• Skip to primary navigation
  • Skip to main content
  • Skip to primary sidebar

Fantabulosity logo

  • 🎄Christmas
  • About
  • Recipes
  • Lifestyle
  • Holidays
  • Shop
    • Printables & Cookbook
    • Shop my Instagram
    • My Favorites
  • Navigation Menu: Social Icons

    • Facebook
    • Instagram
    • Pinterest
menu icon
go to homepage
subscribe
search icon
Homepage link
  • 🎄 Christmas
  • Start Here!
  • Recipes
  • Lifestyle
  • Holidays
  • Shop
  • Contact
    • Facebook
    • Instagram
    • Pinterest
    • Twitter
  • ×
    Home » Blogging

    DIY Backdrops for Food & Blog Photography

    By: Jessica · Posted: Oct 5, 2016 · Updated: Nov 5, 2023 · This post may contain affiliate links. Please read my disclosure policy.

    DIY Backdrops for Food & Blog Photography: A quick and simple way to achieve the backgrounds and backdrops that you desire, without having to use your real spaces.

    diy photo backdrop for bloggers - for food and blogs

    Since starting this blog, back in 2013, I had always wanted a big, beautiful BRIGHT white kitchen, to take all of my photos in. But there was one big problem…

    I had a big, beautiful, DARK brown, kitchen. My builder husband, tends to always go in the brown (safe) color pallet for a “resale,” factor. It was time to get creative, and think of how I could pull off the look that I wanted, without having to talk my husband in to remodeling our whole kitchen. That’s where the brainstorming began, and I can’t help but share this with you all, in case you’re sitting in the same boat.

    DIY Backdrops for Blog Photography

    diy photo backdrop for bloggers

    It began with a trip to Lowe’s, and browsing the isles for ideas. I settled on the following materials for the two different backdrops:

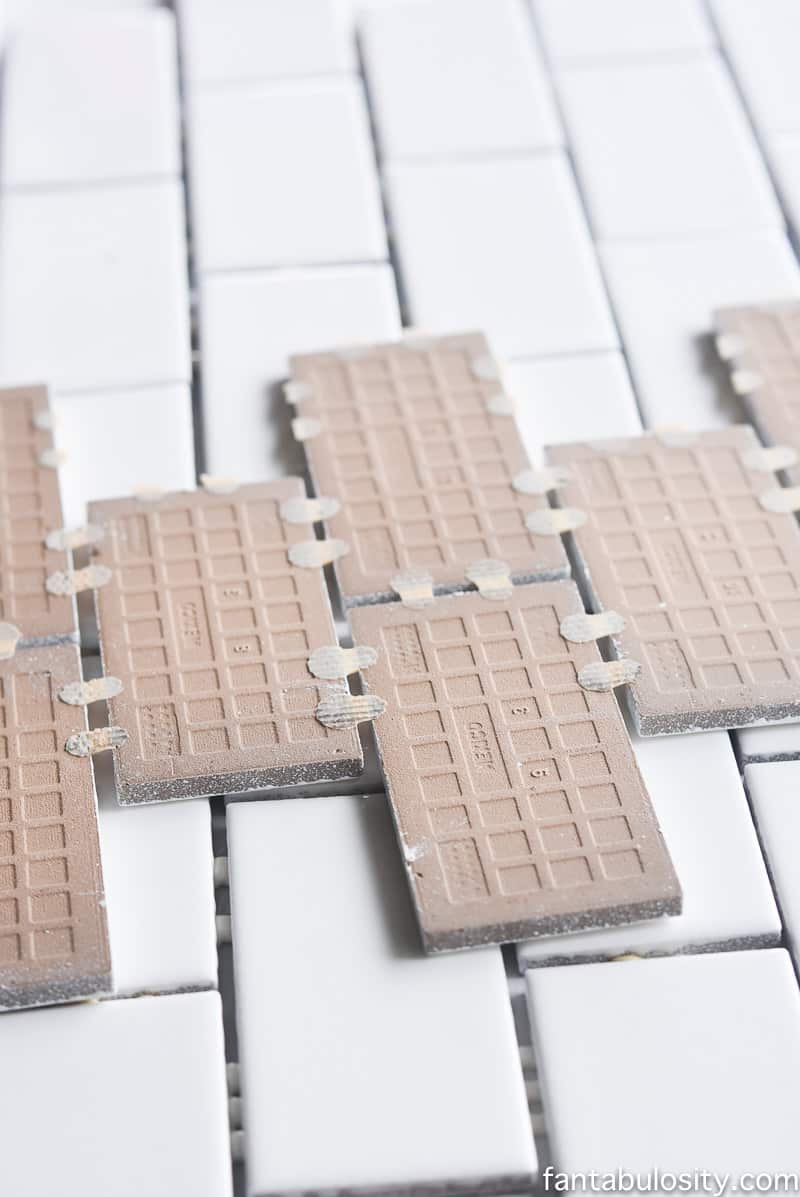
    • 2ft. x 2ft. Drywall patching panel

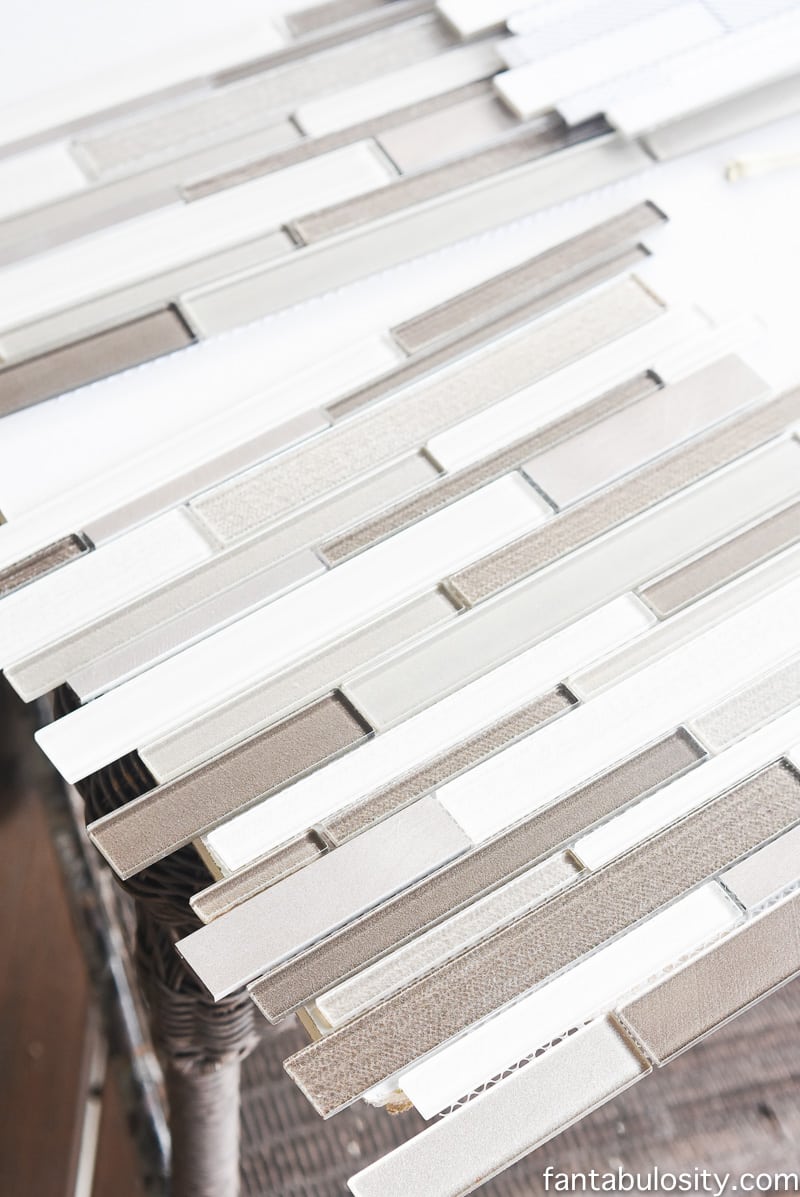
    • Backsplash kitchen tiles (I used subway tile, and mosaic tiles)
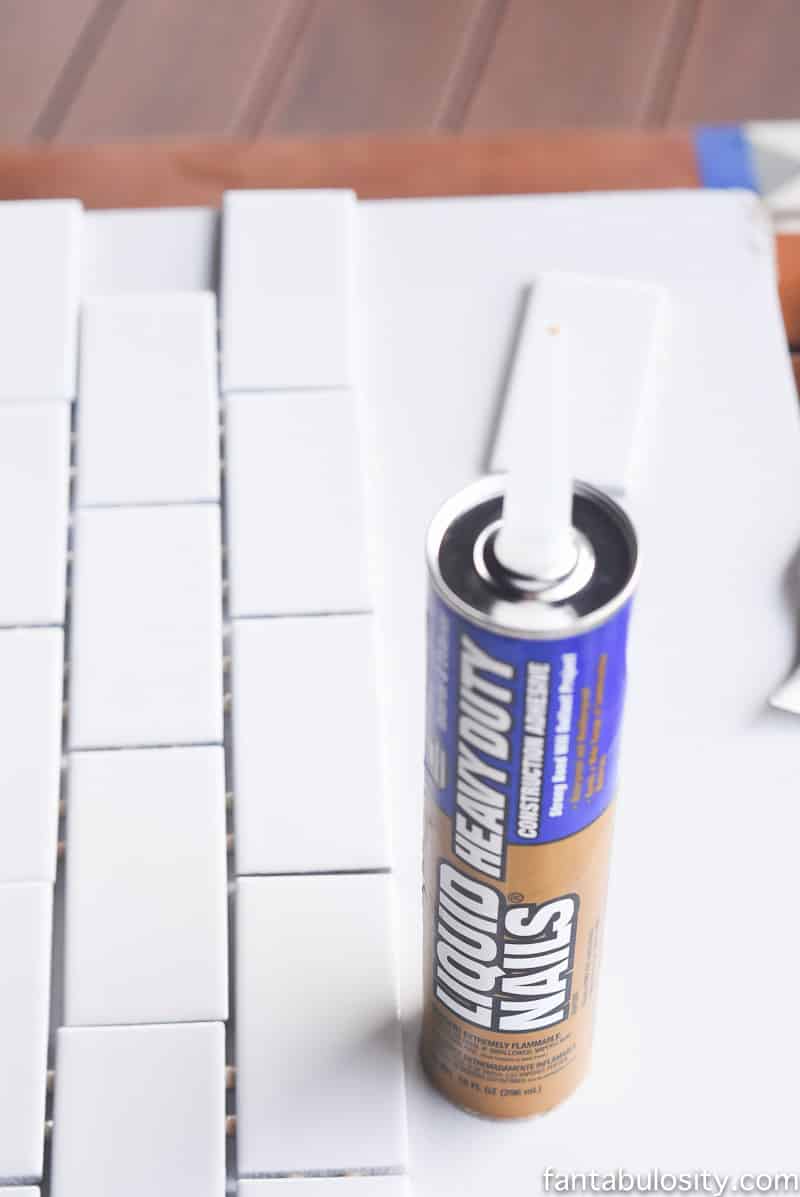
    • Liquid Nails

    • Caulk (Color depends on what coordinates with the backdrop.)

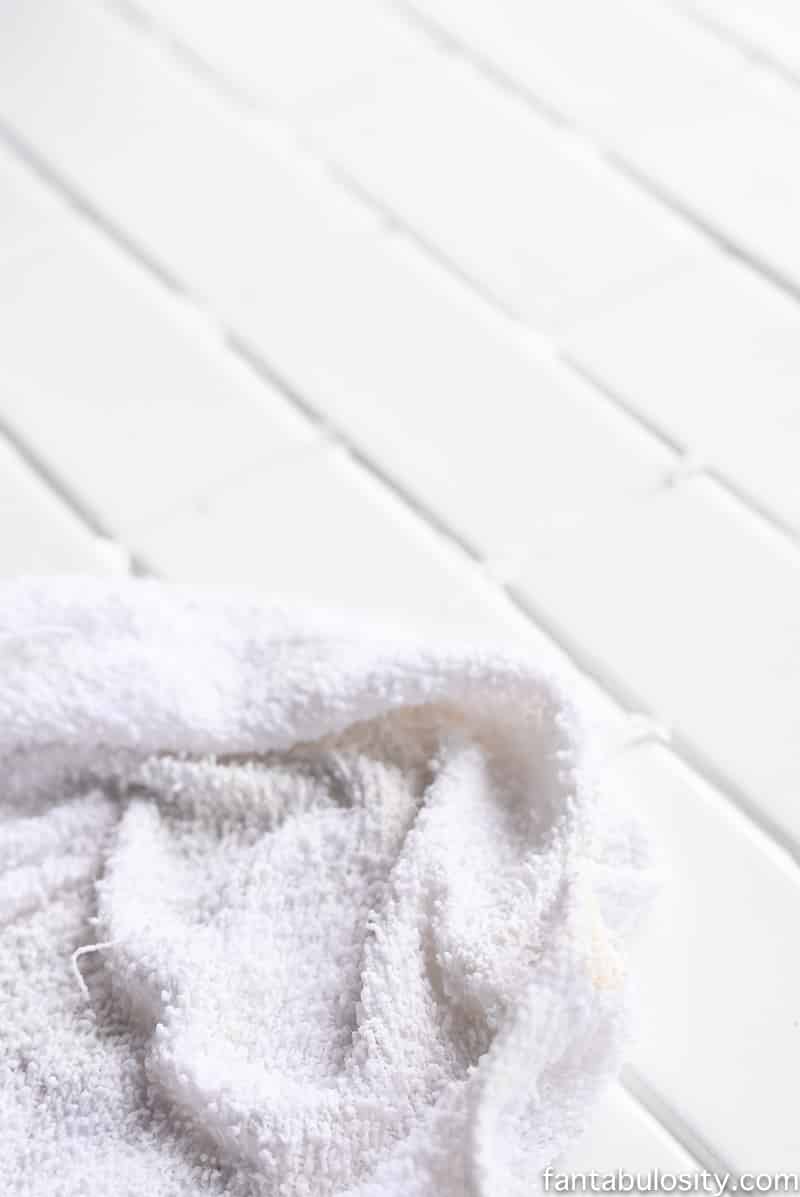
    • Damp towel for wiping excess caulk

    diy photo backdrop for bloggers

    I purchased just enough backsplash that would cover my 2ft. x 2ft. piece of drywall. (Just enough for those close-up shots that I take of my recipes, and dishes.)  diy photo backdrop for bloggers

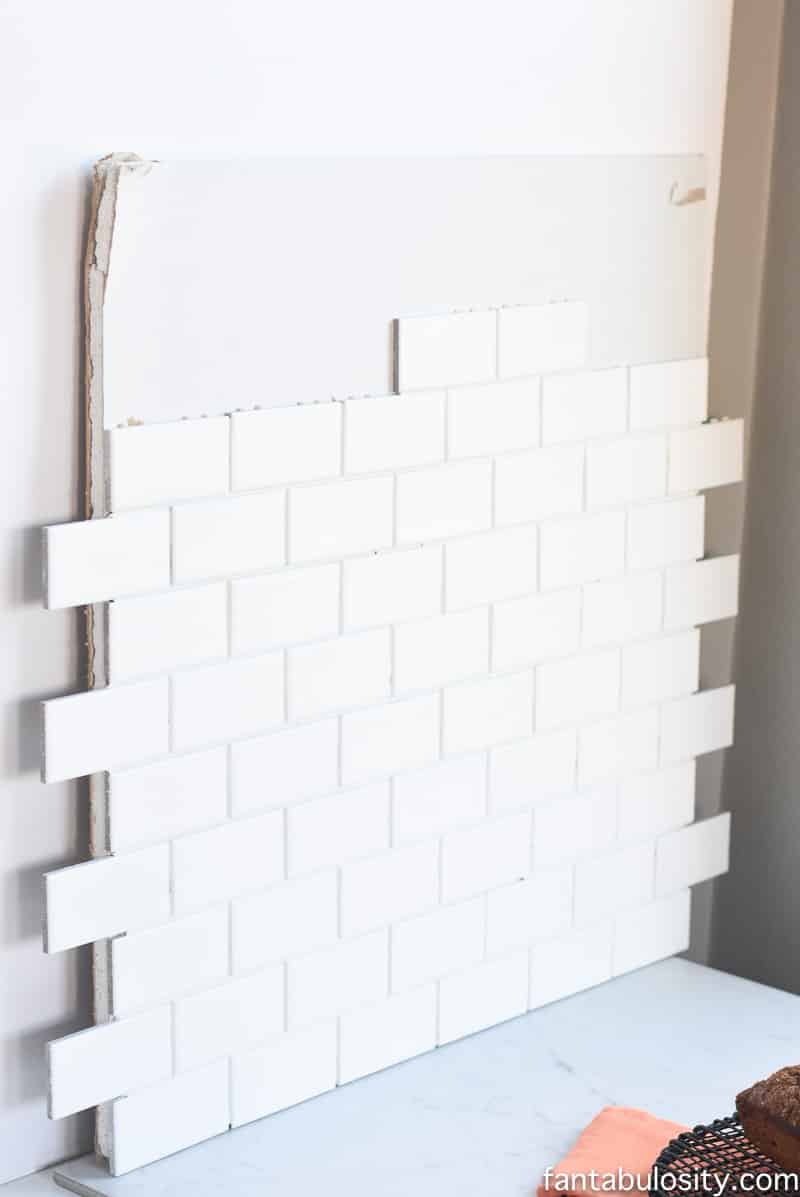
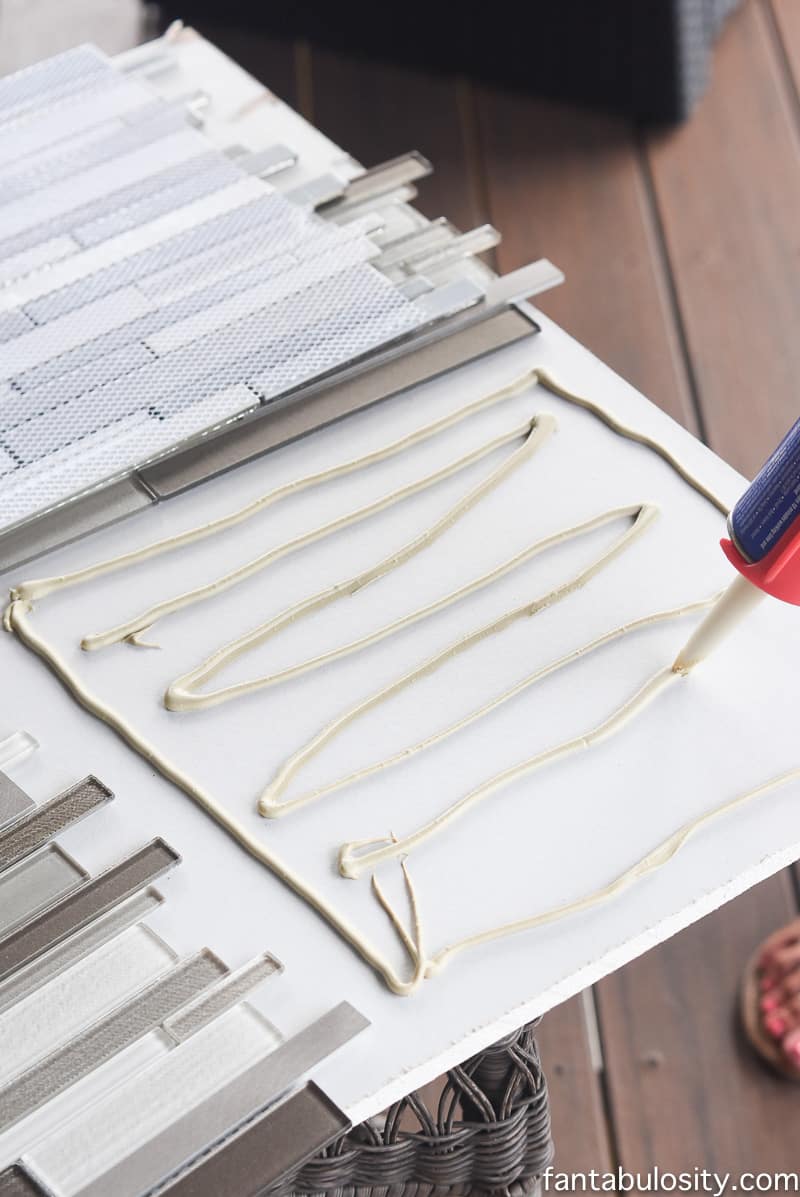
    When I returned home, I put down the sheet of drywall, arranged the subway tile and pieced it together like a puzzle. Once I found the “look,” that would work on the drywall, I placed the liquid nails in the caulk tool and “liquid nailed,” the tile to the drywall; section by section.

    diy photo backdrop for bloggers
    diy photo backdrop for bloggers
    diy photo backdrop for bloggers
    diy photo backdrop for bloggers
    DIY photo backdrop for bloggers

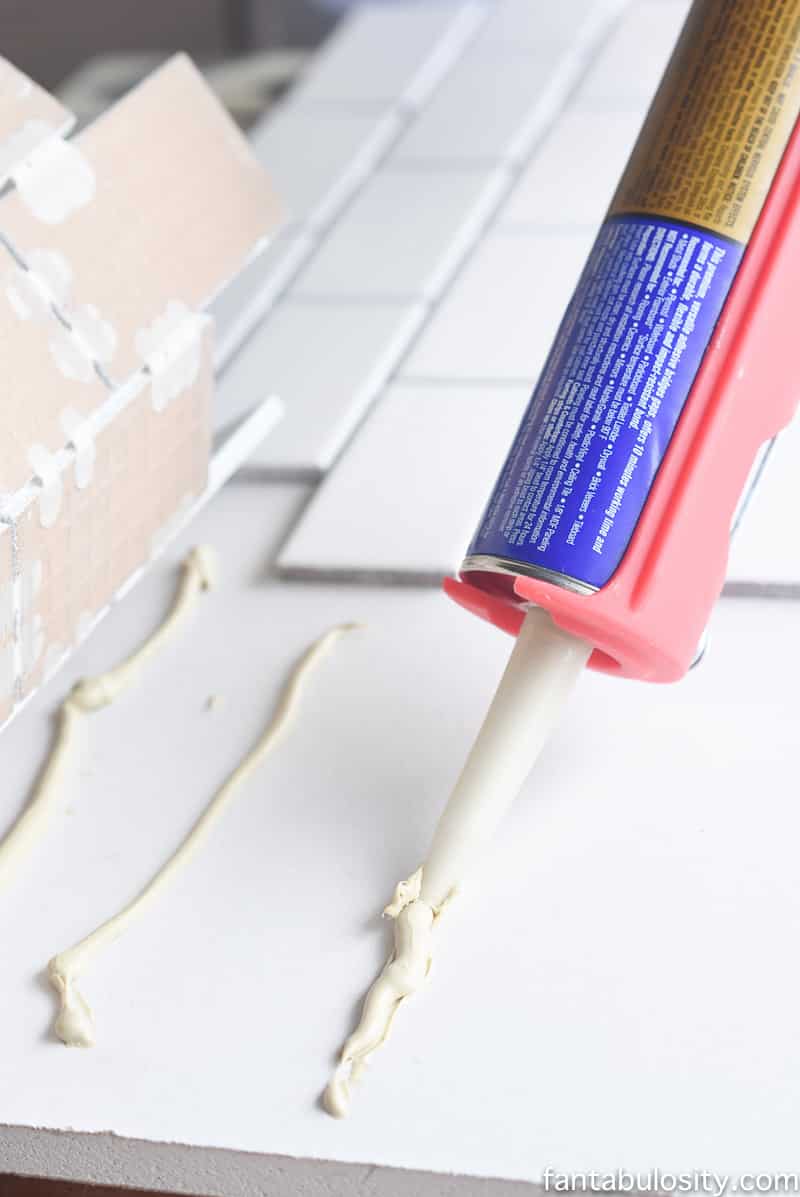
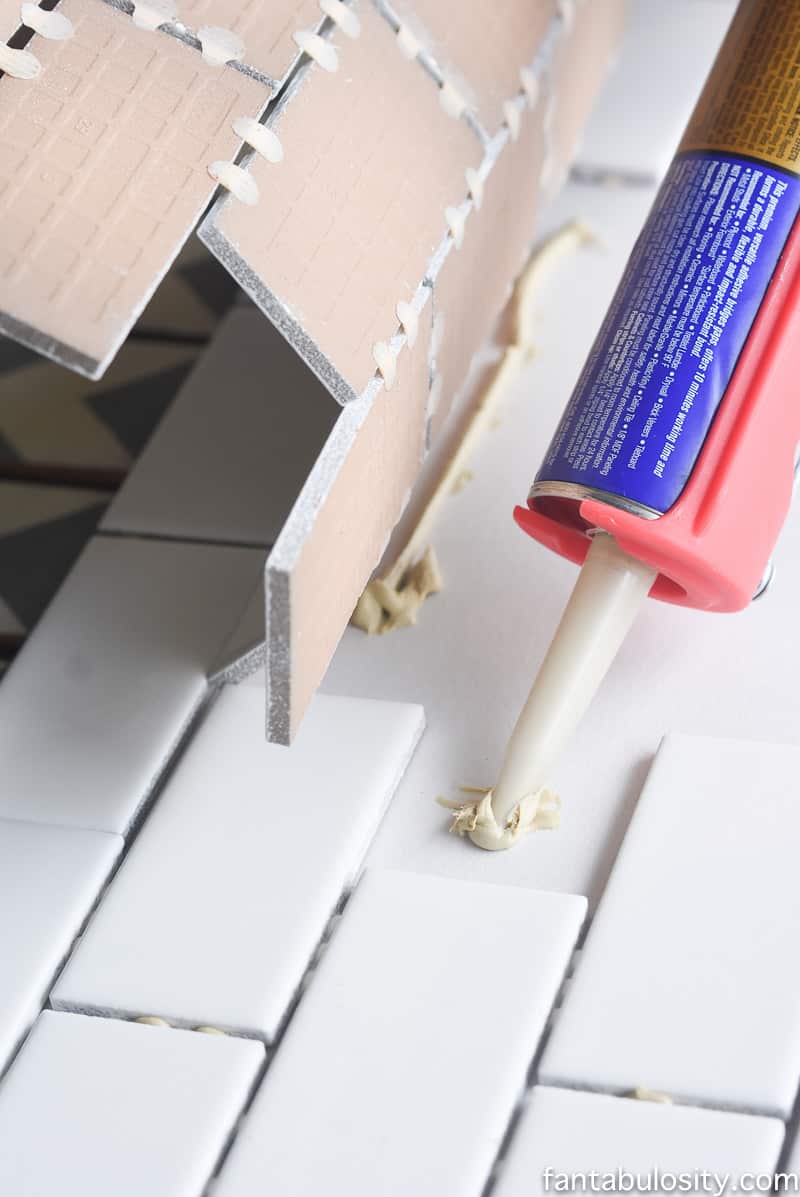
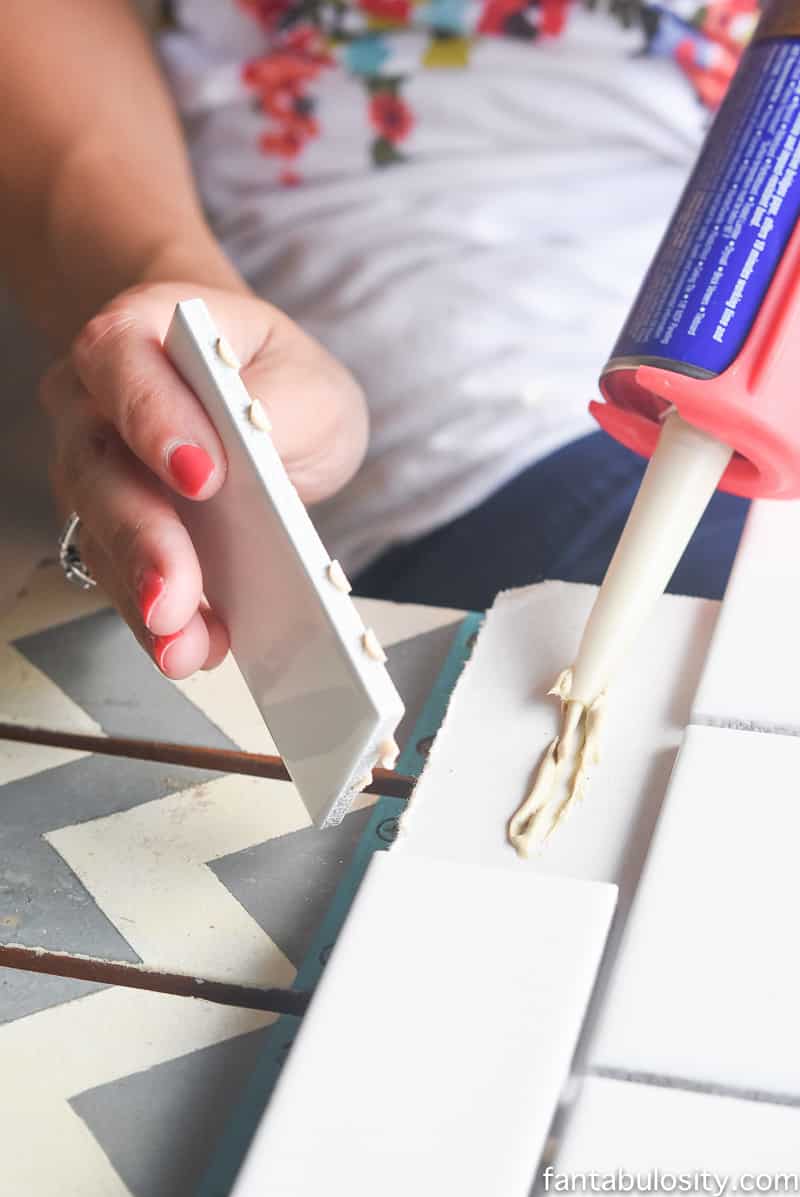
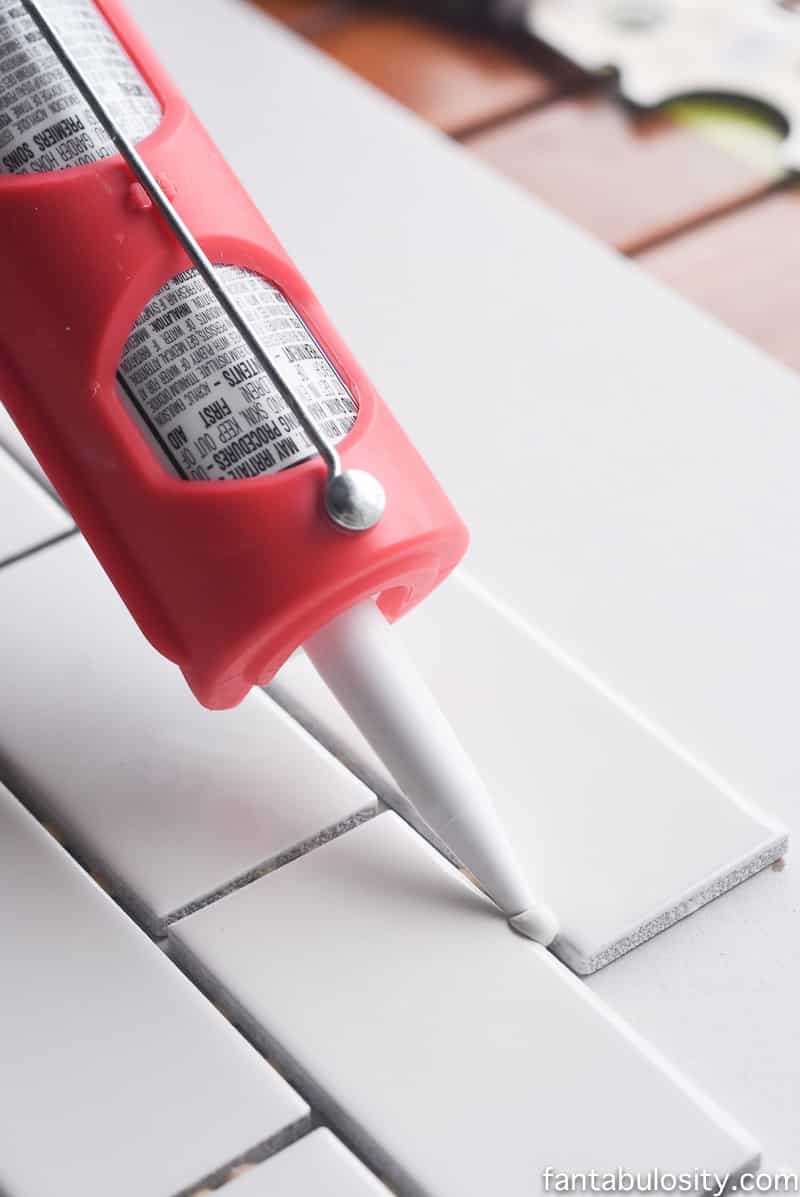
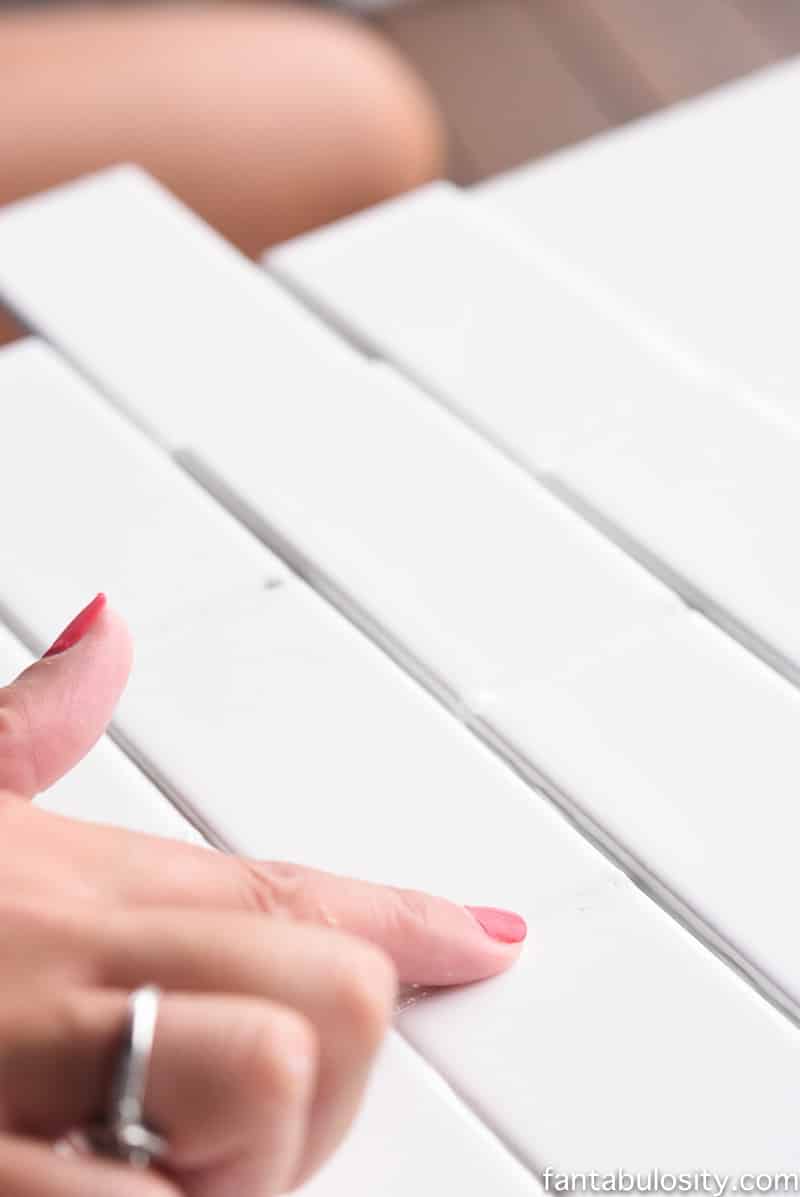
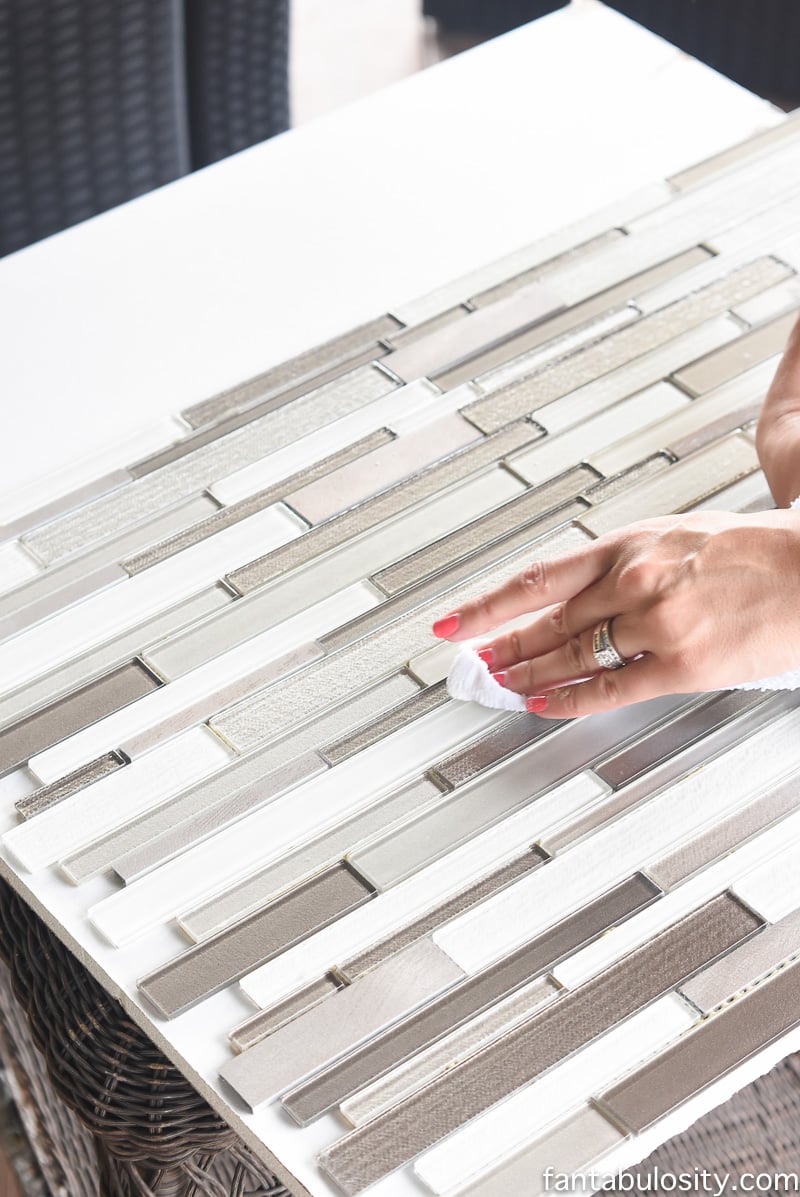
    Once all of the tiles were adhered to the drywall, I filled the spaces with white caulk. After applying the caulk, I used my index finger to “push,” the caulk down inside the spaces, and used a damp rage to wipe away any excess.

    DIY photo backdrop for bloggers
    DIY photo backdrop for bloggers
    DIY photo backdrop for bloggers

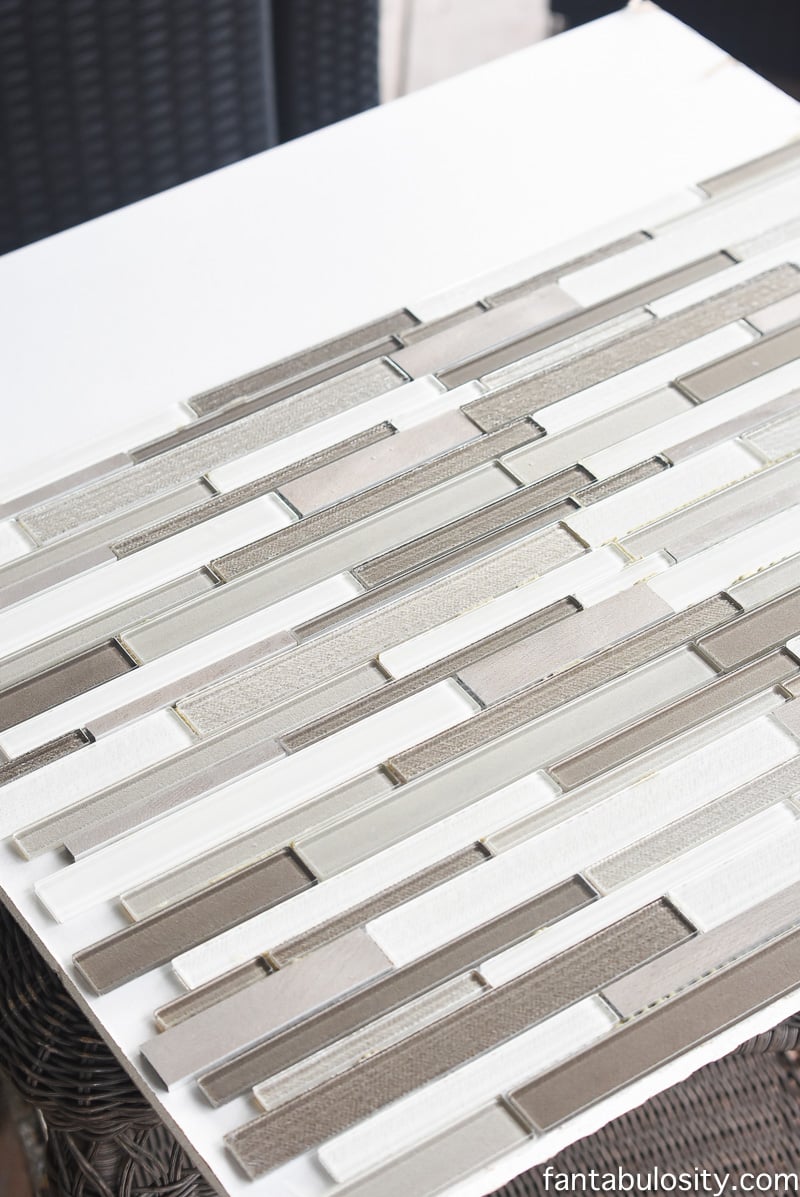
    I let it sit and dry for a few days, before using, just to make sure it would stay put, before I placed the backdrop upright, next to something important that I planned to photograph.

    diy photo backdrop for bloggers - food blog and recipe blogs

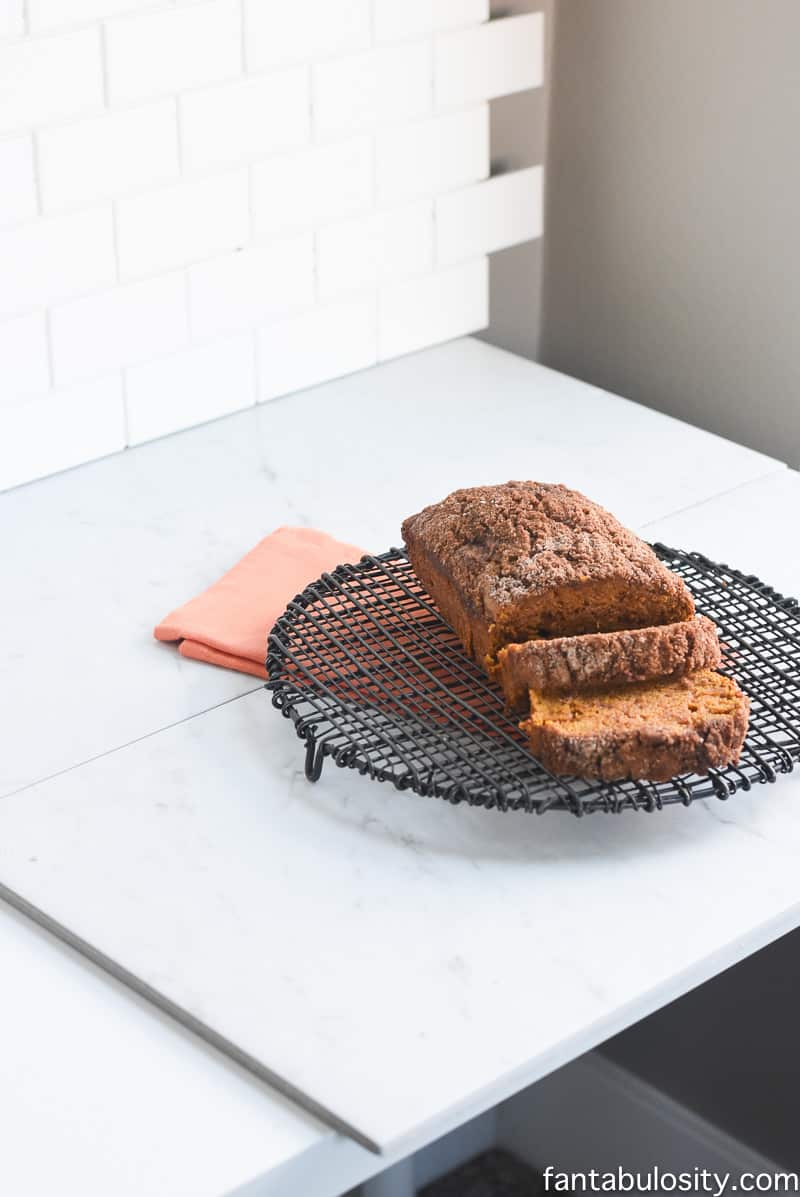
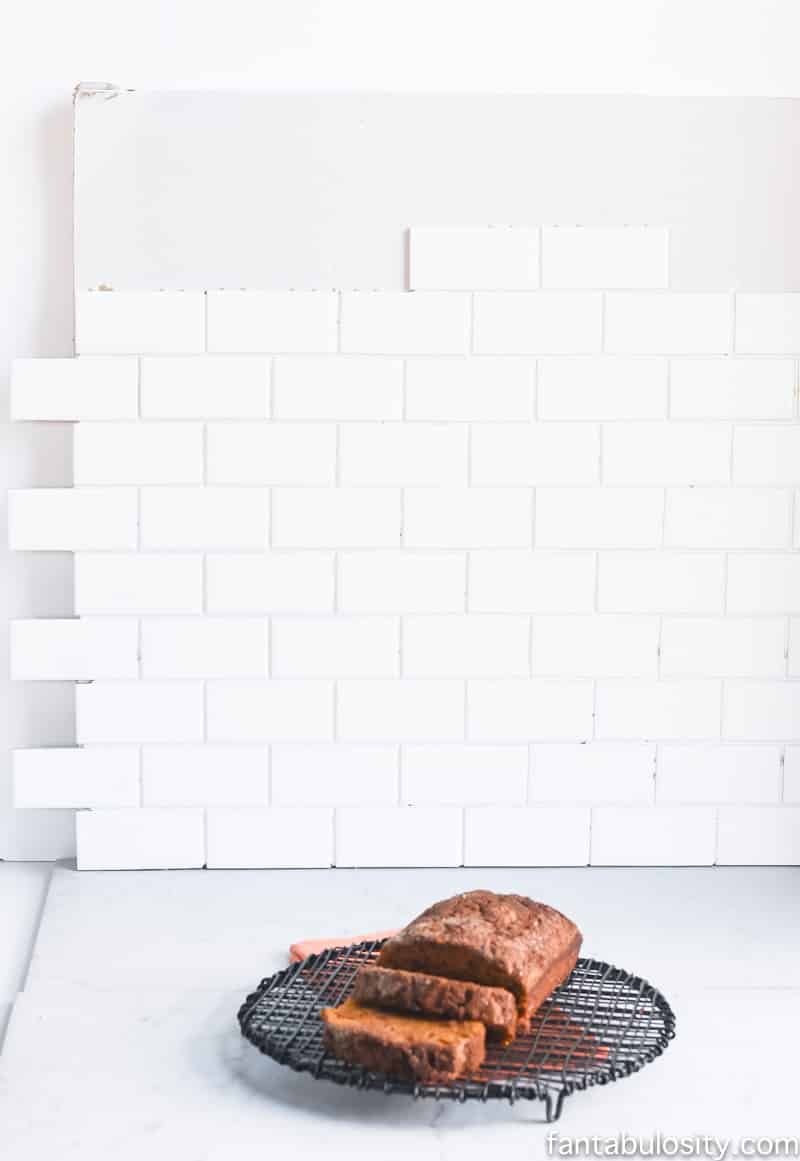
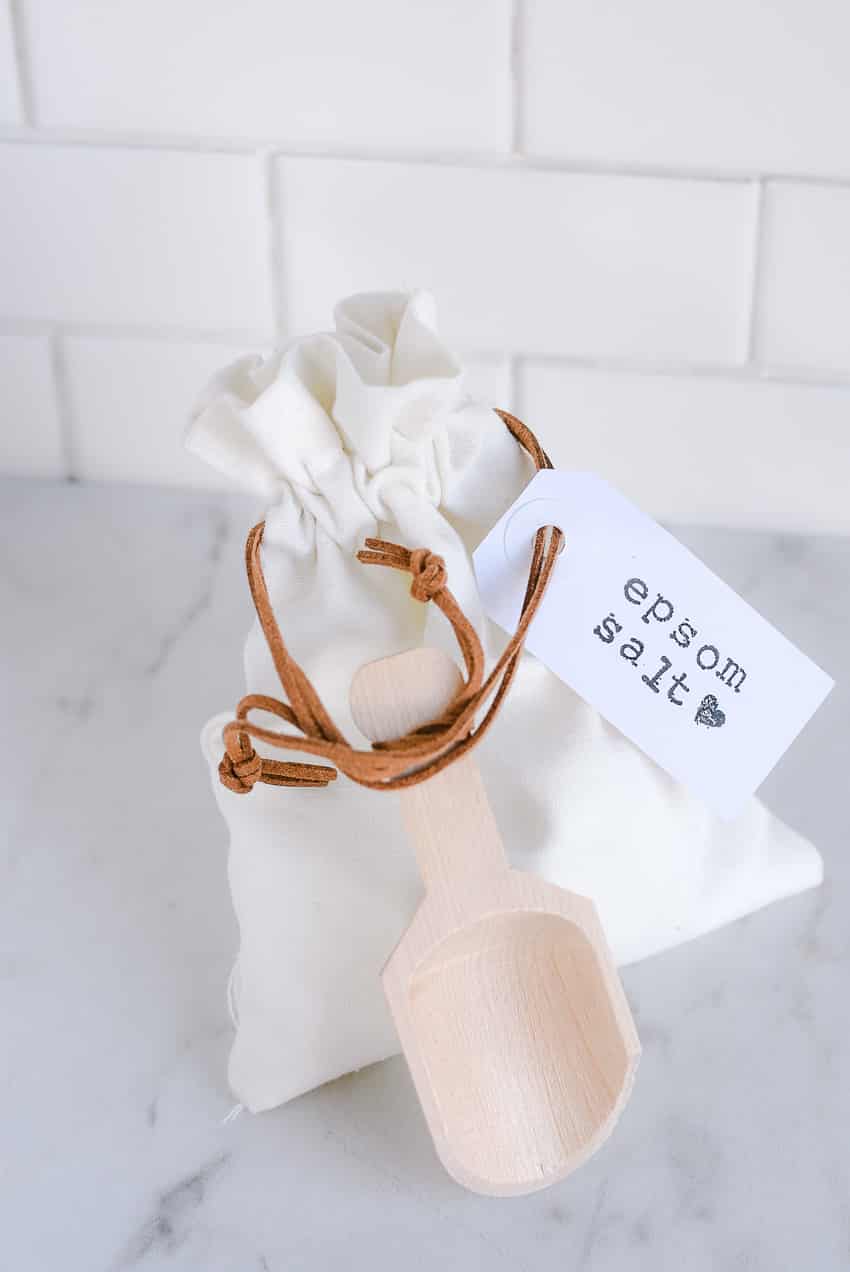
    Finished Backdrop “Look”

    You can see in the photo I took for a different post below, how the DIY backdrop works great for blog photography!

    Epsom Salt - Scented Overnight gift bag idea

    Second Photo Backdrop Look:

    Using mosaic tile, I simply followed the same process, and it was completed in no time!

    DIY photo backdrop for bloggers
    DIY photo backdrop for bloggers
    DIY photo backdrop for bloggers
    DIY photo backdrop for bloggers

    Now I have a whole new “look,” when it comes to trying to snag a photo with a different background. With just a little “DIY,” and a few dollars, my studio is set up to provide a few different looks.

    diy photo backdrop for bloggers

    Have so much fun creating different “looks,” for your blog photos! This little DIY project has been a lifesaver when I’ve really needed to step up my game with my blog photography.

    If you’re looking for other blog photography resources, don’t forget my post from a few months back, that shares all of my favorite equipment, software, and tricks for my photography:

    Photography Resources

    and of course where I share tips for photo editing for blogging.

    how to edit photos

    More Blogging Tips

    • How to Start a Blog, in 5 easy steps
      How to Start a Blog: In 5 Easy Steps
    • how to make money online
      How to Make Money Online: 7 REAL Ways that are AUTHENTIC to you!
    • How do I know if a Lifestyle Blog is right for me?
      How do I Know if I Should Start a Lifestyle Blog?
    • how to start a blog - online business
      How to Start a Lifestyle Blog
    Subscription Form

    Get my 5 Secrets to Get Dinner on the Table FAST!

    Reader Interactions

    Comments

      Leave a Reply Cancel reply

      Your email address will not be published. Required fields are marked *

      Recipe Rating


      This site uses Akismet to reduce spam. Learn how your comment data is processed.

    1. Mrs Major Hoff says

      October 17, 2016 at 12:41 pm

      Love making my own backdrops and props! So easy. Going to the hardware store is so much more fun now, LOL!

      Reply
      • Jessica says

        October 17, 2016 at 9:49 pm

        Haha!!! I couldn’t agree more! I’m there WAY more often, now that I know to take matters in to my own hands. Lol! Thanks for stopping by! 🙂

        Reply
    2. Danielle S says

      October 10, 2016 at 9:59 am

      Love this idea so much! I can’t wait to do some for my invites! 🙂

      Reply
      • Jessica says

        October 10, 2016 at 5:35 pm

        Yaaaay! Let me know if we need to have a cocktail while I help you make some. Ha! XO

        Reply
    3. Laura says

      October 09, 2016 at 12:21 pm

      This is such a GREAT idea!!! WOW!!! Thank you so much!!!! Genius!

      Reply
    4. Heather says

      October 09, 2016 at 9:41 am

      Jessica, I’m so glad you sent this post in your email because I had missed it. Amazing idea! It’s one of those ideas where you say, “why didn’t I think if that?” I am starting to love the white kitchens too but have dark cabinets, which I also love. This will let me have the best of both worlds, at least in pictures. ????

      Are those just 4 tiles you set your projects on?

      Now off to Lowes…

      Reply
      • Jessica says

        October 09, 2016 at 9:46 am

        Oh good!!! I’m so glad! Thank you!

        Yes! I just grabbed two square tiles for the “counter.” Lol. BUT… at my Lowe’s I couldn’t find the type of marble-counter “look,” in a large square tile, so I had to settle for two. But in my photo editing, I’ll just blend or “fix,” the line in the middle if it’s showing. I hope that helps! 🙂

        Reply

    Primary Sidebar

    Jessica Burgess of Fantabulosity

    Hi, I'm Jessica! - Owner, Creator of the lifestyle blog and brand, Fantabulosity.

    I believe you can have simplicity in life, and still feel fabulous. Here you'll find easy, tested recipes, and life + home tips to inspire you in your everyday.

    More about me →

    Christmas Recipes

    • Christmas Tree Cake Dip in white bowl
      Christmas Tree Cake Dip
    • fruit salad in gray bowl
      Fruit Salad with Cool Whip
    • Bright green cornflake cookies dotted with bright red cinnamon candies fill a parchment lined baking sheet
      Cornflake Wreaths
    • Christmas Chex Mix in white bowl
      Christmas Chex Mix

    Popular Recipes

    • bread pudding in baking dish
      Bread Pudding Recipe: Easy Old Fashioned Recipe (With Video!)
    • Hamburgers in the oven - baked recipe with cheese
      The BEST Hamburgers in the Oven – Gone VIRAL!
    • two tuna salad sandwiches stacked on top of one another
      The GREATEST Tuna Salad Recipe
    • Oven Baked Steak with Butter and a side of potatoes
      How to Cook Steak in the Oven
    • Strawberry brownies on white marble cutting board.
      Strawberry Brownies Recipe
    • Cheeseburger Sliders
      Easy Cheeseburger Sliders

    Fantabulosity Blog Featured On Media

    Footer

    ↑ back to top

    About

    • About Jessica
    • Contact
    • Collaborate
    • 5 Meal Planning Secrets

    Easy Recipes

    • All Recipes
    • Dinner Recipes
    • Side Dishes
    • Desserts

    How to Cook

    • Oven-Baked
    • Stove-Top
    • No Bake
    • Slow Cooker

    Privacy Policy |Accessibility Copyright © 2023 Fantabulosity | Terms & Conditions | FTC