

Easter Coconut Macaroon Nests: These Easter coconut macaroon cookies are quick and easy to make, and would make a beautiful addition to your holiday dessert table!
Quick Overview: Mix ingredients, shape, and bake at 325° for 20-25 mins. Add white chocolate to the “nest”, top with eggs, serve & enjoy!

Why you’ll love this recipe
I don’t know about you, but I love any excuse to decorate and make my house feel fun and festive. This also extends to the meals I cook for holidays and special events – the more fun we can make it, the better!
Enter these adorable (and delicious) macaroon nest cookies! I love that they are a bit different than your regular old cookie, and they are super cute and festive.
If you are looking for an easy dessert that will create a big wow factor, put these cookies on your “must bake” list for this Easter, with these decorated Easter Oreo cookies.
Jump to:
Ingredients
This recipe uses simple, everyday ingredients you can find in your grocery store to create something elegant!
You’ll need:
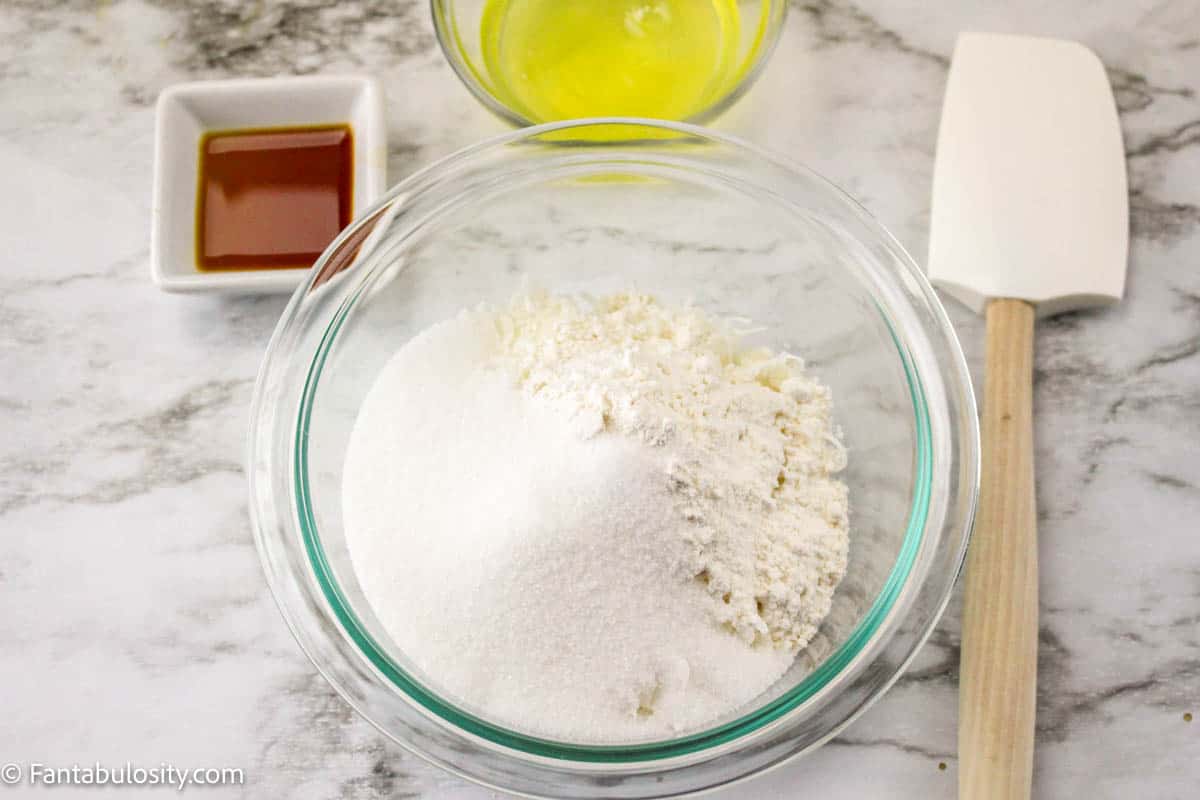
- 1⅓ cups sweetened shredded coconut
- ⅓ cup white sugar
- 3 tablespoons flour
- ⅛ teaspoon salt
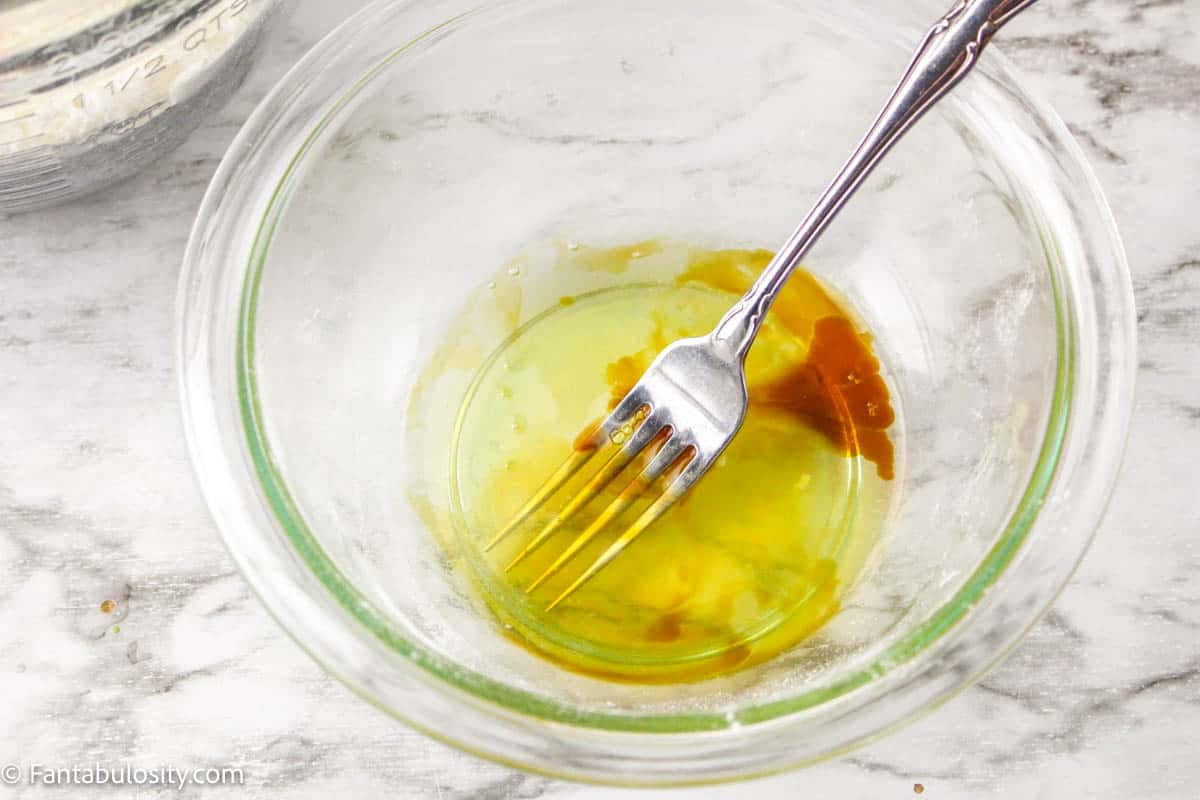
- 2 egg whites room temperature
- ½ teaspoon vanilla extract
- 1 cup white chocolate morsels melted
- 24 candy coated chocolate mini eggs like Cadbury Mini Eggs
Skip to the recipe card now, or keep reading to see how insanely easy it is to make these cute Easter treats!

Instructions
- Preheat the oven to 325 degrees f. Prepare a baking sheet by lining it with parchment paper.
- In a medium bowl, stir together the coconut, sugar, flour, and salt.
- In a separate, small bowl, whisk together the egg whites and vanilla just until blended. Stir the egg mixture into the coconut mixture until completely combined.
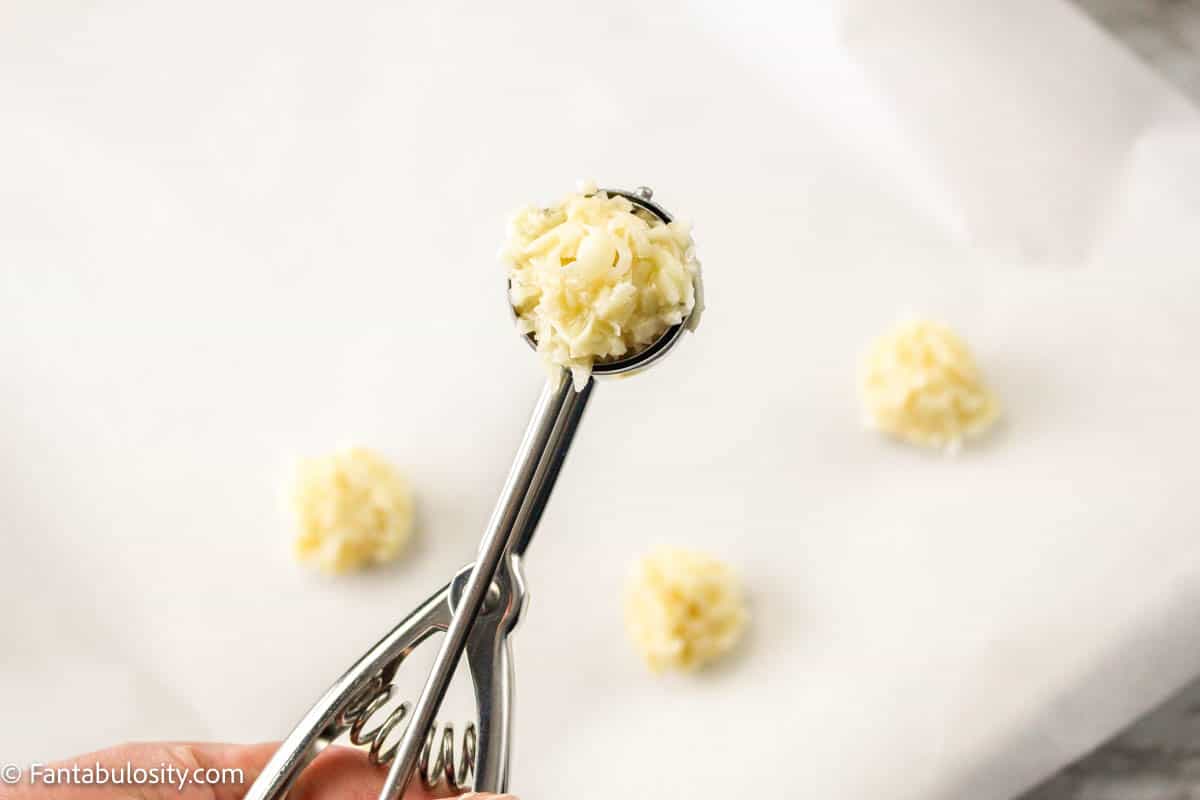
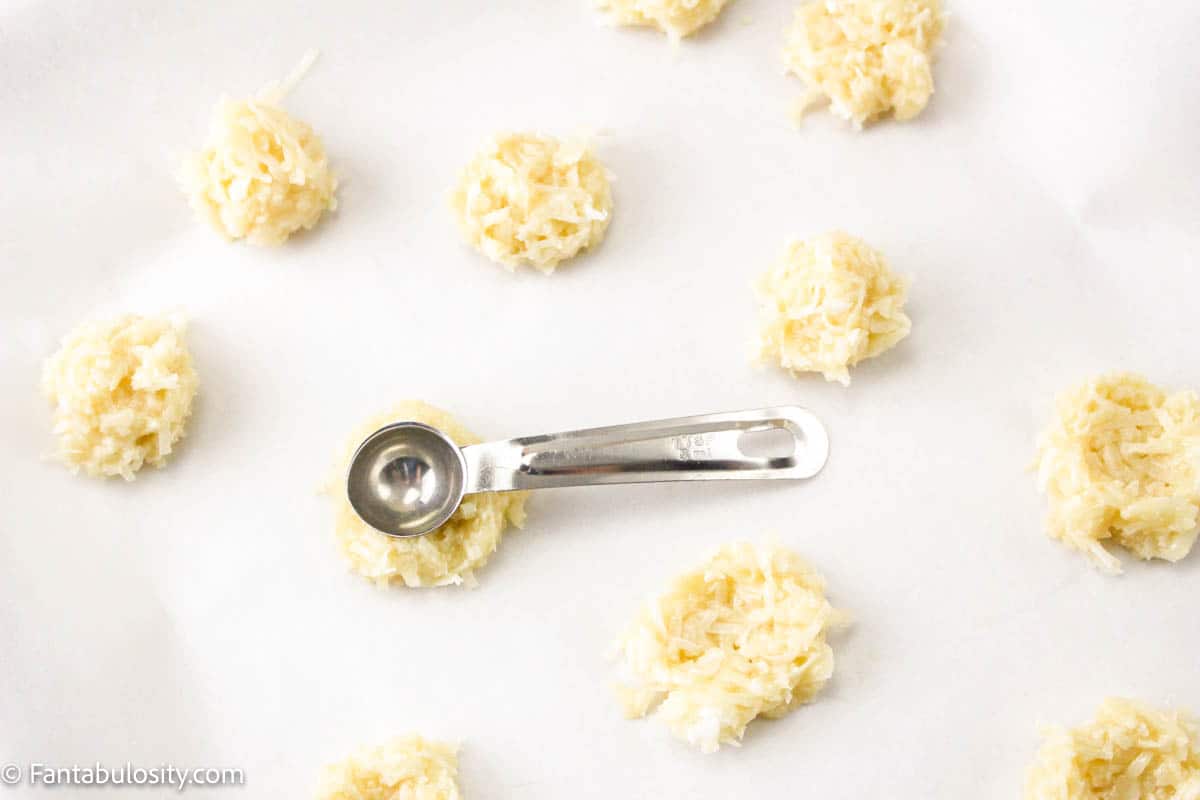
- Roll the dough out into approx. 2 inch balls and place the dough balls on the prepared baking sheet. Using a teaspoon, press a well into the center (this creates your “nest” shape).
- Bake for 20 to 25 minutes or until the edges begin to brown. Remove from the oven and cool completely on a wire rack.
- Put your white chocolate in a microwave safe bowl and warm it in the microwave in 30 second intervals until it’s fully melted, stirring after each interval. Should take 1-2 mins.
- Transfer the melted white chocolate into a piping bag (or a ziplock bag, and then snip a tiny bit of the corner off to create a piping bag) and fill each well with chocolate.
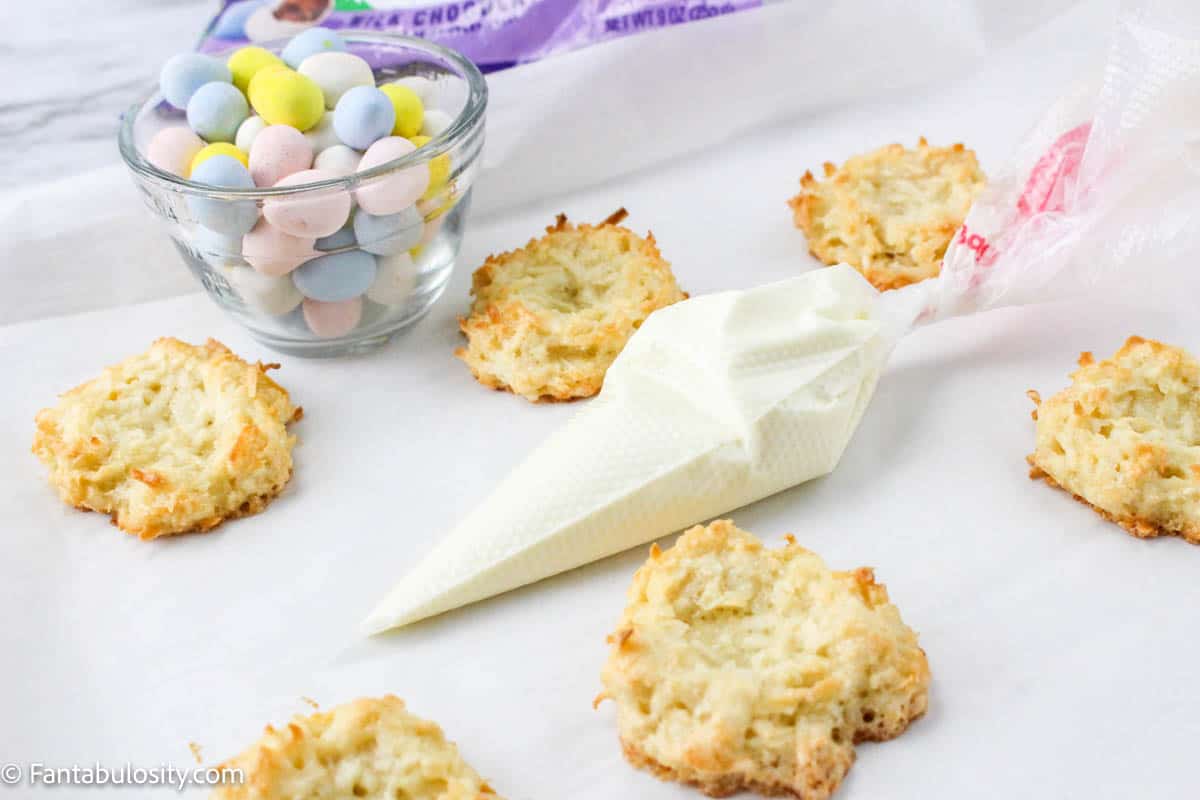
- Immediately place three candies into each well before the chocolate hardens! Allow the chocolate to set completely prior to storing or serving so your eggs don’t roll out.

- Serve & enjoy!

Substitutions
- Sugar Free – if you are on a restricted diet as far as sugar goes, you could reduce the sugar in this recipe by using unsweetened shredded coconut, stevia in place of the sugar, and sugar free white chocolate. For the eggs, you can search your local grocery store or bulk store for a sugar free candy option!
- Gluten Free – this recipe is really well suited to being made gluten free since it only calls for a small amount of flour. You could easily replace the 3 tablespoon of flour in this recipe with a gluten free blend (check the natural aisle of your local grocery store – it’s getting much easier to find)!
Variations
While this recipe is specifically for an Easter macaroon, you could easily make this cookie suit any holiday or special occasion!
- Christmas – add red and green M&Ms in the nest
- Halloween – fill the nest with candy corn or orange and black M&Ms (how great is it that there is an M&M for every holiday?)
- Thanksgiving – find those cute little pumpkin candies and turn your macaroon nests into a tiny pumpkin patch!
You could also fill them with your favorite candy and serve them any old time you like!

Storage
You can store these in a single layer in an airtight container on the counter for up to 1 week (or freeze them in a single layer in an airtight, freezer safe container for up to a month!)
While they don’t need to be refrigerated after baking, if you store your macaroons in a single layer in an airtight container in the fridge, they should stay crispy on the outside.
Expert tips and FAQs
Most of the time cookies will spread as the fat in the recipe melts (which is why people refrigerate dough to keep it from spreading while baking).
Since these coconut macaroon nests are held together with egg whites and not a fat, they shouldn’t spread very much at all.
While they don’t need to be refrigerated after baking, if you store your macaroons in a single layer in an airtight container in the fridge, they should stay crispy on the outside.
These sound a lot alike, but they are actually quite different. Both macaroons and macarons are cookies made with egg whites, but macarons are typically made with finely ground blanched almonds while macaroons are made with sweetened flaked coconut.
The Food Network has a blog post showing you exactly what we mean.
No, you don’t need to refrigerate your macaroons (although they will stay crispier if you do). You can store these in an airtight container on the counter for up to 1 week (or freeze them in a single layer in an airtight, freezer safe container for up to a month!)
Related Recipes
Looking for other quick, easy, and delicious Easter dessert recipes? You HAVE to check out our Easter bird nest cookies and our easy Easter egg truffles!
Recipe

Easter Coconut Macaroon Nests
Ingredients
- 1⅓ cups sweetened shredded coconut
- ⅓ cup white sugar
- 3 tablespoons flour
- ⅛ teaspoon salt
- 2 egg whites room temperature
- ½ teaspoon vanilla extract
- 1 cup white chocolate morsels melted
- 24 candy coated chocolate mini eggs like Cadbury Mini Eggs
Instructions
- Preheat the oven to 325 degrees f. Prepare a baking sheet by lining it with parchment paper.
- In a medium bowl, stir together the coconut, sugar, flour, and salt.
- In a separate, small bowl, whisk together the egg whites and vanilla just until blended. Stir the egg mixture into the coconut mixture until completely combined.
- Roll the dough out into approx. 2 inch balls and place the dough balls on the prepared baking sheet. Using a teaspoon, press a well into the center (this creates your "nest" shape).
- Bake for 20 to 25 minutes or until the edges begin to brown. Remove from the oven and cool completely on a wire rack.
- Put your white chocolate in a microwave safe bowl and warm it in the microwave in 30 second intervals until it's fully melted, stirring after each interval. Should take 1-2 mins.
- Transfer the melted white chocolate into a piping bag (or a ziplock bag, and then snip a tiny bit of the corner off to create a piping bag) and fill each well with chocolate.
- Immediately place three candies into each well before the chocolate hardens! Allow the chocolate to set completely prior to storing or serving so your eggs don't roll out.
- Serve & enjoy!
Notes
Nutrition
Nutritional information is based on third-party calculations and should be considered estimates. Actual nutritional content will vary with brands used, measuring methods, portion sizes and more.


Comments
No Comments