Easter Oreos: Oreo cookies covered in different colors of melted chocolate, and decorated as the cutest bunnies, chicks, and Easter eggs! These Easter Oreos are a close match with these Bunny Butt Cookies, and we think the two of them on a cookie platter would be absolutely adorable!

Easter is one of the prettiest holidays of the year. (Or at least I think so!) The spring colors, with bright touches, and adorable treats that can make an appearance, like these cookies and other fun desserts like these Easter egg truffles, these mini egg cookies, and this bunny bait!
Whether you’re looking for cute Easter desserts for Easter baskets or to include on an Easter charcuterie board for an Easter celebration, these chocolate-covered Oreos are going to be the perfect treat! (If you’re looking to cut down on the Easter sweets, you’ll love this list of ideas for non-candy Easter basket ideas!)
Jump to:
⭐️ Why This Recipe Works
- Fun for Kids: Kids will love helping with this recipe, and sprinkling on the sugars and festive sprinkles can be a fun task for them!
- Pre-made ingredients: Don’t feel like baking? Covering Oreos or cookies with chocolate is an easy treat that doesn’t take long!
- Gift Giving: If you love making treats for Easter, for neighbors, kiddos or friends/family, these will be adored by so many!
🧾 Ingredients Needed
I’ve highlighted a couple of ingredients with some relevant notes. Aside from this, the ingredients needed are pretty basic.
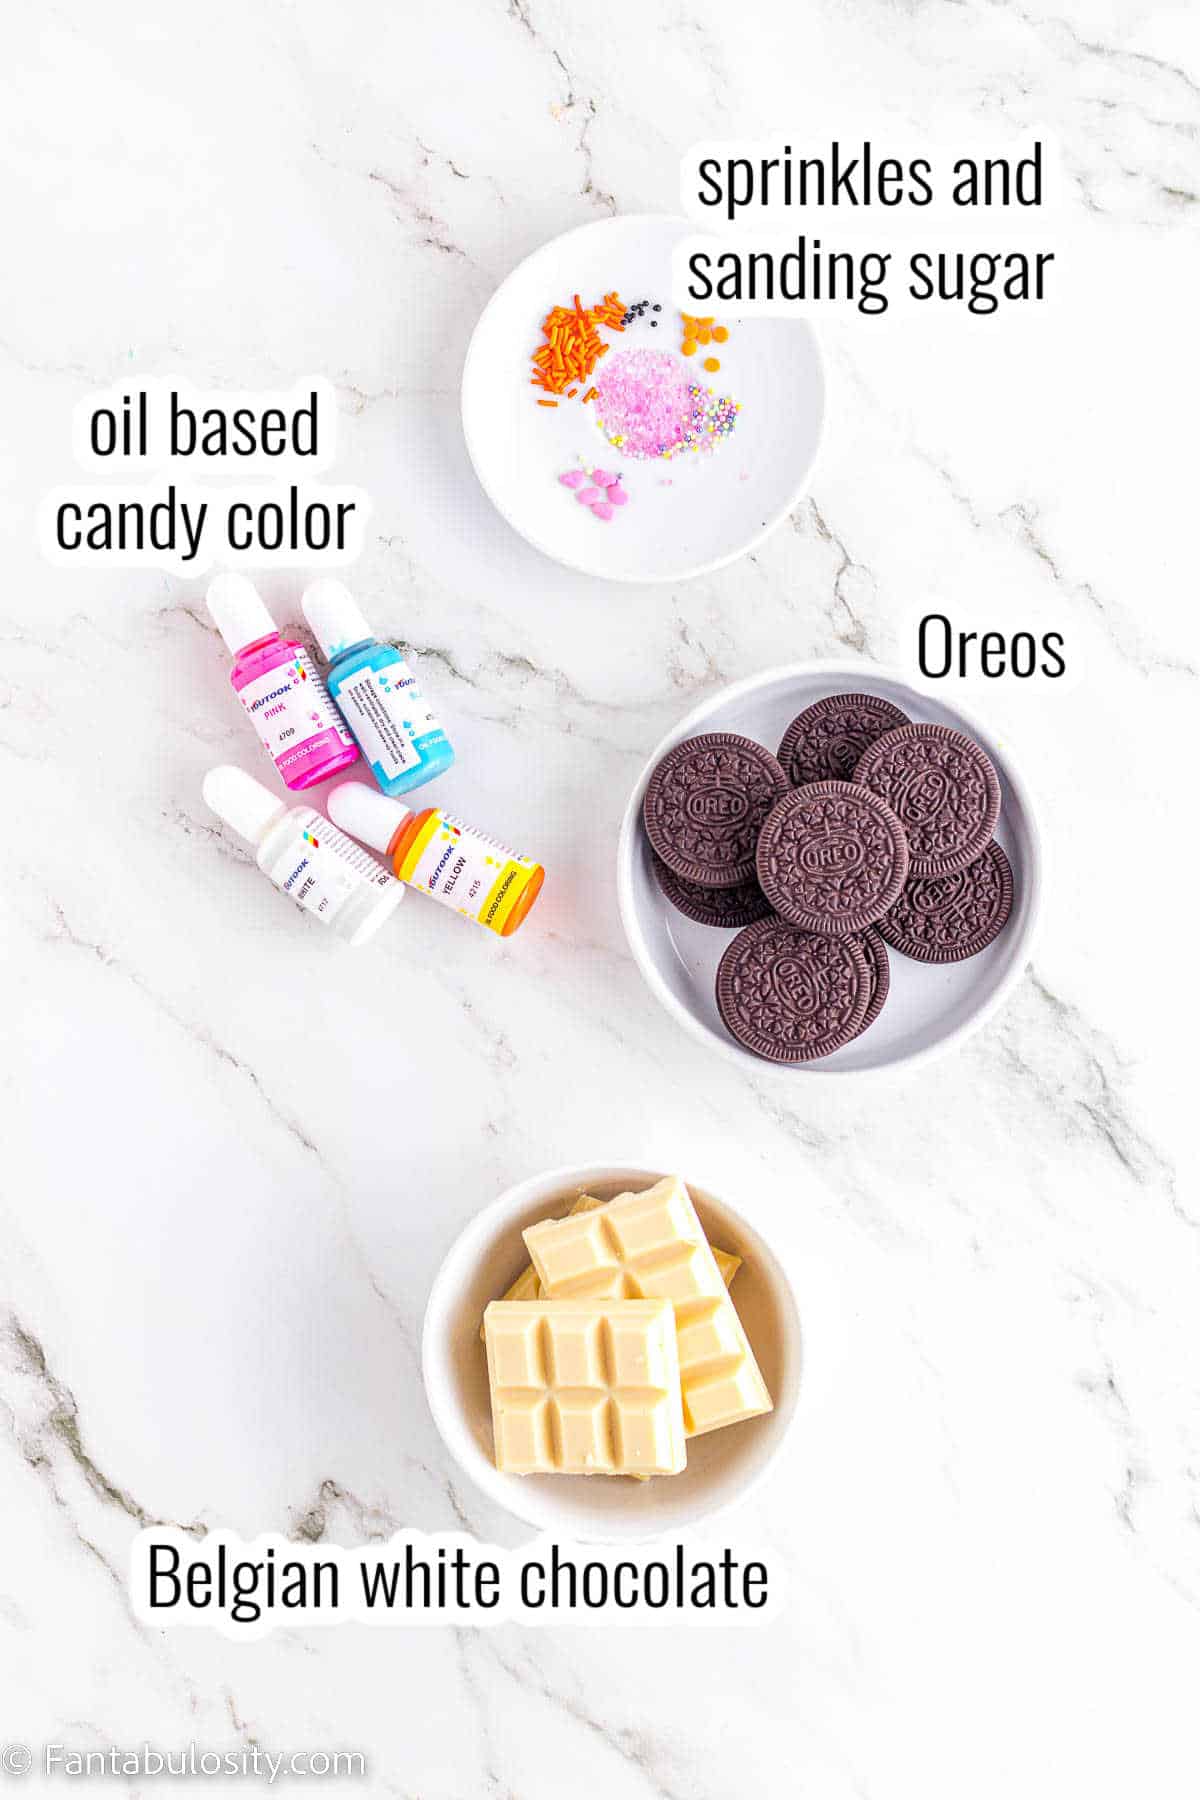
- Oil-Based Candy Color – Use only oil-based candy coloring for chocolate. Gel color or food coloring may be uneven and leave streaks. Here is oil-based color that you can use!
- Sprinkles – If you need sprinkles like you see in the images here, you can get the following with the provided links:
– heart sprinkles for bunny nose
– black nonpareils for eyes, orange jimmies for the chick feet, and orange circular sprinkles for the chick nose. If in stock, these Halloween sprinkles are perfect because they have everything you need. However, if they’re out of stock, you can buy them separately: get the sprinkles for eyes and chick feet, and orange circles for chick nose (and use the other colors for other spring desserts like Easter Bark!)
– For sprinkles for the Easter egg cookies, these spring sprinkles are a perfect fit!
📖 Substitutions
Sometimes you may find that you need to substitute some items for a recipe, or that you want to change some things out. Here are some suggestions that you may find helpful if you need to change anything:
- Belgian Chocolate – Substitute colored candy melts for the Belgian chocolate if you wish. You may even be able to use white almond bark or white chocolate chips too if you’re comfortable with those, although we did not test those with this recipe.
- Cookies – You can also use Golden Oreos instead of original Oreos too if you like those better!
👩🏻🍳 How to Make these Easter Oreos
There are 3 different kinds of decorated Easter cookies you can make:
- Bunny rabbit Oreo cookies
- Baby chicks made out of Oreos
- Easter egg Oreo cookies
*Be sure to see the recipe card below for the full ingredients list & instructions!*
This recipe can be easily doubled or tripled to make any many as you’d like! We also give tips along the way to make these Easter cookies a success.
🐰 How to Make Bunny Oreos
STEP 1. Melt 1⁄2 cup white chocolate in a small deep microwave-safe bowl in 20-second increments and stir until smooth.
STEP 2. Mix in the white candy color until the desired shade is reached.
Tip: Overheating the chocolate. Do not overheat your chocolate. The 20-second increments are perfect for safely heating in the microwave.
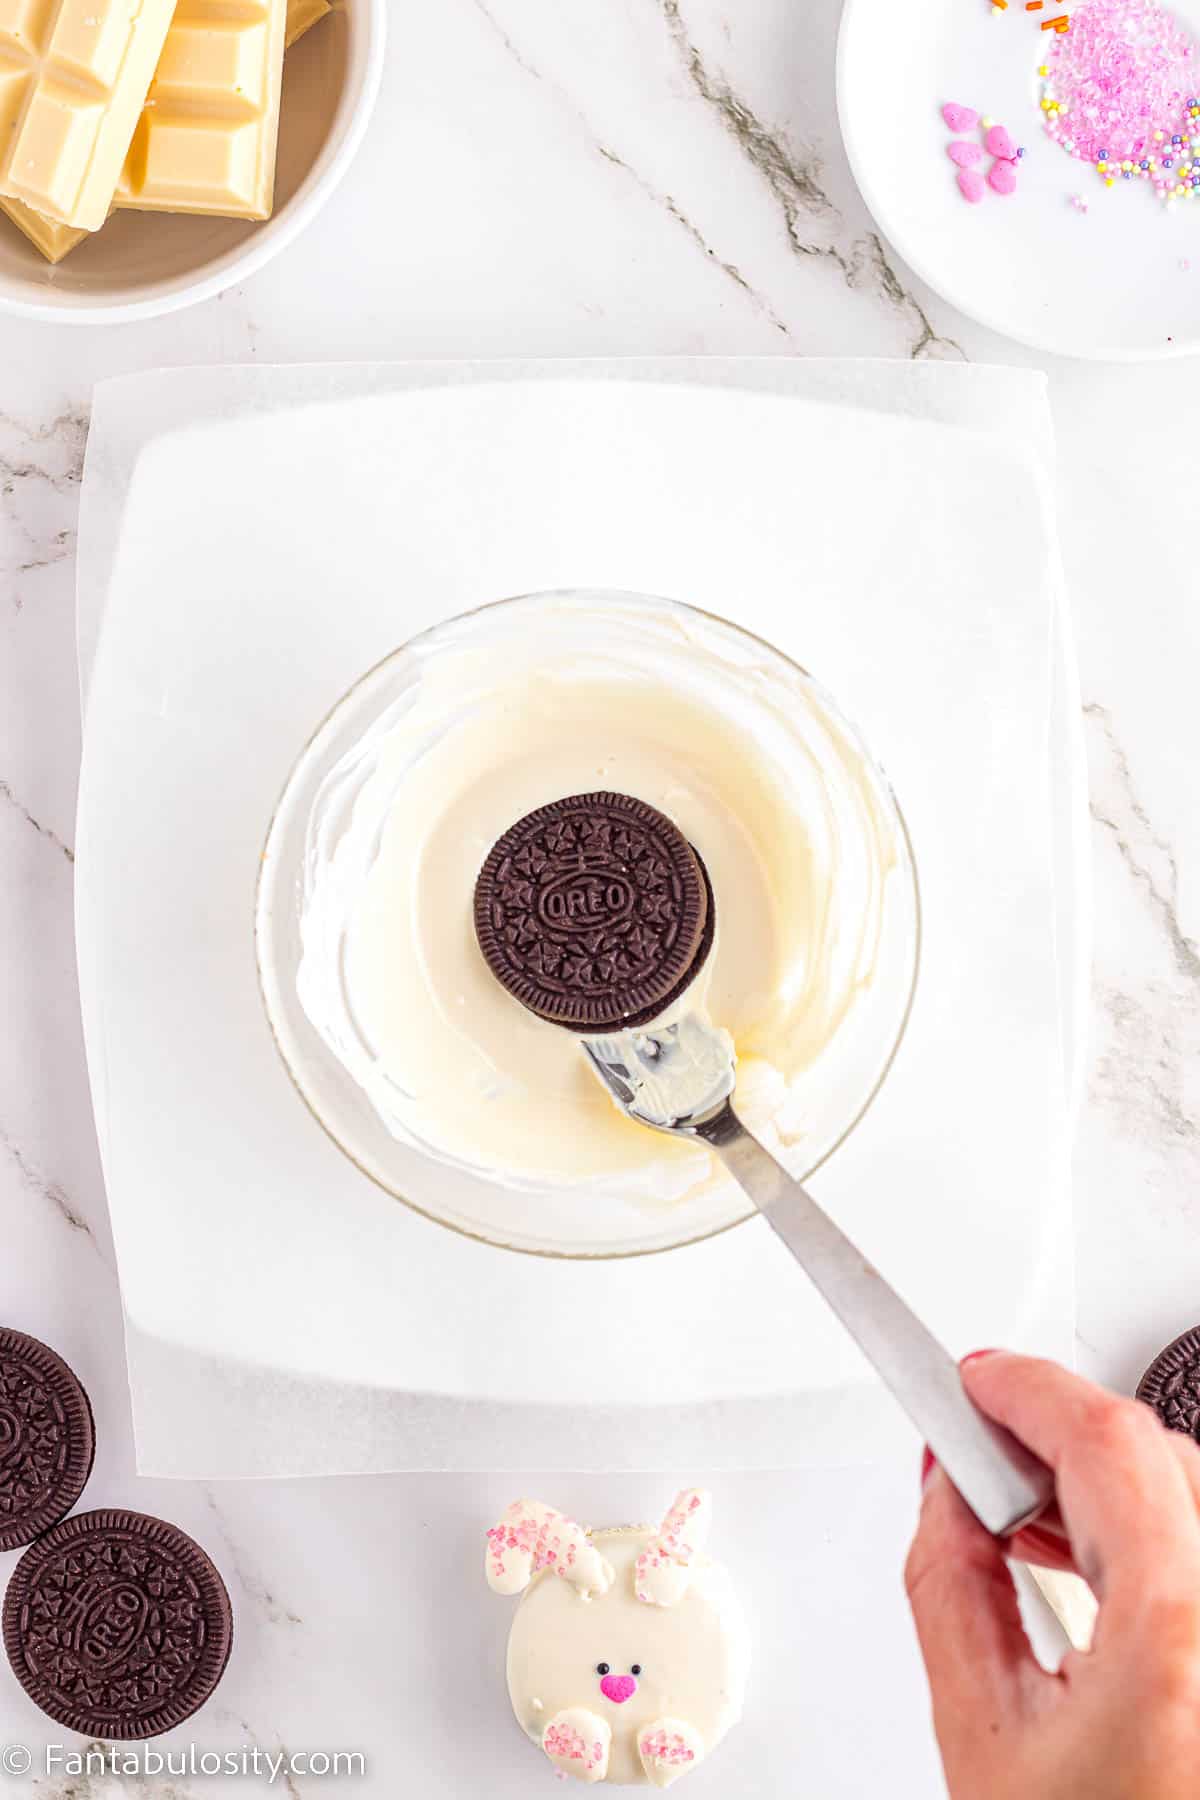
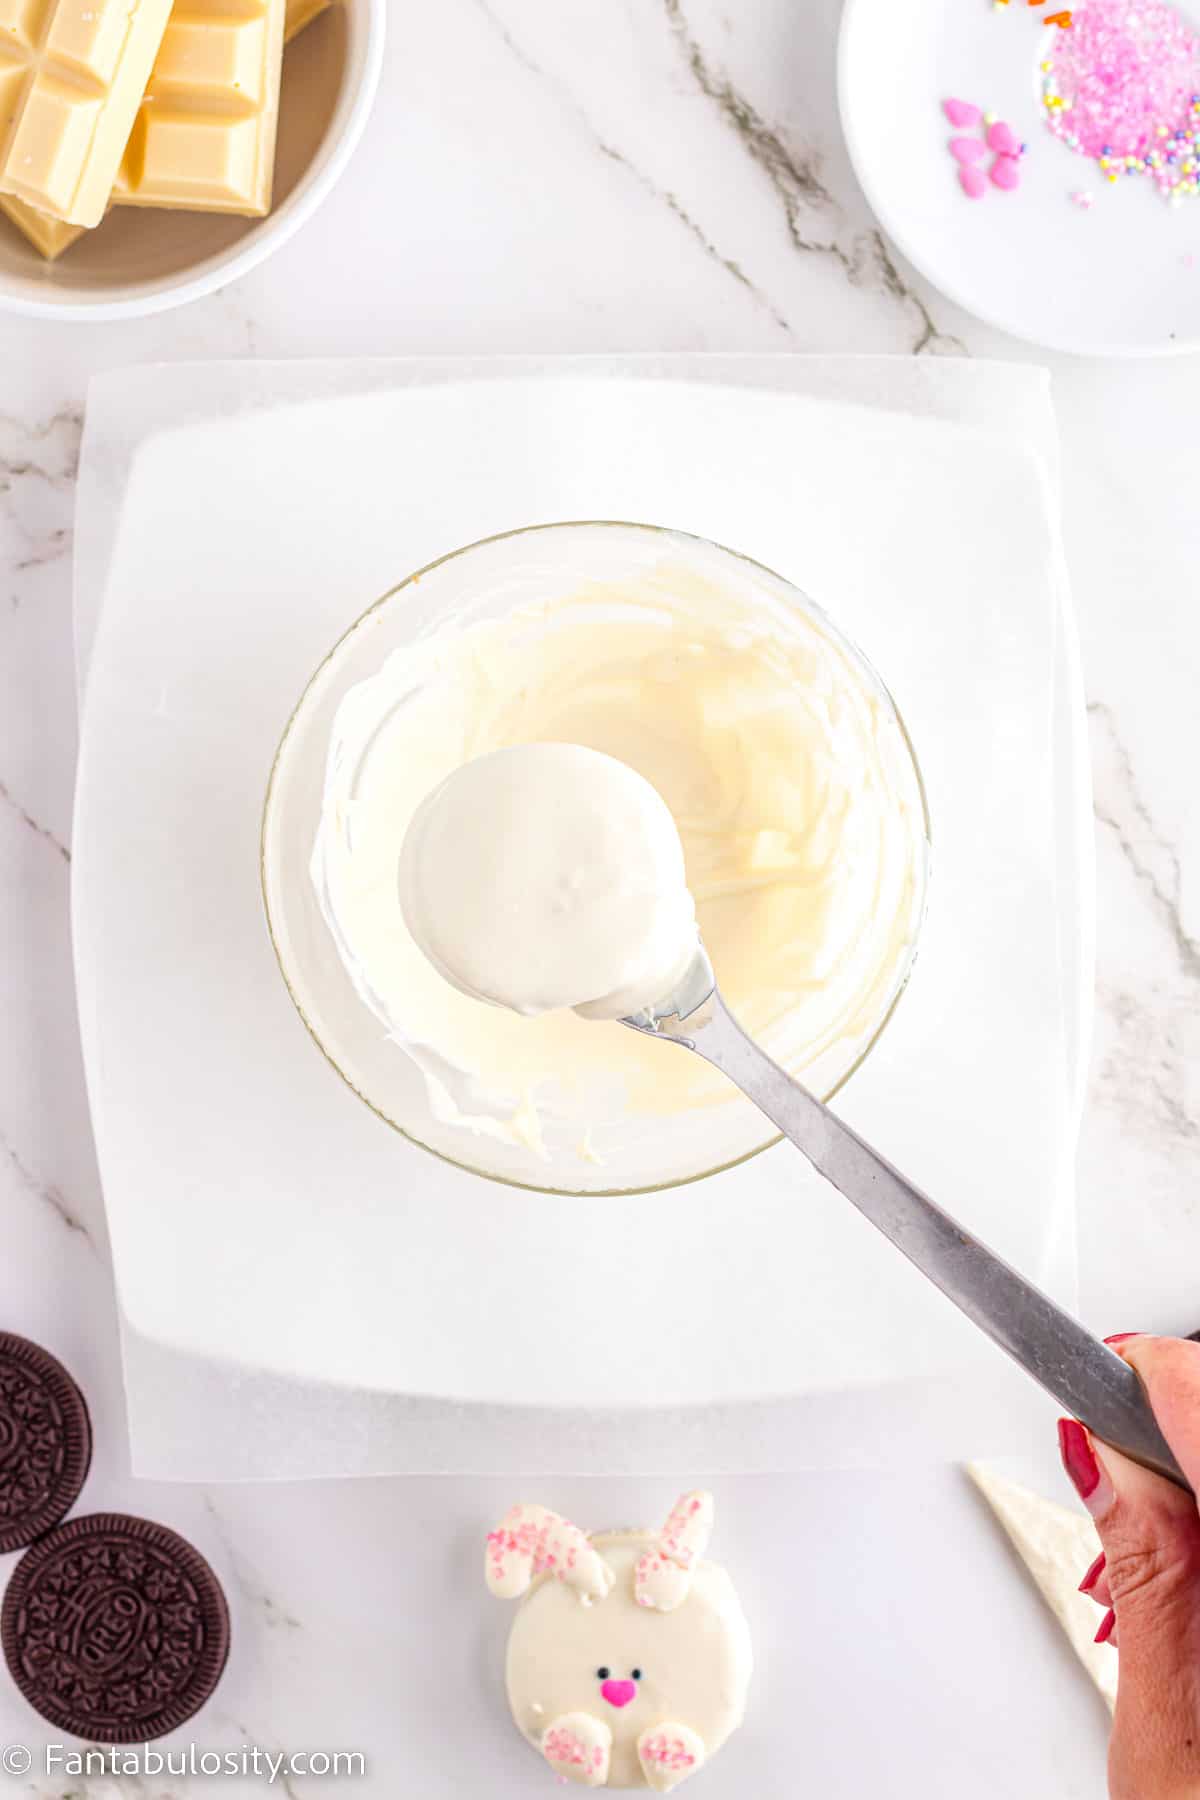
STEP 3. Dip an Oreo cookie, using a fork, until it is covered, and allow the excess drip back into the bowl. Place the dipped Oreo on a wax paper-lined plate or cookie sheet (Images 1 & 2).
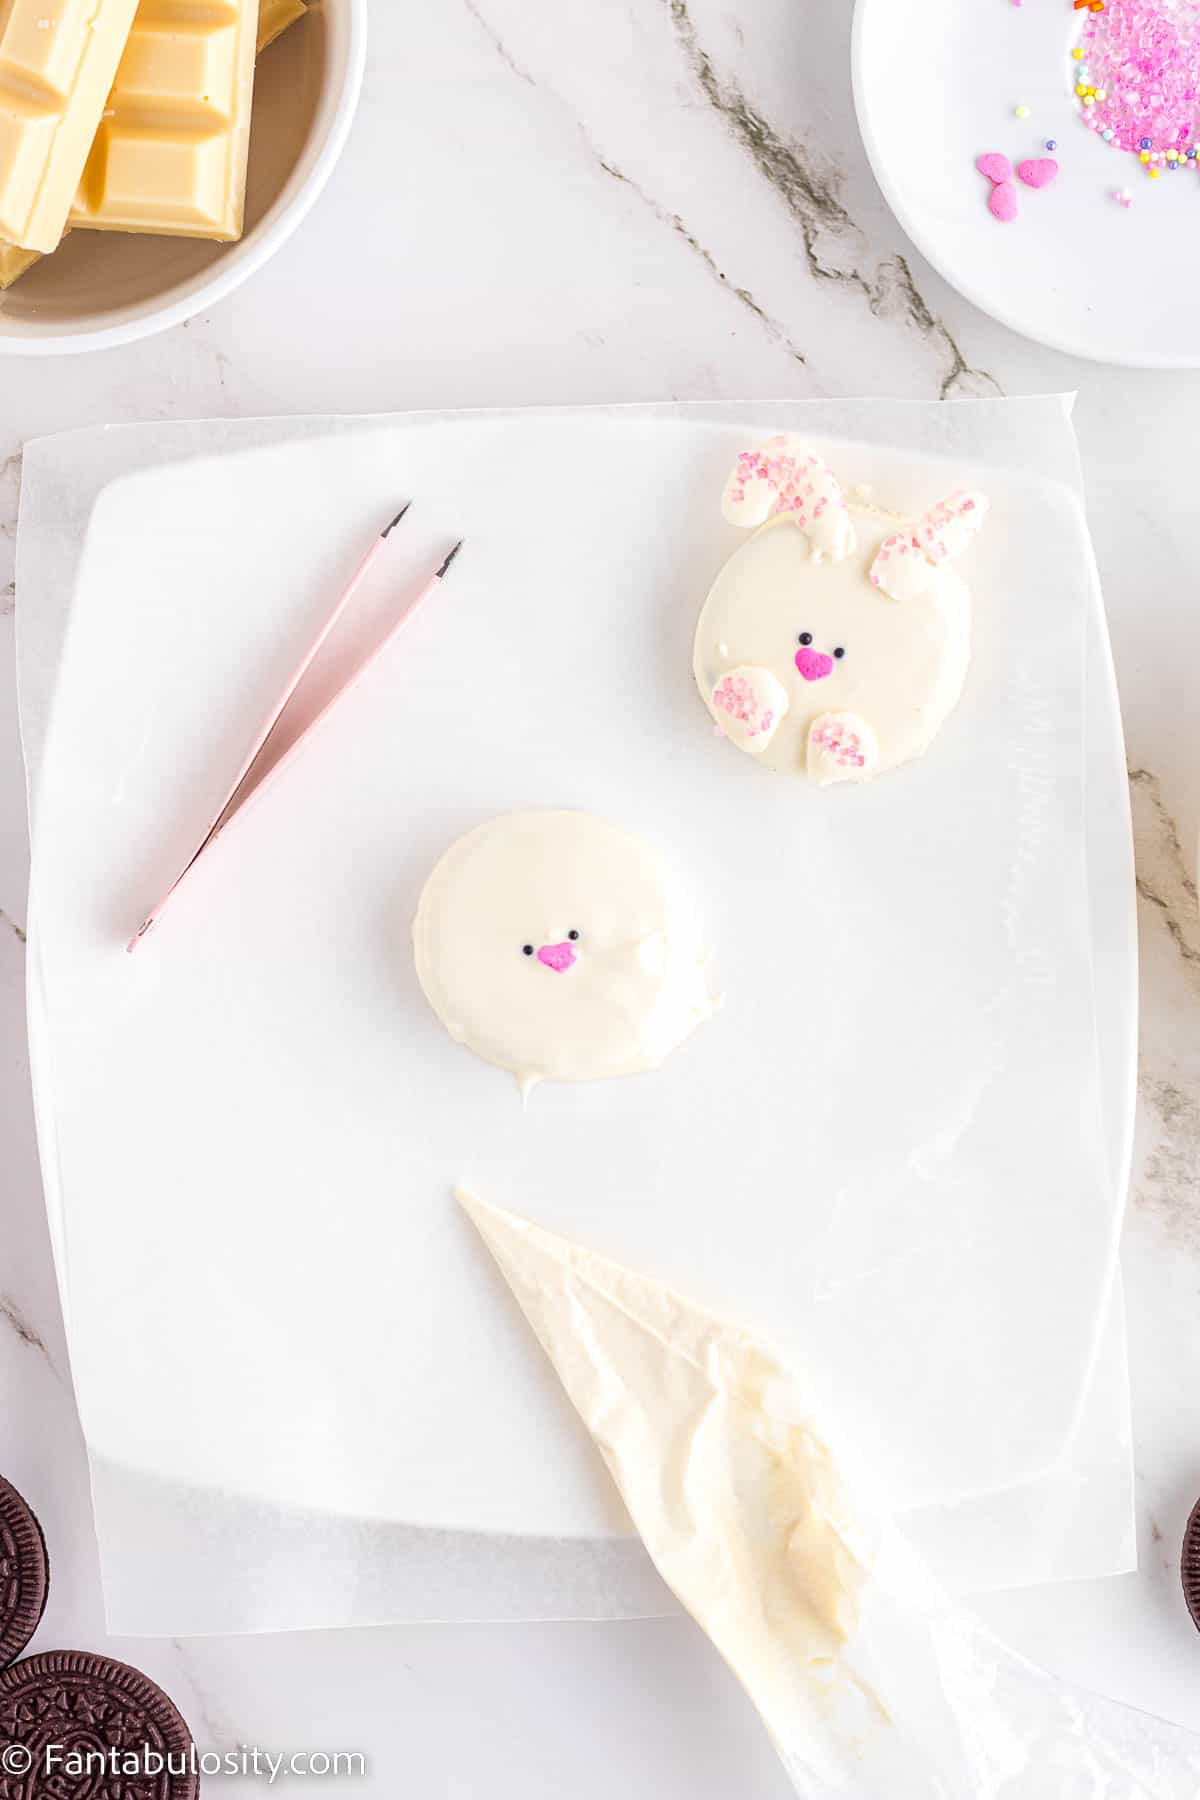
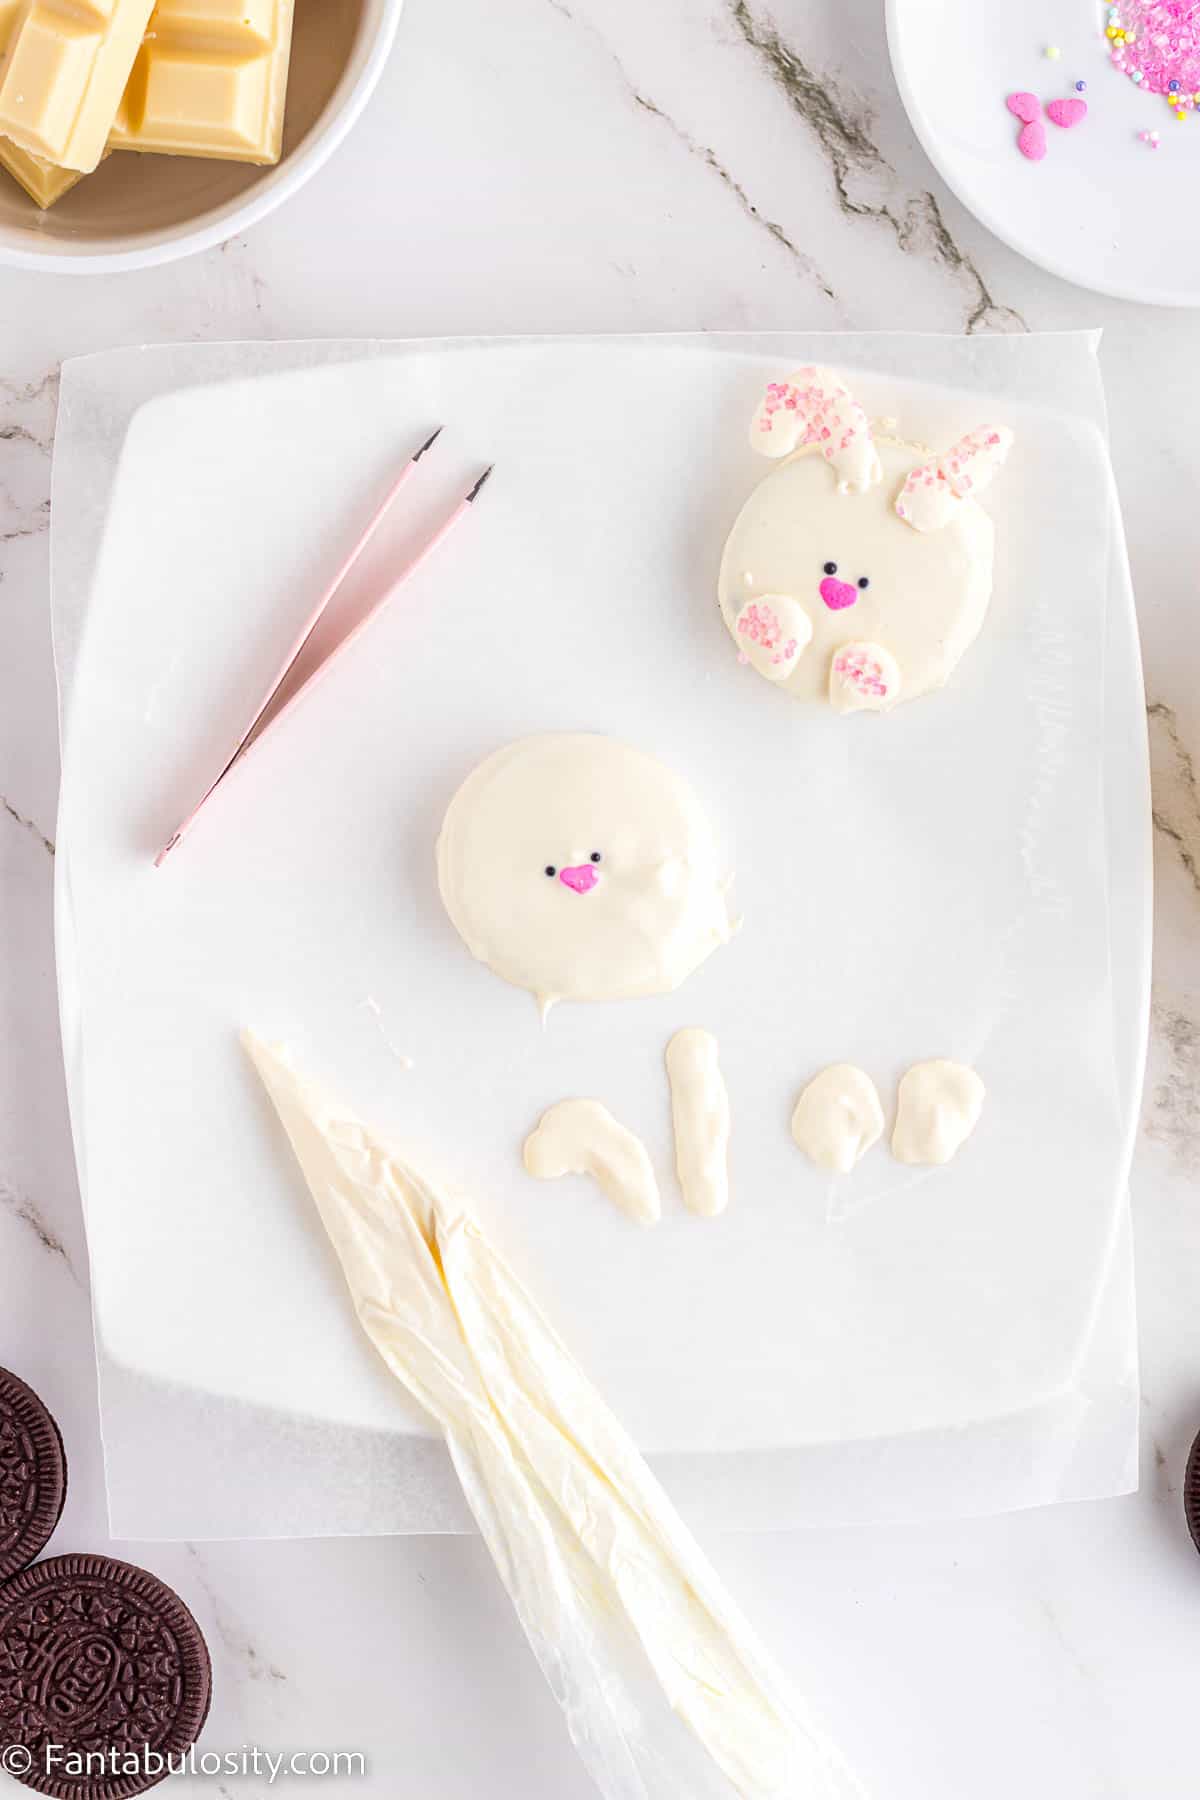
STEP 4. While the chocolate is still wet, add 2 small, black sprinkles for the eyes and a pink heart sprinkle for the nose (Image 3).
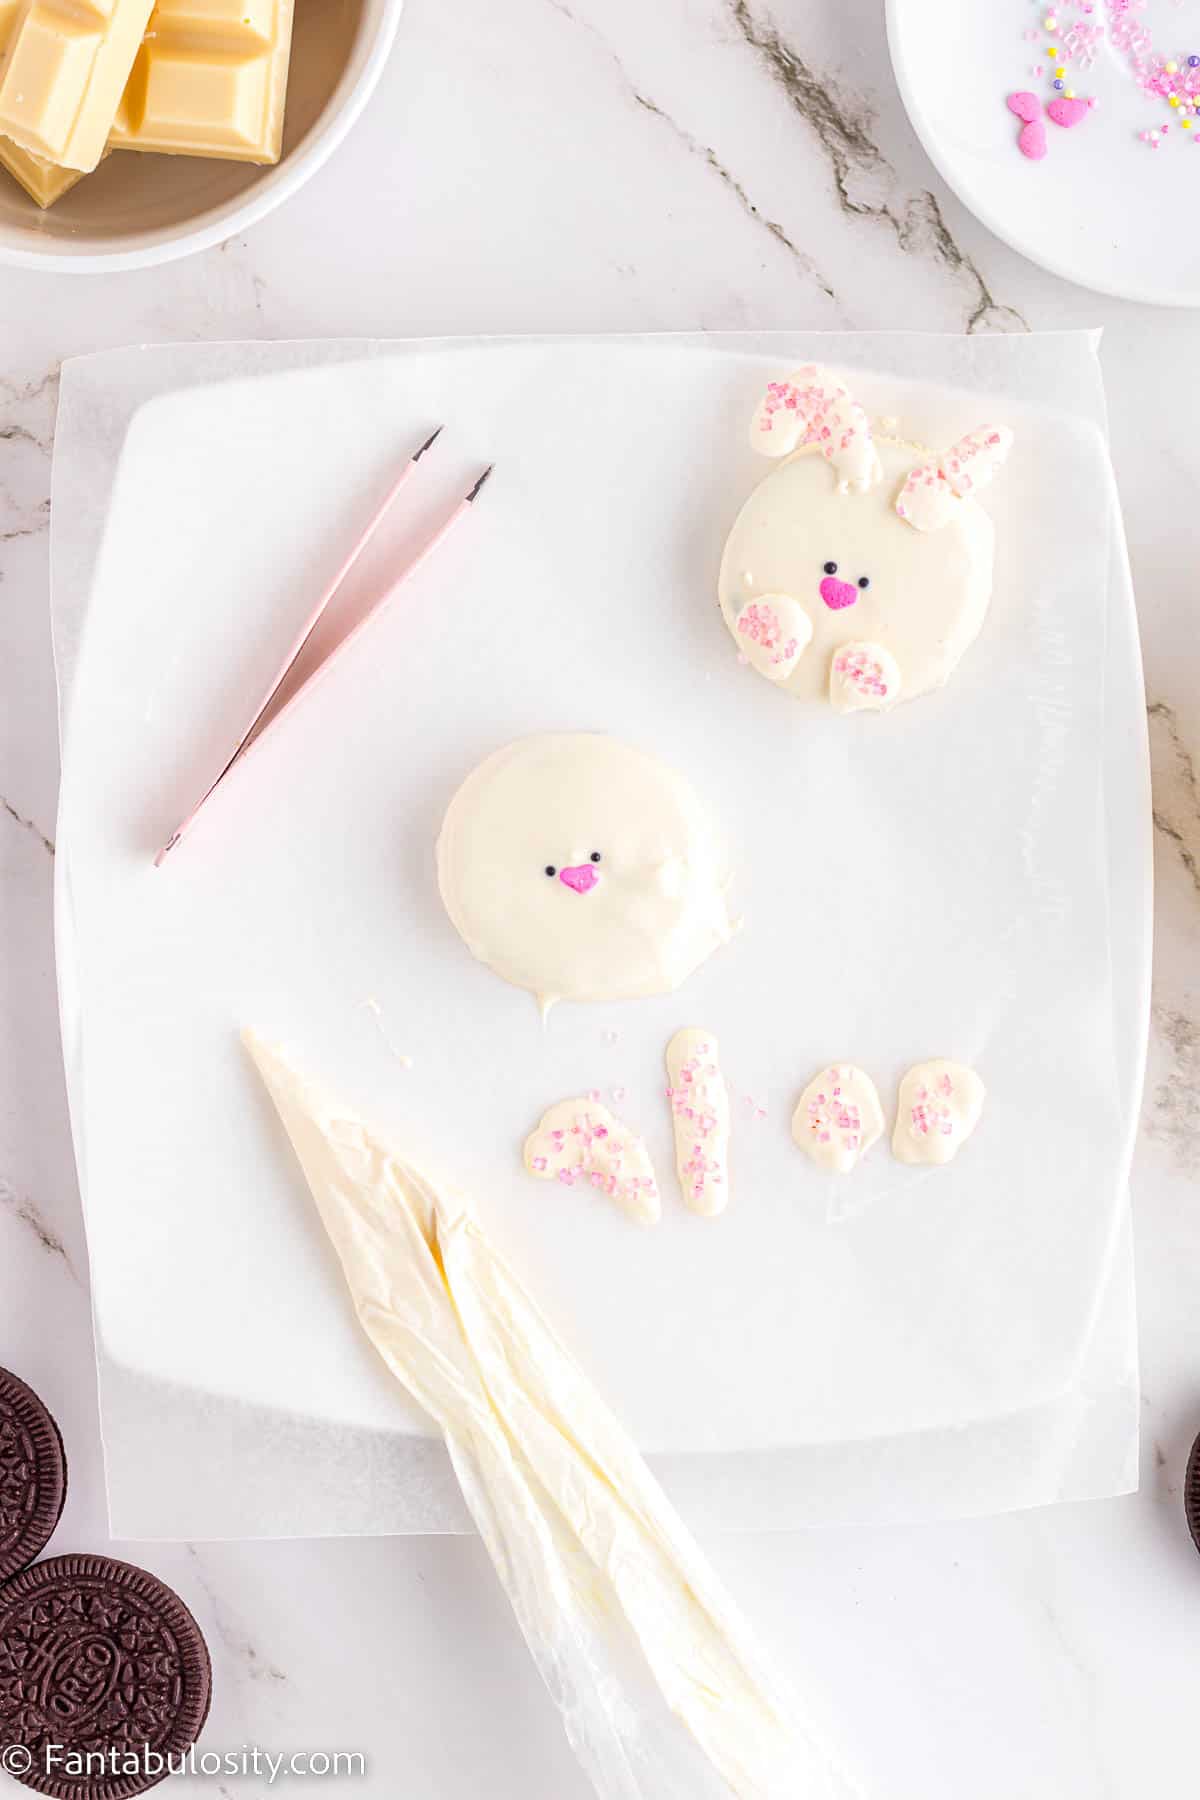
STEP 5. Place a tablespoon of the melted white chocolate into a piping bag and pipe 2 ears and 2 bunny paws on the wax paper (Image 4). Sprinkle them with pink sanding sugar. Place the plate in the freezer for 10 minutes to set (Image 5).
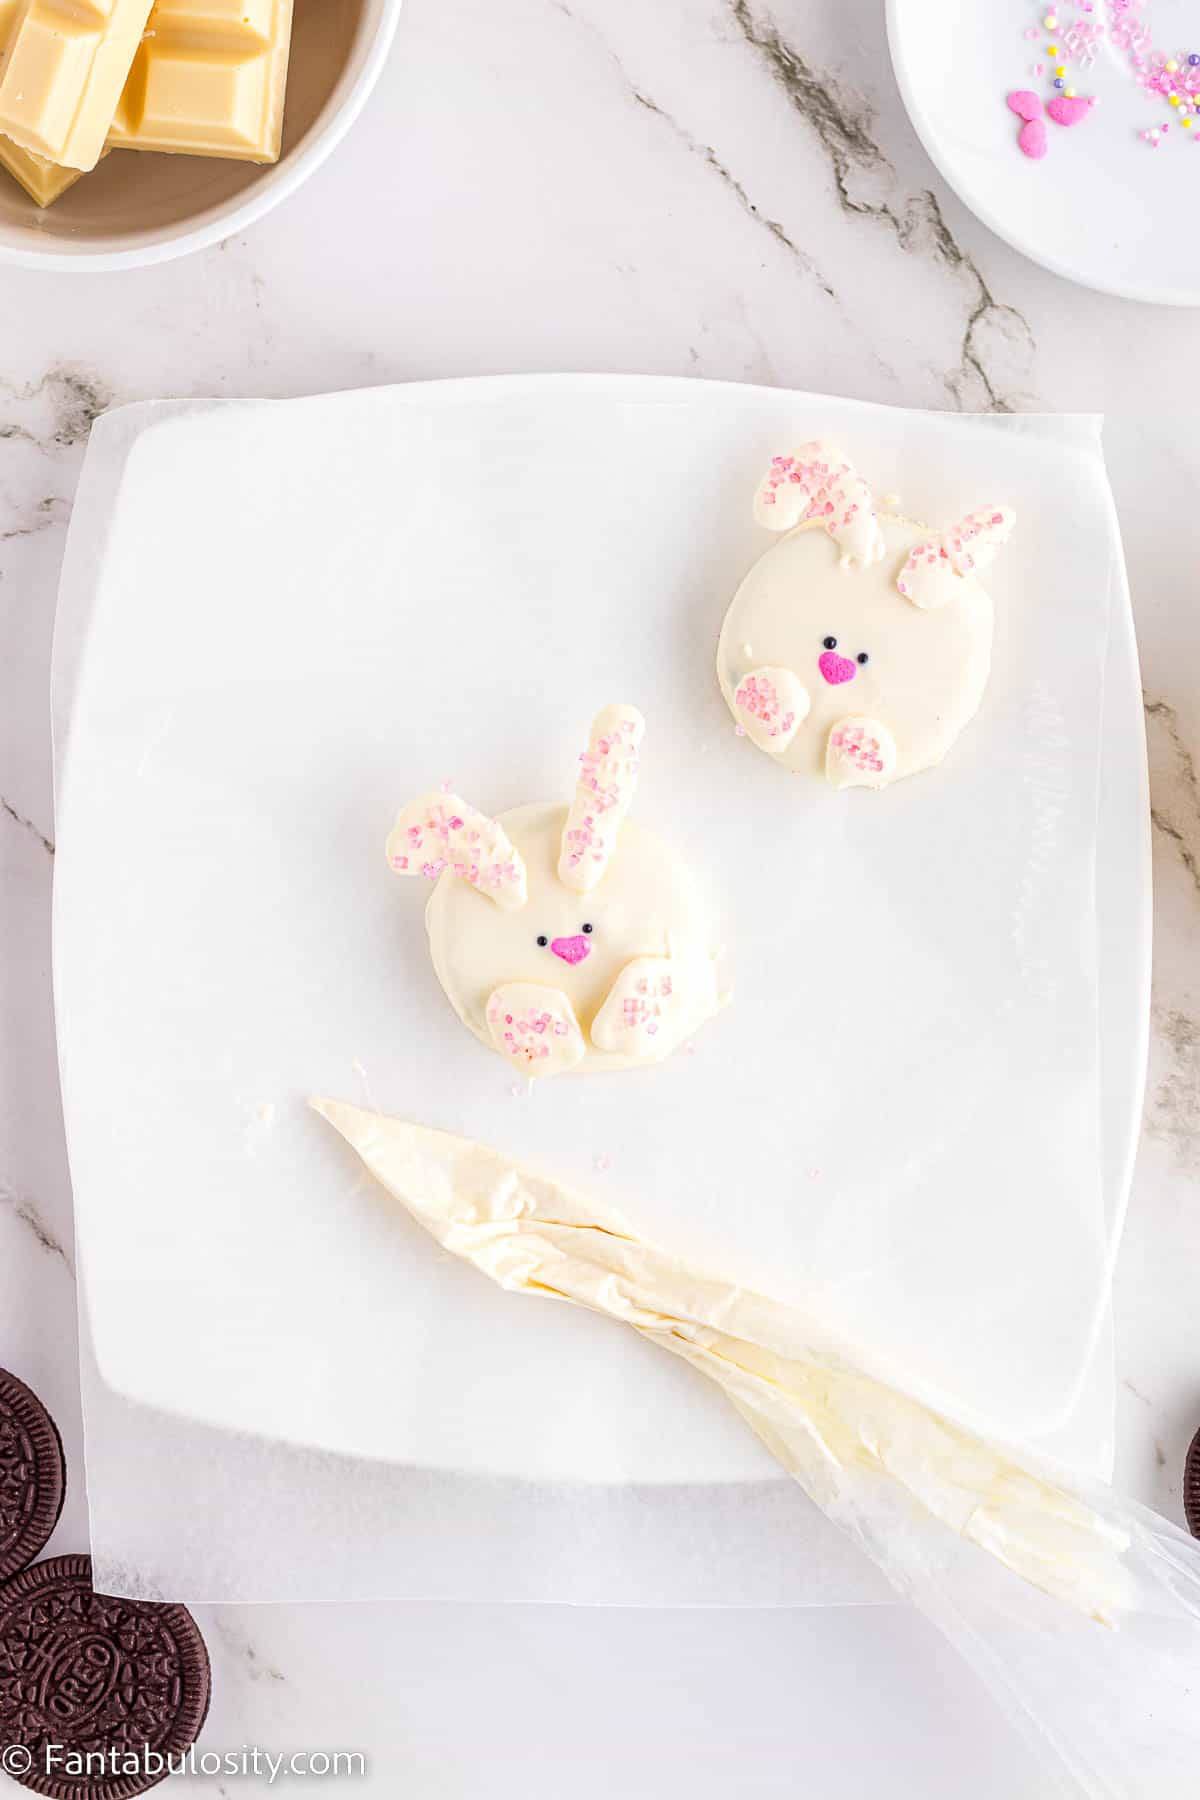
STEP 6. Once set, remove the ears and feet from the wax paper and attach them to the bunny Oreo, using small dollops of melted chocolate (Image 6).
Allow to set until ears and feet are secure.
🐥 How to Make Easter Chicks Cookie
STEP 1. Melt 1⁄2 cup white chocolate in a small deep microwave-safe bowl, in 20-second increments, and stir until smooth.
STEP 2. Mix in yellow candy color until the desired shade is reached.
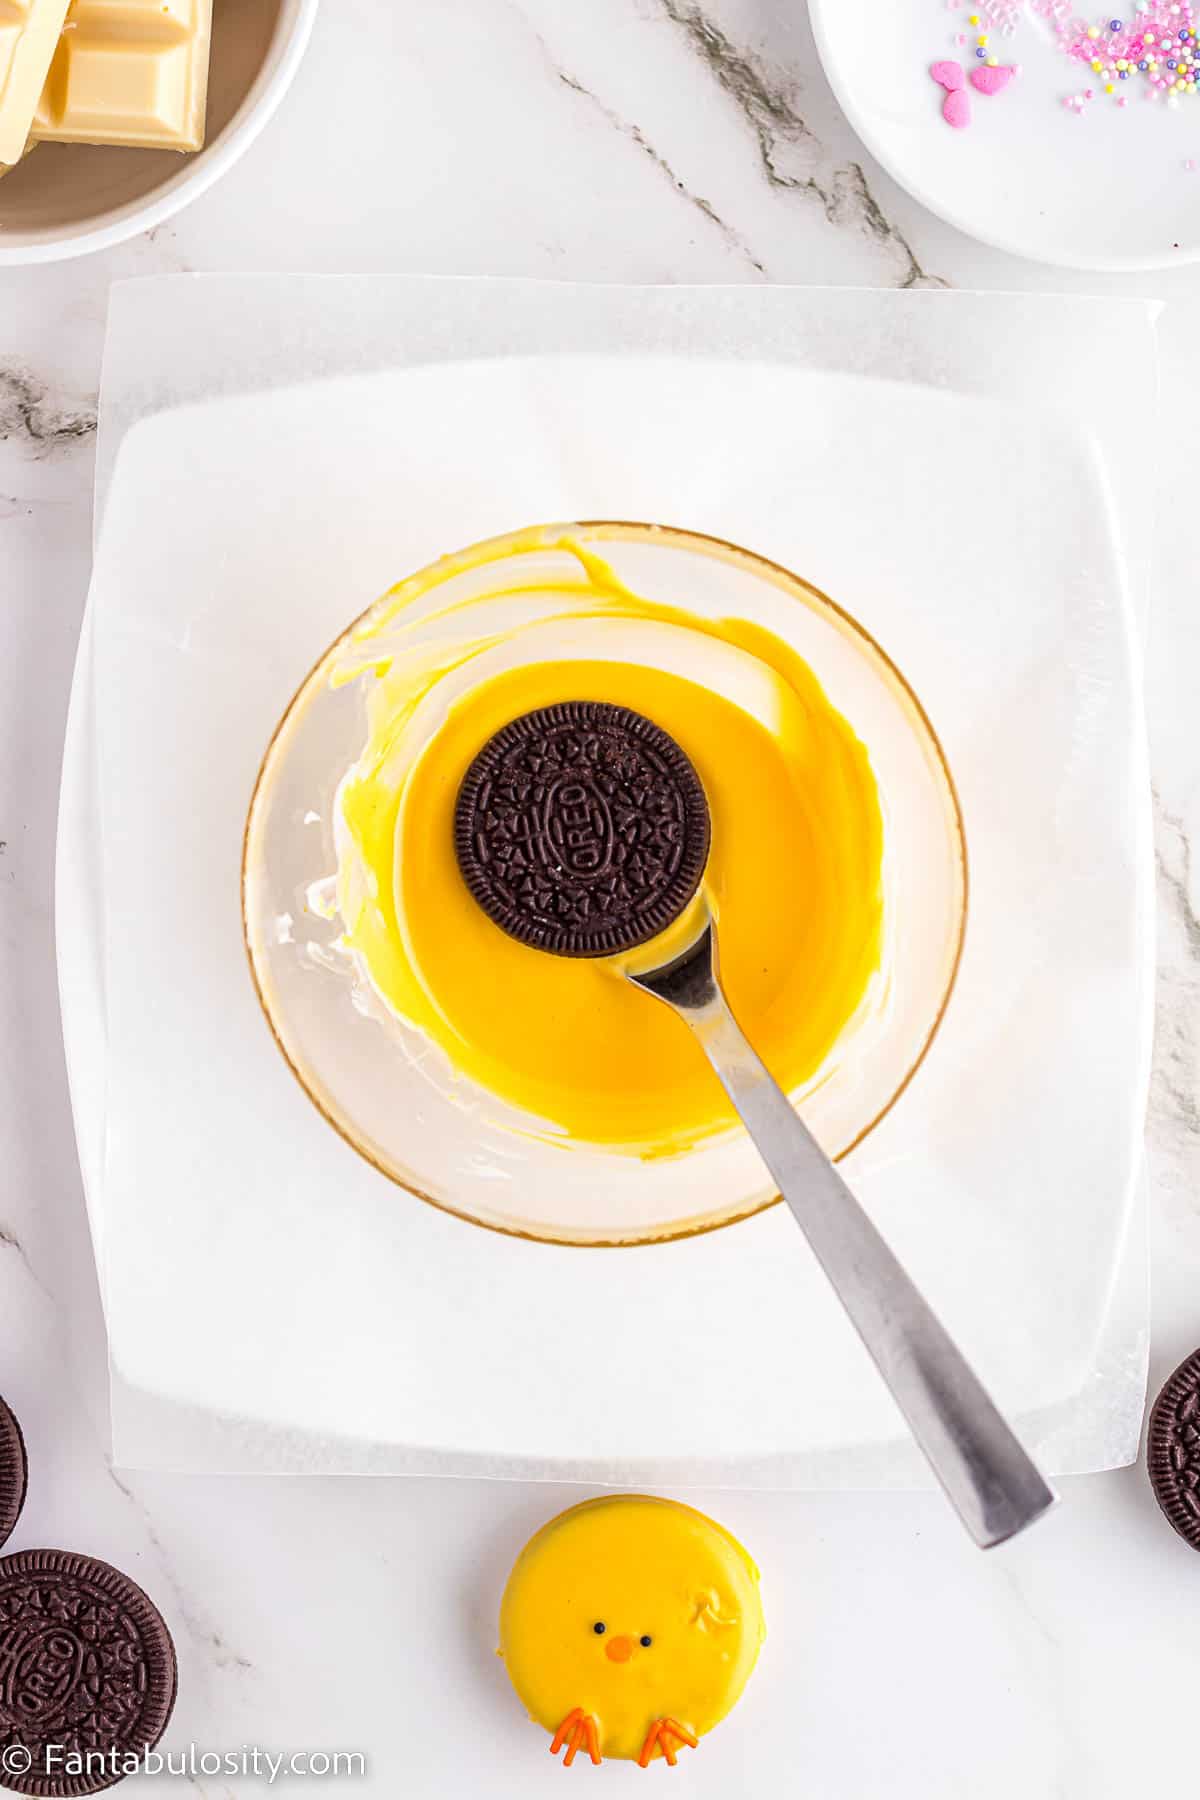
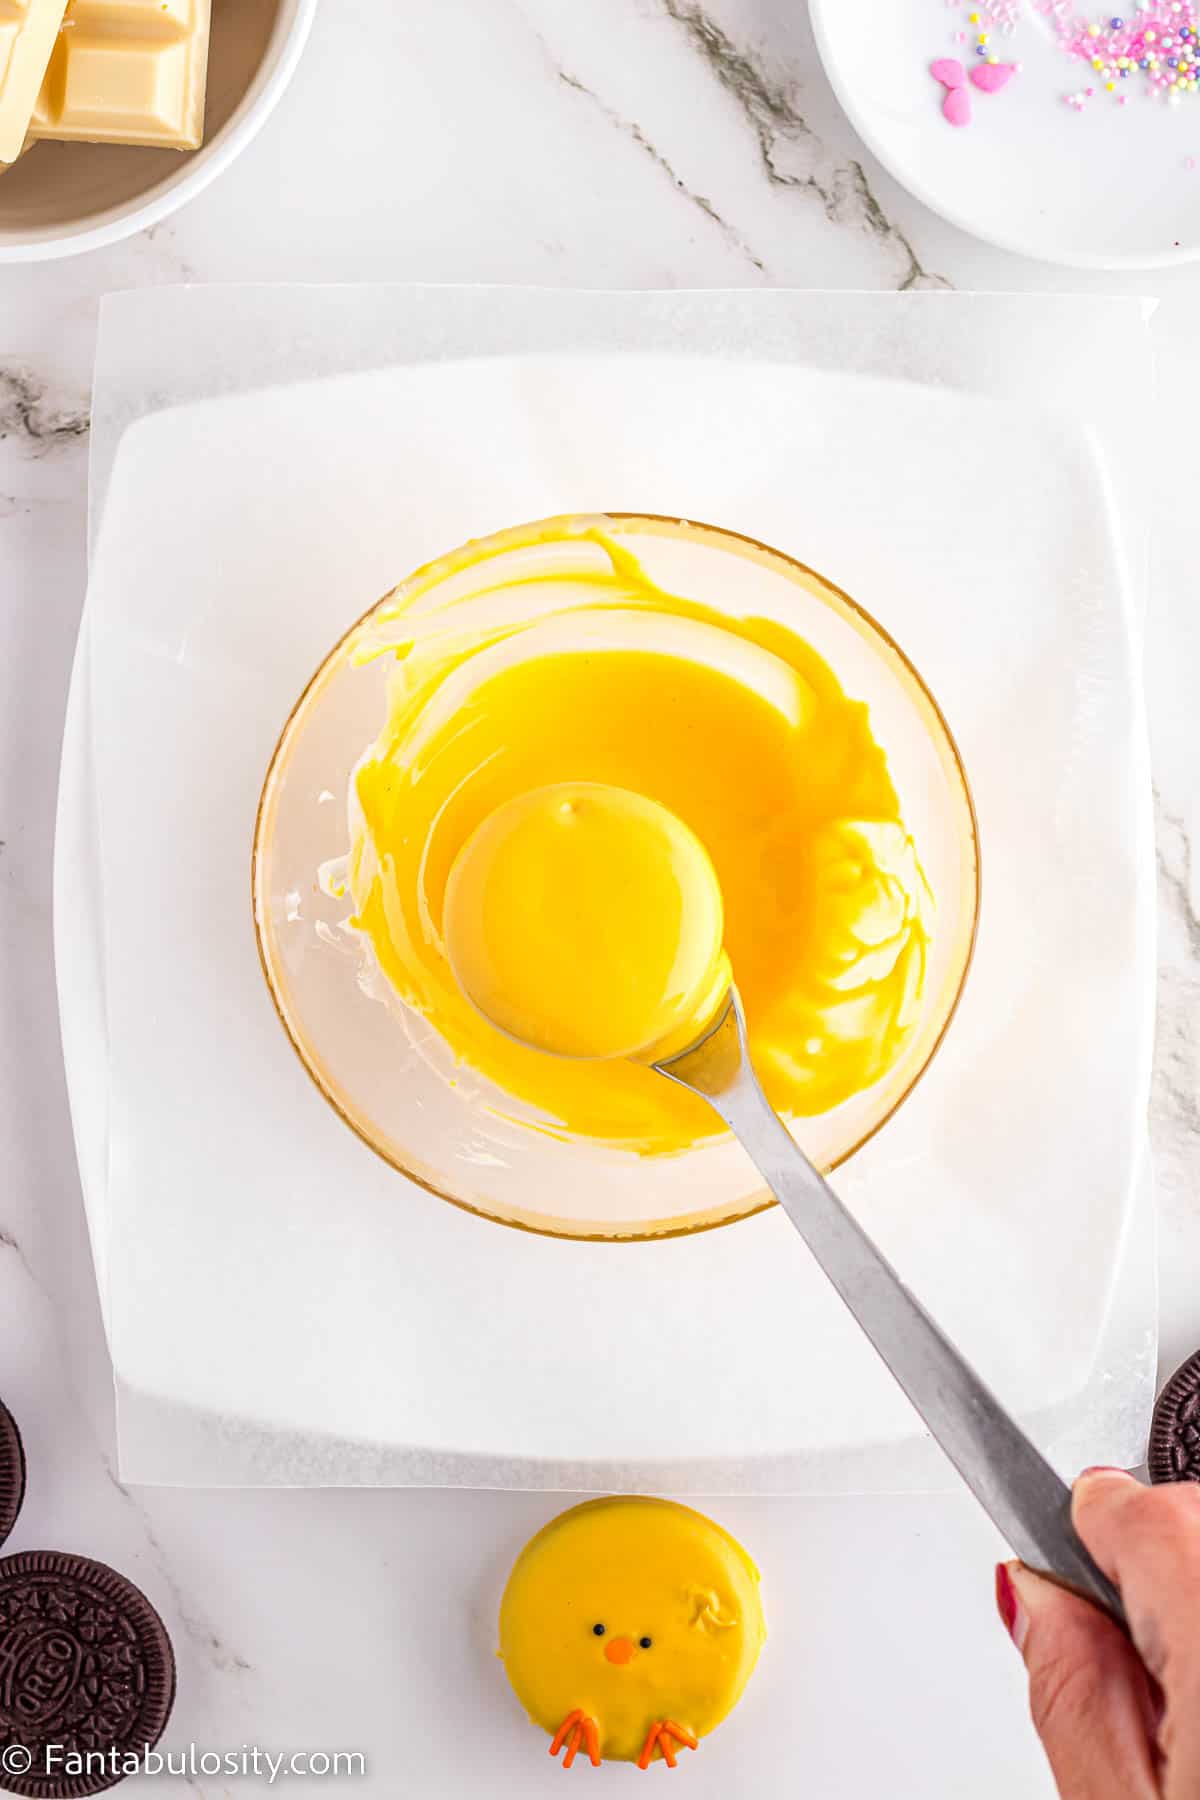
STEP 3. Dip an Oreo cookie into the yellow melted chocolate, using a fork, until it is covered, and allow the excess to drip back into the bowl. Place the dipped Oreo on a wax paper-lined plate (Images 7 & 8).

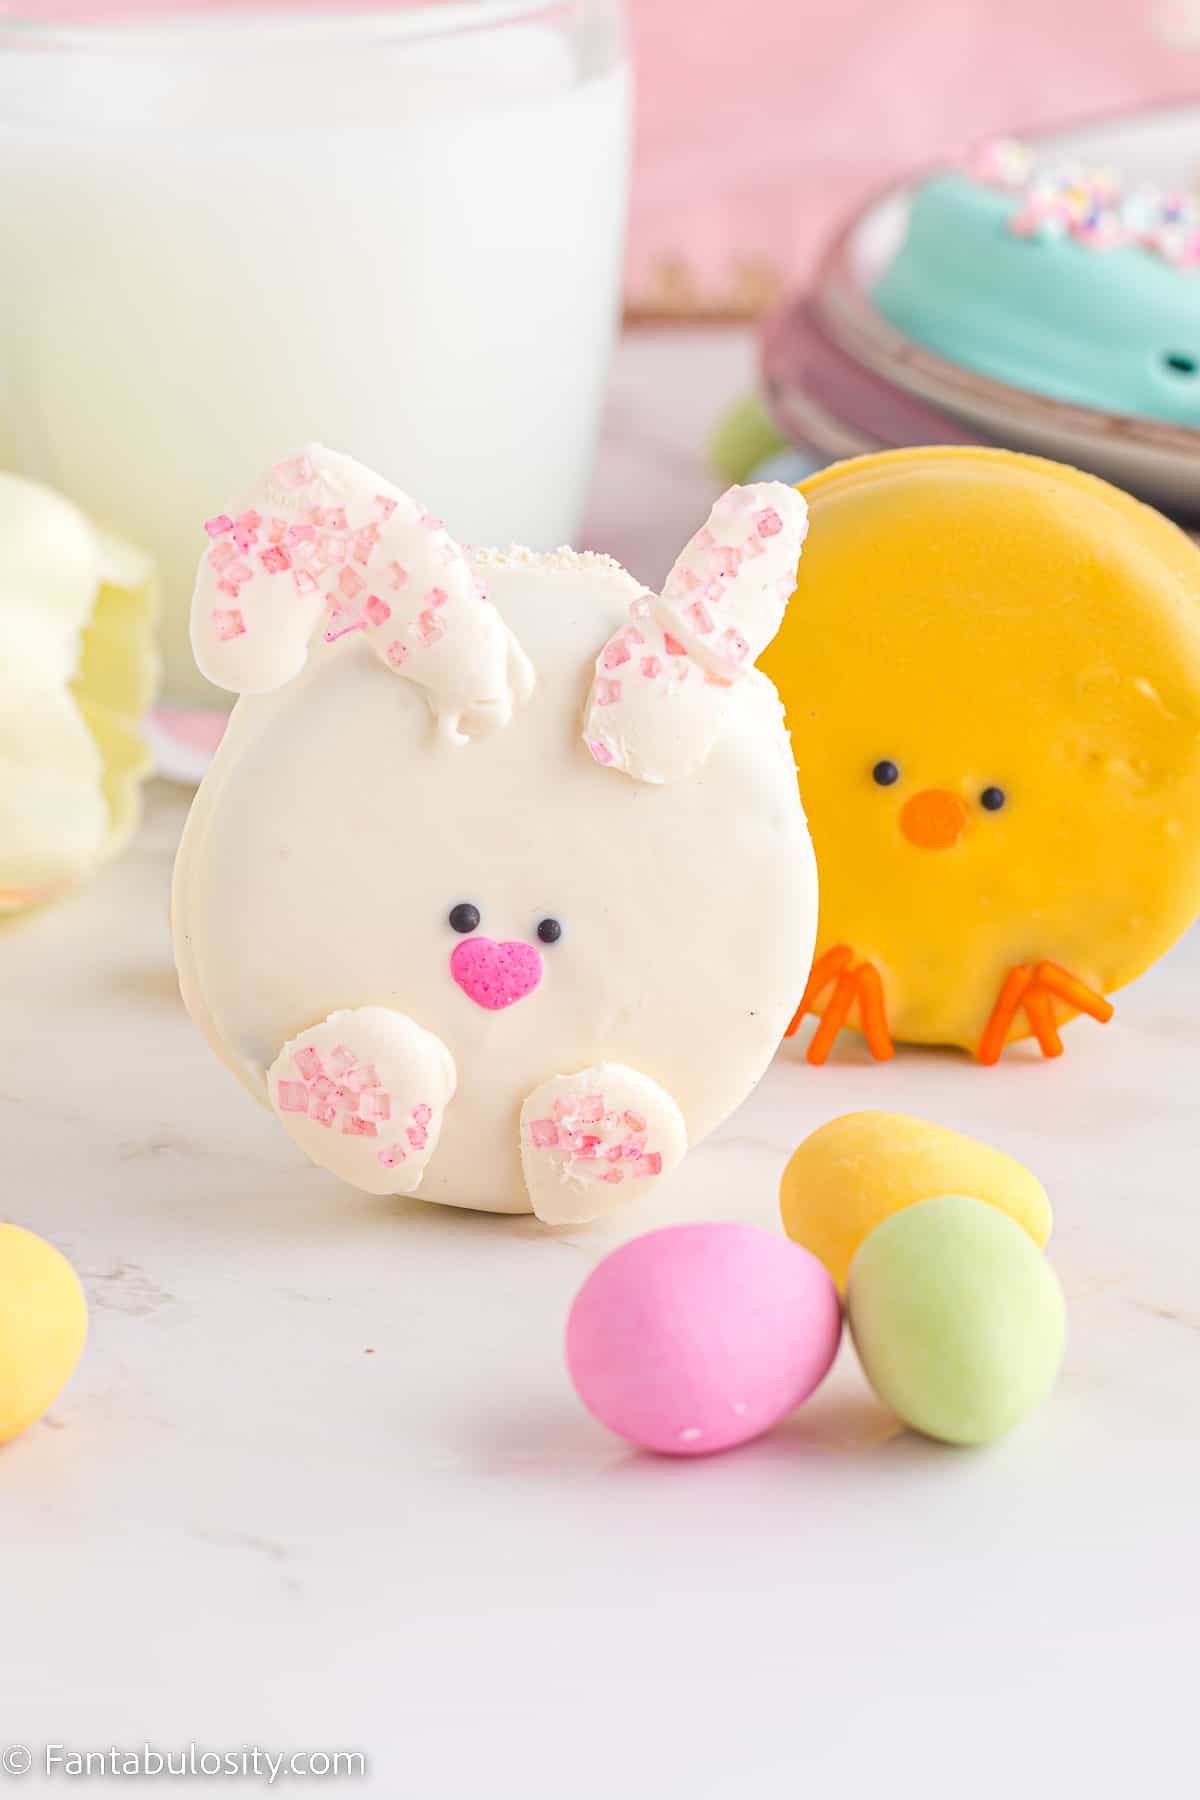
STEP 4. While the chocolate is still wet add 2 black nonpareil sprinkles for the eyes and an orange round sprinkle for the nose (Image above).
STEP 5. Next, carefully add 3 orange Jimmie sprinkles to form each of the chick’s feet (Image above).
Allow to set until chocolate has hardened.
🥚 How to Make Easter Egg Cookies
STEP 1. In 2 small deep microwave-safe bowls, melt 1⁄2 cup (each) of white chocolate in 20-second increments and stir until smooth.
STEP 2. Mix in the pink color in one bowl and the blue in the other until the desired shade is reached.
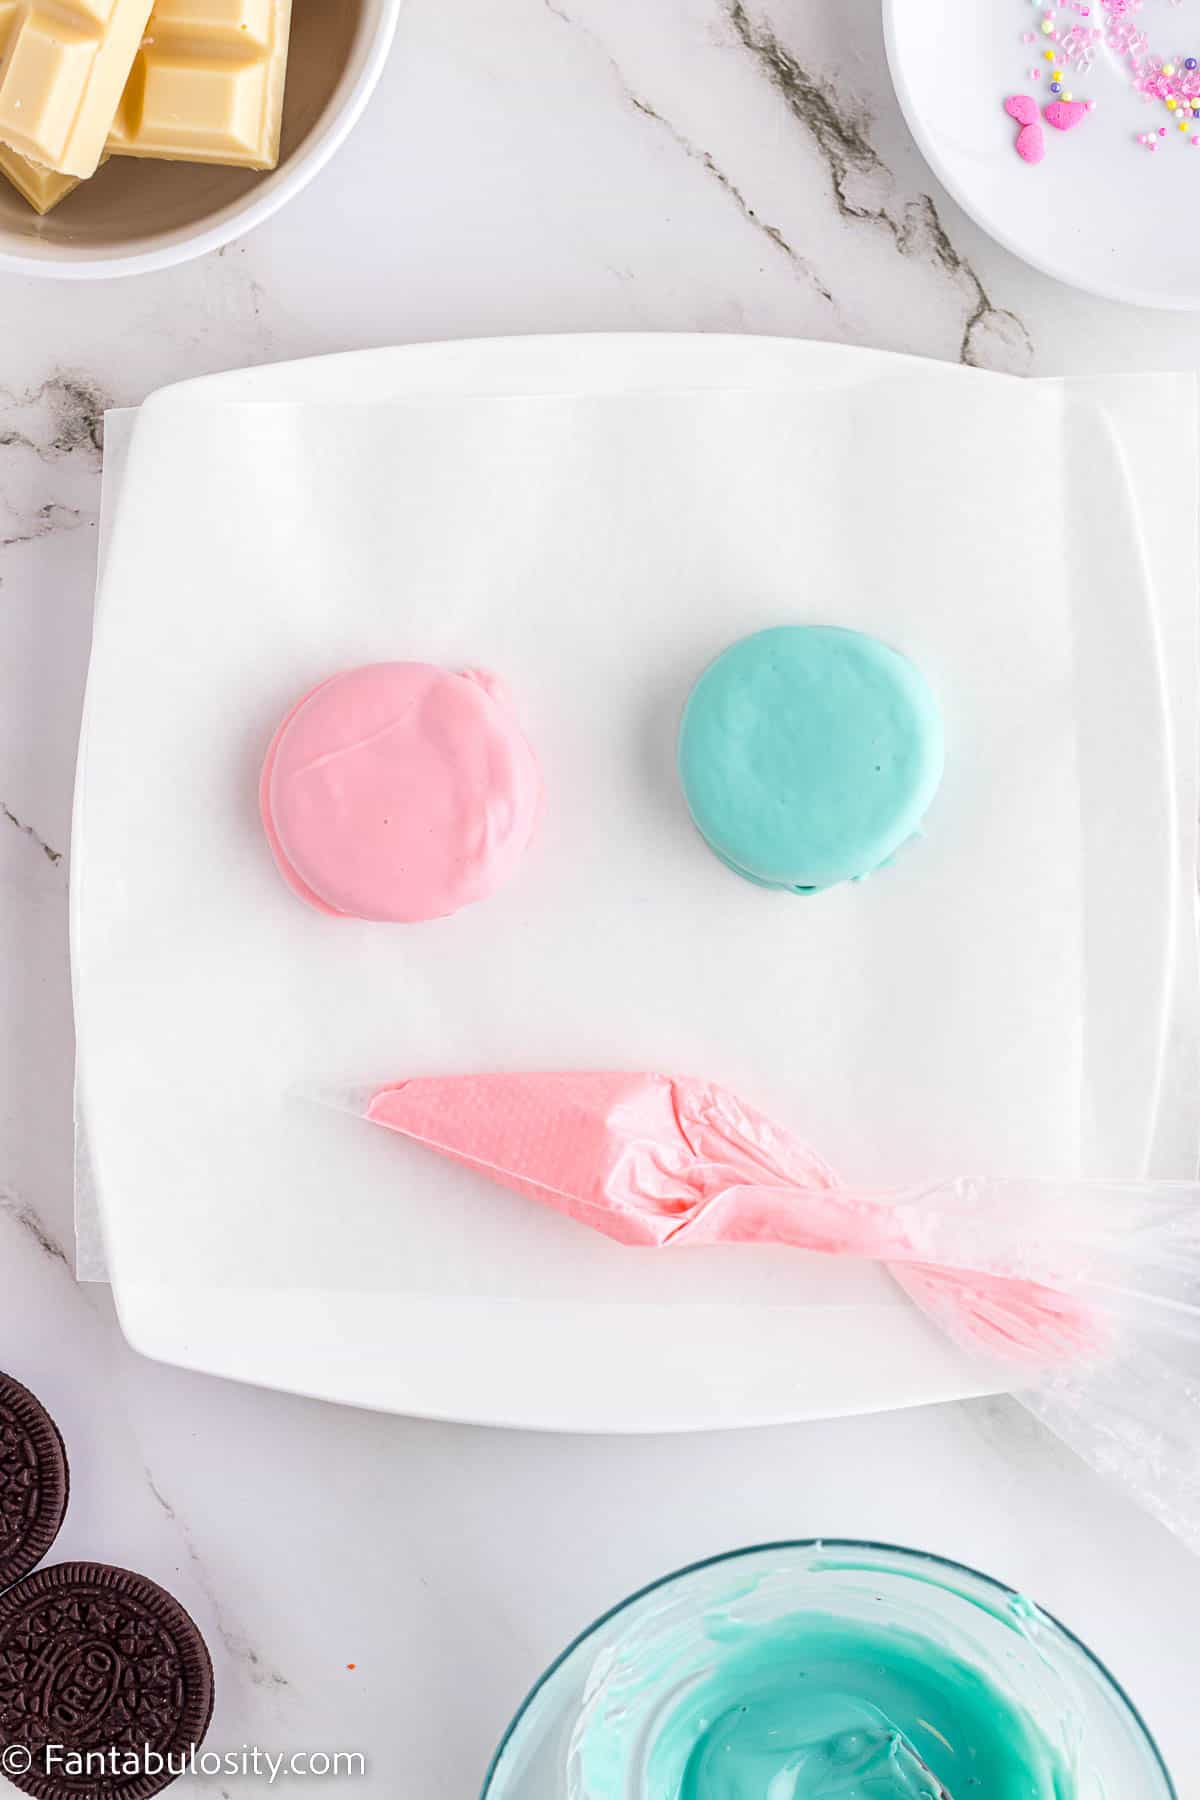
STEP 3. Using a fork dip an Oreo cookie until it is covered in the pink chocolate and allow the excess to drip back into the bowl. Place the dipped Oreo on a wax paper-lined plate. Continue with another Oreo and the blue chocolate. (You will have 2 Oreos of each color.)
Place the plate in the freezer for 10 minutes to set (Image 9).
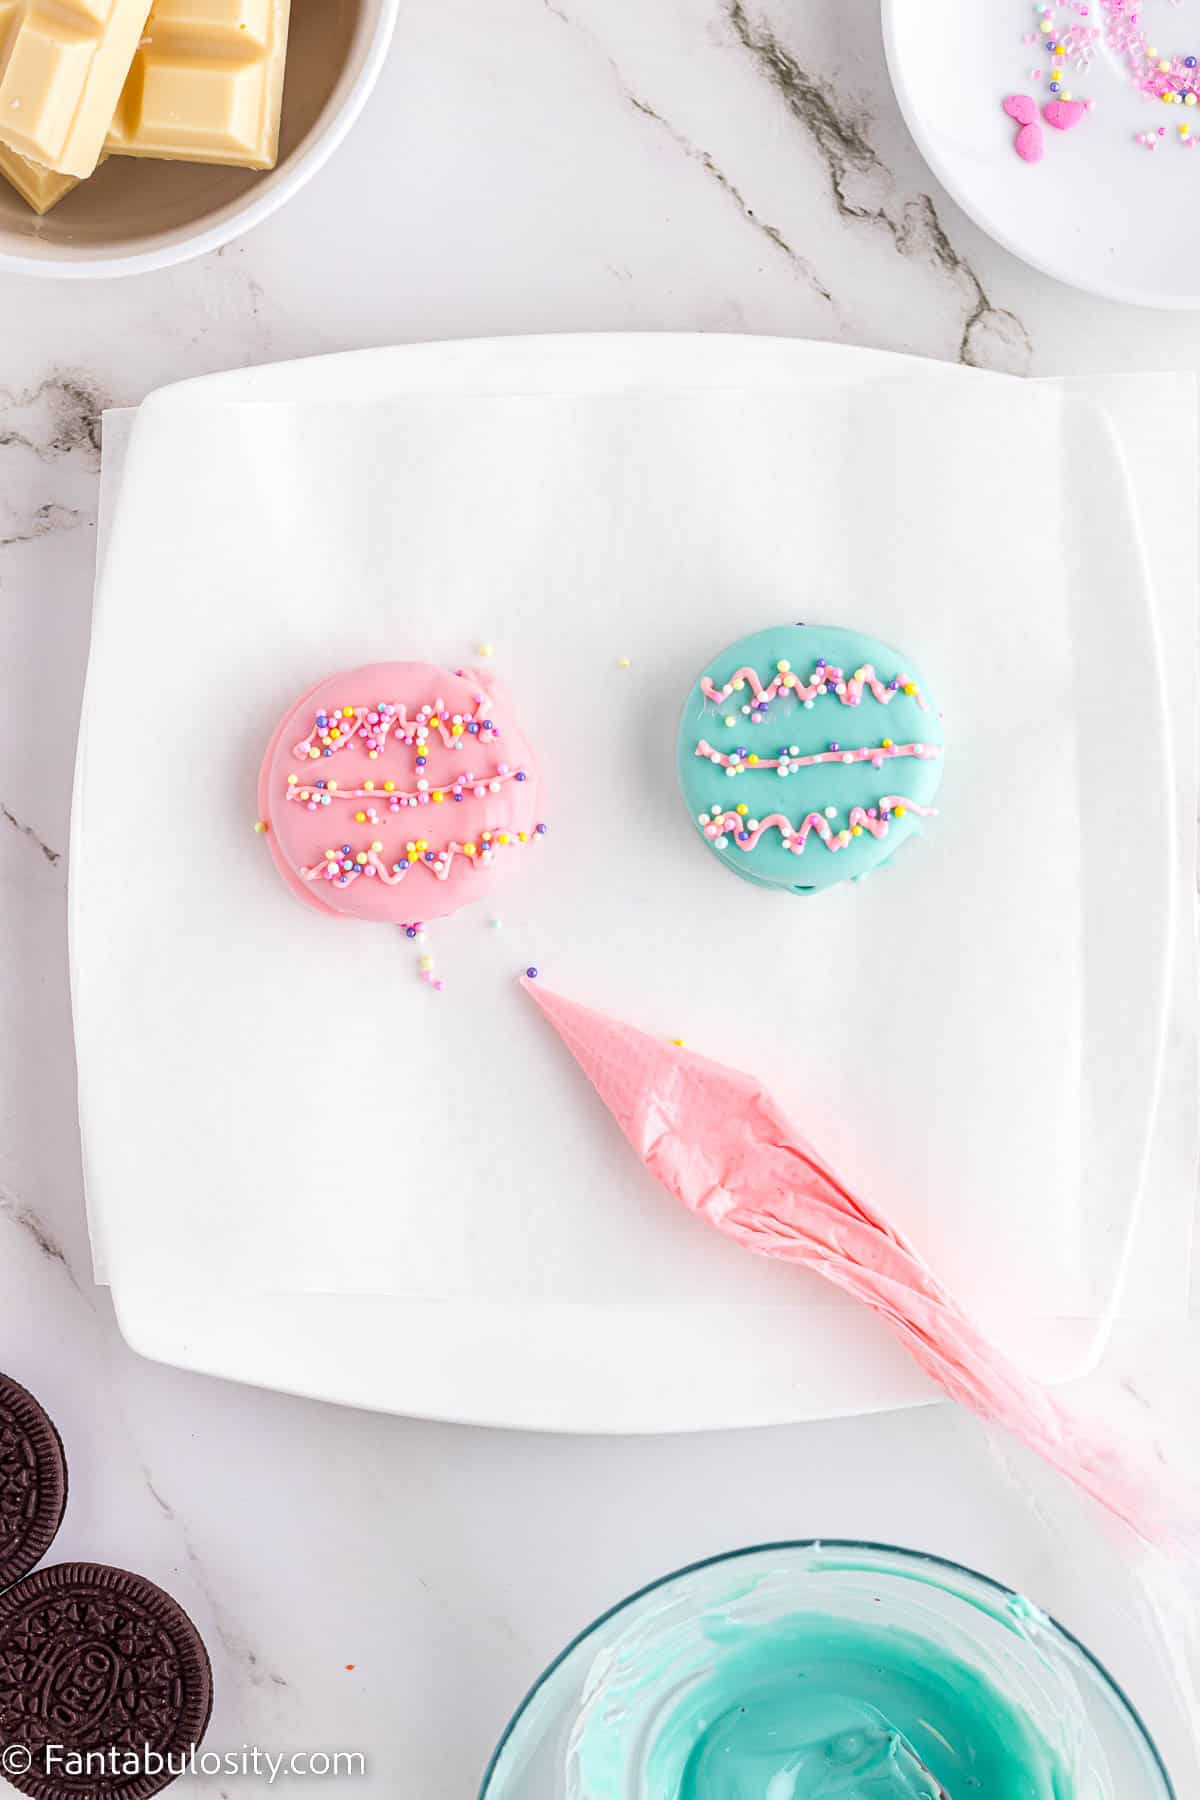
STEP 4. Place a tablespoon of the melted pink chocolate into a piping bag. Once the Oreos are set, pipe a zig-zag pattern and cover it with sprinkles while it is still wet.
Then pipe a line across, cover in sprinkles and then repeat the zig-zag pattern at the bottom of the Oreo to complete the design and then cover in sprinkles.
Repeat with the remaining Oreos, remembering to garnish the piping with sprinkles while the chocolate is still wet.
Allow to set until the chocolate has hardened.

💭 Recipe Pro Tips
- Using Tweezers. When decorating cookies you can use tweezers to add the sprinkles. Be sure not to clamp the sprinkles too hard or they can easily break.
- Fragile for Gifting. The Bunny ears can be very delicate, so if you are packaging these chocolate Oreos for gifting in a gift box, be sure that they are fully set and packed in a single layer to avoid smudging. If one breaks, you can “glue” them back together with more melted chocolate and cover the seam with more sanding sugar. Chill in the refrigerator for a few moments to set.
📋 Recipe FAQs
Yes! As long as they’re made as instructed, and no cream cheese or other perishable ingredients have been added.
Store Oreos at room temperature in an airtight container for up to 2 weeks.
Oreos, Golden Oreos, and even Ritz cracker peanut butter sandwiches are delicious when covered in milk chocolate.
🐣 More Easter Recipes
If you love Easter ideas and Easter treats, then you’ll also love these delicious recipes and favorites:
Did you make this? I’d be so grateful if you left a “star” rating below to let me know what you thought! Then, the next time you need a quick and easy recipe, come back to Fantabulosity to browse all of my easy recipes!
Recipe

Easter Oreos
Ingredients
- 8 Oreos or chocolate sandwich cookies
- Oil-based candy color for coloring chocolate (white, yellow, pink, and light blue)
- ½ cup melted Belgian white chocolate, colored white. (Bunny Oreo)
- ½ cup melted Belgian white chocolate, colored yellow. (Chick Oreo)
- ½ cup melted Belgian white chocolate, colored pink. (Easter Egg Oreo)
- ½ cup melted Belgian white chocolate, colored blue. (Easter Egg Oreo)
- assorted sprinkles
- pink sanding sugar
Instructions
Easter Bunny Tutorial
- Melt 1⁄2 cup white chocolate in a small deep microwave-safe bowl in 20-second increments and stir until smooth.
- Mix in the white candy color until the desired shade is reached.
- Dip an Oreo cookie, using a fork, until it is covered and allow the excess to drip back into the bowl. Place the dipped Oreo on a wax paper-lined plate or cookie sheet.
- While the chocolate is still wet, add 2 small, black sprinkles for the eyes and a pink heart sprinkle for the nose.
- Place a tablespoon of the melted white chocolate into a piping bag and pipe 2 ears and 2 bunny paws on the wax paper. Sprinkle them with pink sanding sugar. Place the plate in the freezer for 10 minutes to set.
- Once set, remove the ears and feet from the wax paper and attach them to the bunny Oreo, using small dollops of melted chocolate.
- Allow to set.
Easter Chick Tutorial
- Melt 1⁄2 cup white chocolate in a small deep microwave-safe bowl, in 20-second increments and stir until smooth.
- Mix in yellow candy color until the desired shade is reached.
- Dip an Oreo cookie in to the yellow melted chocolate, using a fork, until it is covered and allow the excess to drip back into the bowl. Place the dipped Oreo on a wax paper-lined plate.
- While the chocolate is still wet add 2 black nonpareil sprinkles for the eyes and an orange round sprinkle for the nose.
- Next, carefully add 3 orange Jimmie sprinkles to form each of the chick's feet.
- Allow to set.
Easter Egg Tutorial
- In 2 small deep microwave-safe bowls, melt 1⁄2 cup (each) of white chocolate in 20-second increments and stir until smooth.
- Mix in the pink candy color in one bowl and the blue in the other until the desired shade is reached.
- Using a fork dip an Oreo cookie until it is covered in the pink chocolate and allow the excess to drip back into the bowl. Place the dipped Oreo on a wax paper-lined plate. Continue with another Oreo and the blue chocolate. ( You will have 2 Oreos of each color.) Place the plate in the freezer for 10 minutes to set.
- Place a tablespoon of the melted pink chocolate into a piping bag. Once the Oreos are set, pipe a zig-zag pattern and cover it with sprinkles while it is still wet.Then pipe a line across, and cover in sprinkles and then repeat the zig-zag pattern at the bottom of the Oreo to complete the design and then cover in sprinkles.Repeat with the remaining Oreos, remembering to garnish the piping with sprinkles while the chocolate is still wet.
- Allow to set.
Notes
- Overheating the chocolate. Do not overheat your chocolate. The 20-second increments are perfect for safely heating in the microwave.
- Using Tweezers. When decorating cookies you can use tweezers to add the sprinkles. Be sure not to clamp the sprinkles too hard or they can easily break.
Nutrition
Nutritional information is based on third-party calculations and should be considered estimates. Actual nutritional content will vary with brands used, measuring methods, portion sizes and more.






Natasha says
These treats are so pretty and yummy! Did these easter Oreos with my kids and we all enjoyed it!
Olivia says
Thanks for sharing this recipe! These were so fun to decorate with my kids, they absolutely loved decorating these cookies — and eating them too!!
Andie says
Seriously the cutest easter treats! Going to give these away as neighborhood gifts!