
DIY lemonade stand for kids: With this easy tutorial, your kids can have a lemonade stand to use and reuse for years to come!
Not only will you find the instructions on how to make this, I also share lemonade stand ideas and how to make it super fun!
Post updated April 21, 2021 with new links of where to find supplies!
DIY Lemonade Stand Ideas
I’m a bit excited to show you this. It’s been on my “to-do,” list for over a year, and crafting the lemonade stand for the kids, FINALLY happened. I first found a lemonade stand tutorial on Pinterest, and knew I wanted to make it for my kiddos. I immediately bought the supplies, but then they sat in my basement for.ever.
It wasn’t until my friend came over one day, and said, “JESSICA… it’s time. Let’s finally put this thing together.” Shockingly, it didn’t take long at all, and my kids LOVE it.
How to Make a Lemonade Stand
Now I cannot take all of the credit for this lemonade stand. My crafty friend helped me put this together, so I want to make sure she gets the handy-man award for this one!
Instructions:
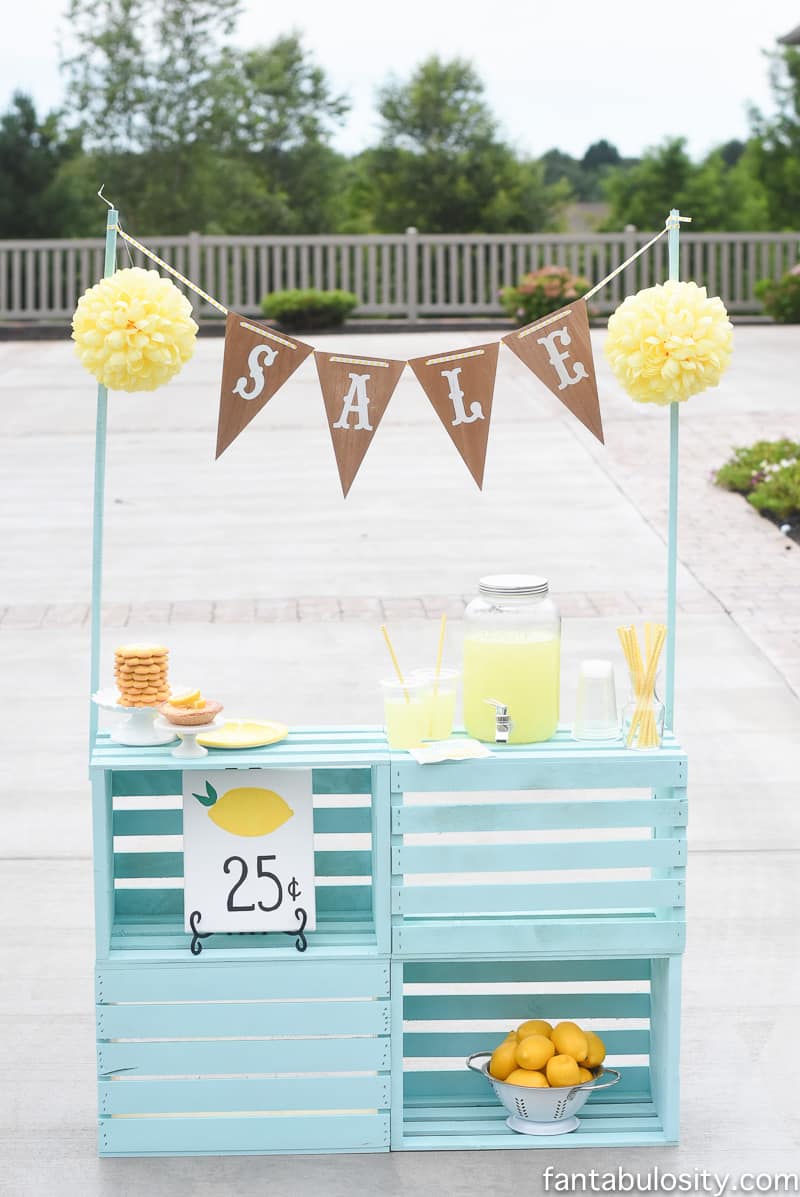
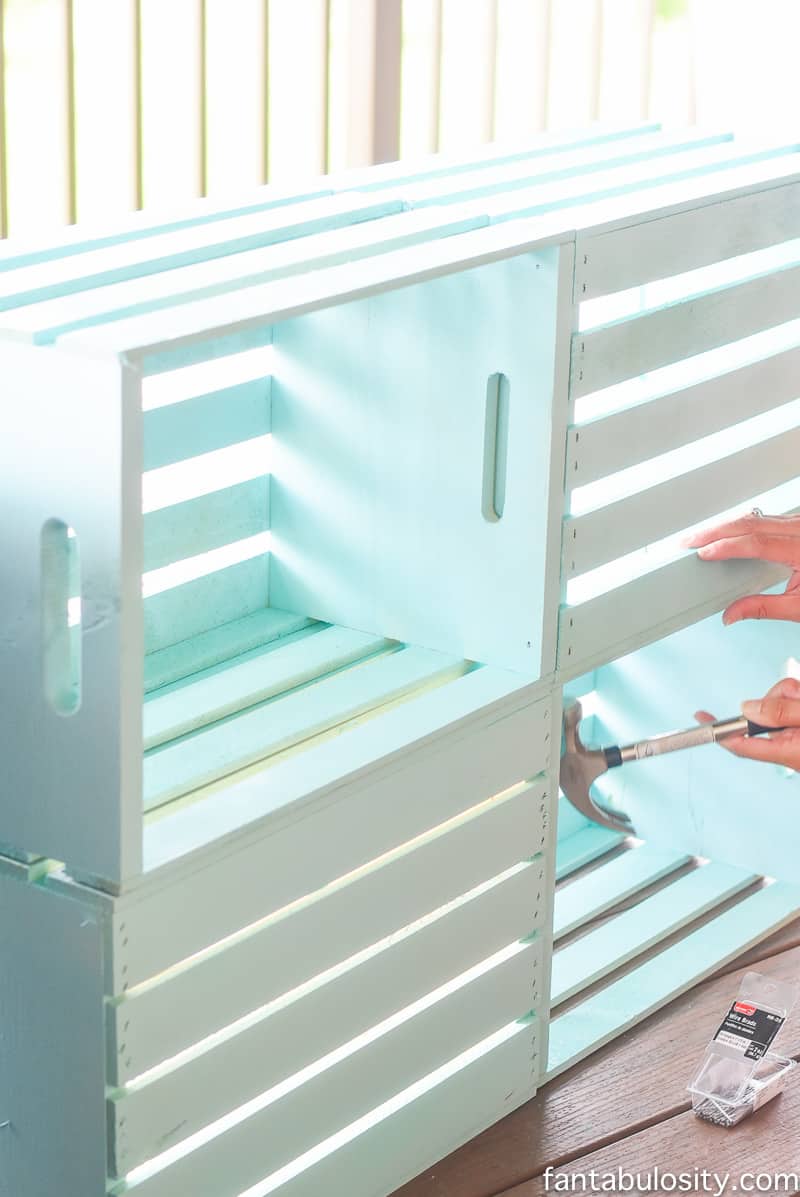
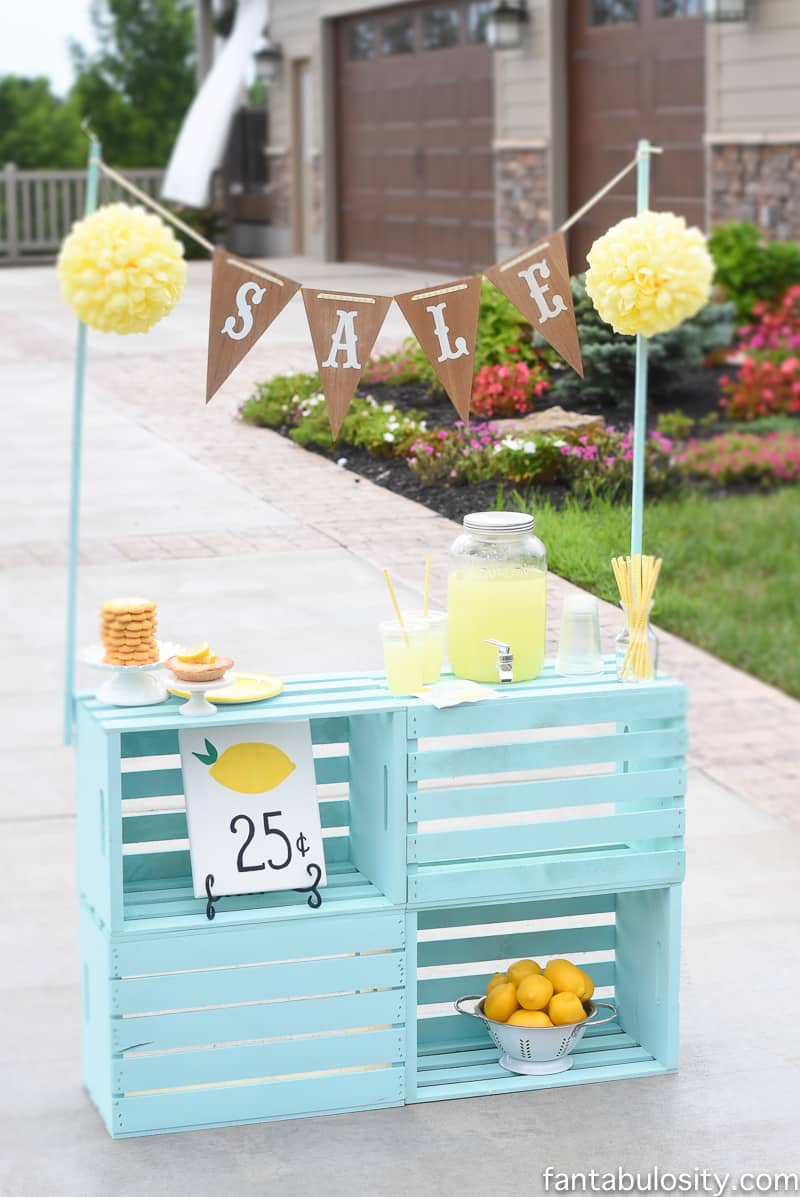
I bought four wooden crates, and spray painted them with aqua spray paint (but use any color you prefer)!
After the paint dried, we stacked two of them side by side, to nail them all together.
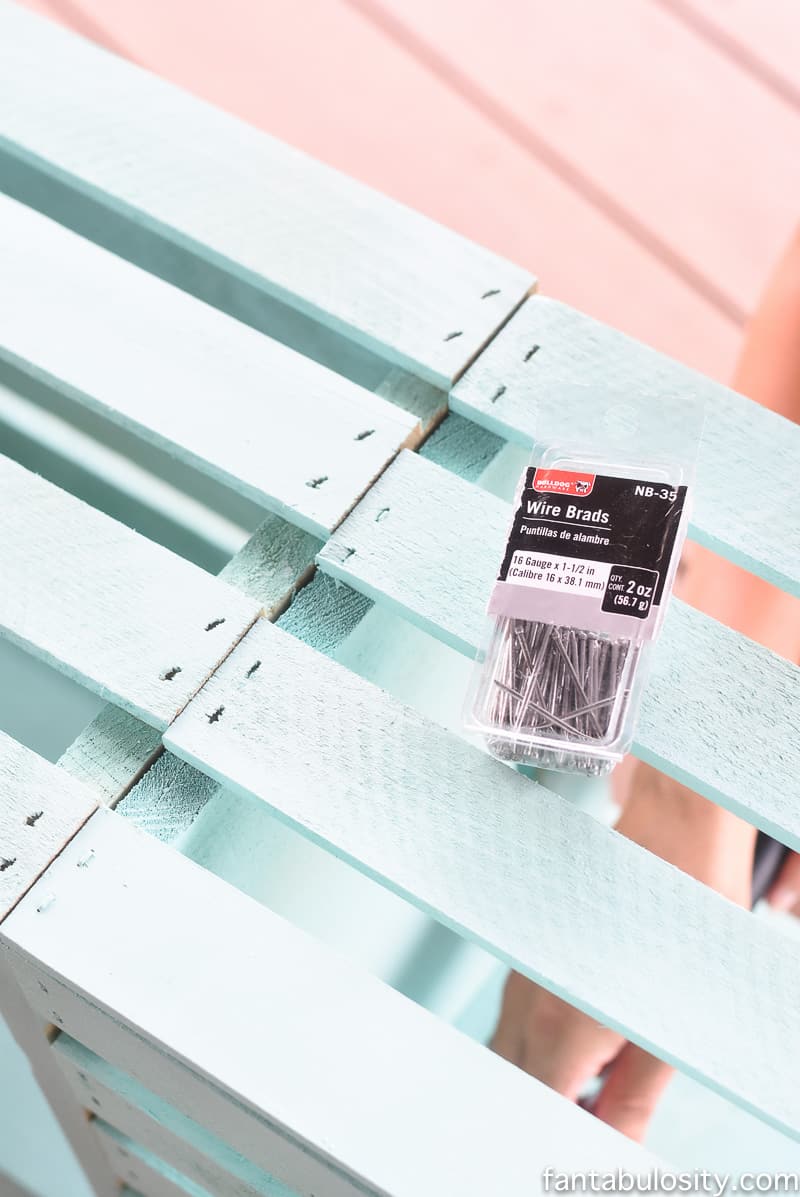
With a hammer and nails, we connected the crates together. The nails we used above worked for some areas but needed bigger nails for the thicker sections.
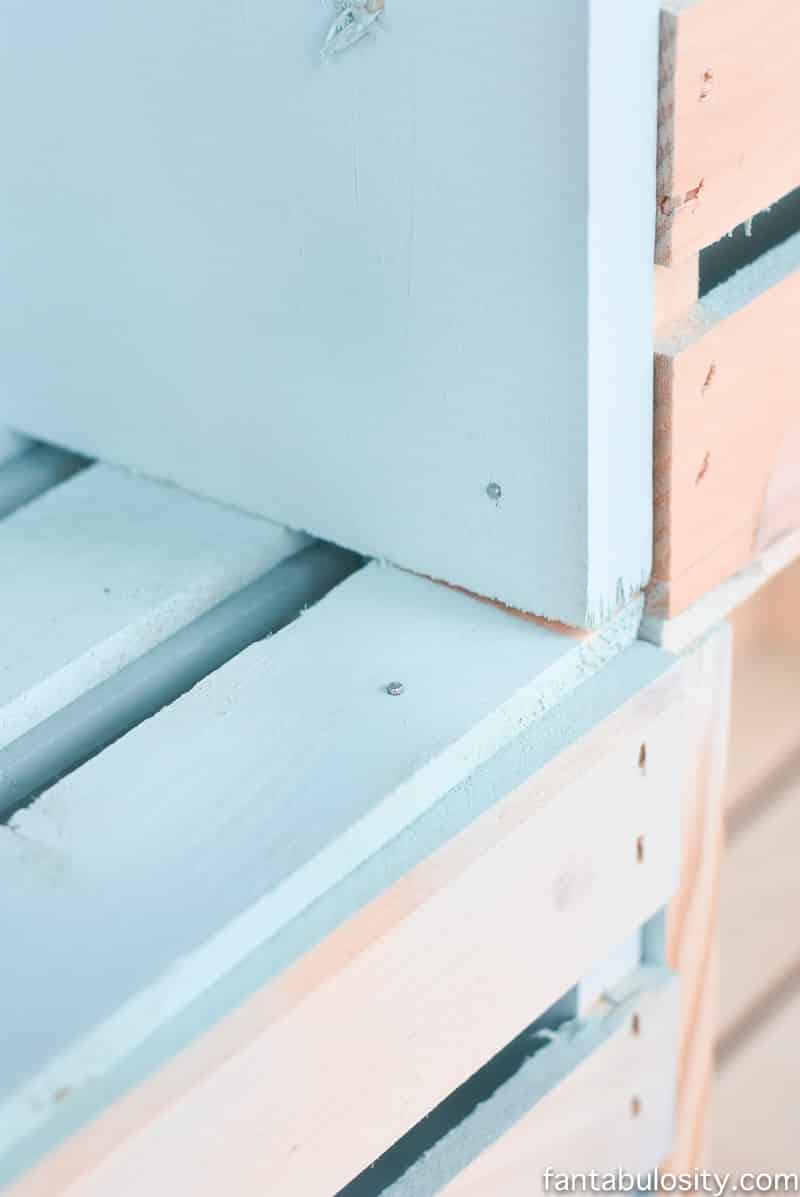
Connect the four crates, by nailing all of the corners where they connect.

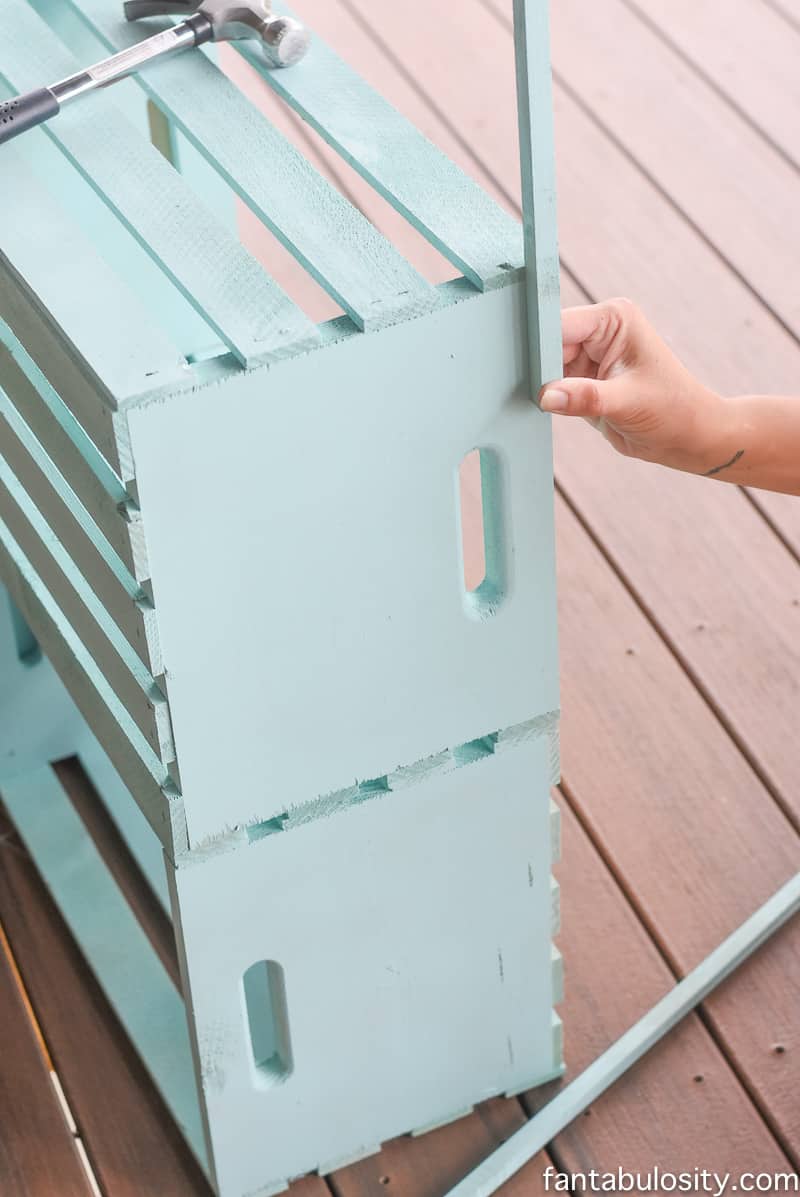
We found two wooden rods at Hobby Lobby, and knew they’d be perfect to hold the banner up above the stand when it was all together. We spray painted those to match the crates.
There are a few different rod sizes available, but we chose the length that would be tall enough that my kids could still see under it, after the pendents were attached. See below.
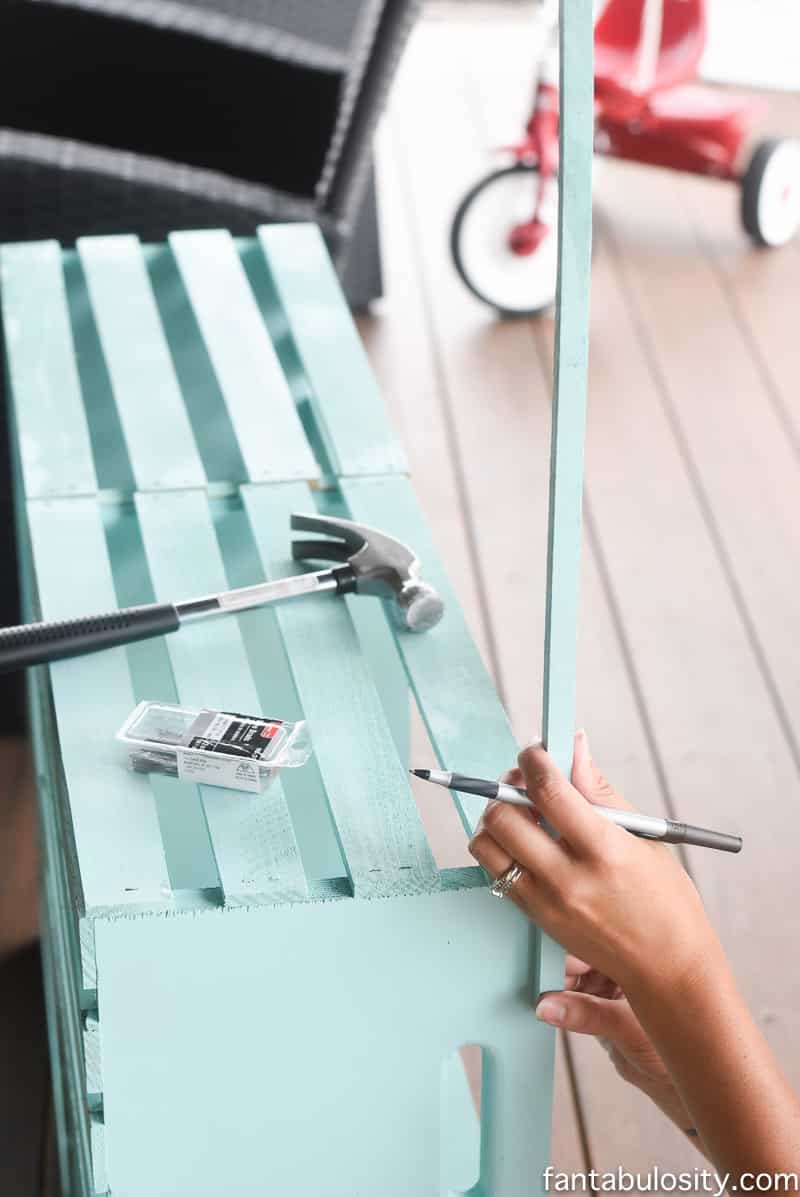
We then hammered on the rods, (one on each side), on the back of the crates.
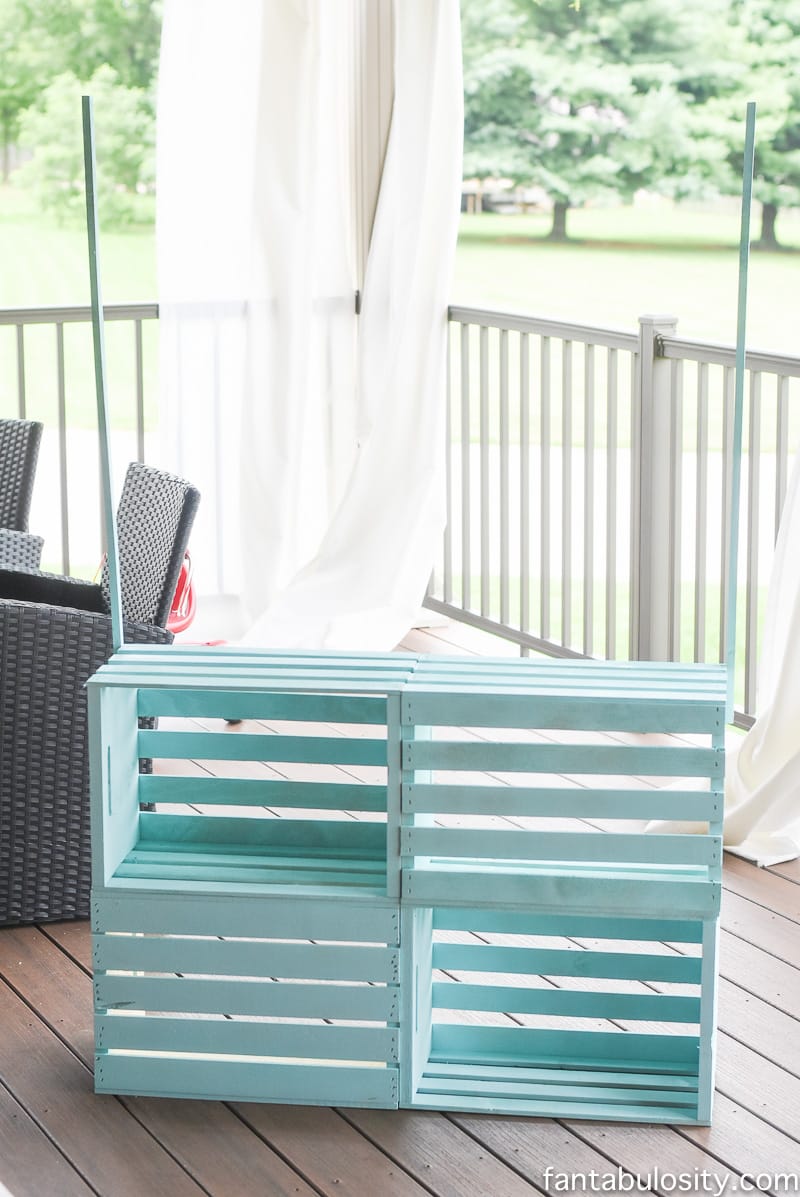
Yay! That part was DONE! (Yes, the rods are a little crooked, but as it turns out…that’s because they were crooked when we bought them. So check them before leaving the store.)
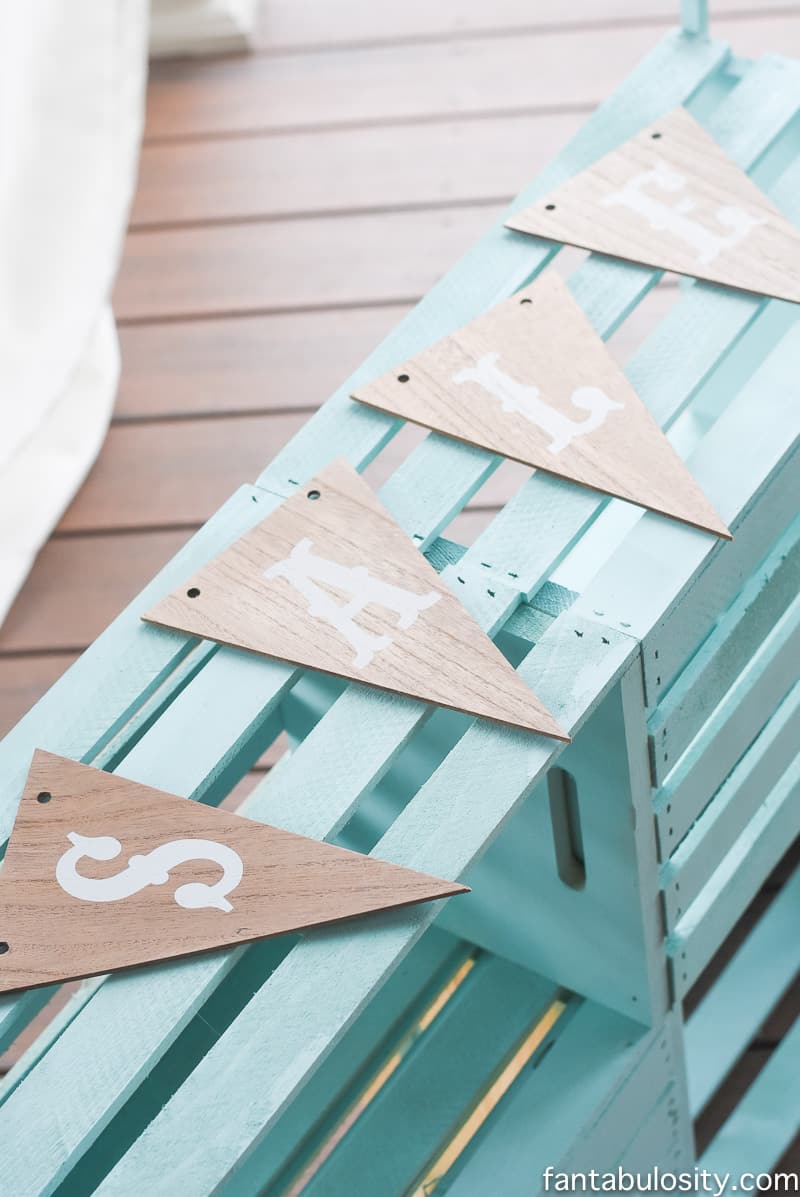
I found the CUTEST wooden pennants at Hobby Lobby, on sale, and they went PERFECTLY with the stand. The hardest part was deciding what to spell, and “Sale,” was my favorite phrase, in case we want to sell something different on our “stand,” one day!
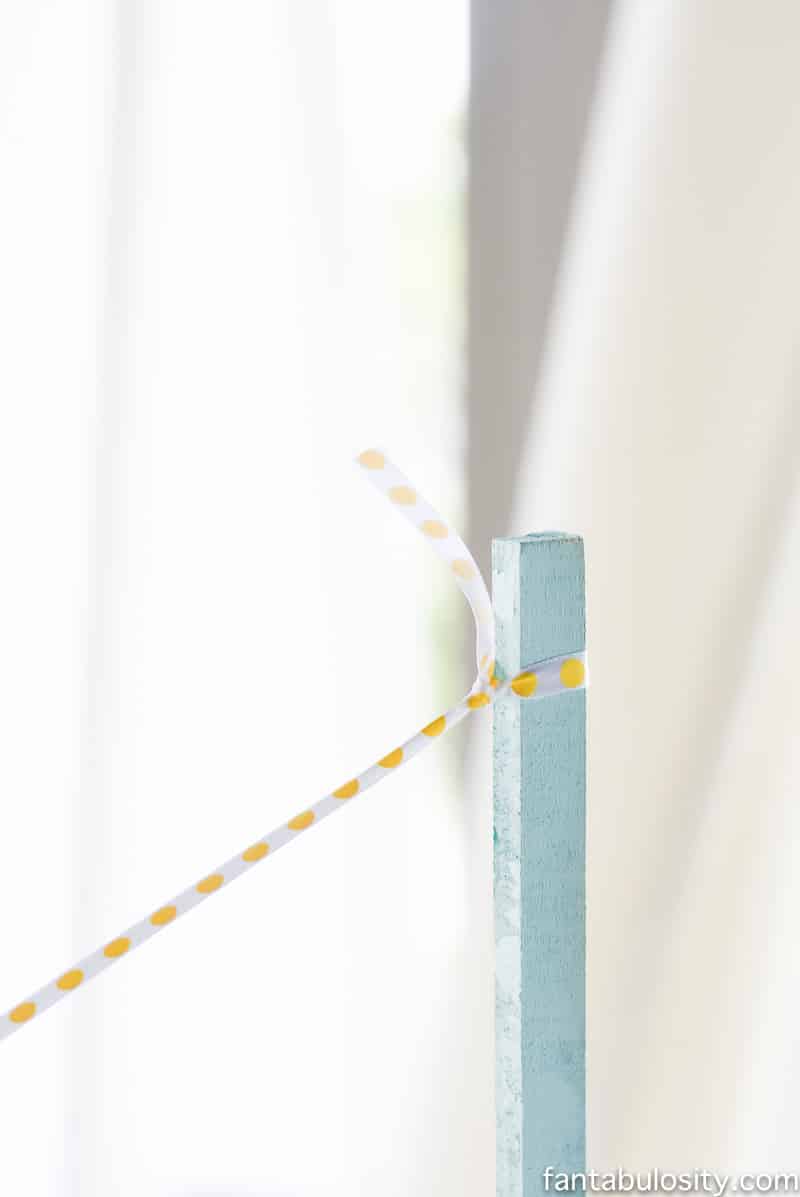
Using ribbon (similar white and yellow polka dot ribbon here), we simply threaded each pendant on and tied the ribbon around each rod.
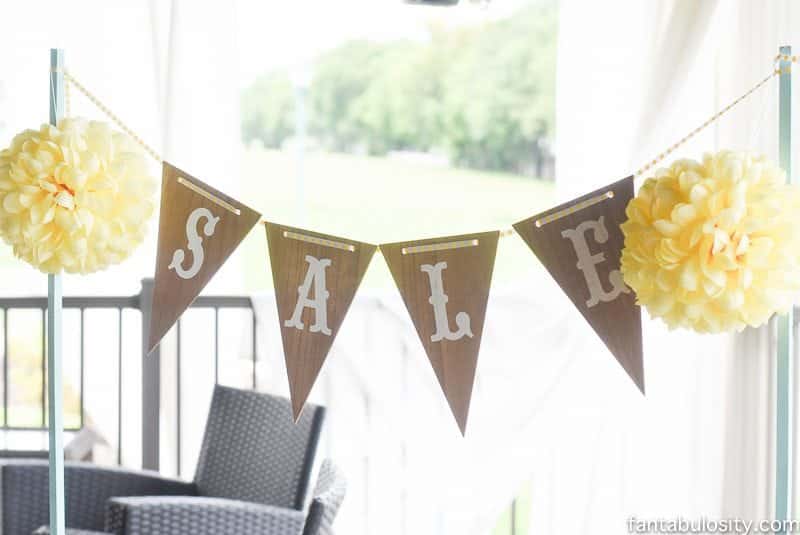
I may, or may not have found the cutest yellow “poms,” at Hobby Lobby too, and thought they HAD to be included.
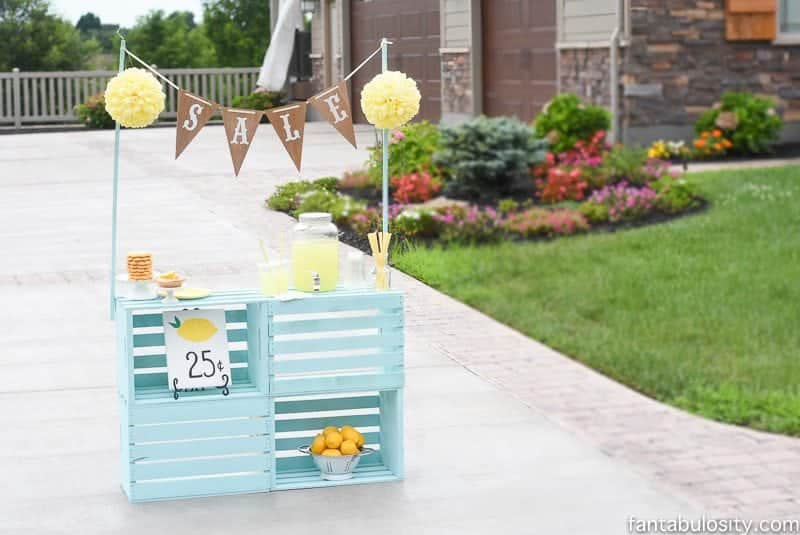
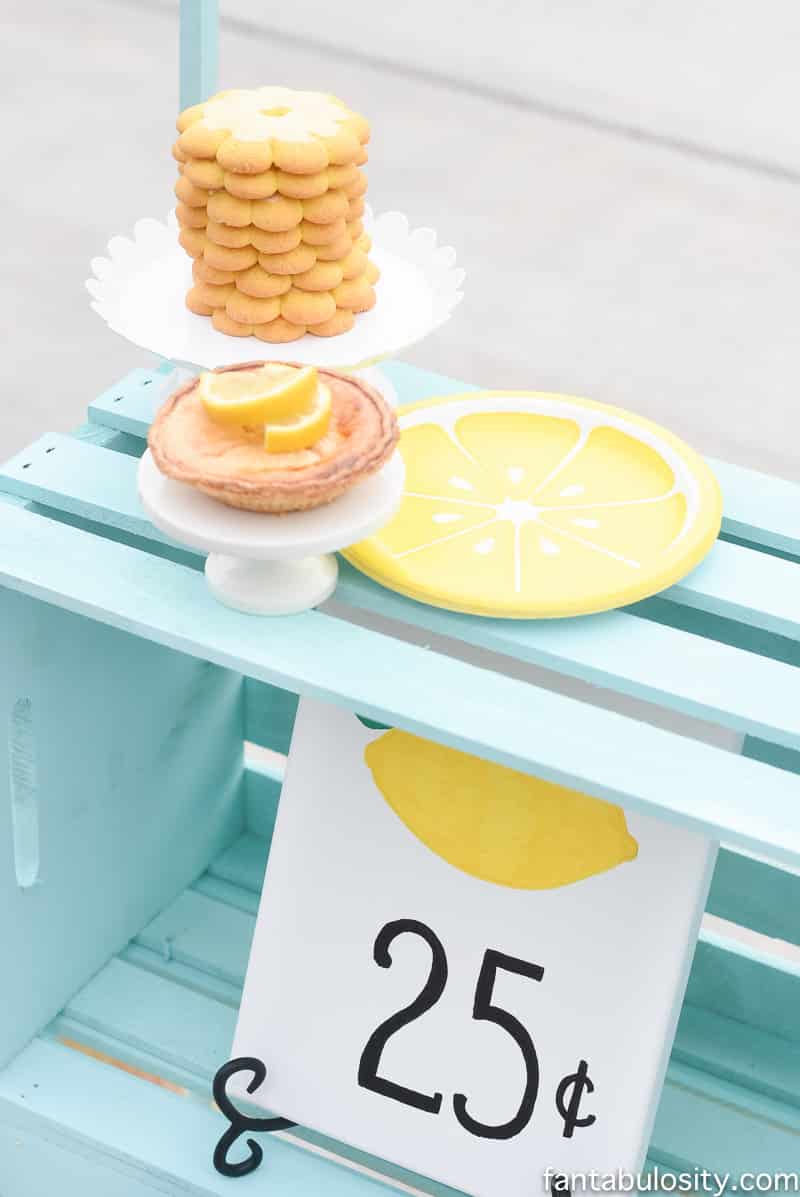
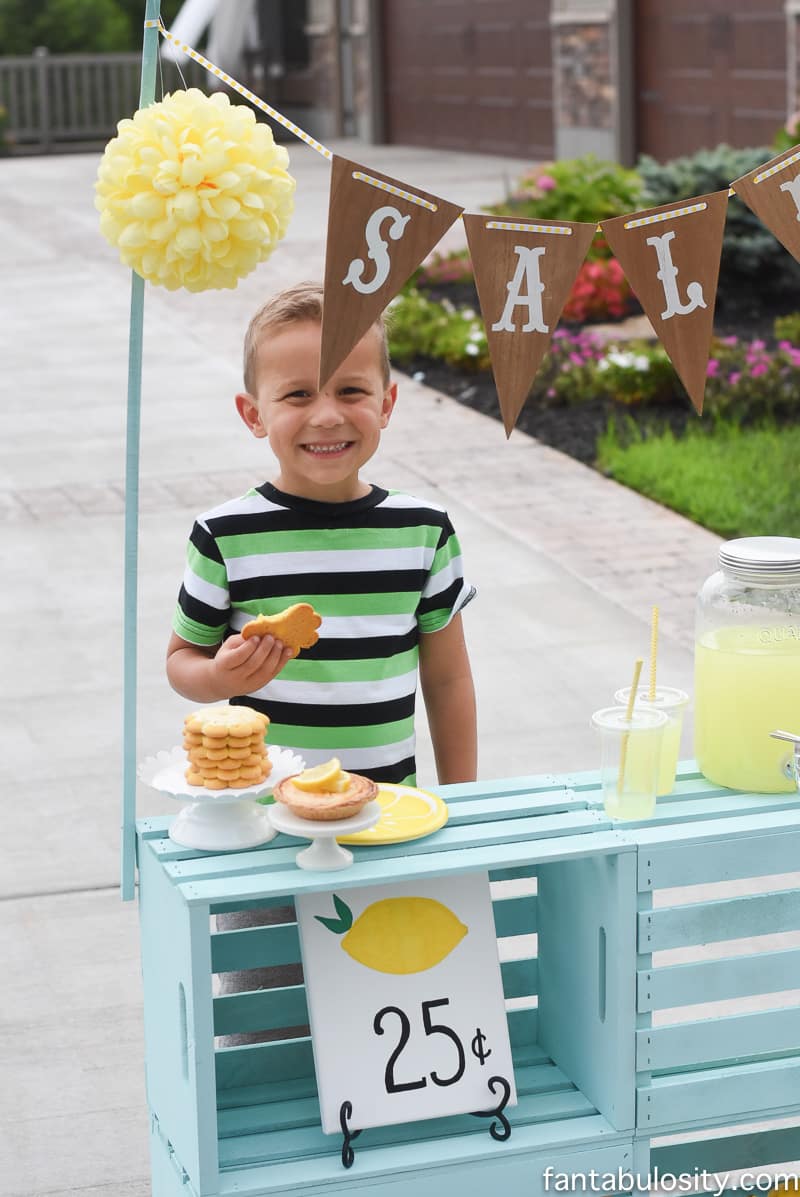
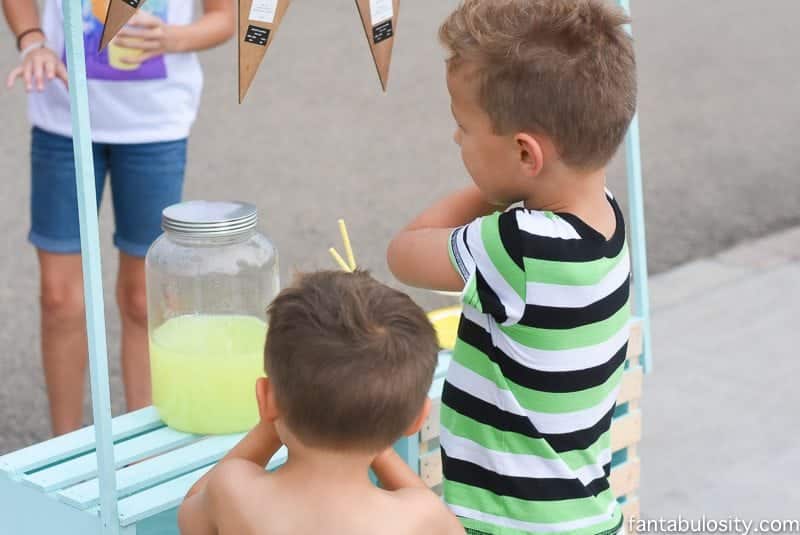
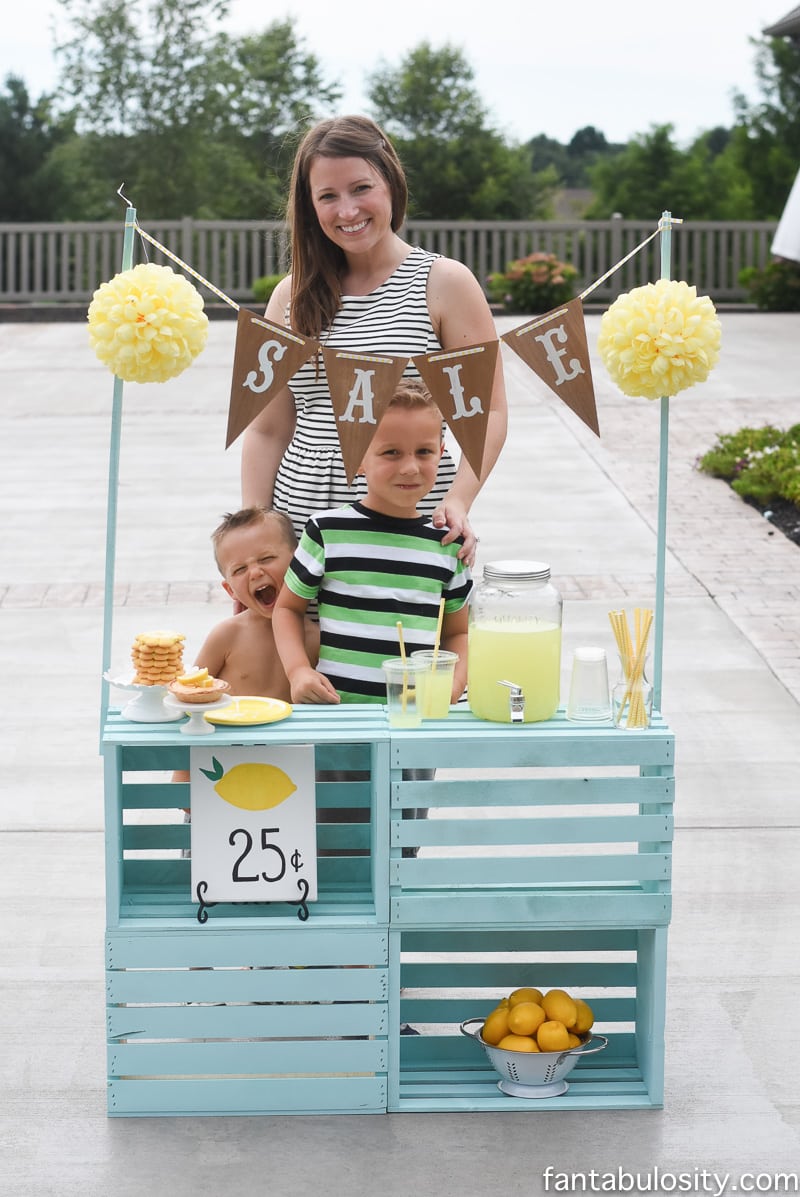
The lemonade stand is complete! Now… when the boys are ready to have a “sale,” we just pull it out of the garage and it’s ready to go! See what all we included on our lemonade stand, on the first day of business….
Open for Business
What to Sell at a Lemonade Stand Besides Lemonade
Of course you sell lemonade, at a lemonade stand. But what else can you sell? Here are our favorites:
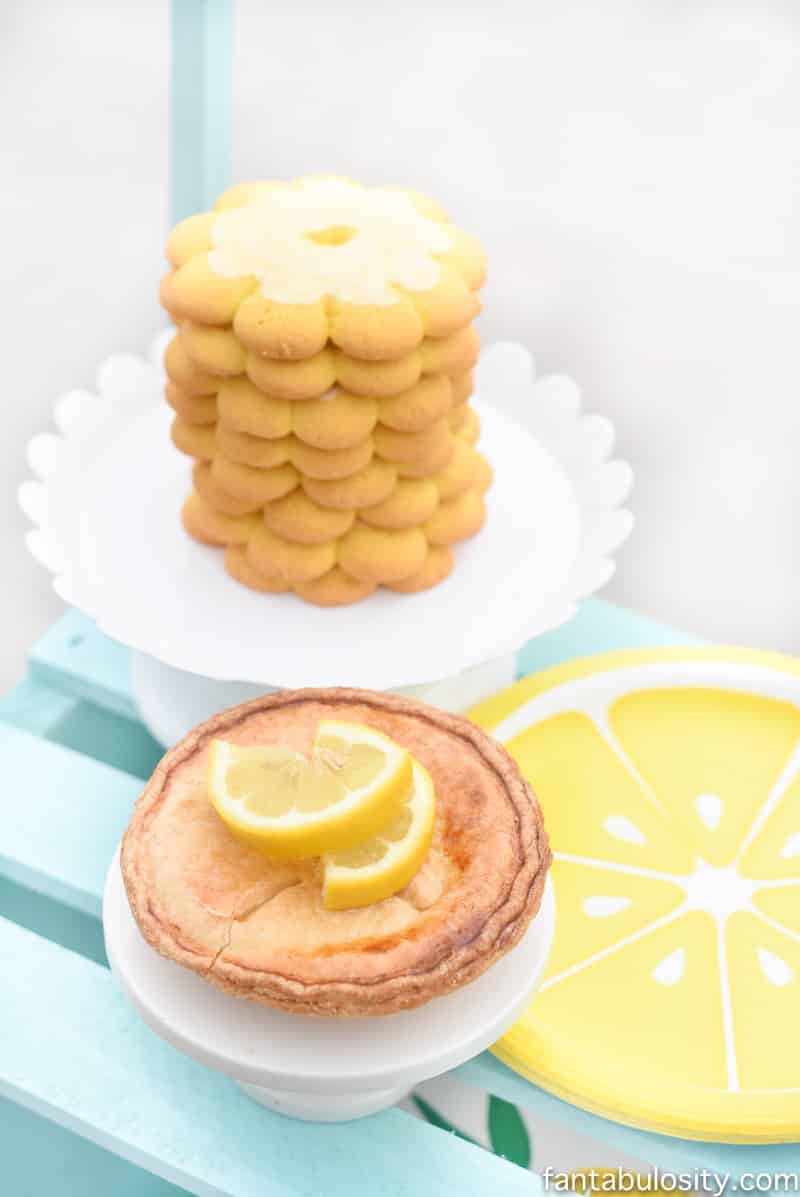
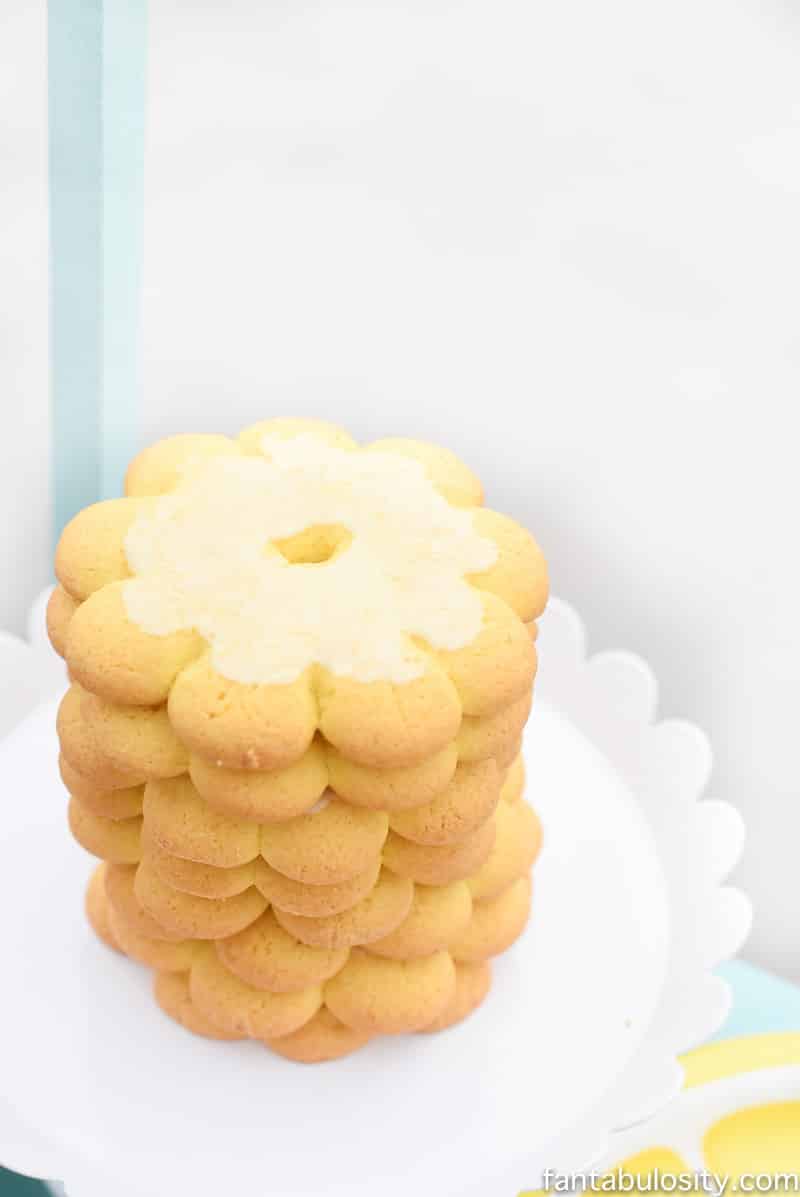
- Slices of this lemon poke cake recipe
- Lemon Cookies (cake mix cookies recipe – just use lemon cake mix instead)
- Lemon Blondies
- Slices of vintage lemon pie
- Lemon Bars
- Mini Lemon Pies
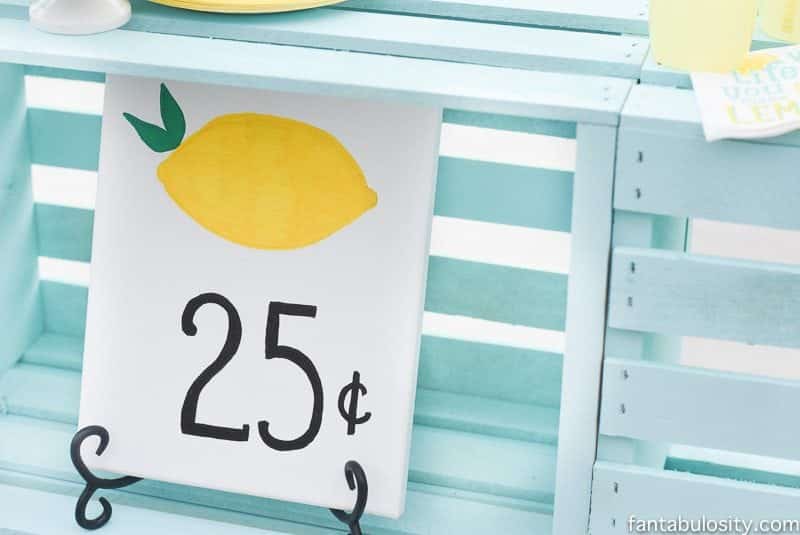
• Price sign. (We made our own using a white canvas.)
Lemonade Stand Decor and Extras
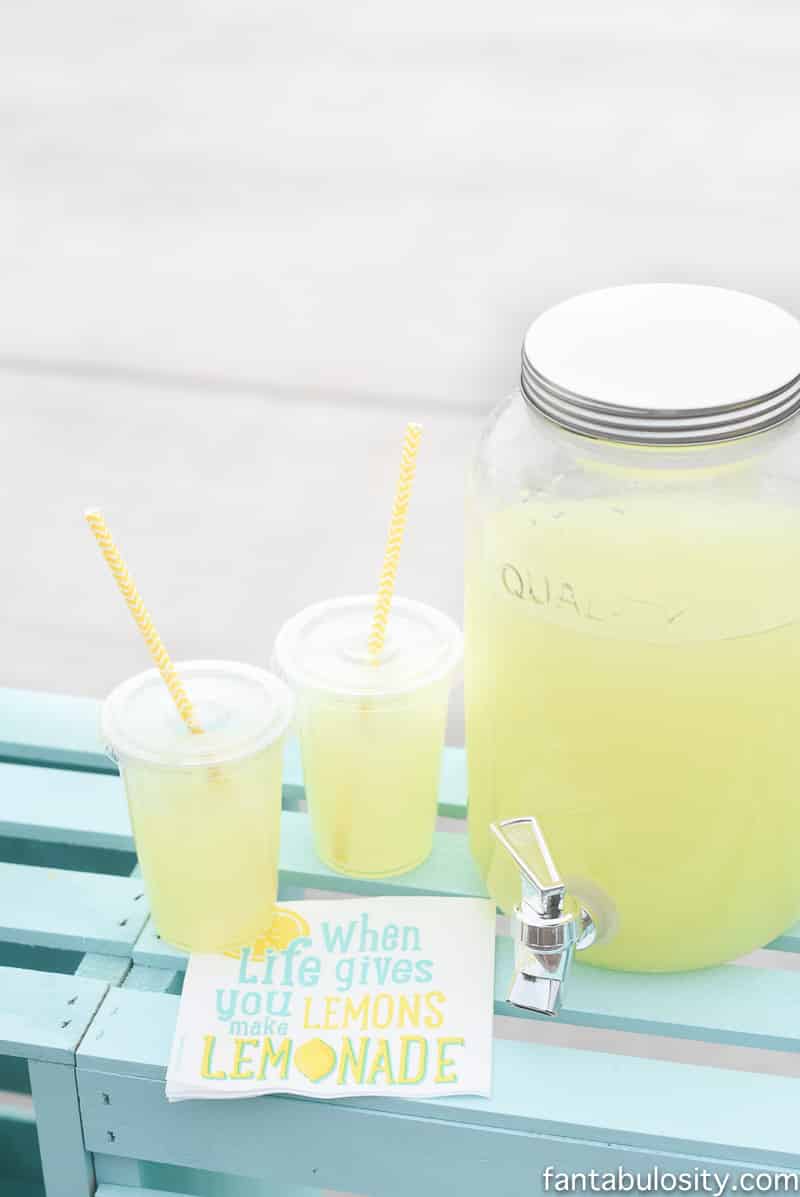
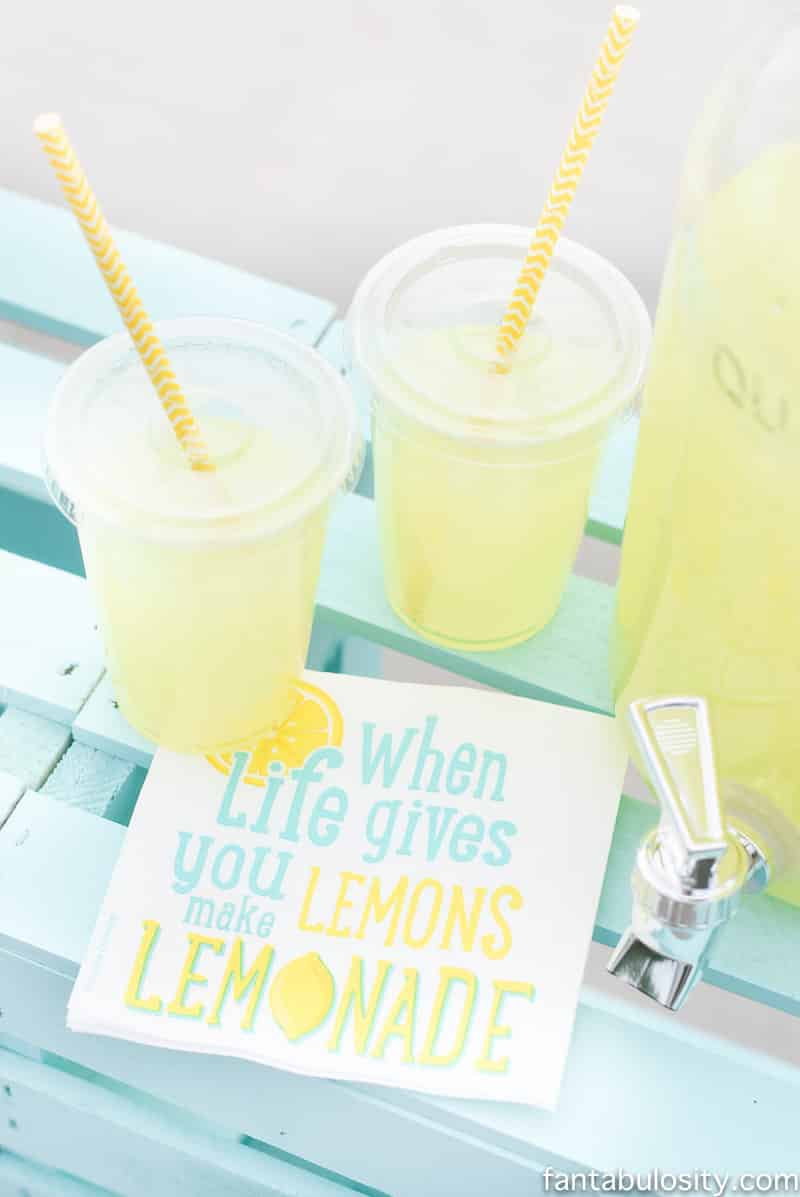
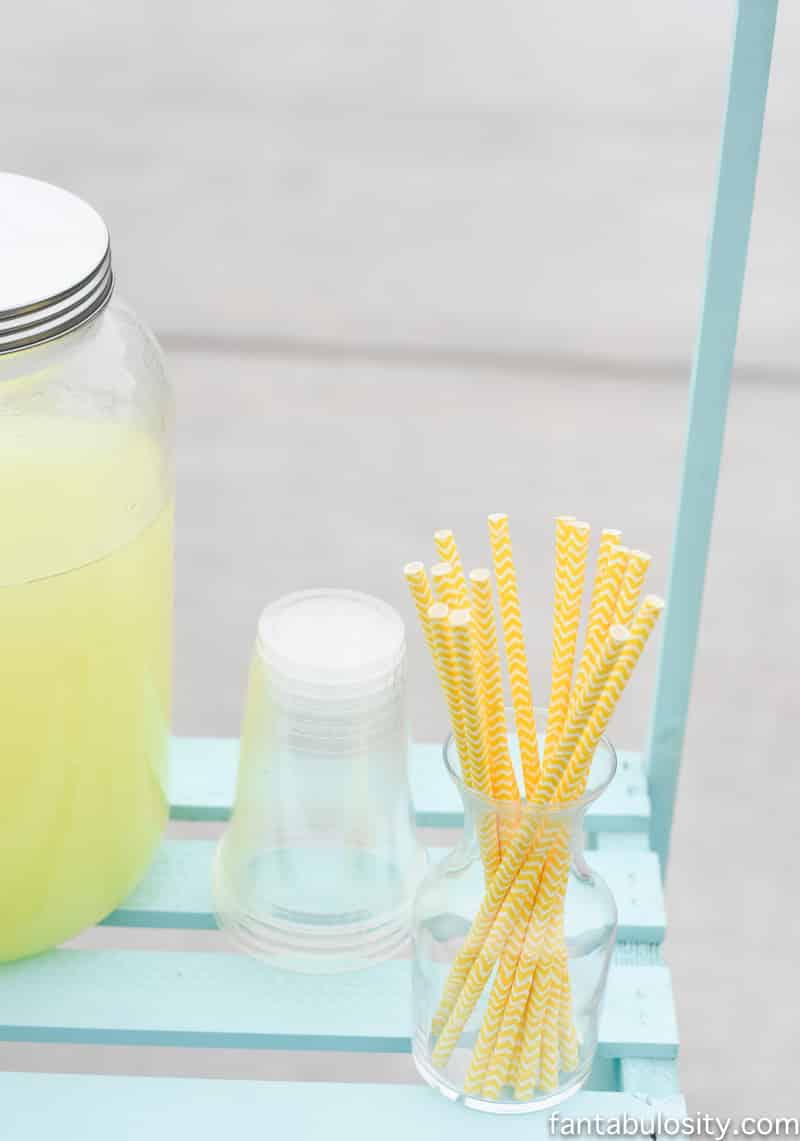
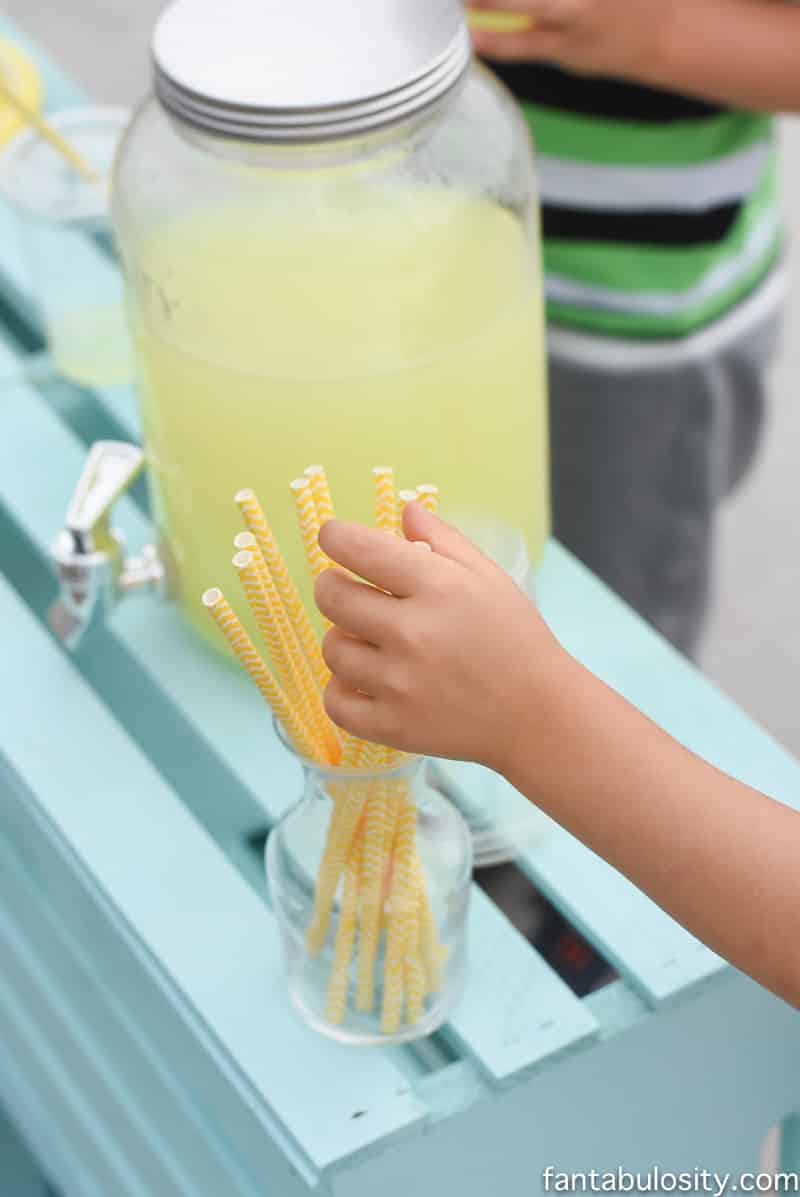
- Plastic tumblers with lids – I love using these for any kid-outing too!
- Fun paper straws I may have an obsession with these, and have them in every color.
- Beverage Dispenser (Similar)
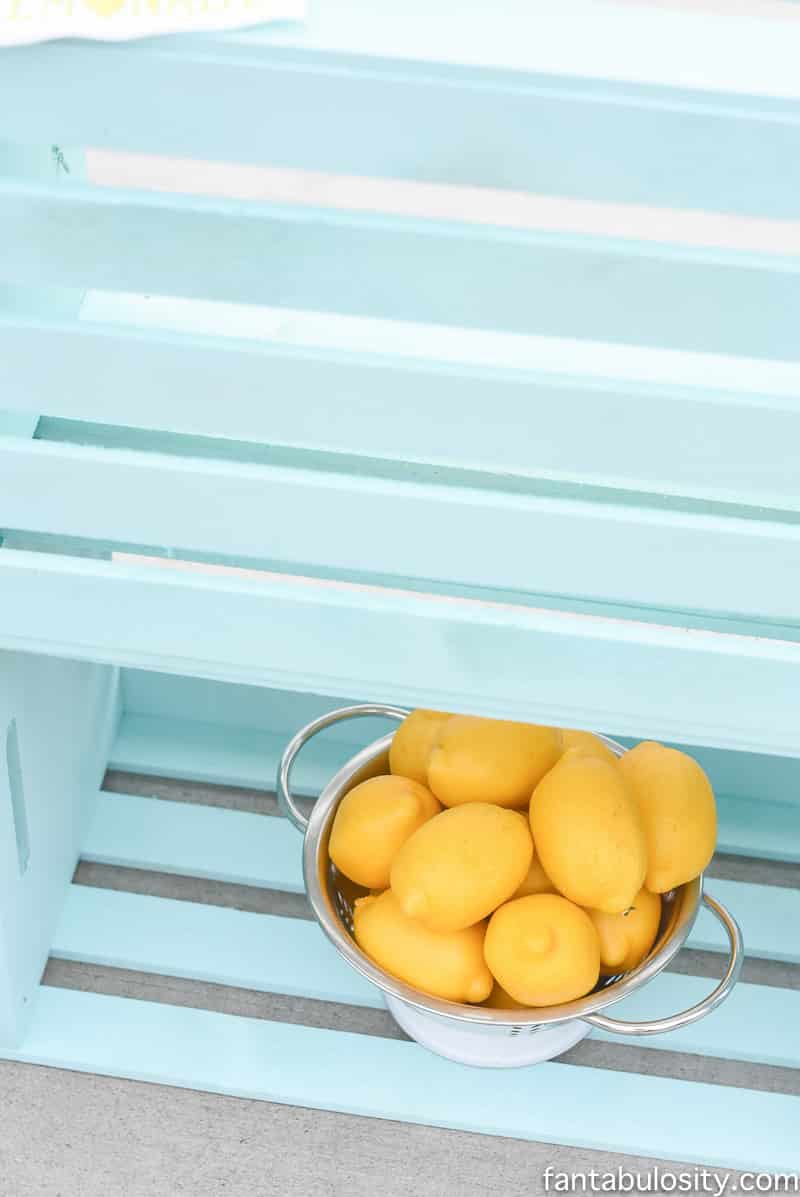
I always have a white colander on my kitchen counter full of lemons, and it made its way out for some lemonade stand decoration! Buy fake lemons HERE!

My little guys were in LOVE with their lemonade stand, and MAY have consumed most of the lemonade and cookies.
Although they ADORE their new lemonade stand, they’re now asking to make another one, but to turn it in to a McDonald’s stand. This.Should.Be.Interesting.
Supplies Needed to Make Lemonade Stand
- 4 wooden crates
- 2 wooden rods (can also get at home improvement or craft store to make sure they’re the right size to be above your kiddo’s head when standing at the stand)
- Spray Paint
- Hammer & Nails
- Wooden pennant (similar wooden pennant – can make your own)
- Ribbon (similar)


Rose says
I love how you tied all the colors together and simplified the process for some of us who are not crafty at all! May I ask where you got the lemon plates? Thank you so much for sharing! Your boys are adorable!
Jessica says
Aw, I’m so glad it was helpful Rose! Thank you! You know… I believe I snagged those on clearance at Target a few years ago, but I found some on Amazon HERE that are similar!! 🙂
Lili Henderson says
How many spray cans did you use?
Jessica says
Hi Lili! I only had to use one can! I hope that helps!
Brittany Stocker says
I decided to make one and do mini sessions for my photography business! It turned out great and all of my clients LOVED it!!! This was such an adorable idea. Thank you soo much!! I’ll leave a link to a picture of it below. I hope you get a chance to check it out.
Jessica says
Ahh! I just took a look Brittany, and the photos are adorable! I love what you did. It’s all so fantastic, and the photos are so stinking cute! Thank you for sharing this with me. I absolutely love seeing things like this. 🙂 XO
Arden says
Thank you so much! This was the ABSOLUTE BEST! We made it for my son’s 2nd birthday and will be using it all summer because i’m obsessed 😊 Just starting a blog and it’s so fun seeing all of your ideas! Love having so many mentor accounts to follow. Can’t wait to see your next project! We are @ourlifefromatoz on Instagram if you feel like heading over. I’d also be happy to send pics! It turned out so cute 🍋
Jessica says
Hi Arden! Awwww, I’m so happy that you liked it and it turned out great! Whaaaaat?! That’s so exciting that you’ve started a blog too! Love that. You’re so sweet, and I’ll be sure to head over and check out your Instagram too! Thank you so much for the sweet words! XO
emme says
i love it me and my friends plan on doing this in the summer
Jessica says
Aww! That’s fantastic!! Have so much fun!
Lili says
This was such an adorable stand! My daughter has been using the one we made all summer, and people can’t resist stopping because of how cute it is. Thank you for sharing, I always tell them where to find your tutorial!
Jessica says
Awww! Thank you Lili! I’m so happy that your daughter enjoys it! That means so much that you tell them where, thank you! 🙂
Oh my goodness yes! Thank you for sharing that on Zara! How fun! XOXO
Amber says
What color of blue did you use? Its’ so pretty!
Jessica says
Hi there! It’s the Gloss Blue Ocean Breeze! You can get it here: http://amzn.to/2uiHNCt (affiliate)
Mary says
We are going to do this!! Love your idea
Jessica says
Aw, great!!! Have sooo much fun with it! XO
Ednita says
Do you know the size of the crates?
Jessica says
Hi there! I’m not exactly sure right at the moment, but the crates that I used look like these: http://rstyle.me/n/cpamgbbne5f (affiliate) I also bought mine from walmart and they had this same label. I hope that helps!
Rachel says
This is absolutely adorable! Great job!
Jessica says
Thank you so much Rachel!! XO