

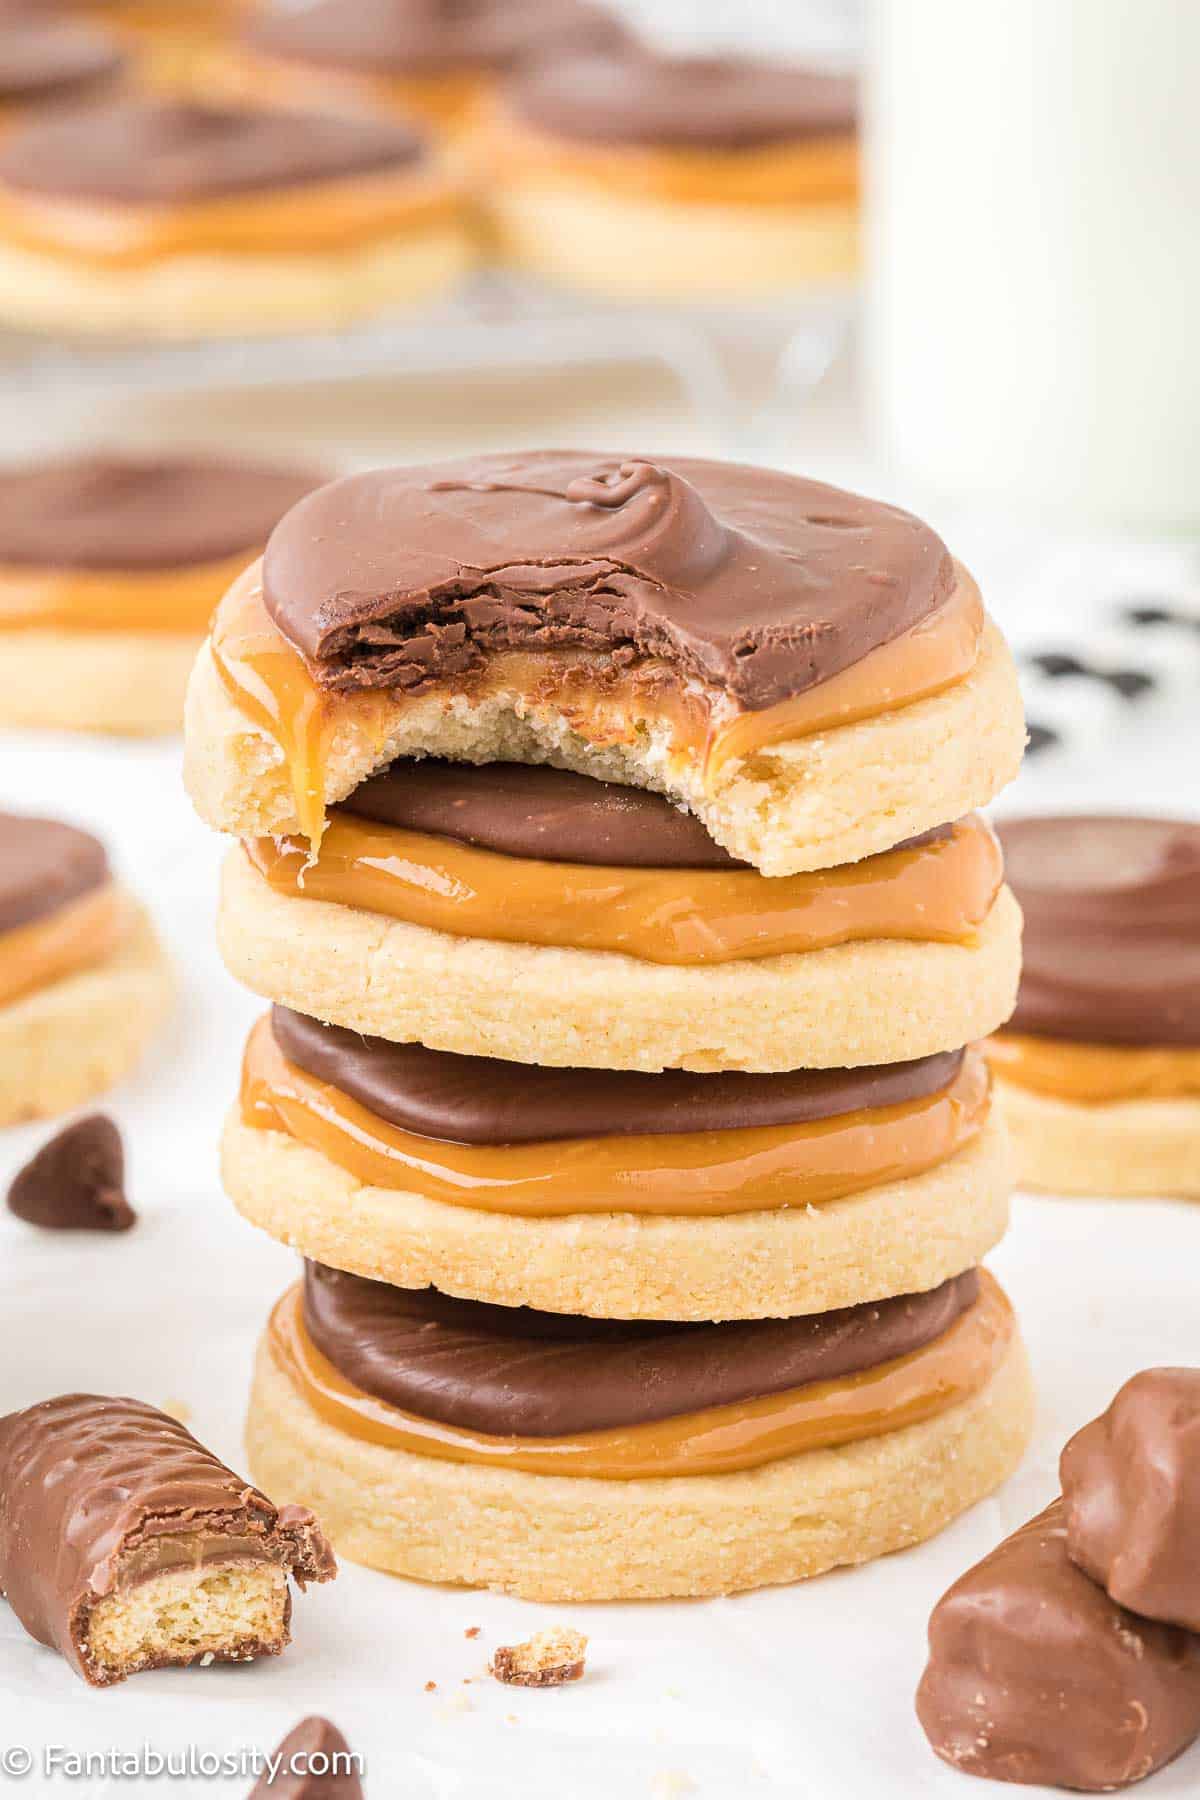
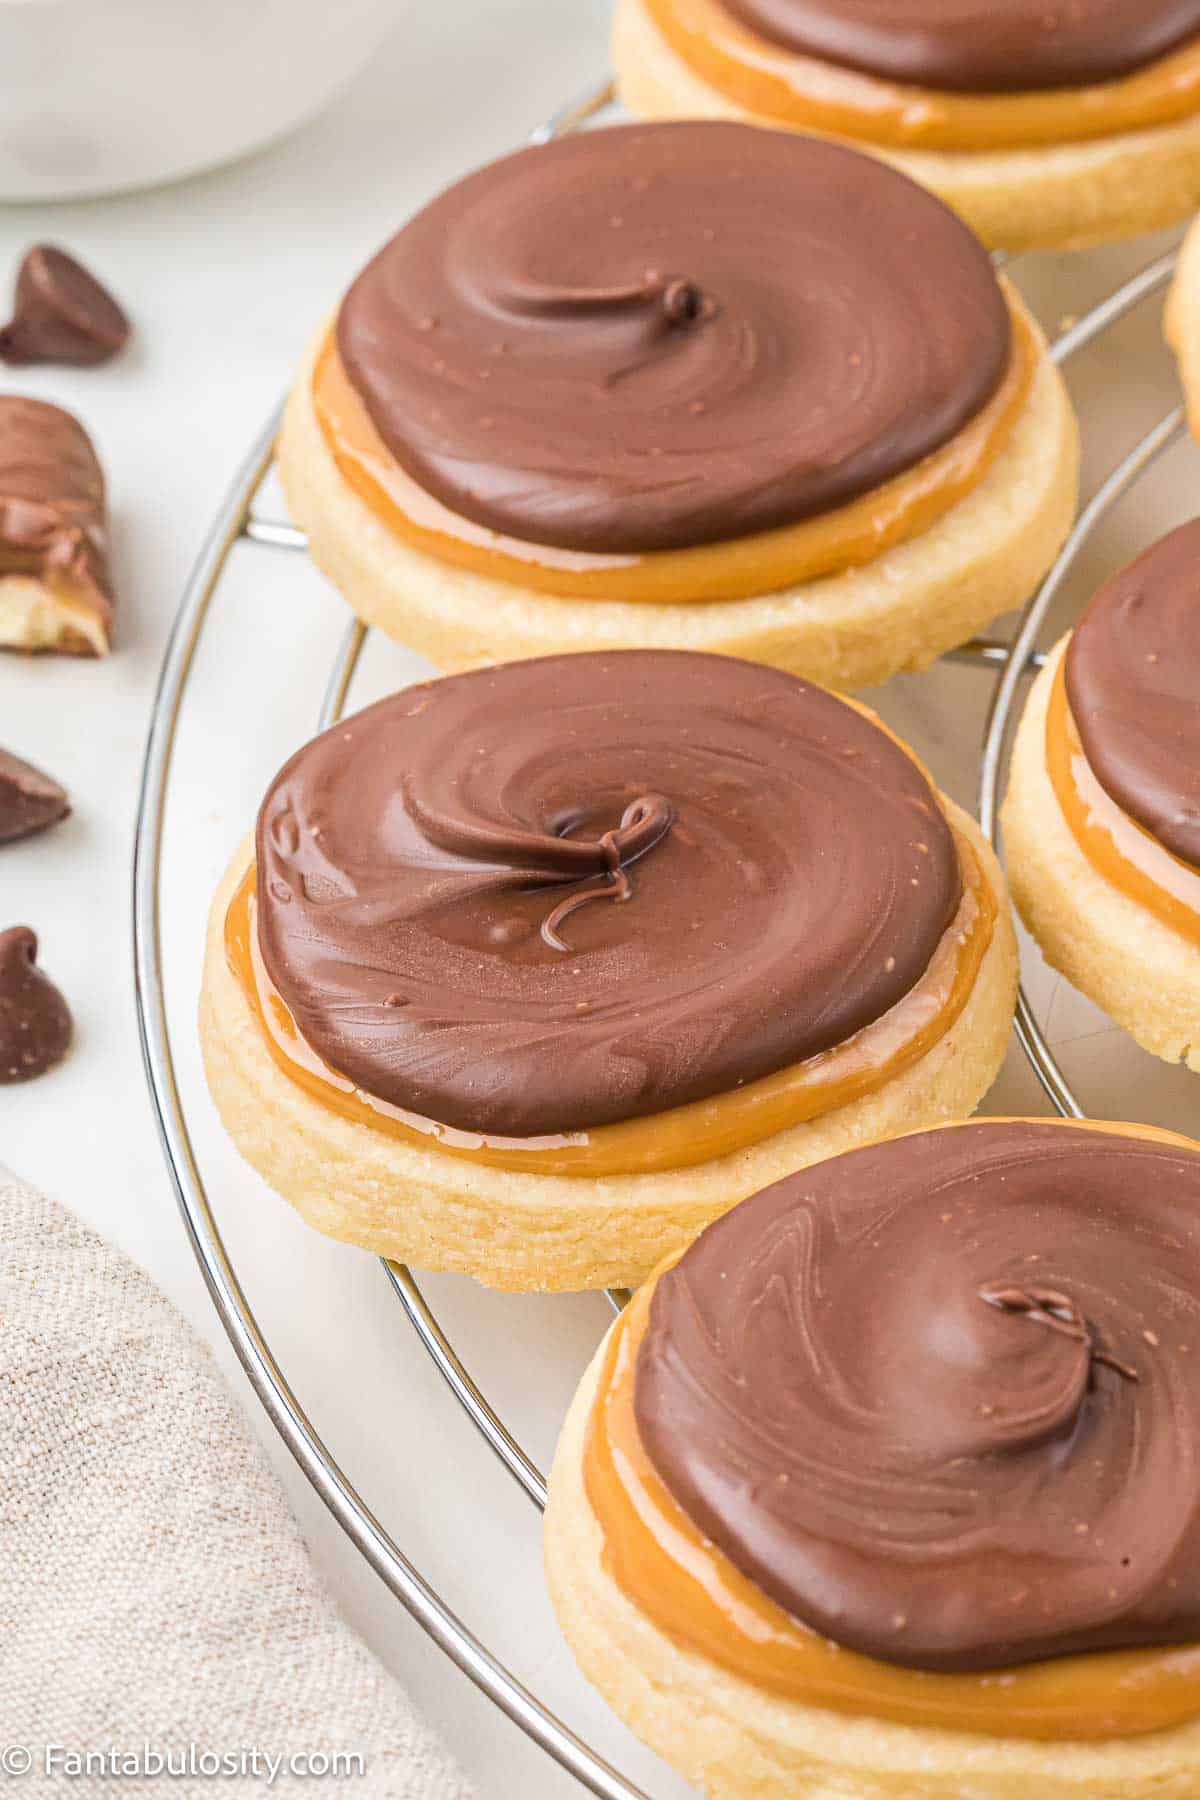
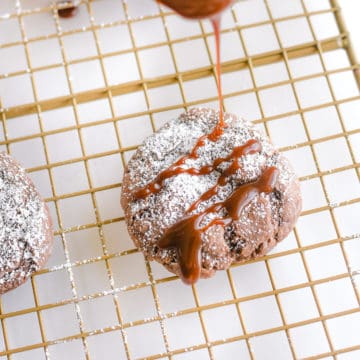
Twix Cookies, a combo of a buttery shortbread base, gooey caramel, and smooth chocolate. These chocolate caramel cookies have the taste of Twix candy bars, in cookie form.
If you are left with the urge to make more easy recipes with chocolate, you could try my No Bake Chocolate Pie for those times when you don’t want to turn on the oven. Or for another delicious dessert, make some Chocolate Peanut Butter Brownies that combine two of the best flavors in one recipe!
Jump to:
Why You’ll Love This Recipe
- Perfect for all occasions: Whether it's a holiday, birthday party, or just a casual gathering, these Twix bar Cookies will be the talk of the event, appealing to both children and adults alike.
- Customizable to taste: If you're feeling creative, this recipe can easily be adapted with different types of chocolate or add-ins like nuts and sea salt for a personalized touch to this perfect treat.
- Kid-friendly kitchen activity: Making Twix Cookies can be a fun and educational experience for children, allowing them to help with dipping in chocolate and layering the ingredients, all while learning basic baking skills.
Ingredients Needed
I’ve highlighted a couple of ingredients with some relevant notes. Aside from this, the ingredients needed are pretty basic.
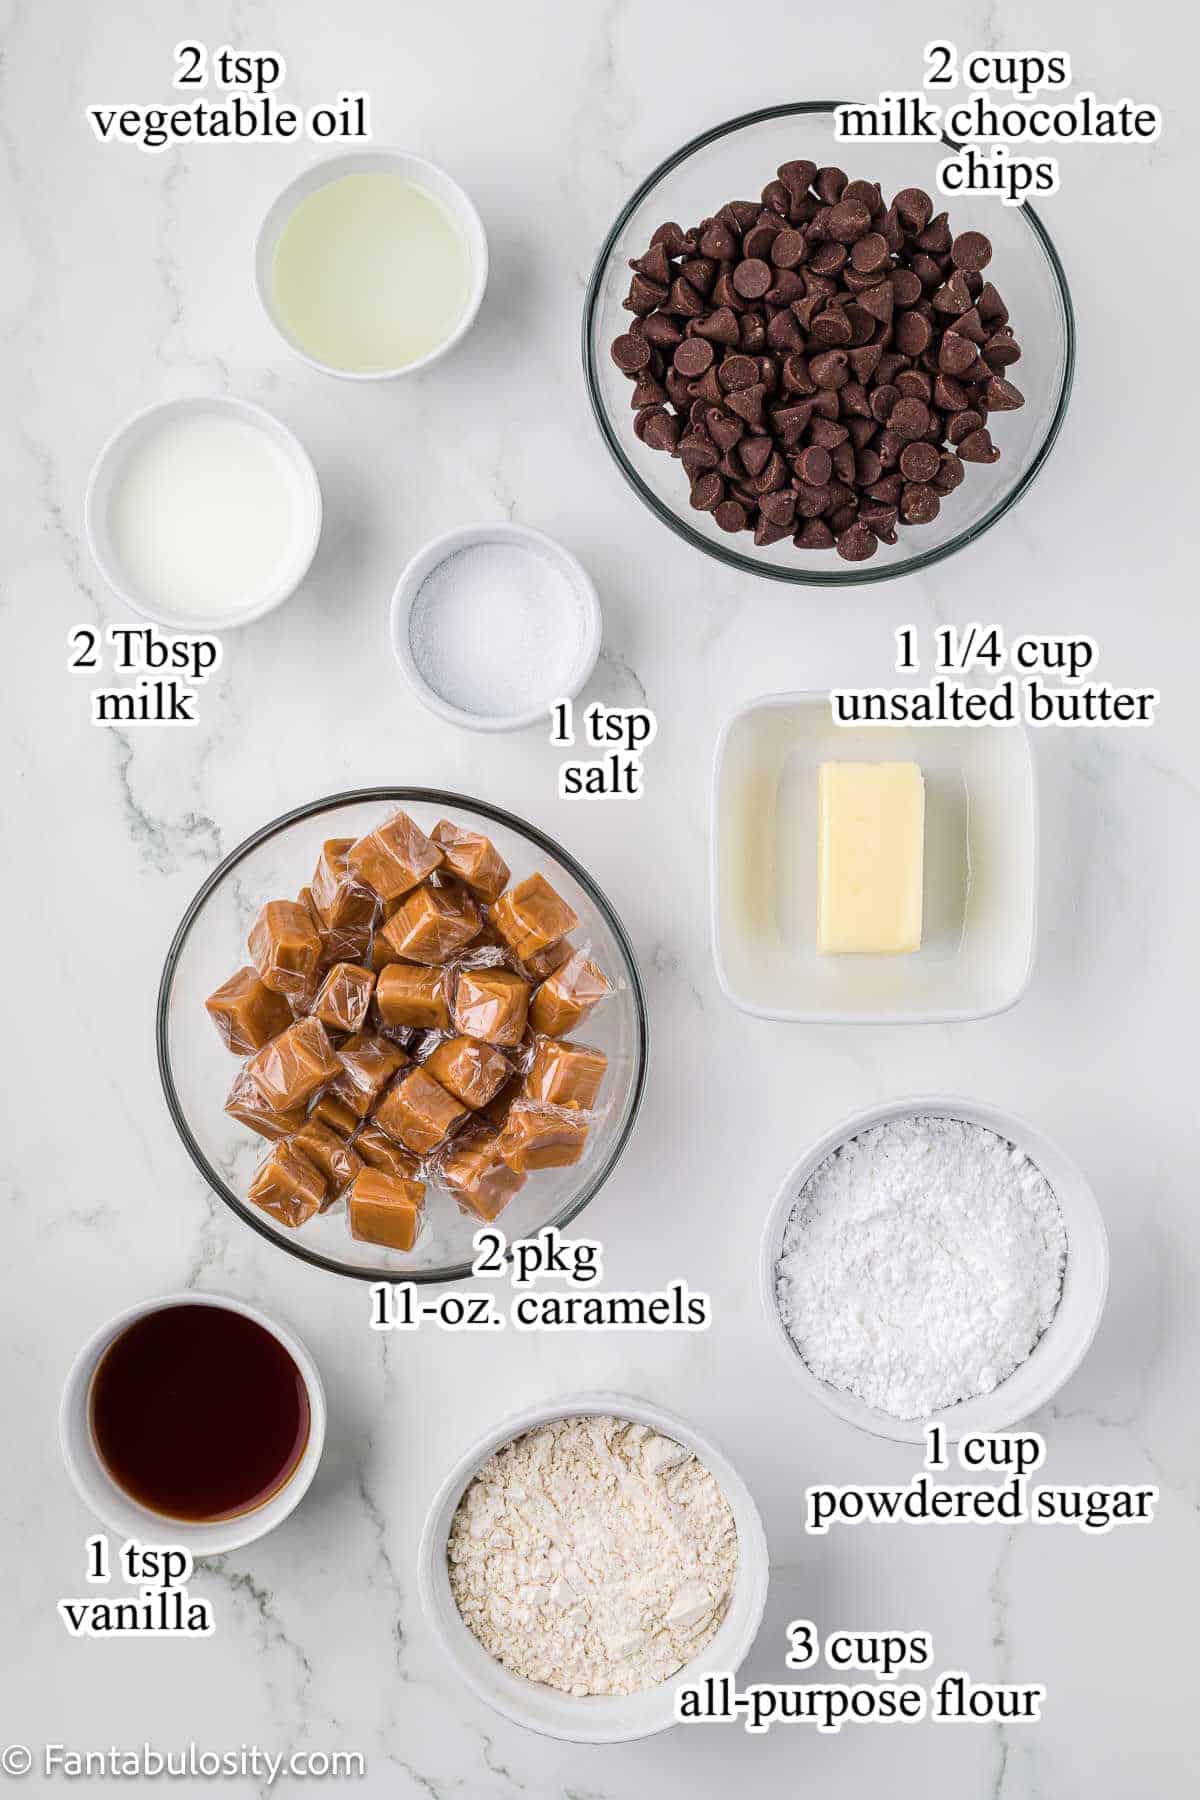
- Powdered Sugar – Also known as confectioners’ sugar, this fine sugar is essential for creating a smooth and spreadable frosting. For best results, sift the powdered sugar before using it to prevent lumps and ensure a silky texture on your Twix Cookies.
- Caramels – Quality matters when it comes to the caramel layer. Choose a premium brand of caramels for melting. For a foolproof melt and rich flavor, consider using soft caramels from a confectioner’s shop.
- Milk Chocolate Chips – For the classic Twix taste, use high-quality milk chocolate chips. Ghirardelli chocolate chips melt beautifully and provide a luxuriant, creamy finish that complements the caramel and shortbread layers perfectly.
*Be sure to see the recipe card below for the full ingredients list & instructions!*
Substitutions
Sometimes substitutions are necessary because of ingredients that are unavailable or needed for dietary restrictions. Here are some suggestions that can help:
- Caramels – If you are unable to find soft caramels, you can opt for a homemade caramel sauce or even dulce de leche as a rich and creamy alternative.
- Cream – In recipes that require cream, such as for a caramel layer, coconut cream can be a lactose-free substitute that adds a subtle tropical flavor. For those not averse to dairy but out of cream, condensed milk can sometimes serve as a suitable alternative, especially in sweet recipes.
- Milk Chocolate Chips – For a less sweet or dairy-free option, dark chocolate chips can be used. For a vegan alternative, look for dairy-free chocolate chips made with a cocoa butter base. If you want a more intense chocolate flavor, try using semi-sweet chocolate chips instead.
Variations
- White Chocolate Dream: Swap the milk chocolate for white chocolate chips for a sweeter, creamier taste. This version is especially delightful for white chocolate enthusiasts.
- Nutty Crunch: Mix in some finely chopped pecans or almonds into the caramel layer before setting, adding texture and a nutty flavor to your delicious cookie.
- Sea Salt Sprinkle: Enhance the flavors by lightly sprinkling sea salt over the chocolate layer before it sets, offering a savory contrast to the sweet caramel and chocolate.
- Cookie Butter Base: Experiment with cookie butter spread as a base layer for a twist that brings a spiced, gingerbread-like dimension to the flavor profile.
How to Make Twix Cookies
STEP 1: Prepare Baking Sheets – Line two baking sheets with parchment paper to prevent cookies from sticking.
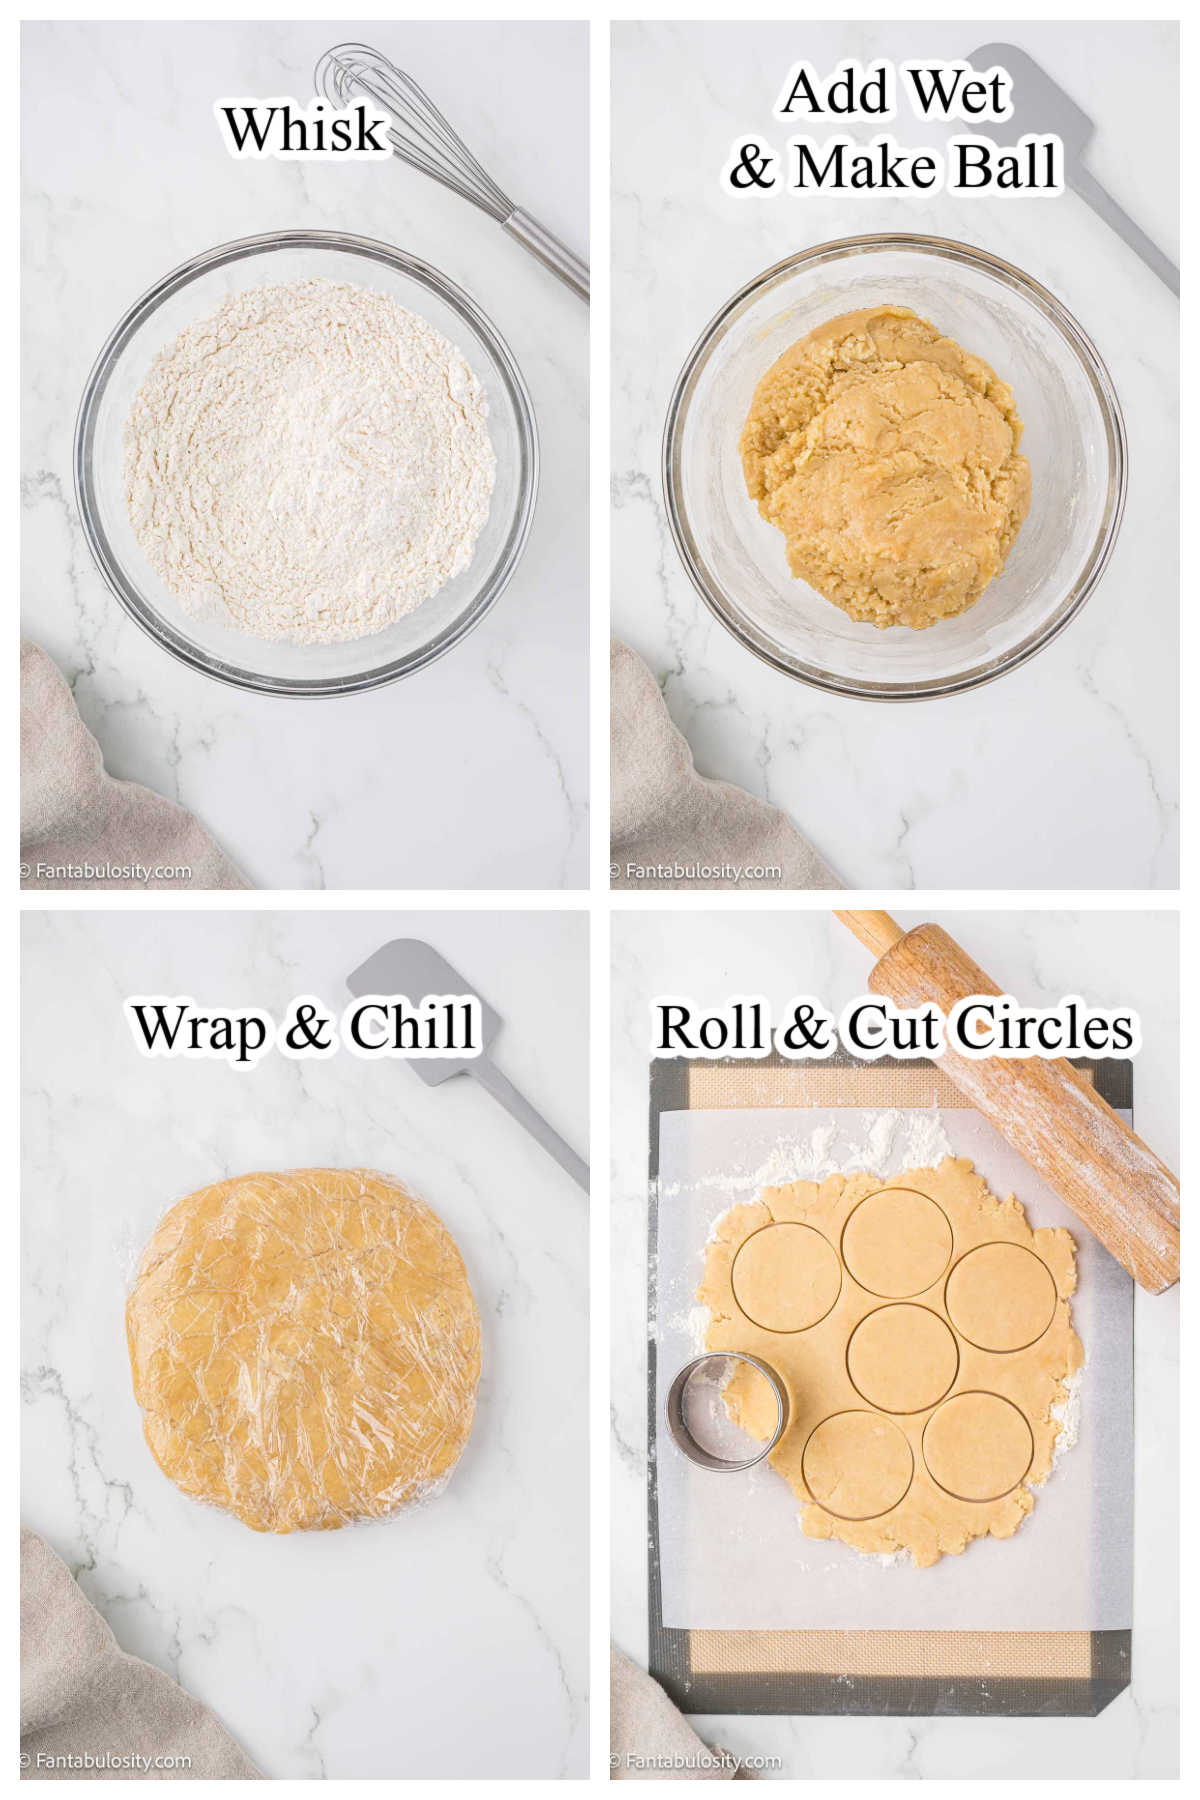
STEP 2: Mix Dry Ingredients – In a large bowl, combine flour, sugar, and salt by whisking them together.
STEP 3: Incorporate Wet Ingredients – Melt butter and add it to the bowl along with the vanilla. Use a spatula to mix the ingredients until they’re just combined, then use your hands to form a dough ball.
STEP 4: Chill Dough – Flatten the dough into a disk, cover it in plastic wrap, and refrigerate between 1 hour and overnight to firm up.
STEP 5: Rest Dough – Before rolling, let the dough rest at room temperature for 15 minutes to 1 hour, depending on how long it was chilled.
STEP 6: Preheat Oven – Around 10 minutes before you’re ready to roll out the dough, set the oven to preheat at 350 degrees Fahrenheit.
STEP 7: Roll and Cut Dough – On a floured surface, gently roll the dough to a thickness between ¼ and ½ inch, then use a round cookie cutter to form circles. Place the cut cookies on the prepared sheets, spacing them about 1 inch apart. Re-roll and cut any remaining dough.
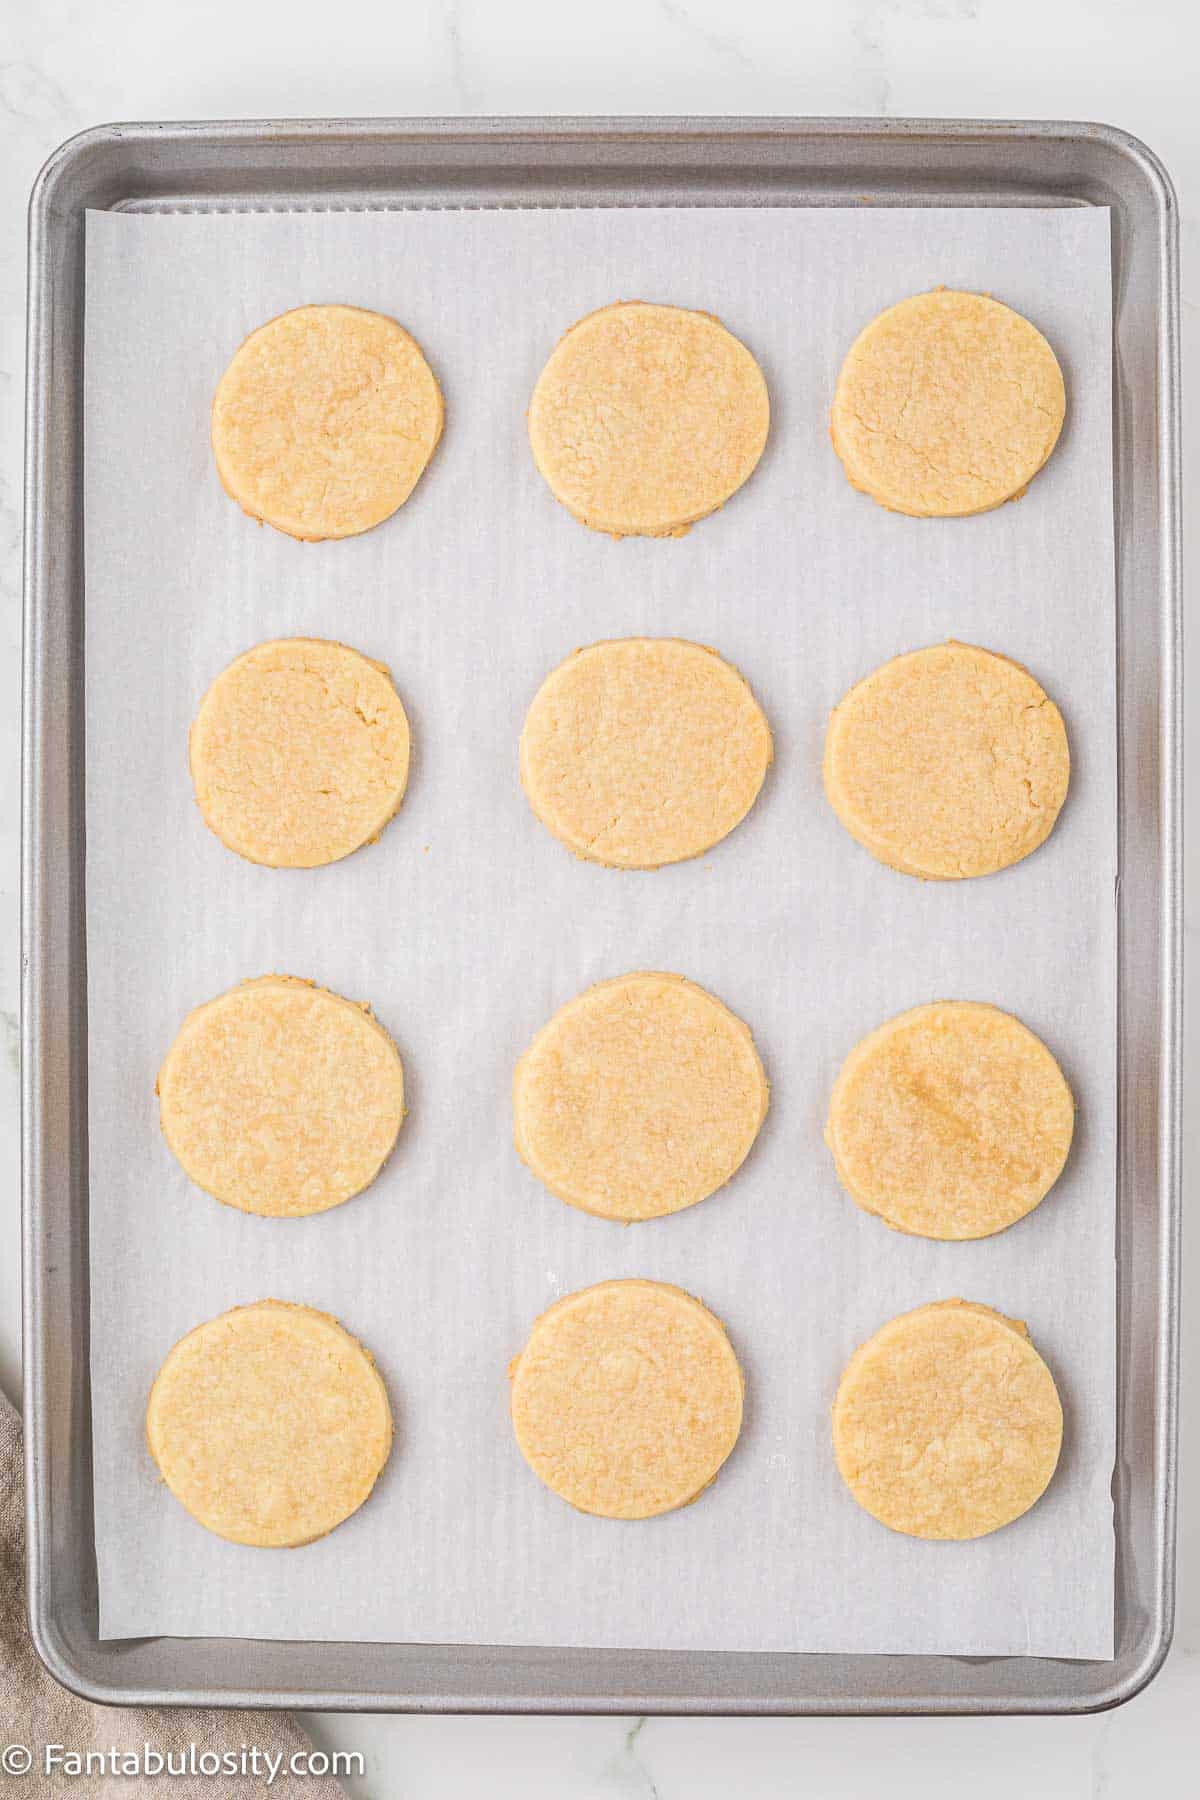
STEP 8: Bake Cookies – Bake for 12-14 minutes until the edges are firm and the bottoms of the cookies have a light golden hue. Allow them to cool on the baking sheet for a few minutes before transferring them to a cooling wire rack.
STEP 9: Melt Caramels – Place caramels in a medium bowl with cream or milk and melt in the microwave oven, stirring halfway through the heating process until smooth and fully melted.
STEP 10: Add Caramel to Cookies – Dollop a tablespoon of the melted creamy caramel onto the top of each cookie, spreading it close to the edges, and then chill the cookies to set the layer of caramel.
STEP 11: Melt Chocolate – Put chocolate chips and oil in a microwave-safe bowl and heat in short bursts, stirring regularly to avoid overheating until fully melted.
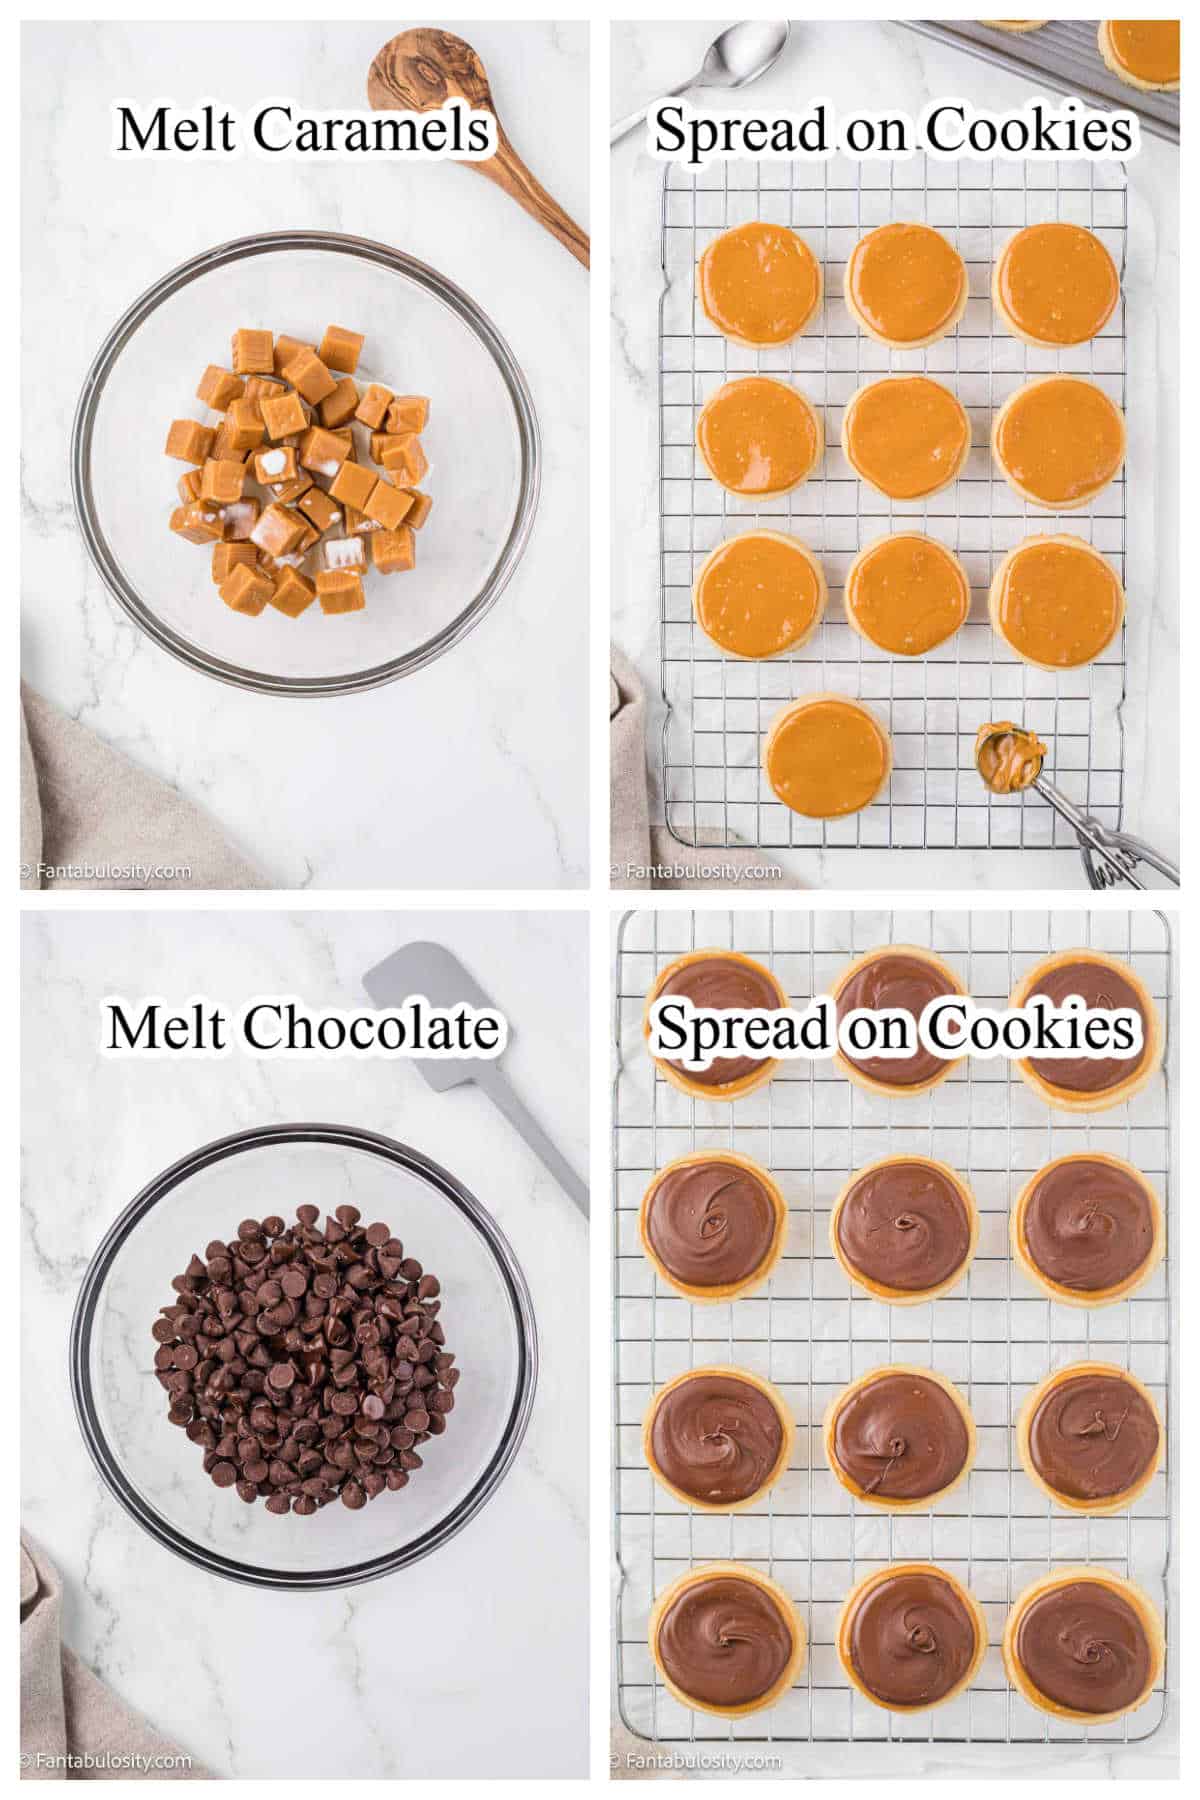
STEP 12: Layer Chocolate – Spoon or scoop the melted chocolate onto the caramel-covered cookies, spreading it nearly to the caramel’s edges with a swirling motion.
STEP 13: Set Chocolate – Allow the chocolate to harden on the cookies for a short time in the fridge or at room temperature, then they are ready to enjoy!
Recipe Pro Tips
- Evenly Rolled Dough: For uniform cookies, use rolling pin guides or a pair of chopsticks on either side of the dough when rolling it out.
- Precise Caramel Layer: To achieve a neat caramel layer, use a silicone mold or an ice cube tray sprayed with cooking spray as a template. Pour the caramel into the mold, then freeze for easy placement on your cookies.
- Smooth Chocolate Topping: For a glossy chocolate finish, consider tempering the chocolate if you’re experienced with the technique, or else ensure your chocolate isn’t too hot when you pour it over the caramel for that smooth shiny surface.
- Cookie Craftsmanship: If your chocolate sets too quickly, warm the knife in hot water before slicing for cleaner cuts without cracking the chocolate layer.
- Cream Over Milk: I strongly suggest using cream instead of milk for the caramel. The cream creates a thicker and more stable caramel layer. When milk is used, the caramel may spread slightly after being at room temperature. However, milk can still be used if necessary.
Recipe FAQs
Yes, you can use a gluten-free flour blend designated for baking, but keep in mind that the texture and taste of your cookies may vary slightly from the original recipe.
If you don’t have vanilla extract, you can try almond extract for a different flavor profile or omit it altogether. The buttery flavor of the shortbread will still shine through.
The key is to watch the caramel closely as it melts with the cream or milk. Overcooking can cause it to harden too much once cooled. Additionally, adding a bit more cream or milk can help keep the caramel layer soft.
Absolutely! You can melt both the caramel and chocolate in a double boiler on the stove, just be sure to stir continuously to prevent burning and to achieve a smooth texture.
Crumbly cookies can result from various factors, including measuring the flour incorrectly, overmixing the dough, or not allowing the dough to chill sufficiently. Make sure to measure your ingredients carefully and follow the steps for chilling and resting the dough.
Use a cookie cutter or the rim of a glass to ensure consistent shapes and sizes. For even thickness, use a rolling pin with adjustable rings or place guides such as wooden dowels on each side of the dough when rolling out.
What to Serve with Twix Cookies
Twix cookies are a delightful treat on their own, but they also pair beautifully with a variety of beverages and snacks. Serve them alongside a steaming mug of hot cocoa or a cold glass of milk to complement their rich, buttery flavors.
If serving at a gathering, consider a dessert platter with fresh fruit and an assortment of cheeses, which will offer a pleasant counterbalance to the caramel and chocolate notes of the cookies.
Storage
To keep your Twix cookies tasting fresh, place them in an airtight container and store at room temperature for up to 5 days. For longer storage, you can refrigerate them for up to 2 weeks.
To freeze: These cookies are also freezer-friendly-layer them between sheets of parchment paper in a freezer-safe container, and they can be stored for up to 3 months.
To thaw: Simply thaw them at room temperature or give them a brief stint in the microwave for a warm, gooey treat.
More Cookie Recipes You’ll Love
In the mood for more cookies? You could try making these Rocky Road Cookies that are packed with flavor but still simple to make. Or try some of my Easy Chocolate Turtle Cookies Recipe if you are still craving chocolate and caramel!
Or, for some of my other favorite easy desserts, give one of these a try:
Did you make this? I’d be so grateful if you left a “star” rating below to let me know what you thought! Then, the next time you need a quick and easy recipe, come back to Fantabulosity to browse all of my easy recipes!
Recipe

Twix Cookies
Ingredients
- 3 cups all-purpose flour spooned into measuring cup and leveled
- 1 cup powdered sugar
- 1 teaspoon salt
- 1 ¼ cup unsalted butter melted
- 1 teaspoon vanilla
- 2 packages of 11-ounce caramels
- 2 tablespoons cream or milk
- 2 cups milk chocolate chips
- 2 teaspoons vegetable oil
Instructions
- Line two baking sheets with parchment paper.
- In a large bowl, whisk together flour, sugar and salt.
- Add melted butter and vanilla and combine ingredients together with a spatula, just until incorporated and combined. Using your hands, form the dough into a ball.
- Flatten dough into a disk, cover with plastic wrap, and chill dough for 1 hour to overnight. The dough can be rolled out without refrigeration but will stay together best with a little chilling.
- Take the dough disc out of the fridge and let rest for 15 minutes- 1 hour depending on the length of refrigeration. The dough needs to be slightly soft to be able to roll out.
- 10 minutes before rolling out, preheat oven to 350 degrees Fahrenheit.
- On a floured surface, gently roll dough ¼ to ½ inch thick. Using a 2 ½ inch round cookie cutter, cut dough into circles and place on prepared baking sheets about 1 inch apart. Combine leftover dough and roll out and cut again until all the dough is used.
- Bake cookies for 12-14 minutes until the edges are set and the bottom of the cookies are lightly golden. Let cool on cookie sheets for 2-3 minutes and transfer to a cooling rack to cool.
- Unwrap caramels and place them in a medium-sized microwaveable bowl. Add cream or milk. Microwave for 45 seconds. Remove the bowl from the microwave and stir with a wooden spoon. Reheat in the microwave for an additional 30-45 seconds and stir until caramel is completely melted, slightly reheating again in the microwave if necessary.
- Using a tablespoon or 1-inch cookie scoop, drop approximately 1 tablespoon of caramel onto the center of a cookie. Using the back of a spoon sprayed with cooking spray, spread the caramel to almost the edge of the cookie. Place the cookie on a clean cookie sheet and repeat with all the cookies. Place cookies in the fridge for approximately 15-30 minutes for the caramel to set.
- Pour chocolate chips into a microwaveable bowl. Add oil. Microwave for 30 seconds, then stir with a spatula. Repeat in 15-second intervals, stirring between each one, until chocolate is completely melted. Do not microwave for too long or the chocolate will overheat and seize.
- Using a spoon or a 1-inch cookie scoop, place ¾ tablespoon of chocolate on the center of the cookie over the caramel. Spread the chocolate with a spoon, knife, or offset icing spatula to almost the edges of the caramel, swirling as you go.
- Allow the chocolate to set, for a few minutes in the fridge or at room temperature, and enjoy!
Notes
- Evenly Rolled Dough: For uniform cookies, use rolling pin guides or a pair of chopsticks on either side of the dough when rolling it out.
- Precise Caramel Layer: To achieve a neat caramel layer, use a silicone mold or an ice cube tray sprayed with cooking spray as a template. Pour the caramel into the mold, then freeze for easy placement on your cookies.
- Smooth Chocolate Topping: For a glossy chocolate finish, consider tempering the chocolate if you’re experienced with the technique, or else ensure your chocolate isn’t too hot when you pour it over the caramel for that smooth shiny surface.
- Cookie Craftsmanship: If your chocolate sets too quickly, warm the knife in hot water before slicing for cleaner cuts without cracking the chocolate layer.
Nutrition
Nutritional information is based on third-party calculations and should be considered estimates. Actual nutritional content will vary with brands used, measuring methods, portion sizes and more.

Jessica Heberling says
Love how easy these cookies are!! The best part is the chocolate-dipped bottom 🤤
Jessica says
Oh heavens yes… totally agree! Thank you!