

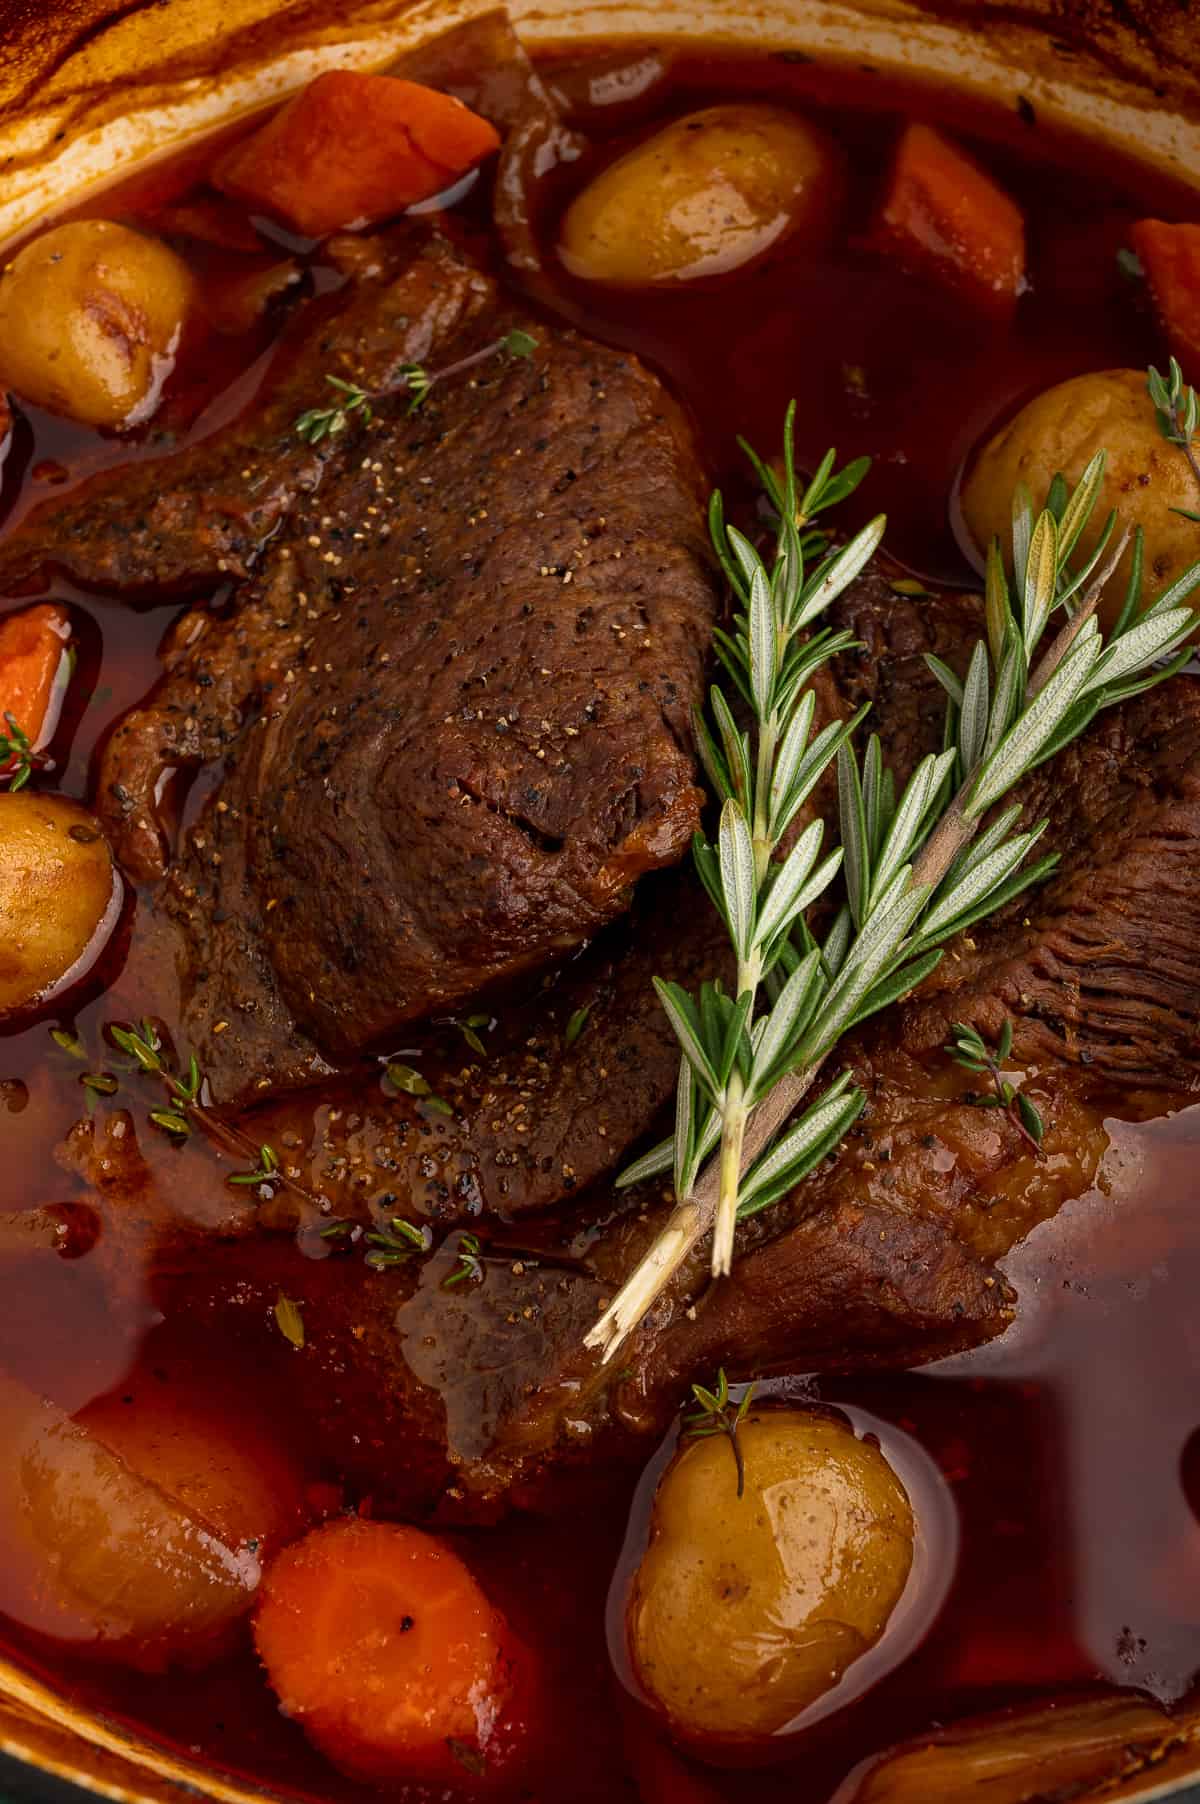
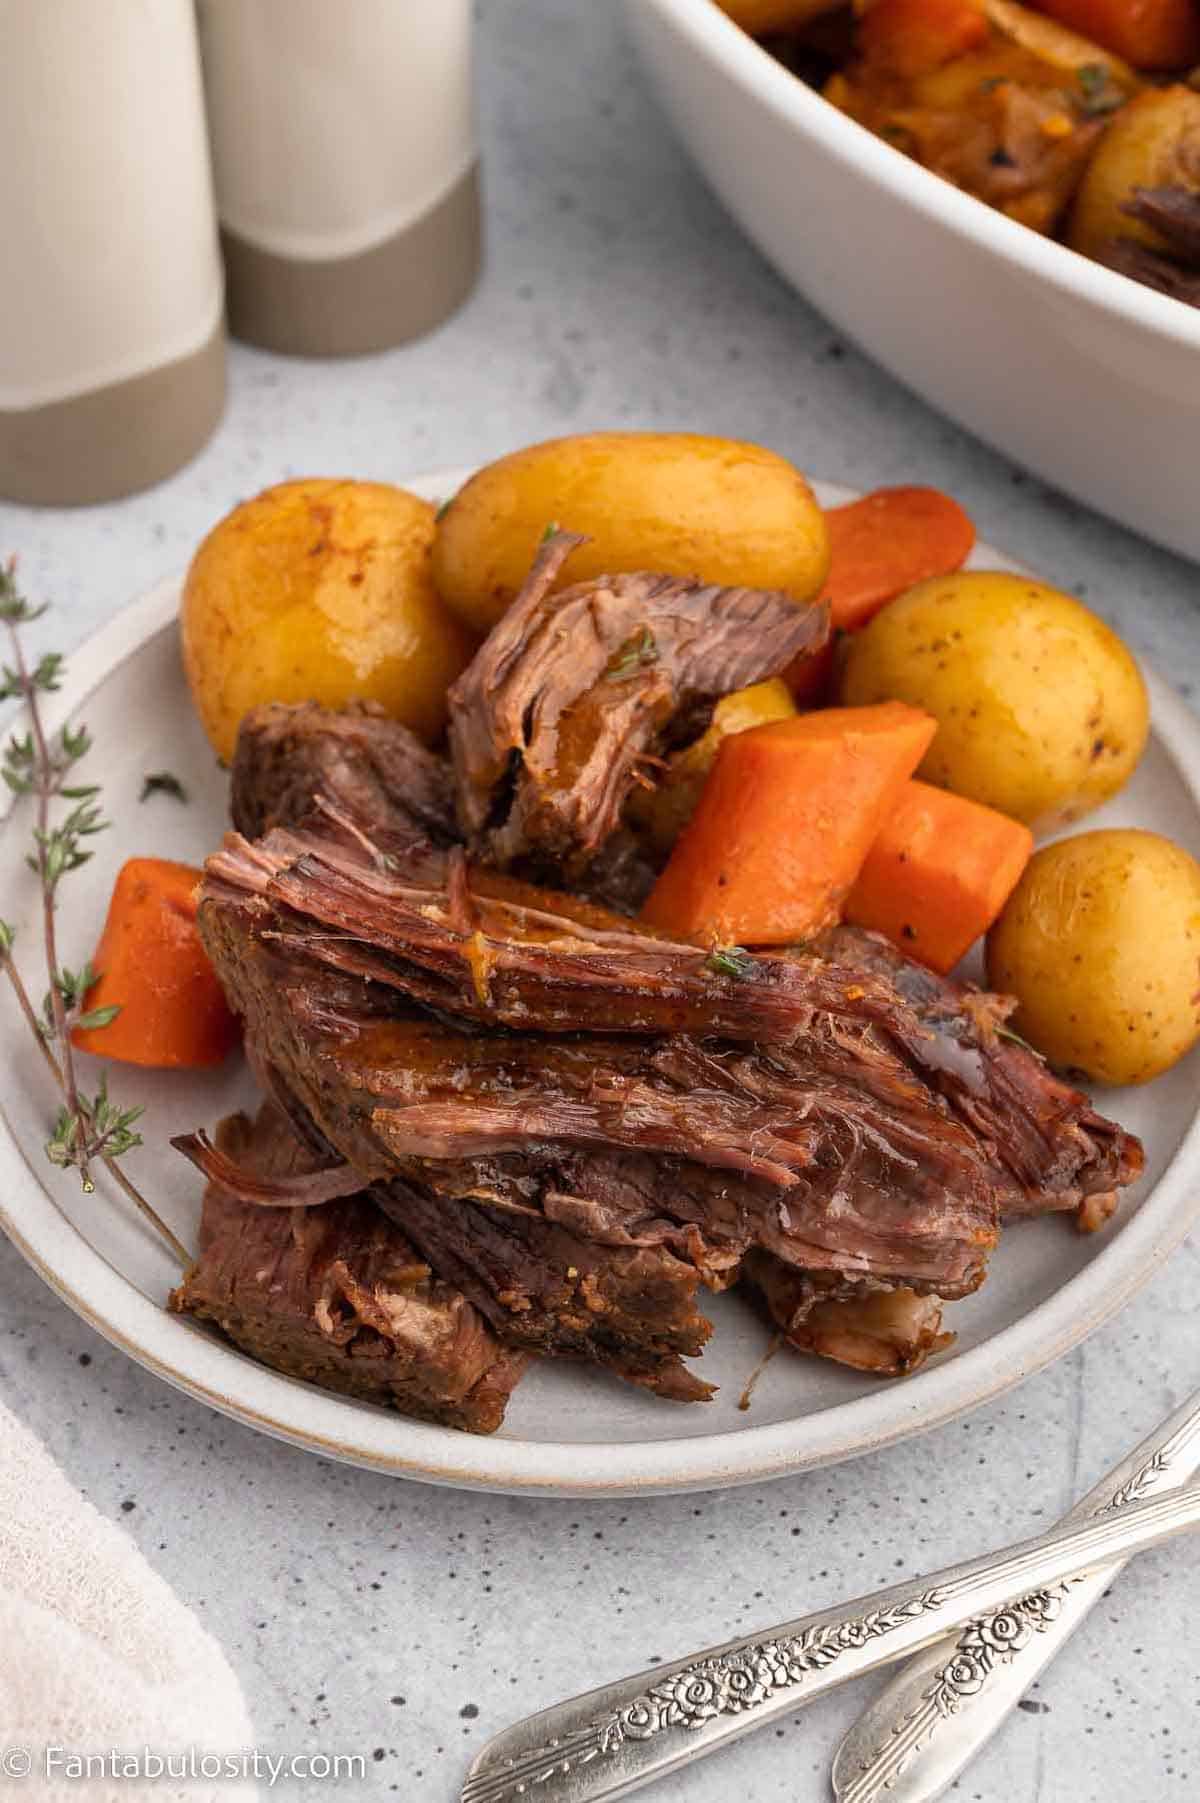
This savory, comforting Dutch Oven Pot Roast is the perfect weeknight dinner. It tastes like you spent hours in the kitchen, but you only spent 15 minutes of active cooking time.
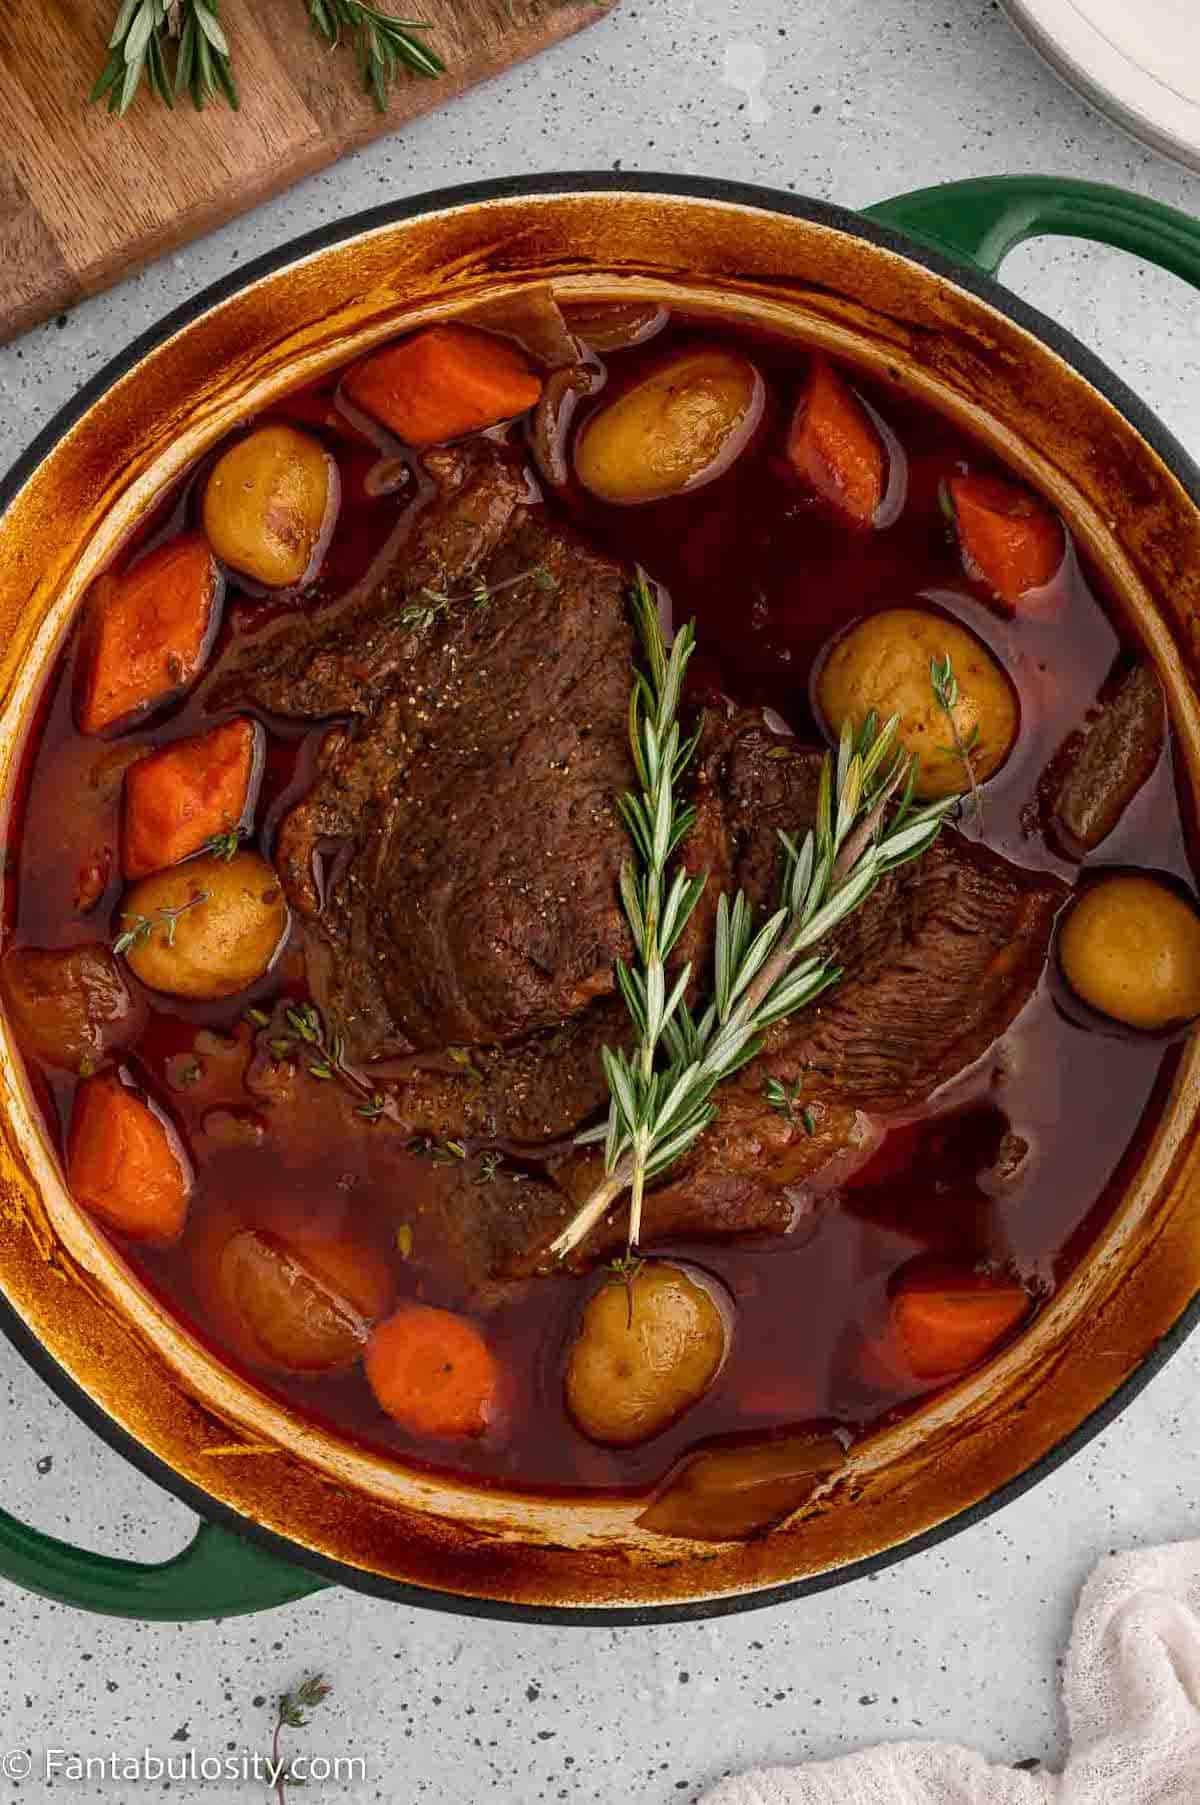
Paired with carrots, potatoes, and a rich sauce, this tasty, fork-tender roast is going to be something the whole family will love. Similar to our dutch oven beef stew, this hearty recipe is perfect for Sunday dinner.
Pot roast has been a Sunday dinner staple for years, and when dinner can sit in the dutch oven and cook for 3 hours, along with the veggies, it’s a great recipe to set it and forget it. This hearty dish is exactly the kind of meal you’ll find in traditional old-fashioned dinner recipes.
This tender dutch oven pot roast is also a comfort food dish to keep on hand for those days when a hot, home-cooked meal is desired; much like our Instant Pot Pot Roast, this Tri-Tip Roast and Gravy recipe and this Creamy Chicken and Gravy recipe.
Jump to:
Why This Recipe Works
- One pot meal: With this being a dutch oven pot roast recipe, it starts in the dutch oven and ends in the dutch oven. Not a lot of dishes to wash, with this classic recipe!
- Simple ingredients: Considering this is a main dish and side dish recipe in one, it does use a good list of ingredients but the good thing is, they’re all simple ingredients, which you may even have on hand or can find at your local grocery store!
- Fall-apart tender: Talk about a quick and easy dinner idea! This dutch oven pot roast recipe, from start to finish, only takes half an hour.
Ingredients Needed
I’ve highlighted a couple of ingredients with some relevant notes. Aside from this, the ingredients needed are pretty basic.

- Chuck roast - Consider size when picking a roast. At 350 F a roast will need about 1 hour per pound to cook. Anything larger than 3 lbs. may need additional broth and seasonings, and will likely need more than 3 hours in the oven. Another thing that can affect the cooking time is the presence of a bone in your roast. A bone-in roast can be used, but if you are not familiar with dealing with bone-in cuts of meat, then boneless chuck roasts are the way to go. Other varieties of roasts that work well using this type of cooking method include bottom chuck roasts, round roasts, or anything labeled pot roast, just be sure to keep size in mind.
- Olive oil - Any neutral-flavored cooking oil will work. Enough fat comes from the meat during the cooking process, so the oil in this recipe is really only used to sear the meat.
- Yellow onion - I like yellow onions because they tend to be sweeter and less overpowering. You could use a white onion in a pinch, but I do not recommend using a red onion as they can be too sharp in flavor.
- Carrots - If using organic carrots, note that they can be smaller so you may need 4-5 small carrots for this recipe.
- Yellow baby potatoes - Also called Dutch babies or baby Yukon potatoes, are starchy and slightly sweet. Really any type of potato can be used in pot roast recipes. Any other variety of baby potatoes will work nicely. If using whole potatoes with tougher skin like russet potatoes, I recommend peeling the skin before dicing.
- Beef broth - Don't discount the power of broth! I do not recommend using water in place of beef broth in this recipe. Vegetable or even my homemade chicken broth recipe can be used if that is what you have on hand, but beef broth will be the best choice. Try a really richly-flavored beef 'drinking bone broth' to add more flavor to the sauce, but keep in mind that these tend to be saltier than traditional broth.
- Herbs - I love the use of fresh thyme and rosemary in pot roasts. It adds a bit of freshness to a mostly meat and root vegetable meal.
Substitutions
- Garlic powder - Fresh garlic is a great way to add flavor to this roast in lieu of garlic powder. Peel and mince 4 garlic cloves and toss them in along with the vegetables.
- Carrots – You could replace the carrots with a peeled and diced sweet potato or yam for something a little different.
- Worcestershire sauce - Sometimes Worcestershire sauce can contain funky ingredients. If you do not generally have Worcestershire sauce in your home or have dietary restrictions, coconut aminos may be used to replace the Worcestershire sauce in a 1:1 ratio. The flavor will be very slightly different, but it will still add a nice umami element to the sauce.
- Balsamic vinegar - If you don't have balsamic vinegar on hand but have an open bottle of red wine, a small splash of red wine will work nicely with these flavors.
- Ground celery seed - Fresh celery can add the same flavor to the roast as ground celery seed. If using celery as a substitute, thinly slice 1-2 stalks and add it in with the rest of the vegetables.
- Herbs – You can absolutely add 1 teaspoon of dried thyme and 1 teaspoon of dried rosemary to the broth mixture in place of the fresh herbs if this is what you're working with. Fresh oregano is also another tasty herb that I like to dice and toss in sometimes.
Variations
Curious about how to cook this dutch oven pot roast with a different method? Here are some suggestions that you may find helpful:
- Slow Cooker – A Dutch oven is very similar to a slow cooker, except that the Dutch oven requires a conventional oven whereas the slow cooker is stand-alone. This recipe can be done in a slow cooker without much alteration. You will want to season and sear the meat over medium heat in a skillet. Prepare the ingredients as described in the recipe card adding them to the crock of a slow cooker. You will cook this roast for 8-10 hours on low heat or 4-6 on high. If you do not want your veggies to get too soft, you can wait about 2 hours before adding them, ensuring that they are covered with broth once they are added.
- For an Instant Pot, you will follow the same instructions but the cooking time will be about 75 minutes (or 25 minutes per pound) on the high or "meat" setting. The veggies can get mushy in a pressure cooker, so it would not be a bad idea to add them halfway through the cooking process if using your Instant Pot.
How to Make this Chuck Roast in the Oven
This oven-baked chuck roast recipe is broken into 3 components:
- searing the roast
- creating the sauce
- roasting in the oven
*Be sure to see the recipe card below for the full ingredients list & instructions!*
You’ll start by seasoning the roast and searing it. Then, it will sit and cook in the juices until ready to serve!
STEP 1. Prep Chuck Roast. Pull the roast from the fridge and allow it to come to room temperature by placing it on the counter for at least 30 minutes before cooking.
Tip: Cooking Evenly: Pulling the meat from the fridge 30-60 minutes before cooking and allowing it to come to room temperature helps to ensure that it will cook evenly and not be overdone on the outside and underdone in the center.
STEP 2. Preheat the oven to 350 F.
STEP 3. While the roast is coming to room temperature, begin preparing the vegetables. Peel and cut the carrots into about 1-inch pieces. Halve the onion and then peel and quarter the halves, breaking the layers apart with your hands.
Wash the baby potatoes and halve them or you can leave them whole. Halving them takes more time but allows them to absorb more flavor from the sauce. Set all veggies aside.
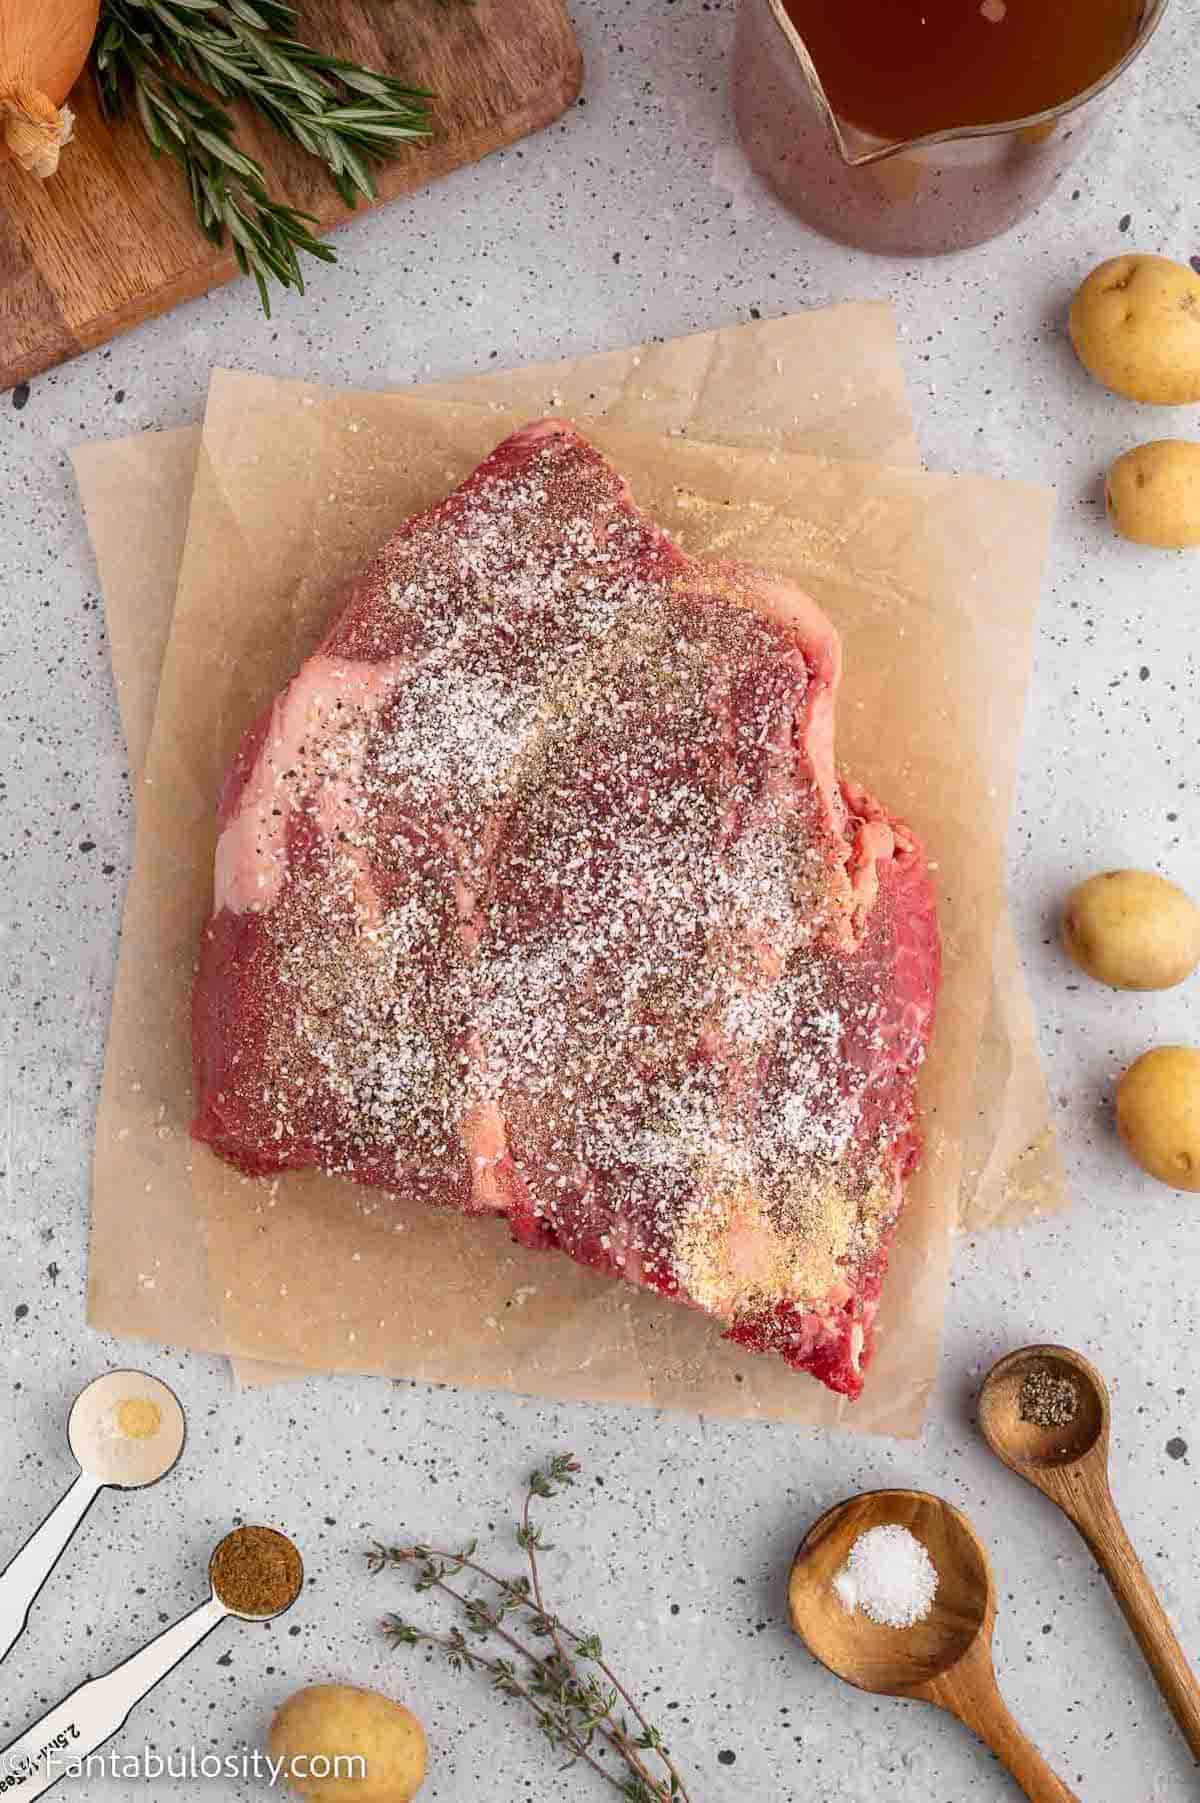
STEP 4. Pat the meat dry using a paper towel and season with salt, pepper, and garlic powder (Image 1).
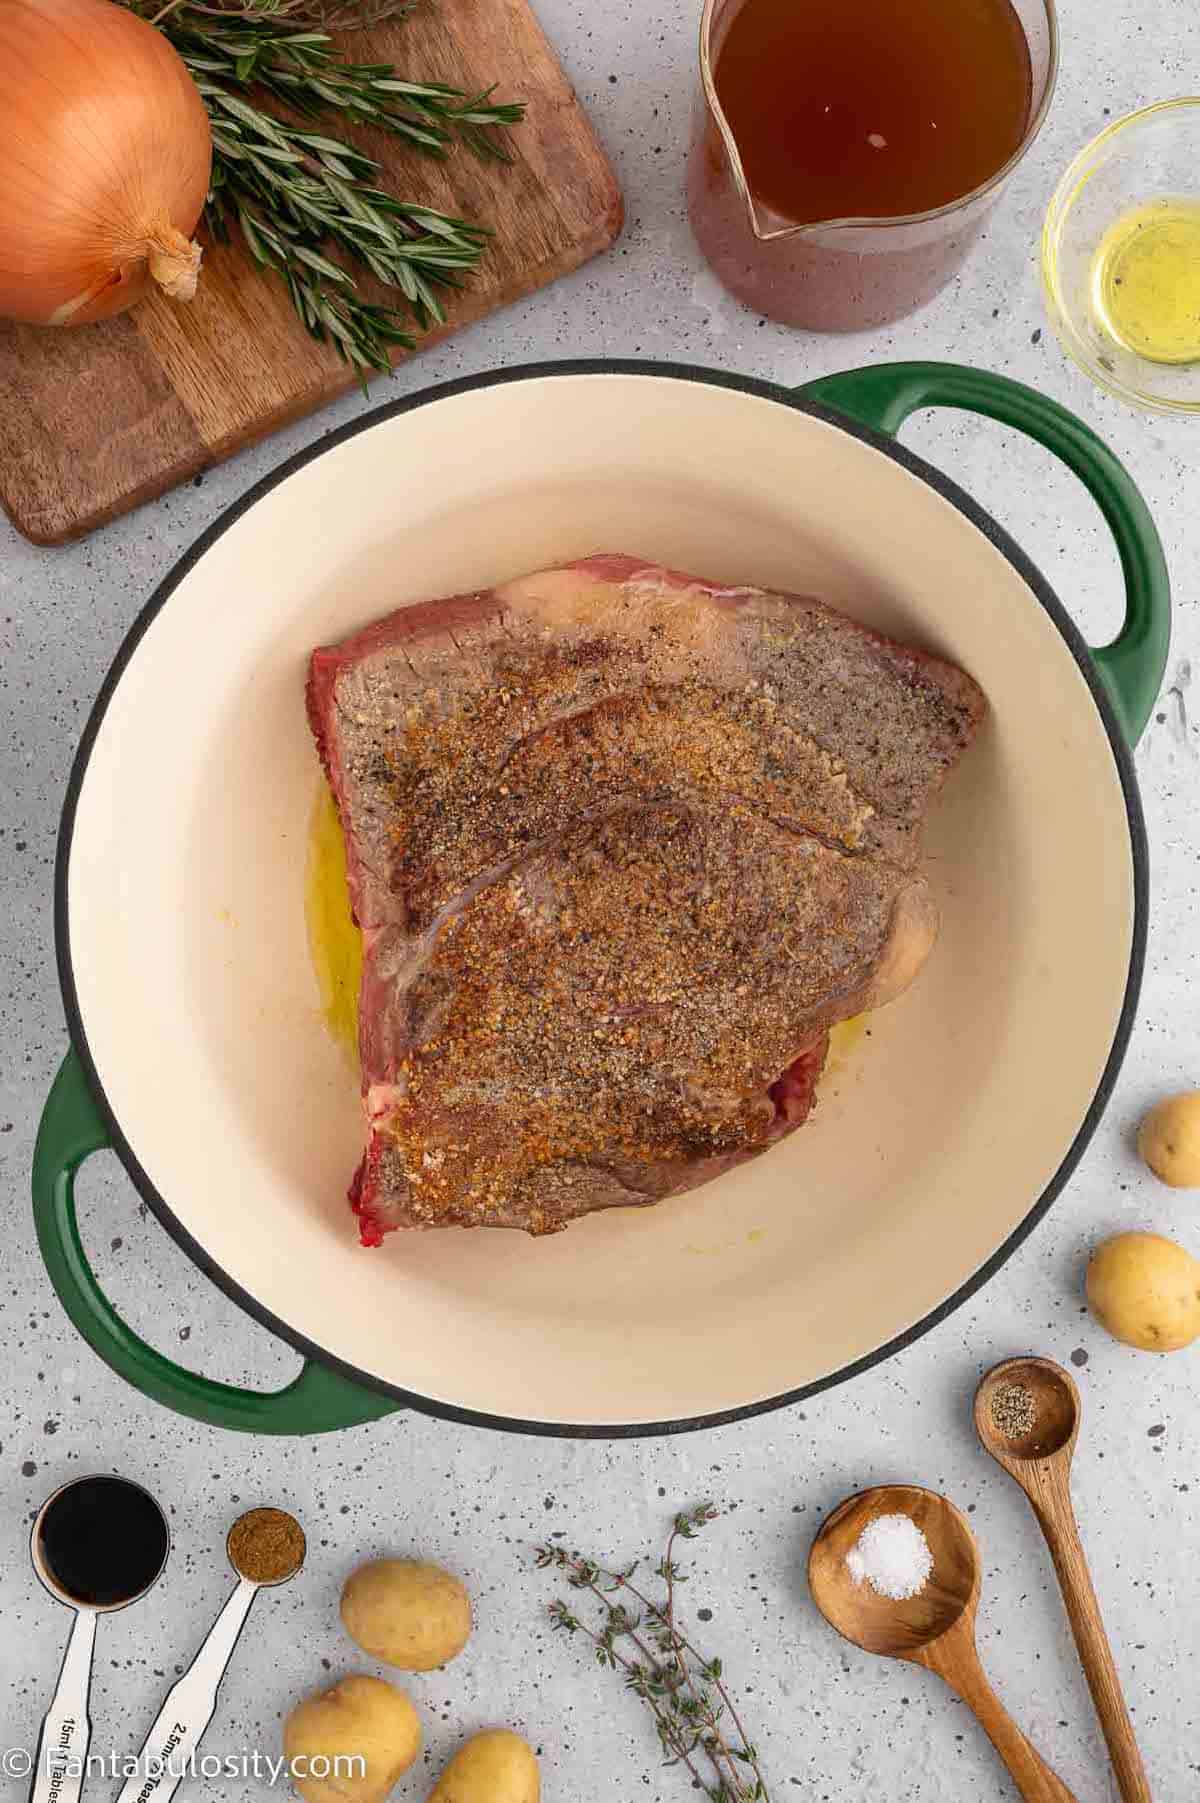
STEP 5. In a large Dutch oven (I used a 7 Qt), heat 2 tbsp. of olive oil over medium heat. Once the oil is hot place the seasoned roast in the pot and begin to sear each side, about 3-4 minutes per side (Image 2).
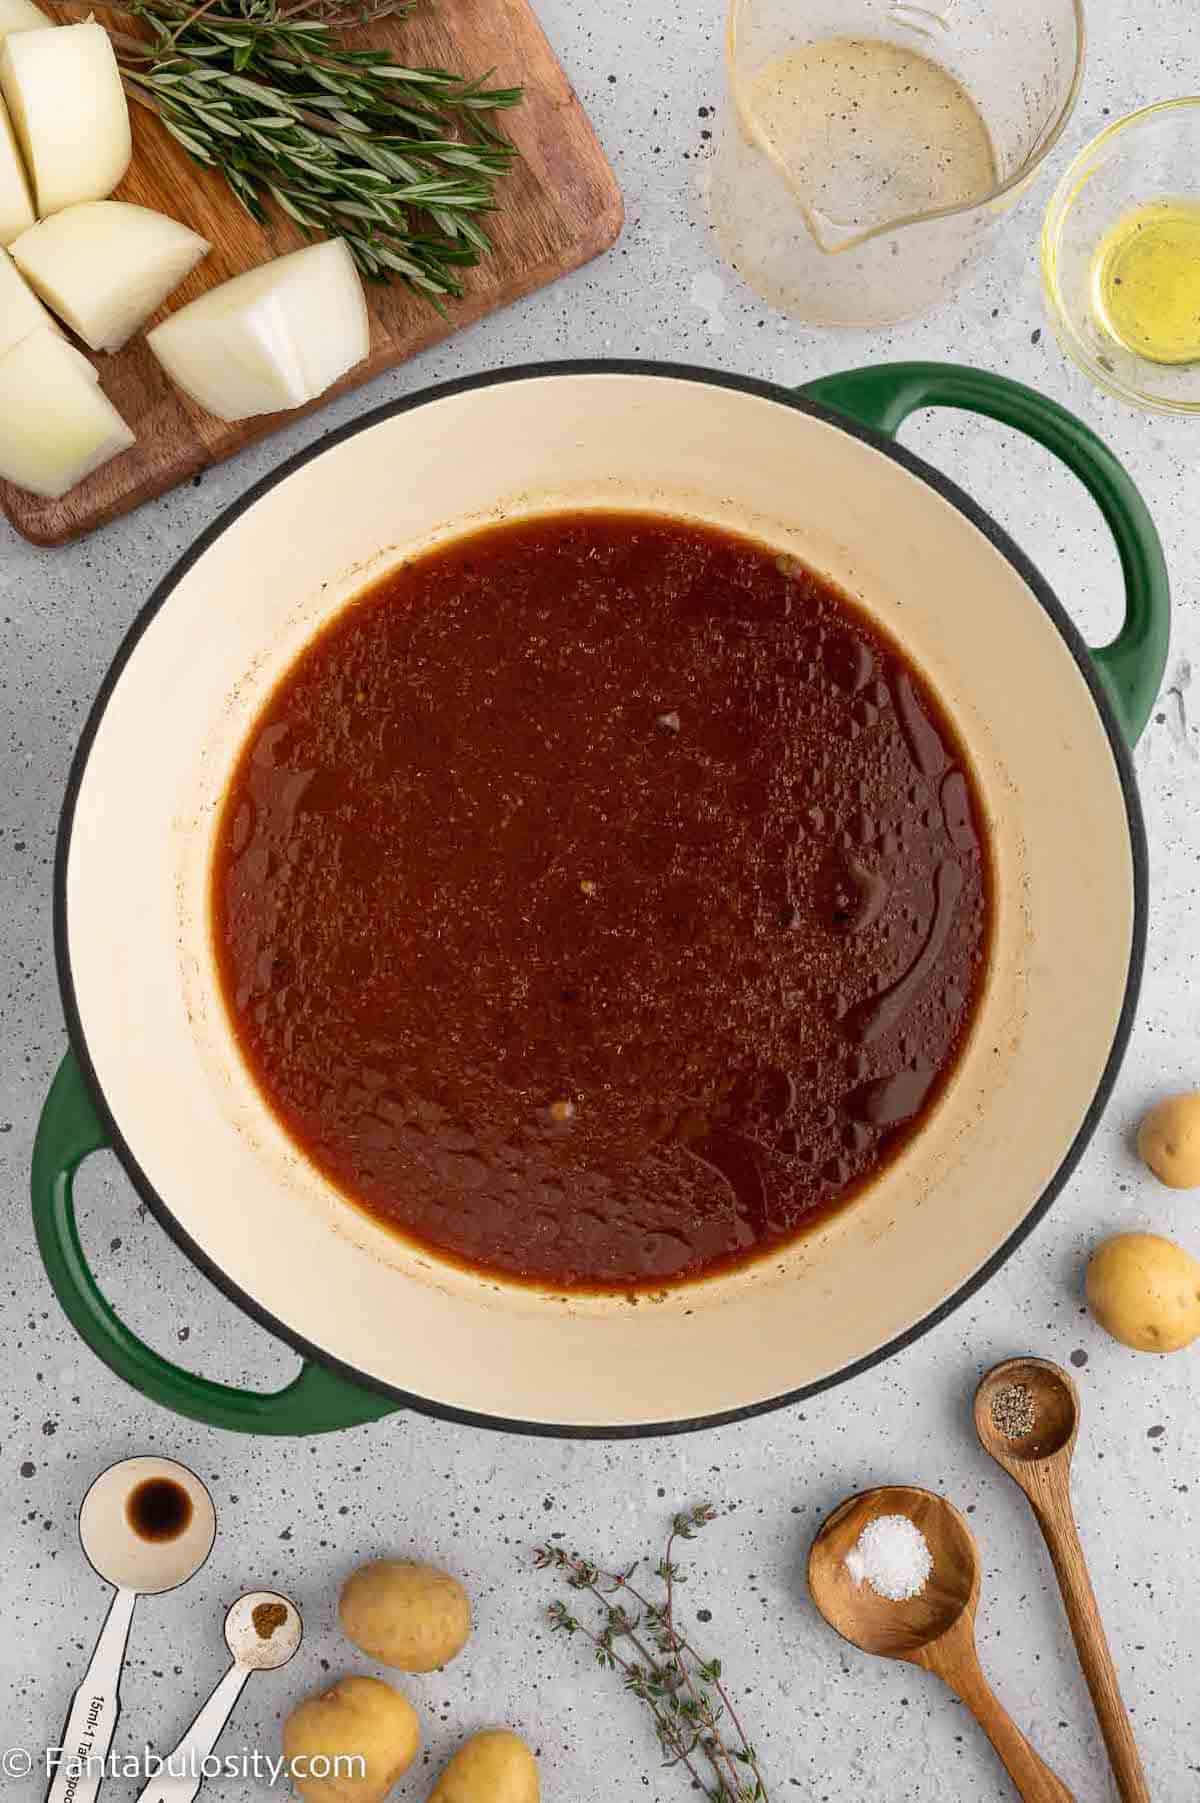
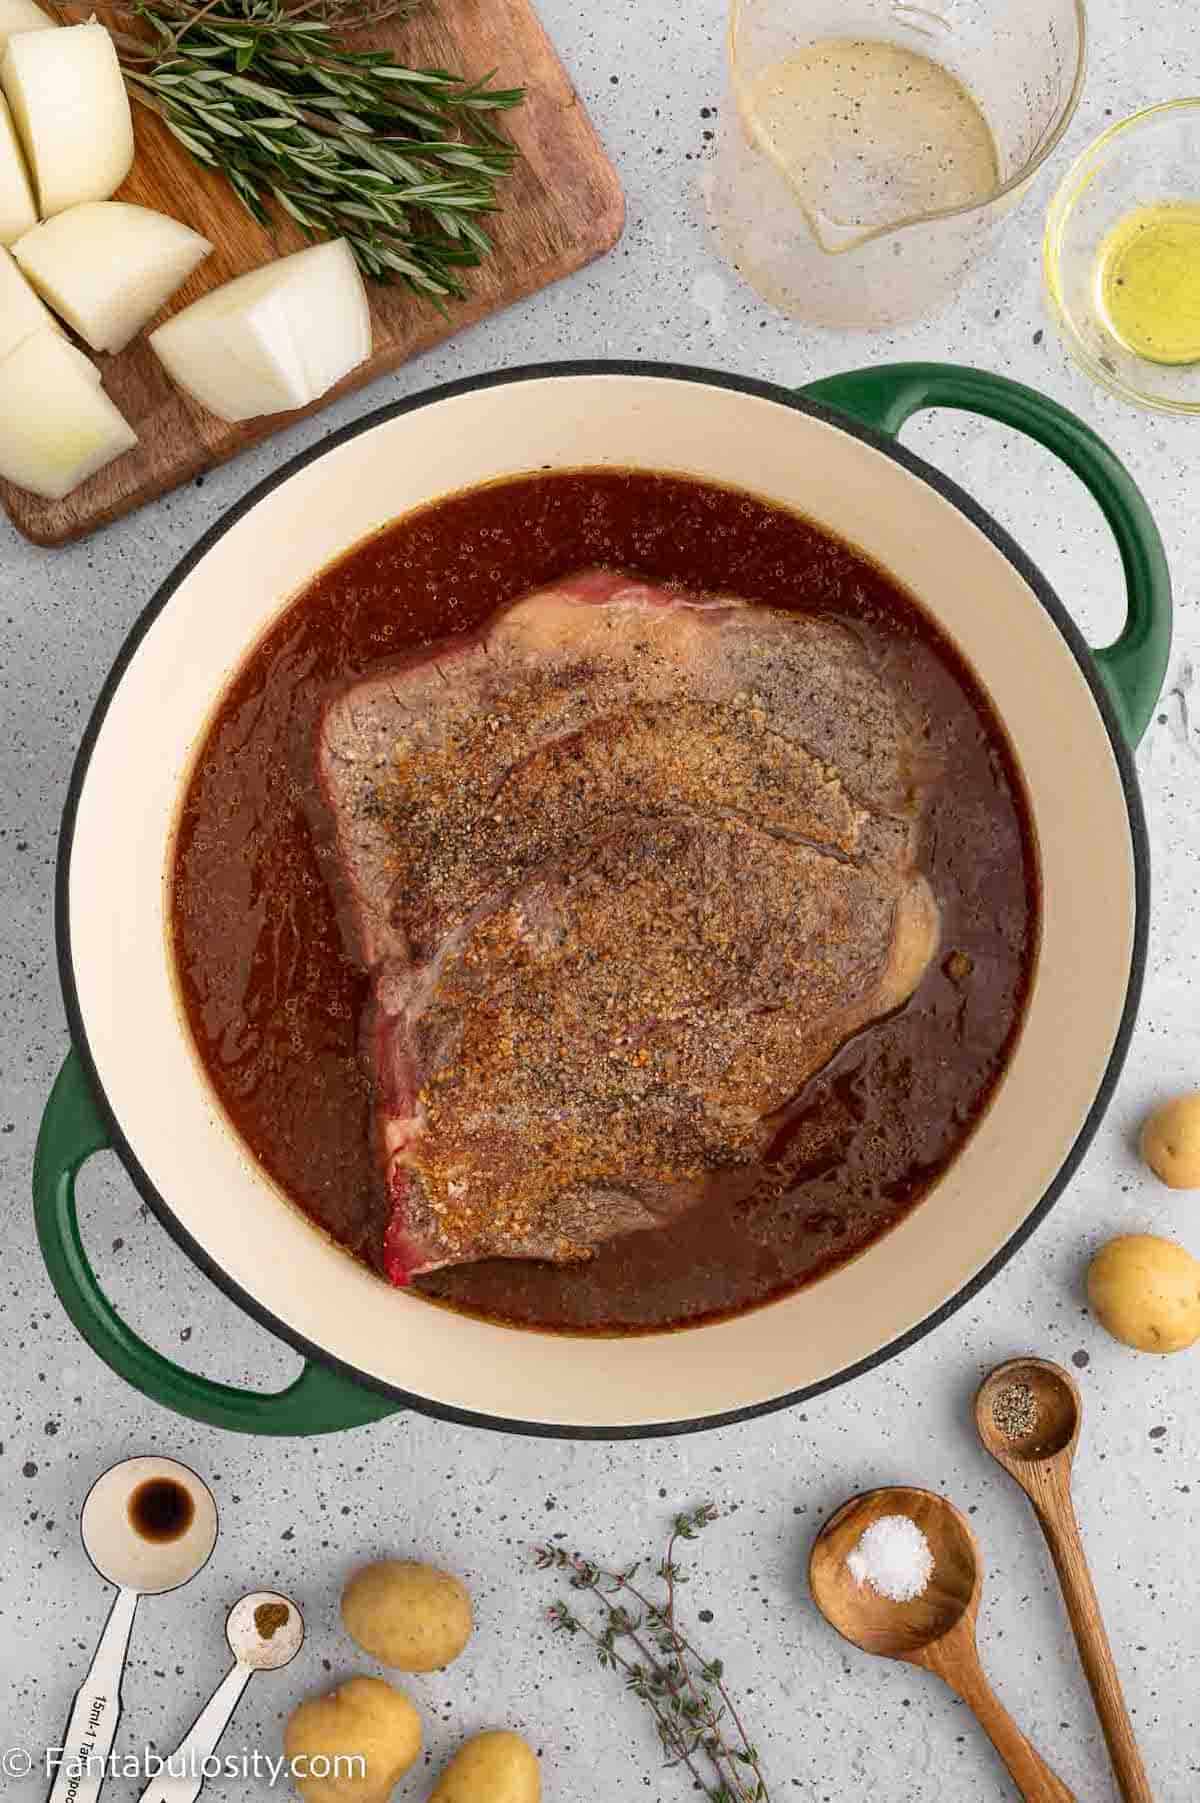
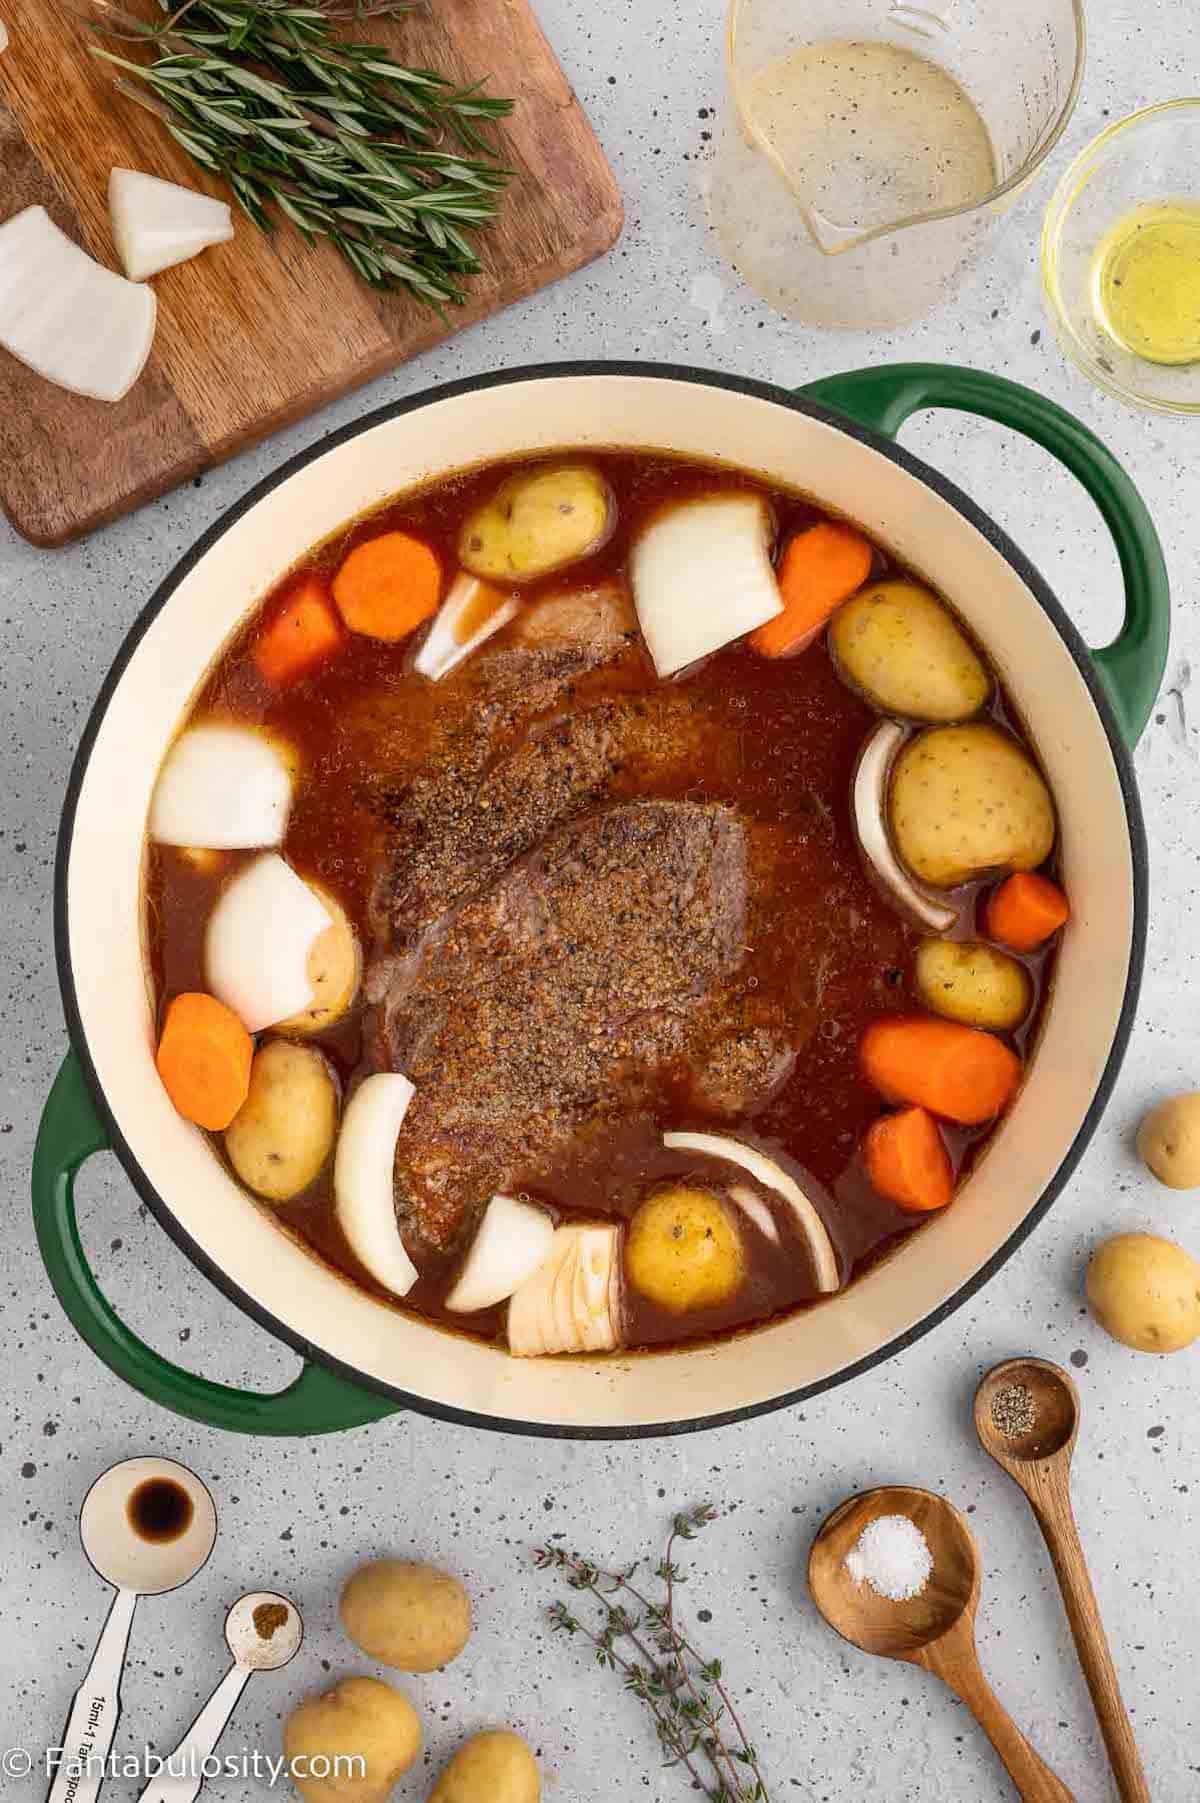
STEP 6. Once the roast has a nice sear on both sides, remove it from the Dutch oven and set it to the side. Deglaze the bottom of the pot using the broth and a wooden spatula to scrape up any brown bits. Add in the tomato paste, Worcestershire sauce, balsamic vinegar, and ground celery seed, and mix together until there are no clumps (Image 3). Place the meat back in the Dutch oven with the broth and surround it with the prepared vegetables (Images 4 & 5).
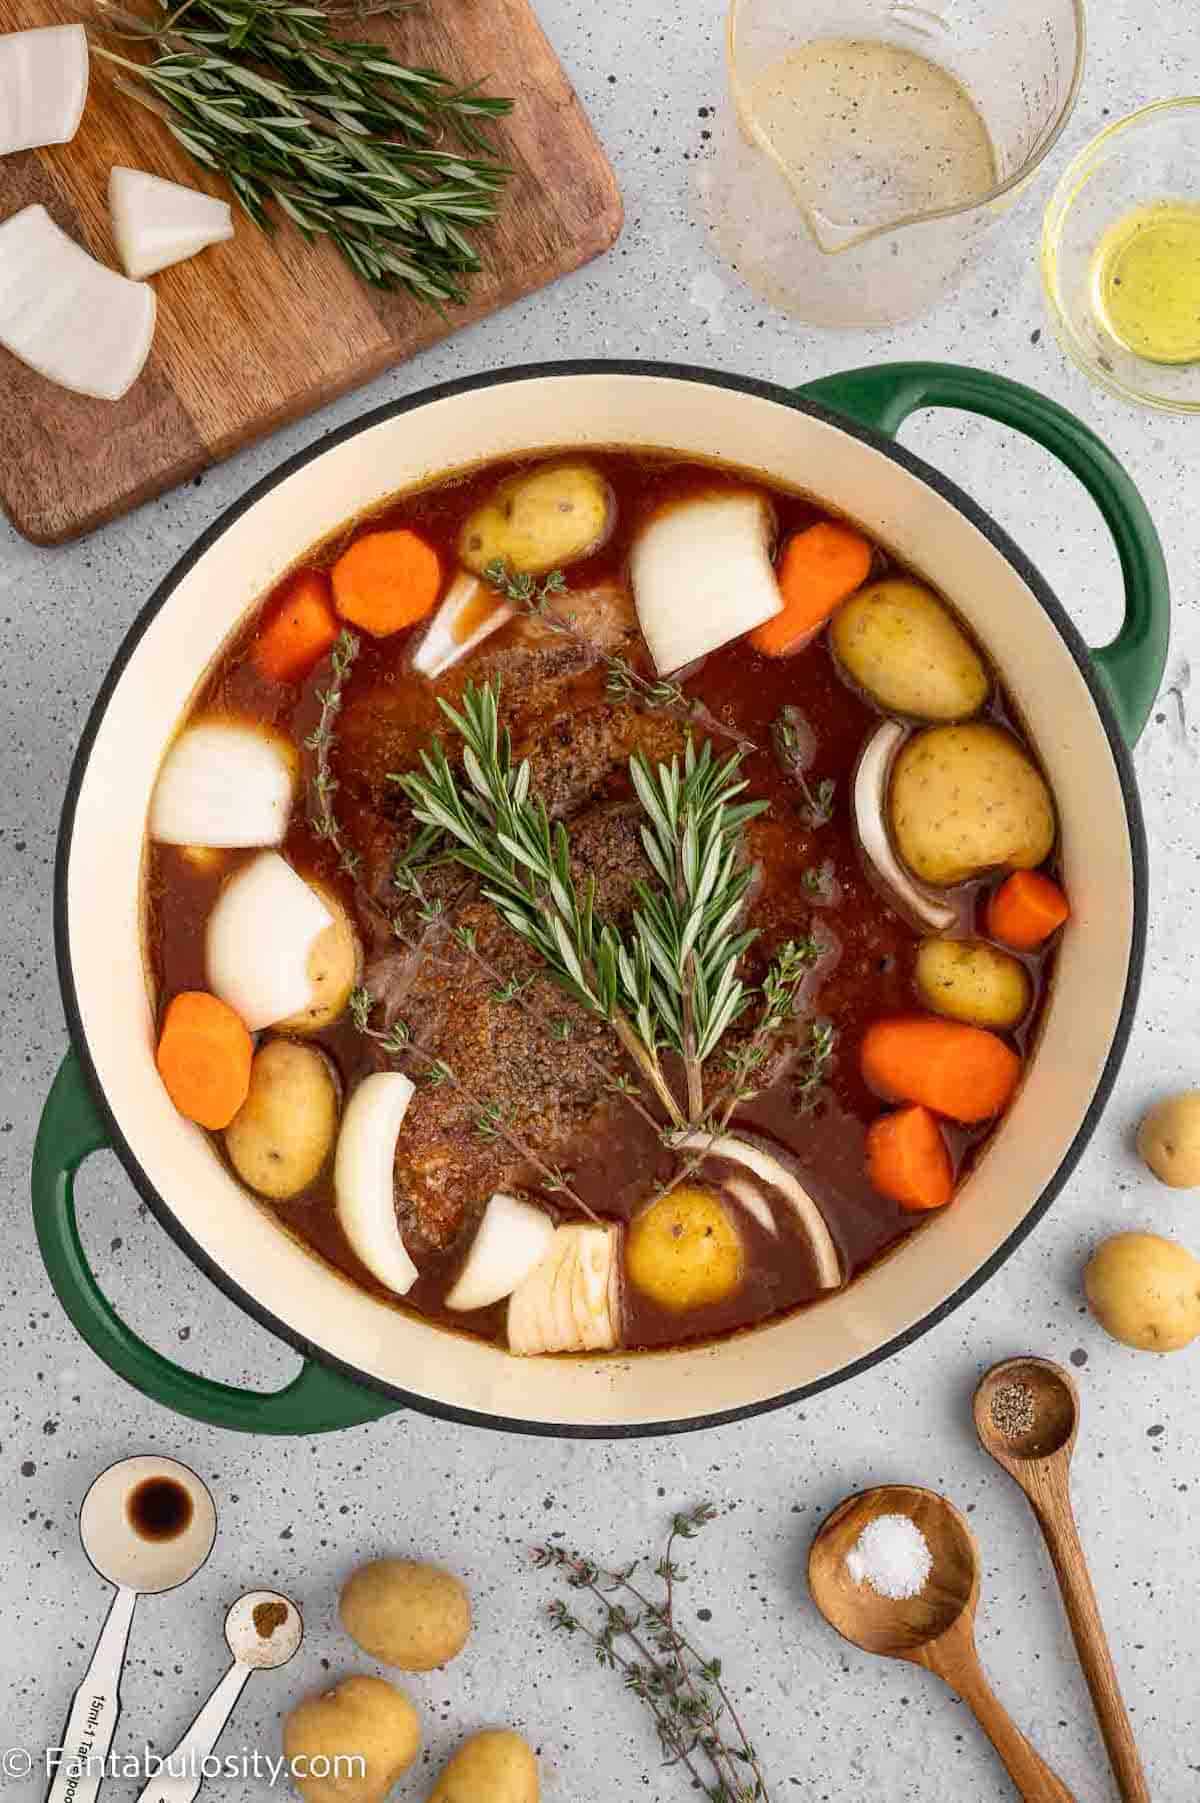
STEP 7. Top the roast with fresh rosemary and thyme (Image 6). Place the lid on the Dutch oven and place it in the oven for about 2.5-3 hours (1 hour per pound of meat), or until the meat becomes fork-tender. Periodically, spoon some of the liquid from the Dutch over the roast to ensure that it stays moist.
STEP 8. Remove from the oven, and remove the sprigs of rosemary and thyme from the pot. Run your fingers along the thyme to release the leaves from the woody stem.
STEP 9. Allow the roast to rest. Once cool enough to handle, slice the roast against the grain or use two forks to pull the meat apart. Serve with the veggies and the sauce that has developed in the Dutch oven.
How to Make Pot Roast Gravy
Thicken the sauce: To thicken the sauce in the Dutch oven to make a flavorful gravy, simply dissolve a teaspoon of starch (like potato starch or cornstarch) in 2 Tablespoons of hot water in a small bowl.
Remove all the veggies and meat from the Dutch oven and scoop out 1-2 cups of the cooking liquid. Combine the hot cooking liquid with the starch slurry and stir in to the rest of the juices in the dutch oven, until well incorporated.
After several minutes it should thicken into a beautiful gravy. If you want it even thicker, you can add an additional teaspoon. of starch using the same process.
Beef and gravy recipes are like PB&J’s. This easy Salisbury steak recipe with mushroom gravy is another old-fashioned favorite to combine the two favorites.
Equipment
- Knife
- Cutting board
- Wooden Spatula
- Dutch oven
What can I use instead of a dutch oven?
A Dutch oven is a versatile kitchen tool and is a worthwhile investment; however, not every home has one. If you want to make this recipe in the oven but do not have a Dutch oven, consider other large oven-safe vessels that have properly fitting lids.
Some options include an oven-friendly stock pot, a large ceramic casserole dish with a glass lid, or a deep oven-safe skillet. Ensure that whatever you choose is large enough not only to hold the roast but the veggies and broth as well. I would not try anything smaller than 5 Qt for this dutch oven pot roast.
Recipe Pro Tips
- Basting for Moisture: Spooning the cooking liquid over the roast periodically during the cooking process can help keep the meat from drying out. This is especially important if your roast is very tall and is not mostly submerged by the broth, or if you are using a large but shallow Dutch oven.
- Tougher Cuts of Meat: If you have a lower-grade cut of meat or are using grass-fed meat (which can be tougher than conventional), cutting the meat into smaller chunks can help expose more surface area to the cooking liquid. This can aid in making the meat more tender.
- Texture of Veggies: For this cooking time (2.5-3 hours) your vegetables should not be mushy, but if you prefer your veggies to have a little more structure consider adding them later in the cooking process. Adding them after the roast has cooked for about an hour should give them enough time to become tender without becoming overly soft.
- Save the liquid: Even if you don't make gravy, do not discard the cooking liquid. Serve and store the meat with this cooking liquid to help keep it moist and flavorful. If your meat gets overcooked, a hearty drizzle of this cooking liquid can be a tasty way to salvage it. There is so much flavor in there!
Recipe FAQs
A beef chuck roast comes from the shoulder of a cow. This section of meat tends to be tough because it is filled with fibrous connective tissue that develops due to being a heavily exercised muscle group. This connective tissue, if broken down properly, can lend a delicious flavor to the meat.
Chuck roast is often ground to make ground beef because it is naturally about an 80:20 ratio of muscle to fat. It is commonly used for pot roast, stews, or in other slow cooking methods that allow the connective tissue time to break down, leaving tender, flavorful meat. Other names for chuck roast include beef chuck arm, beef arm roast, 7-bone roast, shoulder steak roast, chuck shoulder, and shoulder pot roast.
Absolutely. A bone-in chuck roast, often called a 7-bone chuck roast, can be used in this recipe. Personally, I like to remove the bone before cooking to help ensure that the roast cooks evenly. The bone is usually easily accessible and fairly small so it is simple to remove. Some people prefer to leave the bone on the roast for extra flavor.
If the bone is left on, keep in mind that the cooking time may vary slightly depending on the size of the bone. If the bone is particularly large, the portion of meat nearest to the bone may not cook as quickly as the rest of the meat. To get the best of both worlds, you may choose to separate the bone from the roast but add the bone to the Dutch oven to get the flavor and nutrition from the bone.
Make sure you are cooking your roast long enough! A tough roast is most commonly caused by undercooking. A roast is not like a steak, in terms of determining if it is done properly. Even a well-done roast may still be undercooked because the chewy cartilage may not have broken down all the way.
A higher quality grade of meat will ensure there is more intermuscular marbling and help to keep the meat tender and moist. Prime-grade meat has the most marbling and is, therefore, the most tender. With pot roasts, most people are looking for a large cut of meat with an inexpensive price tag, so prime may not be an option. If you are using a select-grade cut of meat, consider cutting the meat into smaller chunks so that there is more surface area exposed to the cooking liquid. Another thing that can help with tougher cuts of meat is physically tenderizing with a meat mallet before cooking.
Apart from the grade of meat, there are other things you can do to help ensure your meat is not too dry. The first thing is to prevent over-cooking. It can be a delicate balance between cooking the meat enough so that the cartilage breaks down and not cooking it too much so that the meat does not become dry.
For smaller roasts always check the meat around the two-hour mark. Another way to help combat dryness is to ensure there is enough cooking liquid throughout the entire cooking process. Your liquid should not cook off in this recipe, but periodically, spooning some of the cooking liquid over the top of the meat can be helpful. This technique is especially important if your roast is not fully submerged in liquid.
Storage
Storage of this dish is easy. Store any leftovers (meat and vegetables) in an airtight container. Top it with any gravy or excess cooking liquid you may have from the Dutch oven. Consume leftovers within 4 days after the roast is prepared. (You may even consider using leftover roast to serve on top of nachos as we did with these bbq queso nachos!)
Can you freeze an oven-baked chuck roast? Yes. You may choose freeze for longer storage, however, the veggies will not hold up well if frozen, so it is best to freeze only the meat along with the cooking liquid. Store in an airtight container in the freezer for 1-2 months.
More Easy Dinner Recipes
If you love easy dinners like this one, we think you’re also going to love:


Did you make this? I’d be so grateful if you left a “star” rating below to let me know what you thought! Then, the next time you need a quick and easy recipe, come back to Fantabulosity to browse all of my easy recipes!
Recipe
Dutch Oven Pot Roast
Equipment
- Dutch Oven
Ingredients
- 2.5-3 pound boneless chuck roast
- 2 teaspoon kosher salt
- 1 teaspoon black pepper
- 1 teaspoon garlic powder
- 2 Tablespoons olive oil
- 1 yellow onion
- 3 large carrots
- 1 pound yellow baby potatoes
- 2 cups beef broth
- 2 Tablespoons tomato paste
- 2 Tablespoons Worcestershire sauce
- 1 Tablespoon balsamic vinegar
- ½ teaspoon ground celery seed
- 2 sprigs fresh rosemary
- 5 sprigs fresh thyme
Instructions
- Allow roast to sit: Pull the roast from the fridge and allow it to come to room temperature by placing it on the counter for at least 30 minutes before cooking.
- Preheat the oven to 350 F.
- Prep Veggies: While the roast is coming to room temperature, begin preparing the vegetables. Peel and cut the carrots into about 1-inch pieces. Halve the onion and then peel and quarter the halves, breaking the layers apart with your hands. Wash the baby potatoes and halve them or you can leave them whole. Halving them takes more time but allows them to absorb more flavor from the sauce. Set all veggies aside.
- Season the roast: Pat the meat dry using a paper towel and season with salt, pepper, and garlic powder.
- Sear roast: In a large Dutch oven (I used a 7 Qt), heat 2 tbsp. of olive oil over medium heat. Once the oil is hot place the seasoned roast in the pot and begin to sear each side, about 3-4 minutes per side.
- Create broth: Once the roast has a nice sear on both sides, remove it from the Dutch oven and set it to the side. Deglaze the bottom of the pot using the broth and a wooden spatula. Add in the tomato paste, Worcestershire sauce, balsamic vinegar, and ground celery seed, and mix together until there are no clumps. Place the meat back in the Dutch oven with the broth and surround it with the prepared vegetables.
- Bake the roast: Top the roast with fresh rosemary and thyme. Place the lid on the Dutch oven and place it in the oven for about 2.5-3 hours (1 hour per pound of meat), or until the meat becomes fork-tender. Periodically, spoon some of the liquid from the Dutch over the roast to ensure that it stays moist.
- Remove from the oven, and remove the sprigs of rosemary and thyme from the pot. Run your fingers along the thyme to release the leaves from the woody stem.
Notes
-
- Basting for Moisture: Spooning the cooking liquid over the roast periodically during the cooking process can help keep the meat from drying out.
-
- Texture of Veggies: For this cooking time (2.5-3 hours) your vegetables should not be mushy, but if you prefer your veggies to have a little more structure consider adding them later in the cooking process.
-
- Save the liquid: Even if you don't make gravy, do not discard the cooking liquid. Serve and store the meat with this cooking liquid to help keep it moist and flavorful.
Nutrition
Nutritional information is based on third-party calculations and should be considered estimates. Actual nutritional content will vary with brands used, measuring methods, portion sizes and more.


Gary T says
This came out absolutely perfect!! All of the kids loved it too.
Sharina says
This Dutch oven pot roast is irresistibly delicious! So tender and juicy, the sauce is a winner!
Journa Liz Ramirez says
What’s not to love in this tender and flavorful pot roast? We can’t get enough of it. Definitely a new family favorite! I’m excited to let the others taste this Dutch Oven pot roast on our next family gathering!