
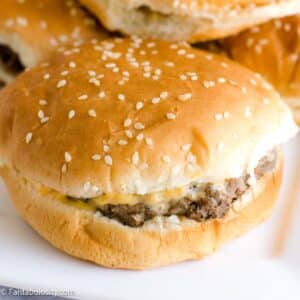
Burgers in the oven have become the favorite way to cook hamburgers by so many readers since first sharing this recipe years ago! This is the original recipe with the aluminum foil trick that makes these ooey-gooey cheeseburgers a favorite! No more messy stovetops from frying burgers.
“Can I cook burgers in the oven?” – It’s asked often!
YES, and let me tell you… it may be your new favorite way to whip up this family favorite dinnertime go-to! (It has only become a favorite way to make these cheeseburger sliders that have become so popular too!)
Not only does baking the burgers in the oven make clean-up a breeze (no splattered grease popping all over the stovetop) but this recipe creates the juiciest burger, and has a trick that will keep you going back for more! (We even bake venison burgers in the oven!)
Featured Comment: I made these burgers today with the special "trick" and let me tell you. Hold on. Sorry I was drooling….. these came out OOEY GOOEY DELICIOUS!!!! – Jeannette Marie Young
It’s incredibly easy to make baked hamburgers… and the best part? With the trick I’ll show you, you can even make these a little in advance in case you’re serving a big crowd, (like for a burger bar) or aren’t exactly sure what time dinner will actually be served.
Jump to:
- Ingredients
- How to Cook Hamburgers in the Oven
- How to Season Hamburgers
- How Long to Cook Burgers in the Oven at 375 Degrees
- The Trick for Melt-in-Your-Mouth Oven-Baked Burgers
- Cooking Hamburgers in Advance
- How to Cook Frozen Burgers in the Oven
- How to Freeze Hamburger Patties
- Toppings for Burgers
- Sides to Go with Burgers
- More Hamburger Recipes You’ll Love:
- More Oven Recipes
- Recipe
- Comments
Ingredients
Here are the basic ingredients for baking hamburgers. The recipe card below includes more tips, seasonings, and toppings ideas.
- ground beef – The ground beef that I use tends to be very lean. If you use a fatty ground beef there could be a lot of grease in the bottom of the baking dish. Some have found that they prefer placing the burger patties on a rack inside of the dish to help prevent the burgers from sitting in a lot of grease.
- salt – See below where I go in to more detail on the type of salt I recommend.
- pepper – See below where I go in to more detail on the type of black pepper I recommend.
- sliced American cheese – Thick sliced cheese is my favorite and recommended.
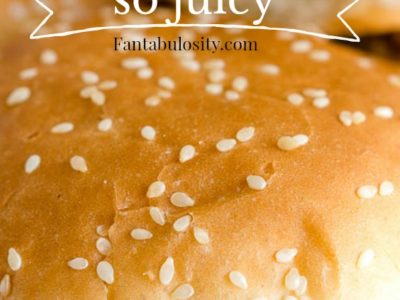
- hamburger buns – You can use your favorite burger buns but I love using sesame buns.
How to Cook Hamburgers in the Oven
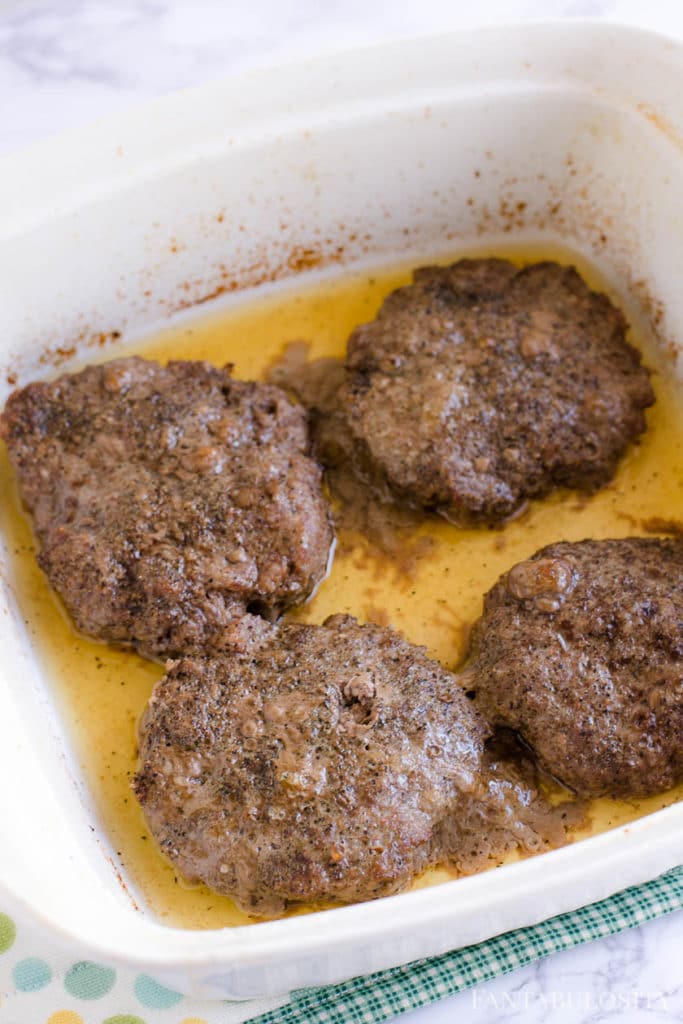
Bake, uncovered in the preheated oven for 20 minutes, or until an inserted thermometer reaches 160 degrees. No flipping required!
Keep reading for step-by-step photos, tips, and the full recipe card
Preheat Oven:
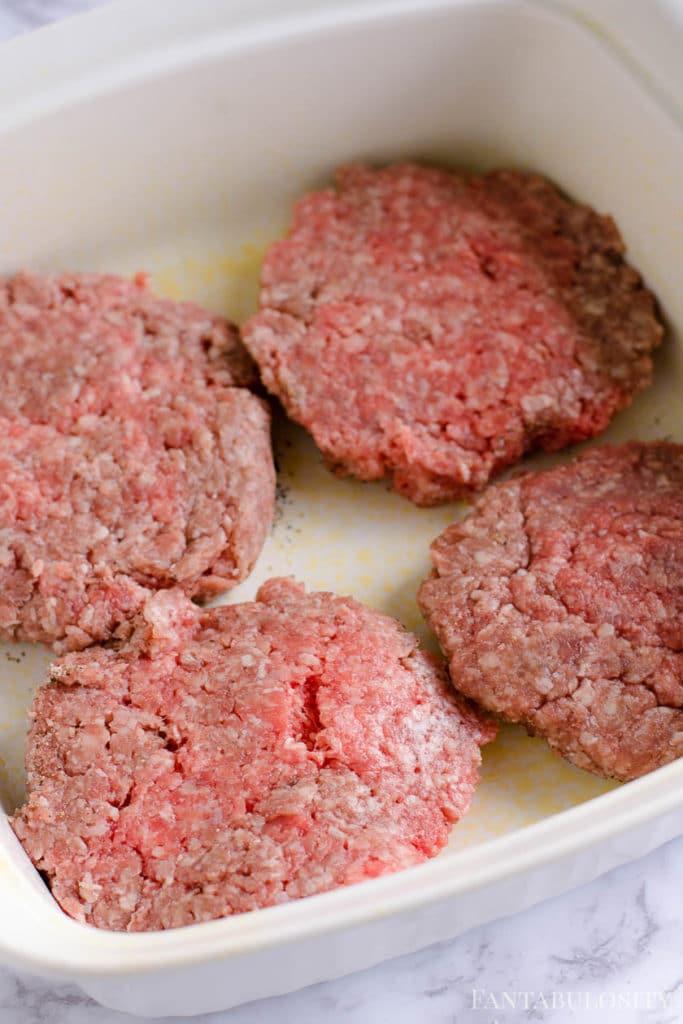
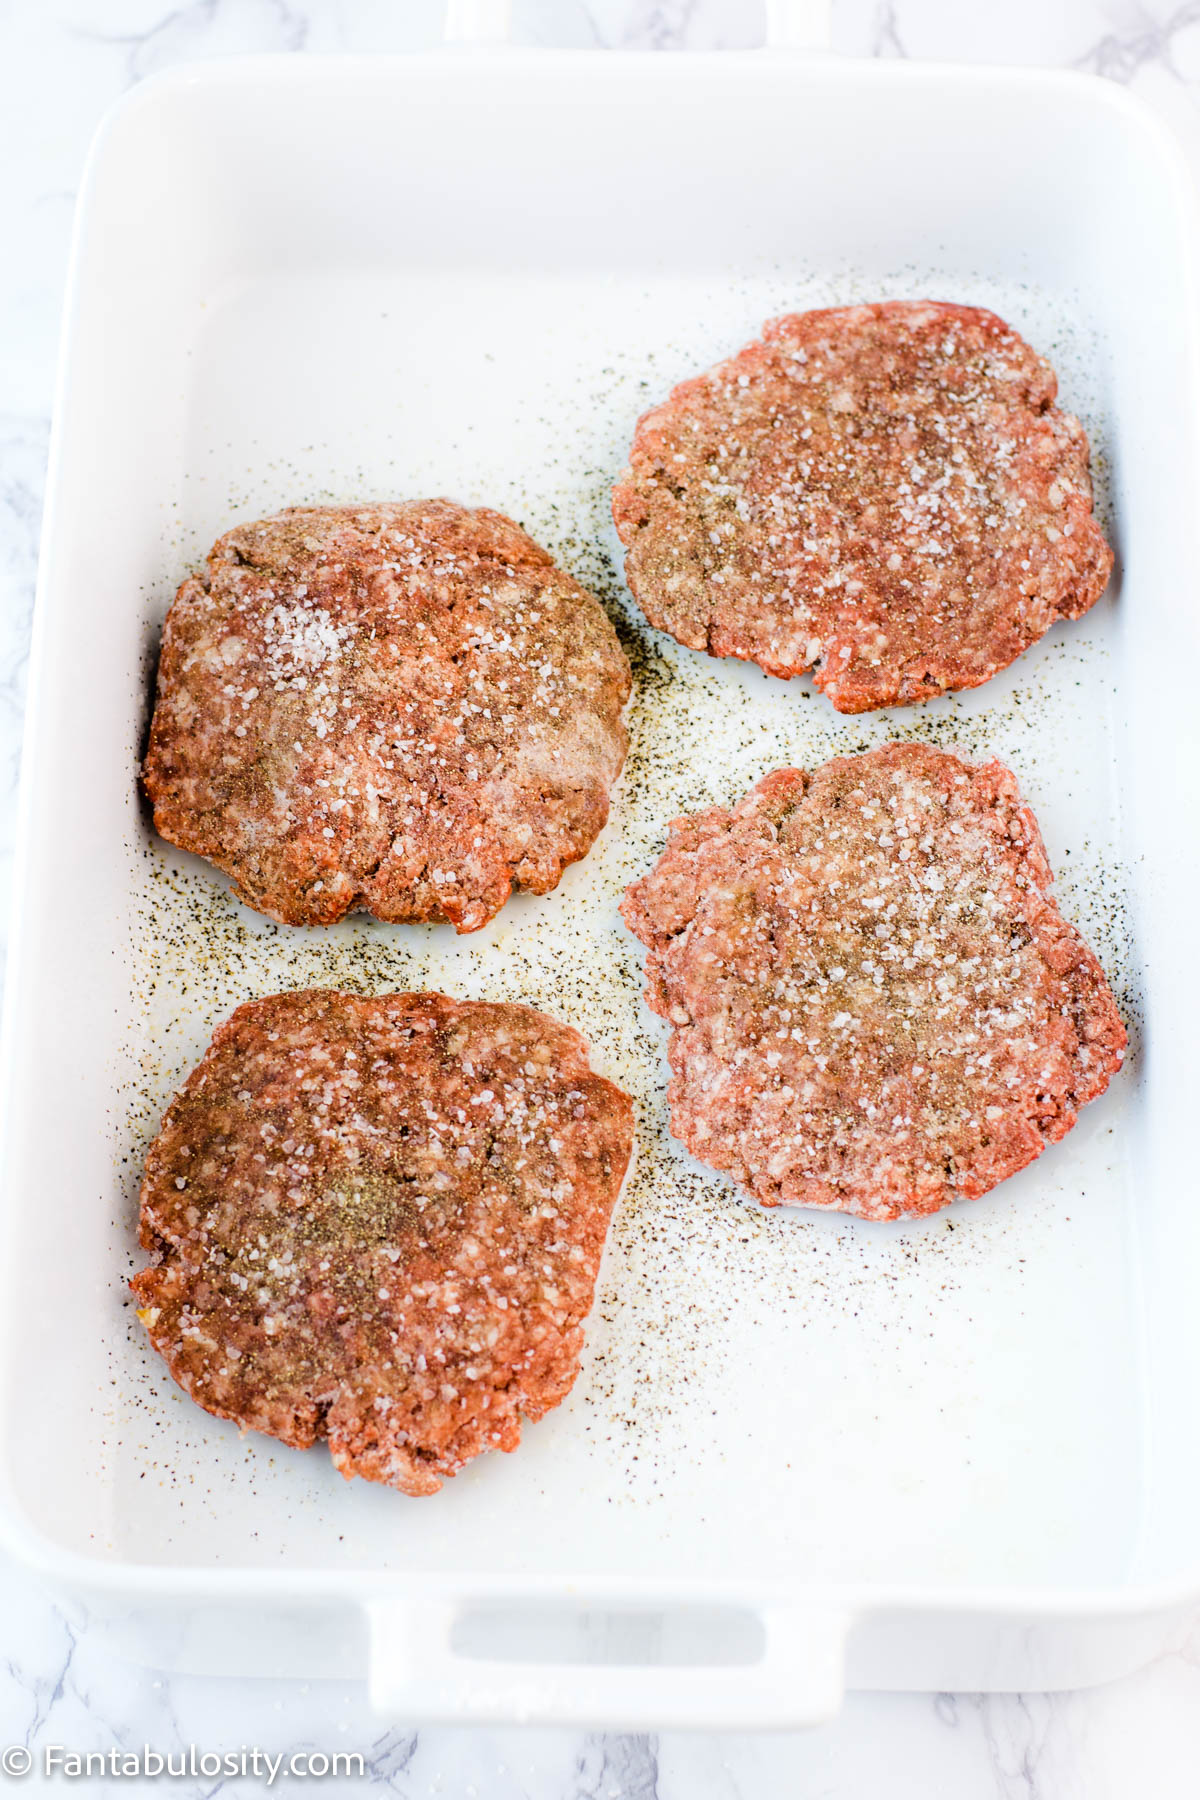
Preheat your oven to 375 degrees, and spray non-stick cooking spray inside of a baking dish, large enough to hold 4 hamburger patties.
Note: When cooking, you can definitely do more at a time if you prefer! Just use a larger baking pan or dish – make sure to use one with raised sides so the juices don’t pour out – and the cooking time will stay the same!
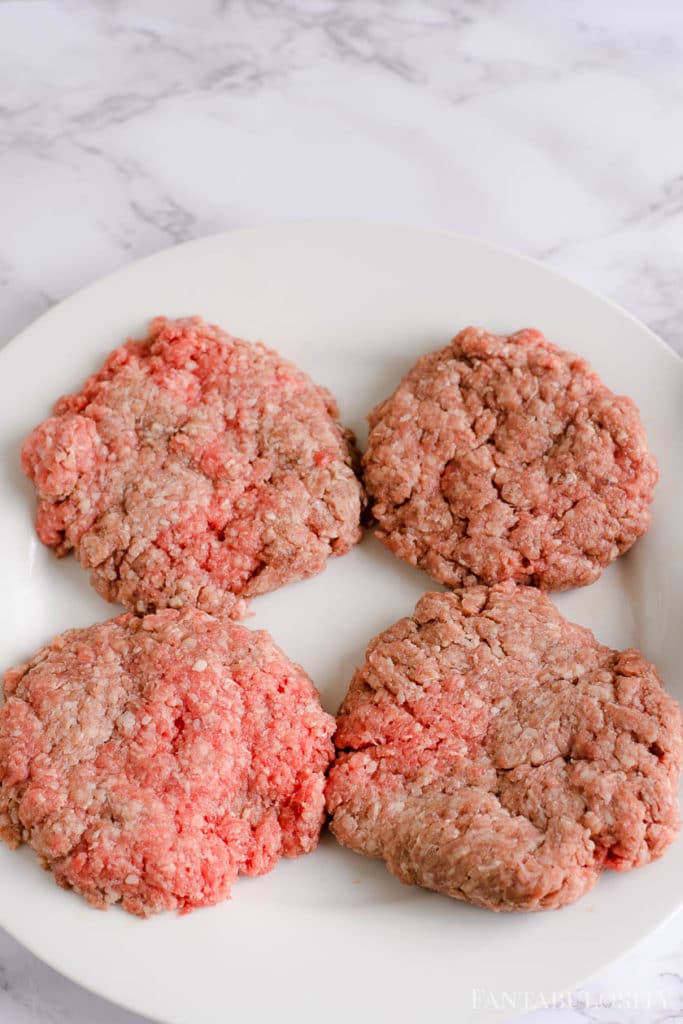
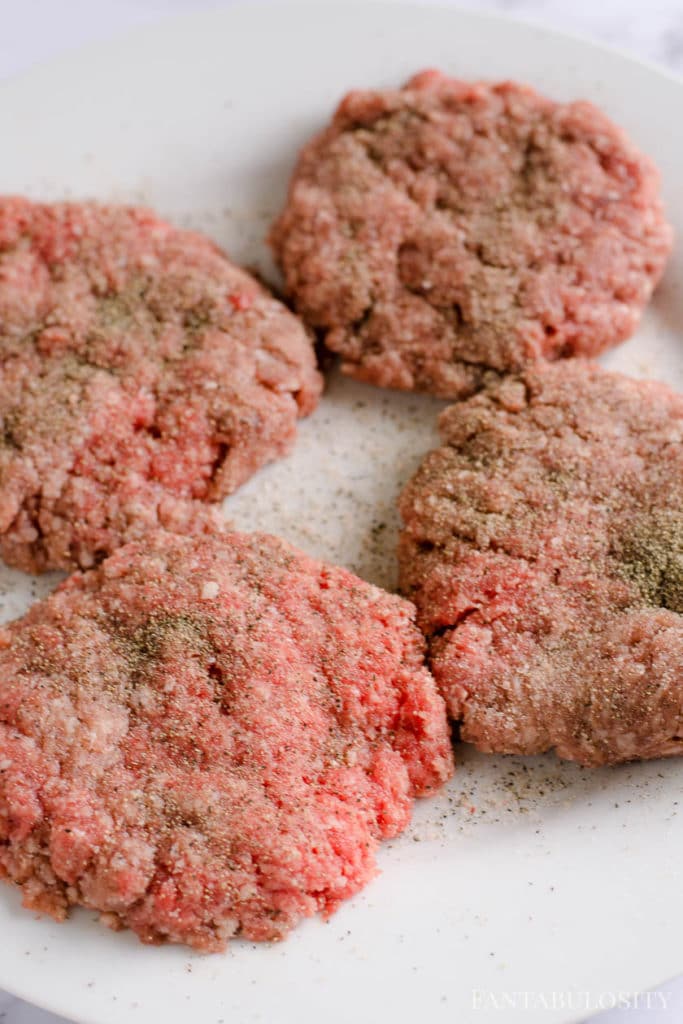
4 Beef Hamburger Patties
Using 1 pound of ground beef, patty out 4 hamburger patties. (Tip: Thaw out another pound of ground beef to make this old-fashioned favorite, Salisbury steak!)
How to Season Hamburgers
In the BEST Cheeseburger recipe, you saw that I love to fry burgers in browned butter for flavoring and use salt and pepper to season.
However, when it comes to baking hamburgers, I prefer to only use salt and pepper.
Feel free to use what you have on hand, or your favorite salt and pepper, but I can’t help but recommend my favorites.
- Fine Grain Himalayan Salt – When I started researching different salts for healthier options, my friend recommended this salt and I haven’t looked back. It is “saltier” so I don’t have to add as much when cooking, but it is also really tasty! I’m a big fan!
However, feel free to use my other favorite, kosher salt, or any type of sea salt/table salt. - Peppercorn Medley – Oh my favorite pepper in all the land! I love using this with the BEST oven baked steak recipe, and anything “beef” related. You’d be surprised at how much flavor this pepper has over regular black pepper. HOWEVER, feel free to use regular ground black pepper too! It’s tasty too!
Alternate Seasoning Options
I don’t know what it is exactly, but this seasoning rocks my world, and I love to put it on just about anything. Especially side dishes like my garlic roasted broccoli and the baked potato wedges.
So when I have some on hand, I love sprinkling this on my cheeseburgers too! Just be cautious of adding salt, because seasoning like this can have a lot of salt in it! This seasoning is similar to a seasoned salt but I’ve had so many readers also say that they love sprinkling their favorite meat seasonings on these burgers too.
Season on Both Sides
Over the years, I’ve learned that I prefer when burgers are GENEROUSLY seasoned with salt and pepper.
(If I had to guess, I’d say I probably use a total of about 2 teaspoon of salt for the four burgers, and then I just make sure I can SEE black pepper all over my burgers.)
Just when you think it may be too much salt and pepper (because let’s face it… you can always add more, but you can’t really take it away) you can finally actually taste it.
So season as you desire, but if you find that your burgers didn’t have much flavor this time, add a little bit more next time.
When you’ve seasoned one side of the burgers, flip the seasoned side down in to the prepared baking dish and season the other side.
How Long to Cook Burgers in the Oven at 375 Degrees
Bake, uncovered in the preheated oven for 20 minutes, or until an inserted thermometer reaches 160 degrees.
(For the trick that makes all of the difference when cooking burgers in the oven, scroll down! You won’t regret it!)
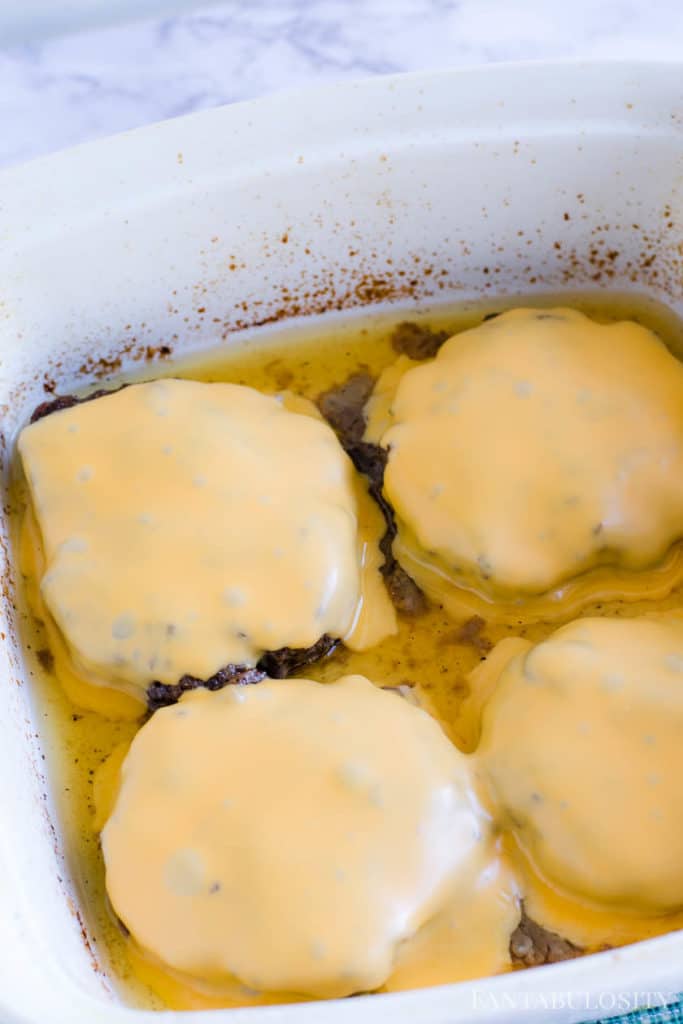
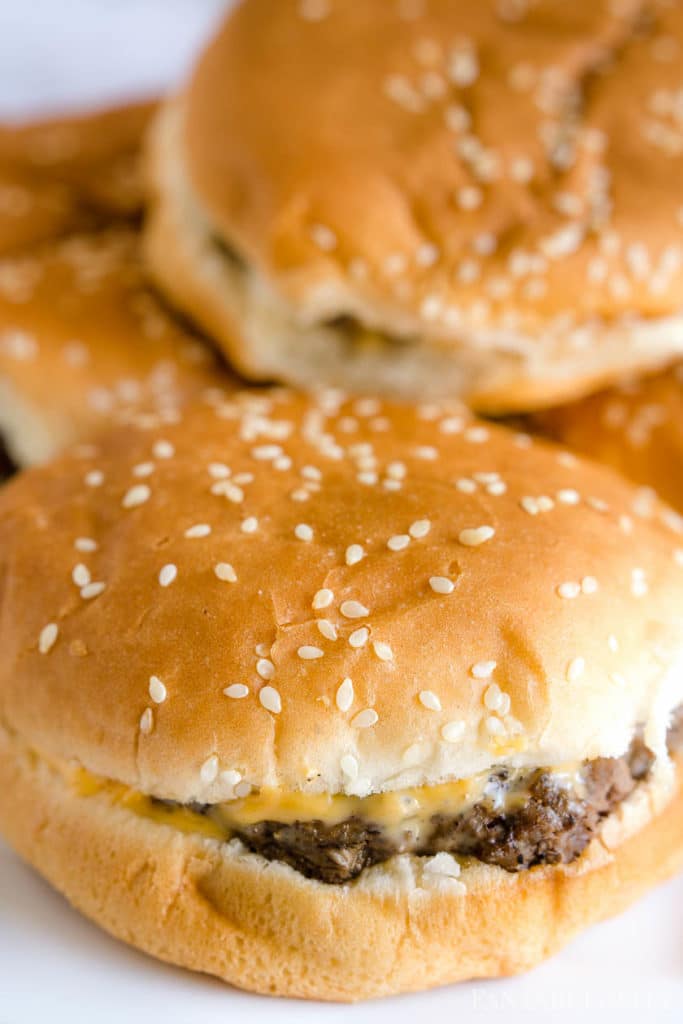
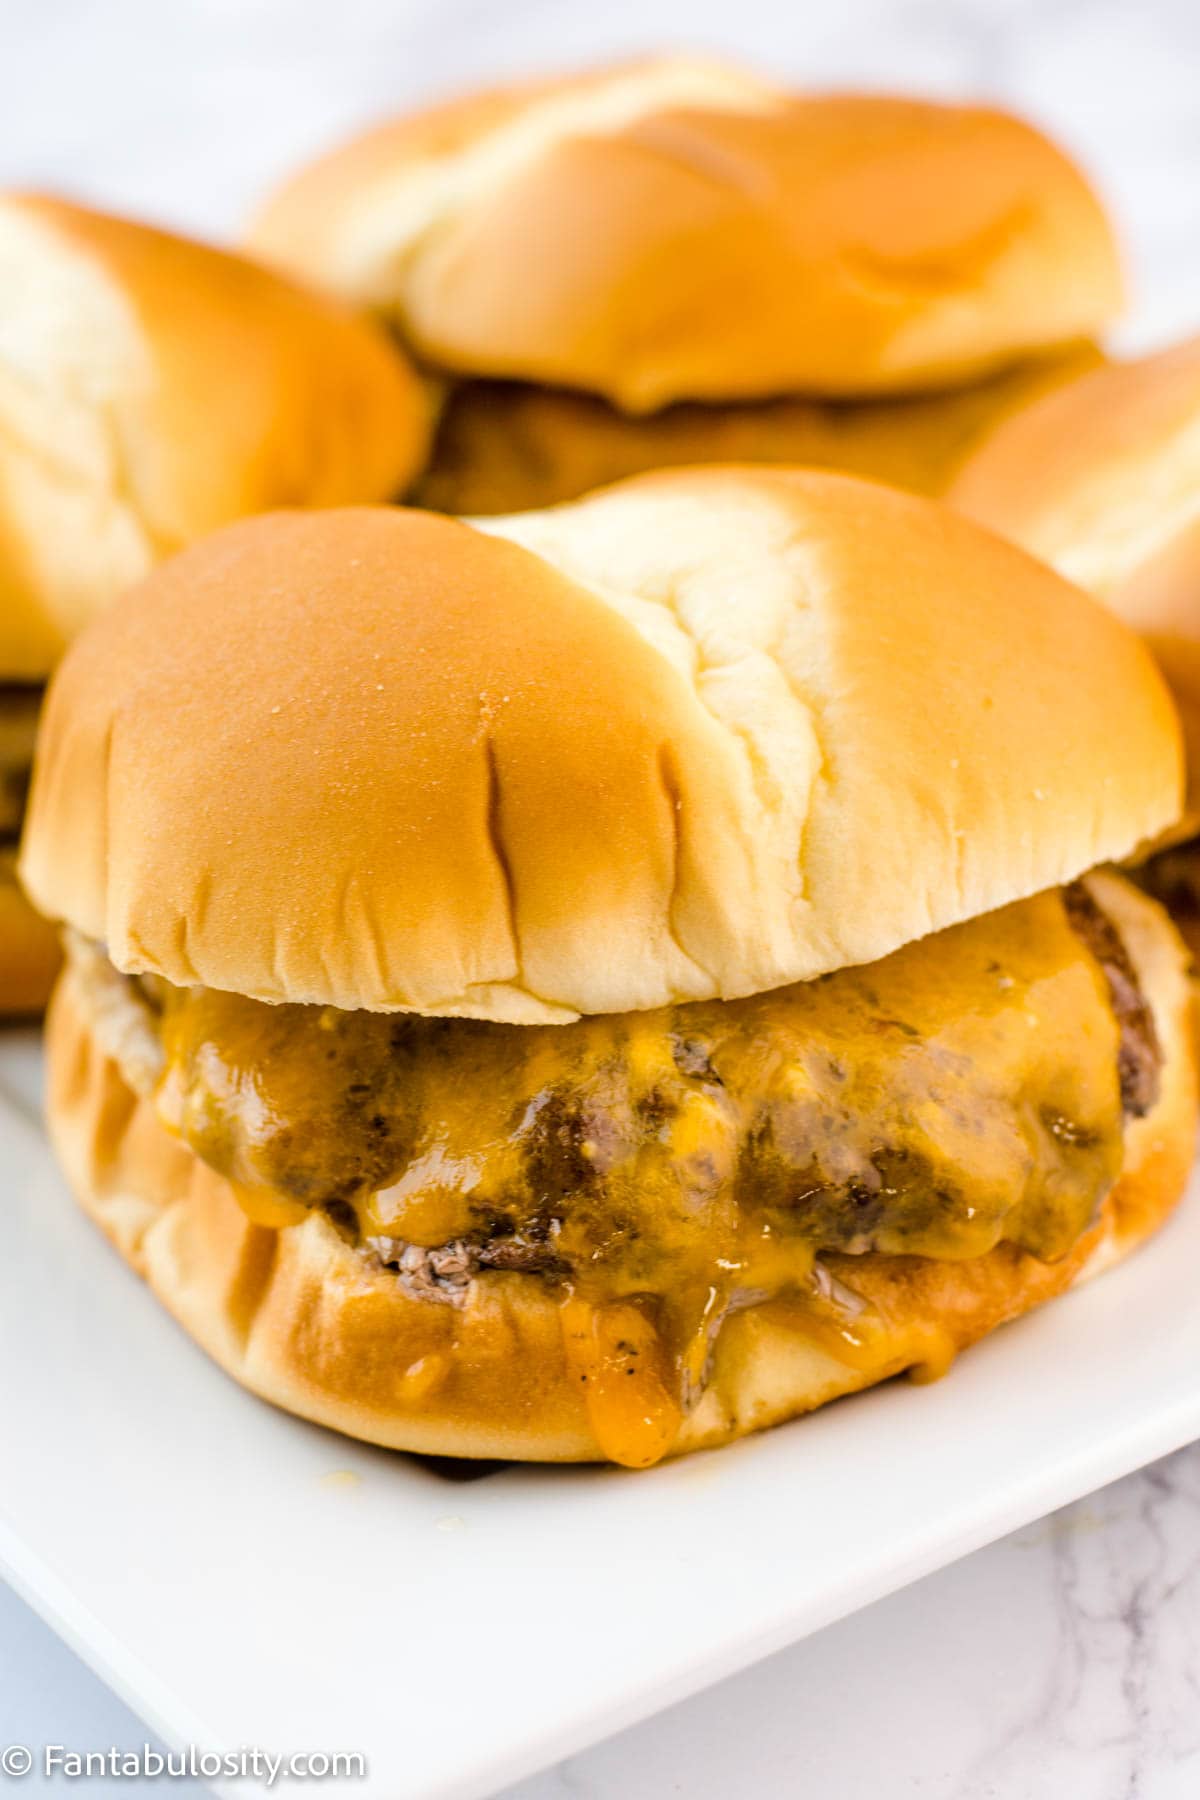
For Cheeseburgers
If you love cheese on your burgers, grab a slice of American cheese (or your favorite kind) and place one slice on each burger.
Place back in the oven for about one minute, or until the cheese has melted! (Unless you plan to do the “bun trick” below, and then you can just add the cheese and wait to melt it in the foil.)
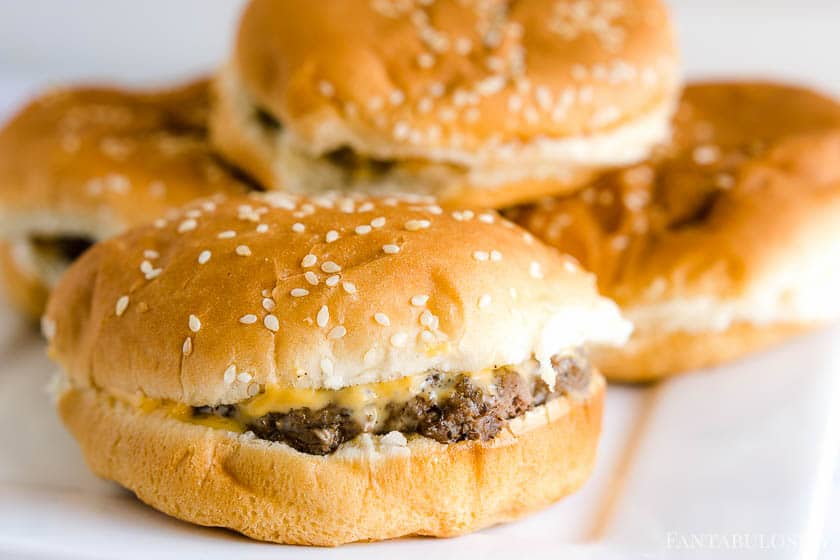
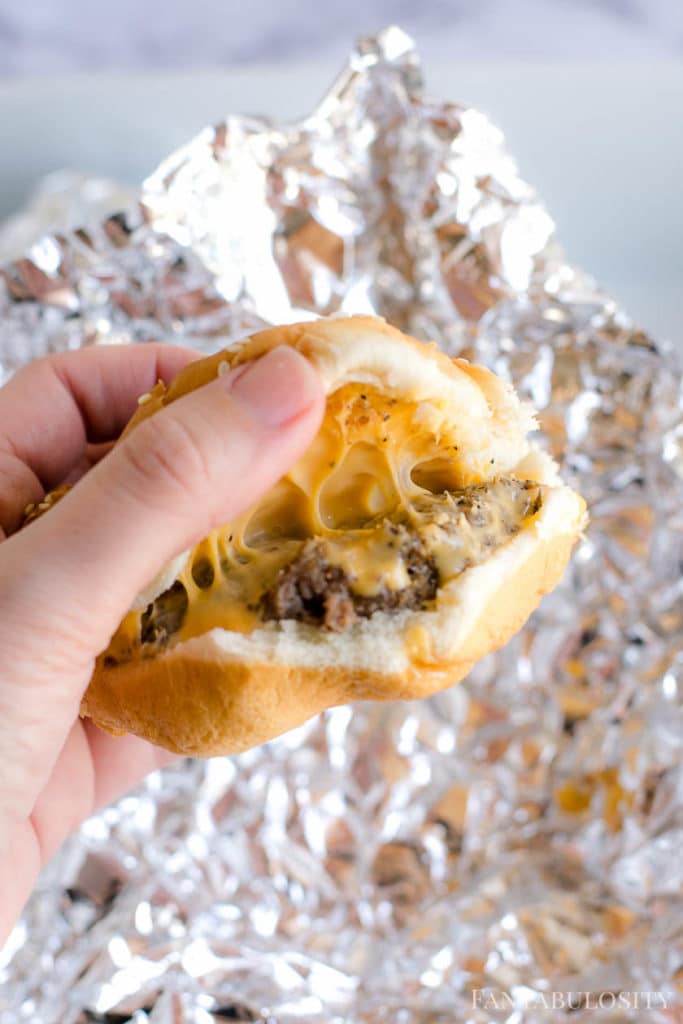
The Trick for Melt-in-Your-Mouth Oven-Baked Burgers
When I started doing this for my burgers, I feel like I changed my family’s burger-lovin’ life.
Tear off 4 squares of aluminum foil (just large enough to wrap each individual burger).

Place the bottom portions of each bun on each sheet of foil, and build the burgers, WITHOUT the extra toppings. Just meat and cheese for now!

Wrap up each burger, and place either in a different baking dish, a cookie sheet or even directly on the oven rack… and let heat in the oven for a 2-3 minutes.
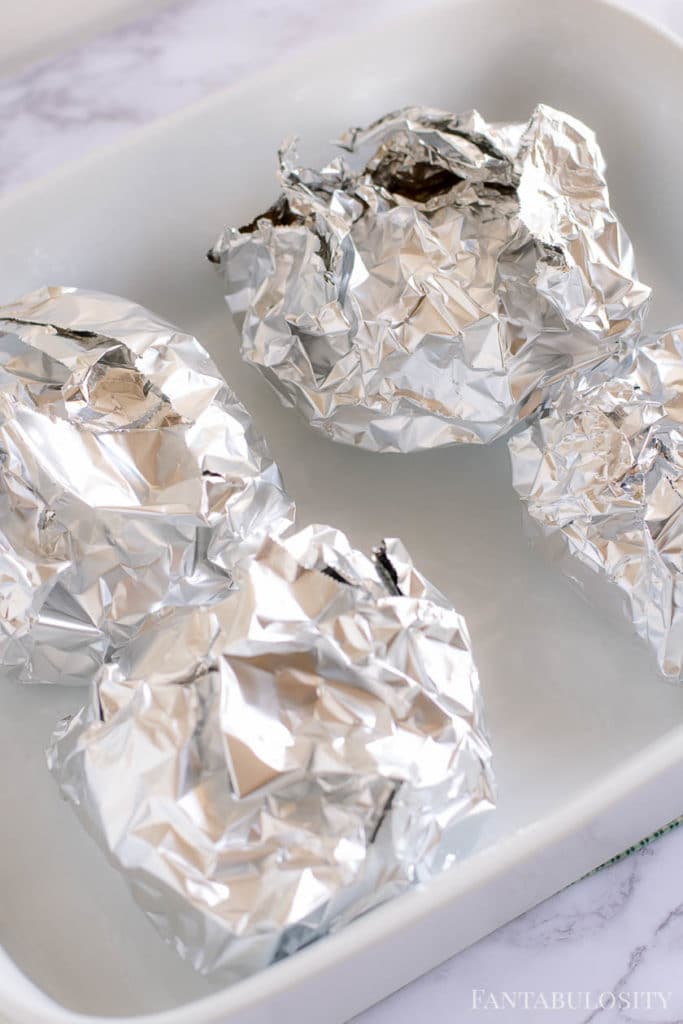
This will allow the cheese and bun to steam/toast, to create the ooey-gooeyness that has become so hard to live without!
Cooking Hamburgers in Advance
If you’re cooking for a large crowd, or just want to make a batch early and keep warm until dinnertime, it’s easy!
Make the burgers like I’ve suggested, and keep the aluminum foil-wrapped burgers in the oven on warm. (Just don’t get the oven too hot, or your buns will get TOO toasty and become hard.) I do this for baking hot dogs in the oven too!
How to Cook Frozen Burgers in the Oven
Yes, you can cook frozen hamburger patties in the oven without thawing them first. This is a great option for busy nights when you forgot to defrost the meat.
To bake frozen burgers:
- Preheat your oven to 400°F.
- Line a baking sheet with foil and place a wire rack on top (optional, but helps grease drip away).
- Arrange frozen hamburger patties in a single layer. Do not stack.
- Bake for 20-25 minutes, flipping halfway through cooking.
- Cook until the internal temperature reaches 160°F.
Frozen burgers typically take about 5-8 minutes longer than fresh patties.
Should You Thaw Burgers Before Baking?
You do not need to thaw hamburger patties before baking. However, thawed patties will cook more evenly and develop better browning.
If cooking from frozen, expect slightly less browning and a little more moisture release during baking.
When Should You Season Frozen Burgers?
Because frozen patties are firm at the start, seasoning won't stick well immediately.
For best results:
- Bake for about 10 minutes first.
- Remove from oven.
- Sprinkle salt, pepper, or seasoning blend on top.
- Flip and season the other side.
- Return to oven to finish cooking.
How Long Do Frozen Burgers Take at Different Temperatures?
At 400°F → 20-25 minutes
At 375°F → 25-30 minutes
At 425°F → 18-22 minutes
Always cook until the center reaches 160°F.
How Do You Keep Frozen Burgers from Drying Out?
- Do not overcook beyond 160°F.
- Flip halfway through cooking.
- Avoid pressing down on patties.
- Let rest 3-5 minutes before serving.
You can also brush lightly with oil before baking to encourage browning.
Can You Add Cheese to Frozen Burgers?
Yes. Add cheese during the last 2-3 minutes of baking so it melts without overcooking the burger.

How to Freeze Hamburger Patties
Freezing hamburger patties is a great way to meal prep and always have dinner ready. Properly freezing them helps prevent freezer burn and keeps the patties from sticking together.
Here's how to freeze burger patties the right way:
- Form ground beef into evenly sized patties.
- Place a small square of wax paper between each patty.
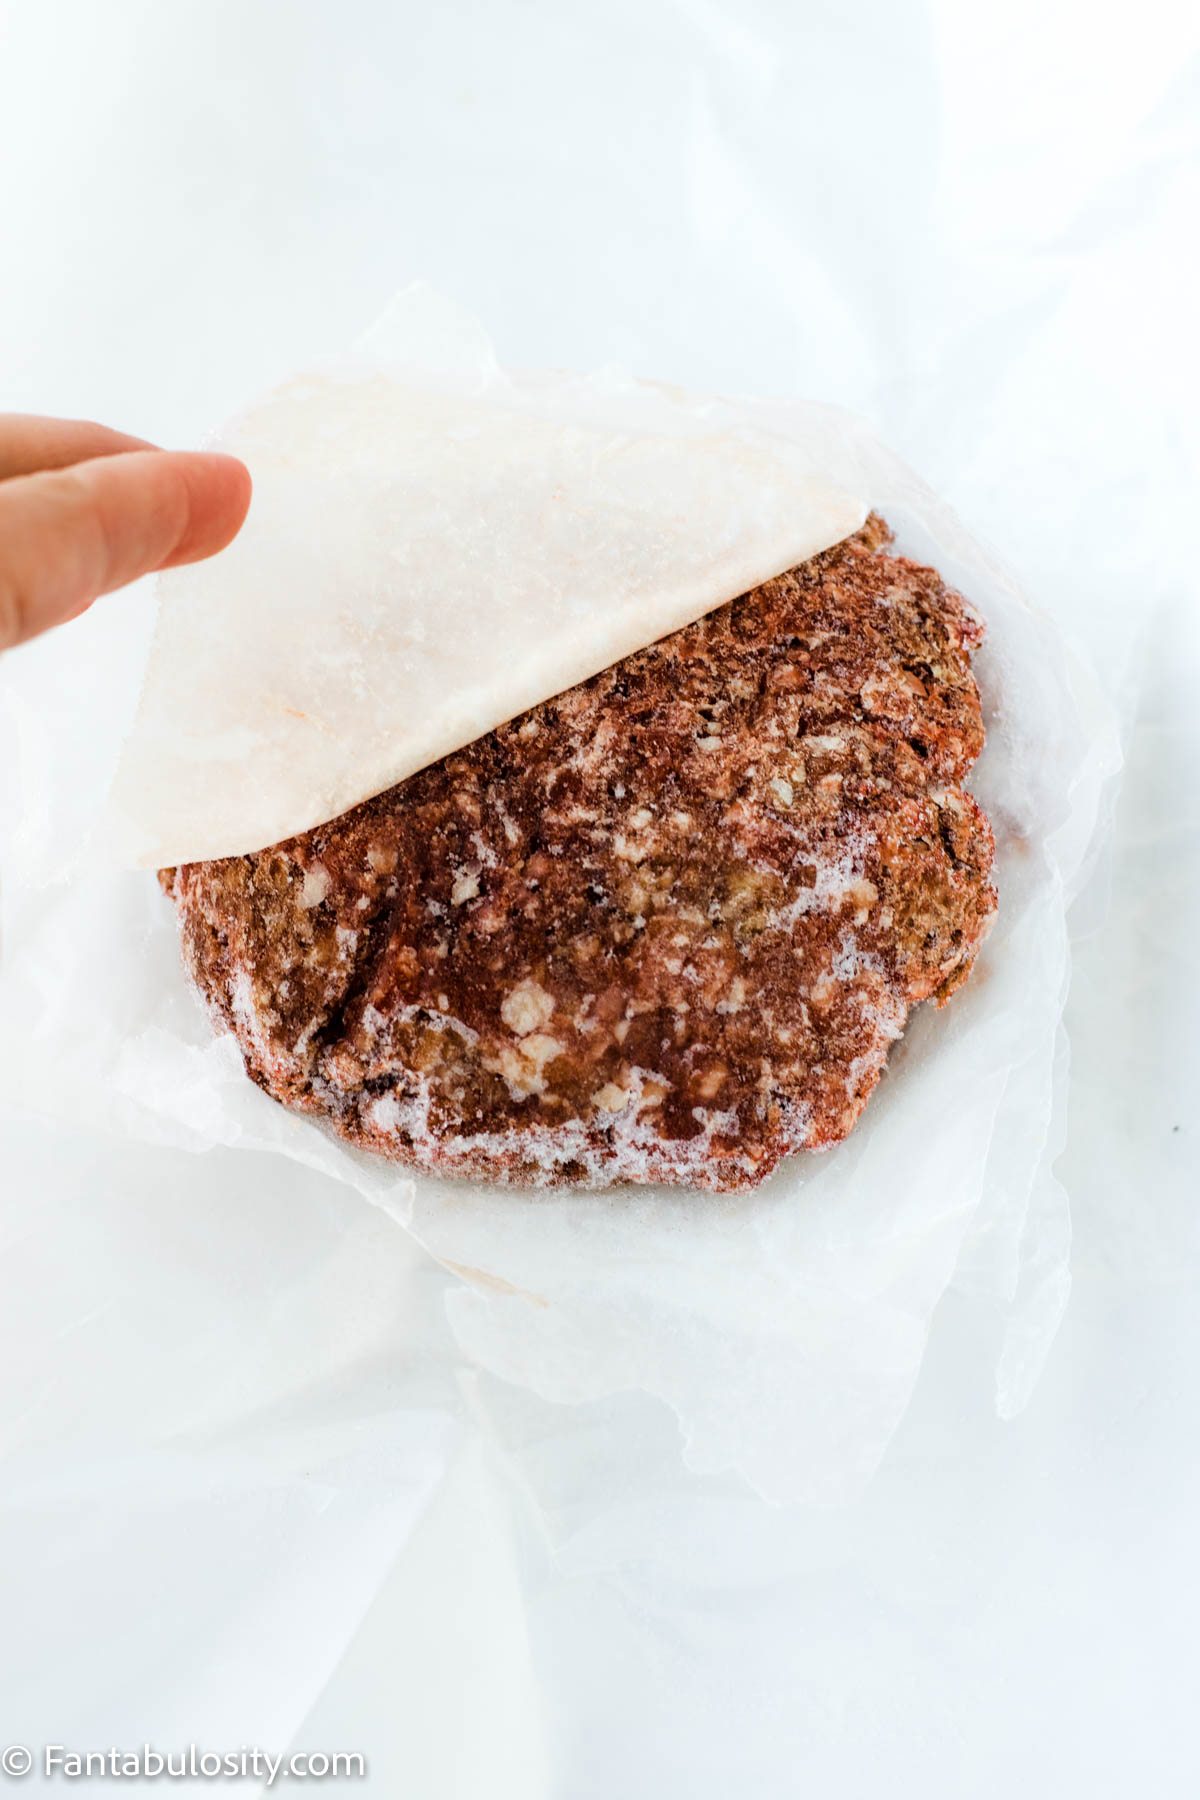
- Stack the patties neatly.
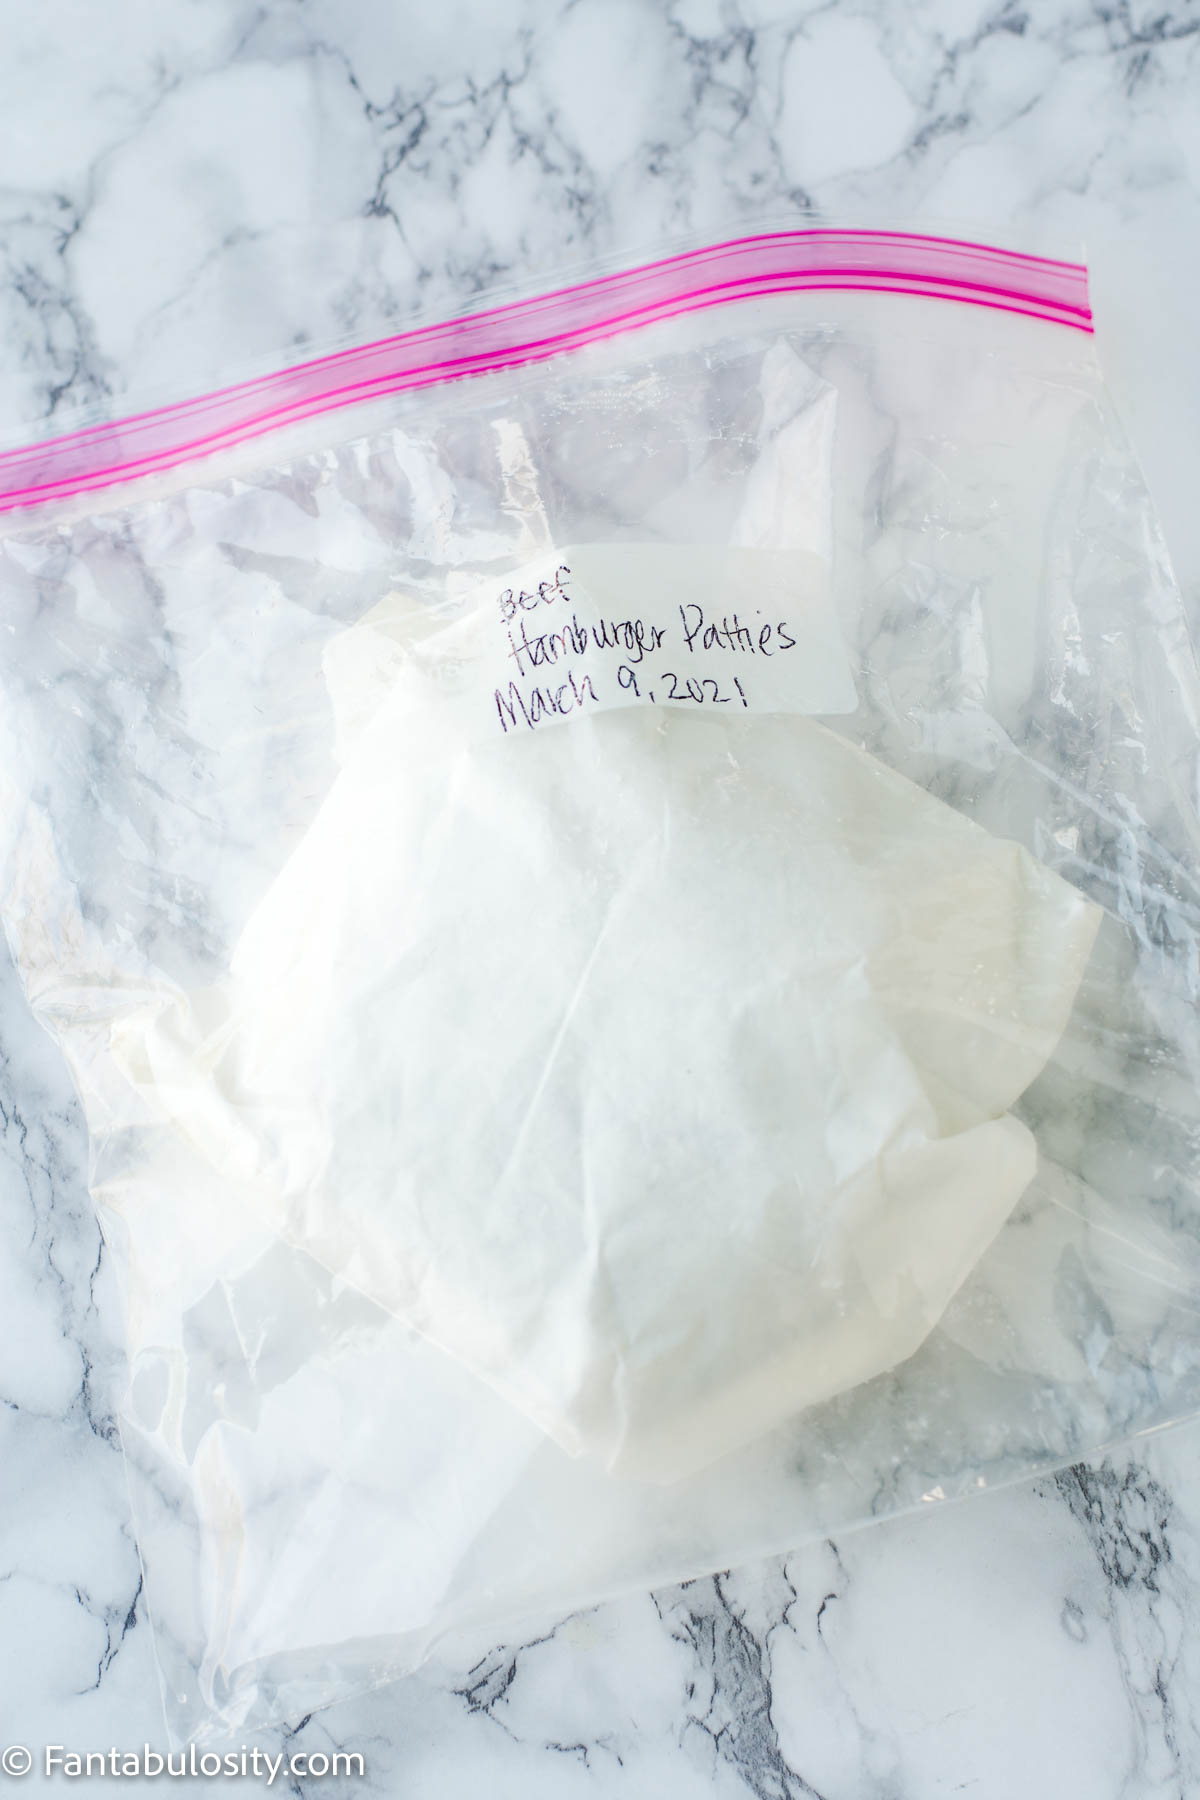
- Place the stack inside a freezer-safe zip-top bag.
- Press out as much air as possible before sealing.
Lay the bag flat in the freezer so the patties freeze evenly.
How Long Do Frozen Burger Patties Last?
Properly stored, raw burger patties can last:
- Up to 3-4 months in the freezer for best quality.
- Longer if sealed tightly, though texture may decline over time.
Label the bag with the date so you can rotate older batches first.
Can You Freeze Cooked Burger Patties?
Yes. Allow cooked burgers to cool completely, then wrap individually in plastic wrap or foil and place inside a freezer bag.
Reheat in the oven at 350°F until warmed through.
Pro Tip for Easy Separation
Using wax paper between patties makes it easy to pull out only what you need without thawing the entire batch.
This also keeps the patties from sticking together once frozen.
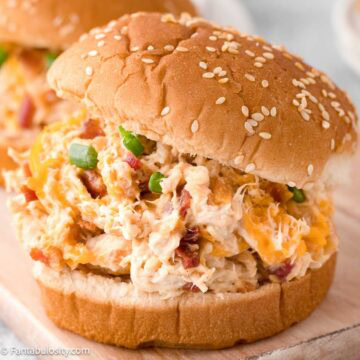
Toppings for Burgers
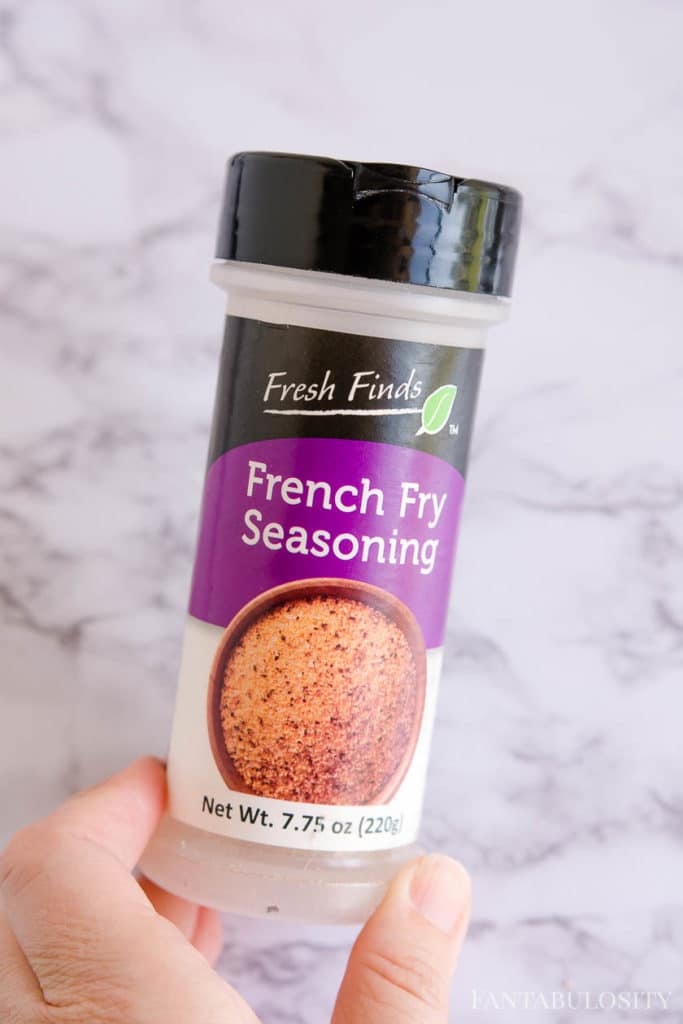
Feel free to top your burgers with your favorite toppings! Honestly, when they’re cooked like this, I love them plain, with just cheese! (Unless I have some of the french fry seasoning that I’ve shared with you, under the recipe.) Although, topping them like a Cowboy Burger is pretty tasty too!
But some of the standard favorite toppings are:
- mustard
- ketchup
- onion
- tomato
- lettuce
- pickles
- mayo
- bacon (you can cook bacon in the oven too!)
- pineapples (Yes! They’re so good on a burger, and we love using them on Aloha burgers too!)
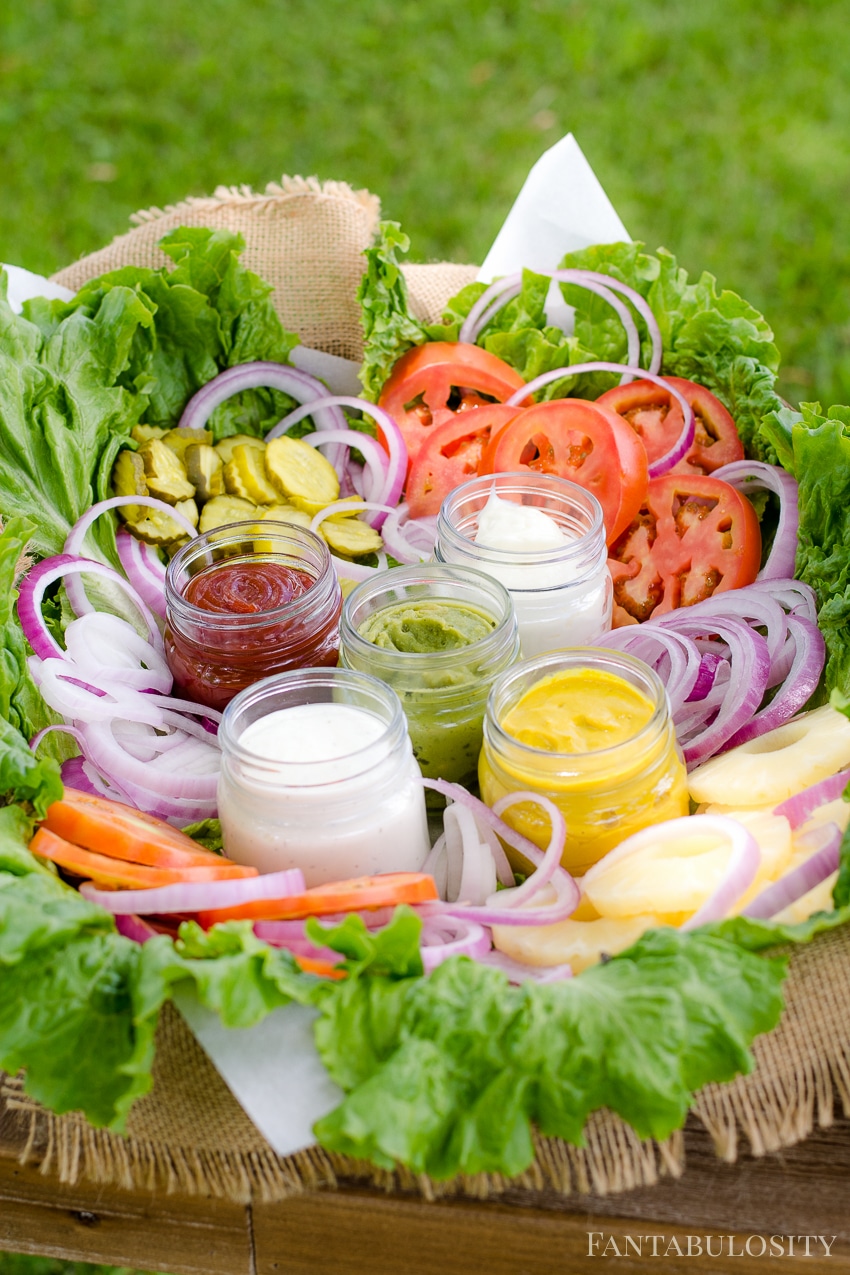
Above photo from the Burger Bar I styled for a party.
Sides to Go with Burgers
Looking for something to serve along with your hamburgers? Here are our favorites:
More Hamburger Recipes You’ll Love:
If you love hamburgers, then you’ll definitely want to see all of the other hamburger recipes that we have. Here are some of our favorites:
Or even if you’re looking for ways to use ground beef, we have suggestions for dinner recipes using ground beef!
More Oven Recipes
If you’re looking for another easy oven protein, see our complete guide on how to cook pork chops in the oven, and also check out these favorite recipes:
Did You Make This?
Snap a pic and hashtag it #Fantabulosity - I love to see your creations on Instagram and Facebook.
Recipe
BEST Burgers in the Oven – With a TRICK!
Video
Equipment
- aluminum foil – optional, for toasting
Ingredients
- 4 beef patties I use 1 pound of ground beef to make 4 patties
- salt as desired – see blog post for tips
- pepper as desired – see blog post for tips
- 4 slices yellow American cheese if desired
- 4 hamburger buns
Optional – For Toasting
- aluminum foil
Instructions
- Preheat oven to 375 degrees and spray baking dish with non-stick cooking spray.
- Generously season one side of the burgers with salt and pepper.4 beef patties, salt, pepper
- Place burger patties in baking dish, spice side down.
- Sprinkle more salt and pepper on each hamburger (or use a preferred seasoning) if you like!
- Bake in oven for 20-25 minutes. (If thinner patties, this may not take as long, so it's best to keep an eye on them. When you no longer see "red" coming out of the top, or on the burgers, it could be time to pull them out of the oven.)
- If desired, place one slice of cheese on each burger and bake an additional minute or until cheese has melted. (Unless you're doing the "bun trick" below and then you can wait to melt the cheese after you've built your burger to place in the aluminum foil.)4 slices yellow American cheese
The TRICK for Ooey Gooey Cheese & a Toasted Bun
- Place a burger patty on a bottom bun, add a slice of cheese, and top with top bun. Wrap each burger in aluminum foil. (Just enough to wrap the burger completely.)4 hamburger buns, aluminum foil
- Place back in oven for 2-3 minutes to allow the cheese to melt in and for the bun to get warm and toasty!
- Serve and top with any toppings desired!
Notes
Nutrition
Nutritional information is based on third-party calculations and should be considered estimates. Actual nutritional content will vary with brands used, measuring methods, portion sizes and more.


Hilary F says
I made these today ahead of time for a family party for Memorial Day weekend and they came out great! I made 2 pans with 12 burgers each. I couldn’t keep them warm in the oven since I was preparing other items and needed the oven space, but I put all the cooked patties and the drippings in a crock pot on “warm” and they stayed tender and juicy! Everyone loved them! So easy, so tasty, and a huge hit all around. I can’t wait to use this recipe again for just my immediate family, bc I am dying to try the aluminum foil trick! Thanks so much for this- highly recommend!
Jessica says
Hi Hilary!
This makes me so happy that you liked these burgers and were able to make such a large batch! I think you’ll really love the “trick” with the buns too. 🙂 Thanks for sharing!
Astevens says
These burgers came out perfectly. My family enjoyed and I added garlic butter and onions to the bottom of my pan and they came out caramelized and yummy.
Joanna says
I used ground turkey for my burgers so not sure if that would make a difference… but my burgers swelled up almost totally round in shape. I know people use the trick of putting putting an ice cube on top or putting an indentation in the top of the burger with their thumb. Since that wasn’t mentioned I thought perhaps oven baking burgers didn’t cause that swelling. Did no one else experience this issue?
Jessica says
Oh that’s interesting! I’ve baked turkey burgers before too and that didn’t happen. So I’m not sure what may have caused that, I’m sorry!
Lynda Spencer says
I’m making these for a crowd. Have you ever wrapped in foil, then left them in a low temp oven for awhile? Do you think that would work?
Jessica says
I’ve wrapped them and kept them on warm for a while, yes!
Mary says
These burgers are absolutely delicious. I like mine well done so when the time was up, I just cut into one and gave it about 3 more minutes. I think it is hard to give an exact time because it depends on the size and thickness of the burgers. Yummy even on my gluten free bun!🙂
Jessica says
Oh that’s so great to hear! Thank you so much for taking the time to leave a comment. I agree, it does depend on the thickness of your burgers. Great point!
Lisa says
The burgers were delicious and so easy! I am on a low carb diet due to medical issues so I didn’t have the buns. I was wondering if following thru with the tin foil wrap minus the buns would help make the burgers less hard. I cooked them for 25 minutes. Like I said they were very tasty but hoping you can help me make them less hard. God bless & thank you.
Jessica says
Hi Lisa! I’m so glad that you like them! I’m sorry they were hard. That’s interesting. Did you happen to use a really lean beef? That could do it. Or if they were really thin patties, they could have been overcooked? I’m not sure if wrapping in foil would really help with the hard beef patty though.
Carol says
Made these burgers exactly as recipe called for. Absolutely loved them. After finishing we added sautéed mushrooms, onions and peppers. Delish!
JEM says
Super good. Cooked a bit more done than I usually prefer but still super juicy. The tinfoil effects was perfect.
Jessica says
That’s awesome!! I’m so glad that you liked these burgers too! Thank you so much for sharing!
C says
That was absolutely awful. They came out raw after 26+ minutes of cooking. Long drawn out instructions… submerged in grease.
Jessica says
Hi C. Hm… I’m not sure why they’d come out raw after 26 minutes of baking??? It sure sounds like something may have gone wrong, especially since I make these at least once a week, and so many others have, with great results too. So sorry it didn’t work out for you. I also want to say that I try to make sure to include instructions for every cooking level, as I have a lot of “new” cooks that are making my recipes so I like to make sure it’s detailed and easy to understand. Have a nice day.
Rob says
A quick, easy way to make juicy & delicious burgers! I’ll definitely use a bit more sea salt next time, a lot of it seems to drain off into the pan. It’s exactly like you said, I was too worried about overdoing it.
Jessica says
So glad you liked these burgers too, Rob! Yes! You can always add more but you can’t take it away. Haha! Thank you for sharing and for leaving a review!
Andrew says
New favorite way to make burgers! I have wanted to try the baked burger method for a long time and let me tell you I am glad I finally came around. Topped with some merkts cheddar they were delicious! Also thank you so much for the foil wrap tip at the end, the steam on the bun really just brings the burger together and makes the cheese and bun combo perfect!!!!
Jessica says
Hi Andrew! I’m so glad that you liked this recipe and that you especially loved the trick at the end with the foil! Isn’t it the best? Thanks for letting us know that you liked it!
Gina LoBiondo says
Hi! Just want to say thanks for a great recipe. I’m so glad I can make my burgers in the oven — saves my frying pans and lots of grease splashes. The burgers came out great, by the way! =)
Jessica says
Hi Gina!! I’m so glad you liked these, and thank you so much for taking the time to drop a note to let us know! I agree… the grease splashes are SOOO nice, not to have. 🙂
Liz says
Can I use nonstick foil for the pan?
Jessica says
I don’t see why not!
Irene says
Such a great recipe. I used to buy frozen burgers but no more. These are our new favourite burgers.
Jessica says
Woo hoo!! We feel the same way Irene. Thank you so much for sharing!
Mary Forsythe says
These were really good! The burgers were cooked perfectly and no grill needed! Next time I will probably toast the buns seperate though. I wanted them to be a little more crispy.
Karen says
This recipe in one area says cook time should be 20 min and in another 25 min uncovered.
Which is it?
I did 20 min, one min for cheese, and three min to toast in aluminum foil. They we pink on the inside.
So I don’t know if I just undercooked or if that’s to be expected?
Jessica says
Hi Karen! Sorry about the confusion. Some ovens will be different and some with prefer a little pink in the middle, so really it just depends on how you prefer them or how your oven will cook… but I’ve found that cooking 25 minutes is best for us! I hope that helps!
Barbara says
I’d use an instant read thermometer to bake them to the level of “done-ness” you prefer.
Jason says
Wow all I can say; fast, easy, delicious
Jessica says
So glad to hear that you like these burgers too! Thank you for sharing and for reviewing!
Jan says
Made these tonight & hubby & I both enjoyed them. Better than air fryer & easier clean up too
Jessica says
Hi Jan! I’m so glad you liked baking the burgers! Definitely an easy clean-up. Thank you so much for sharing and for leaving a review!
Debbie Bullard says
Excellent burgers! We occasionally drive 2 hours to our favorite burger place. My hubby said no more…this is his favorite now. Thanks for a great and easy way to cook burgers without a grill.
Jessica says
Ahhhh!!! This makes me so happy that he said that and feels that way! Thank you for sharing!
Jen says
Making these for a crowd tonight! How long can you leave them warming in the oven in the foil? Just trying to figure out how to time things!
Jessica says
Hi Jen! You know, someone else here made the comment that they kept them in a slow cooker too, to keep warm for guests. (In case that’s helpful.) I thought that was genius! However, I believe it has been said that they can keep warm for 2 hours. But if using something like a slow cooker to keep warm, the buns could get really soggy if in longer than a couple of hours.
April says
Good burger but I had like two inches of grease in my pan and this was lean meat wouldn’t it be best to cook on rack so all grease can drop down.
Jessica says
Hi April! You can if you want but it may cause the burgers not to be as juicy??? But if you try it, I’d love for you to let us know!