

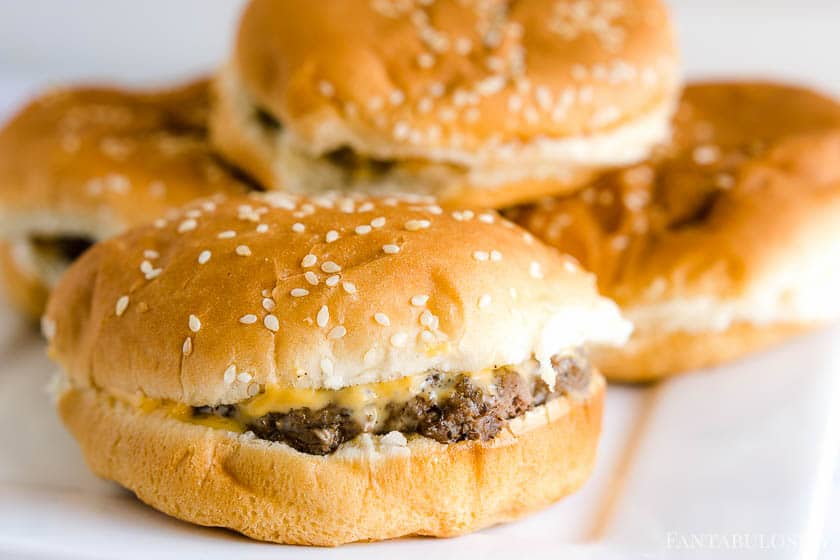
Burgers in the oven have become the favorite way to cook hamburgers by so many readers since first sharing this recipe years ago! This is the original recipe with the aluminum foil trick that makes these ooey-gooey cheeseburgers a favorite! No more messy stovetops from frying burgers.
“Can I cook burgers in the oven?” – It’s asked often!
YES, and let me tell you… it may be your new favorite way to whip up this family favorite dinnertime go-to! (It has only become a favorite way to make these cheeseburger sliders that have become so popular too!)
Not only does baking the burgers in the oven make clean-up a breeze (no splattered grease popping all over the stovetop) but this recipe creates the juiciest burger, and has a trick that will keep you going back for more! (We even bake venison burgers in the oven!)
Featured Comment: I made these burgers today with the special "trick" and let me tell you. Hold on. Sorry I was drooling….. these came out OOEY GOOEY DELICIOUS!!!! – Jeannette Marie Young
It’s incredibly easy to make baked hamburgers… and the best part? With the trick I’ll show you, you can even make these a little in advance in case you’re serving a big crowd, (like for a burger bar) or aren’t exactly sure what time dinner will actually be served.
Jump to:
- Ingredients
- How to Cook Hamburgers in the Oven
- How to Season Hamburgers
- How Long to Cook Burgers in the Oven at 375 Degrees
- The Trick for Melt-in-Your-Mouth Oven-Baked Burgers
- Cooking Hamburgers in Advance
- How to Cook Frozen Burgers in the Oven
- How to Freeze Hamburger Patties
- Toppings for Burgers
- Sides to Go with Burgers
- More Hamburger Recipes You’ll Love:
- More Oven Recipes
- Recipe
- Comments
Ingredients
Here are the basic ingredients for baking hamburgers. The recipe card below includes more tips, seasonings, and toppings ideas.
- ground beef – The ground beef that I use tends to be very lean. If you use a fatty ground beef there could be a lot of grease in the bottom of the baking dish. Some have found that they prefer placing the burger patties on a rack inside of the dish to help prevent the burgers from sitting in a lot of grease.
- salt – See below where I go in to more detail on the type of salt I recommend.
- pepper – See below where I go in to more detail on the type of black pepper I recommend.
- sliced American cheese – Thick sliced cheese is my favorite and recommended.
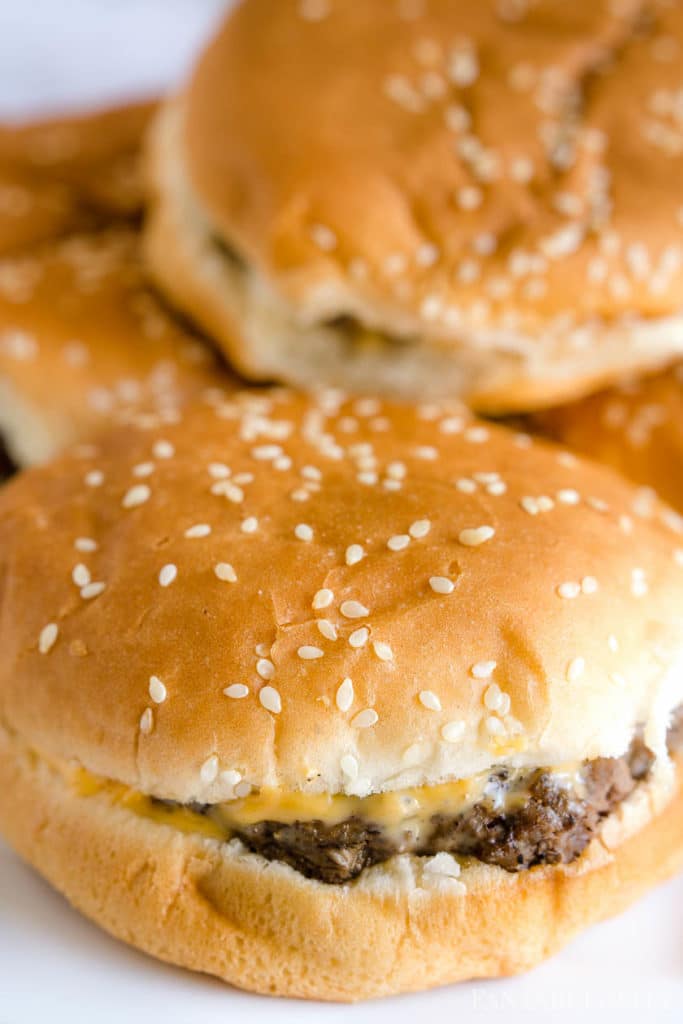
- hamburger buns – You can use your favorite burger buns but I love using sesame buns.
How to Cook Hamburgers in the Oven
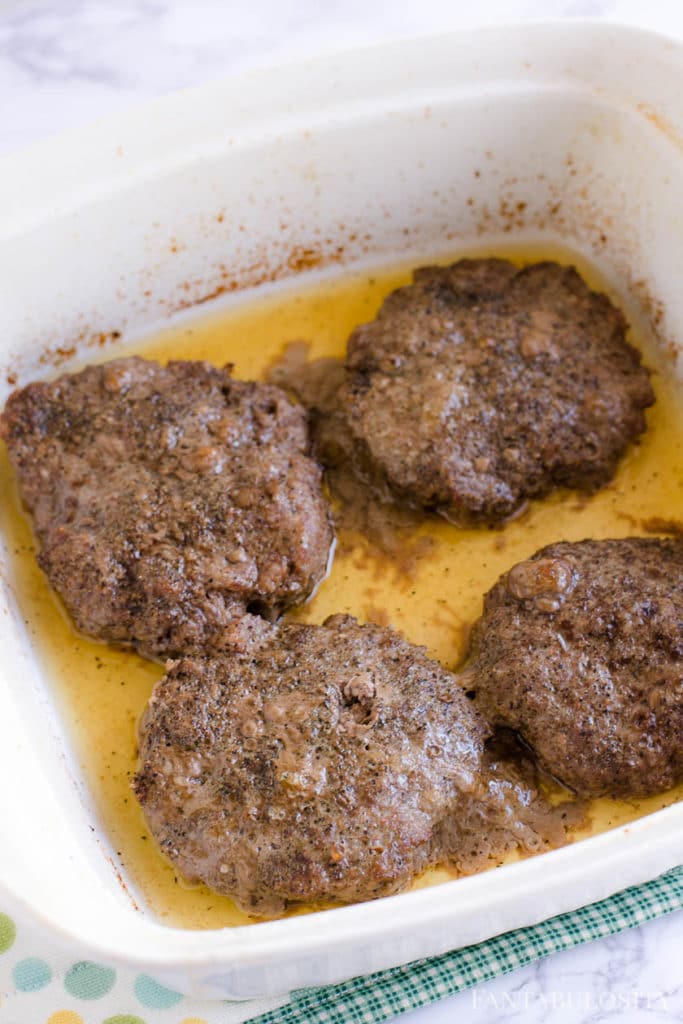
Bake, uncovered in the preheated oven for 20 minutes, or until an inserted thermometer reaches 160 degrees. No flipping required!
Keep reading for step-by-step photos, tips, and the full recipe card
Preheat Oven:
Preheat your oven to 375 degrees, and spray non-stick cooking spray inside of a baking dish, large enough to hold 4 hamburger patties.
Note: When cooking, you can definitely do more at a time if you prefer! Just use a larger baking pan or dish – make sure to use one with raised sides so the juices don’t pour out – and the cooking time will stay the same!
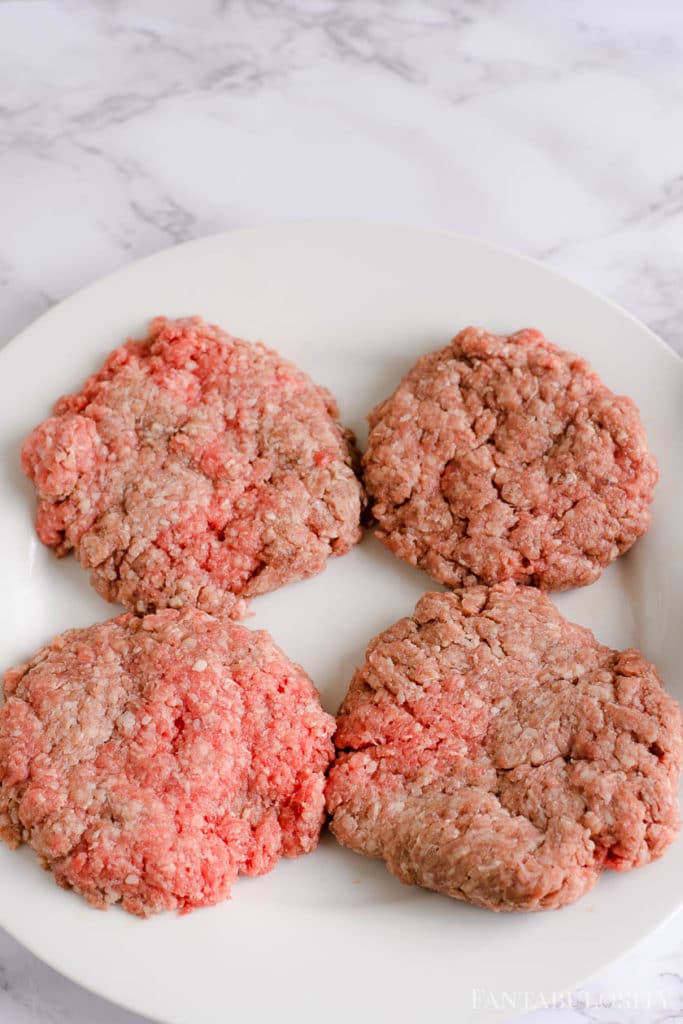
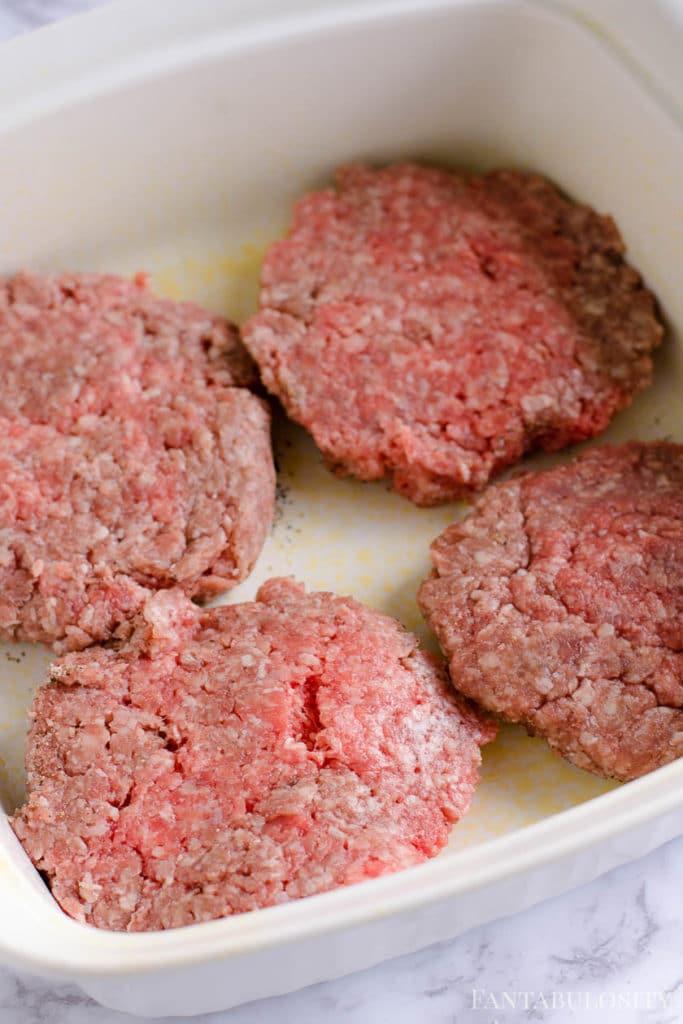
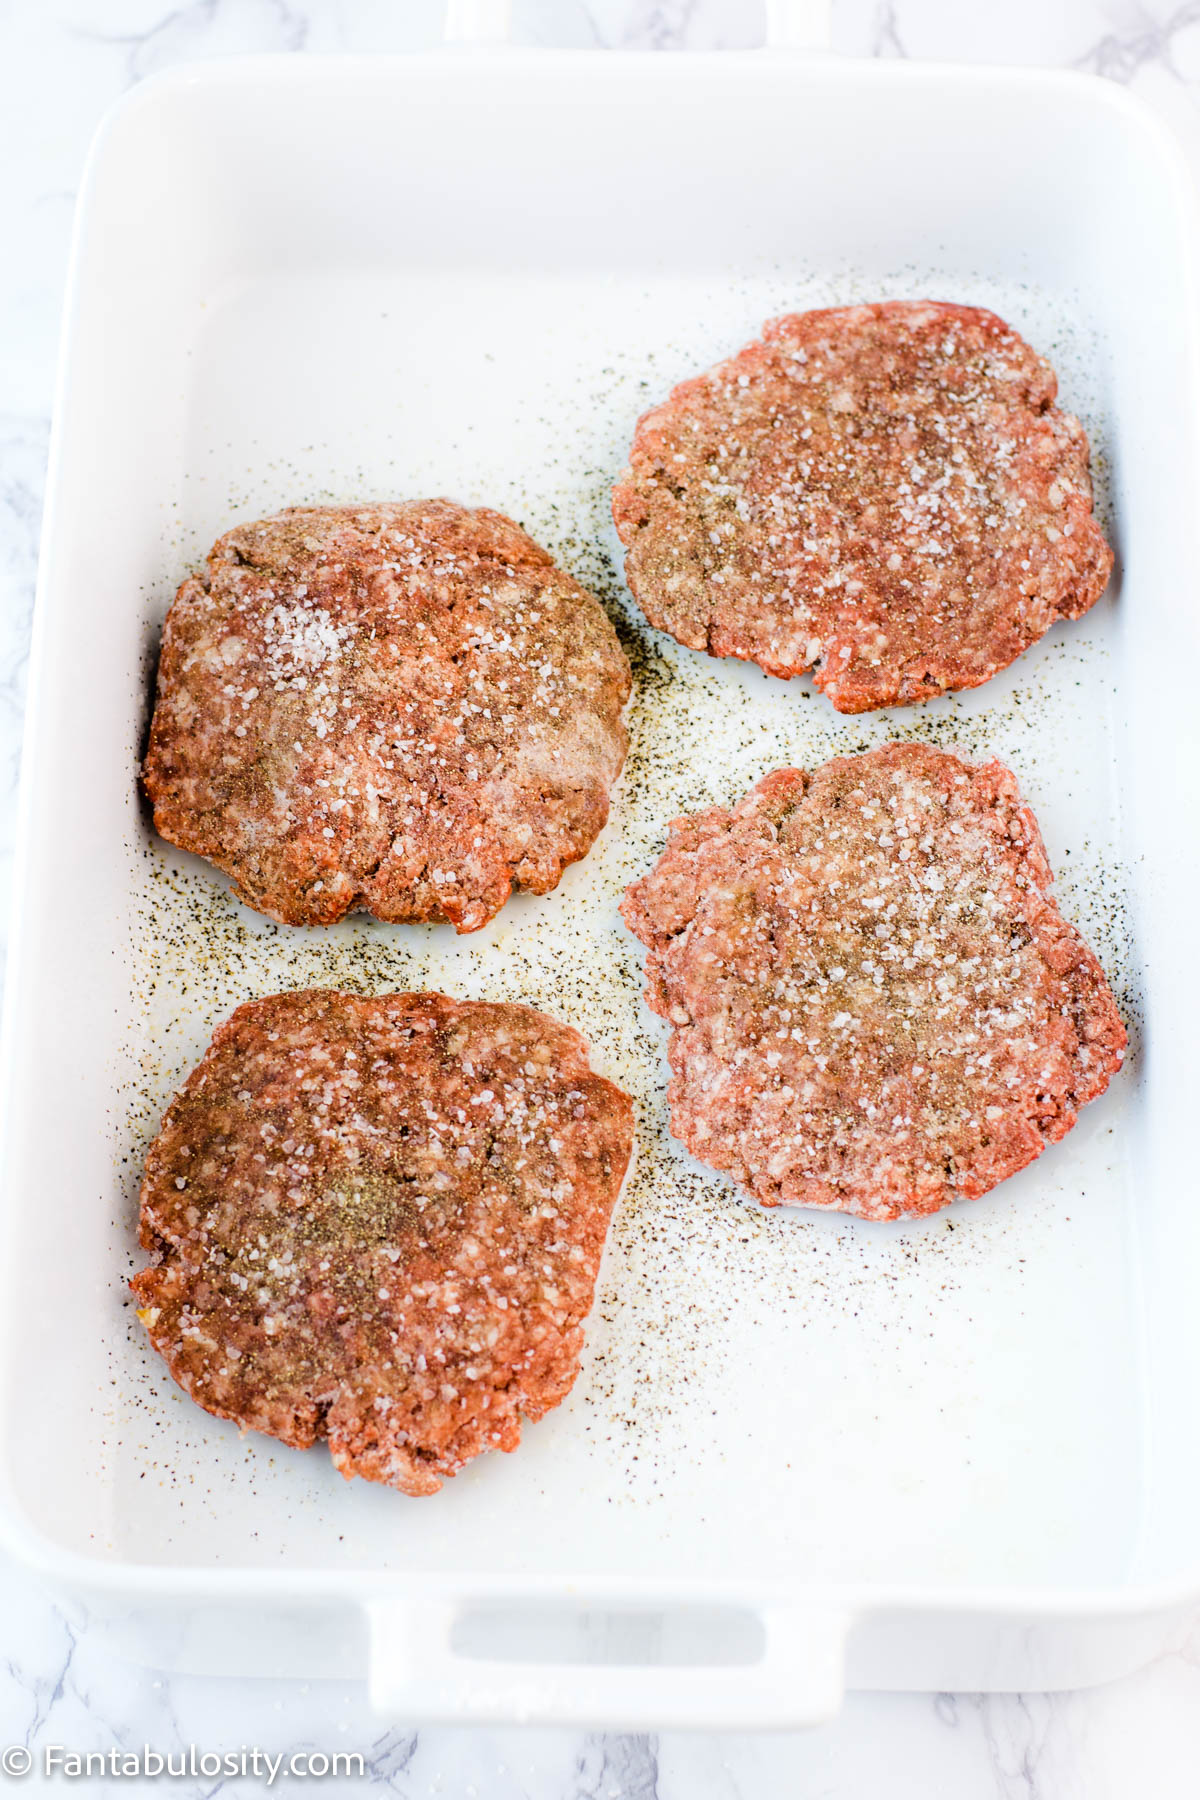
4 Beef Hamburger Patties
Using 1 pound of ground beef, patty out 4 hamburger patties. (Tip: Thaw out another pound of ground beef to make this old-fashioned favorite, Salisbury steak!)
How to Season Hamburgers
In the BEST Cheeseburger recipe, you saw that I love to fry burgers in browned butter for flavoring and use salt and pepper to season.
However, when it comes to baking hamburgers, I prefer to only use salt and pepper.
Feel free to use what you have on hand, or your favorite salt and pepper, but I can’t help but recommend my favorites.
- Fine Grain Himalayan Salt – When I started researching different salts for healthier options, my friend recommended this salt and I haven’t looked back. It is “saltier” so I don’t have to add as much when cooking, but it is also really tasty! I’m a big fan!
However, feel free to use my other favorite, kosher salt, or any type of sea salt/table salt. - Peppercorn Medley – Oh my favorite pepper in all the land! I love using this with the BEST oven baked steak recipe, and anything “beef” related. You’d be surprised at how much flavor this pepper has over regular black pepper. HOWEVER, feel free to use regular ground black pepper too! It’s tasty too!
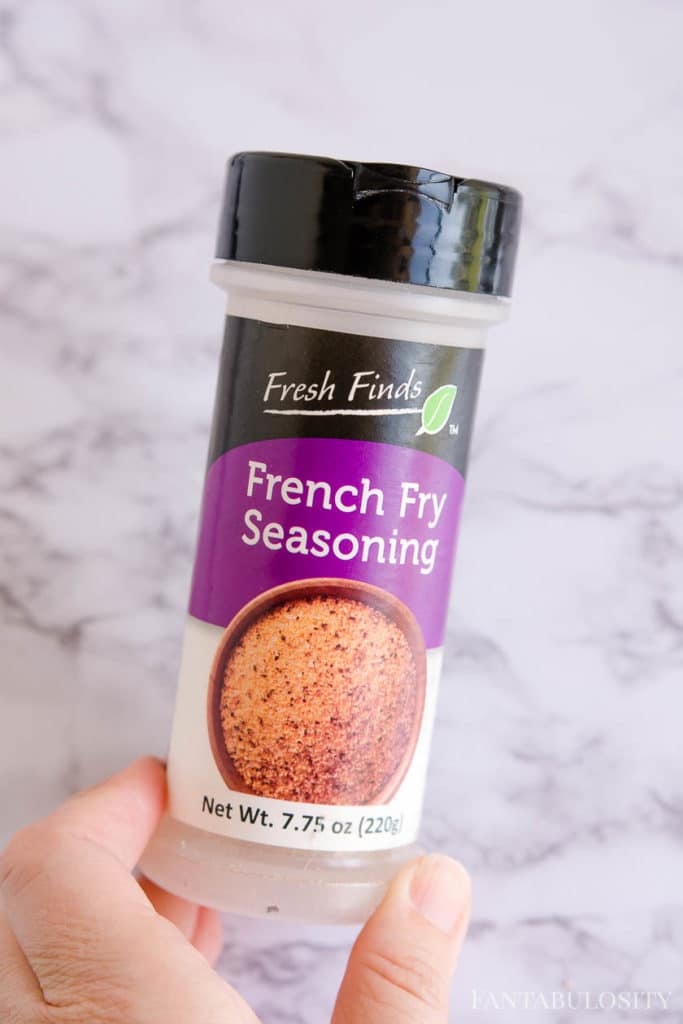
Alternate Seasoning Options
I don’t know what it is exactly, but this seasoning rocks my world, and I love to put it on just about anything. Especially side dishes like my garlic roasted broccoli and the baked potato wedges.
So when I have some on hand, I love sprinkling this on my cheeseburgers too! Just be cautious of adding salt, because seasoning like this can have a lot of salt in it! This seasoning is similar to a seasoned salt but I’ve had so many readers also say that they love sprinkling their favorite meat seasonings on these burgers too.
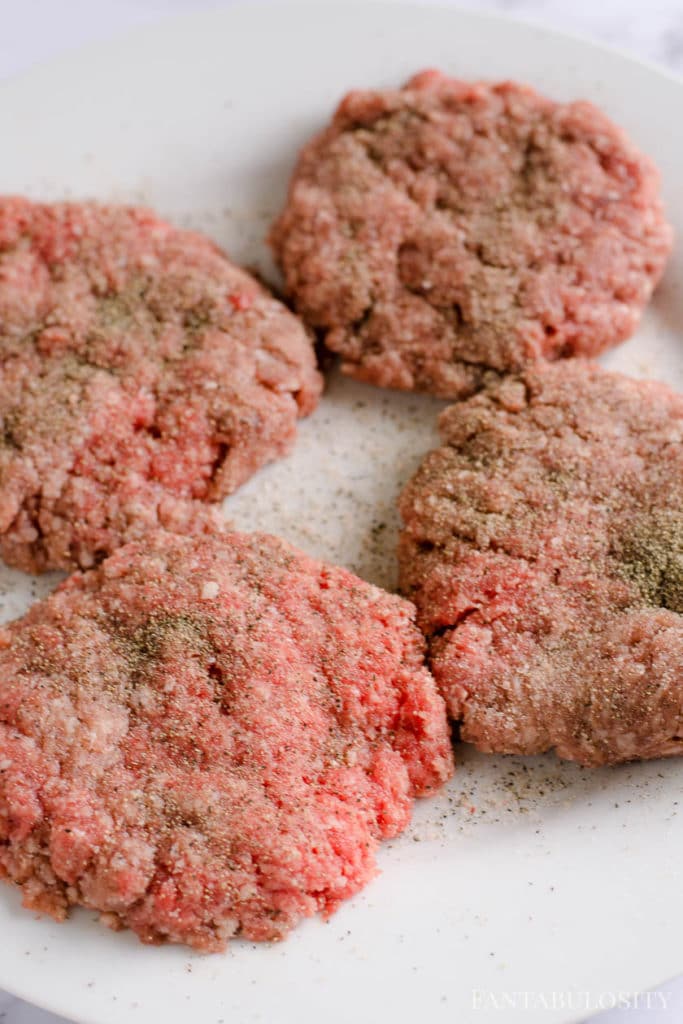
Season on Both Sides
Over the years, I’ve learned that I prefer when burgers are GENEROUSLY seasoned with salt and pepper.
(If I had to guess, I’d say I probably use a total of about 2 teaspoon of salt for the four burgers, and then I just make sure I can SEE black pepper all over my burgers.)
Just when you think it may be too much salt and pepper (because let’s face it… you can always add more, but you can’t really take it away) you can finally actually taste it.
So season as you desire, but if you find that your burgers didn’t have much flavor this time, add a little bit more next time.
When you’ve seasoned one side of the burgers, flip the seasoned side down in to the prepared baking dish and season the other side.
How Long to Cook Burgers in the Oven at 375 Degrees
Bake, uncovered in the preheated oven for 20 minutes, or until an inserted thermometer reaches 160 degrees.
(For the trick that makes all of the difference when cooking burgers in the oven, scroll down! You won’t regret it!)
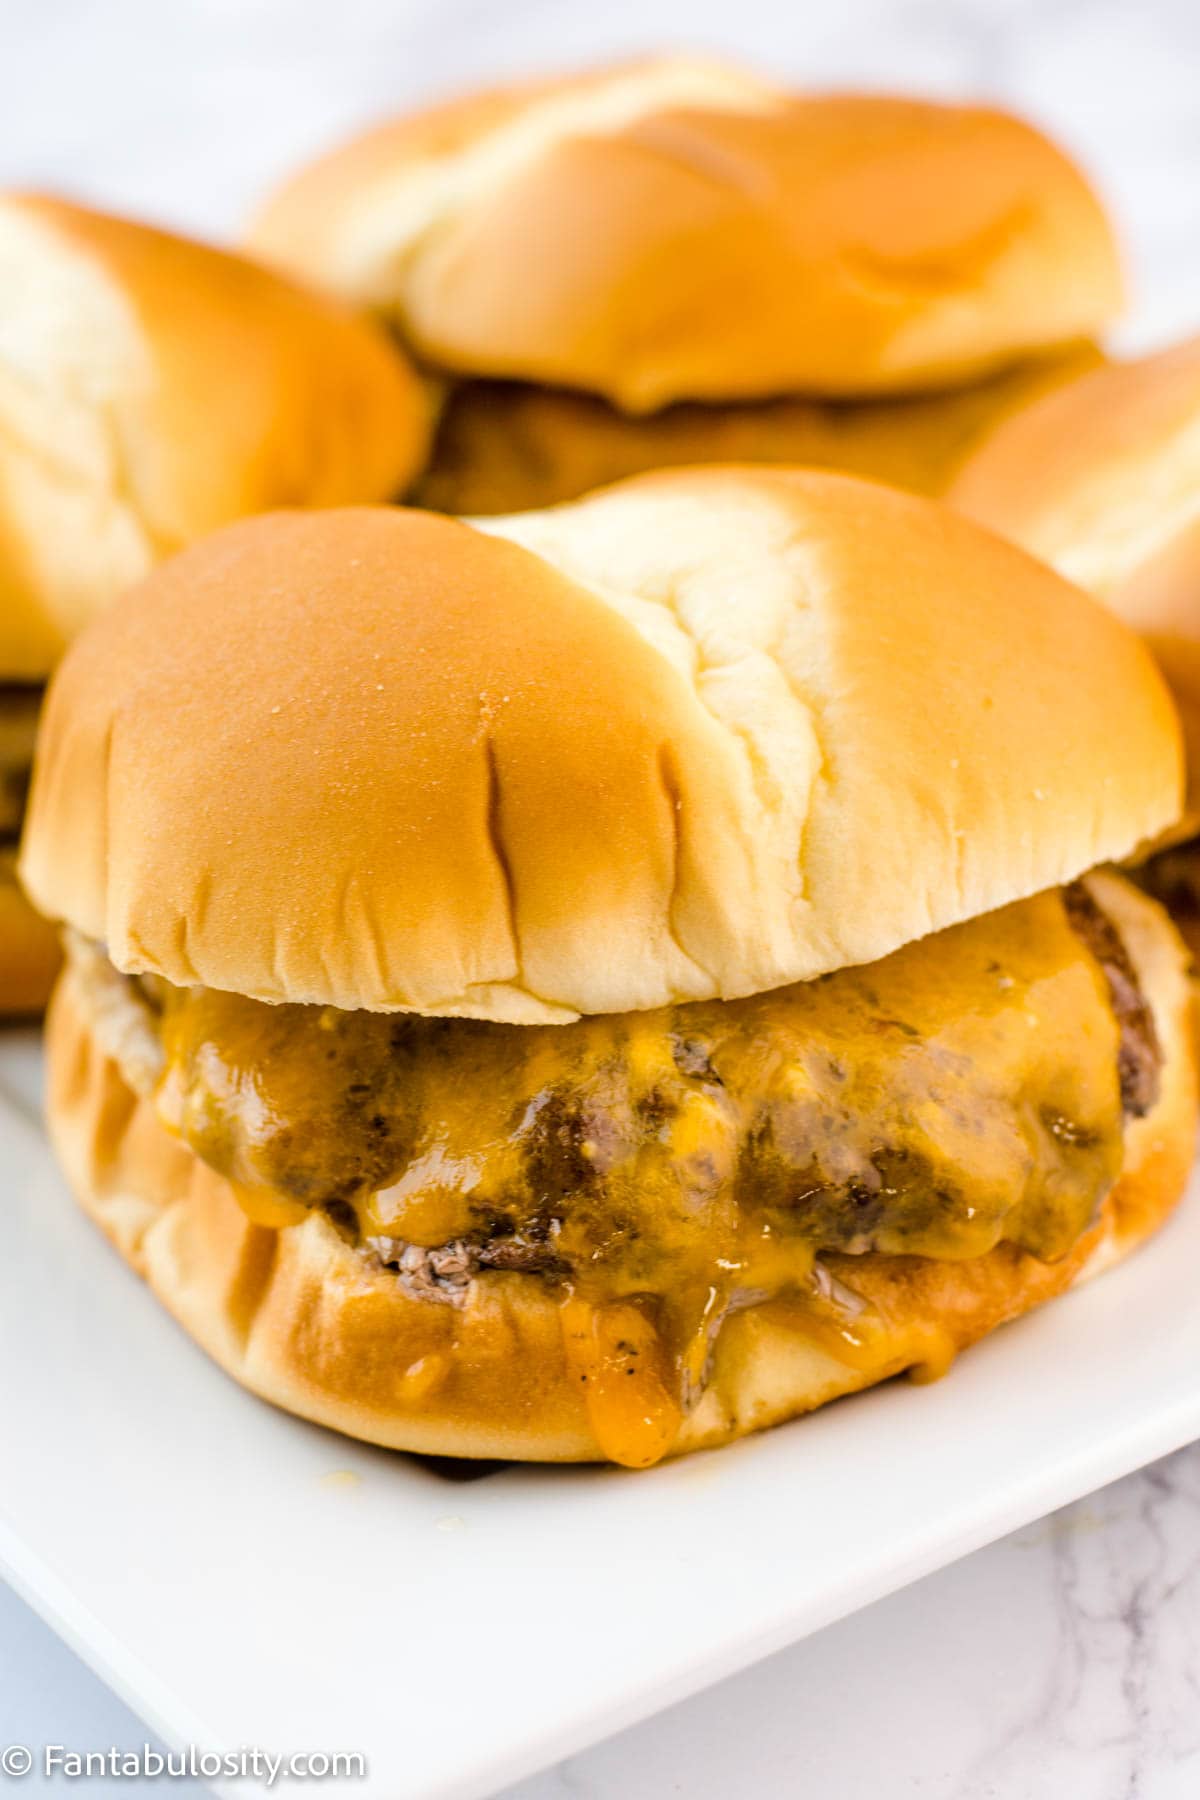
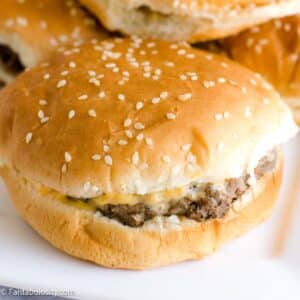
For Cheeseburgers
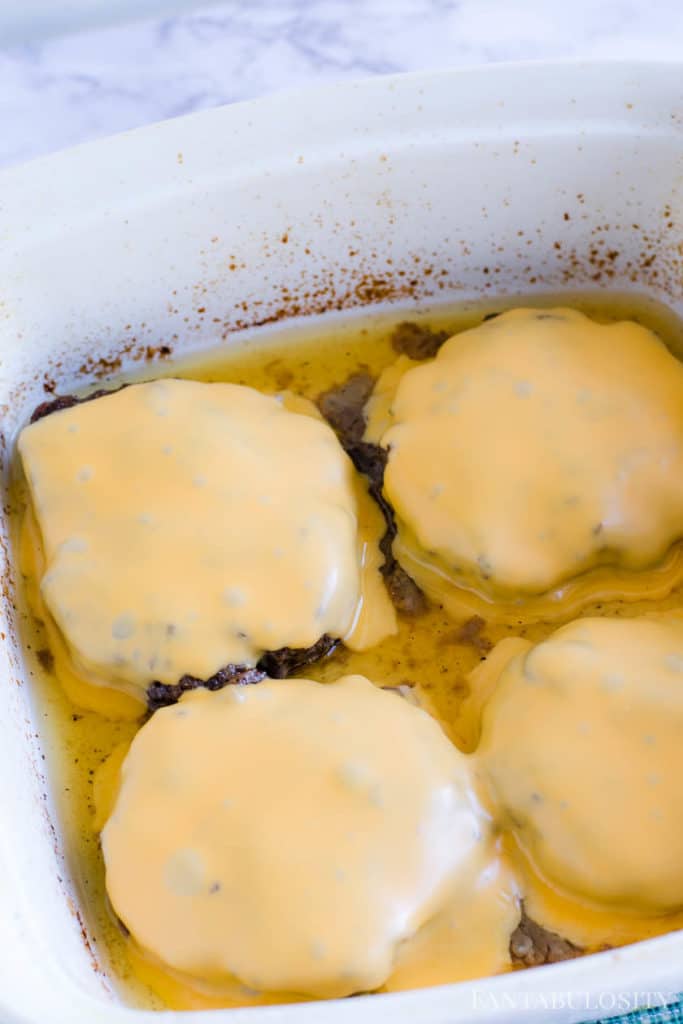
If you love cheese on your burgers, grab a slice of American cheese (or your favorite kind) and place one slice on each burger.
Place back in the oven for about one minute, or until the cheese has melted! (Unless you plan to do the “bun trick” below, and then you can just add the cheese and wait to melt it in the foil.)
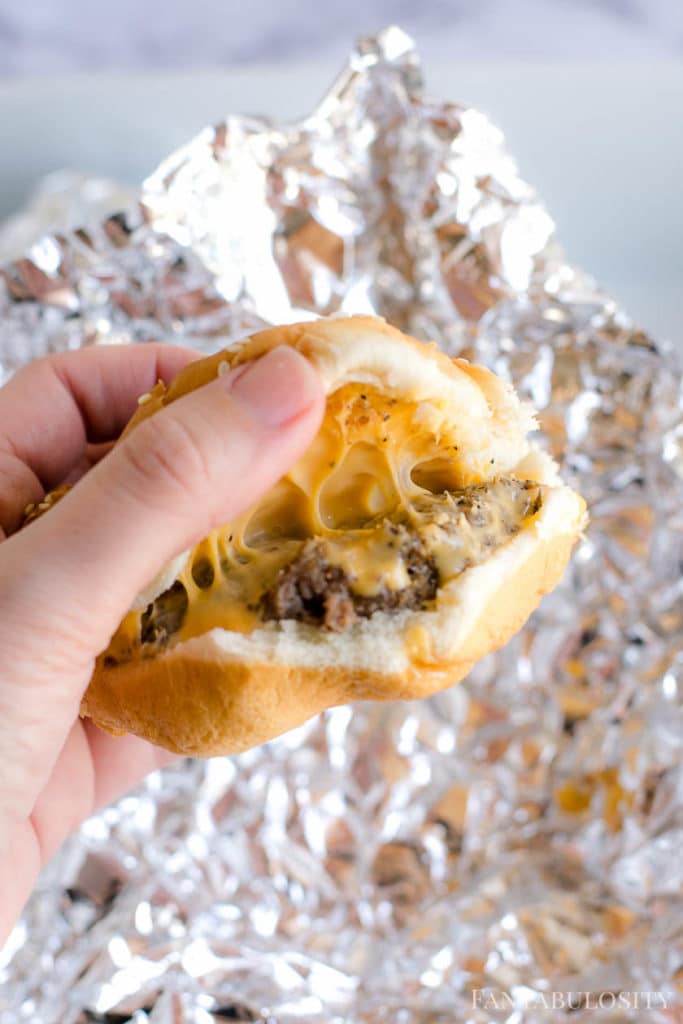
The Trick for Melt-in-Your-Mouth Oven-Baked Burgers
When I started doing this for my burgers, I feel like I changed my family’s burger-lovin’ life.
Tear off 4 squares of aluminum foil (just large enough to wrap each individual burger).

Place the bottom portions of each bun on each sheet of foil, and build the burgers, WITHOUT the extra toppings. Just meat and cheese for now!

Wrap up each burger, and place either in a different baking dish, a cookie sheet or even directly on the oven rack… and let heat in the oven for a 2-3 minutes.
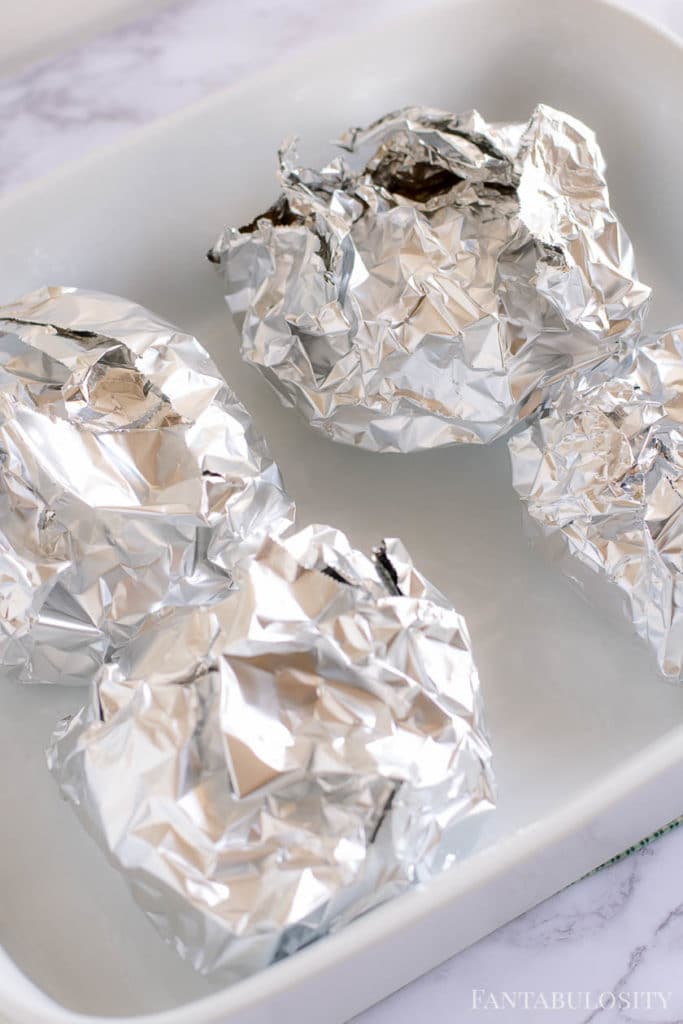
This will allow the cheese and bun to steam/toast, to create the ooey-gooeyness that has become so hard to live without!
Cooking Hamburgers in Advance
If you’re cooking for a large crowd, or just want to make a batch early and keep warm until dinnertime, it’s easy!
Make the burgers like I’ve suggested, and keep the aluminum foil-wrapped burgers in the oven on warm. (Just don’t get the oven too hot, or your buns will get TOO toasty and become hard.) I do this for baking hot dogs in the oven too!
How to Cook Frozen Burgers in the Oven
Yes, you can cook frozen hamburger patties in the oven without thawing them first. This is a great option for busy nights when you forgot to defrost the meat.
To bake frozen burgers:
- Preheat your oven to 400°F.
- Line a baking sheet with foil and place a wire rack on top (optional, but helps grease drip away).
- Arrange frozen hamburger patties in a single layer. Do not stack.
- Bake for 20-25 minutes, flipping halfway through cooking.
- Cook until the internal temperature reaches 160°F.
Frozen burgers typically take about 5-8 minutes longer than fresh patties.
Should You Thaw Burgers Before Baking?
You do not need to thaw hamburger patties before baking. However, thawed patties will cook more evenly and develop better browning.
If cooking from frozen, expect slightly less browning and a little more moisture release during baking.
When Should You Season Frozen Burgers?
Because frozen patties are firm at the start, seasoning won't stick well immediately.
For best results:
- Bake for about 10 minutes first.
- Remove from oven.
- Sprinkle salt, pepper, or seasoning blend on top.
- Flip and season the other side.
- Return to oven to finish cooking.
How Long Do Frozen Burgers Take at Different Temperatures?
At 400°F → 20-25 minutes
At 375°F → 25-30 minutes
At 425°F → 18-22 minutes
Always cook until the center reaches 160°F.
How Do You Keep Frozen Burgers from Drying Out?
- Do not overcook beyond 160°F.
- Flip halfway through cooking.
- Avoid pressing down on patties.
- Let rest 3-5 minutes before serving.
You can also brush lightly with oil before baking to encourage browning.
Can You Add Cheese to Frozen Burgers?
Yes. Add cheese during the last 2-3 minutes of baking so it melts without overcooking the burger.

How to Freeze Hamburger Patties
Freezing hamburger patties is a great way to meal prep and always have dinner ready. Properly freezing them helps prevent freezer burn and keeps the patties from sticking together.
Here's how to freeze burger patties the right way:
- Form ground beef into evenly sized patties.
- Place a small square of wax paper between each patty.
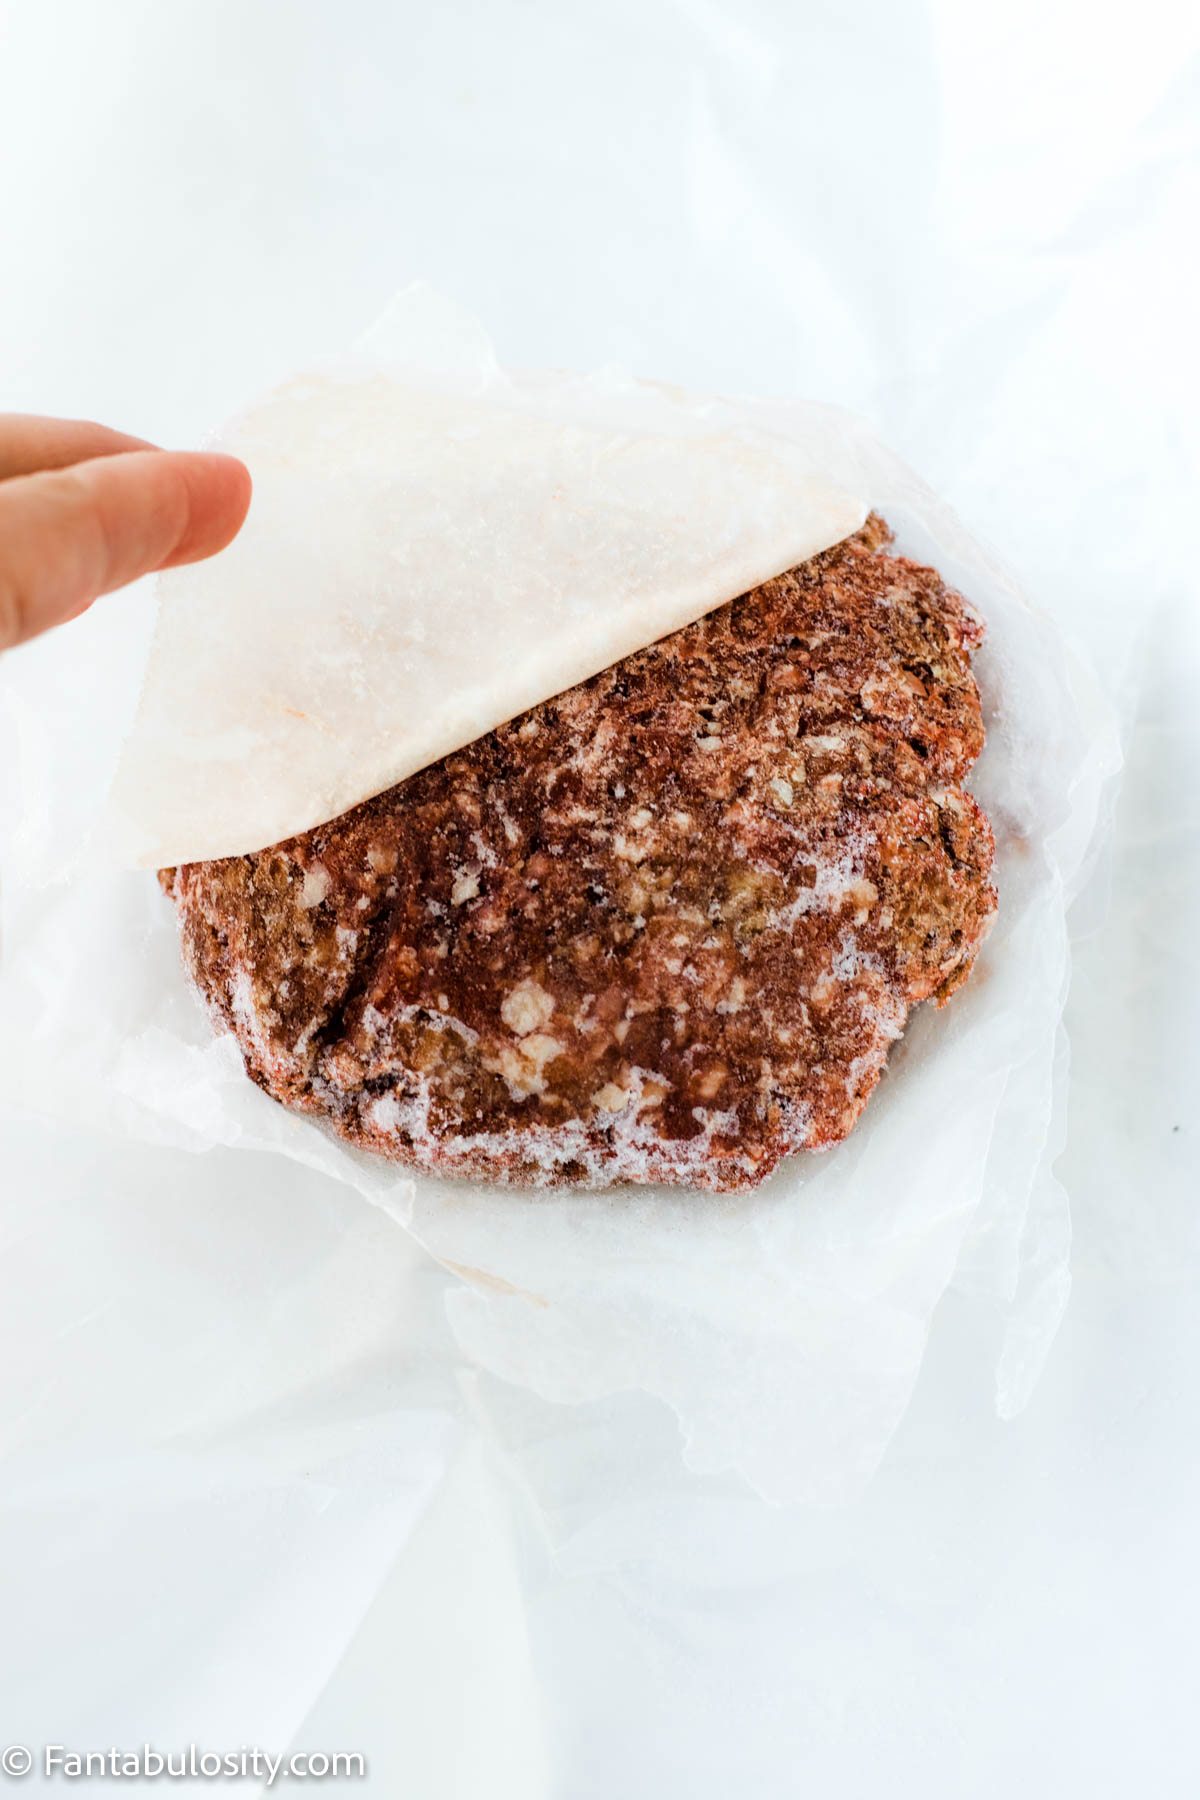
- Stack the patties neatly.
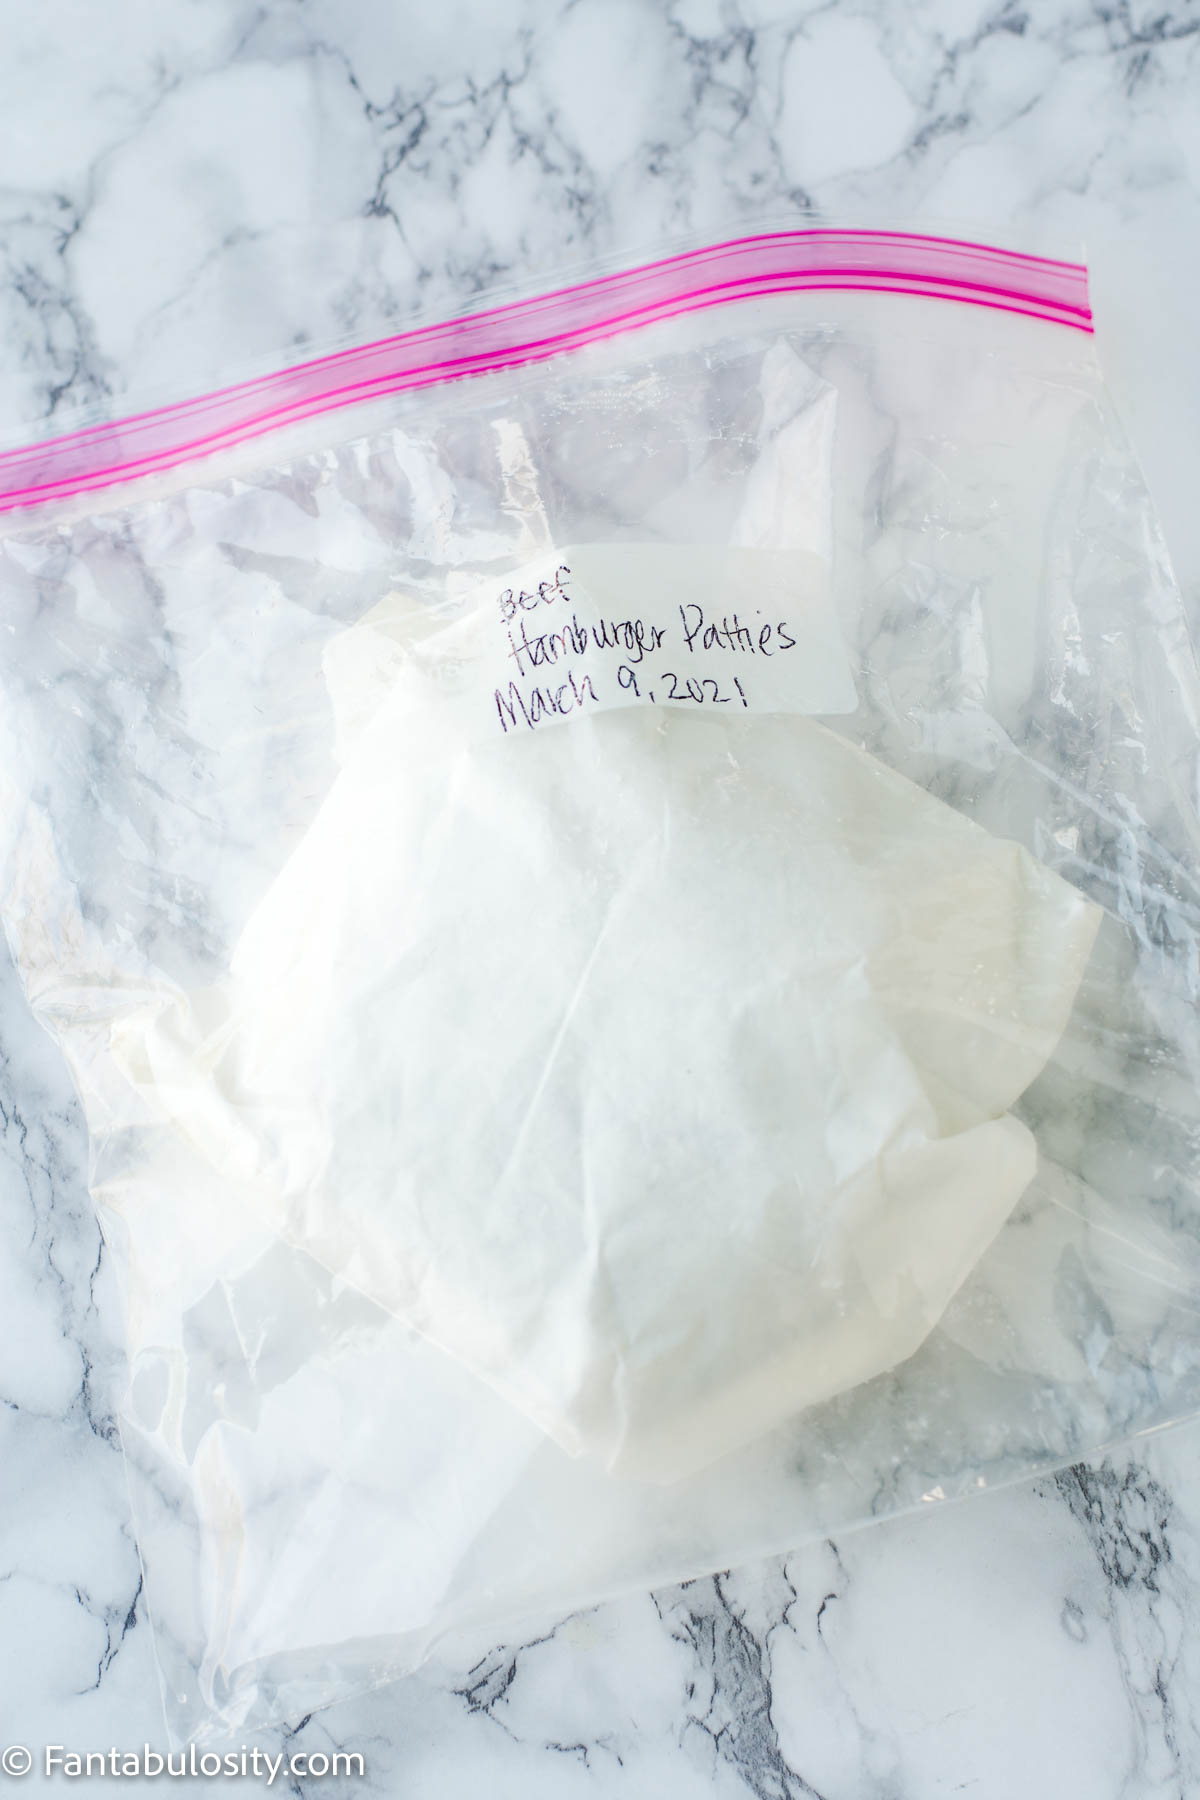
- Place the stack inside a freezer-safe zip-top bag.
- Press out as much air as possible before sealing.
Lay the bag flat in the freezer so the patties freeze evenly.
How Long Do Frozen Burger Patties Last?
Properly stored, raw burger patties can last:
- Up to 3-4 months in the freezer for best quality.
- Longer if sealed tightly, though texture may decline over time.
Label the bag with the date so you can rotate older batches first.
Can You Freeze Cooked Burger Patties?
Yes. Allow cooked burgers to cool completely, then wrap individually in plastic wrap or foil and place inside a freezer bag.
Reheat in the oven at 350°F until warmed through.
Pro Tip for Easy Separation
Using wax paper between patties makes it easy to pull out only what you need without thawing the entire batch.
This also keeps the patties from sticking together once frozen.
Toppings for Burgers
Feel free to top your burgers with your favorite toppings! Honestly, when they’re cooked like this, I love them plain, with just cheese! (Unless I have some of the french fry seasoning that I’ve shared with you, under the recipe.) Although, topping them like a Cowboy Burger is pretty tasty too!
But some of the standard favorite toppings are:
- mustard
- ketchup
- onion
- tomato
- lettuce
- pickles
- mayo
- bacon (you can cook bacon in the oven too!)
- pineapples (Yes! They’re so good on a burger, and we love using them on Aloha burgers too!)
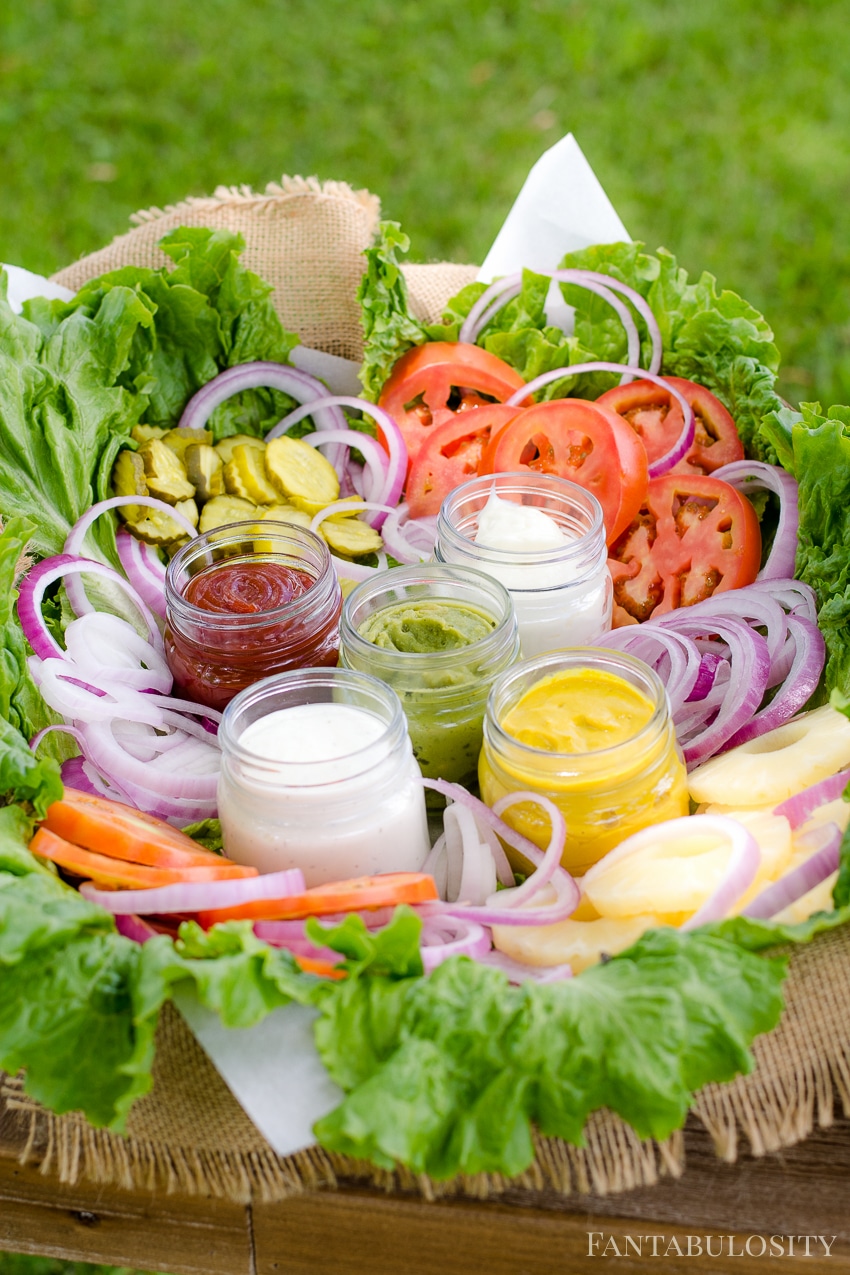
Above photo from the Burger Bar I styled for a party.
Sides to Go with Burgers
Looking for something to serve along with your hamburgers? Here are our favorites:
More Hamburger Recipes You’ll Love:
If you love hamburgers, then you’ll definitely want to see all of the other hamburger recipes that we have. Here are some of our favorites:
Or even if you’re looking for ways to use ground beef, we have suggestions for dinner recipes using ground beef!
More Oven Recipes
If you’re looking for another easy oven protein, see our complete guide on how to cook pork chops in the oven, and also check out these favorite recipes:
Did You Make This?
Snap a pic and hashtag it #Fantabulosity - I love to see your creations on Instagram and Facebook.
Recipe
BEST Burgers in the Oven – With a TRICK!
Video
Equipment
- aluminum foil – optional, for toasting
Ingredients
- 4 beef patties I use 1 pound of ground beef to make 4 patties
- salt as desired – see blog post for tips
- pepper as desired – see blog post for tips
- 4 slices yellow American cheese if desired
- 4 hamburger buns
Optional – For Toasting
- aluminum foil
Instructions
- Preheat oven to 375 degrees and spray baking dish with non-stick cooking spray.
- Generously season one side of the burgers with salt and pepper.4 beef patties, salt, pepper
- Place burger patties in baking dish, spice side down.
- Sprinkle more salt and pepper on each hamburger (or use a preferred seasoning) if you like!
- Bake in oven for 20-25 minutes. (If thinner patties, this may not take as long, so it's best to keep an eye on them. When you no longer see "red" coming out of the top, or on the burgers, it could be time to pull them out of the oven.)
- If desired, place one slice of cheese on each burger and bake an additional minute or until cheese has melted. (Unless you're doing the "bun trick" below and then you can wait to melt the cheese after you've built your burger to place in the aluminum foil.)4 slices yellow American cheese
The TRICK for Ooey Gooey Cheese & a Toasted Bun
- Place a burger patty on a bottom bun, add a slice of cheese, and top with top bun. Wrap each burger in aluminum foil. (Just enough to wrap the burger completely.)4 hamburger buns, aluminum foil
- Place back in oven for 2-3 minutes to allow the cheese to melt in and for the bun to get warm and toasty!
- Serve and top with any toppings desired!
Notes
Nutrition
Nutritional information is based on third-party calculations and should be considered estimates. Actual nutritional content will vary with brands used, measuring methods, portion sizes and more.


Laurel says
Easy! I’ve taken to cooking everything in the oven. I made these using ground turkey, with some smoked paprika, worstershire sauce, and some olive oil. 20 minutes at 400°, as I wanted to roast Brussels sprouts at the same time. Everything tasted great. Thanks!
Jessica says
That’s such a great idea to cook both at the same time! I’m so glad you liked these! Thank you for the review and letting us know!
Suzanne Gibson says
These turned out perfect. Thank you so much for posting this recipe. I don’t like cooking hamburgers on the stove because they always seem to turn out differently. Baking them in the oven is wonderful. Delish!!
Jessica says
Aww, I’m so glad you liked these oven baked burgers too, Suzanne! Thank you so much for sharing and for leaving a review!
Shelley says
Never.Going.Back!!
I fixed these for supper tonight and we loved them. All our bread was frozen (lack of planning) so we ate them dressed from a bowl. So tender and juicy!
Thanks for showing me the light!
Jessica says
Awww, I love hearing this Shelley! Thank you so much for dropping a note and leaving a review!
Rosie says
This was great information. I mixed minced onions, garlic and adobo in the raw meat prior to baking them and they came out perfect.
Jessica says
That’s fantastic and sounds delicious!! Thank you so much for sharing!
John G. says
Hands down these were the best oven cheeseburgers I’ve ever had!! No exceptions.
I followed your recipe to the letter. My burger night gang is still licking their fingers as I type this comment. Thank you for posting your recipe.
PS. I topped with a hash brown, bacon, and fried egg. Winner!!
Jessica says
This is so awesome to hear and I’m so glad that your burger night gang loved them too! Haha! Thank you for taking the time to leave a comment and a 5 star review!
Shannon says
I am so confused by the bad reviews?!? We love these burgers! I just don’t do the bun part for my husband as he doesn’t care for the way it makes the buns stick to the burger. Other than that, we follow the instructions and they turn out perfect every time. I literally have them in the over right now. An easy and reliable dinner that my big family all enjoys!
Jessica says
Thank you so much Shannon! I have to agree with you! They always turn out perfect for us this way and it’s the way we prefer them now. 🙂 I’m so glad that you like them and thank you so much for leaving a review!
Kristi Kelbel says
These burgers are the Best I’ve ever made, or had!
My husband and I have very different preferences for meat cooking. He likes NO pink, I prefer a medium burger.
I’ve used this recipe four times already, and they are always perfectly cooked, juicy and flavorful. These come out well done- but so moist still.
The “reveal” after the foil bake never disappoints: ooey-gooey deliciousness.
Jessica says
Oh Kristi, I’m so excited to hear that you loved this baked burgers recipe! I have all the same thoughts about it too. Haha! Thank you for sharing and for leaving a review!
Ellen K says
These turned out amazing! They browned nicely and were delicious! Thank you!!
Jessica says
Hi Ellen! So glad you liked them and thank you for leaving a review! Is there something that would have made them better to get 5-stars? I’d love to hear your feedback!
Jennifer says
I am making these for the fifth time as I write this. They are so delicious and my boyfriend loves them just as much as I do! Thank you so much for the recipe.
Jessica says
This is great to hear! Thank you so much for sharing and leaving a review! It means a lot. I’m thrilled that you like these baked burgers too!
Nicholas B says
These are amazing. Reminds me a lot of the burgers you would get served in the cafeteria at lunch time in high school. Great recipe and I will make it again. I added some chopped bacon before wrapping up in foil.
Jessica says
Oh good! I’m so glad that you like these hamburgers too! Adding chopped bacon sounds delicious. What a great idea. Thank you for sharing!
TerryDD says
Best Burger Ever!! I added sautéed onions and skipped the foil step and they were excellent. Thank you 🙏
Jessica says
That’s wonderful! So glad to hear that you liked them and we’ll have to try the onions next time!
Vera Moore says
I have been putting burgers in the oven for years when I don’t feel like frying or too cold to grill! I make big batches of 1/3 lb patties; sometimes under, for the freezer. I am all about the flavor so I pre-season the ground beef with salt, coarse black pepper, Worcestershire, dehydrated onion, a little beef Better Than Bouillon broth, sometimes chopped jalapeno!! Once weighed out and pattied they get flash frozen on a parchment lined sheet pan until solid and then double wrapped individually in Saran before going into freezer bags. If you bake from frozen just plan to bake longer until 165F or toss directly on grill or into pan on stove. Tonight I am baking up some from my stash for burgers, potatoes, gravy and veggie!
Jessica says
Hi Vera! Wow! Thank you so much for sharing this with us. I love all the details and helpful advice. 🙂 Tonight’s dinner sounds amazing!
Engine44 says
Hi,
I like my burgers medium-rare and my wife likes her’s well-done. Please advise. Thanks
Jessica says
Hi there. Less cook time for the medium-rare for sure then and for well done, I’d say a little longer than the instructed time. We like them just like this so I’m not 100% sure what times you should cook them to get them at the desired “doneness” you’re looking for.
Michelle - Kalamazoo MI says
BEST BURGER EVER! I live in an apartment that doesn’t allow grills and I’ve been wanting a burger for two years. I made these burgers in the oven tonight and they were fabulous!! So juicy and perfected cooked to well done without being burned. I used 80/20 beef, so I had fat content which helps with any burger. Thank You so much for posting this on Pinterest!! I’ll be sharing this with everyone I know.
Jessica says
Aww, thank you so much Michelle! I’m so glad to hear that you liked it too. Even though we have a grill, I still prefer to cook them in the oven, haha! Thank you for sharing the recipe with everyone too!
Amanda says
OMG theses were so good!! I “use to” bake them at 425 on a baking rack bc I thought they’d be super greasy if I didn’t, but this is my new go to burger!! Thankyou so much 🍔
Jessica says
Yay!! I know it… it’s the best cooked this way for sure! So glad you like them too. Thank you for the review and for sharing!
Ashley Nicole says
Made these delicious burgers today for my husband’s lunch…he called me immediately after eating them and asked why I only gave him two of them!!! I added carmelized onions, bacon, lettuce and tomato and these were a HUGE hit!!! Thank you so much for this awesome recipe!!
Jessica says
Haha!!! I love that! They definitely are delicious! I’m so glad that he liked them too. 🙂 Thank you so much for sharing!
Nichole says
I kept messing up regular burgers on the stovetop. They just wouldn’t cook right! 🙁 this recipe has literally solved all my problems and my bf loves them. Thank you so much. Never making them any other way!!
Jessica says
Woo Hoo! I’m so glad to hear that Nichole! I can totally relate about stovetop cooking! Thrilled that you like it. Thank you for sharing!
Tommy Katrice Shaw says
I’m trying this tonight! I’m using bacon. When should I add the bacon?
Susan says
Cooked to perfection. Juicy . Tasty. Mmm. No more grilled burgers here. This is easier and better.
Jessica says
Oh Susan, this makes me so happy! Thank you for taking the time to share and review! I’m so glad that you liked them too. 🙂
Cindy says
These turned out really well. I usually use an indoor grill, but don’t like the clean up process after. These were so easy and everyone liked them, including my picky eaters. Thanks!
Jessica says
Woo hoo! You wouldn’t believe how many times I’ve heard that picky eaters love these hamburgers too! I’m so glad. Thank you so much for sharing and for the rating!
Ashley says
So disappointed I wasted a lb of ground beef on this recipe. The burgers went in the trash.
Jessica says
I’m sorry they didn’t work out Ashley! Can you tell me what happened? So many others have raved about this recipe, and I make them at least once a week for my own family. I’d love to be able to know more so I can hopefully help troubleshoot what may have gone wrong!
Pam Coble says
Looking forward to trying these… sounds awesome…. but a hamburger is only as good as your meat .. maybe that was the problem?
Jessica says
I hope you love them Pam!!
Pamela A Coble says
trying them tonight! one question though, do these brown ok?
Jessica says
Hi Pam! So glad you’re trying them. We think they brown up perfectly! I hope you liked them as much as we do!
Susan says
Wow! Throwing it in the trash? Too bad you didn’t come p with a plan b. That is such a waste.
Angel says
Omg! This recipe really does take burgers to a whole ‘nother level. Not sure how anyone could mess this up. My kids gave it a 10/10!
Jessica says
Awww, I’m so glad you and they loved these burgers too!! It’s like magic in a pan, haha!
Syl says
You must’ve done something horribly wrong, because these came out phenomenally for me (and many others). Bummer.
Jessica says
Thank you Syl! I’m so glad to hear that they worked for you. We love them too!
Judy says
How in the heck could they be bad enough to throw in the trash? People forget that the meat is already dead. Did you bake them for an hour?
Pokey says
When cooking these for a party how long do you think they keep warm for if I set them out outside wrapped in foil? Or do you think I can place them in a crock pot to keep warm and have people serve themselves when they are ready?
Jessica says
I think for food safety reasons, a slow cooker may work best!