• Skip to primary navigation
  • Skip to main content
  • Skip to primary sidebar

Fantabulosity logo

  • All Recipes
  • Vintage Recipes
  • Holiday
  • Dinner Theme System
  • About
  • Navigation Menu: Social Icons

    • Facebook
    • Instagram
    • Pinterest
    • TikTok
    • YouTube
menu icon
go to homepage
  • Recipes
  • Desserts
  • Dinners
  • Gatherings
  • Holidays
  • About Jessica
    • Facebook
    • Instagram
    • Pinterest
    • TikTok
    • YouTube
  • search icon
    Homepage link
    • Recipes
    • Desserts
    • Dinners
    • Gatherings
    • Holidays
    • About Jessica
    • Facebook
    • Instagram
    • Pinterest
    • TikTok
    • YouTube
  • ×
    Home » Recipes

    Potato Soup with Instant Potatoes

    Potato Soup with Instant Potatoes

    July 11, 2017

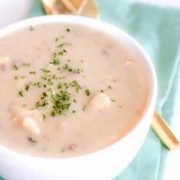
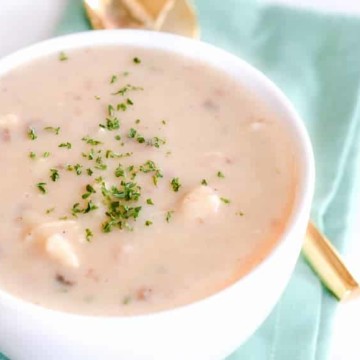
    Easy Potato Soup Recipe Using Instant Potatoes on the stovetop. So quick!!

    Easy Potato Soup: This Quick Stovetop Recipe using instant potatoes can be made in under 10 minutes! I also added leftover chicken too, but it’s not mandatory!
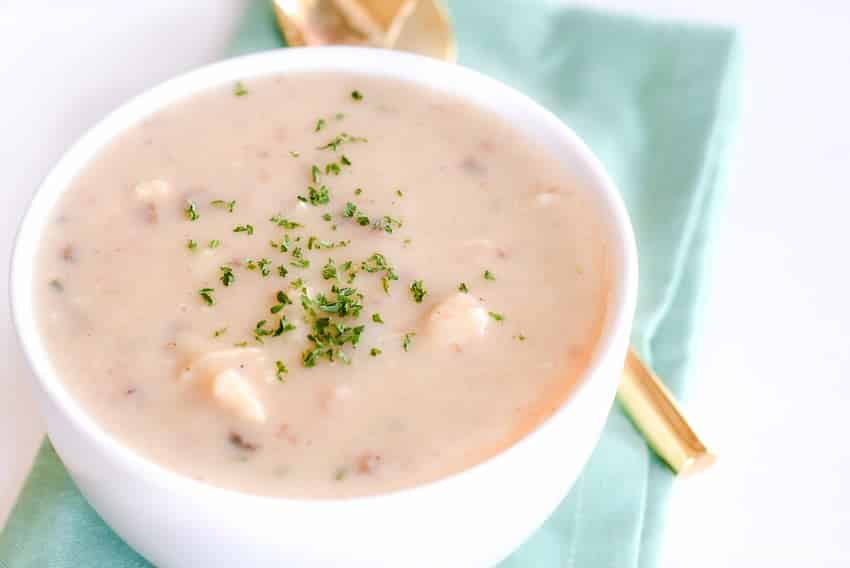
    Easy Potato Soup Recipe Using Instant Potatoes on the stovetop. So quick!!

    I hadn’t gone grocery shopping in DAYS! Ok… WEEKS! Things were getting pretty slim in the house.

    I knew I had leftover chicken tenders in the refrigerator, and wanted to utilize them to make something different so I didn’t hear:

    Chicken tenders AGAIN!?

    from my kids.

    Easy Potato Soup: Quick Stovetop Recipe

    Well we all know how I feel about slightly homemade recipes. (Recipes that are made at home, but utilize some store-bought ingredients and shortcuts to make things quick and easy.)

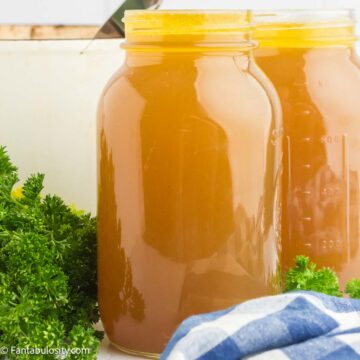
    So when I saw the instant potato package in the pantry, I knew right away that I should utilize those in some way with the chicken. Who knew adding chicken broth and a little heavy cream to this would make a crazy quick and tasty soup for dinner! (You can even make my easy homemade chicken broth for this soup.)

    NOTE: You DO NOT have to use chicken for this soup like I did. (Or I would call this Easy Chicken Potato Soup) But I found it a great way to add some protein and texture to the soup using leftovers, kind of like when I use leftover ham to make this bean soup recipe!)
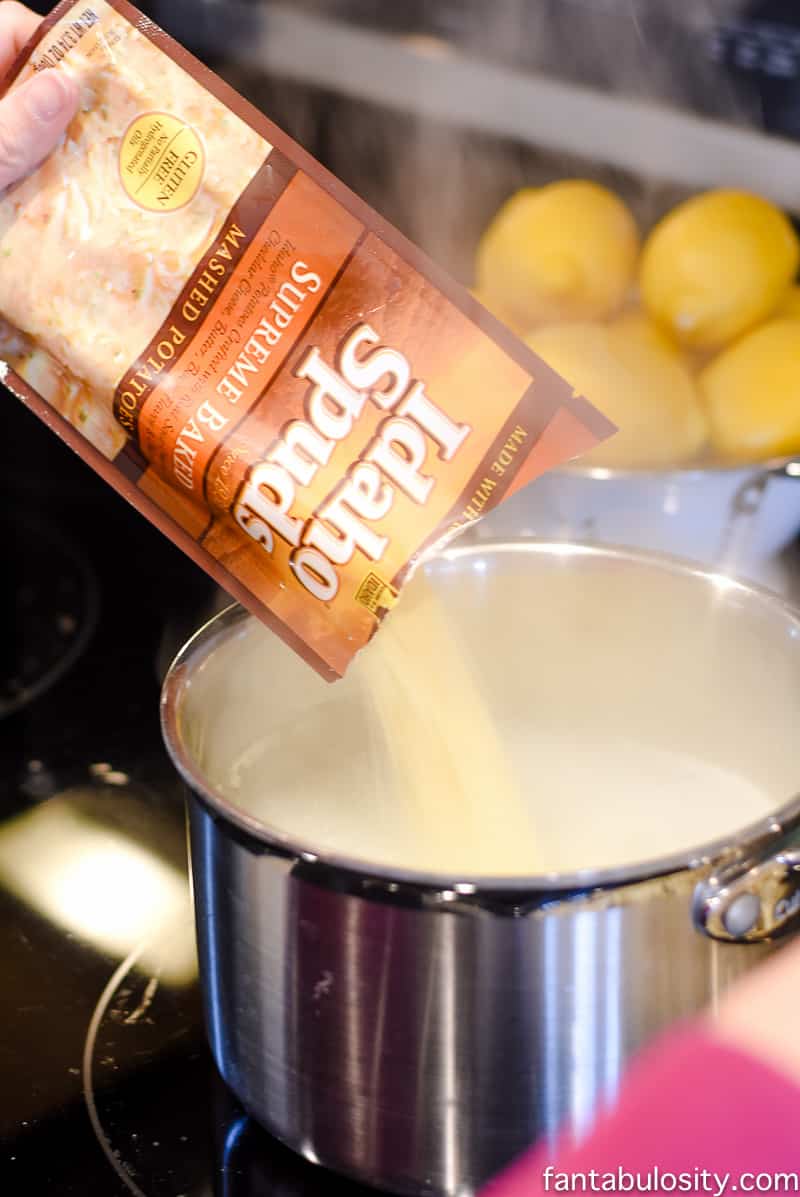
    Using instant potatoes to make a stovetop potato soup is sooo easy!

    NOTE: I believe it’s HIGHLY important to use a loaded or supreme package of instant potatoes, or else you may need to add cheese, spices, sour cream, and other ingredients to give this soup some flavor.

    Another favorite soup to make with rotisserie or leftover chicken is my chicken noodle soup recipe! Mmm… the herbs in it make a dynamite flavor.

    What to serve with this potato soup

    These garlic cheddar biscuits are similar to the cheddar biscuits at Red Lobster, so when I can fix them alongside a soup like this, it makes me feel all warm and cozy inside!

    Chicken Noodle Soup Recipe

    Get the chicken noodle soup recipe!
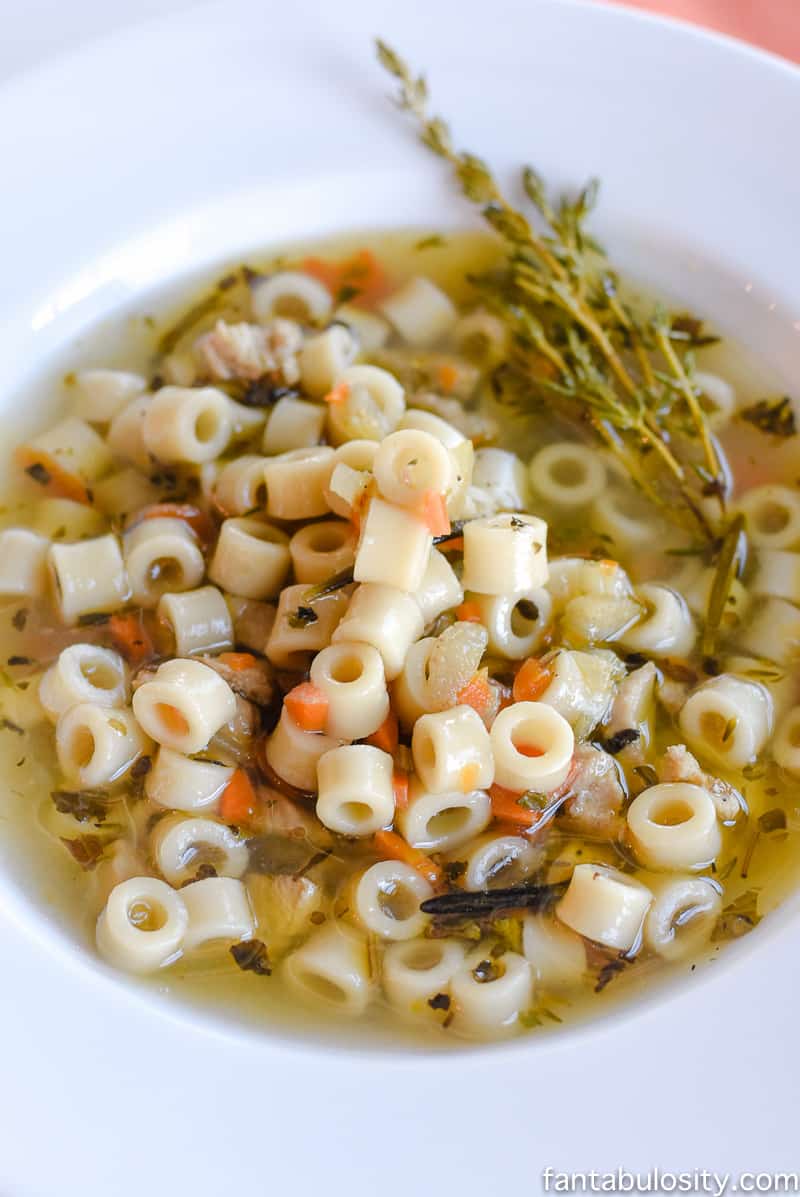
    The Best Chicken Noodle Soup Recipe - Quick and Easy

    Freeze For Later

    Another tip I love? Afraid that chicken will spoil if you don’t do something with it quickly? Make this soup and freeze in containers for quick lunches!
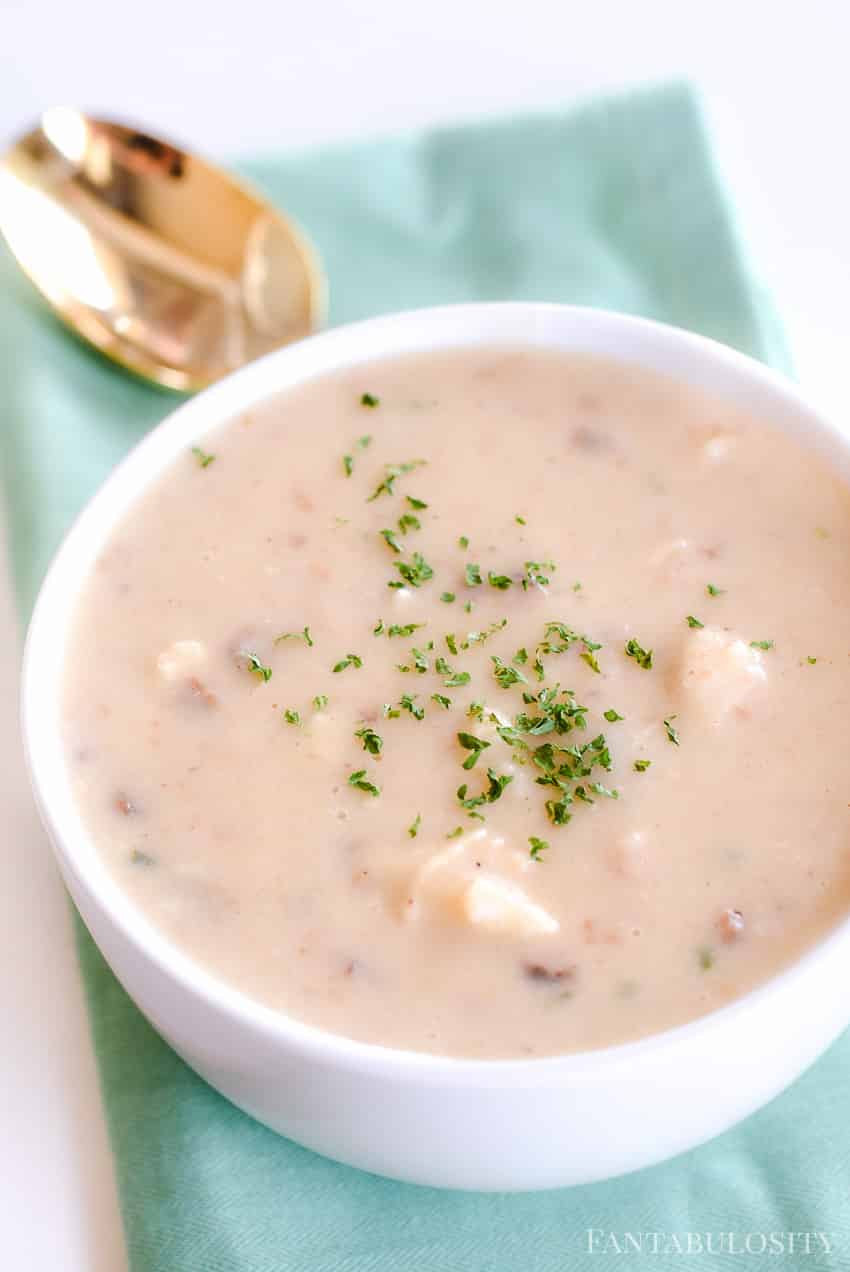
    Easy Potato Soup Recipe Using Instant Potatoes on the stovetop. So quick!!

    More Soup Recipes

    If you love easy soups, then you’ll really love these other soup recipes here on Fantabulosity! You may also love this easy loaded potato soup too!
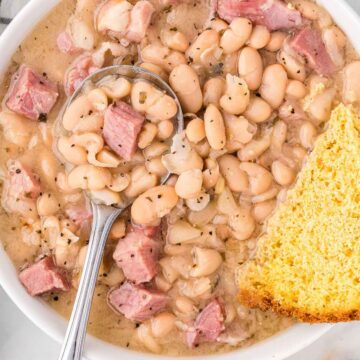

    • Bowl of ham and beans with spoon, and cornbread sitting on side of bowl.
      Ham and Beans Recipe
    • Homemade chili in small bowl with Fritos and cheese on top.
      Simple Chili Recipe
    • Southern chicken and dumplings in bowl.
      Chicken and Dumplings
    • Homemade Chicken Broth

    Recipe

    Easy Potato Soup Recipe Using Instant Potatoes on the stovetop. So quick!!
    Print Pin
    5 from 1 vote

    Potato Soup with Instant Potatoes

    This Quick Stovetop Recipe using instant potatoes can be made in under 10 minutes! I also added leftover chicken too, but it's not mandatory!
    Course Soup
    Cuisine American
    Prep Time 10 minutes minutes
    Cook Time 8 minutes minutes
    Total Time 18 minutes minutes
    Servings 4 servings
    Calories 217kcal
    Author Jessica Burgess

    Ingredients

    • 1 package supreme or loaded instant potatoes I used a 3.74 oz package of Idaho Spuds Supreme
    • 4 cups (32-ounces) chicken broth
    • 1 cup heavy cream

    Optional:

    • left over cooked or rotisserie cubed or shredded chicken I used 2 cups of chicken
    • shredded cheese for garnish
    • parsley for garnish
    • sour cream for garnish

    Instructions

    • In a stockpot over medium heat, combine the package of instant potatoes, heavy cream, chicken broth, and chicken if desired. Cook, stirring often, over medium heat and until heated through. (About 7-8 minutes for me.)
    • Serve!
    Nutrition

    Serving: 1serving (¼ recipe without chicken or garnishes) | Calories: 217kcal | Carbohydrates: 2g | Protein: 2g | Fat: 22g | Saturated Fat: 13g | Cholesterol: 81mg | Sodium: 888mg | Potassium: 233mg | Vitamin A: 875IU | Vitamin C: 16.9mg | Calcium: 53mg | Iron: 0.5mg

    Apple Pie Nachos with Cinnamon Sugar Tortilla Crisps

    July 3, 2017

    Apple Pie Nachos - Cinnamon Sugar baked tortillas, topped with apple pie filling! fantabulosity

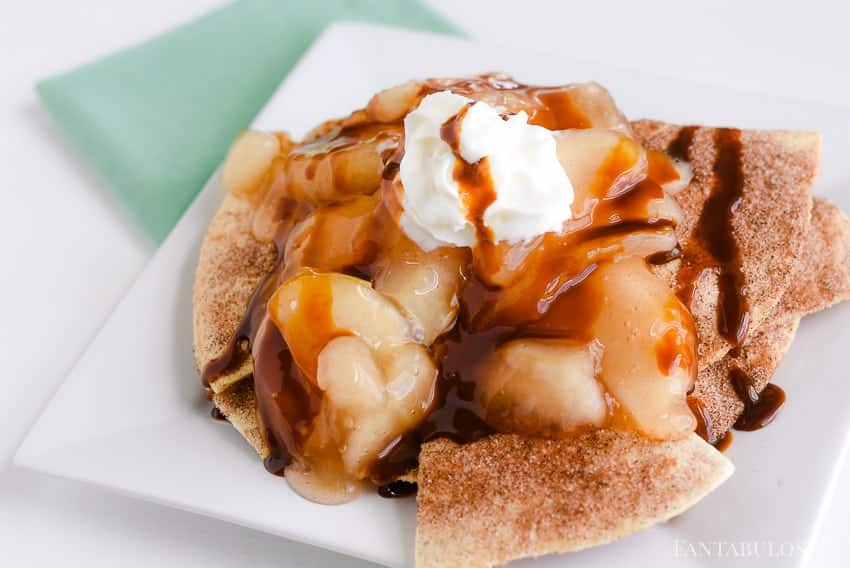
    Apple Pie Nachos with Cinnamon Sugar Tortilla Crisps - A recipe that you can whip up with a few store-bought ingredients, with an option to make them even easier!

    Apple Pie Nachos - Cinnamon Sugar baked tortillas, topped with apple pie filling! fantabulosity

    Wait til you see how you can think outside the box with a can of pie filling here! This is such a fun dessert, and I’ve actually also used pie filling in these Apple Pie Baked Beans! How fun is that?

    Apple Pie Nachos

    I can’t tell you the last time I devoured an entire platter of dessert, practically on my own. Well… until two days ago when my friend Kate came over, and we made apple pie nachos. I had texted her the night before and said:

    Hey, I’m headed to the store. Do you have any fun dessert ideas that we can whip up really quick for the blog?

    She replied with:

    Yep, grab some soft burrito tortillas and a can of apple pie filling. We’re going to make some apple pie nachos.

    Uh, hello! You got it, sister.

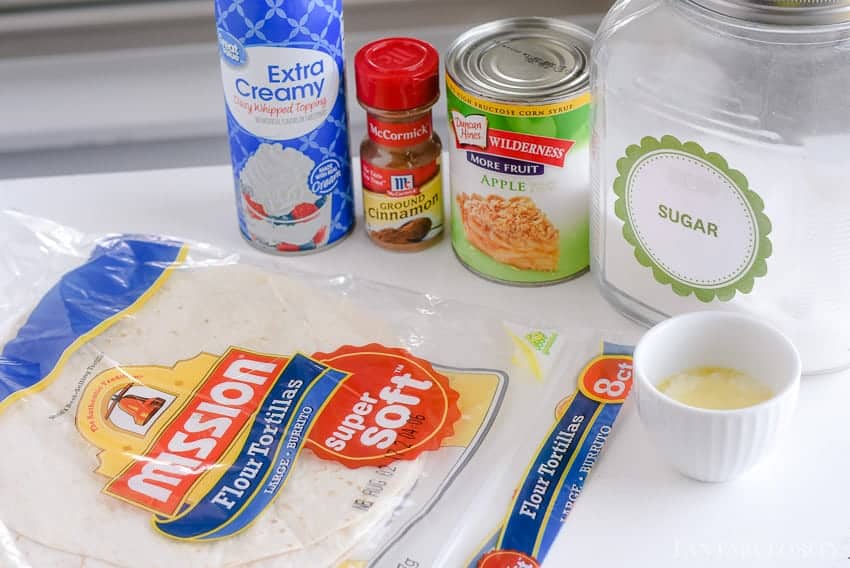
    Apple pie nachos ingredients, quick and easy using canned pie filling

    Apple Pie Nachos

    I have seen others make cinnamon-sugar tortilla crisps/wedges/whatever… and serve them with fruit salsa. (I think I Heart Naptime has my favorite recipe for that delicious dish.)

    But when Kate told me that we were going to pour apple pie filling over the top of them, I kind of fell in love with her.

    UPDATE: While browsing Pinterest, I found this other recipe where Mandy’s Recipe Box Blog used tortilla chips to make Caramel Apple Nachos! So so cool! I love all of the different ways that you can make the “chip” part of these nachos.

    But when you have a few minutes to spare, I have a feeling that making these cinnamon-sugar tortilla crisps at home will tickle your fancy a bit more.

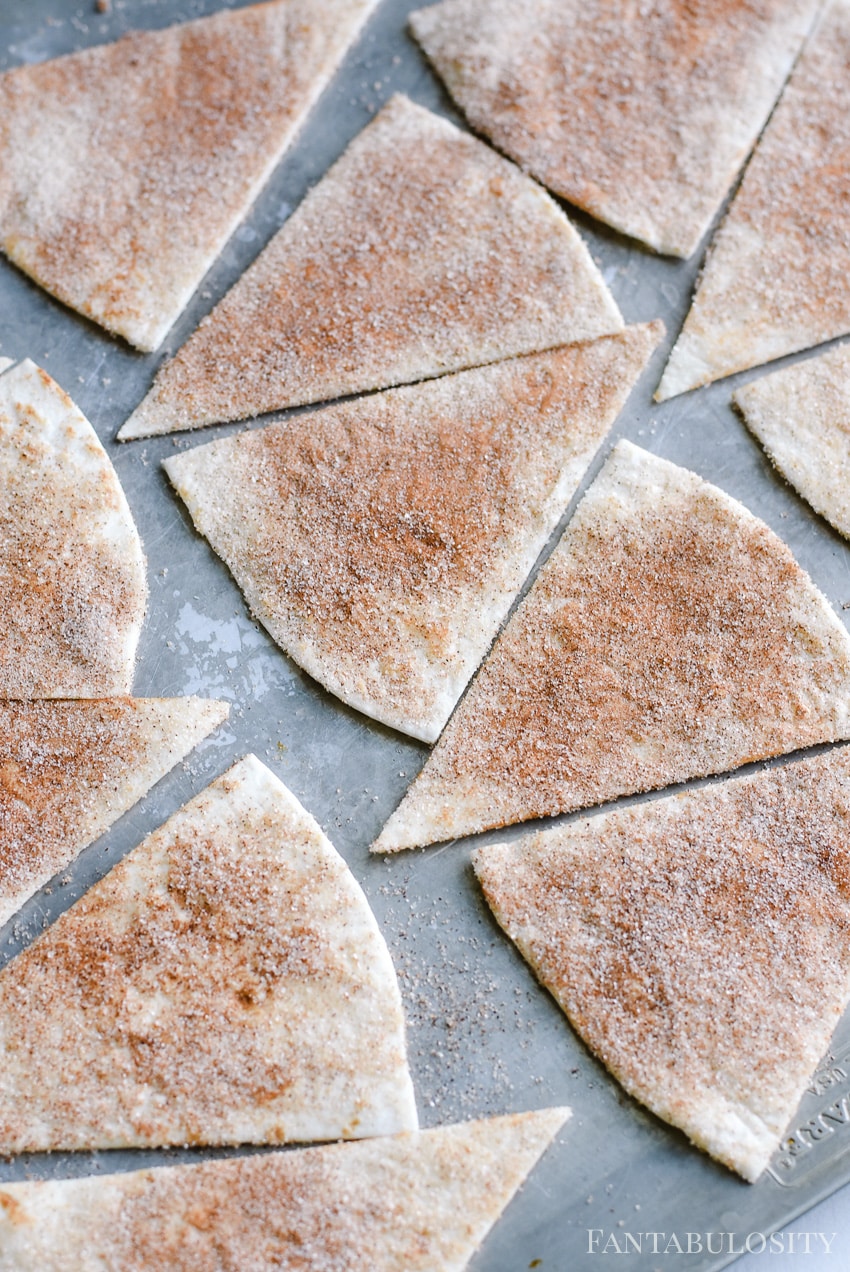
    Slice each burrito size soft tortillas in to 8 triangles. After baking, top with the apple pie filling
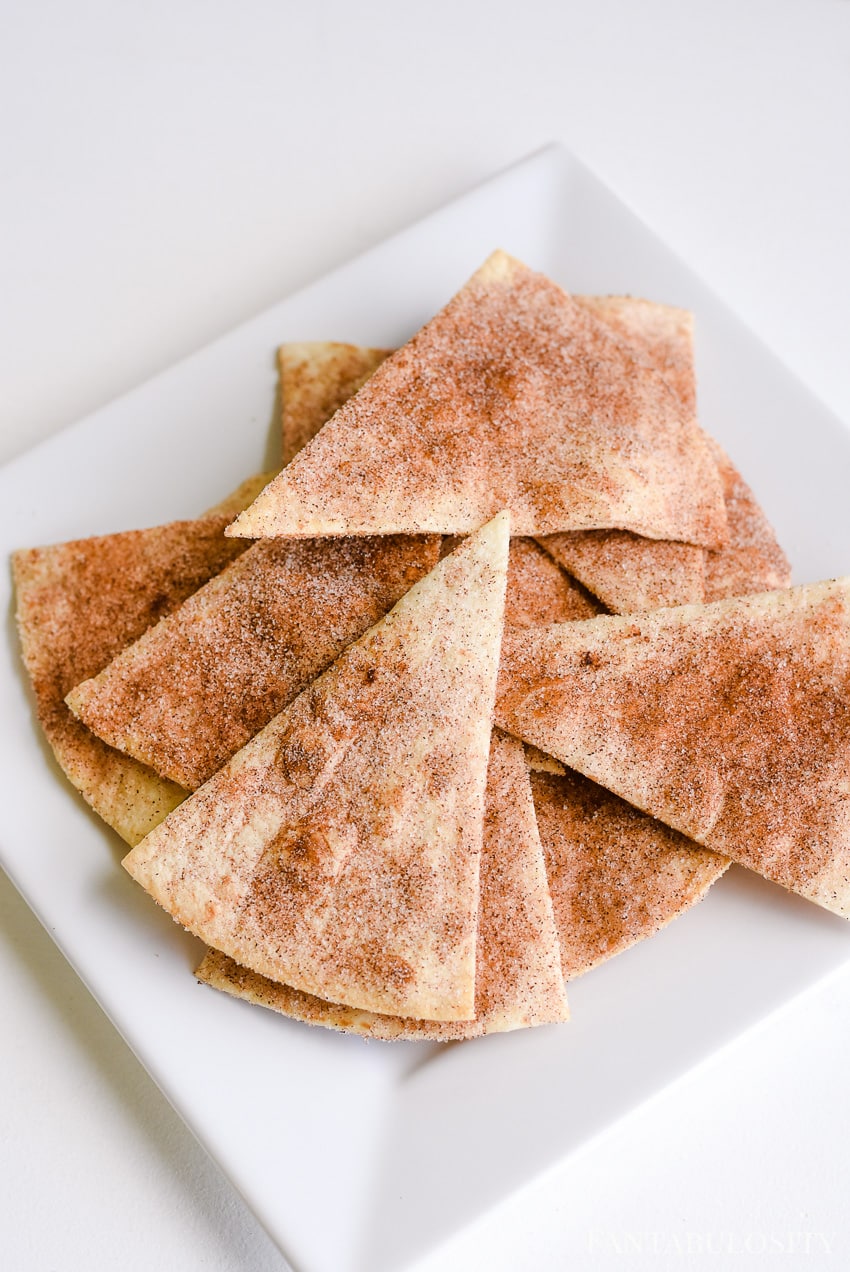
    Slice a burrito size soft tortilla in to triangles and bake them with sugar and cinnamon for a quick apple pie dessert
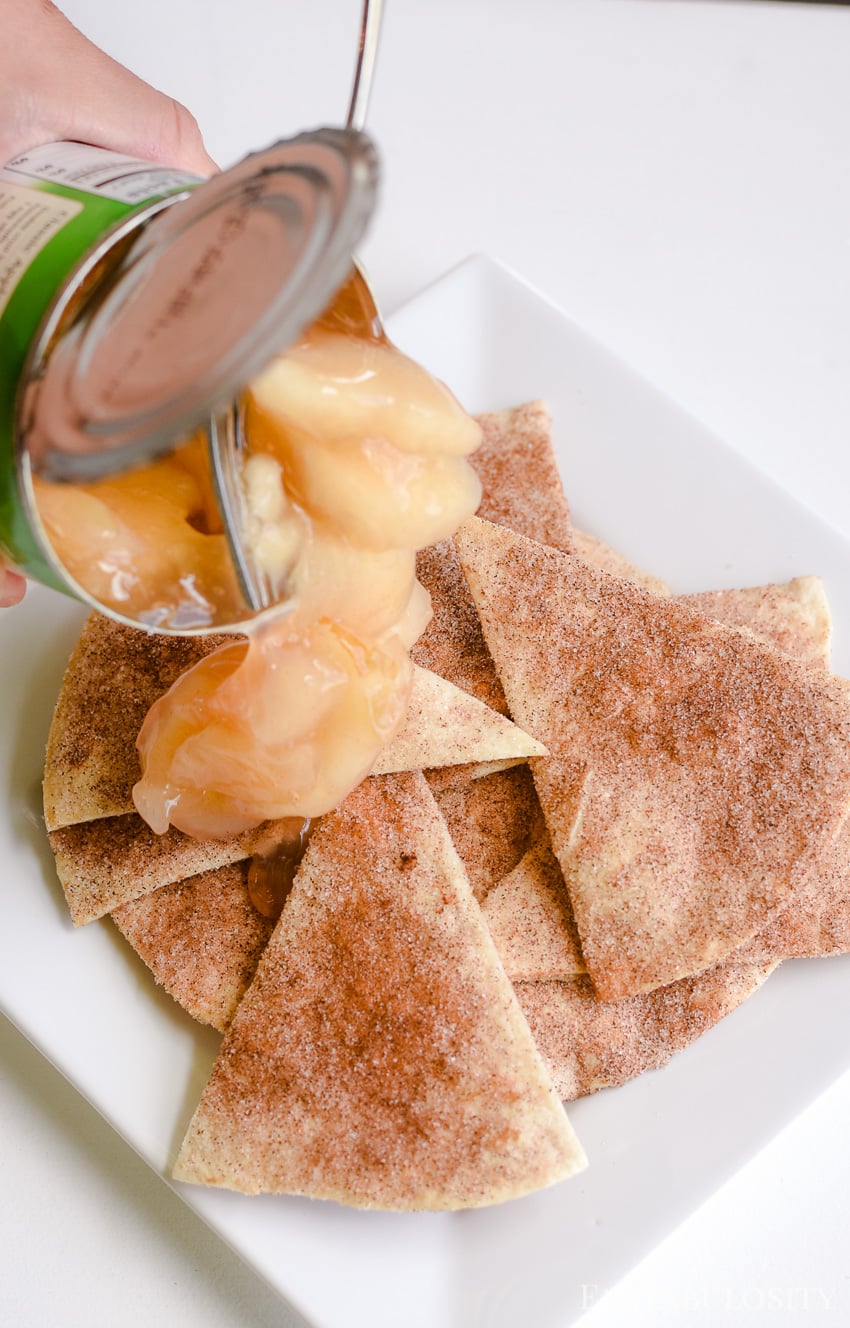
    Using canned pie filling, top the baked cinnamon sugar tortillas
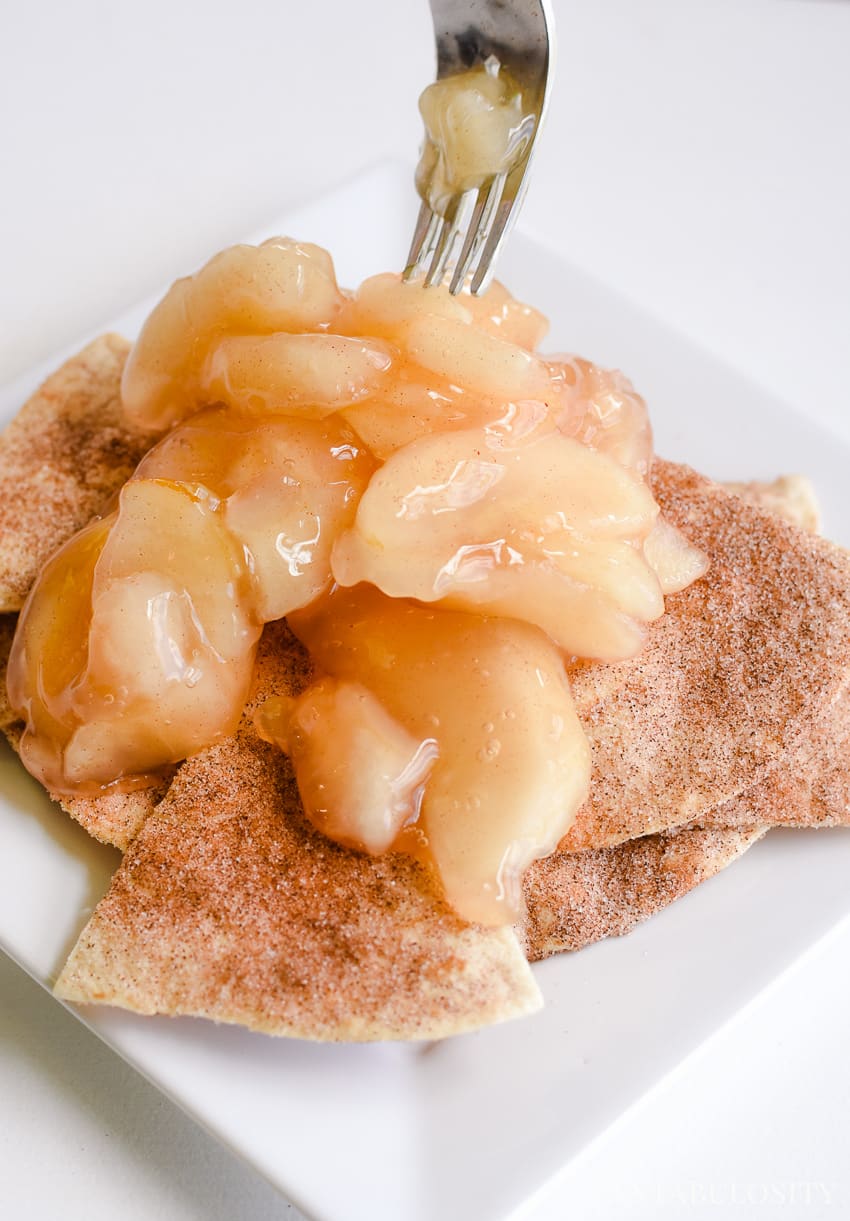
    Canned apple pie filling on top of baked cinnamon and sugar tortilla triangles - easy dessert idea when you don't want to make a whole pie

    We literally ate the apple pie nachos just like this. The filling was poured right out of the can on to the crisps and we ate it. BUT, if you pop this in the microwave for a minute, I bet it would be OUT of this world.

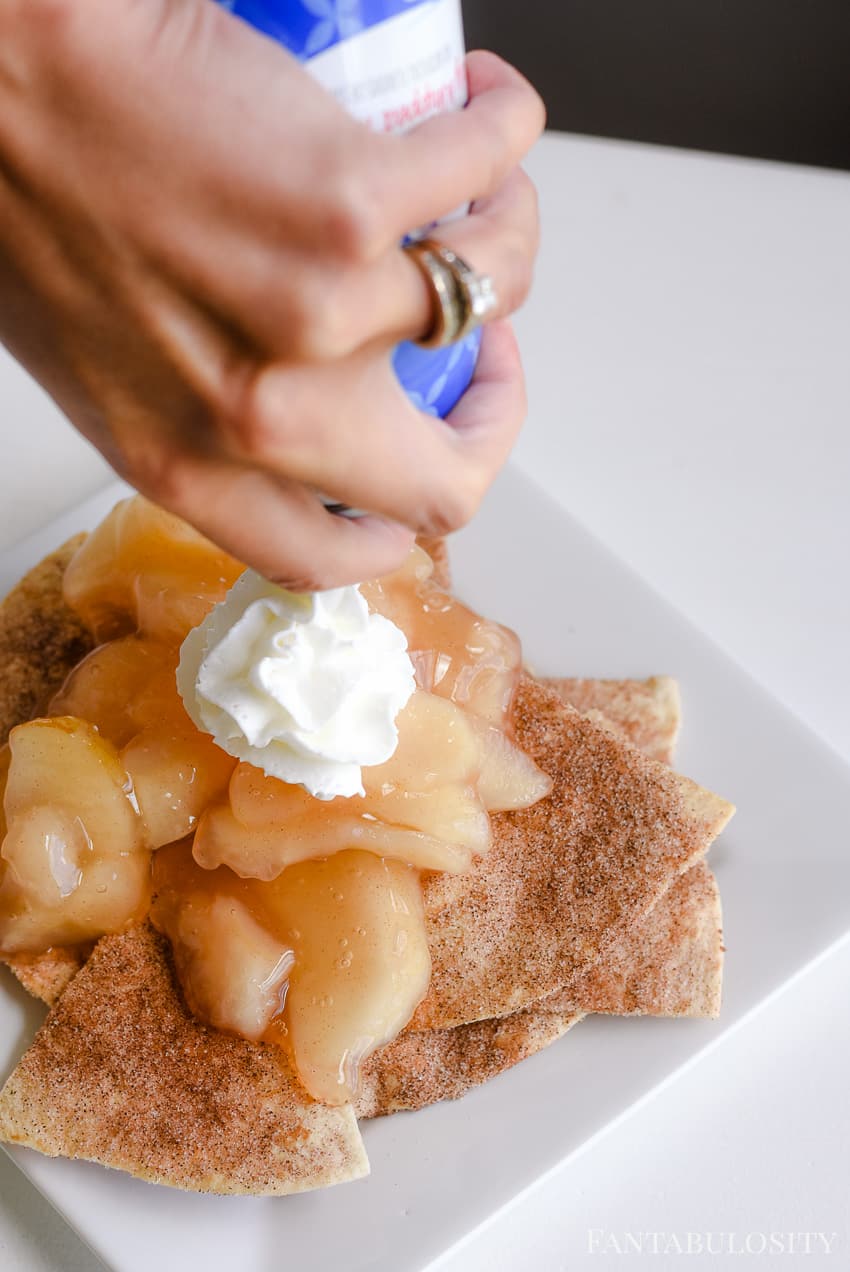
    Top the apple pie nachos with whipped cream for a yummy quick dessert idea
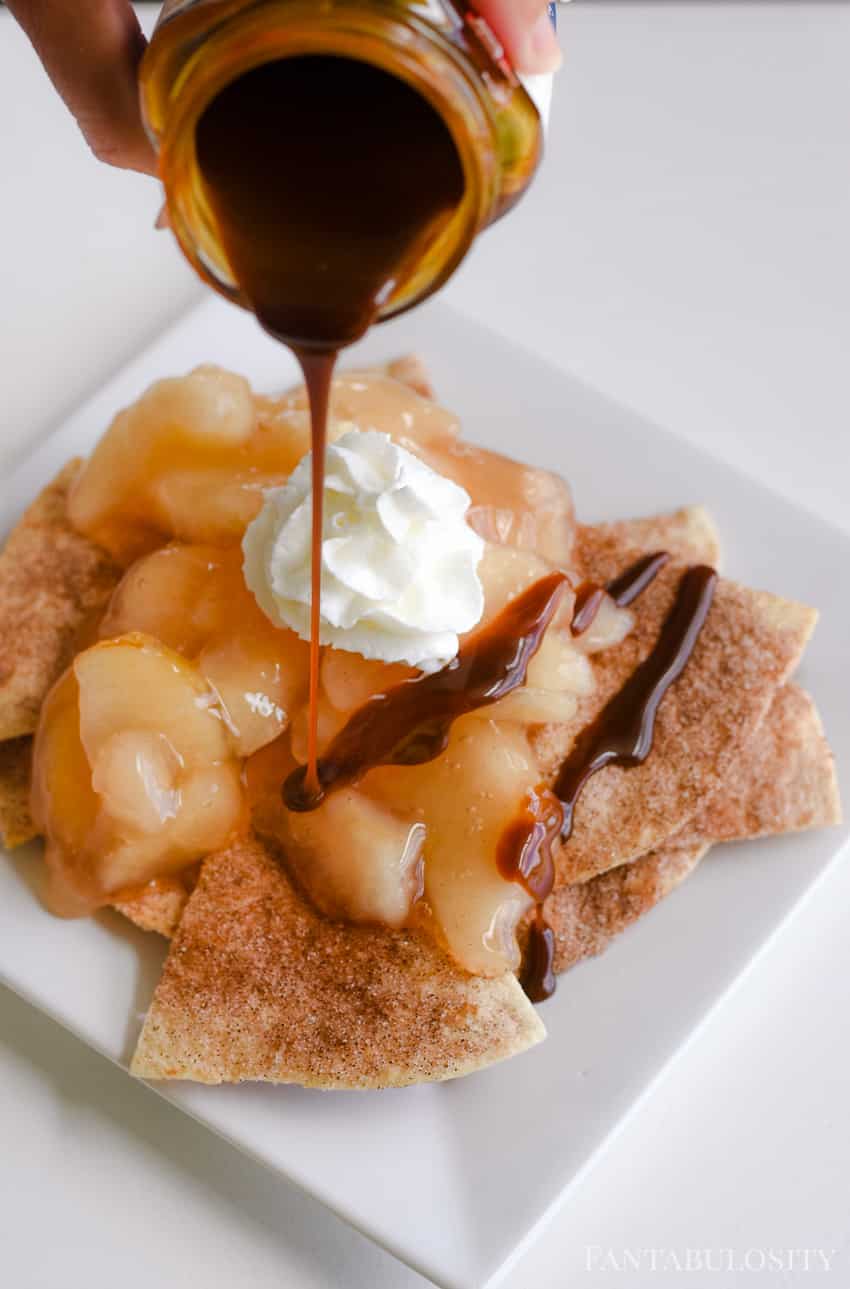
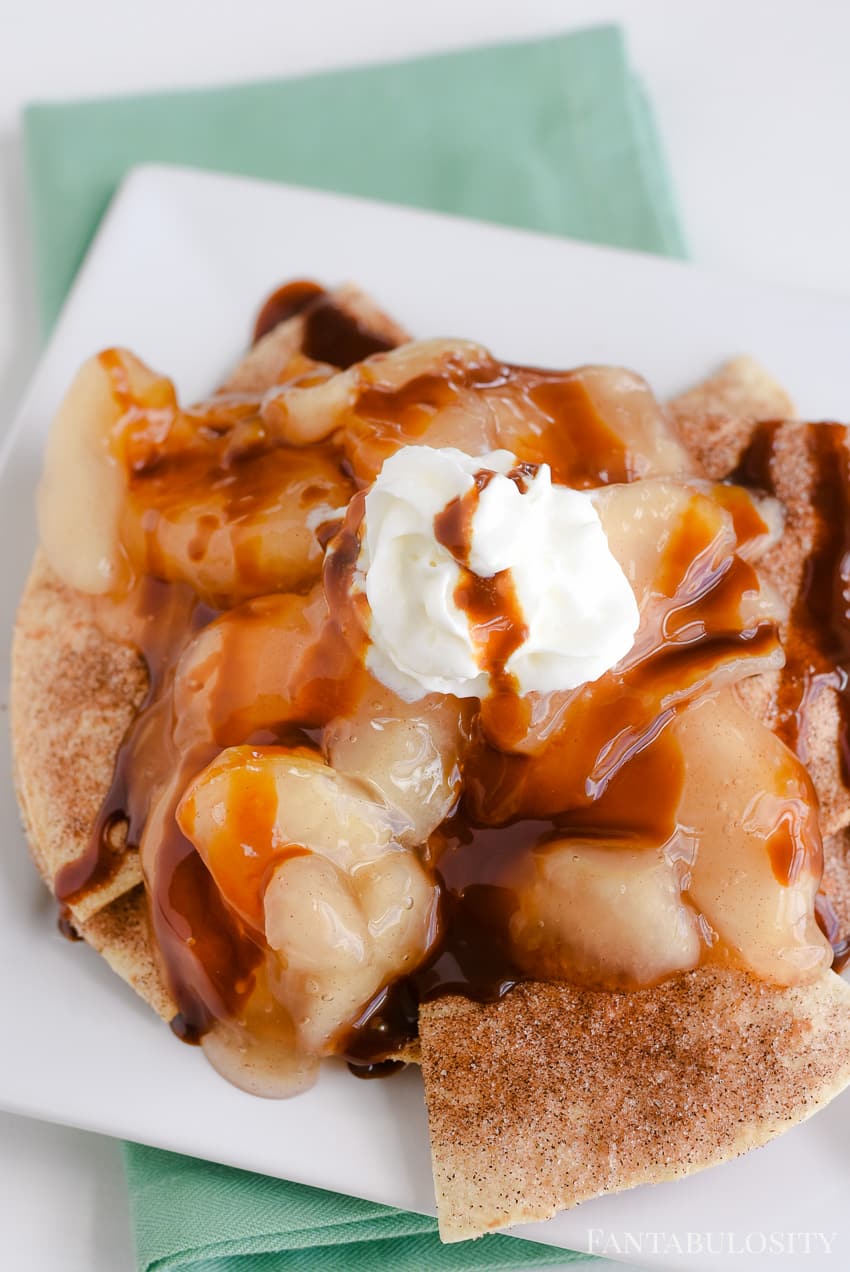
    Using chocolate syrup or caramel drizzle, top the apple pie nachos for a delicious quick and easy dessert idea
    Apple Pie Nachos with Baked Cinnamon Sugar Tortillas

    I caught my kids AND my husband devouring their own little platter when we left the room the other day to work on something else for the Fabulously Fast Dinners Cookbook. So it’s safe to say that this recipe is family approved!

    Recipe

    Apple Pie Nachos - Cinnamon Sugar baked tortillas, topped with apple pie filling! fantabulosity
    Print Pin
    5 from 2 votes

    Apple Pie Nachos with Cinnamon Sugar Tortilla Crisps

    Apple Pie Nachos with Cinnamon Sugar Tortilla Crisps - A recipe that you can whip up with a few store-bought ingredients, with an option to make them even easier!
    Course Dessert
    Cuisine American
    Prep Time 15 minutes minutes
    Cook Time 20 minutes minutes
    Total Time 35 minutes minutes
    Servings 4 servings
    Calories 282kcal
    Author Jessica Burgess

    Ingredients

    • 4 large burrito size tortillas
    • 1 21-ounce can apple pie filling
    • ¼ cup sugar
    • 2 teaspoon cinnamon
    • 1 Tablespoon water
    • 2 Tablespoon melted butter
    • caramel or chocolate drizzle and whipped cream if desired

    Instructions

    • Preheat over to 350 degrees Fahrenheit
    • Using a pizza cutter, cut each tortilla in to 8 triangles
    • Combine sugar and cinnamon
    • Place triangles in a single layer on a greased cookie sheet
    • Brush tortillas with melted butter, and sprinkle with cinnamon/sugar mixture
    • Bake for 15-20 minutes until crispy
    • Assemble nachos by layering tortillas on a serving plate, and top with a ¼ of apple pie filling.
    • Warm in oven/microwave for a few minutes if desired
    • Top with whipped cream and caramel/chocolate drizzle if desired

    Notes

    Nutritional information is figured WITHOUT drizzle and whipped cream. Also, please keep in mind that the nutritional information provided below is just a rough estimate and variations can occur depending on the specific ingredients used. 

    Nutrition

    Serving: 1serving (¼ recipe without whipped cream) | Calories: 282kcal | Carbohydrates: 44g | Protein: 5g | Fat: 10g | Saturated Fat: 5g | Cholesterol: 15mg | Sodium: 462mg | Potassium: 92mg | Fiber: 2g | Sugar: 15g | Vitamin A: 175IU | Calcium: 74mg | Iron: 2.1mg

    Home Tour Part 18 — Craftsman Home Patio Reveal

    June 27, 2017

    Back patio with white cushions, yellow pillows! Craftsman style home

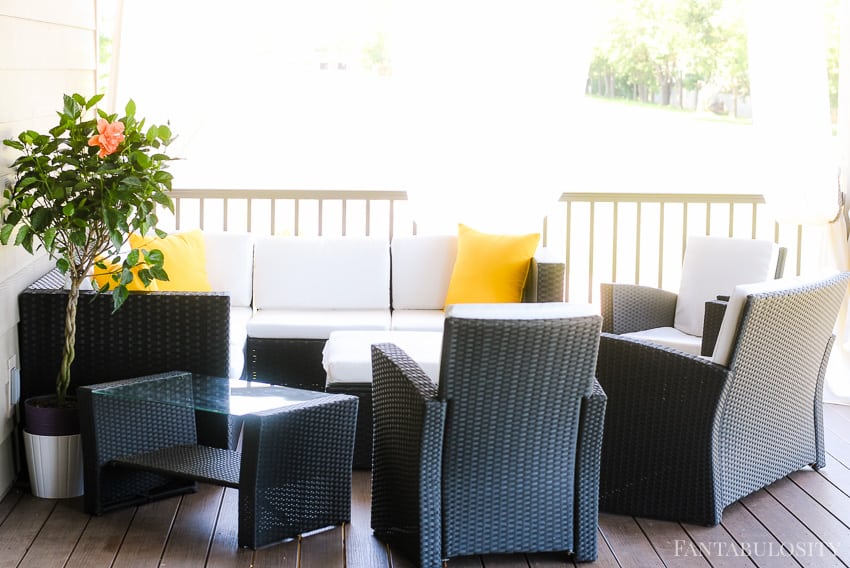
    Home Tour Part 18 - Craftsman Home Patio Reveal: It’s an outdoor oasis surrounded by white patio curtains, with a white cushion sectional from our craftsman style home.

    Craftsman Home Patio Back patio with white cushions, yellow pillows! Craftsman style home

    Craftsman Home Patio Reveal

    I featured our “old” patio in our home tour a couple of years ago (see our other patio decorating ideas), and it has been a YEAR from the moment I started thinking about a new patio look, and I’m happy to say that I finally have it how I’ve wanted it. There have been incredible hurdles through this process, and the crazy part is… there’s really not much to it.

    I mean, new furniture and some patio curtains. How hard can that be, right?! Well oh my goodness. This patio project quickly turned into a story similar to the storyline in the movie The Money Pit. Although I didn’t spend a lot of money on this project, it seemed as if everything kept going wrong from the start. I’d get one item figured out, and then something else would go wrong.

    It definitely wasn’t as easy as the front porch of our craftsman home.

    First the Furniture…

    I originally ordered the new sectional to have for my Favorite Things Party, but the original seating set that I ordered never made it. (Lost in shipping.) Then after reordering, it went on back order for a few months. When I finally received it, the cushions were gray instead of white, and the furniture was black instead of brown. I kind of went a bit crazy during this time, but I must say that after about 5 months of back and forth… Wayfair sent me the white cushions, and I decided to just live with the wrong color of furniture. So, needless to say, THIS is why my patio wasn’t complete and ready to reveal last season.

    Craftsman Home Patio. Outdoor curtains for a back patio. LOVE the white flow to this on this craftsman style home

    Then the Patio Curtains…

    I LOOOOOVE my patio curtains. (I talked about them a lot in the post about how to make DIY Patio Curtain Tie Backs) But our house is up on a hill, and the back patio can take a big gust of wind like nobody’s business. So through a bit of trial and error, I think we finally have these babies hung on hooks that can take a tornado. Bring it, mother nature!

    You can buy the same patio curtains!

    You can also buy the outdoor curtain rods!

    Plus, get my DIY tutorial curtain tie-backs that I made for these, for under $5.00!

    But I’m In Love…

    Even though it has been a bit of a struggle here and there, I’m happy to say that the patio is now a place I refer to as my oasis. It’s simple and it’s relaxing.

    Video Tour

    Along with the photos that you’ll see below, I’ve created a quick video tour on my YouTube channel to give you an up-close visual experience too!

    Craftsman Home Patio. Back patio seating area with couch/sectional and white cushions! Perfect with a craftsman home style.

    I’ve included links to similar furniture pieces at the end of this post, in case you’re in the market for your own patio too!

    Craftsman Home Patio. Back patio design with sectional and curtains. White and yellow pillows - Fantabulosity Home Tour

    White Cushions? She-Crazy!

    When shopping for a new sectional for the back patio, I knew I wanted white-white cushions. My friends thought I was crazy, and STILL think I’m crazy to have white cushions with two messy little boys at home. But I wanted to take the risk, and I’m happy to say that a year later… I’m still happy with the decision.

    Scotchgard has been my best friend, and bleach and OxyClean have also been a swell thing to have on hand.

    Craftsman Home Patio. Yellow outdoor pillows for a white sectional sofa

    Yellow Throw Pillows

    With dark brown (almost black) furniture, and white cushions and patio curtains, I had the hardest time deciding on a pillow color. But when I stopped in at World Market the other day, they had their outdoor pillows on sale and the yellow caught my eye. I’m still not 100% sure I’m going to stick with yellow, but they’ll work for now. I’ll be honest, I’m keeping my eye out for some pale pink pillows, and will just hope that my hubby doesn’t notice them. 

    Craftsman Home Patio. Flowers for a back patio—craftsman style home with white cushions and pillows

    Floral Touch

    I’m a sucker for a green plant on my patio. I’m not much of a green-thumb, so if it’s a plant that can take care of itself, that’s even better. I snagged this one at Lowe’s the day I took these photos, and my poor little flower died the next day. Looks like succulents are in my future.

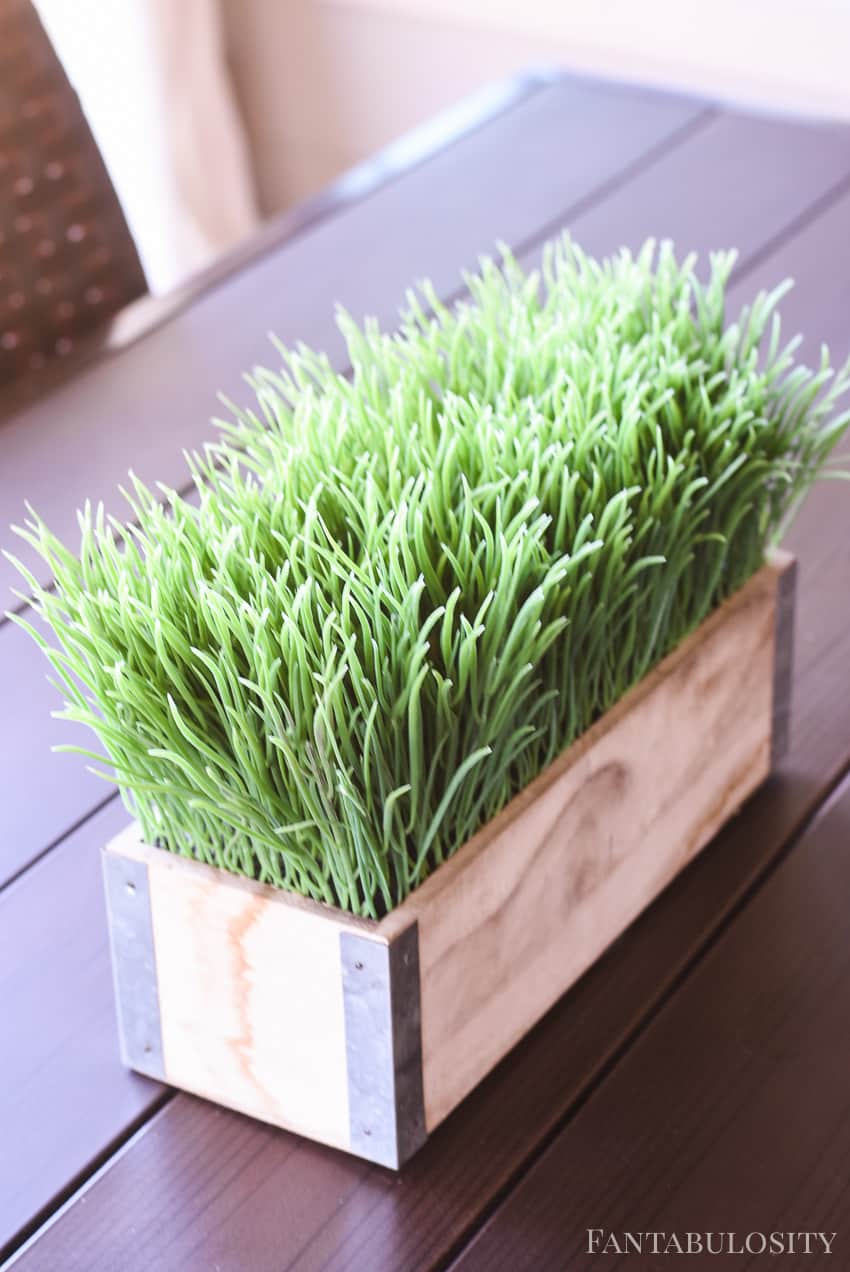
    Or Fake Grass…

    Better than succulents, is FAKE greenery. It may not look the best, but it at least adds a pop of color and can withstand that wind and nasty weather that may come about.

    Craftsman Home Patio. Greenery floral for back porch and patio decor fantabulosity home tour

    I put this arrangement on my dining table. I love having this table and chairs out for when the kiddos want to eat outside or when we have people over for a cookout.

    Craftsman Home Patio. Outdoor dining table for patio. Aluminum - brown with white curtains

    My Happy Place

    The back patio is definitely my happy place. Feel free to virtually come over anytime! You’ll more than likely find me out here (yes, I’m sitting out here typing this now) if the weather is above 60 degrees here.

    Craftsman Home Patio. Brown outdoor wicker with white cushions and yellow pillows - craftsman house plan

    Sectional Details

    Sectional seen here against the wall, but with gray cushions: Magari 4 Piece Deep Seating Group

    Similar sectional with white cushions: Outsunny Rattan Wicker 7 pc Sectional

    Similar sectional with white cushions: Varick Gallery Camron Lounge Seating Group

    4-Piece Seating Group Details

    Similar 4-piece seating set with gray cushions: Varick Gallery Ferreira Deep Seating Group

    Similar 4-piece seating set with beige cushions: Overstock – Costway 4 Pcs Outdoor Seating Set

    Similar seating set with white (or they look white) cushions: Best Choice Sectional

    Tour the Other Rooms in Our Home:

    Part 1: The Exterior

    Part 2: The Master Bedroom

    Part 3:  The Master Bath

    Part 4: The Kitchen

    Part 5: The Playroom

    Part 6: The Guest Bath

    Part 7: The Pantry

    Part 8: The Patio/Deck

    Part 9: The Nursery

    Part 10: *Old* The Office/Craft Room

    Part 11: Big Boy Room

    Part 12: The NEW Nursery

    Part 13: The Dining Room/Foyer

    Part 14: The Guest Bedroom

    Part 15: The Living Room

    Part 16: New Office Reveal

    Part 17:  Garage 

    Craftsman Home Patio. Patio on craftsman style home-how to decorate

    DIY Stencil Drink Serving Tray

    June 23, 2017

    Flamingo DIY Drink Tray using Martha Stewart Paint

    As part of the Martha Stewart “Make it Martha” program, I received complimentary products to make this DIY craft. Thank you Martha!

    DIY Stencil Drink Serving Tray: Using Martha Stewart’s new line of paints, we created the cutest flamingo serving tray for summer entertaining! 

    Flamingo DIY Drink Tray using Martha Stewart Paint

    DIY Drink Serving Tray

    Since my childhood, I’ve been so infatuated with the creativity of Martha Stewart. She totally encompasses everything I love: DIY, cooking, home decor, flowers, and so much more. So I’m sure you can guess how I did cartwheels when I received the invitation to work with the “Make it Martha” program for Martha Stewart.

    I may have jumped up and down, done a twirl, and left my husband saying “Uh, what’s going on, and why are you acting like that?” 

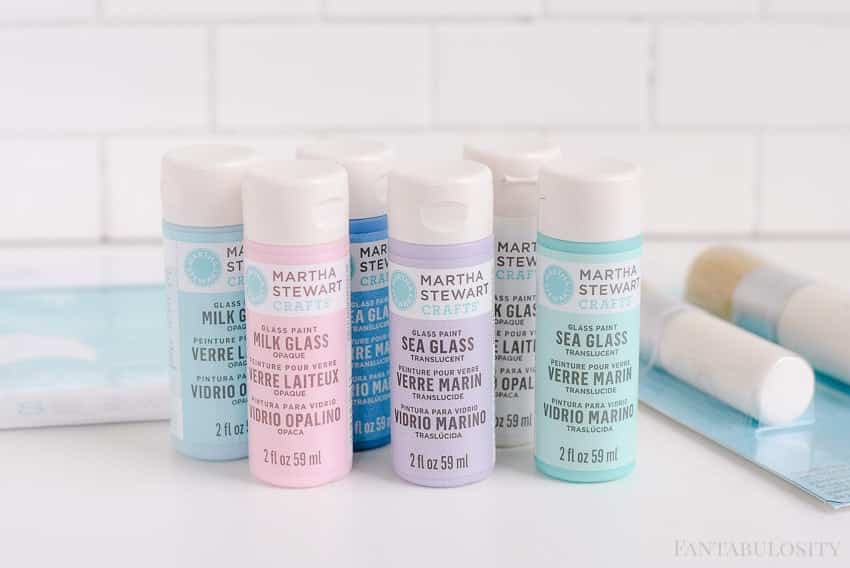
    Martha Stewart Paint for DIY crafts

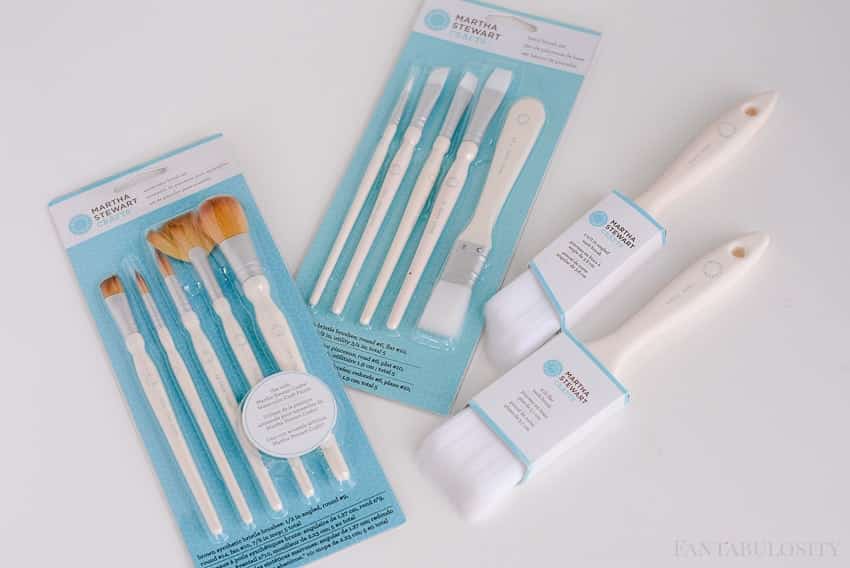
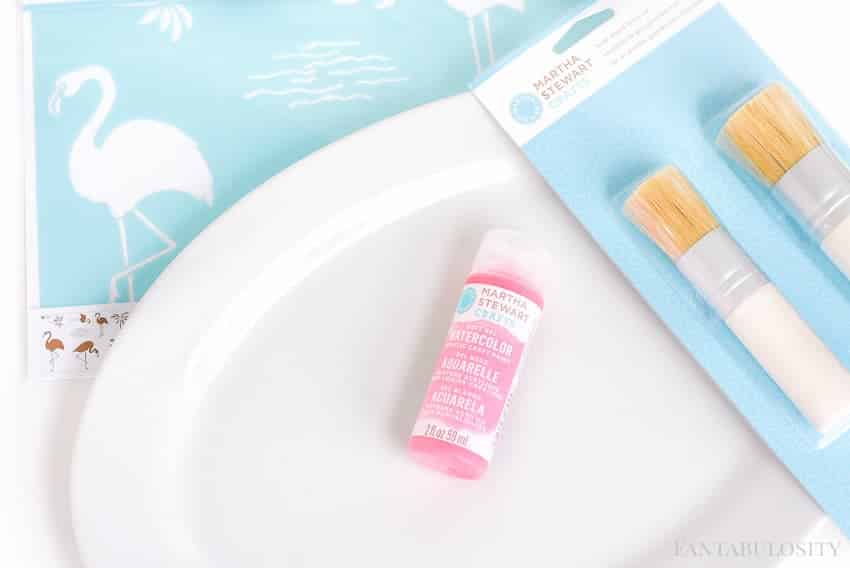
    Here’s a peek at some of the Martha Stewart goodies that I’ve received. I canNOT wait to get to crafting a ton of DIY projects with the new line of paints and paint tools at Michaels!

    Martha Stewart Paint for DIY crafts

    DIY Stencil Drink Serving Tray Tutorial

    The first craft I wanted to tackle was this drink serving tray. When the idea came to me, I knew EXACTLY where I was headed. To the FERGUSON FARM. My momma is the ultimate crafter, and she knows her way around a stencil or two. She was a huge help making this project!

    This DIY tutorial was incredibly easy, since I was able to use the new adhesive stencils. Have you used these!? Oh my goodness. The adhesive helps so much with any potential paint leakage, and prevents the stencil from moving around while painting. These were MADE for people like me!

    Flamingo DIY Stencil Drinking Tray

    To get started, we used the following:

    • White platter/tray

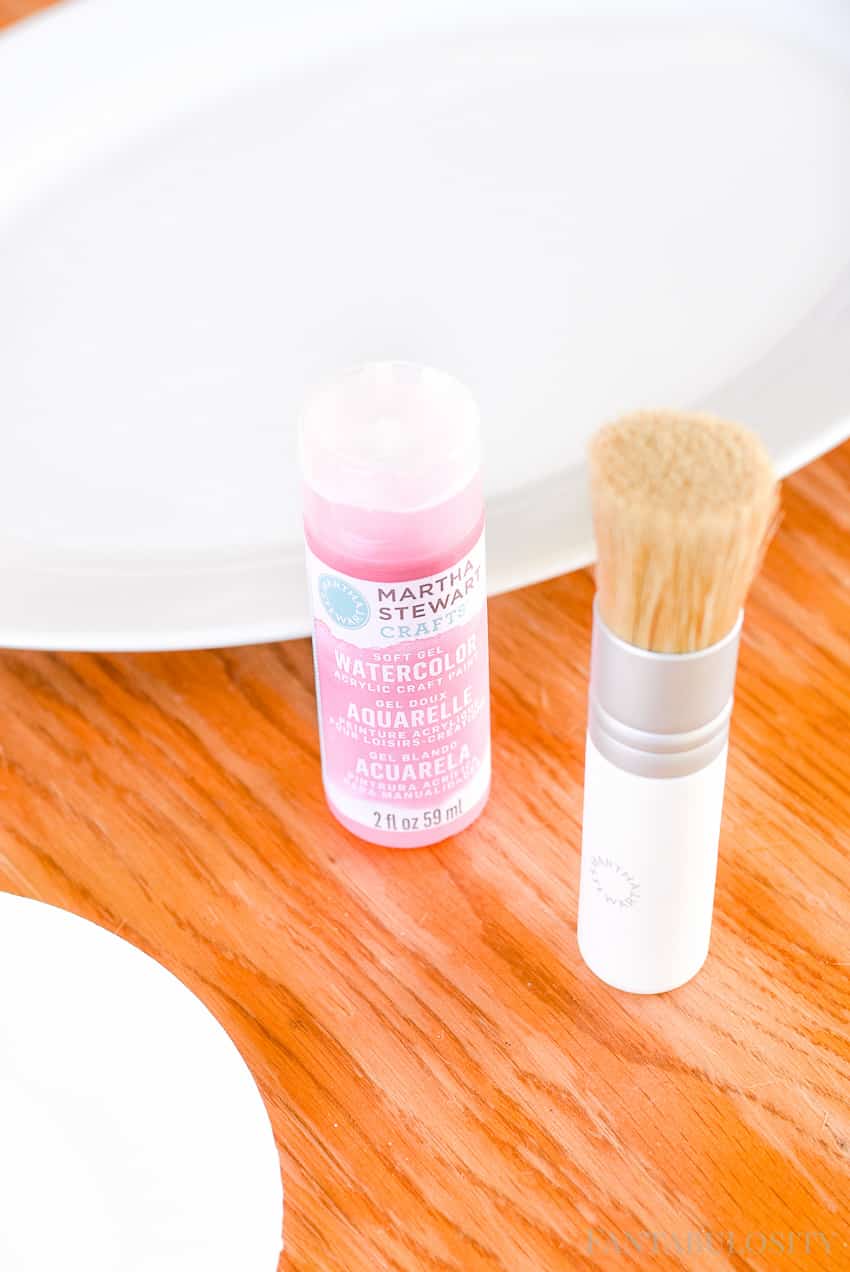
    • Martha Stewart Crafts® Soft Gel Watercolor Paint, Pink Dahlia color

    • Martha Stewart Crafts® large stencil brush set

    • Martha Stewart Crafts® Adhesive Laser-Cut Stencil

    • Painter’s tape

    • Paper towel

    • Paper plate

    Martha Stewart Paint for the drink tray

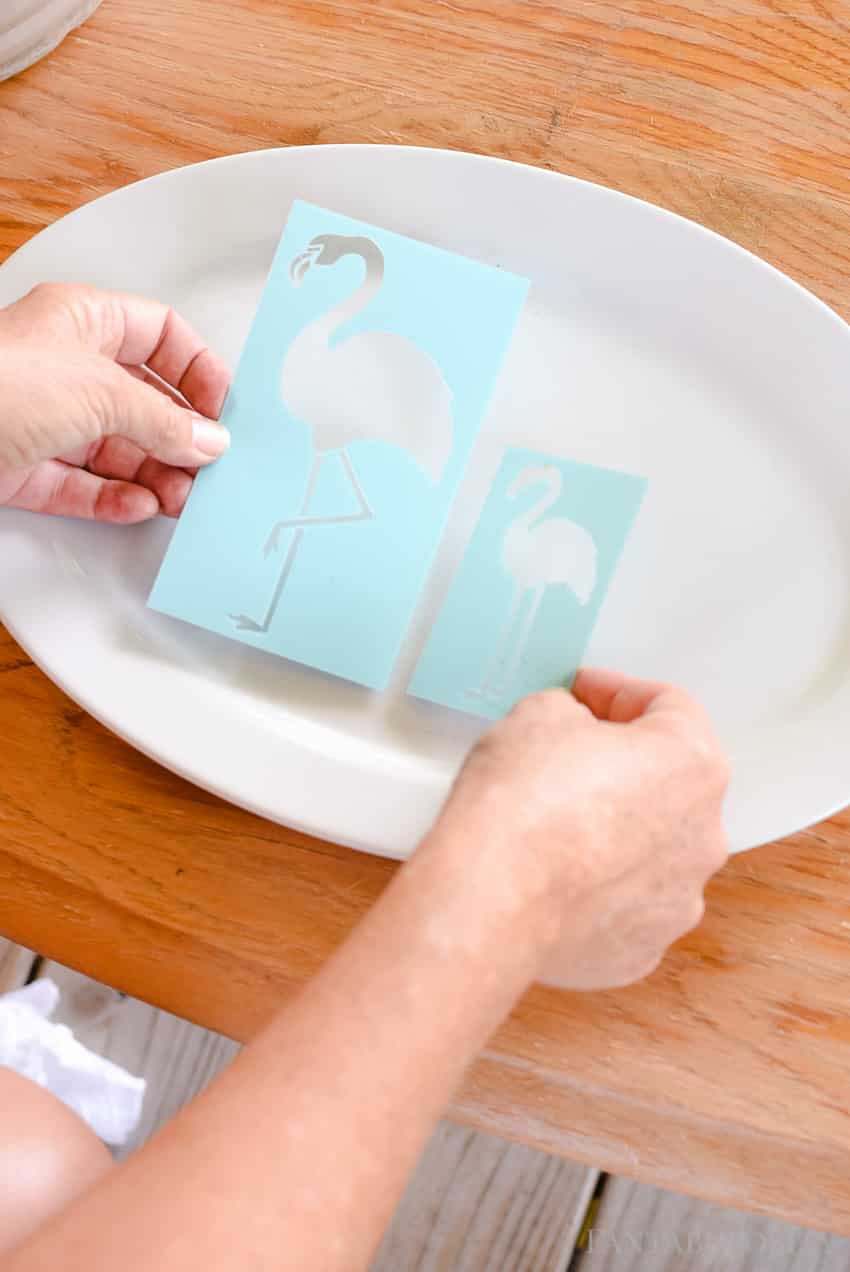
    Peel the stencil from the adhesive paper, and place the stencil where you’d like it on the tray. We preferred it centered on ours.

    Flamingo stencils from Martha Stewart DIY crafts

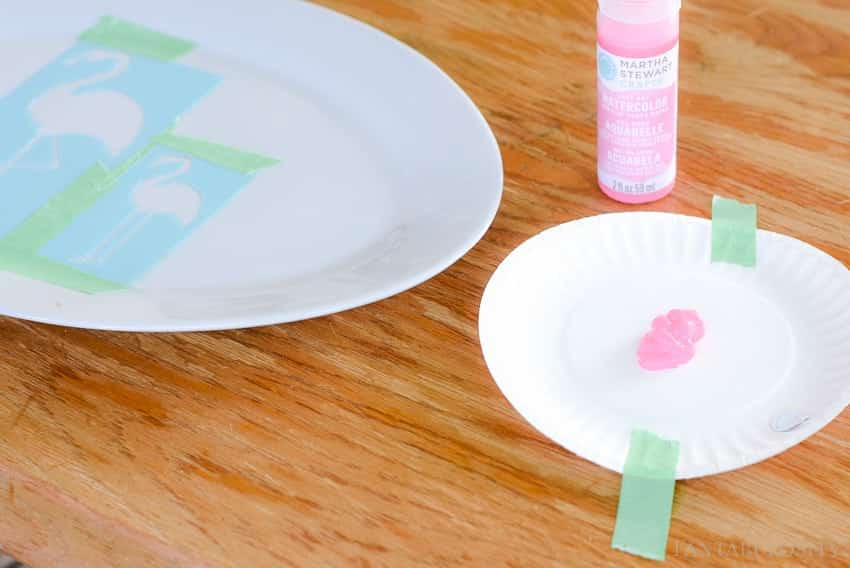
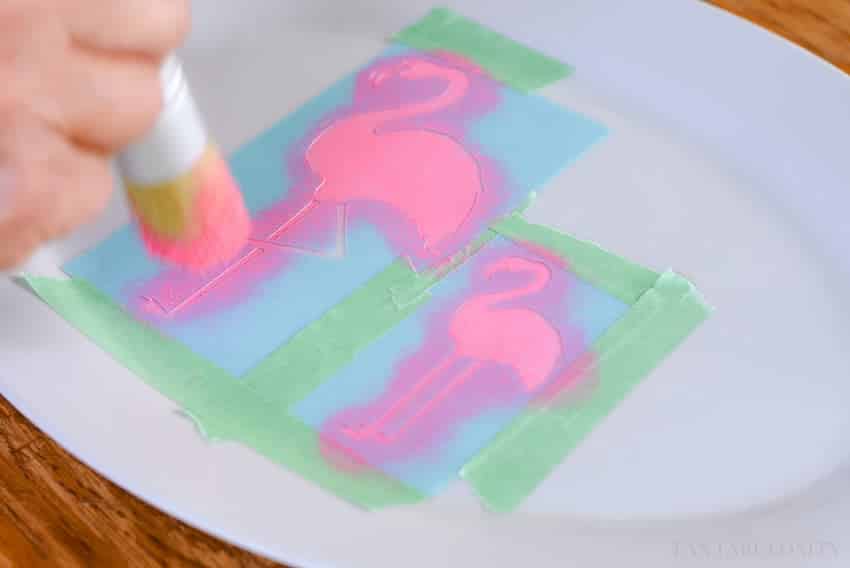
    Next, disburse a small amount of paint (a small amount will go a long way) on to a paper plate.

    Pink paint for flamingo drink serving tray
    We taped our paper plate to the surface so the wind wouldn’t blow it away while crafting outside.

    Push the paint up in the brush for the stencil. Martha Stewart Paints

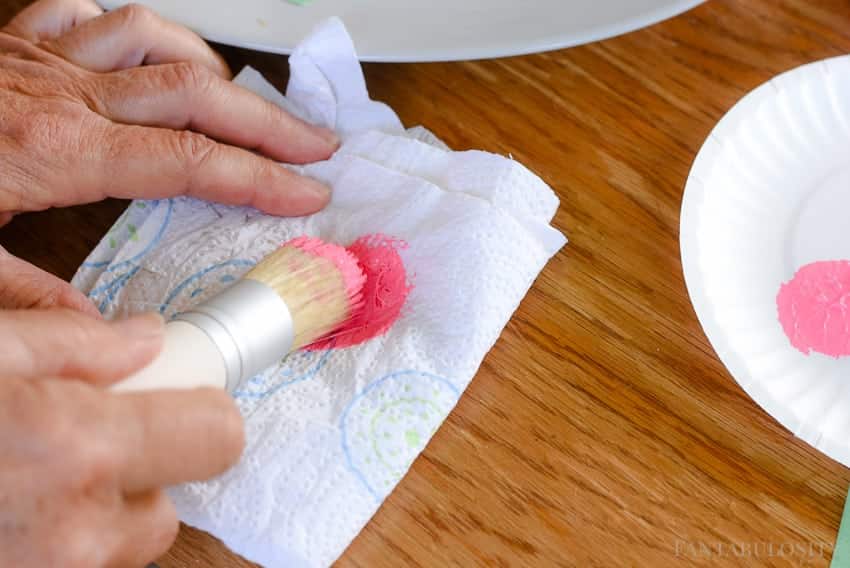
    Dab the stencil brush gently into the paint, and blot it on a paper towel, twirling in a circular motion, pushing the paint up into the stencil brush.

    Flamingo DIY Drink Serving Tray: Martha Stewart Paints

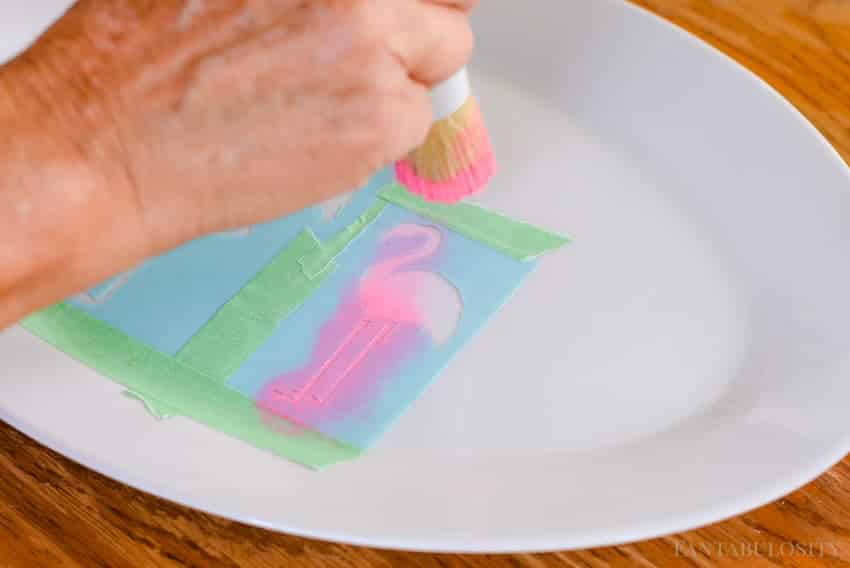
    Next, dab the brush onto the stencil, covering the stencil cut-out. Repeat the process until your craft has reached the desired look.

    Pink stencils for drink serving tray using Martha Stewart paint

    Flamingo DIY Stencil Drinking Tray using Martha Stewart Paint for DIY Projects

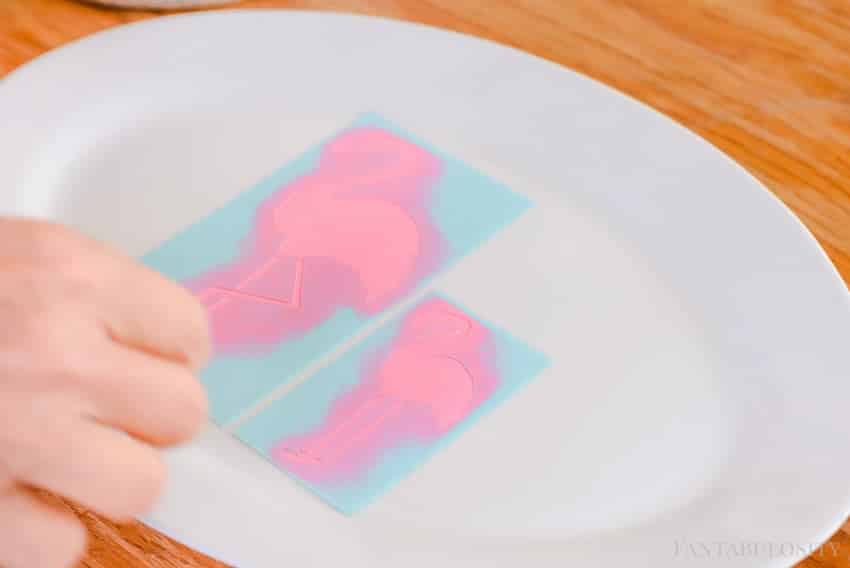
    When you’ve finished painting the stencil cut-out, remove the stencil very carefully.

    Pink stencils for DIY flamingo drink tray

    DIY Drink Serving Tray - Pink Flamingos

    When the paint dries, it’s ready to use!

    NOTE: Paint is not dishwasher or food safe!

    Drink Serving Tray made with Martha Stewart Paint

    Drink Serving Tray made with Martha Stewart Paint. Such a cute DIY

    Flamingo DIY Drink Serving Tray using Martha Stewart paints

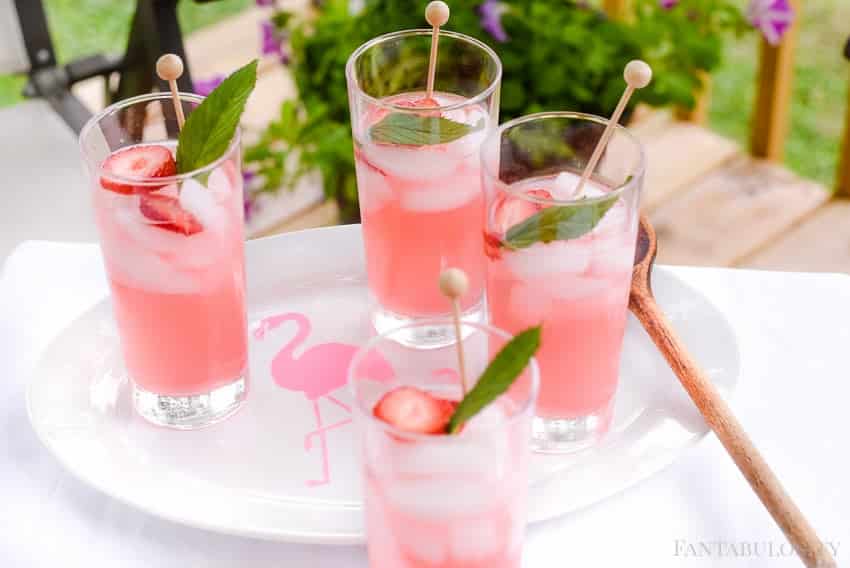
    After crafting, the boys took a break from playing in the bubbles and mud, and thought they needed to partake in my little lemonade party.

    Kiddo drinking lemonade

    Martha Stewart Crafts® Line at Michaels

    You can find all of the Martha Stewart Crafts® at Michaels.com, that I used on this DIY project here:

    Pink Dahlia Martha Stewart Crafts® Watercolor Paint

    Martha Stewart Crafts® Adhesive Laser-Cut Stencil, Flamingo

    Martha Stewart Crafts® Stencil Brush Set, Large

    Thank you!

    Thank you so much for coming by! I’d LOVE to hear what you plan to stencil on your drink serving tray! Let me know below in the comments!

    Fried Cake Bites — At Home Carnival Food

    June 16, 2017

    Fried Cake Bites - Carnival Food at Home

    Fried Cake Bites - At Home Carnival Food: A sweet treat that your taste buds will fall in love with, and it will BLOW your mind how easy they are!

    Fried Cake Bites - Carnival Food at Home

    Oh friends… I couldn’t keep this from you any longer, and I may have stumbled upon a guilty pleasure that will engage your taste buds on so many levels. Anytime a dessert is “fried,” it tends to become a new favorite in our house, like these fried chocolate pies.

    So while at the grocery store the other day, walking past the

    “Oooops, I Baked Too Much”

    sign, I saw this incredibly delicious cake sitting all by its lonesome on the shelf, with a bright yellow price tag. The cake was marked down so cheap that I didn’t think twice about putting it in my cart (with no plan in mind for this sweet treat at all).

    The next day when my gal pal Kate came over (on the day where we get crafty in the kitchen), we started pondering over how we could use this cake for something incredible. Well friends, the thought “Fried Cake Bites” came to mind, and we ran with it. I can’t WAIT to show you how easy this was, and I especially can’t wait to hear how much you’re a new fan of fried cake bites too!

    Fried Cake Bites Tutorial:

    Alright, we’re going to keep things super simple here and you’re going to LOVE the outcome.

    Fried Cake Bites - Using a store bought cake to make this super easy.

    Frosted Store Bought Cake

    You’re MORE than welcome to make your own cake and add your own frosting for these, but it was insanely easy to just use a store-bought frosted cake. The cake we used was a 2 layer, 8-inch vanilla cake with vanilla icing. But any flavor should do.

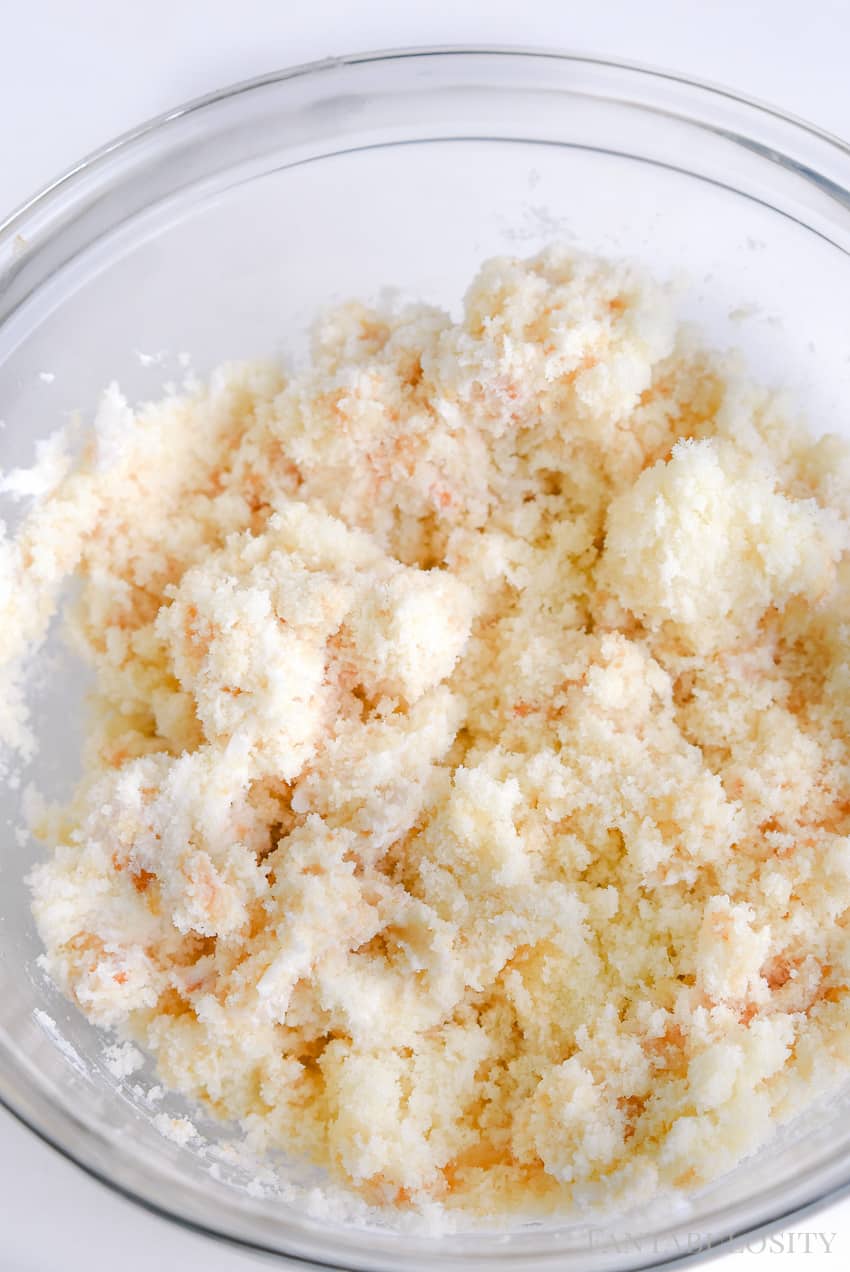
    Stir/mash until frosting is evenly distributed with cake.

    Fried Cake Bites - at home carnival food

    Although a store-bought cake makes things super easy, these cake bites wouldn’t be NEAR anything special without the other stars of the show that make them to-die-for.

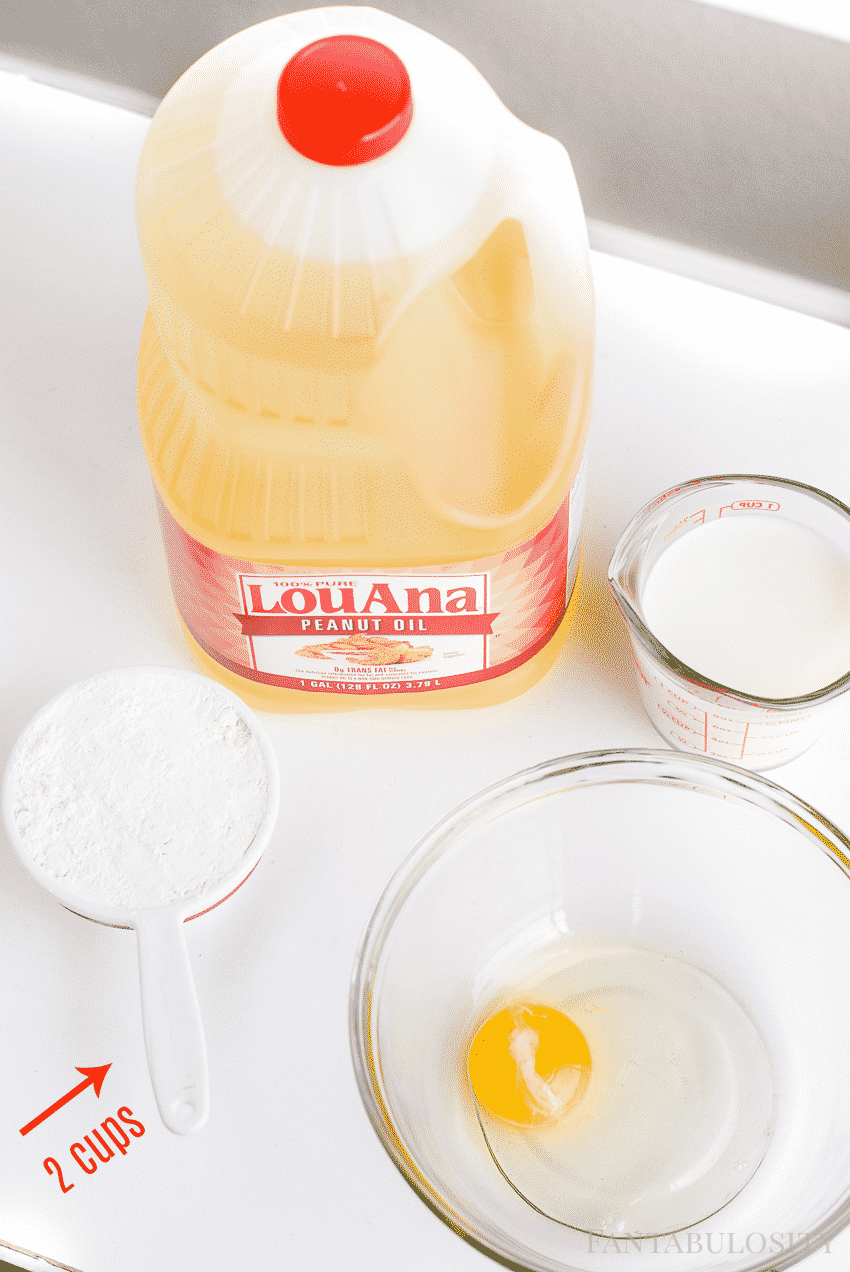
    • LouAna Peanut Oil –  See notes below
    • Pancake Mix
    • Egg
    • Milk
    Peanut Oil for fried cake bites dessert idea

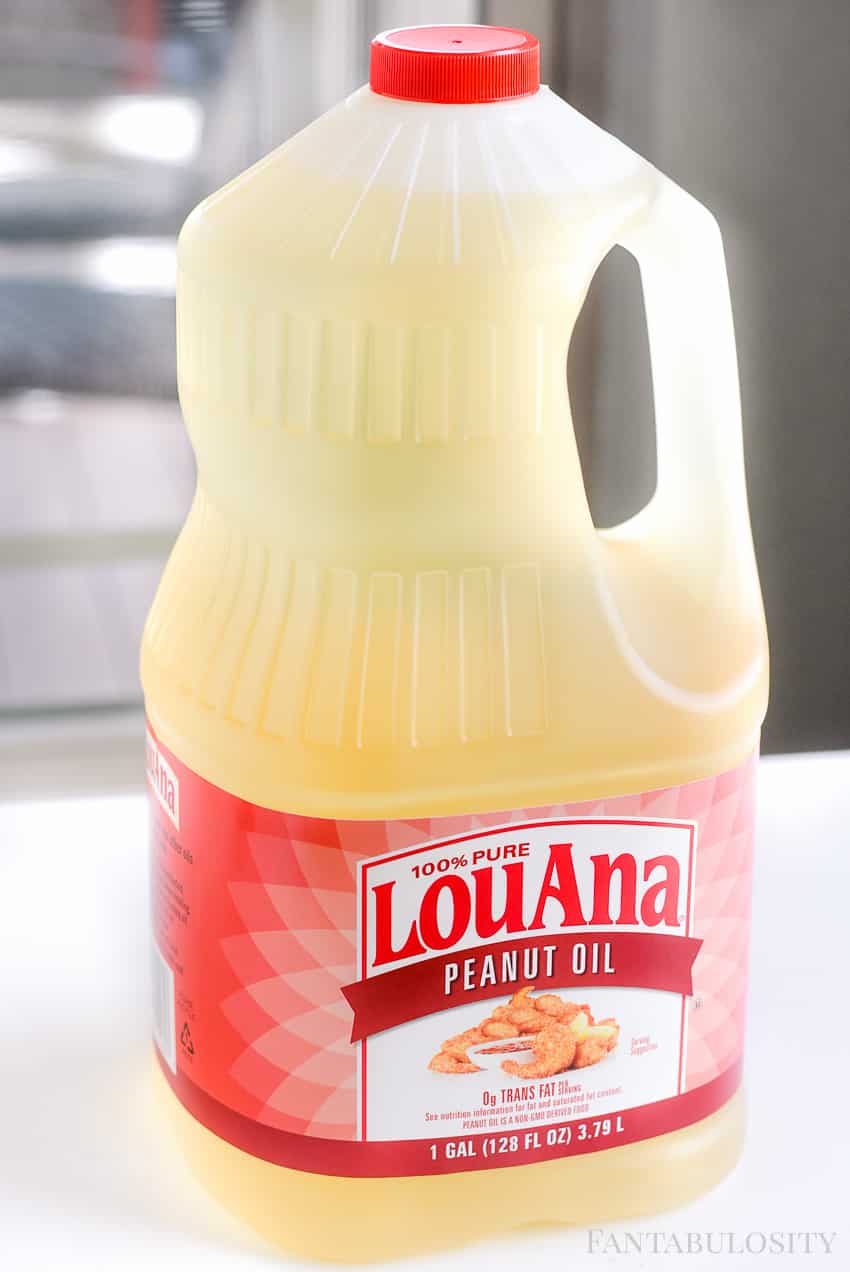
    LouAna Peanut Oil

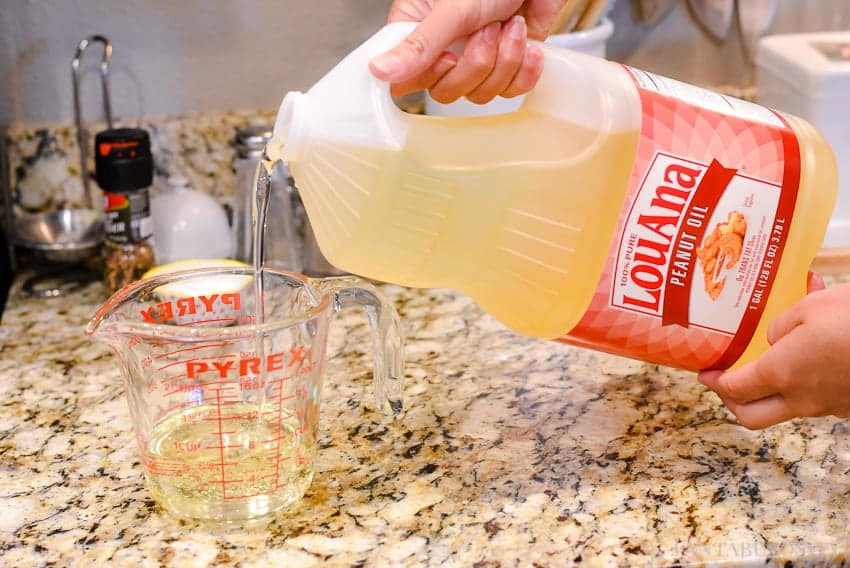
    You’re going to use 2 teaspoon of Peanut Oil and mix it in with the pancake batter, but you’ll also use 2 cups of the oil to fry the cake bites in.

    Fried Cake Bites - Carnival Food at home

    Cake Bite Batter + Assembly

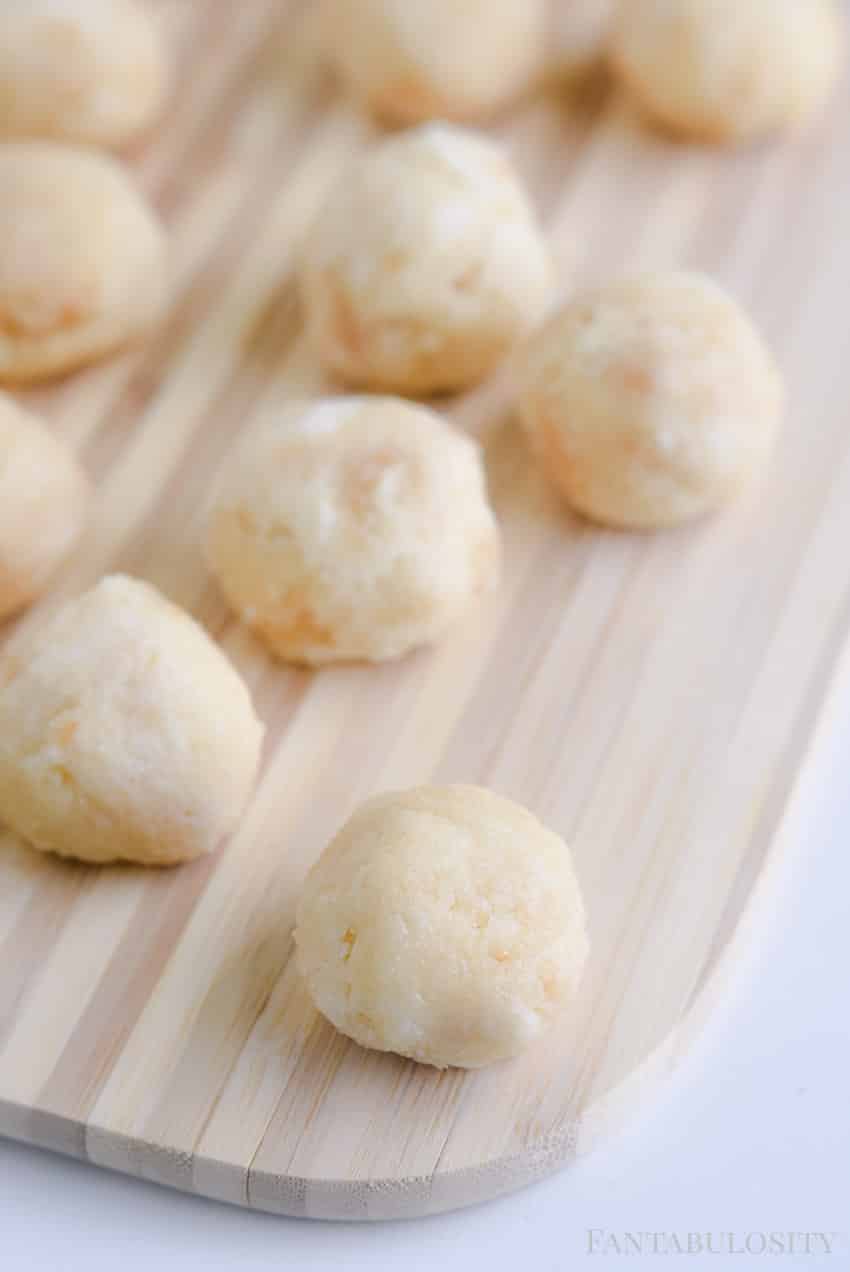
    Using your hands, roll up individual cake bites into about one-inch balls and set aside.

    In a separate bowl, mix together the 2 teaspoon oil, egg, milk, and pancake mix.

    Fried Cake Bites
    Fried Cake Bites - Carnival Food dessert idea

    Fry those Babies

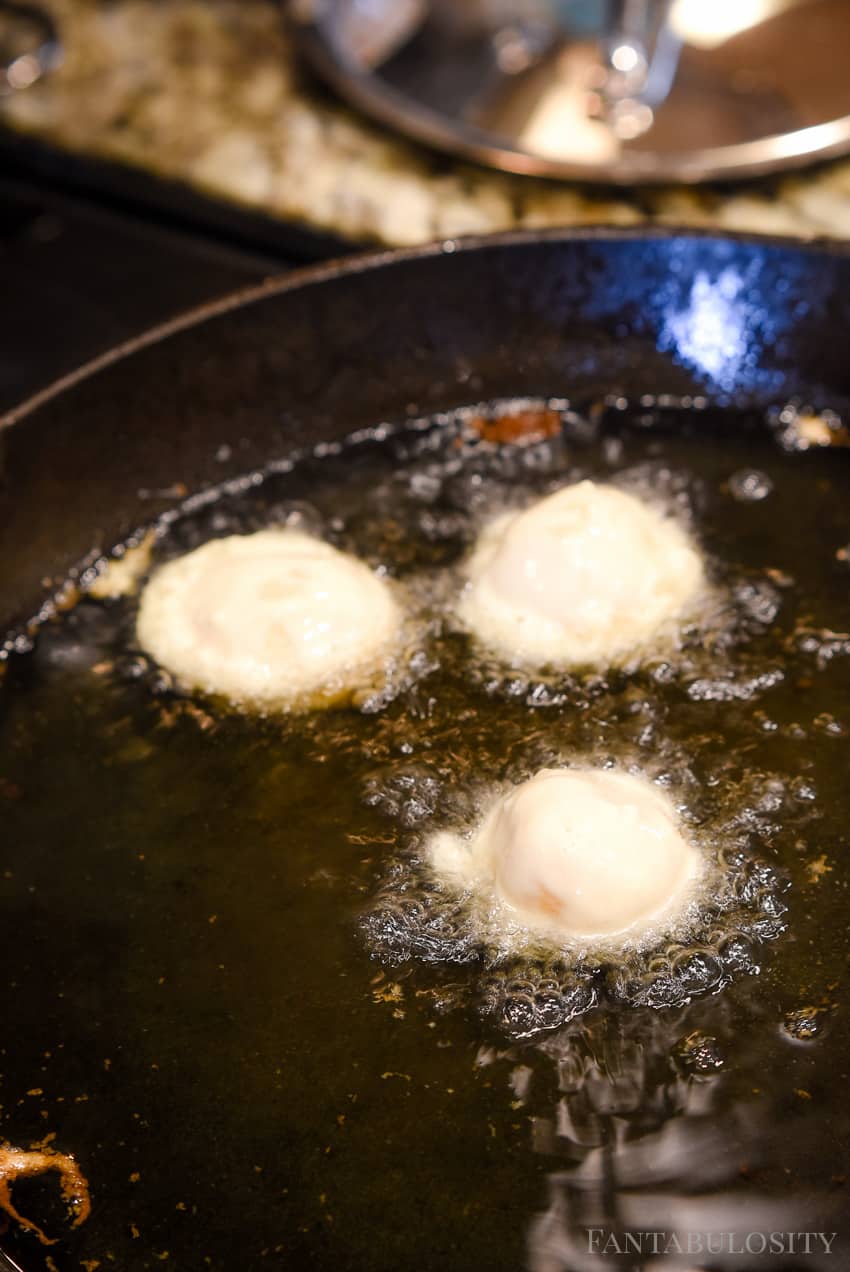
    Heat up 2 cups of Peanut Oil in a pan/skillet (my favorite to use for these is cast iron), over medium-low heat. To test to see if the oil is ready (and not too hot), drop in a dab of the batter to make sure it’s ready for frying.

    Once the oil is ready, dip each cake bite into the pancake batter and gently place each cake ball in to the pan.

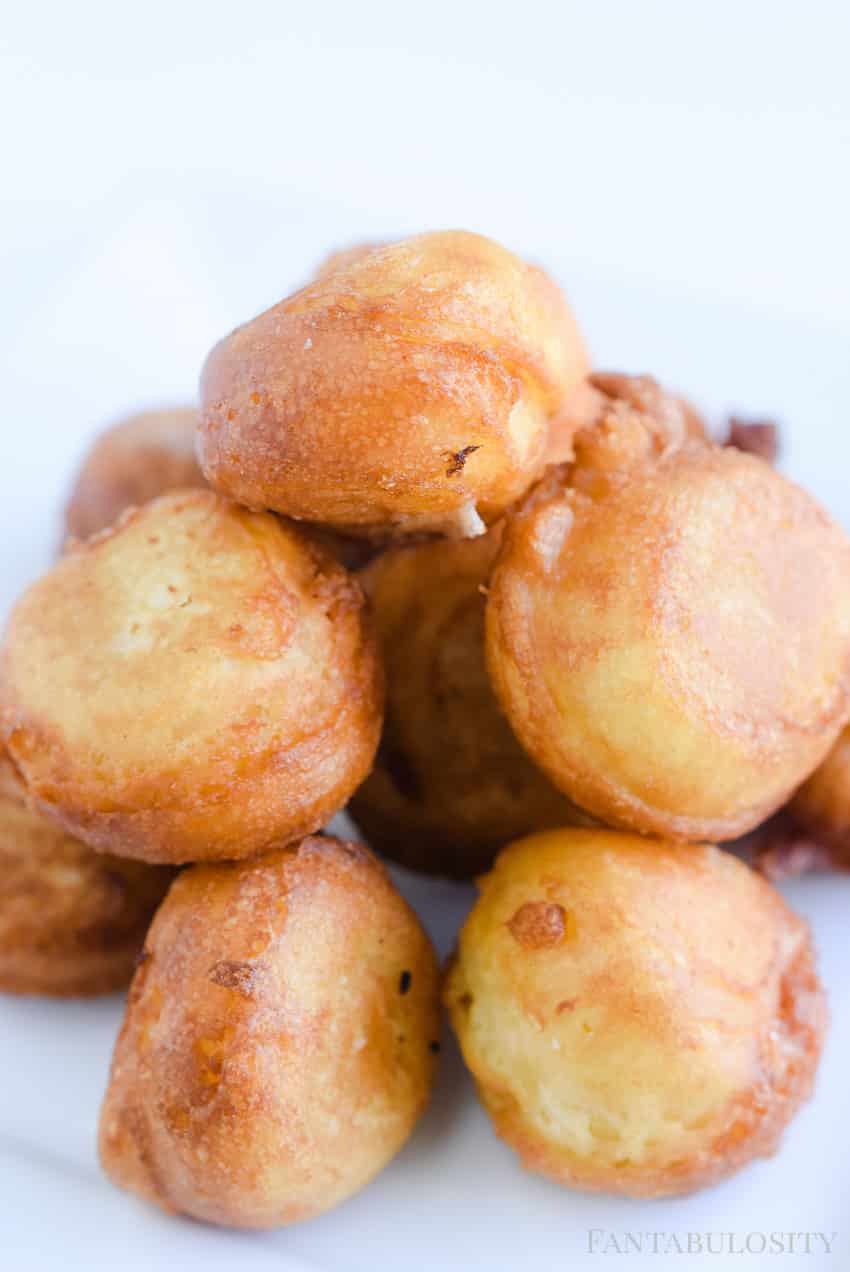
    Fry for one minute, rotating often, until each cake bite reaches a golden brown. Place fried cake bites on to a plate lined with paper towels to absorb excess oil.

    Fried Cake Bites - easy dessert idea

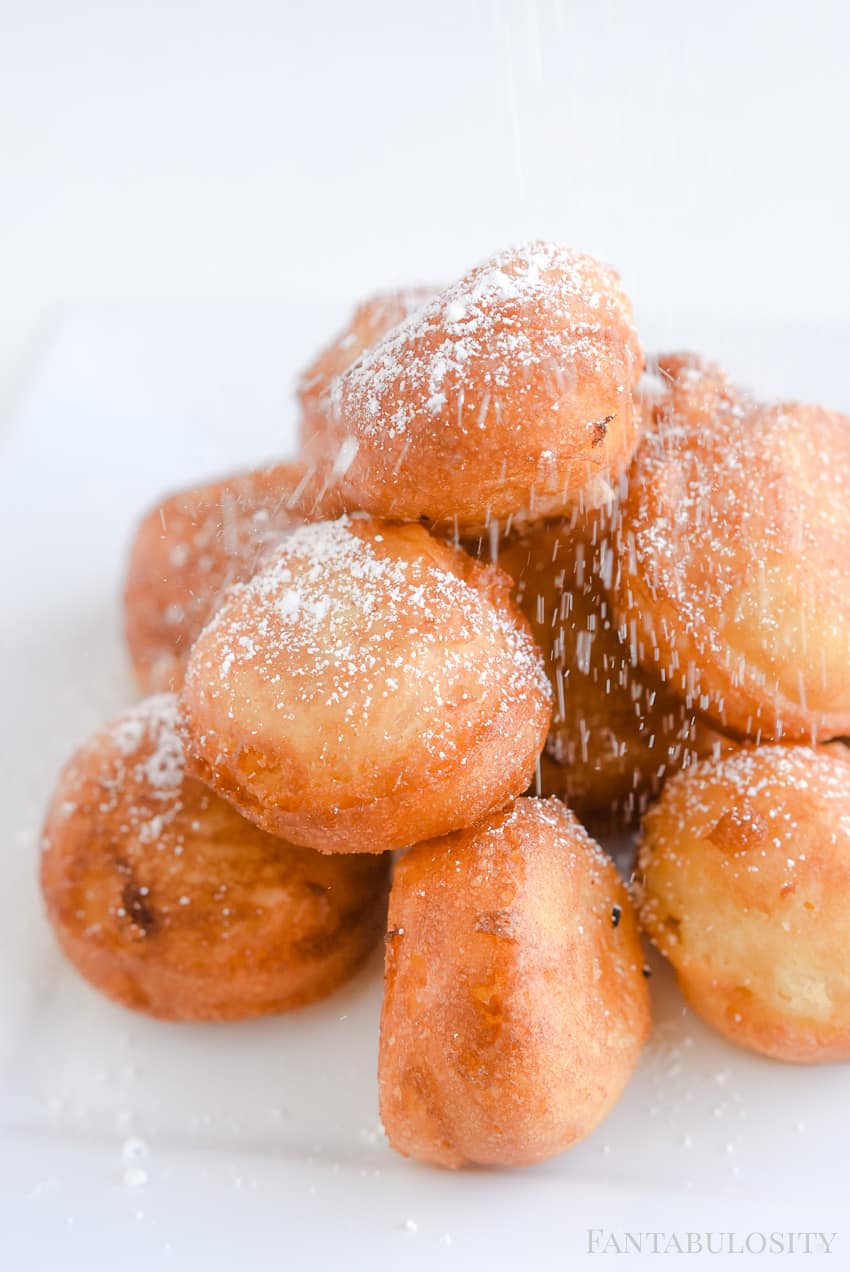
    Remove from pan and allow to cool for a few minutes, and sprinkle with powdered sugar if desired.

    Fried Cake Bites - easy dessert idea

    I Mean… For Real…

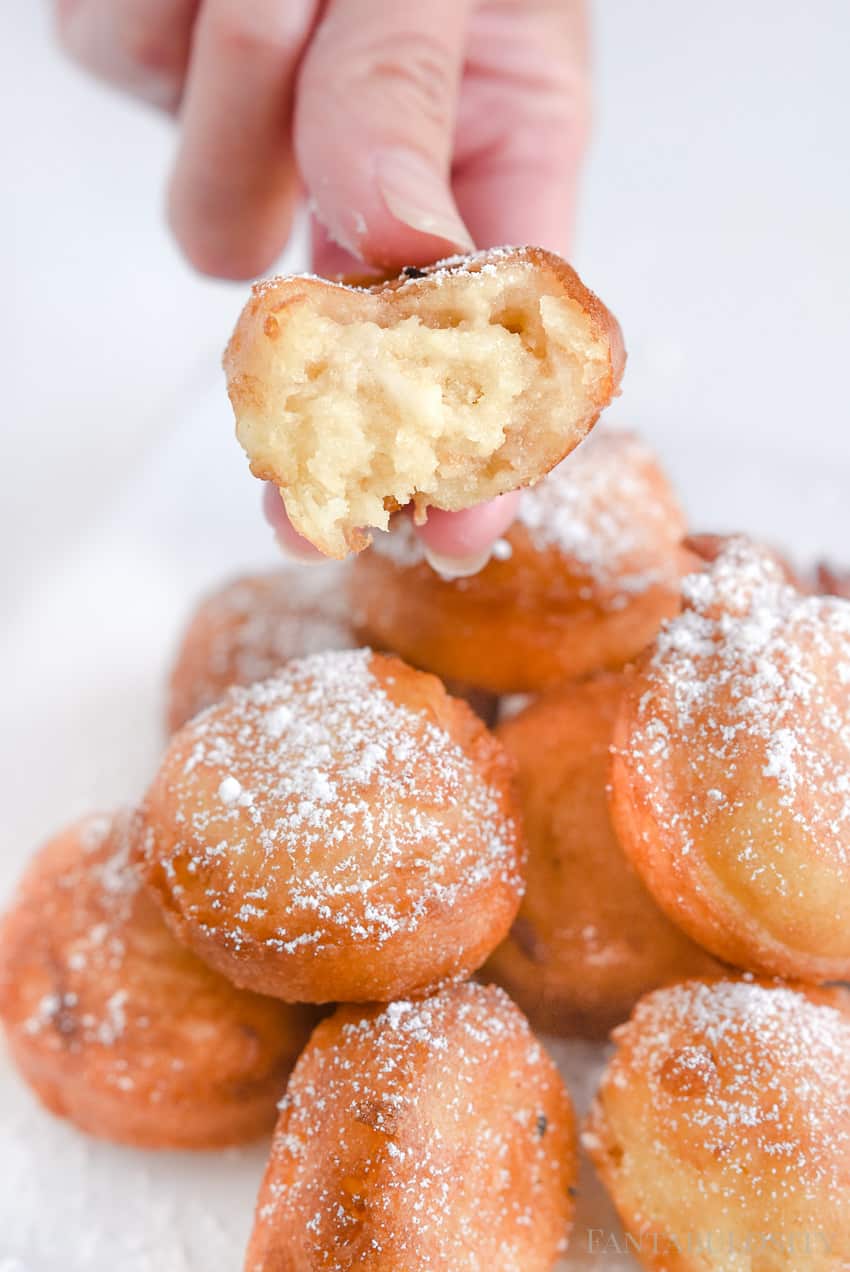
    Are the insides of these a glance at Heaven or what? You could even dip them in to a fun ice cream topping for some extra tastiness, or eat them just like they are.

    TIP: These are not the best leftover (just like any of your favorite carnival food), so make sure you make yourself sick eating as many as you can right away. 😉

    Fried Cake Bites - easy dessert idea

    If you love fun dessert recipes like these, then you’re also going to really love this cakesicles recipe!

    Recipe

    Fried Cake Bites - easy dessert idea
    Print Pin
    5 from 2 votes

    Fried Cake Bites

    Fried Cake Bites - At Home Carnival Food: A sweet treat that your taste buds will fall in love with, and it will BLOW your mind how easy they are!
    Course Dessert
    Cuisine American
    Prep Time 20 minutes minutes
    Cook Time 10 minutes minutes
    Total Time 30 minutes minutes
    Servings 25 cake bites (number may vary based on size)
    Calories 181kcal
    Author Jessica Burgess

    Ingredients

    • 1 premade 2 layer 8-in cake frosted
    • 1 egg beaten
    • 1 cup milk
    • 2 cups pancake mix
    • 2 cups + 2 teaspoons peanut oil divided
    • powdered sugar for garnishing if desired

    Instructions

    • Crumble store-bought cake in a large bowl
    • Stir until frosting is evenly mixed with the cake
    • Roll cake mixture in to one-inch balls
    • In a separate bowl, mix together egg, milk, pancake mix, and 2 teaspoons of oil.
    • Heat 2 cups of oil in a cast iron skillet over medium-low heat.
    • Test oil by dropping in a dab of the batter to make sure it’s hot enough, or not too hot.
    • Roll each cake ball into pancake batter, then place in oil.
    • Fry each cake ball for about 1 minute, rotating often, until golden brown.

    Nutrition

    Serving: 1cake bite | Calories: 181kcal | Carbohydrates: 29g | Protein: 2g | Fat: 6g | Saturated Fat: 1g | Cholesterol: 14mg | Sodium: 227mg | Potassium: 53mg | Sugar: 17g | Vitamin A: 50IU | Vitamin C: 0.1mg | Calcium: 80mg | Iron: 0.6mg
    Fried Cake Bites - Carnival Food at home

    I can see fried cake bites making an appearance at your next family gathering, or at a future birthday party! (Or on a random weekend in your house, just because you want something fun & sweet!) I can’t wait to hear how you topped them, or if you prefer them plain!

    Thank you so much for coming by! If you’re in the mood for more recipe browsing, you can see all of our recipes here on the blog:

    More Easy Recipes

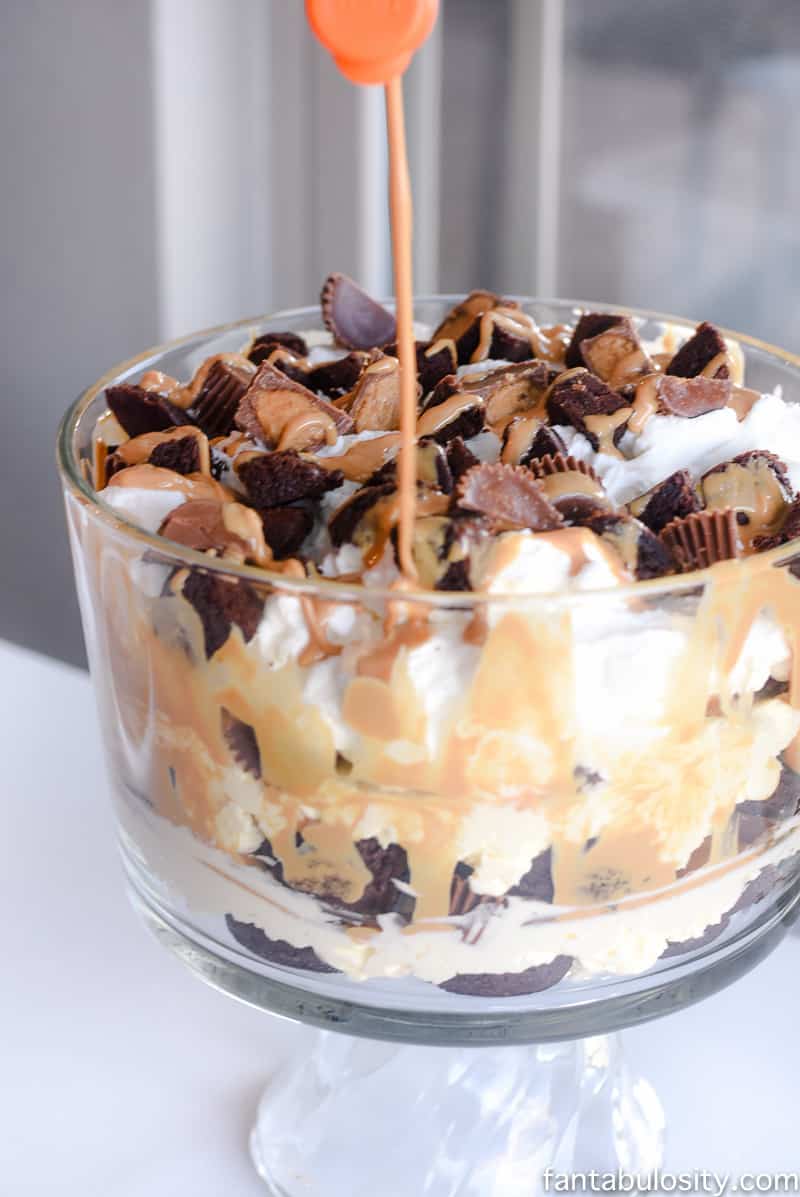
    Brownie Peanut Butter Cup Cheesecake Trifle

    June 3, 2017

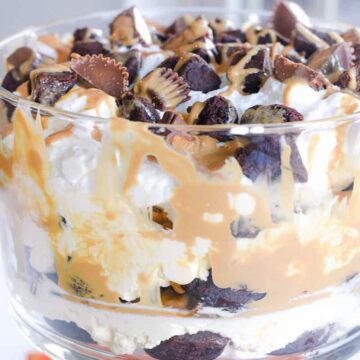
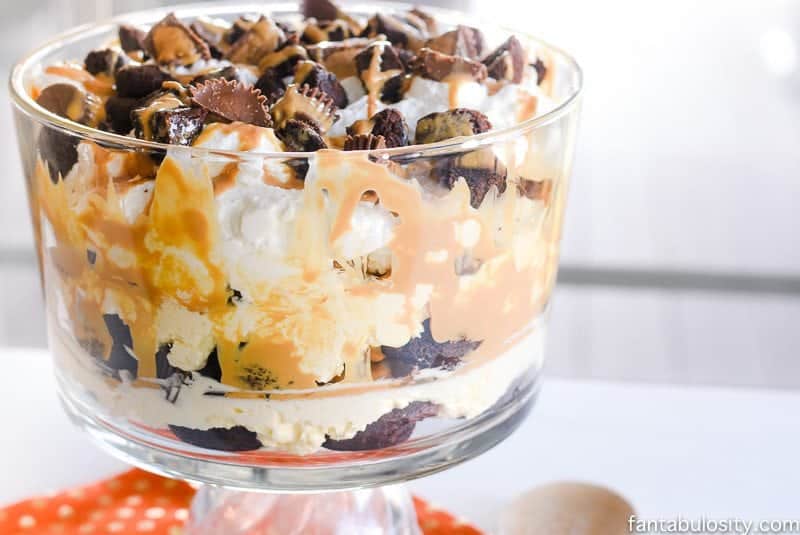
    Brownie Trifle Dessert in trifle dish.

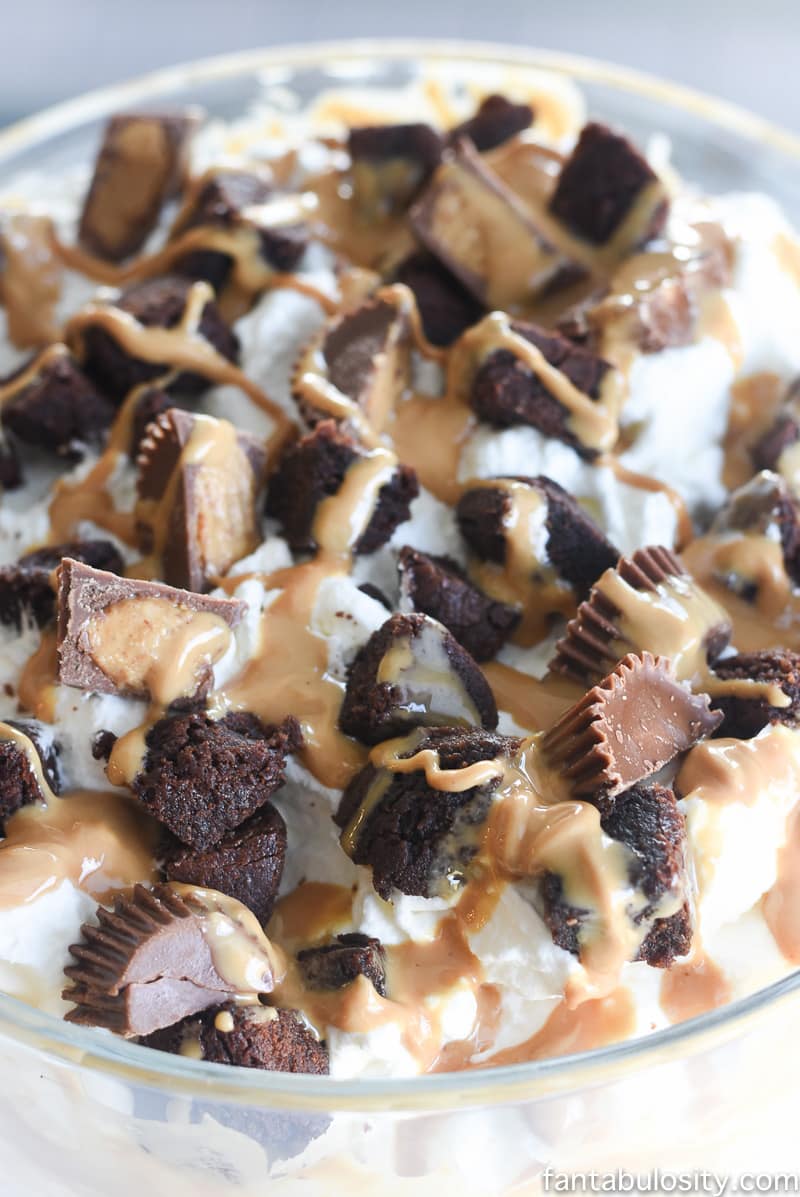
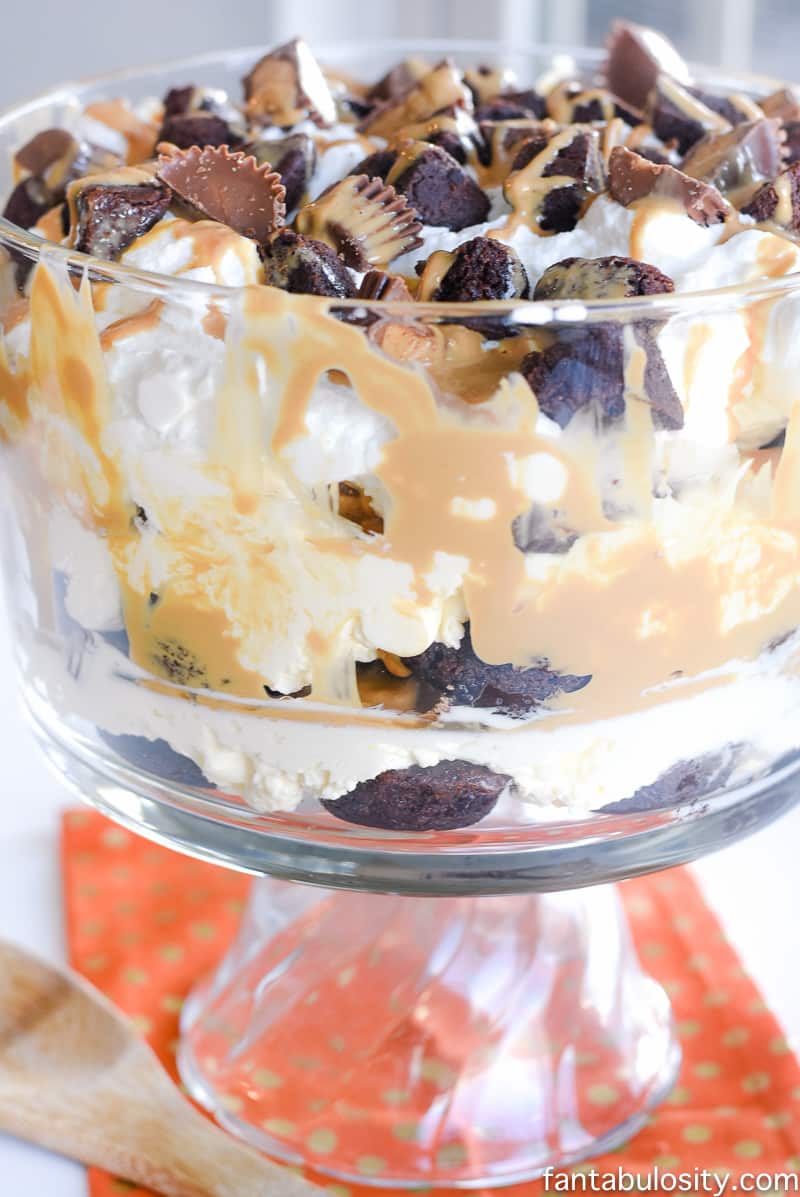
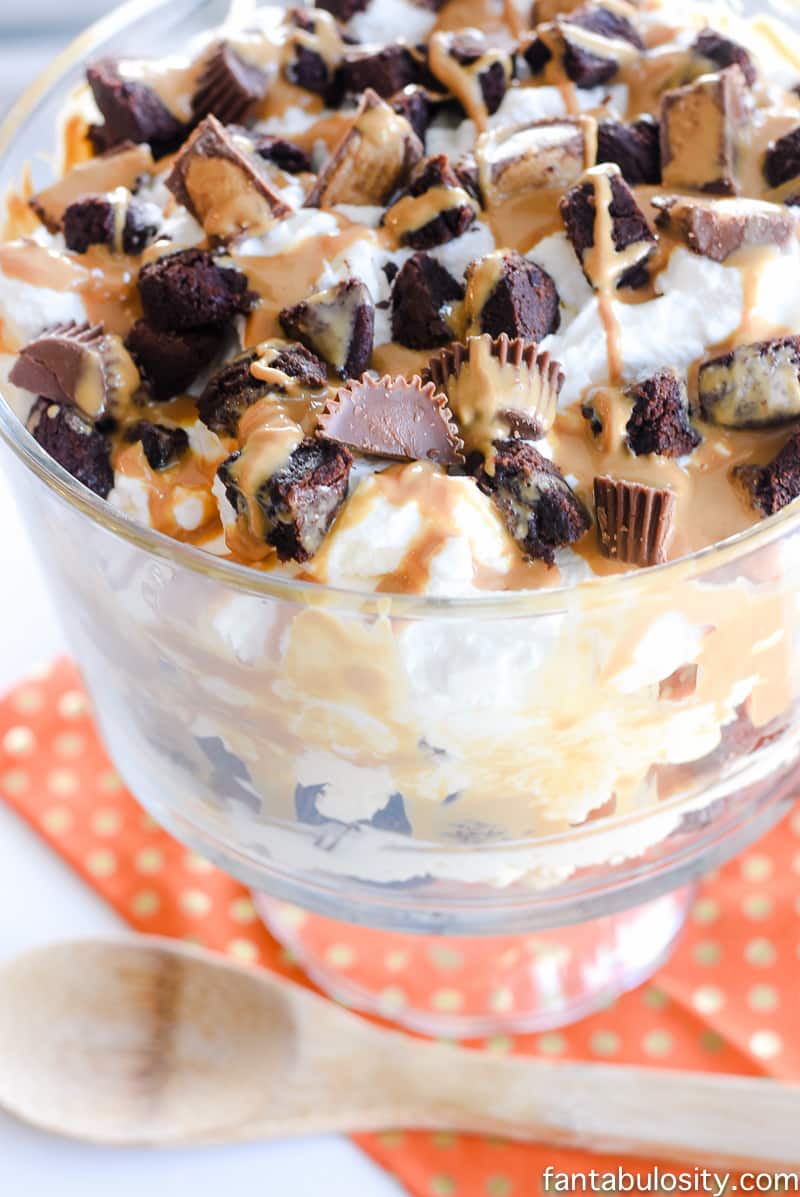
    Easy No Bake Dessert: Brownie Peanut Butter Cup Cheesecake Trifle. Yes, it’s a dessert of the God’s, it’s quick and you don’t even have to bake or cook anything! 

    Easy No Bake Dessert- Brownie Peanut Butter Cup Cheesecake Trifle Recipe

    Brownie Peanut Butter Cup Cheesecake Trifle

    So yes, I’m fully aware of the big title of this blog post. But seriously, would have even come here if you didn’t see that this dessert included all of those amazing ingredients?

    Or possibly, it was the “easy” or “no bake” part of it that tickled your fancy, like in these no bake chocolate peanut butter bars? Either way, you’re here and I’m about ready to fill you in on this dessert that I made for my husband’s birthday.

    This year for his birthday dinner, I made a ribeye with my easy steak recipe, and paired it with a healthy side dish: Roasted Broccoli, so I could cancel it out with the fiesta ranch potato wedges and buffalo bacon blue cheese dip.

    The look on his face when I brought this trifle out to him after dinner, was absolutely priceless.

    What did you do?

    He looked with amazement at this beauty when I walked towards him, almost like when you see one of those crazy-wild milkshakes for the first time? But the look on your face, when you see how quick and easy it is… will probably be pretty similar to his.

    Store Bought Brownie Bites:

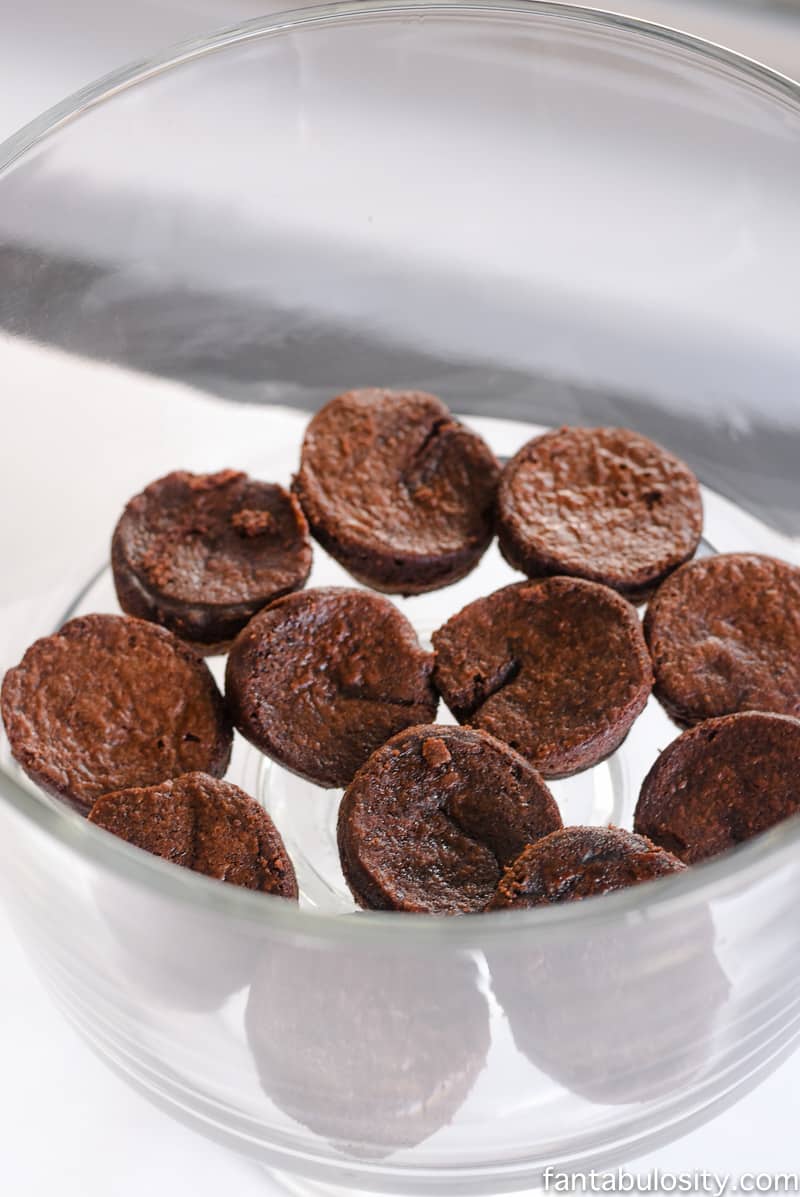
    Alright, I can hear all of you out there that love homemade desserts, and think that store bought anything is a sin. But I adore being able to buy things already made if it will make things in life a bit easier. So for this dessert dish, I bought brownie bites in the bakery of my local grocery store. First, layer the brownies in the bottom of a trifle dish…

    Easy No Bake Dessert- Brownie Peanut Butter Cup Cheesecake Trifle

    Cheesecake Filling:

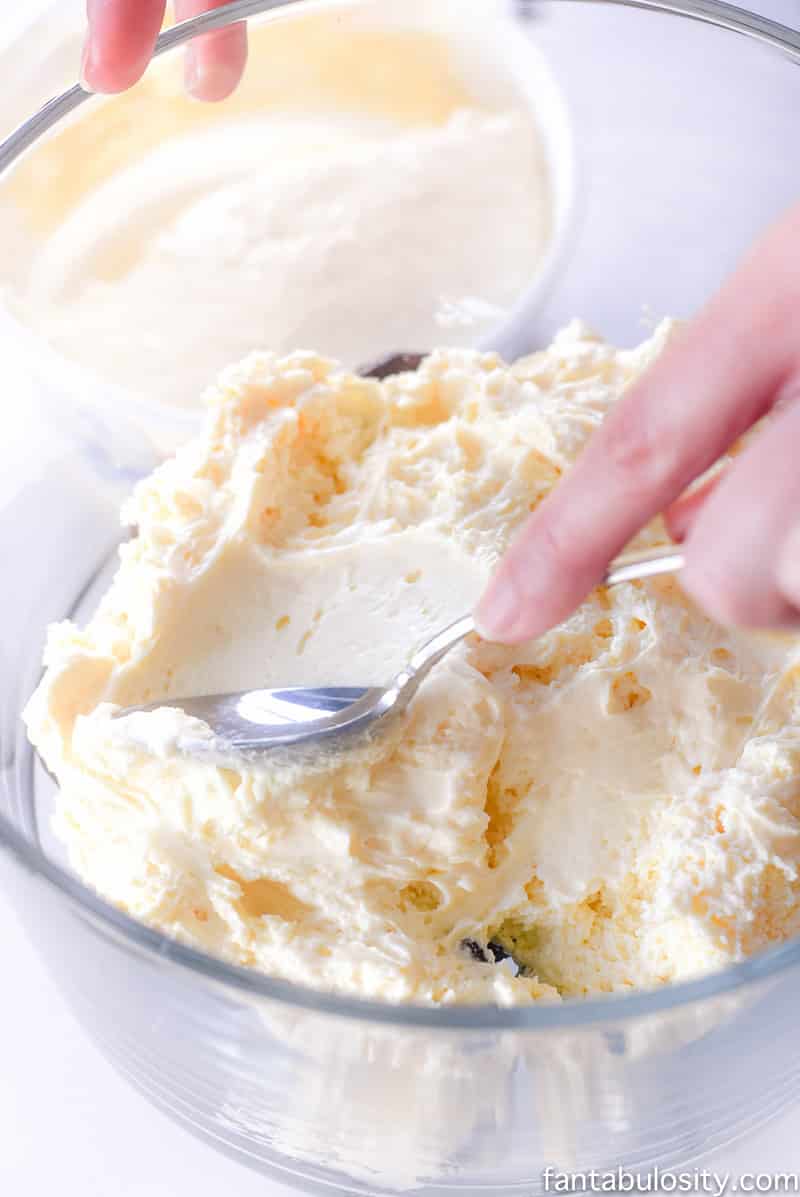
    Yep, they make a cheesecake filling ready to eat, in the store too. Feel free to make your own homemade cheesecake filling for this! I’m sure it will be delightful!

    Then spread the cheesecake filling on top of the brownie pieces.

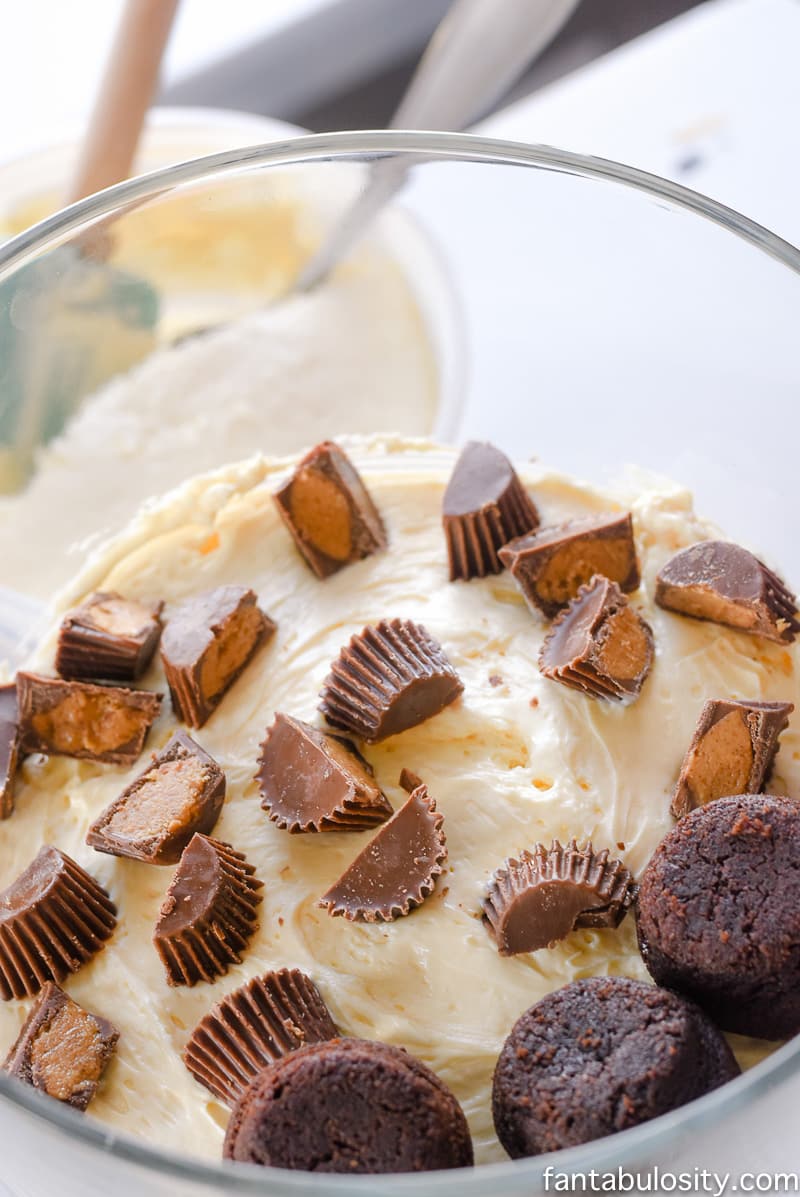
    Easy No Bake Dessert- Brownie Peanut Butter Cup Cheesecake TrifleReeses Cups:

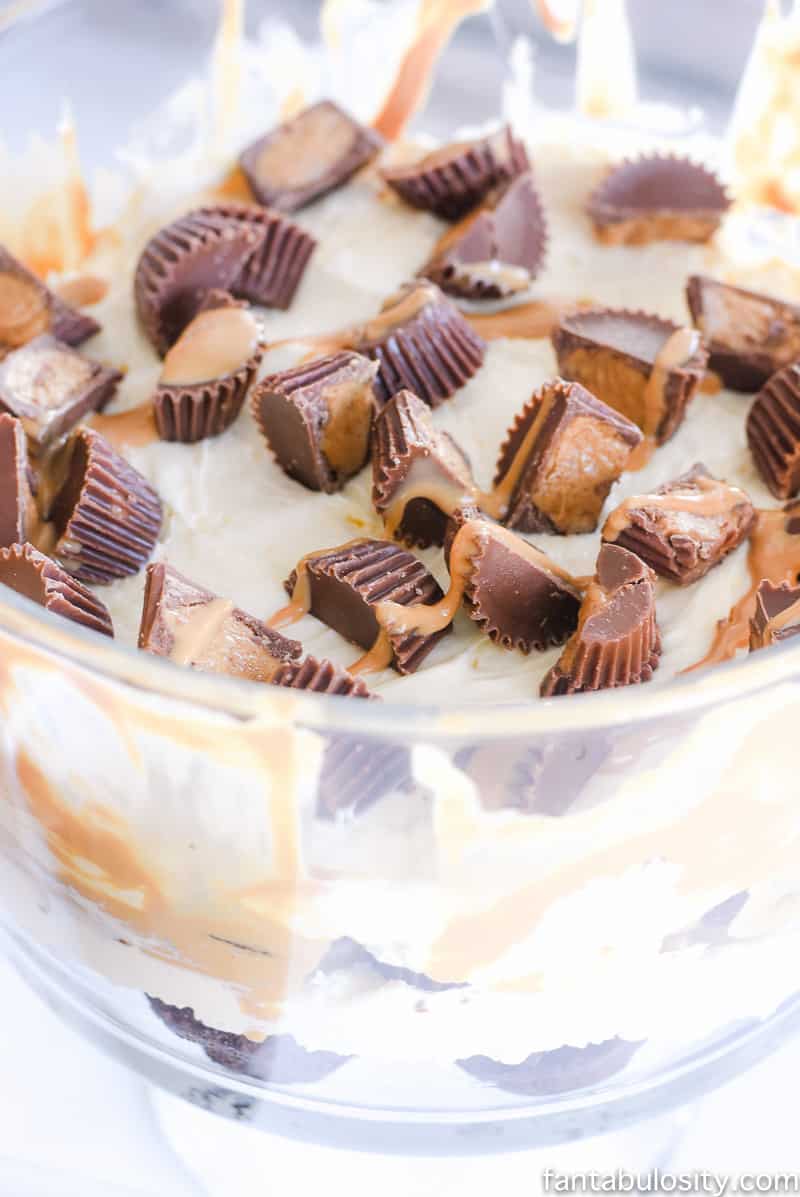
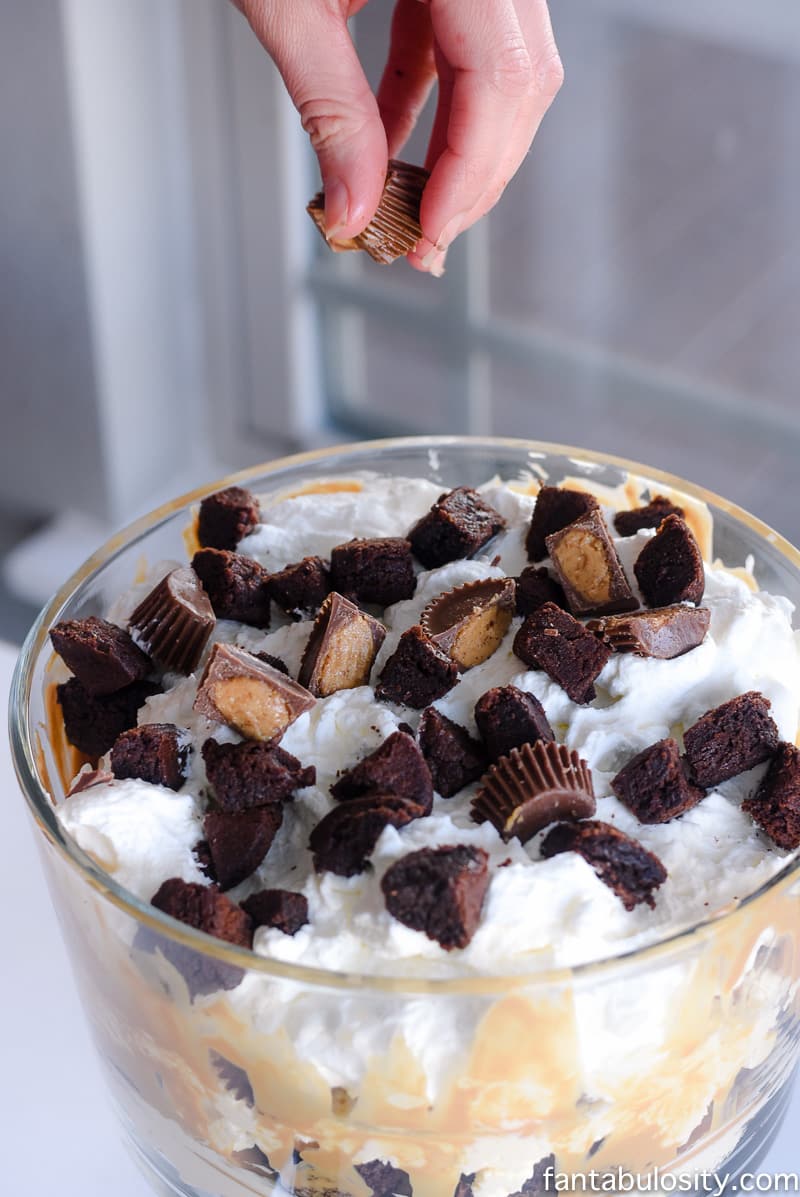
    Sprinkle on chopped up Reeses Cups for tastebud “joy,”… (and use any extras to make these 2-ingredient peanut butter cup cookies!)

    Easy No Bake Dessert- Brownie Peanut Butter Cup Cheesecake Trifle
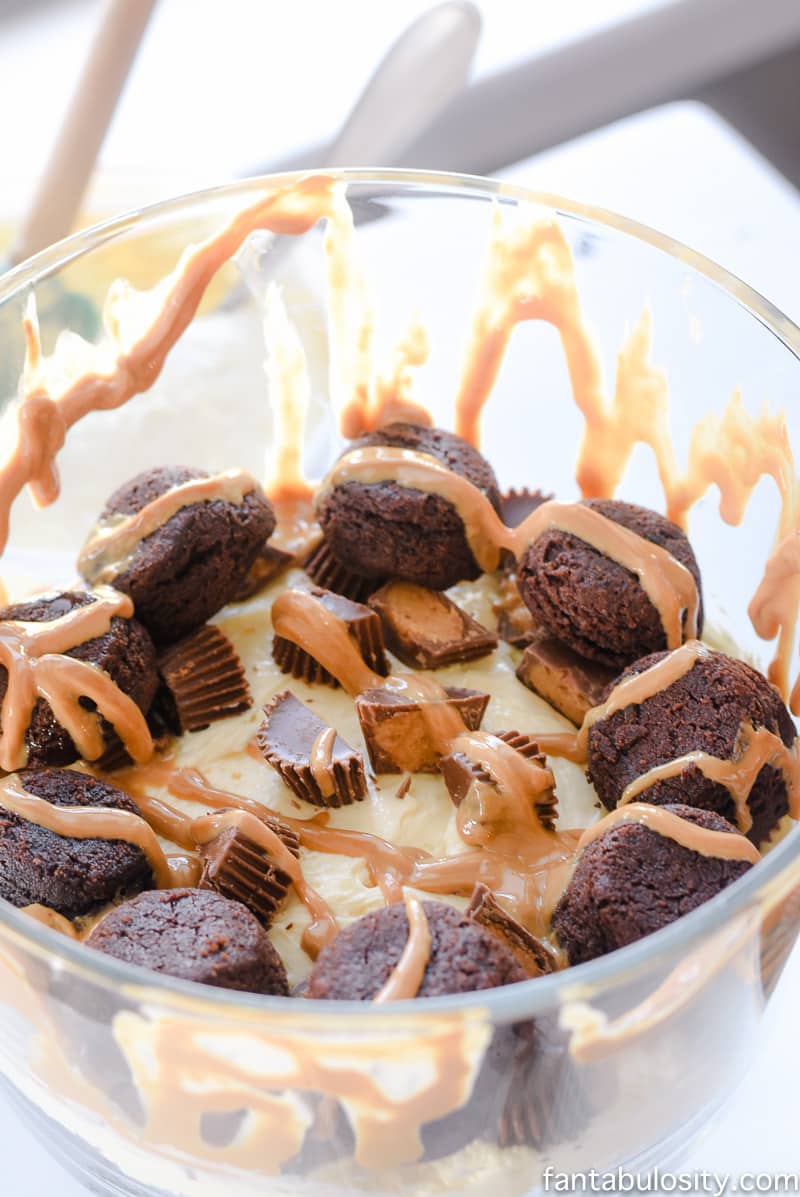
    Yes, I got a little excited and started adding brownies before the peanut butter drizzle.

    Peanut Butter Drizzle:

    Then just get crazy with it, and drizzle on some Peanut Butter (or caramel) ice cream topping.

    Easy No Bake Dessert- Brownie Peanut Butter Cup Cheesecake Trifle

    Repeat:

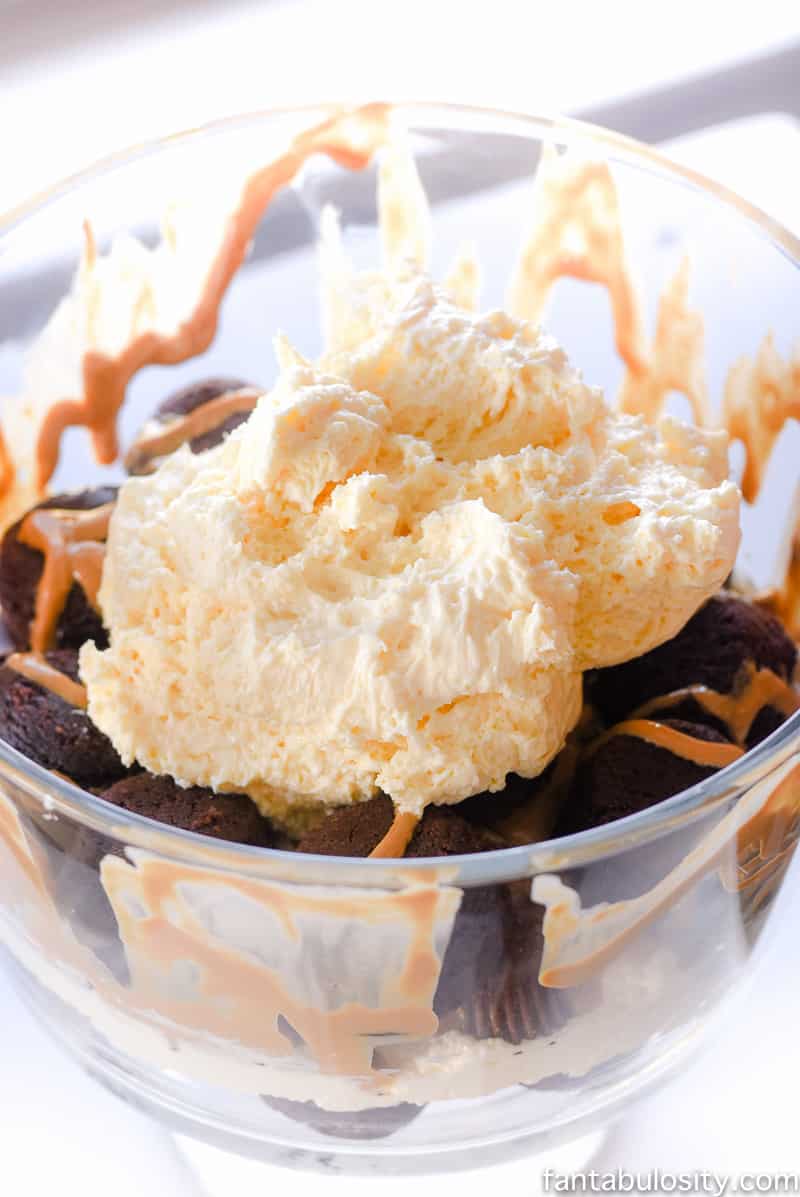
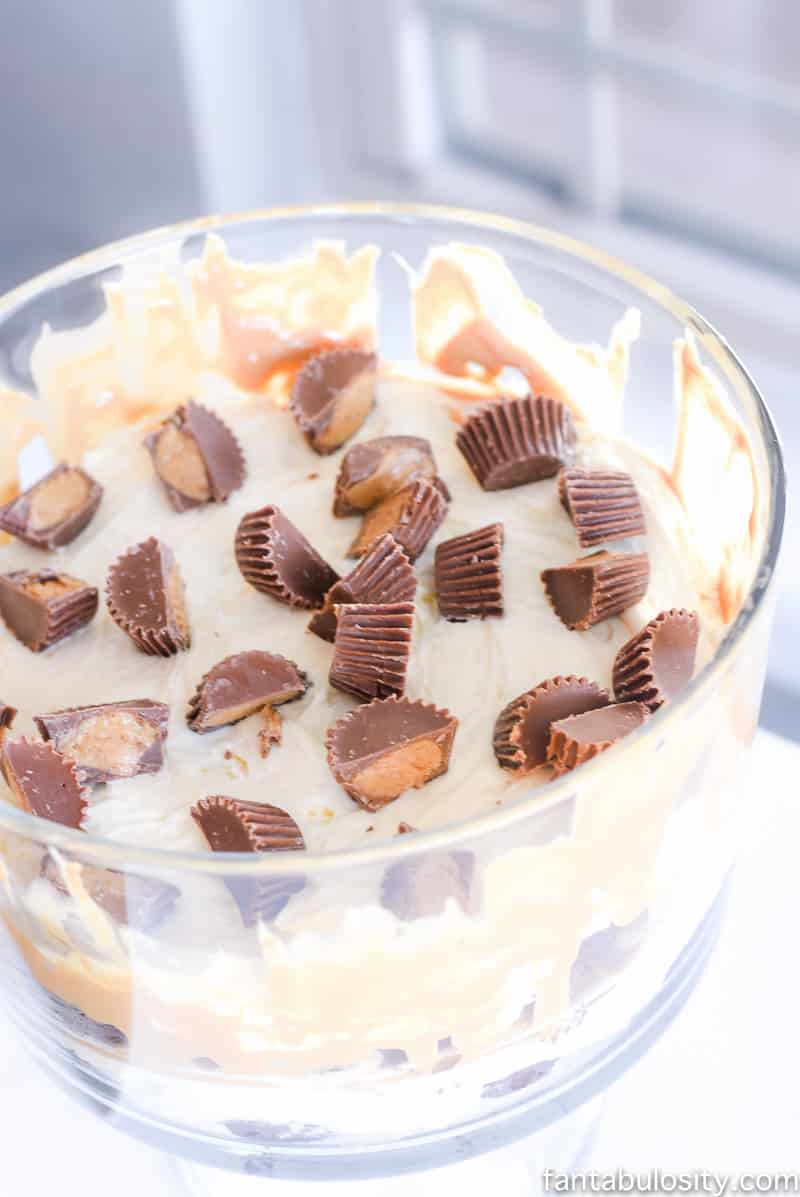
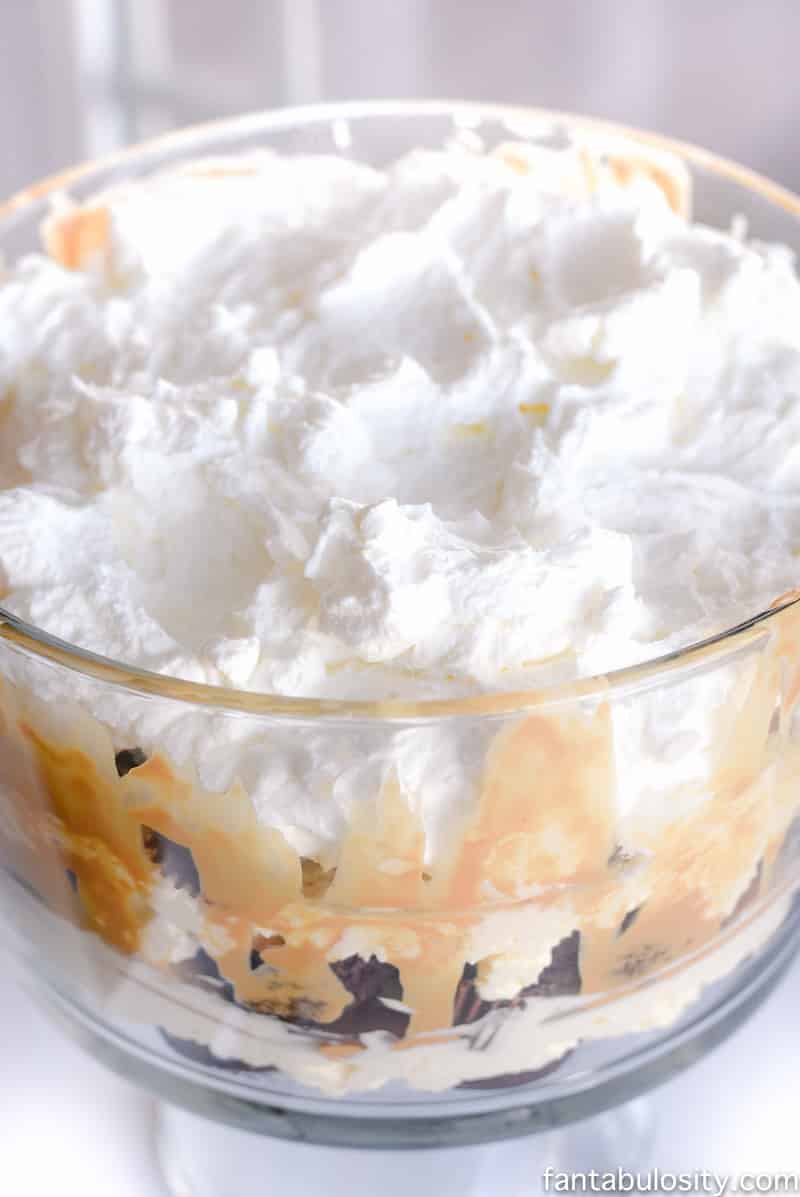
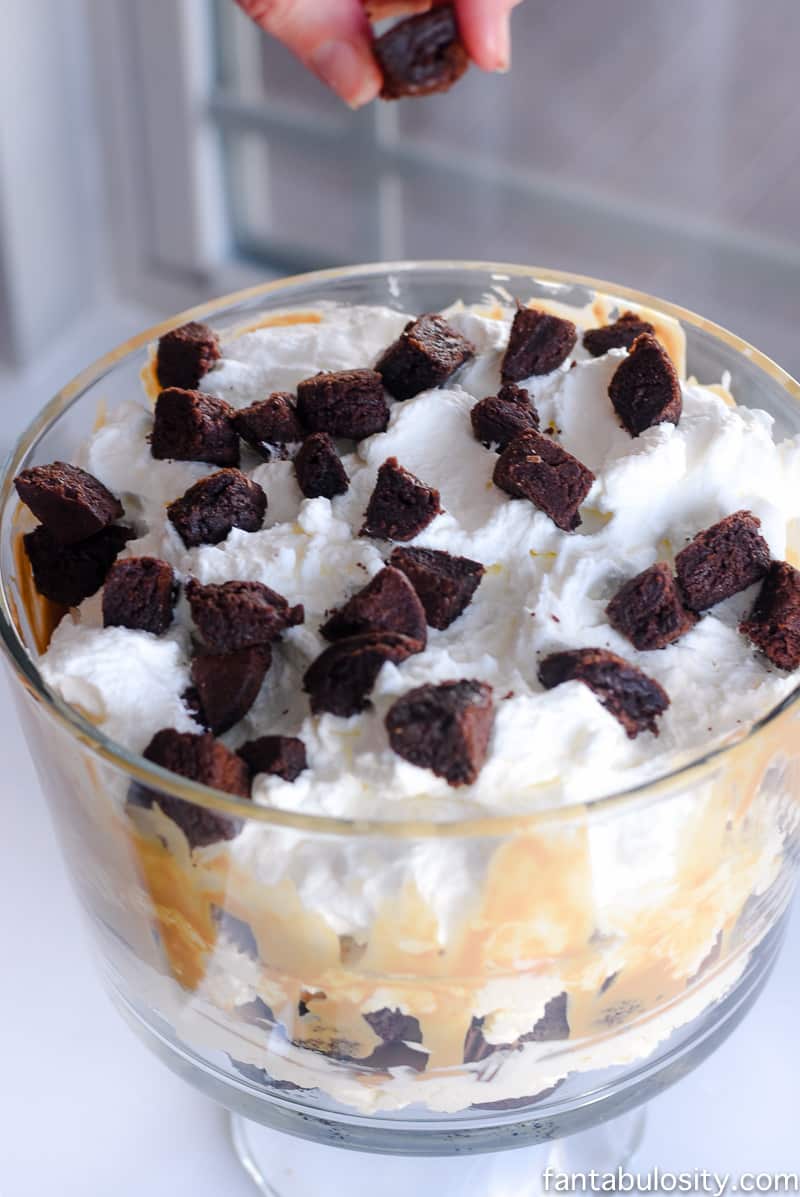
    Repeat the process of the layering until you reach close to the top and add a layer of whipped cream, chopped brownies, Reeses Cups, and peanut butter drizzle. Before you know it, you’ll have a glorious trifle that’s ready to eat.

    Easy No Bake Dessert- Brownie Peanut Butter Cup Cheesecake Trifle
    Easy No Bake Dessert- Brownie Peanut Butter Cup Cheesecake Trifle
    Easy No Bake Dessert- Brownie Peanut Butter Cup Cheesecake Trifle
    Easy No Bake Dessert- Brownie Peanut Butter Cup Cheesecake Trifle
    Easy No Bake Dessert- Brownie Peanut Butter Cup Cheesecake Trifle
    Easy No Bake Dessert- Brownie Peanut Butter Cup Cheesecake Trifle
    Easy No Bake Dessert- Brownie Peanut Butter Cup Cheesecake Trifle
    Easy No Bake Dessert- Brownie Peanut Butter Cup Cheesecake Trifle

    Is that not glorious looking!? If you have a sweet tooth needing conquered, than I would stop looking. This no bake dessert trifle should win you over.

    Easy No Bake Dessert- Brownie Peanut Butter Cup Cheesecake Trifle

    No Trifle Bowl?

    Would you like to make this, but don’t have a trifle bowl? Well you can make this in a baking dish for more of a “sheet,” style dessert.

    Easy No Bake Dessert- Brownie Peanut Butter Cup Cheesecake Trifle

    I’m sure he won’t like me telling you this, but I totally caught my husband eating the leftovers, directly out of the trifle bowl the next morning for breakfast. It was still his birthday, so I decided to just turn around and act like I didn’t see anything…

    Recipe

    Brownie Trifle Dessert in trifle dish.
    Print Pin
    5 from 4 votes

    Brownie Trifle Recipe

    Brownie Trifle Recipe: Layered with cheesecake filling, whipped cream, and peanut butter.
    Course Dessert
    Cuisine American
    Prep Time 20 minutes minutes
    Total Time 20 minutes minutes
    Servings 12 servings
    Calories 418kcal
    Author Jessica Burgess

    Ingredients

    • 12 mini brownie bites* see notes for substitutions
    • 1 24-ounce container ready-to-eat cheesecake filling see post for details
    • 2 cups Miniature Reeses Peanut Butter Cups chopped + more for topping
    • 1 cup whipped cream or Cool Whip
    • melted peanut butter for drizzle

    Instructions

    • Begin by placing a third of the brownies in bottom of trifle dish, covering the bottom.
    • Next, layer on a third of the cheesecake filling.
    • Sprinkle on a third of the chopped miniature peanut butter cups.
    • Drizzle on some of the melted peanut butter.
    • Repeat layers 2 more times.
    • Add a layer of whipped cream and top with any remaining brownies (chopped) peanut butter cups, and peanut butter drizzle.
    • There’s no wrong way to make this recipe, so have fun with it! Refrigerate any leftovers.

    Notes

    Can use 1 batch of homemade or store-bought brownies – cut into bite-sized pieces.

    Nutrition

    Serving: 1serving (about 1 cup) | Calories: 418kcal | Carbohydrates: 47g | Protein: 8g | Fat: 23g | Saturated Fat: 9g | Cholesterol: 23mg | Sodium: 393mg | Potassium: 293mg | Fiber: 2g | Sugar: 22g | Vitamin A: 60IU | Vitamin C: 0.7mg | Calcium: 52mg | Iron: 2.3mg

    RO*TEL Chicken Empanadas

    May 16, 2017

    Cheesy Chicken Empanadas

    This shop has been compensated by Collective Bias, Inc. and Conagra Brands. All opinions are mine alone. #31DaysWithRotel #CollectiveBias

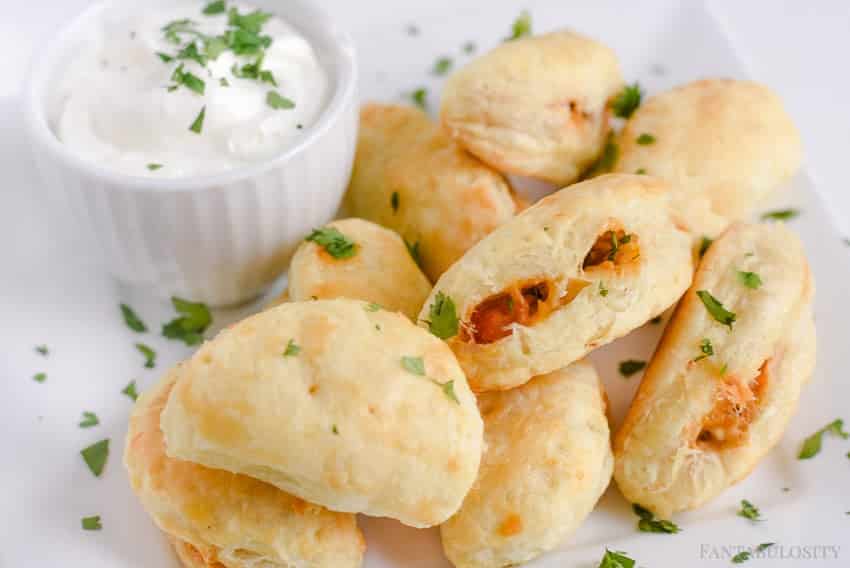
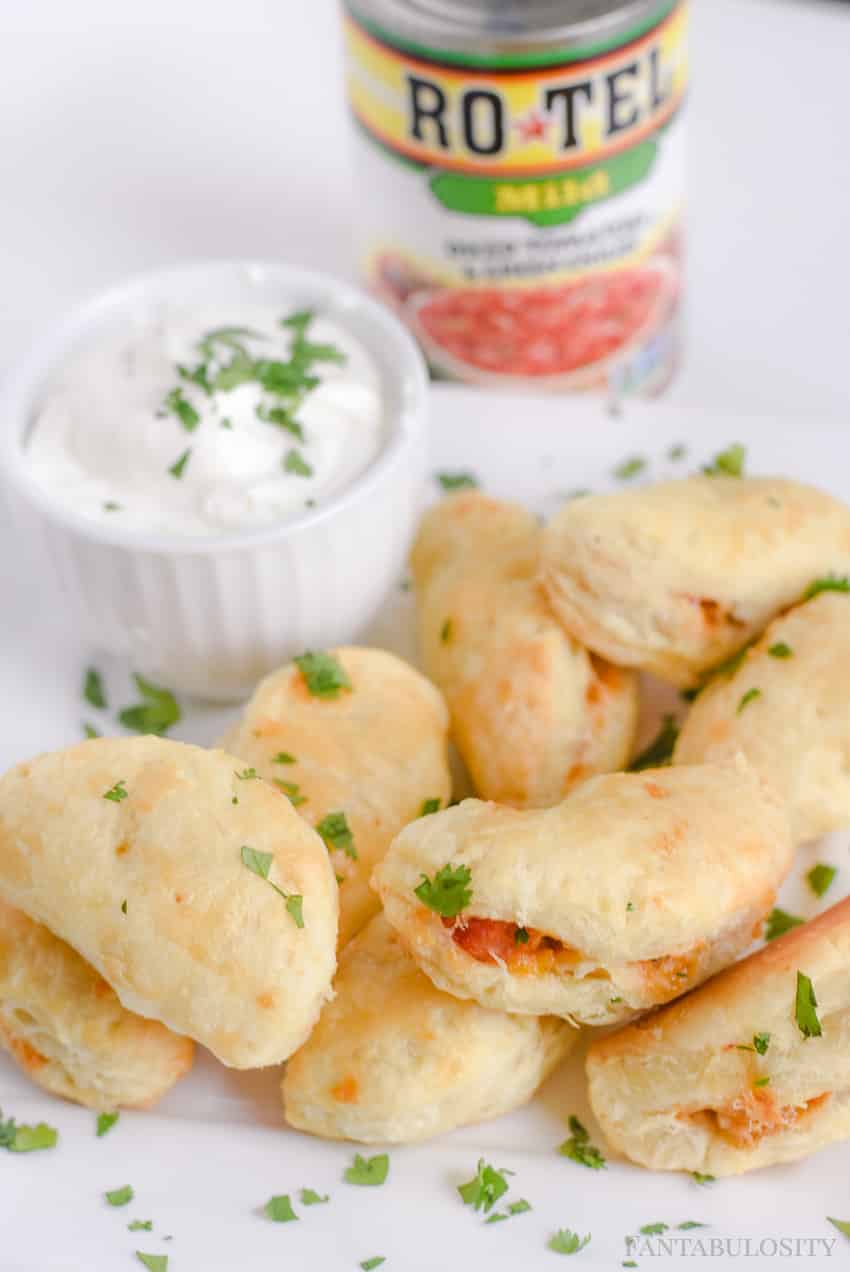
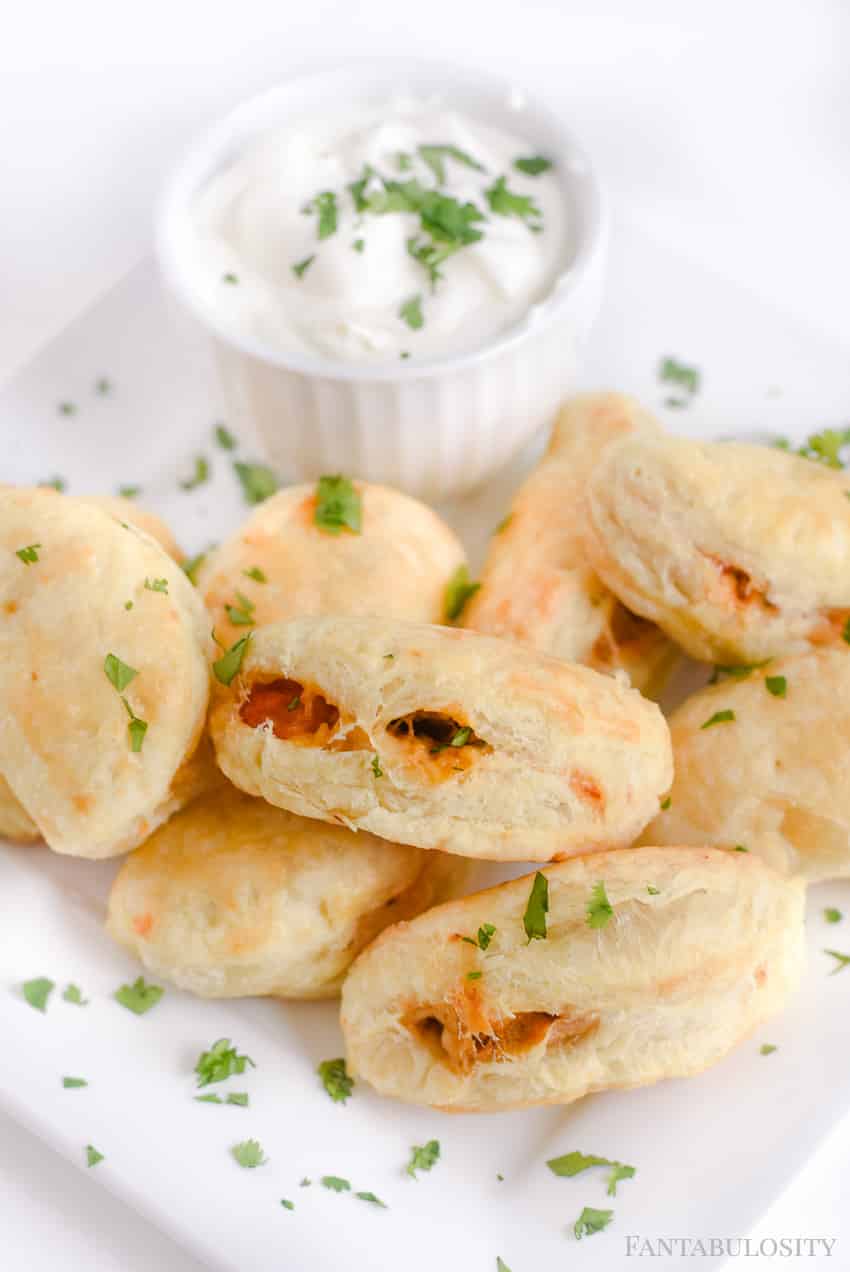
    RO*TEL Chicken Empanadas: A delicious blend of chicken, RO*TEL, sour cream, cheese and spices inside of small pastries, that will make your taste buds jump for joy! 

    RO*TEL Chicken Empanada. Mmmm!!!

    RO*TEL Chicken Empanadas

    It’s the month of May and you know what THAT means! It’s fiesta TIME around here. When I shared the Sweet Confetti Fiesta party with you a couple of weeks ago, I mentioned that I’d share ALL of the recipes that we filled the table with.

    So today, I’m sharing the RO*TEL Chicken Empanadas recipe with you, and you’re going to love the ease behind these little tasty morsels. Mmmm, the combination of cheese, chicken, sour cream and spices combined with RO*TEL (to banish the bland and bring on the bold) was incredible!

    Cheese, chicken, RO*TEL! These sound amazing!

    We use RO*TEL in so many recipes, whether it’s for breakfast, lunch, dinner, or even snacks, because it’s add a spicy spin that we love, and it’s so easy to add a can to whatever we are making. Plus, it can be used in so many ways; toppings, dips, marinades, and so much more!

    Fiesta Theme Party: A confetti and pastel fiesta party!

    The Goodness:

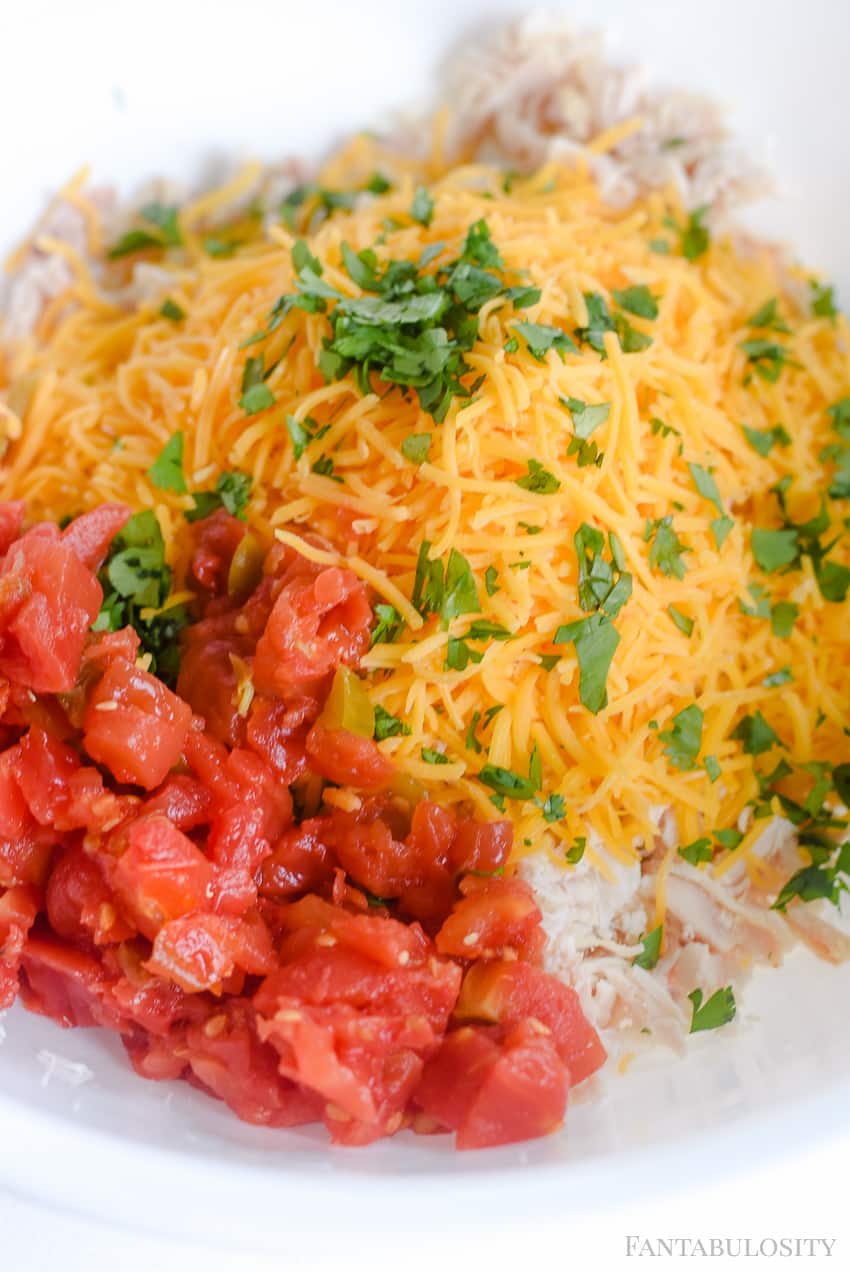
    Let’s get started with the filling of these babies. Seriously, I could have eaten this like a salad right out of the bowl. (But I didn’t, because it was about to get even better.)

    RO*TEL Cheesy Chicken Empanadas

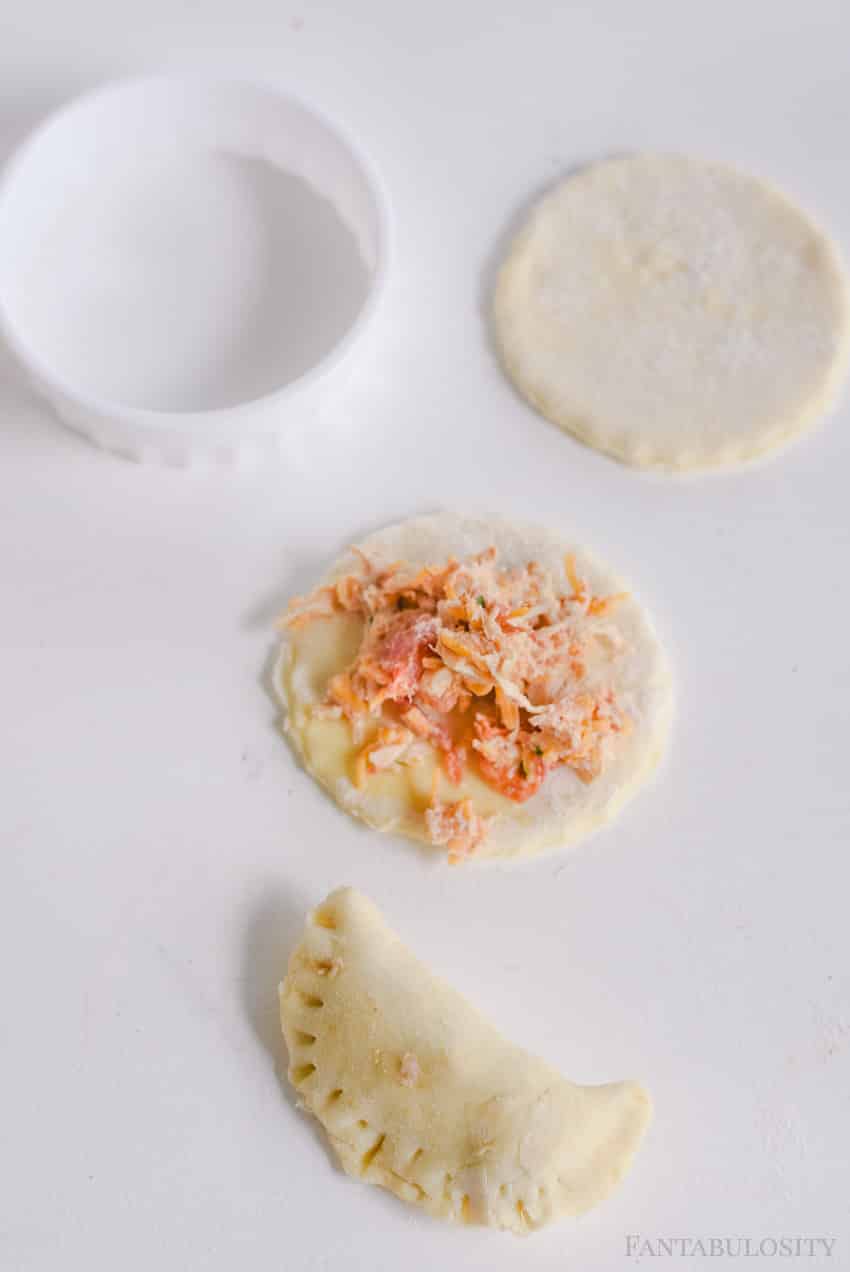
    • First, you’ll mix the filling ingredients together in a bowl. Then, using a 2 or 3 in. circle cutter, (or a wide-mouth drinking glass) cut out circles of the pastry sheet.

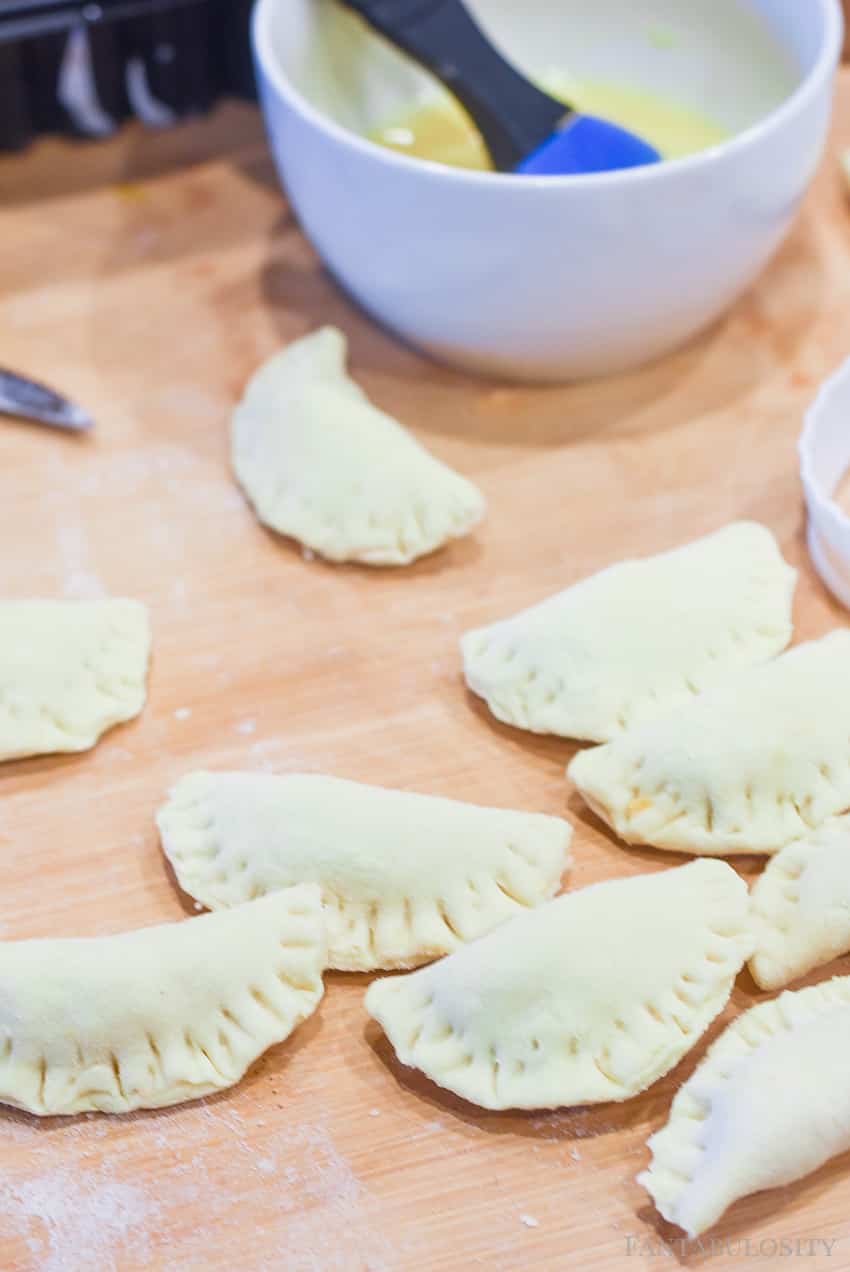
    • Place a dollop of filling in the center, and brush an egg wash around the edges to help it “stick,” when you fold it over.

    Cheese, chicken, RO*TEL! These sound amazing!

    • Use a fork to seal the edges together so it will lock in that yummy filling.

    Cheese, chicken, RO*TEL! These sound amazing!

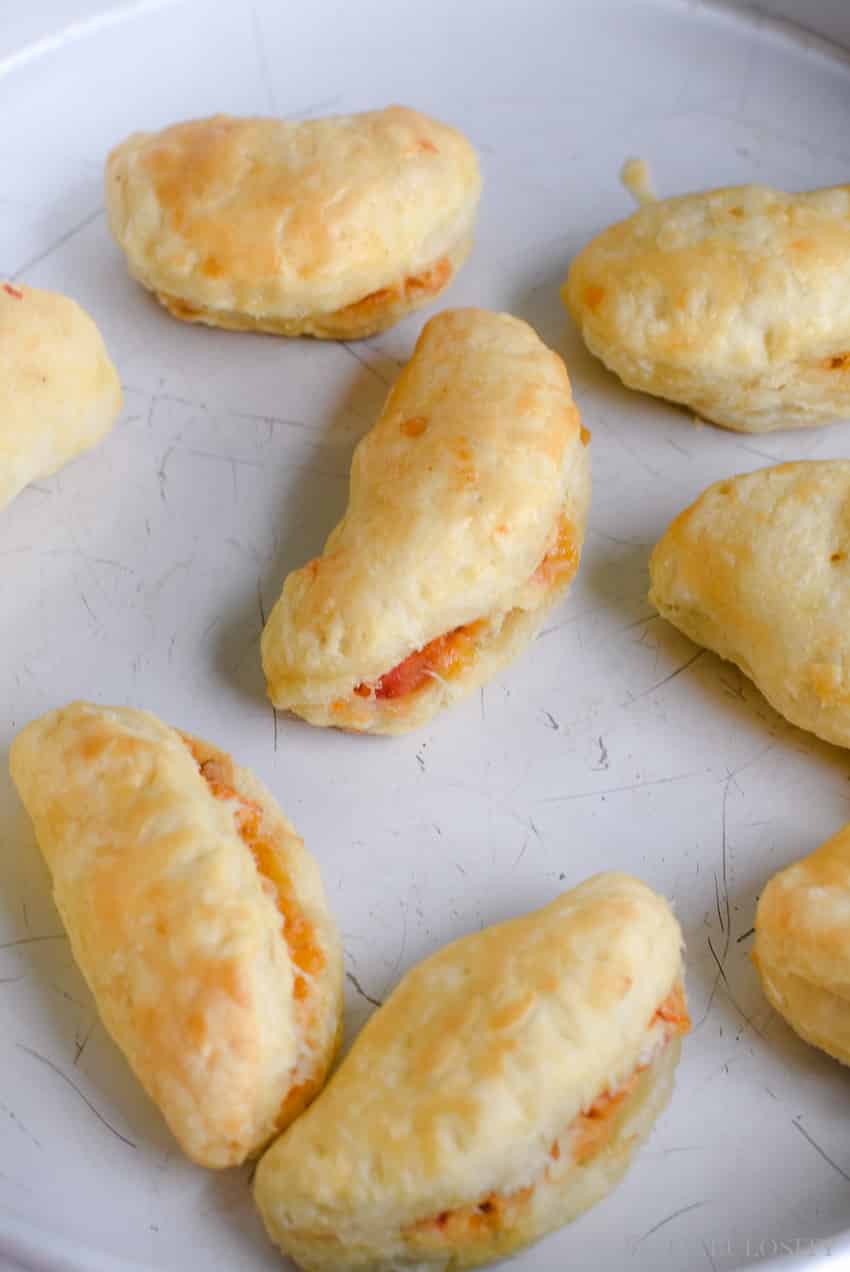
    Pop ’em in the oven, and bake at 425 for approximately 10 minutes, or until they reach a golden brown.

    Cheese, chicken, RO*TEL! These sound amazing!
    Cheese, chicken, RO*TEL! These sound amazing!

    I so hope you enjoy this easy recipe. They’re great for a weeknight meal, OR to serve as an appetizer for any part that you host.

    Have an air fryer? Then try these air fryer empanadas too!

    You’ll also love the Taco pinwheels recipe where we used Rotel too!

    Recipe

    Cheesy Chicken Empanadas
    Print Pin
    5 from 2 votes

    RO*TEL Chicken Empanadas

    RO*TEL Chicken Empanadas: A delicious blend of chicken, RO*TEL, sour cream, cheese and spices inside of small pastries, that will make your taste buds jump for joy! 
    Course Appetizer
    Cuisine American
    Prep Time 20 minutes minutes
    Cook Time 10 minutes minutes
    Total Time 30 minutes minutes
    Servings 16 servings
    Calories 227kcal
    Author Jessica Burgess

    Ingredients

    • 2 cups cooked shredded chicken I used a rotisserie Chicken
    • 1 cup shredded cheese
    • 1 Tablespoon fresh cilantro
    • 1 can RO*TEL diced tomatoes with green chilis drained
    • 1 teaspoon chili powder
    • 1 teaspoon cumin
    • ¼ cup sour cream
    • 2 puff pastry sheets 2 usually come in a pack
    • 1 egg
    • 1 Tablespoon Water
    • sour cream for dipping (optional)

    Instructions

    • Preheat oven to 425 degrees Fahrenheit.
    • Mix together the first 7 ingredients.
    • Unfold puff pastry, and cut 2-inch circles with a cookie cutter.
    • Put 1 Tablespoon of the chicken mixture in the center of each circle
    • Mix egg and water together to make the egg wash.
    • Brush the egg wash around the edges of the circle and fold to make a half circle. Use a fork to seal.
    • Poke a couple of holes on top with a toothpick to let steam.
    • Place on a baking sheet or cake pan, and bake for 10 minutes or until golden brown.
    • Dip with sour cream if desired.

    Nutrition

    Serving: 1serving | Calories: 227kcal | Carbohydrates: 14g | Protein: 8g | Fat: 15g | Saturated Fat: 4g | Cholesterol: 31mg | Sodium: 178mg | Potassium: 78mg | Vitamin A: 125IU | Calcium: 47mg | Iron: 1mg

    DIY Housewarming Gift Basket

    May 8, 2017

    This shop has been compensated by Collective Bias, Inc. and its advertiser. All opinions are mine alone. #PurexCrystalFresh #CollectiveBias

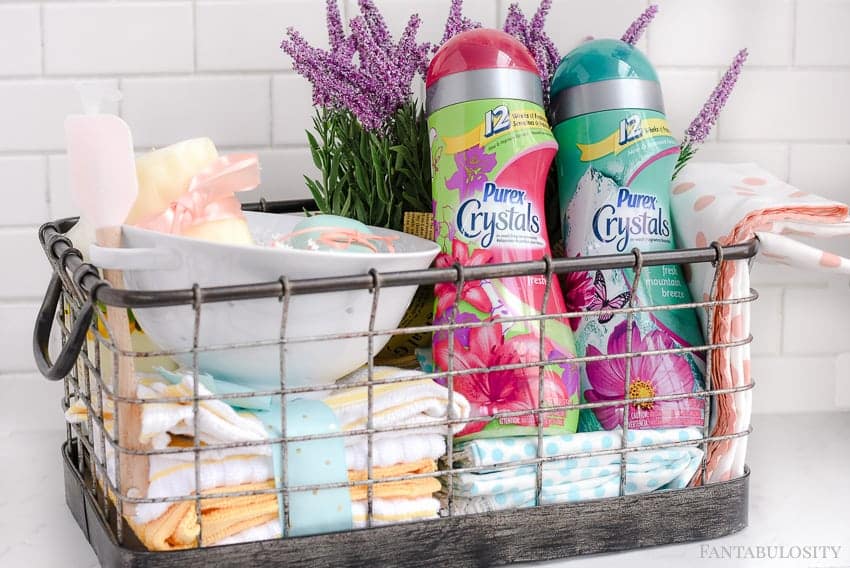
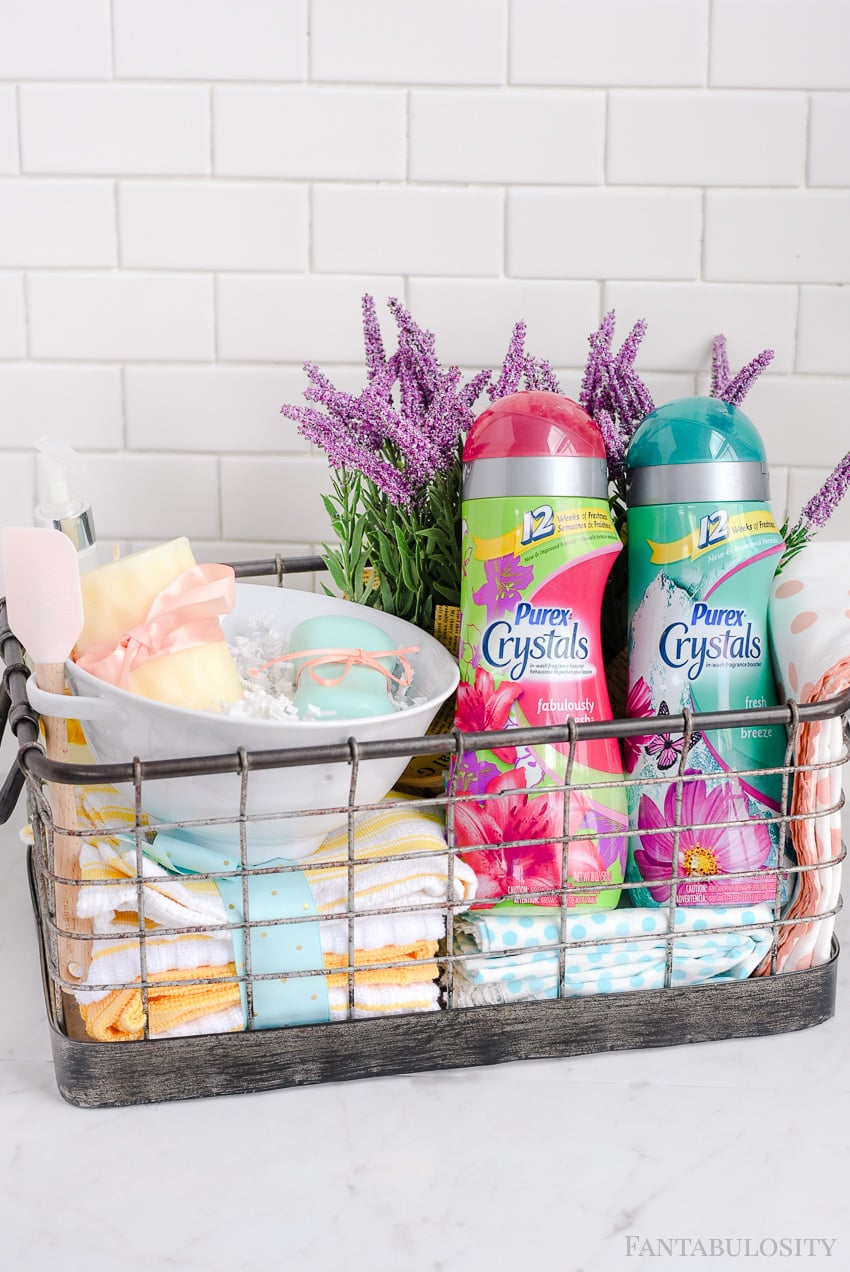
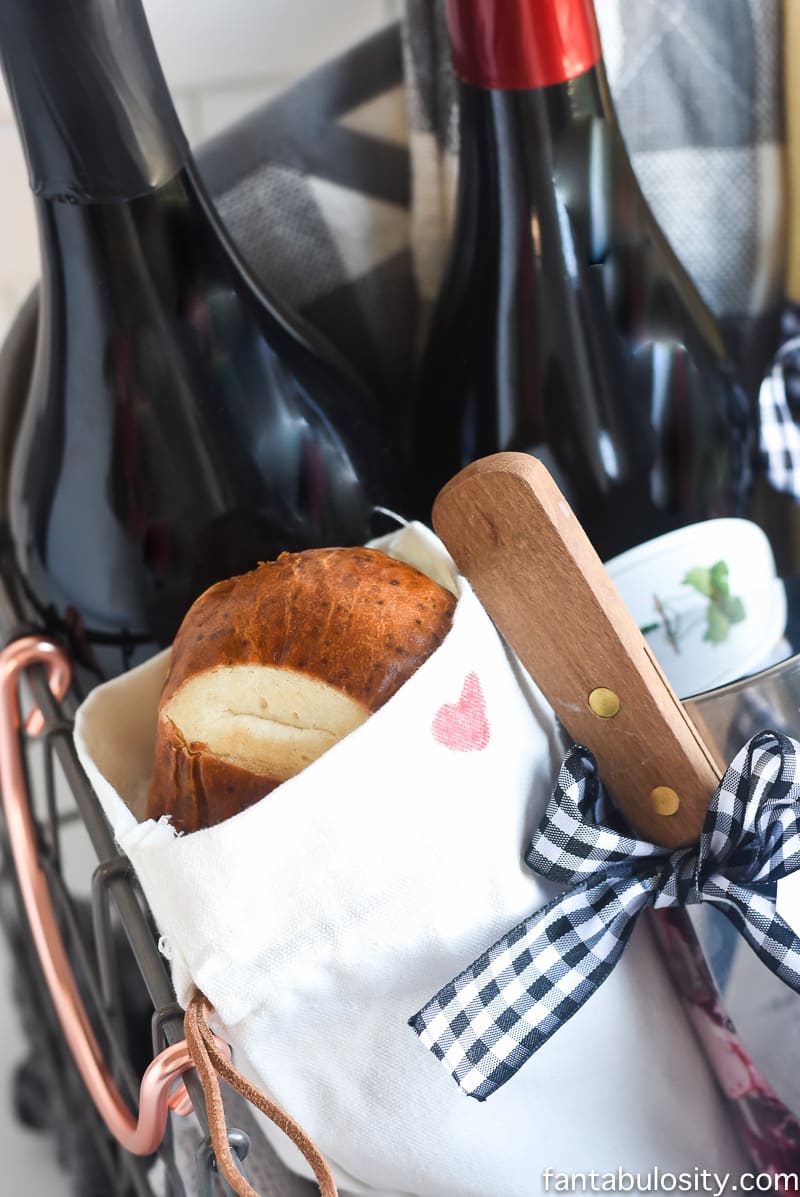
    DIY Housewarming Gift Basket: A bright and cheery basket filled with goodies that anyone moving in to a new home will love!

    DIY Housewarming Gift Basket Ideas: Love how it includes things that you need right when moving in, to help out! Plus a little decor to make it homey!

    DIY Housewarming Gift Basket

    It’s Spring, and that means if I can cram as much pastel and bright, beautiful colors in to just about everything I wear, create, and cook… then I’m a happy girl.

    Recently, we had friends move in to a new home, and I wanted to make them a gift basket of goodies to help celebrate the big move, and that could hopefully help them until they unpack everything.

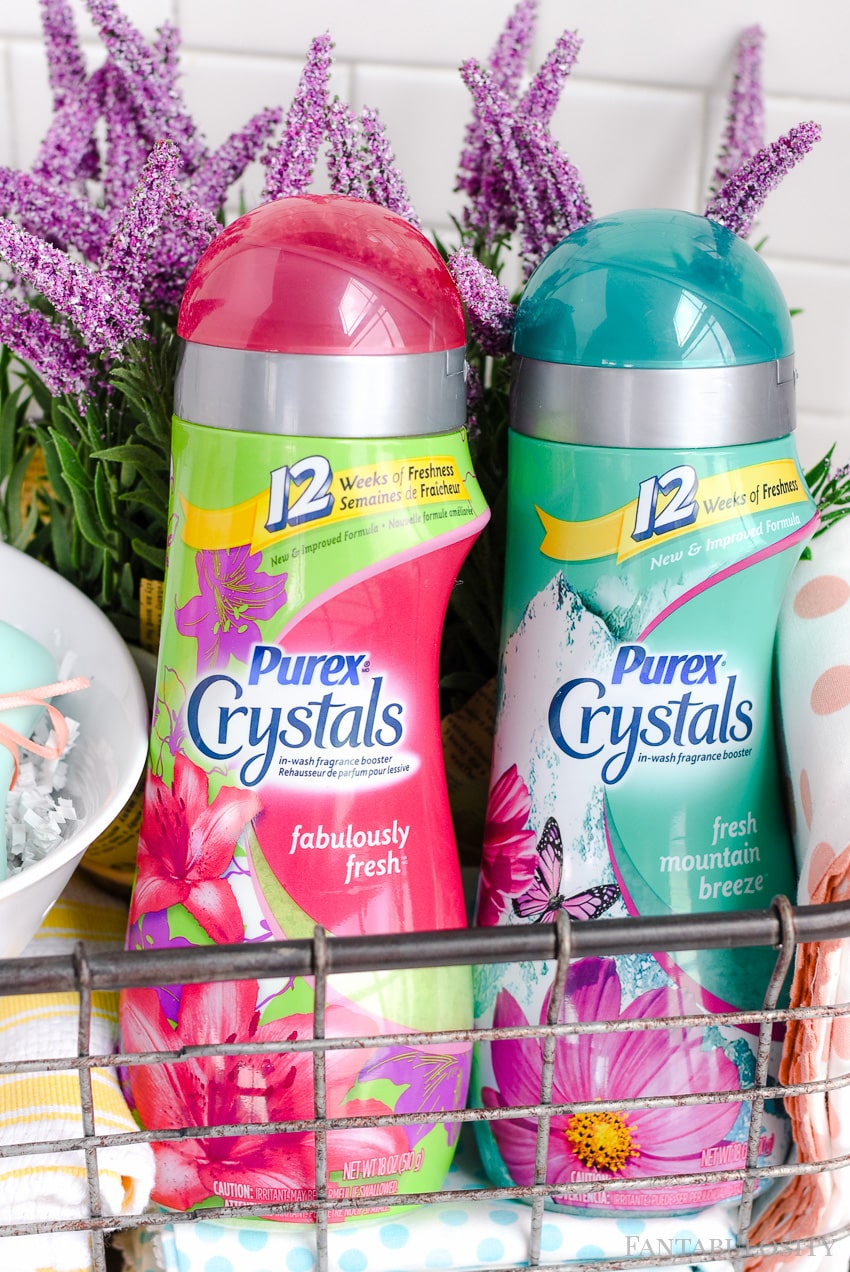
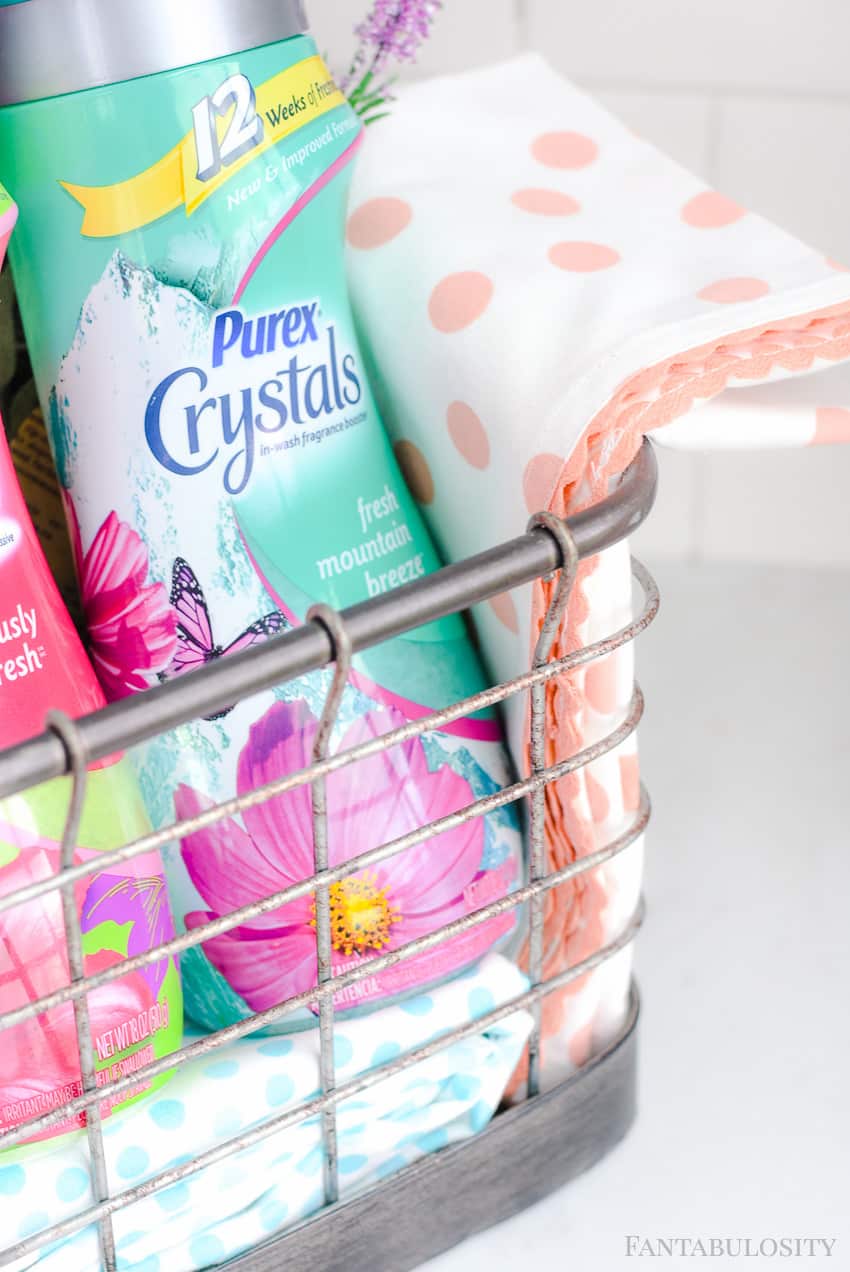
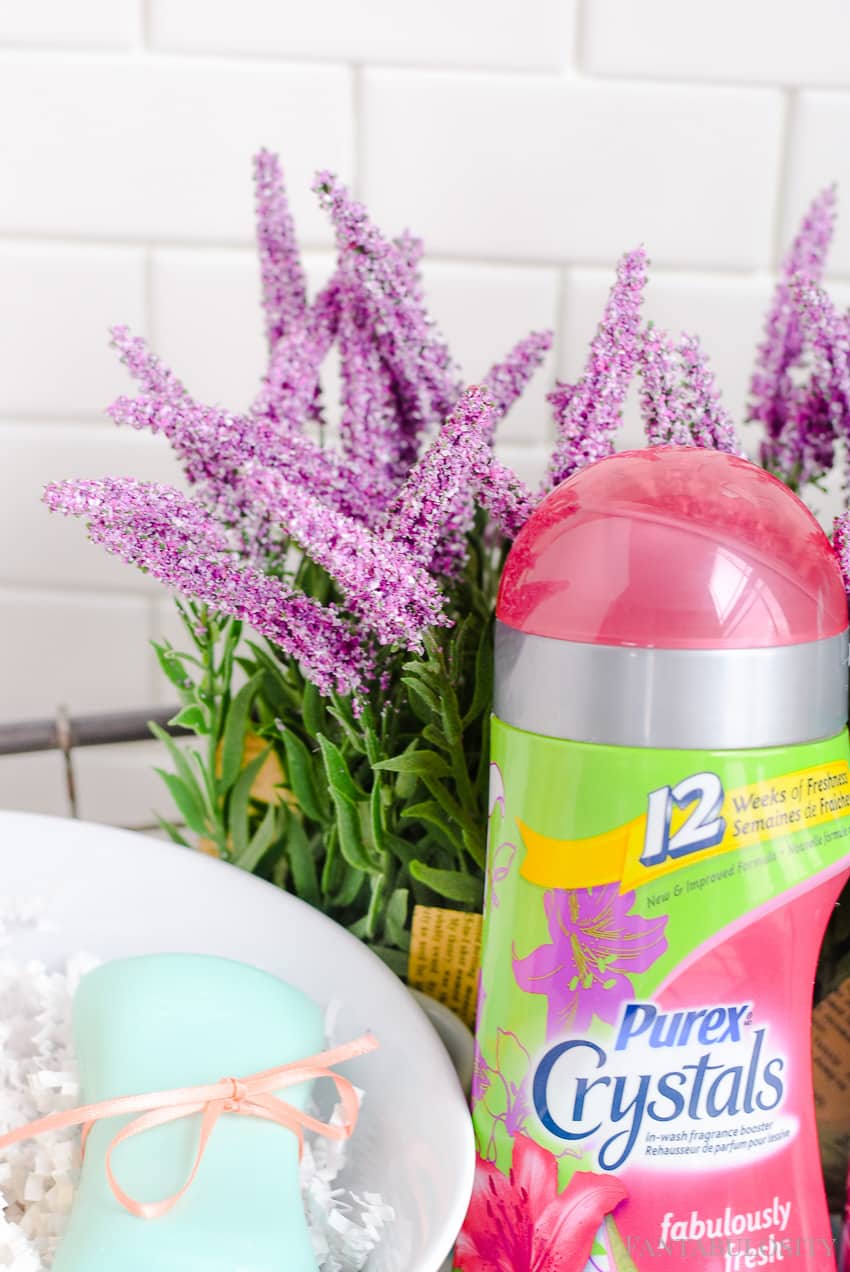
    When I went to Walmart to find the goodies to build the basket with, I found the prettiest bottles of Purex® Crystals, and KNEW they’d look adorable in the gift with their bright colors! Plus, it would be a perfect item to help our friends with laundry in case they hadn’t quite unpacked their laundry supplies yet!

    DIY Housewarming Gift Basket Ideas: Love how it includes things that you need right when moving in, to help out! Plus a little decor to make it homey!

    Gift Basket Building Tips:

    If you haven’t been around here very long, then you may not know my obsession with making DIY gift baskets, when it comes to gift-giving. They just seem so personal, and full of thought. So in most of my other DIY gift basket tutorials, I explain how my two main techniques for making a gift basket look great, is:

    Say “NO” to Tissue Paper:

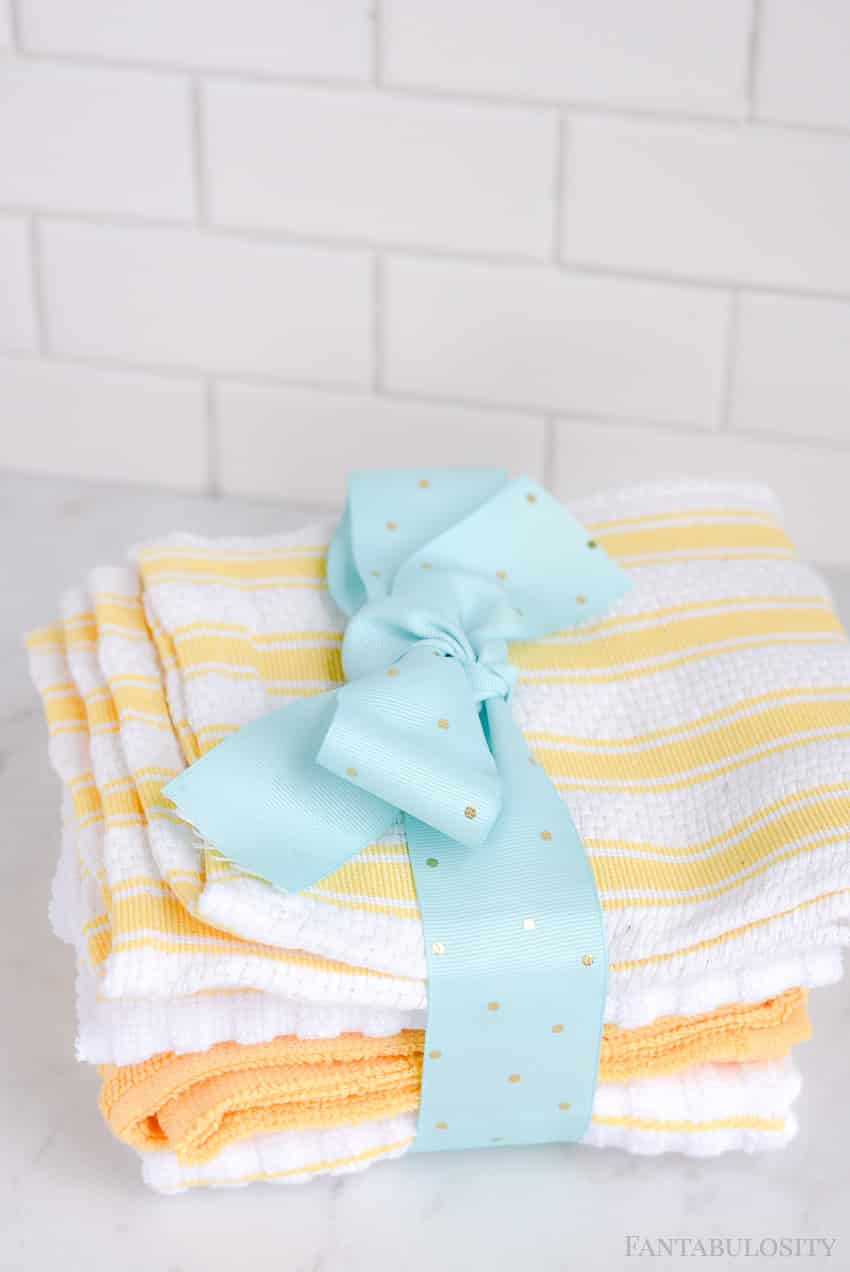
    • Using something other than tissue paper, for the fluff. Of course it’s ok anytime to use it. I just prefer to use something else if it’s going to be visible. Now, I do shove it down inside a basket to give it some “umph,” if you can’t see it. But using something like dishtowels or baby blankets, work great! Plus, it adds to the gift!

    DIY Housewarming Gift Basket Ideas: Love how it includes things that you need right when moving in, to help out! Plus a little decor to make it homey!
    DIY Housewarming Gift Basket Ideas: Love how it includes things that you need right when moving in, to help out! Plus a little decor to make it homey!

    Trash the Trash:

    • Take items out of the “boxey,” boring, packaging that it comes in, and remove the tags. Removing the “store-bought,” look of items can really add a “cleaner,” touch to the gift basket. But when the packaging is as adorable and decorative like the Purex Crystals… leave it! I think these made the gift basket POP with color.

    New Home Gift Basket Ideas: How bright and cheery is this! So easy.

    A Little Decor:

    As part of the housewarming gift, it’s always really nice to add a small element of “home decor.” Being able to put something decorative out in their new home, right away, can be JUST what a corner or shelf needs to make it feel homey, until they get all unpacked. Items like a small floral accent, (something seasonal, or neutral, so odds are it will fit the decor theme they’re going with) are a great choice.

    DIY Housewarming Gift Basket Ideas: Love how it includes things that you need right when moving in, to help out! Plus a little decor to make it homey!

    Incorporate Multiple Rooms

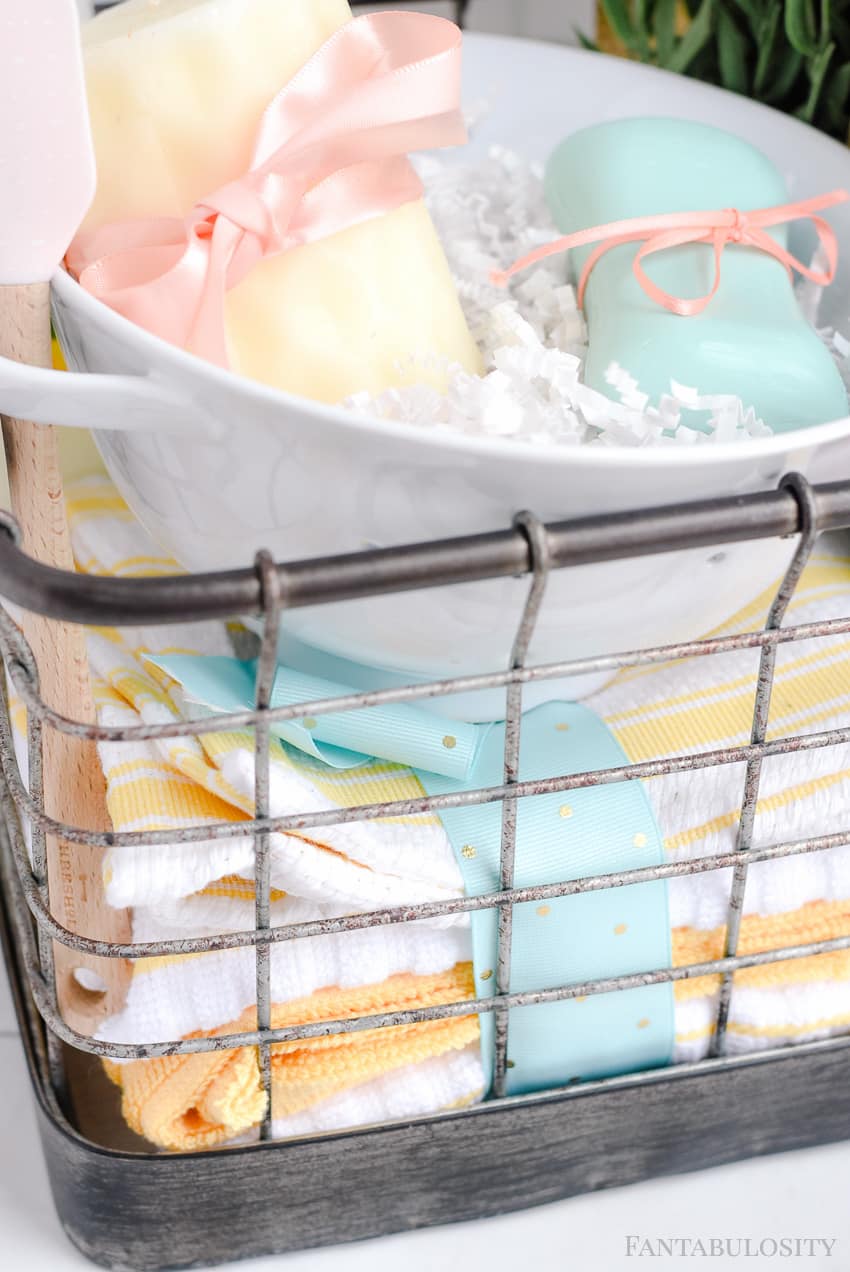
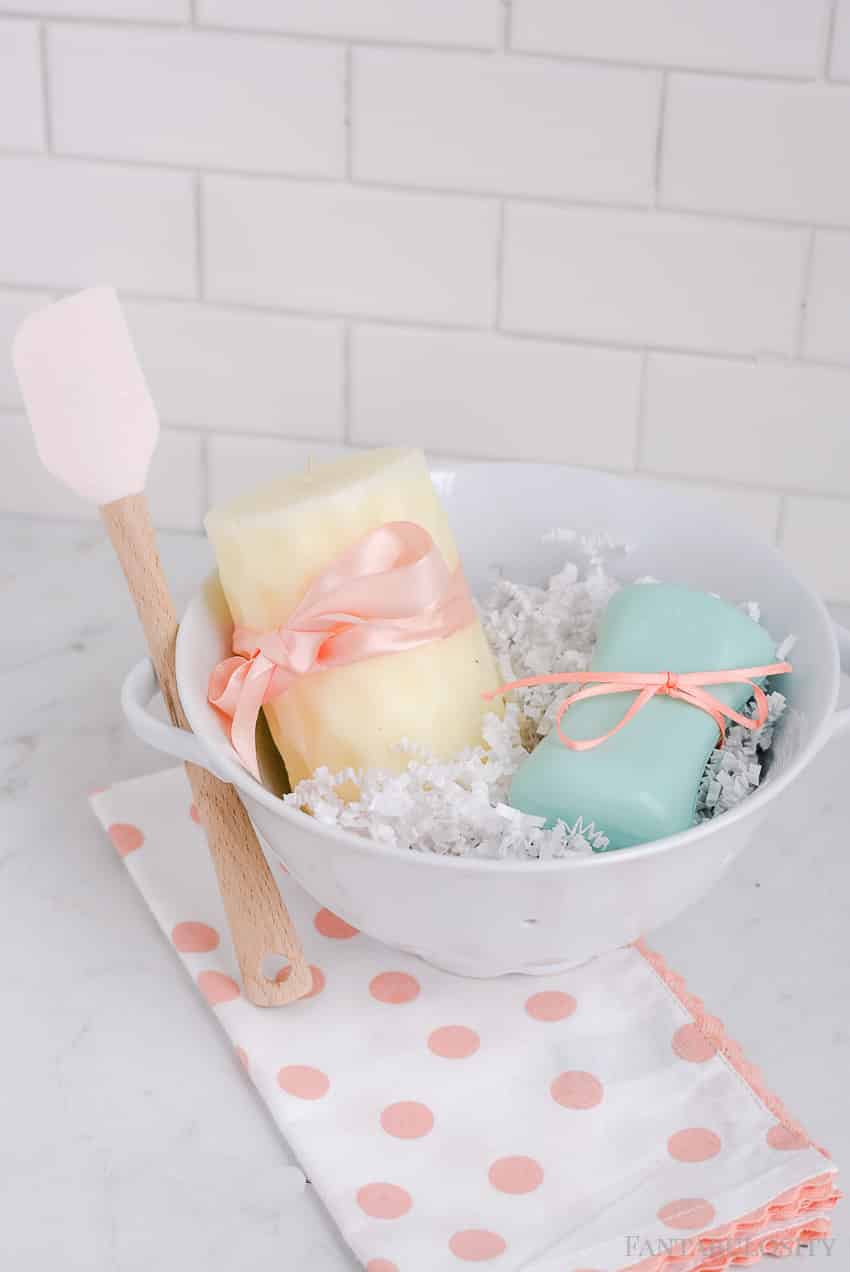
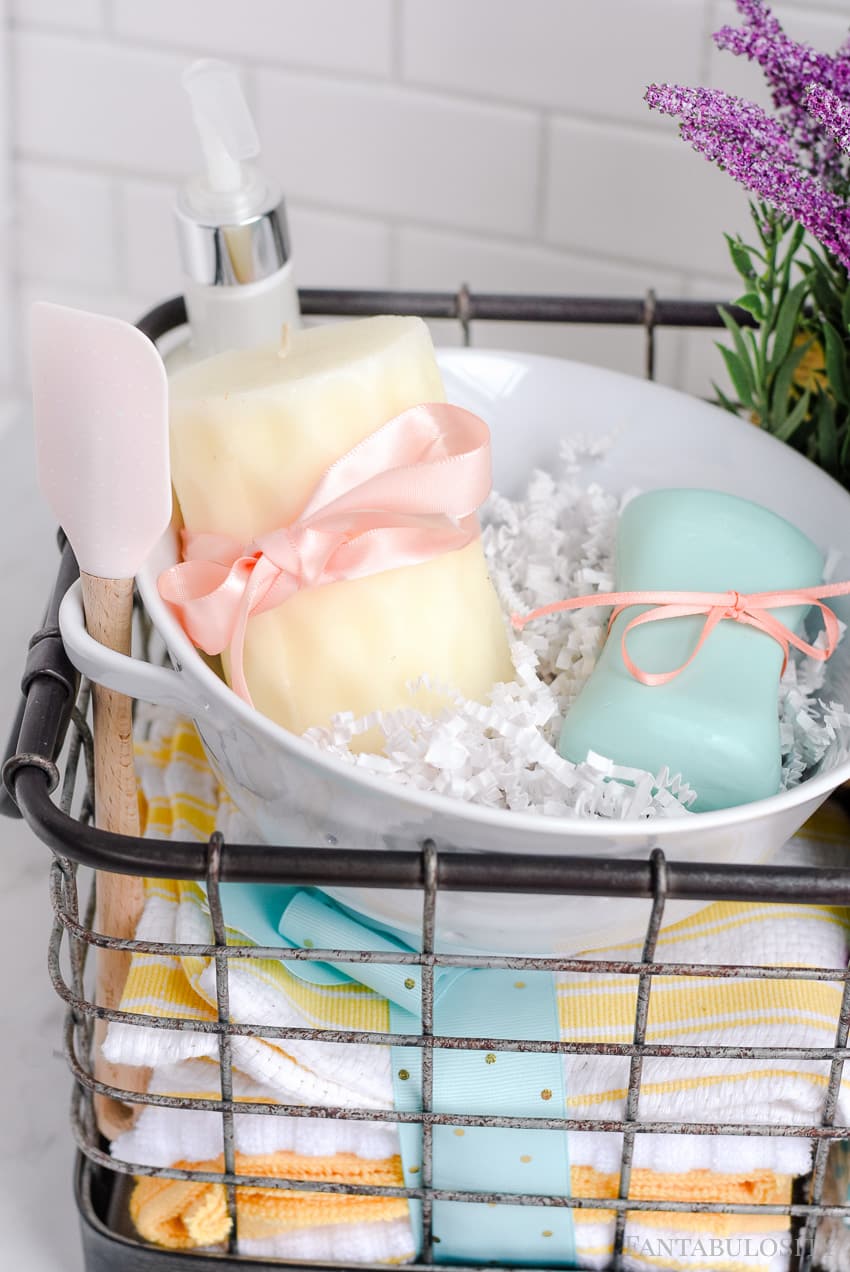
    Well this little colander, spatula, candle and soap could be it’s own little housewarming gift if you ask me. But when making a gift basket full of all kinds of items, adding in a few items for different rooms of the home, like the kitchen, laundry room, bathroom, living, etc. is always a good move.

    DIY Housewarming Gift Basket Ideas: Love how it includes things that you need right when moving in, to help out! Plus a little decor to make it homey!

    Plus, who wouldn’t love a mini colander, and an adorable little spatula? 

    Adding Flair…

    Sure, items in a gift basket are cute anyway. But when you can add things like ribbon around some of the items to add a little flair… it can make it THAT much cuter. Here, we simply wrapped a ribbon around the candle to give it a little more pop of color.

    DIY Housewarming Gift Basket Ideas: Love how it includes things that you need right when moving in, to help out! Plus a little decor to make it homey!

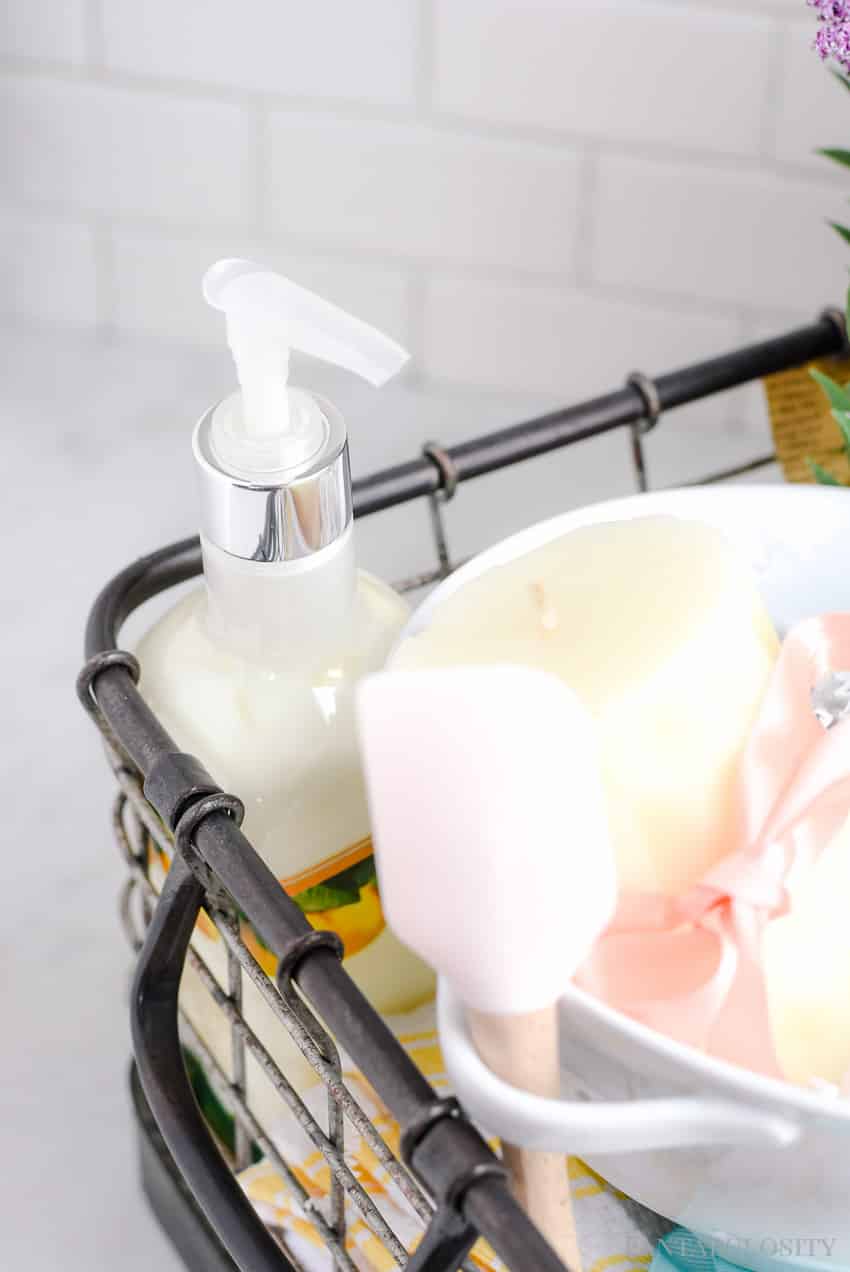
    In the back corner, we tucked a bottle of hand lotion that they can keep in their bathroom on the sink, for guests visiting to see the new home. Functional, AND pretty!

    DIY Housewarming Gift Basket Ideas: Love how it includes things that you need right when moving in, to help out! Plus a little decor to make it homey!

    Basket Buying:

    Then of course shopping for the basket that you put it all in, can be just as fun as finding the items to put in it. But here’s my basket-buying tip: Buy a basket or container that has open sides like this one. That way, the recipient can see right in to the basket, and not have to dig through to see what’s in there!

    Making sure the items are visible right away, when you hand it to them, can add such a “wow,” factor to the overall gift!

    DIY Housewarming Gift Basket Ideas: Love how it includes things that you need right when moving in, to help out! Plus a little decor to make it homey!

    If you love making gift baskets as much as I do, then you may want to see the other gifts I’ve created for friends and family recently:

    Other Gift Ideas

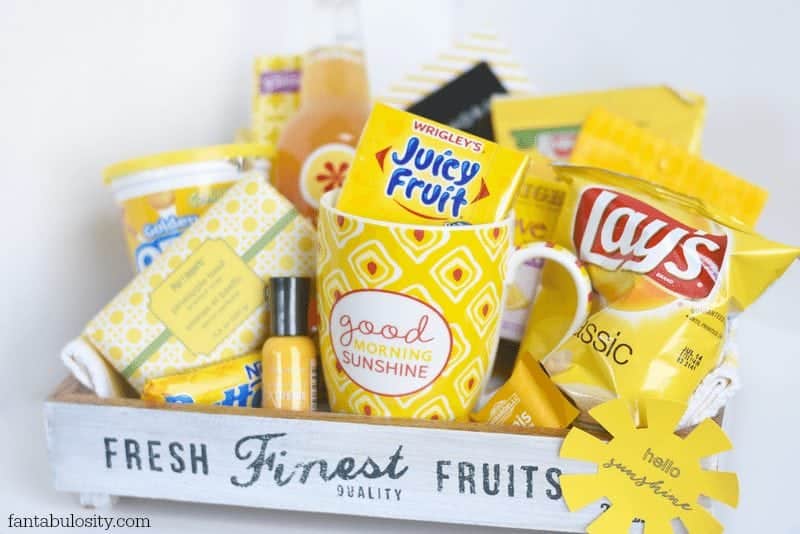
    Sunshine Gift Basket Ideas https://fantabulosity.com

    Buffalo Blue Cheese Dip

    April 28, 2017

    Buffalo Blue Cheese Bacon Dip- Easy dip recipe for a party, or to serve alongside french fries, chips, or a steak!

    Buffalo Blue Cheese Dip – A quick and easy, no bake dip recipe that can be served cold or hot. Serve with chips, french fries, or even on top of a delicious steak recipe.

    Buffalo Blue Cheese Bacon Dip- Easy dip recipe for a party, or to serve alongside french fries, chips, or a steak!

    Buffalo Bacon Blue Cheese Dip

    When making the Baked Fiesta Ranch Potato Wedges the other day, we got the hankering (yes, we say that in the midwest) for a tasty little dip to go with it. But as you know, if it’s coming from my kitchen, it better be easy, and slightly homemade.

    So when our minds got to brainstorming about a dip with a kick, we realized that combining just a few ingredients… we not only made a dip that was tasty and easy… but it was a no-bake, no-cook dip too. I mean, how much stinking easier can it get!? (It’s just as easy as this homemade blue cheese dip, too!)

    No-Bake Dip for a Party

    Have you ever been in charge of a side dish for a party? You know, when the host says,

    Oh just bring a side dish. Something easy.

    Usually “something easy,” and “side dish,” gravitates towards chips and salsa. I mean, that’s easy, isn’t it? But when you’re wanting to actually make something… something that will make everyone say,

    Who made this?

    …and everyone in the room points at you, with gratitude for bringing something other than potato chips and french onion dip? Then my friends, give this Buffalo Bacon Blue Cheese Dip a try.

    No Bake, No Cook, No Leftovers:

    This dip is incredibly versatile. We serve it with the potato wedges recipe that I shared the other day, with french fries, chips, warmed on top of a juicy filet… I mean the options are endless.

    So no matter if you’re looking for an appetizer, a side dish, or a garnish for a main dish for an extra kick, this one should tickle your fancy.

    Recipe

    Buffalo Blue Cheese Bacon Dip- Easy dip recipe for a party, or to serve alongside french fries, chips, or a steak!
    Print Pin
    4.20 from 5 votes

    Buffalo Blue Cheese Dip

    Easy Dip Recipe for a Party: Buffalo Bacon Blue Cheese Dip – A quick and easy, no bake, cold or warm dip that’s EXCELLENT for a party, to serve alongside chips, french fries, or a steak!
    Course Appetizer
    Cuisine American
    Prep Time 10 minutes minutes
    Total Time 10 minutes minutes
    Servings 10 servings
    Calories 38kcal
    Author Jessica Burgess

    Ingredients

    • 1 16-ounce container sour cream
    • 1 1.6-ounce package McCormick Buffalo Wing Original Seasoning Mix
    • ¼ cup blue cheese crumbles
    • ½ cup real bacon bits

    Instructions

    • Mix all ingredients together in a bowl, and chill until ready to serve.
    • Serve chilled for chips, celery, etc, or warm to use as a dip with warm foods like potato wedges, french fries, steak, etc.

    Nutrition

    Serving: 1serving (about ¼ cup) | Calories: 38kcal | Protein: 2g | Fat: 2g | Saturated Fat: 1g | Cholesterol: 8mg | Sodium: 144mg | Potassium: 37mg | Vitamin A: 25IU | Calcium: 18mg | Iron: 0.1mg

    At Home Date Night Ideas & Budget Friendly Too!

    April 17, 2017

    How to make a bed like a hotel! So easy!

    At Home Date Night Ideas: Date night ideas at home that are easy, romantic, and budget-friendly. It’s the perfect list of ideas for when a date night is needed but you don’t want to leave the house.

    My husband and I try to have a date night at least once a week.

    But sometimes life gets in the way and we can’t squeeze a date night in. BUT… for the times that we can, and when we prefer to stay at home… creating a “theme,” to the night, can add a little spark to the evening. Plus, keeping things at home, can REALLY help with making date nights budget-friendly. (A major perk, if you ask me!)

    (If we don’t, the default method of our date night at home is: “Take-Out, movie on Netflix, and I’m asleep on the couch in 30 minutes.)

    So what themes do we have up our sleeve? Well let me share those with you, in case you’re looking for a few thought starters for a date night at home too.

    But first, if you haven’t read Tips for a Romantic Weekend with your Husband,” you may want to. Although “date night,” may not be a “weekend,” you may find some helpful and “ahem,” personal tips in there that may help.

    Make your Own Hotel Suite

    stay at home date night ideas

    One of my FAVORITE date night’s away from home involves staying at a hotel. There’s something about the fresh crisp linens, snacks/beverages nearby, and a relaxing atmosphere of lounging and tv binge watching.

    When the budget is tight, or you don’t feel like going out, creating your own hotel suite may be something that you two would love.

    Fluff up the pillows and blankets, place a tray of snacks and drinks nearby, and settle in for the night. Still hungry? Have a pizza delivered. One of our favorite things to do is to have a pizza delivered from a new pizza restaurant nearby.

    Want to take it another step further? Know how the hotel rooms are pitch black and you wake up in the morning, not even sure what time it is? Throw thick blankets over your bedroom windows to block out any light in the morning. Sleep in and really get the feel of a hotel room!

    Massage/Spa Night at Home

    I really can’t think of anyone that wouldn’t love this date night idea at home. A massage/spa night? Count me in, and you can count my husband in. Even if “physical touch,” isn’t your love language, a nice romantic massage given to you by your other half, may just be what you need after a long week.

    Now you can play it low-key and just say that you’re going to give each other massages on date night, or you can go all out…

    Create a “massage station,” per say, and fill a tray/table with massage oils & lotions, eye mask, and warm towels. You can even play a little relaxing music to really set the scene.

    Now this doesn’t have to be a one-sided affair. You can both switch, and give each other a massage. Ladies, there are two ways you can look at this type of date night at home. 1. You can offer to massage him first, so you can relax after your massage, instead of having to get up after yours and get to work, giving him one. OR 2. You get your massage first, and he’ll probably get so wrapped up in massaging you, that it may lead to something else, and he may forget all about how you’re supposed to give him a massage. 😉

    Date Morning

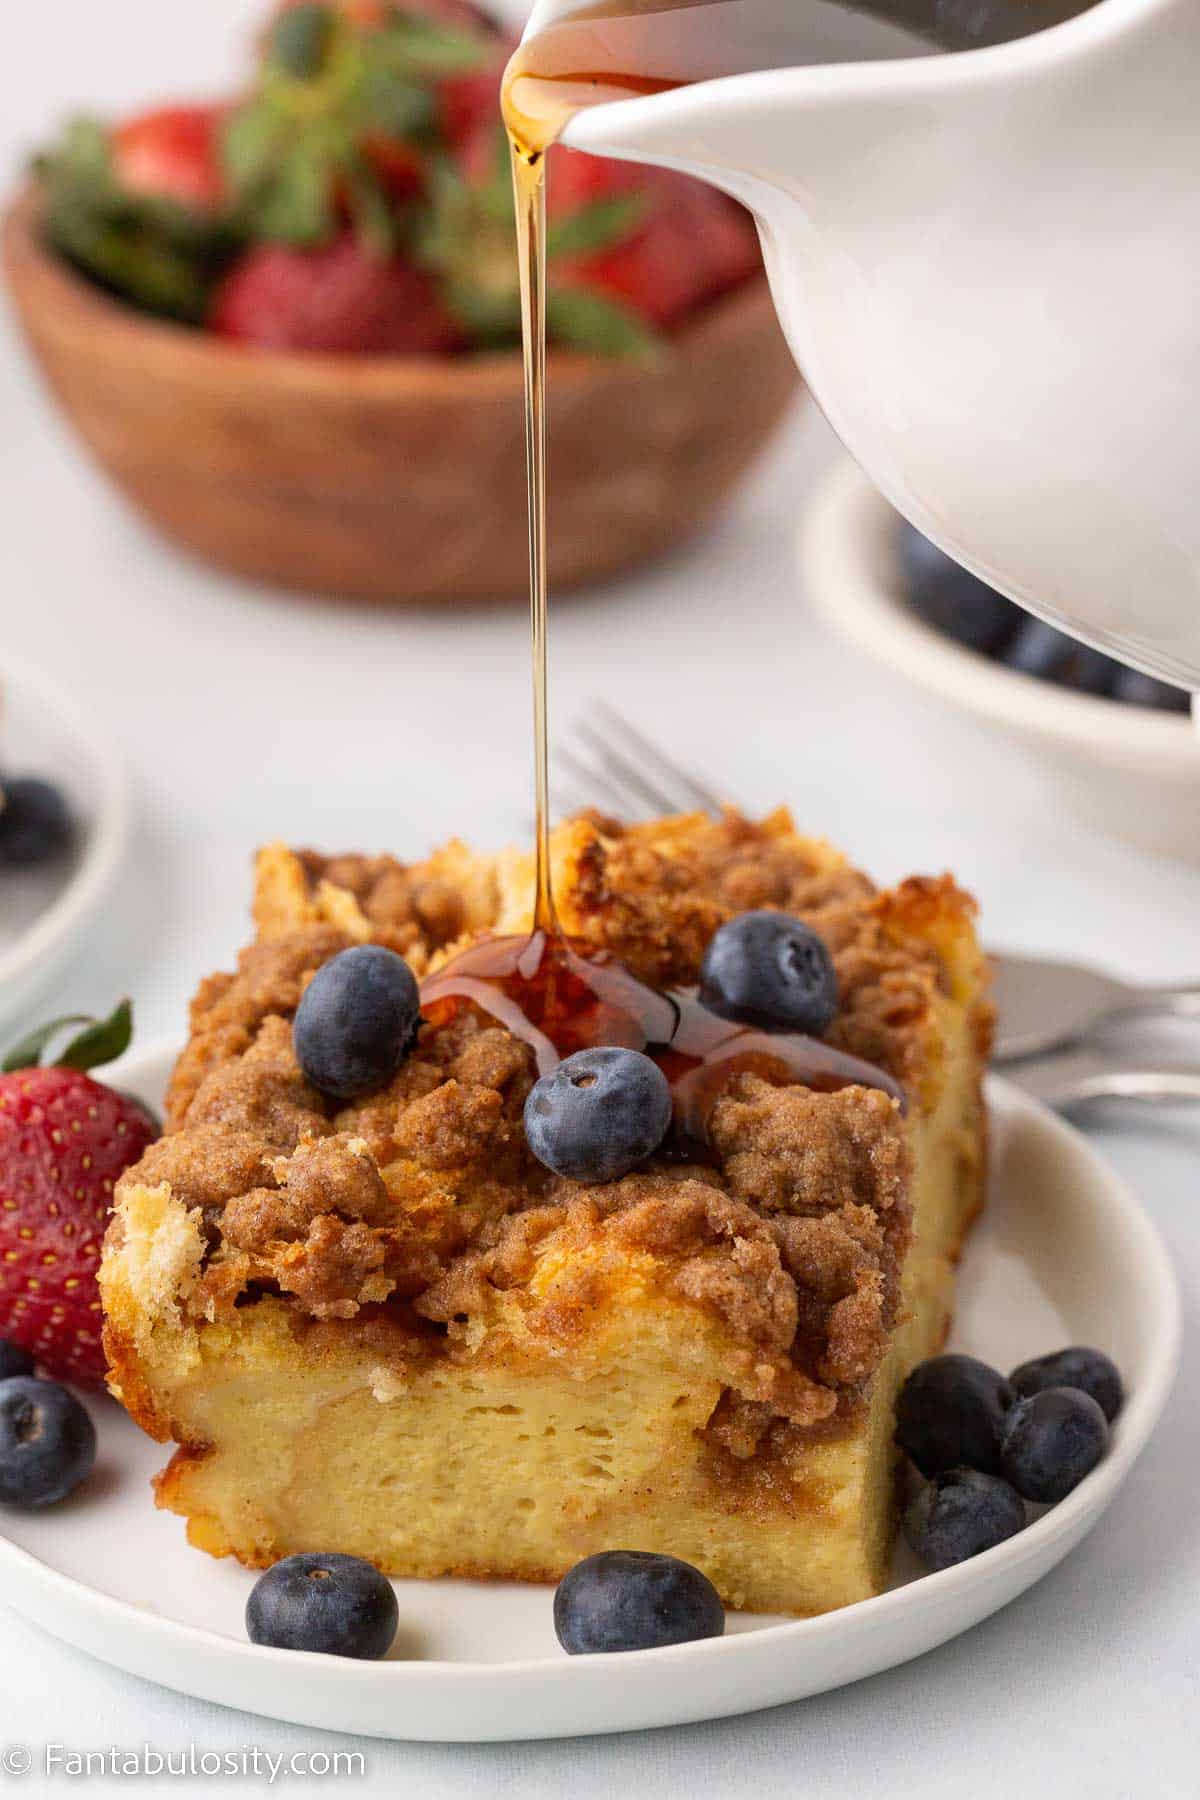
    Syrup pouring over French toast casserole in white plate with blueberries.

    Sometimes switching things up from the norm, can add excitement to an occasion in itself. Instead of the standard “date night,” try reversing date night, and have a date in the morning.

    Perhaps a babysitter would be easier to find in the morning, than a Saturday night? Or maybe the kids stayed at a friends house so you could go to an event with friends the night before, and you don’t have to pick them up until the afternoon?

    A relaxed morning together, making breakfast, drinking coffee, or good heavens… just staying in bed all morning, cuddled up watching movies or your favorite tv series on the DVR that you need to catch up on. Date “nights,” can easily be filled with the high-maintenance expectations, but a relaxed-easy going morning may be just what the “date” doctor ordered.

    Pallet Party

    It sounds like something you’d hear on a “kids activities,” blog post, but you read that right. It’s a date night at home theme, that’s sure to please! It won’t take much.

    Place a blanket (fuzzy is my favorite) on the floor, and line it with a row of pillows (a LOT). Make it look cozy from the start. Turn the lights down low, light a few candles, and turn that tv OFF. You can start out by having a picnic on your pallet with dinner, or just have it cozy and ready for when you finish dinner.

    Turning the tv off will force that conversation, and more than likely… will lead to a little something else. Because let’s face it, if you’ve been together a while, you may not have much to talk about, unless it involves the kids or work. So silence + no distractions + nothing to say = every man’s next move.

    Make a Date Jar

    This is such a fun, and exciting way to keep the “spark” in date night! See how to make your own Date Night Jar and what that means!

    Q&A

    Jessica with Fantabulosity.com, lifestyle blogger

    I’m a sucker for listening/watching Q&A’s when it comes to people that I admire. So when trying to think of new date night ideas, I thought, “Well why wouldn’t a Q&A session between the two of us be interesting, informative, and fun?!”

    Even though we’ve been together 18 years, would you believe there are still things that I don’t know about him? (Or, have forgotten perhaps?) This could very well be the case with you two, as well.

    My favorite thing to do is to compile at least 10 questions that I want to ask him, a couple of days before the scheduled “date night.” He will do the same, and then on date night, we take turns asking each other those questions. It’s incredibly fun, hilarious, and you may just learn something new about one another.

    Need question inspiration?

    • What was your favorite thing to do as a kid?

    • If you only had one more day to live, what would you do, and be specific!

    • If you could hang out with someone for a day, (dead/alive/famous/etc.) who would it be, and what would you want to do?

    Backyard Romantic Dinner for Two

    Pop Up Backyard Dinner Party: Entertaining Ideas, classy, easy simple, quick, fun, outside

    I’m not sure what it is, about dining outside. Whether we are at a restaurant, or on the beach in Mexico, there’s something about that outdoor atmosphere that gets me going. So when we’re looking for a date night at home, an easy, out of the ordinary backyard dinner, is JUST what we need.

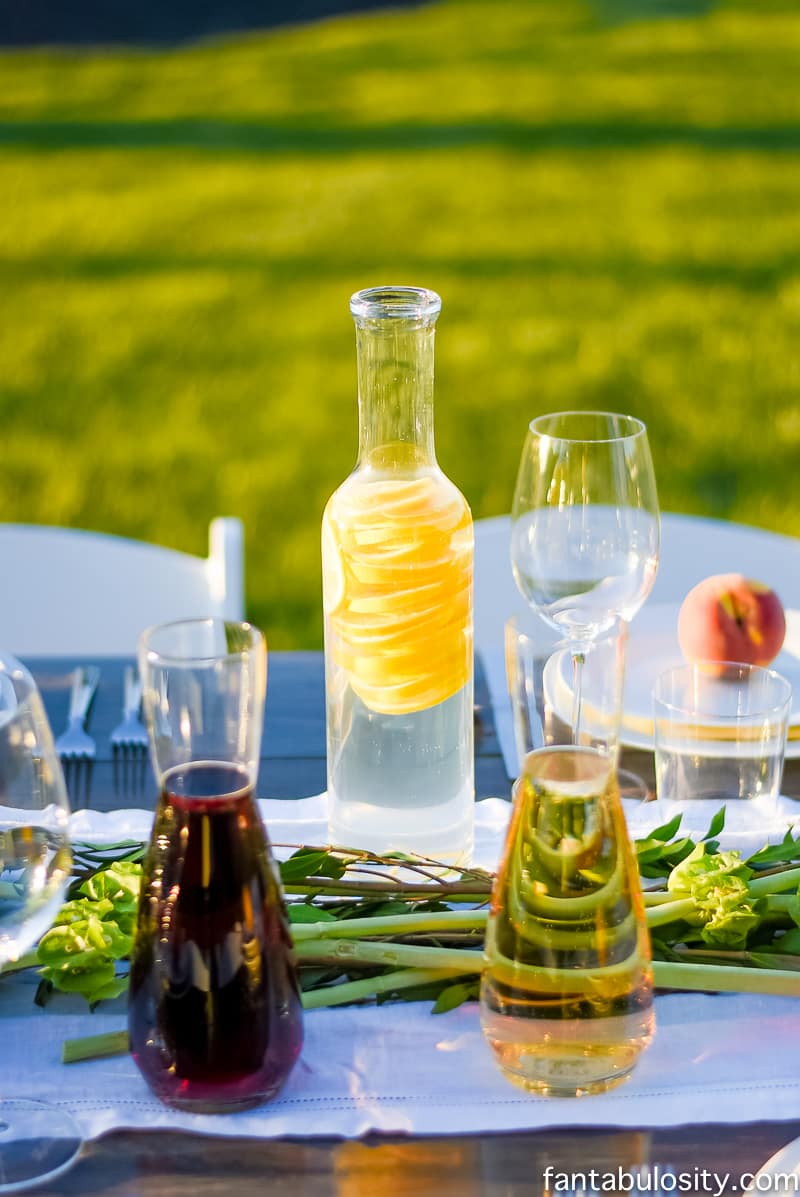
    Feel free to make it super easy, grab some takeout, and mosey outside on the back porch or patio. Or, if you’re really wanting to “snazz,” it up a bit… grab a table, candles, glassware, and prepare an oven baked steak dinner for two, and enjoy it outside together. The sounds of nature/city life is sure to spark romance and dinner conversation, a lot more than eating pizza on the couch would.

    Unplugged Wine & Cheese Tasting

    date night ideas at home

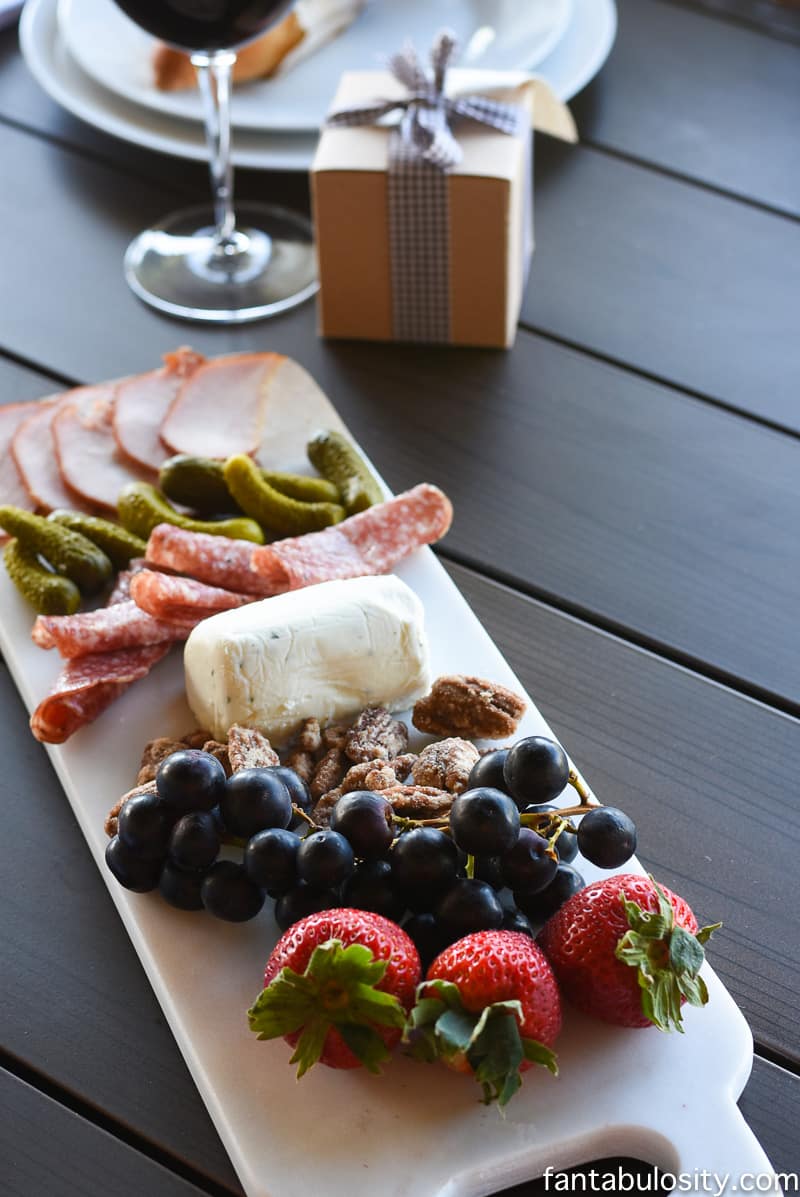
    Although you don’t have to make sure it’s a cheese board, with a side of wine to have an “unplugged,” date night, I thought it would be a nice (fancy-schmancy) snack to chat over. But feel free to have any snack/meal/appetizer you wish. Being in the line of work that my husband is in, he’s “on-call,” 24 hours a day.

    He owns his own business, and although he’s intentional about work time/home time, his phone can still be a distraction. MY phone can even be a distraction with all sorts of beeps and notifications too. So having an “unplugged,” date night, can really help us be intentional with conversation, and experience fewer distractions. Turn those phones off, or stick them in the back room.

    Cooking for Two

    How to keep avocados fresh

    Talking with my friend the other day, she mentioned how she and her husband LOVE to cook together on date nights. They send the kids to Grandma’s for the night, and they get creative in the kitchen. But what I love so much about this, is that they don’t make just plain ole spaghetti. They experiment with a whole new recipe. This way, the romance carries on into the “dining,” portion of their date night, and creates more conversation. The good, the bad, what they’d change about the dish next time, and so on.

    My favorite part? If they create a dish that they love, when they make it again in the future, it will bring back all of those date night memories. And who knows… it may be referred to as “The Date Night,” dish. 🙂

    marriage date night ideas at home

    What is YOUR Favorite Date Night Activity at Home?

    Of course there is nothing wrong with lounging on the couch, watching another episode of your favorite show on Netflix with your main squeeze. But in case you’re looking for a little something “extra,” those are our favorite “out of the box,” date night ideas. I hope they inspire you!

    Ribs on the Grill: Chipotle Apple Butter Ribs Recipe

    April 10, 2017

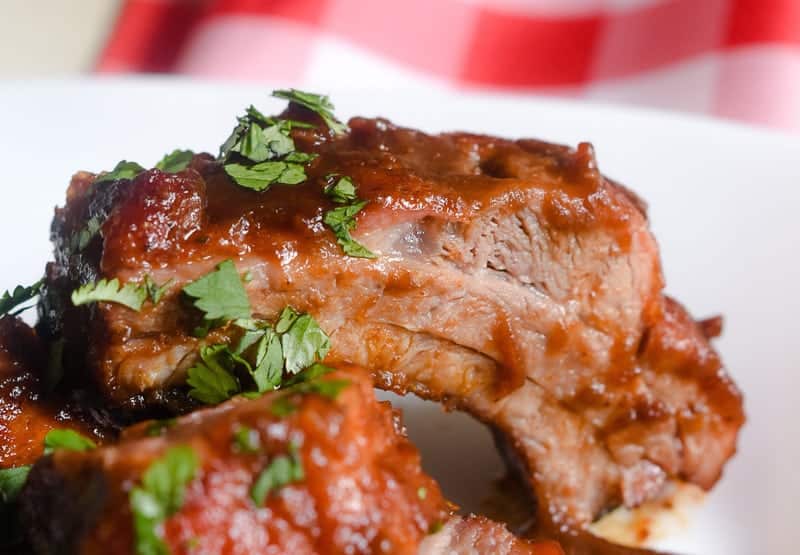
    Grilled Apple Butter Chipotle Ribs on platter.

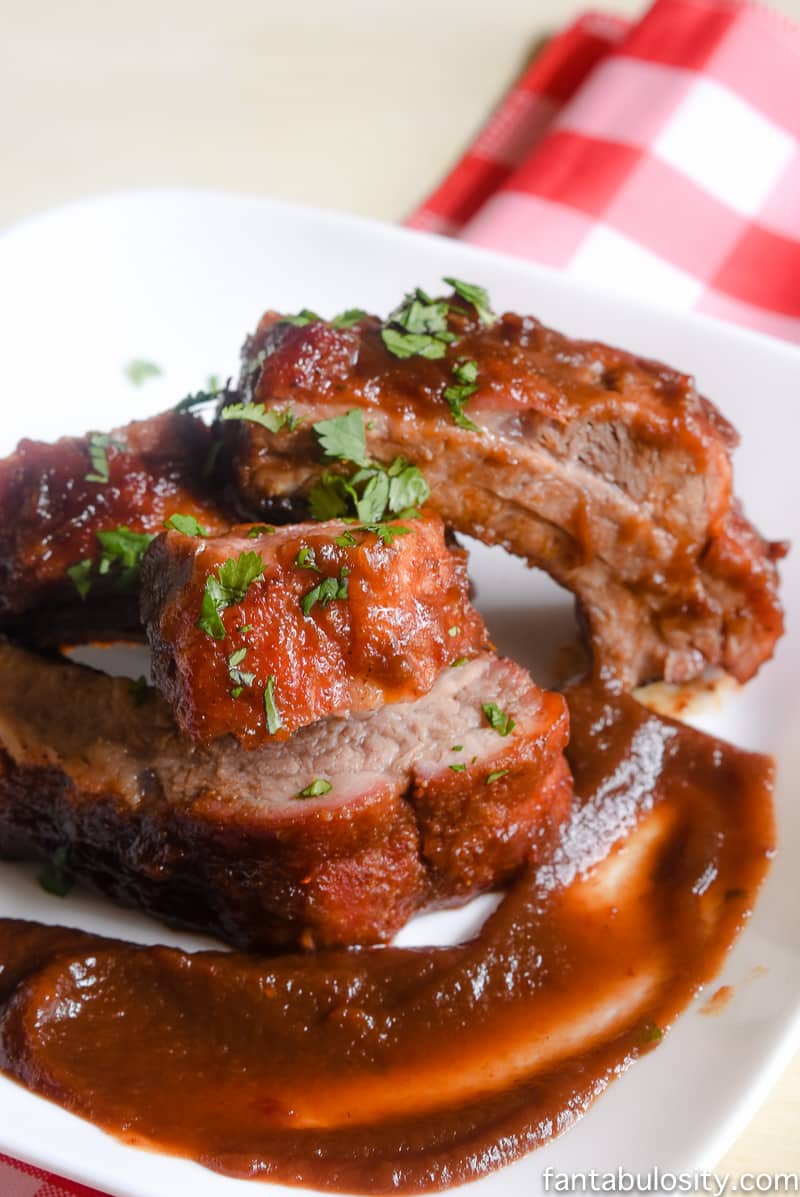
    Ribs on the Grill: Chipotle Apple Butter Ribs Recipe An easy grilled rib recipe, just like these sweet and smokey pork chops, topped with a sauce that will flirt with your tastebuds!

    Ribs on the Grill: Chipotle Apple Butter Ribs Recipe - This sauce and rub recipe is amazing!

    Ribs on the Grill: Chipotle Apple Butter Ribs Recipe

    When the temperature outside even grazes over the 60’s, we start the Spring grilling! (You know me, if it’ means less clean-up in the kitchen, then I’m totally game. Grilling tends to keep the mess and heat outside, so it’s a definite favorite cooking technique in our house!)

    Ribs… on the Grill?!?!

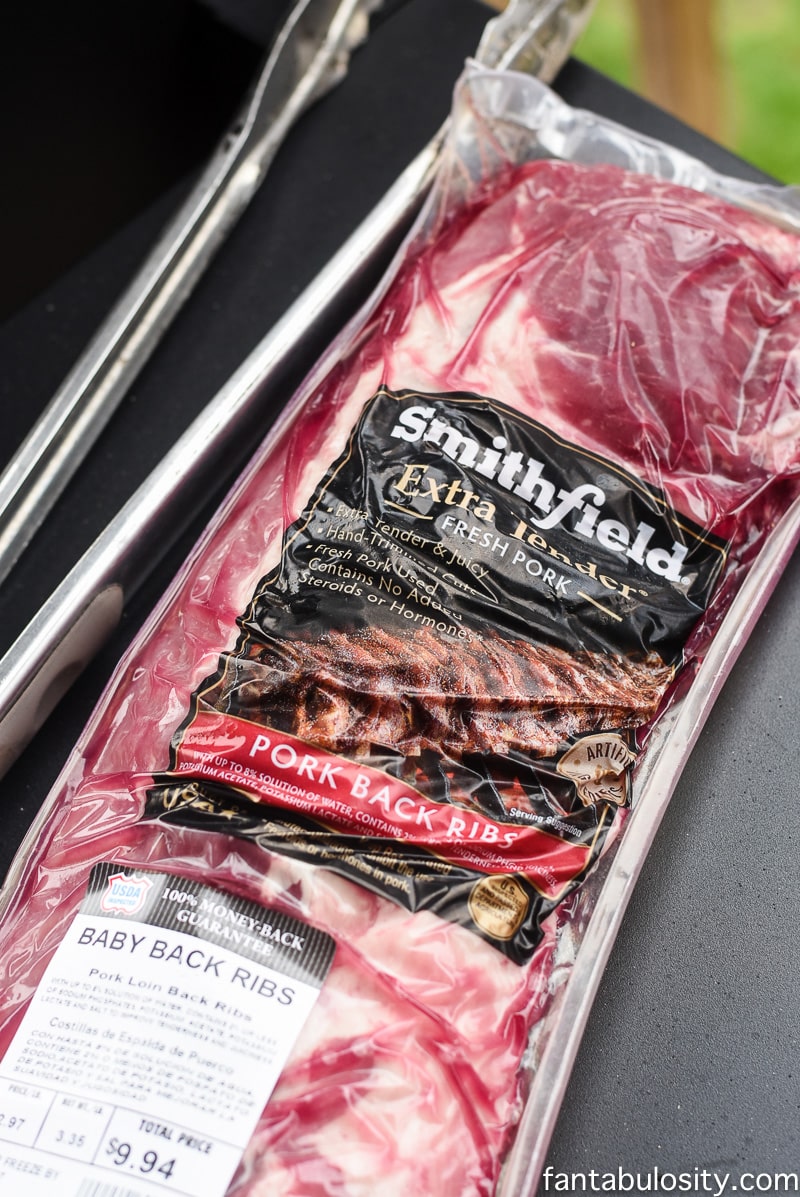
    For YEARS, ribs intimidated me. I wasn’t sure how to make them. Do you bake them? Smoke them? Until I found out how easy it was to GRILL them on a charcoal grill, especially using my new favorite ribs! My girlfriend had me over the other day, and while visiting, I saw her prepping dinner for her family. Me, the nosey-food-loving gal, of course had to find out every little detail about what she was making.

    She explained to me that one of her favorite ways to cook ribs was to grill them on her charcoal grill. After giving me the quick run-through of how she does it, I knew grilling the ribs would be in my near future.

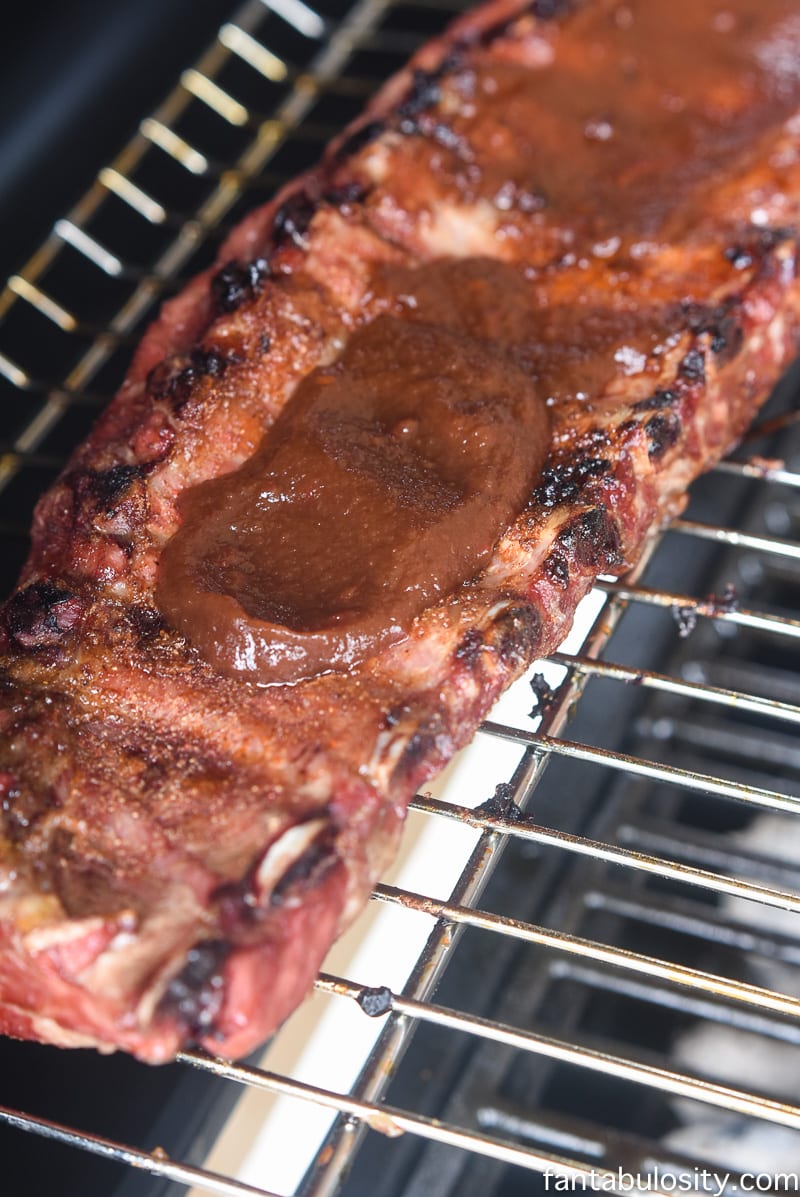
    This sauce was INCREDIBLE. So nice to switch it up from BBQ sauce. Chipotle Apple Butter Ribs on the Grill

    Rub + Sauce:

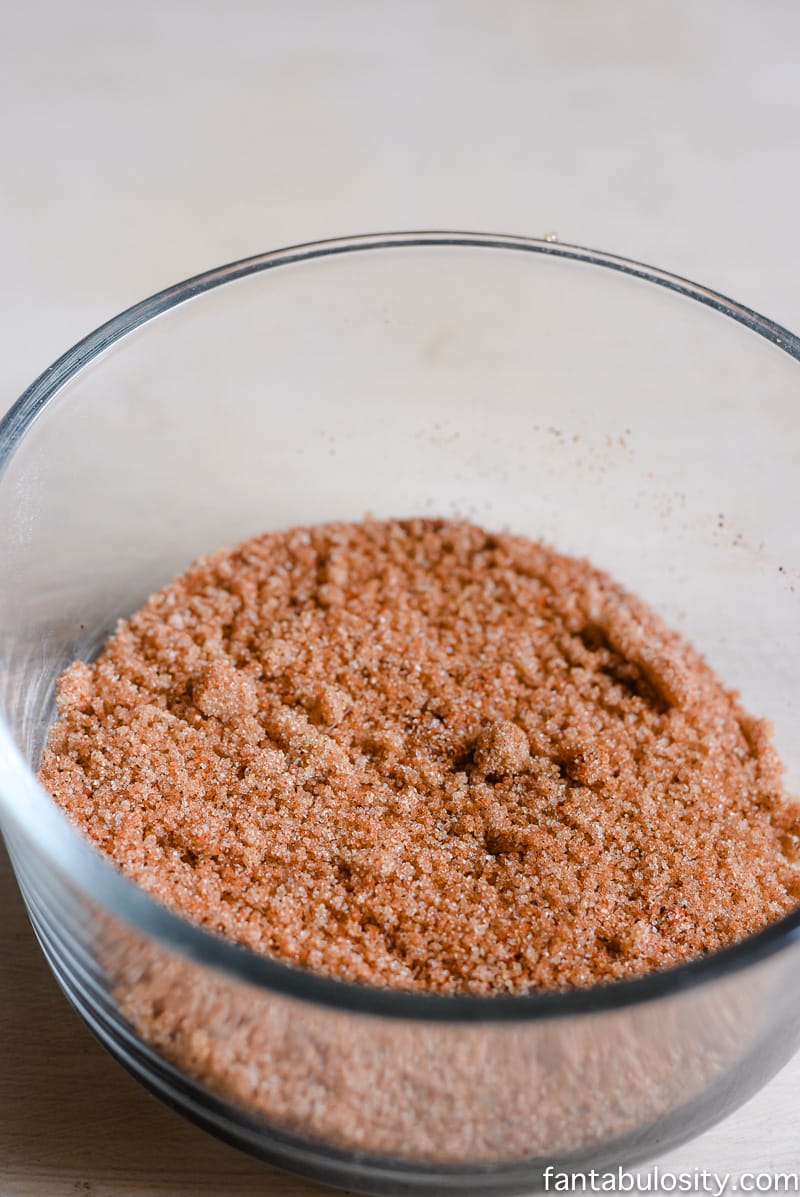
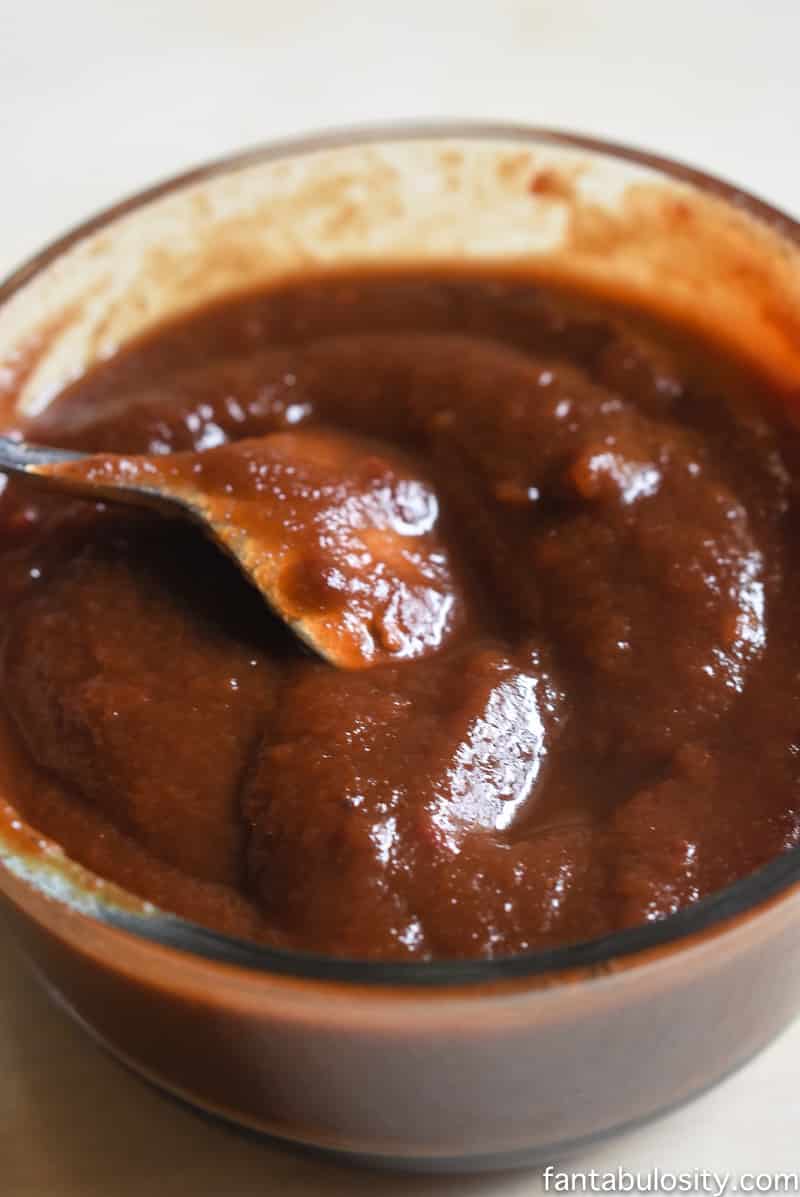
    The rub is made up of everyday ingredients, that you more than likely already have on hand, and well… the sauce may have been what caught your attention to come over here in the first place.

    You all, I can’t stress enough how delicious the two ingredients (apple butter + chipotle sauce) are together. Plus, if you’re a huge apple butter lover like me, you’ll want to try making your own apple butter in the crockpot.

    This sauce was INCREDIBLE. So nice to switch it up from BBQ sauce. Chipotle Apple Butter Ribs on the Grill
    This sauce was INCREDIBLE. So nice to switch it up from BBQ sauce. Chipotle Apple Butter Ribs on the Grill
    This sauce was INCREDIBLE. So nice to switch it up from BBQ sauce. Chipotle Apple Butter Ribs on the Grill
    This sauce was INCREDIBLE. So nice to switch it up from BBQ sauce. Chipotle Apple Butter Ribs on the Grill
    This sauce was INCREDIBLE. So nice to switch it up from BBQ sauce. Chipotle Apple Butter Ribs on the Grill

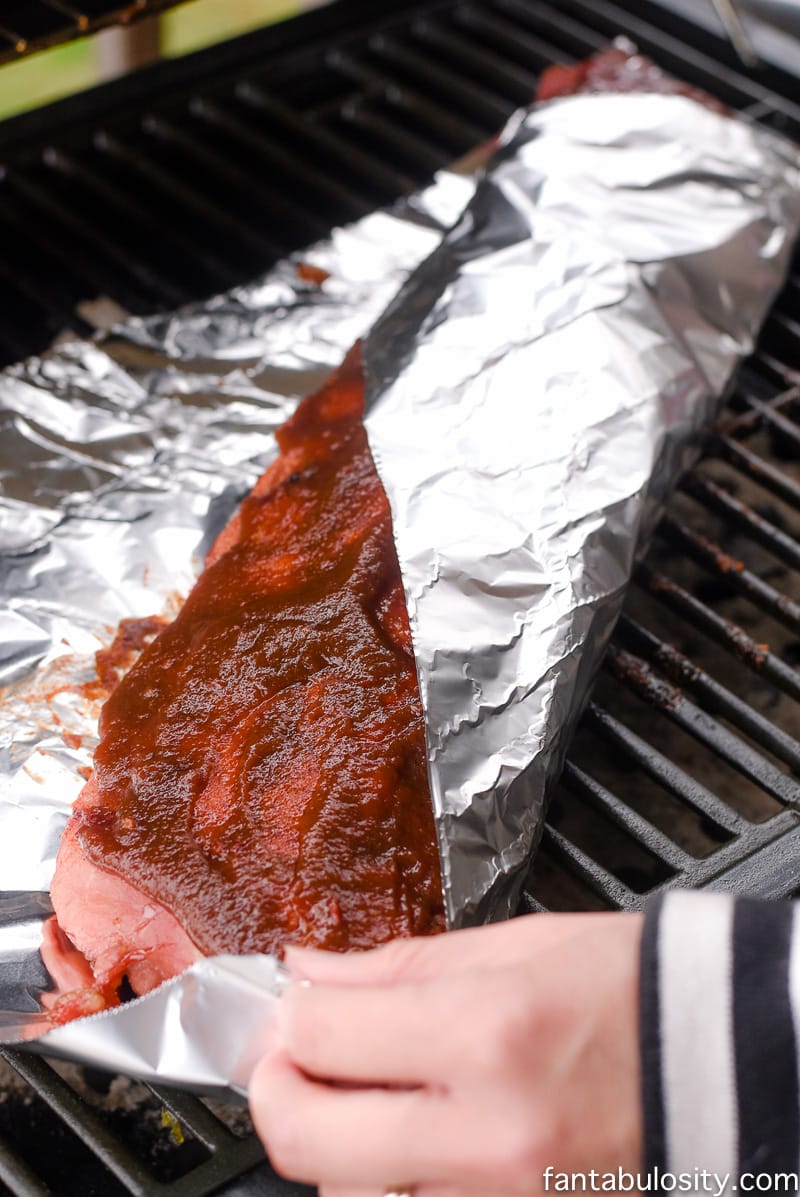
    Tip: Wrap those babies in aluminum foil after applying the Chipotle Apple Butter sauce, to really trap in the flavor and juiciness of the ribs. 

    This sauce was INCREDIBLE. So nice to switch it up from BBQ sauce. Chipotle Apple Butter Ribs on the Grill
    Ribs on the grill - so easy! So nice to switch it up from BBQ sauce. Chipotle Apple Butter Ribs on the Grill
    I didn't even think about putting ribs on the grill, until I found out how easy it is!

    You all, if you want to impress your family, or even have guests over for a bbq this Summer, you’ll want to give this recipe a try. No matter your level of expertise, you too can grill ribs! Use any leftover apple butter to make this apple butter pie, and you’ll have a whole theme!

    Now, if you have an Instant Pot, you may also want to try these Country Style Ribs!

    Recipe

    Grilled Apple Butter Chipotle Ribs on platter.
    Print Pin
    4.67 from 3 votes

    Chipotle Apple Butter Grilled Ribs Recipe

    Chipotle Apple Butter Grilled Ribs Recipe: An easy grilled rib recipe, topped with a sauce that will flirt with your taste buds!
    Course Main Course
    Cuisine American
    Prep Time 10 minutes minutes
    Cook Time 1 hour hour 30 minutes minutes
    Resting Time 13 minutes minutes
    Total Time 1 hour hour 40 minutes minutes
    Servings 8 servings (if ribs are about 2 lbs)
    Calories 460kcal
    Author Jessica Burgess

    Ingredients

    • 1 2-lb package Smithfield Fresh Pork Ribs

    Rub:

    • 3 Tablespoons brown sugar
    • 2 Tablespoons chili powder
    • 1 Tablespoon garlic powder
    • 2 teaspoons table salt

    Sauce:

    • 1 Cup apple butter try my slow cooker apple butter recipe
    • 4 Tablespoons chipotle sauce
    • 1 Tablespoon brown sugar

    Instructions

    • Light charcoal grill. (Its ready for the ribs when the charcoal turns to an ash color.)
    • Rinse the ribs in water and patting dry with a paper towel.
    • Remove the membrane, which is on the bottom of the ribs.
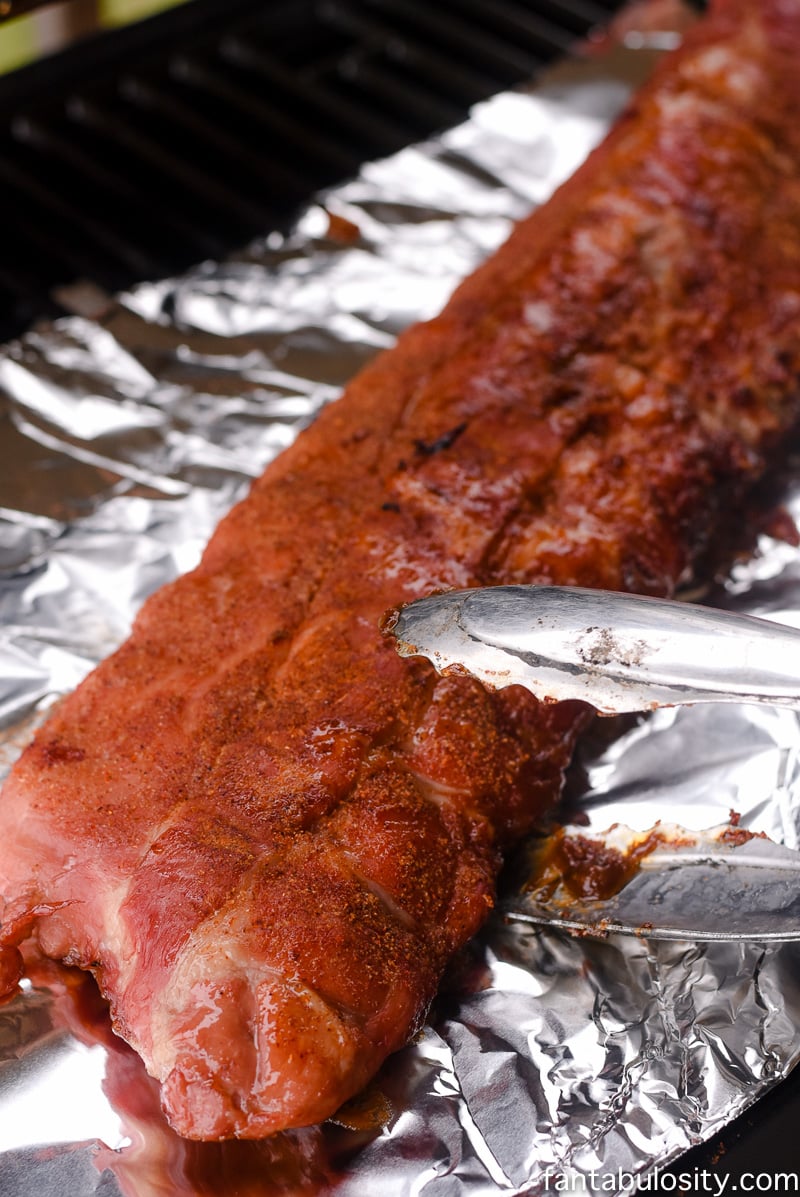
    • Coat ribs with rub, and let sit for 10 minutes.
    • Place ribs on the grill over indirect heat. (Do not place directly over coals.)
    • Grill on each side for about 30 minutes, on each side.
    • Place ribs on a sheet of aluminum foil, and sauce both sides with the chipotle apple butter sauce. Wrap the ribs in the foil, cooking an additional 30 minutes to an hour for more tenderness.
    • Make sure ribs reach an internal temperature of 145 degrees.
    • Let rest for 3 minutes before serving. Serve with any remaining Chipotle Apple Butter Sauce.

    Nutrition

    Serving: 1serving (about 2 ounces of meat) | Calories: 460kcal | Carbohydrates: 23g | Protein: 18g | Fat: 32g | Saturated Fat: 14g | Cholesterol: 85mg | Sodium: 681mg | Potassium: 336mg | Fiber: 1g | Sugar: 18g | Vitamin A: 620IU | Vitamin C: 0.2mg | Calcium: 27mg | Iron: 2.4mg

    Cookie Dough Crescent Bites

    March 29, 2017

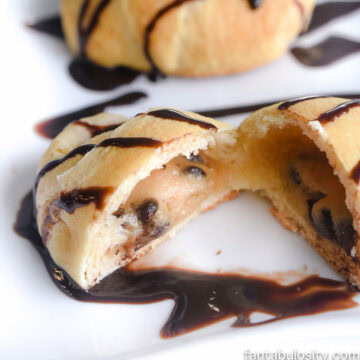
    Crescent rolls stuffed with cookie dough.

    Thank you SO much to Pillsbury for sponsoring this Cookie Dough Crescent Bites recipe! Although compensated, all opinions and views are those of Fantabulosity.

    Cookie Dough Crescent Bites: A quick and easy sweet treat dessert using Pillsbury Crescent rolls and store bought cookie dough! Drizzle with chocolate syrup and BITE!

    2 Ingredients!!? Holy cow these look amazing! Cookie Dough Crescent Bites Recipe

    Cookie Dough Crescent Bites

    Every Spring, our little guys LOVE to walk about our neighborhood leaving little surprise boxes of treats on doorsteps. It’s finally warm enough outside at this point, to spend a good amount of time, and to pop in at our neighbors to bring them a little happiness.

    In my blog post a couple of years ago, “Spring Activity for Kids – Random Act of Kindness,” I mentioned how much that I love that doing this little activity every Spring, is a great way to teach our kiddos about doing something nice for others.

    This year, we got a little creative in the kitchen, using only TWO ingredients. Yes, TWO!

    My kiddos were able to help, and we were out the door with treats in NO time.

    Quick Video Tutorial

    If visual is more your style, make sure to check out the video tutorial here in this post!

    2 Ingredients!!? Holy cow these look amazing! Cookie Dough Crescent Bites Recipe

    Pillsbury Crescent Rolls

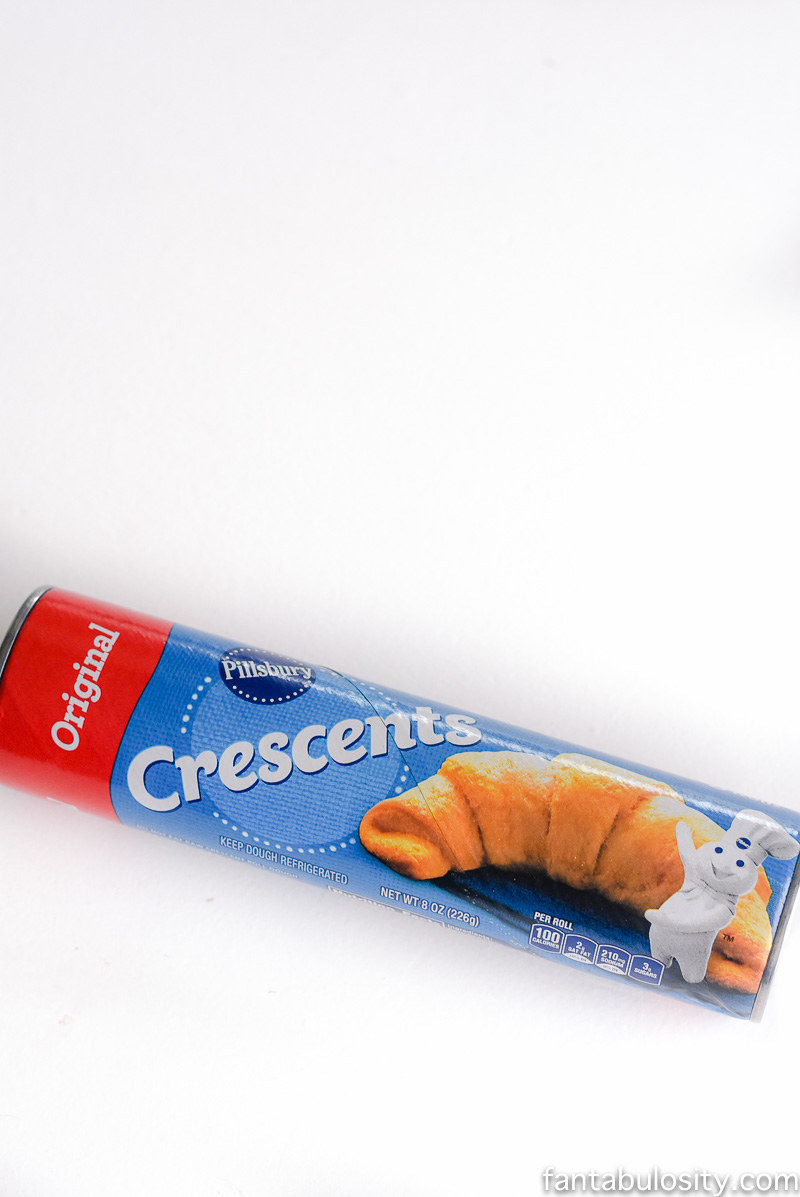
    For our Cookie Dough Crescent Bites, we picked up Pillsbury Original Crescent Rolls, 8 count at Walmart, to be the star of the show! These have become a HUGE favorite in our kitchen. They can be the base of SO many meals, desserts, appetizers, and so much more. For our Spring baking, they don’t require a ton of oven time, so we’re not heating up the house to bake goodies, and we aren’t spending hours in the kitchen… but rather playing and enjoying time outside!

    2 Ingredients!!? Holy cow these look amazing! Cookie Dough Crescent Bites Recipe

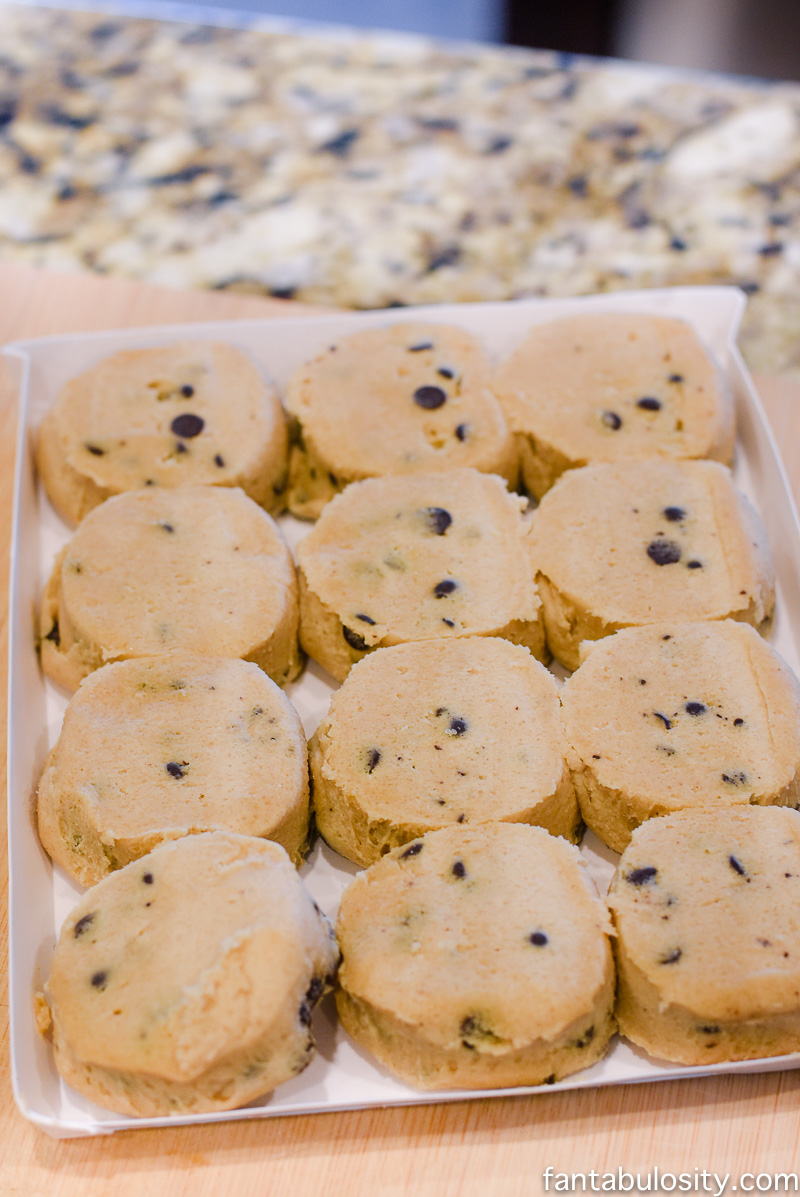
    Using store-bought cookie dough, we’re set up for a quick dessert, and it leaves us with the second and final ingredient of our Cookie Dough Crescent Bites!

    2 Ingredients!!? Holy cow these look amazing! Cookie Dough Crescent Bites Recipe

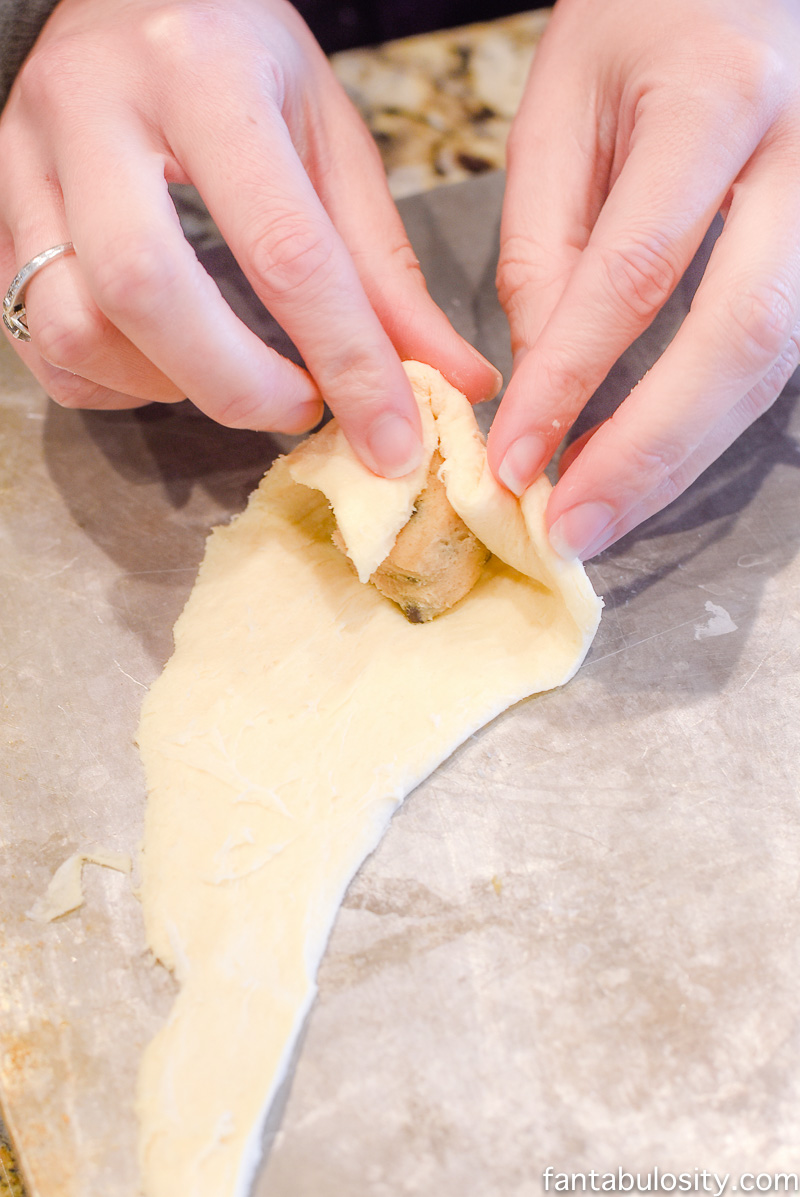
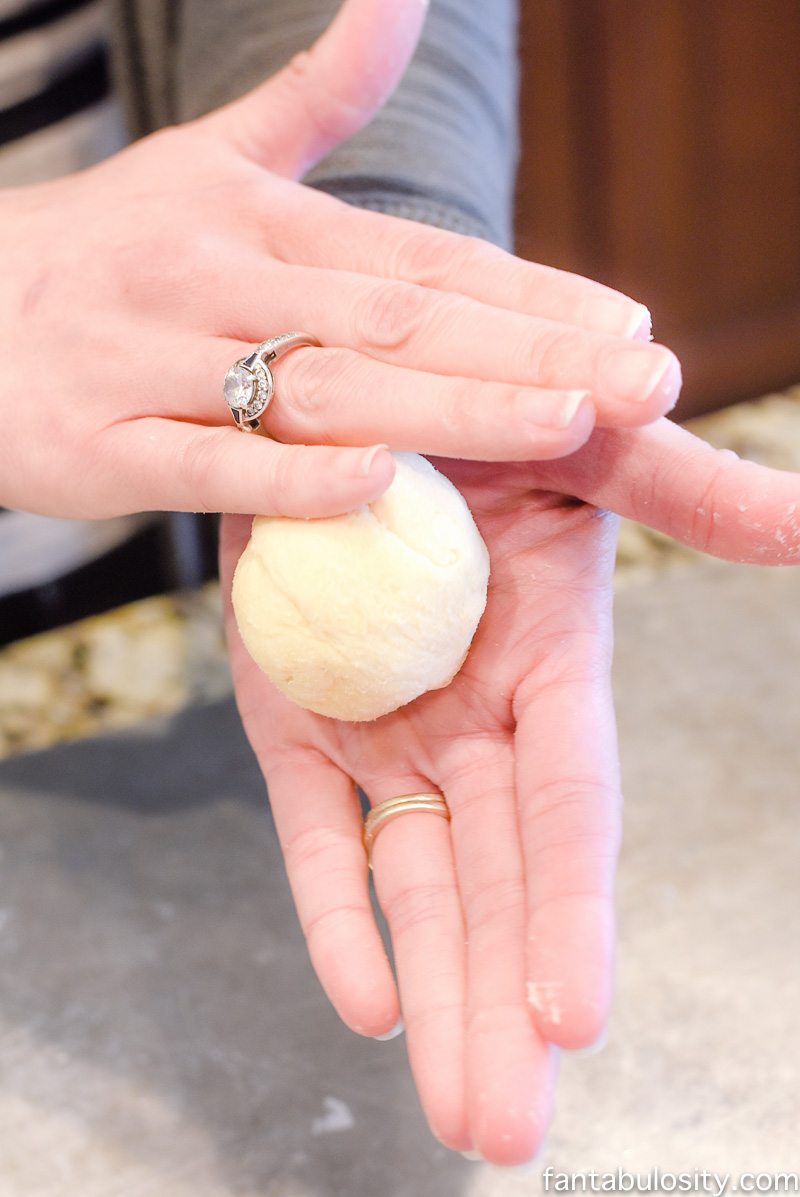
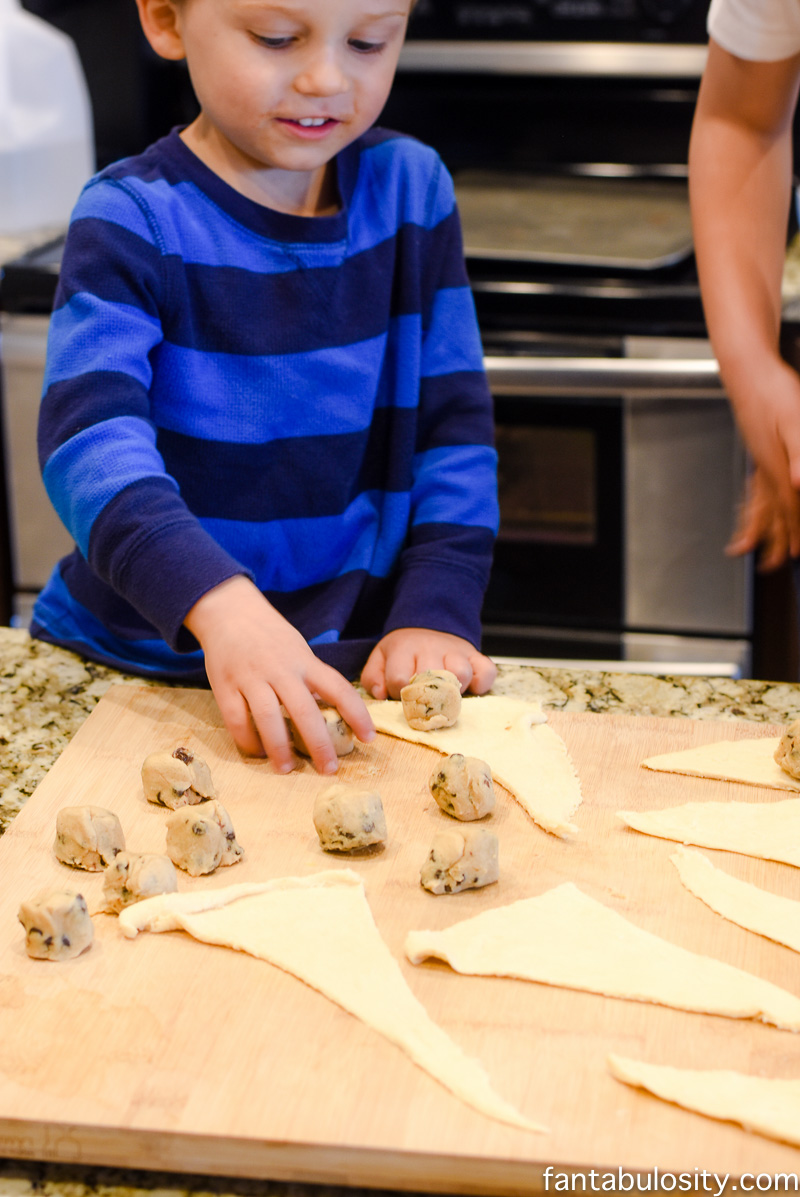
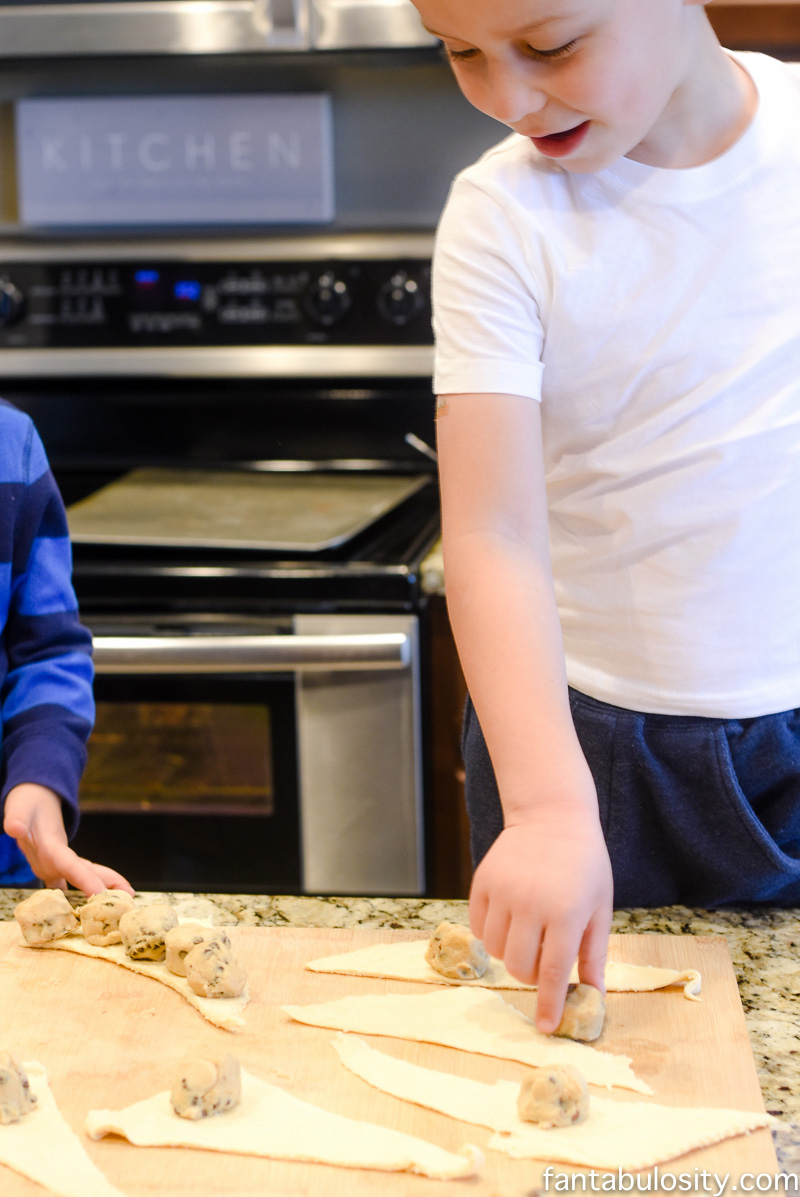
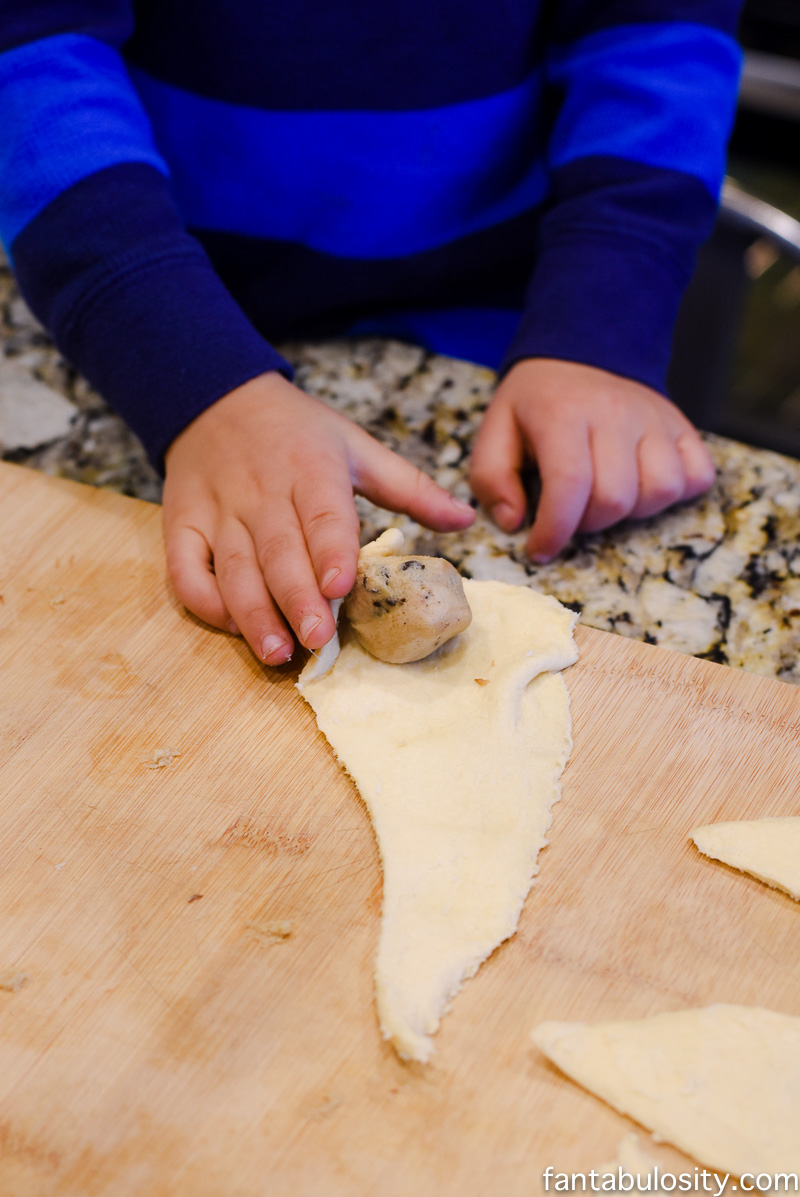
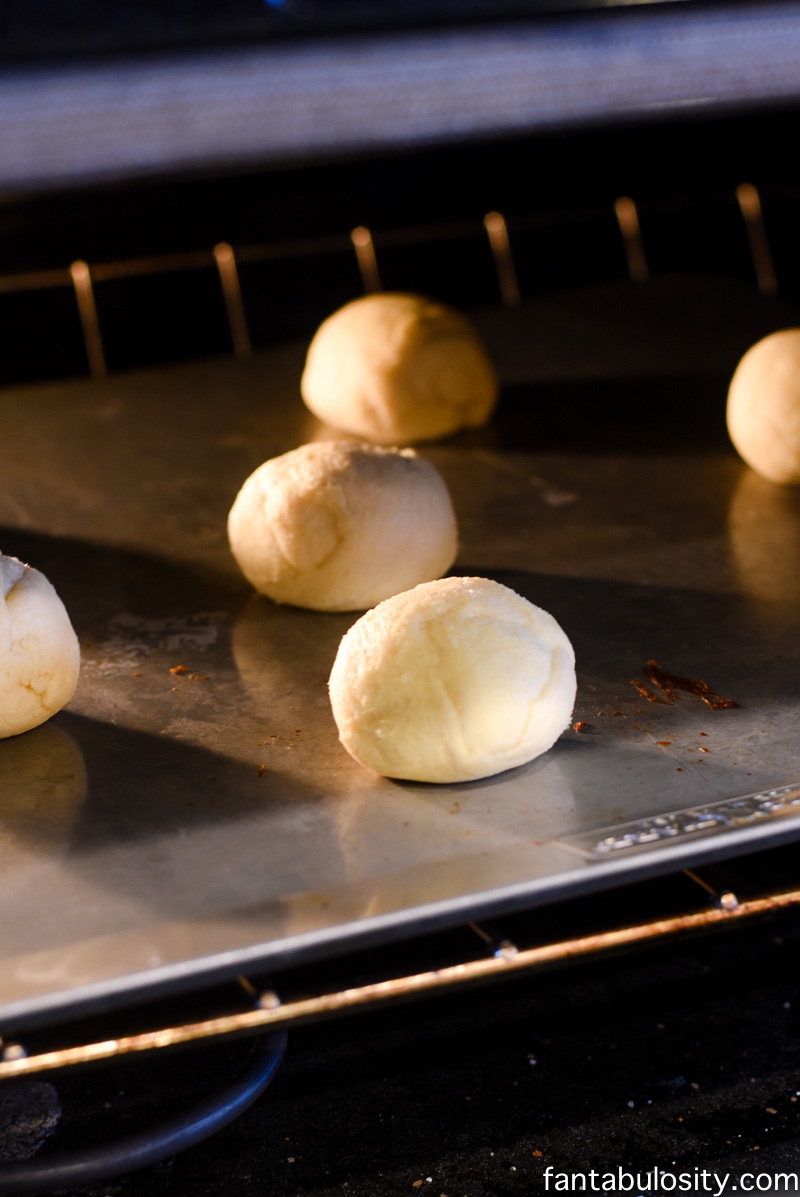
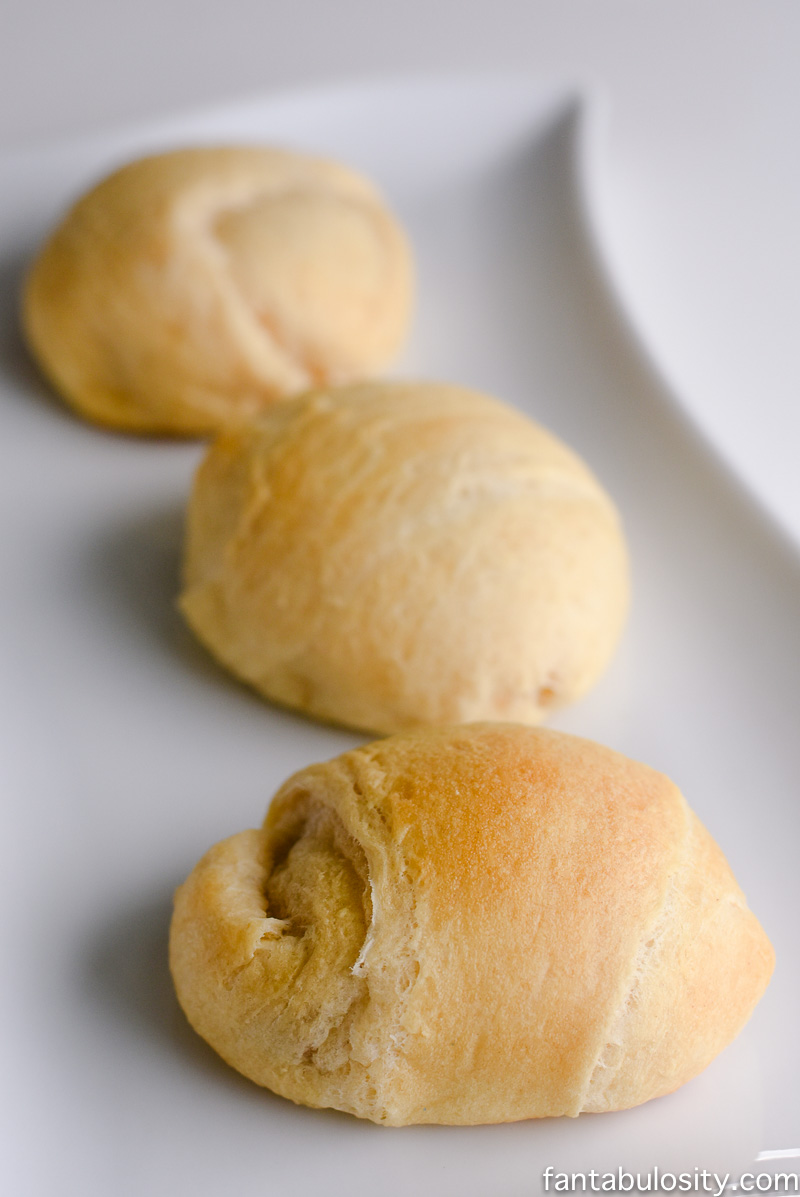
    Separate the crescent rolls, and roll up a square of cookie dough, starting at the wide end. Seal the ends by pinching them together with your fingers, and gently roll between your hands to form a ball shape.

    2 Ingredients!!? Holy cow these look amazing! Cookie Dough Crescent Bites Recipe
    2 Ingredients!!? Holy cow these look amazing! Cookie Dough Crescent Bites Recipe

    My boys may or may not have snuck a bite of that cookie dough during the process.

    2 Ingredients!!? Holy cow these look amazing! Cookie Dough Crescent Bites Recipe
    2 Ingredients!!? Holy cow these look amazing! Cookie Dough Crescent Bites Recipe
    2 Ingredients!!? Holy cow these look amazing! Cookie Dough Crescent Bites Recipe

    On an ungreased cookie sheet, line the bites up allowing about two inches between each one.

    2 Ingredients!!? Holy cow these look amazing! Cookie Dough Crescent Bites Recipe

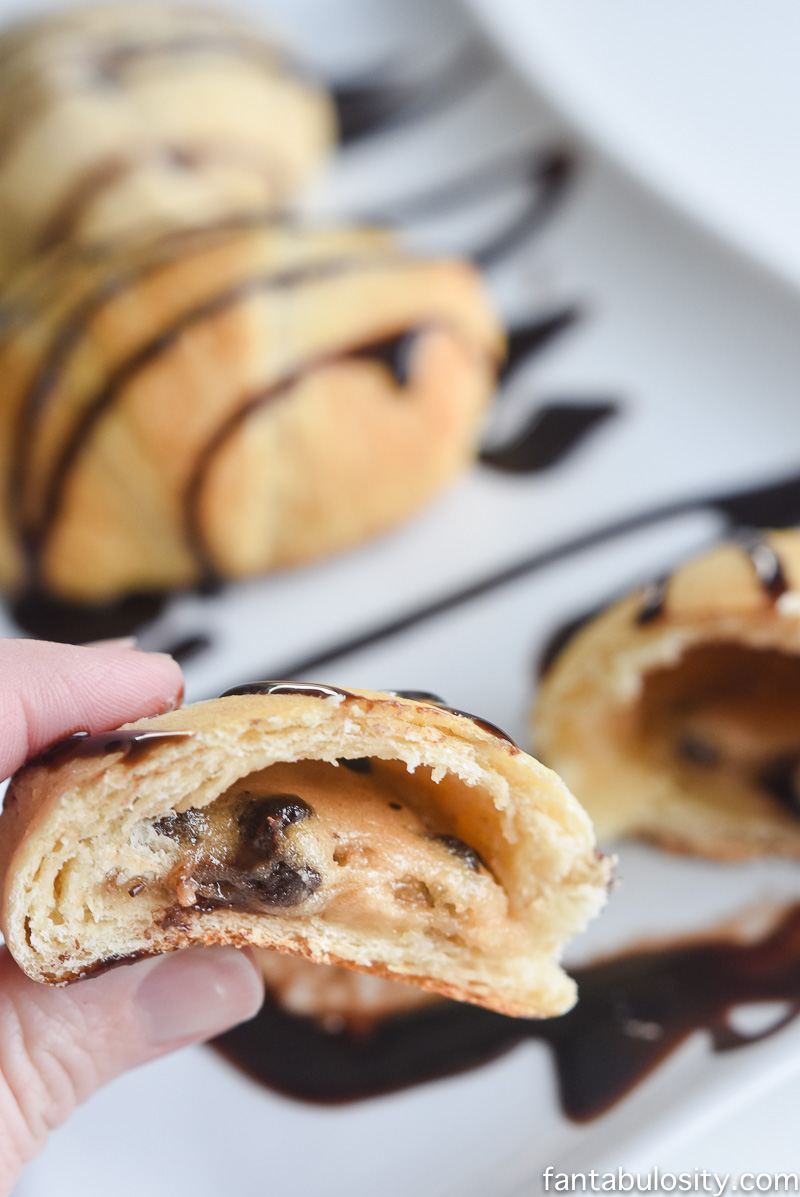
    Mmmmm!!! Can I get an amen on this gloriousness?? Now… let’s make it a little better. Although unnecessary, if you wish to have a third ingredient, drizzle a bit of melted chocolate or chocolate syrup over the top.

    2 Ingredients!!? Holy cow these look amazing! Cookie Dough Crescent Bites Recipe

    Now for the surprise, that our neighbors will get when they bite in to them…

    2 Ingredients!!? Holy cow these look amazing! Cookie Dough Crescent Bites Recipe

    Related Recipe

    If you loved this recipe, then you’re really going to love these mini chocolate puff pastries too!

    Recipe

    Crescent rolls stuffed with cookie dough.
    Print Pin
    5 from 1 vote

    Cookie Dough Crescent Bites

    Cookie Dough Crescent Bites: A quick and easy sweet treat dessert using Pillsbury Crescent rolls and store bought cookie dough! Drizzle with chocolate syrup and BITE!
    Course Dessert
    Cuisine American
    Prep Time 20 minutes minutes
    Cook Time 12 minutes minutes
    Total Time 32 minutes minutes
    Servings 8 crescent bites
    Calories 108kcal
    Author Jessica Burgess

    Ingredients

    • 1 tub Pillsbury Crescent Rolls 8 count
    • 8 square store-bought cookie dough eggless

    Optional

    • chocolate sauce
    • powdered sugar

    Instructions

    • Preheat oven to 375 degrees Fahrenheit.
    • Separate crescent rolls, using the perforated lines.
    • Place a small square of cookie dough (I cut mine in half because the brand I used were so big.), on the wide end.
    • Starting at the wide end, roll up the crescent roll, sealing the edges by pinching them together with your fingers. (You’re enclosing the cookie dough so it doesn’t spread when baked.)
    • Place on an ungreased cookie sheet, about 2-inches apart from one another.
    • Bake for 11-12 minutes or until golden brown.
    • Let cool before topping with chocolate sauce or powdered sugar.
    • Refrigerator any left overs, as cookie dough will not be fully cooked.

    Video

    Nutrition

    Serving: 1crescent bite | Calories: 108kcal | Carbohydrates: 12g | Protein: 1g | Fat: 6g | Saturated Fat: 2g | Sodium: 227mg | Sugar: 3g | Iron: 0.4mg
    2 Ingredients!!? Holy cow these look amazing! Cookie Dough Crescent Bites Recipe

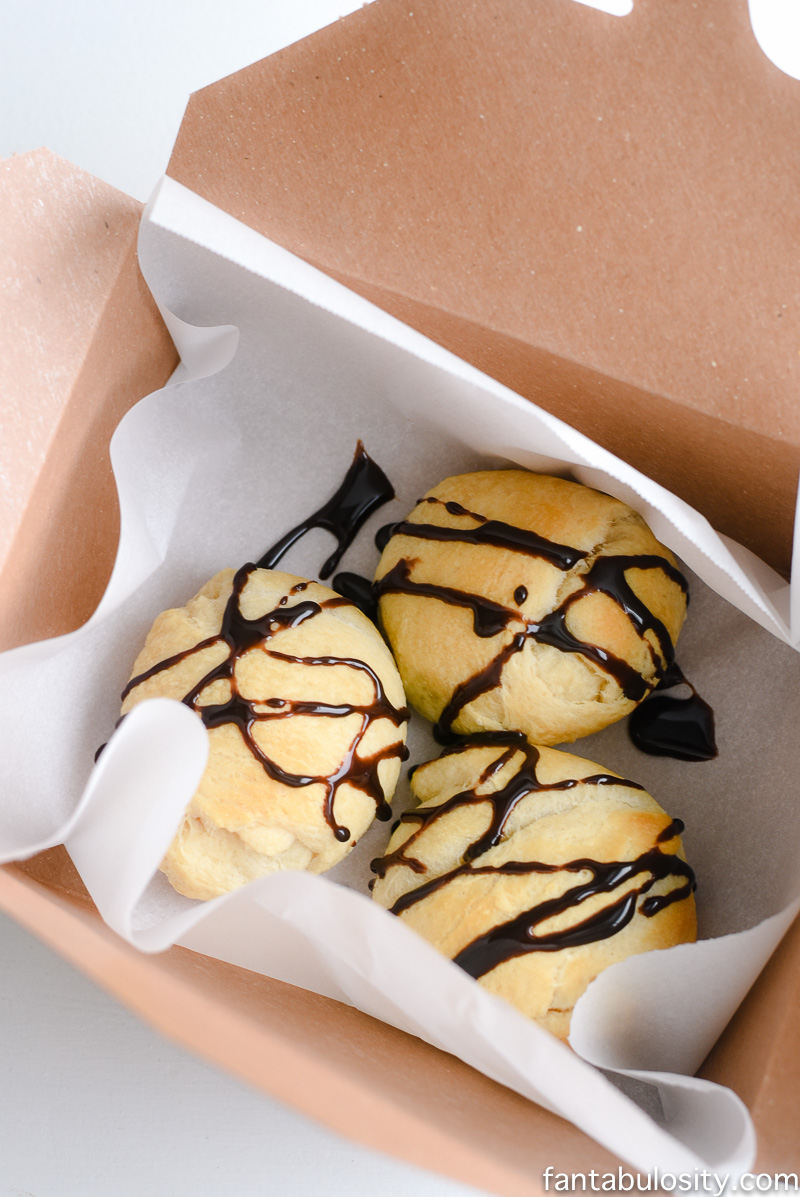
    We packaged the Cookie Dough Crescent Bites up in to cute little packages, and they were out the door!

    2 Ingredients!!? Holy cow these look amazing! Cookie Dough Crescent Bites Recipe

    For More Pillsbury Recipes:

    For more everyday recipes, hop over here to get some new ideas for your Spring baking too! It’s a no-brainer when it comes to using Pillsbury for recipe creations. They’re a trust brand, and always give our recipes a quality flavor!

    2 Ingredients!! Holy cow these are easy and looks ah-mazing! Cookie dough stuffed crescent bites!

    What to do When Your Husband Doesn’t Come Home

    March 21, 2017

    What to do When Your Husband Doesn't Come Home

    What to do when your husband doesn’t come home: Ways to wrap your mind around what’s going on, and the action steps that can help during a tough situation!

    What to do When Your Husband Doesn't Come Home

    What to do When Your Husband Doesn’t Come Home

    After writing How to Make Your Husband Want to Come Home, I’ve found so many readers stumbling upon it, looking for ways to encourage their husbands to come back home when they’ve left… after an argument.

    Now, since that post is really geared towards ways to show your husband “love,” to make them excited to come back home at the end of the day, I’ve wanted to create this post for those looking for help that may be going through a tough situation with their husband at this very moment.

    You May Also Love This Marriage Talk:

    • 29 Tips on How to Be a Good Wife
    • How to Respect Your Husband

    DISCLAIMER: Although I’m no expert, and not a therapist or marriage counselor, I do love to share what I’ve learned through experience within my own marriage, and through individual AND marriage counseling. As I always recommend, seeking counsel with a professional can be one of the most beneficial things you can do in your life. Especially when you’re going through a tough time. It can not only help YOU with YOUR feelings and emotions, it can help you gain a new perspective on what may be going on with those around you who you love.

    [feast_advanced_jump_to]

    What to do When Your Husband Doesn’t Come Home

    What to do When Your Husband Doesn't Come Home

    Now when I say “What to do when your husband doesn’t come home,” I’m not talking about if he said he was on his way home from work, and it’s been an hour and still hasn’t arrived.

    I’m talking about the times that he is temporarily staying somewhere else, expressing that he just needs some time away, and/or you’ve noticed that he’s been avoiding coming/staying at home with you and perhaps your family.

    Also read: If Your Husband Cheats and How to Make it Through

    Confront the Issue

    In times of struggle, or in states of confusion, confronting the actual issue can be a hard task. Letting the emotions and feelings that we are currently experiencing, can quickly overrule any logical thinking that SHOULD be taking place. But I really, really, encourage you to tell your emotions to shut the heck up, so you can think for a minute.

    • What could be the actual issue at hand?
    • Was there an argument that took place?
    • Was there a traumatic circumstance in his life lately?
    • Have you noticed he hasn’t been affectionate as much?

    Start with confronting the issue, so action steps and discussion can start with the right foundation.

    Sometimes we can let our emotions get to us, and we just start spit firing what we think at each other, rather than dealing with the real issue at hand. The real issue then may never come up, or other damage will be done before even getting to the current issue.

    Give Him Time. Don’t Force Him.

    Could he not want to come home because he just needs some time? Maybe he has no intention of leaving for good. Is it possible that he’s the type of guy that never makes time for himself, rarely hangs out with buddies, and always puts his needs on the back burner?

    I know good and well the kind of mental state that I’m in if I don’t make time for myself, or have been ignoring needs that I have.

    So it could be possible that he just needs some time, and if that’s the case, forcing him to give up that time can just make the problem snowball for an even bigger disaster. Giving him much needed time may be something that he’s longing for.

    Ego Can be a Nasty Thing

    Whew. This one has been a tough one on me. Perhaps it’s because I struggled with this one so much. I don’t know about you, but I always had to “Be right.” I had to “be right” in every argument we ever had in our marriage, and I had to do/say what I could to make him realize that I was right.

    It even went so deep that I wasn’t even aware of the fact that I always had to be right. It was as if he was automatically wrong with everything he said/did, and it was a challenge to make him apologize for it.

    The thought of “Well maybe we’re both in the wrong” never came up. It was always, “He’s wrong. I’m right. And even if he IS right, I won’t admit it, because that would be weak. It would mean losing the argument, and losing my upper hand at any future argument.” (I told you ego could be nasty. I lived it.)

    When it comes to your husband being gone, and not wanting to come home, don’t let the ego win. Confront the issue at hand (Step #1), and tell your ego to shut up.

    If that ego blocks anything that he has to tell you, it will take THAT much longer to get where you really want to be. (Where your preferred outcome rests.)

    Pick up the Phone. Don’t Text

    Look, I totally get it. I’m a texter, and it’s how my husband and I communicate by phone 95% of the time. But when we’ve been in the middle of an argument, or have been through a rough patch, and have tried to have conversation… texting has caused more damage than good.

    The emotion and tone are completely gone from the text. Words can be turned around in ways that you or he, never intended. (i.e. Making the existing problem an even bigger one.)

    Pick up the phone and talk. If he refuses to talk, and you have time-sensitive questions that need answers, keep your text short, clear as can be, and to the point. But the “blame game,” explanation and detailed conversations are best heard instead of seen.

    Tip: Before you talk on the phone, make notes of what you’d like to talk about. Usually, when the conversation gets going, the emotion can be so strong that you forget important details you may want to discuss.

    Don’t Assume it’s You That Did Something or it’s You That Needs to be the Only Thing to Change

    After reading those first few tips, I can hear some of you saying, “Crap. It was my fault. It was all me. I shouldn’t have jumped past the issue at hand. The ego stood in front of my rational thinking. I shouldn’t have texted him.” Please, please don’t take it this way.

    Did you know that whatever may be keeping him away from home may be something HE’s going through?

    Don’t assume that it is your fault. Don’t assume that you are the only one who should “fix it”.

    There may be something going on in him that he doesn’t even know how to communicate or explain to you.

    Ready for this, and to think even deeper??? HE may not even be aware of what’s going on with himself, and what’s keeping him away from home. We all know the saying of what “assume” means. So assuming that it’s you can cause unnecessary wear and tear on yourself.

    So what can you do if you’re not sure what’s going on?

    After moving past assuming that it’s you being the problem, take a look through his eyes.

    • Is there something that’s not right at home?
    • Has work been stressful for him?
    • Is there something that he’s briefly mentioned that could be the cause of him not wanting to come home?

    Sit down, and grab a clear picture of what’s not right. Make notes of behaviors and actions that you’ve noticed lately.

    • Is he complacent/displaced?
    • Is he in a crisis?
    • Could these items have been a result of a certain activity that took place?

    Look at the big picture and make note of anything that sparks a question, so you can be aware of what’s actually happening.

    Question Everything

    I don’t mean question him with everything. Question everything that you’ve noticed and made note of.

    Look, if you’ve found your way to this article because you Googled “What to do When Your Husband Doesn’t Come Home,” I can almost bet that you love him, dearly. Right? Because if you didn’t… you probably wouldn’t mind that he’s not coming home right now.

    Questioning everything can that’s going on can help you have a better understanding of what may be going on.

    Questioning everything may even help protect him/you/your marriage early before it gets too carried away. It may help make you aware of what’s really going on, and how to move forward in the right direction.

    Should YOU Fix This?

    I don’t think there have been truer words spoken to me that have given me a “Woah” moment like this one…

    You can’t make anyone do anything, and you can’t keep them from themselves. But you can fix YOU.

    Read that a couple of times to really let that sink in. I’ll admit, the first 20 times I heard my husband and therapist say this, I let it roll right off of my shoulder. It just wouldn’t “click,” for me. Then one day, it did. For YEARS, I’ve wanted to “fix” him. I wanted to prove that I was right. So I spent so much energy and emotion thinking, “If he would just ‘X,’ this would be so much better.” If ‘X’ would just happen for us, life would be so much easier.”

    But the moment that I realized working on myself would produce WAY better results (and faster results), I started down that path. Why is it better and faster? Because again, you can’t make anyone do anything, and you can’t keep them from themselves.

    But you can fix YOU. You can seek counsel. You can train your brain to focus on the reality of a situation, instead of letting the emotions and feelings overrule.

    Wrap-Up

    What to do when my husband doesn't come home

    Were you looking for a list of physical action items that would miraculously make your husband come home? Things like: Dress sexy, make his favorite cookies or plan a romantic weekend away with him?

    Well I’m not saying you shouldn’t do those things. But I did want to touch on an even deeper level that may last a lot longer than cookies and a sexy outfit.

    Again, I’m no therapist, but rather someone that’s learning through life as I go. After marrying my high school sweetheart, we’ve had the privilege of “growing up together,” and experiencing life’s ups and downs. With the blessing of someone telling us early on that seeking counsel can make a major impact on our lives, we’ve been able to take tough times by the reins (with guidance) and take one step at a time. We’re still learning, and will continue to learn. But I hope from our experiences, you can find a bit of encouragement in whatever it may be that you’re going through right now.

    5 Best Stores for Party Supplies

    March 19, 2017

    Blogging questions: for a beginner and those who have been blogging a while.

    A list of party supplies stores and their websites that are always a “go-to,” any time for planning a birthday party, holiday party, or any celebration!

    I’m a “routine,” lovin’ gal. So when it comes to shopping for party supplies for either my own parties or when styling parties for a brand, I have my “go-to,” online party supplies stores that I frequent. I’m never disappointed and ALWAYS find something at these, that I love.

    best websites for party supplies
    [feast_advanced_jump_to]

    Best Party Supplies Websites

    1. Shop Sweet Lulu

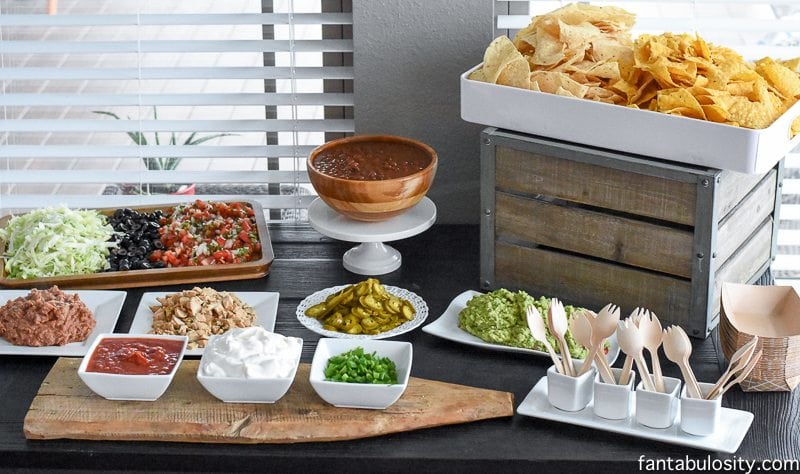
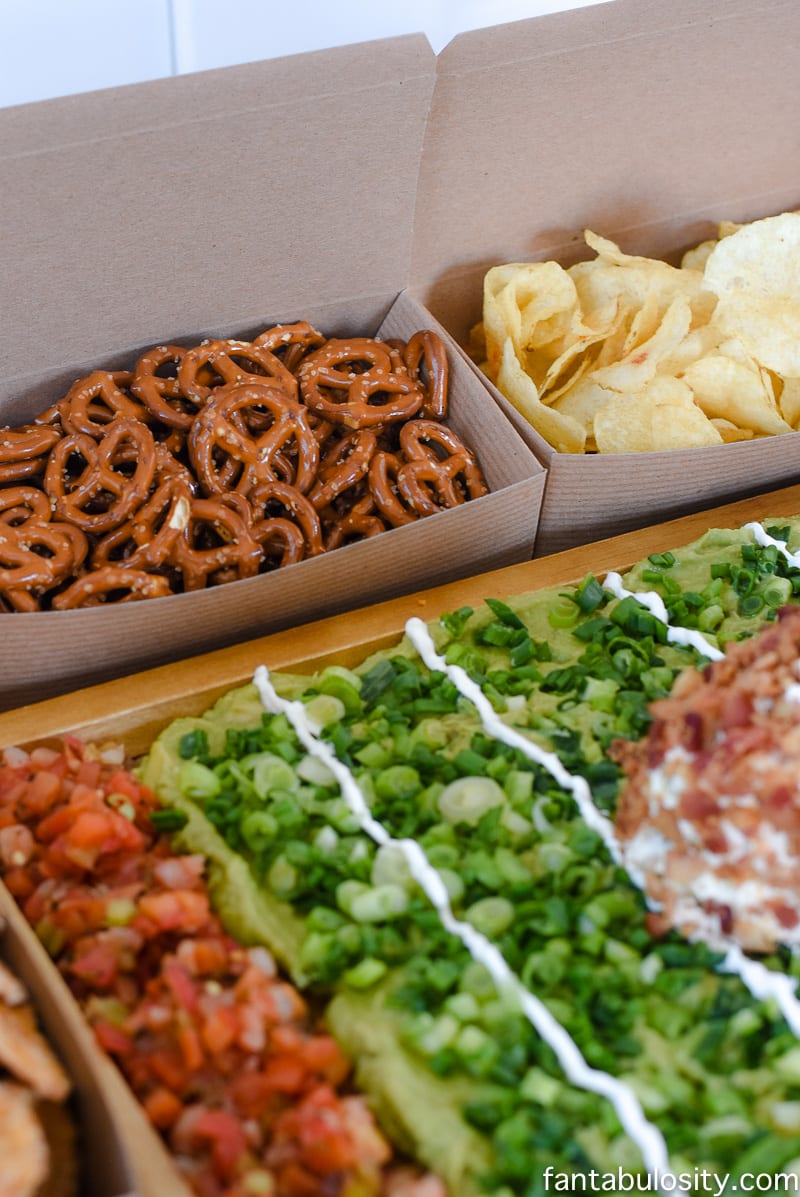
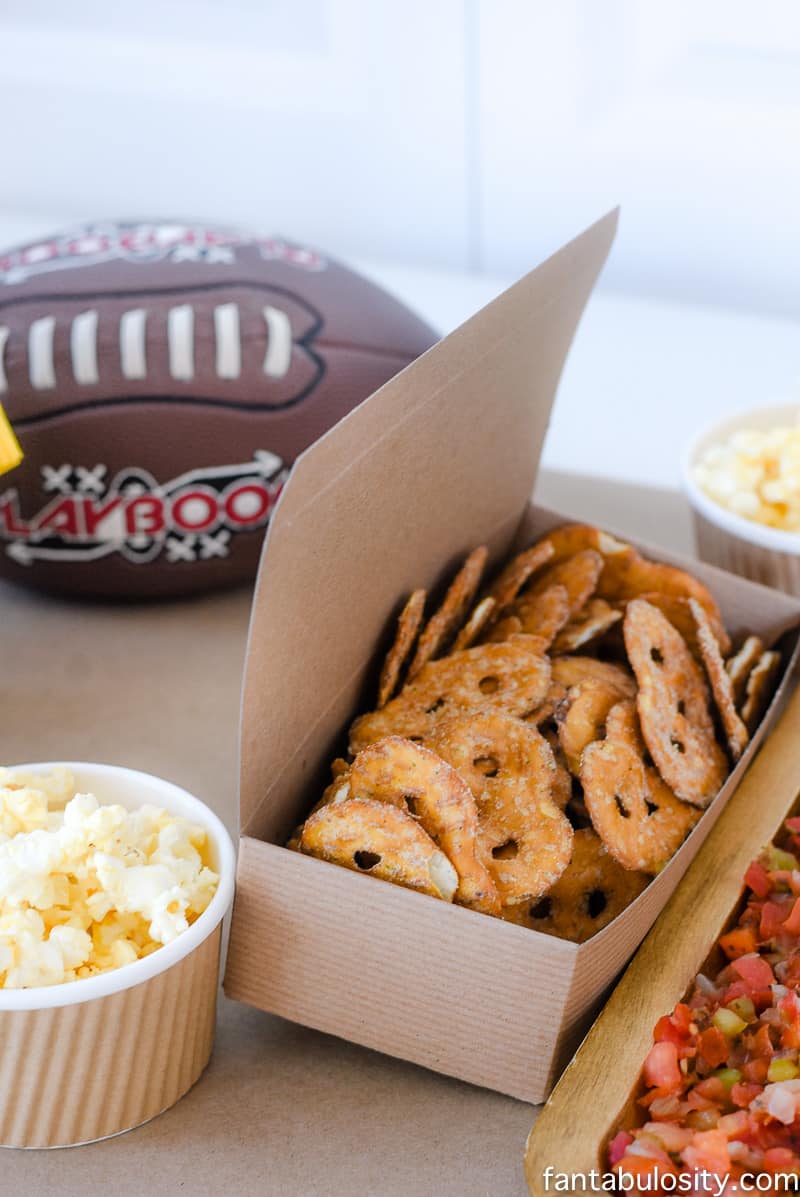
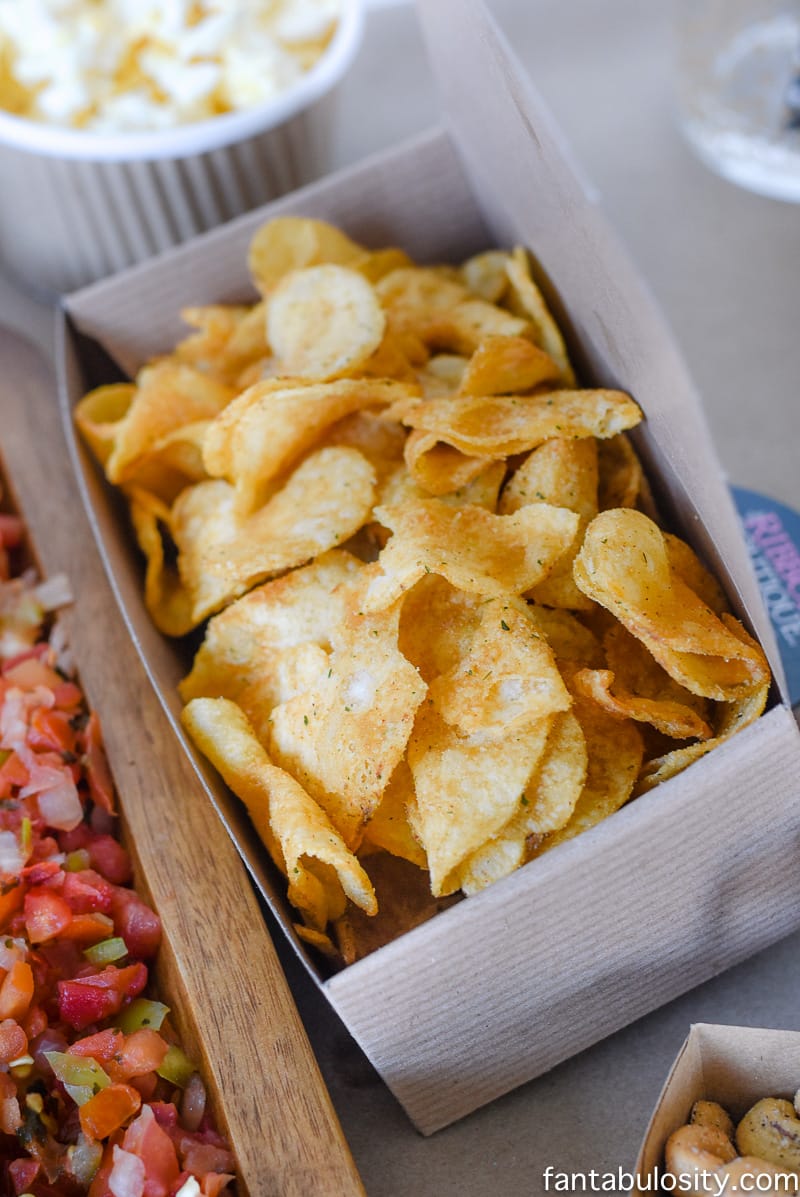
    Whether it’s balloons, favor bags, or cute food containers, I’m a sucker for Shop Sweet Lulu products. When I styled this nacho bar party, I scored the super cute food trays, for our guests to serve themselves! They worked perfectly.

    Party Supplies Stores

    2. Amazon

    Amazon has been a LIFE-SAVER when it comes to party planning. It comes to my rescue when I’m a couple of days away from party-time, and I’ve realized that I’ve forgotten that one important item I needed to decorate or finish the DIY project that I worked on for the party.

    With Amazon, I can get anything from party supplies, to home decor, which is a HUGE party of my party styling techniques. I bought a ton of party goods on Amazon for our Crawfish Boil Party.

    crawfish boil party

    3. Etsy

    Oh Etsy, how I love thee for party printables. I love Etsy for other things as well, but when it comes to party planning, printables are an easy way to add decor. I used printables from Etsy for my son’s Woodland Friends Party below. Can you see just how much printables can decorate for you!?

    Don’t forget that Etsy can also be handy for DIY/Pre-Made party favors, cupcake toppers, sugar cookies, and SO MUCH more. Shop Etsy NOW!

    Woodland Friends First Birthday Party Ideas - Dessert Table https://fantabulosity.com

    4. Oh Happy Day

    Oh my, have you visited Oh Happy Day yet? Adorable paper plates (not your average paper plates), confetti, garlands, and the list goes on. I get LOST in their online shop for hours if I’m not careful, staring at all of the beauties. Shop Oh Happy Day HERE!

    I may just buy confetti from Oh Happy Day, just so I can do this when I want to celebrate something in life. Not kidding. 🙂

    online party supplies websites

    5. Meri Meri

    Paper straws, paper treat bags, drink stirrers, and EVERYTHING party… Petite Party Studio has it. You’ll find paper straws at almost every party that I host. They can add a pop of color in a pinch, and if you’re like me… I GOTTA have a straw with my drink. In the Nautical Birthday Party that I styled for my son, I simply added paper straws to milk bottles, & it created style with little effort.

    Nautical Birthday Party Ideas, milk bottles with lifesaver candy wrapped around them! So cute! https://fantabulosity.com

    There they are! Those are my favorite websites to buy party supplies for any party that I’m hosting. At times, I’ll even check to see if they have any sale items, and stock up in advance.

    Free Party Planning Checklist

    Or if you haven’t downloaded your free party planning checklist yet, then you HAVE to snag that! It’s how I survive all of my party-planning days! Get my party planning checklist.

    free party planning checklist

    Holiday Party Planner

    Are you hosting a holiday gathering? Then you’ll want to snag my Holiday Party Planner that I use to prep and prepare! I’m bound to forget something, and this helps keep me on track! Get my holiday party planner!

    Holiday Party Planner Download. Checklists, menu planner, guest list tracker...

    Office and Stationery Organization

    March 12, 2017

    Stationary Station Organization

    Stationery Station Organization: Say that Five Times… A simple way to organize cards, notepads, and writing tools, for easy access.

    Stationary Station Organization

    Stationery Station

    I literally had to say that out loud 5 times, really fast, to see if I could do it. 

    Hey you! You may be here for the first time as part of the blog hop that’s happening today with some of the BEST bloggers that I know. Not only are they incredibly creative, but they know how to create a workspace that can make you drool! I’m honored to be a part of something so fun and inspiring! So thank you for visiting, and let’s get on to one of my favorite aspects of my home office and craft room!

    Home office and craft space tour
    Although my home office is my happy place, this gal loves spreading out on the floor anywhere my laptop will allow!

    In my FULL home tour office reveal here, I briefly featured my stationery station. This has literally been one of my unintentional “favorite’s” of my home office. More times than I’d like to admit, I’ll be in a mad rush to create a “thank you,” card or a simple little note to leave for someone or attach to a birthday gift.

    So instead of running around digging for a pen, cute card, and envelope, I now know exactly where to go! No more wasting time digging, and using the back of receipts for quick notes to my family.

    Stationery Addiction:

    This station has also helped me with my rare condition of “Stationery Addiction.” (Yes, I know this isn’t a real thing… but I’m completely addicted to grabbing super cute cards and adorable little notepads in the Target dollar spot, and the check out lane a T.J. Maxx.)

    Before my stationery station, I would always THINK I needed note cards and notepads. Why? Because I was unsure of all that I already had on hand, so I figured I would go ahead and buy more “just in case.” (You SOOO know what I mean right? Please tell me I’m not alone here.)

    Anyhoo, now that I have it all stored in one place, I can see exactly when I’m running low of a certain type of card, envelope, pen/marker, or notepad. My husband is very thankful that my spending has greatly reduced in the stationery department.

    Stationary Station Organization

    Rolling Cart:

    I found this adorable (and office matching) rolling cart, at the ever so popular IKEA. It was super easy to put together, and it comes in adorable colors.

    Want to Tour the Whole Office?

    My Home Office Tour

    Chic Office - Coral and Mint, for the Girl Boss

    Chocolate Fountain Bar Ideas

    February 13, 2017

    Chocolate Fountain Bar Ideas: A Modern, Rustic, Pink Party Display

    If you're looking for chocolate fountain ideas for a party, this setup is one of the easiest ways to create a fun, interactive dessert table.

    Chocolate Fountain Bar Ideas: A Modern, Rustic, Pink Party Display

    Chocolate Fountain Ideas for a Party (Easy + Crowd-Pleasing)

    If you're setting up a chocolate fountain for a party, the goal is to keep it simple, fun, and easy for guests to enjoy. With the right dippers and setup, it quickly becomes the highlight of any dessert table.

    If you missed part one of the actual dinner party and how we used cast iron skillets EVERYWHERE for dinner that night, then you may want to head over there now and take a look: Cast Iron Dinner Party

    Chocolate Fountain Bar Ideas: A Modern, Rustic, Pink Party Display

    But as I mentioned in that blog post, there was just too much of a good thing to include it all in one post, and I wanted the chocolate fountain bar to be featured all on its own because it’s one of my favorite food bars and Chocolate shouldn’t have to share the spotlight with anyone.

    Chocolate Fountain Bar Ideas: A Modern, Rustic, Pink Party Display

    How to Set Up a Chocolate Fountain Bar

    • Use skewers or sticks
    • Keep dippers bite-sized
    • Place items in easy-to-reach bowls, serving platters, etc.
    • Keep chocolate warm and flowing

    Chocolate Fountain:

    A chocolate fountain bar wouldn’t be one, without a chocolate fountain, eh? I have had a chocolate fountain for years, but it was looking pretty rough after getting lost in one of our umpteenth moves.

    So online shopping I went, and came across this GORGEOUS (what I thought) rose gold chocolate fountain. Without hesitation, I ordered it, and couldn’t wait to get it in the mail. Sadly, the chocolate fountain arrived about a day before the party, and it wasn’t rose gold. It was actually a stainless color (as seen in the photos.) But, I’ve come to realize that with the stainless color, I’ll be able to use it more often with other party themes anyway. So I suppose it’s better this way. Besides, it still looked pretty cute on this table, don’t you think?

    White Chocolate Fountain for a party! Chocolate Fountain Bar Ideas: A Modern, Rustic, Pink Party Display

    When thinking of a chocolate fountain, milk chocolate is always the default setting my brain lands on. But I knew that the brown color of milk chocolate would stick out like a sore thumb on this bright white and colorful display table. I kicked around the idea of using white chocolate, but wasn’t quite sure if they sold “white” fountain chocolate. Well, my Walmart did not. BUT they did have white chocolate melts, and with a little coconut oil, OH-MY-LANTA. Even our guests talked about how good the chocolate was. I made sure to tell them that with the addition of coconut oil, it was a healthy dessert. 😉

    I turned the fountain off for the photos, so I wouldn’t capture such blurry photos… if you’re wondering why the chocolate looks as hard as a rock! Ha!

    What to Serve with a Chocolate Fountain

    Best Chocolate Fountain Dippers

    • Strawberries
    • Marshmallows
    • Rice krispie treats
    • Donuts
    • Cookies
    • Wafers
    • Pound cake cubes
    Rice Krispy Treats in mini cast iron skillet for Chocolate Fountain Bar Ideas: A Modern, Rustic, Pink Party Display

    Rice Krispies Treats:

    I’m a sucker for premade everything when styling a party. I grabbed the store bought rice krispies treats (the miniature sizes were out for the Valentine’s Day season, and those were perfect), and placed them in a miniature cast iron skillet. These bakery-style rice krispy treats and rice krispie treats with marshmallow fluff are great options too!

    Cookie Dough dippers for white chocolate fountain! Chocolate Fountain Bar Ideas: A Modern, Rustic, Pink Party Display

    Cookie Dough Bites:

    Yes, that is cookie dough. You can make cookie dough fudge for dippers.

    Pink marshmallows for white chocolate fountain: Chocolate Fountain Bar Ideas: A Modern, Rustic, Pink Party Display

    Marshmallows:

    Do they always have pink marshmallows? Well they did the day I visited Walmart, but I’m not sure if that’s just because it was close to Valentine’s Day or not. But I do know that they looked gorgeous on this dessert table, with about 50 shades of pink.

    Strawberry wafers for chocolate fountain: Chocolate Fountain Bar Ideas: A Modern, Rustic, Pink Party Display

    Wafer Cookies:

    I love these little things. Perhaps it’s because of the nostalgia factor that my grandma always having these on hand when I was little. But I did a lot of damage to these little treats, and even had to refill the dish a couple of times before the party even started.

    White powdered donuts for chocolate fountain party: Chocolate Fountain Bar Ideas: A Modern, Rustic, Pink Party Display

    Donuts:

    I can’t help it. I have to have donuts on every single dessert bar that I create. Look at my nautical birthday party and the Baking Party that I styled.

    French Toast bites for a chocolate fountain! Chocolate Fountain Bar Ideas: A Modern, Rustic, Pink Party Display

    French Toast Bites:

    I’m not going to lie. The French toast bites were accidental. I had originally wanted small Belgian waffles, cut in triangles, but couldn’t find any that were pre-made/frozen. Heck with spending what little time I had that day, whippin’ up a batch of fancy waffles. So the French toast bites had to do…. and I’m totally ok with that. They were incredible for soaking up some of the white chocolate. Cutting up this French toast sticks recipe would work great.

    Chocolate Fountain sticks: Chocolate Fountain Bar Ideas: A Modern, Rustic, Pink Party Display

    Chocolate Fountain Skewers:

    Instead of using regular brown skewers, (which would have been just fine), I had these perfectly matched cake pop sticks from a previous party, and they there were the replacement.

    Pinks, corals, white roses for bouquet: Chocolate Fountain Bar Ideas: A Modern, Rustic, Pink Party Display

    Fresh Flowers:

    Although I used fake flowers for the centerpieces on the tablescape of the dinner party, I had to get my fill of fresh, even if it was just a small pitcher full for the dessert table. I’m a sucker for real flowers. (But I’m also a sucker of saving money, and being able to reuse flowers for the future.)

    Pink, red, coral, gold, tassel banner for party backdrop: Chocolate Fountain Bar Ideas: A Modern, Rustic, Pink Party Display

    Tassel Banner & Backdrop:

    If you saw the Chocolate Bar Party that I designed for Godiva, then this backdrop may look a bit familiar. With the addition of the tassel banner that I found at Target about a year ago, the two together made me all warm and fuzzy inside.

    Red white check napkin for party display table: Chocolate Fountain Bar Ideas: A Modern, Rustic, Pink Party Display

    Bring it on Over:

    Like with the mini cast iron skillets, I wanted to carry over the theme from the dinner table, to the dessert table. So with that, I carried over one of the cloth napkins that we used for dinner, and used it as an accent piece to decorate with on the chocolate fountain bar.

    Chocolate Fountain Bar Ideas: A Modern, Rustic, Pink Party Display

    Is it wrong that I left as much of this chocolate fountain bar up, that I could? A midnight snack, and a few wafers the next morning for breakfast, made this sweets-lovin’ gal very, very happy.

    Chocolate Fountain Ideas for Different Parties

    • Birthday parties
    • Bridal showers
    • Holiday parties
    • Valentine's Day

    “Our Love is ‘Sizzlin'” Dinner Party

    February 12, 2017

    So pretty! Pink, coral, red tablescape! Party Theme for Adults- Our Love is Sizzlin' Dinner Party & Dirty Cupid Game

    Party Theme for Adults: Our Love is Sizzlin’ Dinner Party & Dirty Cupid Game: A romantic and fun party idea for adults!

    So pretty! Pink, coral, red tablescape! Party Theme for Adults- Our Love is Sizzlin' Dinner Party & Dirty Cupid Game

    Party Theme for Adults: Our Love is Sizzlin’ Dinner Party

    If you caught my Facebook “LIVE,” video the night before we hosted, then you were able to see a lot of the behind the scenes of what the party consisted of. But there’s WAY too much fun to squeeze all of this Our Love is Sizzlin’ party, in to one blog post. So here, you get to see the “out of the box,” dinner party idea details, AND I’ll tell you about the party game that we played… that’s still cracking me up. Then, tomorrow, I’ll share the crazy-delish chocolate fountain dessert bar that we also had that night. (Trust me, my belly was hanging over my yoga pants after I consumed all of this party food.)

    Pink, red, coral table decorations: Party Theme for Adults- Our Love is Sizzlin' Dinner Party & Dirty Cupid Game

    Cast Iron Place Settings

    Don’t ask me where this idea came from, but I’m SO thankful it came from somewhere because it turned out to be my favorite place settings ever.
    So I have a new, deep fond love for cast iron skillets, (thank you momma) and while planning the party, I knew I wanted to incorporate them somehow. (I just didn’t know until later how MUCH they’d be involved.)

    Cast Iron Dinner part! SOOOO CUTE! Party Theme for Adults- Our Love is Sizzlin' Dinner Party & Dirty Cupid Game

    Each person had their own Lodge mini cast iron skillet. I mean, how stinking cute are these? Did I have to talk myself in to buying them for just this one-use? Yes. But I justified in my head of how I could use them in the future. (I’m really good at convincing myself of why I need necessities like these, ok?)

    Buy the mini cast iron skillets here!

    Ahhh!!! Cast Iron Dinner Party! SO stinking cute! Party Theme for Adults- Our Love is Sizzlin' Dinner Party & Dirty Cupid Game

    Free Printable:

    Inside each mini cast iron, was a sweet little place card that said, “Our Love is Sizzlin’… and too hot to handle.” Since this was a dinner party with couples, I had to squeeze in as much romance as I could get away with. 😉

    If you’ve been following me long, then you know that I can’t keep a lot of things to myself. So as I created this place setting for each skillet, I went ahead and made it in to a PDF so you all could download and use them for free for your party too! Download the free printable here: Our Love is Sizzlin’

    Wood slabs for charge on tablescape! SO cute! Party Theme for Adults- Our Love is Sizzlin' Dinner Party & Dirty Cupid Game

    Coral Doilies

    I placed the printables on top of coral doilies that I found at Hobby Lobby a long time ago, that I’ve been holding on to for a special purpose. THIS was that special purpose. (I just didn’t know it until a week before the party.) Then, I added an itty bitty stem of flowers that I cut off of some of the flowers that I decorated the tablescape with. More on the flowers in a bit.

    Napkins:

    The biggest struggle that I had styling this party, was deciding if red would compliment the pinks and corals that I so desperately wanted to decorate with. I had already bought the red and white napkins, when I bought the cast iron skillets, and being able to use what I had on hand, along with what I just bought would work out perfectly. To my relief, the colors went together like they were made for each other.

    Buy the red and white napkins here!

    Small cast iron skillets for place settings for this rustic romantic dinner! Party Theme for Adults- Our Love is Sizzlin' Dinner Party & Dirty Cupid Game

    Wood Planks:

    To tie in the cast iron feel of things, using wood planks for each place setting was a no brainer. BUT, when I had a hard time finding them online, I relied on my parents to help a gal out. I sent one quick text message to them, asking if I could come down one day and cut a few round wood slices for a party that I had coming up. Before I knew it, they sent me a text back later that day saying they already did it for me. (I guess they didn’t trust me with a chainsaw? Smart, smart people they are.)

    But if you aren’t super luck to have parents who live on a farm, then I finally found a place online where you can buy them!

    Buy round, wood planks here!

    Cotton Candy & Pink Champagne Cocktails. Party Theme for Adults- Our Love is Sizzlin' Dinner Party & Dirty Cupid Game

    Cocktails:

    Keepin’ it classy and keepin’ it real, I wanted the girls to have a pretty little thang, and the guys to feel right at home. So how was I to do this? Well, the girls were served cotton candy champagne, and the guys were sippin’ on ice cold beer. The best of both worlds!

    I made my own cotton candy, using the machine that I showed you on my Facebook LIVE video the night before the party, and it was a HIT! Using Jolly Rancher candy, I whipped up small servings of cotton candy for each glass, and it was a delicious addition to the bubbly.

    Buy the cocktail and beer supplies here:

    Cotton Candy Maker

    Wooden drink stirrers

    Martini Glasses

    Beer Pilsner Glasses

    Beer pilsners for the guys, martini glasses for the girls! Party Theme for Adults- Our Love is Sizzlin' Dinner Party & Dirty Cupid Game
    Place settings for rustic and romantic tablescape: Party Theme for Adults- Our Love is Sizzlin' Dinner Party & Dirty Cupid Game

    Tablescape Decorations:

    Using kraft paper, that was folded in half, I created a tablerunner, that had the same rustic feel and color, to compliment the wood slices of the place settings. Something that would be SUPER cute, (that I didn’t think of until after the fact) would be to write fun, romantic sayings on the table runner too. Or, give each person a black magic marker to write a sweet comment about their spouse, and you can save the table runner and host the same party again the next year… adding to it, year after year. Fun, right!!?

    Buy the kraft paper jumbo roll here!

    Cast iron place settings! So pretty! Party Theme for Adults- Our Love is Sizzlin' Dinner Party & Dirty Cupid Game

    Main Serving Dishes:

    Have you ever been to a fondu restaurant, where you fill yourself up on dips, dips, and more dips? With the same concept, I wanted a romantic, “eat with your hands,” kind of meal, all while keeping it rustic and chic too.

    The meal consisted of 3 dips that were baked in large cast iron skillets, served alongside of complimenting bread for dipping. We had:

    • Pizza Dip with Breadsticks

    • Caprese Dip with toasted french bread slices

    • Spinach and Artichoke Dip with soft rolls

    Each dip was served in 10.25 cast irons, and placed throughout the table for easy sharing.

    Buy the 10.25 in cast iron skillets here!

    Flowers and Candles: red, pink, coral. Party Theme for Adults- Our Love is Sizzlin' Dinner Party & Dirty Cupid Game

    Candles:

    What kind of romantic dinner party would it be without tall, chic candles!? We all sat around the table with the beautiful glow of the lit candles.

    White and coral candles: Party Theme for Adults- Our Love is Sizzlin' Dinner Party & Dirty Cupid Game

    Flowers:

    I had went to Hobby Lobby a few days before the party, hoping to find flowers that I could make an arrangement or two out of. I was ecstatic to find already-made bouquets with almost all of the colors that the party decor consisted of. Only thing missing flower wise? Red. So I found red berry twigs in the next isle over that I knew would be the perfect addition to the bouquets. They added height, and the pop of red that I was looking for.

    I also bought a small piece of white and gold polka dot fabric while there, to wrap around the base of the bouquets, to allow them to pop on top of the kraft paper table runner. The bouquets had burlap around the base, which I loved, but wanted a color contrast so they wouldn’t blend right in to the runner. The white was just what they needed!

    BEAUTIFUL flowers from Hobby Lobby for this tablescape! Party Theme for Adults- Our Love is Sizzlin' Dinner Party & Dirty Cupid Game
    LOVE this!! Dips were served in the big cast iron skillets: Party Theme for Adults- Our Love is Sizzlin' Dinner Party & Dirty Cupid Game

    “Dirty Cupid” – Adult Party Game

    This game sounds a lot worse than it really is. But I couldn’t resist calling it this, because it’s so stinking comical.

    With the idea of the “Dirty Santa,” game concept, I wanted the night to have a gift exchange game to keep things entertaining after dinner.

    How to Play:

    Each person brings a $15 romantic gift for the exchange. (Now, depending on the person… this could get extremely hilarious, which it totally did at our party, or it could be a nice, sweet gift exchange.)

    Using the same rules as Dirty Santa, we drew numbers to see who would pick a gift from the pile first, and then went about the game choosing/stealing gifts along the way. We all went home with new romantic gifts, and SO.MUCH.LAUGHTER was had.

    Gift Ideas?

    I know your next question already. “Jessica, what were some of the gift items?” Well I will tell you that I’m not going to say all of them, because some make me blush. But I will give you the ones that I feel ok saying in front of my mother.

    • Chocolates

    • PJ’s

    • Massage Oil & Warmer

    • “Kinky” Vodka

    Chocolate Fountain Dessert Bar

    Have you ever had a chocolate fountain at a party? Well let me tell you… it will be happening again around here. Not only was it an easy way to serve desserts but all of our guests LOVED making their own chocolate creations!

    See ALL the details of the chocolate fountain bar so you can get ideas for your own!

    Chocolate Fountain Bar - Party Theme for Adults- Our Love is Sizzlin' Dinner Party & Dirty Cupid Game

    4 Sneaky Places Urine Smell Hides in your Bathroom

    January 31, 2017

    4 Sneaky Places Urine Smell Hides in your Bathroom--4 Sneaky Places Urine Smell Hides in your Bathroom

    This post brought to you by The Clorox Company. The content and opinions expressed below are that of Fantabulosity. 4 Sneaky Places Urine Smell Hides in your Bathroom: The areas that can get overlooked in the bathroom that traps that pesky smell, and how to get rid of it!

    I have two little boys home. So I, along with many others in this world I’m sure, am VERY familiar with the urine smell in the bathroom. Before kiddos, I never really knew what moms meant when they said, things like, “The bathroom just always smells! Just wait Jessica… just wait.”

    I’d smile and secretly roll my eyes to the ignorance of what they were talking about. Two little boys, and 5 years in to parenthood… now I’M the mom saying, “Just wait dear, just wait.” But I’m tickled to death to share how we finally CONQUERED the urine smell in our bathrooms here at home!

    4 Sneaky Places Urine Smell Hides in your Bathroom--4 Sneaky Places Urine Smell Hides in your Bathroom

    How to get rid of the urine smell in the bathroom…

    After having a normal recap-of-the-day conversation with my husband one day, I mentioned that I was flabbergasted with the bathroom smell. I had spent HOURS in the boys bathroom that day, trying to clean everything that I could think of, to get rid of the urine smell from my potty trained (But yet not the best with “aim,”) little boys.

    He said, “Well have you tried “X,” “X,” and “X?” I must have looked at him like a deer in headlights with a whole new level of excitement. My husband may have helped me finally conquer the urine smell.

    I immediately ran in to the bathroom, did what he suggested, and I kid you not… the urine smell was GONE!
    Months. MONTHS!! I spent trying to get rid of that “smell,” in the bathroom. My husband is officially  genius. (Don’t tell him I said that.)  So now, I’m sharing with you what finally worked!

    4 Sneaky Places Urine Smell Hides in your Bathroom

    4 Sneaky Places Urine Smell Hides in your Bathroom--4 Sneaky Places Urine Smell Hides in your Bathroom

    First and foremost, I have to say I also tackled these sneaky hiding places in the bathroom with the new Scentiva by Clorox.  Guys…have you smelled this!? One of my friends came over the other day after my recent shopping trip to Target, and saw my Scentiva “haul,” of the spray and wipes, and I had to admit that I’m in love, and had to stock up. I had her smell both scents, (Tuscan Lavender and Jasmine & Hawaiian Sunshine) and she went to the store later and bought it too. When I clean with this, the amazing smell lingers for hours. I ADORE using this in the bathroom to help make it smell delightful, PLUS is has the power of Clorox clean, (Kills 99.9% of Viruses & Bacteria, Cleans, Disinfects and Deodorizes) so it’s a win-win.

    1. Remove the toilet seat lid:

    My husband has been building homes for years, so he will fill me in on tricks of the trade from time to time with household fixtures, and this is one of them. I had NO idea that the toilet seat would pop off so easily, and that this was a HUGE culprit of the bathroom smelling so awful.

    Disclaimer: In this post, I show you a video and photos that you may not want to see if you have a weak stomach. But I feel like I MUST share it with you, so you can see what you may be missing in your very own bathroom.

    4 Sneaky Places Urine Smell Hides in your Bathroom--4 Sneaky Places Urine Smell Hides in your Bathroom

    See the hinge that I’m grabbing on to there? If you have a newer toilet, you may be able to just turn and twist this to unlock it. Then, when unlocked, grab the toilet seat and pull the toilet seat up, and off.

    4 Sneaky Places Urine Smell Hides in your Bathroom--4 Sneaky Places Urine Smell Hides in your Bathroom

    EW! Do you see that? It’s the hidden spot that I can’t get to, when I’m performing a normal cleaning operation! The urine will sneak in the crevices and just sit there, collecting.

    4 Sneaky Places Urine Smell Hides in your Bathroom--4 Sneaky Places Urine Smell Hides in your Bathroom

    So I grabbed a Scentiva wipe and went to town, cleaning away! When finished wiping away, simply lay the toilet seat back down, (don’t forget to wipe down the underside of the toilet seat too), and lock back in to place.
    If you have an older toilet, you may have to use a screwdriver to remove the lid. 

    4 Sneaky Places Urine Smell Hides in your Bathroom--4 Sneaky Places Urine Smell Hides in your Bathroom

    2. Wipe Down Surrounding Furniture

    When little boys are in the bathroom, (at least my little boys) they can get curious and start looking around, not really paying attention to what’s going on. So this means that at times, they can splatter and the urine will end up splashing on the items located around the toilet. The side of the vanity, the side of the bathtub, etc. The moment that I realized that I couldn’t see the urine spatter on the tub or vanity, but that it existed… changed my whole perception of cleaning. Wipe it down, even if you don’t see it!

    4 Sneaky Places Urine Smell Hides in your Bathroom--4 Sneaky Places Urine Smell Hides in your Bathroom

    3. Wipe the Floor

    I know how much work it can be to get out the mop, and fill the bucket full of soapy water. So I usually keep the Scentiva spray and wipes, underneath the sink, and when quickly running through the bathroom for quick cleanup, I’ll wipe the floor around the toilet. Like mentioning earlier, urine can go EVERYWHERE,  and the floor around the toilet is no exception. A quick wipe down can help prevent the urine smell. This way, you won’t have to wait until it’s time to mop again.

    4 Sneaky Places Urine Smell Hides in your Bathroom--4 Sneaky Places Urine Smell Hides in your Bathroom
    4 Sneaky Places Urine Smell Hides in your Bathroom--4 Sneaky Places Urine Smell Hides in your Bathroom

    4. Remove the Rug

     I’ve always wanted a rug in my bathroom, because it makes it feel a bit cozy. But hear me when I say, it will be one of the sneaky spots that the urine smell will hide. If you must have a rug, (like I like to have when my kiddos get out of the bath, but sometimes forget to remove it), I toss it in the washing machine. So my advice is to get rid of the rug, or wash it regularly for sure!

    4 Sneaky Places Urine Smell Hides in your Bathroom--4 Sneaky Places Urine Smell Hides in your Bathroom

    So happy you stopped by! I hope you found these 4 tips helpful for getting rid of the urine smell in your bathroom!

    Our Home Tour:

    Now that you’ve seen the most disgusting part of our home, come take a gander at the rest on our Home Tour. I promise, no more pictures of urine on the toilet. 😉

    How to erase chalk marker off of chalk board
    how to get rid of the urine smell in the bathroom
    Visit Sponsors Site
    The areas that can get overlooked in the bathroom that traps that pesky urine smell, and how to get rid of it!

    21 Day Fix Dinner Recipe: Quick & Easy Soft Chicken Tacos

    January 29, 2017

    21 Day Fix Dinner Recipe: Quick & Easy Soft Chicken Tacos

    21 Day Fix Dinner Recipe: Quick & Easy Soft Chicken Tacos… that aim to please for those doing Beach Body, and looking for something tasty and fast!

    21 Day Fix Dinner Recipe: Quick & Easy Soft Chicken Tacos

    We are huge fans of crispy chicken tacos, but if you’re not in the mood for baking, these stovetop chicken tacos are going to be a great option!

    21 Day Fix Dinner Recipe: Quick & Easy Soft Chicken Tacos

    My friend Amy is a Beach Body Coach, and I’ve been seeing the most delicious looking recipes that she’s been sharing on her Instagram page lately. Then, while browsing on Pinterest the other day for a dinner recipe, I started seeing “21 Day Fix,” EVERYWHERE! (And the food actually looked delish!)

    So I reached out to Amy and asked if she had a 21 Day Fix dinner recipe that she’d like to share with me, so I could make it and hand it out to all of you. She agreed, and here we are! Let me tell you… I took a bite immediately after adding the last topping, (as you’ll see in the video below) and it was absolutely tasty.

    Recipe and more photos below:

    21 Day Fix Soft Chicken Taco Tutorial Video:

    In this video, I simply warmed up the rotisserie chicken with the spices in the coconut oil, since it’s already cooked.

    If the video didn’t do it justice… the photos make my mouth water alone. Even if you aren’t participating in the 21 Day Fix, you’ll want to try this one. It was so incredibly quick to make, and it will now go on my dinner rotation. PLUS, I’ll feel so much better about how healthy it is.

    21 Day Fix Dinner Recipe: Quick & Easy Soft Chicken Tacos

    Chicken Tip:

    Amy mentioned that we could use a rotisserie chicken from the store to make it even easier. (I knew she was my friend for a reason. She’s speaking my love language for certain.)  Then, once we were done with the rotisserie, we boiled it in a bit of water, veggies, and spices to make our own rotisserie chicken stock; WHICH later became the base of my favorite Homemade Chicken Noodle Soup that my husband loves so much. Get that recipe here: The BEST Chicken Noodle Soup.

    21 Day Fix Dinner Recipe: Quick & Easy Soft Chicken Tacos

    21 Day Fix Measurements:

    *1 red (chicken), 2 yellow (if using both tortillas & black beans), 1 blue (avocado), 1 green (lettuce & tomato), ½ purple (salsa), 1 teaspoon (oil)
    You could substitute the avocado for cheese (still would count as 1 blue container).

    21 Day Fix Dinner Recipe: Quick & Easy Soft Chicken Tacos

    Don’t they look delish!?

    21 Day Fix Dinner Recipe: Quick & Easy Soft Chicken Tacos

    If you love delicious chicken recipes like this one, then I think you’re also going to love these chicken fajitas wraps! Or if taco recipes in general are your thing, make sure to try this walking taco casserole recipe that’s delicious!

    Recipe

    21 Day Fix Dinner Recipe: Quick & Easy Soft Chicken Tacos
    Print Pin
    5 from 1 vote

    21 Day Fix Dinner Recipe: Quick & Easy Soft Chicken Tacos

    Whether you are on the 21 Day Fix or not, this healthy tacos recipe is so easy to make and takes less than 20 minutes. Shredded chicken and veggies wrapped in a corn tortilla is the ultimate, Mexican-inspired dinner idea!
    Course Main Course
    Cuisine Mexican
    Prep Time 15 minutes minutes
    Cook Time 10 minutes minutes
    Total Time 25 minutes minutes
    Servings 4 tacos
    Calories 363kcal
    Author Jessica Burgess

    Ingredients

    • 3 cups shredded chicken Rotisserie chicken already cooked from the grocery store is a great option! If not, about 4 pieces of frozen chicken tenderloin pieces
    • 1 cup black beans
    • 4 corn tortillas
    • 1 avocado mashed
    • ½ cup salsa
    • ½ cup lettuce
    • ½ cup tomatoes diced
    • coconut oil or olive oil if cooking chicken
    • minced garlic
    • salt and pepper to taste

    Instructions

    • Cook chicken in a skillet with oil & garlic until done & then shred
    • Heat up black beans & tortillas (just in the microwave)
    • Place chicken, black beans, avocado, tomatoes, & lettuce in a tortilla & enjoy!

    Nutrition

    Serving: 1taco | Calories: 363kcal | Carbohydrates: 29g | Protein: 30g | Fat: 15g | Saturated Fat: 3g | Cholesterol: 81mg | Sodium: 540mg | Potassium: 839mg | Fiber: 9g | Sugar: 2g | Vitamin A: 465IU | Vitamin C: 8.4mg | Calcium: 61mg | Iron: 2.1mg

    DIY Teddy Bear Cookies

    January 28, 2017

    Teddy Bear Food Idea - DIY Cookies. So cute for a woodland friends, camping, or forest party as a party favor too!

    Teddy Bear Food Idea – DIY Bear Cookies: A “beary” good food or snack idea for kids, for a birthday party treat, dessert, sweets, or party favor idea.

    Teddy Bear Food Idea made out of Star Crunch with vanilla wafers.

    DIY Teddy Bear Cookies

    My friend and I were grocery shopping together the other day (Yes, it’s WAY more fun to grocery shop with a friend), and we stood in the snack cake aisle drooling brainstorming over cute ways to create a fun treat for our kiddos, making something out of something on the shelves.

    The minute I saw the Little Debbie Star Crunch’s, I saw the potential “fur,” of a little critter. I ran it by my friend, and she exclaimed “YES! Let’s do it.” So we grabbed a box and headed back to my house to experiment. We had so much fun creating these little DIY Teddy Bear Cookies, and my kids went NUTS when they got home and saw them.

    Then I began to think of how fun these would be if you’re looking for a bear food idea on Pinterest, for a “Build a Bear” birthday party, or a forest birthday party, so I couldn’t WAIT to share them with you. I also realized how adorable they would have been for the Woodland Friends Birthday Party and Camping Party that I designed in the past, and I was slappin’ myself. See those two parties here to get your party fix…

    Camping Sleepover

    A Camping Sleepover Birthday Party!  Fire birthday cake, smores mix, all on a table.

    Woodland Friends

    Woodland Friends First Birthday Party Dessert Table

    DIY Teddy Bear Cookies or not… the parties still turned out pretty cute I think.) 😉 

    Bear Cookie Video Tutorial

    If you’re looking for a photo tutorial, you can see that below too!

    Bear Cookie Photo Tutorial

    Ingredients for Teddy Bear Food Idea
    Teddy Bear Food Idea

    What you’ll need:

    (To make one bear snack)

    • One Little Debbie Star Crunch

    • 2 Vanilla Wafers

    • 2 candy eyes

    • 1 black jelly bean

    • Royal Icing for “glue.” (You MAY be able to use canned frosting, but royal seems to hold up much better.)

    • Brown icing coloring (if desired) to color the royal icing.

    How to Assemble:

    • To “glue,” each of the pieces on to the Star Crunch, royal icing seemed to work best. I use Wilton Royal Icing Mix, and added in a couple of drops of brown Wilton icing coloring to help blend in with the colors of the “bear,” but it’s not necessary.

    • “Glue” one Vanilla Wafer on to the Star Crunch smearing some of the royal icing to the underside of the wafer, and press down on to the Star Crunch.

    • Using a small dab of the royal icing, attach the black jelly bean sideways on to the wafer.

    • Next, using a couple of dabs of royal icing on each eye, secure the eyes to the Star Crunch

    • Cut the other Vanilla Wafer in half, using a knife. (I seemed to have better luck with a clean cut when I sliced it, rather than pushing straight down.)

    • Attach each “ear” to the “bear,” using the royal icing, and hold in place for about 30 seconds to 1 minute. Once the royal icing hardens, the ears should stay in place.

    Teddy bear made out of Star Crunch.

    Teddy Bear Food Idea

    If you’ve found your way here, looking for a bear food idea… I sure hope you like this one! It was incredibly easy and it turned out even cuter than I imagined. Based off of the reaction of my kiddos, I’d say they were a hit too! 😉

    Little boy holding DIY teddy bears.

    We think you’ll also love these chocolate covered Teddy Bear snacks!

    Teddy Bear Food Idea with Starcrunch

    Gift Idea for Him: “I Think You’re Red Hot” Gift Basket Ideas

    January 19, 2017

    Gift Idea for Him- I think you're red Hot Gift Basket Ideas

    Gift Idea for Him: “I think you’re red Hot” Gift Basket Ideas. Always needing a gift idea for my husband, I decided a toolbox full of a lot of his favorite things (in red) would be the perfect gift!

    Gift Idea for Him- I think you're red Hot Gift Basket Ideas

    Gift Idea for Him

    It’s the struggle that a lot of women experience once a year…

    Valentine’s Day gift ideas for him

    Right? Can I get an amen? Heck, Valentine’s Day isn’t the only holiday that I struggle with gift ideas for my husband. It’s ANY gift ideas for my husband. The man has everything he could possibly want. He’s one of those, “He wants it, so he just goes and buys it,” kind of guys. Do you have one of those?

    I admire his will to just make it happen, but that sure makes it difficult come gift-giving time.

    More Ideas for Him, You’ll Love:

    • Gift Ideas for Him
    • 30th Birthday Party Ideas for Him
    • Gift Ideas for Teenage Guys

    So if you’ve found yourself struggling for a gift idea for your boyfriend, husband, or anyone that you think is well… “Red Hot,” then you may like this gift basket idea that I’ve created this year.

    “I think You’re Red Hot” Gift Basket Tool Box

    Gift Idea for Him- I think you're red Hot Gift Basket Ideas

    Tool Box Gift Tutorial:

    • Container: It all began with finding something to put all of the goodies in. For the other gift ideas I’ve created, I’ve either used a simple basket or box to arrange them in. But this time, I wanted to be a little more creative, and package it all up in to something that he could re-use again. Because let’s face it, my husband would NOT be excited about a cutesy little box or wire basket from Target, like I would. 😉  So a toolbox it is! They had the cheaper plastic toolboxes, but I fell in love when I saw this metal, stylish toolbox instead. (Because it’s always about “style,” right?)

    Gift Idea for Him- I think you're red Hot Gift Basket Ideas

    • Contents: Then, it was time to start trying to find all of the red things at the store that my husband loves. This was not as hard as you’d expect. Really! It was actually kind of fun, and a challenge. I’m a challenge junkie.

    Yeah, don’t look too close mom. Some of these may make you blush. Sorry ’bout that.

    Gift Idea for Him- I think you're red Hot Gift Basket Ideas

    You use what??? Awesome.

    Want to hear one of my favorite gift-hacks? Well, I DESPISE tissue paper. Do I use it? You bet. But when I’m making a gift basket, it kind of makes me want to throw up in my mouth a little bit. Why? Because I have the hardest time trying to tame the lion of the tissue paper, to make it look “good.” It always looks like my toddler crinkled it up and stuffed it in.

    Rather, I like to buy those little pieces of fabric at Walmart or the craft store, that are super affordable. I believe they’re made for quilting??? Anyhow, they’re made for gift basket stuffing in my house. The edges ARE frayed, so that kind of stinks, and puts off a ragged look. But I’ll usually try to get creative and tuck the ends under if I’m able.
    If not, fabric glue may be a good option to fold the ends under to have a cleaner look.

    Gift Idea for Him- I think you're red Hot Gift Basket Ideas

    I’m not going to lie. I peed my pants a little bit when we (My right-hand gal Kate and I) saw this wine at Target. How perfect is this for this mens gift idea?

    Gift Idea for Him- I think you're red Hot Gift Basket Ideas

    Red Gift Basket Ideas:

    Ok, so here’s what I put in my husband’s toolbox gift basket. Feel free to take away/add anything to yours of course. I found all of this at Target! This may just give you a jumpstart of some ideas…

    • Tools
    • Wine
    • Beer
    • Cola
    • Chocolate Cigars
    • Hershey’s Kisses
    • Jerky
    • Nuts (These didn’t fit, so I ended up keeping those myself.)
    • Sunflower Seeds (Neither did these. So I ate them. I wish the wine wouldn’t have fit.)
    • Chocolates
    • Body Wash
    • Mints
    • Massage Oil (Sorry mom. I know, that’s gross. But hey, it was red so I had to get it.)
    • 5-Hour Energy (You know, for later.)
    • Candle (You know, for later. Again.)
    Gift Idea for Him- I think you're red Hot Gift Basket Ideas

    Gift Tag:

    So I have this fancy-schmancy Silhouette Cameo machine that could have made the cutest gift tag I’m sure. But let’s face it. I’m a mom, I’m busy. So my husband got a hand-written gift tag and a stamp of some lips. He wouldn’t care if I spent hours designing a gift tag anyway. Magic marker and a stamp it is.

    Tie it on with a ribbon (I tied it to the clamp of the toolbox.)

    Gift Idea for Him- I think you're red Hot Gift Basket Ideas

    More Valentine’s Day Ideas

    • Vanilla mug cake in vintage coffee mug.
      The BEST Vanilla Mug Cake Recipe
    • caramel drizzling on chocolate gooey butter cookie
      Chocolate Gooey Butter Cookies
    • A slice of strawberry heaven cake dessert on a plate.
      Strawberry Heaven
    • Strawberry Pound Cake on cake stand.
      Strawberry Pound Cake with Strawberry Glaze Icing
    Gift Idea for Him- I think you're red Hot Gift Basket Ideas
    Gift Idea for Him- I think you're red Hot Gift Basket Ideas
    Gift Idea for Him- I think you're red Hot Gift Basket Ideas

    That’s it! How fun is this?

    Now if red isn’t your color, and you’d be more in to a “sunshine basket,” then you may want to head over and see how I styled that one, and gave it to a couple of our friends.

    Sunshine Gift Basket Ideas https://fantabulosity.com
    Gift Idea for Him- I think you're red Hot Gift Basket Ideas

    Thanks so much for coming by!!

    Hawaiian Breakfast Sandwich

    January 17, 2017

    OMG YUUM!!! Ham, Pineapple, Egg and pepperjack cheese, on a Hawaiian bun!

    The Hawaiin Breakfast Sandwich: The flavor combination will blow your mind! Sweet and salty are delicious on a Hawaiian bun!

    I’m about ready to rock your world with a sandwich that not only “wowed,” my family, but was so incredibly easy to make. It has turned out to be one of our favorites, along with this fun breakfast egg roll recipe!

    OMG YUUM!!! Ham, Pineapple, Egg and pepperjack cheese, on a Hawaiian bun!

    Why you’ll love these sandwiches

    With only a few ingredients, this sandwich can be created in no-time, but also fill up your family. Have you ever been to a restaurant, and happen across an item on the menu that has rare ingredients, or a combination of ingredients that makes you go, “Whaaa!?”

    That’s how I feel when I think about this sandwich. From the moment of experimentation, I’ll admit… I was thinking, “This can either go really bad, or be surprisingly amazing.” Well if it wasn’t surprisingly amazing, then I wouldn’t be sharing this recipe with you today.

    My husband? You better BELIEVE he loved it. He loves an over-easy egg on a hamburger or on a fried bologna breakfast sandwich, so I knew he’d love an egg on a hot ham sandwich. The pineapple??? I wasn’t sure he’d go for it… but he did, and fell in love.

    Ingredients we used:

    (Full Recipe Below)

    • Honey Ham
    • Pepperjack Cheese
    • Pineapple Ring
    • Over-easy eggHawaiian Buns

    For a family of four: Use 4 buns, 8-12 slices of ham, 4 slices of cheese, 4 pineapple rings, and 4 eggs.

    It’s not just for breakfast:

    Although it’s made with an egg, you may be thinking, “Breakfast.” Well, it would be absolutely delicious for breakfast. But we even love this for lunch, or dinner! (Or a midnight snack, when we get on a Netflix binge watching kick.)

    OMG YUUM!!! Ham, Pineapple, Egg and pepperjack cheese, on a Hawaiian bun!
    OMG YUUM!!! Ham, Pineapple, Egg and pepperjack cheese, on a Hawaiian bun!

    Tutorial:

    If you saw my “Best Cheeseburger Recipe,” video tutorial, then you know I’m a firm believer in toasting buns. Either butter the insides of your bun, and toss on the skillet for about 30 seconds, or coat the skillet with butter, and toast the buns a bit. Set aside.

    OMG YUUM!!! Ham, Pineapple, Egg and pepperjack cheese, on a Hawaiian bun!

    Next, fry your ham in the skillet, and top it with cheese a minute or so right before you plan to take it off. (To allow the cheese to melt on top of the ham a bit.) Top the bottom slice of your Hawaiian bun.

    This is when you can place a pineapple ring, right on top of the ham/cheese, or you can place the pineapple ring in to the skillet for a bit, to allow it to heat up/sear. Either way, it’s delish.

    OMG YUUM!!! Ham, Pineapple, Egg and pepperjack cheese, on a Hawaiian bun!

    In the same skillet, (toss in a little more butter if necessary), and fry your egg “over-easy.” When it has completed frying, place it on top of the pineapple.

    OMG YUUM!!! Ham, Pineapple, Egg and pepperjack cheese, on a Hawaiian bun!

    Place the top bun on, and gently push down, allow the bun to slowly “pop,” the egg so the yolk will slightly flow out on to the rest of the sandwich.

    I’m not going to lie… my mouth is completely watering, writing that last step.

    OMG YUUM!!! Ham, Pineapple, Egg and pepperjack cheese, on a Hawaiian bun!

    It’s a sandwich that your family may say, “Huh?” But that left my family saying, “Yum.”

    For the new year, I pledged to start cooking more at home. We were ALWAYS eating out, and literally throwing money down the drain. But I LOVE food, so I struggled with not being able to try new things all of the time. So I decided to try new recipes at home, and I must say… if we can save money, AND eat amazing things like this Hawaiian sandwich… I don’t know if we’ll ever choose to eat out, over eating at home again. Making 4 of these for my family of 4, took hardly any time at all!

    OMG YUUM!!! Ham, Pineapple, Egg and pepperjack cheese, on a Hawaiian bun!

    Side Note:

    When I started eating this sandwich for the first time I took a bite and immediately ran over to my camera to capture this gloriousness of the egg yolk dripping down over the meat, cheese & pineapple. Oh.My.Gosh. So, so good.

    I found the Castle Wood Reserve® Honey Ham at Walmart near the deli. They have a full line of deli meats, and when preparing a meat/cheese tray, it’s a favorite to use, because of the quality of the flavor.

    Recipe

    OMG YUUM!!! Ham, Pineapple, Egg and pepperjack cheese, on a Hawaiian bun!
    Print Pin
    5 from 2 votes

    The Hawaiian: Ham + Egg + Cheese + Pineapple

    Get a taste of the tropics with this Hawaiian breakfast sandwich. Ham, egg, cheese, and pineapple sandwiched between a bun to make the ultimate breakfast recipe.
    Course Breakfast
    Cuisine American
    Prep Time 10 minutes minutes
    Cook Time 10 minutes minutes
    Total Time 20 minutes minutes
    Servings 4 servings
    Calories 426kcal
    Author Jessica Burgess

    Ingredients

    • 4 Hawaiian buns
    • 8-12 slices ham We used Castle Wood Reserve® Honey Ham
    • 4 slices pepperjack cheese
    • 4 eggs
    • 4 pineapple rings
    • butter for cooking

    Instructions

    • Begin by buttering the insides of the buns, and toasting them in a pan over medium-high heat, for about 30 seconds. Set aside.
    • Fry the ham, topping with a slice of cheese after warmed/fried, and place on the bottom portion of the bun.
    • If desired, place pineapple ring in the pan to sear/warm for about a minute. (Flipping half-way through.) Place on top of ham/cheese.
    • If necessary, add a little butter to the pan to fry your egg(s) over-easy
    • Place on top of meat/cheese/pineapple
    • Top with other bun, and gently push down, allow the egg yolk to slightly drip over the rest of the sandwich.

    Nutrition

    Serving: 1sandwich | Calories: 426kcal | Carbohydrates: 24g | Protein: 27g | Fat: 24g | Saturated Fat: 11g | Cholesterol: 233mg | Sodium: 961mg | Potassium: 314mg | Sugar: 12g | Vitamin A: 480IU | Vitamin C: 5.4mg | Calcium: 247mg | Iron: 1.6mg
    OMG YUUM!!! Ham, Pineapple, Egg and pepperjack cheese, on a Hawaiian bun!

    I hope you enjoy it!

    Electric Skillet Hamburgers

    January 12, 2017

    These were SO juicy and easy! Love what she uses. The BEST Cheeseburger recipe!

    Electric Skillet Hamburgers: a quick and easy way to make burgers without the stove top splatter! Plus, cooking them like this, results in a juicy, all-around cooked burger that’s perfect for a busy weeknight!

    These were SO juicy and easy! Love what she uses. The BEST Cheeseburger recipe!

    Straight out of my husband’s mouth

    “Jessica, this is such a GOOD burger. So good.”

    My husband doesn’t just tell me what I want to hear when it comes to my cooking and/or recipes. So when he goes on and on about how good something is, you better believe I’m going to call it the BEST.

    Don’t miss the SUPER popular and Fantabulosity fan favorite, the Hamburgers in the Oven recipe and the NEW Smoked Burgers recipe!

    Browned Butter Cheeseburger Recipe

    Right along with Fantabulosity recipe tradition, we’re gonna keep things easy.

    I’m not a gourmet chef, and sometimes simple is better. So you can count on this recipe only using ingredients that you more than likely have on hand and can be whipped up in just a short time.

    For YEARS, I made a not-so-appetizing cheeseburger. No lie. They were dry, unflavorful (is that a word), and just “edible.” Now, we have them once a week, and look forward to “cheeseburger day” and I can’t help but think that these are so delicious because of the browned butter (like we use when cooking steaks in the oven) and “steaming” effect that the electric skillet gives!

    Best Cheeseburger Recipe Photo Tutorial

    Don’t let all of the photos scare you. There aren’t many steps to these! I just wanted to be extra thorough for you!

    For the full recipe with measurements, you can see the recipe card towards the end of the post!

    These were SO juicy and easy! Love what she uses. The BEST Cheeseburger recipe!

    Get the Skillet Ready

    Butter (REAL butter… not that fake stuff), Peppercorn, Garlic Powder, and Kosher Salt. Ahh… a heavenly mix, wouldn’t you say?

    These were SO juicy and easy! Love what she uses. The BEST Cheeseburger recipe!

    Using an electric skillet, heat it to 350 degrees, and then coat the skillet with about 2-3 Tablespoons of butter. (You can also cut a chunk of butter and toss it in. I just secretly love sliding the butter back and forth, and enjoying the moment.)

    While your butter is browning (this is KEY… BROWN THAT BUTTER), patty out the burgers.

    If you don’t have an electric skillet, you can cook burgers on the stovetop in a frying pan!

    These were SO juicy and easy! Love what she uses. The BEST Cheeseburger recipe!
    These were SO juicy and easy! Love what she uses. The BEST Cheeseburger recipe!

    Prep the Burgers

    1 lb of ground beef usually makes three burgers for us. (We like them thick.)

    Roll a third of the ground beef into a ball, and then mash down into a patty using both hands. Using your thumbs and fingers… smooth out the edges the best that you can, making sure there are little or NO cracks. This will help hold the juices in, and keep it from falling apart.

    Have leftover ground beef? Or more ground beef in the freezer? Save this list of ground beef dinners.

    These were SO juicy and easy! Love what she uses. The BEST Cheeseburger recipe!

    I also push down a bit in the center of each hamburger patty, to allow the juices to flow towards the middle while cooking, rather than running off of the sides and into the skillet.

    These were SO juicy and easy! Love what she uses. The BEST Cheeseburger recipe!

    What Temperature Do You Cook Hamburgers in an Electric Skillet?

    Put the lid on the electric skillet, and let the burgers cook over 350 for a couple of minutes, or until the tops start turning a grayish/light brown, and the bottoms have a BEAUTIFUL brown color to them.

    Flip the burgers.

    These were SO juicy and easy! Love what she uses. The BEST Cheeseburger recipe!

    Put the lid back on, and let them cook a few minutes more.

    These were SO juicy and easy! Love what she uses. The BEST Cheeseburger recipe!

    The photo above shows an example of how they’re NOT done. The juices coming out of the top are still pink/red.

    These were SO juicy and easy! Love what she uses. The BEST Cheeseburger recipe!

    Now, THIS is how you know they’re done. The juices coming out of the top have changed colors to grayish/tan.

    These were SO juicy and easy! Love what she uses. The BEST Cheeseburger recipe!

    What Kind of Cheese for Cheeseburger

    Turn the electric skillet on simmer, and place a slice of cheese over each burger.

    (Here, I used provolone and American, just because we had the extra cheese on hand and I wanted to see how it would taste. It was good, but I’m still a fan of American cheese on a burger.)

    These were SO juicy and easy! Love what she uses. The BEST Cheeseburger recipe!

    Place the lid back on, and let the cheese slowly melt on to each burger.

    These were SO juicy and easy! Love what she uses. The BEST Cheeseburger recipe!

    How to Toast Hamburger Buns

    Ok, I know it looks nasty. But pouring out the grease/butter into a bowl from the electric skillet is what needs to be done, to get it ready for the buns.

    Pour most of it out, but it’s a-ok if you leave behind some of the seasoning/grease/hamburger pieces. This just adds more flavor to your buns.)

    Coat the skillet again with butter (turning the skillet up to about 300 degrees) and place each half of the buns on the skillet.)

    These were SO juicy and easy! Love what she uses. The BEST Cheeseburger recipe!
    These were SO juicy and easy! Love what she uses. The BEST Cheeseburger recipe!

    The buns should toast in about 30 seconds, and they’ll have this glorious brownish/black look.

    These were SO juicy and easy! Love what she uses. The BEST Cheeseburger recipe!

    Your burgers are ready for assembly!

    How to Make the BEST Cheeseburgers

    This is totally optional, but one of the things my family loves is when I assemble the burgers (without toppings or condiments) and wrap each cheeseburger in aluminum foil and let them sit for about 5 or 10 minutes before serving.

    What this does is “steam” the burgers and connect the burgers, cheese, and buns for a DELICIOUS texture.

    Then, my family will put their toppings or condiments of choice and enjoy!

    Cheeseburger Toppings

    Top your cheeseburger with some of our favorites and other goodies like:

    • Tomatoes
    • Bacon
    • Red Onions
    • Lettuce
    • Mustard
    • Honey Mustard
    • Spicy Mustard
    • Ketchup
    • Mayo
    • Pickles
    • Avocado
    • Spicy or Fiesta Ranch
    • Crispy Fried Onions
    • Fried Egg
    • BBQ Sauce
    • Sriracha
    • Steak Sauce (like A1)
    • Carmalized Onions
    • Peppers
    • Hummus
    •  Hot Sauce
    • Relish
    • Spinach Leaves
    • Slaw
    • Chips
    • Jalapenos
    • Grilled Pineapple – trust us! It’s so good on these Hawaiian Burgers too!
    • Teriyaki Sauce
    • Queso
    • Crumbled Blue Cheese
    • Chili

    More Hamburger Recipes You’ll Love:

    If you love this one, then you’re REALLY going to love these other fan-favorite hamburger recipes, such as the donut burger, waffle burger, stovetop burger and for a fun twist… the crispy chicken burger!

    Recipe

    These were SO juicy and easy! Love what she uses. The BEST Cheeseburger recipe!
    Print Pin
    5 from 2 votes

    Electric Skillet Hamburgers

    Electric Skillet Hamburgers: Learn how to make the best cheeseburger with this easy to follow recipe. Juicy burger covered in cheese is the ultimate comfort meal.
    Course Main Course
    Cuisine American
    Prep Time 10 minutes minutes
    Cook Time 10 minutes minutes
    Total Time 20 minutes minutes
    Servings 3 burgers
    Calories 459kcal
    Author Jessica Burgess

    Equipment

    • Electric Skillet

    Ingredients

    • 1 pound ground beef
    • pinch kosher salt approx. 1-½ teaspoon
    • ground peppercorn to taste
    • 1 tablespoon garlic powder
    • 1 stick butter 8 tablespoons – The REAL unsalted butter is my favorite
    • 3 slices American cheese

    Instructions

    • Turn skillet on to 350 degrees.
    • Mix together ground beef, salt, pepper, and garlic powder.
    • Coat the electric skillet with the butter. (Approximately 3 Tablespoons.)
    • Patty out the burgers and place in the skillet covered, cooking for a couple of minutes until the tops of the burgers turn tan and the bottoms are a gorgeous brown.
    • Flip the burgers and cook for a couple of minutes, or until the juices forming out the top run clear and are no longer pink/red.
    • DO NOT mash down the burgers while cooking. This will release the juices that you want to stay in.
    • Turn skillet down to a simmer, and place a slice of cheese on each burger.
    • Remove cheeseburgers from skillet and place on a dish close to one another to trap in heat.
    • Dump the grease out of the skillet into a heatproof bowl.
    • Increase the heat to 300, and coat the skillet with butter.
    • Place each bun half on the skillet and toast the buns for about 30 seconds.
    • Once the buns are toasted, you’re ready to assemble the cheeseburgers!

    Video

    Notes

    For an extra delicious burger, wrap each burger (after assembled with the bun) in aluminum foil to allow the bun/burger to steam, like we do with the burgers in the oven that have gone viral!

    Nutrition

    Serving: 1serving (⅓ lb burger) | Calories: 459kcal | Carbohydrates: 2g | Protein: 26g | Fat: 37g | Saturated Fat: 13g | Cholesterol: 107mg | Sodium: 163mg | Potassium: 440mg | Calcium: 27mg | Iron: 3.1mg
    These were SO juicy and easy! Love what she uses. The BEST Cheeseburger recipe!

    I hope you enjoy them as much as my husband and my boys! Another quick and easy recipe that’s a house favorite… in the books! Thanks for stopping by and don’t forget to check out my other “BEST’S” recipes like my:

    The BEST Side Salad Recipe

    BEST Beef Tenderloin Recipe

    Holy Cow!!! This is the BEST Beef Tenderloin Recipe EVER. https://fantabulosity.com

    The BEST Guacamole Recipe

    This is always requested at my parties. The BEST Guacamole Recipe

    Loaded Cream Cheese Dip – Football Party Ideas

    January 12, 2017

    Loaded cream cheese dip in bowl.

    Loaded Cream Cheese Dip is an easy, crowd-pleasing appetizer made with cream cheese, ranch seasoning, cheese, bacon, and jalapeños. It's perfect for game day, football parties, or anytime you need a quick dip everyone will love.

    An Easy Game Day Dip That Always Disappears First

    This is one of those recipes that's almost too easy but somehow ends up being the one everyone asks for. Whether you shape it into a football for a themed party or serve it straight from a bowl, it's packed with flavor and comes together in minutes.

    Football Party Food idea: Chips/Dips stadium. So easy and YUM!
    Football party appetizer: Dips & Stadium. So fun!

    FAQs

    Can I make this dip ahead of time?

    Yes! You can mix everything together and refrigerate it until you're ready to serve. If shaping into a football, chill first so it holds its shape.

    Do I have to make it into a football shape?

    No, this dip is just as delicious served in a bowl with chips or crackers.

    What should I serve with cream cheese dip?

    Tortilla chips, crackers, pretzels, or even fresh veggies all work great.

    Can I make this less spicy?

    Yes. Just reduce or omit the jalapeños.

    What to Serve with Loaded Cream Cheese Dip

    This dip pairs well with a variety of dippers, making it perfect for parties or game day spreads.

    • Tortilla chips
    • Crackers
    • Pretzels
    • Toasted bread slices
    • Fresh veggies like celery or bell peppers

    Perfect for Football Parties and Game Day

    If you're hosting for the big game, shaping this dip into a football adds a fun touch that guests love. Pair it with other easy appetizers like sliders, wings, or other dips to create a full game day spread.

    Football Party Food

    I think I’ll base my next statement off of a quote of one of my favorite people.

    A party without snacks, is just a meeting.”

    I’ve recently fallen in love with Julia Child, and her quote “A party without cake is just a meeting.” rings so true with my thoughts exactly.

    I’ve always thoroughly enjoyed decorating and organizing parties, but I must admit that I look forward to the food and snacks the most. It’s an excuse to eat good food, and a great chance to get creative.

    It’s rather an obsession really, that I stock up on snacks, and chips every time I make a trip to the grocery store.

    As a hostess by heart, it’s just too easy to always be prepared for unexpected guests, when you have snacks in the pantry, ready to go.

    Then, if you can find a dip recipe that can be made out of items that you typically have on hand anyway, you’re golden!

    The other day, my friend Kate and I decided to get a little creative with some of my favorite snacks, and create a football-themed party in case you will be hosting a party for the big game this year.

    In the process, we also created a dip that’s out of this world and has become a new favorite.

    PLUS, I can’t WAIT to show you what we ended up creating with it, to bring out a little more “football,” to our “football party.”

    Loaded Cream Cheese Dip

    Loaded Cream Cheese Dip! Ranch, bacon, jalapenos, cheese, YUUUM!

    With only a few ingredients, this dip turned out to be one of my FAVORITES!

    You can easily mix together all of the ingredients and serve it as a dip, or go one extra step and shape it in to a football like we did… for a bit of a wow factor for your party!

    Loaded Cream Cheese Dip! Ranch, bacon, jalapeños, cheese, YUUUM!

    When making the “football,” shape, combine all of the ingredients EXCEPT the real bacon bits.

    Loaded Cream Cheese Dip! Ranch, bacon, jalapeños, cheese, YUUUM!

    “Football” Dip:

    After refrigerating the dip for 10 minutes (Full tutorial below in recipe), it can be shaped in to a football, and ready to coat it with bacon pieces, to resemble the football color.

    Football Party Food: Field made of guacamole and pico de gallo, then a football shaped dip! So fun!

    Lastly, “draw,” the laces on with sour cream, and it’s a football!

    Take it another step further and follow the tutorial below for the “Football Field,” to center it on. 

    Loaded Cream Cheese Dip! Make it in to the shape of a football for a football party. So fun! Ranch, bacon, jalapeños, cheese, YUUUM!

    More Dip Recipes You’ll Love

    This jalapeno artichoke dip is not only to eat but it has tons of flavor and perfect for game day! You’ll also love this everything but the bagel dip and this guacamole recipe that’s the best.

    Loaded Cream Cheese Dip! Ranch, bacon, jalapeños, cheese, YUUUM!

    For a Football Cheese Ball:

    Mix together cream cheese, ranch seasoning, shredded cheddar, jalapeños.
    Poor cream cheese mixture on to plastic wrap, folding the wrap all around the dip, forming a football shape.
    Put back in refrigerator for 10 more minutes.
    Pour bacon bits in to shallow dish
    Remove from plastic wrap and roll cream cheese football in bacon bits, totally covering the cheese ball
    Place reserved cream cheese in to a piping bag, and “draw” the football laces on to the cream cheese football.

    Food Football “Field” Tutorial

    Football Party Food: Field made of guacamole and pico de gallo, then a football shaped dip! So fun!

    • Using a rectangular dish/tray, place pico de gallo on each end. (Forming an “end zone,” look.)

    • Line the middle with a layer of this guacamole recipe. (You may leave out the tomatoes to capture a bigger green field.)

    Football Party Food: Field made of guacamole and pico de gallo, then a football shaped dip! So fun!

    • Using chopped green onions, sprinkle those over the guacamole to give it more of a “turf,” look.

    Football Party Food: Field made of guacamole and pico de gallo, then a football shaped dip! So fun!
    Football Party Food: Field made of guacamole and pico de gallo, then a football shaped dip! So fun!

    • Using sour cream, or cream cheese… draw the lines of a football field across the green onions/guacamole.

    • Then simply place your football-loaded cream cheese dip, in the middle of the field. (You can wait to decorate the football lines, after you’ve place it on the field if you like, like we did. Or you can do it beforehand.)

    Football Party Food: Field made of guacamole and pico de gallo, then a football shaped dip! So fun!
    Football Party Food: Field made of guacamole and pico de gallo, then a football shaped dip! So fun!
    Football Party Food: Field made of guacamole and pico de gallo, then a football shaped dip! So fun!
    Football Party Food: Field made of guacamole and pico de gallo, then a football shaped dip! So fun!

    Football Party Decorations

    Football Party Ideas: Banner made out of green "turf!"

    To create the banner “Go Team,” we used a burlap banner and combined it with a little DIY. We took a green artificial “grass,” rug, and cut it in to triangles to add a little more of a “football,” touch to the banner.
    Then, using my Silhouette Machine, we cut out the letters and simply hot glued them on to the pendents.

    Football party ideas: Craft paper table runner with football plays drawn on. So easy.

    Next, using brown contractors paper as a table runner, (that I picked up at the home improvement store), we drew football “plays,” with a black magic marker.

    Yellow napkins for "flags," at a football party

    Yellow napkins were folded to look like “Flags,” and simply placed in a cute little wooden box.

    Football party ideas: drinks with black straws

    Football Snack Stadium

    Now this was fun to create. Taking little boxes, we filled them with the snacks that we purchased at Walmart, and filled them up, to create the “stands,” for the football stadium.

    Secret Tip:

    To prop the boxes up, we grabbed rolls of ribbon and hid them underneath, and with other party decor.

    Prop up the boxes of snacks, to form "stadium seating," around the dip football field.
    Football party food idea: football field dip with chips as the bleachers. so cute!
    Football party food idea: football field dip with chips as the bleachers. so cute!

    Snyder's of Hanover® Pretzels and Cape Cod® Potato Chips lined one side of the football field!

    Football party food idea: football field dip with chips as the bleachers. so cute!

    Mmm, I’m obsessed with the Garlic Parmesan Snack Factory® Pretzel Crips®! So those HAD to be on the table!

    Football party food idea: football field dip with chips as the bleachers. so cute!

    I’m a sucker for a good jalapeno potato chips, so we also lined one edge with a box of Jalapeno Kettle Brand® Potato Chips.

    Football party food idea: football field dip with chips as the bleachers. so cute!

    Some prefer a good ole tortilla chip to use with dips, so we put out Late July® Tortilla Chips on one corner as well!

    Football party food idea: football field dip with chips as the bleachers. so cute!
    Football party food idea: football field dip with chips as the bleachers. so cute!

    • To round off the corners and close off the gaps of the stadium, we used small round bowls full of the popped, Pop Secret® Popcorn.

    Football party food idea: football field dip with chips as the bleachers. so cute!

    Salt and Pepper ANYTHING always ends up in my shopping cart. I had no clue that Salt and Pepper Cashews from Emerald® Nuts, even existed until I saw them at Walmart. They were AH-mazing!

    Football party food idea: football field dip with chips as the bleachers. so cute!

    What I love about this idea, is that the chips/snacks and dip are all right there together, all while resembling a football stadium. So, so fun.

    Football party food idea: football field dip with chips as the bleachers. so cute!
    Football party food idea: football field dip with chips as the bleachers. so cute!
    Football party food idea: football field dip with chips as the bleachers. so cute!

    See this fun football party that I have styled too, like these football cookies below, for more ideas.

    Football cookies DIY! So cute, and doable!!! Perfect for a football party. Football party ideas fantabulosity.com

    More Football Party Food Ideas

    If you’re hosting, here are some of our favorite football party foods:

    • Turkey Sliders
    • Cheeseburger Sliders
    • Chicken Bacon Ranch Sliders
    • Ham and Cheese Sliders
    • Sloppy Joe Sliders
    • Taquito Casserole
    • Big Mac Casserole
    • Dorito Chicken Casserole
    • Chicken Tater Tot Casserole

    Recipe

    Loaded cream cheese dip in bowl.
    Print Pin
    5 from 1 vote

    Loaded Cream Cheese Dip

    Loaded Cream Cheese Dip: Made with cream cheese, jalapenos, ranch seasoning, cheese and bacon, mixes together everyone's favorite ingredients in this easy to make dip!
    Course Appetizer
    Cuisine American
    Prep Time 5 minutes minutes
    Chill 10 minutes minutes
    Total Time 15 minutes minutes
    Servings 8 servings
    Calories 107kcal
    Author Jessica Burgess

    Ingredients

    • 16 ounces packages of cream cheese softened, 2 8-ounce packages
    • 3 tablespoons Ranch Dip seasoning
    • 1 cup shredded cheddar cheese
    • ¼ cup diced jalapeños
    • ½ cup real bacon bits

    Instructions

    • If making the dip to serve in a bowl, mix together all of the ingredients, chill for 10 minutes and serve!
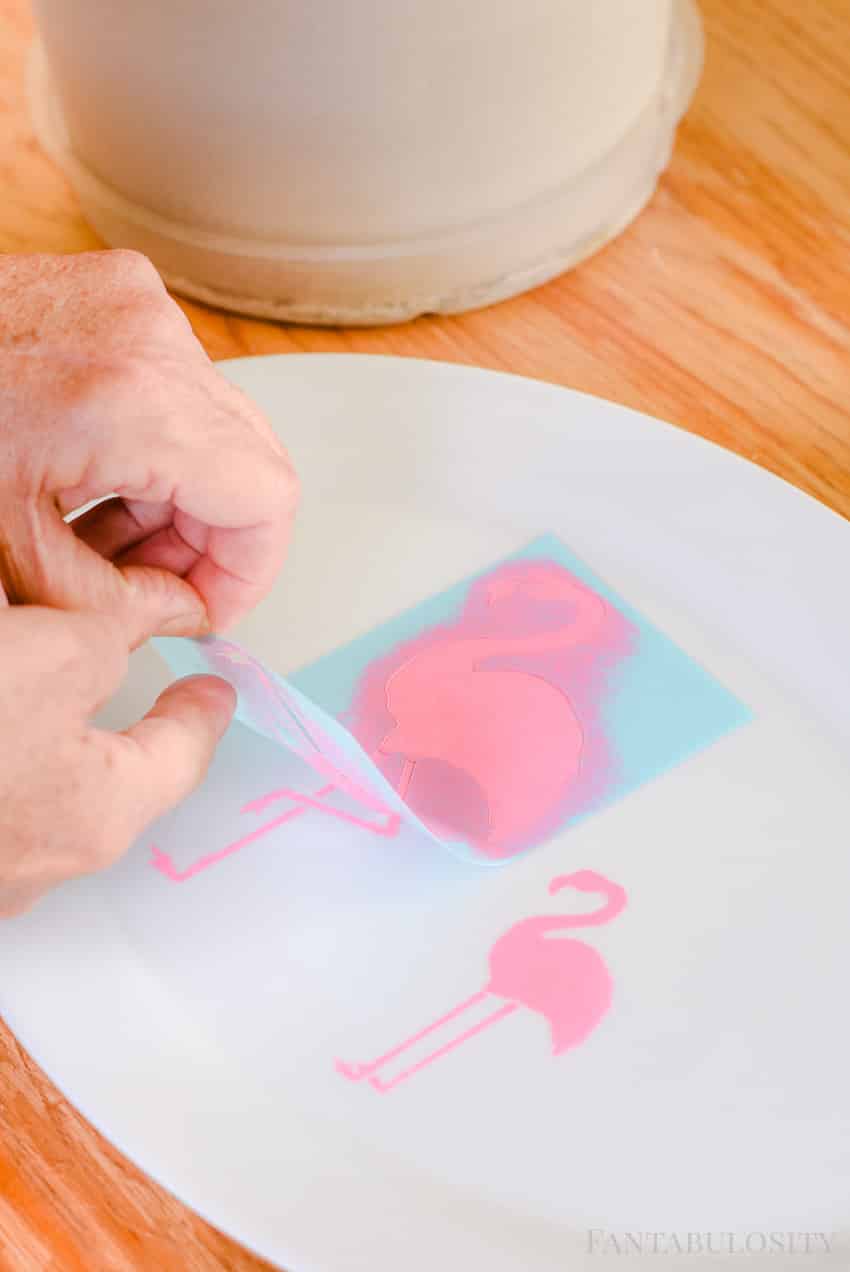
    • If making the football, mix together all ingredients EXCEPT bacon pieces. Chill for 10 minutes, form in to the shape of a football and coat with bacon pieces.

    Notes

    Tips for the Best Cream Cheese Dip

    • Let cream cheese soften before mixing
    • Chill before shaping
    • Use freshly shredded cheese for best flavor

    Nutrition

    Serving: 1serving | Calories: 107kcal | Carbohydrates: 4g | Protein: 6g | Fat: 7g | Saturated Fat: 4g | Trans Fat: 1g | Cholesterol: 22mg | Sodium: 631mg | Potassium: 56mg | Fiber: 1g | Sugar: 1g | Vitamin A: 174IU | Vitamin C: 3mg | Calcium: 103mg | Iron: 1mg

    Easy Potato Trifle Appetizer

    January 5, 2017

    Easy Potato Appetizer for Parties

    Easy Potato Trifle Appetizer for Parties: A quick and fun appetizer idea for a party, that can be easily created and made to look incredibly classy!

    Easy Potato Appetizer for Parties

    Easy Potato Appetizer for Parties

    No matter the party theme, I’m a sucker for making small/bite-size appetizers for our guests. They seem to be easier for the guests to grab and go, and less fuss over making a plate.

    If you’re planning a game day party, these easy potato trifle appetizers need to be on your menu! Especially if your crowd will consist of “meat and potato,” kind of guys & gals… then you’ll be speaking their love-language.

    To go big on game day, I wanted to create an appetizer recipe, that you could easily whip up to help make the game day a bit less stressful on you!

    Mini Trifles! So cute. Easy Potato Appetizer for Parties

    Keep it Easy…

    It’s no secret around here, that I’m all about keeping things super easy in the kitchen. I’m no gourmet chef, so if I can find easy ways to create recipes, and THEN make them look classy for parties, I consider it a success!

    For these, we chose to use the Idaho Spuds Supreme Baked Mashed Potatoes. We literally only had to add water, cook them on the stovetop and we were ready to style the mini trifles with bacon bits, shredded cheese, sour cream and chives.

    In just minutes, these little guys were ready to serve.

    Mini Potato Trifle Tutorial:

    Mini Trifles! So cute. Easy Potato Appetizer for Parties

    We used a piping bag to make life a little easier, getting the potatoes in to the mini trifle glasses.

    Mini Trifles! So cute. Easy Potato Appetizer for Parties

    You could cook your own bacon, and crumble it up… but hey, when they sell real bacon bits in the store, that’s hard to pass up, right?

    Mini Trifles! So cute. Easy Potato Appetizer for Parties
    Mini Trifles! So cute. Easy Potato Appetizer for Parties

    Sprinkle on a layer of shredded cheddar…

    Mini Trifles! So cute. Easy Potato Appetizer for Parties

    Add another layer of potatoes…

    Mini Trifles! So cute. Easy Potato Appetizer for Parties

    A bit of sour cream…

    Mini Trifles! So cute. Easy Potato Appetizer for Parties

    …and finish them off with a sprinkle of bacon bits and a couple sprigs of chives for a spiffy little look.

    Mini Trifles! So cute. Easy Potato Appetizer for Parties

    Recipe

    Easy Potato Appetizer for Parties
    Print Pin
    4.89 from 9 votes

    Easy Potato Trifle Appetizer

    These mashed potatoes titles are the cutest appetizer recipe. Mashed potatoes, bacon bits, sour cream, cheese, and chives make this loaded mash potato recipe a real crowd pleaser!
    Course Appetizer
    Cuisine American
    Prep Time 20 minutes minutes
    Cook Time 10 minutes minutes
    Total Time 30 minutes minutes
    Servings 20 servings
    Calories 71kcal
    Author Jessica Burgess

    Ingredients

    • 1 package Idaho Spuds Supreme Baked Mashed Potatoes
    • 1 cup real bacon bits
    • 1 cup shredded cheddar cheese
    • 1 cup sour cream
    • fresh chives

    Instructions

    • Prepare Idaho Spuds Supreme Baked Mashed Potatoes, according to package directions
    • Using a piping bag, place a small layer of mashed potatoes in each trifle glass.
    • Add a layer of bacon bits, then shredded cheese, and then another layer of mashed potatoes.
    • Top the trifle off with a layer of sour cream, and a few sprinkles of bacon bits.
    • Place a couple of springs of chives in the top of the trifle, and they’re ready to serve!
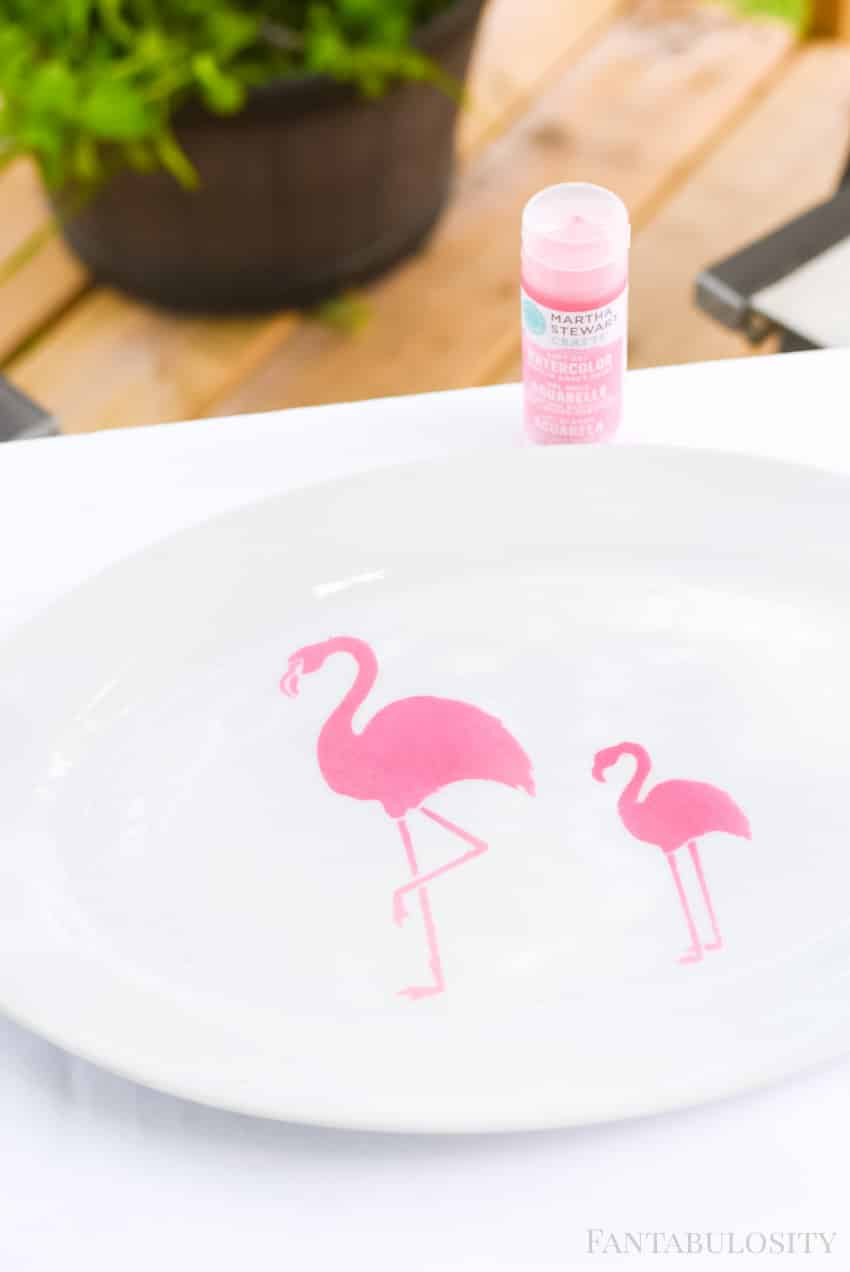
    • Serve warm!

    Nutrition

    Serving: 1trifle | Calories: 71kcal | Protein: 3g | Fat: 6g | Saturated Fat: 3g | Cholesterol: 17mg | Sodium: 141mg | Potassium: 50mg | Vitamin A: 130IU | Vitamin C: 0.1mg | Calcium: 54mg | Iron: 0.1mg
    Mini Trifles! So cute. Easy Potato Appetizer for Parties

    Sweepstakes!

    I’m super excited to fill you in on the sweepstakes that’s going on right now too. You can hoose your favorite Game Day recipe, and then possibly win a Big Adventure in Boise, ID!

    Enter the sweepstakes, and find out more here: Idaho Spuds Game Day Sweepstakes

    Good luck, and I hope you get a chance to make these for any party that you have coming up!

    Mini Trifles! So cute. Easy Potato Appetizer for Parties

    Pin this recipe to remember:

    Mini Trifles! So cute. Easy Potato Appetizer for Parties

    I was selected for this opportunity as a member of Clever Girls and the content and opinions expressed here are all my own.

    Strawberry Jalapeno Bruschetta

    December 30, 2016

    Strawberry Jam Bruschetta with cream cheese.

    Strawberry Jalapeno Bruschetta: A quick and easy appetizer to whip up for last minute guests, or to serve for an elegant cocktail party!

    Jalapeno jellies have been all the rage around our house lately, and I’ve been looking for new and creative ways to incorporate them in to snack-size treats and appetizers. My mom made KILLER jalapeno jelly the other day, but we ate most of it within the day.

    So on the hunt at the grocery store I went to find a jalapeno jelly to restock our refrigerator. I was tickled to see that they had multiple flavors, and fell in love when I saw a “Strawberry Jalapeno” jelly. It just sounded fun and flavorful!

    Strawberry Jalapeno Bruschetta: A quick & easy appetizer to serve for unexpected guests, or a classy dinner party!

    Strawberry Jalapeno Bruschetta

    With a little thought, I grabbed a small loaf of french bread from the bakery, a block of cream cheese and a bit of fresh mint from produce. Before I knew it, a quick and easy appetizer was created.

    Strawberry Jalapeno Bruschetta: A quick & easy appetizer to serve for unexpected guests, or a classy dinner party!

    Quick & Classy

    Like most of my other recipes, it is one that can be made in just a short time, but yet looks classy enough to serve to guests. I thoroughly enjoy making these when family or friends top by at the last minute, because the ingredients are usually common goods that I keep at home.

    If I’m out of french bread, I’ll substitute it with crackers, and it’s JUST as good. You’d be surprised how good a jalapeno jelly combined with cream cheese actually is.

    It’s “no-bake,” it’s quick, it’s easy, it’s classy. Some of my FAVORITE characteristics of an appetizer.

    If you’re a bruschetta-lover, then you’ll also LOVE the BEST Bruschetta Recipe on the planet. (At least I think so.)

    The BEST Bruschetta

    The BEST Bruschetta Recipe. It's a quick & easy appetizer that's PERFECT for a party!

    I’ve made this for numerous parties, and especially adore serving it around the holidays. Like I did at my Favorite Things Party last year, where the colors were super fitting!

    Enjoy!

    Strawberry Jalapeno Bruschetta: A quick & easy appetizer to serve for unexpected guests, or a classy dinner party!

    Recipe

    Strawberry Jam Bruschetta with cream cheese.
    Print Pin
    5 from 2 votes

    Strawberry Jalapeno Bruschetta

    Crispy bread piled with cream cheese and jelly makes a super easy (and delicious) appetizer for parties! Only requiring a handful of ingredients, this appetizer recipe is a must try!
    Course Appetizer
    Cuisine American
    Prep Time 10 minutes minutes
    Cook Time 2 minutes minutes
    Total Time 12 minutes minutes
    Servings 12 servings
    Calories 140kcal
    Author Jessica Burgess

    Ingredients

    • 1 loaf French bread
    • ½ cup cream cheese
    • ¼ cup jalapeno jelly I used strawberry jalapeno
    • fresh mint optional; for garnish

    Instructions

    • Simply slice the french bread into 1-inch slices.
    • Lay out the slices on a cookie sheet and broil for just one minute (or until bread is slightly toasted.)
    • Spread the toasts with cream cheese.
    • Then spread the jalapeno jelly on top of the cream cheese.
    • Garnish with a mint leaf and serve!
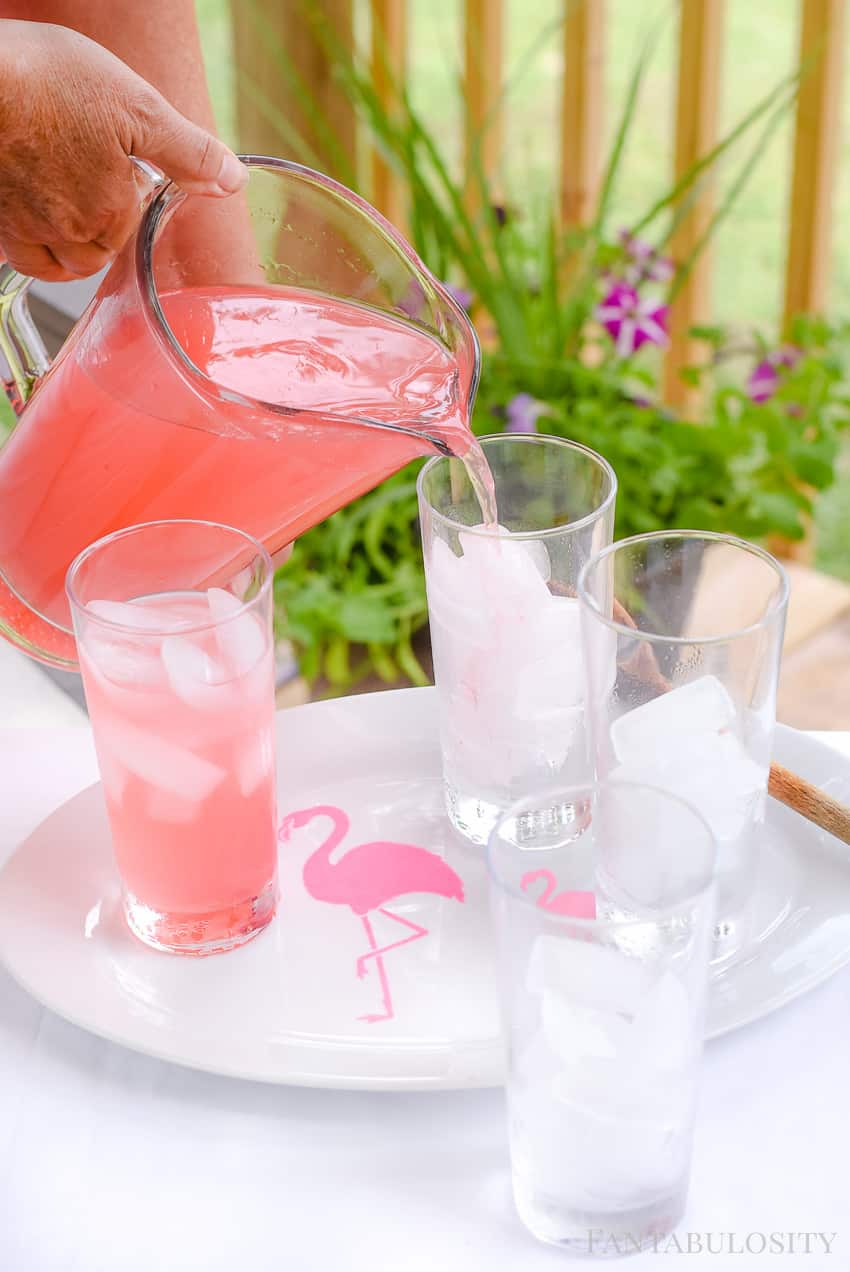
    Nutrition

    Serving: 2bread slices | Calories: 140kcal | Carbohydrates: 22g | Protein: 4g | Fat: 3g | Saturated Fat: 1g | Cholesterol: 10mg | Sodium: 203mg | Potassium: 55mg | Sugar: 3g | Vitamin A: 160IU | Vitamin C: 0.4mg | Calcium: 24mg | Iron: 1.2mg

    Month in Advance, at a Glance — Free Printable

    December 26, 2016

    Month in Advance, at a Glance! Free printable to keep track of what's ahead next month. LOVE this.
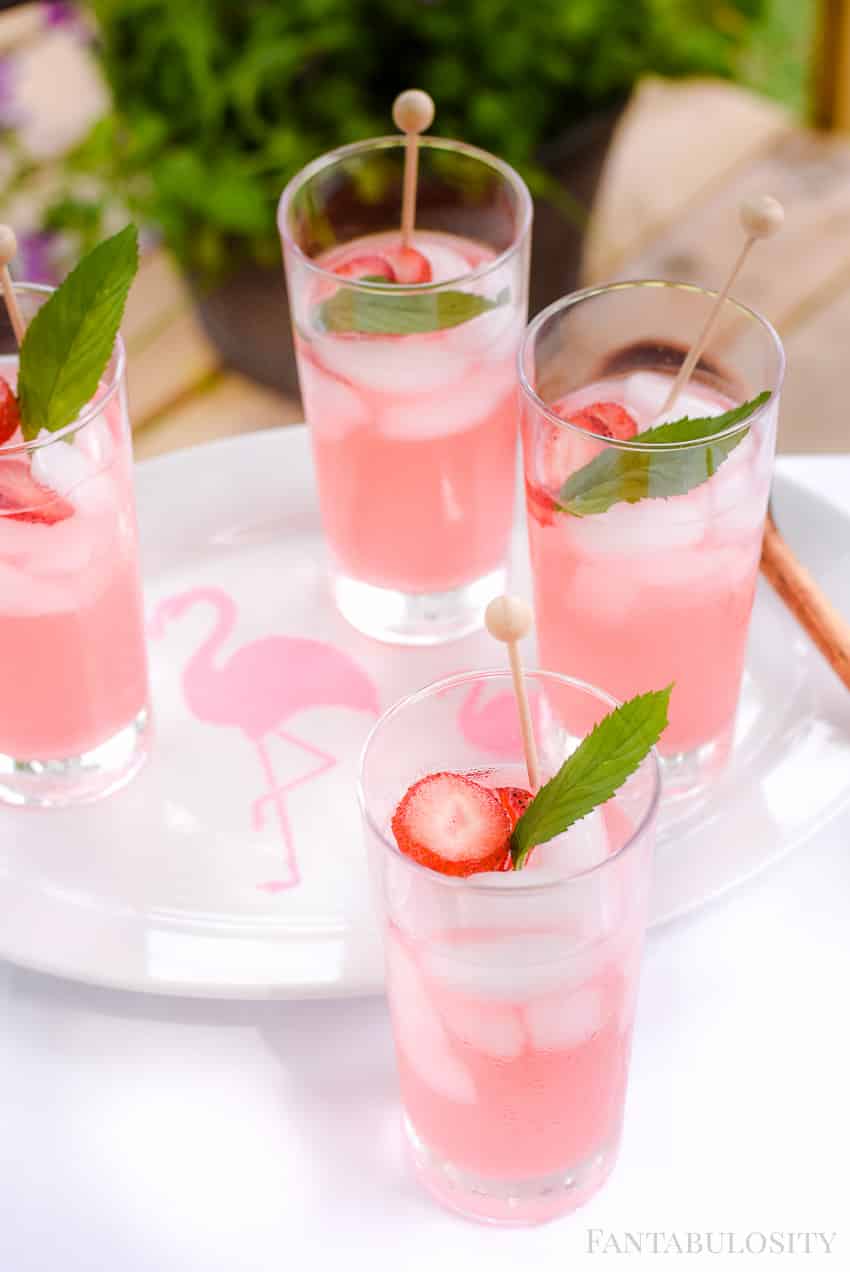
    Month in Advance, at a glance — Free Printable: An organized way to see what’s in store for you next month, so nothing will sneak up on you!
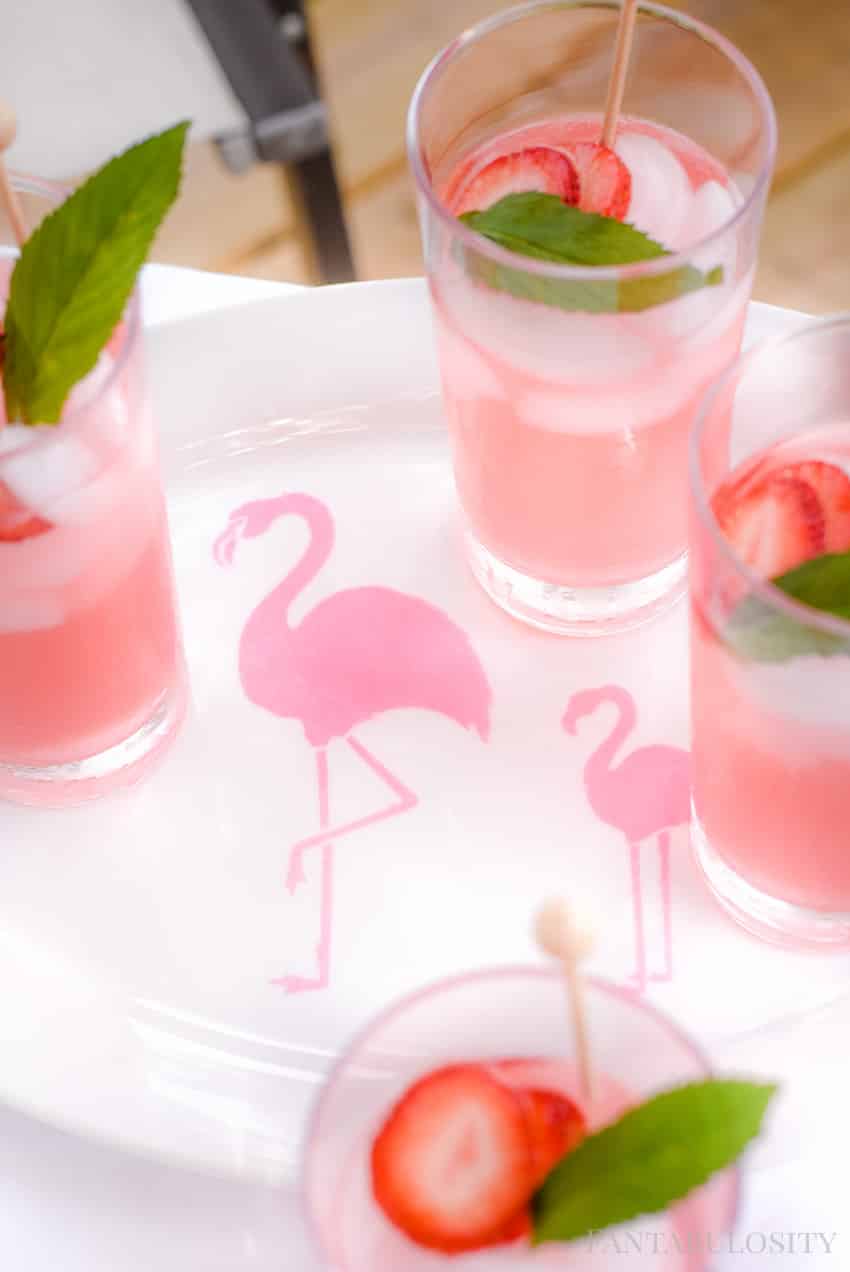
    Month in Advance, at a Glance! Free printable to keep track of what's ahead next month. LOVE this.

    I’m not sure why, but for some reason, when a new month arrives, I feel like someone slapped me upside the head with a “surprise” of activities, events, and bills that are due. I know they’re coming, but it always seems like it’s so far off, because it’s “next month.”

    I’ve found a way to help keep my sanity, and I couldn’t WAIT to share how with you. So if you’ve found yourself with the “slapped upside the head” feeling, then this free printable may be just for you too!

     Month in Advance, at a Glance: Free Printable

    Month in Advance Free Printable

    What about my planner? Or my phone?

    I needed a one-page printable, where I could write down everything that I knew of that was coming up. Birthday parties, date nights, bills, meetings, etc. Sure, I keep a calendar on my phone to help stay organized, and my planner… but when I would want to see a whole month, I would struggle. It was either all condensed on my phone, or too spread out on my monthly planner page. (Which left me feeling overwhelmed, stressed, and the month hadn’t even started yet.) Now, this way, I can see it all clear as day, in advance, at a glance, organized in its own special little categories. Be still my heart. My organized-loving momma should be proud.

    Month in Advance, at a Glance! Free printable to keep track of what's ahead next month. LOVE this.

    When to fill it out:

    Fill out the sheet about a week before the next month arrives, (or whenever you find the time for it. Better late than never, right?) and stick it in your planner, put it on your desk, or hang it by the door you go in and out of, at home.

    Download your FREE PRINTABLE HERE!

    Month in Advance Free Printable

    What Size to Print?

    If you plan to put this in your planner like I do, you should have an option to print it out, the size that will work best for your planner. For instance: 5×7, or an 8×10 may fit perfect, depending on which planner it is that you have!

    Happy monthly planning!

    Month in advance free printable

    FREE Printable Month in advance, at a glance. It's great to see all of this on one sheet each month

    The Best Chicken Noodle Soup Recipe – Quick and Easy

    December 22, 2016

    Homemade chicken noodle soup.

    The Best Chicken Noodle Soup Recipe – Quick and Easy: “This is the BEST Chicken Noodle soup I’ve ever had,” said her husband. Plus a weeknight meal that’s healthy and delicious!

    The Best Chicken Noodle Soup Recipe - Quick and Easy

    So you may have noticed a trend by now around here. I have about 5 recipes in the Fantabulosity archives, that start with “The Best.” (The BEST Guacamole Recipe, the BEST Side Salad Recipe, the BEST Beef Tenderloin Recipe, The BEST Punch Recipe)

    But I want you to know that I do NOT take this term lightly, and only apply it to those that I (we) truly think are the best. And you can pretty much count on there being a story of why I think each one is the best version.

    There are other recipes in Fantabulosity recipe “land” that I think are super delicious, but only those that leave people pausing to say,

    Jessica, I kid you not… this is the best “X” I’ve had.

    get the honor of the title “The Best,” around here.

    Best Chicken Noodle Soup Recipe: Quick & Easy

    So homemade chicken noodle soup is all the same, right? Oh heavens no. For YEARS I’ve wanted a chicken noodle soup recipe that would almost beg someone to get sick, just for an excuse for me to make it for them. I’m happy to say that I think this is IT.

    The Best Chicken Noodle Soup Recipe - Quick and Easy

    So full of flavor, fresh herbs (and dried), and it’s easy to put together.

    The Best Chicken Noodle Soup Recipe - Quick and Easy

    Why You’ll Love This Soup Recipe

    • It’s a soup recipe that tastes amazing when you’re feeling under the weather.

    • It can be doubled/tripled and put in the freezer for quick lunches or dinners during the week.

    • It’s so quick and uses a lot of items on hand that can be made last minute for someone feeling under the weather.

    • It’s not egg noodles. Yes, you can use just about any noodle that you like…and I know egg noodles are used in chicken noodle soup a lot but ditalini pasta is bite-size and so great for the spoon! We do use egg noodles in chicken and noodles though!

    • Don’t be intimidated by the fresh herbs. I know when you’re new to cooking, or heck, even just see fresh herbs in a recipe, it’s easy to think that’s it’s too “fancy,” or too “time-consuming,” for you. But adding fresh herbs can add SO much flavor to something, in an incredible way. I didn’t believe it until I tested it myself.

    The Best Chicken Noodle Soup Recipe - Quick and Easy

    Now, along with every other recipe here on the blog, you can count on it being incredibly easy.

    I’m a mom of two little boys and a husband that loves for me to sit down with him in the evenings so we can have our family time. So a big time-consuming meal doesn’t happen around here during the week. On Sunday’s, yes. But that’s also when my husband usually chips in with the cooking, and we make it an event.

    So this chicken noodle soup recipe is NO different. It’s incredibly quick and easy and fits right in with our weekly menu plan. Would you believe that my picky eaters even eat it, and ask for it?

    PRO TIP: Cook chicken breasts in the slow cooker and keep it in the freezer for quick meals like this soup!

    So the fresh herbs. I can hear some of you now…

    Do I have to use fresh herbs?

    No. Of course not. But man ALIVE. I made this without the fresh rosemary and thyme twice against the dried, and it was a HUGE difference. Can you also use fresh herbs in place of the dried herbs that I suggest. You bet! Just make sure to adjust and remember that fresh herbs are more “potent,” than dried. So use more dried if you plan to go that route, and visa versa.
    Although I must admit… I’ve never had something with TOO many herbs and seasonings. I just haven’t.

    Looking for Quick Weeknight Meals?

    If you’re planning your weekly menu, check out some of my other favorite weeknight meals that tend to rotate in our menu plan.

    • Poppy Seed Chicken Casserole serving on a plate, next to green beans.
      Poppy Seed Chicken Casserole
    • Smothered pork chop with mushroom gravy on top of rice in a plate.
      Smothered Pork Chops in Creamy Mushroom Gravy
    • Church supper recipes collage.
      Church Supper Recipes
    • Close up of cooked salmon patties on a plate, with fresh parsley sprinkled on top.
      Old-Fashioned Salmon Patties Recipe

    Recipe

    Homemade chicken noodle soup.
    Print Pin
    5 from 2 votes

    Easy Chicken Noodle Soup Recipe

    This chicken noodle soup recipe is perfect for weeknight dinners. Fresh herbs, pasta, vegetables, and chicken are combined to make this aromatic and delicious soup recipe.
    Course Soup
    Cuisine American
    Prep Time 15 minutes minutes
    Cook Time 20 minutes minutes
    Total Time 35 minutes minutes
    Servings 8 servings
    Calories 162kcal
    Author Jessica Burgess

    Ingredients

    • 6 cups chicken broth Try my homemade chicken broth recipe
    • 10 sprigs fresh thyme
    • 4 sprigs fresh rosemary
    • 1 Tablespoon basil
    • 1 teaspoon garlic powder
    • 1 teaspoon onion powder
    • 2 bay leaves
    • 1 teaspoon pepper
    • 1 teaspoon kosher salt
    • 1 teaspoon parsley
    • 1 teaspoon oregano
    • 2 carrots chopped in to small pieces
    • 2 stalks of celery chopped in to small pieces
    • 4 Tablespoons olive oil
    • 1 cup Ditalani pasta
    • 1-2 chicken breasts chopped in to small pieces
    • 1-2 cups water optional

    Instructions

    • In a stock pot, combine chicken broth and all spices, and heat over low-medium heat.
    • In a separate saucepan, saute carrots and celery in olive oil over medium heat for 15 minutes.
    • Add in chicken breasts (sprinkle with additional salt and pepper; optional)
    • Cook an additional 5-10 minutes until chicken is cooked through and veggies are tender.
    • Add chicken/veggie mixture to the soup base.
    • Add in noodles about 10-15 minutes before serving.
    • Remove bay leaves and sprigs of rosemary and thyme. (It’s ok if some of the herbal leaves have broken off into the soup. It will just add a bit more character.)
    • For a thinner soup, add in 1-2 cups water once the noodles have softened. (Noodles will soak up most of soup base.)

    Nutrition

    Serving: 1serving (⅛ recipe) | Calories: 162kcal | Carbohydrates: 13g | Protein: 8g | Fat: 8g | Saturated Fat: 1g | Cholesterol: 18mg | Sodium: 990mg | Potassium: 354mg | Fiber: 1g | Sugar: 1g | Vitamin A: 2615IU | Vitamin C: 13.9mg | Calcium: 28mg | Iron: 0.8mg

    Fresh Juice Bar Brunch

    December 15, 2016

    Fresh Juice Bar Brunch Party fantabulosity.com

    What Is a Food Bar?

    A food bar is a "build-your-own" style setup where guests can customize their food using a variety of toppings, bases, and mix-ins. It's a simple way to make hosting easier while giving guests options they'll love.

    A Simple Brunch Drink Idea That Feels Special

    A juice bar doesn't have to be complicated. With just a few ingredients and an easy setup, you can create something that feels thoughtful, fresh, and perfect for entertaining.

    Fresh Juice Bar Brunch Party fantabulosity.com

    Juice Bar Ideas for a Party or Brunch

    If you're setting up a juice bar, the goal is to keep things simple and easy for guests to grab and enjoy. A few fresh options and a clean setup go a long way.

    How to Set Up a Juice Bar

    • Choose 2-3 juice options
    • Use clear pitchers or dispensers
    • Add simple garnishes for color
    • Keep it easy to grab and go

    Fresh Juice Bar Brunch

    For a few years now, I’ve been juicing fruits and vegetables for our family. (Not every day, and sometimes, not even every month.)

    I’ll go through spells where I’ll do it a few times a week, especially during the Winter months when a lot of “sick bugs,” are floating around. It’s a challenge to get my littles to eat raw veggies, so if I can turn them in to “juice,” they’re more willing.

    Luckily, my husband really enjoys it when I juice as well, and I love tying it into my routine for an extra boost of immunity if possible, especially during the Winter months. So when my girlfriends came over for brunch the other day, I set up a tablescape filled with some of my favorite items and my favorite fresh juice recipe. Yes, it’s true… I’m one of those that likes to set up a display for just about EVERY excuse to get together. I mean, who doesn’t love food bars for a get-together?

    Fresh Juice Bar Brunch Party

    What to Put on a Juice Bar

    Juice Options

    • Carrot apple juice
    • Orange juice
    • Mixed fruit juice

    Garnishes

    • Orange slices
    • Fresh herbs (like rosemary or mint)
    • Berries

    Optional Add-Ins

    • Sparkling water
    • Flavored water
    • Smoothies

    Decorating a Brunch Table with Items on Hand:

    A brunch tablescape filled with pops of beautiful colors and ready-to-serve items, is the perfect combination to an easy entertaining spread. As with any party or get-together, one of my favorite party tricks is to decorate the display table with items that I already have on hand.

    • Home decor
    • Seasonal Decor
    • Garnishes
    • Linens & Fabrics
    Fresh Juice Bar Brunch Party
    Fresh Juice Bar Brunch Party

    Brunch “Eats”:

    I served some of my favorite pancakes (that I made ahead of time, and froze for quick meals) and prepared bowls of cereal so all they’d have to do was add milk! It was one of the easiest food-prepping tasks for a get-together yet!

    Fresh Juice Bar Brunch Party
    Fresh Juice Bar Brunch Party

    Brunch Drink:

    Quite possibly one of my favorite juice recipes YET, is Carrot-Apple juice. Garnished with a sprig of rosemary and an orange slice, it looked absolutely stunning on the fresh juice bar!

    Fresh Juice Carrot Apple Recipe YUM!!!

    Carrot & Apple Juice Recipe:

    Ingredients

    For a large batch of homemade fresh juice, (about 5 servings)

    8 small apples
    5 large carrots

    Directions:

    In a juicer, simply juice the apples and the carrots. Serve immediately.

    Pour 8 oz. of fresh carrot-apple juice in glass

    Fresh Juice Bar Carrot Apple Recipe YUM!!!

    Fresh Juice Bar Options:

    Make their own: With your fresh juice bar, you can really let your guests have fun, and have them pick out their own juicing ingredients, creating different combinations and flavors to try. Place fruit and vegetables on the table, in separate containers and pretty bowls; and a cute sign (think of sign like my “it’s so good to be home,” sign) that give the directions on how to use the juicer.

    Fresh Juice Bar Carrot Apple Recipe YUM!!!

    Buffet Style: For my juice bar, I wanted it more of a “buffet,” style, so they could walk right up, grab & go. No thinking involved.

    Fresh Juice Bar Carrot Apple Recipe YUM!!!

    More Food Bar Ideas for Parties

    If you love this idea, you may also enjoy:

    • Coffee bar ideas
    • Chocolate fountain ideas
    • Browse all food bar ideas

    BEST Leggings EVER + Red Buffalo Plaid

    December 11, 2016

    These are the BEST leggings ever. They aren't too light around the waist (aka less love-handles), and are fleece lined but not thick. HEAVEN!! Love this red buffalo plaid shirt too! fantabulosity

    BEST Leggings EVER + Red Buffalo Plaid: Without a doubt, this is my favorite Winter outfit this season. I didn’t know what I was missing until a friend recommended these leggings to me!

    These are the BEST leggings ever. They aren't too tight around the waist (aka less love-handles), and are fleece lined but not thick. HEAVEN!! Love this red buffalo plaid shirt too! fantabulosity

    You know that I NEVER recommend anything to you, that I TRULY don’t recommend, right?

    See my CURRENT favorite fashion finds, and shop my Instagram HERE!

    I hope you do know that, but I felt super compelled to tell you that again today because I’m getting ready to use a term that can be taken lightly. What term? “BEST.”

    BEST Leggings EVER + Red Buffalo Plaid

    Holy.Smokes. After doing Stitch Fix and Trunk Club for some time now, I can STILL even comfortably say that these tights are my favorite fashion find EVER. But the thing is, I didn’t get these leggings in a subscription box. I went shopping with my “personal stylist,” friend last month, and she literally told me,

    You HAVE to get these leggings. They’re the best you’ll ever find.

    These are the BEST leggings ever. They aren't too tight around the waist (aka less love-handles), and are fleece lined but not thick. HEAVEN!! Love this red buffalo plaid shirt too! fantabulosity

    Leggings (No Muffin-Top, No “See-Through,” No Adjusting)

    I’ll admit, I took what she said with a grain of salt, and even put them in the bottom of my closet and forgot they were in there for a few weeks. I mean, tights and leggings are all the same, right? Ummm… No. My leggings world has forever been changed.

    Muffin-Top

    The minute I put these on, I stood in front of my mirror… amazed. Where was my muffin-top? I always have a muffin-top when I wear tights or leggings. But not with these.

    See-Through

    Even talking to some of my friends, we’ve hesitated wearing leggings out in public because we were afraid you could see-through our leggings because of the thin fabric. Not with these.

    Adjusting

    Along with a muffin-top, I always assumed all leggings were constantly having to be pulled up over the “pooch,” and felt loose-fitting throughout the thigh. Not with these.

    The Best: They stay in place, are fleece-lined (but not thick), and flatter my waistline in a way that I haven’t seen before having my first kiddo.

    UPDATE: I have some bad news friends. Victoria Secret sold these, my favorite leggings, and they no longer carry them. WHY VS, WHY!?

    So what I’ve done, is found similar leggings online that I HOPE will be just as good. They’re fleece, have the wider band, and even better news… way cheaper than the Victoria Secret leggings. You can buy them HERE!

    These are the BEST leggings ever. They aren't too tight around the waist (aka less love-handles), and are fleece lined but not thick. HEAVEN!! Love this red buffalo plaid shirt too! fantabulosity

    Leggings // Buy similar HERE since Victoria Secret no longer carries this style.

    The vest is a staple in my closet that you’ve seen before in my Trunk Club Review – Try On Video. I kind of like it, a lot. It goes with a ton of outfits and is great to have for those chilly days that I don’t want to throw on a big coat.

    These are the BEST leggings ever. They aren't too tight around the waist (aka less love-handles), and are fleece lined but not thick. HEAVEN!! Love this red buffalo plaid shirt too! fantabulosity

    Cream Vest // But it HERE, although the pockets have changed a little, but I prefer the updated pocket-look!

    This shirt quickly became a favorite of mine too, simply because my eye is drawn to buffalo plaid this time of year. Heck, I styled a whole stinking party in buffalo plaid last year around the holidays. See that “Favorite Things Party” HERE.

    This red plaid flannel shirt is SOOO amazing on, but it’s showing sold out on H&M right now. BUT… I’ve found a similar red flannel button-up tops for you in case you’ve been looking for one too! You can see them on Amazon HERE!

    These are the BEST leggings ever. They aren't too tight around the waist (aka less love-handles), and are fleece lined but not thick. HEAVEN!! Love this red buffalo plaid shirt too! fantabulosity

    Similar Red Buffalo Plaid Shirts // Buy HERE

    These are the BEST leggings ever. They aren't too light around the waist (aka less love-handles), and are fleece lined but not thick. HEAVEN!! Love this red buffalo plaid shirt too! fantabulosity

    The BOOTS! I sooo love these Hunter Boots. Even if I never wore them again, I’d still be able to say that I’ve gotten my “money’s worth,” with these. They’re the new Hunter Boot design, with a sleek style and lighter than the original boot.

    When I pair them with the Hunter socks, my toes are so comfy cozy that I feel like never taking them off.

    These are the BEST leggings ever. They aren't too tight around the waist (aka less love-handles), and are fleece lined but not thick. HEAVEN!! Love this red buffalo plaid shirt too! fantabulosity

    Hunter Boots // Buy HERE  |   Hunter Socks // Buy HERE

    See my CURRENT favorite fashion finds, and shop my Instagram HERE!

    These are the BEST leggings ever. They aren't too tight around the waist (aka less love-handles), and are fleece lined but not thick. HEAVEN!! Love this red buffalo plaid shirt too! fantabulosity

    DIY Coffee Bar Ideas for the Kitchen & Entertaining

    December 10, 2016

    This is PERFECT for a small space! DIY Coffee Bar Ideas for the Kitchen!

    This post was created in partnership with Ninja Coffee Bar® System. I received complimentary products and compensation to facilitate my review, but all opinions within are my own.

    DIY Coffee Bar Ideas for the Kitchen: An easy set-up for a small coffee station in the kitchen, dining room, or any small space in your home. Keeping it simple, and cute!

    This is PERFECT for a small space! DIY Coffee Bar Ideas for the Kitchen!

    I’m slightly crushing on DIY coffee bar ideas all over Pinterest. Ok, ok, a LOT crushing on them. Ever since we moved in to our home a couple of years ago (have I mentioned that we are listing this one soon?? I know, we are absolutely CRAZY.) I’ve wanted a small designated space in our kitchen for a built-in coffee bar, for everyday coffee recipe creations and for entertaining.

    Not realizing this at the time of building, I didn’t really set aside a space for such a thing. But I did have a little extra space in the breakfast nook area for a small table, that I kept my eye out for at antique shops and flea markets. The day that I found the cutest little dark brown (yes, dark brown) table at a used furniture shop, I knew she had to be mine and that she was going to be my little coffee bar table. My right-hand gal Kate (who LOVES to refinish furniture), took the table under her wing and turned it in to exactly what I imagined.

    DIY Coffee Bar Ideas for the Kitchen & Entertaining

    This is PERFECT for a small space! DIY Coffee Bar Ideas for the Kitchen!

    Coffee Bar Ideas:

    No matter if you have a designated space or just a small space to squeeze in a few coffee bar items, I wanted to give you a few ideas of what you could do, to create a coffee bar in your home.

    1. Cute Table

    Think outside of the box when needing a place to store your coffee bar items. You don’t have to go big or go home when it comes to finding something cute and practical. Keep your eyes open for used furniture, or even look around your home for something that would serve as a great coffee bar table! You may be surprised at what you can find!

    This is PERFECT for a small space! DIY Coffee Bar Ideas for the Kitchen!

    2. Coffee Bar Decor:

    Whether it’s a small sign, a vase full of flowers, or something else that would fit the style of your home… adding a bit of decor to a coffee station can make it suddenly feel homey and “dressed up.” For our coffee bar station, I already had the “Eat Cake for Breakfast,” sign, and since I frequent the coffee bar in the morning around breakfast time… it was absolutely fitting.

    I found a cute croc to store the drink stirrers in, that also helped add a bit of a decor touch.

    The cupcakes?  Yeah, those are real. When entertaining, I LOVE having this coffee bar set up with fun snacks and bite-size foods for my guests.
    If you’re looking to add this type of look to your coffee bar too, but don’t always want real food sitting out, you’d be SURPRISED at the artificial food that you can find at craft stores these days! Artificial donuts, bagels, cupcakes, and cookies would look so stinking cute on a coffee bar table.

    This is PERFECT for a small space! DIY Coffee Bar Ideas for the Kitchen!

    3. Coffee Cups

    It’s always a great idea to have coffee cups ready to go at the coffee bar station. I’m a sucker for all-matching coffee cups like the white mugs that I have here. (But don’t get me wrong, I have a ton of mismatched random cups just like you, hiding away in my cupboard.)  When having guests over, take all of the guesswork out of how to “help themselves,” by making sure everything they would need is already sitting out and ready.

    This is PERFECT for a small space! DIY Coffee Bar Ideas for the Kitchen!

    4. Coffee System

    Then the most important aspect of the coffee bar… a coffee system. You all, I have fallen in absolute love with the Ninja Coffee Bar® System. I’ve had my eye on this guy for quite some time, and I finally have my hands on one. Its sleek appearance looks STUNNING on my coffee bar, and doesn’t take up a ton of space. It amazes me what all this thing can do, in such a compact space.

    This is PERFECT for a small space! DIY Coffee Bar Ideas for the Kitchen!

    When I gave a sneak peek on Facebook the other day of one of my first coffee’s that I made with this, I couldn’t believe the response from you all, about how bad that you’ve wanted one too.

    Coffee Bar Ideas

    A Few Details on the Ninja Coffee Bar® System:

    You all, the set up was so easy, the moment I pulled it out of the box. I was so intimidated at first, thinking that I’d have to put it all together, and I didn’t! It was ready to go, with a quick-start guide! 

    This is PERFECT for a small space! DIY Coffee Bar Ideas for the Kitchen!
    No guess-work:

    It has a “Ninja Smart™ Scoop,” with it, so I can measure out exactly how much coffee to brew, for the amount that I need to make, day to day.

    This is PERFECT for a small space! DIY Coffee Bar Ideas for the Kitchen!
    Big or Small Brew:

    I can make a 10-cup glass carafe on the mornings that I know my husband and I will be drinking more than one cup. Or, if it’s just me at home… I can brew one cup and call it a day!

    This is PERFECT for a small space! DIY Coffee Bar Ideas for the Kitchen!
    This is PERFECT for a small space! DIY Coffee Bar Ideas for the Kitchen!
    Frother:

    The system includes a built-in hot and cold frother, (I LOVE this feature), six brew sizes… and five brew types (including the Ninja-exclusive Cafe Forte brew, which amplifies the flavors of your favorite coffee. I didn’t even know how GOOD coffee could taste at home, until I used this feature. I kid you not.)

    This is PERFECT for a small space! DIY Coffee Bar Ideas for the Kitchen!
    This is PERFECT for a small space! DIY Coffee Bar Ideas for the Kitchen!
    Inner Barista:

    Then it also came with a recipe book that has customized recipes, of fun beverages to make and experiment with! I’ll admit, my inner barista totally slips out some days.

    This is PERFECT for a small space! DIY Coffee Bar Ideas for the Kitchen!

    Mmmm…. I have so much fun experimenting with different recipes. But my favorite so far? This one. A simple brew of coffee, frothed milk, topped with bits of toffee.

    This is PERFECT for a small space! DIY Coffee Bar Ideas for the Kitchen!
    Easy clean-up:

    It has a permanent filter, that I can just clean out when we’re done with coffee for the day, and easily get it ready for the next. No need for disposable filters.

    Eeeek! I couldn’t WAIT to share my new coffee bar with you all! I hope you love it as much as we do!

    DIY Chocolate Melts Gift Idea

    December 3, 2016

    DIY Beverage Chocolate Melts: Coffee or Hot Chocolate Toppers! Fantabulosity

    DIY Beverage Chocolate Melts: Coffee & Hot Chocolate Toppers… a delicious way to top your drink, or give as gifts for a sweet touch!

    DIY Beverage Chocolate Melts: Coffee or Hot Chocolate Toppers! Fantabulosity

    DIY Beverage Chocolate Melts

    When I found a silicone square ice cube tray the other day at Ikea, I wasn’t quite sure what I’d use it for, but I just knew that I had to have it.

    Then on my hour and a half drive home, I started brainstorming what I could put it to use for, and DIY Beverage Chocolate Melts came to mind! I had never heard of such a thing, nor would ever deny putting squares of milk or while chocolate in to my coffee or hot chocolate.

    DIY Beverage Chocolate Melts: Coffee or Hot Chocolate Toppers! Fantabulosity

    Explore the possibilities

    It’s actually kind of fun to explore what you have on hand, that would work in beverage chocolate melts. That’s kind of how I came up with this hot chocolate gift idea too!

    DIY Beverage Chocolate Melts: Coffee or Hot Chocolate Toppers! Fantabulosity

    How-To

    After determining what ingredients to mix in to your chocolate melts, sprinkle them in to the tray first. Then pour the melted chocolate on top of these, so the fun ingredients can be seen at the top when the chocolate hardens!

    We used almond bark, and chocolate chips, although my favorite is to use Ghirardelli chocolate chips or melts. Slowly melt the chips or almond bark in the microwave on 50% power, stirring every 30 seconds until fully melted.

    Pour the chocolate in to each cube, filling close to the rim. (However, you don’t have to fill it completely if you’d prefer a smaller “cube.”)

    Place the tray in the refrigerator until the chocolates harden. Carefully pop each square out, and enjoy or save for later!

    DIY Beverage Chocolate Melts: Coffee or Hot Chocolate Toppers! Fantabulosity

    Varieties

    Much like the toppings you can use on this hot cocoa dip recipe, these are so fun in these cocoa melts…

    • Sprinkles

    • Crushed peanuts

    • Toffee bits

    • Crushed peppermint

    • Mini Chocolate Chips

    DIY Beverage Chocolate Melts: Coffee or Hot Chocolate Toppers! Fantabulosity
    DIY Beverage Chocolate Melts: Coffee or Hot Chocolate Toppers! Fantabulosity
    DIY Beverage Chocolate Melts: Coffee or Hot Chocolate Toppers! Fantabulosity
    DIY Beverage Chocolate Melts: Coffee or Hot Chocolate Toppers! Fantabulosity

    When we made a large amount of these, I quickly realized that they would make WONDERFUL gifts for some of my coffee and hot chocolate loving friends.

    Coffee and Hot Chocolate Gift Idea

    Last year, I created a DIY Coffee Mug for my mom for Mother’s Day, and she absolutely loved it. So this year, I thought it would be fun to create a spin-off of that gift, for some of my gal pals, using the chocolate melts.

    All you need is a coffee mug, a clear treat bag, ribbon, and chocolate melts. Fill the treat bag with the chocolate melts, secure the bag with a ribbon, and place it in the coffee mug! You’re all set. Create a cute gift tag, and that may even kick it up a notch.

    DIY Beverage Chocolate Melts: Coffee or Hot Chocolate Toppers! Fantabulosity

    If you love quick and easy gift ideas, then you ABSOLUTELY have to check out everyone’s favorites here on the blog, like these:

    30th Birthday Gift Ideas for Him

    November 29, 2016

    30th birthday gift ideas for him

    30th Birthday Ideas for Him: A list of birthday gift ideas from men who were asked what they would like to receive for their 30th birthday!

    30th birthday ideas for him and gift ideas to make your gift giving easier! fantabulosity

    30th Birthday Ideas for Him

    Just a couple of years ago, I was right where you are…

    What do I get my husband for his birthday!?

    Before marriage it was,

    What do I get my boyfriend for his birthday?

    I totally get it. They can be SO hard to shop for, no matter what your relationship with them is.

    Well, I wanted to put an end to all of the guessing games when it comes to 30th birthday ideas for a husband, good friend or even a brother or family member!

    I polled a TON of men around the age of 30, to get to the bottom of it, and find out exactly what men really wanted for their 30th birthday. (Give/Take a few years if need be.)

    30th birthday gift ideas for him

    One of my favorite gift ideas for him is this “I think you’re Red Hot!” Valentine’s gift “basket.” See how I made it for my hubby here for Valentine’s Day, but could be for a birthday or a “just because” gift:

    Gift Idea for Him- I think you're red Hot Gift Basket Ideas

    For the Sports & Outdoorsman:

    • Golf equipment
    • Overnight trip to play at his favorite golf course with buddies. (Plan a trip with Expedia.)
    • Sporting event tickets (Baseball, Football, Hockey)
    • Fishing gear
    • Hunting equipment
    • CCW Class
    • Grill
    • Man-cave - Get him out of town, buy a tv or two and fix up a space just for him. When he comes back, surprise him with his friends already hanging out inside.

    For the Handyman:

    • Tools (Air tools)
    • Large tool chest
    • Tool box for truck
    • Paint Sprayer
    • LED Flashlight

    For the Musician:

    • Guitar
    • Drums
    • Tickets to a concert
    • Keyboard/Piano

    For the Professional:

    • Cigars
    • Necktie
    • Cologne
    • New pair of shoes
    • Bottle of bourbon with nice glasses (Shop decanters)

    For the Adventurer:

    • “Escape the Box” – Check your area to see if this is offered. He can take some friends, get locked in a room with a one hour timer, and have to find all the clues to get out before the hour’s up.
    • “Drive a Tank” – A place where he can drive a tank, and plow over cars, houses, and operate machines.
    • A Mexico vacation – See what I did for my husband’s 30th birthday, with all of the little surprises along the way!

    Surprise 30th Birthday https://fantabulosity.com

    For Any Man:

    • Favorite Cake (Cheesecake, Ice Cream Cake, or favorite flavor)
    • Money to spend on himself
    • Full body massage (Extra special from wife or girlfriend, but spa is nice too!)  If it will be from you, make sure you read up on the post I wrote, Preparing for a Romantic Weekend away with your Husband. You may just find a few tips for yourself in there!

    I so hope you found a few gift ideas for the man in your life! It was so nice hearing from men, what they’d actually want for a gift for their birthday. I was completely shocked at how many actually spilled the beans. But that’s good news for us! Woot!

    Hostess Bread Basket Gift Idea

    November 25, 2016

    Bread Basket Hostess Gift Idea: DIY and FREE Printable!! fantabulosity

    A Hostess Bread Basket Gift Idea is incredibly thoughtful, and something that the hostess can put out that evening to let guests enjoy, or even at a later date!

    Bread Basket Hostess Gift Idea: DIY and FREE Printable!! fantabulosity

    Hostess Bread Basket Gift Idea

    If you’ve dug in to the blog much at all, you may have seen the Sunshine Gift Basket, New Baby Gift Basket and the Relaxation Gift Basket that I created for a few people in my life. I absolutely adore building gift baskets, and thinking a little outside of the box when creating them.

    When we made the White Chocolate Spiced Pecans, and the Homemade Blackberry Butter the other day, I looked at the two and realized how cute a gift basket those two combined with a few other items would be.

    Even though this sympathy gift basket is typically for someone who has lost someone, I can’t help but think that it would also be a great gift as a hostess gift too!

    Bread Basket Hostess Gift Idea: DIY and FREE Printable!! fantabulosity

    How to Style a Bread Basket Gift

    • I chose a see-through basket for this gift, because I LOVE for the host or hostess to be able to see everything inside of it, right away if they want.
    • Take as many items as you can, and unpack them from any store bought packaging if possible.
    • Drape a dish-towel over the front of the basket, to add a “pop” of color or pattern to the gift. This also hides any items, and kind of acts as “tissue paper,” in a gift!
    • I like to use items inside the basket to give them a “lift,” so they tower over the rim of the basket. This gives it more of a “wow,” factor when handing it over. To do this, I inserted more dishtowels, and added those as part of the gift. You could vary easily use some sort of “fill,” if you don’t want to spend the money on additional hand/dish towels.
    • Adding small details to some of the items can make a gift-basket a little more personal. For instance, tying a sprig of thyme to the bread loaf using a cute ribbon, and then stamping a red heart that coordinated well with the “joy,” on the free printable gift tag around the homemade butter, adding details that were incredibly easy, but really added to the “look.”
    • If giving homemade butter or jam as part of the gift, you can print my free “Spread the Joy,” gift tags here!

    Free Printable

    Free "Spread the Joy" gift tags for a homemade butter or jam gift! Hostess Bread Basket Gift Idea
    Bread Basket Hostess Gift Idea: DIY and FREE Printable!! fantabulosity
    Bread Basket Hostess Gift Idea: DIY and FREE Printable!! fantabulosity

    Two different types of bread

    Also recently purchasing pretzel buns, I added those to the basket by placing a few inside a white muslin bag. I thought a second type of bread in the basket would be a fun touch, and the muslin bag just added to the cuteness. With a little heart stamp, we simple used red ink, and added the small detail.

    Bread Basket Hostess Gift Idea: DIY and FREE Printable!! fantabulosity

    I so hope you enjoy this gift idea! It was super easy to assemble, and can make your host/hostess smile!

    Vests are Best + Hunter Boots

    November 24, 2016

    J.Crew Vests paired with Hunter Boots. One of my FAVORITE outfits in the winter! fantabulosity.com

    With a vest in almost every color from J.Crew, I always try to find a place for one in my daily outfit selections during the Winter! Plus, the new style of Hunter Boots!

    J.Crew Vests paired with Hunter Boots. One of my FAVORITE outfits in the winter! fantabulosity.com

    Hunter Boot Train + Boot Socks

    I’m going to admit. I didn’t really want to jump on the Hunter Boot train last year. Why? Because every rubber boot that I’ve ever tried on seemed clunky and uncomfortable. But late one night, I found myself on Nordstrom’s website, and I found the NEW Original Refind Hunter Boots. They are a sleek, thinner, more flexible rubber with a slimmer silhouette. I absolutely fell in LOVE, and had to have them.

    As I threw the Hunter Boots in to my virtual shopping cart, the pretty little Original Tall Fleece Welly Boot Socks enticed me. I thought the cream fleece color would look gorge with the dark slate boots, and I am NOT disappointed! They’re not only cute, and add an extra look to an outfit, but you talk about COZY-COZY! I’m kind of looking forward to snow this year, just so I can wear the cozy little things and appreciate the warmth.

    Hunter Boots

    Buy the Hunter Boots HERE in Dark Slate // Buy the Hunter Tall Fleece Welly Boot Socks HERE in Cream Fleece

    The first ever????

    That same night, I branched out and bought my first scarf. YES, I said “first,” scarf. I never really had a desire for a scarf, because I thought they were all big and bulky which is something that I DON’T want on my top half. But when I saw that this BP. “Heritage Plaid” Infinity scarf was pretty thin, rather than bulky, and then found myself swooning over the colors, I had to have it. Now I find myself hoping it will go with every outfit, every day.
    PLUS, I’m a huge fan of BP. brand at Nordstrom, because it’s more affordable than most Nordstrom items…so it just made sense.

    J.Crew Vests paired with Hunter Boots. One of my FAVORITE outfits in the winter! fantabulosity.com

    Buy the scarf here!

    Vests are Best

    My husband and I adore vests. If we are getting dressed to go out somewhere, you can almost bet we will both be wearing a vest. I’m not sure what it is for him, but I feel all warm and cozy in them, and they make layering easy.
    Not to mention that I can throw one on, zip it up, and hide any extra fluff around the waist line from too much white Peppermint Mocha Crunch Cake.

    I love snagging a new colors of quilted puffer vests each season, and this bleached sand vest from J.Crew Factory was a steal! I’m crushing over it this season because it goes with a ton of outfits.

    J.Crew Vests paired with Hunter Boots. One of my FAVORITE outfits in the winter! fantabulosity.com

    Buy the vest HERE!

    Sweater Weather

    Although they no longer have the red sweater that I’m wearing here, they do have a similar one that’s even cashmere!! I know, I know… the word cashmere is scary because that usually means a price tag that’s over $100. But this sweater is under $100, and comes in a ton of different colors! Woot!

    Shop the sweaters HERE!

    This photo makes me giggle. I remember exactly what I was doing when she snapped this shot. I said, “This is so awkward Megan. Why can’t I just pose like those other fashion girls that are naturals? They just turn and pose and twirl so nice. I’m just a hot mess… look.” (And she snapped it.)

    J.Crew Vests paired with Hunter Boots. One of my FAVORITE outfits in the winter! fantabulosity.com

    Shop the look here:

    (Remember, the red sweater is similar, not the one I have on in the photos.)

    [show_shopthepost_widget id=”2148640″]

    Pumpkin White Chocolate Smores

    November 19, 2016

    The PUMPKIN White Chocolate Smores are INCREDIBLE!

    Pumpkin White Chocolate Smores: A twist on the original smore, that SCREAMS Fall, and can be made outdoors over a campfire or indoors in a microwave!

    The PUMPKIN White Chocolate Smores are INCREDIBLE!

    Pumpkin White Chocolate Smores

    Let me just start by saying, original smores are completely blissful. Yes? But the minute we added a white chocolate square, and a spoonful of pumpkin pie filling onto the top of a melted marshmallow, we kind of fell in love all over again.

    Ghirardelli White Chocolate

    Using the white chocolate squares was kind of amazing. Ok, a lot amazing.

    The PUMPKIN White Chocolate Smores are INCREDIBLE!

    Indoor or Outdoor?

    We live smack dab in the middle of town, so the day that we wanted to whip them up, we really didn’t have the kind of atmosphere to build a fire outside. So we did the next best thing, and made them indoor. I absolutely love making them inside, because no matter the weather… we can still enjoy smores for movie nights.

    The PUMPKIN White Chocolate Smores are INCREDIBLE!

    Toast those mallows!

    How did we toast the marshmallows then? You can snag one of those creme brulee torches here, and they seem to toast marshmallows just as well!

    The PUMPKIN White Chocolate Smores are INCREDIBLE!

    A little more warmth?

    Then once the marshmallow reaches its desired “toasty-ness,” we put ours in the microwave for just a few seconds to get it to melt a bit more. (But depending on how long you use the torch, you may not have to microwave it.)

    The PUMPKIN White Chocolate Smores are INCREDIBLE!

    The Pumpkin

    You can make your own pumpkin topping for these by adding your favorite spices, or you can simply grab a can of pumpkin pie filling, to make it super easy. Warm it up just before making the smores, and you’ve added a whole other level of deliciousness.
    Making the smores outside?  Just empty the can in to a cute little bowl, with a spoon for dipping, and put it right by the smores station!

    The PUMPKIN White Chocolate Smores are INCREDIBLE!
    The PUMPKIN White Chocolate Smores are INCREDIBLE!

    Top that marshmallow with a spoonful of pumpkin, and close the creation with the other graham cracker.

    The PUMPKIN White Chocolate Smores are INCREDIBLE!

    Its kind of heavenly, really. But sadly, I can’t stop there. My mind is already wandering, and dreaming up more topping ideas for smores. Perhaps, an apple pie smore? A lemon smore? Don’t get me started… I’ll never stop.

    The PUMPKIN White Chocolate Smores are INCREDIBLE!

    If you love white chocolate as much as we do, then you’ll also love this white chocolate crock pot candy!

    Or, if you’re craving everything pumpkin right now, you’ll want to try these pumpkin cheesecake bites too.

    Recipe

    The PUMPKIN White Chocolate Smores are INCREDIBLE!
    Print Pin
    5 from 1 vote

    Pumpkin White Chocolate Smores

    Try a delicious twist on the campfire nostalgic treat! White chocolate, gooey marshmallows, and pumpkin and sandwiched between two graham crackers!
    Course Dessert
    Cuisine American
    Prep Time 10 minutes minutes
    Cook Time 2 minutes minutes
    Total Time 12 minutes minutes
    Servings 4 servings
    Calories 179kcal
    Author Jessica Burgess

    Ingredients

    • 4 full sheets graham crackers
    • 4 squares white chocolate
    • 4 large marshmallows
    • 4 Tablespoons pumpkin pie filling

    Instructions

    • Top a graham cracker with a white chocolate square (we used Ghirardelli).
    • Add a toasted marshmallow.
    • Add a spoonful of warmed pumpkin pie filling.
    • Top with remaining graham cracker and enjoy!

    Nutrition

    Serving: 1s’more sandwich | Calories: 179kcal | Carbohydrates: 22g | Protein: 1g | Fat: 9g | Saturated Fat: 5g | Cholesterol: 6mg | Sodium: 64mg | Potassium: 103mg | Fiber: 1g | Sugar: 17g | Vitamin A: 1225IU | Vitamin C: 0.5mg | Calcium: 63mg | Iron: 0.2mg

    Peppermint Mocha Crunch Cake

    November 1, 2016

    Peppermint Mocha Crunch Cake Recipe, fantabulosity.com

     This shop has been compensated by Collective Bias, Inc. and its advertiser. All opinions are mine alone. #DelightfulMoments #CollectiveBias

    Peppermint Mocha Crunch Cake: Chocolate cake, LOADED with delectable frosting and crunchy peppermint candies, that’s perfect for beginners in the kitchen.

    Peppermint Mocha Crunch Cake Recipe, fantabulosity.com

    It’s time to finally admit, my heart has been set on dreaming of a white Christmas, for some time now. It seems as if stores are starting earlier, the songs on my radio stations are sneaking it in, and my Pinterest feed is slowly overflowing with holiday cheer!

    So I decided it was time to make a holiday-inspired cake, full of peppermint flavor. (But if you’re looking for a peppermint-flavored dessert, and want a no-bake version, you’ll love this no-bake peppermint pie!)

    Peppermint Mocha Crunch Cake

    We all know that I’m more of a “simply homemade,” kinda gal, right? So it’s no surprise when I wanted to use a cake mix for this, instead of a recipe from scratch. But no worries, if you’re more of a “from scratch,” kinda baker… you can do that too! We made mini chocolate cakes from scratch, that you’ll love to check out!

    We even used a chocolate cake mix in our Ding Dong Cake, and that one is absolutely delicious too!

    Peppermint Mocha Crunch Cake Recipe, fantabulosity.com

    Full recipe will be below, but I wanted to walk you through the process with a few photos in case you’re more of a visual type of reader!

    Cake Tutorial:

    • Start with mixing, and baking the chocolate cake mix according to package directions, for two 8-in. round pans.

    Peppermint Mocha Crunch Cake Recipe, fantabulosity.com

    • While the cake is baking, break peppermint candies up into little pieces. We simply put the unwrapped candies in a plastic zip-top bag and beat them with a rolling pin. Set aside. (This is a fantastic job for the little ones in your kitchen, for a super fun baking activity.)

    Peppermint Mocha Crunch Cake Recipe, fantabulosity.com

    • When the peppermint candies are broken and ready, and while the cake is still baking, it’s a great time to mix together the frosting/filling. (Frosting recipe below.)

    Peppermint Mocha Crunch Cake Recipe, fantabulosity.com

    • When the cake is finished baking, allow to fully cool on a wire baking rack. It’s then time to pipe on the frosting and the filling.

    • Start with spreading the frosting on top of one round cake. Sprinkle some of the peppermint candies on top of this layer of frosting.

    Peppermint Mocha Crunch Cake Recipe, fantabulosity.com

    • Place the other round cake on top, and using a piping bag with a large star tip, pipe the frosting on top of the cake, until the cake is completely covered.

    Peppermint Mocha Crunch Cake Recipe, fantabulosity.com
    Peppermint Mocha Crunch Cake Recipe, fantabulosity.com
    Peppermint Mocha Crunch Cake Recipe, fantabulosity.com

    • Taking some of the peppermint candies, place them into the sides of the cake where the middle is filled with frosting.

    Peppermint Mocha Crunch Cake Recipe, fantabulosity.com

    • Then sprinkle the top of the cake with additional broken peppermint candies.

    Peppermint Mocha Crunch Cake Recipe, fantabulosity.com
    Peppermint Mocha Crunch Cake Recipe, fantabulosity.com
    Peppermint Mocha Crunch Cake Recipe, fantabulosity.com

    We MAY or may not have waited a good 2 minutes before slicing and digging into this cake, to taste test. Trust me when I say it is mouth-watering goodness.

    Peppermint Mocha Crunch Cake Recipe, fantabulosity.com

    I so hope you enjoy this Peppermint Mocha Crunch Cake! Let me just say… my youngest little guy (who’s 3), and all the way up to my 70 year old grandpa… LOVED this cake. It will definitely be a staple in our home this holiday season!

    🍰 More Cake Recipes

    If you love chocolate cake recipes, you’ll also love this Milky Way Cake!

    Recipe

    Peppermint Mocha Crunch Cake
    Print Pin
    5 from 1 vote

    Peppermint Mocha Crunch Cake

    Moist chocolate cake with a rich peppermint buttercream, this cake recipe is perfect for the holidays!
    Course Dessert
    Cuisine American
    Prep Time 30 minutes minutes
    Cook Time 20 minutes minutes
    Total Time 50 minutes minutes
    Servings 10 servings
    Calories 552kcal
    Author Jessica Burgess

    Ingredients

    Cake:

    • 1 box chocolate cake mix cooked according to package EXCEPT: replace the amount of water needed with International Delight® Peppermint Mocha Coffee Creamer.

    Frosting:

    • 1 cup shortening
    • 4 Tablespoons Peppermint coffee creamer
    • 4 cups powdered sugar
    • 1 teaspoons clear butter flavoring
    • 1 cup semi-crushed peppermint candies
    • ½ teaspoon clear peppermint flavoring optional

    Instructions

    Cake:

    • Divide prepared cake batter into 2 greased, 8-inch round cake pans.
    • Bake the cake according to the box directions, except replacing water required for mix with Peppermint Mocha Coffee Creamer.

    Frosting:

    • While cake is baking, and cooling, prepare frosting/filling.
    • With the mixer, mix together shortening, creamer, butter flavoring, and peppermint flavoring if desired.
    • Slowly, one cup at a time, mix in powdered sugar, until smooth.

    Assemble:

    • When cake has completely cooled, frost one cake with the frosting, and sprinkle crushed peppermint candies on top.
    • Place the second layer of cake on top.
    • Arrange peppermint candies into the middle filling.
    • Frost the top of the cake, using a piping bag/large star tip like shown in photos.
    • Sprinkle remaining peppermint candies over the top of the cake.

    Nutrition

    Serving: 1slice | Calories: 552kcal | Carbohydrates: 79g | Protein: 2g | Fat: 27g | Saturated Fat: 6g | Sodium: 358mg | Potassium: 142mg | Fiber: 1g | Sugar: 63g | Calcium: 65mg | Iron: 2mg

    Sympathy Gift Basket Idea

    October 14, 2016

    This is so smart! Sending necessities to those who've recently lost someone, so they don't have to worry about having things on hand for guests. Sympathy Gift Basket Idea for bereavement, grieving, funeral, and condolence.

    Sympathy Gift Basket Idea: Sending necessities to those who’ve recently lost someone, so they don’t have to worry about having things on hand for guests. Sympathy Gift Basket Idea for bereavement, grieving, funeral,  and condolence.

    Sympathy Gift Baskets: This is so smart! Sending necessities to those who've recently lost someone, so they don't have to worry about having things on hand for guests. Sympathy Gift Basket Idea for bereavement, grieving, funeral, and condolence.

    I’ll never forget when Karen, a sweet, sweet friend of ours, sent over a gift basket FULL of necessities, when we tragically lost my husband’s father. During that time of grief, condolence, and incredibly busy time, the last thing we were thinking about, was heading to the store to stock up on paper goods.

    Instead, we were spending time with those that we love, and greeting out of town guests. We were insanely blessed with fabulous comfort food, flowers, and other sympathy and remembrance gifts. But with all of the food, and guests in my in-laws home, we found a major need for paper goods, and everyday necessities. That was… until our friend Karen came over. She had a basket overflowing with everything we needed, to get back the next few days.

    It was from that moment on, that I knew, when someone was going through a tragic change in their life, I would create what our friend Karen created that day. A sympathy gift basket.

    Sympathy Gift Basket Idea

    This is so smart! Sending necessities to those who've recently lost someone, so they don't have to worry about having things on hand for guests. Sympathy Gift Basket Idea for bereavement, grieving, funeral, and condolence.

    If you’re looking for a grieving gift basket idea, although it may not have the incredible appearance of beautiful flowers, I assure you, this gift will provide a feeling of relief for those in need.

    Sympathy Gift Baskets – Content Ideas:

    There are no “right,” or “wrong,” items for this gift basket, but just keep in mind when you’re shopping around, to look for things that will come in handy for those that will be spending a lot of time at home; eating, resting, hosting, etc.
    Also keep in mind that the family may not be at home when you drop off the gift. So staying away from perishable items is ideal, in case you need to leave the gift basket on the doorstep.

    Consider these suggestions:

    • Facial Tissues
    • Disposable Silverware
    • Paper Plates
    • Trash Bags
    • Zip-top Bags
    • Paper Towels
    • Toilet Paper
    • Aluminum Foil
    • Plastic Wrap
    • Sweet note/card

    How to Send This to Someone Far Away…

    I recently had a reader leave a comment about this gift idea, saying they wanted to send a sympathy gift basket to someone who lives far away. What she did, was ordered everything she wanted to include, from Amazon Pantry, and had it shipped to them that way. I thought that was an amazing idea!! Thank you so much for offering this brilliant idea! Shop items like this in Amazon Pantry HERE !

    This is so smart! Sending necessities to those who've recently lost someone, so they don't have to worry about having things on hand for guests. Sympathy Gift Basket Idea for bereavement, grieving, funeral, and condolence.

    When I created this gift basket for a friend, I loved how the recipient could use the basket for something else later if need be. But you could easily use a gift bag instead.

    If you are planning to create a gift basket, keep in mind my favorite suggestions that I told you when I created the “Box of Sunshine Gift Idea,” for making a gift basket look more appealing.

    Gift Giving:

    Not Home: If they’re not home when you deliver, simply place the basket in a place (out of weather), that you suspect they’ll see it upon arrival. (Keep in mind, that THEY have a lot of things on their mind, so texting/calling them just to tell them you’ve dropped a gift off, may be more bothersome than simply thinking outside of the box, and placing it in a safe location where they don’t have to “work,” to find it. Besides, you want them to find it/use it, as soon as possible because the food and guests start arriving almost immediately.)  Don’t forget a sweet card/note explaining how you hope the contents of the gift helps make their next few days a little easier, without having to worry about everyday items.

    Home: If they are home when you arrive, simple explain to them how you hope the gift basket will make the next few days easier with out of town guests, and an abundance of food that will more than likely be arriving. If you have a close relationship, you may even consider putting away the items that you brought, to help ease the load a little more.

    Sympathy Gift Ideas: This is so smart! Sending necessities to those who've recently lost someone, so they don't have to worry about having things on hand for guests. Sympathy Gift Basket Idea for bereavement, grieving, funeral, and condolence.

    Although food and flowers are extremely thoughtful, and SO appreciated during a time of loss, you may consider this type of sympathy gift, instead of what you can almost count on a lot of others bringing to them.

    A Small Gift Idea:

    If you’re looking to do something a bit smaller, yet BIG with thoughtfulness, this lunch box gift is something you could do as a small gesture, when a friend may not even want to think about eating.

    This is so smart! Sending necessities to those who've recently lost someone, so they don't have to worry about having things on hand for guests. Sympathy Gift Basket Idea for bereavement, grieving, funeral, and condolence.

    Fish Finger Tacos

    October 1, 2016

    Cilantro Avocado + Hummus Fish Tacos

    Fish Finger Tacos: These breaded fish tacos are made using cheese, coleslaw mix, and a delicious dressing! Feel free to use your favorite breaded fish, like this fried catfish, instead of fish fingers too!

    Maybe even consider putting a spin on them with this fried tacos recipe!

    Cilantro Avocado + Hummus Fish Tacos

    We had a little frozen (breaded) fish leftover from a previous dinner, and a few odds and ends like tortillas, shredded cheese, cabbage shreds, hummus, and a fun dressing.

    However, we LOVE making a lot of tilapia in the air fryer and this panko-crusted cod, so we can eat leftovers with these tacos, too!

    Cilantro Avocado + Hummus Fish Tacos

    I so hope you enjoy this version of fish tacos, and get a little experimental in the kitchen. Remember, with these… you don’t have to follow it to a “T!” Branch out, and try something new, with what you have on hand! Maybe even try these ingredients with these baked crispy chicken tacos too!

    Cilantro Avocado + Hummus Fish Tacos

    Next time, I’d love to try this same recipe with some shrimp that we have on hand, for sure.

    Serve alongside of chips and salsa, and this will be a meal that you’ll love for the ease and convenience! Besides… who doesn’t love tacos?

    Recipe

    Cilantro Avocado + Hummus Fish Tacos
    Print Pin
    5 from 1 vote

    Fish Finger Tacos

    Fish Finger Tacos: These breaded fish tacos are made using cheese, coleslaw mix and a delicious dressing! Feel free to use your favorite breaded fish instead of fish fingers too!
    Course Main Course
    Cuisine American
    Prep Time 15 minutes minutes
    Cook Time 20 minutes minutes
    Total Time 35 minutes minutes
    Servings 4 tacos
    Calories 289kcal
    Author Jessica Burgess

    Ingredients

    • 4 tortillas
    • 12 pieces breaded fish fingers cooked (or preferred style of fish)
    • 4 Tablespoons hummus any flavor
    • 4 Tablespoons shredded cheese
    • 2 cups coleslaw We LOVE this KFC coleslaw recipe
    • ½ cup cilantro-avocado dressing I used Bolthouse Farms dressing, found in the cold section of the grocery store.

    Instructions

    • First, mix together the coleslaw shreds with the cilantro-avocado dressing. Set aside.
    • If using frozen fish, cook according to package directions.
    • Cut up the fish into small pieces. Set aside.
    • Using a tablespoon of hummus for each, spread the hummus down the middle of each tortilla.
    • Top with fish, shredded cheese, and coleslaw. Serve.

    Nutrition

    Serving: 1taco | Calories: 289kcal | Carbohydrates: 27g | Protein: 7g | Fat: 17g | Saturated Fat: 4g | Cholesterol: 20mg | Sodium: 580mg | Potassium: 148mg | Fiber: 2g | Sugar: 8g | Vitamin A: 155IU | Vitamin C: 12.8mg | Calcium: 130mg | Iron: 1.6mg

    Asian Chicken Lettuce Wraps

    September 18, 2016

    Asian chicken lettuce wraps - quick weeknight meal Fantabulosity

    Asian Chicken Lettuce Wraps: A weeknight meal for those nights you stay in, but feel like take-out! A gourmet-inspired dish, for beginner chefs!
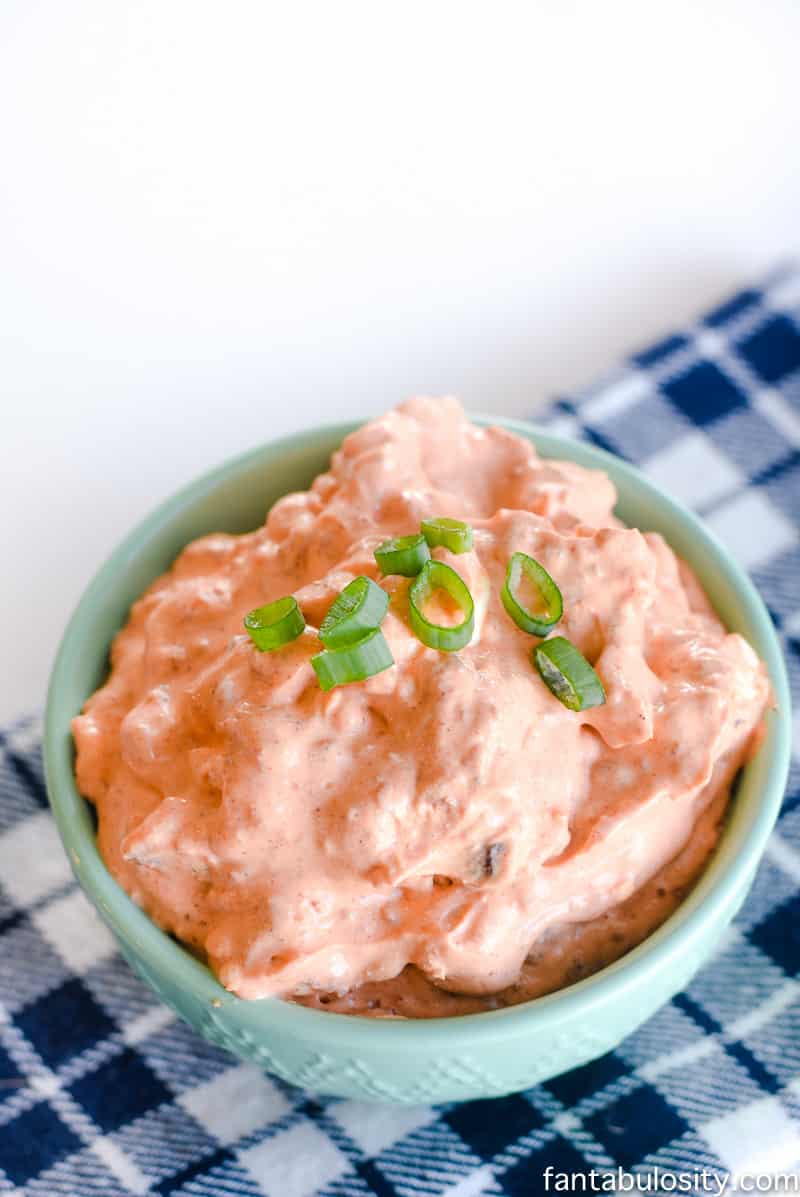
    If you love wrap recipes, then you’ll also love these chicken fajita wraps for an easy dinner recipe.

    Asian chicken lettuce wraps - quick weeknight meal Fantabulosity

    Why Asian Chicken Lettuce Wraps

    With an early start to planning dinner one day, I decided that I would give these wraps a try. The original recipe was created for a slow cooker, but most days I’m not that on top of my game, and I’m realizing at 4:00 that I never planned anything for dinner.

    So my own little “stove-top” Asian chicken lettuce wrap recipe, was created.

    Asian chicken lettuce wraps - quick weeknight meal Fantabulosity

    I rarely cook with ground chicken, so when I saw it in the cast iron, it felt a little odd. I’m used to seeing dark ground beef sautéing away. So the white-meat “look,” took a few minutes to get used to, but quickly stole my heart when the dish was complete. I also use ground chicken in this easy chicken meatloaf recipe!

    Ingredients for this Recipe

    See full recipe card below for ingredients and instructions!

    What you’ll need for this dish:

    • 2 pounds ground chicken
    • 3 Tablespoons minced garlic
    • 1 red bell pepper cored and finely chopped
    • ½ cup finely chopped yellow onion
    • ½ cup hoisin sauce
    • 2 Tablespoons soy sauce
    • salt and pepper to taste
    • 1 8-ounce can sliced water chestnuts drained and rinsed
    • 1-½ cups cooked white rice (or try this wild rice recipe!)
    • 3 green onions sliced
    • 1-½ teaspoons sesame oil
    • 1 package butter lettuce

    The ingredients are similar to my Asian sloppy joe recipe if you want to make those later too.

    One-Pot Dish

    I literally ate it RIGHT out of the pan, when it was complete. My husband was running late for dinner, and I wasn’t waiting. (It’s ok… we made that agreement early on in our marriage. Me + Hangry = Not something he wants to come home to.)

    Asian chicken lettuce wraps - quick weeknight meal Fantabulosity

    I decided to use butter lettuce from the store, and I’m SUPER happy with that decision. I usually buy “leaf” lettuce for my salads but decided to give the butter lettuce a try, and so glad that I did. It was perfect for small little servings, and has a natural curve to it, locking the Asian chicken inside a lot better than leaf lettuce.

    Recipe

    Asian chicken lettuce wraps - quick weeknight meal Fantabulosity
    Print Pin
    5 from 2 votes

    Asian Chicken Lettuce Wraps

    These lettuce wraps are super easy to whip up and are a great low carb dinner option!
    Course Main Course
    Cuisine Asian
    Prep Time 15 minutes minutes
    Cook Time 10 minutes minutes
    Total Time 25 minutes minutes
    Servings 6 servings
    Calories 309kcal
    Author Jessica Burgess

    Ingredients

    • 2 pounds ground chicken
    • 3 Tablespoons minced garlic
    • 1 red bell pepper cored and finely chopped
    • ½ cup finely chopped yellow onion
    • ½ cup hoisin sauce
    • 2 Tablespoons soy sauce
    • salt and pepper to taste
    • 1 8-ounce can sliced water chestnuts drained and rinsed
    • 1-½ cups cooked white rice
    • 3 green onions sliced
    • 1-½ teaspoons sesame oil
    • 1 package butter lettuce

    Instructions

    • Cook the ground chicken and garlic, until juices run clear.
    • Add remaining ingredients, (except butter lettuce) and let cook through for 5 minutes, or so. Just long enough to let the flavors mesh together.
    • To Serve: Scoop a couple of tablespoons into each lettuce leaf and serve.
    • Or eat straight out of the pan like I did. 😉

    Nutrition

    Serving: 1serving | Calories: 309kcal | Carbohydrates: 18g | Protein: 28g | Fat: 13g | Saturated Fat: 3g | Cholesterol: 130mg | Sodium: 799mg | Potassium: 923mg | Fiber: 1g | Sugar: 7g | Vitamin A: 680IU | Vitamin C: 28.7mg | Calcium: 31mg | Iron: 1.9mg

    • « Go to Previous Page
    • Page 1
    • Interim pages omitted …
    • Page 22
    • Page 23
    • Page 24
    • Page 25
    • Page 26
    • Go to Next Page »

    Primary Sidebar

    Jessica Burgess standing in kitchen holding a hummingbird cake.

    Hi, I'm Jessica! - Owner and Creator of the blog and brand, Fantabulosity.

    I’m here to help you make easy comfort food and nostalgic recipes, using simple ingredients, that everyone will love.

    More about me →

    Potluck Recipes

    • A slice of strawberry jello cake, topped with a strawberry slice, sitting on a round plate.
      Strawberry Jello Cake (Easy, Moist Strawberry Cake)
    • Crack green beans on wooden spoon.
      Crack Green Beans
    • Old fashioned potluck cake recipes collage.
      Old-Fashioned Cakes That Still Show Up at Every Potluck
    • Collage of potluck desserts.
      Easy Potluck Desserts (Simple Recipes That Always Get Asked For)
    • Cold Pasta Salad Recipes Collage.
      Cold Pasta Salad Recipes
    • Chicken Casserole recipes image collage.
      20 Chicken Casserole Recipes

    Popular Recipes

    • bread pudding in baking dish
      Bread Pudding Recipe: Easy Old Fashioned Recipe (With Video!)
    • Burger baked in the oven, steamed in aluminum foil, and placed on white plate.
      Burgers in the Oven
    • two tuna salad sandwiches stacked on top of each other
      The BEST Tuna Salad Recipe
    • Sliced banana bread on white platter
      Best Banana Bread
    • Strawberry brownies on white marble cutting board.
      Strawberry Brownies Recipe
    • Cheeseburger Sliders made with Hawaiian Rolls, stacked on top of one another.
      Cheeseburger Sliders

    Footer

    ↑ back to top

    Featured In

    About

    • About Jessica
    • Contact
    • Collaborate
    • Dinner System

    Easy Recipes

    • All Recipes
    • Vintage Recipes
    • Dinner Recipes
    • Desserts

    How to Cook

    • Oven-Baked
    • Stove-Top
    • No Bake
    • Cooking Basics

    Privacy Policy |Accessibility Copyright © 2026 Fantabulosity | Terms & Conditions | FTC
    All recipes, photos, and content are copyrighted and may not be reproduced, republished, or distributed without written permission.

    Rate This Recipe

    Your vote:


    A rating is required
    A name is required
    An email is required