• Skip to primary navigation
  • Skip to main content
  • Skip to primary sidebar

Fantabulosity logo

  • All Recipes
  • Vintage Recipes
  • Holiday
  • Dinner Theme System
  • About
  • Navigation Menu: Social Icons

    • Facebook
    • Instagram
    • Pinterest
    • TikTok
    • YouTube
menu icon
go to homepage
  • Recipes
  • Desserts
  • Dinners
  • Gatherings
  • Holidays
  • About Jessica
    • Facebook
    • Instagram
    • Pinterest
    • TikTok
    • YouTube
  • search icon
    Homepage link
    • Recipes
    • Desserts
    • Dinners
    • Gatherings
    • Holidays
    • About Jessica
    • Facebook
    • Instagram
    • Pinterest
    • TikTok
    • YouTube
  • ×
    Home » Recipes

    Crock Pot Boneless Turkey Breast and Gravy

    Crock Pot Boneless Turkey Breast and Gravy

    November 17, 2025

    Crock Pot Boneless Turkey Breast on plate with vegetables.

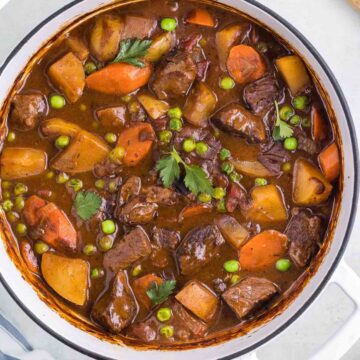
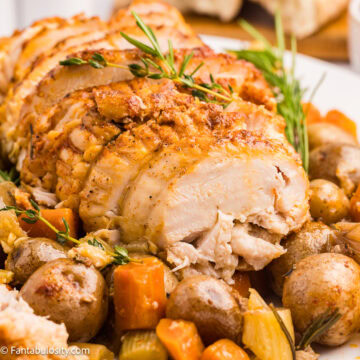
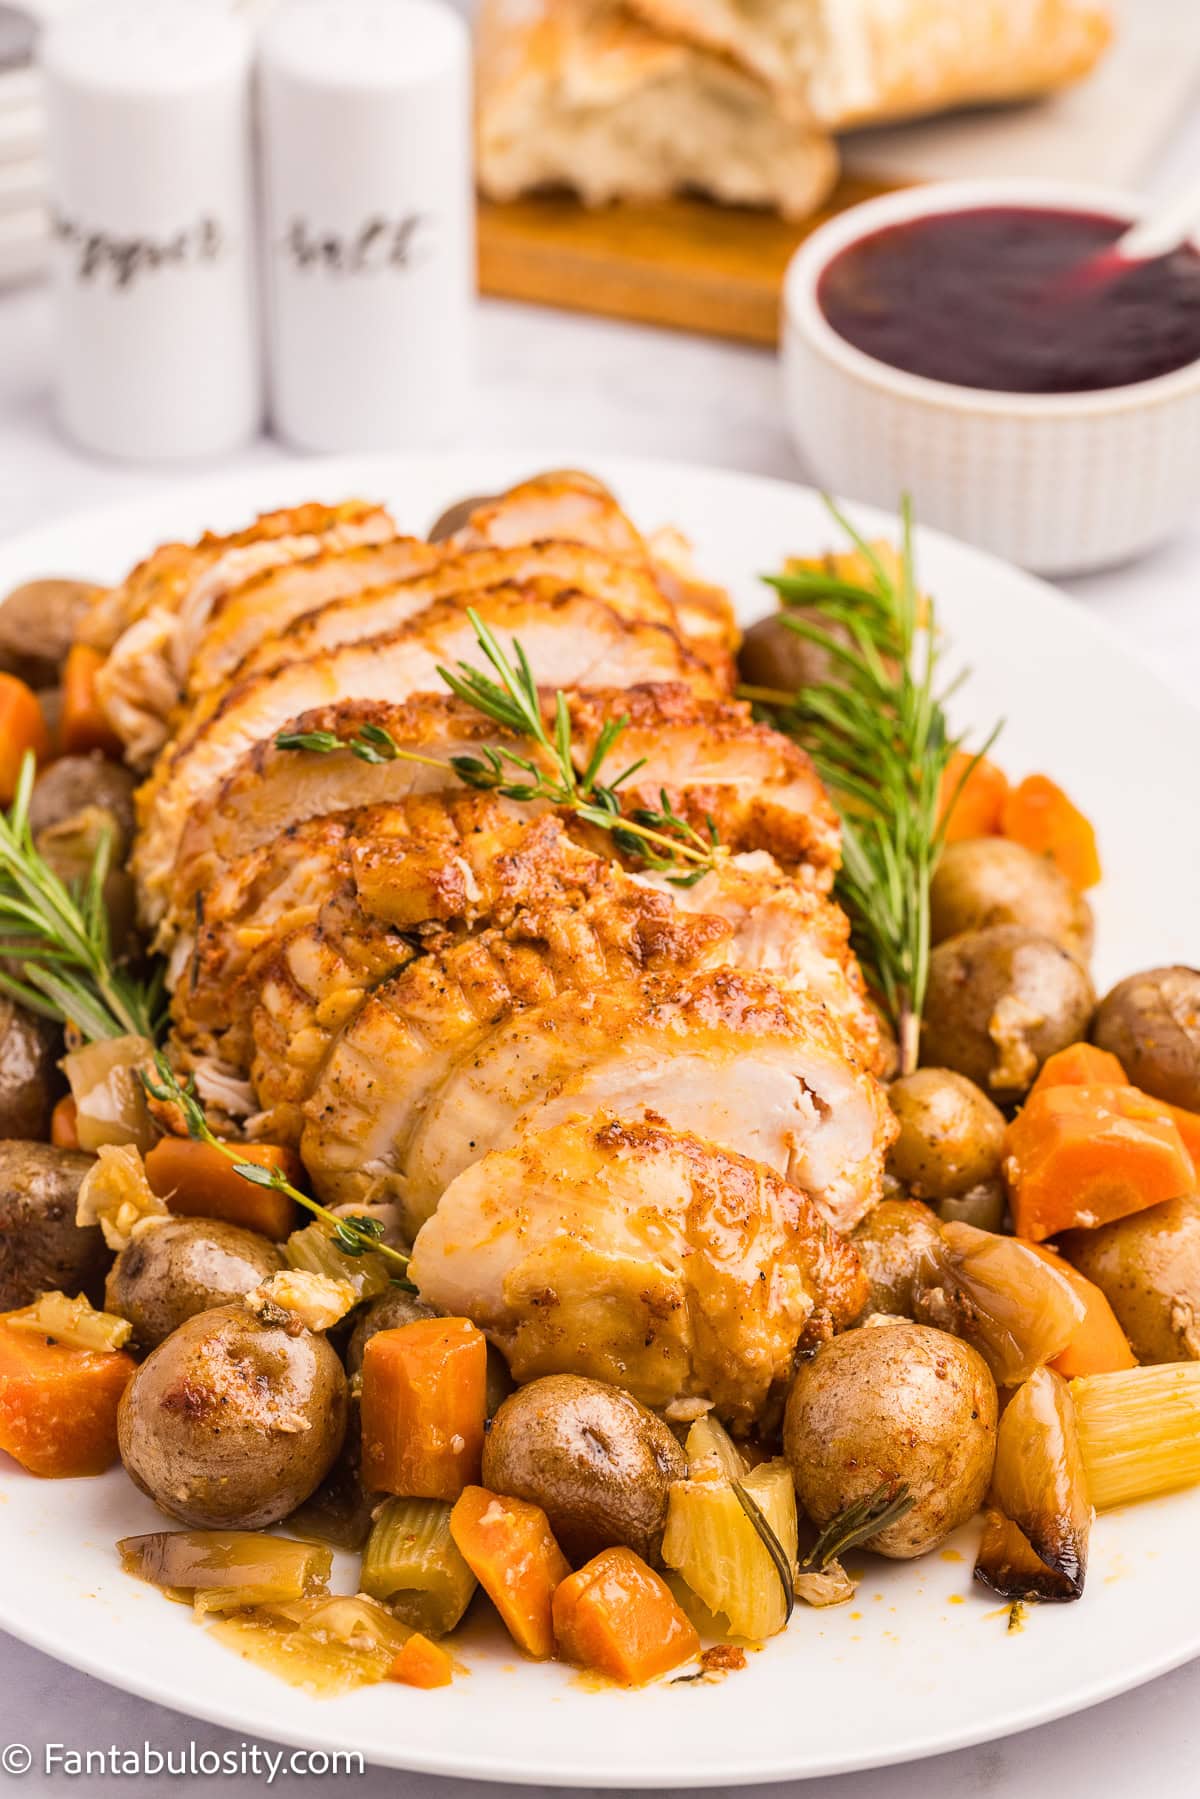
    This crock pot boneless turkey breast gives you tender, juicy meat and a rich gravy made from the cooking juices. Everything cooks together in one pot, so it's not only delicious but incredibly easy. It's perfect for smaller holiday gatherings or weeknight comfort food.

    Sliced, cooked turkey breast on platter with vegetables.

    Why You'll Love This Recipe

    • Hands-off slow cooker recipe with minimal prep
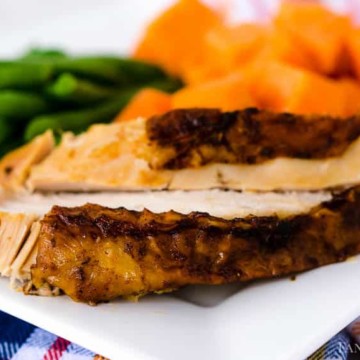
    • Moist, flavorful turkey breast every time
    • Homemade gravy that tastes like it simmered all day
    • A complete meal thanks to the vegetables that cook underneath
    • Ideal for small Thanksgiving dinners or Sunday suppers

    Ingredients (with Notes)

    Ingredients for crock pot boneless turkey breast sitting on counter.
    • Yellow baby potatoes
      These hold their shape well and make this recipe a true dump-and-go option. You can substitute Yukon gold, red potatoes, or peeled russets.
    • Carrots
      Baby carrots or chopped carrots both work. They add a hint of sweetness to the cooking liquid.
    • Celery
      Adds subtle flavor. Leave it out if it's not your thing.
    • Yellow onion
      Gives depth and savory richness. Red onion or shallots make great substitutes.
    • Garlic
      Smashing the cloves infuses the broth with gentle garlic flavor.
    • Chicken broth
      Keeps everything moist and becomes the base of your gravy. Stock or bone broth works too.
    • Fresh rosemary and thyme
      Flavor the turkey and the cooking liquid beautifully. Use dried herbs if needed.
    • Boneless skinless turkey breast
      A three-pound roast fits perfectly in most slow cookers. If your roast has netting, leave it on while cooking.
    • Olive oil
      Helps the seasoning stick and adds moisture.
    • Sea salt, black pepper, garlic powder, onion powder, smoked paprika
      A simple but flavorful seasoning blend that gives the turkey beautiful color and a hint of smokiness.
    • Cornstarch and chicken broth
      Used to thicken the gravy. Flour can be substituted.

    Instructions

    To the bowl of your slow cooker, add the potatoes, carrots, celery, onion, garlic, 1 cup of chicken broth, and the rosemary and thyme. Set aside.

    Vegetables in crock pot.

    Prepare the turkey:
    Pat the turkey breast dry with paper towels. If yours includes netting, keep it on. Drizzle the turkey with olive oil and rub it to coat.

    Turkey breast patted dry and oiled.

    In a small bowl, combine salt, pepper, garlic powder, onion powder, and smoked paprika. Sprinkle the seasoning mixture over the turkey and rub it in so the breast is well coated.

    Boneless turkey breast seasoned and ready for the crock pot.

    Place the turkey on top of the vegetables in the slow cooker. Cover and cook on low for 4 to 6 hours, or until the internal temperature reaches 165°F. Cooking on high isn't recommended because it can dry out the meat.

    Seasoned turkey breast and vegetables in crock pot.

    Once it reaches temperature, transfer the turkey and vegetables to a platter. Cover with foil and let it rest for 15 minutes.
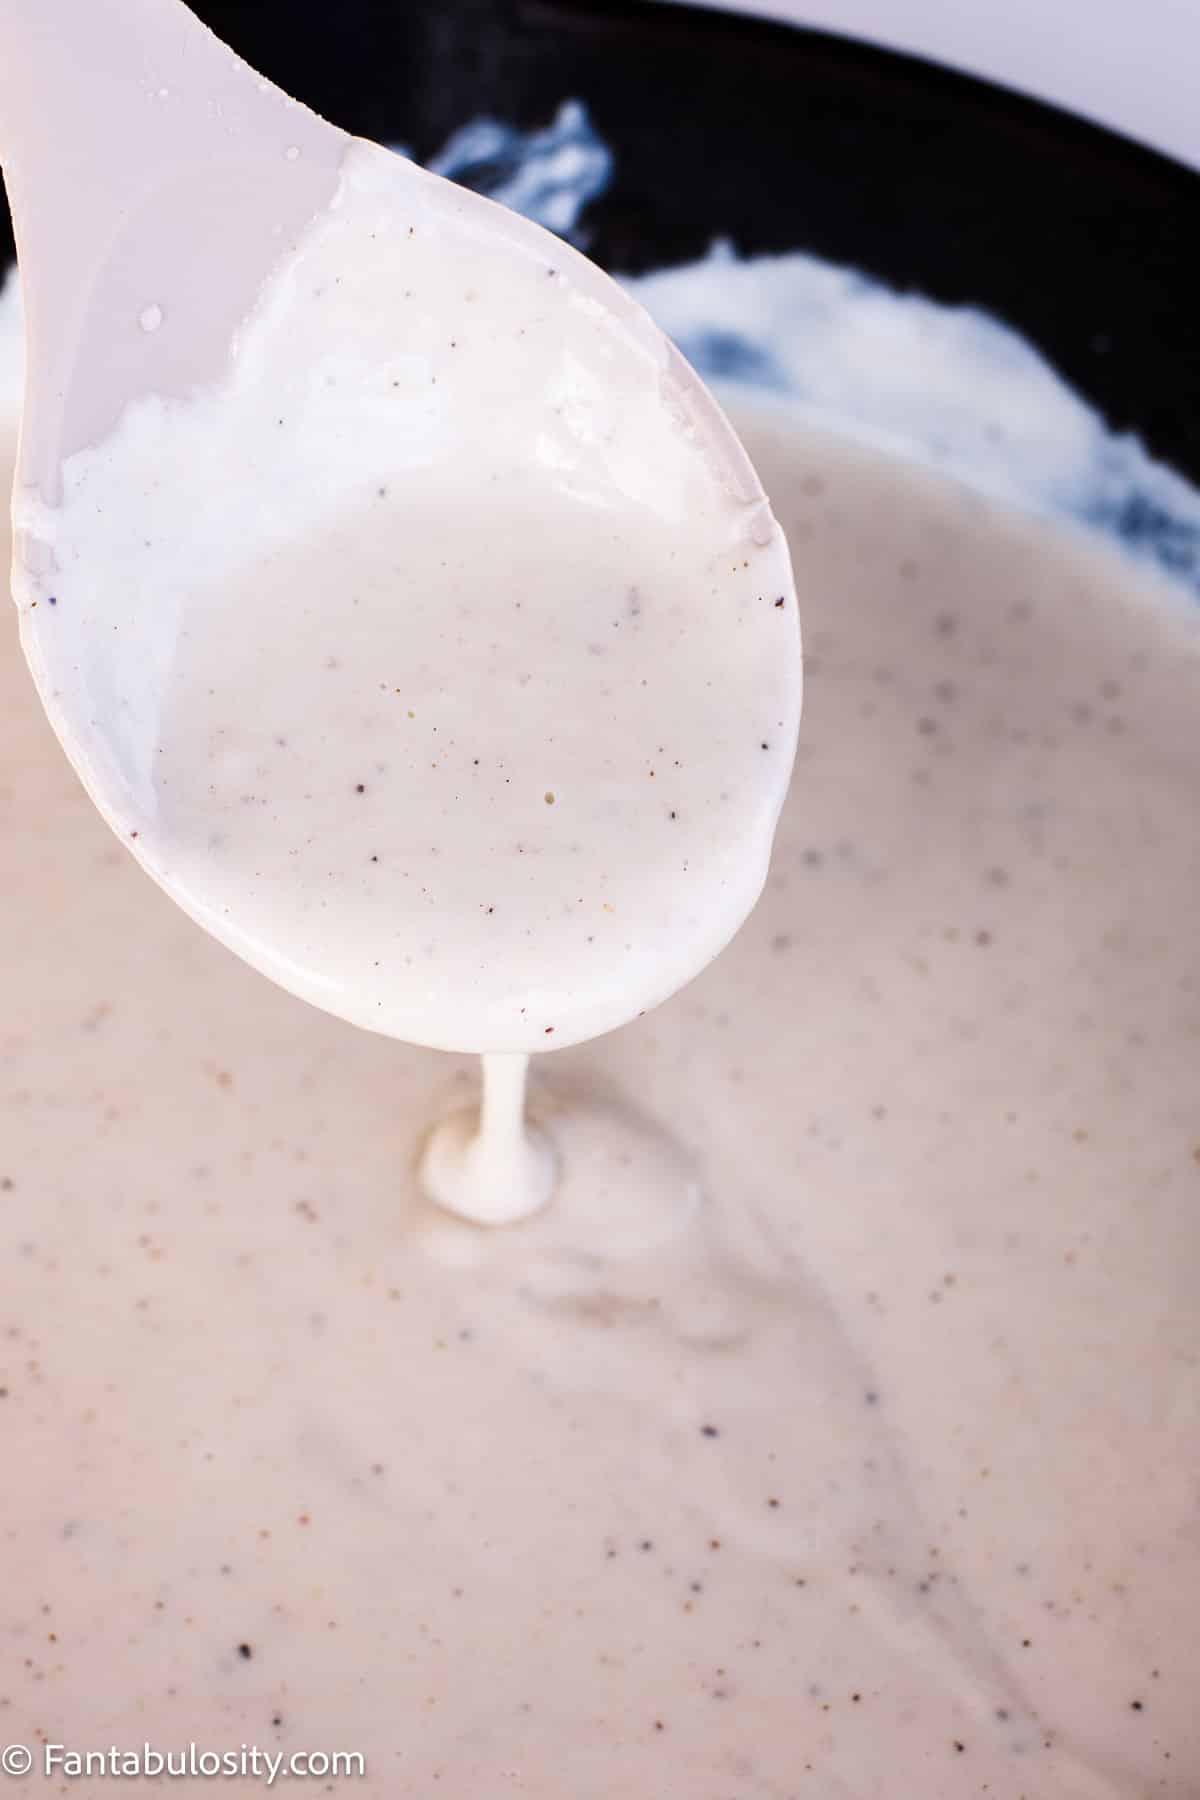
    Cooked boneless turkey breast in slow cooker with vegetables.

    Make the gravy:
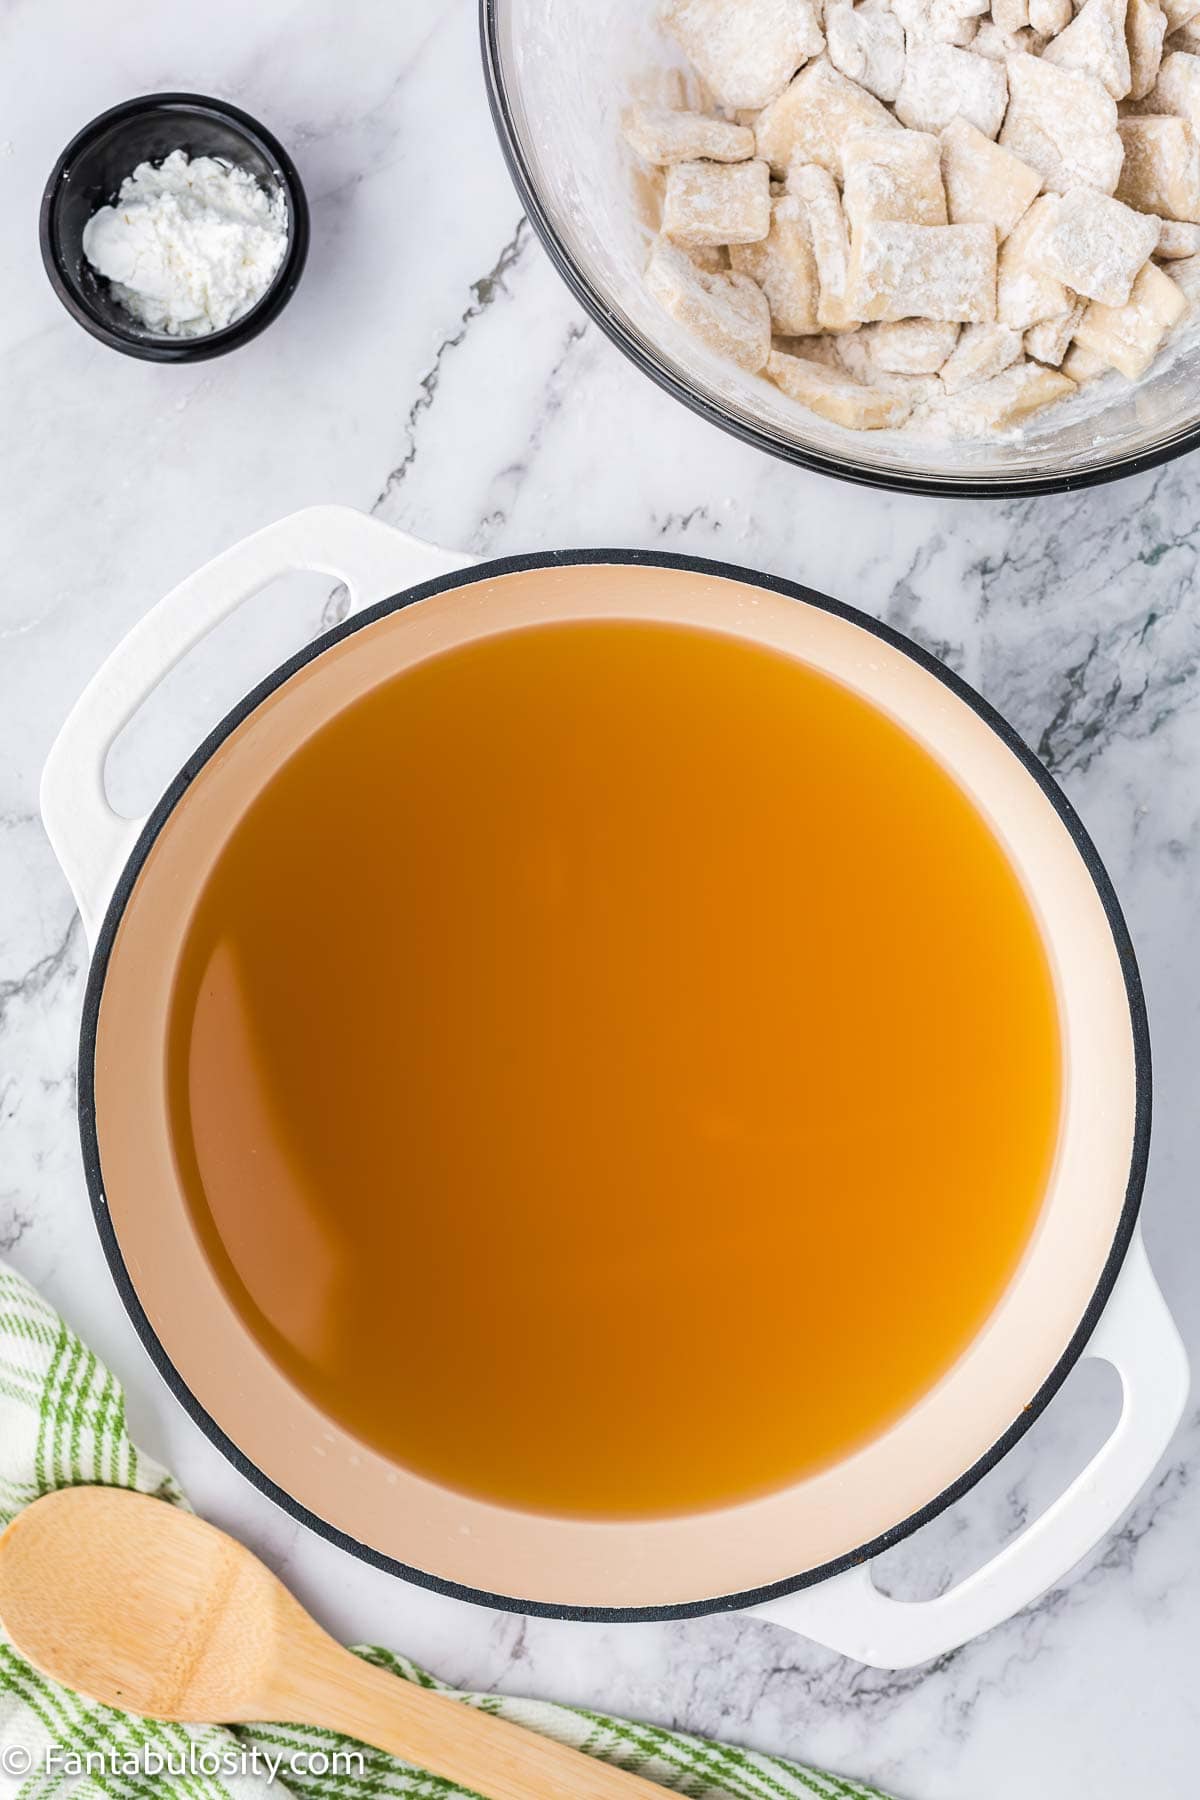
    In a small bowl, whisk together the cornstarch and ¼ cup of chicken broth to create a slurry. Strain the cooking liquid through a fine mesh strainer into a saucepan. Stir in the slurry, set over medium heat, and allow it to thicken. Taste and adjust seasoning if needed.

    Gravy being spooned over piece of turkey breast.

    Transfer the gravy to a gravy boat and serve.

    Tips & Notes

    • Keep the netting on the turkey breast while cooking so it holds its shape.
    • Smoked paprika adds a warm, subtle depth of flavor.
    • The vegetables turn out tender and flavorful, soaking up all that savory broth.
    • Don't skip the gravy. It comes together quickly and tastes incredible.

    FAQs

    How long should I cook a boneless turkey breast in the crock pot?

    Cook on low for 4 to 5 hours, or until the internal temperature reaches 165°F. Cooking on high may dry it out.

    Can I use a frozen turkey breast?

    Yes, but it must be completely thawed before cooking for safe, even results.

    Do I need to sear the turkey first?

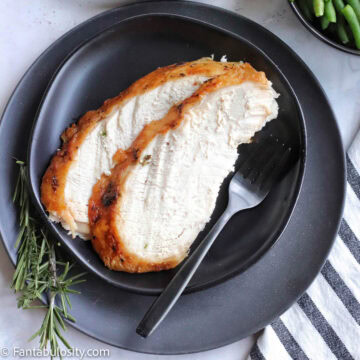
    No, it's not necessary. If you want golden color, you can broil the turkey for a few minutes after slow cooking.

    Do I have to add the vegetables?

    No, but they make this a complete meal. If you skip them, still include the broth, onion, garlic, and herbs to help flavor the turkey and give you liquid for the gravy.

    Storage & Freezing

    Store leftovers in an airtight container in the refrigerator for up to 4 days. Freeze for up to 3 months if needed. When reheating, add a splash of broth to keep the turkey moist.

    Serving Suggestions

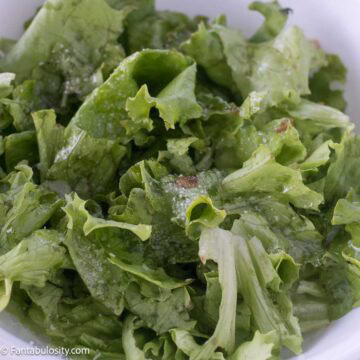
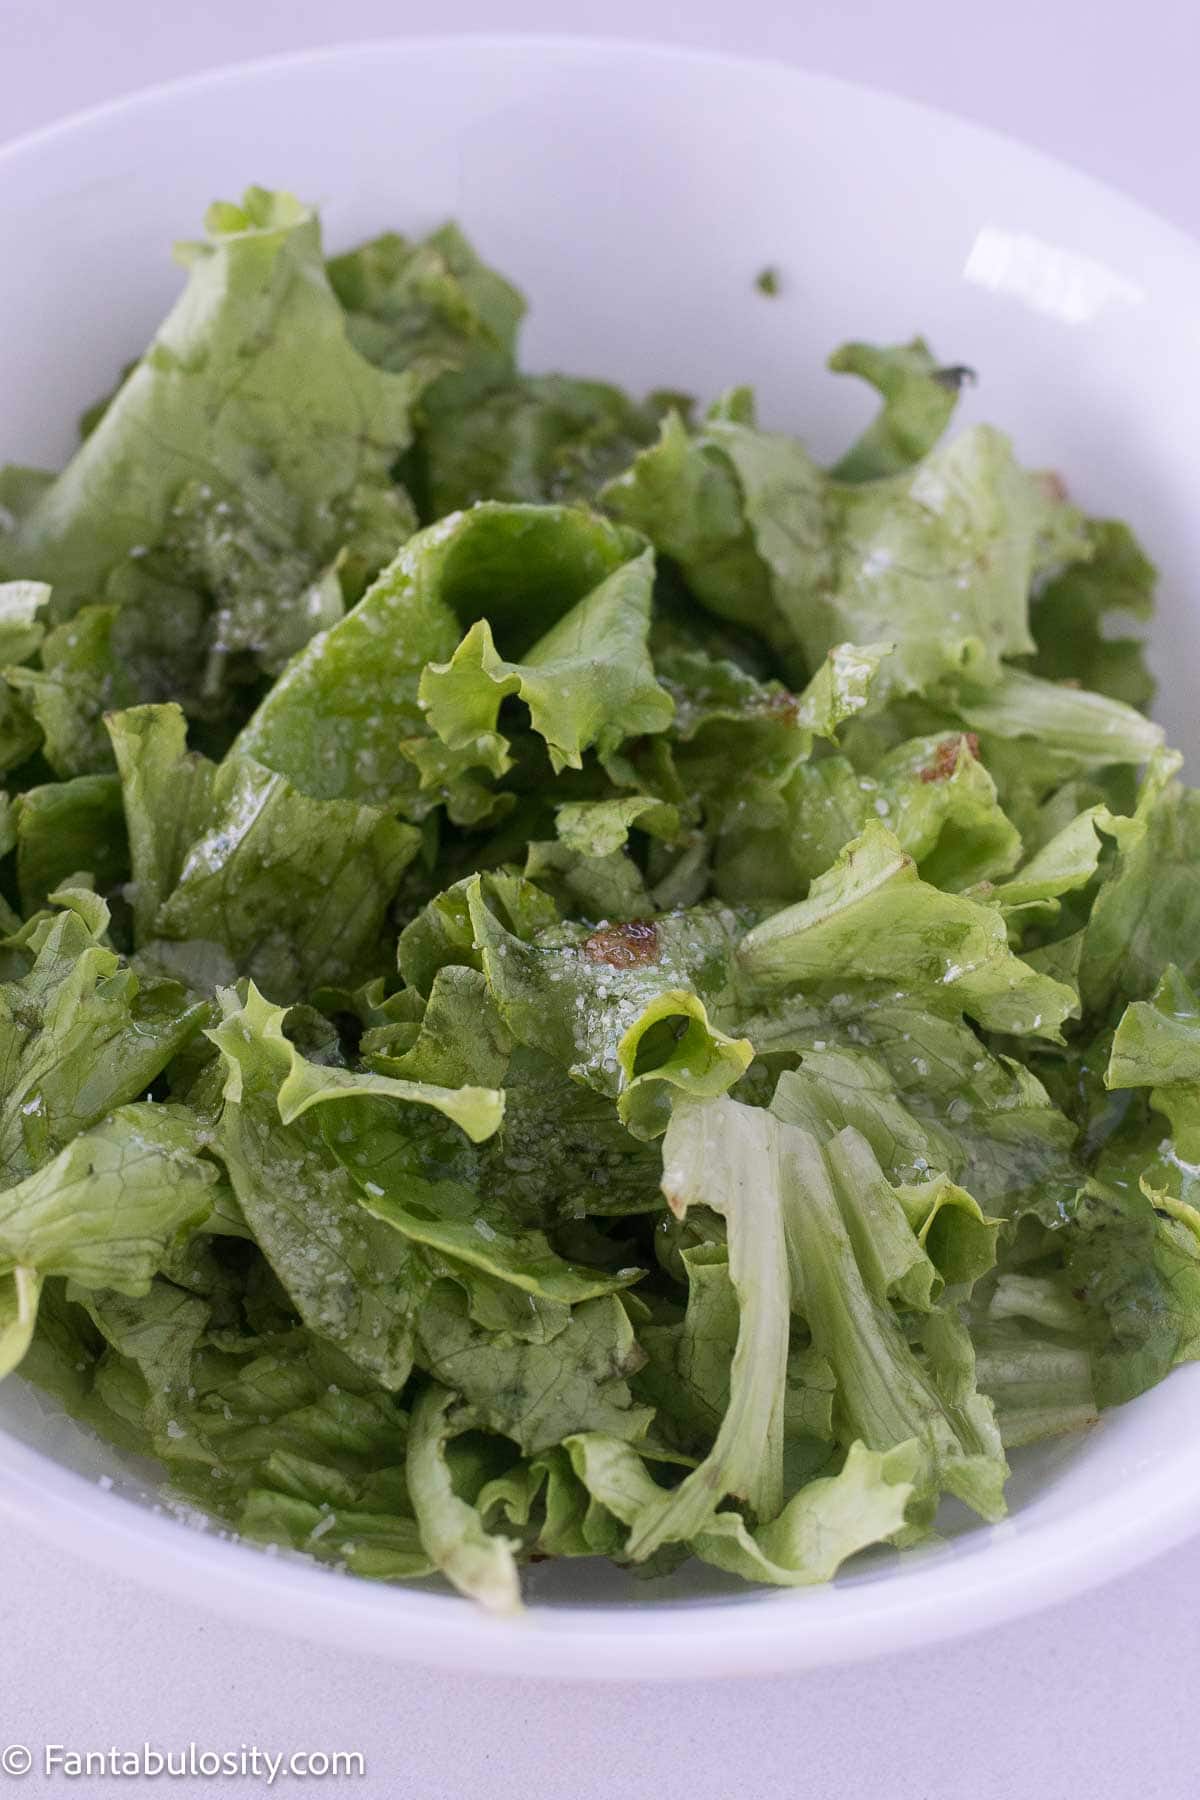
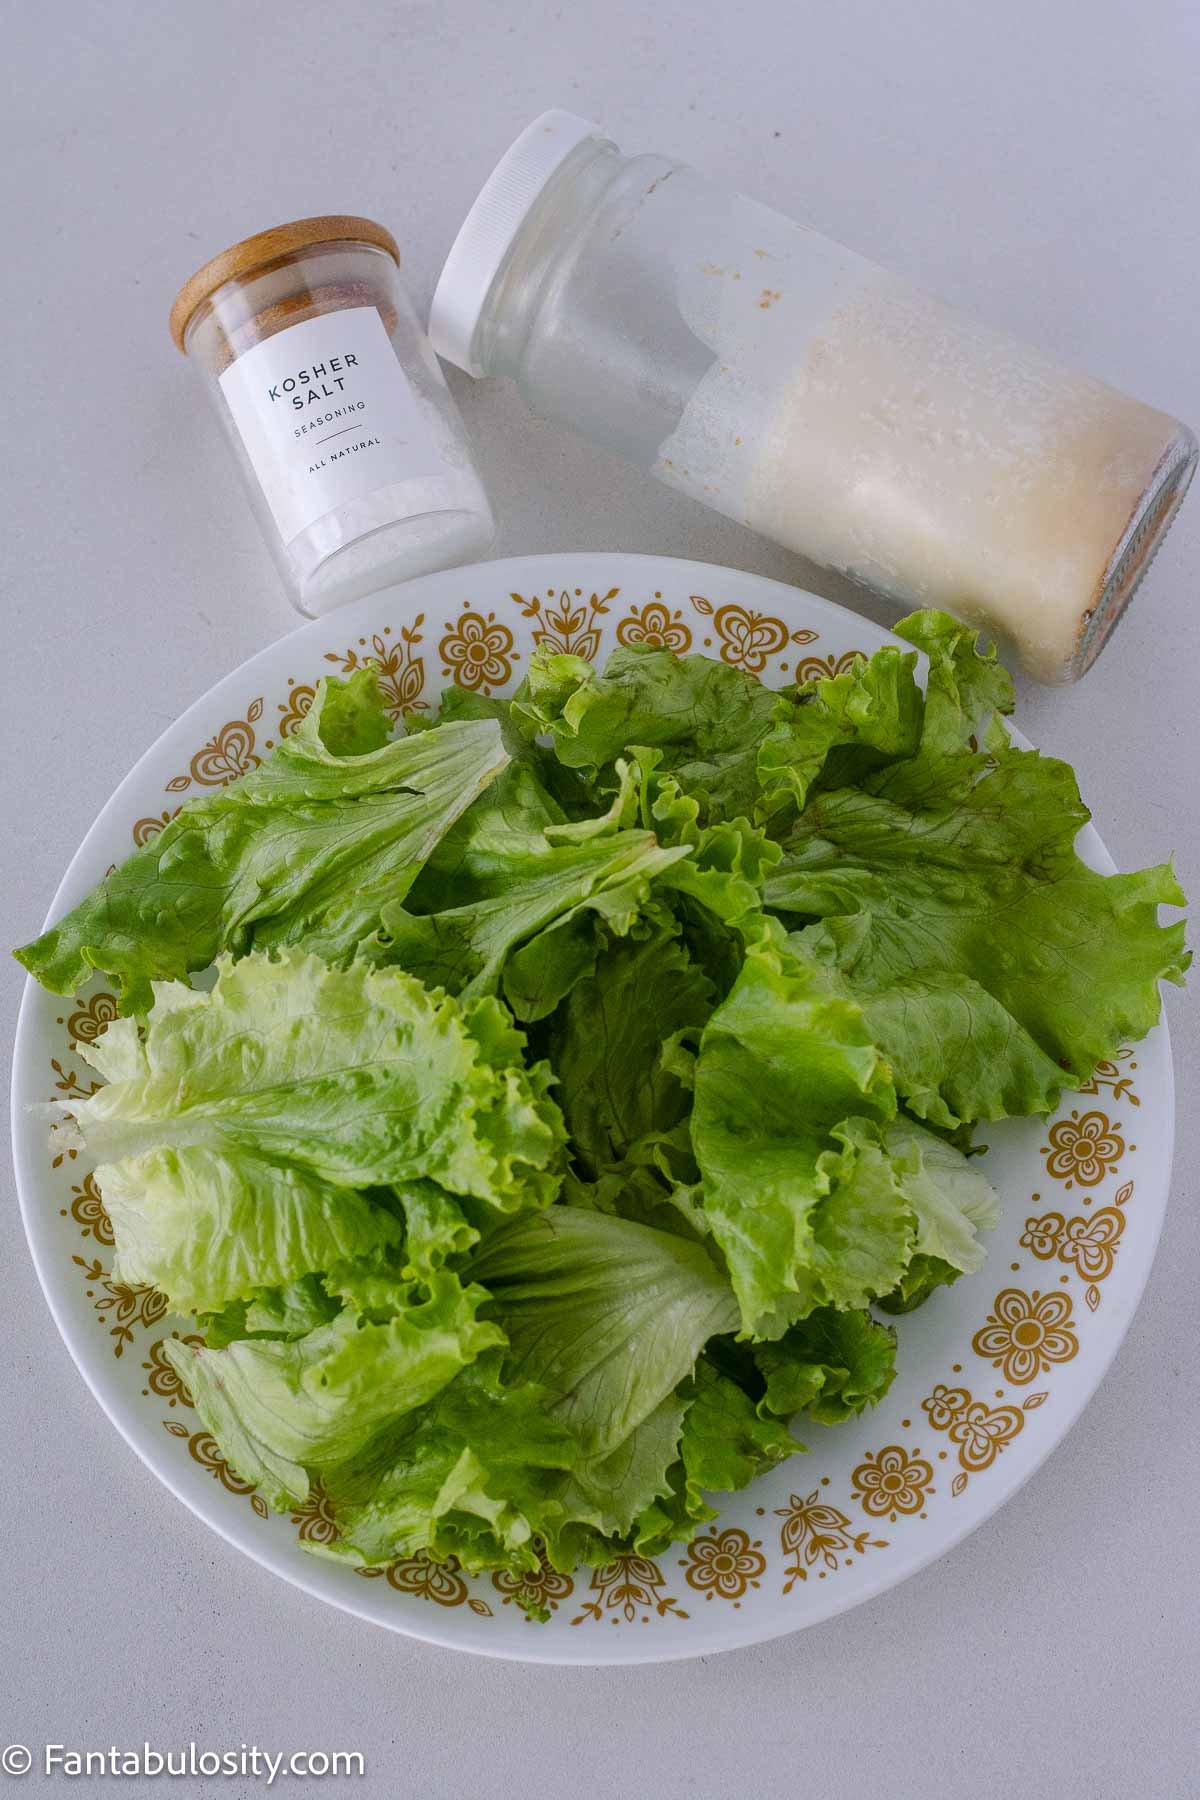
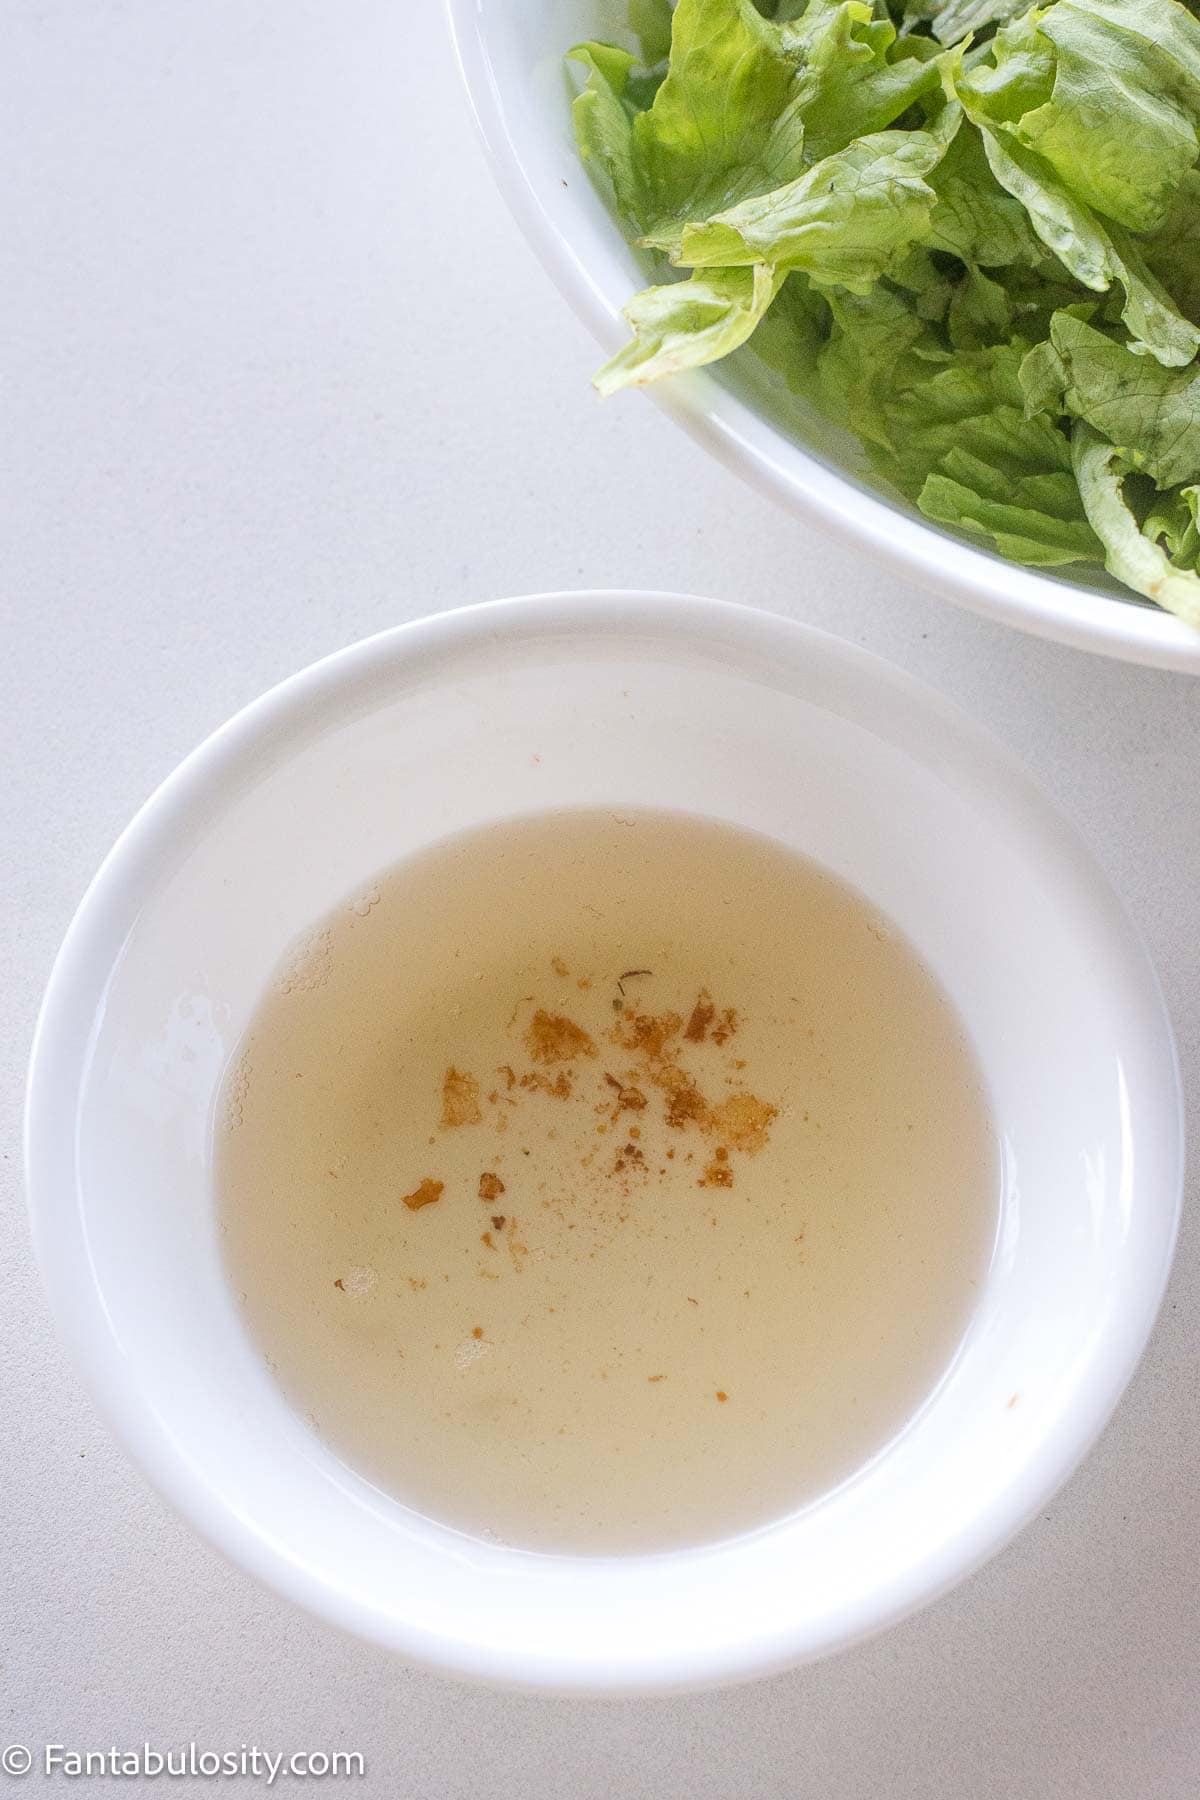
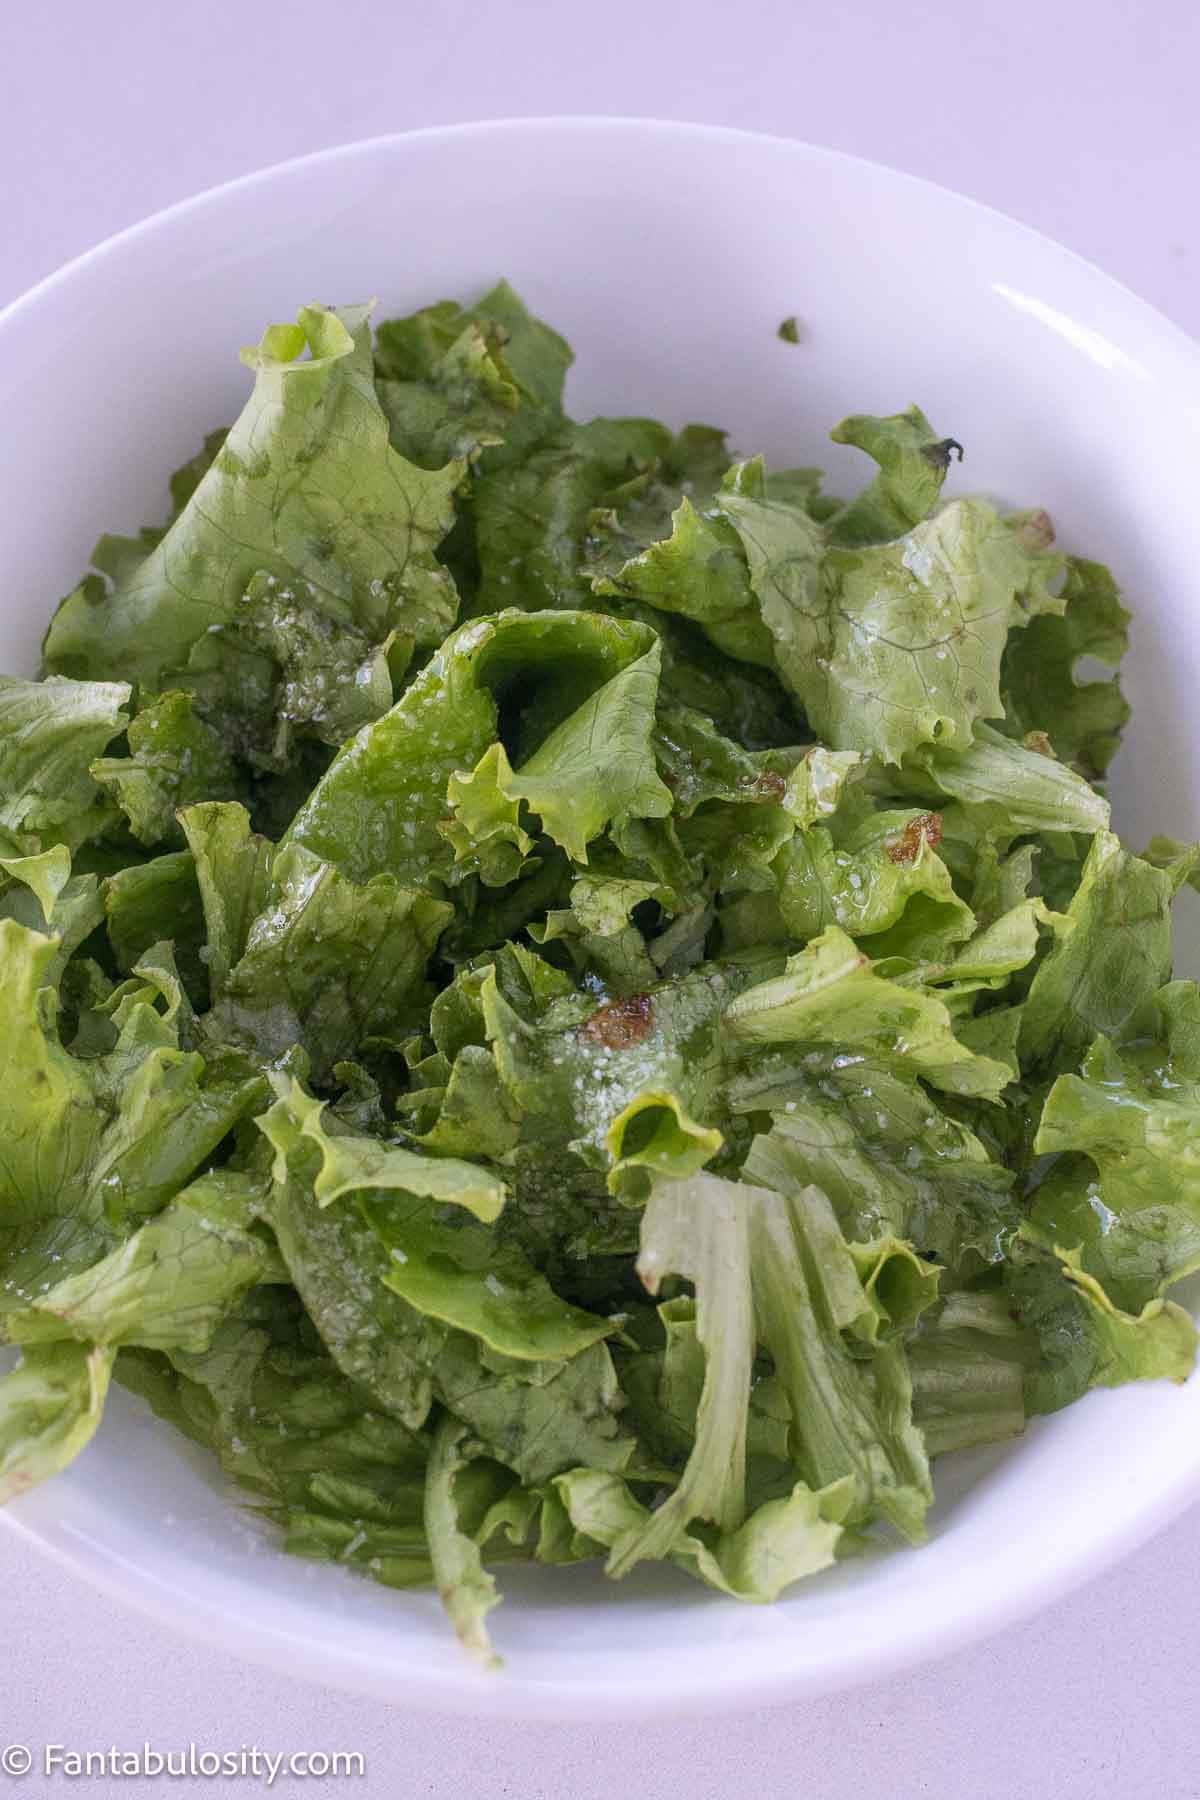
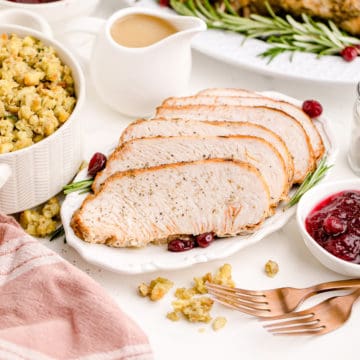
    Serve with a simple green salad, homemade yeast rolls, old-fashioned stuffing, or cranberry sauce for a complete mini Thanksgiving dinner. It also pairs well with roasted vegetables, mashed potatoes, or a classic green bean casserole.

    More Turkey Recipes

    • sliced Instant Pot turkey breast on a white plate with side dishes surrounding
      Instant Pot Turkey Breast
    • How to bake a turkey
      Creole Turkey
    • Baked turkey burger on bun with lettuce, tomato, cheese and fiesta mayo.
      Baked Turkey Burgers
    • Sliced turkey breast cooked in the air fryer.
      Air Fryer Turkey Breast

    Recipe

    Crock Pot Boneless Turkey Breast on plate with vegetables.
    Print Pin
    Be the first to rate!

    Crock Pot Boneless Turkey Breast and Gravy

    This crockpot turkey breast cooks up tender, juicy, and full of flavor, with a rich gravy made right from the slow cooker juices. A simple, hands-off holiday or weeknight meal.
    Course Dinner, Main Course
    Cuisine American
    Prep Time 10 minutes minutes
    Cook Time 4 hours hours
    Resting Time 15 minutes minutes
    Total Time 4 hours hours 25 minutes minutes
    Servings 4 people
    Calories 247kcal
    Author Jessica Burgess

    Equipment

    • slow cooker

    Ingredients

    For the Turkey

    • 1 ½ pounds yellow baby potatoes
    • 2 medium carrots chopped
    • 2 celery stalks chopped
    • 1 small yellow onion quartered
    • 3 garlic cloves smashed
    • 1 cup chicken broth
    • 2 sprigs rosemary
    • 2 sprigs thyme
    • Boneless skinless turkey breast (about 3 pounds
    • 2 tablespoons olive oil
    • 1 teaspoon sea salt
    • ½ teaspoon black pepper
    • 1 teaspoon garlic powder
    • 1 teaspoon onion powder
    • 1 teaspoon smoked paprika

    For the gravy (optional)

    • Sauce from the slow cooker
    • 2 tablespoons cornstarch
    • ¼ cup chicken broth

    Instructions

    • To the bowl of your slow cooker, add the potatoes, carrots, celery, onion, garlic, 1 cup chicken broth, rosemary, and thyme sprigs. Set aside.

    Prepare the turkey

    • Pat the turkey breast dry with paper towels. If the turkey breast contains netting, keep it on; this helps the turkey breast hold its shape while cooking.
    • Drizzle olive oil over the turkey breast so it's fully coated. Set aside.
    • To a small bowl, add the salt, pepper, garlic powder, onion powder, and smoked paprika. Stir to combine.
    • Sprinkle the seasoning mixture over the turkey breast. Using your hands, rub in the spice mixture so it's coated over the turkey breast.
    • Place the turkey breast on top of the vegetables in the slow cooker. Cover and set to low and cook for 4-6 hours or until the turkey breast reaches 165 degrees F. *Cooking on high isn't recommended as it could dry out the turkey breast.
    • Once you get a reading of 165 degrees F from the thickest part of the turkey breast, remove it and the vegetables from the slow cooker and transfer to a platter. Cover with foil and allow it to rest for 15 minutes.

    How to Make Gravy

    • Meanwhile, in a small bowl, combine the cornstarch and ¼ cup of reserved chicken broth. Stir to combine.
    • Strain the cooking liquid using a fine mesh strainer and transfer to a saucepan. Add the cornstarch slurry mixture. Set over medium heat and allow it to thicken.
    • Taste test and season with additional salt and pepper if needed. Transfer the gravy to a gravy boat and serve.

    Nutrition

    Serving: 1serving | Calories: 247kcal | Carbohydrates: 42g | Protein: 5g | Fat: 8g | Saturated Fat: 1g | Polyunsaturated Fat: 1g | Monounsaturated Fat: 5g | Cholesterol: 1mg | Sodium: 890mg | Potassium: 914mg | Fiber: 6g | Sugar: 4g | Vitamin A: 5383IU | Vitamin C: 39mg | Calcium: 53mg | Iron: 2mg

    Sweet Cornbread Recipe

    November 15, 2025

    Sweet cornbread muffins stacked on a plate.

    If you love cornbread that's sweet, soft, and just the right amount of “buttery,” this homemade sweet cornbread recipe is for you. It's made with creamed corn, comes together in minutes, and makes 24 perfectly tender muffins that pair beautifully with chili, BBQ, or even holiday dinners.

    Sweet cornbread muffins stacked on vintage plate.

    Why You'll Love This Recipe

    I consider this a ‘happy accident” recipe because when I made a big ole pot of ham and beans for my family, I went to grab a box of Jiffy mix to make a side of cornbread and realized I didn’t have any.

    But… I DID have a can of creamed corn, so I got to experimenting, and now, this is the cornbread recipe I make instead of using a box mix.

    • No cornmeal needed - just simple pantry staples you more than likely already have.
    • Makes 24 muffins - great for feeding a crowd or freezing for later.
    • Sweet and tender - the honey and creamed corn give it amazing flavor and moisture.
    • Perfect for any meal - enjoy them with soups, stews, ham and beans, or turn them into cornbread dressing for the holidays.
    • Quick and easy - only a few steps and one bowl for dry ingredients, one for wet!

    Ingredients (with Notes)

    • Creamed corn: Adds moisture and sweetness. Don't drain it - that creamy texture makes these muffins irresistible.
    • Eggs: Help the muffins rise and hold their shape.
    • Milk: Regular or 2% works, but whole milk adds extra richness.
    • Butter: Melted unsalted butter gives that perfect buttery flavor in every bite.
    • Honey: Adds natural sweetness and a soft crumb - you can adjust slightly to taste.
    • All-purpose flour: The base that keeps these tender instead of grainy.
    • Baking powder: Gives the muffins a nice lift.
    • Salt: Balances the sweetness and brings out the buttery flavor.

    Instructions

    • Preheat the oven to 400°F and grease two 12-cavity muffin pans (this recipe makes 24 muffins).
    • In a medium bowl, whisk together the eggs, honey, milk, and melted butter until smooth.
    • Stir in the creamed corn.
    Creamed corn, egg, honey, and milk in a glass mixing bowl.
    • In a large bowl, whisk together the flour, baking powder, and salt.
    Flour, baking powder and salt in mixing bowl.
    • Pour the wet mixture into the dry ingredients and stir gently with a spoon until just combined - don't overmix.
    Wet corn mixture combined with flour dry mixture.
    • Fill muffin cups about halfway or two-thirds full.
    Cornbread batter in muffin pan.
    • Bake for 13-14 minutes, or until a toothpick inserted in the center comes out clean.
    Cornbread muffins on wire cooling rack.
    • Cool slightly before removing from the pan and serve warm with butter or honey.

    Tips & Notes

    • Storage: Store in an airtight container at room temperature for up to 2 days or refrigerate for 5.
    • Freezing: Wrap tightly and freeze up to 3 months. Reheat in the oven or microwave until warm.
    • Add-ins: For variety, stir in diced jalapeños, shredded cheese, or a pinch of cinnamon for a fun twist!
    Cornbread muffin sliced in half with butter spread on tops.

    FAQs

    Can I use canned corn instead of creamed corn to make cornbread?

    You can, but the texture will be drier and less sweet. For best results, stick with creamed corn.

    Do I have to use cornmeal for cornbread?

    Nope! That's what makes this recipe special. The flour gives a soft, cake-like texture without any grit and you can the corn flavor from the creamed corn.

    Can I make cornbread ahead for holidays?

    Definitely. Bake these a day or two in advance, let cool, and store covered. If you’re using them for dressing, you can even let them sit out or in an open container for a day to dry out some so they can soak up the dressing mixture.

    Serving Suggestions

    These sweet cornbread muffins are amazing served warm with butter and honey, or alongside:

    • Chili or soup recipes
    • BBQ ribs or slow cooker pulled pork
    • Thanksgiving dinner

    More Side Dish Recipes

    • Cowboy Pasta Salad in bowl with wooden spoon.
      Cowboy Pasta Salad
    • Dr. Pepper baked beans in a cast iron and wooden spoon spooning out a serving.
      Dr. Pepper Baked Beans
    • A collage of side dishes for sliders.
      Best Sides for Sliders (Easy Recipes Your Family Will Love)
    • Crockpot baked beans cooked with a wooden spoon resting inside.
      Crockpot Baked Beans

    Recipe

    Sweet cornbread muffins stacked on a plate.
    Print Pin
    5 from 1 vote

    Sweet Cornbread Recipe

    This sweet, buttery cornbread made with creamed corn and no cornmeal bakes up soft and golden, perfect as a side dish or for using in your favorite cornbread dressing.
    Course Side Dish
    Cuisine American
    Prep Time 5 minutes minutes
    Cook Time 13 minutes minutes
    Total Time 18 minutes minutes
    Servings 24 muffins
    Calories 114kcal
    Author Jessica Burgess

    Ingredients

    • 15 ounces can creamed corn
    • 2 eggs
    • ½ cup milk
    • 8 tablespoons unsalted butter melted
    • ½ cup honey
    • 2 cups all-purpose flour
    • 1 tablespoon baking powder
    • 1 teaspoon salt

    Instructions

    • First, preheat your oven to 400°F. and grease a 12-cavity muffin pan. (Or if you have two, you can grease both now, since this recipe makes 24 cornbread muffins.)
    • In a medium-sized mixing bowl, whisk the eggs, honey, milk and melted butter.
    • Add in the can of cream corn and stir to combine.
    • Next, in a large mixing bowl, add flour, salt and baking powder, and whisk together until combined.
    • Take the wet ingredients and pour them in to the flour mixture and stir with a spoon until evenly combined.
    • Pour cornbread batter in to muffin cavities, until they're about ⅔ or ½ of the way full.
    • Bake in the oven for 13-14 minutes, or until a toothpick inserted in to the center of one of the cornbread muffins, comes out clean.

    Video

    Notes

    For variety, stir in diced jalapeños, shredded cheese, or a pinch of cinnamon for a fun twist!
    Serve with my favorite ham and beans recipe, or this crock pot Cherry Coke pulled pork.

    Nutrition

    Serving: 1muffin | Calories: 114kcal | Carbohydrates: 17g | Protein: 2g | Fat: 4g | Saturated Fat: 3g | Polyunsaturated Fat: 0.3g | Monounsaturated Fat: 1g | Trans Fat: 0.2g | Cholesterol: 24mg | Sodium: 204mg | Potassium: 52mg | Fiber: 1g | Sugar: 7g | Vitamin A: 158IU | Vitamin C: 1mg | Calcium: 41mg | Iron: 1mg

    Old-Fashioned Cornbread Dressing

    November 8, 2025

    Wooden spoon holding a serving of old-fashioned cornbread dressing.

    Sweet cornbread and savory herbs come together with fresh aromatics to make this Cornbread Dressing the talk of your table.

    Cornbread dressing being scooped up out of baking dish with wooden spoon.

    Whether you're making it for Thanksgiving or a Sunday family dinner, this recipe is simple, reliable, and full of that nostalgic old-fashioned comfort we all love.

    Why You'll Love This Recipe

    • Quick and easy: Just a few simple steps - sauté, mix, bake - and it's on the table in under an hour.
    • Sweet + savory balance: Sweet cornbread meets savory herbs and butter for a perfect flavor harmony.
    • Crowd-pleaser: Makes 8-10 servings, so it's perfect for big family gatherings or potlucks.
    • Make-ahead friendly: You can prep it in advance and warm it up when you're ready to serve.
    • Customizable: Easily add meat, cheese, or veggies for your own flavor twist.

    Ingredients (with Notes)

    Labeled ingredients on table to make old-fashioned cornbread dressing.
    • ¼ cup salted butter - You can swap for margarine or unsalted butter if needed; just add a pinch of salt.
    • 1 small sweet onion, diced - Sweet onion adds a mellow flavor, but yellow or white onions work, too.
    • 2 stalks celery, diced - Adds that classic dressing crunch and aroma.
    • 4 cups crumbled cornbread - You can use homemade cornbread or a boxed mix (like Jiffy). One Jiffy mix makes about 3 cups.
    • 2 ½ cups chicken broth - Turkey or vegetable broth work well, too.
    • 1 Tablespoon minced roasted garlic - The mild, jarred kind is perfect here, but you can also use 1 teaspoon garlic powder.
    • 1 large egg, lightly beaten - Helps bind everything together.
    • 1 Tablespoon rubbed sage - Brings that traditional holiday flavor.
    • ½ Tablespoon fresh parsley, finely chopped - Adds color and freshness.
    • 1 teaspoon salt
    • ½ teaspoon black pepper

    Instructions

    • Preheat and prep: Preheat your oven to 350°F and spray a 9×13-inch casserole dish with cooking spray (or lightly butter it).
    • Sauté the flavors: In a large skillet over medium heat, melt the butter. Add onion and celery and cook for about 5 minutes, until soft and fragrant.
    Sautee vegetables in butter in skillet.
    • Mix it all together: In a large bowl, combine the sautéed veggies, crumbled cornbread, broth, garlic, egg, sage, parsley, salt, and pepper. Gently stir until everything is evenly moistened.
    Cornbread mixed with vegetables in mixing bowl for cornbread dressing.
    • Bake: Transfer to the prepared casserole dish and bake uncovered for 30 minutes, or until the edges are golden brown.
    Cornbread dressing in a 9x13 baking dish.
    • Serve warm: Perfect alongside turkey, ham, or your favorite roast.
    Baked cornbread dressing in 9x13 baking dish.

    Tips & Notes

    • Cornbread texture: Slightly dry cornbread works best. It helps soak up the broth without turning mushy.
    • Make it ahead: Assemble the dish (without baking), cover, and refrigerate for up to 24 hours. Bake when ready to serve.
    • Add-ins: Try cooked sausage, chopped turkey, diced jalapeños, or shredded cheese for a fun twist.
    • Leftover cornbread tip: This recipe is a great way to use up leftover cornbread after the holidays, or you can also make cornbread salad with leftover cornbread.

    FAQs

    Can I make my own cornbread?

    Absolutely! Homemade or boxed both work great as long as you have 4 cups of crumbled cornbread.

    Can I make cornbread dressing ahead of time?

    Yes! You can prepare it ahead and refrigerate before baking. Or bake it fully, refrigerate, and reheat before serving (see below).

    How do I reheat it?

    Add ⅓-½ cup of broth to the dish and bake at 350°F for 15-20 minutes. You can also microwave individual portions in 30-second intervals.

    Can I freeze cornbread dressing?

    Freezing can make it a bit soggy, but you can freeze the cornbread itself (before making the dressing) for up to 2 months.

    Can I make this cornbread dressing with sausage?

    Absolutely. Add a pound of cooked, browned, and drained, crumbled sausage to the mixture before baking.

    A serving of cornbread dressing on a round plate, next to 9x13 baking dish.

    Storage & Freezing

    Cool leftovers completely before transferring to an airtight container. Store in the refrigerator for up to 3-4 days. Reheat with a splash of broth to keep it moist.

    Serving Suggestions

    This classic Southern cornbread dressing pairs beautifully with:

    • Thanksgiving Turkey, this slow cooker ham, or chicken
    • Green bean casserole
    • Mashed potatoes and gravy
    • Cranberry sauce
    • A cozy fall salad or roasted veggies

    This comfort food recipe is a must-have for your Thanksgiving or Christmas table, or really, any time you're craving that warm, homemade flavor that reminds you of grandma's kitchen.

    Recipe

    Wooden spoon holding a serving of old-fashioned cornbread dressing.
    Print Pin
    5 from 1 vote

    Old-Fashioned Cornbread Dressing

    Sweet cornbread and savory herbs come together with buttery veggies and broth to make this easy, no-stress old-fashioned cornbread dressing that everyone will ask for again.
    Course Side Dish
    Cuisine American
    Prep Time 10 minutes minutes
    Cook Time 30 minutes minutes
    Total Time 40 minutes minutes
    Servings 8 servings
    Calories 468kcal
    Author Jessica Burgess

    Ingredients

    • ¼ cup salted butter
    • 1 small sweet onion diced
    • 2 stalks celery diced
    • 4 cups crumbled cornbread 1 sheet of Jiffy corn bread mix makes 3 cups, or use about 12 of my homemade cornbread muffins
    • 2 ½ cups chicken broth
    • 1 Tablespoon minced roasted garlic
    • 1 large egg lightly beaten
    • 1 Tablespoon rubbed sage
    • ½ Tablespoon fresh parsley finely chopped
    • 1 teaspoon salt
    • ½ teaspoon black pepper

    Instructions

    • Prepare your dish. Preheat the oven to 350°F and spray a 9×13-inch casserole dish with cooking spray before setting it aside.
    • Melt the butter. In a large skillet over medium heat, melt the butter.
    • Sauté your veggies. Add the chopped onion and celery and gently sauté for about 5 minutes until the celery is soft and the onions are translucent, and turn the heat off.
    • Add more flavor. In a large bowl, add the sauteed vegetables and the crumbled cornbread along with the chicken broth, minced roasted garlic, beaten egg, rubbed sage, parsley, salt, and pepper.
    • Bake and serve. Transfer the mixture to the casserole dish and bake for 30 minutes, uncovered, until the edges are a light golden brown. Serve warm.

    Video

    Notes

    Make it ahead: Assemble the dish (without baking), cover, and refrigerate for up to 24 hours. Bake when ready to serve.
    If using my homemade cornbread recipe, I like to make it the day ahead, and let it sit out overnight so it’s drier, and so it can soak up the cornbread dressing mixture.
    Serving a crowd? Easily double this recipe, using all 24 of these homemade cornbread muffins.

    Nutrition

    Serving: 1serving | Calories: 468kcal | Carbohydrates: 68g | Protein: 9g | Fat: 18g | Saturated Fat: 8g | Polyunsaturated Fat: 3g | Monounsaturated Fat: 6g | Trans Fat: 1g | Cholesterol: 105mg | Sodium: 1329mg | Potassium: 237mg | Fiber: 3g | Sugar: 21g | Vitamin A: 446IU | Vitamin C: 3mg | Calcium: 181mg | Iron: 3mg

    Easy Italian White Bread

    November 8, 2025

    how to make Traditional Italian White Bread

    Easy Italian White Bread: Baking your own bread is not only easier than you think, but it’s also fun and satisfying. Warm and toasty bread is the perfect comfort food for any time of the year!

    If you love bread recipes then you’re also going to love this focaccia bread and this cheesy pull-apart bread!

    italian white bread on cutting board

    Why You’ll Love This Recipe

    There’s nothing better than filling your home with the smell of warm fresh, delicious bread in the wintertime. (Especially when it’s these soft pretzels!)

    There’s something about the smell, taste, and texture of homemade bread that’s just so comforting! Now, of course, you can get the popular Italian bread at the grocery store, but there’s just something about homemade.

    My favorite things to do with this traditional Italian bread is dip it in chicken noodle soup, serve tuna salad on it, use it for bruschetta, or serve it alongside a delicious main dish, like crab legs (you know, for that dripping butter to soak up)! You can also use this bread for a perfect sandwich or use it to make French toast!

    [feast_advanced_jump_to]

    Ingredients

    Traditional Italian White Bread
    • active dry yeast
    • warm water, divided (If the water is too warm, it can lead to your bread not rising properly. If the water is too cool, it can lead to a chance of your bread not rising)
    • granulated sugar (a bit of sugar gives it just a little sweetness but this is not a dessert bread)
    • olive oil (or any vegetable oil)
    • salt
    • unbleached all purpose flour

    Egg wash (optional)

    • egg
    • sesame seeds

    *see recipe card toward the bottom of this post for quantities

    Instructions

    DIRECTIONS:

    1. In the bowl of your stand mixer with a dough hook, add ½ cup of warm water, yeast, and granulated sugar.
    2. Once the yeast has bloomed (or foamed), add the remaining water, oil, and salt. Mix slightly 30 seconds.
    3. Add the flour. I like adding the flour in increments, about a ⅓ at a time, and slightly mix in between each on low speed. Add the next ⅓ of the flour once you don't have much loose flour in the bowl.
    Traditional Italian White Bread instructions
    1. Once you have added all the flour and all ingredients are incorporated, increase the speed of your mixer to medium and mix for 5 minutes. At one point, the dough will form a ball and separate from the wall of the bowl. Once touching the dough, it is sticky but does not leave your hands covered in dough.

    *NOTE* If you are doing this bread without a stand mixer, knead the dough on a floured surface for 5 to 8 minutes until it is no longer sticky and uniform.

    Traditional Italian White Bread
    bread dough with dough hook
    1. Transfer the dough to a lightly floured surface (about 1 tablespoon of flour) and knead the dough into a ball.
    White bread dough on mat
    dough on mat
    1. Transfer the dough into a greased bowl. Cover with a plastic film and let it rise for 1 hour or until it doubles. In a warm, draft-free place. I like putting mine in the microwave
    2. Grease (I like using butter) a cookie sheet. You can also line with a parchment paper or silicone mat. Set aside
    bread down in bowl, rising
    1. Once the dough has doubled, punch the dough and place it on a working surface. I like to use my pastry mat.
    punched bread dough in bowl
    1. Separate the dough into 2 halves.
    Split bread dough for two loaves
    divide dough in to two
    1. Take one half and flatten it out into a rectangle and roll the rectangle into a log.
    2. Once the dough is a log, roll it to have a 12-inch-long rope.
    white bread dough on rolling mat
    1. Place on the prepared cookie sheet
    2. Do the same for the second bread.
    3. Cover and let it rise in a warm, draft-free place for 30 minutes

    *NOTE* At the 10-minute mark, make 3 to 4 slashes in the bread and cover with egg wash, and sprinkle some sesame seeds.

    **NOTE** Put the bread back into warm, draft-free space for 20 minutes

    1. Preheat the oven to 400 degrees F
    2. Bake in the preheated oven for 15 to 20 minutes or until the internal temperature reaches 190 degrees F. The bread will be golden brown. 
    baked white Italian bread on baking sheet

    Hint: Adding sesame seeds changes the look and the taste of the bread. When your bread is baking, the sesame seeds will be roasting. So every bite of this loaf of Italian bread will have a moist inside with roasted sesame seeds!

    How do you keep homemade bread fresh?

    It’s best to store this loaf of Italian bread in an airtight container or plastic bag at room temperature for up to 3 days. Storing homemade bread in the refrigerator causes it to go stale too quickly and heat and/or humidity causes it to mold too quickly.

    how to make Traditional Italian White Bread

    Is Italian bread the same as French Bread?

    French bread tends to be more narrow and longer while Italian bread is shorter and thicker. Italian bread is normally denser and has a harder crust than French bread. Either way, both taste amazing dipped in Italian spices and olive oil!

    Sliced white italian bread

    What is the best flour for making homemade bread?

    Unbleached all-purpose flour is the best type of flour for white bread and other Italian breads. Bread flour is another type of flour that’s used in other bread recipes. Bread flour has a higher amount of protein than unbleached flour which yields a higher rising bread. This recipe calls for unbleached flour and not bread flour!

    sliced white italian bread with butter

    How to Serve

    This easy Italian white bread is the kind of bread that can be served as an appetizer with dipping oil, it’s also a great side dish for those Italian meals or other easy dinner recipes! It would go extremely well with this Swedish meatballs recipe!

    You can also serve this bread, fresh and warm with a slab of butter. Or, top with butter, and cheeses such as Monterey jack cheese and even make a garlic cheese toast out of it!

    Recipe

    how to make Traditional Italian White Bread
    Print Pin
    5 from 7 votes

    Easy Italian White Bread

    Baking your own Italian bread is not only easier than you think, but it's also fun and satisfying. Warm and toast bread is the perfect comfort food for any time of the year!
    Course Appetizer, Side Dish
    Cuisine American, Italian
    Prep Time 15 minutes minutes
    Cook Time 15 minutes minutes
    rising time 1 hour hour 30 minutes minutes
    Total Time 2 hours hours
    Servings 16 slices
    Calories 182kcal
    Author Jessica Burgess

    Ingredients

    • 3 teaspoons active dry yeast
    • 2 cups warm water, divided (If the water is too warm, it can lead to your bread not rising properly. If the water is too cool, it can lead to a chance of your bread not rising)
    • 1 Tablespoon granulated sugar
    • 2 Tablespoons olive oil (or any vegetable oil)
    • 1 teaspoon salt
    • 5 ½ cups unbleached all purpose flour

    Optional Egg Wash & Seeds

    • 1 egg slightly beaten
    • 1 tablespoon sesame seeds

    Instructions

    • In the bowl of your stand mixer with a dough hook, add ½ cup of warm water, yeast, and granulated sugar.
    • Once the yeast has bloomed (or foamed), add the remaining water, oil, and salt. Mix slightly 30 seconds.
    • Add the flour. I like adding the flour in increments, about a ⅓ at a time, and slightly mix in between each on low speed. Add the next ⅓ of the flour once you don't have much loose flour in the bowl.
    • Once you've added all the flour and all ingredients are incorporated, increase the speed of your mixer to medium and mix for 5 minutes. At one point, the dough will form a ball and separate from the wall of the bowl. Once touching the dough, it is sticky but does not leave your hands covered in dough.
      NOTE: If you are doing this bread without a stand mixer, knead the dough on afloured surface for 5 to 8 minutes until it is no more sticky and uniform.
    • Transfer the dough to a light flour surface (about 1 tablespoon of flour) and knead the dough into a ball.
    • Transfer the dough into an oiled large mixing bowl. Cover with a plastic film and let it rise for 1 hour or until it doubles. In a warm, draft-free place. I like putting mine in the microwave.
    • Grease (I like using butter) a cookie sheet. You can also line with a parchment paper or silicone mat. Set aside.
    • Once the dough has doubled, punch the dough and place it on a working surface , I like to use my pastry mat.
    • Separate the dough into 2 halves.
    • Take one half and flatten it out into a rectangle and roll the rectangle into a log.
    • Once the dough is a log, roll it to have a 12-inch-long rope.
    • Place on the prepared cookie sheet.
    • Do the same for the second bread.
    • Cover and let it rise in a warm, draft-free place for 30 minutes.

    Optional Egg Wash

    • At the 10 minutes mark, make 3 to 4 slashes in the bread and cover with eggwash, andsprinkles some sesame seeds.
      **NOTE** Then put the bread back into warm, draft-free space for 20 minutes.
    • Preheat the oven to 400 degrees F.
    • Baked in the preheated oven for 15 to 20 minutes or until internal temperature reaches 190 degrees F. The bread will be nice and golden. 

    Notes

    How do you keep homemade bread fresh?
    It’s best to store this loaf of Italian bread in an airtight container or plastic bag at room temperature for up to 3 days. Storing homemade bread in the refrigerator causes it to go stale too quickly and heat and/or humidity causes it to mold too quickly.

    Nutrition

    Serving: 1slice | Calories: 182kcal | Carbohydrates: 34g | Protein: 5g | Fat: 2g | Saturated Fat: 1g | Polyunsaturated Fat: 1g | Monounsaturated Fat: 1g | Sodium: 149mg | Potassium: 68mg | Fiber: 2g | Sugar: 1g | Vitamin A: 1IU | Vitamin C: 1mg | Calcium: 8mg | Iron: 2mg

    Pumpkin Lush

    November 6, 2025

    A slice of pumpkin lush on round plate.

    This no-bake pumpkin lush is the ultimate fall dessert. It’s creamy, crunchy, and packed with cozy pumpkin spice flavor.

    A slice of pumpkin lush on a round plate, with a fork sitting next to it.

    It's a dreamy layered dessert that feels like a mix between cheesecake and pumpkin pie, but with way less effort. With its buttery cinnamon graham cracker crust, fluffy cream cheese layer, spiced pumpkin filling, and whipped topping, this pumpkin lush recipe is the kind of easy, crowd-pleasing treat that disappears fast at every gathering.

    Why You'll Love This Pumpkin Lush Recipe

    • No-bake perfection: Skip the oven! This dessert chills its way to greatness.
    • Layered deliciousness: Each bite is creamy, crunchy, and full of fall flavor.
    • Easy to make ahead: Chill it in advance for stress-free entertaining.
    • Perfect for holidays: A pumpkin lush dessert that fits right in with Thanksgiving and Christmas menus.

    Ingredients (with Notes)

    Ingredients for pumpkin lush recipe.
    • Cinnamon graham crackers: Add warm spice and crunch. (Honey grahams work too!)
    • Salted butter: Adds flavor and helps the crust set.
    • Full-fat cream cheese: Gives that rich cheesecake-like base.
    • Powdered sugar: Sweetens the creamy layer.
    • Vanilla extract: A little goes a long way.
    • Whipped topping: Light, fluffy, and so easy.
    • Whole milk: Helps blend the pudding layer - any milk works.
    • Instant cheesecake pudding mix: Be sure to grab instant, not cook-and-serve. (You’ll want to use 5.1 ounces of pudding mix, so to get the 5.1 ounces, you’ll want to grab two of the 3.4 ounce boxes and use one box and half of the second box to achieve the 5.1 ounces. Or you can use a 5.1 ounce box of vanilla pudding mix instead.)
    • Pumpkin puree: Just pure pumpkin (not pumpkin pie filling).
    • Pumpkin pie spice: For that classic fall warmth.
    • Chopped pecans: Add crunch and a nutty finish.

    Instructions

    • Prepare your dish: Spray a 9×9-inch baking dish with cooking spray and set aside.
    • Crush graham crackers: Use a food processor until you have fine crumbs.
    Cinnamon graham crackers in food processor.
    • Make the crust: Combine crumbs with melted butter and press into your dish. Freeze while making the filling.
    Butter and graham crackers in baking dish.
    • Cream cheese layer: Beat cream cheese, powdered sugar, and vanilla until smooth.
    • Fold in whipped topping: Add one container and gently fold to keep it light. Spread over crust and freeze briefly.
    Cream cheese and powdered sugar layer on graham cracker crust in baking dish.
    • Pumpkin layer: Whisk milk and pudding mix until smooth. Add pumpkin puree and pie spice, then spread over the cream cheese layer. Chill for at least 2 hours.
    Pumpkin layer on top of cream cheese layer for pumpkin lush in baking dish.
    • Top it off: Spread with the remaining whipped topping and sprinkle with pecans before serving.
    Whipped topping and pecans on top of pumpkin lush in baking dish.

    Tips & Notes

    • Want extra crunch? Mix chopped pecans into the pumpkin layer.
    • Caramel drizzle on top adds a beautiful touch of sweetness.
    • Butterscotch pudding gives a fun twist for a pumpkin lush cake vibe.

    FAQs

    What does pumpkin lush taste like?

    It's like a cross between pumpkin pie and cheesecake - sweet, spiced, and creamy with a buttery, crunchy crust.

    How long is pumpkin lush good for?

    Wrap tightly in plastic wrap or transfer to an airtight container. Keep refrigerated for up to 4 days.

    A slice of pumpkin lush being lifted out of baking dish.

    Storage

    • Refrigerator: Store covered for 3-4 days.

    Serving Suggestions

    • Serve chilled with a drizzle of caramel or dusting of cinnamon.
    • Add a dollop of whipped cream and extra chopped pecans for a pretty finish.
    • Pair with hot coffee, spiced cider, or your favorite fall beverage.

    More Pumpkin Recipes

    Whether you call it pumpkin lush, pumpkin lush dessert, or even pumpkin lush cake, this no-bake beauty is a fall must-make. It's simple, impressive, and irresistibly creamy. If you’re a pumpkin love like me, you’ll also love these pumpkin recipes:

    • Pumpkin Dump Cake serving on round plate.
      Pumpkin Dump Cake
    • Baked pumpkin bread on cutting board.
      Easy Pumpkin Bread Recipe
    • Slice of pumpkin poke cake on plate with fork
      Pumpkin Poke Cake
    • Slice of pumpkin pie made with graham cracker crust.
      No Bake Pumpkin Pie

    Recipe

    A slice of pumpkin lush on round plate.
    Print Pin
    5 from 1 vote

    Pumpkin Lush

    A creamy, no-bake pumpkin lush dessert with layers of cheesecake, pumpkin, and whipped topping over a buttery cinnamon graham cracker crust that's perfect for fall.
    Course Dessert
    Cuisine American
    Prep Time 15 minutes minutes
    Chill Time 2 hours hours
    Total Time 2 hours hours 15 minutes minutes
    Servings 9 slices
    Calories 502kcal
    Author Jessica Burgess

    Ingredients

    • 18 sheets cinnamon graham crackers
    • ½ cup salted butter melted
    • 16 ounce full-fat cream cheese (2- 8 ounce blocks) softened
    • 2 ¼ cups powder sugar
    • 1 teaspoon vanilla extract
    • 2 – 8-ounce tubs whipped topping such as Cool Whip
    • 2 cups whole milk
    • 5.1 ounces instant cheesecake pudding mix unprepared (This will be 1½ boxes of the 3.4 ounce boxes. Or you can use a 5.1 ounce box of vanilla pudding mix.)
    • 15 ounce can pumpkin puree (not pie filling)
    • 2 teaspoons pumpkin pie spice
    • 1 cup chopped pecans

    Instructions

    • Prepare your baking dish. Spray a 9×9, high-sided baking dish with cooking spray and set aside.
    • Crush the graham crackers. In a food processor, pulverize the Graham crackers until they reach a coarse crumb.
    • Make the crust. In a large bowl, combine the graham cracker crumbs with the melted butter until the mixture resembles wet sand. Press firmly into the bottom of your prepared baking dish and place in the freezer to set while you prepare the filling.
    • Make the cream cheese layer. In a large bowl, combine the cream cheese, powdered sugar, and vanilla with an electric hand mixer until very smooth.
    • Fold in whipped topping. Use a spatula to fold 1 (8-ounce) container of whipped topping, starting from the bottom and swooping up and over the top until completely combined. Spread the cream cheese mixture over the graham cracker crust and pop it back into the freezer until you're ready for the next layer.
    • Mix the pumpkin layer. In a large bowl, using a hand or stand mixer, combine the whole milk and cheesecake pudding mix. Then add the pumpkin puree and pie spice. Blend until well incorporated.
    • Spread the mixture over the cream cheese layer and place it in your refrigerator to chill for at least 2 hours.
    • Cover with whipped topping. Spread the top with the whipped topping and garnish with pecans. Serve chilled.

    Video

    Notes

    You can freeze this and make ahead of time, just leave off the pecans, wrap well, and freeze up to 1 month. Thaw in the fridge for 2 hours before serving.

    Nutrition

    Serving: 1slice | Calories: 502kcal | Carbohydrates: 63g | Protein: 6g | Fat: 27g | Saturated Fat: 10g | Polyunsaturated Fat: 4g | Monounsaturated Fat: 10g | Trans Fat: 0.5g | Cholesterol: 38mg | Sodium: 326mg | Potassium: 212mg | Fiber: 2g | Sugar: 44g | Vitamin A: 486IU | Vitamin C: 0.3mg | Calcium: 117mg | Iron: 2mg

    School Pizza Recipe

    November 4, 2025

    School lunch pizza on blue lunch tray, next to corn.

    This school lunch pizza recipe is meant to conjure up nostalgic memories of the pizza you may have gotten at the school cafeteria when you were a kid. Hence the name. And boy oh boy does it do the trick. 

    School lunch pizza on blue lunch tray, with corn, cookies, and fruit cocktail.

    I don’t know about you, but I have fond memories of school lunch pizza! Some of the meals we thought were amazing are definitely not going to taste great as adults. But this? This one does!

    For more nostalgia, make the best PB+J ever, or try a fried bologna sandwich. If diner fare is more your style, don’t forget a classic chicken club served with a milkshake.

    [feast_advanced_jump_to]

    Why You’ll Love This Recipe

    • It uses a few ingredients: Ready made dough is topped with a “cheater” sauce and cheese and you’re good to go.
    • Let the kids help: Stretching pizza dough is a fun tactile activity for them to do on their own.
    • Ready in only 35 minutes: Again, using ready-made ingredients means you can get lunch on the table quick in between sports practices.

    Ingredients Needed

    Here’s what you’ll need to make this school lunch pizza.

    • Pizza dough – I think the tube or can makes this taste the most like school lunch pizza! You can also use the 1 pound balls of dough from the deli, or even go so far as to make it homemade. If your tube is smaller than 13 oz you may want to pick up 2.
    • Sauce – If you can’t make my sauce recipe, you can buy storebought but sweeter sauces are more similar to school pizza. This is often brands like Contadina, and Ragu homemade style pizza.
    • Sausage – We are using Italian pork sausage here, but feel free to use spicy or sweet if you prefer. You can also use chopped ham or pepperoni.
    • Cheese – Combining mozzarella and cheddar adds to the nostalgia! Feel free to use one or the other on its own, but I promise you want to stick to these and not anything else to get the right taste!

    *Be sure to see the recipe card below for the full ingredients list & instructions!*

    How to Make School Lunch Pizza

    First steps of how to make school pizza.

    STEP 1. Bake crust. Sprinkle cornmeal on a baking sheet, and gently spread out the dough. Dock with a fork and bake according to the package directions.

    STEP 2. Prep sausage. brown the sausage until cooked through and drain any excess grease. Season if desired (but I kept it plain!).

    Tip: You can adjust this pizza however you like! Swap out the dough, change out the cheese. Whatever you loved as a kid should be what you use now! We are throwing it back and not making a gourmet adult pizza.

    STEP 3. Make Sauce. First, mix together the tomato paste and water. Then add seasoning and sugar. Mix again.

    School Pizza Sauce recipe in glass mixing bowl with spoon.

    STEP 4. Assemble. Spread the sauce over the baked crust, then sprinkle on the sausage. Top with cheese and pop in the oven!

    Sliced school pizza on school lunch tray, next to corn, fruit cocktail and cookies.

    Recipe Pro Tips

    • Use cornmeal. The cornmeal keeps the crust from sticking to the pan without any excess oil. You can try lining your pan with parchment if you prefer, but I find it too difficult to roll out the crust then.
    • Keep it simple. Use whatever cheese or meat you have on hand. This recipe is perfect for cleaning out the fridge!

    Recipe FAQs

    What is school pizza made of?

    Refrigerated pizza dough, cornmeal (that’s the secret), tomato paste, crushed tomatoes, spices and cheddar and mozzarella cheeses.

    How do you cook school pizza?

    Preheat the oven to 400°F, then bake the crust for 8 minutes, top with toppings and bake for an additional 10 minutes to melt the cheese.

    What size pan do you use to make school pizza?

    I used an 18X13 baking sheet. You could use a larger pan if you'd like. If you do, feel free to scale the recipe up. Otherwise, just don't stretch the dough all the way to the corners. Want to use a smaller pan? Scale the recipe down. If you have to use two tubes of dough, just pinch the seams together well.

    What to Serve with School Lunch Pizza

    Go all in! Try out some frozen corn, canned peaches, and packaged cookies! You can also add a side salad to round things out, and don’t forget a big glass of milk.

    Storage

    • To store. Once the pizza has cooled to room temperature, arrange slices in an airtight container, separating any layers with a sheet of parchment paper. You can store the leftover pizza in the fridge for up to 4 days or in the freezer for up to 3 months. 
    • To reheat. Allow the leftover pizza to thaw in the fridge (if applicable) before arranging the slices in a single layer on a baking sheet lined with parchment paper. Bake at 375°F for 10-15 minutes or until the cheese is melty and the pizza is warm. Alternatively, microwave a slice or two in 20-second intervals until heated through. 
    • To freeze. Prepare the recipe from start to finish, allow the pizza to cool, slice it, arrange the slices in a single layer in an airtight container (use parchment paper to separate multiple layers), and freeze for up to 3 months. When you are ready to enjoy, allow the pizza to thaw and refer to the section below titled "Storage" to learn how to reheat your leftovers. 

    More Pizza Recipes You’ll Love

    • Close up of pizza sliders on white plate.
      Pizza Sliders
    • French bread pizza, sliced on wooden cutting board.
      French Bread Pizza
    • Texas Toast Pizza on baking sheet
      Texas Toast Pizzas
    • Bagel pizza topped with pepperonis on baking sheet.
      Pizza Bagels

    Did you make this? I’d be so grateful if you left a “star” rating below to let me know what you thought! Then, the next time you need a quick and easy recipe, come back to Fantabulosity to browse all of my easy recipes!

    Recipe

    School lunch pizza on blue lunch tray, next to corn.
    Print Pin
    5 from 1 vote

    School Pizza Recipe

    This school pizza recipe brings back all the feels of the cafeteria pizza we had in school. The rectangle cut, sausage toppings and delicious cheese and sauce flavors.
    Course Main Course
    Cuisine American
    Prep Time 10 minutes minutes
    Cook Time 25 minutes minutes
    Total Time 35 minutes minutes
    Servings 12 slices
    Calories 392kcal
    Author Jessica Burgess

    Ingredients

    • 1 can refrigerated pizza dough 13.8 oz
    • 3 tablespoons olive oil divided (1 + 2)
    • ¼ cup cornmeal divided (⅛ cup + ⅛ cup)
    • 1 pound Italian sausage
    • 2¼ cups shredded mozzarella cheese divided (¼ cup + 2 cups)
    • 1 cup shredded cheddar cheese

    School Pizza Sauce Recipe

    • 6 ounces tomato paste
    • ¾ cup water
    • 2 tablespoons olive oil
    • 1 teaspoon garlic powder
    • 1 teaspoon kosher salt
    • ½ teaspoon black pepper
    • ½ tablespoon white granulated sugar
    • ½ tablespoon dried oregano
    • ½ tablespoon dried basil
    • ½ tablespoon dired rosemary

    Instructions

    • Preheat the oven to 475°F, and spray a 18×13 baking pan with nonstick cooking spray, then line with parchment paper. Sprinkle it with about ⅛ of a cup of cornmeal, in an evenly layer.
      Next, this is optional, sprinkle the remaining cornmeal on a work surface (i.e. counter/table), and place pizza dough on cornmeal. (This is so the dough doesn't stick to the surface while rolling. With a rolling pin, roll out the door until it's thin, and it's the shape of the 18×13 pan.)
    • Place the dough on the pan, and stretch the pizza dough so that it reaches the corners and sides of the pan the best you can.
      Brush the dough with 1 tablespoon of olive oil and poke a few holes in it with a fork. Bake for 8 minutes or until it's a light golden brown.
    • Add the sausage to a large heavy bottom skillet and sauté until golden brown and cooked through, breaking it up with a spatula or spoon as you go. Set aside.

    School Pizza Sauce

    • In a medium mixing bowl, mix together the tomato paste and water.
      Then add in the garlic powder, salt, pepper, sugar, oregano, dried basil and rosemary. Stir until combined.
    • This is optional but I like to sprinkle ¼ cup of the shredded mozzarella on to the crust before adding the sauce to help prevent it from getting soggy.
    • Spread the sauce over the pizza crust, spreading all of the way to the edges, and then sprinkle the sausage evenly over the pizza, and finally, sprinkle the remaining cheeses evenly over the top.
    • Bake for 11 minutes on middle rack, or until the cheese has melted.

    Video

    Notes

    Can you freeze school pizza? You can. Prepare the recipe from start to finish, allow the pizza to cool, slice it, arrange the slices in a single layer in an airtight container (use parchment paper to separate multiple layers), and freeze for up to 3 months.

    Nutrition

    Serving: 1slice | Calories: 392kcal | Carbohydrates: 23g | Protein: 16g | Fat: 27g | Saturated Fat: 10g | Polyunsaturated Fat: 3g | Monounsaturated Fat: 12g | Cholesterol: 55mg | Sodium: 1012mg | Potassium: 285mg | Fiber: 2g | Sugar: 5g | Vitamin A: 460IU | Vitamin C: 4mg | Calcium: 194mg | Iron: 2mg

    German Chocolate Sheet Cake

    November 2, 2025

    German Chocolate Sheet Cake in baking dish.

    There's something so comforting about an old-fashioned German Chocolate Cake. But when you turn it into a sheet cake, it becomes the ultimate crowd-pleaser: easy to bake, easy to serve, and just right for Sunday suppers or potluck tables.

    Cakes like this are always popular at gatherings, and you'll find more potluck dessert ideas here.

    German Chocolate Sheet Cake with a couple of pieces missing from the pan.

    This German Chocolate Sheet Cake is deeply chocolatey, perfectly moist, and covered in a gooey, nutty frosting that's worth every minute of stirring on the stove. It's a classic recipe that tastes just like something your grandma would've made - and maybe even better.

    Why You'll Love This Recipe

    • Easy to serve - Sheet cakes slice beautifully and feed a crowd.
    • Classic flavor - That signature blend of mild chocolate, coconut, and pecans never goes out of style.
    • Make-ahead friendly - Both the cake and frosting can be prepared in advance.
    • Nostalgic and cozy - It's the kind of dessert that makes any gathering feel like home.

    Ingredients (with Notes)

    Labeled ingredients sitting on table for German Chocolate Sheet Cake.

    For the Cake:

    • Purified water - Helps melt the chocolate smoothly for a silky batter.
    • German sweet baking chocolate - The key to authentic flavor - milder and smoother than dark chocolate.
    • All-purpose flour - Creates a tender crumb.
    • Baking soda + baking powder - Work together for just the right lift.
    • Kosher salt - Balances the sweetness and deepens the chocolate flavor.
    • Unsalted butter - Gives richness and a soft texture.
    • Granulated sugar - Sweetens the cake and helps it stay moist.
    • Eggs - Add structure and richness.
    • Pure vanilla extract - Enhances the flavor in both the cake and frosting.
    • Buttermilk - Adds tang and moisture, creating that perfect soft crumb.

    For the Coconut Pecan Frosting:

    • Evaporated milk - The base for the custardy frosting.
    • Granulated sugar - Sweetens and caramelizes slightly as it cooks.
    • Egg yolks - Help thicken the frosting and create that silky texture.
    • Unsalted butter - Adds richness and helps it set.
    • Pure vanilla extract - A warm finishing note.
    • Sweetened shredded coconut - Gives that classic chew.
    • Toasted pecans - Add crunch and flavor (toasting makes all the difference!).

    Instructions

    • Preheat the oven to 350°F. Lightly spray a 9×13-inch pan and line it with parchment paper.
    • Melt the chocolate. In a small saucepan, bring 1 cup of water to a simmer. Add the chopped German chocolate and stir until smooth. Set aside to cool slightly.
    German baking chocolate in saucepan with water.
    • Whisk the dry ingredients. In a bowl, combine flour, baking soda, baking powder, and salt.
    Dry ingredients for German chocolate sheet cake in mixing bowl.
    • Cream the butter and sugar. Beat butter and sugar together until pale and fluffy - about 2-3 minutes.
    Butter and sugar mixed together in mixing bowl.
    • Add the eggs and vanilla. Mix in one egg at a time, then add vanilla.
    • Add the chocolate. Pour in the melted chocolate and mix until fully combined.
    Melted bakers chocolate mixed in with butter and sugar in mixing bowl.
    • Combine the wet and dry. Mix in half the dry ingredients, then the buttermilk, then the rest of the dry ingredients. Don't overmix.
    Flour, dry mixture added to wet mixture in mixing bowl
    • Bake. Spread batter evenly in the pan and bake for 40-45 minutes (start checking at 35). The cake should spring back when touched and pull slightly from the edges.
    German chocolate cake batter in 9x13 baking pan.
    • Cool completely. Let it rest on a wire rack before frosting.
    Baked German chocolate cake.

    To Make the Frosting:

    • In a medium saucepan over medium heat, whisk together evaporated milk, sugar, egg yolks, and butter.
    • Cook, stirring constantly, until it thickens and coats the back of a spoon - about 8-10 minutes.
    • Remove from heat and stir in vanilla, coconut, and toasted pecans.
    Egg yolks, coconut, nuts vanilla and evaporated milk in sauce pan for German Chocolate Cake topping.
    • Let cool 20-25 minutes until spreadable. It will thicken as it cools.
    • Spread evenly over the cooled cake, slice, and serve!
    Frosted German Chocolate Cake in a 9x13 sheet pan.

    Tips & Notes

    • For a deeper chocolate flavor, whisk 2 tablespoons of unsweetened cocoa powder into the dry ingredients.
    • If your frosting turns grainy, whisk in a tablespoon of evaporated milk off the heat to smooth it out.
    • Always let the cake cool completely before frosting - otherwise, it'll slide right off!
    • For extra texture, stir in up to ½ cup more coconut or pecans.
    A slice of German chocolate cake on a plate, next to a fork.

    FAQs

    Can I make this German Chocolate Sheet Cake ahead of time?

    Yes! Bake the cake a day ahead and store covered at room temp. Make the frosting up to 2 days early and refrigerate - just let it come to room temperature before spreading.

    How do I store leftover German Chocolate Cake?

    Room temp: Up to 2 days, covered tightly.
    Fridge: Up to 5 days. Bring to room temp before serving.
    Freezer: Up to 2 months. Wrap slices individually for easy grab-and-go treats.

    Serving Suggestions

    This German Chocolate Sheet Cake is pure comfort on its own, but it also pairs beautifully with:

    • A scoop of vanilla or coconut ice cream
    • A drizzle of chocolate syrup for extra indulgence
    • Hot coffee or a cold glass of milk (because some things never change!)

    More Vintage Recipes You’ll Love

    German Chocolate Cake goes back a long time, and if you’re a fan of vintage recipes, you’ll also love these favorites:

    • Slice of chocolate chip cake made in a 9x13 pan, with brown sugar buttercream frosting.
      Chocolate Chip Cake
    • Slice of better than anything cake, showing the toffee and caramel on top of chocolate cake.
      Better Than Anything Cake
    • Angel food cake on cake stand, that's topped with fruit.
      Angel Food Cake Recipe
    • Sliced strawberry lemonade bread, with a glaze dripping over the top.
      Strawberry Lemonade Bread

    Recipe

    German Chocolate Sheet Cake in baking dish.
    Print Pin
    Be the first to rate!

    German Chocolate Sheet Cake

    This easy German Chocolate Sheet Cake is rich, moist, and topped with a buttery coconut-pecan frosting that tastes just like the classic, without the fuss of layers!
    Course Dessert
    Cuisine American
    Prep Time 25 minutes minutes
    Cook Time 50 minutes minutes
    Total Time 1 hour hour 15 minutes minutes
    Servings 12 slices
    Calories 718kcal
    Author Jessica Burgess

    Ingredients

    For the Cake:

    • 1 cup purified water
    • 4 ounces German sweet baking chocolate roughly chopped
    • 2 cups all-purpose flour
    • 1 teaspoon baking soda
    • ½ teaspoon baking powder
    • 1 teaspoon kosher salt
    • 1 cup 2 sticks unsalted butter, softened
    • 2 cups granulated sugar
    • 4 large eggs room temperature
    • 2 teaspoons pure vanilla extract
    • 1 cup buttermilk room temperature

    For the Coconut Pecan frosting:

    • 1 cup evaporated milk
    • 1 cup granulated sugar
    • 3 large egg yolks
    • ½ cup 1 stick unsalted butter, cubed
    • 2 teaspoons pure vanilla extract
    • 1 ½ cups sweetened shredded coconut
    • 1 cup chopped pecans toasted

    Instructions

    • Preheat your oven to 350°F. Prepare a 9×13-inch baking pan with a light coating of nonstick cooking spray, then line it with parchment paper.
    • In a small saucepan, bring 1 cup purified water to a simmer. Add 4 ounces of chopped German sweet baking chocolate and stir until the chocolate is melted and smooth. Remove from heat, pour into a clean bowl, and let it cool slightly while you prepare the rest of the steps.
    • In a medium mixing bowl, whisk together 2 cups of all-purpose flour, 1 teaspoon of baking soda, ½ teaspoon of baking powder, and 1 teaspoon of kosher salt. Set aside.
    • Add 1 cup (2 sticks) of softened unsalted butter and 2 cups of granulated sugar to a large mixing bowl. Beat with a hand mixer on medium speed for 2 to 3 minutes or 1 ½ to 2 minutes with a stand mixer until the mixture is pale, creamy, and fluffy.
      It should look lighter in color and spread like soft frosting, with the sugar no longer appearing gritty. Scrape down the sides and bottom of the bowl once while creaming the butter and sugar to ensure everything is evenly incorporated.
    • Add 4 large eggs, one at a time, mixing well after each addition. Beat in 2 teaspoons pure vanilla extract.
    • Add the melted chocolate mixture and beat until the batter looks smooth and no streaks remain.
    • With the mixer on low speed, add half of the dry ingredients and mix just until combined. Pour in 1 cup of buttermilk and blend gently. Add the remaining dry ingredients and mix on low until the batter is smooth and no streaks of flour remain. Be careful not to overmix.
    • Pour the batter evenly into your prepared pan. Bake for 40-45 minutes. Begin checking the cake for doneness at 35 minutes, as oven temperatures can vary. The cake is ready when the edges pull slightly away from the baking pan, the center springs back when gently touched, and a cake tester or toothpick comes out with a few moist crumbs. If the edges look done but the center needs more time, loosely tent the cake with foil for the last 5 minutes. Cool the cake completely on a wire rack.
    • To make the frosting, place a saucepan over medium heat and whisk together 1 cup of evaporated milk, 1 cup of granulated sugar, 3 large egg yolks, and ½ cup (1 stick) of cubed unsalted butter. Whisk constantly as the mixture cooks over medium heat until the mixture thickens enough to coat the back of a spoon and a path holds when you run your finger through it, about 8 to 10 minutes. If it still appears thin at that point, continue whisking and cooking for an additional 2 to 3 minutes. The mixture often thickens suddenly near the end. As soon as it thickens, remove the pan from the heat immediately to prevent the mixture from curdling.
    • Remove from the heat and stir in 1 teaspoon of pure vanilla extract, 1 ½ cups of coconut, and 1 cup of toasted pecans. Transfer the mixture to a clean bowl and let it sit for 20-25 minutes to thicken, then spread it. It may seem a little loose when hot, but it sets up as it cools.
    • Spread the frosting evenly over the cooled cake. Slice into squares. ENJOY!

    Video

    Notes

    • If your frosting turns grainy, whisk in a tablespoon of evaporated milk off the heat to smooth it out.
    • Always let the cake cool completely before frosting - otherwise, it'll slide right off!

    Nutrition

    Serving: 1slice | Calories: 718kcal | Carbohydrates: 79g | Protein: 9g | Fat: 44g | Saturated Fat: 24g | Polyunsaturated Fat: 4g | Monounsaturated Fat: 13g | Trans Fat: 1g | Cholesterol: 172mg | Sodium: 406mg | Potassium: 302mg | Fiber: 4g | Sugar: 59g | Vitamin A: 942IU | Vitamin C: 1mg | Calcium: 131mg | Iron: 4mg
    • Chocolate Covered Pecans
    • Pecan Pie Recipe
    • Simple Cheese Ball Recipe
    • Coconut Cheesecake
    • Easy Carrot Cake Recipe

    Yeast Rolls Recipe

    November 1, 2025

    Yeast rolls in baking pan.

    This yeast rolls recipe is one of my favorites because it's straight from my mom's kitchen. They’re soft, buttery rolls that are ready in about an hour. No fancy equipment, no all-day proofing…just simple ingredients and a little bit of love.

    Baked, homemade yeast rolls in an aluminum baking pan.

    There's just something special about baking homemade bread in the oven, isn't there? The smell alone feels like a hug from home. If you've ever been intimidated by yeast dough, don't worry. This version is beginner-friendly and nearly foolproof, even if you've never baked homemade rolls before.

    Mom’s Roll Recipe

    My mom has been making this yeast roll recipe for years, and come to find out, it was my grandma’s recipe too! So it’s only natural to carry on the tradition in my own home, right? When my mom came to visit a few months ago, she taught me how to make these, and I made sure to get it on video so I could refer back to it to help me know how to make a successful homemade roll recipe. Now, I share that video with you, too! (See below.)

    Homemade yeast rolls sitting on vintage Corelle plate.

    Why You'll Love This Yeast Rolls Recipe

    • Quick and easy - from start to finish, these rolls are ready in about an hour.
    • Perfect for beginners - no mixer or complicated steps.
    • Soft and fluffy - a tender crumb that melts in your mouth.
    • Versatile - perfect for holidays, weeknight dinners, or sandwich sliders.

    Ingredients (with Notes)

    Labeled ingredients on table, to make an easy yeast rolls recipe.
    • 2 packets active dry yeast - The star of the show. Make sure your yeast is fresh for the best rise.
    • ¼ cup warm water (105-115°F) - Warm, not hot, to activate the yeast.
    • 3½ cups all-purpose flour - Start with 3 cups, then add more as needed.
    • 1¼ cups milk - Adds richness and softness. Whole milk works best.
    • 3 tablespoons sugar - A touch of sweetness that also feeds the yeast.
    • 2 tablespoons vegetable oil - Keeps the rolls moist and tender.
    • 2 teaspoons salt - Balances flavor.

    Instructions

    • Activate the yeast
      Stir the yeast into warm water (around 105-115°F) and let it sit for about 5 minutes, until foamy.
    Yeast and water in measuring cup.
    • Warm the milk mixture
      In a large bowl (glass or crock), combine the milk, sugar, oil, and salt. Microwave until warm - again, around 105-115°F - then stir until the sugar is dissolved.
    Milk and sugar in glass mixing bowl.
    • Combine the yeast and milk mixtures
      Pour the softened yeast into the milk mixture and stir to combine.
    Milk and sugar mixture mixed with yeast mixture.
    • Add the flour
      Stir in 3 cups of flour until fully incorporated. Let the dough rest for 15 minutes because this gives it a head start in rising.
    Flour added to yeast mixture and combined to create a roll dough, in mixing bowl.
    • Prepare your pan
      While the dough rests, grease a 9×13 baking dish or pan with shortening, butter, or oil.
    • Form the dough
      Gradually add a little more flour, a little at a time, until the dough comes together and pulls away from the sides of the bowl. You may not need the full amount. You can use the remaining amount for flouring your surface in next step.
    Wooden spoon pulling roll dough away from the sides of the mixing bowl, showing that it's ready.
    • Knead
      Turn the dough out onto a floured surface and knead (work the dough with your hands) for about 3-5 minutes, until it's smooth and soft (but not sticky).
    Dough on floured surface, showing it's ready for kneading.
    • Shape the rolls
      Pinch off pieces of dough and roll them into smooth balls, about 3 inches across. Arrange them in the greased pan.
    Yeast rolls in baking pan, rising for baking.
    • Let rise
      Let the rolls sit for 15-20 minutes while you preheat your oven to 375°F.
      (I will usually try to place these somewhere warmer if possible, such as on top of the oven while it preheats.)
    • Bake
      Bake for 18-20 minutes, uncovered until golden brown. If they brown too quickly, cover loosely with foil.
    Baked yeast rolls in aluminum baking pan.
    • Finish with butter – Optional
      Remove from oven and brush or spread the tops of warm rolls with butter if you’d like. You can also sprinkle Maldon salt on top, which takes these up a whole notch!
    Butter being spread on top of yeast rolls.

    Tips for Success

    • Check your yeast freshness. If it doesn't foam in the warm water, it may be expired.
    • Don't over-flour. Add just enough flour so the dough pulls away from the bowl but stays soft.
    • Let the dough rest in a warm, draft-free spot.
    • For extra flavor, brush with honey butter or add a sprinkle of garlic powder before baking.

    FAQs

    Can I make yeast rolls ahead of time?

    Yes. You can make and shape the rolls a few hours ahead, cover them tightly, and refrigerate until ready to bake. Let them come to room temperature before baking though.

    Can I freeze homemade rolls?

    Absolutely. Once baked and cooled, wrap the rolls tightly and freeze for up to two months. Reheat in a 300°F oven for about 10 minutes.

    Why are my rolls dense?

    Most often, dense rolls mean too much flour was added or the dough didn't have enough time to rest and rise.

    Hand holding yeast roll.

    Serving Ideas

    These homemade yeast rolls are perfect with:

    • Sunday dinner roasts or any of my easy soup recipes
    • Thanksgiving or Christmas meals
    • Ham sliders or turkey sliders
    • Homemade raspberry jam, apple butter, or flavored butters
    Yeast roll, sliced in half, and topped with butter and apple butter, sitting on vintage plate.

    If you try them, let me know how they turn out, and be sure to check out the original; my mom's original yeast rolls recipe here.

    Other Vintage Recipes You’ll Love

    This yeast rolls recipe is one of those vintage, tried-and-true treasures that never fails. Whether you're making them for a special occasion or just because it's a cozy Sunday afternoon, they'll fill your kitchen with that nostalgic, home-baked smell that's impossible to beat. Here are more vintage recipes you’ll also enjoy:

    • Slice of banana cake with brown butter cream cheese frosting.
      Banana Cake with Brown Butter Frosting
    • A slice of strawberry upside down cake, being held above round cake.
      Strawberry Upside Down Cake
    • A slice of strawberry earthquake cake on a plate with fork.
      Strawberry Earthquake Cake
    • caramel drizzling on chocolate gooey butter cookie
      Chocolate Gooey Butter Cookies

    Recipe

    Yeast rolls in baking pan.
    Print Pin
    Be the first to rate!

    Yeast Rolls Recipe – Ready in an Hour!

    An easy, one-hour yeast rolls recipe that bakes up soft, fluffy, and full of homemade flavor.
    Course Appetizer, Side Dish
    Cuisine American
    Prep Time 40 minutes minutes
    Cook Time 20 minutes minutes
    Total Time 1 hour hour
    Servings 12 rolls
    Calories 180kcal
    Author Jessica Burgess

    Ingredients

    • 2 packages active dry yeast (Two, ¼ ounce packages)
    • ¼ cup warm water 105-115°F
    • 3 ½ cups all-purpose flour
    • 1 ¼ cup milk
    • 3 tablespoons sugar
    • 2 tablespoons vegetable oil
    • 2 teaspoons salt

    Instructions

    • Activate the yeast. Stir the yeast into warm water (water should be around 105-115°F) and let it sit for about 5 minutes, until foamy.
    • Warm the milk mixture. In a large bowl, combine the milk, sugar, oil, and salt. Microwave until warm - again, around 105-115°F - then stir until the sugar is dissolved.
    • Combine yeast and milk mixtures. Pour the softened yeast into the milk mixture and stir to combine.
    • Add the flour. Stir in 3 cups of flour until fully incorporated. Let the dough rest for 15 minutes - this gives it a head start in rising.
    • Prepare your pan. While the dough rests, grease a baking dish or pan with shortening, butter, or oil.
    • Form the dough. Gradually add a little more of the remaining flour, a little at a time, until the dough comes together and pulls away from the sides of the bowl. You may not need the full amount, and can use extra for sprinkingly on surface in next step.
    • Knead. Turn the dough out onto a floured surface and knead for about 3-5 minutes, until it's smooth and soft (but not sticky).
    • Shape the rolls. Pinch off pieces of dough and roll them into smooth balls, about 3 inches across. Arrange them in the greased pan. (This should make about 12 rolls.)
    • Preheat. Now is a good time to preheat your oven to 375°F.
    • Let rise. Let the rolls sit for 15-20 minutes while you preheat your oven to 375°F. I like to place these in a warmer spot (perhaps on top of the oven while preheating.)
    • Bake. Bake for 18-20 minutes, until golden brown. If they brown too quickly, cover loosely with foil.
    • Finish with butter. Remove from oven and if desired, brush warm rolls with melted butter or use stick butter and turn on the tops of rolls to watch the butter melt down the sides. Then, you can also sprinkle with Maldon salt if desired for a touch of saltiness.

    Video

    Notes

    • Check your yeast freshness. If it doesn't foam in the warm water, it may be expired.
    • Don't over-flour. Add just enough flour so the dough pulls away from the bowl but stays soft.

    Nutrition

    Serving: 1roll | Calories: 180kcal | Carbohydrates: 32g | Protein: 5g | Fat: 3g | Saturated Fat: 1g | Polyunsaturated Fat: 1g | Monounsaturated Fat: 1g | Trans Fat: 0.01g | Cholesterol: 3mg | Sodium: 398mg | Potassium: 79mg | Fiber: 1g | Sugar: 4g | Vitamin A: 42IU | Vitamin C: 0.001mg | Calcium: 37mg | Iron: 2mg

    Pecan Pie Dump Cake

    October 26, 2025

    One serving of pecan pie dump cake on a plate topped with vanilla ice cream and caramel drizzle.

    If you've ever wished you could capture the rich, gooey flavor of a Southern pecan pie without the fuss of rolling out pie dough, this pecan pie dump cake is your dream come true. It's sweet, nutty, buttery, and ridiculously easy to make, and the perfect shortcut dessert for busy home cooks who still want that made-from-scratch taste.

    For more simple desserts like this one, you can browse my full dump cake recipes here.

    A serving of pecan pie dump cake on a plate, topped with vanilla ice cream.

    Why You'll Love This Recipe

    • All the flavor of classic pecan pie without the work of making a crust.
    • Perfectly gooey center and buttery, golden cake topping.
    • Feeds a crowd - ideal for Thanksgiving, Friendsgiving, Christmas, or any potluck.
    • Simple ingredients you likely already have in your pantry, similar to those in this butter pecan cake.
    • Freezes beautifully, so you can make it ahead for stress-free entertaining.

    Ingredients (with Notes)

    Labeled ingredients for pecan pie dump cake.
    • Dark brown sugar - Adds deep molasses flavor; light brown sugar works too.
    • Dark corn syrup - Keeps that signature pecan pie gooey texture.
    • Large eggs - Bind everything together for a rich, custard-like layer.
    • Salted butter - Adds flavor depth; margarine works if preferred.
    • Vanilla extract - Or try almond extract for a nuttier twist.
    • Salt - Balances the sweetness.
    • Chopped pecans - The heart of this dessert; toasty, rich, and crunchy.
    • Yellow cake mix - The easy-button topping that gives it the "dump cake" magic.
    • Ground cinnamon & nutmeg - Add warmth and cozy fall flavor.
    • Pecan halves - For extra crunch and a pretty finish.
    • Caramel topping - The final drizzle that makes it absolutely irresistible.

    Instructions

    1. Prepare the pan.
    Preheat your oven to 350°F and spray a 9×13-inch baking dish with nonstick cooking spray.

    2. Mix the pecan pie layer.
    In a large bowl, whisk together the brown sugar, corn syrup, eggs, melted butter, vanilla, and salt until smooth. Stir in the chopped pecans until evenly coated, then pour into your prepared baking dish.

    Sugar, corn syrup, butter, eggs and pecans mixed together and poured in to baking dish.

    3. Make the cake topping.
    In another bowl, mix the cake mix with cinnamon and nutmeg. Cut in the softened butter with a fork until it resembles wet sand.

    Make sure there isn’t any cake mix left thats not mixed with butter. It should all be a dark tan, not a powdery white. (This will result in a dry, top.) Sprinkle evenly over the pecan mixture. It should look like the image below…

    Wet, sandy cake mix and butter mixture on dump cake.

    PRO TIP: Gently press cake mixture down in to wet mixture, just a little bit. Do not stir or mix in. Just pressing down gently will help the topping get a little more moisture.

    4. Add the final touch.
    Top with pecan halves for crunch and beauty. Bake uncovered for 45-50 minutes, or until the center is almost set. If the edges are browning too quickly, you can cover with foil for the remainder of the cooking time.

    Unbaked pecan pie dump cake.

    5. Cool and drizzle.
    Let cool slightly before drizzling with caramel topping. Serve warm with vanilla or butter pecan ice cream - it's heavenly!

    Baked pecan pie dump cake with caramel drizzle on top.

    Tips & Notes

    • Use dark brown sugar and dark corn syrup for that deep, authentic pecan pie flavor.
    • Make sure your butter is softened, not melted, for the best crumble topping texture. The cake mix and butter mixture should not have any white/light, dry cake mix showing. It should all be crumbly and dark tan like a wet sand mixture.
    • Cake browning before rest of cake is done baking? Cover with foil until cake finishes baking.
    • Want to make it a Southern pecan pie dump cake? Add a splash of bourbon or a pinch of cayenne for a little Southern flair.
    • Let the cake rest at least 15 minutes before cutting - it sets up beautifully as it cools.

    FAQs

    What does pecan pie dump cake taste like?

    It's the best of both worlds: a gooey pecan pie meets buttery yellow cake, all in one decadent bite.

    Can I make this ahead of time?

    Yes! You can bake, cool, and refrigerate it for up to 3-4 days. Reheat individual servings in the microwave for 15-20 seconds before serving.

    Can I freeze pecan pie dump cake?

    Absolutely. Wrap tightly in plastic wrap and freeze for up to 2 months. Thaw overnight in the refrigerator before reheating.

    Can I use a different cake mix for this dump cake?

    Try swapping yellow cake for butter pecan cake mix, or sprinkle a few chopped walnuts into the topping for a fun twist.

    Serving of pecan pie dump cake on a plate, topped with vanilla ice cream and caramel drizzle on top.

    Storage & Reheating

    Store leftovers in an airtight container in the refrigerator for up to 4 days. To reheat, microwave in 15-second bursts until warm. It also tastes amazing cold, right from the fridge - no judgment here!

    Serving Suggestions

    Serve this cozy pecan dump cake warm with:

    • A scoop of vanilla or butter pecan ice cream
    • A dollop of whipped cream
    • A drizzle of extra caramel sauce or maple syrup

    Perfect for holidays, potlucks, or Sunday suppers, this pecan pie cake will steal the show every single time and may just be added to your list of favorite old-fashioned dessert recipes.

    More Dump Cake Recipes

    • Pumpkin Dump Cake serving on round plate.
      Pumpkin Dump Cake
    • slice of pineapple dump cake on plate
      Pineapple Dump Cake
    • Slice of lemon dump cake on round plate, next to fork.
      Lemon Dump Cake
    • A serving of banana dump cake in a small ramekin with caramel sauce and sliced bananas.
      Banana Dump Cake

    Recipe

    One serving of pecan pie dump cake on a plate topped with vanilla ice cream and caramel drizzle.
    Print Pin
    4 from 4 votes

    Pecan Pie Dump Cake

    This easy pecan pie dump cake has all the gooey, buttery flavor of classic pecan pie combined with the style of a dump cake.
    Course Dessert
    Cuisine American
    Prep Time 10 minutes minutes
    Cook Time 45 minutes minutes
    Total Time 55 minutes minutes
    Servings 12 slices
    Calories 705kcal
    Author Jessica Burgess

    Ingredients

    • 1 ½ cups dark brown sugar packed
    • ⅔ cup dark corn syrup
    • 4 large eggs lightly beaten
    • ½ cup salted butter, melted (1 stick, 8 tablespoons)
    • 2 Tablespoons vanilla extract
    • 1 teaspoon salt
    • 2 cups chopped pecans

    Topping

    • 15 ounce box yellow cake mix
    • 2 teaspoons ground cinnamon
    • ½ teaspoon ground nutmeg
    • ¾ cup salted butter, softened one and a half sticks, so 12 tablespoons
    • 1 cup pecan halves
    • 1 cup caramel topping

    Instructions

    • Prepare. Preheat your oven to 350°F and spray a 9×13 casserole dish with nonstick cooking or baking spray.
    • Mix the pecan pie layer. In a large bowl, combine brown sugar, corn syrup, eggs, melted butter, vanilla, and salt until well mixed.
    • Stir in the pecans. Add the chopped pecans and stir really well until they're evenly distributed throughout the batter.
    • Transfer to the baking dish. Pour into the baking dish and use a rubber spatula to spread evenly.
    • Flavor the cake mix. In another large bowl, stir together the cake mix with the cinnamon and nutmeg.
    • Make the topping. Add the softened butter and use a fork to work the butter into the cake mix until you have a wet sand texture. **Make sure all of the cake mix is incorporated with butter. (It should be a dark tan color, not a white/light color, or this could make the cake topping dry.)
      Sprinkle the mixture over the baking dish until evenly layered and covering the sugar mixture.
      PRO TIP: Gently press down the butter/cake mix mixture in to the wet. Do not mix, or stir. Pressing it down, gives the cake mix more moisture.
    • Add pecan halves for extra crunch. Sprinkle halved pecans over the cake mixture and bake for 45-50 minutes or until golden brown.
      TIP: Check after about 30 minutes, and if the cake is getting to brown around the edges, before the baking is done, cover with foil until cake is finished baking.
    • Cool and drizzle with caramel. Once baked, allow the cake to cool slightly before drizzling with caramel and serving. Great served with vanilla or butter pecan ice cream!

    Video

    Notes

    Let the cake rest at least 15 minutes before cutting - it sets up beautifully as it cools.
    You can also freeze this cake if you prefer.

    Nutrition

    Serving: 1slice | Calories: 705kcal | Carbohydrates: 92g | Protein: 6g | Fat: 37g | Saturated Fat: 13g | Polyunsaturated Fat: 7g | Monounsaturated Fat: 16g | Trans Fat: 1g | Cholesterol: 95mg | Sodium: 751mg | Potassium: 216mg | Fiber: 3g | Sugar: 72g | Vitamin A: 585IU | Vitamin C: 0.4mg | Calcium: 161mg | Iron: 2mg

    White Gravy Recipe

    October 26, 2025

    White gravy recipe on top of biscuits next to bacon on a vintage plate.

    This White Gravy Recipe is so easy, made in just a few minutes, and is delicious served over 3 ingredient biscuits, on top of southern country-fried steak, or used to dip these breakfast pigs in a blanket in to.

    If you’ve been intimidated by making gravy, don’t be! We’ll show you the step-by-step process and no-fail method for a perfect Southern gravy recipe each time.

    White gravy poured across biscuits, sitting on white plate.

    This easy white gravy recipe is a classic, old-fashioned favorite to serve over biscuits or over Instant Pot mashed potatoes, making this a great recipe for breakfast or even a country-style dinner. Or if you prefer a sausage gravy, this chorizo sausage gravy is one of our favorites that provides a meaty, heated, flavor. Or, fire up those tastebuds with this jalapeno gravy!

    [feast_advanced_jump_to]

    Why You’ll Love This Recipe

    • Classic: This classic white gravy recipe is the old-fashioned favorite, that uses simple, basic ingredients.
    • Only a few ingredients: You don’t need a lot to make this homemade white country-style gravy! Actually, you may already have the ingredients on hand and can whip this up right away!
    • Ready in only 10 minutes: It doesn’t take long to make this creamy white gravy recipe, so it can be made while you cook biscuits in the air fryer!
    • Familiar favorites: Also called a southern gravy, white pepper gravy, or a sawmill gravy, this delicious white gravy is called many things but the bases are similar; flour, milk, fat, salt, and pepper.

    Ingredients Needed

    This easy homemade white gravy recipe uses simple ingredients! However, there are some substitutions that can be made, and more details about some of the ingredients are below.

    Labeled ingredients for white gravy recipe, sitting on kitchen counter.
    • Bacon grease – We love using bacon grease for this recipe. It adds a hint of flavor and saltiness.
    • All purpose flour – We say 2 “heaping” tablespoons of flour, meaning we use a big serving tablespoon, and dip it in the flour, creating a “mountain” of flour on top of the spoon. This is flexible but is similar to about ¼ cup of flour (not packed), or so.
    • Black pepper – Adding black pepper to the gravy is key, in our opinion. Some even prefer a lot of black pepper, some more than others, so that’s why we suggest adding it to your taste preference.
    • Salt – The amount can differ, due to the saltiness of the bacon grease you use. So we say to add the amount of salt to your taste preference. Remember, you can always add but it’s harder to take it away if you add too much.

    Substitutions

    If you’ve found that you’re out of some of the ingredients needed for this recipe, or prefer to use something different, here are some suggestions:

    • Bacon grease – you can also use melted butter instead of grease, or you can use sausage grease, or other meat drippings.
    • Milk – although we prefer using whole milk for white gravy, you can use 2% if that’s what you prefer. Skim milk, or different types of milk may cause the recipe to vary in results.

    Equipment

    A large skillet is used for this recipe, and a cast-iron skillet is preferred for this southern classic if available.

    How to Make White Gravy

    Making this gravy recipe is easy but there are some crucial things to keep in mind while making it for best results, so it doesn’t turn out clumpy, it thickens perfectly, and more.

    We suggest making the gravy right before ready to serve, so if making a big breakfast, save the gravy for last.

    *Be sure to see the recipe card below for the full ingredients list & instructions!*

    Steps 1-4 showing how to make white gravy.

    STEP 1. Melt or warm the bacon grease. Over low, simmering, heat, add bacon grease to the skillet and allow it to warm through. (Image 1).

    Tip: If the skillet is too hot before step 2, clumps will develop. Make sure the pan is gently warm, and not too hot.

    Update to Step 2: (See notes below)

    OLD METHOD STEP 2. Milk & flour. In a jar, or small mixing bowl, add in the 2 heaping tablespoons of flour and about 1 cup of the milk. Tighten lid, and shake vigorously for about 2-3 minutes or until the mixture looks free of clumps. (Image 2). Or, if mixing in a bowl, use a whisk and mix to make sure the mixture is smooth.

    Add to skillet. Once the milk and flour mixture is smooth and evenly mixed, pour in to the warmed bacon grease and whisk to combine.

    Add milk. When the milk and flour mixture is heated through with the bacon grease, add the remaining cold milk, salt, and pepper, and then turn the heat up to medium-high heat, constantly whisking. The gravy will begin to thicken and you’ll want it to cook for at least another 5 minutes to let the flour cook.

    NEW METHOD STEP 2. If you want to skip the jar/bowl method, I’ve found it just as easy as to sprinkle the 2 heaping tablespoons of flour in to the bacon grease and let it cook for just a few minutes, and then just add all of the milk in at once and whisk.

    Continue whisking, add salt, and pepper, and then turn the heat up to medium-high heat, constantly whisking. The gravy will begin to thicken and once thickened to your preference, serve.

    Tip: If you notice the gravy thickening too fast, or too much before the 5+ minutes are up, turn the heat down, still whisking. You want the gravy to thicken but you don’t want it too hot, or it will get too thick and possibly scorch.

    White gravy in a cast iron pan, with a spoon resting inside.

    Once the gravy has thickened, and has cooked through for about 5 minutes, taste test the gravy to see if you should add more salt and or pepper. Serve!

    Spoon scooping up serving of white gravy, out of skillet.

    Recipe Pro Tips

    • If you have clumps. If your skillet was too hot when adding the milk/flour mixture, it’s ok! It may just take a little more whisking, and as it thickens, the lumps can sometimes be thinned out. Whisk vigorously (my favorite is using a flat whisk for this) until the clumps break up. If the clumps are too big or there are too many and the whisk isn’t working, you can also use a hand blender or regular blender in a last effort, or even strain it!
    • Bacon grease. We know that you may not always feel like making bacon just for your milk gravy. If you do love using bacon grease, save the bacon grease when you make, say, air fryer bacon, and freeze the cooled, leftover bacon grease in to ice cube trays, so you can pull 1-2 cubes out when it’s time to make gravy.
    Two biscuits sitting on white plate with white country gravy spooned over the top.

    Recipe FAQs

    What is white gravy made of?

    Flour, milk, bacon grease, salt and pepper.

    Why is my gravy lumpy?

    If the pan is too hot when adding flour, or if the pan is too hot and the gravy sits too long without being stirred, the flour can form in to lumps.

    Why does my white gravy taste like flour?

    Because simmering for at least 5 minutes is important for the flour to cook, and blend with the other ingredients. If not, the gravy can taste doughy or have a raw flour taste.

    Can you freeze white gravy?

    Yes! Allow it to cool and store in an airtight, freezer-safe container, or in a freezer bag, and place in the freezer for up to 3-6 months.

    What to Serve with White Gravy

    Gravy is delicious served with so many things! Here are some of our favorites:

    • hot homemade biscuits
    • air fryer hashbrowns patties
    • scrambled eggs
    • fried pork chops
    • Southern country fried steak
    • fried potatoes and onions
    • Instant Pot mashed potatoes
    • fried deer meat
    • baked chicken cutlets
    • chicken tenders
    Bite of biscuits and gravy on fork, holding above plate.

    Storage

    If you have leftover gravy, allow it to cool and place it in an airtight container and store in the refrigerator for up to 3 days.

    Or if freezing, it can be frozen for 3-6 months.

    More Country-Style Recipes You’ll Love

    Love old-fashioned recipes like this one? We think you’ll also love:

    • Close up of southern fried chicken on white plate.
      Southern Fried Chicken
    • Dutch oven beef stew in white pot.
      Dutch Oven Beef Stew
    • Bowl of ham and beans with spoon, and cornbread sitting on side of bowl.
      Ham and Beans Recipe
    • Old Fashioned Tuna Casserole on white plate.
      Old Fashioned Tuna Casserole

    Did you make this? I’d be so grateful if you left a “star” rating below to let me know what you thought! Then, the next time you need a quick and easy recipe, come back to Fantabulosity to browse all of my easy recipes!

    Have you tried our biscuit and gravy casserole? It’s a must, after this one!

    Recipe

    White gravy recipe on top of biscuits next to bacon on a vintage plate.
    Print Pin
    5 from 5 votes

    White Gravy Recipe

    A classic white gravy recipe, made of flour, milk, bacon grease and salt and pepper! Perfect served over biscuits, or your favorite southern dishes.
    Course Breakfast, Dinner, Side Dish
    Cuisine American
    Prep Time 5 minutes minutes
    Cook Time 5 minutes minutes
    Total Time 10 minutes minutes
    Servings 4 servings
    Calories 238kcal
    Author Jessica Burgess

    Equipment

    • skillet

    Ingredients

    • ¼ cup bacon grease or a little more/less is fine!
    • 2 tablespoons all-purpose flour heaping tablespoons
    • 2½ cups whole milk divided
    • salt to taste
    • black pepper to taste

    Instructions

    • Over low, simmering, heat, add bacon grease to the skillet and allow it to warm through.
    • Note: I have updated my original method to make it even easier. I will provide both below so you can choose your favorite:
      New method: Sprinkle 2 heaping tablespoons of flour in to the heated bacon grease and whisk for 2-3 minutes. Once the flour has cooked and browned a bit, add in the 2 ½ cups of milk, and increase heat to med-high heat, constantly whisking until thickened. Add salt/pepper and serve.
    • Old method: In a jar, or small mixing bowl, add in the 2 heaping tablespoons of flour and about 1 cup of the milk. Tighten lid, and shake vigorously for about 2-3 minutes or until the mixture looks free of clumps. Or, if mixing in a bowl, use a whisk and mix to make sure the mixture is smooth.
      Once the milk and flour mixture is smooth and evenly mixed, pour in to the warmed bacon grease and whisk to combine.
      When the milk and flour mixture is heated through with the bacon grease, (this is cooking the flour, to get the "raw" taste out) add the remaining milk, salt, and pepper, and then turn the heat up to medium-high heat, constantly whisking. The gravy will begin to thicken and you'll want it to cook for at least another 5 minutes to "cook" the flour in the gravy.
      Once the gravy has thickened, and has cooked through for about 5 minutes, taste test the gravy to see if you should add more salt and or pepper. Serve!

    Video

    Notes

    Tip to prevent clumps: If the skillet is too hot before step 2, clumps will develop. Make sure the pan is gently warm, and not too hot. If you have lumps, whisk vigorously until the clumps break up. If the clumps are too big or there are too many and the whisk isn’t working, you can also use a hand blender or regular blender in a last effort, or even strain it!

    Nutrition

    Serving: 1serving | Calories: 238kcal | Carbohydrates: 10g | Protein: 5g | Fat: 20g | Saturated Fat: 9g | Polyunsaturated Fat: 2g | Monounsaturated Fat: 8g | Cholesterol: 32mg | Sodium: 80mg | Potassium: 233mg | Fiber: 0.1g | Sugar: 7g | Vitamin A: 247IU | Calcium: 188mg | Iron: 0.2mg

    Amish Applesauce Cake

    October 25, 2025

    A slice of Amish applesauce cake on plate with fork.

    There's something so cozy about a rustic, old-fashioned cake, especially one that fills your kitchen with the warm scent of cinnamon and nutmeg. This Amish Applesauce Cake is just that kind of recipe. Moist, spiced just right, and incredibly simple to make, it's perfect for breakfast, dessert, or an afternoon snack with coffee.

    Cheesecake slice with caramel topping on white plate, dessert recipe, sweet treats, baked goods, delicious cheesecake.

    Why You'll Love This Amish Applesauce Cake

    Simple, from-scratch flavor. No fancy ingredients or mixers needed, just basic pantry staples.
    Soft, moist texture. Thanks to the applesauce, this cake stays tender and never dries out.
    Perfectly spiced. Cinnamon, nutmeg, and allspice give this cake that signature autumn warmth.
    Great for gatherings. Easy enough to bake for a crowd, this easy applesauce cake is a hit at family get-togethers or potlucks. This Crack Cake is also a fun cake for serving a crowd.
    Make-ahead friendly. It freezes beautifully, so you can enjoy it anytime the craving strikes.
    Old-Fashioned flavor. This, along with this supper cake recipe, is one of those that tastes just like it came out of a church cookbook!

    Ingredients (with Notes)

    Labeled ingredients for Amish applesauce cake on a counter.
    • All-purpose flour - Keeps the crumb light and tender.
    • Ground cinnamon - The star spice that brings cozy warmth.
    • Baking soda - Helps the cake rise.
    • Ground nutmeg & allspice - Add that unmistakable fall spice blend.
    • Salt - Balances the sweetness.
    • Applesauce - Sweetened or unsweetened both work; homemade applesauce adds extra charm.
    • Dark brown sugar & granulated sugar - A mix for depth of flavor and perfect sweetness.
    • Salted butter - Adds richness and that classic buttery taste.
    • Large eggs - Room temperature helps everything blend smoothly.
    • Vanilla extract - Enhances the overall flavor.
    • Chopped walnuts - Give a nice crunch (optional, but delicious).

    (See the full recipe card below for exact measurements.)

    Instructions

    • Preheat the oven. Set your oven to 350°F and spray a 9×13 lipped baking sheet with nonstick spray.
    • Combine the dry ingredients. In a large bowl, whisk together flour, cinnamon, baking soda, nutmeg, salt, and allspice.
    Dry ingredients in mixing bowl.
    • Mix the wet ingredients. In a separate bowl, stir together applesauce, brown sugar, granulated sugar, butter, eggs, and vanilla extract. Don't worry if the butter doesn't fully blend in.
    Wet ingredients in mixing bowl.
    • Combine and mix. Add the wet ingredients to the dry mixture and stir until smooth-but don't overmix.
    Dry ingredients combined with wet ingredients in mixing bowl.
    • Add walnuts. Stir in the chopped walnuts for a little crunch.
    Walnuts added to cake batter in mixing bowl.
    • Bake. Pour into your prepared dish and bake for about 30 minutes, or until a toothpick inserted in the center comes out clean.
    Unbaked amish applesauce cake in 9x13 baking dish.
    • Cool and serve. Let it cool completely before slicing.
    Baked amish applesauce cake in baking dish.
    • Optional Glaze (so good!). Melt 2 tablespoons of butter with 1 tablespoon dark brown sugar in the microwave for 1 minute, stir, and brush over the top before serving.

    Storage & Freezing Tips

    Store: Keep leftovers in an airtight container in the fridge for up to 5 days.
    Freeze: Wrap slices or the whole cake tightly in plastic wrap, then foil, and freeze for up to 2 months. Thaw at room temperature before serving.
    Reheat: Pop a slice in the microwave for about 20 seconds to bring back that fresh-from-the-oven warmth.

    Flavor Variations & Add-Ins

    • Add ½ teaspoon ground cloves for extra spice.
    • Swap in pecans for or alongside walnuts.
    • Try cinnamon or peach applesauce for a fun twist.
    • Drizzle with caramel sauce for a caramel-apple-inspired treat.
    • Dust with powdered sugar for a pretty, rustic finish.
    Amish applesauce cake with a slice cut out and lifted out.

    FAQs

    What does Amish applesauce cake taste like?

    It's soft, and filled with cozy spice. The applesauce keeps it tender while the spices make every bite feel like fall.

    Can I make this cake without nuts?

    Yes! It's just as good without walnuts. You can also add raisins or dried cranberries instead.

    Can I use homemade applesauce?

    Absolutely-it adds a lovely homemade touch and extra apple flavor.

    Is this an Amish recipe?

    This cake is inspired by traditional Amish recipes that use simple, wholesome ingredients to create flavorful, comforting desserts.

    Serving Suggestions

    This spiced applesauce cake is wonderful served plain, but here are a few fun ways to enjoy it:

    • With a scoop of vanilla ice cream
    • Topped with whipped cream and a sprinkle of cinnamon
    • Warm with your morning coffee
    • Served alongside fresh fruit for brunch

    Whether you call it Amish Applesauce Cake, Easy Applesauce Cake, or Walnut Applesauce Cake, one thing's for sure-this simple dessert has old-fashioned charm baked right in. It's the kind of cake that makes your kitchen smell amazing and your family gather around the table for "just one more slice."

    More Vintage Recipes

    • A slice of strawberry shortcake sheet cake on a round plate.
      Strawberry Shortcake Sheet Cake
    • A slice of cherry sheet cake on a plate.
      Cherry Sheet Cake
    • Cherry Blondies stacked on top of one another.
      Cherry Blondies
    • A slice of strawberry banana cake with cream cheese frosting drizzled on top.
      Strawberry Banana Cake

    Recipe

    A slice of Amish applesauce cake on plate with fork.
    Print Pin
    5 from 1 vote

    Amish Applesauce Cake

    This Amish Applesauce Cake is an easy dessert, the perfect blend of cinnamon, nutmeg, and sweet applesauce.
    Course Dessert
    Cuisine American
    Prep Time 10 minutes minutes
    Cook Time 30 minutes minutes
    Total Time 40 minutes minutes
    Servings 12 slices
    Calories 309kcal
    Author Jessica Burgess

    Ingredients

    • 2 cups all-purpose flour
    • 1 teaspoon ground cinnamon
    • 1 teaspoon baking soda
    • ½ teaspoon ground nutmeg
    • ½ teaspoon salt
    • ⅛ teaspoon allspice
    • 1 ¾ cup applesauce
    • ¾ cup dark brown sugar
    • ½ cup granulated sugar
    • ½ cup 1 stick salted butter, softened
    • 2 large eggs
    • 2 teaspoons vanilla extract
    • ½ cup chopped walnuts

    Optional Glaze:

    • 2 tablespoons salted butter
    • 1 tablespoon dark brown sugar

    Instructions

    • Prepare the oven. Preheat your oven to 350°F and spray a 9×13 lipped baking sheet with nonstick baking spray.
    • Combine the dry ingredients. In a large bowl, combine the all-purpose flour, cinnamon, baking soda, ground nutmeg, salt, and allspice and set aside.
    • Mix the wet ingredients. In a medium bowl, mix together the applesauce, brown sugar, granulated sugar, butter, eggs, and vanilla extract. It's ok if the butter doesn't completely blend in.
    • Add the wet to the dry. Add the wet ingredients to the bowl with the dry ingredients and stir together until smooth, but do not overmix.
    • Toss in walnuts for crunch. Add the walnuts to the mixture.
    • Transfer to your baking dish. Pour the batter into the baking dish and bake uncovered for 30 minutes or until a toothpick inserted into the center of the cake comes out clean.
    • Cool and serve. Cool completely before slicing and serving.

    Optional Glaze

    • While waiting for your cake to cool, heat 2 tablespoons of butter and 1 tablespoon dark brown sugar in a small microwave-safe bowl for 1 minute. Stir until the brown sugar has dissolved and brush over the cake before slicing.

    Video

    Notes

    You can make this cake without nuts if desired. 

    Nutrition

    Serving: 1slice | Calories: 309kcal | Carbohydrates: 44g | Protein: 4g | Fat: 14g | Saturated Fat: 7g | Polyunsaturated Fat: 3g | Monounsaturated Fat: 3g | Trans Fat: 0.4g | Cholesterol: 53mg | Sodium: 280mg | Potassium: 105mg | Fiber: 1g | Sugar: 26g | Vitamin A: 347IU | Vitamin C: 0.4mg | Calcium: 31mg | Iron: 1mg

    3-Ingredient Biscuits

    October 21, 2025

    3-ingredient biscuits stacked on vintage plate.

    If you've ever wished for a biscuit recipe that's quick, buttery, and foolproof, this is the one. These 3-ingredient biscuits are now my absolute go-to. They’re soft and fluffy inside, golden and crisp on the outside, with just the right buttery flavor.

    They're perfect for biscuits and old-fashioned white gravy, building a breakfast sandwich after cooking sausage patties in the oven, enjoying warm with butter or apple butter, or honestly… straight out of the pan.

    Why You'll Love This Recipe

    • Only 3 ingredients - no fuss, no fancy tools.
    • Fluffy centers + crispy tops (the dream combo!).
    • Perfect for any occasion - breakfast, brunch, or a side dish for dinner.
    • The buttery, slightly salty flavor is pure Southern comfort.

    Ingredients (with Notes)

    • Salted butter - Use ¼ cup (4 tablespoons) plus 3 more tablespoons, divided. You’ll be using the ¼ cup to mix in for dough, and the 3 other tablespoons for greasing your skillet, and brushing on the tops of the biscuits.
    • Self-rising flour - You'll need 2 cups, plus a little extra for dusting the counter and dough as you work it. Make sure your flour is fresh for the best rise.
    • Cold buttermilk - The chill helps create those tender, flaky layers while adding tangy flavor.

    Instructions

    • Preheat. Preheat the oven to 475 degrees F.
    • Freeze the butter. Stick ¼ cup (4 tablespoons) of salted butter in the freezer for about 5 minutes.
    • Prep your dry ingredients. Sift 2 cups of self-rising flour into a medium mixing bowl.
    • Grate the butter. Using the large holes of a grater, grate your cold butter right into the flour.
    Sifted flour with grated butter in mixing bowl.
    • Mix gently. Use your hands to lightly combine the butter and flour - don't overmix!
    • Add buttermilk. Create a small well in the center and pour in 1 cup of cold buttermilk. Mix gently with your hands just until it comes together.
    Sifted self-rising flour in mixing bowl, with buttermilk in middle of well.
    • Form the dough. Sprinkle a little extra flour on your counter or table. Turn the dough out onto it, and sprinkle a bit more flour on top of the dough so it's not sticky.
    • Fold the dough. With floured hands, fold the dough over 3-4 times. Sprinkle a touch more flour if it feels sticky, then pat it out to about ¾-inch thick.
    Biscuit dough on table that's covered in flour.
    • Prep the pan. Grease your cast-iron skillet with 1 tablespoon of softened butter. ** If you don’t have a cast-iron skillet, that’s ok! I’ve baked these on parchment lined baking sheets and they work just fine. But do watch the bake times. I find that I only baked biscuits on the baking sheet for about 13 minutes. Different pans can vary.
    Cast iron skillet covered in salted butter.
    • Cut the biscuits. Flour your biscuit cutter (I used a 3½-inch cutter) and cut out about 5 biscuits. Press straight down - don't twist the cutter! Twisting seals the edges and keeps the biscuits from rising tall and fluffy.
    • Place. Place each biscuit in the cast iron skillet, making sure the sides touch one another.
    • Bake. Brush the tops of the biscuits with 1 tablespoon of melted butter and bake at 475°F for 15-16 minutes, or until the tops are beautifully golden brown.
    Unbaked biscuits in cast iron skillet, with melted butter brushed on top.
    • Finish. Brush on another tablespoon of melted butter right after baking. If you'd like, sprinkle a touch of Maldon salt on top (totally optional, but lovely).
    Baked 3-ingredient biscuits in cast iron skillet, with melted butter being brushed on top.

    Tips & Notes

    • Cold ingredients = flaky biscuits. Don't skip chilling your butter - it makes all the difference.
    • Add flour as needed. Lightly dust your hands, counter, and dough while working to prevent sticking - but avoid adding too much, or the biscuits will lose their tenderness.
    • No twisting! Always press your cutter straight down so the biscuits rise evenly and get that perfect fluffy texture.

    Serving Suggestions

    Serve these warm from the skillet with:

    • Classic sausage gravy
    • A pat of butter and a drizzle of honey
    • Homemade raspberry jam
    • Alongside your favorite Fantabulosity soup recipe!
    Butter spread on to split 3-ingredient biscuit on plate.

    Storage & Reheating

    Store leftover biscuits in an airtight container at room temperature for up to 2 days, or refrigerate for up to 5. Reheat in the oven or air fryer for that fresh-from-the-oven crispiness.

    FAQs

    Can I use all-purpose flour instead of self-rising flour?

    You can! For every cup of self-rising flour, use 1 cup of all-purpose flour + 1½ teaspoons of baking powder + ¼ teaspoon of salt.

    What if I don't have buttermilk?

    Make your own by adding 1 tablespoon of white vinegar or lemon juice to 1 cup of milk. Stir and let it sit for 5 minutes before using. It won't be quite as rich, but it still works beautifully. I use this same method for the buttermilk substitute in the Fantabulosity banana bread recipe.

    Do I have to use a cast-iron skillet?

    Not at all! Cast iron gives the best crispy bottoms, but you can also bake these on a parchment-lined baking sheet. Just keep an eye on them near the end - every pan browns a little differently.

    How do I keep my biscuits from turning out dense?

    The biggest culprits are overmixing the dough or twisting the cutter. Handle the dough as little as possible and always press straight down when cutting.

    Can I make these ahead of time?

    Yes! You can cut out your biscuits, place them on a baking sheet, and freeze them unbaked. Once frozen, transfer them to a freezer bag. When ready to bake, place them (still frozen) on a buttered skillet and add about 2 extra minutes to the baking time.

    These 3-ingredient biscuits truly deliver - buttery, tender, and comforting every single time. I've made them so many times now that I can honestly say: this recipe is the one I'll be keeping forever.

    Related Recipes

    If you loved this recipe, you’ll also love these other similar recipes…

    • Stack of cinnamon biscuits on white plate.
      Cinnamon Biscuits
    • A Bisquick cheddar biscuit, broken in half so you can see the fluffy texture inside.
      Bisquick Cheddar Biscuits
    • A basket of homemade biscuits lined with a tea towel.
      Easy Homemade Buttermilk Biscuits
    • Cooked, air fried frozen biscuits on white plate, with one biscuit with butter on top.
      Frozen Biscuits in the Air Fryer

    Recipe

    3-ingredient biscuits stacked on vintage plate.
    Print Pin
    5 from 1 vote

    3-Ingredient Biscuits

    These 3-ingredient biscuits are buttery, fluffy, and perfectly golden. So easy to make with self-rising flour, cold butter, and buttermilk for a soft, flaky biscuit every time.
    Course Breakfast, Side Dish
    Cuisine American
    Prep Time 10 minutes minutes
    Cook Time 15 minutes minutes
    Total Time 25 minutes minutes
    Servings 5 biscuits
    Calories 351kcal
    Author Jessica Burgess

    Ingredients

    • 7 tablespoons salted butter divided
    • 2 cups self-rising flour
    • 1 cup buttermilk

    Instructions

    • Freeze the butter. Stick ¼ cup (4 tablespoons) of salted butter in the freezer for about 5 minutes.
    • Prep your dry ingredients. Sift 2 cups of self-rising flour into a medium mixing bowl.
    • Grate the butter. Using the large holes of a grater, grate your cold butter right into the flour. ** I like to dip the butter in to the flour first before grating but that's optional.
    • Mix gently. Use your hands to lightly combine the butter and flour - don't overmix!
    • Add buttermilk. Create a small well in the center and pour in 1 cup of cold buttermilk. Mix gently with your hands just until it comes together.
    • Form the dough. Sprinkle a little extra flour on your counter or table. Turn the dough out onto it, and sprinkle a bit more flour on top of the dough so it's not sticky.
    • Fold the dough. With floured hands, fold the dough over 3-4 times. Sprinkle a touch more flour if it feels sticky, then pat it out to about ¾-inch thick.
    • Prep the pan. Grease your cast-iron skillet with 1 tablespoon of softened butter. **If you don't have cast-iron skillet, see notes below.
    • Cut the biscuits. Flour your biscuit cutter (I used a 3½-inch cutter) and cut out about 5 biscuits. Press straight down - don't twist the cutter! Twisting seals the edges and keeps the biscuits from rising tall and fluffy.
    • Place. Place each biscuit in the cast iron skillet, making sure the sides of the biscuits touch one another.
    • Bake. Brush the tops of the biscuits with 1 tablespoon of melted butter and bake at 475°F for 15-16 minutes, or until the tops are beautifully golden brown.
    • Finish. Brush on another tablespoon of melted butter right after baking. If you'd like, sprinkle a touch of Maldon salt on top (totally optional, but lovely).

    Video

    Notes

    • Cold ingredients = flaky biscuits. Don't skip chilling your butter - it makes all the difference.
    • Add flour as needed. Lightly dust your hands, counter, and dough while working to prevent sticking - but avoid adding too much, or the biscuits will lose their tenderness.
    • ** If you don’t have a cast-iron skillet, that’s ok! I’ve baked these on parchment-lined baking sheets, and they work just fine. But do watch the bake times. I find that I only baked biscuits on the baking sheet for about 13 minutes. Different pans can vary.

    Nutrition

    Serving: 1biscuit | Calories: 351kcal | Carbohydrates: 39g | Protein: 8g | Fat: 18g | Saturated Fat: 11g | Polyunsaturated Fat: 1g | Monounsaturated Fat: 5g | Trans Fat: 1g | Cholesterol: 47mg | Sodium: 177mg | Potassium: 120mg | Fiber: 1g | Sugar: 3g | Vitamin A: 570IU | Calcium: 67mg | Iron: 0.5mg

    Applesauce Crumb Cake

    October 13, 2025

    A slice of applesauce crumb cake on spatula, being held above pan.

    This Applesauce Crumb Cake is the kind of recipe that brings that same comfort to the table. It's tender, buttery, and full of warm spice, topped with a sweet crumb layer and a simple vanilla glaze that finishes it just right.

    If you love soft, spiced cakes like this, you'll want to check out these nostalgic cake recipes for more ideas.

    Slice of applesauce crumb cake on spatula, resting above rest of cake.

    It's the kind of cake you can picture on Grandma's table, the one that gets sliced up before it's even cooled all the way. Whether you serve it for brunch, dessert, or with a quiet afternoon cup of coffee, this cozy bake is one you'll come back to again and again.

    Why You'll Love This Recipe

    • Similar to a coffee cake recipe, an old-fashioned recipe that’s delicious any time of day.
    • The applesauce keeps the cake extra moist without making it too sweet.
    • Alternating dry ingredients and applesauce creates that soft, bakery-style crumb.
    • It's the perfect companion for a cup of coffee or tea.
    • The flavor gets even better the next day, making it great for gatherings or gifting.

    Ingredients (with Notes)

    Labeled ingredients on counter to make applesauce crumb cake.

    Crumb Topping

    • All-purpose flour: Creates the base for the crumb texture.
    • Brown sugar and granulated sugar: A mix that gives both sweetness and a little crunch.
    • Ground cinnamon: Adds that warm, cozy flavor that ties everything together.
    • Unsalted butter: Melted and cooled so it forms perfect crumb clusters.

    Cake

    • All-purpose flour: Provides structure while keeping the cake light.
    • Baking powder and baking soda: Help the cake rise and stay tender.
    • Kosher salt: Balances the sweetness.
    • Cinnamon and nutmeg: Add that bakery-style warmth.
    • Butter and vegetable oil: A combination that keeps the crumb soft and flavorful.
    • Granulated and brown sugar: For sweetness and a touch of caramel flavor.
    • Eggs: Add richness and help the batter come together.
    • Pure vanilla extract: Enhances every flavor in the cake.
    • Unsweetened applesauce: Adds moisture and gentle apple flavor without extra sugar.

    Glaze

    • Powdered sugar: Gives a smooth, sweet drizzle.
    • Heavy cream: Creates a rich, silky consistency.
    • Vanilla extract and cinnamon: Optional, but add a lovely finishing touch.

    Instructions

    • Prepare the pan:
      Preheat the oven to 350°F if using a metal pan, or 325°F for porcelain or ceramic. Spray an 8×8-inch pan with nonstick spray and line it with parchment paper so you can lift the cake out easily later.
    • Make the crumb topping:
      In a bowl, combine the flour, sugars, cinnamon, and salt. Stir in melted butter with a fork until clumps form, then place it in the fridge while you make the batter. Chilling helps those crumbs hold together as they bake.
    Crumb topping mixture in mixing bowl.
    • Mix dry ingredients:
      In another bowl, whisk together flour, baking powder, baking soda, salt, cinnamon, and nutmeg.
    Flour and spices in mixing bowl.
    • Cream butter and sugars:
      In a large mixing bowl, beat the butter, oil, and both sugars with a hand or stand mixer for about two minutes, until light and fluffy.
    Butter and sugars in mixing bowl.
    • Add eggs and vanilla:
      Beat in the eggs one at a time. Mix in the vanilla until smooth.
    Eggs and vanilla added to butter and sugar mixture in mixing bowl.
    • Combine dry ingredients and applesauce:
      With the mixer on low, add half of the dry mixture, then the applesauce, and finish with the remaining dry ingredients. Stop mixing once everything is mostly combined, then use a spatula to gently fold the batter until smooth.
    Applesauce and dry ingredient mixture added to butter and sugar in mixing bowl.
    • Assemble and bake:
      Spread the batter evenly into the pan. Sprinkle the chilled crumb topping over the surface. Bake for 50 to 55 minutes if using a metal pan, or 55 to 65 minutes for porcelain or ceramic. The cake is done when a toothpick comes out with a few moist crumbs.
    Unbaked applesauce crumb cake with crumb topping in square baking dish.
    • Cool and glaze:
      Let the cake cool in the pan on a wire rack for 30 minutes. Lift it out using the parchment paper and let it cool another 20 to 30 minutes. Whisk together the powdered sugar, cream, vanilla, and cinnamon for the glaze, then drizzle it over the cooled cake. Let it set before slicing.
    Baked, applesauce crumb cake with glaze drizzled on top.

    Tips & Notes

    • Chill the crumb topping before baking so the clusters stay crisp and defined.
    • If the top starts to brown too quickly, loosely cover the cake with foil near the end of baking.
    • Gently fold the batter at the end instead of overmixing to keep the crumb soft and tender.
    • Ceramic and porcelain pans hold heat longer, so bake them at a slightly lower temperature for best results.
    Applesauce crumb cake sliced in baking pan.

    FAQs

    What kind of applesauce should I use?

    Unsweetened applesauce works best. Sweetened versions can make the cake too sugary.

    Can I make this cake ahead of time?

    Yes! The flavor actually improves overnight. Store it at room temperature in an airtight container or refrigerate it and bring to room temperature before serving.

    Can I freeze it?

    You can. Freeze the unglazed cake wrapped tightly in plastic and foil for up to two months. Thaw it in the refrigerator overnight and glaze before serving.

    Slice of applesauce crumb cake on plate with a bite taken out.

    Storage & Freezing

    • Store the cooled cake in an airtight container at room temperature for up to three days.
    • Refrigerate for up to five days if needed. Let slices come to room temperature before serving.
    • Freeze (without glaze) for up to two months. Thaw overnight before glazing or serving.

    Serving Suggestions

    This cake is lovely served slightly warm with a cup of coffee or tea. It's also delicious with a spoonful of whipped cream or a scoop of vanilla ice cream. For brunch, try it with fresh fruit and a sprinkle of powdered sugar for a simple but beautiful presentation.

    Related Recipes

    • Slice of strawberry Texas sheet cake on a round plate, with a bite taken out.
      Strawberry Texas Sheet Cake
    • Church supper recipes collage.
      Church Supper Recipes
    • Cherry bread with cherry icing on wooden cutting board.
      Cherry Bread with Cherry Glaze
    • A collage of old-fashioned dessert recipes
      Old-Fashioned Desserts Everyone Knows and Loves

    Recipe

    A slice of applesauce crumb cake on spatula, being held above pan.
    Print Pin
    Be the first to rate!

    Applesauce Crumb Cake

    Simple and sweet, this Applesauce Crumb Cake bakes up soft, spiced, and full of cozy flavor, just like something Grandma would make.
    Course Breakfast, Dessert
    Cuisine American
    Prep Time 25 minutes minutes
    Cook Time 50 minutes minutes
    Total Time 1 hour hour 15 minutes minutes
    Servings 9 servings
    Calories 464kcal
    Author Jessica Burgess

    Ingredients

    For the Crumb Topping

    • ¾ cup all-purpose flour
    • ¼ cup packed light brown sugar
    • 2 tablespoons granulated sugar
    • ¾ teaspoon ground cinnamon
    • ¼ teaspoon kosher salt
    • 4 tablespoons ½ stick unsalted butter, melted and cooled slightly

    For the Cake:

    • 1 ½ cups all-purpose flour
    • 1 teaspoon baking powder
    • ¼ teaspoon baking soda
    • ½ teaspoon kosher salt
    • ½ teaspoon ground cinnamon
    • ¼ teaspoon ground nutmeg
    • 7 tablespoons unsalted butter softened
    • 3 tablespoons vegetable oil
    • ¾ cup granulated sugar
    • ¼ cup packed light brown sugar
    • 2 large eggs room temperature
    • 2 teaspoons pure vanilla extract
    • 1 cup unsweetened applesauce room temperature

    For the Glaze:

    • ½ cup powdered sugar
    • 2 tablespoons heavy cream
    • ¼ teaspoon pure vanilla extract
    • Pinch of ground cinnamon optional

    Instructions

    • Preheat your oven to 350°F if you are using a light-colored metal pan. If you are using a porcelain or ceramic baking dish, lower the oven temperature to 325°F. Spray a light amount of nonstick cooking spray in an 8×8-inch baking pan, then line it with parchment paper, leaving a slight overhang of paper for easy removal.
    • In a medium mixing bowl, whisk together ¾ cup all-purpose flour, ¼ cup packed light brown sugar, 2 tablespoons granulated sugar, ¾ teaspoon ground cinnamon, and ¼ teaspoon kosher salt until combined. Pour in 4 tablespoons of melted unsalted butter and mix with a fork until clumps form. Place the bowl in the refrigerator while you are preparing the cake batter.
    • In a separate medium mixing bowl, whisk together 1 ½ cups of all-purpose flour, 1 teaspoon of baking powder, ¼ teaspoon of baking soda, ½ teaspoon of kosher salt, ½ teaspoon of ground cinnamon, and ¼ teaspoon of ground nutmeg until well combined. Set the dry ingredients aside.
    • In a large mixing bowl, beat 7 tablespoons of softened unsalted butter, 3 tablespoons of vegetable oil, ¾ cup of granulated sugar, and ¼ cup of packed light brown sugar with a hand or stand mixer on medium speed until light and creamy, about 2 minutes. Scrape down the sides of the bowl.
    • Add 2 large eggs, one at a time, mixing until smooth. Beat in 2 teaspoons of pure vanilla extract until combined.
    • With the mixer on low, add half of the dry ingredients, then mix in 1 cup of applesauce, and finish with the remaining dry ingredients. Stop mixing the batter as soon as the flour is almost blended in. Then, switch to a spatula and scrape down the sides, gently folding until the batter is smooth. Avoid overmixing.
    • Spread the batter evenly into your prepared 8×8-inch pan. Sprinkle the chilled crumb topping evenly over the surface. It's okay if you have some of the crumb mixture left over.
    • If you are baking in a metal pan at 350°F, bake for 50-55 minutes. If you are using a porcelain or ceramic dish at 325°F, bake for 55-65 minutes. The cake is ready when the edges look set, the center springs back when lightly touched, and a cake tester or toothpick in the middle comes out with just a few moist crumbs. If the crumbs start to brown too quickly, loosely cover the top with foil near the end of baking.
    • Cool the cake in the pan on a wire rack for 30 minutes, then carefully lift it out of the pan using the parchment paper. Let cool another 20-30 minutes before glazing.
    • To make the glaze, whisk ½ cup powdered sugar, 2 tablespoons heavy cream, ¼ teaspoon pure vanilla extract, and a pinch of ground cinnamon (if using) in a small bowl until smooth and well combined. Drizzle the glaze lightly over the cooled cake with a piping bag or spoon and let it set for about 10 minutes before slicing. ENJOY!

    Video

    Notes

    • Chill crumb topping before baking so the clusters stay crisp.
    • If crumbs brown too quickly, tent lightly with foil near the end.
    • Gently fold the batter to keep the cake tender.
    • Bake at 325°F if using a porcelain or ceramic dish.
    • Use unsweetened applesauce for best flavor and texture.
    • Flavor improves after a day, so this cake is great for making ahead.

    Nutrition

    Serving: 1slice | Calories: 464kcal | Carbohydrates: 65g | Protein: 5g | Fat: 21g | Saturated Fat: 11g | Polyunsaturated Fat: 3g | Monounsaturated Fat: 5g | Trans Fat: 1g | Cholesterol: 77mg | Sodium: 293mg | Potassium: 94mg | Fiber: 1g | Sugar: 41g | Vitamin A: 539IU | Vitamin C: 0.3mg | Calcium: 57mg | Iron: 2mg

    Fried Pears

    October 12, 2025

    Wooden spoon holding a serving of fried pears, in a cast iron skillet.

    If you've ever had, and loved, old-fashioned fried apples, then you’re going to love fried pears! These are buttery, caramelized, and full of cinnamon flavor. They make a delicious side dish, breakfast topping, or even a simple dessert.

    Fried pears sitting in cast iron skillet, on wooden spoon.

    Why You'll Love This Recipe

    • Quick & easy: Only a few simple ingredients cook for about 10 minutes.
    • Cozy and nostalgic: Just like fried apples, but with a mellow pear flavor.
    • Perfectly spiced: Cinnamon and butter caramelize together for that irresistible syrupy glaze.
    • Versatile: Great for breakfast, dessert, or as a sweet side dish for dinner!

    Ingredients (with Notes)

    • Butter: Unsalted or salted: It adds richness and helps caramelize the pears.
    • White sugar: Sweetens the pears and creates a beautiful, glossy syrup. (You can substitute brown sugar for a deeper flavor.)
    • Ground cinnamon: Adds warm spice and that classic "fried fruit" taste.
    • Vanilla extract: Stir this in after cooking to preserve its sweet, aromatic flavor.
    • Pinch of salt: Balances the sweetness and enhances the buttery flavor. If you use salted butter, give the pears a taste-test to see if you prefer more salt.
    • Pears: Use ripe but firm pears (Bartlett or Anjou are great choices). Peel, core, and slice evenly so they cook consistently.

    Instructions

    • Prep the pears: Peel, core, and slice the pears. (I cut 4 sides off each pear, then sliced each side in half again for about 8 slices per pear.)
    Sliced and peeled pears on wooden cutting board.
    • Melt the butter: In a large skillet over medium heat, melt the butter until smooth and slightly bubbly.
    • Add sugar and cinnamon: Stir in the sugar and cinnamon. Cook for 2-3 minutes, stirring often, until the mixture looks syrupy and fragrant.
    Butter, brown sugar and cinnamon in cast iron skillet.
    • Add salt and pears: Stir in a pinch of salt, if using, then add the sliced pears. Cook for 5-6 minutes, stirring occasionally, until the pears are tender and caramelized to your liking.
    Pears added to butter and sugar mixture.
    • Finish with vanilla: Remove the skillet from the heat and stir in the vanilla extract. (Adding it at the end keeps that lovely, rich vanilla aroma intact!)
    Fried pears in cast iron skillet.
    • Serve warm: Spoon over pancakes, waffles, or ice cream - or enjoy them all on their own!

    Storage & Reheating

    • Refrigerate: Store leftovers in an airtight container in the fridge for up to 3 days.
    • Reheat: Warm gently in a skillet or microwave until heated through.
    • Freeze: Not recommended, as pears can become mushy once thawed.

    Serving Suggestions

    These fried pears are so versatile! Try them:

    • Over pancakes, waffles, or French toast for a cozy breakfast.
    • With ice cream or whipped cream for a quick dessert.
    • As a side dish with pork chops or roasted chicken - sweet and savory perfection.
    • On top of oatmeal, yogurt, or cottage cheese for a warm and spiced breakfast twist.
    Fried pears in small bowl, sitting next to skillet.

    Related Vintage Recipes

    • Blueberry dump cake, with serving spoon resting in pan.
      Blueberry Dump Cake (Easy, Buttery Dessert with Fresh Berries)
    • Cherry dump cake topped with homemade whipped cream, served in a dessert bowl.
      Cherry Dump Cake (Easy 3-Ingredient Dessert)
    • A serving of 3-ingredient dump cake in a bowl with a dollop of homemade whipped cream.
      Dump Cake Recipe (Easy 3-Ingredient Dessert That Always Works)
    • Orange upside down cake sliced on spatula.
      Orange Upside Down Cake

    Recipe

    Wooden spoon holding a serving of fried pears, in a cast iron skillet.
    Print Pin
    5 from 1 vote

    Fried Pears

    Fried pears are buttery, cinnamon-spiced fried pears that caramelize beautifully in minutes - just like fried apples, but with a cozy pear twist!
    Course Breakfast, Dessert, Side Dish
    Cuisine American
    Prep Time 15 minutes minutes
    Cook Time 10 minutes minutes
    Total Time 25 minutes minutes
    Servings 4 servings
    Calories 411kcal
    Author Jessica Burgess

    Ingredients

    • ½ cup butter
    • ½ cup white sugar
    • 1 ½ tablespoons ground cinnamon I used 2 tablespoons for a very dark, heavy cinnamon flavor in the photos
    • pinch of salt
    • 4 pears ripe but not mushy (peeled, cored, and sliced)
    • 1 teaspoon vanilla extract optional but highly recommended

    Instructions

    • Make sure pears are peeled, cored and sliced. To give you an idea of the size of the slices: I cut the 4 sides off of each pear, and then sliced each side in half again. Meaning, I cut 8 slices for each pear.
    • In a skillet, melt butter over medium heat.
    • Once butter has melted, add in sugar and cinnamon, for 2-3 minutes, stirring often.
    • Add in sliced pears and a pinch of salt if using, and cook over medium heat for 5-6 minutes or until pears have reached the desired tenderness.
    • If desired, add in vanilla extract, and stir.
    • Serve warm.

    Video

    Notes

    You can use salted or unsalted butter. If using salted, be cautious of adding the additional pinch of salt. Taste test after adding vanilla to see if you prefer the extra salt.

    Nutrition

    Serving: 1serving | Calories: 411kcal | Carbohydrates: 55g | Protein: 1g | Fat: 23g | Saturated Fat: 15g | Polyunsaturated Fat: 1g | Monounsaturated Fat: 6g | Trans Fat: 1g | Cholesterol: 61mg | Sodium: 185mg | Potassium: 228mg | Fiber: 7g | Sugar: 43g | Vitamin A: 762IU | Vitamin C: 8mg | Calcium: 53mg | Iron: 1mg

    Butter Pecan Cake

    October 9, 2025

    A slice of butter pecan cake on a plate.

    This Butter Pecan Cake is one of those desserts that instantly takes you back. It's soft, moist, and loaded with nutty flavor, then topped with a rich brown sugar frosting that sets perfectly on top. Even better? It's baked in a 9×13 pan, making it the perfect crowd-pleasing dessert for holidays, birthdays, or just when you're craving something sweet and homemade.

    Butter pecan sheet cake, with a slice of cake missing from the pan.

    Why You'll Love This Recipe

    • Nutty & Buttery: Pecans folded into both the cake and frosting give you crunch and flavor in every bite.
    • Crowd-Friendly: Bakes in one pan and easily serves 12 (or more if you slice smaller squares).
    • Simple Pantry Ingredients: No fancy ingredients required. Ingredients like butter, sugar, flour, and pecans.
    • Make-Ahead Friendly: Bake the cake a day early and frost before serving for convenience.

    Ingredients (with Notes)

    Labeled ingredients for butter pecan sheet cake recipe, sitting on counter.

    For the Cake

    • All-Purpose Flour - Creates the structure of the cake.
    • Baking Powder & Baking Soda - Helps the cake rise light and fluffy.
    • Kosher Salt - Balances out the sweetness.
    • Unsalted Butter (softened) - Adds richness and moisture.
    • Light Brown Sugar - Sweetens and adds caramel flavor.
    • Eggs (room temperature) - Helps bind the batter and create structure.
    • Pure Vanilla Extract - Enhances the flavor.
    • Whole Milk (room temperature) - Keeps the cake moist and tender.
    • Chopped Pecans - The star ingredient that brings in warm, nutty flavor. Use any leftover pecans to make this granny cake recipe!

    For the Frosting

    • Unsalted Butter - Base of the brown sugar frosting.
    • Light Brown Sugar - Sweetens and deepens the frosting with a caramel note.
    • Powdered Sugar (sifted) - Creates smoothness and structure in the frosting.
    • Heavy Cream - Adds creaminess and helps with spreadability.
    • Pure Vanilla Extract - Enhances the frosting flavor.
    • Chopped Pecans - Folded into the frosting and sprinkled on top for crunch.

    Instructions

    • Preheat your oven to 350°F. Grease a 9×13-inch pan or line with parchment for easy removal.
    • In a medium bowl, whisk together flour, baking powder, baking soda, and salt. Set aside.
    Flour, baking soda, baking powder and salt in mixing bowl.
    • In a large bowl, beat butter and brown sugar until light and fluffy (2-3 minutes).
    Brown sugar and butter in mixing bowl.
    • Add eggs one at a time, mixing after each addition.
    Eggs added to cake batter in mixing bowl.
    • Stir in the vanilla.
    Vanilla added to cake batter in mixing bowl.
    • Alternate adding the dry ingredients and milk to the butter mixture, beginning and ending with dry. Mix just until combined-don't overmix.
    Dry ingredients added to cake batter in mixing bowl.
    • Fold in pecans, then spread the batter evenly in the prepared pan.
    Milk added to cake batter in mixing bowl.
    • Bake for 30-40 minutes, checking at 25 minutes. A toothpick inserted should come out clean. Cool 10-15 minutes.
    Baked butter pecan sheet cake in 9x13 pan.

    For the Butter Pecan Frosting:

    • In a saucepan, melt butter over medium heat. Stir in brown sugar and simmer 2 minutes. Reduce heat, stir in vanilla.
    Butter and brown sugar in sauce pan.
    • Whisk in powdered sugar until smooth. Stir in heavy cream. Fold in ½ cup pecans.
    Pecans added to butter and brown sugar in sauce pan.
    • Spread frosting over the warm cake. Top with remaining pecans. Let set 30 minutes before slicing.
    Butter pecan topping poured on to cake.

    Tips & Notes

    • Use room temperature ingredients for the best texture.
    • Don't overmix once the flour is added-this keeps the cake soft and tender.
    • If the frosting looks lumpy, keep whisking-the heat will smooth it out.
    • Best served within 24 hours, but will stay moist for 2-3 days covered.

    FAQs

    How do I store Butter Pecan Sheet Cake?

    Store covered at room temperature for up to 24 hours, or refrigerate for 2-3 days. For best texture, frost just before serving if making ahead.

    Can I make this cake ahead of time?

    Yes! Bake the cake a day early and store unfrosted. Make the frosting fresh and spread before serving.

    Can I use toasted pecans instead of raw pecans?

    Yes! In fact, toasting the pecans first adds an even deeper, richer flavor. To toast, spread them in a single layer on a baking sheet and bake at 350°F for 6-8 minutes, stirring halfway through. Let them cool before folding them into the batter or frosting. Toasted pecans bring out a warm, buttery nuttiness that really elevates this cake.

    A slice of butter pecan cake on a round plate, with a fork resting next to it.

    Storage & Freezing

    • Storage: Keep covered at room temp up to 24 hours, or refrigerate 2-3 days.
    • Freezing: Freeze the unfrosted cake (wrapped tightly) for up to 2 months. Thaw overnight in the fridge, then frost before serving.

    Serving Suggestions

    • Pair with coffee or tea for an afternoon treat.
    • Add a scoop of vanilla ice cream for a decadent dessert.
    • Slice into smaller squares for potlucks, bake sales, or holiday trays.

    Related Recipes

    • Hot fudge sauce dripping from spoon in to bowl.
      Hot Fudge Sauce Recipe
    • A basket full of baseball snack ideas.
      Baseball Snack Ideas for Kids (Easy + Team Snack Ideas Moms Love)
    • Strawberry Bread loaf with Strawberry Icing, dripping down the side.
      Strawberry Bread with Strawberry Icing
    • A slice of lemon lush sitting on a clear plate, with a fork bite taken out.
      Lemon Lush (Easy Layered Lemon Delight Dessert)

    Recipe

    A slice of butter pecan cake on a plate.
    Print Pin
    5 from 2 votes

    Butter Pecan Cake

    Butter Pecan Sheet Cake - a soft, buttery cake with pecans throughout, topped with a rich brown sugar frosting and extra crunch on top!
    Course Dessert
    Cuisine American
    Prep Time 20 minutes minutes
    Cook Time 30 minutes minutes
    Total Time 50 minutes minutes
    Servings 12 slices
    Calories 855kcal
    Author Jessica Burgess

    Ingredients

    For the Cake:

    • 2 ½ cups all-purpose flour
    • 1 teaspoon baking powder
    • ½ teaspoon baking soda
    • ½ teaspoon kosher salt
    • 1 ¼ cups unsalted butter 2 ½ sticks, softened
    • 1 ½ cups packed light brown sugar
    • 4 large eggs room temperature
    • 2 teaspoons pure vanilla extract
    • 1 ¼ cups whole milk room temperature
    • ½ cup chopped pecans

    For the Frosting:

    • 1 ¼ cups unsalted butter 2 and ½ sticks
    • 1 ½ cups packed light brown sugar
    • 2 cups powdered sugar sifted
    • ¼ cup heavy cream
    • 1 teaspoon pure vanilla extract
    • ¾ cup chopped pecans ½ cup + ¼ cup, divided

    Instructions

    • Preheat your oven to 350°F. Prepare a 9×13-inch baking pan with nonstick cooking spray, or line it with parchment paper for easier removal and cleanup.
    • In a medium mixing bowl, whisk together 2 ½ cups all-purpose flour, 1 teaspoon baking powder, ½ teaspoon baking soda, and ½ teaspoon kosher salt. Set aside.
    • In a large mixing bowl using a mixer, cream 1 ¼ cup (2 ½ sticks) unsalted butter and 1 ½ cups packed brown sugar on medium speed for 2-3 minutes until light and fluffy.
    • Add 4 large eggs one at a time, mixing after each addition. Mix in 2 teaspoons pure vanilla extract.
    • Gradually add the dry ingredients and 1 ¼ cups whole milk to the egg-butter mixture, alternating between the two. Start and end with the dry ingredients. Mix on low speed just until combined. The batter will be thick but smooth. Don’t overmix.
    • Fold in ½ cup of the chopped pecans, then pour the batter into your prepared baking pan and smooth the top with a spatula. Bake for 30-40 minutes, checking at 25 minutes. A cake tester or toothpick inserted in the center should come out clean. Allow the cake to cool for 10-15 minutes.
    • While the cake is cooling, make the frosting. Melt 1 ¼ cups unsalted butter in a saucepan over medium heat. Stir in 1 ½ cups packed brown sugar and bring to a simmer, cooking for 2 minutes. Lower the heat to low and stir in 1 teaspoon pure vanilla extract.
    • Gradually whisk in 2 cups of sifted powdered sugar until smooth with no small lumps. Remove from the heat and stir in ¼ cup heavy cream, whisking until fully incorporated and the frosting is thick and spreadable.
    • Fold in ½ cup chopped pecans until the nuts are coated. Pour the frosting over the slightly warm cake, spreading evenly with a spatula. Sprinkle the remaining ¼ cup of pecans on top as a garnish.
    • Allow the frosting to set for at least 30 minutes before slicing. ENJOY!

    Video

    Nutrition

    Serving: 1slice | Calories: 855kcal | Carbohydrates: 97g | Protein: 7g | Fat: 51g | Saturated Fat: 27g | Polyunsaturated Fat: 4g | Monounsaturated Fat: 16g | Trans Fat: 2g | Cholesterol: 165mg | Sodium: 231mg | Potassium: 224mg | Fiber: 2g | Sugar: 75g | Vitamin A: 1382IU | Vitamin C: 0.2mg | Calcium: 132mg | Iron: 2mg

    Pumpkin Cheesecake Cake

    September 29, 2025

    A slice of pumpkin cheesecake cake, on a round plate.

    This pumpkin cheesecake cake is so easy, is made as a sheet cake, and is the pumpkin flavor you’re looking for in the fall. Tender pumpkin spice cake is swirled with sweet, slightly tangy cheesecake.

    A slice of pumpkin cheesecake sheet cake on round plate.

    Why You'll Love This Recipe

    • Easier than cheesecake - no water bath, no springform pan, and different from pumpkin cheesecake bars!
    • Swirled beauty - the cheesecake swirl makes this cake look stunning with minimal effort.
    • Feeds a crowd - perfect for Thanksgiving, potlucks, or holiday parties.
    • Optional topping - serve with or without the creamy Cool Whip topping.

    Ingredients (with Notes)

    Ingredients on counter, to make pumpkin cheesecake cake.

    Ingredients for the Cheesecake Swirl

    • Cream cheese - full-fat works best for structure and flavor.
    • Granulated sugar - keeps the cheesecake layer sweet and smooth.
    • Almond extract - adds a delicate flavor (or swap for vanilla).
    • 1 egg - binds everything together.

    For the Pumpkin Cake

    • All-purpose flour - the base of the cake.
    • Pumpkin pie spice + cinnamon - warm, cozy autumn flavors.
    • Salt + baking powder - for balance and lift.
    • Pumpkin puree - make sure it's 100% pumpkin, not pie filling.
    • Granulated & brown sugar - both sweetness and moisture.
    • Salted butter - adds richness.
    • Whole milk - keeps the batter tender.
    • Eggs - provide structure.

    For the Topping (Optional)

    • Cool Whip - light, fluffy shortcut topping.
    • Cream cheese - makes the topping extra rich.
    • Granulated sugar - a touch of sweetness.

    Instructions

    • Prepare your baking sheet. Preheat oven to 350°F. Spray a 9×13 lipped baking sheet with nonstick spray.
    • Make the cheesecake mixture. In a medium bowl, beat cream cheese, sugar, almond extract, and egg until smooth. Transfer to a piping bag.
    Cream cheese, sugar, extract, egg in mixing bowl.
    • Mix the dry ingredients. In a large bowl, whisk flour, pumpkin pie spice, cinnamon, salt, and baking powder.
    Dry ingredients like flour, pumpkin pie spice, cinnamon, brown sugar, and baking powder in bowl.
    • Combine the wet ingredients. In another bowl, stir pumpkin puree, sugars, butter, and milk. Beat in eggs until fluffy.
    Wet ingredients such as pumpkin puree, butter and more to make pumpkin cake.
    • Mix wet and dry. Fold the wet mixture into the dry until no streaks remain.
    Wet ingredients added to dry ingredients in mixing bowl.
    • Layer and swirl. Spread half the cake batter into the pan. Pipe cheesecake mixture in lines and swirls. Top with remaining batter and swirl gently with a skewer.
    Pumpkin sheet cake with cheesecake swirl on top for middle layer.
    • Bake. Bake uncovered for 30 minutes or until a toothpick comes out clean.
    Pumpkin cheesecake cake, unbaked in 9x13 baking dish.
    • Make the topping. Mix Cool Whip, cream cheese, and sugar until smooth. Refrigerate until ready.
    Baked pumpkin cheesecake cake in 9x13 baking dish.
    • Cool & serve. Let the cake cool completely, then serve with topping if desired.
    A piece of pumpkin cheesecake cake, lifted up from other pieces of cake in baking dish, so you can see the cheesecake layer.

    Tips & Notes

    • Don't over-swirl the cheesecake mixture-less is more for those beautiful ribbons.
    • For a richer topping, use homemade whipped cream instead of Cool Whip.
    • Lightly grease your piping bag before filling-it helps prevent sticking.

    FAQs

    What does this pumpkin cheesecake cake taste like?

    Like a cross between pumpkin pie, cheesecake, and moist pumpkin cake-all in one bite.

    Can I make this pumpkin cake ahead of time?

    Yes! Bake the cake a day ahead and store it in the fridge. Add the topping just before serving.

    Can I freeze pumpkin cheesecake cake?

    It's not ideal-cheesecake layers can separate when thawed. Best enjoyed fresh.

    Topping Ideas for Pumpkin Cheesecake Cake

    • A drizzle of caramel sauce.
    • Chopped pecans for crunch.
    • Extra cinnamon for bold spice.
    • Raisins for texture.
    A slice of pumpkin cheesecake sheet cake on round plate, with a fork taking a bite off of the slice, and the fork resting on plate.

    Storage & Freezing

    Store leftovers in an airtight container in the refrigerator for up to 3 days.

    Serving Suggestions

    This cake is a showstopper for:

    • Thanksgiving dessert tables
    • Potlucks and church gatherings
    • Fall birthday celebrations
    • Cozy weeknight treats

    More Pumpkin Recipes

    • Slice of pumpkin poke cake on plate with fork
      Pumpkin Poke Cake
    • Pumpkin fluff in Pyrex serving bowl, with Reddi Wip and pumpkin pie spice on top.
      Pumpkin Fluff
    • Pumpkin Dump Cake serving on round plate.
      Pumpkin Dump Cake
    • Baked pumpkin bread on cutting board.
      Easy Pumpkin Bread Recipe

    Recipe

    A slice of pumpkin cheesecake cake, on a round plate.
    Print Pin
    Be the first to rate!

    Pumpkin Cheesecake Cake

    This pumpkin cheesecake sheet cake combines tender pumpkin spice cake with a creamy cheesecake swirl and optional whipped topping-easy, festive, and perfect for fall gatherings.
    Course Dessert
    Cuisine American
    Prep Time 20 minutes minutes
    Cook Time 30 minutes minutes
    Total Time 50 minutes minutes
    Servings 12 slices
    Calories 454kcal
    Author Jessica Burgess

    Ingredients

    For the cheesecake swirl:

    • 8 ounce cream cheese block, softened
    • ½ cup granulated sugar
    • ½ teaspoon almond extract
    • 1 large egg

    For the pumpkin cake:

    • 2 ⅓ cups all-purpose flour
    • 3 teaspoons pumpkin pie spice
    • 1 teaspoon ground cinnamon
    • 1 teaspoon salt
    • ½ teaspoon baking powder
    • 15 ounces can pumpkin puree (not pumpkin pie filling)
    • 1 ½ cup granulated sugar
    • 1 cup light brown sugar
    • ½ cup salted butter softened
    • ¼ cup whole milk
    • 2 large eggs

    For the topping:

    • 18 ounces Cool Whip
    • 4 ounces block cream cheese softened to room temp (very soft)
    • 1 Tablespoon granulated sugar

    Instructions

    • Prepare your baking sheet. Preheat your oven to 350°F and spray a 9×13 lipped baking sheet with nonstick cooking spray.
    • Make the cheesecake mixture. In a medium bowl, use a hand or stand mixer to combine the cream cheese with the sugar, almond extract, and egg. Beat until smooth and creamy.
    • Transfer to a piping bag. Transfer the mixture into a piping bag and set it aside. Clean your medium bowl for the cake mix step.
    • Mix the dry ingredients. In a large bowl, stir together the flour, pumpkin pie spice, ground cinnamon, salt, and baking powder, and set aside.
    • Combine the wet ingredients. In your cleaned-out medium bowl, combine the pumpkin puree with the granulated sugar, brown sugar, butter, and whole milk.
    • Beat in the eggs. Add the eggs to the mixture and beat until well mixed and fluffy.
    • Add the wet to the dry. Pour the wet ingredients into the dry ingredients and use a rubber spatula to fold the wet into the dry until well incorporated and there are no dry bits remaining.
    • Add a layer of cake batter to the baking sheet. Pour half of the batter into the prepared baking dish and spread it into an even layer.
    • Pipe in the cheesecake. Use the cream cheese mixture in the piping bag to pipe lines and swirls into the batter.
    • Top with more cake mix. Pour the remaining cake mix into the dish and smooth it out to the edges of the dish.
    • Swirl. Use a skewer or thin spoon handle to swirl the cake mixture around until the cheesecake mix is evenly swirled but not entirely mixed in.
    • Bake. Bake uncovered for 30 minutes or until a toothpick inserted into the center comes out clean.
    • Make the topping. While the cake bakes, make the topping by combining the Cool Whip, cream cheese, and granulated sugar until smooth and placing it in the refrigerator until ready to serve.
    • Cool and serve. Allow the cake to cool before serving with the topping.

    Video

    Nutrition

    Serving: 1slice | Calories: 454kcal | Carbohydrates: 75g | Protein: 6g | Fat: 16g | Saturated Fat: 9g | Polyunsaturated Fat: 1g | Monounsaturated Fat: 4g | Trans Fat: 0.3g | Cholesterol: 81mg | Sodium: 357mg | Potassium: 178mg | Fiber: 2g | Sugar: 53g | Vitamin A: 6075IU | Vitamin C: 2mg | Calcium: 76mg | Iron: 2mg

    Apple Butter Pie

    September 25, 2025

    A slice of apple butter pie topped with cinnamon whipped cream, sitting on a round plate.

    If you're looking for a cozy, fall-inspired dessert that's creamy, spiced, and irresistible, this Apple Butter Pie is it. Imagine the custardy richness of pumpkin pie, but with the sweet tang of apples and warm cinnamon spices. It's baked into a flaky crust and topped with a dollop of cinnamon whipped cream. It’s perfect for holidays, potlucks, or simply celebrating apple season.

    Spatula holding a piece of apple butter pie, up above the rest of the pie.

    Pro tip: If you'd like to make this pie using homemade apple butter, I recommend using my Slow Cooker Apple Butter Recipe for the filling. It's easy, hands-off, and makes this pie even more special.

    Why You'll Love This Recipe

    • Apple pie flavor in custard form - creamy, spiced, and rich, but still light.
    • Simple prep - just whisk, pour, and bake in a store-bought or homemade crust.
    • Perfect for fall & holidays - cozy flavors of cinnamon, nutmeg, and ginger.
    • Make-ahead friendly - chill it the night before and it's ready to serve.
    • Customizable - use homemade apple butter, swap in brown sugar, or even top with ice cream instead of whipped cream.

    Ingredients (with Notes)

    Labeled ingredients on table, for making apple butter pie.

    For the Pie:

    • 1 store-bought pie dough - or use you can make this easy homemade pie crust.
    • 1 ½ cups half and half - or equal parts milk + cream.
    • 1 cup apple butter - If you’re able, I love using my Slow Cooker Apple Butter. Homemade adds an extra cozy, fresh apple flavor. But store-bought is just fine, and Musselman’s is recommended.
    • ¾ cup granulated sugar - swap with light brown sugar for a deeper flavor.
    • 2 large eggs - binds the custard filling.
    • 2 Tablespoons flour - helps thicken (use cornstarch if gluten-free).
    • 2 teaspoons vanilla extract - or try maple extract for a cozy twist.
    • 1 teaspoon ground cinnamon - warm, classic spice.
    • ½ teaspoon ground nutmeg - adds depth.
    • ¼ teaspoon ground ginger - a subtle zing that brightens the flavor.

    For the Cinnamon Whipped Topping:

    • ¾ cup heavy cream - very cold, whips faster.
    • 2 tablespoons powdered sugar - for sweetness and stability.
    • ½ teaspoon ground cinnamon - warm flavor that ties everything together.

    Instructions

    • Preheat the oven to 375°F. Place pie dough into a pie tin.
    • In a large bowl, whisk together half and half, apple butter, sugar, eggs, flour, vanilla, cinnamon, nutmeg, and ginger until smooth.
    Half and half, apple butter, eggs, spices in mixing bowl.
    • Pour filling into the pie crust, smoothing the top.
    Unbaked apple butter pie batter poured in to unbaked pie shell.
    • Bake 45-55 minutes, until the center is just set and a knife inserted comes out mostly clean. (Cover edges if browning too quickly.)
    Baked apple butter pie, in pie dish, surrounded by plates and forks.
    • Cool completely on a wire rack. Refrigerate at least 2 hours before slicing.
    Baked apple butter pie in dish, with a slice removed.
    • For topping: whip the heavy cream, powdered sugar, and cinnamon until soft peaks form.
    Cinnamon whipped cream in mixing bowl.
    • Slice the pie and serve with a generous dollop of the cinnamon whipped cream.

    Serving Suggestions

    • Top with cinnamon whipped cream (as written).
    • Add a drizzle of caramel sauce.
    • Serve with vanilla ice cream.
    • Pair with hot coffee, apple cider, or this apple cider punch recipe for the perfect fall treat.
    Slice of apple butter pie topped with cinnamon whipped cream, with a bite taken out.

    Tips & Notes

    • Use a pie shield (or foil) to prevent over-browning.
    • Don't skip chilling - it ensures clean, custard-like slices.
    • Cool before refrigerating - prevents soggy crust.
    • Cold cream = best whipped topping - chill bowl and beaters too.

    FAQs

    Can I use homemade apple butter?

    Yes! My Slow Cooker Apple Butter is perfect for this recipe and adds an even fresher, richer flavor.

    Can I use a deep-dish pie pan?

    This recipe works best in a standard pie tin, not deep dish.

    Can I make it ahead of time?

    Yes! Bake the day before, refrigerate overnight, and serve chilled.

    Can I freeze Apple Butter Pie?

    Yes, freeze slices (wrapped well) up to 2 months. Thaw overnight in the fridge.

    Storage & Freezing

    • Refrigerator: Store covered up to 4 days.
    • Freezer: Wrap slices tightly and freeze for up to 2 months.
    • Whipped topping: Best fresh, but can be refrigerated up to 24 hours.
    • Leftover apple butter: If you have leftover apple butter and you’re not sure what to do with it, try using it as a sauce for grilling! We made Chipotle apple butter ribs and they turned out delicious!

    Related Recipes

    This Apple Butter Pie is smooth, custardy, and packed with cozy fall spices-all layered into a flaky crust and finished with cinnamon whipped cream. It's the perfect dessert for Thanksgiving, Christmas, or anytime you're craving something warm and nostalgic.

    If you’re looking for similar recipes, you’ll also love these recipes:

    • Slice of sweet potato pie recipe on spatula.
      Sweet Potato Pie Recipe
    • Egg custard slice on white plate.
      Egg Custard
    • Piece of buttermilk pie topped with whipped cream, sitting on round plate.
      Buttermilk Pie
    • Slice of butterscotch cinnamon pie on white plate, next to gold fork.
      Butterscotch Cinnamon Pie

    Recipe

    A slice of apple butter pie topped with cinnamon whipped cream, sitting on a round plate.
    Print Pin
    Be the first to rate!

    Apple Butter Pie

    Smooth and custardy with warm fall spices, this Apple Butter Pie can be made with store-bought or homemade slow cooker apple butter, baked in a flaky crust, and topped with cinnamon whipped cream for the perfect autumn dessert.
    Course Dessert
    Cuisine American
    Prep Time 15 minutes minutes
    Cook Time 45 minutes minutes
    Chill Time 2 hours hours
    Total Time 3 hours hours
    Servings 8 slices
    Calories 401kcal
    Author Jessica Burgess

    Ingredients

    Apple Butter Pie:

    • 1 store bought pie dough or make my homemade pie crust recipe
    • 1 ½ cups half and half
    • 1 cup apple butter
    • ¾ cup granulated sugar
    • 2 large eggs
    • 2 Tablespoons flour
    • 2 teaspoons vanilla extract
    • 1 teaspoon ground cinnamon
    • ½ teaspoon ground nutmeg
    • ¼ teaspoon ground ginger

    Cinnamon Whipped Topping:

    • ¾ cup heavy cream very cold
    • 2 tablespoons powdered sugar
    • ½ teaspoon ground cinnamon

    Instructions

    • Preheat the oven to 375°F. Place the pie dough into a pie tin.
    • In a large mixing bowl, whisk together the half and half, apple butter, sugar, eggs, flour, vanilla, cinnamon, nutmeg, and ginger until smooth.
    • Pour the filling into the pie crust and smooth the top.
    • Bake for 45-55 minutes or until the center is just set and a knife inserted near the middle comes out mostly clean. Cover the edges of the pie crust if browning too quickly.
    • Cool the pie completely on a wire rack, then refrigerate for at least 2 hours before serving.
    • For the topping, whip the cold heavy cream with powdered sugar and cinnamon until soft peaks form.
    • Slice the chilled pie and serve each piece with a generous dollop of cinnamon whipped topping.

    Video

    Notes

    Check doneness carefully. Insert a knife near the center. It should come out mostly clean, with a slight wobble left in the middle. The pie continues to set as it cools.
    Cool completely before chilling. Placing a warm pie in the fridge creates condensation and a soggy crust. Let it come fully to room temperature first.
    Chill for clean slices. Two hours in the fridge helps the custardy filling firm up so each slice holds its shape beautifully. Overnight chilling gives the best results.

    Nutrition

    Serving: 1slice | Calories: 401kcal | Carbohydrates: 51g | Protein: 5g | Fat: 20g | Saturated Fat: 10g | Polyunsaturated Fat: 2g | Monounsaturated Fat: 7g | Trans Fat: 0.004g | Cholesterol: 82mg | Sodium: 142mg | Potassium: 156mg | Fiber: 1g | Sugar: 36g | Vitamin A: 557IU | Vitamin C: 1mg | Calcium: 83mg | Iron: 1mg

    Slow Cooker Apple Butter

    September 24, 2025

    Smooth slow cooker apple butter in small bowl, sitting next to canned jars of apple butter.

    There's just something about apple butter that feels cozy and nostalgic. This slow cooker apple butter is made in the slow cooker, so it's mostly hands-off, and it makes your home smell incredible all day long.

    Small bowl full of slow cooker apple butter, next to canned apple butter.

    Why You'll Love This Recipe

    • Easy, set-it-and-forget-it: The slow cooker does all the work while you go about your day.
    • Perfectly spiced: Cinnamon, nutmeg, and cloves give it that classic apple butter flavor.
    • Customizable texture: Leave it chunky or blend it smooth with an immersion blender.
    • Different cook time options: Cook on low or high, making it a faster or slower recipe based on your schedule.
    • Great for gifts: Jar it up and share with friends, neighbors, or teachers.
    • Versatile: Spread on biscuits, toast, pancakes, or even swirl into oatmeal or yogurt. You can even use it in other recipes, like this apple butter pie or these apple butter ribs on the grill.

    Ingredients (with Notes)

    • Apples (5 pounds, before peeling, cored, and diced): Any variety works, but mixing sweet and tart apples gives the best flavor.
    • Granulated sugar (½ cup): Adds a touch of sweetness without overpowering.
    • Light brown sugar (1 cup, lightly packed): Brings warmth and depth.
    • Ground cinnamon (1 tablespoon): The star spice for apple butter.
    • Salt (⅛ teaspoon): Enhances flavor.
    • Nutmeg (½ teaspoon): Adds a cozy, earthy note.
    • Ground cloves (¼ teaspoon): A little goes a long way for that signature apple butter taste.

    Instructions

    • Peel, core and dice your apples in to small pieces. Or, now, I love using my peeler, slicer, and corer to speed up the process and make things easy.
    Peeled, cored, diced apples in bowl.
    • In a mixing bowl, stir together both sugars, cinnamon, salt, nutmeg, and cloves.
    Sugars and spices in mixing bowl.
    • Place diced apples in your slow cooker.
    • Pour the mixture over the apples and stir to coat.
    Sliced apples, sugars and spices in slow cooker pot.

    Different Texture Options

    You can choose from different textures and cooking times, and I’ve shared the different methods with you so you can decide which will be best for you.

    For Smooth Apple Butter

    When the apples are tender, you can use an immersion blender or regular blender to create a smooth apple butter, as shown below.

    Smooth apple butter spread on top of biscuits.

    For More Texture

    Skip the blenders, and whisk the apple butter often as it cooks. This helps break the apples down but still leaves texture in the apple butter.

    Different Cook Times

    Slow Cooked apple butter spread on to a roll, sitting on a vintage plate.
    • Cover and cook on low for 10-12 hours, whisking occasionally.
    • Cover and cook on high for 4-5 hours.

    With either timing option, removing the lid at the end of the cook times, and allowing it to cook for about another 30 minutes to a 1 hour, is recommended to help some of the liquid evaporate. This is also based on your preference of your prefered texture/flavor.

    Go ahead, give it a taste test at this point, and see what you think!

    Examples of Cook Times and Textures

    In the image below, I cooked this apple butter for 4 hours, then left the lid off for 1 hour. Then, used my immersion blender to create a smooth apple butter. This made 5 half-pint (8-ounce) jars.

    Smooth apple butter in slow cooker pot with wooden spoon.

    In the next photo, the apple butter was cooked for 11 hours, then an additional hour with the lid off, and whisked often during that cook time. Cooking it a longer time, created a concentrated (less apple butter), textured (chunkier) apple butter, since I did not use a blender.

    Finished apple butter cooked in a slow cooker.

    Tips & Notes

    • Cooking time can vary depending on the apple variety. Softer apples (like Gala or Fuji) may need less time, while firmer ones (like Granny Smith) take longer.
    • The longer you cook it, the thicker and more concentrated the flavor becomes. So, a shorter cook time may result in thinner apple butter, and longer cook time, thicker.
    • If you want to blend the apple butter, and don't have an immersion blender, carefully transfer the mixture in batches to a regular blender (but let it cool slightly first).
    • Serving warm or cold. You can enjoy the apple butter right away, warm. Or, my family prefers to allow it to cool, and then be chilled to serve on warm biscuits.

    FAQs

    Can I use less sugar?

    Yes! Apple butter is very forgiving. If your apples are naturally sweet, you can reduce the sugar.

    Do I have to peel the apples?

    Peeling makes for a smoother apple butter, but if you're blending, you can skip peeling to save time. Just wash them well.

    Can I double the recipe?

    Yes, as long as your slow cooker is large enough. Just be sure not to fill past the max line.

    Homemade slow cooker apple butter in small serving bowl, sitting next to a plate of rolls.

    Storage & Freezing

    • Fridge: Store cooled apple butter in jars or airtight containers for up to 2 weeks.
    • Freezer: Freeze in freezer-safe containers for up to 6 months. Thaw overnight in the fridge.
    Smooth apple butter in small bowl.

    Serving Suggestions

    • Spread on warm biscuits, toast, or English muffins.
    • Use as a filling for cinnamon rolls, hand pies, or cake layers.
    • Swirl into oatmeal, overnight oats, or Greek yogurt.
    • Serve alongside pork chops for a sweet and savory combo.
    • Gift in small jars with a cute ribbon for the holidays!

    Recipe

    Smooth slow cooker apple butter in small bowl, sitting next to canned jars of apple butter.
    Print Pin
    Be the first to rate!

    Slow Cooker Apple Butter

    This slow cooker apple butter is warm, spiced, and perfect for fall! Made with fresh apples, cinnamon, nutmeg, and cloves. It cooks low and slow until smooth and spreadable. Delicious on toast, rolls and biscuits.
    Course Breakfast, Side Dish
    Cuisine American
    Prep Time 15 minutes minutes
    Cook Time 11 hours hours
    Total Time 11 hours hours 15 minutes minutes
    Servings 3 cups
    Calories 821kcal
    Author Jessica Burgess

    Equipment

    • slow cooker

    Ingredients

    • 5 pounds apples before peeling, cored and diced in to small pieces
    • ½ cup granulated sugar
    • 1 cup light brown sugar lightly packed
    • 1 tablespoon ground cinnamon
    • ⅛ teaspoon salt
    • ½ teaspoon nutmeg
    • ¼ teaspoon ground cloves

    Instructions

    • Peeled, cored and sliced. Add apples to slow cooker.
    • In a mixing bowl, mix together remaining ingredients.
    • Pour over apples and stir to combine.
    • Place lid on slow cooker and cook.
    • Cook on high 4-5 hours, or on low for 10-12 hours, depending on texture/flavor preference. See blog post for examples of different cook times.
    • When apples are tender, you can leave as is for a chunkier apple butter, or you can use an immersion blender to smooth out. See blog post for different examples of textures.

    Video

    Notes

    You can change the amount of sugar, depending on how sweet your apples are. 
    The longer the apple butter cooks, the more concentrated it can become. You may prefer to stop the cooking process after 10 hours, or you may prefer a thicker apple butter, cooking it all the way up to 12 hours. 
    If desired, allow apple butter to cool and then chill before serving. However, it’s delicious warm as well. 
     

    Nutrition

    Serving: 1tablespoon | Calories: 821kcal | Carbohydrates: 212g | Protein: 2g | Fat: 2g | Saturated Fat: 0.3g | Polyunsaturated Fat: 0.4g | Monounsaturated Fat: 0.1g | Sodium: 126mg | Potassium: 928mg | Fiber: 20g | Sugar: 184g | Vitamin A: 417IU | Vitamin C: 35mg | Calcium: 135mg | Iron: 2mg

    Tandy Cake

    September 16, 2025

    A slice of tandy cake on a round plate, sitting next to the rest of the cake.

    Inspired by the famous Tastykake version, tandy cake is a homemade treat that’s just as nostalgic: a fluffy vanilla sheet cake topped with a creamy peanut butter layer and finished with smooth milk chocolate. Every bite is pure childhood comfort.

    A slice of tandy cake on a round plate, sitting next to sheet cake.

    This recipe is a vintage family favorite for potlucks, holidays, or anytime you want a sweet treat that feels a little old-school. Much like this Milky Way cake, which is also layered with nostalgic goodness.

    Why You'll Love This Recipe

    • A bakery-style Tandy Cake you can make right in your kitchen.
    • Perfect balance of tender vanilla cake, creamy peanut butter, and rich chocolate.
    • Great for potlucks, holidays, or a fun weekend baking project.
    • Stores well in the fridge, making it easy to make ahead.

    Ingredients (with Notes)

    Labeled ingredients to make tandy cake.

    For the Cake

    • All-purpose flour - the base of your cake with a tender crumb.
    • Baking powder - ensures the cake rises beautifully.
    • Kosher salt - balances the sweetness.
    • Granulated sugar - sweetens and adds golden color.
    • Eggs - structure and lift.
    • Pure vanilla extract - classic flavor enhancer.
    • Whole milk - warmed to blend smoothly into the batter.
    • Unsalted butter - richness in both the cake and topping.

    For the Peanut Butter Layer

    • Creamy peanut butter - stick to creamy (not natural) for best texture.
    • Powdered sugar - sweetens and stabilizes.
    • Unsalted butter - keeps it smooth and spreadable.
    • Heavy cream - creamy texture.
    • Pure vanilla extract - flavor depth.

    For the Chocolate Layer

    • Milk chocolate bars - smooth, classic flavor (chopped for easier melting).
    • Unsalted butter - helps melt and spread evenly.

    Instructions

    • Preheat oven to 350°F. Grease or line a 9×13-inch pan.
    • Whisk flour, baking powder, and salt in a medium bowl. Set aside.
    Flour, baking powder and salt in mixing bowl.
    • In a large bowl, beat eggs, sugar, and vanilla. Start on low, then beat on medium for 3 minutes until pale and ribbon-like.
    Eggs, sugar and vanilla added to mixing bowl.
    • Warm milk and butter in the microwave until steaming (not boiling).
    • Add dry mixture to wet ingredients; mix on low until smooth.
    Dry ingredients being added to wet ingredients in mixing bowl.
    • Pour in warm milk mixture; mix gently until incorporated.
    • Spread batter into prepared pan and bake 25-35 minutes, until golden and a toothpick comes out clean. Cool completely.
    Tandy cake batter poured in to a 9x13 baking dish.
    • Make peanut butter layer: beat peanut butter, powdered sugar, softened butter, heavy cream, and vanilla until creamy.
    Creamy peanut butter frosting in mixing bowl.
    • Spread frosting over cooled cake. Chill 30 minutes.
    Peanut butter frosting spread over the top of a cooled tandy cake.
    • Melt chocolate and butter in microwave in short intervals, stirring until smooth. Let cool slightly, then spread over peanut butter layer.
    Chocolate bars broken in to pieces, in mixing bowl with butter.
    • Chill at least 1 hour before slicing. Wipe knife between cuts for neat squares.
    Chocolate topping spread on top of peanut butter frosting on Tandy cake.

    Tips & Notes

    • Warm (not boiling) milk blends better, giving the cake its tender texture.
    • For a smooth peanut butter layer, pipe it on in rows before spreading.
    • Always chill the peanut butter before adding chocolate, so layers stay distinct.
    • Melt chocolate in short bursts and let cool a bit before spreading-this prevents it from melting the peanut butter.
    Tandy cake in baking pan, sliced, with a piece removed.

    FAQs

    How do I store Tandy Cake?

    Store in an airtight container in the refrigerator for up to 4 days. You can also bake the cake a day ahead-chilling actually helps the layers set beautifully.

    How do I avoid cracks in the chocolate topping when I cut the cake?

    – Let the cake sit at room temperature for 15-20 minutes after chilling before slicing.
    – Use a sharp, thin-blade knife.
    – Wipe the knife clean between each cut (dip in hot water or wipe, then dry).
    – You can even score the chocolate lightly while it's slightly soft (but mostly set) to guide clean cuts.

    A slice of tandy cake on plate, with bite taken out.

    Storage & Freezing

    • Refrigerate: up to 4 days in an airtight container.
    • Freezing: Slice into squares, wrap individually in plastic wrap, then store in a freezer bag for up to 2 months. Thaw overnight in the fridge before serving.

    Serving Suggestions

    • Serve chilled for the neatest layers (like the original Tastykake version).
    • Enjoy with a tall glass of milk or hot coffee.
    • Slice into bite-sized squares for party platters or potlucks.
    A 9x13 baking dish with tandy cake, sliced in to squares.

    Whether you're recreating a childhood favorite or discovering Tandy Cake for the first time, this recipe will win over every sweet tooth at the table.

    More Vintage Recipes

    If you love vintage recipes like this one, you’ll also love these favorites:

    • A slice of peach cobbler cheesecake sitting on a plate next to a fork.
      Peach Cobbler Cheesecake (Easy Baked Recipe with Streusel Topping)
    • A slice of Westhaven cake on a round plate.
      Westhaven Cake
    • A slice of shoofly cake sitting on round plate.
      Shoofly Cake
    • Close up of cooked salmon patties on a plate, with fresh parsley sprinkled on top.
      Old-Fashioned Salmon Patties Recipe

    Recipe

    A slice of tandy cake on a round plate, sitting next to the rest of the cake.
    Print Pin
    Be the first to rate!

    Tandy Cake

    This homemade Tandy Cake is a nostalgic Pennsylvania Dutch favorite with layers of fluffy vanilla cake, creamy peanut butter, and smooth milk chocolate.
    Course Dessert
    Cuisine American
    Prep Time 25 minutes minutes
    Cook Time 30 minutes minutes
    Chill Time 1 hour hour 30 minutes minutes
    Total Time 2 hours hours 25 minutes minutes
    Servings 12 servings
    Calories 521kcal
    Author Jessica Burgess

    Ingredients

    For the Cake:

    • 2 cups all-purpose flour
    • 1 ¼ teaspoons baking powder
    • ¼ teaspoon kosher salt
    • 2 cups granulated sugar
    • 4 large eggs
    • 2 teaspoons pure vanilla extract
    • 1 cup whole milk
    • ¼ cup unsalted butter

    For the Peanut Butter Layer:

    • 1 ¼ cups creamy peanut butter
    • ½ cup powdered sugar
    • ¼ cup unsalted butter softened
    • ¼ cup heavy cream
    • ½ teaspoon pure vanilla extract

    For the Chocolate Layer:

    • 6 1.5-ounce bars milk chocolate, chopped
    • 2 tablespoons unsalted butter

    Instructions

    For the Cake

    • Preheat oven to 350°F. Prepare a 9×13-inch baking pan with nonstick cooking spray or line with parchment paper for easier removal and clean up. Set the pan aside.
    • In a medium bowl, whisk together 2 cups all-purpose flour, 1 ¼ teaspoon baking powder, and ¼ teaspoon kosher salt. Set aside.
    • In a large bowl, combine 4 large eggs, 2 cups granular sugar, and 2 teaspoons pure vanilla extract. Start mixing on low speed with a hand mixer just until the ingredients are combined, then increase to medium speed and continue beating for 3 minutes, or until the mixture is pale, thick, and slightly ribbon-like when you lift the beaters. This technique incorporates air evenly without creating large bubbles.
    • In a microwave-safe bowl, combine 1 cup whole milk and ¼ cup unsalted butter. Microwave on high in 30-second intervals until the butter is melted and the milk is steaming. Do not let the milk boil. Set aside.
    • Add the dry ingredients to the egg and sugar mixture and mix on low speed just until smooth, about 1 minute.
    • Pour the warm milk and butter mixture into the batter. Mix on low speed just until the ingredients are incorporated, scraping down the sides of the bowl. Do not overmix the batter.
    • Pour the batter into the prepared pan and smooth the top. Bake 25-35 minutes, or until a cake tester or toothpick inserted in the center comes out clean. The top of the cake will turn golden brown while baking. Allow the cake to cool completely on a wire rack.

    Peanut Butter Layer

    • For the peanut butter layer, beat together 1 ¼ cups creamy peanut butter, ½ cup powdered sugar, ¼ cup softened unsalted butter, ¼ cup heavy cream, and ½ teaspoon pure vanilla extract until creamy and smooth. Spread the mixture evenly over the cooled cake. Chill in the refrigerator for 30 minutes to set.

    Chocolate Layer

    • For the chocolate layer, melt (6) 1.5-ounce bars of milk chocolate and 2 tablespoons unsalted butter together in the microwave in 30-second intervals, stirring until smooth. Let cool slightly, then spread evenly over the peanut butter layer.
    • Chill the cake for at least 1 hour to set all layers before slicing and serving. ENJOY!

    Video

    Nutrition

    Serving: 1slice | Calories: 521kcal | Carbohydrates: 62g | Protein: 11g | Fat: 27g | Saturated Fat: 11g | Polyunsaturated Fat: 4g | Monounsaturated Fat: 10g | Trans Fat: 0.4g | Cholesterol: 88mg | Sodium: 240mg | Potassium: 234mg | Fiber: 2g | Sugar: 42g | Vitamin A: 480IU | Vitamin C: 0.03mg | Calcium: 81mg | Iron: 2mg

    Hot Dog Mummies

    September 15, 2025

    Hot Dog Mummies resting on round plate.

    Every Halloween party needs a spooky, yet simple treat, and these Hot Dog Mummies are a family favorite! Savory hot dogs are wrapped in buttery crescent roll dough, baked until golden, and finished with silly candy eyeballs.

    Hot dogs wrapped in crescent rolls to look like mummies.

    They're festive, kid-friendly, and perfect as a quick pre-trick-or-treat dinner or a great Halloween recipe for a party.

    Why You'll Love This Recipe

    • Fun & festive - The perfect Halloween food idea for parties or after-school snacks, along with these Mummy Rice Krispie Treats and Mummy Cookies.
    • Quick & easy - Just 25 minutes from start to finish.
    • Kid-friendly - Kids love wrapping the "mummies" and adding the eyes.
    • Crowd-pleaser - Great for serving with dips like ketchup, mustard, or cheese sauce.

    Ingredients (with Notes)

    Ingredients on counter for making mummy hot dogs.
    • 1 (8-ounce) pack crescent rolls - Convenient and flaky; pizza dough works too, but it's less buttery.
    • 1 (8 count) package bun-length beef hot dogs - Beef holds the dough better, but any type works.
    • ¼ cup salted butter, melted - Margarine can be swapped in a pinch.
    • ½ teaspoon garlic powder - Optional, but adds a "garlic knot" flavor.
    • 16 candy eyes - Or DIY edible eyes with mozzarella and olives. Use any extra candy eyes to make Mummy Oreos, Halloween Snack Mix or Halloween Pretzel Sticks.
    • 1 teaspoon ketchup - Used to "glue" the eyes in place.
    • Serving suggestions - Serve with ketchup or mustard for dipping.

    Instructions

    • Preheat & Prepare - Heat oven to 375°F. Line a 9×13 baking sheet with parchment paper.
    • Form the Dough - Pinch the seams of the crescent rolls together to make one large sheet.
    Crescent rolls on wooden cutting board, creating one piece of dough.
    • Cut Strips - Slice the dough into 16 thin strips using a knife or pizza cutter. (Leftovers? Roll them into crescent bites!)
    Crescent rolls cut in to thin strips, sitting on wooden cutting board.
    • Wrap the Mummies - Wrap 2 strips of dough around each hot dog, leaving a gap near the top for the eyes. Place on prepared sheet, spacing about 2 inches apart.
    Hot dogs wrapped in crescent roll strips, made to look like mummies, resting on a baking pan.
    • Brush with Garlic Butter - Mix melted butter and garlic powder, then brush over the dough.
    Pastry brush, brushing garlic butter on to crescent rolls, on hot dogs.
    • Bake - Bake 10-15 minutes, until golden brown.
    Mummy hot dogs on baking pan.
    • Add Eyes - Let cool 5 minutes, then secure candy eyes with a dot of ketchup.
    Mummy hot dogs with candy eyes, sitting on baking pan.
    • Serve - Enjoy warm with ketchup or mustard for dipping.
    Mummy hot dog being dipped in to small bowl of ketchup.

    Tips & Notes

    • Don't skip leaving a gap for the eyes - it makes them look extra spooky!
    • For extra flavor, tuck a strip of cheese under the dough before wrapping.
    • Want spicy mummies? Drizzle with hot sauce before serving.

    FAQs

    Can I make these ahead of time?

    Yes! Bake, cool, and freeze in a resealable bag for up to 3 months. Reheat before serving.

    How do I store leftovers?

    Store cooled mummy dogs in an airtight container in the fridge for 3-4 days.

    How do I reheat them?

    Oven: 350°F for 5-7 minutes
    Microwave: 1 minute
    Air Fryer: 360°F for 3-5 minutes

    Serving Suggestions

    • Pair with an apple cider punch or orange soda for Halloween vibes.
    • Add to a Halloween snack board with chips, pretzels, veggie sticks, and these chocolate coated teddy bear graham crackers.
    • Serve alongside melted cheese dip for dunking.

    More Halloween Recipes

    • A slice of burnt sugar cake on a round, vintage plate.
      Burnt Sugar Cake
    • A slice of chocolate peanut butter dump cake on a round plate.
      Chocolate Peanut Butter Dump Cake
    • Condensed milk brownies on parchment paper with middle brownie turned up on it's side.
      Condensed Milk Brownies
    • A single serving of Oreo dump cake on a plate, that's topped with a scoop of vanilla ice cream.
      Oreo Dump Cake

    Recipe

    Hot Dog Mummies resting on round plate.
    Print Pin
    Be the first to rate!

    Hot Dog Mummies

    Savory hot dogs wrapped in buttery crescent dough and topped with candy eyes for the perfect spooky Halloween snack.
    Course Appetizer, Lunch, Main Course, Side Dish
    Cuisine American
    Prep Time 15 minutes minutes
    Cook Time 10 minutes minutes
    Total Time 25 minutes minutes
    Servings 8 hot dogs
    Calories 83kcal
    Author Jessica Burgess

    Ingredients

    • 8 ounce pack crescent rolls
    • 8 beef hot dogs bun-length
    • ¼ cup salted butter melted
    • ½ teaspoon garlic powder
    • 16 candy eyes
    • 1 teaspoon ketchup
    • Serving suggestions: ketchup and or mustard for dipping

    Instructions

    • Preheat and prepare your pan. Preheat your oven to 375°F and line a 9×13 baking sheet with parchment paper.
    • Create 1 sheet of dough. On a flat nonstick surface like a cutting board, pinch the crescent seams together so it's one sheet of dough.
    • Cut the dough into strips. Using a sharp knife or pizza cutter, cut 16 thin strips. You may have leftover dough, that's ok! Roll it up and make crescent bites!
    • Wrap the hot dogs. Carefully wrap 2 strips of dough around each hot dog, making sure to leave a gap in the dough towards the top of the hot dog for the eyes. Overlap the dough as you wrap it, just like a mummy's wrappings, and place each dough-wrapped hot dog on the parchment-lined baking sheet about 2 inches apart.
    • Make garlic butter. In a small bowl, combine the butter with the garlic powder and brush it over the crescent dough with a pastry brush.
    • Bake. Bake uncovered for 10-15 minutes or until the dough has just begun to turn golden brown.
    • Add the eyes. Let them cool for about 5 minutes and then add the eyes to the gap at the top of the mummy's wrappings. Use a dot of ketchup under each eye to secure them.
    • Serve. Serve warm with ketchup or mustard for dipping

    Nutrition

    Serving: 1hot dog | Calories: 83kcal | Carbohydrates: 2g | Protein: 1g | Fat: 8g | Saturated Fat: 5g | Polyunsaturated Fat: 1g | Monounsaturated Fat: 2g | Trans Fat: 0.2g | Cholesterol: 18mg | Sodium: 137mg | Potassium: 13mg | Fiber: 0.02g | Sugar: 1g | Vitamin A: 180IU | Vitamin C: 0.03mg | Calcium: 3mg | Iron: 0.1mg

    Sweet Potato Pie Recipe

    September 14, 2025

    Slice of sweet potato pie recipe on spatula.

    This Sweet Potato Pie Recipe with Marshmallow Whipped Cream uses fresh sweet potatoes, a refrigerated pie crust (or use my homemade pie crust recipe) and a few simple ingredients to make this delicious classic dessert that’s popular during the holiday season.

    Slice of sweet potato pie with marshmallow whipped cream.

    This homemade sweet potato pie is one to make for Thanksgiving dinner, and it will look amazing on your dessert table sitting next to this apple punch recipe.

    This creamy sweet potato pie filling has a mix between and sweet and savory flavor but topped with the sweet marshmallow whipped cream, it pairs perfectly for a sweet dessert. Sometimes adding a bit of savory or tangy flavor, like in this buttermilk pie recipe, can help complement the sweetness.

    Looking for more sweet potato recipes? This sweet potato crunch and sweet potato bread pudding are favorites around here too. Thanksgiving is full of sweet potato recipes, so don’t forget candied yams too!

    Overhead look of sweet potato pie in baking dish, with slices cut.

    Sweet Potato Pie Highlights

    • Easy to Make: This pie will be ready for serving in about an hour and a half, and is easy enough for a beginner in the kitchen.
    • Thanksgiving Dessert Idea: Although this can be made anytime of year, this is typically made around the Thanksgiving holiday.
    • Make Ahead and Freeze: This pie can be made ahead of time and even frozen to enjoy later. See the tips below for how to freeze a sweet potato pie.

    Key Ingredients

    Here’s what you need to make this sweet potato pie with the marshmallow whipped cream topping:

    Ingredients for homemade sweet potato pie recipe.

    Complete list of ingredients and amounts can be found in the recipe card below.

    • 9 inch deep dish pie crust – If you purchase the box of pie crusts and it has two crusts, use the other to make these pie crust cinnamon cookies. A graham cracker crust would be yummy too.
    • Salted butter – Unsalted would also work, just add an extra pinch of salt to your pie filling.
    • Dark brown sugar – If all you have is light brown sugar, you can use that.
    • Heavy cream – If you wanted to replace the cream in the whipped cream with something already made you could use Cool Whip.
    • Olive oil – Any oil would work here. You could use vegetable, coconut, etc.
    • Vanilla extract – Almond extract would also work, just make sure that you only use half the amount because almond extract is strong. Vanilla bean paste would also be delicious.
    • Cinnamon – You could replace the cinnamon, nutmeg, and clove for pumpkin pie spice. 

    How to Make Sweet Potato Pie

    Cubed sweet potatoes on baking sheet for roasting for pie.
    1. Roast the potatoes.
    Pie crust in baking dish with pie weights.
    2. Bake your pie crust.

    Here is where you can use a pre-made crust or you can make my buttery pie crust recipe and can follow my directions on how to blind-bake a crust if needed.

    You can also pour sugar on top of parchment paper, or use something else if you don’t have pie weights to hold the crust down while baking.

    Mashed sweet potatoes in glass bowl.
    3. Mash sweet potatoes.
    Brown sugar, eggs an other ingredients to make sweet potato pie.
    4. Flavor the sweet potato pie filling.
    Sweet potato pie filling inside of pie crust, ready for baking.
    5. Bake the pie filling.
    Homemade marshmallow whipped cream in mixing bowl.
    6. Make marshmallow whipped cream topping.
    Baked sweet potato pie in pie dish.

    Serve this delicious pie warm, or at room temperature, and by dolloping the marshmallow whipped cream on top of each slice. (Make sure it’s not too hot so the whipped cream doesn’t melt completely.)

    Recipe Tips

    • Homemade Whipped Cream Alternative: You can use a store-bought whipped cream like Cool Whip and fold in the marshmallow fluff to create a similar cream topping. However, make sure to defrost the Cool Whip in the refrigerator overnight or on the counter for at least an hour (until it's completely defrosted). This will make folding in the marshmallow fluff easier.
    • Square Dish Instead of Round: You can use a 9×9 square dish. Something to keep in mind is that the corners can be overcooked easily though. So keep an eye out and if you start to see the edges get a little too brown you can cover them with foil and continue baking. This will ensure that your filling cooks, but your crust doesn't burn. 
    • Boiling Potatoes Instead of Roasting: You can boil them but you'll lose a lot of flavor in the cooking water.  Roasting the sweet potato allows the sugars in the sweet potato to caramelize and brings about a much deeper flavor than you would get if you boiled them. You could microwave or bake the potato instead if you don't want to cube and roast it. Remember that if you're looking to speed things up you can always cut the sweet potatoes into smaller cubes. The smaller the cubes, the faster they will cook. You could also cook your sweet potatoes the day before and keep them in the refrigerator until you're ready to use them. 
    Slice of sweet potato pie with homemade marshmallow whipped cream.

    Storing Tips

    • Refrigerator – When you're ready to store any leftover sweet potato pie, wrap it in plastic wrap and place in the refrigerator. It will last for 3-4 days refrigerated. To reheat, simply place individual slices onto a microwavable plate and warm on 50% power for 1 minute. To reheat in the oven, preheat your oven to 350°F and heat slices for 10-15 minutes or the whole pie for 25-30 minutes. 
    • Freezer – To make your sweet potato pie ahead of time and freeze it, allow the pie to cool completely on the counter. Once completely cooled, wrap your sweet potato pie in foil and place into a resealable bag. This will keep your pie from getting freezer burn.
    • To reheat – Defrost your pie overnight in the refrigerator and simply place individual slices onto a microwavable plate and warm on 50% power for 1 minute. You can also rewarm your pie as a whole or in individual slices. Preheat your oven to 350°F and heat slices for 10-15 minutes or the whole pie for 25-30 minutes. 

    Recipe FAQs

    What does sweet potato pie taste like?

    Sweet potato pie is the perfect balance between sweet and savory. It's similar to pumpkin pie but leans slightly more savory. A hefty dollop of marshmallow whipped cream rounds out these traditional fall flavors and brings it all together. 

    Can I use canned sweet potatoes for sweet potato pie?

    I love a good, canned ingredient but for this recipe, I really don't recommend using canned sweet potatoes. This option really throws off the texture of your pie and leaves you with a soggy and pretty messy situation.

    Should sweet potato pie be served warm or cold?

    This pie tastes great warm or room temperature. It's a great option to set out on a dessert table for the holidays and let people serve themselves. Be sure that the pie is warm and not hot, or your whipped cream will melt and turn into a soupy mess. 

    More Thanksgiving Recipes You’ll Love

    • Scoop of the best green bean casserole.
      The BEST Green Bean Casserole with Bacon and Cheese
    • A round white plate is filled with halved hard boiled eggs with orange yolk filling piped to look like a pumpkin
      Pumpkin Deviled Eggs
    • Corn Casserole Recipe
      The BEST Corn Casserole
    • A stack of desserts bars with a graham cracker crust and swirled pumpkin cheesecake filling are in the center of the photo
      Pumpkin Cheesecake Bars

    Recipe

    Slice of sweet potato pie recipe on spatula.
    Print Pin
    Be the first to rate!

    Sweet Potato Pie with Marshmallow Whipped Cream

    This homemade sweet potato pie recipe uses fresh sweet potatoes, a pre-made pie crust (or homemade) and a few simple ingredients to make this popular holiday dessert.
    Course Dessert
    Cuisine American
    Prep Time 35 minutes minutes
    Cook Time 50 minutes minutes
    Total Time 1 hour hour 25 minutes minutes
    Servings 8 servings
    Calories 582kcal
    Author Jessica Burgess

    Equipment

    • 9 inch pie dish

    Ingredients

    • 2 pounds sweet potatoes peeled and cubed (½ inch cubes)
    • ½ teaspoon salt divided
    • 9-inch pie crust You can make this homemade pie crust recipe
    • ½ cup salted butter softened
    • ⅔ cup dark brown sugar packed
    • 1½ cups heavy cream divided
    • 2 large eggs
    • 2 Tablespoons olive oil or similar type, divided
    • 1½ teaspoon vanilla extract
    • 1 teaspoon cinnamon
    • ¼ teaspoon nutmeg
    • ¼ teaspoon ground cloves
    • ¼ cup marshmallow fluff

    Instructions

    • Roast your potatoes. Preheat the oven to 400°F. Line a baking sheet with parchment paper. Lay out the peeled and cubed 2 pounds sweet potatoes onto the pan and drizzle with 1 Tablespoons olive oil and ¼ teaspoon salt tossing to coat them well. Bake for 25 minutes or until soft. Keep an eye on them as they bake, some might get brown tips and those you want to toss before adding them to your pie. Set aside to cool for at least 10 minutes.
    • Prebake your pie crust. Prebake your 9-inch pie crust according to the recipe or package instructions. Use pie weights or pour sugar over parchment paper to weigh down the crust and make sure the pie keeps its shape. Set aside to let the pie crust cool slightly while making the filling.
    • Mash your sweet potatoes. In a large bowl (or the bowl of a stand mixer) using a hand mixer (or stand mixer fitted with a paddle attachment) add the roasted sweet potatoes and ½ cup salted butter and mash on medium speed. 
    • Flavor your sweet potatoes. Add in the remaining ¼ teaspoon salt, ⅔ cup dark brown sugar, ½ cup heavy cream, 2 large eggs, remaining olive oil, 1½ teaspoon vanilla extract, 1 teaspoon cinnamon, ¼ teaspoon nutmeg and ¼ teaspoon ground cloves and mix on low speed to start, increasing to medium speed for about 3 minutes or until well combined and silky smooth.
    • Bake. Pour your pie filling into the crust and bake uncovered at 375 degrees F. for 50-60 minutes or until a toothpick inserted into the center comes out clean. Check the pie frequently and if the crust is browning too fast you can cover it with foil to prevent burning. While the pie bakes, whip your cream.
    • Whip the cream. Using a hand (or stand) mixer on medium speed, whip the remaining 1 cup heavy cream until stiff peaks form (about 3-4 minutes) and then mix in ¼ cup marshmallow fluff until combined. Don't over whip your cream or you may end up making butter!
    • Serve. Allow the pie to fully cool and slice and top your pie with whipped cream and serve.

    Video

    Notes

    • You can use Cool Whip instead of homemade whipped cream if you prefer.
    • I don’t recommend using canned sweet potatoes for this recipe. 

    Nutrition

    Serving: 1slice | Calories: 582kcal | Carbohydrates: 56g | Protein: 6g | Fat: 38g | Saturated Fat: 20g | Polyunsaturated Fat: 2g | Monounsaturated Fat: 13g | Trans Fat: 0.5g | Cholesterol: 127mg | Sodium: 421mg | Potassium: 493mg | Fiber: 4g | Sugar: 26g | Vitamin A: 17167IU | Vitamin C: 3mg | Calcium: 96mg | Iron: 2mg

    Simple Chili Recipe

    September 13, 2025

    Homemade chili in small bowl with Fritos and cheese on top.

    Simple Chili Recipe: An easy recipe that just may be voted the best chili recipe because it is the perfect base for your favorite chili toppings!

    It’s a classic chili recipe that’s perfect for game day, a large crowd or to serve your family on a weeknight. If you’re in to food bar ideas, make a soup bar, and serve up this chili with this Cowboy Stew and this Buffalo Chicken Soup for an awesome selection!

    Easy Chili with cheese, fritos and sour cream

    Why You’ll Love This Recipe

    We love this chili around here because it can be so versatile, and each person can customize the flavor how they wish, and it’s amazing on top of items like these chili cheese corn dogs.

    With this basic chili recipe, that’s made with simple ingredients, you can either add your favorite secret ingredient, or the ingredients that make up your favorite chili recipe.

    See additional topping ideas and mix-ins below!

    We especially love making Frito Chili Pies with this chili recipe!

    How to Make this Easy Homemade Chili Recipe

    Grab a large pot and get ready for a hearty chili that will soon become a family favorite.

    Easy Chili Recipe in White Dish with Cheese and Corn chips

    Ingredients

    Not pictured: Optional brown sugar and baking soda. See notes below.

    Ingredients for chili recipe

    Make sure to scroll down to the full recipe card with ingredients and instructions for this perfect comfort food recipe.

    • chili beans
    • tomato sauce
    • cumin
    • sliced cheese (we prefer thick sliced american cheese from the deli.)
    • ground beef (See our other ground beef dinner ideas!)
    • brown sugar – this is optional and my family loves the touch of sweetness this adds
    • baking soda – adding baking soda and help the acidity of the tomato sauce and we feel this makes the chili less tangy.

    The ingredients are something that you can have on hand, or literally grab at the grocery store super quick, and come home and throw together in a pinch, in bulk, for a crowd, making it the perfect last-minute easy dinner recipe too!

    Step by Step Instructions

    1. First, cook 1 lb. of ground beef over medium heat, in the pot you’ll be making your chili in. (You can use a separate dish but this saves on having more dirty dishes!)

      Cook for about 7-10 minutes until beef is fully cooked and it is no longer pink.

      If the ground beef you’re cooking has a higher fat content, this could result in a bit of grease in the pot after cooking. For best results, drain the grease and discard grease. (DO NOT DRAIN GREASE IN TO SINK!)
    Cooked ground beef in pot
    1. Once the ground beef is full cooked, it’s time to add the chili beans, tomato sauce, cumin and sliced cheese.
    chili ingredients in pot
    1. Stir to combine the ingredients, and cook over low-medium heat, let the chick over a gentle simmer, until the chili has cooked through, and the cheese has melted. (Usually about 15 minutes.)
    Chili simmering in pot
    1. If desired, serve as is!
    Hearty chili in white bowl

    Chili Topping Ideas and Mix-Ins

    Although this basic chili is amazing as it is, it’s always fun to add additional toppings and spices too! Here are our favorite suggestions:

    Spices

    • salt
    • pepper
    • garlic salt
    • garlic powder
    • onion powder
    • paprika
    • oregano

    Love spicy chili?

    Easily add items like:

    • cayenne pepper
    • chili powder
    • jalapeno peppers
    • hot sauce
    • red bell pepper
    • chopping green onion or white onions

    Looking for a sweet chili?

    You can add ingredients such as:

    • more brown sugar
    • white granulated sugar
    • honey
    • sweet corn

    Garnish and Serve with:

    • shredded cheddar cheese
    • corn chips (or Fritos)
    • a dollop of sour cream
    • tortilla chips
    • saltine crackers
    • oyster crackers
    • chopped white onions
    • chopped red onions
    • sliced avocado
    • peanut butter
    Chili with cheese, sour cream and fritos

    What to Serve with Chili?

    Having a big pot of chili is a meal in itself… but there’s nothing better than serving a delicious sandwich or pairing with a big bowl of chili!

    Our favorite side dishes for chili are:

    • peanut butter and jelly sandwich
    • syrup and peanut butter sandwich
    • peanut butter and honey sandwich
    • corn bread
    • air fried cinnamon rolls (I hear that’s a midwest thing!)
    • grilled cheese
    • caprese chicken sandwich
    • tomato mozzarell wrap
    • side salad

    Or have a chili bar, along with a hot dog bar, if hosting a party!

    How to Store Leftover Chili

    Usually, when making this easy chili recipe, I like to make a double batch so we have leftovers to eat the next day or freeze.

    Refrigerate Leftovers:

    If you plan to eat leftover chili the next day, simply store the leftovers in an airtight container and place it in the refrigerator. It can be enjoyed for the next 4-5 days.

    Freezing Leftovers:

    Chili freezes so well, and it’s so great to have premade chili on a day or weeknight when there’s not a lot of time to cook.

    Store chili in a freezable container or in plastic zip-top bags.

    How to Reheat Chili:

    If refrigerated – Simply place in a microwaveable bowl, and cover with a paper towel (to prevent chili from splattering all over the inside of the microwave) and cook for 2-3 minutes or until heated through. If reheating on the stovetop, reheat on medium heat for 5 minutes or until heated through.

    If frozen – Thaw a container of chili in hot water and then place in a microwavable dish or small soup pot for the stove. Then follow the above steps for reheating for eating.

    Related Recipes

    If you love chili, you’ll also love this White Chicken Chili Recipe, Vegetarian Chili Recipe, and this Venison Chili Recipe!

    Or if you’re just looking for an easy soup recipe in the winter, this ham and beans recipe is so nice to add to the dinner rotation!

    Recipe

    Homemade chili in small bowl with Fritos and cheese on top.
    Print Pin
    4.11 from 28 votes

    Simple Chili Recipe

    Simple Chili Recipe: An easy recipe that just may be voted the best chili recipe because it is the perfect base for your favorite chili toppings!
    Course Main Course, Soup
    Cuisine American
    Prep Time 5 minutes minutes
    Cook Time 20 minutes minutes
    Total Time 25 minutes minutes
    Servings 4 servings
    Calories 358kcal
    Author Jessica Burgess

    Ingredients

    • 1 pound ground beef
    • 28 ounces chili beans 2 (14 ounce cans)
    • 14 ounce can tomato sauce
    • 2 tablespoons cumin
    • 3-4 Slices thick American cheese or 8 slices of thin
    • 1 tablespoon brown sugar optional
    • 1 pinch baking soda optional

    Instructions

    • First, cook 1 pound of ground beef over medium heat, in the pot you'll be making your chili in.
    • Cook ground beef for about 7-10 minutes until beef is fully cooked and it is no longer pink. If the ground beef you're cooking has a higher fat content, this could result in a bit of grease in the pot after cooking. For best results, drain the grease and discard grease.
    • Reduce to low-medium heat.
    • Add in tomato sauce, chili beans, cumin and sliced cheese and stir to combine.
    • If using, add in baking soda and brown sugar, and stir to combine.
    • Rreduce heat to gentle simmer.
    • Let simmer for about 15 minutes or until heated through. Serve with favorite toppings if desired!

    Video

    Notes

    Chili Topping Ideas and Mix-Ins
    Although this basic chili is amazing as it is, it’s always fun to add additional toppings and spices too! Here are our favorite suggestions:
    Spices
    • salt
    • pepper
    • garlic salt
    • garlic powder
    • onion powder
    • paprika
    • oregano
    Love spicy chili?
    Easily add items like:
    • cayenne pepper
    • chili powder
    • jalapeno peppers
    • hot sauce – we love Frank’s
    • red bell pepper
    • chopping green onion or white onions
    Looking for a sweet chili?
    You can add ingredients such as:
    • a little brown sugar
    • white granulated sugar
    • honey
    • sweet corn
    Garnish and Serve with:
    • shredded cheddar cheese
    • corn chips (or Fritos)
    • a dollop of sour cream
    • tortilla chips
    • saltine crackers
    • oyster crackers
    • chopped white onions
    • chopped red onions
    • sliced avocado
    • peanut butter
    How to Store Leftover Chili:
    Usually when making this easy chili recipe, I like to make a double batch so we have leftovers to eat the next day or freeze.
    Refrigerate Leftovers:
    If you plan to eat leftover chili the next day, simply store the leftovers in an airtight container and place it in the refrigerator. It can be enjoyed for the next 4-5 days.
    Freezing Leftovers:
    Chili freezes so well, and it’s so great to have premade chili on a day or weeknight when there’s not a lot of time to cook.
    Store chili in a freezable container or in plastic zip-top bags.
    How to Reheat Chili:
    If refrigerated – Simply place in a microwaveable bowl, and cover with a paper towel (to prevent chili from splattering all over the inside of the microwave) and cook for 2-3 minutes or until heated through. If reheating on the stovetop, reheat on medium heat for 5 minutes or until heated through.
    If frozen – Thaw a container of chili in hot water and then place in a microwavable dish or small soup pot for the stove. Then follow the above steps for reheating for eating.
     

    Nutrition

    Serving: 1serving (¼ recipe) | Calories: 358kcal | Carbohydrates: 2g | Protein: 22g | Fat: 28g | Saturated Fat: 11g | Cholesterol: 96mg | Sodium: 349mg | Potassium: 380mg | Vitamin A: 185IU | Vitamin C: 0.2mg | Calcium: 213mg | Iron: 4.3mg

    Fried Chocolate Pies

    September 12, 2025

    Fried Chocolate Pies stacked on a plate.

    If you grew up loving those packaged chocolate hand pies at the gas station or fair, you're going to flip for these homemade fried chocolate pies.

    Best of all, they're made with shortcut ingredients like refrigerated pie crust and instant pudding mix, so you can have a batch ready in less than 30 minutes.

    Fried chocolate pies on plate, with one having a bite taken out of it.

    Why You'll Love This Recipe

    • Nostalgic & fun - They taste just like the classic snack pies you loved as a kid.
    • Crispy & gooey - Golden fried crust with a creamy chocolate center.
    • Easy shortcut recipe - Uses store-bought pie crust and pudding mix.
    • Crowd pleaser - Makes 20 mini pies, perfect for sharing.

    Ingredients (with Notes)

    Ingredients labeled on counter for making fried chocolate pies.
    • Refrigerated pie crusts (14.1 oz, 2-count box) - The easy base for a flaky, golden crust.
    • Instant chocolate pudding mix (3.9 oz) - Gives you a smooth, rich filling.
    • Half and half (1 cup) - Thicker than milk, so the pudding sets up firm enough to fry.
    • Egg + water - Whisked together for an egg wash to seal the edges.
    • Vegetable oil - For frying; canola or peanut oil also work well.
    • Powdered sugar - Base for the glaze.
    • Milk - Thins the glaze to a pourable consistency.
    • Vanilla extract - Adds bakery-style flavor to the glaze.
    • Light corn syrup - Makes the glaze glossy and smooth.

    Instructions

    • Unroll pie crusts and let sit at room temp for 10 minutes.
    • In a bowl, whisk pudding mix with half and half. It will look grainy - that's fine. Chill in the fridge while you prep the dough.
    Chocolate pudding mix in mixing bowl with half and half.
    • Roll out dough slightly and cut into 3-3.5 inch circles. Re-roll scraps until you have about 20.
    Pie crust with circles cut out, sitting on a wooden cutting board.
    • Place 1 tablespoon of thickened pudding in the center of each circle.
    Pie crust circles cut out and chocolate pudding in center of each.
    • Beat egg with water, brush around edges, fold dough into half-moons, and crimp edges with a fork.
    Pie crusts folding over and sealed, to create hand pies.
    • Place pies on a parchment-lined baking sheet and chill for 5-10 minutes.
    • Heat 1½-2 inches of oil in a deep skillet to 350-365°F. Fry pies 2-3 at a time for 2-3 minutes per side until golden brown.
    • Remove with tongs and drain on a paper towel-lined rack. Cool 10-15 minutes.
    Fried chocolate pies on baking sheet.
    • Whisk powdered sugar, milk, vanilla, and corn syrup until smooth and pourable.
    • Dip or spoon glaze over cooled pies. Let set on a wire rack for 15-20 minutes.
    Glazed fried chocolate pies sitting on wooden cutting board.

    Tips & Notes

    • Only use 1 cup half and half - less than the pudding box calls for - so the filling stays thick.
    • Keep the oil temp steady between 350-365°F for crisp, non-greasy pies.
    • Don't overcrowd the pan; fry in small batches.
    • When re-rolling dough scraps, avoid rolling too thin or the filling may burst out.

    FAQs

    What supplies will I need?

    Rolling pin, round cutter or glass, mixing bowls, whisk, pastry brush, fork, baking sheet, parchment paper, skillet, thermometer, tongs, paper towels, wire rack.

    Can I make them ahead?

    Yes! Assemble and freeze un-fried pies in a single layer, then store in a zip-top bag. Fry straight from frozen, adding 30-90 seconds.

    What's the best way to reheat?

    Bake in a 350°F oven for 5-6 minutes to crisp them back up. Avoid microwaving unless you like them soft.

    Storage & Freezing

    • Store leftovers in an airtight container at room temperature up to 2 days.
    • Reheat in the oven for best texture.
    • Freeze un-fried pies, then fry straight from frozen.
    Chocolate fried pie cut in half, showing the middle filling.

    Serving Suggestions

    • Dust with powdered sugar for a simple finish.
    • Pair with coffee, milk, or hot cocoa.
    • Add a scoop of vanilla ice cream for a pie-a-la-mode moment.
    • Drizzle with extra chocolate or caramel for a bakery-style touch.

    Similar Recipes

    • Fried Cake Bites - Carnival Food at Home
      Fried Cake Bites - At Home Carnival Food
    • Slice of no bake chocolate pie on white plate.
      No Bake Chocolate Pie
    • No bake peanut butter pie
      No Bake Peanut Butter Pie
    • Slice of hummingbird sheet cake on plate.
      Hummingbird Sheet Cake

    Recipe

    Fried Chocolate Pies stacked on a plate.
    Print Pin
    Be the first to rate!

    Fried Chocolate Pies

    Flaky fried hand pies filled with rich chocolate pudding and topped with a glossy glaze for a nostalgic, fair-style dessert in under 30 minutes.
    Course Dessert
    Cuisine American
    Prep Time 15 minutes minutes
    Cook Time 12 minutes minutes
    Total Time 27 minutes minutes
    Servings 20 pies
    Author Jessica Burgess

    Ingredients

    • 14.1 ounce box premade refrigerated pie crusts 2 crusts
    • 3.9 ounce box instant chocolate pudding mix
    • 1 cup cold half and half
    • 1 egg
    • 1 tablespoon purified water
    • Vegetable oil for frying

    For the glaze:

    • 1 cup powdered sugar
    • 1 ½ tablespoons milk or more as needed
    • ½ teaspoon pure vanilla extract
    • ½ tablespoon light corn syrup

    Instructions

    • Unroll both pie crusts and let them sit at room temperature for about 10 minutes so they're easier to handle without cracking.
    • In a medium mixing bowl, whisk together (1) 3.9-ounce box instant chocolate pudding mix and 1 cup cold half-and-half. It will look grainy once whisked; it’s okay, as it will set nicely once you fry the pies. Set it in the fridge to firm up while you prepare the crusts.
    • Roll out the pie dough slightly to even it out, then use a 3 to 3.5-inch round cutter (or the top of a glass) to cut out circles. Re-roll the scraps to obtain approximately 20 circles in total.
    • Spoon about 1 tablespoon of thickened pudding into the center of each dough circle. Don't overfill or it'll leak when frying.
    • In a small bowl, beat 1 egg with 1 tablespoon of water to make an egg wash. Brush around the edges of each circle, then fold them over into half-moons. Press the edges to seal, then crimp with a fork.
    • Place the sealed handpies on a parchment-lined baking sheet and refrigerate them for 5-10 minutes to firm up. This helps them hold their shape while frying.
    • While they chill, heat approximately 1½-2 inches of vegetable oil in a deep skillet over medium heat, aiming for an oil temperature of 350-365°F. Use a kitchen thermometer to monitor the oil temperature.
    • Fry the handpies in batches of 2-3, for 2-3 minutes per side, or until they are golden brown and crispy. Don't overcrowd the pan.
    • Transfer to a paper towel-lined wire rack. Let the pies cool for 10-15 minutes before glazing.

    For the Fried Pie Glaze

    • Whisk 1 cup powdered sugar, 1 ½ tablespoons milk (or more as needed), ½ teaspoon pure vanilla extract, and ½ tablespoon light corn syrup together in a small bowl until smooth. You want it thick but pourable-like Elmer's glue texture. Add a tiny splash of milk if it's too thick.
    • Once the fried handpies are cool (but not cold), dip the tops or spoon the glaze over.
    • Place them on a wire rack and let the glaze set for 15-20 minutes until it firms up.
    • Once the glaze is set and dry to the touch, go ahead and serve! These handpies are best enjoyed the same day-sweet, flaky, and just the right amount of gooey inside. ENJOY!

    Harvest Cake

    September 8, 2025

    A slice of Harvest cake, with cream cheese frosting, sitting on vintage dessert plate.

    If you're craving a cozy, old-fashioned dessert that tastes like fall in every bite, this Harvest Cake is for you. Packed with fresh apples, warm spices, and topped with a luscious cream cheese frosting, it's the kind of recipe that's been passed around at potlucks, church gatherings, and family dinners for generations.

    A slice of harvest cake on a plate, next to the baking pan of cake.

    This cake is full of autumn flavors, and gets even better after a day in the fridge, which makes it perfect for baking ahead of time.

    Ingredients (and Why They Matter)

    Cake Ingredients:

    • Apples - The star of the show! Fresh apples add moisture, natural sweetness, and texture. I used Gala apples but feel free to use your favorite. Some other recommendations for types of apples when baking in a cake are, Honeycrisp, Granny Smith, and Pink Lady. Of course, there are others as well but these are just a few popular types.
    • White Sugar - Not only sweetens the cake, but also helps draw out the juices from the apples when mixed and left to rest. This creates a natural syrup that keeps the cake moist.
    • Vegetable Oil - Keeps the cake soft and tender. Oil-based cakes also stay fresher longer than butter-based cakes. You can use a different type of oil if you prefer.
    • Eggs - Provide structure and stability while helping the cake rise. They also add richness.
    • All-Purpose Flour - The backbone of the cake, giving it structure. Too much flour can make it dense, so careful measuring is key. Make sure to spoon the flour in to your measuring cup so it’s not packed.
    • Baking Soda - Works with the acidity of the apples to help the cake rise.
    • Salt - Balances the sweetness and enhances the flavor of the spices and apples.
    • Cinnamon & Nutmeg - Warm, cozy spices that pair perfectly with apples and make this a true fall dessert.
    • Vanilla - Adds depth of flavor and enhances the sweetness of the apples.
    • Nuts - Pecans or walnuts add crunch and a nutty flavor that balances the soft, moist cake. Optional, but highly recommended!

    Frosting Ingredients:

    • Cream Cheese - The tangy base for the frosting, balancing the sweetness of the cake.
    • Butter - I used unsalted. This adds creaminess and a rich flavor to the frosting.
    • Powdered Sugar - Sweetens the frosting and creates a smooth, fluffy texture.
    • Vanilla Extract - Rounds out the flavor in the frosting.
    • Heavy Cream (optional) - Helps thin the frosting for easier spreading while keeping it silky.

    Instructions

    Peel and dice the apples.

    Apples, peeled and diced on a wooden cutting board.

    Stir the apples with sugar in a large bowl. Let the mixture sit for about an hour so the apples release their juices.

    Apples in bowl with sugar.

    Mix in the oil and eggs.

    Diced apples, eggs, and oil in mixing bowl.

    Then, in a different mixing bowl, add the flour, baking soda, salt, cinnamon, nutmeg, and vanilla. Stir until combined.

    Flour, cinnamon, nutmeg and baking soda in mixing bowl.

    Pour dry mixture in to apple mixture and stir with a mixing spoon, until combined.

    Dry ingredients and vanilla added in to eggs, oil, and apples in mixing bowl.

    Fold in the nuts, if desired.

    Pecans added to apple mixture in mixing bowl.

    Spread the batter into a greased 9×13 pan and bake at 350°F until golden brown and a toothpick comes out clean.

    Unbaked harvest cake in 9x13 baking pan.

    Let the cake cool completely before frosting.

    Baked harvest cake in 9x13 baking pan.

    How to Make Cream Cheese Frosting for Harvest Cake

    Beat cream cheese and butter until smooth, then add vanilla.

    Cream cheese and butter in mixing bowl.

    Gradually mix in powdered sugar.

    Powdered sugar added to cream cheese and butter in mixing bowl.

    If the frosting is too thick for spreading, you can add in a tablespoon or two of heavy cream.

    Cream cheese frosting in mixing bowl.

    Spread evenly over the cooled cake. Serve, or ideally, refrigerate a few hours or overnight for the best flavor.

    Baked harvest cake with cream cheese frosting.

    Tips & Notes

    • Batter will be thick but don't worry, that's normal.
    • Tastes even better the next day as the flavors meld.
    • Store in the fridge up to 5 days or freeze up to 2 months.
    • Pecans are traditional but optional.
    • If you’re looking for a smaller, lighter cake, this supper cake is a light cake that’s so great after dinner.
    Harvest cake with a piece of cake removed to see the cake and frosting.

    FAQs

    Can I use a different baking pan for harvest cake?

    This is also traditionally made in a bundt pan and it can be used and baked at 350 degrees F for 45 minutes. However, the frosting may be too much for this type of cake so a powdered sugar drizzle may be more ideal.

    Do I have to peel the apples for harvest cake?

    Peeling keeps the cake soft, but you can leave skins on if you like texture.

    What if I don't have nutmeg?

    Swap with extra cinnamon or a pinch of pumpkin pie spice.

    Can I skip the frosting?

    The cake is sweet and flavorful on its own, but the cream cheese frosting makes it extra special.

    How do I fix thick frosting?

    Add 1-2 tablespoons of cream or milk until it spreads easily.

    A slice of harvest cake on a vintage dessert plate, with a fork resting next to it, holding a bite of cake.

    Storage & Freezing

    Store the cake covered in the refrigerator for up to 5 days. The frosting helps keep it moist, and the flavors deepen as it rests.

    To freeze, wrap the cake (whole or in slices) tightly in plastic wrap, then in foil or an airtight container. Freeze for up to 2 months. Thaw overnight in the refrigerator before serving. For best results, frost just before serving if freezing without frosting.

    Serving Suggestions

    • Enjoy with this dirty chai latte or tea.
    • Add a drizzle of caramel for a holiday touch.
    • Pair with vanilla ice cream for dessert night.
    • Serve at brunch alongside savory dishes.

    More Vintage Recipes

    If you love old-fashioned classic recipes like this one, you’ll also love these:

    • Sliced lemon blueberry bread with lemon glaze.
      Lemon Blueberry Bread
    • Old fashioned potluck cake recipes collage.
      Old-Fashioned Cakes That Still Show Up at Every Potluck
    • A slice of coconut poke cake on a spatula.
      Coconut Poke Cake Recipe
    • A slice of strawberry heaven cake dessert on a plate.
      Strawberry Heaven

    Recipe

    A slice of Harvest cake, with cream cheese frosting, sitting on vintage dessert plate.
    Print Pin
    Be the first to rate!

    Harvest Cake

    This old-fashioned Harvest Cake is made with fresh apples, warm spices, crunchy nuts, and topped with a cream cheese frosting for the perfect cozy fall dessert.
    Course Dessert
    Cuisine American
    Prep Time 15 minutes minutes
    Cook Time 40 minutes minutes
    soaking time 1 hour hour
    Total Time 1 hour hour 55 minutes minutes
    Servings 12 slices
    Calories 807kcal
    Author Jessica Burgess

    Ingredients

    • 4 cups diced apples This was about 4-5 gala apples.
    • 2 cups sugar
    • 1 cup vegetable oil
    • 2 eggs
    • 3 ¼ cups all purpose flour
    • 1 teaspoon baking soda
    • 1 teaspoon salt
    • ½ teaspoon cinnamon
    • ½ teaspoon nutmeg
    • 1 teaspoon vanilla
    • 1 cup nuts chopped – I used pecans but walnuts can be used as well

    Frosting:

    • 16 ounces block cream cheese 2, 8 ounce boxes, softened
    • ½ cup unsalted butter 1 stick – softened
    • 1 tablespoon pure vanilla extract
    • 4 ½ cups powdered sugar
    • 1-2 tablespoons heavy whipping cream optional

    Instructions

    • Preheat oven to 350° degrees F.
    • Spray a 9×13 baking pan with non-stick cooking spray.
    • Peel and dice apples. Place apples in a large mixing bowl with 2 cups sugar. Stir to combine and allow it to sit for an hour.
    • Add in oil and eggs. Stir to combine.
    • Then, in a different mixing bowl, add the flour, baking soda, salt, cinnamon, nutmeg, and vanilla. Stir until combined
    • In a separate mixing bowl, mix together the flour, baking soda, salt, cinnamon, nutmeg, and vanilla. Stir to combine.
    • Pour the dry ingredients in to the apple sugar mixture and stir to combine. Add in nuts, and stir to combine.
    • Pour in the prepared greased 9×13 pan, and spread in to an even layer.
    • Bake at 350 degrees, for 35-40 minutes, or until the top is golden brown and a toothpick inserted in to the center comes out clean.
    • Allow to cool.

    Cream Cheese Frosting

    • When the cake has cooled, prepare the cream cheese frosting.
    • In a large mixing bowl, add the softened cream cheese and softened butter. Add in vanilla extract and mix.
    • Next, gradually add in powdered sugar, and mix with a hand mixer or stand mixer.
    • You may also want to add 1-2 tablespoons of heavy cream to thin it out if desired, for easier spreading.
    • Spread on as an even layer, to the cooled cake.
    • This harvest cake can be served right away but it also tastes great if stored in the refrigerator for a few hours or overnight before serving.

    Video

    Nutrition

    Serving: 1slice | Calories: 807kcal | Carbohydrates: 116g | Protein: 13g | Fat: 34g | Saturated Fat: 9g | Polyunsaturated Fat: 12g | Monounsaturated Fat: 10g | Trans Fat: 0.4g | Cholesterol: 54mg | Sodium: 566mg | Potassium: 275mg | Fiber: 3g | Sugar: 84g | Vitamin A: 340IU | Vitamin C: 2mg | Calcium: 158mg | Iron: 2mg

    Harvest Chicken Salad

    September 6, 2025

    Chicken salad with grapes and apples, sitting on bread.

    This Harvest Chicken Salad (which is chicken salad with grapes and apples) recipe is a creamy savory salad that gives both a soft and some extra crunch, with the added celery and pecans for the crunch and softness of the chicken.

    It’s delicious served alone on a bed of lettuce as a salad recipe or even on your favorite bread as a sandwich recipe. (We used pretzel slider buns for these!)

    Chicken salad with grapes and apples on slider buns.

    A cool and creamy sandwich is fantastic in the summertime but there’s something about enjoying this chicken salad during the fall because it uses apples, pecans, and red grapes… hence why I decided to call it “Harvest Chicken Salad.”

    Our readers’ favorite tuna salad recipe is another sandwich that is easy to make and wonderful to switch in and out with this one. Or, this curry chicken salad is a great twist when wanting to mix things up!

    Chicken salad with grapes and apples on croissant.
    [feast_advanced_jump_to]

    Why You’ll Love This Recipe

    • Flexible: Some may not like the addition of celery, and although it’s a great way to take the flavor to the next level, you can leave it out and still have the crunchy texture with the apples and pecans.
    • Make-ahead recipe: This chicken apple salad can be made in advance for a great lunch or even a quick dinner idea for an easy meal! However, if serving as sandwiches, it’s best to wait until serving to add it to bread.
    • Ready in only 10 minutes: If you already have the cooked chicken, this chicken grape salad comes together in about 10 minutes! Just a little dicing and mixing is needed and you’re ready to enjoy.
    • Fun flavors: A classic chicken salad may be more creamy (less texture) than this recipe but the fun flavors of the grapes, apples, celery, and pecans can add so much fun to each bite.
    • For an event: Although this is a great option for a meal at home, this chicken waldorf salad (as some call it) can be classy for an event such as a baby shower or even bridal shower.

    Ingredients Needed for the BEST Chicken Salad

    I’ve highlighted some of the ingredients below with some relevant notes. Aside from this, the ingredients needed are pretty basic, and you can get most of these at the grocery store, to make the best chicken salad recipe.

    Labeled ingredients for chicken salad with grapes and apples.
    • Chicken – Although we baked boneless chicken breast for this recipe, you can use a store-bought rotisserie chicken or even canned chicken. (Tip: I’ve found that canned chicken can resemble the taste of tuna, so for best quality, I opt for making chicken myself or using pre-baked/cooked chicken instead.)You can also cook chicken in advance in the Crock Pot.
    • Lemon Juice – You can choose to leave this out but lemon juice will help prevent the apples from turning and it also helps blend with the mayonnaise.
    • Grapes – It’s recommended to use seedless grapes and also red grapes, instead of green. The juicy grapes add such a wonderful twist to the bite.
    • Apples – Red apples are a great addition and add a sweetness to the chicken salad whereas green apples (like a granny smith apple) add a tartness we prefer red but you may want to try green and that’s ok!
    • Pecans – If you prefer to use walnuts in chicken salad, that’s absolutely fine to use instead of pecans.
    • Mayonnaise – We prefer to use the brand Hellman’s or Best Foods for this recipe and all of our salads like this one. You may choose to use plain Greek yogurt or even a mixture of mayo and sour cream instead and that’s perfectly fine!
    • Bread – If serving as a sandwich, using regular sandwich bread is great! But you can also mix things up by using a croissant (like we used for our egg salad), a bagel or even slider buns, such a pretzel slider buns like we used here.

    How to Make Harvest Chicken Salad

    This is an easy chicken salad recipe, and it doesn’t require a lot of ingredients or equipment.

    *Be sure to see the recipe card below for the full ingredients list & instructions!*

    If you haven’t cooked your chicken yet or haven’t purchased pre-cooked chicken, make sure this chicken is cooked before beginning with step one.

    Steps 1-4 of how to make chicken salad with grapes and apples.

    STEP 1. Diced items. In a medium-sized bowl, add cooked chicken, celery, grapes, apples, and pecans. (Image 1).

    Tip: Make sure you use a bowl that’s big enough to stir and combine the chicken salad, as you’ll be mixing it all together in this first bowl that you use.

    STEP 2. Make creamy dressing. In a separate small mixing bowl, whisk together mayonnaise, lemon juice and salt and pepper until evenly combined (Image 2).

    STEP 3. Combine. Pour the creamy mixture over the chicken mixture (Image 3).

    STEP 4. Mix. Stir together the creamy mixture with the chicken mixture until it is evenly coated (Image 4).

    Chicken salad on slider buns.

    Chicken Salad Sliders

    If you’re making chicken salad sliders, my favorite way is to remove the top buns from the bottom (as one whole piece – slicing will come later).

    Then pour the prepared chicken salad on top of the bottom buns, add on leaf lettuce, and top with the top buns. Enjoy!

    Pretzel slider buns with chicken salad to make sandwiches.

    Recipe Pro Tips

    • Allowing chicken salad to set. Making this chicken salad ahead of time can be done, to enjoy the next day. However, the salt can “soak in” and reduce the saltiness of the recipe after chilling. So you may want to add a bit of salt before serving if you notice it has subsided.
    • Serving chicken salad. Instead of only using bread or topping lettuce with the grape and apple chicken salad, try wrapping in large lettuce leaves for lettuce wraps, dipping with crackers, wrapping in a tortilla, and more!
    • Adding onions. If you love the onion flavor in your sandwiches, you may choose to also add diced red onions or even green onion.
    Chicken salad with grapes and apples on croissant.

    Recipe FAQs

    How to make bland chicken salad taste better?

    When adding items such as grapes, apples, celery, and pecans, this can really add a lot more flavor. However, you can also add a splash of pickle juice or mustard (or Dijon mustard) for some zip.

    How to make chicken salad more filling?

    With the addition of nuts, grapes, and apples, this can help make chicken salad more filling. However, you can also add items such as cooked quinoa as well to help even more.

    Does chicken salad with grapes freeze well?

    It does freeze well but mayonnaise will separate after freezing so it’s best that when it has thawed, to stir the chicken salad. Note: Some ingredients can cause the chicken salad to be watery after thawed, whereas others may not so it’s best to see which brands work best for you.

    What do you Serve with Chicken Salad?

    Chicken salad pairs amazingly well with side dishes. This blue cheese dip with some chips, or a hearty soup such as this buffalo chicken soup.

    Storage

    Leftovers: If you have leftover chicken salad, store this in an airtight container in the refrigerator for 3 days.

    Freeze: You can freeze this chicken salad recipe but do note that when thawed, some ingredients can create a watery substance. You can stir to combine it and mix together before serving.

    Similar Savory Salad Recipes You’ll Love

    If you love sandwich recipes like this one, we think you’ll also love these that are perfect for lunches, easy dinners, and more!

    • Crab salad in serving bowl.
      The BEST Crab Salad Recipe (Easy, Classic Recipe)
    • Chicken macaroni salad in a bowl.
      The BEST Chicken Macaroni Salad
    • Old fashioned ham salad on white bun, next to pickles and potato chips
      Ham Salad Recipe
    • Tuna pasta salad in white bowl
      Tuna Pasta Salad

    Did you make this? I’d be so grateful if you left a “star” rating below to let me know what you thought! Then, the next time you need a quick and easy recipe, come back to Fantabulosity to browse all of my easy recipes!

    Originally published: September 2023
    Updated and republished: May 2025

    Recipe

    Chicken salad with grapes and apples, sitting on bread.
    Print Pin
    5 from 6 votes

    Harvest Chicken Salad

    Harvest Chicken Salad has grapes, apples, celery, and pecans, has so many flavors of fall but it's cool enough for an easy summer meal as well.
    Course Appetizer, Dinner, Lunch, Main Course, Side Dish
    Cuisine American
    Prep Time 10 minutes minutes
    Total Time 10 minutes minutes
    Servings 9 sliders
    Calories 157kcal
    Author Jessica Burgess

    Ingredients

    • 2 cups diced cooked chicken
    • ½ cup red, seedless grapes Sliced in half
    • ½ cup diced celery
    • ¼ cup diced red apple
    • ½ cup pecans Broken in to pieces
    • ½ cup mayonnaise We prefer Hellman's brand
    • ½ teaspoon salt
    • 1 teaspoon lemon juice a gentle squeeze of half of a lemon
    • ¼ teaspoon black pepper
    • leaf lettuce optional
    • 9 slider buns or slices of bread, optional

    Instructions

    • In a medium sized bowl add the chicken, grapes, celery, and pecans.
    • In a small, separate bowl, mix together the mayo, salt, pepper, lemon juice. Whisk or stir to combine.
    • Pour the mayo mixture over the top of chicken mixture and stir to combine until it is evenly distributed.

    If Making Sliders

    • Remove the tops of slider buns, and then pour all of the chicken salad on to bottom buns. Top with lettuce, if desired.
    • Then add top bun, and slice (with a bread knife for ease) on the lines of the buns, in to sliders.

    Video

    Notes

    Leftovers: Store any leftovers in an airtight container, and in the refrigerator for up to 3 days.
    Freeze: Place in a freezer container and freeze for up to 3 months.
    Thaw: Place in refrigerator and allow to thaw. Depending on some of the ingredients used, water could separate from the chicken salad. If so, simply stir to combine and serve.

    Nutrition

    Serving: 1slider | Calories: 157kcal | Carbohydrates: 3g | Protein: 3g | Fat: 15g | Saturated Fat: 2g | Polyunsaturated Fat: 7g | Monounsaturated Fat: 5g | Trans Fat: 0.04g | Cholesterol: 14mg | Sodium: 221mg | Potassium: 83mg | Fiber: 1g | Sugar: 2g | Vitamin A: 61IU | Vitamin C: 1mg | Calcium: 10mg | Iron: 0.3mg

    No Bake Cherry Cheesecake

    September 5, 2025

    A slice of cherry cheesecake on a plate, next to full cheesecake.

    No Bake Cherry Cheesecake: This “no bake cherry pie” is a fantastic easy recipe without heating up the oven. It’s creamy, uses only 6 simple ingredients and is a crowd favorite!

    Quick Overview: Only minutes to put together and chill for about 4 hours! So make sure to plan ahead for the chill time!

    Slice of no bake cherry cheesecake on a plate, next to the rest of the pie.

    Desserts like this are classics at church suppers and family gatherings. You can find more potluck dessert ideas here.

    Why You’ll Love This Recipe

    This no bake cherry cheesecake recipe has creamy cheesecake filling, made with cream cheese, sweetened condensed milk, and a few other ingredients, making this a simple recipe that has incredible flavor! Personally, I prefer it over a baked cheesecake and feel its the perfect way to enjoy a classic dessert like this one! If you’re a pie recipe lover, then it’s similar to a no-bake pie, which is one of our favorites here!

    It’s a recipe that you can keep the ingredients on hand for the days you need a dessert without having to run to the store at the last minute! Turn to this perfect dessert for a family gathering, special occasions or when you need an easy dessert idea to take to someone’s house for an after-dinner treat!

    But if you’re more of a chocolate fan, then you’ll also want to try this Oreo Nutella cheesecake recipe!

    [feast_advanced_jump_to]

    Ingredients

    We love shortcuts around here so this recipe uses ingredients that help speed things up, and make things easier, but without sacrificing flavor!

    ingredients on table to make no bake cherry pie
    Ingredients
    • 8 ounce package of cream cheese, softened
    • 14 ounce can sweetened condensed milk
    • ⅓ cup lime juice
    • 1 teaspoon vanilla extract
    • graham cracker crust (storebought or your favorite homemade recipe!)
    • 1 21oz. Can of cherry pie filling

    See the recipe card below for full instructions and ingredients all in one convenient place!

    Instructions

    1. Place the softened cream cheese, condensed milk, lime juice, and vanilla in a large bowl.
    2. Mix with a hand mixer or electric mixer on medium speed until creamy and smooth. (Until there are no lumps — if the cream cheese is not softened before using, it could result in lumps.)
    cream cheese, lime juice, sweetened condensed milk and vanilla in bowl
    Mix cream cheese and liquids
    Mixed cream cheese with liquids in bowl
    Cream cheese mixture
    1. Then, using a rubber spatula, spread the cheesecake filling into the pie crust.
    2. Cover and refrigerate the cheesecake for 2-3 hours.
    Cream cheese mixture in pie shell
    Pour cream cheese filling in pie crust
    Plastic lid covering cheesecake
    Cover cheesecake with lid
    1. Remove from the refrigerator and top with the canned pie filling and cover and return to the refrigerator until it all has completely chilled. (About another hour.)
    Canned cherry pie filling poured on cheesecake
    Top with cherry pie filling
    Cover cheesecake with lid
    Cover with lid & refrigerate

    Serve this cheesecake cold. (We cut it in to about 12, small slices but feel free to make larger slices!)

    No bake cherry cheesecake in metal pie pan.
    Ready to eat!

    Hint: Although I LOVE this recipe, so much, I want you to know if you’re really short on time, they also sell pre-made cheesecake filling at the store! It can be hard to find, and I don’t think it’s near as good as this creamy homemade filling but it is an option if you’re pressed for time, and can find it!

    Substitutions & Variations

    Want to mix things up or need something switched out? Here are some of our favorite suggestions for this no bake cheesecake recipe.

    • Cheesecake Filling – Although I LOVE this recipe, so much, I want you to know if you’re really short on time, they also sell pre-made cheesecake filling at the store! It can be hard to find, and I don’t think it’s near as good as this creamy homemade filling but it is an option if you’re pressed for time, and can find it!
    • Crust – if you prefer to make a no bake crust using graham crackers and melted butter, that’s absolutely ok to use for this recipe! Or, you can even make a Biscoff cookie crust, like we did in our Biscoff cheesecake if you’re looking to have fun with that!
    • Cherry Topping – although we used cherry pie filling in this recipe, feel free to use blueberry pie filling, or even something fun like apple pie filling!
    • Lemon/Lime Juice – We used lime juice for this recipe but you can absolutely use lemon juice if you need!
    • Cool Whip – Although we feel this no-bake cherry cheesecake recipe doesn’t NEED it… it would be delicious to also add whipped cream. You can buy store bought or make your own using heavy cream and sugar!

    If you’re gluten-free, you’ll love this mini cheesecake recipe!

    A slice of no bake cherry cheesecake on plate, next to pie plate.
    No Bake Cherry Cheesecake

    Storage

    With it containing cream cheese, it must be stored in the refrigerator but also, cheesecake will not be firm if left out for a period of time. Either place the lid back on and store or you can cover the cheesecake with plastic wrap.

    Tip

    If desired, you can use another package of cream cheese to make it more “thick” but it could change the flavor a bit.

    Related Recipes

    If you love easy dessert recipes and no bake desserts, then you’re also going to love this oreo dessert, this easy candy cane pie, and this banana cream pie!

    Or if you’re a super fan of “cherry” anything, you’ll also want to try this cherry chip cake, these cherry chocolate cookies, this mini pies recipe, and this delicious cherry yum yum where you can use cherry pie filling!

    Recipe

    A slice of cherry cheesecake on a plate, next to full cheesecake.
    Print Pin
    5 from 6 votes

    No Bake Cherry Cheesecake

    No Bake Cherry Cheesecake: This "no bake cherry pie" is a fantastic easy recipe without heating up the oven. It's creamy, uses only 6 simple ingredients and is a crowd favorite!
    Course Dessert
    Cuisine American
    Prep Time 5 minutes minutes
    Chill Time 2 hours hours
    Total Time 2 hours hours 5 minutes minutes
    Servings 12 slices
    Calories 237kcal
    Author Jessica Burgess

    Ingredients

    • 8 ounces cream cheese softened
    • 14 ounces can of sweetened condensed milk
    • ⅓ cup lime juice
    • 1 teaspoon vanilla extract
    • 1 graham cracker crust store bought or homemade
    • 21 ounces can cherry pie filling

    Instructions

    • Place the softened cream cheese, condensed milk, lime juice, and vanilla in a mixing bowl.
    • Mix with a hand mixer or electric mixer until creamy and smooth. (Until there are no lumps — if the cream cheese is not softened before using, it could result in lumps.)
    • Then, spread the creamy cheesecake filling into the pie crust.
    • Cover and refrigerate the cheesecake for 2-3 hours.
    • Remove from the refrigerator and top with the canned pie filling and return to the refrigerator until it all has completely chilled. (About another hour.) Serve this cheesecake cold.

    Video

    Nutrition

    Serving: 1slice | Calories: 237kcal | Carbohydrates: 42g | Protein: 4g | Fat: 6g | Saturated Fat: 3g | Polyunsaturated Fat: 1g | Monounsaturated Fat: 3g | Cholesterol: 11mg | Sodium: 118mg | Potassium: 199mg | Fiber: 1g | Sugar: 21g | Vitamin A: 194IU | Vitamin C: 5mg | Calcium: 104mg | Iron: 1mg

    Pea Pickin’ Cake

    August 29, 2025

    Slice of pea pickin cake on a plate, with mandarin oranges.

    I'm a sucker for those vintage, potluck-style desserts that our moms, grandmas, and church ladies made famous. This Pea Pickin' Cake is exactly that. Light, fruity, creamy, and oh-so nostalgic. It's one of those "everybody has a story about it" kind of cakes - whether it showed up during the holidays, on a picnic table, or at the neighbor's potluck spread.

    A slice of pea pickin' cake on a round plate, sitting next to a baking dish.

    Why You'll Love This Recipe

    • A true vintage dessert that never goes out of style, much like upside-down cakes.
    • Semi-homemade but tastes completely from scratch.
    • Light, refreshing flavors of mandarin oranges and pineapple.
    • Make-ahead friendly - it actually tastes better chilled overnight.

    Ingredients You'll Need

    Ingredients for making pea pickin cake on counter.
    • Butter cake mix - creates a rich, flavorful base for the cake. A yellow cake mix can be used instead, though the flavor will be slightly different.
    • Mandarin oranges - add sweetness and lightness to the cake batter. Use canned oranges, drained, with just a little juice reserved for mixing.
    • Eggs - help the cake rise and give it structure.
    • Butter - melted butter provides richness and moisture.
    • Vanilla pudding mix - gives the frosting its stability and creamy texture when combined with pineapple and whipped topping.
    • Crushed pineapple - adds natural sweetness and tang to the frosting. Be sure to include the juice for the right consistency.
    • Whipped topping - makes the frosting fluffy and light. Homemade whipped cream can work, but the texture may be less stable.

    Instructions

    • Preheat the oven - Heat to 325°F and prepare a 9×13-inch baking pan with cooking spray or parchment paper.
    • Mix the batter - In a large bowl, combine the cake mix, eggs, melted butter, drained mandarin oranges, and a small amount of reserved juice. Mix on low just until combined - don't overmix.
    Cake mix, eggs, oranges, all added in a mixing bowl.
    • Bake the cake - Pour the batter into the prepared pan, spread evenly, and bake for about 30-35 minutes. Start checking at 25 minutes. If the top is browning too quickly, tent loosely with foil.
    Cake batter poured in to 9x13 baking pan.
    • Cool completely - Place the pan on a wire rack and let the cake cool completely before frosting.
    Baked pea pickin' cake in 9x13 baking dish.
    • Make the frosting - Stir the pudding mix and crushed pineapple (juice included) together until combined. Fold in the whipped topping until light and fluffy.
    Crushed pineapple, pudding and Cool Whip in mixing bowl.
    • Frost & chill - Spread the frosting over the cooled cake, then cover and refrigerate for at least 1 hour, or ideally overnight, to let the flavors develop.
    Pea pickin cake frosted with pineapple frosting.
    • Slice & serve - If desired, top with more mandarin oranges for decoration. Cut into squares and enjoy cold from the fridge.
    Mandarin orange slices placed on top of frosted pea pickin cake.

    Recipe Notes

    • Be gentle when mixing the cake batter - overmixing can make the cake rubbery.
    • Drain the oranges but reserve a small amount of juice for flavor and moisture.
    • Baking at a slightly lower temperature helps the cake bake evenly without over-browning.
    • A metal pan works best for even baking.
    • Always cool the cake completely before frosting to prevent the topping from becoming runny.
    • The frosting sets best when chilled for several hours or overnight.
    • Store covered in the refrigerator for 3-4 days.
    A slice of pea pickin cake on a round plate, sitting next to fork.

    FAQs

    Can I make pea pickin cake ahead of time?

    Yes! This is one of those recipes that actually gets better the longer it chills. Make it the day before, cover it, and let the flavors meld overnight.

    Can I use fresh oranges instead of canned oranges?

    For this recipe, canned fruit works best. The juice from the oranges and pineapple is what gives the batter and frosting the right texture.

    Can I substitute the whipped topping?

    Homemade whipped cream can be used, but the frosting may not hold up as well over time. Whipped topping is recommended for stability.

    Final Thoughts

    Pea Pickin' Cake is a nostalgic, crowd-pleasing dessert that's stood the test of time. It's easy to make, feeds a group, and always gets rave reviews at gatherings. If you've never tried this vintage classic before, you're in for a treat.

    Other Similar Recipes

    If you love old vintage recipes like this one, you’ll also love:

    • bread pudding in baking dish
      Bread Pudding Recipe: Easy Old Fashioned Recipe (With Video!)
    • Slice of depression cake on white plate.
      Chocolate Depression Cake Recipe
    • Slice of hummingbird sheet cake on plate.
      Hummingbird Sheet Cake
    • A piece of granny cake on a small plate.
      Granny Cake

    Recipe

    Slice of pea pickin cake on a plate, with mandarin oranges.
    Print Pin
    5 from 1 vote

    Pea Pickin Cake

    Pea pickin cake is a light and refreshing Southern sheet cake made with mandarin oranges, pineapple, and a fluffy whipped topping frosting - perfect for potlucks, holidays, or summer gatherings.
    Course Dessert
    Cuisine American
    Prep Time 15 minutes minutes
    Cook Time 30 minutes minutes
    Chill Time 1 hour hour
    Total Time 1 hour hour 45 minutes minutes
    Servings 12 slices
    Calories 373kcal
    Author Jessica Burgess

    Ingredients

    For the cake:

    • 15.25 ounce box butter cake mix
    • 15 ounce can mandarin oranges drained, but reserve 2 tablespoons juice
    • 3 large eggs
    • ½ cup unsalted butter melted (1 stick)

    For the frosting:

    • 3.4 ounce box instant vanilla pudding
    • 20 ounce can crushed pineapple, juice included
    • 16 ounces whipped topping 2 tubs of Cool Whip

    Instructions

    • Preheat your oven to 325°F. Prepare a 9×13-inch metal baking pan with nonstick cooking spray or parchment paper and set aside.
    • In a large mixing bowl, combine (1) 15.25-ounce butter cake mix, 3 large eggs, ½ cup melted unsalted butter, (1) 15-ounce can of drained mandarin oranges, and the reserved 2 tablespoons of juice. Use a hand mixer on low speed to mix the batter just until smooth, about 1-2 minutes. Avoid overmixing to prevent the cake from becoming rubbery.
      Cake mix, eggs, oranges, all added in a mixing bowl.
    • Pour the batter evenly into the prepared pan. Smooth the top with a spatula.
      Cake batter poured in to 9x13 baking pan.
    • Bake on the center rack for 30-35 minutes. Check for doneness around the 25-minute mark by inserting a cake tester or toothpick into the center; it should come out clean or with just a few crumbs. Tent with foil for the last 5-10 minutes if the top starts to brown too quickly.
      Baked pea pickin' cake in 9x13 baking dish.
    • Allow the cake to cool completely in the pan on a wire rack before frosting.
    • To make the frosting, in a medium bowl, combine (1) 3.4-ounce box of instant vanilla pudding and (1) 20-ounce can of crushed pineapple, including the juice. Once combined, add (2) 8-ounce tubs of whipped topping and fold gently until thoroughly combined.
      Crushed pineapple, pudding and Cool Whip in mixing bowl.
    • Spread the frosting evenly over the cooled cake. Chill the frosted cake in the refrigerator for at least 1 hour before serving. For best results, allow it to chill for 3-4 hours or overnight, so the frosting sets properly and the flavors can meld. Keep it covered with a lid or plastic wrap while chilling.
      Pea pickin cake frosted with pineapple frosting.
    • If desired, top with slices of more mandarin oranges. Slice into equal squares and ENJOY!
      Mandarin orange slices placed on top of frosted pea pickin cake.

    Video

    Notes

    Store covered in the refrigerator for 3-4 days.

    Nutrition

    Serving: 1slice | Calories: 373kcal | Carbohydrates: 57g | Protein: 4g | Fat: 15g | Saturated Fat: 10g | Polyunsaturated Fat: 1g | Monounsaturated Fat: 3g | Trans Fat: 0.4g | Cholesterol: 62mg | Sodium: 359mg | Potassium: 181mg | Fiber: 2g | Sugar: 41g | Vitamin A: 812IU | Vitamin C: 16mg | Calcium: 124mg | Iron: 1mg

    Monkey Bread Made with Cinnamon Rolls

    August 27, 2025

    Monkey bread made with cinnamon rolls.

    This cinnamon roll monkey bread is soft on the inside with crispy cinnamon edges and a sweet and creamy drizzle on top.

    Monkey bread made with cinnamon rolls and a glaze, sitting on platter.

    With just 10 minutes of prep time, you'll have a warm, gooey cinnamon treat that's perfect for breakfast, brunch, holidays, or an anytime snack. The best part? Your kitchen will smell like pure cinnamon roll heaven while it bakes.

    Why You'll Love This Easy Monkey Bread Recipe

    • Quick & Simple - Just 10 minutes of hands-on prep.
    • Crowd-Pleasing Flavor - Gooey cinnamon-sugar center with caramelized edges.
    • Perfect for Gatherings - Bundt pan presentation makes it a showstopper.
    • Kid-Friendly - Easy to pull apart and fun to eat.

    Ingredients You'll Need

    Ingredients for cinnamon roll monkey bread sitting on a table.

    Here's what you'll need for this recipe, plus some helpful tips and substitutions:

    • Refrigerated cinnamon roll dough - Use the kind that comes with icing included. If you can't find it, you can make a quick icing with powdered sugar and milk. Homemade cinnamon rolls work too-about 24 ounces of dough is perfect.
    • Granulated sugar - Used to coat the dough pieces with cinnamon for that classic flavor.
    • Ground cinnamon - Adjust to your preference. Less for mild, more for bold cinnamon flavor.
    • Dark brown sugar - Creates a rich, caramel-like sauce. Light brown sugar can be swapped in for a milder taste.
    • Salted butter - Gives richness and flavor. Unsalted butter or margarine will also work.
    • Vanilla extract - Optional, but adds warmth and depth to the sauce.
    • Icing from the cinnamon rolls - Don't toss this! You'll mix it with cream cheese for a creamy drizzle.
    • Cream cheese - Full-fat has the best texture, but reduced-fat or fat-free will also work.

    Supplies You'll Need

    A few basic kitchen tools will make this recipe easy to put together:

    • 12-cup bundt pan - Creates the classic monkey bread shape and makes it easy to pull apart.
    • Non-stick baking spray - Helps ensure the bread releases from the pan cleanly.
    • Large bowl - For tossing the dough pieces with the cinnamon sugar.
    • Knife - To cut each cinnamon roll into pieces.
    • Saucepan - For melting the butter and mixing in the brown sugar and vanilla.
    • Plate - For flipping the monkey bread out of the bundt pan.
    • Heat-safe bowl - For warming the cream cheese and mixing with the icing.

    How to Make Cinnamon Roll Monkey Bread

    Step 1. Prepare your pan.
    Preheat oven to 350°F and spray a 12-cup bundt pan with non-stick spray.

    Step 2. Mix cinnamon sugar.
    In a large bowl, combine granulated sugar and cinnamon.

    Sugar and cinnamon in mixing bowl.

    Step 3. Cut cinnamon rolls.
    Separate rolls and cut each into 4 pieces.

    Cinnamon rolls cut up in to pieces, and sitting on a cutting board.

    Step 4. Coat with cinnamon sugar.
    Toss dough pieces in the sugar mixture, working in small batches.

    Small pieces of cinnamon rolls sitting in sugar cinnamon mixture in mixing bowl.

    Step 5. Fill bundt pan.
    Arrange coated pieces evenly in the prepared pan.

    Cinnamon roll pieces added to bundt pan.

    Step 6. Make sauce.
    Melt butter in a saucepan, stir in brown sugar and vanilla, then pour over dough.

    Butter and brown sugar melted in pan, pouring over cinnamon roll pieces.

    Step 7. Bake.
    Bake uncovered for 45 minutes until golden and baked through.

    Baked monkey bread sitting in bundt pan.

    Step 8. Flip.
    Cool for 10 minutes, then place a plate over the bundt pan, flip, and remove pan.

    Baked monkey bread made with cinnamon rolls.

    Step 9. Make drizzle.
    Microwave cream cheese until softened, stir in icing until smooth.

    Cream cheese glaze being drizzled over monkey bread with a spoon.

    Step 10. Drizzle & serve.
    Pour over warm monkey bread and enjoy!

    Storage Instructions

    • Refrigerator: Store cooled monkey bread in an airtight container for 3-4 days.
    • Freezer: Wrap tightly and freeze up to 3 months. Thaw overnight in the fridge, then add the drizzle before serving.
    Fork taking pieces off of monkey bread.

    How to Reheat

    • Microwave: Reheat individual slices for about 1 minute at 50% power. This helps warm it evenly without overheating or drying out.
    • Room temperature: You can also enjoy it without reheating-it's delicious either way!

    Frequently Asked Questions

    What does cinnamon roll monkey bread taste like?

    It's like a mash-up of gooey cinnamon rolls and sticky buns-soft and fluffy in the center with caramelized edges and a creamy drizzle on top.

    Can I make this ahead of time?

    Yes! Bake and freeze up to 3 months in advance. Thaw overnight and add the cream cheese drizzle before serving.

    What if I can't find cinnamon rolls with icing included?

    No problem! You can make a quick drizzle with ½ cup powdered sugar and 2-3 tablespoons of milk or heavy cream.

    Can I use homemade cinnamon rolls instead of refrigerated dough?

    Absolutely. You'll need about 24 ounces of dough. I’ve even thought about trying this with my strawberry cinnamon rolls recipe too!

    Flavor Variations & Extra Tips

    • Add chopped walnuts or pecans to the brown sugar mixture for crunch.
    • Sprinkle in a pinch of nutmeg for a holiday vibe.
    • Try using orange-flavored cinnamon rolls for a citrus twist.
    • Add small dollops of softened cream cheese between layers of dough for an extra surprise inside.
    Fork sticking in to cinnamon sugar monkey bread.

    Why This Recipe Works

    • Faster than Homemade Cinnamon Rolls - No kneading or rising time needed.
    • Pull-Apart Fun - Guests can serve themselves easily.
    • Great for Any Season - Cozy on a chilly morning or fun for a summer sleepover.
    • Budget-Friendly Ingredients - Simple items you can find at any grocery store.

    If you're looking for the ultimate easy cinnamon roll monkey bread recipe, this one is a guaranteed crowd-pleaser. Serve it as a Christmas recipe, at brunch with friends, or whenever you need a warm and gooey cinnamon treat.

    Similar Recipes to Make

    • slice of cinnamon roll casserole on plate
      Cinnamon Roll Casserole
    • French Toast Sticks
      EASY Cinnamon French Toast Sticks
    • Close up photo of a slice of Cinnamon Coffee Cake showing texture of the fluffy cake and cinnamon crumb topping
      Cinnamon Coffee Cake
    • Stack of cinnamon biscuits on white plate.
      Cinnamon Biscuits

    Recipe

    Monkey bread made with cinnamon rolls.
    Print Pin
    Be the first to rate!

    Monkey Bread Made with Cinnamon Rolls

    This cinnamon roll monkey bread is gooey, golden, and drizzled with creamy icing for an easy pull-apart treat that's perfect for breakfast, brunch, or dessert.
    Course Breakfast, Dessert
    Cuisine American
    Prep Time 10 minutes minutes
    Cook Time 45 minutes minutes
    Cool Time 10 minutes minutes
    Total Time 1 hour hour 5 minutes minutes
    Servings 8 servings
    Calories 332kcal
    Author Jessica Burgess

    Ingredients

    • 3 cans refrigerated cinnamon roll dough the 8-count cans
    • ¾ cup granulated sugar
    • ½ Tablespoon ground cinnamon
    • 1 cup dark brown sugar
    • ½ cup 1 stick salted butter
    • 1 teaspoon vanilla extract
    • The icing from your cinnamon rolls should be 3 containers
    • 4 ounces full-fat cream cheese softened

    Instructions

    • Prepare your pan. Preheat your oven to 350°F and spray a 12-cup bundt pan with non-stick baking spray.
    • Mix the cinnamon and sugar. In a large bowl, combine the sugar and cinnamon and set aside.
      Cinnamon and sugar in mixing bowl.
    • Cut the cinnamon rolls. Separate the cinnamon rolls and cut each roll equally into 4 pieces.
      Cinnamon rolls cut up in to pieces, and sitting on a cutting board.
    • Toss to coat in the sugar. Add the pieces to the bowl with the cinnamon and sugar and toss gently to coat them all in the sugar mixture. Work in small batches for best results.
      Small pieces of cinnamon rolls sitting in sugar cinnamon mixture in mixing bowl.
    • Add to the pan. Arrange the coated cinnamon roll pieces in the bunt pan, making sure there are no large gaps.
      Cinnamon roll pieces added to bundt pan.
    • Make the sauce. In a small saucepan over medium heat, melt the butter and stir in the brown sugar and vanilla until smooth. While it's still warm, pour the butter mixture over the cinnamon roll pieces.
      Butter and brown sugar pouring over cinnamon rolls.
    • Bake. Bake uncovered for 45 minutes or until completely baked through.
      Baked monkey bread made with cinnamon rolls.
    • Flip. Once baked, allow the monkey bread to cool slightly (about 10 minutes). Place a flat plate over the bundt pan and flip it over. Remove the pan from the top of your monkey bread and set it aside.
      Baked monkey bread made with cinnamon rolls.
    • Make the topping. In a small heat-safe bowl, melt the cream cheese in the microwave 10 seconds at a time on 50% power and stir in the icing that came with your cinnamon rolls until there are no longer any lumps.
    • Drizzle and serve. Drizzle the cream cheese mixture over the cinnamon roll monkey bread and serve.
      Cream cheese glaze being drizzled over monkey bread with a spoon.

    Video

    Notes

    Storage:
    Refrigerator – Store cooled monkey bread in an airtight container for 3–4 days.
    Freezer – Wrap tightly and freeze up to 3 months. Thaw overnight in the fridge, then add the drizzle before serving.

    Nutrition

    Serving: 1serving | Calories: 332kcal | Carbohydrates: 47g | Protein: 1g | Fat: 17g | Saturated Fat: 10g | Polyunsaturated Fat: 1g | Monounsaturated Fat: 4g | Trans Fat: 0.5g | Cholesterol: 45mg | Sodium: 146mg | Potassium: 62mg | Fiber: 0.3g | Sugar: 46g | Vitamin A: 546IU | Vitamin C: 0.02mg | Calcium: 45mg | Iron: 0.3mg

    Pumpkin Cheese Ball

    August 26, 2025

    Pumpkin cheese ball on plate surrounded by crackers.

    Looking for a show-stopping fall appetizer that's as fun as it is delicious? This pumpkin cheese ball recipe is the perfect party starter for Halloween, Thanksgiving, or any autumn gathering.

    Pumpkin cheese ball on a plate, surrounded by crackers, and a bite taken out to show the inside of the cheese ball.

    With smooth cream cheese, sharp cheddar, smoky bacon, and cozy spices, this festive cheese ball looks like a pumpkin but tastes like the ultimate savory dip.

    Why This Pumpkin Cheese Ball is Perfect for Fall

    When it comes to fall entertaining, you need recipes that are:

    • Festive and eye-catching - It looks like a pumpkin, complete with a pepper stem on top to make a cute little stem.
    • Quick and easy - About 15 minutes of prep and the fridge does the rest.
    • Crowd-pleasing - Cheesy, creamy, and full of bacon flavor – flavors that guests love.
    • Make-ahead friendly - Chill overnight, and it's ready when guests arrive.

    Whether you're planning a Halloween party appetizer or a Thanksgiving snack board, this pumpkin cheese ball fits right in.

    Pumpkin cheese ball sitting on plate, with round crackers.

    Ingredients for Pumpkin Cheese Ball

    Here's what you'll need for this recipe:

    Ingredients to make pumpkin cheese ball on table.
    • Cream cheese - Full-fat works best for shaping.
    • Cheddar cheese - Shredded, sharp or mild.
    • Crispy bacon - Crumbled, or use bacon bits.
    • Onion powder + garlic powder - Adds flavor depth.
    • Dijon mustard - Or swap for yellow or honey mustard.
    • Worcestershire sauce - For that savory flavor.
    • Cheddar cheese powder - The secret to the pumpkin look! (Grab from a mac and cheese box or order online.)
    • Bell pepper stem - Makes the pumpkin "stem."
    • Crackers, pretzels, breadsticks - For serving and dipping.

    How to Make a Pumpkin Cheese Ball

    Step 1: Make the cheese mixture

    In a large bowl, beat softened cream cheese, shredded cheddar, crumbled bacon, onion powder, garlic powder, Dijon mustard, and Worcestershire sauce. The mixture should be creamy but moldable.

    Cream cheese, bacon, cheese, and spices in mixing bowl.

    Step 2: Shape the ball

    On parchment paper, form into a ball. Lightly flatten the top and bottom.

    Cheese ball shaped in to a ball, sitting on a wooden cutting board.

    Step 3: Create the pumpkin ridges

    Wrap tightly in plastic wrap. Use twine or rubber bands to tie around the ball, pulling tight to form pumpkin ridges. Refrigerate for at least 6 hours (overnight is best).

    Cheese ball wrapped in plastic wrap and baking twine to create ridges.

    Step 4: Coat with cheese

    Remove the wrap and strings. Roll in cheddar cheese powder until coated.

    Cheeseball in bowl, sitting in cheddar cheese powder.

    Step 5: Place the stem

    Finally, place the bell pepper stem on top. Serve with crackers or breadsticks.

    Finished pumpkin cheese ball sitting on plate, surrounded by crackers.

    Pumpkin Cheese Ball for Halloween

    Want to make your Halloween party table unforgettable? This cheese ball fits right in with spooky treats while still being savory. Place it on a board surrounded by pretzel sticks, black crackers, or even veggie "witch fingers" for a themed touch.


    Pumpkin Cheese Ball for Thanksgiving

    Need an appetizer that's easy but impressive for Thanksgiving? This pumpkin cheese ball is a stress-free option. You can make it the day before, refrigerate, and then pull it out when guests arrive. It pairs beautifully with a Thanksgiving charcuterie board.

    Pumpkin cheeseball with a bite taken out of it with a cracker.

    Storage Instructions

    Store leftovers tightly wrapped or in an airtight container in the fridge for 3-4 days. I don't recommend freezing, as thawing will ruin the texture and make the coating soggy.


    Pumpkin Cheese Ball Variations

    Here are a few ways you can switch things up:

    • Cheesy coating swap - Use crushed Cheez-Its, Cheetos, or Goldfish instead of cheddar powder.
    • Spicy version - Add ½ teaspoon red pepper flakes to the cream cheese mix.
    • Extra flavor - Stir in 1 tablespoon diced green onion.
    • Classic cheese ball - Skip the pumpkin shaping and serve as a traditional round cheese ball.

    FAQs

    What does this pumpkin cheese ball taste like?

    Savory, creamy, and cheesy with a smoky bacon finish and sharp cheddar kick.

    Can I make it ahead of time?

    Yes - this recipe is best when chilled at least 6 hours, so making it the day before is ideal.

    What can I use instead of cheddar cheese powder?

    Crushed Cheez-Its, Goldfish, or even Doritos make a fun (and tasty) coating.

    Can I freeze it?

    No - the cheese mixture will lose its creamy texture, and the coating won't hold up.


    More Fall Recipes You'll Love

    • Soup ladle with a creamy sausage and tortellini soup inside of it.
      Sausage Tortellini Soup
    • Pumpkin Dump Cake serving on round plate.
      Pumpkin Dump Cake
    • Hamburger hashbrown casserole in baking dish with ladle resting in it.
      Hamburger Hashbrown Casserole
    • A round white plate is filled with halved hard boiled eggs with orange yolk filling piped to look like a pumpkin
      Pumpkin Deviled Eggs

    Recipe

    Pumpkin cheese ball on plate surrounded by crackers.
    Print Pin
    Be the first to rate!

    Pumpkin Cheese Ball

    This festive pumpkin cheese ball is a savory blend of cream cheese, cheddar, and bacon, shaped into a pumpkin for the perfect Halloween or Thanksgiving appetizer.
    Course Appetizer, Snack
    Cuisine American
    Prep Time 10 minutes minutes
    Chill Time 6 hours hours
    Total Time 6 hours hours 10 minutes minutes
    Servings 6 servings
    Calories 170kcal
    Author Jessica Burgess

    Ingredients

    • 8 ounces block cream cheese softened (do not use fat-free, the full fat helps hold the ball together)
    • 1 cup finely shredded cheddar cheese
    • 8 strips crispy bacon crumbled
    • 1 teaspoon onion powder
    • 1 teaspoon garlic powder
    • ½ teaspoon Dijon mustard
    • ½ teaspoon Worcestershire sauce
    • 1 cup cheddar cheese powder
    • 1 top of a bell pepper just the stem
    • Crackers pretzels, bread, and other dipping snacks

    Instructions

    • Make the cheese mixture. In a large bowl, use a hand or stand mixer to combine the cream cheese, cheddar cheese, crumbled bacon, onion powder, garlic powder, Dijon mustard, and Worcestershire sauce.
      Mix until creamy and smooth, but it should have a firm dough texture and be moldable. If it isn’t, the cream cheese has gotten too warm and soft, so put the bowl in your refrigerator, covered, for about 10 minutes or until it has become moldable.
      Cream cheese, bacon, cheese, and spices in mixing bowl.
    • Mold the ball. On a nonstick surface like a cutting board or parchment paper, roll and mold your cheese into a ball. Press the ball on the flat surface slightly to give it a flat bottom and slightly flattened top.
      Cheese ball shaped in to a ball, sitting on a wooden cutting board.
    • Make the ridges of the pumpkin. Wrap the ball in plastic wrap tightly. Using baking twine or rubber bands, tie 4 pieces of string around the ball evenly. Pull the string tight to create vertical line indents in the ball. Refrigerate overnight (6-8 hours) for at least 4 hours.
      Cheese ball wrapped in plastic wrap and baking twine to create ridges.
    • Cover in cheese powder. Unwrap the ball and cut the string to reveal a pumpkin shape, and cover it in the cheese powder. Shake off the excess powder and place the pepper stem on top of the pumpkin. Serve chilled with crackers or other dippers.
      Cheeseball in bowl, sitting in cheddar cheese powder.

    Notes

    Store leftovers tightly wrapped or in an airtight container in the fridge for 3-4 days. I don't recommend freezing, as thawing will ruin the texture and make the coating soggy.

    Nutrition

    Serving: 1serving | Calories: 170kcal | Carbohydrates: 4g | Protein: 14g | Fat: 11g | Saturated Fat: 5g | Polyunsaturated Fat: 1g | Monounsaturated Fat: 3g | Trans Fat: 0.01g | Cholesterol: 34mg | Sodium: 579mg | Potassium: 187mg | Fiber: 0.1g | Sugar: 2g | Vitamin A: 213IU | Vitamin C: 0.2mg | Calcium: 269mg | Iron: 0.3mg

    Peanut Pie

    August 24, 2025

    A slice of peanut pie on small Corelle Gold Butterfly plate.

    If you love classic Southern desserts, then this Peanut Pie is going to be your new favorite! It's rich, sweet, nutty, and baked in a flaky pie crust that makes every bite irresistible. Think of it like a pecan pie's cousin but with roasted, salted peanuts for a unique and crave-worthy twist.

    A slice of peanut pie on a small Corelle plate, sitting next to rest of pie.

    Whether you're making this for the holidays, Sunday dinner, or just because you're craving something cozy, this recipe comes together quickly with simple pantry staples. Pair it with this chocolate chip pie, and your dessert table will be far from boring!

    Why You'll Love This Peanut Pie

    • Simple ingredients - All of the ingredients can commonly be found in almost all grocery stores.
    • Nutty & sweet - The roasted salted peanuts balance the sweetness perfectly.
    • Great for gatherings - Just like pecan pie, this dessert slices beautifully and makes a perfect potluck or holiday treat.

    Ingredients

    See the full list of ingredients and instructions in the recipe card below!

    Ingredients to make peanut pie, sitting on kitchen table.
    • eggs
    • white granulated sugar
    • all-purpose flour
    • salt
    • dark corn syrup
    • melted butter – salted or unsalted will work
    • roasted peanuts (salted)
    • unbaked pie shell, or you can make your own homemade pie crust

    Instructions

    • Preheat oven to 350°F.
    • Place unbaked pie crust in pie plate.
    Unbaked pie crust in pie plate.
    • In a large bowl, beat the eggs until well blended.
    Beaten eggs in mixing bowl.
    • Add in the sugar, flour, salt, corn syrup, and melted butter. Mix until smooth.
    Flour, sugar, salt, butter and corn syrup added to eggs.
    • Stir in the roasted peanuts.
    Peanuts added to egg mixture in mixing bowl.
    • Pour the mixture into the unbaked pie shell.
    Peanut pie mixture sitting in unbaked pie crust.
    • Bake for about 40 minutes, or until the center is set and the top is golden brown.

    TIP: After about 30 minutes of baking, check to see if the crust is turning too brown. If so, you can cover the crust edges with aluminum foil, or use a pie shield like I used below.

    Baked peanut pie, with pie crust shield wrapped around pie crust.
    • Cool before slicing and serving.
    Baked peanut pie in pie plate.

    Tips for the Best Peanut Pie

    • Use roasted salted peanuts - They add that salty-sweet balance that makes this pie extra good.
    • Don't overbake - The filling should be set but still a little soft in the center. It will firm up as it cools.
    • Serve it up - This pie is delicious on its own, but a scoop of vanilla ice cream or a dollop of whipped cream takes it over the top!
    A slice of peanut pie sitting on Corelle plate, next to remaining pie.

    Storing Leftovers

    Cover the cooled pie with plastic wrap or foil and store at room temperature for up to 2 days, or in the refrigerator for up to 5 days. You can also freeze slices (tightly wrapped) for up to 2 months. Just thaw and enjoy when the craving hits.

    Bite taken off of piece of peanut pie, with fork resting on plate.

    More Classic Dessert Recipes

    If you love this Peanut Pie, you'll also enjoy these sweet treats:

    • No bake peanut butter pie
      No Bake Peanut Butter Pie
    • A slice of pecan pie on a white plate, with pecans sprinkled beside it.
      Pecan Pie Recipe
    • Piece of buttermilk pie topped with whipped cream, sitting on round plate.
      Buttermilk Pie
    • Peanut Buster Parfait in white bowl.
      Peanut Buster Parfait

    Recipe

    A slice of peanut pie on small Corelle Gold Butterfly plate.
    Print Pin
    Be the first to rate!

    Peanut Pie

    A rich and nutty Southern-style dessert, this easy Peanut Pie combines roasted peanuts with a sweet, gooey filling in a flaky pie crust.
    Course Dessert
    Cuisine American
    Prep Time 10 minutes minutes
    Cook Time 40 minutes minutes
    Total Time 50 minutes minutes
    Servings 8 slices
    Calories 440kcal
    Author Jessica Burgess

    Ingredients

    • 4 eggs
    • ½ cup sugar
    • 3 tablespoons flour
    • ¼ teaspoon salt
    • 1 cup dark corn syrup
    • 2 tablespoons melted butter
    • 1 cup roasted peanuts – salted
    • 1 uncooked pie crust

    Instructions

    • Place the unbaked pie crust in to a pie plate and press in to the pie plate.
    • In a large mixing bowl, beat the eggs.
    • Next, add sugar, flour, salt, corn syrup and melted butter. Blend well with and hand mixer or stand mixer.
    • Add in the peanuts and stir them in in.
    • Pour the mixture in to the unbaked pie shell. Bake for 40 minutes at 350 F.
    • Remove from oven (pie should not jiggle) and allow to cool. Slice and serve.

    Video

    Nutrition

    Serving: 1slice | Calories: 440kcal | Carbohydrates: 61g | Protein: 10g | Fat: 19g | Saturated Fat: 6g | Polyunsaturated Fat: 4g | Monounsaturated Fat: 8g | Trans Fat: 0.1g | Cholesterol: 89mg | Sodium: 359mg | Potassium: 215mg | Fiber: 2g | Sugar: 46g | Vitamin A: 206IU | Calcium: 44mg | Iron: 2mg

    Root Beer Float Pie

    August 22, 2025

    A slice of root beer float pie on a plate with fork.

    This Root Beer Float Pie is everything you remember about that creamy, fizzy classic-but in pie form! With a buttery cinnamon graham cracker crust, a cool and creamy root beer filling, and fluffy whipped topping with a cherry on top, it's a fun, no-bake dessert that feels like a trip down memory lane.

    Slice of root beer float pie on plate, with fork resting near it.

    This is the perfect pie to bring to cookouts, potlucks, or just as a special treat for the family. Plus-it's quick to throw together and can be made ahead of time.


    Why You'll Love This Recipe

    ✔️ No-bake dessert - no oven required, just chill and serve.
    ✔️ Nostalgic and fun - tastes just like the root beer floats you loved as a kid.
    ✔️ Make-ahead - prepare it the night before and let the flavors meld.
    ✔️ Crowd-pleaser - unique, refreshing, and a conversation starter.


    Ingredients You'll Need

    Here's your quick shopping list for this dreamy no-bake pie:

    • Cinnamon graham crackers
    • Salted butter
    • Root beer
    • Whole milk
    • Root beer extract
    • Cool Whip
    • Powdered sugar
    • Instant vanilla pudding mix (not cook and serve)
    • Maraschino cherries

    (Full measurements and instructions in the recipe card below!)


    Step-by-Step Instructions

    1. Make the crust

    Pulverize your graham crackers in a food processor (or crush them in a bag with a rolling pin) until fine.

    Cinnamon graham crackers in food processor.

    Mix with melted butter until it looks like wet sand, then press firmly into the bottom and sides of a 9-inch pie pan. Chill in the freezer while you make the filling.

    Cinnamon graham cracker crust placed in pie plate.

    2. Mix the filling

    In a large bowl, whisk together root beer, milk, and root beer extract. Stir in the pudding mix and let it set in the fridge for at least 30 minutes.

    Root beer, root beer extract and milk in mixing bowl.

    Vanilla pudding mix added to root beer mixture in mixing bowl.

    3. Fold it together

    Whip Cool Whip with powdered sugar in another bowl, then gently fold into the pudding mixture once it's set.

    Root beer pudding mixture added to Cool Whip mixture in mixing bowl.

    4. Chill

    Spread the filling into your pie crust, cover, and freeze overnight. ** You can store in the refrigerator and even serve this after only 4 hours. However, it won’t have that clean cut look to it like in the photos. It will be more smooth, and have a “messy” look to it but still delicious.

    Root beer float pie mixture poured in to graham cracker crust.

    5. Garnish & serve

    Top with extra Cool Whip, a few maraschino cherries, and serve chilled.

    Root Beer Float pie topped with whipped cream and maraschino cherries.

    Storage & Make Ahead Tips

    • Fridge: Store covered in the refrigerator for up to 3 days.
    • Freezer: Freeze assembled (without toppings) for up to 3-4 months. Thaw in the fridge overnight before serving.

    Recipe FAQs

    What does root beer float pie taste like?

    Creamy, cool, and a little bit fizzy with that classic root beer float flavor. The cinnamon graham cracker crust adds a cozy warmth that balances the sweetness.

    Can I use a different soda?

    Yes! Dr Pepper, orange soda, or lemon lime soda all make fun variations.

    Can I make it without Cool Whip?

    Absolutely. You can whip heavy cream with powdered sugar instead.

    What else can I add?

    • A splash of vanilla extract for extra depth
    • Chocolate sprinkles on top
    • Crushed cookies for garnish
    Slice of root beer float pie being held on spatula next to pie.

    More No-Bake Recipes You'll Love

    • Curry chicken salad with grapes in a white bowl.
      Curry Chicken Salad
    • A slice of caramel cream pie on a round plate, with a fork lying next to it.
      Caramel Cream Pie
    • squares of peanut butter fudge on white plate
      Peanut Butter Fudge with Condensed Milk
    • A slice of pumpkin lush on round plate.
      Pumpkin Lush

    Whether you're reliving childhood memories or making new ones, this Root Beer Float Pie is a sweet, creamy, and easy dessert that everyone will remember.

    Recipe

    A slice of root beer float pie on a plate with fork.
    Print Pin
    4.50 from 2 votes

    Root Beer Float Pie

    This no-bake Root Beer Float Pie combines a cinnamon graham cracker crust with a creamy root beer filling, fluffy whipped topping, and a cherry on top for a nostalgic, make-ahead dessert.
    Course Dessert
    Cuisine American
    Prep Time 10 minutes minutes
    Chill Time 8 hours hours
    Total Time 8 hours hours 10 minutes minutes
    Servings 8 slices
    Calories 347kcal
    Author Jessica Burgess

    Ingredients

    Crust:

    • 16 sheets of cinnamon Graham crackers 2 sleeves
    • ½ cup 1 stick salted butter, melted

    Filling:

    • ½ cup root beer chilled
    • ¼ cup whole milk chilled
    • 2 Tablespoons root beer extract
    • 8 ounces Cool Whip thawed
    • ⅛ cup powdered sugar
    • 3.4 ounce package instant vanilla pudding mix (not heat and serve)

    Topping:

    • 4 ounces Cool Whip half a tub (or use Reddi Wip)
    • Maraschino cherries for garnish

    Instructions

    • Pulverize the graham crackers. Into your food processor or blender, add the graham crackers and pulse until they resemble fine sand.
    • Make the crust. In a large bowl, combine the graham cracker crumbs with the butter until all of the crumbs are coated and it looks like the texture of wet sand.
    • Press into the pie dish. Press the crumbles into the bottom and up the sides of a 9-inch pie pan using the bottom of a measuring cup or other flat-bottom cup and chill in the freezer while you make the filling.
    • Make the filling. In another large bowl, combine the root beer, whole milk, and root beer extract.
    • Add the pudding and chill. Add the pudding mix and stir well before chilling it in the fridge for at least 30 minutes. The longer the filling sets, the better it gets.
    • Fold in the Cool Whip. In a separate large bowl, combine the Cool Whip with the powdered sugar. Once the pudding is set, fold the Cool Whip into the root beer mixture.
    • Chill/Freeze. Add the mixture to the chilled pie plate, cover, and freeze overnight. *See notes regarding less time.
    • Garnish and serve chilled. When ready to serve, top with additional Cool Whip and maraschino cherries and serve chilled. You can either spread the Cool Whip over the entire top or dollop it on individual servings.

    Video

    Notes

    *You CAN serve this pie after 4 hours of chilling/freezing but it won’t cut as clean as the photos. I prefer freezing overnight, so it cuts better, cleaner, and has that cold bite to it, like a Root Beer Float.

    Nutrition

    Serving: 1slice | Calories: 347kcal | Carbohydrates: 47g | Protein: 4g | Fat: 17g | Saturated Fat: 9g | Polyunsaturated Fat: 1g | Monounsaturated Fat: 5g | Trans Fat: 0.5g | Cholesterol: 38mg | Sodium: 388mg | Potassium: 113mg | Fiber: 1g | Sugar: 27g | Vitamin A: 441IU | Calcium: 82mg | Iron: 1mg

    Pumpkin Fluff

    August 21, 2025

    Pumpkin fluff in Pyrex serving bowl, with Reddi Wip and pumpkin pie spice on top.

    This pumpkin fluff is a quick and easy dessert for fall! Think, pumpkin pie in dippable form. A perfect no-bake recipe for Thanksgiving, Halloween, or just a snack for some fall flavors!

    Bowl of pumpkin pie fluff with Reddi-Wip on top, next to graham crackers.

    Also consider whipping up these pumpkin cheesecake bites to serve along with it for the ultimate pumpkin treat!

    I don’t know about you but when it comes to meal planning for Thanksgiving, keeping things delicious and easy are my two favorite things. I mean, we’re even going to make this turkey breast in the air fryer which will speed things up and make our holiday dinner a breeze, so why not keep dessert easy too!

    (P.S. Make sure to get my Thanksgiving meal planner to help you stay organized this year.)

    So when it comes to dessert, we do love the standard pecan pie, and fun things like pumpkin smores (for late-night snacks) but now this pumpkin fluff dip recipe is on the rotation to snack on all day long because it’s one of our favorite pumpkin recipes!

    This no-bake dessert recipe would also be perfect for any fall party, Halloween party or honestly, any dessert table would be lucky to have this on it, next to these pumpkin patch brownies and this no-bake pumpkin pie recipe!

    [feast_advanced_jump_to]

    Ingredients

    This easy pumpkin fluff recipe uses only 7 ingredients and believe me when I say they’re simple ingredients! You may even already have most of these on hand to make one of the best pumpkin desserts!

    Cool Whip, pumpkin, half and half, pumpkin pie spice, brown sugar, vanilla pudding and vanilla on table.
    Ingredients for Pumpkin Dip Cool Whip

    See the full printable recipe card at the end of this post for more details!

    Instructions

    • In a large mixing bowl, whisk together the pudding mix, brown sugar, and pumpkin pie spice.
    Vanilla pudding mix, pumpkin pie spice and brown sugar mixed together in mixing bowl.
    • Add the half and half and whisk until well combined, and the pudding starts to thicken - about two minutes.
    Half and half added to dry ingredients mixture in mixing bowl.
    • Stir in the pumpkin and vanilla until combined.
    Canned pumpkin puree and vanilla extract added to pudding mixture.
    • Gently fold in the whipped topping to incorporate.
    Cool Whip added to pumpkin mixture in mixing bowl.
    • If desired, top with more Cool Whip or Reddi Wip, and sprinkle with a bit more pumpkin pie spice or cinnamon.
    Cool Whip mixed in to pumpkin mixture, in mixing bowl.

    What to Eat with Creamy Pumpkin Fluff Dip

    Dipping items in to it, such as:

    • Pretzels
    • Graham Crackers (even cinnamon graham crackers)
    • Gingersnap Cookies (or Ginger Snaps)
    • Animal Crackers
    • Vanilla Wafers
    • Apple Slices
    • Pear Slices

    … are definitely favorites!

    Pumpkin Pie Fluff in serving bowl, topped with Reddi Wip and pumpkin pie spice, sitting next to graham crackers.

    How to Store Pumpkin Dip

    If you have leftover pumpkin fluff, store in an airtight container for up to 5 days or in the freezer for up to 1 month!

    Hand holding graham cracker that has been dipped in to pumpkin fluff.

    Looking for a fun way to serve this dip? Make a Charbooterie board for Halloween!

    Substitutions

    If you’re shorthanded or out of some of the ingredients, you can do the following:

    I don't have any pumpkin spice – what can I use as a substitute?

    – 1 teaspoons ground cinnamon
    – ¼ teaspoon ground nutmeg
    – ¼ teaspoon ground ginger
    – ⅛ teaspoon ground cloves

    Can I use white sugar in place of the brown sugar?

    Yes.  Just substitute the same amount.

    Can I substitute whipped cream in place of Cool Whip?

    Yes, just whip up 1 cup of heavy cream with 1-2 tablespoons of sugar, until soft peaks form.  Then gently fold this into the pumpkin mixture.  

    Related Recipes

    If you love easy dessert recipes, then you’ll also love these pumpkin bars, turkey cookies, and this Fruit Salad with Cool Whip, and for Christmas, this Little Debbie Christmas Tree Cake Dip!

    Serve on a beautiful platter with crackers and cookies

    Here for the Old Pumpkin Fluff Recipe?

    I have changed the pumpkin fluff recipe that was originally published in 2021, to this new recipe. Although the old recipe was good, I wanted a pumpkin fluff recipe to resemble the taste of pumpkin pie, in dip form, more than it did.

    However, if you’re here for the old recipe, no worries. You can find it here:

    Ingredients for OLD Recipe:

    • 8 ounces cream cheese, softened
    • ½ cup brown sugar
    • 15 ounce pumpkin puree
    • 1 tablespoon pumpkin spice
    • 1 teaspoon maple syrup
    • 1-½ cups frozen whipped topping, thawed

    Instructions for OLD Recipe:

    • Use a standing mixer, or hand mixer to blend together softened cream cheese and brown sugar. Blend until creamy.
    • Blend in the pumpkin puree, pumpkin spice, and maple syrup.
    • Fold the thawed whipped topping into the pumpkin mixture.
    • Store in the refrigerator until ready to serve.

    Recipe

    Pumpkin fluff in Pyrex serving bowl, with Reddi Wip and pumpkin pie spice on top.
    Print Pin
    5 from 6 votes

    Pumpkin Fluff

    This pumpkin fluff is pumpkin pie in dip form! A no bake dessert, this recipe is great for Thanksgiving, Halloween, or any fall get together.
    Course Dessert
    Cuisine American
    Prep Time 10 minutes minutes
    Cook Time 0 minutes minutes
    Total Time 10 minutes minutes
    Servings 12 people
    Calories 30kcal
    Author Jessica Burgess

    Ingredients

    • 1 box instant vanilla pudding mix 3 ounces
    • 2 tablespoons brown sugar
    • 1 ½ teaspoons pumpkin pie spice
    • ½ cup half and half very cold
    • 1 cup pumpkin puree not pumpkin pie filling
    • 1 teaspoon vanilla extract
    • 1 tub whipped topping thawed 8 ounces

    Instructions

    • In a large mixing bowl, whisk together the pudding mix, brown sugar, and pumpkin pie spice.
    • Add the half and half and whisk until well combined, and the pudding starts to thicken - about two minutes.
    • Stir in the pumpkin and vanilla until combined.
    • Gently fold in the whipped topping to incorporate.
    • Enjoy or chill in the refrigerator for later.

    Video

    Notes

    ** I changed the recipe in August 2025, to reflect more of a pumpkin pie flavor. The original recipe from 2021 until August 2025, is in the blog post, just above the recipe card if you’d prefer to make that instead.  I’d love to hear which one you prefer!
    You can store any leftovers in the refrigerator for up to 5 days or store in the freezer for up to 1 month.
    Serve pumpkin fluff with:
    •  Pretzels
    • Graham Crackers
    • Ginger Snaps
    • Vanilla Wafers
    • Apple Slices
    • Pear Slices

    Nutrition

    Serving: 1serving | Calories: 30kcal | Carbohydrates: 4g | Protein: 1g | Fat: 1g | Saturated Fat: 1g | Polyunsaturated Fat: 0.1g | Monounsaturated Fat: 0.3g | Cholesterol: 4mg | Sodium: 8mg | Potassium: 60mg | Fiber: 1g | Sugar: 3g | Vitamin A: 3214IU | Vitamin C: 1mg | Calcium: 20mg | Iron: 0.4mg

    Wilted Lettuce

    August 17, 2025

    A bowl of wilted lettuce, that's leaf lettuce with bacon grease and salt.

    If you grew up in the South or have ever flipped through an old church or community cookbook, chances are you've seen Wilted Lettuce Salad that’s made with hot bacon grease. It's one of those old-fashioned recipes that brings back my childhood every time I make it.

    A bowl of lettuce with bacon grease dressing on top.

    What Is Wilted Lettuce?

    This recipe takes tender leaf lettuce and tops it with a hot bacon grease dressing that slightly "wilts" the greens, giving you a tangy, smoky, and slightly sweet side dish that pairs perfectly with just about any dinner.

    Whether you remember Grandma making it in her cast iron skillet or you're trying it for the first time, this recipe is sure to win a spot on your table.


    Ingredients You'll Need

    Plate with leaf lettuce on it, sitting next to salt, and cold bacon grease in a jar.
    • Fresh leaf lettuce (garden lettuce or leaf lettuce works best - romaine or iceberg don't wilt the same way but you can still use it if that’s what you have!)
    • Bacon Grease (the drippings are the magic!) – I like to save my bacon grease in the refrigerator or freezer. It’s simple! Just allow the bacon grease to cool a little and then pour in to a food-safe, freezer-safe, container that can handle warmth, and store and freeze.
    • Salt (the bacon grease is usually salty already so salt with caution)

    Additional Optional Ingredients

    I’ve often seen others use these common ingredients in their hot bacon grease dressing for a wilted salad…

    • Vinegar (white vinegar works is my favorite but you can use red wine vinegar if you want to.)
    • Green onions, chopped
    • Sugar (balances out the tang of the vinegar)
    • Black pepper, to taste

    How to Make Old-Fashioned Wilted Lettuce

    • Prep the lettuce. Wash and dry your lettuce leaves well, then tear them into bite-sized pieces. Place in a large heatproof bowl with the chopped green onions.
    • Cook the bacon if needed. In a skillet, fry bacon until crispy. Remove the bacon, crumble it, and set aside - but keep the bacon drippings in the pan. You can also cook bacon in the air fryer or bacon in the oven, where you can also collect the bacon grease from.
    • Make the dressing, if using other ingredients. To the hot bacon drippings, stir in vinegar, sugar, salt, and pepper. Heat until the sugar dissolves and the mixture begins to bubble.
    Hot bacon grease in small bowl.

    For us, we keep it simple and just use hot bacon grease, and then sprinkle with salt.

    • Wilt the lettuce. Immediately pour the hot dressing over the lettuce and onions. Toss quickly to coat, and watch the lettuce gently wilt from the heat.
    • Top it off. Sprinkle with the crumbled bacon if desired, or salt, and serve right away.

    Leaf lettuce in bowl that's topped with hot bacon grease and kosher salt.

    Tips & Variations

    • Best Lettuce: This works best with garden-fresh leaf lettuce. If you grow your own or find it at a farmer's market, you'll taste the difference!
    • Bacon Grease: Save and store your leftover bacon grease in the refrigerator or freezer when making a recipe like this bacon chicken ranch pasta casserole or this cold bacon ranch pasta salad, so you can whip up wilted lettuce in a pinch.
    • Sweeter or Tangier? Adjust the sugar and vinegar to your taste. Some families like it sweeter, while others love that extra tang.
    • Make it a Meal: Add boiled eggs or even fried potatoes to make it more filling.

    Why We Love This Recipe

    There's something so comforting about taking simple ingredients and turning them into a dish that feels special. Wilted lettuce isn't fancy - but it's packed with flavor and family tradition. It's one of those recipes that connects generations, making it just as perfect for a weeknight dinner as it is for a church potluck.

    If you're craving a taste of the past (or just want a quick and easy side dish), give this Wilted Lettuce Salad a try. Chances are, you'll fall in love with this old-fashioned favorite just like we did.

    More Old-Fashioned Recipes

    If you love simple, classic recipes like this one, you’ll also love these:

    • Strawberry Pound Cake on cake stand.
      Strawberry Pound Cake with Strawberry Glaze Icing
    • A sliced, boneless pork chop that was baked in the oven, sitting on a plate.
      How to Cook Pork Chops in the Oven (Bone-In & Boneless Guide)
    • A slice of strawberry cheesecake poke cake on a round plate.
      Strawberry Cheesecake Poke Cake
    • A wooden spoon dishing out a serving of meatball casserole in a 9x13 baking dish.
      Meatball Casserole

    Recipe

    A bowl of wilted lettuce, that's leaf lettuce with bacon grease and salt.
    Print Pin
    5 from 1 vote

    Wilted Lettuce Recipe

    A classic Southern side dish with fresh lettuce and hot bacon dressing that wilts the greens just right.
    Course Salad, Side Dish
    Cuisine American
    Prep Time 5 minutes minutes
    Cook Time 2 minutes minutes
    Total Time 7 minutes minutes
    Servings 2 servings
    Calories 266kcal
    Author Jessica Burgess

    Ingredients

    • 14 pieces leaf lettuce this does not have to be exact – torn in to small, bite-size pieces
    • ¼ cup hot bacon grease
    • 1 pinch salt

    Instructions

    • Make sure lettuce has been washed, dried and torn in to small, bite-size pieces. Place them in a heat-proof serving bowl.
    • Make sure bacon grease is hot. (This could be hot from cooking bacon, or hot from warming up in the microwave or on the stove-top.)
    • Pour hot bacon grease over lettuce pieces (carefully) and sprinkle with salt. Toss to cover lettuce leaves. This will "wilt" the lettuce, and serve immediately.

    Video

    Notes

    The measurements are suggestions, flexible, and approximate. 

    Nutrition

    Serving: 1serving | Calories: 266kcal | Carbohydrates: 0.2g | Protein: 0.1g | Fat: 29g | Saturated Fat: 12g | Polyunsaturated Fat: 3g | Monounsaturated Fat: 13g | Cholesterol: 28mg | Sodium: 66mg | Potassium: 14mg | Fiber: 0.1g | Sugar: 0.1g | Vitamin A: 518IU | Vitamin C: 1mg | Calcium: 3mg | Iron: 0.1mg

    Chicken and Dumplings

    August 16, 2025

    Southern chicken and dumplings in bowl.

    This easy homemade Chicken and Dumplings recipe hits the spot on cool days and is made from scratch, using simple ingredients.

    Ready in about an hour, this Southern classic recipe is ready for dinner, a Sunday lunch, or great to take to a potluck. If nostalgic comfort food is your thing, take a look at these old-fashioned dinner ideas.

    Homemade chicken and dumplings in pot.

    Vintage soup recipes like this one, are delicious in the fall and winter months.

    The warm broth combined with the tender chicken and dense dumplings, seasoned with everyday spices like garlic and onion, make this recipe a go-to for when you need something warm on the table or to even make for someone under the weather.

    Love vintage classics like this one? These ham and beans and this easy chicken pot pie recipe are two recipes to keep on hand when you need comfort food.

    Chicken and dumplings soup in bowl with spoon.

    Chicken and Dumplings Highlights

    • Great for beginners: Don’t let these seem intimidating. This recipe is easy, and everyone will think you spent hours in the kitchen.
    • Everyday ingredients: The ingredients used are simple and may even be ingredients that you have on hand. For instance, do you have cooked shredded chicken in the freezer? Or even rotisserie chicken broth saved for this type of recipe?

    Key Ingredients

    Here's what you need to make this old-fashioned chicken and dumplings recipe:

    Ingredients to make chicken and dumplings.

    Complete list of ingredients and amounts can be found in the recipe card below.

    • Boneless, skinless chicken breasts - If you want to save some time, you can use a rotisserie chicken. Remove the meat from the carcass and shred it. 
    • Olive oil - Coconut oil, vegetable oil, or really any neutral cooking oil will work here. 
    • Cold butter - Shortening will also do the trick if needed and salted or unsalted works as well.
    • Half and half - I have been known to use buttermilk instead. Whole milk will also work. 
    • Garlic - You can use 1-2 teaspoons of garlic powder instead. 
    • Chicken broth – you can make my homemade chicken broth if you don’t want to use storebought chicken broth.

    How to Make Chicken and Dumplings

    Full instructions can be found in the recipe card below.

    1. Prep. Preheat the oven to 400°F and grease a baking dish with cooking spray or butter. 

    Raw chicken breasts in baking dish.
    2. Season and cook chicken breasts.
    Shredded cooked chicken breasts in a baking dish.
    3. Shred cooked chicken.

    Other ways to cook chicken: Not a fan of baking the chicken breasts? You can try boiling chicken breasts but note that the spices will more than likely need to be added to the shredded chicken after it’s cooked so the spices carry over to the soup, instead of be left behind in the boiling water.

    Butter and flour in mixing bowl to make dumplings.
    4. Make dumpling dough.
    Flour dumplings cut on cutting board.
    5. Form the dumpling dough.
    Chicken broth in pot for dumplings.
    6. Heat chicken broth.
    From scratch dumplings in chicken broth.
    7. Boil the dumplings in chicken broth.
    Homemade chicken and dumplings in pot.
    8. Add cooked chicken to rest of ingredients in the pot.
    Homemade chicken and dumplings in stock pot.
    9. Mix together, and thicken if desired.
    Serving of easy homemade chicken and dumplings in bowl with spoon.

    Recipe Tips

    • Dutch oven size: An 8-quart Dutch oven was used here, but anything between 6 and 8 quarts will work.
    • Add veggies. Saute chopped celery and carrots along with the garlic. Peas would also be a great addition. This is now similar to my Instant Pot Chicken and Dumplings recipe.
    • Cook it all in a Dutch oven. Cook the chicken in a Dutch oven instead of in a baking dish. Remove the chicken, shred it, and set it aside. Then build the broth and boil the dumplings in the same Dutch oven. 

    Recipe FAQs

    What do you need to make southern chicken and dumplings?

    Flour, chicken broth, chicken breasts, baking powder, oil, butter, half and half, and a few everyday spices.

    What are one-pot chicken and dumplings?

    This recipe can be made in one pot as well. Simply cook the chicken in a dutch oven, then continue with the broth and dumplings, and then combine chicken, dumplings, and broth.

    What type of chicken to use for chicken and dumplings?

    Chicken breasts work fantastic but you can also use any type of leftover chicken, such as a rotisserie chicken or even boiled chicken thighs.

    Storing Tips

    • To store. Allow the chicken and dumplings to cool completely before sealing them in an airtight container. You can store them in the fridge for up to 4 days or in the freezer for up to 3 months. 
    • To reheat. Thaw the leftovers (if applicable) and then transfer them to a pot. Reheat over medium-low heat, stirring occasionally. You can also heat individual servings in the microwave in 30-second intervals until warm. 
    • To freeze. Here's how to freeze the individual components.

      – For the dumplings: Arrange the dumplings in a single layer on a baking sheet lined with parchment paper and pop them in the freezer for a couple of hours to firm up. Load them into a freezer bag and freeze them for up to 3 months. 

      – For the chicken. Allow the shredded chicken to cool before sealing it in an airtight container and freezing it for up to 3 months. 

      – Reheating frozen chicken and dumplings: When you are ready to enjoy, allow the chicken to thaw and boil the dumplings in the flavorful broth just as you normally would. Just for a bit longer. Add the chicken to the mix and, voila! You're done!

    What to Serve with Chicken and Dumplings

    This dish is great served alone but there’s also something so comforting about serving this with a side of bread, whether it’s homemade biscuits, cheesy pull-apart bread, or even this easy focaccia bread recipe.

    A side salad is also a great side dish for that cool, crisp, contrast.

    More Vintage Recipes

    • Baked chicken and rice casserole in baking dish.
      Old Fashioned Chicken and Rice Casserole
    • Close up of southern fried pork chops on white plate, with a pork gravy poured on top.
      Southern Fried Pork Chops
    • Crack green beans on wooden spoon.
      Crack Green Beans
    • Slice of lemon meringue pie on small plate, with slice of lemon laying beside it.
      Lemon Meringue Pie

    Recipe

    Southern chicken and dumplings in bowl.
    Print Pin
    5 from 2 votes

    Chicken and Dumplings

    This easy homemade chicken and dumplings recipe uses simple ingredients and it's the old-fashioned recipe that your family will love and ready in about an hour.
    Course Dinner, Main Course, Soup
    Cuisine American
    Prep Time 20 minutes minutes
    Cook Time 55 minutes minutes
    Total Time 1 hour hour 15 minutes minutes
    Servings 10 servings
    Calories 349kcal
    Author Jessica Burgess

    Ingredients

    • 2 pounds boneless, skinless chicken breasts
    • 2 Tablespoons olive oil
    • 1 Tablespoon minced garlic
    • ½ Tablespoon onion powder
    • 1 teaspoon salt
    • ½ teaspoon black pepper extra for topping at the end
    • 10 cups chicken broth
    • 3 cups all-purpose flour divided – plus more for rolling dough
    • ½ teaspoon baking powder
    • ¼ cup cold butter cubed
    • ¾ cup half and half
    • 1 Tablespoon cornstarch optional

    Instructions

    • Prep. Preheat the oven to 400°F and grease a baking dish with cooking spray or butter. 
    • Bake the chicken. Rub the 2 pounds boneless, skinless chicken breasts with 2 Tablespoons olive oil, 1 Tablespoon minced garlic, ½ Tablespoon onion powder, 1 teaspoon salt, and ½ teaspoon black pepper and arrange it in a single layer in the prepared baking dish. Bake for 25 minutes or until a meat thermometer inserted into the thickest part of the largest piece reads 165°F. 
    • Shred the chicken. Allow the chicken to rest for 5 minutes once cooked. Use two forks to shred the chicken. Set aside. 
    • Make the dumpling dough. In a large mixing bowl, whisk together 2 cups of flour and the ½ teaspoon baking powder. Work the ¼ cup cold butter into the flour mixture with a fork until crumbly (this can also be done in a food processor). Stir in the ¾ cup half and half Mix until the dough comes together into a cohesive ball. Don't over-mix. 
    • Form dumplings. Place the dough on a lightly floured work surface and dust the dough with additional flour. Roll the dough into ¼ inch thick slab and cut it into 1-inch squares, or rectangles (like I made in the video).
      In a large mixing bowl, toss the squares of dough with the remaining flour to coat.
    • Add the broth. Pour the 10 cups chicken broth in a large dutch oven or pot and heat on high.
    • Boil the dumplings. Bring the chicken broth to a rolling boil and reduce heat to medium high. Add the dumpling slices, one at a time, giving the contents of the pot a stir every few slices to keep the dumplings from sticking together. Boil for 15-20 minutes. 
    • Thicken (if necessary). If the broth isn't thickening to your preferences (the flour coating on the dumplings should thicken it quite a bit), whisk together 1 Tablespoon cornstarch (or any extra flour from coating the dumplings) and 2 tablespoons of broth in a small mixing bowl and then whisk it into the rest of the broth. Continue to cook until thickened.
    • Put it all together. Gently stir the shredded chicken into the dumplings. 
    • Serve. Turn the heat off and ladle the chicken and dumplings into bowls. Enjoy!

    Video

    Notes

    Instructions for Making Ahead and Freezing Chicken and Dumplings:
    • Freezing Leftovers: Allow the chicken and dumplings to cool completely before sealing them in an airtight container. You can store them in the freezer for up to 3 months, in a freezer container.
    • Dumplings: Arrange the dumplings in a single layer on a baking sheet lined with parchment paper and pop them in the freezer for a couple of hours to firm up. Load them into a freezer bag and freeze them for up to 3 months. 
    • Chicken: Allow the shredded chicken to cool before sealing it in an airtight container and freezing it for up to 3 months. 

    Nutrition

    Serving: 1serving | Calories: 349kcal | Carbohydrates: 32g | Protein: 25g | Fat: 13g | Saturated Fat: 5g | Polyunsaturated Fat: 1g | Monounsaturated Fat: 5g | Trans Fat: 0.2g | Cholesterol: 81mg | Sodium: 1280mg | Potassium: 452mg | Fiber: 1g | Sugar: 2g | Vitamin A: 239IU | Vitamin C: 2mg | Calcium: 56mg | Iron: 2mg

    Hummingbird Sheet Cake

    August 14, 2025

    Slice of hummingbird sheet cake on plate.

    This Hummingbird Sheet Cake combines the beloved Southern hummingbird cake flavors in a convenient sheet cake form.

    If you need desserts that slice easily and feed a crowd, take a look at my potluck desserts collection, where you’ll also find this similar Preacher’s Cake that is a lot like this one but it’s made without banana.

    Slice of hummingbird cake on plate, frosted with cream cheese frosting.

    What is a Hummingbird Cake?

    Think ripe bananas, crushed pineapple, and toasted pecans topped with rich cream cheese frosting - all the goodness in one pan. Whether you’re serving it at a family gathering, a potluck, or just because, this cake is sure to steal the spotlight.

    Why You'll Love This Hummingbird Sheet Cake

    1. Tropical Flavors in Every Bite
      This cake is a perfect balance of sweet, fruity, and nutty flavors. With bananas and pineapple adding moisture and natural sweetness, it's like a tropical vacation in every bite.
    2. Super Easy to Make
      From mixing to baking, this recipe takes just about an hour. With simple ingredients and a few straightforward steps, you'll have a stunning dessert without the fuss.
    3. Cream Cheese Frosting - Need We Say More?
      The luscious cream cheese frosting is the icing on the cake (literally!). It's smooth, creamy, and adds just the right amount of sweetness to balance the cake's flavor.
    4. Perfect for Potlucks, Parties, and More
      This sheet cake feeds a crowd and is an absolute hit at gatherings. Serve it for birthdays, holidays, or even a casual weeknight dessert - it's versatile and always delicious.

    Recipe Breakdown

    Notes About Key Ingredients:

    Ingredients for hummingbird sheet cake.

    See the full ingredients list in the recipe card below:

    • Flour: Stick with all-purpose flour for the best texture.
    • Eggs: Using room temperature eggs helps them incorporate more smoothly.
    • Vegetable oil: Canola or refined avocado oil also works.
    • Crushed pineapple with juice: Don't drain the juice! You want it for this recipe.
    • Mashed bananas: Use bananas with lots of brown spots for the best flavor and texture.
    • Chopped pecans: You can substitute with walnuts if you prefer.
    • Cream cheese and unsalted butter: Make sure both are softened.
    • Powdered sugar: Sifted to avoid clumps and create a fluffy frosting.
    • Heavy Whipping Cream: If you don't have heavy cream, you can use whole milk or half-and-half, but start with less since they are thinner.

    Directions:

    • Preheat & Prepare the Pan:
      Preheat your oven to 350°F and lightly grease a 9×13-inch baking dish or line it with parchment paper for easy removal.
    • Mix the Dry Ingredients:
      In a large mixing bowl, whisk together flour, sugar, baking soda, cinnamon, and salt until well combined.
    Flour, sugar, cinnamon, baking soda, and salt in mixing bowl.
    • Add Wet Ingredients:
      Add eggs and vegetable oil to the dry ingredients. Stir until just combined. Don't overmix - it'll seem thick at first, but the next steps will loosen it up.
    Eggs and oil added to dry ingredients in mixing bowl.
    • Add the Fun Stuff:
      Fold in the pineapple (juice and all), mashed bananas, vanilla extract, and 1 cup of chopped pecans (if using). Be gentle here - just mix until everything is incorporated.
    Pineapple, bananas and pecans in mixing bowl with other ingredients.
    • Bake the Cake:
      Pour the batter into your prepared baking dish and spread it evenly. Bake for 40-45 minutes, or until a toothpick comes out clean from the center. Let it cool completely.
    Baked hummingbird cake in 9x13 baking pan.
    • Make the Cream Cheese Frosting:
      In a separate bowl, beat softened cream cheese and butter until smooth. Add vanilla extract and sift in the powdered sugar, mixing until fluffy. If it's too thick, add a tablespoon of heavy cream at a time until you reach a spreadable consistency.
    Cream cheese frosting spread on top of baked hummingbird sheet cake.
    • Frost & Serve:
      Spread the frosting over the cooled cake and sprinkle the remaining pecans on top. Slice into squares and serve!
    Baked hummingbird cake in baking dish, frosted with pecans.

    A Few Tips for Perfection

    • Use Very Ripe Bananas: The riper the bananas, the sweeter and more flavorful the cake. Brown spots are key!
    • Don't Drain the Pineapple: The juice adds moisture, so keep it in the batter for the best texture.
    • Let the Cake Cool Completely: For easy frosting, make sure the cake has cooled down completely before you start spreading the cream cheese frosting.
    • Make-Ahead Option: You can bake and frost this cake a day ahead. It gets even better the next day as the flavors meld together!
    Hummingbird Cake in baking pan, frosted with cream cheese frosting and pecans.

    FAQs About Hummingbird Sheet Cake

    Can I skip the nuts?

    Absolutely! If you're not a fan of pecans (or have a nut allergy), feel free to leave them out. Walnuts are also a great option if you want a different flavor.

    How do I store leftovers?

    Cover the cake tightly and store it in the fridge for up to 5 days. For the best texture, bring it to room temperature before serving.

    Can I freeze this cake?

    Yes, you can freeze the unfrosted cake. Wrap it tightly in plastic wrap and foil, then store in the freezer for up to 2 months. Thaw completely before frosting and serving.


    Slice of hummingbird cake on a plate, with a fork resting next to it.

    Why This Hummingbird Sheet Cake is a Must-Make

    This old-fashioned dessert recipe is everything you want in a dessert. It's easy, it's delicious, and it's sure to be a crowd-pleaser. Whether you’re serving it at a potluck or enjoying it for a cozy family night, this tropical-inspired treat will quickly become a favorite.

    Curious About Other Tropical Cake Recipes?

    Here are a few more sweet treats you'll love:

    • Pineapple Sunshine Cake
      Pineapple Sunshine Cake
    • slice of pineapple dump cake on plate
      Pineapple Dump Cake
    • A piece of granny cake on a small plate.
      Granny Cake
    • Slice of Pina Colada sheet cake on a plate.
      Pina Colada Cake

    Recipe

    Slice of hummingbird sheet cake on plate.
    Print Pin
    5 from 3 votes

    Hummingbird Sheet Cake

    This hummingbird sheet cake is bursting with bananas, pineapple, and warm cinnamon, topped with a rich cream cheese frosting-perfect for any occasion!
    Course Dessert
    Cuisine American
    Prep Time 20 minutes minutes
    Cook Time 45 minutes minutes
    Total Time 1 hour hour 5 minutes minutes
    Servings 12 pieces
    Calories 795kcal
    Author Jessica Burgess

    Ingredients

    For the cake:

    • 3 cups all-purpose flour
    • 2 cups granulated sugar
    • 1 teaspoon baking soda
    • 1 teaspoon ground cinnamon
    • ½ teaspoon kosher salt
    • 3 large eggs room temperature
    • 1 cup vegetable oil
    • 1 cup crushed pineapple with juice
    • 2 cups mashed ripe bananas about 4 medium bananas
    • 2 teaspoons pure vanilla extract
    • 1 ¼ cups chopped pecans optional, divided

    For the cream cheese frosting:

    • 2 – 8 ounce blocks cream cheese, softened
    • ½ cup 1 stick unsalted butter, softened
    • 1 tablespoon pure vanilla extract
    • 4 ½ cups powdered sugar sifted
    • 1-2 tablespoons heavy whipping cream optional

    Instructions

    • Preheat your oven to 350°F. Lightly spray a 9×13-inch baking dish or line it with parchment paper. Set the baking dish aside.

    For the Hummingbird Cake

    • In a large mixing bowl, whisk together 3 cups of all-purpose flour, 2 cups granulated sugar, 1 teaspoon baking soda, 1 teaspoon ground cinnamon, and ½ teaspoon kosher salt until all the ingredients are combined.
    • Add 3 large eggs and 1 cup vegetable oil directly to the dry mixture. Stir gently with a wooden spoon or rubber spatula until the ingredients are just combined. The mixture will be fairly thick but will thin out after the next step.
    • Fold in 1 cup crushed pineapple with juice, 2 cups mashed bananas, 2 teaspoons pure vanilla extract, and 1 cup chopped pecans (optional) until all of the ingredients are combined. Don't overmix the batter.
    • Pour the batter into the prepared 9×13-inch baking dish and smooth out the top of the batter so that it is even.
    • Place in the oven and bake for 40-45 minutes, or until a cake tester or toothpick comes out clean from the center. Let it cool completely in the pan on a cooling rack.

    For the Cream Cheese Frosting

    • To make the cream cheese frosting, beat (2) 8-ounce blocks of softened cream cheese and ½ cup (1 stick) of softened unsalted butter together in a large bowl using a hand or stand mixer until smooth and creamy (about 2-3 minutes).
    • Add 1 tablespoon pure vanilla extract, then gradually mix in 4 ½ cups of sifted powdered sugar until the frosting is thick and fluffy. If your frosting feels too thick to spread easily, beat in 1-2 tablespoons of heavy cream, a little at a time, until you reach your desired consistency.
    • Spread the frosting over the cooled cake, making sure to go thick and even across the top. Sprinkle the remaining ¼ cup of chopped pecans over the frosting, if using, and then slice into squares.

    Video

    Notes

    This cake gets even better the next day after the flavors have had time to mingle.

    Nutrition

    Serving: 1slice | Calories: 795kcal | Carbohydrates: 116g | Protein: 6g | Fat: 36g | Saturated Fat: 9g | Polyunsaturated Fat: 14g | Monounsaturated Fat: 11g | Trans Fat: 0.4g | Cholesterol: 63mg | Sodium: 208mg | Potassium: 262mg | Fiber: 3g | Sugar: 86g | Vitamin A: 358IU | Vitamin C: 5mg | Calcium: 30mg | Iron: 2mg

    Apple Snickerdoodle Dump Cake

    August 11, 2025

    A serving of snickerdoodle apple dump cake in a round plate, topped with vanilla ice cream.

    This Apple Snickerdoodle Dump Cake blends the best of both worlds in a ridiculously easy dessert that's perfect for any occasion. It's the dessert we didn't know we needed, and it's guaranteed to become your new favorite!

    This dessert is part of my growing dump cake recipe collection, all gathered in one place.

    Serving of apple snickerdoodle dump cake on a round plate, with vanilla ice cream.

    Whether you’re hosting a potluck, planning a holiday gathering, or just craving a quick weeknight treat, this Apple Snickerdoodle Dump Cake is here to save the day. With just three simple ingredients, it comes together in just a few minutes and bakes into a gooey, cinnamon-spiced dream.

    Why You’ll Love This Apple Snickerdoodle Dump Cake

    1. Super Simple Ingredients:
    This dessert is a breeze to make thanks to just three ingredients: apple pie filling, snickerdoodle cookie mix, and salted butter. That’s it! You don't need fancy ingredients or hours in the kitchen. Just dump, mix, and bake! Or, if you’re up for the task, you could make homemade snickerdoodle cookies.

    2. Nostalgic Apple Pie Flavors with a Snickerdoodle Twist:
    The warm, cinnamon-sugar notes of snickerdoodle cookies pair beautifully with the gooey apple pie filling. The result is a dessert that screams “fall baking”.

    3. Easy Prep, Big Flavor:
    In just 5 minutes, you can have this dessert ready to go into the oven. The hardest part? Waiting for the tantalizing smell of cinnamon and apples to fill your kitchen as it bakes!

    4. Perfect for Potlucks & Parties:
    This dump cake is not only incredibly easy to make, but it also feeds a crowd. It's perfect for gatherings, parties, or even just a cozy family night in. Serve it with a scoop of vanilla ice cream for the ultimate sweet treat.


    Recipe Breakdown

    Ingredients:

    Ingredients sitting on counter to make snickerdoodle apple dump cake.
    • 3 (20-ounce) cans of apple pie filling
    • 1 (17.9 ounce) package of snickerdoodle cookie mix
    • ¾ cup (1 ½ sticks) salted butter, softened (not melted)
    • Optional: Vanilla ice cream for serving

    Directions:

    • Preheat your oven to 350°F and spray a 9×13 casserole dish with non-stick cooking spray.
    • Layer the apple pie filling: Spread the apple pie filling evenly in the bottom of your prepared dish.
    Canned apple pie filling in 9x13 baking dish.
    • Make the topping: In a large bowl, mix the softened butter into the snickerdoodle cookie mix using a fork or your hands. You'll want a soft, crumbly texture.
    Snickerdoodle cookie mix in bowl mixed with butter.
    • Sprinkle this topping evenly over the apple pie filling.
    Cookie mix with butter, sprinkled on top of apple pie filling in baking dish.
    • Bake: Bake uncovered for about 45 minutes or until the top is golden brown and set. You'll know it's ready when the filling is bubbling and the topping is perfectly crisp.
    Baked snickerdoodle apple dump cake in baking pan.
    • Cool slightly and serve warm, optionally with a scoop of vanilla ice cream.

    A Few Tips for Perfection

    • Use a pre-made cookie mix: While it's tempting to make the snickerdoodle cookie dough from scratch, using a pre-made mix like Betty Crocker ensures the perfect ratio of topping to filling and makes the process ultra-fast and convenient.
    • Don't skip the butter: Softened salted butter is key to creating the perfect crumble topping. It brings out the sweet flavors in the cake while adding richness and texture.
    • Ice cream is a must: While optional, a scoop of vanilla ice cream on top of this warm dump cake takes it to the next level. The cold, creamy ice cream pairs perfectly with the warm apple-cinnamon goodness!

    Baked snickerdoodle apple dump cake in a baking dish.

    FAQs About Apple Snickerdoodle Dump Cake

    Can I make this ahead of time?

    Yes! This dump cake is freezer-friendly. Assemble the entire cake, then either bake it right away or freeze it for later. If you freeze it, be sure to let it cool completely before wrapping it tightly and freezing it. When you're ready to bake, thaw overnight in the fridge and bake at 350°F for about 30 minutes.

    What if I don't have salted butter?

    No worries! You can substitute unsalted butter or even margarine if you prefer. However, salted butter helps bring out the sweet flavors in this cake, so I highly recommend it if you can.

    Can I add other flavors to this dump cake?

    Absolutely! This dump cake is incredibly versatile. Try adding:
    Quick oats: ½ cup mixed into the topping for a rustic touch.
    Chopped nuts: Pecans or walnuts add crunch and texture.
    Vanilla extract: Add a teaspoon to the filling for a more complex flavor.
    Cardamom: A pinch (½ teaspoon) in the filling will elevate the flavor even more.

    How do I store leftovers?

    Let the cake cool completely, then cover it tightly with plastic wrap or transfer it to an airtight container. It will keep in the fridge for 3-4 days.


    Serving of snickerdoodle apple dump cake on a round plate.

    Why This Dump Cake Is Perfect for Any Occasion

    This Apple Snickerdoodle Dump Cake is the ultimate convenience dessert: minimal effort, maximum flavor. It’s cozy, cinnamon-apple filling with a buttery, crumbly topping is like comfort in every bite.

    It's also a crowd-pleaser. Whether you're serving a large group or taking it to a potluck, this dump cake will disappear in no time. And with so many ways to customize it, you can keep making it for every occasion, adding your own personal touch each time.

    Cakes like this are always popular at gatherings, and you'll find more potluck dessert ideas here.

    Curious about other, similar recipes here? Here are others you’ll love:

    • Caramel Apple Dump Cake
    • Chopped green apples, and chopped Snickers candy bars on top of vanilla pudding with caramel drizzle.
      Snicker Apple Salad (Easy Snicker Salad Recipe)
    • apple cinnamon oatmeal in a small white bowl with apple pieces on top
      Slow Cooker Apple Cinnamon Oatmeal
    • Close up of apple pie baked beans in skillet, with wooden spoon.
      Apple Pie Baked Beans

    Recipe

    A serving of snickerdoodle apple dump cake in a round plate, topped with vanilla ice cream.
    Print Pin
    5 from 1 vote

    Snickerdoodle Apple Dump Cake

    This snickerdoodle apple dump cake is a warm, fall dessert recipe with cinnamon-spiced apple pie filling topped with a buttery snickerdoodle crumble, perfect for any occasion.
    Course Dessert
    Cuisine American
    Prep Time 5 minutes minutes
    Cook Time 45 minutes minutes
    Total Time 50 minutes minutes
    Servings 6 servings
    Calories 572kcal
    Author Jessica Burgess

    Ingredients

    • 3 – 20 ounce cans of apple pie filling
    • 17.9 ounce package of snickerdoodle cookie mix
    • ¾ cup salted butter 1½ sticks – softened (not melted)
    • Optional vanilla ice cream for serving

    Instructions

    • Prepare your dish. Preheat oven to 350°F and spray a 9×13 casserole dish with non-stick cooking spray.
    • Add the pie filling. In the bottom of the dish, add the apple pie filling, spreading it into an even layer.
    • Make the topping. In a large bowl, with a fork or clean hands, work the butter into the cookie mix until it creates a soft crumble, and sprinkle it evenly over the apple pie filling.
    • Bake. Bake uncovered for 45 minutes or until the top is golden brown and set.
    • Cool slightly. Allow it to cool slightly before serving warm with ice cream.

    Video

    Notes

    While it's tempting to make the snickerdoodle cookie dough from scratch, using a pre-made mix like Betty Crocker ensures the perfect ratio of topping to filling and makes the process ultra-fast and convenient.

    Nutrition

    Serving: 1serving | Calories: 572kcal | Carbohydrates: 65g | Protein: 3g | Fat: 32g | Saturated Fat: 16g | Polyunsaturated Fat: 1g | Monounsaturated Fat: 6g | Trans Fat: 1g | Cholesterol: 61mg | Sodium: 271mg | Potassium: 45mg | Fiber: 2g | Sugar: 40g | Vitamin A: 709IU | Vitamin C: 0.01mg | Calcium: 7mg | Iron: 0.3mg

    Boston Cream Pie Poke Cake

    August 7, 2025

    A slice of Boston Cream Pie Poke Cake on a spatula, resting above baking pan.

    If you’re a fan of the classic Boston Cream Pie, you’re going to love this fun and easy cake version, Boston Cream Pie Poke Cake!

    This is the kind of dessert people expect to see at a potluck, and you'll find more potluck dessert ideas here.

    A slice of Boston Cream Pie Poke Cake on a spatula, resting above a baking pan.

    This dessert has all the delicious elements of the traditional treat: a soft vanilla cake, a creamy vanilla pudding filling, and a rich, glossy chocolate ganache topping. Best of all, it’s incredibly easy to make with simple ingredients and minimal effort. Perfect for gatherings, potlucks, or a sweet treat to enjoy at home!

    Why You'll Love This Cake

    • Simple Ingredients: Made with common pantry items, this cake is a no-fuss dessert that anyone can make!
    • Creamy and Rich: The smooth vanilla pudding and rich chocolate ganache elevate this cake to new heights of decadence.
    • Perfect Texture: With a light, moist cake base, a creamy pudding filling, and silky chocolate topping, every bite is irresistible.
    • Make Ahead: This cake needs a few hours to chill, which makes it the perfect make-ahead dessert for busy days.
    • Impressive Yet Easy: You get all the wow-factor without the stress of complicated baking techniques.

    Ingredients You'll Need:

    Ingredients for Boston cream poke cake on kitchen counter.

    For the Cake:

    • Milk – Use 2% milk so the pudding doesn't get too thick too quickly. Whole milk can sometimes make instant pudding clumpy. It will be divided between the pudding and the cake. You can use skim if that’s what you have on hand.
    • French Vanilla Instant Pudding – Make sure you get instant pudding and not "Cook & Serve." I used JELL-O Instant French Vanilla Pudding Mix. If you can’t find French Vanilla, you can use regular vanilla pudding mix, which is also one of the key ingredients in this decadent Crack Cake.
    • Butter – I used unsalted butter, but salted butter will work, too. Softened butter will melt faster in the microwave, but it's not a requirement.
    • Yellow Cake Mix – I used Duncan Hines Perfectly Moist Classic Yellow Cake Mix. Some cake mixes may only come in 13.25-ounce sizes, but they should still work. The cake may be shorter, though.
    • 3 large eggs
    • Heavy whipping cream
    • Semi-sweet chocolate chips – You can also chop up a 4-ounce semi-sweet chocolate bar.
    • Corn syrup – This is optional, but it gives the ganache a nice shine. It will also add sweetness and cut down on the rich flavor of the semi-sweet chocolate.

    For the Cake Assembly:

    • 9×13 baking dish or pan
    • Cooking spray
    • platic bag if desired, to fill holes in cake, with pudding

    How to Make Boston Cream Pie Poke Cake

    • Preheat the Oven and Prepare the Pan
      Preheat your oven to 350°F (175°C) and spray a 9×13 baking dish or pan with cooking spray. Set aside.
    • Make the Vanilla Pudding
      In a medium bowl, whisk together 3 ½ cups of milk and the French vanilla instant pudding. Whisk for about 2 minutes or until it begins to thicken. Let it rest for 4 minutes, then cover with plastic wrap and chill while you make the cake.
    Milk and pudding mix in mixing bowl, ready to be mixed.
    • Prepare the Cake
      Combine the remaining 1 cup of milk and butter in a microwave-safe bowl or measuring cup. Heat in 1-minute intervals, stirring in between, until the butter is melted and the milk is steaming.
    Milk and butter in measuring cup for heating.
    • Add Cake Mix
      In a large mixing bowl, add the cake mix, eggs, and milk mixture. Use an electric mixer to blend until just combined.
    Cake mix, eggs, added to milk and butter in mixing bowl.
    • Bake the Cake
      Pour the cake batter into the prepared 9×13 dish and bake for 25 minutes, or until the cake is golden brown and a toothpick inserted into the center comes out clean. Let the cake cool completely on a cooling rack at room temperature.
    Baked Boston Cream Poke Cake in baking pan.
    • Make the Ganache
      Pour the heavy whipping cream into a small microwave-safe bowl and heat in 1-minute intervals until steaming. Add the semi-sweet chocolate chips and corn syrup (if using). Let the mixture sit for 3 minutes before stirring until smooth and glossy.
    Heavy cream and chocolate chips in mixing bowl to make ganache.

    Assembly:

    • Poke Holes in the Cake
      Once the cake is completely cooled, use the end of a wooden spoon or a thick skewer to poke holes in the cake about 1 inch apart. Be sure to poke all the way down to the bottom of the cake.
    Baked cake with holes poked in the top.
    • Add the Pudding
      Spoon the chilled vanilla pudding evenly over the cake, making sure it fills the holes completely.

    TIP: I’ll put some of the pudding in a plastic baggie, and cut the corner, to “pipe” the pudding directly in to the holes to make sure it really gets in the cake.

    Vanilla pudding mix poured on top of baked cake.
    • Top with Ganache
      Pour the smooth chocolate ganache over the cake, spreading it out evenly to cover the entire surface.
    Chocolate ganache being poured over the Boston Cream Pie poke cake.
    • Chill and Serve
      Cover the cake with plastic wrap and chill in the refrigerator for at least 3 hours, or until the ganache has set and the flavors have melded together. Serve chilled for the best flavor and texture!
    Chocolate ganache spread on top of cake and sliced in to slices, in baking pan.

    Tips for Success

    • Use the Right Pudding: Make sure you use instant French vanilla pudding (not cook-and-serve) to get that creamy, smooth texture.
    • Ganache Tip: Adding corn syrup to the ganache is optional, but it adds a glossy shine and softens the chocolate’s richness.
    • Make Ahead: This cake needs time to chill, making it an excellent make-ahead option. Prepare it the night before or a few hours before serving for the best results.

    FAQ

    Can I use a different pudding flavor?

    While French vanilla pudding works best for this recipe, you can use regular vanilla pudding or even chocolate pudding if you prefer. Just be sure it’s instant pudding.

    How should I store Boston Cream Pie Poke Cake?

    Store leftovers in the refrigerator. Cover the cake with plastic wrap or place it in an airtight container, and it will stay fresh for up to 3 days.

    Can I freeze the cake?

    I recommend only freezing the cake (before adding the pudding and ganache). Wrap the cooled cake tightly in plastic wrap and foil, then store it in the freezer for up to 3 months. Thaw it overnight in the fridge before assembling the cake.


    Slice of Boston Cream Pie Poke Cake on a plate with fork taking a bite out of it.

    Why You'll Love This Cake

    With its soft, moist sponge, creamy vanilla pudding filling, and rich chocolate ganache topping, Boston Cream Pie Poke Cake is a showstopper that tastes just as good as it looks. Whether you’re serving it for a special occasion or as a weekend treat, it's bound to become a family favorite. The best part? It's so easy to make!

    More Similar Recipes

    • Slice of banana pudding poke cake on white plate.
      Banana Pudding Poke Cake
    • A square of carrot walnut cake.
      Carrot Cake Poke Cake
    • Slice of lemon poke cake on white plate, with lemon wedge on top.
      Lemon Poke Cake
    • Slice of pumpkin poke cake on plate with fork
      Pumpkin Poke Cake

    Recipe

    A slice of Boston Cream Pie Poke Cake on a spatula, resting above baking pan.
    Print Pin
    Be the first to rate!

    Boston Cream Pie Poke Cake

    This Boston Cream Pie Poke Cake is a moist vanilla cake, creamy pudding filling, and rich chocolate ganache, creating a deliciously decadent dessert that's easy to make and perfect for any occasion.
    Course Dessert
    Cuisine American
    Prep Time 15 minutes minutes
    Cook Time 25 minutes minutes
    Chill Time 3 hours hours 30 minutes minutes
    Total Time 4 hours hours 10 minutes minutes
    Servings 12 slices
    Calories 506kcal
    Author Jessica Burgess

    Ingredients

    • 4 ½ cups 2% milk divided
    • 2 3.4-ounce boxes French vanilla instant pudding
    • ½ cup butter
    • 15.25 ounce box yellow cake mix
    • 3 large eggs
    • 1 ½ cups 12 ounces semi-sweet chocolate chips
    • 1 cup heavy whipping cream
    • 2 tablespoons light corn syrup optional

    Instructions

    • Preheat oven to 350°F. Spray a 9×13 baking dish or pan with cooking spray. Set it aside.
    • Whisk 3 ½ cups of milk and the vanilla instant pudding together in a medium bowl for 2 minutes or until it starts to thicken. Let it rest for 4 minutes, then cover it with plastic wrap and chill while you make the cake.
      Milk and pudding mix in mixing bowl, ready to be mixed.
    • Combine the remaining 1 cup of milk and butter in a large microwave-safe bowl or measuring cup, and heat in the microwave in 1-minute intervals until the butter is completely melted and the milk is steaming.
      Milk and butter in measuring cup for heating.
    • In a large mixing bowl, add the cake mix, eggs, and milk mixture. Use an electric mixer to mix the batter together until just combined.
      Cake mix, eggs, added to milk and butter in mixing bowl.
    • Pour the batter into the prepared baking dish or pan, and bake for 25 minutes or until the cake is slightly brown on top and a toothpick poked in the middle of the cake comes out clean. Rest the cake on a cooling rack at room temperature until completely cool.
      Baked Boston Cream Poke Cake in baking pan.
    • Once the cake is cool, pour the heavy whipping cream into a small, microwave-safe bowl, and heat in 1-minute intervals until steaming. Add the chocolate chips and corn syrup and let them stand for 3 minutes. Stir the mixture until the chocolate chips have melted and the ganache is smooth.
      Heavy cream and chocolate chips in mixing bowl to make ganache.

    Assembly:

    • Use the end of a wooden spoon or a thick skewer to poke holes in the cake about 1 inch apart. Spoon the set vanilla pudding over the cake, and spread it out evenly, ensuring that the pudding fills the holes.
      TIP: I like to put a little bit of the pudding in a plastic bag, and cut the corner, to "pipe" the pudding in to the cake holes.
      Baked cake with holes poked in the top.
    • Pour the ganache over the cake, and smooth it out. Cover the cake with plastic wrap and chill in the fridge for at least 3 hours or until the ganache has set. Serve chilled.
      Chocolate ganache being poured over the Boston Cream Pie poke cake.

    Video

    Nutrition

    Serving: 1slice | Calories: 506kcal | Carbohydrates: 55g | Protein: 8g | Fat: 29g | Saturated Fat: 17g | Polyunsaturated Fat: 1g | Monounsaturated Fat: 8g | Trans Fat: 0.4g | Cholesterol: 96mg | Sodium: 436mg | Potassium: 321mg | Fiber: 2g | Sugar: 35g | Vitamin A: 747IU | Vitamin C: 0.1mg | Calcium: 239mg | Iron: 3mg

    Stick of Butter Rice

    August 3, 2025

    A spoonful of stick of butter rice, in dish.

    Looking for a simple yet incredibly flavorful side dish? This Stick of Butter Rice is an easy-to-make recipe that will quickly become a family favorite. It's buttery, savory, and perfectly tender, all thanks to a few pantry staples and just an hour of baking time.

    Stick of butter rice in a serving spoon, resting in the baking dish.

    Why You'll Love This Recipe

    • Buttery Goodness - A whole stick of butter gives this rice a rich, creamy texture.
    • Savory Flavor - The combination of French onion soup and beef broth adds an incredible depth of flavor.
    • Simple Ingredients - You don't need to worry about fancy ingredients-everything is likely already in your pantry!
    • Perfect for Any Meal - This side dish goes perfectly with any main course, from grilled meats to casseroles.
    • Easy Clean-Up - Everything bakes in a single dish, meaning less mess and more time to enjoy your meal.

    Ingredients You'll Need

    Ingredients for stick of butter rice sitting on the counter.

    For the Rice:

    • 1 cup long-grain white rice
    • 1 (10-ounce) can condensed French onion soup
    • 1 (10-ounce) can beef broth
    • ½ cup (1 stick) unsalted butter, thinly sliced

    What Tools Will I Need?

    • 7×11-inch or similar-sized casserole dish
    • Measuring cups and spoons
    • Foil for covering the casserole dish

    How to Make Stick of Butter Rice

    1. Preheat the Oven
      Preheat your oven to 425°F. Lightly grease a 7×11-inch casserole dish (or another similar-sized dish) with non-stick cooking spray or butter.
    2. Combine Ingredients
      In the casserole dish, combine 1 cup of rice, 1 can of French onion soup, and 1 can of beef broth. Stir the mixture to evenly distribute the rice and liquids.
    Rice, beef broth, and French onion soup poured in baking dish.
    1. Top with Butter
      Lay thin slices of 1 stick of unsalted butter over the top of the rice mixture. This will create that rich buttery flavor as the rice bakes.
    Sliced stick of butter sitting on top of rice and canned soup and broth.
    1. Cover and Bake
      Cover the dish tightly with foil and bake for 40 minutes. After that, remove the foil and continue baking for an additional 15 minutes or until all the liquid has been absorbed and the rice is tender.
    Baked stick of butter rice in a baking dish.
    1. Fluff and Serve
      Once the rice is cooked, fluff it with a fork and serve. Enjoy the buttery goodness!
    Fork fluffing the rice, in the baking dish.

    Tips for Success

    Storage:
    Store any leftovers in an airtight container in the refrigerator for up to 4 days. Reheat in the microwave in 30-second intervals. I wouldn't recommend freezing the rice as the texture can become mushy when thawed.

    Substitution Ideas:

    • Broth Swap: You can substitute the beef broth with beef consommé for a similar flavor. If you use beef broth from a carton, you can use the empty French onion soup can to measure 10 ounces of broth easily.
    • Other Broths: If you prefer a lighter flavor, try chicken or vegetable broth instead of beef. However, keep in mind that the rice will have a slightly milder taste.
    • Butter Choices: While unsalted butter is recommended to control the saltiness from the canned broths, you can use salted butter if you prefer a saltier dish.
    A serving of a stick of butter rice on plate.

    Troubleshooting:

    • Rice still crunchy? Oven temperatures can vary. If your rice is still undercooked, just cover it again and bake for another 10-15 minutes. You can add a little more broth to ensure it cooks through.
    • No 7×11-inch baking dish? You can also use an 8×8-inch or 9×9-inch dish, and the cook time will remain the same.
    • Do I need to rinse the rice? No need to rinse the rice. The starch helps the dish develop a creamy texture.

    Why This Recipe Works

    This Stick of Butter Rice recipe is perfect for those busy weeknights or when you’re looking for a no-fuss side dish to feed a crowd. The combination of French onion soup, beef broth, and butter creates a deeply flavorful rice that’s rich without being overly heavy. It’s a simple recipe, but it's packed with flavor and sure to impress!

    Serve it alongside your favorite main dishes-this rice pairs beautifully with everything from roasted chicken to beef stews.

    More Rice Dishes You’ll Love:

    • Cheesy rice in plate.
      Cheesy Rice
    • Fried rice in shallow bowl.
      How to Make Fried Rice
    • Baked chicken and rice casserole in baking dish.
      Old Fashioned Chicken and Rice Casserole
    • Instant Pot parmesan risotto in a bowl.
      Instant Pot Parmesan Risotto

    Recipe

    A spoonful of stick of butter rice, in dish.
    Print Pin
    Be the first to rate!

    Stick of Butter Rice

    This easy Stick of Butter Rice combines long-grain rice, French onion soup, beef broth, and a whole stick of butter for a rich, savory side dish that bakes to perfection in just over an hour.
    Course Side Dish
    Cuisine American
    Prep Time 5 minutes minutes
    Cook Time 55 minutes minutes
    Total Time 1 hour hour
    Servings 4 servings
    Calories 403kcal
    Author Jessica Burgess

    Ingredients

    • 1 cup long-grain white rice
    • 10 ounce can condensed French onion soup
    • 10 ounce can beef broth
    • ½ cup 1 stick unsalted butter, thinly sliced

    Instructions

    • Preheat the oven to 425 degrees F. Lightly grease a 7×11-inch or similar-sized casserole dish.
    • Add the rice, French onion soup, and beef broth to the casserole dish and stir to combine.
    • Arrange the sliced butter evenly over the top of the soup mixture and cover the pan tightly with foil.
    • Bake for 40 minutes, then remove the foil and continue baking for an additional 15 minutes, or until the liquid is fully absorbed.
    • Fluff the rice with a fork, serve, and enjoy.

    Video

    Notes

    An 8×8-inch or 9×9-inch baking dish works well as a substitute. The cook time stays the same.

    Nutrition

    Serving: 1serving | Calories: 403kcal | Carbohydrates: 40g | Protein: 5g | Fat: 24g | Saturated Fat: 15g | Polyunsaturated Fat: 1g | Monounsaturated Fat: 6g | Trans Fat: 1g | Cholesterol: 64mg | Sodium: 635mg | Potassium: 413mg | Fiber: 1g | Sugar: 2g | Vitamin A: 709IU | Calcium: 35mg | Iron: 0.5mg
    • Strawberry Cream Cheese Dump Cake serving on a round plate.
      Strawberry Cream Cheese Dump Cake
    • Old-Fashioned Dinner Recipes collage.
      19 Old-Fashioned Dinner Recipes (Classic Comfort Food Favorites)
    • A slice of cherry yum on a round plate.
      Cherry Yum Yum
    • A square slice of sock it to me cake on a spatula.
      Sock it to Me Cake

    Oreo Cookie Dough Chocolate Sheet Cake

    July 23, 2025

    One slice of chocolate cake with Oreo cookie dough frosting on top.

    This rich, moist Oreo Cookie Dough Chocolate Sheet Cake is topped with a cookie-dough-inspired frosting and finished with crunchy Oreo pieces for an irresistible treat. Whether you’re hosting a special event or just craving something indulgent, this cake is sure to hit the spot.

    Slice of chocolate sheet cake that's topped with cookie dough frosting and Oreos.

    Desserts like this are classics at church suppers and family gatherings. You can find more potluck desserts here.

    Why You’ll Love This Cake

    • Cookie Lovers Cake: Chocolate cake, cookie dough, and Oreos all in one - it doesn't get any better than this.
    • Simple Yet Delicious: With easy-to-follow steps, you can make this mouthwatering dessert even if you're short on time.
    • Guaranteed Crowd-Pleaser: It's the kind of cake everyone will ask for the recipe after tasting.
    A 9x13 baking dish, that has a chocolate sheet cake in it with a cookie dough frosting and crushed Oreos on top.

    Key Ingredient Notes: (See full list of ingredients and recipe card below.)

    • All-purpose flour: Provides the cake with its structure without making it heavy. You could use cake flour for a lighter texture, but I like the slight density from AP flour.
    • Unsweetened cocoa powder: This is where the chocolate flavor begins. I use regular natural cocoa here because it reacts well with the baking soda.
    • Buttermilk: Adds moisture and tenderness. If you don't have it, mix 1 tablespoon lemon juice or vinegar with 1 cup milk and let it sit for a few minutes.
    • Eggs: Bind everything together and add richness. Make sure they're room temperature so they mix in evenly.
    • Granulated and brown sugar: This mixture provides sweetness and a hint of molasses-like richness that complements the cocoa. 
    • Hot coffee: Brings out the chocolate flavor even more. Brewed coffee, or instant coffee, are good options. Just make sure it's hot water when making the coffee.
    • Unsalted butter: The base of our frosting. Softened so it creams easily.
    • Light and dark brown sugar for the frosting: This combination creates a frosting that resembles the color of cookie dough. Dark brown sugar is used to darken the icing; you can substitute with all light brown sugar if you wish. 
    • Heat-treated AP flour: Gives the frosting the classic cookie-dough taste and texture, which is thick, soft, and just a little doughy. Be sure to heat-treat it first to make it safe to eat.
    • Heavy cream: Helps smooth it out to a spreadable consistency. You can use milk if you prefer.
    • Oreo cookies: Crushed and sprinkled on top. I don't grind them too fine; I like to rough chop them for added texture.

    Instructions:

    • Prepare the Cake:
      Preheat your oven to 350°F. Lightly spray a 9×13-inch baking pan with nonstick cooking spray or line it with parchment paper.
    • In a medium bowl, whisk together the flour, cocoa powder, baking soda, baking powder, and salt. Set aside.
    Dry ingredients for chocolate sheet cake, in a mixing bowl.
    • Mix the Wet Ingredients:
      In a large bowl, combine buttermilk, vegetable oil, eggs, vanilla extract, granulated sugar, and light brown sugar. Use a hand or stand mixer on medium-low speed for about 30-45 seconds, until smooth and well blended.
    Wet ingredients such as eggs, oil, vanilla, in mixing bowl.
    • Add Dry Ingredients:
      Gradually add the dry ingredients in two batches, mixing on low speed after each addition until mostly incorporated. Be careful not to overmix the batter.
    Dry ingredients being added to wet ingredients in mixing bowl.
    • Incorporate the Coffee:
      Slowly add the hot coffee to the batter, stirring gently with a rubber spatula until smooth. The batter will be thin and glossy.
    • Bake the Cake:
      Pour the batter into the prepared pan and smooth the top. Bake for 25-30 minutes, or until a toothpick inserted into the center comes out with just a few moist crumbs. Let the cake cool completely in the pan.
    Chocolate cake batter in 9x13 baking dish.
    • Make the Frosting:
      While the cake is cooling, heat-treat the flour for the frosting. Place the flour in a microwave-safe bowl and microwave in short bursts (about 15 seconds each), stirring in between, until it reaches 165°F (this should take 60-90 seconds). Let it cool completely.
    • In a large bowl, beat the butter, light brown sugar, dark brown sugar, sweetened condensed milk, vanilla extract, and salt until fluffy and creamy (about 2-3 minutes).
    Butter, brown sugars, milk, and vanilla in a mixing bowl to make cookie dough frosting.
    • Gradually add the heat-treated flour and powdered sugar, mixing until smooth. Add the heavy cream and mix until combined. Finally, fold in the mini chocolate chips.
    Chocolate chips added to mixing bowl with cookie dough frosting ingredients.
    • Frost the Cake: Once the cake has cooled, spread the cookie dough frosting evenly over the top using an offset spatula.
    Cookie dough frosting spread on top of chocolate sheet cake.
    • Top with Oreos: Sprinkle the chopped Oreo pieces on top.
    Crushed Oreos on top of cookie dough frosting and chocolate cake.
    • Chill and Serve: For cleaner slices, chill the cake in the fridge for about 30 minutes before serving. Slice into squares and enjoy!

    Tips for the Best Oreo Cookie Dough Sheet Cake:

    • Don't Overmix the Batter: Overmixing the cake batter can make the cake dense. Mix just until the flour is incorporated.
    • The Hot Coffee Magic: Hot coffee intensifies the chocolate flavor in the cake. Don't worry, it won't taste like coffee; it just enhances the cocoa!
    • Heat-Treated Flour: Heat-treating the flour in the frosting makes it safe to eat raw, giving the frosting that cookie dough texture without any risk.
    Slice of chocolate cake topped with Oreo cookie dough frosting, sitting on a round plate with a fork sitting next to the cake.

    FAQs:

    What's the secret to getting the perfect texture for cookie dough frosting?

    The key is heat-treating the flour and using the right balance of sugars. If your frosting is too thick, just add a tablespoon of heavy cream at a time until it reaches the perfect spreadable consistency.

    Can I make this Oreo Cookie Dough Cake ahead of time?

    Yes! You can bake the cake the day before, cool it, wrap it tightly, and store it in the fridge. Frost it the next day for an easy make-ahead dessert.

    How should I store leftover chocolate cake with cookie dough frosting?

    Store the cake in the fridge for up to 5 days. Just be sure to cover it tightly to keep it fresh!


    The Oreo Cookie Dough Sheet Cake combines three of the best dessert flavors in one heavenly treat. Chocolate cake, cookie dough frosting, and crunchy Oreos come together for a dessert that's both comforting and indulgent. Perfect for family gatherings, parties, or just when you're craving something sweet, this cake is sure to impress.

    Love recipes like this one? You’ll also love these similar desserts:

    • Chocolate Chip Cookie Dough Fudge
      Cookie Dough Fudge
    • Edible cookie dough in glass jar.
      Edible Cookie Dough Recipe
    • Chocolate peanut butter cake, a round, layered cake with toffee bits and salted caramel drizzled on top.
      Chocolate Peanut Butter Cake
    • Slice of depression cake on white plate.
      Chocolate Depression Cake Recipe

    Recipe

    One slice of chocolate cake with Oreo cookie dough frosting on top.
    Print Pin
    Be the first to rate!

    Oreo Cookie Dough Chocolate Sheet Cake

    Oreo Cookie Dough Chocolate Sheet Cake is a chocolate cake made from scratch, topped with an Oreo cookie dough frosting recipe.
    Course Dessert
    Cuisine American
    Prep Time 20 minutes minutes
    Cook Time 30 minutes minutes
    Cooling Time 45 minutes minutes
    Total Time 1 hour hour 35 minutes minutes
    Servings 12 servings
    Calories 882kcal
    Author Jessica Burgess

    Ingredients

    For the Cake:

    • 1¾ cups all-purpose flour
    • ¾ cup unsweetened cocoa powder
    • 1½ teaspoons baking soda
    • 1 teaspoon baking powder
    • ½ teaspoon kosher salt
    • 1 cup buttermilk room temperature
    • ½ cup vegetable oil
    • 2 large eggs room temperature
    • 2 teaspoons pure vanilla extract
    • 1 cup granulated sugar
    • ¾ cup light brown sugar
    • 1 cup hot coffee about 190 to 200°F

    For the Frosting:

    • 1½ cups 3 sticks unsalted butter, softened
    • ⅔ cup light brown sugar packed
    • ⅓ cup dark brown sugar packed
    • ¼ cup sweetened condensed milk
    • ¾ cup all-purpose flour heat-treated
    • 3½ cups powdered sugar
    • ¼ cup heavy cream
    • 1 tablespoon pure vanilla extract
    • ½ teaspoon kosher salt
    • 1 cup mini chocolate chips
    • 6 – 8 Oreo cookies roughly chopped

    Instructions

    For the Cake

    • Preheat your oven to 350°F. Lightly spray a 9×13-inch baking pan with nonstick cooking spray, or you can line it with parchment paper.
    • In a medium bowl, whisk together 1¾ cups all-purpose flour, ¾ cup cocoa powder, 1 ½ teaspoons baking soda, 1 teaspoon baking powder, and ½ teaspoon kosher salt until well combined. Set aside.
    • In a large bowl, combine 1 cup buttermilk, ½ cup vegetable oil, 2 large eggs, 2 teaspoons pure vanilla extract, 1 cup granulated sugar, and ¾ cup light brown sugar using a Hand or stand mixer on medium-low speed and mix for 30 to 45 seconds, just until everything is smooth and well blended. Scrape down the sides of the bowl as needed.
    • Add the prepared dry ingredients to the wet ingredients in two additions, mixing on low speed for about 20 – 30 seconds each time, just until the flour is mostly incorporated. Avoid overmixing the batter. Stop the mixer when only a few streaks of flour remain.
    • Slowly pour the hot coffee (about 190 to 200°F, just off the boil) into the bowl containing the batter. Use a rubber spatula to gently stir the coffee into the batter by hand until smooth and well combined. The batter will be thin and glossy.
    • Pour the batter into the prepared pan and smooth the top. Bake for 25 to 30 minutes, or until a toothpick inserted in the center comes out with just a few moist crumbs clinging to it. Let the cake cool completely in the pan before frosting.

    For the Frosting

    • While the cake is cooling, go ahead and heat-treat your all-purpose flour for the frosting. Place ¾ cup of all-purpose flour into a microwave-safe bowl and microwave it in short bursts, about 15 seconds at a time, stirring between each round. You're looking for the flour to reach at least 165°F, which usually takes about 60 to 90 seconds total, depending on your microwave. Once it gets to the correct temperature, set it aside and let it cool completely before adding it to the frosting.
    • In a large mixing bowl, beat 1 ½ cups softened unsalted butter, ⅔ cup packed light brown sugar, ⅓ cup dark brown sugar, ¼ cup sweetened condensed milk, 1 tablespoon pure vanilla extract, and ½ teaspoon kosher salt for 2 – 3 minutes until creamy and fluffy.
    • Gradually mix in ¾ cup of heat-treated all-purpose flour and 3 ½ cups of powdered sugar, beating until smooth.
    • Add ¼ cup heavy cream and mix until combined and the frosting is spreadable. Finally, gently fold in 1 cup mini chocolate chips.
    • Once the cake has cooled completely, gently spread the cookie dough frosting over the cooled cake with an offset spatula. Sprinkle the roughly chopped Oreos across the frosting.
    • Slice the cake into squares and ENJOY! To make cleaner slices when serving, chill the cake for about 30 minutes before serving.

    Video

    Nutrition

    Serving: 1slice | Calories: 882kcal | Carbohydrates: 125g | Protein: 7g | Fat: 42g | Saturated Fat: 21g | Polyunsaturated Fat: 7g | Monounsaturated Fat: 10g | Trans Fat: 1g | Cholesterol: 101mg | Sodium: 455mg | Potassium: 252mg | Fiber: 3g | Sugar: 99g | Vitamin A: 906IU | Vitamin C: 0.3mg | Calcium: 132mg | Iron: 3mg

    Pumpkin Dump Cake

    July 21, 2025

    Pumpkin Dump Cake serving on round plate.

    When fall rolls around, all I want to do is fill my kitchen with warm spices, cozy flavors, and the smell of pumpkin baking in the oven. If you're craving something easy, indulgent, and seriously satisfying, this Pumpkin Dump Cake is about to be your new go-to fall dessert, right next to this pumpkin bread recipe and this pecan pie dump cake.

    Serving of pumpkin dump cake on round plate, topped with vanilla ice cream.

    I've put together a list of easy dump cake recipes that work well for sharing and gatherings.

    This is one of those desserts that checks all the boxes: it's simple, comforting, feeds a crowd, and tastes like you spent way more time in the kitchen than you actually did.

    The pumpkin layer is rich and creamy, like pumpkin pie, and it's topped with a buttery, golden cake layer that's soft and just a little crispy around the edges. Add some crunchy pecans (or walnuts!), and you've got texture heaven in every bite.

    Why You'll Love This Pumpkin Dump Cake Recipe

    • Dump-and-bake easy: No fancy mixers or complicated steps here. If you’re more in to no-bake recipes, try this pumpkin lush for a great make-ahead option!
    • Pumpkin pie meets cake: Creamy base, golden buttery topping.
    • Perfect for holidays or last-minute guests: Feeds 12 and can be made ahead!
    • Customizable: Swap the cake mix, add spices, or go nut-free if needed.

    Ingredients

    You'll only need a handful of pantry staples to make this easy fall dessert:

    Labeled ingredients for pumpkin dump cake, sitting on counter.
    • 1 can (15 oz) pure pumpkin puree (not pie filling)
    • 1 can (12 oz) evaporated milk
    • 3 large eggs
    • ¾ cup granulated sugar
    • ½ cup light brown sugar, packed
    • 1 tablespoon pumpkin pie spice
    • ½ teaspoon salt
    • 1 box yellow cake mix
    • 1 cup (2 sticks) unsalted butter, melted
    • 1 cup chopped pecans or walnuts (optional)

    Tools You'll Need

    • 9×13 inch baking dish
    • Large mixing bowl
    • Whisk
    • Measuring cups and spoons
    • Rubber spatula or spoon
    • Can opener
    • Microwave-safe bowl (for butter)
    • Knife or offset spatula
    • Toothpick (to test doneness)
    • Oven mitts

    Instructions

    • Preheat your oven to 350°F (175°C). Grease a 9×13 inch baking dish or line it with parchment paper for easy cleanup.
    • In a large bowl, whisk together the pumpkin puree, evaporated milk, eggs, sugars, pumpkin pie spice, and salt until smooth.
    Pumpkin, milk, egg, sugar, pumpkin spice and salt in mixing bowl with whisk.
    • Pour the pumpkin mixture into your prepared pan and spread it evenly.
    Pumpkin mixture poured in to 9x13 baking dish.
    • Sprinkle the dry cake mix right over the top - don't stir it in!
    • Drizzle the melted butter evenly across the dry mix. Then sprinkle pecans (if using) all over the top.
    Cake mix poured on top of pumpkin mixture, and nuts poured on top of cake mix.
    • Bake for 50-60 minutes or until golden brown and the center is set. A toothpick should come out clean.
    Baked pumpkin dump cake in baking dish.
    • Let it cool for 20-30 minutes before slicing. Serve warm, room temp, or chilled. Don't forget the whipped cream or a scoop of vanilla ice cream on top!

    Helpful Tips

    • Use pure pumpkin - Avoid canned pie filling, which already has sugar and spices added.
    • Even coverage is key - Sprinkle that cake mix as evenly as you can and don't stir.
    • Butter drizzle trick - Pour the melted butter slowly and evenly. Dry patches? Spray lightly with cooking spray next time!
    • Nuts or no nuts - Toast the pecans/walnuts first for extra flavor, or leave them off for a nut-free version.
    • Spice it up - Add extra cinnamon, nutmeg, or even a touch of ground ginger if you love bold flavors.
    • Let it chill - This cake slices even better after it rests (it's amazing the next day!).
    Serving of pumpkin dump cake on plate with vanilla ice cream on top.

    FAQs

    Can I make pumpkin dump cake ahead of time?

    Yes! It actually tastes better the next day. Just refrigerate and reheat slices if you prefer it warm.

    Can I use spice cake mix instead of yellow cake mix?

    Absolutely. Spice cake mix is a great fall-friendly swap if you want more spice flavor.

    How do I avoid dry cake mix spots in a dump cake?

    Make sure the melted butter covers as much of the top as possible. You can also lightly press any dry spots into the filling before baking.

    Is pumpkin dump cake more like a cake or pie?

    A little of both! The bottom is creamy like pie, and the top is crumbly like cake.

    Can I freeze dump cake?

    Yes, once cooled. Wrap slices well or store in airtight containers. Thaw overnight in the fridge and reheat if desired.

    How should I store leftover dump cake?

    Cover and refrigerate for up to 4 days. It's delicious cold or warmed up!


    How to Serve Pumpkin Dump Cake

    Top each slice with:

    • A dollop of whipped cream
    • A scoop of vanilla ice cream
    • A sprinkle of cinnamon or pumpkin spice

    This cozy dessert is perfect for Thanksgiving, fall potlucks, or a random Tuesday when you need a pumpkin fix.

    More Dump Cakes to Try

    If you're baking for a group, you might also like these desserts for a potluck. Or, this is the kind of easy dessert that belongs right alongside other old-fashioned cake recipes that never go out of style.

    Love easy desserts like this one? Make sure to check out:

    • Lemon Dump Cake with Lemon Oreos
    • Apple Dump Cake
    • Banana Dump Cake

    📌 Don't forget to save this recipe on Pinterest so you have it all season long!

    More Dessert Recipes

    • A slice of cloud cake, topped with strawberries, sitting on round plate.
      Cloud Cake Recipe
    • Crock Pot rice pudding in small bowl.
      Crock Pot Rice Pudding
    • A slice of strawberry jello cake, topped with a strawberry slice, sitting on a round plate.
      Strawberry Jello Cake (Easy, Moist Strawberry Cake)
    • A slice of caramel cake with caramel frosting on a spatula.
      Caramel Sheet Cake with Caramel Frosting

    Recipe

    Pumpkin Dump Cake serving on round plate.
    Print Pin
    5 from 3 votes

    Pumpkin Dump Cake

    This easy pumpkin dump cake recipe is so simple to make and has all the flavors of fall, in this fall dessert recipe.
    Course Dessert
    Cuisine American
    Prep Time 15 minutes minutes
    Cook Time 50 minutes minutes
    Cooling Time 30 minutes minutes
    Total Time 1 hour hour 35 minutes minutes
    Servings 12 servings
    Calories 507kcal
    Author Jessica Burgess

    Ingredients

    • 15 ounce can pure pumpkin puree
    • 12 ounce can evaporated milk
    • 3 large eggs
    • ¾ cup granulated sugar
    • ½ cup light brown sugar packed
    • 1 box yellow cake mix
    • 1 cup 2 sticks unsalted butter, melted
    • 1 cup chopped pecans or walnuts
    • 1 tablespoon pumpkin pie spice
    • ½ teaspoon salt

    Instructions

    • Preheat the oven to 350°F (175°C). Grease a 9×13 inch baking dish or line it with parchment paper for easy removal.
    • In a large bowl, whisk together pumpkin puree, evaporated milk, eggs, both sugars, pumpkin spice, and salt until smooth and well combined.
    • Pour the pumpkin mixture into the prepared pan and spread it evenly. Sprinkle the dry cake mix evenly over the top. Do not stir!
    • Drizzle melted butter evenly over the dry cake mix. Sprinkle pecans all across the top.
    • Bake for 50-60 minutes, or until the top is golden brown and the center is set. A toothpick inserted in the center should come out clean.
    • Let the cake cool for at least 20-30 minutes before slicing. Serve warm, at room temperature, or chilled. Top with whipped cream or a scoop of vanilla ice cream. You can even sprinkle a little bit of cinnamon over the top of the ice cream or whipped cream.

    Video

    Nutrition

    Serving: 1serving | Calories: 507kcal | Carbohydrates: 64g | Protein: 7g | Fat: 26g | Saturated Fat: 13g | Polyunsaturated Fat: 6g | Monounsaturated Fat: 6g | Trans Fat: 1g | Cholesterol: 90mg | Sodium: 366mg | Potassium: 254mg | Fiber: 2g | Sugar: 44g | Vitamin A: 6117IU | Vitamin C: 2mg | Calcium: 202mg | Iron: 2mg
    • « Go to Previous Page
    • Page 1
    • Page 2
    • Page 3
    • Page 4
    • Page 5
    • Interim pages omitted …
    • Page 25
    • Go to Next Page »

    Primary Sidebar

    Jessica Burgess of Fantabulosity, slicing an avocado.

    Hi, I'm Jessica! - Owner and Creator of the blog and brand, Fantabulosity.

    I’m here to help you make easy comfort food and nostalgic recipes, using simple ingredients, that everyone will love.

    More about me →

    Potluck Recipes

    • A slice of strawberry jello cake, topped with a strawberry slice, sitting on a round plate.
      Strawberry Jello Cake (Easy, Moist Strawberry Cake)
    • Crack green beans on wooden spoon.
      Crack Green Beans
    • Old fashioned potluck cake recipes collage.
      Old-Fashioned Cakes That Still Show Up at Every Potluck
    • Collage of potluck desserts.
      Easy Potluck Desserts (Simple Recipes That Always Get Asked For)
    • Cold Pasta Salad Recipes Collage.
      Cold Pasta Salad Recipes
    • Chicken Casserole recipes image collage.
      20 Chicken Casserole Recipes

    Popular Recipes

    • bread pudding in baking dish
      Bread Pudding Recipe: Easy Old Fashioned Recipe (With Video!)
    • Burger baked in the oven, steamed in aluminum foil, and placed on white plate.
      Burgers in the Oven
    • two tuna salad sandwiches stacked on top of each other
      The BEST Tuna Salad Recipe
    • Sliced banana bread on white platter
      Best Banana Bread
    • Strawberry brownies on white marble cutting board.
      Strawberry Brownies Recipe
    • Cheeseburger Sliders
      Cheeseburger Sliders with Hawaiian Rolls

    Footer

    ↑ back to top

    Featured In

    About

    • About Jessica
    • Contact
    • Collaborate
    • Dinner System

    Easy Recipes

    • All Recipes
    • Vintage Recipes
    • Dinner Recipes
    • Desserts

    How to Cook

    • Oven-Baked
    • Stove-Top
    • No Bake
    • Cooking Basics

    Privacy Policy |Accessibility Copyright © 2026 Fantabulosity | Terms & Conditions | FTC
    All recipes, photos, and content are copyrighted and may not be reproduced, republished, or distributed without written permission.

    Rate This Recipe

    Your vote:


    A rating is required
    A name is required
    An email is required