• Skip to primary navigation
  • Skip to main content
  • Skip to primary sidebar

Fantabulosity logo

  • All Recipes
  • Vintage Recipes
  • Holiday
  • Dinner Theme System
  • About
  • Navigation Menu: Social Icons

    • Facebook
    • Instagram
    • Pinterest
    • TikTok
    • YouTube
menu icon
go to homepage
  • Recipes
  • Desserts
  • Dinners
  • Cookbook
  • Holidays
  • Gatherings
  • About Jessica
    • Facebook
    • Instagram
    • Pinterest
    • TikTok
    • YouTube
  • search icon
    Homepage link
    • Recipes
    • Desserts
    • Dinners
    • Cookbook
    • Holidays
    • Gatherings
    • About Jessica
    • Facebook
    • Instagram
    • Pinterest
    • TikTok
    • YouTube
  • ×
    Home » Recipes

    Cherry Cheesecake Dump Cake (Easy 6-Ingredient Recipe)

    Cherry Cheesecake Dump Cake (Easy 6-Ingredient Recipe)

    July 7, 2026

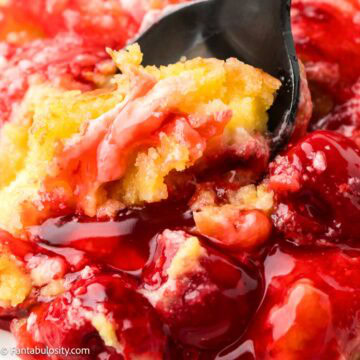
    Cherry cheesecake dump cake being scooped out of a dish.

    Cherry Cheesecake Dump Cake layers cherry pie filling, a sweet cream cheese mixture, dry yellow cake mix, and butter into one pan. It bakes up gooey underneath with a golden, buttery top, feeds a crowd, and skips the fuss of mixing a batter.

    An Easy Dump Cake That Feels Like an Old-Fashioned Potluck Favorite

    If you love desserts that show up on the church potluck table or the family reunion spread, this cherry cheesecake dump cake belongs on your list. It takes about ten minutes to put together, and most of the ingredients probably live in your pantry already. If you like this kind of easy layered dessert, you’ll also love this strawberry cream cheese dump cake and this cherry pineapple dump cake recipe.

    Cherry cheesecake dump cake being scooped up by spoon.

    What makes this one work is the cream cheese layer. A plain cherry dump cake is good on its own, but spoonfuls of sweetened cream cheese baked between the fruit and the cake mix give you that cheesecake tang in every scoop. The cold butter on top melts as it bakes and turns the dry cake mix into a golden, slightly crisp topping.

    This dessert disappears fast at holidays, Sunday dinners, and summer cookouts because it’s simple and everybody recognizes the flavor. Serve it warm with a scoop of vanilla ice cream, or enjoy it cold straight from the fridge the next day. Craving more cherry? Try this chocolate cherry dump cake.

    A scoop of vanilla ice cream on top of cherry cheesecake dump cake.
    Cakes for the Potluck Table cookbook by Jessica Burgess, cover and open recipe spread

    My cookbook · Coming this spring

    Cakes for the
    Potluck Table

    Sixty cakes that never come home leftover. Six are yours free right now.

    Send me the six cakes

    FAQs

    Do you mix a dump cake?

    No. You layer it and leave it alone. Stirring the layers together changes the texture and you lose the golden top. The whole trick is in the layering.

    Does cherry cheesecake dump cake need to be refrigerated?

    Yes. The cream cheese layer means you’ll want to cover and refrigerate leftovers rather than leave them on the counter. They keep for 4 to 5 days.

    Why is my dump cake dry or powdery on top?

    The butter didn’t cover all the cake mix. Slice it thin and lay the pats across the whole surface. If dry spots still show up after baking, melt a tablespoon or two of butter, pour it over the powdery patches, and bake a few more minutes until golden.

    Is it supposed to be gooey?

    Yes. It lands somewhere between a cobbler and a cake, not a firm slice. The rest time after baking helps it thicken up.

    Can I use a different pie filling?

    Absolutely. Blueberry, strawberry, peach, and apple all work well in place of cherry, and I list more ideas in this 3-ingredient dump cake recipe.

    Can I make it ahead?

    Yes. Bake and cool it, then cover and refrigerate. Warm it before serving or enjoy it cold.

    Ingredients

    See the recipe card below for the full printable ingredient list and instructions.

    Ingredients for cherry cheesecake dump cake sitting on kitchen counter.
    • 2 cans (21 oz each) cherry pie filling – the base layer that brings the fruit and most of the sweetness.
    • 1 package (8 oz) cream cheese, room temperature – softened blends smooth without lumps for the cheesecake layer.
    • ½ cup granulated sugar – sweetens the cream cheese mixture.
    • 1 teaspoon vanilla extract – rounds out the cheesecake flavor.
    • 1 box (13.25 oz) yellow cake mix – goes on dry, straight from the box. Don’t prepare it.
    • ½ cup (1 stick) unsalted butter, cold – sliced thin over the top so it melts into the cake mix and turns it golden.
    • 1 teaspoon almond extract (optional) – a little brings out the cherry flavor. Skip it or use extra vanilla.

    Instructions

    Preheat the oven to 350°F and lightly grease a 9×13 baking dish.

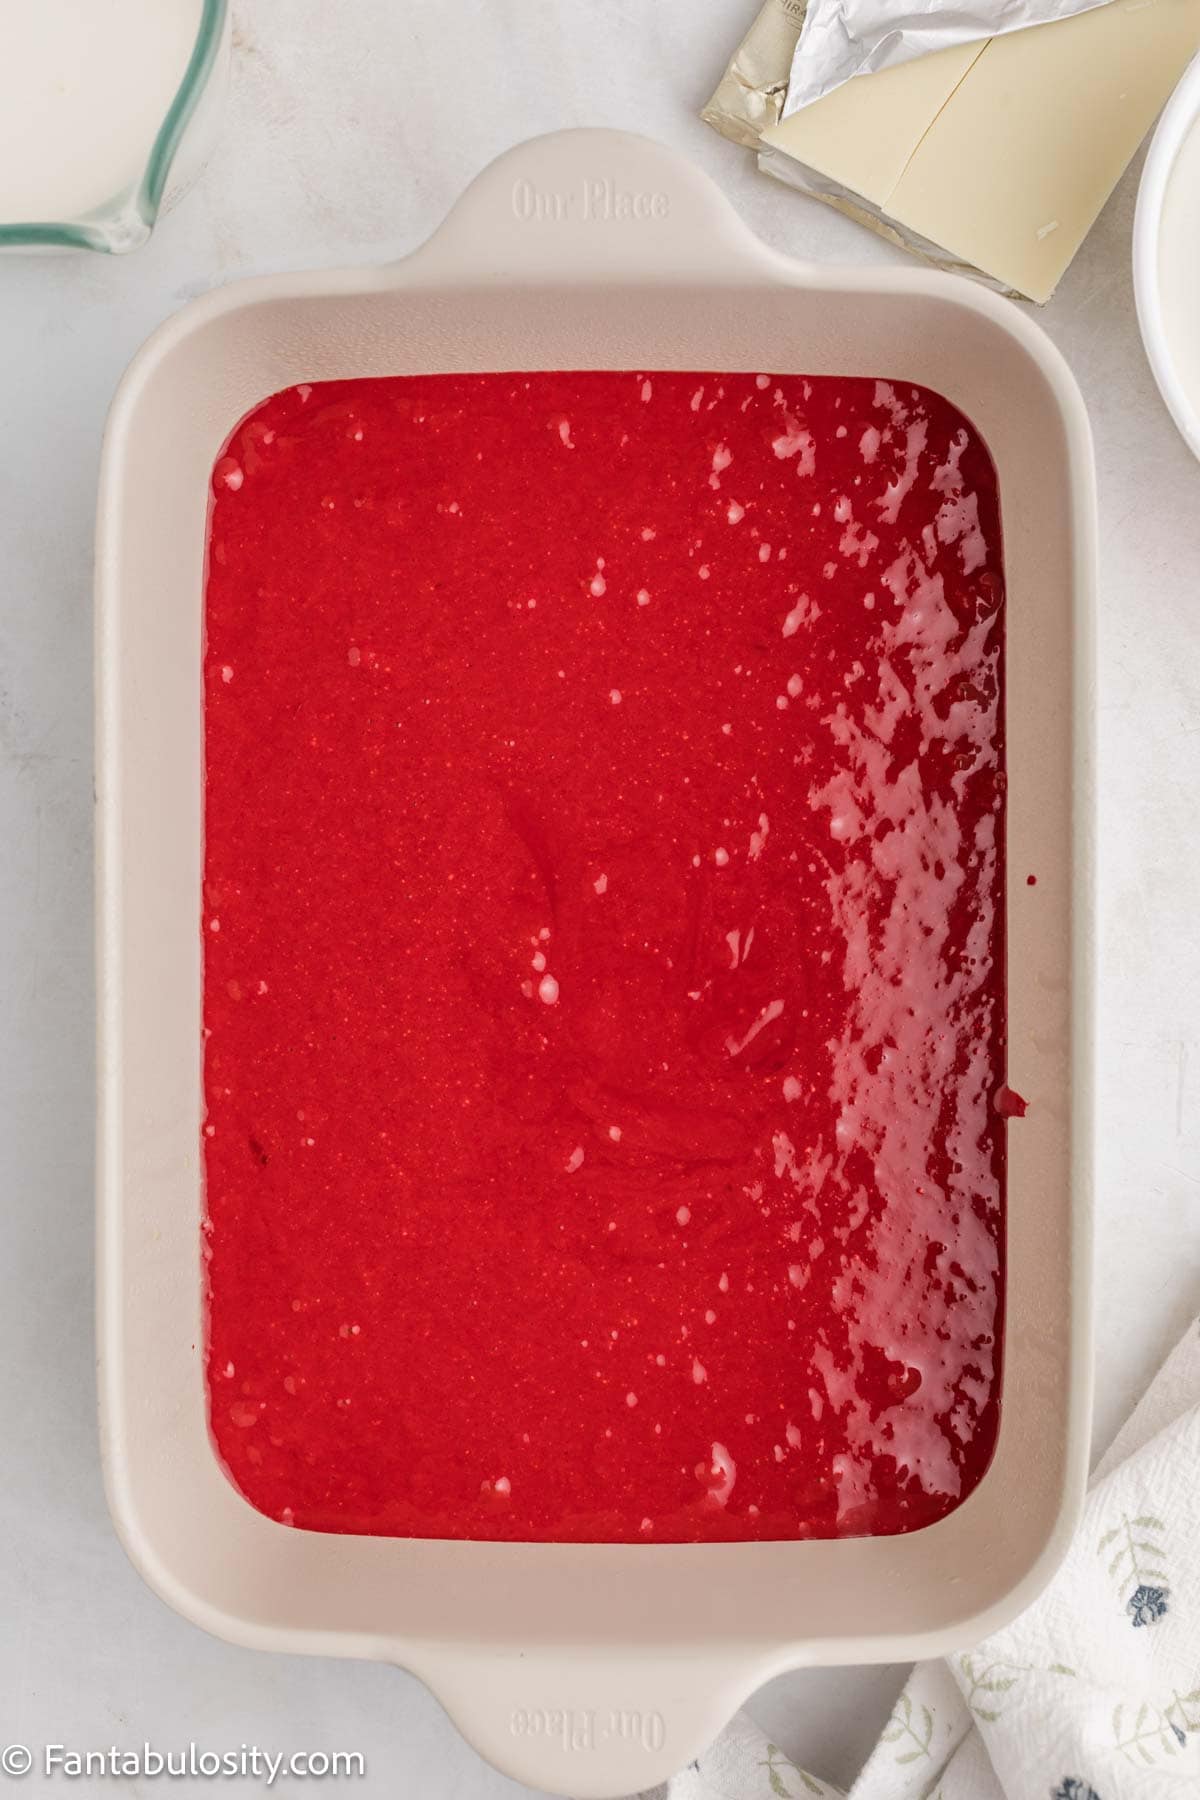
    Spread both cans of cherry pie filling across the bottom of the dish. Stir the almond extract into the filling.

    Cherry pie filling spread out in 9x13 baking dish for cherry cheesecake dump cake.

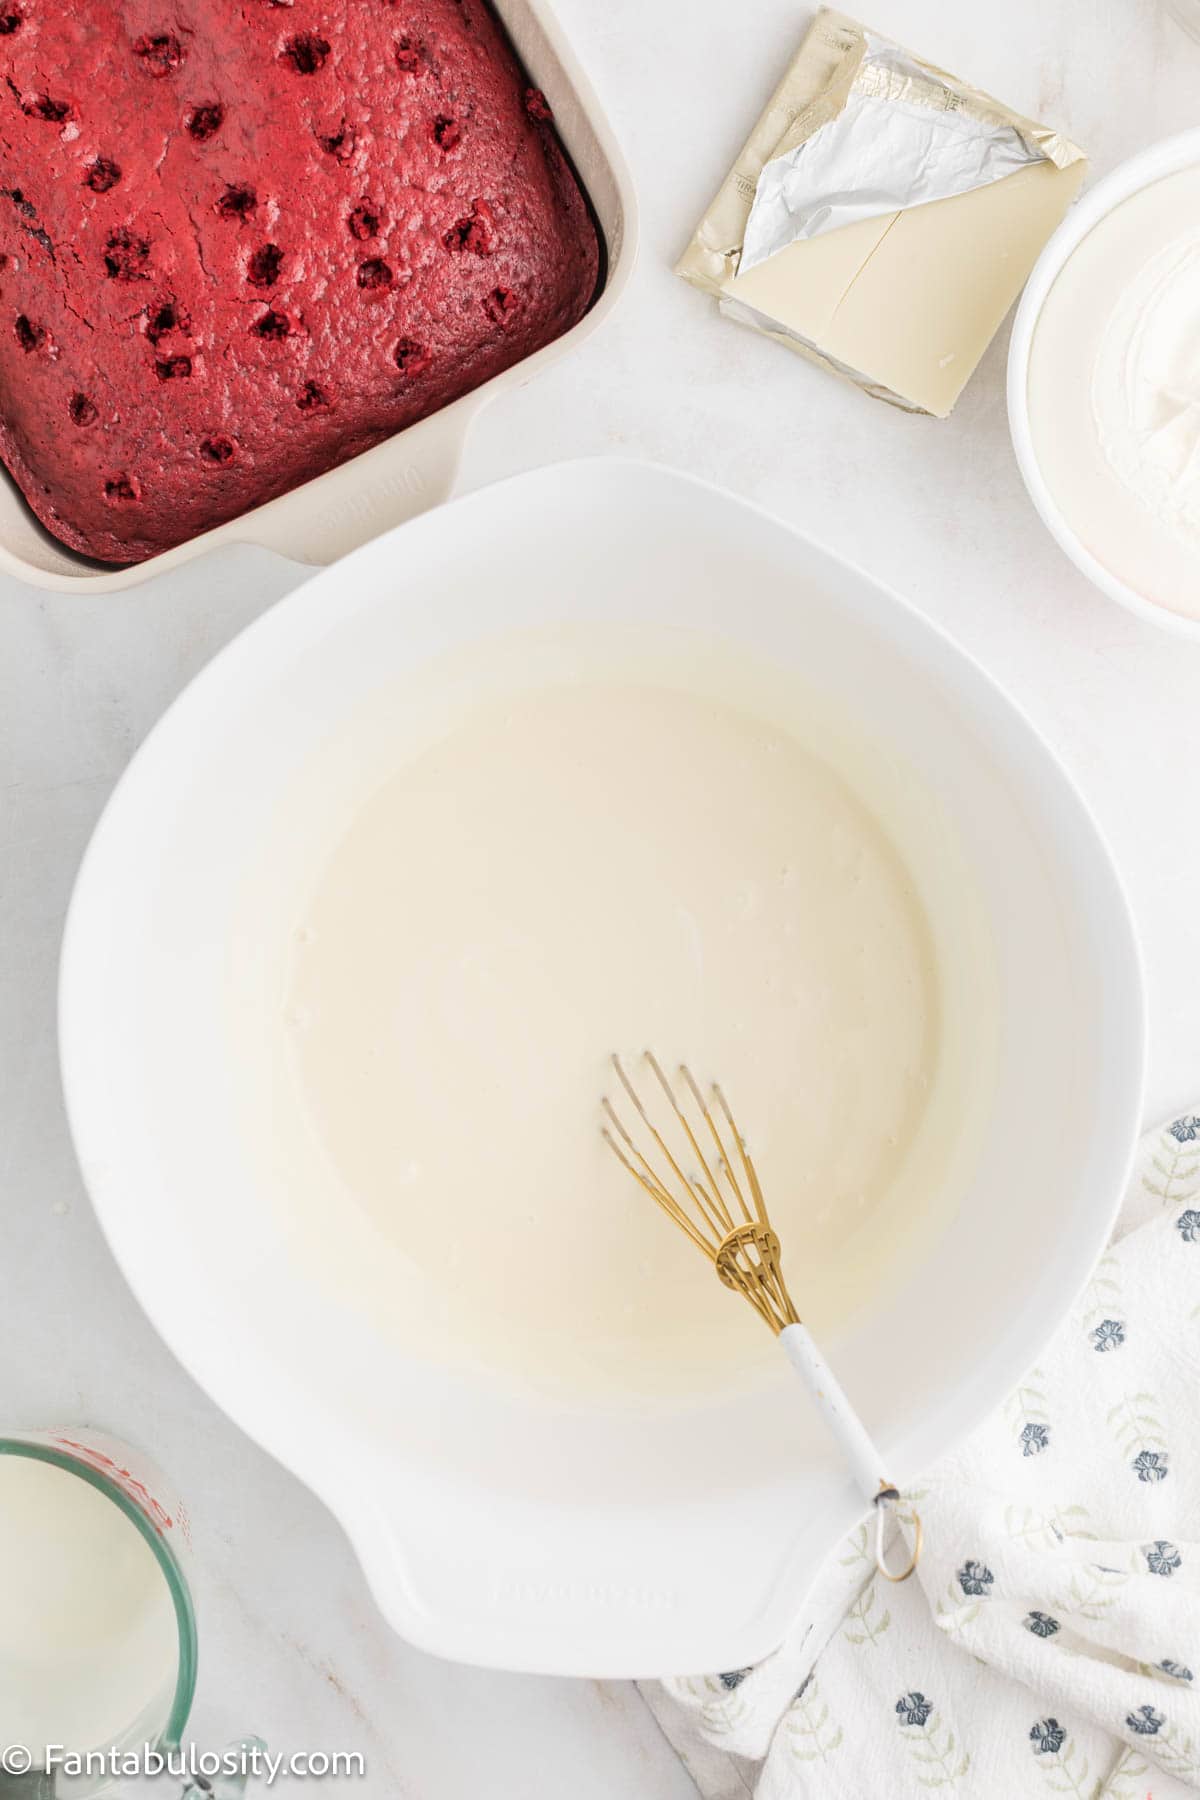
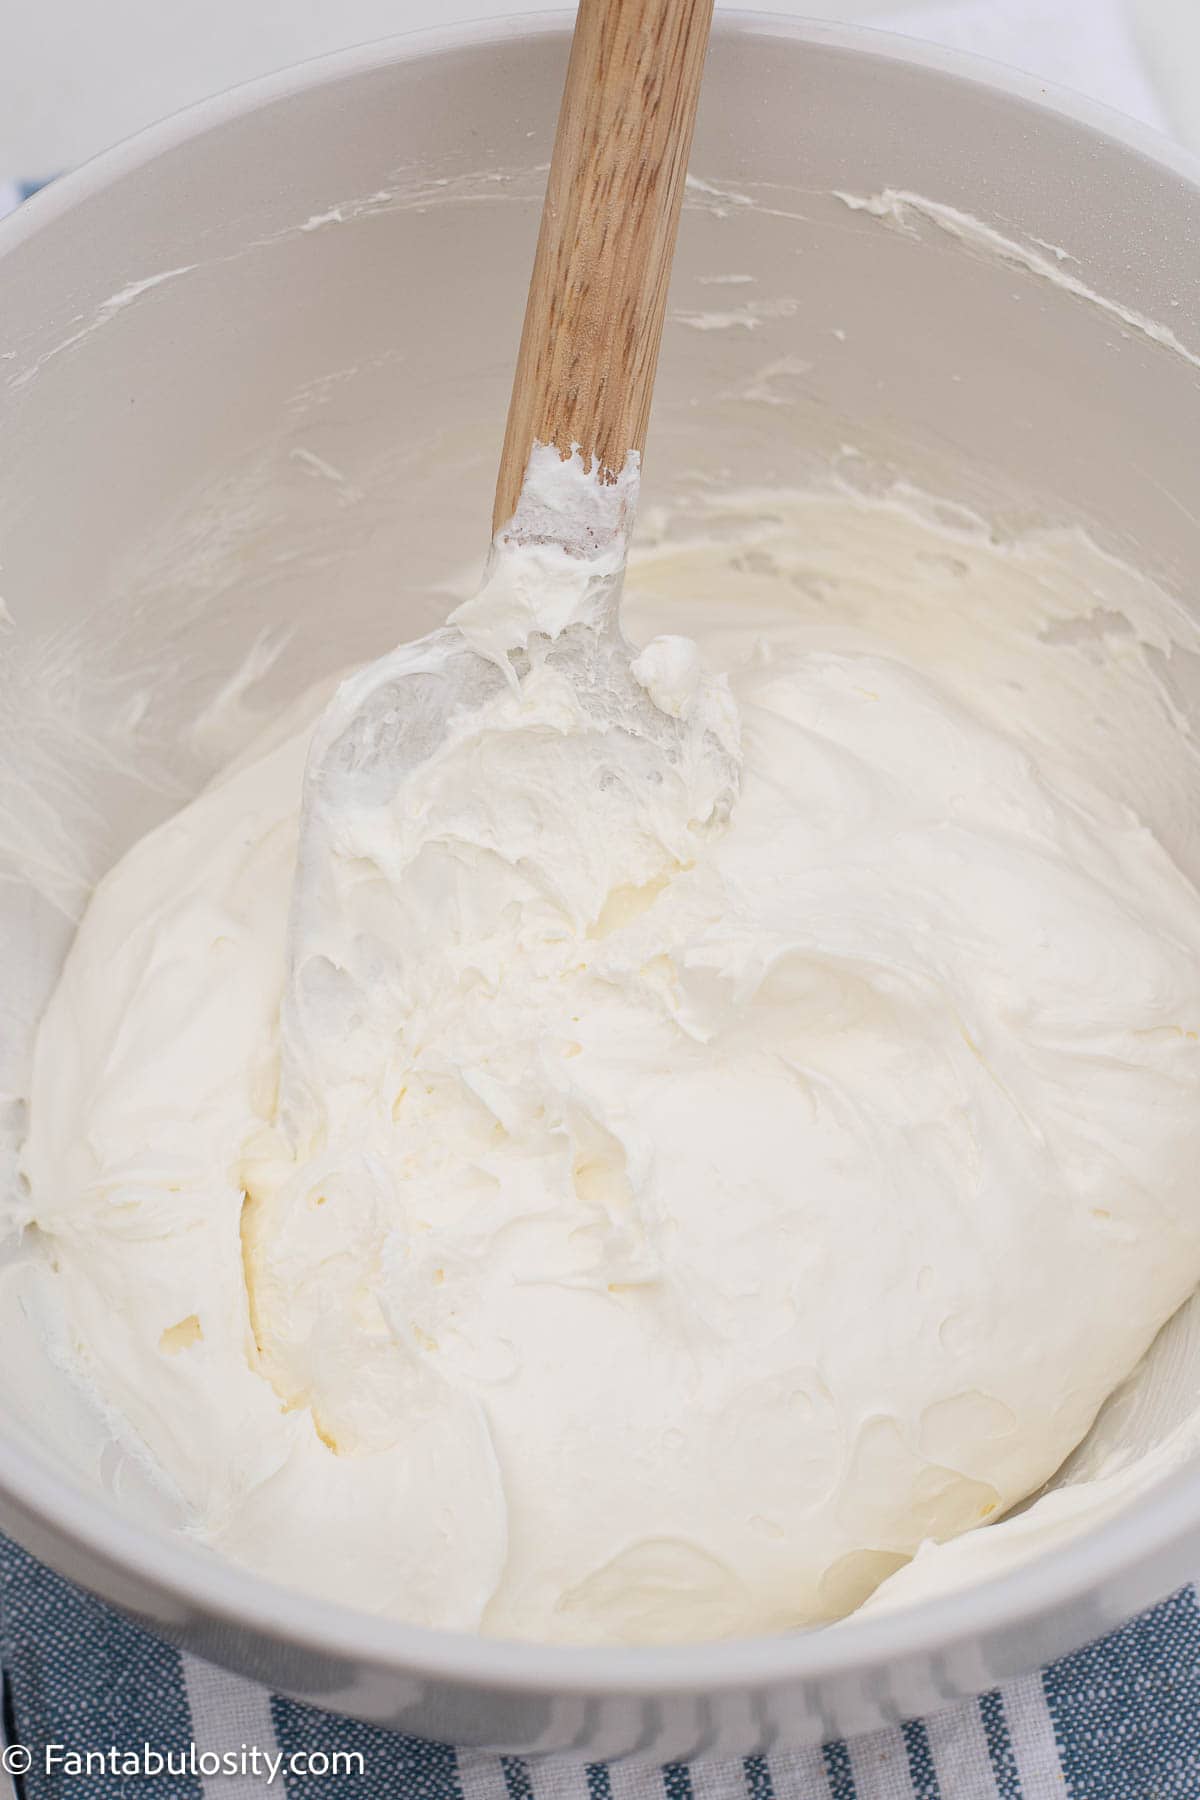
    In a medium bowl, beat the cream cheese, sugar, and vanilla until smooth.

    Cream cheese, sugar and vanilla beat together in mixing bowl.

    Drop spoonfuls of the cream cheese mixture evenly over the cherries.

    Cream cheese dolloped on to cherry pie filling for dump cake.

    Sprinkle the dry cake mix evenly over the top. Don’t stir it in.

    Dry cake mix sprinkled over the top of cherry cheesecake dump cake.

    Slice the cold butter into thin pats and lay them across the whole surface. Cover as much as you can so you don’t get dry patches. (You may also choose to melt the butter and pour over the top to cover cake mix, if desired.)

    Butter squares layered on top of cake mix for cherry cheesecake dump cake.

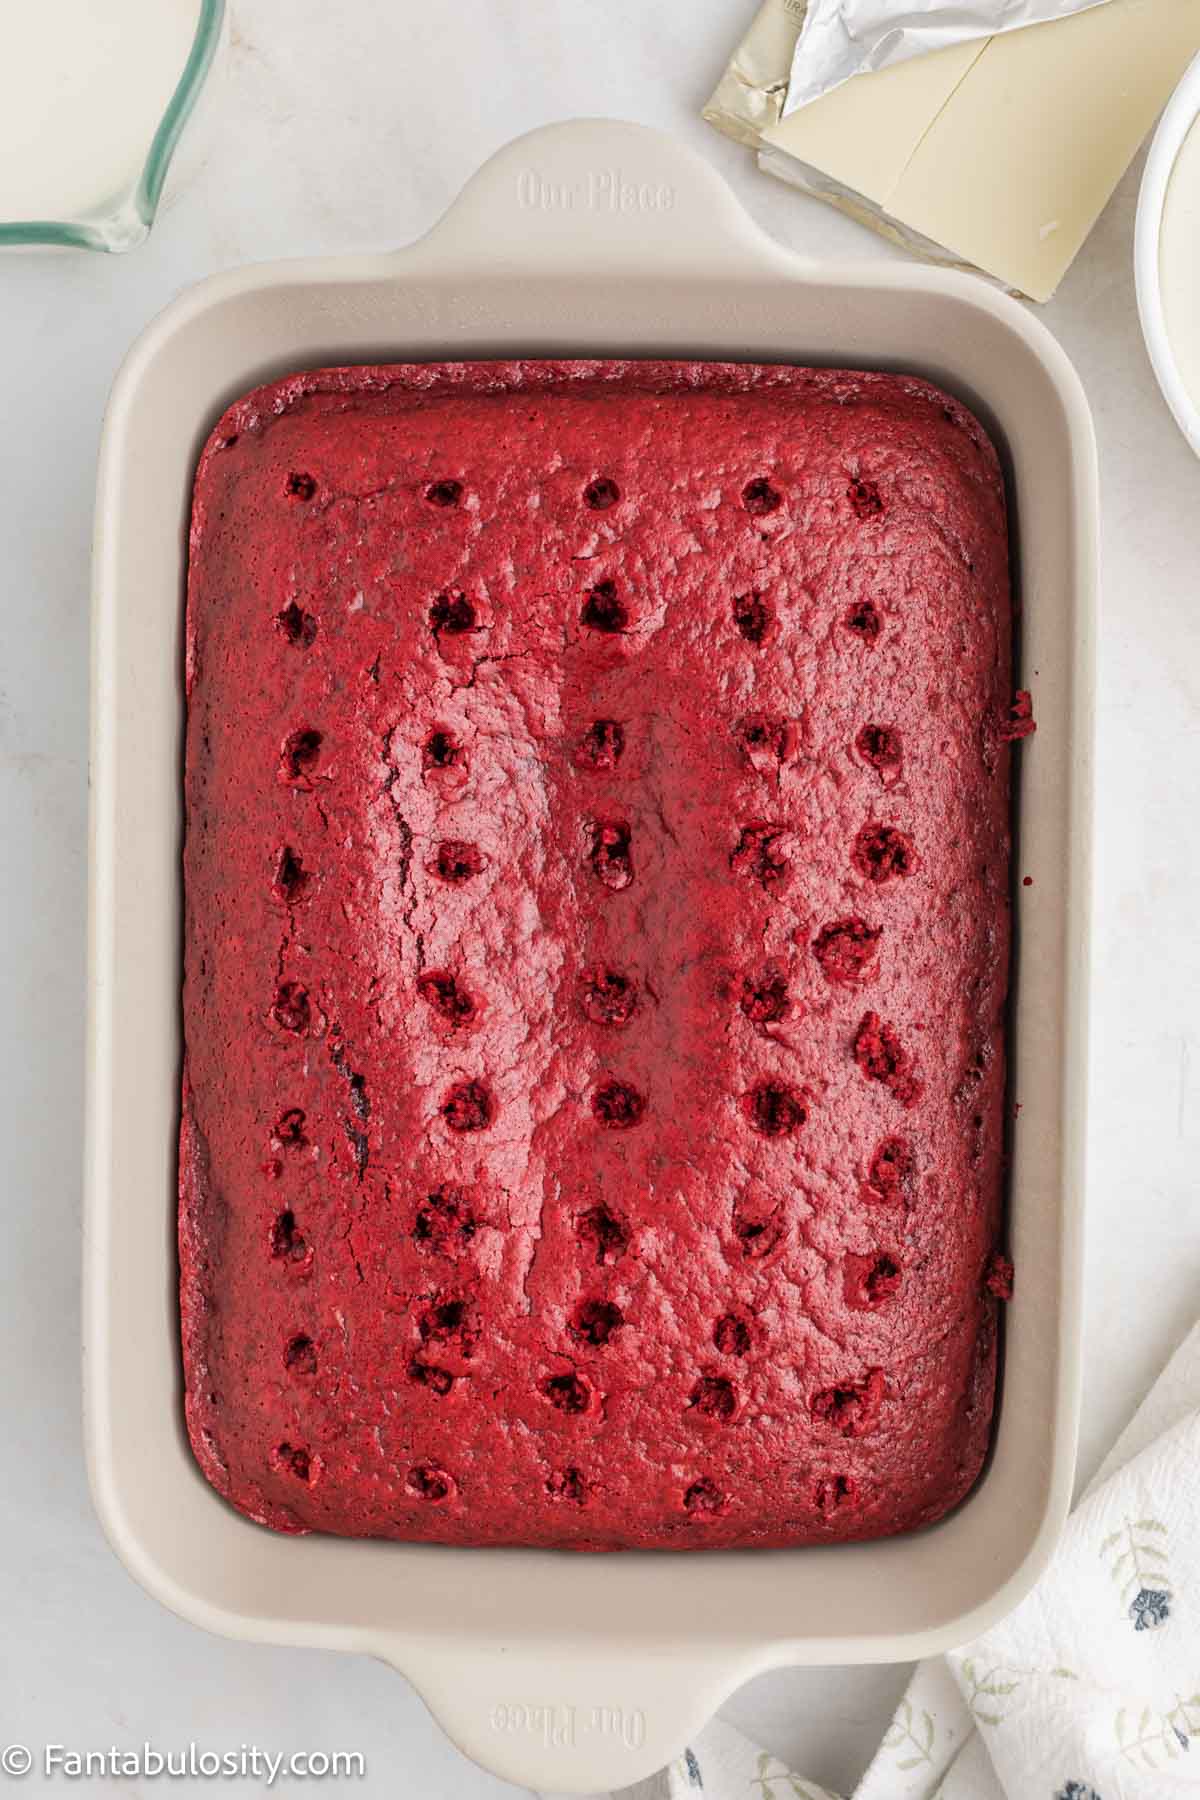
    Bake for 45 to 50 minutes, until the top is golden and the edges are bubbling.

    Let it sit for 15 to 20 minutes so it thickens, then scoop and serve.

    Baked cherry cheesecake dump cake.

    Tips

    • Distribute the butter evenly. Full coverage keeps the top from baking up dry and powdery.
    • Use room temperature cream cheese so the cheesecake layer blends smooth.
    • Don’t mix the layers. Dump cake works because of the layering, and stirring it changes the texture.
    • Go by look, not just the clock. You want a golden top and bubbling edges.
    • Let it rest before serving. It thickens as it cools and scoops much cleaner.
    Cherry cheesecake dump cake serving on a small plate.

    Storage

    Cover and refrigerate leftovers for up to 4 to 5 days, since there’s a cream cheese layer inside.

    Freeze in an airtight container for up to 2 to 3 months. Thaw overnight in the refrigerator before reheating.

    To reheat, microwave individual portions for 30 to 45 seconds, or warm in a 300°F oven until heated through.

    Cherry cheesecake dump cake on a plate, topped with vanilla ice cream.

    More Recipes

    If you love easy dump cakes and old-fashioned potluck desserts, you’ll also love these:

    • Pineapple Dump Cake
    • No Bake Cherry Cheesecake
    • Banana Dump Cake
    • Pumpkin Dump Cake

    Made this Cherry Cheesecake Dump Cake? Scroll down and leave a star rating. It helps other readers find the recipe and tells me which ones to keep sharing.

    Recipe

    Cherry cheesecake dump cake being scooped out of a dish.
    Print Pin
    Be the first to rate!

    Cherry Cheesecake Dump Cake

    Cherry Cheesecake Dump Cake layers cherry pie filling, a sweet cream cheese mixture, yellow cake mix, and butter into one easy pan. It bakes up gooey underneath with a golden top, and it feeds a crowd with almost no effort.
    Course Dessert
    Cuisine American
    Prep Time 15 minutes minutes
    Cook Time 50 minutes minutes
    Resting Time 20 minutes minutes
    Total Time 1 hour hour 25 minutes minutes
    Servings 10 servings
    Calories 340kcal
    Author Jessica Burgess

    Ingredients

    • 2 21 ounce cans cherry pie filling
    • 8 ounce cream cheese room temperature
    • ½ cup granulated sugar
    • 1 teaspoon vanilla extract
    • 13.25 ounce box yellow cake mix
    • ½ cup unsalted butter cold (1 stick)
    • 1 teaspoon almond extract optional

    Instructions

    • Preheat the oven to 350°F. Lightly grease a 9×13 baking dish.
    • Spread both cans of cherry pie filling across the bottom of the dish. Stir in the almond extract.
    • In a medium bowl, beat the cream cheese, sugar, and vanilla until smooth.
    • Drop spoonfuls of the cream cheese mixture evenly over the cherries.
    • Sprinkle the dry cake mix evenly over the top. Do not mix it in.
    • Slice the cold butter into thin pats and lay them evenly over the cake mix, covering as much surface as possible.
    • You may also choose to melt the butter and pour over the top to cover cake mix, if desired.
    • Bake for 45 to 50 minutes, until the top is golden and the edges are bubbling.
    • Let the cake rest for 15 to 20 minutes before serving so it thickens.

    Notes

    • Distribute the butter evenly to avoid dry patches. If any show up after baking, melt a tablespoon of butter, pour it over the spots, and bake a few more minutes.
    • Use room temperature cream cheese for a smooth layer.
    • Don’t mix the layers.
    • Refrigerate leftovers for up to 4 to 5 days. Freeze for up to 2 to 3 months and thaw overnight in the fridge before reheating.
    Nutrition

    Serving: 1serving | Calories: 340kcal | Carbohydrates: 42g | Protein: 3g | Fat: 18g | Saturated Fat: 11g | Polyunsaturated Fat: 1g | Monounsaturated Fat: 5g | Trans Fat: 0.5g | Cholesterol: 47mg | Sodium: 346mg | Potassium: 52mg | Fiber: 0.5g | Sugar: 27g | Vitamin A: 589IU | Vitamin C: 0.01mg | Calcium: 104mg | Iron: 1mg

    Oreo Tres Leches Cake (Easy Cookies and Cream Poke Cake)

    July 8, 2026

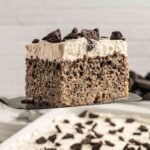
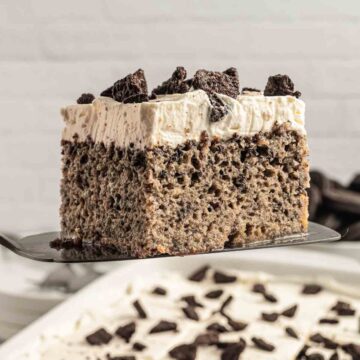
    Oreo Tres Leches cake slide, on spatula.

    Oreo Tres Leches Cake takes everything you love about a classic three-milk cake and folds in crushed Oreos from top to bottom. The cake bakes up tender, soaks up a sweet milk mixture until it’s spoon-soft, and gets finished with fluffy whipped cream and more cookie crumbs. It’s cool, creamy, and the kind of dessert people ask about before they’ve even finished their slice.

    If you love the classic version, don’t miss my strawberry whipped cream cake (Tres Leches with Strawberries) and Chocolate Tres Leches Cake too.

    A slice of Oreo Tres Leches cake on a spatula.

    Why You’ll Love This Recipe

    • Two favorites in one pan. Cookies and cream meets classic tres leches, so it feels familiar and a little special at the same time.
    • Make it ahead. It needs time in the fridge anyway, which makes it perfect for potlucks, holidays, and Sunday dinner.
    • Grocery store ingredients. Nothing fancy. A package of Oreos, three kinds of milk, and pantry basics.
    • Feeds a crowd. One 9×13 pan gives you 12 generous slices.
    Cakes for the Potluck Table cookbook by Jessica Burgess, cover and open recipe spread

    My cookbook · Coming this spring

    Cakes for the
    Potluck Table

    Sixty cakes that never come home leftover. Six are yours free right now.

    Send me the six cakes

    Recipe FAQs

    What is tres leches cake?

    Tres leches means “three milks.” It’s a light sponge-style cake soaked in a mix of sweetened condensed milk, evaporated milk, and whole milk. The cake drinks up the liquid and turns soft and custardy without getting soggy. This version adds crushed Oreos to the batter and the topping.

    Why do you scrape the filling out of the Oreos?

    The creme filling can seize up and make the crumbs clump when they hit the batter. Scraping it out gives you clean, fine cookie crumbs that spread evenly through the cake. Regular or Double Stuf both work since the filling comes out anyway.

    Will the cake get soggy from all that milk?

    It definitely has a “wet” texture, compared to regular cakes but it won’t so soggy that it’s hard to eat with a fork.

    Can I make Oreo Tres Leches ahead of time?

    Yes, and you should. It needs at least 4 hours in the fridge, and it’s honestly better the next day. Add the whipped cream topping right before serving so it stays fresh and fluffy.

    Do I have to use homemade whipped cream?

    Homemade holds up best and tastes richest, but a couple tubs of thawed whipped topping will work in a pinch. If you go homemade, chill your bowl and beaters first so the cream whips faster and stiffer.

    Ingredients

    Ingredients to make Oreo Tres Leches cake, sitting on counter.

    Cake

    • 2 cups (240 grams) all-purpose flour - spoon and level it if you don’t own a kitchen scale
    • 2 teaspoons baking powder
    • ½ teaspoon baking soda
    • ½ teaspoon salt
    • 1 ¼ cups (250 grams) granulated sugar
    • ¾ cup oil - any neutral oil like canola or vegetable
    • 3 large eggs - room temperature bake more evenly
    • 2 teaspoons vanilla extract
    • 1 cup whole milk - the extra fat keeps the crumb tender
    • 20 Oreo cookies - filling scraped out, crushed into fine crumbs

    Milks

    • 1 (14-ounce) can sweetened condensed milk
    • 1 (12-ounce) can evaporated milk
    • 1 cup whole milk

    Whipped cream topping

    • 2 cups heavy whipping cream - keep it cold until you whip it
    • ½ cup powdered sugar
    • 1 teaspoon vanilla extract
    • Extra crushed Oreos for the top, if you’d like

    Step-by-Step Instructions

    Make the Cake

    • Heat your oven to 350°F. Spray a 9×13 baking dish with cooking spray and set it aside.
    • Scrape the creme filling out of the Oreos, then crush the cookies into fine crumbs in a food processor or a large zip-top bag.
    • In a medium bowl, whisk together the flour, baking powder, baking soda, and salt.
    Flour and dry ingredients mixed in mixing bowl.
    • In a large bowl, beat the sugar and oil with an electric mixer until fluffy. Add the eggs and vanilla and mix well. Alternate adding the dry ingredients and the milk until the batter is just combined, then fold in the Oreo crumbs.
    Oil, sugar and crushed Oreos in mixing bowl.
    • Pour the batter into the greased dish. Bake for 35 to 40 minutes, or until a toothpick poked in the center comes out clean.
    Cake batter poured in to 9x13 baking dish.
    • Let the cake cool to room temperature, then poke holes all over the top about 1 inch deep. A chopstick or the handle of a wooden spoon works well. Cover the whole surface.
    Bake Oreo cake, with holes poked in the top for milk mixture.

    Soak the Cake

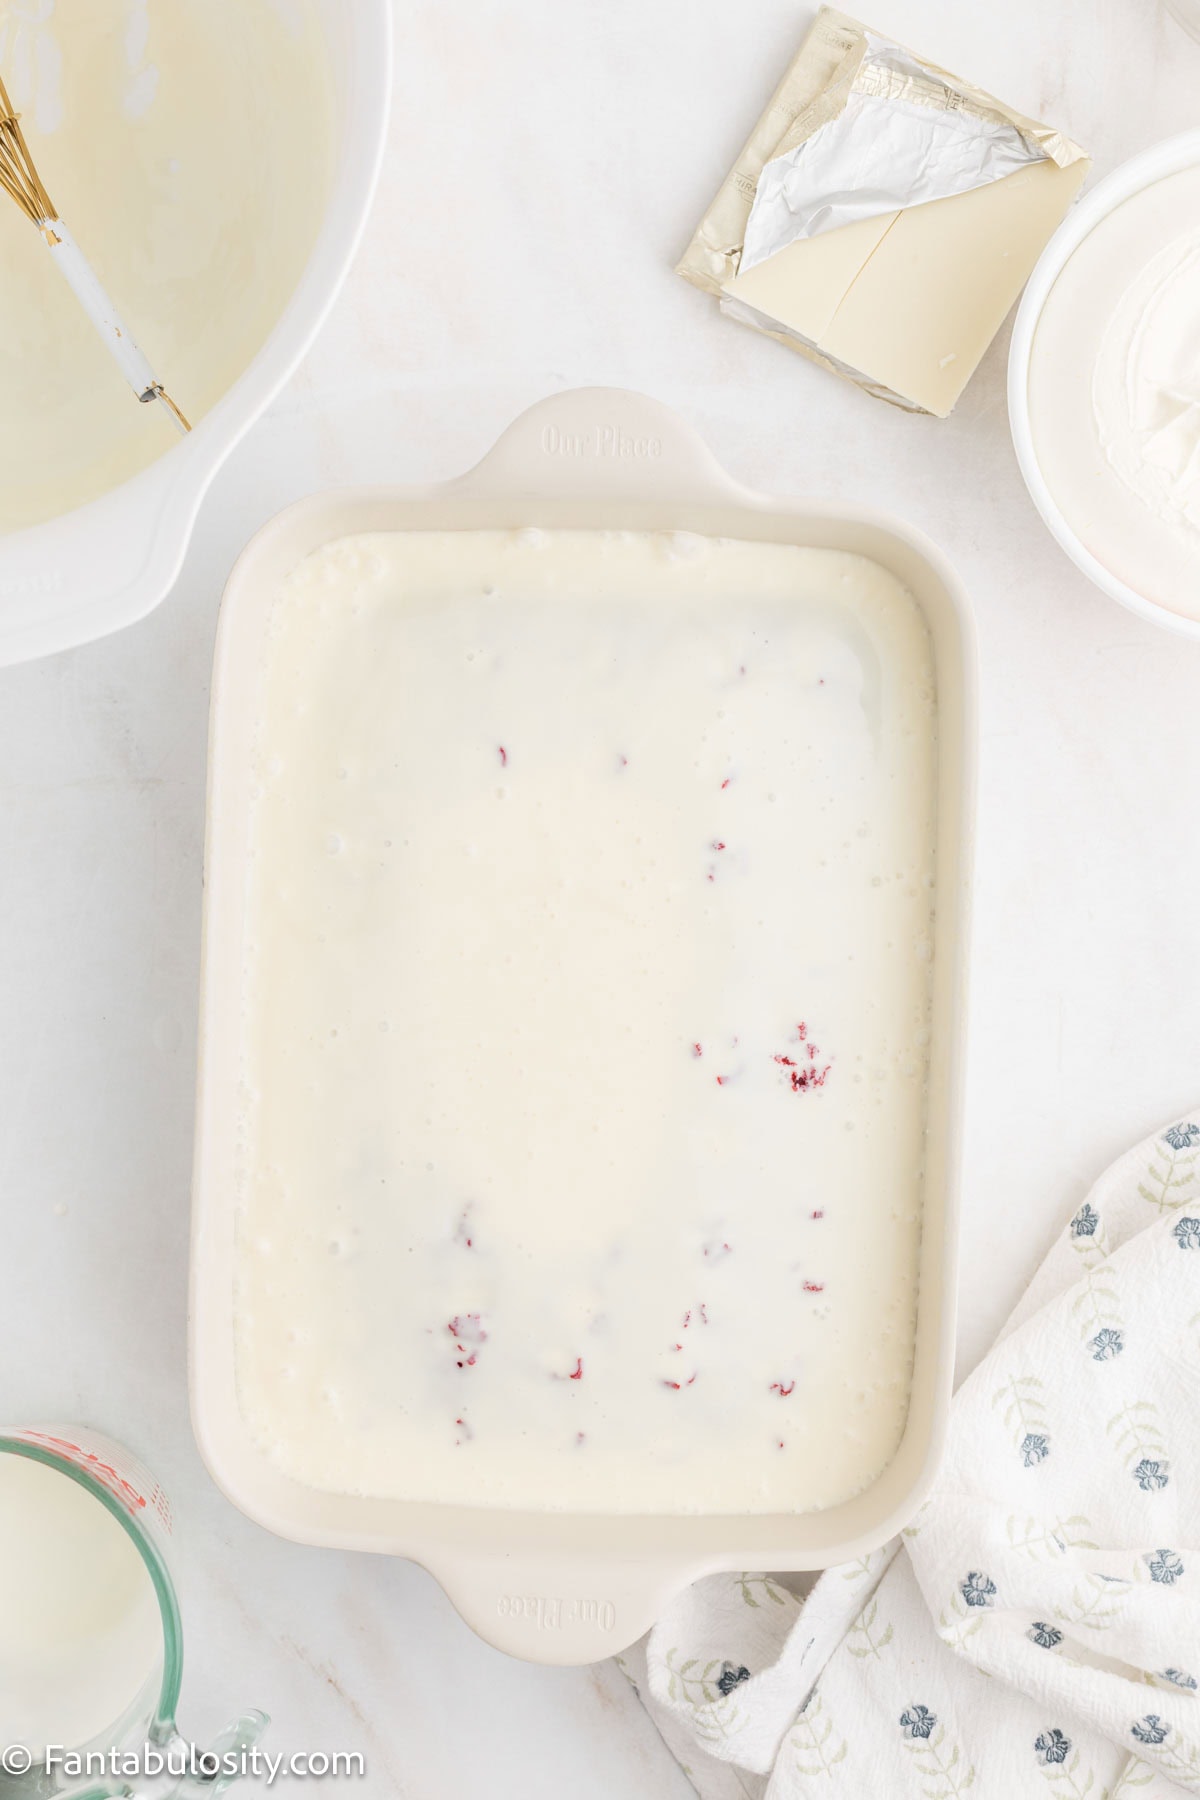
    • Whisk the sweetened condensed milk, evaporated milk, and whole milk together until smooth. Pour the mixture slowly and evenly over the cake.
    • Cover with plastic wrap and chill for at least 3-4 hours, or overnight.
    Milk mixture pouring over poked cake.

    Finish and Serve

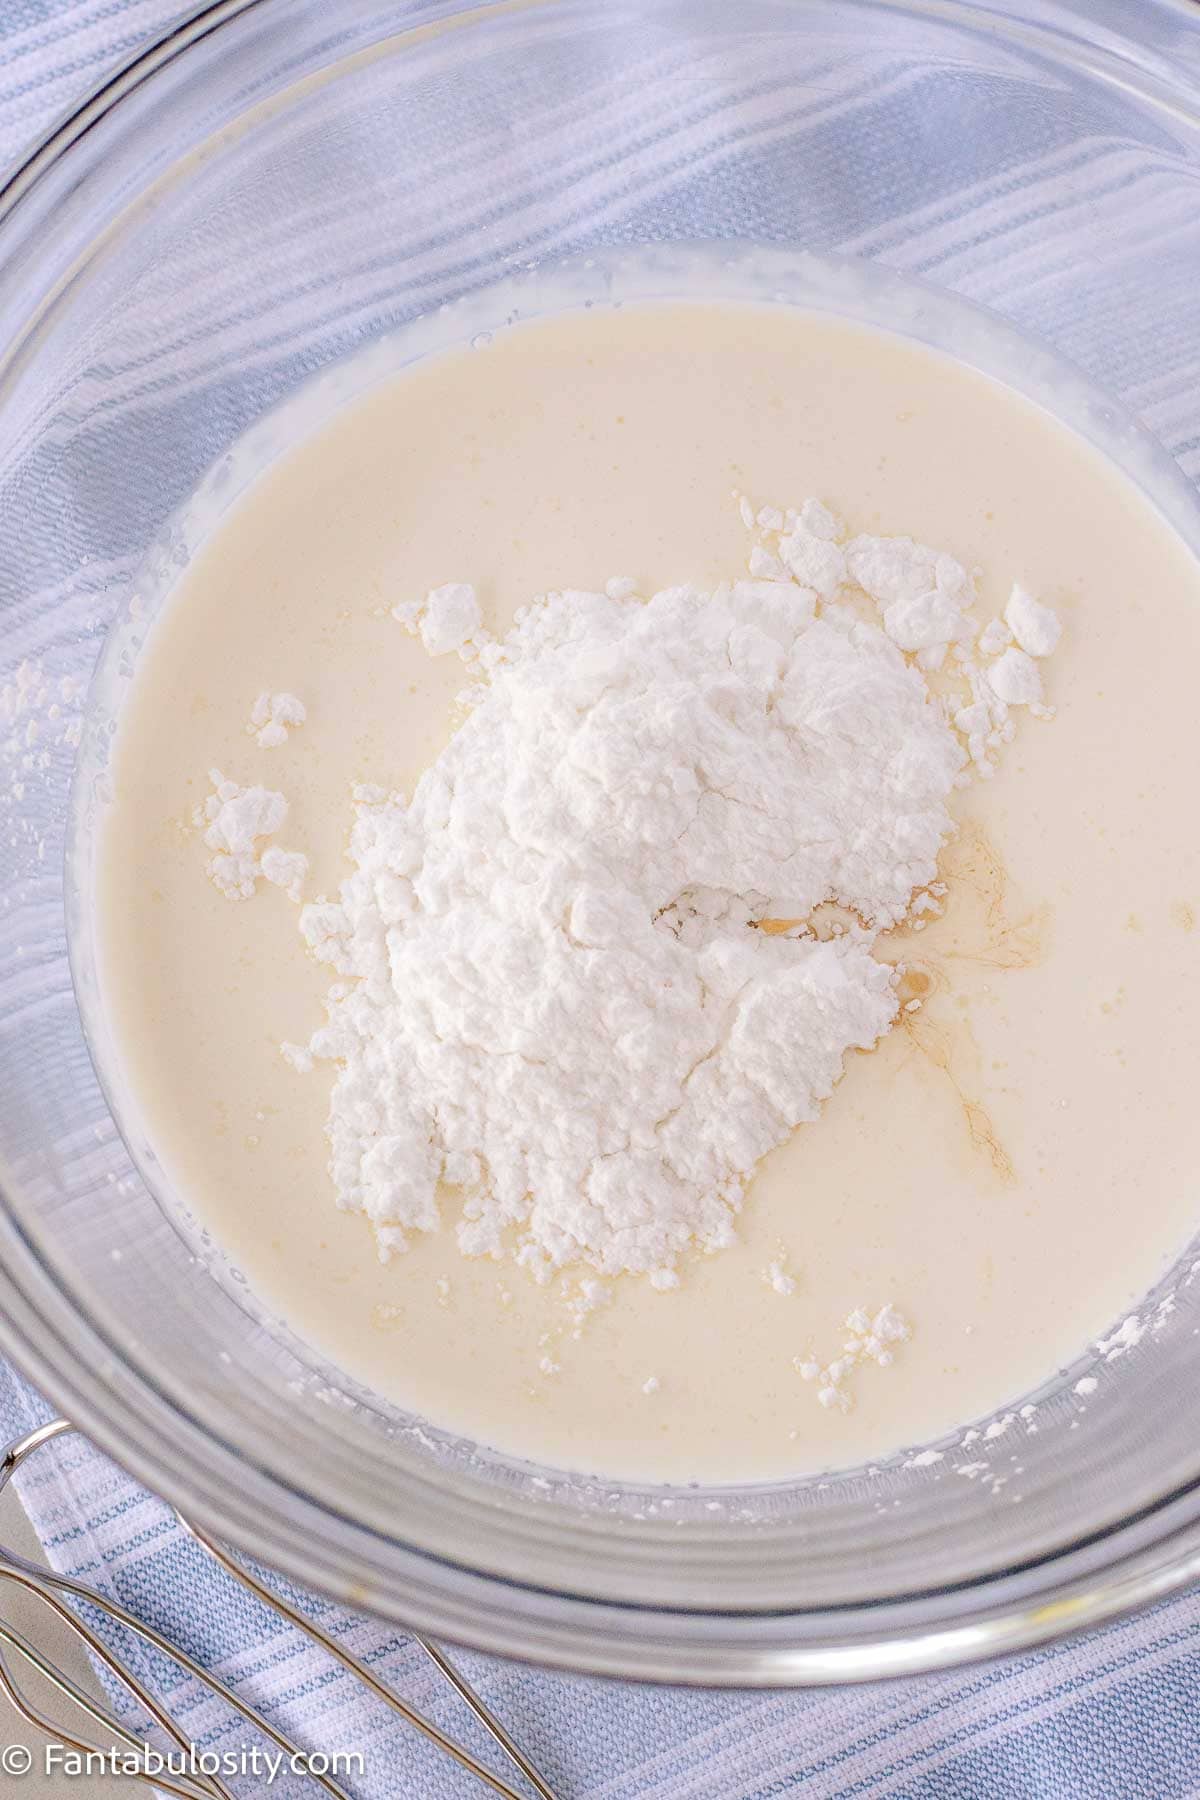
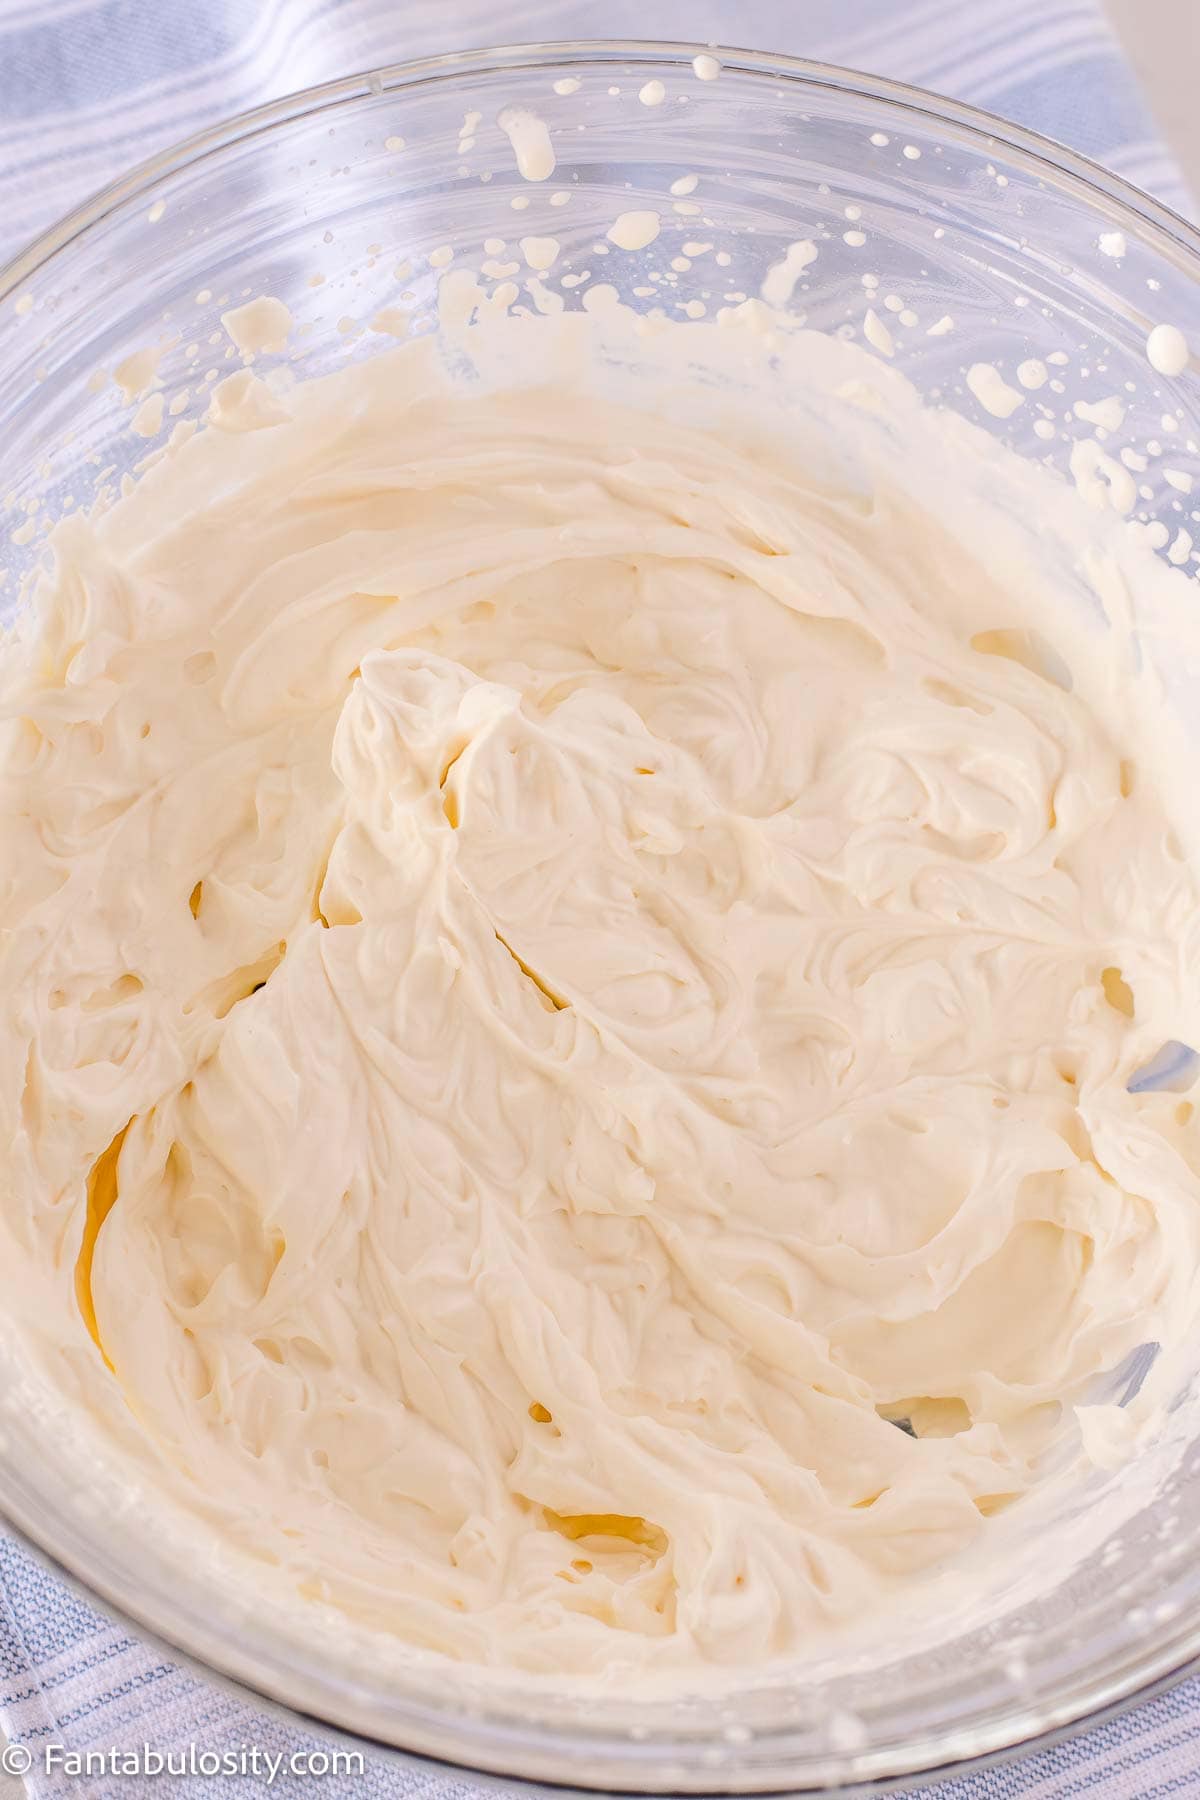
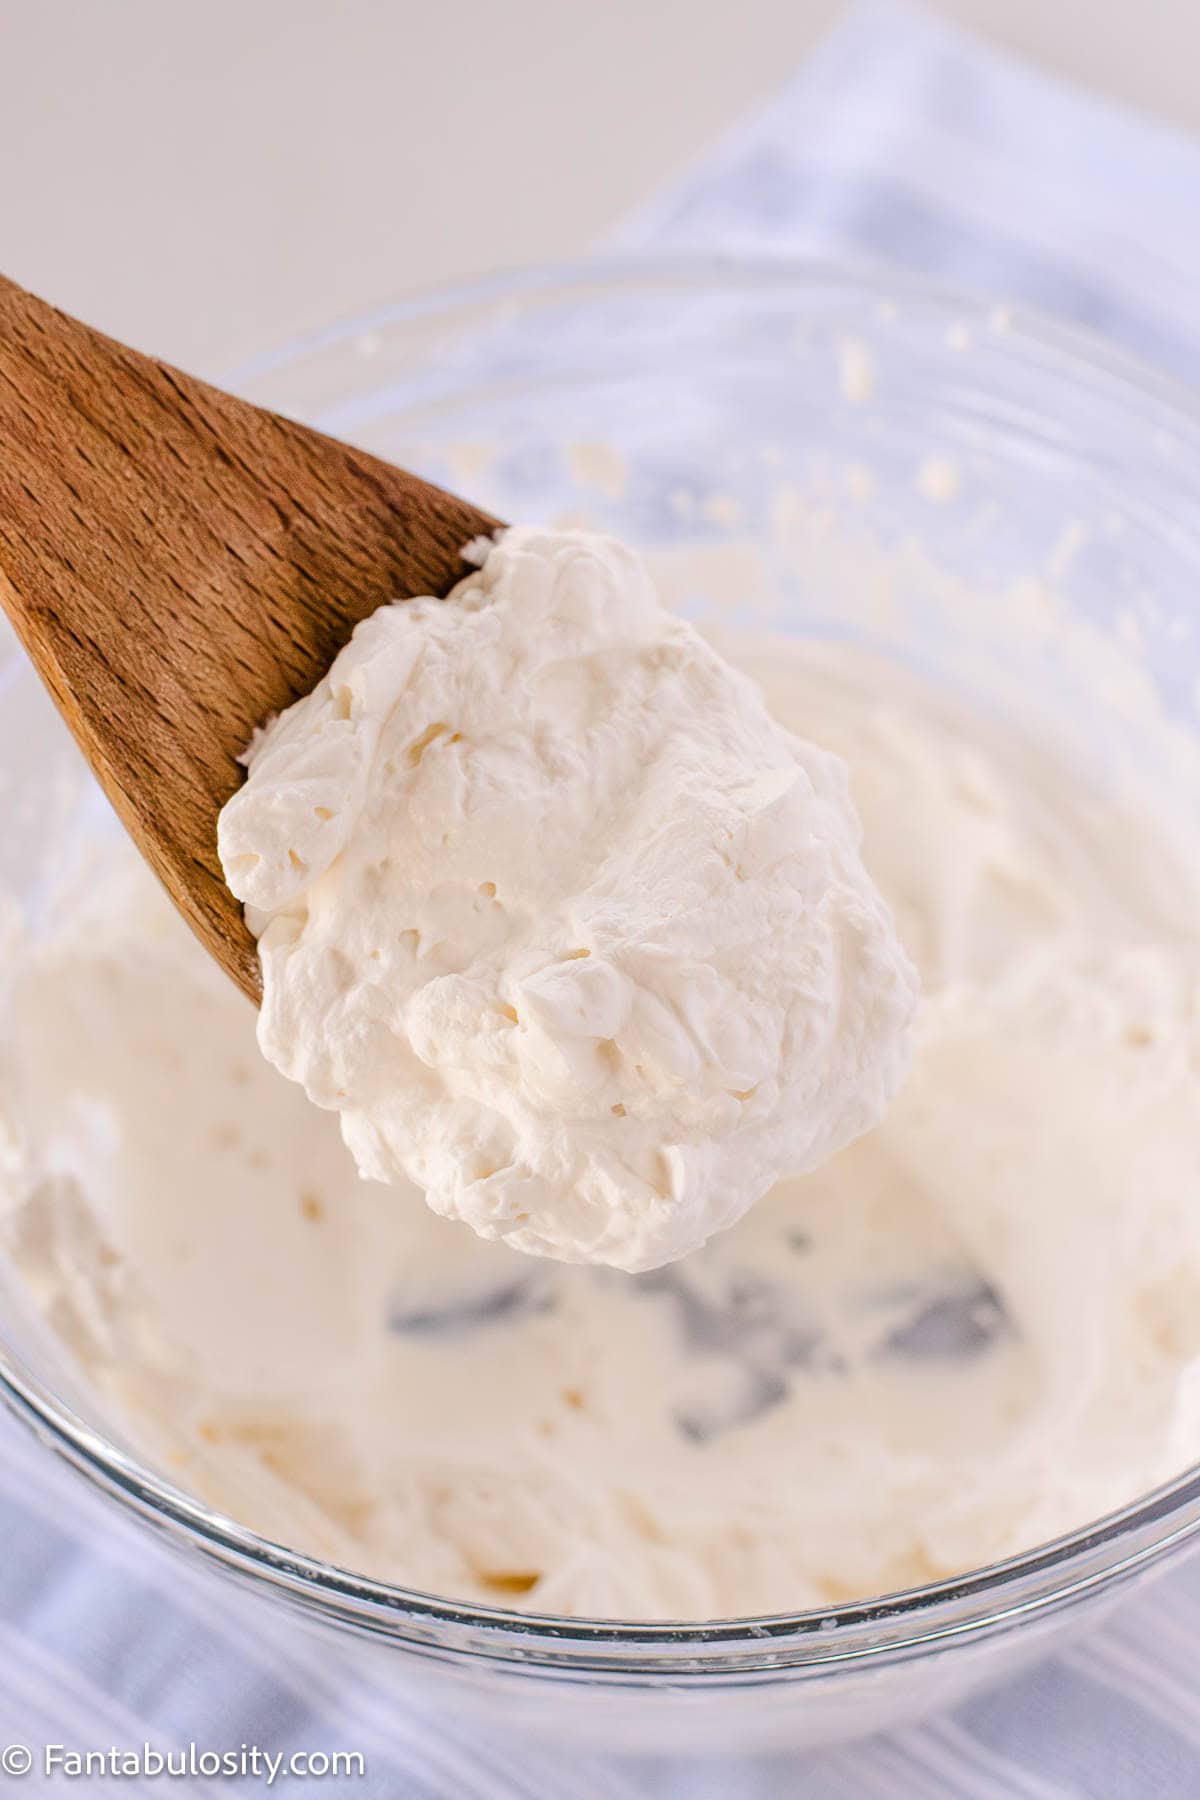
    • When you’re ready to serve, beat the cold heavy cream, powdered sugar, and vanilla until stiff peaks form. Spread it evenly over the cake.
    • Sprinkle extra crushed Oreos over the top. Slice and serve chilled.
    Frosting spread on top of Oreo Tres Leches cake in 9x13 baking pan.

    Variations

    • Extra cookies and cream. Stir a handful of chopped Oreos into the whipped cream topping for more crunch.
    • Chocolate lovers. Drizzle chocolate syrup or hot fudge over each slice before serving.
    • Mint Oreo. Swap in mint Oreos and add a drop of peppermint extract to the whipped cream for a cool twist.
    • Golden Oreo. Use Golden Oreos for a vanilla-forward, lighter-looking cake.
    • More of a no-bake fan? My BEST Oreo Dessert is the easiest cookies-and-cream treat on the site.
    Chopped Oreos sprinkled on top of Oreo Tres Leches cake.

    Storage and Freezing

    • Refrigerator: Keep the cake covered or in an airtight container for up to 3 days. It stays best when you add the whipped cream close to serving.
    • Freezer: Freeze the unsoaked cake for the best result. Wrap it tightly in plastic wrap and foil and freeze for up to 3 months. Thaw overnight in the fridge, then add the milk mixture and whipped cream topping.
    A slice of Oreo Tres Leches cake on a plate, next to a bowl of Oreos.

    Did you make this Oreo Tres Leches Cake? Leave a star rating below and tell me how it turned out. Your reviews help other readers find the recipe, and I love hearing which potluck it stole the show at.

    More Oreo and Tres Leches Recipes

    • Oreo Cheesecake
    • Oreo Dump Cake
    • Eggnog Tres Leches Cake
    • Chocolate Tres Leches Cake

    Recipe

    Oreo Tres Leches cake slide, on spatula.
    Print Pin
    Be the first to rate!

    Oreo Tres Leches Cake

    Oreo Tres Leches Cake is a tender cookies-and-cream cake soaked in three milks and topped with fluffy whipped cream and crushed Oreos. It's cool, creamy, make-ahead, and built for a crowd.
    Course Dessert
    Cuisine Mexican
    Prep Time 20 minutes minutes
    Cook Time 35 minutes minutes
    Chilling Time 4 hours hours
    Total Time 4 hours hours 55 minutes minutes
    Servings 12 slices
    Calories 715kcal
    Author Jessica Burgess

    Ingredients

    Cake:

    • 2 cups all-purpose flour 240 grams
    • 2 teaspoons baking powder
    • ½ teaspoon baking soda
    • ½ teaspoon salt
    • 1 ¼ cups granulated sugar 250 grams
    • ¾ cup oil vegetable oil or similar
    • 3 large eggs
    • 2 teaspoons vanilla extract
    • 1 cup whole milk
    • 20 Oreo cookies

    Milks:

    • 14 ounce can sweetened condensed milk
    • 12 ounce can evaporated milk
    • 1 cup whole milk

    Whipped Cream Topping:

    • 2 cups heavy whipping cream cold
    • ½ cup powdered sugar
    • 1 teaspoon vanilla extract

    Instructions

    Cake:

    • Preheat oven to 350°F. Spray a 9×13 baking dish or pan with cooking spray and set aside.
    • Scrape the creme filling out of the Oreos and crush them in a food processor or a large ziplock bag until they are fine crumbs.
    • Whisk together the flour, baking powder, baking soda, and salt in a medium bowl.
    • In a separate large bowl, use an electric mixer to beat the sugar and oil until fluffy. Mix in the eggs and vanilla extract, then alternate adding dry ingredients and milk until the batter is just combined. Fold in the Oreo crumbs.
    • Pour the batter into the greased baking dish, and bake for 35-40 minutes or until a toothpick poked in the middle of the cake comes out clean. Let the cake cool to room temperature before poking holes all over the cake, about 1 inch deep.

    Milks:

    • Whisk the condensed, evaporated, and whole milks together until smooth. Pour the milk mixture over the cake, cover with plastic wrap, and chill for at least 3-4 hours.

    Whipped Cream:

    • When you are ready to serve the cake, pour the heavy whipping cream, powdered sugar, and vanilla extract into a large bowl, and beat until the cream is stiff. Spoon it on top of the cake, and spread it out evenly.
    • Top with extra crushed Oreos, if desired, and serve chilled.

    Notes

    • Scrape the creme filling out of the Oreos so the crumbs stay fine and spread evenly.
    • The cake can be warm or cooled when you add the milk mixture. Just don’t let it go into the fridge piping hot.
    • Cover the whole surface with holes. A chopstick works well.
    • Chill your bowl and beaters before whipping the cream so it stiffens faster.
    • For make-ahead, freeze the cake before soaking. Add the milks and whipped cream after it thaws.

    Nutrition

    Serving: 1slice | Calories: 715kcal | Carbohydrates: 80g | Protein: 12g | Fat: 40g | Saturated Fat: 16g | Polyunsaturated Fat: 6g | Monounsaturated Fat: 16g | Trans Fat: 0.1g | Cholesterol: 110mg | Sodium: 405mg | Potassium: 394mg | Fiber: 1g | Sugar: 58g | Vitamin A: 865IU | Vitamin C: 2mg | Calcium: 297mg | Iron: 4mg

    Hostess Cupcake Cookies

    July 15, 2026

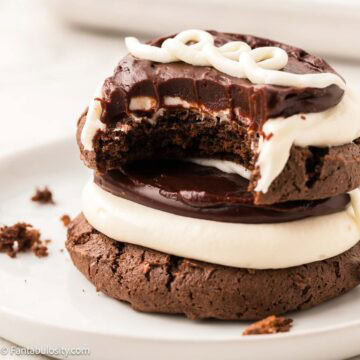
    Hostess Cupcake cookies stacked on top of one another and a bite taken out.

    These Hostess Cupcake Cookies turn the classic snack cake into a soft, handheld cookie, made from a chocolate cake mix base like these devils food cookies, then topped with a fluffy marshmallow filling, a smooth chocolate ganache, and the classic white swirl. They’re easy to make, feed a crowd, and have that nostalgic flavor everyone loves.

    An Easy Copycat Cookie That Tastes Just Like a Hostess Cupcake

    If you love desserts that feel like they came straight from a church potluck table or a family reunion, these cookies belong on your list. The chocolate cake mix base stays soft and tender, while the marshmallow filling and ganache give you that snack-cake flavor, like in these red velvet cake mix cookies and these funfetti cake mix cookies.

    Hostess Cupcake cookies on baking sheet, with bite taken out of cookie.

    What makes these cookies work so well is the balance between the soft chocolate cookie, the light marshmallow center, and the glossy ganache on top. That famous white loop does all the decorating for you, so they look bakery-made without any real fuss.

    They’re the kind of treat that disappears fast at birthdays, potlucks, and holiday cookie trays because they’re simple, nostalgic, and easy to hand out. If you’re feeding a crowd, they’ll also love these marshmallow cookies. Or, if you want to keep the cake mix shortcut but change up the flavor, these strawberry cake mix cookies are a must.

    Stacked, finished, Hostess Cupcake Cookies.

    FAQs

    Do these taste like a real Hostess cupcake?

    Yes. The chocolate cookie, marshmallow filling, and chocolate ganache give you that familiar snack-cake flavor, just with a soft, homemade cookie texture instead of a spongy cake.

    Why are they called Hostess Cupcake Cookies?

    They’re a nod to the classic Hostess cupcake, right down to the chocolate top and the white loop swirl piped across it. This version puts all of that on a soft cookie base.

    Can I use a different cake mix?

    The recipe uses a 15.25-ounce box of chocolate cake mix, and a chocolate fudge cake mix works especially well here.

    Can I use canola oil instead of vegetable oil?

    Yes. Canola oil can be substituted in equal amounts for the ⅓ cup of vegetable oil, and it keeps the cookies just as tender.

    Do I have to pipe the white swirl on top?

    No, but it’s what makes them look like the classic snack cake. You set aside ½ cup of the marshmallow filling to pipe the white loop over the ganache at the end. You can skip it and leave the tops as plain ganache if you’d rather.

    Can I make these ahead of time?

    Yes. Once they’re assembled, store them in a sealed container in the fridge for up to 5 days, and let them come to room temperature before serving for the softest texture.

    How should I store Hostess Cupcake Cookies?

    Store them tightly covered at room temperature for up to 2 days. For longer storage, refrigerate in a sealed container for up to 5 days, and let them soften at room temperature before eating.
    Freeze: You can also freeze them for up to 2 months. Freeze the cookies in a single layer until firm, then transfer to an airtight container or freezer bag with parchment between the layers. Thaw them uncovered at room temperature so no condensation forms on the ganache or white swirl, and enjoy them within 24 hours once thawed.

    Ingredients

    See the recipe card below that has the printable, full ingredient list and instructions.

    Ingredients on countertop to make Hostess Cupcake Cookies.

    For the Cookies

    • (1) 15.25-ounce box chocolate cake mix – Creates a soft, chewy cookie base with minimal effort. Chocolate fudge works especially well.
    • 2 large eggs, room temperature – Bind the dough and add richness.
    • ⅓ cup vegetable oil – Keeps the cookies tender and moist.
    • 1 teaspoon pure vanilla extract – Adds warmth and rounds out the chocolate flavor.

    For the Marshmallow Filling

    • (1) 13-ounce jar marshmallow fluff – Gives the filling its signature creamy texture.
    • 1 cup (2 sticks) unsalted butter, room temperature – Makes the filling rich and helps it hold its shape.
    • 2 cups powdered sugar, sifted – Sweetens and thickens the filling.
    • 1 teaspoon pure vanilla extract – Adds flavor and depth.
    • 2 tablespoons heavy cream – Smooths the filling and adds richness.
    • Pinch of kosher salt – Balances the sweetness.

    For the Chocolate Ganache Topping

    • 1 cup semisweet chocolate chips – Melt into that classic Hostess chocolate top.
    • ⅓ cup heavy cream – Melts the chocolate into a glossy, pourable ganache.
    • 1 tablespoon unsalted butter, softened – Adds shine and a smooth finish.
    • ½ teaspoon pure vanilla extract – Rounds out the chocolate flavor.
    • Pinch of kosher salt – Sharpens the overall flavor.

    Instructions

    • Preheat the oven to 350 degrees Fahrenheit and line two baking sheets with parchment paper.
    • In a large mixing bowl, add the 15.25-ounce box of chocolate cake mix, 2 large eggs, ⅓ cup vegetable oil, and 1 teaspoon vanilla extract. Blend with a hand mixer on medium speed just until a thick, sticky dough forms with no dry mix left. Scrape the bowl with a spatula so everything is evenly combined.
    Cake mix, oil and eggs in mixing bowl.
    • Scoop the dough with a 1-tablespoon cookie scoop and place the mounds on the prepared sheets, spacing them about 2 inches apart.
    Cookie dough scooped out on to baking sheet.
    • Bake for 10 to 13 minutes, or until the tops look set and the edges are just firm. The centers should still look soft, since they keep setting as they cool. Let the cookies rest on the sheet for 5 minutes, then move them to a cooling rack to cool completely.
    Baked Hostess Cupcake Cookies on baking sheet.

    How to Make the Marshmallow Filling

    • While the cookies cool, beat 1 cup (2 sticks) of unsalted butter until creamy. Add the 13-ounce jar of marshmallow fluff, 2 cups powdered sugar, 1 teaspoon vanilla extract, 2 tablespoons heavy cream, and a pinch of kosher salt. Mix on medium speed until fluffy and smooth, about 2 minutes.
    Marshmallow filling for cookies in a mixing bowl.
    • Reserve ½ cup of the filling in a piping bag fitted with a thin tip for later. Transfer the rest to another piping bag fitted with a round tip. Pipe a generous swirl on each cooled cookie, staying about ¼ inch from the edges. You may have some filling left over. Chill the cookies in the fridge for 10 minutes to firm the tops.
    Marshmallow filling piped on to chocolate cookies.

    How to Make the Chocolate Ganache

    • Heat ⅓ cup heavy cream in a microwave-safe bowl for 30 to 45 seconds, until warm but not boiling. Add 1 cup semisweet chocolate chips, 1 tablespoon softened butter, ½ teaspoon vanilla extract, and a pinch of kosher salt. Let it sit for 2 minutes, then whisk until glossy and smooth. Microwave a few more seconds if the chocolate is still lumpy, but don’t overheat it.
    Chocolate chips, butter and heavy cream in a mixing bowl for ganache for Hostess Cupcake Cookies.
    • Spoon or pipe the warm ganache over each cookie to fully cover the marshmallow filling. Smooth it with the spoon or an offset spatula. Set the cookies back on the parchment and refrigerate for 10 minutes to help the chocolate set.
    Chocolate ganache spooned on top of marshmallow filling for cookies.

    How to Finish the Cookies

    • Use the reserved marshmallow filling to pipe the classic Hostess-style white loop across the top of each cookie. Let the swirl set at room temperature for 15 minutes before serving.
    White icing piped on to Hostess Cupcake cookies.

    Tips

    • Let the cookies cool completely before adding the marshmallow filling so it doesn’t slide off.
    • Do not overbake the cookies or they may turn dry. Pull them when the centers look set but still soft.
    • Use a 1-tablespoon cookie scoop so the cookies bake evenly and stay the same size.
    • Warm the cream just until hot, not boiling, and don’t overheat the chocolate so the ganache stays smooth.
    • Set aside about ½ cup of the marshmallow filling for the white swirl before you fill the cookies.
    • Chill the cookies for the full 10 minutes between the filling, the ganache, and the swirl so each layer sets cleanly.

    More Recipes

    If you love easy cookies like these, then you’ll also love these treats:

    • cake mix peanut butter cookies
    • chocolate turtle cookies
    • big fat chewy chocolate chip cookies
    • no bake cookies

    Recipe

    Hostess Cupcake cookies stacked on top of one another and a bite taken out.
    Print Pin
    5 from 2 votes

    Hostess Cupcake Cookies

    These Hostess Cupcake Cookies start with a chocolate cake mix, so the cookie bakes up soft, then get a marshmallow filling, a layer of chocolate ganache, and the white swirl everyone recognizes. They taste just like the snack cake you grew up on, with plenty in a batch to pass around.
    Course Dessert
    Cuisine American
    Prep Time 30 minutes minutes
    Cook Time 10 minutes minutes
    Cooling Time 50 minutes minutes
    Total Time 1 hour hour 30 minutes minutes
    Servings 24 cookies
    Calories 327kcal
    Author Jessica Burgess

    Ingredients

    For the Cookies

    • 15.25 ounce box chocolate cake mix
    • 2 large eggs room temperature
    • ⅓ cup vegetable oil
    • 1 teaspoon pure vanilla extract

    For the Marshmallow Filling:

    • 13 ounce jar marshmallow fluff
    • 1 cup 2 sticks unsalted butter, room temperature
    • 2 cups powdered sugar sifted
    • 1 teaspoon pure vanilla extract
    • 2 tablespoons heavy cream
    • 1 pinch of kosher salt

    For the Chocolate Ganache Topping:

    • 1 cup semisweet chocolate chips
    • ⅓ cup heavy cream
    • 1 tablespoon unsalted butter softened
    • ½ teaspoon pure vanilla extract
    • 1 pinch of kosher salt

    Instructions

    • Preheat the oven to 350° F and line two baking sheets with parchment paper.
    • In a large mixing bowl, add (1) 15.25-ounce box chocolate cake mix, 2 large eggs, 1⁄3 cup vegetable oil, and 1 teaspoon vanilla extract. Use a hand mixer on medium speed to blend just until a thick, sticky dough forms, with no dry mix remaining. Scrape the bowl with a spatula to make sure everything is evenly combined.
    • Scoop the dough using a 1-tablespoon cookie scoop and place each mound onto the prepared sheets, spacing them about 2 inches apart.
    • Bake for 10-13 minutes, or until the tops look set and the edges are just firm. The centers should still look soft since they'll continue to set as they cool. Remove from the oven and let the cookies rest on the baking sheet for 5 minutes before moving them to a cooling rack to cool completely.
    • While the cookies cool, beat 1 cup (2 sticks) of unsalted butter until creamy. Add (1) 13-ounce jar marshmallow fluff, 2 cups powdered sugar, 1 teaspoon vanilla extract, 2 tablespoons heavy cream, and a pinch of kosher salt. Mix on medium speed until fluffy and smooth, about 2 minutes.

    Marshmallow Filling

    • Reserve ½ cup of the frosting and place it in a piping bag with a thin tip for later. Then transfer the remaining filling to another piping bag fitted with a round tip.
      Pipe a generous swirl on top of each cooled cookie, keeping about 1⁄4 inch from the edges. You may have some leftover frosting. Place the cookies in the fridge for 10 minutes to firm the tops.

    Make the Ganache

    • Heat 1⁄3 cup heavy cream in a microwave-safe bowl for 30-45 seconds or until warm but not boiling. Add 1 cup semisweet chocolate chips, 1 tablespoon softened butter, 1⁄2 teaspoon vanilla extract, and a pinch of kosher salt. Allow it to sit for 2 minutes, then whisk until glossy and smooth. Microwave for a few more seconds if the chocolate is still slightly lumpy. Don't overheat the chocolate.
    • Spoon or pipe warm ganache onto each cookie to fully cover the marshmallow frosting. Smooth out with the spoon or an offset spatula. Place the cookies back on the parchment and refrigerate for 10 minutes to help the chocolate set.
    • Use your reserved marshmallow frosting in a piping bag to pipe the classic Hostess-style white loop swirl across the top of each cookie. Allow the swirl to set at room temperature for 15 minutes before serving. ENJOY!

    Notes

    • Cool the cookies completely before adding the filling. Warm cookies melt the marshmallow layer and it slides off.
    • Before you pipe the filling, set aside ½ cup for the white loop on top. It’s easy to use it all if you don’t pull it out first.
    • Don’t overbake. Pull the cookies when the tops look set but the centers still look soft. They firm up as they cool.
    • Heat the cream just until warm, not boiling, and don’t overheat the chocolate, or the ganache turns grainy and dull instead of glossy.

    Nutrition

    Serving: 1cookie | Calories: 327kcal | Carbohydrates: 40g | Protein: 2g | Fat: 19g | Saturated Fat: 9g | Polyunsaturated Fat: 3g | Monounsaturated Fat: 5g | Trans Fat: 0.4g | Cholesterol: 41mg | Sodium: 160mg | Potassium: 115mg | Fiber: 1g | Sugar: 29g | Vitamin A: 342IU | Vitamin C: 0.03mg | Calcium: 39mg | Iron: 1mg

    Brownie Cake

    July 16, 2026

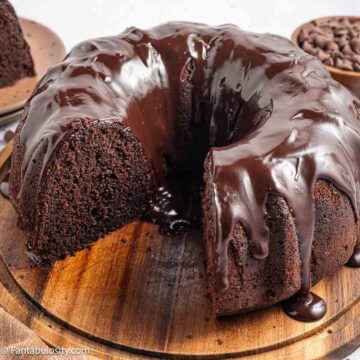
    Chocolate brownie cake in bundt shape on cake stand.

    This chocolate brownie cake is a rich, fudgy bundt cake made with a box of cake mix and a box of brownie mix, then topped with a smooth chocolate ganache, a lot like the hot fudge cake. It’s easy to make, feeds a crowd, and has that deep chocolate flavor everyone reaches back for.

    An Easy Chocolate Bundt Cake That Feels Like a Church Cookbook Favorite

    Two boxes do the heavy lifting here. Devil’s food cake mix brings the tender crumb and deep chocolate flavor, and the brownie mix packs in that dense, fudgy texture. You get the best of both in one bundt, without pulling out a scale or measuring cocoa.

    Chocolate brownie cake sliced on wooden cake stand.

    It’s the kind of dessert that disappears at a potluck. If you’re building a table of crowd-pleasers, it fits right in with these easy potluck desserts, and it holds its own next to a pan of chocolate peanut butter brownies or a batch of strawberry brownies.

    If you like desserts that lean on a boxed mix to save time, you’ll also love this dump cake and this black forest poke cake. This one just happens to look a little fancier thanks to that glossy ganache poured over the top.

    Cakes for the Potluck Table cookbook by Jessica Burgess, cover and open recipe spread

    This cake is in my cookbook

    Cakes for the
    Potluck Table

    Sixty old-fashioned cakes, coming this spring. Six of the recipes are free right now.

    Send me the six cakes

    FAQs

    What does chocolate brownie cake taste like?

    Rich, sweet, and very chocolatey. The crumb is dense and moist like a brownie, and the ganache adds a smooth, fudgy layer on top. If you love deep chocolate flavor, this is your cake.

    Why does this use both cake mix and brownie mix?

    The cake mix keeps the crumb soft and tender, while the brownie mix makes it dense and fudgy. Together they give you a cake that’s sturdy enough to slice but still gooey in the middle.

    Can I use a different cake mix flavor?

    Devil’s food is the pick here because it’s richer with a stronger chocolate flavor. You can swap in another chocolate cake mix, but the flavor won’t be quite as deep.

    Do I have to use a bundt pan?

    This recipe is written for a 12-cup bundt pan. Grease it well with shortening or butter and dust it with unsweetened cocoa powder so the cake releases cleanly. Flour works for dusting too, but it can leave a little white residue on the outside.

    Is the corn syrup necessary for the ganache?

    No. The 2 tablespoons of light corn syrup are optional. They add a little sweetness and give the ganache a beautiful shine, but the ganache will still set up without it.

    Can I make this ahead of time?

    Yes. You can bake the cake a day ahead and add the ganache the day you serve it. For longer make-ahead, freeze the bare cake before adding ganache and make the ganache fresh.

    How do I store chocolate brownie cake?

    Because of the cream in the ganache, store the finished cake in an airtight container in the refrigerator for up to 4 days. If you haven’t added the ganache yet, the bare cake keeps covered on the counter for up to 3 days. To freeze, wrap the bare cake in plastic wrap and foil and freeze up to 3 months, then thaw overnight in the fridge and add fresh ganache before serving.

    A sliced chocolate brownie cake on cake stand.

    Ingredients

    See the recipe card below that has the printable, full ingredient list and instructions.

    Ingredients to make chocolate brownie cake.

    For the Chocolate Brownie Cake:

    • 1 (13.25-ounce) box devil’s food cake mix – Gives the cake its rich, deep chocolate base.
    • 1 (18.3-ounce) box brownie mix – Adds the dense, fudgy texture that makes it taste like a brownie.
    • 4 large eggs – Bind the batter and give the cake structure.
    • 1 cup milk – Adds moisture for a tender crumb.
    • 1 cup oil – Keeps the cake rich and moist.

    For the Chocolate Ganache:

    • ⅓ cup heavy whipping cream – Melts the chocolate into a smooth, pourable ganache.
    • ⅔ cup semi-sweet chocolate chips – Set into a glossy chocolate topping.
    • 2 tablespoons light corn syrup – Optional, but adds shine to the ganache.

    Instructions

    • Preheat the oven to 350°F. Grease a 12-cup bundt pan with shortening or butter, then dust it with unsweetened cocoa powder and set it aside.
    • In a large mixing bowl, add the devil’s food cake mix, brownie mix, 4 eggs, 1 cup milk, and 1 cup oil. Mix with an electric mixer until smooth, scraping down the sides of the bowl so all the dry ingredients are worked in.
    Brownie mix and chocolate cake mix, mixed with eggs and oil.
    • Pour the batter into the prepared pan. Bake for 50 to 55 minutes, or until a thin knife inserted into the middle comes out clean or with a few tiny crumbs.
    Cake and brownie batter in bundt pan.
    • Rest the cake in the pan for 30 minutes, then invert it onto a large platter or cake stand. Let it cool completely before adding the ganache.
    Baked brownie cake in bundt pan.

    How to Make the Chocolate Ganache

    • Pour ⅓ cup heavy whipping cream into a small, microwave-safe bowl. Heat it in 30-second increments until it starts to steam, about 1 minute.
    • Add ⅔ cup chocolate chips and 2 tablespoons corn syrup to the hot cream. Let the mixture rest for about 2 minutes.
    Hot milk with chocolate chips in mixing bowl.
    • Stir until the ganache is smooth, then pour it over the top of the cooled cake evenly.
    • Let the cake rest for about 30 minutes so the ganache can set, then serve at room temperature.
    Chocolate ganache poured on top of brownie cake.

    Tips

    • Grease the bundt pan well and dust it with unsweetened cocoa powder so the cake releases cleanly. Flour works too, but it can leave a little white residue on the outside. It won’t affect the taste.
    • Let the cake cool completely before pouring on the ganache. Warm cake will make the ganache slide off.
    • Heat the cream in 30-second bursts and stop as soon as it steams, about 1 minute, so it doesn’t scorch.
    • Let the chocolate chips sit in the hot cream for 2 full minutes before stirring. That’s the trick to a smooth ganache.
    • Use a good-quality chocolate chip. It melts more easily for a smoother finish.
    • Give the ganache about 30 minutes to set before slicing.
    A slice of brownie cake on a plate.

    More Recipes

    If you love easy chocolate desserts like this one, then you’ll also love these:

    • vanilla mug cake
    • hot fudge cake
    • chocolate peanut butter brownies
    • red velvet brownies
    • turtle pie

    Recipe

    Chocolate brownie cake in bundt shape on cake stand.
    Print Pin
    Be the first to rate!

    Chocolate Brownie Cake

    This chocolate brownie cake is rich, fudgy, and made with a box of devil's food cake mix and a box of brownie mix. It bakes up in a bundt pan and gets topped with a smooth chocolate ganache. It's an easy, crowd-pleasing dessert with deep chocolate flavor.
    Course Dessert
    Cuisine American
    Prep Time 10 minutes minutes
    Cook Time 55 minutes minutes
    Cooling Time 2 hours hours
    Total Time 3 hours hours 5 minutes minutes
    Servings 10 servings
    Calories 740kcal
    Author Jessica Burgess

    Ingredients

    Chocolate Brownie Cake:

    • 2 tablespoons cocoa powder for dusting the pan
    • 13.25 ounce box devil's food cake mix
    • 18.3 ounce box brownie mix
    • 4 large eggs
    • 1 cup milk
    • 1 cup oil

    Chocolate Ganache:

    • ⅓ cup heavy whipping cream
    • ⅔ cup semi-sweet chocolate chips
    • 2 tablespoons light corn syrup optional

    Instructions

    Cake:

    • Preheat oven to 350°F. Grease a 12-cup bundt pan with shortening or butter, then dust with unsweetened cocoa powder. Set aside.
    • In a large mixing bowl, add the cake mix, brownie mix, eggs, milk, and oil. Use an electric mixer to mix the batter together until smooth, scraping down the sides of the bowl to make sure all of the dry ingredients are incorporated.
    • Pour the batter into the prepared pan, and bake for 50-55 minutes, or until a thin knife inserted into the middle of the cake comes out clean or with a few tiny crumbs.
    • Rest the cake in the pan for 30 minutes before inverting it onto a large platter or cake stand. Allow the cake to cool completely.

    Ganache:

    • Pour the cream into a small, microwave safe bowl, and heat it in the microwave in increments of 30 seconds until it starts to steam, about 1 minute.
    • Add the chocolate chips and corn syrup, and let the mixture rest for about 2 minutes. Stir until the ganache is smooth, then pour it over the top of the cake evenly.
    • Let the cake rest for about 30 minutes so the ganache will set, then serve at room temperature. Store in an airtight container in the refrigerator for up to 4 days.

    Notes

    • Let the cake cool completely before adding the ganache so it doesn’t slide off.
    • Let the chocolate chips sit in the hot cream for 2 minutes before stirring for the smoothest ganache.
    • The corn syrup is optional but adds shine.
    • Store in an airtight container in the refrigerator for up to 4 days.

    Nutrition

    Serving: 1serving | Calories: 740kcal | Carbohydrates: 79g | Protein: 9g | Fat: 45g | Saturated Fat: 10g | Polyunsaturated Fat: 9g | Monounsaturated Fat: 23g | Trans Fat: 0.1g | Cholesterol: 87mg | Sodium: 505mg | Potassium: 264mg | Fiber: 2g | Sugar: 49g | Vitamin A: 271IU | Vitamin C: 0.05mg | Calcium: 111mg | Iron: 4mg

    Smothered Pork Chops in Creamy Mushroom Gravy

    July 30, 2026

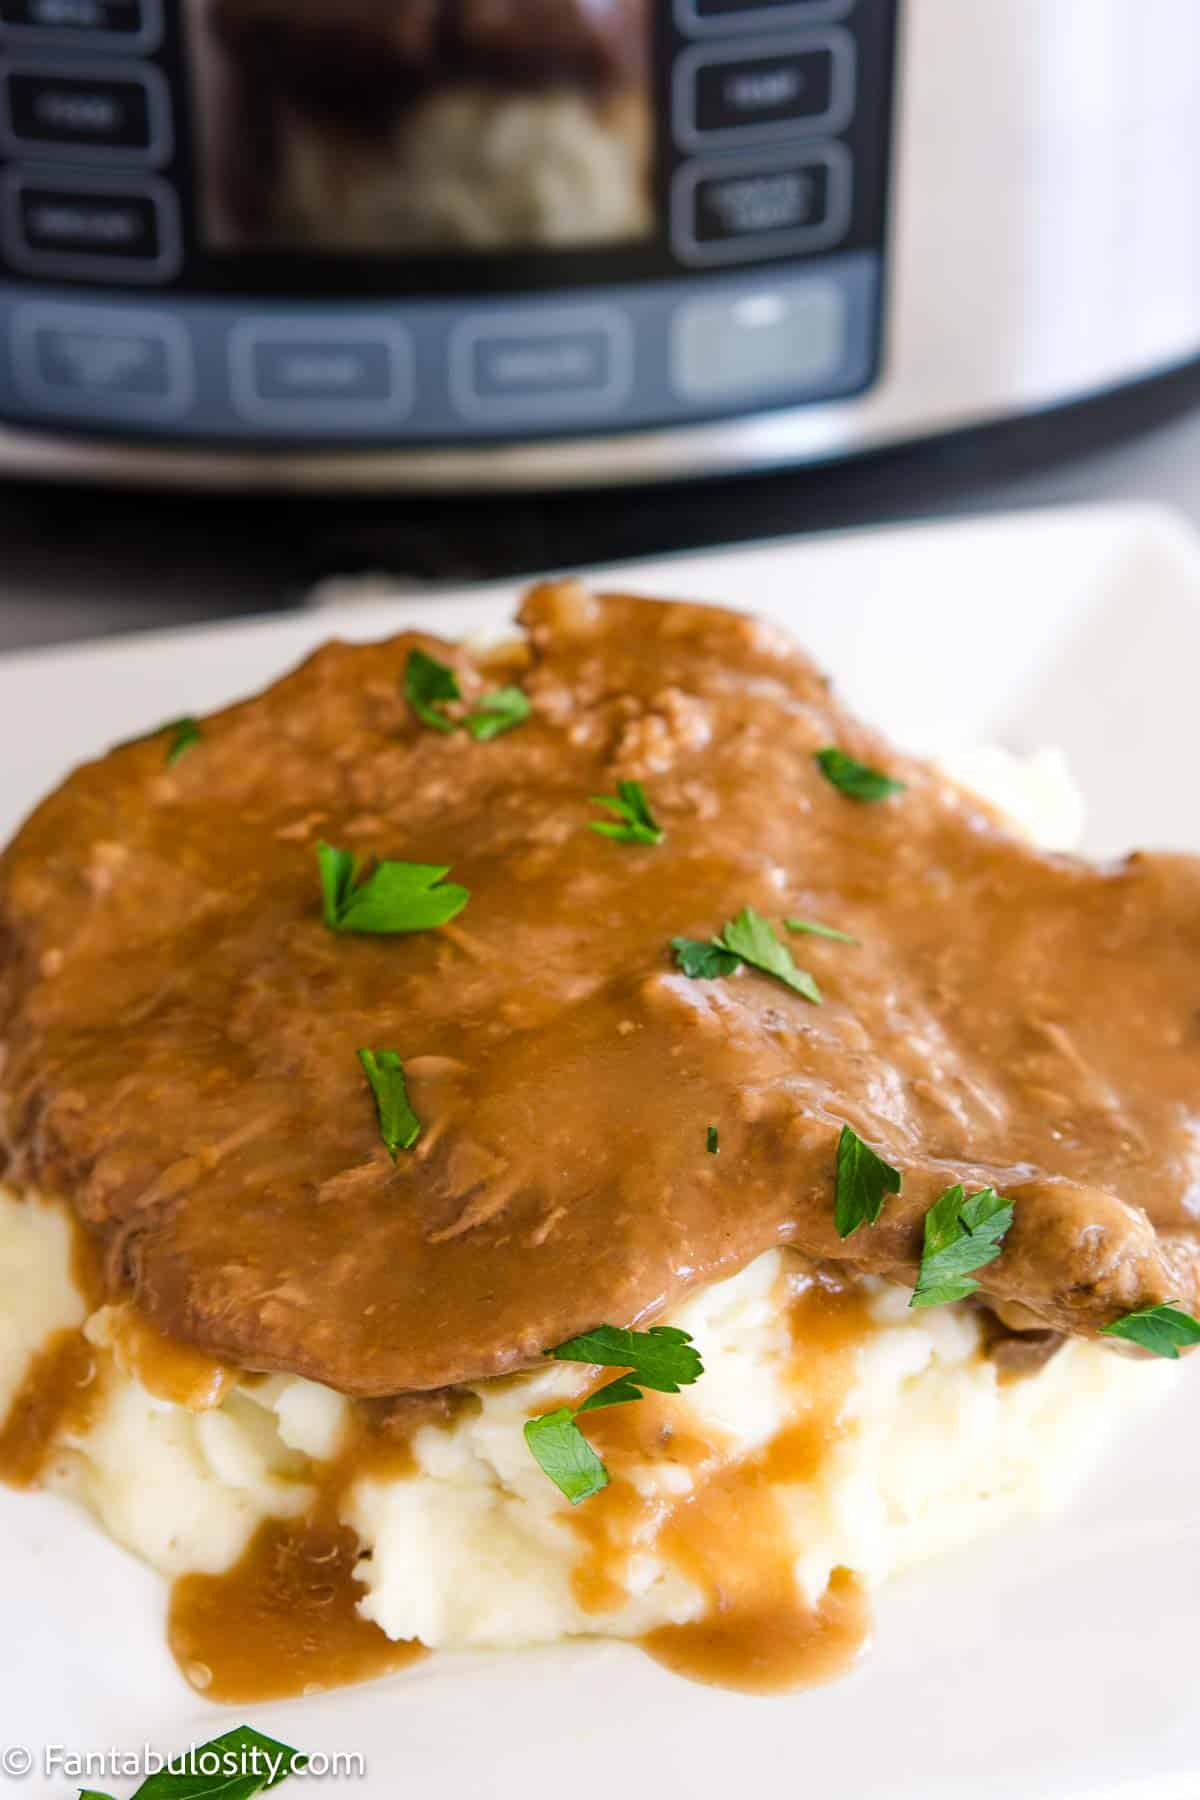
    Smothered pork chop with mushroom gravy on top of rice in a plate.

    These smothered pork chops are seared until golden, then simmered in a creamy onion and mushroom gravy until they’re tender and coated in flavor, a lot like the pan sauce magic in these Southern pork chops. It’s ready in about 30 minutes, feeds the whole family, and has that stick-to-your-ribs comfort everyone comes back for.

    An Easy Skillet Dinner That Tastes Like It Simmered All Day

    Smothered pork chops are the kind of supper that looks fancy but comes together in one pan on a busy weeknight. You season and sear the chops, build a quick gravy from the drippings and the leftover seasoned flour, then let everything simmer together so the pork soaks up all that creamy, savory sauce.

    Smothered pork chop on a wooden spatula, out of skillet.

    The gravy is where it earns its name. Butter, onion, mushrooms, and garlic cook down into a rich base, and a splash of Worcestershire gives it that deep, savory finish. If you love a good homemade gravy, you’ll want to bookmark this pork gravy too. It’s the same idea, built for spooning over everything on the plate.

    This one fits right in with the other cozy dinners in the family rotation. If you like these, you’ll also love baked BBQ pork chops for the nights you want the oven to do the work, Swedish meatballs in a creamy sauce, and this Cracker Barrel country fried steak. Serve the chops over rice or mashed potatoes with a side of crack green beans, and you’ve got a plate straight out of a church cookbook. You’ll find plenty more in the full collection of easy comfort food recipes.

    Smothered pork chop on rice, covered in gravy.

    FAQs

    What are smothered pork chops?

    Smothered pork chops are chops that get seared, then simmered (“smothered”) in a gravy until tender. Here that’s a creamy onion and mushroom gravy made right in the same pan.

    What do they taste like?

    Savory and rich, with browned pork, earthy mushrooms, sweet cooked onion, and a creamy gravy rounded out by Worcestershire sauce. It’s classic comfort food, not fussy or overly seasoned.

    What kind of pork chops work best?

    This recipe uses ½ to ¾-inch boneless pork chops. Boneless keeps the cook time short so the meat stays juicy.

    Can I use bone-in pork chops?

    You can. Bone-in chops take longer to cook through, so sear them over medium heat instead of medium-high. That gives them more time in the pan without the outside burning.

    Can I use a different kind of mushroom?

    Yes. The recipe calls for sliced brown mushrooms, but white button mushrooms work just as well. Swap in whatever your store carries.

    What should I serve with smothered pork chops?

    They’re made for steamed rice, which soaks up the gravy, but mashed potatoes or egg noodles are just as good. Add a simple green vegetable and dinner’s done.

    Can I make them ahead?

    This one’s best fresh off the stove while the gravy is creamy and the pork is juicy. You can prep by whisking the dredge and slicing the onion and mushrooms earlier in the day to make dinner come together faster.

    How do I store leftovers?

    Store leftovers in an airtight container in the fridge for up to 3 to 4 days. Reheat gently over low heat, adding a splash of broth if the gravy has thickened too much.

    Ingredients

    See the recipe card below that has the printable, full ingredient list and instructions.

    Ingredients to make smothered pork chops, sitting on kitchen counter.

    For the Pork Chops and Dredge

    • 2 tablespoons canola oil – Gets the pan hot for a good sear.
    • ½ cup all-purpose flour – Coats the chops and later thickens the gravy.
    • 1 ½ tablespoons kosher salt – Seasons the dredge; most shakes off with the excess.
    • 1 teaspoon garlic powder – Savory depth in the coating.
    • 1 teaspoon onion powder – Rounds out the seasoning.
    • 1 teaspoon paprika – Adds color and a mild warmth.
    • ½ teaspoon coarse ground pepper – A little bite.
    • 4 (½ to ¾-inch) boneless pork chops, set out at room temperature about 15 minutes – The star; resting them out helps them cook evenly.

    For the Gravy

    • 3 tablespoons salted butter – The base for cooking the vegetables.
    • 1 small yellow onion, diced – Sweetness and flavor in the gravy.
    • 1 ½ cups sliced brown mushrooms – Earthy flavor and texture.
    • 3 cloves garlic, minced – Fresh, savory punch.
    • 1 cup low-sodium chicken broth – The body of the gravy; low-sodium lets you control the salt.
    • ⅓ cup heavy cream – Makes the gravy rich and creamy.
    • 1 tablespoon Worcestershire sauce – Deep, savory finish.

    For Serving

    • Chopped parsley, for garnish, optional – A little color on top.
    • Steamed rice, for serving, optional – Soaks up the gravy.

    Instructions

    • In a heavy-bottomed or cast-iron pan, heat 2 tablespoons canola oil over medium-high heat.
    • In a shallow bowl, whisk together ½ cup flour, 1 ½ tablespoons kosher salt, 1 teaspoon garlic powder, 1 teaspoon onion powder, 1 teaspoon paprika, and ½ teaspoon pepper.
    Flour and spices mixed in mixing bowl.
    • Lightly dredge each pork chop in the flour mixture, shaking off the excess. Reserve the flour mixture.
    Pork chop dredged in flour and spice mixture.
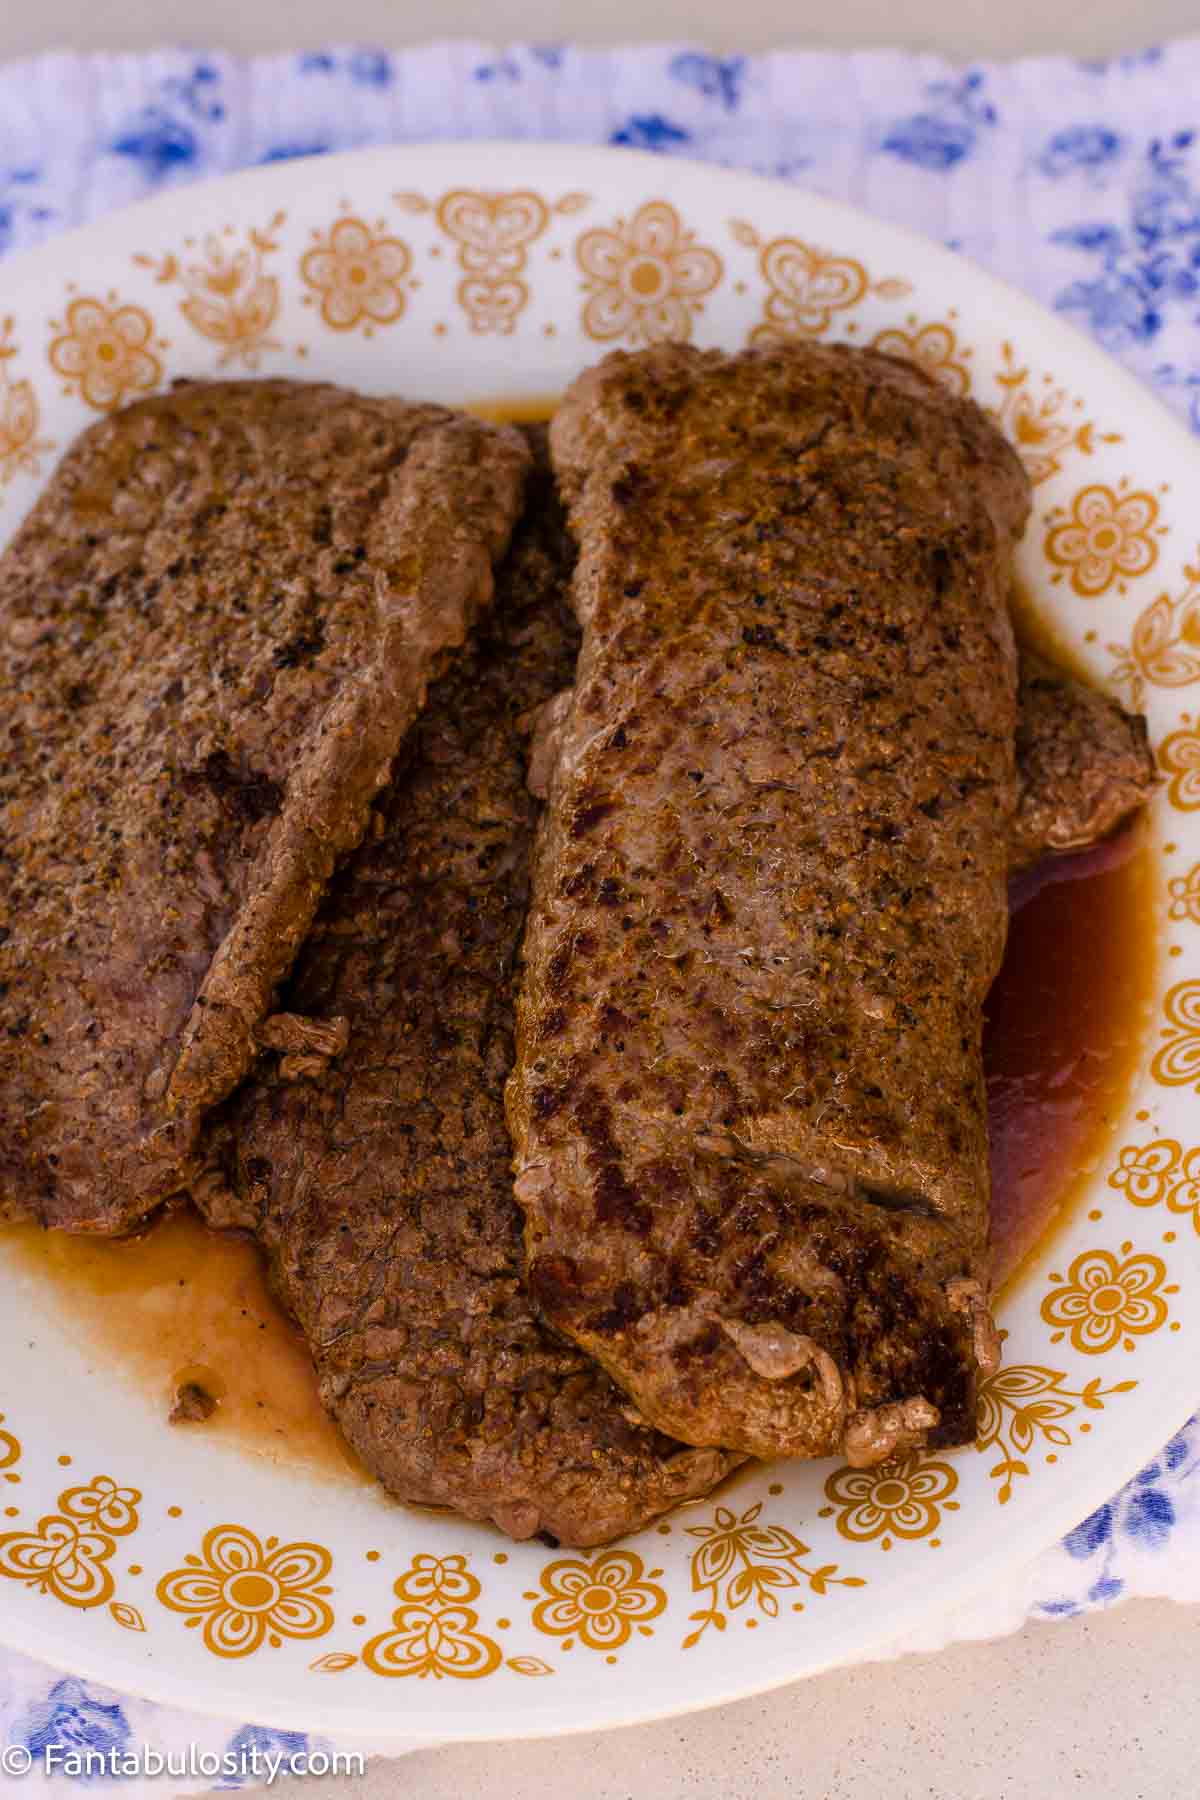
    • Place the pork chops in the pan, careful not to overcrowd them. Work in batches if needed. Sear each side about 2 minutes, until nicely browned. Remove to a plate and tent with foil to keep warm. They won’t be cooked all the way through yet.
    Pork chop seared in cast iron skillet.

    How to Make the Gravy

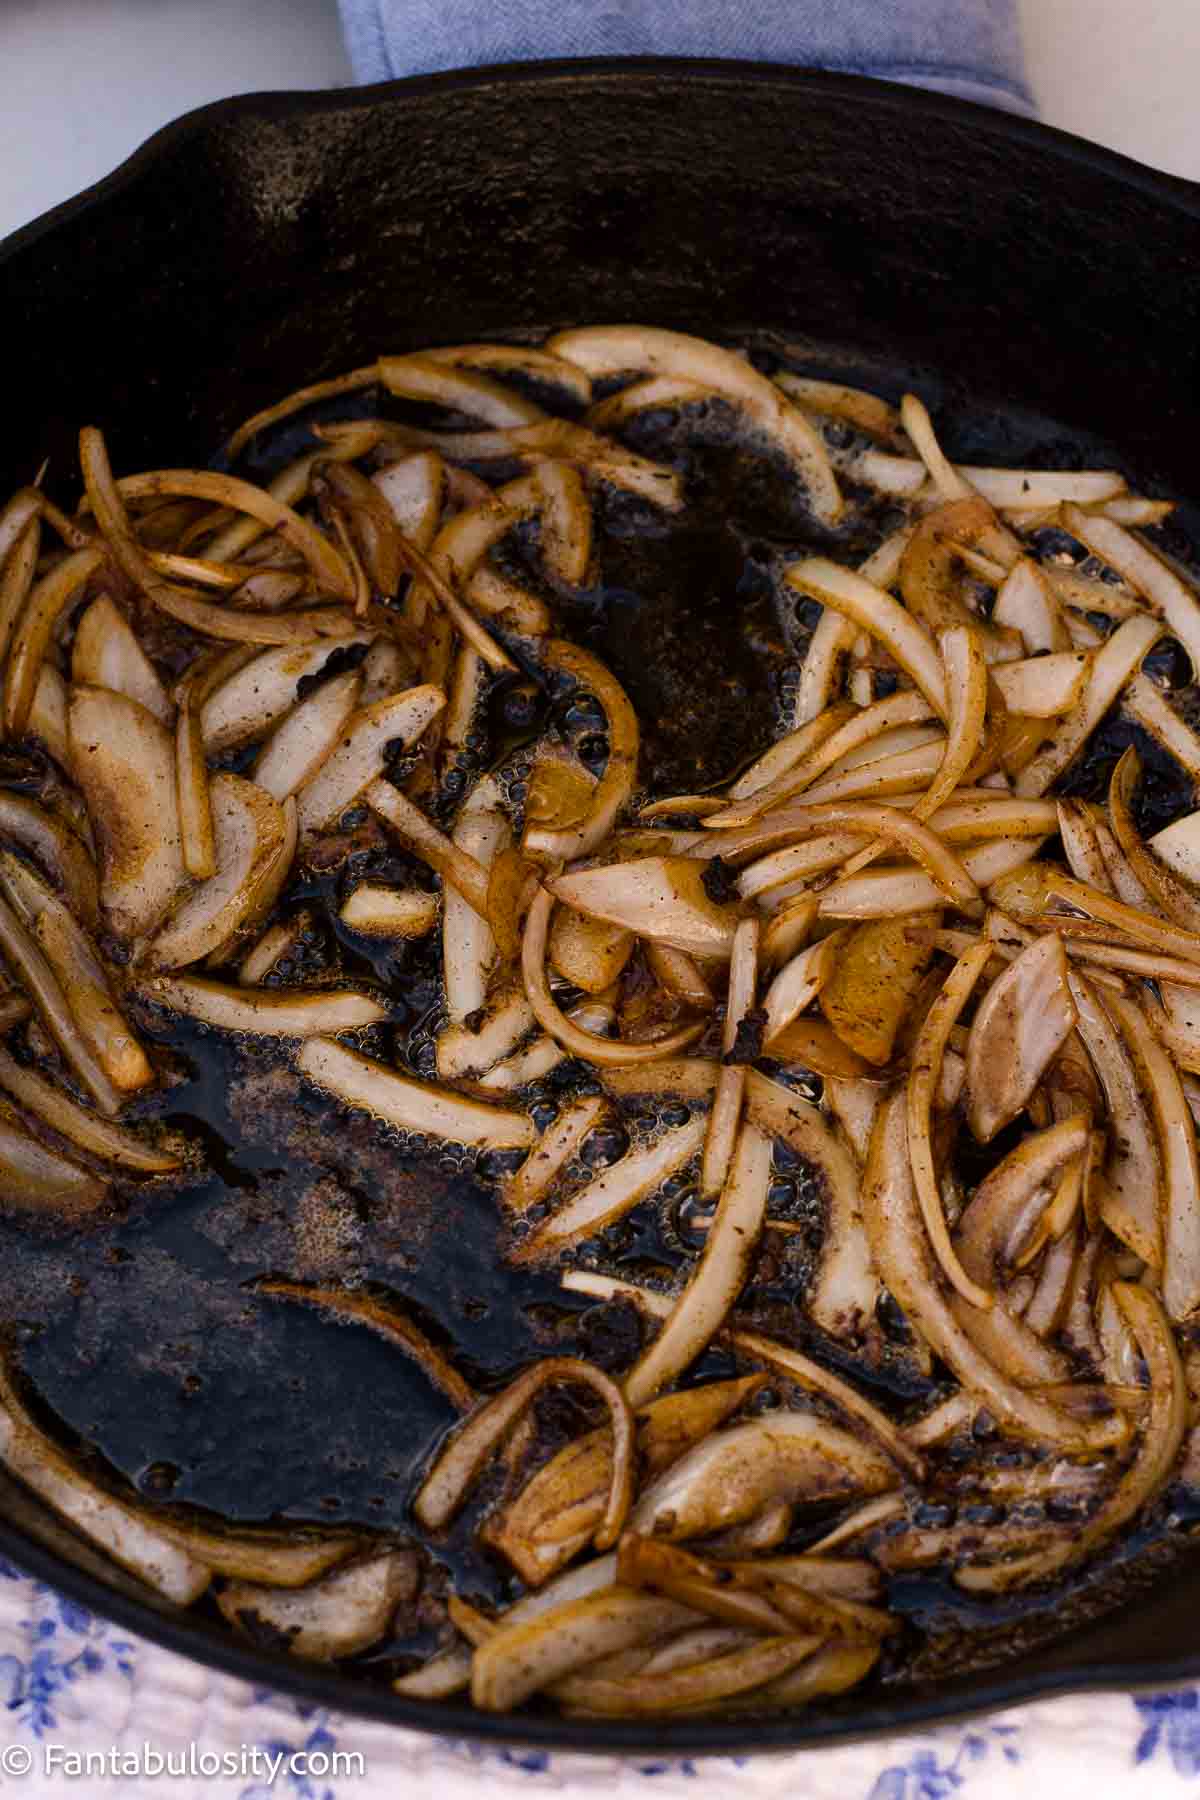
    • Reduce the heat to medium. In the same pan, melt 3 tablespoons butter, then add the diced onion and 1 ½ cups sliced mushrooms. Sauté 4 to 5 minutes, until softened.
    Onions, flour and spices added to skillet.
    • Add the 3 cloves minced garlic and 3 tablespoons of the reserved dredging flour. Stir for 2 to 3 minutes.
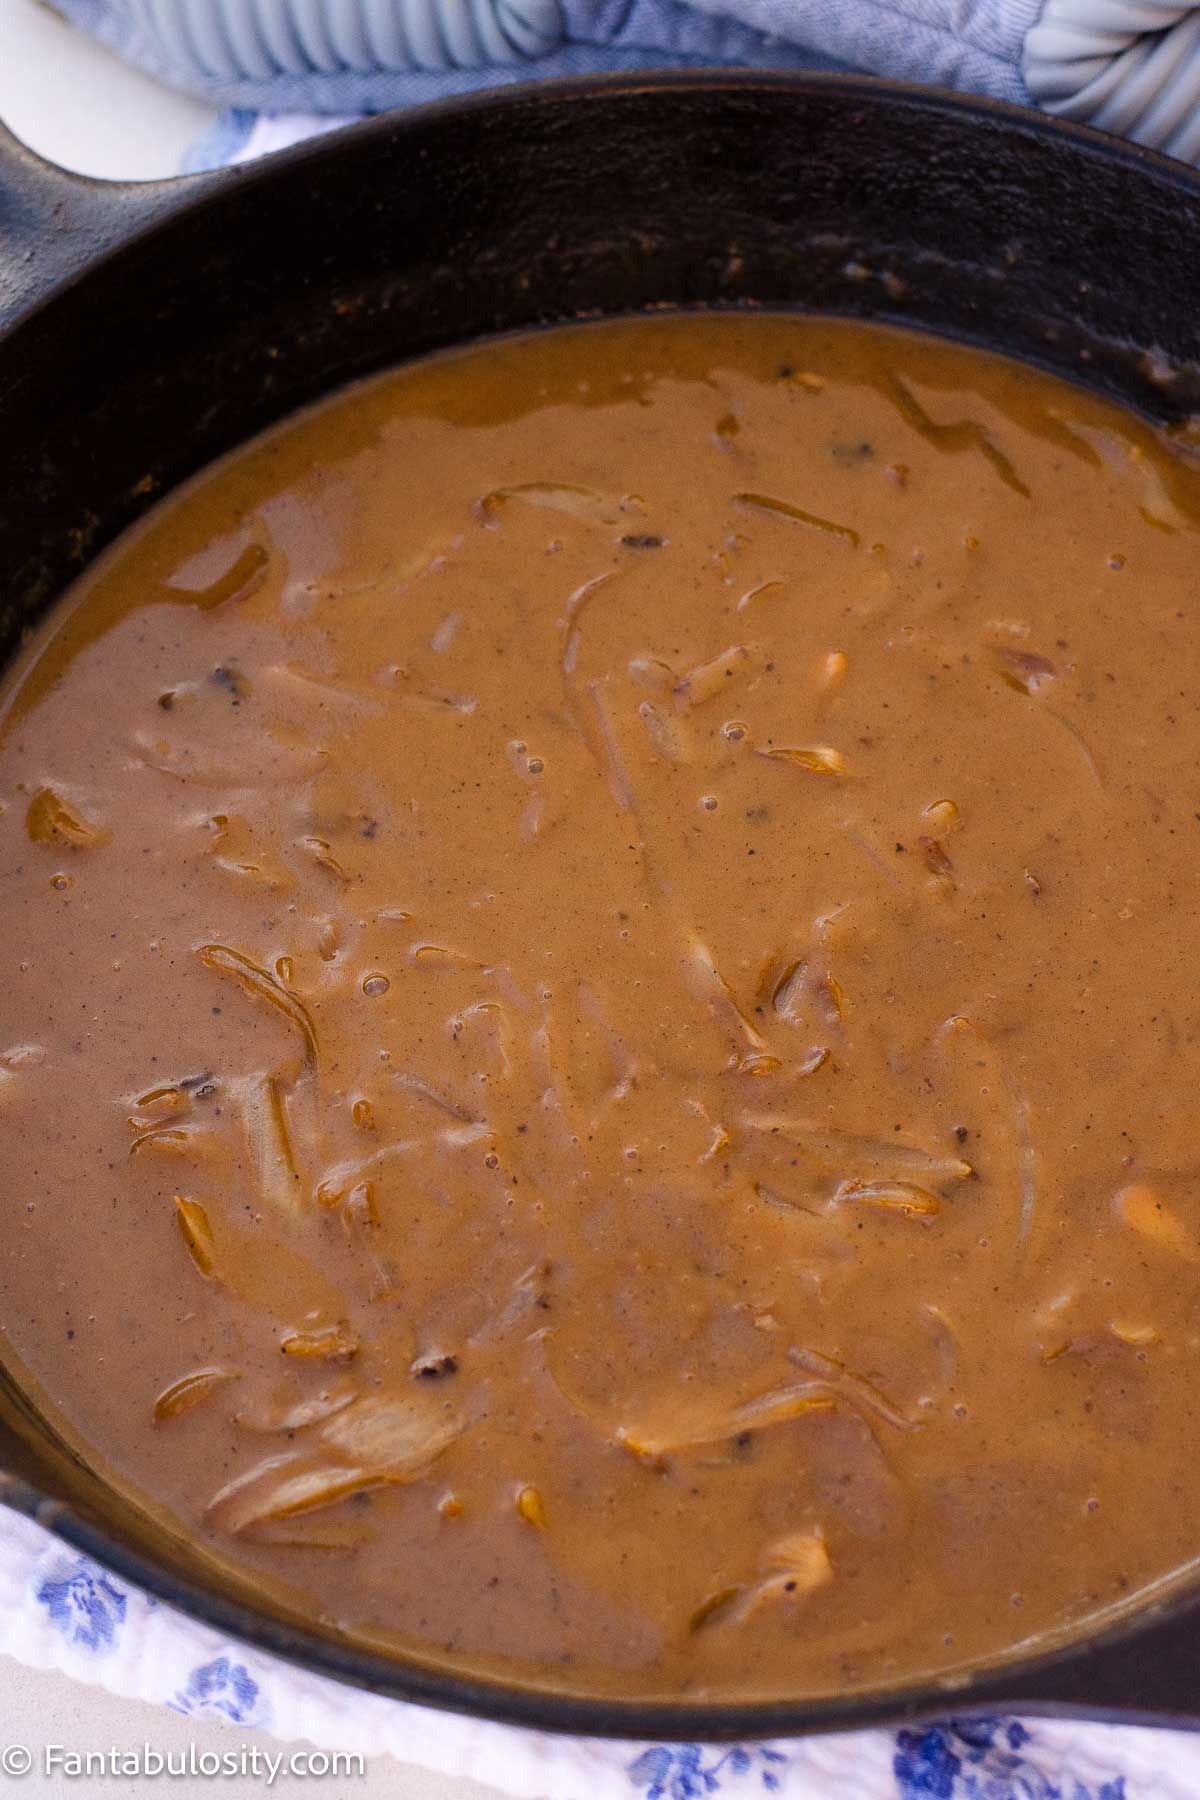
    • While whisking, slowly pour in 1 cup chicken broth, followed by ⅓ cup heavy cream and 1 tablespoon Worcestershire sauce, until combined. Taste and add more salt and pepper if needed.
    Broth and sauces added to skillet.
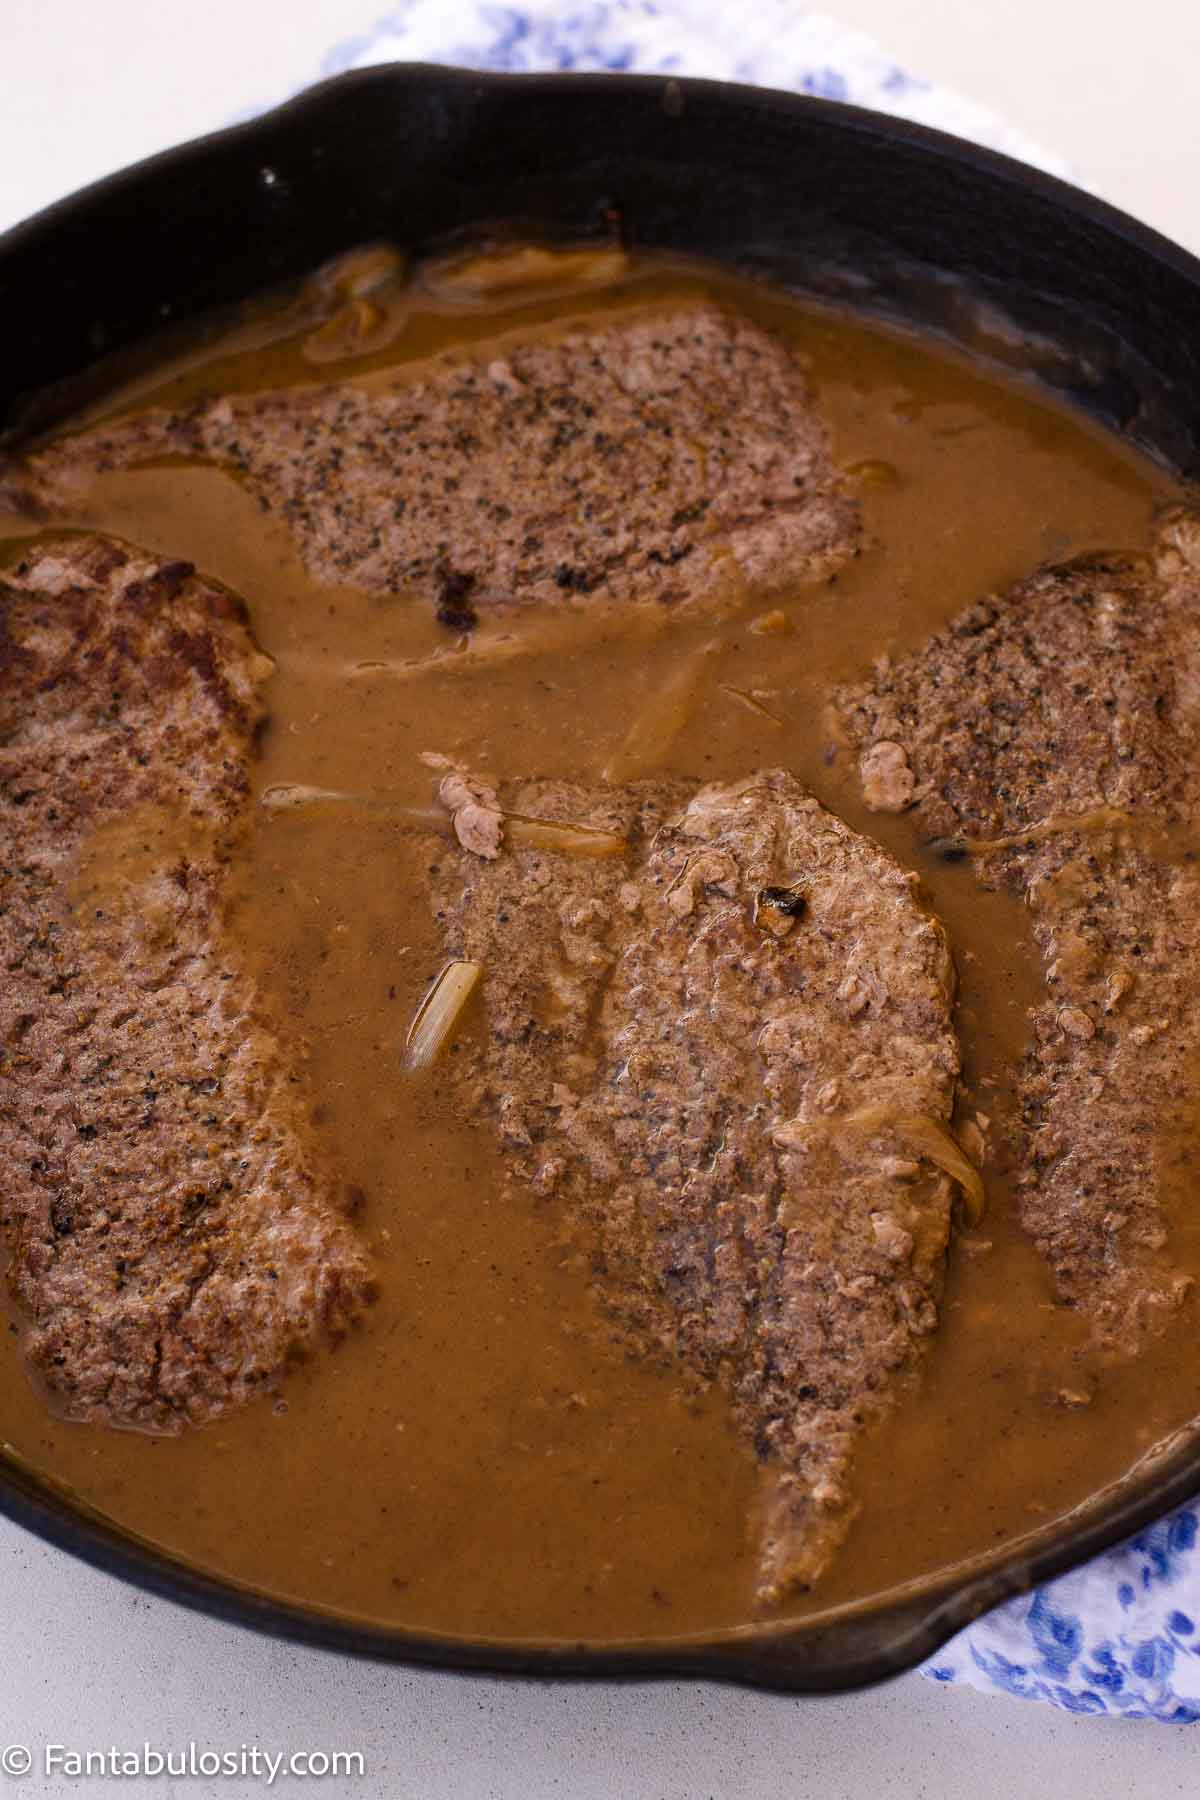
    • Add the pork chops back into the pan. Once the mixture starts to simmer, reduce the heat to medium-low and cook until the sauce has thickened and the pork chops reach 145°F. Careful not to overcook the meat.
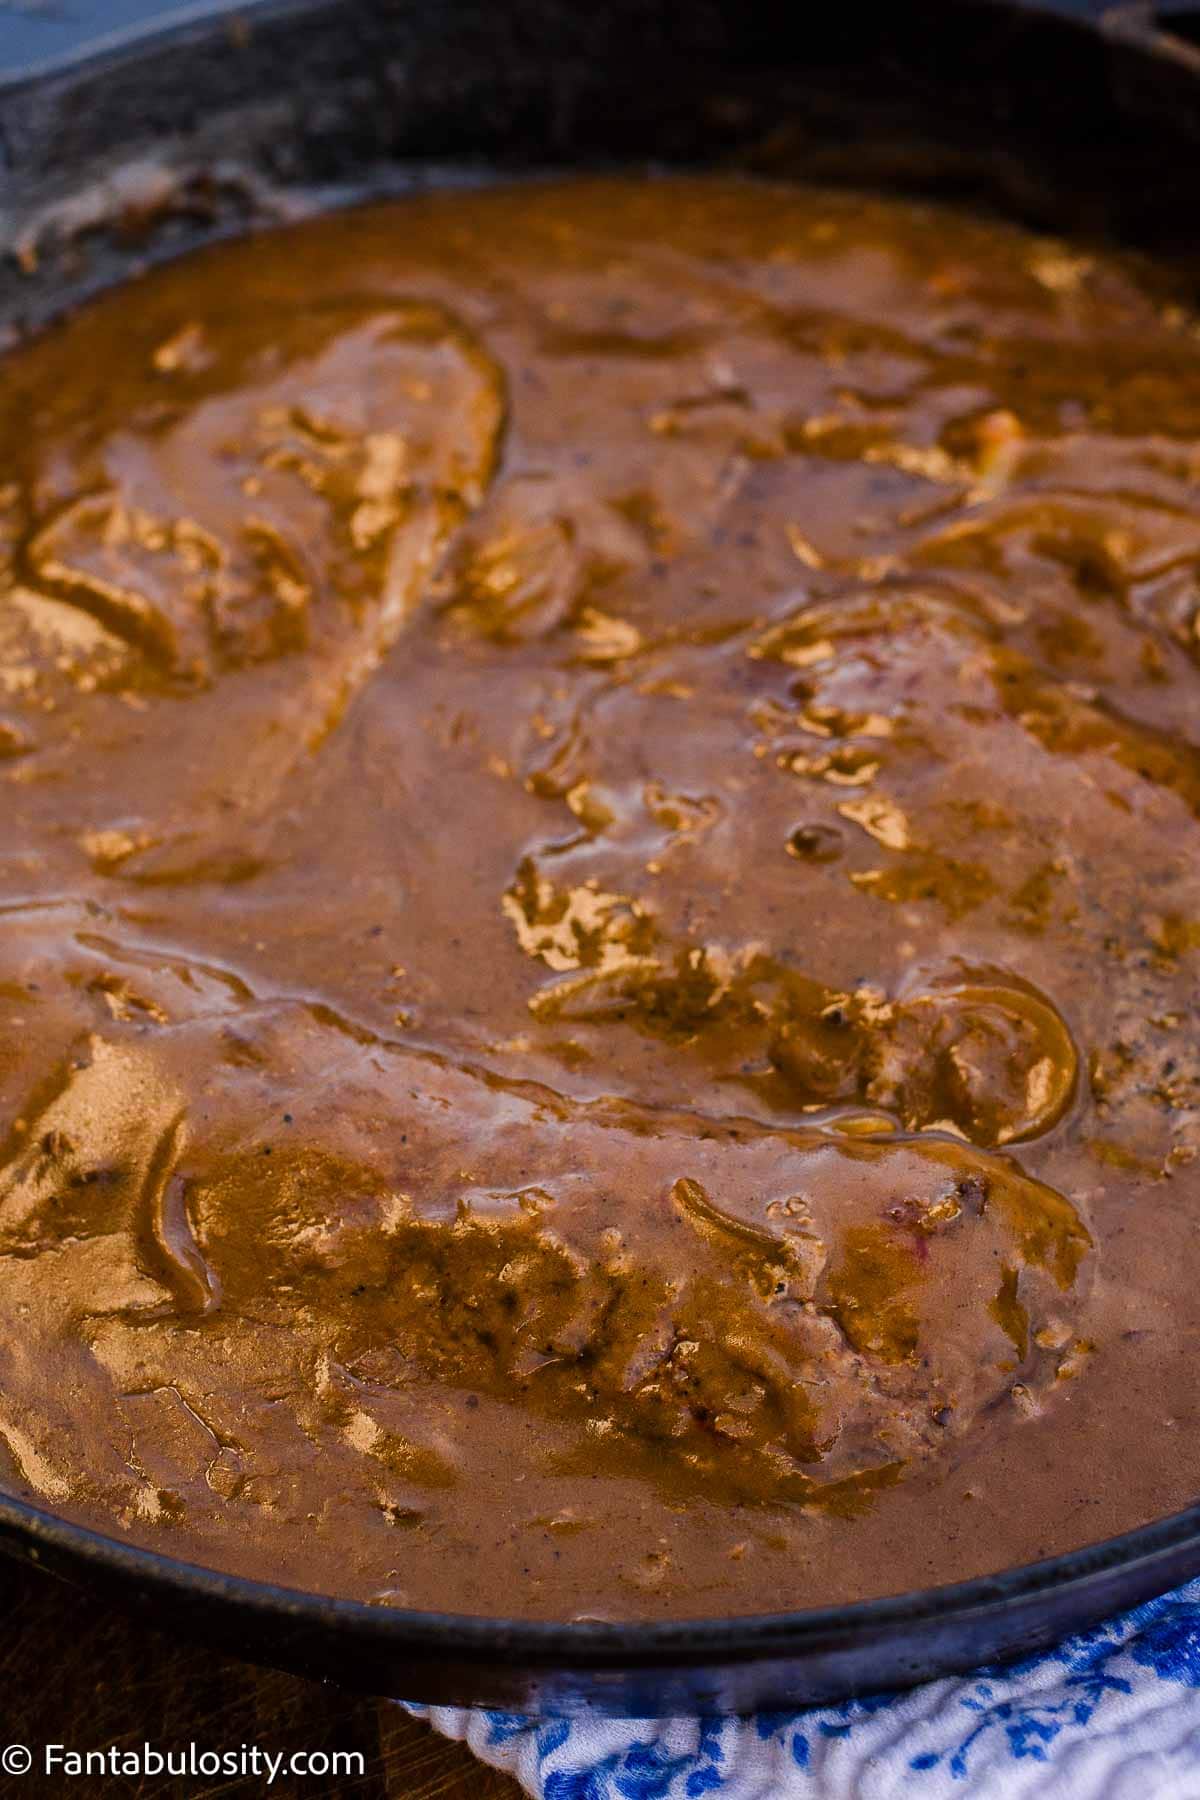
    Cooked pork chops added to skillet and gravy.
    • Serve over rice with a garnish of parsley, if desired.

    Tips

    • Set your pork chops out at room temperature about 15 minutes before dredging. This helps them cook more evenly.
    • Don’t crowd the pan when searing. Give each chop room and work in batches if you need to, so they brown instead of steam.
    • Use the reserved flour from the dredge for the gravy. It’s already seasoned, and it cuts down on waste.
    • Low-sodium broth lets you control the salt. Taste the gravy and add more only if it needs it.
    • Use a thermometer and pull the chops at 145°F. Overcooking is what dries them out.
    • For bone-in chops, sear at medium heat so they can cook longer without burning.
    Smothered pork chops and gravy in skillet.

    More Recipes

    If you love easy comfort food dinners like this one, then you’ll also love these:

    • southern pork chops
    • baked BBQ pork chops
    • pork gravy
    • chicken and noodles

    Recipe

    Smothered pork chop with mushroom gravy on top of rice in a plate.
    Print Pin
    Be the first to rate!

    Smothered Pork Chops

    Seared pork chops simmered in a rich, creamy onion and mushroom gravy until tender and full of flavor. It's an easy 30-minute comfort food dinner, and it's delicious served over fluffy rice.
    Course Main Course
    Cuisine American
    Prep Time 10 minutes minutes
    Cook Time 20 minutes minutes
    Total Time 30 minutes minutes
    Servings 4 servings
    Calories 314kcal
    Author Jessica Burgess

    Ingredients

    • 2 tablespoons canola oil
    • ½ cup all-purpose flour
    • 1 ½ tablespoons kosher salt
    • 1 teaspoon garlic powder
    • 1 teaspoon onion powder
    • 1 teaspoon paprika
    • ½ teaspoon coarse ground pepper
    • 4, ½- ¾- inch boneless pork chops set out at room temperature for about 15 minutes
    • 3 tablespoons salted butter
    • 1 small yellow onion diced
    • 1 ½ cups sliced brown mushrooms
    • 3 cloves garlic minced
    • 1 cup low-sodium chicken broth
    • ⅓ cup heavy cream
    • 1 tablespoon Worcestershire sauce
    • Chopped parsley for garnish, optional
    • Steamed rice for serving, optional

    Instructions

    • In a heavy bottomed or cast-iron pan, heat the oil over medium-high heat.
    • In a shallow bowl whisk together the flour, salt, garlic powder, onion powder, paprika, and pepper.
    • Lightly dredge each pork chop in the flour mixture, shaking off the excess. Reserve the flour mixture.
    • Place the pork chops in the pan, careful to not over-crowd. You can do this in batches if needed. Sear each side of the pork chop for about 2 minutes or until nicely browned and seared. Remove to a plate and tent with foil to keep warm. They will not be cooked all the way through yet.
    • Reduce the heat to medium. In the same pan, melt the butter and add the onion and mushrooms. Sauté for 4-5 minutes or until softened. Add the garlic and 3 tablespoons of flour from the pork dredging. Stir for 2-3 minutes.
      While whisking, slowly pour in the broth followed by the cream and Worcestershire sauce until combined. Taste the sauce and add more salt and pepper, if needed. Add the pork chops back into the pan.
    • Once the mixture starts to simmer, reduce the heat to medium low and cook until the sauce has thickened and the pork chops are fully cooked to 145 F. Careful to not overcook the meat.
    • Serve over rice with a garnish of parsley, if desired.

    Notes

    • Set the pork chops out at room temperature about 15 minutes before dredging so they cook evenly.
    • Use the reserved seasoned flour from the dredge to build the gravy.
    • Low-sodium broth lets you control the salt. Taste before adding more.
    • Pull the chops at 145°F to keep them juicy.
    • For bone-in chops, sear at medium heat so they cook longer without burning.

    Nutrition

    Serving: 1serving | Calories: 314kcal | Carbohydrates: 22g | Protein: 6g | Fat: 24g | Saturated Fat: 11g | Polyunsaturated Fat: 3g | Monounsaturated Fat: 9g | Trans Fat: 0.4g | Cholesterol: 47mg | Sodium: 3015mg | Potassium: 287mg | Fiber: 3g | Sugar: 4g | Vitamin A: 806IU | Vitamin C: 4mg | Calcium: 48mg | Iron: 2mg

    Poppy Seed Chicken Casserole

    August 2, 2026

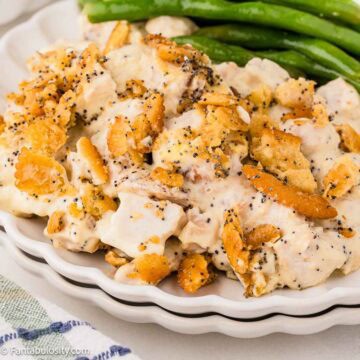
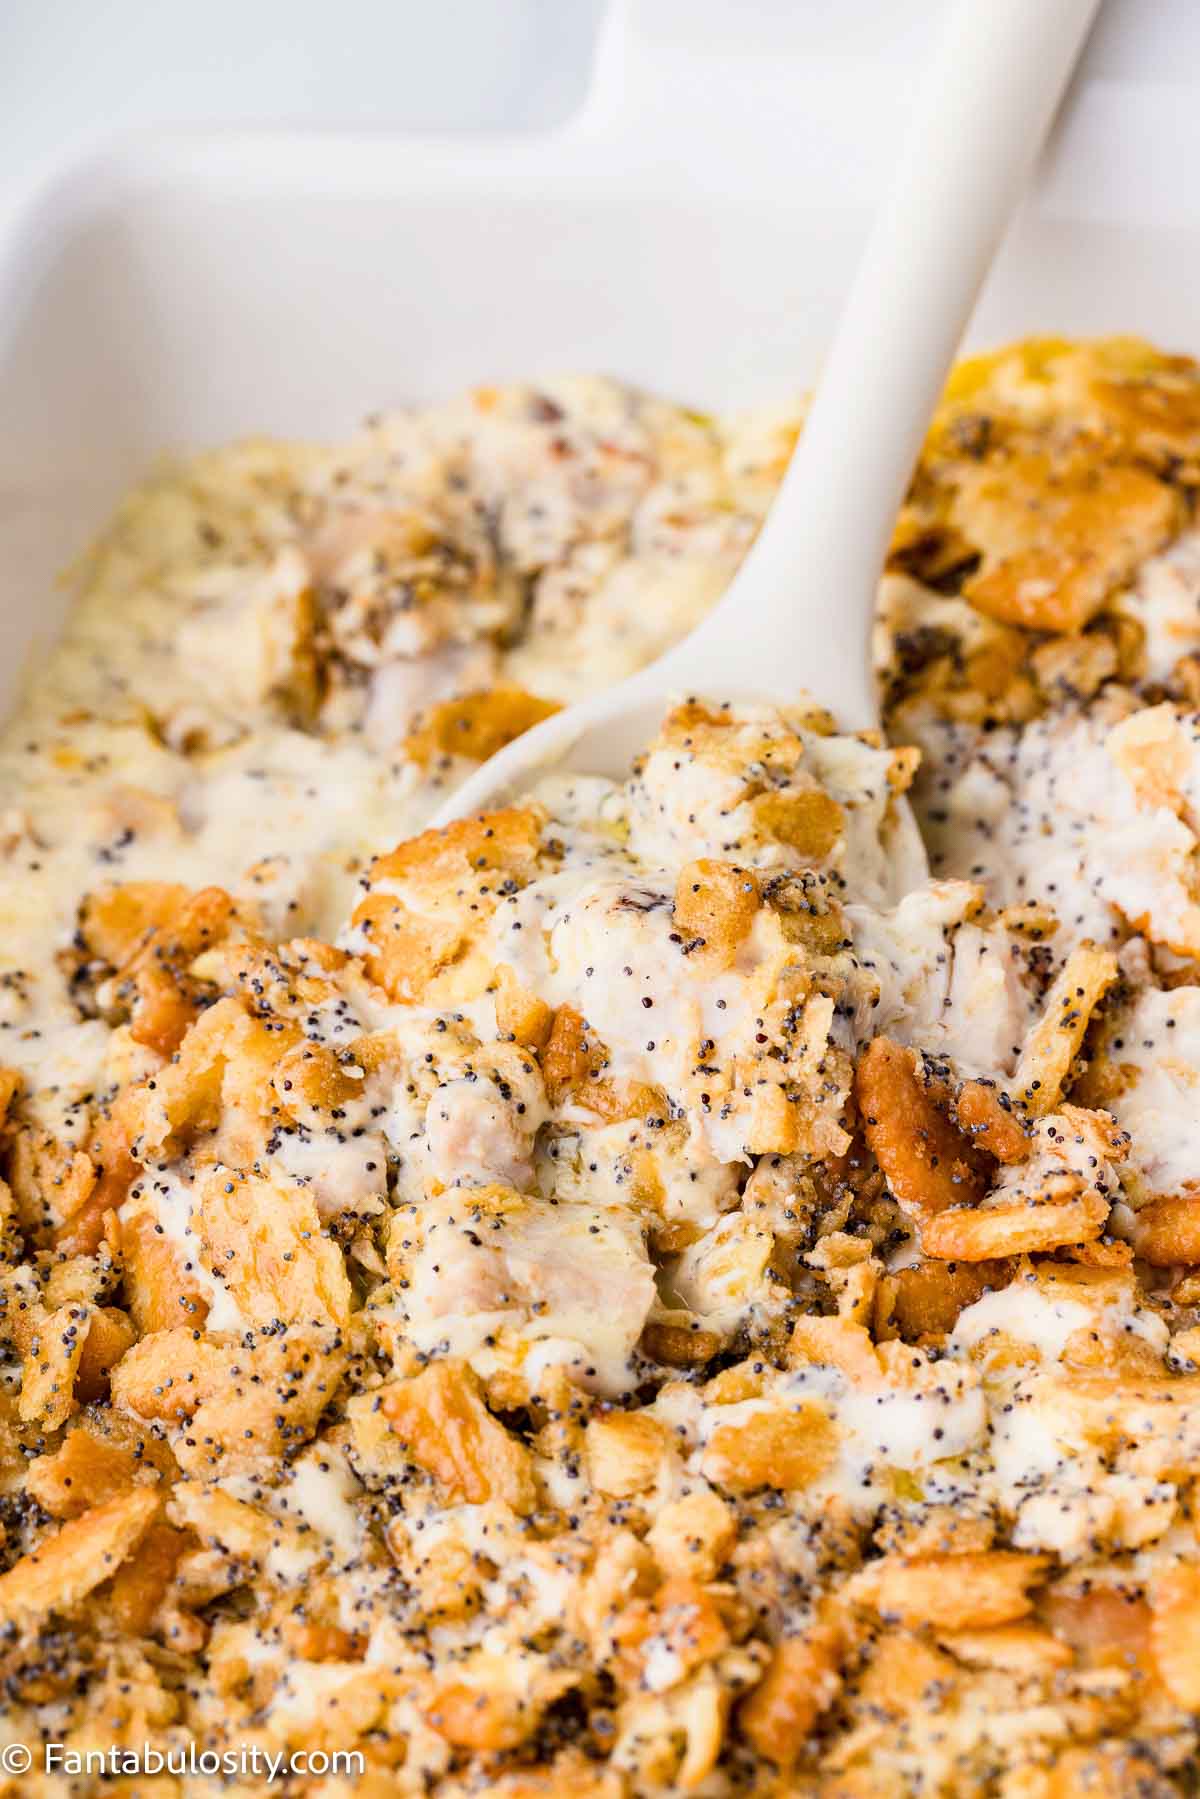
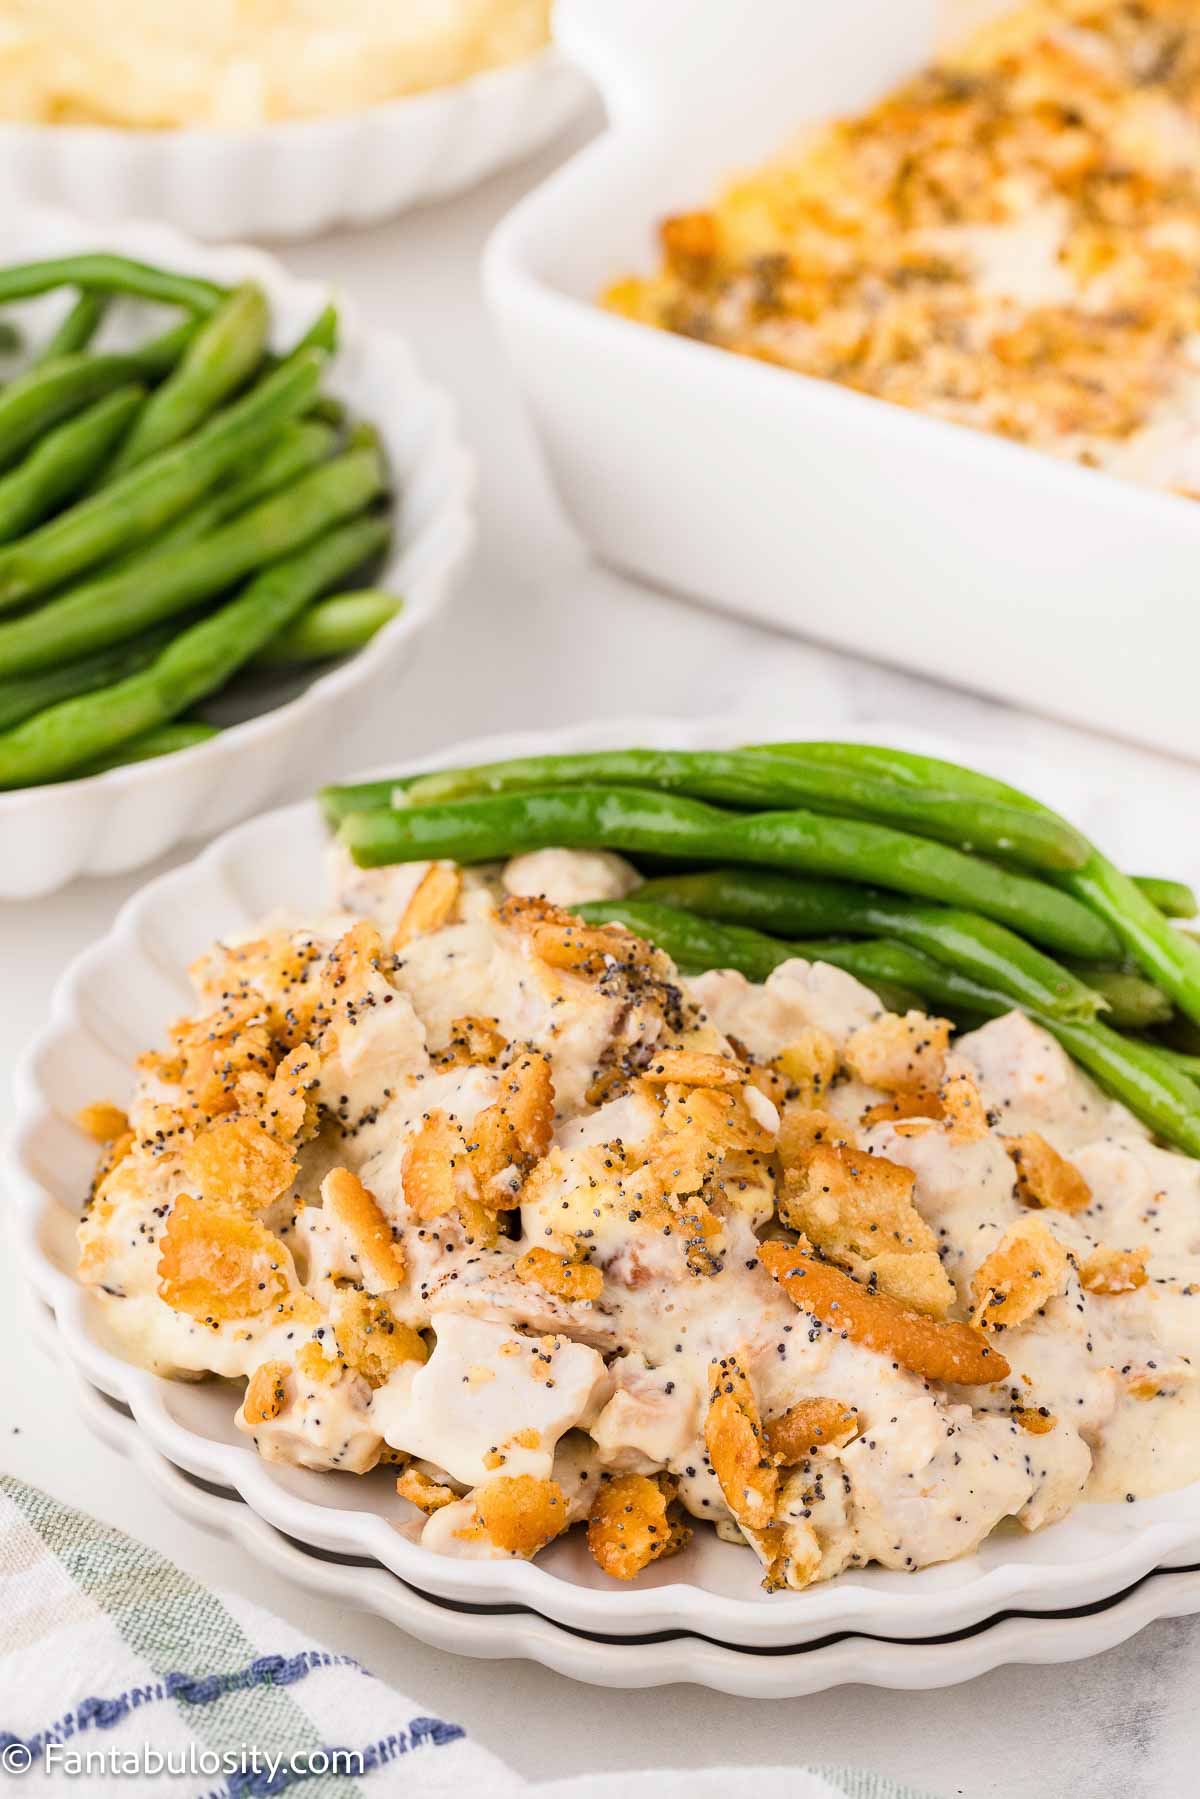
    Poppy Seed Chicken Casserole serving on a plate, next to green beans.

    Poppy Seed Chicken Casserole is a creamy, savory dinner with a buttery Ritz cracker topping, made the same old-fashioned way as this Old Fashioned Chicken and Rice Casserole. It comes together with cooked chicken and a few pantry staples, bakes in under half an hour, and feeds the whole family with almost no fuss.

    An Easy Chicken Casserole That Tastes Like a Church Supper Favorite

    This is the kind of dish that shows up at every church supper and family potluck, and there’s a reason it never goes home with leftovers. The filling is rich and creamy without being heavy, thanks to a scoop of sour cream that balances the cream of chicken soup. The topping is where it earns its name. Crushed Ritz crackers, melted butter, and poppy seeds bake up golden and crisp over the top.

    Poppy Seed Chicken Casserole in 9x13 baking dish.

    If you keep cooked chicken or a rotisserie bird on hand, you can have this assembled in about ten minutes. That makes it a weeknight lifesaver, right alongside easy favorites like this Doritos Chicken Casserole and this Stove Top Stuffing Chicken Casserole. Every one of them leans on pantry shortcuts and cooked chicken, so they’re perfect for busy nights.

    Fans of creamy, comforting chicken dinners will want to keep this one in the regular rotation. If you love the crunchy-topping-over-creamy-filling combo, you’ll also love this Chicken Pot Pie Casserole and this Frito Chicken Casserole. They all deliver that same nostalgic, grocery-store-simple comfort.

    FAQs

    What does poppy seed chicken casserole taste like?

    It’s creamy and savory with a rich, comforting filling, topped with a buttery, crunchy cracker layer. The poppy seeds add a little texture and speckled look, while garlic and onion powder keep the flavor savory from top to bottom.

    Why is it called poppy seed chicken casserole?

    The name comes from the poppy seeds mixed into the buttery Ritz cracker topping. They give the top layer its signature crunch and that familiar speckled look.

    Can I use rotisserie chicken?

    Yes, and it’s a great shortcut. About 4 cups of shredded chicken is roughly one rotisserie chicken’s worth of meat. Grilled chicken breast strips or any cooked chicken you have on hand will work too.

    What can I use instead of Ritz crackers or cream of chicken soup?

    Any buttery cracker works in place of Ritz, or use panko breadcrumbs for a lighter topping (add a little extra seasoning if you do). For the soup, cream of mushroom or cream of celery both swap in nicely. Plain Greek yogurt can stand in for the sour cream.

    Can I make this casserole ahead of time?

    Yes. Assemble the filling in the baking dish, cover, and refrigerate up to 24 hours. Add the cracker topping right before baking so it stays crisp.

    How do I store and freeze leftovers?

    Refrigerate leftovers in an airtight container for 3 to 4 days. To freeze, freeze the unbaked filling without the topping for up to 3 months, then thaw overnight in the fridge, add the topping, and bake as directed. You can freeze baked leftovers too, but the topping will lose some of its crunch. Reheat in a 350°F oven, covered with foil, for about 15 to 20 minutes, uncovering at the end to re-crisp the top.

    Why did my casserole come out watery?

    This usually comes from chicken that wasn’t well drained or a filling that wasn’t fully combined. Drain any excess liquid from the chicken before folding it into the soup mixture.

    Ingredients

    See the recipe card below that has the printable, full ingredient list and instructions.

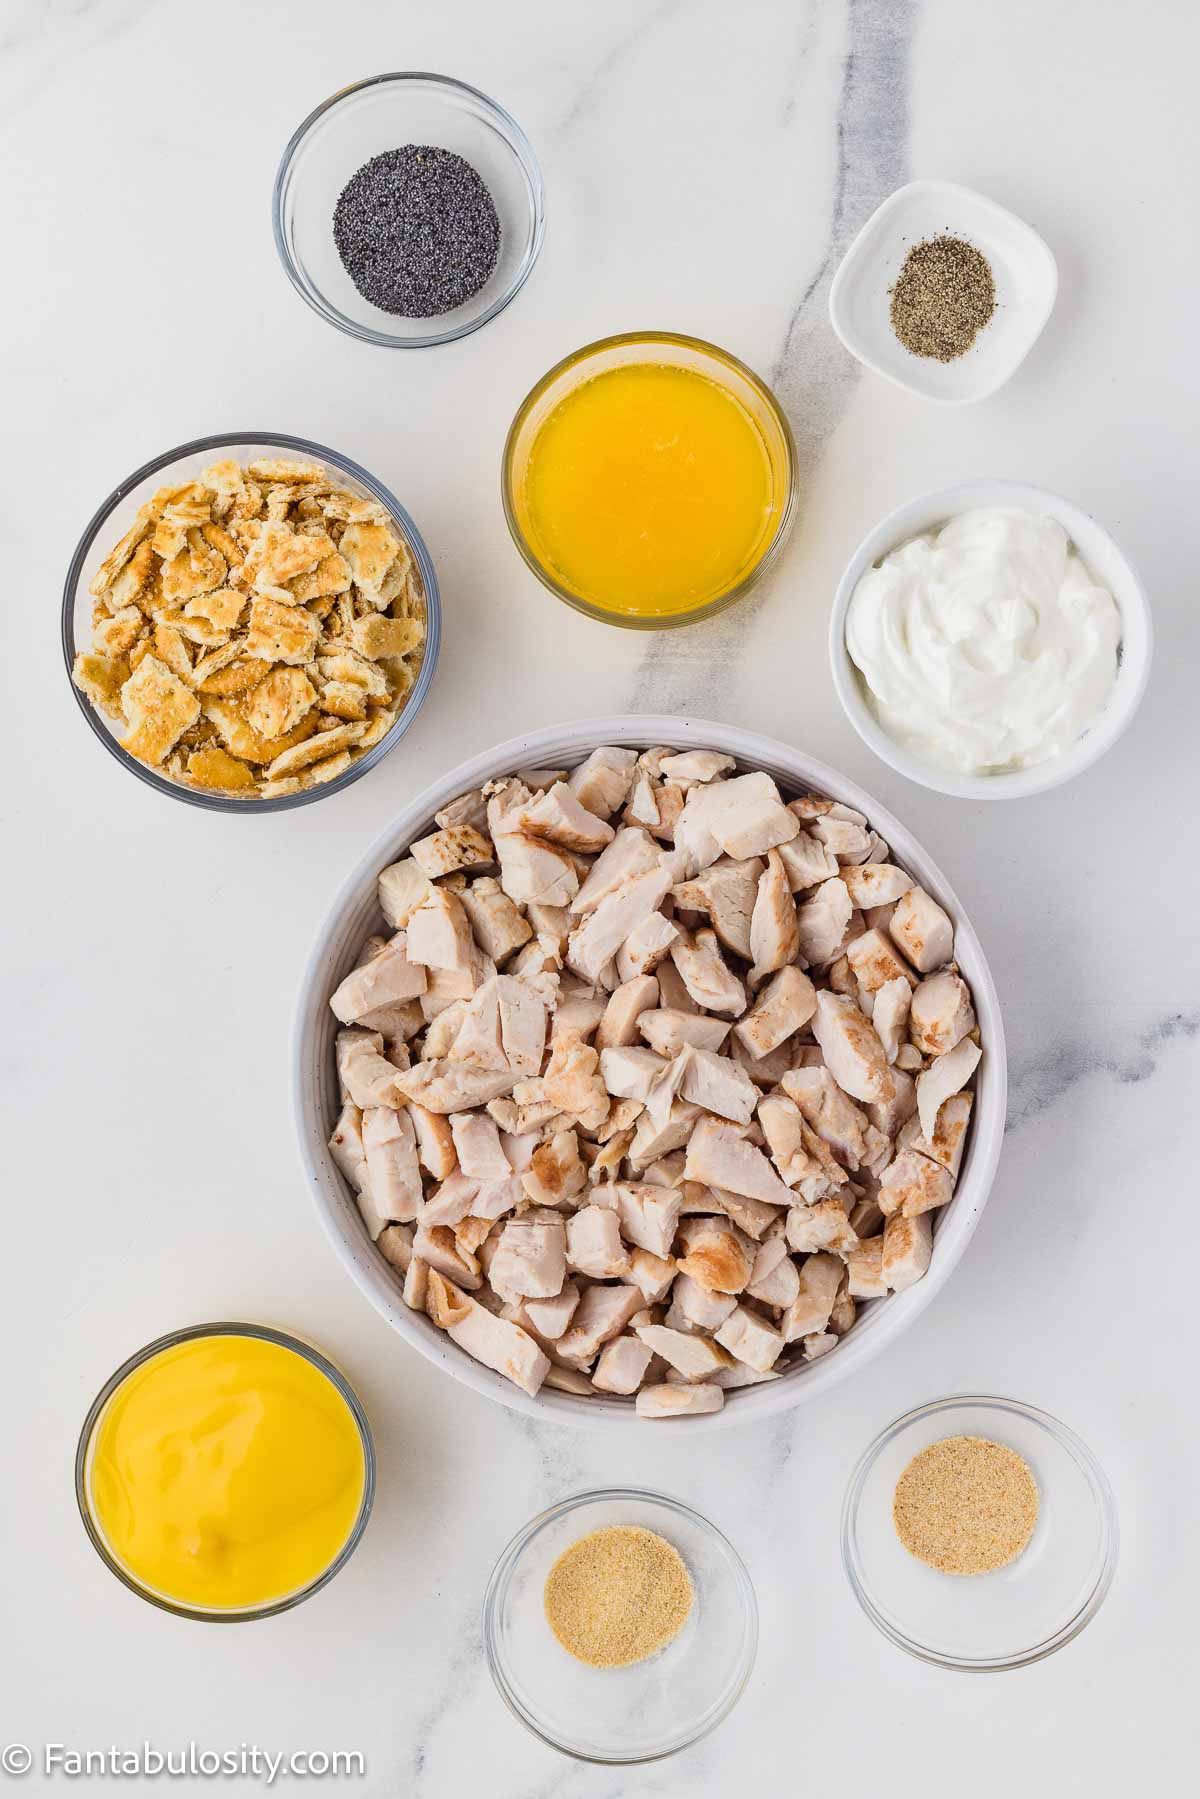
    Ingredients to make chicken poppy seed casserole, sitting on counter.

    For the Filling

    • 2 (10.5 ounce) cans cream of chicken soup – Makes the creamy base and gives the casserole its classic comforting texture.
    • 1 cup sour cream – Cuts the richness of the soup so the filling doesn’t taste too heavy.
    • 1 teaspoon garlic powder – Adds savory flavor and distributes more evenly than fresh garlic.
    • 1 teaspoon onion powder – Adds a steady layer of flavor without the moisture fresh onion brings.
    • ½ teaspoon black pepper – Adds just enough bite to keep the filling from tasting flat.
    • 4 cups cooked chicken, shredded or cubed – The heart of the dish. Rotisserie or grilled chicken strips are easy shortcuts, but any cooked chicken works.

    For the Topping

    • 1 sleeve (big sleeve about 32 crackers) Ritz crackers, crushed – Forms the crunchy top layer, and their buttery flavor helps everything brown.
    • 1 tablespoon poppy seeds – Adds crunch and that signature speckled texture.
    • ½ teaspoon garlic powder – Keeps the savory flavor consistent from filling to topping.
    • ½ teaspoon onion powder – Rounds out the topping with steady, even flavor.
    • 6 tablespoons unsalted butter, melted – Holds the topping together and helps it turn golden as it bakes.

    Instructions

    • Preheat the oven to 350°F. Lightly grease a 9×13 baking dish with non-stick spray.
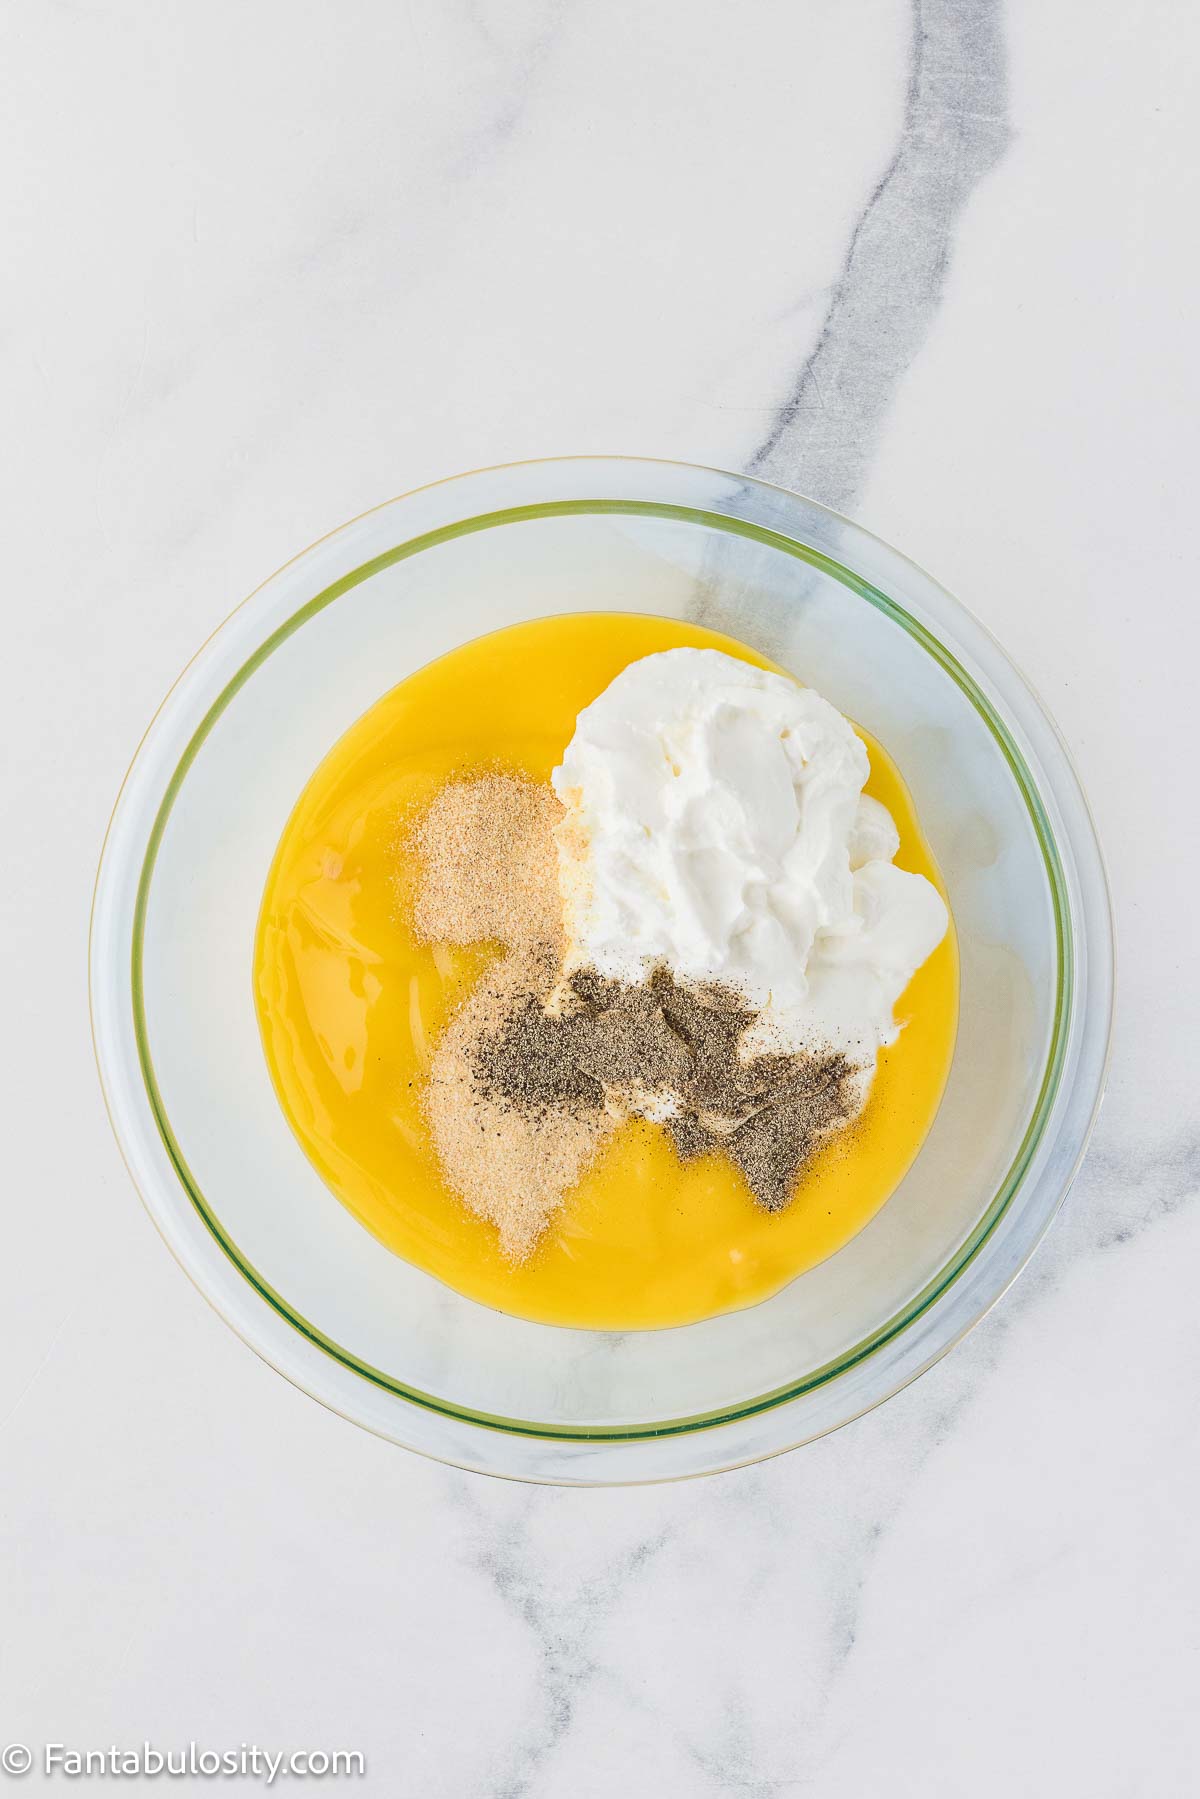
    • In a large bowl, whisk together the 2 cans cream of chicken soup, 1 cup sour cream, 1 teaspoon garlic powder, 1 teaspoon onion powder, and ½ teaspoon black pepper until smooth.
    Soup, sour cream and spices in mixing bowl for filling of casserole.
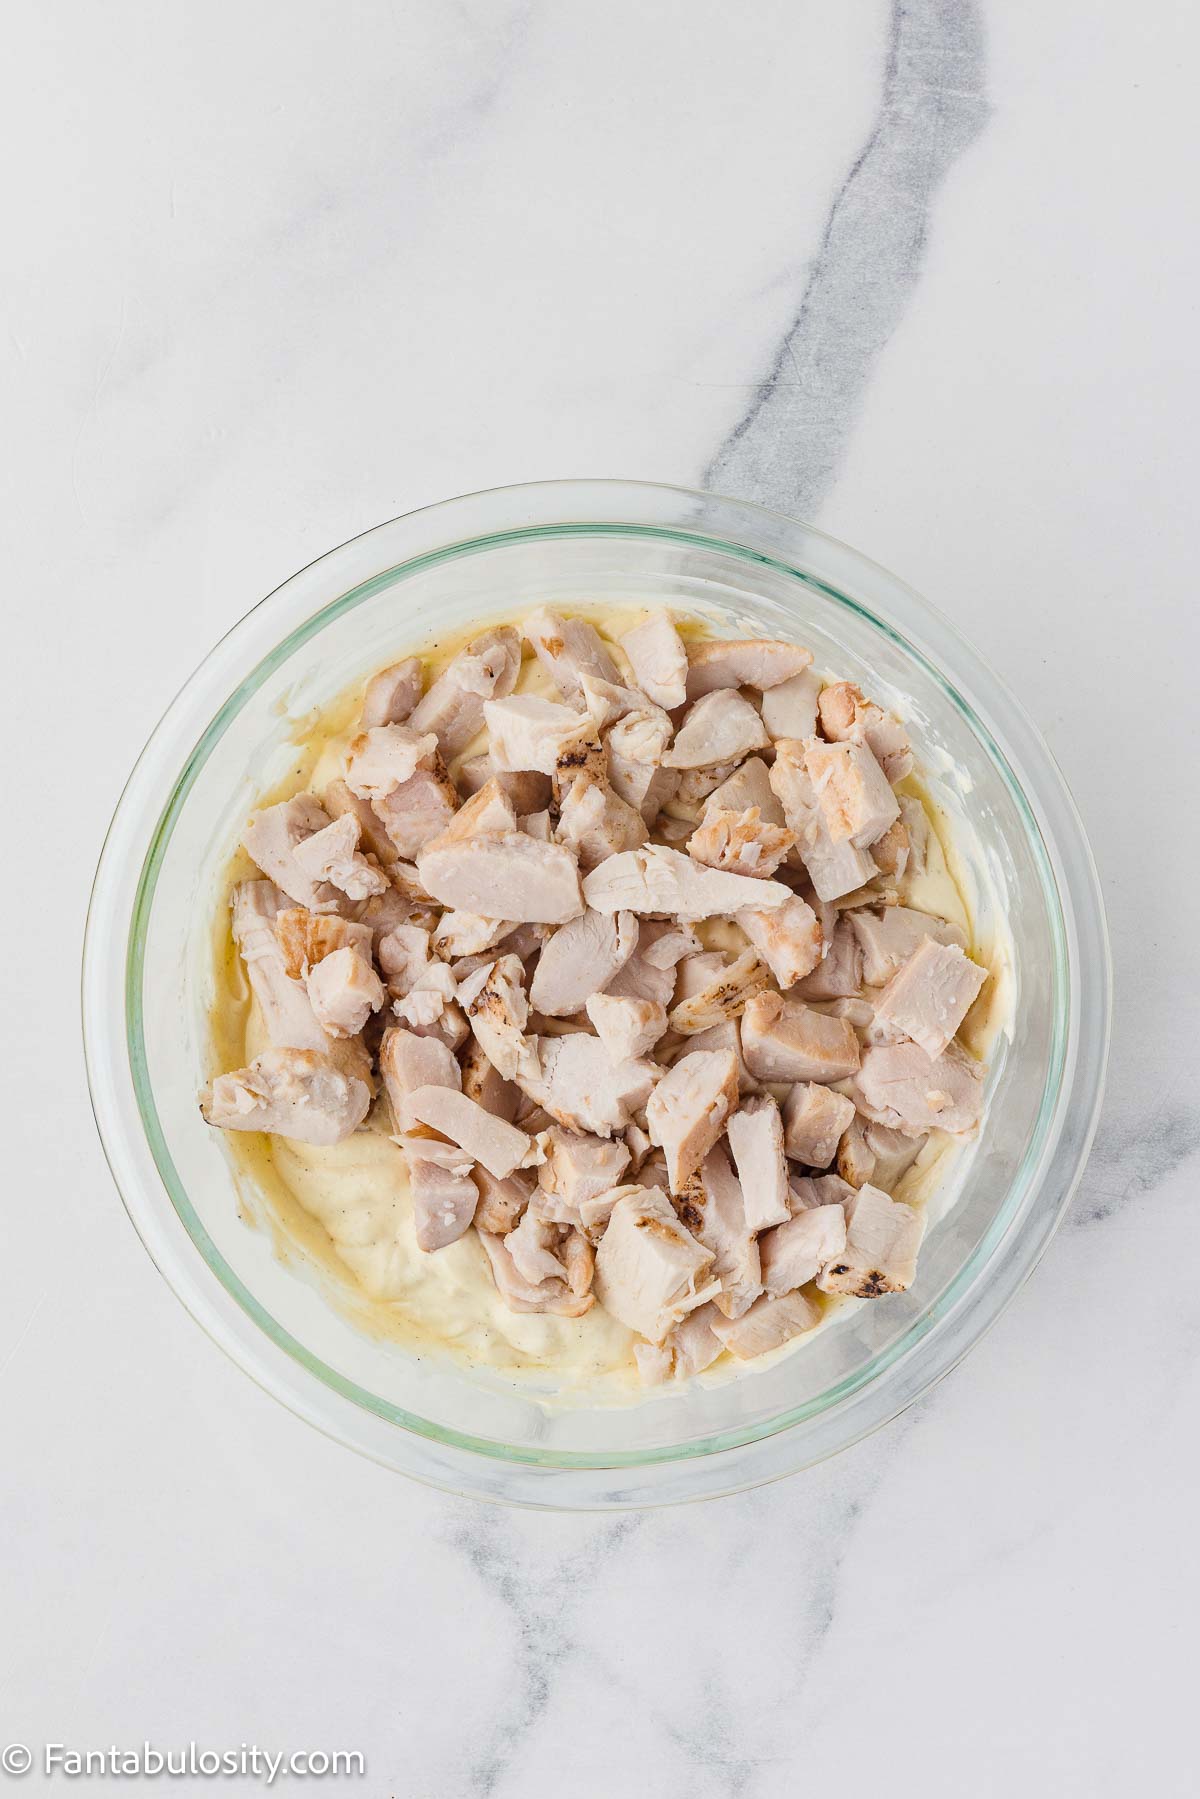
    • Fold in the 4 cups cooked chicken until evenly coated.
    Chicken added to soup mixture in mixing bowl.
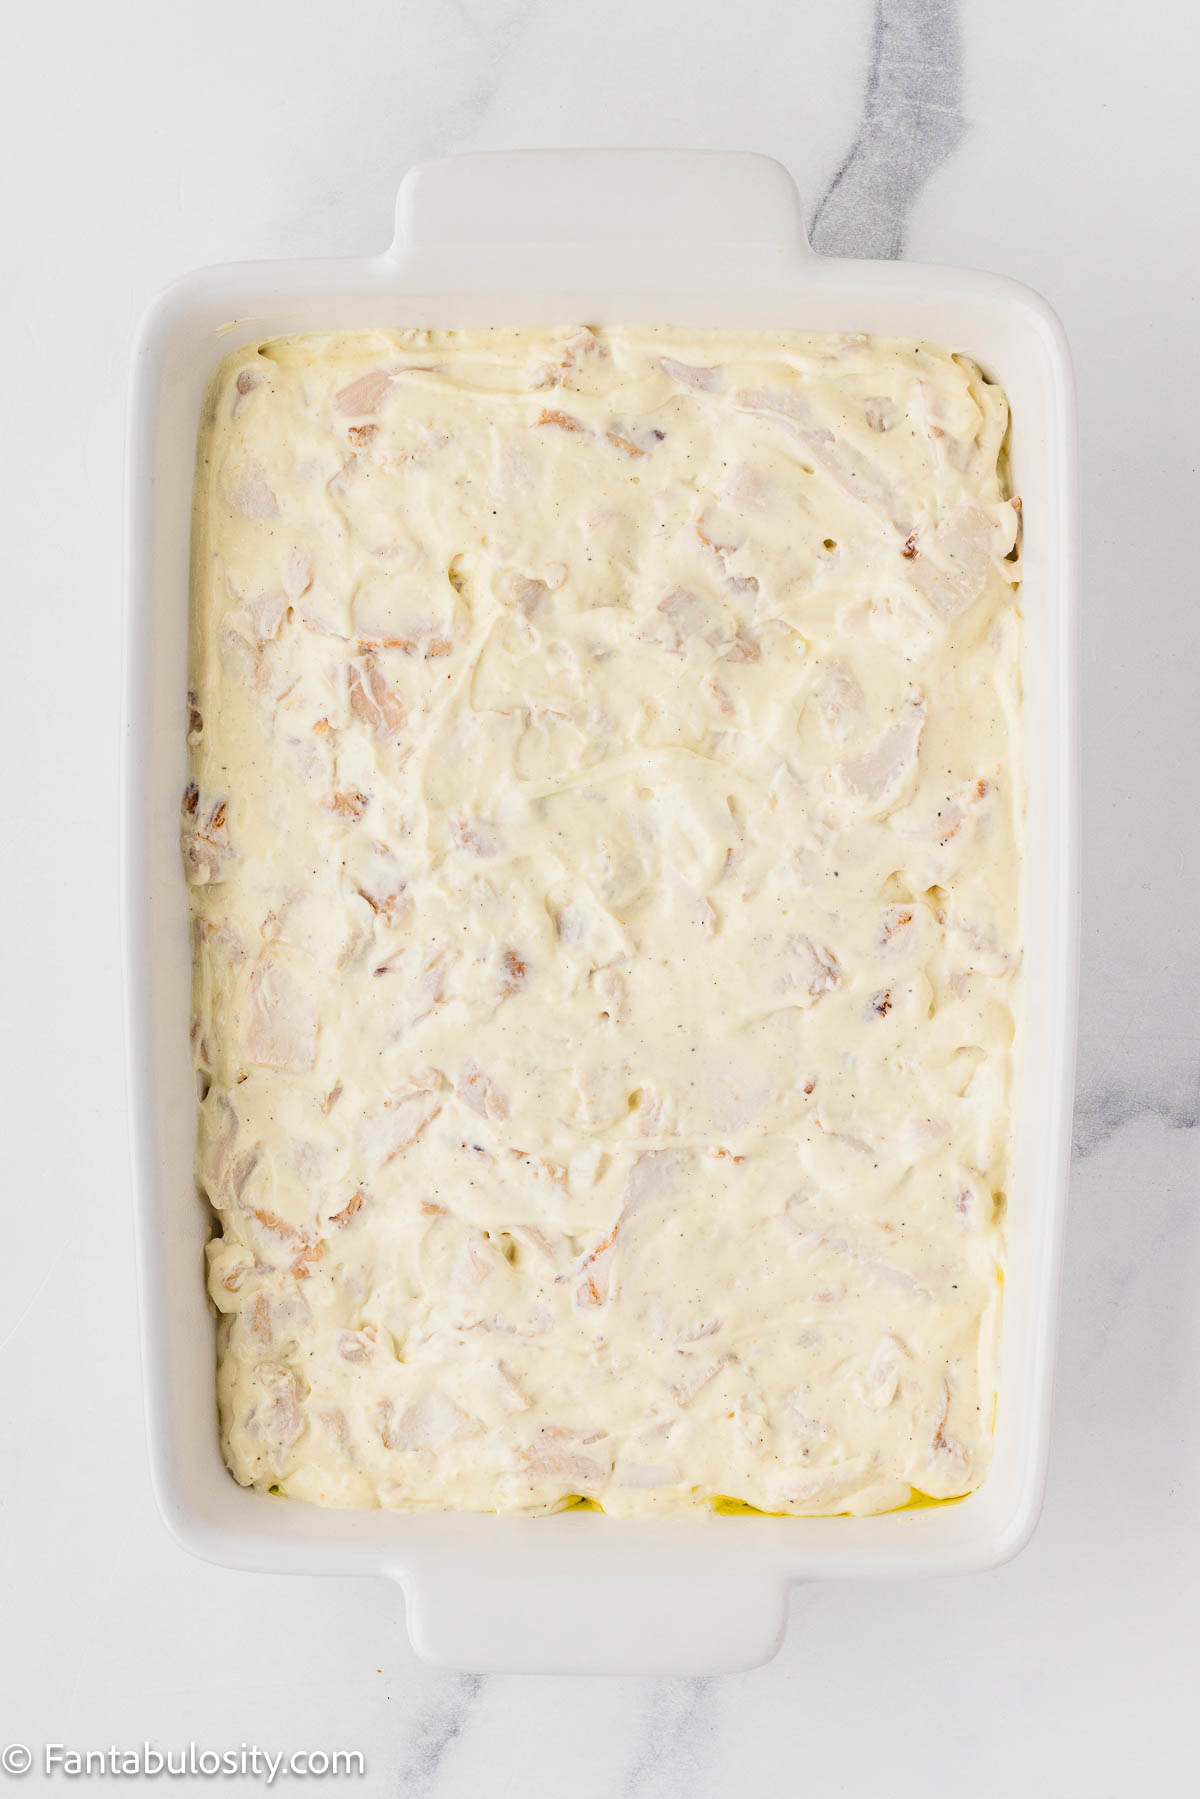
    • Spread the chicken mixture evenly into the prepared baking dish.
    Chicken and soup mixture poured in to 9x13 baking dish.

    How to Make the Topping

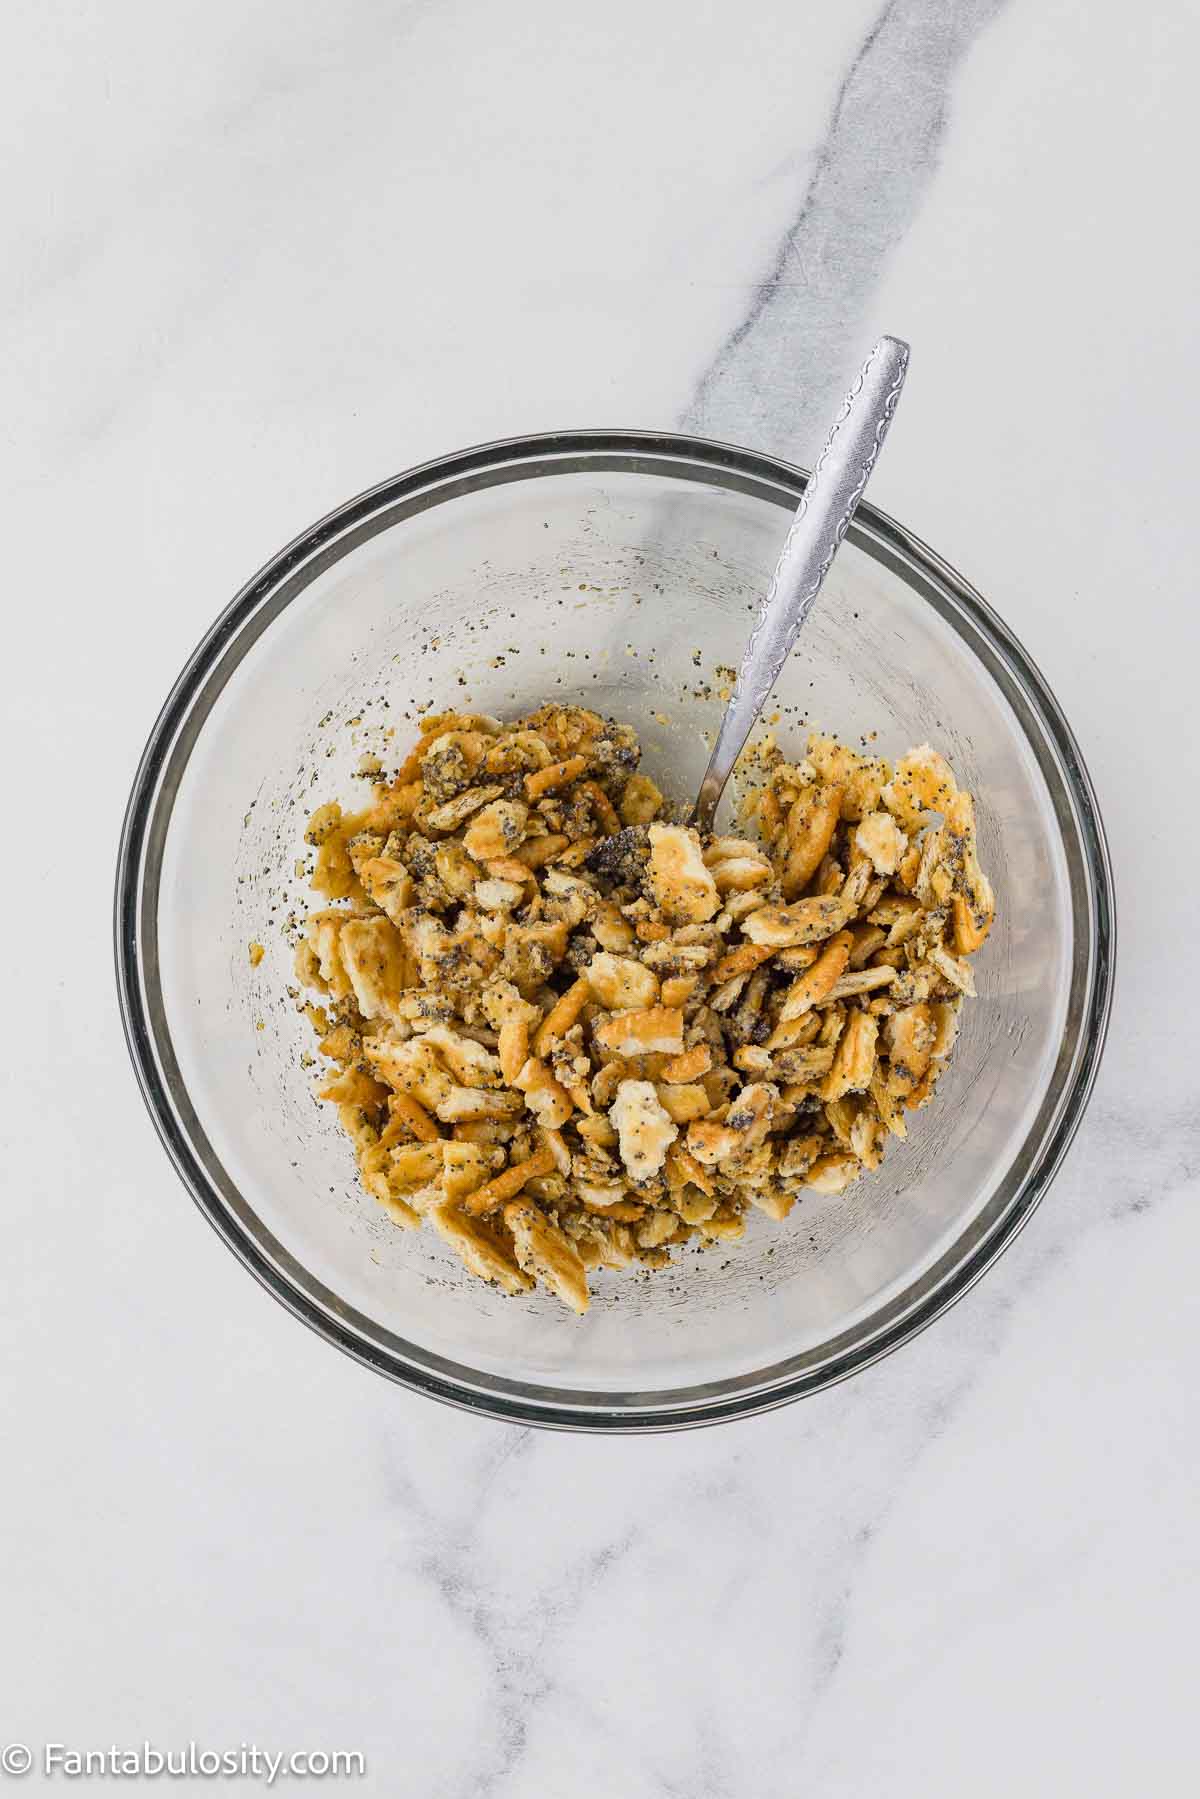
    • In a separate bowl, toss the crushed Ritz crackers, 1 tablespoon poppy seeds, ½ teaspoon garlic powder, ½ teaspoon onion powder, and 6 tablespoons melted butter until combined. The mixture should look like damp sand, with no dry crumbs or pooled butter.
    Ritz cracker casserole topping in mixing bowl.
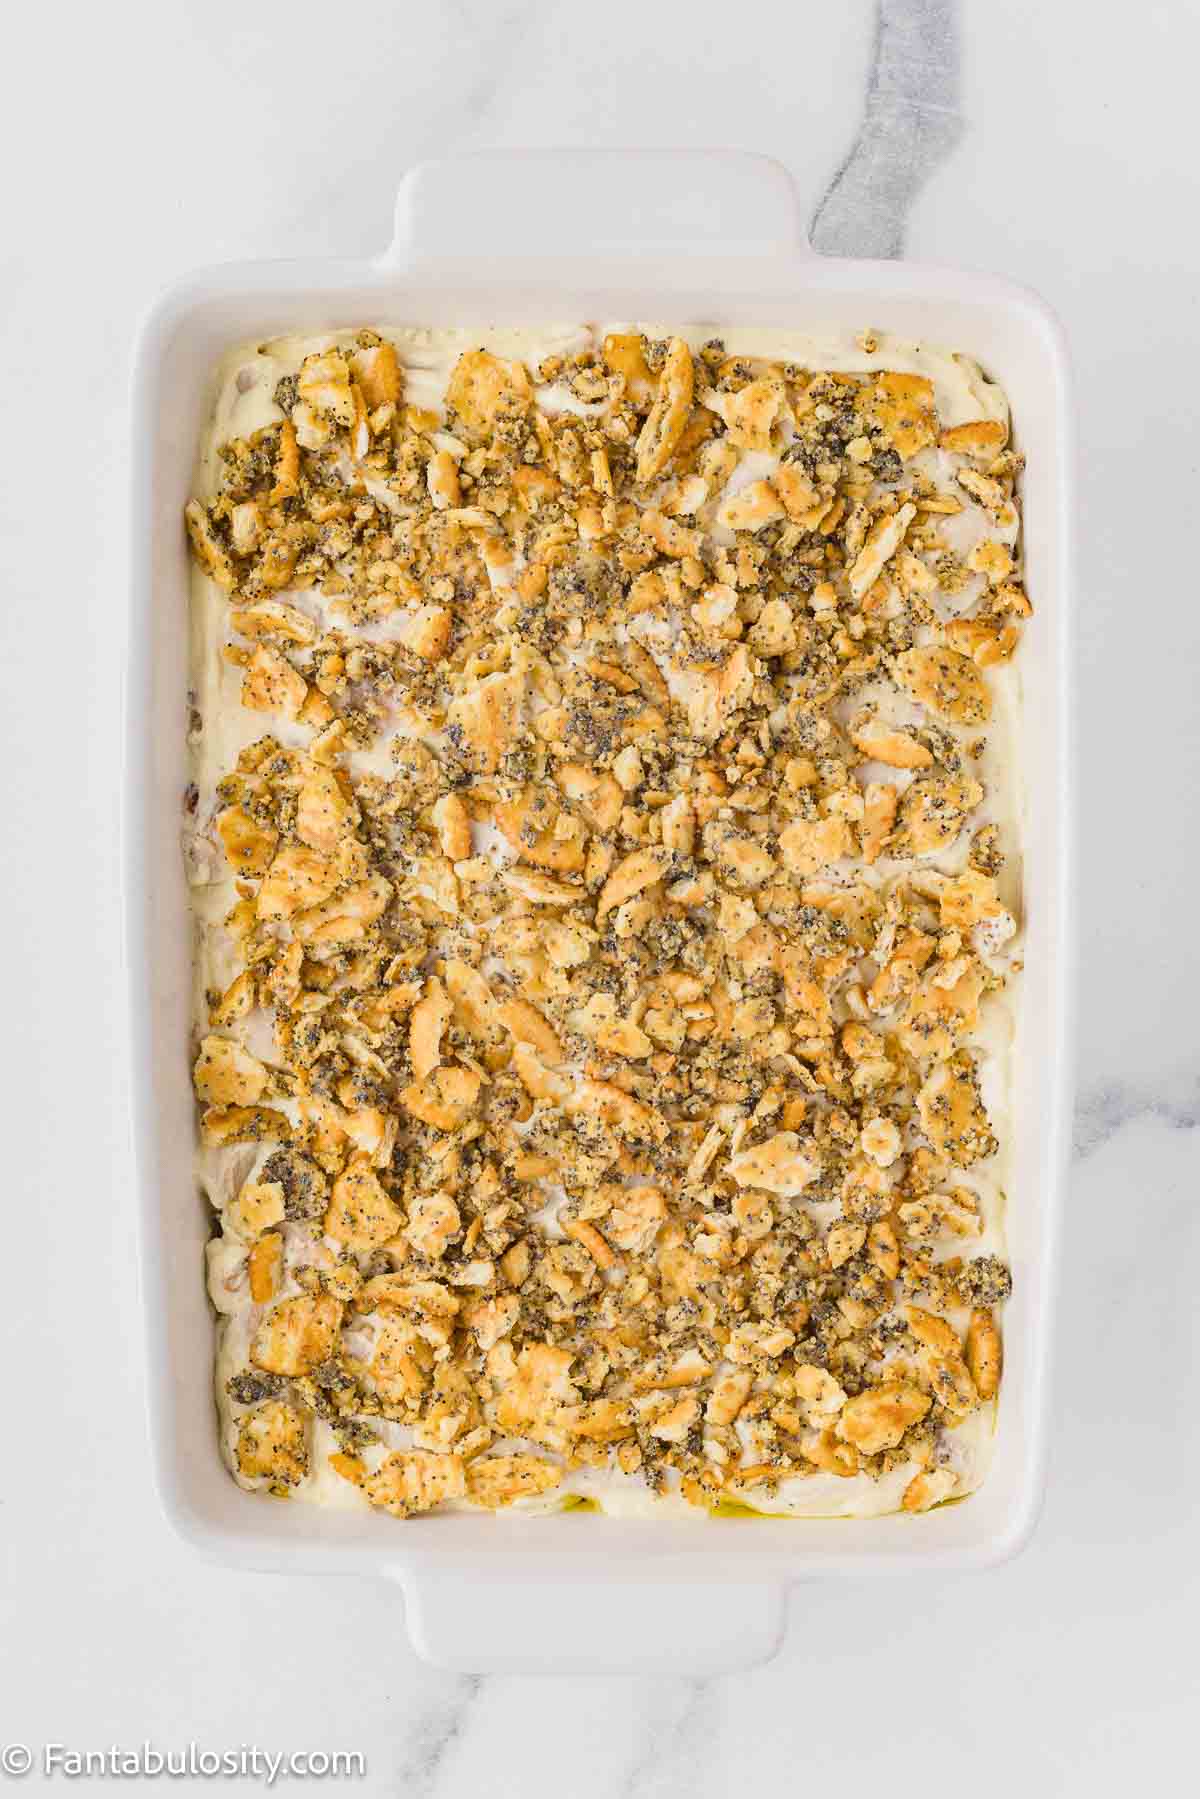
    • Sprinkle the cracker topping evenly over the chicken mixture.
    Cracker topping spread on top of poppy seed chicken casserole, ready for baking.
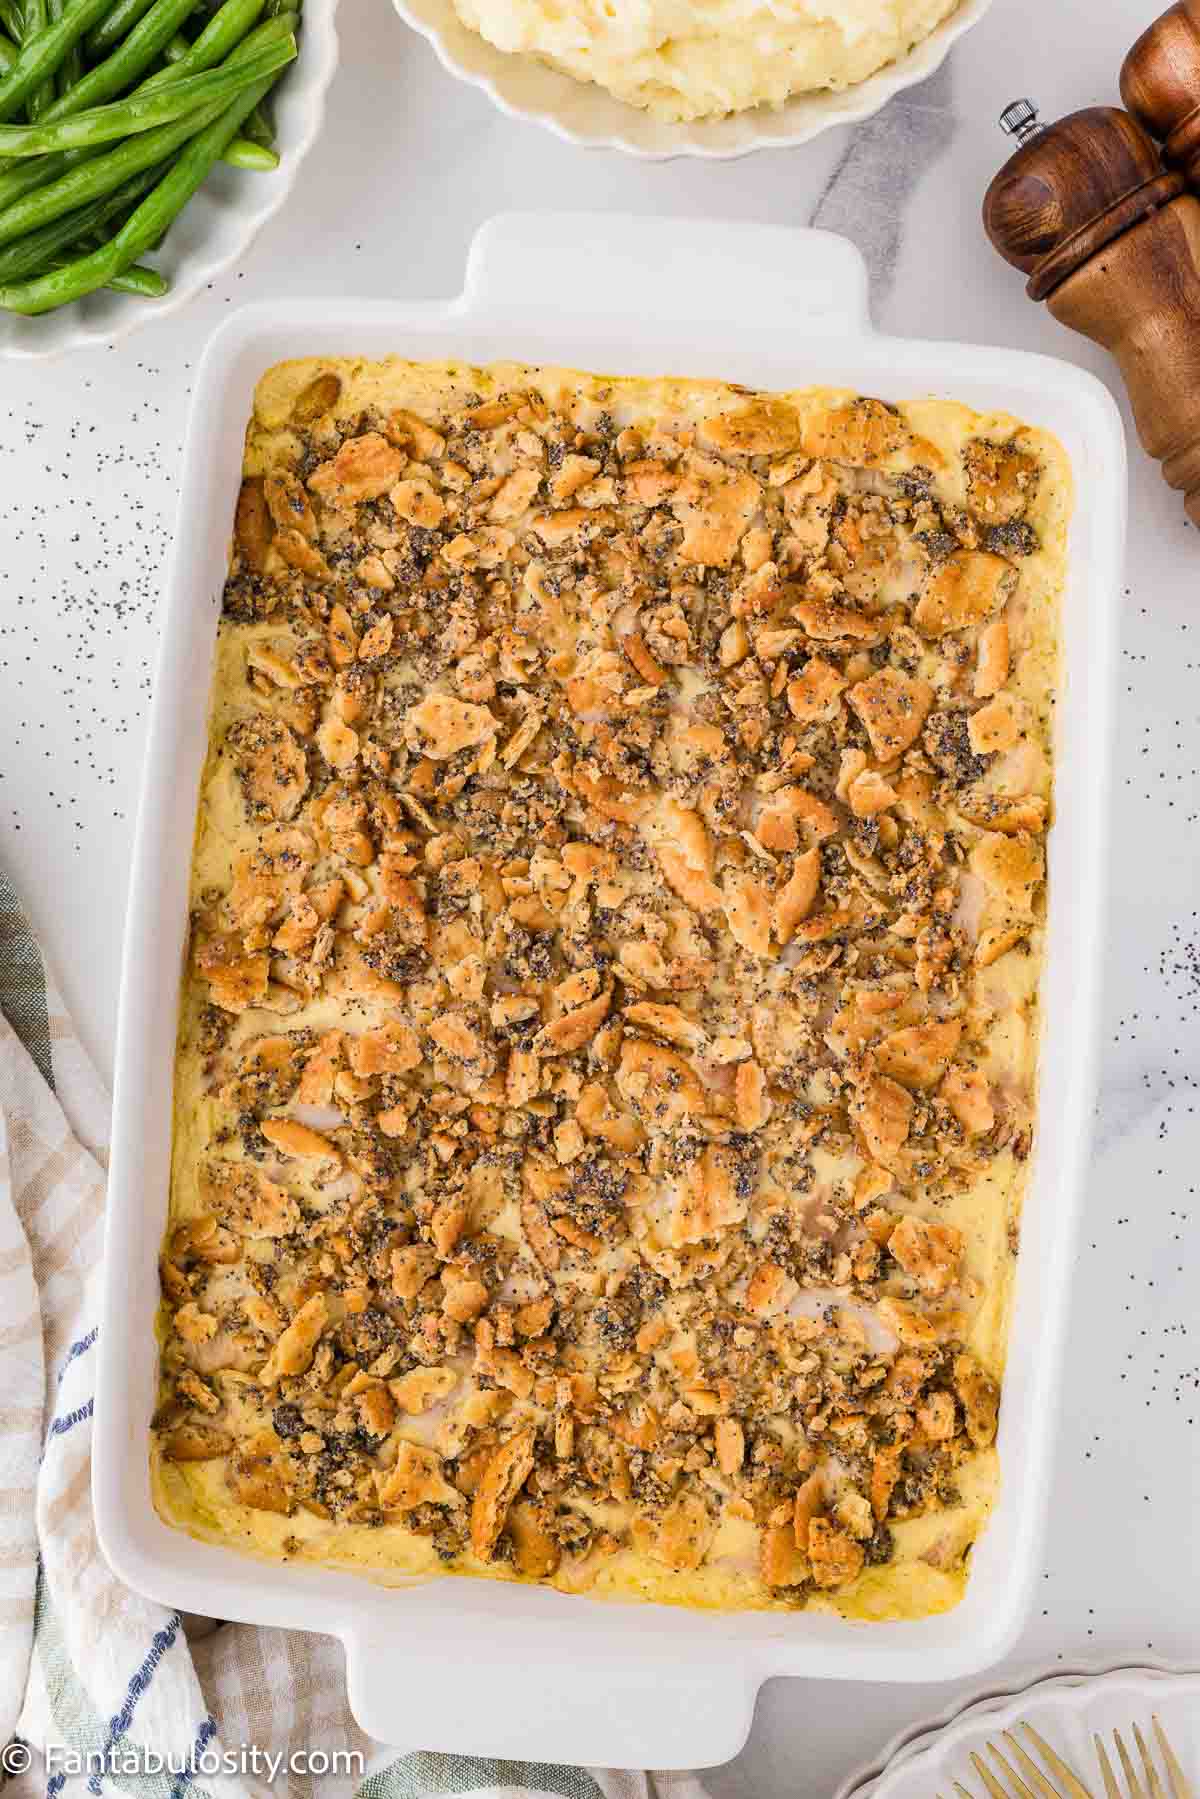
    • Bake uncovered for 25 to 28 minutes, until bubbly around the edges and the topping is golden brown.
    • Let rest 5 minutes before serving.
    Baked poppy seed chicken casserole in 9x13 baking dish.

    Tips

    • Crush the crackers coarsely. Coarse crumbs give better crunch. Crushed too fine, the topping can turn pasty instead of crispy.
    • Taste the filling before baking. It’s much easier to adjust the seasoning now than after it’s out of the oven.
    • Bake uncovered. A covered dish traps steam and softens the topping. Keep it uncovered so the crackers crisp up.
    • Watch the last 5 minutes. Ovens vary, so keep an eye on the top toward the end and tent with foil if it’s browning too fast.
    • Let it rest before serving. The 5-minute rest lets the filling set slightly, so you get clean portions instead of a runny scoop.
    Poppy seed chicken casserole on a dinner plate, with green beans.

    More Recipes

    If you love easy, creamy chicken casseroles like this one, then you’ll also love these comfort food dinners:

    • doritos chicken casserole
    • chicken tater tot casserole
    • taco chicken casserole
    • old fashioned chicken and rice casserole

    Recipe

    Poppy Seed Chicken Casserole serving on a plate, next to green beans.
    Print Pin
    Be the first to rate!

    Poppy Seed Chicken Casserole

    A creamy, comforting chicken casserole with a buttery Ritz cracker and poppy seed topping. It comes together in about ten minutes with cooked chicken and a few pantry staples, then bakes up golden and bubbly. It's an easy weeknight dinner that's just as at home on the potluck table.
    Course Dinner, Main Course
    Cuisine American
    Prep Time 10 minutes minutes
    Cook Time 25 minutes minutes
    Resting Time 5 minutes minutes
    Total Time 40 minutes minutes
    Servings 6 servings
    Calories 513kcal
    Author Jessica Burgess

    Ingredients

    • 2 – 10.5 ounce cans cream of chicken soup
    • 1 cup sour cream
    • 1 teaspoon garlic powder
    • 1 teaspoon onion powder
    • ½ teaspoon black pepper
    • 4 cups cooked chicken shredded or cubed (Springer Mountain Farm Chicken Strips were used here)

    For the Topping

    • 1 sleeve Ritz crackers large sleeve, about 32 crackers, crushed
    • 1 tablespoon poppy seeds
    • ½ teaspoon garlic powder
    • ½ teaspoon onion powder
    • 6 tablespoons unsalted butter melted

    Instructions

    • Preheat the oven to 350°F. Lightly grease a 9×13 baking dish with non-stick spray.
    • In a large bowl, whisk together the cream of chicken soup, sour cream, garlic powder, onion powder, and black pepper until smooth. Fold in the chicken until evenly coated.
    • Spread the chicken mixture evenly into the prepared baking dish.
    • In a separate bowl, toss the crushed Ritz crackers, poppy seeds, garlic powder, onion powder, and melted butter until combined. The mixture should look like damp sand, with no dry crumbs or pooled butter.
    • Sprinkle the cracker topping evenly over the chicken mixture.
    • Bake uncovered for 25-28 minutes, until bubbly around the edges and the topping is golden brown.
    • Let rest 5 minutes before serving.

    Notes

    • Crush the crackers coarsely for the best crunch. Too fine and the topping turns pasty.
    • Bake uncovered so the topping crisps instead of steaming.
    • Taste and adjust the filling’s seasoning before baking.
    • Drain the chicken well to avoid a watery casserole.
    • Tent with foil at the end if the top browns too quickly.

    Nutrition

    Serving: 1serving | Calories: 513kcal | Carbohydrates: 21g | Protein: 28g | Fat: 35g | Saturated Fat: 15g | Polyunsaturated Fat: 5g | Monounsaturated Fat: 10g | Trans Fat: 1g | Cholesterol: 131mg | Sodium: 922mg | Potassium: 360mg | Fiber: 1g | Sugar: 3g | Vitamin A: 808IU | Vitamin C: 1mg | Calcium: 117mg | Iron: 3mg

    Apple Bread Recipe with Maple Glaze (So Moist and Easy)

    August 4, 2026

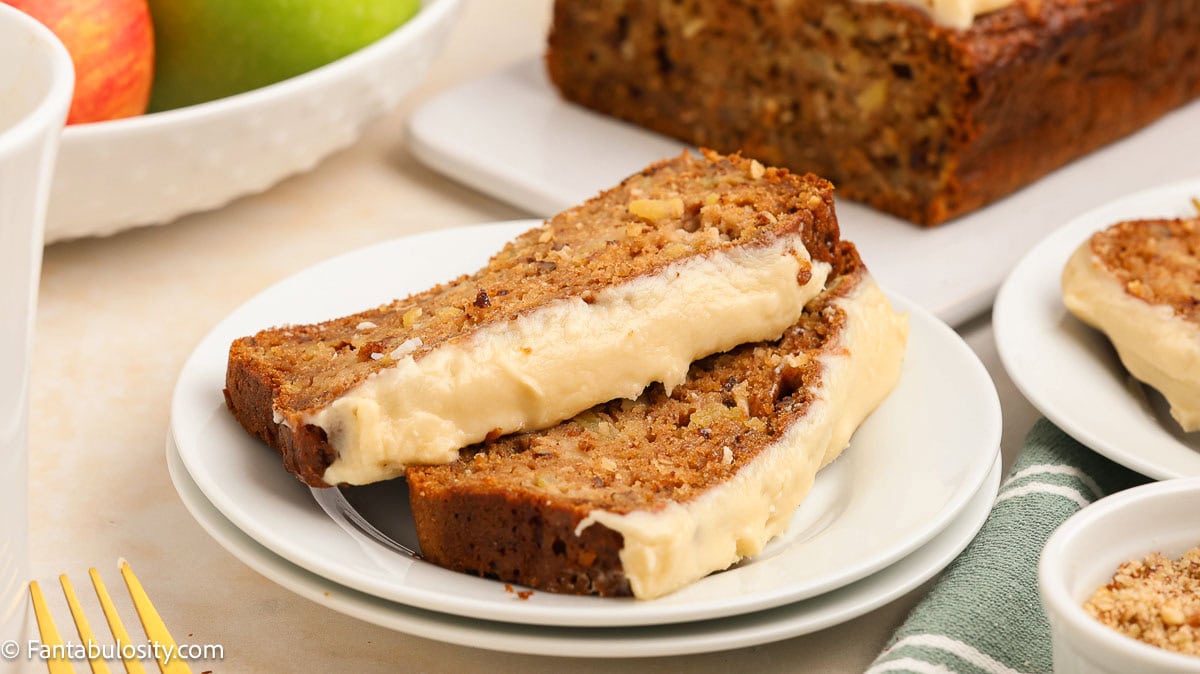
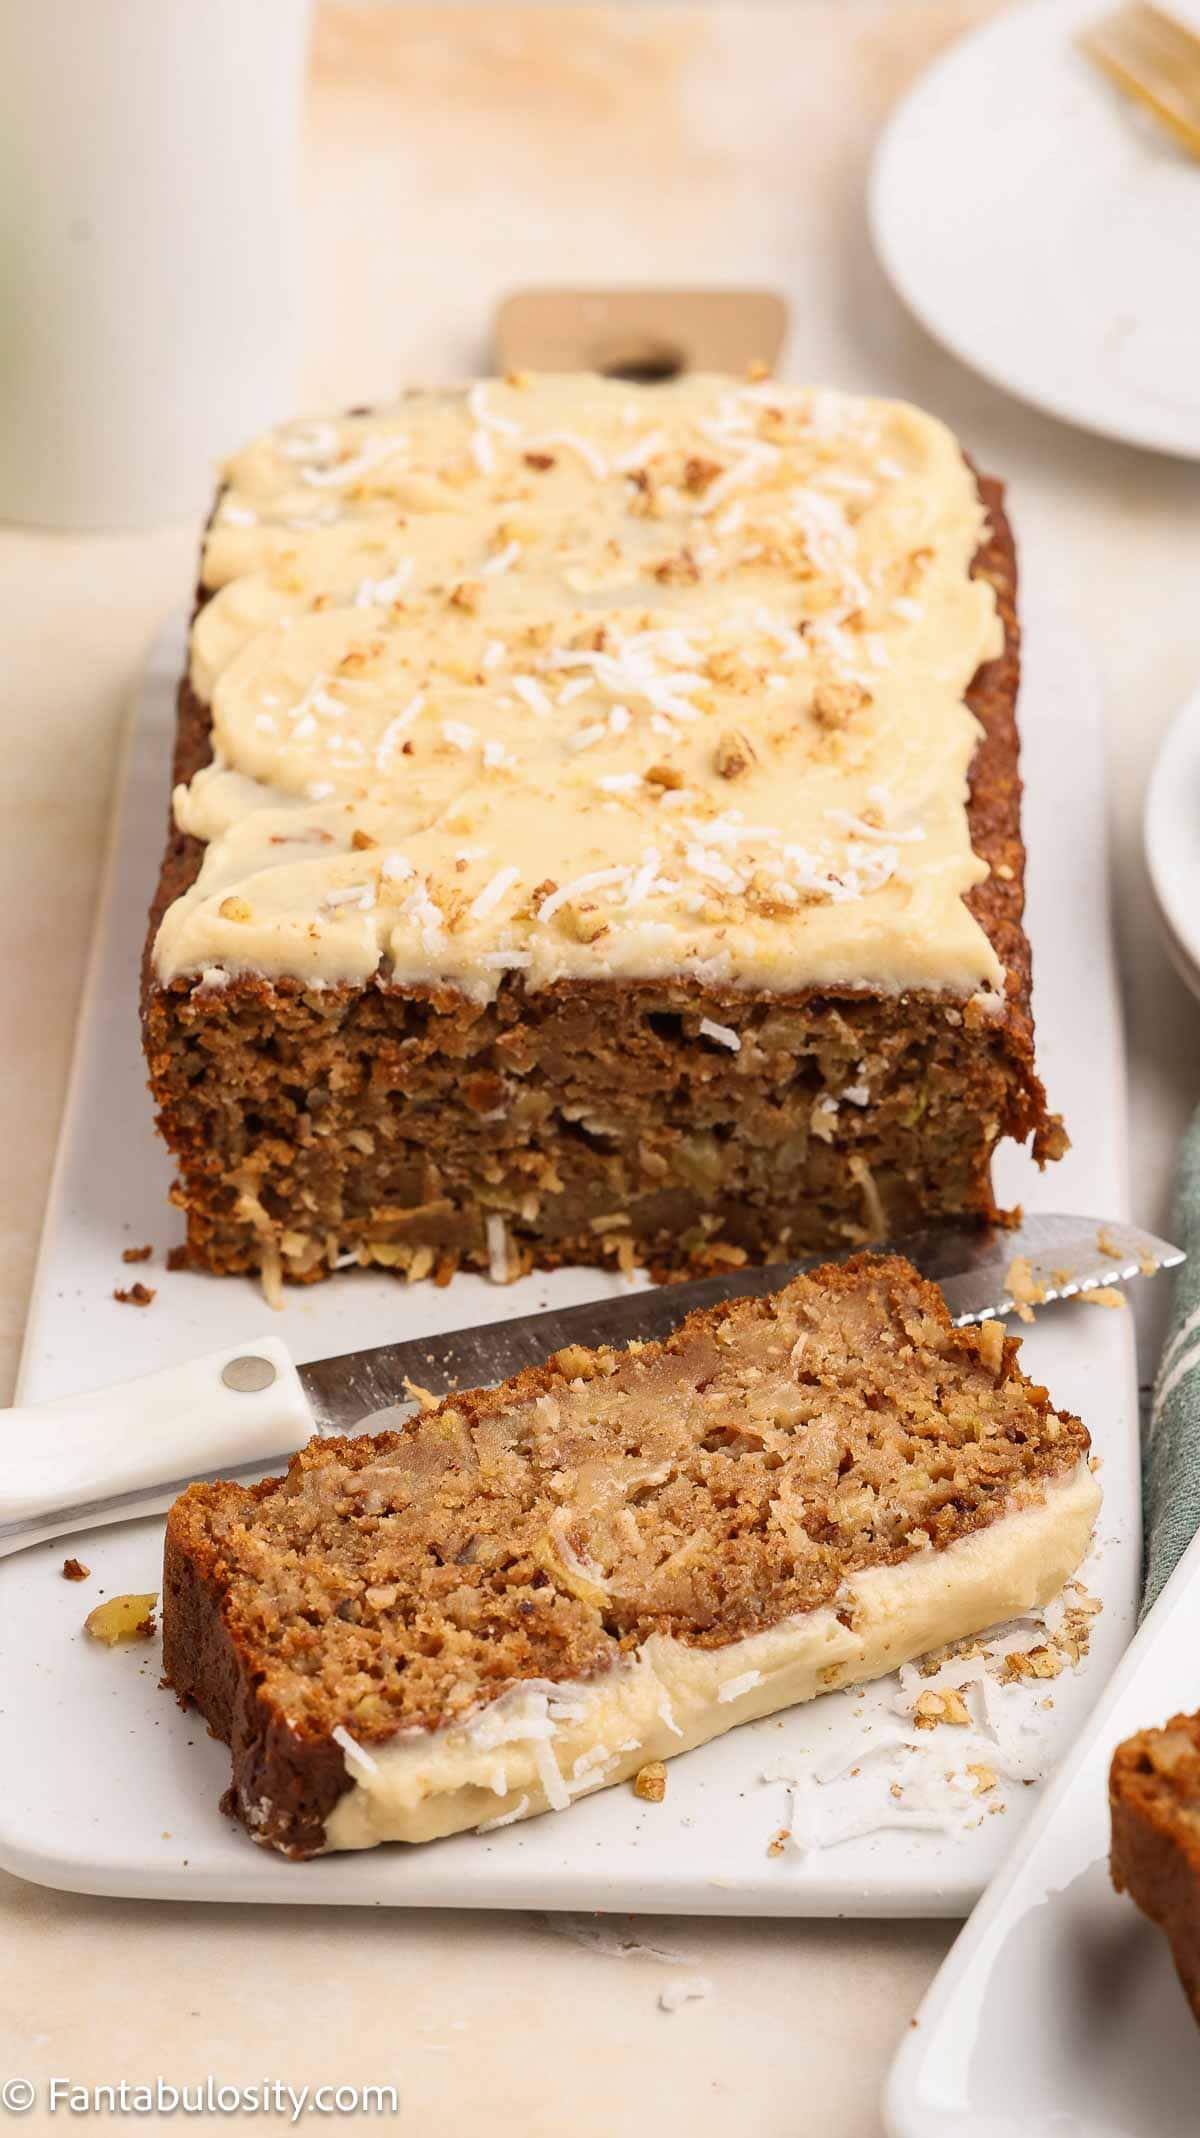
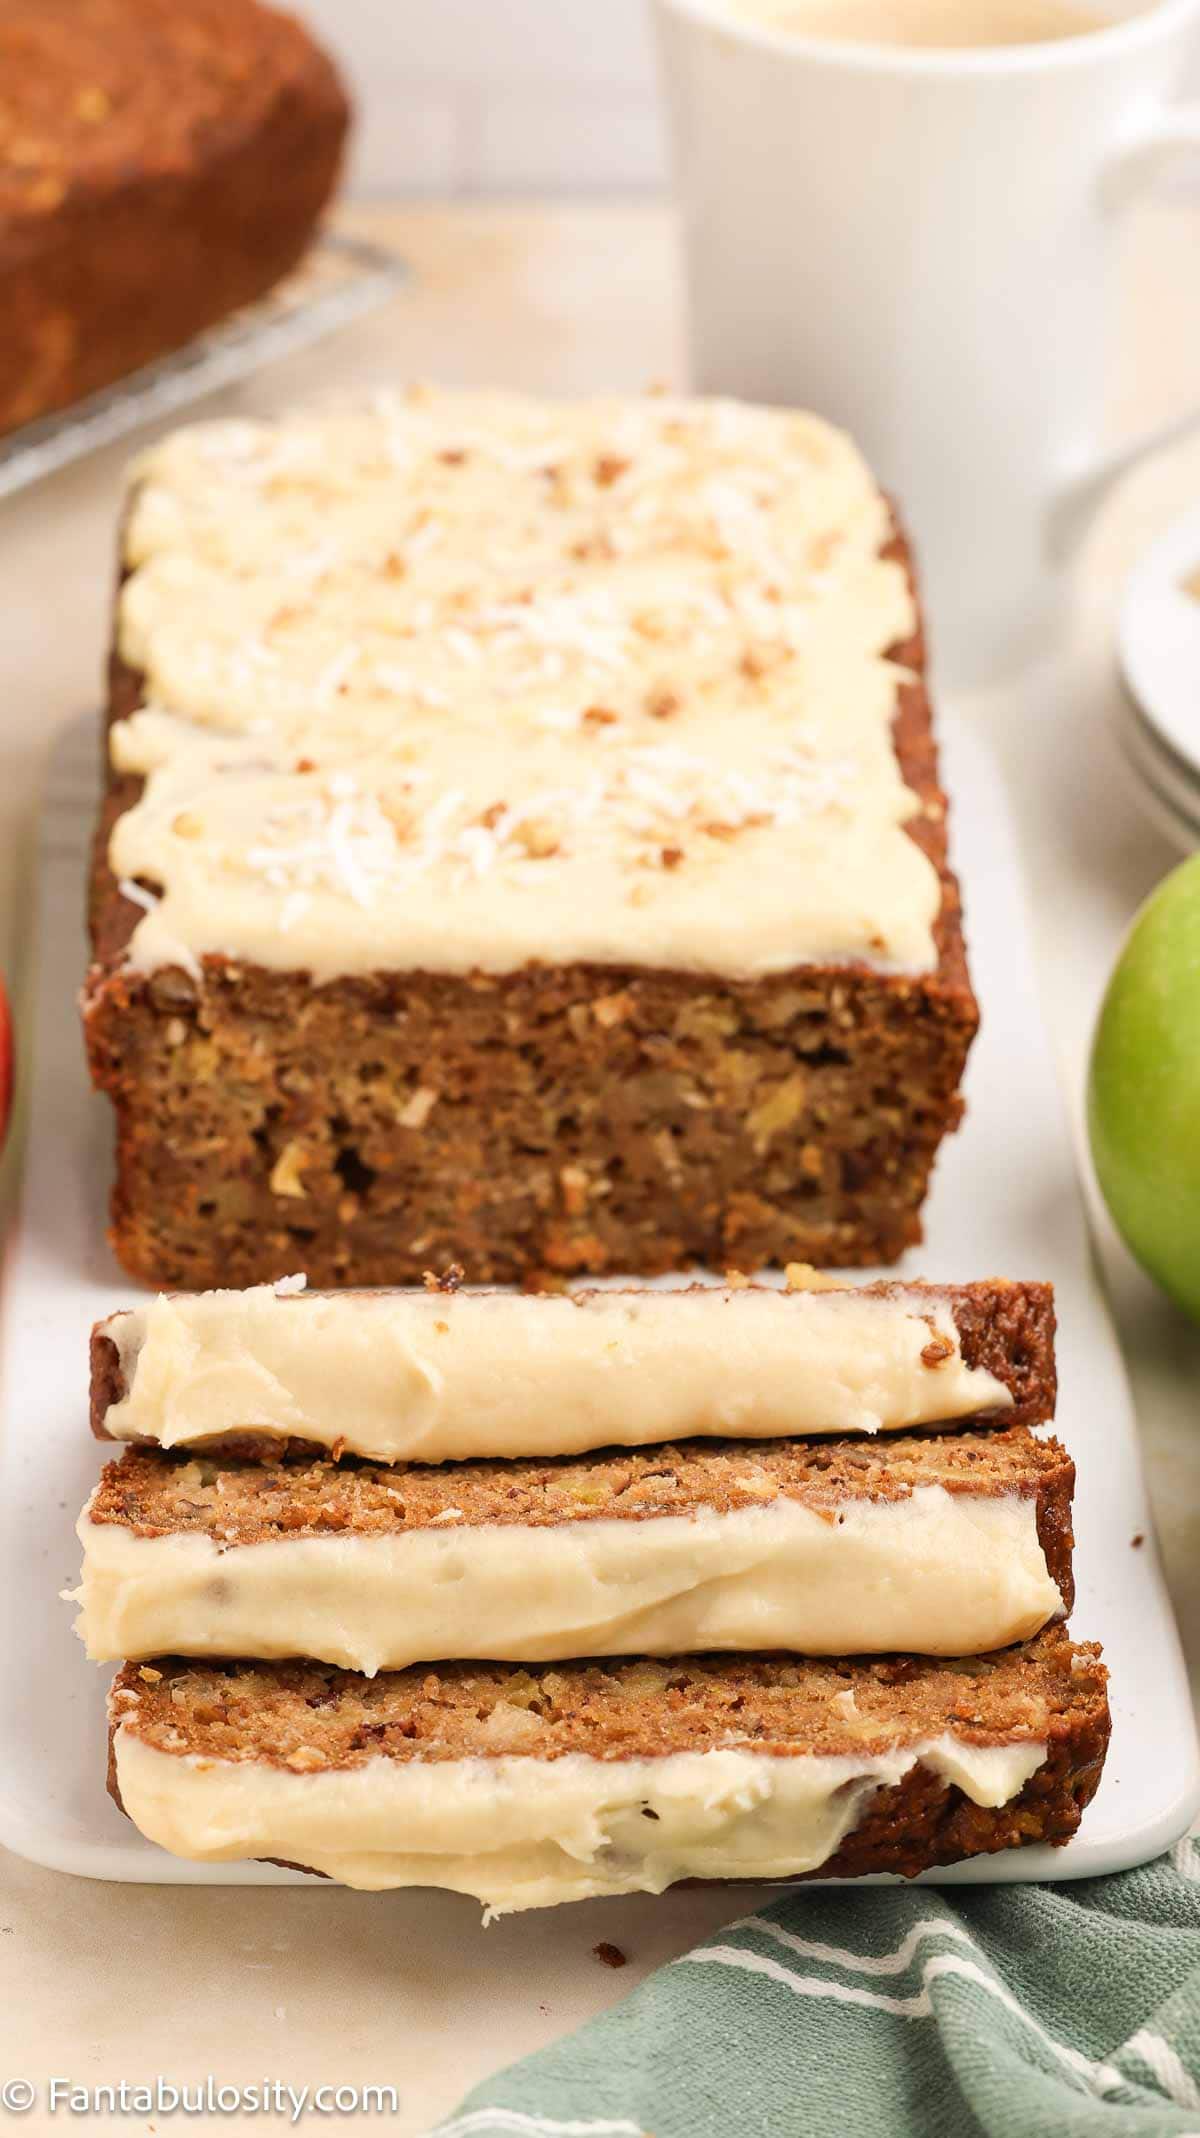
    Sliced apple bread with a maple frosting.

    This apple bread recipe is a moist, old-fashioned quick bread with a little chunk of apple in every bite, a lot like our best banana bread. Applesauce keeps it tender, coconut and pecans add texture, and an easy maple glaze goes on while the loaf is still warm. It’s simple to make, great for brunch or an afternoon snack, and full of that cozy bread recipe everyone loves.

    If you’re baking with apples this fall, this apple dapple cake is another easy one that feeds a crowd.

    Quick breads count as dessert in my book. Here’s the rest of our apple and pumpkin favorites.

    A Moist Apple Bread That Feels Like an Old-Fashioned Favorite

    Sliced apple bread with maple frosting.

    The secret to how moist this loaf is comes from applesauce. It does double duty, adding apple flavor and keeping every slice soft for days. Fresh chopped apples fold right into the batter, so you get real fruit in the crumb instead of just spice. If you like apple flavor in easy forms, you’ll want to try this alongside slow cooker apple butter and a batch of slow cooker apple cinnamon oatmeal. Or for more apple goodness, this harvest cake is loaded with chopped apples and warm spices for a comforting fall treat.

    The maple glaze is what takes it over the top. It’s just butter, maple syrup, and powdered sugar whisked smooth, then spread over the warm loaf so it soaks into the top. If a glazed quick bread sounds like your kind of thing, you’ll love this cherry bread too. And when you’re in a fall baking mood, keep this easy pumpkin bread and cinnamon roll casserole on your list.

    Loaf of apple bread with maple glaze and a slice lying in front.

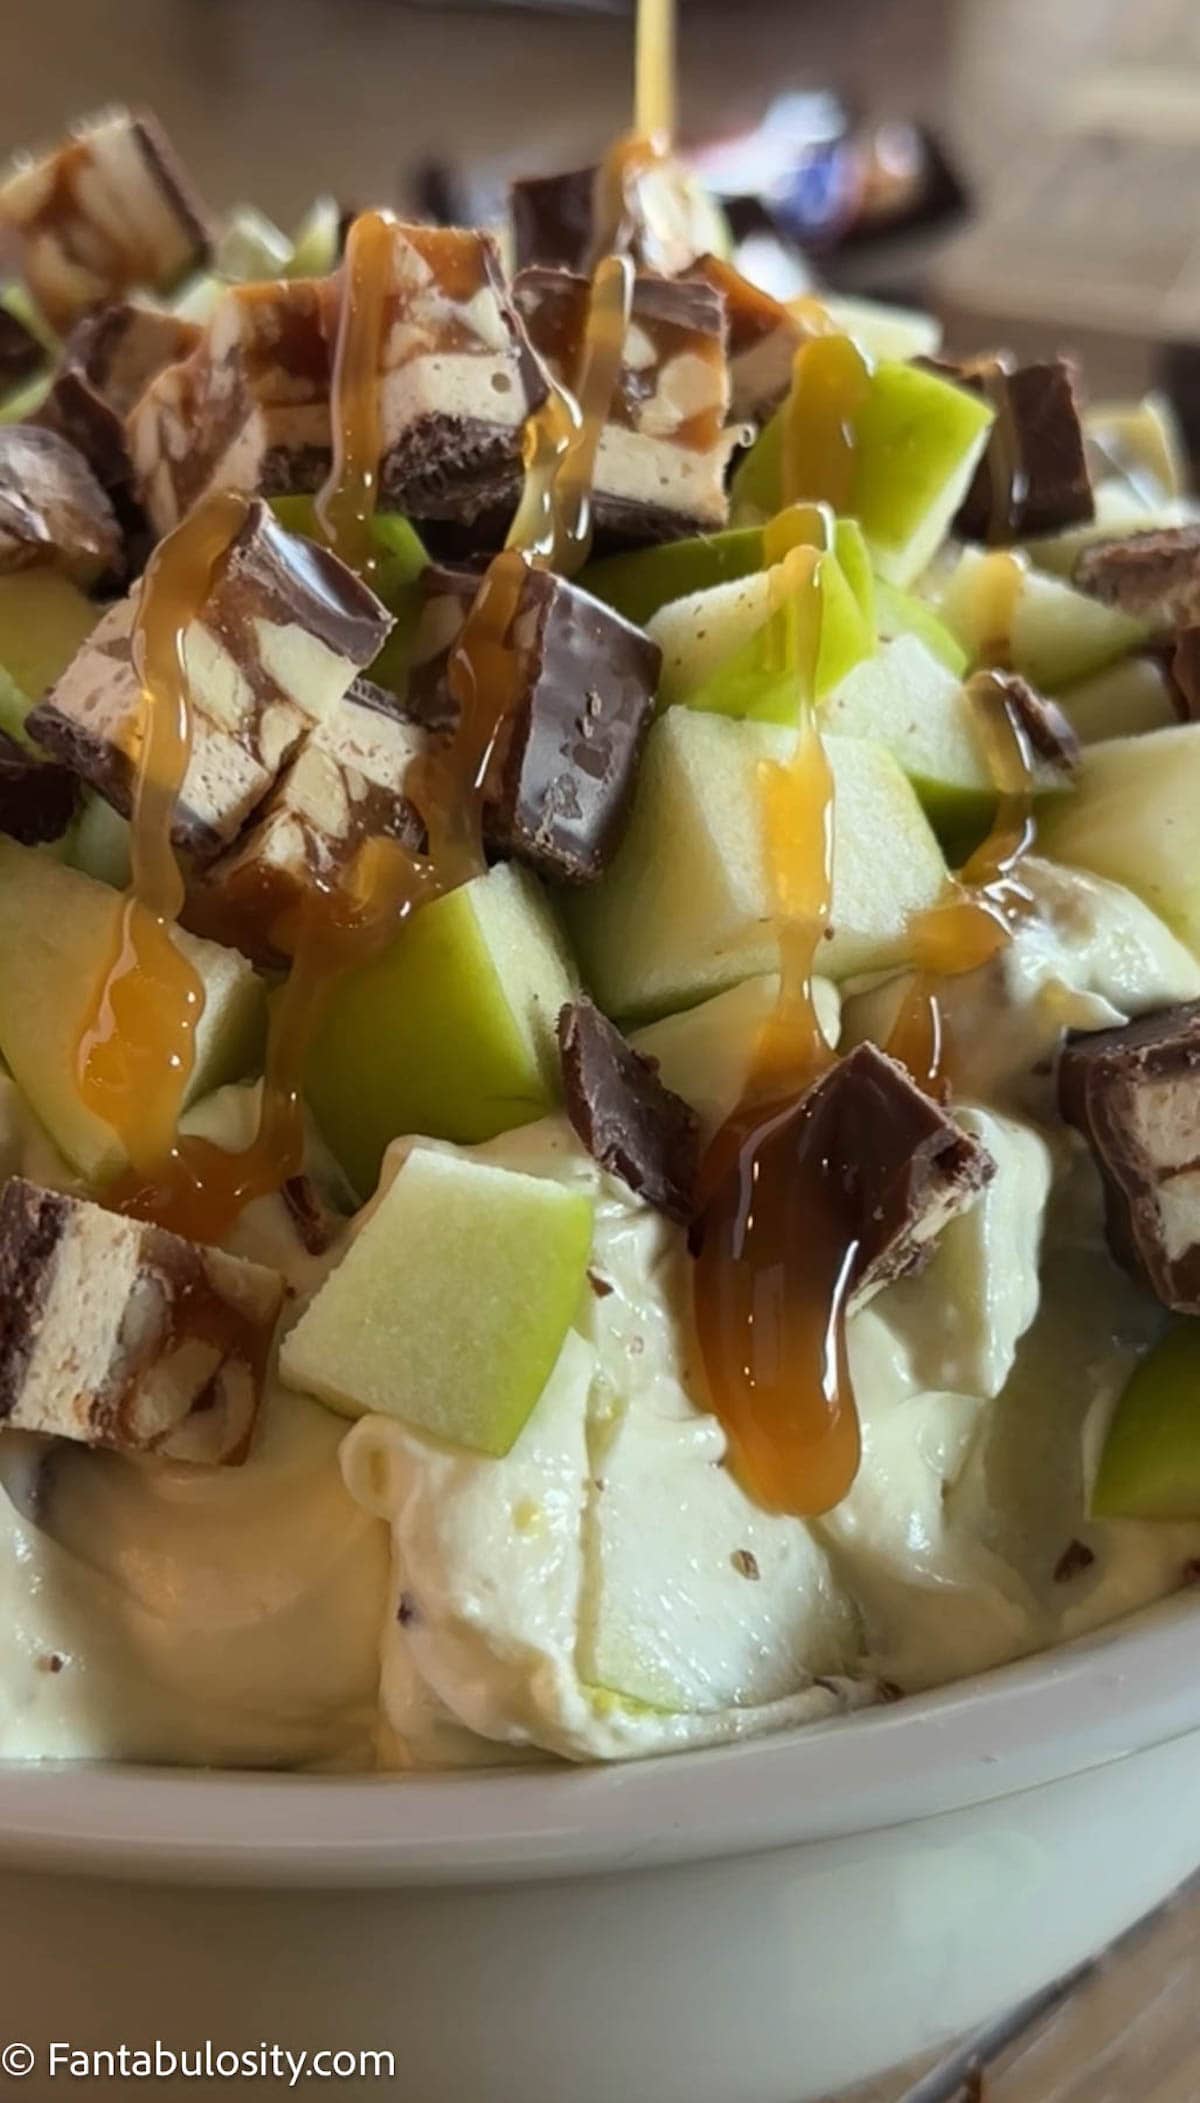
    This one travels well, which makes it a nice addition to any easy potluck dessert spread. Bring it to a brunch or a family get-together and set it next to something like Snicker apple salad, and it won’t last long.

    FAQs

    What kind of apples are best for apple bread?

    A mix works best. This recipe uses Granny Smith and Honeycrisp, so you get one tart apple and one sweet apple. The combination gives the bread a nice balanced flavor.

    Why is this apple bread so moist?

    The applesauce. It adds moisture along with the fresh chopped apples, so the loaf stays soft and never dries out.

    Can I make it without the coconut and pecans?

    Yes. The shredded coconut and chopped pecans add texture, but you can leave either one out if you prefer a plain apple loaf.

    Do I have to add the maple glaze?

    No, but it’s worth it. The glaze adds a sweet, decadent top. If you skip it, the bread is a little less sweet and works well for breakfast.

    Can I make mini loaves instead of one big loaf?

    You can. Divide the batter into 3 or 4 small loaf pans depending on their size. Start checking them early, since smaller loaves bake faster.

    How do I store apple bread?

    Store it in an airtight container in the refrigerator for up to a week. To keep it longer, freeze it for up to 3 months and thaw before serving.

    Can I use cinnamon instead of pumpkin pie spice?

    Yes. Pumpkin pie spice already has cinnamon in it, so plain cinnamon is a fine swap if that’s what you have on hand.

    Why did the top of my loaf shrink as it cooled?

    That’s normal. Once the apple bread starts to cool, the top can shrink down a little. It doesn’t affect the flavor or texture.

    Can I use a different oil instead of coconut oil?

    Yes. The coconut oil is only 2 tablespoons, so you can swap it 1:1 for vegetable, canola, or avocado oil. Melted butter works too and adds a little richness. The shredded coconut in the batter still gives you that flavor.

    Ingredients

    See the recipe card below that has the printable, full ingredient list and instructions.

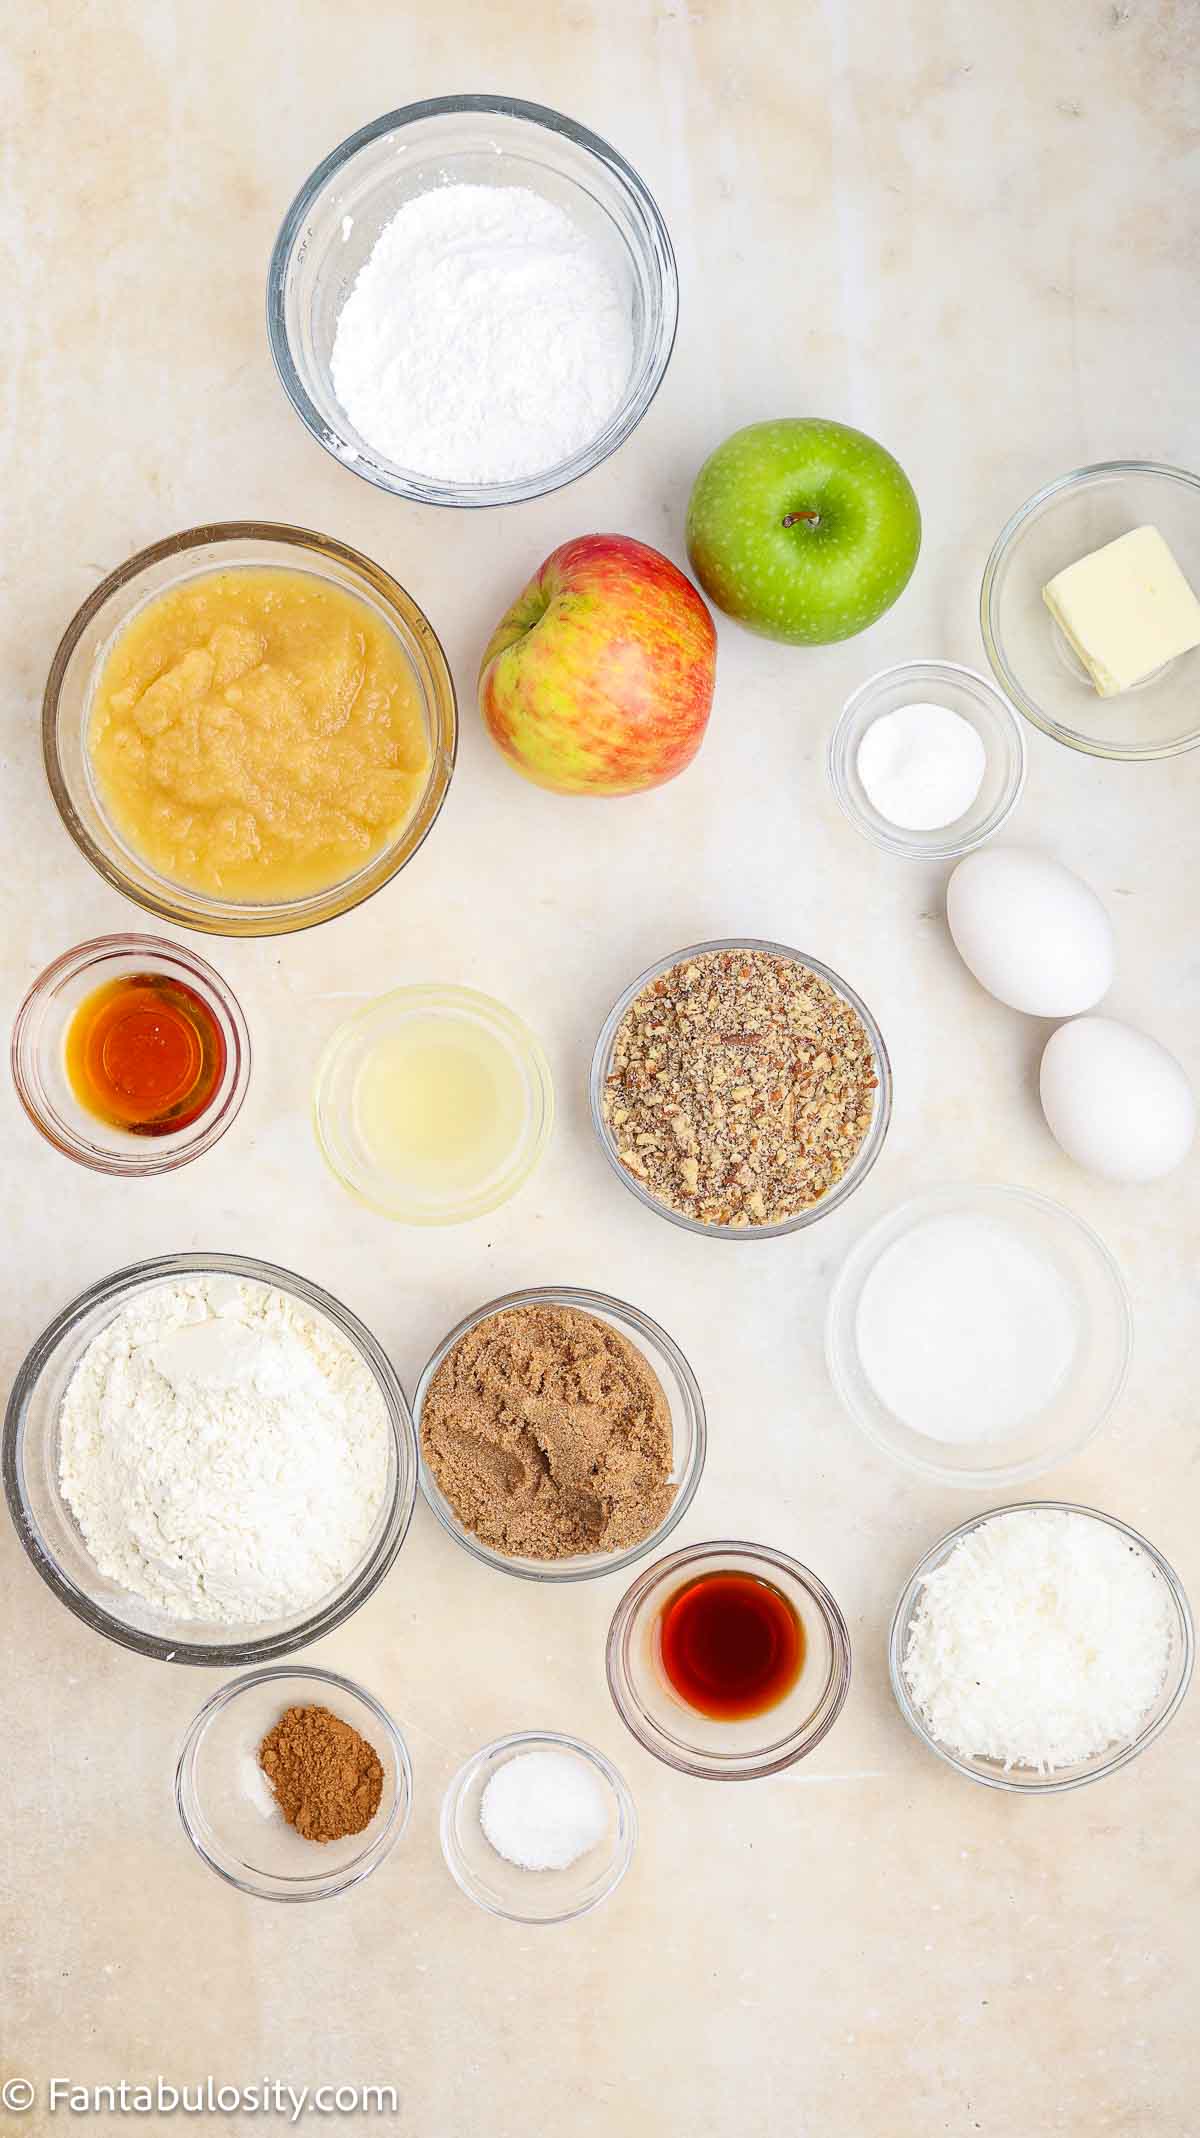
    Ingredients to make apple bread sitting on counter.

    For the Bread

    • 2 medium apples, peeled and chopped (Granny Smith and Honeycrisp) – Fresh fruit and little bites of apple in every slice.
    • 1 teaspoon lemon juice – Keeps the chopped apples from browning.
    • 1 ½ cups unsweetened applesauce – Adds moisture and apple flavor.
    • 2 large eggs – Bind the batter and give it structure.
    • 2 tablespoons coconut oil, melted – (or vegetable, canola, or avocado oil) – Adds richness and a soft crumb.
    • 1 ½ teaspoons vanilla extract – Rounds out the flavor.
    • ½ cup dark brown sugar – Sweetens the loaf with a light molasses note.
    • 1 ½ cups all-purpose flour – The base of the bread.
    • 1 teaspoon baking soda – Helps the loaf rise.
    • 1 teaspoon pumpkin pie spice – Warm fall spice that pairs with apples.
    • ½ teaspoon sea salt – Balances the sweetness.
    • ½ cup shredded coconut – Adds texture and a little chew.
    • ½ cup chopped pecans – Adds crunch.

    For the Maple Glaze

    • 2 tablespoons butter, melted – The base of the glaze.
    • 3 tablespoons pure maple syrup – Gives the glaze its maple flavor.
    • ¾ cup powdered sugar – Thickens the glaze and adds sweetness.

    Instructions

    • Preheat the oven to 350 degrees. Line a loaf pan with parchment paper.
    • In a small bowl, toss the 2 chopped apples with 1 teaspoon lemon juice. Set aside.
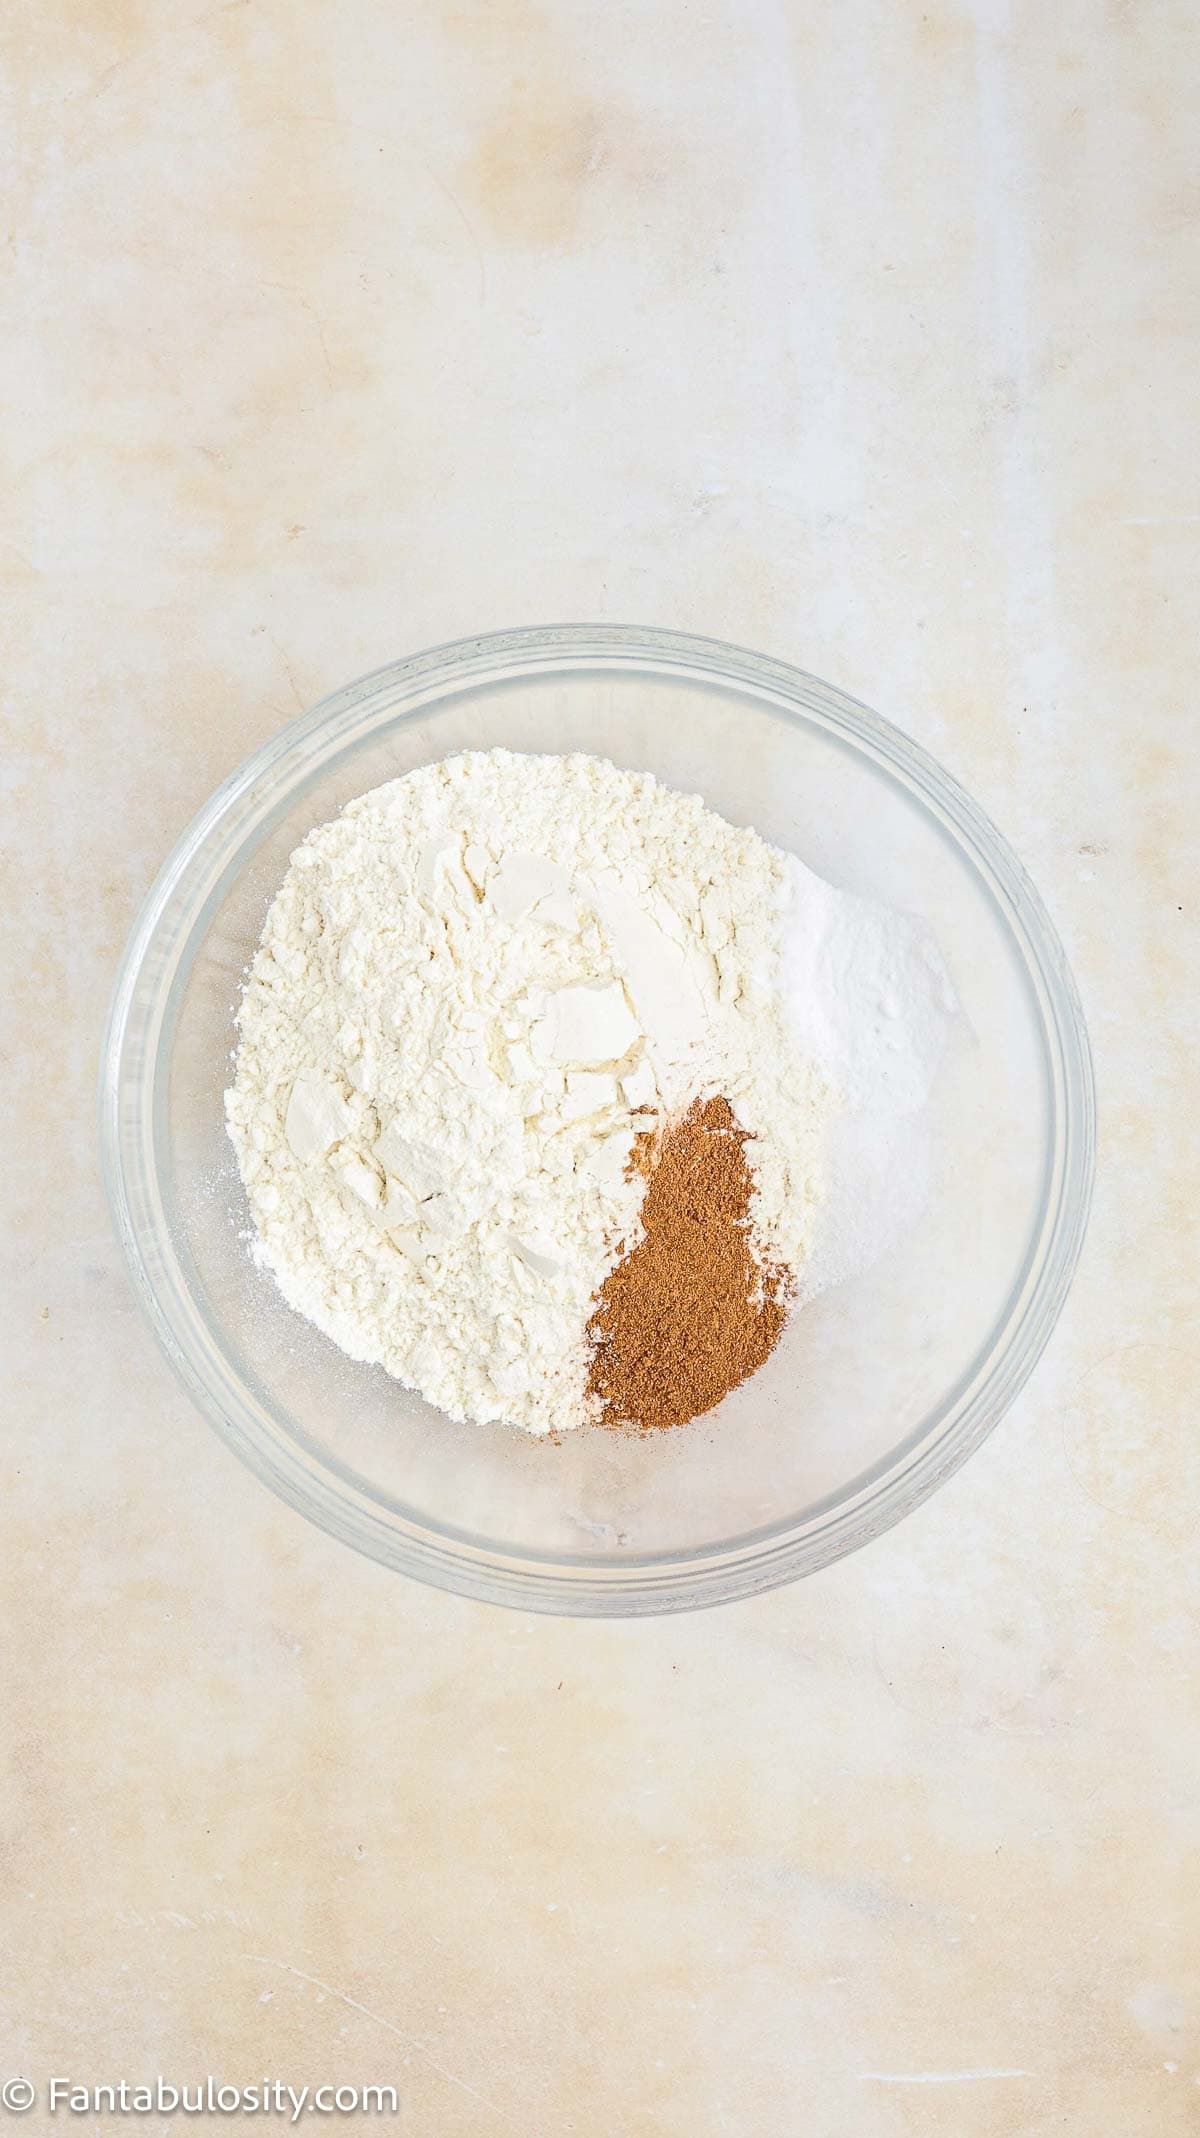
    • In a medium bowl, whisk together 1 ½ cups flour, 1 teaspoon baking soda, 1 teaspoon pumpkin pie spice, and ½ teaspoon sea salt.
    Flour and spices in mixing bowl.
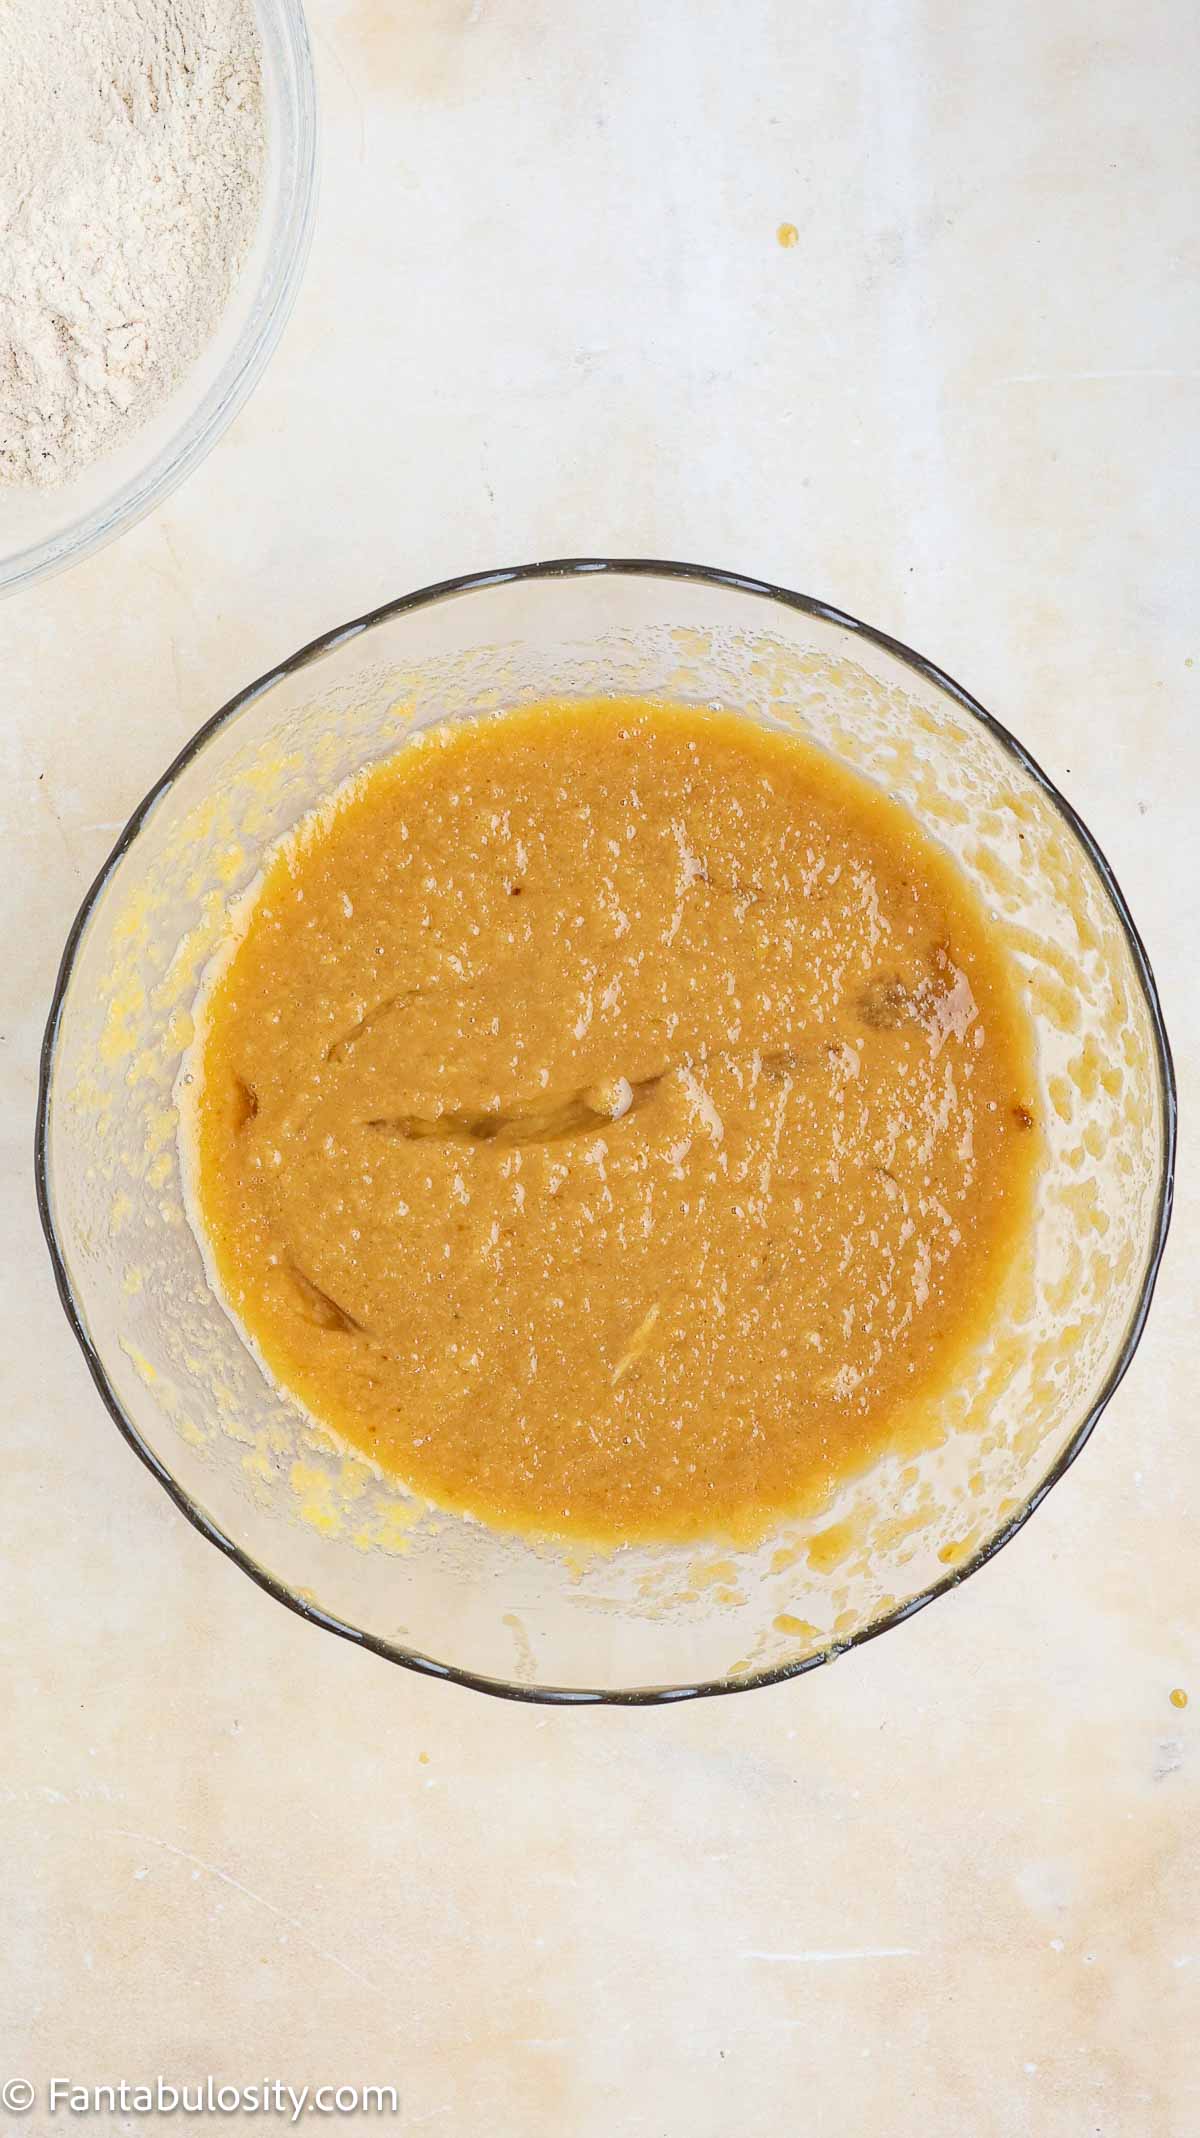
    • In a large bowl, mix 1 ½ cups applesauce, 2 eggs, 2 tablespoons melted coconut oil, 1 ½ teaspoons vanilla, and ½ cup dark brown sugar until well combined.
    Applesauce, eggs, and oil in mixing bowl.
    • Add the flour mixture to the wet ingredients and stir just until incorporated.
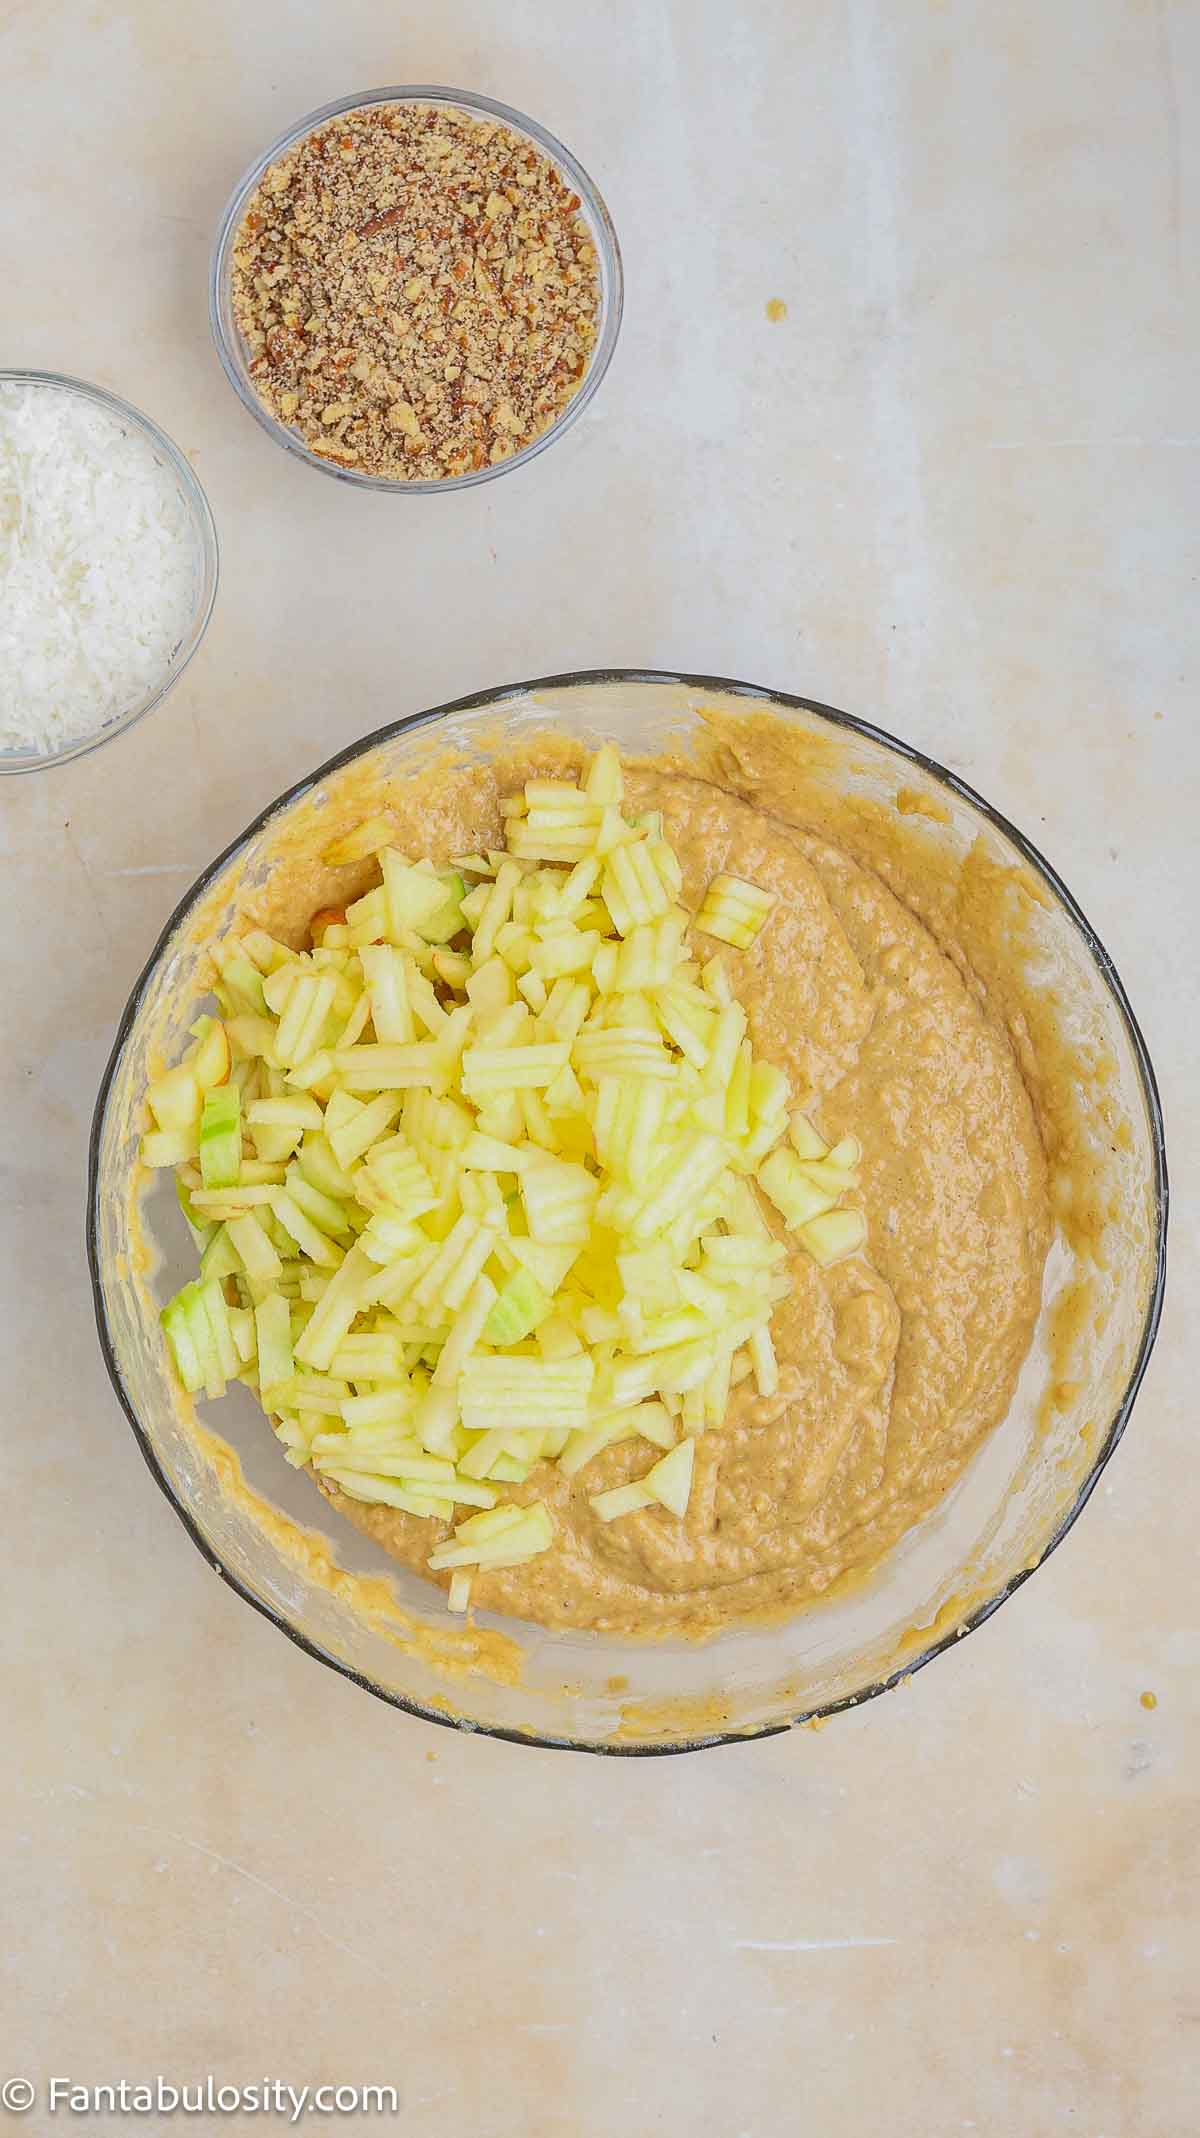
    • Stir in the chopped apples.
    Apples added in to bread batter mixture in mixing bowl.
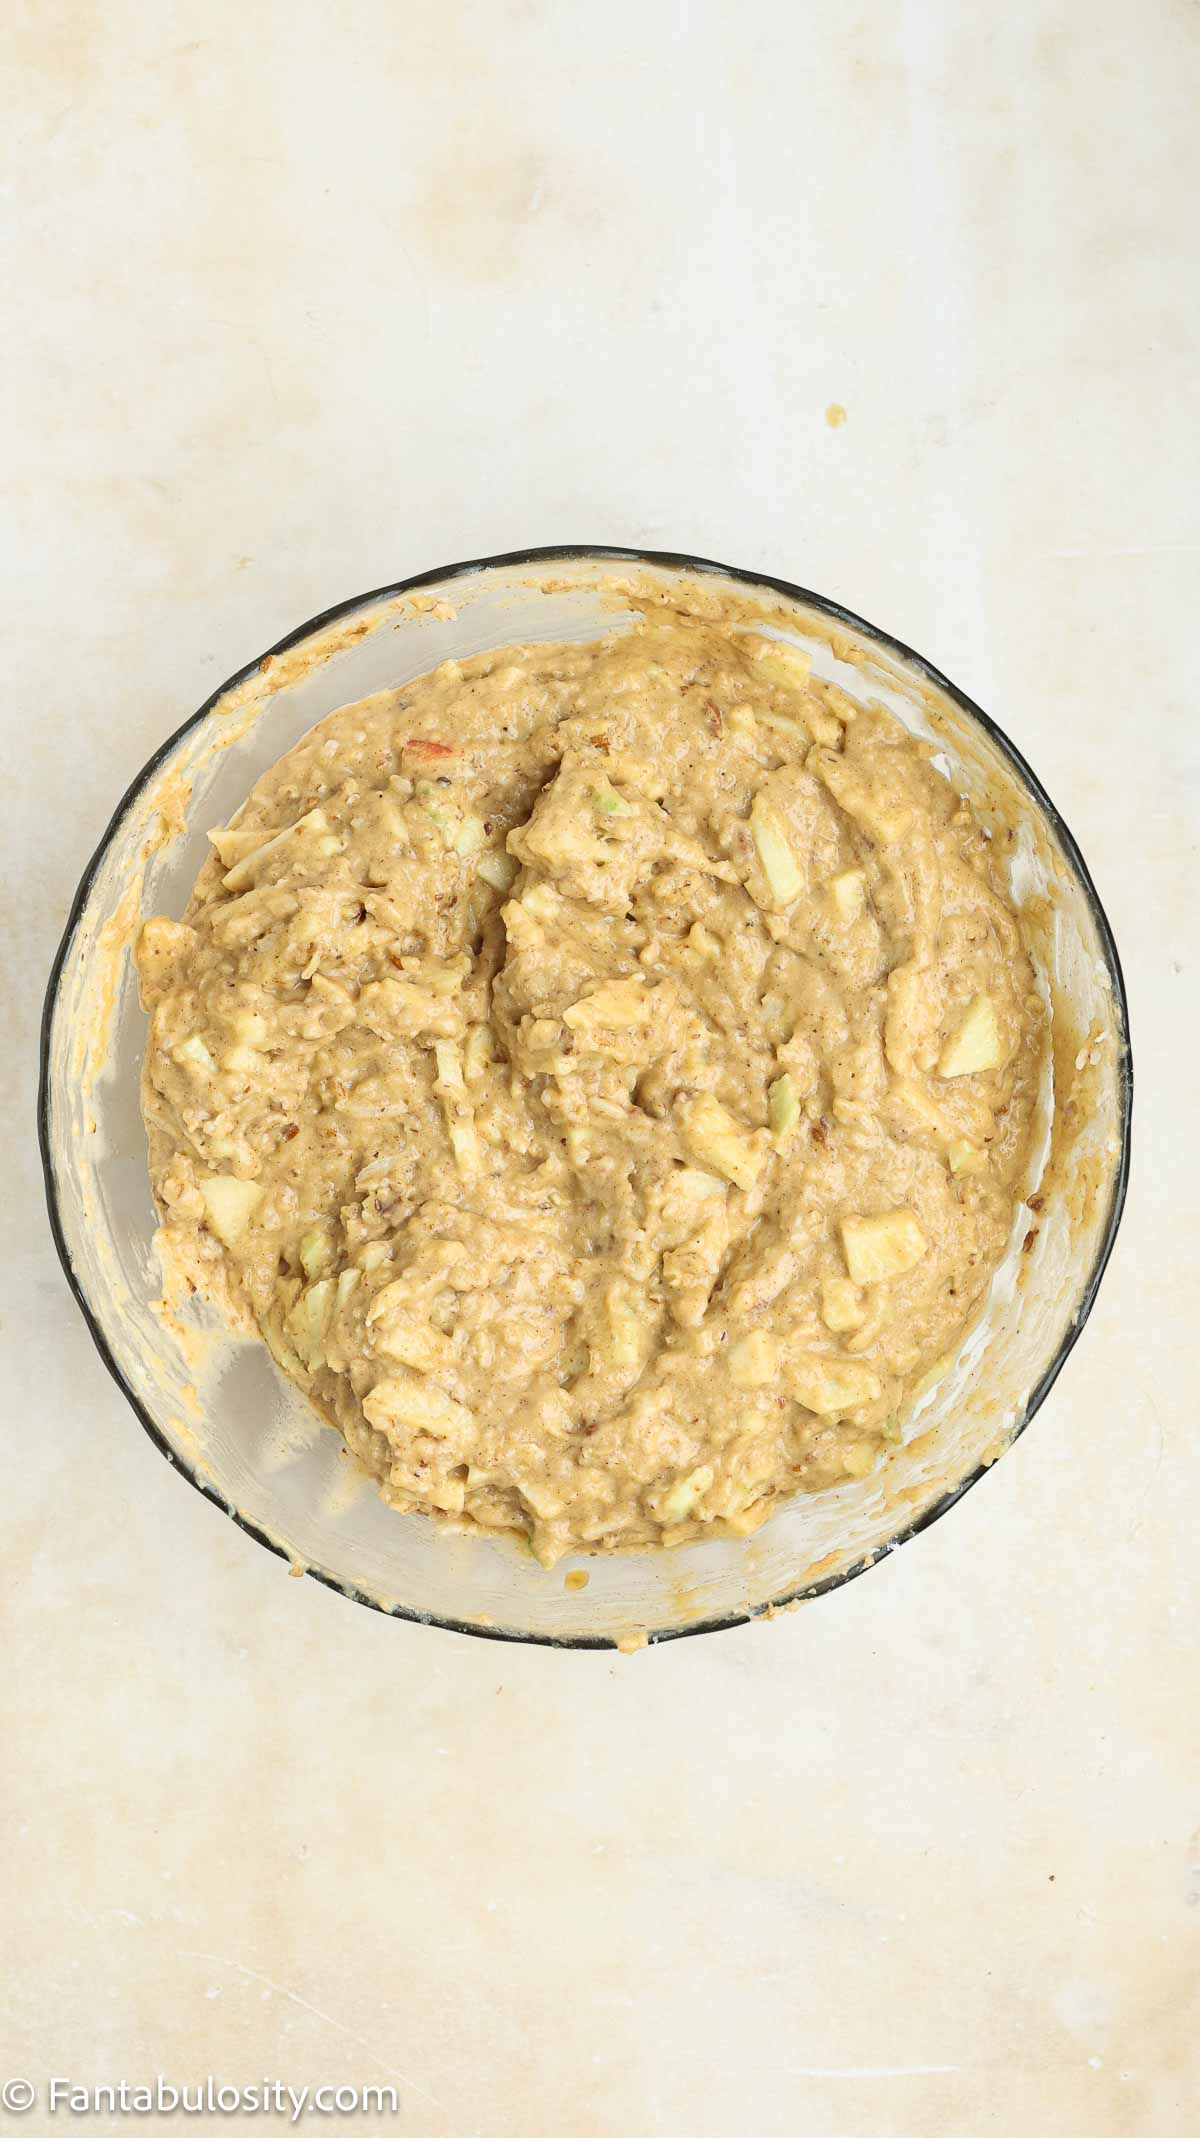
    • Fold in ½ cup shredded coconut and ½ cup chopped pecans.
    Apples added to flour and batter mixture in mixing bowl.
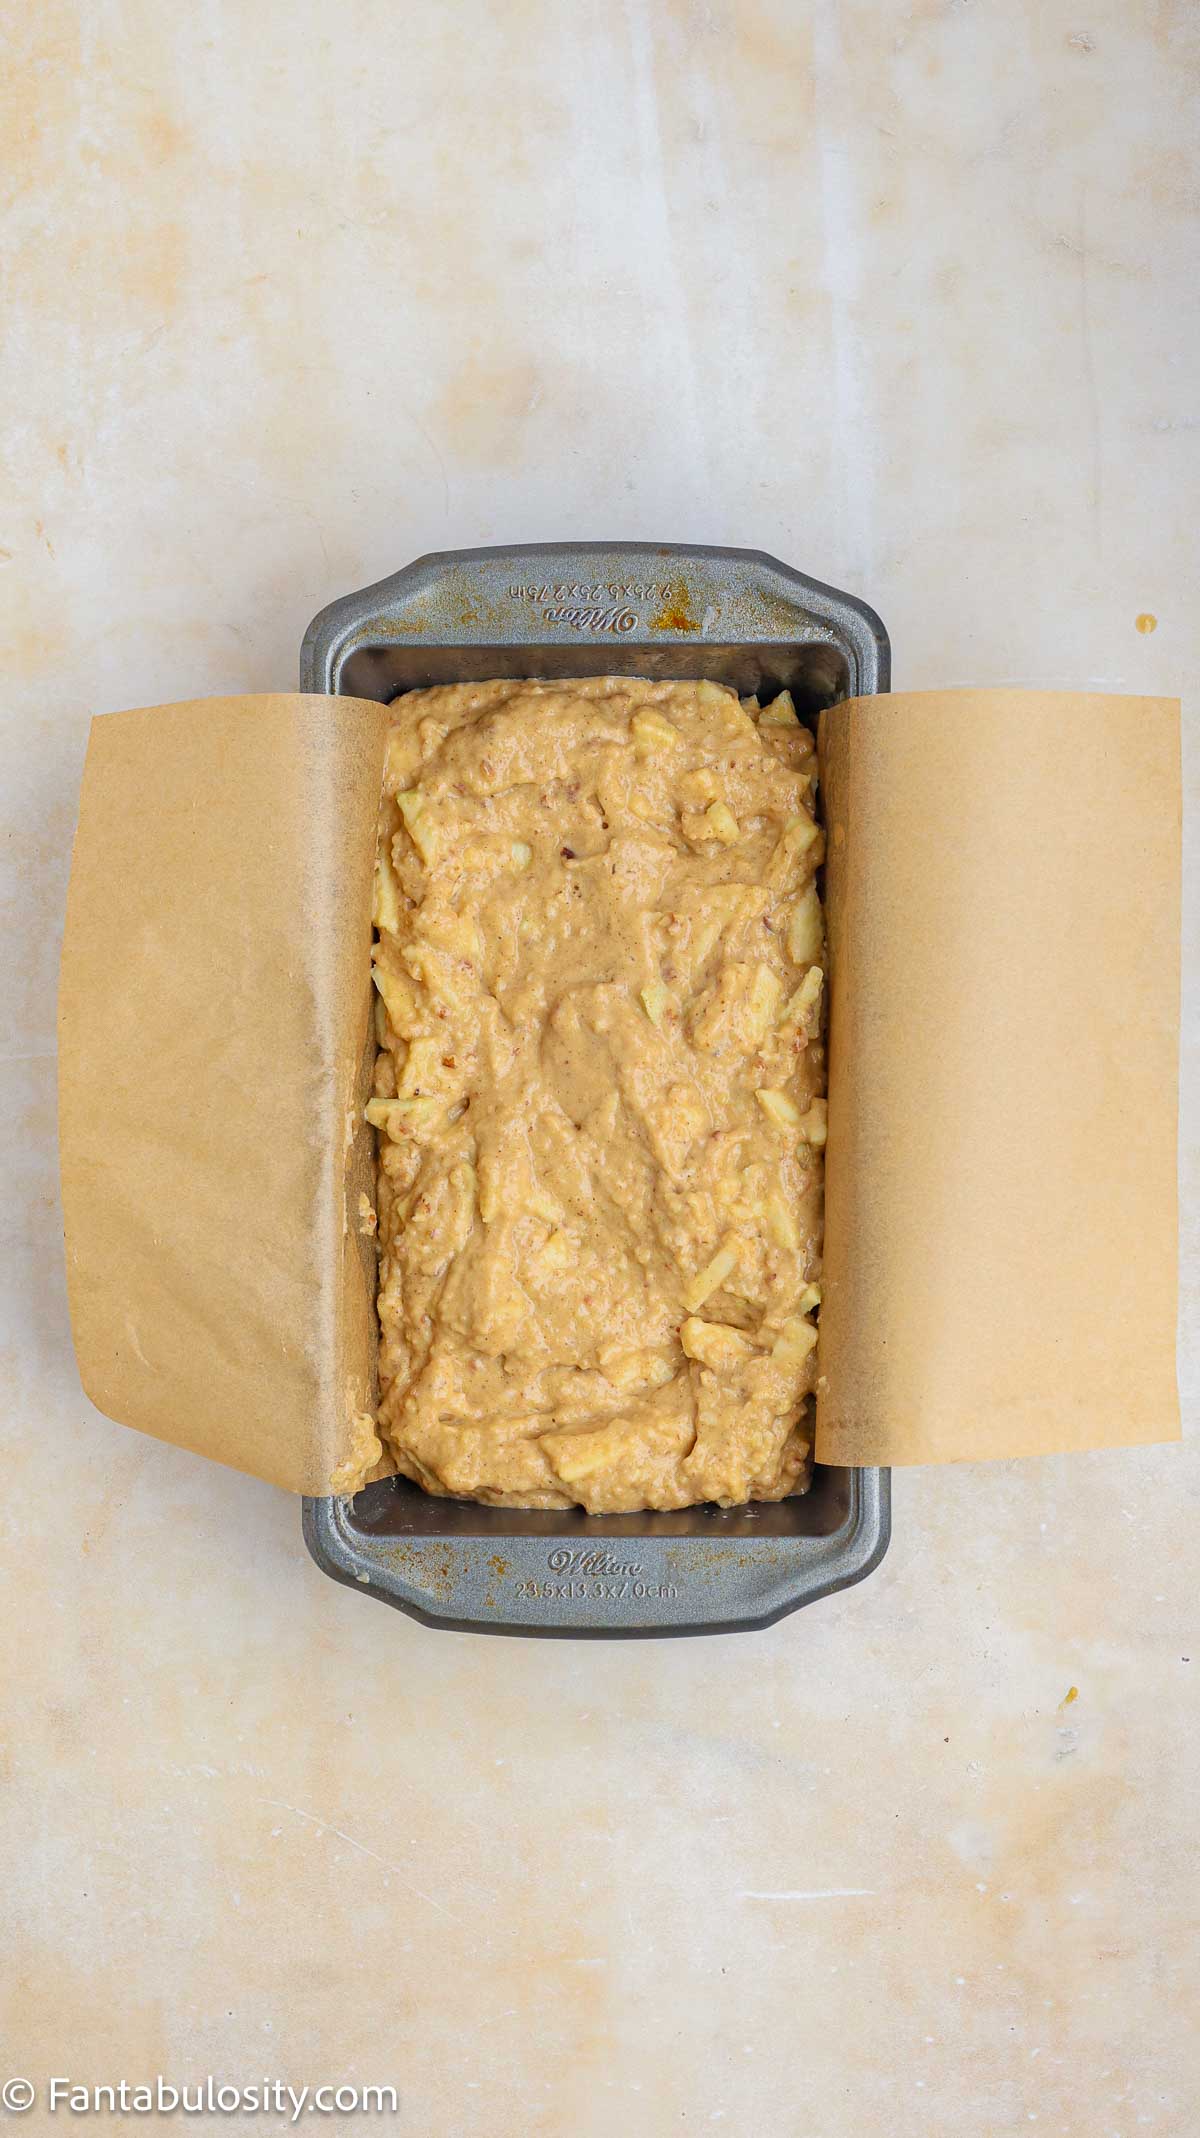
    • Pour the batter into the prepared pan. Bake about 50 minutes, until a toothpick comes out clean in the center.
    Apple bread batter in loaf pan.
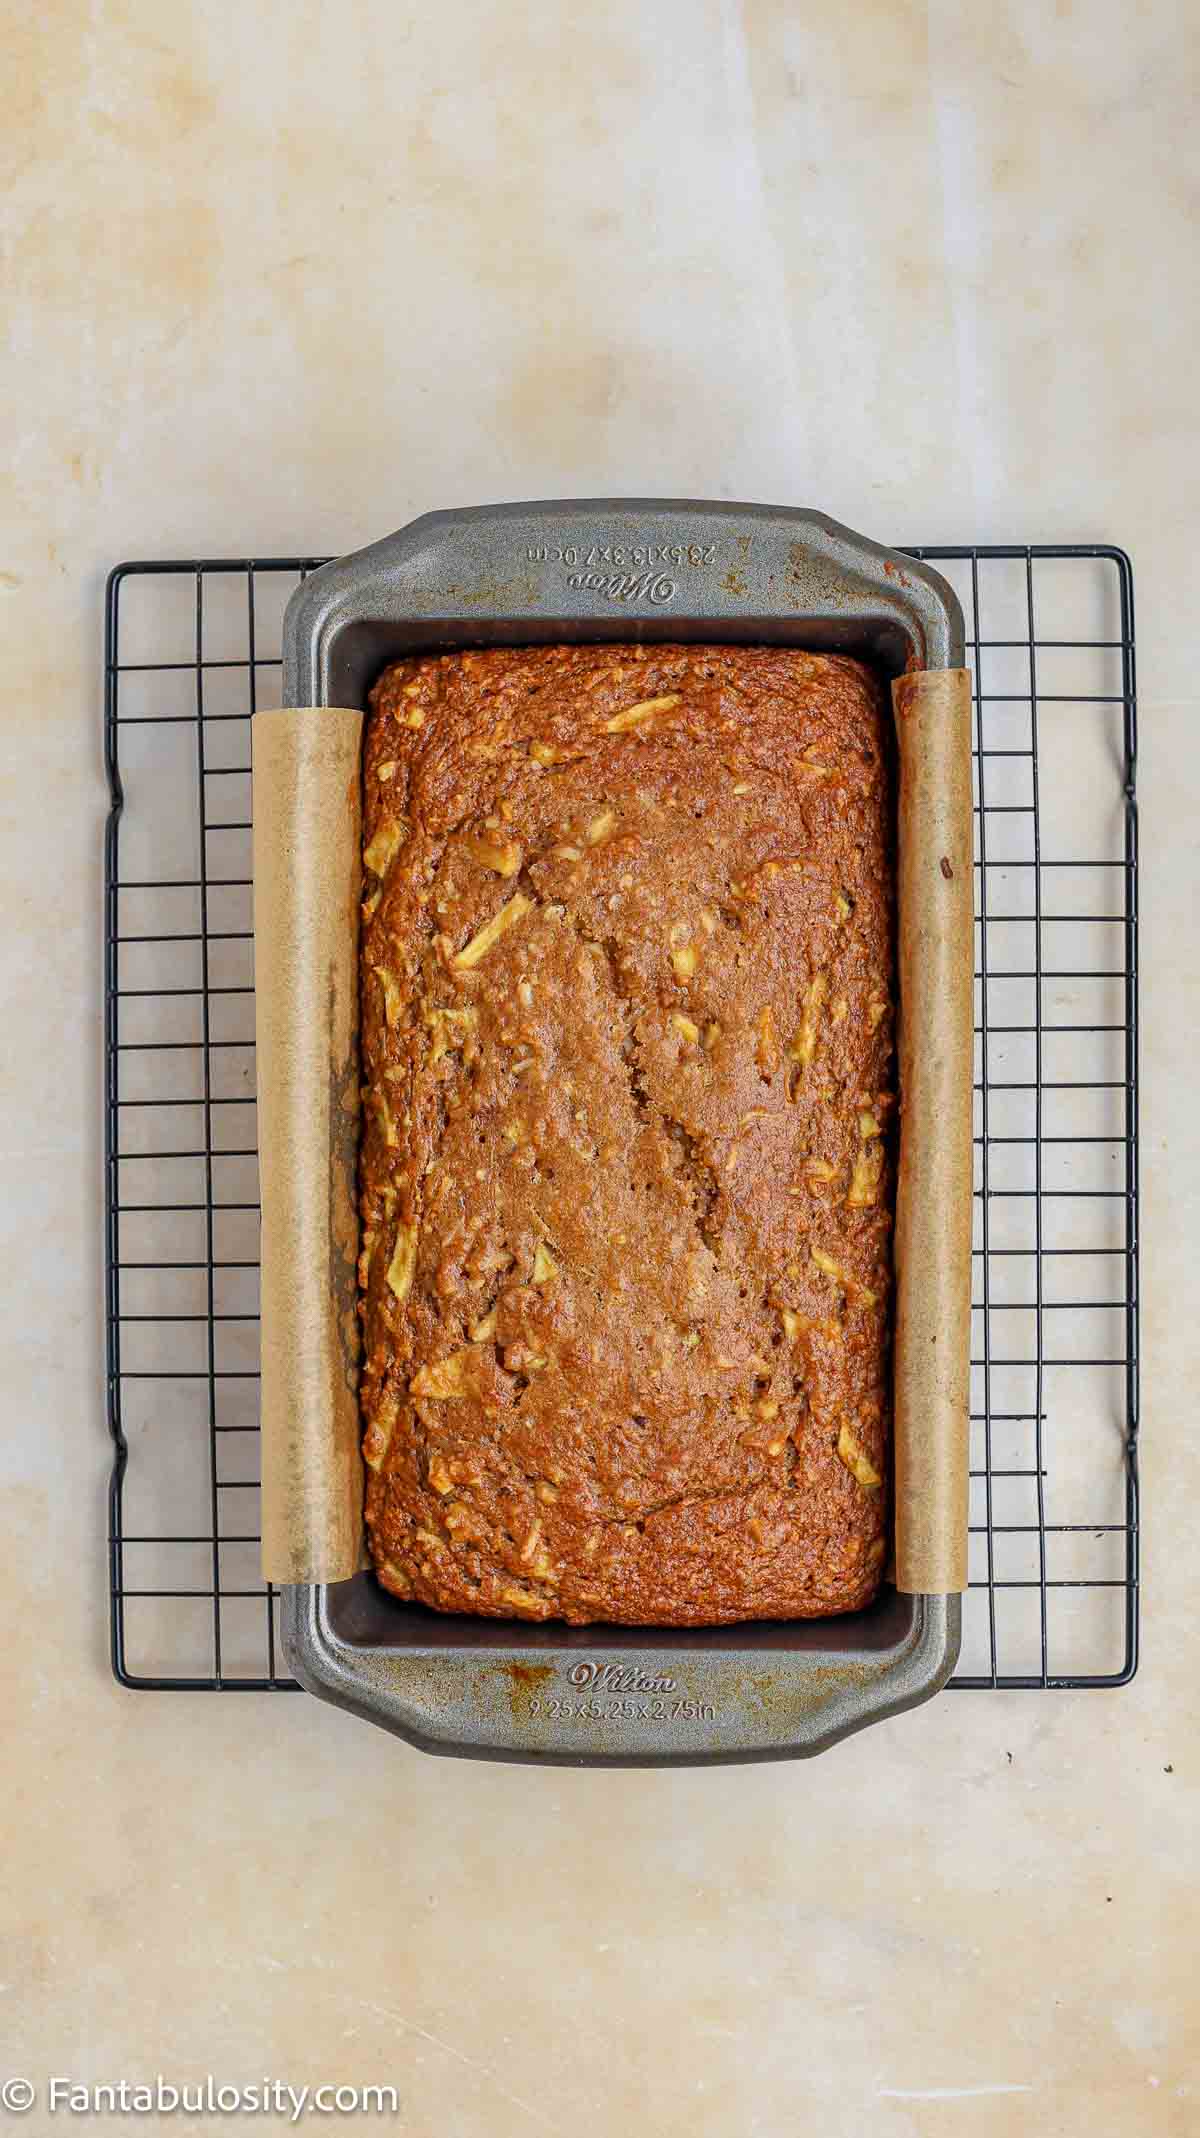
    • Transfer to a wire rack and cool about 10 minutes before removing from the pan.
    Baked apple bread in loaf pan on wire cooling rack.

    How to Make the Maple Glaze

    • Whisk together 2 tablespoons melted butter, 3 tablespoons maple syrup, and ¾ cup powdered sugar until smooth.
    • Spread it over the warm loaf. Add extra chopped pecans and coconut on top if you like.
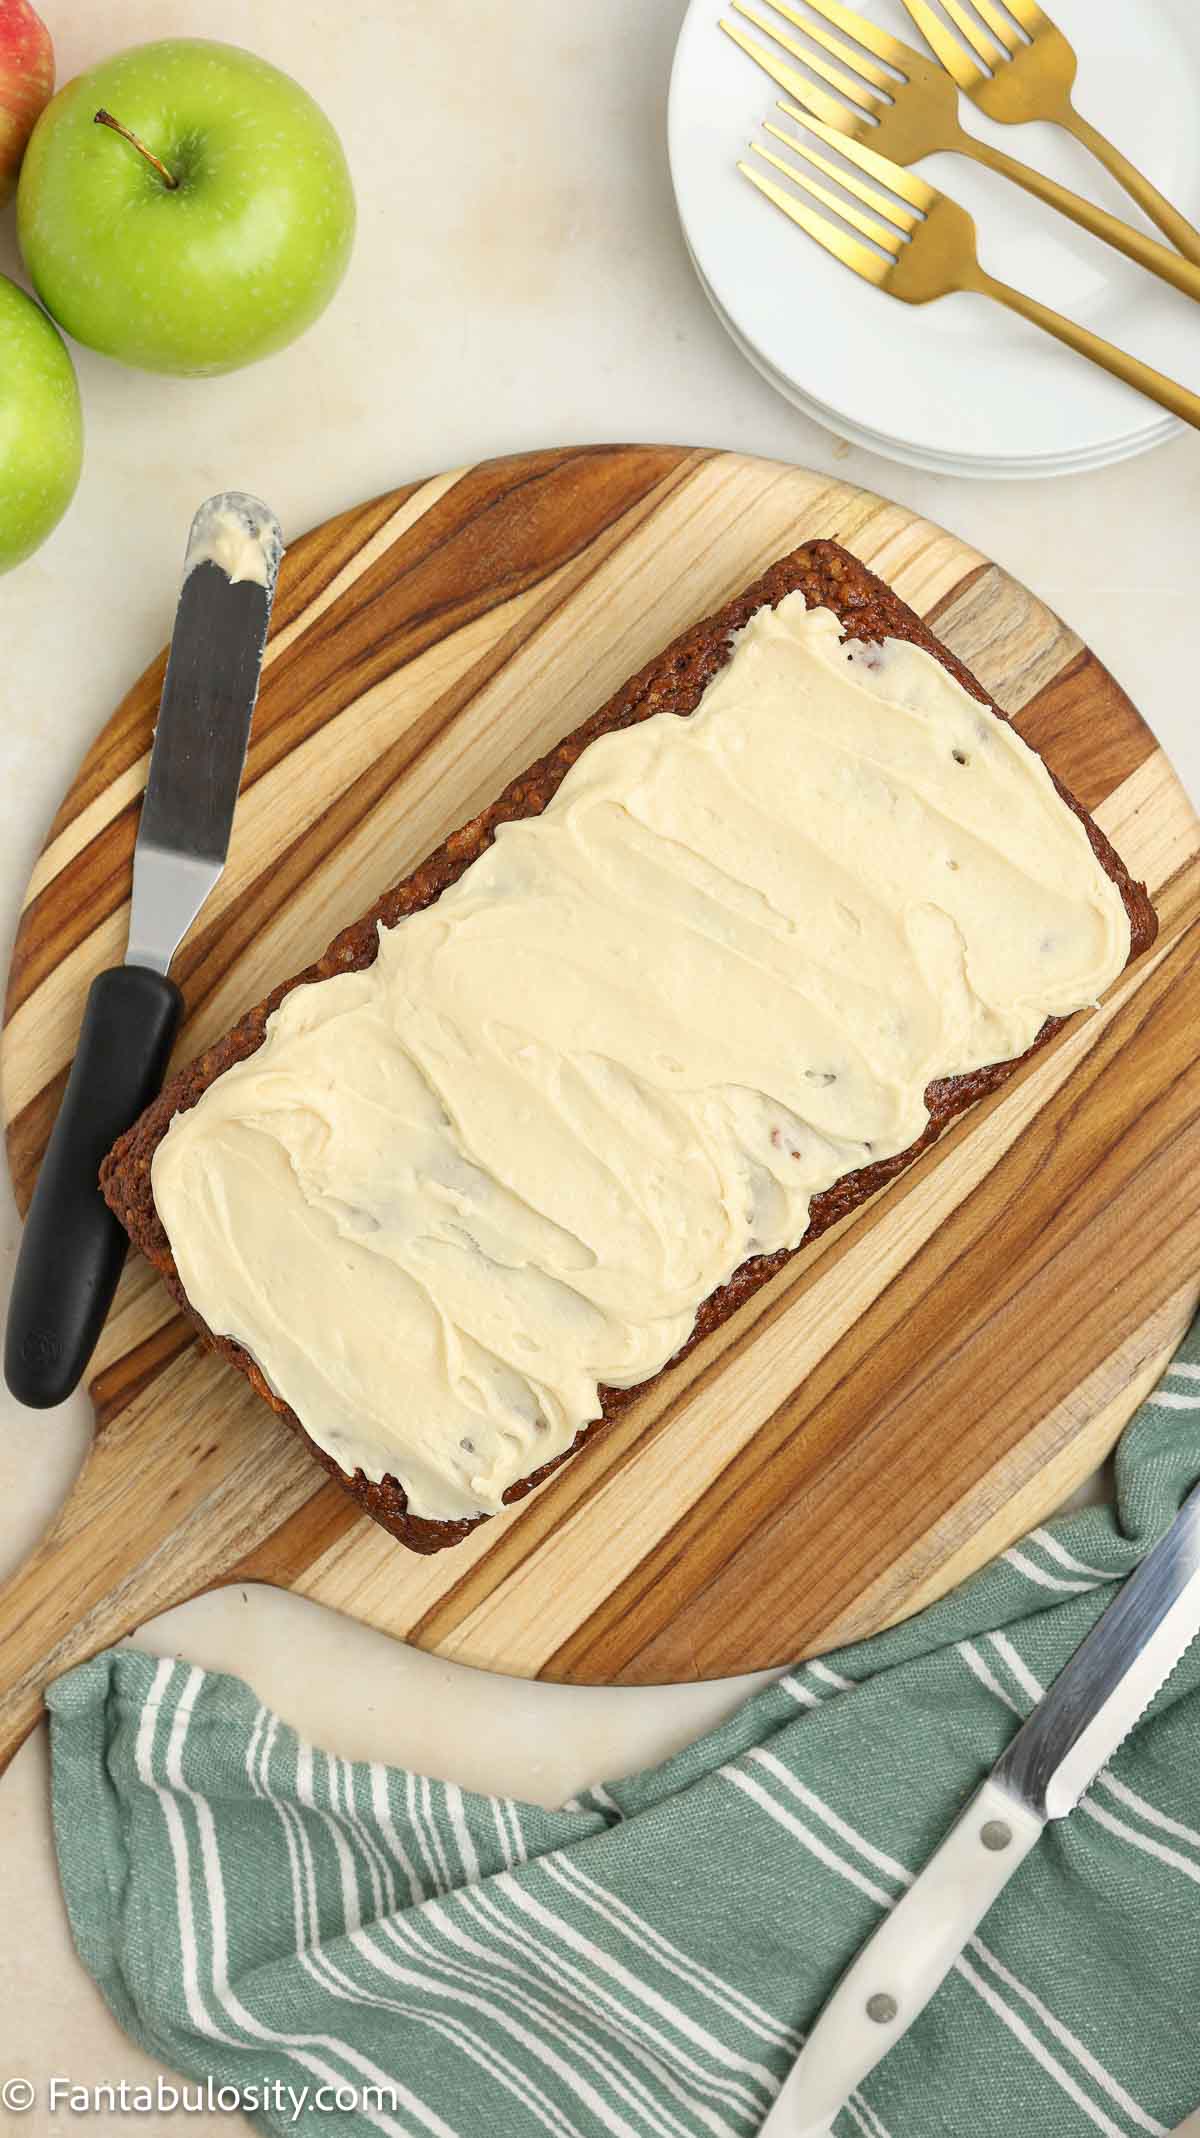
    Maple glaze spread on top of apple bread, sitting on wooden cutting board.

    Tips

    • Use two different apples, one tart and one sweet, for the best balanced flavor.
    • Don’t overmix the batter. Stir just until the flour disappears so the loaf stays tender.
    • Spread the glaze while the loaf is still warm so it settles into the top.
    • The top may shrink down a little as it cools, and that’s perfectly normal.
    • To make mini loaves, divide the batter into 3 or 4 small pans and check them early.
    Apple bread with maple glaze, sliced on platter.

    More Recipes

    If you love an easy sweet bread like this one, then you’ll also love these:

    • best banana bread
    • easy pumpkin bread
    • cherry bread
    • chocolate bread

    Recipe

    Sliced apple bread with a maple frosting.
    Print Pin
    Be the first to rate!

    Apple Bread Recipe

    Moist apple bread made with fresh apples, applesauce, coconut, and pecans, then finished with an easy maple glaze. It's simple to make with grocery store ingredients and perfect for brunch, an afternoon snack, or a potluck. Every slice has a little chunk of apple and a whole lot of flavor.
    Course Breakfast, Snack
    Cuisine American
    Prep Time 15 minutes minutes
    Cook Time 50 minutes minutes
    Cooling Time 10 minutes minutes
    Total Time 1 hour hour 15 minutes minutes
    Servings 8 slices
    Calories 403kcal
    Author Jessica Burgess

    Ingredients

    For the Bread

    • 2 medium apples peeled and chopped (Granny Smith and Honeycrisp)
    • 1 teaspoon lemon juice
    • 1 ½ cups unsweetened applesauce
    • 2 large eggs
    • 2 tablespoons coconut oil melted
    • 1 ½ teaspoons vanilla extract
    • ½ cup dark brown sugar
    • 1 ½ cups all-purpose flour
    • 1 teaspoon baking soda
    • 1 teaspoon pumpkin pie spice
    • ½ teaspoon sea salt
    • ½ cup shredded coconut
    • ½ cup chopped pecans

    For the Maple Glaze

    • 2 tablespoons butter melted
    • 3 tablespoons pure maple syrup
    • ¾ cup powdered sugar

    Instructions

    • Preheat the oven to 350 degrees and line a loaf pan with parchment paper.
    • Toss the chopped apples with the lemon juice in a small bowl and set aside.
    • In a medium bowl, whisk the flour, baking soda, pumpkin pie spice, and salt.
    • In a large bowl, mix the applesauce, eggs, coconut oil, vanilla, and brown sugar until well combined.
    • Add the flour mixture to the wet ingredients and stir just to incorporate.
    • Stir in the chopped apples.
    • Fold in the shredded coconut and chopped pecans.
    • Pour into the prepared pan and bake about 50 minutes, until a toothpick comes out clean in the center.
    • Transfer to a wire rack and cool about 10 minutes before removing from the pan.
    • Spread the maple glaze over the warm loaf.

    Maple Glaze

    • Whisk the melted butter, maple syrup, and powdered sugar until smooth, then spread over the warm loaf.

    Notes

    • Use one tart apple and one sweet apple for balanced flavor.
    • Don’t overmix the batter so the loaf stays tender.
    • Glaze the loaf while it’s still warm.
    • The top may shrink slightly as it cools, which is normal.
    • Divide into 3 or 4 mini loaf pans and bake for less time if you prefer smaller loaves.

    Nutrition

    Serving: 1slice | Calories: 403kcal | Carbohydrates: 62g | Protein: 5g | Fat: 16g | Saturated Fat: 9g | Polyunsaturated Fat: 2g | Monounsaturated Fat: 4g | Trans Fat: 0.1g | Cholesterol: 48mg | Sodium: 329mg | Potassium: 222mg | Fiber: 4g | Sugar: 39g | Vitamin A: 190IU | Vitamin C: 3mg | Calcium: 43mg | Iron: 2mg

    Coca-Cola Cake (The Old-Fashioned Sheet Cake Everyone Asks For)

    August 5, 2026

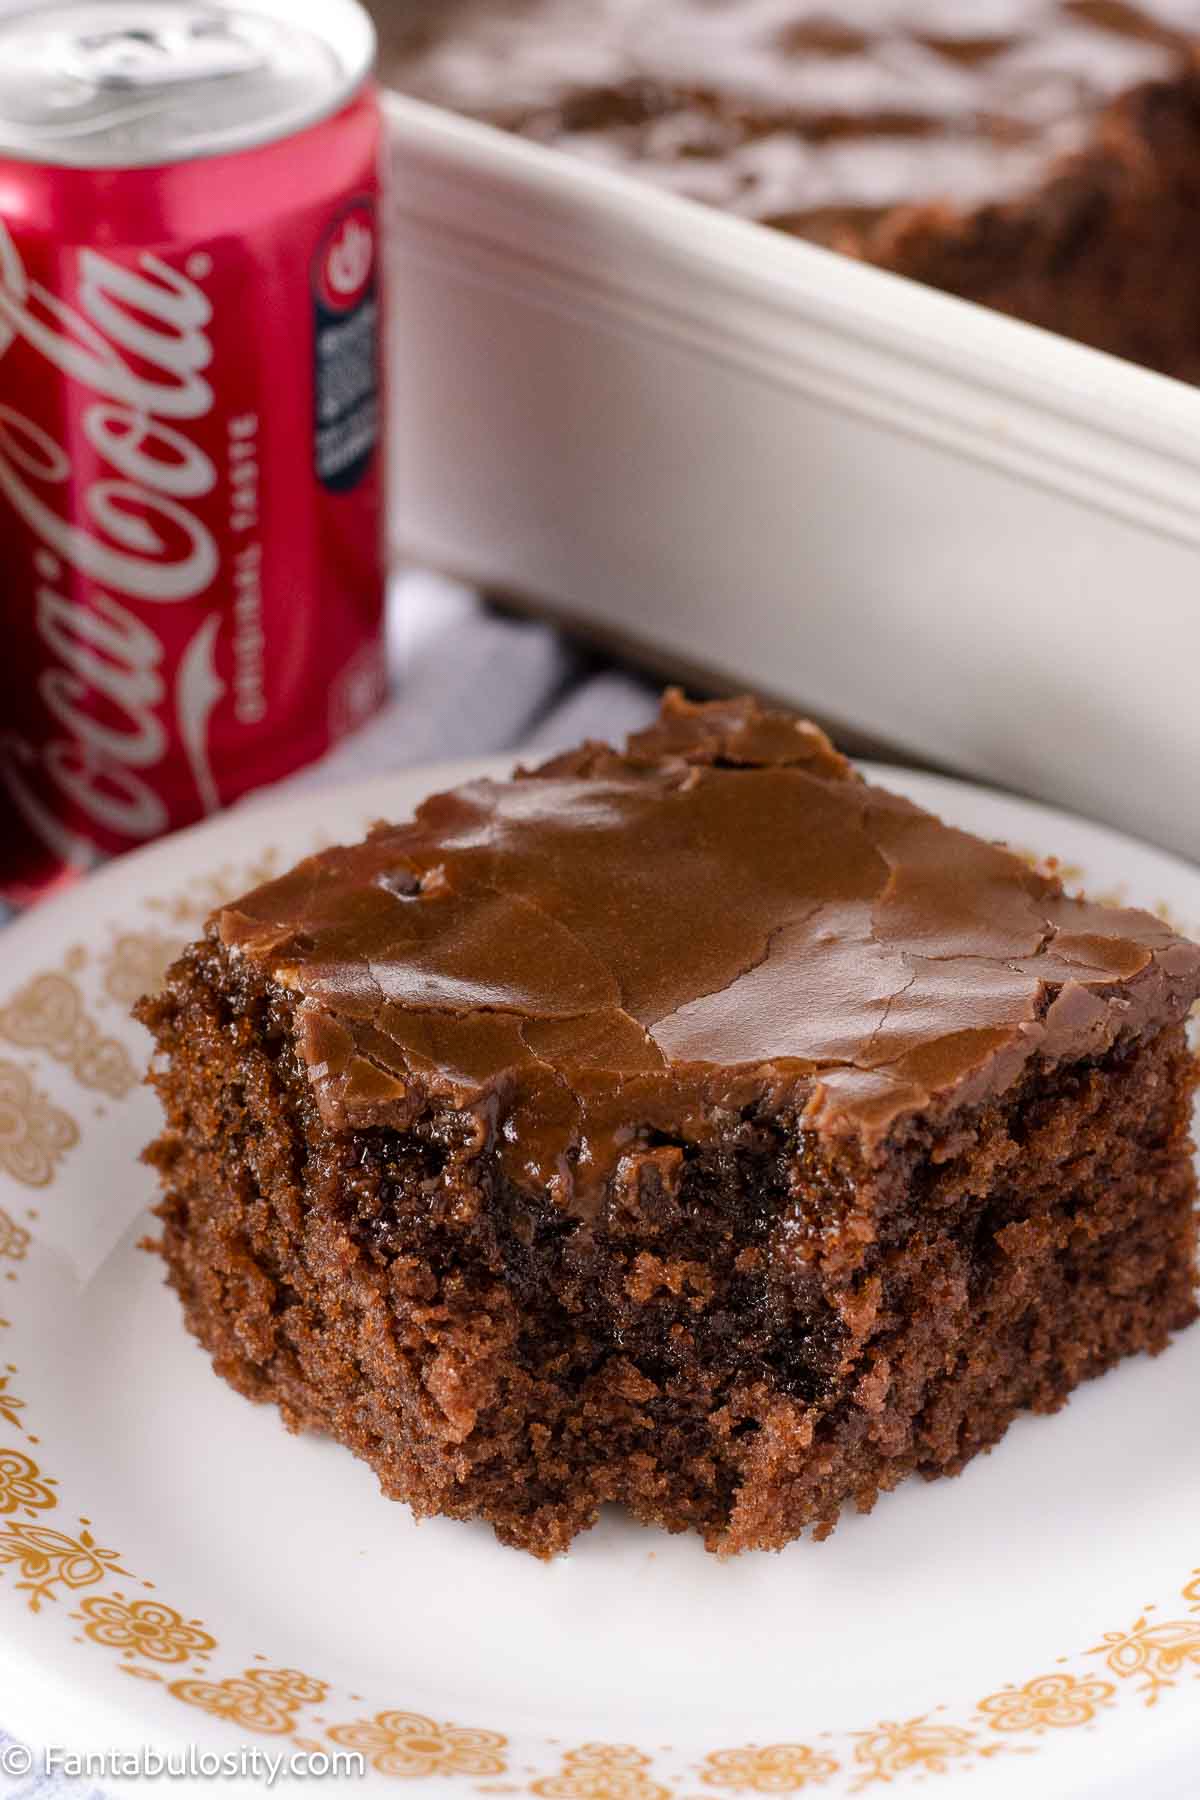
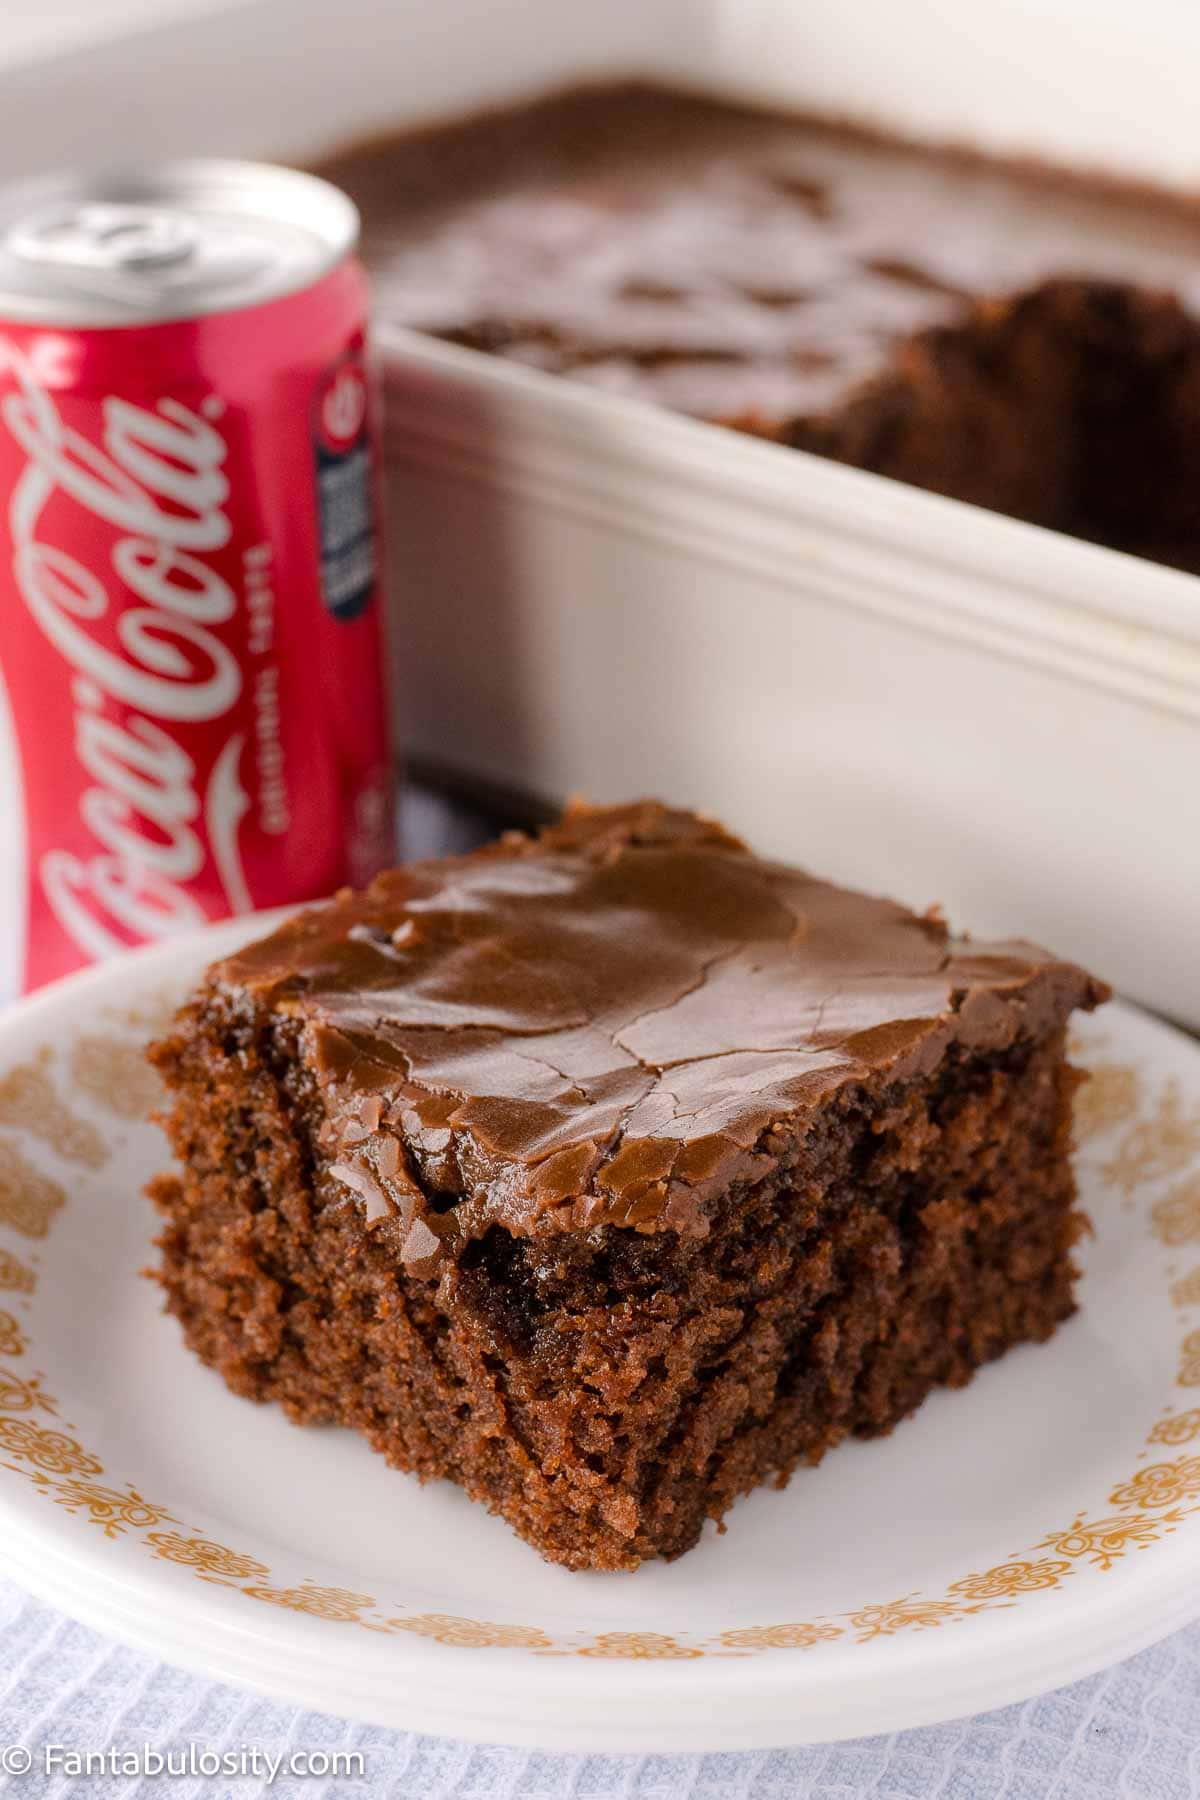
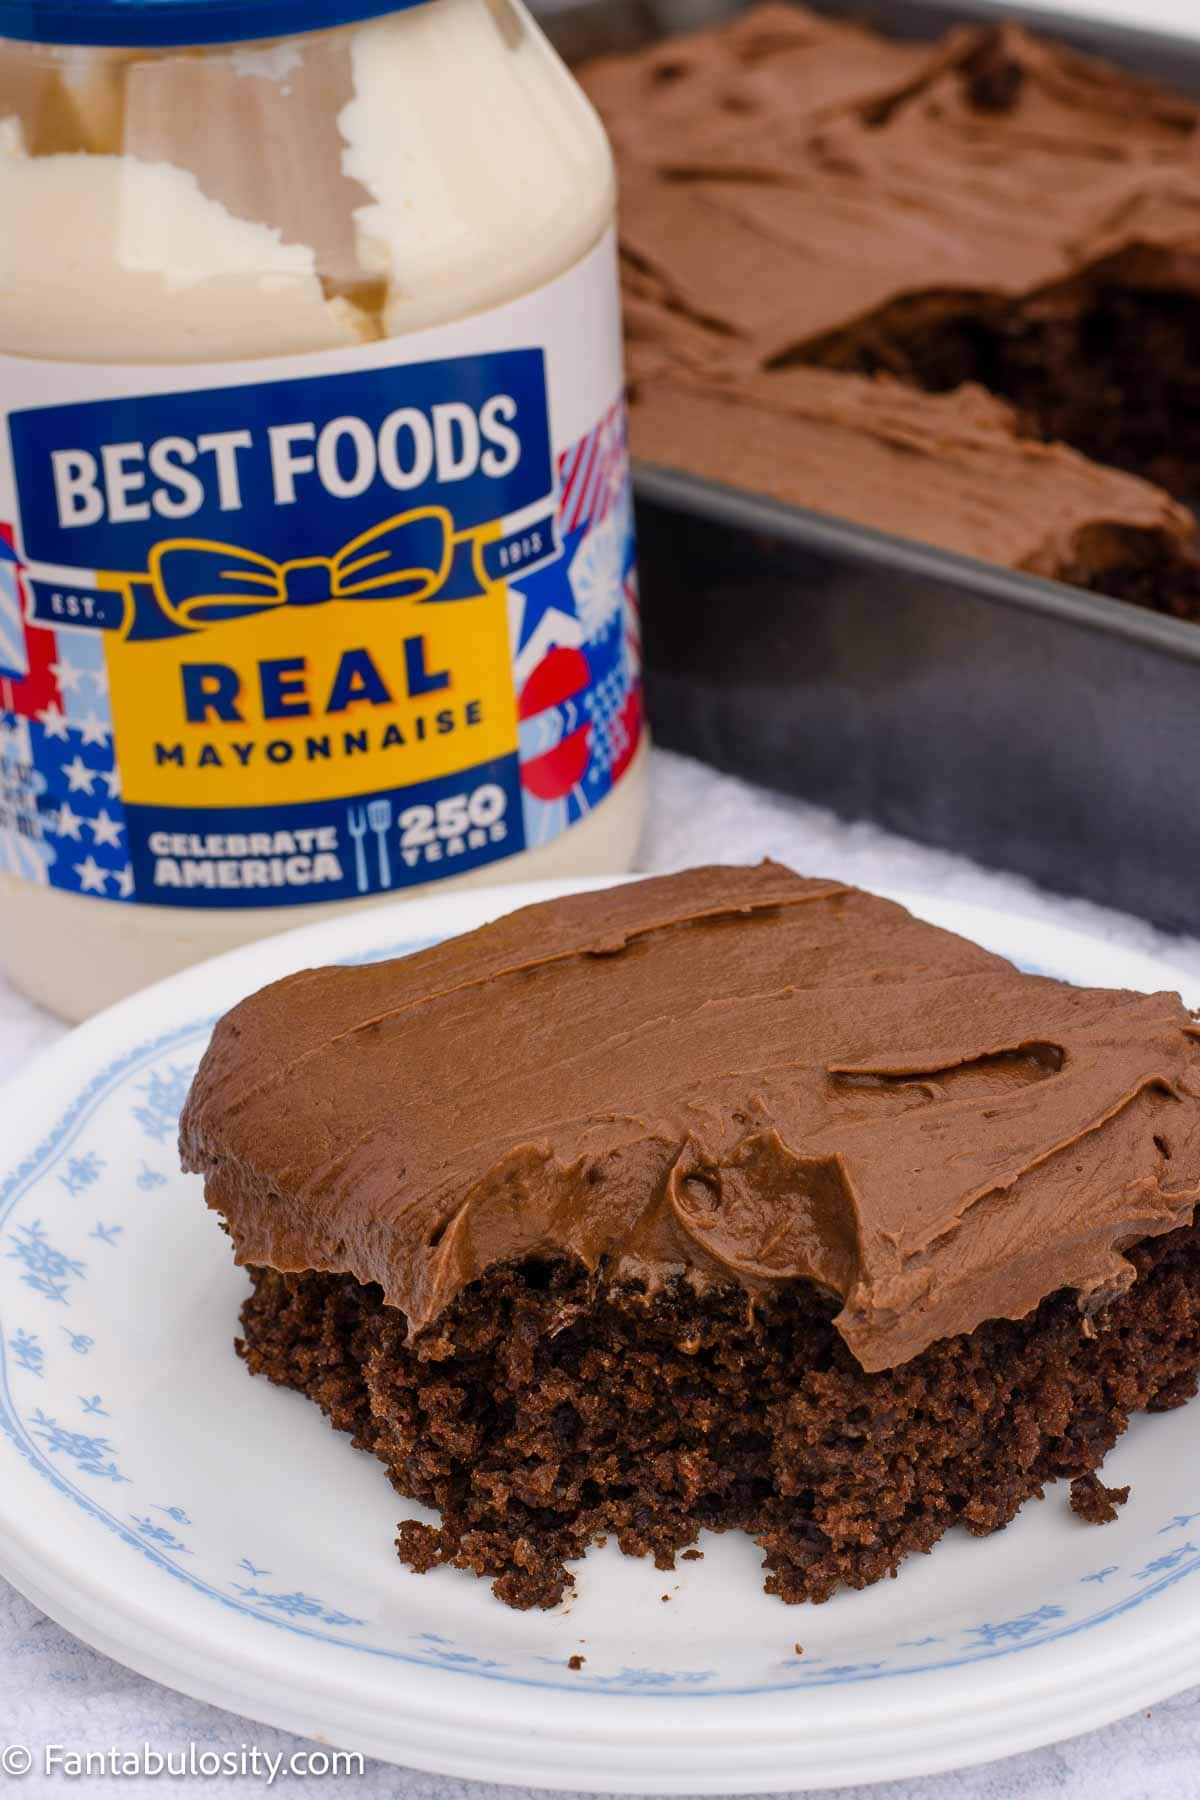
    A slice of Coca-Cola cake on a vintage plate, sitting next to a Coca-Cola can.

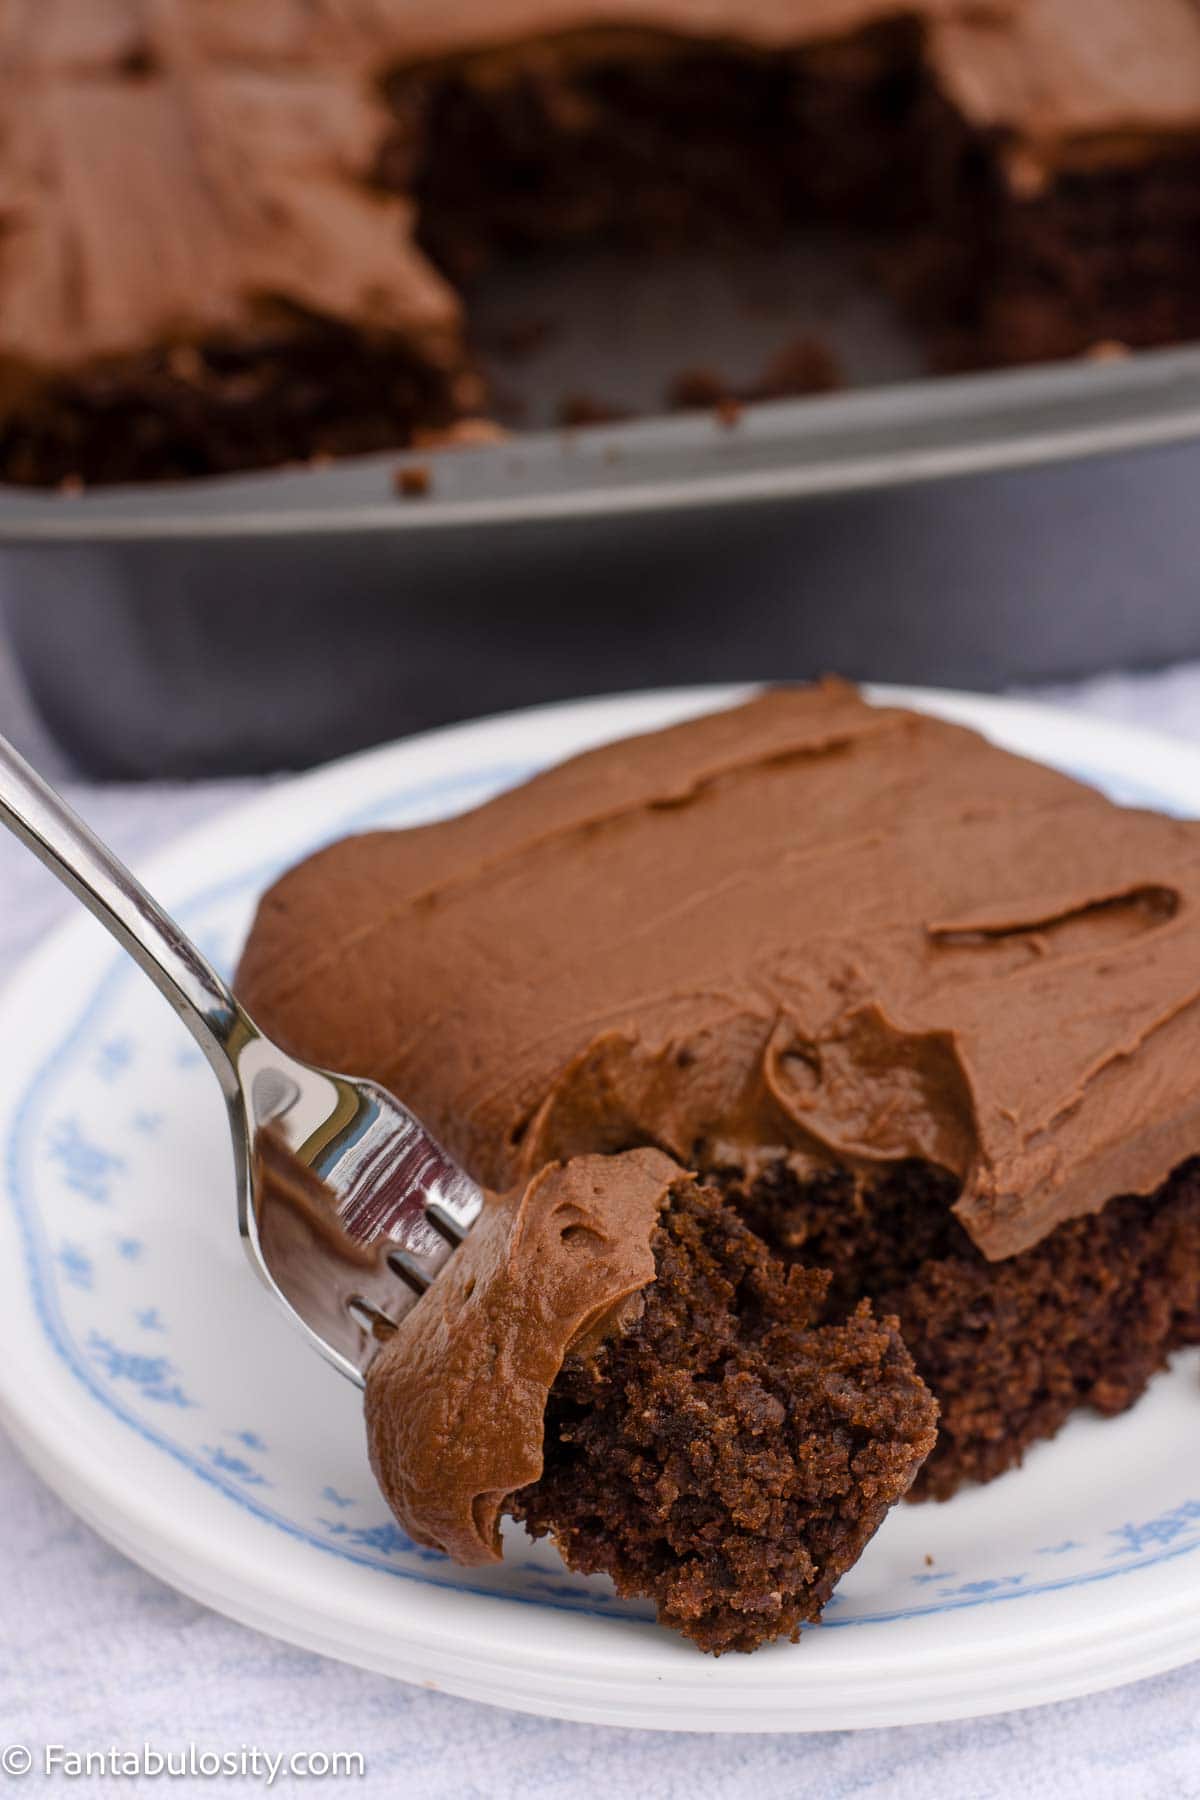
    This Coca-Cola Cake is an old-fashioned chocolate sheet cake baked in a 9×13, with mini marshmallows folded into the batter and warm chocolate frosting poured over the top, a lot like this peanut butter sheet cake. It’s easy to make, feeds a crowd, and has that nostalgic flavor everyone remembers from church cookbooks and family reunions.

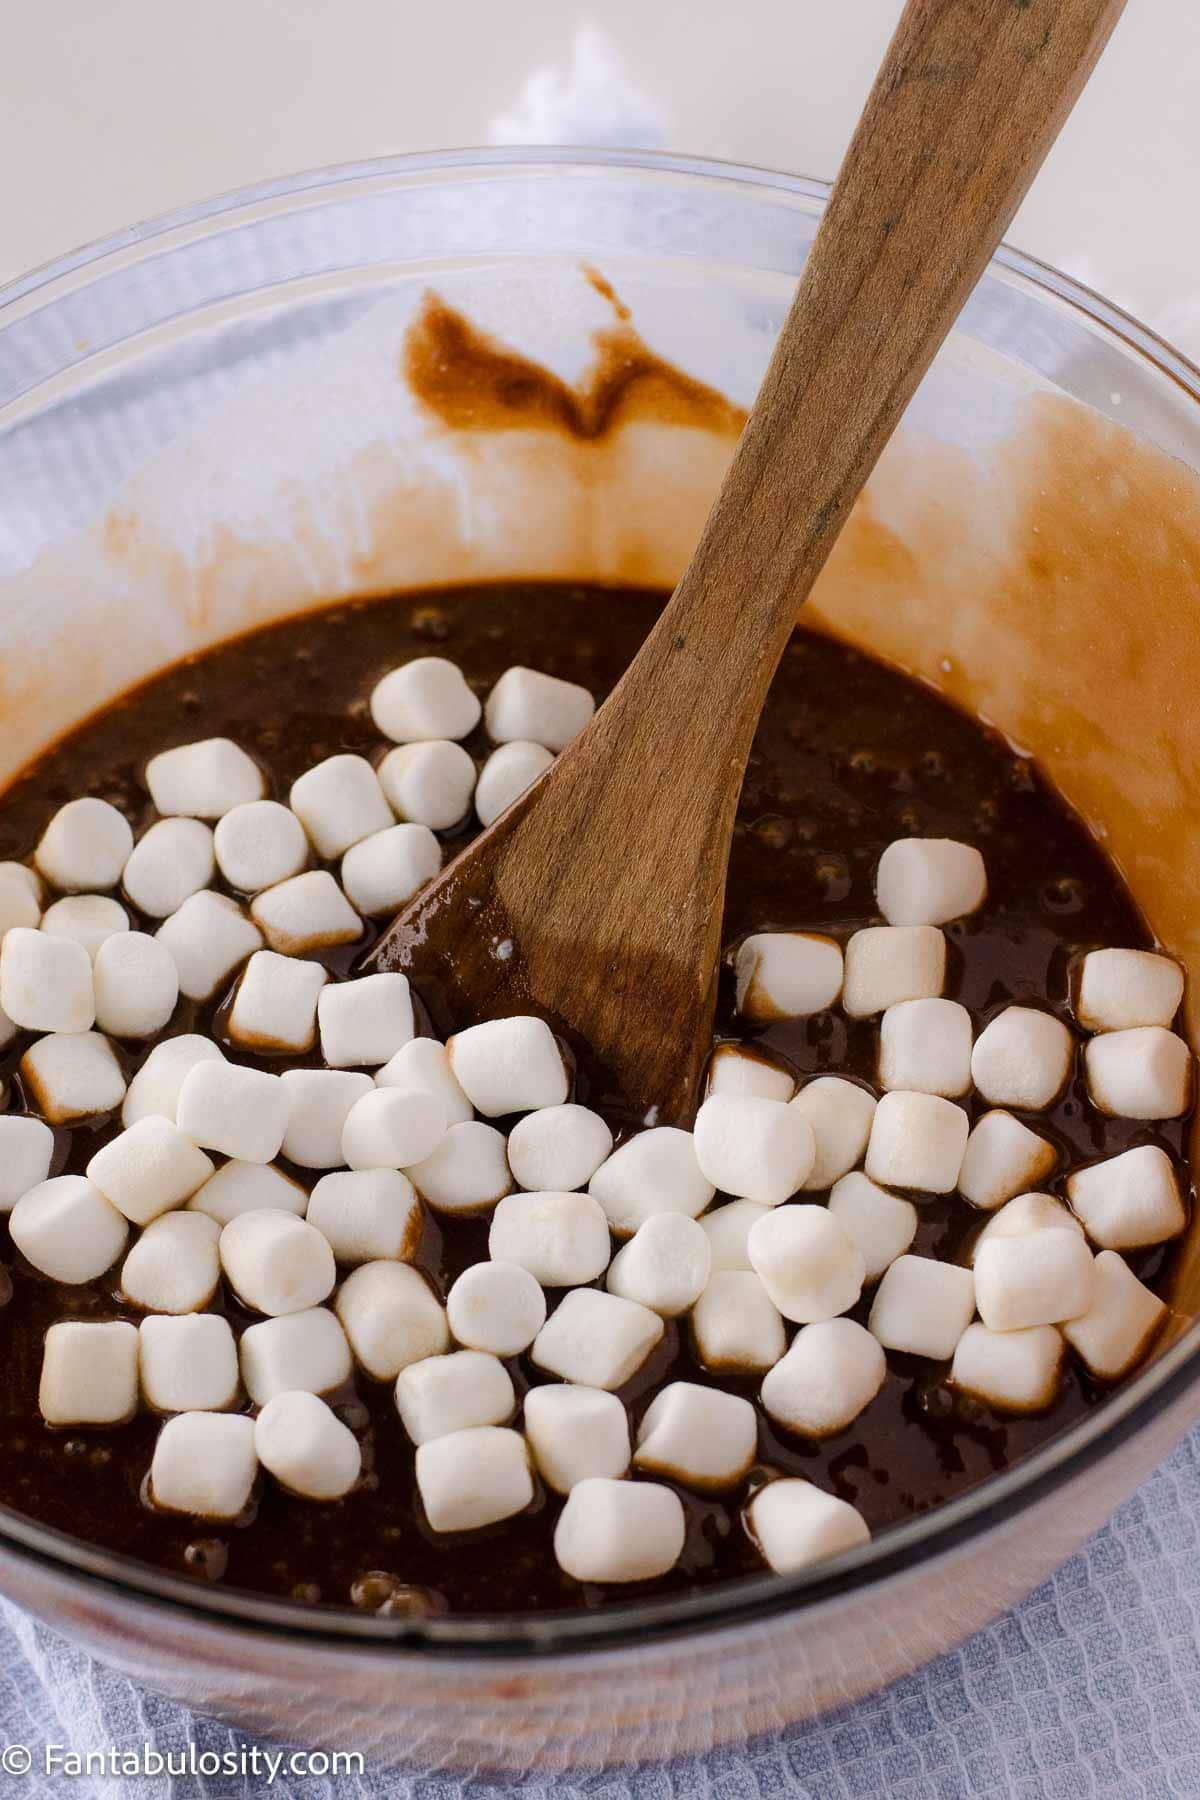
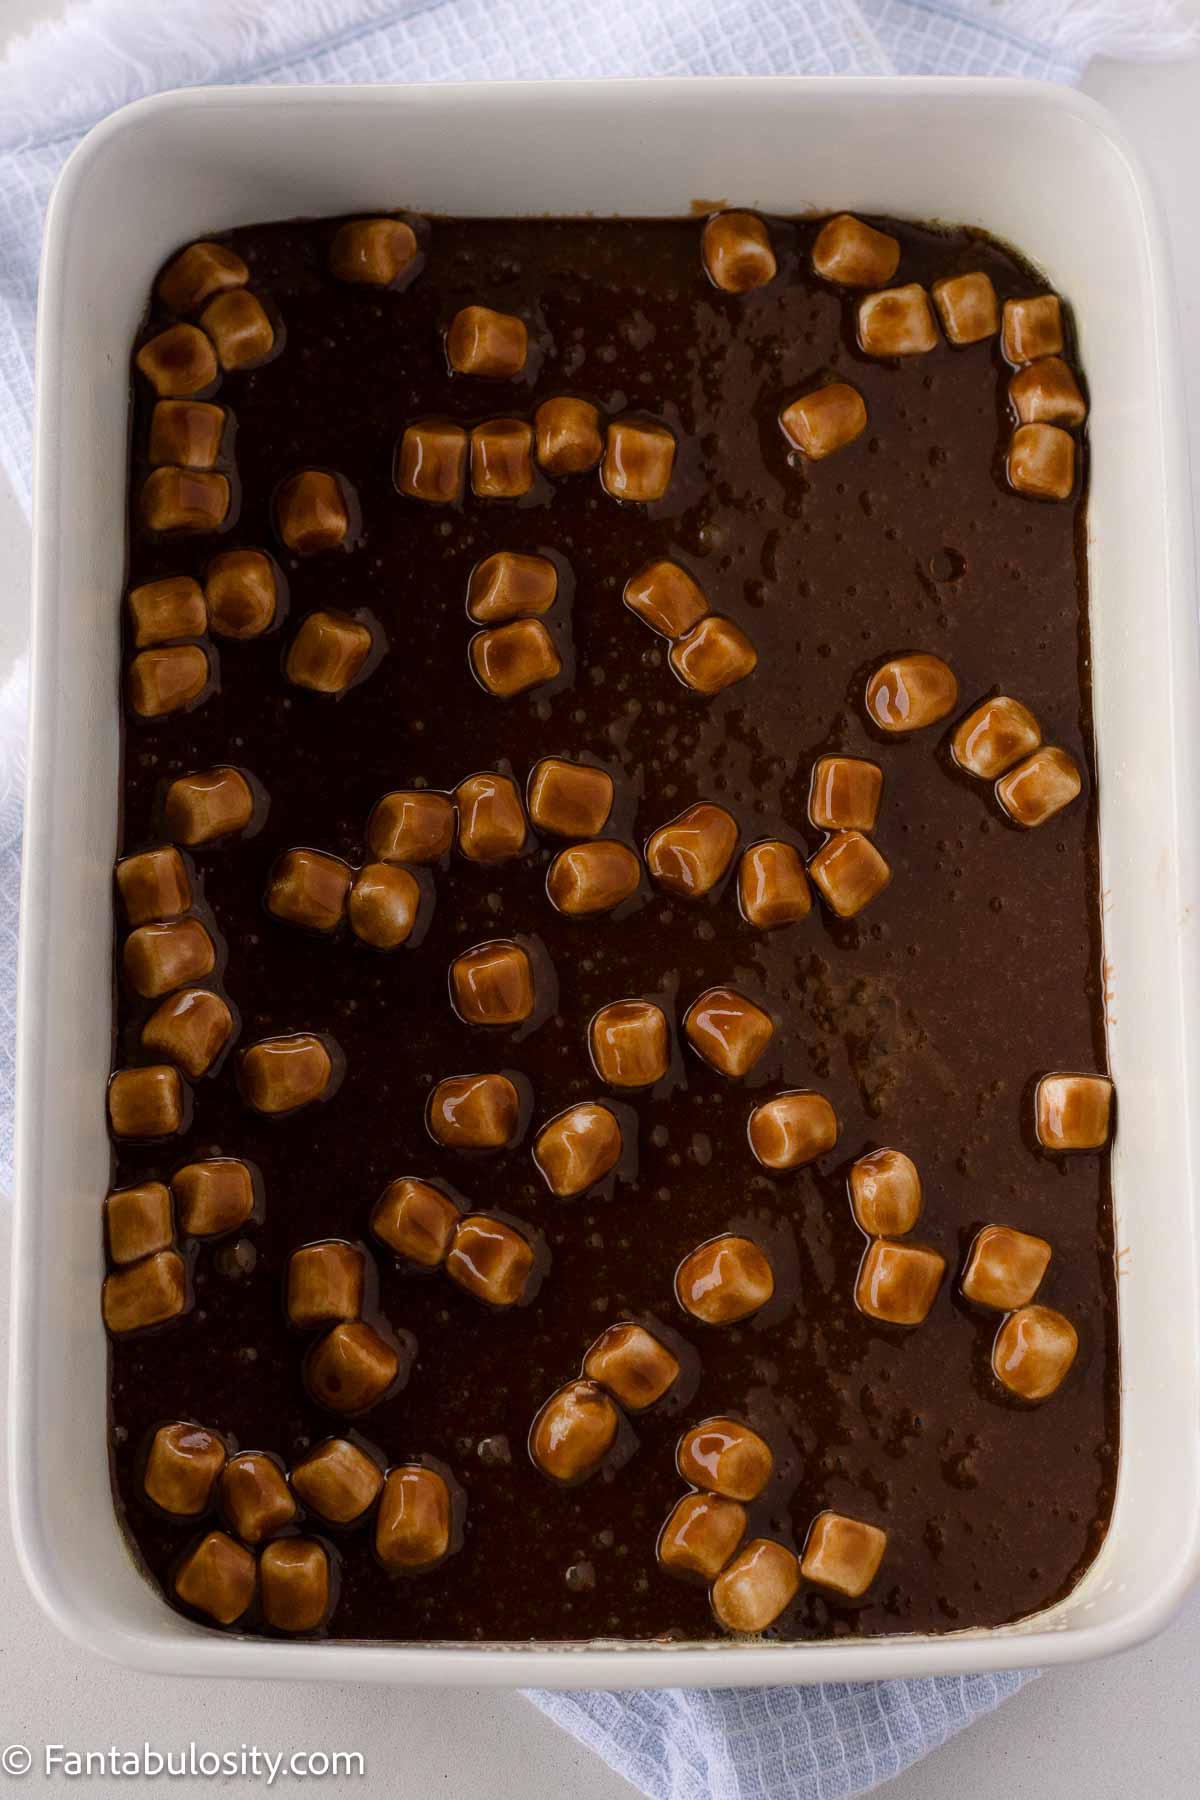
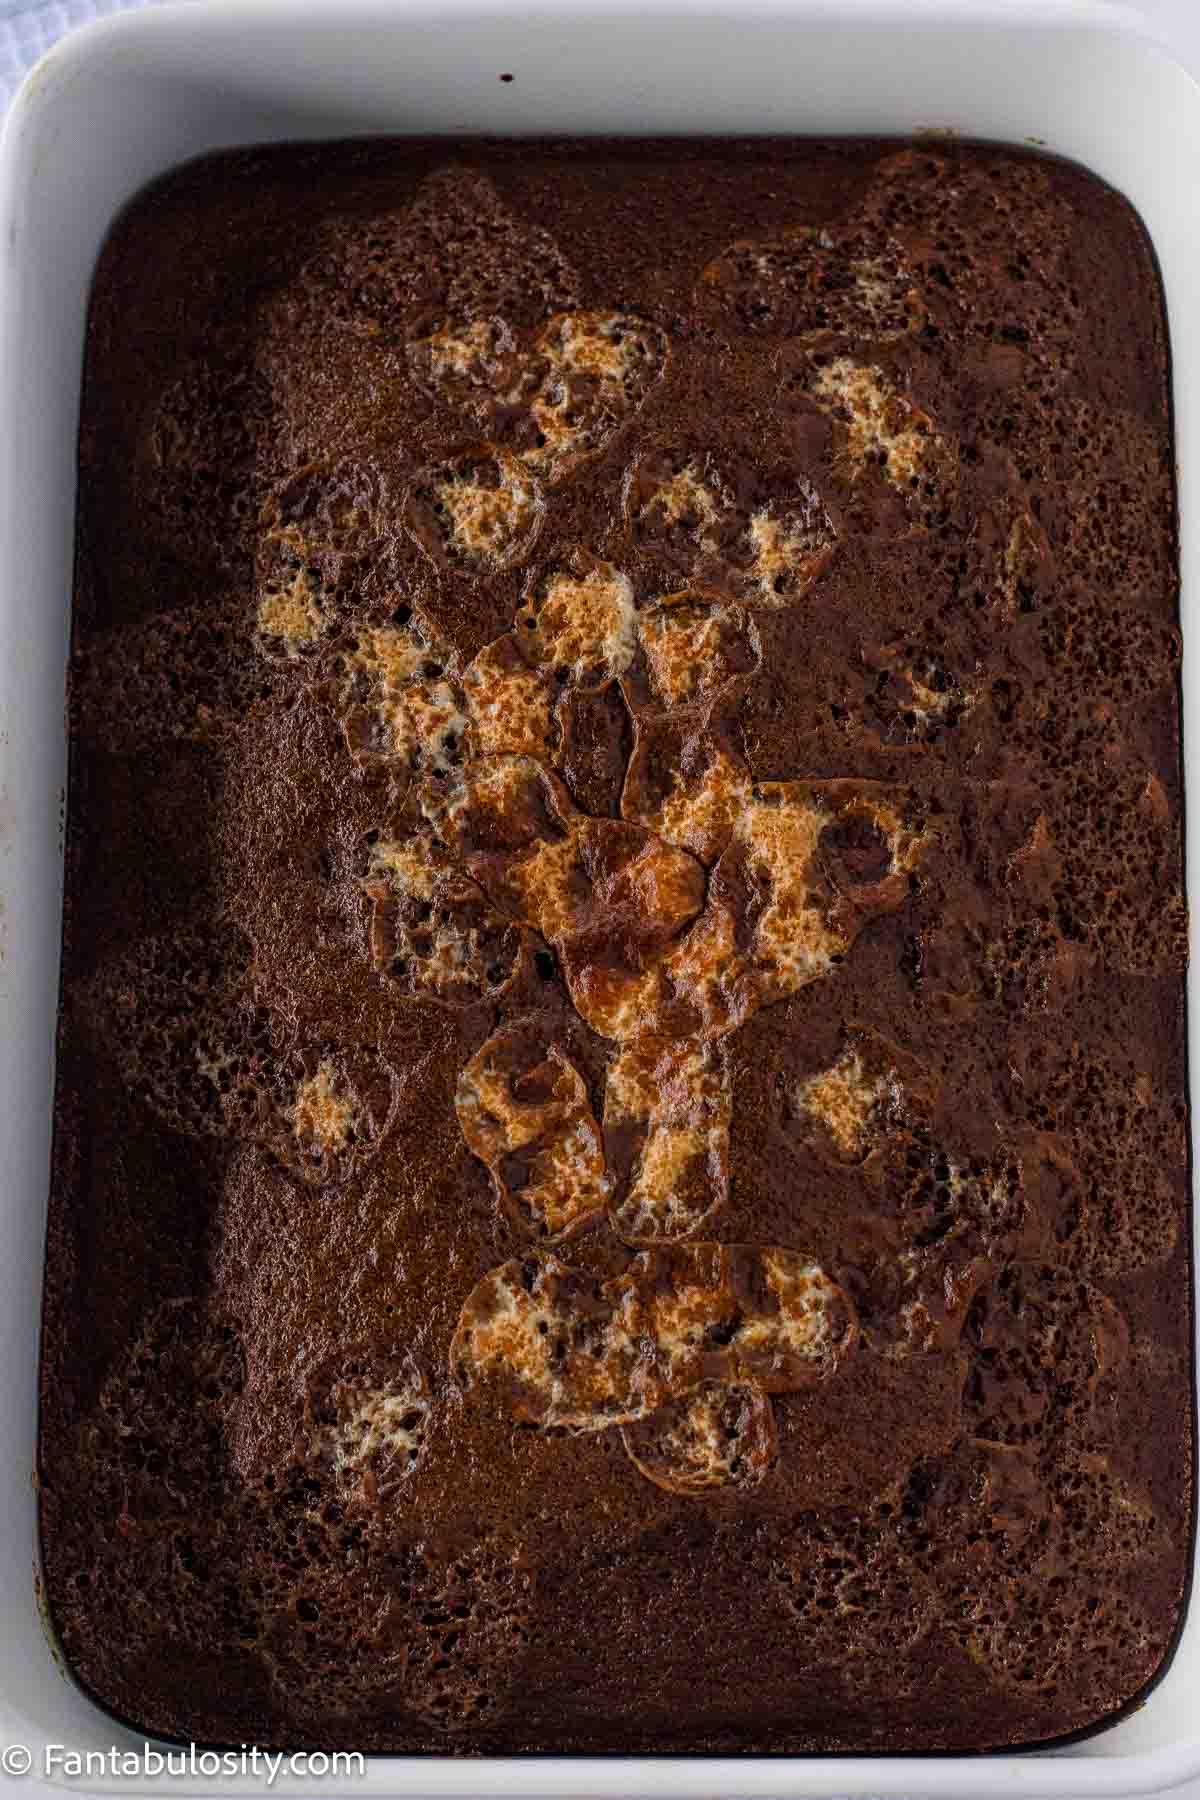
    Marshmallows in the batter and warm frosting poured on top. Find more nostalgic cake recipes here.

    An Easy Chocolate Sheet Cake That Tastes Like an Old-Fashioned Favorite

    A slice of Coca-Cola Cake on a vintage plate, sitting next to a can of Coke.

    The Coca-Cola does two things here. It keeps the cake incredibly moist, and it adds a soft caramel note under all that chocolate. You won’t bite into it and taste soda. You’ll just taste a deeper, richer chocolate cake than you’re used to. If you’ve made this hot fudge cake before, you already know the kind of gooey, comforting dessert we’re going for.

    The warm frosting is the trick. You pour it over the cake while both are still warm, so it soaks in a little at the edges and sets up smooth and fudgy on top. It’s the same pour-it-while-warm method that makes a good Tandy cake so hard to walk past.

    This one belongs on the table right next to the rest of your easy potluck desserts. If your family reaches for anything made with a can of soda, like this 7UP cake, or they love an easy chocolate crowd-pleaser like this black forest poke cake, this is the cake they’ll be asking you to bring again.

    Cakes for the Potluck Table cookbook by Jessica Burgess, cover and open recipe spread

    This cake is in my cookbook

    Cakes for the
    Potluck Table

    Sixty old-fashioned cakes, coming this spring. Six of the recipes are free right now.

    Send me the six cakes

    FAQs

    What does Coca-Cola Cake taste like?

    Like a rich, moist chocolate sheet cake. The cola adds a light caramel background note, but it doesn’t taste like soda. The marshmallows melt in and leave little soft, sweet pockets throughout the cake.

    Does Coca-Cola Cake actually taste like Coke?

    No. The Coca-Cola mostly works behind the scenes to keep the cake moist and boost the chocolate flavor. Most people can’t pick out the soda unless you tell them it’s in there.

    Why do you put Coca-Cola in a cake?

    The cola adds moisture and a little caramel sweetness, and it pairs naturally with chocolate. It’s an old grocery-store trick from a time when a can of Coke was always in the pantry.

    Can I use a different cola?

    The recipe is written for Coca-Cola, but any regular cola will work the same way. Diet colas can change the sweetness and texture a little, so regular is the safer choice.

    Do I have to add the marshmallows?

    No. The 1 cup of mini marshmallows melts into the batter for extra sweetness, but the cake still bakes up fine without them if you’d rather leave them out.

    Should I add nuts?

    That’s up to you. Many traditional Coca-Cola Cakes stir a cup of chopped pecans or walnuts into the frosting. Leaving them out gives the softest texture and works for the widest crowd, so that’s the way I’d lean.

    Can I make Coca-Cola Cake ahead of time?

    Yes. It actually holds up well, so you can bake and frost it a day before you need it. Let the frosting set completely, then cover it once it’s cool.

    How do I store Coca-Cola Cake?

    Cover it and keep it at room temperature for up to 3 days, or in the fridge for up to 5. To freeze, wrap individual slices well and freeze for up to 3 months, then thaw at room temperature before serving.

    Ingredients

    See the recipe card below that has the printable, full ingredient list and instructions.

    For the Cake:

    • 2 cups all-purpose flour – Gives the cake its structure.
    • 2 cups granulated sugar – Sweetens the batter and helps keep it moist.
    • ½ teaspoon salt – Balances the sweetness and deepens the chocolate flavor.
    • 1 teaspoon baking soda – Helps the cake rise.
    • 1 cup Coca-Cola – Adds moisture and a soft caramel note.
    • 1 cup salted butter (2 sticks) – Adds richness to the batter.
    • ⅓ cup unsweetened cocoa powder – Gives the cake its chocolate flavor.
    • ½ cup buttermilk – Keeps the crumb tender.
    • 2 large eggs – Bind the batter together.
    • 1 teaspoon vanilla extract – Rounds out the chocolate flavor.
    • 1 cup mini marshmallows – Melt into the cake for little pockets of sweetness.

    For the Chocolate Frosting:

    • ½ cup salted butter (1 stick) – Makes the frosting smooth and rich.
    • 3 tablespoons unsweetened cocoa powder – Adds the chocolate flavor.
    • 6 tablespoons Coca-Cola – Thins the frosting and carries the flavor through.
    • 1 teaspoon vanilla extract – Adds warmth and depth.
    • 3¾ cups powdered sugar – Sweetens and thickens the frosting so it sets.

    Optional:

    • 1 cup chopped pecans or walnuts – Stir into the frosting for crunch. Many traditional recipes include them, but leaving them out gives the best texture for a crowd.

    Instructions

    • Preheat the oven to 350°F and grease a 9×13-inch baking dish.
    • In a large bowl, whisk together the 2 cups flour, 2 cups sugar, ½ teaspoon salt, and 1 teaspoon baking soda.
    • In a medium saucepan over medium heat, combine the 1 cup Coca-Cola, 1 cup butter, and ⅓ cup cocoa powder. Heat until the butter melts and the mixture just begins to simmer, whisking now and then.
    Butter, cocoa and Coca Cola in a saucepan.
    • Pour the hot cocoa mixture into the dry ingredients and whisk until combined.
    Hot chocolate mixture poured in to dry ingredients.
    • Add the ½ cup buttermilk, 2 eggs, and 1 teaspoon vanilla. Stir just until smooth.
    Eggs, buttermilk and oil added to chocolate mixture in mixing bowl.
    • Fold in the 1 cup mini marshmallows.
    Marshmallows added to chocolate mixture in mixing bowl.
    • Pour the batter into the prepared dish.
    Coca-Cola cake batter in 9x13 baking dish.
    • Bake for 30 to 35 minutes, until a toothpick inserted in the center comes out with a few moist crumbs. Some marshmallows may rise to the top as it bakes. They disappear under the frosting.
    Baked Coca-Cola caked in 9x13 baking dish.

    How to Make the Chocolate Frosting

    • About 5 minutes before the cake is done, start the frosting.
    • In a saucepan over medium heat, melt the ½ cup butter with the 3 tablespoons cocoa powder and 6 tablespoons Coca-Cola until smooth and hot.
    Cocoa butter and Coca Cola in a sauce pan.
    • Take it off the heat and whisk in the 1 teaspoon vanilla and 3¾ cups powdered sugar until smooth.
    Powdered sugar added to sauce pan with chocolate frosting mixture.
    • Stir in the 1 cup chopped nuts now if you’re using them.
    • Pour the warm frosting over the warm cake and spread it evenly.
    Chocolate Coca-Cola frosting poured on top of Coca-Cola cake in 9x13 baking dish.
    • Let the frosting cool and set before slicing.

    Tips

    • Frost the cake while both the cake and the frosting are still warm. That’s what gives the top its smooth, fudgy finish.
    • Time the frosting to be ready the moment the cake comes out. Start it about 5 minutes before the bake time is up.
    • Pull the cake when a toothpick comes out with a few moist crumbs, not clean, so it stays moist.
    • Don’t worry if some marshmallows float to the center and to the top while baking. The warm frosting covers them.
    • Let the frosting set before slicing so you get clean pieces.
    • Leave the nuts out for the softest texture, or stir them into the frosting if your crowd loves the crunch.
    A slice of Coca-Cola cake on a vintage plate, sitting next to a can of Coca-Cola.

    More Recipes

    If you love an easy chocolate cake like this one, then you’ll also love these:

    • chocolate mayonnaise cake - another old-fashioned 9×13 chocolate cake, topped with chocolate buttercream
    • hot fudge cake
    • tandy cake
    • 7up cake
    • cherry chocolate dump cake

    Recipe

    A slice of Coca-Cola cake on a vintage plate, sitting next to a Coca-Cola can.
    Print Pin
    5 from 4 votes

    Coca-Cola Cake

    A rich, old-fashioned chocolate sheet cake made in a 9×13 with mini marshmallows and warm chocolate frosting poured right over the top. The Coca-Cola keeps it moist and adds a soft caramel note under all that chocolate. It's easy to make and feeds a crowd, which makes it a potluck and family-dinner favorite.
    Course Dessert
    Cuisine American
    Prep Time 20 minutes minutes
    Cook Time 35 minutes minutes
    Cooling Time 45 minutes minutes
    Total Time 1 hour hour 40 minutes minutes
    Servings 15 servings
    Calories 534kcal
    Author Jessica Burgess

    Ingredients

    For the Cake:

    • 2 cups all-purpose flour
    • 2 cups granulated sugar
    • ½ teaspoon salt
    • 1 teaspoon baking soda
    • 1 cup Coca-Cola
    • 1 cup salted butter 2 sticks
    • ⅓ cup unsweetened cocoa powder
    • ½ cup buttermilk
    • 2 large eggs
    • 1 teaspoon vanilla extract
    • 1 cup mini marshmallows

    For the Frosting:

    • ½ cup salted butter 1 stick
    • 3 tablespoons unsweetened cocoa powder
    • 6 tablespoons Coca-Cola
    • 1 teaspoon vanilla extract
    • 3¾ cups powdered sugar
    • 1 cup chopped pecans or walnuts optional

    Instructions

    Cake

    • Preheat the oven to 350°F and grease a 9×13-inch baking dish.
    • Whisk together the flour, sugar, salt, and baking soda in a large bowl.
    • In a medium saucepan over medium heat, combine the Coca-Cola, butter, and cocoa powder. Heat until the butter melts and the mixture just begins to simmer, whisking occasionally.
    • Pour the hot cocoa mixture into the dry ingredients and whisk until combined.
    • Add the buttermilk, eggs, and vanilla. Stir just until smooth.
    • Fold in the mini marshmallows.
    • Pour the batter into the prepared dish and bake for 30 to 35 minutes, or until a toothpick comes out with a few moist crumbs. (Don't worry if some of the mini marshmallows rise toward the top or center of the cake while baking. They'll be covered with the warm frosting and melt into the cake.)

    Chocolate Frosting

    • About 5 minutes before the cake is done, melt the butter with the cocoa powder and Coca-Cola in a saucepan over medium heat until smooth and hot.
    • Remove from the heat and whisk in the vanilla and powdered sugar until smooth.
    • Stir in the nuts if using.
    • Pour the warm frosting over the warm cake and spread evenly.
    • Let the frosting set before slicing.

    Video

    Notes

    • Frost the cake while both the cake and frosting are warm for the smoothest top.
    • Have the frosting ready the moment the cake comes out of the oven.
    • Bake just until a toothpick shows a few moist crumbs so the cake stays moist.
    • Leave the nuts out for the softest texture, or add them for crunch.

    Nutrition

    Serving: 1slice | Calories: 534kcal | Carbohydrates: 77g | Protein: 5g | Fat: 25g | Saturated Fat: 13g | Polyunsaturated Fat: 5g | Monounsaturated Fat: 6g | Trans Fat: 1g | Cholesterol: 72mg | Sodium: 319mg | Potassium: 123mg | Fiber: 2g | Sugar: 61g | Vitamin A: 614IU | Vitamin C: 0.1mg | Calcium: 33mg | Iron: 2mg
    Cakes for the Potluck Table cookbook by Jessica Burgess, cover and open recipe spread

    My cookbook · Coming this spring

    Cakes for the
    Potluck Table

    Sixty cakes that never come home leftover. Six are yours free right now.

    Send me the six cakes

    Homemade Whipped Cream (Just 3 Ingredients, Ready in 5 Minutes)

    August 8, 2026

    Spoonful of homemade whipped cream with a bowl of strawberries.

    Homemade whipped cream is one of those little extras that makes any dessert feel special, and it comes together with three ingredients in about five minutes.

    Whipped cream is also the finishing touch on this strawberry pie without Jell-O.

    Real cream, a spoonful of powdered sugar, and a splash of vanilla beat up into soft, billowy clouds that taste like a little spoonful of heaven. Spoon it over berries, dollop it on pie, or fold it onto a strawberry whipped cream cake.

    An Easy Whipped Cream Recipe That Beats the Stuff in the Tub

    Spoon holding a bite of homemade whipped cream over a bowl of strawberries.

    Real whipped cream is lighter and creamier than anything from a can, and it’s the kind of finishing touch that makes a dessert taste homemade. It only needs three ingredients you probably already have, and it turns even the simplest treat into something worth serving. A spoonful on a slice of turtle pie or a warm bowl of cherry dump cake makes all the difference.

    It’s also endlessly useful. Pile it on sliced strawberries for the easiest summer dessert there is, layer it into a no-bake treat, or set it out next to a strawberry crunch cheesecake. It’s the kind of recipe that earns a spot at every potluck and Sunday dinner.

    Best of all, it’s fast. Five minutes with a hand mixer and you’ve got fresh cream ready to go. Get the hang of it once, and it becomes second nature.

    Bowl of strawberries topped with homemade whipped cream.

    FAQs

    What kind of cream do you need to make whipped cream?

    You need heavy whipping cream or heavy cream. Both have enough fat to whip into peaks and hold their shape, and they’re basically the same thing, so grab whichever your store carries. Skip half-and-half and milk.

    Can you use milk instead of heavy cream?

    No. Milk and half-and-half don’t have enough fat to trap air and form peaks. You’ll just end up with cold, sweet milk. Heavy whipping cream is the only way to get that fluffy texture.

    Should you use powdered sugar or granulated sugar?

    Powdered sugar works best. It dissolves smoothly, and the little bit of cornstarch in it helps the cream hold its shape a touch longer. Granulated sugar can leave a gritty texture since it doesn’t fully dissolve.

    How do you know when whipped cream is done?

    Watch the peaks. Soft peaks fold over at the tip when you lift the beaters, which is perfect for spooning over fruit or cocoa. Stiff peaks stand straight up and hold their shape, which is what you want for topping pies or piping. Stop as soon as you hit stiff peaks so you don’t overdo it.

    Can you make homemade whipped cream ahead of time?

    Yes. It’s best fresh, but you can make it up to a day ahead and keep it covered in the fridge. If you need it to hold longer or plan to pipe it, stabilize it with a little gelatin (see the recipe notes). Stabilized whipped cream keeps its shape for a few days.

    Why is my whipped cream runny, and can you fix over-whipped cream?

    Runny cream usually means it wasn’t cold enough or didn’t whip long enough. Start with cream straight from the fridge and keep beating. If you go too far and it looks grainy, gently stir in a splash of fresh cold cream by hand to smooth it back out. Just catch it before it turns to butter.

    How long does homemade whipped cream last, and can you freeze it?

    Store leftovers in an airtight container in the refrigerator for 2 to 3 days. It may soften a little, so give it a quick whisk before serving. You can also freeze it. Drop dollops onto a parchment-lined tray, freeze until solid, then keep them in a freezer bag for up to 3 months. Set them right on your hot chocolate or coffee straight from the freezer.

    What do you use whipped cream on?

    Just about anything. It’s a natural on pie, shortcake, and fresh berries, and it melts into hot chocolate and coffee. It’s also the finishing touch on no-bake desserts like pumpkin lush and the best Oreo dessert. Once you have a batch, you’ll find plenty of excuses to use it.

    Ingredients

    See the recipe card below that has the printable, full ingredient list and instructions.

    Ingredients to make homemade whipped cream sitting on counter.
    • 1 cup cold heavy whipping cream – The base. It has to be cold to whip up into peaks.
    • 2 tablespoons powdered sugar – Sweetens the cream and helps it hold its shape. Use 3 tablespoons if you like it sweeter.
    • 1 teaspoon vanilla extract – Adds that warm, classic flavor.

    Instructions

    • Pour 1 cup cold heavy whipping cream into a large mixing bowl.
    • Add 2 tablespoons powdered sugar and 1 teaspoon vanilla extract.
    Heavy cream, powdered sugar and vanilla in a mixing bowl to make homemade whipped cream.
    • Beat with a hand mixer on medium speed until soft peaks form.
    • Keep beating until stiff peaks form, watching closely so you don’t overmix.
    Homemade whipped cream in a mixing bowl.
    • Serve right away, or refrigerate until you’re ready to use it.

    Whipped Cream with Gelatin

    This recipe is designed to be a classic homemade whipped cream that’s perfect for serving right away. If you’re making it ahead of time or need it to hold its shape for piping, you can easily stabilize it with gelatin. I’ve included those instructions in the recipe notes below.

    Tips

    • Chill your mixing bowl and beaters for about 15 minutes before you start. Cold equipment gives you the fluffiest results.
    • Keep the cream cold right up until you whip it. Cold cream whips faster and holds better.
    • Watch closely once you reach soft peaks. Stiff peaks come quickly, and a few extra seconds can turn the cream grainy.
    • Use 2 tablespoons powdered sugar for an all-purpose cream, or 3 tablespoons if you want it sweeter.
    • Store leftovers in an airtight container in the refrigerator for 2 to 3 days.
    • To make it hold up for piping or making ahead, stabilize it with gelatin. See the recipe notes.
    Wooden serving spoon dishing out homemade whipped cream.

    More Recipes

    If you love easy desserts like this one, then you’ll also love these sweet treats to top with a spoonful of fresh cream:

    • dump cake
    • pumpkin dump cake
    • strawberry crunch cake
    • cheesecake stuffed strawberries

    Recipe

    A spoonful of homemade whipped cream resting above strawberries.
    Print Pin
    Be the first to rate!

    Homemade Whipped Cream

    Light, fluffy homemade whipped cream made with just three ingredients. It comes together in about five minutes and tastes worlds better than the store-bought kind. Perfect on pie, berries, hot chocolate, and everything in between.
    Course Dessert
    Cuisine American
    Prep Time 5 minutes minutes
    Total Time 5 minutes minutes
    Servings 8 servings
    Calories 110kcal
    Author Jessica Burgess

    Ingredients

    • 1 cup cold heavy whipping cream
    • 2 tablespoons powdered sugar
    • 1 teaspoon vanilla extract

    Instructions

    • Pour the cold heavy whipping cream into a large mixing bowl.
    • Add the powdered sugar and vanilla extract.
    • Beat with a hand mixer on medium speed until soft peaks form.
    • Continue beating until stiff peaks form, being careful not to overmix.
    • Serve immediately or refrigerate until ready to use.

    Notes

    • For the fluffiest whipped cream, chill the mixing bowl and beaters for about 15 minutes before starting.
    • Use 2 tablespoons powdered sugar for a versatile, lightly sweet cream, or 3 tablespoons for a sweeter version.
    • Store leftovers in an airtight container in the refrigerator for 2 to 3 days.
    • To stabilize the whipped cream so it holds its shape for piping or making ahead: Bloom 1 teaspoon (one 0.25-ounce packet) of unflavored gelatin in 1 tablespoon cold water. Let it sit for 1 minute, then microwave for 5 to 10 seconds, just until melted. Let it cool until warm but not hot, then slowly drizzle it into the cream once it reaches soft peaks. Keep beating until stiff peaks form.

    Nutrition

    Serving: 1serving | Calories: 110kcal | Carbohydrates: 3g | Protein: 1g | Fat: 11g | Saturated Fat: 7g | Polyunsaturated Fat: 0.5g | Monounsaturated Fat: 3g | Cholesterol: 34mg | Sodium: 8mg | Potassium: 29mg | Sugar: 3g | Vitamin A: 437IU | Vitamin C: 0.2mg | Calcium: 20mg | Iron: 0.03mg

    Easy Fall Desserts (34 Cozy Recipes for the Whole Season)

    August 10, 2026

    Fall Dessert Recipes collage, showing pumpkin, apple and pecan desserts.

    Once the mornings get crisp (which is often here in Montana), the oven pretty much doesn’t turn off. Apples and cinnamon, pumpkin everything, caramel and toasted pecans.

    Working on the whole holiday menu? Pair these with my roundup of Thanksgiving side dishes.

    These are the fall desserts that friends and family ask for year after year… you know, the ones that show up at every potluck from now clear through Thanksgiving.

    An image collage of fall desserts.

    I’ve sorted them by kind below, so you can jump straight to what you’re craving. But just a heads up… my family begs for this pecan pie dump cake as soon as the summer heat disappears.

    Apple Desserts

    Caramel Apple Dump Cake

    caramel apple dump cake with vanilla ice cream scoop

    Apples and caramel under a buttery cake-mix topping, and you barely lift a finger.

    Try this caramel apple dump cake when you want fall in a pan with almost no effort.


    Apple Dapple Cake

    A square slice of apple dapple cake topped with caramel glaze on a white plate next to a green apple.

    Chunks of granny smith apple baked into a thick, spiced batter with warm caramel glaze poured over the top.

    Serve this apple dapple cake when you need an old-fashioned dessert that feeds a crowd.

    Apple Snickerdoodle Dump Cake

    Serving of snickerdoodle apple dump cake on a round plate.

    Warm spiced apples with a snickerdoodle-cake layer baked right on top.

    Make this apple snickerdoodle dump cake for a cozy apple dessert that comes together fast.


    Apple Bread with Maple Glaze

    Apple bread with maple glaze, sliced on platter.

    Moist apple bread finished with a sweet maple glaze. It’ll have the whole house smelling like fall.

    Bake up this apple bread recipe when you want something that fills the kitchen with the smell of fall.


    Amish Applesauce Cake

    Amish applesauce cake with a slice cut out and lifted out.

    A soft, spiced applesauce cake, just like the ones out of an old Amish kitchen.

    Save this amish applesauce cake for an old-fashioned spiced cake made from pantry staples.


    Applesauce Crumb Cake

    Slice of applesauce crumb cake on plate with a bite taken out.

    Tender applesauce cake under a buttery crumb you’ll keep sneaking bites of.

    Grab this applesauce crumb cake when you want a snack cake for a cool afternoon.


    Apple Butter Pie

    Baked apple butter pie in dish, with a slice removed.

    Silky apple butter baked into a pie. If you love apple butter, this one’s for you.

    Pull out this apple butter pie for a different take on apple pie.


    Air Fryer Apple Fritters

    Bite taken out of air fryer apple fritters, that are stacked on top of one another.

    Warm cinnamon apple fritters with a glaze, and no vat of oil to deal with.

    Try these air fryer apple fritters when you want that fried apple taste without the deep frying.


    Apple Pie Nachos

    Apple Pie Nachos with Baked Cinnamon Sugar Tortillas

    Cinnamon-sugar crisps piled high with warm apples. Set it out and watch it go.

    Make these apple pie nachos for a shareable fall treat that’s a little different.


    Snicker Apple Salad

    Snicker Apple Salad in bowl, with caramel drizzle on top.

    Crisp apples, candy bar chunks, and a fluffy dressing. It shows up at every potluck for a reason.

    Stir up this Snickers apple salad when you need a no-bake dish for a get-together.


    Pumpkin Desserts

    Pumpkin Sheet Cake

    A slice of pumpkin sheet cake with brown butter frosting on a vintage plate.

    A thin, tender pumpkin cake under poured brown butter frosting that sets while it’s still warm.

    Bake this pumpkin sheet cake when you need one pan to feed the whole table.


    Pumpkin Dump Cake

    Serving of pumpkin dump cake on round plate, topped with vanilla ice cream.

    Pumpkin pie flavor with a crisp buttery top, and not a crust in sight.

    Save this pumpkin dump cake for pumpkin pie flavor the easy way.


    Pumpkin Poke Cake

    Pumpkin Poke Cake on Plate with bite on fork

    Poke it, soak it, and pile on the whipped cream. This is the one people ask about.

    Grab this pumpkin poke cake when you want a cozy fall cake everyone remembers.


    Pumpkin Cheesecake Cake

    A slice of pumpkin cheesecake sheet cake on round plate, with a fork taking a bite off of the slice, and the fork resting on plate.

    Spiced pumpkin cake layered with creamy cheesecake, for when you want to show off a little.

    Pull out this pumpkin cheesecake cake for a pumpkin dessert worth showing off.


    Pumpkin Cheesecake Bars

    A stack of desserts bars with a graham cracker crust and swirled pumpkin cheesecake filling are in the center of the photo

    Creamy pumpkin cheesecake cut into easy squares for a crowd.

    Try these pumpkin cheesecake bars when you need a crowd-friendly fall dessert.


    Pumpkin Lush

    A slice of pumpkin lush being lifted out of baking dish.

    Layers of cream cheese, pumpkin pudding, and whipped topping, no baking required.

    Make this pumpkin lush for a no-fuss layered pumpkin dessert.


    Pumpkin Fluff

    Hand holding graham cracker that has been dipped in to pumpkin fluff.

    A five-minute pumpkin dip that never lasts long at a party.

    Whip up this pumpkin fluff when you want a quick pumpkin treat.


    Easy Pumpkin Bread

    Baked loaf of pumpkin bread on parchment paper.

    Moist pumpkin bread with cream cheese and toffee tucked inside.

    Save this pumpkin bread recipe for pumpkin bread that’s a step above the usual.


    Pumpkin Streusel Muffins

    Pumpkin muffins on white counter

    Spiced pumpkin muffins with a buttery streusel top, made for busy mornings.

    Grab these pumpkin muffins when you want a grab-and-go fall breakfast.


    No Bake Pumpkin Pie

    Pull out this no bake pumpkin pie for pumpkin pie when the oven’s already full.


    Pumpkin Patch Brownies

    A close up of a pan of pumpkin patch brownies with crushed Oreo dirt and a patch of orange chocolate covered strawberries that look like pumpkin

    Fudgy brownies dressed up for fall. The kids get a kick out of these.

    Try these pumpkin patch brownies when you want a festive treat the kids will love.


    Caramel and Pecan Desserts

    Caramel Sheet Cake

    Caramel sheet cake in pan with one slice being held above with spatula.

    Buttery cake with from-scratch caramel frosting poured on warm. Caramel folks, start here.

    Make this caramel sheet cake when caramel is your love language.


    Pecan Pie Dump Cake

    Serving of pecan pie dump cake on a plate, topped with vanilla ice cream and caramel drizzle on top.

    All the gooey pecan pie flavor with a fraction of the work.

    Bake up this pecan pie dump cake for pecan pie taste the easy way.


    Butter Pecan Cake

    A slice of butter pecan cake on a round plate, with a fork resting next to it.

    Toasted pecans and a buttery crumb, straight off the church-supper table.

    Save this butter pecan cake for that toasted-pecan, old-fashioned flavor.


    Pecan Pie

    Slice of pecan pie on a white plate.

    The classic gooey, nutty pecan pie your holiday table’s been waiting on.

    Grab this pecan pie recipe when only real pecan pie will do.


    Turtle Pie

    Slice of turtle pie on spatula, being held above rest of pie.

    Chocolate, caramel, and pecans layered into a cool, sliceable pie.

    Make this turtle pie for a turtle-candy dessert in pie form.


    Turtle Cookies

    Baked turtle cookies stacked on top of one another.

    Chocolate, caramel, and pecans in a little cookie you can hand out by the dozen.

    Bake up these turtle cookies when you want turtle candy in cookie form.


    Caramel Cupcakes

    Caramel cupcake with caramel buttercream frosting in a swirl.

    Tender cupcakes crowned with caramel buttercream.

    Grab these caramel cupcakes when you want caramel in a single serving.


    Cozy Spice and Other Fall Favorites

    Harvest Cake

    A slice of harvest cake on a plate, next to the baking pan of cake.

    Warm spices and a cozy crumb, made for cool weather and a full table.

    Try this harvest cake when the weather turns and you want something spiced.


    Cinnamon Coffee Cake

    slice of coffee cake on white plate
    Coffee Cake Recipe

    Tender coffee cake with a cinnamon swirl and a crumb top, made for a slow morning.

    Bake up this cinnamon coffee cake when you want something cozy with your coffee.


    Sock It To Me Cake

    A slice of sock it to me cake on a spatula above rest of cake.

    Sour cream cake with a cinnamon-pecan streusel running right through the middle.

    Save this sock it to me cake for a vintage cake that never goes out of style.


    Shoofly Cake

    A slice of shoofly cake on a spatula.

    An old molasses cake with a crumb topping, straight from Amish country.

    Grab this shoofly cake when you’re craving an old-fashioned molasses cake.


    Butterscotch Cinnamon Pie

    Butterscotch Cinnamon Pie slice on a plate next to a gold fork.

    Creamy butterscotch and warm cinnamon in a pie you don’t see every day.

    Pull out this butterscotch cinnamon pie for a cozy, out-of-the-ordinary pie.


    Sweet Potato Bread Pudding

    A serving of sweet potato bread pudding on a plate.

    Sweet potato casserole and bread pudding rolled into one warm, spoonable dish.

    Make this sweet potato bread pudding for a warm, spoonable fall dessert.


    The Flavors That Make Fall Feel Like Fall

    You don’t need anything fancy to bake for fall. A can of pumpkin, a bag of apples, a little cinnamon and caramel, and you’ve got something everyone remembers. Pick one from the list, make it this weekend, and let your kitchen smell like the season.

    26 Easy Crockpot Dinners (Slow Cooker Recipes for Busy Weeknights)

    August 17, 2026

    Crockpot recipe collage

    When fall and winter roll around here in Montana, these are the crockpot dinners that I come back to. Most start with a few grocery store basics, they lean hearty and comforting, and almost all of them are the kind of thing kids will actually clean off their plates.

    Load it in the morning, walk away, and come home to supper that’s already handled. Start with the chicken and stuffing if you want the one that tastes like a mini Thanksgiving.

    Image collage of crockpot dinners.

    Slow Cooker Beef Dinners

    Slow Cooker Steak

    A bite of slow cooker steak and mashed potatoes on a fork.

    Fork-tender beef in a rich, homemade gravy, cooked low and slow all day.

    Serve up this slow cooker London broil and gravy over mashed potatoes for a Sunday-dinner feel on a weeknight.

    Slow Cooker Shredded Pulled Beef

    Shredded slow cooked beef, with forks poked in.

    Juicy shredded beef that feeds a crowd and reheats all week beautifully.

    Make this slow cooker pulled beef when you need one batch to cover buns, rice bowls, and tacos.

    Slow Cooker Shredded Beef Tacos

    Shredded beef tacos folded up in line with toppings.

    Seasoned beef that shreds into juicy strands, no browning or draining required.

    These slow cooker shredded beef tacos are great on taco night when you want it completely hands-off.

    Crock Pot Goulash

    A spoon is tucked into a white bowl filled to the brim with goulash packed with vegetables, beef and noodles

    Beef, pasta, and a tomato base that tastes like the church potluck version you grew up on.

    Serve this crock pot goulash for old-fashioned comfort in a bowl.

    Crock Pot Cube Steak

    Crock Pot cube steak on top of mashed potatoes, sitting in front of slow cooker.

    Tender cube steak and gravy, the definition of hands-off comfort food.

    Spoon this crock pot cube steak and gravy over mashed potatoes or rice.

    Slow Cooker BBQ Meatballs

    Slow Cooker Meatballs - frozen with jelly

    Sweet, saucy meatballs that work as a main over rice or a plate at the party.

    Stir up these slow cooker BBQ meatballs and let them simmer until sticky.

    Slow Cooker Chicken Dinners

    Crockpot Chicken and Stuffing

    Crock pot chicken and stuffing in pot.

    Chicken, stuffing, and gravy layered into one cozy, clean-plate dinner.

    Make this crockpot chicken and stuffing when you want a meal that tastes like a mini Thanksgiving.

    Slow Cooker Chicken Drumsticks

    A black crockpot holds cooked chicken drumsticks swimming in a dark reddish brown sauce

    Cheap, hands-off, and a hit with kids.

    Toss in these slow cooker chicken drumsticks on a night you forgot to plan anything.

    Crockpot Orange Chicken

    Cooked orange chicken in the crockpot with sauces.

    Sweet, sticky, and ready over a bowl of rice by the time you walk in the door.

    Skip the takeout and make this crockpot orange chicken instead.

    Crockpot Jalapeno Chicken

    Cheese melted and bacon and jalapenos on top of chicken in slow cooker.

    A little heat, a lot of flavor.

    Shred this crockpot jalapeño chicken for tacos, nachos, or an easy rice bowl.

    Slow Cooker Shredded Chicken

    cooked shredded chicken in slow cooker

    The meal-prep workhorse for soups, casseroles, and quesadillas.

    Batch up this slow cooker shredded chicken on Sunday and use it all week.

    Crockpot Chicken Pasta

    Crockpot chicken pasta with garlic parmesan sauce.

    Creamy, cheesy chicken pasta the whole family digs into.

    Load up on this crockpot chicken pasta for a cozy, filling weeknight dinner.

    Crock Pot Chicken Enchiladas

    A close up photo of a serving of crock pot chicken enchiladas garnished with sour cream and fresh chives

    All the enchilada flavor, layered and slow-cooked until melty.

    Dish up these crock pot chicken enchiladas on a busy Mexican night.

    Crack Chicken Sandwiches

    Crack chicken filling on hamburger bun, sitting on wooden cutting board.

    Creamy ranch chicken with bacon and cheese, piled on a soft bun.

    Pile these crack chicken sandwiches high for an easy game-day supper.

    Chicken Caesar Sandwich

    Chicken Caesar sandwich.

    Tender shredded chicken with a creamy Caesar bite.

    Fill a bun with this chicken Caesar sandwich for a fast, hands-off dinner.

    Slow Cooker Pork Dinners

    Cherry Cola Slow Cooker Pulled Pork

    Cherry Cola pulled pork on parchment paper.

    Two ingredients, sweet and tender, ready for sandwiches or sliders.

    Make this cherry Coca-Cola slow cooker pulled pork for an easy crowd-pleaser.

    Crockpot Grape Jelly Little Smokies

    Cooked little smokies in white crockpot.

    The three-ingredient appetizer at every family gathering.

    Stir together these crockpot grape jelly little smokies and let them warm.

    Slow Cooker Sausage Casserole

    Sausage casserole in slow cooker with spoon dishing some out.

    Hearty and filling, made for a hungry family.

    This slow cooker sausage casserole is excellent for a lazy weekend supper.

    Creamy Crock Pot Pork Chops

    Gravy covered pork chops that were cooked in the crock pot.

    Smothered pork chops that cook up melt-in-your-mouth tender.

    Spoon this creamy crock pot pork chops and gravy over mashed potatoes.

    Crock Pot Pork Tenderloin

    Crock Pot Pork Tenderloin on plate.

    A tender, juicy pork tenderloin with almost no effort.

    Slow-cook this crock pot pork tenderloin for an easy Sunday main.

    BBQ Pork Steaks in the Slow Cooker

    BBQ Pork Steaks in the slow cooker or crock pot

    Fall-apart pork steaks in a sweet, smoky barbecue sauce.

    Fire up these BBQ pork steaks in the slow cooker for a backyard-cookout feel any night.

    Slow Cooker Ham with Pineapple

    Sliced spiral ham cooked in the slow cooker topped with pineapple chunks.

    A sweet, glazed ham that practically cooks itself.

    Set out this slow cooker ham with pineapple for Sunday dinner or a holiday spread.

    Slow Cooker Turkey

    Crock Pot Boneless Turkey Breast and Gravy

    Crock Pot Turkey Breast on a platter.

    Juicy turkey breast and gravy without heating up the whole oven.

    Slow-cook this crock pot boneless turkey breast and gravy for Thanksgiving or an easy Sunday.

    Slow Cooker Soups and Chili

    Venison Chili

    Venison Chili in soup pot with ladle.

    A hearty, cool-weather bowl for the hunters in the family.

    Ladle this venison chili from the slow cooker on a cool night.

    Slow Cooker Sides

    Slow Cooker Cabbage

    Cooked cabbage on a serving spoon, over the slow cooker.

    Buttery, tender, and simple. A side dish that’s great all year but amazing for St. Patrick’s Day.

    Add this slow cooker cabbage to free up your stovetop on a busy holiday.

    Crock Pot Cheesy Hashbrowns

    An oval slow cooker insert is shown with diced potatoes that have been cooked for several hours and are cheesy and golden brown

    The funeral-potato favorite, made hands-off.

    Bring these crock pot cheesy hashbrowns to the potluck and watch them disappear first.

    Supper, Handled Before Lunch

    That’s the beauty of a slow cooker. A few minutes in the morning, and dinner takes care of itself while you’re off living your day. Keep this page handy through the fall and winter, and you’ll always have a warm meal waiting.

    More Roundups

    • Easy Fall Desserts
    • Easy Potluck Desserts
    • Easy Casserole Recipes

    Slider Recipes: 19 Easy Ideas for Dinner, Parties & Game Day

    August 16, 2026

    Sliders in a collage, for slider recipes.

    Slider recipes are one of the easiest ways to feed a group without making individual sandwiches one at a time. Most are built right in the pan, baked together, and sliced into individual sandwiches when they’re ready to serve.

    I’ve gathered all of my slider recipes here, from cheeseburger and roast beef sliders to chicken, turkey, pulled pork, seafood, and breakfast versions. Many are made with Hawaiian rolls and work just as well for a weeknight dinner as they do for game day, parties, potlucks, and holidays.

    An image collage of sliders.

    If you’re planning the rest of the meal too, these sides for sliders have plenty of ideas for what to serve with them.

    Beef Slider Recipes

    If you want something hearty, start here. Ground beef, roast beef, and corned beef all work especially well on small rolls with plenty of melted cheese.

    Cheeseburger Sliders

    Cheeseburger sliders made with Hawaiian rolls, stacked on to one another.

    Seasoned ground beef bakes as one large rectangle, then gets layered with cheese on Hawaiian rolls and finished with garlic butter.

    Start with these cheeseburger sliders when you want to make 12 little cheeseburgers at once.

    Smoked Cheeseburger Sliders

    Cheeseburger sliders stacked on one another.

    The same idea cooked on the smoker, for cheeseburger sliders with a deeper, smoky flavor.

    Fire up these smoked cheeseburger sliders when you already have the smoker going or you’re feeding people at a backyard cookout.

    Sloppy Joe Sliders

    Sloppy joey sliders with cheese.

    Saucy sloppy joe filling goes between soft rolls and bakes until everything’s hot and the tops turn golden.

    Kids tend to eat these sloppy joe sliders with a lot less mess than the regular kind.

    Roast Beef Sliders

    Close-up of roast beef sliders, laying on their side, in baking dish.

    Thin-sliced roast beef and provolone layer onto soft rolls and bake until the cheese melts and the sandwiches warm through.

    Serve these roast beef sliders with au jus for dipping, for dinner or a party tray.

    Corned Beef Sliders

    Corned beef sliders stacked on top of one another, sitting on a white plate.

    Corned beef and Swiss cheese go on soft rolls with a tangy dressing for a warm, savory slider.

    These corned beef sliders are especially handy around St. Patrick’s Day when there’s leftover corned beef in the refrigerator.

    Chicken Slider Recipes

    Chicken sliders can go in a lot of different directions, from crispy fried chicken to buffalo sauce and cheesy bacon ranch.

    Chicken Bacon Ranch Sliders

    Chicken bacon ranch sliders being pulled apart with cheese stretching.

    Shredded chicken, bacon, ranch, and cheese make these sliders hearty enough for dinner but simple enough to put out for a party.

    A rotisserie chicken from the grocery store does most of the work in these chicken bacon ranch sliders.

    Buffalo Chicken Sliders

    Buffalo chicken sliders, showing one inside of sandwich.

    Shredded chicken in buffalo sauce, layered with cheese and baked on soft rolls under a buttery topping.

    Set out ranch and celery alongside these buffalo chicken sliders, and you’ve covered the whole game-day spread.

    Fried Chicken Sliders

    Fried chicken sliders, assembled and ready to eat, sitting on white plates.

    Crispy chicken, pickles, sauce, and soft rolls make a slider that doesn’t require much prep.

    These fried chicken sliders are also a way to use up leftover chicken tenders.

    Ham, Pork & Italian Sliders

    Deli meats and cooked pork make some of the easiest sliders, because most of the work is simply layering everything on the rolls and putting the pan in the oven.

    Ham and Cheese Sliders

    Ham and cheese sliders stacked on top of one another.

    Ham and Swiss cheese go on sweet rolls under a buttery poppy seed topping, then bake until melted.

    A pan of ham and cheese sliders is the one that comes home empty from a church potluck.

    Pulled Pork Sliders

    Pulled pork sliders stacked on top of one another.

    Tender pulled pork piled onto soft rolls makes a hearty little sandwich, especially useful when you already have cooked pork on hand.

    If you’ve already got pork shoulder in the slow cooker, these pulled pork sliders are the easiest way to serve it to a crowd.

    Italian Sliders

    Italian sliders stacked on top of one another

    Deli meat and provolone tuck into rolls, finished with Italian seasoning and a buttery topping.

    These Italian sliders come together quickly with ingredients you can pick up right from the deli.

    Smoked Italian Sliders

    Smoked Italian sliders stacked on top of one another.

    Italian meats and cheese go on rolls and finish on the smoker instead of in the oven.

    Make these smoked Italian sliders when you want something on the smoker that isn’t another rack of ribs.

    Pizza Sliders

    Close up of pizza sliders on wooden cutting board.

    Pepperoni and melted cheese give these Hawaiian roll sliders all the familiar flavors of pizza in a small sandwich.

    These pizza sliders are an easy one to hand off to the kids to assemble.

    Turkey & Seafood Sliders

    Turkey, fish, and salmon give you a few alternatives to the heavier beef and pork sliders, and several are useful for turning leftovers into another meal.

    Turkey Sliders

    Stacked turkey sliders with melted cheese.

    Sliced turkey and cheese bake on soft rolls under a buttery topping until warm and melty.

    Deli turkey keeps these turkey sliders more affordable enough to make a double batch.

    Turkey Cranberry Sliders

    A metal spatula holds a cranberry and turkey slider above a pan of the same slider sandwiches

    Turkey and cranberry sauce go together on sweet rolls, a way to use up what’s left from Thanksgiving.

    Save these turkey cranberry sliders for the day after Thanksgiving, when you want the leftovers to feel like a different meal.

    Fish Sliders

    Fish sliders on cookie sheet, ready to eat.

    Crispy fish fillets sit on soft rolls with tartar sauce and pickles, an alternative to a traditional fish sandwich.

    Fix these fish sliders for a Friday-night dinner, or during Lent.

    Salmon Sliders

    Salmon slider on white platter, topped with aioli, lettuce, tomato and bacon.

    Flaky salmon, sauce, and fresh toppings turn salmon into a handheld meal.

    Leftover fillets from dinner the night before are exactly the right amount for these salmon sliders.

    Breakfast Slider Recipes

    The same slider idea works for breakfast too. Eggs, cheese, and breakfast meats can be assembled into a pan of sandwiches for holidays, brunch, or mornings when you’re feeding several people.

    Bagel Breakfast Sliders

    Bagel breakfast sliders stacked on top of one another on a plate.

    Eggs, cheese, and breakfast meat stack on mini bagels and bake together for a batch of hot breakfast sandwiches.

    Mini bagels hold up better than soft rolls here, so these bagel breakfast sliders won’t go soggy sitting out on a brunch table.

    Hawaiian Roll Breakfast Sliders

    A single breakfast slider sandwich is balanced on a wooden serving spoon

    Scrambled eggs, sausage, and cheese layer onto Hawaiian rolls under a buttery glaze.

    Assemble these Hawaiian roll breakfast sliders the night before, then bake them Christmas morning while everybody’s opening presents.

    What Are the Best Rolls for Sliders?

    Hawaiian rolls are popular for baked sliders because they’re soft, slightly sweet, and usually come connected in a sheet. That makes it simple to slice the entire package horizontally, add the fillings, replace the tops, and bake everything in one pan.

    Regular dinner rolls, mini buns, and even small bagels can work too. The best choice really depends on the filling and the kind of slider you’re making.

    Can You Make Sliders Ahead of Time?

    Many baked sliders can be assembled ahead of time and refrigerated until you’re ready to bake them. If a recipe uses a buttery topping, you may want to wait and add it shortly before baking so the rolls don’t absorb too much of it while they sit.

    Check the individual recipe before making it ahead, since fillings and sauces can affect how well the assembled sliders hold overnight.

    Which Slider Recipe Should I Make?

    • For a classic crowd favorite, start with the cheeseburger sliders or ham and cheese sliders.
    • For game day, try buffalo chicken, sloppy joe, or Italian sliders.
    • If you’re working with leftovers, pulled pork, turkey cranberry, fried chicken, and salmon sliders can turn what you already have into another meal.
    • For breakfast or brunch, go straight to one of the two breakfast slider recipes above.

    More Recipes for Feeding a Crowd

    If you’re planning a party, potluck, or casual get-together, you may also want to browse:

    • Best Sides for Sliders
    • Easy Party Appetizers
    • Hamburger Recipes
    • Church Supper Recipes

    40+ Thanksgiving Side Dishes (Easy Recipes for a Crowd)

    August 25, 2026

    Collage of Thanksgiving side dishes.

    The turkey gets top billing every year, but ask anyone what they actually pile on their plate and you’ll hear about the potatoes. And the dressing. And that one green bean dish somebody’s aunt has been bringing since 1994.

    Need a dessert to go with all these sides? This pumpkin dump cake feeds a crowd.

    Around here in Montana, Thanksgiving gets divided up over the phone about two weeks ahead. Somebody claims the rolls, somebody claims the sweet potatoes, and whoever answers last ends up with the gravy. I’ve been on both ends of that call. So I keep every side dish I trust in one place, and this is it.

    An image collage showing Thanksgiving side dish recipes.

    If you only make one new thing this year, make the crack green beans. Bacon, brown sugar, and a little soy sauce, and the pan comes back empty every single time. Fair warning.

    Potatoes, Every Way

    Buttery sour cream mashed potatoes served on a floral plate with dinner.

    Yukon Gold potatoes mashed with butter, sour cream, and warm half-and-half.

    Make these sour cream mashed potatoes for a simple stovetop side to serve with turkey and gravy.

    9x13 baking dish with party potatoes baked inside.

    Buttery, cheesy potatoes you can assemble the night before and slide in the oven.

    Bring party potatoes to the table when you want the dish everyone asks about.

    A few spoonfuls of cheesy hashbrown potatoes have been served from a white baking dish

    Cheesy hashbrowns that cook in the crock pot but finish off in the oven.

    Crock pot cheesy hashbrowns are so easy to make and a crowd-pleaser.

    Cooked fried potatoes and onions in cast iron skillet.

    Crispy edges, soft centers, and onions that go sweet in the skillet.

    Fix a skillet of fried potatoes and onions for the folks who show up early and hungry.

    Air fryer baby potatoes in bowl.

    Little potatoes with crackly skins, done in the air fryer while the oven stays busy.

    Toss together air fryer baby potatoes for a side that needs almost no counter space.

    Creamy instant pot mashed potatoes

    Creamy mashed potatoes without babysitting a pot on an already crowded stove.

    Make these Instant Pot mashed potatoes when every burner is already spoken for.

    Green Beans and Fall Vegetables

    Cooked green beans with bacon, in skillet.

    Canned green beans baked with bacon, brown sugar, and soy sauce until they’re sticky and salty.

    Pass around a pan of crack green beans and watch it disappear before the turkey’s carved.

    Scoop of green bean casserole with cheese and bacon.

    The classic casserole with bacon and cheese stirred in, because it earns its spot.

    Bake this green bean casserole with bacon and cheese if your family expects the traditional one.

    how to make canned green beans taste better

    A few pantry tricks that turn a plain can of green beans into something worth seconds.

    Learn how to make canned green beans taste better when you’re working with what’s already in the cabinet.

    Cooked green beans and red potatoes in the Instant Pot Pressure Cooker.

    Green beans and potatoes cooked together the old way, with bacon running through it.

    Simmer up Instant Pot green beans and potatoes for two sides in one pot.

    Roasted brussels sprouts on baking pan

    Crispy, caramelized sprouts that convert the people who swear they don’t like them.

    Roast a sheet pan of roasted Brussels sprouts for the easiest green thing on the table.

    Roasted Brussel Sprouts with Bacon

    Sprouts with bacon and dried cranberries under a sweet glaze, dressed up for company.

    Plate up roasted Brussels sprouts with bacon and cranberries when you want one side that looks fancy without the work.

    Close up up cooked candied carrots topped with bright green parsley in a white serving bowl

    Buttery, brown sugar carrots that the kids will actually eat.

    Stir up a pan of candied carrots and put a vegetable on the table nobody argues about.

    Garlic roasted broccoli.

    Broccoli roasted with garlic until the edges go brown and crisp.

    Add garlic roasted broccoli when the rest of the menu is heavy and you need something simple.

    Cooked bacon wrapped asparagus

    Asparagus bundled in bacon and baked until the bacon crisps up.

    Wrap up some bacon wrapped asparagus for a side that doubles as an appetizer.

    Cooked cabbage on a serving spoon, over the slow cooker.

    Tender cabbage cooked down slow with butter and seasoning.

    Start slow cooker cabbage in the morning and forget about it until dinner.

    Air Fryer Butternut Squash Cubes

    Sweet squash with crisp edges, ready in about fifteen minutes.

    Cook up air fryer butternut squash for fall flavor without heating up the kitchen.

    Casseroles, Corn, and Rice

    Easy corn casserole recipe on plate with fork

    Soft, sweet, spoonable corn casserole that sits somewhere between a side and a bread.

    Spoon out this corn casserole and expect to be asked for the recipe before dessert.

    Cheese, buttery broccoli casserole close up.

    Cheesy broccoli and rice baked together, straight out of a church cookbook.

    Bake a dish of Southern broccoli casserole when you need something comforting that travels well.

    Stick of butter rice in serving spoon.

    Three ingredients, one dish, and rice so buttery it barely needs anything else.

    Try stick of butter rice for the side dish with the shortest grocery list on this page.

    Corn on the cob in Instant Pot with water pouring over.

    Sweet corn on the cob without tying up a burner or a big pot of water.

    Load up Instant Pot corn on the cob when you’re feeding a crowd and short on stovetop.

    Dressing, Rolls, and Bread

    Cornbread dressing being scooped up out of baking dish with wooden spoon.

    Cornbread dressing made the way it’s been made for generations, moist in the middle and crisp on top.

    Make this old-fashioned cornbread dressing if you want the one dish that tastes like your grandma’s kitchen.

    Sweet cornbread muffins stacked on vintage plate.

    Sweet, moist cornbread that works as a side or as the base for your dressing.

    Bake a muffin tin full of sweet cornbread a day early and use half of it for dressing.

    Homemade yeast rolls sitting on vintage Corelle plate.

    Soft, pull-apart yeast rolls worth the rise time.

    Fill a basket with these yeast rolls and let the smell do the rest.

    Cooked, from scratch, buttermilk biscuits in pan on top of towel.

    Flaky buttermilk biscuits for the people who’d rather have biscuits than rolls.

    Whip up easy homemade buttermilk biscuits and put butter and honey on the table beside them.

    Homemade biscuits on vintage plate.

    Biscuits from three ingredients when the oven schedule has gotten away from you.

    Keep 3-ingredient biscuits in your back pocket for the year everything runs late.

    sliced white italian bread with butter

    A soft white loaf that slices beautifully and makes the best leftover turkey sandwiches.

    Bake an Italian white bread on Wednesday and thank yourself on Friday.

    Sweet Potatoes and Candied Sides

    Candied yams cooked in stock pot.

    Sweet, syrupy yams baked until the edges caramelize.

    Serve up these candied yams for the side that blurs the line between dinner and dessert.

    A close-up look of inside of sweet potato casserole in white baking dish.

    Sweet potatoes under a brown sugar and pecan topping that goes crunchy in the oven.

    Assemble a dish of sweet potato crunch the night before and bake it Thanksgiving morning.

    Sweet potatoes sliced with butter.

    Perfectly soft sweet potatoes with no oven time at all.

    Cook Instant Pot sweet potatoes as your starting point for any topping you like.

    Fried pears sitting in cast iron skillet, on wooden spoon.

    Warm, cinnamon-soft pears cooked down in butter.

    Cook a skillet of fried pears for an old-fashioned side most people have never had.

    Smooth apple butter in small bowl.

    Apple butter that cooks itself in the slow cooker and makes the whole house smell like fall.

    Put up a batch of slow cooker apple butter to spread on those rolls.

    Make-Ahead Salads and Fluff

    A spoon holds a bite of light orange fluffy dessert salad with a mandarin orange slice and a mini marshmallow with a bowl of the same salad in the background

    Creamy orange fluff with mandarin oranges and marshmallows, straight off the potluck table.

    Stir together orange fluff salad the night before and pull it out cold.

    pea salad in white bowl with spoon sticking out

    Peas, cheese, and bacon in a creamy dressing, the way it showed up at every church supper.

    Mix up old fashioned pea salad a day ahead and let the flavors settle in.

    Snicker Apple Salad in bowl, with caramel drizzle on top.

    Apples, Snickers, and whipped topping in the salad that’s really a dessert.

    Bring Snicker apple salad if you want the bowl that empties first.

    Carrot salad in bowl.

    Shredded carrots with raisins and pineapple in a sweet, creamy dressing.

    Shred up a bowl of carrot salad for a bright spot on a very beige plate.

    Broccoli crunch salad in bowl, sitting on fabric napkin on table.

    Broccoli, bacon, raisins, and sunflower seeds in a sweet-tangy dressing.

    Toss up broccoli crunch salad when you want something cold and crisp between all the casseroles.

    Leaf lettuce in bowl that's topped with hot bacon grease and kosher salt.

    Leaf lettuce wilted with hot bacon dressing, an old recipe most people have forgotten.

    Dish up wilted lettuce for the side your grandparents will recognize right away.

    Best Salad Recipe in White Plate with Red Napkin

    A simple green salad with a dressing that makes it worth eating.

    Round out the table with the best side salad when you need one light thing.

    Gravy and the Finishing Touches

    White country gravy dripping from spoon.

    Smooth, peppery white gravy that comes together in one skillet.

    Whisk up this white gravy for the mashed potatoes and the biscuits both.

    Finished pork gravy being scooped out of sauce pan.

    Rich gravy built from the drippings you already have in the pan.

    Pour homemade gravy with drippings over everything and don’t apologize for it.

    Close up of deviled eggs with bacon pieces

    Deviled eggs topped with candied bacon, gone in about four minutes.

    Fill a tray of deviled eggs with candied bacon to keep everyone out of the kitchen while you finish up.

    A close up of halved hard boiled eggs filled with orange yolk filling and snipped chives inserted as stems to look like pumpkins

    Or, get even more creative and make these adorable pumpkin deviled eggs.

    Stuffed celery with cream cheese and seasonings, sitting on white square plate, and yellow napkin.

    Celery sticks filled with seasoned cream cheese, the appetizer that never left.

    Set out stuffed celery with cream cheese on the relish tray like your mom used to.

    Flavored butter sliced on a cutting board.

    Honey butter, cinnamon butter, and a few more ways to dress up a dinner roll.

    Soften some flavored butter and let people help themselves.

    The Table Takes Care of Itself

    Pick four or five from this list and you’ve got a Thanksgiving spread nobody’s going to forget. My advice is one potato, one green thing, one casserole, something cold you made the day before, and bread. That combination has never once let me down.

    And write down what people ask about. That’s next year’s list, already done.

    More Roundups

    • Easy Fall Desserts
    • Church Supper Recipes
    • 19 Old-Fashioned Dinner Recipes
    • Easy Potluck Desserts

    Pumpkin Sheet Cake with Brown Butter Frosting

    August 26, 2026

    A slice of pumpkin sheet cake with brown butter frosting on a vintage plate.

    This pumpkin sheet cake is a thin, tender pumpkin cake baked in one big pan and poured over with warm brown butter frosting, made the same way as the old-fashioned Texas sheet cake everybody asks for. It’s easy to make, feeds a crowd, and has that nostalgic fall flavor everyone loves.

    For another cake that feeds a crowd from one pan, there’s this apple dapple cake.

    A slice of pumpkin sheet cake topped with brown butter frosting, sitting on vintage plate.

    An Easy Pumpkin Texas Sheet Cake That Feels Like an Old-Fashioned Favorite

    Sheet cakes earned their spot at potlucks for a reason. One pan, one bowl for the batter, and enough squares to feed the whole table. This one skips the mixer completely, and the frosting gets poured over the cake while both are still warm, so it settles into a smooth, fudgy layer instead of sitting on top like buttercream. If you’ve made the peanut butter sheet cake, you already know the method.

    Browning the butter is what sets the frosting apart. Regular powdered sugar icing tastes sweet. Brown butter icing tastes toasted and a little nutty, and it plays off the cinnamon and pumpkin the way caramel would. Takes about five extra minutes and it’s the whole reason people ask for the recipe.

    Fall is when this cake really pulls its weight. Bring it to a church supper, a school function, or Thanksgiving dessert alongside a pumpkin poke cake or a pan of pumpkin dump cake. It travels well, cuts clean, and holds up on a buffet table for hours.

    Building the whole dessert table? Start with these easy fall desserts and these easy potluck desserts for recipes that travel well and always get asked for.

    Cakes for the Potluck Table cookbook by Jessica Burgess, cover and open recipe spread

    This cake is in my cookbook

    Cakes for the
    Potluck Table

    Sixty old-fashioned cakes, coming this spring. Six of the recipes are free right now.

    Send me the six cakes

    FAQs

    Does this taste like pumpkin pie?

    Not exactly. The pumpkin and spices are there, but the texture is cake, not custard. Think spiced pumpkin bread with frosting on it. The cinnamon comes through stronger than the pumpkin does.

    Why is it called a Texas sheet cake?

    Texas sheet cake refers to the method, not the flavor. The cake bakes thin in a large pan, and warm frosting gets poured over the warm cake and spread fast before it sets. Chocolate is the version most people know, but the technique works with pumpkin just as well.

    Can I bake this in a 9×13 pan instead?

    I’ve only made this in the 10 x 15-inch jelly-roll pan, so that’s the pan I can vouch for. The batter is sized for it, and the thin cake is what gives you that high frosting-to-cake ratio in every bite. A 9×13 has less surface area, so the cake bakes up thicker and needs longer in the oven. I haven’t tested those times yet, so I’d stick with the jelly-roll pan if you have one.

    Can I use pumpkin pie filling instead of pumpkin puree?

    No. Pumpkin pie filling is already sweetened and spiced, and it’ll throw off both the sugar and the texture. Look for a can labeled 100% pure pumpkin.

    Do I have to brown the butter?

    The recipe is built around it, and it’s where most of the flavor lives. If you’re short on time you can melt the butter without browning it, but you’ll end up with a plain sweet icing instead of the toasted, nutty one.

    Can I leave out the pecans?

    Absolutely. They’re optional. Stir them into the warm frosting if you want them, or scatter them over the top right after you spread it if you’d rather see them.

    Can I make this ahead?

    Yes, and it’s actually better on day two once the frosting has fully set into the cake. Bake it the day before, cover it tightly, and leave it at room temperature.

    How do I store leftovers?

    Cover the pan tightly and keep it at room temperature up to 2 days, or in the refrigerator up to 5 days. For longer storage, cut it into squares, wrap them individually, and freeze. Thaw at room temperature before serving.

    A whole pumpkin sheet cake in a jelly roll pan topped with brown butter frosting.

    Ingredients

    See the recipe card below that has the printable, full ingredient list and instructions.

    For the Pumpkin Cake

    • 2 cups all-purpose flour – Gives the cake its structure.
    • 2 teaspoons ground cinnamon – The main spice flavor here, more forward than the pumpkin itself.
    • 1 teaspoon pumpkin pie spice – Rounds out the warm spice notes.
    • 1 teaspoon baking soda – Helps the cake rise and brown.
    • 1 teaspoon baking powder – Works with the soda to keep the crumb light.
    • ½ teaspoon salt – Balances the sugar.
    • ½ cup salted butter, melted and slightly cooled – Brings the butter flavor.
    • ½ cup vegetable oil – Keeps the cake moist for days.
    • 1½ cups granulated sugar – Sweetens the cake.
    • ½ cup packed light brown sugar – Adds a little molasses depth.
    • 4 large eggs – Bind everything and give the cake its tender texture.
    • 1 can (15 ounces) pumpkin puree – The flavor and the moisture. Not pumpkin pie filling.
    • 2 teaspoons vanilla extract – Warms up the spices.

    For the Brown Butter Frosting

    • ¾ cup salted butter – Gets browned for that toasted, nutty flavor.
    • 6 tablespoons whole milk – Loosens the frosting so it pours.
    • 4 cups powdered sugar – Sweetens and thickens the frosting so it sets.
    • 2 teaspoons vanilla extract – Rounds out the brown butter.
    • ½ teaspoon ground cinnamon, optional – Ties the frosting back to the cake.
    • ¾ cup chopped pecans, optional – The traditional finish on a sheet cake.

    Instructions

    • Preheat the oven to 350°F. Grease a 10 x 15-inch jelly-roll pan with nonstick cooking spray.
    • Whisk together 2 cups flour, 2 teaspoons cinnamon, 1 teaspoon pumpkin pie spice, 1 teaspoon baking soda, 1 teaspoon baking powder, and ½ teaspoon salt in a medium bowl. Set aside.
    • In a large mixing bowl, whisk together ½ cup melted butter, ½ cup vegetable oil, 1½ cups granulated sugar, and ½ cup brown sugar.
    • Add 4 eggs, the 15-ounce can of pumpkin puree, and 2 teaspoons vanilla. Whisk until smooth and completely combined.
    • Add the dry ingredients to the pumpkin mixture. Stir just until no streaks of flour remain. Don’t overmix.
    • Spread the batter evenly in the prepared pan.
    • Bake 20 to 25 minutes, until the center springs back when lightly touched and a toothpick comes out clean or with a few moist crumbs.
    • Start the frosting about 5 minutes before the cake finishes baking.
    Baked pumpkin sheet cake in jelly roll pan.

    How to Make the Brown Butter Frosting

    • Put ¾ cup salted butter in a medium, light-colored saucepan over medium heat. A light pan lets you see the color change.
    • Cook and stir frequently as the butter melts and foams. Keep going until golden-brown specks appear on the bottom of the pan and the butter smells toasted and nutty.
    • Take the pan off the heat. Carefully whisk in 6 tablespoons whole milk.
    • Add 4 cups powdered sugar, 2 teaspoons vanilla, and ½ teaspoon cinnamon if you’re using it. Whisk until smooth, then stir in ¾ cup chopped pecans if you want them.
    • Let the baked cake rest about 5 minutes.
    • Pour the warm frosting over the warm cake. Work quickly and spread it to the edges before it starts to set.
    • Let the cake cool and the frosting set before slicing.

    Tips

    • Use pumpkin puree, not pumpkin pie filling. Check the can label.
    • Measure every frosting ingredient before you start browning the butter. This frosting sets fast once it’s mixed.
    • A light-colored saucepan makes it much easier to see when the butter has browned. In a dark pan you’re going by smell alone.
    • If the frosting thickens up too much to pour, whisk in more milk 1 teaspoon at a time.
    • Stir the pecans into the warm frosting for the traditional look and texture.
    • Both the cake and the frosting need to be warm when they meet. That’s what gives you the smooth, poured finish instead of spread-on icing.
    A slice of pumpkin sheet cake with brown butter frosting, and a fork taking a bite.

    More Recipes

    If you love easy pumpkin desserts like this one, then you’ll also love these fall favorites:

    • pumpkin lush
    • pumpkin cheesecake bars
    • pumpkin dump cake
    • harvest cake

    Recipe

    A slice of pumpkin sheet cake with brown butter frosting on a vintage plate.
    Print Pin
    5 from 1 vote

    Pumpkin Sheet Cake

    A thin, tender pumpkin cake baked in one big pan and topped with poured brown butter frosting. It feeds 20 to 24 people and comes together without a mixer. Perfect for potlucks, church suppers, and Thanksgiving dessert tables.
    Course Dessert
    Cuisine American
    Prep Time 15 minutes minutes
    Cook Time 25 minutes minutes
    Cooling Time 1 hour hour
    Total Time 1 hour hour 40 minutes minutes
    Servings 24 servings
    Calories 345kcal
    Author Jessica Burgess

    Ingredients

    Pumpkin Cake

    • 2 cups all-purpose flour
    • 2 teaspoons ground cinnamon
    • 1 teaspoon pumpkin pie spice
    • 1 teaspoon baking soda
    • 1 teaspoon baking powder
    • ½ teaspoon salt
    • ½ cup salted butter melted and slightly cooled
    • ½ cup vegetable oil
    • 1½ cups granulated sugar
    • ½ cup packed light brown sugar
    • 4 large eggs
    • 1 can 15 ounces pumpkin puree
    • 2 teaspoons vanilla extract

    Brown-Butter Texas Sheet Cake Frosting

    • ¾ cup salted butter
    • 6 tablespoons whole milk
    • 4 cups powdered sugar
    • 2 teaspoons vanilla extract
    • ½ teaspoon ground cinnamon optional
    • ¾ cup chopped pecans optional

    Instructions

    Make the Pumpkin Cake

    • Preheat the oven to 350°F. Grease a 10 × 15-inch jelly-roll pan with nonstick cooking spray.
    • In a medium bowl, whisk together the flour, cinnamon, pumpkin pie spice, baking soda, baking powder, and salt. Set aside.
    • In a large mixing bowl, whisk together the melted butter, vegetable oil, granulated sugar, and brown sugar.
    • Add the eggs, pumpkin puree, and vanilla extract. Whisk until smooth and completely combined.
    • Add the dry ingredients to the pumpkin mixture. Stir just until combined and no streaks of flour remain. Do not overmix.
    • Spread the batter evenly in the prepared pan.
    • Bake for 20-25 minutes, or until the center springs back when lightly touched and a toothpick inserted into the center comes out clean or with a few moist crumbs.
    • Begin making the frosting approximately 5 minutes before the cake finishes baking.

    Make the Frosting

    • Place the butter in a medium, light-colored saucepan over medium heat.
    • Cook, stirring frequently, as the butter melts and begins to foam. Continue cooking until golden-brown specks appear on the bottom of the pan and the butter smells toasted and nutty.
    • Remove the saucepan from the heat. Carefully whisk in the milk.
    • Add the powdered sugar, vanilla, and optional cinnamon. Whisk until the frosting is smooth. Stir in the chopped pecans, if using.
    • Allow the baked cake to rest for about 5 minutes.
    • Pour the warm frosting over the warm cake. Working quickly, spread it evenly to the edges before it begins to set.
    • Let the cake cool and the frosting set before slicing and serving.

    Video

    Notes

    • Be sure to use pumpkin puree, not pumpkin pie filling.
    • Have the frosting ingredients measured before you begin. Texas sheet cake frosting sets quickly once mixed.
    • If the frosting becomes too thick to pour, whisk in additional milk, 1 teaspoon at a time.
    • When pouring the frosting on, it can run off of the sides of the pan, so I like to gradually add some, spread to the edges and continue, trying not to allow it to run off. 
    • For a more traditional look and texture, add the chopped pecans directly to the warm frosting.
    • Store the cake tightly covered at room temperature for up to 2 days or in the refrigerator for up to 5 days.

    Nutrition

    Serving: 1slice | Calories: 345kcal | Carbohydrates: 46g | Protein: 3g | Fat: 18g | Saturated Fat: 7g | Polyunsaturated Fat: 4g | Monounsaturated Fat: 5g | Trans Fat: 0.4g | Cholesterol: 53mg | Sodium: 202mg | Potassium: 53mg | Fiber: 1g | Sugar: 37g | Vitamin A: 344IU | Vitamin C: 0.1mg | Calcium: 32mg | Iron: 1mg

    Halloween Recipes: 29 Easy Treats, Snacks & Dinner Ideas

    August 30, 2026

    Image collage of Halloween recipes.

    Most of what’s below is easy on purpose. Halloween lands on a school night as often as not, and nobody has time for fussy. These are the treats my kids actually ask for, the pumpkin desserts are what I bring to fall potlucks, and the kind of supper you can have ready before trick-or-treating starts.

    Image collage of Halloween recipes.

    If you only make one thing off this list, make the hot dog mummies. They take about fifteen minutes, the kids think they’re hilarious, and I’ve never once brought home leftovers.

    Easy Halloween Treats for Class Parties

    A close up photo of Oreo cookies dipped in white chocolate and decorated to look like mummies

    Dipped Oreos wrapped in white chocolate bandages with two candy eyes peeking through.

    Make a batch of mummy Oreos the night before a class party and let the kids press the eyes on.

    A plate full of Mummy Rice Krispie Treats is displayed with a glass of milk and another krispie treat is in the foreground beside a decorative black and white towel

    The same mummy trick on a rice krispie treat, so you get a bigger bite for the same effort.

    Try these mummy rice krispie treats when you need something sturdy enough to survive a lunchbox.

    Close up of the a candy corn rice krispie treat, showing the yellow, orange and white layers of the treat

    Layered orange, yellow, and white treats cut into wedges that look just like candy corn.

    Cut these candy corn rice krispie treats into triangles and watch them clear the tray first.

    Assorted chocolate dipped pretzel rods decorated in several ways for Halloween are scattered on a black background

    Pretzel rods dipped in melted candy and covered in sprinkles, ready as soon as they set.

    Set out a plate of Halloween pretzels when you want something salty sitting next to all that candy.

    stacked monster cookies

    Big soft cookies loaded with oats, peanut butter, chocolate chips, and M&Ms.

    Bake a double batch of monster cookies and freeze half for the week after Halloween.

    A cut piece of candy corn topped cake is centered, showing the tri-colored layers inside the cake

    A bright layered cake in candy corn colors that slices into a real showstopper.

    Bring this candy corn cake to the fall party when you want one dessert doing all the work.

    A close up of a pan of pumpkin patch brownies with crushed Oreo dirt and a patch of orange chocolate covered strawberries that look like pumpkin

    Fudgy brownies topped with strawberries dipped to look like little pumpkins.

    Put these pumpkin patch brownies on the table and let the strawberry pumpkins be the whole decoration.

    Spoon scooping Halloween mix out of bowl

    Sweet and salty mix with candy corn, pretzels, and whatever else is in the pantry.

    Stir up a bowl of Halloween snack mix to set out while everybody’s getting costumes on.

    Pumpkin Desserts Worth the Oven Time

    Serving of pumpkin dump cake on round plate, topped with vanilla ice cream.

    Pumpkin, cake mix, and butter, and the oven does the rest.

    Start this pumpkin dump cake before dinner and serve it warm with vanilla ice cream.

    Pumpkin Poke Cake on Plate with bite on fork

    Poked all over and soaked with sweetened condensed milk, then covered in whipped topping.

    Serve up a pan of pumpkin poke cake straight from the fridge on a warm October afternoon.

    A slice of pumpkin lush being lifted out of baking dish.

    Layers of crust, cream cheese, pumpkin pudding, and whipped topping in a 9×13.

    Scoop out squares of pumpkin lush for the crowd that would rather have something cold than pie.

    A slice of pumpkin cheesecake sheet cake on round plate, with a fork taking a bite off of the slice, and the fork resting on plate.

    Cheesecake and pumpkin in bar form, so you can skip the springform pan.

    Slice up these pumpkin cheesecake bars when you want cheesecake without the fuss.

    Hand holding graham cracker that has been dipped in to pumpkin fluff.

    Three ingredients whipped together into a dip that works with graham crackers or apple slices.

    Whip up pumpkin fluff and set it out with sliced apples for the easiest dessert on the table.

    Close up of stacked pumpkin streusel muffins

    Soft pumpkin muffins with a brown sugar streusel on top.

    Bake a pan of pumpkin streusel muffins on Sunday so breakfast is handled all week.

    Sliced pumpkin bread on wooden cutting board with a streusel on top.

    Pumpkin bread with cream cheese and toffee running all the way through it.

    Wrap a loaf of this easy pumpkin bread in parchment and hand it to a neighbor.

    Caramel, Apple, and Popcorn Treats

    caramel apple dump cake with vanilla ice cream scoop

    Apple pie filling and caramel under a buttery cake mix topping.

    Pull this caramel apple dump cake out of the oven right as everybody gets back from trick-or-treating.

    Oreo and peanut butter on caramel apple

    Apple slices on sticks dipped in caramel, so kids can roll their own in whatever toppings you set out.

    Set out a tray of sliced caramel apples on a stick with bowls of sprinkles and let the kids build their own.

    Caramel corn in black metal french fry stand.

    Homemade caramel corn baked low and slow so it stays crisp.

    Fill paper bags with caramel corn and hand them out to the kids on the block.

    popcorn balls without corn syrup

    Popcorn balls held together with melted marshmallow, no candy thermometer needed.

    Roll up a batch of marshmallow popcorn balls and wrap them one at a time for the treat table.

    Let cool fully, then cut into squares and serve.

    Rice krispie treats made with caramel for a chewier, richer bite.

    Cut caramel rice krispie treats into small squares so they stretch across a big group.

    Apple Pie Nachos with Baked Cinnamon Sugar Tortillas

    Warm apple pie filling over cinnamon sugar tortilla crisps with caramel drizzled on top.

    Pile up apple pie nachos on one big platter and let everybody grab a piece.

    Apple cider punch in a pumpkin drink dispenser.

    Spiced apple cider punch that fills the whole house with that smell.

    Pour apple cider punch into a big drink dispenser and let it sit out all afternoon.

    Halloween Night Supper and Party Food

    Mummy hot dog being dipped in to small bowl of ketchup.

    Hot dogs wrapped in strips of crescent roll dough with two little mustard eyes.

    Serve hot dog mummies with a bowl of ketchup and call supper done.

    Chili in small white bowl.

    The chili my mom made, thick enough to eat with a fork.

    Get this simple chili going in the morning so it’s ready when the costumes go on.

    Frito Chili Pie in food boat.

    Chili and cheese over Fritos, served right in the bag if you want.

    Set up Frito chili pie in individual bags so nobody has to sit down to eat.

    Scoop of walking taco casserole taken out of baking dish.

    All the walking taco flavors baked into one 9×13.

    Bake a walking taco casserole when you’re feeding a house full of kids and their friends.

    A close up of halved hard boiled eggs filled with orange yolk filling and snipped chives inserted as stems to look like pumpkins

    Deviled eggs piped and scored to look like little pumpkins.

    Arrange pumpkin deviled eggs on a tray for the grown-ups standing around the kitchen.

    Pumpkin cheese ball on a plate, surrounded by crackers, and a bite taken out to show the inside of the cheese ball.

    A cheese ball shaped and scored to look like a pumpkin, with a pretzel stem.

    Shape a pumpkin cheese ball the day before and pull it out when the first guests knock.

    A close up of cowboy queso dip.

    Queso with ground beef, beans, and corn, thick enough to count as a meal.

    Keep cowboy queso warm in the slow cooker and let people help themselves.

    Costumes On, Supper Handled

    Halloween goes fast. The kids are out the door by six and back before you’ve finished cleaning up, so the best plan is one thing in the slow cooker, one tray of treats on the counter, and something warm to hand people when they stop by.

    Pick two or three off this list, make what you can the day before, and let the rest of the night be about the costumes.

    More Roundups

    • Easy Potluck Desserts
    • No-Bake Desserts
    • Old-Fashioned Desserts
    • Nacho Bar Ideas

    Apple Dapple Cake (Old-Fashioned Recipe With Caramel Glaze)

    September 2, 2026

    A square slice of apple dapple cake topped with caramel glaze on a white plate next to a green apple.

    This apple dapple cake is an old-fashioned apple cake baked in a 9×13 pan and finished with a warm caramel glaze, a lot like this caramel apple dump cake but made completely from scratch. It’s easy to make, feeds a crowd, and has that nostalgic flavor everyone loves.

    A slice of apple dapple cake on a white plate with cinnamon sticks, green apples, and the pan of cake behind it.

    An Easy Apple Cake With Caramel Glaze That Feels Like an Old-Fashioned Favorite

    The batter is thick, closer to cookie dough than cake batter, and it’s packed with cubes of granny smith apple and chopped walnuts. Spread into the pan it can look like too little for a 9×13, but it rises more than you’d expect. Once it bakes, all that fruit softens into the cake and keeps it moist for days. The caramel glaze goes on while the cake is still slightly warm, so some of it soaks down into the top instead of sitting on it.

    Cakes like this one belong on the potluck dessert table. A 9×13 gives you 12 generous slices, and it travels in the same pan you baked it in. It’s an easy one to bring in the fall alongside a few other easy fall desserts.

    If you bake sheet cakes, this one will feel familiar. It has the same appeal as the sock it to me cake and the German chocolate sheet cake, just with apples and caramel instead of cinnamon swirl or coconut pecan. For more apple desserts, there is also this apple snickerdoodle dump cake.

    Cakes for the Potluck Table cookbook by Jessica Burgess, cover and open recipe spread

    My cookbook · Coming this spring

    Cakes for the
    Potluck Table

    Sixty cakes that never come home leftover. Six are yours free right now.

    Send me the six cakes

    FAQs

    What does apple dapple cake taste like?

    It tastes like a spiced apple cake with a caramel topping. The cinnamon and nutmeg come through, the apples stay soft and a little tart, and the glaze adds a buttery brown sugar sweetness on top. The crumb is a little denser than a plain layer cake, which is part of why it stays so moist.

    Why is it called apple dapple cake?

    The name comes from the way the apples are scattered, or dappled, all through the batter instead of layered or arranged on top. Cut a slice and you’ll see chunks of apple in every bite.

    What kind of apples should I use?

    Granny smith apples work best here because they’re firm and slightly tart, which keeps them from turning to mush. Honeycrisp or braeburn will also hold up well.

    How many apples do I need?

    Three cups of half inch cubes takes about 3 small apples or 2 large ones, and plan on roughly 10 minutes to peel and cut them. Stick with 3 cups. Four is more than this amount of batter can carry, especially once the walnuts go in.

    Can I leave the walnuts out?

    Yes. The walnuts are optional and the cake works fine without them, though the texture and flavor they add are worth keeping if you have them. Pecans can be swapped in for the walnuts.

    Can I use a different oil?

    Any neutral flavored oil works in place of the vegetable oil, like canola or avocado oil.

    Can I use salted butter in the glaze?

    Yes. Use salted butter and leave out the pinch of salt.

    Can I make it ahead of time?

    You can. The cake is even more moist the next day, so baking it a day before you need it works in your favor.

    How do I store apple dapple cake?

    Cover it and keep it at room temperature for up to 2 days. For longer than that, cover it and refrigerate for up to 5 days, then let slices sit out for a few minutes or warm them in the microwave before eating. Individual slices can be wrapped and frozen for up to 3 months.

    Ingredients for apple dapple cake measured into bowls on a marble counter.

    Ingredients

    See the recipe card below that has the printable, full ingredient list and instructions.

    For the Cake

    • 3 cups all-purpose flour – Gives the cake structure so it can hold all of the apples.
    • 1 teaspoon baking soda – Lifts the thick batter as it bakes.
    • 1 teaspoon ground cinnamon – The main warm spice.
    • ½ teaspoon ground nutmeg – Rounds out the cinnamon.
    • ½ teaspoon salt – Keeps the sweetness in check.
    • 1 ¼ cups granulated sugar – Sweetens the cake.
    • 1 cup vegetable oil – Keeps it moist for days.
    • ¾ cup brown sugar, packed – Adds a little molasses flavor.
    • 3 eggs – Bind the batter and lighten it up.
    • 2 teaspoons vanilla – Warms up the flavor.
    • 3 cups peeled, chopped Granny Smith apples, cut into about ½ inch cubes – The star of the cake.
    • ½ cup chopped walnuts, optional – Adds crunch and flavor.

    For the Caramel Glaze

    • ¼ cup unsalted butter – The base of the glaze.
    • ¼ cup brown sugar, packed – Gives the glaze its caramel flavor.
    • ¼ cup granulated sugar – Sweetens and helps it set.
    • ¼ cup heavy cream – Makes it smooth and pourable.
    • ½ teaspoon vanilla extract – Finishes the flavor.
    • Pinch of salt – Balances the sugar.
    A pan of baked apple dapple cake covered in caramel glaze.

    Instructions

    • Preheat the oven to 325°F. Grease a 9×13-inch pan and set it aside.
    • In a medium bowl, whisk together 3 cups all-purpose flour, 1 teaspoon baking soda, 1 teaspoon cinnamon, ½ teaspoon nutmeg, and ½ teaspoon salt. Set aside.
    • In a large bowl, mix 1 ¼ cups granulated sugar, 1 cup vegetable oil, and ¾ cup packed brown sugar until well combined. Scrape down the sides of the bowl.
    Sugars and oil in mixing bowl.
    • Add 3 eggs one at a time along with 2 teaspoons vanilla, stirring well and scraping the bowl between each addition. The batter will smooth out and lighten as you go.
    Egg added to sugar and oil mixture in mixing bowl.
    • Slowly add the dry ingredients to the wet ingredients and mix until just combined, with no streaks of flour left. The batter will be thick.
    • Gently fold in 3 cups chopped apples and ½ cup walnuts.
    Chopped apples and walnuts folded into thick apple dapple cake batter.
    • Spread the batter evenly into the prepared pan and bake for 40 to 45 minutes, until a toothpick in the center comes out clean or with just a few crumbs. The cake should be golden brown on top and starting to pull away from the sides.
    Baked apple dapple cake cooling in a 9x13 pan.
    • Let the cake cool about 15 minutes before making the glaze.

    How to Make the Caramel Glaze

    • Add ¼ cup butter, ¼ cup packed brown sugar, ¼ cup granulated sugar, ¼ cup heavy cream, ½ teaspoon vanilla, and a pinch of salt to a small saucepan.
    • Heat over medium, stirring constantly, until the mixture comes to a boil. Boil for one minute, then remove it from the heat right away.
    • Cool the glaze in the saucepan for about 5 minutes.
    Caramel glaze after boiling in a small saucepan.
    • Pour the glaze over the slightly warm cake and spread it evenly.
    • Wait until the cake is completely cool to slice and serve.
    Warm caramel glaze being poured over a pan of apple dapple cake.

    Tips

    • A light metal 9×13 inch pan works well here. A glass pan can be used, but the cake may need a little longer. Tested at high altitude in a glass pan it took about 44 minutes.
    • Grease the inside corners of the pan well so the cake doesn’t stick.
    • An easy way to cut the apples: slice a little off the top and bottom, peel them, then cut down each side around the core so you have four flat pieces. Dice those into half inch cubes.
    • Cut the butter for the glaze into cubes so it melts faster.
    • Use a wooden spoon to stir the batter. It’s thick enough to break a rubber spatula.
    • Boiling the glaze for one minute gives you a pourable glaze. Two minutes makes it noticeably thicker, closer to a frosting. Either works, but the longer you boil it the faster you need to spread it.
    • Small holes in the top after glazing are normal. The hot glaze sinks into air pockets in the cake, which is part of what makes it so moist.
    A gold fork lifting a bite from a slice of apple dapple cake on a white plate.

    More Recipes

    If you love old-fashioned apple desserts like this one, then you’ll also love these easy recipes:

    • apple butter pie
    • apple snickerdoodle dump cake
    • air fryer apple fritters
    • caramel cupcakes

    Recipe

    A square slice of apple dapple cake topped with caramel glaze on a white plate next to a green apple.
    Print Pin
    Be the first to rate!

    Apple Dapple Cake

    An old-fashioned apple cake baked in a 9×13 pan and topped with a warm caramel glaze. It is loaded with cubes of granny smith apple and chopped walnuts, and it stays moist for days. Easy enough for a weeknight and big enough for a potluck.
    Course Dessert
    Cuisine American
    Prep Time 30 minutes minutes
    Cook Time 45 minutes minutes
    Cooling Time 1 hour hour
    Total Time 2 hours hours 15 minutes minutes
    Servings 12 slices
    Calories 558kcal
    Author Jessica Burgess

    Ingredients

    Cake

    • 3 cups all-purpose flour 360 g
    • 1 teaspoon baking soda 6 g
    • 1 teaspoon ground cinnamon 3 g
    • ½ teaspoon ground nutmeg 2 g
    • ½ teaspoon salt 3 g
    • 1 ¼ cups granulated sugar 250 g
    • 1 cup vegetable oil 210 g
    • ¾ cup brown sugar, packed 165 g
    • 3 eggs about 150 g
    • 2 teaspoons vanilla 8 g
    • 3 cups peeled, chopped granny smith apples, cut into about ½ inch cubes 342 g
    • ½ cup chopped walnuts 56 g, optional

    Caramel Glaze

    • ¼ cup unsalted butter 56.5 g
    • ¼ cup brown sugar, packed 55 g
    • ¼ cup granulated sugar 50 g
    • ¼ cup heavy cream 57 g
    • ½ teaspoon vanilla extract 2 g
    • Pinch of salt

    Instructions

    Make the Cake

    • Preheat the oven to 325°F. Grease a 9×13 inch pan and set aside.
    • In a medium bowl, whisk together the flour, baking soda, cinnamon, nutmeg, and salt. Set aside.
    • In a large bowl, mix the granulated sugar, vegetable oil, and brown sugar until well combined. Scrape down the sides of the bowl.
    • Add the eggs one at a time along with the vanilla, stirring well and scraping the bowl between each addition.
    • Slowly add the dry ingredients to the wet ingredients and mix until just combined, with no streaks of flour remaining. The batter will be thick.
    • Gently fold in the apples and walnuts.
    • Spread the batter evenly into the prepared pan and bake 40 to 45 minutes, until a toothpick in the center comes out clean or with a few crumbs. The cake should be golden brown and starting to pull away from the sides.
    • Let the cake cool about 15 minutes before making the glaze.

    Make the Caramel Glaze

    • Add all of the glaze ingredients to a small saucepan.
    • Heat over medium, stirring constantly, until the mixture comes to a boil. Boil for one minute, then remove from the heat.
    • Cool the glaze in the saucepan about 5 minutes.
    • Pour the glaze over the slightly warm cake and spread evenly.
    • Wait until the cake is completely cool to slice and serve.

    Notes

    • A light metal 9 by 13 inch pan works best. A glass pan may need a few extra minutes. Tested at high altitude in a glass pan it took about 44 minutes.
    • Grease the corners of the pan well to prevent sticking.
    • Three cups of apples takes about 3 small apples or 2 large ones. An easy way to cut them: slice a little off the top and bottom, peel, then cut down each side around the core and dice those pieces into half inch cubes.
    • Use a wooden spoon for the batter. It is thick enough to break a rubber spatula.
    • Boiling the glaze for one minute gives a pourable glaze. Two minutes makes it thicker, closer to a frosting.
    • Small holes in the top after glazing are normal. The hot glaze sinks into air pockets in the cake.
    • The cake is even more moist the next day.

    Nutrition

    Calories: 558kcal | Carbohydrates: 72g | Protein: 6g | Fat: 28g | Saturated Fat: 7g | Polyunsaturated Fat: 13g | Monounsaturated Fat: 6g | Trans Fat: 0.3g | Cholesterol: 57mg | Sodium: 212mg | Potassium: 137mg | Fiber: 2g | Sugar: 47g | Vitamin A: 270IU | Vitamin C: 2mg | Calcium: 39mg | Iron: 2mg

    Baked BBQ Chicken Thighs with Crispy Skin

    September 3, 2026

    Baked BBQ chicken thighs with crispy skin and a sticky caramelized glaze, sprinkled with parsley.

    These baked BBQ chicken thighs come out of the oven with crispy skin and a sticky, caramelized glaze, and you do not need a grill to pull it off. It is the same oven method that works so well for juicy chicken drumsticks in the oven, only with bone-in thighs and a homemade BBQ glaze brushed on at the very end. Simple ingredients, one pan, and a dinner the whole family will ask for again.

    Baked BBQ chicken thighs with crispy skin and a sticky caramelized glaze, sprinkled with parsley.

    An Easy Oven BBQ Chicken Recipe That Tastes Like It Came Off the Grill

    Bone-in, skin-on thighs are one of the best deals in the meat case, and they are forgiving. Thighs stay juicy even if you leave them in a few minutes longer than you meant to, which is more than you can say for chicken breast. The dry rub is all pantry seasonings, plus a quarter teaspoon of baking powder that helps the skin dry out and crisp up while it bakes.

    Timing the sauce is the whole trick. BBQ sauce is full of sugar, so it burns if it sits in a hot oven for 45 minutes. Bake the chicken plain first, then brush the glaze on in two thin coats at the end. Same rule that keeps the sauce glossy instead of scorched on baked BBQ pork chops in the oven and pork steaks in the oven.

    Weeknights are when this one earns its keep. Ten minutes of hands-on work and the oven does the rest, so it fits the same slot as baked chicken cutlets on a busy Tuesday.

    FAQs

    What do baked BBQ chicken thighs taste like?

    Smoky and a little sweet, with tang behind it. The smoked paprika does most of the work on the smoke, and the glaze balances honey against apple cider vinegar and Worcestershire so it is not just sugar. The skin turns crisp and the meat underneath stays juicy.

    Why is there baking powder in the seasoning?

    A quarter teaspoon of baking powder mixed into the rub helps the skin dry out as it bakes, and dry skin is crisp skin. You will not taste it. Keep the coating light and even so you do not end up with dark patches.

    Can I use boneless chicken thighs?

    Yes, and they cook faster, so watch them. Start checking the temperature around the 25 minute mark before you glaze them. Aim for 165°F to 175°F for boneless thighs.

    Why did my BBQ sauce burn?

    Usually one of two things: too much sauce at once, or the sauce went on too early. Brush thin coats near the end of the bake, and if you use the broiler, do not walk away from it.

    Can I use parchment paper instead of foil?

    You can. Parchment is fine at 400°F while the chicken bakes, but you cannot run the broiler with it. Since the wire rack is doing the work anyway, foil is the easier choice here and it makes cleanup faster.

    Do I have to broil the chicken at the end?

    No, it is completely optional. If the glaze already looks glossy and caramelized after the last few minutes of baking, skip it. Broil only if you want a little extra color, and only for 30 to 60 seconds with your eyes on it.

    What should I serve with BBQ chicken thighs?

    Cookout sides, even in the middle of January. Apple pie baked beans and KFC coleslaw are the classic pairing, and corn casserole or a pan of sweet cornbread rounds out the plate.

    How do you store and freeze leftover chicken thighs?

    These are best baked right before you serve them, but you can mix the seasoning and stir the glaze together a day ahead. Leftovers keep in an airtight container in the fridge for up to 4 days, or in the freezer for up to 3 months. Reheat in a 350°F oven until warmed through rather than the microwave, which turns the skin soft.

    Baked BBQ chicken thighs served on a white plate with green beans and a bowl of BBQ sauce.

    Ingredients

    See the recipe card below that has the printable, full ingredient list and instructions.

    For the Chicken

    • 4 bone-in, skin-on chicken thighs, about 2 ½ to 3 pounds – The bone keeps the meat juicy and the skin is what crisps up.
    • ¾ teaspoon kosher salt – Seasons the meat and pulls moisture out of the skin.
    • ½ teaspoon black pepper – Adds a little bite.
    • ¾ teaspoon smoked paprika – Gives the chicken that off-the-grill smoky flavor.
    • ½ teaspoon garlic powder – Savory base flavor.
    • ½ teaspoon onion powder – Rounds out the rub.
    • ¼ teaspoon chili powder – A gentle warmth, not heat.
    • ¼ teaspoon baking powder – Helps the skin dry out and crisp in the oven.

    For the BBQ Glaze

    • ¾ cup your favorite BBQ sauce, divided – ½ cup goes into the glaze and ¼ cup is set aside for serving.
    • 1 tablespoon honey – Sweetens the glaze and helps it caramelize.
    • 1 ½ teaspoons apple cider vinegar – Cuts the sweetness with a little tang.
    • 1 ½ teaspoons Worcestershire sauce – Deepens the flavor of the sauce.
    Ingredients for baked BBQ chicken thighs measured into bowls on a marble counter.

    Instructions

    • Heat the oven to 400°F. Line a large rimmed baking sheet with aluminum foil, set a wire rack on top, and give the rack a light coat of nonstick cooking spray.
    • Pat the 4 chicken thighs very dry with paper towels, especially the skin. Arrange them skin side up on the rack with space between each one.
    Raw chicken thighs patted dry and arranged skin side up on a wire rack in a foil-lined sheet pan.
    • Stir together ¾ teaspoon kosher salt, ½ teaspoon black pepper, ¾ teaspoon smoked paprika, ½ teaspoon garlic powder, ½ teaspoon onion powder, ¼ teaspoon chili powder, and ¼ teaspoon baking powder in a small bowl. Sprinkle it evenly over the chicken and rub it into the skin.
    Salt, pepper, smoked paprika, garlic powder, onion powder, chili powder, and baking powder whisked together in a small bowl.
    • Roast uncovered for 35 to 45 minutes, depending on the size of the thighs. Rotate the pan halfway through if your oven runs hot in spots. The skin should be golden and crisp and the thickest part of the meat should read at least 165°F on an instant-read thermometer. Bone-in thighs are best at 175°F to 185°F. If the skin is getting too dark before the chicken is done, tent it loosely with foil and keep baking.
    Seasoned chicken thighs roasted until the skin is golden and crisp, before the BBQ glaze goes on.
    • While the chicken bakes, stir ½ cup BBQ sauce, 1 tablespoon honey, 1 ½ teaspoons apple cider vinegar, and 1 ½ teaspoons Worcestershire sauce together in a small bowl. Save the remaining ¼ cup BBQ sauce for serving.
    • Once the chicken reads at least 165°F, brush a thin layer of glaze over the tops and sides of the thighs. Return the pan to the oven for 5 minutes.
    Brushing the first thin layer of BBQ glaze onto baked chicken thighs on a wire rack.
    • Brush on a second thin layer of glaze and bake another 3 to 5 minutes, until it is glossy and caramelized and the chicken reads about 175°F to 185°F in the thickest part near the bone.
    • For extra caramelization, switch the oven to broil for 30 to 60 seconds. Watch it the whole time. You want the glaze bubbly, not burnt. This step is optional.
    A second coat of BBQ glaze brushed onto the chicken thighs until glossy and caramelized.
    • Let the chicken rest about 5 minutes, then serve with the reserved ¼ cup BBQ sauce on the side.
    Baked BBQ chicken thighs on a white plate with a bowl of BBQ sauce and fresh parsley.

    Tips

    • Dry skin is the whole ballgame. Pat the thighs as dry as you can before the seasoning goes on, because moisture on the skin keeps it from crisping.
    • Keep the rub light and even. A thick layer does not add flavor, it just burns in patches.
    • Hold the BBQ sauce until the end. Sugar burns, so wait until the chicken is nearly cooked before the first coat goes on.
    • Two thin coats beat one thick one. That is what gives you the even, glossy, caramelized finish.
    • Check the temperature in the thickest part of the thigh near the bone, but do not let the thermometer touch the bone or you will get a false reading.
    • Rest the chicken 5 minutes before serving. The juices settle and the glaze turns sticky.
    Close up of the sticky caramelized glaze on baked BBQ chicken thighs.

    More Recipes

    If you love easy chicken dinners like this one, then you will also love these:

    • bbq chicken pasta
    • teriyaki chicken
    • old fashioned chicken and rice casserole
    • easy crockpot dinners

    Recipe

    Baked BBQ chicken thighs with crispy skin and a sticky caramelized glaze, sprinkled with parsley.
    Print Pin
    Be the first to rate!

    Baked BBQ Chicken Thighs

    Baked BBQ chicken thighs with crispy skin and a sticky, caramelized glaze, all from the oven. A simple dry rub does the seasoning and a quick homemade BBQ glaze goes on at the end. Easy enough for a weeknight and good enough for company.
    Course Main Course
    Cuisine American
    Prep Time 10 minutes minutes
    Cook Time 55 minutes minutes
    Resting Time 5 minutes minutes
    Total Time 1 hour hour 10 minutes minutes
    Servings 4 servings
    Calories 549kcal
    Author Jessica Burgess

    Equipment

    • Large rimmed baking sheet
    • wire rack
    • Instant-read meat thermometer
    • Basting brush

    Ingredients

    Chicken

    • 4 bone-in, skin-on chicken thighs about 2 ½ to 3 pounds
    • ¾ teaspoon kosher salt
    • ½ teaspoon black pepper
    • ¾ teaspoon smoked paprika
    • ½ teaspoon garlic powder
    • ½ teaspoon onion powder
    • ¼ teaspoon chili powder
    • ¼ teaspoon baking powder

    BBQ Glaze

    • ¾ cup BBQ sauce divided
    • 1 tablespoon honey
    • 1 ½ teaspoons apple cider vinegar
    • 1 ½ teaspoons Worcestershire sauce

    Instructions

    Bake the Chicken

    • Heat the oven to 400°F. Line a large rimmed baking sheet with aluminum foil, place a wire rack on top, and lightly grease the rack with nonstick cooking spray.
    • Pat the chicken thighs very dry with paper towels, paying particular attention to the skin. Arrange them skin side up on the rack, leaving space between each piece.
    • In a small bowl, combine the salt, black pepper, smoked paprika, garlic powder, onion powder, chili powder, and baking powder. Sprinkle the seasoning evenly over the chicken, rubbing it into the skin.
    • Roast uncovered for 35 to 45 minutes, depending on thigh size. Rotate the pan halfway through if your oven has hot spots. Cook until the skin is golden and crisp and the thickest part of the meat registers at least 165°F on an instant-read thermometer. For the best texture, bone-in thighs are especially good cooked to 175°F to 185°F. If the skin is getting too dark before the chicken is cooked through, tent it loosely with foil and continue baking.

    Glaze and Serve

    • While the chicken cooks, stir together ½ cup of the BBQ sauce, the honey, apple cider vinegar, and Worcestershire sauce in a small bowl. Reserve the remaining ¼ cup BBQ sauce for serving.
    • Once the chicken has reached at least 165°F, brush a thin layer of the glaze over the tops and sides of the thighs. Return the chicken to the oven and bake for 5 minutes.
    • Brush on a second thin layer of glaze. Return the chicken to the oven for another 3 to 5 minutes, until the glaze is glossy and caramelized and the chicken reaches about 175°F to 185°F in the thickest part near the bone.
    • For extra caramelization (optional), switch the oven to broil and broil for 30 to 60 seconds, watching the chicken constantly. The glaze should become glossy and bubbly without burning.
    • Remove the chicken from the oven and let it rest about 5 minutes. Serve with the reserved BBQ sauce on the side.

    Notes

    • Dry skin is the biggest key to crispiness. Pat the chicken as dry as possible before seasoning, because moisture on the skin will keep it from crisping.
    • Use a light, even coating of seasoning. Too much can create burnt or dark patches.
    • Add the BBQ sauce near the end of the cook time. BBQ sauce contains sugar that burns if it is exposed to high heat for too long.
    • Use two thin coats of sauce rather than one thick one for an even, glossy, caramelized finish.
    • Insert the thermometer into the thickest part of the thigh near the bone, without touching the bone.
    • Boneless thighs work too. They cook faster, so start checking the temperature around 25 minutes and pull them at 165°F to 175°F.

    Nutrition

    Calories: 549kcal | Carbohydrates: 28g | Protein: 44g | Fat: 28g | Saturated Fat: 8g | Polyunsaturated Fat: 6g | Monounsaturated Fat: 11g | Trans Fat: 0.2g | Cholesterol: 198mg | Sodium: 963mg | Potassium: 551mg | Fiber: 1g | Sugar: 22g | Vitamin A: 817IU | Calcium: 56mg | Iron: 3mg

    Red Velvet Poke Cake (The Easiest One You’ll Ever Make)

    September 6, 2026

    Red velvet poke cake slice with cream cheese frosting and white chocolate curls on a plate.

    This red velvet poke cake starts with a boxed cake mix, soaks up a sweetened condensed milk filling, and gets topped with fluffy cream cheese frosting. If you’d rather bake one from scratch, this red velvet sheet cake with ermine frosting is the one to make. It’s easy to make, feeds a crowd, and has that nostalgic flavor everyone loves.

    A slice of red velvet poke cake on a plate with white chocolate shavings and filling soaked through the cake.

    An Easy Red Velvet Dessert That Feels Like an Old-Fashioned Potluck Favorite

    Poke cakes have been showing up on church cookbook pages and reunion dessert tables for decades, and this one earns its spot. The holes let the sweetened condensed milk sink all the way down, so every bite stays soft and a little bit sticky in the best way. Nothing here is fussy. A box mix, a can, a tub of whipped topping, and one bar of white chocolate for the top.

    Cream cheese frosting is what pulls it together. Red velvet without a little tang tastes flat, and folding whipped topping into the cream cheese keeps the frosting light instead of heavy. That same box of cake mix also turns into these red velvet cake mix cookies if you end up with one to spare. If your family already loves banana pudding poke cake, this one belongs in the rotation too.

    Make it the night before and it only gets better. That’s what makes it such a good potluck dessert, since it travels in the pan it was baked in and comes straight out of the fridge ready to slice. Set it next to a black forest poke cake or any of these old-fashioned cakes and see which pan empties first.

    A slice of red velvet poke cake lifted on a cake server showing the filling soaked into the red cake.
    Cakes for the Potluck Table cookbook by Jessica Burgess, cover and open recipe spread

    My cookbook · Coming this spring

    Cakes for the
    Potluck Table

    Sixty cakes that never come home leftover. Six are yours free right now.

    Send me the six cakes

    FAQs

    What does red velvet poke cake taste like?

    Like a soft red velvet cake that’s been soaked in sweet cream. The sweetened condensed milk filling makes the crumb dense and moist, and the cream cheese frosting adds just enough tang to keep it from tasting too sweet.

    Why is it called a poke cake?

    Because you literally poke holes in the cake after it bakes. Pouring the filling over the top lets it run down into the holes instead of sitting on the surface, which is what gives poke cakes their signature texture.

    Can I use a homemade red velvet cake instead of a box mix?

    Yes, as long as it bakes in a 9×13 inch pan. The rest of the recipe works the same. The box mix is what keeps this one quick, but a scratch cake will hold the filling just fine.

    Do I have to use whipped topping in the frosting?

    The recipe is written for an 8 ounce tub of thawed whipped topping, which is what keeps the frosting fluffy and spreadable straight from the fridge. Sweetened whipped cream can stand in, but it softens faster and won’t hold up as long on a dessert table.

    Can I make it ahead of time?

    This one’s better made ahead. It needs at least 2 hours in the fridge, and overnight is even better. Hold off on the white chocolate curls until right before serving.

    Why did my filling sit on top instead of soaking in?

    The holes probably weren’t wide enough, or the cake had cooled too long. Twist the skewer as you poke to open each hole up, and pour the filling while the cake is still slightly warm.

    Can I use something other than white chocolate on top?

    Mini chocolate chips work, and so do crumbles of red velvet cake if you have extra. Any of the three give you that finished look without much effort.

    How do I store red velvet poke cake?

    Cover it and keep it in the fridge for up to 4 days. To freeze, wrap the whole pan tightly or freeze individual slices on a tray first, then transfer them to a freezer bag. Thaw in the fridge overnight before serving.

    Ingredients for red velvet poke cake measured out on a marble counter.

    Ingredients

    See the recipe card below that has the printable, full ingredient list and instructions.

    For the Cake:

    • 14 to 15.25 ounce box red velvet cake mix – The base of the cake. Duncan Hines was used here.
    • 3 large eggs – Bind the batter. Check your box in case it calls for a different number.
    • ½ cup vegetable oil – Keeps the crumb soft and moist.
    • 1 cup milk – Used in place of the water the box calls for, which gives you a richer cake.

    For the Filling:

    • 14 ounce can sweetened condensed milk – Soaks down into the holes and keeps the cake moist for days.
    • 1 cup heavy whipping cream – Thins the condensed milk just enough that it runs into the holes instead of pooling.

    For the Frosting:

    • 8 ounce package cream cheese, softened – Gives the topping its tang and body.
    • 1 cup confectioner’s sugar – Sweetens the frosting.
    • 1 teaspoon vanilla extract – Rounds out the flavor.
    • 8 ounce tub whipped topping, thawed – Lightens the cream cheese so the frosting spreads soft and fluffy.
    • 2 ounce bar white chocolate – Shaved or curled over the top for the finish.
    Red velvet cake batter spread in a 9x13 baking pan before baking.

    Instructions

    • Preheat the oven and bake the red velvet cake mix according to the package directions for a 9×13 inch pan, using milk anywhere the box calls for water. Grease the pan with nonstick cooking spray first. The cake is done when the middle is set and the edges start to brown.
    • Let the cake cool for 20 minutes.
    • Poke about 50 deep holes across the top with a wooden skewer, twisting to widen each hole as you go. Stop just short of the bottom of the pan.
    A baked red velvet cake in a 9x13 pan poked full of holes with a skewer.

    How to Make the Filling

    Sweetened condensed milk and heavy whipping cream whisked together in a white mixing bowl.
    • Whisk the 14 ounce can of sweetened condensed milk and 1 cup heavy whipping cream together in a mixing bowl until combined.
    • Pour the mixture slowly and evenly over the surface of the cake so it settles into the holes.
    The sweetened condensed milk filling poured over the poked red velvet cake in the pan.

    How to Make the Frosting

    Cream cheese frosting with whipped topping folded in, in a white mixing bowl.
    • Beat the softened 8 ounce package of cream cheese with a hand or stand mixer until creamy.
    • Beat in 1 cup confectioner’s sugar and 1 teaspoon vanilla extract.
    • Fold in the 8 ounce tub of thawed whipped topping until fluffy.
    • Spread the frosting evenly over the cake with a spatula, cover, and refrigerate at least 2 hours or overnight.
    • Make curls or shavings from the 2 ounce white chocolate bar, sprinkle them gently over the top, then cut and serve.
    Red velvet poke cake frosted in the pan and topped with white chocolate shavings.
    A slice of red velvet poke cake lifted out of the pan with filling running down the side.

    Tips

    • Swap milk for water anywhere the cake mix calls for it. Small change, noticeably richer cake.
    • Poke the holes after only 20 minutes of cooling. A warm cake takes on the filling much better than a cold one.
    • Twist the skewer with every poke. Straight up and down leaves holes too narrow for the filling to sink in.
    • Let the cream cheese soften all the way on the counter. Cold cream cheese leaves lumps you can’t beat out later.
    • Give it the full 2 hours in the fridge. The filling needs time to set or the slices won’t hold their shape.
    • Add the white chocolate curls right before serving so they stay sharp instead of softening under refrigeration.
    A fork taking a bite from a slice of red velvet poke cake on a plate.

    More Recipes

    If you love easy poke cakes like this one, then you’ll also love these cakes:

    • red velvet sheet cake
    • banana pudding poke cake
    • strawberry cheesecake poke cake
    • boston cream pie poke cake

    Recipe

    Recipe

    Red velvet poke cake slice with cream cheese frosting and white chocolate curls on a plate.
    Print Pin
    Be the first to rate!

    Red Velvet Poke Cake

    Red velvet poke cake starts with a boxed cake mix, gets soaked with a sweetened condensed milk filling, and finishes with fluffy cream cheese frosting and white chocolate curls. It’s a make-ahead dessert that feeds a crowd out of one 9×13 inch pan, perfect for potlucks, holidays, and Sunday dinner.
    Course Dessert
    Cuisine American
    Prep Time 20 minutes minutes
    Cook Time 30 minutes minutes
    Chilling Time 2 hours hours 20 minutes minutes
    Total Time 3 hours hours 10 minutes minutes
    Servings 12 slices
    Calories 612kcal
    Author Jessica Burgess

    Ingredients

    Cake

    • 1 box red velvet cake mix 14 to 15.25 ounces, such as Duncan Hines
    • 3 large eggs or as called for on the cake mix box
    • ½ cup vegetable oil or as called for on the cake mix box
    • 1 cup milk used in place of the water called for on the box

    Filling

    • 14 ounces sweetened condensed milk 1 can
    • 1 cup heavy whipping cream

    Frosting

    • 8 ounces cream cheese softened
    • 1 cup confectioner’s sugar
    • 1 teaspoon vanilla extract
    • 8 ounces whipped topping thawed, such as Cool Whip
    • 2 ounces white chocolate bar

    Instructions

    Make the Cake

    • Preheat the oven and bake the cake according to the package directions for a 9×13 inch pan sprayed with nonstick cooking spray, using milk in place of any water the box calls for. Bake until the middle is set and the edges begin to brown.
    • Cool the cake for 20 minutes, then poke about 50 deep holes with a wooden skewer, twisting to widen each hole. Do not poke all the way to the bottom.

    Make the Filling

    • Whisk the sweetened condensed milk and heavy whipping cream together in a mixing bowl.
    • Slowly pour the mixture evenly over the surface of the cake so it settles into the holes.

    Make the Frosting

    • Beat the cream cheese until creamy, then beat in the confectioner’s sugar and vanilla extract.
    • Fold in the whipped topping until fluffy.
    • Spread the frosting evenly over the cake, cover, and refrigerate at least 2 hours or overnight.
    • Make curls or shavings from the white chocolate bar, sprinkle over the top, then cut and serve.

    Notes

    • Use milk anywhere the cake mix calls for water for a richer crumb.
    • Twist the skewer with each poke so the holes are wide enough for the filling to soak in.
    • Let the cream cheese soften fully on the counter to keep the frosting smooth.
    • Chill at least 2 hours so the filling sets and the slices hold their shape.
    • Add the white chocolate curls right before serving.
    • Store covered in the refrigerator for up to 4 days.
    • Swap the white chocolate for mini chocolate chips or crumbles of red velvet cake.

    Nutrition

    Calories: 612kcal | Carbohydrates: 64g | Protein: 10g | Fat: 37g | Saturated Fat: 17g | Polyunsaturated Fat: 8g | Monounsaturated Fat: 10g | Trans Fat: 0.1g | Cholesterol: 103mg | Sodium: 447mg | Potassium: 366mg | Fiber: 1g | Sugar: 51g | Vitamin A: 751IU | Vitamin C: 1mg | Calcium: 234mg | Iron: 2mg

    Easy Weekly Meal Plan #1: Five Dinners and Bread Pudding

    September 8, 2026

    Collage of tuna salad sandwiches, chicken spaghetti, oven-baked cheeseburgers, and BBQ chicken thighs, labeled Easy Weekly Meal Plan, Week 1.

    For this easy weekly meal plan, we're making tuna salad sandwiches, cheesy chicken spaghetti, burgers in the oven, BBQ chicken thighs, and creamy taco soup. There's old-fashioned bread pudding for dessert, too.

    This plan has five dinners for four people, one leftovers or eat-out night, and one night left open. Move the meals around to fit your week. Those two flexible nights leave a little breathing room!

    I've linked a side dish for each dinner, plus easy shortcuts for nights when you need them. The grocery list includes the featured sides and the portions noted below. Click the dinner and side-dish names for their full recipes.

    Jump to the grocery list

    This Week's Meal Plan

    NightDinner and sides
    1Tuna Salad Sandwiches
    Carrot Salad and apples
    2Chicken Spaghetti with Rotel
    BEST Side Salad
    3Leftovers or eat out
    Use what’s already in the fridge
    4Burgers in the Oven
    Red Skin Potato Salad — half batch
    5Baked BBQ Chicken Thighs
    Crack Green Beans and white rice
    6Creamy Taco Soup
    Air Fryer Garlic Bread
    7Open
    Your choice!

    Something sweet: Bread Pudding, whenever it fits your week.

    Collage of tuna salad sandwiches, chicken spaghetti, oven-baked cheeseburgers, and BBQ chicken thighs, labeled Easy Weekly Meal Plan, Week 1.
    A Month of Dinners, Planned for You printable PDF

    Want the next four weeks planned, too?

    A Month of Dinners, Planned for You has 28 family dinners with the full recipes and a grocery list for every week, all in one printable PDF.

    See the plan, $19

    Night 1: Tuna Salad Sandwiches

    Save this one for a busy evening. My tuna salad recipe has sweet pickle relish, celery, and red onion for a little crunch-and there's no cooking involved.

    Time: 10 minutes for the tuna salad.

    For four people: Make one batch and divide it among four sandwiches. You'll need eight slices of bread.

    Serve with: Carrot Salad and four apples. One batch of the carrot salad serves four and takes about 10 minutes. The list allows for 8 carrots, 2 garlic cloves, and soy sauce instead of liquid aminos; walnuts and raisins are optional.

    Easy shortcut: Serve plain carrot sticks with the apples instead of making the carrot salad.

    Little tip: Drain the tuna well before mixing. Keep the filling chilled until you're ready to put the sandwiches together.

    Night 2: Chicken Spaghetti with Rotel

    This is our casserole night! Chicken Spaghetti with Rotel brings together shredded chicken, a creamy sauce, and plenty of cheddar cheese.

    Allow: About 50-55 minutes with the chicken already cooked. That includes preparation, 30-35 minutes of baking, and a 5-minute rest.

    For four people: Make the full recipe, which is listed as six servings. You may have about two portions left, depending on appetites.

    Serve with: My BEST Side Salad. Make the full five-serving recipe, with a little extra for the table. Allow about 15 minutes to assemble it once the bacon and boiled eggs are ready. The grocery list includes the listed toppings, 4 bacon slices, and ¼ cup of bottled dressing; spinach is optional.

    Easy shortcut: A bagged green salad and bottled dressing work here, too.

    Want bread, too? My Cheesy Pull Apart Bread starts with a crusty loaf and adds garlic butter, mozzarella, and cheddar. One batch serves four and takes about 35 minutes, including 25 minutes in the oven. It bakes at 350°F, the same temperature as the casserole. Its ingredients are in a separate optional section of the grocery list.

    Little tip: Use 2 cups of shredded rotisserie chicken to save a step. Measure 8 ounces of dry spaghetti, then cook and drain it before assembling the casserole. Drain the Rotel, too.

    Night 3: Leftovers or Eat Out

    Take a night off from making a new recipe.

    There may be two portions of chicken spaghetti waiting in the fridge, but that won't be a full second dinner for four. Mix and match with other leftovers you already have, or make this your eat-out night.

    If you'd rather save the spaghetti for lunches, that works, too. Refrigerate it in an airtight container and use it within three days, as noted in the recipe.

    Night 4: Burgers in the Oven

    No need to get the grill out for these Burgers in the Oven. Add cheese if your family likes it, and don't miss the foil-wrapped bun trick in the recipe!

    Allow: About 30-35 minutes, including the optional bun-warming step.

    For four people: One pound of ground beef makes four burgers. You'll also need four hamburger buns.

    Serve with: Red Skin Potato Salad. Make half of the ten-serving recipe for about five side servings: use 1½ pounds of potatoes, 3 eggs, and half of every other ingredient. The grocery list already accounts for that smaller batch. Allow about 40 minutes, plus chilling if you prefer it cold.

    Easy shortcut: Potato chips are fine here! Allow 4 ounces for four people in place of the potato salad. You can also make the potato salad a day ahead, as noted in the recipe.

    Little tip: Have the buns and optional toppings ready while the burgers bake. Check that the burgers reach 160°F in the center.

    Night 5: Baked BBQ Chicken Thighs

    These Baked BBQ Chicken Thighs finish with a sticky BBQ glaze, all from the oven.

    Time: 1 hour 10 minutes, including preparation and resting.

    For four people: Make the recipe with four bone-in, skin-on thighs, about 2½-3 pounds total. That's one thigh per person.

    Serve with: Crack Green Beans and white rice. One batch of the beans serves four and takes about 30 minutes on the stovetop. Cook 1 cup of dry white rice according to the package directions, using water, and divide it among four plates.

    Easy shortcut: Use 16 ounces of plain frozen green beans, cooked according to the package, in place of the bacon-and-brown-sugar beans. Keep the rice.

    Little tip: Get the rice and beans going while the chicken bakes. The glaze goes on near the end, so follow the recipe's timing rather than adding it at the beginning.

    Night 6: Creamy Taco Soup

    My Creamy Taco Soup has ground beef, beans, corn, and Rotel in a creamy broth. Seven ingredients, one pot, and dinner is on its way.

    Allow: About 40-45 minutes. The recipe calls for 25-30 minutes of simmering after the beef is browned, so leave time for both steps.

    For four people: Make the full six-serving batch. You may have about two portions left for lunch or the next night, depending on appetites. That won't be another full dinner for four.

    Serve with: Air Fryer Garlic Bread, using four pieces of frozen garlic toast. Allow 6-10 minutes per batch in a single layer, and make it while the soup simmers. These four pieces are included in the main grocery list.

    Easy option: No air fryer? Bake the same frozen toast according to its package directions.

    Little tip: Cut the cream cheese into small blocks so it blends into the soup. Drain the corn; use the Rotel and chili beans with their liquid. The grocery list covers the soup without extra toppings.

    Night 7: Your Choice

    Keep this night open for whatever fits. You can use any soup left from the night before, add something already on hand, or go out. Extra food for this flexible night isn't included in the grocery list.

    Something Sweet: Bread Pudding

    Set aside six slices of bread for my Bread Pudding. It's an old-fashioned dessert made with simple ingredients, and one batch makes six servings.

    Time: 50 minutes-5 minutes of preparation and 45 minutes of baking. Allow extra time if you need to dry fresh bread or soak very stale bread.

    For four people: Make one batch and enjoy a little extra after dessert.

    Little tip: This week's grocery list covers plain bread pudding. The recipe has sauce options if you'd like to add one; check the ingredients for your chosen sauce before shopping.

    A Few Things to Do Before the Week Gets Busy

    • Set aside eight slices of bread for the tuna sandwiches and six for dessert.
    • Cook the 4 bacon slices and boil the 2 eggs for the green salad before assembling it. Keep its toppings separate until serving.
    • Make the half batch of potato salad the day before burger night if that helps. Keep it refrigerated.
    • Set aside 1 pound of ground beef for burgers and 1 pound for soup; freeze the soup portion for later in the week and thaw it in the refrigerator before cooking. Check your pantry and choose any shortcuts before shopping.

    Already using my Dinner Theme System? Tuck these recipes into the themes you've chosen and move the nights around to suit your family.

    Week 1 Grocery List

    This list covers one batch of all five dinners and plain bread pudding, one batch each of Carrot Salad, BEST Side Salad, and Crack Green Beans, and a half batch of Red Skin Potato Salad. It also includes four apples, the white rice, and four pieces of frozen garlic toast for soup night. The green salad and half batch of potato salad each make about five side servings, so you may have a little extra.

    The main list uses bottled salad dressing, sweet pickle relish in both the tuna and potato salads, soy sauce in the carrot salad, and all the green salad toppings listed in its recipe except the optional spinach. Optional toppings, ingredients for Cheesy Pull Apart Bread with spaghetti, and shortcut purchases are separated below. Breakfasts, lunches, and additional food for the two flexible nights aren't included.

    Quantities are amounts needed; packages may contain extra. Cross off what you already have. If you choose a shortcut, skip ingredients used only in the side you're replacing, and keep what you need for the other recipes.

    Produce

    • ☐ 4 apples - tuna sandwich night
    • ☐ 9 carrots - 8 for Carrot Salad; use ¼ cup chopped from the remaining carrot for the green salad
    • ☐ 1 small red onion - use 2 tablespoons minced in tuna salad
    • ☐ Celery - 1 stalk for tuna salad, plus ¼ cup chopped for the green salad
    • ☐ 1 lemon - use 1 tablespoon juice
    • ☐ 1 small bunch flat-leaf parsley - use 1 tablespoon
    • ☐ 3 heads romaine lettuce - BEST Side Salad
    • ☐ 1 roma tomato and 1 radish - green salad toppings
    • ☐ Green onions - 4 stalks, plus 2 tablespoons sliced: 3 stalks for Carrot Salad, 1 for the green salad, and 2 tablespoons for potato salad
    • ☐ 2 garlic cloves - Carrot Salad
    • ☐ Fresh ginger - enough for 1 teaspoon grated
    • ☐ 1½ pounds red potatoes - half batch of potato salad
    • ☐ 1 small yellow onion - use ½ cup diced for the green beans

    Meat & fish

    • ☐ 1 (12-ounce) can tuna in water - drain before using
    • ☐ Cooked chicken - 2 cups shredded; a rotisserie chicken is an easy option
    • ☐ 2 pounds ground beef - 1 pound for four burger patties, 1 pound for taco soup
    • ☐ 4 bone-in, skin-on chicken thighs - 2½-3 pounds total
    • ☐ 8 slices bacon - cook 4 for the green salad; use the other 4 in the green beans

    Bread, dairy & eggs

    • ☐ Sandwich bread - at least 14 slices: 8 for sandwiches, 6 for pudding
    • ☐ 4 hamburger buns
    • ☐ 4 pieces frozen garlic toast - for taco soup night; buy a package containing at least four
    • ☐ 2½ cups shredded cheddar cheese - 2 cups for spaghetti, ½ cup for the green salad
    • ☐ 1 cup sour cream
    • ☐ 1 (8-ounce) block cream cheese - taco soup
    • ☐ 2 cups milk
    • ☐ 9 eggs - 4 for pudding, 2 boiled for the green salad, and 3 for potato salad
    • ☐ 3 tablespoons butter - includes greasing the pudding dish

    Cans, pasta & rice - check your shelves

    • ☐ 8 ounces DRY spaghetti - cook before assembling the casserole
    • ☐ 1 (10.5-ounce) can cream of chicken soup
    • ☐ 1 (10.5-ounce) can cream of mushroom soup
    • ☐ 2 (10-ounce) cans Rotel tomatoes - drain one for spaghetti; keep the liquid in the other for taco soup
    • ☐ 3 cups chicken broth - 1 cup for spaghetti, 2 cups for potato salad
    • ☐ 4 cups beef broth - taco soup; one 32-ounce carton
    • ☐ 1 (15.25-ounce) can corn - drain for taco soup
    • ☐ 1 (15.5-ounce) can chili beans - include the liquid in taco soup
    • ☐ 1 cup dry white rice - chicken thigh night
    • ☐ 2 (14.5-ounce) cans cut green beans - drain for Crack Green Beans

    Pantry staples - buy only what you need

    • ☐ 1 cup + 1 tablespoon + 1 teaspoon real mayonnaise - tuna and potato salads
    • ☐ 6 tablespoons + 2 teaspoons sweet pickle relish - tuna and potato salads
    • ☐ 1 tablespoon coarse Dijon mustard - potato salad
    • ☐ ¼ cup bottled salad dressing - green salad
    • ☐ 3 tablespoons avocado oil - Carrot Salad
    • ☐ 2 tablespoons apple cider vinegar - Carrot Salad and chicken glaze
    • ☐ 1 tablespoon + 2 teaspoons soy sauce - Carrot Salad and green beans
    • ☐ 2½ teaspoons Worcestershire sauce - chicken glaze and green beans
    • ☐ ¾ cup BBQ sauce - includes ¼ cup reserved for serving
    • ☐ 1 tablespoon honey
    • ☐ ¾ cup white granulated sugar - bread pudding
    • ☐ 6 tablespoons light brown sugar - 2 teaspoons for Carrot Salad, ⅓ cup for green beans
    • ☐ 1 teaspoon each: vanilla extract and cinnamon
    • ☐ 3½ teaspoons garlic powder; 1½ teaspoons onion powder
    • ☐ 1 tablespoon dried basil and 1 tablespoon hulled sunflower seeds - green salad
    • ☐ ¾ teaspoon smoked paprika
    • ☐ ¼ teaspoon each: chili powder and baking powder
    • ☐ 1 teaspoon kosher salt, plus 1 teaspoon salt; extra for burgers and pasta water as desired
    • ☐ 1¾ teaspoons black pepper, plus more for burgers as desired
    • ☐ Nonstick cooking spray - burger dish, casserole dish, and chicken rack
    • ☐ 1 (1-ounce) packet taco seasoning - taco soup

    Optional extras - add only if using

    • ☐ 4 slices American cheese - for cheeseburgers
    • ☐ 1 teaspoon dried chives - optional in tuna salad
    • ☐ Ketchup, mustard, or pickles - preferred burger toppings
    • ☐ 2 cups chopped fresh spinach - optional in BEST Side Salad
    • ☐ ¼ cup walnuts and/or ¼ cup raisins - optional in Carrot Salad

    Optional bread with spaghetti - Cheesy Pull Apart Bread

    Add these only if making the optional bread. These amounts cover one full four-serving recipe and are in addition to the main grocery list. Check your pantry before buying more.

    • ☐ 1 crusty Italian or sourdough loaf - separate from the sandwich bread
    • ☐ 4 ounces shredded mozzarella - about 1 cup
    • ☐ 4 additional ounces shredded cheddar - about 1 cup, beyond the 2½ cups in the main list
    • ☐ 1 additional green onion
    • ☐ 2 additional garlic cloves
    • ☐ 4 ounces unsalted butter - ½ cup or 1 stick, in addition to the 3 tablespoons for pudding
    • ☐ ½ teaspoon additional salt
    • ☐ ½ teaspoon additional black pepper
    • ☐ ½ teaspoon red pepper flakes - optional even when making the bread

    Shortcut purchases - only if replacing a featured side

    • ☐ 8 ounces bagged green salad - instead of BEST Side Salad; use the bottled dressing above
    • ☐ 4 ounces potato chips - instead of the half batch of potato salad
    • ☐ 16 ounces plain frozen green beans - instead of Crack Green Beans

    For the carrot shortcut, use some of the carrots already listed as plain sticks instead of making Carrot Salad.

    Check your supplies: Foil for the chicken pan and optional burger bun step, a wire rack, and a meat thermometer. Have a kitchen scale handy to measure the dry spaghetti. Use an air fryer for the garlic toast, or follow its package oven directions. If making the optional pull-apart bread, have parchment paper and extra foil ready, too.

    Want another week of dinner ideas? Browse all of my easy weekly meal plans.

    Which dinner are you making first? I’d love to hear!

    Oven Baked Ribs (Fall Off the Bone Baby Back Ribs)

    September 9, 2026

    Sliced oven baked ribs on parchment showing tender meat under a dark BBQ glaze

    Oven baked ribs come out fall-off-the-bone tender without a smoker, a grill, or a decent weather forecast. Two racks of baby backs, a foil-lined sheet pan, and a low oven do the whole job.

    A rack of oven baked ribs on a wooden board with coleslaw, baked beans, and potato salad

    An Easy Rib Recipe That Tastes Like It Came Off a Smoker

    The method is simple. Baby back ribs get a heavy coat of homemade rib rub, bake covered at 275°F until the meat pulls back from the bones, then get sauced and finished at 400°F so the BBQ sauce turns sticky and caramelized around the edges. Most of that time is hands-off.

    Low and slow is what does the tenderizing. At 275°F the connective tissue melts into gelatin instead of squeezing the meat dry, and the tight foil seal traps every bit of steam. You never add liquid to the pan. The ribs release plenty on their own.

    This is the recipe I make in January when the grill is buried, and honestly, it is the one I reach for in July too. Serve them with Dr. Pepper baked beans, a bowl of coleslaw, and some Amish potato salad and you have a plate that tastes like a summer cookout no matter what month it is.

    Close up of sliced baby back ribs showing meat pulling away from the bone

    FAQs

    How long do you bake ribs in the oven at 275°F?

    Baby back ribs take about 2 ½ hours covered at 275°F, plus another 30 to 35 minutes uncovered at 400°F once they’re sauced. Thicker racks can need an extra 20 to 30 minutes in the covered stage, so check for tenderness before you move on.

    Do I need to add water or liquid to the pan?

    No. The ribs release plenty of moisture as they cook, and the tightly sealed foil keeps it in the pan. Adding liquid waters down the rub sitting on the meat.

    What if my ribs aren’t tender after 2 ½ hours?

    Cover the pan tightly again and return it to the 275°F oven for another 20 to 30 minutes before checking. Racks vary a lot in thickness, so some just take longer. Keep the temperature where it is instead of raising it.

    Can I use this recipe for St. Louis-style or spare ribs?

    Yes, though they’ll need longer than baby backs because they’re bigger with more fat and connective tissue. Use the same method and let tenderness tell you when they’re ready instead of the clock.

    Should ribs be meat-side up or bone-side up in the oven?

    Meat-side up. That keeps the heavily seasoned side on top through the whole low and slow bake and makes it easy to sauce them once the foil comes off.

    Do I have to remove the membrane from ribs?

    You don’t have to, but the ribs are better when you do. The membrane doesn’t soften in the oven, it keeps the seasoning off the meat, and it gets papery. It takes about a minute per rack.

    Can I cut the racks in half before baking?

    Absolutely. If two full racks won’t fit comfortably, cut them into halves or smaller sections. Arrange them in a single layer instead of stacking so they cook evenly.

    Can I use boneless country-style ribs?

    I wouldn’t. This recipe was built for bone-in baby back ribs. Country-style ribs are a different cut of pork and need a different method and timing.

    What if there’s a lot of liquid in the pan?

    That’s normal. The ribs release fat and juices under the sealed foil. Pour it off before you sauce them, or leave it, whichever you prefer.

    Can I make just one rack of ribs?

    Yes. Cut the rub and the mustard in half for a single rack. The bake time stays about the same, since tenderness depends on the thickness of the rack rather than how many are in the pan.

    Can I make these ahead for a party?

    Yes, and it’s a good way to do it. Bake through the covered stage a day ahead, cool the racks, and refrigerate them wrapped. The day of, sauce them and finish uncovered at 400°F for 30 to 35 minutes. Add a few minutes since they’re going in cold.

    Two racks of glazed oven baked ribs beside bowls of classic cookout sides

    Ingredients

    See the recipe card below that has the printable, full ingredient list and instructions.

    For the Rib Rub:

    • ½ cup dark brown sugar – Gives the ribs that classic sweet BBQ flavor.
    • 2 tablespoons smoked paprika – Brings the smoky flavor you would normally only get from a grill.
    • 1 tablespoon fine sea salt – Seasons the meat and ties the other spices together.
    • 2 teaspoons coarse ground black pepper – Adds little peppery bites throughout.
    • 2 teaspoons garlic powder – Builds the savory base.
    • 2 teaspoons onion powder – Rounds out the savory base.
    • 2 teaspoons chili powder – Adds depth and a mild chili flavor rather than heat.
    • 2 teaspoons dry mustard – Adds tang and sharpness to balance the brown sugar.
    • 1 teaspoon unsweetened cocoa powder – Adds richness without any chocolate flavor.
    • 1 teaspoon ground cumin – Layers in a little more smoky flavor.
    • 1 teaspoon dried oregano – Adds a subtle herby note in the background.
    • 1 teaspoon celery seed – Adds a savory, slightly earthy flavor.
    • ½ teaspoon ground allspice – Adds warmth that pairs with the brown sugar.
    • ½ to 1 teaspoon cayenne pepper – Adds the heat. Use less for mild, or leave it out.

    For the Ribs:

    • 2 racks baby back ribs (about 3 to 3.5 lbs each) – Naturally tender and quicker to cook than bigger cuts.
    • ¼ cup yellow mustard – Acts as a binder so the rub sticks in an even layer. It will not taste like mustard.
    • 2 cups BBQ sauce – Use a thicker sauce so it clings to the ribs and turns sticky instead of running into the pan.
    Two racks of raw baby back ribs with bowls of dry rub, yellow mustard, and BBQ sauce

    Instructions

    1. Heat the oven to 275°F and line a large rimmed baking sheet with heavy-duty foil.
    2. Set the ribs on the pan bones up. Work the tip of a butter knife under one edge of the membrane until you can lift a corner, grip it with a paper towel, and peel it away from the rack.
    Loosening the membrane from the back of a rack of baby back ribs
    1. Blot the ribs with clean paper towels, especially anywhere moisture has collected.
    2. Brush a light coating of yellow mustard across the front and back of each rack.
    Blotting raw baby back ribs dry with a paper towel on a foil-lined sheet pan
    Brushing yellow mustard over baby back ribs as a binder for the dry rub
    1. Mix the rub in a medium bowl, breaking apart any packed clumps of brown sugar so the color is even all the way through.
    2. Coat both sides of each rack. Instead of rubbing back and forth, press the seasoning firmly onto the meat so a thick layer stays in place.
    Two racks of ribs coated in a thick layer of homemade dry rub on a sheet pan
    1. Position the ribs meaty side up, lay foil over the whole baking sheet, and crimp it firmly around the rim.
    2. Bake at 275°F for 2 ½ hours, undisturbed. Do not add any liquid.
    Sheet pan of seasoned ribs covered tightly with heavy-duty aluminum foil
    1. Peel back the foil carefully, watching for hot steam. There will be liquid in the pan, and you can pour it off or leave it.
    2. The meat should be pulling away from the tips of the bones, and a toothpick slid between two bones should pass through without resistance. With a thermometer, look for 195 to 205°F.
    3. Racks that still feel firm need more time. Reseal the pan and give them another 20 to 30 minutes before checking again.
    Baby back ribs after baking covered at 275 degrees, with the rub set into a crust

    How to Sauce and Finish the Ribs

    1. Turn the oven up to 400°F. While it heats, brush ½ cup of BBQ sauce over the top and sides of each rack.
    2. Return the ribs uncovered and bake 15 minutes. Add the remaining sauce and bake another 15 to 20 minutes, until the glaze is sticky and caramelizing at the edges.
    3. For deeper color, broil 3 to 4 minutes and stay right at the oven. Ribs go from caramelized to scorched fast.
    4. Let the racks rest 10 minutes before cutting between the bones.
    Brushing BBQ sauce over baked ribs before the final uncovered bake
    Oven baked ribs with a caramelized BBQ glaze after finishing at 400 degrees

    Tips

    • Take the membrane off. It does not break down in the oven, it blocks the seasoning, and it turns papery. This one step makes the biggest difference in the finished ribs.
    • Crimp the foil tight. A loose seal lets steam escape, and steam is what makes these tender.
    • Judge doneness by feel, not the clock. Two racks of the same weight can finish 30 minutes apart. Lift one end with tongs. A finished rack sags and the surface starts to crack.
    • Sauce in two rounds. One coat before the hot bake and one partway through builds a real glaze. All at once and it stays thin.
    • Spare ribs and St. Louis-style work too. They are larger with more connective tissue, so plan on a longer bake and go by tenderness.
    • For dry ribs, skip the sauce entirely, finish uncovered at 400°F for 15 to 20 minutes, and sprinkle on a little extra rub as they come out.
    • Leftovers keep 3 to 4 days in the refrigerator. Reheat covered at 300°F with a thin layer of sauce brushed on first.
    Oven baked ribs served with baked beans, coleslaw, and potato salad

    More Recipes

    If ribs are on the menu, these round out the plate.

    • Dry Rub for Ribs
    • Chipotle Apple Butter Grilled Ribs
    • Pork Steaks in the Oven
    • Dr. Pepper Baked Beans
    • KFC Coleslaw Copycat
    • 3 Bean Salad
    Sliced oven baked ribs on a board with cookout sides in the background

    Recipe

    Sliced oven baked ribs on parchment showing tender meat under a dark BBQ glaze
    Print Pin
    Be the first to rate!

    Oven Baked Ribs

    Fall-off-the-bone oven baked ribs with a homemade sweet and smoky rub, baked low and slow, then finished hot with a sticky BBQ glaze. No grill or smoker needed.
    Course Main Course
    Cuisine American
    Prep Time 20 minutes minutes
    Cook Time 3 hours hours
    Resting Time 10 minutes minutes
    Total Time 3 hours hours 30 minutes minutes
    Servings 6 servings
    Calories 626kcal
    Author Jessica Burgess

    Ingredients

    Rib Rub (makes about 1 ¼ cups)

    • ½ cup dark brown sugar packed
    • 2 tablespoons smoked paprika
    • 1 tablespoon fine sea salt
    • 2 teaspoons black pepper coarse ground
    • 2 teaspoons garlic powder
    • 2 teaspoons onion powder
    • 2 teaspoons chili powder
    • 2 teaspoons dry mustard
    • 1 teaspoon unsweetened cocoa powder
    • 1 teaspoon ground cumin
    • 1 teaspoon dried oregano
    • 1 teaspoon celery seed
    • ½ teaspoon ground allspice
    • ½-1 teaspoon cayenne pepper adjust to taste

    Ribs

    • 2 racks baby back ribs about 3 to 3.5 lbs each
    • ¼ cup yellow mustard
    • 2 cups BBQ sauce use your favorite thick sauce

    Instructions

    • Heat the oven to 275°F. Cover a large rimmed baking sheet with heavy-duty foil to make cleanup easier.
    • Place the ribs on the pan, bones up, and blot away surface moisture with paper towels. If the membrane is still intact, work the tip of a butter knife underneath one edge until you can lift enough to grab. Hold the loosened piece with a paper towel, then peel the membrane away from the rack.
    • Make the rib rub by adding the dark brown sugar, smoked paprika, sea salt, black pepper, garlic powder, onion powder, chili powder, dry mustard, cocoa powder, cumin, oregano, celery seed, allspice, and cayenne to a medium bowl. Stir thoroughly, breaking apart any packed pieces of brown sugar so the spices are evenly distributed.
    • Blot the ribs again with clean paper towels, especially anywhere moisture collected while you prepared the seasoning. Brush a light coating of yellow mustard across the front and back of each rack.
    • Coat the ribs generously on both sides with the rub. Instead of rubbing it back and forth, press the mixture firmly onto the meat with your hands to leave a substantial layer of seasoning in place.
    • Cover and bake. With the ribs positioned meaty side up, lay foil over the entire baking sheet and crimp it firmly around the rim. Transfer the covered pan to the 275°F oven and leave the ribs undisturbed for 2 ½ hours.
    • Check for tenderness. Carefully peel back the foil, watching for hot steam. There will be some excess liquid, and you can pour it off now or leave it in the pan. The meat should be beginning to pull away from the tips of the bones, and a toothpick or knife inserted between two bones should pass through without much resistance. If you are checking with a thermometer, look for an internal temperature around 195-205°F. Racks that still feel firm need more time. Reseal the pan and give them another 20-30 minutes at 275°F before checking again.
    • Sauce the ribs. When they have reached the desired tenderness, raise the oven temperature to 400°F. While the oven heats, brush ½ cup BBQ sauce over the top and sides of each rack.
    • Finish uncovered. Once the oven reaches 400°F, return the ribs to the oven with no foil. Bake for 15 minutes, then add the remaining BBQ sauce. Cook an additional 15-20 minutes, until the sauce has thickened into a sticky glaze and begins to caramelize around the edges. For even more caramelization, switch the oven to broil for 3-4 minutes. Stay close to the oven during this step, because the ribs can go from caramelized to scorched quickly.
    • Rest the ribs for 10 minutes before slicing.

    Notes

    Remove the membrane: taking the thin membrane off the back of the ribs helps them get more tender and lets the seasoning reach the meat.
    Keep the pan tightly covered: a tight foil seal traps moisture while the ribs bake, which is what makes them fall-off-the-bone tender.
    Cooking time varies: depending on the thickness of the racks, they may need an extra 20-30 minutes at 275°F.
    Check for doneness: the ribs are ready when the meat has pulled back from the ends of the bones and a toothpick or thin knife slides easily between the bones.
    BBQ sauce: use a thick sauce so it clings to the ribs. Sweeter sauces caramelize faster during the final bake, so watch them closely.
    Make ahead: bake through the covered stage a day early, refrigerate, then sauce and finish uncovered at 400°F for 30-35 minutes.

    Nutrition

    Calories: 626kcal | Carbohydrates: 47g | Protein: 38g | Fat: 33g | Saturated Fat: 11g | Polyunsaturated Fat: 6g | Monounsaturated Fat: 14g | Trans Fat: 0.3g | Cholesterol: 130mg | Sodium: 2075mg | Potassium: 766mg | Fiber: 3g | Sugar: 38g | Vitamin A: 1614IU | Vitamin C: 1mg | Calcium: 132mg | Iron: 3mg

    Dry Rub for Ribs (The Only One I Make Anymore)

    September 9, 2026

    Spices for homemade dry rub for ribs measured into a white bowl before mixing

    This dry rub for ribs is the one I keep mixed up in a jar on the spice shelf. Once you have made your own, the store-bought stuff tastes flat and one-note.

    A bowl of homemade dry rub for ribs made with brown sugar and smoked paprika

    A Sweet and Smoky Rib Rub Made From Pantry Spices

    It is sweet from dark brown sugar, smoky from paprika, and savory enough that it never tips into tasting like dessert. One batch makes about 1 ¼ cups, which coats two full racks with a generous layer.

    Everything in it comes from a regular grocery store, and it takes about five minutes to stir together. You probably have most of it already.

    It works on ribs in the oven, on the grill, or in the smoker, and it is just as good on pork steaks and chicken. This is the rib rub recipe I use on my oven baked ribs.

    Homemade dry rub for ribs mixed in a white bowl with a wooden spoon

    FAQs

    How long does homemade dry rub for ribs last?

    About 6 months in an airtight jar kept away from heat and light. It won’t spoil after that, but the spices fade and you’ll notice the difference. Mix a fresh batch when it stops smelling strong.

    Can I make this rib rub ahead of time?

    Yes, and I’d recommend it. Mix a double batch and keep it in a jar so it’s ready whenever ribs go on sale. Making it ahead also gives the flavors time to settle together.

    How much dry rub do I need per rack of ribs?

    Plan on about ½ cup per rack for a heavy, barbecue-style coating. One batch of this recipe makes about 1 ¼ cups, which covers two racks with a little to spare.

    Is this dry rub spicy?

    Not at ½ teaspoon of cayenne. It reads sweet and smoky with a little warmth at the end. At a full teaspoon you’ll notice real heat. Leave the cayenne out completely if you’re cooking for kids.

    Do I have to use mustard with the rub?

    No, but it helps. Yellow mustard is a binder that gives the seasoning something to grip so you get an even coat. Olive oil or a little BBQ sauce works too, or you can press the rub onto dry meat and skip the binder altogether.

    How long should the rub sit on the ribs before cooking?

    You can cook them right away. If you have time, season the racks, cover them, and refrigerate for 2 to 12 hours. The salt works its way into the meat and the flavor goes a little deeper. Longer than about 12 hours and the surface can start to cure and turn hammy.

    Can I use this rub on ribs in the smoker or on the grill?

    Yes. It was built for ribs in the oven, but it works over any heat. Just keep an eye on it with direct grilling, since the brown sugar can darken faster than you’d expect.

    Can I use this rub on beef or chicken?

    Chicken, absolutely. Beef works too, though I’d cut the brown sugar in half and add more black pepper so it doesn’t come across so sweet.

    Can I double or triple the recipe?

    Yes. Scale every ingredient evenly and whisk it well, since larger batches take more stirring to distribute the brown sugar. A wire whisk does a better job than a spoon once you get past a couple of cups.

    Small bowls of brown sugar, smoked paprika, and spices for homemade rib rub

    Ingredients

    See the recipe card below that has the printable, full ingredient list and instructions.

    Makes about 1 ¼ cups, enough to coat two full racks of ribs.

    • ½ cup dark brown sugar – Gives the ribs that classic sweet BBQ flavor.
    • 2 tablespoons smoked paprika – Brings the smoky flavor you would normally only get from a grill.
    • 1 tablespoon fine sea salt – Seasons the meat and ties the other spices together.
    • 2 teaspoons coarse ground black pepper – Adds little peppery bites throughout.
    • 2 teaspoons garlic powder – Builds the savory base.
    • 2 teaspoons onion powder – Rounds out the savory base.
    • 2 teaspoons chili powder – Adds depth and a mild chili flavor rather than heat.
    • 2 teaspoons dry mustard – Adds tang and sharpness to balance the brown sugar.
    • 1 teaspoon unsweetened cocoa powder – Adds richness without any chocolate flavor.
    • 1 teaspoon ground cumin – Layers in a little more smoky flavor.
    • 1 teaspoon dried oregano – Adds a subtle herby note in the background.
    • 1 teaspoon celery seed – Adds a savory, slightly earthy flavor.
    • ½ teaspoon ground allspice – Adds warmth that pairs with the brown sugar.
    • ½ to 1 teaspoon cayenne pepper – Adds the heat. Use less for mild, or leave it out.

    Not sure what belongs in your spice cabinet? My list of the top 20 spices every kitchen needs covers almost everything in this rub.

    Unmixed spices for dry rub for ribs in a white bowl before stirring

    Instructions

    1. Add the dark brown sugar, smoked paprika, sea salt, black pepper, garlic powder, onion powder, chili powder, dry mustard, cocoa powder, cumin, oregano, celery seed, allspice, and cayenne to a medium bowl.
    2. Stir thoroughly, using the back of the spoon to break apart any packed clumps of brown sugar. You want the color even all the way through with no pockets of sugar or paprika.
    3. Use it right away, or funnel it into an airtight jar and store it in a cool, dark cabinet.
    Spices for homemade dry rub for ribs measured into a white bowl before mixing

    Tips

    • Pull the membrane off the ribs first. The rub cannot season through it, and it turns tough and papery in the oven.
    • Use a binder. Brush a thin coat of yellow mustard over both sides so the rub grabs in an even layer instead of leaving bare patches. It will not taste like mustard.
    • Press, do not rub. Instead of rubbing back and forth, press the seasoning onto the meat with your hands so it stays put. Plan on about ½ cup per rack.
    • Season ahead if you have time. Cover the racks and refrigerate 2 to 12 hours. Longer than that and the surface can start to cure and turn hammy.
    • Store it away from the stove. Heat and light are what dull spices. It stays at its best about 6 months in an airtight jar.
    • Keep the jar clean. Measure what you need into a small bowl rather than dipping a used spoon or seasoned hands back in.
    • Beyond ribs, it is excellent on pork tenderloin, chicken thighs, and burgers. For beef, cut the brown sugar in half and add more black pepper.
    Two racks of ribs pressed with a generous coat of homemade dry rub

    More Recipes

    Put the rub to work.

    • Oven Baked Ribs
    • Chipotle Apple Butter Grilled Ribs
    • Pork Steaks in the Oven
    • The Best Beef Rub Recipe
    • Smoked Chicken Tenders
    • Dr. Pepper Baked Beans

    Recipe

    Spices for homemade dry rub for ribs measured into a white bowl before mixing
    Print Pin
    Be the first to rate!

    Dry Rub for Ribs

    A sweet and smoky homemade dry rub for ribs made with dark brown sugar, smoked paprika, and pantry spices. Makes enough to coat two full racks.
    Course Seasoning
    Cuisine American
    Prep Time 5 minutes minutes
    Total Time 5 minutes minutes
    Servings 20 tablespoons
    Calories 28kcal
    Author Jessica Burgess

    Ingredients

    • ½ cup dark brown sugar packed
    • 2 tablespoons smoked paprika
    • 1 tablespoon fine sea salt
    • 2 teaspoons black pepper coarse ground
    • 2 teaspoons garlic powder
    • 2 teaspoons onion powder
    • 2 teaspoons chili powder
    • 2 teaspoons dry mustard
    • 1 teaspoon unsweetened cocoa powder
    • 1 teaspoon ground cumin
    • 1 teaspoon dried oregano
    • 1 teaspoon celery seed
    • ½ teaspoon ground allspice
    • ½-1 teaspoon cayenne pepper adjust to taste

    Instructions

    • Combine the dark brown sugar, smoked paprika, sea salt, black pepper, garlic powder, onion powder, chili powder, dry mustard, cocoa powder, cumin, oregano, celery seed, allspice, and cayenne in a medium bowl.
    • Stir thoroughly, using the back of the spoon to break apart any packed clumps of brown sugar, until the color is even all the way through with no pockets of sugar or paprika.
    • Use right away, or transfer to an airtight jar and store in a cool, dark place for up to 6 months.

    Notes

    Yield: about 1 ¼ cups, enough to generously coat two racks of ribs (roughly ½ cup per rack).
    Heat level: ½ teaspoon of cayenne is mild. Use a full teaspoon for noticeable heat, or leave it out entirely.
    Binder: brush a thin coat of yellow mustard on the meat first so the rub sticks in an even layer. It will not taste like mustard.
    Storage: keep it in a cool, dark cabinet away from the stove. Measure into a small bowl rather than dipping used utensils into the jar.
    Beyond ribs: works on pork steaks, pork tenderloin, chicken, and burgers. For beef, cut the brown sugar in half and add more black pepper.

    Nutrition

    Calories: 28kcal | Carbohydrates: 7g | Protein: 0.3g | Fat: 0.3g | Saturated Fat: 0.04g | Polyunsaturated Fat: 0.1g | Monounsaturated Fat: 0.1g | Sodium: 355mg | Potassium: 44mg | Fiber: 1g | Sugar: 5g | Vitamin A: 429IU | Vitamin C: 0.2mg | Calcium: 14mg | Iron: 0.5mg

    Pumpkin Bars with Cream Cheese Frosting

    September 11, 2026

    Pumpkin bars with cream cheese frosting cut into squares on parchment paper

    These pumpkin bars with cream cheese frosting bake in one 9×13 pan and come out soft, dense, and warmly spiced, closer to a blondie than a cake. If you like a pumpkin dessert that feeds a crowd without much fuss, these sit right alongside this pumpkin sheet cake. They’re easy to make, they cut into 24 squares, and the tangy frosting keeps every bite from tipping too sweet.

    A pumpkin bar with cream cheese frosting on a white plate with pumpkins and a cinnamon stick

    An Easy Pumpkin Bar Recipe That Feels Like an Old-Fashioned Fall Favorite

    Most pumpkin bars taste like pumpkin sheet cake cut into squares. These don’t. Melted butter, brown sugar, an extra egg yolk, and a fairly small amount of pumpkin give them a texture that’s dense and a little chewy. You still get all that warm cinnamon, ginger, nutmeg, and clove flavor, just in a bar you can pick up and eat with one hand.

    A frosted pumpkin bar lifted on a spatula showing the dense crumb

    That makes them a good fit for the places a fork isn’t practical. Bake sales, tailgates, class parties, church suppers. They travel well in the pan they were baked in, which is the same reason a pumpkin dump cake or a pan of pumpkin lush shows up on so many fall dessert tables. Everything comes from the grocery store, and you don’t need a mixer for the bars themselves.

    The cream cheese frosting is plain on purpose. Cream cheese, butter, powdered sugar, vanilla, and a little salt. No maple, no extra spice, nothing fancy. Sweet spiced pumpkin needs something tangy across the top, and this frosting does that job without taking over. If pumpkin and cream cheese is your combination, you will also love these pumpkin cheesecake bars with their graham cracker crust, and this pumpkin fluff for the no-bake nights.

    Building the whole dessert table? Start with these easy fall desserts and these easy potluck desserts for recipes that travel well and always get asked for.

    FAQs

    Are pumpkin bars supposed to be cakey?

    Not these. A lot of pumpkin bar recipes bake up like pumpkin sheet cake, but this one is built to be denser and more like a blondie. The melted butter, brown sugar, extra egg yolk, smaller amount of pumpkin, and minimal leavening are what give them that soft, dense, slightly chewy texture.

    Why did my pumpkin bars turn out cakey?

    Overbaking is the usual reason. Too much flour or extra leavening will do it too. Spoon the flour into the measuring cup and level it off instead of scooping straight from the container, and pull the pan when the center is just set and a toothpick comes out with a few moist crumbs.

    Why are my pumpkin bars wet or gummy in the middle?

    They probably need a few more minutes in the oven. The bars should be moist and dense, but the center shouldn’t look wet or raw. Ovens vary, so go by the visual cue and the toothpick test rather than the clock alone.

    Can I use pumpkin pie filling instead of pumpkin puree?

    No. Pumpkin pie filling has sugar and spices already added, which changes both the flavor and the texture of these bars. Use plain canned pumpkin puree. Homemade puree works as long as it’s a similar consistency, and if yours is watery, drain off some of the liquid before measuring.

    Can I use pumpkin pie spice instead of the individual spices?

    Yes. Replace the cinnamon, ginger, nutmeg, and cloves with pumpkin pie spice. Blends vary by brand, so start with 3 ½ to 4 teaspoons and adjust to taste.

    Can I add nuts or chocolate chips?

    Both work. Fold chopped pecans, walnuts, or semi-sweet or dark chocolate chips into the finished batter right before you spread it in the pan. Nuts will make the bars a little more substantial and change the texture slightly.

    Can I make pumpkin bars ahead of time?

    Yes. Bake the bars a day ahead and keep them covered until you’re ready to frost. The frosting can be made ahead and refrigerated too. Let it soften a little and stir or beat it briefly before spreading.

    How do I store pumpkin bars?

    Because of the cream cheese frosting, store frosted bars in an airtight container in the refrigerator for up to 5 days. Let them sit at room temperature for 15 to 20 minutes before serving for the best texture and flavor. Unfrosted bars can be wrapped tightly and kept at room temperature for a day or refrigerated for 3 days. They freeze well either frosted or unfrosted. Freeze them in a single layer until firm, then wrap well and move them to a freezer-safe container. Thaw overnight in the refrigerator.

    Ingredients for pumpkin bars with cream cheese frosting measured into bowls on a marble counter

    Ingredients

    See the recipe card below that has the printable, full ingredient list and instructions.

    For the Bars

    • ¾ cup unsalted butter – Melted butter gives these bars their rich flavor and dense, chewy, blondie-like texture instead of a light cake crumb.
    • 1 cup + 2 tablespoons light brown sugar, packed – Brings sweetness, moisture, chew, and a warm caramel flavor that works with pumpkin and spices.
    • ¼ cup granulated sugar – Adds sweetness, balances the moisture from the pumpkin, and helps with the structure of the bars.
    • 1 large egg + 1 egg yolk – The whole egg provides structure and binds everything together. The extra yolk adds richness without the extra moisture another whole egg would bring.
    • 1 teaspoon vanilla extract – Rounds out the brown sugar, pumpkin, and warm spices.
    • ⅔ cup pumpkin puree – Adds pumpkin flavor, moisture, and color. Use plain puree, not pumpkin pie filling.
    • 2 ¼ cups all purpose flour – Gives the bars enough structure to hold up while staying soft.
    • ¾ teaspoon baking powder – A small amount of lift without making the bars light and cakey.
    • ¼ teaspoon baking soda – Adds a touch of leavening and helps with browning.
    • 1 teaspoon salt – Balances the sweetness and brings the pumpkin and spice flavors forward.
    • 2 teaspoons cinnamon – The primary warm spice in the bars.
    • 1 teaspoon ground ginger – Adds a little heat and brightness to the spice blend.
    • ½ teaspoon ground nutmeg – Warm and earthy, and it plays well with pumpkin.
    • ¼ teaspoon ground cloves – Adds a subtle aromatic depth.

    For the Cream Cheese Frosting

    • 8 ounces cream cheese, softened – The tang and the creamy texture the frosting is known for.
    • ½ cup butter, softened – Softens the tang of the cream cheese and makes the frosting smooth and spreadable.
    • 2 cups powdered sugar – Sweetens and thickens the frosting while keeping it smooth.
    • 1 teaspoon vanilla – Adds flavor and complements the spices in the bars.
    • ½ teaspoon salt – Balances the powdered sugar and brings out the cream cheese flavor.

    Instructions

    • Prepare a 9×13 baking pan with a small amount of baking spray and lay in a piece of parchment paper. Set it aside and preheat the oven to 350 degrees F.
    • Melt the ¾ cup of butter in a saucepan over medium-low heat.
    Melted butter in a cream saucepan for pumpkin bars
    • Remove the pan from the heat and whisk in the 1 cup plus 2 tablespoons of brown sugar and the ¼ cup of granulated sugar until the mixture is smooth and glossy. Let it cool slightly.
    Light brown sugar and granulated sugar added to melted butter in a saucepan
    • Whisk the egg, egg yolk, and 1 teaspoon of vanilla into the butter and sugar mixture.
    Egg, egg yolk, and vanilla whisked into the butter and sugar mixture
    • Add the ⅔ cup of pumpkin puree and whisk until it’s completely incorporated.
    Pumpkin puree added to the butter, sugar, and egg mixture in a saucepan
    • In a separate bowl, whisk together the 2 ¼ cups of flour, 2 teaspoons of cinnamon, 1 teaspoon of ginger, ½ teaspoon of nutmeg, ¼ teaspoon of cloves, ¾ teaspoon of baking powder, ¼ teaspoon of baking soda, and 1 teaspoon of salt.
    Flour, cinnamon, ginger, nutmeg, cloves, baking powder, baking soda, and salt in a mixing bowl
    • Add the dry ingredients to the pumpkin mixture. Using a rubber spatula, fold everything together just until no dry streaks remain. Don’t overmix.
    Dry ingredients added to the pumpkin mixture before folding together
    • Fill the prepared 9×13 pan with the batter.
    Pumpkin bar batter spread into a parchment lined 9x13 baking pan
    • Bake at 350 degrees F for 18 to 22 minutes, or until the center is set and a toothpick inserted into the center comes out clean. Be careful not to overbake. The bars should stay soft and dense rather than turning cakey or dry.
    • Cool completely before frosting.
    Baked pumpkin bars cooling in the 9x13 pan before frosting

    How to Make the Cream Cheese Frosting

    • Beat the 8 ounces of softened cream cheese and ½ cup of softened butter until smooth and creamy.
    Softened cream cheese and butter in a mixing bowl for cream cheese frosting
    • Add the 2 cups of powdered sugar, 1 teaspoon of vanilla, and ½ teaspoon of salt. Beat until smooth and fully incorporated.
    Smooth cream cheese frosting in a mixing bowl
    • Spread the frosting over the completely cooled bars.
    Cream cheese frosting spread over the cooled pumpkin bars
    • For the cleanest cuts, refrigerate the frosted bars briefly before slicing. Cut into 24 squares, 6 rows by 4 rows.
    Pumpkin bars with cream cheese frosting cut into squares on parchment paper

    Tips

    • Don’t overbake. This is the one that matters most. Pull the bars when the center is set but a toothpick still picks up a few moist crumbs.
    • Let the butter and sugar mixture cool slightly before the eggs go in. You don’t want it hot.
    • Spoon and level the flour instead of scooping. Too much flour makes the bars dry and less tender.
    • Use the parchment paper. It makes lifting the cooled slab out of the pan and slicing it much easier.
    • Use room-temperature cream cheese and butter for the frosting. It’s the difference between smooth and lumpy.
    • Cool completely before frosting. Even slightly warm bars will soften the cream cheese frosting.
    • A metal pan gives the best results for this texture. Glass or ceramic will work. For thicker, cakier bars, bake in a 9×9 or 8×8 pan and plan on 25 to 30 minutes.
    A pumpkin bar with cream cheese frosting on a white plate with a fork

    More Recipes

    If you love pumpkin desserts like this one, then you’ll also love these:

    • pumpkin sheet cake
    • pumpkin poke cake
    • pumpkin cheesecake bars
    • harvest cake

    Recipe

    Pumpkin bars with cream cheese frosting cut into squares on parchment paper
    Print Pin
    Be the first to rate!

    Pumpkin Bars with Cream Cheese Frosting

    Soft, dense pumpkin bars with a texture closer to a blondie than a cake, baked in one 9×13 pan and topped with tangy cream cheese frosting. Warmly spiced with cinnamon, ginger, nutmeg, and cloves. Cuts into 24 squares, so it is an easy one for potlucks, bake sales, and fall gatherings.
    Course Dessert
    Cuisine American
    Prep Time 20 minutes minutes
    Cook Time 20 minutes minutes
    Cooling and Chilling Time 2 hours hours 30 minutes minutes
    Total Time 3 hours hours 10 minutes minutes
    Servings 24 bars
    Calories 256kcal
    Author Jessica Burgess

    Ingredients

    Pumpkin Bars

    • ¾ cup unsalted butter
    • 1 ⅛ cups light brown sugar, packed 1 cup plus 2 tablespoons
    • ¼ cup granulated sugar
    • 1 large egg
    • 1 egg yolk
    • 1 teaspoon vanilla extract
    • ⅔ cup pumpkin puree not pumpkin pie filling
    • 2 ¼ cups all purpose flour
    • ¾ teaspoon baking powder
    • ¼ teaspoon baking soda
    • 1 teaspoon salt
    • 2 teaspoons ground cinnamon
    • 1 teaspoon ground ginger
    • ½ teaspoon ground nutmeg
    • ¼ teaspoon ground cloves

    Cream Cheese Frosting

    • 8 ounces cream cheese softened
    • ½ cup butter softened
    • 2 cups powdered sugar
    • 1 teaspoon vanilla extract
    • ½ teaspoon salt

    Instructions

    Pumpkin Bars

    • Prepare a 9×13 baking pan with a small amount of baking spray and lay in a piece of parchment paper. Set aside. Preheat the oven to 350 degrees F.
    • Melt the butter in a saucepan over medium-low heat.
    • Whisk the brown sugar and granulated sugar into the melted butter off the heat, until smooth and glossy. Allow the mixture to cool slightly.
    • Whisk in the egg, egg yolk, and vanilla.
    • Add the pumpkin and whisk until completely incorporated.
    • Combine the flour, cinnamon, ginger, nutmeg, cloves, baking powder, baking soda, and salt in a separate bowl.
    • Fold the dry ingredients into the pumpkin mixture with a rubber spatula, just until no dry streaks remain. Do not overmix.
    • Spread the batter into the prepared pan.
    • Bake at 350 degrees F for 18 to 22 minutes, or until the center is set and a toothpick inserted into the center comes out clean. Do not overbake.
    • Cool completely before frosting.

    Cream Cheese Frosting

    • Beat the cream cheese and butter until smooth and creamy.
    • Add the powdered sugar, vanilla, and salt. Beat until smooth and fully incorporated.
    • Spread the frosting over the completely cooled bars.
    • Chill the frosted bars briefly for the cleanest cuts, then cut into 24 squares, 6 rows by 4 rows.

    Notes

    • Don’t overbake. The center should be set with a few moist crumbs on the toothpick. This is what keeps the bars dense instead of cakey.
    • Use pumpkin puree, not pumpkin pie filling.
    • Spoon and level the flour rather than scooping it straight from the container.
    • Cool the bars completely before frosting so the frosting doesn’t melt.
    • Use room-temperature cream cheese and butter for a smooth frosting.
    • A metal pan gives the best results. For thicker, cakier bars, use a 9×9 or 8×8 pan and bake 25 to 30 minutes.

    Nutrition

    Calories: 256kcal | Carbohydrates: 33g | Protein: 2g | Fat: 13g | Saturated Fat: 8g | Polyunsaturated Fat: 1g | Monounsaturated Fat: 4g | Trans Fat: 0.4g | Cholesterol: 51mg | Sodium: 238mg | Potassium: 62mg | Fiber: 1g | Sugar: 23g | Vitamin A: 1504IU | Vitamin C: 0.3mg | Calcium: 36mg | Iron: 1mg

    Easy Weekly Meal Plan #2: Five Dinners and Caramel Apple Dump Cake

    September 15, 2026

    Collage of sloppy joes, chicken and noodles, baked ravioli, and French toast, labeled Easy Weekly Meal Plan, Week 2.

    This week, we're making sloppy joes, chicken and noodles, pork chops, baked ravioli, and French toast for supper. There's caramel apple dump cake for dessert, too!

    I've planned five dinners for four people, with a night for leftovers or eating out and another night left open. Move them around however you need to. A few recipes make six servings, so you may have a little extra for lunch or another evening.

    Click the dinner and side dish names for the full recipes. I've put the grocery list below, with the optional extras listed separately so you can decide what sounds good before you shop.

    Jump to the grocery list

    This week's menu

    NightDinner and sides
    1Old Fashioned Sloppy Joes on buns with KFC Coleslaw
    2Chicken and Noodles with Garlic Roasted Broccoli
    3Leftovers or eat out
    4Oven Baked Pork Chops with Candied Carrots and white rice
    5Baked Ravioli with Italian Cucumber Salad; optional Air Fryer Garlic Bread
    6French Toast with Breakfast Sausage in the Oven and grapes
    7Open night. Use what you have or make a family favorite.

    Dessert: Caramel Apple Dump Cake

    Collage of sloppy joes, chicken and noodles, baked ravioli, and French toast, labeled Easy Weekly Meal Plan, Week 2.
    A Month of Dinners, Planned for You printable PDF

    Want the next four weeks planned, too?

    A Month of Dinners, Planned for You has 28 family dinners with the full recipes and a grocery list for every week, all in one printable PDF.

    See the plan, $19

    Night 1: Sloppy joes and coleslaw

    Make one batch of my Old Fashioned Sloppy Joes. It makes six servings, so after four sandwiches tonight, you may have enough filling for a couple more. I've included six buns on the grocery list for that reason.

    Serve them with half a batch of my KFC Coleslaw, or about five side servings. I've already halved the ingredients on the grocery list for you.

    Allow: About 30 to 35 minutes for the sloppy joes. The coleslaw needs about 10 minutes of preparation and at least two hours in the refrigerator, so stir it together earlier in the day.

    Make it easier: An 8-ounce bag of plain cabbage-and-carrot slaw mix saves some chopping. Use it instead of the cabbage and carrot for the coleslaw, then add the homemade dressing and chill. Or serve potato chips if that's easier tonight. Just add those to your list if you're skipping the slaw.

    Night 2: Chicken and noodles with roasted broccoli

    One batch of Chicken and Noodles makes six servings. It starts with two cups of already-cooked, shredded chicken, so rotisserie chicken is a handy shortcut. Measure out what you need and save any extra chicken for another meal.

    For the side, make two batches of Garlic Roasted Broccoli. That uses 24 ounces of fresh broccoli and makes about six side servings. The grocery list includes enough for both batches.

    Allow: About 30 to 35 minutes with the chicken already cooked. The chicken and noodles take about 25 minutes, and the broccoli needs about 20 minutes in the oven after you season it.

    Little tip: Put the broccoli in the oven while you make the chicken and noodles on the stove. Use two pans if the broccoli looks crowded. The egg noodles go into the chicken recipe uncooked, so you can skip boiling them in a separate pot.

    Night 3: Leftovers or eat out

    Let's see what's in the fridge! You may have a couple of servings each of sloppy joes and chicken and noodles, plus some sides. Everyone can pick what they'd like.

    If your family finished those dinners, make this your eat-out night or choose something you already have. The shopping list doesn't include another meal for this night.

    Night 4: Pork chops, candied carrots, and rice

    Make four Oven Baked Pork Chops, using boneless chops about one inch thick for this plan. Serve them with one full batch of Candied Carrots, which makes six side servings.

    For a little rice on each plate, I've allowed one cup of dry white rice for the four of you. Cook it according to the directions on your package.

    Allow: About 30 to 40 minutes for the whole meal, depending on your rice. The chops bake at 400°F for about 15 to 20 minutes, with a rest afterward. Check for 145°F in the center and let them rest for at least three minutes.

    Little tip: Start the rice and carrots first, then put the chops in the oven. The carrots cook on the stove, which keeps the oven free for the pork chops. Remember to divide the salt as the carrot recipe directs. Some goes in the cooking water and some goes in the glaze.

    Night 5: Baked ravioli and cucumber salad

    My Baked Ravioli makes six servings in a 9×13-inch baking dish. Pick up fresh refrigerated or frozen cheese ravioli, rather than dried. There's no need to boil it before it goes into the casserole.

    Make one full batch of Italian Cucumber Salad for about six side servings. Put it together earlier that day so it has its two hours of chilling time before dinner.

    Allow: About 50 minutes for the ravioli. The salad takes about 10 minutes to put together, plus two hours to chill. Follow the ravioli recipe's baking time for the kind you bought, since frozen needs a few extra minutes.

    If you'd like bread, too: Add Air Fryer Garlic Bread. Four frozen garlic toasts give everyone one piece. I've listed them with the optional groceries. They take about 6 to 10 minutes at 400°F in the air fryer, with extra time if you need a second batch.

    Night 6: French toast for supper

    One batch of French Toast makes eight full slices, giving everyone two. Use plain, thick Texas toast bread for this recipe. It's different from the frozen garlic toast suggested with the ravioli.

    Serve it with Breakfast Sausage in the Oven, planning on 12 small raw pork sausage links, or three per person. You'll see 14 links in the sausage recipe. For this dinner, we're using 12. Keep them in a single layer on the pan.

    I've also put two cups of grapes and ½ cup of maple syrup on the list. That's ½ cup of grapes and two tablespoons of syrup per person. Add more if your family likes a bigger helping.

    Allow: About 25 to 40 minutes for dinner. The French toast recipe lists 20 minutes, but a small skillet means a few more batches. The sausage bakes at 350°F for about 12 to 15 minutes, depending on the links.

    Little tip: Start the sausage while you mix the French toast batter. And take a peek at the ingredients before you start. This French toast uses heavy cream and a little flour.

    Something sweet: Caramel apple dump cake

    This Caramel Apple Dump Cake uses apple pie filling, caramel sauce, cinnamon, dry cake mix, and butter. One 9×13-inch cake makes about 12 servings, so there's enough for another dessert night or to share.

    Allow: About 15 minutes to prepare and 45 to 50 minutes to bake, plus time to cool before serving.

    The main grocery list covers the cake without pecans. Add the optional pecans or vanilla ice cream if you'd like. Use the cake mix dry, as directed in the recipe; you don't need the eggs, oil, or milk called for on the cake-mix box.

    A little preparation before the week starts

    • Check your pantry before shopping, especially the spices, baking ingredients, and sauces. Several recipes share garlic powder, butter, onions, and brown sugar.
    • Make the coleslaw at least two hours before the sloppy joe dinner. Save the cucumber salad for later in the week, and give it two hours to chill before ravioli night.
    • Measure two cups of cooked chicken for Night 2. If you're chopping onions for the sloppy joes, you can also set aside the measured amounts for the chicken and noodles and coleslaw.

    Already using my Dinner Theme System? These dinners can fit right into the themes you've chosen.

    Grocery list

    Here's what you'll need for five dinners and their sides for four people, plus the 12-serving cake. I've included half a batch of coleslaw, a double batch of broccoli, and full batches of the other recipes. You'll need to add your usual breakfasts, lunches, and anything extra for the two flexible nights.

    Check what you have before you head to the store. I've listed the amounts you'll use and suggested a package size where it helps. Take a look at the labels on the ravioli, marinara, and cake mix so you bring home enough.

    Produce

    • ☐ 3 medium yellow onions: for ½ onion in the sloppy joes, ½ cup chopped onion in the chicken and noodles, 1½ teaspoons finely chopped onion in the half batch of coleslaw, and 1 onion in the cucumber salad.
    • ☐ 1 green bell pepper: use half for the sloppy joes.
    • ☐ 4 cups finely chopped green cabbage: approximately half a medium head, for the coleslaw. Alternatively, buy 8 ounces plain cabbage-and-carrot coleslaw mix and omit the extra 2 tablespoons of carrot for the slaw below.
    • ☐ 2-pound bag of carrots: use 1½ pounds for candied carrots and 2 tablespoons finely chopped carrot for the coleslaw, unless using the mix.
    • ☐ 24 ounces fresh broccoli florets.
    • ☐ 2 large cucumbers.
    • ☐ 1 pint cherry tomatoes.
    • ☐ 1 pound seedless grapes: measure 2 cups for dinner; save the rest for snacking.
    • ☐ 1 tablespoon minced garlic: fresh or jarred, for the chicken and noodles.

    Meat and poultry

    • ☐ 1 pound lean ground beef.
    • ☐ 2 cups cooked, shredded chicken: measure this after cooking, or use rotisserie chicken.
    • ☐ 4 boneless pork chops, about 1 inch thick.
    • ☐ 12 small raw pork breakfast sausage links.

    Bread, dairy, and eggs

    • ☐ 6 hamburger buns: four for dinner and two for possible leftover sandwiches.
    • ☐ 8 slices plain, thick Texas toast bread: for French toast.
    • ☐ 4 eggs.
    • ☐ 1 cup heavy cream.
    • ☐ 2 tablespoons whole milk.
    • ☐ 2 tablespoons buttermilk.
    • ☐ 3 cups shredded mozzarella cheese: about 12 ounces.
    • ☐ 3 tablespoons shredded Parmesan cheese: for the ravioli; extra for broccoli is optional below.
    • ☐ 3 sticks unsalted butter, or 1½ cups total: the chicken and noodles, carrots, and cake use 1 cup plus 5½ tablespoons altogether. That leaves 2½ tablespoons for the French toast pan; use more if needed.

    Cans, jars, pasta, and rice

    • ☐ 1 (15-ounce) can plain tomato sauce: for sloppy joes.
    • ☐ 4 cups chicken broth: one 32-fluid-ounce carton.
    • ☐ 2 (10.5-ounce) cans condensed cream of chicken soup.
    • ☐ 3 cups uncooked egg noodles: measure by volume; package weights vary.
    • ☐ 1 cup dry white rice: cook with the amount of water directed on its package.
    • ☐ 25 ounces fresh refrigerated or frozen cheese ravioli: not dried.
    • ☐ 25 ounces marinara sauce: check the jar size and buy enough for the full amount.
    • ☐ 2 (20- or 21-ounce) cans apple pie filling.
    • ☐ 15 ounces yellow or golden cake mix: check the box's net weight; use the dry mix.

    Check your pantry: sauces, baking ingredients, and seasonings

    • ☐ Olive oil: 6 tablespoons total.
    • ☐ Mayonnaise: ¼ cup.
    • ☐ Worcestershire sauce: 2 tablespoons.
    • ☐ White distilled vinegar: ½ teaspoon.
    • ☐ Italian dressing: 1 cup, or 8 fluid ounces.
    • ☐ Caramel sauce for ice cream: ½ cup.
    • ☐ Maple syrup: ½ cup for serving the French toast.
    • ☐ All-purpose flour: ¼ cup.
    • ☐ Granulated sugar: 3 tablespoons plus 2 teaspoons total.
    • ☐ Light brown sugar: ½ cup plus 2½ tablespoons total.
    • ☐ Vanilla extract: 1 tablespoon.
    • ☐ Garlic powder: 2 tablespoons plus 2 teaspoons total.
    • ☐ Ground cinnamon: 1½ teaspoons total.
    • ☐ Ground mustard: ½ teaspoon.
    • ☐ Paprika: ½ teaspoon.
    • ☐ Italian seasoning: 1 tablespoon.
    • ☐ Salt: 4⅛ teaspoons total, plus to taste for the broccoli. This includes the salt used in the carrots' cooking water, most of which is drained off. Follow each recipe's salt directions.
    • ☐ Black pepper: 1½ teaspoons total, plus a small pinch for the half batch of coleslaw. Add more only if you'd like it on the broccoli.
    • ☐ Cooking spray or your usual pan-greasing supplies. Check for foil to cover the ravioli, too.

    Optional extras

    • ☐ 4 frozen garlic toasts: for the ravioli dinner; separate from the plain French toast bread.
    • ☐ ½ cup chopped pecans: for the dump cake.
    • ☐ 1 pint vanilla ice cream: enough for four ½-cup scoops with one family dessert serving, not all 12 cake servings.
    • ☐ Extra Parmesan cheese: about ¼ cup as a suggested topping for the broccoli.
    • ☐ A small bunch of fresh parsley: optional garnish for the carrots or ravioli.
    • ☐ Potato chips: if serving them instead of the coleslaw. Remove the coleslaw ingredients you won't otherwise need from your shopping list.

    Want another week of dinner ideas? Browse all of my easy weekly meal plans.

    20 Cozy Soup Recipes for Fall (Easy Soups, Stews & Chili)

    September 18, 2026

    Collage of six cozy soups, stews, and chili recipes.

    When the mornings turn cold here in Montana, the first thing I do is pull the big pot out of the cabinet. Soup weather announces itself, and these are the soup recipes I reach for once it does, right through till spring.

    This is every soup, stew, and pot of chili I make on repeat. Some simmer all afternoon, some come together in the Instant Pot on a busy Tuesday, and every one is built from grocery store basics.

    20 Cozy Soup Recipes - easy soups, stews, and chili for fall.

    Ladle any of these into a bowl with a hunk of bread and you’ve got supper. Start with momma’s chili if you want the one that’s been feeding my family for years.

    Bookmark this page. It’s the one I pull up all winter when somebody asks what’s for dinner and the answer needs to be warm. If you only make one new thing, make the sausage tortellini soup. It tastes like it simmered all day, and it didn’t.

    Chili, Every Way

    Simple Chili

    Bowl of homemade chili topped with Fritos and shredded cheese.

    Momma’s thick, beefy chili that’s been on our table for as long as I can remember.

    Start a pot of this simple chili on the first cold night and don’t be surprised when everyone asks for seconds.

    White Chicken Chili

    Bowl of creamy white chicken chili.

    Creamy, mild, and loaded with tender chicken and white beans.

    Stir up this white chicken chili with cream cheese when you want a cozy change from the usual red.

    Vegetarian Chili

    Bowl of hearty vegetarian chili with beans and peppers.

    Hearty enough that nobody misses the meat, packed with beans and peppers.

    Simmer a pot of vegetarian chili for a meatless night that still eats like comfort food.

    Venison Chili

    Bowl of rich venison chili.

    Rich, hearty chili made with venison, on the stovetop or in the slow cooker.

    Cook up this venison chili when there’s game in the freezer and a chill in the air.

    Instant Pot Chili Mac

    Bowl of cheesy chili mac made in the Instant Pot.

    Chili and macaroni together in one pot, done fast in the Instant Pot.

    Pressure-cook this Instant Pot chili mac for the kind of dinner kids clean their bowls for.

    Beef Soups & Stews

    Cowboy Stew

    Bowl of hearty cowboy stew.

    A big, loaded beef stew that fills up hungry crowds.

    Fix a pot of cowboy stew when you need to feed a bunch on a budget.

    Dutch Oven Beef Stew

    Dutch oven beef stew with tender beef and vegetables.

    Fork-tender beef and vegetables cooked down slow the old-fashioned way.

    Braise up this Dutch oven beef stew on a lazy Sunday and let the house smell like supper all afternoon.

    Lasagna Soup

    Bowl of lasagna soup topped with melted cheese.

    All the comfort of lasagna without the layering, in a cozy bowl.

    Ladle up this lasagna soup when you’re craving lasagna but not the work.

    Creamy Taco Soup

    Bowl of creamy taco soup with toppings.

    All your taco favorites simmered into one creamy, dump-and-go soup.

    Stir together this creamy taco soup for an easy dinner that practically makes itself.

    Creamy & Cheesy Soups

    Loaded Baked Potato Soup

    Bowl of loaded baked potato soup with bacon and cheese.

    Thick, creamy potato soup with bacon, cheese, and all the baked-potato fixings.

    Spoon up this loaded baked potato soup when you want a bowl that eats like a full meal.

    Easy Potato Soup

    Bowl of creamy potato soup made with instant potatoes.

    Creamy potato soup on the table fast, made with instant potatoes.

    Whip up this potato soup with instant potatoes on the nights you need dinner in a hurry.

    Instant Pot Broccoli Cheddar Soup

    Bowl of broccoli cheddar soup.

    Cheesy broccoli soup like the restaurant kind, done in the Instant Pot.

    Pressure-cook this Instant Pot broccoli cheddar soup for a cozy bowl in a fraction of the time.

    Instant Pot Cauliflower Soup

    Bowl of creamy cauliflower soup.

    Silky, creamy cauliflower soup that comes together in minutes.

    Blend up this Instant Pot cauliflower soup for something light but still comforting.

    Buffalo Chicken Soup

    Bowl of buffalo chicken soup with green onions and chips.

    Creamy chicken soup with a little buffalo kick for the heat lovers.

    Ladle out this buffalo chicken soup when you want cozy with a bit of attitude.

    Hearty & Brothy Soups

    The Best Chicken Noodle Soup

    Bowl of homemade chicken noodle soup.

    The classic that fixes everything, quick and easy with tender noodles.

    Make a pot of this chicken noodle soup the first time somebody in the house sniffles.

    Sausage Tortellini Soup

    Bowl of sausage tortellini soup.

    Cheesy tortellini and savory sausage in a rich, brothy soup.

    Simmer this sausage tortellini soup when you want something that tastes fancy with almost no effort.

    15 Bean Soup

    Bowl of 15 bean soup with ham.

    Old-fashioned bean soup cooked down with ham until it’s thick and hearty.

    Put on a pot of 15 bean soup and let it simmer low while you go about your day.

    Chowders & Bisques

    Clam Chowder

    Bowl of thick and creamy clam chowder.

    Thick, creamy New England-style clam chowder, right at home in a bread bowl.

    Ladle up this clam chowder when you want a bowl that feels a little special.

    Lobster Bisque

    Bowl of lobster bisque with crackers.

    Restaurant-style lobster bisque, creamy and rich, made easy at home.

    Treat the table to this lobster bisque when a regular weeknight needs a little upgrade.

    Crab Bisque

    Bowl of creamy crab bisque.

    Smooth, creamy crab bisque that comes together quicker than you’d think.

    Stir up this crab bisque for a cozy starter that feels like a night out.

    A Pot on the Stove

    That’s the whole trick to getting through a Montana winter. A pot on the stove, a loaf of bread in the oven, and nobody goes to bed cold or hungry. Keep this page handy and you’ll have a warm dinner for every chilly night from here to spring.

    More Roundups

    • Easy Crockpot Dinners
    • 80+ Best Easy Dinners
    • Church Supper Recipes
    • Easy Fall Desserts

    Black Eyed Peas Recipe (Southern Style, No Soaking)

    September 25, 2026

    Black eyed peas with bacon and sliced green onions in a white bowl.

    No soaking required and just 15 minutes of hands-on work make this black eyed peas recipe easy to get started the day you want to serve it. Dried peas simmer with smoky bacon and a few grocery store staples, making this an easy dinner or side dish for the week or a potluck.

    Serve them with warm sweet cornbread to soak up the broth, and save a little bacon for the top. The peas get a buttery finish, a small splash of apple cider vinegar, and one last step that made all the difference when I tested them: a 10-minute rest before serving.

    A bowl of black eyed peas topped with bacon and green onions on a striped towel.

    Do You Have to Soak Black Eyed Peas?

    No, you don’t need to soak the dried black-eyed peas for this recipe. Just rinse them, pick out any small stones or shriveled peas, and add them to the pot when you’re ready to cook.

    The peas simmer for about 1 hour, then rest off the heat for 10 minutes. Older dried peas can take up to 90 minutes of simmering. Including prep, cooking, and resting, this recipe takes 1 hour 40 minutes as tested.

    Dried black eyed peas in a white colander.

    Ingredient Notes

    You’ll find the full ingredient list and measurements in the recipe card below. Here are a few things to keep in mind before you start:

    • Dried black-eyed peas: Use a 1-pound bag. The broth amount and cooking time are for dried, unsoaked peas.
    • Bacon: Six slices give the peas smoky flavor, and you’ll use the drippings to cook the onion. Bacon keeps the shopping simple, with no ham hock to track down.
    • Chicken broth: Start with 6 cups. That was enough in my test to leave the finished broth right around the level of the peas. Keep extra nearby in case your pot needs a little more during cooking.
    • Smoked paprika and red pepper flakes: The smoked paprika stands in for the smoke you’d get from a ham hock. The pepper flakes add a little heat.
    • Butter and apple cider vinegar: Both go in at the end. The butter adds richness, and the vinegar balances it. Don’t leave that little splash out!

    You’ll also need a yellow onion, garlic, brown sugar, salt, and black pepper.

    How to Make Black Eyed Peas with Bacon

    Chopped bacon cooking in a Dutch oven.

    Cook the bacon. Cook the chopped bacon in a Dutch oven over medium heat until crisp, about 8 minutes. Transfer it to a paper towel, leaving the grease in the pot.

    Diced onion cooking in bacon drippings in a Dutch oven.

    Soften the onion. Add the diced onion to the bacon grease and cook for about 5 minutes, until softened. Stir in the garlic and cook for 30 seconds.

    Black eyed peas bubbling in seasoned broth in a Dutch oven.

    Add the peas and simmer. Stir in the rinsed peas, broth, brown sugar, salt, pepper, smoked paprika, and red pepper flakes. Bring to a boil, then turn the heat to low. Cover and simmer about 1 hour, until the peas are creamy all the way through with no chalk in the center. Older dried peas can take up to 90 minutes.

    Butter and cooked bacon added to black eyed peas in a Dutch oven.

    Finish and rest. Take the pot off the heat, stir in the butter, vinegar, and most of the bacon. Let it sit 10 minutes before serving.

    Don’t skip the vinegar: Two teaspoons in the whole pot balance the bacon and butter without giving the peas a vinegary flavor.

    After the rest, top each bowl with some of the reserved bacon, and spoon in the broth along with the peas. The sliced green onions shown in the photos are an optional garnish.

    How to Know When Black Eyed Peas Are Done

    Bite one of the peas. It should be creamy all the way through with no chalk in the center. Older dried peas take longer to soften, so use that texture to guide you.

    When I tested this recipe on my gas stove, I used 6 cups of broth, a 1-hour simmer, and a 10-minute rest off the heat. After the rest, the peas had the creamy texture I was looking for. That’s why the rest is part of the recipe.

    Watch the simmer, too. You want a few lazy bubbles. If your stove keeps the pot bubbling hard even on low, try a smaller burner. A hard boil can split the skins, and the liquid can cook away too quickly.

    My black eyed peas were still firm, what happened?

    Older dried peas take longer to soften. Keep simmering and check every 10 minutes, going by the bite rather than the timer. The 10-minute rest off the heat also helps the peas finish softening, so give every batch that rest before serving.

    Are Black Eyed Peas Supposed to Be Soupy or Thick?

    This version is brothy, with a consistency like a loose stew. In my test, the finished liquid was glossy and amber, sitting about level with the peas.

    That seasoned cooking liquid, often called pot likker, belongs in the bowl. Don’t drain it off or keep cooking just to make the peas dry. Spoon some over your cornbread, too.

    Cooked black eyed peas and broth in a Dutch oven with a wooden spoon.

    What to Serve with Black Eyed Peas

    Cornbread and a bowl of these peas can make a simple supper. To fill out the meal, try one of these:

    • Slow cooker cabbage: An easy vegetable side to serve alongside your peas and cornbread.
    • Southern fried pork chops: A crisp main dish to pair with the creamy peas.
    • Southern fried chicken: Another option when you’re making a bigger Southern-style dinner.
    • Cooked rice: Spoon the peas and broth over a serving of rice for a heartier bowl.
    Black eyed peas served with cornbread, with a Dutch oven of peas in the background.

    Can I use canned black eyed peas?

    You can, and it cuts this down to about 30 minutes. Use 4 cans (15 ounces each), drained and rinsed. Cook the bacon, onion, and garlic the same way, then add the peas with 2 cups of broth instead of 6 and all the seasonings. Simmer 15 to 20 minutes, just long enough for everything to come together. Stir in the butter, vinegar, and bacon like usual.

    The broth won’t be as thick, since you don’t get the starch that comes off dried peas as they cook. Still good, just a little thinner.

    For another easy canned vegetable side, see how to make canned green beans taste better.

    What’s the Difference Between Black Eyed Peas and Hoppin’ John?

    Hoppin’ John combines peas and rice; the type of pea and preparation can vary. Anson Mills describes the traditional Carolina version as a combination of Sea Island red peas and Carolina Gold rice.

    This recipe makes a pot of black-eyed peas with bacon, with no rice cooked into it. If you’d like rice with yours, cook it separately and spoon the peas over it so you can keep the tested broth amount and cooking time.

    Why Eat Black Eyed Peas on New Year’s Day?

    Eating black-eyed peas on New Year’s Day is a Southern tradition associated with good luck for the year ahead. They’re often served with greens, which symbolize money or prosperity, a tradition explored in the Smithsonian’s look at New Year’s foods.

    If they’re on your January 1 menu, this no-soak recipe lets you start that day. It’s also a cozy pot of peas to make whenever a bowl of something warm sounds good.

    Storage and Reheating

    Divide leftovers into shallow, covered containers and refrigerate within 2 hours. Keep them in the refrigerator for 3 to 4 days, or freeze for up to 3 months for best quality. These storage times follow USDA guidance for leftovers.

    The peas thicken as they sit, so keep their broth with them. When reheating, add a splash of broth to loosen them, stir occasionally, and heat to 165°F throughout. Thaw frozen portions in the refrigerator before reheating.

    More Bean Recipes

    • Ham and beans, made with canned great northern beans and ham.
    • 15 bean soup, for another hearty pot of beans with ham.
    • Apple pie baked beans, for a sweet and savory side dish.

    Recipe

    Black eyed peas with bacon and sliced green onions in a white bowl.
    Print Pin
    Be the first to rate!

    Black Eyed Peas Recipe (Southern Style, No Soaking)

    No soaking required and just 15 minutes of hands-on work for these black-eyed peas with bacon. Dried peas simmer with onion, garlic, and smoky seasonings, then finish with butter, a splash of apple cider vinegar, and a 10-minute rest. Serves 6 to 8.
    Course Side Dish
    Cuisine American
    Prep Time 10 minutes minutes
    Cook Time 1 hour hour 20 minutes minutes
    Rest Time 10 minutes minutes
    Total Time 1 hour hour 40 minutes minutes
    Servings 8 servings
    Calories 309kcal
    Author Jessica Burgess

    Equipment

    • Dutch oven with a lid
    • Colander
    • Slotted spoon

    Ingredients

    • 1 pound dried black-eyed peas
    • 6 slices bacon chopped
    • 1 yellow onion diced
    • 3 cloves garlic minced
    • 6 cups chicken broth plus more only if needed during cooking
    • 1 tablespoon brown sugar
    • 1 teaspoon salt
    • ½ teaspoon black pepper
    • ½ teaspoon smoked paprika
    • ¼ teaspoon red pepper flakes
    • 2 tablespoons butter
    • 2 teaspoons apple cider vinegar

    Instructions

    • Rinse the black-eyed peas in a colander, picking out any small stones or shriveled peas. No soaking is needed.
    • Cook the chopped bacon in a Dutch oven over medium heat until crisp, about 8 minutes. Transfer the bacon to a paper towel with a slotted spoon, leaving the grease in the pot.
    • Add the onion to the bacon grease and cook for about 5 minutes, until softened. Stir in the garlic and cook for 30 seconds.
    • Add the black-eyed peas, 6 cups chicken broth, brown sugar, salt, black pepper, smoked paprika, and red pepper flakes. Stir to combine.
    • Bring to a boil, then turn the heat to low. Cover and simmer about 1 hour, until the peas are creamy all the way through with no chalk in the center. Older dried peas can take up to 90 minutes.
    • Take the pot off the heat, stir in the butter, vinegar, and most of the bacon. Let it sit 10 minutes before serving. Don’t skip the vinegar: the 2 teaspoons balance the richness of the bacon and butter without making the peas taste vinegary.
    • Spoon the peas and their broth into bowls and top with the remaining bacon.

    Notes

    Keep the simmer gentle. If the pot bubbles hard on low, move it to a smaller burner. A hard boil can split the skins and reduce the broth too quickly.
    Start with 6 cups of broth. Add extra during cooking only if the peas need it. The finished dish should be brothy, like a loose stew.
    Judge by texture. Older dried peas take longer to soften. Keep simmering and check every 10 minutes until creamy all the way through.
    Always rest for 10 minutes. Take the pot off the heat, stir in the butter, vinegar, and most of the bacon, then let it sit before serving.
    Leftovers: Refrigerate promptly in shallow containers and use within 3 to 4 days. Add a splash of broth when reheating and heat to 165°F.

    Nutrition

    Serving: 1serving | Calories: 309kcal | Carbohydrates: 38g | Protein: 17g | Fat: 11g | Saturated Fat: 4g | Polyunsaturated Fat: 2g | Monounsaturated Fat: 4g | Trans Fat: 0.1g | Cholesterol: 22mg | Sodium: 1088mg | Potassium: 729mg | Fiber: 6g | Sugar: 7g | Vitamin A: 207IU | Vitamin C: 2mg | Calcium: 79mg | Iron: 5mg

    Easy Weekly Meal Plan #3: Five Dinners and Pumpkin Sheet Cake

    September 22, 2026

    Collage of chili, baked chicken cutlets with green beans, loaded baked potato soup, and pumpkin sheet cake, labeled Easy Weekly Meal Plan, Week 3.

    This week, we're making chili, chicken cutlets, ham casserole, potato soup, and biscuits and gravy for supper. There's pumpkin sheet cake for dessert, too!

    I've planned five dinners for four people, with a night for leftovers or eating out and another night left open. Move them around however you need to. Several of these recipes make more than four servings, so Night 3 should be an easy one.

    Collage of chili, baked chicken cutlets with green beans, loaded baked potato soup, and pumpkin sheet cake, labeled Easy Weekly Meal Plan, Week 3.

    Click the dinner and side dish names for the full recipes. I've put the grocery list below, with the optional extras listed separately so you can decide what sounds good before you shop.

    Jump to the grocery list

    This week's menu

    NightDinner and sides
    1Simple Chili with Cornbread Without Cornmeal
    2Baked Chicken Cutlets with Instant Pot Mashed Potatoes and Better Canned Green Beans
    3Leftovers or eat out
    4Ham Casserole with Roasted Brussels Sprouts
    5Loaded Baked Potato Soup with Broccoli Crunch Salad
    6Old Fashioned Sausage Gravy over 3-Ingredient Biscuits with Fried Pears
    7Open night. Use what you have or make a family favorite.

    Dessert: Pumpkin Sheet Cake

    A Month of Dinners, Planned for You printable PDF

    Want the next four weeks planned, too?

    A Month of Dinners, Planned for You has 28 family dinners with the full recipes and a grocery list for every week, all in one printable PDF.

    See the plan, $19

    Night 1: Chili and cornbread muffins

    My Simple Chili makes four servings, which is just right for tonight. It's ground beef, chili beans, tomato sauce, cumin, and a few slices of American cheese stirred right in to make it creamy.

    Serve it with a full batch of Cornbread Without Cornmeal. It makes 24 muffins, so you'll have plenty left for Night 3 and the soup on Night 5. Freeze any you won't eat in a few days.

    Allow: About 25 minutes for the chili. The cornbread muffins need about 5 minutes to mix and 13 to 14 minutes at 400°F per pan.

    Little tip: Mix the cornbread batter and get the first pan in the oven before you brown the beef. Both will be ready at about the same time. Shredded cheese, corn chips, and sour cream are nice on top, and I've listed them with the optional groceries.

    Night 2: Chicken cutlets, mashed potatoes, and green beans

    One batch of Baked Chicken Cutlets makes six servings from 1½ pounds of chicken breast. You'll pound the chicken thin, dip it in egg, coat it in Italian bread crumbs and Parmesan, and bake it on a sheet pan. No frying.

    Make one batch of Instant Pot Mashed Potatoes, which makes eight servings. The leftovers are good for Night 3. For the green beans, use the canned green bean trick: heat two cans with 2 tablespoons of butter and ½ teaspoon of garlic powder until the liquid cooks down by about half.

    Allow: About 30 to 40 minutes for the whole meal. The cutlets bake at 400°F for 15 to 20 minutes. The potatoes cook for 13 minutes under pressure, plus the time it takes your Instant Pot to come up to pressure.

    Little tip: Start the potatoes first. While they cook, pound and bread the chicken. A little cooking spray on top of the breaded cutlets helps them brown.

    Night 3: Leftovers or eat out

    Let's see what's in the fridge! You'll probably have chicken cutlets, mashed potatoes, and a good stack of cornbread muffins. Warm everything up and let everyone pick what they'd like.

    If your family finished those dinners, make this your eat-out night or choose something you already have. The shopping list doesn't include another meal for this night.

    Night 4: Ham casserole and roasted Brussels sprouts

    My Ham Casserole is egg noodles, ham, cream of mushroom soup, sour cream, and Swiss cheese baked in a 9×13-inch pan. It makes about 8 cups. It's a good use for leftover ham, or pick up a ham steak.

    Serve it with one batch of Roasted Brussels Sprouts. The recipe makes four servings from 12 ounces of Brussels sprouts.

    Allow: About 1½ hours, most of it hands-off. The casserole bakes covered at 350°F for 45 minutes, then uncovered for 15 more. The Brussels sprouts roast at 425°F for 25 to 30 minutes.

    Little tip: The two recipes bake at different temperatures. When the casserole comes out, cover it with foil to keep it hot. Then turn the oven up to 425°F and roast the Brussels sprouts. The noodles go into the casserole already cooked, so boil them while the oven preheats. Or cook them the night before.

    Night 5: Potato soup and broccoli salad

    Make half a batch of my Loaded Baked Potato Soup, or about five servings. It uses russet potatoes, milk, a little cream, bacon bits, and ranch seasoning. I've already halved the ingredients on the grocery list for you.

    Serve it with half a batch of Broccoli Crunch Salad, about four servings. It has bacon, dried cranberries, sliced almonds, and a creamy mayo and Greek yogurt dressing. Warm up a few leftover cornbread muffins, too.

    Allow: About 30 minutes. The potatoes need to boil until tender, then the soup simmers for 10 to 15 minutes. The salad takes about 15 minutes, plus about 10 minutes to cook the bacon.

    Little tip: Cook the bacon for the salad while the potatoes boil. Save the bacon grease in a small jar in the fridge. The sausage gravy tomorrow night can use 2 tablespoons.

    Night 6: Biscuits and gravy for supper

    My Old Fashioned Sausage Gravy makes about 4 cups, enough for four people. It takes one pound of breakfast sausage, flour, whole milk, salt, and pepper.

    Make a double batch of 3-Ingredient Biscuits for 10 biscuits, or two or three per person. They only need salted butter, self-rising flour, and buttermilk. For something sweet on the side, make one batch of Fried Pears, which serves four.

    Allow: About 40 minutes. The biscuits take about 10 minutes to put together and 15 to 16 minutes at 475°F. The gravy takes about 17 minutes, and the pears about 10 minutes after you slice them.

    Little tip: One cast-iron skillet holds about five biscuits, so for a double batch, use two skillets or a parchment-lined baking sheet. On a baking sheet, start checking them at about 13 minutes. Make the gravy while the biscuits bake.

    Something sweet: Pumpkin sheet cake

    This Pumpkin Sheet Cake is a thin pumpkin cake with a poured brown butter frosting, baked in a 10×15-inch jelly-roll pan. It makes 24 servings, so there's plenty to share or take to a potluck.

    Allow: About 15 minutes to prepare and 20 to 25 minutes to bake, plus about an hour for the cake to cool and the frosting to set.

    Use pumpkin puree, not pumpkin pie filling. The frosting sets quickly, so measure its ingredients before the cake comes out of the oven. The main grocery list covers the cake without pecans. They're with the optional extras if you'd like them.

    A little preparation before the week starts

    • Check your pantry before shopping, especially flour, sugar, and spices. This week uses a lot of butter, so count your sticks, too.
    • Buy the pears a few days early if they're still firm. You want them ripe but not mushy by Night 6.
    • Cook the egg noodles and chop the ham for the casserole the night before Night 4. That turns it into a quick stir-together dinner.
    • Put the cornbread muffins you won't eat in the next few days into a freezer bag after Night 1.

    Already using my Dinner Theme System? These dinners can fit right into the themes you've chosen.

    Grocery list

    Here's what you'll need for five dinners and their sides for four people, plus the 24-serving cake. I've included half batches of the potato soup and broccoli salad, a double batch of biscuits, and full batches of the other recipes. You'll need to add your usual breakfasts, lunches, and anything extra for the two flexible nights.

    Check what you have before you head to the store. I've listed the amounts you'll use and suggested a package size where it helps. Take a look at the labels on the chili beans, tomato sauce, and pumpkin so you bring home the right cans.

    Produce

    • ☐ 5½ pounds russet potatoes: 3 pounds for the mashed potatoes and 2½ pounds for the half batch of potato soup.
    • ☐ 12 ounces Brussels sprouts.
    • ☐ 2½ cups broccoli florets: for the half batch of broccoli salad.
    • ☐ 4 ripe pears: ripe but not mushy, for the fried pears.
    • ☐ 1 small yellow onion: use half for the ham casserole.
    • ☐ 1 small red onion: for 2 tablespoons plus 2 teaspoons diced in the broccoli salad.
    • ☐ 2 cloves garlic: for the ham casserole.

    Meat and poultry

    • ☐ 1 pound ground beef.
    • ☐ 1½ pounds boneless, skinless chicken breasts: about 2 large breasts.
    • ☐ 2 cups chopped ham: leftover ham or a ham steak.
    • ☐ 4 slices thick-cut bacon: for the broccoli salad.
    • ☐ 1 pound ground pork breakfast sausage: for the gravy.

    Bread, dairy, and eggs

    • ☐ 8 eggs: 2 for the cornbread, 2 for the cutlets, and 4 for the cake.
    • ☐ 5 cups whole milk, plus 1 tablespoon: a half-gallon covers it. That's 2½ cups for the gravy, 1 cup for the soup, ½ cup each for the cornbread and mashed potatoes, 6 tablespoons for the frosting, and 3 tablespoons for the cutlets.
    • ☐ 2 cups buttermilk: for the double batch of biscuits.
    • ☐ ¼ cup heavy whipping cream: for the soup.
    • ☐ ¼ cup half and half: for the ham casserole.
    • ☐ 1 cup plus 2 tablespoons and 2 teaspoons sour cream: a 16-ounce container is plenty. That's ½ cup each for the mashed potatoes and ham casserole, plus the soup.
    • ☐ ¼ cup plain Greek yogurt: for the broccoli salad dressing.
    • ☐ 2 cups shredded Swiss cheese: for the ham casserole.
    • ☐ 3 to 4 slices thick American cheese, or 8 thin slices: for the chili.
    • ☐ ¼ cup grated Parmesan cheese: 2 tablespoons each for the cutlets and soup.
    • ☐ 2 tablespoons crumbled goat cheese: for the broccoli salad.
    • ☐ Salted butter: 3 cups plus 6 tablespoons, or 6¾ sticks: a 2-pound package leaves you a little extra. That's 14 tablespoons for the biscuits, 1¼ cups for the cake and frosting, ½ cup each for the mashed potatoes and fried pears, and 2 tablespoons each for the ham casserole and green beans.
    • ☐ 1 stick unsalted butter: for the cornbread.

    Cans, jars, pasta, and rice

    • ☐ 2 (14-ounce) cans chili beans.
    • ☐ 1 (14- or 15-ounce) can tomato sauce.
    • ☐ 1 (15-ounce) can creamed corn: for the cornbread.
    • ☐ 2 (14.5-ounce) cans cut green beans.
    • ☐ 1 (10.5-ounce) can condensed cream of mushroom soup.
    • ☐ 1 (15-ounce) can pumpkin puree: not pumpkin pie filling.
    • ☐ 8 ounces egg noodles.
    • ☐ ¼ cup chicken broth: for the soup.
    • ☐ ½ cup real bacon bits: for the soup.

    Check your pantry: sauces, baking ingredients, and seasonings

    • ☐ All-purpose flour: 4 cups plus 2 heaping tablespoons total, plus a little for dusting the biscuit dough.
    • ☐ Self-rising flour: 4 cups.
    • ☐ Granulated sugar: 2 cups plus ¼ teaspoon total.
    • ☐ Light brown sugar: ½ cup, packed.
    • ☐ Powdered sugar: 4 cups: a 2-pound bag covers it.
    • ☐ Honey: ½ cup.
    • ☐ Italian bread crumbs: 1 cup.
    • ☐ Baking powder: 1 tablespoon plus 1 teaspoon total.
    • ☐ Baking soda: 1 teaspoon.
    • ☐ Vanilla extract: 1 tablespoon plus 2 teaspoons total.
    • ☐ Vegetable oil: ½ cup.
    • ☐ Olive oil: 2 tablespoons.
    • ☐ Mayonnaise: ¼ cup.
    • ☐ Dried cranberries: ¼ cup.
    • ☐ Sliced almonds: ¼ cup.
    • ☐ Ranch seasoning: half of a 1-ounce packet.
    • ☐ Ground cumin: 2 tablespoons.
    • ☐ Ground cinnamon: 1½ tablespoons plus 2 teaspoons total, plus ½ teaspoon if you'd like it in the frosting.
    • ☐ Pumpkin pie spice: 1 teaspoon.
    • ☐ Garlic powder: 1 tablespoon plus ½ teaspoon total.
    • ☐ Onion powder: 1½ teaspoons.
    • ☐ Celery seed: 1 teaspoon.
    • ☐ Lemon pepper: 1 teaspoon.
    • ☐ Seasoning salt: 1 teaspoon.
    • ☐ Salt: 3½ teaspoons total, plus a pinch for the pears and to taste for the soup.
    • ☐ Kosher salt: 1 tablespoon plus ½ teaspoon total.
    • ☐ Black pepper: 1¾ teaspoons total, plus to taste for the soup.
    • ☐ Cooking spray, parchment paper, and foil.
    • ☐ Check your equipment: an Instant Pot, a 12-cup muffin pan, a 9×13-inch baking dish, a 10×15-inch jelly-roll pan, and a cast-iron skillet or baking sheet for the biscuits.

    Optional extras

    • ☐ Chili toppings: shredded cheddar, corn chips, and sour cream.
    • ☐ 1 tablespoon brown sugar and a pinch of baking soda: optional add-ins for the chili.
    • ☐ Mashed potato toppings: bacon bits, chopped chives, or shredded Colby Jack.
    • ☐ Shredded cheddar and green onions: for topping the potato soup.
    • ☐ A small bunch of fresh parsley: optional garnish for the cutlets.
    • ☐ 3 tablespoons poppy seeds: optional in the ham casserole, plus a sprinkle on top.
    • ☐ 2 tablespoons bacon grease: optional for the sausage gravy. Save it from the Night 5 bacon.
    • ☐ ¾ cup chopped pecans: for the cake frosting.

    Want another week of dinner ideas? Browse all of my easy weekly meal plans.

    Easy Weekly Meal Plan #4: Five Dinners and Sock it to Me Cake

    September 24, 2026

    Collage of sausage tortellini soup, baked chicken drumsticks, walking taco casserole, and sock it to me cake, labeled Easy Weekly Meal Plan, Week 4.

    This week, we’re making sausage tortellini soup, chicken drumsticks, walking taco casserole, pulled pork sliders, and a sausage and egg casserole for supper. There’s sock it to me cake for dessert, too!

    I’ve planned five dinners for four people, with a night for leftovers or eating out and another night left open. Move them around however you need to. A few of these recipes make eight or ten servings, so there will be plenty for Night 3.

    Click the dinner and side dish names for the full recipes. I’ve put the grocery list below, with the optional extras listed separately so you can decide what sounds good before you shop.

    Jump to the grocery list

    This week’s menu

    NightDinner and sides
    1Sausage Tortellini Soup with Easy Italian White Bread
    2Chicken Drumsticks in the Oven with Air Fryer Baby Potatoes and Old Fashioned Pea Salad
    3Leftovers or eat out
    4Walking Taco Casserole with Corn Casserole
    5Pulled Pork Sliders with Dr. Pepper Baked Beans
    6Sausage and Egg Casserole with Orange Fluff Salad
    7Open night. Use what you have or make a family favorite.

    Dessert: Sock it to Me Cake

    Collage of sausage tortellini soup, baked chicken drumsticks, walking taco casserole, and sock it to me cake, labeled Easy Weekly Meal Plan, Week 4.
    A Month of Dinners, Planned for You printable PDF

    Want the next four weeks planned, too?

    A Month of Dinners, Planned for You has 28 family dinners with the full recipes and a grocery list for every week, all in one printable PDF.

    See the plan, $19

    Night 1: Sausage tortellini soup and Italian bread

    One batch of Sausage Tortellini Soup makes eight servings, so there’s plenty left for Night 3. It’s Italian sausage, carrots, onion, and cheese tortellini in a creamy broth, with fresh spinach stirred in at the end.

    For bread, my Easy Italian White Bread makes 16 slices. The dough needs about an hour and a half to rise, so start it in the afternoon or make it the day before.

    Allow: About 55 minutes for the soup. The bread takes about two hours from start to finish, and most of that is rising time.

    Make it easier: A loaf of Italian bread from the store works just as well on a busy night. The grocery list has it as an option so you can decide when you shop.

    Night 2: Chicken drumsticks, air fryer potatoes, and pea salad

    Make eight Chicken Drumsticks in the Oven, or two per person. The recipe is written for six, so I’ve put one and a half times the butter mixture on the grocery list. Each drumstick gets dipped in melted butter, Parmesan, and garlic powder before it bakes.

    Serve them with one batch of Air Fryer Baby Potatoes, which makes six side servings, and half a batch of Old Fashioned Pea Salad, about six side servings. I’ve already halved the pea salad on the grocery list.

    Allow: About 40 minutes. The drumsticks bake at 400°F for 30 minutes, and the potatoes take 15 minutes in the air fryer at 400°F. The pea salad takes about 15 minutes to put together.

    Little tip: Make the pea salad earlier in the day so it can chill. Cook the bacon for it at the same time as the bacon for Night 5’s baked beans, and you’ll only dirty that pan once.

    Night 3: Leftovers or eat out

    Let’s see what’s in the fridge! There should be soup from Night 1, and maybe a drumstick or two with some potatoes. Warm everything up and let everyone pick.

    If your family finished those dinners, make this your eat-out night or choose something you already have. The shopping list doesn’t include another meal for this night.

    Night 4: Walking taco casserole and corn casserole

    My Walking Taco Casserole makes ten servings. It’s seasoned ground beef with cream cheese, green chilis, and corn, baked under two kinds of cheese, then topped with Fritos, lettuce, tomato, and sour cream right before serving.

    Serve it with The BEST Corn Casserole, which makes nine servings from a box of Jiffy mix, canned corn, sour cream, and butter.

    Allow: About 50 minutes. The taco casserole bakes at 375°F for 15 minutes, and the corn casserole bakes at 350°F for 40 to 45 minutes.

    Little tip: Put the corn casserole in first, then brown the beef while it bakes. The two dishes bake at different temperatures, so start the corn casserole at 350°F, then turn the oven up when it comes out. The Fritos go on top at the very end so they stay crunchy.

    Night 5: Pulled pork sliders and Dr. Pepper baked beans

    My Pulled Pork Sliders use four cups of already-cooked pulled pork, so a tub from the store makes this an easy night. The pork gets mixed with barbecue sauce, piled on Hawaiian rolls with provolone, and brushed with a buttery glaze before baking. One pan makes 12 sliders, or three each.

    Serve them with Dr. Pepper Baked Beans, which makes six servings. It’s canned baked beans doctored up with bacon, brown sugar, and Dr. Pepper.

    Allow: About an hour. The beans bake at 325°F for 45 minutes and the sliders bake at 350°F for 20 minutes.

    Little tip: Start the beans first, then put the sliders together while they bake. The beans can sit covered for a few minutes while the sliders finish.

    Night 6: Sausage and egg casserole for supper

    One Sausage and Egg Casserole makes ten servings. Crescent dough goes in the bottom of a 9×13-inch pan, then breakfast sausage, tater tots, cheddar, and an egg mixture poured over the top.

    Serve it with Orange Fluff Salad for something cool alongside, which makes eight servings from orange gelatin, vanilla pudding, whipped topping, mandarin oranges, and marshmallows.

    Allow: About 1 hour 15 minutes for the casserole, most of it hands-off. The fluff salad takes about 5 minutes to mix and 35 minutes to chill.

    Little tip: You can put the casserole together the night before, keep it covered in the refrigerator, and bake it when you get home. Make the fluff salad while it bakes.

    Something sweet: Sock it to me cake

    This Sock it to Me Cake is an old-fashioned sour cream cake with a cinnamon pecan ribbon running through the middle and a simple glaze poured over the top. One 9×13-inch pan makes 15 servings.

    Allow: About 25 minutes to put together and 45 minutes to bake, plus about 40 minutes to cool before you glaze it.

    The butter, eggs, and sour cream should be at room temperature before you start, so set them out about an hour ahead.

    A little preparation before the week starts

    • Check your pantry before shopping, especially flour, sugar, and spices. This week uses a lot of butter and sour cream, so count what you have.
    • Cook the whole pound of bacon at once. Half goes in the pea salad on Night 2 and the rest goes in the baked beans on Night 5.
    • Make the pea salad earlier in the day on Night 2, and the orange fluff salad while the casserole bakes on Night 6. Both are better cold.
    • If you’re baking the Italian bread, start the dough about two hours before supper, or make it the day before.
    • Set the butter, eggs, and sour cream out an hour before you make the cake.

    Already using my Dinner Theme System? These dinners can fit right into the themes you’ve chosen.

    Grocery list

    Here’s what you’ll need for five dinners and their sides for four people, plus the 15-serving cake. I’ve included half a batch of pea salad and full batches of everything else. You’ll need to add your usual breakfasts, lunches, and anything extra for the two flexible nights.

    Check what you have before you head to the store. I’ve listed the amounts you’ll use and suggested a package size where it helps. Take a look at the labels on the tortellini, baked beans, and canned corn so you bring home enough.

    Produce

    • ☐ 3 sweet onions: 1 large for the soup, 1 large for the taco casserole, and half for the baked beans.
    • ☐ 1 small red onion: for ¼ cup finely chopped in the pea salad.
    • ☐ 2 carrots: for the soup.
    • ☐ 4 cloves garlic: for the soup.
    • ☐ 2 cups fresh spinach: for the soup.
    • ☐ 1½ pounds mini gold potatoes.
    • ☐ 1 tomato: half goes in the taco casserole and half on top.
    • ☐ 1 cup shredded lettuce: for topping the taco casserole.
    • ☐ 1 tablespoon fresh rosemary: for the potatoes. A teaspoon of dried rosemary works instead.

    Meat and poultry

    • ☐ 16 ounces mild Italian sausage: for the soup.
    • ☐ 8 chicken drumsticks.
    • ☐ 1 pound ground beef.
    • ☐ 4 cups cooked pulled pork: a tub from the deli or meat case is the easy way.
    • ☐ 1 pound breakfast sausage: for the egg casserole.
    • ☐ 1 pound thick-cut bacon: about 6 slices for the pea salad and 8 for the baked beans.

    Bread, dairy, and eggs

    • ☐ 15 eggs: 9 for the breakfast casserole and 6 for the cake. Buy 18 to be safe.
    • ☐ 1½ cups heavy cream: for the soup.
    • ☐ 1½ cups milk, plus 2 tablespoons: whole or 2% for the breakfast casserole, and a little for the cake glaze.
    • ☐ 24 ounces sour cream: 1 cup for the corn casserole, 1 cup for the cake, ½ cup for topping the taco casserole, and 2 tablespoons for the pea salad.
    • ☐ 4 ounces cream cheese: for the taco casserole.
    • ☐ 2¼ cups grated Parmesan, plus 1 teaspoon: most of it is the coating for the drumsticks.
    • ☐ 2½ cups shredded cheddar: 2 cups for the breakfast casserole and ½ cup cubed for the pea salad.
    • ☐ 1 cup shredded Colby Jack and 1 cup shredded Mexican blend cheese: for the taco casserole.
    • ☐ 9 slices provolone cheese: for the sliders.
    • ☐ 8 ounces whipped topping: thawed, for the fluff salad.
    • ☐ 8 ounces crescent dough sheet: or crescent rolls with the seams pressed together.
    • ☐ 12 Hawaiian slider buns.
    • ☐ Salted butter: 3¼ sticks, or 1½ cups plus 1 tablespoon: 12 tablespoons for the drumsticks, ½ cup for the corn casserole, ¼ cup for the slider glaze, and 1 tablespoon for the beans.
    • ☐ 2 sticks unsalted butter: for the cake.
    • ☐ 1 loaf Italian bread, if you’re buying it instead of baking it.

    Cans, jars, pasta, and rice

    • ☐ 6 cups chicken broth: one 48-ounce carton.
    • ☐ 16 ounces cheese tortellini: refrigerated or frozen.
    • ☐ 1 packet taco seasoning.
    • ☐ 1 (4.5-ounce) can green chilis.
    • ☐ ½ cup southwest corn: frozen or canned.
    • ☐ 1 (14.75-ounce) can cream-style corn.
    • ☐ 2 (15-ounce) cans whole kernel corn.
    • ☐ 1 (8.5-ounce) box Jiffy corn muffin mix.
    • ☐ 2 (28-ounce) cans original baked beans.
    • ☐ ¾ cup Dr. Pepper.
    • ☐ 1 cup barbecue sauce.
    • ☐ 1 (10-ounce) bag frozen peas.
    • ☐ 2 cups mini tater tots.
    • ☐ 4 cups Frito corn chips: about a 9-ounce bag.
    • ☐ 30 ounces canned mandarin oranges: two 15-ounce cans, drained.
    • ☐ 1 (3-ounce) box orange gelatin.
    • ☐ 1 (3.4-ounce) box instant vanilla pudding mix.
    • ☐ 2 cups miniature marshmallows.

    Check your pantry: sauces, baking ingredients, and seasonings

    • ☐ All-purpose flour: 3 cups plus 3 tablespoons and 1½ teaspoons total, plus more if you bake the bread (5½ cups).
    • ☐ Granulated sugar: 2½ cups plus 1½ teaspoons total.
    • ☐ Light brown sugar: ½ cup for the beans and ⅓ cup for the cake filling.
    • ☐ Powdered sugar: 1 cup.
    • ☐ ¾ cup chopped pecans: for the cake’s cinnamon ribbon.
    • ☐ Olive oil: 3 tablespoons total.
    • ☐ Mayonnaise: 2 tablespoons.
    • ☐ Barbecue sauce, Worcestershire sauce, and Dijon mustard: 1 tablespoon Worcestershire and ½ teaspoon Dijon for the beans, 1 teaspoon each for the sliders.
    • ☐ Apple cider vinegar: 1½ teaspoons.
    • ☐ Vanilla extract: 3 teaspoons total.
    • ☐ Ground cinnamon: 1½ teaspoons.
    • ☐ Italian seasoning: 2 teaspoons.
    • ☐ Garlic powder: 1½ tablespoons plus 2 teaspoons total.
    • ☐ Baking soda: ½ teaspoon.
    • ☐ Sesame seeds: 1 teaspoon.
    • ☐ Cayenne pepper: a pinch.
    • ☐ Salt, kosher salt, flaky sea salt, and black pepper.
    • ☐ Cooking spray, parchment paper, and foil.
    • ☐ Check your equipment: an air fryer, a large pot or Dutch oven, an oven-safe or cast-iron skillet, two 9×13-inch pans, and an 8×8-inch dish.

    Optional extras

    • ☐ 2 sliced jalapeños and extra sour cream: for topping the taco casserole.
    • ☐ 1 cup small curd cottage cheese: stirred into the orange fluff salad if you like it that way.
    • ☐ ½ teaspoon red pepper flakes: for the soup or the slider glaze.
    • ☐ Fresh parsley: a garnish for the pea salad.
    • ☐ Crushed pineapple or extra pecans: nice additions to the fluff salad.

    Want another week of dinner ideas? Browse all of my easy weekly meal plans.

    Fresh Strawberry Pie (Old-Fashioned, No Jell-O)

    September 23, 2026

    Fresh strawberry pie with whipped cream around the edge and a slice pulled away.

    This fresh strawberry pie is the old-fashioned kind, with no Jell-O. Halved berries get stirred into a glossy glaze made from sugar, cornstarch, and mashed strawberries, then piled into a flaky baked crust and chilled until it slices clean. A ring of homemade whipped cream goes on right before serving.

    Close-up of fresh strawberry pie with a slice cut out, showing whole strawberries in a glossy red glaze under piped whipped cream.

    An Easy Strawberry Pie That Tastes Like the Diner Classic

    This is the pie you remember from summer church suppers and the pie case at the local diner. The strawberries stay in big halves, so every slice is full of bright red berries instead of a thick layer of jelly.

    The glaze is what makes it work. Part of the strawberries are diced and mashed right into it, so it tastes like real fruit and stays thick in the fridge. It also means you don’t need a box of gelatin. Sugar, cornstarch, water, and berries are all it takes.

    It’s a good one to bring to a get-together, too. Set it out with your other potluck desserts, or add it to your list of old-fashioned desserts worth making every year. If your family loves strawberries, try this strawberry shortcake sheet cake or strawberry heaven next.

    Overhead view of a fresh strawberry pie with whipped cream around the edge and one slice pulled away.

    FAQs

    Do You Need Jell-O to Make Strawberry Pie?

    No. This pie sets with a cooked glaze made from sugar, cornstarch, water, and mashed strawberries. The mashed berries give the glaze real strawberry flavor and a deep red color, so there’s nothing a box of gelatin would add.

    Why Is My Strawberry Pie Runny?

    Water is almost always the cause. Wet strawberries, glaze that was poured on while it was still very hot, or glaze that didn’t boil long enough can all leave a pie loose. Dry the berries well, boil the glaze for a full 2 minutes, and let it cool in the pan for 10 minutes before stirring in the berries.

    How Long Does Strawberry Pie Take to Set?

    Plan on at least 3 hours in the fridge. The filling should feel firm before you slice it. It’s at its best after 3 to 4 hours of chilling.

    Can You Make Strawberry Pie the Day Before?

    It’s best the day you make it, but it holds up for a day. The strawberries slowly release juice as the pie sits, which softens the filling and the crust over time. To get a head start, bake and cool the crust ahead and assemble the pie the day you plan to serve it.

    How Do You Store Strawberry Pie?

    Once the filling is firm, cover the pie with plastic wrap and keep it in the fridge. It’s best within 1 day and still good for up to 2 days. By the end of the second day, the top may start to split and the bottom crust gets softer.

    Can You Use Frozen Strawberries?

    This recipe was only tested with fresh strawberries, and that’s what I recommend. Frozen berries let off a lot of liquid as they thaw, and extra liquid is exactly what makes this kind of pie runny.

    Can You Use a Store-Bought Pie Crust?

    Yes. This pie was tested with my buttery pie crust, but store-bought works too. Either way, blind bake the crust first and let it cool completely before you add the filling.

    Can You Use Store-Bought Whipped Cream?

    Yes, store-bought whipped cream works on this pie too. The whipped cream in the recipe card is a little thicker than usual, so it holds its shape on the pie and doesn’t wilt down.

    Ingredients for fresh strawberry pie: baked pie crust, strawberries, sugar, cornstarch, water, lemon zest, heavy cream, vanilla, and powdered sugar.

    Ingredients

    See the recipe card below that has the printable, full ingredient list and instructions.

    For the Pie:

    • 1 (9-inch) baked pie crust shell – Holds the filling. This pie was tested with my buttery pie crust recipe. It needs to be fully baked and completely cool.
    • 5 cups strawberries, divided – 3 ½ cups are halved for the filling and 1 ½ cups are diced for the glaze.
    • 1 cup plus 2 tablespoons granulated sugar – Sweetens the glaze.
    • ¼ cup plus 1 tablespoon cornstarch – Thickens the glaze so the pie slices cleanly.
    • ¾ cup cold water – Cold water helps the cornstarch stir in smoothly.
    • ½ to 1 teaspoon lemon zest (optional) – Brightens the strawberry flavor and makes the pie taste extra fresh.

    For the Whipped Cream:

    • 1 cup heavy whipping cream – Whips into a thick topping that holds its shape.
    • 1 teaspoon vanilla – Adds flavor to the cream.
    • ½ cup powdered sugar – Sweetens the cream and dissolves smoothly.
    Halved and diced strawberries on a wooden cutting board.

    Instructions

    • Hull the 5 cups of strawberries and pat them as dry as possible.
    • Cut 3 ½ cups of the strawberries in half, quartering any extra large ones, and place them in a medium bowl.
    • Dice the remaining 1 ½ cups of strawberries. Mash half of the diced berries and set all of the diced and mashed berries aside.
    • In a medium saucepan, whisk together 1 cup plus 2 tablespoons granulated sugar and ¼ cup plus 1 tablespoon cornstarch.
    Sugar and cornstarch in a saucepan.
    • Add the diced and mashed strawberries and ¾ cup cold water and stir together. It will look like light pink strawberry milk.
    Diced strawberries and water added to the sugar mixture in a saucepan.
    • Heat over medium heat, stirring constantly, until the mixture comes to a boil.
    • Keep stirring and boil for exactly 2 minutes. The glaze will turn thicker, darker red, and shiny. Remove it from the heat.
    Thickened strawberry glaze in a saucepan after boiling.
    • Let the glaze cool in the pan for 10 minutes, then stir in ½ to 1 teaspoon lemon zest if using.
    Lemon zest on top of the cooked strawberry glaze.
    • Pour the glaze over the halved strawberries and stir gently until every berry is coated.
    Halved strawberries stirred into strawberry glaze in a glass bowl.
    • Spoon the strawberry mixture into the cooled pie shell. Use a small spoon and any glaze left in the bowl to fill gaps around the edges.
    • Refrigerate for at least 3 hours, until the filling is firm.
    Strawberry filling spread into a baked pie crust.

    How to Make the Whipped Cream

    • Add 1 cup heavy whipping cream, 1 teaspoon vanilla, and ½ cup powdered sugar to a medium bowl.
    Heavy cream, vanilla, and powdered sugar in a mixing bowl.
    • Beat with a hand mixer on low speed until the sugar is mixed in, then turn it up to high and beat until stiff peaks form.
    Whipped cream beaten to stiff peaks in a metal bowl.
    • Pipe or spoon the whipped cream around the edge of the pie just before serving.
    Fresh strawberry pie topped with piped whipped cream around the edge.

    Tips and Variations

    • Dry the strawberries well after washing. Extra water on the berries ends up in the filling.
    • Stir the sugar and cornstarch together before adding any liquid. It keeps the cornstarch from clumping.
    • Boil the glaze for exactly 2 minutes. In testing, 2 minutes gave the most consistent, thick glaze.
    • Don’t skip the 10-minute cool down. Hot glaze makes the strawberries release more juice and leaves the filling thin.
    • Mash only half of the diced berries. In testing, blending all of them made the glaze thick but seedy, like jam.
    • Stir the berries into the glaze before filling the crust. Pouring glaze over berries already in the crust can leave empty pockets at the bottom.
    • Quarter any really large strawberries so the pie is easier to slice and eat.
    • The lemon zest is optional, but it makes the pie taste extra fresh.
    • The whipped cream makes about 2 cups, enough to pipe around the edge. Double it to cover the whole top.
    • Chill the bowl and beaters for a few minutes first and the cream whips up faster.
    A slice of fresh strawberry pie on a white plate with whipped cream and the rest of the pie behind it.

    More Recipes

    If you love old-fashioned pies like this one, then you’ll also love these pies:

    • possum pie
    • caramel cream pie
    • peanut pie
    • root beer float pie

    Recipe

    Fresh strawberry pie with whipped cream around the edge and a slice pulled away.
    Print Pin
    Be the first to rate!

    Fresh Strawberry Pie

    This old-fashioned fresh strawberry pie skips the Jell-O. Halved berries are folded into a glossy homemade glaze, piled into a baked pie crust, chilled until firm, and finished with whipped cream. It's the classic summer pie from church suppers and family reunions.
    Course Dessert
    Cuisine American
    Prep Time 12 minutes minutes
    Cook Time 8 minutes minutes
    Chilling Time 3 hours hours 10 minutes minutes
    Total Time 3 hours hours 30 minutes minutes
    Servings 8 slices
    Calories 387kcal
    Author Jessica Burgess

    Ingredients

    Pie

    • 1 baked pie crust shell 9-inch, cooled completely
    • 5 cups strawberries divided
    • 1 cup granulated sugar plus 2 tablespoons
    • ¼ cup cornstarch plus 1 tablespoon
    • ¾ cup cold water
    • ½ to 1 teaspoon lemon zest optional

    Whipped Cream

    • 1 cup heavy whipping cream
    • 1 teaspoon vanilla
    • ½ cup powdered sugar

    Instructions

    Make the Filling

    • Hull the strawberries and keep them as dry as possible. Cut 3 ½ cups in half, quartering any extra large berries, and place them in a medium bowl. Dice the remaining 1 ½ cups, mash half of the diced berries, and set all of them aside.
    • Whisk the granulated sugar and cornstarch together in a medium saucepan. Add the diced and mashed strawberries and the cold water and stir together.
    • Heat over medium heat, stirring constantly, until the mixture begins to boil. Keep stirring and boil for exactly 2 minutes, until thicker, darker, and more translucent. Remove from the heat.
    • Cool the glaze in the pan for 10 minutes, then stir in the lemon zest if using.
    • Stir the glaze into the halved strawberries until all the berries are coated.
    • Pour the strawberry mixture into the pie shell, using any extra glaze to fill gaps around the edges. Refrigerate until firm, at least 3 hours.

    Make the Whipped Cream

    • Beat the heavy whipping cream, vanilla, and powdered sugar with a hand mixer, starting on low until the sugar is mixed in, then on high until stiff peaks form.
    • Pipe or spoon the whipped cream onto the pie just before serving.

    Notes

    • Blind bake the pie crust and let it cool completely before filling. Homemade or store-bought both work.
    • Dry the strawberries well. Extra water makes the pie runny.
    • Use cold water in the glaze so the cornstarch stirs in smoothly.
    • Boil the glaze for exactly 2 minutes, and let it cool 10 minutes before adding the berries.
    • Best served after 3 to 4 hours of chilling. Cover and refrigerate leftovers. Best within 1 day, good up to 2 days.
    • The whipped cream makes about 2 cups, enough to pipe around the edge. Double it to cover the whole pie. Store-bought whipped cream also works.

    Nutrition

    Calories: 387kcal | Carbohydrates: 58g | Protein: 3g | Fat: 17g | Saturated Fat: 9g | Polyunsaturated Fat: 1g | Monounsaturated Fat: 5g | Cholesterol: 34mg | Sodium: 99mg | Potassium: 189mg | Fiber: 2g | Sugar: 41g | Vitamin A: 448IU | Vitamin C: 53mg | Calcium: 39mg | Iron: 1mg

    Smothered Cube Steak with Onion Gravy (Skillet Recipe)

    September 30, 2026

    Smothered cube steak topped with onion gravy beside mashed potatoes.

    This smothered cube steak cooks in one skillet with sliced onions and homemade brown gravy. Serve it with mashed potatoes, rice, or egg noodles to soak up the extra gravy.

    Cube steak covered in brown onion gravy with mashed potatoes on a floral plate.

    A Skillet Dinner with Plenty of Homemade Gravy

    I started with 2 cups of broth, but I prefer having more gravy for the steak and mashed potatoes. This recipe uses 3 cups of broth, but if you only have 2 cups, use 2 tablespoons of flour instead of 3.

    You'll cook the onions in the same skillet you used for the beef, then stir in flour, broth, and Worcestershire sauce. Keep the browned bits in the pan; they flavor the gravy.

    Smothered cube steak and onion gravy served with mashed potatoes.

    FAQs

    Do I need to tenderize cube steak before cooking?

    No. Store-bought cube steak has already been tenderized, which gives it those little indentations. For this recipe, pat it dry, season it, and cook it as it comes from the package.

    Do I coat the cube steaks in flour?

    No. The flour in this recipe goes into the onions to thicken the gravy. The steaks are seasoned and browned without breading.

    Can I make this in the Crock Pot?

    This recipe is written for the skillet. For a slow cooker option, use my Crock Pot cube steak recipe, which has its own ingredient amounts and cooking directions.

    What goes with smothered cube steak?

    Serve it with Instant Pot mashed potatoes, rice, or egg noodles. Add green beans, peas, or a simple salad on the side.

    How do I store and reheat leftovers?

    Refrigerate the steak and gravy in shallow, airtight containers within 2 hours of cooking, or within 1 hour if the temperature is above 90°F. Use within 3-4 days. Reheat gently in a covered skillet, adding a splash of broth or water if needed, until the leftovers reach 165°F.

    Ingredients

    For the steaks:

    • 1½ pounds cube steak: About 4 pieces, fully thawed. No extra tenderizing is needed.
    • ½ teaspoon each table salt, black pepper, and garlic powder: To season both sides of the beef.
    • 2 tablespoons vegetable oil: Divided between the two batches of steaks.

    For the onion gravy:

    • 3 tablespoons unsalted butter.
    • 1 large yellow onion: Thinly sliced so it softens evenly.
    • 3 tablespoons all-purpose flour: This thickens the gravy.
    • 3 cups low-sodium beef broth: For plenty of gravy, with room to adjust the salt to taste.
    • 2 teaspoons Worcestershire sauce: For savory flavor.
    • Additional salt and pepper: Taste the finished gravy before adding more.

    You'll find the printable recipe with all the amounts and instructions in the recipe card below.

    Instructions

    Use a large skillet, preferably 12 inches, so you have room to brown the beef in batches and make the gravy. Start your side dish first so everything is ready together.

    • Pat the 1½ pounds of cube steak dry. Season both sides with ½ teaspoon each salt, pepper, and garlic powder.
    • Heat 1 tablespoon oil over medium-high heat. Add two steaks without overlapping and cook for about 2 minutes per side, until browned. Transfer to a plate and repeat with the remaining 1 tablespoon oil and steaks. Thinner pieces may cook faster.
    Two browned cube steaks resting on a floral plate.
    • Reduce the heat to medium. Add 3 tablespoons butter and the sliced yellow onion to the same skillet. Cook for 8-10 minutes, stirring occasionally, until soft and lightly golden. Keep the browned bits for flavor, but remove any blackened, burned bits.
    Sliced onions cooking in a cast-iron skillet.
    • Stir 3 tablespoons flour into the onions and cook for 1 minute. Gradually stir or whisk in 3 cups broth, then add 2 teaspoons Worcestershire sauce. Scrape up the browned bits and simmer gently for 3-5 minutes, until the gravy lightly coats a spoon.
    Brown onion gravy in a cast-iron skillet.
    • Return the steaks and their juices to the skillet and spoon gravy over them. Reduce the heat to low. Check the temperature right away, then every minute, cooking until the centers reach 160°F, or a higher temperature if the package directs. This may take 1-3 minutes or longer, depending on thickness and how much the steaks cooked during browning. Insert the thermometer sideways into the center of a thin steak.
    Browned cube steaks returned to the skillet of onion gravy.
    • Once the steaks reach the temperature above, take the skillet off the heat. Taste the gravy, adjust the salt and pepper, and serve.

    Tips

    • Give the steaks room. Brown them in batches so they can make contact with the hot pan.
    • Watch the onions. Lower the heat if they darken before softening. Burned bits can make the gravy bitter.
    • Pour the broth in gradually. Stir as you pour to help the flour blend smoothly into the liquid.
    • Adjust the gravy at the end. If it is too thick, stir in broth or water 1 tablespoon at a time. If it is too thin, lift out the steaks and simmer the gravy a little longer.
    • Check the temperature. Steak thickness varies, so use the thermometer and treat the cooking times as estimates.
    Cube steaks covered with onion gravy in a cast-iron skillet.

    More Recipes

    If you're planning another beef dinner, try one of these:

    • Salisbury steak with mushroom gravy - a skillet dinner made with ground beef patties.
    • Cracker Barrel country fried steak - breaded cube steak topped with white gravy.
    • Crock Pot cube steak - a slow cooker version with a creamy soup-based gravy.

    Recipe

    Smothered cube steak topped with onion gravy beside mashed potatoes.
    Print Pin
    Be the first to rate!

    Smothered Cube Steak with Onion Gravy

    Cube steak cooked in a skillet with soft onions and homemade brown gravy, with plenty of gravy for mashed potatoes, rice, or noodles.
    Course Dinner
    Cuisine American
    Prep Time 10 minutes minutes
    Cook Time 30 minutes minutes
    Total Time 40 minutes minutes
    Servings 4 servings
    Calories 504kcal
    Author Jessica Burgess

    Equipment

    • 1 large skillet, preferably 12 inches
    • 1 instant-read thermometer

    Ingredients

    • 1 ½ pounds cube steak about 4 pieces, fully thawed
    • ½ teaspoon table salt
    • ½ teaspoon black pepper
    • ½ teaspoon garlic powder
    • 2 tablespoons vegetable oil divided
    • 3 tablespoons unsalted butter
    • 1 large yellow onion thinly sliced
    • 3 tablespoons all-purpose flour
    • 3 cups low-sodium beef broth
    • 2 teaspoons Worcestershire sauce
    • Additional salt and pepper to taste

    Instructions

    • Pat the steaks dry. Season both sides with the salt, pepper, and garlic powder.
    • Heat 1 tablespoon oil in a large skillet over medium-high heat. Brown two steaks for about 2 minutes per side. Transfer to a plate. Repeat with the remaining oil and steaks. Thin pieces may cook faster.
    • Reduce the heat to medium. Add the butter and onion to the same skillet. Cook for 8-10 minutes, stirring occasionally, until soft and lightly golden. Keep the browned bits, but remove any blackened, burned bits.
    • Stir in the flour and cook for 1 minute. Gradually add the broth while stirring or whisking, then add the Worcestershire sauce. Scrape up the browned bits and simmer gently for 3-5 minutes, until the gravy lightly coats a spoon.
    • Return the steaks and their juices to the skillet. Spoon gravy over them and reduce the heat to low. Check the temperature right away, then every minute, until the centers reach 160°F, or a higher temperature if the package directs. This may take 1-3 minutes or longer, depending on thickness and how much the steaks cooked during browning. Insert the thermometer sideways into the center of a thin steak.
    • Remove from the heat once the meat is hot and cooked through. Taste the gravy and adjust the salt and pepper. Serve with mashed potatoes, rice, or egg noodles.

    Notes

    • Cube steak is already mechanically tenderized; no extra pounding is needed.
    • This recipe uses 3 cups broth and 3 tablespoons flour for plenty of gravy. For a smaller amount of gravy, use 2 cups broth and 2 tablespoons flour; keep the other ingredient amounts the same. If it becomes too thick, stir in broth or water 1 tablespoon at a time. If too thin, remove the cooked steaks and simmer the gravy a little longer.
    • Cooking times are approximate. Steak thickness and your skillet affect how quickly the meat cooks; use a thermometer as your guide.
    • Refrigerate leftovers promptly in shallow, airtight containers and use within 3-4 days. Reheat to 165°F, adding a splash of broth or water as needed.
    • Nutrition is an estimate for one-fourth of the steak and gravy, excluding side dishes and extra salt and pepper added to taste.

    Nutrition

    Calories: 504kcal | Carbohydrates: 9g | Protein: 39g | Fat: 34g | Saturated Fat: 14g | Polyunsaturated Fat: 5g | Monounsaturated Fat: 12g | Trans Fat: 0.4g | Cholesterol: 145mg | Sodium: 765mg | Potassium: 1025mg | Fiber: 1g | Sugar: 2g | Vitamin A: 267IU | Vitamin C: 3mg | Calcium: 56mg | Iron: 3mg

    Pecan Pie Dip with Cream Cheese

    September 26, 2026

    Close-up of pecan pie dip with a spoon showing the creamy base beneath the pecan topping.

    This pecan pie dip has a fluffy brown sugar cream cheese layer, a buttery pecan topping, and plenty of crunch in every scoop. Serve it with graham crackers, apple slices, or vanilla wafers for a no-bake dessert with those familiar pecan pie flavors.

    Graham cracker scooping cream cheese and pecan topping from a dish of pecan pie dip.

    No pie crust to roll, and no oven space to find! The topping cooks briefly on the stovetop, then cools before you spread it over the cream cheese. You can assemble the dip the day before Thanksgiving and tuck it in the refrigerator until dessert time.

    Plan on about 15 minutes of active preparation, plus an hour for the topping to cool and 2 hours for the assembled dip to chill. The waiting time matters here: it gives you two distinct layers and a topping that’s thick enough to scoop.

    For a dessert dip with no stovetop step, try this booty dip with marshmallow fluff and chocolate chips.

    Ingredients and Notes

    Labeled ingredients for pecan pie dip: chopped pecans, light brown sugar, powdered sugar, light corn syrup, salt, vanilla extract, heavy cream, unsalted butter, and cream cheese.

    You’ll find the full measurements in the printable recipe card below. A few things to keep in mind before you start:

    • Cream cheese: Let it soften before mixing so it blends smoothly with the sugars. The recipe uses one 8-ounce package.
    • Heavy cream: You’ll use ½ cup in the cream cheese layer and 2 tablespoons in the topping. Bring the cream for the base to room temperature before adding it; very cold cream can make the mixture less smooth.
    • Brown sugar and powdered sugar: Both sweeten the base, while another portion of brown sugar goes into the topping. Pack the brown sugar into the measuring cup. Light brown sugar is used here; dark brown sugar gives a deeper molasses flavor.
    • Chopped pecans: Smaller pieces make the dip easier to scoop. Measure 1¼ cups total, then set aside ¼ cup for sprinkling over the finished dip.
    • Light corn syrup and unsalted butter: These go into the glossy pecan topping. Measure the corn syrup separately from the brown sugar before you start heating the saucepan.
    • Vanilla and salt: Both layers need their own portion. Keeping the base ingredients and topping ingredients separate makes it easier to add the right amounts.

    How to Make Pecan Pie Dip

    A hand mixer or stand mixer works for the creamy layer. Use a small serving dish, such as the 6½ × 4½-inch rectangular dish shown in the photos, or a small pie dish. A wider dish will give you thinner layers.

    1. Mix the cream cheese layer

    Beat the softened cream cheese, powdered sugar, and brown sugar until smooth, scraping down the bowl. Mix in the vanilla and salt. Slowly add the heavy cream, then beat on medium speed for 2-3 minutes, until fluffy. Spread the mixture in your serving dish, cover, and refrigerate.

    Cream cheese mixture spread evenly in a small white rectangular dish.

    2. Make the pecan topping

    Melt the butter in a saucepan, then stir in the brown sugar and corn syrup. Warm the mixture just until small bubbles appear. Remove the pan from the heat and stir in the cream, vanilla, and salt.

    Return the saucepan to the heat, stirring constantly, just until bubbles begin to form again. Remove it from the heat and fold in 1 cup of the chopped pecans.

    Chopped pecans mixed into the brown sugar topping in a saucepan.

    Watch for those first little bubbles. A full rolling boil can make the topping firm or chewy once it cools. It will thicken more as it rests, so there’s no need to boil it down.

    3. Cool before layering

    Transfer the pecan topping to a bowl, cover, and let it cool to room temperature, about 1 hour. Keep the cream cheese base in the refrigerator while you wait. Warm topping can soften that fluffy bottom layer.

    Pecan topping in a glass bowl, ready to cool before layering.

    4. Assemble and chill

    Spoon the cooled topping over the cream cheese layer. Cover and refrigerate for 2 hours. Take the dip out 10-15 minutes before serving so it’s easier to scoop, then sprinkle the reserved ¼ cup pecans over the top.

    Pecan topping spread over the cream cheese layer in a white rectangular dish.

    What to Serve with Pecan Pie Dip

    Graham crackers give each bite a little of that pie-crust flavor. Apple slices add a crisp, tart contrast to the sweet topping, and vanilla wafers are easy to arrange around the dish. Shortbread cookies, gingersnaps, and pretzels work for dipping, too.

    Set out a spoon so everyone can scoop some onto a plate alongside their dippers. For a dessert board with two dips, add a bowl of pumpkin fluff and share the graham crackers and apple slices between them.

    A serving of pecan pie dip on a plate with apple slices and vanilla wafers.

    Make Ahead and Storage

    Assemble the dip the day before, cover tightly, and refrigerate. Save the final sprinkle of pecans for just before serving so they keep their crunch.

    Store covered leftovers in the refrigerator for up to 4 days. Let the dip stand for 10-15 minutes before serving, then return it to the refrigerator afterward. Keep total time at room temperature under 2 hours, or 1 hour if the temperature is above 90°F.

    Recipe FAQs

    Is pecan pie dip served warm or cold?

    Serve this version chilled, after letting it stand for 10-15 minutes to soften for scooping. The topping cooks on the stovetop, but it needs to cool to room temperature before it goes over the cream cheese.

    Why is my pecan topping runny?

    The topping thickens as it cools and again in the refrigerator. Give it the full cooling and chilling time before judging its consistency. If it is still unusually thin after chilling, it may not have been heated enough during preparation.

    Can I use dark corn syrup?

    Yes. Dark corn syrup can replace the light corn syrup in this recipe; it will make the topping darker.

    Can I freeze pecan pie dip?

    Freezing is not recommended. The cream cheese and cream mixture can lose its smooth, fluffy texture after thawing.

    More Dessert Recipes

    If you love the buttery pecan topping, try this pecan pie dump cake next. It bakes with a cake-mix topping and is delicious served warm with a scoop of ice cream.

    For a cookies-and-cream option, this Oreo dip combines crushed cookies, cream cheese, and whipped topping.

    Pecan Pie Dip Recipe

    Recipe

    Close-up of pecan pie dip with a spoon showing the creamy base beneath the pecan topping.
    Print Pin
    Be the first to rate!

    Pecan Pie Dip

    A fluffy brown sugar cream cheese dip with a buttery pecan topping. No oven needed; allow time for cooling and chilling.
    Course Dessert
    Cuisine American
    Diet
    Prep Time 15 minutes minutes
    Cooling and Chilling 3 hours hours
    Total Time 3 hours hours 15 minutes minutes
    Servings 8 servings
    Calories 445kcal
    Author Jessica Burgess

    Equipment

    • Electric hand mixer or stand mixer
    • mixing bowls
    • Small saucepan
    • rubber spatula
    • Small serving dish (6 ½ x 4 ½ inches) or small pie dish

    Ingredients

    Cream cheese layer

    • 8 ounces cream cheese softened
    • ½ cup powdered sugar
    • ¼ cup packed light brown sugar
    • 1 teaspoon vanilla extract
    • ¼ teaspoon salt
    • ½ cup heavy cream at room temperature

    Pecan topping

    • 4 tablespoons unsalted butter
    • ¼ cup packed light brown sugar
    • ¼ cup light corn syrup
    • 2 tablespoons heavy cream
    • 1 teaspoon vanilla extract
    • ¼ teaspoon salt
    • 1 ¼ cups chopped pecans divided

    Instructions

    • Beat the softened cream cheese, powdered sugar, and ¼ cup brown sugar until smooth, scraping down the bowl. Mix in 1 teaspoon vanilla and ¼ teaspoon salt.
    • Slowly add the ½ cup heavy cream. Beat on medium speed for 2-3 minutes, until fluffy. Spread in a 6 ½ x 4 ½-inch serving dish or small pie dish. Cover and refrigerate.
    • Melt the butter in a saucepan. Stir in the remaining ¼ cup brown sugar and the corn syrup. Warm until small bubbles begin to appear; do not bring to a rolling boil.
    • Remove from heat. Stir in the 2 tablespoons cream, remaining teaspoon vanilla, and remaining ¼ teaspoon salt. Return to the heat, stirring constantly, just until small bubbles form again. Remove from heat.
    • Fold in 1 cup pecans. Transfer to a bowl, cover, and cool to room temperature, about 1 hour. Keep the cream cheese layer refrigerated.
    • Spoon the cooled topping over the cream cheese layer. Cover and refrigerate for 2 hours.
    • Remove from the refrigerator 10-15 minutes before serving. Sprinkle with the reserved ¼ cup pecans and serve with graham crackers, apple slices, vanilla wafers, or pretzels.

    Notes

    Makes 8-10 servings, depending on portion size.
    The 15-minute prep estimate includes the brief stovetop preparation. Allow 1 hour for the topping to cool and 2 hours for the assembled dip to chill, plus 10-15 minutes out of the refrigerator before serving.
    Use softened cream cheese and room-temperature cream for a smoother base. Refrigerate the base while the topping cools.
    Heat the topping only until small bubbles appear. A rolling boil can make it firm or chewy as it cools.
    To make ahead, assemble the day before and refrigerate, adding the reserved pecans just before serving. Cover leftovers tightly and refrigerate for up to 4 days. Freezing is not recommended. Keep total time at room temperature under 2 hours, or 1 hour above 90°F.
    Nutrition: Estimates are for 1 serving (one-eighth of the dip), including all of the pecans. Graham crackers, fruit, cookies, pretzels, and other dippers are not included.

    Nutrition

    Serving: 1serving | Calories: 445kcal | Carbohydrates: 34g | Protein: 4g | Fat: 34g | Saturated Fat: 15g | Polyunsaturated Fat: 5g | Monounsaturated Fat: 13g | Trans Fat: 0.2g | Cholesterol: 65mg | Sodium: 251mg | Potassium: 147mg | Fiber: 2g | Sugar: 31g | Vitamin A: 839IU | Vitamin C: 0.3mg | Calcium: 66mg | Iron: 1mg

    Chocolate Mayonnaise Cake (Old-Fashioned Recipe)

    October 17, 2026

    Close-up slice of chocolate mayonnaise cake with thick chocolate buttercream and a jar of mayonnaise behind it.

    This chocolate mayonnaise cake is an old-fashioned 9×13 sheet cake with a soft, tender crumb and a thick layer of chocolate buttercream on top. The mayonnaise is doing the work of the oil and the eggs, and you can’t taste it once the cake is baked.

    It mixes by hand in one bowl, bakes in about half an hour, and travels to a potluck right in the pan. If you’ve been curious about mayonnaise cake but never quite talked yourself into it, this is the one to start with.

    Slice of chocolate mayonnaise cake with chocolate buttercream frosting and a bite on a fork.

    If this is your kind of cake, you’ll probably love my chocolate depression cake too. Same pantry-cake idea, just oil instead of mayonnaise and a little lighter. Coca-Cola cake is the other sheet cake my family asks for by name, and the rest of them live with my old-fashioned cake recipes.

    Why Put Mayonnaise in Chocolate Cake?

    Mayonnaise is oil and eggs already whisked together. That’s most of what you’d be adding to a chocolate cake anyway, so using it means you skip cracking eggs and measuring oil and get both in one scoop.

    Because the fat is already emulsified, it spreads through the batter more evenly than loose oil does. That’s what gives this cake its soft, almost velvety crumb. No tang, no mayonnaise flavor, just chocolate.

    Cakes for the Potluck Table cookbook by Jessica Burgess, cover and open recipe spread

    My cookbook · Coming this spring

    Cakes for the
    Potluck Table

    Sixty cakes that never come home leftover. Six are yours free right now.

    Send me the six cakes

    Ingredient Notes

    See the recipe card below for the full ingredient amounts and instructions.

    • Mayonnaise. Use full-fat regular mayonnaise like Hellmann’s, Best Foods, or Duke’s. Skip Miracle Whip, and skip light or reduced-fat mayo.
    • Cocoa powder. Regular unsweetened cocoa is all you need. You’ll whisk it into boiling water first, which does more for the chocolate flavor than any other step in this recipe.
    • Brown sugar. Half the sugar is light brown sugar. It holds moisture, so the cake still eats soft on day two.
    • Boiling water. It needs to be hot enough to bloom the cocoa, then cooled for 10 minutes before the mayonnaise goes in.
    • Heavy cream. For the frosting. Milk works in a pinch, but the buttercream won’t be as silky.

    You’ll also need all-purpose flour, granulated sugar, baking soda, baking powder, salt, and vanilla, plus butter and powdered sugar for the frosting. Keep a little extra cocoa powder handy for dusting the pan.

    How to Make Mayonnaise Cake

    Heat the oven to 350°F, or 325°F if you’re baking in a dark or nonstick pan. Grease a 9×13-inch pan and dust it with cocoa powder instead of flour so you don’t end up with white streaks on a chocolate cake.

    1. Bloom the Cocoa

    Whisk the cocoa powder into the boiling water until it’s completely smooth, then whisk in both sugars while the liquid is still hot so they dissolve all the way. Let it sit for 10 minutes. This step is doing two jobs. It wakes up the cocoa so the cake tastes richer, and it brings the temperature down enough that the liquid won’t break down the mayonnaise in the next step.

    Cocoa powder whisked into boiling water until smooth for chocolate mayonnaise cake.

    2. Whisk In the Mayonnaise

    Whisk the mayonnaise and vanilla into the cooled cocoa mixture until smooth. It should look like thin chocolate pudding.

    Mayonnaise being whisked into the cocoa mixture for chocolate mayonnaise cake batter.

    3. Add the Dry Ingredients and Bake

    Whisk the flour, baking soda, baking powder, and salt together in a separate bowl, then add them to the wet mixture in two or three additions. Whisk until the batter is smooth with no pockets of dry flour. The batter will be thin and pourable, and that’s exactly right. Pour it into the pan and get it into the oven right away.

    Bowl of flour next to a bowl of bloomed cocoa for chocolate mayonnaise cake.
    Chocolate mayonnaise cake batter stirred smooth with a wooden spoon.

    Bake 28 to 33 minutes, and start checking at 28. When the edges just begin to pull away from the sides of the pan, that’s your cue to start testing the center. The cake is done when the center springs back to a light touch and a toothpick comes out with a few moist crumbs clinging to it. A toothpick that comes out completely clean means it baked a little too long. Cool the cake completely in the pan before frosting.

    Baked chocolate mayonnaise cake with a flat top cooling in the pan.

    Make the Chocolate Buttercream

    Beat the softened butter until creamy, then beat in the cocoa powder. Add the powdered sugar gradually, alternating with the heavy cream, and finish with the vanilla and a pinch of salt.

    Beat it on medium-high for two or three minutes at the end. That’s what turns it smooth and spreadable instead of stiff. If it still feels thick, add another tablespoon of cream.

    Whipped chocolate buttercream frosting in a glass mixing bowl.

    Make sure the cake is completely cool before the frosting goes on. Buttercream on a warm cake tears the top and melts into the crumb.

    Chocolate mayonnaise cake frosted with chocolate buttercream in a 9x13-inch pan.

    Tips for a Moist Cake

    • Don’t skip the cocoa bloom. Whisking the cocoa into boiling water is the biggest flavor step in the whole recipe.
    • Whisk the batter smooth. Pockets of dry flour won’t work themselves out in a batter this thin, and you’ll see them in the baked cake.
    • Watch the edges. When they just start pulling away from the sides of the pan, start testing the center. A toothpick that comes out clean means the cake is already past done.
    • Use full-fat mayonnaise. Light mayo cuts the fat roughly in half, and you’ll taste the difference.

    Make Ahead and Storage

    You can bake and frost this cake a day ahead. Once it’s completely cool and frosted, cover it tightly and leave it at room temperature for up to 3 days.

    Keep the covered cake in the refrigerator for up to 5 days. Let slices sit out for 20 to 30 minutes before serving so the crumb softens back up.

    For longer storage, wrap the unfrosted cake or individual slices tightly and freeze for up to 3 months. Thaw overnight in the refrigerator or at room temperature.

    Recipe FAQs

    Does mayonnaise cake taste like mayonnaise?

    No. Once it bakes there’s no tang and no mayonnaise flavor at all. The mayonnaise is only there for the oil and eggs it’s already made from. What you taste is chocolate.

    Why did my mayonnaise cake sink in the middle?

    Almost always too much leavening in older mayonnaise cake recipes. They tend to call for 2 teaspoons of baking soda, which makes the batter rise fast and then collapse once the structure can’t hold it. The fallen part compresses into a dense, gummy layer, which is why a sunken cake can taste underbaked even when it isn’t. This recipe uses ¾ teaspoon of baking soda with 1 teaspoon of baking powder, which gives a good rise without the crash. Opening the oven door or bumping the pan before the center sets will also do it, so leave it alone until at least 28 minutes.

    Can I use Miracle Whip?

    Full-fat mayonnaise works best here. Miracle Whip has added sugar and spices that change the flavor, and it’s lower in fat, so the cake won’t be as moist.

    Can I make this as a layer cake?

    Yes. Divide the batter between two greased 9-inch round pans and bake 25 to 30 minutes, checking at 25.

    Can I add chocolate chips?

    Sure but it’s full of chocolate flavor as is. Fold in 1 cup of semisweet chocolate chips before pouring the batter into the pan.

    More Cakes to Try

    For another 9×13 cake with a different flavor, try this Strawberry Texas Sheet Cake. It starts with a cake mix and gets its strawberry flavor from Jell-O and preserves.

    Or browse these old-fashioned desserts for more cakes, cobblers, and other familiar sweets.

    Slice of chocolate mayonnaise cake on a plate with a jar of mayonnaise and the pan of cake in the background.

    Recipe

    Close-up slice of chocolate mayonnaise cake with thick chocolate buttercream and a jar of mayonnaise behind it.
    Print Pin
    Be the first to rate!

    Chocolate Mayonnaise Cake

    An old-fashioned chocolate sheet cake made with mayonnaise instead of butter and eggs. Don’t let the mayo scare you off. It’s just oil and eggs already mixed together, and it makes one of the most tender, moist chocolate cakes you’ll ever pull out of a 9×13.
    Course Dessert
    Cuisine American
    Prep Time 20 minutes minutes
    Cook Time 30 minutes minutes
    Total Time 50 minutes minutes
    Servings 15 slices
    Calories 514kcal
    Author Jessica Burgess

    Equipment

    • 1 9×13-inch baking pan
    • mixing bowls
    • Whisk
    • electric mixer
    • rubber spatula
    •  Measuring cups and spoons

    Ingredients

    Cake

    • ½ cup unsweetened cocoa powder
    • 1 ¼ cups boiling water
    • 2 cups all-purpose flour
    • ¾ teaspoon baking soda
    • 1 teaspoon baking powder
    • ¾ teaspoon fine salt
    • 1 cup full-fat mayonnaise
    • 1 cup granulated sugar
    • ½ cup light brown sugar packed
    • 2 teaspoons vanilla extract
    • 1 tablespoon unsweetened cocoa powder for dusting the pan

    Chocolate Frosting

    • ½ cup unsalted butter softened
    • ⅓ cup unsweetened cocoa powder
    • 3 cups powdered sugar
    • ½ cup heavy cream plus 1-2 tablespoons more if needed
    • 1 teaspoon vanilla extract
    • 1 pinch salt

    Instructions

    Cake

    • Heat the oven to 350°F, or 325°F if you’re using a dark or nonstick pan. Grease a 9×13-inch pan and dust it with cocoa powder instead of flour so you don’t end up with white streaks on a chocolate cake.
    • Whisk the cocoa powder into the boiling water until completely smooth, then whisk in the granulated sugar and brown sugar while the liquid is still hot so they dissolve all the way. Let it sit for 10 minutes to cool to warm. This wakes up the cocoa so the cake tastes richer, and it brings the temperature down enough that the liquid won’t break down the mayonnaise.
    • In a separate bowl, whisk together the flour, baking soda, baking powder, and salt until there are no clumps.
    • Whisk the mayonnaise and vanilla into the cooled cocoa mixture until smooth.
    • Add the dry ingredients to the wet in two or three additions, whisking until the batter is completely smooth with no streaks or pockets of dry flour. The batter will be thin and pourable, and that’s exactly right.
    • Pour the batter into the prepared pan and get it into the oven right away.
    • Bake 28 to 33 minutes, checking at 28. When the edges just begin to pull away from the sides of the pan, start testing the center. The cake is done when the center springs back to a light touch and a toothpick comes out with a few moist crumbs clinging to it. If the toothpick comes out completely clean, it baked a little too long.
    • Set the pan on a wire rack and cool the cake completely before frosting.

    Chocolate Frosting

    • Beat the butter until creamy, then beat in the cocoa powder until fully incorporated.
    • Add the powdered sugar gradually, alternating with the heavy cream. Beat in the vanilla and salt.
    • Beat on medium-high for 2 to 3 minutes until smooth, glossy, and spreadable. Add another tablespoon of cream if it’s stiff.
    • Spread evenly over the cooled cake.

    Notes

    Pan and oven temperature: Dark and nonstick pans absorb more heat, so bake at 325°F if that’s what you have. Light metal and glass pans go at 350°F. Either way the bake time stays about the same. Start checking at 28 minutes.
    How to tell when it’s done: Go by the cake, not the clock. The first sign is the edges just starting to pull away from the sides of the pan, which means it’s time to start testing the center. The center should spring back when you press it lightly, and a toothpick should come out with a few moist crumbs. A completely clean toothpick means you’ve overbaked it. If you use a thermometer, the center should read 200 to 205°F.
    Which mayonnaise: Use full-fat regular mayonnaise like Hellmann’s, Best Foods, or Duke’s. Skip Miracle Whip, which has added sugar and spices, and skip light or reduced-fat mayo, which cuts the fat roughly in half and will give you a dry cake.
    Don’t leave dry flour pockets: This batter is thin, so any unmixed flour won’t work itself out in the oven. Whisk until it’s genuinely smooth. There’s enough fat in this batter that mixing it smooth won’t make the cake tough.
    Storage: Cover the frosted cake tightly and keep it at room temperature for up to 3 days, or in the refrigerator for up to 5 days. Let refrigerated slices sit out for 20 to 30 minutes before serving. To freeze, wrap the unfrosted cake or individual slices tightly and freeze up to 3 months, then thaw overnight in the refrigerator.

    Nutrition

    Serving: 1slice | Calories: 514kcal | Carbohydrates: 74g | Protein: 3g | Fat: 24g | Saturated Fat: 9g | Polyunsaturated Fat: 9g | Monounsaturated Fat: 6g | Trans Fat: 0.3g | Cholesterol: 34mg | Sodium: 424mg | Potassium: 111mg | Fiber: 2g | Sugar: 55g | Vitamin A: 322IU | Vitamin C: 0.03mg | Calcium: 27mg | Iron: 2mg

    Easy Weekly Meal Plan #5: Five Dinners and Hot Fudge Cake

    October 1, 2026

    Collage of chicken and dumplings, smothered pork chops, stuffing meatloaf, and hot fudge cake, labeled Easy Weekly Meal Plan, Week 5.

    This week, we’re making chicken and dumplings, smothered pork chops, stuffing meatloaf, ham and beans, and salmon patties for supper. There’s hot fudge cake for dessert, too!

    Five dinners are planned out, Night 3 is leftovers, and Night 7 is open. Two of this week’s mains make big batches on purpose, so the leftovers night takes care of itself. It’s all old-fashioned, grocery store cooking, nothing fancy.

    Click the dinner and side dish names to pull up each recipe. The grocery list at the bottom has everything combined, so you can shop once and be done thinking about supper for the week.

    Jump to the grocery list

    This week’s menu

    NightDinner and sides
    1Chicken and Dumplings with Wilted Lettuce
    2Smothered Pork Chops with Stick of Butter Rice and Air Fryer Carrots
    3Leftovers or eat out
    4Stove Top Stuffing Meatloaf with Party Potatoes
    5Ham and Beans with Hush Puppies
    6Salmon Patties with Broccoli Casserole
    7Open night. Use what you have or make a family favorite.

    Dessert: Hot Fudge Cake

    Collage of chicken and dumplings, smothered pork chops, stuffing meatloaf, and hot fudge cake, labeled Easy Weekly Meal Plan, Week 5.

    Night 1: Chicken and dumplings and wilted lettuce

    One batch of Chicken and Dumplings makes ten servings, so start the week here and Night 3 takes care of itself. The dumplings are rolled and cut, not dropped, so they hold their shape in the broth instead of going to mush.

    Alongside it, Wilted Lettuce is about as old-fashioned as a side gets. Torn leaf lettuce with hot bacon grease poured over the top and a pinch of salt. That’s the whole thing. The recipe serves two, so double it for four.

    Allow: About an hour and fifteen minutes for the dumplings. The lettuce comes together in under ten, but you need the bacon grease hot, so cook your bacon while the chicken simmers.

    Little tip: Cook six to eight slices of bacon early in the day and pour the grease into a jar. You’ll want about half a cup for the doubled lettuce, and the bacon itself is good crumbled right over the top.

    Night 2: Smothered pork chops, stick of butter rice, and carrots

    Smothered Pork Chops are dredged, seared, and finished in an onion and mushroom gravy right in the same skillet. Four chops, thirty minutes, one pan to wash.

    The gravy needs something underneath it, and Stick of Butter Rice is exactly right. Rice, a can of French onion soup, a can of beef broth, and a stick of butter go in a dish and the oven does the rest. Add Air Fryer Carrots for something bright on the plate.

    Allow: The rice bakes for an hour, so put it in first. The chops take thirty minutes and the carrots twenty, both at the end.

    Make it easier: Plain steamed rice works fine under the chops if you’d rather not run the oven for an hour. You’ll lose the buttery, oniony part, but supper still lands on time.

    Night 3: Leftovers or eat out

    Let’s see what’s in the fridge! The chicken and dumplings from Night 1 should still be holding strong. Nothing extra to buy for this one.

    Night 4: Stuffing meatloaf and party potatoes

    Stove Top Stuffing Meatloaf uses a box of stuffing mix in place of breadcrumbs, which keeps it from drying out and saves you measuring out seasonings. It serves eight, so you’ll likely have some for sandwiches.

    Party Potatoes are the hashbrown casserole you’ve eaten at every church supper, with crushed ruffle chips on top instead of cornflakes. Both go in the oven at the same temperature, so they can share.

    Allow: About 55 minutes for the meatloaf and an hour for the potatoes. Start the potatoes about five minutes ahead and they’ll finish together.

    Little tip: Let the meatloaf sit for ten minutes before you slice it. Cut it straight out of the oven and it falls apart on you.

    Night 5: Ham and beans and hush puppies

    Ham and Beans uses canned great northern beans and a smoked ham hock, so you get the long-simmered flavor without soaking anything overnight. Under an hour from start to bowl.

    Hush Puppies are the right thing to eat alongside. The full recipe makes two dozen, which is more than four people need, so a half batch is plenty.

    Allow: About 50 minutes for the beans. The hush puppies fry in a few minutes once the oil is hot, so start them when the beans are nearly done.

    Make it easier: A pan of cornbread does the same job without the frying. If you skip the hush puppies, leave the cornmeal and buttermilk off your list.

    Night 6: Salmon patties and broccoli casserole

    Salmon Patties are made from a can, crushed saltines, and an egg, fried until the edges go crisp. They’re a Friday-night supper a lot of us grew up on, and they cost almost nothing to put together.

    Broccoli Casserole rounds it out with cheddar and a crushed cracker top. It serves eight, so make half unless you want it for lunch the next day.

    Allow: About 45 minutes for the patties and 40 for the casserole. Get the casserole in the oven, then fry the patties while it bakes.

    Little tip: Drain the salmon well and press it dry before you mix. Wet salmon makes patties that fall apart in the skillet.

    Something sweet: Hot fudge cake

    Hot Fudge Cake makes its own sauce while it bakes. You spread the batter in the pan, scatter cocoa and brown sugar over it, pour hot water on top, and it comes out of the oven as cake sitting in a pool of hot fudge. It serves nine.

    Allow: About 55 minutes, start to finish. Almost everything in it is already in your pantry.

    Serve it warm with a scoop of vanilla ice cream if you have some. It thickens as it sits, so scoop it while it’s fresh out of the oven.

    A little preparation before the week starts

    • Cook a package of bacon and save the grease in a jar for Night 1’s wilted lettuce.
    • Chop your onions for the week all at once. You’ll need them on Nights 2, 4, and 6.
    • The hot fudge cake needs hot water poured over the top right before it bakes. Put the kettle on when you preheat the oven.
    • Nights 2 and 4 both want the oven for an hour. If that’s a tight evening for you, swap one with Night 6.
    • Pull the ground beef and pork chops into the fridge to thaw the night before you need them.

    Already using my Dinner Theme System? These dinners can fit right into the themes you’ve chosen.

    Grocery list

    Here’s what you’ll need for five dinners and their sides for four people, plus the 9-serving cake. I’ve included half batches of the hush puppies and broccoli casserole, a doubled batch of the wilted lettuce, and full batches of everything else. You’ll need to add your usual breakfasts, lunches, and anything extra for the two flexible nights.

    Check what you have before you head to the store. I’ve listed the amounts you’ll use and suggested a package size where it helps. Take a look at the labels on the beans, the broth, and the hashbrowns so you bring home enough.

    Produce

    • ☐ 3 yellow onions: 1 small for the pork chops, half for the meatloaf, and half for the broccoli casserole.
    • ☐ 1 bunch green onions: 4 sliced, for the party potatoes.
    • ☐ 1 head leaf lettuce: about 28 leaves for the doubled wilted lettuce.
    • ☐ 2 lb carrots: for the air fryer carrots.
    • ☐ 8 oz sliced brown mushrooms: for the pork chop gravy.
    • ☐ 1 head garlic: 3 cloves for the pork chops and 3 for the meatloaf. Jarred minced garlic works for the dumplings and the salmon patties.
    • ☐ 1 lemon: for serving with the salmon patties.

    Meat and fish

    • ☐ 2 lb boneless, skinless chicken breasts: for the chicken and dumplings.
    • ☐ 4 boneless pork chops: half to three-quarters of an inch thick.
    • ☐ 1 lb lean ground beef: for the meatloaf.
    • ☐ 2 cups diced ham: a ham steak works well here.
    • ☐ 1 smoked ham hock: for the ham and beans.
    • ☐ 1 package bacon: you need about half a cup of grease for the wilted lettuce.
    • ☐ 15 oz canned salmon: for the patties.

    Bread, dairy, and eggs

    • ☐ 1 dozen eggs: uses about 8, across the meatloaf, hush puppies, salmon patties, broccoli casserole, and cake.
    • ☐ ¾ cup half and half: for the dumpling dough.
    • ☐ ½ cup heavy cream: for the pork chop gravy.
    • ☐ 16 oz sour cream: for the party potatoes.
    • ☐ 1 cup buttermilk: uses about ⅜ cup for the half batch of hush puppies.
    • ☐ 3 cups shredded cheddar: 2 cups for the party potatoes and ¾ cup sharp cheddar for the broccoli casserole.
    • ☐ 1 lb salted butter: uses about 1½ sticks across the dumplings, pork chops, party potatoes, hush puppies, and broccoli casserole.
    • ☐ 1 stick unsalted butter: for the rice, plus 2 tablespoon for the cake.
    • ☐ ½ cup milk: for the hot fudge cake.

    Cans, jars, and frozen

    • ☐ 15 cups chicken broth: 10 for the dumplings, 1 for the pork chops, and 4 for the ham and beans. That’s about four 32-oz cartons.
    • ☐ 5 (15-oz) cans great northern beans: drain 3 and leave 2 undrained.
    • ☐ 1 (10-oz) can condensed French onion soup: for the rice.
    • ☐ 1 (10-oz) can beef broth: for the rice.
    • ☐ 2 (10.5-oz) cans cream of chicken soup: one for the party potatoes, one for the broccoli casserole.
    • ☐ 1 cup long-grain white rice: for the stick of butter rice.
    • ☐ 1 (6-oz) box Stove Top stuffing mix: for the meatloaf.
    • ☐ 2 lb frozen southern-style hashbrowns: for the party potatoes.
    • ☐ 3 cups frozen steamable broccoli: half a batch of the casserole.
    • ☐ ¾ cup ketchup: for the meatloaf topping.
    • ☐ 1 bag cheddar and sour cream ruffle chips: 2 cups crushed, for the party potatoes.
    • ☐ 1 sleeve saltine crackers: ¾ cup crushed, for the salmon patties.
    • ☐ 1 box Cheez-Its: ¾ cup crushed, for the broccoli casserole.
    • ☐ ½ cup yellow cornmeal: for the half batch of hush puppies.

    Check your pantry: sauces, baking ingredients, and seasonings

    • ☐ All-purpose flour: about 5 cups, across the dumplings, pork chops, hush puppies, and cake.
    • ☐ Granulated sugar: about 1 cup. Brown sugar: ½ cup. Unsweetened cocoa powder: 6 Tbsp.
    • ☐ Vegetable oil: about 3 cups, mostly for frying. Olive oil: 3 Tbsp. Canola oil: 2 Tbsp.
    • ☐ Mayonnaise: about ⅓ cup, for the salmon patties and broccoli casserole.
    • ☐ Worcestershire sauce: about ⅓ cup, for the meatloaf and pork chops.
    • ☐ Maple syrup: 2 Tbsp. Honey: 1 Tbsp.
    • ☐ Cornstarch: 1 Tbsp, optional, for thickening the dumplings.
    • ☐ Baking powder and baking soda
    • ☐ Vanilla extract: 1½ tsp.
    • ☐ Ground cinnamon
    • ☐ Onion powder, garlic powder, and paprika
    • ☐ Old Bay seasoning and Italian seasoning
    • ☐ Dried basil, dried minced onions, bay leaves, and cayenne: for the ham and beans.
    • ☐ Salt, kosher salt, and black pepper
    • ☐ Cooking spray and foil
    • ☐ Equipment: air fryer, large pot or Dutch oven, deep skillet for frying, 9×13 dish, 8×8 dish, loaf pan, and an 8×8 or 9×9 for the cake.

    Optional extras

    • ☐ Vanilla ice cream: for the hot fudge cake.
    • ☐ Fresh flat-leaf parsley: for the pork chops, carrots, and salmon patties.
    • ☐ Extra sharp cheddar: for the top of the broccoli casserole.
    • ☐ A pan of cornbread: if you’d rather skip frying the hush puppies.

    Want another week of dinner ideas? Browse all of my easy weekly meal plans.

    Old-Fashioned Penuche Fudge

    September 29, 2026

    Penuche fudge squares with pecans on a wooden board.

    Penuche fudge is a brown sugar fudge with a buttery, caramel-like flavor and a tender bite. This old-fashioned version is made with heavy cream and toasted pecans, then cooked, cooled, and beaten to give it that creamy, slightly crumbly texture.

    Penuche fudge squares with pecans on a wooden board.

    The ingredient list is short, but this is a recipe to give a little time. A candy thermometer takes the guesswork out of cooking the sugar mixture, and the cooling time matters just as much as the time on the stove. Plan ahead so the fudge has several hours, or overnight, to firm up before you cut it.

    Cut the batch into small squares for a Christmas candy tray, tuck a few into a treat box, or keep a container ready for a little something sweet after dinner. For another flavor to add to the tray, try this peanut butter fudge.

    What Is Penuche Fudge?

    Penuche is a traditional fudge made primarily with brown sugar, butter, and milk or cream. Brown sugar gives it its tan color and caramel-like flavor, with a little molasses flavor in the background.

    There's no chocolate in this recipe. The brown sugar is the main flavor, with vanilla to round it out and toasted pecans for crunch. It's rich, so a small piece goes a long way.

    Ingredients and Helpful Notes

    You'll find the complete ingredient amounts and printable instructions in the recipe card below.

    Labeled ingredients for penuche fudge: light brown sugar, granulated sugar, unsalted butter, pecans, vanilla extract, heavy cream and salt.
    • Light brown sugar: Pack it into the measuring cup, then level the top. Light brown sugar keeps the molasses flavor gentle.
    • Granulated sugar: This recipe uses a smaller amount of white sugar along with the brown sugar. Measure both amounts as written.
    • Unsalted butter: You'll need ¾ cup, which is 1½ sticks, for the fudge, plus a little extra to grease the parchment.
    • Heavy cream: Use liquid heavy cream, also labeled heavy whipping cream. This recipe was developed with cream, so stick with it for the intended texture.
    • Salt: A small amount balances the sweetness. Use unsalted butter so you control how much salt goes in.
    • Vanilla extract: This goes in after the mixture has cooled to 110°F, just before beating.
    • Pecans: Toast, cool, and finely chop them. Small pieces are easier to distribute through the fudge and cut into neat squares.

    You'll also need a heavy-bottomed saucepan, a candy thermometer, a heat-safe mixing bowl, and an 8×8-inch pan. For beating, use a wooden spoon or a stand mixer fitted with the paddle attachment.

    How to Make Penuche Fudge

    1. Cook the brown sugar mixture

    Melt the butter in the saucepan over medium heat. Stir in the brown sugar, granulated sugar, cream, and salt until combined and the mixture begins to boil.

    Once it's boiling, stop stirring. Keep it at a steady boil until it reaches 240°F at sea level, with the thermometer's tip in the mixture without touching the bottom of the pan. If you live at a higher elevation, use the adjustment below.

    Brown sugar, granulated sugar and cream added to melted butter in a saucepan.
    Brown sugar fudge mixture boiling in a saucepan fitted with a candy thermometer.

    2. Let it cool without stirring

    Carefully pour the hot mixture into a heat-safe mixing bowl. Leave it undisturbed until the thermometer reads 110°F. This can take 1-2 hours, depending on your kitchen's temperature.

    This is a good time to get the pecans and pan ready. Toast the pecans at 300°F for 5-8 minutes, until fragrant and lightly toasted. Let them cool completely, then finely chop them. Line the pan with two crossing pieces of parchment, leaving overhang, and lightly butter the paper.

    Cooked brown sugar mixture resting in a stainless steel mixing bowl.

    3. Beat until the appearance changes

    At 110°F, add the vanilla. Beat with a wooden spoon, or use the stand mixer's paddle on low to medium-low speed.

    Look for three changes: the fudge becomes thicker, lighter in color, and less glossy. The recipe's timing is about 5-7 minutes with a stand mixer or 8-10 minutes by hand, but use those appearance changes to decide when it's ready.

    4. Add the pecans and fill the pan

    Fold in the toasted pecans and immediately spread the fudge in the prepared pan. Have the pan close by before you start beating-the mixture can begin setting quickly once it thickens.

    Chopped pecans added to the brown sugar fudge mixture in a mixing bowl.

    5. Let it set, then slice

    Leave the fudge at room temperature for several hours or overnight, until fully firm. Lift it out using the parchment and cut it with a sharp knife. For 36 small pieces, cut six rows in each direction.

    Penuche fudge cut into squares in a parchment-lined pan.

    Tips for the Best Texture

    • Check the thermometer first. A small temperature difference can change the finished texture. Keep the tip off the bottom of the saucepan so it reads the mixture's temperature.
    • Give the cooling stage time. Leave the bowl alone until the mixture reaches 110°F. Stirring or beating too soon can encourage larger sugar crystals and gritty fudge.
    • Have everything ready before beating. The pecans should be cool and chopped, and the pan should be lined and buttered.
    • Stop when the fudge is ready. Once it thickens, lightens, and loses its shine, fold in the pecans and get it into the pan. Continuing to beat can leave it dry and difficult to spread.

    Making fudge at a higher elevation

    The 240°F target is for sea level. At higher elevations, the cooking temperature needs to be lower.

    Check the temperature your candy thermometer reads in boiling water. Subtract the difference between that reading and 212°F from the recipe's 240°F target. For example, if boiling water reads 202°F, lower the target by 10°F and cook the fudge to 230°F. This follows Utah State University Extension's candy-making guidance.

    Recipe FAQs

    Why did my penuche fudge turn out grainy?

    Coarse, gritty fudge can develop when sugar crystals form too early. Stirring during boiling, disturbing the mixture while it cools, or beating it before it reaches 110°F can contribute. Wait for the cooling temperature before you begin beating; the goal is fine crystals that feel creamy rather than gritty.

    Why didn't my fudge set?

    Undercooking can leave too much moisture in the mixture. Check your thermometer and make sure the fudge reaches the correct cooking temperature for your elevation. It also needs to be beaten until thick and less glossy, then left in the pan until fully firm before slicing.

    Why is my fudge dry or too hard?

    Cooking past the target temperature can remove too much moisture. Overbeating after the fudge thickens can also make it dry and crumbly. On the next batch, check the thermometer, adjust for elevation if needed, and transfer the fudge to the pan as soon as it's ready.

    Can I use dark brown sugar?

    Yes, but expect a darker fudge with a stronger molasses flavor. Light brown sugar gives this version its milder brown sugar flavor.

    Can I make penuche fudge ahead of time?

    Yes. Making it the day before gives it time to set overnight before you slice and pack it. Follow the storage directions below once the fudge is firm.

    How to Store Penuche Fudge

    Store the fudge in an airtight container at a cool room temperature for up to 1 week. Place parchment or wax paper between layers so the pieces don't stick together.

    For longer storage, refrigerate it in an airtight container for up to 2-3 weeks. Let the pieces come to room temperature before serving for the best texture.

    To freeze, wrap the fudge tightly in plastic wrap and place it in a freezer-safe airtight container or bag for up to 3 months. Thaw overnight in the refrigerator, then bring it to room temperature before serving.

    More Fudge Recipes

    If you're putting together a candy tray, Oreo fudge adds a cookies-and-cream option, and this three-ingredient peanut butter fudge is another simple batch to make ahead.

    Recipe

    Penuche fudge squares with pecans on a wooden board.
    Print Pin
    5 from 1 vote

    Old-Fashioned Penuche Fudge

    Brown sugar, butter, and heavy cream make a rich, caramel-flavored fudge with toasted pecans in every bite. A candy thermometer and patient cooling help create its creamy, slightly crumbly texture. Total time is a planning estimate that includes an overnight set; see the timing note.
    Course Dessert
    Cuisine American
    Prep Time 15 minutes minutes
    Cook Time 20 minutes minutes
    Cooling, beating & setting (estimate) 10 hours hours 10 minutes minutes
    Total Time 10 hours hours 45 minutes minutes
    Servings 36 small pieces
    Calories 152kcal
    Author Jessica Burgess

    Equipment

    • Heavy-bottomed saucepan
    • Candy thermometer
    • Heat-safe mixing bowl
    • Wooden spoon or stand mixer with paddle attachment
    • baking sheet
    • 8×8-inch baking pan
    • parchment paper
    • Heat-resistant spatula
    • Sharp knife

    Ingredients

    • ¾ cup unsalted butter plus a little extra for greasing the parchment
    • 3 cups light brown sugar packed
    • ½ cup granulated sugar
    • ¾ cup heavy cream
    • ¼ teaspoon salt
    • 1 teaspoon vanilla extract
    • 1 cup pecans finely chopped, toasted and cooled

    Instructions

    • Cook the mixture. Melt the ¾ cup butter in a heavy-bottomed saucepan over medium heat. Add the brown sugar, granulated sugar, cream, and salt. Stir until combined and the mixture begins to boil. Attach a candy thermometer with its tip in the mixture, away from the pan's bottom. Stop stirring and cook at a steady boil until it reaches 240°F at sea level, or the adjusted temperature in the notes.
    • Cool undisturbed. Carefully pour into a heat-safe mixing bowl. Let cool without stirring or beating until it reaches 110°F, about 1-2 hours.
    • Prepare the pecans and pan. While the mixture cools, heat the oven to 300°F. Spread the pecans on a baking sheet and toast for 5-8 minutes, until fragrant and lightly toasted. Cool completely and finely chop. Line an 8×8-inch pan with two crossing pieces of parchment, leaving overhang on the sides. Lightly butter the parchment.
    • Beat the fudge. Once the mixture reaches 110°F, add the vanilla. Beat with a wooden spoon or the paddle attachment of a stand mixer on low to medium-low speed until noticeably thicker, lighter in color, and no longer glossy. This takes about 5-7 minutes with the mixer or 8-10 minutes by hand; watch the texture as well as the time.
    • Add pecans and spread. Fold in the cooled pecans. Immediately transfer to the prepared pan and smooth the top.
    • Set and slice. Let stand at room temperature for several hours or overnight, until firm. Lift out with the parchment and cut into 36 small squares.

    Notes

    Pecans: Measure 1 cup finely chopped pecans. If starting with halves, toast and cool them, then chop and measure. If already toasted, skip the toasting step.
    Elevation: Lower the 240°F cooking target by the difference between 212°F and your thermometer’s reading in boiling water. If boiling water reads 202°F, cook the fudge to 230°F. Keep the cooling target at 110°F.
    Timing: Cook for about 15–20 minutes, using the thermometer as your guide. Initial cooling takes 1–2 hours; beating takes about 5–7 minutes with a mixer or 8–10 minutes by hand. The fudge then needs several hours or overnight in the pan before slicing. The displayed total is an overnight planning estimate: 15 minutes prep + 20 minutes cooking + 2 hours initial cooling + 10 minutes beating + an 8-hour setting allowance. The setting allowance is an estimate, not a tested exact duration; wait until fully firm.
    Storage: Store airtight at cool room temperature for up to 1 week, refrigerated for 2–3 weeks, or frozen for 3 months. Separate layers with parchment or wax paper. Thaw overnight in the refrigerator, then bring to room temperature for serving.
    Nutrition: Estimated for 1 small piece (1/36 of the batch), including pecans and excluding the extra butter used to grease the parchment. Values vary by ingredients and piece size.

    Nutrition

    Serving: 1small piece | Calories: 152kcal | Carbohydrates: 21g | Protein: 0.5g | Fat: 8g | Saturated Fat: 4g | Polyunsaturated Fat: 1g | Monounsaturated Fat: 3g | Trans Fat: 0.2g | Cholesterol: 16mg | Sodium: 23mg | Potassium: 43mg | Fiber: 0.3g | Sugar: 21g | Vitamin A: 193IU | Vitamin C: 0.1mg | Calcium: 22mg | Iron: 0.2mg

    Peanut Butter Oatmeal Bars (3 Ingredients, No Bake)

    October 6, 2026

    A close-up of peanut butter oatmeal bars with peanut butter drizzle.

    These peanut butter oatmeal bars are soft, chewy, and made with just three ingredients: creamy peanut butter, honey, and old-fashioned oats. They only need about 10 minutes of prep before going into the refrigerator. No oven needed!

    A 9×9 pan makes 16 bars, so you can tuck a few away for an afternoon snack and freeze the rest for later. Just plan for at least 2 hours of chilling before cutting them.

    Peanut butter oatmeal bars topped with peanut butter drizzle on parchment paper.

    Three Ingredients, One Pan of Bars

    The peanut butter gives these bars their rich flavor, and the honey adds a little sweetness while helping the oats stick together. Old-fashioned oats give each bite a tender, chewy texture. Add a drizzle of peanut butter on top if you want a little extra.

    If you like this peanut butter and oat combination in smaller bites, try my no-bake energy balls, which also have vanilla and mini chocolate chips.

    FAQs

    What kind of peanut butter should I use?

    Use regular creamy peanut butter for this recipe. It mixes smoothly with the honey and helps hold the oats together. Natural peanut butter that separates can change the consistency and how firmly the bars set.

    Can I use maple syrup instead of honey?

    Honey is the sweetener called for in this recipe. Maple syrup may work, but the flavor and firmness can be different, so it is not a confirmed one-for-one substitute here.

    Why are my peanut butter oatmeal bars falling apart?

    Make sure every bit of the oats is coated, press the mixture firmly into the pan, and refrigerate for at least 2 hours before slicing. The bars should be firm and set. If they soften in a warm room, return them to the refrigerator.

    How do I store these bars?

    Keep the bars covered at cool room temperature for up to 4 days, or in an airtight container in the refrigerator for up to 7 days. They can soften in a warm spot. Serve at room temperature for a softer bite, or enjoy them chilled.

    Can I freeze peanut butter oatmeal bars?

    Yes! Wrap the bars individually in plastic wrap, place them in an airtight freezer container, and freeze for up to 2 months. Thaw overnight in the refrigerator, then bring to room temperature if you like.

    Ingredients

    You only need three ingredients for the bars. The extra peanut butter drizzle is optional.

    Labeled bowls of old-fashioned oats, creamy peanut butter, and honey for peanut butter oatmeal bars.
    • 1 cup creamy peanut butter: Choose regular creamy peanut butter rather than a natural variety that separates.
    • ½ cup honey: Clover honey works well here. It sweetens the bars and helps bind the oats.
    • 3 cups (300 grams) old-fashioned oats: Use old-fashioned rolled oats for the intended chewy texture.

    The full printable recipe is in the recipe card below.

    Instructions

    Line a 9×9-inch square pan with two pieces of parchment paper, leaving enough over the sides to lift out the chilled bars.

    • Warm the peanut butter and honey. Add both to a saucepan that holds at least 2 quarts. Heat over medium heat, stirring until smooth and combined. Warming the mixture makes it easier to stir through the oats.
    Creamy peanut butter and honey in a saucepan before warming.
    • Stir in the oats. Fold them in right away with a wooden spoon or stiff spatula. Keep stirring until all of the oats are coated.
    Old-fashioned oats mixed with peanut butter and honey in a saucepan.
    • Press into the pan. Transfer the mixture to the lined pan and press it firmly into an even layer. The flat bottom of a glass or measuring cup helps compact it, especially in the corners.
    Peanut butter and oat mixture pressed evenly into a parchment-lined square pan.
    • Chill and slice. Cover with plastic wrap and refrigerate for at least 2 hours, or until firm and set. Lift the slab out with the parchment and cut into 16 bars. Drizzle with extra peanut butter, if desired, and serve at room temperature or chilled.
    A slab of peanut butter oatmeal bars cut into 16 squares on parchment paper.

    Tips

    • Have the pan ready first. The peanut butter and honey mixture thickens as it cools, so measure the oats and line the pan before heating.
    • Press firmly, then chill fully. Both steps help the bars hold together when you cut them.
    • Choose your thickness. A 9×9 pan makes bars about ½ inch thick. For thicker bars, use an 8×8 pan.
    • Keep them cool until serving. These are soft, chewy bars and can soften further in a warm room.
    A hand holding a peanut butter oatmeal bar to show its chewy oat texture.

    More Recipes

    For more easy treats with peanut butter or oats, try these next:

    • No Bake Cookies - chocolate, peanut butter, and oatmeal in a classic stovetop cookie.
    • Peanut Butter Pie - a creamy no-bake dessert with an Oreo crust.
    • Breakfast Cookies - baked oatmeal cookies with peanut butter, applesauce, and chocolate chips.

    Recipe

    A close-up of peanut butter oatmeal bars with peanut butter drizzle.
    Print Pin
    Be the first to rate!

    Peanut Butter Oatmeal Bars

    Soft, chewy peanut butter oatmeal bars made with just 3 ingredients. These no-bake bars take 10 minutes to prepare, plus at least 2 hours to chill.
    Course Dessert, Snack
    Cuisine American
    Prep Time 10 minutes minutes
    Chill Time 2 hours hours
    Total Time 2 hours hours 10 minutes minutes
    Servings 16 bars
    Calories 200kcal
    Author Jessica Burgess

    Equipment

    • 1 9×9-inch square baking pan
    • 1 Saucepan at least 2 quarts
    • parchment paper
    • Wooden spoon or stiff spatula

    Ingredients

    • 1 cup creamy peanut butter
    • ½ cup honey
    • 3 cups old-fashioned oats 300 grams

    Instructions

    • Line a 9×9-inch square pan with two crossing pieces of parchment paper, leaving an overhang for lifting out the bars.
    • Warm the peanut butter and honey in a saucepan (at least 2 quarts) over medium heat, stirring until combined and smooth.
    • Fold in the oats right away with a wooden spoon or stiff spatula, stirring until thoroughly coated.
    • Transfer to the prepared pan and press firmly into an even layer. Cover with plastic wrap and refrigerate for at least 2 hours, or until firm and set.
    • Lift out using the parchment and cut into 16 bars. Drizzle with extra peanut butter, if desired. Serve at room temperature or enjoy chilled.

    Notes

    Peanut butter: Use regular creamy peanut butter. Natural peanut butter that separates can change how the bars hold together.
    Oats: Use old-fashioned rolled oats for the intended chewy texture.
    Press firmly: Use the flat bottom of a glass or measuring cup to compact the mixture. A 9×9-inch pan makes bars about ½ inch thick; an 8×8-inch pan makes thicker bars.
    Storage: Keep covered at cool room temperature for up to 4 days or in an airtight container in the refrigerator for up to 7 days. The bars soften in a warm room. Serve at room temperature or chilled.
    Freezing: Wrap bars individually, place in an airtight freezer container, and freeze for up to 2 months. Thaw overnight in the refrigerator.
    Nutrition: Estimated per bar, based on 16 bars. Optional extra peanut butter drizzle is not included.

    Nutrition

    Serving: 1bar | Calories: 200kcal | Carbohydrates: 25g | Protein: 6g | Fat: 9g | Saturated Fat: 2g | Polyunsaturated Fat: 2g | Monounsaturated Fat: 4g | Sodium: 71mg | Potassium: 164mg | Fiber: 3g | Sugar: 11g | Vitamin C: 0.1mg | Calcium: 18mg | Iron: 1mg

    Cranberry Pretzel Salad

    October 7, 2026

    Close-up of the cranberry, cream cheese, and crumbly pretzel layers in a slice of cranberry pretzel salad.

    This cranberry pretzel salad has a salty pretzel crust, a fluffy cream cheese middle, and a ruby-red cranberry topping. Two cans of whole berry cranberry sauce give that top layer plenty of fruit, with just enough tartness to balance the sweet filling.

    A slice of cranberry pretzel salad with red cranberry topping, white cream cheese filling, and a coarse pretzel crust.

    A Make-Ahead Holiday Dessert

    This is the kind of dessert to put together the day before Thanksgiving or Christmas. The crust spends just 10 minutes in the oven, but the cooling and chilling time matters. Plan on about 30 minutes of hands-on work, a few pauses between layers, and an overnight stay in the refrigerator.

    FAQs

    Can I make cranberry pretzel salad the day before?

    Yes, and this recipe needs that overnight chill. Cutting it the same night can leave ragged slices; give the assembled salad until the next morning for cleaner cuts. Keep it refrigerated until serving.

    What can I use instead of cranberry Jell-O?

    Raspberry or black cherry Jell-O can replace the cranberry flavor. Use two 3-ounce boxes of regular gelatin and keep the other amounts the same. The two cans of whole berry sauce supply the cranberry flavor and fruit; the gelatin helps set and color the topping while adding its own flavor. Raspberry or black cherry will change the flavor slightly.

    How do I keep the pretzel crust from getting soggy?

    Spread the cream cheese filling all the way to the pan on every side and into the corners. Any gap gives the cranberry mixture a path to the pretzels. The crust must be completely cool before adding the filling, and the cranberry mixture must be cool and syrupy before it goes on top.

    Can I use jellied cranberry sauce?

    Use whole berry cranberry sauce for this version. The berries give the topping its texture, and the recipe is written for two 14-ounce cans. Jellied sauce won’t give you the same fruit-filled layer.

    How do I store cranberry pretzel salad?

    Keep it covered in the refrigerator and use within 3-4 days. Keep the cover from touching the topping. The pretzels will soften as it sits, so plan to serve it the day after making it for the best contrast between the layers.

    Ingredients

    See the recipe card below for the printable ingredient list and full instructions.

    Pretzel crust

    • 2 ½ cups crushed pretzels - measured after crushing; coarse crumbs
    • ½ cup butter - melted
    • ¼ cup granulated sugar

    Cream cheese layer

    • 8 ounces cream cheese - fully softened
    • 1 cup powdered sugar
    • 8 ounces Cool Whip - thawed

    Cranberry layer

    • 2 3-ounce boxes cranberry Jell-O - regular, not sugar-free; 6 ounces total
    • 1 ½ cups boiling water
    • 2 14-ounce cans whole berry cranberry sauce - 28 ounces total

    Pretzels: Crush them first, then measure 2½ cups. Leave small pieces for texture rather than grinding them to dust.

    Cream cheese and Cool Whip: Let the cream cheese soften fully and thaw the whipped topping before mixing. Beat out the cream cheese lumps before folding in the Cool Whip.

    Cranberry sauce and Jell-O: You’ll need two cans of whole berry sauce and two small boxes of gelatin. Use the 1½ cups of boiling water listed here, without adding the extra cold water called for on the Jell-O box.

    Instructions

    • Make the crust. Heat the oven to 350°F. Stir together the crushed pretzels, melted butter, and granulated sugar until combined.
    Coarsely crushed pretzels mixed with melted butter and sugar in a white bowl.
    • Press the mixture firmly and evenly into a 9×13-inch baking dish. Bake for 10 minutes, then cool completely, at least 30 minutes. Wait longer if the dish or crust is still warm.
    Pretzel crumb mixture pressed into the bottom of a rectangular glass baking dish.
    • Mix the filling. Beat the softened cream cheese and powdered sugar until completely smooth, then fold in the thawed Cool Whip.
    Cream cheese filling in a white mixing bowl with a spatula.
    • Spread the filling over the cooled crust, sealing it against the pan on all four sides and into the corners. Refrigerate for 1 hour.
    White cream cheese filling spread over the pretzel crust to the edges of a glass dish.
    • Make the cranberry layer. In a heatproof bowl, stir both boxes of Jell-O into 1½ cups boiling water for a full 2 minutes, until dissolved. Stir in both cans of whole berry cranberry sauce, breaking up the sauce so the berries spread evenly.
    Cranberry gelatin and whole berry cranberry sauce mixed in a clear bowl.
    • Refrigerate the cranberry mixture for about 90 minutes, until cool and syrupy, roughly the consistency of raw egg white. It should still be spoonable, not fully set. Check the texture as it chills; a warm, watery mixture can melt the filling or seep through gaps.
    • Add the topping. Gently spoon the thickened cranberry mixture over the chilled cream cheese layer. Spread it carefully to cover the filling without dragging through the white layer underneath.
    Cranberry mixture partially spread over the cream cheese layer in a glass dish.
    • Chill overnight. Cover with a lid or tented foil that doesn’t touch the topping. You can also refrigerate it uncovered for the first hour, until the surface firms, then cover without pressing on it. Leave the assembled salad in the refrigerator overnight.
    An overhead view of cranberry pretzel salad with the red topping spread across the pan.
    • Cut with a thin knife, wiping the blade clean between slices. Slide a wide spatula underneath each serving to support the pretzel crust as you lift it from the pan.
    A plated slice of cranberry pretzel salad with a forkful and loose pretzel crumbs.

    Tips

    • Check the edges before chilling. A continuous cream cheese layer is what keeps the cranberry gelatin away from the crust. Take a moment to fill any gaps at the sides and corners.
    • Let the topping cool and thicken. The 90 minutes is a guide; the cool, syrupy texture is the cue to look for. Don’t pour warm Jell-O over the cream cheese.
    • Give the foil some headroom. Foil resting on the surface leaves an indentation as the Jell-O sets. A lid or a loose foil tent protects the top without touching it.
    • Keep the overnight chill. It helps the layers hold together for cleaner slices. Use a wide spatula to support each slice as you lift it from the pan.

    More Recipes

    • Cranberry Cake with Butter Sauce - Another way to put cranberries on the holiday dessert table, with warm butter sauce spooned over the cake.
    • Pecan Pie Dip - A creamy dessert dip with a buttery pecan topping to serve with cookies or apple slices.
    • Pumpkin Fluff - Pumpkin pie flavor in an easy dip for graham crackers or gingersnaps.

    Recipe

    Close-up of the cranberry, cream cheese, and crumbly pretzel layers in a slice of cranberry pretzel salad.
    Print Pin
    Be the first to rate!

    Cranberry Pretzel Salad

    A sweet-and-salty layered dessert with a buttery pretzel crust, fluffy cream cheese filling, and a topping made with two cans of whole berry cranberry sauce. Make it the day before; the assembled salad needs an overnight chill.
    Course Dessert
    Cuisine American
    Prep Time 30 minutes minutes
    Cook Time 10 minutes minutes
    Cooling and Chilling (estimate) 11 hours hours
    Total Time 11 hours hours 40 minutes minutes
    Servings 12 servings
    Calories 465kcal
    Author Jessica Burgess

    Equipment

    • 9×13-inch baking dish
    • Mixing bowls, including a heatproof bowl
    • Electric hand mixer or stand mixer
    • rubber spatula
    • Thin knife and wide serving spatula
    • Lid or foil for covering

    Ingredients

    Pretzel crust

    • 2 ½ cups crushed pretzels measured after crushing; coarse crumbs
    • ½ cup butter melted
    • ¼ cup granulated sugar

    Cream cheese layer

    • 8 ounces cream cheese fully softened
    • 1 cup powdered sugar
    • 8 ounces Cool Whip thawed

    Cranberry layer

    • 2 boxes cranberry Jell-O 3 ounces each; regular, not sugar-free; 6 ounces total
    • 1 ½ cups boiling water
    • 2 cans whole berry cranberry sauce 14 ounces each; 28 ounces total

    Instructions

    • Heat the oven to 350°F. Crush the pretzels to coarse crumbs, leaving some texture, and measure 2½ cups after crushing. Stir together with the melted butter and granulated sugar. Press firmly and evenly into a 9×13-inch baking dish.
    • Bake for 10 minutes. Cool completely, at least 30 minutes and longer if the crust or dish is still warm.
    • Beat the fully softened cream cheese and powdered sugar until smooth with no lumps. Fold in the thawed Cool Whip. Spread over the cooled crust all the way to the edges and corners, sealing against the pan on all four sides. Refrigerate for 1 hour.
    • In a heatproof bowl, dissolve both boxes of Jell-O in 1½ cups boiling water, stirring for a full 2 minutes. Stir in both cans of whole berry cranberry sauce, breaking up the sauce so the berries distribute evenly.
    • Refrigerate the cranberry mixture for about 90 minutes, until cool and syrupy, roughly the texture of raw egg white. It should still be spoonable, not fully set. Keep the cream cheese layer refrigerated while the topping chills.
    • Gently spoon the cranberry mixture over the chilled filling and spread carefully without dragging through the layer underneath.
    • Cover with a lid or tented foil that stays above the surface, and refrigerate overnight. Alternatively, leave uncovered in the refrigerator for the first hour until the surface firms, then cover without pressing on it.
    • Cut with a thin knife, wiping the blade clean between slices. Use a wide spatula to support the pretzel crust when lifting each serving.

    Notes

    • Yield: 12-15 servings. Nutrition is estimated for 1/12 of the recipe.
    • Timing: About 30 minutes active preparation and 10 minutes baking, plus complete crust cooling, 1 hour chilling the filling, about 90 minutes chilling the cranberry mixture, and an overnight chill after assembly. The displayed total is a planning estimate using 30 minutes crust cooling and an 8-hour allowance for overnight; actual time can be longer. Make the day before and chill overnight until fully set.
    • Seal the filling to every edge to keep the gelatin from reaching the crust. The cranberry mixture must be cool and syrupy before layering; warm gelatin can melt the filling.
    • Keep foil off the surface to prevent an indentation. Same-night slices can be ragged; overnight chilling gives cleaner cuts.
    • Raspberry or black cherry Jell-O can replace cranberry Jell-O in the same two 3-ounce boxes. Whole berry cranberry sauce provides the cranberry flavor and fruit; the gelatin sets and colors the topping and contributes its own flavor. Use the water amount in this recipe, not the box directions.
    • Keep covered and refrigerated. Use within 3-4 days; the crust will soften over time.

    Nutrition

    Serving: 1serving | Calories: 465kcal | Carbohydrates: 74g | Protein: 5g | Fat: 18g | Saturated Fat: 11g | Polyunsaturated Fat: 1g | Monounsaturated Fat: 4g | Trans Fat: 0.3g | Cholesterol: 39mg | Sodium: 398mg | Potassium: 84mg | Fiber: 1g | Sugar: 52g | Vitamin A: 518IU | Vitamin C: 1mg | Calcium: 29mg | Iron: 1mg

    Easy Apple Crumble Without Oats

    October 8, 2026

    Apple crumble without oats with golden crumbs and apple filling on a serving spoon in a glass baking dish.

    This apple crumble without oats starts with canned apple pie filling and a homemade brown sugar topping. A little cinnamon, vanilla, and melted butter turn a few pantry ingredients into golden crumbs to spoon over warm apples. No peeling, slicing, or mixer needed!

    If you have more apple pie filling to use, my caramel apple dump cake adds caramel and a cake mix topping, while this apple snickerdoodle dump cake uses a cookie mix for its cinnamon-sugar crumble.

    A spoon lifting apple filling and golden crumble topping from a glass baking dish.

    An Easy Apple Crumble with Pie Filling

    I had plenty of canned apple pie filling on hand, and this was such a good way to use it. The filling goes right into the baking dish with a little lemon juice, while the crumble comes together in a separate bowl.

    Mine baked for the full 45 minutes. I wanted the topping to look more golden and the edges to bubble a little more than they did at 40 minutes. Start checking then, but use those two cues to decide when yours is ready.

    FAQs

    Does apple crumble need oats?

    No. A flour, sugar, and butter topping makes a crumble without any oats. Apple crisp often includes oats, although the names are sometimes used interchangeably. This recipe has a buttery brown sugar crumble topping.

    Can I make apple crumble with canned pie filling?

    Yes! This recipe uses two 21-ounce cans of apple pie filling, including all of the sauce. The filling is already sweetened and thickened, so you only add lemon juice before scattering the homemade crumble on top.

    Can I substitute fresh apples?

    Fresh apples need their own sugar, thickener, and cooking adjustments, so they are not a straight swap for the canned filling in this recipe. Use prepared apple pie filling for the version shown here.

    Why is my crumble topping powdery?

    Measure the flour lightly by spooning it into the cup and leveling it off, or weigh 150 grams. Stir the melted butter through all of the dry ingredients, then squeeze small handfuls together and break them into crumbs. The mixture should be evenly moistened before it goes over the apples.

    How do I store and reheat apple crumble?

    Cover and refrigerate leftovers, and use within 3-4 days. Reheat in a 350°F oven until hot throughout, loosely covering the top if it starts to brown too much. A microwave works for individual portions, but the topping will be softer. Add ice cream after reheating.

    Ingredients

    See the recipe card below for the printable ingredient list and full instructions.

    Apple filling

    • 2 cans apple pie filling, 21 ounces each - 42 ounces total; keep all of the sauce.
    • 1 tablespoon lemon juice - adds a little tartness to the sweet filling.

    Crumble topping

    • 1¼ cups all-purpose flour (150 grams) - spoon into the measuring cup and level it off.
    • ½ cup packed light brown sugar (100 grams) - break up any firm lumps.
    • 2 tablespoons granulated sugar
    • ½ teaspoon ground cinnamon
    • ¼ teaspoon fine salt
    • 6 tablespoons unsalted butter (85 grams) - melt it, then let it cool until warm.
    • 1 teaspoon vanilla extract

    Pie filling: Choose apple pie filling, rather than plain canned apples. Brands vary in sweetness and spice, so the filling you use will affect the finished flavor. There is no extra sugar or thickener in the apple layer. You can also spoon this type of filling over cinnamon-sugar tortilla crisps for my apple pie nachos.

    Butter: Melted butter lets you stir this topping together with a fork. If you use salted butter, leave out the added salt.

    Instructions

    • Prepare the filling. Heat the oven to 375°F with a rack in the center. Lightly grease an 8×8-inch baking dish that is at least 2 inches deep. Stir the apple pie filling and lemon juice together in the dish, then spread evenly.
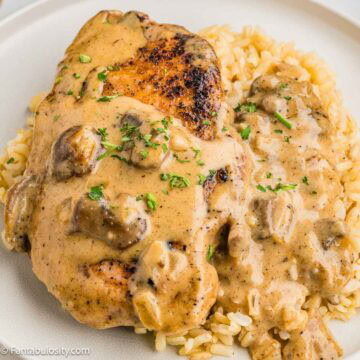
    Canned apple pie filling spread in an eight-inch square glass baking dish.
    • Mix the dry ingredients. Combine the flour, brown sugar, granulated sugar, cinnamon, and salt in a medium bowl. Break apart any brown sugar lumps.
    Flour, brown sugar, granulated sugar, cinnamon, and salt in a glass mixing bowl.
    • Make the crumbs. Stir the vanilla into the warm melted butter. Add it to the dry mixture and mix with a fork until evenly moistened. Squeeze small handfuls together, then break them into small crumbs and roughly dime-sized pieces.
    Buttery crumble topping mixed into small crumbs and larger clumps in a glass bowl.
    • Top the apples. Scatter the crumble over the filling, leaving the crumbs loose. Don't press them into a solid layer.
    Unbaked crumble topping scattered evenly over the apple filling.
    • Bake. Set the dish on a rimmed baking sheet. Bake for about 45 minutes, checking at 40 minutes. Look for a golden-brown topping and filling bubbling around the edges and through gaps in the crumbs. If the top browns before the filling bubbles, loosely tent with foil and keep baking.
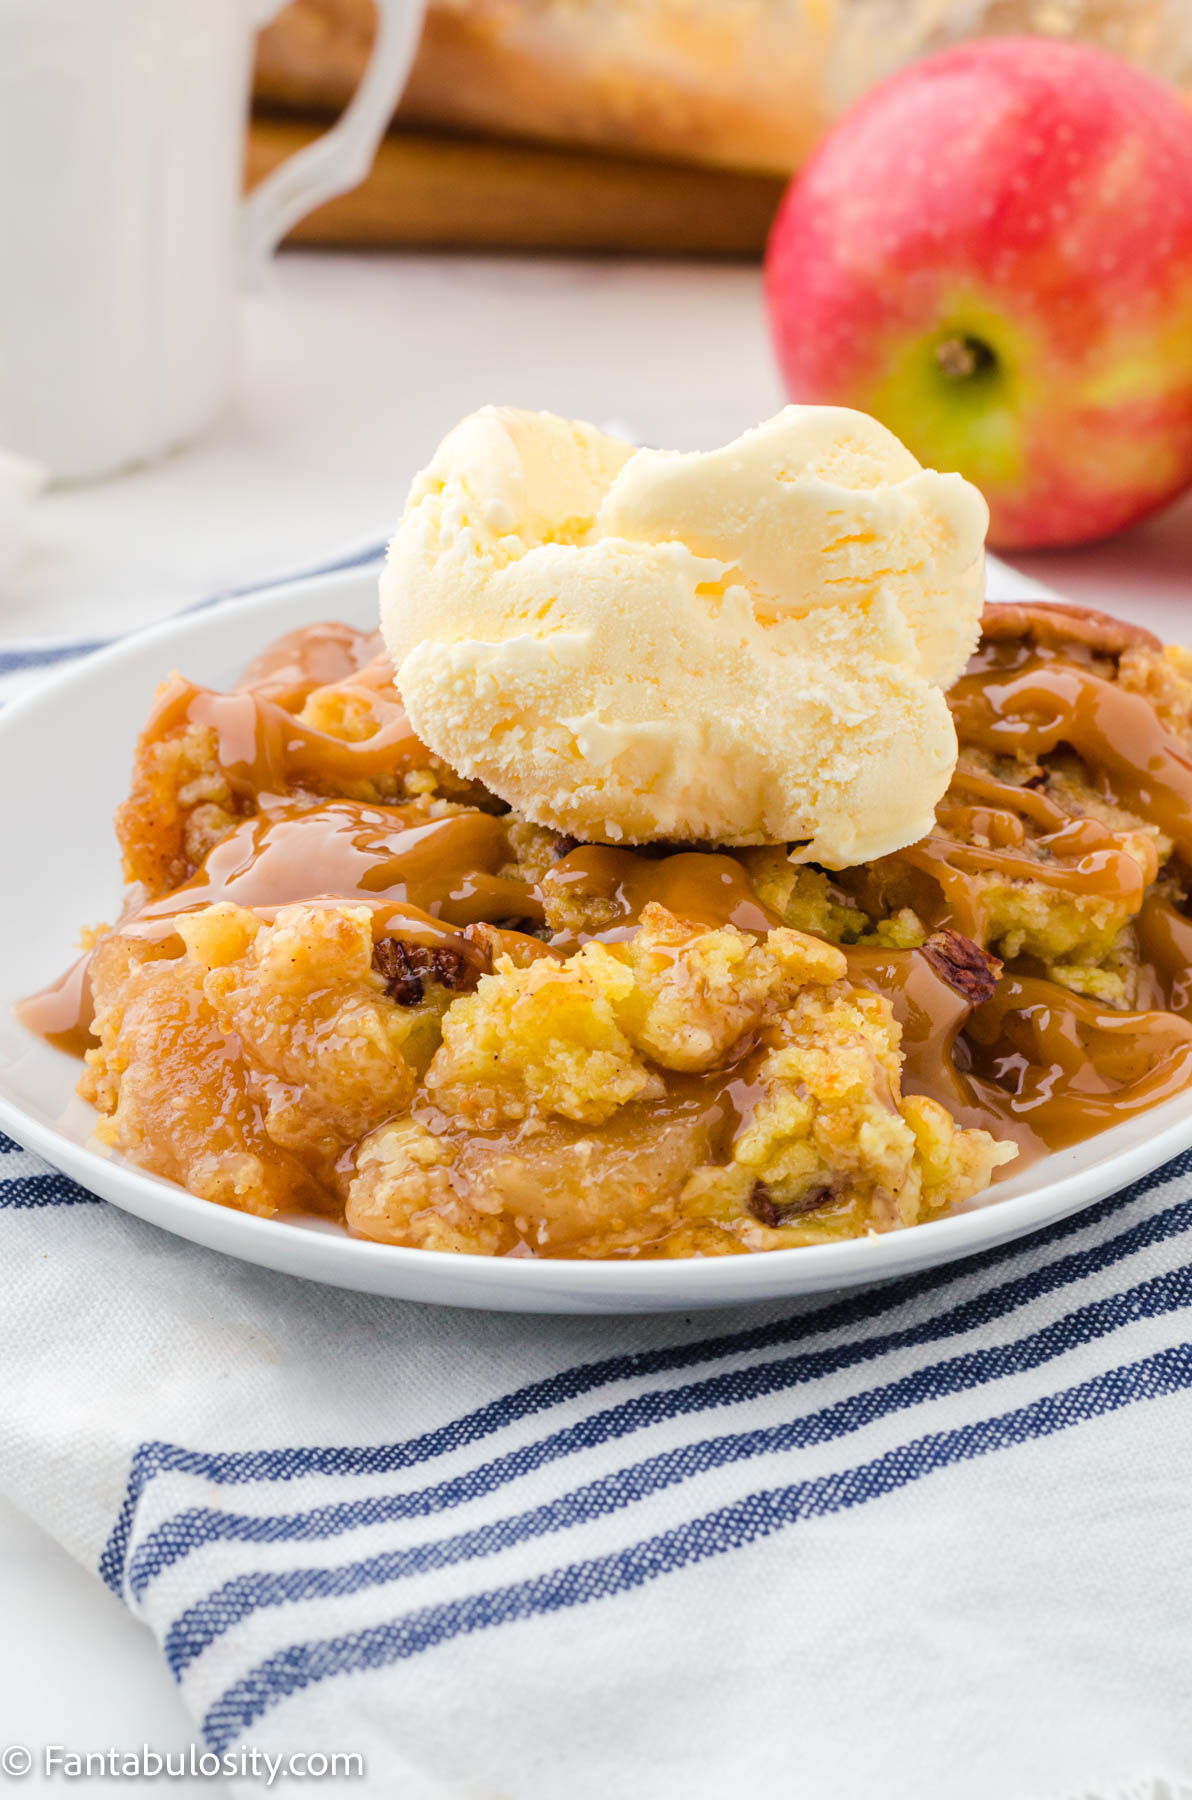
    Golden baked apple crumble in a square glass dish with apple filling visible around the edges.
    • Rest and serve. Let the crumble stand uncovered for 20 minutes before scooping. Serve warm, with vanilla ice cream if you'd like.
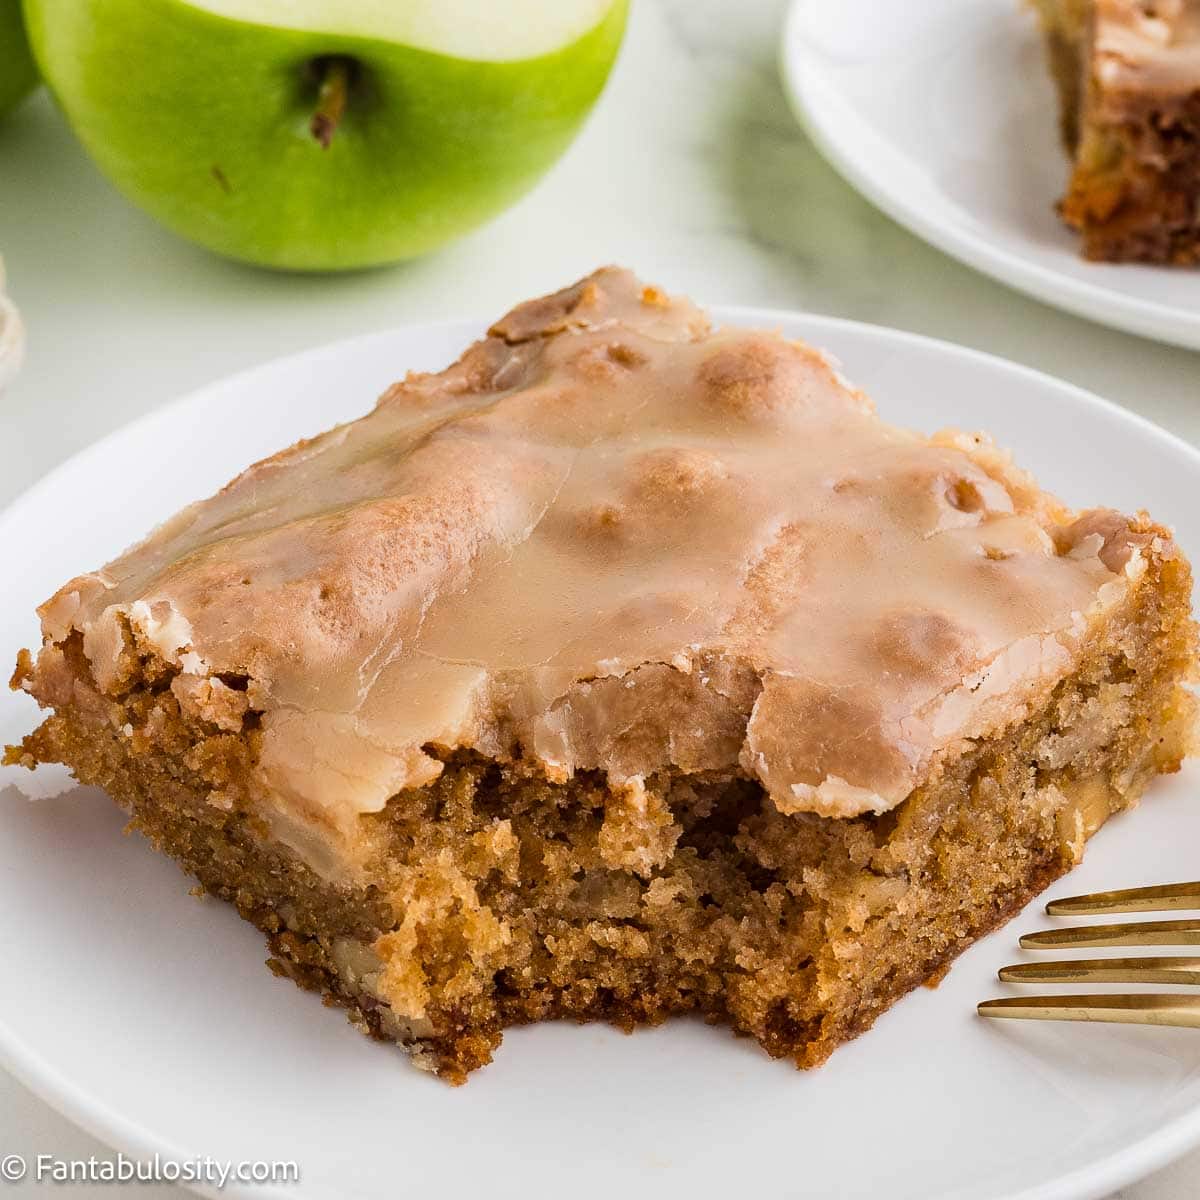
    A bowl of apple crumble topped with a scoop of vanilla ice cream.

    Tips

    • Keep a mix of crumb sizes. Small crumbs cover the apples, while the larger pieces give you those buttery bites of topping. Take a moment to squeeze and break up the mixture before adding it to the dish.
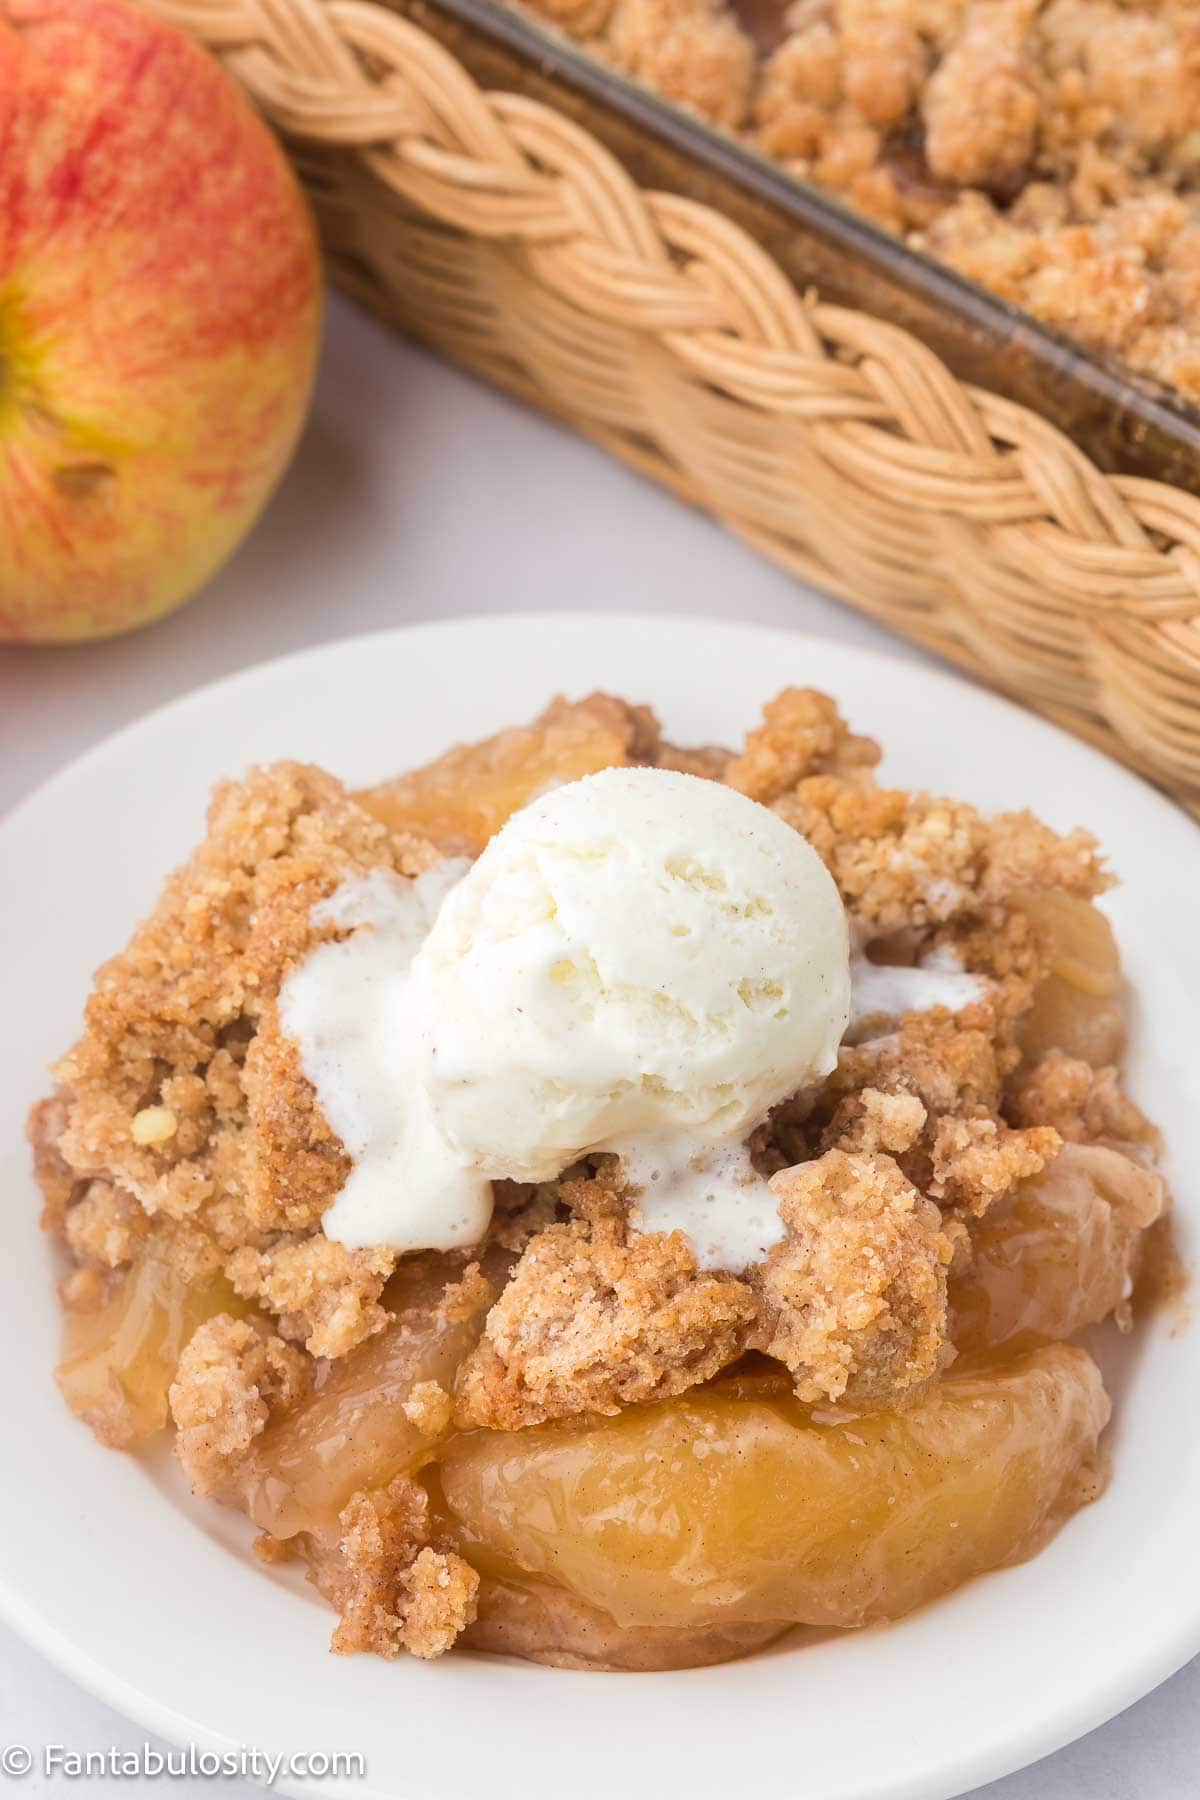
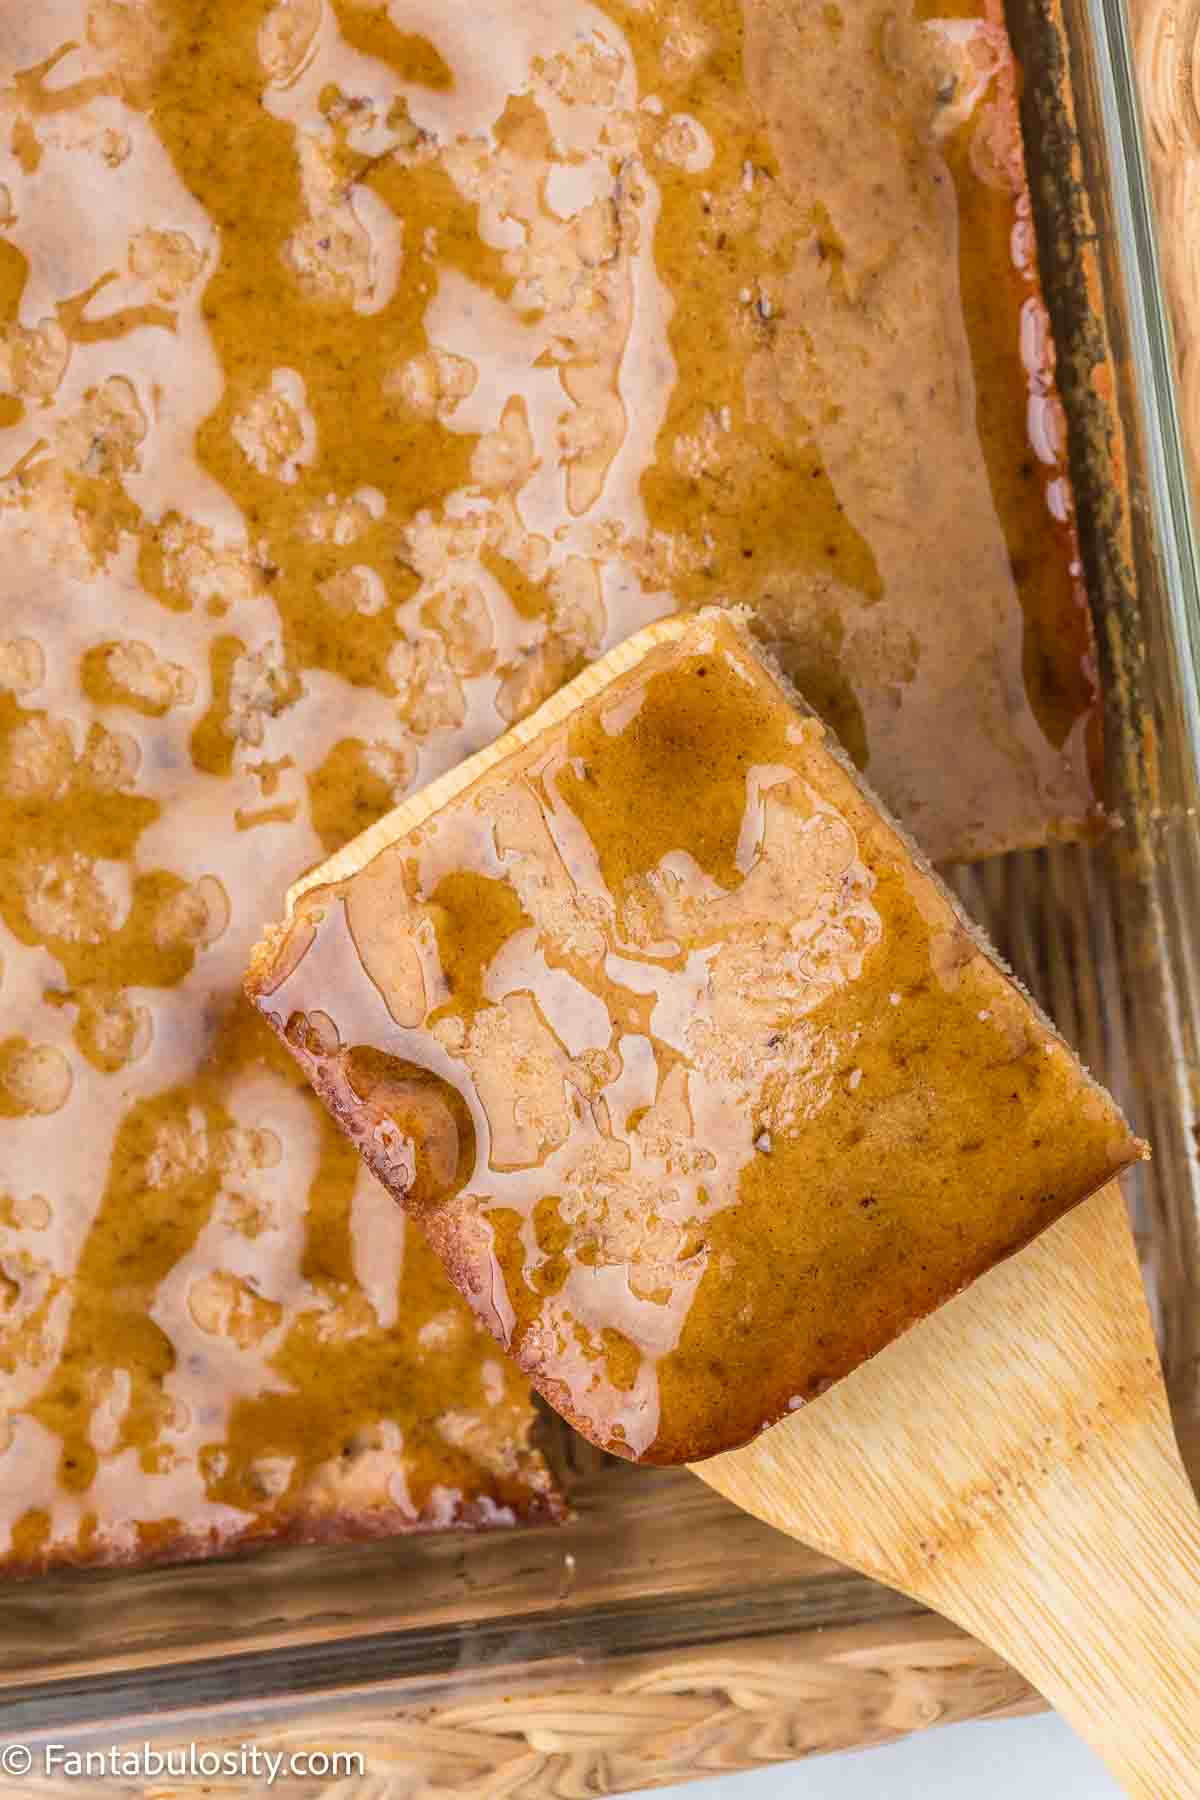
    • Use the right dish. An 8×8-inch dish at least 2 inches deep gives the filling and topping room. A larger pan makes thinner layers and can change the baking time.
    • Watch the color and the filling. A golden top and bubbling edges are more useful than the timer alone. The baking sheet underneath catches any drips.
    • Give it the 20-minute rest. It lets the filling settle before serving, and the crumble will still be warm.

    More Recipes

    • Apple Snickerdoodle Dump Cake - Another way to use canned apple pie filling, with a snickerdoodle cookie mix topping.
    • Caramel Apple Dump Cake - Apple pie filling, caramel, and cake mix in an easy baked dessert.
    • Easy Fall Desserts - More ideas for your fall dessert table.

    Recipe

    Apple crumble without oats with golden crumbs and apple filling on a serving spoon in a glass baking dish.
    Print Pin
    Be the first to rate!

    Easy Apple Crumble Without Oats

    Canned apple pie filling and a homemade brown sugar crumble make an easy warm apple dessert with no oats. Serve with vanilla ice cream if you like.
    Course Dessert
    Cuisine American
    Prep Time 10 minutes minutes
    Cook Time 45 minutes minutes
    Resting Time 20 minutes minutes
    Total Time 1 hour hour 15 minutes minutes
    Servings 8 servings
    Calories 354kcal
    Author Jessica Burgess

    Equipment

    • 1 8×8-inch baking dish at least 2 inches deep
    • 1 rimmed baking sheet
    • 1 medium mixing bowl
    • 1 Fork

    Ingredients

    Apple filling

    • 2 cans apple pie filling 21 ounces each, 42 ounces total
    • 1 tablespoon lemon juice

    Crumble topping

    • 1 ¼ cups all-purpose flour 150 grams, spooned and leveled
    • ½ cup light brown sugar 100 grams, packed
    • 2 tablespoons granulated sugar
    • ½ teaspoon ground cinnamon
    • ¼ teaspoon fine salt
    • 6 tablespoons unsalted butter 85 grams, melted and cooled until warm
    • 1 teaspoon vanilla extract

    Instructions

    • Prepare the oven and dish. Heat the oven to 375°F, with a rack in the center. Lightly grease an 8×8-inch baking dish that is at least 2 inches deep.
    • Add the filling. Stir the apple pie filling and lemon juice together in the dish, then spread into an even layer. Include all the sauce from the cans.
    • Mix the dry topping ingredients. In a medium bowl, combine the flour, brown sugar, granulated sugar, cinnamon, and salt. Break apart any firm lumps of brown sugar.
    • Form the crumble. Stir the vanilla into the melted butter. Pour it over the flour mixture and work it together with a fork until evenly moistened. Squeeze small handfuls together, then break them into a mixture of small crumbs and roughly dime-sized chunks.
    • Cover the apples. Scatter the crumble evenly over the filling. Keep the pieces loose rather than pressing them into a solid layer.
    • Place the dish on a rimmed baking sheet. Bake at 375°F for about 45 minutes, checking at 40 minutes. The topping should be golden brown and the filling should bubble around the edges and through gaps in the topping. If the top browns before the filling bubbles, loosely cover with foil and continue baking.
    • Let it settle. Rest uncovered for 20 minutes before scooping. Serve warm, with vanilla ice cream if desired.

    Notes

    Filling: Use two 21-ounce cans of apple pie filling, including all of the sauce. Plain canned apples or fresh apples are not a straight swap. No extra sugar or thickener is needed in the apple layer.
    Butter: If using salted butter, omit the added salt.
    Baking: Start checking at 40 minutes; my batch took 45 minutes for a golden topping and bubbling edges. Keep the crumbs loose and rest uncovered for 20 minutes before serving.
    Storage: Cover and refrigerate leftovers for 3–4 days. Reheat in a 350°F oven until hot throughout, tenting if needed to prevent overbrowning. The microwave works for individual portions but softens the topping.
    Nutrition: Estimated for ⅛ of the recipe, excluding optional ice cream and butter used to grease the dish. Values vary with the apple pie filling and other brands used.

    Nutrition

    Serving: 1serving | Calories: 354kcal | Carbohydrates: 69g | Protein: 2g | Fat: 9g | Saturated Fat: 5g | Polyunsaturated Fat: 0.4g | Monounsaturated Fat: 2g | Trans Fat: 0.3g | Cholesterol: 23mg | Sodium: 148mg | Potassium: 109mg | Fiber: 2g | Sugar: 36g | Vitamin A: 302IU | Vitamin C: 3mg | Calcium: 23mg | Iron: 1mg

    Easy Weekly Meal Plan #6: Five Dinners and Apple Dapple Cake

    October 11, 2026

    Collage of poppy seed chicken casserole, salisbury steak, fried catfish, and apple dapple cake, labeled Easy Weekly Meal Plan, Week 6.

    This week, we’re making poppy seed chicken casserole, salisbury steak, fried catfish, crock pot pork chops, and mac and cheese with ham for supper. There’s apple dapple cake for dessert, too!

    Five dinners, two open nights, and one night for leftovers. Every dinner has a side to go with it, and the grocery list at the bottom adds everything up for you so you’re not flipping between recipes in the store.

    Click the dinner and side dish names to open the full recipes.

    Jump to the grocery list

    This week’s menu

    NightDinner and sides
    Night 1Poppy Seed Chicken Casserole + Air Fryer Asparagus
    Night 2Easy Salisbury Steak + Slow Cooker Cheesy Hashbrowns
    Night 3Leftovers or eat out
    Night 4Fried Catfish, Black-Eyed Peas + Bisquick Cheddar Biscuits
    Night 5Crock Pot Pork Chops + Candied Yams
    Night 6Mac and Cheese with Ham + a bagged green salad
    Night 7Open night. Use what you have or make a family favorite.

    Dessert: Apple Dapple Cake

    Collage of poppy seed chicken casserole, salisbury steak, fried catfish, and apple dapple cake, labeled Easy Weekly Meal Plan, Week 6.

    Night 1: Poppy seed chicken casserole and air fryer asparagus

    We’re starting the week with a 9×13 of poppy seed chicken casserole. It serves six, which is the whole point of putting it on Night 1. What’s left goes straight into Night 3.

    The casserole calls for 4 cups of cooked chicken. A rotisserie chicken from the deli gets you there in about five minutes of pulling meat off the bone, and that’s what I’d do on a Monday.

    The air fryer asparagus takes seven minutes start to finish, so make it while the casserole rests.

    Allow: about 40 minutes for the casserole and 7 minutes for the asparagus.

    Little tip: crush the Ritz crackers in the sleeve before you open it. Fewer crumbs on the counter.

    Night 2: Salisbury steak and cheesy hashbrowns

    Salisbury steak with mushroom gravy comes together in half an hour on the stovetop. It’s the kind of supper that tastes like it took longer than it did.

    The cheesy hashbrowns are the part that needs planning. They’re five hours in the slow cooker, so get them going in the morning and forget about them.

    The recipe as written feeds fifteen, which is wonderful for a potluck and a lot for a Tuesday. The grocery list below buys for a half batch. If you want the full pan, double what’s listed.

    Allow: 5 hours in the slow cooker for the hashbrowns, 30 minutes for the salisbury steak.

    Make it easier: the gravy uses two packets of brown gravy mix, so there’s no roux to babysit.

    Night 3: Leftovers or eat out

    Let’s see what’s in the fridge! There should be casserole from Night 1 and probably hashbrowns from Night 2. Nothing new to buy.

    Night 4: Fried catfish, black-eyed peas, and cheddar biscuits

    This is the big Southern supper of the week, and it’s the one night that needs a head start.

    The catfish soaks in buttermilk for two hours before it ever hits the oil. The black-eyed peas simmer for about an hour and twenty minutes. Start both in the early afternoon and the actual cooking at suppertime is quick.

    The peas make a full pound, which is more than four people will eat. That’s on purpose. Dried peas come in one pound bags, and they reheat better than almost anything else in this plan.

    The cheddar biscuits bake in twelve minutes while the fish drains.

    Allow: 2 hours for the buttermilk soak, about 1 hour 20 minutes for the peas, and 30 minutes of active cooking at the end.

    Little tip: the catfish breading wants fine-ground cornmeal, not the coarse kind. Coarse cornmeal falls off in the pan.

    Night 5: Crock pot pork chops and candied yams

    Four ingredients go in the crock pot and three hours later you have creamy pork chops. This is the easiest dinner of the week by a wide margin.

    Because the chops are in the slow cooker, the oven is free for candied yams, which bake for an hour.

    One note on the yams: they call for two tablespoons of vanilla. That’s not a typo. It’s what makes them taste like the ones at a church dinner instead of just sweet potatoes with sugar on them.

    Allow: 3 hours in the crock pot, 1 hour in the oven for the yams.

    Make it easier: you only need one slow cooker this week. Night 2 and Night 5 are far enough apart that it washes in between.

    Night 6: Mac and cheese with ham and a green salad

    Mac and cheese with ham is thirty minutes and one pot of pasta. A bagged salad on the side is plenty.

    The recipe wants 1½ cups of diced cooked ham. A ham steak from the meat case is the simplest way to get it without buying a whole ham.

    Allow: 30 minutes.

    Little tip: shred the cheese yourself if you have a minute. Bagged shredded cheese is coated so it doesn’t clump, and that coating is what makes a cheese sauce grainy.

    Night 7: Open night

    Open night. Use what you have or make a family favorite.

    Something sweet: Apple dapple cake

    Apple dapple cake is an old church cookbook cake, and it serves twelve, so it’ll last most of the week.

    It’s a heavy batter packed with chopped Granny Smith apples, and then you pour a warm brown sugar topping over it while it’s still hot so it soaks down into the cake.

    Allow: 30 minutes to prep, 45 minutes to bake, and an hour to cool before you cut it.

    The walnuts are optional. Leave them out if you’ve got picky eaters and nobody will miss them.

    A little preparation before the week starts

    • Pull the chicken off a rotisserie chicken and refrigerate it. Night 1 needs 4 cups.
    • Thaw the catfish in the fridge the day before Night 4. Two pounds takes overnight.
    • Night 2 and Night 4 both need a morning or early afternoon start. Put them on nights you’ll be home.
    • Peel and chop the apples for the cake the night before and toss them with a little lemon juice so they don’t brown.
    • Check that you have enough vanilla. The candied yams alone use two tablespoons.

    Already using my Dinner Theme System? These dinners can fit right into the themes you’ve chosen.

    Grocery list

    Everything below is added up across all five dinners, the sides, and the cake. Where two recipes use the same thing, I’ve combined them so you’re buying the right amount once.

    The note after each item tells you what it’s for, so if you’re skipping a night you know what to leave off the list.

    Produce

    • ☐ 1 bundle asparagus: air fryer asparagus
    • ☐ 1 lemon: air fryer asparagus
    • ☐ 1 head garlic, plus jarred minced: asparagus, black-eyed peas
    • ☐ 8 oz sliced mushrooms: salisbury steak
    • ☐ 1 yellow onion: black-eyed peas
    • ☐ 2 lb sweet potatoes: candied yams
    • ☐ 1 large orange: candied yams, for the zest and juice
    • ☐ 4 medium Granny Smith apples: apple dapple cake, for 3 cups chopped
    • ☐ 1 bag green salad: Night 6

    Meat and fish

    • ☐ 4 cups cooked chicken: poppy seed casserole. One rotisserie chicken covers it.
    • ☐ 1 lb ground beef: salisbury steak
    • ☐ 2 lb catfish fillets: fried catfish
    • ☐ 6 slices bacon: black-eyed peas
    • ☐ 3 to 4 lb boneless pork chops: crock pot pork chops
    • ☐ 1½ cups diced cooked ham: mac and cheese. A ham steak works.

    Bread, dairy, and eggs

    • ☐ 16 oz sour cream: poppy seed casserole, cheesy hashbrowns
    • ☐ 1 lb unsalted butter: uses about 3¼ sticks across the casserole, hashbrowns, biscuits, peas, candied yams, mac and cheese, and the cake
    • ☐ 1 dozen eggs: uses 4, for the salisbury steak and the cake
    • ☐ ½ gallon whole milk: cheddar biscuits, mac and cheese
    • ☐ 1 pint heavy cream: mac and cheese, cake topping
    • ☐ 1 quart buttermilk: fried catfish soak
    • ☐ 18 oz shredded cheddar: about 4½ cups, for the hashbrowns, biscuits, and mac and cheese
    • ☐ ½ cup shredded mozzarella: cheddar biscuits
    • ☐ 1 cup shredded Colby Jack: mac and cheese

    Cans, jars, and frozen

    • ☐ 3 (10.5 oz) cans cream of chicken soup: poppy seed casserole uses 2, pork chops use 1
    • ☐ 1 (10.5 oz) can cream of mushroom soup: pork chops
    • ☐ 1 (10.5 oz) can condensed cheddar cheese soup: cheesy hashbrowns, uses half for a half batch
    • ☐ 1 (26 oz) bag frozen diced hashbrowns: cheesy hashbrowns, half batch
    • ☐ 2 (32 oz) cartons chicken broth: black-eyed peas, needs 6 cups
    • ☐ 1 lb dried black-eyed peas: black-eyed peas
    • ☐ 2 packets brown gravy mix: salisbury steak
    • ☐ 1 large sleeve Ritz crackers: poppy seed casserole topping, about 32 crackers
    • ☐ 1 jar dill pickles: fried catfish needs 2 tablespoons of the juice
    • ☐ 2 cups elbow macaroni: mac and cheese
    • ☐ 1 box Bisquick: cheddar biscuits, needs 2½ cups
    • ☐ 1 oz packet ranch dressing seasoning mix: crock pot pork chops

    Check your pantry: sauces, baking ingredients, and seasonings

    • ☐ All-purpose flour: about 3½ cups
    • ☐ Granulated sugar: about 2½ cups
    • ☐ Brown sugar: about 1⅓ cups
    • ☐ Vegetable oil: 1 cup for the cake, plus enough to fry the catfish
    • ☐ Olive oil and cooking oil
    • ☐ Fine-ground yellow cornmeal: 1½ cups
    • ☐ Bread crumbs: ¼ cup
    • ☐ Mayonnaise and ketchup
    • ☐ Worcestershire sauce: 3 teaspoons
    • ☐ Apple cider vinegar and Dijon mustard
    • ☐ Vanilla extract: about 3 tablespoons total
    • ☐ Baking soda
    • ☐ Poppy seeds: 1 tablespoon
    • ☐ Ground cinnamon, nutmeg, and pumpkin pie spice
    • ☐ Garlic powder, onion powder, Italian seasoning
    • ☐ Old Bay, seasoned salt, smoked paprika, crushed red pepper
    • ☐ Salt, black pepper, garlic salt
    • ☐ Cooking spray
    • ☐ Equipment: air fryer, slow cooker, 9×13 pan, deep skillet or Dutch oven for frying, baking sheet, large pot

    Optional extras

    • ☐ Vanilla ice cream: for the cake
    • ☐ Parmesan cheese: for the asparagus
    • ☐ Fresh parsley: salisbury steak, hashbrowns
    • ☐ Chopped walnuts: ½ cup for the cake

    Want another week of dinner ideas? Browse all of my easy weekly meal plans.

    Easy Weekly Meal Plan #7: Five Dinners and Texas Sheet Cake

    October 16, 2026

    Collage of chicken pot pie, smothered cube steak, slow cooker ham, and Texas sheet cake, labeled Easy Weekly Meal Plan, Week 7.

    This week, we’re making chicken pot pie, smothered cube steak, panko crusted cod, slow cooker ham, and beanie weenies for supper. There’s Texas sheet cake for dessert, too!

    Five dinners, two open nights, and one night for leftovers. Every dinner has a side to go with it, and the grocery list at the bottom adds everything up for you so you’re not flipping between recipes in the store.

    Click the dinner and side dish names to open the full recipes.

    Jump to the grocery list

    This week’s menu

    NightDinner and sides
    Night 1Chicken Pot Pie + a bagged green salad
    Night 2Smothered Cube Steak + Fried Potatoes and Onions
    Night 3Leftovers or eat out
    Night 4Panko Crusted Cod + Macaroni and Tomatoes
    Night 5Slow Cooker Ham + Sweet Potato Crunch
    Night 6Beanie Weenies + Easy Homemade Biscuits
    Night 7Open night. Use what you have or make a family favorite.

    Dessert: Texas Sheet Cake

    Collage of chicken pot pie, smothered cube steak, slow cooker ham, and Texas sheet cake, labeled Easy Weekly Meal Plan, Week 7.

    Night 1: Chicken pot pie and a green salad

    We’re starting with chicken pot pie because it serves six and it reheats beautifully. That’s the whole reason it’s on Night 1. What’s left goes straight into Night 3.

    It calls for 3 cups of cooked chicken and two refrigerated pie crusts, so there’s no dough to make. A rotisserie chicken from the deli covers the filling in about five minutes of pulling meat off the bone.

    A bagged salad is plenty alongside it. The pie has vegetables in it already.

    Allow: 25 minutes to put together and 35 minutes in the oven.

    Little tip: brush the top crust with the egg wash. It’s the difference between a pale crust and a golden one, and it takes ten seconds.

    Night 2: Smothered cube steak and fried potatoes

    Smothered cube steak is onion gravy over tender beef, and it’s one of the cheapest cuts at the meat counter. Forty minutes start to finish.

    Fried potatoes and onions cook in a skillet right alongside it. Two pans, one burner each, done at the same time.

    Allow: 40 minutes for the steak, about 25 for the potatoes.

    Little tip: slice the potatoes a quarter inch thick and no thicker. Thick slices steam instead of browning.

    Night 3: Leftovers or eat out

    Let’s see what’s in the fridge! There should be pot pie from Night 1. Nothing new to buy.

    Night 4: Panko crusted cod and macaroni and tomatoes

    Panko crusted cod is the quickest dinner of the week. Season it, press on the panko, bake it. No frying, no splatter.

    Macaroni and tomatoes is the old-fashioned kind, cooked right in the broth so the noodles soak up the flavor. The recipe serves eight, so the grocery list below buys for a half batch. Make the full pot if you want leftovers, it’s good cold.

    Allow: about 20 minutes for the cod and 25 for the macaroni.

    Make it easier: frozen cod works fine here. Thaw it in the fridge the night before and pat it dry before seasoning.

    Night 5: Slow cooker ham and sweet potato crunch

    Four ingredients go in the crock pot and you end up with glazed ham that tastes like a holiday. Brown sugar, maple syrup, a spiral-cut ham, and a can of pineapple.

    Because the ham is in the slow cooker, the oven is free for sweet potato crunch, which is the pecan-topped casserole you’d see at a church dinner. It serves twelve, so the list buys for a half pan.

    A 3 to 4 pound ham will leave you leftovers. That’s on purpose. Ham sandwiches are a free lunch all week.

    Allow: a few hours in the slow cooker for the ham, about 45 minutes for the sweet potatoes.

    Night 6: Beanie weenies and homemade biscuits

    Beanie weenies is the cheapest supper in this plan and the one the kids will ask for again. It’s three cans of baked beans, a package of hot dogs, and a handful of pantry seasonings.

    Homemade biscuits on the side make it feel like a real supper instead of a shortcut. They take 25 minutes and the recipe makes ten.

    Allow: 30 minutes for the beans, 25 for the biscuits.

    Make it easier: canned biscuits work. Nobody will say a word.

    Night 7: Open night

    Open night. Use what you have or make a family favorite.

    Something sweet: Texas sheet cake

    Texas sheet cake serves fifteen, which means it’ll last most of the week unless your family is quicker than mine.

    It’s a thin chocolate cake baked in a sheet pan, and the warm icing goes on while the cake is still hot so it sets into the top instead of sitting on it.

    Allow: 15 minutes to mix, 20 minutes to bake, and time for the icing to set.

    The walnuts in the icing are optional. Leave them out for picky eaters.

    A little preparation before the week starts

    • Pull the meat off a rotisserie chicken and refrigerate it. Night 1 needs 3 cups.
    • Thaw the cod in the fridge the day before Night 4 and pat it dry before seasoning.
    • Night 5 needs the slow cooker going earlier in the day. Put it on a night you’ll be home.
    • Cook the sweet potatoes ahead if you can. They need to be fork-tender before the casserole goes together.
    • Let the butter for the sheet cake come to room temperature. Cold butter makes a lumpy batter.

    Already using my Dinner Theme System? These dinners can fit right into the themes you’ve chosen.

    Grocery list

    Everything below is added up across all five dinners, the sides, and the cake. Where two recipes use the same thing, I’ve combined them so you’re buying the right amount once.

    The note after each item tells you what it’s for, so if you’re skipping a night you know what to leave off the list.

    Produce

    • ☐ 1 sweet onion: chicken pot pie
    • ☐ 2 large yellow onions: cube steak, fried potatoes
    • ☐ 1 bunch celery: chicken pot pie
    • ☐ 4 red potatoes: fried potatoes and onions
    • ☐ 2 lb sweet potatoes: sweet potato crunch, half pan
    • ☐ 1 lemon: panko crusted cod
    • ☐ 1 head garlic: fried potatoes
    • ☐ Fresh parsley: cod, cube steak garnish
    • ☐ 1 bag green salad: Night 1

    Meat and fish

    • ☐ 3 cups cooked chicken: pot pie. One rotisserie chicken covers it.
    • ☐ 1½ lb cube steak: about 4 pieces
    • ☐ 1 lb cod filets: 4 pieces
    • ☐ 1 (3 to 4 lb) precooked spiral-cut ham: slow cooker ham
    • ☐ 14 oz package all-beef hot dogs: beanie weenies

    Bread, dairy, and eggs

    • ☐ 2 lb butter: uses about 6¼ sticks across the pot pie, cube steak, cod, sweet potatoes, biscuits, and the sheet cake. Most recipes call for unsalted.
    • ☐ 1 dozen eggs: uses 5, for the pot pie wash, sweet potatoes, biscuits, and cake
    • ☐ 1 pint half and half: pot pie, sweet potato crunch
    • ☐ 1 cup buttermilk: biscuits, uses ¾ cup
    • ☐ ½ pint whole milk: sheet cake icing
    • ☐ 8 oz sour cream: sheet cake, uses ½ cup
    • ☐ Grated parmesan: 1 tablespoon for the cod
    • ☐ Stick of margarine: biscuits, 2½ tablespoons. Butter works if you’d rather.

    Cans, jars, and frozen

    • ☐ 1 (32 oz) carton chicken broth: pot pie, macaroni and tomatoes
    • ☐ 1 (32 oz) carton low-sodium beef broth: cube steak
    • ☐ 2 refrigerated pie crusts: one 14.1 oz box
    • ☐ 1 cup frozen peas and carrots: pot pie
    • ☐ 1 (14.5 oz) can petite diced tomatoes: macaroni and tomatoes, half batch
    • ☐ 1½ cups elbow macaroni: half batch
    • ☐ 1 (20 oz) can pineapple chunks in juice: slow cooker ham, do not drain
    • ☐ 3 (16 oz) cans original baked beans: beanie weenies
    • ☐ ⅓ cup plain panko crumbs: cod
    • ☐ ½ cup chopped pecans: sweet potato crunch topping
    • ☐ 1 cup chopped walnuts: sheet cake icing, optional
    • ☐ ⅓ cup pure maple syrup: slow cooker ham

    Check your pantry: sauces, baking ingredients, and seasonings

    • ☐ All-purpose flour: about 5 cups
    • ☐ Granulated sugar: 2 cups
    • ☐ Brown sugar: about ¾ cup, plus 1½ cups dark brown for the ham
    • ☐ Powdered sugar: 4 cups for the icing
    • ☐ Cocoa powder: about ⅔ cup
    • ☐ Cooking oil: about 5 tablespoons
    • ☐ Honey: 1 tablespoon
    • ☐ Worcestershire sauce and Dijon mustard
    • ☐ Apple cider vinegar: 1 teaspoon
    • ☐ Vanilla extract: about 4 teaspoons
    • ☐ Baking powder and baking soda
    • ☐ Mrs. Dash Table Blend: 2 teaspoons for the cod
    • ☐ Dried thyme, dried basil, dried parsley
    • ☐ Cinnamon and nutmeg
    • ☐ Garlic powder, onion powder, chili powder, smoked paprika, cayenne, crushed red pepper
    • ☐ Salt, kosher salt, black pepper
    • ☐ Cooking spray
    • ☐ Equipment: slow cooker, deep skillet, sheet pan, 9×13 pan, pie dish, baking sheet

    Optional extras

    • ☐ Vanilla ice cream: for the sheet cake
    • ☐ Green onions: for the fried potatoes
    • ☐ Extra lemon: for the cod

    Want a month at a time?

    These come one week at a time, and they always will. If you’d rather have four weeks in hand, I put them in a printable PDF with the grocery lists already made.

    Get a Month of Dinners

    Want another week of dinner ideas? Browse all of my easy weekly meal plans.

    Easy Weekly Meal Plan #8: Five Dinners and Milky Way Cake

    October 22, 2026

    Collage of chicken and rice casserole, crock pot turkey breast, school pizza, and Milky Way cake, labeled Easy Weekly Meal Plan, Week 8.

    This week, we’re making chicken and rice casserole, crock pot turkey breast, chili mac, school pizza, and lemon pepper salmon for supper. There’s Milky Way cake for dessert, too!

    Five dinners, two open nights, and one night for leftovers. Every dinner has a side to go with it, and the grocery list at the bottom adds everything up for you so you’re not flipping between recipes in the store.

    Two notes on this week. Night 2 is a small Thanksgiving, on purpose, so you can practice the turkey before the day that counts. And Night 4 lands on Halloween, so it’s chili mac and a cake made with candy bars.

    Click the dinner and side dish names to open the full recipes.

    Jump to the grocery list

    This week’s menu

    NightDinner and sides
    Night 1Old-Fashioned Chicken and Rice Casserole + green beans
    Night 2Crock Pot Turkey Breast, Cornbread Dressing + Green Bean Casserole
    Night 3Leftovers or eat out
    Night 4Chili Mac + cornbread
    Night 5School Pizza + a bagged green salad
    Night 6Lemon Pepper Salmon + Air Fryer Butternut Squash
    Night 7Open night. Use what you have or make a family favorite.

    Dessert: Milky Way Cake

    Collage of chicken and rice casserole, crock pot turkey breast, school pizza, and Milky Way cake, labeled Easy Weekly Meal Plan, Week 8.

    Night 1: Chicken and rice casserole and green beans

    Old-fashioned chicken and rice casserole is five minutes of work and then the oven does the rest. Everything goes in raw, rice included, and comes out an hour and twenty minutes later.

    It serves six, which is why it’s on Night 1. Night 3 is covered.

    A can of green beans alongside is plenty. Save your effort for Night 2.

    Allow: 5 minutes to assemble, 1 hour 20 minutes in the oven.

    Little tip: chicken thighs stay juicier than breasts through a long bake, and that’s what the recipe calls for. Don’t swap them.

    Night 2: Turkey breast, cornbread dressing, and green bean casserole

    This is Thanksgiving dinner on a weeknight, four weeks early, and that’s the point.

    If the big meal makes you nervous, this is your practice run. Crock pot turkey breast cooks with potatoes and carrots right in the pot, so the slow cooker handles the part people worry about most. You find out now whether your turkey comes out dry, not on the day everyone’s watching.

    Cornbread dressing and green bean casserole both bake around 350, so they share the oven while the turkey finishes.

    The dressing needs four cups of crumbled cornbread. One sheet of Jiffy makes three cups, so bake it the day before or make a batch and a half.

    Allow: 4 hours in the slow cooker plus 15 minutes to rest, and about 35 minutes for each casserole.

    Little tip: write down what you’d change. That’s the whole value of a practice run.

    Night 3: Leftovers or eat out

    Let’s see what’s in the fridge! There should be casserole from Night 1 and turkey from Night 2. Nothing new to buy.

    Night 4: Chili mac on Halloween

    Chili mac is the right supper for a night you’re answering the door every four minutes. It’s one pot, thirty minutes, and it serves eight, so it holds on the stove while kids come and go.

    Cornbread on the side if you have time. Nobody will mind if you don’t.

    Allow: 30 minutes.

    Make it easier: feed the kids early, before the costumes go on. Then the pot just stays warm for whoever wanders back through.

    Night 5: School pizza and a green salad

    School pizza is the rectangular cafeteria pizza, the one with the slightly sweet sauce and the cornmeal on the bottom. If you went to school in America, you know exactly what this tastes like.

    It’s baked on a sheet pan and cut into squares, and it serves twelve. Leftover squares reheat well in the oven.

    Allow: 10 minutes to put together, 25 minutes to bake.

    Little tip: the cornmeal under the dough is what makes it taste right. Don’t skip it.

    Night 6: Lemon pepper salmon and butternut squash

    After a week of casseroles and pizza, lemon pepper salmon is a lighter night. Twenty minutes, five ingredients you already have.

    Air fryer butternut squash with cinnamon goes in while the salmon cooks.

    Allow: 20 minutes for the salmon, 25 for the squash.

    Make it easier: buy the squash already peeled and cubed. It’s worth the extra dollar.

    Night 7: Open night

    Open night. Use what you have or make a family favorite.

    Something sweet: Milky Way cake

    Milky Way cake melts eight fun-size candy bars right into the batter, which makes it the obvious cake for the week the candy shows up in the house.

    It serves twelve and the frosting is a chocolate and marshmallow cream mixture that sets up soft.

    Allow: 20 minutes to prep, 35 minutes to bake, plus cooling before you frost it.

    The pecans are optional, and so is the caramel drizzle on top.

    A little preparation before the week starts

    • Bake the cornbread for the dressing a day ahead. You need 4 cups crumbled, and one sheet of Jiffy makes about 3.
    • Thaw the turkey breast in the fridge. Three pounds takes a couple of days.
    • Night 2 needs the slow cooker going by early afternoon. Put it on a night you’ll be home.
    • Night 1 is 1 hour 20 minutes in the oven, so start it earlier than feels necessary.
    • Pick up the candy bars for the cake before the Halloween shelves empty out.

    Already using my Dinner Theme System? These dinners can fit right into the themes you’ve chosen.

    Grocery list

    Everything below is added up across all five dinners, the sides, and the cake. Where two recipes use the same thing, I’ve combined them so you’re buying the right amount once.

    The note after each item tells you what it’s for, so if you’re skipping a night you know what to leave off the list.

    Produce

    • ☐ 1½ lb yellow baby potatoes: turkey breast
    • ☐ 2 medium carrots: turkey breast
    • ☐ 1 bunch celery: turkey breast, cornbread dressing
    • ☐ 1 small yellow onion: turkey breast
    • ☐ 1 small sweet onion: cornbread dressing
    • ☐ 1 red onion: chili mac
    • ☐ 1 green bell pepper: chili mac
    • ☐ 1 head garlic: turkey breast, dressing
    • ☐ 1 lemon: salmon, for zest and juice
    • ☐ 3 cups cubed butternut squash: buy it pre-cut if you can
    • ☐ Fresh rosemary and thyme: 2 sprigs each, for the turkey
    • ☐ Fresh parsley: dressing, salmon garnish
    • ☐ Green onions: chili mac
    • ☐ 1 bag green salad: Night 5

    Meat and fish

    • ☐ 1½ lb boneless skinless chicken thighs: Night 1 casserole
    • ☐ 3 lb boneless skinless turkey breast: Night 2
    • ☐ 1 lb ground beef: chili mac
    • ☐ 1 lb Italian sausage: school pizza
    • ☐ 4 salmon filets: 4 to 5 oz each, skin-on
    • ☐ 4 slices bacon: green bean casserole

    Bread, dairy, and eggs

    • ☐ 1 lb unsalted butter: uses 2½ sticks, all for the Milky Way cake
    • ☐ 1 dozen eggs: uses 5, for the dressing and the cake
    • ☐ ½ gallon milk: green bean casserole, cake
    • ☐ ½ cup shredded parmesan: Night 1 casserole
    • ☐ 2½ cups shredded mozzarella: school pizza
    • ☐ 16 oz shredded cheddar: about 3½ cups, for the chili mac, green bean casserole, and pizza
    • ☐ 1 can refrigerated pizza dough: 13.8 oz

    Cans, jars, and frozen

    • ☐ 1 can cream of mushroom soup: Night 1 casserole
    • ☐ 1 (10.5 oz) can cream of mushroom soup: green bean casserole
    • ☐ 1 can cream of chicken soup: Night 1 casserole
    • ☐ 2 (32 oz) cartons chicken broth: Night 1, turkey, dressing
    • ☐ 2 cups vegetable broth: chili mac
    • ☐ 1 (15 oz) can kidney beans: chili mac
    • ☐ 28 oz diced tomatoes: chili mac
    • ☐ 6 oz tomato paste: school pizza sauce
    • ☐ 2 (14.5 oz) cans french style green beans: green bean casserole
    • ☐ 1 can green beans: Night 1 side
    • ☐ 1½ cups french fried onions: green bean casserole
    • ☐ 4½ cups elbow macaroni: chili mac
    • ☐ 1¼ cups white rice: Night 1 casserole, raw
    • ☐ 1 box Jiffy corn muffin mix: or two, you need 4 cups crumbled cornbread
    • ☐ 8 fun-size Milky Way bars: plus extra for the top if you like
    • ☐ 6 oz semi-sweet chocolate chips: cake frosting
    • ☐ 1 (14 oz) can sweetened condensed milk: cake frosting
    • ☐ 1 cup marshmallow cream: cake frosting
    • ☐ 1 cup chopped pecans: cake, optional

    Check your pantry: sauces, baking ingredients, and seasonings

    • ☐ All-purpose flour: 2½ cups for the cake
    • ☐ Granulated sugar: 2 cups, plus ½ tablespoon for the pizza sauce
    • ☐ Powdered sugar: 2½ cups for the frosting
    • ☐ Cornmeal: ¼ cup for the pizza crust
    • ☐ Cornstarch: 2 tablespoons, for the turkey gravy
    • ☐ Olive oil: about 7 tablespoons
    • ☐ Cooking oil: 1 tablespoon
    • ☐ Vanilla extract: 2 teaspoons
    • ☐ Baking soda
    • ☐ Rubbed sage: 1 tablespoon for the dressing
    • ☐ Cinnamon: 1 teaspoon for the squash
    • ☐ Chili powder and cumin
    • ☐ Dried oregano, basil, rosemary, Italian seasoning
    • ☐ Garlic powder, onion powder, smoked paprika
    • ☐ Sea salt, kosher salt, black pepper
    • ☐ Caramel ice cream topping: optional, for the cake
    • ☐ Cooking spray
    • ☐ Equipment: slow cooker, air fryer, sheet pan, 9×13 pan, large pot, baking dish

    Optional extras

    • ☐ Vanilla ice cream: for the cake
    • ☐ Extra Milky Way bars: chopped, for the top
    • ☐ Lemon slices: for the salmon
    • ☐ Cornbread: for Night 4

    Want a month at a time?

    These come one week at a time, and they always will. If you’d rather have four weeks in hand, I put them in a printable PDF with the grocery lists already made.

    Get a Month of Dinners

    Want another week of dinner ideas? Browse all of my easy weekly meal plans.

    Grandma Ann’s Chocolate Chip Cookies

    October 12, 2026

    Grandma Ann’s chocolate chip cookies piled on a white plate with a gold floral pattern.

    Grandma Ann's Chocolate Chip Cookies are soft and fluffy inside with crisp, golden edges and plenty of chocolate chips. Made with margarine (yes, we like it better than butter in these) and a little baking powder alongside the baking soda, this is by far my favorite chocolate chip cookie recipe, ever.

    “Grandma Ann” isn’t my grandma at all actually. She is my brother-in-law's mom, and she was so kind to share it with me and since it means so much to me, it deserves a place here on the blog, with ALL the credit to her.

    If you enjoy trying different styles of chocolate chip cookies, my big fat chewy chocolate chip cookies are another option when you're in the mood for a larger cookie.

    A plate of golden chocolate chip cookies with more cookies cooling on a wire rack behind it.

    The Little Details in Grandma Ann's Recipe

    She uses margarine instead of butter and adds ¼ teaspoon of baking powder along with the baking soda. Once the wet ingredients are beaten together, the dry ingredients get stirred in by hand.

    The other detail to watch is how they look coming out of the oven. The edges should be golden brown, while the tops still look light and puffy – not wet, or they’ll be underbaked. You don't need to wait for the entire cookie to turn golden. That’s what creates that soft fluffy center and crisp edge.

    FAQs

    How do I know when the cookies are done?

    Start checking at 9 minutes. Look for golden-brown edges and light, puffy tops. Grandma Ann's baking time is 9-12 minutes, but the size of your scoops can affect the timing.

    Can I use a hand mixer or stand mixer?

    You can but only use a mixer to beat the margarine, sugars, and vanilla until creamy, then beat in the eggs. Switch to a spoon or sturdy spatula when adding the dry ingredients. Stir just until the flour is incorporated, then stir in the chocolate chips.

    How should I store these cookies?

    Let the cookies cool completely, then keep them in an airtight container at room temperature. For longer storage, place the cooled cookies in a freezer-safe container or bag, separating layers with parchment paper. Thaw at room temperature before serving.

    Ingredients

    See the recipe card below for the printable ingredient list and instructions.

    Labeled ingredients for Grandma Ann’s chocolate chip cookies: flour, margarine, brown sugar, granulated sugar, eggs, vanilla, chocolate chips, salt, baking soda, and baking powder.
    • 2¼ cups all-purpose flour
    • 1 teaspoon baking soda
    • ¼ teaspoon baking powder - This is in addition to the baking soda.
    • 1 teaspoon salt
    • 1 cup margarine, softened - Grandma Ann uses margarine in this recipe.
    • ¾ cup granulated sugar
    • ¾ cup firmly packed brown sugar - Pack it into the measuring cup before adding it.
    • 1 teaspoon vanilla extract
    • 2 eggs
    • 1 cup milk chocolate chips – More if you prefer but we prefer more cookie than chips

    Instructions

    • Preheat the oven to 375°F. Have your ungreased cookie sheets ready.
    • Combine the dry ingredients. In a small bowl, stir together the flour, baking soda, baking powder, and salt.
    • Beat the wet ingredients. In a large bowl, beat the softened margarine, granulated sugar, brown sugar, and vanilla until creamy.
    Flour mixture in a white bowl beside margarine, brown sugar, granulated sugar, and vanilla in a glass mixing bowl.
    • Add the eggs. Beat the eggs into the creamed mixture.
    • Stir in the flour mixture. Put the mixer aside. Gradually add the dry ingredients to the wet ingredients, stirring by hand until the flour is incorporated.
    Eggs added to the creamed mixture, followed by the flour mixture in a glass mixing bowl.
    • Add the chocolate chips. Stir until they're distributed throughout the dough.
    • Scoop the dough. Drop evenly sized scoops onto the ungreased cookie sheets, leaving about 2 inches between them.
    Chocolate chip cookie dough in a mixing bowl beside scoops of dough on an ungreased baking sheet.
    • Bake for 9-12 minutes. Look for golden-brown edges with tops that still look light and puffy.
    • Let the cookies cool. Leave them on the baking sheet until they're firm enough to lift, then transfer them to a wire rack.
    Golden chocolate chip cookies on a baking sheet and on a wire cooling rack.

    Tips

    • Pay attention to the edges. They're your cue to check for doneness while the tops are still light.
    • Keep the scoops consistent. Cookies of similar size will bake more evenly on the same pan.
    • Stir gently once the flour goes in. Stop when you no longer see dry flour, then stir in the chocolate chips.
    • Let the cookie sheets cool between batches. Scoop the next round of dough onto a cool sheet so it doesn't begin spreading on a hot pan.
    A chocolate chip cookie in front of a plate piled with more cookies.

    More Recipes

    For another batch of cookies or a different way to enjoy chocolate chips, try these:

    • Peanut Butter Chocolate Chip Cookies
    • Chocolate Chip Sugar Cookies
    • Monster Cookies
    • Chocolate Chip Cookie Pie

    Recipe

    Grandma Ann's chocolate chip cookies piled on a white plate with a gold floral pattern.
    Print Pin
    Be the first to rate!

    Grandma Ann's Chocolate Chip Cookies

    Soft, fluffy chocolate chip cookies with crisp, golden edges. Grandma Ann's family recipe uses margarine and a little baking powder, with the dry ingredients stirred in by hand.
    Course Dessert
    Cuisine American
    Prep Time 15 minutes minutes
    Cook Time 11 minutes minutes
    Total Time 26 minutes minutes
    Servings 30 cookies
    Calories 163kcal
    Author Jessica Burgess

    Equipment

    • mixing bowls
    • electric mixer
    • Spoon or spatula
    • Cookie Scoop
    • Cookie sheets
    • Wire cooling rack

    Ingredients

    • 2 ¼ cups all-purpose flour
    • 1 teaspoon baking soda
    • ¼ teaspoon baking powder
    • 1 teaspoon salt
    • 1 cup margarine softened
    • ¾ cup granulated sugar
    • ¾ cup brown sugar firmly packed
    • 1 teaspoon vanilla extract
    • 2 eggs
    • 1 cup milk chocolate chips

    Instructions

    • Preheat the oven to 375°F. Have ungreased cookie sheets ready.
    • In a small bowl, combine the flour, baking soda, baking powder, and salt.
    • In a large bowl, beat the softened margarine, granulated sugar, brown sugar, and vanilla until creamy. Beat in the eggs.
    • Using a spoon or spatula, gradually stir the dry ingredients into the wet ingredients just until incorporated. Stir in the chocolate chips.
    • Scoop evenly sized portions of dough onto the ungreased cookie sheets, leaving about 2 inches between them.
    • Bake for 9-12 minutes, or until the edges look golden brown and the tops look light and puffy. Start checking at 9 minutes; the baking time will depend on the size of your scoops.
    • Let the cookies rest on the cookie sheet until firm enough to lift, then transfer them to a wire rack to cool.

    Notes

    Bake each tray for 9-12 minutes, watching for golden brown edges and light, puffy tops. Cookie size affects baking time and yield. Stir the flour mixture into the wet ingredients by hand. Allow the cookie sheets to cool before adding more dough. Cool the cookies completely before storing in an airtight container.

    Nutrition

    Serving: 1cookie | Calories: 163kcal | Carbohydrates: 22g | Protein: 1g | Fat: 8g | Saturated Fat: 2g | Polyunsaturated Fat: 2g | Monounsaturated Fat: 3g | Trans Fat: 0.001g | Cholesterol: 11mg | Sodium: 195mg | Potassium: 42mg | Fiber: 0.3g | Sugar: 14g | Vitamin A: 287IU | Vitamin C: 0.02mg | Calcium: 16mg | Iron: 1mg
    • « Go to Previous Page
    • Page 1
    • Interim pages omitted …
    • Page 24
    • Page 25
    • Page 26
    • Page 27
    • Go to Next Page »

    Primary Sidebar

    Jessica Burgess standing in kitchen holding a hummingbird cake.

    Hi, I'm Jessica! - Owner and Creator of the blog and brand, Fantabulosity.

    I’m here to help you make easy comfort food and nostalgic recipes, using simple ingredients, that everyone will love.

    More about me →

    Recipe Collections

    • Crockpot recipe collage
      26 Easy Crockpot Dinners (Slow Cooker Recipes for Busy Weeknights)
    • Church supper recipes collage.
      Church Supper Recipes
    • Fall Dessert Recipes collage, showing pumpkin, apple and pecan desserts.
      Easy Fall Desserts (34 Cozy Recipes for the Whole Season)
    • Collage of Thanksgiving side dishes.
      40+ Thanksgiving Side Dishes (Easy Recipes for a Crowd)
    • Old fashioned potluck cake recipes collage.
      Old-Fashioned Cakes That Still Show Up at Every Potluck
    • Collage of potluck desserts.
      Easy Potluck Desserts (Simple Recipes That Always Get Asked For)

    Popular Recipes

    • bread pudding in baking dish
      Bread Pudding Recipe: Easy Old Fashioned Recipe (With Video!)
    • Burger baked in the oven, steamed in aluminum foil, and placed on white plate.
      Burgers in the Oven
    • two tuna salad sandwiches stacked on top of each other
      The BEST Tuna Salad Recipe
    • doritos chicken casserole on plate
      Doritos Chicken Casserole
    • Strawberry brownies on white marble cutting board.
      Strawberry Brownies Recipe
    • Cheeseburger Sliders made with Hawaiian Rolls, stacked on top of one another.
      Cheeseburger Sliders

    Footer

    ↑ back to top

    Featured in Parade, TODAY, House Beautiful, First for Women, The Pioneer Woman, BuzzFeed, Martha.com, Country Living, Woman’s World, and Access Hollywood.

    About

    • About Jessica
    • Contact
    • Collaborate
    • A Month of Dinners

    Easy Recipes

    • All Recipes
    • Vintage Recipes
    • Dinner Recipes
    • Desserts

    Popular Recipes

    • Cake Recipes
    • Bread Pudding
    • Chicken Spaghetti
    • 3-Ingredient Biscuits

    Privacy Policy |Accessibility Copyright © 2026 Fantabulosity | Terms & Conditions | FTC
    All recipes, photos, and content are copyrighted and may not be reproduced, republished, or distributed without written permission.

    Rate This Recipe

    Your vote:


    A rating is required
    A name is required
    An email is required