• Skip to primary navigation
  • Skip to main content
  • Skip to primary sidebar

Fantabulosity logo

  • All Recipes
  • Vintage Recipes
  • Holiday
  • Dinner Theme System
  • About
  • Navigation Menu: Social Icons

    • Facebook
    • Instagram
    • Pinterest
    • TikTok
    • YouTube
menu icon
go to homepage
  • Recipes
  • Desserts
  • Dinners
  • Gatherings
  • Holidays
  • About Jessica
    • Facebook
    • Instagram
    • Pinterest
    • TikTok
    • YouTube
  • search icon
    Homepage link
    • Recipes
    • Desserts
    • Dinners
    • Gatherings
    • Holidays
    • About Jessica
    • Facebook
    • Instagram
    • Pinterest
    • TikTok
    • YouTube
  • ×
    Home » Recipes

    Nautical Party Ideas (Birthday Theme, Food & Decorations)

    Nautical Party Ideas (Birthday Theme, Food & Decorations)

    February 15, 2019

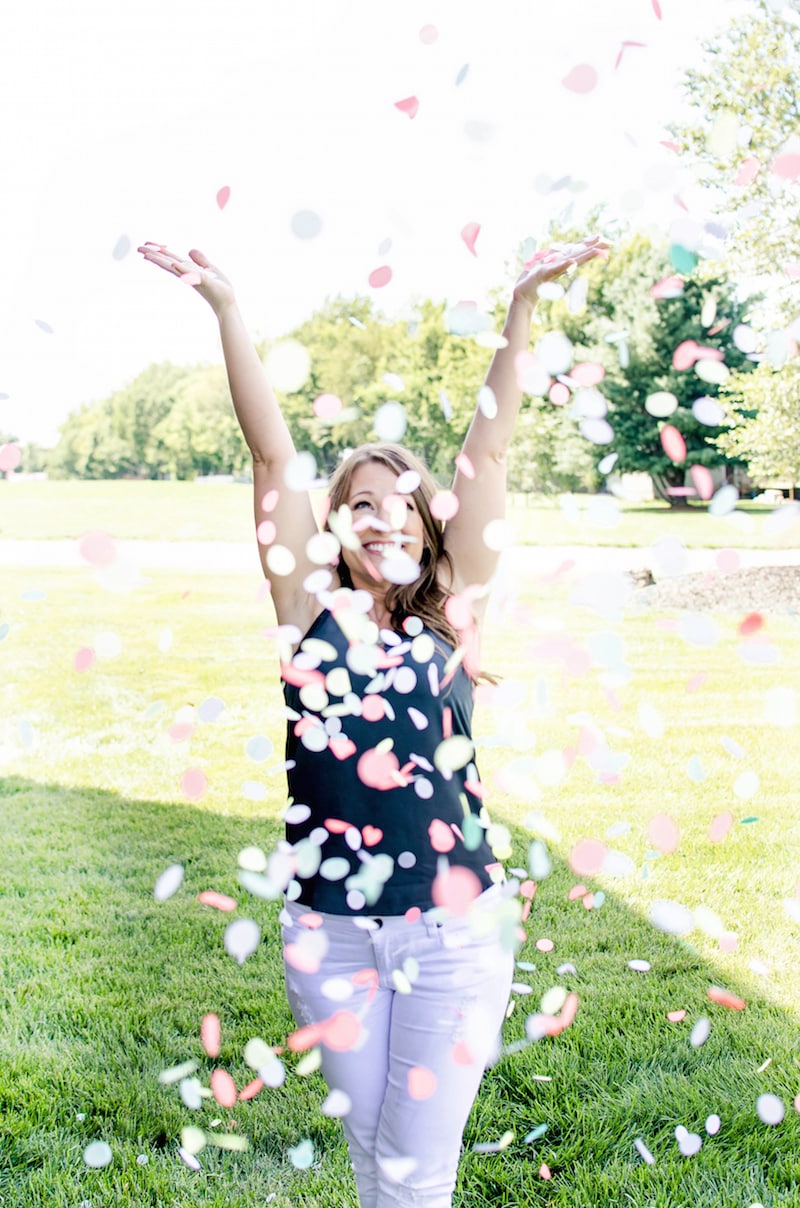
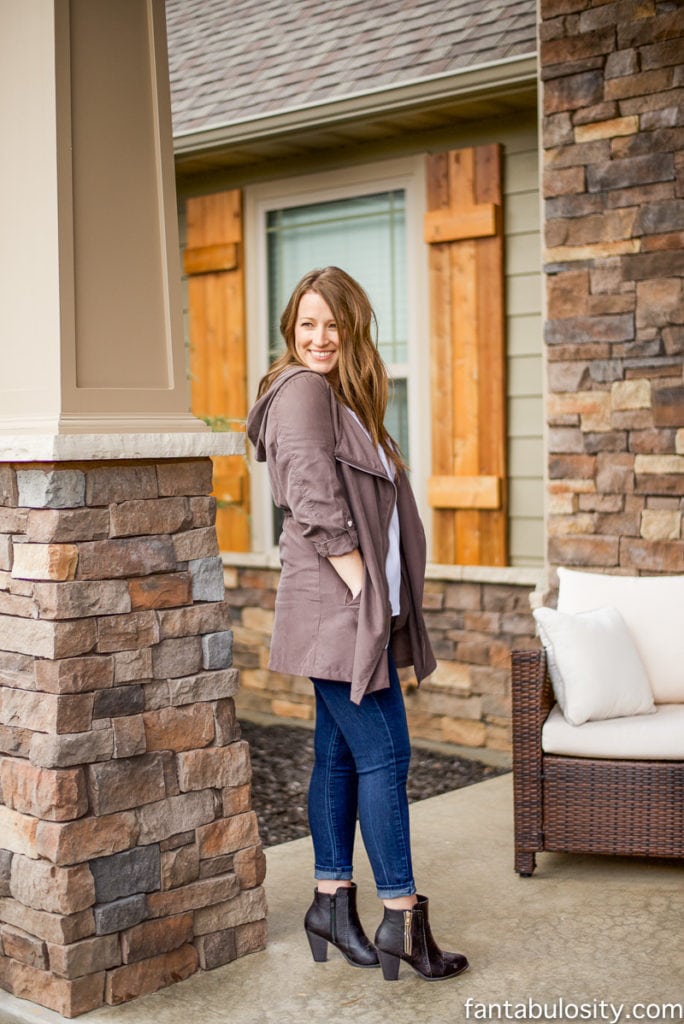
    If you're looking for nautical party ideas that are easy to pull together but still feel special, this theme is one of the most versatile options for birthdays, baby showers, or summer gatherings.

    Nautical Birthday Party Ideas, Boy or Girl! Navy Blue and White Dessert table! https://fantabulosity.com

    Nautical Party Ideas (Simple + Easy to Recreate)

    If you're planning a nautical-themed party, the key is keeping things simple, fun, and easy to pull together. Whether it's for a birthday, baby shower, or summer gathering, these ideas will help you create a cohesive look without overcomplicating things.

    Last year, we hosted a Crawfish Boil party for his 3rd birthday, and this year… we finally decided on a theme about 3 weeks before the big day. My little guy went back and forth:

    A “Dino-Thomas,” birthday party!

    A “Superhero,” birthday!

    I know! A Lego birthday party!

    …there were a few more ideas in there, like a fireman birthday party, but he just couldn’t make up his mind.

    (So I took matters in to my own hands.)

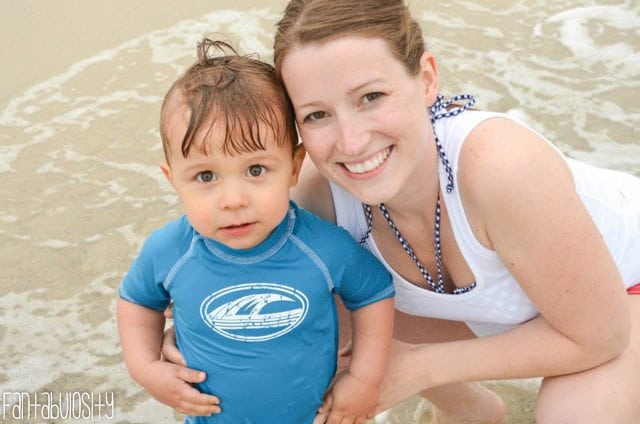
    I knew he loved water, and with his birthday being in Summer, I knew “water,” was going to the theme. So a nautical birthday party it was! Update: 3 years later, this is STILL his favorite birthday party theme!

    Nautical Birthday Party Ideas

    It started out with designing a nautical invitation. (See how to create your own birthday party invites in Canva!) I created it, based on the “vision,” I had in my head of what I wanted the party to look like. (P.S. I blurred the bottom in this photo for privacy. )

    Nautical Birthday Party Invitation! https://fantabulosity.com

    Nautical Birthday Party Invitations

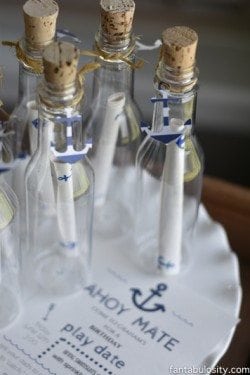
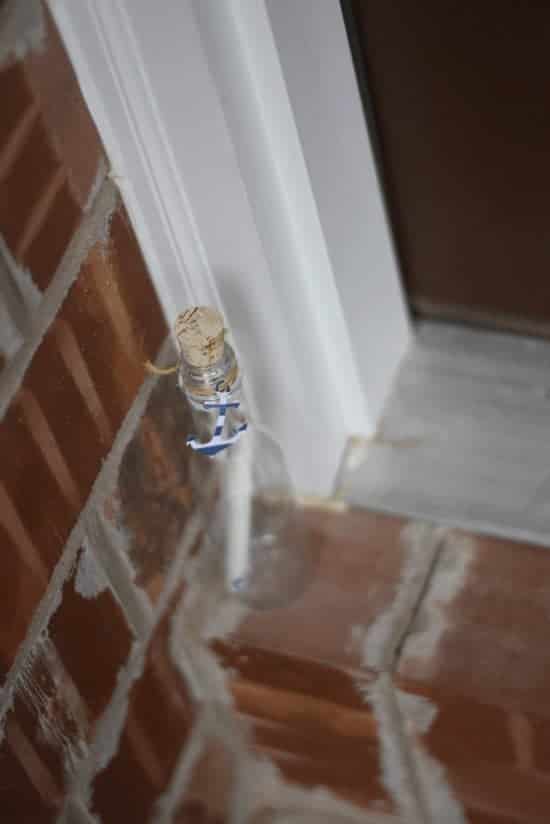
    I printed the invites, rolled them up tight, taped them with nautical-anchor washi tape, and stuffed them in to little plastic bottles, for a message in a bottle invitation! I cut out little anchors with my silhouette machine, and tied them around the bottles with twine.

    Nautical Birthday Party Invitation, Message in a bottle! So cute! https://fantabulosity.com
    Nautical Birthday Party Invitation, Message in a bottle! So cute! https://fantabulosity.com


    Delivering the Invites

    Here’s the fun part! (Note: I’ll say that about 10 times I’m sure.)  Since we kept it a small play date, we didn’t have to send out a TON of invitations. So to add to the fun, and anticipation of the party, we hand delivered the message in a bottle invitations to his little friends!

    Nautical Birthday Party Ideas, Boy or Girl! fantabulosity.com-2

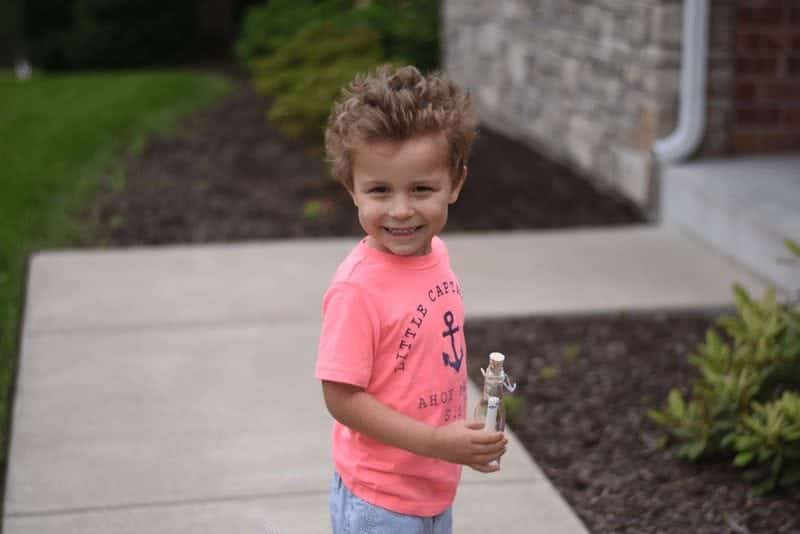
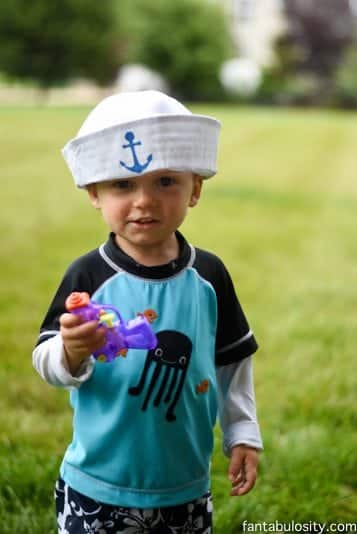
    I promise I didn’t purposely put this anchor shirt on him to deliver the invites. But that worked out nice… 😉

    So we didn’t bother the families on a Sunday afternoon, we just quietly placed the bottles on their porch steps, and I texted their mommies that they had a surprise waiting for them.

    Nautical Birthday Party Invitation, Message in a bottle! So cute! https://fantabulosity.com

    Party Time!

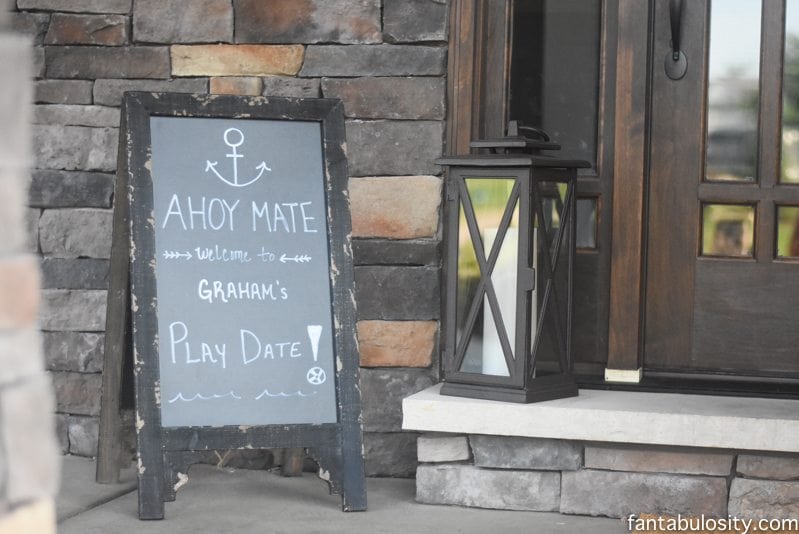
    “Welcome to my Play Date”

    If I’m able, I always like to make some sort of welcome sign, to let our guests know what door to come in. I tied the design of the invitations in our little welcome sign, to keep the theme rollin’. 😉

    AHOY MATE! Welcome to my play date! https://fantabulosity.com

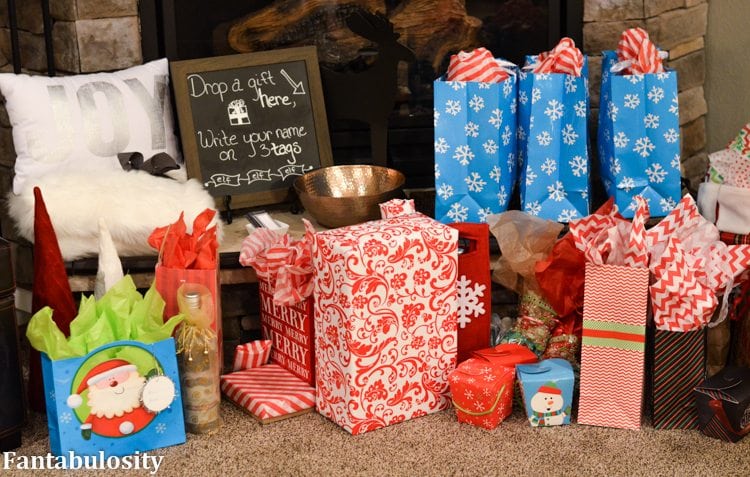
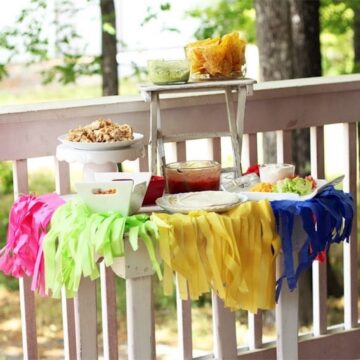
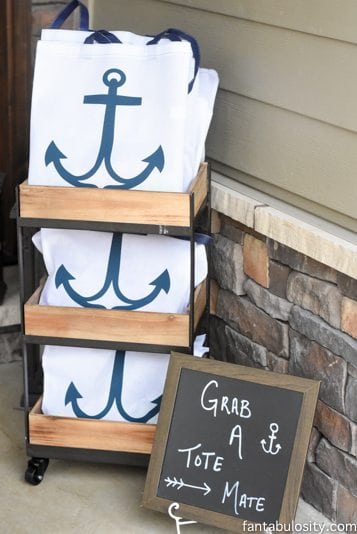
    Nautical Party Favors

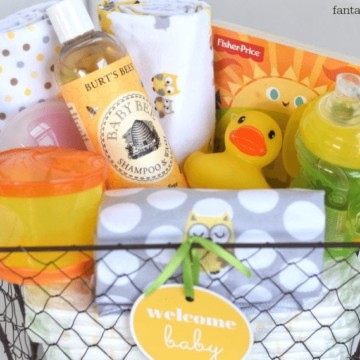
    On the other side of the door, I put out little nautical beach bag favors, for the little guys and gals to grab on their way in.
    The bags were full of bubbles, sunglasses, water balloons, tattoos, a little wooden fish the kids could paint, and more! 

    DIY Tutorial: I purchased mine, but I don’t believe they’re available any more.
    You could easily get plain small canvas bags, and iron on an anchor with a cutout of heat transfer material from your Silhouette machine, or just cut out an anchor, and stencil paint it on each bag. 🙂

    Nautical Birthday Party Ideas! Favor Ideas! Beach bag full of summer fun items! https://fantabulosity.com-51

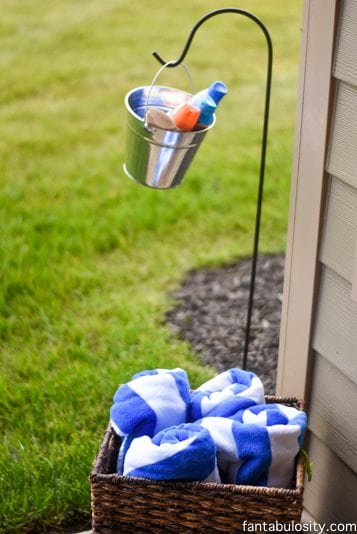
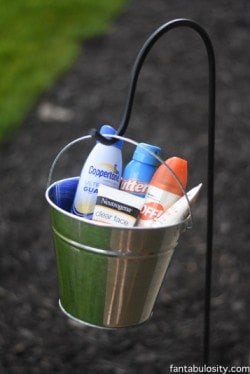
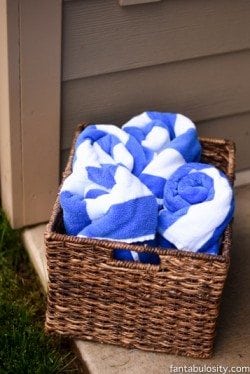
    Pre & Post Play, Station

    The last thing that you want your guests to do is worry about sunburns and bugs, at your outdoor party. To help the situation out a bit, I always try to provide the sunscreen and bug spray right at their fingertips to avoid any unnecessary troubles. I also wanted to have some towels handy, for the little guys playing in the water. Running in and out of the house, wet from the water games outside, can get cold in that air conditioning! 😉

    Love this Pre-play & Post-play station! Sunblock, bug spray for when you're headed out to play in the water at the birthday party, and towels for when you're done! Brilliant! https://fantabulosity.com

    Love this Pre-play & Post-play station! Sunblock, bug spray for when you're headed out to play in the water at the birthday party, and towels for when you're done! Brilliant! https://fantabulosity.com
    Love this Pre-play & Post-play station! Sunblock, bug spray for when you're headed out to play in the water at the birthday party, and towels for when you're done! Brilliant! https://fantabulosity.com


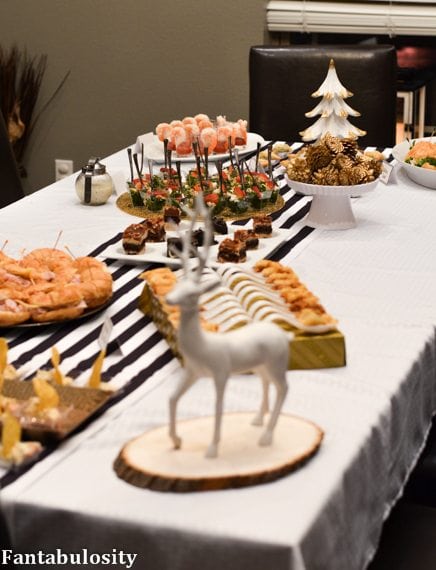
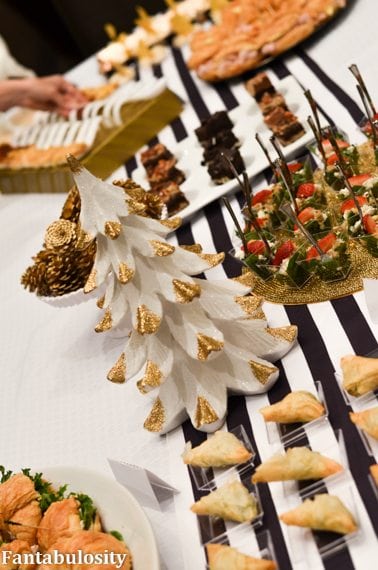
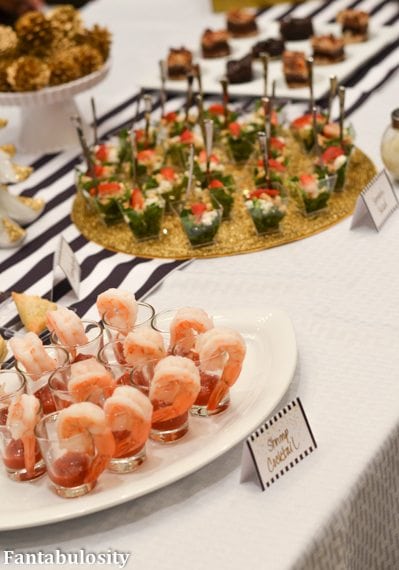
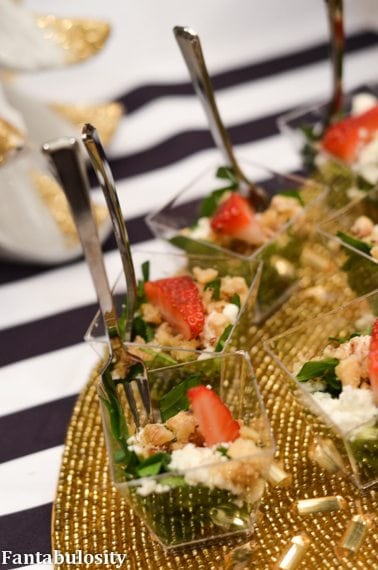
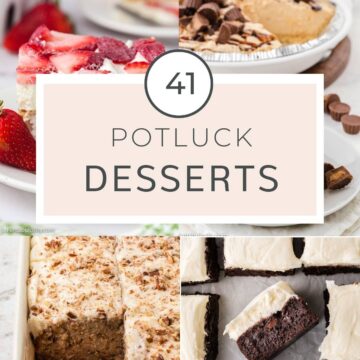
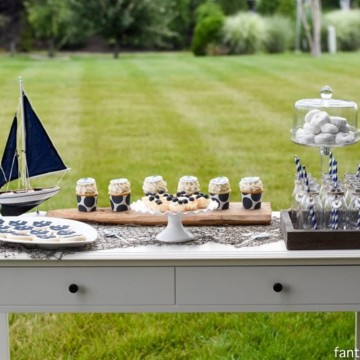
    Nautical Dessert Table – Sweets & Treats

    Nautical Birthday Party Ideas, Boy or Girl! Navy Blue and White Dessert table! https://fantabulosity.com-35


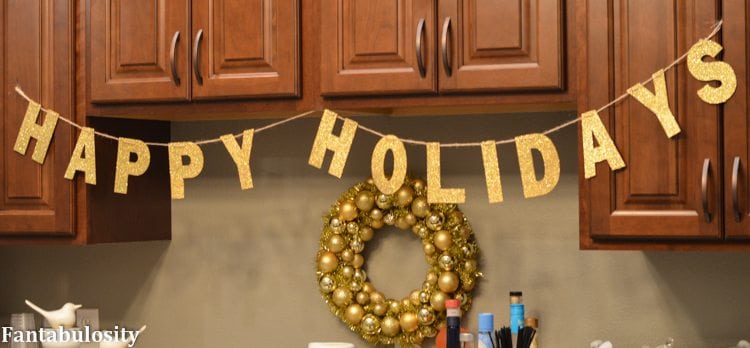
    Navy and White Party Decor

    I know I say it every time, but this is seriously my favorite party theme yet. I’ve always had a crush on a navy and white color scheme, so it was a no-brainer when the party planning went in to works.

    Nautical Birthday Party Ideas, Boy or Girl! Navy Blue and White Dessert table! https://fantabulosity.com

    Food and Treats Tip:

    After upteen parties that I have hosted, I’ve learned a valuable lesson. DON’T over do it on the treats. No… not for the reason that you think. It’s not the sugar highs, or the parents hating me because I’ve provided endless amounts of sugar for their kids… but rather:

    THE KIDS DON’T EAT ALL OF IT!
    Dead serious. Don’t get me wrong… they’ll eat a cupcake, a cookie, maybe some ice cream… but they are way too busy playing with friends, the new toys laying around etc., that most of them barely even make it to the dessert table more than once.

    Nautical Birthday Party Ideas! Or a baby shower! https://fantabulosity.com
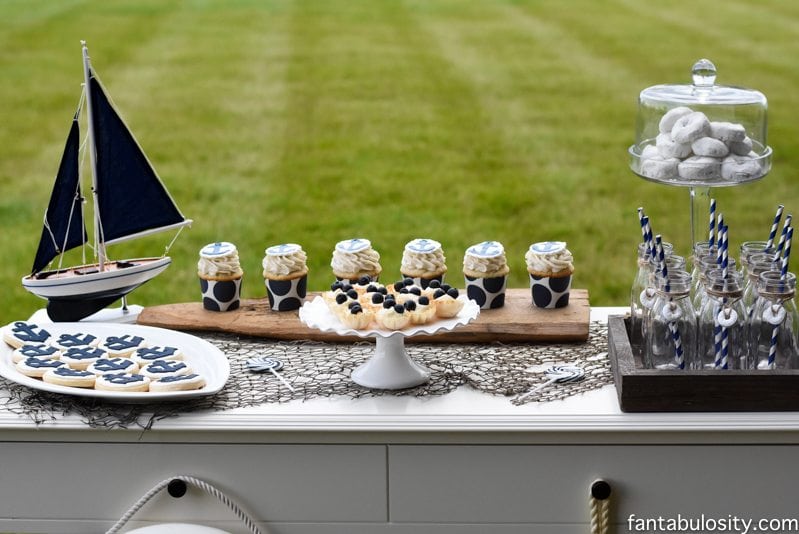
    So this time, I kept it small (rather than the normal smorgasbord of goodies that I usually do.)
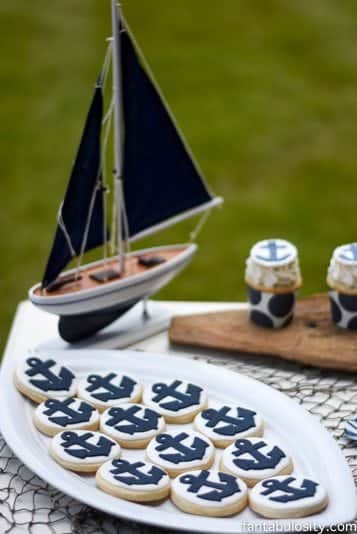
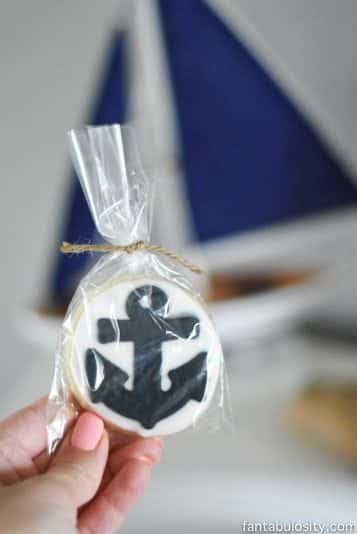
    Nautical Birthday Party Ideas, for a Boy or Girl! Navy and White dessert table! https://fantabulosity.com


    Anchor Cookies

    These cookies. OMG, can you BELIEVE how adorable these are!? Guess what… I found them on Etsy! Yes! Wooden It Be Sweet  has these in her shop, and she was MORE than accommodating with my needs! She shipped them to me, wrapped in the most precious little plastic bags, tied with twine.
    I was able to send some of them home with guests since they were wrapped {as an addition to the party favors}, and I unwrapped a few for the dessert table.

    Look how cute these are wrapped:

    Nautical Cookies for baby shower, birthday party, favors, etc! So cute! https://fantabulosity.com

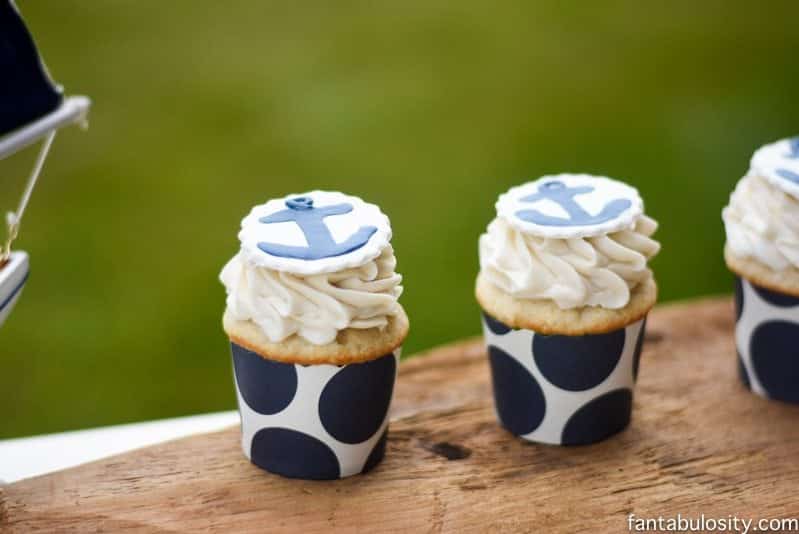
    Cupcakes + Cupcake Toppers

    I can’t shout it from the rooftops loud enough, how PERFECT these nautical cupcakes were from MAB Cupcakes.  Like a crazy person, I waited until the last minute to order cupcakes. (I don’t recommend it.)  But when I put a call in to order the cupcakes, I simply just asked for some white cupcakes. I didn’t expect what I received…

    Anchor cupcake toppers!!! I did mention that it was for the nautical birthday party that I was hosting, and if they had anything navy blue in the shop they could throw on… I’d be forever grateful. You guys… THIS WAS THE RESULT…

    Nautical Birthday Party cupcakes! OMG so adorable! https://fantabulosity.com

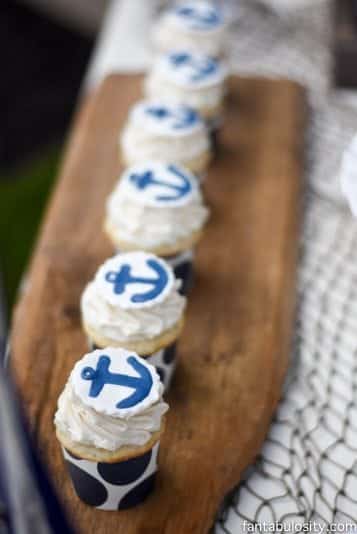
    P.S. I found the wooden board at a local antique shop, and it worked perfect to line the cupcakes on.

    Nautical Navy Blue and White Cupcakes! Perfect for a baby shower, or birthday party! https://fantabulosity.com

    Blue Food??

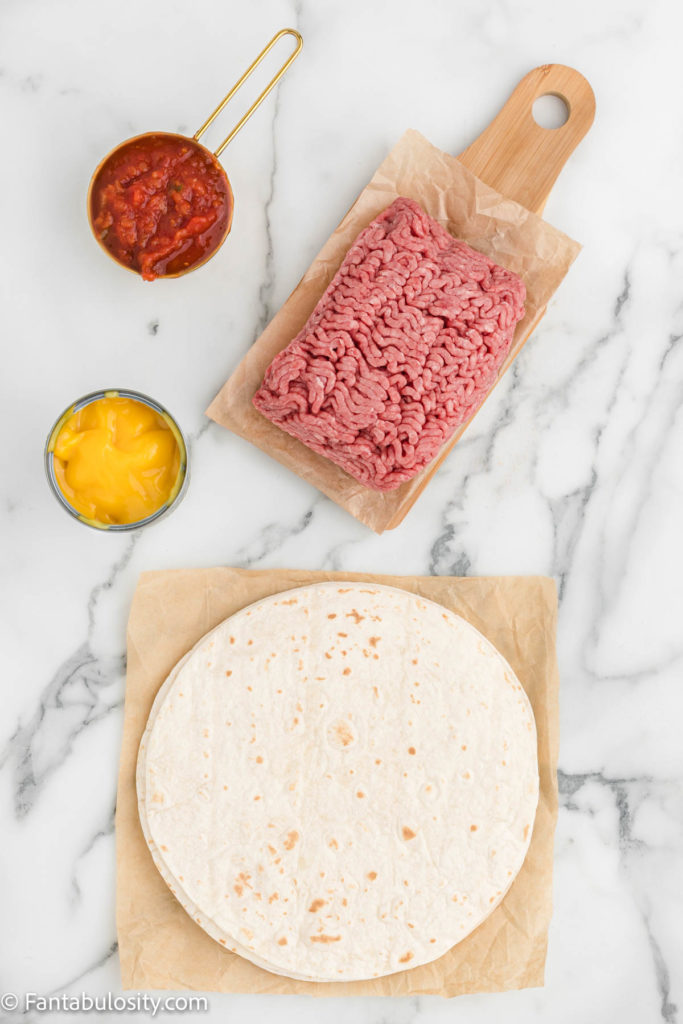
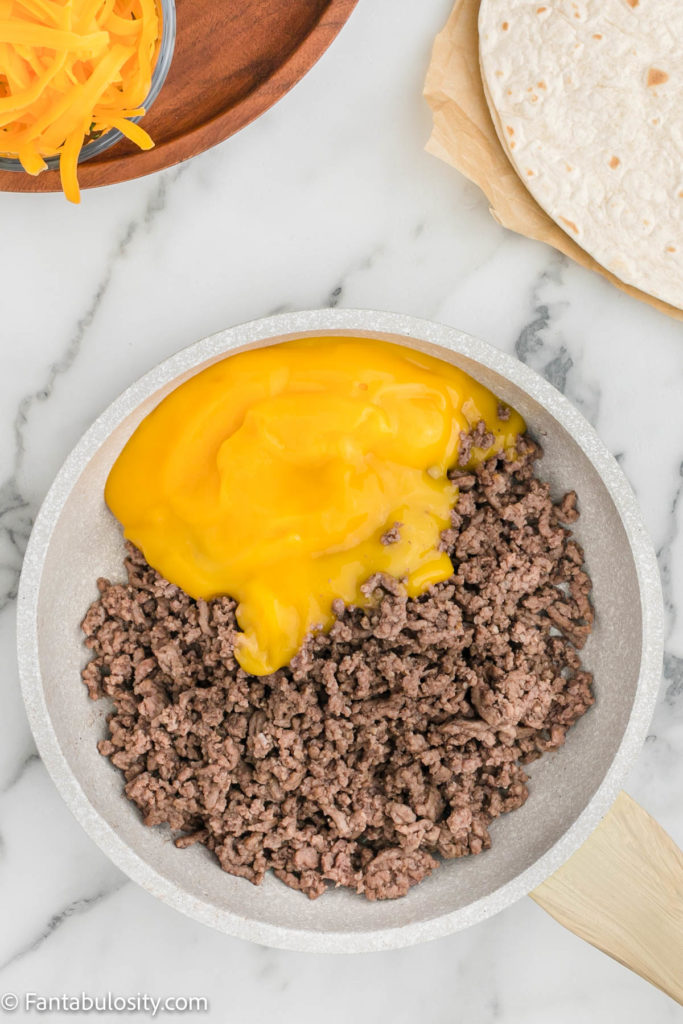
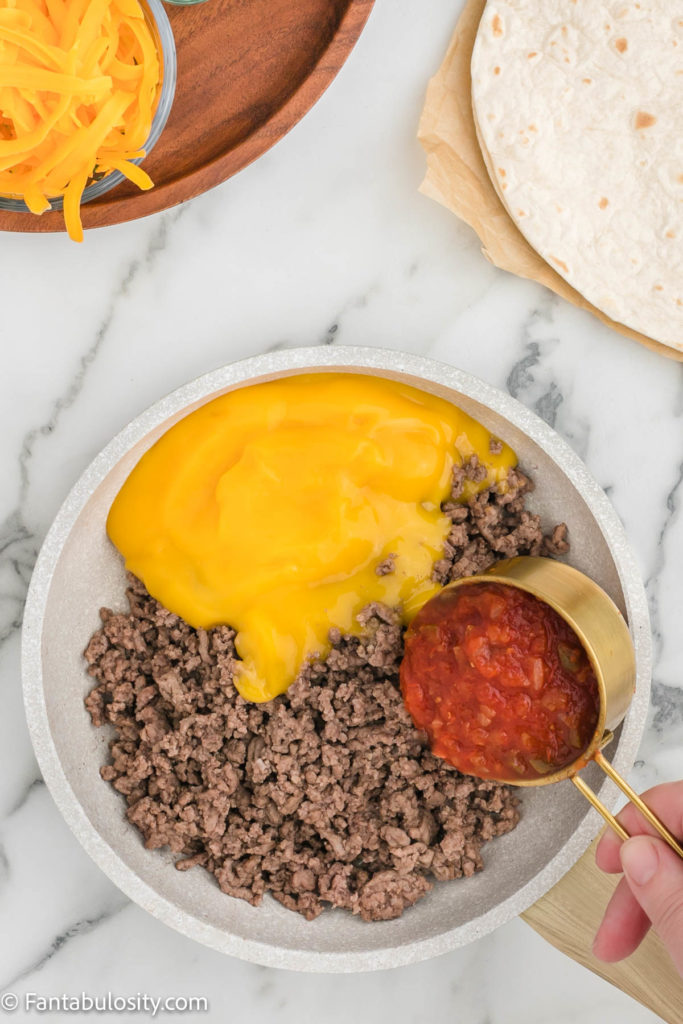
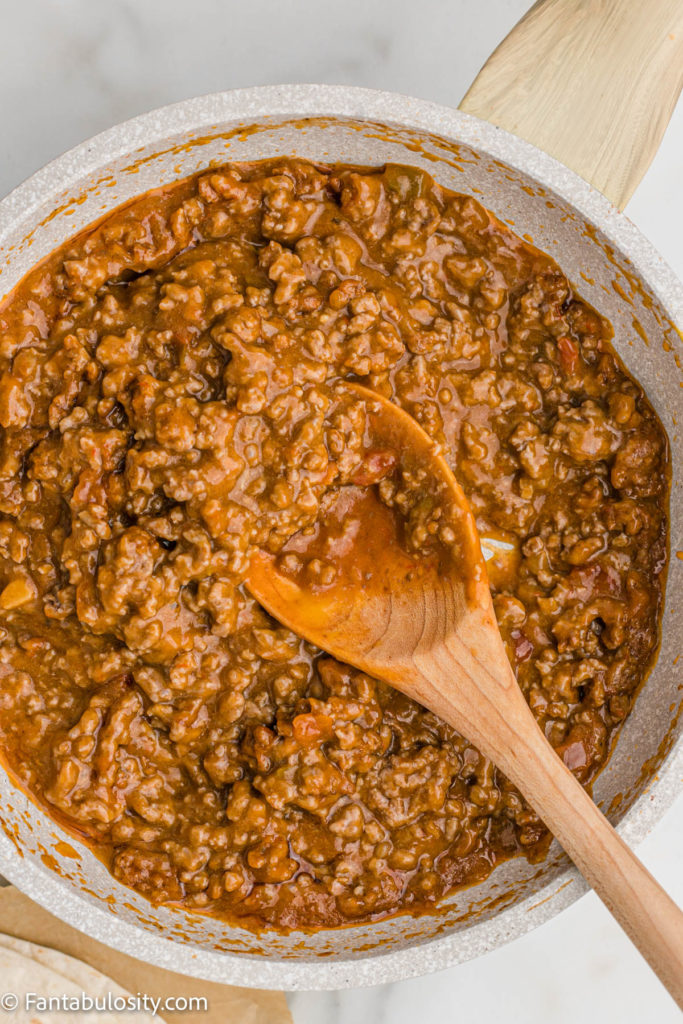
    I knew for the dessert table, I wanted to keep all of the food, white or navy blue. When I started to think of, “Blue food,” I’ll be honest… there wasn’t much out there. So I knew if I went to “white,” food, and just use Blue decor on the table, it should work out pretty well.

    Mini Cheesecakes for navy blue and white party or baby shower. You'll faint when you find out how easy these are. This can't be. https://fantabulosity.com

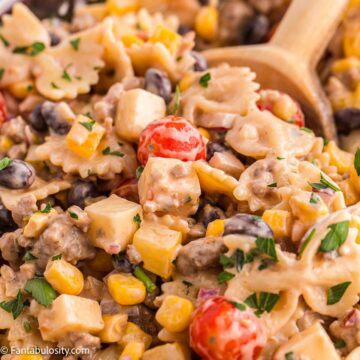
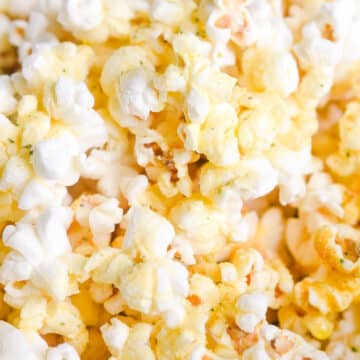
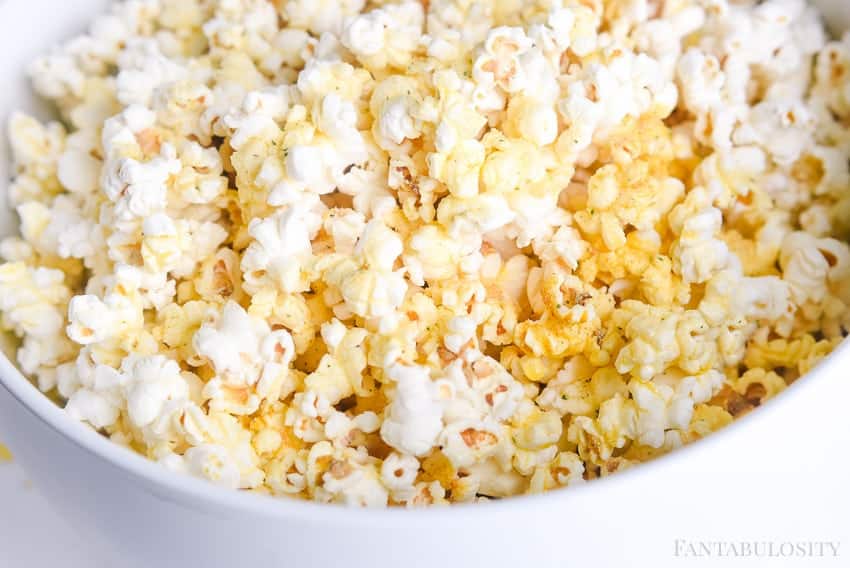
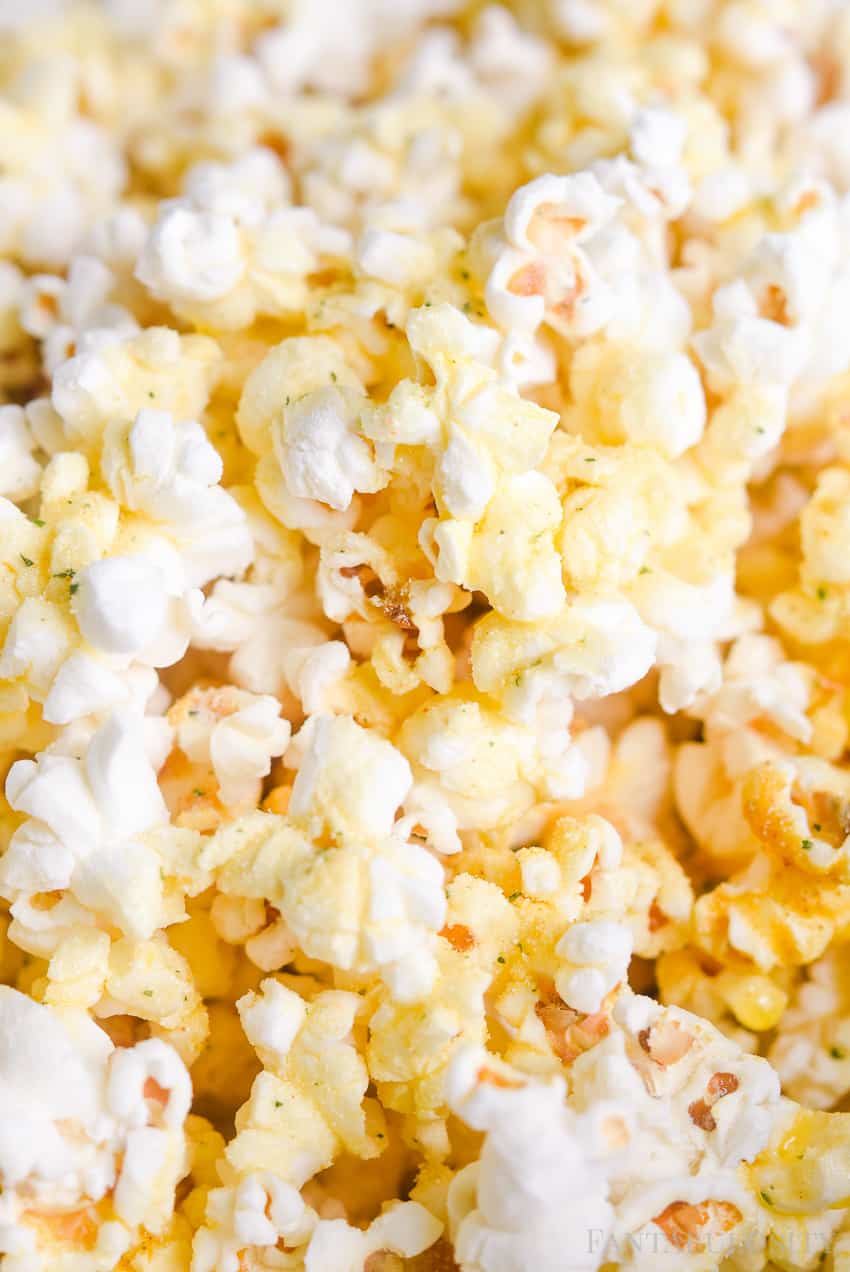
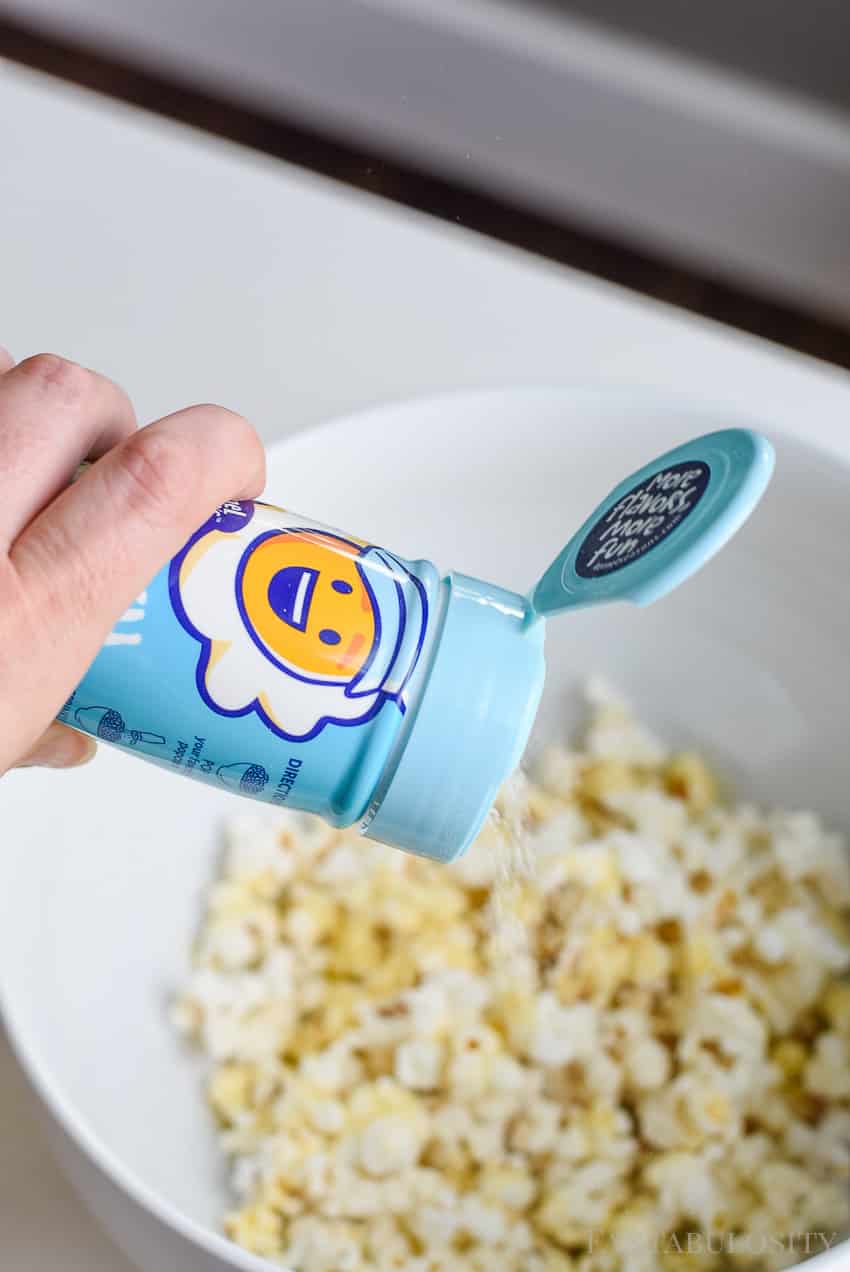
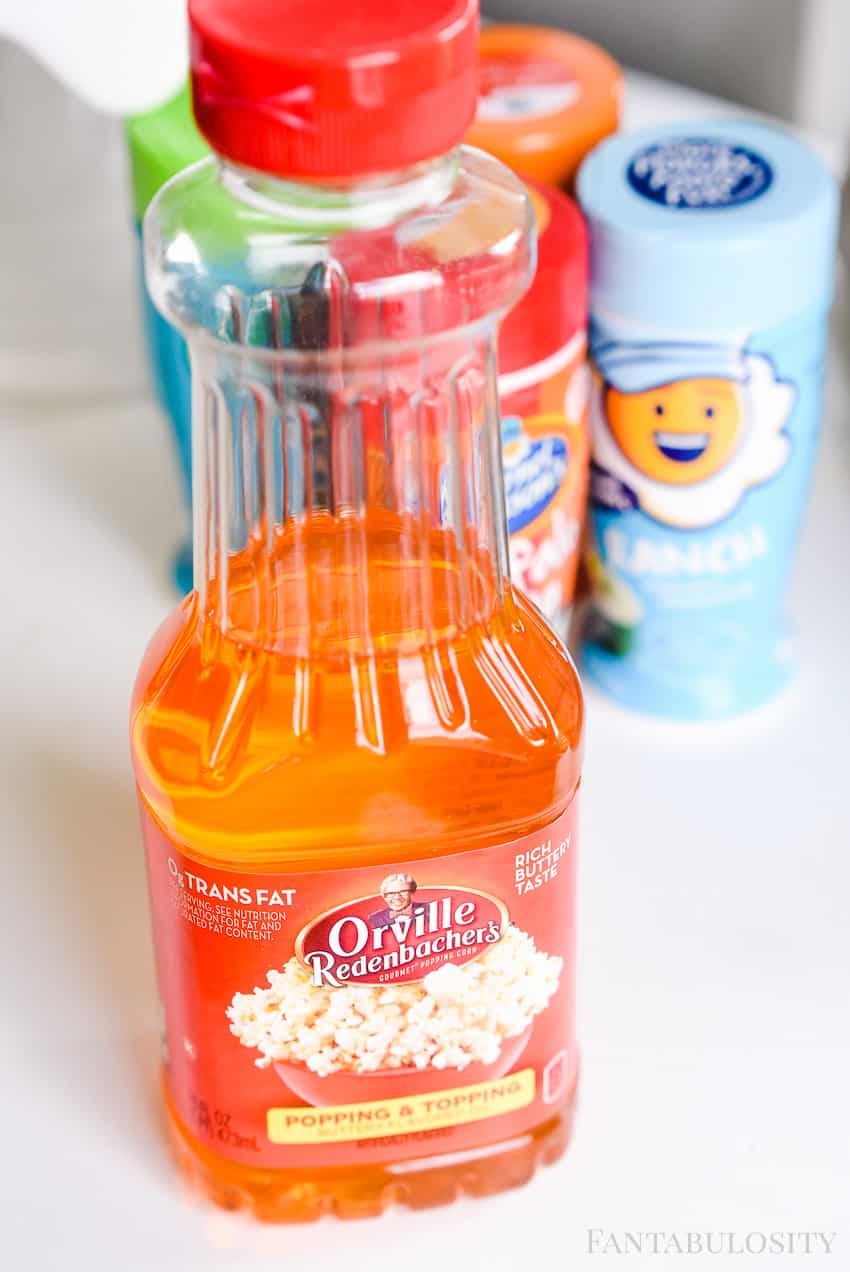
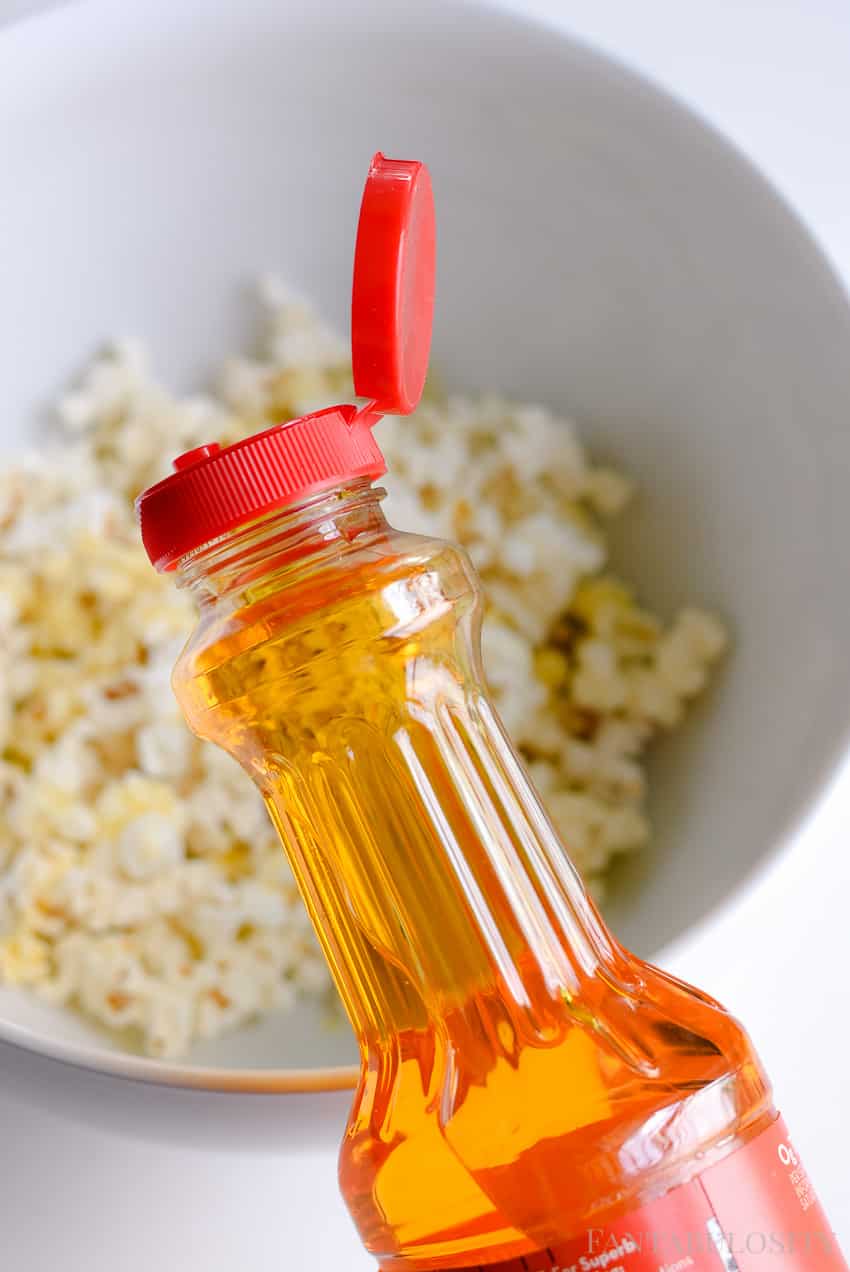
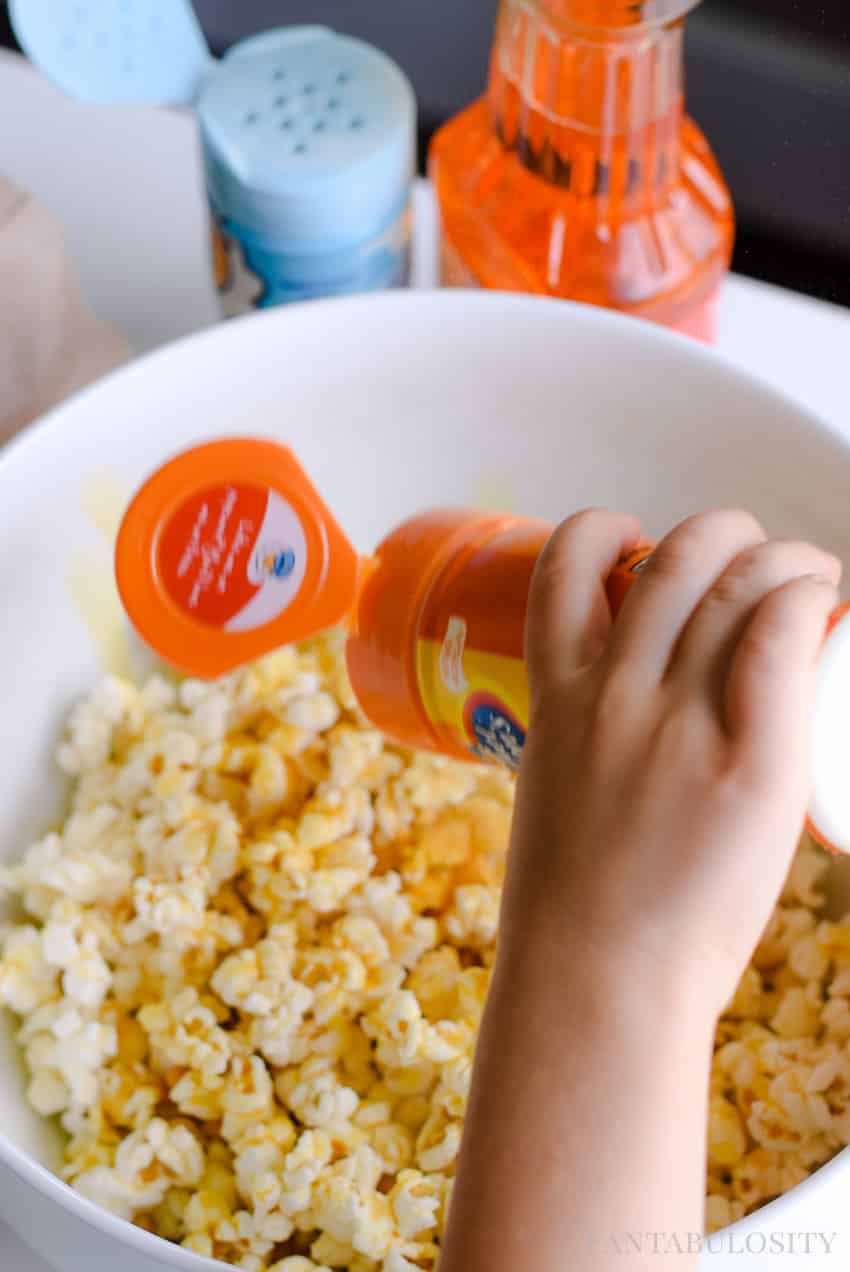
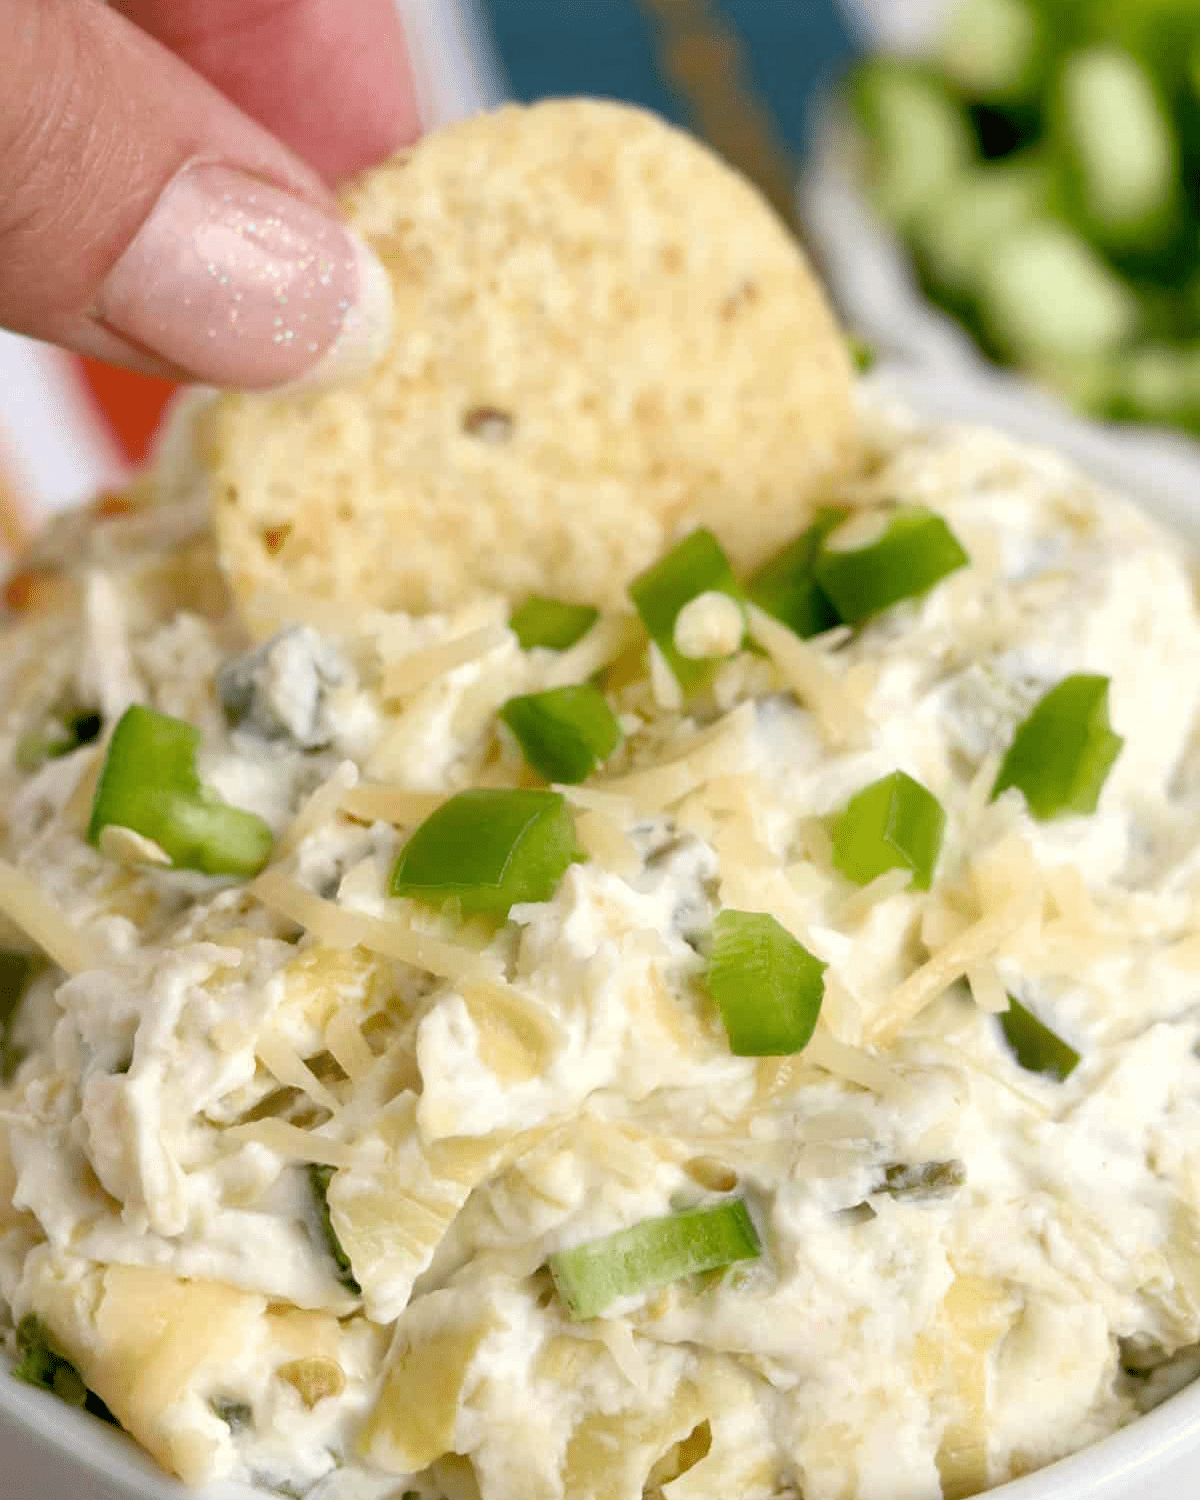
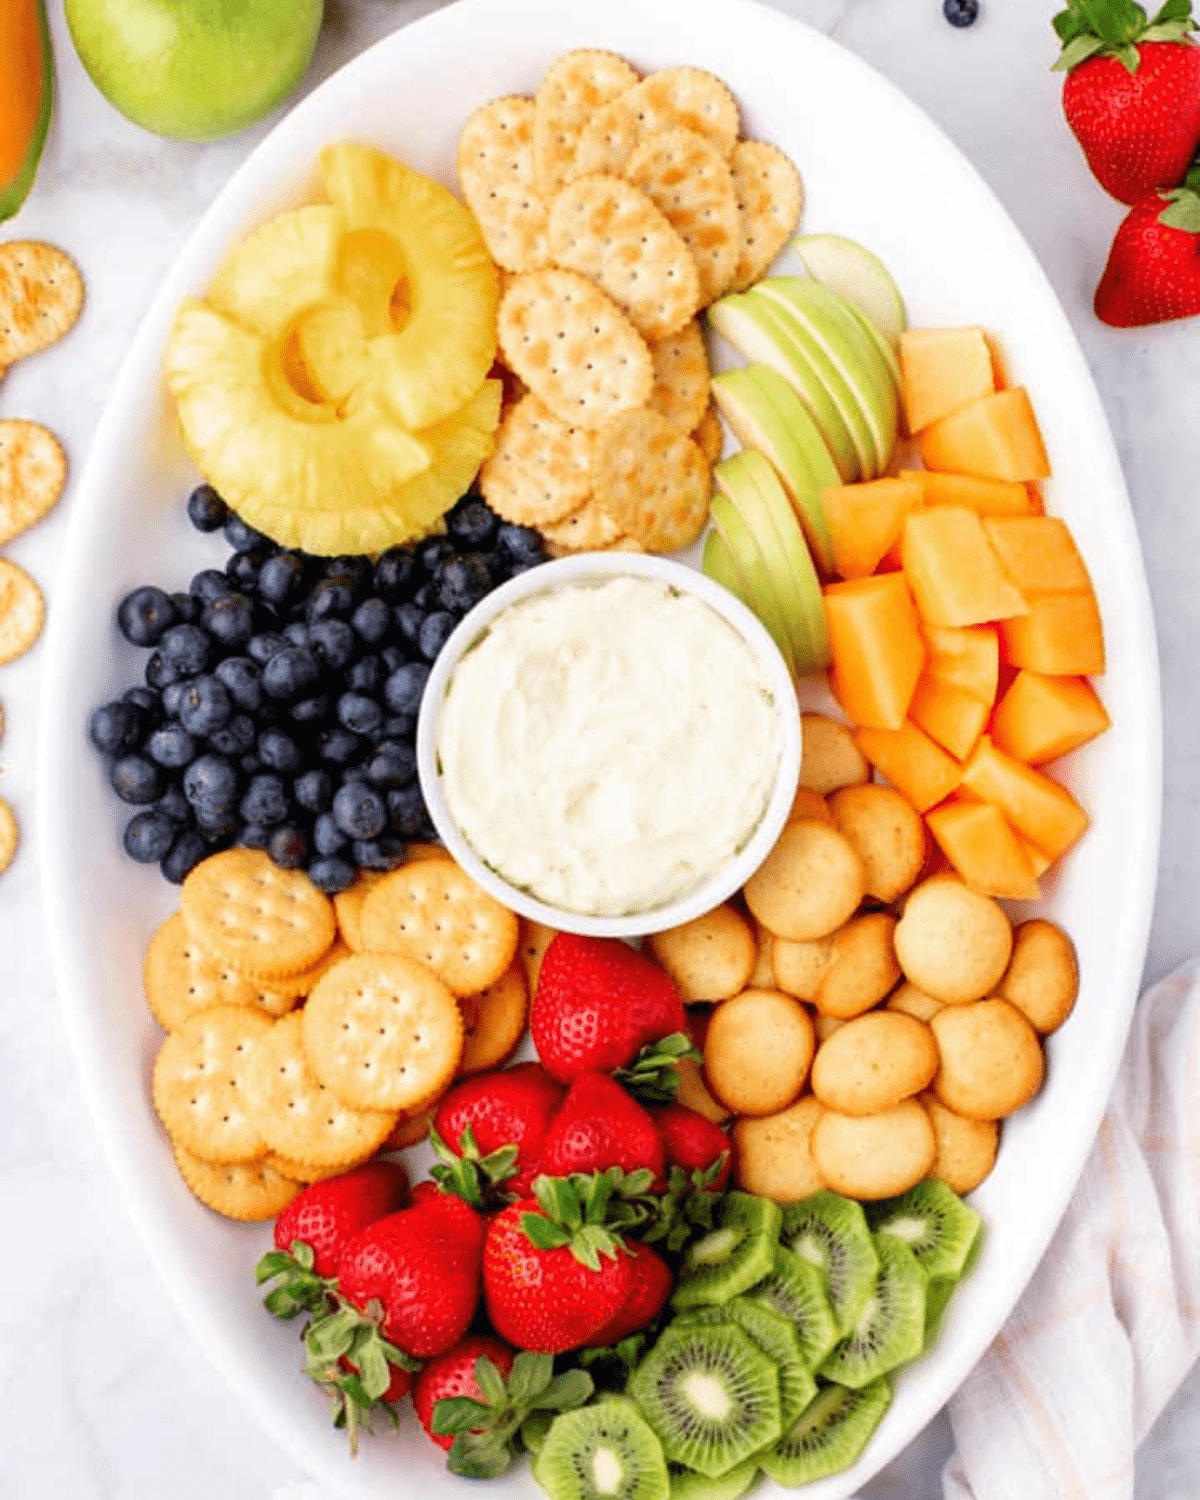
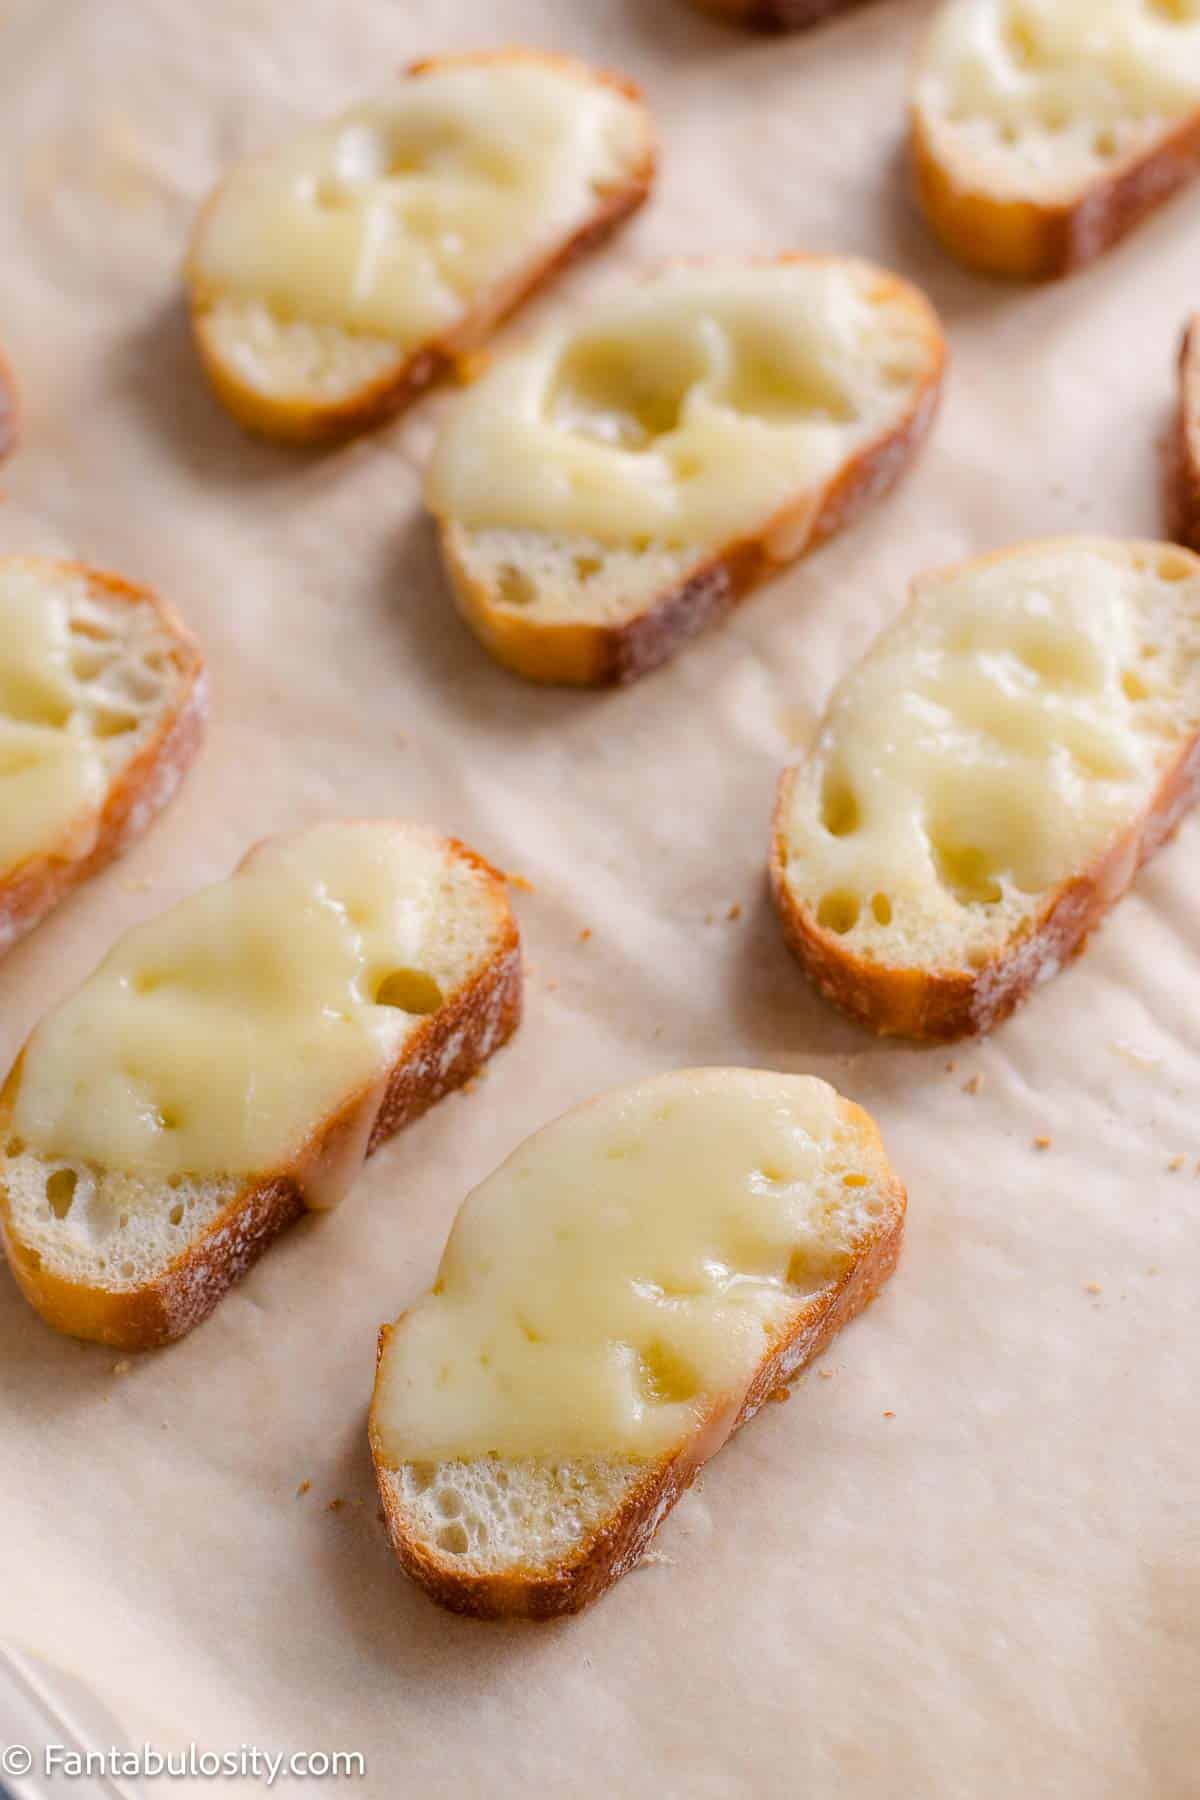
    What to Serve at a Nautical Party

    Keeping the food simple and on-theme makes a big difference, especially for outdoor or kid-friendly parties.

    Easy Party Foods

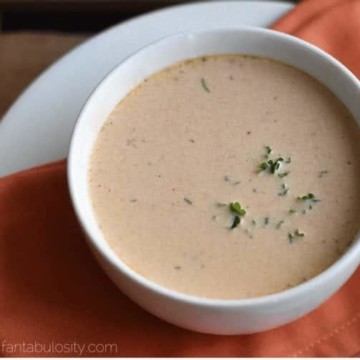
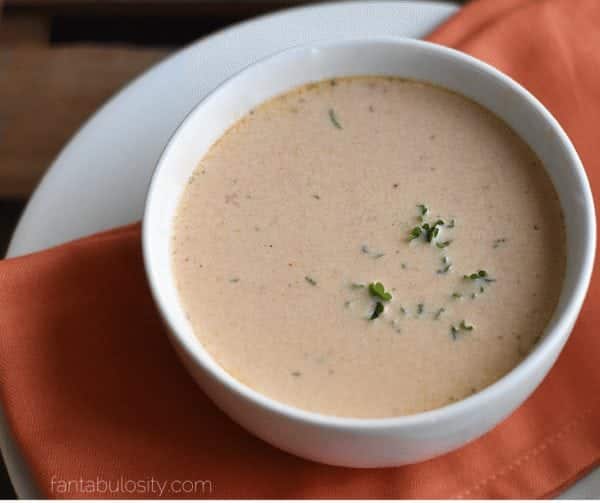
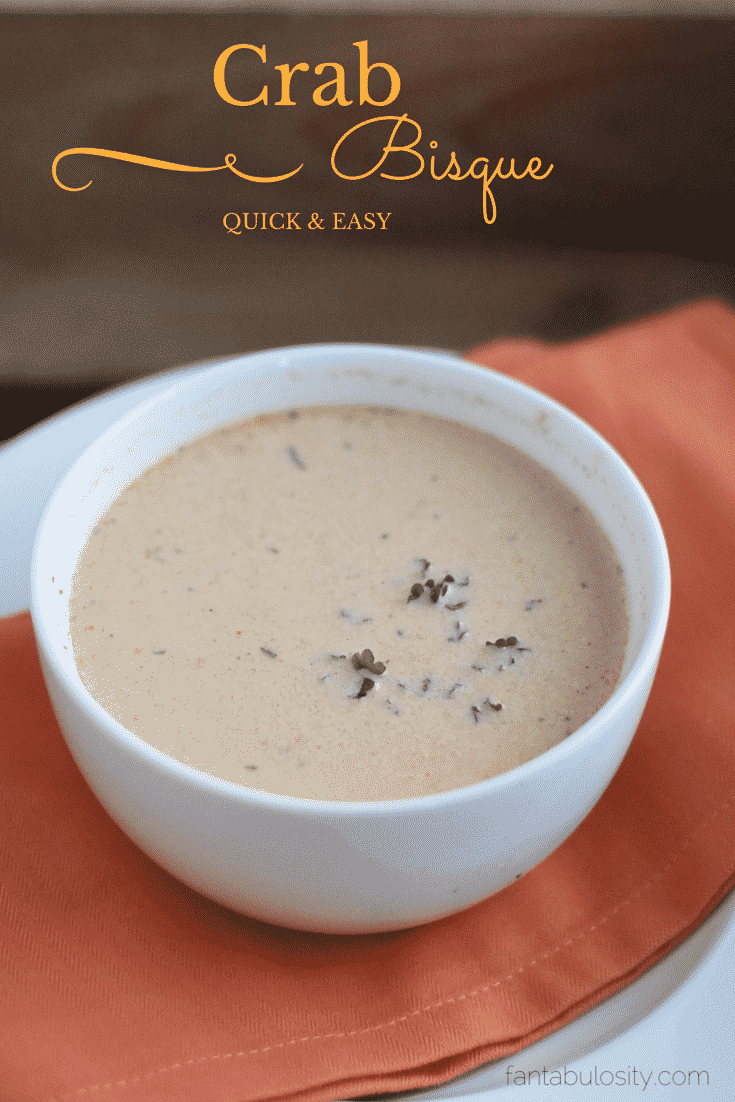
    • Mini cheesecakes with blueberries
    • Cupcakes with themed toppers
    • Powdered donuts (simple and crowd-friendly)

    Fun Themed Treats

    • Anchor cookies
    • Blue and white desserts
    • Ice cream bar with toppings
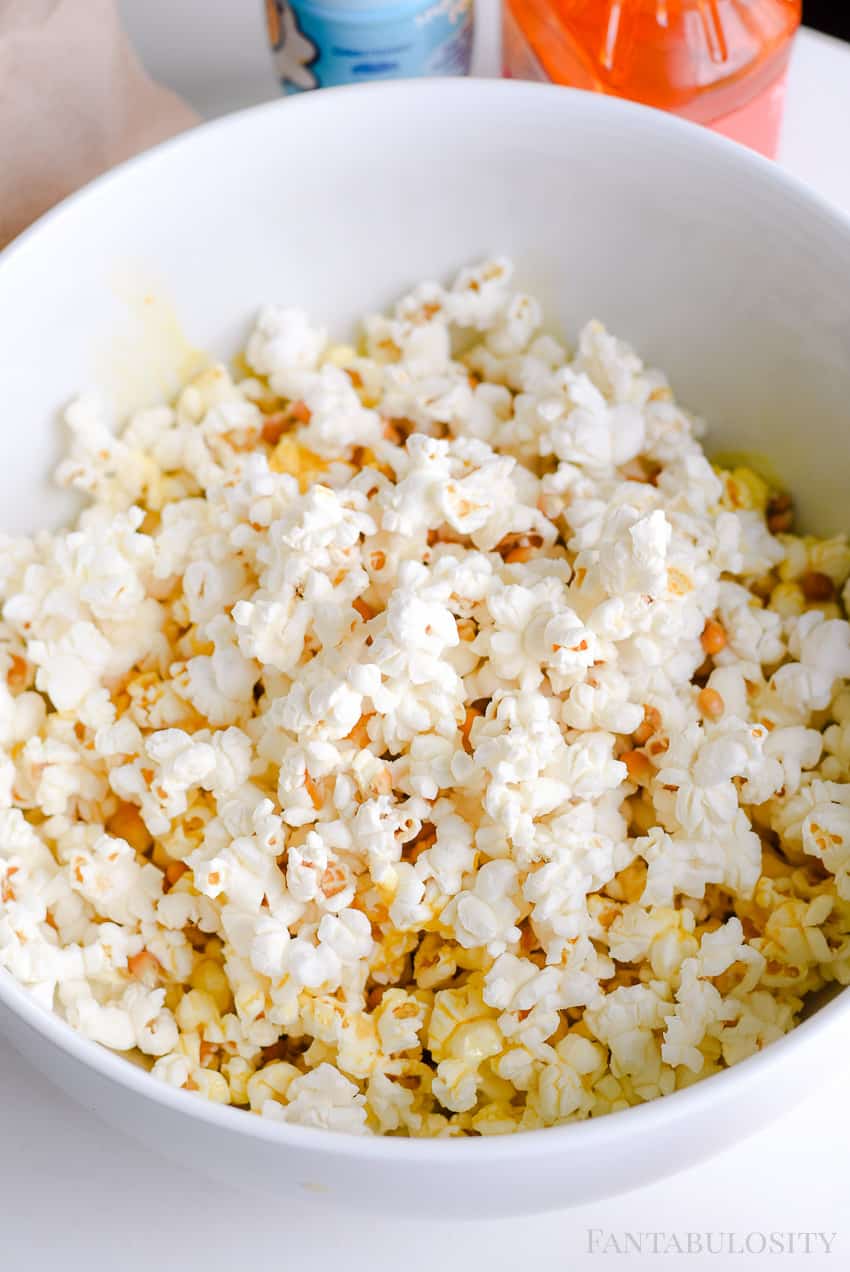
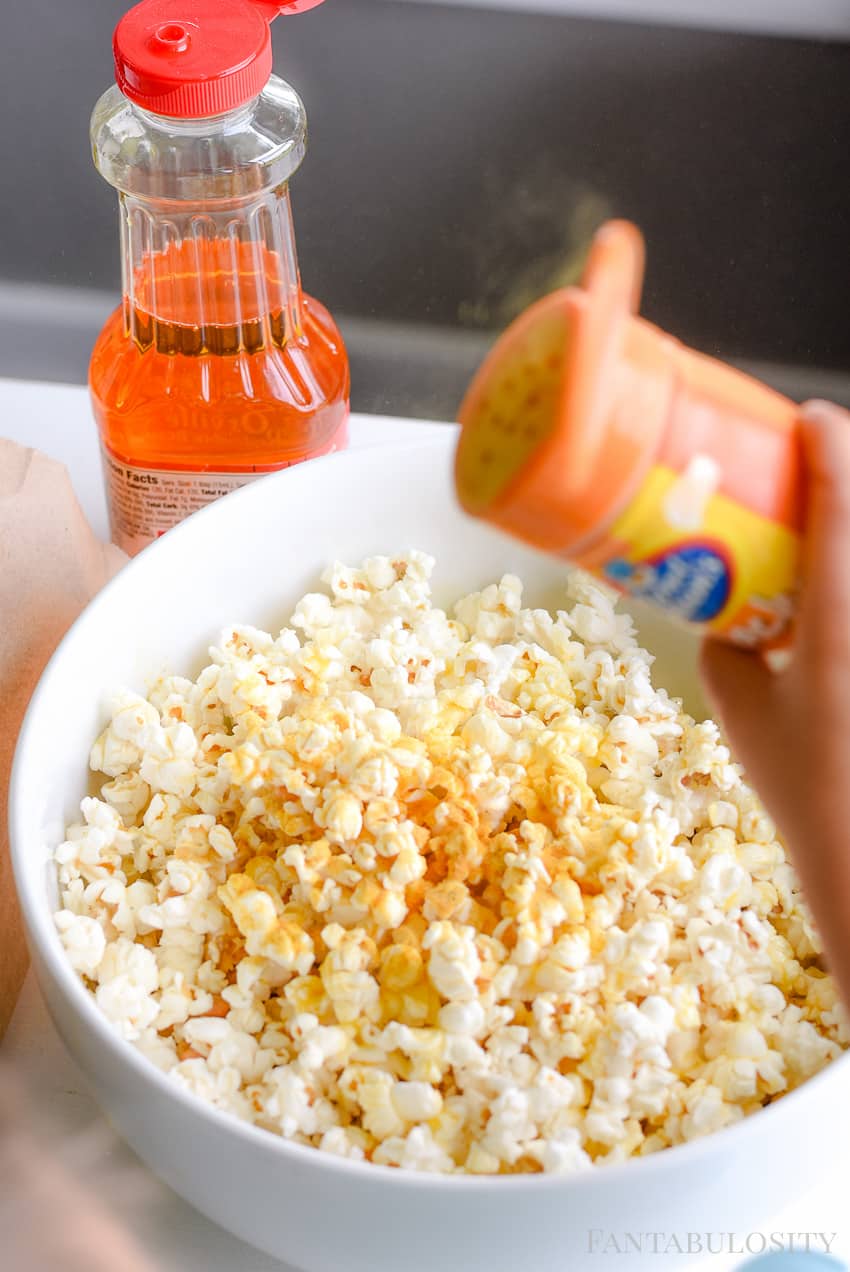
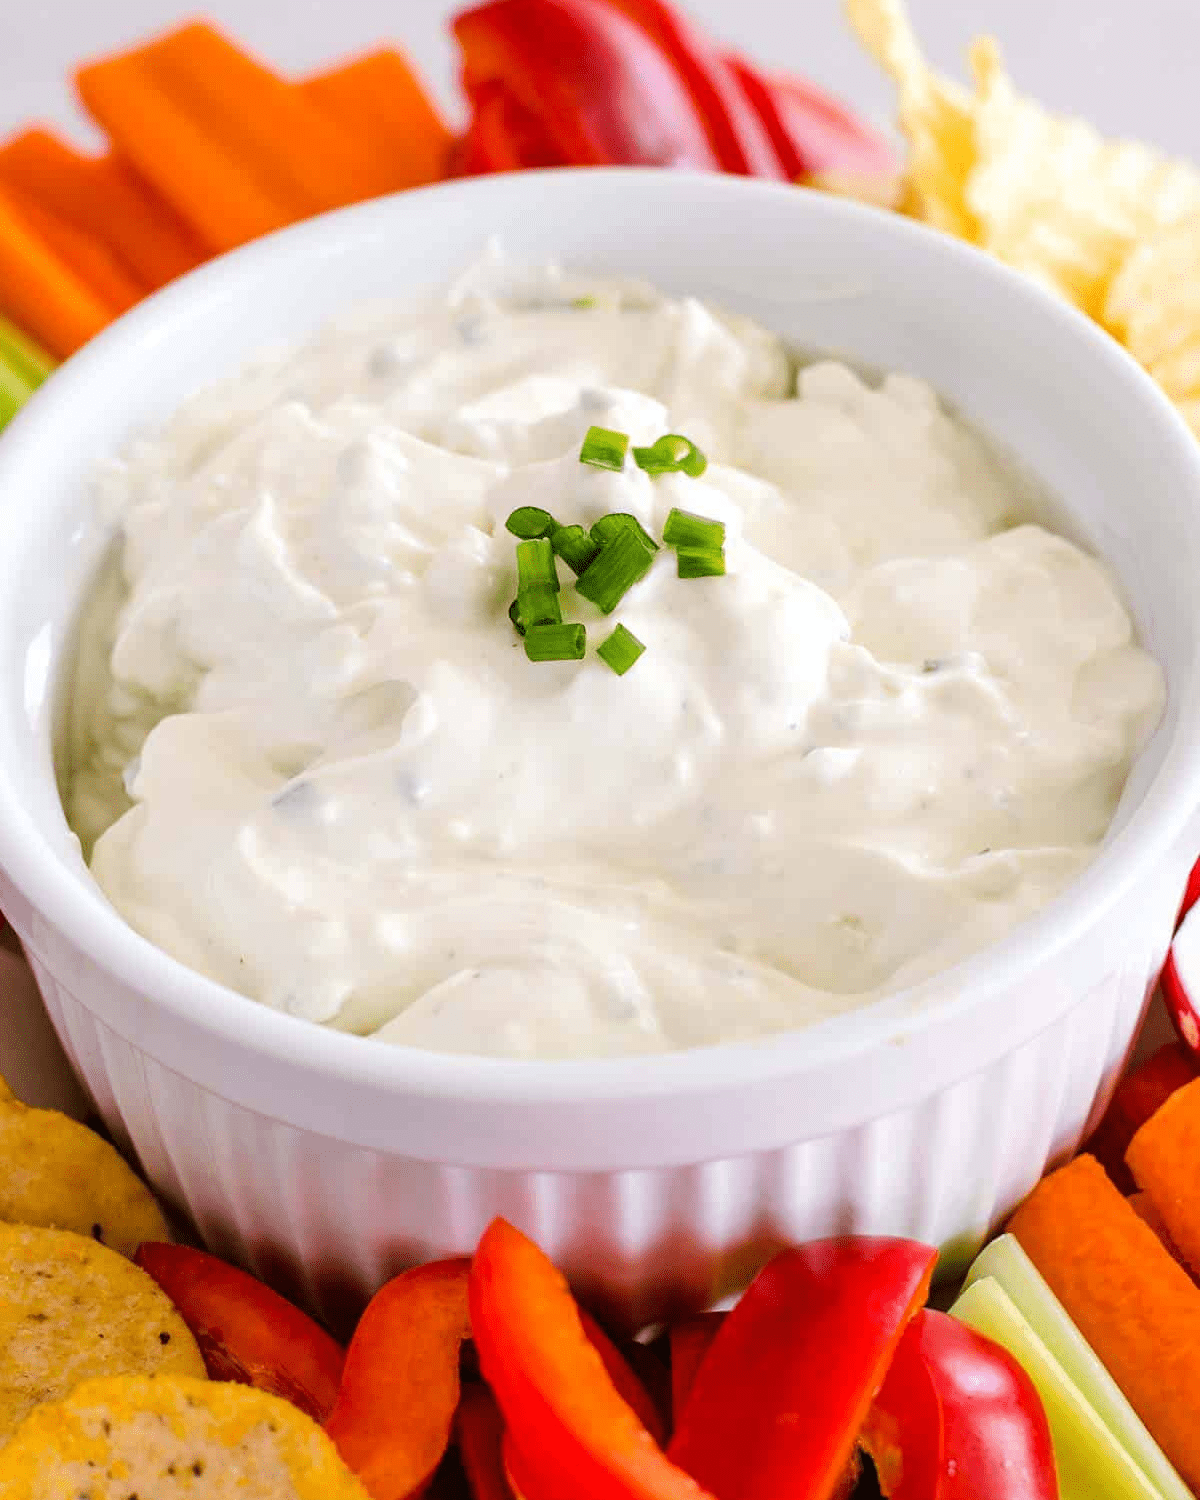
    Savory Snacks

    • Simple snack cart setup
    • Chips and easy finger foods

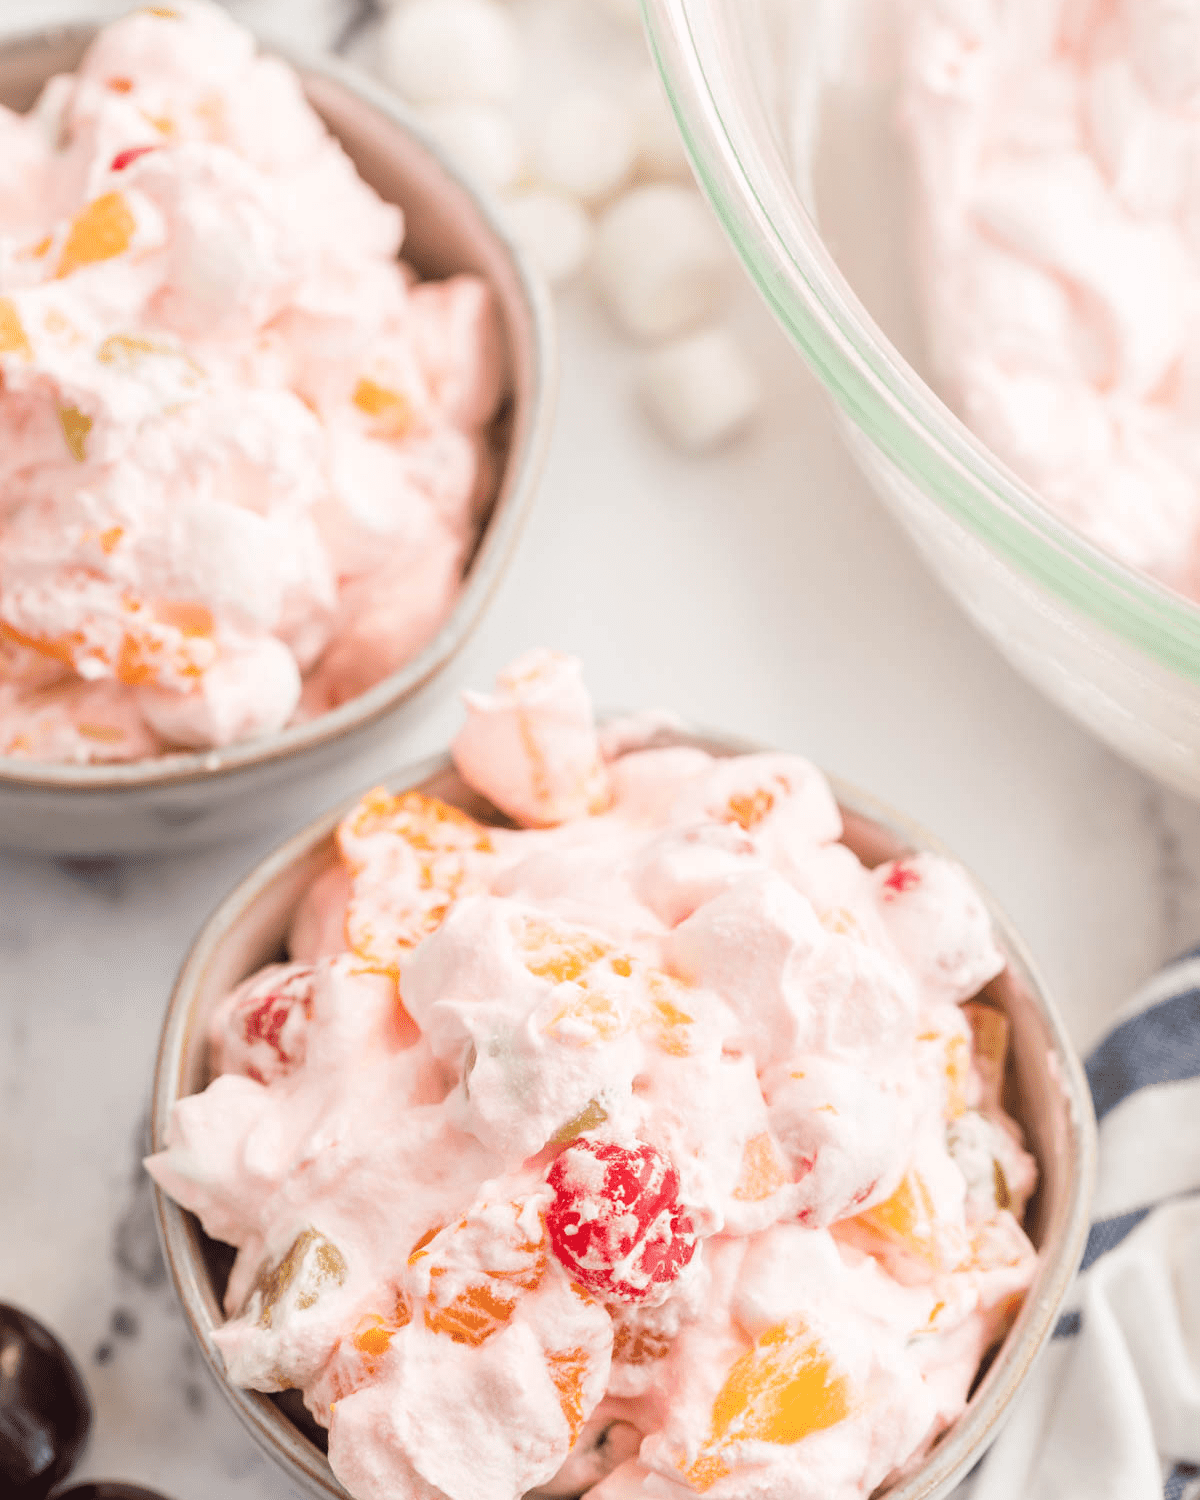
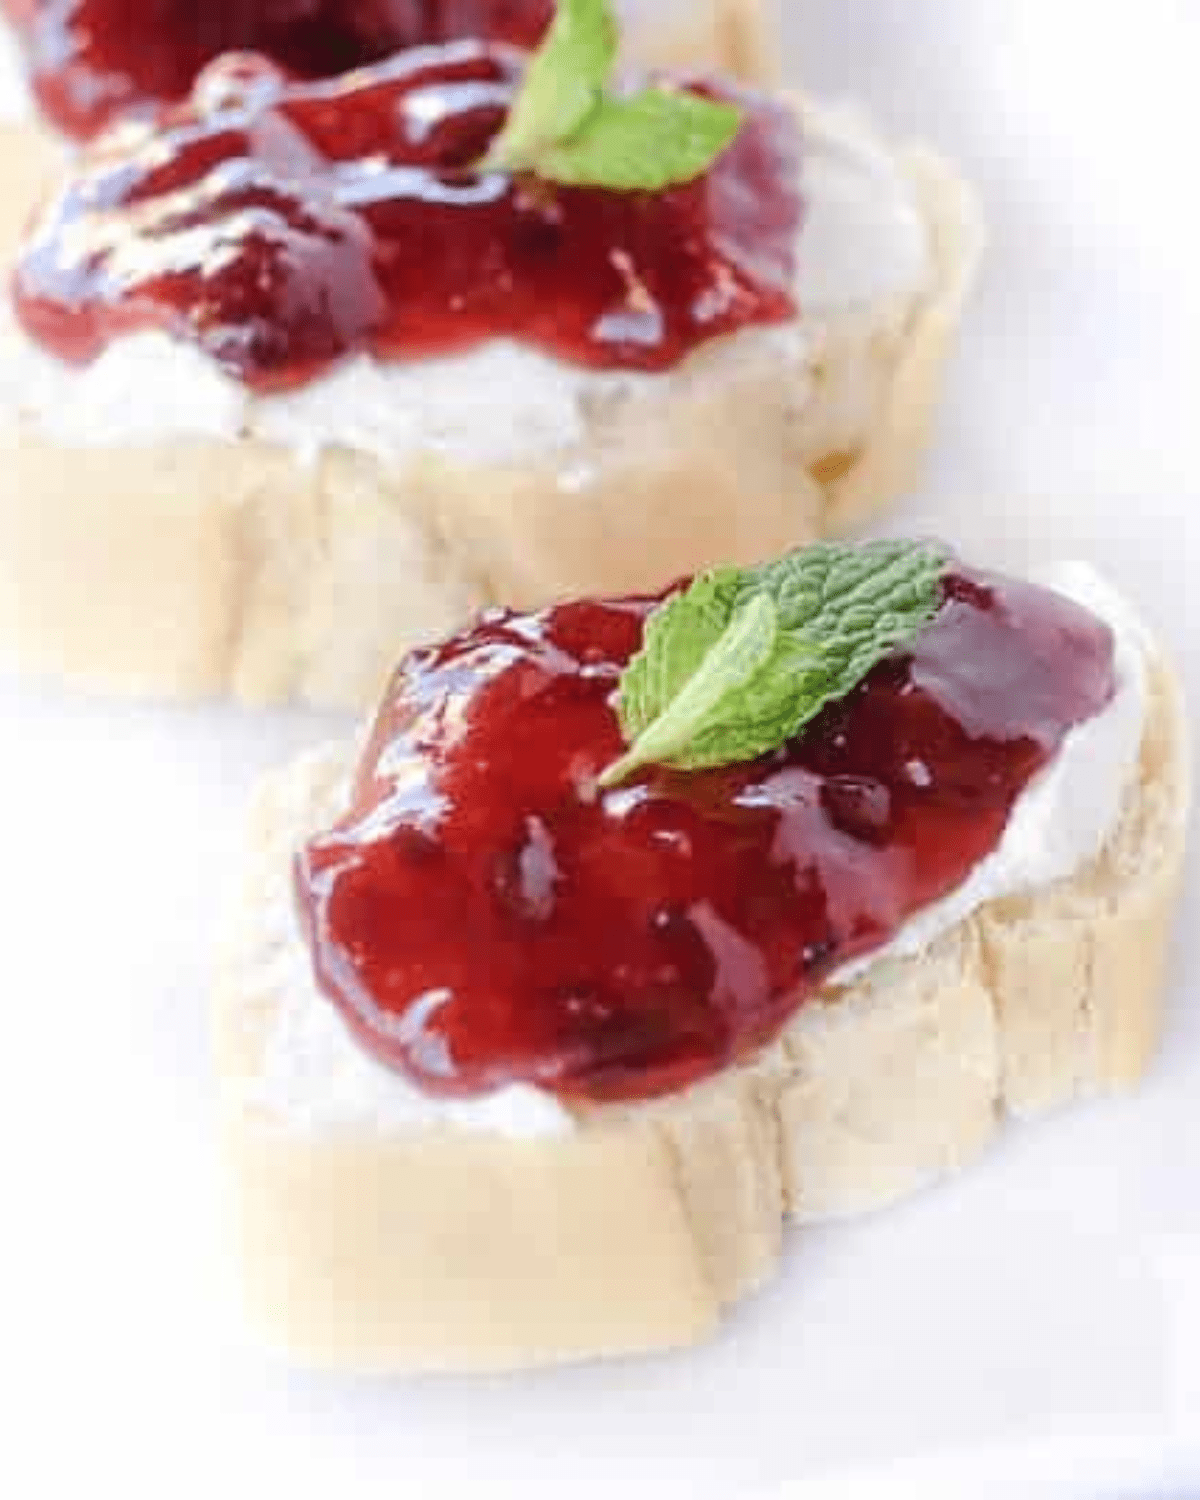
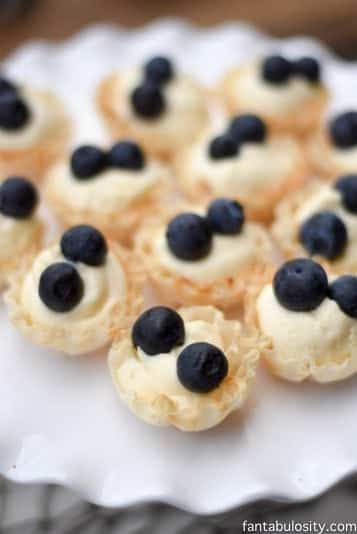
    I went to one of my trusty desserts for parties (that’s simple and delish), the ready-to-eat cheesecake filling.

    At my All White Christmas party a while back, I took this filling, and filled mini shooters with graham cracker layers. This time, I just grabbed some fillo shells and filled them with the cheesecake filling, and topped them with a couple of blueberries.
    These would be soooo cute for a nautical baby shower too I must say!

    Mini Cheesecakes for navy blue and white party or baby shower. You'll faint when you find out how easy these are. This can't be serious. https://fantabulosity.com

    If you follow me on Facebook, you may have seen my little snapshot of my DIY process of making these. I was smitten with how cute they were looking. I found the idea on Pinterest, and cannot remember for the life of me who came up with this brilliant idea. If you know, please let me know! I’d love to link to them and give credit where credit is due!

    Nautical Birthday Party Ideas, milk bottles with lifesaver candy wrapped around them! So cute! https://fantabulosity.com

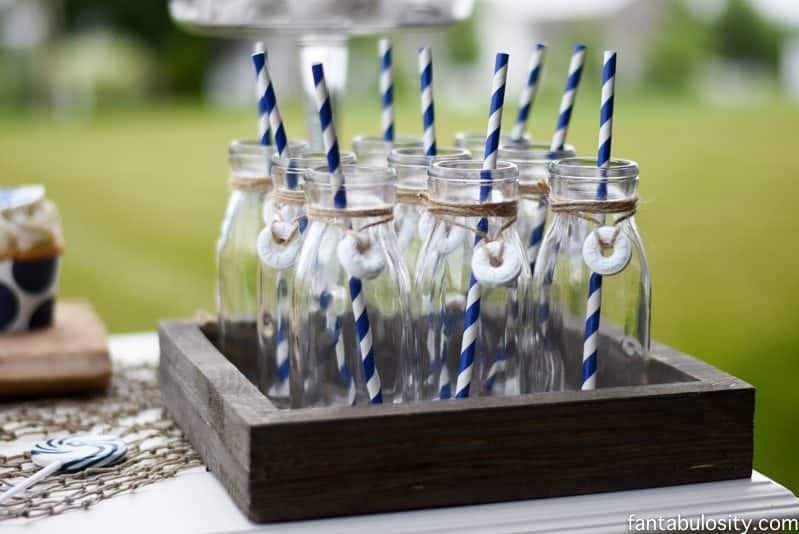
    I just grabbed lifesavers, and tied them on to the twine, (kind of like when I made the DIY nautical candles) and wrapped it around the bottles. This DIY project went by in a flash.

    Nautical Birthday Party Ideas. Milk bottles with life savers wrapped around the neck with twine! So cute! https://fantabulosity.com

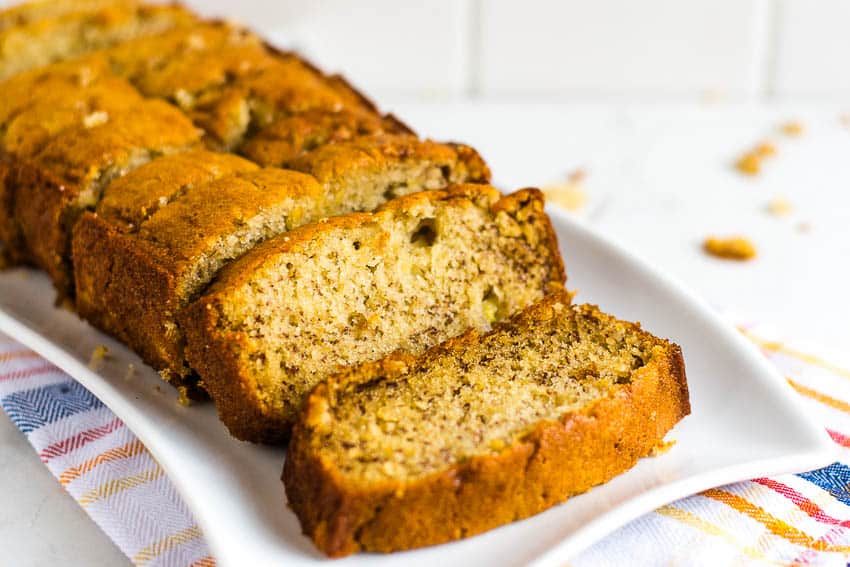
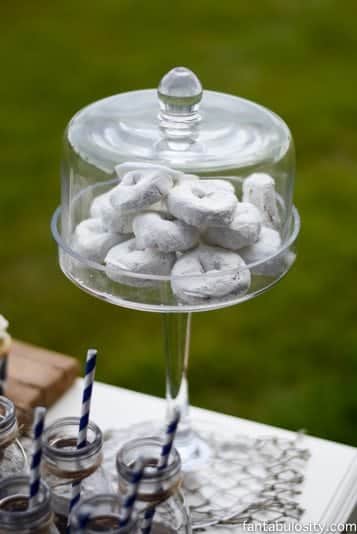
    White powdered donuts seem to always make an appearance on my dessert tables too. Mainly because I adore them. (Ahem… I mean my guests adore them.)

    Nautical Birthday Party Ideas! White powdered donuts, so easy and cute! https://fantabulosity.com

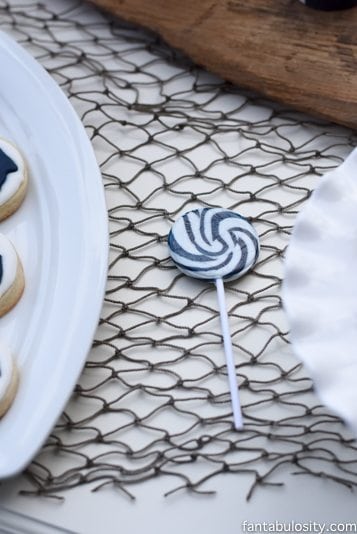
    I found cute little navy and white suckers before the party, and although I didn’t really have the “space,” for them, I did put a couple out on the table just to add a “sweet,” touch. 😉

    Nautical Birthday Party Ideas! Blue and White suckers! https://fantabulosity.com

    Make Your Own Ice Cream Bar

    In another corner of the backyard, I created an ice cream bar. With the hot month of June, an ice cream on a hot summer day is a treat! Literally!
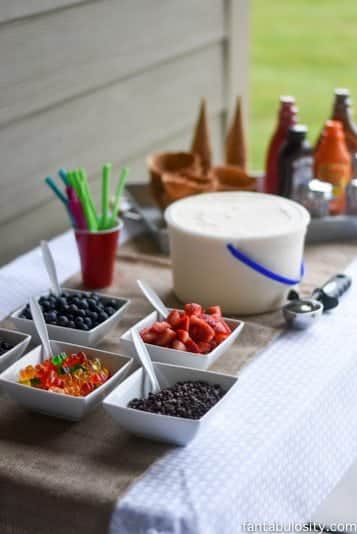
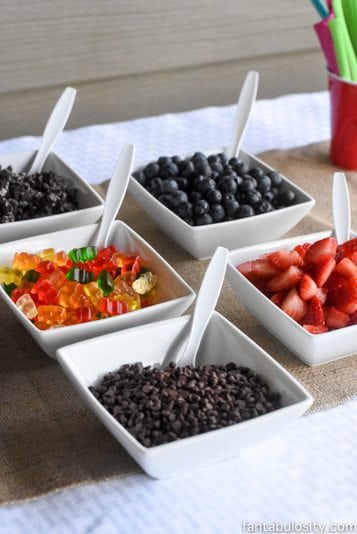
    Ice Cream Bar for an outdoor summer birthday party https://fantabulosity.com

    Ice Cream Toppings

    I put out blueberries, strawberries, chocolate chips, gummy bears, and crushed up Oreos, for the little ones to get creative. TIP… set this table up in the yard or somewhere that you don’t mind getting dirty! It had potential to get messy. 😉

    Ice Cream Bar for an outdoor summer birthday party https://fantabulosity.com

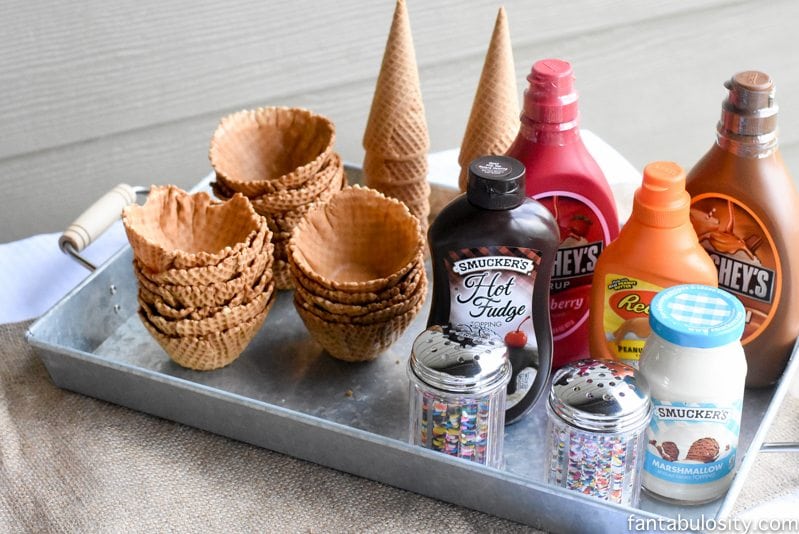
    There was a variety of flavored syrups too, and they were able to choose between a waffle cone or bowl! The kids had a BLAST choosing which toppings they wanted. Ok ok… I did too.

    Ice Cream Bar for an outdoor summer birthday party https://fantabulosity.com

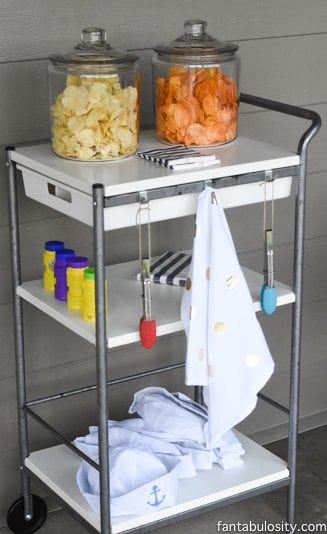
    Snack + Toy Cart – Finger Foods

    I put up a little snack cart with chips, in case anyone got hungry and was missing a sweet tooth. Putting them in to canisters makes it look a little fancier than just a few chip bags laying around. This is where I also stored overflow of bubbles, sailor hats, and other little goodies.
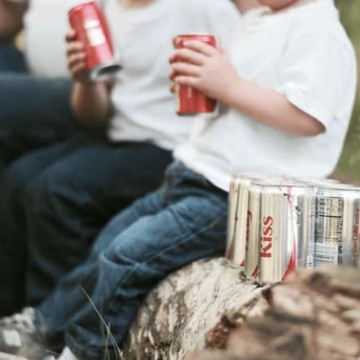
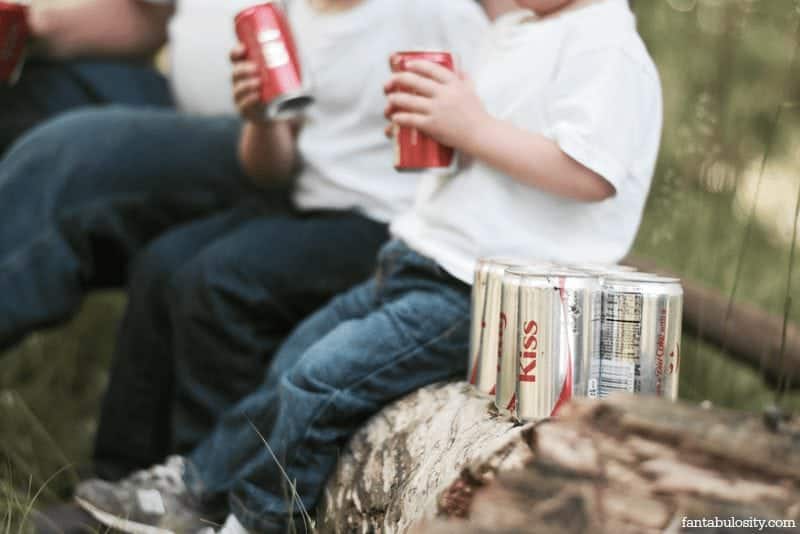
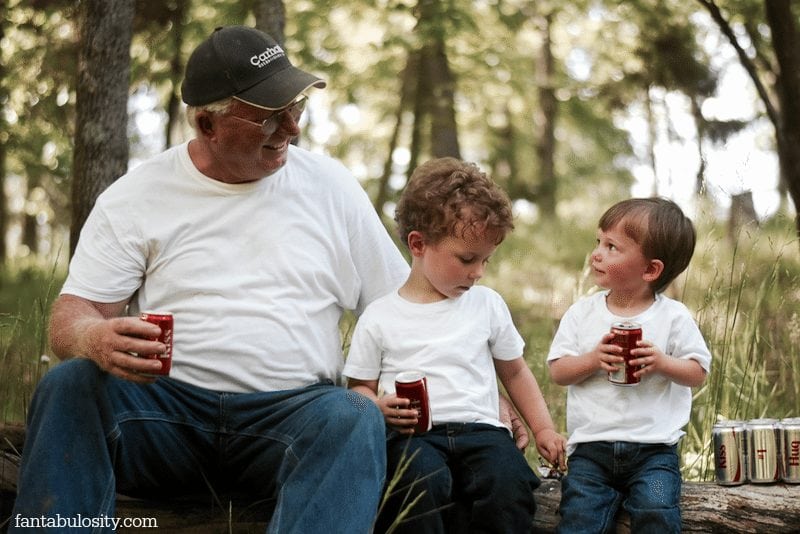
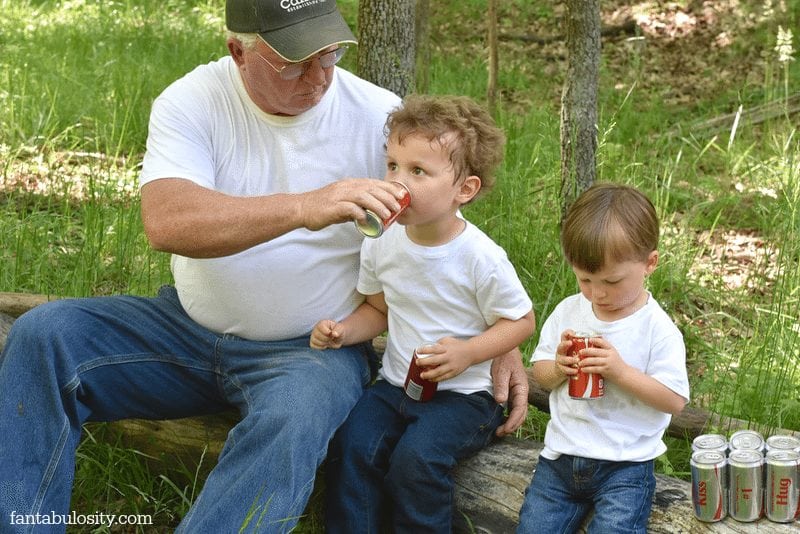
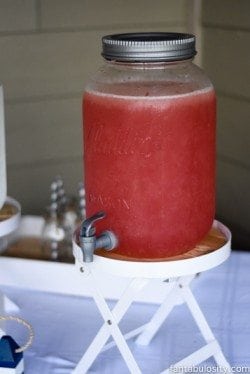
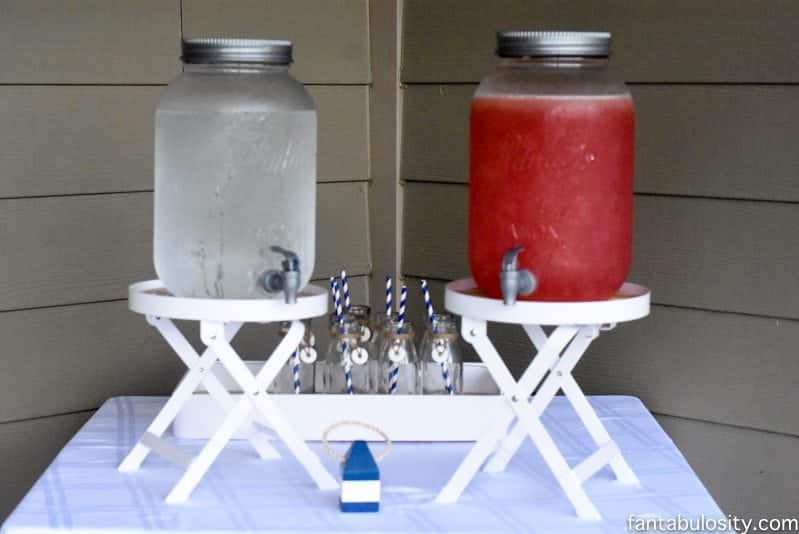
    Snack cart for a birthday party! Love how the chips are in canisters! https://fantabulosity.com

    Kid Drinks

    Since it was a kiddo party, I wanted to make sure we had plenty of kid-friendly drinks. Fruit Punch and water took up the main stage in my drink dispensers.

    Drink Dispensers for a party, on a stand. So cute! https://fantabulosity.com
    Drink Dispensers for a party, on a stand. So cute! https://fantabulosity.com


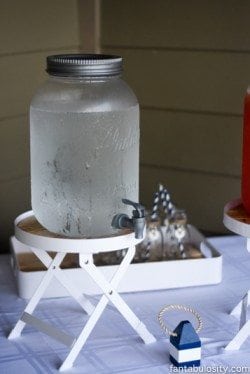
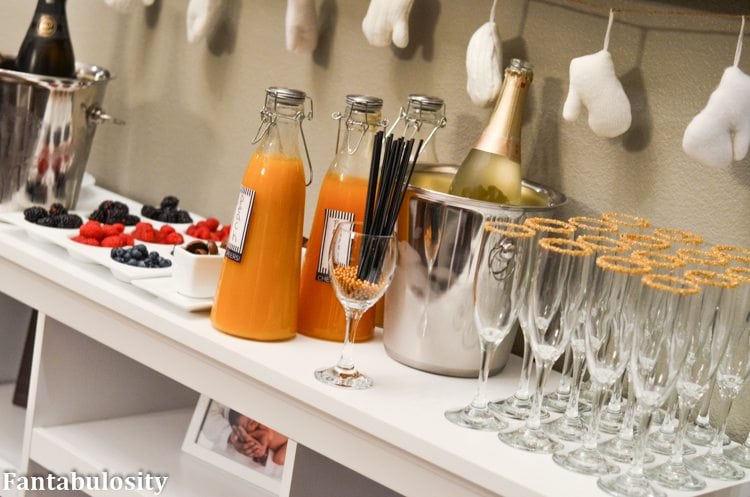
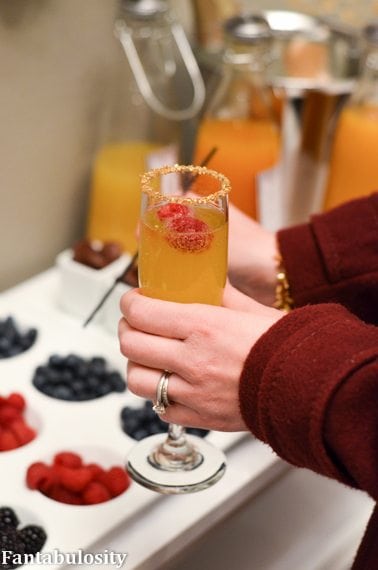
    Not pictured: The adults may or may not have had an “adult beverage,” section too. 😉
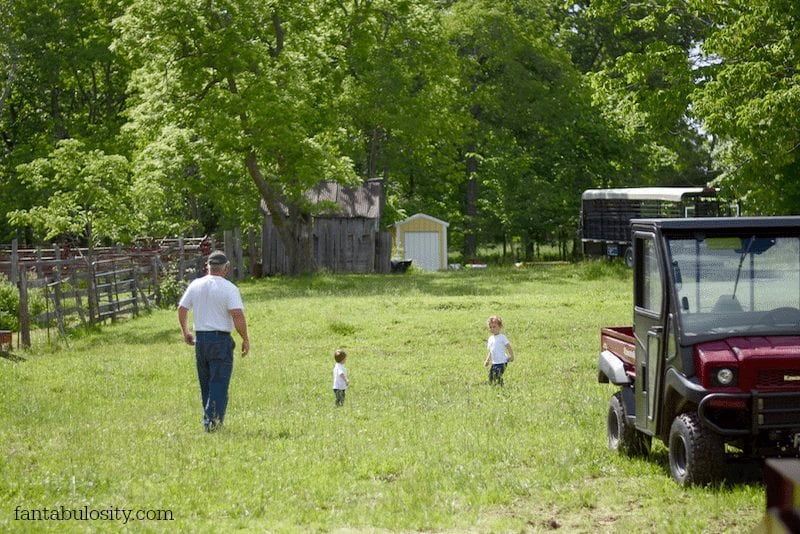
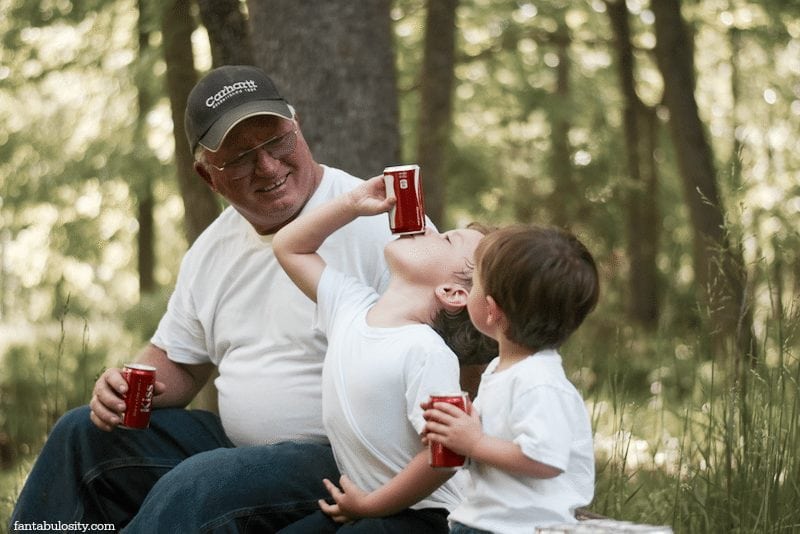
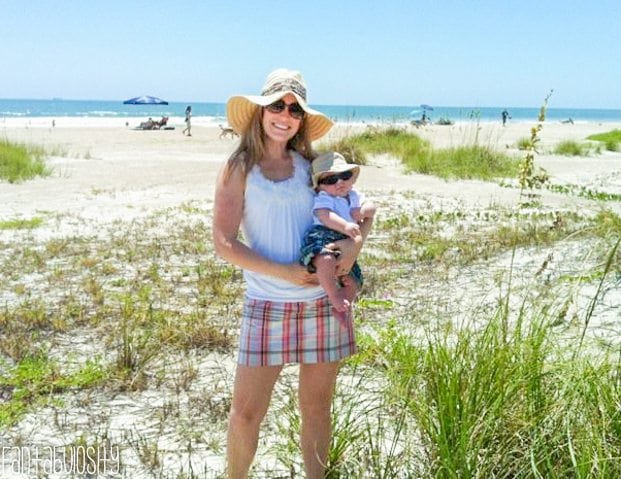
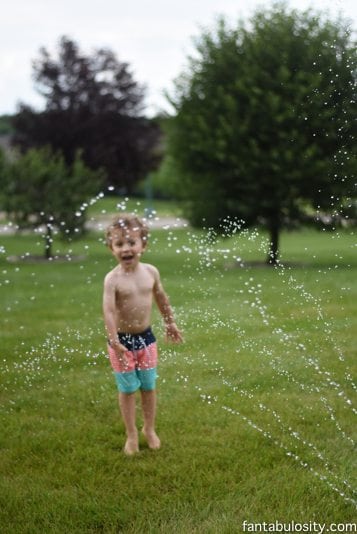
    Drink Dispensers for a party, on a stand. So cute! https://fantabulosity.com

    Water Fun!

    My boys and their little guests had a blast in the water. Water sprinklers, water balloons, and just tubs of water! Fun for hours.

    Nautical Birthday Party Ideas, Navy Blue and White! Perfect for boy or girl! fantabulosity.com-9

    If you’re having a slumber party, make sure to check out these fun ideas for a boys slumber party, too!

    Nautical Birthday Party Ideas, Navy Blue and White! Perfect for boy or girl! fantabulosity.com-9

    I had such a good time designing this party. I already can’t wait for my other kiddos birthday this Fall. Let the ideas and designing begin!

    Nautical Birthday Party Ideas! Party Planning Services! https://fantabulosity.com

    7 Easy Steps on How to Get Beach Waves

    March 14, 2015

    Beach waves tutorial

    How to Get Beach Waves: A quick 7 easy steps on how I get beach waves with a curling wand, and the hair products that I use!

    I couldn’t be more than excited to share with you, How I get beach waves in my hair! I’ve had so many people ask recently if I’d do a tutorial, and since I’m FAR from a hair stylist, I was like, “Whaaaat!? But I don’t know what I’m doing!” But then I realized you may want to see someone do their hair, that’s not a professional, so you can relate! 🙂

    How To Style Beach Waves Picture and Video Tutorial fantabulosity.com

    How to Get Beach Waves

    I’ve provided photos of the step by step instructions of how to do beach waves, but I’ve also included a video tutorial at the bottom of this post, in case you’re a “watch and learn,” kinda person. 🙂

    Step 1:

    Grab a top layer of hair, and clip it up at the top. You’ll begin curling with the bottom layer.

    Clip Hair Up - how to get beach waves fantabulosity.com

    Step 2:

    Spray the entire bottom layer with a heat thermal spray. I use “Chi Iron Guard.” After trying a lot of brands, even being guilty of trying to get by with the generic Sally Beauty brands… Chi Iron Guard is faaar better, in my opinion.

    Heat Thermal Spray for beach waves fantabulosity.com

    Step 3:

    I start by grabbing a one inch section, and brushing through that section, just to remove any tangles or frizz, so I’ll get a “cleaner,” curl.

    Grab your pre-heated curling wand. I recommend the Bed Head Curlipops Curling Wand. It’s so easy to use, and even comes with a glove if you want to use it! 🙂

    This is the BEST wand to get beach waves

    Buy the Curling Wand HERE!

    *Note: You will take a different approach when working with the strands that are around the face. So when we move on to the next strand, I’m going to give you a different technique. 

    Starting with the first strand that’s by your face:

       About half way up (Not all the way at the top, next to your head) you’ll place your curling wand on top of the hair at an angle, and start wrapping the hair around the wand, in an “outter,” motion. (You will be switching back and forth between each 1-inch section.)
    When you’re wrapping the hair, don’t overlap the hair. Each time you wrap the hair, make sure it directly touches the wand…not rest on top of the previous wrapped-around hair.

    Wrap hair around wand - how do get beach waves fantabulosity.com

    Step 4:

    After about 10 seconds, pull the curling wand straight out of the hair, while cupping your other hand underneath the curled hair, holding it for about 5 seconds, allowing the freshly curled hair to cool while it’s still in the “roll.” Gently remove your hand, and let your hair go.

    Cup the curl - how to do beach waves fantabulosity.com

    Yeah! Just like that! See that first curl!?

    How to do beach waves tutorial fantabulosity.com

    Step 5:

    Ok! Very good! Now let’s move on to the next 1-inch strand of hair, and you’ll do it a bit different this time.

    Starting at the TOP of the hair (right by the head), place your curling wand UNDER the strand, and wrap the hair around, in an “over,” motion. Keep your wand “straight” in a horizontal position, and not diagonal this time.

    How to do beach waves in hair fantabulosity.com

    Here’s a side view of the way it looks when you’ve wrapped the entire strand around the wand. (I did overlap a bit in this one, and I’ve slapped my hand for that. Ooops.)

    Curl bottom layer - how to get beach waves fantabulosity.com

    Now you have two curls! Look at you go!

    Curls are forming - how to getbeach waves fantabulosity.com

    Step 6:

    Ok! Now… on the third time, go back to curling it, and place the wand on top of the hair and wrap it around in an “under,” motion. So what you’re doing is changing back and forth after each hair strand, mixing it up, so you’re not doing ever strand in the same motion.

      • Continue on, going about your business, and finish curling out the entire bottom section of hair.
    • When the bottom layer is complete, unclip the top layer, spray with your CHI Iron Guard, and begin curling the top layer of hair, remembering to ALTERNATE going over/under with each strand.

    Wrap underneath every other - how to get beach waves fantabulosity.com

    Step 7:

    All curled? Excellente! Now… grab a “polish,” like the CHI Pliable Polish that I use, and put about a marble size dab of it in the palm of your hand. Rub your hands together, mixing between the fingers, just to evenly coat,

    and start running your hands/fingers through your hair, breaking up the “tightness,” of the curl, and to give your hair a more “pieced,” look, rather than a curled mass of hair. 🙂

    This is where I also kind of “flip,” my hair around from side to side, and add volume with my fingers by “teasing,” the hair at the crown of my head, etc.
    (You may laugh, but each day, my hair decides if it wasn’t to favor the “left,” or “right,” side of my face; no matter how I style it! So, I let it determine which side it prefers that day, and run with it.)  🙂

    Run Polish Through - how to get beach waves fantabulosity.com

    (Now don’t look closely below, because I’m sure you can see my “grays,” starting to show up in this “30 something,” head.)

    Pliable Polish - how to get beach waves fantabulosity.com

    Run Pliable Polish Through - how to get beach waves fantabulosity.com

    There they are! You have successfully created beach waves in your hair!

    Now I do use hair spray to lock-in the beach waves on my hair. You obviously don’t HAVE to have hair spray to create beach waves, so I didn’t want to make that a step. But… it does hold the wave longer for me, and I LOVE LOVE LOVE using the Big Sexy Spray and Play, because when I “poof,” up my hair with my fingers, when I’m running the Pliable Polish in, I like to “freeze,” that volume that I’ve created.

    Hair Spray Beach Waves - how to get beach waves fantabulosity.com

    You like that “hair spray,” action shot? Yeah, my helper Brandy was good like that. You should have seen the excitement on her face when she realized she caught that “moment,” in her photo taking process.)  😉

    Spray those beach waves - how to get beach waves fantabulosity.com

    Are you more of a “watch and learn,” kinda person?

    Well then I’ve created this video tutorial just for you!

    How to Get Beach Waves Video Tutorial


    I soooo hope that this was helpful for you, and that you are ready to create beach waves in your hair!

    TIDBIT: You may have to reference this a couple of times, before you get the “hang,” of it. So “Pin,” this image below, so you can always reference it!

    Photo & Video Tutorial on

    Thank you for coming by!

    Jessica Burgess of Fantabulosity

    Easy 5 Minute Butternut Squash Pancakes

    March 8, 2015

    Butternut Squash Pancakes stacked with butter on top.

    5 Minute Butternut Squash Pancakes Easy: Sneak in a little “healthy,” for kids all while adding a delicious rich flavor to plain pancakes! 

    5 Minute Butternut Squash Pancakes http://fantabulosiity.com

    More Breakfast Recipes You’ll Love:

    • Brioche French Toast
    • Blueberry Pancakes
    • Fluffy Homemade Pancakes from Scratch
    • Easy French Toast Recipe
    • Easy Cinnamon French Toast Sticks
    • French Toast Bake

    Healthy Pancakes for Kids

    The flu bug had been floating around our house for the previous couple of weeks, and I was determined to try and make the pancakes have at least a smidgen of “healthiness,” to it, so I could feel a little better about feeding him just plain sugar and white starches. Anything to encourage that little immune system to improve.

    I thought to myself, “What can I add to the pancake mix, to make the pancakes just a little bit healthier?” Continuing to talk to myself like some crazy person, I said, “Hey… people put fruit in pancakes all of the time… why couldn’t I sneak in a little something healthy to these?”

    If you prefer using almond milk in your pancakes, you can try

    I had been staring at a can of butternut squash in my pantry for months. Don’t ask me why I bought this, but now I’m glad I did. 🙂

    Secret Ingredient to my pancakes! https://fantabulosity.com

    Butternut Squash Pancakes “Recipe”

    I mixed the pancakes up using my favorite pancake mix (Krusteaz is my all time favorite because it only requires water and makes the FLUFFIEST pancakes), making the recommended measurements on the box for 4-6 pancakes.

    Or, if you want to make your own pancakes from scratch, or these almond milk pancakes, you can do that, and proceed with the below.

    Then I added just a large spoonful (a little over a Tablespoon) of canned butternut squash to the batter. I then mixed it up, and poured out little pancakes on my griddle like nothing ever happened.

    The pancakes were done in 5 minutes. I kid you not.  (I also saved the remaining butternut squash for a future recipe, or for more butternut squash pancakes the next morning.)

    The True Test:

    I put the pancakes in front of my two little guys, and they scarfed them down like normal, and my three year old even exclaimed, “Mommy, deez pancakes are dewicious.” SUCCESS.

    Honestly… I sat down with them and had a taste of the Butternut Squash Pancakes too, and I must say… they WERE delicious. I even happened to get a bite where I didn’t mix it up too well, and got a taste of the butternut squash puree… and it had a VERY nice flavor to it.

    Totally recommend it you guys.

    5 Minute Butternut Squash Pancakes https://fantabulosity.com

    Butternut Squash Pancakes will forever be on my quick go-to breakfast list. Since this little experiment in the kitchen, I’ve also tried Sweet Potato Pancakes, using canned sweet potatoes too!

    If you love pancakes as much as I do, then you’ll want to get a hold of this list of over 95 pancake toppings to add to all sorts of pancakes!

    Recipe

    Butternut Squash Pancakes stacked with butter on top.
    Print Pin
    Be the first to rate!

    Butternut Squash Pancakes Recipe

    Using a pancake mix or my homemade pancakes recipe, and canned butternut squash, these pancakes are filled with flavor and something the kids will love!
    Course Breakfast
    Cuisine American
    Prep Time 5 minutes minutes
    Cook Time 2 minutes minutes
    Total Time 7 minutes minutes
    Servings 5 pancakes
    Calories 58kcal
    Author Jessica Burgess

    Ingredients

    • pancake mix Enough for 4-6 pancakes and required ingredients or this homemade pancake recipe
    • 1 Tablespoon butternut squash pureed, I use canned

    Instructions

    • Make pancake batter according to package directions, or according to my homemade pancakes recipe.
    • Mix in butternut squash puree and mix until combined. Don't mix too hard or too much as this will make the pancakes very thin.
    • Cook pancakes as directed.

    Nutrition

    Serving: 2pancakes | Calories: 58kcal | Carbohydrates: 8g | Protein: 2g | Fat: 2g | Saturated Fat: 1g | Polyunsaturated Fat: 1g | Monounsaturated Fat: 1g | Cholesterol: 18mg | Sodium: 131mg | Potassium: 62mg | Fiber: 1g | Sugar: 0.1g | Vitamin A: 379IU | Vitamin C: 1mg | Calcium: 57mg | Iron: 0.4mg

    Blue Cheese Burgers

    May 25, 2024

    Blue cheese burger on pretzel bun, with lettuce leaf, sitting next to french fries on plate.

    Blue Cheese Burgers are taking your burger game to the next level. The ground beef filled with blue cheese crumbles gives the burger a juicy bite, with the perfect flavor of cheese. Pair it with a pretzel bun, and it’s mouth-watering central.

    Blue Cheese burger on pretzel bun, sitting on square plate with french fries.

    Although I’ve cooked this blue cheese burgers recipe in a cast-iron on the stove, you can use a nonstick skillet or you can even bake burgers in the oven, or make burgers in an electric skillet, grilled burgers, or burgers in the air fryer. (Or your favorite method of course!)

    If you love stepping up your burger game, you’re also going to love this Aloha burger recipe and this Juicy Lucy Burger!

    [feast_advanced_jump_to]

    Ingredients You’ll Need

    As you can see below, not much is required to make this delicious burger recipe! I’ve included notes on the key ingredients below. Make sure to check the recipe card below for exact measurements.

    Overhead view of ingredients on counter for blue cheese burgers.
    • Ground beef: I typically use more of a lean ground beef, since we have a beef butchered every year. But you should be able to use your favorite type of ground beef for this recipe.
    • Blue cheese: You can actually use too much blue cheese in this recipe. (Or at least my husband said when I was testing this recipe. I preferred more but he said it was too much. So if you find that you want more blue cheese, go for it!) You can also use Gorgonzola if that’s what you have!
    • Pretzel buns: You don’t have to use pretzel buns but my goodness the flavor is so good! But we’ve used regular hamburger buns and they’re delicious too.

    How to Make Blue Cheese Burgers

    Raw, uncooked burgers in cast iron skillet.
    • Combine the ground beef, blue cheese, and spices in a bowl, and mix until evenly combined.
    • Place seasoned burgers in skillet (I did add a little butter since using a cast iron but you can use nonstick spray or your favorite item to use to keep burgers from sticking) and cook for 3-5 minutes and then flip. Cook for an additional 3-5 minutes or until the juices run clear.
    Cooked blue cheese burgers in cast iron skillet.

    Topping Ideas

    When the burgers are finished cooking, it’s time to build your burger! We chose to use pretzel buns and lettuce leaves. The blue cheese crumbles are enough cheese for me. However, here are some other ideas:

    • mustard
    • ketchup
    • onion
    • pickles (or go wild and make this fried pickle chips recipe!)
    • bacon
    • onion rings (like in my cowboy burger recipe)
    • bbq sauce
    Side view of blue cheese burger on pretzel bun, with lettuce leaf, sitting next to french fries.

    Can we talk about how delicious that blue cheese cooks in to that burger, above. You can see the crispy little golden blue cheese nuggets on the outside edge there!

    Storage

    If you have leftover blue cheese burgers, allow them to cool before storing them in an airtight container or storage bag, and place them in the refrigerator. Enjoy within 3-4 days.

    More Burger Recipes You’ll Also Love:

    Love hamburger recipes as much as we do? Then you’ll love these:

    • Smoked Burgers
    • Donut burgers
    • Baked Turkey Burgers

    So tell me… did you try these? Did you like them?  They make another great weeknight meal! As you know from my other dinner recipes, quick & easy is my favorite! Or if you have ground beef in the freezer, get your meal-planning game on with these ground beef dinners!

    More Easy Recipes You’ll Love:

    • Close up of cooked salmon patties on a plate, with fresh parsley sprinkled on top.
      Old-Fashioned Salmon Patties Recipe
    • A sliced, boneless pork chop that was baked in the oven, sitting on a plate.
      How to Cook Pork Chops in the Oven (Bone-In & Boneless Guide)
    • A wooden spoon dishing out a serving of meatball casserole in a 9x13 baking dish.
      Meatball Casserole
    • Old-Fashioned Dinner Recipes collage.
      19 Old-Fashioned Dinner Recipes (Classic Comfort Food Favorites)

    Recipe

    Blue cheese burger on pretzel bun, with lettuce leaf, sitting next to french fries on plate.
    Print Pin
    5 from 1 vote

    Blue Cheese Burgers

    Juicy blue cheese burgers are easy to make, and add a twist to the traditional cheeseburger! Pile on your favorite toppings, and a pretzel bun for a delicious burger.
    Course Main Course
    Cuisine American
    Prep Time 10 minutes minutes
    Cook Time 10 minutes minutes
    Total Time 20 minutes minutes
    Servings 4 hamburgers
    Calories 356kcal
    Author Jessica Burgess

    Ingredients

    • 1 pound ground beef
    • ½ cup blue cheese crumbles
    • 1 teaspoon salt
    • ½ teaspoon black pepper or to taste
    • 1 Tablespoon garlic powder
    • 4 pretzel buns
    • your favorite burger toppings

    Instructions

    • In a medium-sized bowl, mix together ground beef, blue cheese crumbles, and spices.
    • Form burger patties into 4 equal-sized patties.
    • Place in a skillet and cook one side of the burger over medium heat for 3-5 minutes, and then flip to cook the other side for 3-5 minutes, or until the juices run clear.
      (I do also add about one Tablespoon of butter or spray the pan before cooking to prevent sticking.)
    • DO NOT mash down the burgers while cooking. This will release the juices that you want to stay in.
    • Assemble the burgers and top with additional toppings of your preference.

    Notes

    This recipe can easily be doubled for leftovers later! 
    Make sure to allow the burgers to cool before storing leftovers in the refrigerator.

    Nutrition

    Serving: 1burger (with pretzel bun) | Calories: 356kcal | Carbohydrates: 2g | Protein: 23g | Fat: 27g | Saturated Fat: 11g | Cholesterol: 93mg | Sodium: 913mg | Potassium: 373mg | Vitamin A: 130IU | Calcium: 109mg | Iron: 2.5mg

    Kielbasa Pasta

    February 8, 2024

    Close up of pasta recipe with kielbasa on white plate.

    Kielbasa Pasta: My kielbasa pasta is a one-pot dish of savory sausage, tender pasta, and a creamy, tomato-infused sauce that promises to delight your taste buds. 

    Pasta recipe with kielbasa on white plate.

    This Polish sausage pasta dish isn’t just an easy weeknight dinner -it’s a comforting hug in a bowl that’s sure to please everyone at the table. So grab your Dutch oven and let the flavors of this heartwarming meal bring smiles all around your dinner circle!

    Looking for more spicy sausage recipes? You could try this Kielbasa and Cabbage in the Instant Pot for an easy-to-make one-pot recipe. Or, for another spicy alternative, try my Instant Pot Cajun Pasta.

    [feast_advanced_jump_to]

    Why You’ll Love This Recipe

    • Family favorite: This cheesy kielbasa pasta recipe is a hit with both kids and adults. It’s got that cheesy pasta goodness that children love, while adults appreciate the robust flavors and the feeling of a full, satisfied tummy.
    • Versatile: I often switch up the cheeses or throw in different veggies that I have in the fridge, making each time a new adventure in taste. It’s the perfect recipe to get those creative kitchen juices flowing!
    • Leftover magic: If, by some miracle, there are leftovers, they taste even better the next day. The flavors meld and intensify, making lunchtime the highlight of your workday!

    Ingredients Needed

    I’ve highlighted a couple of simple ingredients with relevant notes. Other than this, the ingredients needed are pretty basic.

    Labeled ingredients for kielbasa pasta recipe.
    • Kielbasa – For that deep, smoky flavor we all adore, you can’t go wrong with a good kielbasa. Here’s a little tip: if you want to add an extra zing to your dish, try lightly searing the kielbasa before you toss it into the mix. 
    • Onion and Pepper Mix – Keep a bag of this frozen mix on hand, and you’ll always be ready to add a pop of color and nutrients to your meals. It’s a no-chop, no-fuss shortcut that catapults your cooking from simple to spectacular. 
    • Rotel Tomatoes – These little gems, which contain green chilies, bring a sassy kick to the table! Add them at any stage of the cooking process for a bit of cheeky boldness that will wake up your taste buds. 
    • Butter – We use unsalted for this recipe but you can use salted if you prefer. Just remember that you may want to reduce the amount of salt the recipe calls for if using salted butter.
    • Cream – Double (heavy) cream is best. Make sure it’s at room temperature if added in when cold, it will cause the caramel to split.

    *Be sure to see the recipe card below for the full ingredients list & instructions!*

    Substitutions

    Sometimes substitutions are necessary because of ingredients that are unavailable or needed for dietary restrictions. Here are some suggestions that can help:

    • Kielbasa – No kielbasa sausage? No problem! Try smoked sausage, bratwurst, or even turkey sausage for a lighter take that still packs a punch of flavor.
    • Rotel Tomatoes – If Rotel tomatoes aren’t on hand, dice up some fresh tomatoes and add a small can of green chilies. You’ll get that same vibrant taste that makes the dish pop!
    • Bowtie Pasta: Any type of pasta shape will work, be it fusilli, shells, or penne pasta. It’s just a fun way to play with texture and make each bite interesting!
    • Cheddar Cheese – Feeling adventurous with the cheese? Swap cheddar out for Monterey Jack for a melty, creamy experience or a mild Colby for a softer flavor profile. You can’t go wrong here-cheese is the glue that holds our culinary dreams together!

    Variations

    Variations to a recipe are like adding your own personal riff to a favorite song - it’s where the magic happens! Here are some fun twists you can try:

    • Go Veggie: Swap the kielasa for some hearty portobello mushrooms or eggplants for a vegetarian twist that still delivers on flavor. 
    • Cheese, Please: Try adding a scoop of ricotta for a creamy spin, or sprinkle on some mozzarella and put it under the broiler for a few minutes for a bubbly, golden topping that’s irresistibly Instagram-worthy. 
    • Spice it Up: For those who like a little fire in their forkful, slice in some jalapeños or sprinkle on red pepper flakes to turn up the heat.
    • Garden Fresh: With spring in full bloom, why not fold in some fresh spinach, bell peppers, or arugula right at the end? It adds a pop of color and a dash of freshness that elevates the whole experience. 

    How to Make Kielbasa Pasta

    This Kielbasa pasta is broken into 2 components:

    • Make the sauce
    • Cook the pasta and combine
    Image collage showing process images of kielbasa pasta recipe.

    STEP 1: Heat a Dutch Oven. Let it get nice and hot. Then, pop in a splash of oil, followed by the sausage, onions, and peppers. Let them sizzle undisturbed for 1-2 minutes to get that beautiful browning.

    STEP 2: Stir the ingredients. Give everything a good stir and let it cook for about five minutes more until the sausage is mostly browned and those peppers and onions are nice and tender.

    Final steps showing image collage of how to make kielbasa pasta recipe.

    STEP 3: Add seasoning. Sprinkle in the parsley, oregano, salt, and garlic or some Italian seasoning, and mix them in well. 

    STEP 4: Add tomatoes. It’s time for the Rotel tomatoes. Pour them in and stir, making sure to scrape up all those tasty browned bits from the bottom.

    STEP 5: Simmer, then add pasta. Turn down the heat to medium-low and pour in the broth and cream. Wait for it to start bubbling gently, then welcome the pasta into the pot.

    Close up of kielbasa pasta in pot, with a wooden spoon holding up a serving.

    STEP 6: Cook the pasta. Cover it and let it cook for 10-15 minutes. Peek in occasionally to stir things around and prevent any stickiness.

    STEP 7: Add the cheese. Test the pasta to make sure it’s cooked to your liking, then take the pot off the heat. Now for the grand finale - stir all that cheese into the cooked pasta.

    STEP 8: Add greens. For a bit more color and fresh crunch, throw some chopped green onions over the top as a garnish. 

    Recipe Pro Tips

    • Patience is Key: Resist the urge to stir the pot too frequently. Allowing it to cook uninterrupted means more deliciously crisp edges on your sausage and vegetables. 
    • Stock Matters: Opt for a good quality stock-it’s the secret to a rich, deeply flavored sauce. Home-made or your go-to brand will work wonders here.
    • Cheese Choices: For creaminess, freshly grated cheese blends that are smoother than pre-shredded varieties which often contain anti-caking agents.
    • Divine Leftovers: If you’ve got extra servings, let the flavors mingle overnight. Pasta dishes like this one often taste even better the next day.
    • Pasta Pointers: When combining your pasta with the sauce, undercook it by a minute or two-it’ll continue to absorb and will not get mushy.
    • Herb Hints: Fresh herbs can truly transform a dish. If you have them, use them. If not, dried herbs work, but remember they’re more potent, so use them sparingly.

    Recipe FAQs

    Can I make this Kielbasa pasta recipe ahead of time? 

    Sure thing! You can definitely prepare your veggies and sausage in advance. Keep them refrigerated until you’re ready to start cooking. The cheese sauce
     can also be made ahead and gently reheated when it’s time to mix with pasta. 

    Is this recipe adaptable to different dietary needs?

    Absolutely! It’s super flexible. Gluten-free pasta can be swapped in for a wheat-free option, and there are amazing dairy-free cheeses out there if you’re avoiding dairy. Just keep in mind to check the labels on your sausage as well for any hidden gluten or dairy.

    What kind of cream is best for this recipe?

    I usually go for heavy cream
     because it brings a lovely richness. But if you’re after something a bit lighter, half-and-half will still give you creaminess without the same level of fat. 

    How do I prevent my pasta from getting too soft?

    Remember, the pasta will continue to cook once you’ve added it to the sauce. To keep the perfect bite, cook it ‘al dente
    ‘ - firm to the bite - then it’ll be just right by the time you’re ready to serve. 

    What to Serve with Kielbasa Pasta

    When you’ve got a savory stunner like this Kielbasa pasta on your table, you might be wondering what to pair it with to round off this easy meal. Well, how about a light and crunchy garden salad? It’s a cinch to whip up, and the crisp freshness is the perfect counterbalance to the pasta’s rich, hearty flavors. 

    And for those extra toasty nights, why not chill some zesty lemonade to enjoy alongside? It’s like a little sunshine in a glass - and so ridiculously easy! Whether you’re gathering with family or having a cozy dinner for two, these simple additions turn your dinner time into a feast. 

    Storage

    Stashing away leftovers is a breeze. Simply let the pasta cool down, then transfer it to an airtight container and pop it in the fridge. It’ll stay fresh and tasty for about 3-4 days - perfect for those not-a-cooking-kind-of-night nights.

    This pasta freezes like a champ. Just make sure it’s in a freezer-safe container. I like to leave a little space at the top because it’ll expand slightly once frozen. 

    When you’re ready for a re-run, thaw it overnight in the fridge, then reheat gently on the stove to bring back that just-cooked deliciousness. 

    🍝 More Pasta Recipes You’ll Love

    For a simple meal that will feed the whole family, try this Easy Sausage Pasta Bake. Or, for a recipe that is packed with flavor and tons of color, try this Zesty Italian Pasta Salad Recipe.

    • A slice of Westhaven cake on a round plate.
      Westhaven Cake
    • A slice of shoofly cake sitting on round plate.
      Shoofly Cake
    • Old fashioned potluck cake recipes collage.
      Old-Fashioned Cakes That Still Show Up at Every Potluck
    • A slice of coconut poke cake on a spatula.
      Coconut Poke Cake Recipe

    Did you make this? I’d be so grateful if you left a “star” rating below to let me know what you thought! Then, the next time you need a quick and easy recipe, come back to Fantabulosity to browse all of my easy recipes!

    Recipe

    Close up of pasta recipe with kielbasa on white plate.
    Print Pin
    5 from 2 votes

    Kielbasa Pasta Recipe

    This Kielbasa Pasta dish is a blend of savory sausage, tender pasta, and a creamy, tomato-infused sauce that's quick and comforting for an easy dinner recipe.
    Course Dinner, Main Course
    Cuisine American
    Prep Time 5 minutes minutes
    Cook Time 25 minutes minutes
    Total Time 30 minutes minutes
    Servings 6
    Calories 312kcal
    Author Jessica Burgess

    Ingredients

    • 1 Tablespoon Cooking Oil
    • 14 Ounce to 1 Pound Kielbasa Sausage Sliced into Rounds
    • 1 Cup Frozen Onion and Peppers Mix
    • ½ Teaspoon Garlic Powder
    • ½ Teaspoon Salt
    • 1 Teaspoon Parsley
    • 1 Teaspoon Oregano
    • 10 Ounce Can Rotel Tomatoes
    • 2 Cups Chicken Broth
    • ½ Cup Heavy Cream
    • 8 Ounces Bowtie Pasta Uncooked
    • 1 Cup Sharp Cheddar Cheese
    • Optional: ⅓ Cup Green Onion Sliced

    Instructions

    • Heat a Dutch Oven over medium high heat until hot. Once hot add in 1 tablespoon of oil, then add the sausage and onions and peppers. Cook for 2 to 3 minutes before stirring to allow the sausage to brown.
    • Stir, cooking for an additional five minutes until most of the sausage is brown, and peppers and onions are softened.
    • Next add in the parsley, oregano, salt, and garlic. Stir to combine.
    • Add the Rotel tomatoes, stir well. As you are stirring, scrape any browned bits from the bottom of the pan.
    • Reduce heat to medium low then add in the broth and the cream. Bring to a simmer then stir in the pasta.
    • Cover and cook for 10-15 minutes, stirring occasionally to prevent sticking.
    • Once the noodles are done remove from heat and stir in all of the cheese.
    • If desired, garnish with green onions.

    Notes

    5 cups of uncooked bowtie pasta is about 8 ounces. 
    What readers are saying: “Cooked this dish for second time today 3/2/25. Delicious! I did add full cup of heavy cream & 2 cans of broth which it needed to cook pasta and have extra sauce for bread dipping. Excellent, quick dish!”


    Nutrition

    Calories: 312kcal | Carbohydrates: 30g | Protein: 10g | Fat: 17g | Saturated Fat: 8g | Polyunsaturated Fat: 1g | Monounsaturated Fat: 5g | Trans Fat: 0.01g | Cholesterol: 43mg | Sodium: 615mg | Potassium: 139mg | Fiber: 1g | Sugar: 2g | Vitamin A: 489IU | Vitamin C: 0.2mg | Calcium: 163mg | Iron: 1mg

    “Take it Easy,” Gift Basket Idea for Men or Women

    January 23, 2015

    Gift basket idea for men or women

    Take it Easy Relaxation Gift Basket Idea for Men or Women: This simple gift idea is perfect for any man or woman for ANY occasion! Who wouldn’t love a basket with an excuse to relax!

    My sister’s birthday was in December, and she’s one of those, “My birthday is around Christmas, so everyone forgets about it,” kinda people. Do you know someone like this too? 😉

    This year, I’m pretty excited about her gift. Not only was it so EASY… not only is it a concoction of things for relaxing…not only is it gender neutral and perfect for those men & women that are hard to shop for  in your lives… IT’S something that can be used over and over again!

    Relaxation Gift Basket Idea for Men or Women

    fantabulosity.com

    What’s Included?

    I’ve done a little research for you, and found similar items to create this gift basket idea for men OR women, at the bottom of this post! So all you have to do is go snag them, and put them in the canvas basket when it comes in! 

    Fur Throw:

    Well I found this one at Restoration Hardware the other day, (here’s a similar fur throw) along with “down” slippers (get similar slippers).  I’m telling ya…it’s like slipping your foot in to a little slice-o-Heaven.

    Coffee Mug & Tea Towel:

    Then I added in the “Good Morning,” coffee mug from World Market. I also added a little tea towel from H&M, just for a little pizzazz, and in case she makes a little spill while sippin’ her coffee. Oh … coffee. That would be a really nice little addition to this gift basket too. 😉

    Storage Tote:

    Now we can’t forget about the adorable “storage,” tote that I found at H&M Home, to put it all in!

    This gift basket idea is spot-on for any other kind of event that you’ll need a gift for.

    How about:

    • Valentine’s Day Gift Idea (Or you may also love this Gift Idea for a Boyfriend!)
    • Mother’s Day Gift Ideas (Or see what mom really wants for Mother’s Day?)
    • Father’s Day Gift Ideas
    • Best Friend Gift Ideas
    • Gender Neutral Secret Pal Gift

    Now no worries. You don’t have to have this same tote, blanket, coffee cup, or slippers. Just find any container, and throw any kind of patterns/colors together. But I did find similar items below that would work perfect to create this gift…

    Great Gender Neutral Gift Idea for any occasion! https://fantabulosity.com

    Garlic Roasted Broccoli

    September 4, 2024

    Garlic roasted broccoli in square bowl, sitting on linen napkin.

    Garlic Roasted Broccoli is such a delicious way to enjoy the popular green vegetable. The garlic powder, olive oil, and kosher salt are all it takes to make this broccoli side dish in the oven, something the family will love.

    Garlic Roasted Broccoli

    Within 25 minutes, (including prep and cook time) this recipe is ready to serve alongside your favorite main dish like this cheesy chicken bake or this Ribeye steak in the oven.

    [feast_advanced_jump_to]

    How to Make Garlic Roasted Broccoli

    To start, just a small little bowl will do, and mix the oil and the seasonings together in it.

    Olive oil with spices

    For the broccoli, you can buy the already-cut, broccoli florets, or you can buy the stalks and cut it yourself.

    Just cut the broccoli stems off the big stalk, to create smaller broccoli pieces, easy for picking up with a fork and taking a bite. Place them in a plastic bag. (You can also put them in a bowl, and mix this way if you prefer.)

    Pour the seasoned oil over the broccoli, seal the bag, and shake to try and coat all of the broccoli.

    Broccoli in plastic bag to season

    To avoid dirty dishes, cover cookie sheet (or baking pan) with aluminum foil and spray it with a non-stick spray.

    Lay all of the broccoli out on to the foil, trying to make sure pieces don’t overlap. (This is so it will cook evenly.)

    Uncooked Broccoli

    How Long to Bake Broccoli

    Bake it at 425 degrees F, for 20 minutes (or longer if you like an even crispier broccoli — I sure do).

    Roasted broccoli in oven

    Enjoy this broccoli hot, right out of the oven. If you prefer, you can also sprinkle parmesan cheese over the broccoli or even a little black pepper, or include it in the seasoned oil before coating the broccoli.

    This was so easy, and GOOD! I don't even like broccoli that much! Healthy Side Dish Recipe

    Storage

    If you have leftovers, allow the baked broccoli to fully cool and then store in a container, in the refrigerator and enjoy within 4-5 days.

    Reheat: When reheating, you can warm the broccoli in the microwave or if you have an air fryer or even a toaster oven, this can help the broccoli remain a bit crispy, instead of soggy. You could also put it back in the oven but reheating at a lower temperature would be best so it doesn’t cook more and burn.

    Related Recipes

    If you love easy vegetables or are looking for more side dishes to serve with dinner, I think you’ll also love this asparagus wrapped in bacon!

    • Easy Broccoli Raisin Salad with Bacon
    • Roasted Brussel Sprouts with Bacon, Cranberries + Sweet Glaze
    • Air Fryer Butternut Squash

    Recipe

    Garlic roasted broccoli in square bowl, sitting on linen napkin.
    Print Pin
    4.57 from 32 votes

    Garlic Roasted Broccoli

    This garlic roasted broccoli side dish is the BEST way to eat broccoli. Pair this with chicken or steak, and a starch for a rounded out meal.
    Course Side Dish
    Cuisine American
    Prep Time 5 minutes minutes
    Cook Time 20 minutes minutes
    Total Time 25 minutes minutes
    Servings 3 servings
    Calories 131kcal
    Author Jessica Burgess

    Ingredients

    • 12 ounces broccoli florets About 1.5-2 cups
    • 2 Tablespoons olive oil
    • 3 teaspoons garlic powder
    • salt to taste; I used 2 teaspoons kosher salt
    • black pepper optional
    • parmesan cheese optional

    Instructions

    • Preheat oven to 425 degrees F
    • Place your broccoli in a gallon size ziptop bag
    • In a small bowl, combine oil, powder, and salt (pepper if using)
    • Pour liquid mixture over the top of the broccoli
    • Shake until broccoli is fully covered
    • Pour broccoli out on to a greased cookie sheet, covered in aluminum foil
    • Bake for 20 minutes
    • Remove from oven. Sprinkle with additional salt, parmesan cheese if desired.
    • Serve immediately.

    Notes

    It’s best to use fresh broccoli, and not frozen for this recipe. Frozen broccoli has a lot of moisture and can alter the bake time for this roasted broccoli.
    It’s best to enjoy this right after cooked, however leftovers can also be enjoyed at a later date.

    Nutrition

    Serving: 1serving (⅓ recipe without cheese) | Calories: 131kcal | Carbohydrates: 10g | Protein: 4g | Fat: 10g | Saturated Fat: 1g | Sodium: 39mg | Potassium: 394mg | Fiber: 3g | Sugar: 2g | Vitamin A: 705IU | Vitamin C: 101.1mg | Calcium: 53mg | Iron: 1mg

    White Chicken Chili with Cream Cheese

    January 20, 2022

    White chicken chili in white bowl

    White Chicken Chili with Cream Cheese: This easy soup recipe is perfect for a weeknight main course or for lunch on a Sunday. Made with simple ingredients, it’s ready in only 25 minutes!

    If you love creamy soup recipes like this, then you’re going to want to make this easy clam chowder after this one!

    white chicken chili in bowl surround by rolls
    Delicious white chicken chili
    [feast_advanced_jump_to]

    What You’ll Love About this Recipe

    Not only is this chicken chili a recipe that’s perfect for those last-minute dinner ideas, but it’s also something that you can keep ingredients on hand for when you’ve forgotten to run to the store to grab something to make, after a busy day!

    It has the perfect kick of flavor with using the canned tomatoes and green chilies but it’s not too spicy, so it can be something the whole family will love, and will possibly become a family favorite! (But if you love “spicy” then you’ll love this spicy soup recipe!)

    Or, if you’re looking for a warm, comforting dish for game day, you may want to mix things up from a classic chili, since it tends to be a crowd-pleaser!

    Ingredients

    What makes this an easy recipe, is the fact that it uses simple ingredients, and they can all be cooked in one pot; keeping dishes to a minimum!

    Here’s what you’ll need:

    • 2-3 chicken breasts cut up in to small pieces (or deboned rotisserie chicken – then boil the rotisserie for stock)
    • 8 ounces of a block of cream cheese
    • 1  15-ounce can black beans rinsed and drained
    • 1 15-ounce can corn undrained
    • 1 15-ounce can diced tomatoes with green chilis undrained
    • 1 package ranch dressing mix seasoning
    • 1 teaspoon ground cumin
    • 1 teaspoon onion powder
    • 2 Tablespoon milk

    You can jump to the Chicken Grilled Cheese to see the full recipe now or keep reading to see how easy it is to make this creamy soup!

    ingredients for soup on white table
    Ingredients for Chicken Chili

    How to Make White Chicken Chili

    In a large stock pot on the stovetop, cook your cubed chicken over medium heat until it’s done. (It will be done with the inside of the chicken is white, and no longer pink.)

    Raw chicken pieces in soup pot
    Cook chicken pieces

    I don’t use any oil but you’re more than welcome to if you prefer dropping a tablespoon or so of olive oil.

    Cooked chicken pieces in soup pot
    Cooked chicken

    Once the chicken is fully cooked, add the remainder of the ingredients in to the pot.

    Remainder of ingredients in pot
    Pour remaining ingredients in

    Heat the white chili over medium heat, stirring often to evenly combine the ingredients and so it will “melt,” the cream cheese.

    Don’t worry, it looks mighty thick at this stage but as the juices from the corn and Rotel, mix with the melted cream cheese and milk, it combines to make a beautiful, creamy texture.

    Chili ingredients in pot, stirred
    Mix together

    Once heated through, and the cream cheese has fully melted, serve this warm creamy white chicken chili in a bowl and dig in! You can even reduce the heat to a simmer and let the chili simmer for a few minutes to allow the flavors to incorporate even more.

    Soup being heated in pot
    Soup heating through in pot

    Substitutions

    To make things easier or if you only have certain ingredients on hand, here are some of our favorite substitutions:

    • Chicken: Feel free to make this white chili recipe using shredded chicken from a rotisserie chicken from the grocery store, or even buy frozen, pre-cooked chicken to keep on hand! Or, you an even use leftover chicken!
    • Tomatoes & Green Chilies: I refer to the tomatoes and green chilies as “Rotel”, some here in this recipe but any brand will do!

    Variations

    Looking to customize this soup a little more to your liking? Here are some topping ideas (which are very similar to the ones that we include in our traditional chili recipe) and extra ingredients that may be delicious if you’d like to experiment! (We haven’t tried these yet, only because we love the recipe just the way it is!)

    • Chicken Broth: (Or chicken stock.)This is meant to be a thicker soup but feel free to add chicken broth if you’d like for it to be a little more thin, especially if you use heavy cream instead of milk. You can even try my easy chicken broth recipe.
    • Bacon: I do love bacon in just about everything so I can’t imagine that adding a couple of slices of bacon to this white chicken chili would be a bad idea. To keep things simple, cook the bacon in with the chicken! To be honest, I wouldn’t even drain the bacon grease if it’s just a tablespoon or so… that may just be delicious!
    • Green Onions: Although there is already onion powder in this recipe, I believe adding some chopped green onion, whether you add it in with the remaining ingredients, or you simply serve on top, it would be a delicious addition!
    • Sour Cream: For you sour cream fans out there, a small dollop of sour cream on top, just before serving, would be a nice touch!
    • Shredded Cheddar Cheese: Shredded cheddar, or even a fiesta blend shredded cheese would add some wonderful additional flavor, just like it does with other chili recipes or how I add it to the top of these chili cheese corn dogs.
    • Fresh Cilantro: I LOVE adding a bit of greenery to the top of soup as a garnish, and cilantro would be the fresh herb of choice for this recipe!
    White chicken chili in white bowl with rolls & parsley surrounding

    What to Serve with this Chili:

    This peanut butter and syrup sandwich is one of our all-time favorite side dishes to serve with a bowl of this white chicken chili, along with a nice green side salad! Or, you can also serve items such as:

    • tortilla chips
    • saltines
    • corn chips
    • slices of homemade Italian bread

    How to Store Leftover White Chicken Chili?

    If you happen to have leftover chili, store cooled-off chili in an airtight container and place in the refrigerator for 3-4 days.

    Simply reheat chili in the microwave or on low heat in a sauce pan, on the stove-top.

    Love Chili Recipes?

    If you think this recipe was a huge hit, then make sure you also try our easy chili recipe, this Frito chili pie, and this chili mac!

    Recipe

    White chicken chili in white bowl
    Print Pin
    5 from 4 votes

    White Chicken Chili with Cream Cheese

    White Chicken Chili with Cream Cheese: This easy soup recipe is perfect for a weeknight dinner or for lunch on a Sunday. Made with simple ingredients, it's ready in only 25 minutes!
    Course Main Course
    Cuisine American
    Prep Time 5 minutes minutes
    Cook Time 20 minutes minutes
    Total Time 25 minutes minutes
    Servings 4 servings
    Calories 331kcal
    Author Jessica Burgess

    Ingredients

    • 2-3 chicken breasts cut up in to small pieces (or deboned rotisserie chicken)
    • 8 ounces cream cheese
    • 15 ounce can of black beans rinsed and drained
    • 15 ounce can of corn undrained
    • 15 ounce can of diced tomatoes with green chilies undrained
    • 1 package ranch dressing mix seasoning
    • 1 teaspoon cumin
    • 1 teaspoon onion powder
    • 2 Tablespoons milk

    Instructions

    • In a large stock pot on the stove, cook your cubed chicken over medium heat until done.
    • Lower to medium heat, and add in remaining ingredients.
    • Stir until cream cheese has melted, and heated through.
    • Serve warm.

    Nutrition

    Serving: 1serving (¼ recipe) | Calories: 331kcal | Carbohydrates: 3g | Protein: 27g | Fat: 22g | Saturated Fat: 11g | Cholesterol: 135mg | Sodium: 317mg | Potassium: 515mg | Sugar: 2g | Vitamin A: 795IU | Vitamin C: 1.3mg | Calcium: 74mg | Iron: 1mg

    How to Host a Favorite Things Party (Easy Gift Exchange + Setup Guide)

    December 4, 2019

    Favorite Things Party Ideas

    Wondering how to host a favorite things party? From setting up the gift exchange to creating a simple, fun atmosphere, this guide walks you through everything you need to plan a stress-free girls night your guests will love.

    Looking for what to serve? Don't miss these favorite things party food ideas!

    Favorite Things Party Ideas

    After planning my son’s “Woodland Friends Birthday Party,” I immediately started thinking about planning another, and the Favorite Things Party was born.

    ——> Stop right here if you need a free party planning checklist! Then come back and check out how I host a Favorite Things shindig!

    Favorite Things Party Ideas-Champagne Bar Ideas https://fantabulosity.com

    How to Host a Favorite Things Party

    I gotta say, that I went in to planning my first “Favorite Things Party,” empty-handed. 

    I googled…

    • “Favorite Things Party Ideas,”
    • “How To Host a Favorite Things Party,”
    • “How Does a Favorite Things Party Work.” 

    All of those gave me great tips, ideas, and tricks, but I have to say I still did it my own way, which is the beauty of it.

    Favorite Things Party Ideas

    See my Christmas Favorite Things Party, and even consider having a Christmas movie-themed party!

    Martini Bar Ideas fantabulosity.com Red apple martini and White Chocolate Peppermint Martini

    …and the Summer Favorite Things Party!

    favorite things party ideas

    Now back to THIS Favorite Things Party…

    Favorite Things Party Ideas-Champagne Bar Garnishes https://fantabulosity.com

    Favorite Things Party Ideas

    The planning of my favorite things party, all started with my favorite drink. Champagne.

    DRINK IDEAS

    I thought and thought about creating a signature drink for the evening, but the more I thought about it, the more I was loving the idea of letting everyone get creative and serve up their own bubbly, by creating a Champagne Bar!

    I provided:

    • fruit garnishes (blueberries, blackberries & raspberries)
    • fruit juices
    • chocolates

    I coated the rims of the champagne glasses with gold sprinkles, and not only did that make it super cute… but we all loved the extra “sweetness,” with every sip.

    I also provided different types of champagne, in case we had “Sweet,” lovers, and “Dry,” lovers. Which… I’m glad we did, because I had a healthy mix of both “tastes” attend.

    It didn’t take long for the girlies to get in the champagne. I always knew we were friends for a reason. 🙂

    Favorite Things Game & Gift Station

    How to do a favorite things gift exchange party

    I knew I wanted to designate a space for my guests to immediately drop off their gifts when they came in the door. No one wants to carry and “babysit,” gifts all night.
    (For Heaven’s sake we left the kids at home. We needed to drop our bags and get a glass of champagne in our hands… quickly!) 

    I used my fireplace as a landing zone for the gifts. This worked out beautifully because this is where I had everyone gather when it was time for the favorite things gift exchange, so we didn’t have far to go.

    I also made sure to provide a sign, explaining to everyone what they needed to do when dropping off the gifts. (Don’t worry… I’ll fill you in on how I had everyone play the game, below.)

    Favorite Things Party Ideas-Gifts

    So my color scheme for the Favorite Things Cocktail party was easy. White.Black.Gold. The colors I think of when I think of Kate Spade goodies.

    Favorite Things Party Ideas-Cocktail Party. White, Black, Gold decorations

    The Menu

    I was so excited to finally throw a party that could have a cocktail party “feel,” to it. I’ve thrown a ton of kids parties, so it was Momma’s turn.

    Favorite Things Party Ideas-Cocktail Party Menu https://fantabulosity.com

    I did mention to the catering manager, that I wanted to take the goodies, and put them in my own, small “tasting,” dishes.

    So I just took what they gave me, and divided it all up into the small dishes. My guests LOVED the small tasting dish options! Besides… who wouldn’t love miniature plates and forks? They’re simply just too cute.

    Food on table for Favorite Things Party
    Favorite Things Party Ideas-3
    Favorite Things Party Ideas=Cocktail Party Menu Ideas https://fantabulosity.com

    The strawberry-spinach salad was a no-brainer for this party. It’s classy, AND delish.

    Favorite Things Party Ideas-Food Ideas, spinach & strawberry salad https://fantabulosity.com

    Buy the little square plastic dishes we used for the salads here: Mini Square Cubes

      Small, itty-bitty Snicker cake bites were a perfect dessert idea for the party, and were a huge hit. Everyone loved them… and I may have had 5 {ahem 15} myself.

    Favorite Things Party Ideas-Food and Menu Ideas- Cake Bites https://fantabulosity.com

    Pictured below: Gooey Butter Cake

    Favorite Things Party Ideas-Dessert Idea; Gooey Butter Cake in Mini Spoons https://fantabulosity.com

    Favorite Things Party Gift Ideas

    Let’s move on to the purpose of the night. The Favorite Things Gift Exchange!!! Here are my girls gathering in the living area, ready to give and receive!

    Favorite Things Party Ideas-Girls night cocktail party! https://fantabulosity.com

    Some of my favorite gifts to give at a Favorite Things Party, are:

    • cake stands
    • mascara
    • drink dispenser
    • coffee frother
    • dry shampoo
    • bakers twine

    How a Favorite Things Party Works

    • Each guest brings a set number of their favorite items
    • Gifts are usually within a set budget
    • Names are drawn for gift distribution
    • Guests leave with a variety of new favorite things

    Well here’s how we did it. Remember above how everyone wrote their names down on three different pieces of paper? I had them put all three pieces of paper into the bowl when they were done.

    Each person would take turns, going up to the front of the group… grab the three gifts that they brought, and draw three names out of the bowl.

    Those three people would get the “drawers,” three favorite things! I had everyone explain why those were their favorite things, and it just gave it a little more of a personal touch!

    Now… some guests brought three different favorite items, and some people brought 3 of the same favorite items. Either way worked fantabulous! (P.S. We also did a price limit. Each gift could not exceed $10.)

    Favorite Things Party Rules (Simple Version)

    • Set a price limit
    • Decide how many gifts each guest brings
    • Choose how gifts are exchanged
    • Keep it simple and fun

    Girls will be Girls… with Champagne

    I have NO idea what I was doing here, but I can tell you that I was having a fab time with that big ole grin on my face.

    Favorite Things Party Ideas https://fantabulosity.com
    Favorite Things Party Ideas-Gift Giving! https://fantabulosity.com

    I must say… the best part of the night was sitting back and watching everyone cut loose and have a good time.

    It’s a rare occasion when just the girls can get together to mingle, have a cocktail (or two) and actually get some “me,” time… so seeing smiles on my guest’s face all night, was truly the highlight of it all.

    Favorite Things Party Ideas- https://fantabulosity.com

    More Party Activity Ideas

    If your party is hosted during the holidays and you’re looking for something else to do besides the gift exchange, going on a Christmas scavenger hunt would be a super fun idea too!

    Or, if you’re thinking of making fun party favors or fun little gifts for everyone, I loved making these hangover kits for the gals.

    To see more of the shindigs & parties I have hosted:

    • Cowboy Pasta Salad in bowl with wooden spoon.
      Cowboy Pasta Salad
    • Collage of potluck desserts.
      Easy Potluck Desserts (Simple Recipes That Always Get Asked For)
    • Image collage of dump cake recipes.
      Best Dump Cake Recipes (Easy, Crowd-Pleasers)
    • Taco bar on table with salsa, chicken, and toppings in bowls.
      Taco Party and Taco Bar Ideas

    How to Remove Chalk Marker & Clean a Chalkboard

    July 29, 2019

    How To Remove Chalk Marker from a Chalkboard https://fantabulosity.com

    How to remove chalk marker off of a chalkboard: After trying SO many different things, this is what finally worked! (It only takes two things!)

    I’ve been doing some testing over the last few months trying to find out how to clean my chalkboard. As you know, I love to decorate my chalkboard for each holiday or season that is approaching.

    How to clean a chalkboard: my Christmas chalkboard art

    How to Remove Chalk Marker

    With this, has come a “pain in the rear,” process, of trying to figure out how to remove chalk marker from a chalkboard.

    I don’t get it. I have 2 or 3 other chalkboards, and the chalk marker simply wipes off, with a wet rag.

    But with the chalkboard in my entry, from Restoration Hardware??? Forget it. I thought I was going to have to send it back, and get a plan B in place for my entry wall, because I was struggling with getting the “ghost,” shadow of a chalk marker off of the board.

    That was until I FINALLY came up with a technique that works for me, and NOW so many others!


    Check out the comments at the bottom of this post for success stories! Yay!

    You don’t want to miss how to make your own DIY Chalkboard frame too!

    How To Remove Chalk Marker from a Chalkboard https://fantabulosity.com

    How to Clean Your Chalkboard

    I am, in by NO means, saying that this will work for you. I am not responsible for anything that happens to your chalkboard.

    Actually, I recommend reading the instructions on how to clean your chalkboard that came with it, before you even touch it with a chalk pen or marker. Some say you have to “treat,” them before applying anything.

    I, however… did not read my instructions, and I feel that’s where I messed up. If I had treated it, I may not have the problem of the markers leaving a ghost shadow.

    How to Remove Chalk Marker from a Chalkboard

    After trying soap and water, Clorox wipes, all-purpose cleaner, vinegar, a magic eraser…and let the list go on… I couldn’t find anything that would work.

    Finally, I was so fed up, that I just started experimenting.

    I decided I didn’t care if it messed up my chalkboard, I was going to try anything to get that chalk dust shadow off of my board, no matter what it did to it.

    Which led me to this:

    How to Remove Chalk Marker from Chalkboard https://fantabulosity.com

    Magic Eraser + Vinegar

    That folks, is a magic eraser, AND some vinegar. I combined the two for some serious chalk marker removin’ solution.

    Yes… this is me scrubbing away below. Now… this is important. I DO have to put a little muscle behind the scrubbing. It doesn’t just pleasantly wipe off.

    So your arms may get a workout, but honestly, I think that’s just a bonus. No need to do my arm workout that day.

    (Who am I kidding? I don’t work out)

    How to Remove Chalk Marker https://fantabulosity.com

    So I just use the magic eraser and rub up and down, and in a circle, in a small area first. When that chalk spot is gone, I move on to the next area!

    Another Helpful Tip for Cleaning Your Chalkboard:

    Keep a dry rag or towel, nearby, so you can wipe off the “wetness,” after every few scrubs, so you can lower the risk of just letting chalk-smear dry.

    (Also, I tend to have some “black,” come off on my magic eraser when I do this. I’m wondering if that’s a normal thing, or if that was part of that, “I should have pre-treated this thing first,” deal.)

    My little guy is so helpful below. I’m sure you other moms can appreciate not being able to do anything alone. 🙂

    A Mommy is Never Alone https://fantabulosity.com

    Did this Clean Your Chalkboard?

    So there you have it! I really hope this helps ease your frustration with trying to get chalk marker off of your chalkboard. Talk about making a DIY gal go CRAZY!

    Join all of the others and let me know below… did this work for you? I’d love to know! Make sure to check out more of my favorite cleaning tips and tricks!

    Love Easy Recipes and Decorating Your Home?

    Remember, if this is your first time here, hang around and check out some of our favorite simple and easy recipes, home decor posts, and SO much more!

    Want to see the rest of our home?

    Or if you LOVE browsing homes in your downtime, you can take a tour of our home, (inside and out) starting with part 1 of our home tour.!

    How to erase chalk marker off of chalk board

    “Pin” this image, so you can always come back to it if you run into the same problem I did!

    How To Remove Chalk Marker off of a chalkboard! Those shadows drive me nuts! https://fantabulosity.com

    Southern Fried Pork Chops

    November 8, 2023

    Close up of southern fried pork chops on white plate, with a pork gravy poured on top.

    Southern Fried Pork Chops – This delicious, bone-in pork chops recipe is simple to make, so juicy on the inside and crispy on the outside. Similar to our country-fried steak recipe, the pork chops are marinated in a buttermilk seasoning mixture, and they come out flavorful after being cooked on the stove-top in the skillet.

    Southern fried pork chops on white platter, after cooked.

    Serve this Southern fried pork chops recipe with your favorite side dishes, like Instant Pot mashed potatoes (or this fried potatoes recipe) with white country gravy, green beans, and a country-style homemade biscuit for the ultimate, classic Southern dish and dinner idea.

    If you love country-fried recipes like this one, we think you’re also going to love how we cooked deer tenderloin. It’s similar to the cooking process, and it uses up that venison that you may have in the freezer. Or, a classic Southern staple, this Southern Fried Chicken is always another great choice.

    [feast_advanced_jump_to]

    Why You’ll Love This Recipe

    • Simple Ingredients: More than likely, you have most, if not all, of the ingredients on hand to make the perfect pork chop. If not, the ingredients can easily be found at most grocery stores.
    • Marinade: Some recipes don’t call for a pork chop marinade but this one does! The seasoned buttermilk will help tenderize the meat and help flavor it more.
    • Classic Southern food: A deep-fried comfort dish, these delicious southern fried pork chops will soon become a family favorite.

    Ingredients Needed

    With the ingredients being simple and easy, there’s not much to say about what’s required, however, we’ve touched on a few notes and tips below that can be helpful!

    Labeled ingredients for southern fried pork chops.
    • Pork Chops – For this recipe, we like to use bone-in pork chops, the same as in this broiled pork chops recipe. We typically use 4 pork chops, although if they’re really small, you can get by with 6, with the ingredients. You may get less meat when choosing bone-in but you’ll have more flavor when choosing bone-in. If you have boneless pork chops, this creamy crock pot pork chop recipe is delicious too!

      For complete temperature and timing guidance, see our full guide on how to cook pork chops in the oven.
    • Red Pepper Flakes & Chili Powder – You can leave these out if you prefer but they add a bit of a kick, which is delicious in this type of recipe.
    • Flour – Use all-purpose flour for this recipe.

    Substitutions

    If you find that substituting is necessary, or desired, here are some suggestions that can help:

    • Pork Chops – You could use boneless pork chops if you would like, however, they will cook a little more quickly. If you prefer to use thick-cut pork chops, instead of storebought thin pork chops, they will take longer to cook and you might find that your breading starts to brown a bit too much (bordering on burning) before the pork chops are cooked all the way through. If you choose to go with thick-cut pork chops, I suggest using a meat thermometer to check that the internal temperature reaches 145°F. 
    • Oil – Feel free to use canola oil or peanut oil instead of vegetable oil.
    • Paprika - Smoked paprika will also do the trick and will add a nice smokiness to the dish. 

    Oven Fried Pork Chops Option:

    Baking the pork chops in the oven is an option if you prefer it. Here’s how:

    • Oven-Baked Fried Pork Chops – You could also make these pork chops in the oven. Arrange the dredged pork chops in a single layer on a wire rack set above a baking sheet. Bake at 425°F for 20 minutes, flipping halfway through. 

    For complete temperature and timing guidance, see our full guide on how to cook pork chops in the oven.

    Equipment

    • Mixing bowls 
    • Measuring cups and spoons
    • Whisk 
    • Wire rack 
    • Skillet – Wee used a 12-inch skillet. You could use a larger or a smaller one. Just make sure you have 1 inch of oil filling it for proper frying. One benefit of using a larger pan is that you won't have to fry in as many batches to avoid crowding the oil. 
    • Candy thermometer (optional, but recommended) 
    • Tongs 

    How to Make Fried Pork Chops

    Making these southern-fried pork chops is easy but there are three steps to make these one of your favorite pork chop recipes:

    • marinating the pork chops
    • coating the pork chops in the seasoned flour mixture
    • frying the pork chops in the hot oil

    *Be sure to see the recipe card below for the full ingredients list & instructions!*

    Steps 1-4 of how to make Southern fried pork chops with flour batter.
    1. Make the marinade. Whisk together the buttermilk, salt, pepper, ½ teaspoon garlic powder, ½ teaspoon onion powder, and paprika in a bowl. 
    2. Marinate. Add the pork to the bowl with the buttermilk mixture, making sure to coat the meat in the marinade. Cover the bowl with plastic wrap, and chill in the fridge for 2-4 hours.
    3. Make the Breading. Whisk together the four, red pepper flakes, chili powder, 1 teaspoon onion powder, and 1 teaspoon garlic powder. 
    4. Dredge. Dredge the sides of the pork chops in the flour mixture, making sure to coat each piece thoroughly, and arrange the pieces on a wire rack until you are ready to fry. 
    Pork chop being fried in skillet, with black tongs flipping it.
    1. Heat the oil. Pour the oil into a large skillet (you should have about 1-inch of oil). Heat the oil over medium heat, to medium-high heat (don’t want to get it too hot, so make sure it gets to 350-360°F – I recommend using a candy thermometer to check the temperature). 
    2. Fry. Fry the pork for 8-10 minutes, flipping halfway through until they’re golden brown. Transfer the fried pork to a plate lined with paper towels. Be careful not to crowd the pan here folks. If you need to fry the pork in batches, do so by adding the remaining pork chops to the oil. Just be sure to bring the oil back to temperature between batches.
    Cooked fried pork chop on black cooling rack.

    Recipe FAQs

    Can I make pork chops ahead of time and freeze them?

    You can. Place the marinading pork chops in a freezer-safe airtight container and store them in the freezer for up to 3 months. When you are ready to enjoy, allow them to thaw in the fridge, prepare the breading, dredge, and fry. 

    How to make pork chops tender when frying?

    Being careful not to overcook them is one way to keep them tender. Marinating them in buttermilk is another way to keep them tender.

    How do you keep breading on fried pork chops?

    Soaking the pork chops in buttermilk will help secure the breading on to the pork chops.

    Cooked fried pork chop on white plate.

    Storage

    • Refrigerator. Once the pork chops have cooled to room temperature, seal the leftover pork chops in an airtight container and store them in the fridge for up to 4 days. 
    • Freezer. Allow the leftover fried pork chops to cool completely before sealing them in a freezer-safe airtight container and store them in the freezer for up to 3 months. Allow them to thaw in the fridge before reheating. (Do note that the breading for these pork chops is prone to falling off upon thawing. They will still taste delicious, though!)
    • To reheat. Arrange the pork chops in a single layer in a baking dish, cover with aluminum foil, and bake at 350°F for 10-15 minutes or until heated through. 
    Fork cutting out a bite from cooked Southern fried pork chop.

    Brown Fried Pork Chop Gravy:

    If you prefer a white gravy, you can follow our white gravy recipe but use pork drippings instead of bacon grease.

    What you’ll need for brown, pork chop gravy:

    • 4 tablespoon of reserved seasoned flour
    • 2 cups beef broth
    • 1 tablespoon reserved pork drippings/oil
    Image collage showing how to make fried pork chop gravy in 4 steps.

    If you love gravy on your pork chops, there’s a delicious pork gravy you can make to go on top. Here’s how you can make it with the fried pork chop drippings:

    1. Make sure to reserve the extra seasoned flour that you used to coat the pork chops.
    2. Allow the oil to cool a bit, after frying the pork chops, and then reserve about a tablespoon of oil and fried pork bits. (TIP: I will pour the oil in to another dish, and use a mesh strainer to capture the pork bits, and place back in my skillet.)
    3. Turn the burner to low and pour in one cup of beef broth. Allow this to warm through for a couple of minutes. (You don’t want this to be too hot when adding the remaining ingredients, so the cold/cooler broth and flour won’t curdle when adding.)
    4. Next, mix together 4 Tablespoons of the reserved seasoned flour (or new flour if you’ve ran out), with one cup of beef broth. Whisk this together until blended and pour in to the broth that’s already warm in the skillet.
    5. Whisk this together, turn the heat up to medium, or medium-high heat, whisking constantly until thickened.

    Usually, this gravy could still use some salt and pepper since we’ve added broth. Feel free to add salt and pepper to your taste preference. Or, we’ve also shared a pork gravy recipe that is a bit different for some zing. Love mushrooms in your gravy? This mushroom gravy on Salisbury steaks will be a recipe you’ll love too!

    Southern fried pork chop topped with brown pork gravy, sitting on white plate.

    More Southern Recipes You’ll Love

    Whether you’re looking for more Southern side dishes or main dishes to add to your meal planner, we feel like you’re going to be a fan of these too:

    • Southern broccoli casserole with cheese
      Southern Broccoli Casserole
    • fried shrimp on plate next to sauce
      The BEST Fried Shrimp
    • Fried chicken sliders on white plate, topped with mayo, lettuce and pickles.
      Fried Chicken Sliders
    • Baked chicken and rice casserole in baking dish.
      Old Fashioned Chicken and Rice Casserole

    Did you make this? I’d be so grateful if you left a “star” rating below to let me know what you thought! Then, the next time you need a quick and easy recipe, come back to Fantabulosity to browse all of my easy recipes!

    Recipe

    Close up of southern fried pork chops on white plate, with a pork gravy poured on top.
    Print Pin
    5 from 5 votes

    Southern Fried Pork Chops

    These Southern fried pork chops are made with simple ingredients, marinated in buttermilk, and so juicy on the inside and crispy on the outside.
    Course Main Course
    Cuisine American
    Prep Time 20 minutes minutes
    Cook Time 10 minutes minutes
    Marinade Time 2 hours hours
    Total Time 2 hours hours 30 minutes minutes
    Servings 4 servings
    Calories 447kcal
    Author Jessica Burgess

    Ingredients

    • 1 cup buttermilk
    • 1½ teaspoons salt
    • ½ teaspoon black pepper
    • 1½ teaspoons garlic powder divided
    • 1 teaspoon onion powder divided
    • ½ teaspoon paprika
    • 4-6 bone-in pork chops
    • 1 cup flour
    • ½ teaspoon red pepper flakes
    • ½ teaspoon chili powder
    • Vegetable oil Enough for 1-inch in the skillet

    Optional Pork Chop Gravy

    • 4 Tablespoons reserved seasoned flour from breading pork chops
    • 1 Tablespoon reserved pork drippings/oil
    • 2 cups beef broth chicken or vegetable will work too

    Instructions

    • Make the marinade. Whisk together the buttermilk, salt, pepper, ½ teaspoon garlic powder, ½ teaspoon onion powder, and paprika in a bowl. 
    • Marinade. Add the pork to the bowl with the buttermilk mixture, making sure to coat the meat in the marinade. Cover the bowl with plastic wrap, and chill in the fridge for 2-4 hours.
    • Make the breading. Whisk together the flour, red pepper flakes, chili powder, 1 teaspoon onion powder, and 1 teaspoon garlic powder. 
    • Dredge. Dredge the pork in the flour mixture, making sure to coat each piece thoroughly, and arrange the pieces on a wire rack until you are ready to fry. 
    • Heat the oil. Pour the oil into a skillet (you should have about 1-inch of oil). Heat the oil to 350-360°F (I recommend using a candy thermometer to check the temperature). 
    • Fry. Fry the pork for 8-10 minutes, flipping halfway through. Transfer the fried pork to a plate lined with a paper towel. Be careful not to crowd the pan here folks. If you need to fry the pork in batches, do so. Just be sure to bring the oil back to temperature between batches.

    Optional Pork Chop Gravy

    • Reserve flour. Make sure to reserve the extra seasoned flour that you used to coat the pork chops.
    • Save drippings. Allow the oil to cool a bit, after frying the pork chops, and then reserve about a tablespoon of oil and fried pork bits and leave in the skillet. (TIP: I will pour the oil in to another dish, and use a mesh strainer to capture the pork bits, and place back in my skillet.)
    • Add 1 cup broth. Turn the burner to low and pour in one cup of beef broth. Allow this to warm through for a couple of minutes. (You don't want this to be too hot when adding the remaining ingredients, so the cold/cooler broth and flour won't curdle when adding.)
    • Mix. Next, mix together 4 Tablespoons of the reserved seasoned flour (or new flour if you've ran out), with one cup of beef broth. Whisk this together until blended, and then pour in to the broth that's already warm in the skillet.
    • Whisk. Whisk this together, turn the heat up to medium, or medium-high heat, whisking constantly until thickened. Pour over cooked pork chops.
      TIP: Usually, this gravy could still use some salt and pepper since we've added broth. Feel free to add salt and pepper to your taste preference.

    Notes

    For Oven Baked Pork Chops: Arrange the dredged pork chops in a single layer on a wire rack set above a baking sheet. Bake at 425°F for 20 minutes, flipping halfway through. 

    Nutrition

    Serving: 1porkchop | Calories: 447kcal | Carbohydrates: 29g | Protein: 41g | Fat: 18g | Saturated Fat: 6g | Polyunsaturated Fat: 2g | Monounsaturated Fat: 7g | Trans Fat: 0.2g | Cholesterol: 124mg | Sodium: 1038mg | Potassium: 733mg | Fiber: 1g | Sugar: 3g | Vitamin A: 382IU | Vitamin C: 0.1mg | Calcium: 113mg | Iron: 3mg

    Easy Crab Bisque

    April 16, 2020

    Quick Crab Bisque! Holy Moly this is good! https://fantabulosity.com

    Easy Crab Bisque: A not-so-gourmet, but tastes gourmet, bisque that you can make at home with real crab or imitation crab meat!

    Easy Crab Bisque - in a white bowl, orange napkin

    My Lobster Bisque recipe has gone a bit “viral,” on Pinterest these last few months, and I can understand why. It is ridiculously good.

    So the other day when I went to make it again, I remembered that I had crab meat in the fridge that I needed to use instead.
    It was a container that my husband found in the store that had diced, steam-cooked crab meat, ready to go, and we just knew we’d find something to make with it…

    and I did…

    More recipes you’ll love:

    • Best Chicken Noodle Soup
    • Taco Soup Recipe
    • Loaded Ranch Potato Soup
    • Buffalo Chicken Soup
    • Easy Lobster Bisque

    Easy Crab Bisque

    I’ll be honest, over the years and being a food blogger in general… I’ve come across a lot of crab bisque recipes online but they look SUPER difficult to make and require a ton of ingredients.

    Are they delicious? I’m sure they are. But if I’m going to spend an arm and a leg on dinner, I prefer to head out to a nice restaurant and have someone make it for me. Ammiright?

    So when I decided to whip crab bisque up, I knew I wanted to keep things simple.

    I’m so happy to say that this recipe was SO good, and I knew it had to make an appearance here on the blog because I know how much you all love a good, easy, recipe… and especially one that tastes like it took forever in the kitchen. (Especially this clam chowder soup recipe!)

    How to Make Easy Crab Bisque

    You can find the full recipe with ingredients and instructions at the bottom of this post!

    Crab Bisque Ingredients

    You can count on this being just like all of the other easy recipes here on Fantabulosity that use everyday ingredients.

    This recipe uses: (see the recipe card below for the measurements and instructions!)

    • garlic cloves
    • petite diced tomatoes with juice
    • low sodium chicken broth (You could make my homemade chicken broth, and control the sodium.)
    • Old Bay seasoning
    • black pepper
    • crab meat (you can substitute with imitation like we do in this crab pasta bake, but we LOVE real crab meat if we have it)
    • heavy cream
    • flour & butter for a roux if you want a “thicker” bisque
    • fresh parsley chopped, optional

    Easy, right? Odds are, you may even have most of the ingredients on hand anyway! That’s perfect for those of you that have crab on hand and you’ve found your way here by searching of a way to use it! Hopefully no need to head to the store before you make this!

    How do you thicken crab bisque?

    We’re a fan of making a roux to go in the crab bisque, to thicken it a little. And although “roux” sounds like a fancy word, it’s super easy, so don’t worry about that.

    I recommend that you start with just a little because you can always add a little more here and there. So starting with about 2 tablespoons of flour and 2 tablespoons of butter, heat them together, stirring, until butter has melted all of the way and the two are mixed evenly.

    Next, add the flour/butter mixture to the bisque and let it sit 1-2 minutes until soup thickens.

    Still not thick enough? Make another batch of roux and repeat until the bisque reaches it’s desired thickness!

    What do you serve with crab bisque?

    Our favorite side dish with ANY soup is the BEST Side Salad Recipe. It never disappoints and it compliments a dinner in one of the tastiest ways possible!

    But other side dishes that go well with crab bisque too are:

    • Apple Salad (more so like a dessert, or it can be invited to the dinner table!)
    • Pico de Gallo and Chips
    • Caprese Sandwich Recipe
    • Drop biscuits with garlic and cheese

    Recipe

    Quick Crab Bisque! Holy Moly this is good! https://fantabulosity.com
    Print Pin
    4.73 from 11 votes

    Easy Crab Bisque

    This soup recipe is super simple to make. Fresh crab in a tomato cream broth. Pair with warm bread for the ultimate comfort meal.
    Course Soup
    Cuisine American
    Prep Time 15 minutes minutes
    Cook Time 45 minutes minutes
    Total Time 1 hour hour
    Servings 8 servings
    Calories 287kcal
    Author Jessica Burgess

    Ingredients

    • 1 garlic clove minced
    • 2 14.5-ounce cans petite diced tomatoes with juice
    • 1 32-ounce carton low sodium chicken broth
    • 1-2 Tablespoons Old Bay seasoning to taste
    • ¼ cup fresh parsley chopped
    • 1 teaspoon black pepper
    • 16 ounces crab meat chopped (you can substitute with imitation but I recommend real crab meat)
    • 1 pint heavy cream

    Optional Roux (if you prefer a thicker bisque):

    • 2 Tablespoons flour
    • 2 Tablespoons butter room temperature

    Instructions

    • In a large bowl, add all ingredients, except crab meat heavy cream. Stir together to mix.
    • In a blender, pour ⅓ of the soup mixture, and blend for about 5 seconds. Pour into a soup pot.
    • Add another ⅓ of soup to the blender, and blend for 3 seconds. Empty into the soup pot.
    • Pour remaining unblended soup into the blender. Give one or two short pulses, just barely blending the soup. (you want each ⅓ to blend less and less for a better consistency.)
    • Pour remaining soup into the pot. Add the crab meat.
    • Cook soup over low-medium heat for about 45 minutes, stirring occasionally.
    • After 45 minutes, stir in heavy cream.

    Optional Roux (if you choose to omit, skip to last step):

    • Heat flour and butter in a small pan until mixed, and then add to bisque. Whisk together and let sit 1-2 minutes until soup thickens.
    • Serve immediately.

    Nutrition

    Serving: 1serving (2/8 recipe with roux) | Calories: 287kcal | Carbohydrates: 3g | Protein: 11g | Fat: 25g | Saturated Fat: 15g | Cholesterol: 112mg | Sodium: 523mg | Potassium: 170mg | Vitamin A: 1140IU | Vitamin C: 6.9mg | Calcium: 72mg | Iron: 0.7mg

    P.S. I myself like a thicker bisque, so I make about 2 sets of roux to get it to the consistency that I like.

    Can you freeze crab bisque?

    Absolutely! You can freeze leftovers or make a double batch to freeze and enjoy later.

    Freezing in freezer bags or mason jars are great options.
    (Just note: when freezing in mason jars, be sure to let the soup cool down a bit and don’t crowd the jars in the freezer, as they’ll need a little room to expand as it freezes. You don’t want to have crab bisque all over the inside of the freezer!)

    I so hope you enjoy this recipe and I’d love to hear in the comments below if you made it!

    Pin it to Remember it:

    Easy Crab Bisque! Holy Moly this is good! https://fantabulosity.com

    Baby Gift Basket

    August 15, 2019

    New Baby Gift Basket Ideas https://fantabulosity.com

    Baby Gift Basket Idea: For a boy or girl, this present will be perfect for the baby shower or just to give to the mom to be!

    Recently, our friends had a baby (eeeeek… she’s so precious) and I wanted to put together a little something for them to show them a little love. And since I love sharing gift ideas with you, I knew I had to share this one too!

    Now if you missed my “Box of Sunshine,” gift idea, or the “Happy Pops Day,” basket, don’t forget to go check those out. Hint: You’ll find my secret to making gift baskets look fabulous, in my “Box of Sunshine,” post!

    Baby Gift Basket

    When I’m putting together a gift basket for a new baby, I love using YELLOW! Why? Well, because yellow is so bright and cheery and this way it works for either a boy or a girl.

    Plus, if they have another kiddo, they can use the yellow for the next baby that comes along too!

    New Baby Gift Basket Ideas https://fantabulosity.com

    Didn’t this turn out just adorable? Not because of me… but because EVERYTHING “baby,” is just adorable.

    Need something fun for a baby shower? These printable parenting advice cards are so fun and a great alternative to a baby shower game.

    Best Baskets for Gift Baskets:

    I bought this basket a LOOONG time ago, for just this kind of thing. I love buying these, 3 or 4 at a time, to have on hand for gift giving. But I can’t even tell you where I got it. However, here are some of my favorite baskets:

    World Market Gift Baskets

    Pier 1 Gift Baskets

    Amazon Wire Baskets

    H&M Home

    What to Put in a Baby Gift Basket?

    Well you can put just about anything you like in a gift basket, but here are the items you’ll find in this one:

    • Size 2 Diapers (To grow in to. I stacked these in to the bottom, to “lift,” the other goodies, “up.”)
    • Receiving blankets – I rolled two in the back, and rolled one, for the front center, so the “owl” would add a little centerpiece
    • Snack cup (my favorite baby-snack must-have.
    • Teether (in the plastic case)
    • Baby shampoo/body wash
    • Rubber Ducky (because everyone needs one of those.)
    • Book
    • Sippy cup

    Gift Basket Tip:

    When building a gift basket, always try to stick with one “main,” color.

    In this one, I decided to go with yellow. Of course there’s a little orange and pink in there too… but the big “wow,” is the yellow. I do this because then it all looks a little more uniform, rather than all over the place.

    Free Printable Gift Tag: “Welcome Baby”

    New Baby Gift Basket Idea with free printable https://fantabulosity.com

    I have a fun surprise for you, to make your gift basket making a little easier!

    When I designed my gift tag for this gift basket, I wanted to make it available to you, so you could use it.

    Just print it, and cut it. You can either tape it on to your basket, or punch a hole in it like I did, and tie it with a ribbon. Get it here:

    welcome baby gift basket free printable
    Download “Welcome Baby” Gift Tag HERE!

    I hope you have fun getting creative and building your New Baby Gift Basket! As always, let me know if you have any questions! I love hearing from you!

    Until next time,

    XO!

    You’ll Also Love

    Sangria Gift

    What new mom and dad wouldn’t love a sangria kit to take the edge off of the really stressful days?!

    Aw, how cool is this! DIY Gift Idea: Sangria for Friends, housewarming, for women, new neighbor, anyone! Who wouldn't love this!? They can even use the drink dispenser again and again!

    Pin it for Later!

    New Baby Gift Basket Ideas https://fantabulosity.com

    More Gift Ideas

    If you love making gift baskets or gifts in general, then you’ll LOVE browsing my gift ideas!

    Hosting a Baby Shower?

    If you’re the one with hosting duty, don’t miss the CUTEST ideas for baby showers and new moms here:

    • Owl “Meet the Baby” Shower
    • Mom Advice Cards – Free Printable

    Box of Sunshine Gift Ideas

    January 24, 2021

    Sunshine Gift Basket Ideas https://fantabulosity.com

    A Little Box of Sunshine Gift Ideas: A sunshine box is a fun gift to not only give, but to put together! Go on a hunt for all things yellow, and surprise someone special with the gift basket!

    By FAR, my favorite “go-to,” gift right now.

    I couldn’t WAIT to share my Box of Sunshine gift ideas with you. Why? Because not only is this gift absolutely fabulous for ANYONE that you know, I had a blast shopping for it!

    Sunshine Gift Basket Ideas https://fantabulosity.com

    More Gift Basket Ideas

    • Baby Gift Basket
    • 50+ Gift Ideas for Her
    • Best Friend Birthday Gifts
    • Sympathy Gift Idea
    • Gift Basket Ideas – For Men, Women, Babies, Holiday’s & More!
    What is a Sunshine Box?

    A care package created with items that are the color “yellow” to bring the color of “sunshine” to someone’s day!

    How to Make a Sunshine Box?

    You can choose to make it many different ways but they typically are made using boxes, baskets, gift bags or even mason jars!

    What do you put in a box of sunshine?

    Items that are yellow! For example, gum, candy, lotion, candles, stationery, perfume, snacks, and whatever else you think he/she will love! See below for a long list of ideas that are yellow!

    Edible "Sunshine" Gift Ideas (Easy Food Additions)

    If you want to make something for you gift, here are some ideas to help you get started:

    • lemon cookies
    • banana bread
    • lemon blondies
    • lemon puppy chow
    • candy snack mixes

    Little Box of Sunshine Item Ideas

    When you’re on a scavenger hunt through the store, looking for “yellow,” it just makes shopping a bit more fun. (But like I need “more fun” when shopping.)

    When I saw the original idea on Pinterest, ahem, we should totally follow each other by the way —> My Pinterest, I fell in love. BUT… I noticed that most of them were only for people that needed “cheering up.”

    I thought, “Well, I’d love to receive one of those sunshine boxes, as a ‘just because,’ ‘thank you,’ or a ‘birthday gift.” I mean… wouldn’t you? So… I just made the tags to say, “Hello Sunshine,” instead of “You are my sunshine,” or “Let me Brighten up your day.”

    Two Gift Basket Ideas

     So let me tell you what I did with these two Boxes of Sunshine gifts…

    I had a couple of people to “thank,” and I just knew that they would LOVE LOVE LOVE, something like this. Even though they are two different people, who love different things, they’d BOTH love something like this sunshine gift box.

    A BIG “thank you.”

    Someone that works in my husband’s office did an amazing job on a project recently, and he wanted to “thank them,” in a BIG way. So although the sunshine gift box can run on the “affordable gift,” side… I could easily add something to it. Stay tuned for what that was below…

    Sunshine Gift Basket Ideas https://fantabulosity.com

    Here’s how I put this one together, and what I put in it:

    Wooden Crate: I bought this at H&M, and although I don’t think they have it anymore, they have some SUPER cute other boxes and bins in their “home,” section.

    Crate Contents:

    • Yellow/White Dishtowel
    • Ghirardelli Milk Chocolate & Caramel Squares
    • “Good Morning Sunshine,” Mug from Pier 1
    • Juicy Fruit Gum
    • Yellow Nail Polish (I bought mine off of Amazon)
    • Butterfinger Candy Bar
    • Bar of Soap from Pier 1
    • Golden Oreos
    • Izze Sparkling Peach Soda
    • Kleenex’s
    • Personalized Stationery
    • Keebler Cookies
    • Peanut M&M’s
    • “I Love Lemon,” tea
    • Small bag of Lay’s potato chips
    • Sephora gift card (that I attached to yellow scrapbook paper)
    Sunshine Gift Basket Ideas https://fantabulosity.com

    Arranging the Gift Basket:

    I lined the box with the dishtowel and just arranged the goodies the best way I could, so each item was showing. This took a little “stuffing,” and “fill,” per-say, to lift items “up,” and keep them tilted to one side.

    Hello Sunshine Gift Basket with gift card https://fantabulosity.com

    How I added the “BIG,” thank you: So I needed to add a little more “thanks,” to really show her how thankful we were for her hard work.

    To add some “umph,” to this gift, I simply found a gift card to somewhere that I knew she’d like, (The Sephora gift card), and simply just “up’d” the value of the gift by making it the value that we wanted to spend on her gift. Since it was “black,” I taped it to a yellow piece of scrapbook paper. (I also attached the receipt showing the balance of the gift card, to the back of the scrapbook paper, in case she runs in to any trouble at the store, trying to redeem it.)

    A little personal touch…

    To add a little more “thought,” to the gift, adding personalized stationery, is the perfect touch. See that “R,” back there in the back? Yeah.. that’s the stationary.

    Hello Sunshine Gift Basket personalized stationary https://fantabulosity.com

    Gift Tag Free Printable:

    Hello Sunshine Gift Tag for basket! https://fantabulosity.com
    Hello Sunshine Gift Tag for basket! https://fantabulosity.com

    Gift Tag: I actually used my silhouette machine for the tags on these sunshine boxes, but realized that not everyone has one. So to help you all out, I created a little something below for you, and you can simply just “cut,” it out. 🙂

    Get the free printable here: “Hello Sunshine”  Then, just tape it on the crate/basket/box, and you’re good to go!

    "Hello Sunshine" free printable https://fantabulosity.com


    A Pail of Sunshine:

     A bit smaller, as a simple “thank you.”

    We had a friend help us out the other day, just out of the kindness of her heart. She doesn’t realize it, but she came to our rescue, for sure. So to let her know that it didn’t go unnoticed, I wanted to do a little something for her. A box of sunshine was a must.

    Sunshine Gift Pail Ideas https://fantabulosity.com

    This gift had almost all of the contents as the one above, but the pail just wasn’t big enough for everything. Or it would have…

    Oddly enough, this person had the same initial that I used for the other one above, so I had to order an “R,” for that one too. Talk about craziness…

    Sunshine Gift Pail Ideas https://fantabulosity.com

    Big Tip Reveal: How to Make a Gift Basket look fabulous:

    Did you notice that I took almost everything that I could, out of its packaging? The stationery for instance, came with the cards open, laying flat, wrapped in plastic wrap. Yuck! I opened the package, folded the cards, and tied them with a ribbon.

    The mug came in a clear, plastic box. Yuck. I took that out.

    So… long story short… take everything that you can, out of its packaging. It will make a HUGE difference in the overall “look,” of the gift.

    Ahhhh… it feels so good to finally share this Box of Sunshine gift idea with you all. There’s nothing I love more than sharing “fab,” things with you. I just know some of you out there will find this idea helpful, and the perfect gift giving idea for your next “gifting,” reason. 🙂

    Pin them for Later:

    Sunshine Gift Basket or Box Ideas! fantabulosity.com
    Sunshine Gift Ideas! Buckets, Box, Bags, anything woiuld work for this! Love it! https://fantabulosity.com

    Happy “Pops” Day! Father’s Day Gift Idea

    May 24, 2015

    Happy Pops Day! Father's Day Gift Idea! http://fantabulosity.com

    I have been in a “gifting,” mood all week, and although that sounds really good… it’s only because I’ve been putting off getting TONS of gifts that I have been needing to get for a while now, and I’m finally getting around to it.

    With Father’s Day right around the corner, I knew that I better get on the ball, since I was “gifting,” anyway. 🙂

    We have a friend that has recently become a new “dad,” and I wanted to get him something that I had seen on Pinterest, so when I was planning his gift, it hit me…

    Why can’t I just do the same thing for my dad?

    Happy “Pops” Day Gift Basket

    Happy Pops Day! Father's Day Gift Idea! https://fantabulosity.com

    How fun is THAT!? Everything in the basket has the word “Pop,” in it. It’s full of fabulous snacks and goodies for the “Pop,” in your life. Best part? I don’t know ANY man that wouldn’t love this. Especially one that’s hard to shop for! 😉

    So here’s what I did:

    • I grabbed a crate at the store, rather than a basket. {Yes, I called it a gift basket anyway}  A crate just seemed more manly than a basket. Here’s a milk crate that I found, that I like even better than the one I used: Milk Crate
    • I actually used a baby receiving blanket to line the crate (only because I had an extra one left over from the baby gift that I was also doing. But you could use a dish towel if you wanted. Or any type of material. I just think material looks better than tissue paper.}
    • I printed off this Happy “Pops” Day gift tag {Yes, it’s a free printable for you!}  🙂  Just make sure you “size,” it when you’re getting ready to print, depending on how big or little you want it… depending on what size your basket or crate is.
    • Then I punched holes in the tag, and simply tied a white ribbon through it, and tied it around the crate.

    Gift Basket Contents:

     Kellogg’s Pops Cereal
    Quaker Popped Chips
    Pop Secret Popcorn
    A bottle of Coke “Pop”
    Pop-Tarts
    Lemon Poppy Seed Muffin Mix
    Pop Rocks Candy
    Happy Pops Day! Father's Day Gift Idea with free printable! Love this! https://fantabulosity.com

    Our kiddos have also made this Father’s Day fingerpainting craft too, and their daddy loved it!

    I hope this has solved all of your Father’s Day gift idea woes, and you now know what to do for the father in your life!

    P.S. It was sooo fun going through the store trying to find all of the “pop,” items. Turn this in to a game, and take the kids with you on a scavenger hunt, looking for all they can find. You’ll be surprised how much is available!

    Until next time,

    XO!

    5 Simple Ways to Make Your Husband “WANT” to Come Home…

    September 2, 2015

    How to make your husband want to come home

    WHEW! There are some brutal people out there! Ever since I published this post, it has gone crazy viral and some of you are NOT afraid to speak your mind. So I feel I must explain my intentions with this post, to explain where I’m coming from.

    My husband is very good to me, and does extremely nice things for me. So in return, and out of respect, I like to do nice things for him.

    how can I make my husband come home
    My husband and my sweet babies!

    Have you ever heard someone say,

    Be the wife your husband can’t wait to come home to at night?

    No? Yes? I’ve heard it a million times, and I always try to keep advice in my head. As I would hope my husband would think the visa versa. Right?

    So I began to think,

    What are some things that he would love, to really make him feel special?

    and this post was born.

    No people, I’m not saying rewind 60 years and be a Stepford Wife. I’m just saying what I like to do for my husband to show my appreciation, and I would very well expect respect in return. Right?

    So let’s carry on with this post, and maybe all of the bullies will stop “hating,” on this post. If not… sorry. This is something that works well in my marriage, and I hope it can give someone else great ideas too! If not, I’d LOVE to hear what works in your marriage. Every marriage is different.

    You May Also Love This Marriage Talk:

    • 29 Tips on How to Be a Good Wife
    • How to Respect Your Husband
    • What to do When Your Husband Doesn’t Come Home

    Back to the post:

    It may be a husband who is in the military and is coming home after a year stay overseas, a husband that has only been gone for 3 days, or a husband that is coming home after a long day at work.

      (P.S. You gals that have husbands gone for a super long time, I COMPLETELY adore your strength.)

    how can I make my husband come home

    A little behind the scenes…

    My husband owns his own company, and like many other professions, those days as a CEO of a large company, can be excruciating. There’s nothing more that I want to do when he comes home, than to show him my appreciation for working hard. Don’t hear what I’m not saying. I’m not saying I don’t work hard.

    I’m a stay at home mom, and I run and operate THIS… my blog. But I AM saying that I want to make our home a place that he’s excited to come home to, every night. ESPECIALLY when he’s been gone for a few days.

    5 Simple Ways to Make Your Husband Want to Come Home https://fantabulosity.com

    How to Make Your Husband WANT to Come Home:

    So how do I do this so-called, “making him happy to come home,” thang?

    Just don’t ask my husband, because he may tell you different. Haha! Kidding. Only kidding.

    make your hubby want to come home

    • His love language.


      Every husband is different. If you read my post on the secret to a marriage, then you know that everyone has their “language,” that speaks to their heart. (Some husbands, may have more than one.) Read up on what your husbands love language is, and think about something that would fulfill that language that he speaks! 😉  You can buy the book “The Five Love Languages” HERE!


    • Be positive.


      Yes, I know real-life happens, and sometimes life throws us some curveballs. The kids were acting awful, the lawn-mower chucked a rock at the dining room window, or the bank account is in the red because it’s been a rough month. But keeping a positive attitude when he walks through that door, can really help for the later part in the evening when it’s time to have a conversation about the not-so-fun things. So when he walks through the door, maybe wait just a bit before you throw up all of the “uglies” at him.

    How to Prepare for Your Husband Coming Home https://fantabulosity.com
    Don’t forget to make each other laugh. Him and I dressed up for the Def Leppard concert, a few years ago. You’re never too old to have fun. 😉

    • Send him love notes.


      Once a day, I will try to remember to send him a love note, through text. Yeah yeah yeah… I could get up early, write him a sweet note, and stick it in his coffee cup sleeve… but that’s not going to happen. So when breakfast is over, the kids are playing on their own, I’ll send my hubby a little love note, through a text. “How did I get so lucky to deserve you?” Or something like, “I can’t wait to see you when you get home.” That little “surprise” with something nice can really make his day.


    • Ask him.


       In the evening after the kids are off to bed, many times, I’ll ask him:

    I’m grabbing something to drink, do you want something?

    Or before he leaves for work, I may ask him:

    I’m pretty free today. Is there anything you need help with?

    Not only are you doing something nice for him by offering to help him… you may also figure out some of the types of things he likes for you to do for him. He may say something like:

    You wouldn’t have time to take my truck for an oil change would you? Or I’ll have to take it on Saturday, and miss the little guy’s soccer game.

    What?! Who knew? I thought he liked getting out of the house on Saturday mornings by himself to get the oil changed.

    5 Simple Ways to Make Your Husband Want to Come Home https://fantabulosity.com
    Our beach wedding, back in 2008

    • Get fancy-schmancy.


       Now Mom, (my mom), you may want to stop reading here. I may say some things that you don’t want to read or know about your daughter.

      (Mom… you’re still reading aren’t you? You’re such a rebel.)

      As a mom, I’m usually jumping in the shower as quick as I can, while my kids sit in the bathroom floor. So tending to my female upkeep, can be considered a rare and special occasion. 🙂  Shave those legs. Don’t forget the armpits, and whatever else you shave. Paint those toe-nails. Put on that lotion that’s supposed entice your hubby in to the sheets. (But like he needs a lotion from Victoria Secret to put him in the mood.) Put on that “Woah Baby,” outfit you bought at the mall a year ago that you’ve been dreading, putting on. And surprise him with a raring and ready to go attitude. Every man may be different, but I have a feeling most would appreciate this one. 😉

    Wrap Up.

    I so hope I didn’t offend you, but rather give you some ideas to try and show your husband that you love and care for him. I’d love to hear what you think below! But please remember, I’m human. I’m not a computer. So although I want you to be honest, I would love for you to also be kind. XOXO

    5 Ways to Prepare for a Romantic Weekend with Your Husband https://fantabulosity.com

    Just remember…”Be the woman your husband can’t wait to come home to.”

    creating your happy


    As a mom, wife, sister, friend, employee, boss, and whatever else society calls you… we sometimes need to be reminded what it is that makes us happy, so we can fulfill our duties with the best intentions and the way we choose and want.

    DISCLAIMER from the owner/founder: “I fail each day, trying to be the “best,” mom, wife, sister, and friend. But if I can be intentional & recognize one LITTLE thing that I accomplished that day… I can be “happy,” with that, and should celebrate it.”

    5 Simple Ways to Make Your Husband Want to Come Home https://fantabulosity.com

    On the Farm with Paw Paw

    May 20, 2015

    Sharing a Coke, with the guys

     My boys love… I mean… LUUUUV… hanging out with their paw paw. Hanging out with their paw paw means there are TONS of fun things in store.

    You see, “Paw Paw,” lives (and operates) a beef farm, and a short trip to see him, usually includes seeing big, four-legged creatures that say “moo,” a tractor ride, and a “wade,” in the spring.

    Sharing a Coke, with the guys

    So the other day, we set out on an adventure and headed to Paw-Paw’s with a surprise in store for him. A Coke. It’s his favorite and we knew it would make his day.

    In his own words:

    I drink a Coke every morning for breakfast. There’s nothin’ better.

    Share a Coke 6pk

    When we arrived at his house, as always… he was working outside. (He’s the hardest worker I know.)

    Pulling in the drive, my boys shouted with excitement,

    There he is! There’s Paw Paw!

    Share a Coke with Paw Paw

    Farming + Grandkids + Coke = Paw Paw’s Day is Made

    Up on the tractor they went, handed Paw Paw his Coke, and “Mom” was no longer there. Who needs mom when you have your paw paw, and a farm anyway, right?

    Share a Coke on the tractor

    I sat back quietly as the boys went about their business, and got the “work,” done.

    There is something absolutely heart-melting, watching your own kids, “light-up,” when they’re spending time with someone that makes you “light-up,” too.

    Let’s go boys, time to feed the bulls…

    Down on the Farm - Share a Coke
    Share a Coke on the farm fantabulosity.com

    I forget how little they are until I see ’em like this. Such precious babies they are. 

    My dad’s big “pet,” he calls it… this bull did NOT get the memo of the photoshoot. I mean… he could have taken a dip in the creek or something before I came.

    Bull! Share a Coke
    Share a Coke -Bulls

    Break Time

    You know, that farmin’ is hard work. It was time to take a break, and head to the creek and grab a drink…(and skip a rock or two).

    Sharing a Coke with Grandpa https://fantabulosity.com

    No words needed… (insert this momma’s heart-melting).

    Grandpa Sharing a Coke https://fantabulosity.com

    Sharing a Coke with Grandpa… it just tastes better. Apparently.

    Sharing a Coke with Grandpa at the Creek

    Although we’ve made this trip to Paw Paw’s, a thousand and twenty-three times,  (ok not that many surely) I’ve never just grabbed my camera to capture memories of it. I’m so incredibly thankful for these simple moments that we tend to take for granted.

    Share a Coke, Cowboy Boots

    But now… it’s time for Mommy to enjoy hers. 😉

    Share a Coke - Jessica

    Until next time,

    XO!

    Fried Peanut Butter and Jelly Sandwich

    April 4, 2023

    Fried peanut butter and jelly sandwich, sliced on white plate.

    This Fried Peanut Butter and Jelly Sandwich takes your classic pb&j recipe to the next level. The outside is golden brown, and inside the two slices of bread is gooey peanut butter combined with warm jelly.

    Made like a grilled cheese sandwich (and our chicken grilled cheese) it’s cooked on the stovetop over medium-low heat, to get the crispy bread. It’s the perfect easy lunch idea or even a warm breakfast recipe.

    Fried peanut butter and jelly sandwich on a white plate.
    [feast_advanced_jump_to]

    We all love the pb&j from childhood, and now, with this method, you can still have the famous sandwich but with a twist, with a delicious, buttery coating.

    Why You’ll Love this Recipe

    • Crispy & Creamy: The texture of this sandwich is completely different than simply spreading peanut butter and jelly on two pieces of bread. The golden, crispy, outside texture combines perfectly with the inside, creamy texture.
    • Restaurant Style: If you ever watch shows that feature fun and different recipes, this fried peanut butter & jelly feels like something you’d find at a “must-visit” diner.
    • Ready in minutes: With a regular pb&j only taking a few minutes, don’t be intimidated by the extra step of frying or grilling! It will only take a few minutes to cook the sandwich on both sides.
    Sliced friend peanut butter and jelly sandwich on white plate, surrounded by milk jars and strawberries.

    Fried PB&J Ingredients & Variations

    The beautiful thing about this sandwich is that you can use your favorite ingredients that you love using to make a peanut butter and jelly, and then add one more ingredient (butter).

    Ingredients for fried peanut butter and jelly sandwich.
    • Bread – There are so many options for bread. Brioche, sliced white bread, wheat, or your favorite sandwich bread.
    • Peanut Butter – Crunchy or creamy, or even a substitute like Nutella or your favorite nut butter will work too.
    • Jelly – Strawberry or grape jelly work, or you can even use your favorite flavor of jam.
    • Butter – Using spreadable butter is recommended so it slides across the bread easier. Or, if you have stick butter, melt it gently to make it smooth to spread easier. Salted butter is a great option because it adds that hint of salt with all of the sweetness.

    How to Make a Fried Peanut Butter and Jelly Sandwich

    *Be sure to see the recipe card below for the full ingredients list & instructions!*

    Steps 1-4 image collage of how to make a friend peanut butter and jelly.
    1. Add Peanut Butter – Spread peanut butter on one side, of one slice of bread.
    2. Spread Jelly – Then, spread jelly on one side, of the other slice of bread.
    3. Butter the Bread – Place the coated sides of the bread together, so they form a classic pb&j. Next, coat the outside of both sides of the sandwich, with butter and place on a skillet, and cook over medium-high heat for 3-4 minutes or until the side facing down, is a golden brown.
    4. Toast the Bread – Flip once golden, and cook the other side for 3-4 minutes, or until golden brown. Serve!
    Fried, whole, peanut butter and jelly sandwich on white plate.

    Tip: Sprinkle with a little powdered sugar if desired for an extra sweet treat.

    Sliced fried peanut butter and jelly sandwich on white plate.

    Recipe Pro Tips

    • Multiple Sandwiches – If making multiple sandwiches, make as many sandwiches as you need, up until the point of adding them to a skillet. Using a griddle (a much larger cooking surface) place all of the assembled sandwiches on the griddle at the same time, in a single layer, to cook them at the same time. This way, you’re not making one at a time, which can be time-consuming.
    • Fun Additions. Love bananas on your peanut butter sandwich? Slice bananas to place on the peanut butter, or add other fun items like marshmallow fluff or honey or syrup like in our peanut butter and syrup sandwich, bacon, or even sprinkles!

    Recipe FAQs

    Should peanut butter and jelly sandwiches be toasted?

    They don’t have to be but they’re delicious when toasted. But frying them in a pan is ideal, rather than using a toaster because the jelly and peanut butter can melt out.

    What is the best bread for PB&J?

    We think sliced white bread is the best for pb&j but brioche is a delicious option too.

    Do you use smooth or crunchy peanut butter in PBJ?

    This is a personal preference, however, crunch peanut butter can make the sandwich “unbalanced” so the bread can slip around more, due to the nuts.

    Is jam or jelly better for PB&J?

    Either one works but jam will slide on more smooth, as jelly can be a little “bumpy” causing the bread to slide around a little more.

    More Sandwich Recipes

    If you love classic sandwiches and fun recipes to make for lunch, you’ll love these reader favorites too:

    • Fried Bologna and Egg Sandwich
      Fried Bologna and Egg Sandwich
    • two tuna salad sandwiches stacked on top of each other
      The BEST Tuna Salad Recipe
    • Hot ham and cheese sandwich on white plate
      Hot Ham and Cheese Sandwiches
    • egg salad on croissant
      The BEST Egg Salad Recipe

    Recipe

    Fried peanut butter and jelly sandwich, sliced on white plate.
    Print Pin
    5 from 7 votes

    Fried Peanut Butter and Jelly Sandwich

    A fried peanut butter and jelly sandwich is your classic pb&j, cooked on the stovetop with butter, giving it a crispy outside with a warm and gooey inside.
    Course Main Course, Snack
    Cuisine American
    Prep Time 5 minutes minutes
    Cook Time 5 minutes minutes
    Total Time 10 minutes minutes
    Servings 1 sandwich
    Calories 326kcal
    Author Jessica Burgess

    Ingredients

    • 2 slices bread Your favorite sliced sandwich bread
    • 1 ½ Tablespoon peanut butter smooth or crunchy
    • 1 ½ Tablespoon jelly or jam
    • 1 Tablespoon butter

    Instructions

    • Add Peanut Butter – Spread peanut butter on one side, of one slice of bread.
    • Spread Jelly – Then, spread jelly on one side, of the other slice of bread.
    • Butter the Bread – Place the coated sides of the bread together, so they form a classic pb&j. Next, coat the outside of both sides of the sandwich, with butter and place on a skillet, and cook over medium-high heat for 3-4 minutes or until the side facing down, is a golden brown.
    • Toast the Bread – Flip once golden, and cook the other side for 3-4 minutes, or until golden brown. Serve!

    Notes

    Multiple Sandwiches – If making multiple sandwiches, make as many sandwiches as you need, up until the point of adding them to a skillet. Using a griddle (a much larger cooking surface) place all of the assembled sandwiches on the griddle at the same time, in a single layer, to cook them at the same time. This way, you’re not making one at a time, which can be time-consuming.
     

    Nutrition

    Serving: 1sandwich | Calories: 326kcal | Carbohydrates: 36g | Protein: 7g | Fat: 17g | Saturated Fat: 8g | Cholesterol: 30mg | Sodium: 430mg | Potassium: 153mg | Fiber: 2g | Sugar: 8g | Vitamin A: 350IU | Vitamin C: 0.9mg | Calcium: 77mg | Iron: 2mg

    Turning a Crib in to a Dressing Room- Let’s Play Dress-Up!

    April 16, 2015

    Turn your crib in to a dress up, dressing room! https://fantabulosity.com

    My sister and her husband are the most creative people that I know. With her creative brain, and his mad handy-man skillzzz… the two of them together, blow my mind.

    If you saw the crawfish boil party that I had for my son, you already know how awesome my sister and brother-in-law are. Seriously… go look if you haven’t —-> Crawfish Boil Party

    Turning a Crib in to a Dressing Room

    I can’t exactly remember how the conversation came up, but when I found out that my sister and her husband took a crib, and transformed it in to a “dress-up,” area for my toddler niece… I told her that I HAD to see a picture of that. {Mainly because I couldn’t picture in my head what in the heck that they were talking about.}

    After they sent this first picture… I TOTALLY knew where they were going with it. How cool is this? But just wait…

    Transform your crib in to a dressing room! Boy or girl, any kid would love this to dress up area to put their costumes on! https://fantabulosity.com

    Second photo that I received…

    {Isn’t that adorable? You can tell that my niece couldn’t WAIT to start hanging up her princess dresses.}

    So do you see what they did there? They used the “spring,” part of the crib, as a place to hang the dresses and play clothes. BRILLIANT.

    But just wait…

    Transform your crib in to a kids dressing room! Boy or Girl, any kid would love this! https://fantabulosity.com

    Umm…. Yeah. They told me that it’s still not finished {mainly because I think they are just perfectionists}, but I am FLABBERGASTED at how fabulous this turned out.

    {Ahem… I bought the pink net for my niece for Christmas. Hey… I had to get a little credit for something in this DIY project, right? Ok ok… my sister even told me to buy that for her.}

    Turn your crib in to a dress up, dressing room! https://fantabulosity.com

    So as you can see, by the perfect little model herself… she LOVES how this dressing room turned out.

    I SERIOUSLY want one of these in my room. I wonder if my sister and her husband can turn my bed in to a dressing room? Here guys… here’s a tour of my master bedroom

    take a look and see what you can come up with —-> Master Bedroom Tour  😉

    Turn your crib in to a dress up, dressing room! https://fantabulosity.com

    Now you KNOW this DIY project doesn’t have to be just for girls. My sons would LOVE this, so they could put their superman and batman costumes on… anytime that they want.

     Are you dying to know how they did this transformation?  Let me know in the comments below, and I may be able to sweet talk them in to telling us… 😉

    Pin it like a crazy person:

    Turn your crib in to a dressing room!  Boy or Girl, any kid would love this for their costumes! https://fantabulosity.com

    Woodland Friends First Birthday Party

    October 25, 2014

    Woodland Friends First Birthday Party Dessert Table - https://fantabulosity.com

    We had our sons, “Woodland Friends,” first birthday party, and it was a real “hoot.”

    (No pun intended. Ok, maybe a little.)

    Woodland Friends First Birthday Party Ideas #1 https://fantabulosity.com

    Considering this was my second kiddo’s first birthday, I wanted to make sure that we did the same type of celebration for him, that we did for our oldest sons, first birthday. {See that party here: Airplane First Birthday Party}

    So that meant inviting friends and family, extra sweets, and fun little “extras,” to make it super special. (That you’ll see below.)

    Woodland Friends Party

    When I decided on the Woodland Friends party theme, I knew that I better start off by contacting someone for my invitations. “Perfect Printables,” came to my rescue!

    Not only did Megan run with the theme when I told her my ideas, the customer service, and production turn-around time, was impeccable! She knew I had kinda slacked, and waited until the last minute to order them, but she totally made it happen for me. “Perfect Printables,” will definitely be on my contact list for party invitations in the future!

    TIP: If you’d like to design your own birthday invitation, see how you can make your own birthday invitation in Canva!

    Woodland Friends First Birthday Party-21

    (I smudged out the address and phone number for photo purposes. I assure you that they were spot on, and “perfect.” No pun intended. Ok.. maybe a little again.)

    Aren’t they adorable!?

    For my oldest son’s first birthday, we asked the guests to forgo bringing a birthday gift, but if they insisted on bringing something, we would love to donate goodies to St. Jude’s Children’s Hospital.

    This time, we did the same, and donated goodies to “Operation Christmas Child.” What a wonderful organization it is, and what a great feeling imagining boys and girls opening gifts on Christmas that they may not have received otherwise. (I had Perfect Printables create a small card to include with the invites, explaining the details for the guests!)

    Woodland Friends First Birthday Party Invitation Ideas https://fantabulosity.com

    Keeping with tradition, we like to create a time capsule for our kiddos, so guests can write a little message for the birthday boy, that they can open on their 20th birthday and read what everyone had to say! We lock it away, and he will wipe the dust off in 19 years, and see what’s been said. 🙂

    Woodland Friends First Birthday Party Ideas - Birthday Time Capsule. Have guests write letters for the birthday boy/girl to open on a future adult birthday! So fun! https://fantabulosity.com

    Ok guys… seriously… this was the easiest party I have ever thrown. Adding in “stuffed,” forest animals, created such an easy, adorable touch to the dessert table. So if you’re planning on throwing a woodland theme party, I highly suggest grabbing stuffed animals for décor!

    Woodland Friends First Birthday Party Ideas - Dessert Table https://fantabulosity.com

    So let me say… I now have a major crush on The Pretty Paper Studio’s Etsy shop, and I can be pretty particular when it comes to printables for one of my parties. When I searched Etsy, and found them, I immediately fell in love. It’s almost as if they are in my brain, and know what my taste is exactly.

    The Birthday Party Mega Pack, was ABSOLUTELY perfect for the direction I was going in! Water bottle covers, cupcake toppers, signs, food tents, and so much more! Fantabulous customer service, and precious designs…. make a combination that automatically adds them to my “go-to” list for party printables, and you should too! See why:

    The backdrop of any dessert table is always a highlight, and I couldn’t think of a better place for the “Happy Birthday,” banner. Seriously… the colors, and modern look to the printables are just too…stinkin…cute!

    Woodland Friends First Birthday Party - Happy Birthday Banner https://fantabulosity.com

    Such a sweet little welcome sign, creates a warm welcome to any dessert table… don’t you think?

    Woodland Friends First Birthday Party "Welcome to my party," sign! https://fantabulosity.com

    Let’s get in to the dessert table details, shall we?

    Woodland Friends First Birthday Party Dessert Table - https://fantabulosity.com
    Woodland Friends First Birthday Party Forest Animals https://fantabulosity.com

    I found the wood cake stands at Hobby Lobby, and I’m so glad that I did. I was so already preparing to head to my mom and dads farm, and “sweet talk” my dad in to becoming a lumber jack. 🙂

    Woodland Friends First Birthday Party Forest Stuffed Animals https://fantabulosity.com

    Ok, woodland friends or not… I still had to throw in a white porcelain cake stand {or two}. I have to squeeze in a little “girly,” in this house full of boys!

    Woodland Friends First Birthday Party Ideas - Forest Animals https://fantabulosity.com

    Eeeeek! The cupcake toppers were the perfect addition to the cupcakes. {I’m no baker, let alone cupcake decorator… so when I could count on The Pretty Paper Studio’s cupcake toppers, I knew I was saved!}

    Woodland Friends First Birthday Party Cupcake Toppers https://fantabulosity.com

    I can’t throw a party without having Sweet. Sassy’s cake pops. I sent over a picture that I found on Pinterest, asked if they could do it, and they were up for the challenge! So excited with the way they turned out. Delicious… as always… too!

    Woodland Friends First Birthday Party Ideas Acorn Cake Pops https://fantabulosity.com

    The night before the party, I shared on my Facebook page that I had found a new love, in the sweet-snack world. I seriously cannot keep this in my house, like, EVER. Its amazingly easy to make, and even more delicious. If you’re ever looking for something quick to throw together for a party, look no further than this trail mix. Yumm-O.

    S’mores Trail Mix

    To make this, I simply combined a box of Golden Graham’s Cereal, a bag of miniature marshmallows, and a bag of milk chocolate or semi-sweet, chocolate chips. Of course you could adjust the quantities of each item to your liking, but I found it super easy to just use the whole box or bag of each! 🙂

    Woodland Friends First Birthday Party Smores Trail Mix https://fantabulosity.com

    I found little “S’mores,” candy, during my search for party treats. When they arrived, I saw they were a “round,” shape, and thought it would be cute to call them “stones,” to carry on the woodland {outdoor} theme.

    Woodland Friends First Birthday Party Smore's candy https://fantabulosity.com

    Yep, I totally can’t take credit for these adorable little hedgehogs. I found the idea on Pinterest, AND my friend Brandy made them for me, on party day. She said they were super easy, and I couldn’t get over how stinkin’ cute they were. Right?

    Woodland Friends First Birthday Party Donut Hole Hedge hogs https://fantabulosity.com

    Was this an easy way out for a quick dessert? You bet. Hey… who doesn’t love a Kit-Kat?

    Woodland Friends First Birthday Party "Sticks" https://fantabulosity.com

    I’m such a sucker for color coordinating straws. But how could I resist birch straws, for this party? Add the straw flags from The Pretty Paper Studio, and it just made perfect sense.

    Woodland Friends First Birthday Party Birch Straws and Straw Flags https://fantabulosity.com

    If space allows, I always try to incorporate an area for guests, and create a “guest central.” For this party, I had the drop off basket for gifts that were being donated, the time capsule station, and the favors for the guests to grab on their way out. This little set up worked perfect, and took out any confusion, or “missed,” items of the party.

    Woodland Friends First Birthday Party Guest Welcome Center https://fantabulosity.com

    So what were the favors? A Pinterest find of course! Smore’s-To-Go! Wrapped in “treat bag,” plastic, and tied with a party favor label, made the perfect woodland friends party favor!

    Woodland Friends First Birthday Party Smores Favors https://fantabulosity.com

    No matter how good the cake pops are, how cute the decorations, how much fun my son had, or how many friends & family came by…

    there is NOTHING better than the feeling of helping other boys and girls out, that may not be able to have blessings in their lives, such as birthday parties, and even a Christmas gift.

    Our hearts are full, looking at this photo of all of the goodies from friends and family that will be sent to the “Operation Christmas Child,” organization this year.

    It’s never too early to start teaching our children to think of others, right? 🙂

    Woodland Friends First Birthday Party. Donate gifts to a charity or organization instead of filling your house with unnecessary toys! Great idea for a first birthday! https://fantabulosity.com

    More Birthday Party Ideas for Boys

    If you’re throwing a birthday party soon, our boys love fireman theme parties, nautical parties, indoor camping parties, and even a party based on their favorite food… “A nacho bar party!” Or if a slumber party is on the agenda, these boy slumber party ideas are so fun!

    Vendor Credits:

    Invitations: Perfect Printables

    Party Printables {Banner, cupcake toppers, straw flags, sign, etc.}: The Pretty Paper Studio Etsy Shop

    Cake Pops: Sweet. Sassy.

    How to Keep Avocados Fresh

    September 28, 2014

    How to keep avocados fresh

    This was a sponsored post by Yahoo Food and all of the opinions are my own.

    How to Keep Avocados Fresh: A few simple tips and tricks to keeping these tasty little pesky things fresh for cooking, eating, or garnishing.

    I totally feel like I’ve hit the AVOCADO jackpot…

    How to keep avocados fresh
    How to keep avocados fresh

    Don’t even try…

    Back a few years ago, anytime that I would see a recipe call for an avocado, I’d skip it, and move on to the next. Now wait… not because I didn’t like the taste of them, but because I thought there was too much to an avocado.

    First, I’d pick one up at the store, look it over really good…. think I had a good one and BAM! When I’d cut in to it at home, it would be all brown and nasty. So… I’d trash the $2 green egg looking thing, and flush my $2 down the toilet.

    how to keep avocados fresh

    How to Peel an Avocado

    Don’t even get me started on how I struggled with peeling and cutting an avocado. (You know you’re with me on this when you were first learning how to cut this weird looking thing in half with a big ole brown ball stuck in the middle of it.)

    Once I schooled myself in the “shopping for an avocado,” department, and then learned the trick of how to cut in to one, (YouTube it if you’re not sure), I was faced with one final dilemma of the “avocado.”

    How to Keep Avocados Fresh

    You see, I have brought my love of magazine reading, to a new level. (My husband told me that he welcomes me to 2000s, since I finally gave up the hard copies of magazines, and started viewing most of them online. Smartypants.)

    Yahoo Food!, is one of the digital magazines that I follow, that gives AH-mazing tips and tricks with recipes, food finds, and an endless supply of fun “reads,” with anything “food.”

    While browsing Yahoo Food the other day, I found the perfect solution to keep an avocado from turning brown so quickly, after it has already been cut in half. JACKPOT! I’ve nailed all of the other avocado struggles, but I was always rushing to keep the remainder of my avocado fresh, and nothing I was doing, was working. Then… I had the “ah-ha” moment, and can’t think them enough for the fantabulous tricks!

    According to Yahoo Food:

    • One trick is to brush the half of the avocado with olive oil, and store in an airtight container. This prevents direct contact with air, that causes the avocado to brown quickly.
    Keep your avocado from turning brown! https://fantabulosity.com
    Image Source: Yahoo! Food
    • If you don’t have olive oil on hand, give lemon juice a try! Brush the half of the avocado with lemon juice, and the citric acid will work it’s magic!
    Keep that avocado from turning brown! https://fantabulosity.com
    Image Source: Yahoo! Food
    • Lastly, the onion method is another way to keep ’em fresh. Onion??? Yeah, I wondered how that would help too, but you can read how they make it happen here: Stop Letting Avocados Get Brown
    Keep an avocado from turning brown with onions! https://fantabulosity.com
    Image Source: Yahoo! Food

    Don’t you love things that make your life easier, save money, and just make you go, “ah-haa,” all around? Me too. So needless to say, I couldn’t keep this trick to myself.

    Seriously… if you didn’t know about Yahoo’s Digital Magazine, I think you should go see it now, and see other brilliant articles like:

    • Cocktail Recipes
    • The best way to cook certain foods
    • Tricks when cooking for one
    • Fun new ways to order off of a menu
    • and so much more…
    Yahoo Digital Magazine

    Now, since you know how to keep your avocados fresh, you can use them more for avocado toast recipes! Our absolute favorite!

    Or, use them in avocado, mozzarella tomato salad too!

    How to Make Fried Rice

    May 19, 2019

    Fried rice in shallow bowl.

    How to Make Fried Rice: This Chinese fried rice recipe is now a favorite recipe to have at home after my husband perfected after three tries! 

    My husband and I have been having so much fun in the kitchen lately. He absolutely loves making this beef tenderloin and helping with this easy fried chicken recipe, but now…

    …after the third time of creating and perfecting this Chinese Fried Rice recipe, it’s time to share this one with you.

    Restaurant Style Fried Rice, easily made at home! https://fantabulosity.com

    How to Make Fried Rice

    I’m sure you’ve had many different styles of fried rice like I have. 

    Some are loaded with peas and green onions, different types of meat or even fruit like pineapple! 

    With this fried rice, you can add your preference of toppings and vegetables to make it your very own!

    NOTE: We LOVE garlic in our house, so we use 3 cloves in our recipe, but feel free to cut this back in yours. I’ve noticed ours has a little more garlic flavor than restaurant fried rice.

    What Kind of Rice to Use for Fried Rice?

    When we’re making it at home, we use whatever rice we have on hand. However, our absolute favorite rice to use for any dish, is basmati rice, which is used in a lot of Indian Recipes like this Chilli Chicken Recipe. But feel free to use:

    • Basmati Rice
    • Jasmine Rice
    • Instant Rice
    • Long Grain

    Note: Just make sure directions on rice packaging matches up (or are similar) to how we cook our rice in the recipe card below. If not, follow the directions on the type of rice you’re using, so you have a fully cooked rice, before finishing the fried rice recipe.

    Do I Have to Use a Wok Pan to Make Fried Rice?

    Nope. You can use a regular skillet, but we love using a wok because it makes things much easier (and fun) to toss the rice around while it’s cooking.

    What are the Different Types of Fried Rice

    There are many different types of fried rice, and that’s what I love about sharing easy recipes with you here on Fantabulosity because they’re super flexible to customize to your liking! Here are a few ideas:

    How to Make Chicken Fried Rice

    One of the most popular fried rice dishes in our family, whether at home or at our local favorite Chinese restaurant, is chicken fried rice.

    This is easy to do! You can make chicken similar to how we made chicken bites, chicken breasts in the crock pot, or grab a rotisserie chicken and use the meat from that along with this fried rice recipe below!

    How to Make Shrimp Fried Rice

    If you’re wanting to make shrimp fried rice, there are different ways you can do this! 

    • Buy pre-cooked shrimp that just needs to be warmed up.
    • Make your own shrimp like this garlic butter shrimp on the stovetop.
    • Use a shrimp marinade and grill your shrimp like in this grilled shrimp recipe.
    • Or get creative and use this fried shrimp recipe! Doesn’t that sound amazing?

    Just don’t forget to remove the tails of the shrimp before adding them to the rice for much easier eating! 

    How to Make Stir Fry Rice

    My grandma used to LOVE making stir fry. She’d steam white rice and serve mixed veggies and soy sauce with it and would call it day. It was one of my FAVORITES! 

    Well taking hers up a notch, we love making stir fry with this fried rice recipe and tossing in stir fry vegetables like:

    • Frozen mixed stir-fry veggies

    or

    • Canned bamboo shoots, bean sprouts, water chestnuts and baby corn.

    Other Types of Fried Rice:

    • Pineapple Fried Rice
    • Pork Fried Rice
    • Tofu Fried Rice
    • Cauliflower Fried Rice (look for frozen cauliflower rice!)
    • Cashew Fried Rice
    • Lobster, Scallop or Crab Fried Rice

    So no matter if you want to enjoy it alone or if you want to add something into your fried rice recipe, this recipe will be fantastic to use…

    What to Serve with Fried Rice

    If you’re looking for a side dish for fried rice, you’ll LOVE this pan-fried dumplings recipe!


    What Should I Serve with Fried Rice?

    You can eat fried rice just as it is, but serving the standard Chinese food favorites like:

    • Sweet & Salty Chicken

    Or if you’re looking for a completely different type of side dish to serve with fried rice, here are some of our favorites:

    • Asian Chicken Lettuce Wraps
    • Egg Rolls
    • Crab Rangoons (or our guacamole wontons for a fun spin)
    • Chinese Dumplings

    Love Restaurant Meals at Home?

    Then you’ll LOVE these:

    • Italian Chopped Chicken Salad
    • Oven Steak Recipe
    • Easy Lobster Bisque

    Recipe

    Fried rice in shallow bowl.
    Print Pin
    5 from 1 vote

    Chinese Fried Rice Recipe

    This fried rice recipe is so easy to make and tastes delicious! Add your leftover meat and vegetables to this versatile dish.
    Course Main Course
    Cuisine Chinese
    Prep Time 0 minutes minutes
    Cook Time 30 minutes minutes
    Total Time 30 minutes minutes
    Servings 6 servings
    Calories 258kcal
    Author Jessica Burgess

    Ingredients

    • 1 Tablespoon salted butter
    • 1 cup rice
    • 1 cup water
    • 2 Tablespoons sesame oil
    • 1 sweet onion chopped
    • 1 cup carrots chopped
    • 3 cloves garlic chopped
    • 2 Tablespoons oyster sauce
    • 1 cup meat chopped and cooked (optional)
    • 2 eggs
    • 2 Tablespoons soy sauce
    • 1 teaspoon black pepper
    • 1 teaspoons sesame seeds

    Instructions

    • In a saucepan, melt butter on high and add rice.
    • “Toast,” the rice on high heat stirring often, for 2 minutes. Reduce heat to low.
    • Add water, and cover and let sit for 15 minutes on low, set aside.
    • In a wok pan, pour in sesame oil, and turn the heat on high. When smoking, add onion. Cook onions until clear (3 minutes)
    • Add carrots, and garlic and cook for 2 minutes.
    • Add oyster sauce
    • Add in cooked rice from earlier, and mix well.
    • Add choice of meat if desired. Mix.
    • Push rice mixture to one side of wok pan.
    • Crack eggs into the side of pan and scramble, and mix with rice once cooked.
    • Add soy sauce, pepper, and sesame seeds
    • Serve!

    Nutrition

    Serving: 1serving (⅙ recipe) | Calories: 258kcal | Carbohydrates: 32g | Protein: 10g | Fat: 9g | Saturated Fat: 2g | Cholesterol: 75mg | Sodium: 588mg | Potassium: 300mg | Fiber: 1g | Sugar: 3g | Vitamin A: 3700IU | Vitamin C: 4.7mg | Calcium: 43mg | Iron: 1mg

    Best Banana Bread

    March 14, 2025

    Sliced banana bread on white platter

    This banana bread recipe is the one I come back to over and over. It’s soft, incredibly moist, and made with one simple ingredient that makes all the difference. If you've been searching for a banana bread that actually turns out every time, this is it.

    This recipe uses buttermilk for extra moisture and a tender crumb. It adds just enough richness and moisture to keep the bread from drying out, while also enhancing the overall flavor.

    Easy Banana Bread

    This is one of those recipes people come back to again and again because it just works.

    Bread recipes are one of our favorite recipes to bake but this banana bread is the BEST and is now a favorite in so many kitchens! While it’s moist and delicious on its own, it would be a fun treat to serve with some vanilla sauce, or even add some blackberries in this banana bread.

    If you love easy, comforting recipes like this, you may also enjoy these old-fashioned cake recipes.

    [feast_advanced_jump_to]
    Banana Bread Testimonial Review - Best
    A Fantabulosity reader thinks this is the best banana bread recipe too! Thank you for sharing Jeanne!

    Why You’ll Love This Banana Bread

    • Secret Ingredient: It’s buttermilk (or substitute with a combination of lemon juice and milk), that creates a moist, flavorful banana bread.
    • Classic and Flexible. You can add your favorite additions if you want something other than regular banana bread. For instance, chocolate chips, nuts, and blueberries are DELICIOUS in this recipe!
    • Extra Bananas: It’s a great way to use up bananas that are turning brown!
    This banana bread is UNBELIEVABLE! https://fantabulosity.com

    How to Make Banana Bread Moist

    To get the best results, use very ripe bananas, avoid overmixing the batter, and don't overbake. The buttermilk also helps create a soft texture that stays moist for days.

    What Baking Pan to Use for Banana Bread

    I’ve made this recipe using regular loaf pans and mini loaf pans. Honestly, it doesn’t matter to me which way I make it because it’s delicious either way. However, if making in mini loaf pans, you’ll want to bake it for less time.

    Mini Loaf Pans

    The first time I made this, I knew I wanted to use the CUTEST little mini loaf baking pan so I knew I need to adjust the bake time.

    If you’re using a mini loaf pan (since all can be different) just start checking the middle after about 20 minutes of baking, and remove them when a toothpick inserted into the middle comes out clean.

    Regular Loaf Pans

    My oven cooks SUPER fast, so I had to be cautious when it came to baking this banana bread. So where I had to bake my banana bread in regular size loaf pans for 40 minutes, it may take anywhere from 40-55 minutes for your oven.

    Periodically check with a toothpick until the center comes out clean after about 40 minutes.

    SIDE NOTE: Since I used two different pans, they both cooked differently too. One pan was much thinner than the other, so that loaf of bread finished before the other.

    How to Make the Best Banana Bread

    For the full list of ingredients and instructions all in one place, see the printable recipe card toward the bottom of this post!

    Easy Banana Bread

    Start with Ripe Bananas

    I’m not going to lie. When I see at least 3 bananas on my counter that are starting to turn a little brown, I get a little too excited.

    I despise eating bananas by themselves. But turn them into banana bread, and you can’t keep me out of it.

    For this recipe, start with ripe bananas.

    Don’t worry… if you need to make this old-fashioned banana bread NOW, and the store only had underripe bananas… you can ripen bananas for banana bread.

    Ripe bananas recipes

    Secret Ingredient – Buttermilk for Banana Bread

    I truly believe there’s an ingredient in this banana bread recipe that makes it so good, and moist.  Buttermilk. Yes, really!

    Buttermilk Substitute

    Don’t have buttermilk on hand, DON’T worry! In a small dish or bowl, mix together ½ cup milk with 2 teaspoons of lemon juice! Works perfect every time!

    Buttermilk makes banana bread moist!

    Banana Bread Batter

    With a mixer, mix the butter and the sugar.

    Banana Bread few ingredients - moist and the BEST

    Next, add in the mashed bananas and the eggs.

    How to mash bananas - ziploc bag

    Pro Tip: Throw your bananas into a Ziploc bag, seal, and mash them with your hands through the bag or with a rolling pin!

    flour, baking soda, salt mixture

    In a separate bowl, mix together your flour, baking soda, and salt.

    Alternate the flour mixture and the buttermilk

    Next, fold in the dry ingredients, alternating the buttermilk (or milk and lemon juice) with the flour.

    Mix together milk and lemon juice to make buttermilk for banana bread
    Mix together the banana bread ingredients

    Once that is mixed, you’re ready to add to your desired, greased baking dish.

    How Long to Bake Banana Bread in Oven

    Mini loaves take me about 20 minutes, and two regular loaf pans take about 40 minutes.

    Pour batter in to two different regular size loaf pans
    Banana Bread Recipe - Easy and the BEST

    How Long to Cool Banana Bread

    Once you remove your banana bread from the oven, let it sit a few minutes and then release it from the loaf pan to fully cool on a wire rack. (I do this when we want to eat it in a hurry.)

    Banana Bread - moist and the best

    Slice and serve!

    But do me a favor… if you’re making it just for fun, give it a try when it’s warm. You won’t regret it.

    FAQs and Expert Tips

    Can you use too many bananas in banana bread?

    YES! Using too much banana can make the bread soggy and too dense. This recipe calls for only 3 bananas (about 1 ½ cups of mashed bananas).

    How do you ripen bananas?

    If you have bananas that are not ripened but you want to make banana bread, place the bananas, still in the peels, on a baking sheet and bake in the oven at 300° until they turn black. See my tips on how to ripen bananas in the oven!

    Easy Banana Bread Recipe

    How Long Does Banana Bread Last?

    Banana bread can sit out on the counter for four days, and leaving it at room temperature will help it stay moist longer. Refrigerating banana bread can cause it to dry out faster.

    Can Banana Bread Sit Out Overnight?

    Yes, banana bread can sit out overnight.

    How to Freeze Banana Bread

    You can freeze banana bread for up to 3 months, as long as it’s stored correctly! It’s best to store, wrapped, in a freezer bag, freezer paper or even a vacuum-sealed bag. (Just remember to choose the setting that won’t flatten it out while removing the air.)

    More Bread Recipes You’ll Love:

    If you loved this recipe, then you’ll also love this Easy Bread Pudding Recipe and this Banana Bread Pudding! Or try this chocolate quick bread.

    If you love banana flavor for a sweet treat, this banana pudding poke cake recipe is one to save.

    Recipe

    Sliced banana bread on white platter
    Print Pin
    4.52 from 95 votes

    Best Banana Bread Recipe (Moist, Easy, and Never Dry)

    It's the secret ingredient that makes this the BEST banana bread recipe that makes it so moist and so delicious. Plus, it's easy, quick and uses simple ingredients.
    Course Breakfast, Dessert
    Cuisine American
    Prep Time 10 minutes minutes
    Cook Time 40 minutes minutes
    Total Time 50 minutes minutes
    Servings 8 servings
    Calories 352kcal
    Author Jessica Burgess

    Equipment

    • 2 loaf pans or mini loaf pans
    • 2 mixing bowls
    • measuring spoons and cups
    • hand mixer or stand mixer

    Ingredients

    • ½ cup buttermilk or you can combine ½ cup milk with 2 teaspoons lemon juice & set aside to curdle
    • ¾ cup butter softened (1½ sticks)
    • 1½ cup granulated sugar
    • 1½ cup very ripe bananas mashed, which is about 3 large bananas
    • 2 eggs
    • 2 cups all-purpose flour
    • 1 teaspoon baking soda
    • 1 teaspoon salt

    Mix-Ins (optional):

    • chocolate chips
    • nuts walnuts or pecans

    Instructions

    • Preheat oven to 325 degrees F. In a mixing bowl, cream the butter and the sugar.
      ¾ cup butter, 1½ cup granulated sugar
    • Add in the mashed bananas and eggs. Mix together until well combined.
      1½ cup very ripe bananas, 2 eggs
    • In a separate bowl, mix together the flour, baking soda, and salt.
      2 cups all-purpose flour, 1 teaspoon baking soda, 1 teaspoon salt
    • Add the flour mixture and the buttermilk alternately to the wet mixture, and mix with a hand mixer on low or by hand until combined. (If you're adding chocolate chips/nuts, add to mixture and hand stir to combine.)
      ½ cup buttermilk, chocolate chips, nuts
    • If baking in regular-size loaf pans (split batter in half between the two.) 
      If using mini loaf pans, fill each cavities about half way.
    • If baking in regular-size loaf pans, bake at 325 for 40-45 minutes. (Some have stated their ovens do better at baking for 50-55 minutes.) 
       If baking in mini loaf pans, bake at 325 and begin checking after 20 minutes with a toothpick to see if it comes out clean. (Because each mini loaf size is different like mentioned above.)

    Video

    Notes

    How long does banana bread last?
    Banana bread can sit out on the counter for four days. Store in a bag or airtight container so it doesn’t dry out easily.
    How to Freeze Banana Bread:
    You can freeze banana bread for up to 3 months, as long as it’s stored correctly! It’s best to store, wrapped, in a freezer bag, freezer paper or even a vacuum-sealed bag. (Just remember to choose the setting that won’t flatten it out while removing the air.)

    Nutrition

    Serving: 1slice (⅛ loaf) | Calories: 352kcal | Carbohydrates: 40g | Protein: 5g | Fat: 19g | Saturated Fat: 11g | Cholesterol: 88mg | Sodium: 611mg | Potassium: 124mg | Fiber: 1g | Sugar: 15g | Vitamin A: 625IU | Vitamin C: 1.2mg | Calcium: 33mg | Iron: 1.7mg

    Ghost Craft for Kids

    September 5, 2022

    cotton ball ghosts craft

    Ghost Craft for Kids: Such a fun project for the kids at Halloween. Just a few items, that you probably even have on hand, for craft time success!

    two ghost craft projects on table
    Ghost Craft for Halloween

    When Halloween rolls around in our house, a craft is a MUST and this Ghost Halloween Craft is one of our favorites! It’s easy to make, and uses items that we usually have in our craft bin anyway!

    Materials Needed:

    • White Cardstock, Small Posterboard, or White Construction Paper (Card Stock is thicker, so I chose this so it would hold up better}
    • Black Construction Paper
    • Scissors
    • Cotton Balls (amount depends on size of ghost you cut out. We used 35-40)
    • Googley Eyes
    • Glue (we use glue sticks to keep it less messy)

    Just for fun, you’ll also love snacking on this Monster Mix or these Halloween pretzel sticks, while you’re crafting!

    Instructions:

    1. Start by using white cardstock, and cut a “bell” shape (or upside down “U”) and feel free to add a scalloped edge to the bottom, to give the ghost a “flowy” look.
    Ghost template on white cardstock
    Ghost template
    1. Next, cut out the ghost shape with scissors.
    Cutting ghost template out of paper
    Cut out ghost
    1. Then, using black construction paper, cut out a small round or oval shape, to create the mouth of the ghost. Glue on to ghost where the mouth should go.
    Scissors cutting out mouth, from black construction paper
    Cut out mouth
    1. Using adhesive craft eyes, stick the eyes on to the ghost. (Or, if not adhesive eyes, glue the eyes on.)
    Attaching eyes to ghost paper
    Add eyes to ghost
    Both eyes on ghost
    Both eyes added
    1. Next, using glue (we use a glue stick but you can use Elmer’s glue if desired) spread glue on the white parts of the ghost.
    Stick glue spread on ghost
    Use a glue stick
    1. Begin sticking cotton balls on to glue, pressing down to secure each ball.
    Hand sticking cotton balls on to ghost
    Stick cotton balls on to ghost
    1. Cover the entire ghost with as many cotton balls as it takes, making sure the eyes and mouth still show.
    ghost craft being held up by kid hands
    Ghost Craft Idea
    cotton ball ghost craft being held by kiddo hand
    Kids Ghost Craft

    Then it’s done! Hang it up on the refrigerator, in their bedroom or out on a display for all the trick-or-treaters to see!

    Hint: Save it for next year as a little keepsake, and you can display it for Halloween again!

    Related Halloween Ideas

    I also think you’ll love this pumpkin patch dessert that we love making this time of year!

    Recipe

    Yield: 1 ghost

    Ghost Craft

    cotton ball ghosts craft

    Ghost Craft for Kids: Such a fun project for the kids at Halloween. Just a few items, that you probably even have on hand, for craft time success!

    Active Time 15 minutes
    Total Time 15 minutes
    Difficulty Easy

    Materials

    • white card stock (or mini poster board)
    • black construction paper
    • cotton balls
    • glue stick (or Elmer's Glue)
    • googly eyes

    Tools

    • scissors

    Instructions

      1. Start by using white cardstock, or mini white poster board, and cut out a "bell" shape or an upside-down "U" shape. Feel free to scallop the bottom if desired, or keep it straight across.
      2. Next, cut out that shape with the scissors.
      3. Then, using black construction paper, cut out a round or oval shape, for the ghost's mouth. Glue on.
      4. Using adhesive googly eyes, stick two on the ghost. Or, if they're not adhesive, glue them on.
      5. Next, using glue, spread glue on to the whites of the ghost, around the eyes and mouth.
      6. Begin sticking cotton balls to glue, pressing down to secure each cotton ball.
      7. Cover the entire ghost with cotton balls.
      8. Allow to dry!
    © Jessica

    A flashback to when my toddler made this for the first time and I had to help him. Now, he did it all on his own!

    Halloween Ghost Craft for Kids-5
    Toddler Halloween Craft, Ghost Halloween Craft for Kids

    Baby Travel Checklist – Free Printable: What to Pack for Babies

    March 21, 2016

    Baby Checklist: Travel Edition Free Printable Download

    Baby Travel Checklist: This baby traveling checklist free printable can be your lifesaver!

    Traveling with a baby, can be super stressful at times. But honestly, that never kept us from planning a last minute trip with the baby, to get outta dodge. So if you’re notorious for planning last-minute trips, or you’re the “planner,” type… my free baby travel checklist  can be a HUGE life saver for you.

    Baby Packing Travel Checklist - Free Dowload
    Last minute, Miami Florida trip with our then, 8-week old little guy.

    Baby Travel Checklist – Free Printable

    A couple of weeks ago, I shared my updated “Toddler Packing List.” After updating that free printable, I knew the Baby Checklist HAD to be next. The toddler packing list went viral on Pinterest, and that told me that there’s a major need for organization when it comes to traveling with kids. I’ve also heard that tips for flying with a baby, are in high-demand from you all, so I’ll work on that asap. I’ve flown a time or two a hundred times with babies, and have learned some tricks along the way! I’d love to share those with you!

    But without further ado… save my FREE baby packing travel checklist here: Baby Travel Packing Checklist

    Baby Travel Checklist: Travel Edition Free Printable Download

    Enjoy this free printable, and remember to “pin” it here, so you have it when you need it the next time! I hope this makes your life a little easier with traveling with a baby.

    Before you get to packing, make sure you see HOW I pack clothes for my kiddos when we head out on vacation too. Talk about a major life saver! You can see my little trick HERE!

    The SMART way to pack your Baby or Toddler for Vacation

    If you’re on the hunt for more printables and organization printables, feel free to browse our free printables!

    Grocery List Template – Free Printable

    November 11, 2020

    Grocery List Template

    Grocery Shopping List Template: This adorable and free printable will help you organize your grocery shopping to make things so much easier!

    Post Originally Published in August 2013 – Updated in November 2020


    Grocery List Template

    So I don’t like grocery shopping as much as you do. Yes, sometimes if I get out of the house without the kids to go grocery shopping, it may feel a little like a vacation… but still… I DESPISE grocery shopping.

    And now that grocery pick-up and delivery is a thing, my grocery shopping life is SO much easier. BUT…

    Grocery Shopping List Template

    Are you ready for me to make your grocery shopping life easier even if you do grocery pick-up and/or delivery? Welcome to my FREE GROCERY SHOPPING LIST TEMPLATE!

    Get this free grocery shopping list right away, when you join my email list!

    How to Use my Grocery Shopping Master List:

    Free grocery shopping list template download

    For probably close to 15 years, my mom has been using something that has changed her (and my) daunting grocery shopping trips.

    She created a master copy of a grocery shopping list, and after taking hers and adding a little pink and “fantabulosity flair”, I’m sharing this version with you!

    How to Use the Grocery List Template:

    • Simply select and print.
    • Hang it on the refrigerator door (or wherever your central station is).
    • Highlight the items with a highlighter as needed, as you run out or think of them.
    • Take the list with you to the store when you’re ready.
    • Grab your highlighted items at the store, and you're all set!

    Print, again and again, to keep the same system going!

    Common Grocery Items

    Wondering if this list has common grocery items on it? YES! This list was created with everyday staples with a “family” in mind.

    This list has the main categories you’re used to shopping for like,

    • Household
    • Breakfast Food
    • Bread
    • Deli
    • Dry Ingredients
    • Beverages
    • Dairy
    • Canned Foods
    • Children
    • Frozen Foods
    • Baking Goods
    • Spices
    • …and so much more!

    With individual items under each category like:

    • butter
    • milk
    • cake mix
    • bread
    • shredded cheese
    • salt
    • pepper
    • cereal
    • pop tarts
    • light bulbs
    • paper towels
    • …and so many more everyday items you need!

    My Favorite Ways to Grocery Shop:

    I’m a BIG fan of Walmart Grocery Pickup and Instacart Delivery.

    With two little boys at home… loading up and heading to the grocery store to spend an hour saying “no” to cookies, toys and fruit snacks… doesn’t really sound like a ton of fun.

    So when Walmart grocery pickup and Instacart came to my hometown, I immediately fell in love.

    I can easily place my order online and either head down the street to pick up my groceries, or they show up on my doorstep a few hours later with what I need!

    List for Online Grocery Ordering

    I STILL use this grocery shopping list, even though I’m ordering online.

    I keep the grocery list handy throughout the week, and still mark up the items I need, as I realize we need them.

    But the difference from going to the store, is I simply sit down on my couch while my favorite tv show is on, and I order away by what my list says I need!

    Looking for More Printables?

    Have a specific printable you’d love to see here? Let me know in the comments below. I’m a bit of a printable junkie, so if I know what you want… it will more than likely go on my list to create.

    Bread Pudding Recipe: Easy Old Fashioned Recipe (With Video!)

    March 11, 2024

    bread pudding in baking dish

    Bread Pudding Recipe: An easy old fashioned recipe is the BEST, and this recipe resembles the old-fashioned dessert recipe that we all love! It’s basic, and uses everyday ingredients and an optional brown-buttered vanilla sauce, or this vanilla sauce for bread pudding, to drizzle on top!

    If you're looking for more desserts that work well for sharing, you'll find my favorite potluck desserts here.

    Bread Pudding with Vanilla Sauce

    Looking for quick and easy dessert recipes to add to your Pinterest boards? Then you’ll also LOVE this peach cobbler made with Bisquick, the BEST Banana Bread, and this easy pound cake recipe!

    [feast_advanced_jump_to]

    I’m so glad that you’re here for this bread pudding. It may just change your decadent dessert life.

    But if this is your first time here, you’re going to find tons of quick and easy recipes around here!

    What is Bread Pudding?

    Well it’s not the “pudding” you’re probably thinking of. Rather it’s a recipe that uses old, stale bread, combined with a creamy custard that consists of things like sugar, butter, milk, eggs, cinnamon, vanilla, and then bake it all. The outside edges may have a slight crisp, while the middle is a soft, custard-like texture.

    Bread pudding serving in small white bowl

    Where did bread pudding come from?

    New Orleans is famous for its bread pudding! However, bread pudding originated in England (UK) and was actually created as “poor man’s pudding” since it used very little ingredients. Since then, other ingredients were added to enhance the flavor.

    I found out about it because my grandma used to make this old-fashioned dessert and I fell in love with it from the first moment I had it!

    When I wanted to make this for the first time, I found a few good recipes for bread pudding in my old cookbooks, but they all had something that didn’t tickle my fancy. (Such as raisins – although you can add these if you like.)

    So… I gathered all of the recipes up and came up with my own plan and I have to admit, using simple ingredients helped make this the BEST bread pudding!

    Ingredients for Bread Pudding

    Front view of bread pudding ingredients, sitting on kitchen counter.

    This bread pudding is made with easy-to-find ingredients. Here are a few notes on some of the key ingredients. See the recipe card below for the measurements.

    • Bread: Stale bread is best so it really soaks up the custard mixture, instead of it settling in the bottom and cooking the eggs separately.
    • Butter: I’ve used salted and unsalted for this recipe and it turns out great each time.
    • Milk: Feel free to try half & half or heavy cream if that’s what you have!
    • Sugar: I use white granulated sugar for this but brown sugar for the optional sauce.
    • Vanilla extract: If you can use pure vanilla, that’s the best. But I’ve used imitation vanilla in a pinch.

    What Kind of Bread is Best for Bread Pudding?

    French bread is a great bread for this recipe although I’ve used leftover sandwich bread, hot dog buns, hamburger buns, and more, and it always turns out great! (Or if you have stale donuts, you may want to make this donut bread pudding recipe!) Check out all the different types of bread readers have used over the years, in the comments!

    How to Make Stale Bread

    If you’re craving bread pudding, but don’t have the leftover bread or the stale bread to use for it, no worries!

    Grab some fresh bread and either pop it in the toaster for a bit, or cut in to bread cubes (about 1-inch pieces) and bake it in the oven on 350° for about 5-10 minutes. (Don’t burn it or turn it brown. You’re just removing as much moisture from it as you can.)

    Dish of Bread Pudding

    I love this recipe, and I really do think it’s the best because it only includes items I usually have on hand, resembles the old-fashioned recipe that we’ve all known to love, and I had it all put together and in the oven in a matter of minutes.

    How to Make Bread Pudding from Scratch

    1. Begin by preheating your oven to 350 degrees.
    2. Then you’ll start by buttering your 8×8 baking dish (or 9×13 casserole dish if doubling the recipe) and breaking up the bread into about 1-inch cubes.
    Spreading butter stick on baking dish
    1. Toss the bread into the buttered dish.
    Uncooked bread cubes in baking dish
    1. Melt your remaining 2 tablespoons of butter, and drizzle melted butter over bread pieces and set aside.
    eggs, milk, cinnamon, sugar, butter in large mixing bowl ready to be mixed
    1. Next, in a large mixing bowl, mix together the eggs, milk, sugar, cinnamon, and vanilla.
    Egg custard mixture in bowl, ready to pour over bread pieces
    1. Next, simply pour the egg mixture over the bread pieces and make sure each piece has been covered or submerged to let that bread soak up that amazing custard mixture!
    Close-up image of egg custard batter pouring out of mixing bowl on to top of bread

    Oh my… doesn’t that photo of the egg mixture just make you drool!? It does me, every stinking time I look at it.

    Bread cubes soaking pudding mixture in baking dish

    How Long to Bake Bread Pudding

    1. Toss that baby in the oven and let it bake the bread mixture uncovered for 40-45 minutes at 350º.
    Bread Pudding in dish without sauce

    FAQs and Expert Tips:

    How do you know when bread pudding is done?

    Just like almost any dessert, or bread that you’re baking, insert a clean knife into the center and see if it comes out clean!

    What is day-old bread?

    Well, it’s stale bread. Not super hard, and crispy… but bread that just wouldn’t be your favorite to use to make your favorite sandwich.
    The reason you want day-old or stale bread is because you’ll want the bread to soak up the batter/custard of the bread pudding mixture.

    Can you freeze bread pudding?

    Yep! It’s actually a great idea to make some of this ahead of time in case you need a last-minute dessert idea or to take a care package to a friend in need!
    Just bake it as normal, and once cooled, place in the freezer for up to 2 months. When ready to thaw it, place it in the refrigerator to thaw it out.

    Do you eat bread pudding warm or cold?

    You can enjoy bread pudding cold or warm, but if you prefer it warm after freezing/thawing, gently warm it to reheat.

    Can I prepare bread pudding the night before?

    Absolutely! I love make-ahead meals about as much as anyone, especially when entertaining! So if you want to make this ahead of time, feel free to!
    You can either mix it all together and refrigerate it overnight before baking, or bake it, let it cool, and then refrigerate.

    How to store leftovers

    For best results, if you have left-over bread pudding, cool it until becomes room temperature and store in an airtight container (or cover the dish with plastic wrap) for up to 5 days, in the refrigerator.

    Old-Fashioned Bread Pudding

    That golden-brown bread pudding will remind you of grandma’s old-fashioned recipe as soon as you pull it out of the oven.

    Serve it warm alone, with ice cream, or top it with the super-easy bread pudding sauce that I tell you about below…

    Bread pudding on a spoon over dish

    What to Serve with Bread Pudding?

    If you’re looking for a little something extra to serve with your new, easy bread pudding recipe, you might consider:

    Bread pudding with raisins in baking dish, sitting on table, on top of lace cloth.
    • raisins – as shown above
    • chocolate sauce
    • caramel ice cream topping
    • ice cream
    • whipped cream
    • candied nuts
    • dried fruit
    • powdered sugar
    • or this crazy-easy and delicious bread pudding sauce I whipped up for you…

    Amazing Bread Pudding Vanilla Sauce

    For years I shared this recipe without a sauce or a drizzle. But there have been tons of you who have made this recipe and left so many amazing reviews and comments below saying you’ve made a bourbon bread pudding, caramel sauce, or vanilla sauce, and I must say… you’ve inspired me.

    So when I remade this recipe to take new photos for the blog, I decided to whip up a quick buttery vanilla sauce to see how it would taste, and have also provided a creamy vanilla sauce recipe that you can top it with.

    The bread pudding is great as a stand-alone, but I’m a fan of this addition now, in a BIG way!

    How to Make Browned Butter Sauce:

    You’ll need the following, everyday ingredients to make this drizzle, that is more nutty, and a little less sweet than the custardy vanilla sauce option below:

    • butter (I used salted but unsalted butter works just fine!)
    • brown sugar
    • milk or heavy cream (or even water)
    • vanilla

    It’s super easy. Grab a small saucepan, and melt (on high) 3 Tablespoons of salted butter.

    Vanilla Sauce in sauce pan

    Once melted, turned it down to medium heat and wait a bit to let the butter brown. (Browned butter is my JAM!)

    Then, reduce heat to a simmer, and add in brown sugar, milk or cream, and then whisk for 1-2 minutes.

    Remove from heat and whisk in vanilla. Pour on top of the cooked bread pudding.

    Bread Pudding with vanilla sauce in dish

    How to Make Vanilla Sauce for Bread Pudding

    Get the creamy vanilla sauce recipe if you prefer a sauce that is more “custard” like, rich, and also called “crème anglaise,” instead of the browned butter sauce that I’ve made above.

    Bourbon Bread Pudding

    If you love the taste of bourbon in your bread pudding, you can easily add bourbon to the vanilla sauce recipe above by adding in a tablespoon of bourbon (less or more, depending on your taste) when you add in the sugar and vanilla.

    Related Recipes:

    We have a major sweet tooth and are HUGE fans of bread pudding recipes so make sure you check out our chocolate bread pudding recipe, donut bread pudding, sweet potato casserole bread pudding, and banana bread pudding to see which one is your favorite! Or, you may even love trying this croissant bread pudding!

    So tell me… did you make this bread pudding? Did you like it? Let me know below in the comments with the others, and give this a rating to let others know how much you love it!

    Recipe

    bread pudding in baking dish
    Print Pin
    4.92 from 1187 votes

    The BEST Bread Pudding Recipe

    This old-fashioned bread pudding recipe is so easy, traditional, and is the custard dessert recipe we all love! Plus, an optional vanilla sauce to drizzle on top!
    Course Dessert
    Cuisine American
    Prep Time 5 minutes minutes
    Cook Time 45 minutes minutes
    Total Time 50 minutes minutes
    Servings 6 servings
    Calories 316kcal
    Author Jessica Burgess

    Equipment

    • 1 8 x 8 Baking Dish
    • 1 Mixing bowl
    • 1 Saucepan Only if making sauce
    • 1 Whisk Only if making sauce

    Ingredients

    • 6 slices stale bread (Or about 4-5 cups of broken bread pieces or cubes. Some ideas to use are: french bread, buns, rolls, donuts, challah, toast or another type of bread.)
    • 3 tablespoons of butter 1 Tablespoon + 2 Tablespoons
    • 4 beaten eggs
    • 2 cups milk
    • ¾ cup white sugar
    • 1 teaspoon vanilla extract
    • 1 teaspoon cinnamon
    • raisins optional

    Optional Creamy Vanilla Sauce

    • vanilla sauce get my vanilla sauce recipe

    Optional Brown Sugar Butter Drizzle

    • 3 tablespoons butter salted (but unsalted is ok too!)
    • 1 tablespoon brown sugar
    • 1 teaspoon vanilla extract
    • 1-2 tablespoons milk or heavy cream – optional *see notes

    Instructions

    • Preheat oven to 350 degrees, and use 1 Tablespoon of butter to coat the inside of your 8 inch square baking dish.
    • Break your bread (I made larger pieces, rather than crumbling it up) in to the buttered baking dish.
    • Melt your remaining 2 tablespoons of butter, and drizzle over bread pieces.
    • In a bowl, mix remaining ingredients (don't forget to beat your eggs first) until mixed well.
      4 beaten eggs, 2 cups milk, ¾ cup white sugar, 1 teaspoon vanilla extract, 1 teaspoon cinnamon
    • Pour this mixture over the bread, making sure to evenly coat each piece.
    • Bake for 45 minutes, or until the top of the bread pudding springs back after lightly touching it with a fork.

    Optional Buttery Brown Sugar Sauce

    • Grab a small saucepan, and melt (on high) 3 Tablespoons of salted butter.
      Once melted, turned it down to medium heat and wait a bit to let the butter brown.
    • Turn down to a simmer. Then, add in a tablespoon of brown sugar and the 1 to 2 tablespoons of milk/cream.
      Whisk to combine and simmer/whisk for 1-2 minutes. Remove from heat and whisk in vanilla.
      Serve over entire bread pudding in dish before serving or over individual servings.

    Video

    Notes

    Helpful Info:
    • Which sauce to make? This bread pudding is great even without an optional sauce. However, if you want a sauce, I recommend picking one of the two. The browned butter sauce is more of an “accent” drizzle, and less rich/sweet than the vanilla sauce. I’ve recently added heavy cream as optional ingredient to help smooth the sauce out. If you prefer the older method, simply leave the cream out. The vanilla sauce is rich, more creamy, and more of a major topper for the bread pudding. Both are optional and not necessary for a delicious bread pudding.
    • How do you know when bread pudding is done? Just like almost any dessert, or bread that you're baking, insert a clean knife into the center and see if it comes out clean!
    • Can you freeze bread pudding? Yes! Bake it as normal, and once cooled, place in the freezer for up to 2 months. When ready to thaw it, place it in the refrigerator to thaw it out.
    • Can I prepare bread pudding the night before? Yes! You can either mix it all together and refrigerate it overnight before baking, or bake it, let it cool, and then refrigerate.
    • How to store leftovers For best results, store it in an airtight container for up to 5 days, in the refrigerator.

    Nutrition

    Serving: 1serving (⅙ recipe) | Calories: 316kcal | Carbohydrates: 43g | Protein: 9g | Fat: 12g | Saturated Fat: 6g | Cholesterol: 132mg | Sodium: 272mg | Potassium: 198mg | Fiber: 1g | Sugar: 30g | Vitamin A: 465IU | Calcium: 152mg | Iron: 1.5mg

    Greenhouse Gardening Ideas & DIY Tips

    July 4, 2016

    Raised garden beds out of pallets

    Greenhouse Gardening Ideas: A look at a real-life greenhouse, using old recycled items to organize and operate a DIY greenhouse operation!

    Raised garden beds out of pallets - Greenhouse gardening ideas using some recycled items and other little tricks

    What’s that saying? “If I’m half the woman she is, I’ll be lucky.” Or something like that.

    As an inspiring “green-thumb,” I tend to get the jealous “bug,” when I visit my mom’s back yard, on the farm. Her greenhouse has caught the eyes of many “passer-by’s,” and is the topic of many inspiring greenhouse dreamers.

    Right now, with the temps are hanging around the 80 degrees in Missouri, working INSIDE the greenhouse is out of the question.

    She’s been doing most of her planting outside, but she starts her seeds for all the veggies and plants lettuce inside during the winter. The weather was stinking gorgeous the other day when I was visiting, so I decided to snap a couple of shots, in case you’ve been on the hunt for greenhouse ideas. She is the ultimate creative thinker, and I’m sure you’ll snag a few ideas…

    Greenhouse Gardening Ideas

    Greenhouse plan ideas - if building, this is the plan I want to use! So cool - Greenhouse gardening ideas using some recycled items and other little tricks

    Green house plan ideas, this is so cool. I want this one day - Greenhouse gardening ideas using some recycled items and other little tricks

    She used so many recycled pots/pans/containers, etc., to plant everything in. Keep your eye open for little DIY tricks that she created during the greenhouse building and set-up process.

    Inside the greenhouse, love this setup - Greenhouse gardening ideas using some recycled items and other little tricks

    Pegboards:

    She lined the inside walls with pegboard to hang a lot of her tools on, including old shower organizers, old shelves, and anything she had already laying around the house. This woman is incredible at finding multiple uses out of ordinary things.

    Did you SEE how she uses old plastic knives to label her veggies in the first photo? Yeah. Like that.

    Catch rain water in buckets, off the roof of the green house to recycle the water. How awesome!

    Tubs for Rain Water:

    Although my kiddos (her grandkiddos) think that these tubs are for playing in, she uses them to catch rain water off of her roof of the greenhouse. She’ll then use the rain water to water plants, or anything else she may need water for while hanging around out there.

    You can barely see the sink that her and my dad were working on at the the time I took these photos. I tell you… these two and their creations out of what’s on hand. Cinderblocks, and plywood turned outdoor greenhouse vanity.

    Raised garden beds out of pallets. Love this ideas. Greenhouse gardening ideas using some recycled items and other little tricks

    DIY Walkway:

    To keep out of the mud, she put down old plank boards to create a walkway. Even if you don’t think you’re building in a muddy area, think about all of the water that will be around when you’re watering your plants, or if you get a rainy season. You may want to think about a walkway of some sort too!

    Using Old Pallets:

    Using old pallets to build raised beds, has been extremely helpful when it comes to “farm critters,” strolling by to steal a bite. Not to mention that it reduces having to spend a lot of time bent over in the garden. (Can you tell I’m getting older, since that’s one of my “bonus,” thoughts of why having a tall, raised garden, is a good idea?)

    Raised garden bed - Greenhouse gardening ideas using some recycled items and other little tricks

    Raised garden bed - Greenhouse gardening ideas using some recycled items and other little tricks

    Greenhouse gardening ideas using some recycled items and other little tricks

    My favorite part of this greenhouse, is all of the fresh-grown tomatoes that she gives us every year to make my favorite bruschetta! I won’t lie about that.

    I hope you found some greenhouse gardening ideas for your own project!

    greenhouse plan ideas

    Greenhouse Gardening Ideas

    Free Toddler Travel Packing List

    March 3, 2016

    Toddler Packing Checklist Free Printable for when we travel! fantabulosity.com

    Free Toddler Packing List: This checklist has saved my sanity a TON! No frantic, last minute things to worry about forgetting.

    Our family loves to travel, and about 90% of the time, it’s last minute. So I’ve learned to save my sanity, by always having my toddler travel packing list, for our toddler’s items to pack his bags super quick.

    This is a snapshot below of my little guy and me, when we visited Gulf Shores Alabama, when he was just an itty bitty guy. I was also horribly sick with morning sickness, at 3 months along with baby #2, so excuse the pale skin color….

    Toddler Packing List

    Toddler Travel Packing Checking

    Save, and print my FREE toddler packing list here:

    Toddler Travel Packing Checklist

    Toddler Packing Checklist Free Printable for when we travel! fantabulosity.com

    Since we spent most of the summer traveling with the kiddo, I’ve learned A LOT from experience, so I’m also working on sharing with you all my packing list for a newborn, travel tips with kids, and toy ideas to keep your kiddos occupied on a road trip! Follow me on Facebook, Pinterest, and sign up for new posts, to make sure you don’t miss these FREEBIES!

    Beef and Cheese Burritos

    August 10, 2021

    Beef and Cheese Burritos on plate.

    Beef and Cheese Burritos: An easy recipe using ground beef, canned cheddar cheese, and salsa to make the best burritos at home! Ready in minutes!

    Beef and cheese burrito

    This is by far one of the easiest main course on the blog, and is even perfect if the craving for Mexican hits, and you don’t have the items on hand to make these chicken street tacos!

    Let me fill you in on a little “weeknight meal,” secret that I have.

    [feast_advanced_jump_to]

    Beef and Cheese Burritos

    I’ll never forget the day my mom made these for the first time, when I was a kid. I ran to the stove, (super hungry, dying to know what we were having for dinner) I looked in the pan, looked up at her, and kinda “snarled” my nose and asked what it was. She said,

    Oh Jess, this is a new recipe I’m trying. I think it will taste better than it looks.

    My mom never lied to me, so I knew I should give it a try.

    I’m SOOOO glad I did. I make this quite often, now that I have a family of my own.

    How to Make This Easy Burrito Recipe:

    This is a great recipe for a quick, weeknight meal when you don’t have anything planned on the menu and you probably already have the ingredients on hand! It’s a 30-minutes or less dinner recipe that you’ll want to add to your meal plan for sure. Or see these easy ground beef dinner recipes so you can meal plan!

    What do you put in a burrito?

    For a classic burrito, you’ll want ground beef and cheese and seasonings like a taco seasoning packet. However, some burritos also include beans, and of course any preferred toppings.

    But for this recipe, you only need 4 ingredients to create the BEST burrito that’s great for lunch or even a busy weeknight.

    Ingredients:

    It only takes 4 ingredients (plus any additional toppings you want) to make these cheesy burritos!

    Ingredients for Beef and Cheese Burritos
    • 1 pound ground beef
    • 10-ounce can cheddar cheese soup undiluted (see notes)
    • ½ cup salsa
    • flour tortillas
    • taco seasoning, optional

    What kind of cheese goes on a burrito?

    First, the kind of cheese that makes this burrito recipe really good, is the cheddar cheese soup that you can find in a can. It’s already a creamy texture that heats right up and gives the burrito the classic flavor that you’re looking for. DO NOT add water to the soup!

    Can you add additional cheese as toppings? Absolutely… but the canned cheddar cheese is definitely enough “cheese” flavor so additional is not necessary.

    What kind of salsa to use for burritos?

    You can use your favorite kind of salsa for this recipe but I’d recommend a red salsa like we used here, instead of a green, Verde type of salsa.

    But it can be “chunky”, “restaurant-style” or any type/brand that you prefer! I’d just make sure it’s a flavorful salsa, instead of a bland type… because using salsa in this recipe replaces the “seasoning” that you may need for other burrito recipes!

    Step by Step Instructions

    1. First, brown 1 lb. of ground beef and cook until done.
    2. When beef is fully cooked, drain the grease if needed.
    3. Return the beef to the pan, and add your cheddar cheese soup and stir until well blended. (Image below.)
    Ground beef and cheddar cheese soup in pan
    1. Next, add in your ½ cup of salsa (and taco seasoning if desired) and stir until blended.
    Add salsa in to ground beef and cheddar cheese soup
    1. Let the burrito mixture simmer for a couple of minutes to let the cheese and salsa cook into the beef and heat through.
    Beef and Cheese Salsa Burrito Filling
    1. Spoon meat and cheese filling down the center of a warmed tortilla, and load that baby up with your desired toppings, and you’re golden.
    Place beef and cheese burrito filling on tortilla

    Our boys prefer the burritos without toppings and just this cheesy beef mixture and I’m not going to lie… sometimes for a quick snack or lunch, I’ll just do this too and it’s perfect!

    Beef and Cheese Burrito

    Burrito Topping Ideas

    If you need topping ideas for your burritos, these are our favorites! They’re very similar to the taco toppings I recommend too!

    • Cheese, shredded
    • Lettuce, shredded
    • Tomatoes or this easy Pico de Gallo
    • Black Olives
    • White, Red or Green Onions
    • Jalapenos
    • Refried Beans
    • Mexican Rice
    • Extra Salsa
    • Jalapeno Ranch Dressing
    • Taco Sauce
    • Authentic Guacamole
    • Avocados
    • Sour cream
    • Limes, sliced
    • Cilantro
    • Tortilla Chips
    • Fritos
    Beefy Cheese Burrito with toppings

    This literally takes only about 10 minutes to make and our kids LOVE them!

    What to Serve with Burritos

    If you’re looking for side dishes for burritos, this taco layer dip, side salad, and this authentic Mexican rice are all delicious with it!

    How Store Leftover Burritos

    If you have leftover burritos, you can store the burrito meat in an airtight container in the refrigerator for 3-4 days. Store the tortillas separately and build burritos only before serving/eating.

    Related Recipes

    If you love quick and easy dinner recipes like this one, then you’re also going to love this Frito Chili Pie, Dorito Chicken Casserole, and Mozzarella Wraps.

    Then, if you happen to have leftover burrito meat, you can see our favorite ways to use leftover taco meat, because they’re VERY similar!

    Serve this Mexican flan as dessert, to keep the theme going!

    If you enjoyed this post, be sure to follow me on Instagram, Facebook, Pinterest and YouTube! Share a photo of your recipe and use the hashtag #Fantabulosity so I can find it and follow along!

    Recipe

    Beef and Cheese Burritos on plate.
    Print Pin
    4.73 from 18 votes

    Beef and Cheese Burritos

    Beef and Cheese Burritos: An easy recipe using ground beef, canned cheddar cheese soup, and salsa to make the best burritos at home!
    Course Main Course
    Cuisine American, Mexican
    Prep Time 10 minutes minutes
    Cook Time 10 minutes minutes
    Total Time 20 minutes minutes
    Servings 4 servings
    Calories 387kcal
    Author Jessica Burgess

    Ingredients

    • 1 pound ground beef
    • 10 ounce can cheddar cheese soup undiluted (see notes)
    • ½ cup salsa
    • flour tortillas
    • package of taco seasoning if desired, optional for more flavor

    Instructions

    • In a medium skillet, brown ground beef over medium heat and then drain.
    • Add in the can of cheddar cheese soup, and salsa (and taco seasoning if desired).
    • Stir and let cook 1-2 minutes
    • Serve on tortilla and top with additional desired toppings

    Notes

    Can of cheddar cheese soup calls for 1 can of soup plus 1 can of water. Do not add water for this recipe!
    Topping Suggestions:
    • Cheese, shredded
    • Lettuce, shredded
    • Tomatoes or easy Pico de Gallo
    • Black Olives
    • White, Red or Green Onions
    • Jalapenos
    • Refried Beans
    • Mexican Rice
    • Extra Salsa
    • Jalapeno Ranch Dressing
    • Taco Sauce
    • homemade Guacamole recipe
    • Avocados
    • Sour cream
    • Limes, sliced
    • Cilantro
    • Tortilla Chips
    • Fritos

    Nutrition

    Serving: 1burrito | Calories: 387kcal | Carbohydrates: 17g | Protein: 22g | Fat: 24g | Saturated Fat: 9g | Cholesterol: 80mg | Sodium: 512mg | Potassium: 444mg | Fiber: 1g | Sugar: 2g | Vitamin A: 155IU | Vitamin C: 0.6mg | Calcium: 62mg | Iron: 3.3mg

    My 10 Favorite Stores to Shop at for Mom Clothes

    August 29, 2022

    Woman wearing overalls

    As a mom, and some over 30 (pushing 40 now) I was feeling stuck for a long time on where to shop for clothes. I wasn’t sure if I’d feel silly shopping at Forever21 (but stay tuned to see what I shop for there now!) and found it hard to find a pair of jeans that didn’t make my “mom pooch” stick out like a sore… uh… thumb. (Yeah, that’s it. Sore thumb.)

    Woman in overalls standing in front of mirror

    Shop the overalls!

    I’m a 30-somethin’ year old gal, who has two little, mud-lovin’, boys at home.

    In a perfect world, I’d love to dress up every day in something like a fancy all-white trench suit, or a fun dress.

    But let’s face it. I’d have that gorgeous white pants suit on, and my youngest would chuck his melted chocolate chip muffin at it, and game over.

    You have littles too? You’ll LOVE these “mom life” shirts that I’ve found for us mamas!

    So if I’m not wearing one of my favorite “mom life shirts“, as a mom, on-the-go, I have to think practical, versatile, and affordable. (You know, for those outfits that can’t see the light of day again, because of the chocolate chip muffin incident I mentioned a second ago.)  So when shopping at my favorite stores, I always try to keep those three main bullet points in mind:

    3 Things to Keep in Mind While Shopping

    There are a few things I like to keep in mind when I’m shopping for clothes and when I’m looking for stores to shop at.

    • Practical

    I’m a mom, so even though I’d love to play “dress up” every single day… it’s not going to happen. We may be off to the park, wrestling in the living room, or sitting and doing homeschool multiple hours a day. So I make sure to only buy clothes that I TRULY think I’ll wear.

    No more “I may need that one day” conversations with myself, as I’m buying something I know good and well will just hang in the closet.

    Woman posing in yoga pants and a black jacket

    • Versatile

    I work at home so I don’t want to be sitting on my laptop, wearing a pair of stiff jeans every day. So you’ll normally find me wearing a pair of comfortable jeans or even yoga pants that are suitable for going out in public. (See my tips for staying active as a stay at home mom too!)

    This makes it easy to wear something comfortable at home but yet ready to hop up and run to Home Goods down the road if the mood strikes.

    Woman wearing jeans and a tank top

    • Affordable

    I’m notorious for trying to quickly make lunch for my kids, forgetting to my apron on. This usually results in staining one of my favorite shirts… so considering I’m almost 40 and haven’t learned my lesson yet, I have to make sure my clothes are affordable, in case I ruin them.

    woman wearing blue romper

    Clothing Stores for Moms over 30 and 40

    Are there endless stores and boutiques out there that women over 30 can shop at? Of course. So just because I don’t mention them, doesn’t mean that you should stay away from it. All I’m doing is listing my favorite stores that seem to compliment the three bullet points that I shop by…

    1. Target

    Can I get an amen!? Target will totally come to my rescue for the best fashion finds, when I run in for shampoo. They do have styles at times that aren’t my favorite but I can usually find a t-shirt or casual top that will be a winner. (The overalls at the top of the post??? Target.)

    woman wearing yoga pants and athletic shirt

    2. H&M

    It’s been a favorite for years. It’s also a “hit or miss.” Then there are also those times I walk in there, (shop online) and see a “Whaaaaa?! Is that seriously in style now?” item.

    But more times than not, I find basics and super cute items that are great for mom-life and looking stylish. The red and black buffalo plaid shirt in the photo below? That came from H&M. It’s one of my faves.

    Fashion for moms tips ideas and the stores that she loves to shop at that are affordable and practical. fantabulosity.com

    See the outfit details in the photo above here: Best Leggings Ever + Red Buffalo Plaid

    3. Nordstrom

    Ok, don’t get scared budgeting mama. I hear you loud and clear. The name Nordstrom scared me to death for years. I didn’t even want to look over to the store window when I’d bypass it at the mall. I had heard how expensive it was and made sure to stay away from there, in case I accidentally bought something by staring at it.

    That was until a good friend of mine wanted to go in to look one day, and I had already gone to the bathroom, had a Starbucks in hand, and couldn’t think of another excuse of why I couldn’t walk inside there with her.

    To my surprise, she headed right towards a section of clothes that had price tags on it, that was VERY comparable to other stores that I shopped at. I couldn’t believe it. She explained to me that they have different sections of brands/designers, and there were definitely more expensive items in the store, but that I could feel safe hanging out with her in the comfortable price range area. So give it a whirl.

    4. Modcloth

    I’m a sucker for dresses. Sundresses at that. They tend to pull off a timeless look, aren’t too short, and can be classy, casual, and dressy all at the same time if need be. When I have a blog photo session coming up, or family photos, I make sure to check here.

    I’ve had wonderful experiences with them with all of my orders too! This green dress was purchased from there, and it’s by FAR, one of my favorites. Shop Modcloth HERE!

    Fashion for moms tips ideas and the stores that she loves to shop at that are affordable and practical. fantabulosity.com

    5. Amazon

    More and more these days, I find adorable clothes on Amazon. It has a HUGE selection so that can be overwhelming at times but if I have an idea of what I’m looking for (i.e. pink dress with white polka dots) and I can type that in and get a ton of results to choose from. That’s really nice, as opposed to going to some other online store and they may not even have a pink dress in stock.

    woman wearing a pink polka dot dress

    Shop this pink dress I’m wearing and shop this hat from Gigi Pip hats, using code: JESSICAB10 to get 10% off!

    Woman wearing fitness attire

    I also love buying workout clothes from Amazon, and my white tennis shoes!

    6. LOFT

    I was scared of LOFT too for a long time because I thought it would be crazy expensive. But when I realized the quality of their clothes… it was a game-changer.
    I may only pay $24.99 or so for a shirt at Target, and a full-price shirt at Loft may be closer to $40.00 for the same type… but it seems to last SO much longer.

    Plus, LOFT is just like any online store… they run SALES and I stock up when my favorites are on sale.

    What are my favorites from LOFT?

    Their tops and their dresses. When I need something classy for say, a date night, I love their flowy tops that I can pair with a dark pair of denim jeans.

    Mom Clothes - floral dress from LOFT

    7. J.Crew Factory Outlet

    Now I do love J.Crew, but it’s so much more enjoyable while shopping at the J. Crew Factory Outlet, simply because of the price. Everything seems to always be at least 50% off, and I feel like I’ve found a deal every time I shop online there.

    I’ll mostly snag cute tops, like this adorable scalloped cami and leopard flats below, from J.Crew Factory Outlet or puffy vests in the winter season.

    8. SheIn

    This is a newer love, and to be honest, I didn’t really trust this store when I saw it online. Why? Because their prices just seemed way too good to be true.

    But I decided to risk it and buy a couple items one day, and I was VERY pleased with it and continue to buy from here. I tend to buy a LOT of dresses from Shein and a lot of workout clothes and undergarments! Shop SheIn here!

    Woman wearing light blue dress
    Woman wearing red workout pants
    woman wearing tan dress

    9. American Eagle

    Up until a few months ago, I hadn’t shopped at American Eagle since high school. But desperate to find jeans that weren’t high rise, I thought I’d give it a chance. I didn’t find any jeans but I did find this super cute dress and now go in there to see what I may randomly find! I can usually find something casual and super cute… if I just ignore the items that are not my style.

    Woman wearing denim dress

    10. Forever21

    Now, I will say that I RARELY find anything at Forever21 these days… EXCEPT swimming suits. I absolutely love how they fit and how affordable they are! They usually have the tops and bottoms separate which is nice if you need different sizes than what they may pair together themselves.

    Woman wearing light blue swimming suit
    woman in swimming suit by pool

    What is YOUR Favorite Store for Mom Clothes?

    I SO hope that you found at least a little outfit inspiration for your mom-self, in this post!

    I don’t always get to share new outfits on the blog, but I do tend to share most of them on my Instagram, so head over there for up to date trends!

    See my CURRENT favorite fashion finds, and shop my Instagram HERE!

    I’d love to hear what your favorite store to shop at is! Let me know in the comments below because I’d LOVE to add it to my online shopping routine.

    Some of my Old Favorite Pieces

    This post has been up since 2015 or so… but my thoughts and opinions have changed over the years so I’ve made sure to update accordingly. But I thought it would be fun to leave the old items up as well for a look down memory lane at some of the most popular outfits here on the blog!

    fashion for moms over 30, and stores to shop at
    Fashion for moms tips ideas and the stores that she loves to shop at that are affordable and practical. fantabulosity.com

    See the outfit details in the photo above here: Cozy Neutrals + A Bootie Must-Have

    J.Crew Vests paired with Hunter Boots. One of my FAVORITE outfits in the winter! fantabulosity.com

    See the outfit details in the photo above here: Vests are Best + Hunter Boots

    Fashion for moms tips ideas and the stores that she loves to shop at that are affordable and practical. fantabulosity.com

    See the outfit details of the photo above here: Dressy Trench + Winter Neutrals

    How to Make Popcorn in the Microwave

    June 23, 2021

    Homemade popcorn with butter and seasonings sprinkled on.

    How to make popcorn in the microwave with little effort – a quick and easy way to pop popcorn, without oil, in brown lunch bags and it’s ready in minutes & perfect for movie night!

    If you love snack recipes, get ready because we have some of the best around here, like this homemade chex mix and these chocolate-dipped animal crackers.

    How to Make Homemade Popcorn in the Microwave in a brown paper bag. Without oil!
    [feast_advanced_jump_to]

    I never realized how much better making homemade popcorn was than store-bought. I find that store-bought microwave popcorn packets have a “film” or “waxy” texture to it but I didn’t have a popcorn popper, an air popper and had no idea how to make stovetop popcorn.

    But I didn’t know you could make your own microwave popcorn like this until we had a friend show us how, and now it’s the only way we do it!

    Can you pop plain popcorn in the microwave?

    Absolutely. All it takes is popcorn kernels, brown paper bags and a few minutes to make this paper bag popcorn!

    Then – take it a step further and melt some homemade butter to pour over the top!

    How to Make Homemade Popcorn in the Microwave

    How to Make Homemade Popcorn in the Microwave in a brown paper bag

    The first time we tried doing this in the microwave oven, we ended up with popcorn EVERYWHERE, and it was a huge mess. We had only used one bag, and folded the top over with the opening folded under.

    But, as it cooked, the popped popcorn expanded and caused popcorn to come out of the bag and go all over the place.

    Then my brilliant, yes BRILLIANT husband, came up with an amazing idea for the paper bag method, and it has worked like a charm ever since. I’ll show you how we pop it without a mess! (I’ll show you the “how-to,” through the photos, but there’s also a recipe below!)

    Brown Bag Microwave Popcorn:

    How to Make Homemade Popcorn in the Microwave in a brown bag with no oils

    There are just a few simple steps!

    Grab two brown paper bags, and pour a half of a cup of unpopped kernels in the bottom of one paper bag.

    How to Make Homemade Popcorn in the Microwave in a brown bag with no oils

    Open the other brown paper lunch bag, and slide the top of the bag over the top of the other, creating a closed package for the popcorn to pop in.

    How to Make Homemade Popcorn in the Microwave in a brown bag with no oils
    How to Make Homemade Popcorn in the Microwave in a brown bag with no oils

    Lay the brown bag on it’s side, inside of the microwave and cook.

    How long to Cook Popcorn in the Microwave?

    We have one of those “popcorn,” sensory cook buttons on our microwave, but when prepping this post, I paid attention to the popcorn microwave time, so I could give you a cooking time.

    HOWEVER, each microwave setting can be different so the exact time may vary. So I really recommend to start with 3-4 minutes and listen to how the popcorn pops. When you hear it really slowing down, stop the cooking process and pull it out of the microwave. (CAUTION: HOT!!)

    How to Make Homemade Popcorn in the Microwave in a brown bag with no oils

    When popcorn is finished…

    When the popcorn has stopped popping or the 3-4 minutes is up, simply pull the two bags apart (try to do this over a big bowl, as some popcorn may fall out while separating the two bags).

    How to Flavor Microwave Popcorn

    After trial and error, we’ve also figured out our favorite ways to flavor up the popcorn.

    Doesn’t it drive you nuts when you go to the movies; you sit down in your comfy chair to enjoy the movie, dig in and eat your popcorn… only to find that the popcorn is so bland and nasty after the first layer is gone? (Right, I know that life could be worse. But when that bag of popcorn takes a ¼ out of my child’s college fund, it’s pretty disappointing when the flavor is gone before the movie even starts.)

    So we figured out a way to make the flavor last, and “STICK,” to the popcorn, so we can enjoy every stinking bite… all the way down to the bottom!

    Healthy Homemade Popcorn in the Microwave in a brown bag with no oils

    Popcorn Butter and Seasoning

    First we put a small layer of the popped popcorn in a large bowl. (So as you’re pulling the two bags apart, only pour a small layer of popcorn in the bowl first.)

    How to Make Homemade Popcorn in the Microwave in a brown bag with no oils

    Then grab your favorite popcorn seasoning and sprinkle on a layer, all over the popcorn.

    (Our favorite popcorn seasonings, (Kernel Season’s flavorings are our favorite and you can usually find them at your local grocery store or online) and we sprinkle layers of this in the order I share next.)

    Popcorn Seasoning Ideas

    If you don’t have specific popcorn seasoning on hand, there are many different ways you can season it! Here are some fun ideas that we’ve tried as well, or that others love too so feel free to use your favorite topping!

    • Garlic Salt
    • Nutritional Yeast
    • Brown Sugar
    • Popcorn Salt
    • Garlic Powder
    • Seasoning Salt
    • Kosher Salt
    • Fresh rosemary
    Seasonings on homemade popcorn
    How to Make Homemade Popcorn in the Microwave in a brown bag with no oils

    Then, we grab the Orville Redenbacher’s butter flavor topping, (also our favorite, and sometimes called “fake butter”) and drizzle a layer of butter (as much butter as you prefer) on top of the seasonings. You can also use melted butter!

    Popcorn butter for homemade popcorn
    How to Make Homemade Popcorn in the Microwave in a brown bag and flavors and butter!

    Next, we sprinkle another layer of seasoning. (Sometimes mixing up the flavors for a bit of fun!)

    How to Make Homemade Popcorn in the Microwave in a brown bag and flavors and butter!

    Then it’s time for another small layer of popcorn…

    How to Make Homemade Popcorn in the Microwave in a brown bag and flavors and butter!

    Then repeat the seasoning process! So here’s the order in how we season and make the microwave popcorn better!

    1. Layer of popcorn
    2. Season with favorite seasoning (this could be salt or other fun flavors like we use!)
    3. Drizzle of butter
    4. More seasoning
    5. Another layer of popcorn
    6. Repeat with #2-#5 until all popcorn has been seasoned!
    How to Make Homemade Popcorn in the Microwave in a brown bag and flavors and butter!

    Serve Right Away

    For best results, fresh popcorn has the best flavor if you eat it right away. However, we’ve been known to make a big batch and have some leftover. So once it’s cooled off, we store it in an airtight container and snack on it the next day!

    It does have a different texture but if I’m being honest… it’s actually still REALLY good the next day!

    We’re the “Popcorn People”

    Now, after perfecting the homemade microwave popcorn recipe, we even have family asking for it when they come over because it has become a favorite snack food.

    So the next time you want popcorn, I hope you give this a try! Let me know how you like it! You may just be hooked like we are!

    More Popcorn Recipes and Other Ways to Enjoy Popcorn

    • Popcorn balls recipe
    • Caramel corn recipe
    • Popcorn snack mix

    Originally published: June 2021
    Updated and republished: April 2025

    Recipe

    Homemade popcorn with butter and seasonings sprinkled on.
    Print Pin
    5 from 3 votes

    Homemade Popcorn in the Microwave

    How to Make Homemade Popcorn in the Microwave: A quick and easy way to pop microwave popcorn, without oil, in a brown bag, and it's ready in minutes!
    Course Snack
    Cuisine American
    Prep Time 2 minutes minutes
    Cook Time 3 minutes minutes
    Total Time 5 minutes minutes
    Servings 12 cups
    Calories 26kcal
    Author Jessica Burgess

    Equipment

    • microwave

    Ingredients

    • 2 brown paper bags
    • ½ cup uncooked popcorn kernels We use Orville Redenbacher Corn or even off-brand yellow popping corn.
    • Popcorn Seasoning We LOVE Kernel Season's
    • Popcorn butter topping We LOVE Orville Redenbacher’s

    Instructions

    • Open one brown paper bag, and pour in the cup of kernels.
    • Using the other brown paper bag, open it up and slide it down on top of the other, creating an enclosed bag for it to pop in.
    • Place the bag on it’s side in the microwave and cook for 3-4 minutes, listening for the kernels to slow down.
    • NOTE: Each microwave is different and cooking times may vary. We use our popcorn sensing button, and it pops for about 3 minutes.
    • Remove popcorn from microwave, and gently pull the two bags apart from one another.
    • Caution: HOT!!
    • Pour one layer of the popcorn in to a large bowl.
    • Sprinkle with popcorn seasoning desired
    • Then drizzle popcorn butter on top
    • Repeat with another layer of seasoning.
    • Add another layer of popcorn, and repeat the seasoning process until all of the popcorn has been seasoned.

    Video

    Nutrition

    Serving: 3cups | Calories: 26kcal | Carbohydrates: 5g | Protein: 1g | Fat: 1g | Saturated Fat: 1g | Sodium: 1mg | Potassium: 19mg | Fiber: 1g | Sugar: 1g | Calcium: 1mg | Iron: 1mg

    35 Easy Summer Snacks Ideas

    May 9, 2023

    Summer snack ideas photo collage with text overlay.

    The best summer snacks are light and full of flavors. They make use of fresh fruits and veggies and aren't too heavy on a hot day. If you are looking for some new summer snack ideas, you are going to love these recipes! They have been tried and tweaked to perfection so you can get a delicious snack with every recipe.

    See more of our easy snack recipes for any time of year and our summer dinner ideas to prep you for your summer, especially for a picnic! Or, if it’s too hot to be outside, make sure you see these indoor picnic food ideas for a treat at home.

    Summer Snack Ideas

    From a spicy and creamy artichoke dip that is just as good as any starter from a chain restaurant, to pretty in pink chocolate-covered strawberries that make for a perfectly portioned after-dinner treat. I am sure you will find a few recipes that you can't wait to try. They’d also be great food ideas for a picnic if you’re planning to take advantage of the warm weather.

    You might want to save this collection of 35 Summer Snack Ideas to your snack ideas board.

    Jalapeno artichoke dip with chips

    Jalapeno Artichoke Dip

    This easy dip has 6 ingredients and is perfect for a summer snack. It is creamy, spicy and pairs perfectly with chips or veggies!

    nuts and bolts snack mix in a brown bowl

    Nuts and Bolts

    This is the snack to make and pack for a road trip or to take along for a beach day. It is easy to make with simple ingredients and it tastes amazing, no matter where you snack on it.

    Mexican street corn dip in a white bowl with lime

    Elote Dip

    Get street corn flavor in a tasty dip for summer snacking. Take this elote dip along to a picnic, or to a BBQ for authentic flavors that can feed a crowd.

    fruits on a platter with dip and cookies

    Fruit Board

    This platter of fresh fruit is just the thing to serve on a hot summer day. Luscious juicy fruits taste so good with this creamy dip. 

    Oreo cookie dip with cookies and pretzels

    Oreo Dip

    If you love cookies and cream flavors, you are going to want to save this decadent oreo dip recipe. You can dip cookies, graham crackers or fruits into this for a dreamy indulgent treat.

    Chocolate Rice Krispie treats on a tray with a bowl of chocolate chips beside them.

    Chocolate Rice Krispie Treats

    These no bake treats are so good! Kids and adults alike are going to reach for a second. They have so much fluffy chocolate flavor in a tidy little square that packs great for a road trip or a camping trip.

    Taco dip in a baking dish

    Taco Layer Dip

    This dip has layers of meat, cheese, veggies and cream cheese for a totally delicious summer snack that can feed a crowd. Serve with chips or tortilla shells for a really tasty option that will fuel hours of summer fun.

    Tater tots with cheese and jalapeno peppers

    Loaded Tater Tots 

    Take tots from the side dish category and turn them into a crispy, cheesy snack! This recipe cooks in the air fryer for a satisfying snack you can serve anytime! These are perfect for cocktail hour with friends.

    Chocolate Dipped Waffle Cones

    Make ice cream a special snack with this easy chocolate dipped waffle bowl. Soft ice cream paired with a crispy bowl and plenty of sweet chocolate make for a memorable goodie to share.

    Spicy ranch crackers close-up.

    Spicy Ranch Crackers

    This simple snack is seriously so good! Make spicy ranch crackers for a budget friendly snack that you won't be able to stop munching on.

    Marshmallow Fruit Dip 

    You are going to love this easy marshmallow fluff fruit dip. It tastes amazing with berries, pineapple and apples! You also will love this with graham crackers.

    Red, white and blue layered cupcakes

    4th of July Layered Cupcakes

    These layered cupcakes are popping with festive colors! Make a few dozen of these and take them to a 4th of July picnic for a really fun dessert.

    guacamole wontons with avocados

    Avocado Wontons

    This recipe makes for the best wontons to serve with chips and salsa for a unique summer snack. If you like avocados, you are going to want to grab 2 of these because they are so good!

    Everything bagel dip with veggies and crackers

    Everything Bagel Dip

    Put your garden fresh veggies and pair them with this dreamy, creamy dip! It has all of the flavors of an everything bagel for a healthier snack option.

    easy pico de gallo with tortilla chips

    Garden Fresh Pico de Gallo

    Garden fresh onions, tomatoes and herbs make for the best summer snack! Thispico de gallo  is easy to make and tastes so good! Pair this with a summer cocktail if you want to unwind with the freshest flavors.

    edible chocolate chip cookie dough in a glass jar

    Edible Cookie Dough

    If you are craving cookies but don't want to turn on the oven and heat up the house, check out this edible cookie dough recipe. Store a jar of this in the fridge for a fast summer snack on demand.

    Mixed berry trifle

    Mixed Berry Trifles

    Make these trifles in individual jars for a portable summer snack! These are full of fresh summer berries for a pretty and delicious after dinner sweet.

    booty dip with wafers

    Booty Dip

    Don't give up on a sweet treat because it is too hot to bake. This booty dip is a viral sensation for good reason. It is nothing short of amazing! So decadent and tasty and easy to make.

    Rice krispie stars layered with red, white and blue

    Red, White and Blue Star Rice Krispie Treats

    This festive summer snack needs no baking and is perfect to pack in a picnic basket and share as you watch fireworks. Everyone will love the colorful layers and shape!

    cool whip fruit salad in a bowl

    Cool Whip Fruit Salad

    This fluffy fruit salad uses cool whip to make a delicious sweet treat to share. You will love how this tastes after a hot day in the sun.

    Cowboy queso dip with chips

    Cowboy Queso

    This cheesy dip is packed with tasty things! Black beans, corn, and avocado make this dip hearty enough to satisfy a crowd of hungry snackers!

    strawberry jalapeno bruschetta

    Strawberry Jalapeno Bruschetta

    I know you are going to love this easy snack! It is sweet, spicy and so easy to make on a summer afternoon. This pairs well with a glass of wine or a glass of fruit punch.

    Blue cheese dip with crackers and veggies

    Blue Cheese Dip

    This dip is so flavorful! Make it and enjoy with chips or fresh veggies like peppers and celery for a summer snack that is very satisfying. This is great as a side with burger night too!

    graham cracker crumbs sprinkled on top of strawberries

    Cheesecake Stuffed Berries

    This recipe for cheesecake stuffed berries is perfect for summer snacking! They are sweet, tart and creamy!

    Fruity pebbles marshmallow treats

    Fruity Pebbles Treats

    Fruity pebbles make this unique marshmallow treat pop with colors and flavors! Make these at the last minute for a treat you can share with everyone.

    smoky cheese dip with fresh veggies

    Smoked Queso 

    If you are entertaining on the patio, you are going to want to dig this smoked queso! It is awesome with chips, veggies, or even drizzled over a taco if you like.

    Oreo rice krispie treats stacked on a plate

    Oreo Rice Krispie Treats

    Give your oreo cookies a whole new experience by mixing them into rice krispie treats! These are so good! You are definitely going to make these to take to the next summer party.

    key lime cookies with a bite taken out

    Key Lime Pie Cookies

    Cookies are always a good idea, and this recipe is no exception! Make these crumbl copycats when you crave a fruity snack. These soft cookies have the best tart kick to them for an afternoon pick me up.

    peanut butter yogurt dip

    Peanut Butter Yogurt Dip

    This dip is the ultimate cool and creamy dessert. It has peanut butter, honey and yogurt to make a healthy sweet snack that everyone will want to dip a fruit or cookie into.

    Cheese board with fruit and nuts.

    How to Make a Cheese Board

    Pair meat (you can even make salami roses) cheese, fruit and crackers together for a snack that you can share. You can also add in your favorite options to make this cheese board unique to your taste buds. 

    Skinny No Bake Cookie Oatmeal

    If you have been craving cookies, then this skinny oatmeal makes a guilt free summer treat you can munch on without the guilt. This tastes so much like no bake cookies. You are going to love it.

    Air fryer apple chips

    Air Fryer Apple Chips

    Take a healthy air fryer snack along on all of your adventures this summer with these crunchy apple chips. These are satisfying, nutritious and so easy to make.

    Best ever guacamole in a bowl

    Easy Guacamole Recipe 

    Get fresh flavor in every bite with the best ever homemade guacamole. I know you are going to want to make this every week for a summer snack to savor with fresh veggies.

    Lemon puppy chow in white bowl, sitting next to lemons.

    White Chocolate Lemon Puppy Chow

    White chocolate and lemon are so good together in this sweet and crunchy snack. Make this puppy chow in a big bowl and pass it out for a light snack that will fuel summer fun until you stop for dinner.

    pink chocolate coated strawberries

    Pink Chocolate Strawberries

    After your next trip to the strawberry patch, you have to make these pretty pink chocolate covered berries. They are so delicious and easy to make. The results are completely luscious.

    Which of these snacks do you want to make first? I would love for you to leave a comment and let me know what you like to munch on in the summer.

    Tips for Making Summer Snacks

    Since you’re looking for ideas for snacks for the summertime, here are some tips to keep in mind:

    • Use fresh ingredients whenever possible. Your garden is a great source of snack ingredients, as is your local farmers market!
    • Be creative with your fresh ingredients to discover new flavor combinations that taste amazing.
    • Store your snacks in an airtight container to keep them fresh until you are ready to serve them.
    • Keep them cold in the fridge, or nestled on a bed of ice to keep your snacks fresh in the summer sun.

    We love gathering recipes for you, depending on cuisine, ingredient, holiday, or season! See all of our amazing recipe collections!

    Free “Hello Summer” Printable

    April 19, 2023

    Hello summer free printable.

    This “hello summer” free printable is perfect to frame, and show off in your home, or even fun if you’re hosting a summer party and you’re looking for table decor.

    I absolutley love giving you free printables to download and use, and this summer printable is no different.

    What I love about this printable is that it’s simple, classic and looks good with almost any decor or color scheme you plan to use it with. I personally think it would look amazing on a table when you’re hosting, sitting next to some summer cocktails, and next to some of these delicious summer dinner ideas that may be sitting on the table too.

    You could also even include a framed copy of this inside of this sunshine gift basket for an adorable touch.

    Hello summer printable - free download.

    I hope you enjoy this super cute summer printable. Simply click the “Download the printable HERE” button below, to get your free download that’s not watermarked! It was created as an 8.5 x 11 pdf but if your printer settings allow you to print smaller, such as a 5×7, etc. that should work too!

    Download the Printable HERE!

    More Printables You’ll Love:

    Don’t forget to download this “End of Summer” checklist too, to make sure you don’t forget to do your favorite things, and grab this list of summer snacks to take on your adventures!

    Cream Cheese Filling For Crepes

    May 6, 2025

    Three crepes on a plate filled with a cream cheese filling.

    This cream cheese filling for crepes only uses 3 ingredients, and has a light, creamy, and delicious flavor that creates the perfect base for your additional fillings or toppings.

    Three crepes on plate, stacked, and filled with cream cheese filling.

    The first time I had a delicious crepe at a restaurant in Florida, I knew it was something I wanted to make at home. But when thinking about the different types of crepes I could make, I decided it would be best if I made a base first, that I could use in so many different types of crepes.

    Ingredients Needed: (See the full recipe details in the recipe card below)

    Ingredients on counter to make cream cheese filling for crepes.
    • cream cheese – it’s best to make sure this is softened before mixing, so it mixes more evenly.
    • whipped cream – homemade whipped cream provides a deeper, heavier, creamier filling but using store-bought whipped cream (like Cool Whip) is an option if you’re short on time, or want to keep things quick and easy.
    • powdered sugar – this gives an airy, sweet taste and texture to the filling of the crepes.

    How to Make a Cream Cheese Filling for Crepes

    Gather your ingredients, and make sure the cream cheese has softened.

    Mix together the cream cheese and whipped cream, then add in the powdered sugar and mix until evenly blended.

    Cream cheese, Cool Whip and powdered sugar mixed together in mixing bowl.

    Spoon a couple of tablespoons (or more if you prefer, depending on if you’re adding other items to your crepes) on to one side of the crepe.

    Cream cheese filling spread on crepe.

    Begin rolling the crepe up, by starting on the side where you spread the cream cheese filling, and roll to the other edge.

    Crepes stacked on plate, stuffed with cream cheese filling.

    Crepe Topping and Filling Ideas

    If desired, top your crepes with other items such as:

    • caramel drizzle
    • powdered sugar
    • chocolate syrup
    • strawberry syrup
    • fruit (such as strawberries, blueberries, raspberries, bananas)
    • chocolate chips
    • whipped cream

    Related Recipes

    If you love easy recipes, then I think you’re also going to love this coffee cake, or these other favorite breakfast recipes:

    • Bagel French Toast casserole in the crock pot.
      Crock Pot Bagel French Toast Casserole
    • Crock Pot rice pudding in small bowl.
      Crock Pot Rice Pudding
    • White gravy recipe on top of biscuits next to bacon on a vintage plate.
      White Gravy Recipe
    • A slice of Amish applesauce cake on plate with fork.
      Amish Applesauce Cake

    Recipe

    Three crepes on a plate filled with a cream cheese filling.
    Print Pin
    4.88 from 8 votes

    Cream Cheese Filling for Crepes

    This cream cheese filling for crepes is so easy to make, uses simple ingredients and is ready in minutes. The perfect flavors to serve as is or as a base for other crepe favorite fillings.
    Course Breakfast
    Cuisine American, French
    Prep Time 15 minutes minutes
    Cook Time 10 minutes minutes
    Total Time 25 minutes minutes
    Servings 2 cups
    Calories 221kcal
    Author Jessica Burgess

    Equipment

    • Mixing bowl
    • mixer

    Ingredients

    • 8 ounces cream cheese softened
    • 1 cup whipped cream or Cool Whip if you're short on time
    • ½ cup powdered sugar and extra for garnish

    Instructions

    • Grab a medium size mixing bowl, and mix (with a hand mixer) the cream cheese, whipped cream, and powdered sugar, until well blended.

    Nutrition

    Serving: 0.25cup | Calories: 221kcal | Carbohydrates: 24g | Protein: 1g | Fat: 13g | Saturated Fat: 8g | Cholesterol: 42mg | Sodium: 88mg | Potassium: 68mg | Sugar: 22g | Vitamin A: 450IU | Calcium: 50mg | Iron: 0.1mg

    Surprise 30th Birthday for my Husband

    March 4, 2014

    Surprise 30th Birthday https://fantabulosity.com

    Surprise 30th Birthday Ideas for Him: A trip full of little surprises, and secret missions for my husband’s 30th birthday! A celebration we will NEVER forget!

    When it comes to gift ideas for your husband’s 30th birthday, this was the ULTIMATE gift for my husband.

    After visiting all-inclusive resorts in Mexico, quite a few times, and falling in love with them, I planned a surprise trip along with other fun secret surprises, so you’ll want to keep reading about what I did to surprise the special guy!

    You may find it hard to believe that I kept all of this a secret for a year.

    5 Ways to Prepare for a Romantic Weekend with Your Husband https://fantabulosity.com

    Surprise 30th Birthday Trip for Him

    We LOVE to travel. Even though we recently visited Avon Colorado, and now live in Montana, we have a major love for warm tropical places. So when my husband’s “dirty 30“, was starting to approach us, swimsuits and flip flops were on the mind.

    My husband turned 30 over the weekend, and I’ve had a 30th birthday surprise trip planned for him, for over a year. Yes, I kept a secret from him for over a year, and it was one of the most difficult things I’ve ever done.

    Surprise 30th Birthday https://fantabulosity.com

    The trip wasn’t the only surprise. There were little surprises along the way that made this trip extra special!

    Planning the Trip

    First, I told my husband two months ago that he needed to block off his schedule between certain dates, because I was planning to take him somewhere for his milestone of a birthday. His response?

    “Are friends going with us?”

    “Nope, just a trip you and I are taking together.“

    Well… I know my extrovert of a husband, and his love for being around people, so that was a total lie. (It’s ok to have a white lie if it’s for a birthday surprise, right?) If he only knew I had invited friends a year ago, and he was about to be in for the surprise of his life.

    The day came, and my husband knew we were leaving town. “Are we flying? Going by train? Are we going out of the country?” Those were the major questions I kept hearing him repeat to me. However, my answer to all of them were, “Well… we’ll see.”

    #1 Surprise: Friends are coming too!!!???

    That evening before we had left, I had arranged to have our friends show up at our house, right before we were to head out of the door.

    “Surprise!  We’re going with you!”

    Our friends totally shocked my husband, as he opened the door thinking the babysitter had a pizza delivered, only to see our friends standing there toting some serious luggage.

    Surprise 30th Birthday https://fantabulosity.com

    Driving or Flying?

    We all got in the car, and my husband with a puzzled (yet excited) look on his face said,

    “Ok… where we going?“

    “Sorry babe, not ready to tell you yet.”

    Now… me, the planner and organizer in the family, would probably be freaking about not having control in this moment if the roles were reversed. But my husband’s a trooper and loved the suspense.

    About after an hour and a half of driving in the car, we stopped at a hotel that was near the airport, and my husband immediately knew we were flying out somewhere the next morning.

    #2: A “Yearbook” T-Shirt Gift

    The next morning we all woke up early, and I surprised my husband with a custom shirt that I had made for him, that had

    “Warning: Matt’s 30th Birthday in Progress,”

    printed on the front; then on the back,

    “Matt’s 30 Year Old Yearbook,”

    with “one-liners,” 30 friends and family had to say about Matt.

    This was absolutely one of the most hilarious, and interesting things I could have done. I learned nick-names that my husband had, and I heard stories about what my husband had done in the past that were hysterical!

    Most importantly, my husband felt the love from 30 awesome people. (Totally recommend doing something like this for someone that you love.)

    Surprise 30th Birthday https://fantabulosity.com

    It’s time to fly!!!

    We shuttled to the airport, and it was time to check-in for our flight. My husband was so excited to find out where we were going. Ohhhhh… but only if it were that simple. I made him hand over his drivers license (only to throw him off, because I already had, and only needed his passport) and made him stand back, as I whispered to the flight receptionist,

    “Ok, it’s my husband’s birthday, and he has no idea where we are going, and I’d love it if you could help me out by not telling him.”

    To my surprise the receptionist was totally cool, and played along. (God bless that man for being friendly and fun at 6:00 in the morning.)

    Surprise 30th Birthday https://fantabulosity.com
    Catching breakfast before our flight to Dallas 🙂

    Boarding passes in hand (hidden in my purse) we proceeded to our gate. Arriving at the correct gate, my husband sees “Dallas Texas,” on the TV screen at our departure gate.

    “Really honey? Dallas?”

    I wanna say I had him fooled for about 10 minutes that we were actually taking him to Dallas to celebrate his big 30th. Nothing against Dallas, but the poor guy couldn’t get his mind wrapped around celebrating there.

    Surprise 30th Birthday https://fantabulosity.com
    “Dallas? Really?” Totally a fake smile, and so not excited about Dallas.

    So then started the “Hmm… where would Dallas be a layover for?” His mind began to wonder.

    Then… almost like I had planned it myself, on our flight, the stewardess  announced the connecting cities for our layover.

    “San Francisco, Honolulu, Miami, Cancun, Cabo,”

    and the list went on. This was absolutely perfect. My husband all of a sudden knew that a layover in Dallas meant NOTHING, as the connecting cities were so scattered around the world. PERFECTION!

    Surprise 30th Birthday https://fantabulosity.com
    Starbucks to “cheers” for a 30th to remember!

    MEXICO!!!???

    As we departed the plane in Dallas, we neared the connecting gate, and there it was on the big screen, “Departing to Cancun, Mexico.” My husband was ecstatic! Totally caught him off guard, and the wheels were turning.

    “How did you arrange this? Do you have my passport? Where in Mexico are we going? Is it an all-inclusive?”

    Surprise 30th Birthday https://fantabulosity.com
    Surprise 30th Birthday https://fantabulosity.com
    We’ve arrived! Transporting to the resort!

    We arrived!

    He was excited. I was excited. Our friends were excited. It was one of the most awesome feelings. I then looked at my best friend, and said,

    “You know you love someone, when you get complete joy out of his own happiness.”

    One More Surprise

    When we arrived to the resort in Mexico, we walked in to the lobby and my husband couldn’t BELIEVE it when he saw the backs of what looked like more friends there waiting for us!

    Other friends had arrived on a different flight and were ready to party… all with matching shirts!

    Surprise 30th Birthday https://fantabulosity.com
    Surprise 30th Birthday https://fantabulosity.com
    Surprise 30th Birthday https://fantabulosity.com
    Surprise 30th Birthday https://fantabulosity.com

    An Incredible Weekend

    We spent my husband’s actual birthday, celebrating with a special dinner on the beach, right next to the water. Sure wish I could have gotten a better photo in the dark, but I wouldn’t have traded seeing the sunset while drinking a pina colada for anything! 😉

    Surprise 30th Birthday https://fantabulosity.com
    Little fuzzy, but wouldn’t trade a sunset with poor lighting for anything.

    The next 5 days were some of the most awesome, crazy, relaxing, days we had-had in a loooongg time.

    We couldn’t imagine spending his 30th anywhere different, nor with anyone different. I HIGHLY recommend getting “away,” with the one you love if you can. What an experience, and what an amazing man… father… husband… and person.

    Surprise 30th Birthday https://fantabulosity.com

    If you’re looking for 30th birthday ideas for your husband, fiancé, or boyfriend, but aren’t quite ready for a trip, then you’ll LOVE my post on 30th Birthday Ideas for Him, where I surveyed and polled a ton of men to get REAL ideas and those that they’d absolutely love!

    Thinking of planning an all-inclusive vacation for a special day? I’ve compiled all of my favorite tips for staying at an all-inclusive resort, that you DON’T want to miss, along with a Mexico packing list that will help you know what to take with you!

    Mexico Vacation, El Dorado Royale Resort Casitas Review https://fantabulosity.com

    The BEST Side Salad Recipe

    April 24, 2023

    side salad on white plate drizzled with ranch

    This is the BEST side salad recipe you’ll ever have! It’s the requested side dish at family gatherings and not your ordinary run-of-the-mill side salad.

    There’s a SECRET! How to cut the lettuce and add these two common spices that change your salad-making life, and you can see more about this below.

    Best Salad Recipe in White Plate with Red Napkin

    Of all of the salad recipes we’ve ever had, this is by far the favorite and easy side salad to serve alongside your favorite dinner recipes, whether it’s a steak in the oven recipe, creamy lemon chicken pasta, chicken drumsticks in the oven, air fryer fish, or whatever the main course is!

    [feast_advanced_jump_to]

    Expert Tip:

    If you’re making this salad as a main dish, you should try making this tuna salad recipe to go on top of it! You won’t believe how delicious the creaminess of the tuna, adds to the salad… so much so, that you may not even need a dressing! It’s the perfect lunch or light dinner!

    What Makes it the BEST Green Salad:

    I have to thank my mother-in-law for teaching me how to make the BEST of the best when it comes to side salad recipes. The woman has some serious salad skills and I couldn’t wait to share her secret with you. Don’t worry, I asked for her permission!

    For this side salad, there are two ingredients and a certain way to cut the lettuce.

    I bet you even have the two ingredients in your pantry!

    Tips on How to Make the Best Salad

    So there are a few secrets to the best side salad recipe that has literally left people saying,

    I don’t know what it is, but it’s SO good! Why is it so good!?

    Well, it’s a couple of things.

    1. How the Lettuce is Cut

    Two image collage of cutting romaine lettuce.

    Romaine Lettuce:

    You’ll want to use romaine for a side salad. I’ve used other greens like, mixed greens, leaf lettuce and head lettuce and although they’ll do in a pinch, those types of lettuce don’t measure up to romaine. However, what’s even better than just romaine is a combination of TWO different kinds of greens…

    Using Spinach Too:

    Using fresh spinach along with romaine is definitely optional but it REALLY adds a delicious texture to the salad.

    Even as someone who’s not a huge fan of spinach salads, I always try to incorporate a small handful of chopped spinach in to this salad now because it makes a wonderful difference.

    How to Cut Romaine Lettuce (and Spinach)

    The key is chopping the lettuce into small pieces and removing the white part (the stem) because it can overpower and cause your salad to taste bitter.

    Have you ever eaten a “chopped salad” at a restaurant and found the texture and flavor to be so much more amazing than a head-lettuce or romaine salad with all of the white crunchy pieces like you typically find on a salad bar?

    This is why it’s so good. The lettuce is easier to eat, less bitter and so much more enjoyable.

    Side salad with toppings in clear bowl.
    There are 2 ingredients that make this salad the best!

    The 2 Ingredients That Make It the BEST Salad

    Basil & Garlic Powder.

    Isn’t that EASY?

    This combination on a salad is dynamite. I’m talking dried basil and garlic powder that you probably already have in your pantry. (But if you have fresh basil, chop a few leaves up instead of dried and the flavor is even more incredible!)

    Sprinkle on your desired taste preference, and toss.

    By FAR one of my favorite touches to this side salad. It’s easy, and it makes a HUGE difference for your salad…. making it the BEST salad recipe of all time. At least in our house! 🙂

    Side Salad Ingredients and Toppings

    Salad ingredients on plate with dressing on the side.
    Pick your favorite salad ingredients and dressing

    Along with the right lettuce and the garlic powder and basil, we love adding our favorite toppings!

    Feel free to use what you like and take out what you don’t!

    • Carrots
    • Celery
    • Hard-Boiled Eggs
    • Shredded Cheese – bagged is just fine but fresh shredded block cheddar is amazing!
    • Bacon (or Air Fryer Bacon)
    • Tomato
    • Cucumber
    • Radish
    • Sunflower Seeds
    • Green Onions
    • Croutons (especially these brioche croutons)

    Or turn your side salad in to a main dish by adding proteins like:

    • grilled chicken (These chicken bites are incredible in this side salad.)
    • baked chicken
    • buffalo chicken
    • steak
    • salmon
    • shrimp (like this grilled shrimp recipe)
    • crab
    • pork (like this slow cooker BBQ pulled pork)
    • leftover meats (smoked brisket, roast, etc.)
    • lunchmeat (ham, turkey)

    Toppings Tip: Cutting the lettuce in to small bite-size pieces is important. But if you chop all of your toppings too, it makes it even better!

    Dinner salad on white plate with red and white cloth.
    The perfect dinner salad

    Making This Simple Salad Ahead of Time

    We have this salad at least a couple of times a week at home. It gets in our veggies, and it takes a lot of guesswork out of what we are going to have alongside our main dish because it goes with almost everything!

    I’ve never been a huge fan of making a large salad in bulk because I’ve been told that cut lettuce won’t “keep” as long in the refrigerator.

    But I AM a fan of pre-chopping the ingredients and putting them in containers ahead of time, so my side dishes get easier and easier throughout the week.

    See more make-ahead salads that we love!

    Recipe FAQs

    What kind of dressing is best for a side salad?

    Feel free to top it with the dressing of your choice, but we are HUGE fans of making the Hidden Valley Ranch Buttermilk Dressing, with the seasoning packet that you can make with mayo and buttermilk! See below.

    What is a side salad?

    A small green salad to serve alongside a main dish recipe, that usually includes a house dressing or favorite salad dressing like ranch, blue cheese, or oil & vinegar!

    How big is a side salad?

    Plan on 1 to 1 ½ cups of salad for a side salad to go with dinner.

    Homemade Salad Dressing

    For this salad recipe, there’s no better dressing than this homemade salad dressing, using Hidden Valley Buttermilk Ranch, Restaurant Style!

    Ingredients:

    • 1 package of Hidden Valley Buttermilk Recipe (Restaurant Style)
    • 1 cup mayo
    • 1 cup buttermilk (you can use regular milk if that’s all you have but the buttermilk is thicker and is much better!)

    Mix all three ingredients together and chill for about 30 minutes. Drizzle on this green salad and enjoy!

    Store any remaining salad dressing in the refrigerator in an air-tight container or mason jar!

    Or, if you love a spicy kick, you may love this homemade jalapeno ranch dressing instead!

    Hidden Valley Buttermilk Ranch Dressing Packet.
    Our favorite dressing for a salad – Hidden Valley Ranch Restaurant Style Dressing

    More Salad Recipes

    We’re BIG fans of salad around here, whether that’s pasta salad, a quick lettuce salad, savory salads, or dessert salads. If you love them too, here are our favorite salad recipes, that I think you’ll love, especially this crab salad that we’re addicted to!

    More Side Dishes

    You may also love these side dishes that are popular with others:

    • side salad on white plate drizzled with ranch
      The BEST Side Salad Recipe
    • Chicken macaroni salad in a bowl.
      The BEST Chicken Macaroni Salad
    • Old fashioned ham salad on white bun, next to pickles and potato chips
      Ham Salad Recipe
    • Chicken Caesar Pasta Salad in big bowl, sitting on napkin.
      Chicken Caesar Pasta Salad Recipe

    Did you make this? I’d be so grateful if you left a “star” rating below to let me know what you thought! Then, the next time you need a quick and easy recipe, come back to Fantabulosity to browse all of my easy recipes!

    More Lettuce Salad Recipes You’ll Love:

    • Summer Side Salad
    • Italian Chopped Salad
    • Apple Cranberry Salad

    Recipe

    side salad on white plate drizzled with ranch
    Print Pin
    4.18 from 553 votes

    The BEST Side Salad Recipe

    The BEST Side Salad Recipe: There's a SECRET to this salad, and it tops all salad recipes we've tried!
    Course Side Dish
    Cuisine American
    Prep Time 15 minutes minutes
    Total Time 15 minutes minutes
    Servings 5 servings
    Calories 222kcal
    Author Jessica Burgess

    Ingredients

    • 3 heads romaine lettuce See how to cut and remove stalk
    • 2 cups chopped fresh spinach optional
    • 1 tablespoon dried basil or fresh!
    • 1 teaspoon garlic powder or more/less if you prefer!
    • ½ cup shredded cheddar cheese For best results, shred your own block cheese
    • 1 roma tomato chopped
    • 3-4 slices cooked bacon chopped
    • 2 boiled eggs chopped
    • ¼ cup celery chopped
    • ¼ cup carrots chopped
    • 1 radish chopped
    • 1 stalk green onions chopped
    • 1 tablespoon sunflower seeds hulled

    Instructions

    • Slice romaine leaves off of white stems, (discard white stems) and chop lettuce into small pieces and pour in large serving bowl. If also using fresh spinach, chop and add to romaine in bowl.
    • Next layer on your favorite toppings, such as chopped tomato, bacon, eggs, radishes, green onions, celery, carrots, sunflower seeds and cheddar cheese.
    • Sprinkle the garlic powder and the dried basil on top.
    • Serve with choice of dressing. (Our favorite is to make the Hidden Valley Buttermilk Ranch dressing, with the seasoning packet, buttermilk and mayo.)

    Video

    Notes

    TIPS to make this the best side salad:
    • Chop everything in to small pieces, including the lettuce.
    • We love using Hidden Valley Buttermilk Ranch for dressing (The packet that you make with mayo and buttermilk) and making this before starting the salad so it can sit in the refrigerator for 30 minutes, according to package directions.
    • If you want to make this ahead of time, chop up the toppings and store them separately so the toppings don’t make the lettuce soggy.
    Topping Ideas: 
    Carrots, radishes, green onions, tomatoes, cooked bacon, hard-boiled eggs, celery, sunflower seeds, and shredded cheddar cheese.

    Nutrition

    Serving: 1salad (⅕ recipe; without dressing) | Calories: 222kcal | Carbohydrates: 16g | Protein: 13g | Fat: 13g | Saturated Fat: 5g | Polyunsaturated Fat: 2g | Monounsaturated Fat: 5g | Trans Fat: 1g | Cholesterol: 95mg | Sodium: 233mg | Potassium: 1177mg | Fiber: 9g | Sugar: 6g | Vitamin A: 35288IU | Vitamin C: 21mg | Calcium: 256mg | Iron: 5mg

    Easy Lobster Bisque Recipe

    November 26, 2024

    Lobster bisque in small bowl with crackers on a plate underneath.

    Easy Lobster Bisque Recipe: Lobster soup with heavy cream, imitation lobster, and savory spices. Surprisingly easy to make with simple ingredients and something the whole family can enjoy!

    Lobster bisque in bowl, next to crackers, and parsley.

    What You’ll Love About This Recipe

    This lobster bisque is similar to lobster bisque at a fancy restaurant. The recipe and ingredients are simple but the flavors are strong and the texture is extra creamy.

    Imitation lobster is super easy to cook with, tasty, and saves you the hefty price tag of fresh lobster meat. Cooking bisque with imitation crab and lobster is so much more affordable but you can definitely use fresh, real lobster in this.

    I love reheating soup recipes for a quick and easy lunch the next day! Soup keeps well in the fridge so it’s perfect for meal prepping. (Especially this clam chowder recipe and this loaded baked potato soup recipe!)

    [feast_advanced_jump_to]

    Ingredients for Lobster Bisque Soup

    You only need a handful of lobster bisque ingredients.

    Ingredients for easy lobster bisque.

    Full list of ingredients and amounts can be found in the recipe card below.

    • Old Bay Seasoning – I prefer using 4 tablespoons but you may want to start with 2, and add more later if desired, considering it can get spicy.
    • Fresh Parsley – I know it’s not always easy to keep fresh parsley on hand but it’s highly recommended for this recipe.
    • Imitation Lobster – Real lobster works too but imitation can be more affordable
    • Chicken Broth – Storebought or my easy chicken broth recipe is great for this too.

    Roux (optional – if you like a thicker bisque)

    • 2 Tablespoons all-purpose flour
    • 2 Tablespoons butter

    Or more, depending on the thickness of the bisque desired.

    Instructions for Easy Lobster Bisque

    Ingredients added to stock pot for lobster bisque.
    1. Add garlic, diced tomatoes, Old Bay, fresh parsley, chicken broth and pepper.
    Hand blender being used to blend soup in pot.
    2. Mix with blender.
    Lobster added to soup in pot.
    3. Add imitation lobster. Cook for 45 minutes.
    Heavy cream added to stock pot and soup ingredients.
    4. Add in heavy cream and cook until heated through.
    Lobster bisque being ladled out of stockpot.

    How to Make a Roux for Bisque:

    If you prefer a thicker bisque, you can make a roux to thicken it.

    1. In a small saucepan, melt 1 tablespoon of butter over medium heat, and add 1 tablespoon of flour.
    2. Whisk the roux mixture until a thick paste forms, about 3-5 minutes, or until the flour loses its raw smell. At this point, I will also add a ladle of the bisque to the roux and mix, just to help blend the roux in even better.
    3. Add the roux to the bisque, and continue stirring and simmer the bisque over medium-low heat until the bisque thickens to desired consistency.
    4. If soup does not reach the desired consistency, after about 10 minutes, repeat steps 8-10 until bisque is to your desired thickness.

    NOTE: My husband prefers a very thick bisque so I make a roux out of 8 tablespoons of butter and 8 tablespoons of flour.

    Variations

    There are a few different ways you can switch up this classic lobster bisque recipe!

    • Some people like to use tomato paste instead of petite diced tomatoes. Tomato paste will give your soup a thicker texture since there are less tomato juices.
    • Classic lobster bisque from New England uses white wine in its preparation. Feel free to swap some chicken stock for white wine.
    • Adding bay leaves or bay leaf seasoning to this recipe while cooking is another great way to add authentic flavor. Feel free to add more of your favorite herbs.
    Easy lobster bisque recipe made with imitation lobster.

    Can you Freeze Lobster Bisque?

    Yes! You can freeze lobster bisque for up to 3 months. I recommend freezing in an airtight container after your bisque has cooled completely. The cream might settle when you freeze but you’ll simply have to stir before serving.

    Expert Tips

    What is a substitute for lobster in lobster bisque?

    You can substitute crab (like in my crab bisque), shrimp, or even crawfish tail meat.

    How do you thicken bisque?

    If you’re someone who likes their soup then I recommend adding 2 tablespoon of flour with 2 tablespoon of butter. It won’t change the flavor but it will make your soup thicker!

    Is bisque hot or cold?

    Most lobster bisques and other recipes are served hot but they can also be served cold if that’s what you prefer. When serving cold, it’s important to make sure your soup is stirred all the way to prevent separation.

    What to Serve With Lobster Bisque

    The best lobster bisque recipe is served with warm bread, rolls or garlic biscuits, or breadsticks for the ultimate comfort meal. For a bigger meal, feel free to serve with a grilled cheese or even a caprese sandwich!

    More Seafood Recipes

    If you love seafood as much as we do, you’ll also love this Seafood Paella!

    Recipe

    Lobster bisque in small bowl with crackers on a plate underneath.
    Print Pin
    4.12 from 18 votes

    Easy Lobster Bisque Recipe

    Not only is this lobster bisque recipe so easy to make but it’s so delicious! Pair with warm bread for the ultimate comfort meal.
    Course Appetizer, Main Course, Soup
    Cuisine American
    Prep Time 20 minutes minutes
    Cook Time 45 minutes minutes
    Total Time 1 hour hour 5 minutes minutes
    Servings 8 servings
    Calories 241kcal
    Author Jessica Burgess

    Ingredients

    • 1 Tablespoon minced garlic finely minced
    • 2 14.5-ounce cans petite diced tomatoes with juices
    • 32 ounces chicken broth
    • 2-4 Tablespoons Old Bay seasoning or your desired spice level. Old Bay can get spicy. *See notes below.
    • ¼ cup fresh parsley chopped
    • 1 teaspoon black pepper or to taste
    • 2 cups imitation lobster chopped in to small pieces
    • 1 pint heavy cream
    • salt optional – add at the end if you feel it needs more salt since Old Bay contains salt.

    Roux (optional – if you like a thicker bisque)

    • 2 Tablespoons all-purpose flour
    • 2 Tablespoons butter room temperature

    Instructions

    • Add garlic, tomatoes, chicken broth, Old Bay seasoning, parsley and pepper to a large stock pot. Using an immersion blender, blend until the desired chunkiness. Or, if using a blender, pour the soup in to the blender. You may need to do two batches if it won't all fit which is why it's best to mix it before hand in the stock pot.
    • Add soup back to pot, and cook over medium heat.
    • Add your chopped imitation lobster.
    • Simmer on medium-low heat for about 45 minutes to really let the ingredients cook through one another.
    • Just before serving, add the heavy cream and cook until heated through. ** If you prefer a thinner bisque, you can stop at step 7.  If you prefer a thicker bisque, continue with step 8 (bisque pictured).
    • In a small saucepan, melt your butter over medium heat, and add the flour.
    • Whisk the roux mixture until a thick paste forms, about 3-5 minutes, or until the flour loses it’s raw smell.
    • Add the roux to the bisque, and continue stirring and simmer bisque over medium-low heat until bisque thickens to desired consistency.
    • If soup does not reach desired consistency, after about 10 minutes, repeat steps 8-10 until bisque is to your desired thickness.
      * See notes below about thickness.

    Video

    Notes

    * Seasoning: I prefer using 4 tablespoons of Old Bay Seasoning. However, it’s best to start with 2, and then add more just before serving if you feel it could use more. 
    * Thickness/Roux: As a gauge for consistency, my husband prefers a very thick bisque, requiring 8 tablespoons of butter and 8 tablespoons of flour. (Not pictured.)

    Nutrition

    Serving: 1bowl (⅛ recipe) | Calories: 241kcal | Carbohydrates: 4g | Protein: 1g | Fat: 24g | Saturated Fat: 15g | Cholesterol: 88mg | Sodium: 50mg | Potassium: 61mg | Vitamin A: 1140IU | Vitamin C: 3.1mg | Calcium: 51mg | Iron: 0.6mg

    The BEST Bruschetta Recipe

    April 10, 2024

    Bruschetta slice sitting on wooden cutting board.

    Bruschetta Recipe – The BEST recipe there is! Whether you’re serving this on a slice of bread, or on top of chicken, you’ll love the fresh flavors in this easy to make recipe!

    Bruschetta slices on a wooden cutting board, surrounded by fresh parsley.

    I have a “go-to” appetizer recipe when I’m having guests over, and you’re lookin’ at it.

    Easy Bruschetta Recipe

    Bruschetta is one of the quickest & easiest appetizers to throw together when we are having people over, and if you’re having people over, don’t forget to save my free party planning checklist, to make sure you don’t forget the most important things!

    Whether a small dinner party or a large crowd, this recipe is a hit. It’s classy, easy to pick up and eat, and the guests drool over its deliciousness.

    I mean, look at this comment that sweet Kimberly said below in the comments on this recipe:

    “Great for my Law School Study Group and Brunch At My Brother's!! Everyone raves about it. Each person ate no less than 4-6 each and thought I catered it. It was so pretty and so tasty!! I am your BIGGEST FAN & that of the BRUSCHETTA too, of course!!! Thank you so much. Please keep sharing!! We need you!!!”

    The best part?  It gives an impressive appearance that looks like it took a long time to prepare.
    (But it doesn’t!)

    More Easy Appetizer Recipes You’ll Love:

    • The BEST Guacamole Recipe
    • Easy Pico de Gallo
    • Strawberry Bruschetta Recipe

    What is Bruschetta?

    Well if you ask Wikipedia, it pretty much says that it’s toasted bread with olive oil, garlic, and tomatoes. Or you can even do a “breakfast” version and do an avocado tomato “bruschetta” toast!

    The BEST Bruschetta Recipe

    But if you ask me, the best bruschetta consists of a little butter, French bread, a little cheese (mozzarella, provolone, parmesan or whatever your favorite choosing is) spices and fresh herbs. Here’s what you’ll need:

    (Full recipe card and instructions below!)

    • Roma tomatoes
    • Olive oil
    • Fresh parsley
    • Fresh basil
    • Cloves of garlic
    • Salt (I love using Kosher Salt, but table salt would work just fine)
    • Crushed red pepper flakes (to add a slight kick)
    • Black pepper
    • Shredded parmesan cheese (grated works too)
    • French baguette (or make this Italian bread recipe as it would be delicious too!) (
      If buying store-bought, I use the mini loaves, for a smaller “bite-size” appetizer.)
    • Butter
    Ingredients to make bruschetta sitting on counter.

    Some love balsamic vinegar drizzled across their bruschetta, so feel free to do so… but I’m not a fan, so I leave that off and I’ve NEVER heard one of my guests wish they had it.

    How to Make Bruschetta

    It’s easy and perfect for any beginner in the kitchen! (Full recipe card and instructions at the bottom of this post!)

    Toast Bread:

    You’ll start by slicing your bread in to small pieces – about a half an inch thick but don’t measure too hard. Just a good size for biting.

    Slice bread in to small pieces.

    Toasting your French baguette with the butter and melted cheese. Set aside and let cool. (If you have any leftover bread, you should consider making cheese avocado toast the next morning!)

    Melted cheese on small pieces of toasted bread.

    Chop and Mix Tomato Bruschetta Ingredients:

    While cooling, this is the perfect time to chop and combine the ingredients for the bruschetta topping.

    Bruschetta topping ingredients in a glass bowl.

    Easily Assemble Bruschetta:

    Spoon a tablespoon or so of the bruschetta mixture on top of the golden brown toast.

    TIP: Do not top bread with bruschetta mixture until right before serving, so it keeps from getting soggy!

    Bruschetta complete and ready to eat, on a white platter.

    Tip for Tomato Bruschetta

    When it comes to the tomatoes, although it’s tempting to make ahead, refrigerating the tomato bruschetta mixture is not recommended. Refrigerating really takes the flavor out of the tomatoes.

    “Can I Use Dried Herbs?”

    You can, but if you’re able… the fresh herbs give this bruschetta recipe the BEST flavor.

    Bruschetta Chicken

    One of my favorite chicken recipes is the Salt & Pepper Chicken Bites that I shared with you. If you’re looking for low-carb and keto recipes, consider combining the tomato bruschetta mixture with the salt & pepper chicken bites for a fresh, quick and delicious dinner!

    More Easy Appetizer Recipes

    If you’re hosting and looking for more recipes to serve your guests, you’re going to LOVE these bacon-wrapped dates! The saltiness of the bacon, sweetness of the dates and the creaminess of the cheese, all combine to make a bite-size flavor that’s perfect for guests!

    Rate This Recipe

    Did you love it as much as we do?! We’d love to hear from you and see your “star rating” in the recipe card above!

    For more, easy recipes, head to the archives and pin your favorites to your Pinterest boards to have them for your meal planning!

    Recipe

    Bruschetta slice sitting on wooden cutting board.
    Print Pin
    4.28 from 33 votes

    Easy Bruschetta Recipe

    Easy Bruschetta Recipe – The BEST + So Addicting: Whether you’re serving this on a slice of bread, or on top of chicken, you’ll find this one of the best bruschetta recipes there is!
    Course Appetizer
    Cuisine Italian
    Prep Time 10 minutes minutes
    Cook Time 1 minute minute
    Total Time 11 minutes minutes
    Servings 10 servings (20 bruschetta bites)
    Calories 130kcal
    Author Jessica Burgess

    Ingredients

    Toasted Bread:

    • 1 French baguette sliced into ½ inch slices (I use the mini loaves, for a smaller “bite-size” appetizer.)
    • 2 Tablespoons butter for spreading not necessary but recommended
    • 5 slices provolone cheese cut into fourths, can substitute with another white cheese

    Bruschetta:

    • 4 Roma tomatoes chopped, (or other type of tomato is fine!)
    • 3 Tablespoons olive oil
    • 2 Tablespoons fresh parsley minced
    • ¼ cup fresh basil minced
    • 3 cloves garlic minced and chopped
    • ⅛ teaspoon salt I love using Kosher Salt, but table salt would work just fine
    • ⅛ teaspoon crushed red pepper flakes or to taste
    • ⅛ teaspoon black pepper
    • ½ cup shredded parmesan cheese (grated works too)

    Instructions

    • Spread a small dab of butter on sliced baguettes, and top each baguette with a slice of the quartered cheese.
    • Place the baguettes on an ungreased baking sheet, and broil in the oven for 1 minute (or until the cheese is melted, and the bread is slightly toasted.)
    • Combine all ingredients for bruschetta.
    • Top each baguette slice with about a Tablespoon of the tomato-herbed mixture, and serve immediately!

    Video

    Notes

    Make-Ahead: Although tempting, do not refrigerate the tomato-bruschetta mixture. The tomatoes lose flavor.
    Fresh is Best: Use fresh herbs for the ultimate fresh taste!

    Nutrition

    Serving: 2bruschetta bites | Calories: 130kcal | Carbohydrates: 14g | Protein: 4g | Fat: 6g | Saturated Fat: 1g | Cholesterol: 3mg | Sodium: 264mg | Potassium: 98mg | Vitamin A: 350IU | Vitamin C: 4.9mg | Calcium: 85mg | Iron: 0.9mg

    Avocado Wontons

    February 6, 2014

    Guacamole Wontons Recipe: Turning a favorite appetizer recipe, crab rangoons, into a dynamite recipe with a combination of the best guacamole, cream cheese, and spices.

    gucamole wontons

    I don’t know if I’ve been hiding under a rock, or if Avocado (or guacamole) Wontons are a new thing to hit restaurants.

    But after having them one night at a local pub, I was determined to find a guacamole wontons recipe to fix for my family. But to my dismay… I couldn’t find one online! So… it was time to get creative and come up with my own recipe, and YUM!!!

    Avocado Wontons

    Please keep in mind, it all depends on how many wontons you want to make. The ingredients below, are for about a 2 person serving. This made about 10 guacamole wontons, but we had tons of wonton wrappers leftover from the package, so you can double, triple, quadruple this batch if you like!

    Different Ways to Use Avocados

    You know when you grab a bag of avocados from the store with the intentions of eating them all before they get too ripe? Well, if you don’t play it just right, time can run out and you’re left with a bag of avocados that you need to eat up quickly! See my tips on how to keep avocados fresh.

    So making a batch of these wontons is one of my favorite ways… or, I’m also a BIG fan of avocado toast recipes and love having it for breakfast!

    The BEST Guacamole Recipe:

    For this recipe, we LOVE using this delicious guacamole recipe that has been pinned close to 100,000 times on Pinterest. Yes really… it is the best! But if you’re pressed for time or don’t have the ingredients on hand you can use store-bought guac or even just mashed avocado!

     How to Fold a Wonton:

    There are a few different ways to fold a wonton. No matter which way you do it… just make sure the filling is secure inside, by closing all of the edges.

    This is one way you could fold a wonton:

    Put a small amount of the filling in the bottom-center (in the corner) of your wonton. (Image below.)

    Fold the bottom corner over the guacamole mixture, and press on to the center.

    Guacamole Wontons Recipe https://fantabulosity.com

    Grab the bottom right corner and fold that towards the center as well.

    Guacamole Wontons Recipe https://fantabulosity.com

    Same with the bottom left corner, fold towards the center.

    Guacamole Wontons Recipe https://fantabulosity.com

    After folded: 

    One by one, add a wonton to the heated oil. Fry on each side for about 15 minutes or until it reaches an overall golden brown color.

    guacamole wontons recipe

    Sauce for Wontons

    You can eat guacamole wontons by themself or you can dip them in a sauce for some extra flavor! Sauces like:

    • sweet chili sauce (images below)
    • soy sauce
    • jalapeno ranch dressing
    • yum yum sauce
    • teriyaki sauce recipe without ginger
    Bite taken out of wonton with sauce.
    Sweet chili sauce

    More Appetizers

    If you love fun appetizers like this one, then you’ll also love easy taco dip, easy pico de Gallo recipe, and chips and salsa, especially if you’re hosting a party so guests can snack on these fun dishes all night!

    Did you make this? I’d be so grateful if you left a “star” rating below to let me know what you thought! Then, the next time you need a quick and easy recipe, come back to Fantabulosity to browse all of my easy recipes!

    Recipe

    Print Pin
    5 from 4 votes

    Avocado Wontons

    Avocado Wontons are delicious guacamole or mashed avocado wrapped in a wonton and fried to perfection. These quick and easy bite-sized apps are perfect for parties and potlucks!
    Course Appetizer
    Cuisine American
    Prep Time 15 minutes minutes
    Cook Time 10 minutes minutes
    Total Time 25 minutes minutes
    Servings 15 wontons
    Calories 368kcal
    Author Jessica Burgess

    Ingredients

    • 1 package wonton wrappers
    • ½ cup guacamole or mashed avocado – I used store bought to save some time
    • 1 tablespoon cream cheese
    • 2 cups oil for frying
    • sweet chili sauce for dipping (optional)

    Instructions

    • Heat enough oil in a deep skillet or pan, {about an inch deep} over medium-high heat.
    • Mix together the guacamole and cream cheese until blended.
    • Lay out a wonton wrapper, and put about a teaspoon of the guacamole mixture on to one corner of a wonton.
    • Fold your wonton: There are many ways you can do this, and feel free to fold as you like, but you can see in the steps above how I folded it, and it worked great!
    • Add your wrapped wontons to the heated oil, and fry for about 15 seconds on each side, or until the wontons become a nice golden brown.
    • Remove from oil, and lay wontons on a plate, that is covered with a paper towel to soak up any remaining oil. Serve immediately, with sweet chili sauce for dipping (optional).

    Notes

    Feel free to use guacamole or mashed avocado for this recipe! Using guacamole can add more spices and flavor to these avocado wontons.
    Serve with dippings sauces if desired, such as:
    • Sweet Chili Sauce
    • Jalapeno Ranch
    • Yum Yum
    • Teriyaki Sauce
    • Soy Sauce

    Nutrition

    Serving: 5wonton | Calories: 368kcal | Carbohydrates: 18g | Protein: 3g | Fat: 32g | Saturated Fat: 3g | Polyunsaturated Fat: 9g | Monounsaturated Fat: 20g | Trans Fat: 1g | Cholesterol: 4mg | Sodium: 175mg | Potassium: 66mg | Fiber: 1g | Sugar: 1g | Vitamin A: 29IU | Vitamin C: 1mg | Calcium: 16mg | Iron: 1mg
    • Page 1
    • Page 2
    • Page 3
    • Interim pages omitted …
    • Page 25
    • Go to Next Page »

    Primary Sidebar

    Jessica Burgess of Fantabulosity, slicing an avocado.

    Hi, I'm Jessica! - Owner and Creator of the blog and brand, Fantabulosity.

    I’m here to help you make easy comfort food and nostalgic recipes, using simple ingredients, that everyone will love.

    More about me →

    Potluck Recipes

    • A slice of strawberry jello cake, topped with a strawberry slice, sitting on a round plate.
      Strawberry Jello Cake (Easy, Moist Strawberry Cake)
    • Crack green beans on wooden spoon.
      Crack Green Beans
    • Old fashioned potluck cake recipes collage.
      Old-Fashioned Cakes That Still Show Up at Every Potluck
    • Collage of potluck desserts.
      Easy Potluck Desserts (Simple Recipes That Always Get Asked For)
    • Cold Pasta Salad Recipes Collage.
      Cold Pasta Salad Recipes
    • Chicken Casserole recipes image collage.
      20 Chicken Casserole Recipes

    Popular Recipes

    • bread pudding in baking dish
      Bread Pudding Recipe: Easy Old Fashioned Recipe (With Video!)
    • Burger baked in the oven, steamed in aluminum foil, and placed on white plate.
      Burgers in the Oven
    • two tuna salad sandwiches stacked on top of each other
      The BEST Tuna Salad Recipe
    • Sliced banana bread on white platter
      Best Banana Bread
    • Strawberry brownies on white marble cutting board.
      Strawberry Brownies Recipe
    • Cheeseburger Sliders
      Cheeseburger Sliders with Hawaiian Rolls

    Footer

    ↑ back to top

    Featured In

    About

    • About Jessica
    • Contact
    • Collaborate
    • Dinner System

    Easy Recipes

    • All Recipes
    • Vintage Recipes
    • Dinner Recipes
    • Desserts

    How to Cook

    • Oven-Baked
    • Stove-Top
    • No Bake
    • Cooking Basics

    Privacy Policy |Accessibility Copyright © 2026 Fantabulosity | Terms & Conditions | FTC
    All recipes, photos, and content are copyrighted and may not be reproduced, republished, or distributed without written permission.

    Rate This Recipe

    Your vote:


    A rating is required
    A name is required
    An email is required