• Skip to primary navigation
  • Skip to main content
  • Skip to primary sidebar

Fantabulosity logo

  • All Recipes
  • Vintage Recipes
  • Holiday
  • Dinner Theme System
  • About
  • Navigation Menu: Social Icons

    • Facebook
    • Instagram
    • Pinterest
    • TikTok
    • YouTube
menu icon
go to homepage
  • Recipes
  • Desserts
  • Dinners
  • Gatherings
  • Holidays
  • About Jessica
    • Facebook
    • Instagram
    • Pinterest
    • TikTok
    • YouTube
  • search icon
    Homepage link
    • Recipes
    • Desserts
    • Dinners
    • Gatherings
    • Holidays
    • About Jessica
    • Facebook
    • Instagram
    • Pinterest
    • TikTok
    • YouTube
  • ×
    Home » Recipes

    Zesty Italian Pasta Salad Recipe

    Zesty Italian Pasta Salad Recipe

    June 1, 2022

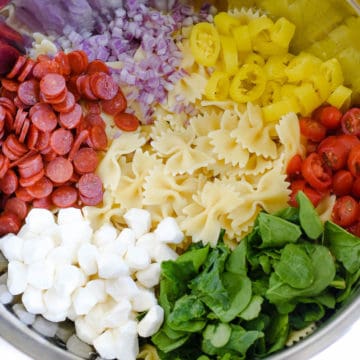
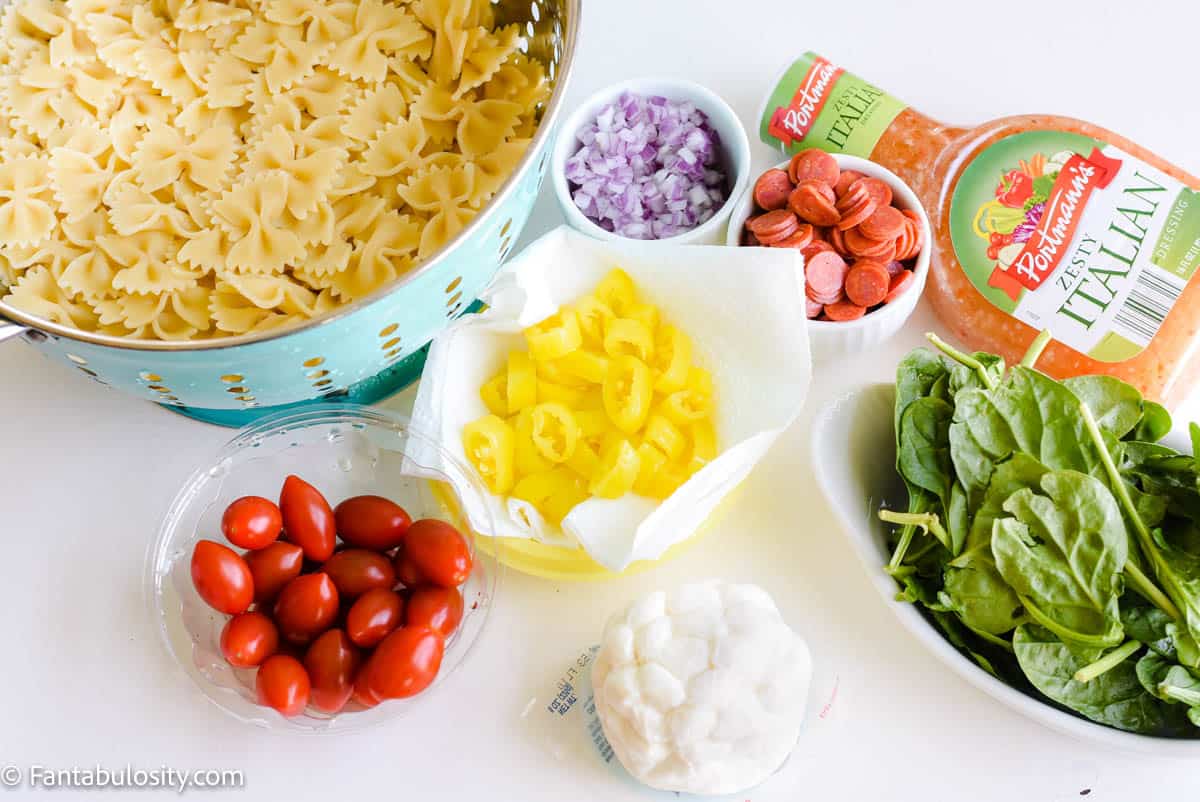
    ingredients in bowl for zesty Italian pasta salad

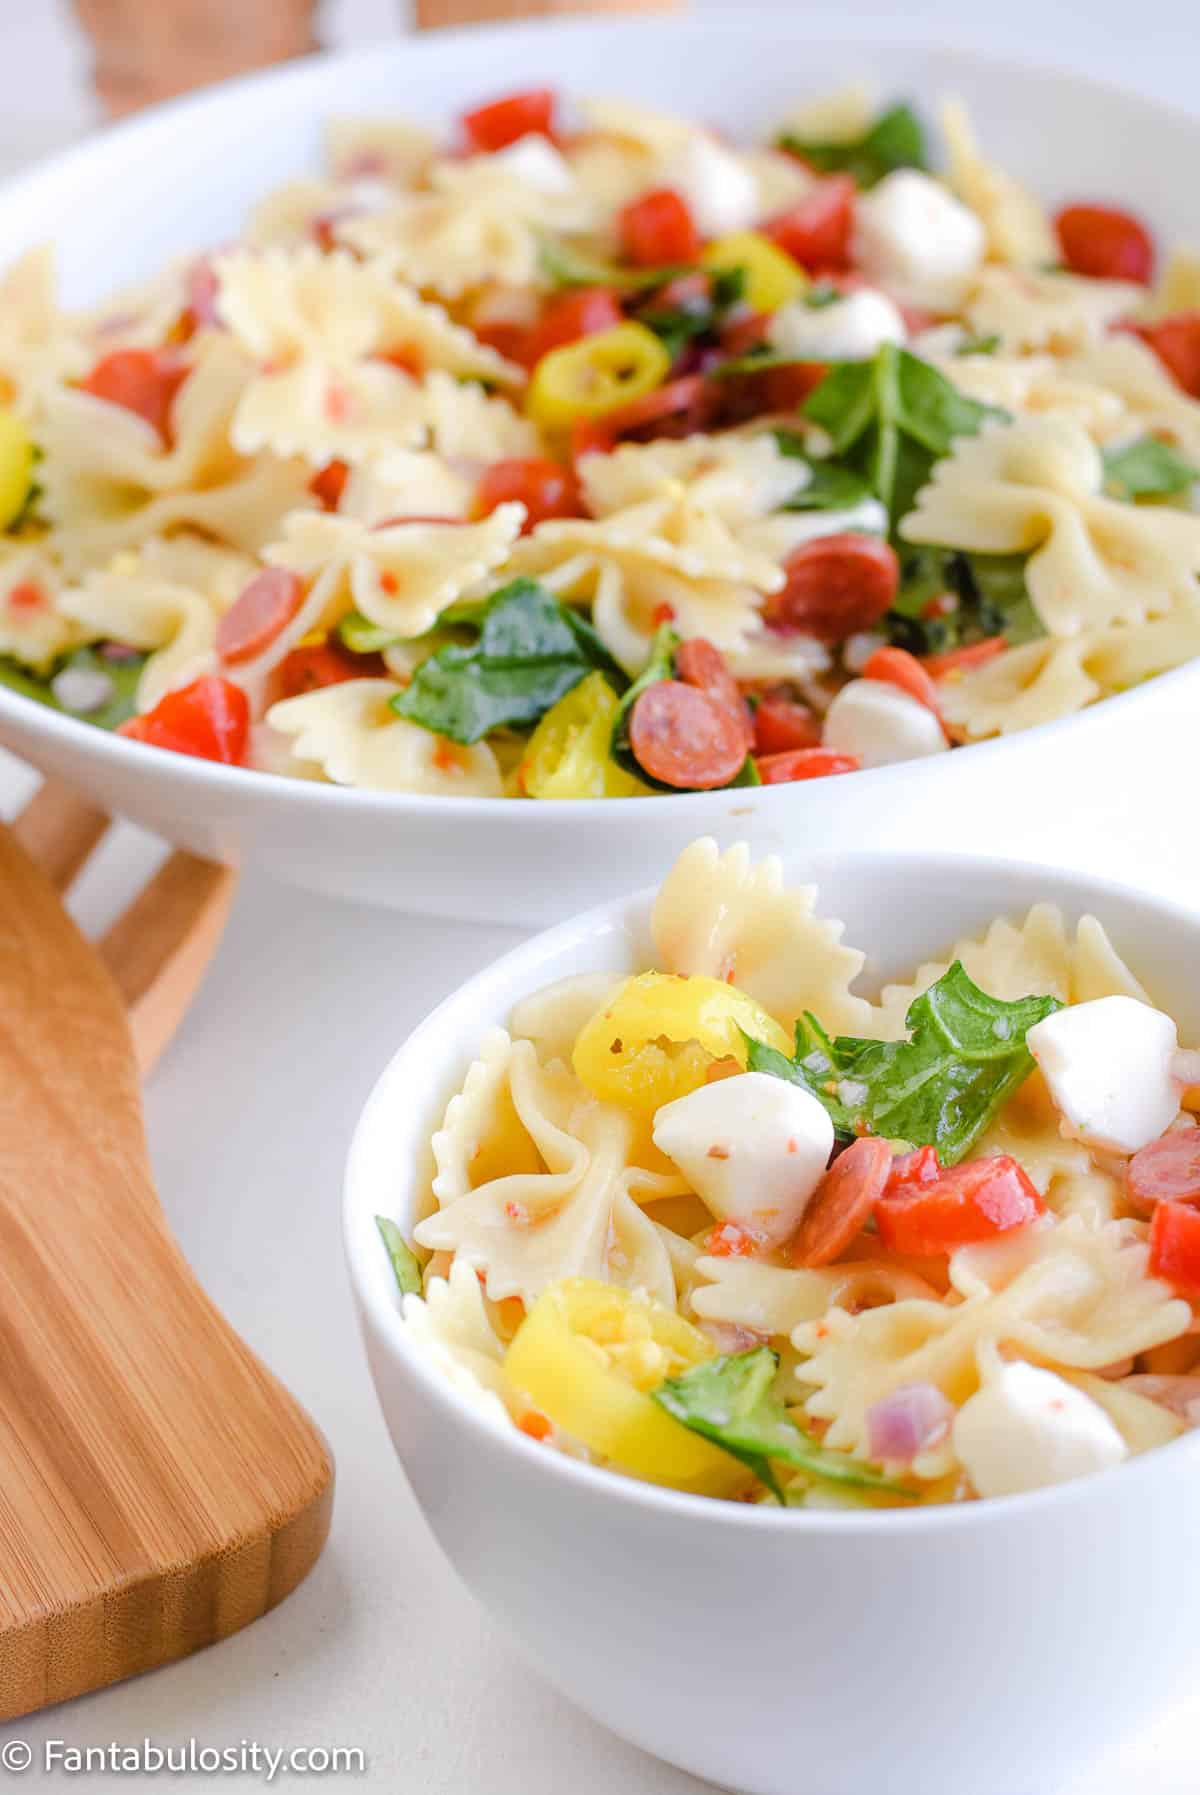
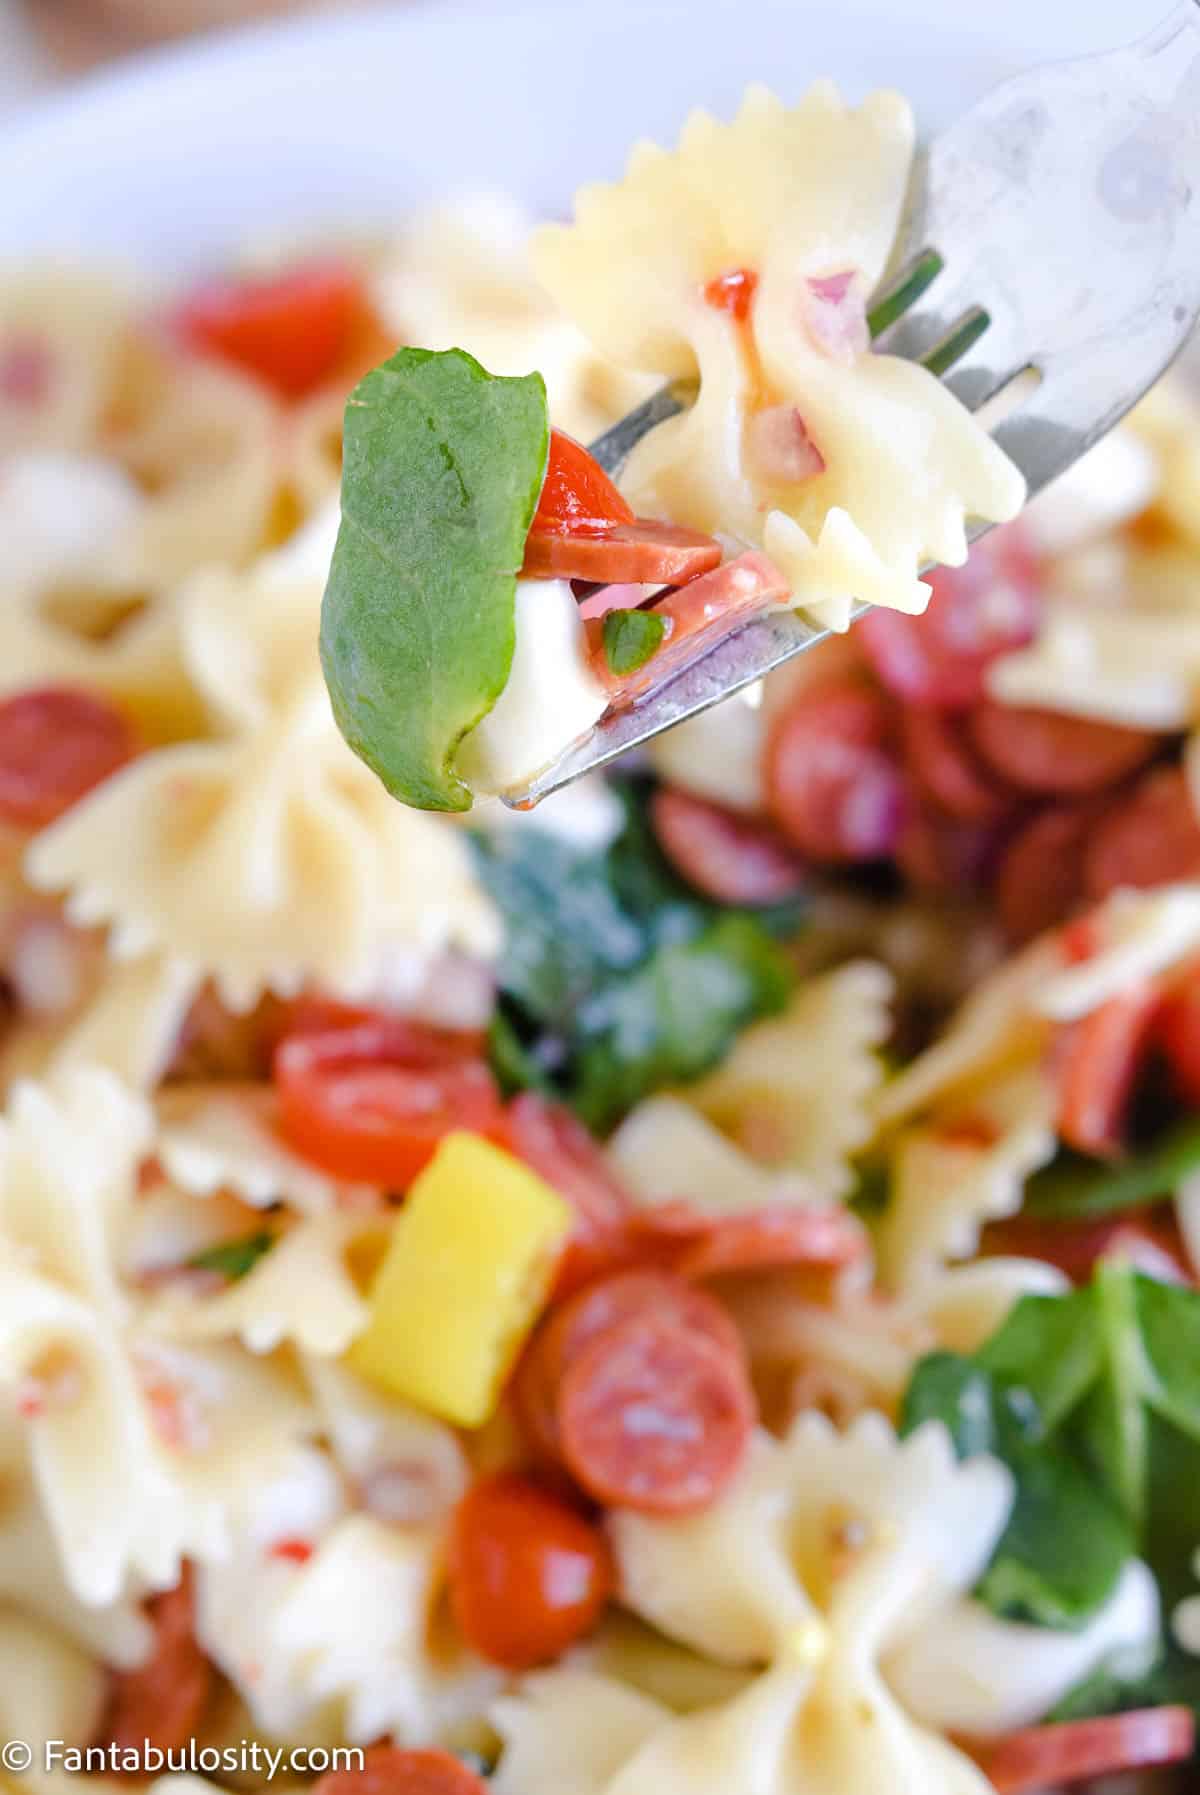
    Zesty Italian Pasta Salad: This super easy recipe is made using any type of pasta you prefer, a few other simple ingredients, and Zesty Italian dressing!

    You know we love salad recipes around here right? Well this one is at the top of our favorites list for sure! And if you’re an overall fan of pasta salads then you’ll especially love this shrimp pasta salad!
    Post originally published in 2017 – Updated in June of 2022!

    If you need a little something to go along with this pasta salad, these Hot Italian Sliders would pair amazingly with this!
    Pasta Salad Recipe – Cold, Italian Style and SO Easy

    I’m sharing how to make pasta salad, the super easy and delicious way!

    It not only looks gorgeous as a side dish with all of the pops of color, but it is packed with TONS of flavor.

    Plus, in “slightly homemade” and Fantabulosity fashion, this side dish recipe is quick and oh so easy to whip up for a weeknight meal. Another quick and easy option is this cowboy pasta salad that also comes together quickly and easily.
    Cold Pasta Salad

    A nice cold, flavorful pasta salad is a side dish that is PERFECT for a summer bbq. (Like I served at our Backyard BBQ Party!) But I must admit, no matter what time of year it is, it’s quite delicious any time of year, paired with some of main course, and one of my favorite steak sides!

    Plus, with it being a cold pasta salad recipe, that means NO cooking, and very little prep! One of my favorite recipe combinations!
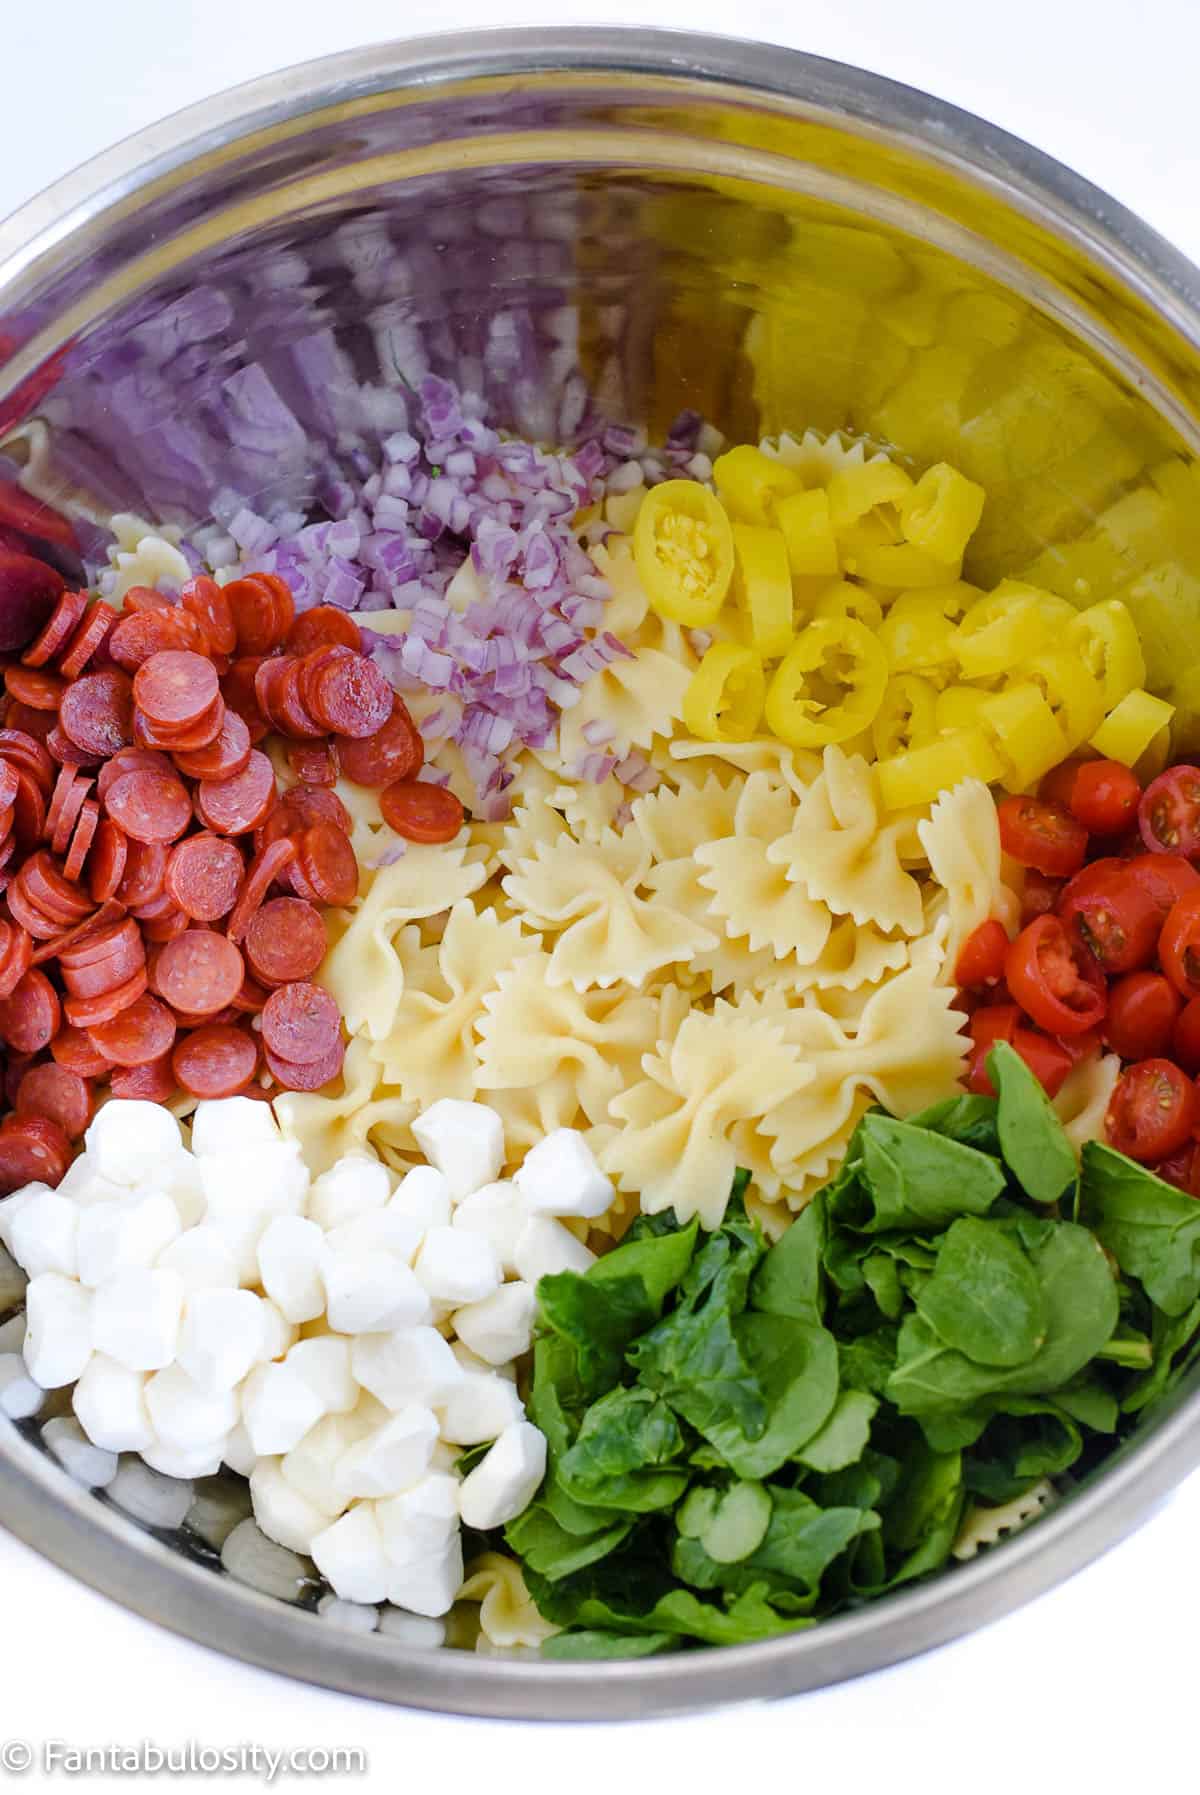
    Italian Pasta Salad

    When I started experimenting with this pasta salad, I was craving an Italian pasta salad. The thought of mixing together herbs with oils and vinegar crossed my mind, but then that sounded WAY too time consuming and fancy for this momma. So when I eyed the Zesty Italian salad dressing in my pantry, I knew it was exactly what this Italian pasta salad needed!

    Then, the addition of the cute little pepperoni and mozzarella helped tie in the Italian theme as well.

    But the combo of flavors with the red pepper, banana peppers, cherry tomatoes, and spinach rounding off the rest of it, is just what this cold pasta salad needed!
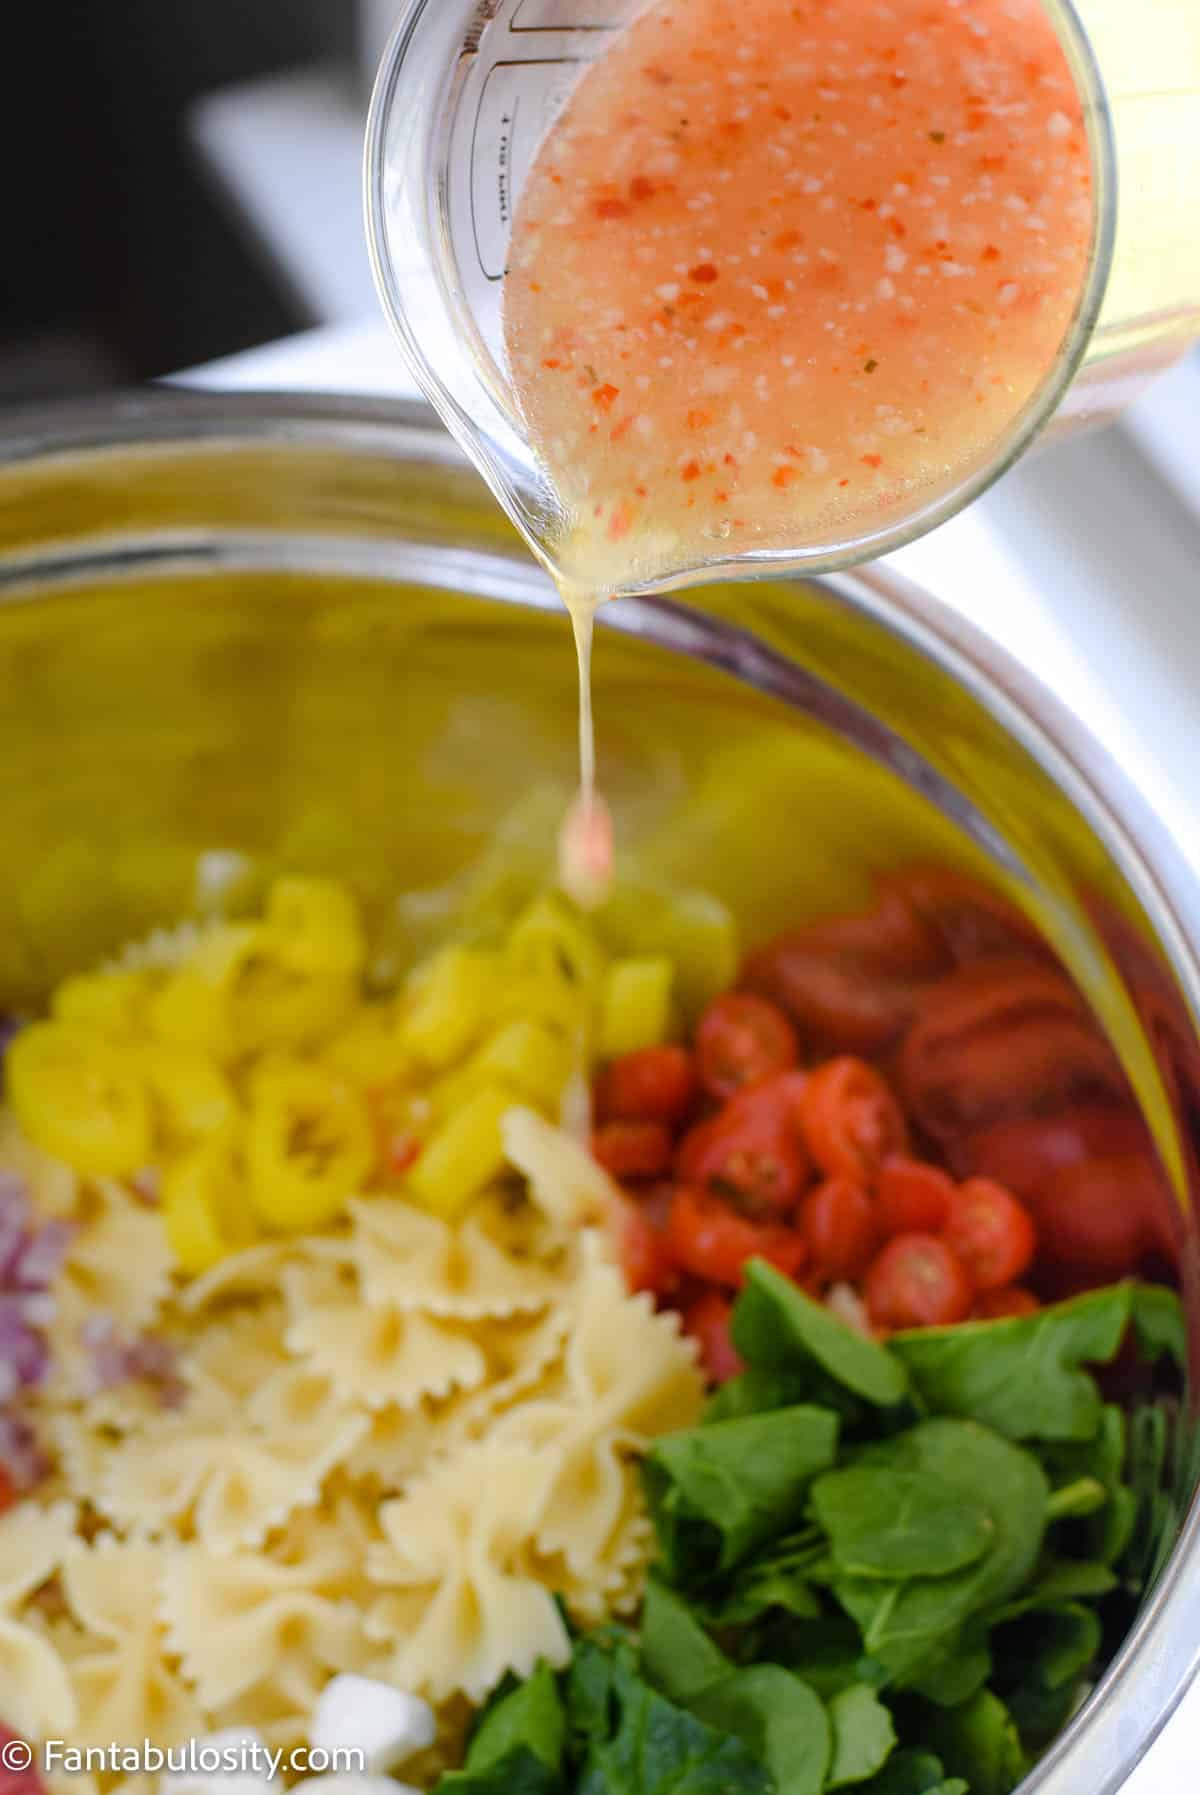
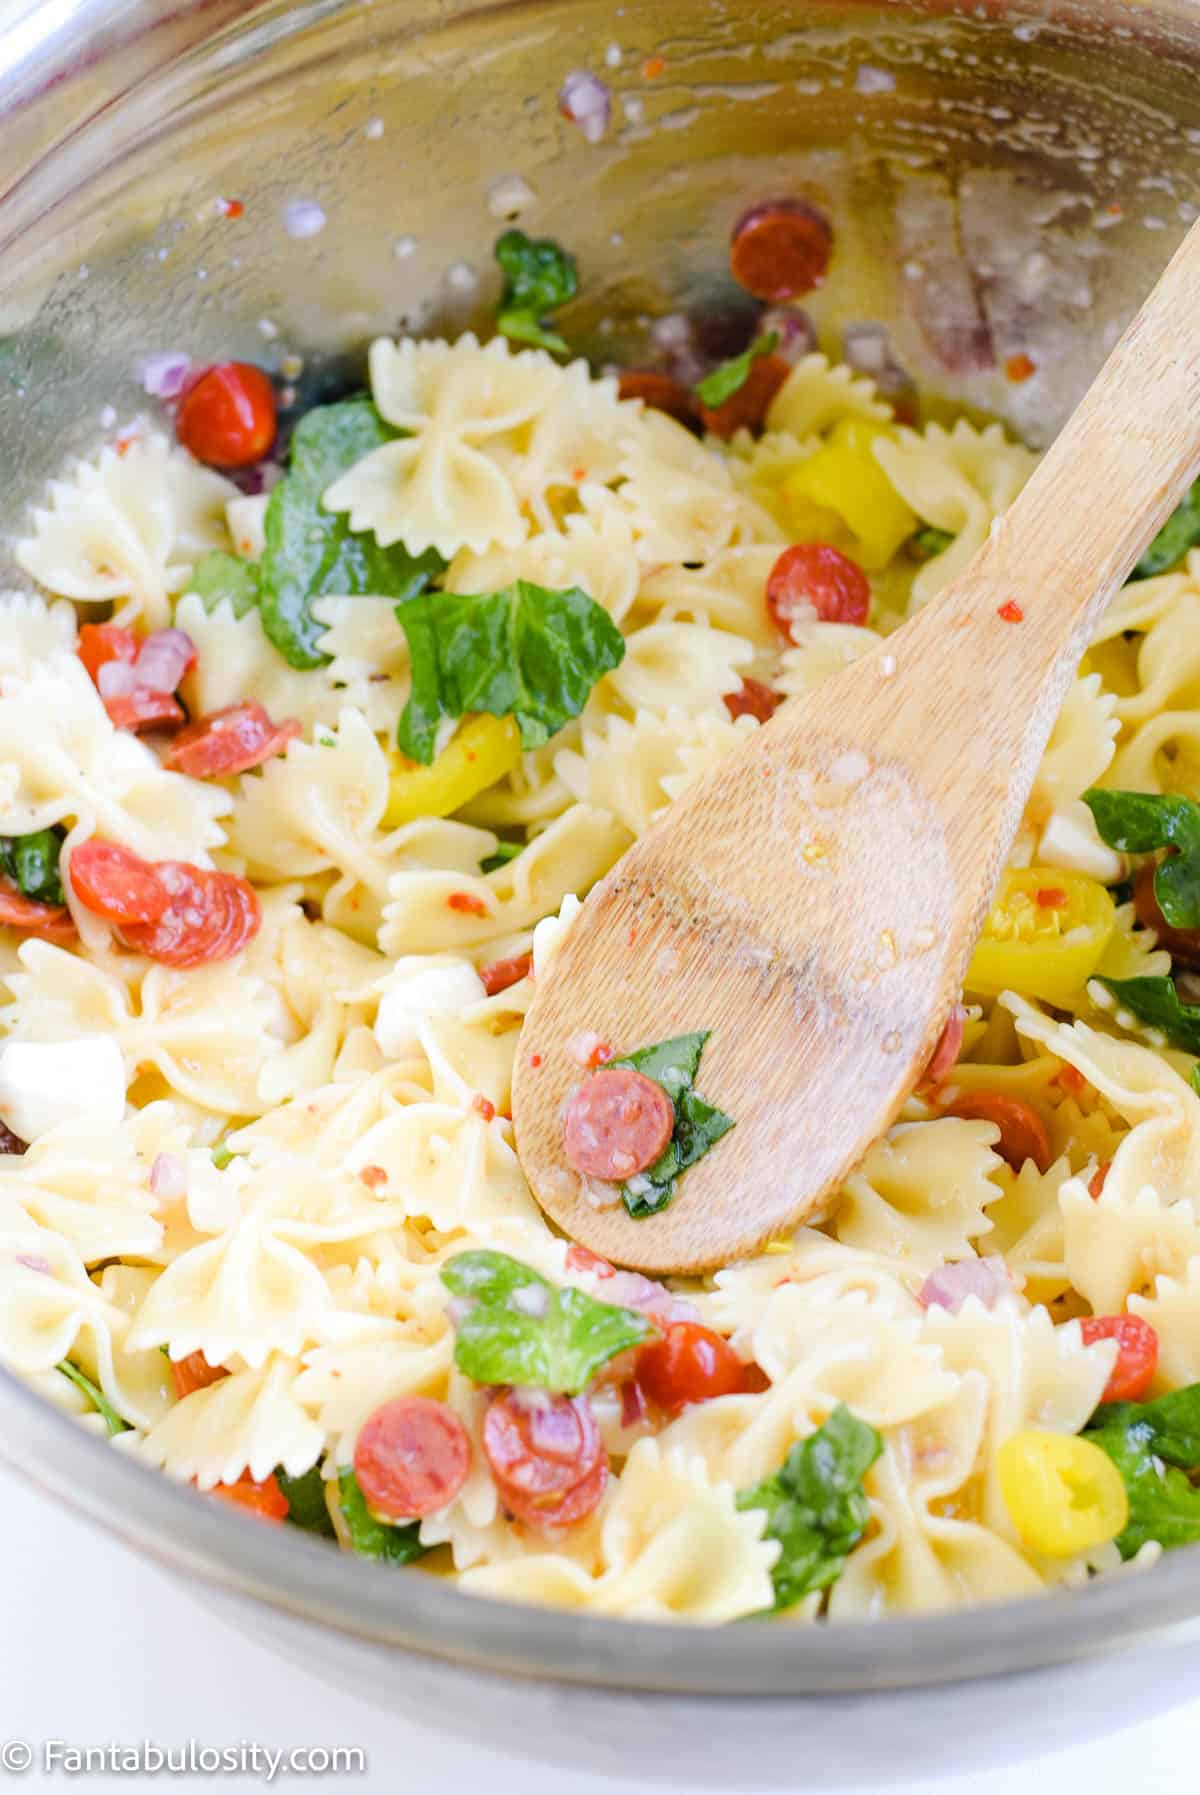
    Tip for Pasta Salad Recipes:

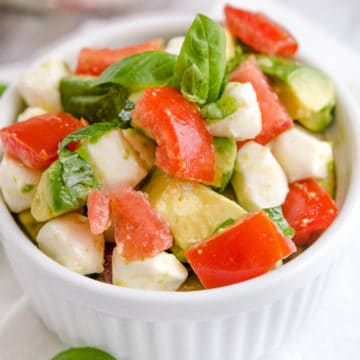
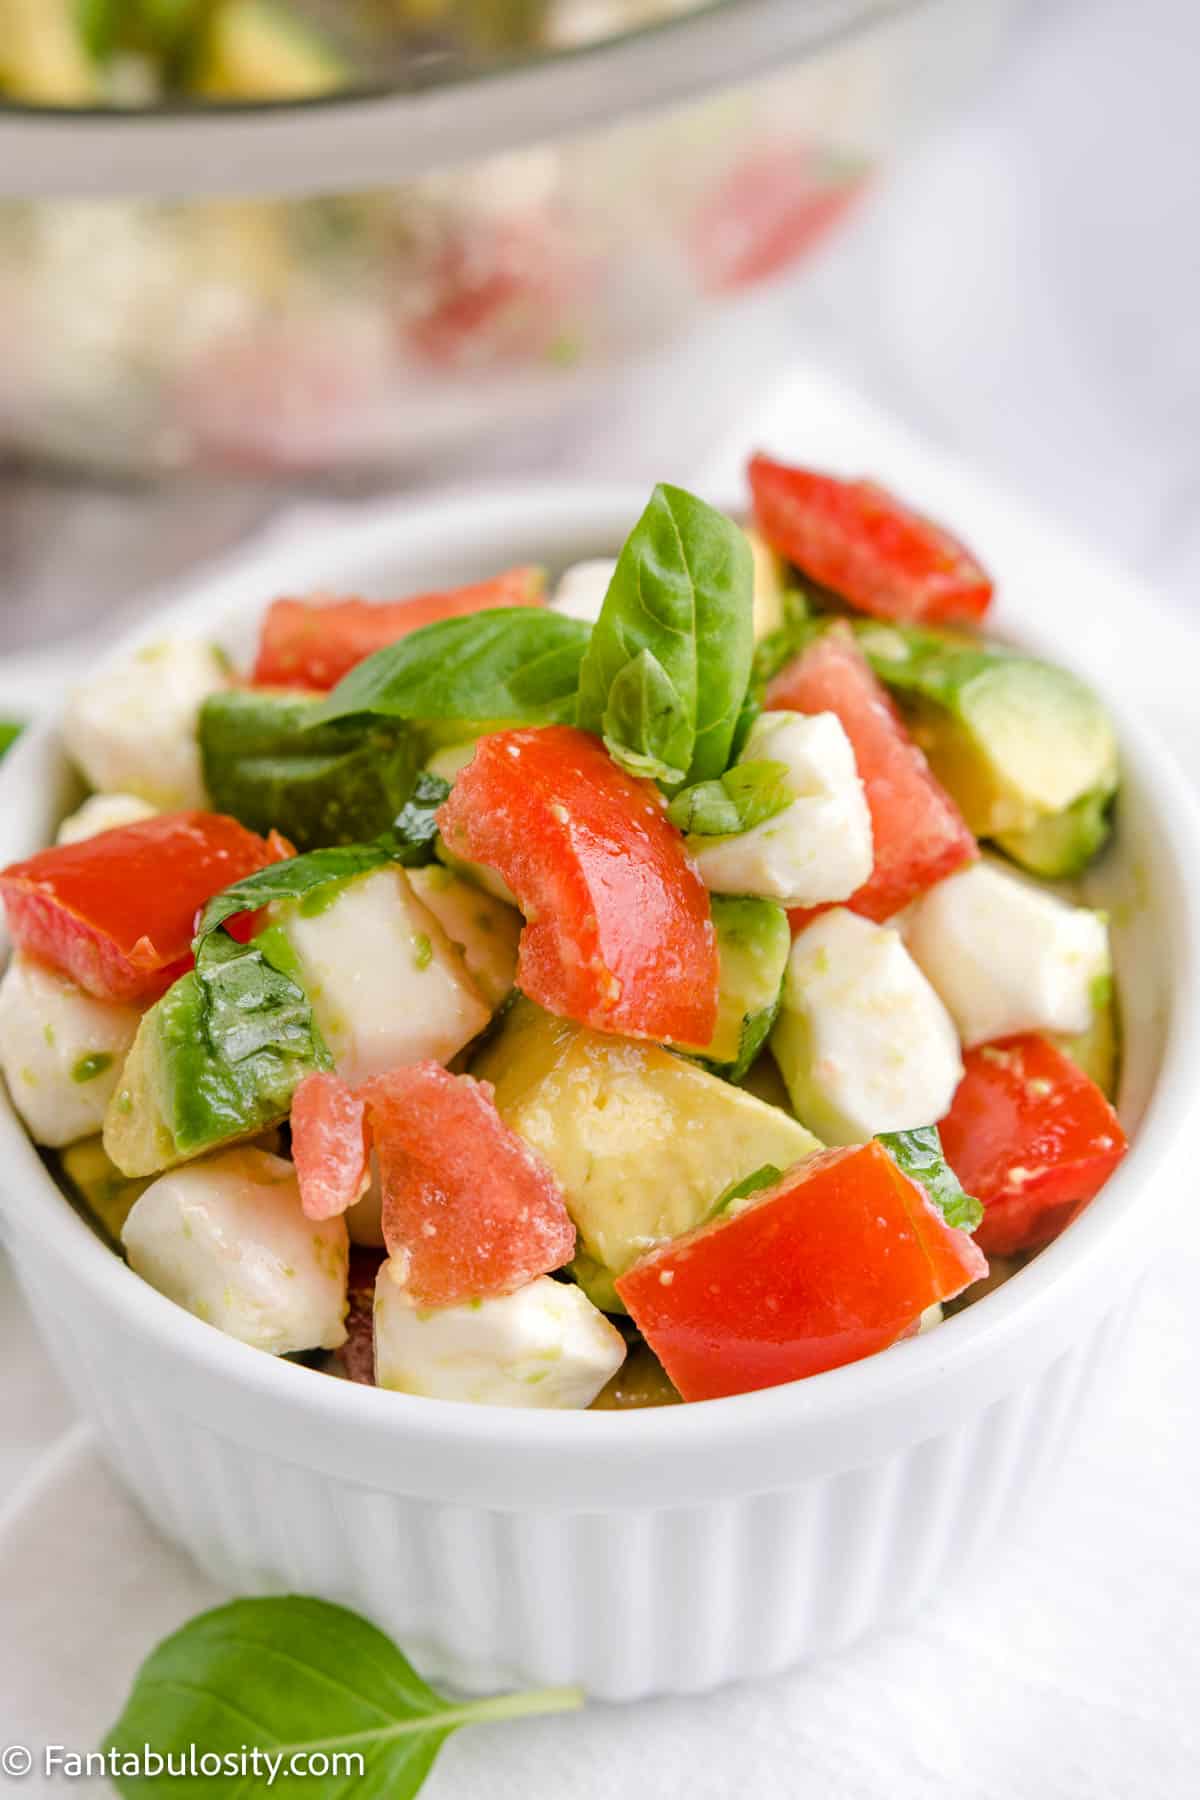
    When I’m making pasta salads, or ANY salad that has tomatoes in it (like one of my favorites: My Tomato Mozzarella and Avocado Salad), PLEASE don’t make this ahead of time and chill it. Now, if it makes life so much easier to… then that’s ok, go ahead. But the refrigeration of the tomatoes causes them to lose SO much flavor. But not only that, the pasta will soak up the dressing and it begins to lose that punch of flavor too.

    What about left overs?  Well save them… I do. But if you have any extra Italian dressing laying around to add more to your left overs, that helps a ton!
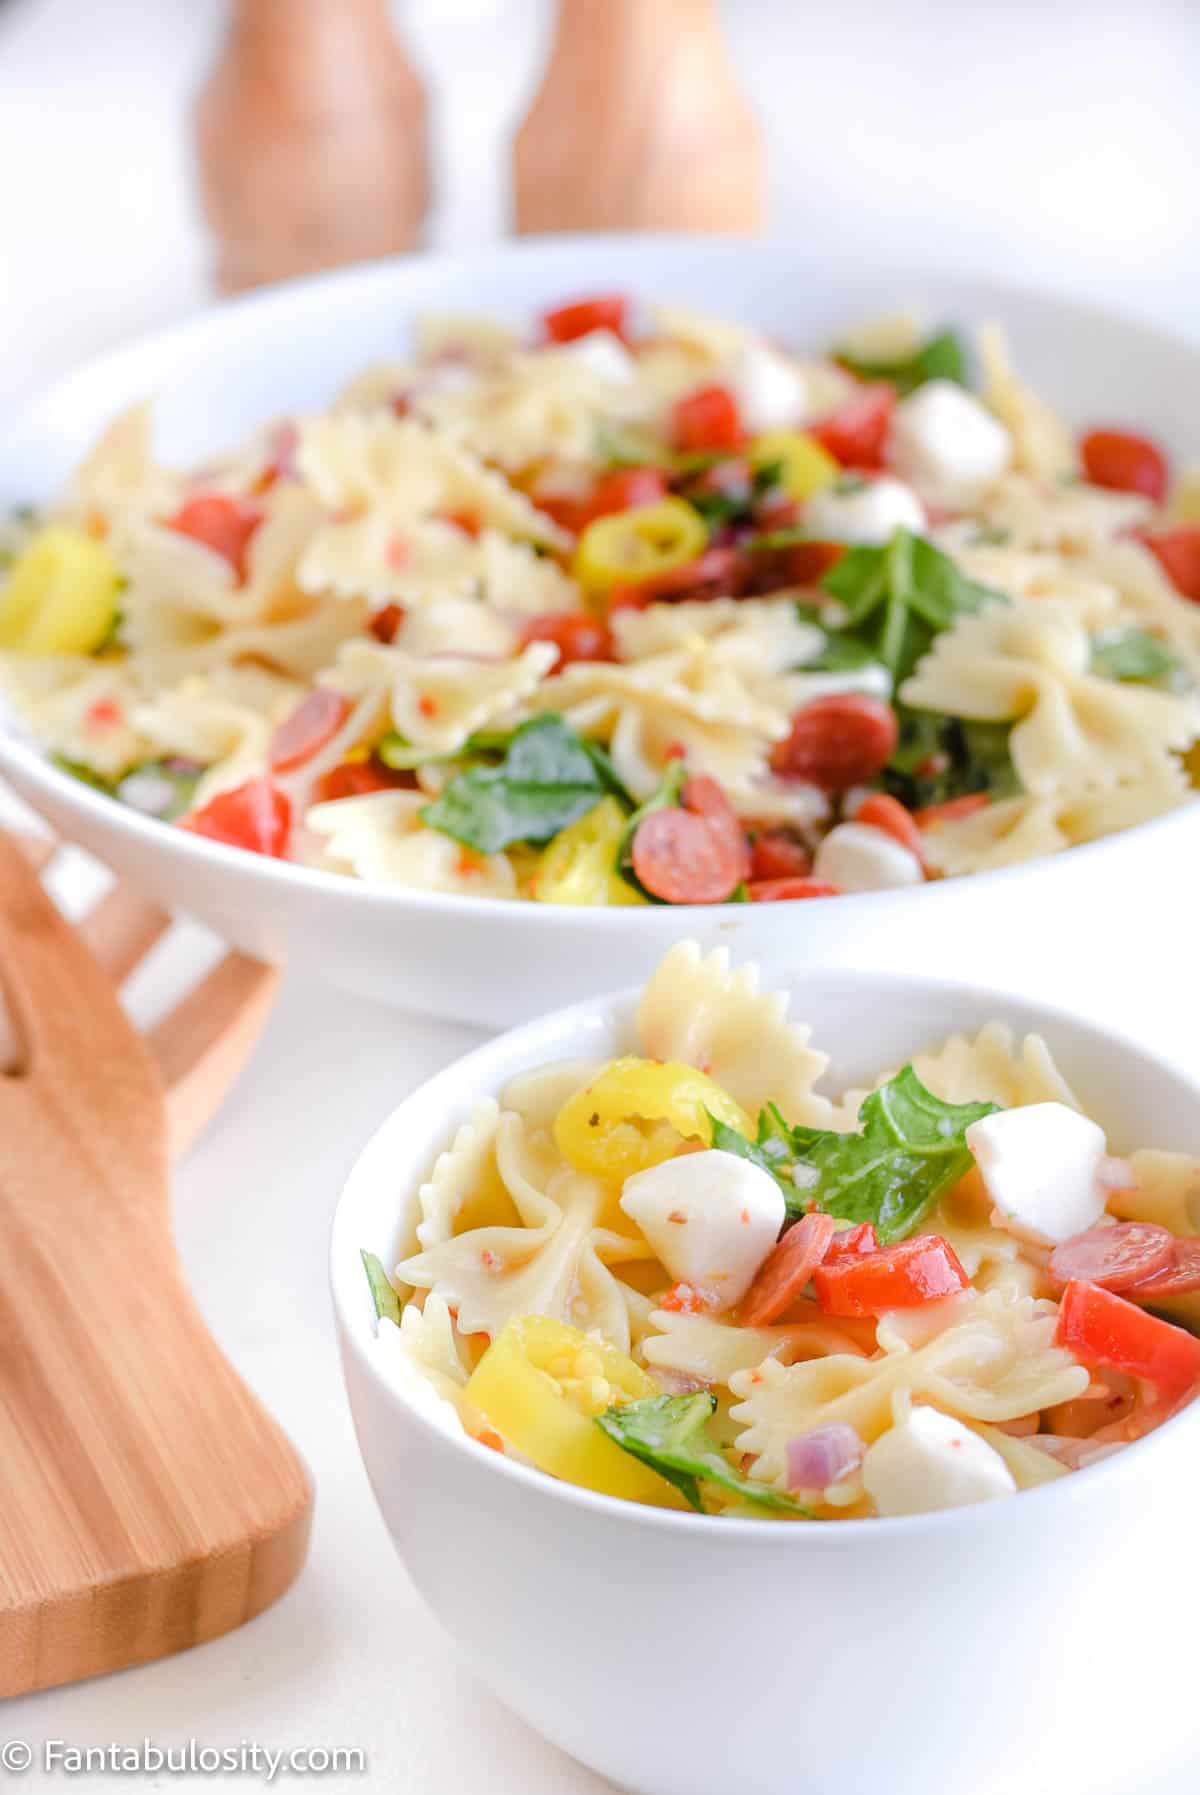
    Mason Jar Pasta Salad

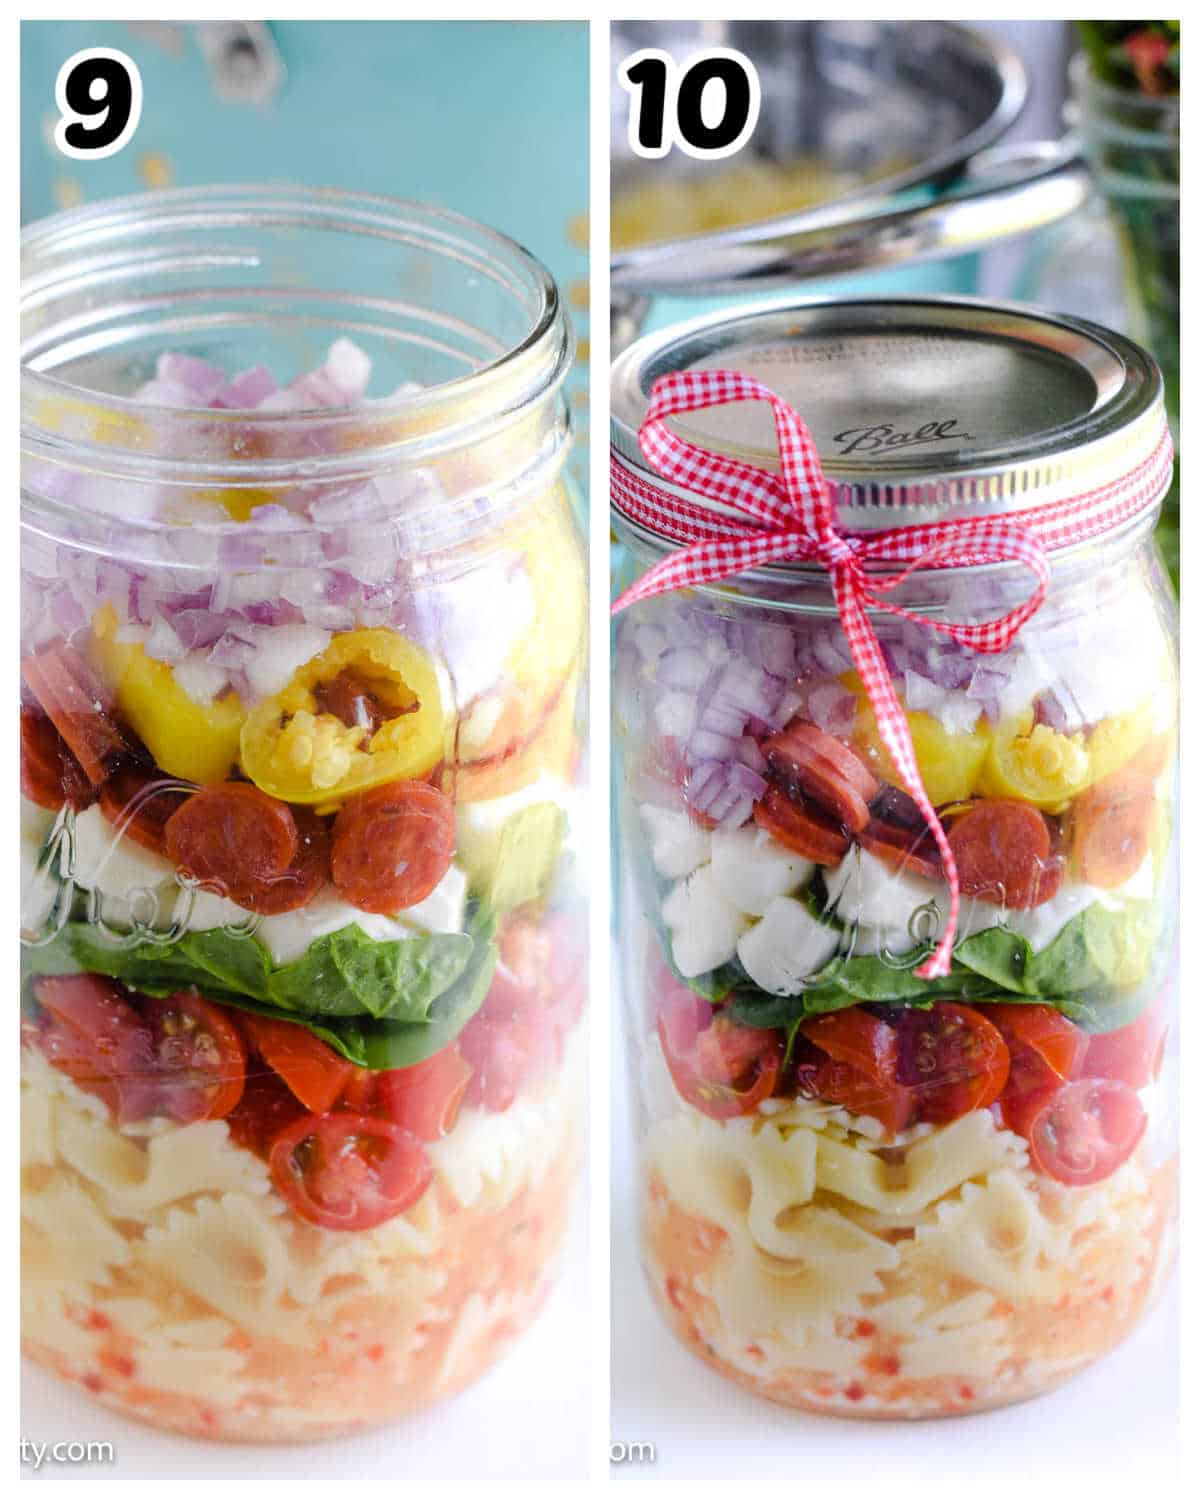
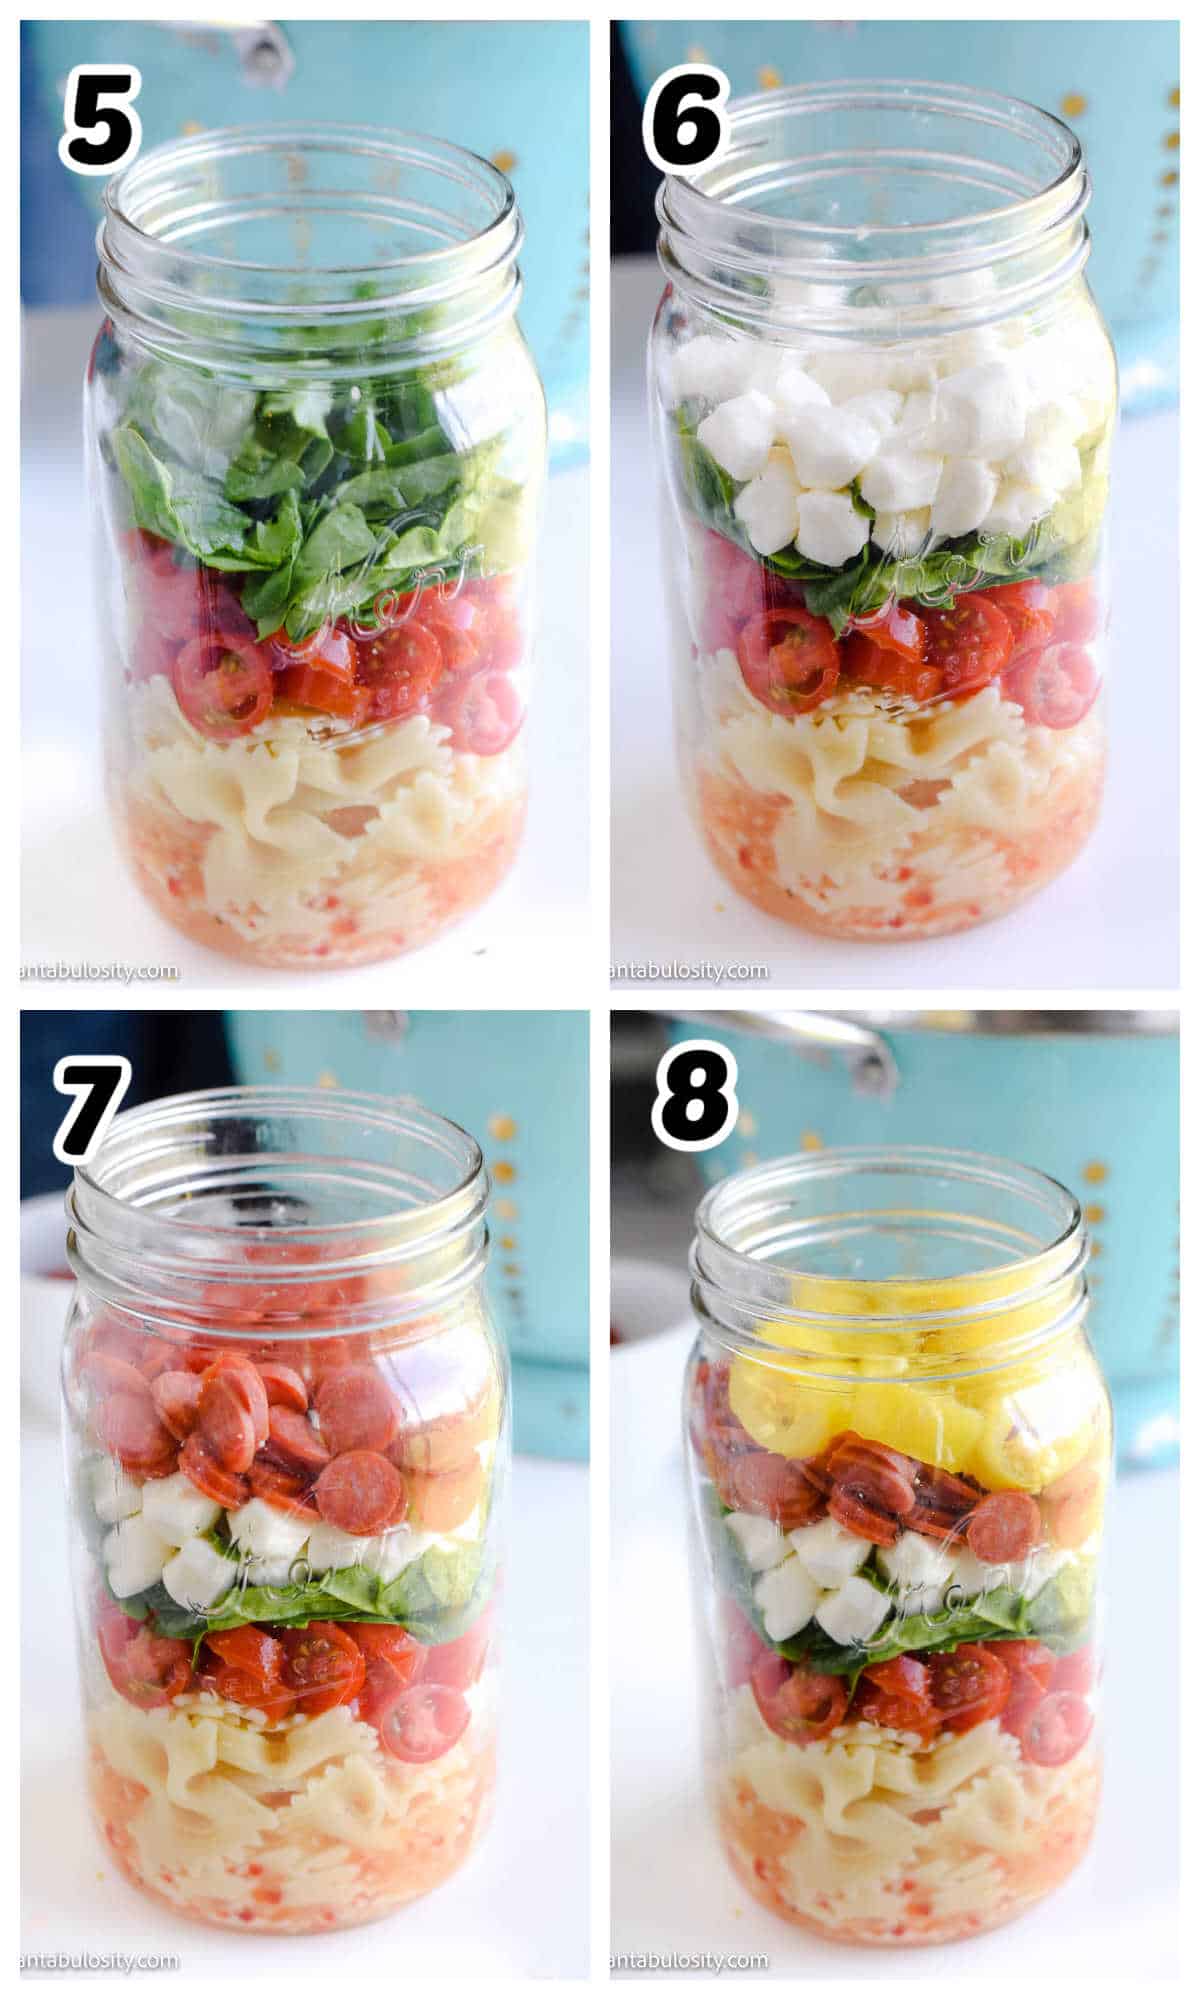
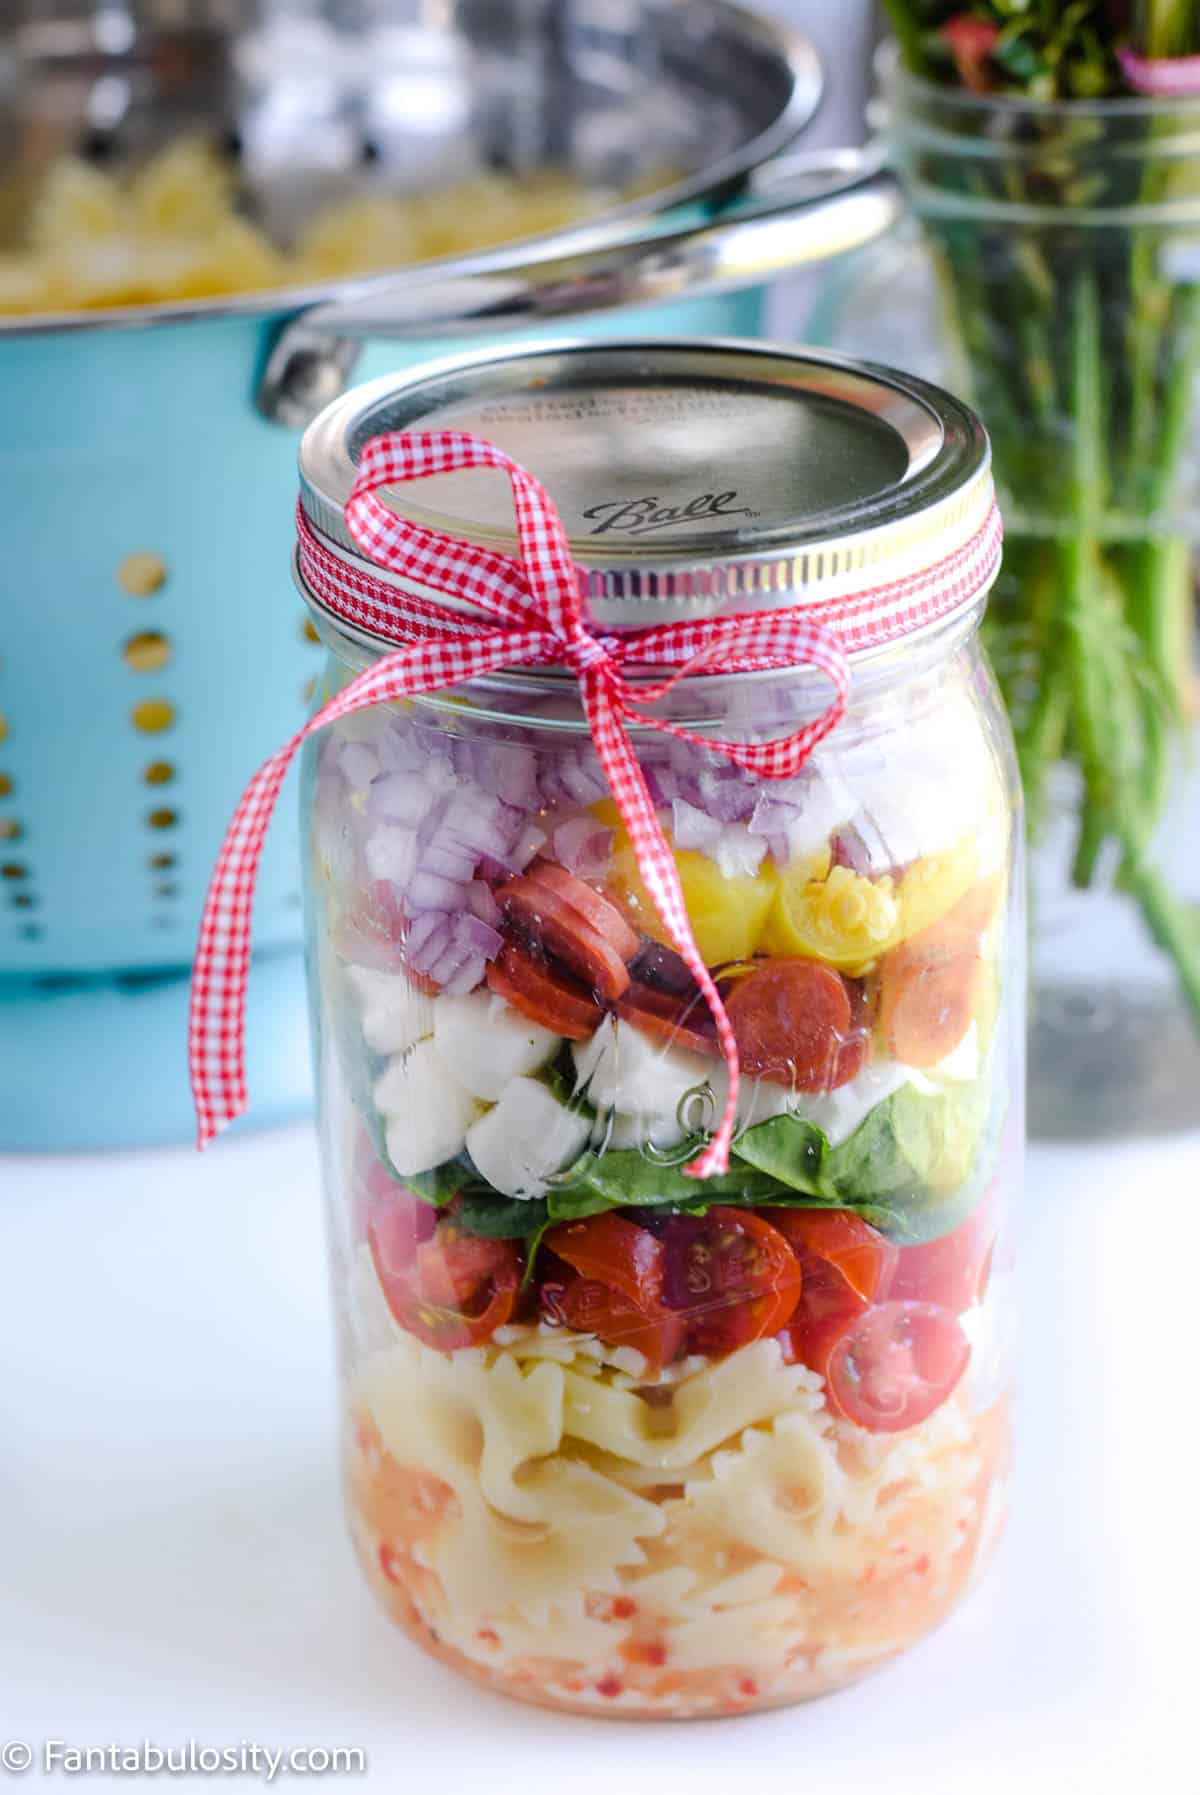
    I couldn’t help but to also show you how I assemble the pasta salad in to a jar, when I’m making it to-go, to deliver to family and friends, or when you need an easy picnic food idea. The presentation of the rainbow layer of colors is my all-time favorite.

    Here’s the step by step layering I do when making this Italian Pasta Salad for a care package!

    Finish off the jar with a cute little ribbon and all they have to do is dump it out in to a bowl, stir and serve to their family!
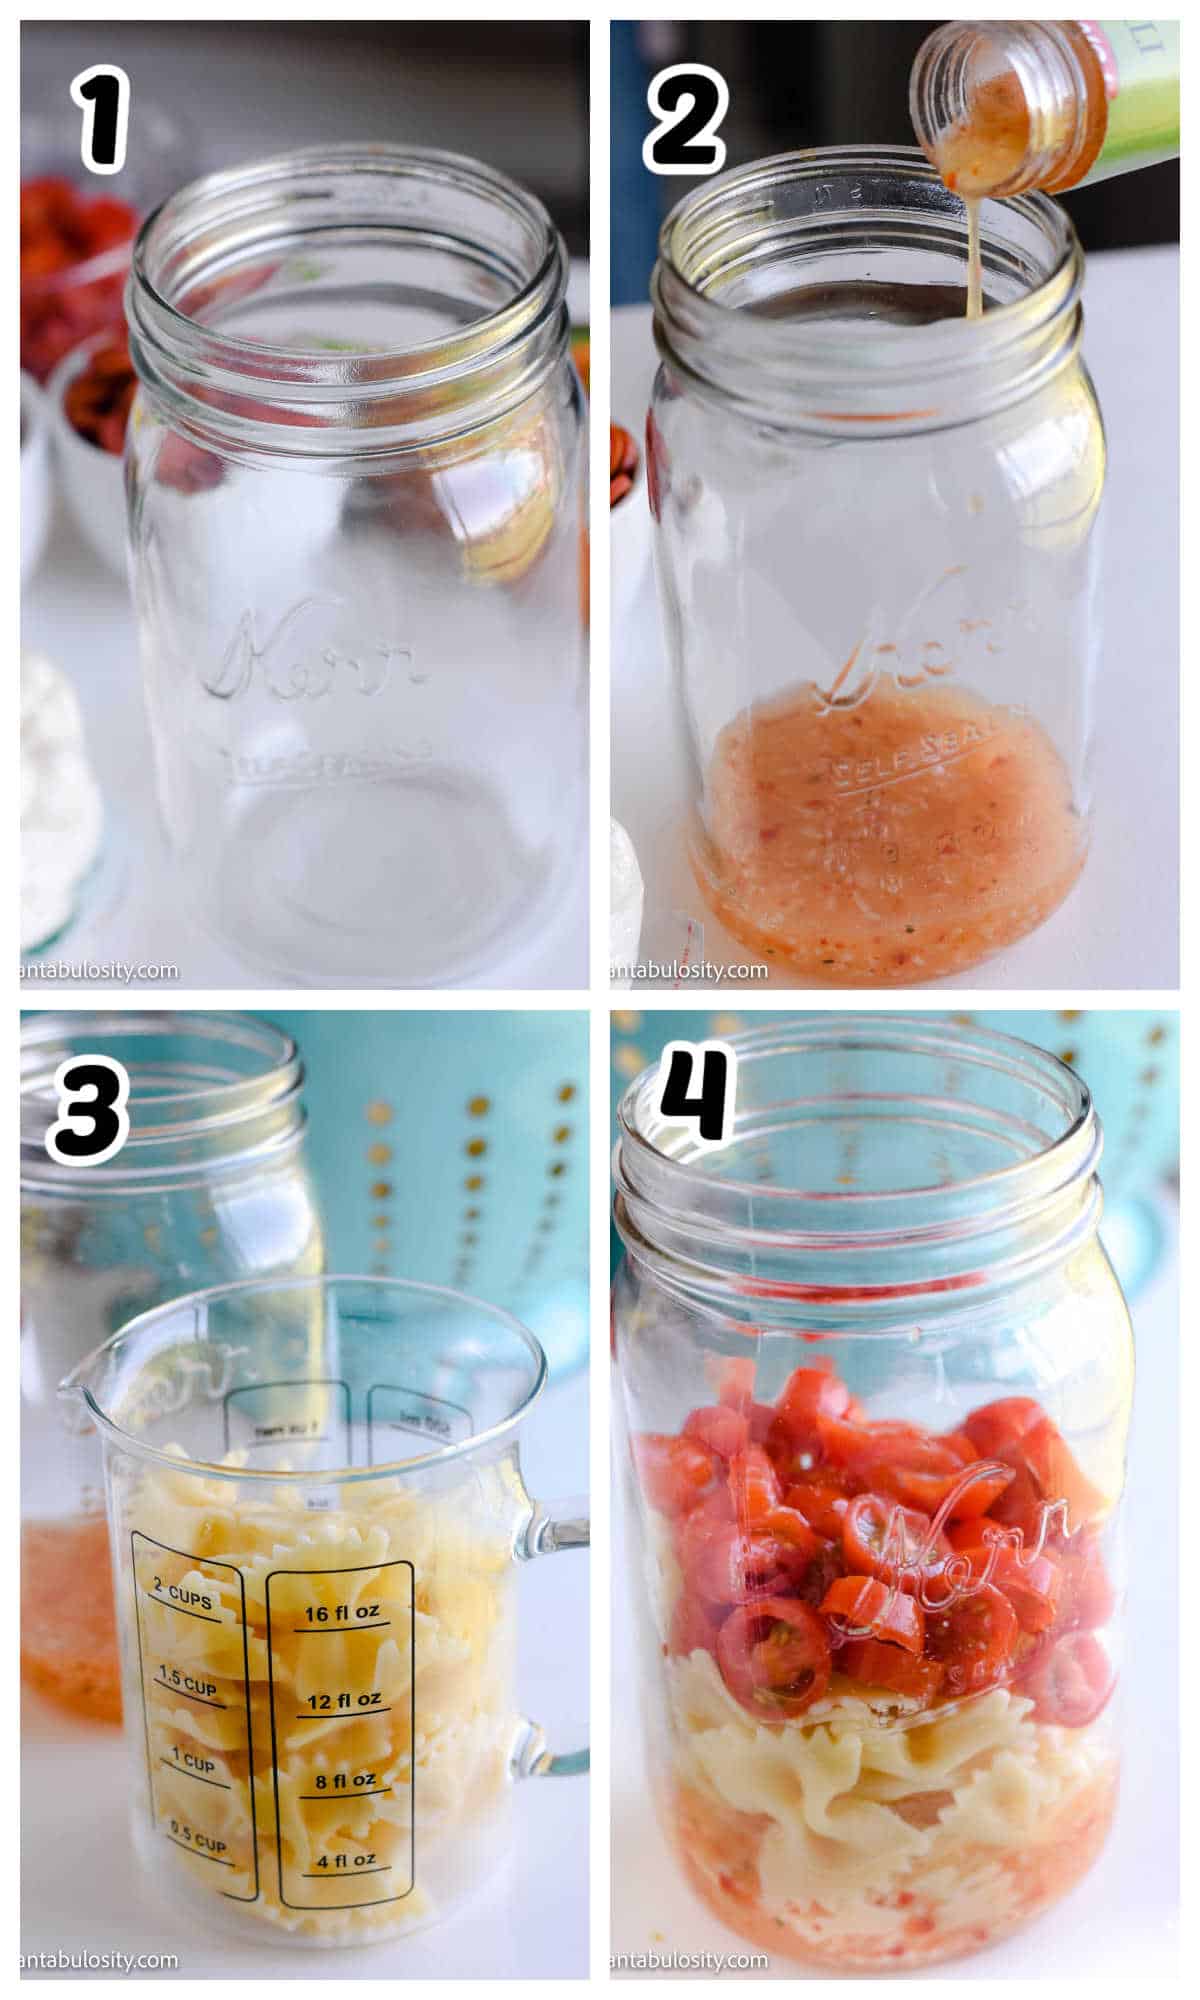
    4 image collage of pasta salad in jar
    Steps 1-4
    4 image collage of zesty italian pasta salad recipe
    Steps 5-8
    2 image collage of pasta salad in mason jar
    9-10

    Love Easy Side Dishes?

    If you love easy side dishes, then you’ll LOVE the others here on the blog. Check out more easy side dishes and pin all of those that you love to your Pinterest board for when you need them!
    Recipe
    ingredients in bowl for zesty Italian pasta salad
    Print Pin
    4.73 from 18 votes

    Zesty Italian Pasta Salad

    Zesty Italian Pasta Salad: This super easy recipe is made using any type of pasta you prefer, a few other simple ingredients, and Zesty Italian dressing!
    Course Side Dish
    Cuisine Italian
    Prep Time 10 minutes minutes
    Cook Time 8 minutes minutes
    Total Time 13 minutes minutes
    Servings 5 servings
    Calories 871kcal
    Author Jessica Burgess

    Ingredients

    • 1 lb bowtie pasta
    • 1 16-ounce bottle zesty Italian dressing
    • 5 ounces cherry tomatoes sliced
    • 1 cup sliced banana peppers
    • 5 ounces mini pepperoni’s
    • 8 ounces of mozzerella pearls
    • 2 cups chopped spinach
    • 1 cup finely diced red onion

    Instructions

    • Cook bowtie pasta according to package directions.
    • Drain pasta and rinse in cold water until pasta is fully cooled.
    • Mix the past together with all of the remaining ingredients.
    • Serve!
    Nutrition

    Serving: 1cup | Calories: 871kcal | Carbohydrates: 86g | Protein: 30g | Fat: 44g | Saturated Fat: 13g | Cholesterol: 65mg | Sodium: 1763mg | Potassium: 635mg | Fiber: 4g | Sugar: 15g | Vitamin A: 1690IU | Vitamin C: 33.3mg | Calcium: 293mg | Iron: 2.8mg

    Beautiful Walk-in Pantry Organization Ideas

    May 31, 2022

    walk in pantry organization ideas

    Walk-in Pantry Organization Ideas: Tips for making a beautiful and organized pantry for easy access to your dry goods and pantry items.

    See links below to all of the items I used to organize this pantry!

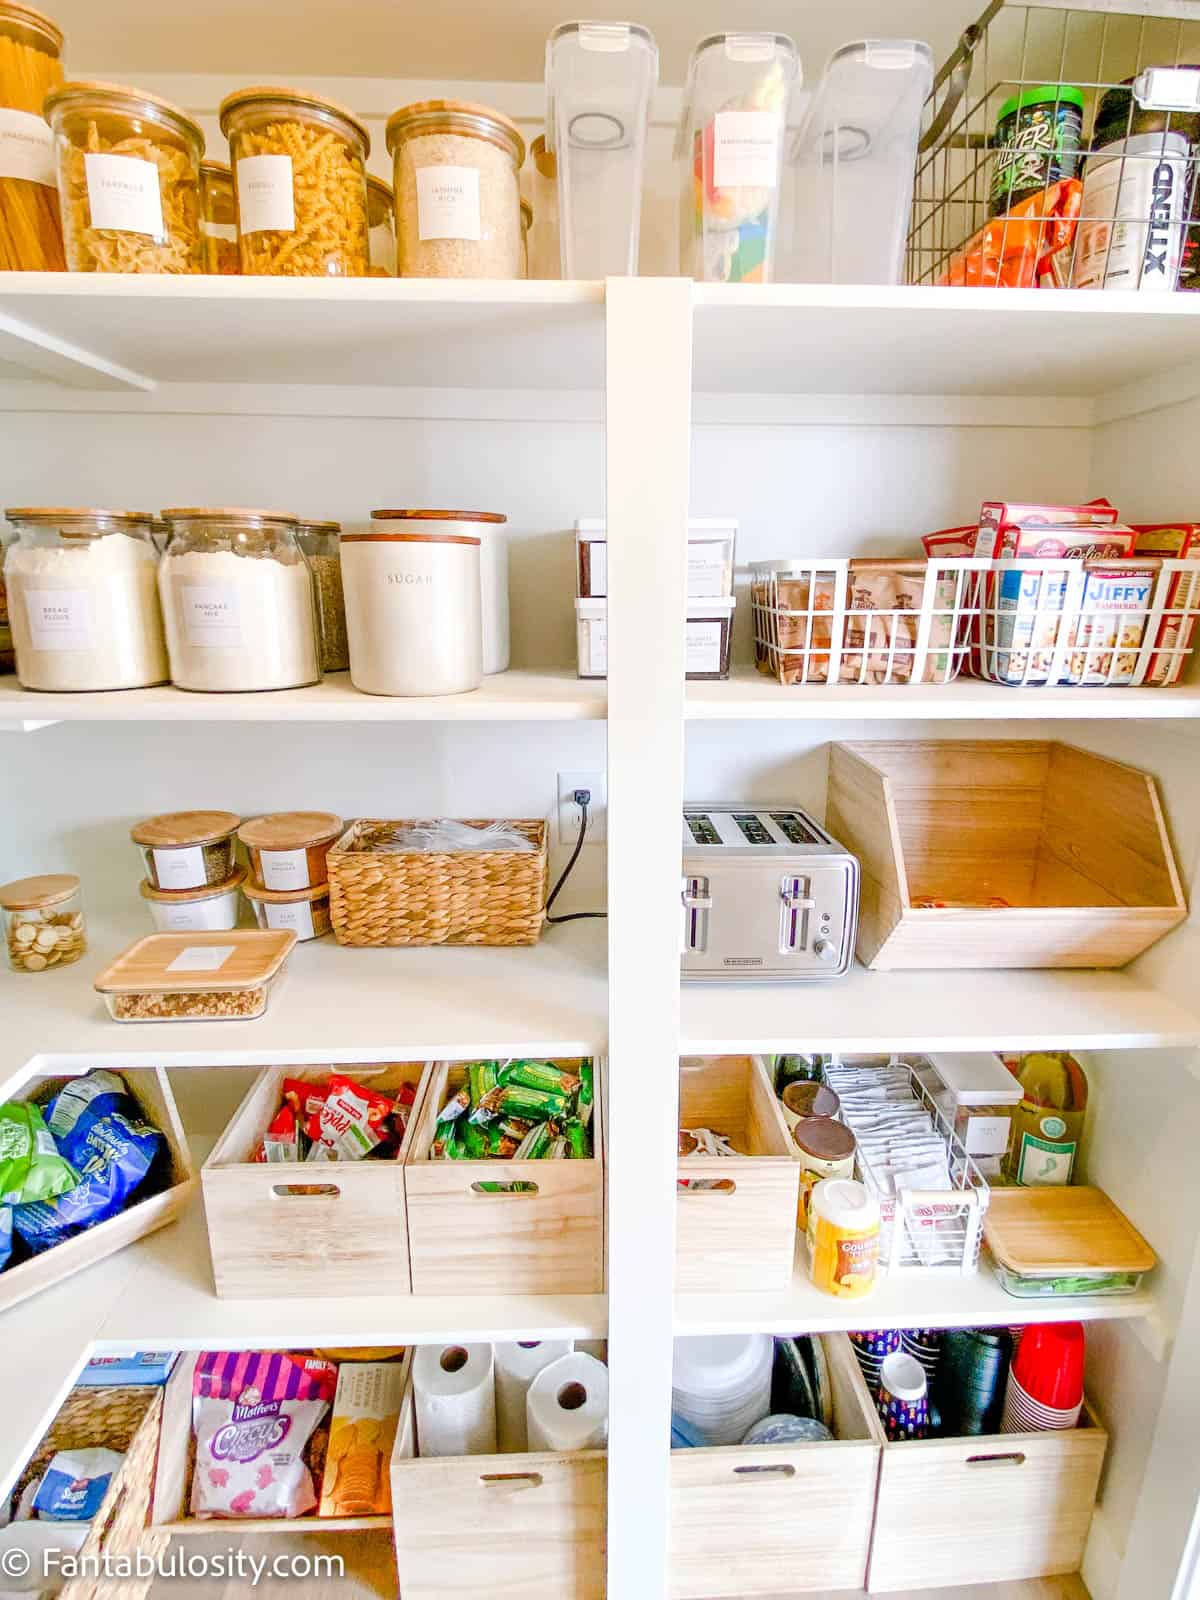
    white pantry shelves with organized items
    Walk-in Pantry Organization Tips

    Keeping the pantry organized in our busy home is a great way to stay on top of meal planning and be able to keep track of the food items that we have on hand, especially when it’s time for a trip to the grocery store!


    When planning out the system for this pantry makeover in our home, I wanted to keep things affordable, yet stylish at the same time. It’s also a very real space in our home, with little kids, so using products like lazy susans, clear containers, and baskets makes these easily accessible, especially with deep shelves, was super important.

    You will also love these other organization ideas!

    [feast_advanced_jump_to]

    What can I use to organize my pantry?

    When it comes to pantry storage, there are specific tips that I have that work for the pantries I’ve organized over the years:

    (See the full “how-to” card below to print and use as a guide for your own pantry organization!)

    • Lazy Susans: These can be really helpful for reaching items in the back of the shelf, especially with deep shelving.
    • Clear Containers: Using these or clear bins for certain products is a great idea, so you can see in without having to open or pull out the container.
    • Glass Jars: They provide such a classy look and also allow you to see in!
    • Labels: I used pre-printed labels for most of the products and I absolutely love this set! You can also use a label maker or chalkboard labels!
    • Spice Racks: Placing spices, canned goods, and other small jars/bottle-type items are KEY for deep shelves. This way items aren’t hidden and you can utilize height!
    • Baskets and Crates: You can use various sizes and types but they work fantastic for keeping similar items all in one place!
    • Can Risers: Sometimes you can use the same riser for canned goods and spices! Just be sure to check your measurements, and make sure the spice rack is big enough to hold a large canned good.
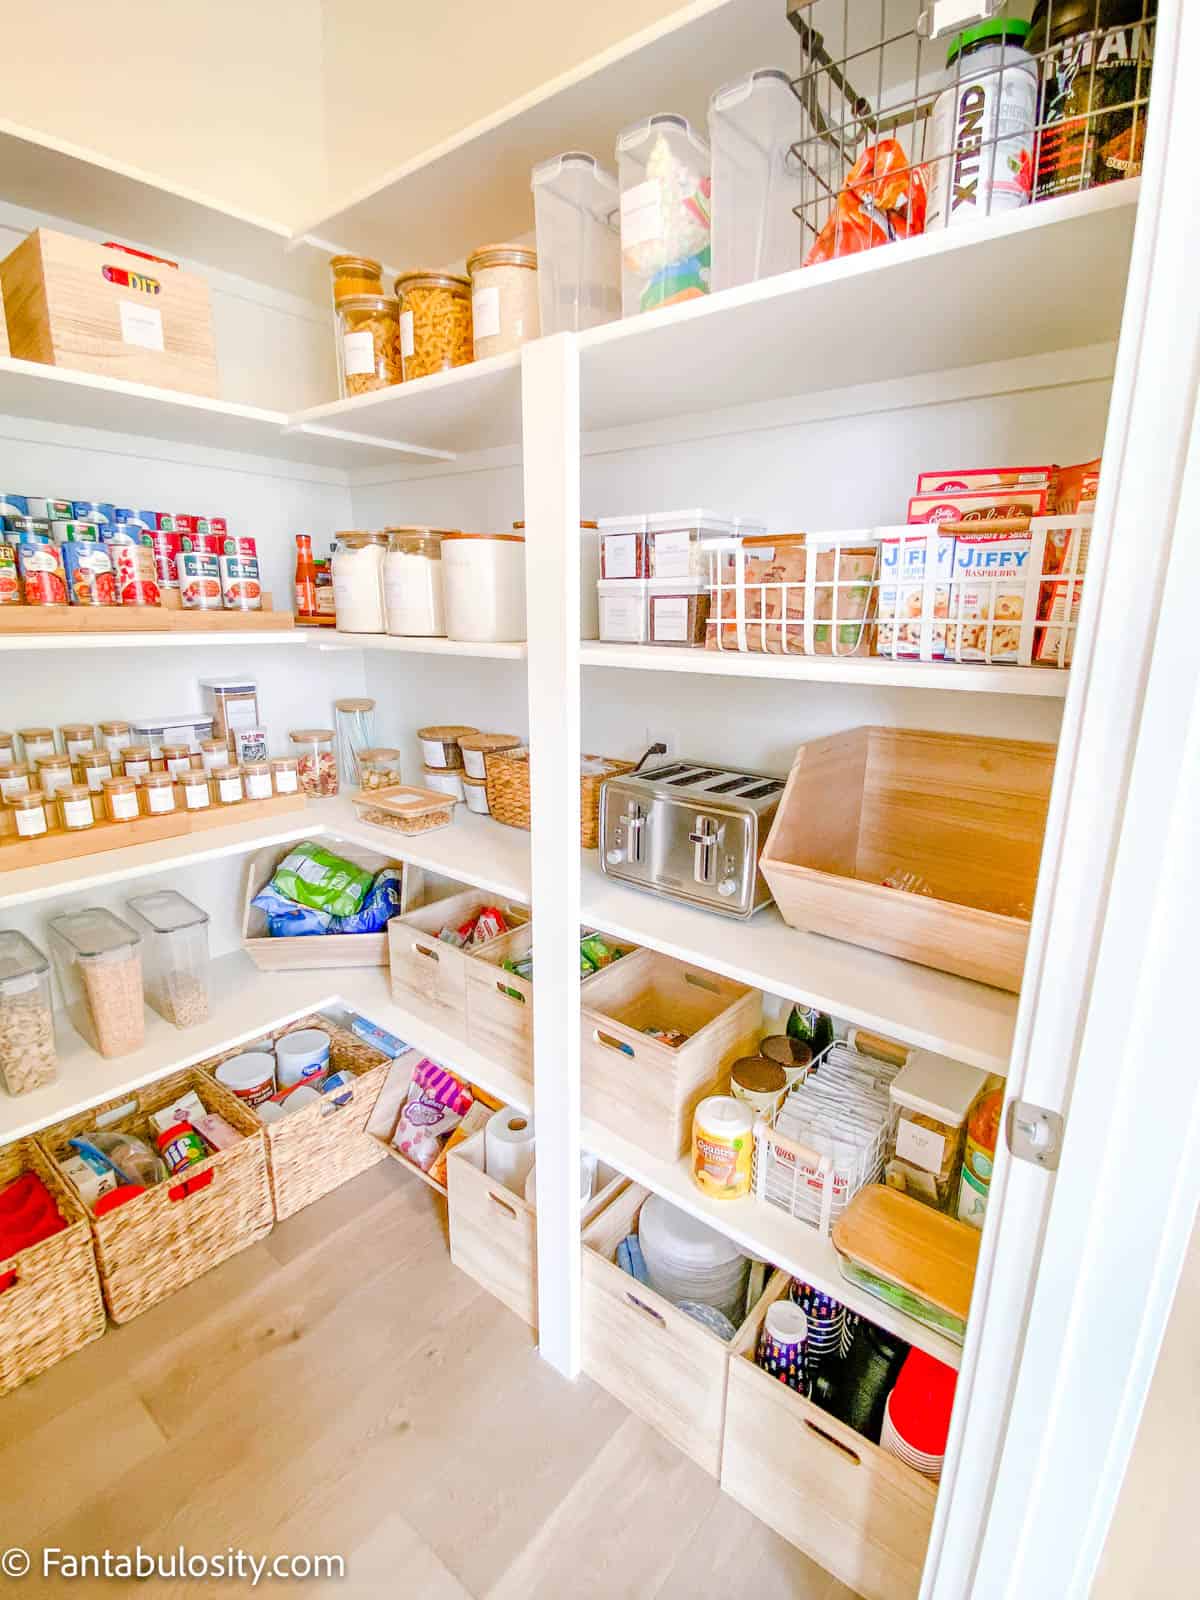
    Wide angle view of white pantry organization
    Walk In Pantry Ideas

    Walk-in Pantry Shelving

    Since we have a white pantry, the walk-in pantry shelving is made of wooden shelves that are painted white wood, on white walls. We’ve had wire shelves in the past but wire shelving allows items to fall through and smaller items may have a hard time balancing on the wires.

    So if you’re building or doing a pantry makeover, I highly recommend using wooden shelves if possible. (Although if you have wire shelves, the baskets and crates come in even handier.) You can also use a shelf liner though if you have struggled with items falling through the wire shelving.

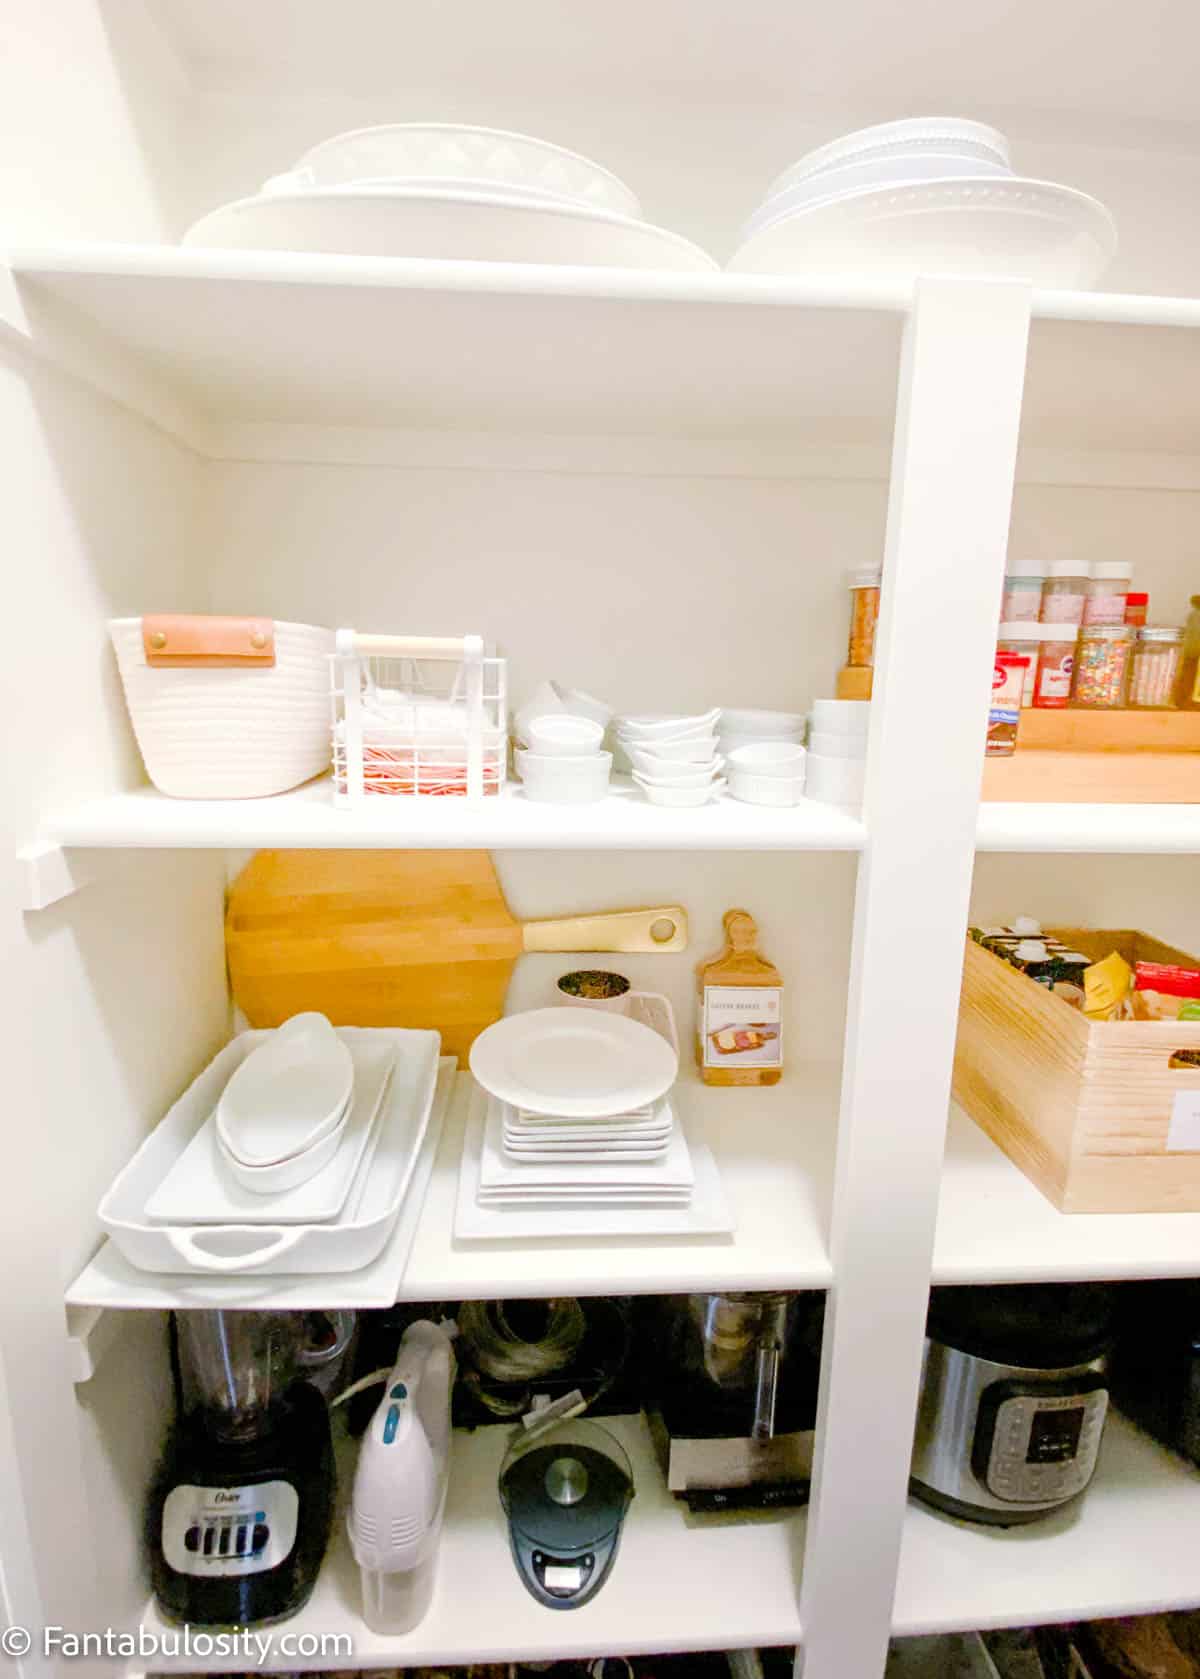
    small appliances and white plates in pantry
    Small appliances & Dishes

    Deep Pantry Organization

    How do you organize a walk in pantry with deep shelves?

    The items I used for this walk-in pantry work lovely for deep shelves. The baskets and crates can pull out, so you can not only reach items in the back easily but so you can carry them to your kitchen if you’re baking and cooking something and want to use a few things at the same time!

    I also make sure to only put larger containers towards the back, make sure they’re full of items that I don’t have to use often, and that they’re not super heavy. (I don’t want to have to pull out a really heavy item from far back.)

    Organized pantry shelves
    Organized Pantry Shelving

    Dry Foods and Goods

    Mostly everything, when it comes to food in a pantry, is considered “dry foods” but depending on the dry good, and how it’s packaged, varies on how to store and organize it.

    Expert Tip:

    If you purchase dry goods that come in small, individual packages, such as:

    • hot chocolate
    • oatmeal
    • granola bars

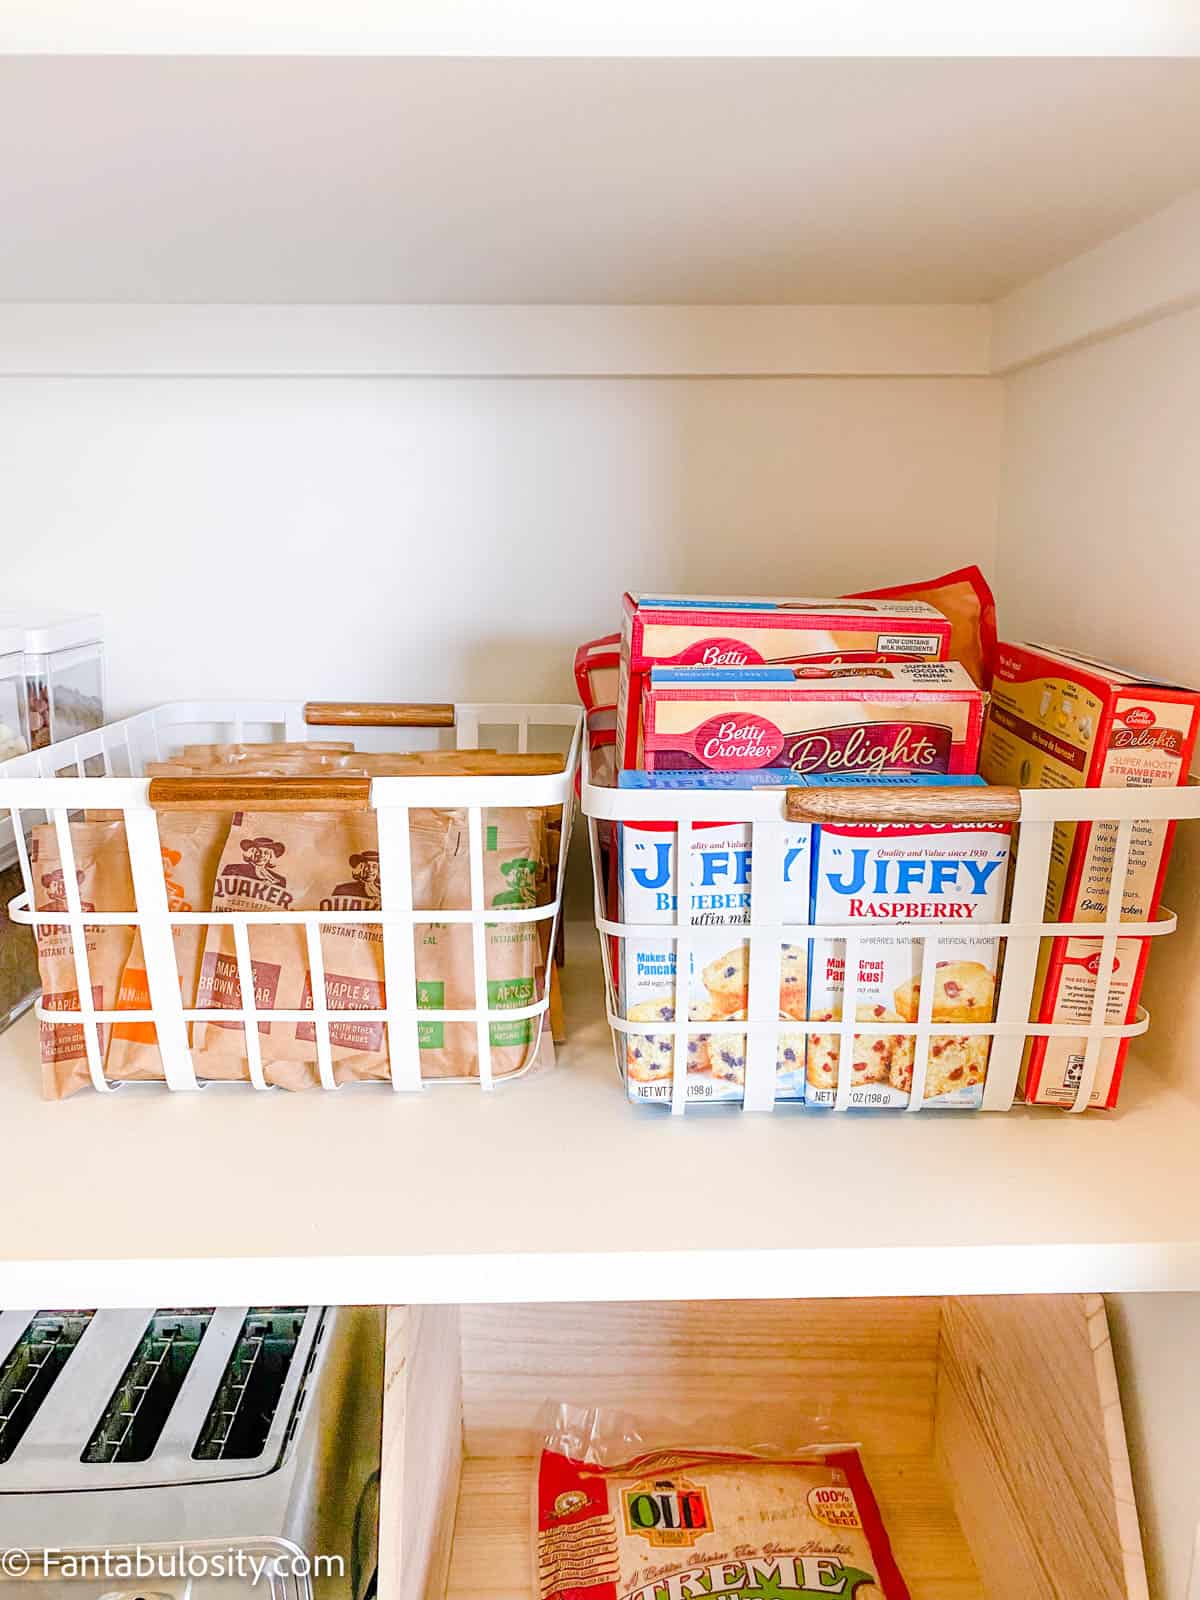
    Those look best, unboxed and stored in their own basket or crate. (As long as the individual item is labeled. If not labeled, (such as cake mixes) I leave those in the box, if you can’t see what the item is. If it’s something such as “saltines” you can leave those in the box, or store the sleeves. Whatever you prefer!)

    Packaged mixes in white baskets
    Packaged & Boxed Goods

    What you see in the photo above:

    • Bread Box (bottom right) – this has tortillas in it currently because I simply needed to make a trip to the grocery store!
    • White Baskets – These are PERFECT for small packaged items such as oatmeal, cake mixes, etc. You can see through the baskets to see what’s inside of them but they hold items really well!
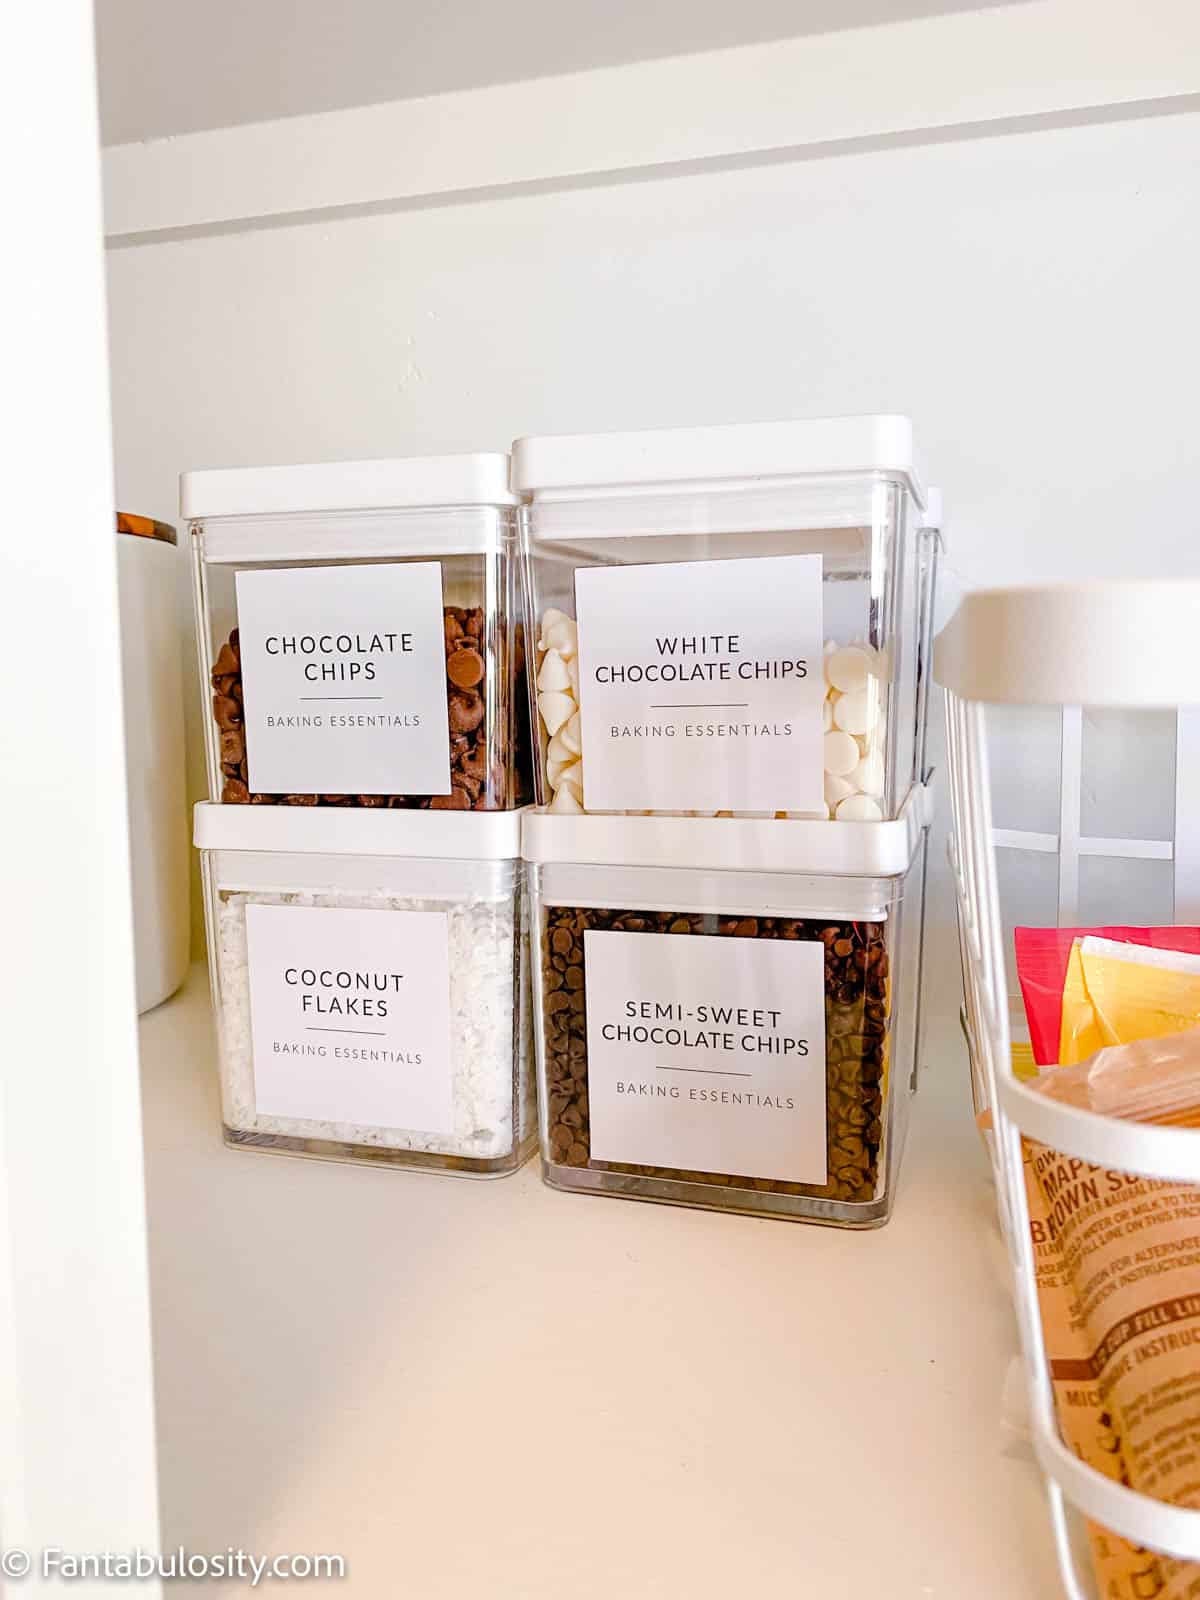
    small clear containers with labels
    Clear containers

    What you see in the photo above:

    • Small clear containers with white lids: These are smaller but hold items such as chocolate chips, dried fruit, candy, and nuts, PERFECTLY!
    • Labels: This is an amazing set of sticker labels for just about anything you’d store in your pantry!
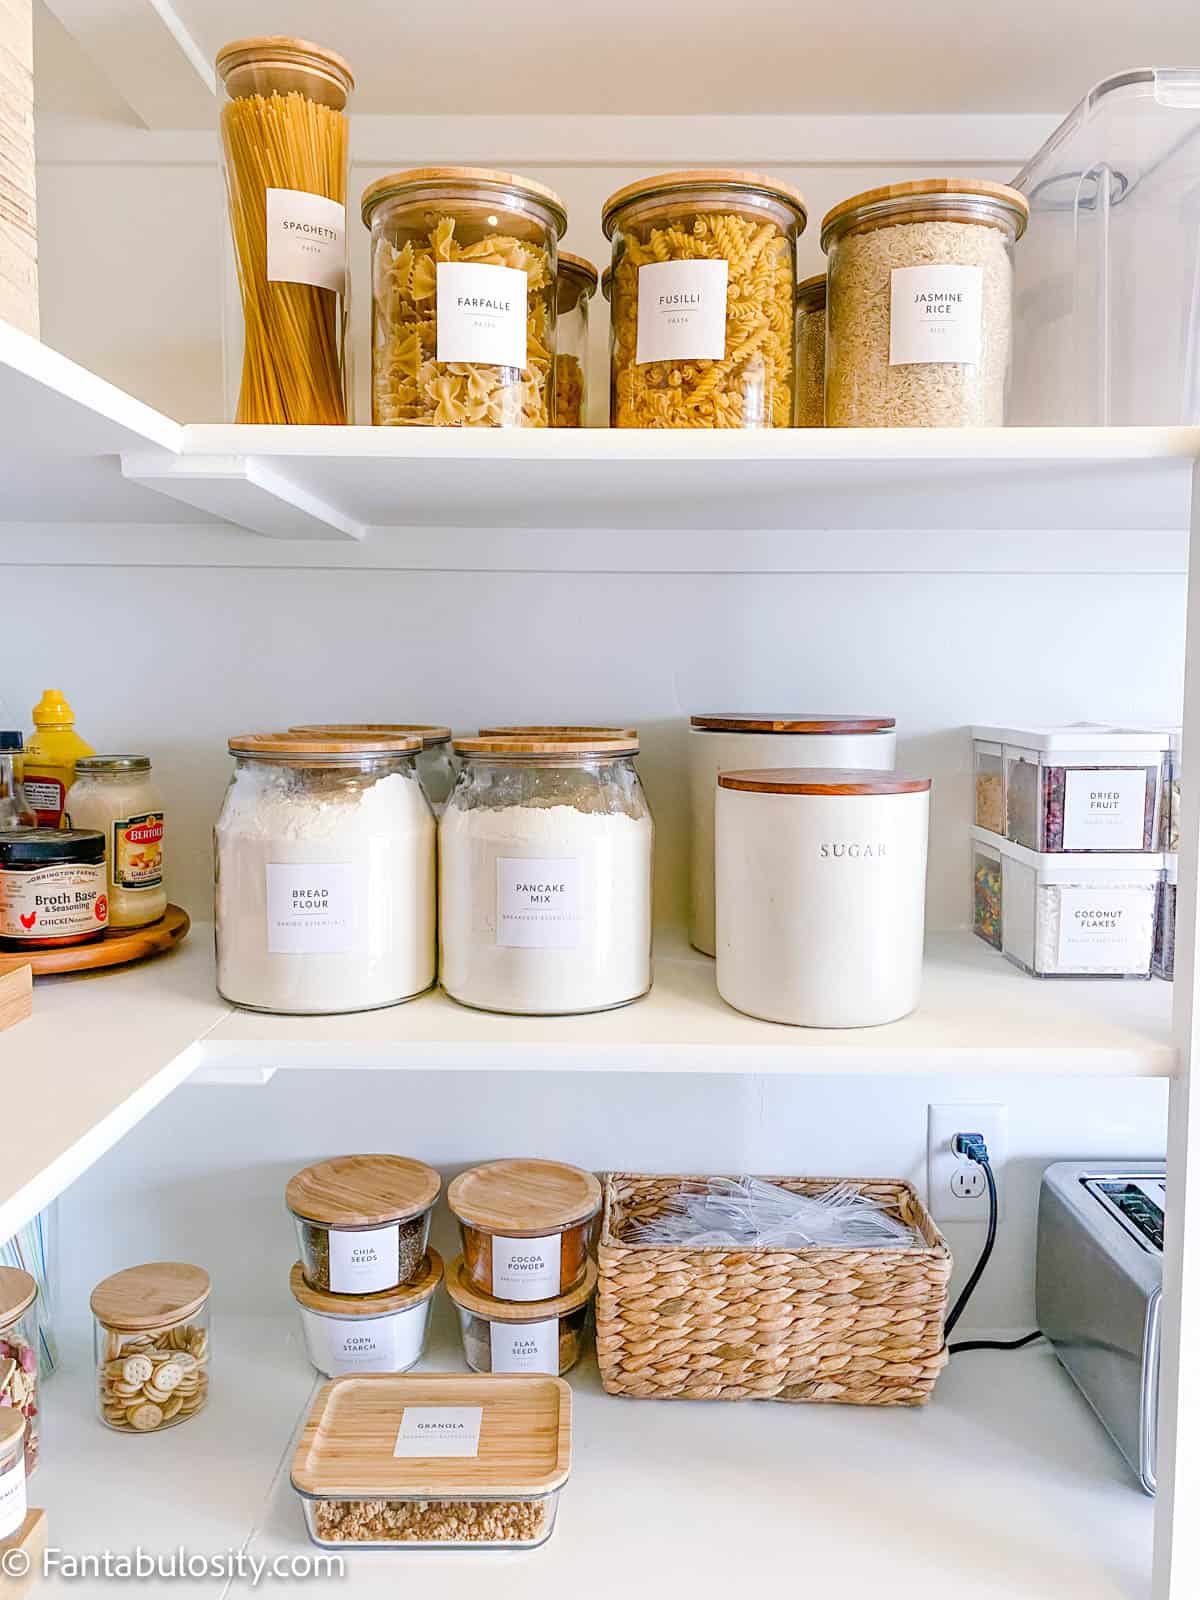
    Flour and pasta organization ideas
    Flour, Sugar and Pasta

    What you see in the photo above:

    • Jars with Wooden Lids: I found mine at Ikea and Amazon. The spaghetti and small jars with animal and mini Ritz crackers can be found on Amazon. The larger glass jars (pancake mix and bread flour canisters) were found at Ikea but similar can be found here!
    • Flour and Sugar Canisters: I found the flour canister and the sugar canister at Target!
    • Smaller glass bowls with wooden lids: the smaller bowls (that are holding the cocoa powder, chia seeds, corn starch, and flax seeds) were from Ikea but similar can be found here! (They’re 22 oz. and the glass canisters I used are 20 oz.)
    • Basket for plastic wear: I LOVE putting our disposable forks, spoons, and knives in this basket! It makes them so accessible and looks better than the boxes/bags that they come in!

    Snacks and Paper Goods

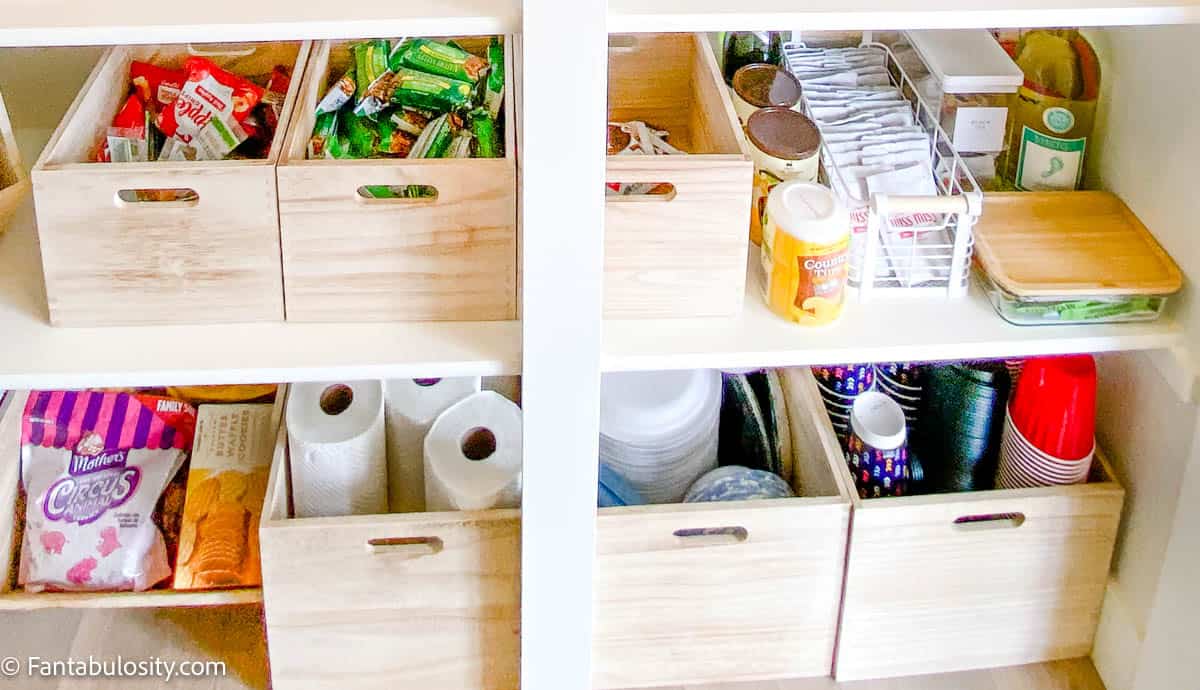
    Wooden Crates on Shelves
    Wood Crates

    In the photo above:

    • Large Wooden Crates (On the bottom): I used the large crates to store paper goods such as paper towels, paper plates/bowls, and solo and coffee cups.
    • Open Crate (Bottom Left): I used the same crate here as I did for the “bread box” above, to store cookies in!
    • Small Wooden Crates (Top left): These are the perfect size to hold snack bars, fruit snacks, and more! Something to keep in mind when organizing snacks in a pantry is that keeping HEALTHY snacks on a low shelf, with easy access, can come in handy so the kids aren’t always asking for a snack.
    • Small wire basket (top right): This basket holds hot chocolate mixes wonderfully! I made sure to keep this in a “drink” section of the pantry.
    • Clear, tall container with white lid: This is a taller version of the clear containers I used above for baking chips and dried fruit. I stored tea bags in this container.
    • Small glass rectangular container with wood lid: Sometimes we have drink mix packets (Liquid Iv’s powdered mix, etc.) that we store in here. I found this at Ikea but you can find a similar set of them, here!
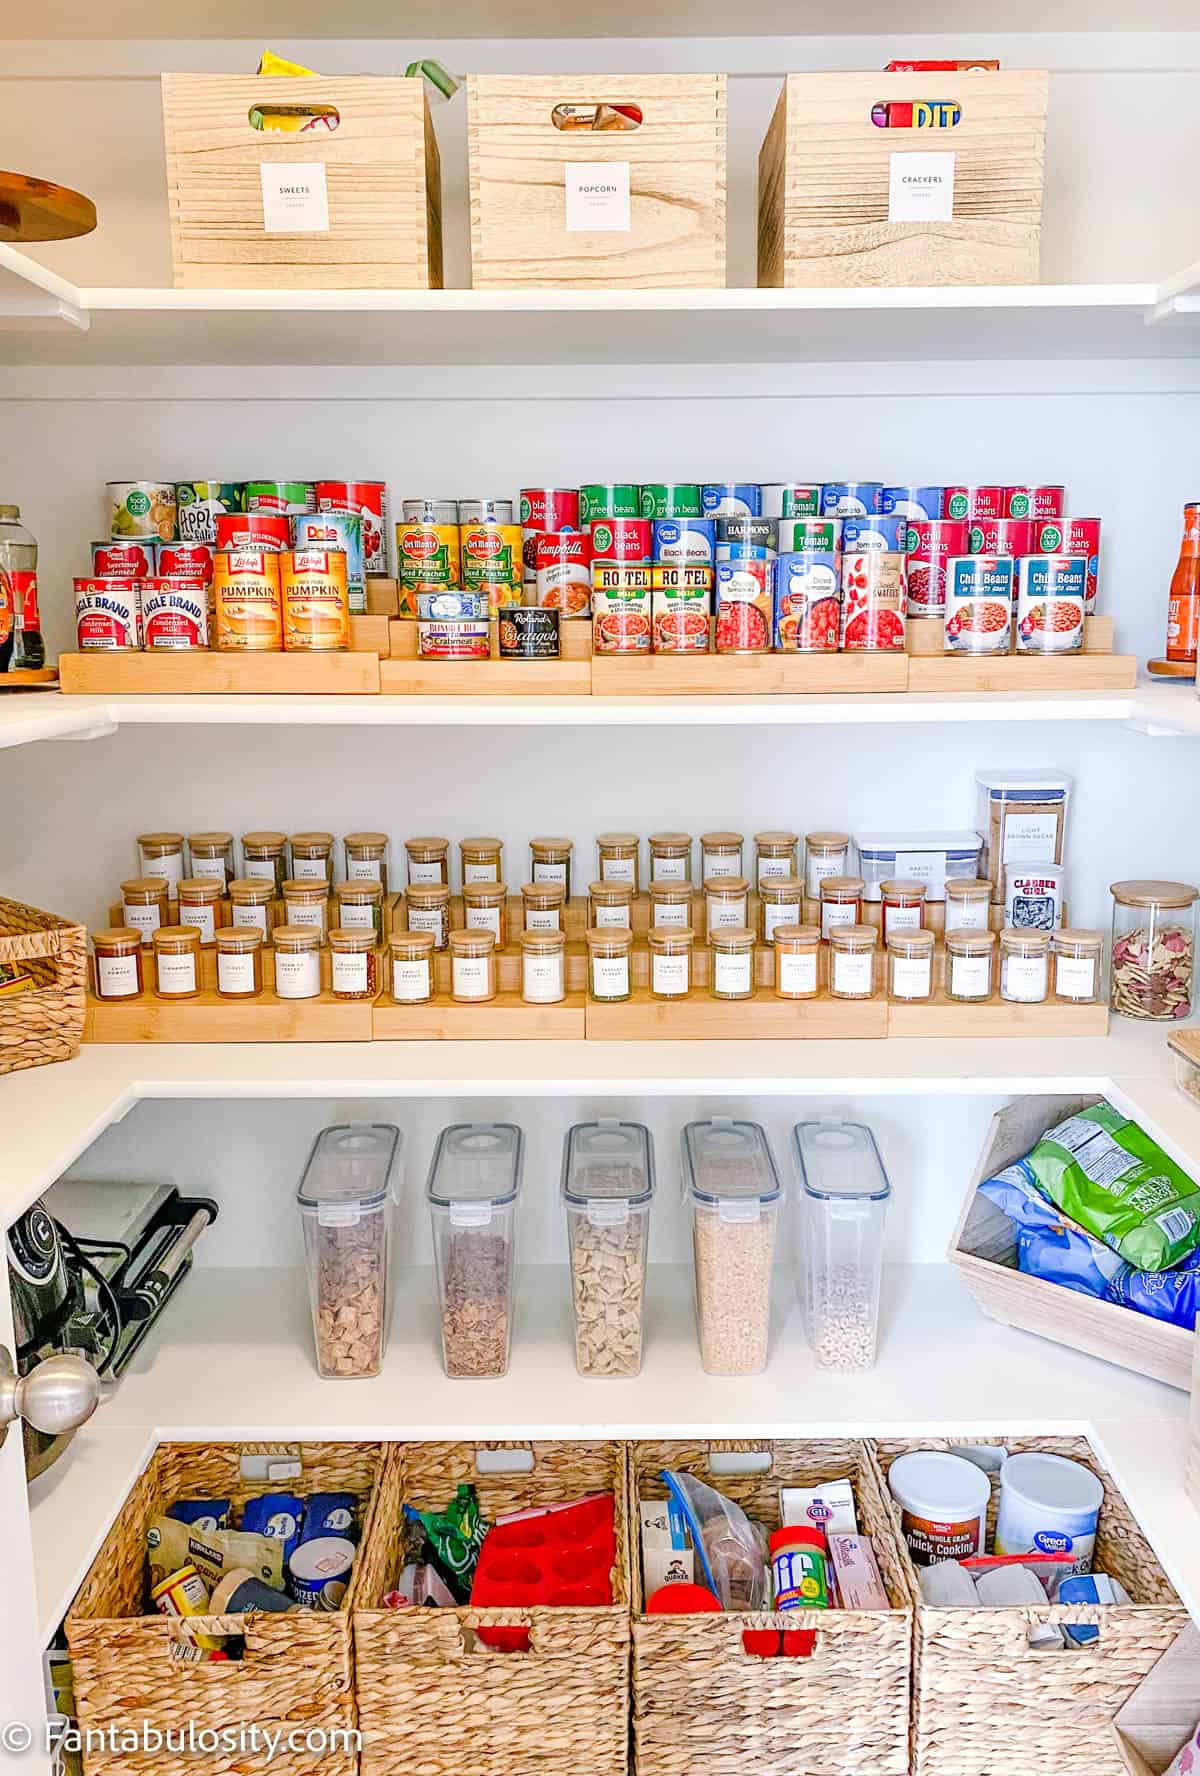
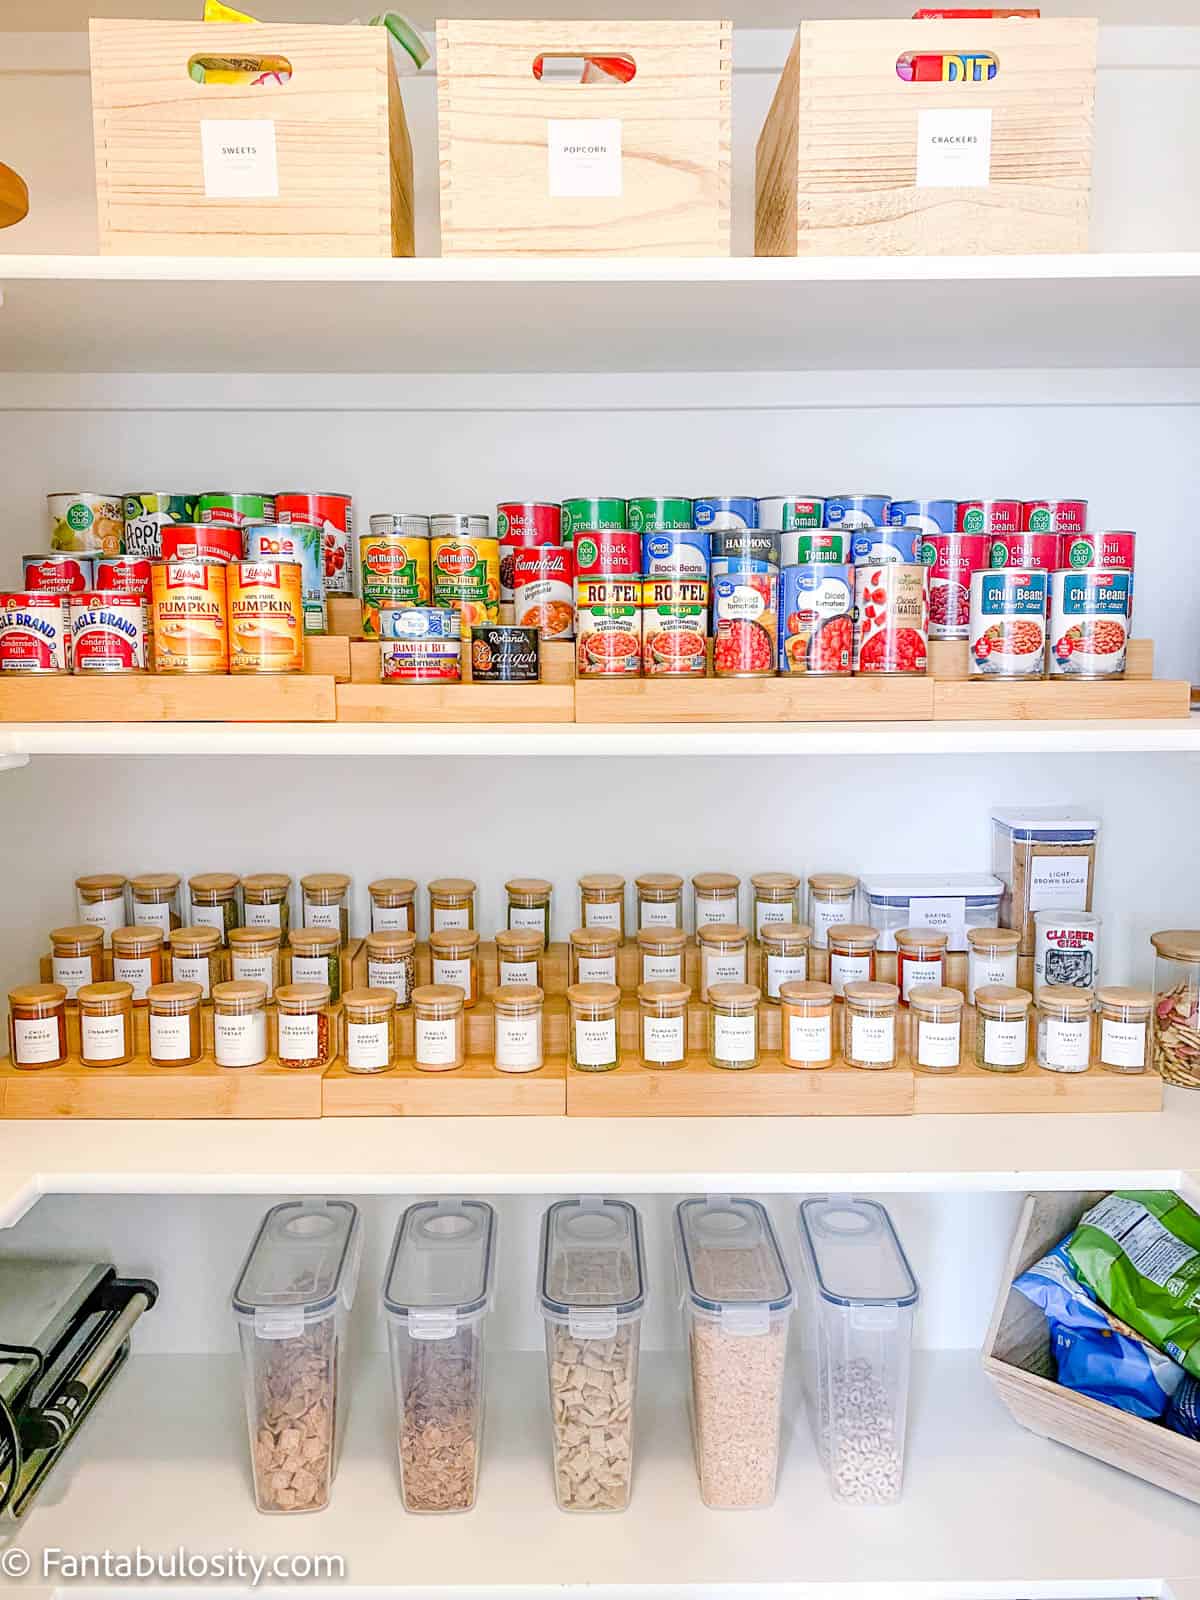
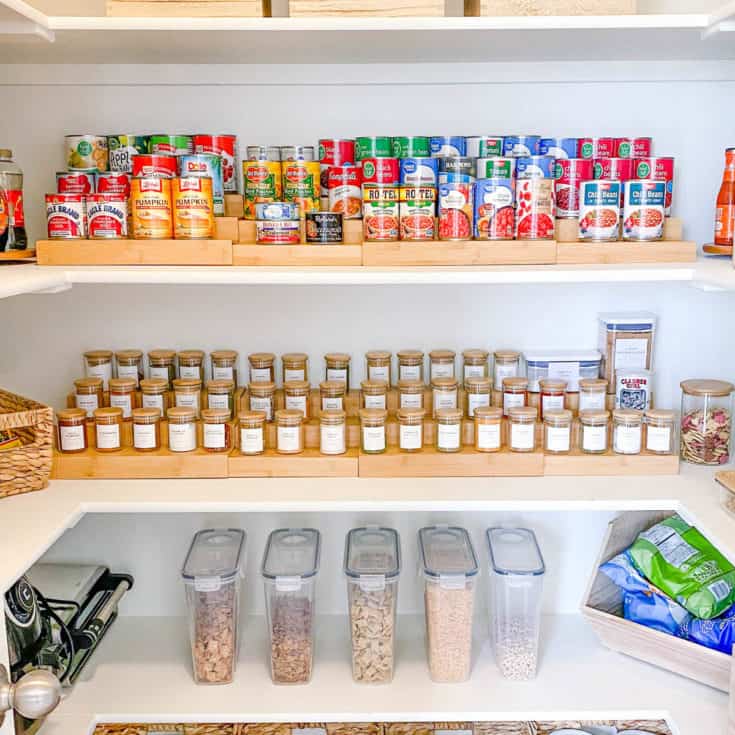
    Pantry shelves with organized canned goods and spices
    Spices and Canned Goods

    Spices, Canned Goods, and Cereal

    • Large Wooden Crates (on the top shelf): I use these to store items that we don’t need very often and that need to stay in their boxes/bags. (Such as candy, popcorn kernels, popcorn fixings, saltines, etc.) I chose solid crates for these items so you can’t see in.
      There really isn’t a need to see inside them, since we don’t use the items very often, and they usually look messy inside
    • Wooden Can and Spice Jar Risers: I absolutely LOVE these. They do make wire risers (a lot like pantry wire shelving) but I loved the wood look, so they’d match the crates and baskets.
    • Spice Jars and Labels: Use code: FANTAB10 to get 10% off your own! The second I saw these, I knew I had to have them. Not only are they beautiful but I loved buying them from the place that I did because they create custom labels for you! (Sometimes when you buy a set, you only get so many labels and they may not have a specific spice that you need!) If you need help deciding which spices to put in your pantry, you’ll love where I share the top 20 spices to have in your kitchen!
    • Baking Soda Container: I love OXO products but wasn’t too fond of the prices so I limited what items I used. I like to keep my baking soda and brown sugar (see next) fresh as can be so I was willing to spend a bit more for these.
    • Brown Sugar Container: Like the baking soda above, brown sugar is something I wanted to keep fresh with an air-tight seal. I also use this brown sugar keeper to keep things fresh!
    • Cereal Containers: These are AMAZING! They not only look so much nicer than cereal boxes but the seals on these are tight and keep our cereal fresh. (I bought extras because sometimes we have more cereal than some and I also use them to store marshmallows!)
    • Chip Crate (Bottom right corner): Same as the bread box used above, this is a crate that’s shaped in a way that it can hold items that won’t roll out but that’s open in the front so it’s easy to reach in and grab what you need! (We put this on a low shelf because our kiddos like chips!)
    • Large Baskets (not pictured in this photo but they are visible in the first image in this article): I needed something to store overflow products in. Meaning, if I have a little flour leftover, or an extra jar of peanut butter, I store them in the “overflow” bins.
      TIP: These really help keep clutter down on the shelves, and I always know to check the basket when I run out of the item on the shelves. When I pull the extra out of the basket, I know to add it to my grocery list.
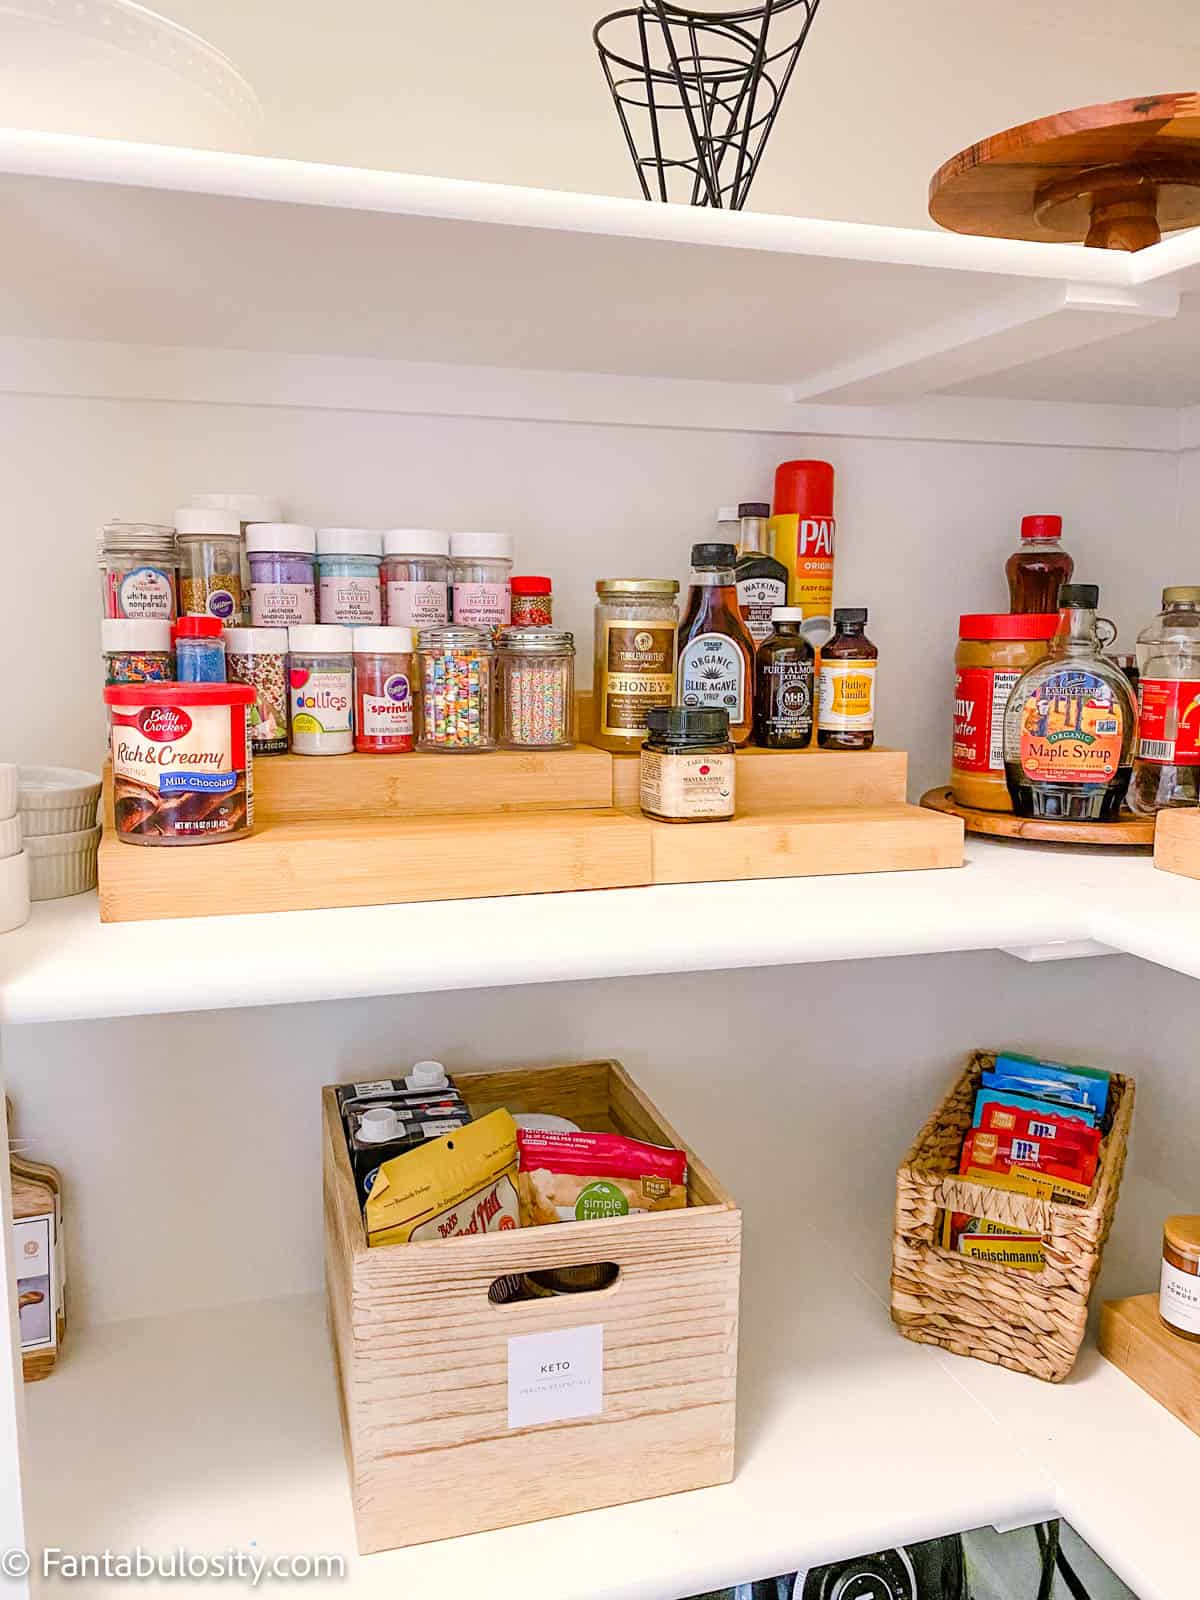
    Sprinkles and spice mixes on shelves
    Baking goods & spices mixes

    What you see in the photo above:

    • Lazy Susan: I have two of these, one in each corner on the same shelf. On one lazy susan I stored condiments such as BBQ sauce, dressing, etc. On the other (in the photo above) I stored sweet condiments such as peanut butter and syrup.
    • Wood Riser: Just like I used for canned goods and spices, this riser comes in handy for items such sprinkles, honey, canned frosting.
    • Small Crate: Same as above, for the snacks, we use the small crate to hold our keto supplies.
    • Woven Rectangular Basket: I used this same basket above for the plastic utensils. In this space, I used it to hold sauce and seasoning packets.
    Baskets of oil and produce
    Oil and produce

    Oil and Produce

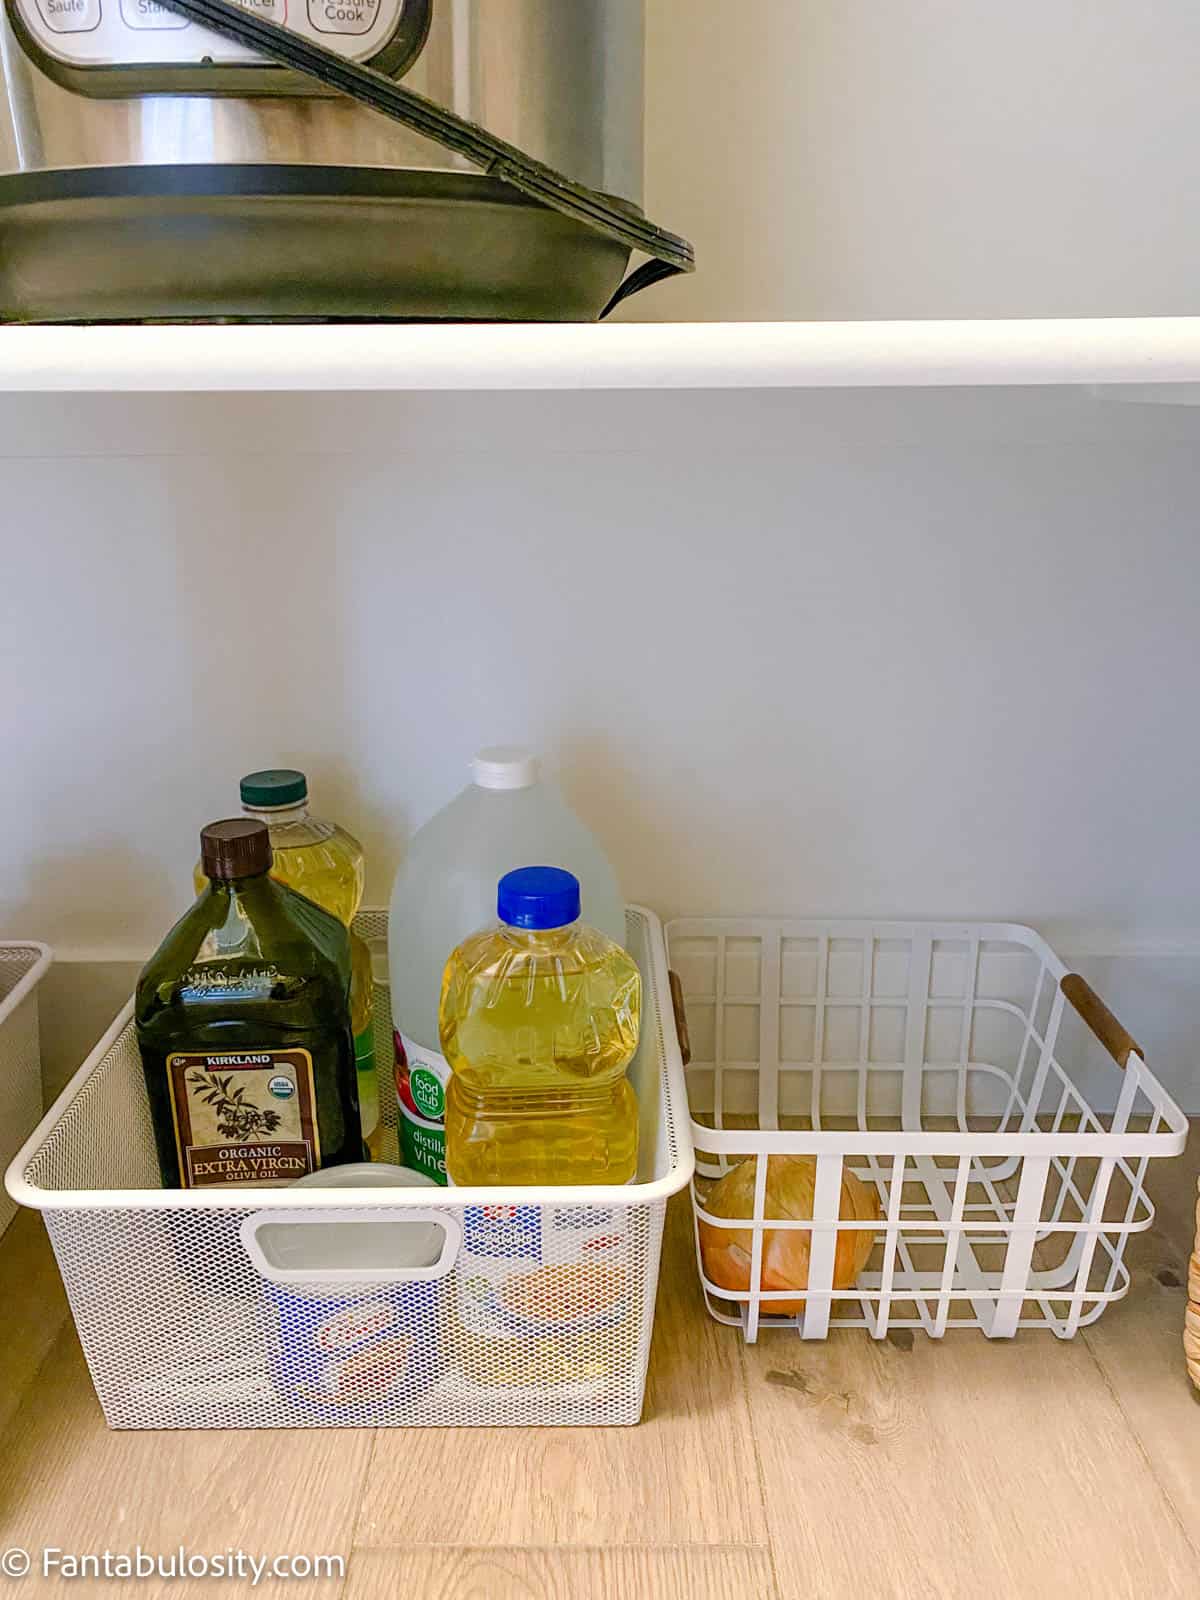
    On the floor, underneath my small appliances, I like to keep oils and produce on the bottom so it’s cool and dark.

    • White Mesh Basket: This is what I use to store my vegetable oil, large jugs of olive oil, etc.
    • White Metal Basket: When I have potatoes, I usually store them in the basket you see but all I had was one lonely onion when I took this photo. This basket works great for produce that needs to stay in a dark, cool area.

    Dishes and Cookware

    white dishes on shelves
    White dishes

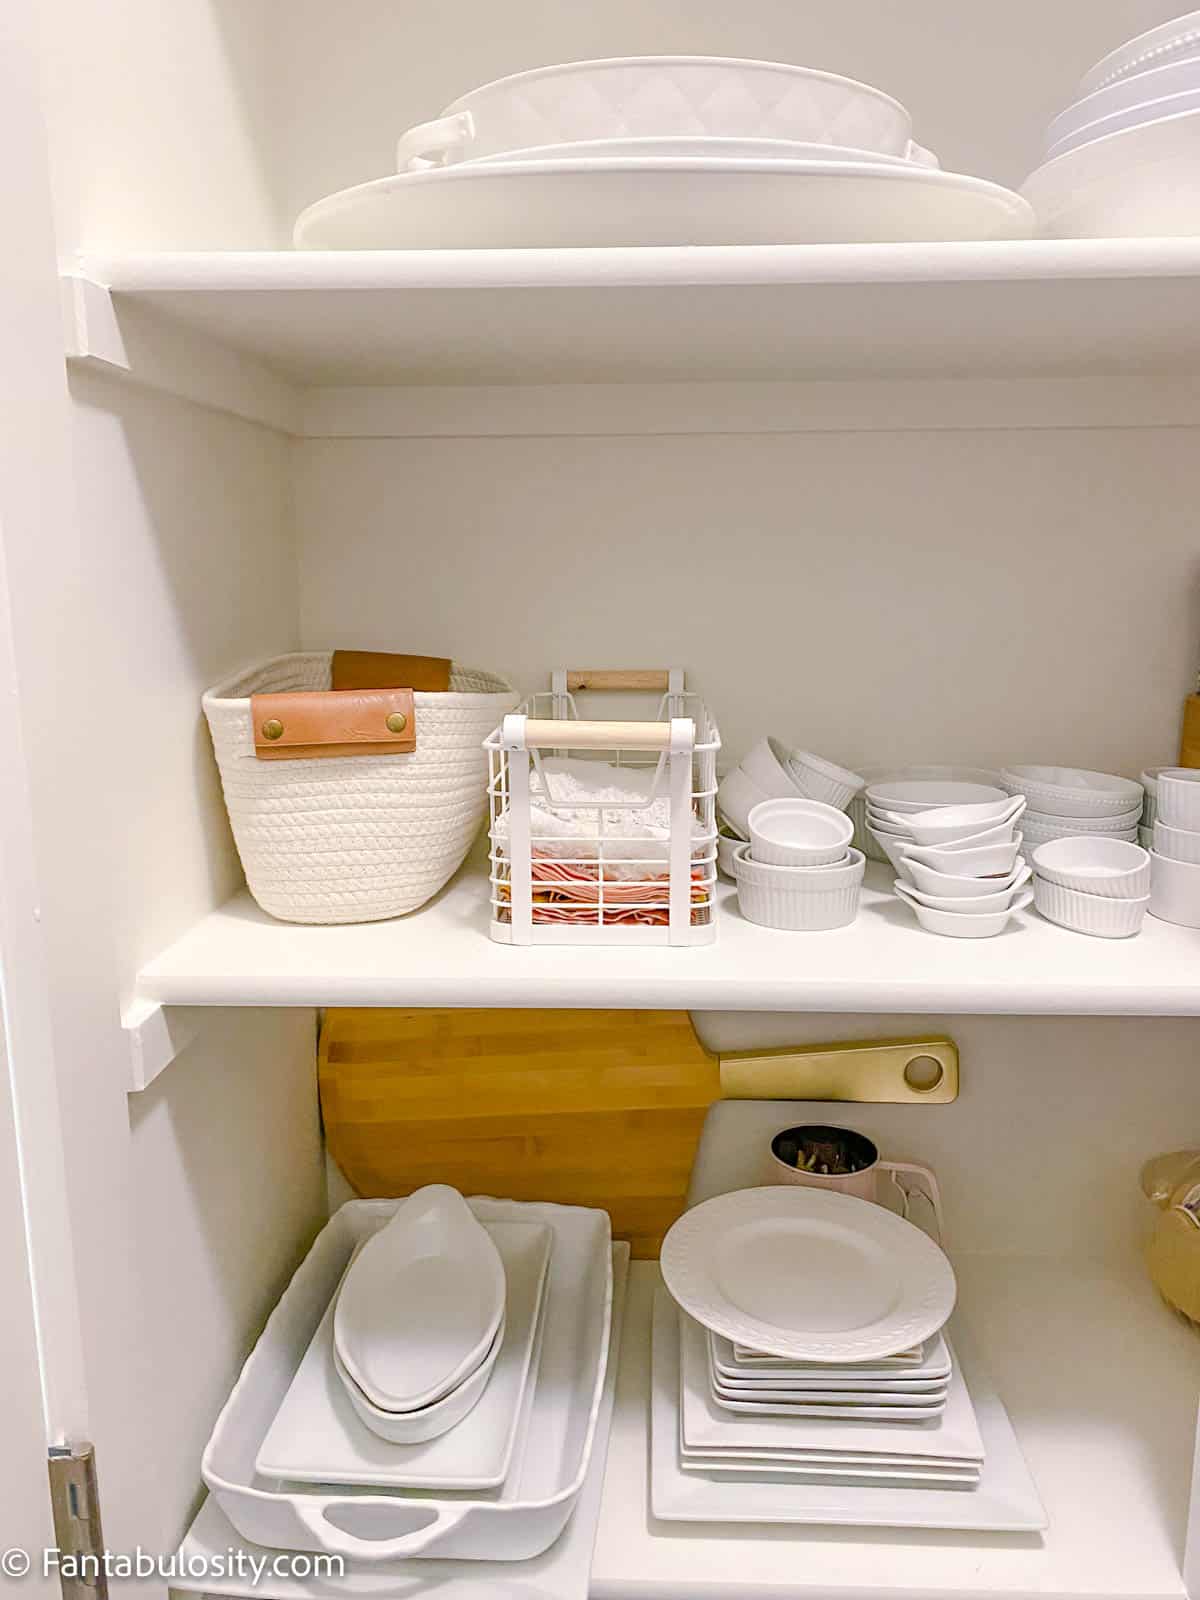
    White Dishware: I didn’t use anything to store the dishes in, simply because they’re too big and they look pretty when they’re stacked an organized way!

    small appliances on white shelf
    Small appliances
    Instant Pot and air fryer on shelf
    Instant Pot and Air Fryer

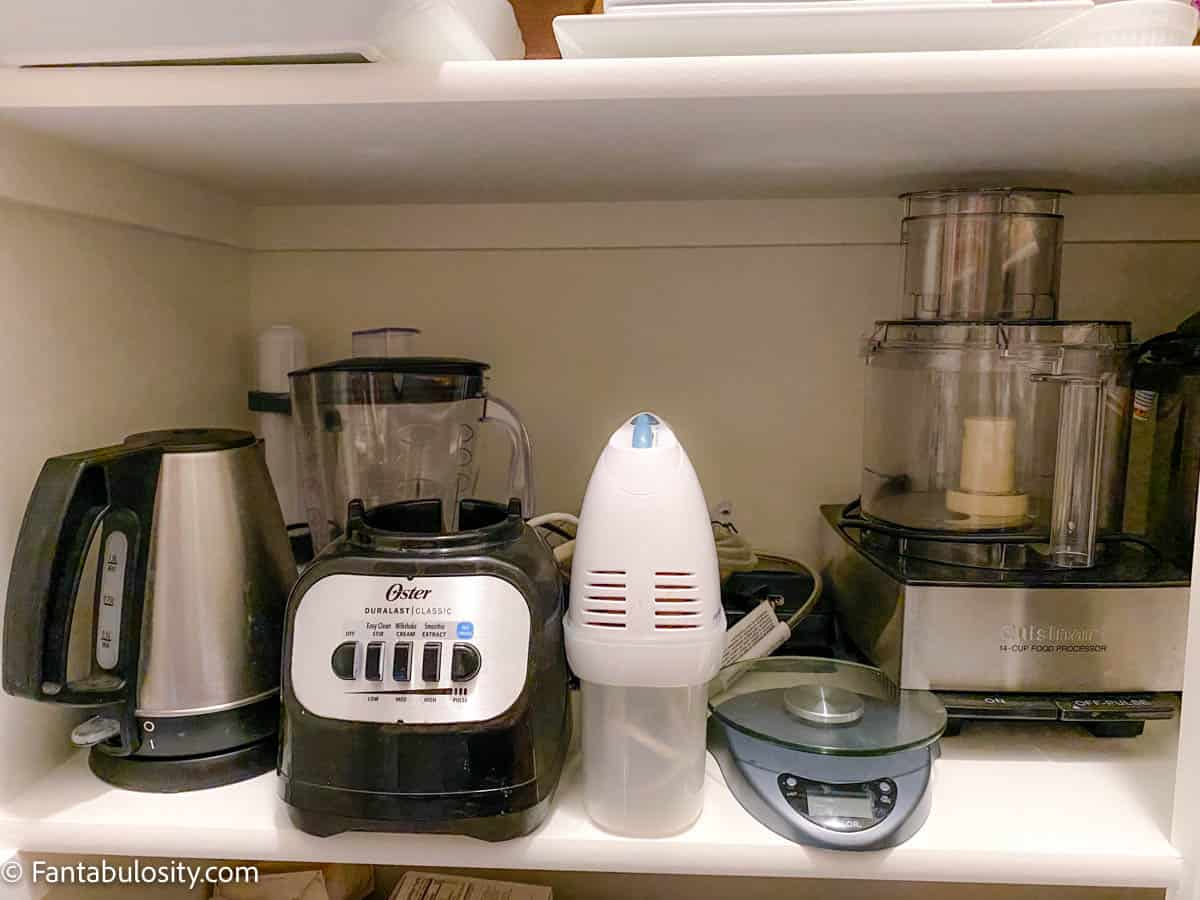
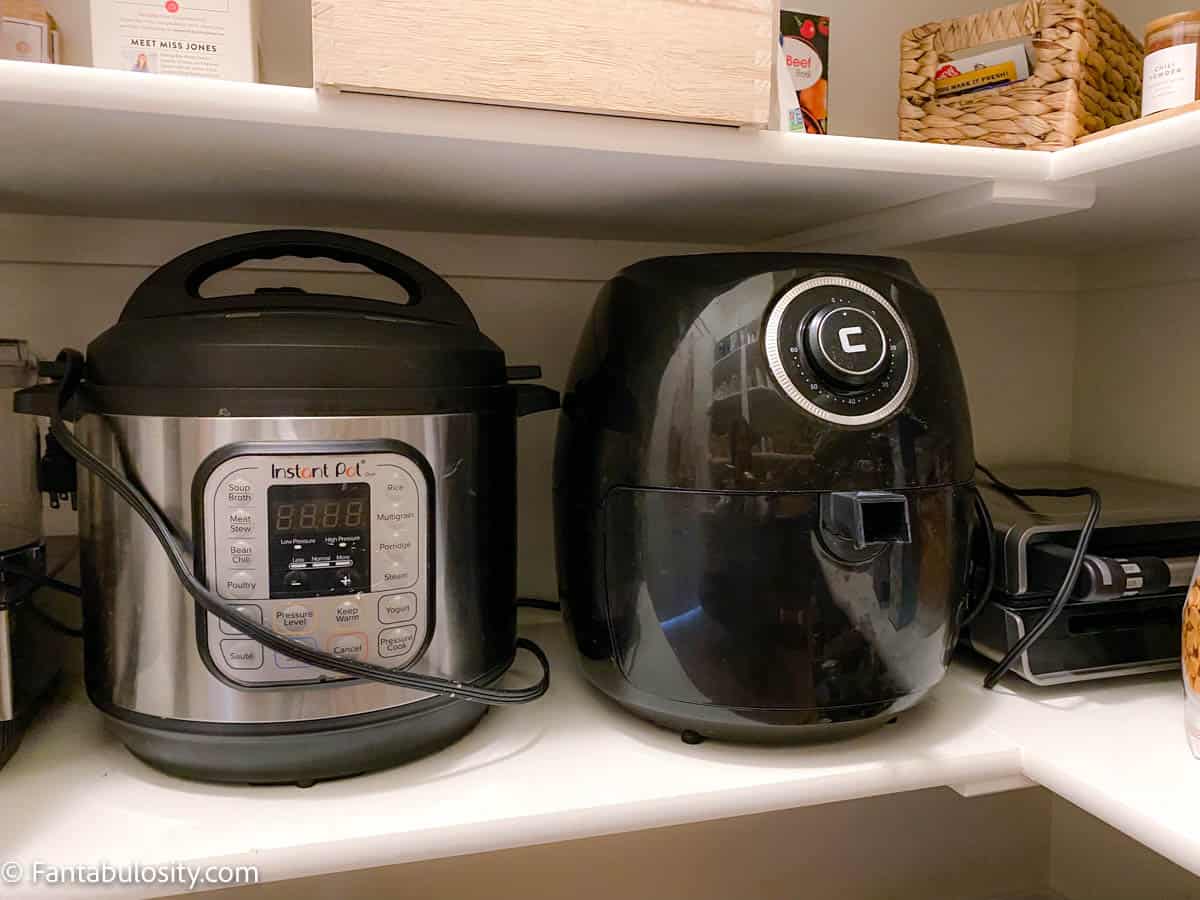
    Small Appliances (above): All along the bottom shelf (hidden behind the door, when opened) I store all of my small appliances. They’re handier this way than storing in a deep cabinet and when the door is open, you can’t see them anyway so it works out!

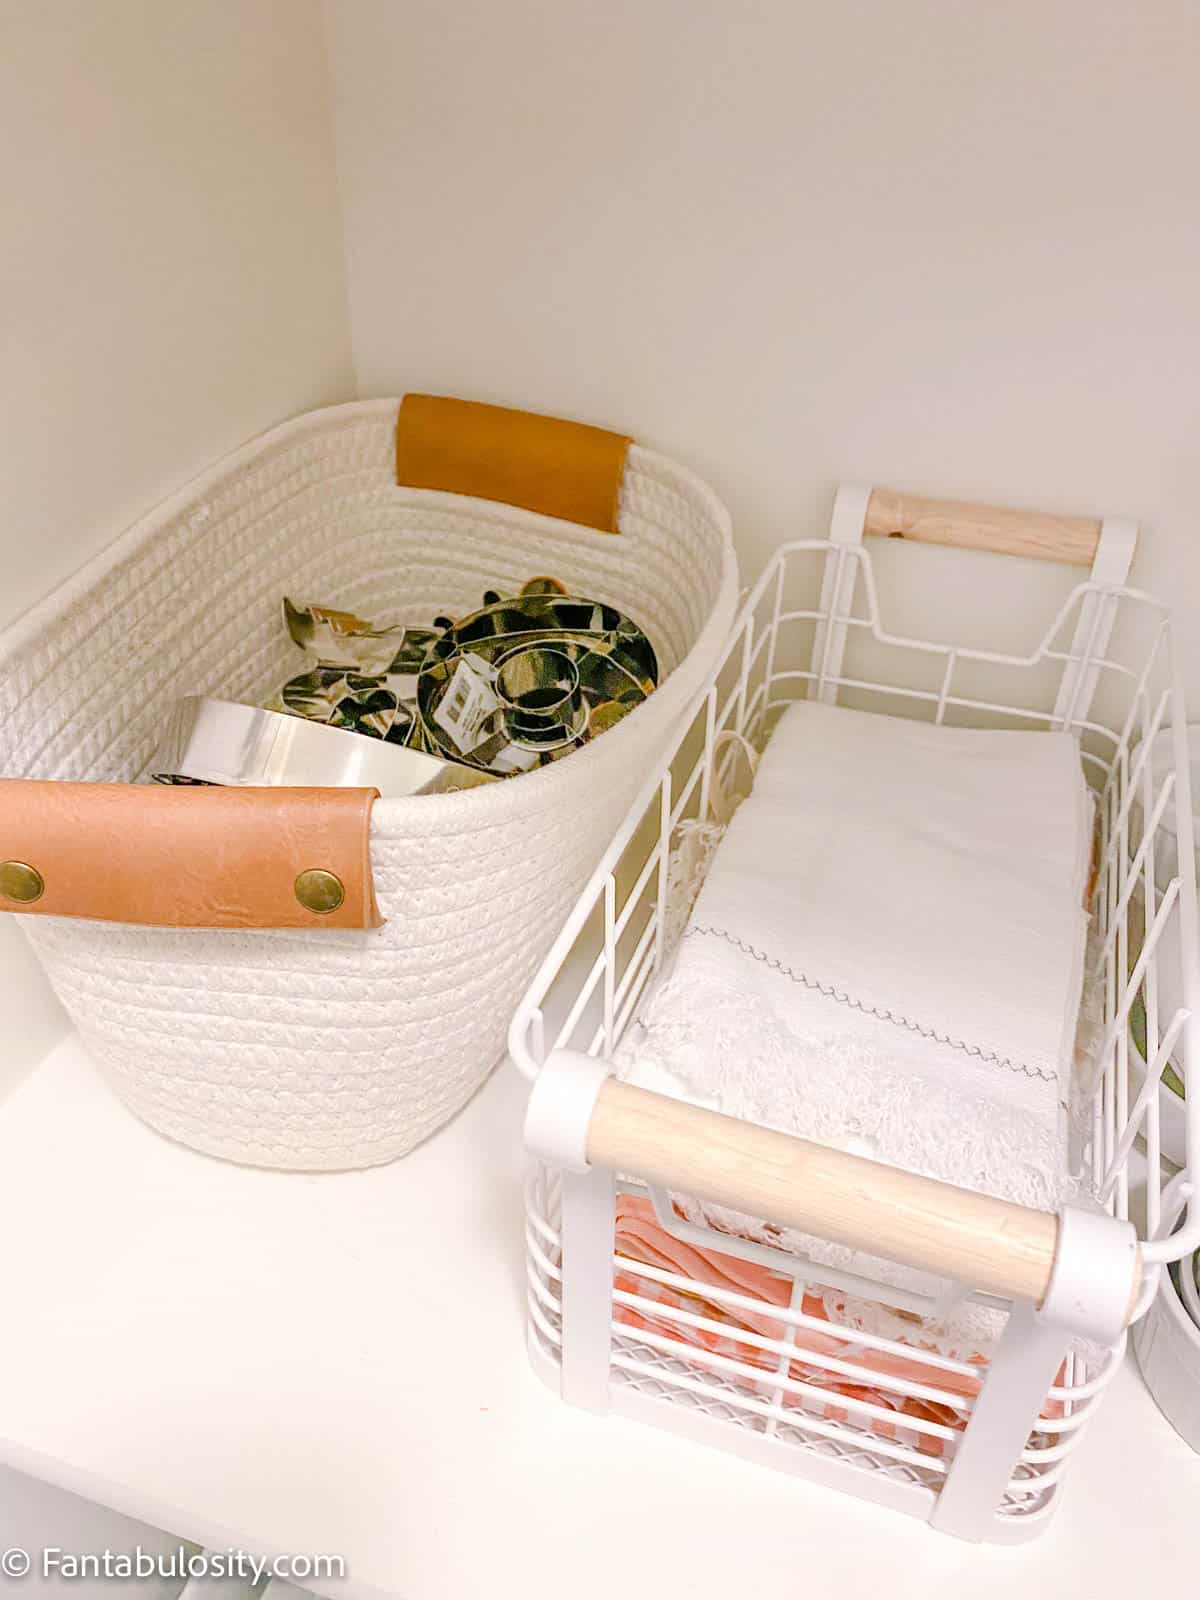
    Cookie cutters and cloth napkins on shelf
    Cookie cutters and cloth napkins

    What you see in the photo above:

    • White Linen Basket: I use this basket on the left to hold my cookie cutters simply because I loved the look of it. But you could also use a woven basket.
    • White Wire Basket: I use this basket on the right, to store fabric napkins and they fit perfectly!
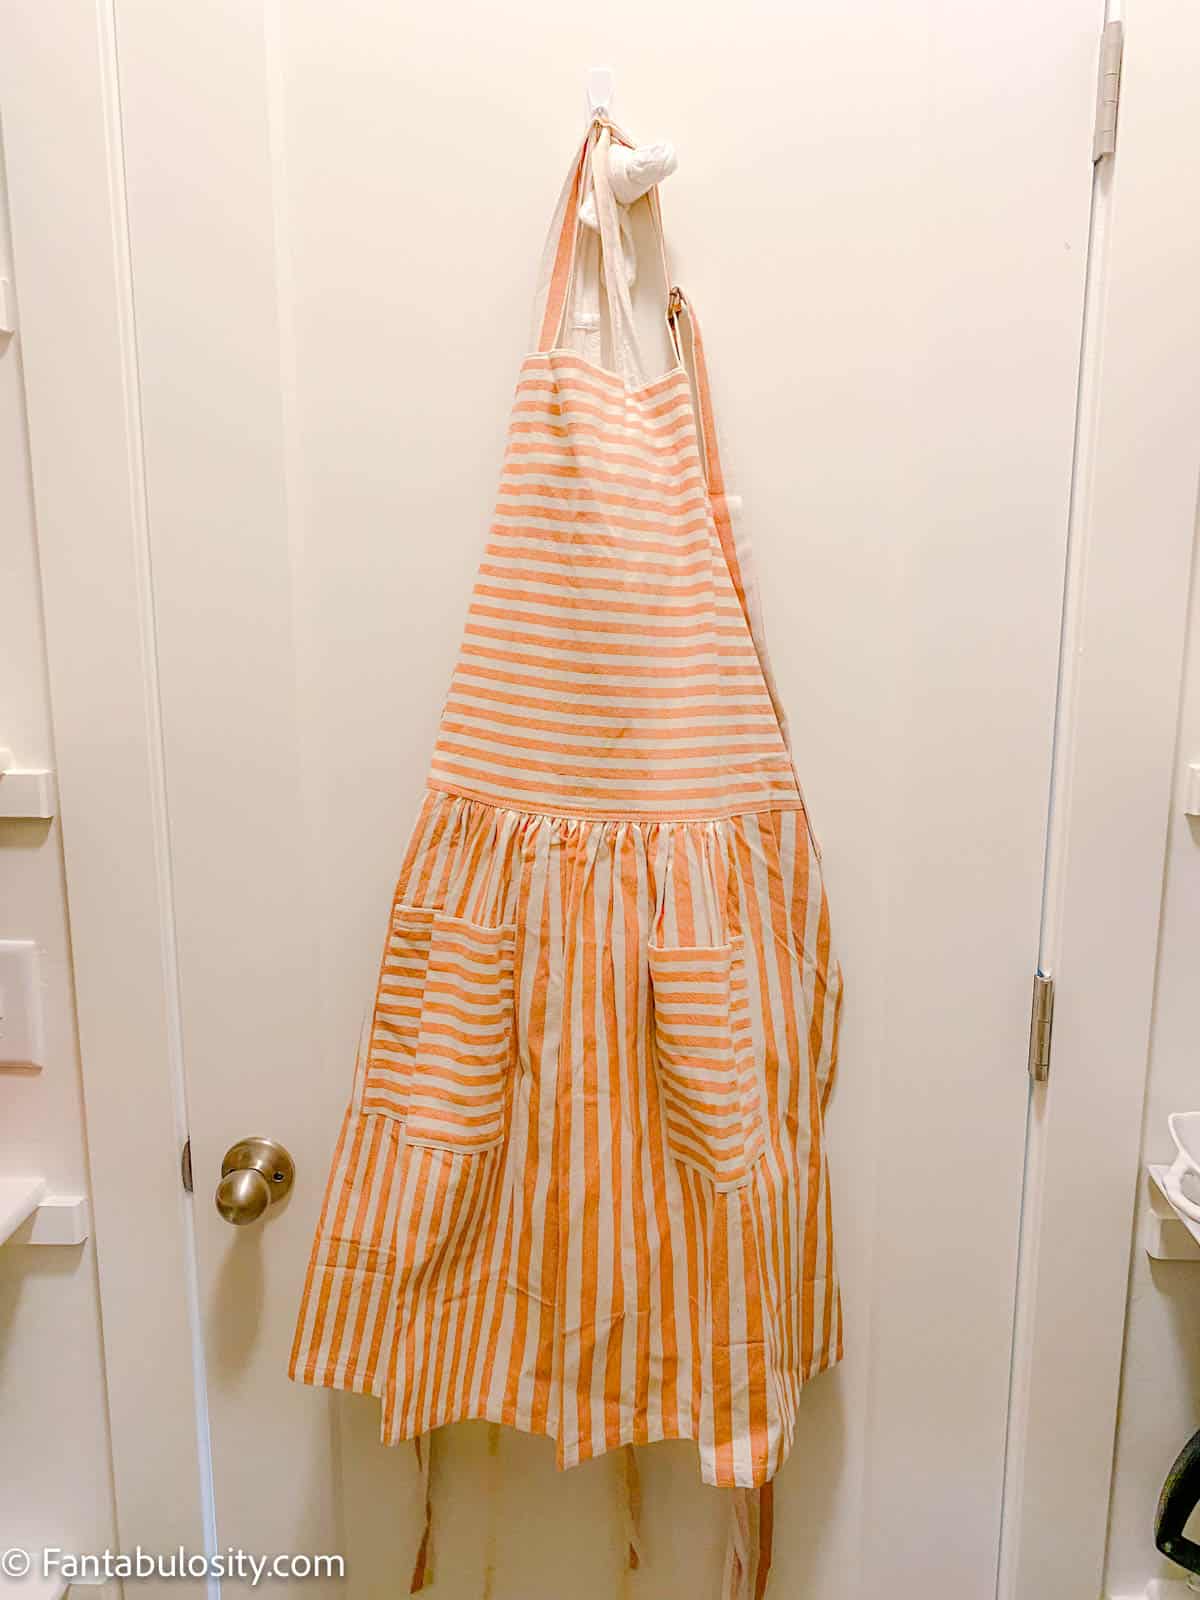
    apron hanging on door
    Aprons

    Apron Organization

    I LOVE a good apron. So I like to keep them handy for when I’m cooking, so hanging them on the back of the door with a Command Hook, works for me! You could also use the back of the pantry door if you’re low on pantry space, for more storage if you have a small pantry, and use a door rack. (Or even a shoe organizer to hold spices, if you have very little cabinet space!)

    How to Organize a Pantry

    Here are my tips for getting started, for walk-in pantry organization ideas, or any type of pantry, really!

    1. Start by making a list of “categories” that your pantry will have. For instance, will you have a “baking” section? Or what about a “cereal” or “chips” section? Making a brain dump of all the items you’d like to store in your pantry is a great place to start!
    2. Next, measure your shelves. Go ahead and take a photo of the pantry too, so if you’re out and about shopping and you see some amazing containers, you’ll be able to refer back to the photo to see if it would work in that space. Carry a mini tape measure in your purse so you can measure something at the store if need be. This little gadget also comes in SO handy when shopping for home furnishings.

      Extra tip: Love organizing as much as me? Jot down the measurements in your Trello account so you can easily access them while you’re out. Or, upload a photo of your pantry to an app on your photo and with text, add the measurements of the shelves and spaces, right on the photo, in the space.
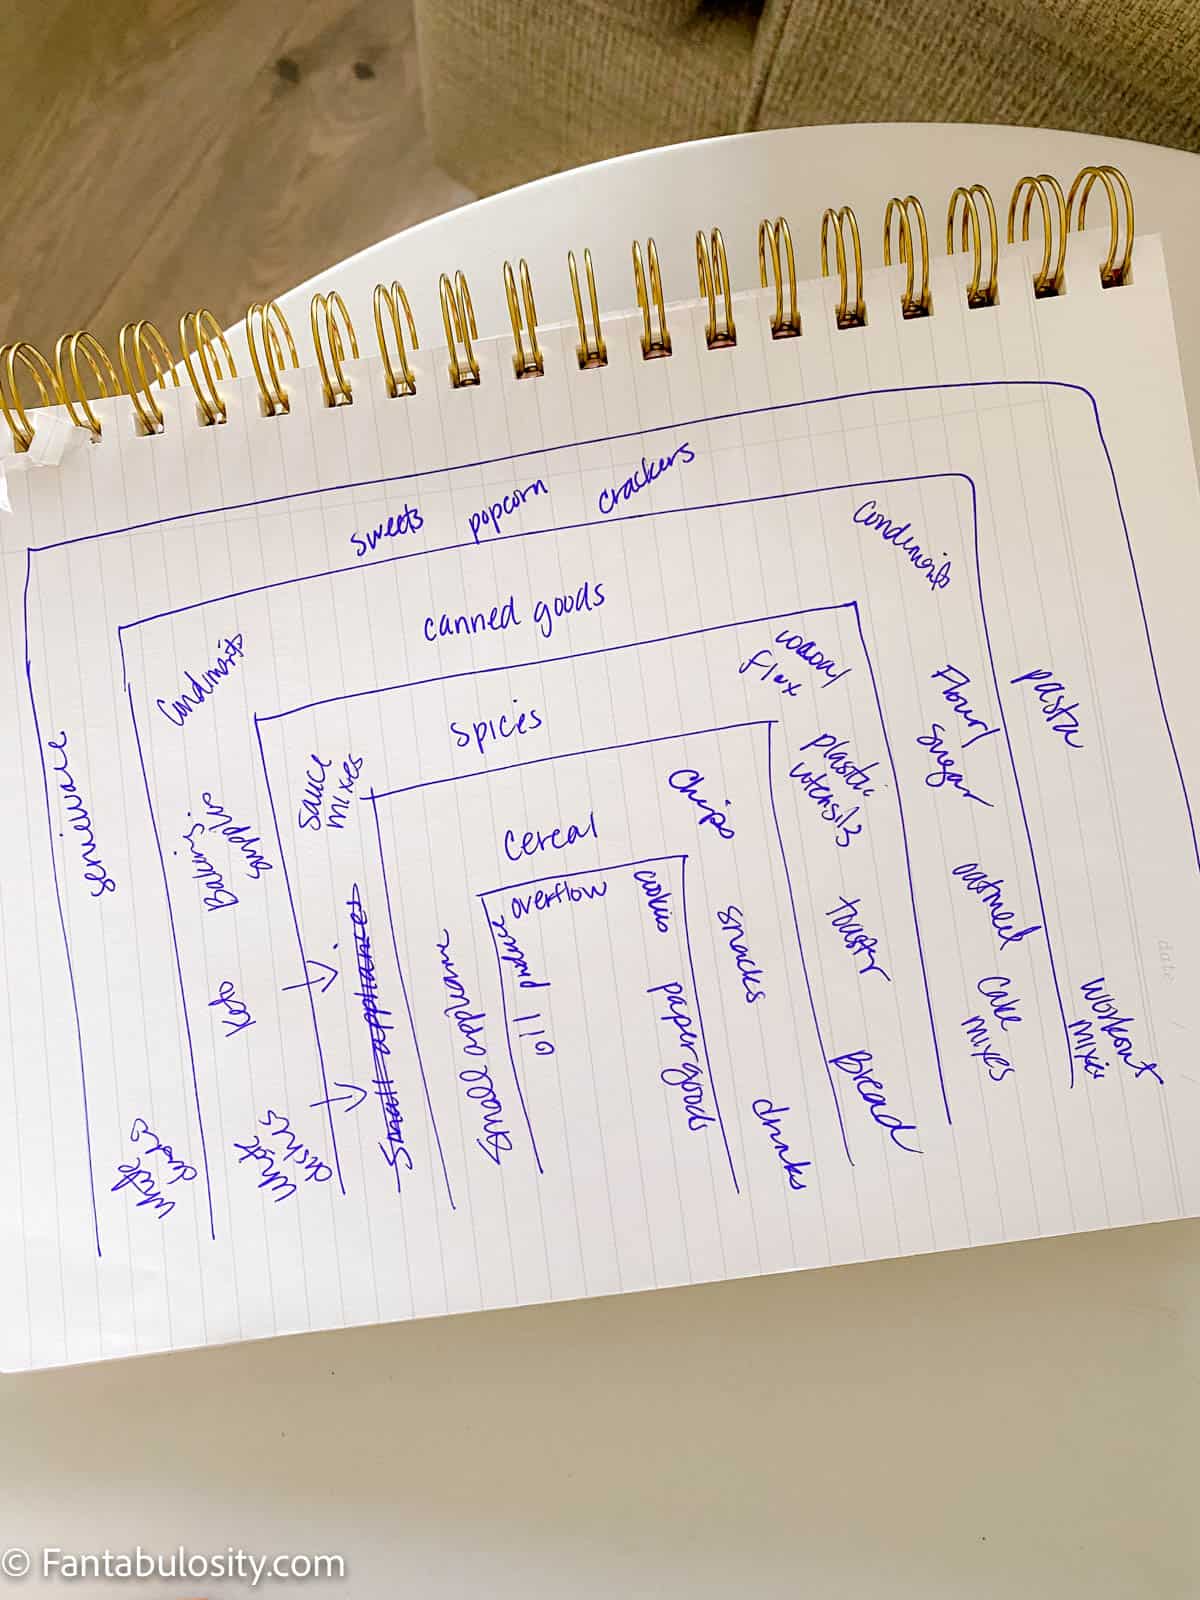
    3. Draw it out! If you’re a sketcher (don’t worry, you don’t have to make it look pretty) draw some lines on the paper, resembling your pantry, and write in where you think each category should go.
    sketched drawing of pantry organization
    Sketch it!
    1. Start buying products! I’ve linked to all of the items I’ve used (under each photo above) but I’ve also linked to them all in one spot to make things easy for you:

      Shop the items I bought from Amazon!
      Shop the items I bought from Target!


      I also know that sometimes things are unavailable or not going to work for your pantry. So don’t feel like you can’t get one thing at a time, here and there. It’s a work-in-progress, and even though I’ve shared my “final” pantry reveal with you, I’m sure I’ll continue to add and change things as time goes on.

    Common Questions & FAQs

    How do I arrange my walk in pantry?

    It’s key to keep similar items in categories, similar to the way grocery stores have items organized. Baking supplies, canned goods, snacks, etc. are typically all in the same aisle so the same organization can take place in your pantry!

    How can I keep my kitchen pantry organized?

    The best way to keep your pantry organized once it’s all in place, is to remember (and encourage family members to remember) that everything has a “home” inside of the pantry. Nothing should be left out of crates, baskets, off risers, etc.

    How to Keep Track of Expiration Dates on Unpackaged Items

    If you remove food/products from its original packaging to have a more organized pantry, a trick to use is to either cut the expiration date out of the packaging and tape it to the underside of the kid or the container. (Or, use a piece of clear tape and write the date on the tape.) You can also use a dry erase marker on clear glass/plastic containers.

    If you need to declutter and organize your life, make sure to also check out my free, 5-day decluttering challenge!

    Recipe

    How to Organize a Walk-in Pantry

    walk in pantry organization ideas
    5.0 Stars (2 Reviews)

    Walk-in Pantry Organization Ideas: Tips for making a beautiful and organized pantry for easy access to your dry goods and pantry items.

    You can find the links to all of the items I used to organize my pantry, in the instructions of this card or in the body of the article.

    Active Time 1 hour
    Total Time 1 hour
    Difficulty Easy

    Materials

    • Lazy Susans
    • Clear Containers or Clear bins
    • Glass Jars
    • Labels
    • Spice Racks
    • Baskets
    • Crates
    • Can Risers

    Instructions

    1. Start by making a list of "categories" that your pantry will have. For instance, will you have a "baking" section? Or what about a "cereal" or "chips" section? Making a brain dump of all the items you'd like to store in your pantry is a great place to start!
    2. Next, measure your shelves. Go ahead and take a photo of the pantry too, so if you're out and about shopping and you see some amazing containers, you'll be able to refer back to the photo to see if it would work in that space. Carry a mini tape measure in your purse so you can measure something at the store if need be. This little gadget also comes in SO handy when shopping for home furnishings.Extra tip: Love organizing as much as me? Jot down the measurements in your Trello account so you can easily access them while you're out. Or, upload a photo of your pantry to an app on your photo and with text, add the measurements of the shelves and spaces, right on the photo, in the space.
    3. Draw it out! If you're a sketcher (don't worry, you don't have to make it look pretty) draw some lines on the paper, resembling your pantry, and write in where you think each category should go.
    4. Start buying products! I've linked to all of the items I've used (under each photo above) but I've also linked to them all in one spot to make things easy for you:
      Shop the items I bought from Amazon!
      Shop the items I bought from Target!
    © Jessica

    Funfetti Cake Mix Cookies

    May 27, 2022

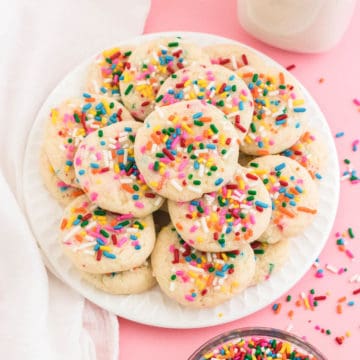
    A plate of funfetti cake mix cookies.

    Funfetti Cake Mix Cookies: These brightly colored funfetti cake mix cookies are so quick and easy to make! A box of funfetti cake mix, oil, eggs, sprinkles, vanilla, and 30 minutes are all you need to create these delicious cookies!

    Quick Overview: 5 minutes of prep time, 20 minutes of chill time, 8-10 minutes of cook time.

    A stack of funfetti cake mix cookies.

    Cake mix cookies are the absolute best because not only are they delicious, they are also incredibly quick and easy to whip up! They are also made with ingredients that you can easily keep on hand, so they are the perfect recipe to whip up for last-minute guests. We’ve even made peanut butter cookies with a cake mix!

    These funfetti cake mix cookies would make the perfect spring or summer cookies because they are so fun and brightly colored! They would also be adorable at birthday parties, baby showers, Mother’s Day brunch, or even for Valentine’s Day!

    [feast_advanced_jump_to]

    Why You’ll Love This Easy Cookie Recipe

    Quick: You can whip these cookies up in just 30 minutes!

    Easy: Because these are made with a cake mix, they are the absolute easiest thing to make…seriously! One bowl, five ingredients, stir it all together and roll it into balls. It doesn’t get much easier than that.

    Delicious: These cookies aren’t only quick & easy, but they are also super tasty! They are soft and chewy and everything you want from a cookie. If you have a bit of a sweet tooth, this easy recipe is for you!

    Perfect for Little Bakers

    This funfetti cookie recipe is the perfect one to make with your little bakers because it’s super simple to make! They’ll love stirring together the batter, rolling out the dough, and adding all those rainbow sprinkles! Making these alongside other fun cookies like these rocky road cookies that also use a cake mix, would be so fun for them too!

    Ingredients for Funfetti cake cookies

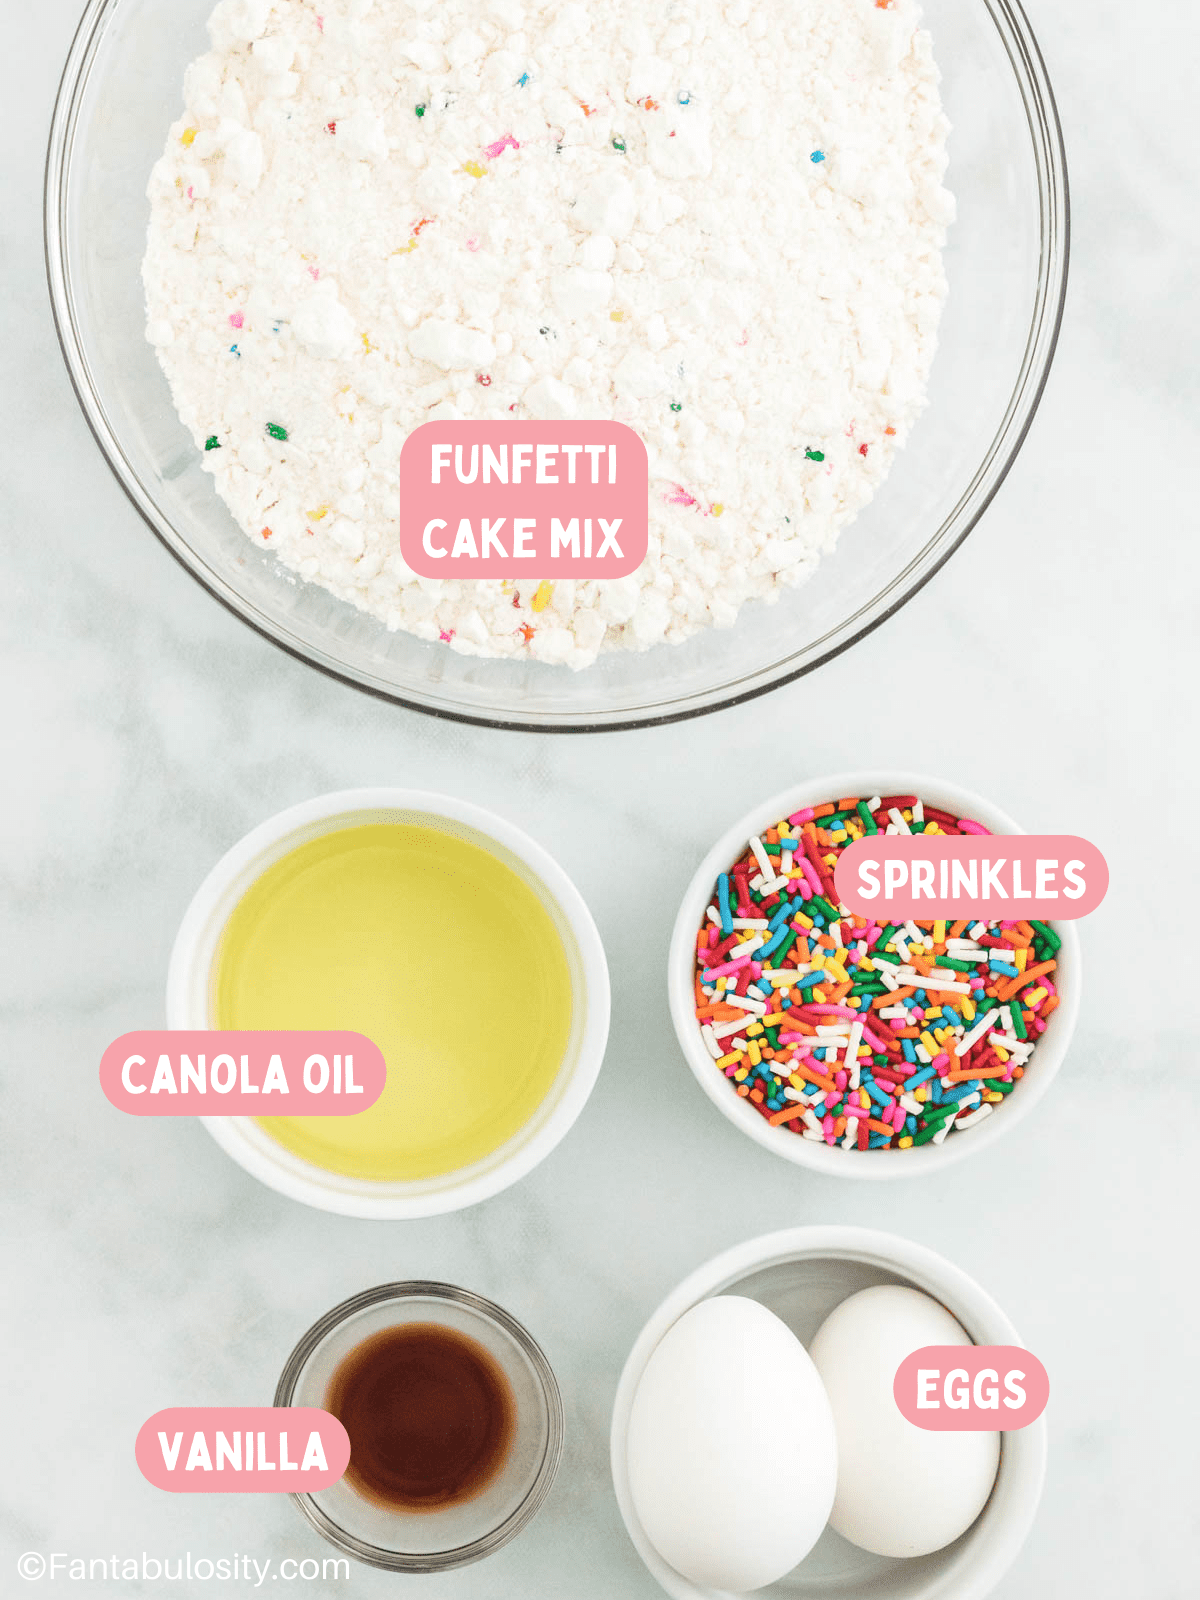
    You only need 5 simple ingredients for these cookies, and you probably have most (if not all) of them in your house right now! If you don’t, you can find all of these at your local grocery store.

    Ingredients for confetti cake mix cookies with labels on the image.
    Ingredients

    You can find the complete list of ingredients and directions can be found in the recipe card below.

    • 1 box funfetti cake mix
    • ⅓ cup canola oil
    • 2 eggs
    • ¼ cup + 2 tablespoons colored sprinkles, divided
    • 1 teaspoon vanilla

    How to make these easy funfetti cake mix cookies

    1. Preheat the oven to 350 degrees. Place a piece of parchment paper on a baking sheet and set aside. 
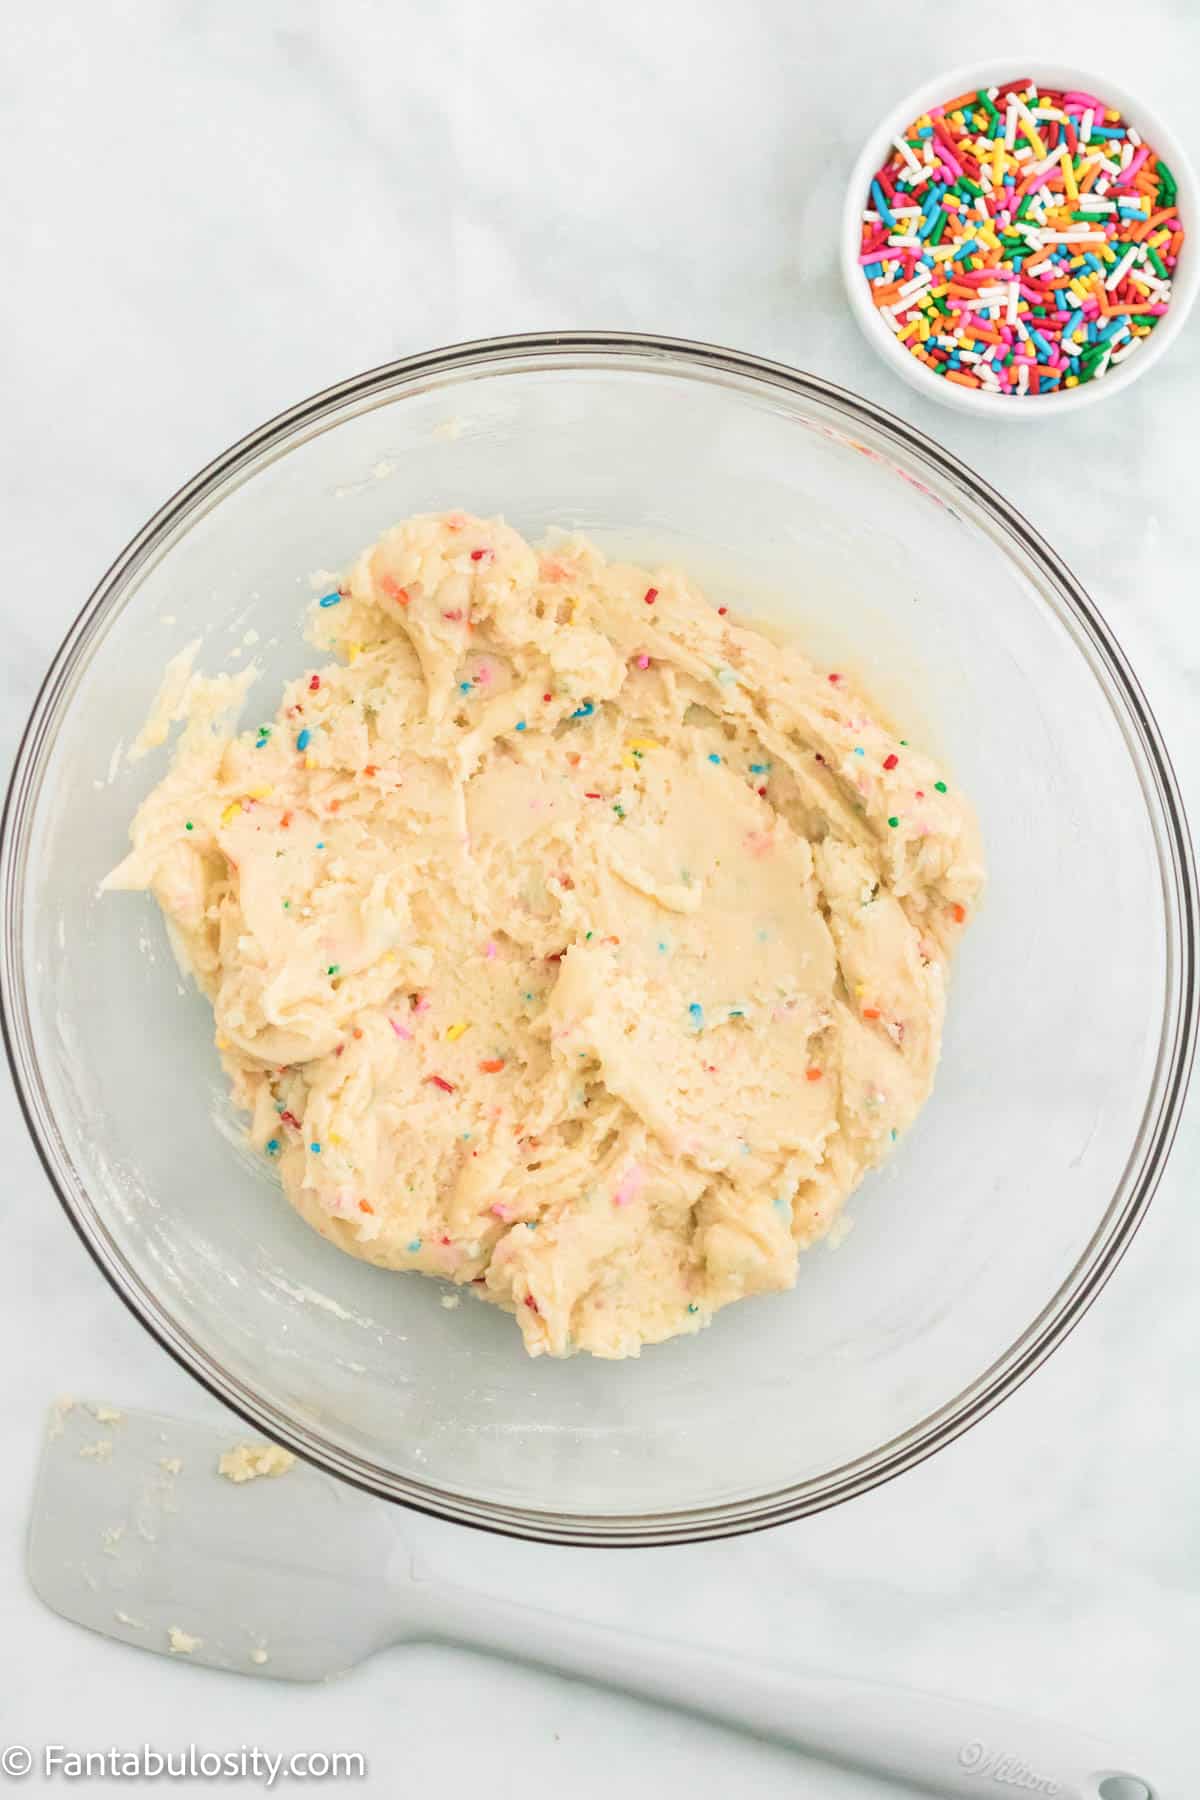
    2. In a large bowl, add the funfetti cake mix, canola oil, eggs, 2 tablespoons colored sprinkles, and vanilla. Stir with a rubber spatula until well combined, about 1-2 minutes.
    3. Cover the bowl in plastic wrap and chill in the refrigerator for 20 minutes.
    Funfetti cake mix cookie dough.
    Combine ingredients, refrigerate 20 mins.
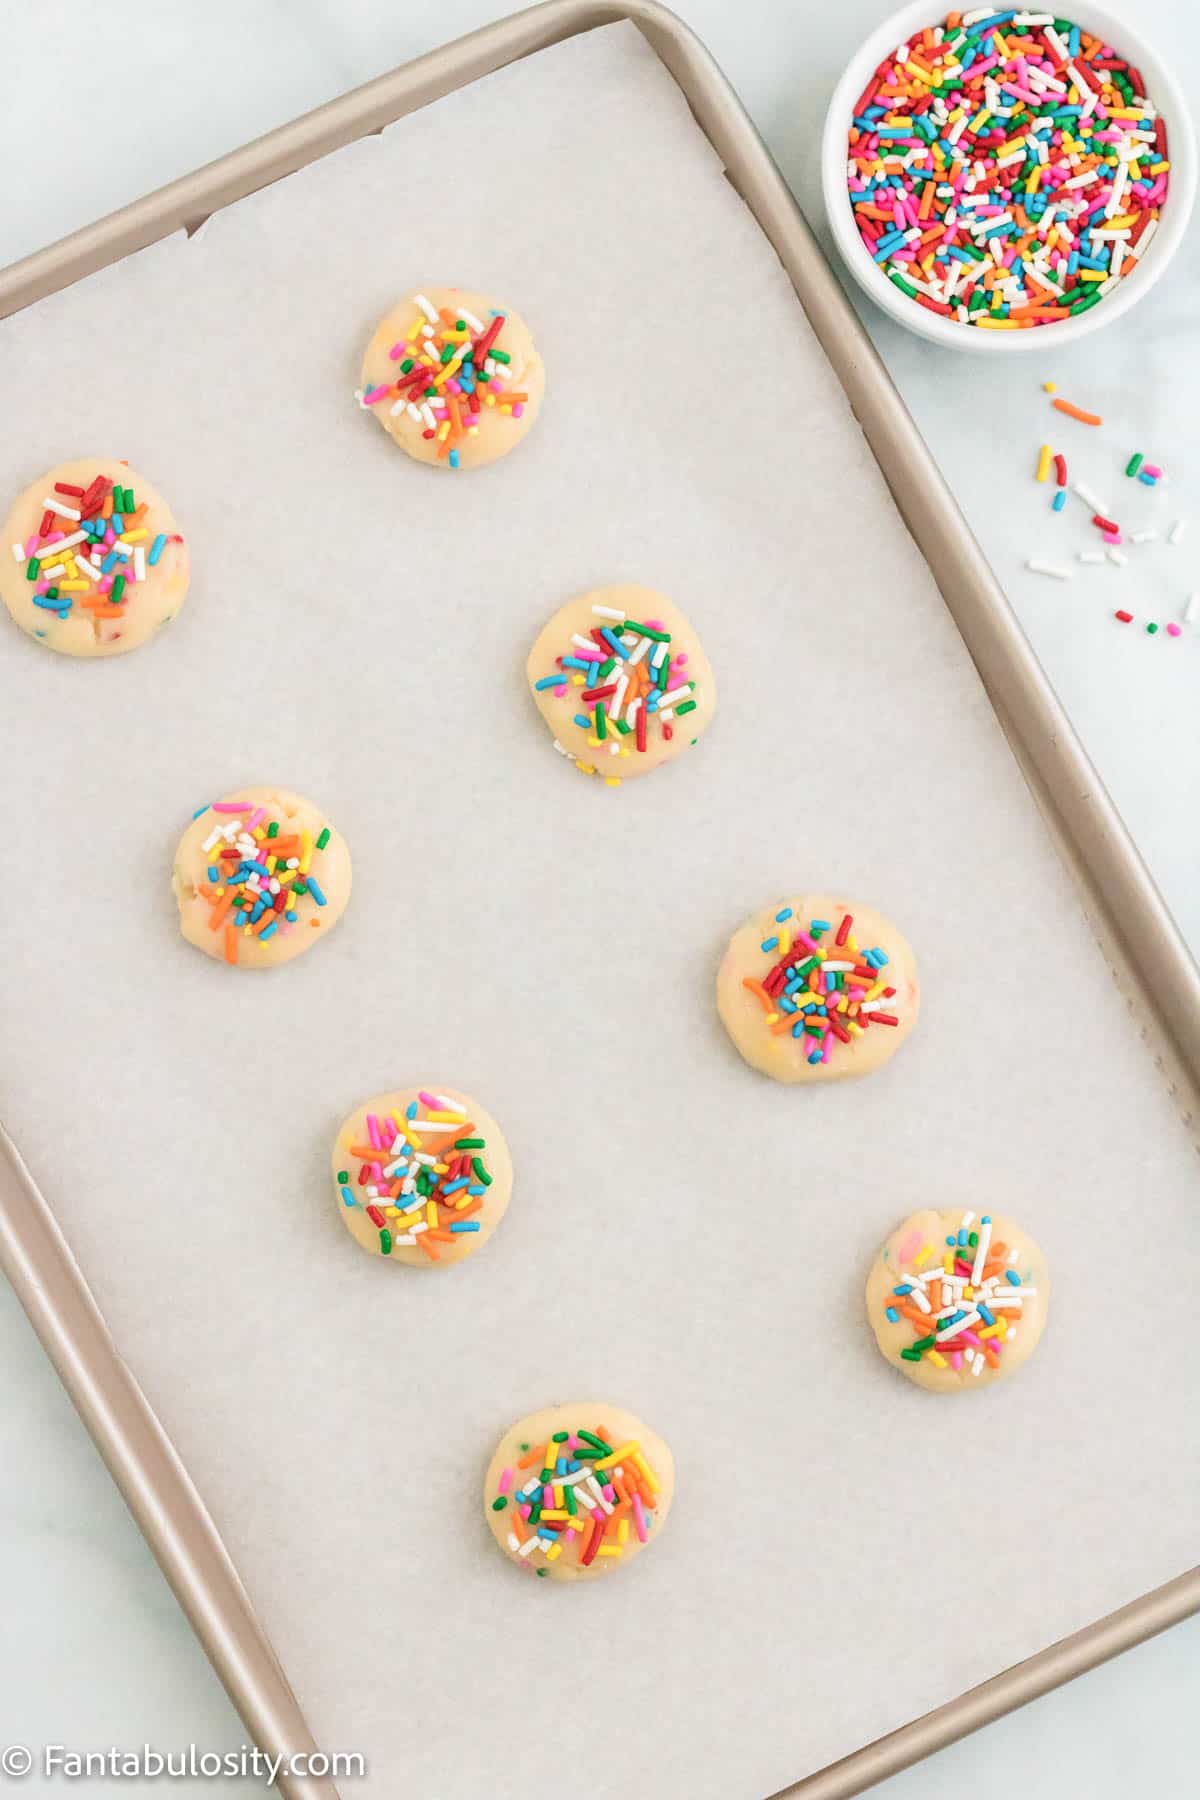
    1. Remove the bowl from the refrigerator and scoop the cake batter cookie dough into 1- to 1 ½-inch balls. Place the dough balls on the prepared baking sheet and lightly press down to "flatten" the tops a little bit. 
    2. With the remaining ¼ cup of sprinkles, add them to the slightly flattened tops of the cookies.
    Uncooked balls of funfetti cake mix cookies on a parchment lined baking sheet.
    Scoop dough, add sprinkles.
    1. Place the cookie sheet in the oven and bake for 8-10 minutes. For the perfect cookies, do not overbake.
    2. Remove the baking tray from the oven and let the cookies cool completely on a cooling rack before serving. Warning: cake mix cookies usually have a soft texture, so be careful when transferring them to the cooling rack!
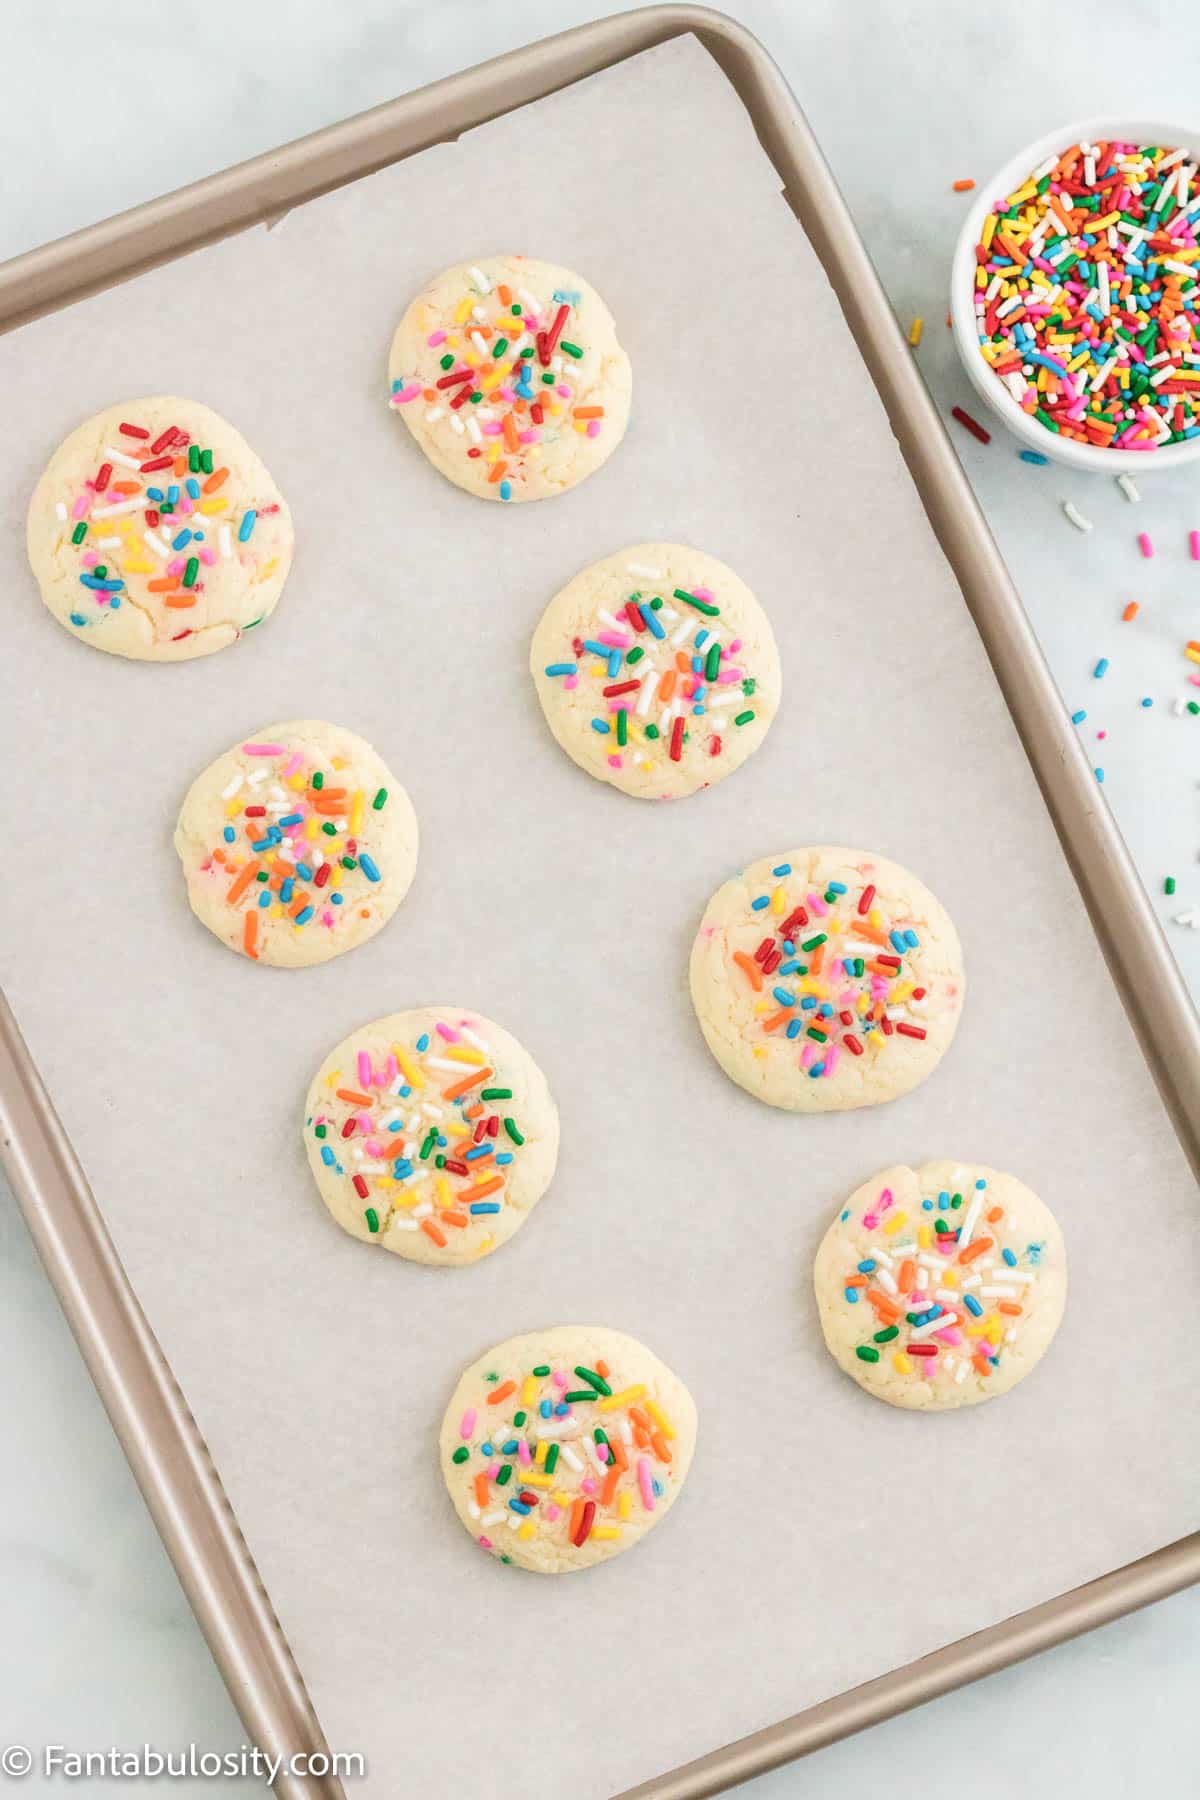
    Baked funfetti cake mix cookies on a parchment lined baking sheet.
    Bake 8-10 mins.
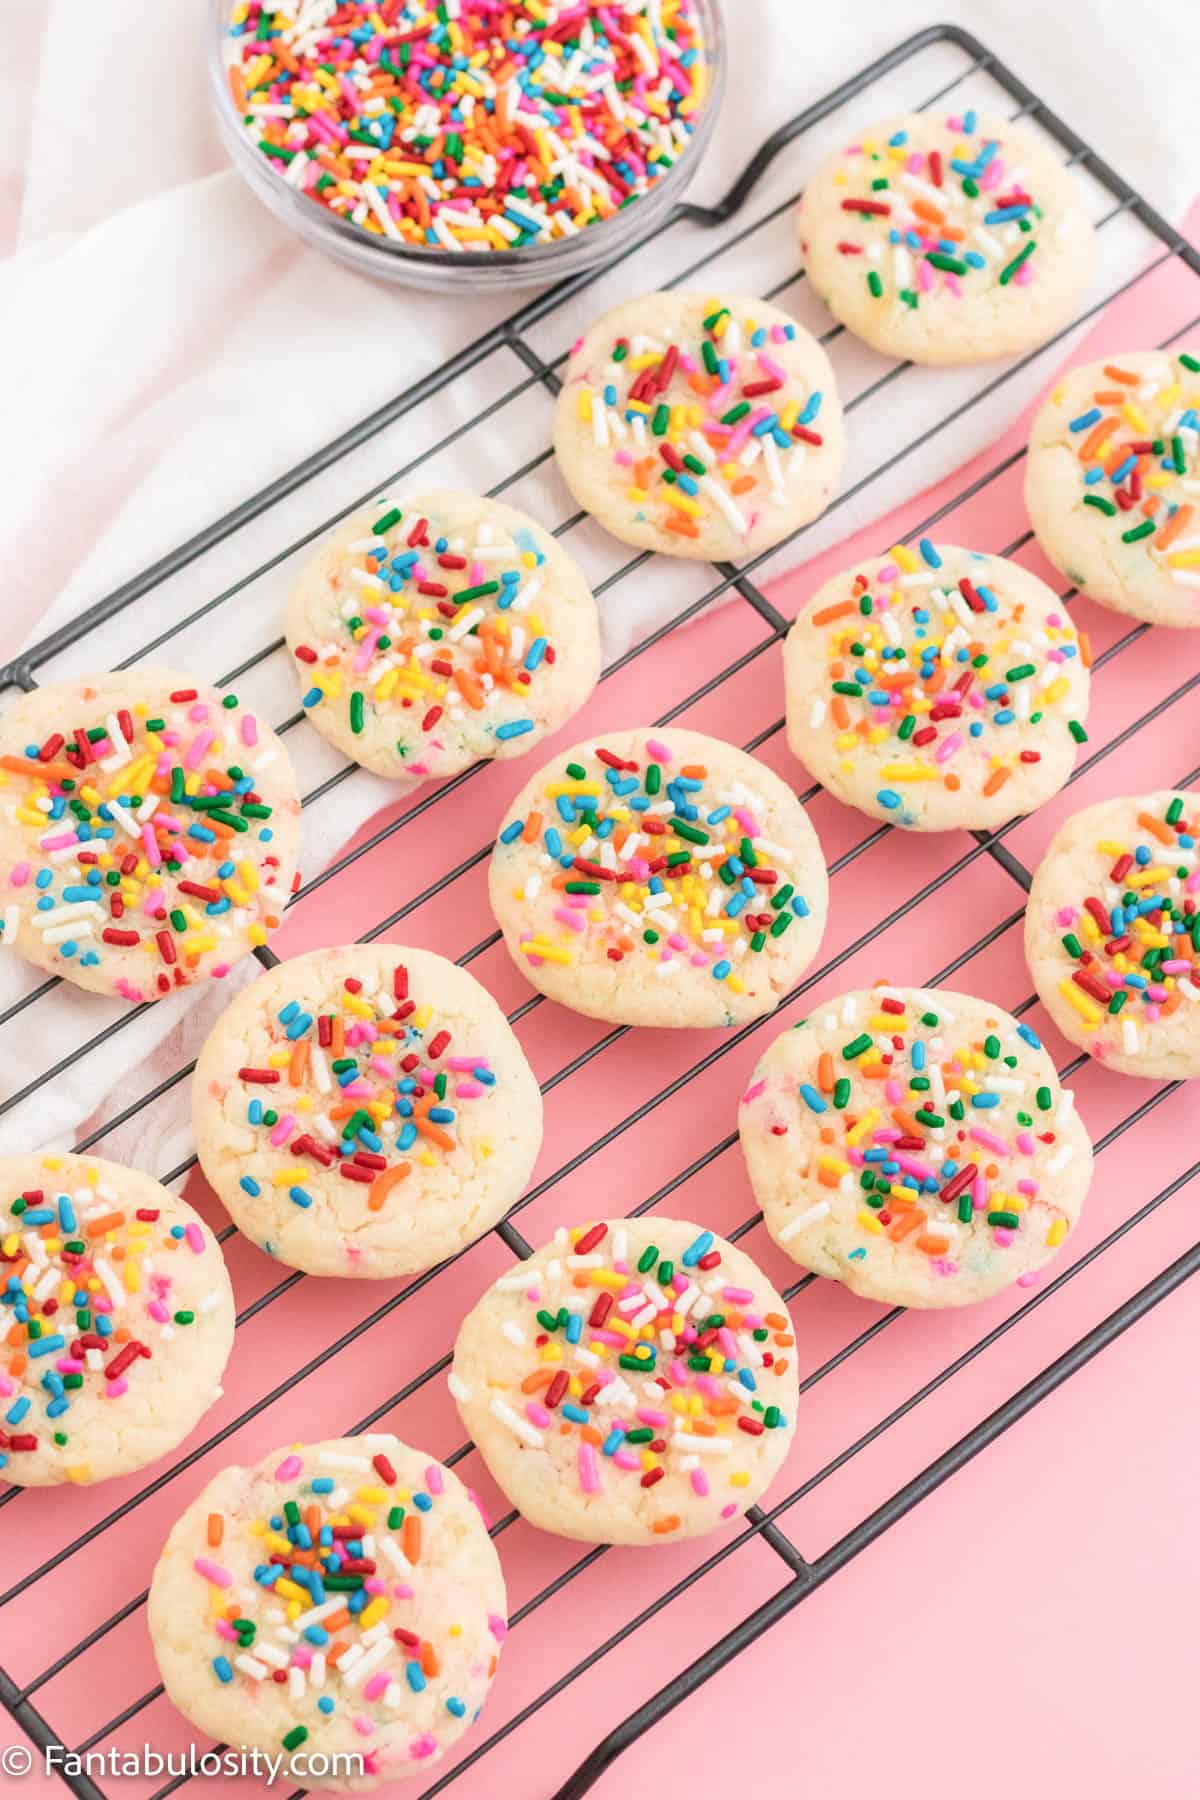
    Funfetti cake mix cookies cooling on a wire rack.
    Cool on a wire rack.

    I’m a huge fan of cake mix cookies because they are the easiest cookies to make!

    If you enjoyed these easy cake mix cookies, you should try our other easy cake mix cookie recipes! Check out the brownie mix cookies and red velvet cake mix cookies on the blog.

    I’m a firm believer that you should always have a box of cake mix on hand. Not only can you use it as the box directs, you can also use it for recipes like the cake mix cookies we mentioned above and for other quick, easy, and delicious dessert recipes! Our pineapple sunshine cake, caramel apple dump cake, and lemon cake mix brownies are easy recipes also made using dry cake mix!

    Substitutions & Variations

    Want to mix things up or need something switched out? Here are some of our favorite suggestions for switching up these colorful cookies.

    • Canola Oil – instead of canola oil, you can use vegetable oil, your favorite oil, or even melted butter.
    • Eggs – instead of eggs, you could use a “cornstarch egg” as a binding agent. Check out this tutorial for more info.
    • Cake Mix – they won’t be funfetti cake mix cookies anymore, but you could absolutely replace the funfetti cake mix with your favourite flavor and create a whole new cookie.
    • Holidays – if you are making these cookies for a specific occasion or holiday, you can add sprinkles that match the theme! Green sprinkles on top for St. Patrick’s Day, red and green for Christmas, red and white for Valentine’s Day…

    Storage

    Store your confetti cake mix cookies in an airtight container at room temperature for 4-5 days.

    You can also freeze these chewy funfetti cookies in an airtight, freezer safe container for up to a month!

    Expert Tips and FAQs

    Is Funfetti cake mix the same as white cake mix?

    Funfetti is a white cake mix with sprinkles added in! You can use a funfetti cake mix or a white cake mix and add extra sprinkles to make these easy funfetti cookies!

    Is confetti and Funfetti the same thing?

    Funfetti is technically a trademark of Pillsbury, so yes a funfetti cake mix and confetti cake mix are just the same thing by different names. We used the terms funfetti cookies and confetti cookies interchangeably in this recipe because they are essentially the same thing. Some other brands have their own name for white cake with sprinkles (like Betty Crocker rainbow bit cake mix), but any cake mix with colourful sprinkles will do.

    Can I add more sprinkles to Funfetti cake mix?

    Absolutely! You can add extra sprinkles to the batter to your preference.

    🍪 More Cookie Recipes

    If you love cookie recipes, you’ll also love these Key Lime Pie Crumbl Copycat cookies!

    Did you make this? I’d be so grateful if you left a “star” rating below to let me know what you thought! Then, the next time you need a quick and easy recipe, come back to Fantabulosity to browse all of my easy recipes!

    Recipe

    A plate of funfetti cake mix cookies.
    Print Pin
    5 from 11 votes

    Funfetti Cake Mix Cookies

    Funfetti Cake Mix Cookies: These brightly coloured funfetti cake mix cookies are so quick and easy to make! A box of funfetti cake mix, oil, eggs, sprinkles, vanilla and 30 minutes are all you need to create these delicious cookies!
    Course Dessert, Snack
    Cuisine American
    Prep Time 5 minutes minutes
    Cook Time 10 minutes minutes
    Chill Time 20 minutes minutes
    Total Time 35 minutes minutes
    Servings 22 cookies
    Calories 115kcal
    Author Jessica Burgess

    Ingredients

    • 1 box funfetti cake mix
    • ⅓ cup canola oil
    • 2 eggs
    • ¼ cup + 2 tablespoons colored sprinkles divided
    • 1 teaspoon vanilla

    Instructions

    • Preheat the oven to 350 degrees. Place a piece of parchment paper on a baking sheet and set aside. 
    • In a large bowl, add the funfetti cake mix, canola oil, eggs, 2 tablespoons colored sprinkles, and vanilla. Stir with a rubber spatula until well combined, about 1-2 minutes.
    • Cover the bowl in plastic wrap and chill in the refrigerator for 20 minutes.
    • Remove the bowl from the refrigerator and scoop the cookie dough into 1- to 1 ½-inch balls. Place the balls on the prepared baking sheet and lightly press down to "flatten" the tops a little bit. 
    • With the remaining ¼ cup of rainbow sprinkles, add them to the slightly flattened tops of the cookies.
    • Place the baking tray in the oven and bake for 8-10 minutes. For the perfect cookies, do not overbake.
    • Remove the baking tray from the oven and let the cookies cool completely on a wire rack before serving. Warning: cake mix cookies usually have a soft texture, so be careful when transferring them to the cooling rack!

    Notes

    STORAGE: Store your confetti cake mix cookies in an airtight container at room temperature for 4-5 days. You can also freeze these chewy funfetti cookies in an airtight, freezer safe container for up to a month!

    Nutrition

    Serving: 1cookie | Calories: 115kcal | Carbohydrates: 16g | Protein: 1g | Fat: 5g | Saturated Fat: 1g | Polyunsaturated Fat: 1g | Monounsaturated Fat: 2g | Trans Fat: 1g | Cholesterol: 15mg | Sodium: 132mg | Potassium: 6mg | Fiber: 1g | Sugar: 10g | Vitamin A: 22IU | Calcium: 10mg | Iron: 1mg

    4th of July Rice Krispie Treats

    May 24, 2022

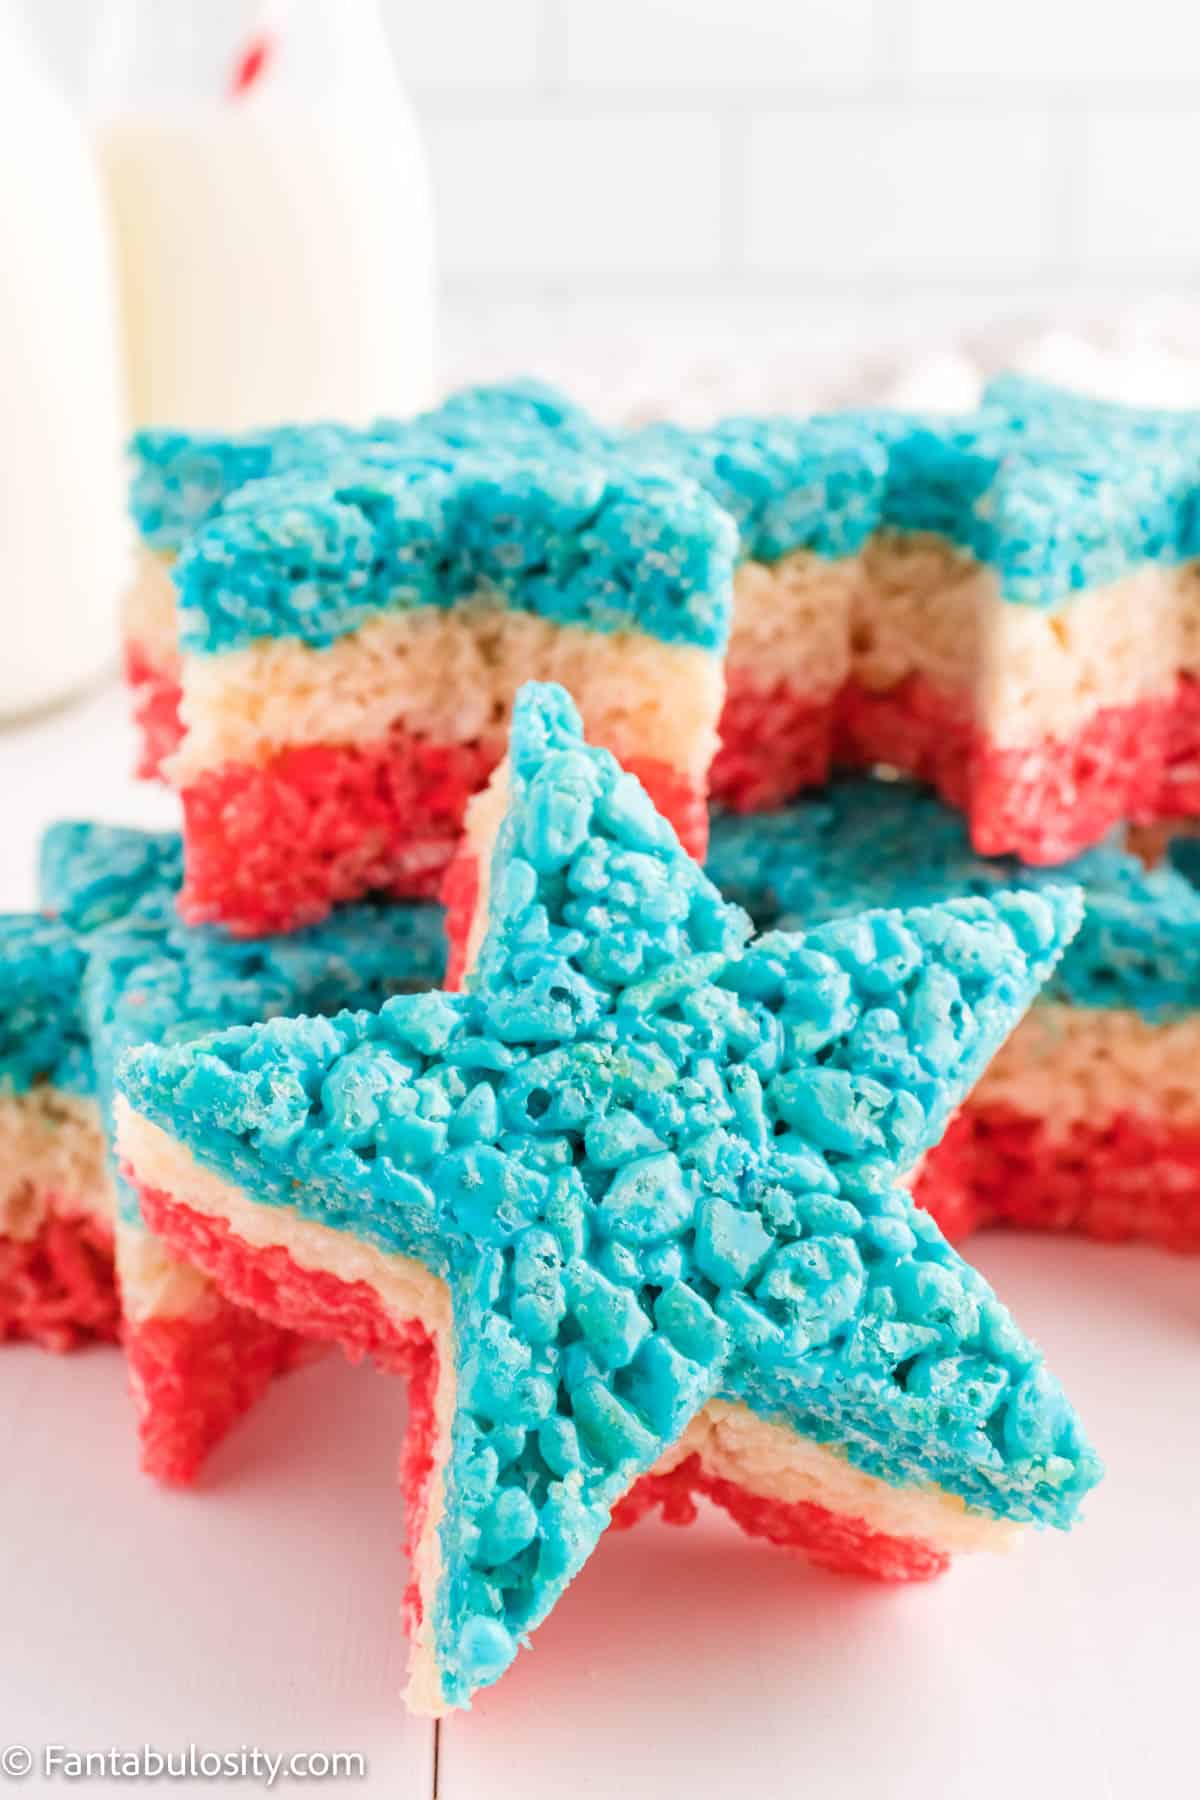
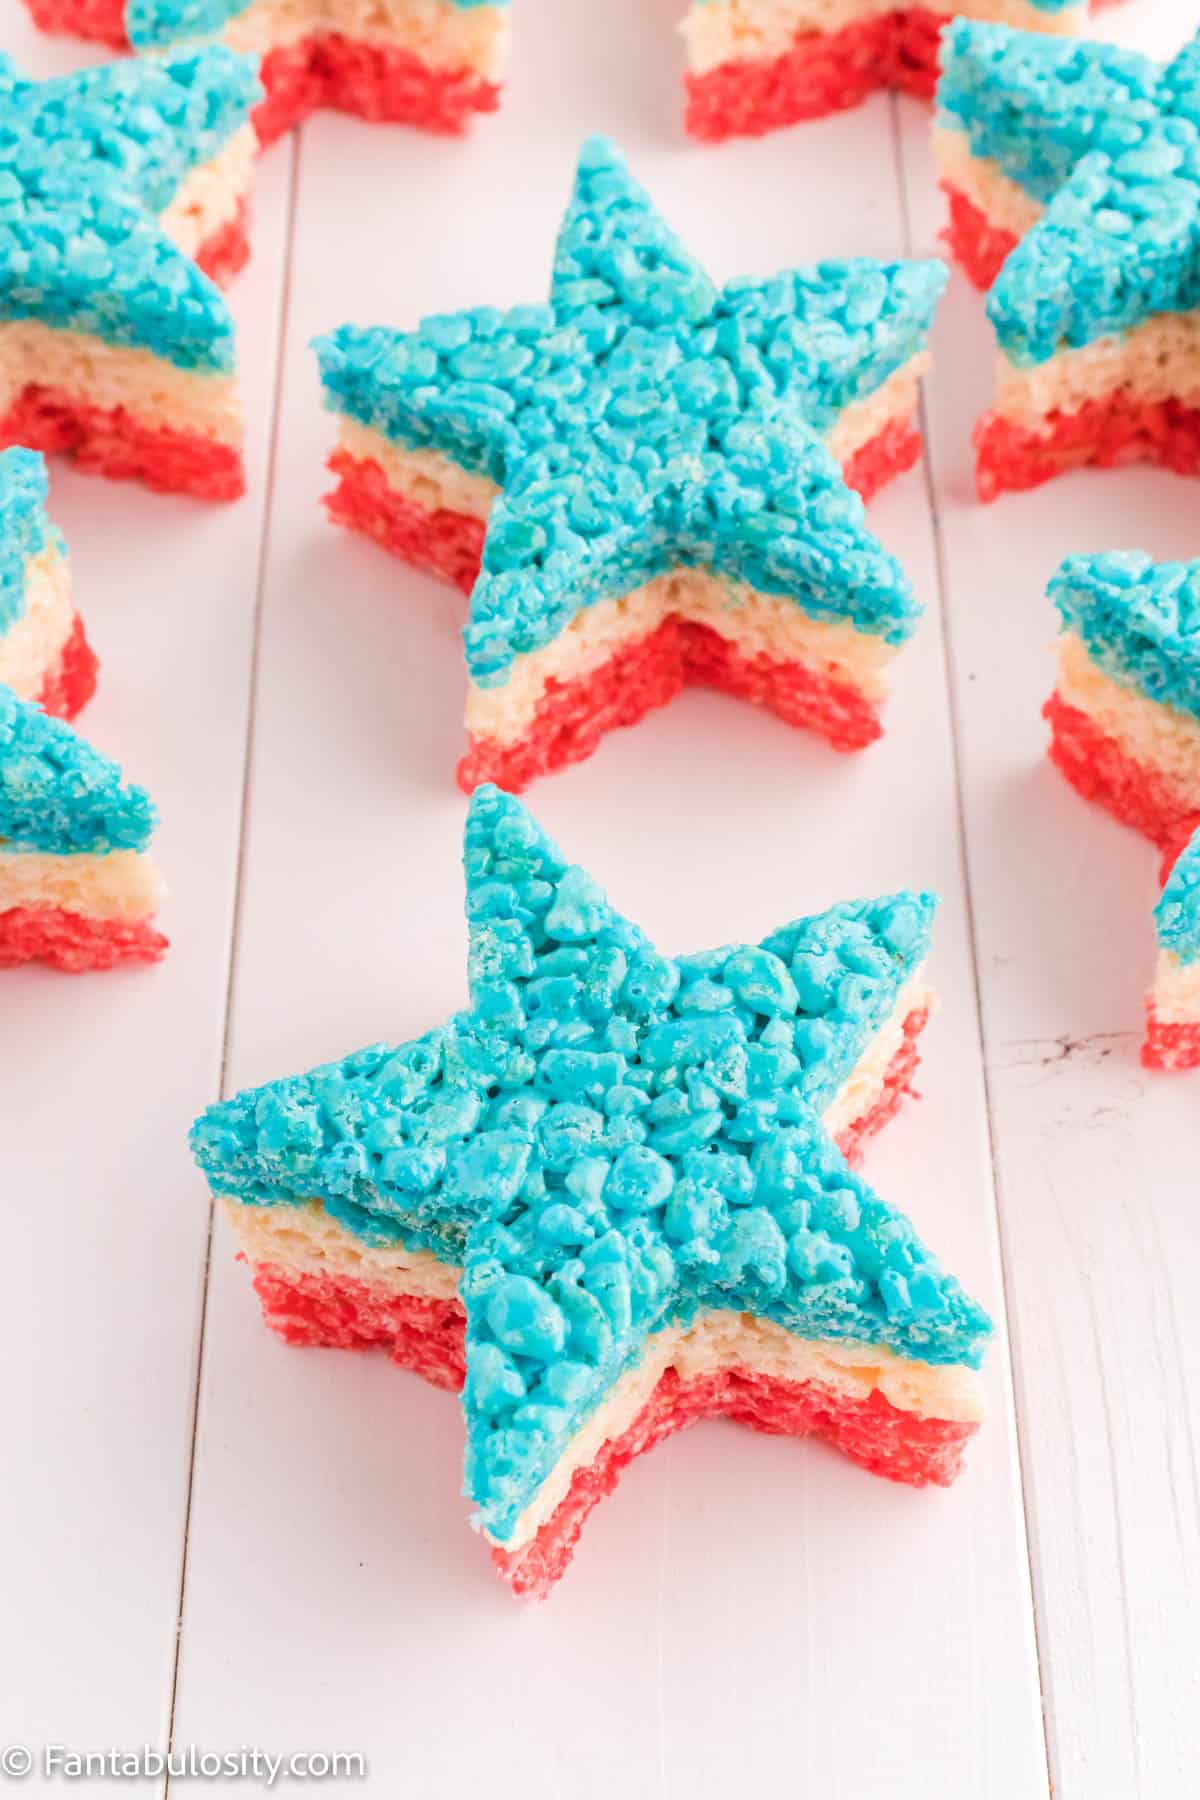
    A 4th of July Rice Krispie star with layers fo red, white and blue Rice Krispie treat!

    4th of July Rice Krispie Treats: This patriotic dessert is easy to make, super delicious, and tons of fun to serve at your Fourth of July get-together (or anytime)! Our American Flag Pizza Dessert is another fun recipe to make for the holiday too!

    A stack of Rice Krispie treats shaped like stars that clearly show three layers - red, white, and blue.

    I love a good Rice Krispie treat, but I love it even more when it’s themed to the occasion. This red, white, and blue dessert is the perfect treat to serve for the Fourth of July, along with these 4th of July cupcakes of course!

    Rice Krispie treats are an easy, no bake dessert to make and they are so fun to customize. This easy Fourth of July dessert combines three layers of this tasty, nostalgic rice treat and then cuts it into a star for an extra wow factor.

    Serve them at your backyard barbecue, your lunch picnic, or any old time! Your party guests are sure to love these Fourth of July Rice Krispie Treats, especially if this 4th of July Puppy Chow is sitting next to them too!

    [feast_advanced_jump_to]

    Why You’ll Love This Recipe

    Fun & Festive: This red, white, and blue dessert is patriotic and the perfect dessert to serve at your Fourth of July barbecue or get together. See our substitutions & variations section for ideas of other holidays you could make this for!

    Quick & Easy: Although this recipe takes a little bit of time because it has three layers, it’s still a quick and easy dessert to put together.

    No Bake: You won’t have to heat up the oven and the house to make this yummy no bake dessert. And if you’re making it for the Fourth of July, which is pretty dang warm in some parts of the country, that’s a big plus!

    Delicious: I think most of us have had a Rice Krispie treat before, and for good reason. They are delicious!

    What is the Fourth of July?

    Here in the USA, July 4th is Independence Day. This is a federal holiday commemorating the Declaration of Independence of the United States, which was ratified by the Second Continental Congress on July 4, 1776.

    For patriotic holidays like July 4th, it’s common for Americans to celebrate with friends and family. Often these celebrations involve food that is themed after our nation’s flag (which is red, white, and blue and has both stars and stripes on it) as a show of patriotic pride.

    How do you make 4th of July rice crispy treats?

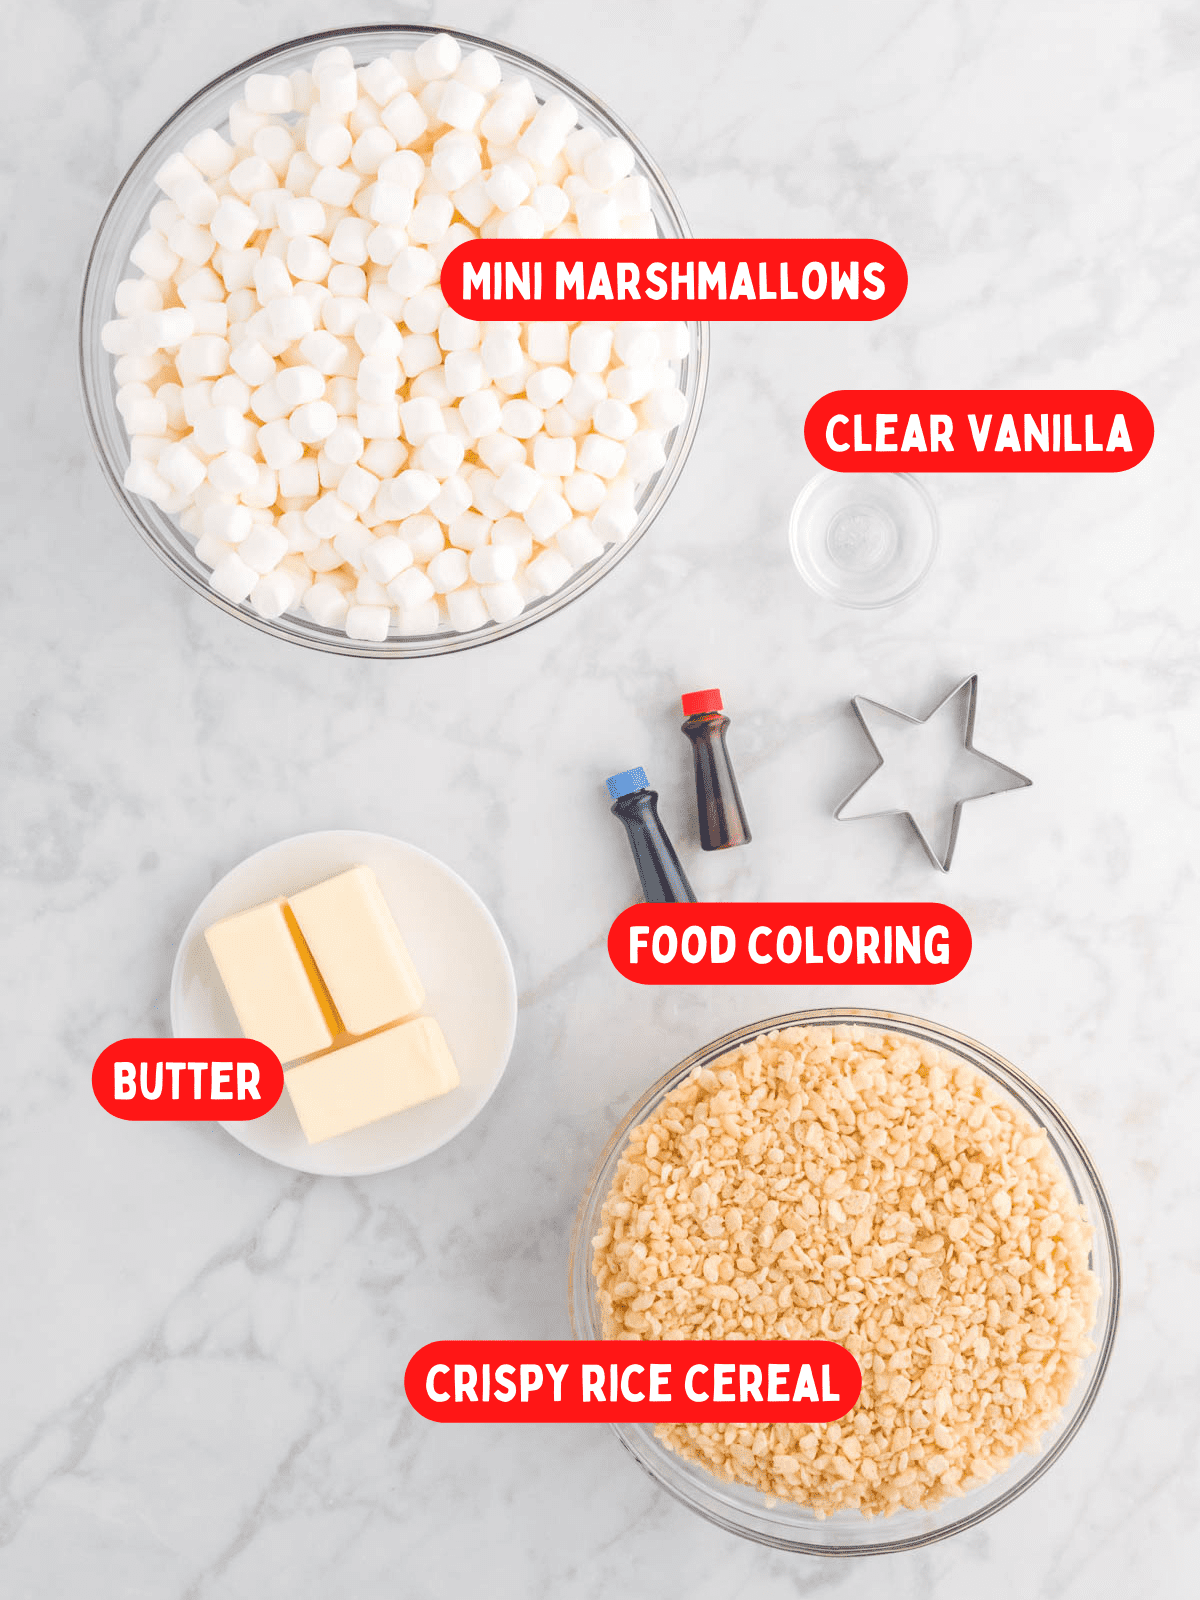
    You only need 5 simple ingredients (that you probably have in your pantry) to make this super fun treat!

    Ingredients for 4th of July Rice Krispie treats laid out on a counter with labels on each.

    Ingredients

    • ¾ cup butter divided
    • 15 cups mini marshmallows
    • 12 cups of Rice Krispies, divided (or any crispy rice cereal)
    • 1½ teaspoons clear vanilla extract divided
    • red & blue food coloring (8-9 red drops, 6 blue)

    You can find a complete list of ingredients and directions in the recipe card below.

    Instructions

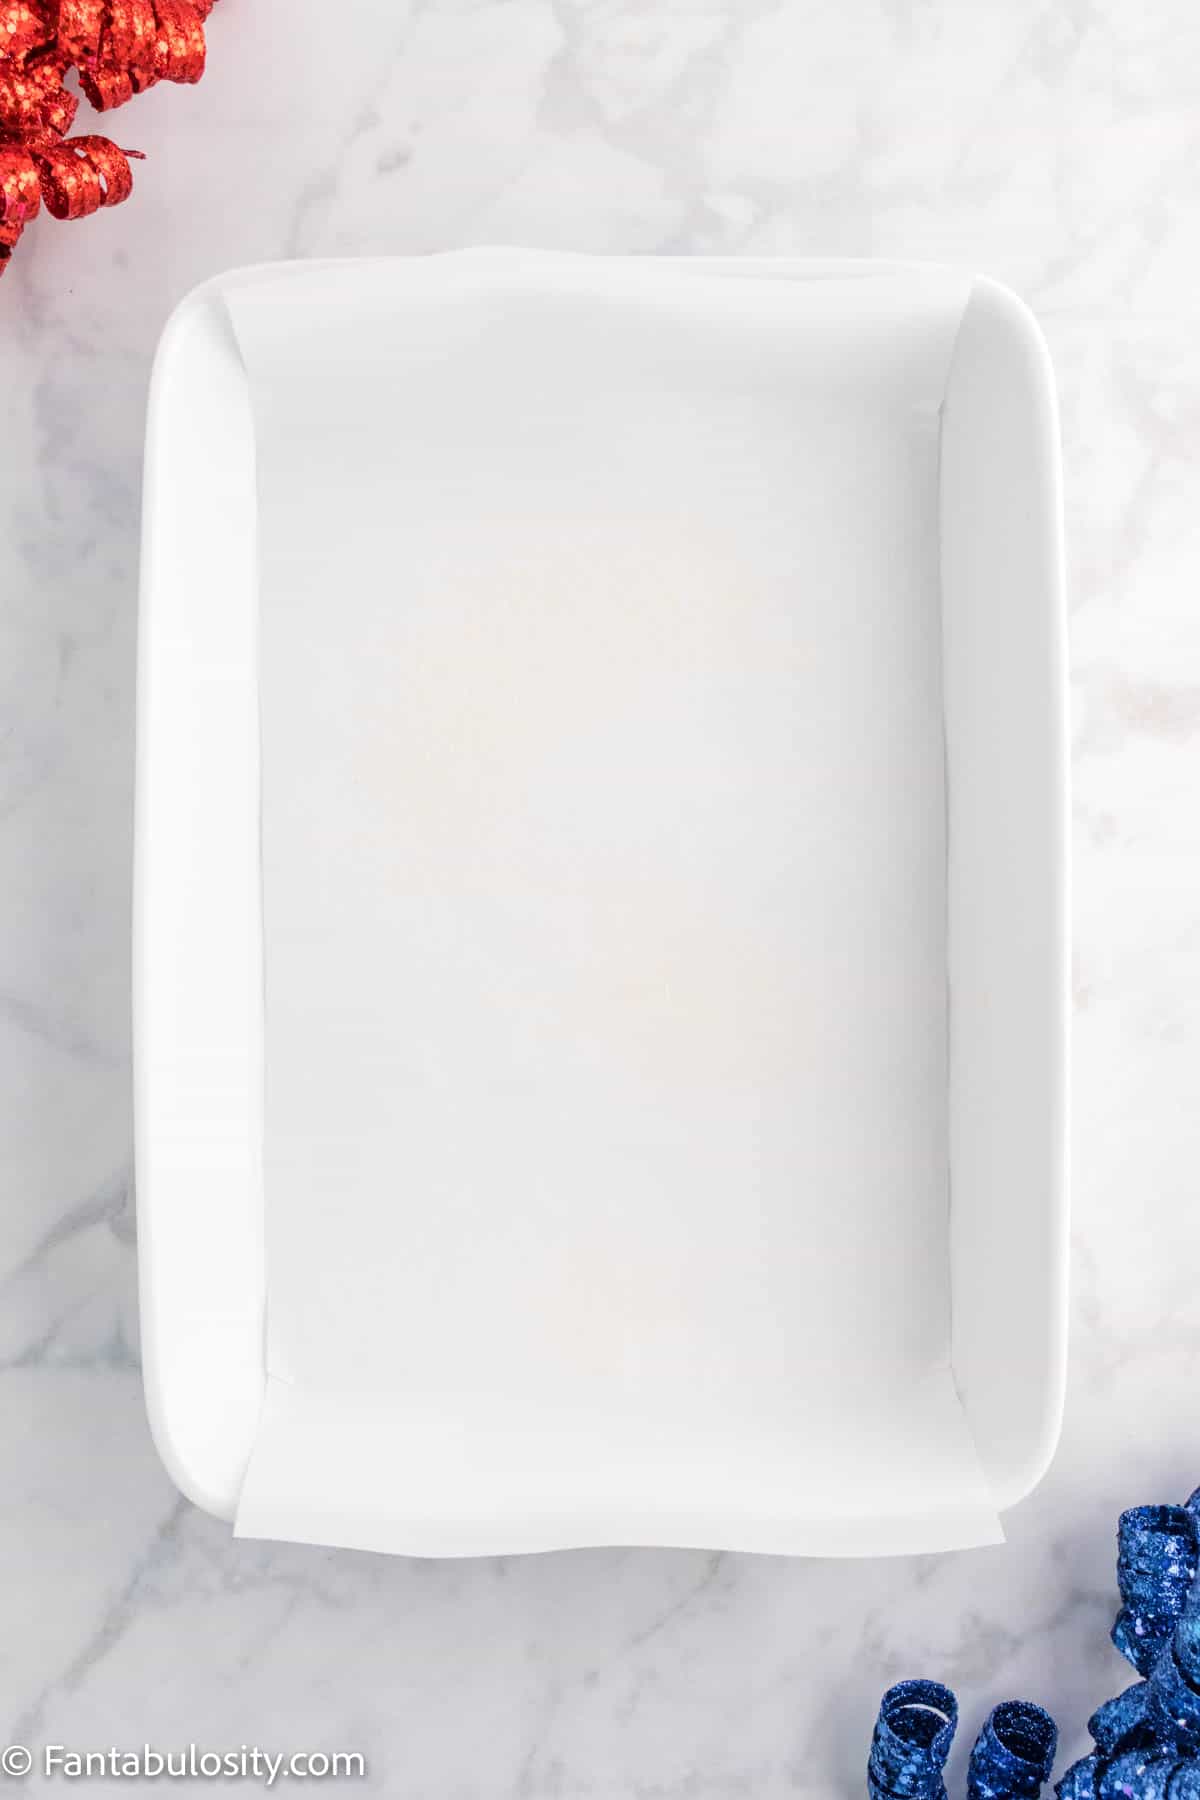
    1. Line a 9×13-inch pan with parchment paper. Spray lightly with nonstick cooking spray.     
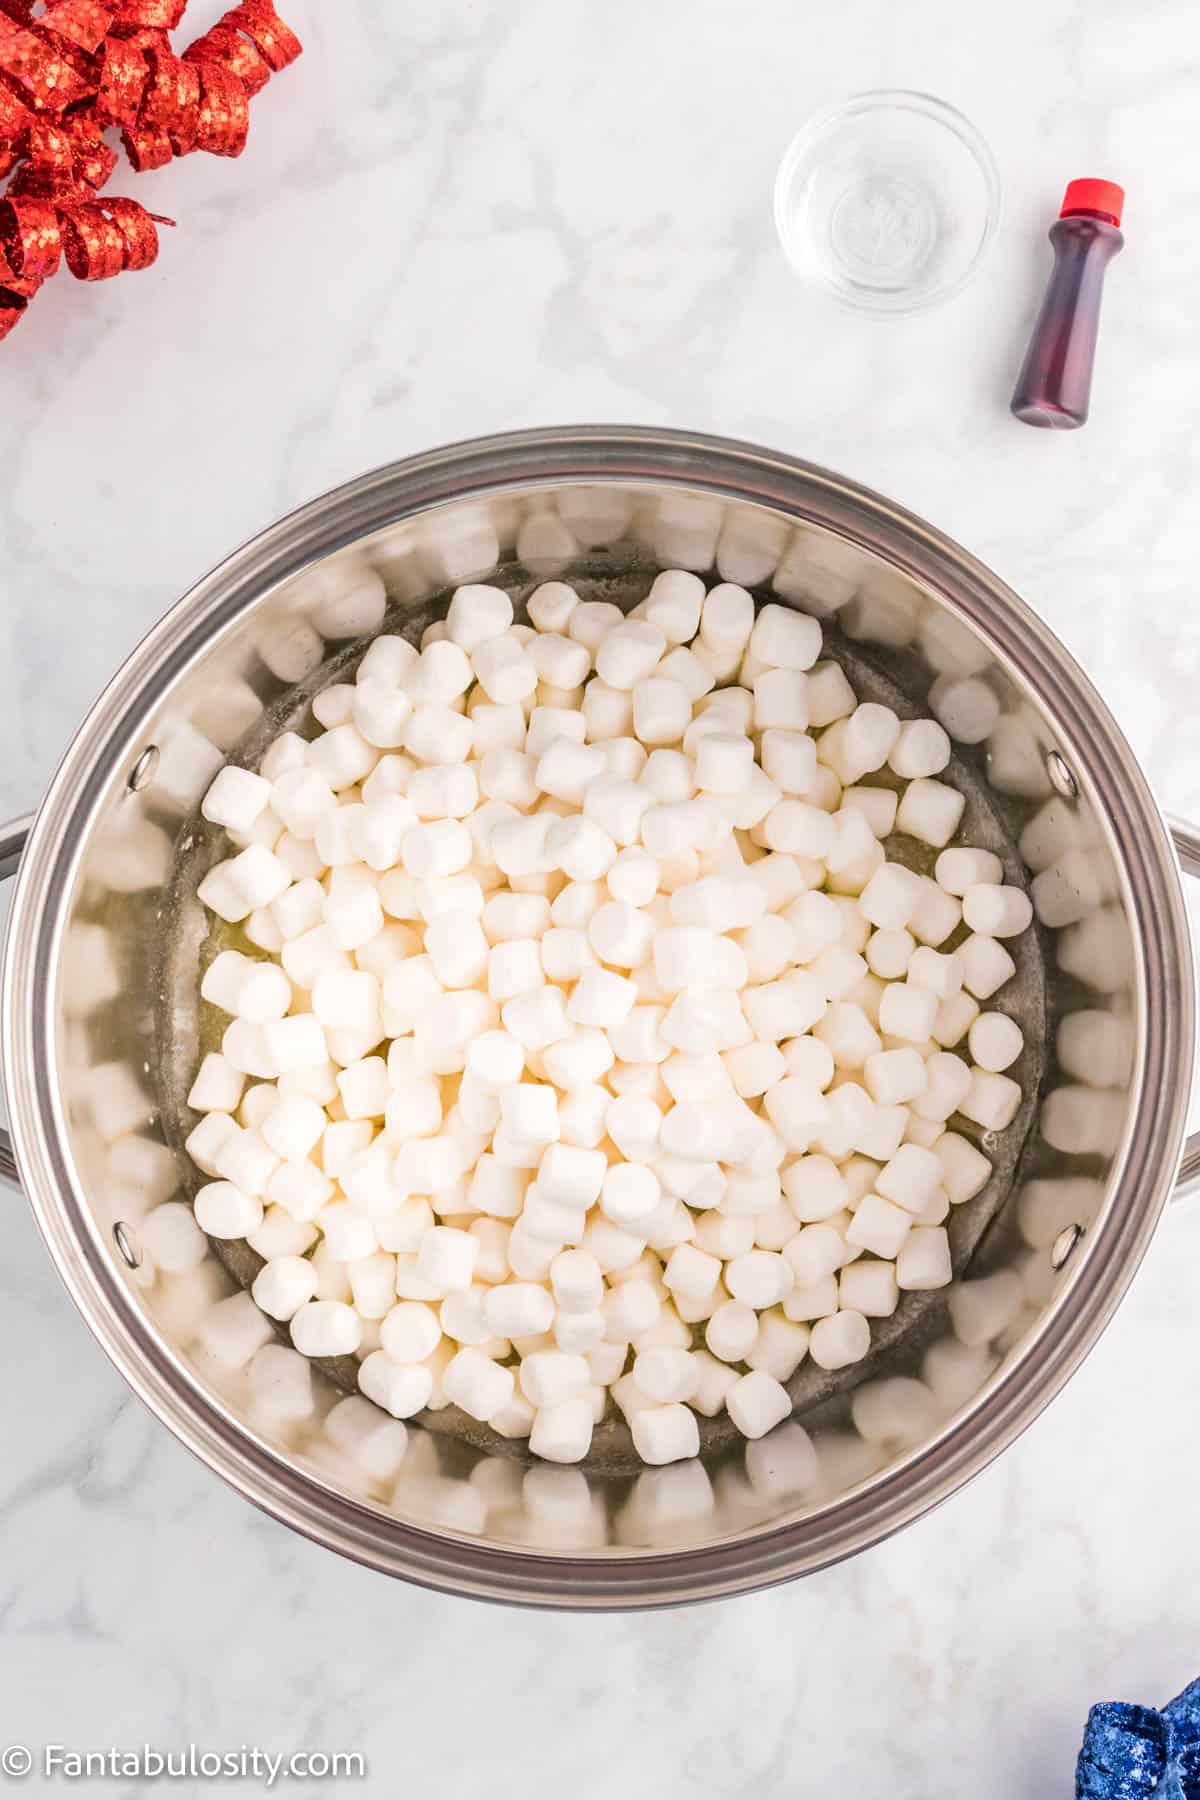
    2. In a large pot, start to melt ¼ cup butter over medium-low heat. Once melted, add 5 cups of marshmallows to the butter, stirring often. Once the marshmallows are almost melted, turn the heat to low. 
    A 9x13 pan on a counter.
    Prepare the 9×13.
    Marshmallows in a large pot with melted butter.
    Melt butter, add marshmallows
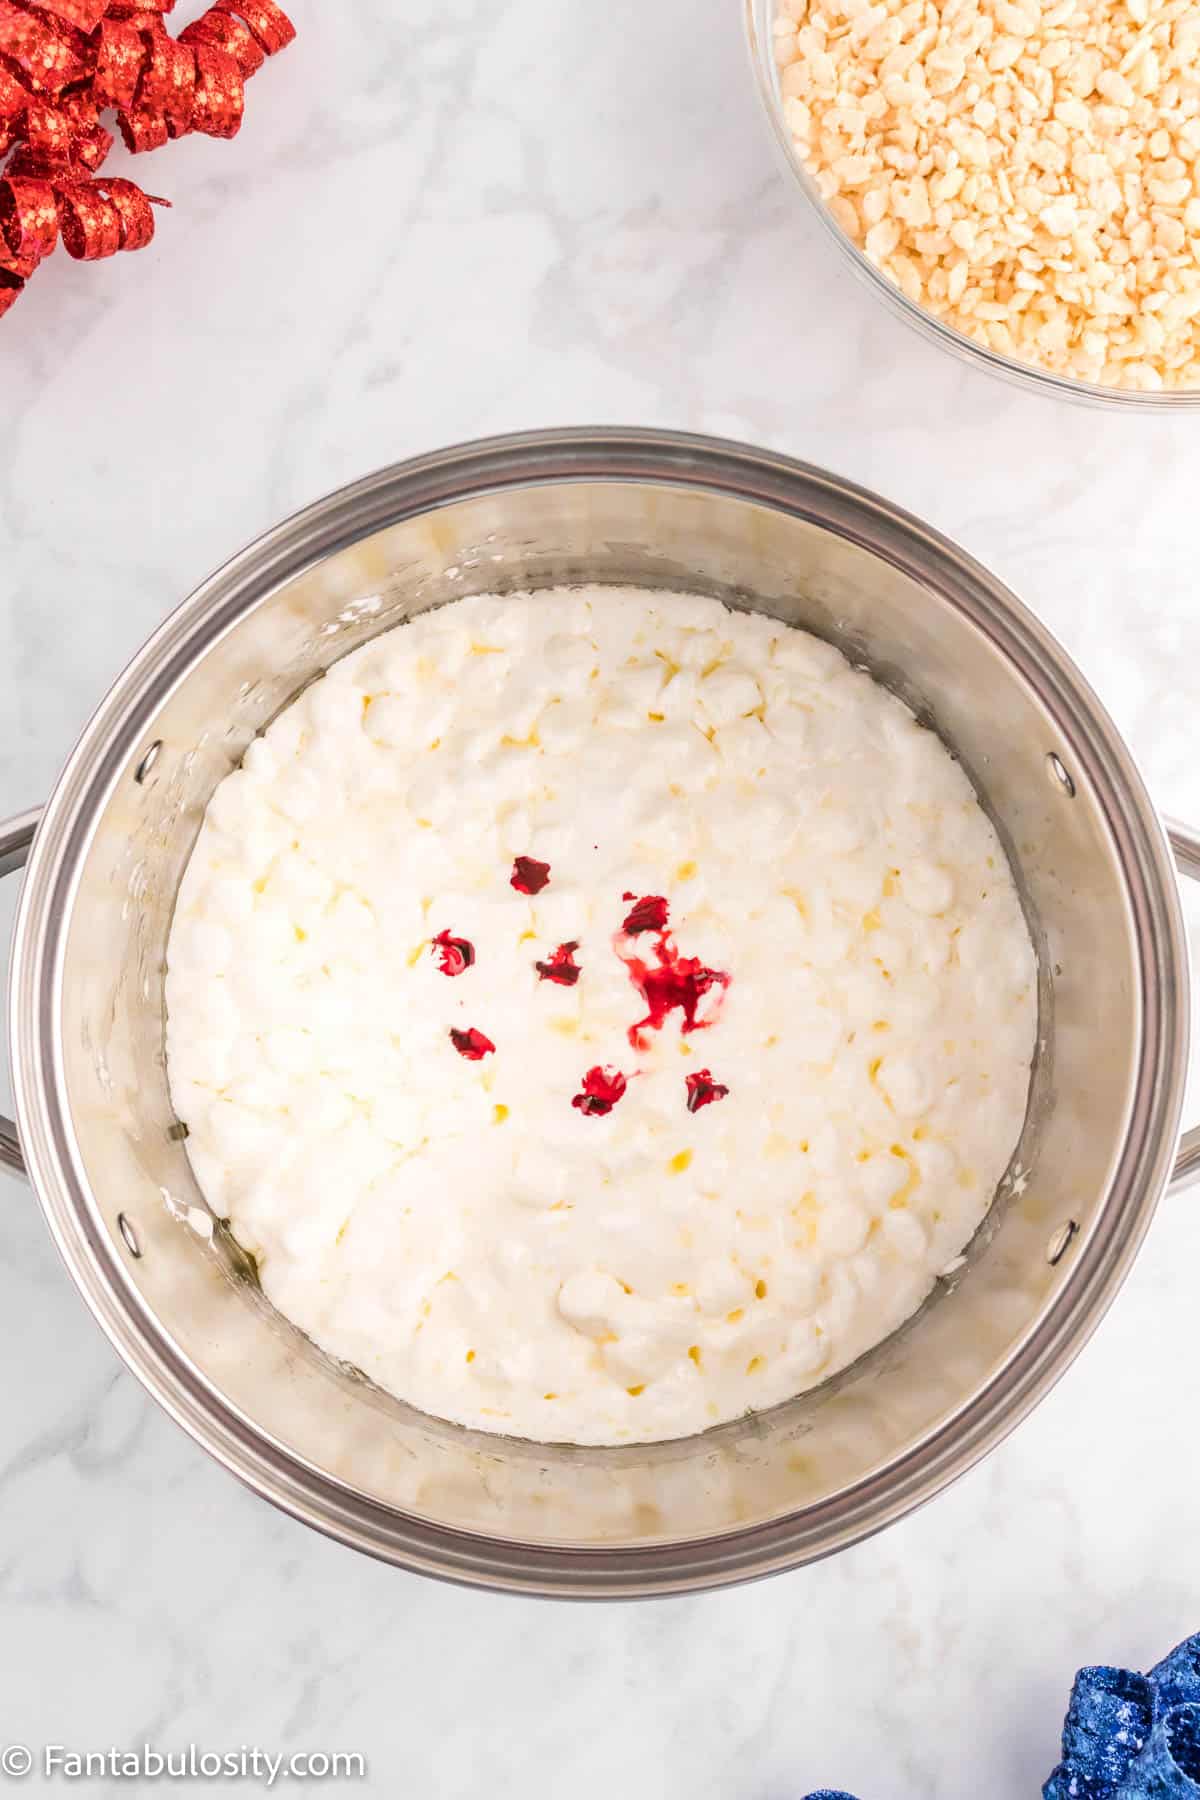
    1. Add ½ teaspoon of vanilla and the red food coloring, a few drops at a time, and mix well. If needed, continue to add food coloring until desired color. Remove from heat. 
    2. Mix in 4 cups of the Rice Krispie cereal. Stir until the cereal is well coated. 

    Note: The marshmallow cools down quickly, so be prepared to mix in the cereal immediately after removing from the heat, then quickly add them to the pan before cooling down too much and getting very sticky. 

    Melted marshmallows and butter with red food colouring added in.
    Add food coloring.
    Rice Krispies on top of the red melted marshmallow mixture.
    Stir in rice cereal.
    1. Pour into the parchment-lined pan. Spread evenly while pressing down firmly, and smooth the top using the back of a buttered spoon. 
    2. Repeat the same process, leaving this second batch white. Pour the white batch on top of the red layer. Press down and smooth evenly.
    Red Rice Krispie treats being pressed into the 9x13.
    Spread in pan.
    A white layer of Rice Krispies on top of the red layer in the 9x13 pan.
    Repeat with white layer.
    1. Repeat the process one last time with the blue food coloring. Place the blue Rice Krispie Treats on top of the white layer. Press firmly and smooth out the top layer. Allow to cool completely at room temperature (will take about an hour). 
    2. Remove the treats from the pan, using a knife to cut around the edges if needed. Peel off the parchment paper and place on a cutting board. 
    Repeat with blue layer; cool.
    Remove from pan.
    1. Cut the red, white, and blue Rice Krispy treats into star shapes using a cookie cutter. If the cutter isn't deep enough to completely reach the bottom of the pan, create an indentation with the cutter to use as a stencil, and then cut it out completely using a knife. Be sure to spray your cookie cutter and/or knife with cooking spray so the Rice Krispie doesn’t stick to them.
    2. Serve & enjoy!
    A star shaped cookie cutter about to press into the Rice Krispie treat.
    Cut into stars.
    Several red, white, and blue star shaped Rice Krispie treats sitting on a counter.
    Serve and enjoy!

    Looking for more no bake desserts? Try this no bake cherry cheesecake or this 4th of July Dip! In fact, if you used a mixture of cherry pie filling and blueberry pie filling this could become another easy Fourth of July dessert!

    And since you’re looking for no bake recipes, why not whip up a batch of our amazing no bake cookies to have on hand? They’re a family favorite!

    Looking for more Fourth of July recipes and decorating ideas? Check out the Fourth of July section on the blog for red donuts, a red, white and blue themed dip bar, and more!

    Substitutions & Variations

    Missing an ingredient? Looking for other ways to enjoy these American Rice Krispie Treats? Try these suggestions…

    • Butter – I love the flavor of butter, but you can use margarine in this recipe if you need.
    • Marshmallows – Store brand marshmallows and old, dried out marshmallows don’t work as well for this recipe. Make sure you use good quality marshmallows, and pick up a fresh bag for the best results!
    • Other Holidays/Occasions – The colored layers can be changed for any holiday or occasion. Make these for Christmas (red & green), St. Patrick's Day (green), Valentine's Day (red & pink), etc. 
    • Add Sprinkles or Mix-Ins – Before your top layer cools, quickly press some sprinkles or other fun mix-ins into it for a fun decoration! You could also stir sprinkles/mix-ins into the marshmallow cereal mixture before you press it into the pan. For this recipe, you could use red, white, and blue sprinkles or red, white, and blue m&m. If you are making it for another holiday/occasion, use things that fit with that theme!

    Storage

    Store your star rice Rice Krispie treats in an airtight container on the counter for 2-3 days, or in the fridge for 4-5 days.

    You could also put these in an airtight, freezer-safe container and freeze them for up to a month. Rice Krispie treats keep well in the freezer.

    Expert Tips and FAQs

    Do you have to refrigerate rice krispie treats?

    No, it’s not necessary to refrigerate Rice Krispie Treats. If you need them to cool down faster you can chill them for a short while while they are setting, but otherwise, they can be stored at room temperature.

    How to keep rice krispies treats fresh?

    The absolute best way to keep these fresh is to make sure they are stored in an airtight container! If you are concerned about it, you can individually wrap each star in plastic wrap before placing them in an airtight container and this should ensure that they stay nice and soft/fresh until you are ready to eat them.

    What if I don’t have a star-shaped cookie cutter?

    If you don’t, don’t worry at all! This dessert will look just as great cut into squares, and you’ll still be able to see all three layers and colors that way.

    You could also make yourself a star-shaped template out of paper and cut around that with a knife to make your star-shaped treats.

    How do you make Rice Krispie treats more sticky and gooey?

    If you like your Rice Krispie treats a bit more on the gooey side (where they pull apart super easily and are more sticky to eat), simply add an additional cup of marshmallows to each of the batches you are making (the red, the plain, and the blue).  

    Can I make these in the microwave?

    Technically, yes you can. In a large, microwave-safe bowl melt the butter in 30-second increments. Once melted, add your marshmallows and continue to heat in 30-second increments (stirring often). When your butter and marshmallows are melted completely, stir in the vanilla and food coloring and quickly stir in the cereal. From there the recipe continues as it is written.

    Did you make this? I’d be so grateful if you left a “star” rating below to let me know what you thought! Then, the next time you need a quick and easy recipe, come back to Fantabulosity to browse all of my easy recipes!

    Recipe

    A 4th of July Rice Krispie star with layers fo red, white and blue Rice Krispie treat!
    Print Pin
    5 from 4 votes

    4th of July Rice Krispie Treats

    4th of July Rice Krispie Treats: This patriotic dessert is easy to make, super delicious, and tons of fun to serve at your Fourth of July get together (or anytime)!
    Course Dessert, Snack
    Cuisine American
    Prep Time 25 minutes minutes
    Cook Time 15 minutes minutes
    COOL TIME 1 hour hour
    Total Time 1 hour hour 40 minutes minutes
    Servings 8 stars
    Calories 279kcal
    Author Jessica Burgess

    Equipment

    • 3-inch star cookie cutter

    Ingredients

    • ¾ cup butter divided
    • 15 cups mini marshmallows
    • 12 cups crispy rice cereal divided (I used Rice Krispies)
    • 1½ teaspoons clear vanilla extract divided
    • red & blue food coloring (8-9 red drops, 6 blue)

    Instructions

    • Line a 9×13-inch pan with parchment paper. Spray lightly with nonstick cooking spray.     
    • In a large pot, start to melt ¼ cup butter over medium-low heat. Once melted, add 5 cups of the mini marshmallows to the butter, stirring often. Once the marshmallows are almost melted, turn the heat to low.
    • Add ½ teaspoon of vanilla and the red food coloring, a few drops at a time, and mix well. If needed, continue to add food coloring until desired color. Remove from heat.
    • Mix in 4 cups of the cereal. Stir until the cereal is well coated.
    • Pour into the parchment lined pan. Spread evenly while pressing down firmly, and smooth the top using the back of a buttered spoon. 
    • Repeat the same process, leaving this second batch white. Pour the white batch on top of the red layer. Press down and smooth evenly.
    • Repeat the process one last time with the blue food coloring. Place on top of the white layer. Press firmly and smooth out the top layer. Allow to cool completely at room temperature (will take about an hour). 
    • Remove the treats from the pan, using a knife to cut around the edges if needed. Peel off the parchment paper and place on a cutting board. 
    • Cut the treats into star shapes using a cookie cutter. If the cutter isn't deep enough to completely reach the bottom of the pan, create an indentation with the cutter to use as a stencil, and then cut it out completely using a knife. Be sure to spray your cookie cutter and/or knife with cooking spray so the Rice Krispie doesn't stick to them. 
    • Serve & enjoy!

    Notes

    NOTE: The marshmallow cools down quickly, so be prepared to mix in the cereal immediately after removing from the heat, then quickly add them to the pan before cooling down too much and getting very sticky. 
     
    STORAGE: Store your patriotic homemade Rice Krispie treats in an airtight container on the counter for 2-3 days, or in the fridge for 4-5 days. 
    You could also put these in an airtight, freezer safe container and freeze them for up to a month. Rice Krispie treats keep well in the freezer. 

    Nutrition

    Serving: 1star | Calories: 279kcal | Carbohydrates: 50g | Protein: 2g | Fat: 9g | Saturated Fat: 6g | Polyunsaturated Fat: 1g | Monounsaturated Fat: 2g | Trans Fat: 1g | Cholesterol: 23mg | Sodium: 107mg | Potassium: 21mg | Fiber: 1g | Sugar: 27g | Vitamin A: 266IU | Calcium: 5mg | Iron: 1mg

    Air Fryer Zucchini No Breading

    May 24, 2022

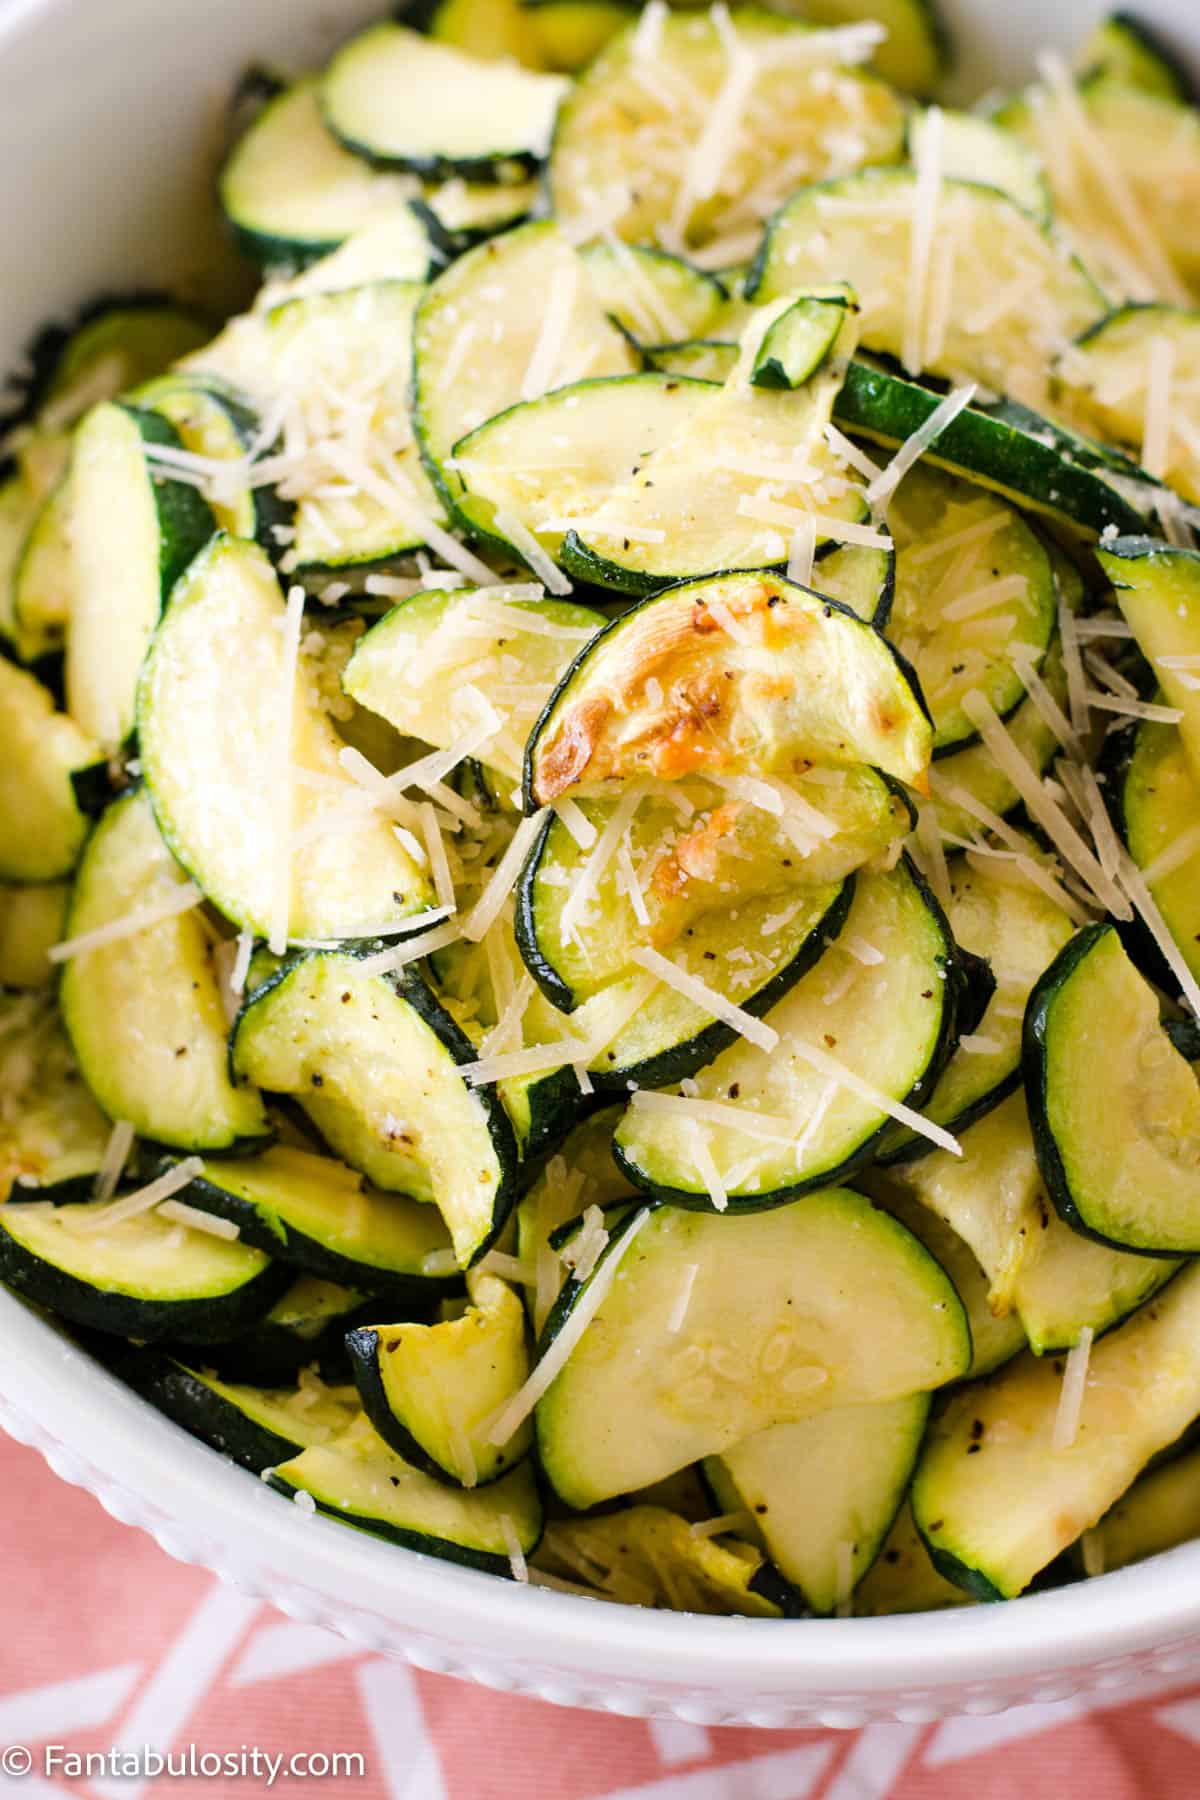
    sliced air fryer zucchini in white bowl

    Air Fryer Zucchini: An easy (and low carb) recipe without breading that is the perfect side dish to serve with dinner! Cut in to chips or fries & done in as little as 10 minutes!

    sliced, cooked air fryer zucchini in white bowl
    Air Fryer Zucchini

    Why You’ll Love This Recipe

    We have this air fried zucchini at LEAST 3 times a week and my family has NOT grown tired of this recipe yet! I’d say that’s a “win” since it’s one of the healthiest side dishes we’ve ever had here on Fantabulosity.

    When it comes to air fryer recipes, this one may just take the cake. It’s easy, it’s healthy and it’s so delicious that our guests will stop mid-bite and ask what we did to make this zucchini so delicious!

    More Air Fryer Recipes You’ll Love:

    • Air Fryer Bacon
    • Hamburgers in the Air Fryer
    • Air Fryer Chicken Legs

    So without further ado… let’s get in to the details of how to make this zucchini so you can make it too!

    Ingredients

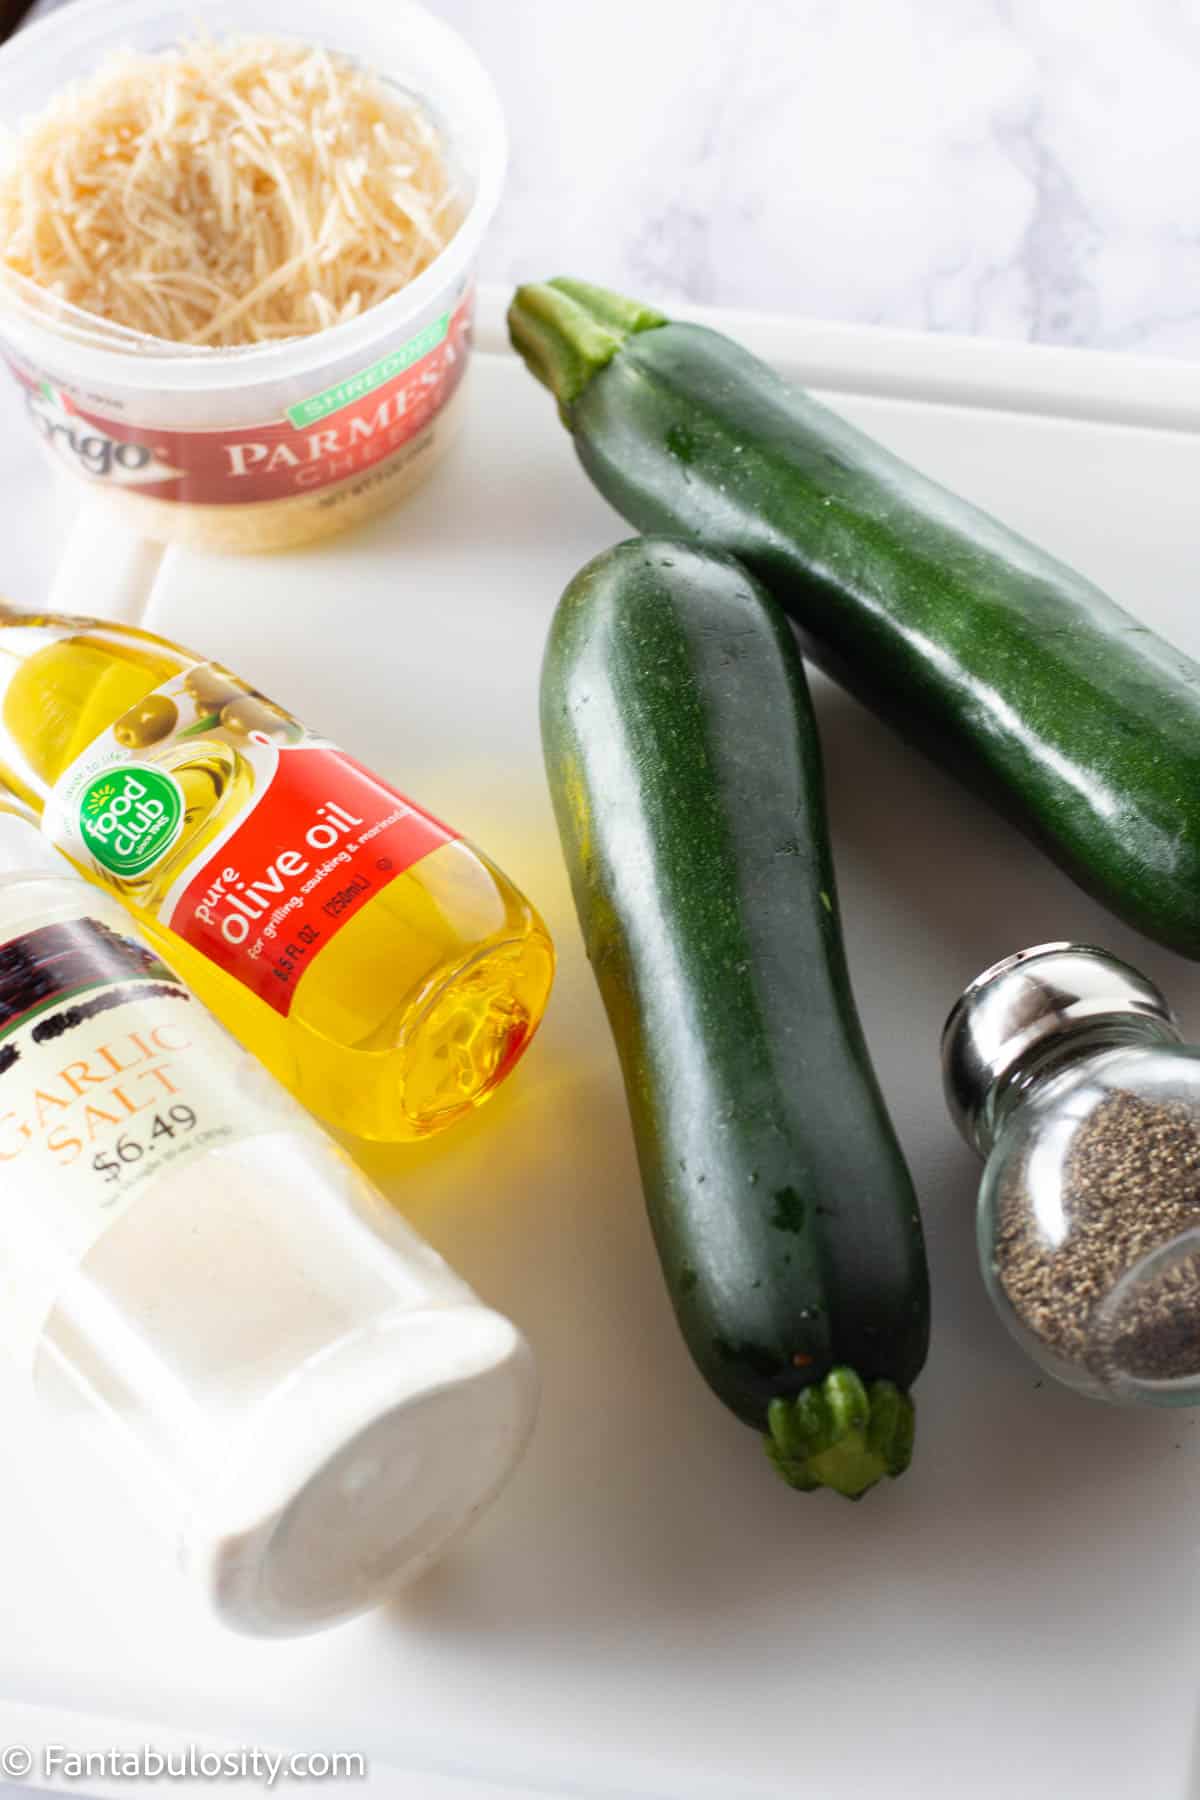
    ingredients for air fryer zucchini
    Ingredients

    If you’re a vegan, no fear… leave the parmesan cheese out, and simply only use the remainder of the ingredients to whip up this simple and delish veggie.

    What you’ll need:

    • Zucchini (I use two medium zucchini) for our family of four, but depending on the exact size of the “summer squash” — yep, it’s also a squash, a “medium” size can sometimes serve 5-6.)
    • 2 tablespoon olive oil
    • ¼ teaspoon garlic salt (Or more, if you’re the salty type — Woah…I simply mean “taste bud” wise friend, not personality-wise.)
    • A dash of black pepper, or to taste
    • ½ cup (or more if you’re the cheese-lover type) of shredded parmesan cheese

    NOTE: Am I flexible with the measurements of the ingredients? Yep. Why? Because this recipe is VERY forgiving and customizable to what you prefer. The good thing for you? When you’ve added in the oil, garlic salt, and pepper, give the zucchini a taste to see how the flavor is! Eating raw zucchini is a-ok!

    Zucchini in the Air Fryer, No Breading…

    Yep, you heard me. No breading needed/used here and you’re still going to love it, especially if you use the shredded parmesan cheese that can give this recipe a slight “toast” flavor to bring in what you may miss if you’re a diehard, breaded zucchini lover.

    How to Make Zucchini in the Air Fryer

    Ready to see just how easy this recipe is? Let’s get with it.

    Slice the Zucchini

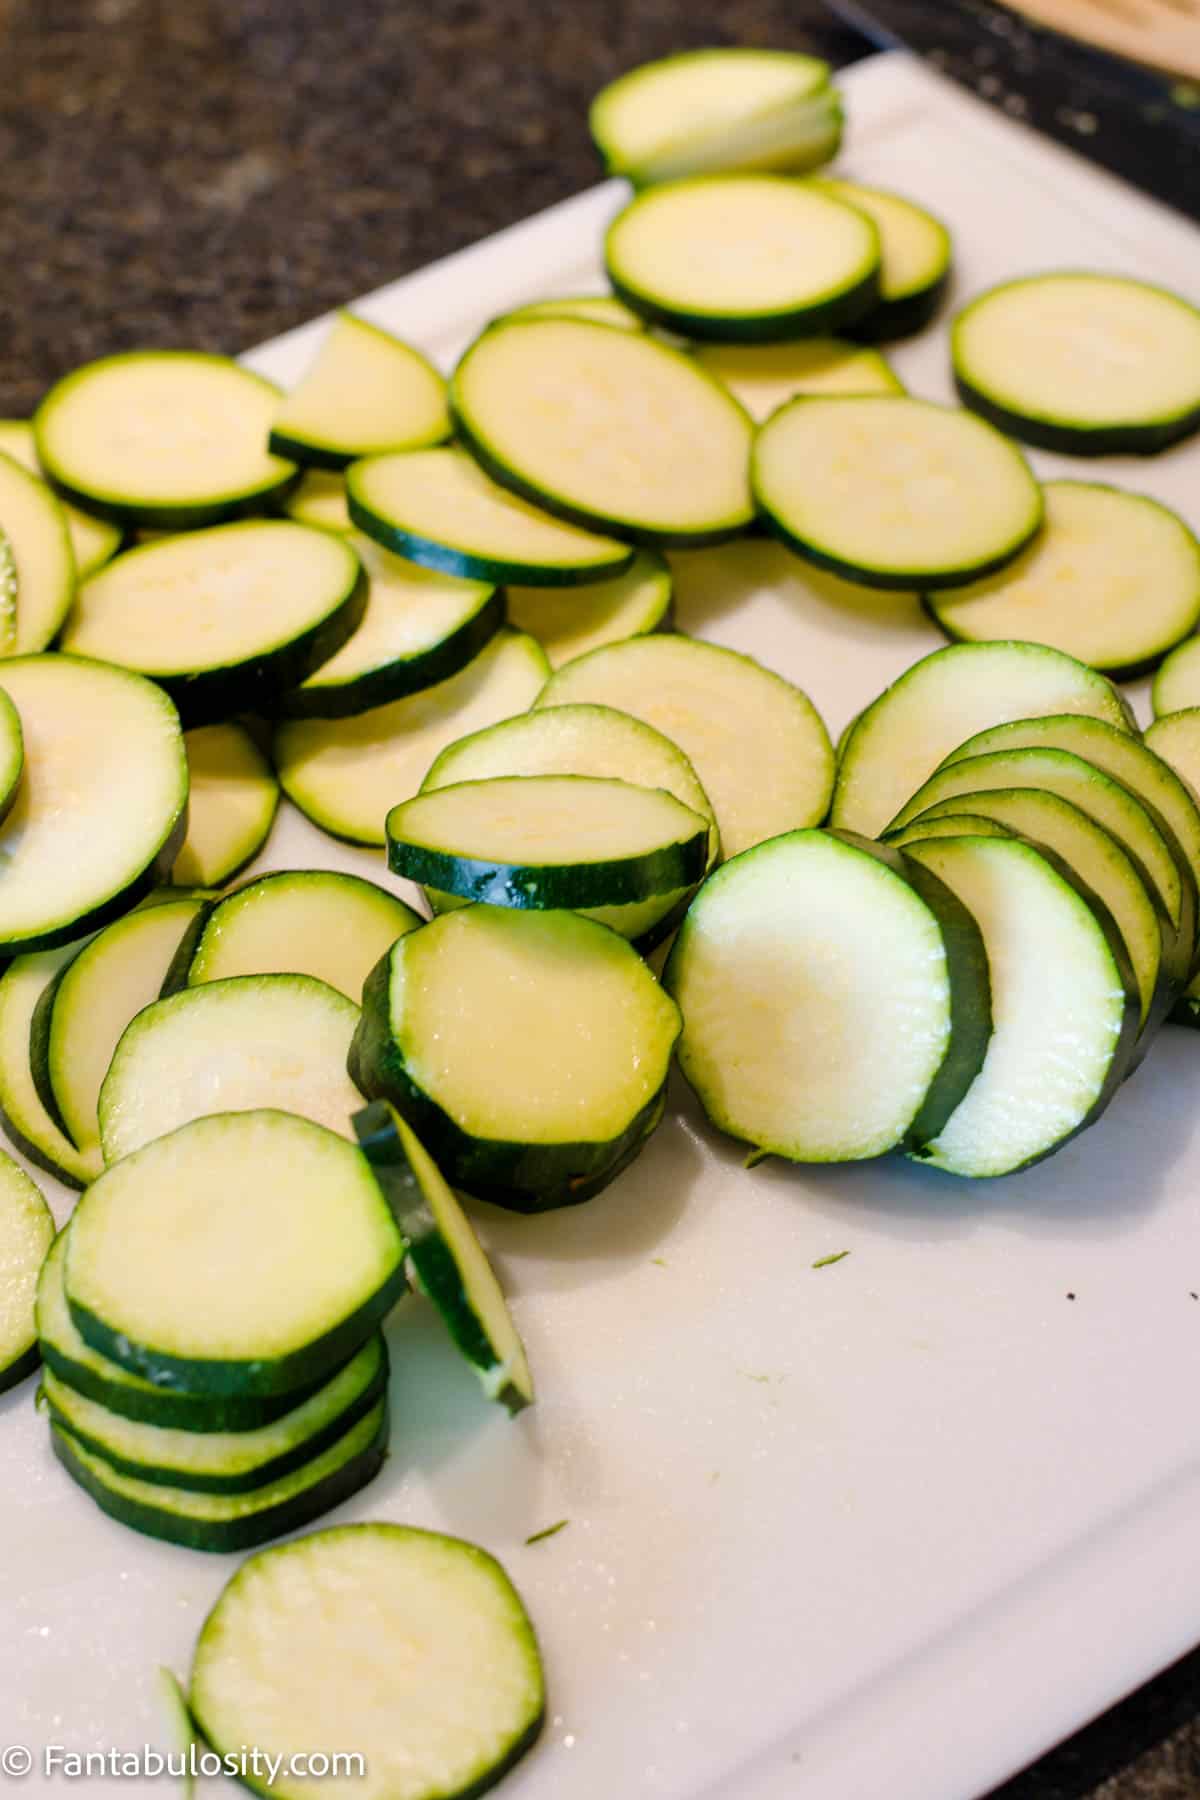
    My family prefers for the zucchini to be sliced about a ¼ in. thick — again, very forgiving, so feel free to do thicker/thinner as you prefer. Just know that the cook time may need to adjust a bit.

    sliced zucchini on white cutting board
    Slice zucchini

    Slice the Zucchini Again

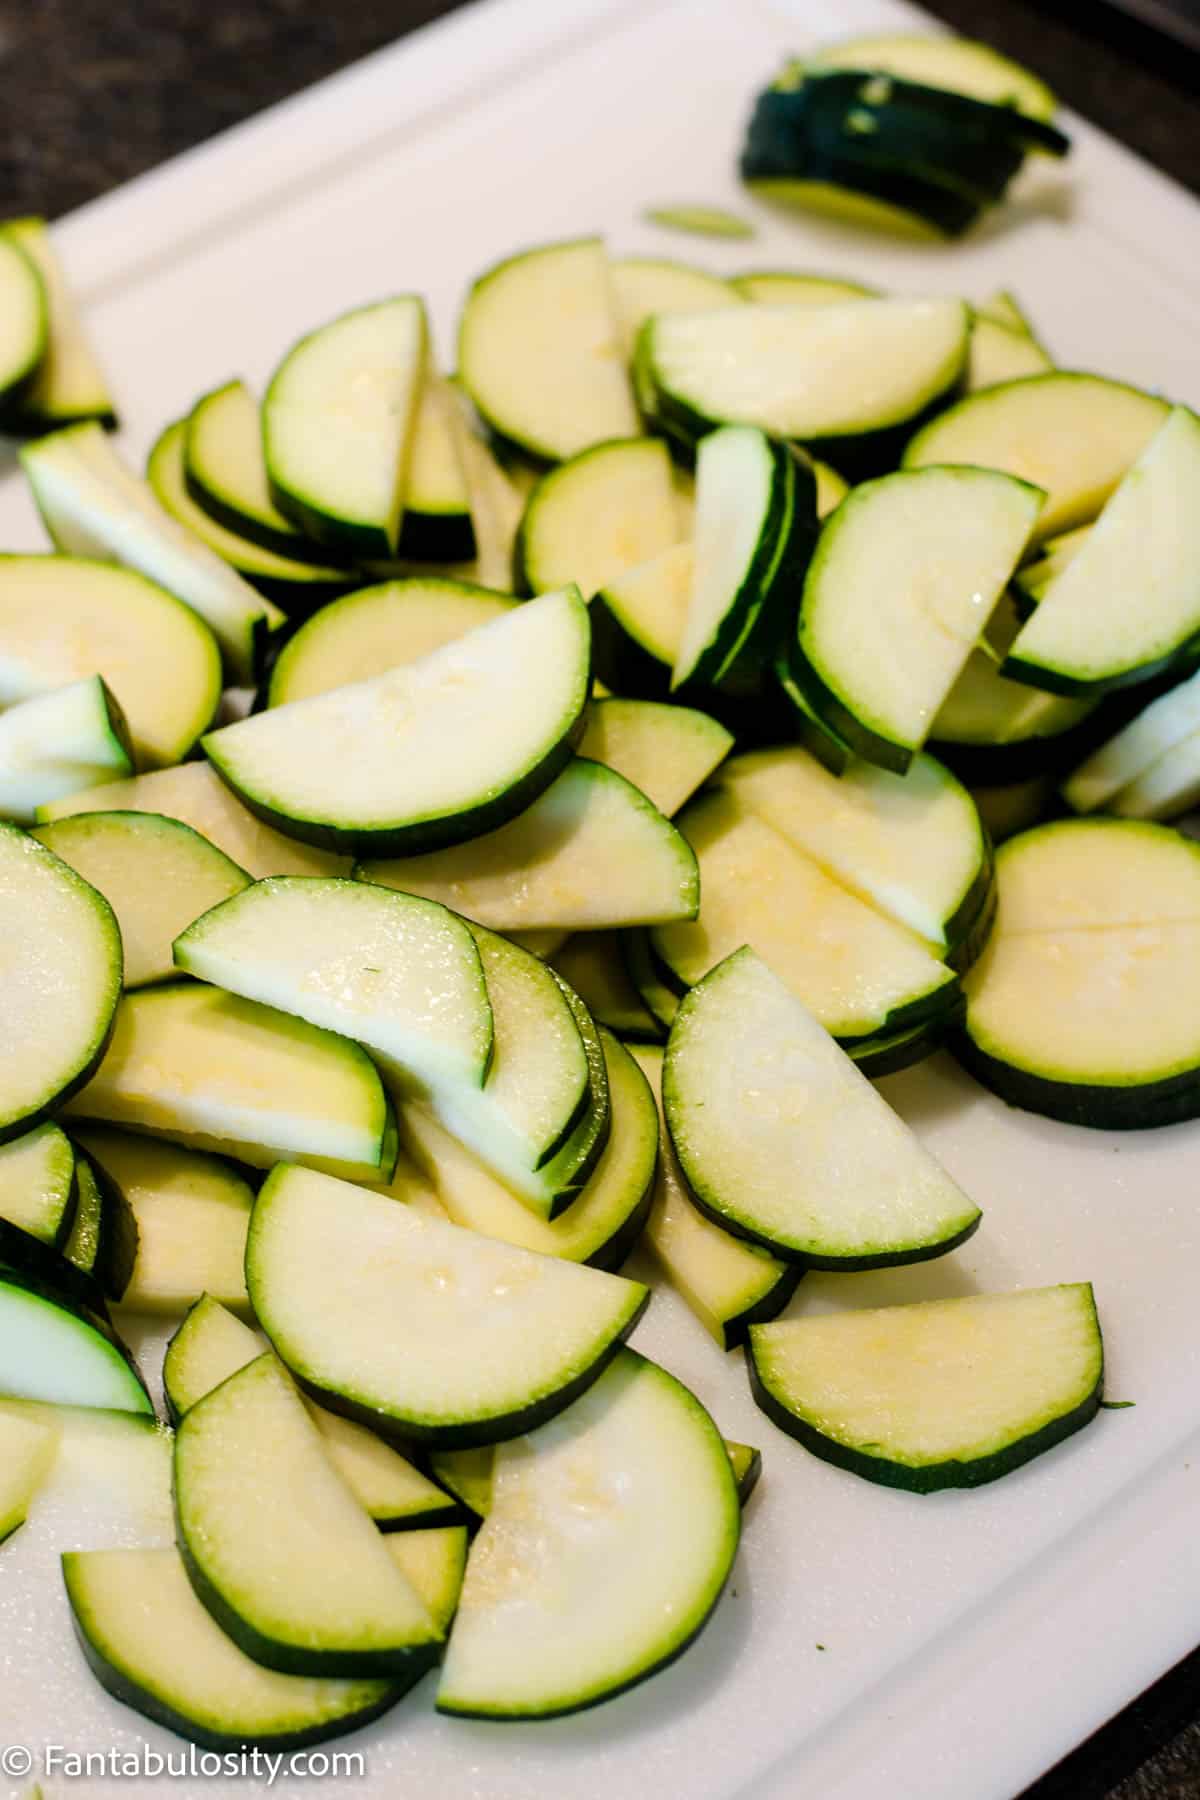
    If you want to make it just like yours truly, slice those circles in half again. Is this a “must”? Nope… we just prefer to have it cut like this.

    sliced zucchini in halves on white cutting board
    Slice again

    Oil and Season

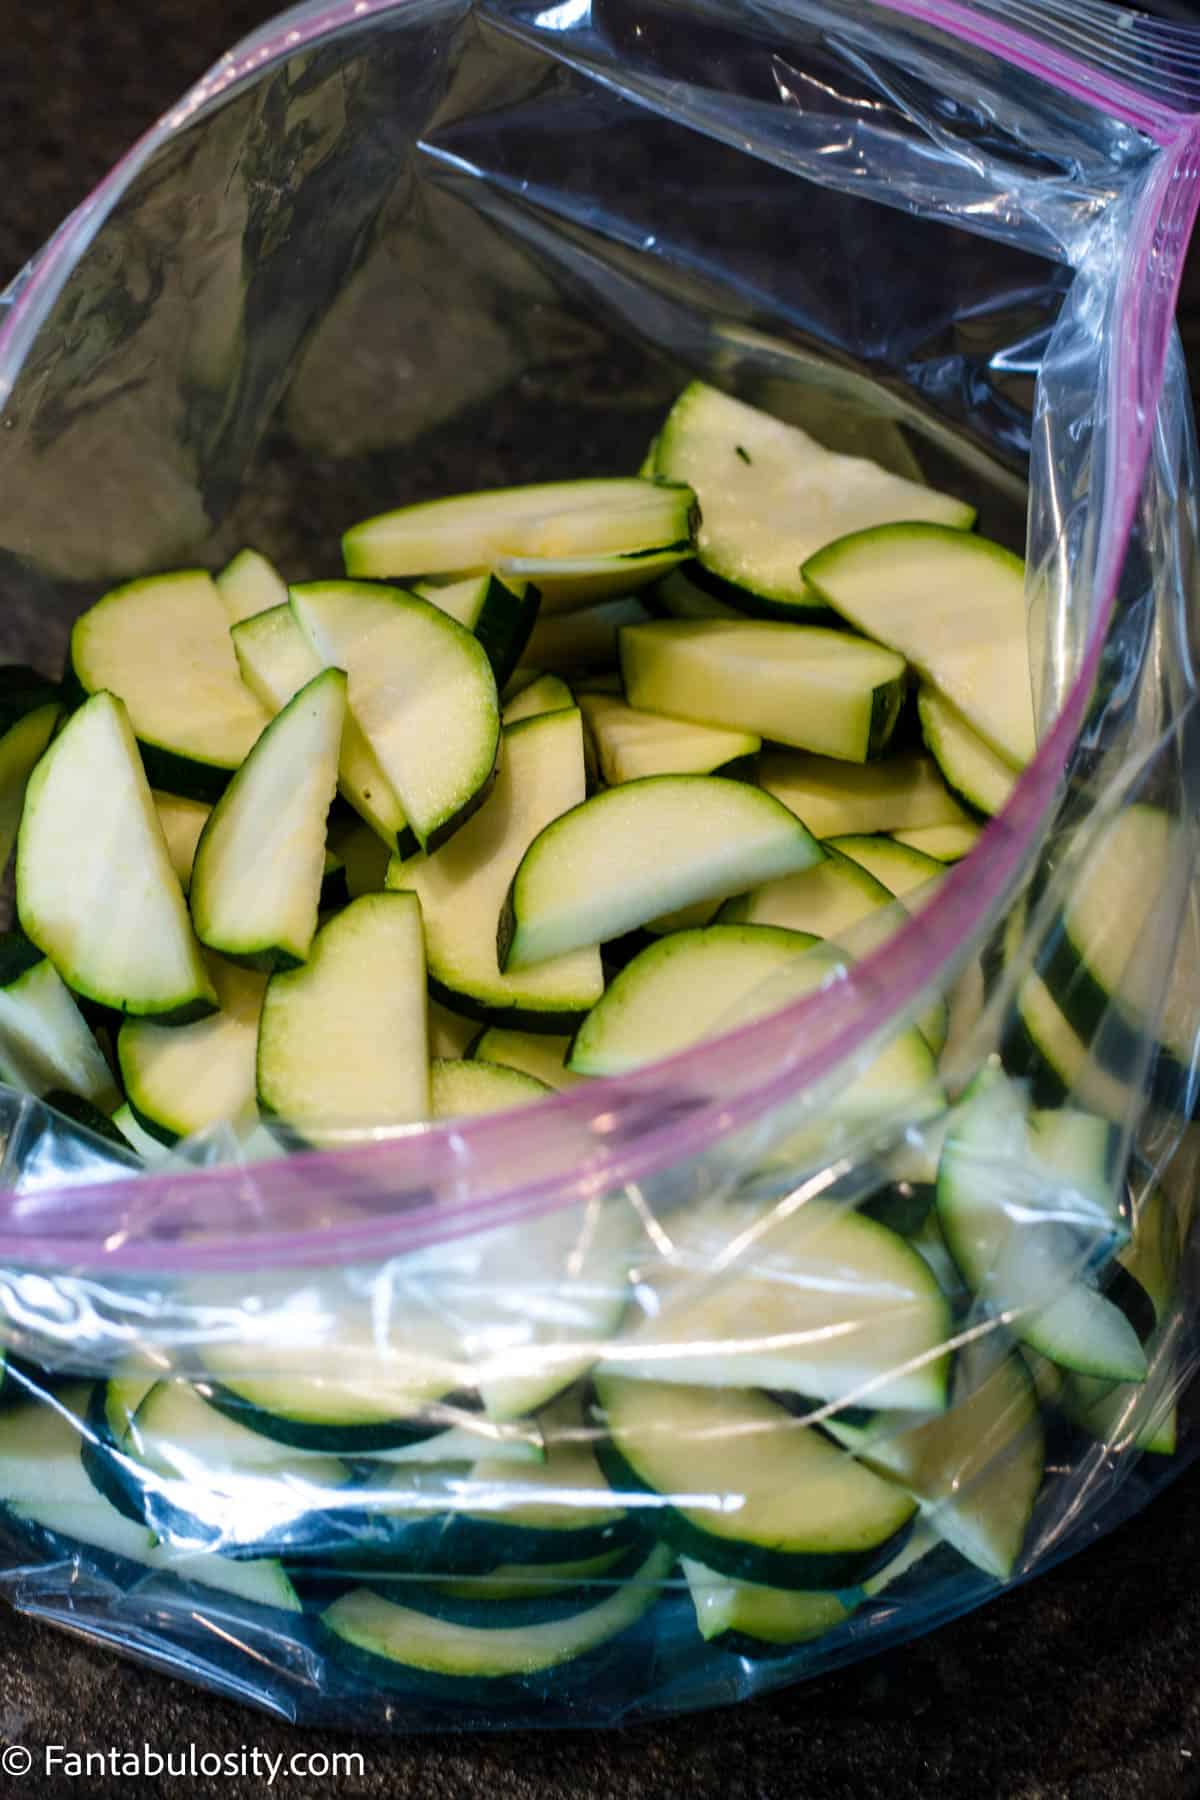
    If you love the idea of a quick and clean kitchen, grab a Ziploc bag and pourr the zucchini inside.

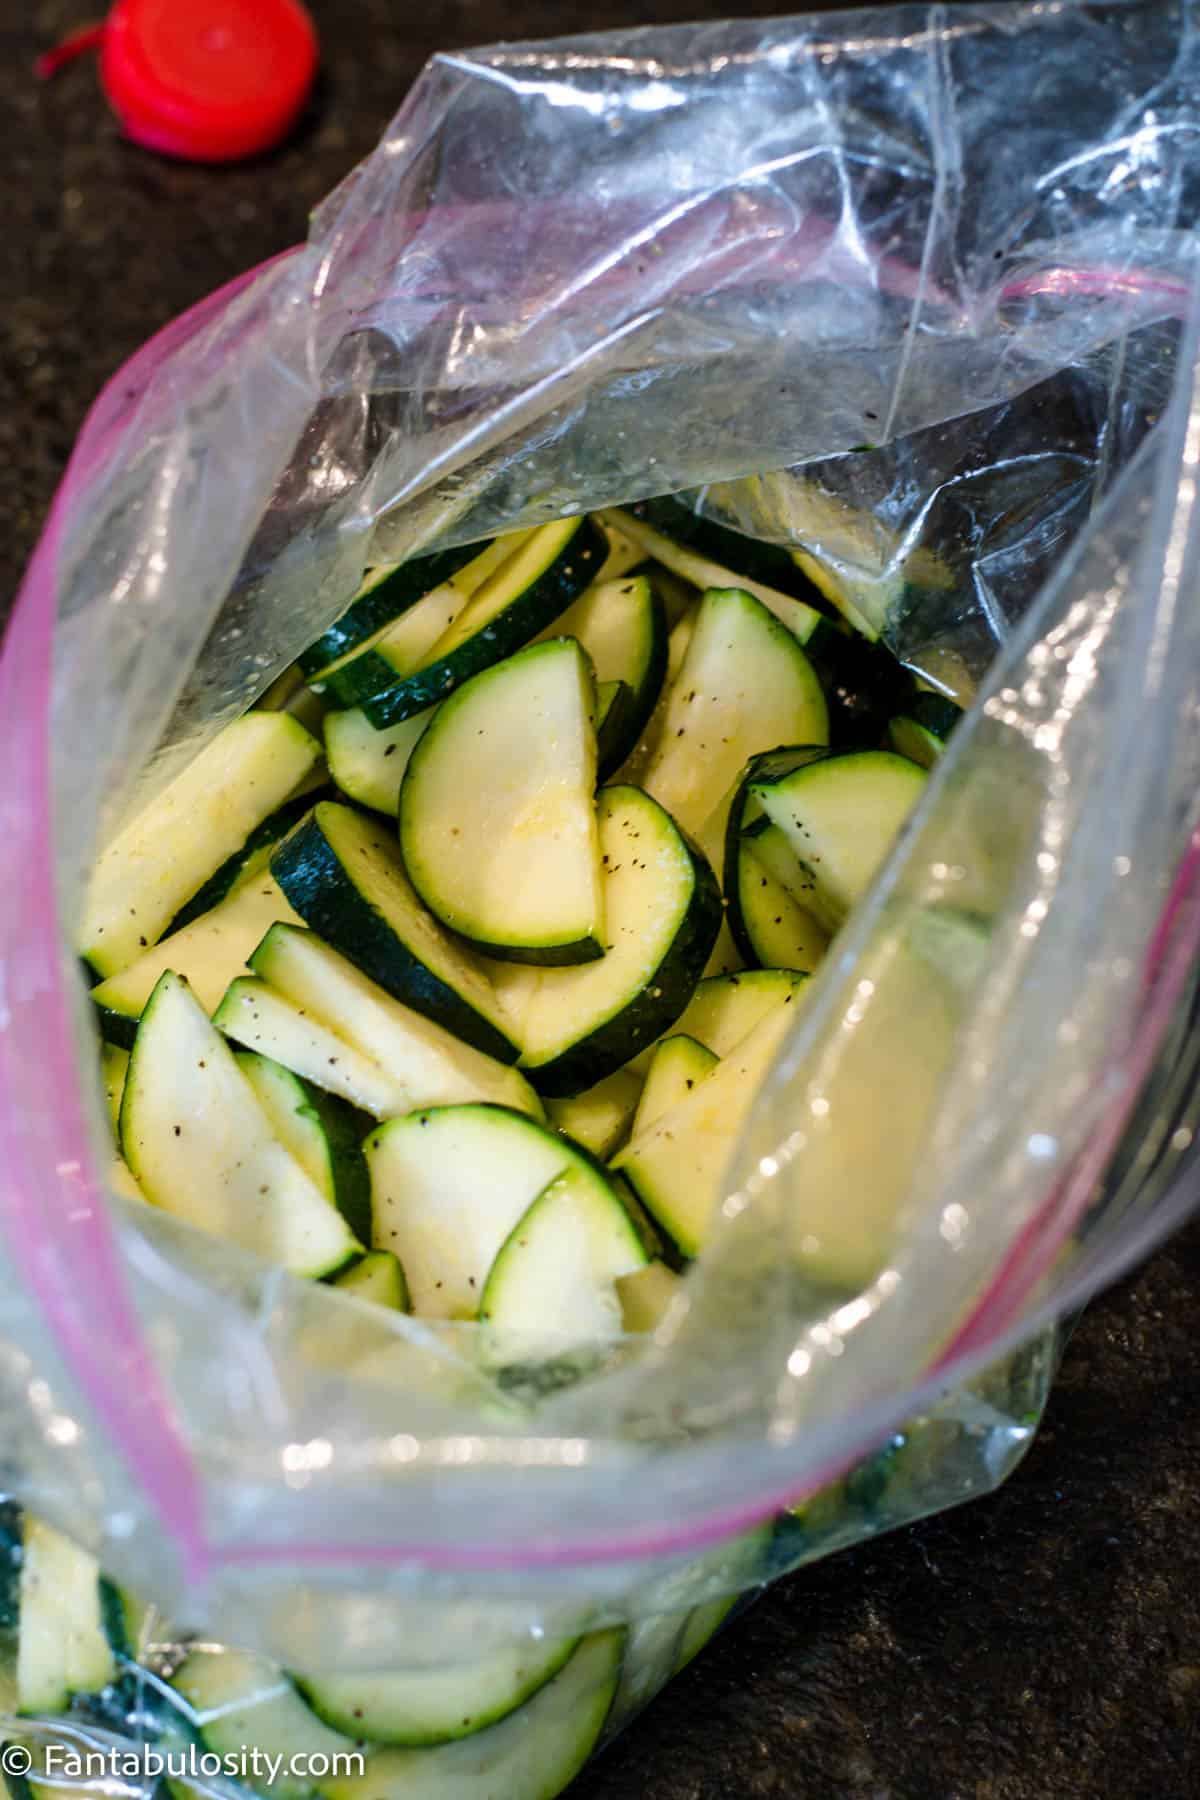
    Add in the olive oil, garlic salt and pepper.

    Shake until all zucchini has been coated with the oil/seasoning mixture.

    sliced zucchini in plastic ziptop bag
    Place in bag

    If you prefer to mix in a bowl to save a bag, you can do so! OR, get really snazzy and just place the zucchini, oil, and seasonings right in the air fryer basket and stir inside until evenly coated! (You just don’t want most of your oil to drip down through the basket holes.)

    seasoned zucchini in bag
    Season zucchini

    How long to air fry the zuccini

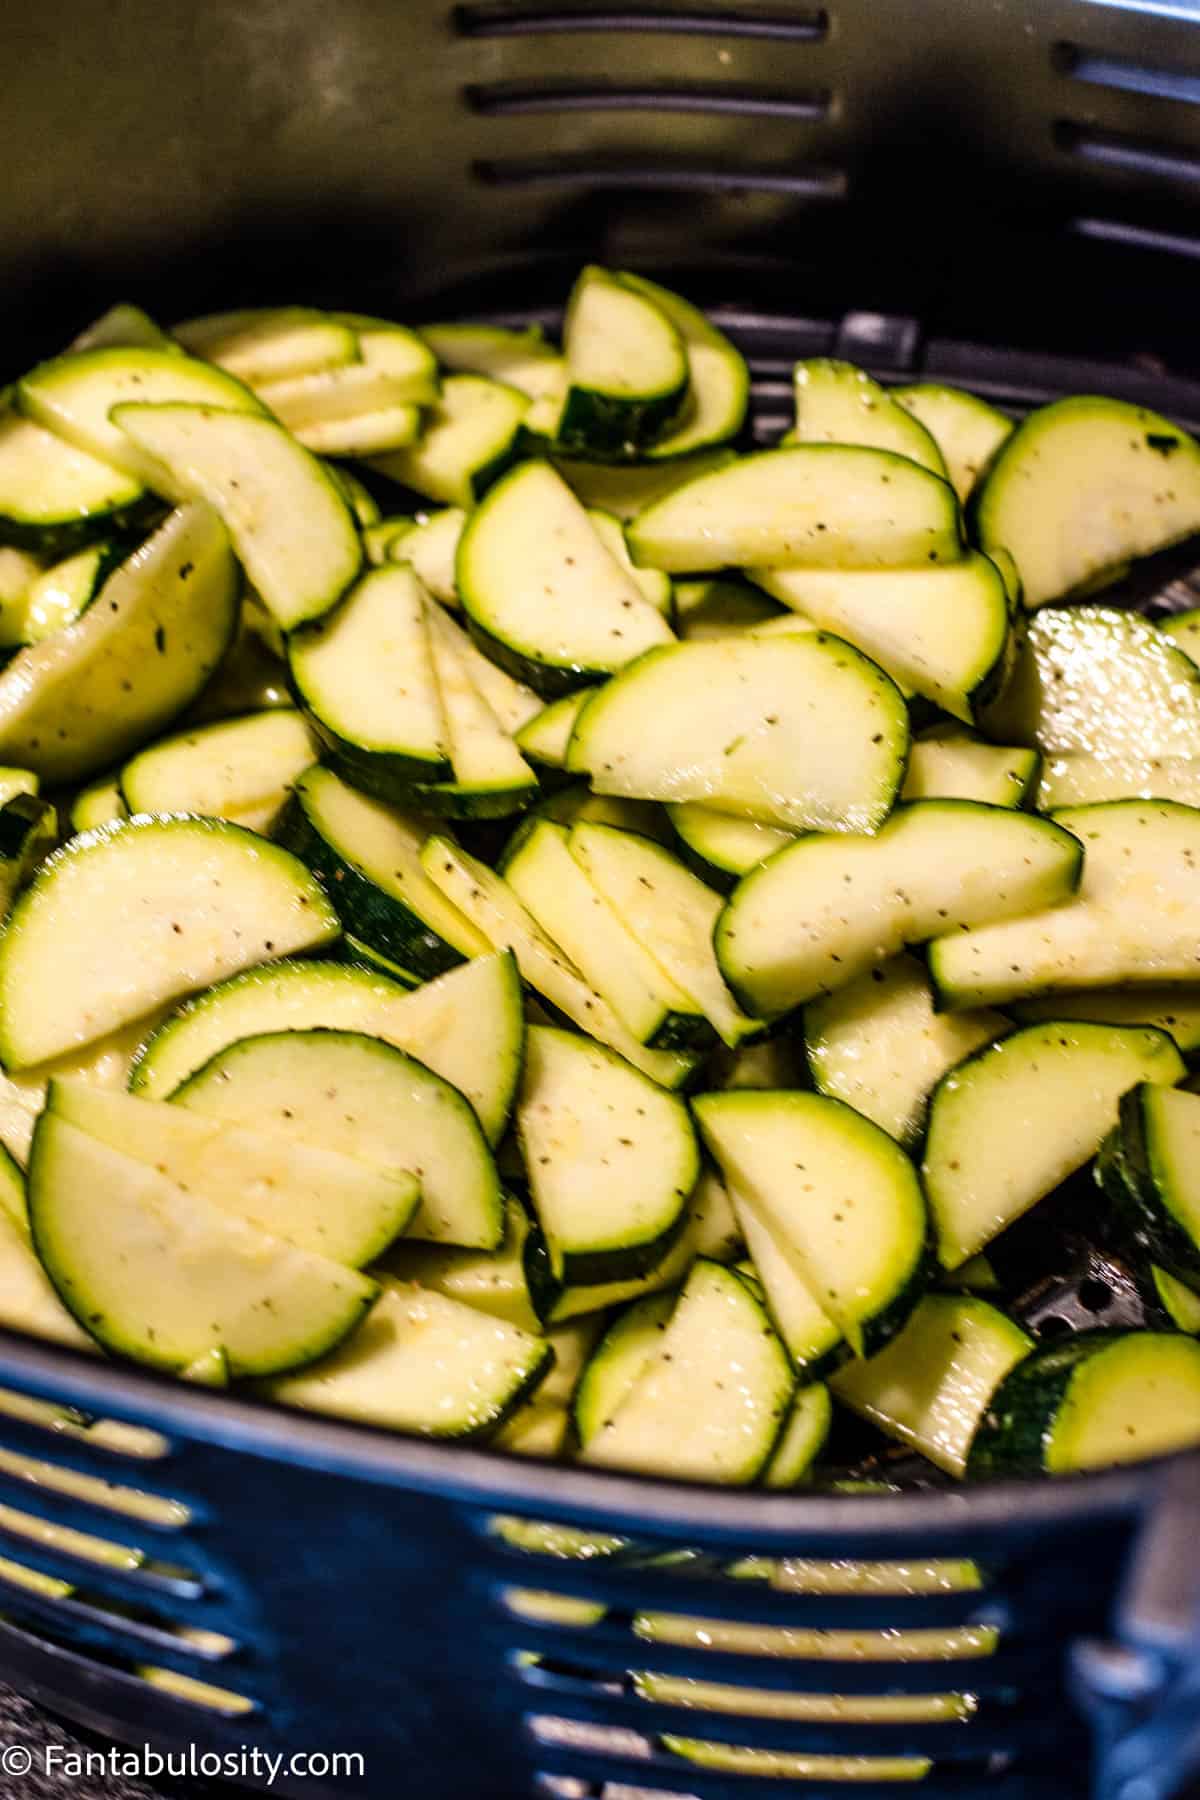
    If you prefer to preheat your air fryer, go for it! I’m too impatient so I just like to cook it with the idea in mind that it may take the food I’m cooking a little longer than a recipe calls for.

    So with that said, I cook my zucchini at 400° for about 10 minutes and this leaves me with a semi-crunchy zucchini. My husband prefers a softer texture so sometimes I’ll leave it in a few minutes longer.

    NOTE: Keep in mind that the cook time may vary, depending on the power level of your air fryer. (Some air fryers can cook much differently than one another.) But the good thing with zucchini is that you can open up the air fryer and check it occasionally if you prefer. It won’t ruin the taste but may just let the heat escape and take a little longer.
    Experiment with your air fryer, zucchini texture preference and you’ll have it nailed down in no-time!

    Seasoned zucchini in air fryer
    Place in air fryer

    Add the Parmesan (If Desired)

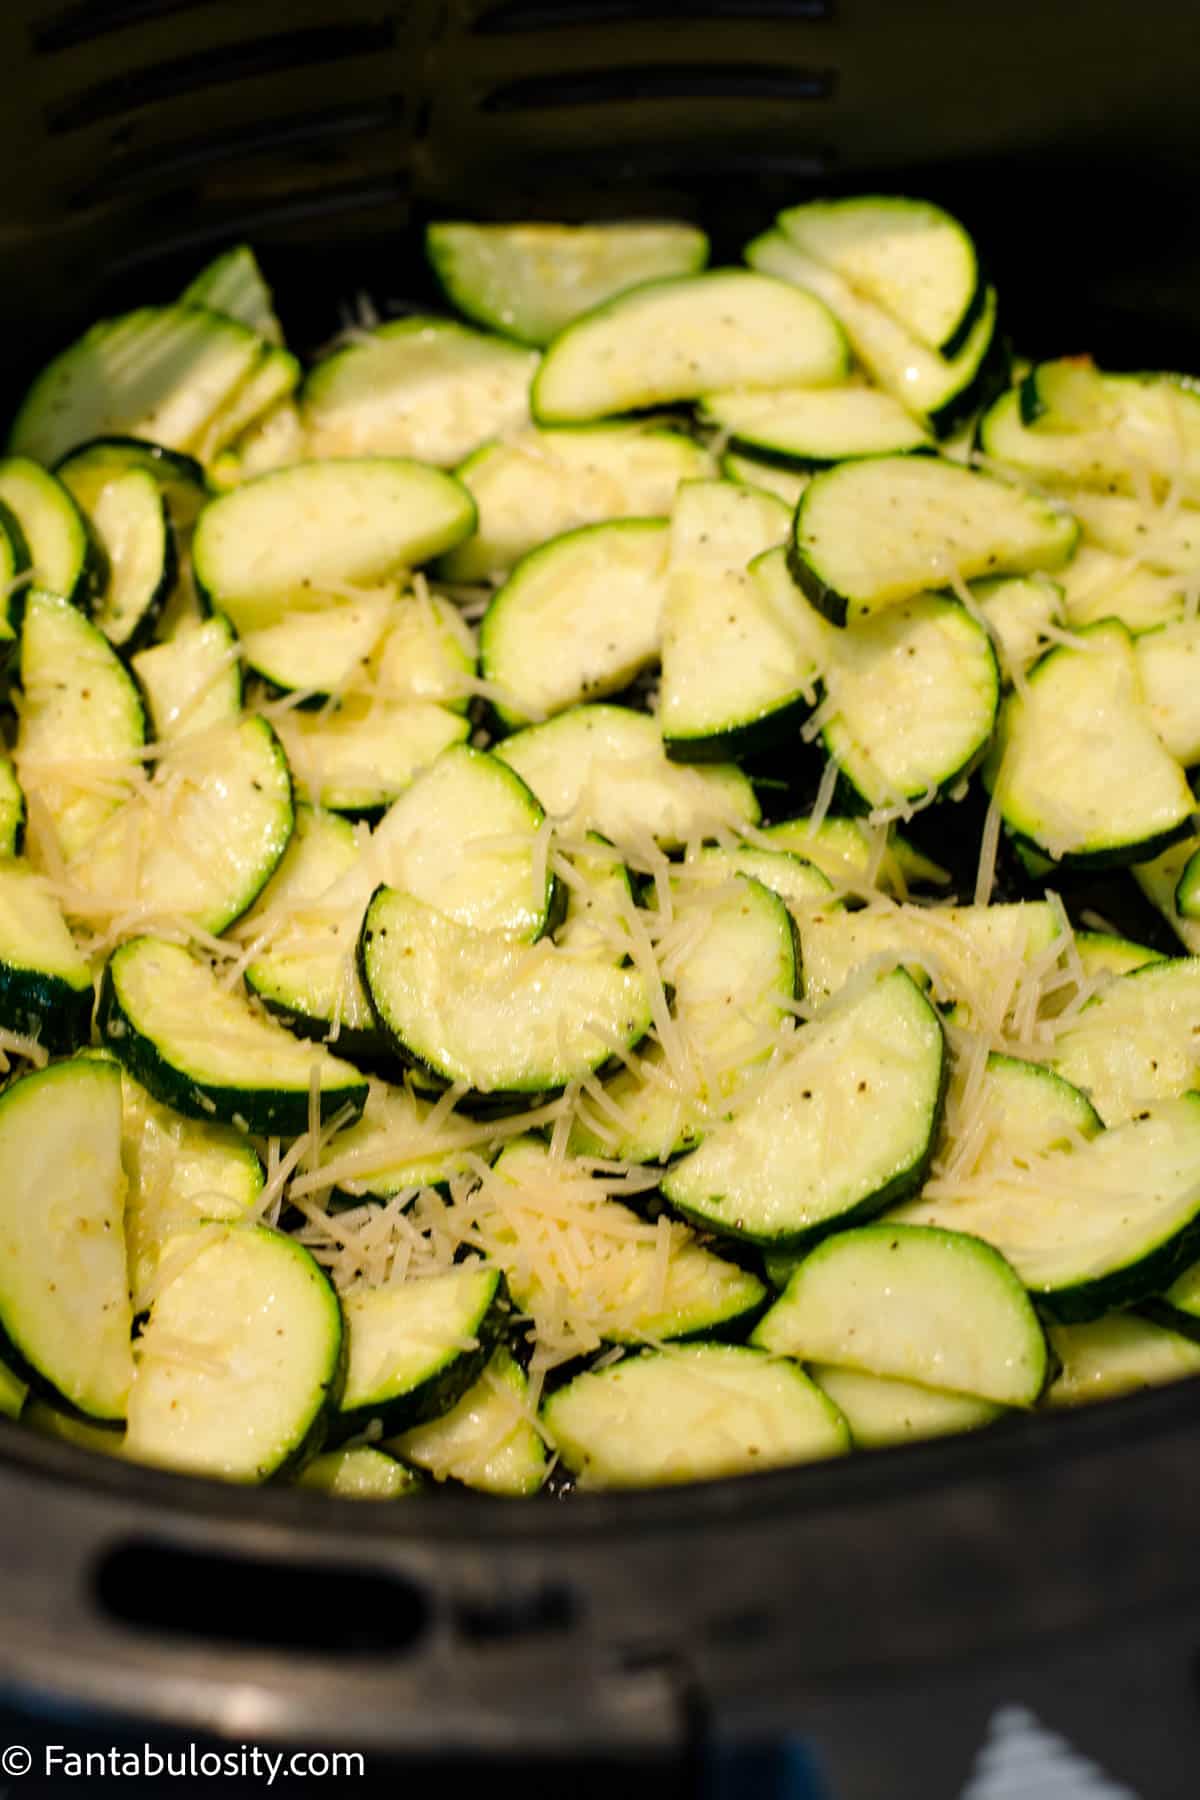
    If you’re not looking for a vegan recipe, then sprinkle with parmesan cheese after the 10 minutes and cook for an additional 2-3 minutes to toast the cheese! So so good!

    parmesan cheese on top of zucchini
    Add parmesan

    Serve

    Serve right away with your favorite side dish or if you’re a rebel like me, eat it as a stand-alone dish whenever you’re cooking for one!

    Extra Cheese? Yes Please.

    If you feel ever so frisky, top with any extra or remaining shredded parmesan cheese just before serving for a pop of goodness.

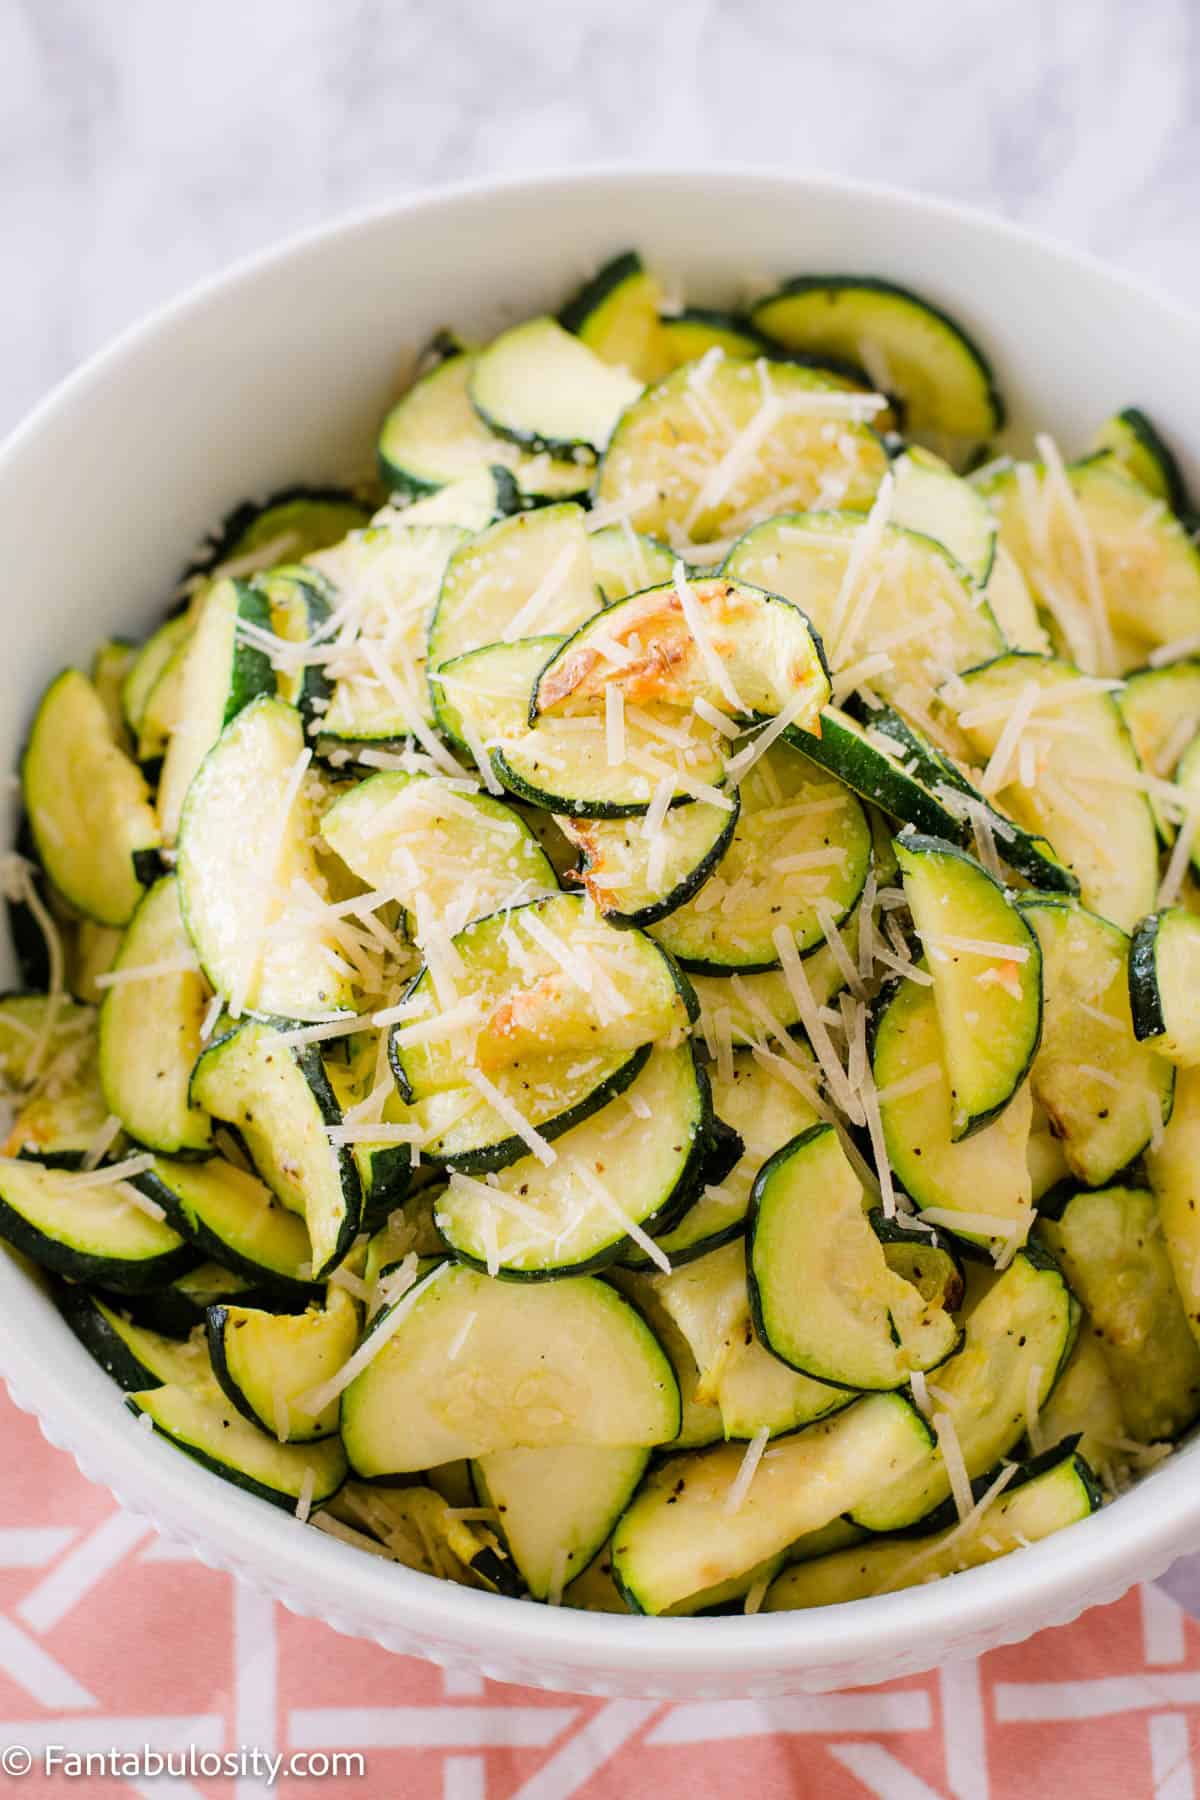
    air fried zucchini slices in white bowl
    Ready to eat!

    What to Serve Zucchini With?

    If you know you want to make this zucchini as a side dish but are unsure of what main dish to serve alongside it… here are our favorites: this oven baked steak, roasted pork tenderloin and these salt & pepper chicken bites!

    If you find that you have a lot of zucchini on hand, you may want to try freezing it for later. This is a great tutorial on how to freeze zucchini!

    Did you make this? I’d be so grateful if you left a “star” rating below to let me know what you thought! Then, the next time you need a quick and easy recipe, come back to Fantabulosity to browse all of my easy recipes!

    If you love to make zucchini many different ways, then you’ll also love these baked zucchini fries!

    Or, if you have a sweet tooth, then you’ll want to try this chocolate zucchini cake!

    Recipe

    sliced air fryer zucchini in white bowl
    Print Pin
    5 from 3 votes

    Air Fryer Zucchini

    Air Fryer Zucchini: An easy (and low carb) recipe that is the perfect side dish to serve with dinner! Cut in to chips or fries & done in as little as 10 minutes!
    Course Side Dish
    Cuisine American
    Prep Time 5 minutes minutes
    Cook Time 13 minutes minutes
    Total Time 18 minutes minutes
    Servings 4 people
    Calories 128kcal
    Author Jessica Burgess

    Equipment

    • air fryer

    Ingredients

    • 2 medium zucchini
    • 2 tablespoon olive oil
    • ¼ teaspoon garlic salt or to taste
    • ⅛ teaspoon pepper or to taste
    • ½ cup shredded parmesan cheese optional

    Instructions

    • Slice zucchini in to ¼ in. slices (see notes if you prefer a different cut) and then slice in half again.
    • Place cut zucchini in to a ziptop bag or bowl and pour in olive oil, garlic salt and pepper.
    • Shake the bag until all of the zucchini is evenly coated.
    • Pour zucchini in to air fryer basket.
    • Cook zucchini at 400° for 10 minutes (see notes to ensure the zucchini reaches the "doneness" you prefer).
    • If you prefer to add shredded parmean cheese, this is the time to sprinkle on the cheese and cook for an additional 3-4 minutes to melt /toast the cheese!

    Video

    Notes

    NOTE:
    We prefer to slice the zucchini in to ¼ inch circles (give/take) and then slice in half again. If you prefer to cut the zucchini in to “fries” that’s perfectly fine too!
    Keep in mind that the cook time may vary, depending on the power level of your air fryer. (Some air fryers can cook much differently than one another.) But the good thing with zucchini is that you can open up the air fryer and check it occasionally if you prefer. It won’t ruin the taste but may just let the heat escape and take a little longer.
    Experiment with your air fryer, zucchini texture preference and you’ll have it nailed down in no-time!

    Nutrition

    Serving: 1cup | Calories: 128kcal | Carbohydrates: 3g | Protein: 6g | Fat: 11g | Saturated Fat: 3g | Cholesterol: 9mg | Sodium: 354mg | Potassium: 267mg | Fiber: 1g | Sugar: 3g | Vitamin A: 294IU | Vitamin C: 18mg | Calcium: 164mg | Iron: 1mg

    Easy Butterscotch Brownies

    May 23, 2022

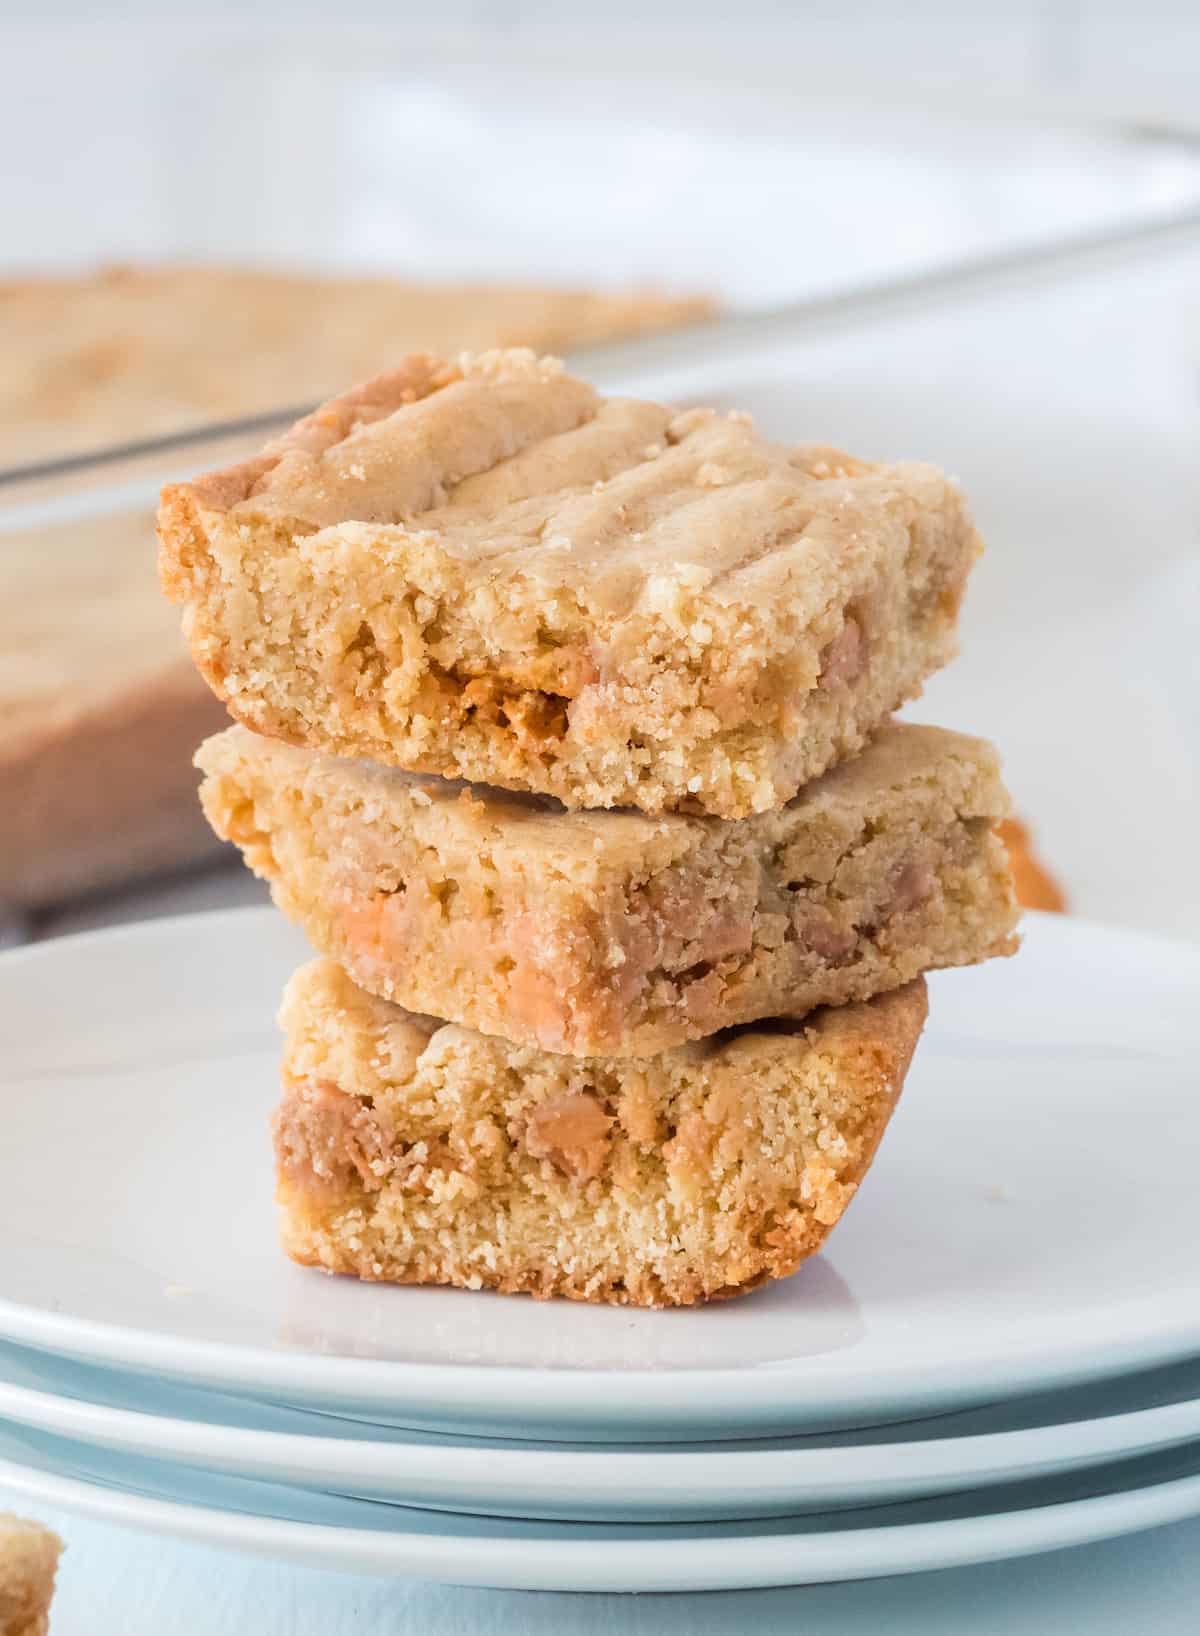
    A stack of easy butterscotch brownies.

    Easy Butterscotch Brownies: These old-fashioned butterscotch brownies are chewy, fudgy, and surprisingly quick to make!

    If potlucks are on your calendar, you'll find plenty of easy potluck desserts here.

    stacked butterscotch brownies

    Quick Overview: 15 mins prep, only 30 minutes of cook time and you’ll have a delicious twist on a blondie ready for your whole family to enjoy!

    Why You’ll Love This Recipe

    This chewy butterscotch brownies recipe is one of those ones you can whip up on short notice and wow your guests with. It’s made with simple ingredients you can keep on hand at all times, and it only takes 15 minutes to get into the oven. (If you have a little more time, you’ll also love these ultimate banana pudding brownies or these incredible peanut butter brownies!)

    They have all the fudgy, chewy goodness of a brownie, the unique light coloring of a blondie, and delicious butterscotch flavor with the addition of butterscotch chips! With just the right amount of sweetness, these are sure to satisfy your sweet tooth and be a hit with the whole family!

    [feast_advanced_jump_to]

    Ingredients

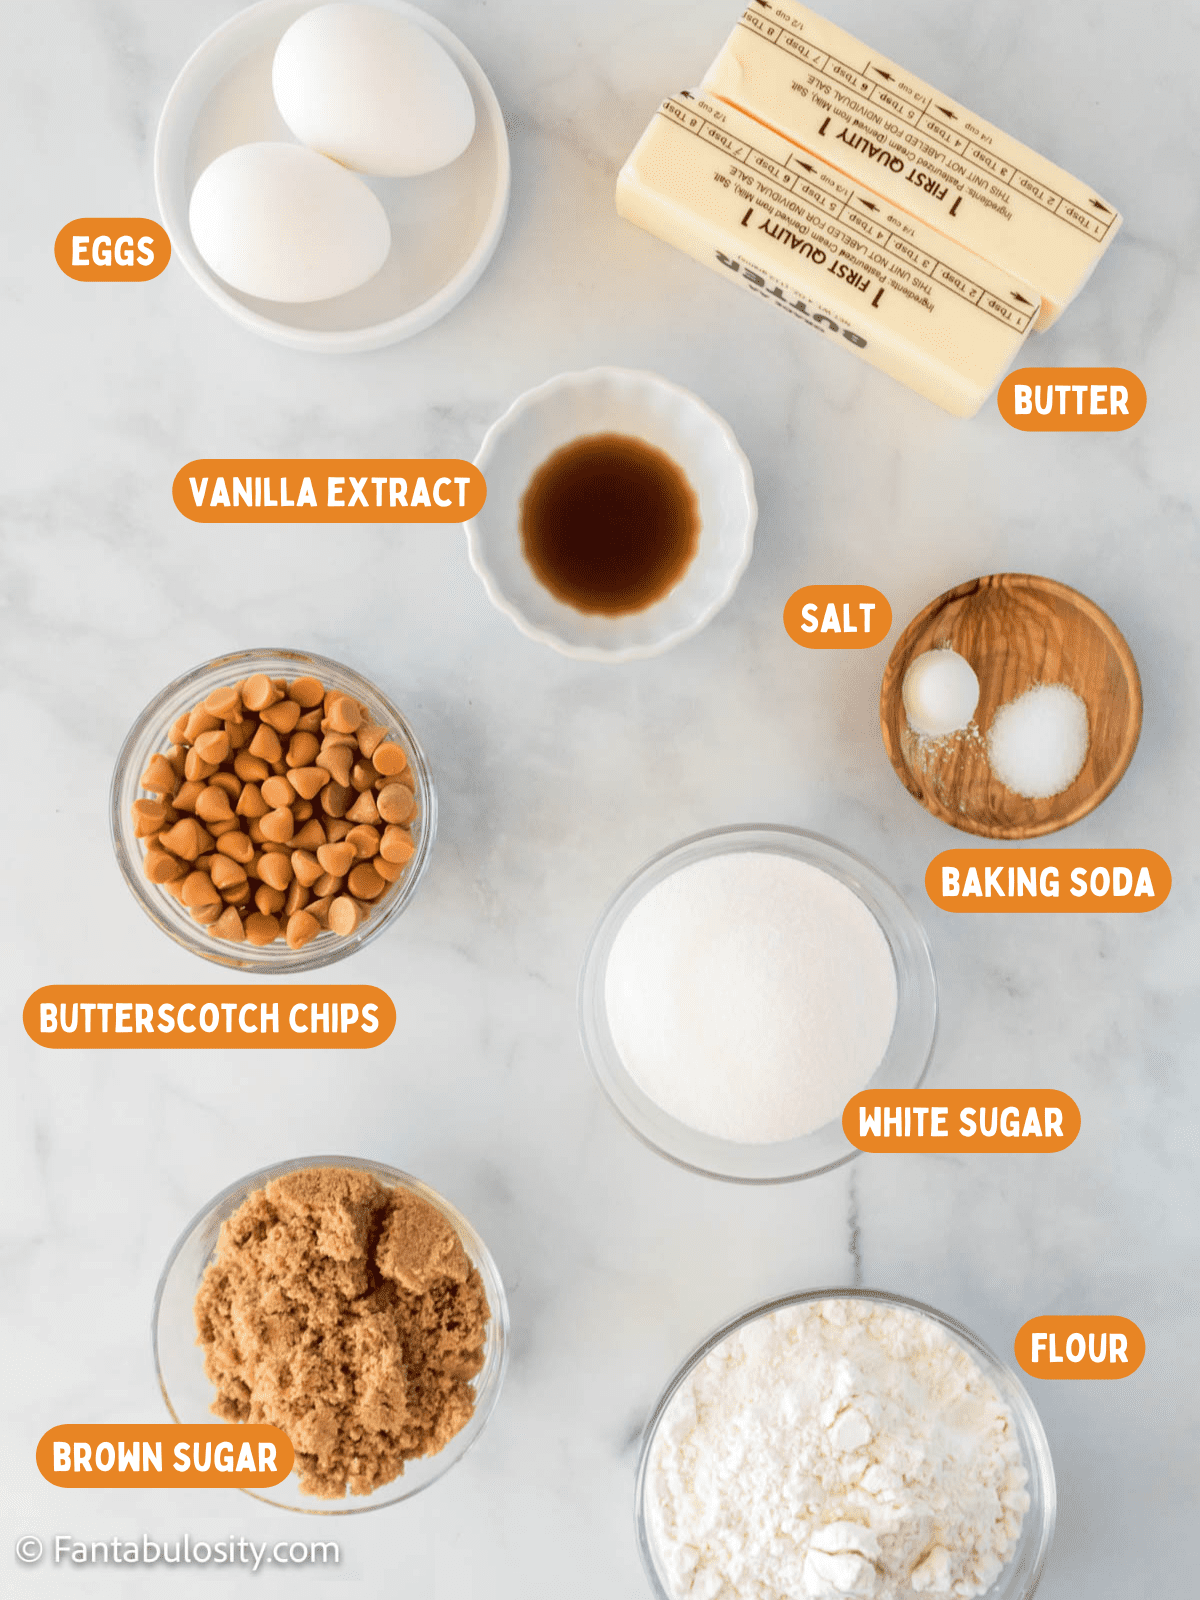
    You don’t need anything fancy for this easy butterscotch brownie recipe – some butter, sugar, eggs, flour, butterscotch chips, and a couple of other pantry staples come together to create a delicious treat!

    Ingredients for easy butterscotch brownies laid out on a counter with labels added to the photo.
    Ingredients
    • 1 cup of unsalted butter, melted
    • 1 cup brown sugar (dark brown sugar or light brown sugar)
    • ½ cup white sugar
    • 2 eggs, beaten
    • 1 ½ teaspoons vanilla extract
    • 2 ¼ cups all-purpose flour
    • ½ teaspoon baking soda
    • ½ teaspoon salt
    • ¾ cup butterscotch chips

    See the recipe card below for full instructions and ingredients all in one convenient place!

    Instructions

    These brownies with butterscotch chips are super easy to make. Keep reading for step-by-step instructions!

    1. Heat oven to 350 degrees. Grease a 9×13 pan (or an 8×8 pan if you want thicket brownies) with nonstick cooking spray or line it with parchment paper.
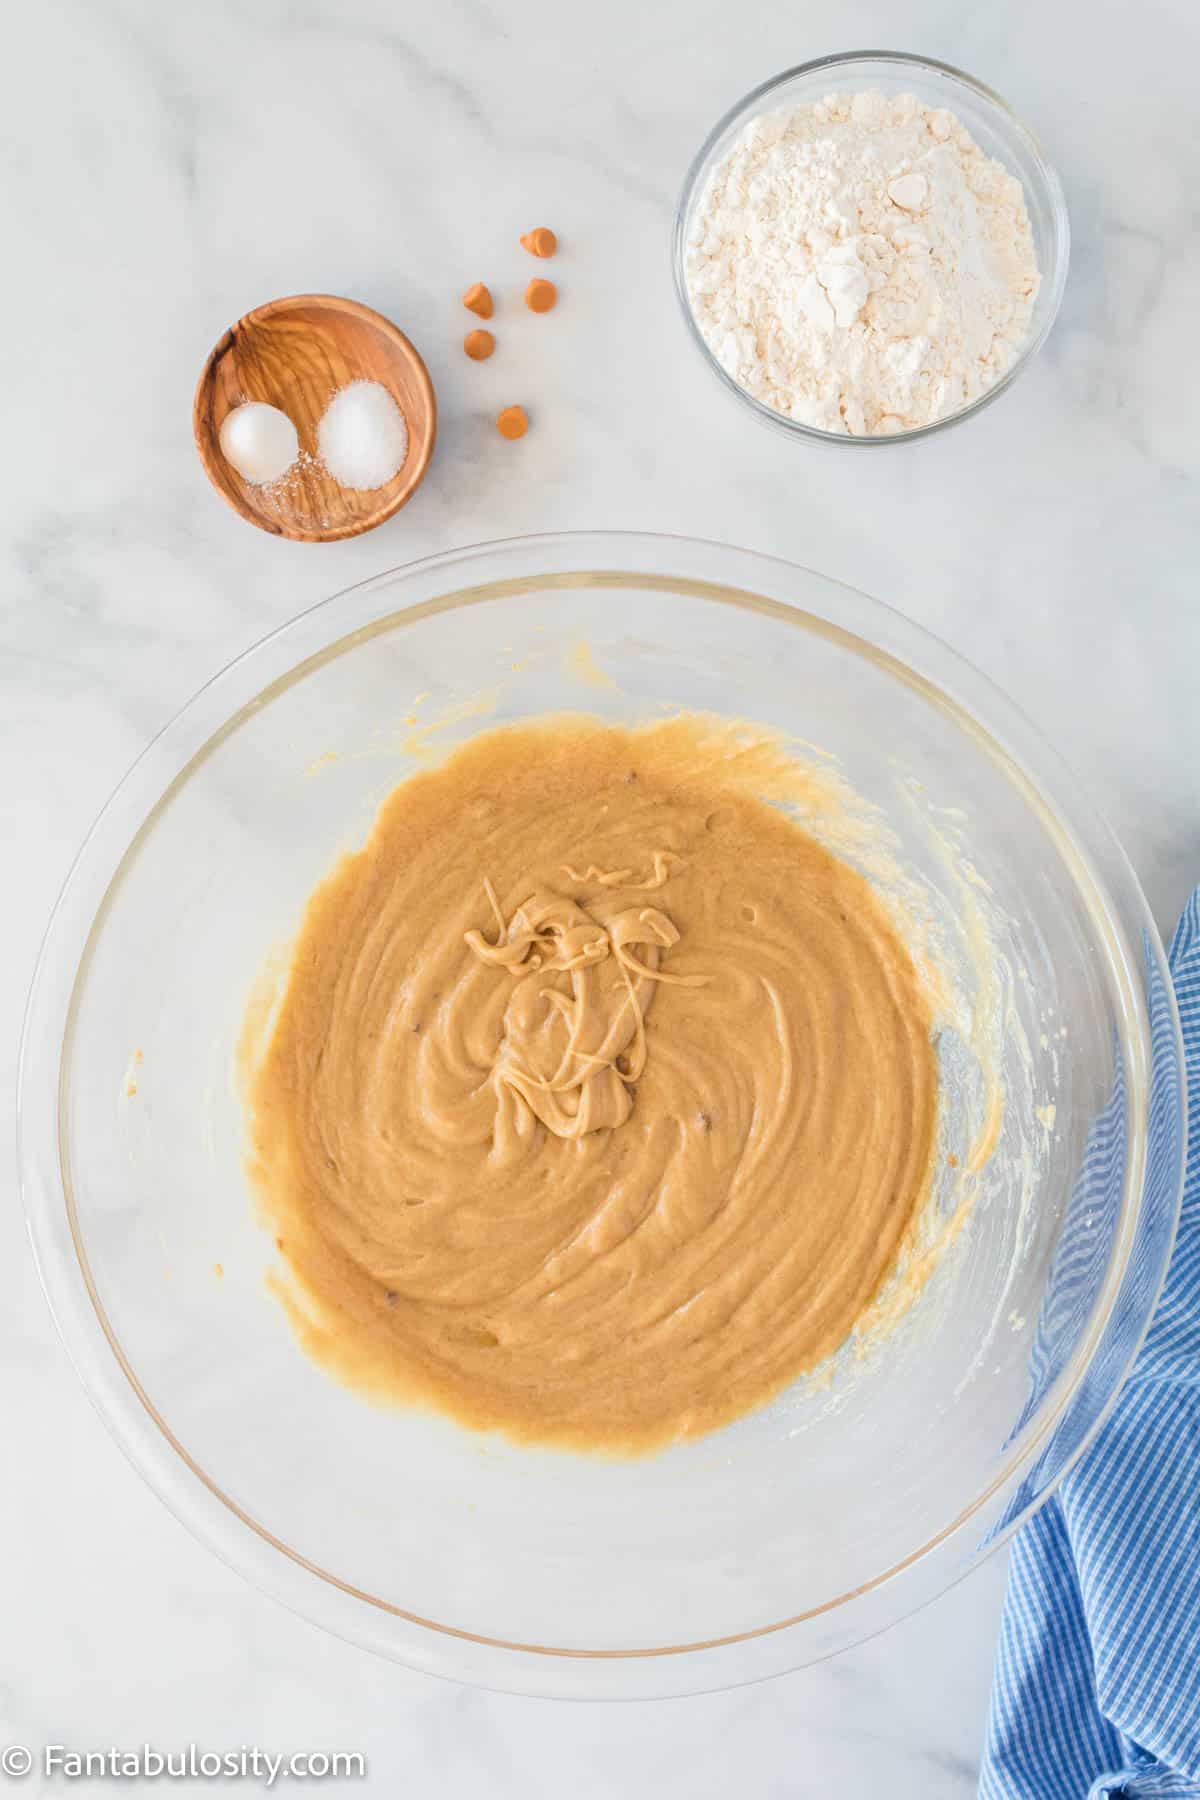
    2. Blend together melted butter, brown sugar, and white sugar in a large mixing bowl or the bowl of a stand mixer. Whisk in eggs and vanilla.
    Brown sugar, white sugar, and butter creamed together in a bowl.
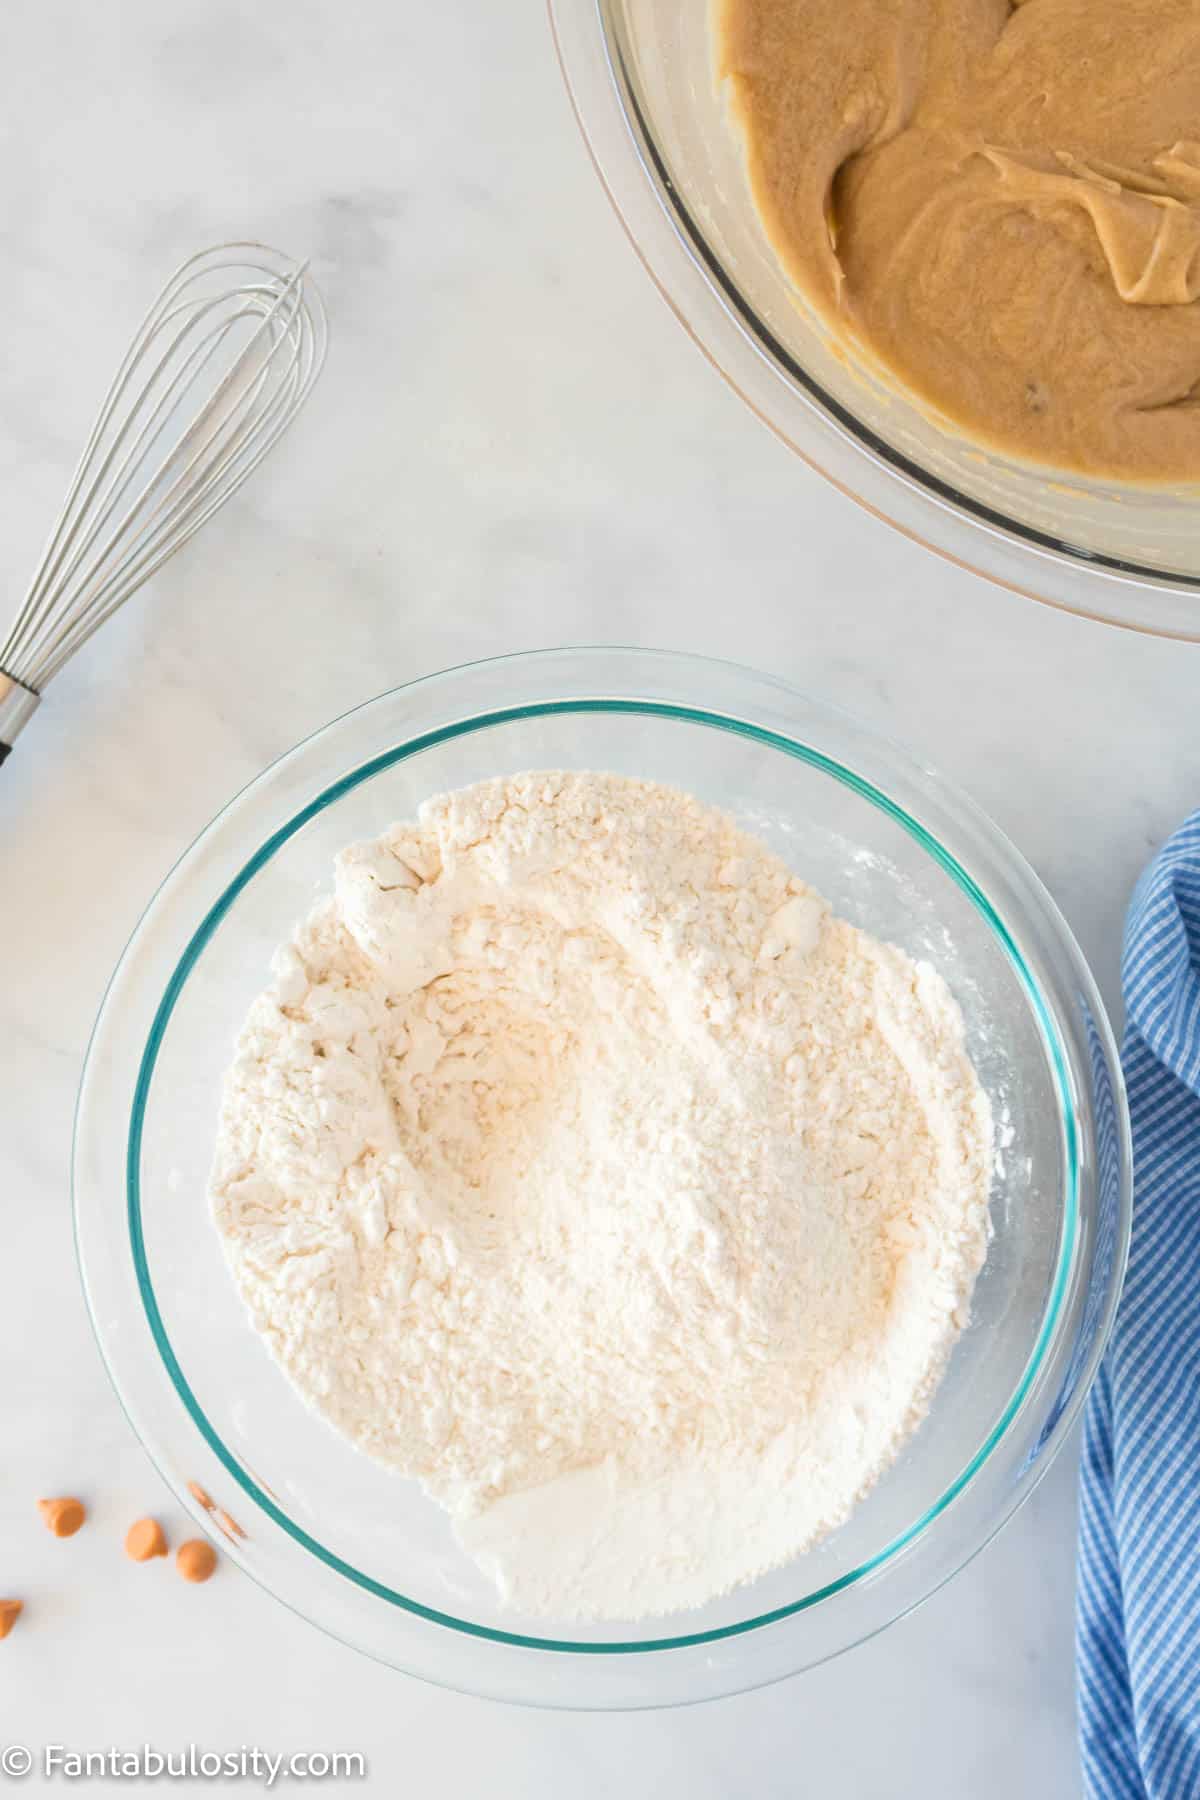
    1. In a separate bowl, mix together flour, baking soda, and salt.
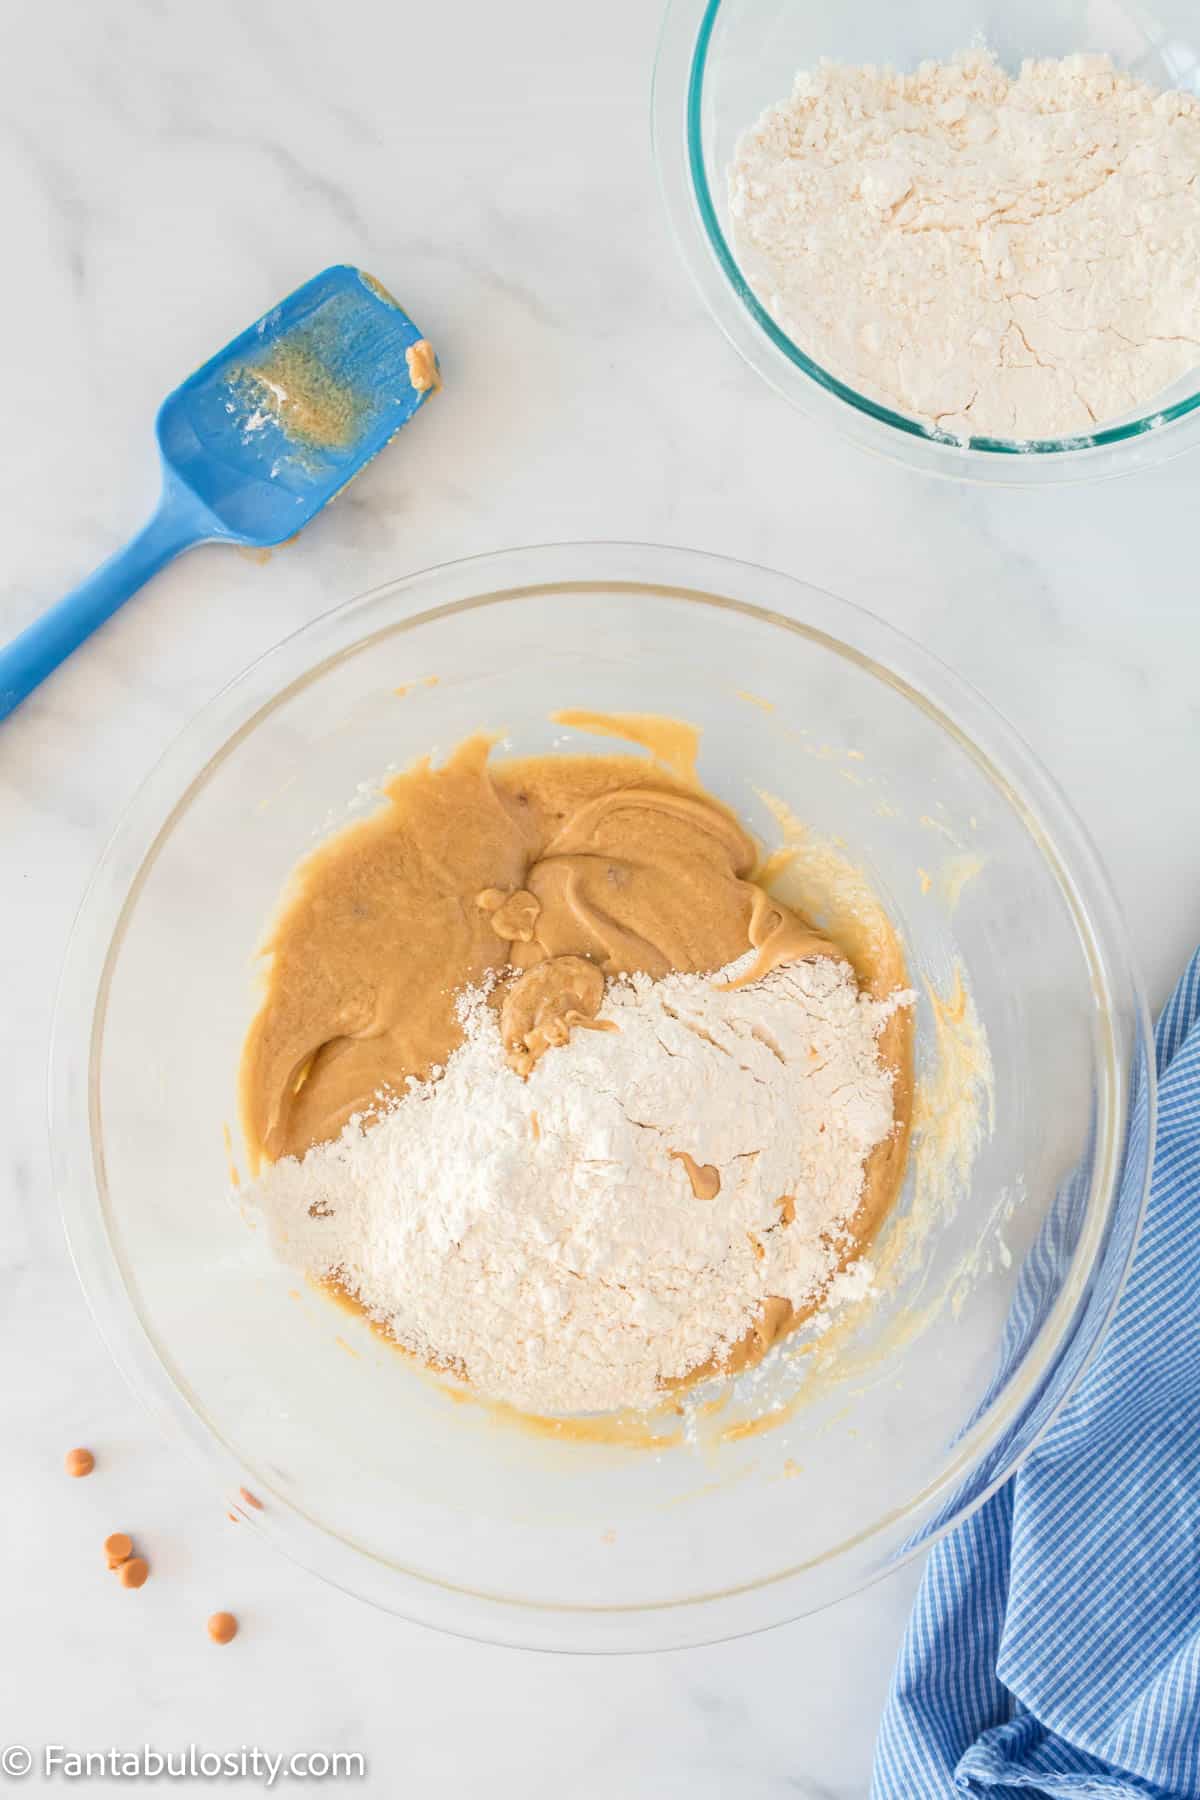
    2. Using a wooden spoon (or the paddle of a stand mixer on low), combine flour and sugar mixtures together in the large bowl until batter forms. Batter will be thick.
    Mix flour, baking soda, salt in a bowl.
    Combine dry ingredients in a separate bowl.
    Add flour mixture to sugar mixture and combine.
    Combine sugar mixture & flour mixture.
    1. Using a rubber spatula, fold in butterscotch chips. Spread batter into the prepared baking dish.
    2. Bake at 350 degrees for 25-30 minutes or until a toothpick inserted in the center comes out clean.

    (If you’re using an 8×8 square pan, bake for an additional 10-15 minutes.)

    Fold in butterscotch chips.
    Fold in butterscotch chips.
    Spread brownie batter into prepared 9x13 pan.
    Bake at 350°.
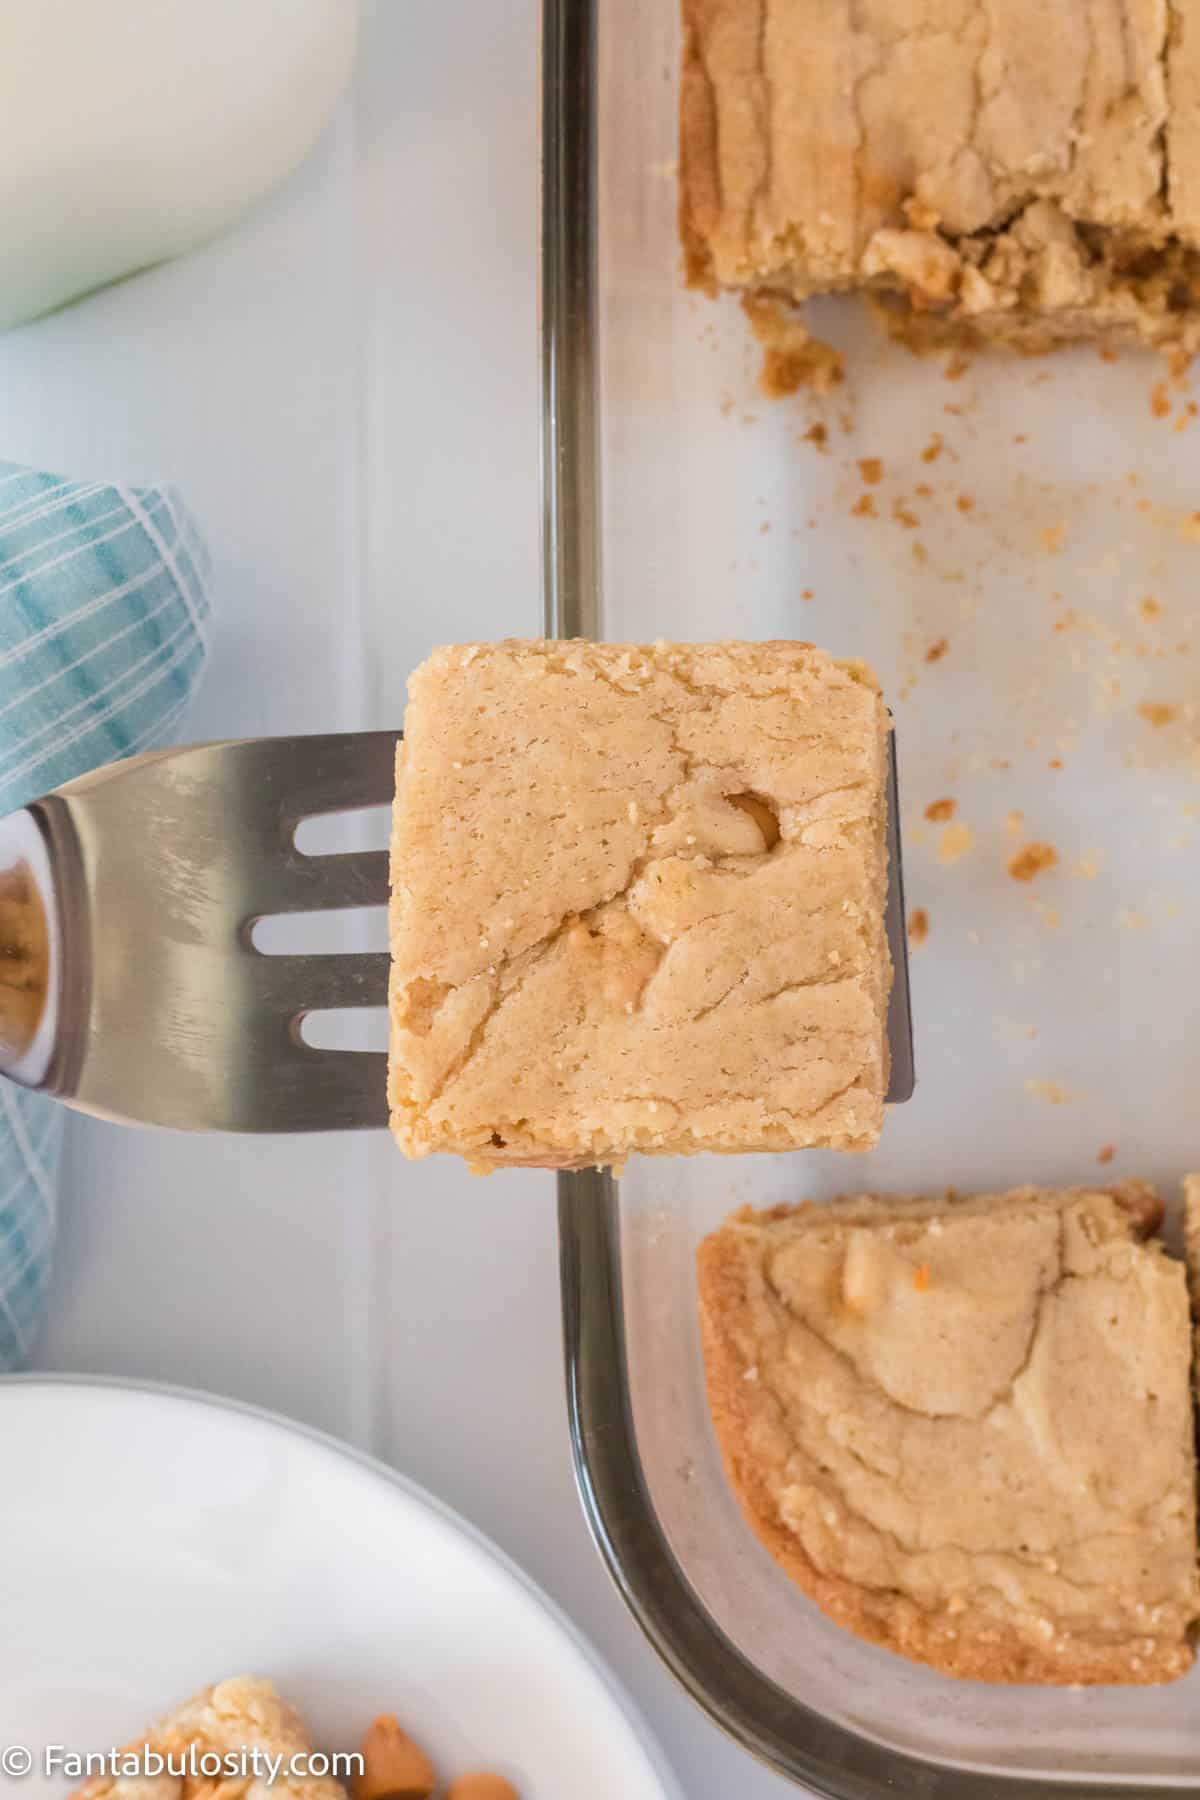
    1. Transfer your 9×13 to a wire rack and cool for 10-15 minutes. Cut into 24 squares and serve. These would be delicious with a scoop of vanilla ice cream and a cup of coffee!
    A spatula removing a square of baked butterscotch brownie from a 9x13 tray.
    Cool, cut & serve!

    More brownie recipes: If you’re looking for more fun twists on a classic brownie, check out our peanut butter banana brownies, these super quick & easy lemon cake mix brownies, or these delicious & pretty strawberry brownies! Or if traditional chocolate brownies are more your style, you’ll love these chocolate brownies with cream cheese frosting.

    More butterscotch recipes: If you’re craving more butterscotch, give these hello dollies bars and this butterscotch cinnamon pie recipe a try!

    Substitutions & Variations

    Want to mix things up or need something switched out? Here are some of our favorite suggestions for this easy butterscotch brownie recipe.

    • Sugars – a blend of brown and white sugar will result in the best brownies, but that being said if you are in a pinch you can definitely use one or the other exclusively.
    • Eggs -if you don’t have eggs, or can’t eat eggs, you could use a flax egg in this recipe.
    • Butterscotch Chips – although we love this recipe just the way it is, with the butterscotch chips in it, you could technically replace the butterscotch chips with and kind you like! You could try peanut butter chips, chocolate chips, white chocolate chips - the options are endless!
    • Butter – if you want to use salted butter, decrease the salt in this recipe to ¼ teaspoon.
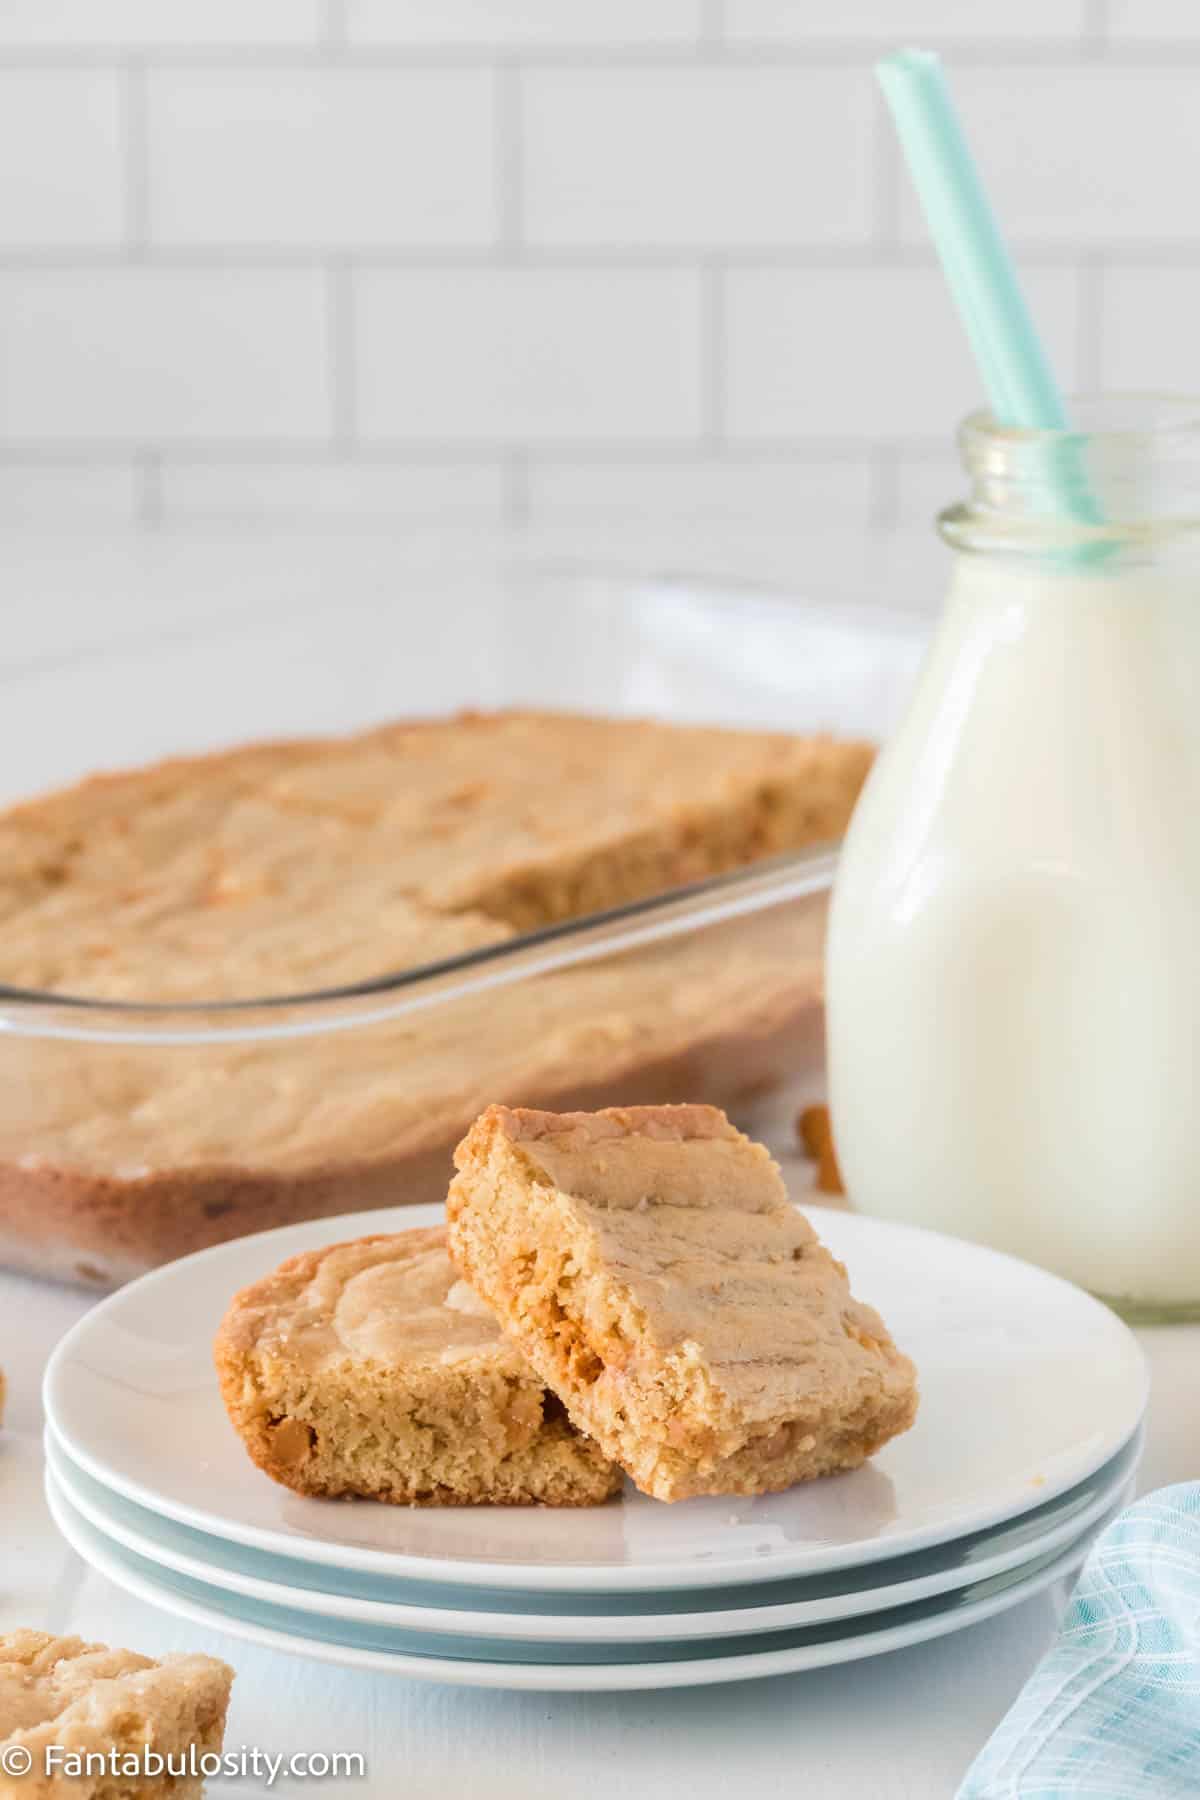
    Butterscotch brownies on a plate with a tray of brownies and a glass of milk in the background.
    Butterscotch Brownies

    Storage

    Store any leftover butterscotch brownies at room temperature for 3-4 days in an airtight container, or for 7-10 days in an airtight container in the fridge.

    You can also store these for up to 4 months in a freezer, as long as they are in an airtight, freezer-safe container.

    Expert Tips and FAQs

    Do butterscotch chips taste good in a brownie?

    Absolutely! It’s a great alternative to chocolate chips and gives that old-fashioned flavor that’s a nice twist from a milk chocolate chip.

    What’s the difference between butterscotch brownies and butterscotch blondies?

    Typically, a brownie is a baked good that has chocolate or chocolate flavoring in it (cocoa powder, chocolate, white chocolate). A blondie is a baked good that has no chocolate in it (aside from maybe some chocolate chips sprinkled in).

    By that definition, these would technically be butterscotch blondies…but we still think of them as butterscotch brownies. If you are looking for blondie recipes, check out our Lucky Charms Blondies.

    More Brownie Recipes

    If you love brownie recipes, you’ll love how easy it is to make these red velvet brownies, or one of these favorites:

    • Strawberry brownies on white marble cutting board.
      Strawberry Brownies Recipe
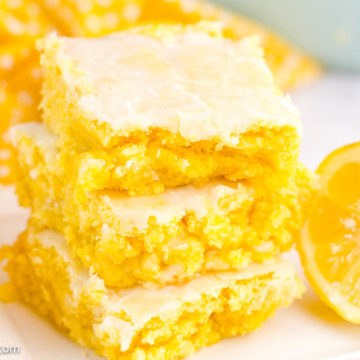
    • Lemon Brownies Recipe with cake mix
      Lemon Cake Mix Brownies
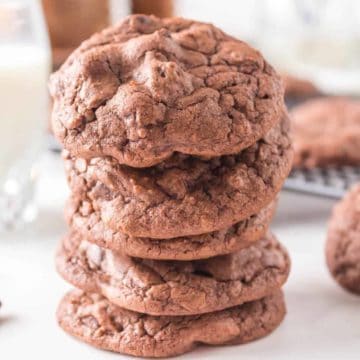
    • Brownie mix cookies stacked on top of one another
      Brownie Mix Cookies
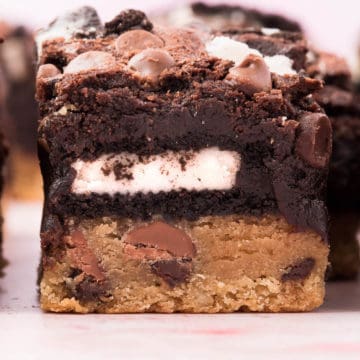
    • Oreo Brookies
      Oreo Brookies

    Did you make this? I’d be so grateful if you left a “star” rating below to let me know what you thought! Then, the next time you need a quick and easy recipe, come back to Fantabulosity to browse all of my easy recipes!

    Recipe

    A stack of easy butterscotch brownies.
    Print Pin
    5 from 9 votes

    Easy Butterscotch Brownies

    Easy Butterscotch Brownies: These old fashioned butterscotch brownies are chewy, fudgey, and surprisingly quick to make! 15 mins prep, 30 mins cook time and you'll have a delicious twist on a blondie ready for your whole family to enjoy!
    Course Dessert, Snack
    Cuisine American
    Prep Time 15 minutes minutes
    Cook Time 30 minutes minutes
    Total Time 45 minutes minutes
    Servings 24 servings
    Calories 189kcal
    Author Jessica Burgess

    Ingredients

    • 1 cup unsalted butter melted
    • 1 cup brown sugar
    • ½ cup white sugar
    • 2 large eggs beaten
    • 1 ½ teaspoons vanilla extract
    • 2 ¼ cups all-purpose flour
    • ½ teaspoon baking soda
    • ½ teaspoon salt
    • ¾ cup butterscotch chips

    Instructions

    • Heat oven to 350 degrees. Grease a 9×13 pan (or an 8×8 pan if you want thicket brownies) with nonstick cooking spray or line it with parchment paper.
    • Blend together butter, brown sugar and white sugar in a large bowl or the bowl of a stand mixer. Whisk in eggs and vanilla.
    • In a separate bowl, mix together flour, baking soda and salt.
    • Using a wooden spoon (or the paddle of a stand mixer on low), mix together sugar and flour mixtures until batter forms. Batter will be thick.
    • Using a rubber spatula, fold in butterscotch chips. Spread batter into the prepared baking pan.
    • Bake at 350 degrees for 25-30 minutes or until a toothpick inserted in the center comes out clean.
      (If you're using an 8×8 pan, bake for an additional 10-15 minutes.)
    • Transfer your 9×13 to a wire cooling rack and cool for 10-15 minutes. Cut into 24 squares and serve.

    Nutrition

    Serving: 1serving | Calories: 189kcal | Carbohydrates: 27g | Protein: 2g | Fat: 8g | Saturated Fat: 5g | Polyunsaturated Fat: 1g | Monounsaturated Fat: 2g | Trans Fat: 1g | Cholesterol: 36mg | Sodium: 102mg | Potassium: 33mg | Fiber: 1g | Sugar: 17g | Vitamin A: 264IU | Calcium: 14mg | Iron: 1mg

    Peanut Butter Banana Brownies

    May 18, 2022

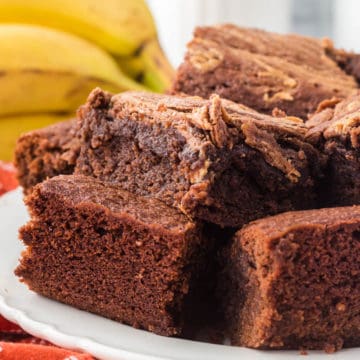
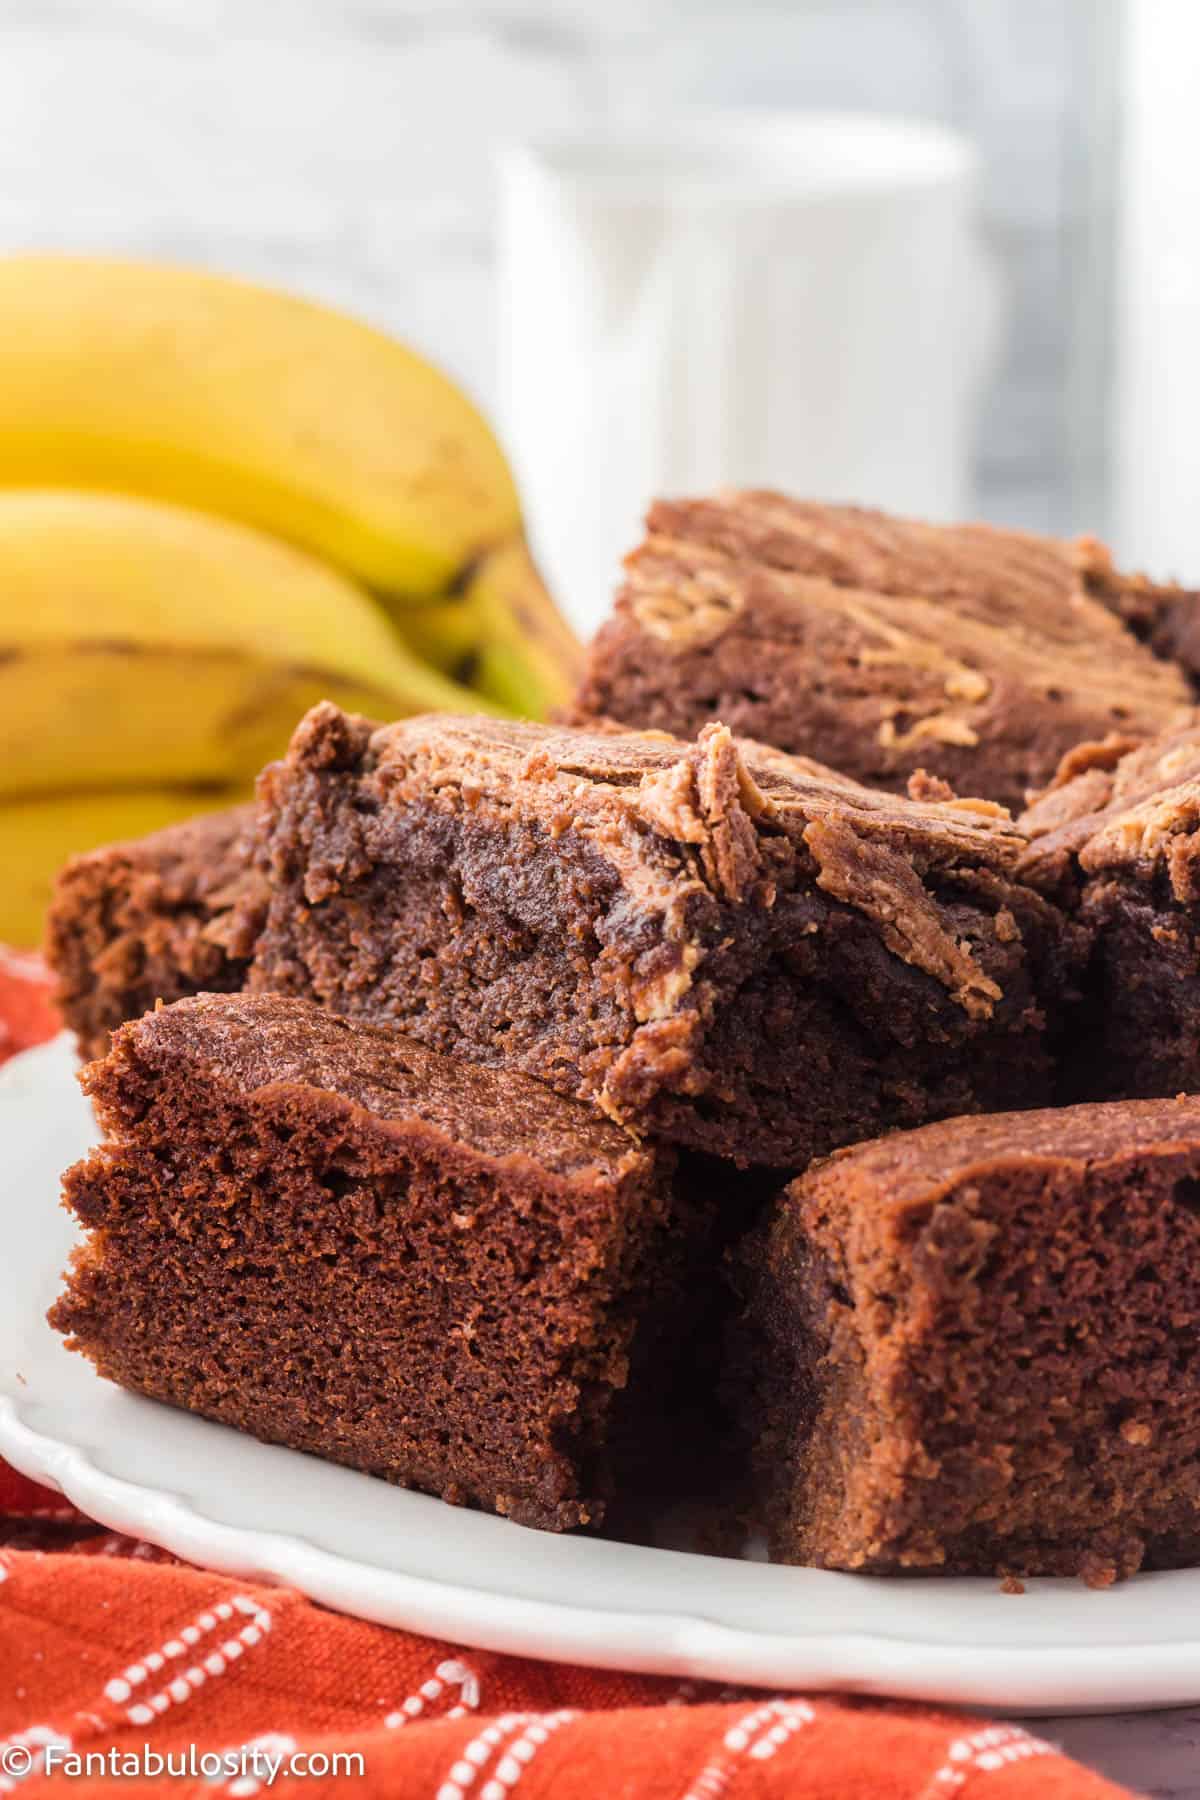
    A plate of peanut butter banana brownies.

    Peanut Butter Banana Brownies: Move over regular brownies, these peanut butter banana brownies are the ones you’ve been waiting for! It only takes 15 minutes to get these in the oven, and pantry staples you probably have on hand right now!

    Brownie recipes can be so fun and these red velvet brownies and strawberry brownies are even made with cake mixes to make them easier!

    A plate of peanut butter banana brownies.

    Why You’ll Love This Recipe

    I’m a self-professed peanut butter lover as well as a chocolate lover, so these brownies were an easy yes for me! The addition of the banana is just a bonus!

    If you are looking for a quick, easy brownie recipe that uses ingredients you will likely always have on hand, these cocoa powder brownies are the ones for you! (As well as these cornflake brownies.)

    They are full of flavor, moist and soft, fudgy and chewy. These would be perfect for an after school snack, for dipping in a chocolate fondue, or as a dessert with a scoop of ice cream beside them.

    [feast_advanced_jump_to]

    Ingredients

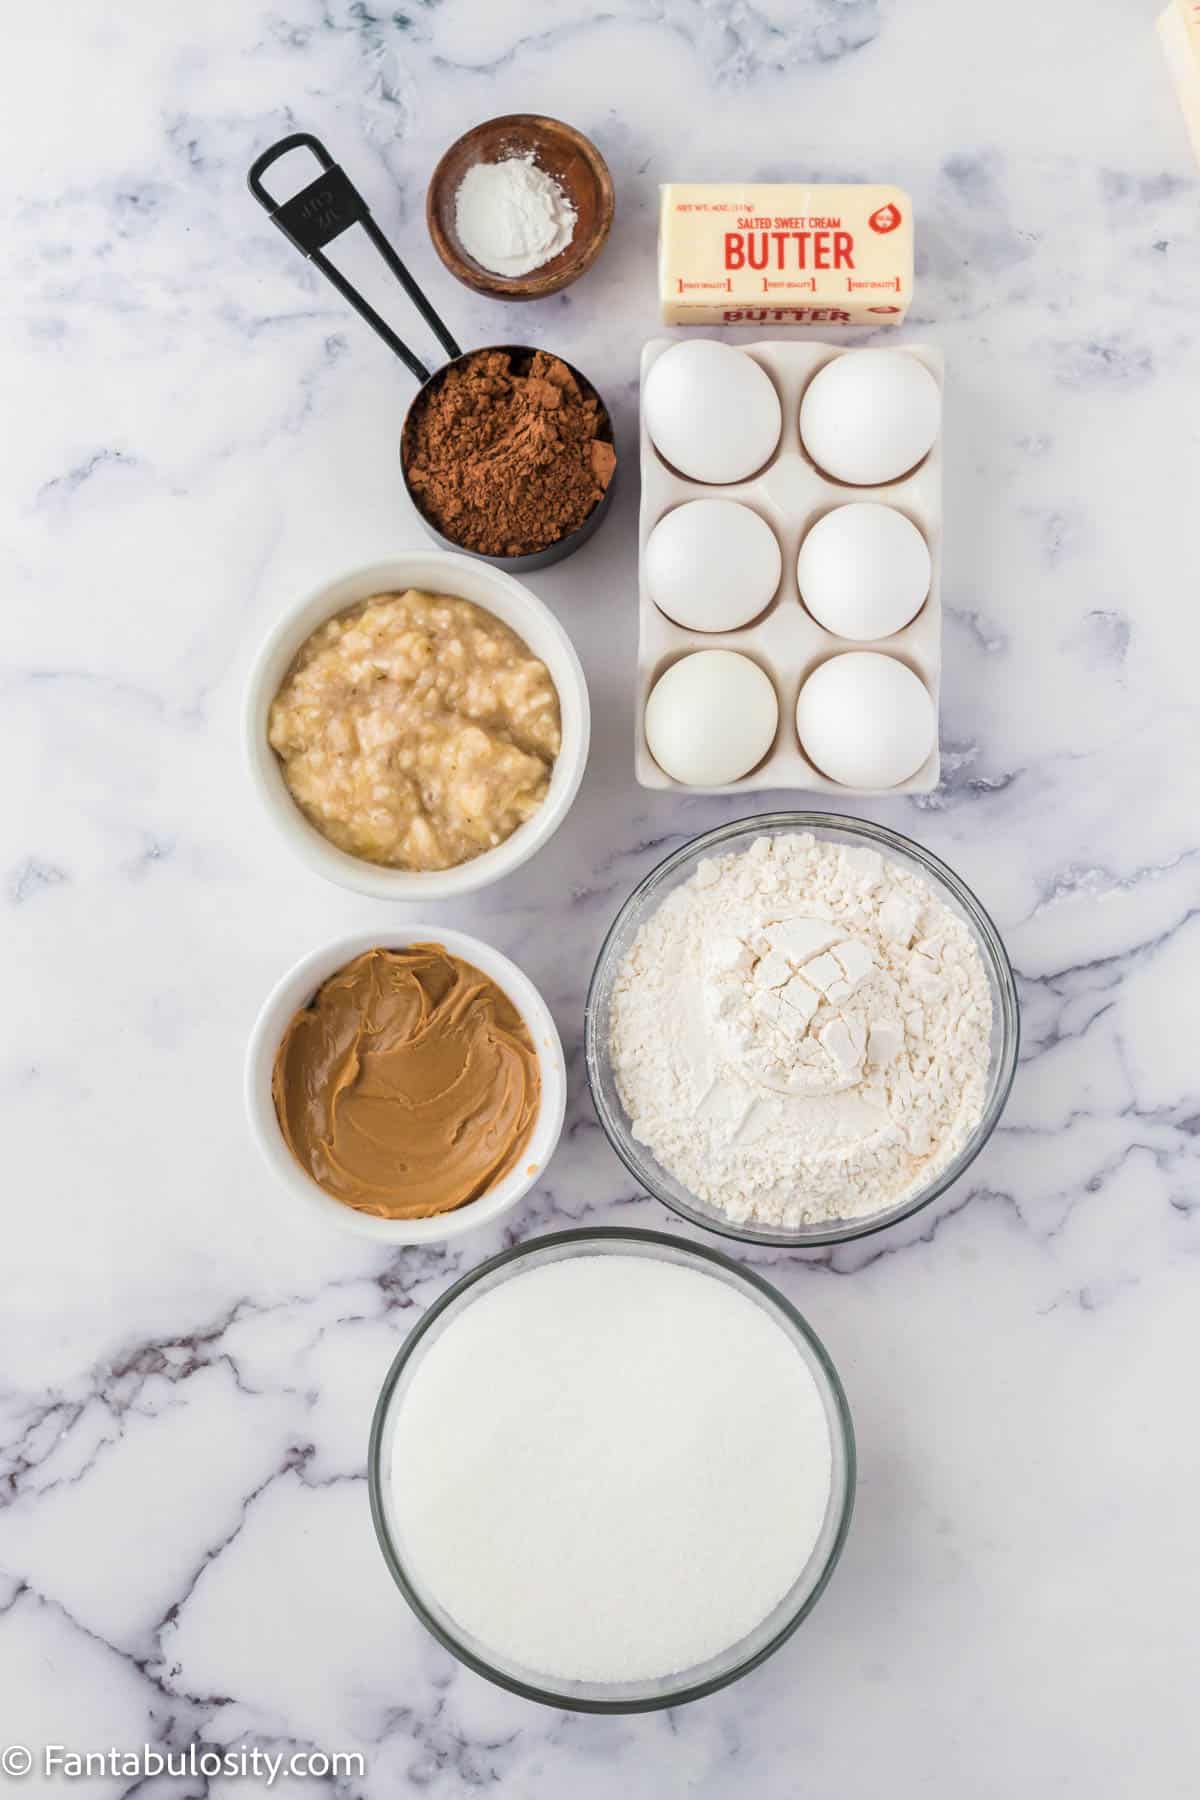
    Sometimes we run out of chocolate chips in my house (probably because my kids think they are the best snack food), so fudgy brownies that can be made with just cocoa powder are a must for me! This easy brownie recipe uses ingredients that you probably have right now but could easily get at a grocery store if you don’t!

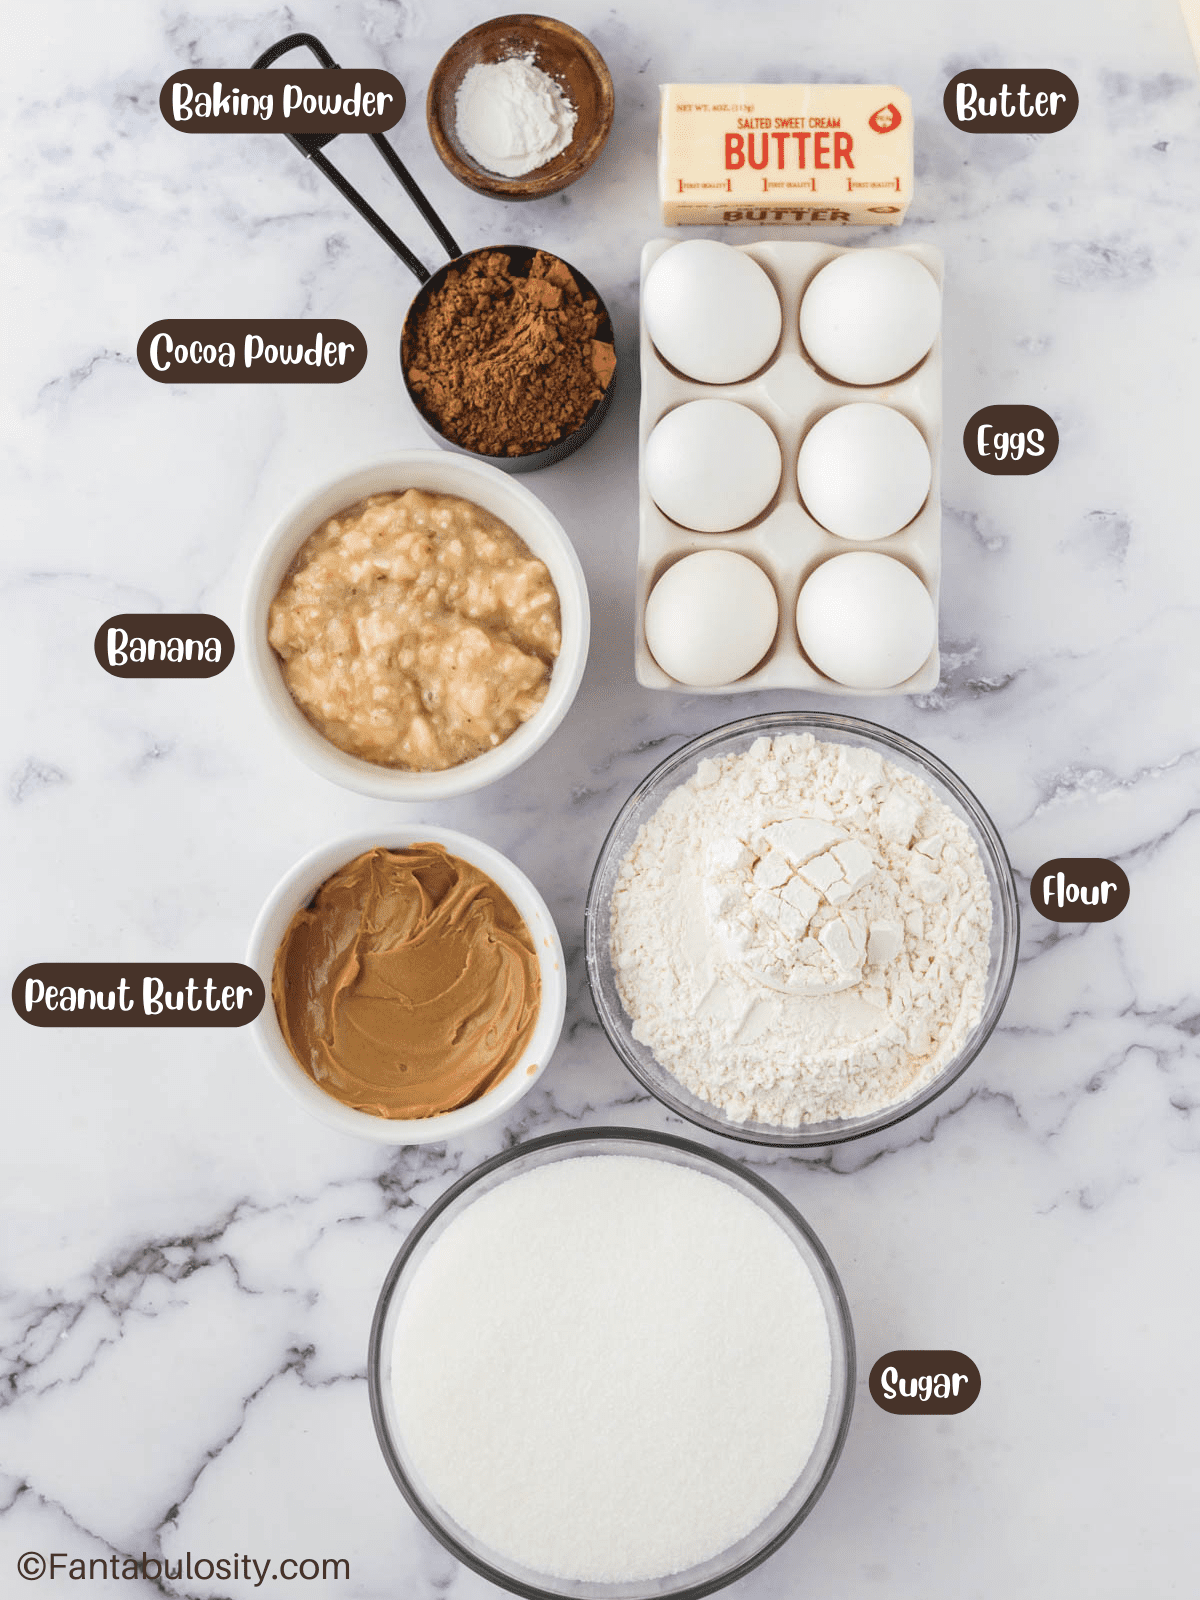
    Peanut butter banana brownie ingredients with labels.
    Ingredients
    • Butter: This makes the brownie fudgy and moist!
    • Baking Powder: This is the leavening agent that helps your brownie rise a bit.
    • Ripe Bananas: Adding ripe bananas will give it a light banana flavor and also make your brownie moist!
    • White All Purpose Flour: Of course we need some flour to help hold this all together. We used white all purpose flour for this recipe, but you could use whole wheat flour if you prefer (or see our substitutions for gluten-free alternatives).
    • Sugar: Just the right amount of sugar helps make this brownie sweet but not too sweet.
    • Eggs: Eggs are important for so many reasons! Most brownies don’t have a ton of flour in them, so eggs act as a binding agent to hold the brownie together. They also help give your brownie that fudgy texture.
    • Cocoa Powder: Since we aren’t using any chocolate in this brownie recipe, the cocoa powder is what gives it its chocolatey flavor!
    • Peanut Butter: Add in some creamy peanut butter for a delicious peanut butter flavor.

    You can find a complete list of ingredients and directions in the recipe card below.

    Instructions

    These brownies are super quick and easy to make – all you need is one bowl and 15 minutes of your time, and you’ll have delicious brownies in the oven making your house smell amazing.

    Peanut butter banana brownie ingredients in bowls on the counter.
    A few ingredients
    Butter and sugar in a bowl.
    Cream butter & sugar
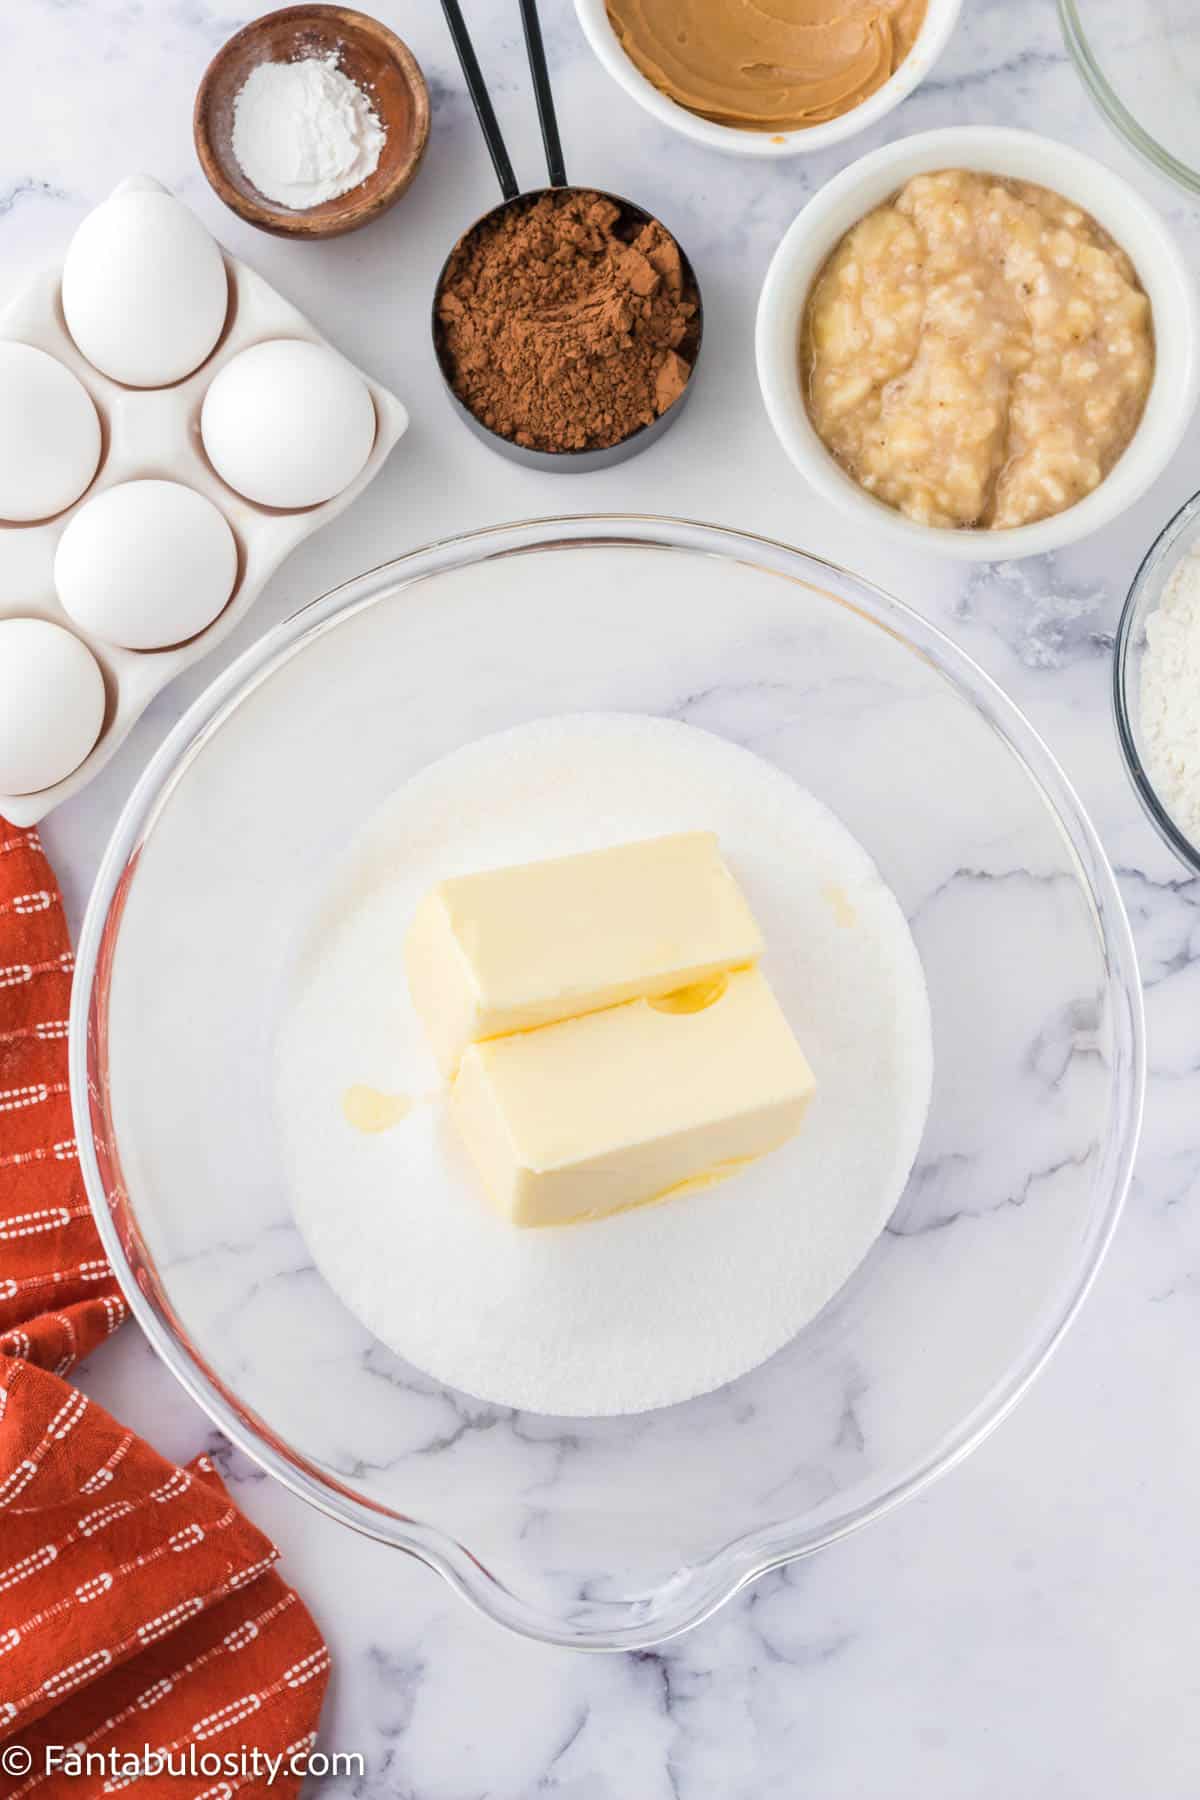
    1. Gather your ingredients, heat oven to 350 degrees, and coat a 9×13 inch baking pan in nonstick cooking spray.
    2. In a large bowl or the bowl of a stand mixer, cream together the sugar and butter until creamy and well combined.
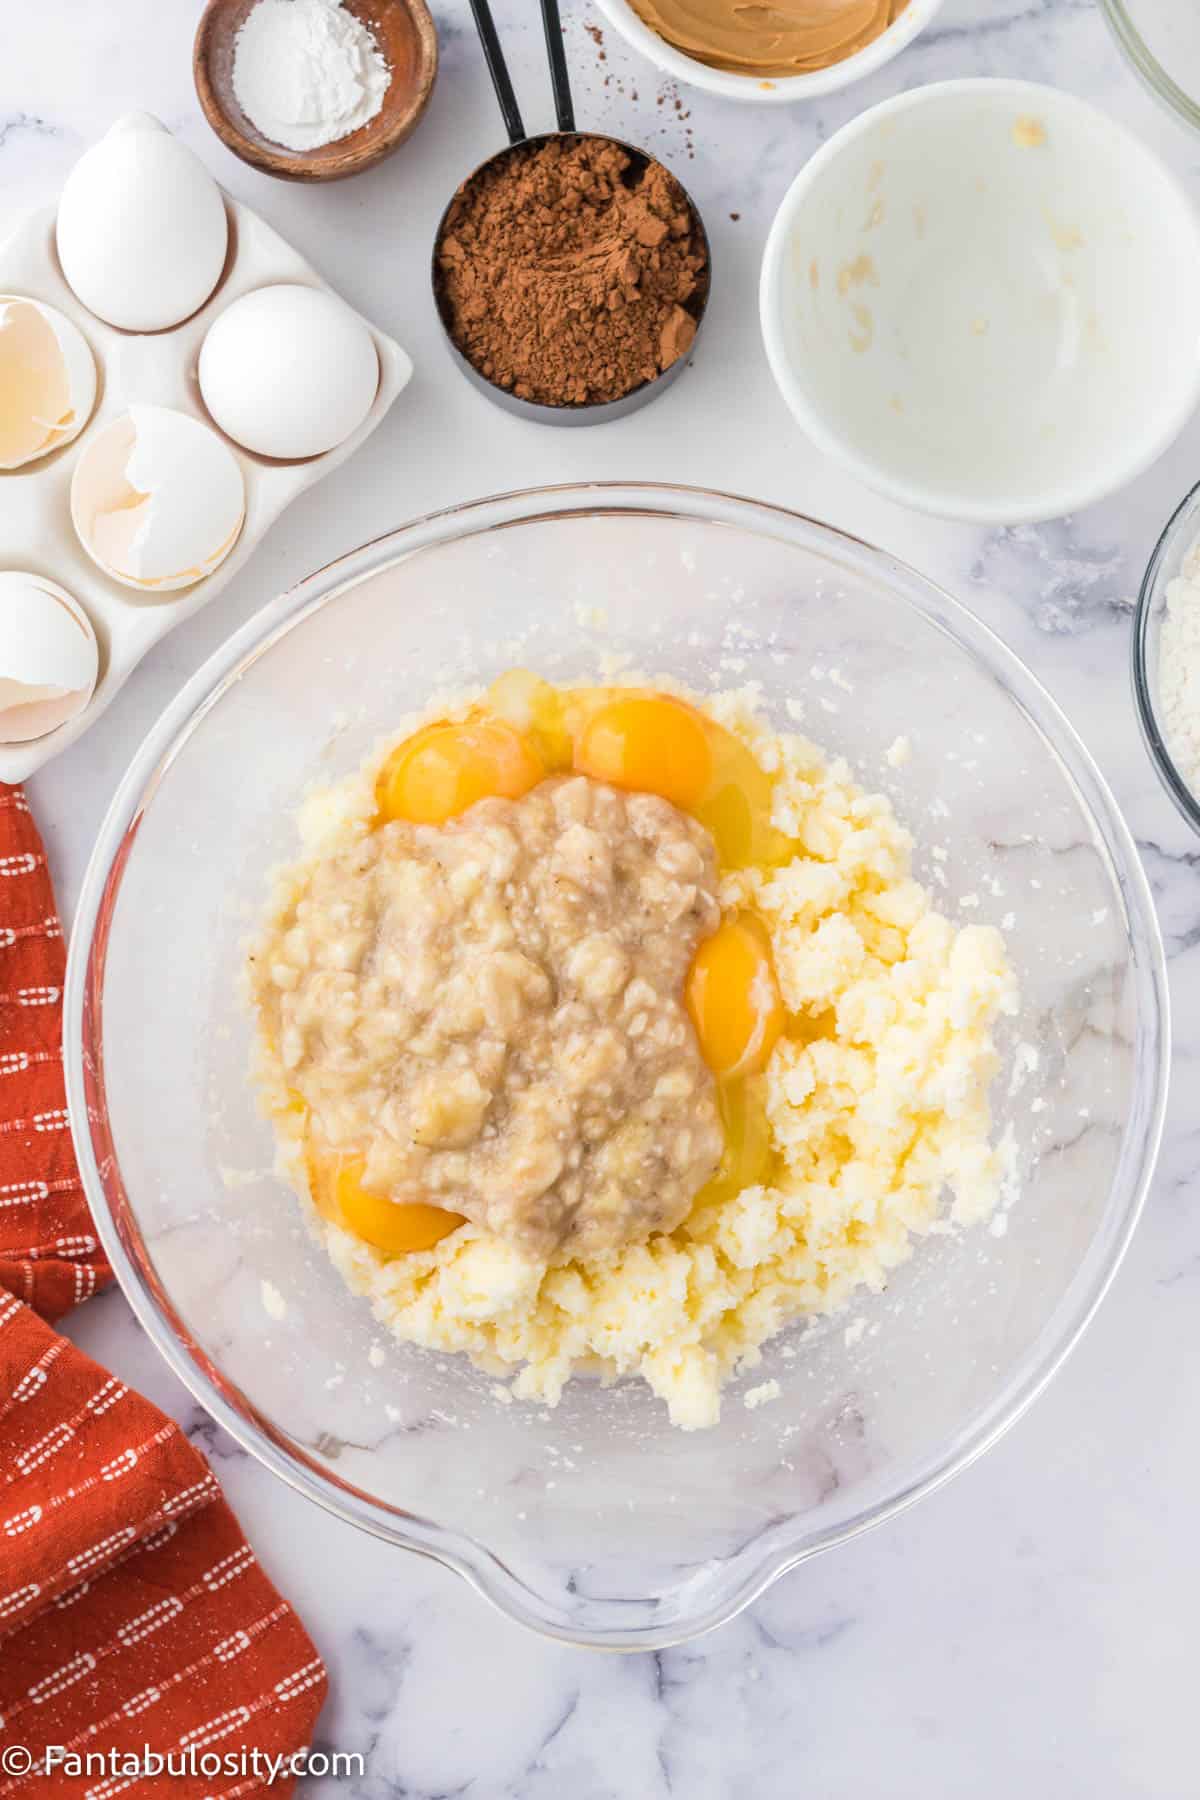
    Eggs and banana added to the butter and sugar mixture in the bowl.
    Add banana
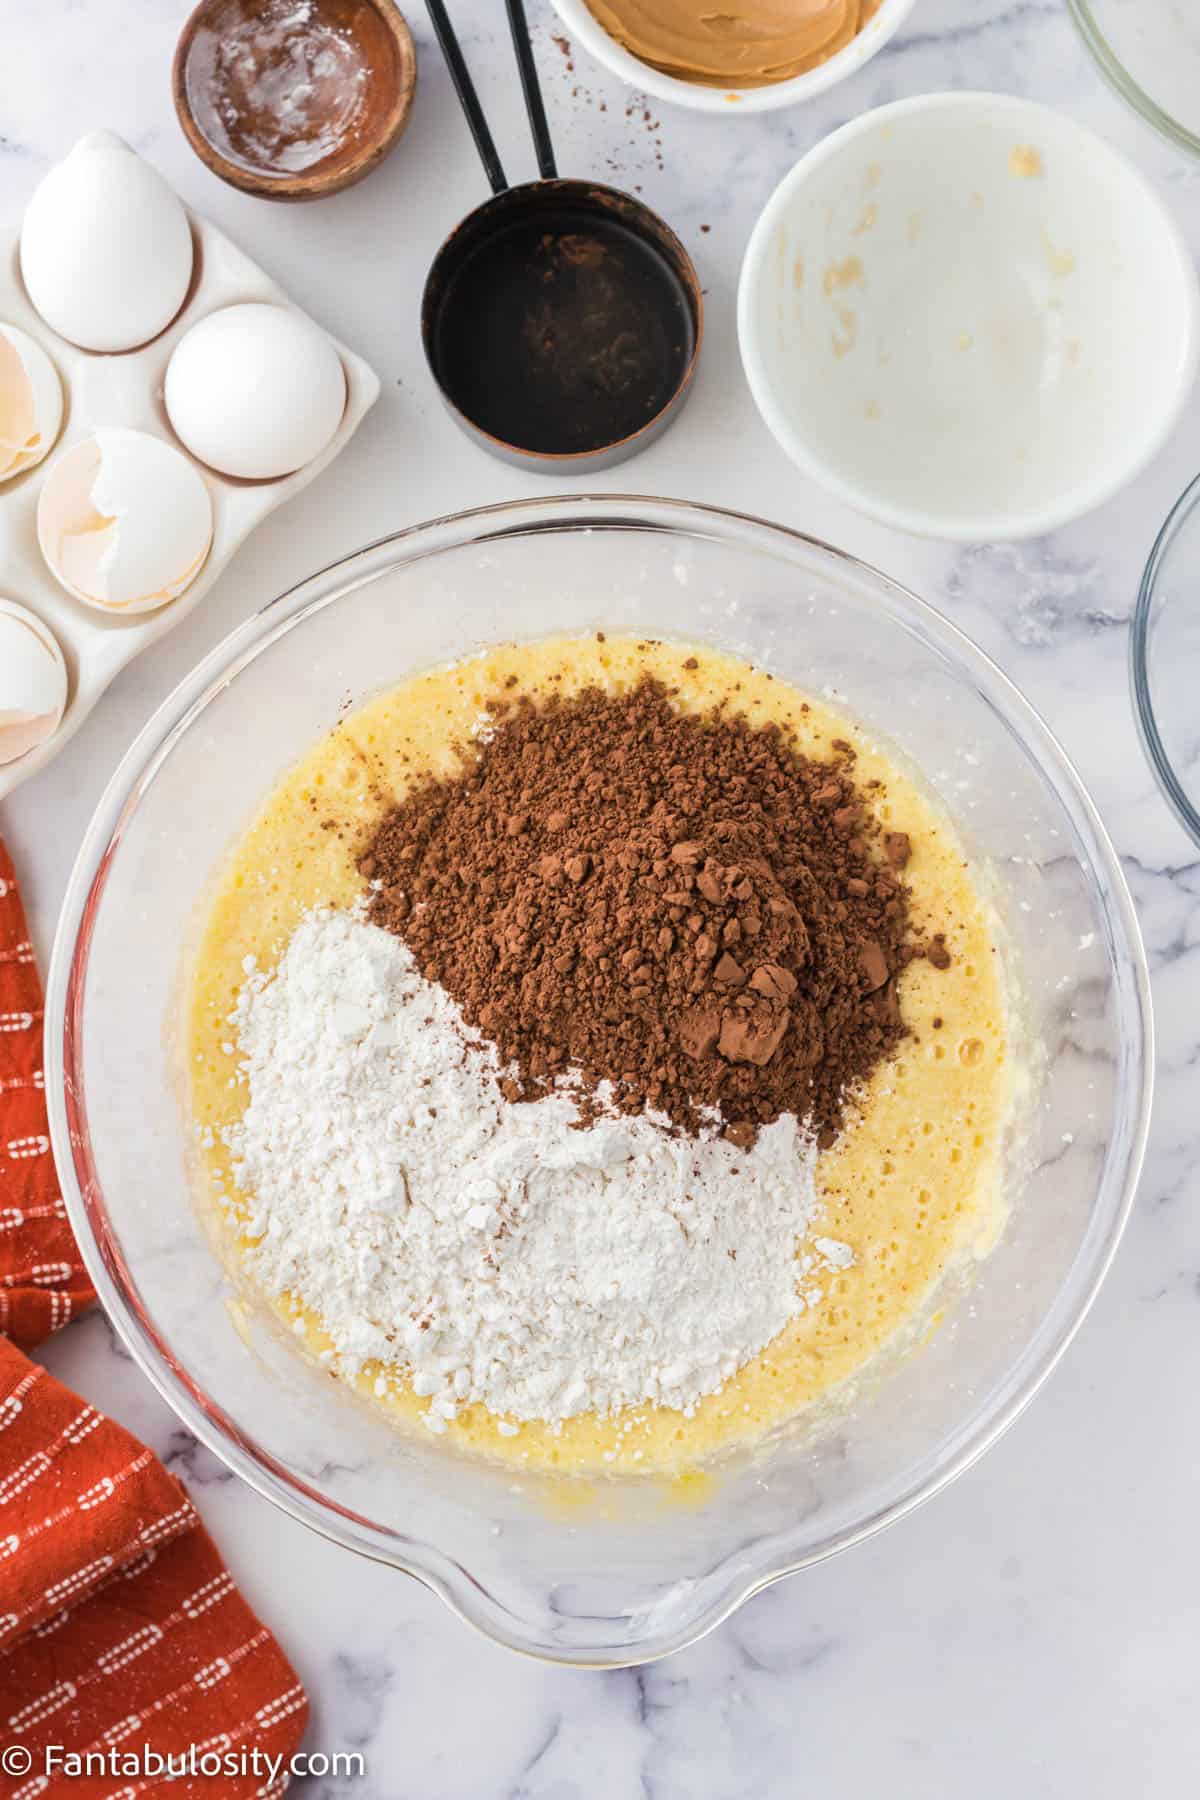
    Flour and cocoa powder on top of the butter, sugar, egg, banana mixture in a bowl.
    Add cocoa
    1. Mash bananas. Whisk the eggs and mashed bananas into the creamed butter mixture until the mixture is smooth.
    2. Add the ½ cup cocoa powder (use a good quality cocoa powder for the best results), flour, and baking powder. Whisk the dry ingredients into the wet ingredients until no clumps of flour remain.
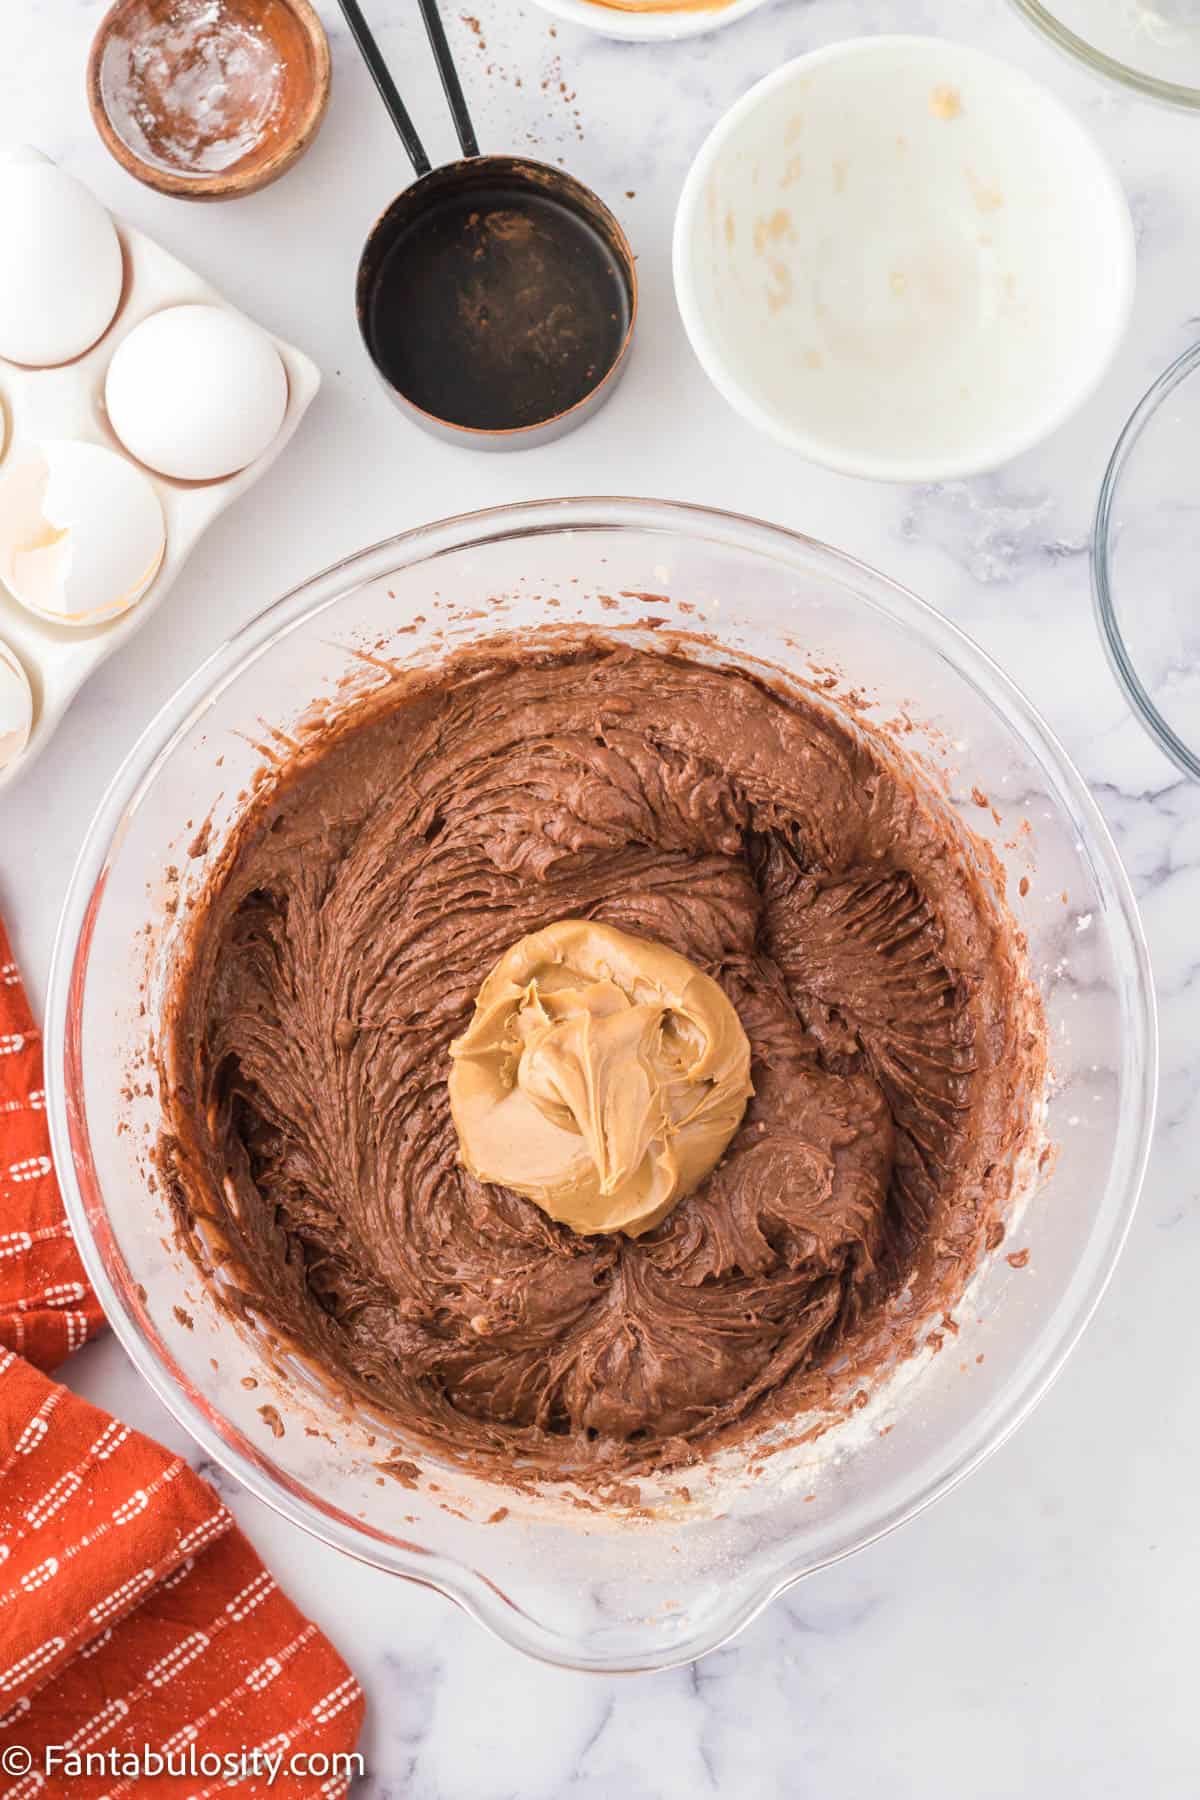
    Peanut butter on top of the brownie batter in a bowl.
    Add peanut butter
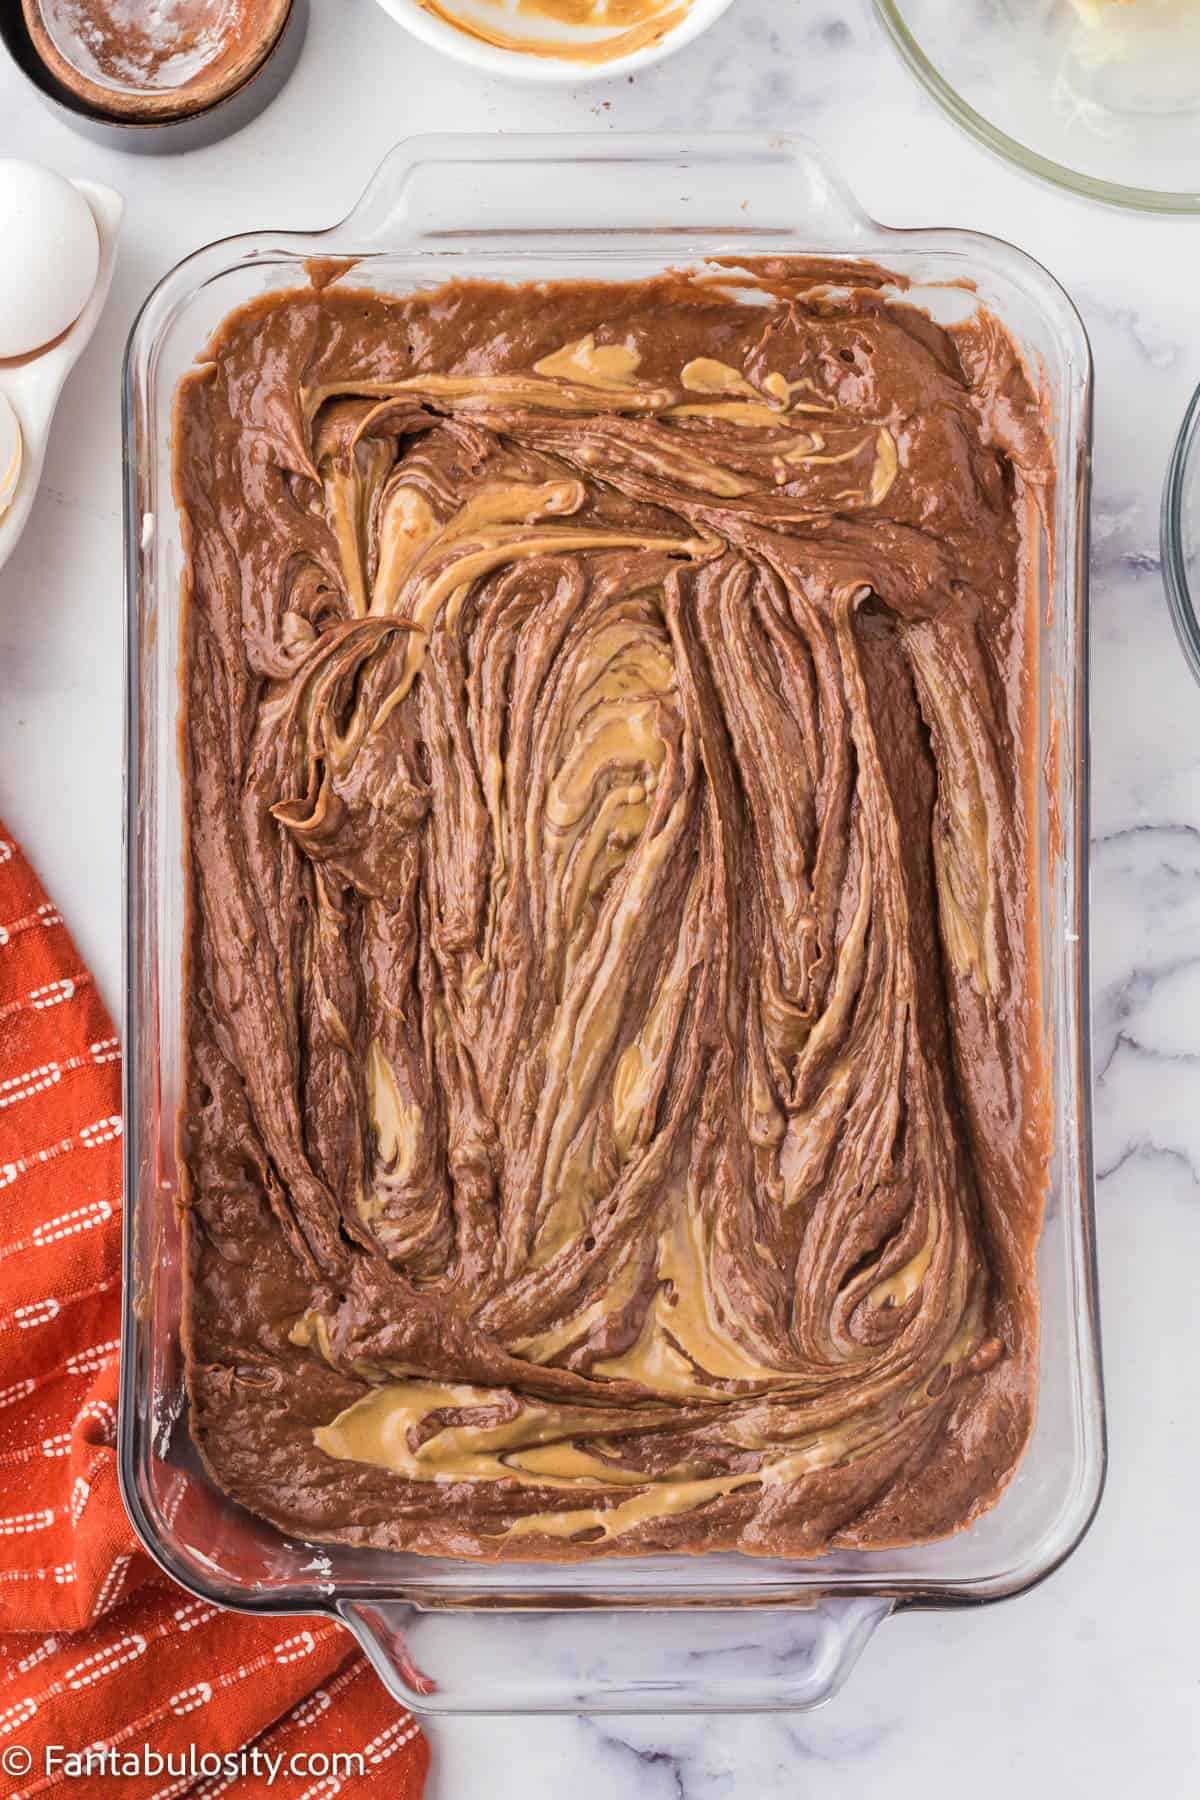
    Brownie batter spread into a prepared 9x13 pan.
    Fold in the peanut butter
    1. Fold in the ½ cup peanut butter with a rubber spatula until it is evenly distributed throughout the brownie batter. I found that creamy peanut butter worked better than crunchy peanut butter; however, you can always sprinkle chopped peanuts over the batter before baking if you want a crunchy experience!
    2. You can add a few dollops of peanut butter to the top of the batter and use a butter knife to swirl it in for a pretty peanut butter swirl on top! Pour the brownie mixture into the pan and bake for 50-55 minutes or until a toothpick can be cleanly removed from the center of the pan.
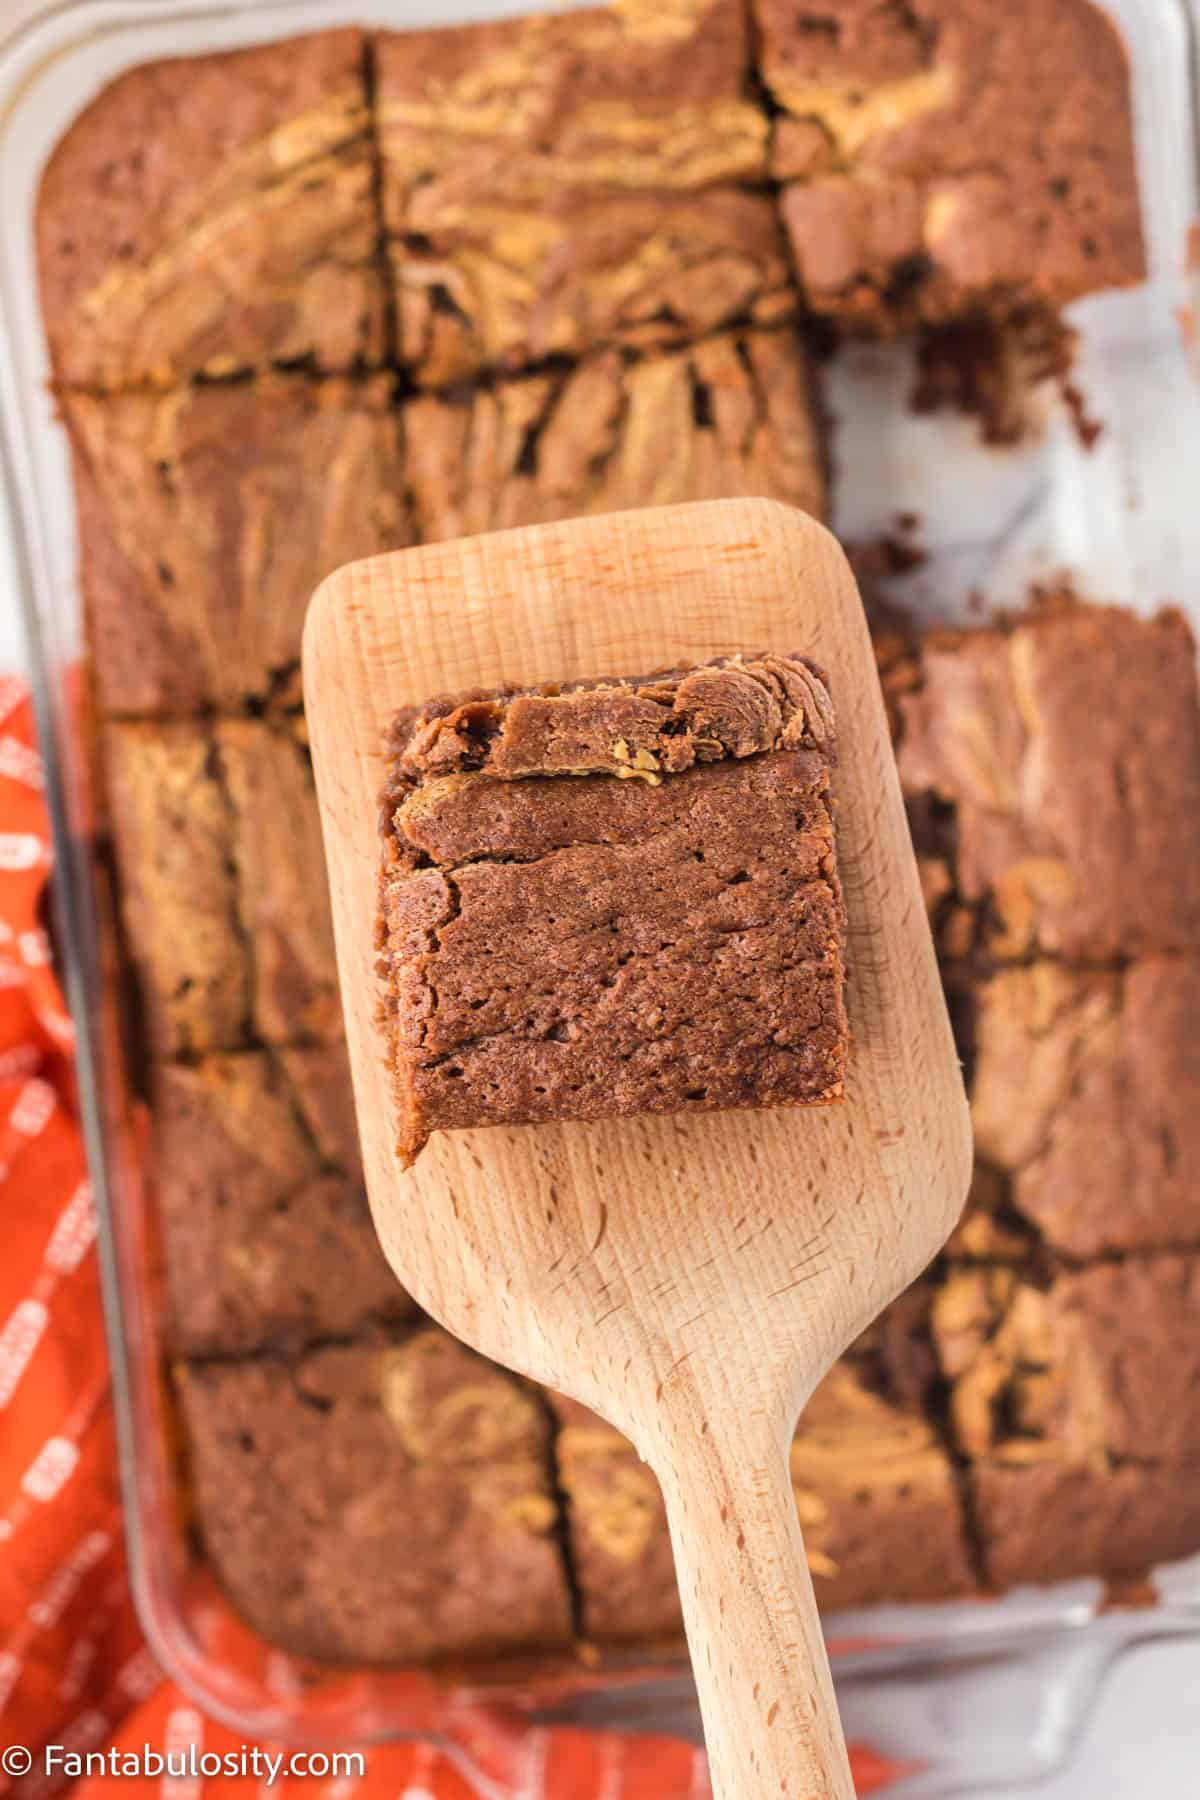
    One brownie square being held on a spatula above the full 9x13 pan of brownies.
    Cut and serve!
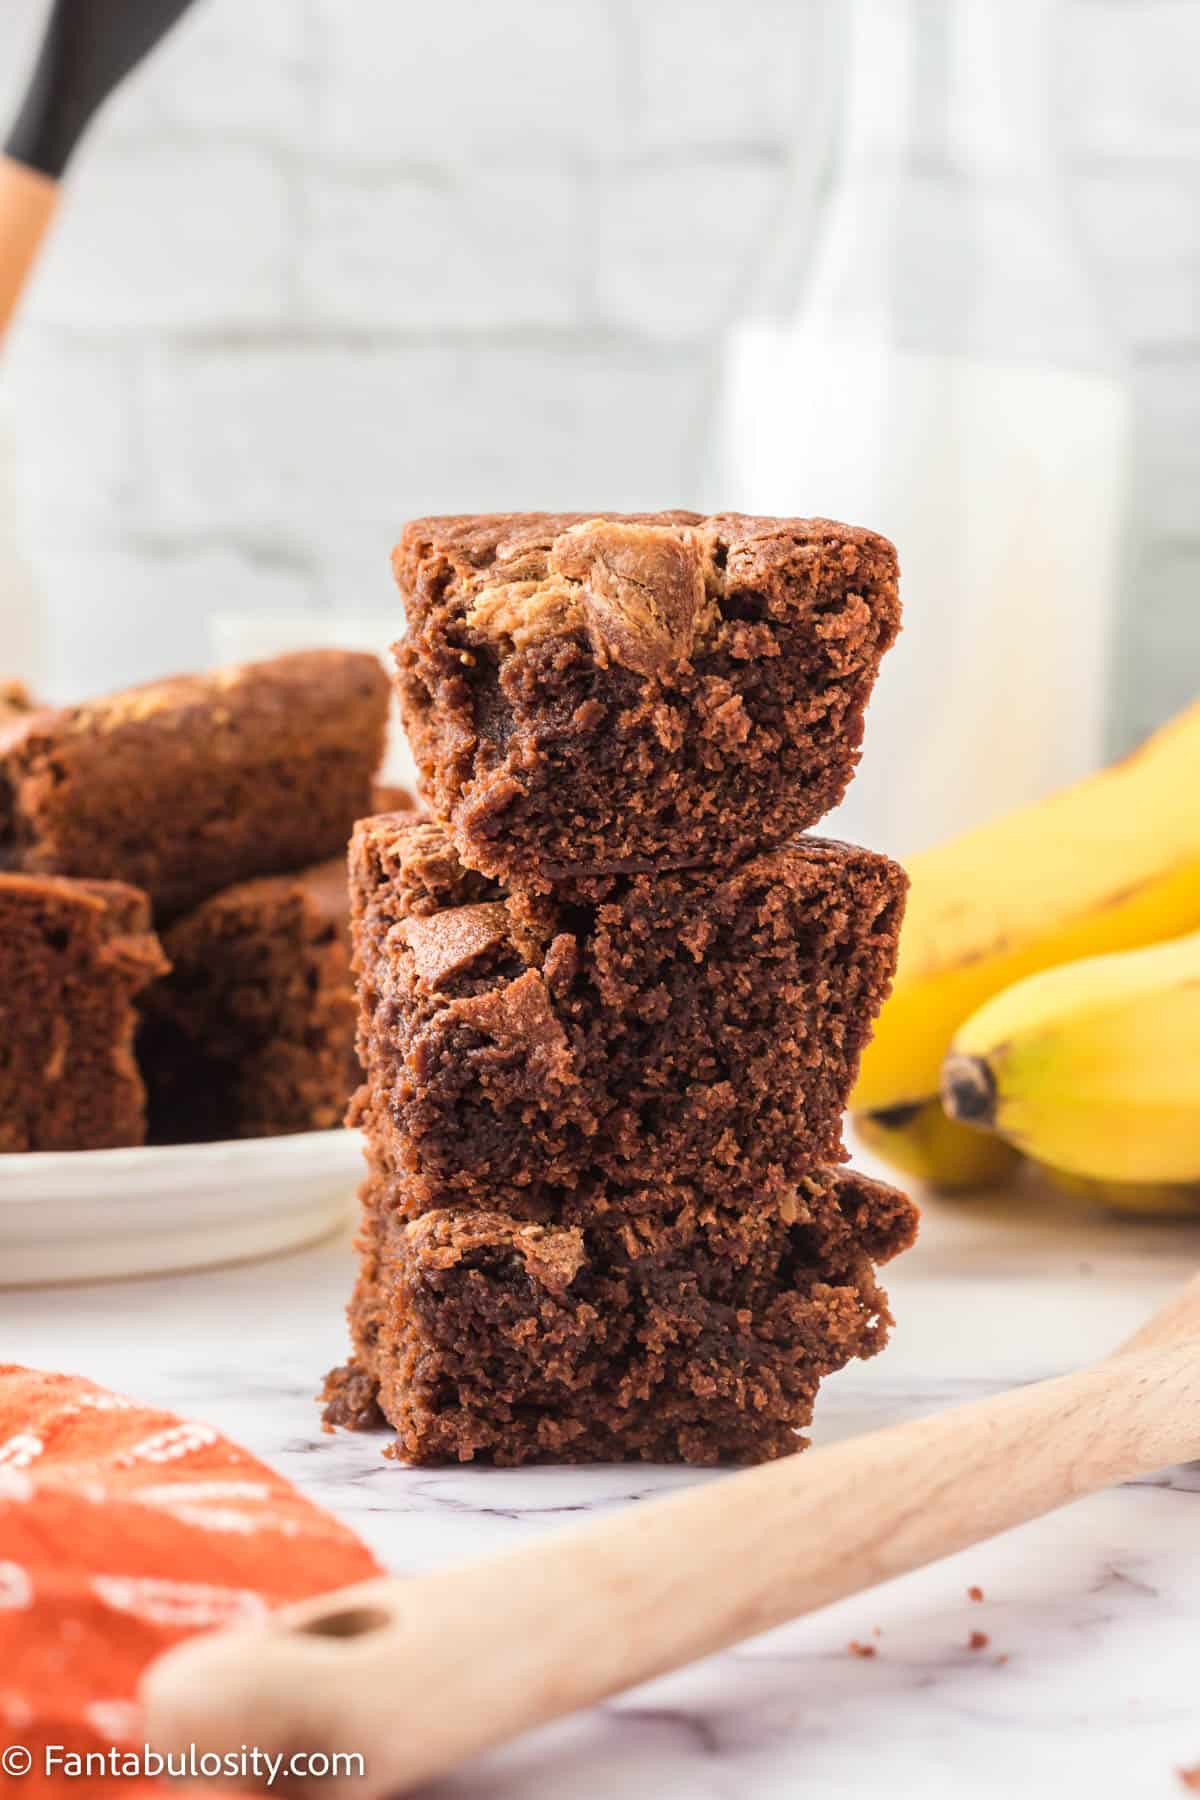
    A stack of brownies with a plate of brownies and bunch of bananas in the background.
    Delicious peanut butter banana brownies
    1. Let cool on a cooling rack, then slice into squares and enjoy! These brownies can either be served immediately or served cold, they’re great either way!

    Serving Suggestion: Serve these peanut butter chocolate banana brownies cold alongside a cup of coffee, warm with a scoop of ice cream or with a glass of cold milk!

    Substitutions

    • Peanut Butter – creamy works best, but you could use natural peanut butter, other natural nut butters or even a crunchy peanut butter if you prefer.
    • Gluten-Free – you can easily make these brownies gluten-free by replacing the 1 cup of white flour for a 1:1 ration gluten-free flour blend! You could also try using 1 cup almond flour instead of white flour (we haven’t tested this substitution – let us know if you try it)!
    • Dairy-Free – replace the butter in this recipe with a dairy-free alternative (or even coconut oil) so that even those on a dairy-free diet can enjoy them!
    • Eggs – if you can’t have eggs, you can try using flax eggs instead. You might notice a slight flax flavor in the brownies, but they will work as a binding agent just as well as an egg for this recipe.
    • Vegan – if you use the dairy-free substitution and the egg substitution above, you can turn these into vegan peanut butter banana brownies!
    • Sugar – you can use brown sugar instead of white sugar for this recipe. It will change the texture of the finished product, but it will work in a pinch!

    Variations

    The best part of a brownie recipe is that it’s a great base to get creative with! Here are a few fun ideas for you to try…

    • Holiday Festive – mix in some sprinkles and sprinkle some on top of the batter before baking to make your brownies festive! Try red and pink sprinkles for Valentine’s Day, green and tiny 4 leaf clover sprinkles for St. Patrick’s Day, red and green for Christmas, little pumpkin sprinkles for Halloween. Get creative!
    • S’mores Brownies – sprinkle some mini marshmallows and a little bit of chopped graham crackers on top of the banana brownie batter before baking to make these into s’mores themed peanut butter banana brownies!
    • Extra Chocolate – if you have a major sweet tooth, stir some chocolate chunks (or we even used a chocolate pudding mix in brownies, before) into the brownie batter before baking! Your brownies will be gooey and delicious!

    Storage

    You can store your banana peanut butter brownies on the counter or in the fridge, as long as it’s in an airtight container. On the counter they should last 3-5 days, in the fridge they should last at least a week.

    You can also store these in an airtight, freezer safe container in the freezer for up to 2 months. Perfect for when you want a quick snack (and if you haven’t tried eating a frozen brownie before, you really should).

    Expert Tips and FAQs

    Do I have to use ripe bananas?

    It is important to use ripe bananas to get the best banana flavor. An unripe banana really won’t taste the same. If you only have fresh bananas and need to ripen some quickly, check out this blog post on how to ripen a banana faster!

    Can you use bananas in brownies?

    Why yes, yes you can! This brownie recipe is the perfect way to use up all those overripe bananas you have kicking around!

    Related Recipes

    More brownie recipes: If you’re in the mood for another twist on the classic brownies recipe, go check out our lemon cake mix brownies or our strawberry brownies recipe! We have so many great recipes on the blog for brownies!

    More chocolate recipes: In the mood for something super chocolatey? You have to try this hot fudge cake! This is one of our favorite recipes when it comes to chocolate cake.

    Need to use up some overripe bananas?: I have the best banana bread recipe (with a secret ingredient) as well as an amazing banana bread pudding recipe you should try! Or, this banana pudding poke cake has a lot of banana flavor.

    Did you make this? I’d be so grateful if you left a “star” rating below to let me know what you thought! Then, the next time you need a quick and easy recipe, come back to Fantabulosity to browse all of my easy recipes!

    Recipe

    A plate of peanut butter banana brownies.
    Print Pin
    5 from 5 votes

    Peanut Butter Banana Brownies

    Peanut Butter Banana Brownies: Move over regular brownies, these peanut butter banana brownies are the ones you've been waiting for! It only takes 15 minutes to get these in the oven, and pantry staples you probably have on hand right now!
    Course Dessert, Snack
    Cuisine American
    Prep Time 15 minutes minutes
    Cook Time 55 minutes minutes
    Total Time 1 hour hour 10 minutes minutes
    Servings 12 brownies
    Calories 390kcal
    Author Jessica Burgess

    Ingredients

    • 1 cup salted butter softened at room temperature
    • 2 cups white granulated sugar
    • 4 large eggs
    • 2 ripe bananas mashed
    • ½ cup cocoa powder
    • 1 cup white all-purpose flour (whole wheat also works)
    • 1 teaspoon baking powder
    • ½ cup creamy peanut butter

    Instructions

    • Heat oven to 350 degrees and coat a 9×13 inch baking pan in nonstick cooking spray.
    • In a large mixing bowl or the bowl of a stand mixer, cream together the sugar and butter until creamy and well combined.
    • Mash bananas. Whisk the eggs and mashed bananas into the creamed butter mixture until the mixture is smooth.
    • Add the cocoa powder, flour, and baking powder. Whisk the dry ingredients into the wet ingredients until no clumps of flour remain.
    • Fold in the peanut butter with a rubber spatula until it is evenly distributed throughout the brownie batter.
    • Pour the batter into the pan and bake the brownies for 50-55 minutes or until a toothpick can be cleanly removed from the center of the pan.
    • Let cool, then slice into squares and enjoy!

    Nutrition

    Serving: 1brownie | Calories: 390kcal | Carbohydrates: 44g | Protein: 6g | Fat: 23g | Saturated Fat: 11g | Polyunsaturated Fat: 2g | Monounsaturated Fat: 7g | Trans Fat: 1g | Cholesterol: 103mg | Sodium: 192mg | Potassium: 134mg | Fiber: 1g | Sugar: 35g | Vitamin A: 563IU | Vitamin C: 1mg | Calcium: 35mg | Iron: 1mg

    Nacho Bar Ideas

    May 18, 2022

    nacho bar ideas

    Nacho Bar Ideas: An easy “serve yourself,” style of food bar for a party or event. Topping ideas, and my favorite way to serve the cheese!

    As a party planner at heart, I decided to style an easy nacho bar since food bars are my favorite!

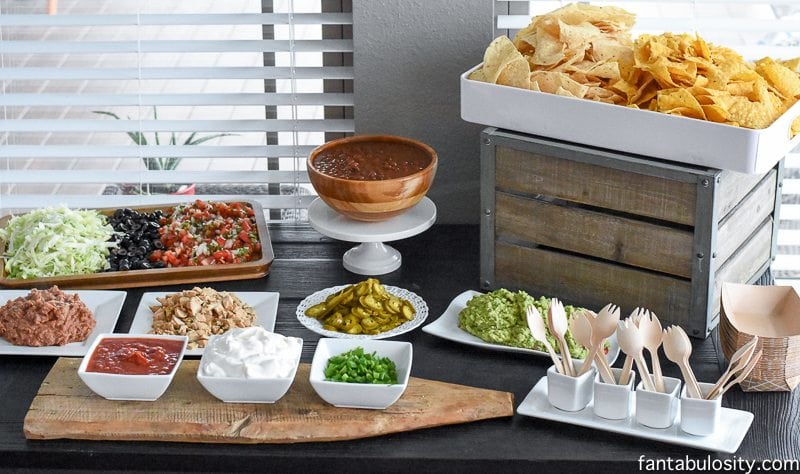
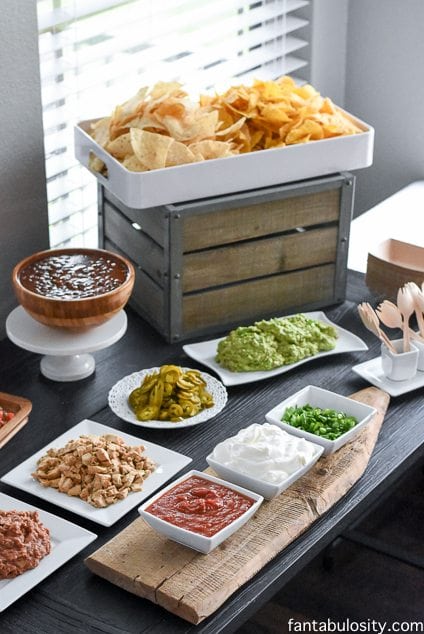
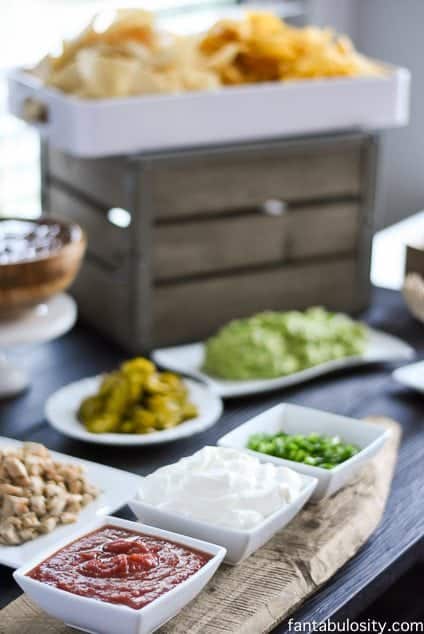
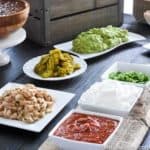
    Table with nacho bar toppings in bowls and on plates

    We invited a few of our closest friends over on a Friday night, with a Facebook invite saying,

    It’s Nacho Birthday, it’s his!

    We then told them to plan on coming over to our house after school & work that Friday evening, for a nacho bar & some brew. (Juice boxes for the kiddos.)

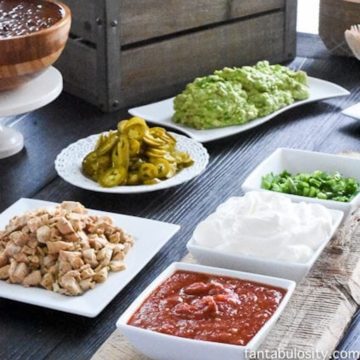
    Nacho toppings on table, easily for guests to grab and go

    You’ll Also Love:

    • Taco Bar Toppings Ideas
    • Leftovers? Make these BBQ White Queso Nachos

    Everyone LOVED the nacho bar idea! They were able to make their own… just the way they wanted it, and it was the perfect way to vedge out, on a Friday evening.

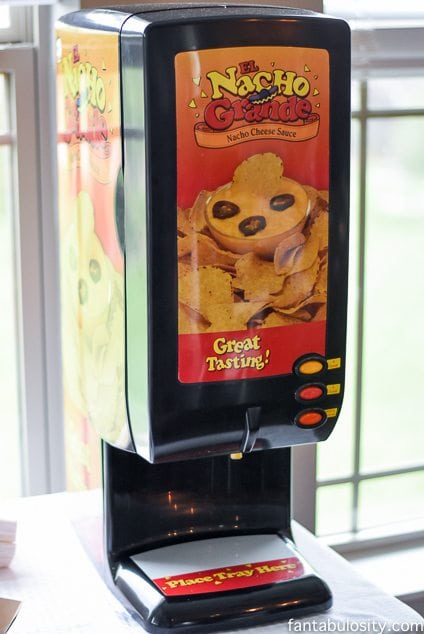
    The idea started, when I saw a sign out front of the party rental store in my home town that said,

    “NOW CARRYING A NACHO CHEESE MACHINE.”

    I just about rear-ended someone, because of my excitement. I literally planned this party days later. 😉

    Nacho Bar Ideas

    Nacho cheese machine

    How to Make a Nacho Bar

    I literally bought almost everything already pre-made and pre-cut. It was by choice to make the guacamole and pico de gallo. But a nacho bar is PERFECT for a last minute party idea because it was literally all ready in no time.

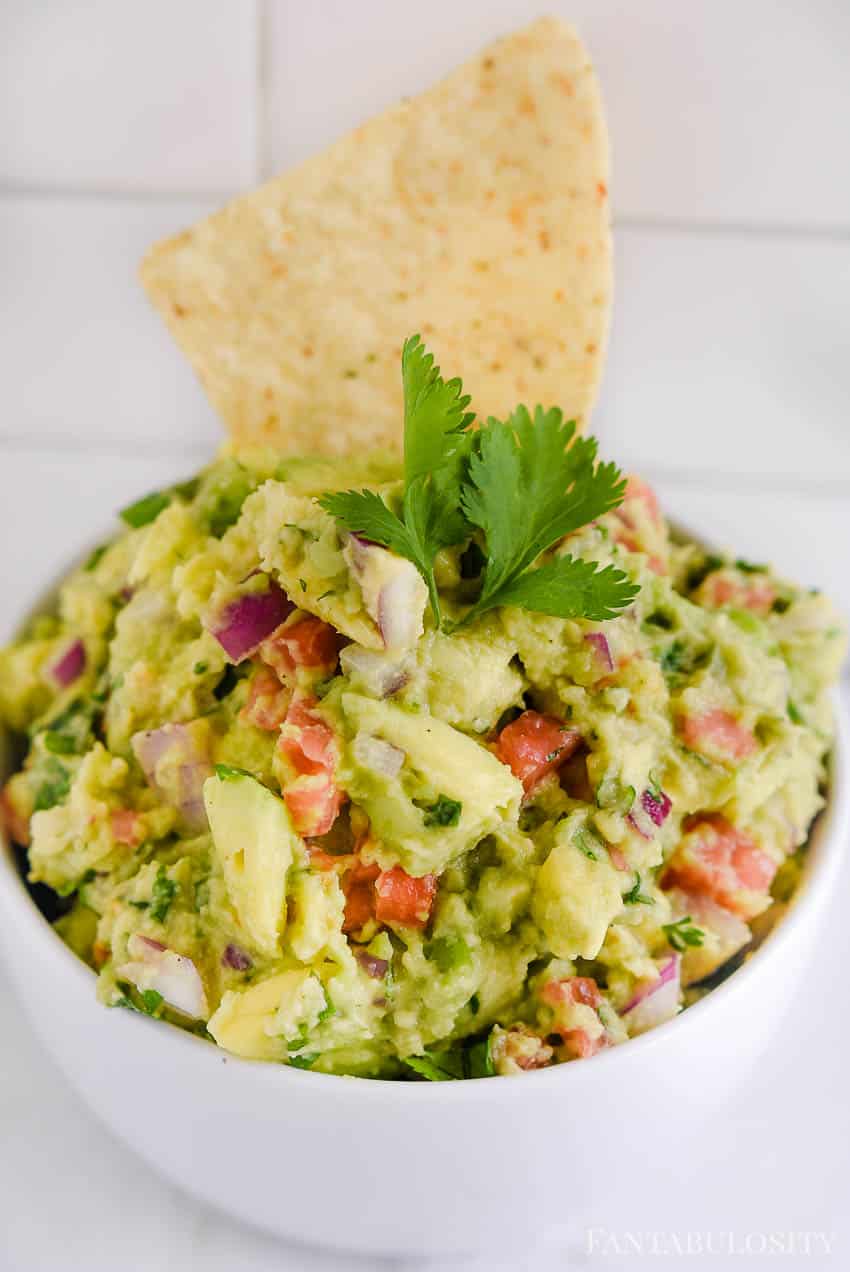
    My easy guacamole recipe is a HUGE hit on Pinterest, and my top most-visited recipe post every year if you want to snag it too:

    Guacamole Dip in white bowl

    Type of Cheese for Nacho Bar

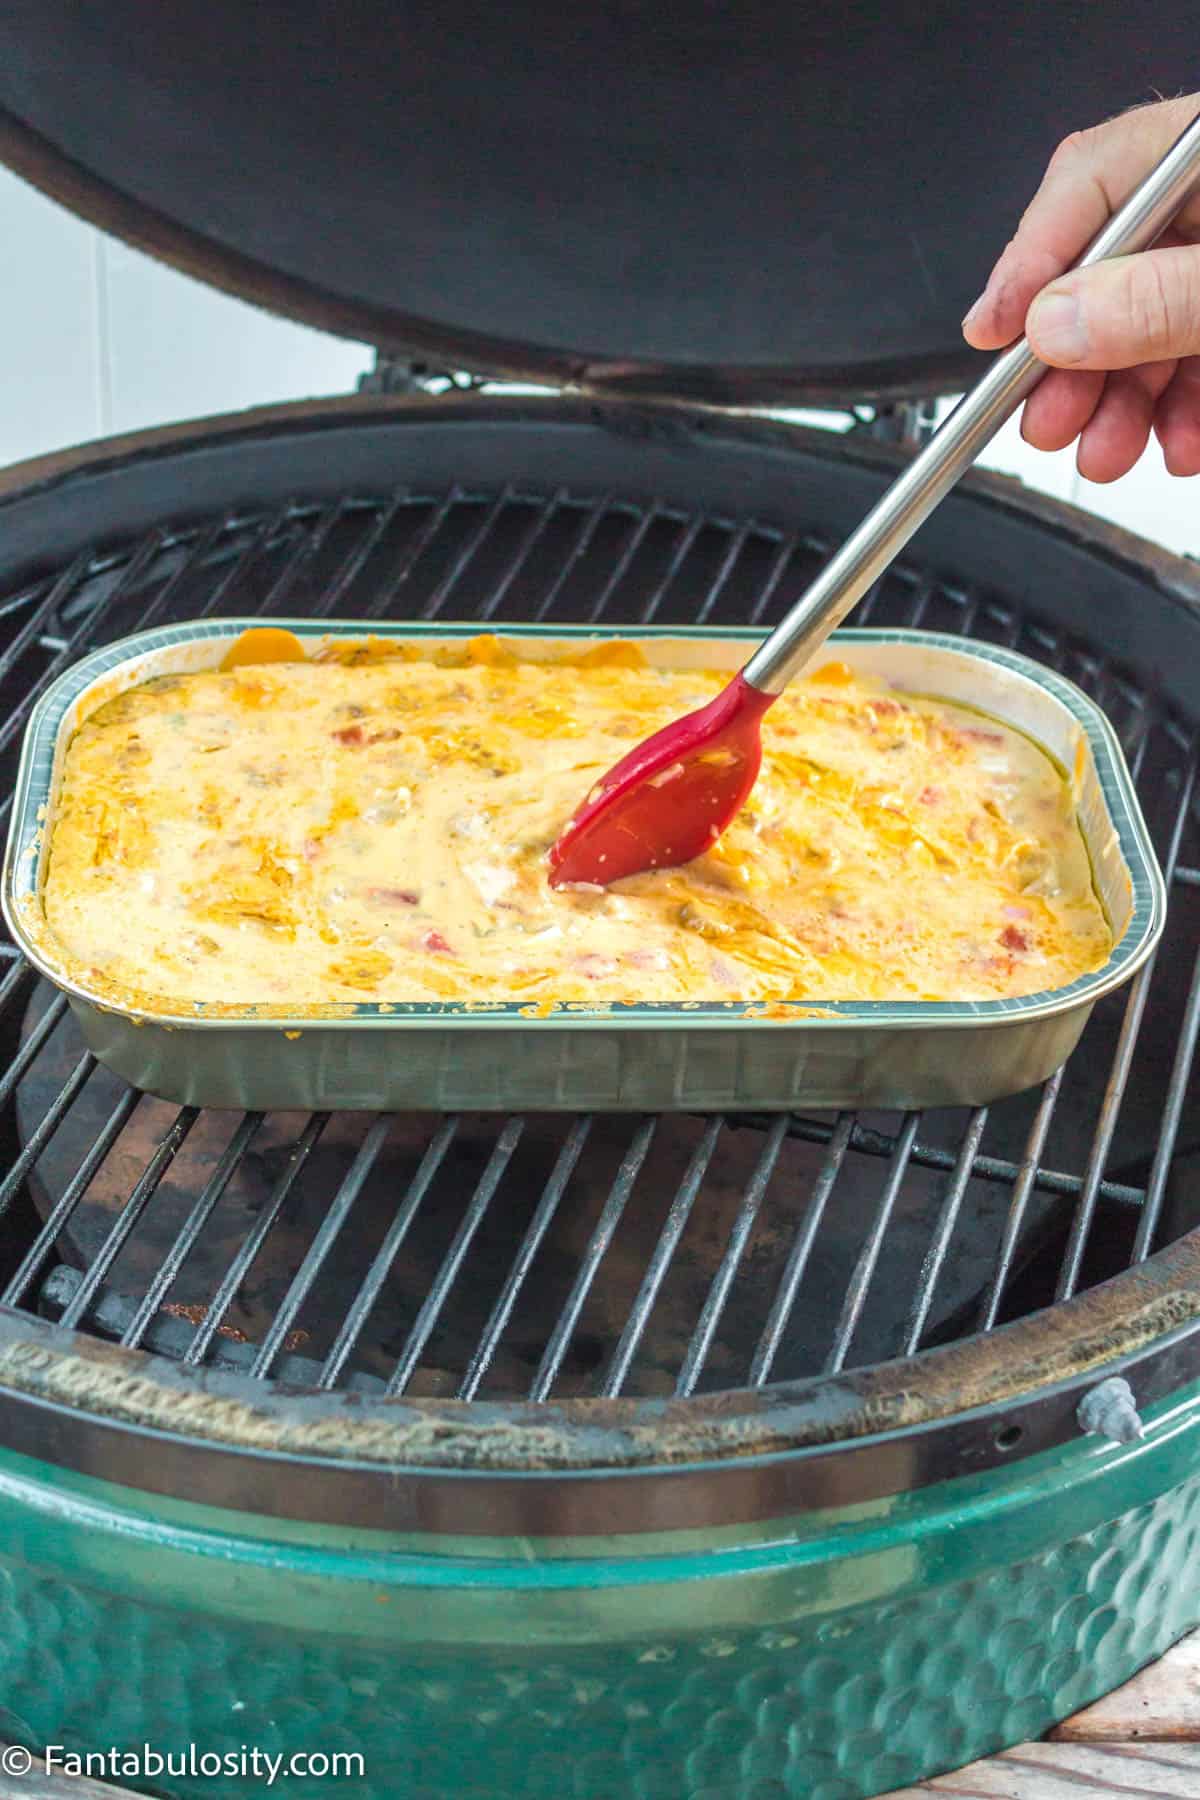
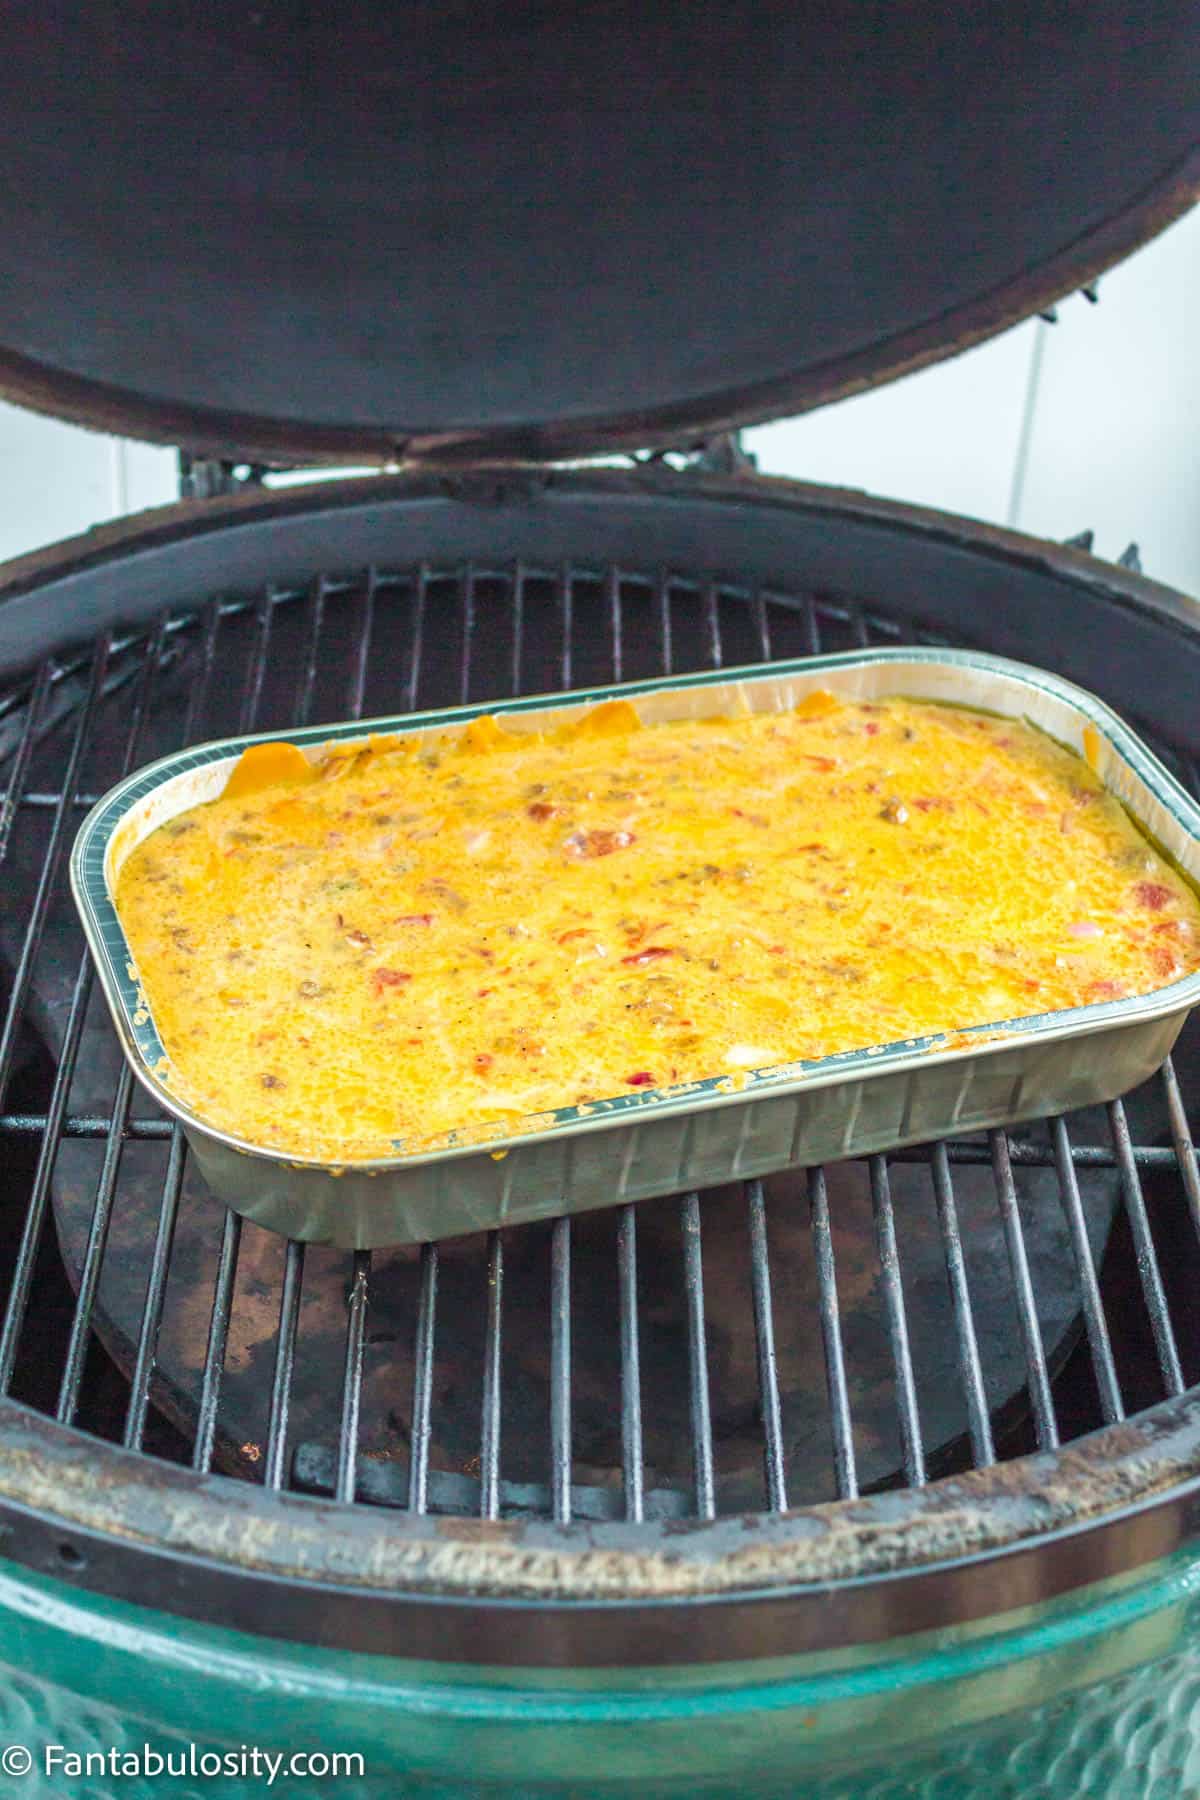
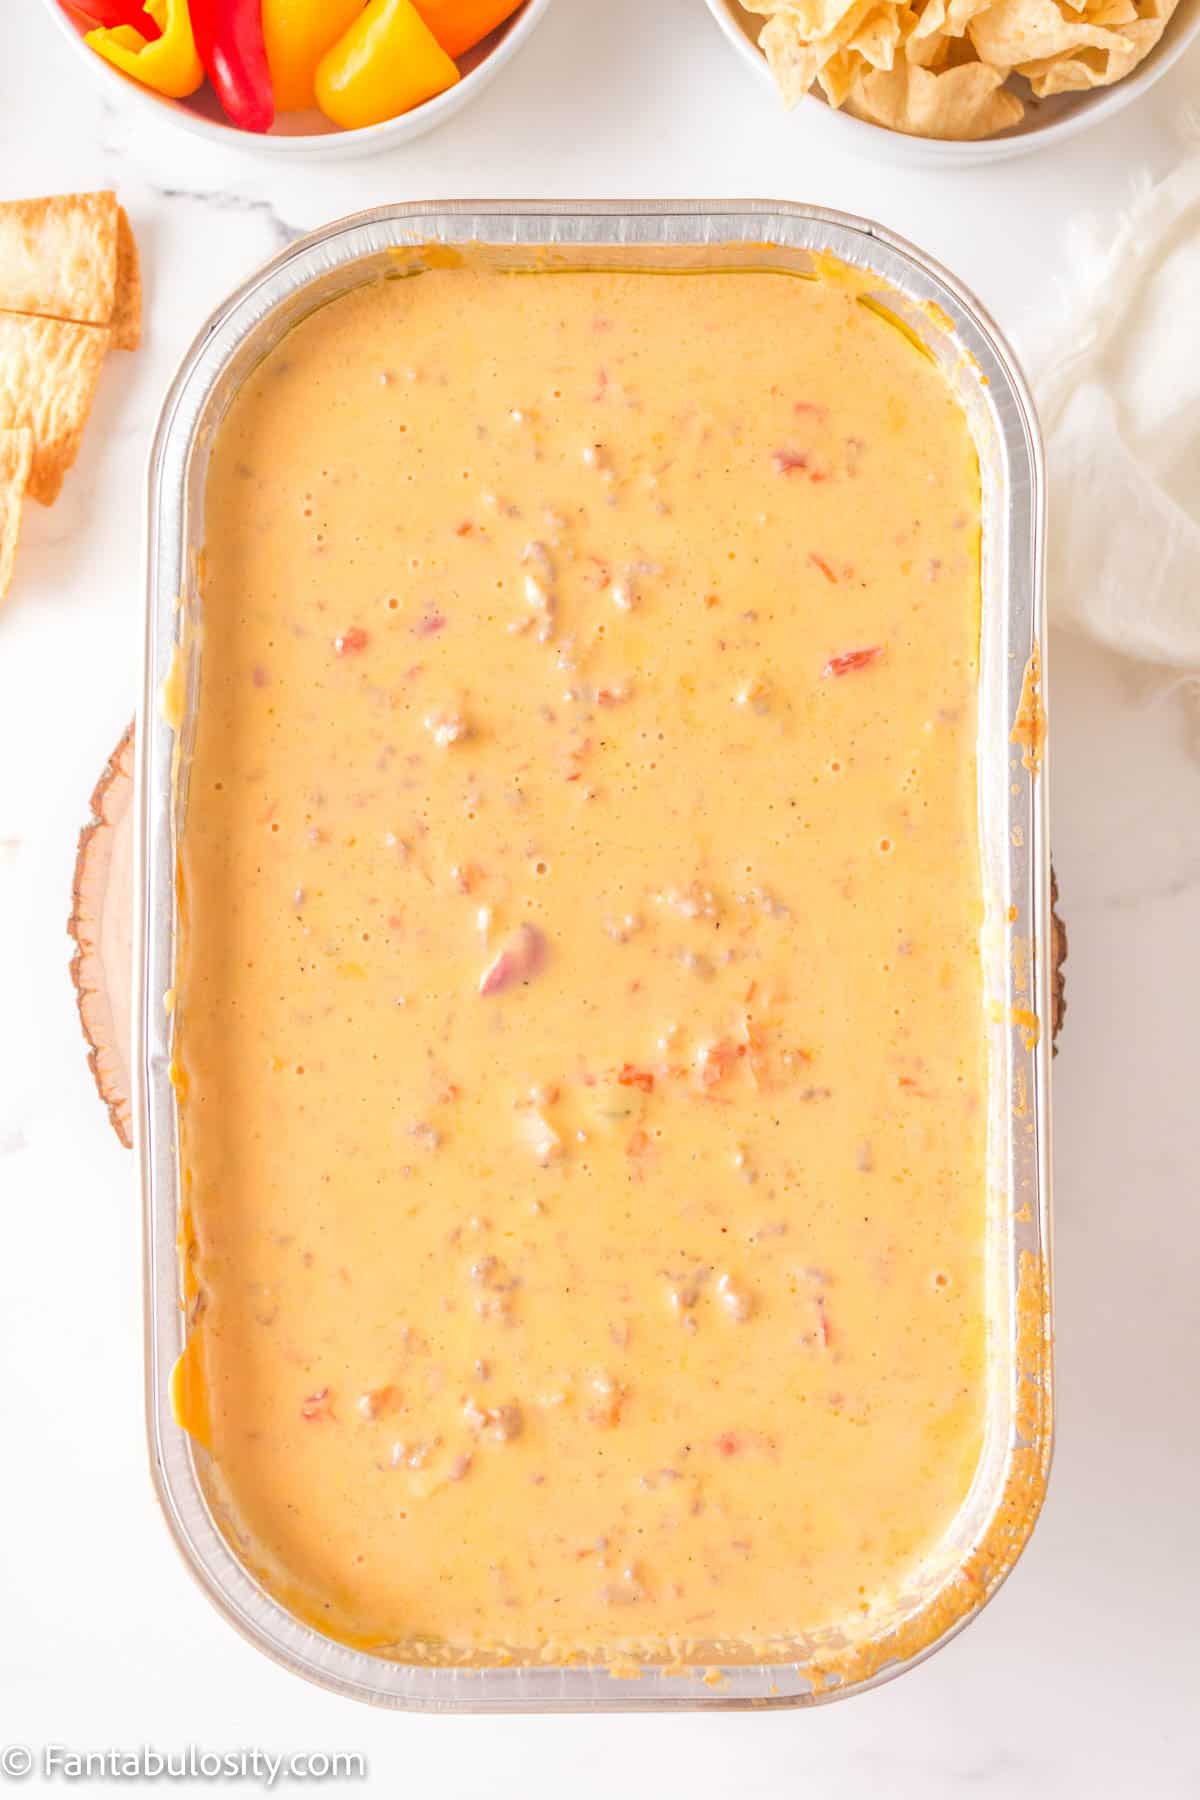
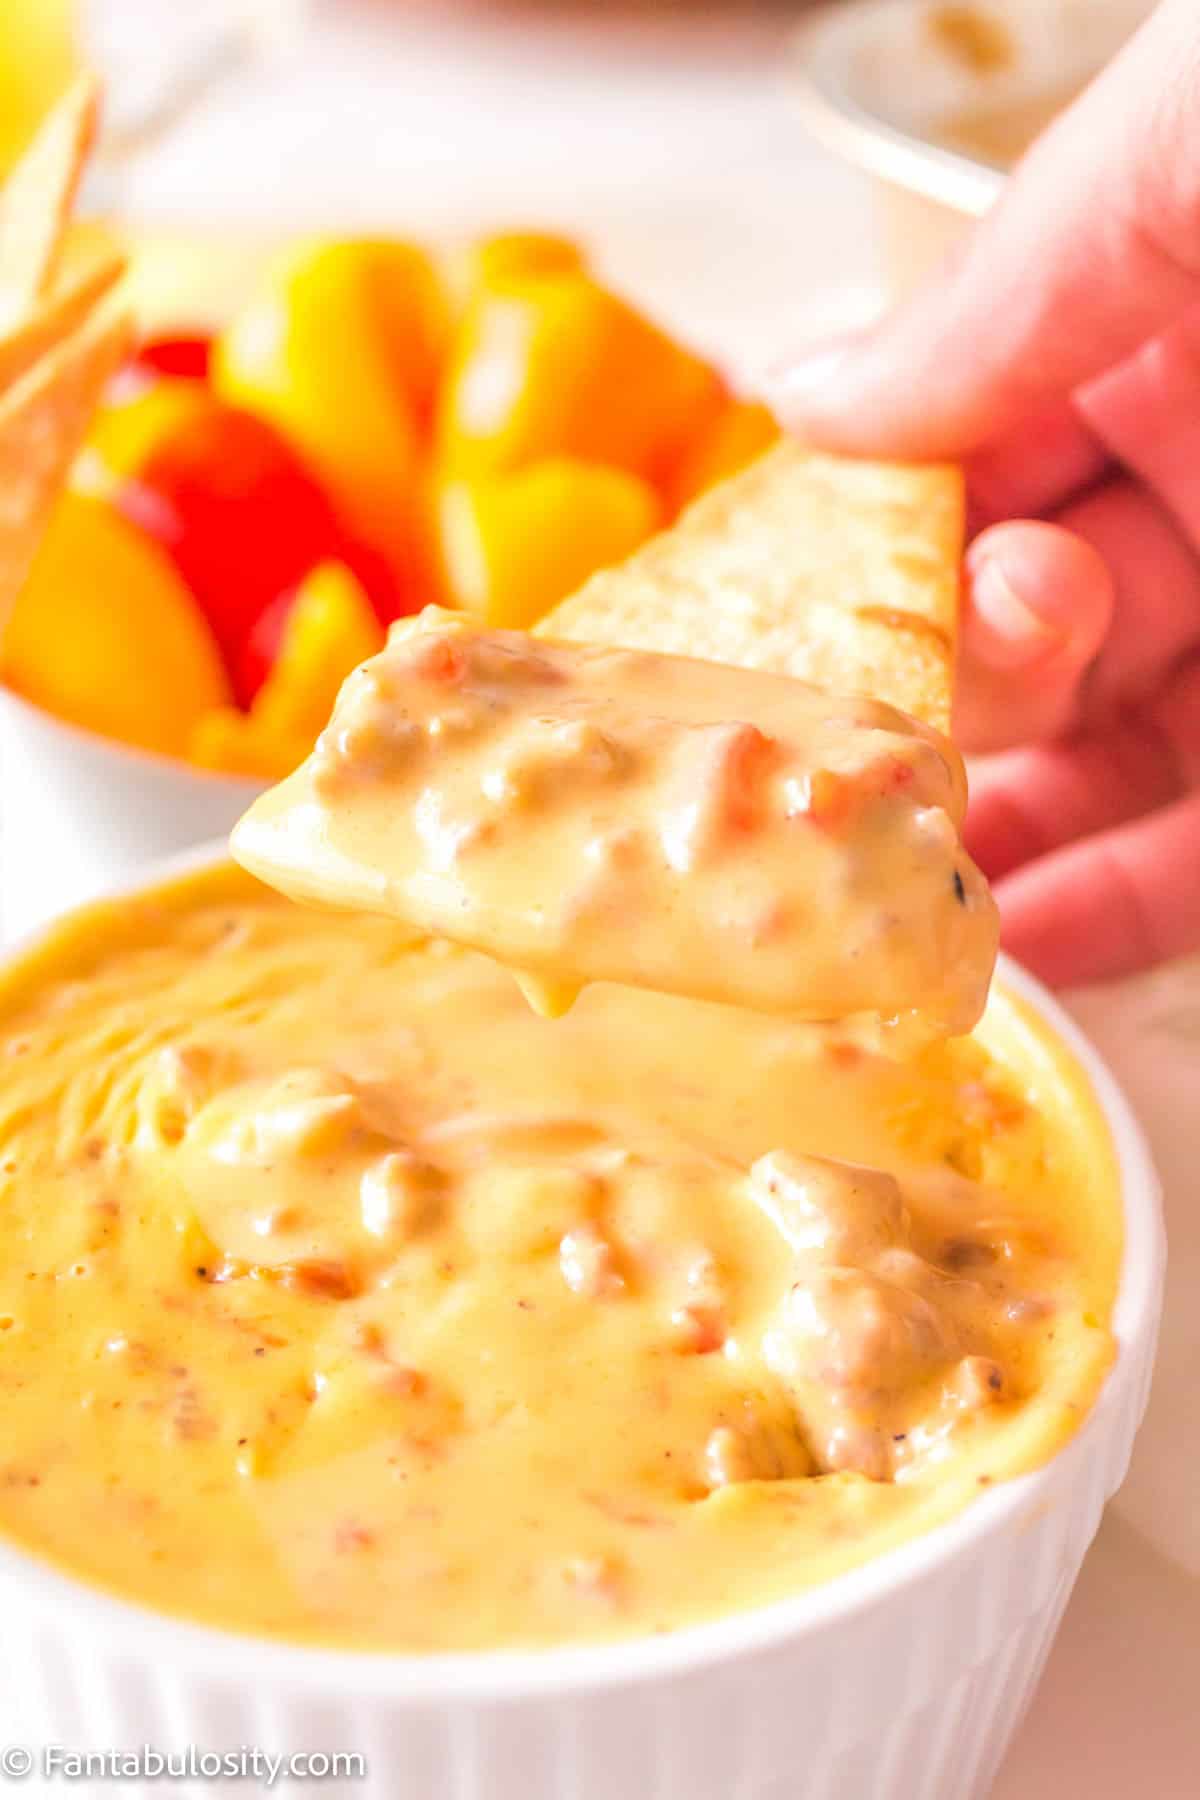
    In the recipe card below, you’ll find instructions for making your own cheese for the nacho bar, or you can make our Rotel Dip with Ground Beef!

    However, you can also look in to a nacho cheese machine rental, or you can usually also find the large cans of nacho cheese at grocery stores!

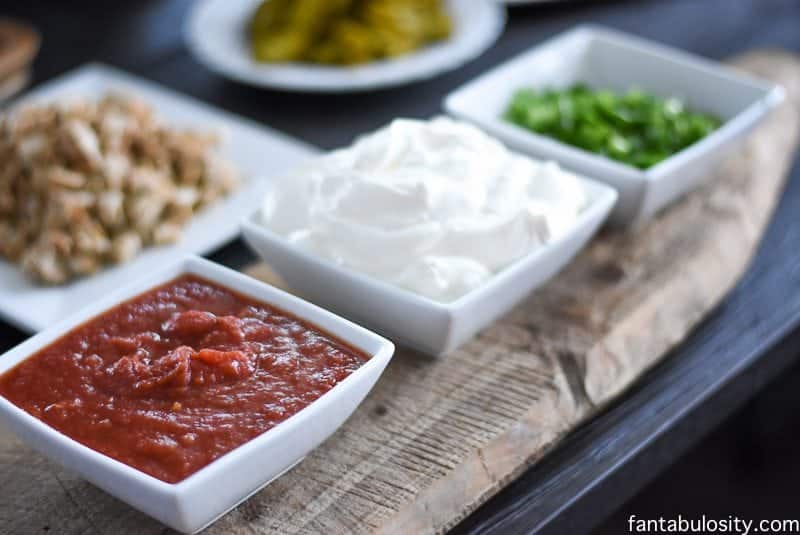
    White dishes full of salsa, sour cream, green onions

    Chips for a Nacho Bar

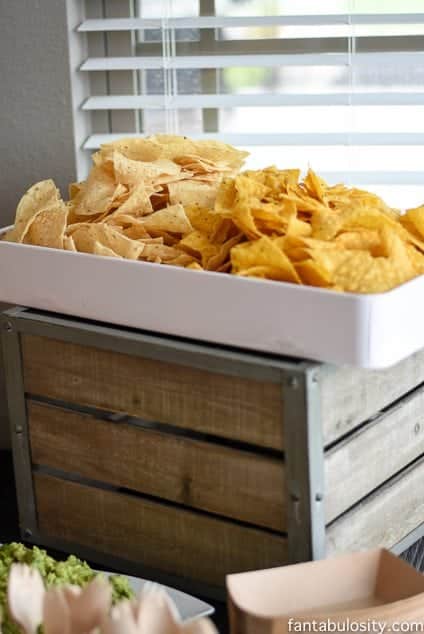
    Feel free to use your favorite tortilla chips (corn or flour)! Or, add a variety of chips, such as nacho cheese chips (like I use in this easy Doritos nachos recipe, lime chips, or even something fun like black bean chips!

    It’s fun to pour chips in to a basket, to serve them that way, instead of leaving them in the bags.

    But if you don’t have a basket, they’ll also go great in a large bowl!

    Chips in white basket

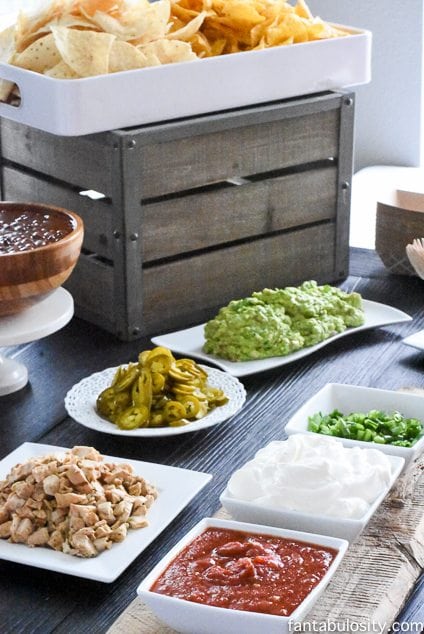
    Toppings for a Nacho Bar

    A nacho bar isn’t complete without salsal (try my rotel salsa), sour cream, and green onions.

    White bowls filled with salsa, sour cream, green onions

    (I had this wooden “plank,” left over from my son’s Nautical Birthday party,” and I thought it would work perfectly to add a little boost or height to the table.)

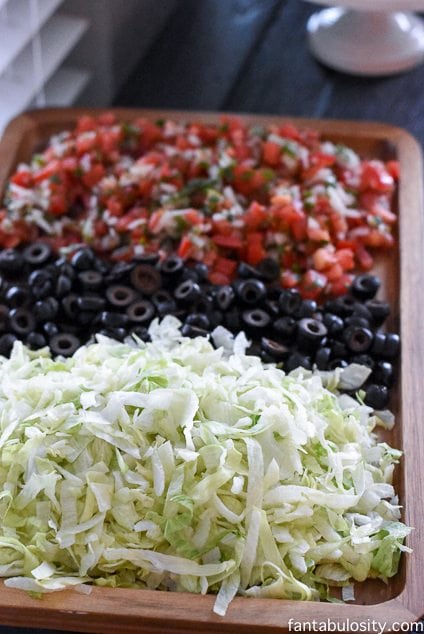
    Shredded lettuce, black olives & Pico de Gallo…

    Brown tray full of lettuce, black olives, pico

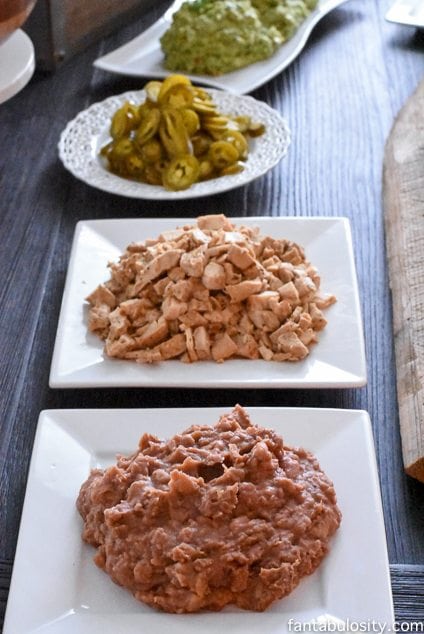
    refried beans, fajita chicken, & jalapeños…

    Refried beans, chicken and jalapenos on white plates

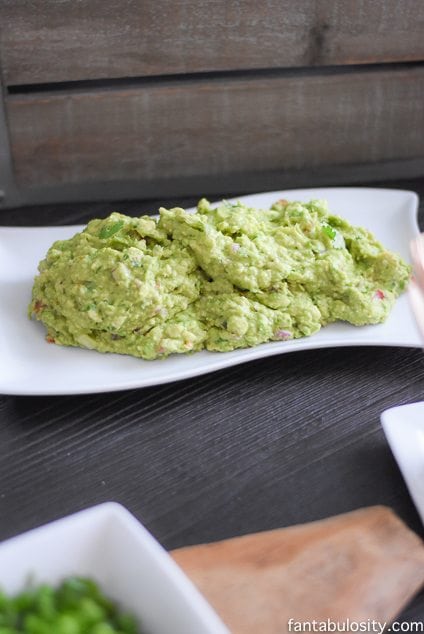
    oh…. and guac. Guacamole. My weakness.

    Guacamole on white plate

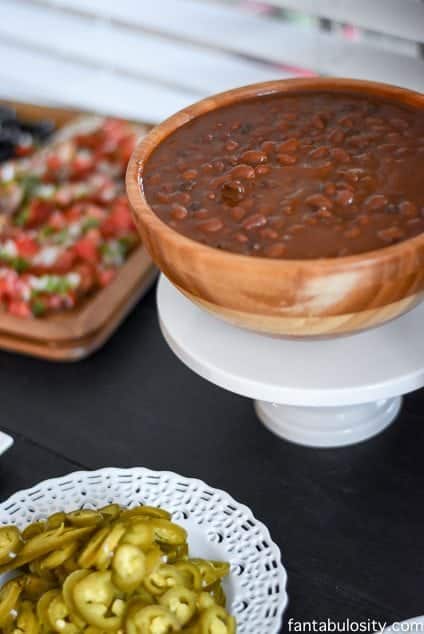
    Mmmmm, & Chili. I do love a mean chili-cheese-nacho.

    Chili in bowl

    What to serve nachos in?

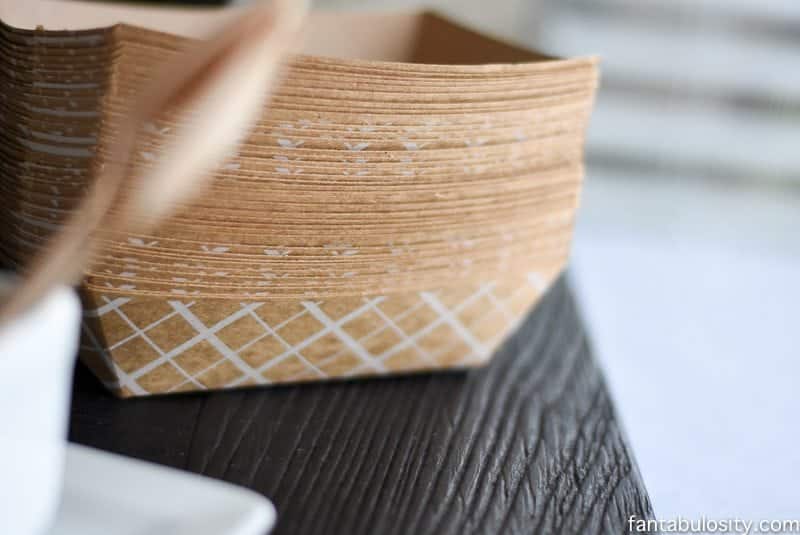
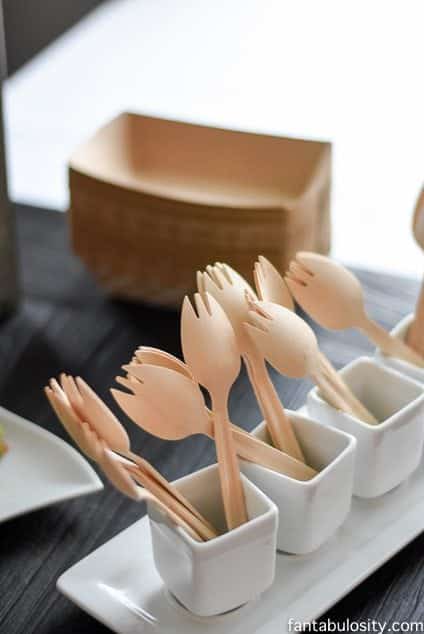
    I found the cutest “boats,” & wooden utensils for the nachos, and they worked perfectly! No dishes to wash! (Well… besides the platters and small bowls on the table.)

    Food boats
    Wooden utensils in white cups

    The best part? People were coming and going all night, and they were able to snack as they pleased. This will definitely be happening in our house again.

    Nacho toppings in white dishes

    Nacho Toppings Ideas:

    • Salsa
    • Sour Cream
    • Green Onions
    • Lettuce
    • Black Olives
    • Pico De Gallo
    • Refried Beans
    • Chicken Breast
    • Jalapeños
    • Guacamole
    • Chili

    …of course don’t forget your chips & cheese.

    If you’re able to rent a cheese machine, do it! The kids (AND ADULTS) loved the heck out of that thing. I’ll admit… I had “cheese,” with EVERYTHING the entire weekend, that I had this glorious invention, rented.

    More recipes to serve, if desired:

    If you’re looking to serve a few main dishes along with this, you may like the idea of these Crock Pot Enchiladas because they’re easy and can be in a slow cooker!

    Nacho Bar for Birthday Party

    Since you’re probably thinking of doing a nacho bar because it’s easy, then I wanted to make sure you saw my easy birthday cake that I did for my son. (In case you’re doing a nacho bar for a birthday party too!)

    For my parties, I usually hire out for the cake, cake pops, or cupcakes. But this year, since a big “to-do,” wasn’t taking place, (and only our closest friends would “see,” the cake), I thought I’d give it a whirl.

    Birthday Cake with little balloons!

    Now… I can make a cake. That’s not the problem. It’s the DECORATING the cake. 

    Birthday Cake with little balloons!

      There’s a cake on Pinterest, that had itty bitty balloons sticking out of it, and I thought… I can do that! I just grabbed wooden skewers, small balloons, and super glued them to the skewers, and stuck ’em in. It worked, right?!

    Party Favors and Games

    I couldn’t send our guests out the door empty-handed. While my normal “stroll,” through the Target dollar bin, I came across playing cards & play dough, and thought they’d be the perfect little items to throw into goodie bags and to keep the kiddos busy on the car ride home.

    Easy Party Favors - Playing cards & Playdough

    I placed a rolling cart that I have from World Market, by the front door, and stuffed the goody bags in it… with a sign that said, “Take 1.” It worked out perfectly, and there wasn’t ONE favor left, by the end of the night. 

    Easy Party Favors - Playing cards & Playdough in wooden rolling cart

    If you’re looking for birthday game ideas for your nacho bar party, these 40th birthday party games are fun to keep in mind!

    So there it is! It was my “It’s Nacho Birthday, It’s His,” nacho bar party!

    P.S. My little guy LOVED his cake… & the nachos. He’s a “cruncher,” like his momma and loves anything salty and sweet. Ok, ok… he’s like his momma because he’ll eat anything.

    More Food Bar Ideas!

    If you love hosting food bars like I do, then you’ll also love these 51+ Food Bar Ideas too!

    Or, see some of our favorites, below:

    • Taco bar on table with salsa, chicken, and toppings in bowls.
      Taco Party and Taco Bar Ideas
    • hot dog toppings
      Hot Dog Bar Toppings and Ideas for Your Next Party
    • Burger Bar Ideas for an outdoor party
      Burger Bar Ideas for Your Next Party
    • Cereal Bar Ideas: Brunch shower, bridal shower, mother's day, baby shower breakfast party
      Cereal Bar Ideas for a Fun and Easy Party Setup

    Other Party Ideas by Fantabulosity

    • I can SO do this!!! Coffee Bar Party: "You've Warmed My Heart," theme! LOVE what she did as a random act of kindness with her guests! DIY Coffee bar ideas galore, and SO easy! fantabulosity.com
      Coffee Bar Ideas for a Party (What to Serve + Easy Setup Guide)
    • nacho bar ideas
      Nacho Bar Ideas
    • Ice Cream Party Ideas: Pastel Colors, ice cream cookies, cones with sprinkles,
      Ice Cream Party Ideas (Simple Decorations, Treats & Birthday Ideas)
    • Favorite Things Party Ideas
      Bloom Theme Party Ideas for a Girls Night or Shower

    Recipe

    nacho bar ideas
    Print Pin
    5 from 3 votes

    Nacho Bar Toppings & Ideas

    Nacho bars are SO fun and easy to serve for a crowd! Keep the toppings easy and use these tricks to make a spread worth inviting others to enjoy!
    Course Appetizer
    Cuisine American, Mexican
    Prep Time 10 minutes minutes
    Cook Time 15 minutes minutes
    Total Time 25 minutes minutes
    Servings 16 people
    Calories 108kcal
    Author Jessica Burgess

    Ingredients

    If making your own cheese

    • processed cheese
    • 10 ounces diced tomatoes and green chilies Such as Rotel

    Topping Ideas

    • salsa
    • sour cream
    • green onions
    • lettuce
    • black olives
    • pico de gallo
    • refried beans
    • cooked chicken pieces
    • jalapenos
    • guacamole
    • chili
    • chips

    Instructions

    Melting the Cheese

    • If making your own nacho cheese: Slice the processed cheese (Velveeta) and place into a microwavable bowl.
    • Pour in the can of diced tomatoes and green chilies. (Undrained)
    • Microwave for 2-3 minutes. Stirm and then cook again in 1-2 minute increments until melted.
    • To keep warm for nacho bar, place melted cheese in a slow cooker or in a food warmer.

    Assemble Nachos

    • In small dishes or plates, start by placing tortilla chips down first. Pour cheese on top and top with favorite toppings!

    Nutrition

    Serving: 1serving | Calories: 108kcal | Carbohydrates: 2g | Protein: 5g | Fat: 9g | Saturated Fat: 5g | Polyunsaturated Fat: 1g | Monounsaturated Fat: 2g | Trans Fat: 1g | Cholesterol: 28mg | Sodium: 475mg | Potassium: 71mg | Fiber: 1g | Sugar: 1g | Vitamin A: 289IU | Vitamin C: 2mg | Calcium: 302mg | Iron: 1mg

    Easy Banana Cream Pie Recipe

    May 17, 2022

    A slice of banana cream pie.

    Easy Banana Cream Pie Recipe: Using whole milk, heavy cream, banana pudding mix, bananas, and a pie crust, you can make this in no time! It’s a simple pie recipe that’s sure to please any crowd (with a simple option for a no-bake banana cream pie, too)!

    Quick Overview: Only 10 minutes to put together and 3 hours to set. (Allow extra time if you prefer to bake your favorite homemade crust or refrigerated pie crust.)

    A slice of banana cream pie with the rest of the pie and a bunch of bananas in the background.

    Why You’ll Love This Recipe

    Of all the cream pies, banana is one of my favorite pies (right up there with this no bake chocolate pie recipe). And I think banana cream pie is one of those classic recipes that everyone should try making at least once. And if you’re going to try making it, I’d highly recommend you try using this recipe because it’s so dang easy (you get a big wow factor with little effort)!

    The filling is made using a banana pudding mix which gives it a yummy banana flavor and makes the pie creamy and rich (without it taking as long as a homemade pudding). The bananas add a bit of texture to the pie, and the whole thing is simply great! This easy banana cake is a lovely cake version of a banana dessert.

    If you’re looking for a no-bake banana cream pie recipe, skip to the variations and see how you can turn this into one super quickly and easily!

    [feast_advanced_jump_to]

    Ingredients

    Using a banana cream pudding mix makes this homemade banana cream pie so quick and easy to throw together.

    Since this recipe uses simple ingredients, chances are you have some if not all of the ingredients on hand right now (and if not, your local grocery store absolutely will). So let’s make a pie!

    Banana cream pie ingredients with labels.

    You can find the complete list of ingredients and directions in the recipe card below.

    • Whole Milk: Using whole milk instead of anything less will ensure that your pie filling is as rich and creamy as possible.
    • Heavy Whipping Cream: The same goes for the heavy whipping cream! This helps thicken the pie filling as well as create a creamy, rich pudding.
    • Banana Pudding Mix: Using an instant pudding mix allows you to have this pie ready in no time! The chill time is similar to if you made the custard from scratch, but this pie mix version of banana cream pie can be put together in less than 10 minutes!
    • Prepared Pie Crust: Whether it’s from a store, homemade, dough or graham crackers (see variations), you’ll need something to hold all that yummy banana pie filling.
    • Ripe Bananas: Adding some sliced bananas into the filling gives the pie a bit of texture and an added layer of banana flavor! If you only have fresh bananas that aren’t very ripe yet, check out this blog post on how to ripen bananas quickly.

    How to Make Banana Cream Pie

    Let me show you how quickly and easily you can put together this banana cream pie. Follow along for step-by-step instructions.

    Ingredients for banana cream pie in dishes on a counter.
    Prepare pie crust.

    Step 1: Gather your ingredients, prepare your pie crust, and blind bake it according to the package or recipe (or use a graham cracker pie crust for a no-bake option).

    Milk, cream, and pudding mix together in a glass bowl.
    Mix milk, cream, pudding mix.

    Step 2: In a medium bowl, whisk milk, cream, and pudding mix for 3-4 minutes, or until the mixture begins to thicken. For the best results, use cold milk and cream.

    Mixed banana pie filling with sliced bananas in a bowl nexts to it.
    Add sliced bananas.

    Step 3: Once the pudding mixture has thickened, put a layer of pudding, then a single layer of sliced ripe banana, then a layer of pudding (and so on) into the prepared pie shell. 

    Banana pie filing in a prepared crust.
    Chill 3 hours.

    Step 4: Place the pie in the fridge to allow the pudding to finish setting for about three hours.

    Prepared banana pie with whipped cream, bananas, and almonds on top.

    Step 5: Cover the top of the pie with your favorite toppings (like whipped cream, bananas, almonds, etc.) and enjoy!

    More banana recipes: If you’re still craving yummy banana flavored treats, head over and try our banana bread pudding and the BEST banana bread you’ll ever make.

    More old-fashioned pie recipes: If it’s pie you’re craving, we’ve got you covered! Check out our old fashioned peanut butter pie (a no-bake recipe). And if you’re in the mood for something baked, you have to try our old fashioned egg custard!

    Substitutions

    • Milk – you could technically use any milk here, including a dairy-free option like soy or coconut milk.
    • Dairy-Free – if you are replacing the milk with a dairy-free option, try using coconut cream instead of whipping cream. It will change the flavor of the pie slightly, though. You can also find a coconut whipped topping to decorate the top of the pie with!
    • Gluten-Free – a lot of grocery stores now have pre-made, gluten-free crusts in the freezer section of their natural food aisles! Alternatively, you could always make a pie crust with gluten-free flour. Here’s a recipe for a gluten-free crust (that has a dairy-free option as well)!
    slice of banana cream pie on white plate with bite taken out

    Variations

    • No-bake Banana Cream Pie with Graham Cracker Crust – buy a pre-made graham crust from the store for the quickest and easiest no-bake pie crust ever! You can also make your own using graham cracker crumbs and melted butter (check out our no-bake s’mores cheesecake recipe for a recipe and step-by-step instructions).
    • Banana Caramel Pie – You could stir some caramel sauce into your banana pudding mix and drizzle some on top of your finished, decorated pie for a caramel twist on this easy banana cream pie!

    Storage

    Store your leftover banana cream pie in an airtight container in the fridge for up to 3-4 days.

    You can also freeze this pie (without the whipped cream on top)! Store it in the freezer in a freezer-safe, airtight container (maybe even wrap it tightly in plastic wrap so the pudding doesn’t form a film) for up to two months. You can either serve it straight from the freezer for a super thick banana cream pie, or let it thaw in the fridge for a more creamy, soft consistency.

    Expert Tips and FAQs

    How do you keep bananas from turning brown in a banana cream pie?

    If you eat it fast enough, they won’t have a chance to turn brown. But in all seriousness, if you want to prevent your bananas from browning you can treat them with a citrus juice (like lemon juice or lime juice). You don’t want them to taste a whole lot like lemon/lime, so try to do so sparingly. Brush the banana slices lightly with the juice or put it in a food safe spray bottle and spritz your slices.

    Why is my banana cream pie runny?

    If this was a from-scratch recipe, the culprit would be undercooking the pudding. Since we are using a pudding mix, if your pie is runny you probably haven’t let it set up in the fridge long enough.

    Note: there is also a slight chance of having a slightly softer/runnier pudding filling if you don’t use whole milk and use something thinner (like almond milk or soy). You could decrease the amount of milk you are adding slightly, making sure that the finished pudding is nice and thick.

    Why is it called banana cream pie?

    I bet you can guess the answer to this one - it’s right in the name! We call this a banana cream pie because it has a creamy, custard filling and it’s full of bananas and delicious banana flavor.

    Did you make this? I’d be so grateful if you left a “star” rating below to let me know what you thought! Then, the next time you need a quick and easy recipe, come back to Fantabulosity to browse all of my easy recipes!

    More No-Bake Pie Recipes

    Love no-bake pies as much as we do? Then you’ll love these others that we recommend:

    • Slice of turtle pie on white plate.
      Turtle Pie
    • Slice of no bake chocolate pie on white plate.
      No Bake Chocolate Pie
    • Slice of pumpkin pie made with graham cracker crust.
      No Bake Pumpkin Pie
    • No bake chocolate pie slice on wood spatula
      Chocolate Cream Cheese Pie

    Recipe

    A slice of banana cream pie.
    Print Pin
    5 from 5 votes

    Easy Banana Cream Pie Recipe

    Easy Banana Cream Pie Recipe: Using whole milk, heavy cream, banana pudding mix, bananas, and a pie crust, you can make this in no time! It's a simple recipe that's sure to please any crowd (with a simple option for a no-bake banana cream pie, too)!
    Course Dessert
    Cuisine American
    Prep Time 10 minutes minutes
    Chill Time 3 hours hours
    Total Time 3 hours hours 10 minutes minutes
    Servings 8 servings
    Calories 217kcal
    Author Jessica Burgess

    Ingredients

    • 1 cup whole milk
    • 1 cup heavy whipping cream
    • 1 – 5 ounce banana pudding mix
    • 1 prepared pie crust store-bought or homemade
    • 2 ripe bananas sliced

    Instructions

    • If using your favorite homemade pie crust recipe, prepare accordingly.
      If using a storebought pie crust, prepare pie crust if needed. (I like Pillsbury crust, and the directions for this brand, are to preheat oven to 450ºF. Place unbaked crust in pie pan and fold excess crust under, and press together to form thick crust edge. Prick the bottom and side with fork. Bake 10 to 12 minutes or until light brown. Cool. But different brands can vary for instructions.)
    • In a medium bowl, whisk together the milk, cream, and pudding mix for 3-4 minutes, or until the mixture begins to thicken.
    • Once the pudding mixture has thickened, put a layer of pudding, then a layer of sliced ripe banana, then a layer of pudding (and so on) into the prepared pie shell. 
    • Place the pie in the fridge to allow the pudding to finish setting for about three hours.
    • Top with your favorite toppings (like whipped cream, bananas, almonds, etc.) and enjoy!

    Notes

    STORAGE: Store your leftover banana cream pie in an airtight container in the fridge for up to 3-4 days. 
    You can also freeze this pie (without the whipped cream on top)! Store it in the freezer in a freezer-safe, airtight container for up to two months. You can either serve it straight from the freezer for a super thick banana cream pie, or let it thaw in the fridge for a more creamy, soft consistency.

    Nutrition

    Serving: 1serving | Calories: 217kcal | Carbohydrates: 13g | Protein: 3g | Fat: 17g | Saturated Fat: 9g | Polyunsaturated Fat: 1g | Monounsaturated Fat: 6g | Cholesterol: 37mg | Sodium: 108mg | Potassium: 96mg | Fiber: 1g | Sugar: 2g | Vitamin A: 487IU | Vitamin C: 1mg | Calcium: 61mg | Iron: 1mg

    Pineapple Bread

    May 8, 2022

    Sliced pineapple bread on a wood cutting board.

    Pineapple Bread: This easy recipe for pineapple bread is sure to be a hit! This moist, perfectly sweet loaf is bursting with tropical flavors thanks to the pineapple and coconut in the recipe!

    Sliced pineapple bread on a wooden counter.

    The bright tropical flavors in this recipe make it the perfect dessert to serve for a baby shower, spring brunch, or summer barbecue! This Preacher Cake has a similar flavor profile as it also has pineapple and coconut, but it’s slathered in a rich cream cheese frosting.

    This bread is moist, flavorful, and perfectly sweet. Serve up a slice with a piña colada and pretend you are on a beach somewhere, or cut yourself a slice of bread and pour a cup of coffee and have a sweet treat for breakfast!

    [feast_advanced_jump_to]

    Why You’ll Love This Recipe

    1. Bursting with Flavor: Move over banana bread, pineapple bread is here. The pineapple flavor with a hint of coconut makes this a tropical delight!
    2. Unique: Wow your guests with something new they may not have tried before (but definitely should)! This sweet pineapple bread is sure to be a hit!
    3. Easy: I love a recipe that’s simple, and this one definitely is. No rise time, no complicated techniques – simply mix the wet, mix the dry, combine and bake.

    Ingredients

    This pineapple bread uses simple ingredients that are easy to find. One quick trip to the grocery store is all you need and you’ll be ready to whip up this tasty tropical treat!

    Pineapple Loaf

    • all purpose flour
    • baking powder
    • baking soda
    • salt
    • eggs
    • sour cream
    • canned pineapple
    • white sugar
    • unsalted butter 

    Icing

    • powdered sugar
    • canned pineapple
    • unsalted butter
    • unsweetened shredded coconut

    You can find a complete list of ingredients and directions in the recipe card below.

    Sliced pineapple bread.

    Step-by-Step Instructions

    Step 1: Heat oven to 350 degrees F. Grease an 8×4 bread pan or spray with non stick cooking spray.

    Step 2: In a large mixing bowl, combine flour, salt, baking soda, and baking powder. Make a well in the center and set it aside.

    Dry ingredients for pineapple bread in a bowl.
    Mix dry ingredients.

    Step 3: In a medium mixing bowl, whisk together the melted butter and sugar. Add eggs and 1 cup of the pineapple and whisk again. Mix in sour cream until well incorporated.

    A measuring cup pouring butter into a bowl with liquid and a whisk in it.
    Mix wet ingredients.

    Step 4: Pour wet mixture into the well of the flour mixture. Gently fold together with a spatula until blended together. Do not over mix.

    Liquid ingredients being poured into dry ingredients in a bowl.
    Pour wet into dry ingredients.

    Step 5: Pour batter into prepared loaf pan. Gently spread evenly. Bake for 50-60 minutes, until toothpick, comes out clean in center.

    Pineapple bread batter in a loaf pan.
    Spread evenly in loaf pan.

    Step 6: In a separate bowl, make icing by creaming together the butter and icing sugar until light and fluffy (approximately 3 minutes). Add pineapple, a tablespoon at a time, until desired consistency is reached. Set aside until bread is done.

    Liquid being poured into the icing ingredients in a bowl.
    Make icing.

    Step 7: Remove bread from the oven when done and allow to cool for 10 minutes before removing it from the pan, then transfer it to a wire rack to cool completely. Pour the remaining pineapple onto the loaf (this will make it extra moist and pineapple flavored).

    Baked pineapple bread in a loaf pan.
    Let bread cool.

    Step 8: Once bread is completely cooled spread icing evenly over the top. Sprinkle coconut evenly on top. Slice up your fresh pineapple bread and enjoy!

    Icing being spread on a baked pineapple bread loaf.
    Spread icing on loaf.
    Shredded coconut being poured onto iced pineapple bread loaf.

    More sweet bread: If you’re in the mood for more delicious, comforting dessert breads, try this banana bread with a secret ingredient that makes it so moist and flavorful! And this lemon bread with blueberries is sweet, tart, and also delicious. And, this gorgeously pink strawberry bread with strawberry icing is bright and delicious.

    More pineapple recipes: If you’re in the mood for more easy recipes with pineapple flavor, check out this pineapple sunshine cake or this pineapple dump cake (similar to a pineapple upside-down cake).

    Substitutions

    If you need or want, here are a few substitutions you can make…

    • Coconut – This can be omitted if you don’t have or don’t like the taste of coconut.
    • Gluten-Free – Use your favorite gluten-free blend of flour and make this recipe gluten-free.
    • No Eggs – Can’t have eggs? A cornstarch egg or flax egg should work just as well in this recipe.
    • Dairy-Free – Instead of butter, try using coconut oil in this recipe and replace the sour cream with a dairy-free alternative!

    Variations

    Looking to change this recipe up a bit? Here are a few suggestions?

    • Chunky Pineapple – Instead of blending your pineapple, leave it in the larger pieces it comes in. This will add some extra texture to the finished loaf.
    • Nuts – If you’re a nut lover, stir some chopped walnuts or pecans into the batter.
    • Chocolate Chips – If you’re anything like my kids, you think every dessert loaf needs chocolate chips. Mix a handful or two of chocolate chips into the batter for a chocolate twist.
    • Fruit – Try switching out the canned fruit you use to make this loaf completely knew! I haven’t tried this, but I think canned peaches would make a delicious loaf! Or something similar may be this strawberry bread!
    • Cream Cheese Icing – This recipe would taste delicious with a cream cheese icing on the top as well!

    Storage

    Store your pineapple loaf cake in an airtight container at room temperature for 3-4 days or in the fridge for up to a week.

    You could freeze the pineapple bread before icing (in an airtight, freezer safe bag or container), but we wouldn’t recommend freezing an iced loaf as the icing ingredients will not hold up well in the freezer.

    Expert Tips

    What is pineapple bread made of?

    Pineapple bread is similar to banana bread, but instead of bananas to add flavor and moisture it uses pineapple!

    How do you crush a pineapple?

    If you are wanting to use fresh pineapple instead of canned for this recipe, simply cut the exterior peel off of your pineapple, chop it into smaller pieces and then pulse it in a food processor to make “crushed pineapple”.

    For this recipe, we blended the pineapple to create a smooth texture but if you want small chunks in your finished loaf you can use crushed pineapple instead!

    What’s the difference between powdered sugar, confectioners sugar, and icing sugar?

    These are actually all the same thing! Different parts of the world use different terms for this, but they are all referring to the finely powdered sugar used for making icing.

    Recipe

    Sliced pineapple bread on a wood cutting board.
    Print Pin
    5 from 3 votes

    Pineapple Bread

    Pineapple Bread: This easy recipe for pineapple bread is sure to be a hit! This moist, perfectly sweet loaf is bursting with tropical flavors thanks to the pineapple and coconut in the recipe!
    Course Dessert, Snack
    Cuisine American
    Prep Time 20 minutes minutes
    Cook Time 1 hour hour
    Total Time 1 hour hour 20 minutes minutes
    Servings 10 slices
    Calories 420kcal
    Author Jessica Burgess

    Ingredients

    Bread

    • 2 cups all purpose flour
    • 1 teaspoon baking powder
    • ½ teaspoon baking soda
    • ¼ teaspoon salt
    • 2 eggs
    • ¼ cup sour cream
    • 14 ounces crushed pineapple blended until smooth (divided)
    • ⅔ cup white sugar
    • ½ cup unsalted butter melted

    Icing

    • 2 cups powdered sugar
    • 2 – 3 tablespoons blended pineapple
    • ½ cup unsalted butter softened
    • ½ cup unsweetened shredded coconut

    Instructions

    • Heat oven to 350 degrees F. Grease an 8×4 bread pan or spray with non stick cooking spray.
    • In a large mixing bowl, combine flour, salt, baking soda, and baking powder. Make a well in the centre and set aside.
    • In a medium mixing bowl, whisk together the melted butter and sugar. Add eggs and 1 cup of the pineapple and whisk again. Mix in sour cream until well incorporated.
    • Pour liquid ingredients into the well of dry ingredients. Gently fold together with a spatula until blended together. Do not overmix.
    • Pour batter into your prepared loaf pan. Gently spread evenly. Bake for 50-60 minutes, until toothpick comes out clean in centre.
    • Make icing by creaming together the butter and powdered sugar until light and fluffy (approximately 3 minutes). Add pineapple, a tablespoon at a time, until desired consistency is reached. Set aside until bread is done.
    • Remove bread from the oven when done and allow to cool for 10 minutes before removing it from the pan, then transfer to a wire rack and let cool completely. Pour remaining pineapple onto the loaf (this will make it extra moist and pineapple flavoured).
    • Once bread is completely cooled spread icing evenly over the top. Sprinkle coconut evenly on top.

    Video

    Notes

    This recipe makes one 8×4 loaf pan. 
     
    STORAGE: Store your pineapple bread in an airtight container at room temperature for 3-4 days or in the fridge for up to a week.
    You could freeze the pineapple bread before icing (in an airtight, freezer safe bag or container), but we wouldn’t recommend freezing an iced loaf as the icing ingredients will not hold up well in the freezer. 

    Nutrition

    Serving: 1slice | Calories: 420kcal | Carbohydrates: 63g | Protein: 3g | Fat: 18g | Saturated Fat: 12g | Polyunsaturated Fat: 1g | Monounsaturated Fat: 4g | Trans Fat: 1g | Cholesterol: 40mg | Sodium: 120mg | Potassium: 148mg | Fiber: 2g | Sugar: 41g | Vitamin A: 484IU | Vitamin C: 19mg | Calcium: 38mg | Iron: 1mg

    Chocolate Rice Krispie Treats

    May 2, 2022

    Three chocolate rice krispie treats stacked on top of each other.

    Chocolate Rice Krispie Treats: This recipe is a fun twist on an old classic! Soft, gooey Rice Krispie treats get a chocolate upgrade with the addition of chocolate chips. Ready in under 10 minutes, this sweet treat is the perfect last minute snack!

    Chocolate Rice Krispie treats on a tray with a bowl of chocolate chips beside them.

    Classic rice krispie treats are a classic for a reason – they come together quickly and easily, they use simple pantry ingredients that most of us have on hand at all times, and they are delicious! Next, try making these Marshmallow Fluff Rice Krispie Treats to see which you like better!

    A traditional Rice Krispy treat is just marshmallows, butter and rice cereal, but I’m a chocolate lover so of course I needed to try adding chocolate into the Rice Krispie treats. And the end result didn’t disappoint! If you’re a chocolate fan and/or a Rice Krispie fan, this recipe is for you!

    Or, if you want to experiment with different types of cereal, you may love using Lucky Charms for marshmallow treats! If you love a good twist on a recipe, you’ll want to try these carrot cake rice krispie treats too.

    [feast_advanced_jump_to]

    Why You’ll Love This Recipe

    1. Quick & Easy: This recipe takes less than 10 minutes to make and is so simple you can even invite the kids to help you make it if you like!
    2. Pantry Ingredients: You don’t need anything fancy to make this yummy snack, just a few simple ingredients most of us have on hand at all times.
    3. It’s Delicious: Rice Krispie squares are a treat that has stood the test of time (they were first created in the early 1900’s) for a good reason – they’re delicious. The addition of chocolate to this classic recipe takes this yummy treat to a whole new level and will make chocolate lovers and cereal treat lovers everywhere happy!

    Ingredients for this Classic Treat

    You only need 5 simple ingredients to make this easy recipe!

    • Butter – the addition of unsalted butter helps keep your Rice Krispie treats soft.
    • Miniature Marshmallows – you can’t have a Rice Krispie treat without sweet marshmallows! Using mini marshmallows makes it easier to mix everything together as they melt quicker and more evenly.
    • Half and Half Cream – adding cream makes it easier to combine all of your ingredients. It also makes your Rice Krispie treats a bit more creamy.
    • Rice Cereal – this is the iconic ingredient from which the treat gets its name. Of course we can’t forget about the rice cereal (we used Rice Krispies).
    • Chocolate Chips – the addition of chocolate chips elevates this snack to a whole new level.

    You can find a complete list of ingredients and directions in the recipe card below. 

    Instructions for This Easy Chocolate Rice Krispie Treat Recipe

    Chocolate Rice Krispie Treats
    1. Prepare: Spray an 8×8 pan with non stick cooking spray.
    2. Melt: In large saucepan on low or medium-low heat, combine butter, marshmallows, and chocolate chips.  Stir often until marshmallows have melted.  Add in half and half and stir until mixture is smooth and creamy.
    3. Stir: Add cereal into your melted chocolate and marshmallow mixture and mix until everything comes together and cereal is coated in the marshmallow mixture. 
    4. Press: Place the cereal mixture into the prepared pan, pressing firmly to fill the bottom of the pan evenly.
    5. Chill: Allow to set or chill for 10 minutes before cutting.

    Serving Suggestion: Try sprinkling some extra chocolate chips and extra marshmallows on top of your Rice Krispies treats before they set.

    Chocolate Rice Krispie Treats with chocolate chips and Rice Krispies on the table next to them.
    A fun chocolate twist on a classic!

    More Rice Krispie marshmallow treats: If you’re looking for more quick, easy, and delicious Rice Krispie treats, you definitely need to try our caramel Rice Krispies treats and our Oreo Rice Krispie treats!

    Other fun cereal treats: If you love cereal, check out this fun Fruity Pebbles treat recipe!

    Looking for other easy desserts? We have plenty!

    Substitutions

    The ingredients in this recipe are pretty simple, but there are a few substitutions that can be made if you need.

    • Half and half cream – you can use whole milk (or whatever milk you have in the fridge) instead. Your rice Krispy treats won’t be as creamy, but the milk will still help with mixing the ingredients together more easily.
    • Marshmallows – I haven’t tried this, but some people have had great success replacing the marshmallows with marshmallow fluff or even creamy peanut butter. If you do try this substitution, let me know in the comments below!
    • Chocolate Chips – you can use 4 ounces of milk chocolate instead of chocolate chips. Either one will create that yummy chocolate flavor we are looking for in this dessert.

    Variations

    Our chocolate Rice Krispie treats are already a variation on a classic no bake fun treat, but there’s still tons of ways you can mix things up! Here are a few suggestions…

    • Mix-ins – our favorite way to add variety to simple recipes is to add some mix-ins to match the occasion. Whether it’s a holiday, a birthday, or just a Tuesday, you can find fun and festive sprinkles and candies to stir into and sprinkle on top of your Rice Krispie treats!
    • Mint – instead of vanilla extract, try using peppermint extract to turn these into Mint Chocolate Rice Krispie Treats!
    • Switch Up The Cereal – instead of classic crispy rice cereal, try a different rice cereal like cocoa Krispies, fruity pebbles, or similar!

    Storage

    Store your Rice Krispie treats in the pan (covered), in an airtight container, or wrap each treat individually in plastic wrap. Treats should keep for 2 days at room temperature. 

    Expert Tips and FAQs

    What can I use instead of marshmallow for Rice Krispie Treats?

    I haven’t tried this, but some people have had great success replacing the marshmallows with marshmallow fluff or even peanut butter. If you do try this substitution, let me know in the comments below!

    Why did my rice crispy treats turn out hard?

    The biggest culprit here is heat – if you melt your marshmallows over too high of heat (even though it’s tempting to speed things up) they will become harder! Take it low and slow and you’ll be rewarded with soft, chewy Rice Krispie treats.

    Can you melt old marshmallows?

    Technically you can, but old marshmallows don’t melt as well as fresh ones. We would highly recommend grabbing a fresh bag for this recipe!

    Did you make this? I’d be so grateful if you left a “star” rating below to let me know what you thought! Then, the next time you need a quick and easy recipe, come back to Fantabulosity to browse all of my easy recipes!

    Recipe

    Three chocolate rice krispie treats stacked on top of each other.
    Print Pin
    5 from 5 votes

    Chocolate Rice Krispie Treats

    Chocolate Rice Krispie Treats are soft, gooey Rice Krispie treats get a chocolate upgrade with the addition of chocolate chips. Ready in under 10 minutes, this sweet treat is the perfect last minute snack! 
    Course Dessert, Snack
    Cuisine American
    Prep Time 2 minutes minutes
    Cook Time 7 minutes minutes
    Chill Time (Optional) 10 minutes minutes
    Total Time 9 minutes minutes
    Servings 12 treats
    Calories 86kcal
    Author Jessica Burgess

    Ingredients

    • 2 tablespoons butter unsalted
    • 1 – 10 ounce bag mini marshmallows
    • ½ cup chocolate chips
    • 5 cups crispy rice cereal I used Rice Krispies
    • 1 tablespoon half and half cream or whole milk (optional)

    Instructions

    • Spray an 8×8 pan with nonstick cooking spray.
    • In large pot on low heat, combine butter, marshmallows, and chocolate chips.  Stir often until marshmallows have melted.  Add in half and half and stir until mixture is smooth and creamy.
    • Add cereal and mix until everything comes together and cereal is coated in marshmallow mixture.   
    • Place into the prepared pan, pressing firmly to fill the pan evenly.
    • Allow to set or chill for 10 minutes before cutting (optional, but highly recommended).

    Notes

    • Adding the half and half cream or whole milk makes combining everything a lot easier. 
    • Use fresh marshmallows for the best results. 
    SUBSTITUTIONS: If you don’t have chocolate chips, you can use 4 ounces of milk chocolate in its place. 
    STORAGE: Store your Rice Krispie treats in the pan (covered) or wrap each treat individually in plastic wrap. Treats should keep for 2 days at room temperature. 

    Nutrition

    Serving: 1treat | Calories: 86kcal | Carbohydrates: 12g | Protein: 1g | Fat: 4g | Saturated Fat: 2g | Polyunsaturated Fat: 1g | Monounsaturated Fat: 1g | Trans Fat: 1g | Cholesterol: 7mg | Sodium: 21mg | Potassium: 11mg | Fiber: 1g | Sugar: 5g | Vitamin A: 80IU | Vitamin C: 1mg | Calcium: 11mg | Iron: 1mg

    Instant Pot Broccoli Cheddar Soup

    May 1, 2022

    Instant Pot Broccoli Cheddar Soup on spoon over bowl of soup

    This Instant Pot Broccoli Cheddar Soup is a Panera Bread copycat recipe that uses simple ingredients and is ready in just 30 minutes!

    Close up of broccoli cheddar soup on spoon
    Instant Pot Broccoli Cheddar Soup

    Quick Overview: Saute vegetables right inside of the pot, high-pressure the broth and veggies, create a roux with butter and flour on the stovetop, and finish by adding roux to the Instant Pot for a thick and creamy, delicious Instant Pot broccoli cheese soup for an easy Instant Pot recipe.

    Love copycat recipes? Broccoli cheddar soup is one of Panera’s most popular recipes and the next time you’re craving it, try this easy recipe for some quick comfort food that may just become one of your new favorite things!

    When to serve: Serve this great recipe, something that the whole family will love, (yes, even picky eaters!) on a busy weeknight or for something warm and comforting on the weekends in a bread bowl!

    See our easy soup recipes that are perfect for the cooler months or to serve a crowd!

    broccoli cheddar soup in a white bowl with spoon
    Broccoli Cheddar Soup Recipe
    [feast_advanced_jump_to]

    Ingredients

    Made with REAL ingredients like shredded cheddar cheese, chicken broth (you can even make my homemade chicken broth recipe), and milk, this broccoli cheese soup recipe is made from scratch but is quick to make!

    You may even have all, or at least a handful of ingredients on hand already, to make this soup!

    Ingredients for broccoli cheddar soup
    Ingredients
    1. Butter – salted or unsalted butter will work!
    2. Celery – Chop in to small pieces, or very fine if you have a picky eater and want to try to slip it past them.
    3. Garlic – cloves, minced (but feel free to use the pre-minced garlic that you can buy at the store, to speed things up).
    4. Flour – all purpose flour is ideal for this recipe
    5. Milk – Whole, 2%, 1%, and skim are fine to use but whole milk is preferred
    6. Chicken broth – Feel free to use homemade chicken broth, chicken stock, storebought broth or even granules to make your own broth
    7. Broccoli florets – we use fresh broccoli florets and find that works better than watery, frozen broccoli.
    8. Carrots – shred the carrot, fine, or even buy pre-shredded carrots (about ½ cup or so of shredded can equal one carrot, shredded)
    9. Salt – amounts suggested in the recipe card but salt to taste
    10. Black pepper – just a pinch of pepper is needed for the perfect spice
    11. Shredded cheddar cheese – you can definitely speed things up by buying shredded cheese in the grocery store. However, if you have time to shred your own, you’ll get much better results, as shredding your own doesn’t contain the powdery substance that most store bought, pre-shredded cheeses do.

    Substitutions and Variations

    • Vegetables – If you aren’t a fan of the vegetables used in this recipe, you can simply omit them. However, do note that removing things like the onion, can really change the flavor of the soup overall so you may have a different result than what the recipe calls for.
    • Cheese – although this recipe calls for shredded cheddar, if you only have different kinds of cheeses on hand, don’t be afriad to try it. It may result in a slightly different flavor if using something far from cheddar. You can also a mild cheddar or a sharp cheddar cheese.
    • Milk – If you only have heavy cream or half and half on hand, you can definitely use it instead but do note that using something thicker than milk can result in a thicker soup.
    • Broth – This recipe calls for chicken broth but you can easily substitute it for vegetable broth if you prefer a vegetarian soup.

    You can find the complete list of ingredients and directions can be found in the recipe card below.

    Instructions for this Broccoli Cheese Soup Recipe

    steps 2 through 4: Image collage for soup
    Steps 2-4
    1. Turn your Instant Pot to the sauté function and add 2 tablespoons of butter.
    2. When the butter melted, add the diced onion and celery. Sauté until the vegetables are tender. Add garlic and cook for another 30 seconds.
    3. Add chicken broth to the cooked onions, garlic, and celery.
    4. Add broccoli and carrots to the Instant Pot.

    Lock your lid in place and make sure your vent is sealed. Pressure for 2 minutes.
    When the time is up, quick release the pressure and allow the steam to vent until you can open the lid.

    Steps 5 and 6 for making Instant Pot soup
    Making the roux
    1. In the meantime, in a medium saucepan, melt 1⁄2 cup of butter. Slowly whisk in flour until blended and creamy. Set aside.

    Turn your Instant Pot on to the sauté function.

    1. Add a cup of the hot broth from your instant pot to your butter/flour mixture and continue to whisk until blended.

    Next, add the butter/flour mixture to your instant pot. Whisk until soup thickens.


    1. Heat up your milk in microwave UNTIL VERY WARM. DO NOT BOIL. This will prevent the milk from curdling when adding it to the hot soup.
    2. Add the shredded cheese and stir until melted. Season with salt and pepper.
    3 image collage showing steps 7 through 9 for broccoli cheese soup
    Add roux, milk & cheese

    What to Serve with this Soup

    If you have a bread bowl to serve this delicious soup in, it really hits the spot but it’s not necessary and you can absolutely use a regular bowl! You can also make this easy Italian bread recipe, these Bisquick Cheddar Biscuits or Foccacia bread to serve with the soup, and dip pieces of bread in the soup!

    For side dishes, any of these salad recipes go wonderfully with this soup!

    Soup ladle holding broccoli cheddar soup
    Delicious Broccoli Cheddar Soup

    More soup recipes: This Instant Pot cauliflower soup is a similar recipe that you’ll love adding to the rotation. Also, our buffalo chicken soup is another soup that gives that creamy, comforting texture!

    Love using your Instant Pot? Our readers have really fallen in love with this Cheeseburger Macaroni in the Instant Pot and it’s one of our favorite Instant Pot recipes too! (Over 100 reviews!)

    Top tip

    We all love a good shortcut but sometimes those shortcuts can make a recipe sacrifice flavor. So if you have time and don’t mind spending a little bit of time, shred your own cheese. The creaminess of the real, shredded cheddar, is hard to beat! Plus, the storebought shredded cheese can contain an “anti-caking” ingredient that doesn’t allow cheese to melt as well as self-shredded.

    Faq’s

    Why is my Broccoli Cheddar soup gritty?

    It could be because the milk wasn’t properly added to the soup, and it caused it to curdle. See the steps below on how to add colder milk to the warmer soup for the best results.

    Can I freeze broccoli cheddar soup?

    Yes. It freezes really well, for up to 3 months. Just make sure to allow the soup to fully cool before placing in a freezer-safe container to freeze.

    Why won’t my cheese melt in my broccoli cheddar soup?

    If using pre-shredded cheese from the store, and it had too much of the “anti-caking” properties, that doesn’t allow it to melt smoothly.

    Storage

    When leftover soup has cooled, place in an airtight container and store in the refrigerator for 3-4 days.

    Did you make this? I’d be so grateful if you left a “star” rating below to let me know what you thought! Then, the next time you need a quick and easy recipe, come back to Fantabulosity to browse all of my easy recipes!

    Recipe

    Instant Pot Broccoli Cheddar Soup on spoon over bowl of soup
    Print Pin
    5 from 2 votes

    Instant Pot Broccoli Cheddar Soup

    This Instant Pot Broccoli Cheddar Soup is a Panera Bread copycat recipe that uses simple ingredients and is ready in just 30 minutes!
    Course Main Course, Soup
    Cuisine American
    Prep Time 20 minutes minutes
    Cook Time 10 minutes minutes
    Total Time 30 minutes minutes
    Servings 8 servings
    Calories 385kcal
    Author Jessica Burgess

    Equipment

    • Instant Pot (Pressure Cooker)

    Ingredients

    • 10 Tablespoons butter divide
    • onion small, chopped
    • 2 celery stalks large, chopped
    • 2 cloves garlic minced
    • ½ cup flour
    • 2 cups milk
    • 3 cups chicken broth
    • 3 cups broccoli chopped
    • 1 carrot large, shredded
    • 3 cups shredded cheddar cheese
    • ½ teaspoon salt
    • ¼ teaspoon pepper

    Instructions

    • Turn your Instant Pot to the sauté function and add 2 tablespoons of butter.
    • When the butter melted, add the diced onion and celery.
      Sauté until the vegetables are tender. Add garlic and cook for another 30 seconds.

    • Add chicken broth to the cooked onions, garlic, and celery.

    • Add broccoli and carrots to the Instant Pot.
 Lock your lid in place and make sure your vent is sealed. Pressure for 2 minutes. 

      When the time is up, release the pressure and allow the steam to vent until you can open the lid. 

    • In the meantime, in a medium saucepan, melt 1⁄2 cup of butter. Slowly whisk in flour untilblended and creamy. Set aside. 

    • Turn your Instant Pot on to the sauté function.
      Add a cup of the hot broth from your instant pot to your butter/flour mixture and continue towhisk until blended.
    • Next, add the butter/flour mixture to your instant pot. Whisk until soup thickens.

    • Heat up your milk in microwave UNTIL VERY WARM. DO NOT BOIL. This will prevent the milk from curdling when adding it to the hot soup.
 Pour in to soup.
    • Add the shredded cheese and stir until melted. Season with salt and pepper.

    Notes

    How to Store:
    When soup has cooled, place in an airtight container and store in the refrigerator for 3-4 days.
     
    Can I freeze broccoli cheddar soup?
    Yes. It freezes really well, for up to 3 months. Just make sure to allow the soup to fully cool before placing in a freezer-safe container to freeze.

    Nutrition

    Serving: 1serving | Calories: 385kcal | Carbohydrates: 14g | Protein: 14g | Fat: 31g | Saturated Fat: 18g | Polyunsaturated Fat: 1g | Monounsaturated Fat: 7g | Trans Fat: 1g | Cholesterol: 89mg | Sodium: 903mg | Potassium: 291mg | Fiber: 1g | Sugar: 4g | Vitamin A: 2454IU | Vitamin C: 31mg | Calcium: 404mg | Iron: 1mg

    Cookies and Cream Milkshake

    April 26, 2022

    Cookies and Cream Milkshake

    This creamy, dreamy cookies and cream milkshake doesn’t require any special ingredients to make. All you need is ice cream, milk, vanilla, and Oreos and you can have this ready in 15 minutes!

    Cookies and Cream Milkshake
    Cookies and cream milkshake – yum!

    I’m a bona fide ice cream lover, (remember our ice cream sandwich cake?) and that means that I obviously love a classic Oreo milkshake that’s made with simple ingredients. This one totally satisfies my milkshake cravings!

    Blend your favorite vanilla ice cream with some milk and vanilla extract, stir in some crushed Oreos and top it with your favorite toppings for a delicious homemade milkshake treat your whole family will love. (Possibly as much as they love these cookies and cream cinnamon rolls!)

    [feast_advanced_jump_to]

    Why you’ll love this recipe

    1. Simple Ingredients: You don’t need any special order ingredients to make this milkshake. Just simple things you can find in any grocery store!
    2. Quick & Easy: This recipe comes together in less than 15 minutes and would be a great one to let the kids help you with.
    3. Cookies & Cream Flavor: I personally think cookies and cream might be the very best milkshake flavor!
    4. Easy to Customize: This would make a great feature at a party! Create a milkshake bar, have someone make a big batch of the milkshake base and then let people stir in their own fun additions and add fun toppings!

    Ingredients

    Only a few everyday ingredients are needed to whip up this tasty milkshake treat!

    Ingredients to make cookies and cream milkshake.
    Ingredients.

    You can find a complete list of ingredients and directions in the recipe card below.

    • Vanilla ice cream – it seems everyone has their favorite brand when it comes to vanilla ice cream. Grab a tub of your favorite next time you’re at the store!
    • Milk – you can use any type of milk here, but the higher the milk fat content the creamier the milkshake will be. I like to use whole milk.
    • Vanilla extract – this isn’t completely necessary, but it adds amazing vanilla flavor to your shake!
    • Oreos – this cookies and cream milkshake wouldn’t be complete with…the cookies!
    • Optional toppings – you can get creative here and top your cookies and cream shake with your favorite toppings. I like whipped cream, some Oreo cookie crumbs and a maraschino cherry on top!

    How to make this cookies and cream milkshake recipe

    Three pictures of making a cookies and cream milkshake - two of blenders with ingredients, one of the finished product.
    Making a cookies and cream milkshake.
    1. Thaw Ice Cream: Slightly thaw your favorite vanilla ice cream before beginning – about 10 minutes on the counter works great.
    2. Crush Oreos: Crush 5 oreo cookies into chunks by putting it in a ziploc bag and smashing with a hammer or rolling it with a rolling pin – or just use your hands. You want it crushed into large chunks of cookies – not fine dust.
    3. Scoop Ice Cream: Scoop the slightly softened ice cream into a blender.
    4. Add Liquid: Add vanilla and ¼ cup milk.
    5. Blend: Blend well. If you want the milkshake to be thinner, add more milk, mixing between additions until you get the thickness you prefer.
    6. Add Oreos: Dump in the crushed Oreos and pulse ever so slightly just to incorporate into the milkshake mixture. (You want to have large chunks!)
    7. Make It Pretty: Pour into 2 chilled glasses (this recipe makes about 2 cups of milkshake, so you can have one large milkshake or two smaller ones). Top with your favorite toppings such as whipped cream, homemade chocolate sauce, cherries, and chunks of cookies!
    8. Serve: Serve & enjoy!

    Serving Suggestion: For a pretty presentation, drizzle a little chocolate syrup onto the sides of the glasses and freeze before preparing the milkshake.

    What to serve with this cookies and cream milkshake?

    I think that the perfect way to serve a milkshake is alongside a burger and fries. It’s a classic combination for a reason.

    But you could also serve this milkshake as a dessert after any meal or as an easy dessert on its own!

    A cookies and cream milkshake with oreos and a maraschino cherry on top.
    Yummy milkshake goodness!

    More single serving desserts: If you’re looking for another quick and delicious dessert to make for one, you have to try this vanilla mug cake. It’s ready in 7 minutes and made in a mug in the microwave!

    More yummy drinks: If you’re looking for a fun warm drink, you’ll love this hot strawberries and cream smoothie! It’s got the flavor of a strawberry milkshake, the warm comfort of hot chocolate, and it has fresh strawberries in it (so you get some extra fruit in your day).

    Substitutions

    • Dairy Free – I know some people can’t have dairy, but that doesn’t mean you can’t enjoy a good milkshake! There are lots of great dairy free ice creams and milks out there you could use in this recipe (and Oreos are already dairy free, so no trouble there)!
    • Gluten Free – if you can’t have gluten, see if you can find a package of gluten free Oreos in your local store. If not, there are a lot of other gluten free chocolate sandwich cookies out there that would work, too.

    Variations

    This recipe is simple, but sometimes those ones are the easiest ones to play around with! By changing one of the ingredients, you create a whole new version. Here are a few suggestions…

    • Ice Cream – instead of vanilla ice cream, use your favorite flavor (chocolate ice cream, strawberry ice cream, mint ice cream, or even cookies and cream ice cream).
    • Cookies – by using a different kind of cookie you create a totally new milkshake!
    • Extract – you could try adding almond, coconut, or mint extract to your milkshake to compliment whichever ice cream and cookie combination you chose.

    Here are a few examples of what you could do:

    Strawberry ice cream + chunks of frosted circus animal cookies + vanilla extract.

    Chocolate mint ice cream + chopped peppermint patties + mint extract.

    …the options are endless!

    A cookies and cream milkshake.
    Loads of cookie bits for the ultimate cookies and cream flavor!

    Expert tips and FAQs

    What is the best milkshake combination?

    This is totally personal preference. I love the cookies and cream combination we created in this recipe, but I also listed a few other combinations I think would be delicious in the variations section of this blog post!

    How do you thicken a milkshake?

    The easiest way to get a thick milkshake is to add the milk little by little. If you add too much milk, your milkshake will get runny. If this does happen you can always add a bit of extra ice cream to help thicken it back up.

    How long do you blend a milkshake?

    It should only take about a minute to get a nice, creamy milkshake. If you enjoy your milkshakes a bit more on the lump side, cut that back to 30-45 seconds.

    Did you try this recipe? If you did, I’d love to hear from you! Drop a comment on this blog post, head over to my Instagram page, find me on Facebook, or search me up on Pinterest. It means the world to me when you leave your feedback about Fantabulosity’s recipes.

    Recipe

    Cookies and Cream Milkshake
    Print Pin
    5 from 3 votes

    Cookies and Cream Milkshake

    This creamy, dreamy cookies and cream milkshake doesn't require any special ingredients to make. All you need is ice cream, milk, vanilla, and Oreos and you can have this ready in 15 minutes!
    Course Dessert, Drinks
    Cuisine American
    Prep Time 15 minutes minutes
    Total Time 15 minutes minutes
    Servings 1 serving
    Calories 748kcal
    Author Jessica Burgess

    Equipment

    • Blender

    Ingredients

    • 3 scoops vanilla ice cream
    • ¼ – ⅓ cup milk
    • 2 teaspoons vanilla
    • 5 oreo cookies
    • chocolate syrup, whipping cream, maraschino cherries optional

    Instructions

    • Slightly thaw your favorite vanilla ice cream before beginning – about 10 minutes on the counter works great.
    • While it is thawing, crush 5 oreo cookies into chunks by putting it in a ziplock bag and smashing with a hammer or rolling it with a rolling pin – or just use your hands. You want it crushed into large chunks of cookies – not fine dust.
    • Scoop the slightly softened ice cream into a blender.
    • Add vanilla and ¼ cup milk.
    • Blend well. If you want the milkshake to be thinner, add more milk, mixing between additions until you get the thickness you prefer.
    • Dump in the crushed oreos and pulse ever so slightly just to incorporate into the milkshake mixture. (You want to have large chunks!)
    • Pour into 2 chilled glasses (this recipe makes about 2 cups of milkshake, so you can have one large milkshake or two smaller ones).
    • Top with your favorite toppings such as whipped cream, chocolate sauce, cherries, and more crushed oreos!

    Notes

    SERVING SUGGESTION: For a pretty presentation, drizzle a little chocolate syrup onto the sides of the glasses and freeze before preparing the milkshake.
     

    Nutrition

    Serving: 1serving | Calories: 748kcal | Carbohydrates: 93g | Protein: 12g | Fat: 35g | Saturated Fat: 18g | Polyunsaturated Fat: 3g | Monounsaturated Fat: 12g | Trans Fat: 1g | Cholesterol: 94mg | Sodium: 415mg | Potassium: 638mg | Fiber: 3g | Sugar: 70g | Vitamin A: 934IU | Vitamin C: 1mg | Calcium: 342mg | Iron: 7mg

    Chicken Pot Pie Casserole

    April 24, 2022

    Chicken Pot Pie Casserole in white baking dish

    This chicken pot pie casserole recipe takes your classic chicken pot pie and uses biscuits to make the “pie crust”! Grab everyday ingredients, such as cooked chicken, cream of chicken soup, vegetables, refrigerated biscuits, and a few other ingredients for a casserole ready to eat in only 45 minutes!

    It’s one of our most popular chicken casserole recipes, and similar to this Stove-Top Stuffing Chicken Casserole recipe, since it uses something other than noodles!

    Chicken pot pie casserole with biscuits on top in white baking dish

    Love the flavors and heartiness of chicken pot pie but want to make it even easier? This chicken pot pie casserole recipe uses refrigerated biscuits that you place on top of the chicken mixture in a casserole dish and bake!

    If you love casserole recipes, then you’re also going to love this tater tot casserole with chicken, this cheeseburger casserole and this Doritos chicken casserole will be new favorites too!

    chicken pot pie casserole bite on fork
    Creamy, chicken and vegetables

    Why you’ll love this Chicken Pot Pie “Bubble Up” Casserole

    1. “Bubble Up”: Sometimes called a “bubble up” casserole, the biscuits on top “rise” or “bubble up” during the cooking process, and after it cooks it looks amazingly delicious and fun!
    2. Simple Ingredients: Like your favorite chicken pot pie recipe with cream of chicken soup, this casserole is the ultimate comfort food, made with everyday ingredients!
    3. Shortcuts: It calls for cooked chicken, so using something like a rotisserie chicken (you could even boil the rotisserie chicken for broth for later), or leftover chicken, speeds things up even more! Or frozen vegetables that you can heat up quickly in the microwave is a great way to speed things up, instead of using fresh vegetables.
    4. Family Favorite: This casserole has that creamy filling that classic chicken pot pie has, and it has the flavors of a chicken pot pie that the whole family will love!
    5. Freezer Meal: Good old comfort food never fails! Make this as a dish to take to someone in need, so they can freeze it and cook it whenever they need a fast dinner idea! (See freezer tips below and one of my secret weapons for quick meal plans too!)
    [feast_advanced_jump_to]

    Ingredients for easy chicken pot pie casserole

    We love using a lot of shortcuts for this recipe to get a delicious dinner on the table fast! It calls for cooked chicken and cooked mixed vegetables, so that’s why it’s one of our favorite recipes to make with leftovers!

    But if you don’t have leftovers, there are some quick tips below to speed things up with certain ingredients!

    ingredients on table, labeled with names
    Ingredients

    You can find the complete list of ingredients and directions can be found in the recipe card below.

    • Cooked Chicken – we use about 2 chicken breasts, cooked & cut into ½ inch cubes (about 2-3 cups of chicken). You can bake, saute, or grill chicken, or even cook chicken quickly in an Instant Pot or pressure cooker. See substitutions for cooked chicken, below!
    • Cream of chicken soup – this helps make that creamy sauce that we love in traditional pot pie.
    • Milk – Whole, 2% or skim is just fine to use! Or try heavy cream if you have it on hand!
    • Sour cream – sour cream really helps give that texture that we all love in a creamy chicken pot pie.
    • Onion – To keep things easy, we like to use onion powder but if you prefer fresh onion, you absolutely can!
    • Seasoned salt – If you don’t have seasoned salt, you can use regular but seasoned salt is delicious and we love using that in so many recipes, like our cheeseburger sliders for the garlic butter that we brush on the rolls!
    • Pepper – regular black pepper is such a great addition to this dish for the perfect amount of spice.
    • Shredded cheddar cheese – what’s a casserole without shredded cheese? You’ll divide the cheese for mixing in and for sprinkling on top.
    • Mixed veggies – Any kind of cooked vegetables will work. We used a medley of peas, carrots, corn, and green beans. If using frozen veggies, you’ll just want them to be cooked before adding them to this recipe, and remember to discard any excess water that may remain after thawing.
    • Refrigerated biscuits – We used Grands biscuits, but you can also make your own biscuits using Bisquick! See the notes below for making sure how the biscuits will fully cook.
    • Butter – you’ll brush the top of the flaky biscuits, after baked, with butter for an amazing, buttered flaky crust flavor!

    How to make chicken pot pie casserole

    This is the perfect weeknight meal, and can be ready in only 45 minutes! Here’s how:

    2 image collage with ingredients in bowl and then mixed in to baking dish
    Mix ingredients and bake!
    1. Preheat: Oven to 375°F and grease a 9×13 glass or ceramic baking dish.
    2. Mix: In a large bowl, using only 1 cup of the shredded cheese, mix together all of the ingredients except for the biscuits and melted butter.
    4 image collages showing steps for chicken pot pie casserole
    Steps 3 and 4-6
    1. Bake: Pour chicken mixture into the prepared baking dish. Bake uncovered for 15 minutes. Remove from oven and stir. Sprinkle the remaining ½ cup of cheese on top of the mixture.
    2. Add Biscuits: Divide the top and bottom of each biscuit, separating each biscuit in half, so that they aren't as thick, so they’ll fully cook. Place 12 biscuits on top of the chicken and cheese mixture (do not overlap biscuits).
    3. Baking Time (2nd): For another 15-20 minutes or until biscuits are golden brown and cooked through.
    4. Brush: The tops of biscuits with melted butter and serve!
    Slice of chicken pot pie on spatula, above dish
    Chicken pot pie serving

    What to serve with pot pie?

    For an easy weeknight meal, this great recipe is delicious with a lettuce salad, or even a quick and easy fruit salad!

    Easy casserole recipes: If you’re a fan of casseroles, then you’ll also love this southern broccoli casserole and this corn casserole, that we enjoy ALL year long; not just during the holidays!

    Quick weeknight dinners: We’ve compiled some of the best, easy dinner recipes for you, so you’ll always have something fun for the meal plan rotation!

    Substitutions

    • Chicken – Instead of cooking your own chicken, try using a rotisserie chicken, and shred it or grab some store-bought cooked chicken, such as canned chicken or you can even find cooked chicken in the deli of most grocery stores.
    • Mixed Vegetables – If you don’t have frozen vegetables as we used, you can use cooked, canned vegetables!
    • Onion – if you’d prefer real onions, you can sauté ⅓ cup chopped onion in 1 tablespoon of butter until tender before adding to the chicken mixture.
    • Biscuits – If you don’t want to split the biscuits in half, you can also cut each biscuit in to fourths. You can also do a lattice top, using strips of crescent rolls! (Just make sure to follow the cook time for crescent rolls, as the time may vary
    chicken pot pie casserole with biscuits on a white plate
    Delicious chicken pot pie casserole

    Storage

    If you have leftover chicken pot pie, store in an airtight container, in the refrigerator for 3-4 days.

    Top tip

    When you have small amounts of leftover vegetables from side dishes, during the week (such as corn, green beans, carrots, etc.) but it’s not enough to serve the whole family leftovers, try keeping a small bowl in the freezer, that you continually add leftover vegetables too. Then, when you collect 2 cups worth, you can use the vegetables for this chicken pot pie casserole!

    Faq’s

    Can I freeze chicken pot pie casserole?

    You can but do note: since the cooking process calls for baking first and then adding the biscuits before baking it a second time, it would be best to freeze without the biscuits. Prep to the point of pouring chicken mixture in to baking dish, then freeze. When serving, thaw in the refrigerator overnight, and follow remaining steps.

    If your chicken pot pie is runny…

    This could be because frozen vegetables were used, and when thawed, the excess water was not discarded. Remember to drain any excess before adding to the recipe.

    Related Recipes

    If you love this easy dinner idea, then you’ll also love these new easy dinner recipes:

    • Bowl of ham and beans with spoon, and cornbread sitting on side of bowl.
      Ham and Beans Recipe
    • Poppy Seed Chicken Casserole serving on a plate, next to green beans.
      Poppy Seed Chicken Casserole
    • Smothered pork chop with mushroom gravy on top of rice in a plate.
      Smothered Pork Chops in Creamy Mushroom Gravy
    • Church supper recipes collage.
      Church Supper Recipes

    Did you make this? I’d be so grateful if you left a “star” rating below to let me know what you thought! Then, the next time you need a quick and easy recipe, come back to Fantabulosity to browse all of my easy recipes!

    Recipe

    Chicken Pot Pie Casserole in white baking dish
    Print Pin
    5 from 4 votes

    Chicken Pot Pie Casserole

    This chicken pot pie casserole uses refrigerated biscuits for the pie crust, and other everyday ingredients to make this a quick, hearty dish!
    Course Main Course
    Cuisine American
    Prep Time 1 hour hour 15 minutes minutes
    Cook Time 30 minutes minutes
    Total Time 1 hour hour 45 minutes minutes
    Servings 8 servings
    Calories 449kcal
    Author Jessica Burgess

    Ingredients

    • 2 cooked chicken breasts 2-3 cups – cut in to ½ inch cubes (or see blog post for substitutions)
    • 10.5 ounces can of cream of chicken soup
    • ½ cup milk
    • ½ cup sour cream
    • 1 teaspoon onion powder or 1 tablespoon minced onion
    • ½ teaspoon seasoned salt
    • ⅛ teaspoon pepper
    • 1 ½ cups shredded cheddar cheese divided
    • 2 cups cooked mixed vegetables frozen or canned work well
    • 1 can refrigerated biscuits We used Grands biscuits
    • 1 tablespoon butter melted

    Instructions

    Preheat & Prep:

    • Preheat oven to 375°F. Grease a 9×13 glass or ceramic baking dish.

    Mix:

    • In a large bowl, using only 1 cup of the shredded cheese, mix together all ingredients except for the biscuits and melted butter.

    Bake:

    • Pour chicken mixture into prepared baking dish. Bake uncovered for 15 minutes.

    Top Casserole:

    • Remove from oven and stir. Sprinkle remaining ½ cup of cheese on top of the mixture.
    • Separate each biscuit in half, dividing top and bottom so that they aren't as thick. Place 12 biscuits on top of the chicken and cheese mixture (do not overlap biscuits).

    Bake Again:

    • Bake for another 15-20 minutes or until biscuits are browned and cooked through.

    Brush:

    • Brush tops of biscuits with melted butter and serve!

    Notes

    Top Tip:
    When you have small amounts of leftover vegetables from side dishes, during the week (such as corn, green beans, carrots, etc.) but it’s not enough to serve the whole family leftovers, try keeping a small bowl in the freezer, that you continually add leftover vegetables too. Then, when you collect 2 cups worth, you can use the vegetables for this chicken pot pie casserole!
    Can you freeze this chicken pot pie casserole?
    You can. DO NOTE: since the cooking process calls for baking first and then adding the biscuits before baking it a second time, it would be best to freeze without the biscuits. Prep to the point of pouring chicken mixture in to baking dish, then freeze. When serving, thaw in the refrigerator overnight, and follow remaining steps.

    Nutrition

    Serving: 1serving | Calories: 449kcal | Carbohydrates: 36g | Protein: 24g | Fat: 23g | Saturated Fat: 9g | Polyunsaturated Fat: 4g | Monounsaturated Fat: 7g | Trans Fat: 1g | Cholesterol: 72mg | Sodium: 904mg | Potassium: 396mg | Fiber: 3g | Sugar: 3g | Vitamin A: 2691IU | Vitamin C: 5mg | Calcium: 231mg | Iron: 3mg

    Easy Beef Stroganoff Recipe

    April 23, 2022

    beef stroganoff in black skillet

    This beef stroganoff recipe is an old-fashioned favorite that’s easy to make for a quick weeknight dinner. You only need ground beef, egg noodles, cream of mushroom soup, and a few other simple ingredients and it’s a dinner that’s ready in 30 minutes!

    Spoonful of beef stroganoff

    Needing a quick weeknight dinner recipe? This classic beef stroganoff recipe is a delicious recipe, that’s a comfort food favorite, that the whole family will love, much like this easy chicken pot pie recipe.

    If you love easy dinner recipes, then you’ll want to see this amazing list of 80+ easy dinner ideas!

    ground beef stroganoff in black skillet

    Why You’ll Love this Recipe

    1. Quick Meal: It’s ready in only 30 minutes!
    2. Simple Ingredients: You can find all of the ingredients at your local grocery store! No fancy, hard-to-find ingredients here!
    3. Last-Minute Dinner Idea: Forget to plan dinner? You may already have the ingredients on hand to make this tonight! If not, try this lemon chicken pasta that you’ll also love!
    4. Creamy Sauce: This easy-to-make sour cream sauce, also uses milk, and mushroom soup which makes it such a great recipe! (Similar to how we make simple chicken and noodles for a quick dinner!)
    [feast_advanced_jump_to]

    The Ingredients in Classic Beef Stroganoff

    Only simple ingredients for this easy beef stroganoff recipe!

    You can find the complete list of ingredients and directions can be found in the recipe card below.

    • Egg noodles – original beef stroganoff typically calls for egg noodles but you can use a different kind of pasta or noodle if you prefer. Such as fettuccini noodles, elbow, rotini, etc.
    • Can of cream of mushroom soup – doesn’t get much easier than a soup that can help create a creamy mushroom sauce!
    • Onion – fresh white onion is our favorite but you can use a yellow onion or even minced, frozen chopped, or dried onion if that’s what you have on hand! I’ve even considered adding onion soup mix in to this recipe!
    • Ground beef – Any kind of ground beef should do, just make sure to drain after it has fully cooked, if necessary. (Make sure to see these other dinner recipes with ground beef.) I’d be curious what ground chicken here would look like but saving it for this ground chicken meatloaf may be a better idea.
    • Sour cream – adding a little sour cream can really help give that rich sour cream gravy that smooth flavor that we love in this recipe.
    • Milk – this creamy beef stroganoff wouldn’t be nearly as good without the creaminess of milk, half and half or heavy cream. You could use either one for this recipe but you may want to use a little more milk if you find that your stroganoff is too thick.
    • Fresh parsley – this is optional but it adds an amazing color!
    • Salt – you may find that you want more/less than what this recipe calls for but remember, you can always add it but you can’t take it away, if you use too much! Taste test!
    • Pepper – just a small amount of black pepper is all this needs for the perfect touch!

    How to make this traditional beef stroganoff

    collage of 3 images showing how to make beef stroganoff
    Recipe steps
    1. Boil Noodles: Cook noodles according to package directions. Drain and set aside. 
    2. Cook Ground Beef: In a large saucepan, brown ground beef over medium heat until no longer pink, breaking it into small pieces as it cooks; drain the fat. Add onion and cook until translucent (about 1 minute).
    3. Make Sauce: Stir soup, milk, sour cream, salt, and pepper into the meat.
    4. Simmer: Cook over medium heat for just a few minutes, stirring often, until hot and bubbly.
    5. Combine: Add the noodles into the sauce and mix.
    6. Serve: Top with chopped parsley and serve.

    What to Serve with Beef Stroganoff?

    When serving something as comforting and warm as this dish, this homemade Italian bread hits the spot! Or having a nice easy side salad helps get in those extra veggies you’ve been looking for!

    beef stroganoff cooked in black pan
    Ready to eat!

    More quick pasta dinners: why not add a new pasta dish to your meal rotation! This 30-minute taco pasta or chicken bacon ranch pasta may just become new family favorites! Or, using cheese and hamburger together to make this stovetop beefy mac and cheese is always a good choice!

    Pasta recipes you’ve never heard of: If you’re feeling adventurous, this creamy cream cheese pasta, pasta with corn and tomatoes, and this baked feta pasta, are two recipes that will help mix up the same old recipes during the week!

    Substitutions

    • Rice – instead of using pasta, you can use rice, such as brown or white rice.
    • Mashed Potatoes – Instead of pasta or rice, you could even spoon the beef stroganoff over mashed potatoes for an old-fashioned dinner!
    • Meat – want to use something other than ground beef? No problem. Try ground turkey or even sausage for a different flavor spin!

    Sometimes you may find it necessary to substitute items and experiment with what you have on hand. So feel free to try other common ingredients such as cream cheese, beef broth (or beef stock), to add more creaminess or to thin it out.

    If you’d like to add more flavors or season it even more, you may like to try adding a bit of Worcestershire sauce, white wine, soy sauce, or even dijon mustard for some zing!

    Faq’s

    What is the best cut of meat for beef stroganoff?

    For traditional beef stroganoff, ground beef is preferred in our house. However, you can also use other using tender strips of beef such as sirloin steak (top sirloin), which we think is the best cut of meat. If you have tougher cuts of meat, such as stew meat, you could even put it in a pressure cooker before hand if you like for a more tender meat result.

    How do you keep sour cream from curdling in beef stroganoff?

    This could be because your sour cream was really cold when added in to the meat mixture. It can help to temper your sour cream by adding a small amount of the warm mixture in to the sour cream, stirring (to warm it up a bit), and then adding it to the rest of the dish to continue cooking.

    Is beef stroganoff supposed to be thick?

    We prefer it to be on the thicker side but if you like it to be more “thin” you can definitely add a little milk to it, to reach the consistency you prefer!

    Storage

    If you happen to have leftover stroganoff, let it cool off, and then you can store it in an airtight container in the refrigerator for 3-4 days. Simply reheat the stroganoff by placing it in the microwave or heating it on low, in a saucepan. (You may need to add a little milk to help thin it out if the noodles soaked up most of the creamy brown gravy.)

    Did you make this? I’d be so grateful if you left a review below to let me know what you thought! Then next time you need a quick and easy recipe, come back to Fantabulosity to browse all of my easy recipes!

    Recipe

    beef stroganoff in black skillet
    Print Pin
    4.75 from 8 votes

    Beef Stroganoff – Quick & Easy!

    This beef stroganoff recipe is an old-fashioned favorite that's easy to make for a quick weeknight dinner, using egg noodles, cream of mushroom, and other simple ingredients!
    Course Main Course
    Cuisine American
    Prep Time 5 minutes minutes
    Cook Time 25 minutes minutes
    Total Time 30 minutes minutes
    Servings 4 servings
    Calories 573kcal
    Author Jessica Burgess

    Ingredients

    • 4 cups dry medium egg noodles
    • 1 pound ground beef
    • ½ cup chopped onion
    • 1 can cream of mushroom soup 10.5 ounces
    • ¾ cup milk half & half or heavy cream can be used as well
    • ½ cup sour cream
    • ½ teaspoon salt
    • ¼ teaspoon pepper
    • chopped fresh parsley for garnish

    Instructions

    • Boil Noodles: Cook the noodles according to package directions. Drain and set aside. 
    • Cook Ground Beef: In a large saucepan, brown ground beef over medium heat until no longer pink, breaking it into small pieces as it cooks; scraping from the bottom of the pan, and then drain the fat. Add onion and cook until translucent (about 1 minute).
    • Make Sauce: Stir soup, milk, sour cream, salt, and pepper into the meat.
    • Simmer: Cook over medium heat for just a few minutes, stirring often, until hot and bubbly.
    • Combine: Add the noodles into the sauce and mix.
    • Serve: Top with chopped parsley and serve.

    Notes

    See blog post notes for substitution ideas and tips to make it the best beef stroganoff recipe!
    Storing Leftovers: Allow to cool off, and then store in an airtight container in the refrigerator for 3-4 days. 

    Nutrition

    Serving: 1serving | Calories: 573kcal | Carbohydrates: 36g | Protein: 31g | Fat: 33g | Saturated Fat: 14g | Polyunsaturated Fat: 1g | Monounsaturated Fat: 13g | Trans Fat: 1g | Cholesterol: 139mg | Sodium: 942mg | Potassium: 630mg | Fiber: 2g | Sugar: 5g | Vitamin A: 278IU | Vitamin C: 2mg | Calcium: 127mg | Iron: 4mg

    Fruity Pebbles Treats

    April 23, 2022

    fruity pebbles treats on white plate

    Fruity Pebbles Treats: Your favorite classic no-bake dessert with a fruity twist, using fruit flavored rice cereal to make crispy treats!

    Fruity Pebbles Treats stacked on white plate

    Why You’ll Love These Fruity Pebble Rice Crispy Treats

    The combination of soft, gooey marshmallows with crispy cereal, like in classic rice krispie treats, is absolutely delicious. But using fruity cereal instead of plain Rice Krispies, gives these a flavor that so many will love and is one of our favorite easy snacks! You’re also going to want to try these Lucky Charms treats!

    This no bake dessert is also one that can be made at that the last minute. You can also keep the ingredients on hand for the times when you need something quick, such as an after school snack, especially during warmer weather months as a summer snack idea, so you’re not heating up the oven!

    [feast_advanced_jump_to]

    Ingredients

    It doesn’t take a lot of ingredients to make this Fruity Pebbles rice krispie recipe.

    • 3 tablespoons butter
    • 1 teaspoon vanilla extract
    • 1 package (10 oz., about 40) marshmallows or 5 ½ cups of mini marshmallows
    • 6 cups Fruity Pebbles cereal
    ingredients on table for fruity pebble treats
    Ingredients

    Ingredients

    • 3 tablespoons butter
    • 1 teaspoon vanilla
    • 1 package (10 oz., about 40) marshmallows or 6 cups of miniature marshmallows
    • 6 cups fruity rice cereal, such as Fruity Pebbles

    See the recipe card toward the end of this post for ingredients and detailed instructions all in one place for these cereal treats.

    Instructions

    1. First, grease or butter a 9×13 baking dish, and set aside.
    2. Next, melt butter in large saucepan (big enough to eventually hold all 6 cups of Fruity Pebbles) over low heat.
    3. Once you have completely melted butter, pour marshmallows in and gently melt on low heat, stirring constantly, until all marshmallows have melted.
    4. Next, add in vanilla extract and stir to fully combine.
    marshmallows in stockpot
    melt butter and marshmallows
    add in vanilla in to stockpot
    add in vanilla
    1. Pour in Fruity Pebbles and stir to combine cereal and melted marshmallows until it looks evenly combined.
    Fruity Pebbles added to pot
    Add Fruity Pebbles
    cereal stirring in to marshmallows
    Stir to mix with marshmallow mixture
    1. When combined, pour Fruity Pebbles mixture in to prepared baking dish and press cereal mixture to flatten and reach sides. You’ll want this to be flattened, in to an even layer.
    Fruity Pebble treat mixture poured in to dish
    Pour in greased baking dish

    Tip: If pressing with your hands, spray hands with non-stick cooking spray, so the gooey marshmallow doesn’t stick to your hands. If using the back of a wooden spoon to flatten, spray that as well. (You could also use a greased or buttered spatula as well.)

    Slice Fruity Pebble treats in to squares
    Cut in to squares
    1. Allow resting time for marshmallows to cool (about 10 minutes) and then slice in to squares. You can slice them as big or as small as you like but we tend to slice them in about 12 squares.

    Substitutions

    • Instead of a buttered or greased baking dish, you may choose to use parchment paper and that’s ok too! Or, you can use a sheet of wax paper if you prefer.
    • Love the idea of this fun treat but looking to mix things up? Try some of your other favorite cereals. Who knows what kind of other delicious treats you can come up with!
    Stacked Fruity Pebble treats on white plate
    Enjoy!

    Storage

    If you happen to have leftover Fruity Pebbles rice krispie treats, you can store them in an airtight container, at room temperature for a couple of days. They do tend to get hard and are better, the sooner you eat them!

    Bake Sales and Farmers Markets

    These sweet treats are PERFECT for selling at fundraising events or markets! Package them up in to small treat bags, or even wrapped in plastic wrap.

    Related Recipes

    We’re HUGE fans of no bake desserts and treats around here. So if you love these then you’ll also love the caramel rice krispy treats, and these Oreo Rice Krispie Treats!

    If you love Fruity Pebbles as much as we do, then you’ll also love this Fruity Pebbles Ice Cream!

    Recipe

    fruity pebbles treats on white plate
    Print Pin
    5 from 5 votes

    Fruity Pebble Treats

    Fruity Pebbles Treats: Your favorite classic no-bake dessert with a twist, using fruity rice cereal to make crispy treats!
    Course Dessert, Snack
    Cuisine American
    Prep Time 2 minutes minutes
    Cook Time 5 minutes minutes
    Cooling Time 10 minutes minutes
    Total Time 17 minutes minutes
    Servings 12 squares
    Calories 179kcal
    Author Jessica Burgess

    Ingredients

    • 3 tablespoons butter
    • 1 teaspoon vanilla extract
    • 5 ½ cups miniature marshmallows or 10 oz., about 40 regular marshmallows
    • 6 cups Fruity Pebbles cereal

    Instructions

    • First, grease or butter a 9×13 baking dish, and set aside.
    • Next, melt butter in large saucepan (big enough to eventually hold all 6 cups of Fruity Pebbles) over low heat.
    • Once butter has melted, pour marshmallows in and gently melt on low heat, stirring constantly, until all marshmallows have melted.
    • Next, add in vanilla extract and stir to fully combine.
    • Pour in Fruity Pebbles and stir to combine cereal and melted marshmallows until it looks evenly combined.
    • When combined, pour Fruity Pebbles mixture in to prepared baking dish and press cereal mixture to flatten and reach sides. You'll want this to be flattened, in to an even layer.
    • Allow resting time for marshmallows to cool (about 10 minutes) and then slice in to squares. You can slice them as big or as small as you like but we tend to slice them in about 12 squares.

    Video

    Nutrition

    Serving: 1square | Calories: 179kcal | Carbohydrates: 36g | Protein: 1g | Fat: 4g | Saturated Fat: 3g | Polyunsaturated Fat: 1g | Monounsaturated Fat: 1g | Trans Fat: 1g | Cholesterol: 8mg | Sodium: 147mg | Potassium: 17mg | Fiber: 1g | Sugar: 20g | Vitamin A: 587IU | Vitamin C: 4mg | Calcium: 5mg | Iron: 1mg

    Red Velvet Donuts

    April 22, 2022

    Three red velvet donuts stacked on top of each other.

    Red Velvet Donuts: These mouth-watering red velvet donuts are so easy to make you’ll hardly believe it. All you’ll need is red velvet cake mix, ripe bananas, and some cream cheese frosting!

    The festive color of these yummy red velvet donuts makes them the perfect treat to serve for special occasions like the Fourth of July, Valentine’s Day, or even Christmas morning.

    Three red velvet donuts stacked on top of each other.
    Red velvet donuts

    Why You’ll Love These Red Velvet Donuts

    I never turn down a good donut, especially if it comes with a little bit of coffee. But these red velvet donuts? They’re on a whole other level. They have all that classic red velvet flavor (complete with the tangy cream cheese glaze) in the convenient packaging of a donut! (Super fun, right? Similar to these brownie donuts!)

    The best part of these moist donuts is that they are not only delicious (but let me tell you, they sure are), they are also SO easy to make. This is the kind of recipe you can make on a moment’s notice with things you can keep in your pantry at all times.

    Plus, if you’re a fan of red velvet, you’ll also love this red velvet cupcakes recipe, these red velvet cookies made with a cake mix, and this red velvet sheet cake with ermine frosting.

    [feast_advanced_jump_to]

    Ingredients

    This easy recipe requires simple ingredients that you can keep in your pantry so you’ll be ready to whip up a batch of these red velvet donuts on a whim! Having a recipe on hand that doesn’t take a long time to make is perfect for last-minute guests.

    You’ll need:

    • 1 box red velvet cake mix, dry
    • 2 cups mashed ripe bananas
    • 1 – 16 oz container cream cheese frosting
    • Red sugar sprinkles (or sprinkles of your choice!)
    • Cooking spray
    • Ziploc bag or pastry bag
    Ingredients required for red velvet donuts.
    Ingredients

    Step-by-Step Instructions for Red Velvet Cake Donuts

    1. Preheat your oven to 425 degrees F and spray your donut mold(s) with nonstick spray.
    2. In a large bowl, mash the ripe bananas with a fork or potato masher.
    Mashed bananas in a bowl.
    Mash bananas
    1. Stir in the dry red velvet cake mix until just combined.
    Mashed bananas with red velvet cake mix on top of them in a bowl.
    Add cake mix.
    Red velvet donut batter in a bowl.
    Stir to combine.
    1. Pour the mixture into a large plastic bag or piping bag. Cut the tip off of one corner of the bag and pipe batter into donut cavities until they are about ⅔ full.
    Donut batter piped into donut pan.
    Fill donut pan.
    1. Bake in the preheated oven for 7-8 minutes, or until the donuts are cooked through and a toothpick inserted in the donut comes out clean.
    Baked donuts in a donut pan.
    Bake 7-8 mins.
    1. Allow the donuts to cool in the pan for 5-10 minutes before transferring them to a wire cooling rack.
    2. Add the frosting to a microwave safe bowl and microwave cream cheese frosting for 10-20 seconds for a runny consistency (this makes dipping easier).
    3. Dunk each cooled donut upside down into the frosting and return to the cooling rack right-side up. Follow immediately with sprinkles on top of the donuts before the frosting sets. 
    A red velvet donut being dipped in a bowl of cream cheese icing with a bowl of red sprinkles beside it.
    Dunk donuts in melted frosting, add sprinkles
    1. Allow to fully cool before serving, enjoy!
    Iced red velvet donuts on a wire rack.
    Let cool, serve & enjoy!

    Substitutions

    This recipe doesn’t call for very many ingredients, so there aren’t very many substitutions. That being said…

    • Bananas – 2 cups of applesauce can be used to replace the bananas.

    Variations

    Although there aren’t many substitutions, there are lots of ways you can create variety with this recipe.

    • Cake Mix – this recipe is for red velvet donuts, but if you switched out the cake mix you could make something different entirely!
    • Sprinkles – swap out the sprinkles to make these festive for the specific occasion you are making them for. Do red and green for Christmas, pink and hearts for valentine’s day, blue and red for the Fourth of July. You get the idea!
    • Other Toppings – you can get as creative as you like with the toppings on a donut. Crunch up some ripple chips and drizzle it with chocolate sauce. Add some crispy bacon bits and drizzle it with maple syrup. The sky’s the limit.
    • Frosting – personally I’m a big fan of the delicious cream cheese glaze in this recipe, but if you don’t like cream cheese frosting you can try your favorite frosting in its place!

    Equipment

    To make these red velvet donuts, you will need a donut pan. This donut pan is similar but any donut pan will do. If your pans only hold 6 donuts, you’ll need to have two of them or bake two separate batches.

    Storage

    Store in an airtight container for up to 1-2 day at room temperature, or 5-7 days in the refrigerator.

    You can also freeze these donuts unfrosted in a freezer safe, airtight container for up to a month.

    Iced red velvet donuts on a wire rack.
    Sweet treat…mmm!

    Expert tips and FAQs

    What is the difference between baked and fried donuts?

    The difference is mostly in the baking method. A baked donut will be cooked in the oven, where as a fried donut is usually deep fried in oil.

    Most of the time, a baked donut will be more of a cake donut as well and a fried donut will be made with yeast dough.

    What can I use instead of eggs in donuts?

    Your in luck, because this donut recipe doesn’t call for any eggs at all! If you are using a different recipe and it calls for eggs, you could try replacing it with a cornstarch egg, or look for a vegan egg alternative in your local grocery store.

    Is a donut a baked good?

    You betcha! Donuts would be classified as a “baked good”, and these donuts, in particular, are both baked and goooooood.

    Related Recipes

    If you’re looking for more red velvet recipes, check out our red velvet cake mix cookies and our red velvet cupcakes with chocolate chip frosting (trust us, that one’s a winner)!

    Or you can browse the latest dessert recipes on the blog…

    • A slice of pumpkin cheesecake cake, on a round plate.
      Pumpkin Cheesecake Cake
    • Pumpkin Dump Cake serving on round plate.
      Pumpkin Dump Cake
    • A serving of hummingbird cake on a vintage, round dessert plate.
      Hummingbird Sheet Cake
    • Spoonful of homemade whipped cream with a bowl of strawberries.
      Homemade Whipped Cream (Just 3 Ingredients, Ready in 5 Minutes)

    Recipe

    Three red velvet donuts stacked on top of each other.
    Print Pin
    5 from 1 vote

    Red Velvet Donuts

    Red Velvet Donuts: These mouth-watering red velvet donuts are so easy to make you'll hardly believe it. All you'll need is red velvet cake mix, ripe bananas, and some cream cheese frosting! 
    Course Breakfast, Snack
    Cuisine American
    Prep Time 10 minutes minutes
    Cook Time 8 minutes minutes
    Cooling Time 10 minutes minutes
    Total Time 28 minutes minutes
    Servings 12 donuts
    Calories 177kcal
    Author Jessica Burgess

    Equipment

    • 2 donut pans like this (or one donut pan if it holds 12)
    • ziploc bag or pastry bag

    Ingredients

    • cooking spray
    • 1 box red velvet cake mix dry
    • 2 cups ripe bananas mashed
    • 1 – 16 ounce cream cheese frosting
    • red sugar sprinkles or sprinkles of your choice

    Instructions

    • Preheat your oven to 425 degrees F and grease your donut baking pan(s).
    • In a large mixing bowl, mash the ripe bananas with a fork or potato masher.
    • Stir in the dry red velvet cake mix until just combined.
    • Pour the mixture into a large ziploc bag. Cut the tip off of one corner of the bag and pipe the batter into each donut cavity about ⅔ full.
    • Bake in the preheated oven for 7-8 minutes, or until the donuts are cooked through and a toothpick inserted in the donut comes out clean.
    • Allow the donuts to cool in the pan for 5-10 minutes before transferring them to a wire cooling rack.
    • Add the frosting to a microwave safe bowl and warm in the microwave for 10-20 seconds for a runny consistency (this makes dipping easier).
    • Dunk each donut upside down into the frosting and return to the cooling rack right-side up. Follow immediately with sprinkles on top of the donuts before the frosting sets. 
    • Allow to fully cool before serving, enjoy!

    Notes

    STORAGE: Store in an airtight container for up to 1-2 day at room temperature, or 5-7 days in the refrigerator. You can also freeze these donuts unfrosted in a freezer safe, airtight container for up to a month. 
    SUBSTITUTIONS: 2 cups of applesauce can be substituted for the bananas.

    Nutrition

    Serving: 1donut | Calories: 177kcal | Carbohydrates: 32g | Protein: 2g | Fat: 6g | Saturated Fat: 1g | Polyunsaturated Fat: 2g | Monounsaturated Fat: 2g | Sodium: 297mg | Potassium: 208mg | Fiber: 2g | Sugar: 17g | Vitamin A: 17IU | Vitamin C: 2mg | Calcium: 55mg | Iron: 2mg

    Soft Pretzel Recipe

    April 20, 2022

    Soft Pretzels stacked on a plate.

    Soft Pretzel Recipe: Warm, soft, salty and delicious – this homemade soft pretzel recipe is every bit as good as the ones you get from the store and it’s easier to make than you think!

    Imagine dipping a warm pretzel into this delicious golden pretzel cheese dip or gooey, cheesy smoked queso dip? Now THAT’S a party appetizer.

    Pretzel cheese dip surrounded by soft pretzels on a wood tray.
    Soft Baked Pretzels

    Why You’ll Love This Recipe

    Pretzels are so fun to make, and the best part is that they don’t require any fancy ingredients at all! That means anytime you have a hankering for a pretzel, you can just whip some up.

    It honestly kind of amazes me how a simple dough can turn into a pretzel with amazing, chewy texture just by adding a secret, pretzel-making step (don’t worry, I’ll tell you what it is)!

    I know that yeast bread products can be a bit intimidating to some, but I promise it’s not that tough. I’ll walk you through this easy soft pretzel recipe step-by-step, and by the end of this post you’ll be ready to run to the kitchen and get started on your own homemade soft pretzels!

    [feast_advanced_jump_to]

    What You’ll Need:

    Nothing fancy here, just a few things that most of us have in the pantry already. And if you don’t? You can easily find these at your local grocery store.

    • 1 ½ cups lukewarm water
    • 1 package (2 ¼ teaspoons) active dry yeast
    • 1 tablespoon brown sugar
    • 1 teaspoon kosher salt
    • 4 cups all-purpose flour
    • ½ cup baking soda
    • pretzel salt or coarse sea salt
    Ingredients for soft pretzels.

    Instructions

    1. Mix the yeast and lukewarm 1 ½ cups of water in a small bowl until the yeast is dissolved. Set aside for 5 minutes, until foamy.
    Yeast and warm water in a small bowl.
    Mix yeast & water in small bowl.
    1. Mix the kosher salt, brown sugar, and flour together in the bowl of a stand mixer or a large bowl. Add the water and yeast mixture.
    2. If you are using a stand mixer, fit it with a dough hook attachment and mix on low speed until the dough has formed a smooth ball. If you are not using a stand mixer, use a rubber spatula to combine the ingredients into a shaggy ball. Then, turn the dough out onto a lightly floured surface and knead it until it forms a smooth ball, about 8 minutes.
    Dry ingredients for soft pretzels in a measuring cup.
    Combine dry ingredients, add yeast mixture.
    Ball of pretzel dough.
    Mix until smooth ball forms.
    1. Place the smooth ball of dough in an oiled large bowl and cover with a damp kitchen towel. Let the dough rise in a warm place until it has doubled, about 1 hour.
    Dough in a glass bowl.
    Put dough in bowl & cover.
    Dough after proofing and doubling in size.
    Let rise 1 hour.
    1. Line two baking sheets with parchment paper and set them aside. Punch down the ball of dough and turn it out onto a lightly floured work surface. Divide the dough into 8 equal pieces.
    Divide dough into 8 pieces.
    Divide dough into 8 pieces.

    Shaping the Pretzel Dough

    1. Form each piece of dough into a ball and begin rolling it out into a long rope, about 1.5 feet long and 2 inches in diameter. To do this, start in the middle of the ball and roll it away from you, slowly moving your hands to the edges of the rope. When you reach the end of the rope, move back to the middle and repeat the process again so the rope has an even thickness.
    One ball of pretzel dough rolled out into a long rope-like line.
    Roll dough into a rope.
    1. After you form a rope, bend it into a "U" shape.
    Pretzel dough formed into a U shape.
    Make a U shape.
    1. Cross the right side over the left side to create a small circle at the top and two tails coming out the bottom.
    Pretzel dough with tails crossed over each other.
    Cross right side over left.
    1. Turn over the dough at the crossover point to create a twist. You will still have a small circle and two tails.
    Pretzel dough twisted once.
    Create a twist.
    1. Fold the two tails / ends of the rope over the circle with the twist lying in the middle of the circle to create the classic pretzel shape. Press down lightly where the tails meet the circle to keep them adhered. Place the pretzels on the prepared baking sheet and cover with a damp kitchen towel so they can rest and rise again.
    Finished raw pretzel placed on baking sheet.
    Set on baking sheet.
    Raw pretzel dough after rising the second time.
    Cover & let rest/rise.

    Baking the Soft Pretzels

    1. While the pretzels are resting, preheat the oven to 450F. Bring 10 cups water and the baking soda to a boil in a large pot. Make sure all of the baking soda is dissolved.
    2. Dip 1 to 2 pretzels at a time in the boiling water for 20 to 30 seconds (psst, this is that secret step I told you about). If they are left for longer, they will develop a metallic baking soda taste. Use a slotted spoon to remove them from the water and hold them above the pot for a couple of seconds to allow excess water to drip off.
    3. Place them back on the baking sheet and sprinkle with the desired amount of salt. Make sure to sprinkle the pretzel salt on while the pretzels are still wet so the salt will stick.
    4. Bake the pretzels for 15-18 minutes or until they are a little darker than golden brown. You can serve them warm or let them cool completely on a wire rack. They can be stored in an airtight container for 2 days at room temperature, but are best served fresh.
    Finished, baked pretzels stacked on top of each other.
    Yum!

    Substitutions

    • Salt – if you don’t have pretzel salt or coarse sea salt, you can lightly dust the pretzels with table salt after boiling. I wouldn’t recommend this, though. Even though it will give you a bit of that salty flavour, the larger crystals used on pretzels are less salty (I know, salt is kind of crazy when you learn more about it) and the finished product will taste different.

    Variations

    There are basically two ways to get creative with a soft pretzel recipe – with things you mix into the dough, or with things you sprinkle on top. Here are some of my suggestions (some are sweet, some are savoury)…

    Mix-Ins

    • shredded cheddar cheese
    • cinnamon and raisins
    • chopped bacon
    • Italian spices
    • chopped strawberries
    • chopped red peppers

    Toppings

    • Crunchy onion and jalapeno toppers
    • Everything bagel spice
    • cinnamon sugar
    • sesame seeds
    • parmesan cheese

    These lists could go on forever, but you get the idea! You can get creative and make your pretzel exactly the way you want it.

    Storage

    Your homemade pretzels can be stored (after cooling) in an airtight container for 2 days at room temperature, but they are best served fresh.

    The salt on top can draw moisture out of the pretzels and make the crust soggy, so skip adding the salt if you plan to serve them a long time after baking. If you plan to make these ahead of time, you can brush the pretzels with melted butter to get the salt to stick and sprinkle on the salt as desired right before serving. 

    Expert Tips and FAQs

    Why do you boil soft pretzels before baking? Do you HAVE to boil pretzels before baking?

    The boiling step is actually super important when making pretzels. When you put the pretzel in the boiling water, it instantly puffs up and the exterior begins to cook a bit. This gives it a head start on forming that classic chewy, crisp pretzel crust.

    The baking soda lowers the pH of the outside of the pretzels making them more alkaline. Alkaline things brown more easily, so this baking soda bath gives pretzels their characteristic crust and flavor.

    If you skip the boiling step, you’ll get more of a pretzel shaped bun and less of a chewy golden pretzel. We would NOT recommend skipping it.

    How do you get salt to stick to pretzels?

    The key to getting the salt to stick to your pretzels is to put it on while the pretzels are still wet from their boil time. If you find that they still aren’t sticking, you could also brush your pretzels with an egg wash and then stick the salt to them. The egg wash will help hold the yummy salt bits on the pretzel as it bakes.

    What to serve with soft pretzels?

    The answer to this really depends whether you were trying to create a sweet or savoury soft pretzel experience.

    If you wanted a sweet soft pretzel, you could serve it with Nutella, melted chocolate, a sweet dip (like our pumpkin fluff cool whip dip), or even charcuterie style with some fruit and spreads!

    If you were trying to create more of a savory pretzel experience, our favorite would be to serve it with our pretzel cheese dip (see the variations in that post to find out how you can turn it into a beer cheese dip or a mustard cheese dip)! You could also serve it with our smoked queso dip!

    The dough is shrinking when I try to roll it out. What should I do?

    This is a result of the gluten that formed during kneading. If the dough is snapping back into a shorter length, leave it to rest for a couple of minutes and then continue. This will give the gluten time to relax and it won’t shrink as much.

    Related Recipes

    Looking for more yummy, bread type goodness? Why not try our quick and easy focaccia bread or our easy Italian white bread?

    You can also see other bread recipes that you’ll love:

    • Sliced apple bread with a maple frosting.
      Apple Bread Recipe with Maple Glaze (So Moist and Easy)
    • Sliced strawberry lemonade bread, with a glaze dripping over the top.
      Strawberry Lemonade Bread
    • Cherry bread with cherry icing on wooden cutting board.
      Cherry Bread with Cherry Glaze
    • Strawberry Bread loaf with Strawberry Icing, dripping down the side.
      Strawberry Bread with Strawberry Icing

    Recipe

    Soft Pretzels stacked on a plate.
    Print Pin
    5 from 7 votes

    Soft Pretzel Recipe

    Soft Pretzel Recipe: Warm, soft, salty and delicious – this homemade soft pretzel recipe is every bit as good as the ones you get from the store and it's easier to make than you think!
    Course Appetizer, Snack
    Cuisine American
    Prep Time 30 minutes minutes
    Cook Time 20 minutes minutes
    Rest Time 1 hour hour
    Total Time 1 hour hour 50 minutes minutes
    Servings 8 pretzels
    Calories 228kcal
    Author Jessica Burgess

    Ingredients

    • 1 ½ cups lukewarm water
    • 1 package (2 ¼ teaspoons) active dry yeast
    • 1 tablespoon brown sugar
    • 1 teaspoon kosher salt
    • 4 cups all-purpose flour
    • ½ cup baking soda
    • pretzel salt like this one

    Instructions

    Making the Dough

    • Mix the yeast and lukewarm water in a small bowl until the yeast is dissolved. Set aside for 5 minutes, until foamy.
    • Mix the kosher salt, brown sugar, and flour together in the bowl of a stand mixer or a large bowl. Add the water and yeast mixture. 
    • If you are using a stand mixer, fit it with a dough hook and mix on low speed until the dough has formed a smooth ball. If you are not using a stand mixer, use a rubber spatula to combine the ingredients into a shaggy ball. Then, turn the dough out onto a lightly floured surface and knead it until it forms a smooth ball, about 8 minutes.
    • Place the smooth ball of dough in an oiled large bowl and cover with a damp kitchen towel. Let the dough rise in a warm place until it has doubled, about 1 hour.
    • Line two baking sheets with parchment paper and set them aside. Punch down the ball of dough and turn it out onto a lightly floured work surface. Divide the dough into 8 even balls.

    Shaping the Dough

    • Form each portion into a ball and begin rolling it out into a long rope, about 1.5 feet long and 2 inches in diameter. To do this, start in the middle of the ball and roll it away from you, slowly moving your hands to the edges of the rope. When you reach the end of the rope, move back to the middle and repeat the process again so the rope has an even thickness.
    • After you form a rope, bend it into a "U" shape. 
    • Cross the right side over the left side to create a small circle at the top and two tails coming out the bottom. 
    • Turn over the dough at the crossover point to create a twist. You will still have a small circle and two tails. 
    • Fold the two tails over the circle with the twist lying in the middle of the circle to create the classic pretzel shape. Press down lightly where the tails meet the circle to keep them adhered. Place the pretzels on the prepared baking sheet and cover with a damp kitchen towel so they can rest and rise again.

    Baking the Pretzels

    • While the pretzels are resting, preheat the oven to 450F. Bring 10 cups water and the baking soda to a boil in a large pot. Make sure all of the baking soda is dissolved. 
    • Dip 1 to 2 pretzels at a time in the boiling water for 20 to 30 seconds. If they are left for longer, they will develop a metallic baking soda taste. Use a slotted spoon to remove them from the water and hold them above the pot for a couple of seconds to allow excess water to drip off. 
    • Place them back on the baking sheet and sprinkle with the desired amount of salt. Make sure to sprinkle the salt on while the pretzels are still wet so the salt will stick.
    • Bake the pretzels for 15-18 minutes or until they are a little darker than golden brown. You can serve them warm or let them cool completely on a wire rack. They can be stored in an airtight container for 2 days at room temperature, but are best served fresh.

    Notes

    STORAGE: Your baked pretzels can be stored (after cooling) in an airtight container for 2 days at room temperature, but they are best served fresh.
    The salt on top can draw moisture out of the pretzels and make the crust soggy, so skip adding the salt if you plan to serve them a long time after baking. If you plan to make these ahead of time, you can brush the pretzels with melted butter to get the salt to stick and sprinkle on the salt as desired right before serving. 

    Nutrition

    Serving: 1pretzel | Calories: 228kcal | Carbohydrates: 48g | Protein: 6g | Fat: 1g | Saturated Fat: 1g | Polyunsaturated Fat: 1g | Monounsaturated Fat: 1g | Sodium: 2344mg | Potassium: 67mg | Fiber: 2g | Sugar: 1g | Calcium: 10mg | Iron: 3mg

    Breakfast Waffle Charcuterie Board

    April 15, 2022

    A breakfast waffle charcuterie board.

    Breakfast Waffle Charcuterie Board: This beautiful breakfast charcuterie board is perfect for special occasions, a baby shower, or really any day. It’s quick and easy to put together, but it looks so impressive!

    Quick Overview: Make your waffles, such as these blueberry Belgian waffles, or even these chocolate waffles, and prepare your fresh fruit. Arrange waffles on the board, add small bowls of yummy toppings, fill in the spaces with fruit, and voila! Serve this epic breakfast board with a side of air fried bacon or sausage links for a breakfast people will rave about!

    Close up of the breakfast waffle charcuterie board.

    Why You’ll Love This Food Board Idea

    Charcuterie boards are, in my opinion, the most fun way to display food! Charcuterie boards are so beautiful, and they also offer people a lot of options to customize their meals (Especially at Christmas time with this Christmas Charcuterie!)

    But can you have a charcuterie board for breakfast? OF COURSE!

    This breakfast platter is a delicious example. You get to fill the board with your favorite fruits, waffle toppings, syrups/spreads, and some delicious waffles (or other carbs, see the variations later on in this post)! If you’re a breakfast fan like me, then your mouth is probably watering by now.

    This easy brunch charcuterie board is perfect for any time, but I think it would be especially fun at Easter brunch, Valentines Day brunch, or Mother’s Day!

    [feast_advanced_jump_to]

    Ingredients

    When it comes to charcuterie boards, you can use whatever ingredients your heart desires! That being said, we have a list of ingredients that we think will create the best waffle-eating experience. Here’s what you’ll need…

    • Blueberry Waffles (or for fun, these colorful waffles!)
    • Blueberries 
    • Bananas 
    • Kiwis
    • Grapes 
    • Strawberries
    • Blueberry syrup 
    • Granola
    • Nutella 
    • Whipped Cream
    • Yogurt
    Ingredients for the breakfast waffle charcuterie board.

    What does “charcuterie” mean?

    Charcuterie is a French term that, when literally translated, means “a store selling cold cooked meats”. These days, charcuterie typically refers to a platter that has a mix of cold meats, cheeses, and sweet and savory items.

    What is normally on a charcuterie board?

    The general formula for a charcuterie board is:

    • Good cheese(s)
    • Cured meat(s)
    • Pickled items
    • Condiments and spreads (sweet and savory)
    • Fresh fruit 
    • Often nuts or other salty items
    • And then crackers or other carbs fill in the remaining spaces

    This charcuterie breakfast board is a bit of a twist on the traditional charcuterie boards, but we think it’s a great way to serve up breakfast favorites with flair! (You could even put these breakfast egg rolls on the board for fun!) You’ll even find a lot of other charcuterie board ideas to get tons of ideas from.

    How to Create a Waffle Charcuterie Board

    1. Prepare your blueberry waffles
    2. Wash and prepare all of your fruits. 
    3. Prepare all of your toppings by placing them in bowls, then set them aside. 
    4. Once your waffles are ready, break them up into quarters and place them in a decorative pattern on a 12 x 18 (or similar) charcuterie board or wooden cutting board. Feel free to get creative! 

    Don’t have a charcuterie board or wooden cutting board? There are other suggestions below for what you can use!

    Waffles on a cutting board.
    Arrange waffles.
    1. Next, add in all of your prepared toppings sporadically around the waffles. 
    Waffles and toppings on a cutting board.
    Add toppings.
    1. Lastly, add all of the previously prepared fruits carefully to fill the remaining empty spaces and complete your breakfast charcuterie board.
    Breakfast waffle charcuterie board.
    Add fruit.
    1. Pour yourself a cup of coffee, serve your breakfast or brunch board, and enjoy! 
    Waffles with yummy toppings and fruit on a plate.

    What can I use as a charcuterie board?

    If you don’t have a charcuterie board or wooden cutting board, here are a few ideas of what you can use in its place…

    • Large serving platter – if you have a nice big platter of any kind, you can turn it into a charcuterie board!
    • Wood board – If you have any large, food safe wood board it would work beautifully for this charcuterie board.
    • Cookie sheet – use a baking sheet or tray to serve your breakfast waffle charcuterie. You can line your sheet pans with wax paper if you like.
    • Serve it on the table – you heard us right, you can lay down some wax paper on the table and create your charcuterie board right there!

    Variations

    The ingredients we listed in this recipe are the ones we think make for a great waffle charcuterie board, but you can absolutely play around with other ones!

    Carbs

    • Instead of waffles, make mini pancakes! We would suggest trying our amazing fluffy pancakes from scratch or our quick and easy blueberry pancakes.
    • Instead of waffles or pancakes, you could also make this a French toast charcuterie board (or heck, why not mix all three)! Our brioche french toast would be amazing for a charcuterie board.
    • Replace the waffles on the board with mini bagels! If you do this, omit the syrup and add a spread instead.
    • Try throwing some mini cinnamon rolls on there for good measure (you won’t regret it).
    • You could use English muffins as the main carb. If you do this, omit the syrup and add a spread instead (like jam or marmalade).

    Savory Options

    • Add a bowl of crumbled, crispy bacon to the board to sprinkle over your waffles!
    • Cream cheese is a delicious addition to a waffle breakfast. Just make sure it’s nice and soft so it can be spread on the waffle without ripping it.
    • Thinly shaved salmon would be delicious (especially on top of the cream cheese we mentioned)!
    • Add some sliced cheese (brie, cheddar, whatever your family likes) to the board.

    Sweet Treats

    • Instead of Nutella, serve peanut butter as a waffle/pancake/bagel topping.
    • Instead of blueberry syrup, try maple syrup.
    • Fresh berries (blackberries, strawberries, raspberries).
    Waffle board close up image.
    Yum!

    Storage

    Store your waffles, toppings, and fruit in separate, airtight containers in the fridge for 3 days.

    Expert Tips and FAQs

    How do I keep my waffles warm until I’m ready to serve without them getting soggy?

    This can be a challenge, for sure! The best way to keep them warm is to put a wire rack on top of a baking tray and store that in a warm oven (170-200°F). Once a waffle comes off the iron, pop it straight in there until you are ready to load up your charcuterie board!

    What drink goes well with a breakfast waffle charcuterie board?

    You can’t go wrong with a classic glass of OJ, but you could also try making something super fun and festive like this orange sherbert punch. The kids will LOVE it.

    Related Recipes

    If you liked this breakfast waffle charcuterie board, be sure to check out some of our other fun hosting ideas like how to make a fruit platter, our yogurt and pudding bar and our coffee bar set-up (which would be so fun to do alongside this breakfast waffle charcuterie board)!

    Or you can check out the latest breakfast recipes on the blog…

    • Bagel French Toast casserole in the crock pot.
      Crock Pot Bagel French Toast Casserole
    • Crock Pot rice pudding in small bowl.
      Crock Pot Rice Pudding
    • White gravy recipe on top of biscuits next to bacon on a vintage plate.
      White Gravy Recipe
    • A slice of Amish applesauce cake on plate with fork.
      Amish Applesauce Cake

    Recipe

    A breakfast waffle charcuterie board.
    Print Pin
    5 from 5 votes

    Breakfast Waffle Charcuterie Board

    Breakfast Waffle Charcuterie Board: This beautiful breakfast charcuterie board is perfect for special occasions, a baby shower, or really any day. It's quick and easy to put together, but it looks so impressive!
    Course Breakfast, Snack
    Cuisine American
    Prep Time 15 minutes minutes
    Cook Time 10 minutes minutes
    Total Time 25 minutes minutes
    Servings 12 servings
    Calories 243kcal
    Author Jessica Burgess

    Ingredients

    • Blueberry Waffles
    • Blueberries
    • Bananas
    • Kiwis
    • Grapes
    • Strawberries
    • Blueberry Syrup
    • Granola
    • Nutella
    • Whipped Cream
    • Yogurt

    Instructions

    • Prepare blueberry waffles.
    • Wash and prepare all of your fruits. 
    • Prepare all of your toppings by placing them in bowls, then set them aside. 
    • Once your waffles are ready, break them up and place them in a decorative pattern on a 12 x 18 (or similar) charcuterie board. Get creative! 
    • Next, add in all of your prepared toppings sporadically around the waffles. 
    • Lastly, add all of the previously prepared fruits carefully filling the remaining empty spaces to complete your breakfast charcuterie board. 
    • Serve and enjoy! 

    Nutrition

    Serving: 1serving | Calories: 243kcal | Carbohydrates: 36g | Protein: 5g | Fat: 9g | Saturated Fat: 4g | Polyunsaturated Fat: 2g | Monounsaturated Fat: 2g | Trans Fat: 1g | Cholesterol: 16mg | Sodium: 222mg | Potassium: 260mg | Fiber: 3g | Sugar: 14g | Vitamin A: 624IU | Vitamin C: 21mg | Calcium: 136mg | Iron: 3mg

    Blueberry Waffles Recipe

    April 15, 2022

    Blueberry waffles on a plate, drenched in syrup.

    Blueberry Waffles: With a few simple ingredients like milk, eggs, flour, and fresh blueberries you can whip up homemade blueberry waffles and have them on the table in 30 mins! Perfect for family weekend breakfasts or brunch with friends!

    Make a side of air fryer bacon and some honey lime fruit salad to go along with your blueberry waffles, or even make this waffle charcuterie board, and you’ve got the makings of the best breakfast or brunch you’ve ever tasted!

    Syrup being poured on blueberry waffles that are stacked on a plate with blueberries and whipped cream on top of them.
    Blueberry Waffles

    Why You’ll Love This Recipe

    I have yet to meet someone who doesn’t love a warm, fluffy, homemade waffle. (Especially these Belgian chocolate waffles and this rainbow waffle recipe.) And with the addition of juicy blueberries, now who could say no to that? Adding blueberries is the perfect way to change up a classic waffle recipe.

    This blueberry waffles recipe uses simple, everyday ingredients to create a delicious breakfast entree that can be eaten for breakfast any day of the week or dressed up for a fancy brunch!

    This is the best waffle recipe to have on hand for the next time you are looking for a quick, delicious breakfast recipe! Check out our suggestions for some fun things you can top your blueberry waffles with, below.

    [feast_advanced_jump_to]

    Ingredients

    I think the key to a good waffle is being able to whip it up last minute for weekend breakfast, or waffle burger, and still know that it will turn out amazing. This blueberry waffles recipes uses ingredients you probably have in the house already, so it’s the perfect waffle recipe to have in your back pocket!

    You’ll need:

    • 2 cups milk, room temperature
    • 2 medium eggs, room temperature
    • 4 tablespoons unsalted butter, melted
    • 2 tablespoons maple syrup
    • 2 tablespoon lemon juice, fresh (but concentrate also works)
    • 2 teaspoons vanilla extract
    • 2½ cups all-purpose flour
    • 1 tablespoon baking powder
    • 3 tablespoons white sugar
    • 1 teaspoon salt
    • ¼ teaspoon cinnamon
    • 2 cups fresh blueberries, divided
    • cooking spray
    • blueberry syrup (optional)

    Make sure to visit the recipe card below for all of the ingredients and instructions!

    Ingredients for blueberry waffles.

    Instructions

    1. Preheat waffle maker (we used a Belgian waffle maker, but you can use whatever you have).
    2. In a medium mixing bowl, combine 2 cups of milk, 2 medium eggs, 4 tablespoons melted butter, 2 tablespoons maple syrup, 2 teaspoons of vanilla extract, 2 tablespoons of lemon juice, and blend until combined.
    Milk, eggs, butter, vanilla, maple syrup in a bowl.
    Place wet ingredients in bowl.
    Wet ingredients for blueberry waffles mixed in a bowl.
    Whisk together.
    1. In a large bowl, combine 2 ½ cups of all-purpose flour, 1 tablespoon of baking powder, 2 tablespoons granulated sugar, 1 teaspoon of kosher salt, and ¼ teaspoon ground cinnamon and ensure all dry ingredients are well combined.
    The dry ingredients for blueberry waffles in a glass bowl, ready to be mixed.
    Mix dry ingredients.
    1. Next, combine wet ingredients in the medium mixing bowl into the dry ingredients. Whisk until combined. Allow some lumps to remain in the batter.
    2. Once wet and dry ingredients are combined, using a rubber spatula gently fold in 1 cup of fresh blueberries. Allow the batter to rest for 15 minutes.
    Blueberry waffle batter in a glass bowl.
    Combine wet and dry ingredients.
    1. Spray the waffle maker with cooking spray. Add approximately ⅓ cup of batter to the waffle maker and cook waffles for approximately 5-7 minutes (or until golden brown and crisp).
    Blueberry waffle batter on a waffle maker bottom iron.
    Pour batter on hot waffle iron.
    A cooked blueberry waffle sitting on the bottom iron of a waffle maker.
    Cook 5-7 mins.
    1. Garnish with the remaining blueberries and syrup (or whatever your favorite way to enjoy waffles looks like) and enjoy!

    Still have blueberries left over? This skillet blueberry cobbler is so easy to make and will be a great dessert for later.

    A close up photo of blueberry waffles.
    Belgian waffles with blueberries.

    Substitutions

    If you need to make some changes, this is what we would suggest:

    • Milk – You can replace milk with your favorite dairy free alternative (almond milk or coconut milk would be delicious)!
    • Eggs – If you need to omit the eggs, you could use a cornstarch egg instead. Mix 2 tablespoons of cornstarch with 1 tablespoon of cold water and use this instead of an egg.
    • Butter – You can replace butter with your favorite type of oil if you like (vegetable oil, coconut oil, or olive oil would all work nicely).
    • Maple Syrup – I used real maple syrup for this recipe, but if you don’t have that on hand you could try using honey or even sugar in its place.
    • Fresh Blueberries – If you don’t have pounds of blueberries on hand, you can always use frozen blueberries instead! Add the frozen berries right into the batter, and use the frozen blueberries to make a compote for the topping.

    Variations

    Regular waffles are all well and good, but fluffy waffles with yummy bits in (or on) them are even better! Here are a few ideas for how you can change up this recipe if you want to (although it’s pretty great the way it is now).

    • Lemon Zest – Give your waffles a little extra fresh flavor, sprinkle some lemon zest into the batter!
    • Fresh Fruit – If blueberries aren’t your thing, you can replace them with your favorite fruit! Try cut up strawberries, fresh raspberries, bananas, or whatever sounds yummy to you.
    • Chocolate Chips – You can add these instead of the blueberries or in addition to them. Either way, chocolate chip waffles sound delicious to me (and the kids will love them).
    • Blueberry Almond Waffles – Replace the milk in this recipe with almond milk and replace the vanilla extract with almond extract to create a nutty twist on the original recipe!

    Equipment

    I used a Belgian waffle maker for this recipe, but if you have a different style you can absolutely use it! Just be sure not to overfill the waffle maker or your batter will leak out the edges (and make a big old mess).

    Storage

    Store leftover waffles in an airtight container in the fridge for 3 days.

    You can also freeze your waffles after allowing them to cool completely! Once they are cool, freeze them in an airtight container for up to 3 months. You’ll probably find that placing parchment paper between the waffles will keep them from sticking. To reheat, place your waffle in a microwave, an air fryer, or a toaster oven until fully reheated.

    blueberry belgian waffle with butter on top

    What toppings can you put on waffles?

    You might be wondering, “What goes good with blueberry waffles?” and to that we would say - so many things! Here is a list of some of our favorites:

    • More Blueberries - I love topping my blueberry waffles with more fresh blueberries. Can there ever really be too many blueberries? I think not.
    • Whipped Cream
    • Blueberry Syrup
    • Honey (try it, it’s yummy!)
    • Other Fresh Fruits - Mix it up a bit and try putting some fresh raspberries and fresh strawberries on top!
    • Chocolate Sauce - The kids (and chocolate lovers) will like this one. Try drizzling some chocolate sauce over your blueberry waffles!
    • Blueberry Sauce – If you like a thicker topping than syrup, you could make a blueberry sauce/compote and put it all over your blueberry waffles.
    • Ice Cream – Waffles aren’t just for breakfast! Imagine a blueberry waffle with a scoop of ice cream and some blueberry syrup on it served as a dessert - how delicious would that be? You could cut the waffle into quarters if an entire waffle feels a bit too big.
    • Maple Syrup – You can’t go wrong with a classic! Add a drizzle of maple syrup to your blueberry waffles.

    Or you can experiment and add a bunch of these toppings together!

    Blueberry waffles on a platter.

    Expert Tips and FAQs

    Do blueberry waffles have real blueberries?

    Those blueberry waffles in the freezer section of the grocery store might not have real blueberries in them, but this yummy blueberry waffle recipe is packed full of them!

    How do you make blueberry waffles without sticking to the waffle iron?

    I recommend using cooking spray to pre-spray your waffle maker to prevent this exact problem from happening. The one I find works the best is Kirkland brand spray, but there are lots of great options out there.

    Why are my waffles not crispy?

    Sometimes a soggy waffle is due to the recipe (too much moisture, not enough leavening agent) but more often than not it has to do with what you do after it’s done cooking!

    The best way to serve a waffle is straight off the waffle maker and onto a plate to be eaten right away. If you can’t do that, I recommend keeping a baking tray with a wire rack set on top of it in the oven on the warming setting. By putting your waffles on the wire rack instead of right on the baking tray, you allow the warm air to circulate and keep both sides of your waffle crispy. Make sure you don’t overlap the waffles, either, because that will cause them to get soggy as well.

    Related Recipes

    If you are looking for delicious, easy-to-make breakfast foods then you HAVE to try our easy blueberry turnovers or these buttermilk blueberry muffins! We love a good pastry around here, and this one is so easy and so delicious. It’s almost as good as our blueberry pancakes (another big winner in our house)! Or check out our super fun, waffle breakfast sandwiches!

    Or you can try one of these new breakfast recipes:

    • 3-ingredient biscuits stacked on vintage plate.
      3-Ingredient Biscuits
    • A slice of applesauce crumb cake on spatula, being held above pan.
      Applesauce Crumb Cake
    • Wooden spoon holding a serving of fried pears, in a cast iron skillet.
      Fried Pears
    • Smooth slow cooker apple butter in small bowl, sitting next to canned jars of apple butter.
      Slow Cooker Apple Butter

    Recipe

    Blueberry waffles on a plate, drenched in syrup.
    Print Pin
    5 from 4 votes

    Easy Blueberry Waffles Recipe

    Blueberry Waffles: With a few simple ingredients like milk, eggs, flour, and fresh blueberries you can whip up homemade blueberry waffles and have them on the table in 30 mins! Perfect for family weekend breakfasts or brunch with friends!
    Course Breakfast
    Cuisine American
    Prep Time 10 minutes minutes
    Cook Time 7 minutes minutes
    Rest Time 13 minutes minutes
    Total Time 30 minutes minutes
    Servings 6 7-inch waffles
    Calories 403kcal
    Author Jessica Burgess

    Ingredients

    • 2 cups milk room temperature
    • 2 medium eggs room temperature
    • 4 tablespoons unsalted butter melted
    • 2 tablespoons maple syrup
    • 2 tablespoons lemon juice fresh (but concentrate also works)
    • 2 teaspoons vanilla extract
    • 2½ cups all-purpose flour
    • 1 tablespoon baking powder
    • 3 tablespoons white sugar
    • 1 teaspoon salt
    • ¼ teaspoon cinnamon
    • 2 cups fresh blueberries divided
    • cooking spray
    • blueberry syrup optional

    Instructions

    • Preheat waffle maker (we used a Belgian waffle maker, but you can use whatever you have).
    • In a medium mixing bowl, combine 2 cups of milk, 2 medium eggs, 4 tablespoons melted unsalted butter, 2 tablespoons maple syrup, 2 teaspoons of vanilla extract, 2 tablespoons of lemon juice, and blend until combined.
    • In a large mixing bowl, combine 2 ½ cups of all-purpose flour, 1 tablespoon of baking powder, 2 tablespoons granulated sugar, 1 teaspoon of kosher salt, and ¼ teaspoon ground cinnamon and ensure all dry ingredients are well combined.
    • Next, combine wet ingredients in the medium mixing bowl into the dry ingredients. Whisk until combined. Allow some lumps to remain in the batter.
    • Once wet and dry ingredients are combined, using a rubber spatula gently fold in 1 cup of fresh blueberries. Allow the batter to rest for 13 minutes.
    • Spray waffle maker with cooking spray. Cook waffles for approximately 5-7 minutes or until golden brown and crisp.
    • Garnish with the remaining blueberries and syrup, enjoy!

    Notes

    STORAGE: Store leftover blueberry waffles in an airtight container in the fridge for 3 days.
    You can also freeze your waffles after allowing them to cool completely! Once they are cool, freeze them in an airtight container for up to 3 months. You’ll probably find that placing parchment paper between the waffles will keep them from sticking. To reheat, place your waffle in a microwave, an air fryer, or a toaster oven until fully reheated.

    Nutrition

    Serving: 1, 7-inch waffle | Calories: 403kcal | Carbohydrates: 63g | Protein: 10g | Fat: 12g | Saturated Fat: 7g | Polyunsaturated Fat: 1g | Monounsaturated Fat: 3g | Trans Fat: 1g | Cholesterol: 84mg | Sodium: 445mg | Potassium: 463mg | Fiber: 3g | Sugar: 19g | Vitamin A: 471IU | Vitamin C: 7mg | Calcium: 217mg | Iron: 3mg

    Avocado Tomato Mozzarella Salad

    April 15, 2022

    avocado tomato mozzarella salad in white bowl

    Avocado Tomato Mozzarella Salad: Or also called, a Caprese salad, is an easy salad recipe that can be made in minutes, and is the ultimate side dish!

    avocado tomato mozzarella salad in white bowl
    Avocado Tomato Mozzarella Salad

    Why you’ll love this recipe

    If you love quick and easy side dishes, then this simple salad recipe to hang on to! It can be put together in just a few minutes and can even be made ahead of time!

    Note: I’ve found if you refrigerate tomatoes, they tend to lose the flavor so I actually prefer to make this right before serving to experience the bright flavors, but it’s not mandatory, and can be made in advance.

    Ingredients

    It’s so wild to believe that just a few ingredients can pack a punch of flavor! See the ingredients you need to make this, below, with extra ideas and substitutions provided below, if needed, as well!

    ingredients for caprese salad
    Ingredients
    • fresh mozzarella cheese pearls
    • red ripe tomato
    • fresh basil leaves
    • olive oil (extra virgin is our favorite)
    • salt

    Instructions

    1. Begin by breaking up the mozzarella pearls and placing them in a medium-size bowl.
    mozzarella pearls in glass bowl
    Break up mozzarella in bowl
    1. Next, slice up the avocado and the tomato in to small, bite-size pieces.

    Tip: When slicing the tomato, we’ve found it’s best to remove the inside (gooey part of the tomato) as this makes the salad a different texture and seedy).

    Diced avocado
    Slice avocado
    Sliced tomatoes on cutting board
    Slice tomatoes
    1. Pour diced avocado and diced tomato on top of mozzarella pearls.
    avocado added to mozzarella in bowl
    Add avocado
    tomato added to bowl
    Add tomato
    1. Chop fresh basil and add to bowl.
    2. Drizzle olive oil on and sprinkle kosher salt on top.
    fresh basil added to bowl
    Add fresh basil
    salt added to bowl
    Add salt
    1. Stir to combine.
    ingredients for salad stirred together
    Stir to combine

    Serve!
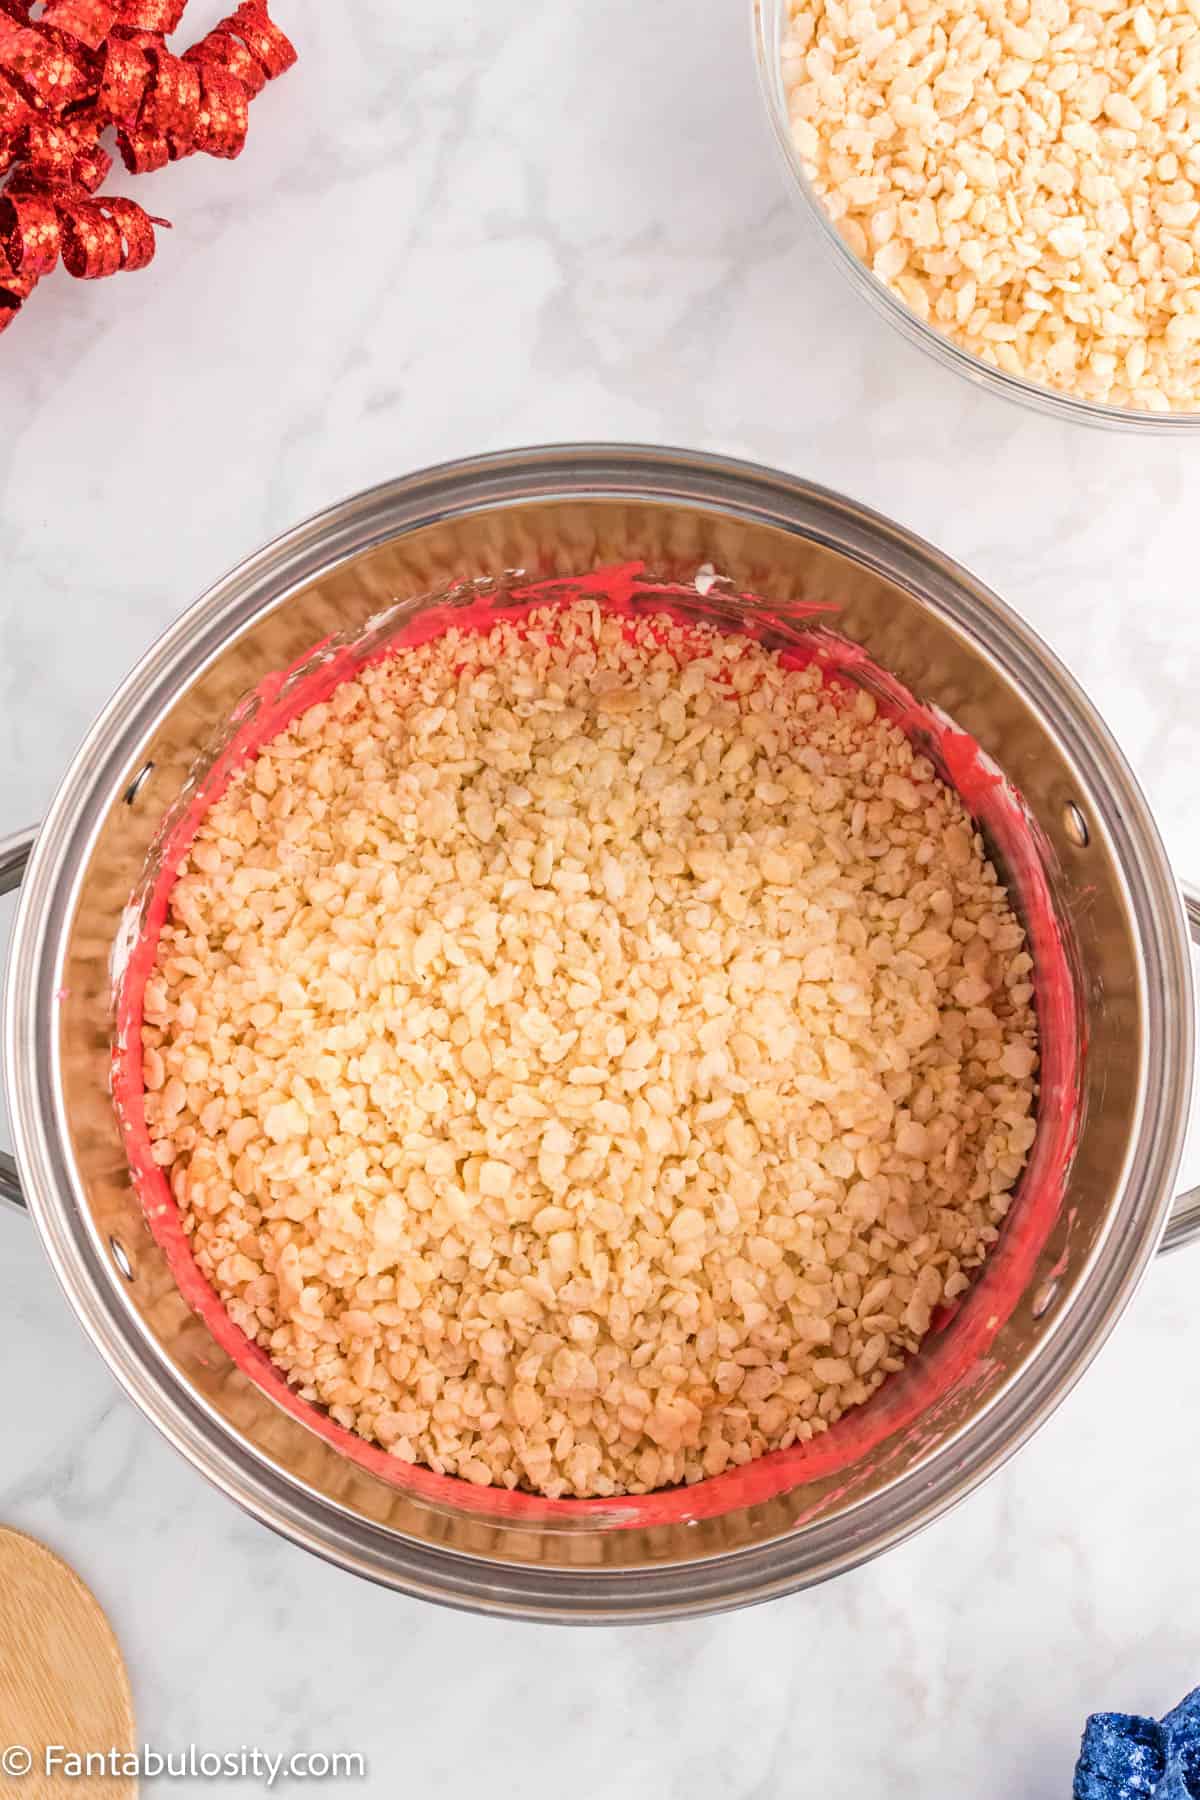
    avocado tomato mozzarella salad in white bowl
    Ready to serve

    Substitutions

    Cheese: If you don’t have mozzarella pearls on hand, you can absolutely use a ball of mozzarella that you slice in to small pieces. That creamy mozzarella is to die for and much better than shredded, powdery mozzarella.

    You can also substitute feta or goat cheese (or your favorite cheese) if you like! It’s a versatile recipe, that tends to incorporate different cheeses well.

    Tomatoes: You can use roma or vine tomatoes for this recipe, or even cherry tomatoes if you prefer. (Note: I’d slice the cherry tomatoes in half for easier bites.)

    Basil: Using fresh ingredients like basil, is our absolute FAVORITE but I know keeping that on hand can be more difficult than keeping a jar of dried basil in the pantry. Feel free to use dried if you like. We’ve used that many times and it’s still delicious!

    Variations

    If you love adding balsamic vinegar (or balsamic glaze, or balsamic dressing) to your avocado Caprese salad recipe, you can definitely add that to this one. I’d add a teaspoon to start, and then add more after tasting if you prefer a stronger flavor.

    Additional Items – If you’d like to add other items or spices to this, here are some ideas you may like to try:

    • Garlic Powder
    • Chicken (to create a main course)
    • Crushed Red Pepper Flakes
    • Dashes of Hot Sauce
    • Cumin
    • Red Onions
    • Black pepper

    How to store

    As mentioned earlier, when a tomato is refrigerated, it can tend to become more firm and lose flavor. However, if you happen to have some of this leftover caprese avocado salad, it must be stored in the refrigerator.

    Store in an airtight container, or by placing plastic wrap over the bowl it was made in, in the refrigerator for up to 2 days.

    Love avocado and tomato together?

    We absolutely love using any extra tomatoes and avocados that we may have on hand, to make tomato avocado toast the next morning! It’s so easy and refreshing for a quick and healthy breakfast idea!

    Avocado Tip

    It’s best to use ripe avocados! Soft to the touch, on the skin but not too soft… as those are too ripe. If you cut in to the avocado and there’s brown everywhere, you’ll want to discard it. A beautiful green is the desired ripeness.

    I know how hard it is, to keep avocados on hand before they rot.

    Note, I’ve made this recipe a TON, only using the cheese and tomatoes, without the addition of avocado and it’s STILL delicious!

    But here are tips on how to help keep avocados from turning brown!

    Looking for other healthy side dishes?

    I’ve compiled all of our healthy side dish recipes in case you are looking to add more to your meal plan!

    Recipe

    avocado tomato mozzarella salad in white bowl
    Print Pin
    5 from 2 votes

    Avocado Tomato Mozzarella Salad

    Avocado Tomato Mozzarella Salad: Or also called, a Caprese salad, is an easy salad recipe that can be made in minutes, and is the ultimate side dish!
    Course Side Dish
    Cuisine American
    Diet Vegetarian
    Prep Time 10 minutes minutes
    Total Time 10 minutes minutes
    Servings 4 servings
    Calories 98kcal
    Author Jessica Burgess

    Ingredients

    • 1 tomato roma or vine
    • 1 avocado
    • 1 package mozzarella pearls or mozzarella ball
    • pinch Kosher salt
    • ¼ teaspoon fresh basil or dried
    • ½ Tablespoon olive oil

    Instructions

    • Break mozzarella pearls apart and place in medium sized mixing bowl.
    • Chop tomatoes and avocado in to small, bite-size pieces and add to bowl.
    • Chop fresh basil in to small pieces, and sprinkle on to veggies and cheese.
    • Drizzle olive oil on to mixture and sprinkle on the salt.
    • Stir to combine and then serve!
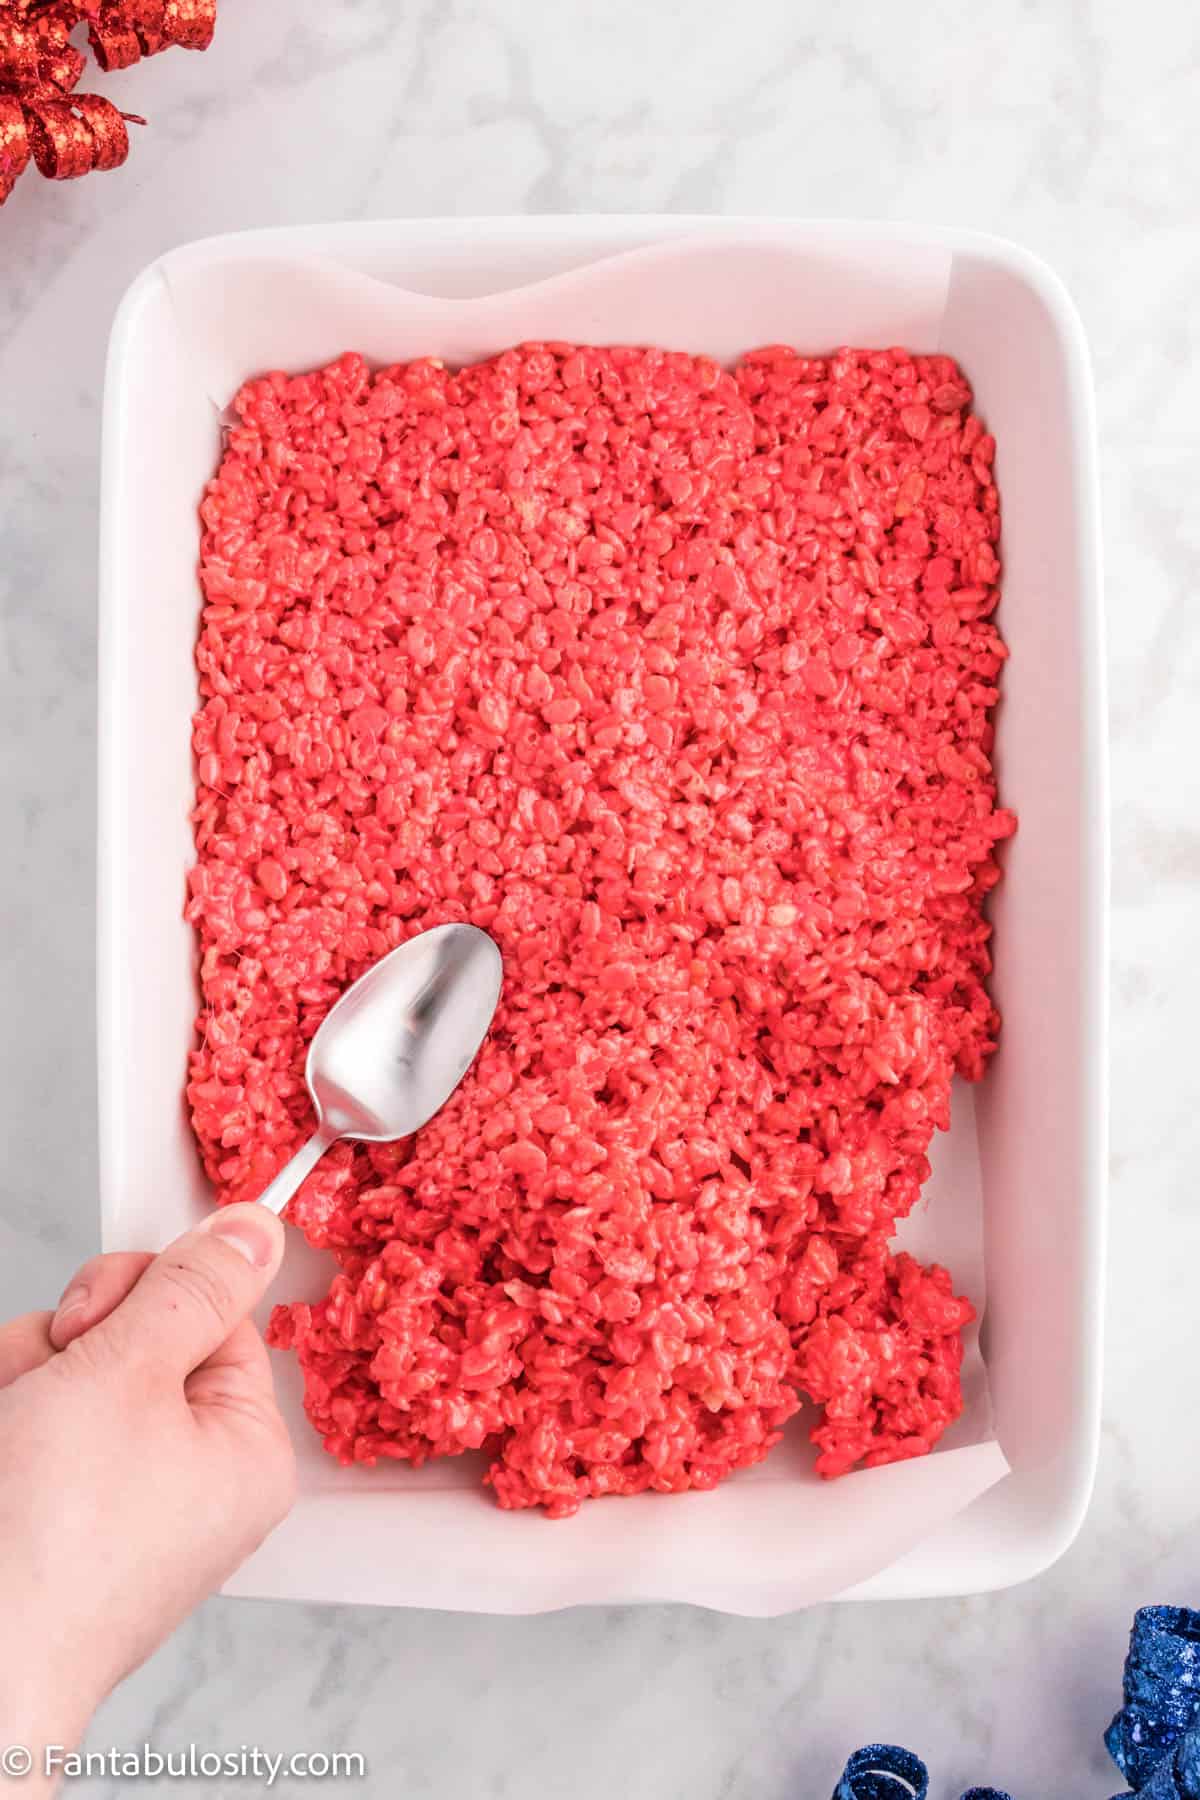
    Video

    Notes

    Tip: Remove seeds and insides of tomato and discard. Adding this to the salad is not ideal. 
    Storing:
    When a tomato is refrigerated, it can tend to become more firm and lose flavor. However, if you happen to have some of this leftover chopped caprese salad, it must be stored in the refrigerator.
    Store in an airtight container, or by placing plastic wrap over the bowl it was made in, in the refrigerator for up to 2 days.

    Nutrition

    Serving: 1serving (¼ recipe) | Calories: 98kcal | Carbohydrates: 4g | Protein: 1g | Fat: 9g | Saturated Fat: 1g | Sodium: 4mg | Potassium: 280mg | Fiber: 3g | Vitamin A: 200IU | Vitamin C: 7.2mg | Calcium: 6mg | Iron: 0.3mg

    This delicious avocado caprese salad is one of my favorite staple weeknight recipes. I hope you give it a try and that it becomes one of your favorite salads too!

    Instant Pot Tri Tip

    April 14, 2022

    sliced tri tip with brown gravy

    Instant Pot Tri Tip: Found at the grocery store, Tri tip is an affordable cut of meat, and is wonderful made as a roast in this Instant Pot recipe.

    sliced roast, gravy and carrots and potatoes
    Instant Pot Tri Tip

    Quick Overview: Pressure cook on high for 30 minutes and natural release. Optional gravy recipe included!

    Why You’ll Love This Recipe

    Similar to cooking a pot roast in the Instant Pot, this tri tip in the Instant Pot is not only easy but it is an affordable cut of meat that makes a wonderful roast! It helps you accomplish those dinner goals with minimal effort!

    This Instant Pot tri-tip recipe also uses simple ingredients so it’s nice that you can usually keep the ingredients on hand for a quick Sunday dinner idea (or busy weeknight dinner) that the entire family will love!

    [feast_advanced_jump_to]

    Ingredients

    Although we used potatoes and carrots in this recipe, you can leave those out if you prefer, and the roast will still cook the same way! There’s just something about adding potatoes and carrots to a roast recipe, so we include it in our oven-baked chuck roast recipe and our dutch oven beef stew recipe, too!

    Here’s what you’ll need:

    ingredients for instant pot tri tip
    Ingredients

    Tri-Tip Ingredients

    • 2 to 2.5 pound tri tip roast (it’s a cut of beef that has a triangular shape)
    • 1 Tablespoon paprika
    • 1 Tablespoon garlic powder
    • 1 Tablespoon onion powder
    • 1 Tablespoon black pepper
    • 1 Tablespoon dried rosemary
    • 1 Tablespoon kosher salt
    • 1 Tablespoon brown sugar
    • 1 teaspoon crushed red pepper (this can make it pretty spicy for kiddos – either omit or cut in ½)
    • 2 Tablespoon butter
    • 4 cups of beef broth
    • 1 pound baby potatoes
    • 4-5 carrots, peeled and cut in to small sticks

    Gravy, if desired:

    • 5-6 tablespoons of flour
    • 5-6 tablespoons of water
    • meat drippings

    See recipe card toward the bottom of this post for full instructions.

    Instructions

    1. This tri-tip that we used was about 2.5 pounds. But yours may be slightly different in size, yet the cooktime should remain the same, as long as it’s within 2 to 2.5 pounds.
    Raw tri tip on white plate
    Tri Tip ready to cook
    1. Mix paprika, garlic powder, onion powder, black pepper, dried rosemary, kosher salt, brown sugar and crushed red pepper (if desired), together in small bowl.
    spices in white bowl
    spices for rub
    spices mixed together in white bowl
    Mix spices
    1. Then, rub spice mixture on both sides of the meat, massaging it in to the meat.
    Spice rubbed tri tip on platter
    Rub spice blend on tri tip
    1. Turning the saute function on, on your Instant Pot, add the butter and allow it to melt.
    2. Once butter has melted, place tri tip in pot and sear each side of the tri tip for 5 minutes on each side.
    sear tri tip in butter on saute
    Sear one side
    Trip tip searing in Instant Pot
    Sear other side
    1. Then remove the instant pot tri-tip roast from the Instant Pot and set aside.
    Trip tip removed from Instant Pot
    Remove seared tri tip
    1. Pour a small amount of beef broth in to instant pot and using a wooden spoon (or similar) scrape brown bits of cooked meat/spices off the bottom of the pot.
    2. Next, place trivet (metal rack) inside of Instant Pot.
    Beef broth poured in pot
    Pour in some broth, and scrape
    Place trivet in Instant Pot
    Insert trivet in to pot
    1. Place tri tip on metal rack and, if desired, pour any leftover spices on top of meat.
    tri tip back in instant pot
    Place tri tip back in pot
    pour rest of broth in to pot
    Pour rest of broth in to pot
    1. Pour in beef broth, pouring around the roast, so it doesn’t wash spices off.
    2. Next, add in the potatoes and carrots.
    3. Pressure cook on high for 30 minutes, and then allow to natural release.
    veggies added in to pot
    Add veggies in to pot
    cooked veggies and tri tip
    Cooked tri tip and veggies

    How Long to Pressure Cook a Tri-Tip

    My Instant Pot is an 8 quart – and the natural release took about 35 minutes. This time may vary for different sizes.

    You CAN use the quick release method, if you’re in a rush but I prefer to naturally release it because I believe it helps make a tender meat or tender roast.

    cooked tri tip, potatoes and carrots
    Cooked tri tip, potatoes and carrots

    How to Make Gravy for Tri-Tip

    If you would like to make a gravy for the tri tip, our favorite method is using the drippings that remain in the pot.

    1. Remove veggies and roast from pot and leave drippings.
    Cooked tri tip with veggies
    Cooked Tri Tip and Vegetables
    1. In small bowl, mix cold water and flour until smooth.
    2. Add in a few spoonfuls of the meat drippings and mix together until smooth.
    flour and cold water in white bowl
    Flour and cold water
    drippings added in to flour mixture
    Add in drippings to flour mixture
    1. When smooth, pour in to pot of drippings and turn Instant Pot on to “saute” and let gravy cook and stir (with a whisk) until thickened.
    brown gravy from drippings in bowl
    Brown gravy

    Gravy Tip: Before serving, we found it best to pour gravy in to a mesh colander, to separate any fat, etc. for a “cleaner” gravy but it’s not necessary.

    Gravy poured on tri tip and vegetables
    Tri Tip Roast with Gravy

    Substitutions

    If you prefer to switch out some of the spices, feel free too! The wonderful thing about roast, is that it can be flexible with your favorite spices.

    Although we use beef broth in this recipe, feel free to use vegetable broth or even chicken broth if that’s what you have on hand or prefer.

    If you prefer to leave out the brown sugar, for less sugar… you absolutely can. The brown sugar just gives it a hint of sweet to go with the salty spice flavor.

    Olive oil can be used instead of butter if you prefer.

    Tri tip roast with vegetables on fork
    Tri tip with vegetables

    Soon, you’ll have a delicious meal that may just become your new favorite easy recipe!

    Equipment

    I used an 8 quart Instant Pot but this can also be made in a 6 quart. The only difference is that it could take less time to come to pressure if using a smaller Instant Pot.

    You may also use a different brand of electric pressure cooker or even a stovetop pressure cooker but do note that the times may vary for a pressure cooker tri tip.

    What to Serve with Tri-Tip

    This tri tip can pair perfectly with delicious breads, such as Italian baked bread, this easy Focaccia bread, or even these cheddar biscuits! But if you have a slow cooker, we absolutely love having these crock pot cheesy hashbrowns with them!

    Storage

    If you have leftover Instant Pot tri-tip roast and/or gravy, allow to fully cool and then place in an airtight container in the refrigerator for 3-4 days.

    To reheat, you can microwave leftovers or even place in the oven in an oven-safe baking dish.

    Top Tip

    If you find that your roast is tough, it could be the cut of meat. You can also try pressure cooking a little longer, around 15-30 minutes to see if it becomes more tender.

    More Tri-Tip Recipes

    If you love tri tip steak, roast or this cut of meat, you will absolutely love this smoked tri tip recipe! (We found our tri tip at Costco and two came in a pack so we made one in the pressure cooker and smoked one, and then made tri tip tacos with leftoves!)

    Recipe

    sliced tri tip with brown gravy
    Print Pin
    4.97 from 28 votes

    Instant Pot Tri Tip

    Instant Pot Tri Tip: Found at the grocery store, Tri tip is an affordable cut of meat, and is wonderful made as a roast in this Instant Pot recipe.
    Course Main Course
    Cuisine American
    Prep Time 15 minutes minutes
    Cook Time 30 minutes minutes
    Pressure Release 35 minutes minutes
    Total Time 1 hour hour 20 minutes minutes
    Servings 6 servings
    Calories 414kcal
    Author Jessica Burgess

    Equipment

    • Pressure Cooker

    Ingredients

    • 2 pound tri tip roast 2 to 2.5 pound will work
    • 2 tablespoons butter salted or unsalted
    • 1 tablespoon paprika
    • 1 tablespoon garlic powder
    • 1 tablespoon onion powder
    • 1 tablespoon black pepper
    • 1 tablespoon dried rosemary
    • 1 tablespoon kosher salt
    • 1 tablespoon brown sugar
    • 1 teaspoon crushed red pepper this can make it pretty spicy for kids – either omit or cut in half
    • 4 cups beef broth
    • 1 pound baby potatoes
    • 4 carrots peeled and sliced in to small sticks

    Tri Tip Roast Gravy, if desired

    • 5 tablespoons flour
    • 5 tablespoons cold water
    • meat drippings

    Instructions

    • This tri-tip that we used was about 2.5 pounds. But yours may be slightly different in size, yet the cooktime should remain the same, as long as it's within 2 to 2.5 pounds.
    • Mix paprika, garlic powder, onion powder, black pepper, dried rosemary, kosher salt, brown sugar, and crushed red pepper (if desired), together in small bowl.
    • Then, rub spice mixture on both sides of the meat, massaging it in to the meat.
    • Turning the saute function on, on your Instant Pot, add the butter and allow it to melt.
    • Once butter has melted, place tri tip in pot and sear each side of the tri tip for 5 minutes on each side.
    • Then remove the instant pot tri-tip roast from the Instant Pot and set aside.
    • Pour a small amount of beef broth in to instant pot and using a wooden spatula (or similar) scrape brown bits of cooked meat/spices off the bottom of the pot.
    • Next, place trivet (metal rack) inside of Instant Pot.
    • Place tri tip on metal rack and, if desired, pour any leftover spices on top of meat.
    • Pour in beef broth, pouring around the roast, so it doesn't wash spices off.
    • Next, add in the potatoes and carrots
    • Pressure cook on high pressure for 30 minutes, and then allow to natural release. For my 8 quart, this took about 35 minutes of natural release. You can, if in a hurry, manual release but I feel that the natural release results in a more tender roast.

    Tri Tip Gravy Instructions, if desired

    • Remove veggies and roast from pot and leave drippings.
    • In small bowl, mix cold water and flour until smooth. Add in a few spoonfuls of the meat drippings and mix together until smooth.
    • When smooth, pour in to pot of drippings and turn Instant Pot on to the sauté setting and let gravy cook and stir (with a whisk) until thickened.
    • Gravy Tip: Before serving, we found it best to pour gravy in to a mesh colander, to separate any fat, etc. for a "cleaner" gravy but it's not necessary.

    Nutrition

    Serving: 1serving | Calories: 414kcal | Carbohydrates: 27g | Protein: 40g | Fat: 16g | Saturated Fat: 7g | Polyunsaturated Fat: 1g | Monounsaturated Fat: 7g | Trans Fat: 0.2g | Cholesterol: 108mg | Sodium: 1375mg | Potassium: 1021mg | Fiber: 4g | Sugar: 5g | Vitamin A: 7601IU | Vitamin C: 18mg | Calcium: 82mg | Iron: 4mg

    Easter Snack Mix – Bunny Bait

    April 12, 2022

    easter snack mix - bunny bait in white bowl

    Easter Snack Mix: This “Bunny Bait” is not only easy but it’s a fantastic Easter dessert idea, and perfect to snack on at an Easter celebration!

    Quick Overview: Grab a large mixing bowl, baking sheet, and just a few of your favorite ingredients and you’ll have Easter mix, ready to eat, in minutes!

    easter snack mix in white bowl
    Easter Snack Mix – Bunny Bait

    Why you’ll love this recipe

    This bunny bait trail mix is super flexible, meaning you can use whatever candy or cereal you prefer! I mean, when it’s covered in melted white chocolate chips, it’s hard not to love!

    When we shared the bunny bark recipe, and the no bake Easter egg truffles, I knew that this easy sweet chex mix recipe had to be next! They’re all such delicious Easter ideas! It’s similar to a mix that we make every Christmas too, which is this Christmas snack mix, and it’s a hit for any holiday!

    TIP: Have candy leftovers from the Easter charcuterie board? Mix it in with this Easter snack mix!

    [feast_advanced_jump_to]

    Snack Mix Ingredients

    Even though I’ll provide a list of ingredients for this recipe, please feel free to change things up! It’s very similar to our Leprechaun Bait recipe, for St. Patrick’s Day, so it’s very versatile for any holiday.

    You’ll just want to make sure you keep the melted chocolate and dry cereal ratio the same… so you have enough chocolate to cover it! (But also feel free to use different types of cereal.)

    ingredients in small bowls for snack mix
    Ingredients
    • 2 cups rice Chex
    • 1 cup cheerios
    • 1 cup Cinnamon Toast Crunch
    • 1 ½ cups white chocolate chips
    • 1 cup peanut m&m's 
    • ¼ cup Easter sprinkles (or pastel colors)
    • ½ cup jelly beans
    • 1 cup Cadbury mini eggs (like we used in these mini egg cookies!)

    See recipe card toward the bottom of the post for full instructions and ingredients, all in one place!

    Instructions

    1. First, thinking ahead, grab a large baking sheet and cover it completely with parchment paper.
    2. Next, melt the chocolate baking chips in a microwave safe bowl (a big bowl) (large enough that the cereal will fit in it after the chocolate is melted) following the package directions for melting. (Most will be to melt on half-power for 2 minutes, stirring every 30 seconds. Do NOT overcook.)
    white chocolate chips in bowl
    White chocolate baking chips
    melted white chocolate chips
    Melt chips
    1. Once the chocolate is completely melted, pour your dry cereal in to the bowl of white chocolate and carefully give it a good stir to mix, trying to make sure all of the cereal becomes covered.
    dry cereal mixture in bowl
    Cereal in large bowl
    chocolate poured over cereal
    mix chocolate and cereal
    1. Pour in half of the sprinkles and stir.
    1. Once mixed, pour out your chocolate covered cereal on to the parchment paper and spread it out so most of it is in a single layer. (It's ok if some of it's still touching - you'll be breaking it up in to small pieces anyway once it's hardened.)
    sprinkles pouring in to cereal
    Add half of sprinkles
    spread mixture on baking sheet
    Pour mixture on baking sheet
    1. Quickly, sprinkle the reamaining sprinkles on the top of the cereal before the chocolate hardens.
    2. Allow cereal to "dry" (about 10 minutes).
    Pour more sprinkles on cereal
    Pour remaining sprinkles
    allow cereal to dry
    Allow to dry
    1. Once dry, pour candy on top of cereal mixture and mix up/break up the cereal in to small bite-size pieces. (Remember, this is a snack mix so it's ok if some of cereal is stuck together but large pieces are harder to eat when snacking.)
    Pour candy in to mix
    Add candy
    Bread up in to little pieces
    Break in to pieces
    1. Once broken in to bite-size pieces and combined, as evenly as possible with the candy, place it in a bowl, ready for serving!
    easter chex mix in white bowl
    Easter Chex Mix

    Aren’t those bunny cookies next to the mix so cute? If you want to make bunny cookies, you’ll also love these bunny cookies!

    How to serve bunny bait recipe

    What’s great about this dessert is that it can be made ahead of time and placed out in small bowls, around the room, or on a buffet, so guests can snack as they please!

    Or, if you want to put small amounts in treat bags, for little Easter treats, it’s a great way to create a little gift for your friends and family, or even classmates! It’s also a great treat to add to Easter baskets.

    You may also want to include these chocolate-covered Easter Oreos too!

    Bunny bait in white bowl
    Bunny Bait

    Substitutions

    If you don’t have some of the items on hand, it’s absolutely ok to substitute your favorite cereal, candy and more! Here are some ideas:

    • Golden Grahams cereal
    • All Chex cereal instead of using a variety
    • Easter Hershey kisses
    • Reese’s cups
    • Mini candy bars
    • Starburst Jelly Beans
    • Mini marshmallows
    • Candy melts instead of baking chips
    • Pretzel sticks, pretzel twists, mini pretzels
    • Candy Easter eggs
    • Bunny graham crackers
    • Popcorn
    fingers holding bite of bunny bait
    Snackable treat

    Variations

    This recipe has a white chocolate flavor but if you prefer the taste of muddy buddies, (or puppy chow) you may want to add peanut butter to your melted chocolate before pouring over the dry cereal!

    How to store Easter bunny bait snack mix

    It’s best to store any leftover sweet snack mix in an airtight container, and best to enjoy for 5-7 days.

    More Easter Ideas

    If you’re looking for easy recipes and ideas for the Easter season, you’ll LOVE these Easter desserts and more:

    • A slice of strawberry heaven cake dessert on a plate.
      Strawberry Heaven
    • Strawberry Pound Cake on cake stand.
      Strawberry Pound Cake with Strawberry Glaze Icing
    • A slice of strawberry cheesecake poke cake on a round plate.
      Strawberry Cheesecake Poke Cake
    • A slice of burnt sugar cake on a round, vintage plate.
      Burnt Sugar Cake

    Recipe

    easter snack mix - bunny bait in white bowl
    Print Pin
    5 from 4 votes

    Easter Snack Mix – Bunny Bait

    Easter Snack Mix: This "Bunny Bait" is not only easy but it's a fantastic Easter dessert idea, and perfect to snack on at an Easter celebration!
    Course Dessert, Snack
    Cuisine American
    Prep Time 5 minutes minutes
    Cook Time 2 minutes minutes
    Cooling Time 10 minutes minutes
    Total Time 17 minutes minutes
    Servings 12 servings
    Calories 393kcal
    Author Jessica Burgess

    Ingredients

    • 2 cups Rice Chex
    • 1 cup Cheerios
    • 1 cup Cinnamon Toast Crunch
    • 1 ½ cups white chocolate chips
    • 1 cup Peanut M&M's
    • ¼ cup Easter sprinkles
    • ½ cup Funfetti jelly beans
    • 1 cup Cadbury Mini Eggs

    Instructions

    • First, thinking ahead, grab a large baking sheet and cover it completely with parchment paper.
    • Next, melt the chocolate baking chips in a large bowl (large enough that the cereal will fit in it after the chocolate is melted) following the package directions for melting. (Most will be to melt on half-power for 2 minutes, stirring every 30 seconds. Do NOT overcook.)
    • Once the chocolate is completely melted, pour your dry cereal in to the bowl of white chocolate and carefully stir to mix, trying to make sure all of the cereal becomes covered.
    • Next, pour in half of the sprinkles, and stir.
    • Once mixed, pour out your chocolate covered cereal on to the parchment paper and spread it out so most of it is in a single layer. (It's ok if some of it's still touching - you'll be breaking it up in to small pieces anyway once it's hardened.)
    • Sprinkle the reamaining sprinkles on the top of the cereal before the chocolate hardens.
    • Allow cereal/icing to "dry" for about 10 minutes.
    • Pour on remaining candies and break up in to small, bite-size pieces. Mix up so it's as evenly combined as possible. Serve!
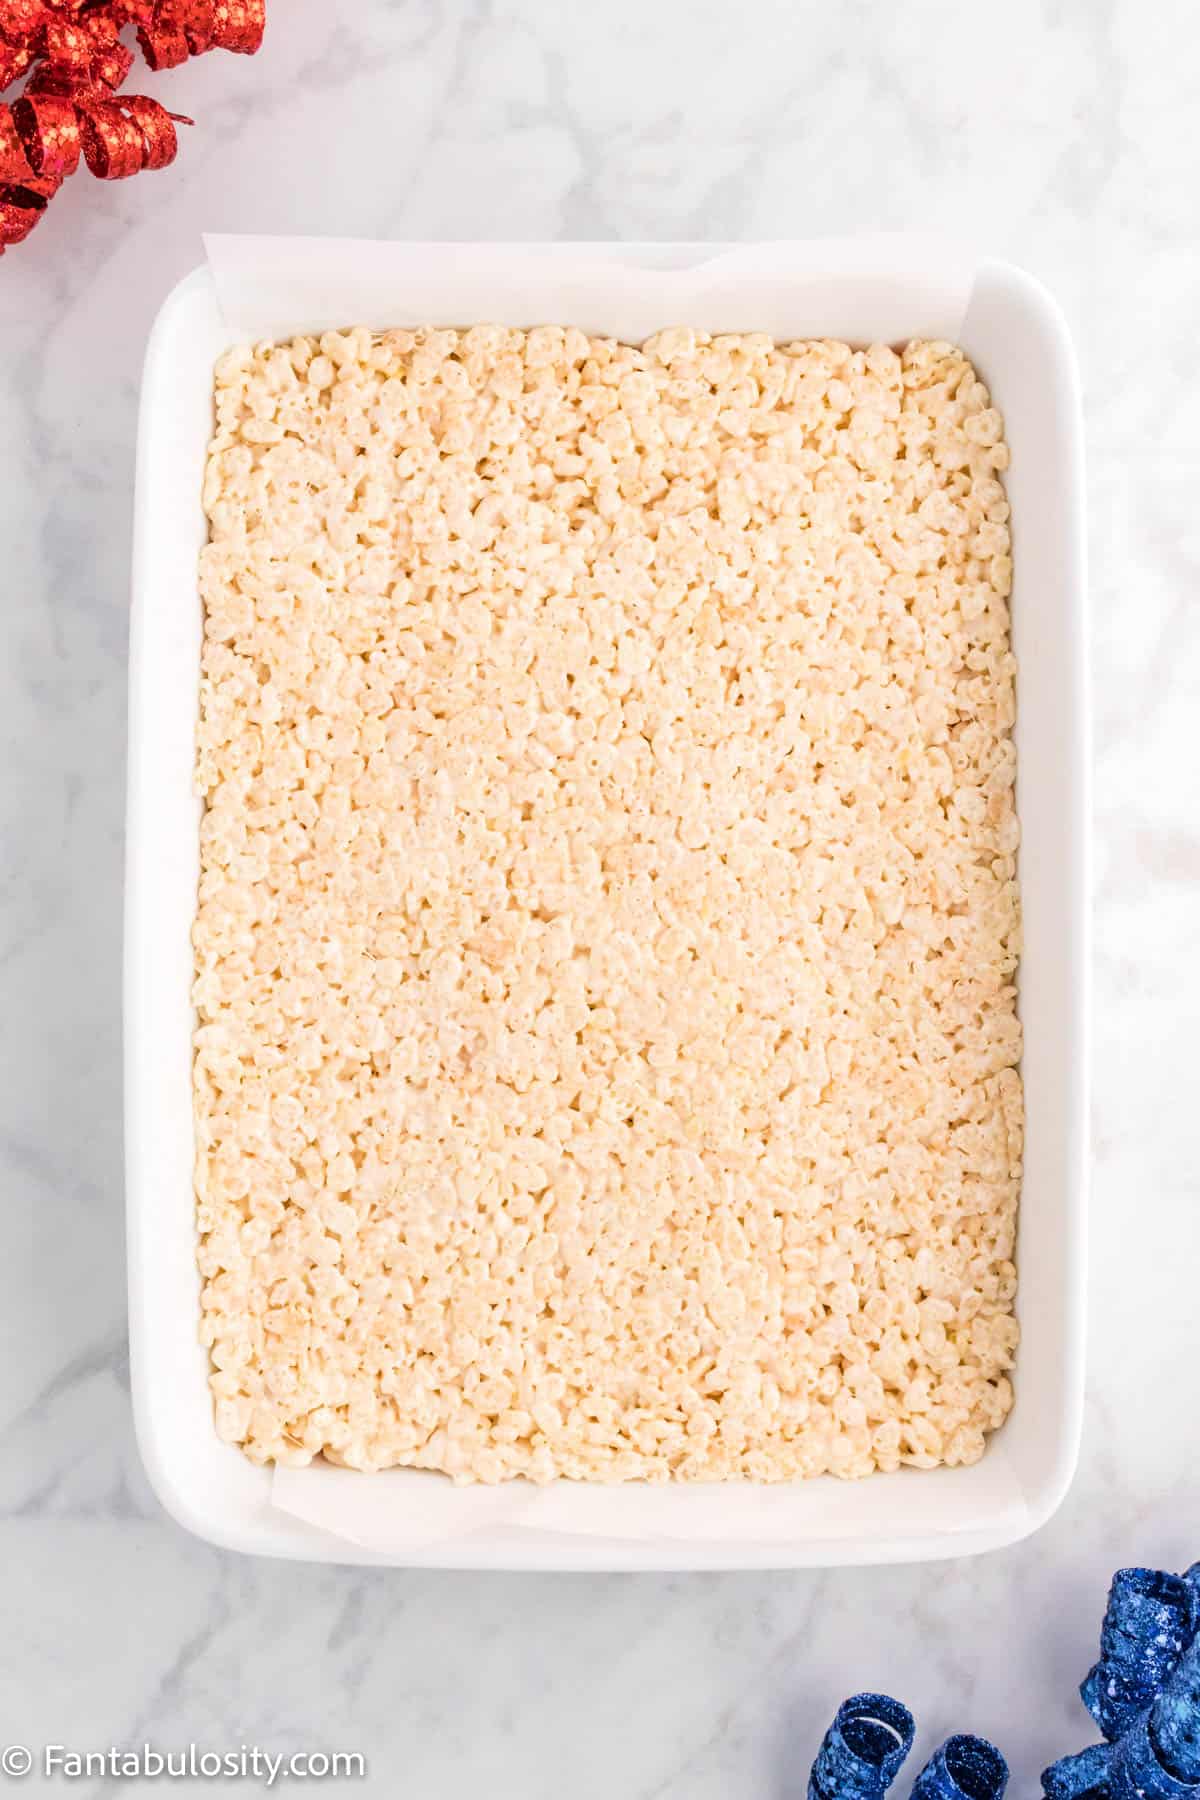
    Notes

    How to store Easter snack mix:
    It’s best to store any leftover sweet snack mix in an airtight container, and best to enjoy for 5-7 days.

    Nutrition

    Serving: 1serving | Calories: 393kcal | Carbohydrates: 57g | Protein: 5g | Fat: 18g | Saturated Fat: 11g | Polyunsaturated Fat: 1g | Monounsaturated Fat: 2g | Trans Fat: 1g | Cholesterol: 10mg | Sodium: 115mg | Potassium: 105mg | Fiber: 1g | Sugar: 46g | Vitamin A: 320IU | Vitamin C: 2mg | Calcium: 130mg | Iron: 3mg

    Easter Charcuterie Board

    April 6, 2022

    Easter charcuterie board

    Easter Charcuterie Board: There are a lot of ideas on what and how you can make a dessert and candy board for the Easter holiday but here is a simple and easy way to create your own!

    Quick Overview: Feel free to change up candies, cookies, snacks, and more for your own board. TIP: Using store-bought decorated cookies (like these Chocolate Covered Easter Oreos or making these Easter Bunny Cookies) is a quick way to add some cuteness and they’re a huge hit!

    Easter Charcuterie Board on white counter

    Why You’ll Love Making this Easter Dessert Board

    If you’re hosting for Easter or looking for a fun dessert recipe to take along to family gatherings, this is such a fun way to serve dessert! Especially if you’re not someone who loves to bake or cook because putting together a charcuterie board like this, requires very little prep and skill and it’s fantastic when entertaining. Themed charcuterie boards are perfect for just about any holiday and a great way to feed your guests!

    Now although this Easter charcuterie board appetizer is more of a dessert and/or candy type of board, you can absolutely do more of a savory board if you prefer.

    However, with it being Easter, I thought it would be so much fun to utilize all of the fun Easter treats at the store and make one of my favorite dessert charcuterie boards. Speaking of “boards” if you have a chalkboard you’d like to decorate for the holiday, make sure you see this fun Easter chalkboard idea!

    What you’ll need to make this board:

    I’ll list everything below that I used for this delicious grazing board. However, feel free to leave out some of the following ingredients, or even add your own favorite candies and goodies, even getting ideas from this list of charcuterie board types. I’ll also include a list of more ideas below, that you can put on your own board!

    • Peanut M&M’s
    • Funfetti Jelly Beans
    • Easter Hershey Kisses
    • Neopolitan Organic Bunny Grahams
    • Golden Oreos
    • Shortbread Cookies (Store-bought in a tin)
    • Cadbury Mini Eggs (chocolate eggs, like we used in these Easter mini egg cookies!)
    • Store-Bought Decorated Sugar Cookies
    • Robin Egg Candy (candy eggs)
    • Reese’s Cups
    • Peeps
    • Rabbit Marshmallow Pop
    labeled Easter treats on board
    What’s included

    How to Build the Easter Board

    There really is no wrong or right way to make your own dessert board. However, I want to share some tips with you that may make the process easier!

    1. Board, Tray, Platter – I used a white, marble lazy susan for this board, and I love it because it turns, allowing guests to easily spin the board to what treat they have their eyes on. Buy a similar lazy susan here. You won’t need a large platter unless you’re serving a larger group, or more than 15-20 people.
    empty white marble lazy susan
    White marble lazy susan
    1. Next, place a few small bowls on the lazy susan. (I used two oval bowls and two small round bowls – with the intention of the oval bowls looking like rabbit ears. Not sure it did that… but it was fun trying. Haha!)
    empty small bowls on white board
    start with bowls
    1. Then, fill your bowls with candy. (You can do a different type of candy in each bowl, or even add more bowls to your board if you prefer. Remember, there’s no right or wrong way!)
    Small bowls filled with Easter candy
    Fill bowls with candy
    1. After filling the bowls, I then place a few rows of different cookies. Staggering them is always a nice look, and it gives the cookies some “height” to save room of other items and to give the board some dimension.
    Cookies added to lazy susan
    Add cookies
    1. Once you’ve added the cookies, it’s time to fill up the empty space with candy and other treats! Pile the candy up, and feel free to place the same candy in multiple areas, or even mix the candies together.
    Left side of charcuterie board of treats
    Candy filled board
    Right side of Easter candy board
    Variety of sweet treats

    Now, you have a beautiful Easter charcuterie board to serve to your guests, or for even the kiddos for a fun afternoon snack!

    How to serve your snack board

    Once your entire board is full, and you no longer see any “white space”, it’s ready to serve! Place it in the center of the room, on the buffet, or in a place where guests can easily grab a treat and go! Or maybe the Easter Bunny would like a nice treat when he visits that night!
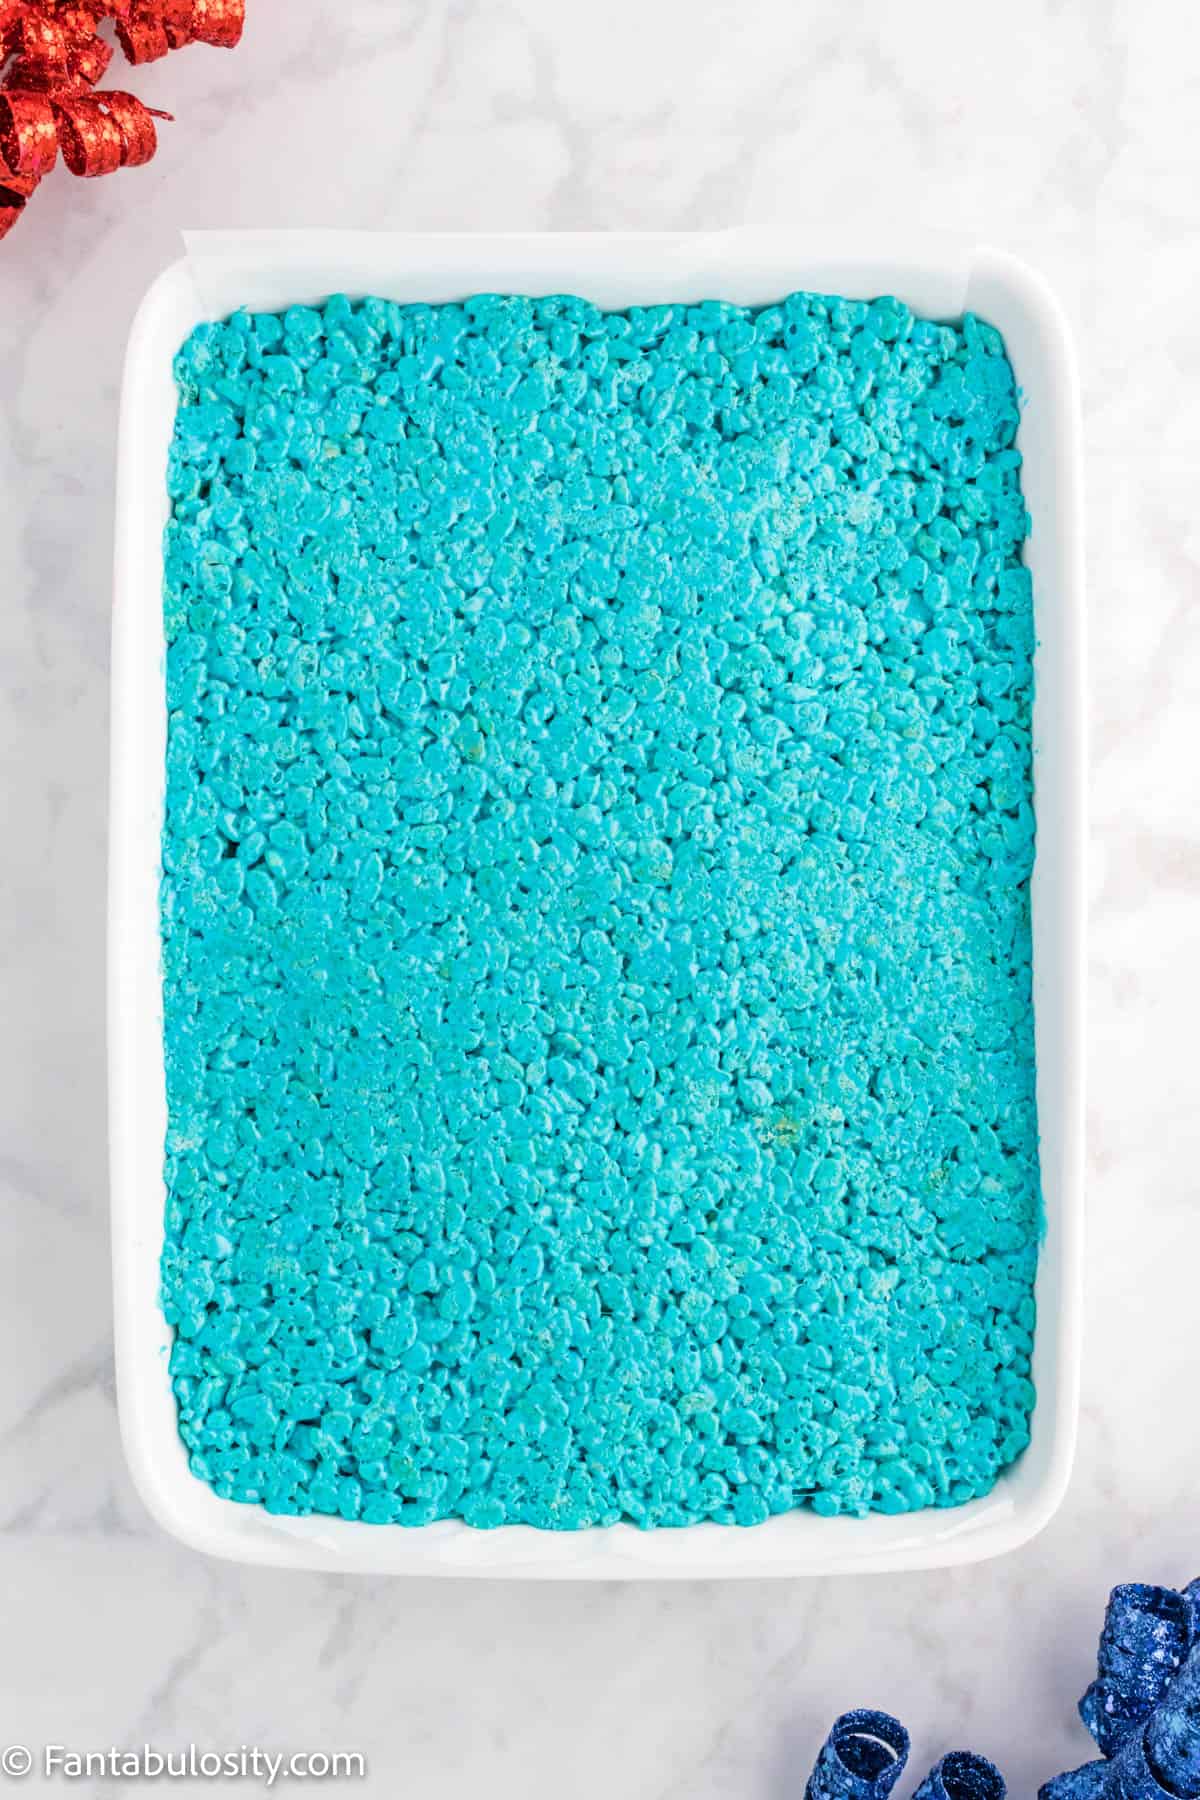
    Full platter of Easter desserts
    Ready to serve!
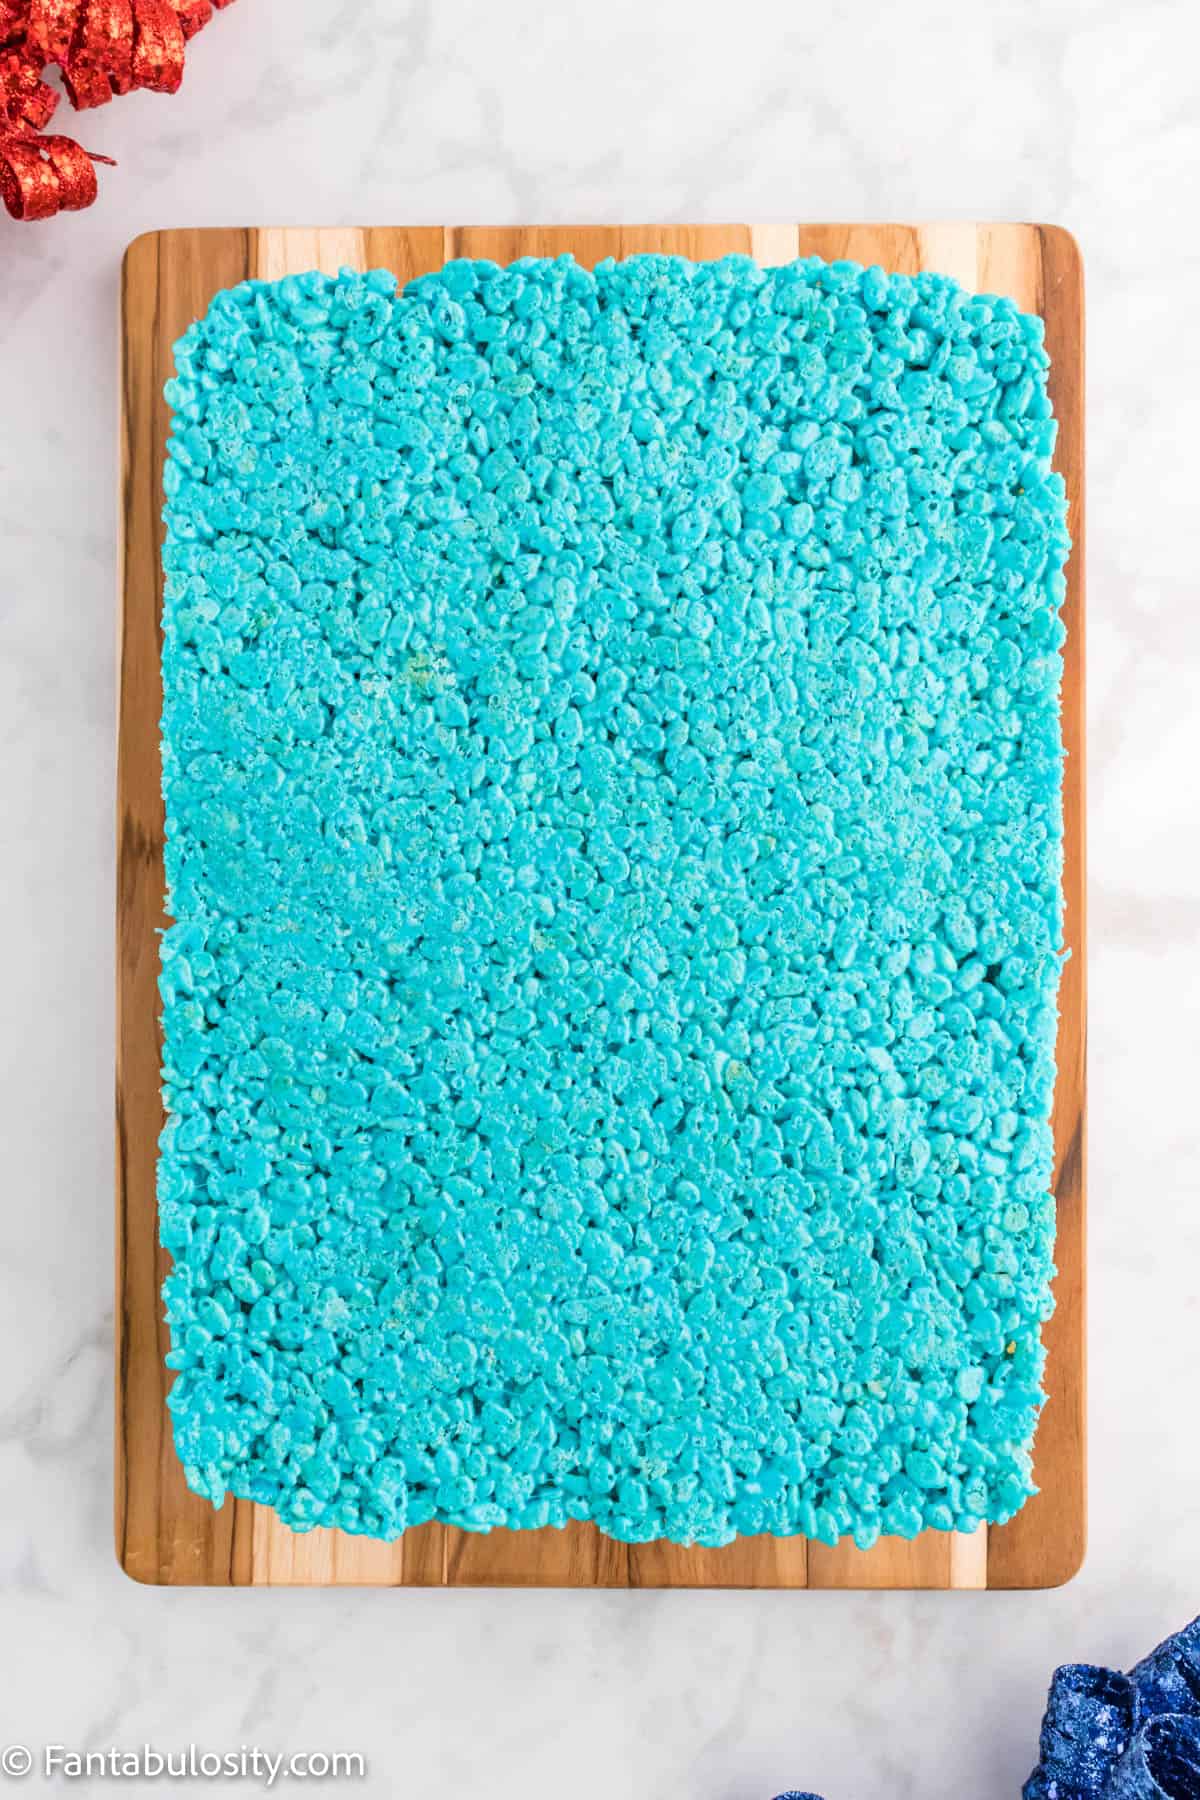
    Expert Tips and FAQ’s

    • Don’t worry if you don’t use all of the candy or treats that come in a package. You’ll find that some of the candies may get eaten more than the others. If hosting, just keep an eye on the board and when you see white space start to appear, simply fill it back up with the extras that you’ve set aside.
    • If you have leftover Easter candies after Easter weekend, don’t throw them away! Make these mini egg bars! Or, if you have leftover cookies or Oreos, break them up and make these rice krispie treats with cookies!
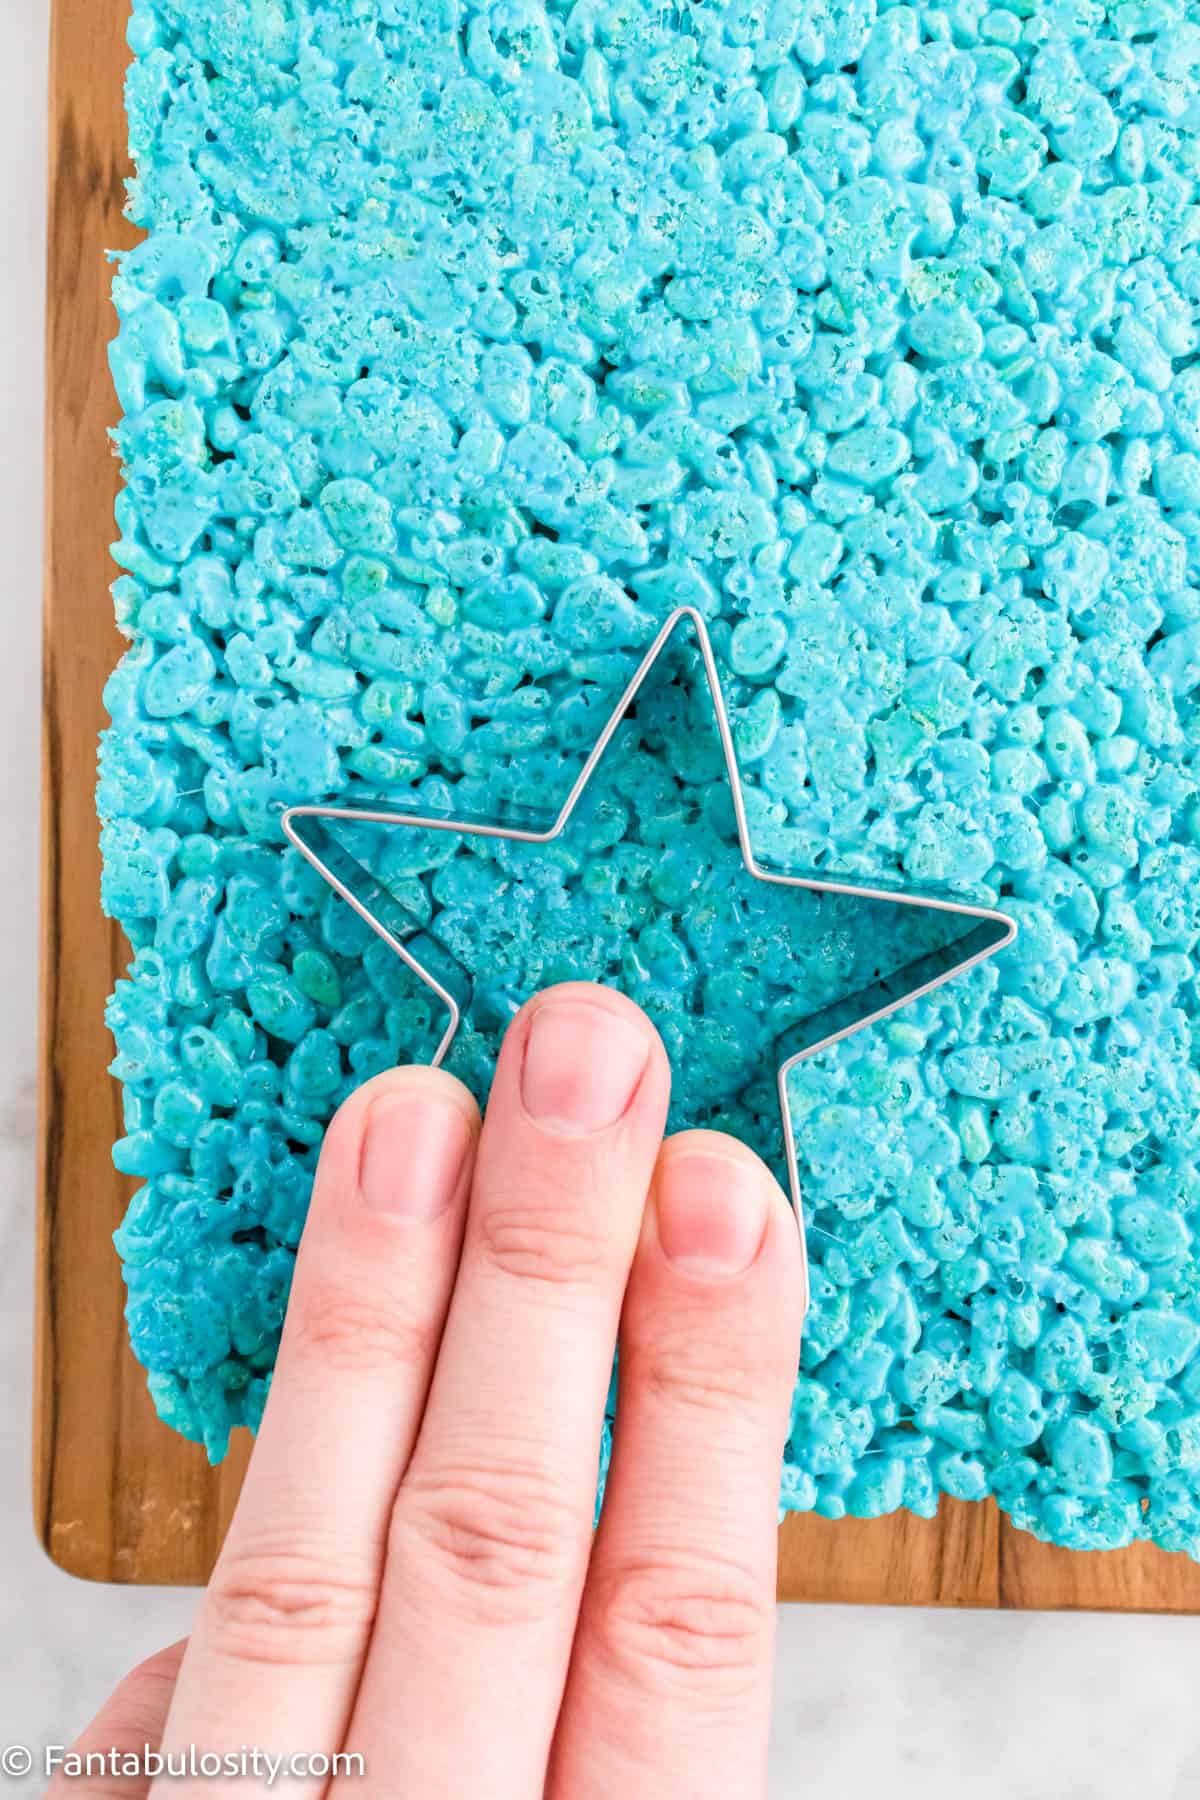
    • The key to a beautiful Easter, and it looking cohesive is having a lot of the same color scheme. For instance, using a lot of pastel colors is ideal to really tie in the spring colors.

    More Easter charcuterie board food items

    If you can’t find some of the items that I’ve used on my board, or if you prefer to use different items, here are some of our favorite things to use on charcuterie boards:

    • fresh fruit
    • chocolate bunnies
    • meats (Such as salami roses – although meat and candy can be hard to serve with one another, although you could do one side of savory appetizers and one side of sweets.)
    • fresh vegetables
    • nuts (pine nuts, pecans, cashews, almonds) – be cautious of food allergies
    • cheese cubes

    Related Easter ideas

    If you’re getting ready for your next Easter party, you’ll also love these Easter recipes: Easter egg nest cookies, Easter bark, and our favorite… Easter Egg Cookie Truffles! Or, if you’re looking to cut down on the amount of candy your Easter has, these ideas for non-candy treats for Easter baskets will come in handy!

    • bread pudding in baking dish
      Bread Pudding Recipe: Easy Old Fashioned Recipe (With Video!)
    • A slice of old-fashioned carrot cake on round, vintage plate.
      Old-Fashioned Carrot Cake Recipe
    • Crack green beans on wooden spoon.
      Crack Green Beans
    • Pistachio Salad in white bowl on pink background
      Pistachio Salad

    Recipe

    Easter charcuterie board
    Print Pin
    5 from 4 votes

    Easter Charcuterie Board

    Easter Charcuterie Board: There are a lot of ideas on what and how you can make a dessert and candy board for Easter but here is a simple and easy way to create your own!
    Course Appetizer, Dessert
    Cuisine American
    Prep Time 20 minutes minutes
    Total Time 20 minutes minutes
    Servings 15 people
    Calories 674kcal
    Author Jessica Burgess

    Ingredients

    • 2 cups Peanut M&M's
    • 1 cups Funfetti jelly beans
    • 1 cup Hershey Kisses
    • ½ cup Neopolitan Organic Bunny Grahams
    • 4 Golden Oreos
    • ½ cup Cadbury Mini Eggs
    • 15 Shortbread cookies
    • 2 Decorated sugar cookies
    • 1 cup Robin Egg candies
    • 2 cups Reese's Cups miniatures
    • 4 Peeps
    • 1 Rabit marshmallow pop

    Instructions

    • Place 4 small bowls, in different areas on platter, board or serving tray. (See post for more tips!)
    • Next, pour candies in to bowls until full. (Any candy will do – but I poured jelly beans and peanut M&M's in to the bowls.)
    • Place and stagger rows of cookies around platter.
    • Finally, fill any open spaces on the platter with varieties of candies and treats!

    Notes

    Don’t worry if you don’t use all of the candy or treats that come in a package. You’ll find that some of the candies may get eaten more than the others. If hosting, just keep an eye on the board and when you see white space start to appear, simply fill it back up with the extras that you’ve set aside.
    If you have leftover Easter candies, don’t throw them away! Make these mini egg bars! Or, if you have leftover cookies or Oreos, break them up and make these rice krispie treats with cookies!

    Nutrition

    Serving: 1serving | Calories: 674kcal | Carbohydrates: 93g | Protein: 9g | Fat: 32g | Saturated Fat: 15g | Polyunsaturated Fat: 3g | Monounsaturated Fat: 6g | Trans Fat: 1g | Cholesterol: 13mg | Sodium: 264mg | Potassium: 153mg | Fiber: 3g | Sugar: 75g | Vitamin A: 144IU | Vitamin C: 1mg | Calcium: 129mg | Iron: 2mg

    The BEST Oatmeal Raisin Cookies

    April 5, 2022

    Close up image of one oatmeal cookie on a plate of cookies.

    The BEST Oatmeal Raisin Cookies: These chewy oatmeal cookies combine simple ingredients like quick oats, sugar, butter, flour, and raisins to create the BEST oatmeal raisin cookie ever!

    Quick Overview: Mix dry ingredients, cream butter, and sugars and combine everything together. Chill the dough, roll into dough balls, and bake at 350°!

    Oatmeal raisin cookies on a plate.

    Why You’ll Love This Recipe

    I think everyone needs a few recipes for classic cookies in their back pocket, and oatmeal raisin cookies are one of them!

    This easy oatmeal raisin cookies recipe requires simple ingredients you probably have in your pantry, it comes together in just over 30 minutes, and it gives you a chewy, soft oatmeal raisin cookie every time. It’s really the BEST oatmeal raisin cookie recipe ever!

    These would make a perfect gift, too! Next time, make a double batch (or also make these banana chocolate cookies to give with them) and give some to your friends, family or neighbors (because who doesn’t love homemade cookies).

    [feast_advanced_jump_to]

    Ingredients

    The ingredients for this chewy oatmeal cookies recipe are ones you probably have in your house already, but if you don’t you can for sure find them at your local grocery store!

    Every good oatmeal raisin cookie needs:

    • ¾ cup quick oats (aka instant oats)
    • 8 tablespoons butter (unsalted, room temperature)
    • ½ cup white sugar
    • ¼ cup light muscovado sugar (can use dark or brown sugar)
    • 1 teaspoon vanilla extract
    • 1 large egg (room temperature)
    • ¾ cup all purpose flour
    • ½ teaspoon baking soda
    • ½ teaspoon baking powder
    • ¼ teaspoon salt
    • ⅔ cup raisins (can add more if you like)
    Someone's hand holding one oatmeal raisin cookie with many cookies in the background.

    Instructions

    1. Heat oven to 350 degrees f. 
    2. Line 2 large cookie sheets with parchment paper or silicone mats and set aside.
    3. In a large bowl, whisk together the flour, oats, baking soda, baking powder, and salt. Mix well and set aside. 
    Dry ingredients, well combined, sitting in a glass bowl.
    Whisk dry ingredients together.
    1. With a hand mixer in a large bowl or in a stand mixer with the paddle attachment, beat the butter with both sugars until creamy, about 2 minutes. 

    (Note: I don't recommend substituting brown sugar for white sugar entirely. It’s been tested and a mix of both gives the best results!) 

    1. Add egg, vanilla and beat on low. 
    Butter and sugar creamed together and sitting in a glass bowl.
    Cream together butter and sugars.
    1. Add the flour mixture in batches and mix on low until thoroughly combined. 
    Dry ingredients dumped into a bowl of creamed butter and sugar.
    Add flour in batches.
    1. Stir in the raisins with a wooden spoon. 
    2. For best results, put the dough in the freezer for 10-15 minutes until it resembles soft playdough. If you are short on time, you can still bake the cookies right away without chilling. (If you don’t chill them, the cookies will spread out more and may be a bit more crispy, but the flavor shouldn’t change.)
    Raisins dumped on top of cookie dough batter in a bowl.
    Add raisins.
    Oatmeal Raisin Cookie batter in a bowl.
    Stir to combine.
    1. Roll the dough into 12-13 balls (about 2 tablespoons of dough per ball), lay on the prepared baking sheets (don't flatten them). Make sure there is about 2-3 inches between each cookie to allow for spreading. 
    Balls of oatmeal raisin cookie dough on a parchment lined baking sheet.
    Be sure to leave 2-3″ between dough balls!
    1. Bake cookies for 10-12 minutes. (If you need to make two batches, be sure to pop the dough back in the freezer while the first batch is baking)
    2. Let the cookies sit on the baking tray for a few minutes, then transfer them to a wire rack to cool to the touch. Enjoy the best oatmeal cookies ever!
    Oatmeal Raisin Cookies stacked on a plate.

    Substitutions

    • Light Muscovado Sugar – you can use dark muscovado sugar in place of light which will give the cookie more of a toffee like flavor due to its high molasses content. You could also use regular brown sugar in place of light muscovado, but know that muscovado melts beautifully and has very small sugar crystals that help the texture of the cookie.
    • Egg – if you can’t have eggs, you can use a flax egg or chia egg in this recipe. It changes the taste a bit but it shouldn’t affect the texture of the cookie.

    Variations

    We think this cookie recipe is a classic and we love it just as it is, but if you want to change it up here are a few suggestions…

    • Chocolate Chips – the most obvious suggestion is to add chocolate chips. You can add them in addition to the raisins (maybe reducing the raisins to ½ cup and adding ½ cup chocolate chips) or you can replace the raisins entirely!
    • Other Chips – you could also replace the raising (half of the raisins or all of them) with other types of chips like white chocolate chips, dark chocolate chips, butterscotch chips, peanut butter chips…the options are endless!
    • Coconut – if you like oatmeal cookies with a bit of coconut in them, you could try mixing in ¼ cup of unsweetened, shredded oatmeal. I haven’t tried this, but I bet it would be delicious (oatmeal and coconut are the perfect combination, in my opinion).
    Oatmeal raisin cookies on a plate.

    Storage

    Store these oatmeal raisin cookies in an airtight container at room temperature for up to a week. You could also freeze these in an airtight, freezer-safe container for up to a month.

    Freezing Oatmeal Raisin Cookie Dough Balls

    Yes, you read that right! You can freeze the uncooked dough. 

    I like to form them into a ball, freeze them for 20 minutes on a plate lined with parchment paper then put them into a plastic freezer bag or freezer-safe container. Doing it this way they all freeze individually, and it is easier for me to pick only a few out when I am ready to cook them.

    You can store these dough balls in the freezer for up to 6 weeks (which is perfect if you want to be able to whip up fresh cookies for company in mere minutes- just pop these in the oven and voila!).

    Baking Frozen Cookie Dough

    You have two options for baking frozen dough balls…

    1. You put them on the prepared baking sheet and let them thaw, then you cook them as the recipe states, or

    2. You lower the oven temperature by 15°, put the frozen dough on the prepared baking sheet and bake it for 3-5 minutes longer than the recipe says (watching closely at the end to see when they are done).

    Expert Tips and FAQs

    Should you soak raisins before baking cookies?

    This isn’t necessary, but you sure can! If you want to make your cookies extra soft and your raisins extra plump, soak your raisins in some warm water for 10 minutes before adding them to the recipe.

    Be warned: we haven’t tried this recipe with soaked raisins and we aren’t sure how it will affect the bake time.

    How do you soften oatmeal raisin cookies?

    Getting a nice, soft oatmeal raisin cookie has to do with the way you bake it! There are a few things to note:
    1. If you don’t freeze your dough it will spread out faster, resulting in a flatter cookie with a crisp edge.
    2. If you make your dough balls too small (and don’t reduce the baking time accordingly), the cookies will spread out more and become crispier.
    3. DON’T OVERBAKE! The secret to a soft, chewy oatmeal raisin cookie is to just bake the cookies until they edges are golden brown and the middle looks set (not jiggly). Remember, you can always pop it back in the oven for a bit longer but you can’t un-bake a cookie.

    Why did my oatmeal cookies get hard?

    This question is answered in detail just above, but the most likely reason for this is over-baking. Your cookies will also get hard if you don’t store them in an airtight container!

    What makes cookies soft?

    A few things contribute to this - making sure you don’t over-bake them, chilling the dough before baking, and using a white sugar/brown sugar mixture in the recipe!

    If you want a softer cookie, be sure to use the white sugar and muscovado sugar listed in this recipe and watch the bake time carefully!

    More great recipes like this one

    If you’re looking for more easy cookie recipes your kids will love, you’ll really love these no bake chocolate oatmeal cookies, these ranger cookies, and these no bake energy bites with oats. Or, check out these new cookie recipes, here:

    • Hostess Cupcake cookies stacked on top of one another and a bite taken out.
      Hostess Cupcake Cookies
    • caramel drizzling on chocolate gooey butter cookie
      Chocolate Gooey Butter Cookies
    • Stacked snickerdoodle cookies on a vintage plate.
      Mom’s Snickerdoodle Cookies
    • Cookies with cherries, dates and walnuts, stacked on vintage plate.
      Grandma’s Christmas Cookies

    Recipe

    Close up image of one oatmeal cookie on a plate of cookies.
    Print Pin
    5 from 10 votes

    The BEST Oatmeal Raisin Cookies

    The BEST Oatmeal Raisin Cookies: These chewy oatmeal cookies combine simple ingredients like quick oats, sugar, butter, flour and raisins to create the BEST oatmeal raisin cookie ever!
    Course Dessert, Snack
    Cuisine American
    Prep Time 8 minutes minutes
    Cook Time 12 minutes minutes
    Chill Time 15 minutes minutes
    Total Time 35 minutes minutes
    Servings 12 cookies
    Calories 194kcal
    Author Jessica Burgess

    Ingredients

    • ¾ cup quick oats
    • 8 tablespoons butter unsalted, room temperature
    • ½ cup white sugar
    • ¼ cup light muscovado sugar can use dark or brown sugar
    • 1 teaspoon vanilla extract
    • 1 large egg room temperature
    • ¾ cup all purpose flour
    • ½ teaspoon baking soda
    • ½ teaspoon baking powder
    • ¼ teaspoon salt
    • ⅔ cup raisins can add more if you like

    Instructions

    • Heat oven to 350 degrees f.
    • Line 2 large cookie sheets with parchment paper or silicone mats and set aside.
    • In a large bowl, whisk together the flour, oats, baking soda, baking powder, and salt. Mix well and set aside. 
    • With a hand mixer in a large bowl or in a stand mixer with the paddle attachment, beat the butter with both sugars until creamy, about 2 minutes.
      (Note: I don't recommend substituting brown sugar for white sugar entirely. It's been tested and a mix of both gives the best results!) 
    • Add egg, vanilla and beat on low. 
    • Add the flour mixture in batches and mix on low until thoroughly combined.
    • Stir in the raisins with a wooden spoon.
    • For best results, put the dough in the freezer for 10-15 minutes until it resembles soft playdough. If you are short on time, you can still bake the cookies right away without chilling.
      (If you don't chill them, the cookies will spread out more and may be a bit more crispy, but the flavor shouldn't change.)
    • Roll the dough into 12-13 balls (about 2 tablespoons of dough per ball), lay on the prepared baking sheets (don't flatten them).
      Make sure there is about 2-3 inches between each cookie to allow for spreading.
    • Bake for 10-12 minutes. (If you need to make two batches, be sure to pop the dough back in the freezer while the first batch is baking)
    • Let the cookies sit on the baking tray for a few minutes, then transfer them to a wire rack to cool to the touch. Enjoy!

    Nutrition

    Serving: 1cookie | Calories: 194kcal | Carbohydrates: 29g | Protein: 2g | Fat: 8g | Saturated Fat: 5g | Polyunsaturated Fat: 1g | Monounsaturated Fat: 2g | Trans Fat: 1g | Cholesterol: 36mg | Sodium: 164mg | Potassium: 124mg | Fiber: 1g | Sugar: 13g | Vitamin A: 256IU | Vitamin C: 1mg | Calcium: 22mg | Iron: 1mg

    Ranger Cookies

    March 25, 2022

    Ranger cookies piled up on a cutting board.

    Ranger Cookies: These quick and easy ranger cookies (also called cowboy cookies) are crunchy on the outside and chewy on the inside. Corn flakes and crispy rice cereal give these chewy cookies a crunchy texture that will make them a family favorite in no time!

    If you're looking for make-ahead desserts for sharing, take a look at my potluck dessert ideas.

    Ranger cookies piled in a tower with a jug labeled "milk" sitting behind them.
    Ranger cookies with corn flakes.

    Why You’ll Love This Recipe

    I think the original ranger cookies (you know, the coconut ranger cookies with oatmeal) are delicious, but you know what’s better? Ranger cookies with corn flakes. Ranger cookies with Rice Krispies.

    And THE BEST ranger cookies have all of those things in them! This ranger cookie recipe takes a classic for a little spin and creates something even better.

    In this ranger cookies recipe you’ll find all of the classic ranger cookie ingredients (butter, sugar, coconut flakes, oatmeal) as well as some fun new additions to add crunch and flavor (corn flakes, Rice Krispies, walnuts if you like).

    This is quickly becoming one of my new favorite cookie recipes (along with these easy homemade oatmeal raisin cookies) - you have to try it!

    [feast_advanced_jump_to]

    What are Ranger Cookies?

    A ranger cookie is an oatmeal cookie that sometimes contains coconut or other yummy additions. But why is it called a ranger cookie?

    Some say the cookie originated in Texas (so I guess that would make it a Texas ranger cookie), others say it was named “cowboy cookie” because it’s tough enough to withstand a day in a saddle bag.

    But I think you can call it whatever you like, as long as you share some with me! These crispy-on-the-outside and chewy-on-the-inside cookies are so good, I never can seem to eat just one.

    Ingredients

    You can make these cookies with basic ingredients you probably already have your cupboard right now. And if you don’t, you can find them all super easily at the local grocery store!

    • 1 cup unsalted butter, softened at room temperature
    • 1 cup white sugar
    • 1 cup light brown sugar, packed
    • 2 large eggs
    • 1 teaspoon vanilla extract
    • 2 cups all purpose flour
    • 2 teaspoons baking soda
    • ½ teaspoon baking powder
    • 1 teaspoon kosher salt
    • 2 cups quick oats
    • 1 cup corn flakes
    • 1 cup rice cereal (we used Rice Krispies)
    • 1 cup unsweetened coconut flakes
    • 1 cup chopped walnuts, optional
    Ingredients for ranger cookies laid out on a marble countertop.
    Ingredients

    Step-by-Step Instructions

    1. In the bowl of a stand mixer with the paddle attachment on medium speed, cream the softened butter with the granulated sugar and brown sugar until light and fluffy, about 3 minutes. 

    [You can also do this in a large mixing bowl with a hand mixer, or even by hand if you like.]

    Butter, white sugar and brown sugar in a mixing bowl.
    1. Add the eggs and vanilla extract, mix on medium speed until just combined. Scrape down the sides of the bowl as needed.
    Add eggs & vanilla.
    Mixture after eggs and vanilla were added and combined.
    Mix until combined
    1. In a medium bowl, combine flour, baking soda, baking powder and salt and then add this flour mixture to the sugar and butter mixture, mixing on low speed just until combined. 
    Dry ingredients added to the mixing bowl.
    Add the flour mixture.
    Dough once dry ingredients have been combined with wet ingredients.
    Mix just till combined.
    1. Add the oatmeal to the mixing bowl and mix on low speed until combined.
    Oatmeal dumped on cookie dough inside mixing bowl.
    Add oats.
    1. Fold in the cornflakes, rice cereal, shredded coconut and chopped nuts by hand with a sturdy spatula. 
    Coconut flakes, rice cereal, corn flakes, and walnuts dumped onto cookie dough in mixing bowl.
    Add coconut, corn flakes, rice cereal, walnuts.
    Cookie dough once all ingredients are added and mixed together.
    Fold in by hand with spatula.
    1. Using a 1 ounce cookie scoop (or a tablespoon if you don’t have a cookie scoop), create 1 ounce cookie dough balls. Place your dough balls on the parchment lined baking sheet.
    Balls of cookie dough on parchment lined baking sheet.
    Roll 1 oz. dough into a ball.
    1. Bake at 350 degrees f for  9-12 minutes. The cookies will be golden brown around the edges and set in the center. 
    Baked ranger cookies on parchment lined baking sheet.
    Bake 9-12 mins at 350°.
    1. Let cool on the baking sheet for a few minutes before transferring them to a wire cooling rack to let cool completely.
    2. Serve these ranger cookies alongside a glass or milk or a cup of coffee and enjoy!
    Baked ranger cookies cooling on wire rack.
    Cool on a wire rack.

    Substitutions

    This recipe is great as it is, but if you need to make changes we have a few suggestions…

    • Gluten Free – use gluten free flour in place of the all purpose flour (you can usually find this in the natural food aisle of your local grocery store). The rest of the ingredients are already gluten free!
    • No Eggs – you can replace the eggs in this recipe with flax eggs!
    • Dairy Free – if you use a dairy free butter (like Earth Balance) you can easily make these cookies suit a dairy free diet!
    Ranger cookies, layered in front of one another on white surface
    The BEST Ranger Cookies

    Variations

    The original recipe for these cookies already has a ton of fun extras in it, but if you’re the wild kind (like yours truly) and you still want more, try these…

    • Chocolate Chip Cookies – add some chocolate chips (white chocolate chips, milk chocolate chips, dark chocolate chips – it’s up to you) to make these chocolate chip ranger cookies!
    • Other “Chips” – You could also add in other fun “chips” that aren’t chocolate, like peanut butter chips or butterscotch chips.
    • Raisins – if you’re a fan of oatmeal cookies with raisins, like me, try mixing in a handful of raisins! You could mix in any kind of dried fruit you like, as long as it’s chopped up in small enough pieces (cranberries, blueberries, mangos…).

    Cookies are so fun because you can customize a basic recipe to no end and have a different cookie each time you bake them!

    Equipment

    We used a 1 ounce cookie scoop for this recipe, but if you don’t have one you can scoop your dough out with a regular old tablespoon from your cutlery drawer and then roll it into a ball. It works just as well.

    Stacked ranger cookies.

    What is the “scoop and level” method?

    All this fancy term means is that instead of taking your measuring cup and scooping a full cup of flour, you use a spoon or other utensil to slowly fill up the measuring cup and then scrape it flat to ensure you are getting just the right amount.

    If you need to see a more detailed example of what we mean, check out this blog post.

    Storage

    Store your leftover ranger cookies in an airtight container at room temperature for up to a week, or freeze them for up to a month.

    Expert Tips and FAQs

    Why are they called ranger cookies?

    A ranger cookie is an oatmeal cookie that sometimes contains coconut or other yummy additions. But why is it called a ranger cookie?

    Some say the cookie originated in Texas (so I guess that would make it a Texas rangers cookie), others say it was named “cowboy cookie” because it’s tough enough to withstand a day in a saddle bag.

    But I think you can call it whatever you like, as long as you share some with me! These crispy-on-the-outside and chewy-on-the-inside cookies are so good, I never can seem to eat just one.

    What ingredient makes cookies harder? And what is the secret to a chewy cookie?

    The answer to both of these questions, in my opinion, is baking time!

    If you bake a cookie for slightly longer it will become harder, and the secret to a chewy cookie is to make sure you DO NOT overtake them. Keep a close eye on them when they reach the end of their baking time - as long as the cookie is a bit golden brown around the edges, it’s safe to pull them out.

    If you are worried they aren’t quite done yet, let them sit on the pan for 5 mins or so (the heat from the baking sheet will actually continue cooking them a bit even out of the oven). Remember, you can always pop them back in the oven to bake a bit longer but you can’t unbake them!

    What do I add to cookies to make them fluffy?

    The secret to a fluffy cookie is the creaming of the butter and sugar! The process of creaming together butter and sugar incorporates air into your cookie batter.

    While it’s tempting to simply combine then together quickly and move on, letting your butter and sugar beat for a good 3-5 minutes will ensure there is plenty of air mixed in and you get a nice, fluffy cookie.

    Related Recipes

    If you are looking for more great recipes you can whip up on a dime next time company shows up unexpectedly, check out our easy peanut butter cookies and our chewy monster cookies! Or, if you love Crumbl Cookies, make sure you check out these key lime pie copycat cookies!

    Recipe

    Ranger cookies piled up on a cutting board.
    Print Pin
    5 from 8 votes

    Ranger Cookies

    Ranger Cookies: These quick and easy ranger cookies (also called cowboy cookies) are crunchy on the outside and chewy on the inside. Corn flakes and crispy rice cereal give these chewy cookies a crunchy texture that will make them a family favorite in no time!
    Course Dessert, Snack
    Cuisine American
    Prep Time 30 minutes minutes
    Cook Time 12 minutes minutes
    Total Time 42 minutes minutes
    Servings 60 cookies
    Calories 107kcal
    Author Jessica Burgess

    Ingredients

    • 1 cup unsalted butter softened at room temperature
    • 1 cup white sugar
    • 1 cup light brown sugar packed
    • 2 large eggs
    • 1 teaspoon vanilla extract
    • 2 cups all purpose flour scoop and level method
    • 2 teaspoons baking soda
    • ½ teaspoon baking powder
    • 1 teaspoon kosher salt
    • 2 cups quick oats
    • 1 cup corn flakes
    • 1 cup rice cereal we used Rice Krispies
    • 1 cup unsweetened coconut flakes
    • 1 cup chopped walnuts optional

    Instructions

    • In the bowl of a stand mixer with the paddle attachment on medium speed, cream the softened butter with the granulated sugar and brown sugar until light and fluffy, about 3 minutes.
      [You can also do this in a large mixing bowl with a hand mixer, or even by hand if you like.]
    • Add the eggs and vanilla extract, mix on medium speed until just combined. Scrape down the sides of the bowl as needed.
    • In a medium bowl, combine flour, baking soda, baking powder and salt and then add this flour mixture to the sugar and butter mixture, mixing on low speed just until combined. 
    • Add the oatmeal to the mixing bowl and mix on low speed until combined.
    • Fold in the cornflakes, rice cereal, shredded coconut and chopped nuts by hand with a sturdy spatula. 
    • Using a 1 ounce cookie scoop (or a tablespoon if you don't have a cookie scoop), create 1 ounce cookie dough balls. Place your dough balls on the parchment lined baking sheet. 
    • Bake at 350 degrees f for  9-12 minutes. The cookies will be golden brown around the edges and set in the center. 
    • Let cool on the baking sheet for a few minutes before transferring them to a wire rack to let cool completely.
    • Serve these ranger cookies alongside a glass or milk or a cup of coffee and enjoy!

    Video

    Notes

    STORAGE: Store your leftover ranger cookies in an airtight container at room temperature for up to a week, or freeze them for up to a month. 

    Nutrition

    Serving: 2cookies | Calories: 107kcal | Carbohydrates: 13g | Protein: 2g | Fat: 6g | Saturated Fat: 3g | Polyunsaturated Fat: 1g | Monounsaturated Fat: 1g | Trans Fat: 1g | Cholesterol: 14mg | Sodium: 87mg | Potassium: 44mg | Fiber: 1g | Sugar: 7g | Vitamin A: 121IU | Vitamin C: 1mg | Calcium: 12mg | Iron: 1mg

    Banana Bread Pudding

    March 25, 2022

    Slice of banana bread pudding on white plate

    Banana Bread Pudding is a combination of two of the BEST desserts: Banana Bread and Bread Pudding! This is a great way to use up ripe bananas and day-old bread!

    Slice of banana bread pudding on white plate

    It only makes sense to combine two of our most popular recipes, banana bread, and bread pudding, to make this dish, so we did! So get ready for one of the most delicious dessert recipes ever!

    You’ll also love this Old-Fashioned Banana Pudding for a no-baked dessert that’s great for summertime.

    Why You’ll Love This Banana Bread Pudding

    Not only does this recipe use simple ingredients but it uses items that you may even already have on hand!

    With this recipe being flexible when it comes to the type of bread you can use, feel free to use anything such as hamburger buns, hot dog buns, leftover rolls, muffins, donuts like we used in this donut bread pudding, etc. Or, if you are just craving this delicious dessert, you can use regular sliced bread!

    Ingredients

    Here’s what you’ll need to make this:

    (You can also scroll toward the bottom of the post to see the full recipe card with ingredients and instructions all in one place.)

    • 6 slices (about 4-5 cups, loosely measured) leftover french bread, sourdough bread, buns, rolls, donuts, challah, toast, or another type of bread, like when we made this croissant bread pudding recipe – broken in to 1-inch cubes
    • 3 Tablespoons of butter 1 tablespoon + 2 Tbsp
    • 4 large eggs
    • 2 cups milk
    • ½ cup white sugar
    • 1 teaspoon vanilla extract
    • 1 teaspoon cinnamon
    • 2 large bananas (if you only have fresh bananas, this is how you can ripen bananas quickly or take a look at this banana poke cake too.)
    ingredients for banana bread pudding on white table

    Instructions

    1. Preheat oven to 350 degrees, and use 1 Tablespoon of butter to coat the inside of your 8 in. square baking dish. (Or, I melted the 3 tablespoon of butter at once, and poured about 1 tablespoon in to the dish.)
    2. Next, pour bread pieced in to dish.
    Pouring butter in to dish
    Pour 1 tablespoon melted butter
    Pour bread pieces in to dish
    Pour bread pieces in to dish
    1. Using your hand, spread the bread around in the dish, trying to make sure the butter is spreading and that the bread is even in the dish.
    2. Next, pour the remaining melted butter over the top of the bread cubes.
    Spread bread around in dish
    Spread bread around in dish
    Pouring melted butter over bread
    Pour 2 tablespoon melted butter over bread
    1. Crack eggs in to a medium bowl. (Big enough to hold the milk, eggs, etc. that will be added soon.)
    2. Whisk eggs until blended.
    eggs in bowl with whisk
    Whisk eggs in bowl
    Whisked eggs in bowl
    Eggs are whisked
    1. Next, add in milk, cinnamon, vanilla, and sugar.
    2. Whisk together until evenly combined.
    Ingredients in bowl with eggs
    Add cinnamon, sugar, milk
    egg mixture in glass bowl
    Whisk until blended
    1. In a separate bowl or even a plastic zip-top bag, mash bananas.
    2. Carefully pour mashed bananas in to egg mixture and stir or slowly whisk.
    mashed bananas in glass bowl
    Mash bananas
    mashed bananas in bowl with eggs
    Add mashed bananas
    1. Right before pouring egg mixture over bread pieces, stir to make sure ingredients are blended as much as possible.
    2. Pour banana and egg mixture over bread pieces, as evenly as possible. Using spoon, gently press bread down to make sure all/most pieces of bread are coated in batter.
    Pour banana mixture over bread
    Pour banana mixture over bread
    1. Bake in the oven, uncovered, for 45-55 minutes or until the top of bread pudding rises above dish (see below), becomes golden brown and springs back when touched. (If you pull it out, cut in to the middle of the bread pudding, and it still has liquid running, it’s not done yet. Place back in the oven for 5 minutes until the middle is no longer runny. However, it SHOULD be a custard-like, wet, texture.
    Baked banana bread pudding in dish

    Serve a slice of the banana bread pudding as a warm dessert, for a brunch recipe, or as an easy breakfast.

    Banana bread pudding slice on white plate

    If desired, slice any other remaining banana to top the banana bread pudding with for some extra banana flavor!

    Bite of banana bread pudding on fork

    Variations

    Chocolate goes wonderful with banana – Try our chocolate bread pudding recipe for a chocolate chip banana bread pudding. Or, try butterscotch chips for a lovely flavor!

    Caramel Banana Bread Pudding – drizzle in caramel pieces or caramel ice cream drizzle, in to the batter before baking.

    Pineapple Bread – Could you imagine using leftover Pineapple bread for this? That would be some incredible tropical flavor!

    Although this isn’t a bread pudding recipe, this blackberry banana bread is a must-make if you love bananas.

    Banana Bread Pudding on white plate
    Banana Bread Pudding Serving

    Topping Ideas

    Although this is absolutely wonderful to eat the way it is, right out of the oven, you may also decide to top it with some of your favorite toppings. Here are some ideas for you:

    • Caramel Sauce
    • Vanilla Ice Cream
    • Whipped Cream
    • Toffee Pieces
    • Banana Slices
    • Blueberries
    • Strawberries

    How to Store

    If you have leftover banana bread pudding, allow it to cool off completely to room temperature and then store in the refrigerator in an airtight container for 3-5 days.

    To reheat leftovers the next day, place in microwave for 30 seconds to 1 minute until heated through.

    Related Recipes

    If you love easy, old-fashioned desserts, you’ll also love this egg custard, ugly duckling cake, and this gooey butter cake!

    Recipe

    Slice of banana bread pudding on white plate
    Print Pin
    5 from 22 votes

    Easy Banana Bread Pudding

    Banana Bread Pudding is a combination of two of the BEST desserts: Banana Bread and Bread Pudding! This is a great way to use up ripe bananas and day-old bread!
    Course Dessert
    Cuisine American
    Prep Time 5 minutes minutes
    Cook Time 45 minutes minutes
    Total Time 50 minutes minutes
    Servings 8 servings
    Calories 240kcal
    Author Jessica Burgess

    Ingredients

    • 6 slices stale bread french bread, buns, rolls, donuts, challah, toast or another type of bread, broken in to 1-inch cubes or 4-5 cups loosely measured cups of bread pieces
    • 2 ripened bananas (Here's a quick way to ripen bananas.)
    • 3 Tablespoons butter melted
    • 4 eggs
    • ½ cup sugar
    • 1 teaspoon vanilla extract
    • 1 teaspoon cinnamon
    • 2 cups milk

    Instructions

    • Preheat the oven to 350 degrees F.
    • Pour about 1 tablespoon of melted butter in to 8×8 baking dish.
    • Next, pour bread pieces in to dish, and spread them out so they're evenly spread out in the pan.
    • Pour remaining melted butter over bread pieces, set aside.
    • Crack 4 eggs in to a medium sized bowl (one big enough to fit the remaining ingedients. Whisk eggs until combined.
    • Pour in sugar, milk, cinnamon and vanilla. Whisk until combined.
    • Mash bananas in plastic ziptop bag or in a small separate bowl. Pour mashed bananas in to egg mixture and gently stir.
    • Pour egg, banana and milk mixture over the top of bread pieces, trying to cover all of them. Gently press any pieces of bread down, trying to make sure all pieces of bread have been submerged in to batter.
    • Bake at 350° for 45-55 minutes or until bread pudding has risen above the baking dish, has turned golden brown and the top springs back when touched.(If you cut in to the middle and it's still liquid, it needs to cook longer. It should have a custard-like, wet, center but not runny.)
    • Serve warm!

    Notes

    How to Store Banana Bread Pudding
    If you have leftover banana bread pudding, allow to cool off and place in an airtight container, in the refrigerator for 3-5 days.

    Nutrition

    Serving: 1serving (⅛ recipe) | Calories: 240kcal | Carbohydrates: 32g | Protein: 7g | Fat: 9g | Saturated Fat: 5g | Polyunsaturated Fat: 1g | Monounsaturated Fat: 2g | Trans Fat: 1g | Cholesterol: 100mg | Sodium: 188mg | Potassium: 260mg | Fiber: 2g | Sugar: 20g | Vitamin A: 369IU | Vitamin C: 3mg | Calcium: 119mg | Iron: 1mg

    Easter Bark

    March 23, 2022

    Easter Bunny Bark on a plate.

    Easter Bunny Bark: With just 3 simple ingredients you can have this quick, fun, and easy Easter Bunny Bark made in less than 30 minutes! Perfect as an Easter dessert, fun Easter treats, or even as a gift!

    Easter Bunny Bark is a great gift. I mean, who doesn't love a cute, homemade gift idea that you can have ready in under an hour? Wrap it up in a cute little box or plastic bag with some bright, spring-colored ribbon and you have a perfect Easter gift for your friends, family, or neighbors! Or, place it on an Easter board for an adorable dessert!

    Easter Bunny Bark piled on a plate.
    Easter Bunny Bark

    Why you’ll love this recipe

    This Easter bark is perfect because it’s so easy to make, requires only THREE ingredients, and you can use it for Easter treats for the kiddos, as one of your Easter desserts (how cute would this look on your dessert table, next to an Easter chalkboard sign), or even as a gift!

    Oh, and did I mention it is SO yummy?! This is the kind of dessert that you have to give away so you don’t eat it all yourself (I might be speaking from experience, here).

    Make it with your kids

    If your kiddos love to help in the kitchen like mine do, this is a great recipe to let them make with you! We love having our kiddos also help with these Easter Oreo cookies because they have fun with the sprinkles!

    Younger kids could help you spread melted chocolate and press in the fun toppings. Since this is such an easy recipe, older kids could even make it themselves (as long as they keep a close eye on their microwave times and watch the chocolate melt).

    And the best part? When you finish, you have a delicious treat to share!

    [feast_advanced_jump_to]

    Ingredients

    You only need three ingredients to make this simple recipe!

    • 12 ounces semi-sweet chocolate, chopped into small pieces
    • 8 ounces white baking chocolate, chopped into small pieces
    • 4 ounces Cadbury mini eggs, chopped (We used these in this mini egg cookie recipe too!)
    The three ingredients for Easter Bunny Bark – mini eggs, semi-sweet chocolate, white chocolate.
    Ingredients

    Instructions

    1. Line a small baking sheet with parchment paper (about a 7"x10"). If you want to double the recipe, use a large baking sheet.
    2. Melt semi-sweet chocolate in a microwave safe bowl or using a double boiler. If you’re using a microwave, melt in short bursts (30 second increments), mix well and repeat. 
    Chopped semi-sweet chocolate in a bowl.
    Add chopped chocolate to bowl.
    Melted semi-sweet chocolate in a bowl.
    Melt semi-sweet chocolate.
    1. Pour onto the baking sheet and spread as evenly as you can; you do not have to go edge to edge. 
    Melted semi-sweet chocolate dumped on the parchment lined baking sheet.
    Dump chocolate.
    Melted semi-sweet chocolate spread over the parchment lined baking sheet.
    Spread out.
    1. Melt the white chocolate the same way as the semi-sweet.
    Chopped white chocolate in a bowl.
    Chop white chocolate.
    Melted white chocolate in a bowl.
    Melt white chocolate.
    1. Pour on the baking sheet and spread it out covering most or all the semi-sweet chocolate. TIP: Allow it to cool in the fridge for about 5-10 minutes, before starting with the white chocolate if you don’t want the chocolate colors to blend.
    Melted white chocolate drizzled over the melted semi-sweet chocolate.
    Add white chocolate to pan.
    Melted white chocolate smeared on top of the melted semi-sweet chocolate.
    Spread it out.
    1. Immediately add any toppings you want, lightly pressing down if needed to get them to stick into the chocolate.
    2. Chill in the fridge for about 25 minutes until set.
    Easter Bunny Bark on the baking sheet.
    Add toppings.
    1. Place paper on a cutting board and chop into desired sizes and shapes.
    2. Store, well-sealed, for a 7 to 10 days on the counter in a room no more than 70F, in the fridge for a few weeks, or in the freezer for a few months!
    Easter Bunny Bark on a plate.
    Chop and serve!
    Substitutions

    • White baking chocolate - you could use white chocolate chips or instead (and then you don’t have to chop them) or even white candy melts.
    • Semi-sweet chocolate - you could use semi-sweet chocolate chips here (and, again, then you don’t have to chop). You could also use dark chocolate chips instead!

    If you want this to be a white chocolate bark only, you could double the white chocolate and skip the semi-sweet chocolate entirely!

    • Mini chocolate eggs - if you don’t want to this to be an Easter egg bark, you could pick anything from our variations list below and use it in its place!

    Variations

    Easter Bunny Bark is super versatile; you could honestly add whatever you want to it! Here are a few suggestions:

    • chopped cookies (chocolate chip, Oreo, circus animal)
    • chopped, dried fruit
    • pastel sprinkles
    • chopped pretzels (salty and sweet make a perfect combo!)
    • Easter M&Ms (or pastel M&Ms)
    • chopped marshmallow peeps
    • mini marshmallows
    • jelly beans

    This recipe would be a great way to use up all that leftover Easter candy from your kid’s Easter basket (like those chocolate bunnies that everyone seems to get)! Add in your favorite Easter candy and have fun with it!

    Storage

    Store your Easter Bunny Bark, well-sealed, for a week to 10 days on the counter in a room no more than 70F, in the fridge for a few weeks, or freezer for a few months.

    Easter Bunny Bark on a plate.
    Easter Bunny Bark

    Expert tips and FAQs

    How long will Easter Bunny Bark last? 

    If kept in an airtight container in the fridge it should stay fresh for 2-3 weeks. If you prefer your bark left out at room temperature it will last up to 7-10 days. 

    What else can I add to my Easter Bunny Bark? 

    Bark is very versatile so feel free to have fun with it! Here are some suggestions you could try adding: chopped cookies like chocolate chip or Oreo, chopped candy bars, pretzels (perfect for that salty and sweet combination) or dried cranberries!   

    Related Recipes

    Looking for more yummy Easter dessert ideas? We have so many fun Easter dessert recipes on the blog right now! Check out our quick and easy bird nest cookies, these Easter bunny butt cookies, or our super fun, no-bake Easter egg truffles!

    If you love homemade chocolate bark, then you definitely need to try making our white chocolate spiced pecans and our no-bake cake batter truffles!

    Recipe

    Easter Bunny Bark on a plate.
    Print Pin
    5 from 4 votes

    Easy Easter Bark

    Easter Bunny Bark: With just 3 simple ingredients you can have this quick, fun, and easy Easter Bunny Bark made in less than 30 minutes! Perfect as an Easter dessert, Easter treat or even as a gift!
    Course Dessert, Snack
    Cuisine American
    Prep Time 5 minutes minutes
    Set Time 25 minutes minutes
    Total Time 30 minutes minutes
    Servings 10 servings
    Calories 377kcal
    Author Jessica Burgess

    Ingredients

    • 12 ounces semi-sweet chocolate chopped into small pieces
    • 8 ounces white baking chocolate chopped into small pieces
    • 4 ounces Cadbury mini eggs chopped

    Instructions

    • Line a small baking sheet with parchment paper (about a 7"x10"). If you want to double the recipe, use a large baking sheet. 
    • Melt semi-sweet chocolate in a microwave safe bowl or using a double boiler. If you're using a microwave, melt in 30 second increments, mix well and repeat.
    • Pour onto the baking sheet and spread as evenly as you can; you do not have to go edge to edge. 
    • Melt the white chocolate the same way as the semi-sweet.
    • Pour on the baking sheet and spread it out covering most or all the semi-sweet chocolate. 
      TIP: Allow it to cool in the fridge for about 5-10 minutes, before starting with the white chocolate if you don't want the chocolate colors to blend.
    • Immediately add any toppings you want, lightly pressing down if needed to get them to stick into the chocolate.
    • Chill in the fridge for about 25 minutes until set.
    • Place paper on a cutting board and chop into desired sizes and shapes.
    • Store, well-sealed, for a 7 to 10 days on the counter in a room no more than 70F, in the fridge for a few weeks, or in the freezer for a few months!

    Notes

    Store your Easter Bunny Bark, well-sealed, for a week to 10 days on the counter in a room no more than 70F, in the fridge for a few weeks, or freezer for a few months.

    Nutrition

    Serving: 1serving | Calories: 377kcal | Carbohydrates: 38g | Protein: 4g | Fat: 24g | Saturated Fat: 14g | Polyunsaturated Fat: 1g | Monounsaturated Fat: 6g | Trans Fat: 1g | Cholesterol: 8mg | Sodium: 33mg | Potassium: 258mg | Fiber: 3g | Sugar: 32g | Vitamin A: 53IU | Vitamin C: 1mg | Calcium: 89mg | Iron: 2mg

    Almond Milk Pancakes

    March 21, 2022

    Almond milk pancakes with syrup and blueberries on them.

    These fluffy almond milk pancakes are made with simple ingredients you probably already have on hand and they make THE BEST pancakes that your entire family will love!

    Almond milk pancakes stacked with syrup on and around them and blueberries on top of the stack.

    Whip up a batch of these pancakes with eggs and a side of our air fryer bacon or turkey bacon for a breakfast that’ll have your family raving!

    Or you could make a fresh honey lime fruit salad and check out the easy way to make these pancakes vegan, too!

    Why You’ll Love This Recipe

    If you’ve been wondering if you can use almond milk instead of milk for pancakes, the answer is YES! These fluffy, homemade pancakes with almond milk are perfect for anyone who is sensitive to dairy milk (or just prefers almond milk).

    Not to worry, though, if you aren’t a fan of almond milk we have a trick for you to try below so that you can enjoy these fluffy almond milk pancakes as much as traditional pancakes!

    These pancakes are fluffy, perfectly sweet, and flavorful. It’s so easy to make delicious pancakes from scratch that you’ll wonder why you ever used pancake mix in the first place!

    You could make these for an easy breakfast on a Saturday morning or for a fancy brunch with friends, but they are quick and easy enough to make during the week before school, too!

    [feast_advanced_jump_to]

    Ingredients

    You probably have everything you need to make this easy pancake recipe in your kitchen right now! To make almond milk pancakes, you need these simple household ingredients…

    • all-purpose flour
    • baking powder – make sure it’s still in-date for fluffy pancakes.
    • white granulated sugar
    • almond milk – You can use flavored or unflavored almond milk here.
    • vegetable oil – You can use a different type of oil if you prefer, such as coconut oil or avocado oil.
    • vanilla extract – Pure vanilla extract is recommended.

    If you are looking for a regular milk version of these pancakes, check out our amazing fluffy pancake recipe.

    Ingredients needed for almond milk pancakes.

    How to Make Almond Milk Pancakes

    1. In a mixing bowl, mix together the dry ingredients (flour, baking powder, and sugar).
    A whisk mixing up dry ingredients in a glass bowl.
    Mix together dry ingredients.
    1. Next, add in the wet ingredients (almond milk, egg, butter).Then, add in the vanilla last.
    Wet ingredients being whisked into the dry ingredients in the glass bowl.
    Vanilla being added into the pancake batter.
    Add vanilla.
    1. Using a whisk, lightly mix the batter blending the ingredients. Do not overmix. Lumps are good!
    Pancake batter in a glass bowl.
    Batter, ready to go.
    1. Use an additional tablespoon of oil or butter, and melt in a non-stick pan or skillet over medium heat. If you find your pancakes are browning too much, turn to medium-low heat.
    2. Using the ¼ measuring cup, scoop out a serving of batter on the oil (or melted butter) covered pan.
    3. When bubbles start to form on top of the pancake, flip.
    Pancakes being cooked on a skillet.
    Flip when bubbles form.
    1. Cook this side of the pancake for about 1-2 minutes, or until the color of the underside of the pancake reaches a golden brown.
    2. Top your almond milk pancakes with your favorite pancake toppings, serve and enjoy!
    Two stacks of almond milk pancakes on plates with a bowl of blueberries next to it.

    Substitutions

    Need to make this pancake recipe with almond milk just a little bit different? Here are a few suggestions…

    • Vegan – instead of an egg, you can use applesauce, chia seed egg, or one ripe, mashed banana in your almond milk pancakes. Replace the butter with the oil of your choice (or vegan butter) and voila - vegan almond milk pancakes! You could use vegetable oil, olive oil, coconut oil or canola oil.
    • Gluten-Free – if you need gluten-free pancakes, replace the regular flour in this recipe with your favorite gluten-free brand (Bob’s Red Mill 1:1 is a good one, but your local grocery store should have some options available, too).
    • Dairy-Free – since this recipe uses almond milk instead of dairy products, these are perfect dairy-free pancakes! The only substitution you need to make is to swap the butter in this recipe for the oil of your choosing (vegetable and olive oil work well).
    • Nut-free – can’t have almond products (or not a fan of their nutty flavor)? Try using coconut milk, soy milk, or oat milk in place of the almond milk.
    • Sugar – if you prefer not to use white sugar, you can use brown sugar, honey, or maple syrup in its place!

    Variations

    The easiest way to add some variety to your pancakes is to customize the toppings! This almond milk pancake recipe can be made in over 95 different ways if you switch up the yummy toppings. Think we’re exaggerating? Check out this post - 95+ pancake topping ideas!

    You can also play around with mix-ins to add some fun to your pancakes! Here are a few of our favorites:

    • chocolate chips
    • cut up strawberries
    • cereal (like Lucky Charms)
    • blueberries

    Does Almond Milk Taste Good in Pancakes?

    We think that the almond milk in these pancakes gives them a yummy, mildly nutty flavor but we also know that now everyone is a fan of almond milk or almonds in general.

    If you are one of the people who doesn’t really like the taste of almond milk, we have a trick for you to try! When you buy almond milk in the grocery store, you’ll see that there are usually plain versions and vanilla versions - if you use vanilla almond milk, you’ll taste much more of the vanilla flavor than the almond flavor!

    Just be sure you are still buying the unsweetened kind, or you may need to cut back on the sugar in the recipe (or cut it out entirely, depending on how you like your pancakes).

    Storage

    Once cool, store leftovers in an airtight container in the fridge for 3-4 days.

    You can also freeze your leftovers! Once cooked and cooled, store the pancakes in the freezer in an airtight, freezer-safe bag/container until ready to reheat and serve.

    Pouring syrup over almond milk pancakes.

    Make Your Own Dry Pancake Mix

    To save even more time in the future, whip up extra dry ingredients to create your own pancake mix and store it in a sealable container or bag. Then, just add the wet ingredients when it comes time to make! 

    Pro Tip: Print off the recipe card below and tape it to the plastic container for easy reference!

    This is perfect to take with you camping so you can have fresh, homemade pancakes cooked over the fire without the hassle of mixing it all up there at your campsite!

    Expert Tips and FAQs

    Can you substitute egg with anything to make these almond pancakes vegan?

    Instead of an egg, you can use a flax egg, applesauce, chia seed egg, or one ripe, mashed banana in your almond milk pancakes. Replace the butter with the oil of your choice (or vegan butter) and voila - vegan almond milk pancakes!

    Can I make this almond milk pancake batter ahead of time?

    Yes, you can actually make the pancake batter in advance! Simply mix as instructed and refrigerate in an air-tight, covered container for up to 2 days, until ready to cook.

    Can I freeze leftover pancakes?

    Absolutely! Once cooked and cooled, store the pancakes in the freezer until ready to reheat and serve!
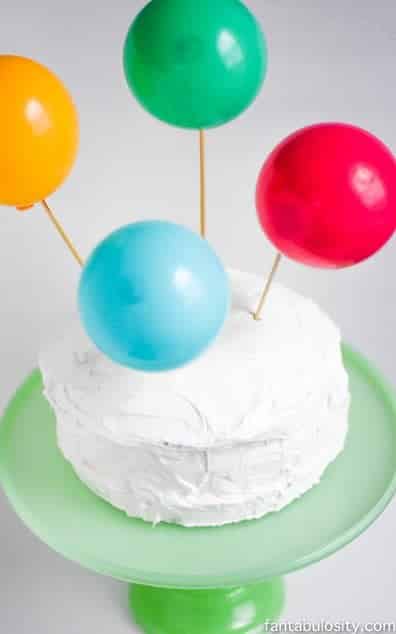
    You could even make a large batch (simply double or triple the recipe using the quick-calculation buttons in the recipe card below to figure measurements for you) and freeze extras to have on hand for worry-free breakfasts on weekdays.

    Related Recipes

    We are BIG fans of pancakes around here! If this is your first time here, I want to make sure you know about our delicious blueberry pancakes, secret healthy ingredient pancakes (hint: the kids will never know!), our easy Oreo pancakes and our Lucky Charms pancakes that are perfect for St. Patrick’s Day (or really any day)!

    If you love using almond variations in your recipes, make sure to check out this homemade almond butter too!

    Recipe

    Almond milk pancakes with syrup and blueberries on them.
    Print Pin
    5 from 5 votes

    Almond Milk Pancakes

    These fluffy almond milk pancakes are made with simple ingredients you probably already have on hand and they make THE BEST pancakes that your entire family will love! 
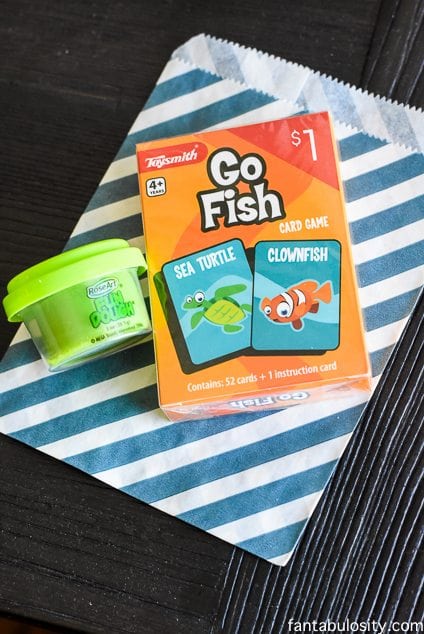
    Course Breakfast, Snack
    Cuisine American
    Prep Time 5 minutes minutes
    Cook Time 2 minutes minutes
    Total Time 7 minutes minutes
    Servings 5 pancakes
    Calories 250kcal
    Author Jessica Burgess

    Ingredients

    • 1 ½ cups all purpose flour
    • 3 ½ teaspoons baking powder
    • 3 tablespoons white sugar
    • 1 ¼ cups almond milk
    • 1 egg
    • 3 tablespoons butter (or vegetable oil, for vegan/dairy free)
    • 1 teaspoon vanilla extract

    Instructions

    • In a mixing bowl, mix together the dry ingredients (flour, baking powder, and sugar).
    • Next, add in the wet ingredients (almond milk, egg, butter and vanilla).
    • Using a whisk, lightly mix the batter blending the ingredients. Do not overmix. Lumps are good!
    • Use an additional tablespoon of oil or butter, and melt in a non-stick pan or skillet over medium heat. If you find your pancakes are browning too much, turn to medium-low heat. 
    • Using the ¼ measuring cup, scoop out a serving of batter on the oil (or melted butter) covered pan.
    • When bubbles start to form on top of the pancake, flip.
    • Cook this side of the pancake for about 1-2 minutes, or until the color of the underside of the pancake reaches a golden brown.
    • Top your almond milk pancakes with your favorite pancake toppings, serve and enjoy!

    Notes

    • Making Pancakes in Advance - You can actually make the pancake batter in advance. Simply mix as instructed and refrigerate in an air-tight, covered container for up to 2 days, until ready to cook.
    • Freezing Pancakes - Love having pancakes on hand? You can make a large batch (simply double or triple the recipe using the quick-calculation buttons in the recipe card below to figure measurements for you) and once cooked and cooled, store the pancakes in the freezer until ready to reheat and serve!
    • To save even more time in the future, whip up extra dry ingredients to create your own pancake mix and store it in a sealable container or bag. Then, just add the wet ingredients when it comes time to make! Pro Tip: Print off the recipe card below and tape it to the plastic container for easy reference!
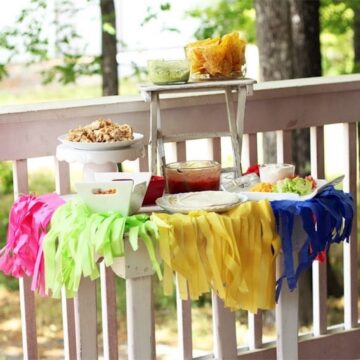
    Nutrition

    Serving: 1pancake | Calories: 250kcal | Carbohydrates: 37g | Protein: 4g | Fat: 9g | Saturated Fat: 1g | Polyunsaturated Fat: 5g | Monounsaturated Fat: 2g | Trans Fat: 1g | Sodium: 85mg | Potassium: 324mg | Fiber: 1g | Sugar: 7g | Calcium: 202mg | Iron: 2mg

    Easter Coconut Macaroon Nests

    March 20, 2022

    Easter coconut macaroon nest cookies sitting on a plate.

    Easter Coconut Macaroon Nests: These Easter coconut macaroon cookies are quick and easy to make, and would make a beautiful addition to your holiday dessert table!

    Quick Overview: Mix ingredients, shape, and bake at 325° for 20-25 mins. Add white chocolate to the “nest”, top with eggs, serve & enjoy!

    Easter coconut macaroon nest cookies sitting on a plate.

    Why you’ll love this recipe

    I don’t know about you, but I love any excuse to decorate and make my house feel fun and festive. This also extends to the meals I cook for holidays and special events – the more fun we can make it, the better!

    Enter these adorable (and delicious) macaroon nest cookies! I love that they are a bit different than your regular old cookie, and they are super cute and festive.

    If you are looking for an easy dessert that will create a big wow factor, put these cookies on your “must bake” list for this Easter, with these decorated Easter Oreo cookies.

    [feast_advanced_jump_to]

    Ingredients

    This recipe uses simple, everyday ingredients you can find in your grocery store to create something elegant!

    You’ll need:

    • 1⅓ cups sweetened shredded coconut
    • ⅓ cup white sugar
    • 3 tablespoons flour
    • ⅛ teaspoon salt
    • 2 egg whites room temperature
    • ½ teaspoon vanilla extract
    • 1 cup white chocolate morsels melted
    • 24 candy coated chocolate mini eggs like Cadbury Mini Eggs

    Skip to the recipe card now, or keep reading to see how insanely easy it is to make these cute Easter treats!

    Ingredients for easter coconut macaroon nests.
    Ingredients

    Instructions

    1. Preheat the oven to 325 degrees f. Prepare a baking sheet by lining it with parchment paper.
    2. In a medium bowl, stir together the coconut, sugar, flour, and salt.
    Coconut, sugar, flour and salt in a bowl.
    Combine dry ingredients.
    1. In a separate, small bowl, whisk together the egg whites and vanilla just until blended. Stir the egg mixture into the coconut mixture until completely combined.
    Egg whites and vanilla being whisked together in a small bowl with a fork.
    Whisk egg whites & vanilla.
    1. Roll the dough out into approx. 2 inch balls and place the dough balls on the prepared baking sheet. Using a teaspoon, press a well into the center (this creates your “nest” shape).
    Roughly a 2" cookie dough ball inside a cookie scoop.
    Create 2″ balls of dough.
    A spoon creating indents in the balls of macaroon cookie dough to make nests.
    Press a well in the centre.
    1. Bake for 20 to 25 minutes or until the edges begin to brown. Remove from the oven and cool completely on a wire rack. 
    2. Put your white chocolate in a microwave safe bowl and warm it in the microwave in 30 second intervals until it’s fully melted, stirring after each interval. Should take 1-2 mins.
    3. Transfer the melted white chocolate into a piping bag (or a ziplock bag, and then snip a tiny bit of the corner off to create a piping bag) and fill each well with chocolate. 
    Melted white chocolate in a piping bag next to baked macaroon nests.
    Melt chocolate, transfer to piping bag.
    1. Immediately place three candies into each well before the chocolate hardens! Allow the chocolate to set completely prior to storing or serving so your eggs don’t roll out. 
    Candy coated chocolate mini eggs in a bowl next to completed coconut macaroon nest cookies.
    Top chocolate with mini eggs immediately.
    1. Serve & enjoy!
    Easter coconut macaroon nest cookies.
    Serve & enjoy!

    Substitutions

    • Sugar Free – if you are on a restricted diet as far as sugar goes, you could reduce the sugar in this recipe by using unsweetened shredded coconut, stevia in place of the sugar, and sugar free white chocolate. For the eggs, you can search your local grocery store or bulk store for a sugar free candy option!
    • Gluten Free – this recipe is really well suited to being made gluten free since it only calls for a small amount of flour. You could easily replace the 3 tablespoon of flour in this recipe with a gluten free blend (check the natural aisle of your local grocery store – it’s getting much easier to find)!

    Variations

    While this recipe is specifically for an Easter macaroon, you could easily make this cookie suit any holiday or special occasion!

    • Christmas – add red and green M&Ms in the nest
    • Halloween – fill the nest with candy corn or orange and black M&Ms (how great is it that there is an M&M for every holiday?)
    • Thanksgiving – find those cute little pumpkin candies and turn your macaroon nests into a tiny pumpkin patch!

    You could also fill them with your favorite candy and serve them any old time you like!

    Easter coconut macaroon nest cookies.
    Easter coconut macaroon nests.

    Storage

    You can store these in a single layer in an airtight container on the counter for up to 1 week (or freeze them in a single layer in an airtight, freezer safe container for up to a month!)

    While they don’t need to be refrigerated after baking, if you store your macaroons in a single layer in an airtight container in the fridge, they should stay crispy on the outside.

    Expert tips and FAQs

    How do you keep coconut macaroons from spreading?

    Most of the time cookies will spread as the fat in the recipe melts (which is why people refrigerate dough to keep it from spreading while baking).

    Since these coconut macaroon nests are held together with egg whites and not a fat, they shouldn’t spread very much at all.

    How do you keep coconut macaroons crispy?

    While they don’t need to be refrigerated after baking, if you store your macaroons in a single layer in an airtight container in the fridge, they should stay crispy on the outside.

    What’s the difference between a coconut macaroon and a macaron?

    These sound a lot alike, but they are actually quite different. Both macaroons and macarons are cookies made with egg whites, but macarons are typically made with finely ground blanched almonds while macaroons are made with sweetened flaked coconut.

    The Food Network has a blog post showing you exactly what we mean.

    Do coconut macaroons need to be refrigerated?

    No, you don’t need to refrigerate your macaroons (although they will stay crispier if you do). You can store these in an airtight container on the counter for up to 1 week (or freeze them in a single layer in an airtight, freezer safe container for up to a month!)

    Related Recipes

    Looking for other quick, easy, and delicious Easter dessert recipes? You HAVE to check out our Easter bird nest cookies and our easy Easter egg truffles!

    Recipe

    Easter coconut macaroon nest cookies sitting on a plate.
    Print Pin
    5 from 1 vote

    Easter Coconut Macaroon Nests

    Easter Coconut Macaroon Nests: These Easter coconut macaroon cookies are quick and easy to make, and would make a beautiful addition to your holiday dessert table! 
    Course Dessert, Snack
    Cuisine American
    Prep Time 10 minutes minutes
    Cook Time 25 minutes minutes
    Total Time 35 minutes minutes
    Servings 8 cookies
    Calories 259kcal
    Author Jessica Burgess

    Ingredients

    • 1⅓ cups sweetened shredded coconut
    • ⅓ cup white sugar
    • 3 tablespoons flour
    • ⅛ teaspoon salt
    • 2 egg whites room temperature
    • ½ teaspoon vanilla extract
    • 1 cup white chocolate morsels melted
    • 24 candy coated chocolate mini eggs like Cadbury Mini Eggs

    Instructions

    • Preheat the oven to 325 degrees f. Prepare a baking sheet by lining it with parchment paper.
    • In a medium bowl, stir together the coconut, sugar, flour, and salt.
    • In a separate, small bowl, whisk together the egg whites and vanilla just until blended. Stir the egg mixture into the coconut mixture until completely combined.
    • Roll the dough out into approx. 2 inch balls and place the dough balls on the prepared baking sheet. Using a teaspoon, press a well into the center (this creates your "nest" shape).
    • Bake for 20 to 25 minutes or until the edges begin to brown. Remove from the oven and cool completely on a wire rack.
    • Put your white chocolate in a microwave safe bowl and warm it in the microwave in 30 second intervals until it's fully melted, stirring after each interval. Should take 1-2 mins.
    • Transfer the melted white chocolate into a piping bag (or a ziplock bag, and then snip a tiny bit of the corner off to create a piping bag) and fill each well with chocolate.
    • Immediately place three candies into each well before the chocolate hardens! Allow the chocolate to set completely prior to storing or serving so your eggs don't roll out.
    • Serve & enjoy!

    Notes

    STORAGE: You can store these in a single layer in an airtight container on the counter for up to 1 week (or freeze them in a single layer in an airtight, freezer safe container for up to a month!)
    While they don’t need to be refrigerated after baking, if you store your macaroons in a single layer in an airtight container in the fridge, they should stay crispy on the outside.

    Nutrition

    Serving: 1cookie | Calories: 259kcal | Carbohydrates: 33g | Protein: 3g | Fat: 14g | Saturated Fat: 10g | Polyunsaturated Fat: 1g | Monounsaturated Fat: 2g | Cholesterol: 5mg | Sodium: 111mg | Potassium: 131mg | Fiber: 1g | Sugar: 30g | Vitamin A: 14IU | Vitamin C: 1mg | Calcium: 54mg | Iron: 1mg

    Chocolate Cream Cheese Pie

    March 19, 2022

    No bake chocolate pie slice on wood spatula

    This chocolate cream cheese pie is such an easy recipe, that uses only 6 ingredients, and is frozen to “set”, making it a no-bake dessert recipe that is velvety delicious. Similar to our turtle pie recipe, it’s filled with chocolate flavor!

    Quick Overview: Using a store-bought Oreo pie crust, it only takes 10 minutes to put together. Freeze for at least 6 hours to set or overnight. But make sure you check this one out if you’re looking for more of an old-fashioned chocolate pie recipe. It’s one of our popular pie recipes! Or, if you have extra cream cheese on hand, this dump cake with strawberries and cream cheese also takes minutes to prepare using a store-bought yellow cake mix.

    Slice of no bake chocolate pie on wooden spatula

    Why You’ll Love This Recipe

    I wasn’t sure whether to call this recipe a chocolate cheesecake pie or chocolate cream cheese pie but since the texture is a little firmer than a typical cheesecake, say like our no-bake Oreo cheesecake, I figured it would be called, a “cream cheese pie.” Either way… it’s one of our favorite no-bake desserts that cream cheese lovers and any chocolate lover will adore.

    Then, whether you need an easy dessert recipe just for fun or for a holiday gathering, this is an ideal pie because you can make it ahead of time, or even freeze it for up to 1-2 months (so much like our No Bake Candy Cane Pie)!

    Plus, with only a few simple ingredients, you probably even have almost all of the ingredients (if not all of them) on hand!

    [feast_advanced_jump_to]

    Ingredients

    Some of our favorite recipes around here are those that have shortcuts or include very few ingredients. This chocolate cream cheese pie recipe is no different! It uses a store-bought oreo pie crust but you can also use your own pie crust recipe if you prefer. (See alternative ideas for different pie crusts below.)

    ingredients for pie on counter
    Ingredients
    • 1 store-bought chocolate Oreo crust (or desired type of pie crust)
    • 1 – 8 oz block of cream cheese, room temperature
    • ½ cup whole milk
    • 1 cup powdered sugar
    • 8 oz container of Cool Whip (store-bought whipped cream), room temperature
    • 1 cup semi-sweet chocolate chips (or milk chocolate, white chocolate, etc.)

    See the full recipe card for ingredients and instructions all in one place.

    Instructions

    1. Place cream cheese in a large bowl and mix together with an electric mixer or stand mixer until smooth and creamy.
    2. Once whipped, add the milk and powdered sugar to the mixing bowl and mix the ingredients until smooth and blended together.
    3. Next, add in the Cool Whip and mix again until it is fully incorporated into the pie mixture.
    powdered sugar and milk poured in bowl
    Add milk and powdered sugar
    add in Cool Whip to mixture in bowl
    Add in Cool Whip
    1. Melt the chocolate chips in the microwave, by placing them in a separate small or medium bowl. Melt for 30 seconds, stirring and microwaving an additional 30 seconds until just melted. (Don’t over cook them.)
    2. Pour the melted chocolate into the cream cheese mixture, and stir until blended in.
    3. Pour the chocolate filling into the pie shell and place the pie in the freezer to set for at least 6 hours, or overnight. (It may be best to cover with plastic wrap or in an airtight container.)
    melted chocolate chips poured on mixture
    Add melted chocolate chips
    Pour chocolate mixture in to crust
    Pour mixture in to crust
    1. Top with whipped cream, shaved chocolate, serve and enjoy! (You can pipe stiff peaks of whipped cream like shown here or you can just spread on top!) You can also top individual servings as well, just before serving.
    Top of chocolate pie decorated
    If desired, decorate the top

    Expert Tips and FAQs

    • It is important to make sure the cream cheese is at room temperature before starting the recipe, otherwise, the mixture will not combine properly, and you may end up with chunks of cream cheese throughout your pie.
    • Chocolate Shavings: To make chocolate shavings, you can use a vegetable peeler, and shave the edge of a chocolate bar for narrow curls, or the side of the chocolate bar for wide curls.
    Chocolate pie topped with whipped cream and chocolate shavings

    Substitutions

    • Crust: If you’d love to switch up the crust you use for this recipe, you may love this Biscoff pie crust! Or, we used a graham cracker crust in this pumpkin pie, so you may prefer that too!
    • Cocoa Powder: You can use ⅓ cup cocoa powder instead of chocolate chips if you want a more subtle chocolate flavor.
    • Chocolate: Want to do chocolate curls/shavings but wanting to mix things up? Using a white chocolate bar, or a dark chocolate bar for the shavings!
    No bake chocolate pie slice on gray plate
    Slice of no bake chocolate pie

    Variations

    If you only have certain items on hand, it’s completely ok to mix things up sometimes! For this recipe you can:

    • Want to make your own pie crust? Go for it! Only have a graham cracker pie crust? That’s ok too! You will still end up with a delicious recipe.
    • You can use any kind of chocolate chips in this recipe. Love milk chocolate chips? That’s absolutely fine!
    • Instead of using Cool Whip for the topping, you can make your own homemade whipped topping by whipped heavy whipping cream and sugar together, if you prefer! It does tend to pipe better and hold it’s “peak” longer than storebought Cool Whip.
    Bite of chocolate pie on gold fork
    Take a bite!

    Storage

    If you have leftovers or want to make in advance, this pie will last for 1-2 months in the freezer. Just make sure to store it properly in an airtight container that’s suited for the freezer.

    Related Recipes

    If you loved this pie, then you’ll also love this Oreo dessert, peanut butter pie, and Biscoff cookie cheesecake! Or, if you haven’t heard of this possum pie recipe, you’ll definitely want to check it out! Or, for an old-fashioned dessert idea, you’ll also love these chocolate fried pies.

    Recipe

    No bake chocolate pie slice on wood spatula
    Print Pin
    5 from 15 votes

    Chocolate Cream Cheese Pie

    This chocolate cream cheese pie is such an easy recipe, that uses only 6 ingredients, and is frozen to "set", making it a no-bake dessert that is velvety delicious.
    Course Dessert
    Cuisine American
    Prep Time 10 minutes minutes
    Freeze Time 6 hours hours
    Total Time 6 hours hours 10 minutes minutes
    Servings 10 servings
    Calories 320kcal
    Author Jessica Burgess

    Ingredients

    • 1 oreo pie crust store bought
    • 8 ounces cream cheese room temperature
    • ½ cup whole milk
    • 1 cup powdered sugar
    • 8 ounces Cool Whip room temperature
    • 1 cup semi-sweet chocolate chips

    Instructions

    • In a large mixing bowl, whip the cream cheese until smooth and creamy.
    • Once whipped, add the milk and powdered sugar to the mixing bowl and mix the ingredients until smooth and mixed together.
    • Add in the cool whip and mix again until the Cool Whip is fully incorporated into the pie mixture.
    • Melt the chocolate chips in the microwave, by placing them in a small separte bowl. Melt for 30 seconds, stirring and microwaving an additional 30 seconds until just melted. (Don't over cook them.)
    • Pour the melted chocolate into the mixture, and stir until mixed together.
    • Pour the mixture into the pie crust and place the pie in the freezer to set for at least 6 hours, or overnight.
    • Top with whipped cream, shaved chocolate, serve and enjoy!

    Notes

    To store leftover pie or to freeze and make-ahead:
    If you have leftovers or want to make in advance, this pie will last for 1-2 months in the freezer. Just make sure to store it properly in an airtight container that’s suited for the freezer.

    Nutrition

    Serving: 1slice | Calories: 320kcal | Carbohydrates: 32g | Protein: 4g | Fat: 20g | Saturated Fat: 10g | Polyunsaturated Fat: 2g | Monounsaturated Fat: 6g | Trans Fat: 1g | Cholesterol: 29mg | Sodium: 136mg | Potassium: 183mg | Fiber: 2g | Sugar: 26g | Vitamin A: 373IU | Calcium: 73mg | Iron: 1mg

    Lucky Charms Blondies

    March 12, 2022

    Stacked Lucky Charms Blondie Bars

    Lucky Charms Blondies are an easy dessert recipe, using a cake mix that’s perfect any time of year but especially on St. Patrick’s Day!

    Quick Overview: Bake for 30 minutes at 350° and allow to cool if frosting is desired! See below for ingredients for blondies and fun Lucky Charms frosting!

    Stacked Lucky Charms Blondies on white counter

    Bars like this are easy to portion and share, which is why they're included in my potluck desserts collection.

    Why You’ll Love This Recipe

    I just love making holidays feel fun and festive. I say it’s for my kids, but honestly I love it just as much as they do!

    I made this super cute St. Patrick’s Day printable a few years ago (you can get it for free), and this year I think I’m going to make this Lucky Charms blondies recipe for dessert and this St. Patrick’s Day dessert charcuterie, on St. Patrick’s Day!

    These Lucky Charms bars are quick and easy to make but they are packed full of flavor, color, and fun. You need to try them for yourself! The bite of the soft blondie with the crunch of the cereal pieces may just be my favorite! (Well, these and the Lucky Charms Treats too of course.)

    [feast_advanced_jump_to]

    Ingredients

    This recipe uses simple ingredients (and some festive, fun sprinkles) to create a yummy dessert that kids of all ages will love!

    You’ll need:

    Blondies

    • 1 box white cake mix
    • 1 large egg
    • ⅓ cup oil vegetable or olive work well
    • ¼ cup water
    • ¼ cup whipping cream 35% cream
    • ¾ cup white chocolate chips
    • ¼ cup St. Patrick’s Day themed sprinkles optional

    Frosting

    • ½ cup butter 1 stick, softened at room temperature
    • 4 ounces cream cheese softened at room temperature
    • 1 tablespoon milk
    • 4 cups powdered sugar aka icing sugar
    • ⅛ teaspoon salt
    • 2 teaspoons almond extract
    • green food coloring optional
    • 1 entire box of Lucky Charms cereal
    • St. Patrick’s Day themed sprinkles optional
    Ingredients needed to make leprechaun blondies.
    Blondie ingredients.
    Frosting ingredients.
    Frosting ingredients.

    How to make this easy blondie recipe

    1. Preheat oven to 350°, spray a 9×13 baking dish and set aside.
    9x13" pan sprayed with cooking spray.
    Grab your baking dish
    1. In a large bowl combine the cake mix, egg, oil, water, whipping cream, and mix well. Fold in the white chocolate chips and sprinkles.
    Cake mix, egg, oil, water, whipping cream in a large bowl.
    Mix batter ingredients.
    Sprinkles and white chocolate chips poured into the bowl of batter.
    Fold in sprinkles and chocolate chips.
    1. Spread the batter evenly in the prepared 9×13 baking dish.
    Blondie batter spread into the prepared 9x13" pan.
    Spread into pan.
    1. Bake for 30 minutes or until a toothpick inserted comes out clean. Let cool completely before adding the frosting (about 20 minutes).

    To make the frosting…

    1. In a medium bowl, cream softened butter and cream cheese until smooth and creamy.
    Butter and cream cheese in a large bowl.
    Cream butter and cream cheese.
    1. Add milk and salt; mix together.
    Milk and salt added to the creamed butter frosting mixture.
    Add milk and salt.
    1. Add 1 cup of sugar at a time, mixing well after each addition.
    Icing sugar added to the frosting mixture bowl.
    Add sugar
    1. Add almond extract and the desired amount of food coloring. Mix until combined.
    Almond extract and green food colouring added to the icing mixture.
    Add extract & color.
    1. Spread on top of cooled blondies. Sprinkle the cereal and sprinkles on top. Cut into bars and enjoy!
    Frosting on top of the blondies in the 9x13 pan.
    Spread frosting.
    Lucky Charms cereal on top of the frosting on the blondies.
    Top with cereal.
    Cut up Lucky Charms Bars.
    Cut up & enjoy!

    Substitutions

    If you’re short on ingredients or need to switch things up a bit, here are a few substitution suggestions…

    • Oil – you can replace this with melted butter
    • Whipping Cream – your blondie will be a little less rich, but you could simply use milk in place of the cream

    Variations

    Blondie recipes are fun because you can play around with them and they are always delicious in the end! For example…

    • Icing Flavors – in the recipe we used almond extract, but you could easily swap that for vanilla, orange, or another extract to make the icing whatever flavor you wanted!
    • Change the Theme – if you are making these for a different occasion (not St.Patrick’s Day), switch up the cereal/sprinkles/food color to match the occasion! Having a birthday party? Try Froot Loops, rainbow sprinkles and pink food colouring.
    • Box Mix – we used a white cake mix for this recipe, but you could experiment with different types of mix! Yellow cake mix, butter cake mix, or even cherry chip…so many options!
    • Store Brand Cereal – You can use a store brand of Lucky Charms instead of General Mills but we’ve tried all kinds and we keep coming back to the OG!
    • Extra Lucky Charms Marshmallows – If you really want to load up on Marshmallows, you can try and find the packages of JUST marshmallows!
    • Marshmallow Drizzle – Want some extra fun toppings? Drizzle marshmallow cream (or ice cream topping) on top!
    • Add chopped fruit – I love the combination of cherries and almond flavor, so I created these blondies with cherries.
    A Lucky Charms bar.
    Lucky Charms Blondies

    Storage

    Because there is cream cheese in the frosting, it’s best to store these bars in the fridge. Put them in an airtight container and they should keep for up to a week in the fridge!

    Expert Tips and FAQs

    My batter turned green from the sprinkles but I wanted it to be white. Help!

    Oops, sprinkles have a tendency to leak color and do that. If you would prefer to have a white/plain batter, just leave out the sprinkles. We promise they’ll still feel festive without them.

    What is a blondie?

    A typical blondie is essentially a brownie without chocolate (typically vanilla flavored). They are just as decadent and dense as a brownie, but without the chocolate flavors.

    Related Recipes

    If you’re looking for quick and easy ways to make your St. Patrick’s Day more festive, check out our super fun Lucky Charms Pancakes and this adorable free St. Patrick’s Day printable! Or if you’re looking just to curve that sweets craving, you’ll also love these marshmallow treats!

    Recipe

    Stacked Lucky Charms Blondie Bars
    Print Pin
    5 from 4 votes

    Lucky Charms Blondies

    Lucky Charms Blondies are an easy dessert recipe, using a cake mix that's perfect any time of year but especially on St. Patrick's Day!
    Course Dessert, Snack
    Cuisine American
    Prep Time 5 minutes minutes
    Cook Time 30 minutes minutes
    Cooling Time 20 minutes minutes
    Total Time 55 minutes minutes
    Servings 16 bars
    Calories 609kcal
    Author Jessica Burgess

    Ingredients

    Blondies

    • 1 box white cake mix
    • 1 large egg
    • ⅓ cup oil vegetable or olive work well
    • ¼ cup water
    • ¼ cup whipping cream 35% cream
    • ¾ cup white chocolate chips
    • ¼ cup St. Patrick's Day themed sprinkles optional

    Frosting

    • ½ cup butter 1 stick, softened at room temperature
    • 4 ounces cream cheese softened at room temperature
    • 1 tablespoon milk
    • 4 cups powdered sugar aka icing sugar
    • ⅛ teaspoon salt
    • 2 teaspoons almond extract
    • green food coloring optional
    • 1 box Lucky Charms cereal
    • St. Patrick's Day themed sprinkles optional

    Instructions

    Blondies

    • Preheat oven to 350°, spray a 9×13 baking dish and set aside.
    • In a large bowl combine the cake mix, egg, oil, water, whipping cream, and mix well. Fold in the white chocolate chips and sprinkles.
    • Spread the batter evenly in the prepared 9×13 baking dish.
    • Bake for 30 minutes or until a toothpick inserted comes out clean. Let cool completely before adding the frosting (about 20 minutes).

    Frosting

    • In a medium bowl, cream softened butter and cream cheese until smooth and creamy.
    • Add milk and salt; mix together.
    • Add 1 cup of sugar at a time, mixing well after each addition.
    • Add almond extract and the desired amount of food coloring. Mix until combined.
    • Spread on top of cooled blondies. Sprinkle the cereal and sprinkles on top. Cut into bars and enjoy!

    Notes

    STORAGE: Because there is cream cheese in the frosting, it’s best to store these bars in the fridge. Put them in an airtight container and they should keep for up to a week in the fridge!

    Nutrition

    Serving: 1bar | Calories: 609kcal | Carbohydrates: 85g | Protein: 4g | Fat: 29g | Saturated Fat: 10g | Polyunsaturated Fat: 7g | Monounsaturated Fat: 10g | Trans Fat: 1g | Cholesterol: 42mg | Sodium: 555mg | Potassium: 126mg | Fiber: 1g | Sugar: 61g | Vitamin A: 877IU | Vitamin C: 5mg | Calcium: 185mg | Iron: 5mg

    Juicy Lucy Burgers

    February 27, 2022

    A juicy Lucy burger cut in half so we can see the cheese inside and stacked one half on top of the other.

    Juicy Lucy Burgers: Juicy burger patties are stuffed with a slice of cheese to create an easy homemade version of the classic “Juicy Lucy” (or Jucy Lucy) burger!

    We are HUGE fans of burger recipes around here. No matter if it’s beef patties, baked turkey burgers, crispy chicken burgers, or something wild like a donut burger! Plus, you’ll find out about our most popular burger here on the blog, below, when we talk about baking these in the oven!

    A juicy Lucy burger cut in half and stacked so we see the cheese inside. There are tater tots on the plate as well.

    What is a Lucy Burger? Why is it called a Juicy Lucy?

    A Juicy Lucy burger is basically the ultimate cheeseburger- unlike a regular cheeseburger that has the cheese on top of the patty, a Juicy Lucy burger has a cheese slice stuffed in the center of the patty!

    As it cooks, the fat in the burger patty combines with the melted cheese to create a delicious, molten cheese sauce on the inside. It’s a juicy hamburger, for sure!

    [feast_advanced_jump_to]

    Where are Juicy Lucy Burgers From?

    Juicy Lucy burgers originated in Minneapolis, Minnesota, and are touted as “Minnesota's favorite pan-seared burgers busting at the seams with melty cheese!”

    There are actually two different bars that both claim to have created these extra cheesy burgers, Matt’s bar and the 5-8 Club.

    No matter who created it, it’s a delicious burger and I think you’re going to love it!

    Ingredients for Juicy Lucy Burgers

    This is one of those easy recipes that use simple ingredients (as all great recipes do) to create something delicious!

    To make Juicy Lucy burgers, you’ll need:

    • 6 hamburger buns
    • 2 pounds ground beef – 80/20 ground beef or regular ground beef- not lean beef. (Or, try these other ground beef recipes, or if you have ground venison in the freezer, you could make these as directed but make a venison burger recipe instead!)
    • 12 slices of American or cheddar cheese
    • 3 tablespoons Worcestershire sauce
    • 1 tablespoon olive oil
    • 1 tablespoon butter
    • 1 teaspoon salt
    • 1 teaspoon black pepper

    You can jump straight to the recipe card or keep reading for step-by-step instructions on how to make this Juicy Lucy burgers recipe.

    The ingredients for making juicy Lucy Burgers, laid out on a wood cutting board.

    How to Make This Juicy Lucy Burger Recipe

    1. Place the ground beef in a large bowl and lightly break it apart.
    2. Combine ground beef with the salt, pepper, and Worcestershire sauce and mix it all together (I find using your hands works best for this). 
    3. Divide the meat into 6 equal portions.
    Ground beef and seasonings in a bowl sitting on a cutting board with cheese, buns and other spices sitting next to it.
    Add spices to beef.
    Ground beef combined with spices in a bowl.
    Combine beef and spices well.
    1. Split each of those 6 portions of beef into 2 pieces. Flatten both pieces into thin patties slightly larger than the hamburger bun.
    Thin patties sitting on the cutting board next to butter, spices and buns.
    Split each portion into two and flatten.
    1. Take 2 slices of the cheese and break it apart into small pieces, placing the pieces into the center of the burger patty.
    2. Put the second patty on top of the cheese and crimp the edges together, making sure you make a tight seal. Flip the burger over, gently press the burger down and crimp again. 

    Note: The best way to form the patties is to take your time. You want to be sure they are sturdy and have no cracks or holes that the cheese will melt through.

    Pieces of cheddar cheese on top of one of the thin burger patties with a second, plain patty beside it.
    Place pieces of cheese on one patty.
    The assembled burger patty (bottom patty, cheese, top patty).
    Top with second patty, seal.
    1. Take the back of a large spoon and press a small dimple into the middle of the burger. By doing this you will help the burger to stay flat while cooking and not become rounded.
    A spoon making a diet in the top of the burger patty.
    1. Once all of the burger patties have been made, melt the butter and olive oil in a cast iron pan/cast iron skillet/grill pan (whatever you want to call it) over medium heat.
    A stack of three Juicy Lucy burger patties with wax paper between them.
    Make all 6 patties.
    A skillet with melted butter bubbling inside of it.
    Melt butter and oil in skillet.
    1. Once the oil is hot, carefully place patties in the pan and cook for approximately 4 minutes on each side. While you are cooking the first set of patties, put the remaining patties in the fridge to keep them cool.
    Three raw burger patties in a large skillet.
    Cook burgers in hot grill pan.
    Three cooked burger patties in a large skillet.
    Flip after 4 mins.
    1. These burgers are best served immediately. Serve on a hamburger bun with your favorite toppings. The Juicy Lucy is traditionally served with only dill pickles, but you can get creative and add the toppings of your choice! (Or, you can top it with items that we topped our Cowboy Burger recipe with, too!)
    A Juicy Lucy burger on a plate cut in half to reveal the cheese inside.

    How to Make Juicy Lucy Burgers in the Oven

    Did you know you can make great burgers in the oven, too? You sure can!

    We have some tips to create the best burger in the oven (it will melt in your melt). Go check out our recipe for the best hamburgers in the oven!

    A Juicy Lucy burger patty on a plain burger bun with tater tots in the background.

    Variations

    This burger is a nicely seasoned base that can be jazzed up with your favorite cheese and toppings!

    • Cheese – any cheese that melts well will work for this recipe. Get creative! You could even get real wild and stuff these with blue cheese, if that’s your style. Just be sure to watch how much cheese you use (you don’t want gooey cheese leaking out of your burger).
    • Bun – by changing the hamburger bun you use, you can create a totally different burger experience! You could use a soft bun like brioche buns, a crusty roll, a chewy pretzel bun, or a sweet Hawaiian roll!
    • Spicy – use a spicy cheese like a pepper jack or jalapeño havarti and add some banana peppers or other spicy peppers to your burger!
    • Classic – for a more classic burger, top your Juicy Lucy patty with tomato slices, lettuce, dill pickles, red onion, and your favorite condiments!
    A hand holding half of a Juicy Lucy burger with the cheese visible in the middle.

    Storage

    Store any leftover burger patties in an airtight container or wrapped in plastic wrap in the fridge for 3-4 days (be sure to store your patties, buns, and toppings separately to keep everything as fresh as possible).

    You could also freeze these patties in a freezer-safe, airtight container for up to 3 months.

    Expert Tips and FAQs

    Can I make these in the air fryer?

    We haven’t tried this yet, but I bet you could! We have a post on air fryer burgers that you could follow if you want to try it out (and if you do, pretty please leave us a comment and let us know how it goes).

    How is a Juicy Lucy burger different from a regular hamburger?

    A Juicy Lucy burger has the cheese in the middle of the burger instead of on top of the burger!

    Could I cook these on an outdoor grill (gas grill or charcoal grill)?

    Absolutely, although the end result will be a bit different than if you cook them in a pan. But if you like that smokey BBQ flavor and those dark grill marks from hot grill grates on your burger, you can definitely cook these on your BBQ the same as you would any other homemade burger.

    What to Serve with Juicy Lucy Burgers

    Serve these burgers with a side of air fryer sweet potato fries or baked fiesta ranch potato wedges for a meal the whole family will enjoy!

    Related Recipes

    If you enjoyed these Juicy Lucy Burgers then you should definitely try some of our other cheeseburger recipes like Hawaiian Burgers, our buttery glazed donut burger (I know, what?!) and our air fryer turkey burgers!

    Recipe

    A juicy Lucy burger cut in half so we can see the cheese inside and stacked one half on top of the other.
    Print Pin
    5 from 4 votes

    Juicy Lucy Burgers

    Juicy Lucy Burgers: Juicy burger patties are stuffed with a slice of cheese to create an easy homemade version of the classic "Juicy Lucy" (or Jucy Lucy) burger! 
    Course Main Course
    Cuisine American
    Prep Time 20 minutes minutes
    Cook Time 10 minutes minutes
    Total Time 30 minutes minutes
    Servings 6 burgers
    Calories 685kcal
    Author Jessica Burgess

    Ingredients

    • 6 hamburger buns
    • 2 pounds ground beef (80/20 ground beef or regular ground beef- not lean)
    • 12 slices of American or cheddar cheese
    • 3 tablespoons Worcestershire sauce
    • 1 tablespoon olive oil
    • 1 tablespoon butter
    • 1 teaspoon salt
    • 1 teaspoon black pepper

    Instructions

    • Place the ground beef in a large bowl and lightly break it apart.
    • Season the beef with the salt, pepper, and Worcestershire sauce and mix it all together (I find using your hands works best for this).
    • Divide the meat into 6 equal portions.
    • Split each of those 6 portions of beef into 2 pieces. Flatten both pieces into patties slightly larger than the hamburger bun.
    • Take 2 slices of the cheese and break it apart into small pieces, placing the pieces into the center of the burger patty.
    • Put the second patty on top of the cheese and crimp the edges together, making sure there are no cracks. Flip the burger over, gently press the burger down and crimp again.
      Note: The best way to form the patties is to take your time. You want to be sure they are sturdy and have no cracks or holes that the cheese will melt through.
    • Take the back of a large spoon and press a small dimple into the middle of the burger. By doing this you will help the burger to stay flat while cooking and not become rounded.
    • Once all of the burger patties have been made, melt the butter and olive oil in a cast iron pan/cast iron skillet/grill pan (whatever you want to call it) over medium heat.
    • Once the oil is hot, carefully transfer a couple patties to the pan and cook for approximately 4 minutes on each side.
    • These burgers are best served immediately. Serve on a hamburger bun with your favorite toppings. The Juicy Lucy is traditionally served with only dill pickles, but you can get creative and add whatever toppings you like!

    Notes

    STORAGE: Store any leftover burger patties in an airtight container in the fridge for 3-4 days (be sure to store your patties, buns, and toppings separately to keep everything as fresh as possible).
    You could also freeze these patties in a freezer-safe, airtight container for up to 3 months. 

    Nutrition

    Serving: 1burger | Calories: 685kcal | Carbohydrates: 24g | Protein: 39g | Fat: 47g | Saturated Fat: 21g | Polyunsaturated Fat: 2g | Monounsaturated Fat: 19g | Trans Fat: 2g | Cholesterol: 148mg | Sodium: 1015mg | Potassium: 569mg | Fiber: 1g | Sugar: 4g | Vitamin A: 408IU | Vitamin C: 2mg | Calcium: 358mg | Iron: 5mg

    Mini Egg Cookies

    February 23, 2022

    Mini Egg Cookies on pink napkin

    This mini egg cookie recipe is not only easy but the cookies with mini eggs have an amazing “crunch” with the addition of Cadbury eggs!

    When it comes to Easter, it’s fair game for all of the pretty pastel colors for all of the desserts, like these egg truffles, Easter egg nests, and mini egg bars!

    Mini Egg Cookies on pink napkin
    Easter Cookies with Mini Eggs

    Why You’ll Love these Cadbury mini egg cookies

    • It’s your favorite chocolate chip cookie, with a little extra “crunch” with the mini Cadbury eggs we love seeing hit shelves each Easter! (We love them so much, we even have them in an Easter Bunny Bark!)
    • It uses simple ingredients that are usually pantry staples
    • Cookies for Easter just make sense for snacking, and even as gift-giving ideas in Easter baskets! (Make these along with this Bunny Butt cookie recipe!)
    [feast_advanced_jump_to]

    Ingredients

    The simple ingredients in this recipe can be found at most grocery stores and are typically ingredients that you may already have in your pantry and refrigerator!

    ingredients for mini egg cookies
    Ingredients for Cookies
    • 1 cup butter, softened (2 sticks – 8 tablespoons)
    • 1 cup light brown sugar
    • ½ cup granulated sugar
    • 2 large eggs, room temperature
    • 2 tsp vanilla extract
    • 1 teaspoon baking soda
    • 3 cups all purpose flour
    • 1 teaspoon salt
    • 1 cups milk chocolate chips 
    • 2 – 7 oz. bags of Cadbury mini eggs

    See the recipe card below for ingredients and instructions all in one place!

    Instructions

    Preheat oven to 350°.

    1. First, you’ll want to get a large bowl and put softened butter and brown sugar and white sugar in to it. Then, using a hand mixer or a stand mixer, mix sugars and butter on medium speed until it’s well combined and creamy.
      (About 3-5 minutes. Make sure there are no brown sugar clumps, and it has blended in well, as it can tend to clump up if it’s not a super fresh batch.)
    sugars and butter in mixing bowl
    Mix sugars with softened butter
    combined sugars with butter
    Sugars and butter combined
    1. Next, add in one cracked egg, and mix with mixer until fully mixed in.
    2. Add in the other egg and mix again, until fully mixed in.
    3. Pour in vanilla extract and mix again, until fully mixed.
    Add egg in dough
    Add in eggs, one at a time, mix together, and then add vanilla and mix!
    1. In a separate bowl, pour in the flour, baking soda and salt. Mix together with a fork, as this helps “sift” the ingredients together.
    2. Pour a third of the flour mixture in to the wet ingredients (butter/sugar mixture), and mix together until combined.
    baking soda, flour, salt
    In separate bowl, mix flour, salt and baking soda
    Pour part of the flour in to the dough
    Pour a 3rd of the flour in to the cookie dough
    1. Add in a little more flour mixture, and mix again until combined.
    2. Finally, add the last third of the flour mixture in to the butter mixture and fully combine.
    Flour mixed in to dough, compeltely
    All dry ingredients mixed in to dough
    1. Next, pour in chocolate chips and gently stir using a large wooden spoon or rubber spatula until combined.
    Chocolate chips poured in to dough
    Add in chocolate chips
    Chocolate chips stirred in to dough
    Stir with spatula to gently mix in chocolate chips
    1. Line a cookie sheet with parchment paper and scoop out small portions of cookie dough to roll in to smooth, rounded balls. (I used an ice cream scoop and filled it half-way, to make the size of the cookies you see here.)
    Chocolate chip cookie dough balls on baking sheet
    Using an ice cream scoop, scoop out about half a scoop to form in to a ball
    1. Gently press 3 Cadbury mini eggs in to the top of the cookies. (I didn’t push the chocolate eggs all the way down inside of the cookie but rather just a little so it would be secured on to the top of the cookie.)
    Cookie dough balls with Cadbury mini eggs
    Press mini eggs on top of each cookie dough ball

    How Long to Bake Cookies

    1. Place baking sheet of cookie dough in to preheated oven, and bake for 12 minutes, or until the bottom edges start to turn a golden brown. (Baking time can differ for ovens.)
    baked mini egg cookies on baking sheet
    Baked mini egg cookies
    1. Remove from oven and allow cookies to rest on baking sheet for about a minute, before moving to a cooling rack. (This helps the cookies fully cook through the center for a crispy edge and soft center.)
    2. Transfer the cookies from the baking sheet to cooling rack and allow cookies to fully cool before packaging them up for storing.
    mini egg cookies cooling on rack
    Cool mini egg cookies on rack

    Storage

    If you have leftover cookies or want to store them for later, perhaps as gift-giving to friends and family with some of these Easter Oreos, store them in an airtight container for 3-5 days.

    Mini egg cookies stacked
    Ready to eat Cadbury Egg cookies

    Substitutions

    If the chocolate chip style cookies aren’t your favorite thing, you can easily make classic peanut butter cookies, or even peanut butter chocolate chip cookies and add Cadbury eggs to the tops! Or, feel free to browse our favorite cookie recipes for more ideas!

    Love the look of an Easter egg cookie but can’t find Cadbury mini eggs? No problem! Use your favorite candy, like the springtime M&M’s or pastel Peanut M&M’s to use instead or your favorite Easter candy!

    Cadbury egg chocolate chip cookies stacked
    Fun Easter Cookies

    Top tip

    If unable to bake all of the cookies at once, place the unbaked cookie dough in the refrigerator while others are baking and pull back out a couple of minutes before rolling and baking the remaining cookies.

    More Easter Ideas

    Love Easter as much as we do? Then you’ll also love these other Easter desserts and Easter ideas that are fun to make or that the Easter bunny may want to deliver!

    • A slice of chocolate peanut butter dump cake on a round plate.
      Chocolate Peanut Butter Dump Cake
    • Strawberry Cream Cheese Dump Cake serving on a round plate.
      Strawberry Cream Cheese Dump Cake
    • Dr. Pepper baked beans in a cast iron and wooden spoon spooning out a serving.
      Dr. Pepper Baked Beans
    • A slice of cherry yum on a round plate.
      Cherry Yum Yum

    Recipe

    Mini Egg Cookies on pink napkin
    Print Pin
    5 from 5 votes

    Mini Egg Cookies

    This mini egg cookie recipe is not only easy but the cookies with mini eggs have an amazing "crunch" with the addition of Cadbury eggs!
    Course Dessert, Snack
    Cuisine American
    Prep Time 10 minutes minutes
    Cook Time 12 minutes minutes
    Resting Time 1 minute minute
    Total Time 23 minutes minutes
    Servings 34 cookies
    Calories 205kcal
    Author Jessica Burgess

    Ingredients

    • 1 cup softened butter salted or unsalted
    • 1 cup light brown sugar packed
    • ½ cup white granulated sugar
    • 2 eggs room temperature
    • 2 teaspoon vanilla extract
    • 1 teaspoon baking soda
    • 3 cups all purpose flour
    • 1 teaspoon salt
    • 1 cup milk chocolate chips
    • 14 ounces Cadbury mini eggs 2 – 7 oz. bags

    Instructions

    Prepping the Cookie Dough

    • Preheat oven to 350°
    • Get a large mixing bowl and put softened butter and brown sugar and white sugar in to it. Then, using a hand mixer or a stand mixer, mix sugars and butter together until it's well combined and creamy. (About 3-5 minutes. Make sure there are no brown sugar clumps, and it has blended in well, as it can tend to clump up if it's not a super fresh batch.)
    • Next, add in one cracked egg, and mix with mixer until fully mixed in.
    • Add in the other egg and mix again, until fully mixed in.
    • Pour in vanilla extract and mix again, until fully mixed.
    • In a separate bowl, pour in the flour, baking soda and salt. Mix together with a fork, as this helps "sift" the ingredients together.
    • Pour a third of the flour mixture in to the butter/sugar mixture, and mix together until combined.
    • Add in a little more flour mixture, and mix again until combined.
    • Finally, add the last third of the flour mixture in to the butter/sugar mixture and fully combine.
    • Next, pour in chocolate chips and gently stir using a large wooden spoon or rubber spatula until combined.
    • Line a baking sheet with parchment paper and scoop out small portions of cookie dough to roll in to smooth, rounded balls. (I used an ice cream scoop and filled it half-way, to make the size of the cookies you see here.)
    • Gently press 3 Cadbury mini eggs in to the tops of each cookie dough ball. (I didn't push them all the way down inside of the cookie but rather just a little so it would be secured on to the top of the cookie.)

    Baking the Cookies

    • Place baking sheet of cookie dough in to preheated oven, and bake for 12 minutes, or until the bottom edges start to turn a golden brown.
    • Remove from oven and allow cookies to rest on baking sheet for about a minute, before moving to a cooling rack. (This helps the cookies fully cook through teh center for a crispy edge and soft center.)
    • Transfer cookies from the baking sheet to cooling rack and allow cookies to fully cool before packaging them up for storing.

    Nutrition

    Serving: 1cookie | Calories: 205kcal | Carbohydrates: 27g | Protein: 2g | Fat: 10g | Saturated Fat: 6g | Polyunsaturated Fat: 0.3g | Monounsaturated Fat: 2g | Trans Fat: 0.2g | Cholesterol: 26mg | Sodium: 159mg | Potassium: 26mg | Fiber: 0.3g | Sugar: 18g | Vitamin A: 211IU | Vitamin C: 0.4mg | Calcium: 34mg | Iron: 1mg

    Easter Egg Truffles Recipe (Easy No-Bake Dessert)

    February 22, 2022

    easter egg truffles in white bowl

    Easter egg truffles are an easy no-bake dessert made with creamy centers and a chocolate coating. These simple Easter treats are perfect for parties, baskets, or spring gatherings.

    Easter egg truffles in egg carton

    These no-bake egg truffles are adorable for Easter and are made with crushed, frosted animal cookies, cream cheese, and other easy ingredients, making them a delightful holiday dessert idea!

    If you love truffle recipes for easy holiday desserts, you'll also love these Biscoff truffles and this sugar cookie truffles recipe.

    Why You’ll Love These No Bake Easter Eggs

    Not only is this recipe “easy” but the creaminess of the cream cheese, mixed with frosted animal cookies also make these truffles a crowd-pleaser!

    Plus, if you’re in the baking mood, you can make these alongside the mini egg bars, Easter egg nest cookies, or mini egg cookies for treats all around!

    [feast_advanced_jump_to]

    Ingredients

    With only 3 main ingredients (not counting any decorating favorites) you can have Easter truffles in no-time!

    For decorating, you can use items such as food coloring, sprinkles, sanding sugar, etc. (We used a lot of these for these Easter Oreos that are absolutely adorable too!) See more tips and ideas for decorating, below!

    ingredients on table for truffles
    Ingredients
    • 14 oz. iced animal cookies
    • 8oz. cream cheese, room temperature
    • 2 packages of 14 oz. white chocolate melting wafers (I use Ghirardelli)
    • Gel colors, if desired
    • Sprinkles or sanding sugar, if desired

    See the recipe card at the bottom of this post for full quantities and instructions, all in one place, for this no-bake Easter dessert.

    Instructions for Easter Egg Truffles

    1. First, prepare a large baking sheet or something similar, like a platter, by covering it with parchment paper.
    2. Next, process animal cookies in food processor or crush cookies placing them in a ziplock bag, rolling over them with a rolling pin until they are in fine crumbs.
    Crushed frosted animal cookies in bowl
    Crushed frosted animal crackers
    1. In a large bowl, mix together the softened cream cheese and crushed cookies until evenly combined. 
    cream cheese in bowl with crushed cookies
    Mix cream cheese in with cookies
    cream cheese mixed with animal crackers
    Cream cheese mixed with cookies
    1. Grab about a tablespoon of cookie mixture and mash it together with your hands (this is securing the cookie crumbs more in to the cream cheese so it will "hold".)
    2. Next, roll it in to a ball by cupping hands together, and gently move hands in a circle rotation until it it forms a round ball. (See first image below.)
    3. When in a ball shape, straighten out hands and roll the ball up and down between the two hands to give the "ball" more of an "egg" shape. (See second image below.)

    Also, you can also gently pinch the top of the "egg" to give it even more of an egg-shape.

    If it does not look like an egg yet, carefully mold with hands in to a shape of an egg. (More narrow at the top and the bottom.) Repeat until all the truffle dough is in the shape of eggs.

    hands rolling small amount of truffle dough in to ball
    Cup hands and roll truffle dough in to a ball
    Hands rolling dough in to an egg shape
    Roll dough between hands, back and forth to make egg shape
    1. Once the “eggs” are formed, place them all on prepared baking sheet and refrigerate for an hour.
    Cookie truffles on baking sheet
    Roll out balls and place on cookie sheet

    How to Decorate Easter Truffles

    At this point, it’s important to decide how you’ll want to decorate the Easter truffles.

    Either covered with white chocolate and then drizzled with colored chocolate, or covered in white chocolate and then coated in sanding sugar. Or, both!

    When you’ve decided how you want to decorate them, make sure to have all decorating supplies handy, and ready to go. See more below.

    Melt White Chocolate

    When it comes to which type of chocolate to use for these, I have a favorite but there are other options too!

    Which type of chocolate is best for truffles?

    If you ask me, the Ghirardelli white melting wafers are hard to beat! They melt easily but more importantly… they taste waaaaay better than other chocolate melts.

    However, you can also use white chocolate baking chips like we used in our pink strawberries, (which we prefer Ghirardelli in those too!) or you can use other candy melts, wafers, almond bark, or chips if that’s what you prefer!

    1. Make sure to follow (if any) package directions for melting chocolate. However, melting chocolate in microwave on half power for about 2 minutes (or as long as needed until melted), stopping the microwave to stir the chocolate every 30 seconds.
    white chocolate baking chips in bowl
    White chocolate chips
    melted white chocolate in bowl
    Melt white chocolate chips
    1. Remove truffles from the refrigerator and place a toothpick in to one end (top or bottom of the egg) and dip eggs in to melted chocolate and lift back out, allowing excess chocolate to drip off.
      (You’ll want to be patient with this, to allow most of the excess to drip off so it doesn’t leave a “pool” of chocolate under the egg when drying.)
    toothpick in truffle, dipping in to white chocolate
    Insert toothpick and dip truffle in to white chocolate
    Chocolate dipped Easter truffle
    Fully coat truffle in white chocolate

    Decorating with Sprinkles or Sanding Sugar

    If you’ll be decorating the eggs with sanding sugar and/or sprinkles, (as in the light blue egg in the photo below) you’ll want to decorate the eggs BEFORE the chocolate hardens.

    Sanding sugar decorated egg truffle in bowl
    Sanding sugar decorated eggs

    So once excess chocolate has dripped off, you can:

    • place eggs on cookie sheet and pour sprinkles/sanding sugar on top (the bottoms won’t be covered this way)
    • OR, to cover all of the egg with sprinkles/sanding sugar, hold the chocolate covered egg by the toothpick, over a coffee cup or bowl, and pour decorations over egg, while rotating it, trying to cover each area. Place egg on baking sheet to harden.

    Decorating with Drizzled Melted Chocolate

    If you’re wanting to leave the eggs white and decorate the eggs with different colors, you can go ahead and cover all of the eggs in white chocolate and place them on the cookie sheet to harden. (You’ll want the chocolate to harden before drizzling on the colored chocolate.)

    Once all have been coated in chocolate, place cookie sheet in fridge for 10-15 minutes.

    Decorated Easter egg truffles in bowl
    Decorated Easter egg truffles

    Expert Tip

    If you’ll be leaving the eggs white, gently, twist and remove the toothpick from the egg after dipping and smooth a little white chocolate over the toothpick hole, with the same toothpick, before the chocolate hardens. This way, it will cover the hole.

    hand holding toothpick, spreading white chocolate over hole in truffle
    Spread chocolate over hole with toothpick

    How to Make Colored White Chocolate

    When I made these eggs, I decided on the different gel colors I wanted to use. (Pink, light blue, light green, and yellow.)

    So I made sure to get 4 different little bowls, that I could melt the chocolate melts in, and then drop one drop of gel coloring in to each bowl, to make the individual colors.

    Doing one color at a time, melt the chocolate, add in the gel coloring, stir and it’s ready to drizzle on the eggs you want to decorate with that color.

    After chocolate has hardened on eggs, re-melt any remaining chocolate if needed, and divide it in to small portions to add gel food coloring to to decorate the eggs.

    How to Drizzle on White Chocolate

    I used piping bags with a #3 piping tip, (bigger or smaller will work too). However, you can also drizzle it from a spoon, or even pour chocolate in to a small zip-top bag, and cut out a small hole in the corner of the bag to act as a piping bag.

    NOTE: I only had one #3 piping tip so I cleaned the tip really good after each color and re-used it to drizzle on the other colors.

    decorated easter egg truffles in white bowl
    White chocolate drizzled Easter egg truffles

    Substitutions

    Truffle Cookies: If you’re not a fan of frosted animal cookies, you can substitute those for regular animal crackers, Golden Oreos for Oreo egg truffles, or even something fun like crushed pop-tarts!

    Variations

    You can make these for any time of the year! Simply change out the colors for the holiday (think “green” and “red” for Christmas, “black” and “orange” for Halloween, etc.) and simply leave them in the shape of a ball, instead of the extra step of shaping like an egg.

    Bite taken out of no bake cookie truffle
    Creamy center of cookie and cream cheese mixture

    Supplies + Quick Links

    Want to purchase most of the items I used? Here’s a quick-link section where you can find almost everything that I used:

    • gel colors
    • sanding sugar
    • Ghirardelli white chocolate wafers
    • iced animal cookies
    • similar egg cartons (packaging idea for Easter gifts)

    Storage

    If storing for later, or if you have leftovers, it’s important to refrigerate the egg truffles, due to the insides having cream cheese in them. Store in an airtight container for 3-5 days.

    More Easter Ideas

    How cute would this Easter candy recipe look next to Easter Bunny Bark, especially on an Easter Charcuterie Board, and next to these Bunny Butt cookies made with a cake mix?

    You’ll love our other Easter inspiration, and even Easter decor ideas for the home! See some of our favorites here:

    • A collage of side dishes for sliders.
      Best Sides for Sliders (Easy Recipes Your Family Will Love)
    • A square slice of sock it to me cake on a spatula.
      Sock it to Me Cake
    • A slice of cloud cake, topped with strawberries, sitting on round plate.
      Cloud Cake Recipe
    • Condensed milk brownies on parchment paper with middle brownie turned up on it's side.
      Condensed Milk Brownies

    Recipe

    easter egg truffles in white bowl
    Print Pin
    5 from 3 votes

    Easter Egg Truffles

    These no-bake egg truffles are adorable for Easter and are made with crushed, frosted animal cookies, cream cheese, and other easy ingredients, making them a delightful holiday dessert!
    Course Dessert
    Cuisine American
    Prep Time 20 minutes minutes
    Chill Time 1 hour hour
    Total Time 1 hour hour 20 minutes minutes
    Servings 18 truffles
    Calories 154kcal
    Author Jessica Burgess

    Equipment

    • toothpicks
    • baking sheet or platter to transfer truffles to refrigerator

    Ingredients

    • 14 ounces iced animal cookies
    • 8 ounces cream cheese softened
    • 28 ounces white chocolate melting wafers we used 2 packages of 14 ounces Ghirardelli White Chocolate Melting Wafers
    • gel food colors if desired
    • sanding sugars if desired
    • sprinkles if desired

    Instructions

    • First, gather ingredients and prepare a large baking sheet or something similar, like a platter, by covering it with parchment paper.
      ingredients on table for truffles
    • Next, process animal cookies in food processor or crush cookies placing them in a ziplock bag, rolling over them with a rolling pin. 
      Crushed frosted animal cookies in bowl
    • In a mixing bowl, mix together the softened cream cheese and crushed cookies until evenly combined. 
      cream cheese in bowl with crushed cookies
    • Grab about a tablespoon of cookie mixture and mash it together with your hands (this is securing the cookie crumbs more in to the cream cheese so it will hold together better.)
      cream cheese mixed with animal crackers
    • Next, roll it in to a ball by cupping hands together, and gently move hands in a circle rotation until it it forms a round ball.
      hands rolling small amount of truffle dough in to ball
    • When in a ball shape, straighten out hands and roll the ball up and down between the two hands to give the "ball" more of an "egg" shape.
      Hands rolling dough in to an egg shape
    • Once the "eggs" are formed, place them all on prepared cookie sheet and refrigerate for an hour.
      Cookie truffles on baking sheet

    Melting Chocolate

    • Make sure to follow (if any) package directions for melting chocolate. However, melting chocolate in microwave on half power for about 2 minutes (or as long as needed until melted), stopping the microwave to stir the chocolate every 30 seconds is a common method and how I melted this chocolate.
      melted white chocolate in bowl
    • Remove truffles from the refrigerator and place a toothpick in to one end (top or bottom of the egg) and dip in to melted chocolate and lift back out, allowing excess chocolate to drip off.(You'll want to be patient with this, to allow most of the excess to drip off so it doesn't leave a "pool" of chocolate under the egg when drying.)
      Chocolate dipped Easter truffle

    Decorating Easter Egg Truffles

    • It's imporant to decide how you want to decorate the eggs before covering them with chocolate. If using sanding sugar or sprinkles, you'll want to decorate before the chocolate hardens. If decorating with colored melted chocolate drizzle, you can wait to decorate after the chocolate has hardened. See full post for tips on how to decorate the eggs!
      Decorated Easter egg truffles in bowl

    Notes

    How to Store Egg Truffles:
    Since they contain cream cheese, it’s important to keep the truffles refrigerated when storing and between eating.
    How to Store:
    Store truffles in an airtight container in the refrigerator for 3-5 days.

    Nutrition

    Serving: 1truffle | Calories: 154kcal | Carbohydrates: 15g | Protein: 2g | Fat: 10g | Saturated Fat: 4g | Polyunsaturated Fat: 1g | Monounsaturated Fat: 4g | Cholesterol: 18mg | Sodium: 156mg | Potassium: 39mg | Fiber: 1g | Sugar: 4g | Vitamin A: 188IU | Calcium: 20mg | Iron: 1mg

    Mini Egg Bars

    February 19, 2022

    Mini Eggs Bars

    Mini Egg Bars: These festive Easter cookie bars are made with one of our favorite Easter candy, Cadbury mini eggs! These mini egg bars are an easy dessert for Easter time or any time of year!

    If you’re looking for other Easter recipes to serve this year, you’ll especially want to see our mini egg cookies and you can also check out our ham casserole and our Southern broccoli casserole!

    Mini Egg Bars
    Mini Egg Bars

    Why you’ll love this recipe

    This is the perfect Easter dessert (I’m speaking directly to my fellow mini egg lovers on this one). We called them “mini egg bars”, but we might as well have called them Easter cookie bars!

    These magic bars are made with cookie dough and my personal favorite Easter candy, Cadbury mini eggs, which basically makes them Easter in bar form if you ask me.

    If you’re looking for simple recipes to make your Easter baking easier, move this one to the top of your list. This easy recipe for mini egg Easter bars is a crowd-pleaser and will have your guests asking for the recipe for sure! Pro Tip: place these on an Easter charcuterie board with these Easter cookies for the ultimate treat!

    [feast_advanced_jump_to]

    Ingredients for mini egg bars recipe

    You only need a few simple ingredients to make these delicious cookie bars. For this easy treat, you’ll need:

    • 2 sticks salted butter at room temperature (2 sticks = 1 cup)
    • 1 ¼ cups light brown sugar packed
    • 2 large eggs
    • 1 teaspoon vanilla extract
    • ⅛ teaspoon salt
    • 2 ¼ cups all purpose flour
    • ½ teaspoon baking soda
    • 1 ¼ cups Cadbury mini eggs
    • ½ cup chocolate chips

    Jump to the recipe card to see the ingredient amounts and instructions or keep reading to learn how to make these chewy mini egg cookie bars!

    Ingredients for the mini egg bars.
    Ingredients for mini egg bars.

    Do they sell Cadbury Mini Eggs all year?

    The answer to this depends on where you live. If you live in the United States or another country you might not be able to get these outside of mini egg season.

    Consider stocking up next time these hit the shelves so you can make them a few times later in the year (or not…it might be a good thing these only come out once a year because they are addicting)!

    Depending on when the stores in your area start putting out Easter treats, you might even be able to make these for Valentine’s Day! We think they would make the perfect treat for either occasion!

    P.S. When we say Cadbury eggs, we’re talking about the mini egg candies and not the bigger cream eggs or the mini egg chocolate bar.

    How to make the mini egg cookie bar

    The best part of this recipe (aside from it having mini eggs in it) is that it doesn’t take a lot of work to make! Read on to see exactly how simple it is.

    1. Preheat oven to 350 degrees f.
    2. Butter a 9×13 baking dish.  Line the dish with parchment paper and butter the paper. *NOTE* Lining with parchment paper makes it easier to take the whole thing out onto a cutting board and cut those perfect squares. Do you need to do it? No, it won't change the result of the recipe. 
    3. In a large mixing bowl and using an electric mixer (or the bowl of a stand mixer), mix the butter and sugar until nice and fluffy. Scrape down the sides of the bowl as you go. 
    Butter and sugar in a bowl, ready to be creamed.
    Cream together butter and sugar in a large mixing bowl.
    1. Add the wet ingredients- the eggs, splash of vanilla extract, and salt. Mix until they are all blended and set aside. 
    Eggs being mixed into the creamed butter mixture with an electric handheld mixer.
    Add wet ingredients.
    The dough after the wet ingredients are fully combined.
    Combine together.
    1. In a medium bowl combine the dry ingredients- the flour, baking soda, Cadbury eggs, and chocolate chips. Whisk together until the eggs and chocolate chips are coated with the flour and baking soda.
    The dry ingredients (flour, chocolate chips, mini eggs) in a medium bowl.
    Combine dry ingredients.
    The dry ingredients being combined until they are all coated.
    Mix until coated.
    1. Mix in approximately ⅓ of the dry mixture to the wet mixture. Repeat until all the ingredients are incorporated.*NOTE* For this step, using a hand mixer is great but your dough will be very thick at the end. You could absolutely use a stand mixer as well. 
    A wooden spoon full of the dry ingredients being held over the combined bowl of wet ingredients.
    Add dry ingredients ⅓ at a time.
    The dough once the wet and dry ingredients have been combined.
    Mix till combined.
    1. Pour the dough for the cookie layer into the prepared pan and spread evenly.
    2. If you want a really chocolatey treat you can add any remaining chocolate eggs to the top of the bar now. You could also sprinkle crushed mini eggs over the top or wait until the bars come out of the oven and add the eggs to the top. 
    The cookie layer pressed firmly into a parchment lined 9x13 baking dish.
    Press cookie layer into prepared baking dish.
    1. Bake in the preheated oven for 28-31 minutes or until golden brown. You will notice the edges starting to pull from the pan.
    The baked 9x13 dish of mini egg bars in the pan.
    1. Remove from the oven and let the bars cool on a wire rack. Let it cool completely before cutting it up to serve.
    2. If you chose to put parchment paper under your bars, use the parchment to lift the entire pan of cooled mini egg bars out onto a cutting board and cut into 24 even squares (if not, cut them right in the pan). Since we didn’t use a square pan, you might find it helpful to cut a bit of the border off to help create nice straight edges. 
    The baked 9x13 dish of mini egg bars removed from the pan.
    Remove from the baking dish.
    The mini egg bars cut into squares.
    Cut into squares.
    1. Serve and enjoy!
    The mini egg bar squares stacked on a plate.
    Serve and enjoy!

    This easy Easter treat would make a perfect gift to share with your neighbors. Consider making a big batch and packaging it up with cute spring-colored ribbon- what a great way to share some love!

    Substitutions

    For these Easter egg mini egg cookie bars, there are a few substitutions you can make.

    • Chocolate Chips – instead of milk chocolate chips, you can use dark chocolate chips or white chocolate chips (or a combination of the three)! Since the mini eggs are made with creamy milk chocolate, you can get creative with the other chocolate you add to create the perfect mix for your tastes.

    Pro tip: sometimes I cut up the solid milk chocolate bunnies the kids get at Easter and use them for baking. Shh…don’t tell them!

    • Brown Sugar – if you are out of brown sugar you can use white sugar, but the bars will be a bit less chewy and a bit more crunchy. Still, in a pinch, it will do!
    • Eggs – if you ran out of eggs and you are panicking, we’re here to help! In cookie-type recipes like this a cornstarch egg will work decently well. This recipe calls for 2 eggs, so the cornstarch egg replacement would be 2 tablespoons of cornstarch stirred into 6 tablespoons of cold water. Use this directly in place of the eggs in the recipe.
    mini egg bars stacked on plate
    Easter Egg Bars

    Variations

    Although we created these as Easter cookie bars, you could easily modify them for other holidays and events! Since this is basically a cookie bar with a few mix-ins, it’s the perfect recipe to get creative with!

    • Valentine’s Day – instead of mini eggs, stir in some pink and red candy-coated chocolate and some pink or red sprinkles!
    • St. Patrick’s Day – check your local bulk store or grocery store for green-colored candy-coated chocolate or use peppermint-flavored chocolates and mix in some gold and green sprinkles (or cute little shamrock sprinkles like these sprinkles if you can find them)!
    • Christmas – at Christmas time there are usually a lot of options for red and green chocolate and sprinkles. Stir in your favorite, add some to the top and you’ve got a perfect dessert for your holiday celebrations!
    Mini egg bar leaning up against bottle of milk
    Serve with milk for the ultimate treat

    Storage

    You can store these bars in an airtight container (or cover the entire baking dish with plastic wrap) at room temperature for 3 to 4 days, or in the fridge for up to 1 week.

    Although we haven’t tried it yet, these bars should freeze well too! Put them in an airtight, freezer-safe container or bag and freeze them for up to 3 months.

    Expert Tips and FAQs

    What kind of chocolate chips can I use for this recipe?

    Instead of milk chocolate chips, you can use dark chocolate chips or white chocolate chips (or a combination of the three)! Since the mini eggs are made with creamy milk chocolate, you can get creative with the other chocolate you add to create the perfect mix for your tastes.

    Pro tip: sometimes I cut up the solid milk chocolate bunnies the kids get at Easter and use them for baking. Shh…don’t tell them!

    Can I freeze these mini egg bars?

    Although we haven’t tried it yet, these bars should freeze well too! Put them in an airtight, freezer safe container or bag and freeze them for up to 3 months.

    Related Recipes

    If you liked these Cadbury mini egg bars, you should check out our other easy Easter desserts, Easter cake donuts, and Easter egg nest cookies, along with these:

    • Mac and Cheese with Ham in bowl.
      Mac and Cheese with Ham
    • A slice of strawberry jello cake, topped with a strawberry slice, sitting on a round plate.
      Strawberry Jello Cake (Easy, Moist Strawberry Cake)
    • Crockpot baked beans cooked with a wooden spoon resting inside.
      Crockpot Baked Beans
    • A slice of caramel cake with caramel frosting on a spatula.
      Caramel Sheet Cake with Caramel Frosting

    Recipe

    Mini Eggs Bars
    Print Pin
    5 from 4 votes

    Mini Egg Bars

    Mini Egg Bars: These festive Easter cookie bars are made with one of our favorite Easter candy, Cadbury mini eggs! These mini egg bars are an easy dessert for Easter time or any time of year!
    Course Dessert, Snack
    Cuisine American
    Prep Time 20 minutes minutes
    Cook Time 31 minutes minutes
    Total Time 51 minutes minutes
    Servings 24 squares
    Calories 242kcal
    Author Jessica Burgess

    Ingredients

    • 2 sticks salted butter at room temperature (2 sticks = 1 cup)
    • 1 ¼ cups light brown sugar packed
    • 2 large eggs
    • 1 teaspoon vanilla extract
    • ⅛ teaspoon salt
    • 2 ¼ cups all purpose flour
    • ½ teaspoon baking soda
    • 1 ¼ cups Cadbury mini eggs
    • ½ cup chocolate chips

    Instructions

    • Preheat oven to 350 degrees f.
    • Butter a 9×13 baking dish.  Line the dish with parchment paper and butter the paper. 
      *NOTE* Lining with parchment paper makes it easier to take the whole thing out onto a cutting board and cut those perfect squares. Do you need to do it? No, it won't change the result of the recipe. 
    • In a large mixing bowl and using an electric mixer (or the bowl of a stand mixer with a paddle attachment), mix the butter and sugar until nice and fluffy. Scrape down the sides of the bowl as you go.
    • Add the wet ingredients- the eggs, splash of vanilla extract, and salt. Mix until they are all blended and set aside. 
    • In a medium bowl combine the dry ingredients- the flour, baking soda, Cadbury eggs, and chocolate chips. Whisk together until the eggs and chocolate chips are coated with the flour and baking soda.
    • Mix in approximately ⅓ of the dry mixture to the wet mixture. Repeat until all the ingredients are incorporated.
      *NOTE* For this step, using a hand mixer is great but your dough will be very thick at the end. You could absolutely use a stand mixer as well.
    • Pour the dough for the cookie layer into the prepared pan and spread evenly.
    • If you want a really chocolatey treat you can add any remaining chocolate eggs to the top of the bar now. You could also sprinkle crushed mini eggs over the top or wait until the bars come out of the oven and add the eggs to the top.
    • Bake in the preheated oven for 28-31 minutes or until golden brown. You will notice the edges starting to pull from the pan.
    • Remove from the oven and let the bars cool on a wire rack. Let it cool completely before cutting it up to serve.
    • If you chose to put parchment paper under your bars, use the parchment to lift the entire pan of cooled mini egg bars out onto a cutting board and cut into 24 even squares (if not, cut them right in the pan).
      Since we didn't use a square pan, you might find it helpful to cut a bit of the border off to help create nice straight edges.
    • Serve and enjoy!

    Video

    Notes

    Helpful tips: 
    • When spreading the dough evenly in the bakeware before cooking, I used an offset spatula. You could as well use a butter knife or mixing spoon.
    • Make sure to cook in a 9×13 and not a 9×9. If doing in a 9×9 it will brown too fast, the edges will be cook, but the middle won't.
    • You can store these bars in an airtight container at room temperature for 3 to 4 days, or in the fridge for up to 1 week. Although we haven’t tried it yet, these bars should freeze well too! Put them in an airtight, freezer safe container or bag and freeze them for up to 3 months. 

    Nutrition

    Serving: 1square | Calories: 242kcal | Carbohydrates: 30g | Protein: 3g | Fat: 13g | Saturated Fat: 8g | Polyunsaturated Fat: 1g | Monounsaturated Fat: 2g | Trans Fat: 1g | Cholesterol: 38mg | Sodium: 124mg | Potassium: 36mg | Fiber: 1g | Sugar: 20g | Vitamin A: 298IU | Vitamin C: 1mg | Calcium: 46mg | Iron: 1mg

    Instant Pot Hard Boiled Eggs

    February 16, 2022

    sliced hard boiled eggs on plate

    Instant Pot Hard Boiled Eggs: So quick, easy and it made the shells peel off so easily, with the 5, 5 & 5 method!

    See how long to cook the eggs, and how well they turn out in the quick video below, too!

    Sliced hard boiled eggs on plate next to Instant Pot
    Hard Boiled Eggs in the Instant Pot

    If you watched my Instant Pot review of my Instant Pot®, and my first run at using it by cooking chicken breasts, then you know I fell in love with the thing immediately.

    Now today, I’m going to show you how easy it is to make hard-boiled eggs with it and you will be AMAZED at how easy the shells come off of the eggs when they’re done. It’s an absolute game-changer! Then, you’ll want to see how we make these deviled eggs with candied bacon, and you’ll never want to make a classic deviled egg recipe, again!

    How To Cook Eggs in the Instant Pot

    In this quick, 7 minute video, I’ll show you from beginning to end, how to cook eggs in the Instant Pot®.

    No Time to Watch the Video?

    No problem, I wrote out the process below the video for your quick reference!

    1. Pour water into the bottom of Instant Pot®.
    2. Using trivet that came with your Instant Pot®, and place it into the bottom. 
    3. Gently place eggs on top of the trivet, and place lid on to Instant Pot®.
    eggs inside of Instant Pot
    Place eggs inside of Instant Pot
    1. Press “pressure cook”, and make sure it’s on “high pressure”. 
    2. Set the timer on the Instant Pot® to 5 minutes. (Make sure “keep warm” option is turned off.) 
    3. Pressure cooker will pressurize for about 5 minutes before the timer starts, then the timer will start when cooking.
    4. While cooking, prepare an ice bath to put the eggs in when eggs are finished cooking/cooling.
    5. After the timer runs out, let the pressure cooker naturally cool down. It will be safe to remove the lid when the stainless steel metal float, lowers back down inside of the lid. (Approx. another 5 minutes.) 
    Cooked eggs in ice bath
    Chill cooked eggs in ice bath
    1. Remove the lid and lift the trivet out (with tongs, or very carefully with hands/pot holder), then carefully place eggs into an ice bath for a couple of minutes. 
    2. Peel eggs and watch those shells practically fall off! 
    Sliced hard boiled eggs on plate
    Cooked and sliced hard boiled eggs

    The inside of the eggs should have the perfect yellow color!

    Tips

    • You can add 1 teaspoon of baking soda to the water before cooking but we’ve found that it’s not a must. The shells still peel perfectly fine. However, if you’re using really fresh eggs, those can be harder to peel so it may be best to try baking soda.
    • The trivet is recommended above becuase it comes with the Instant Pot. However, we absolutely LOVE using the mesh steamer basket for making hard boiled eggs, that you can get separately.
    Perfect center in hard boiled egg
    Perfect yolk center in hard boiled egg

    FAQ’s

    What is the 5 5 5 method for eggs in Instant Pot?

    It is 5 minutes to come to pressure, 5-minute cook-time and 5 minute natural release timing.

    How long does it take eggs to boil in Instant Pot?

    We’ve found that minutes does the trick!

    How many eggs can you hard boil in an Instant Pot at one time?

    We have cooked up to 18 eggs at one time in the Instant Pot. We have found that the eggs turn out just fine even if they’re stacked on top of one another, just as long as the eggs are not touching the lid. (Any more than 18 and you may need more than one cup of water too.)

    Now, if you have a Ninja Foodie, did you know you can also make them in that? It’s true. See How to Make Hard-Boiled Eggs in Ninja Foodi!

    Different Ways to Use Hard Boiled Eggs

    If you’re looking for different ways you can use your hard-boiled eggs now, we love using them to make an Egg Salad Sandwich, putting them in this side salad recipe, or in a tuna salad sandwich. Or if making a potato salad, you could put them in this cauliflower potato salad or this Amish potato salad, which is also made using the Instant Pot!

    Recipe

    sliced hard boiled eggs on plate
    Print Pin
    5 from 4 votes

    Instant Pot Hard Boiled Eggs

    Instant Pot Hard Boiled Eggs: So quick, easy and it made the shells peel off so easily, with the 5, 5 & 5 method!
    Course Appetizer, Breakfast, Main Course, Side Dish, Snack
    Cuisine American
    Prep Time 10 minutes minutes
    Cook Time 5 minutes minutes
    Total Time 15 minutes minutes
    Servings 12 eggs
    Calories 62kcal
    Author Jessica Burgess

    Equipment

    • Pressure Cooker (We use the Instant Pot)

    Ingredients

    • 12 Eggs Can use less or more – see tips in post
    • 1 cup Water

    Instructions

    • Pour water into the bottom of Instant Pot®.
    • Using trivet that came with your Instant Pot®, place it into the bottom. 
    • Gently place eggs on top of the trivet, and place lid on to Instant Pot®.
    • Press “pressure cook”, and make sure it’s on “high pressure”. 
    • Set the timer on the Instant Pot® to 5 minutes. (Make sure “keep warm” option is turned off.) 
    • Pressure cooker will pressurize for about 5 minutes before the timer starts, then the timer will start when cooking.
    • While cooking, prepare an ice bath to put the eggs in when eggs are finished cooking/cooling.
    • After the timer runs out, let the pressure cooker naturally cool down. It will be safe to remove the lid when the stainless steel metal float, lowers back down inside of the lid. (Approx. another 5 minutes.) 
    • Remove the lid and lift the trivet out (with tongs, or very carefully with hands/pot holder), then carefully place eggs into an ice bath for a couple of minutes. 
    • Peel eggs and watch those shells practically fall off! 

    Video

    Notes

    How many eggs can you hard boil in the Instant Pot at one time?
    We have cooked up to 18 eggs at one time in the Instant Pot. We have found that the eggs turn out just fine even if they’re stacked on top of one another, just as long as the eggs are not touching the lid. (Any more than 18 and you may need more than one cup of water too.)

    Nutrition

    Serving: 1egg | Calories: 62kcal | Protein: 5g | Fat: 4g | Saturated Fat: 1g | Cholesterol: 163mg | Sodium: 63mg | Potassium: 60mg | Vitamin A: 240IU | Calcium: 25mg | Iron: 0.8mg

    Smoked Queso

    February 15, 2022

    Smoked Queso dip in a serving dish.

    Smoked Queso: With ground sausage, Velveeta cheese, Colby jack cheese, and rotel this might just be the best smoked queso recipe of all time! The ultimate party dip and a definite crowd pleaser!

    Quick Overview: Combine all of your ingredients in a BBQ safe dish, place it on the grill for an hour (stirring every 15 mins), serve, and enjoy as a delicious smoked appetizer!

    A close up of someone dipping a bell pepper into the smoked quest dip.
    Smoked Queso

    Why you’ll love this recipe

    I think everyone needs to have a good queso recipe in their recipe box, like this Rotel Dip recipe and now, this smoked cheese dip. It’s a delicious dip (full of cheesy goodness) and a great option for taking to parties or serving when you have guests over!

    This version of your favorite cheese dip is full of delicious smoky flavor because it’s cooked by indirect heat on a charcoal grill (although you can do it on a gas grill, too). If you love cheese as much as I do, you may also love this BBQ white queso nacho recipe. It’s loaded with cheesy goodness, too.

    Good thing this cheesy dip is hitting the blog in time for grilling season because you’re going to want to make a big batch for your next party, for sure!

    [feast_advanced_jump_to]

    ingredients for smoked queso recipe

    You can find everything you need to make this yummy smoked cheese dip at your local grocery store, even the disposable foil pan (most grocery stores have this in the baking section somewhere near the cupcake liners).

    You’ll need:

    • 1 pound ground sausage
    • 1 pound velveeta cheese 
    • 3 cups Colby Jack cheese, shredded (If you can shred the block! It’s much creamier!)
    • 1- 10 oz can Rotel diced tomatoes and green chilis (drained)
    • 1 cup beer
    • ½ cup red onion chopped, divided
    • 1 teaspoon garlic powder
    • ½ teaspoon ground pepper
    • ½ teaspoon salt

    Optional (for those looking to level-up their queso game)

    • chopped jalapeños
    • ⅓ cup bacon bits
    The ingredients you need to make smoked queso.
    Ingredients

    Instructions for smoked queso dip recipe

    1. Open a beer and let it sit out until it’s flat and room temperature. Set aside.
    2. If your sausage isn’t cooked yet you’ll need to do that now. Put 1 tablespoon of olive oil in a pan over medium heat, add 2 tablespoons of your chopped onion. Warm up for 2 minutes then cook the ground sausage until there is no more pink.
    3. Prepare your BBQ for indirect heat and let it warm up to 225 degrees f. If you’re using a charcoal grill, put some hickory wood in the coals to give the dip a nice smoke flavor.
    A hand on the handle of a charcoal grill.
    Warm up the grill.
    1. Dice your Velveeta cheese, set aside. 
    2. Shred the Colby Jack cheese, set aside. 
    3. Chop the red onion, set aside. 
    4. Add cooked sausage, Velveeta, shredded Colby Jack, Rotel. tomatoes, onion, and spices to a 9×13 BBQ safe dish (I use a disposable aluminum pan). Set aside. 
    All of the smoked queso ingredients (minus the beer) in an aluminum 9x13 pan.
    Add ingredients to 9×13 pan.
    1. Once your BBQ has reached the desired temperature, place your 9×13 dish in the center and pour ½ cup of beer into it. 
    Someone pouring a cup of beer into the 9x13 pan on the BBQ with the rest of the smoked queso ingredients.
    Pour beer into the pan.
    1. Close the lid and cook for 30 minutes, mixing at 15 minutes. *NOTE* When mixing, make sure to scrape the sides and bottom and give it a good stir so all the flavours are incorporated.
    The 9x13 pan of smoked queso ingredients sitting on the grill of a charcoal BBQ.
    Let cook on the grill.
    A spatula stirring the queso while it cooks on the charcoal grill.
    Stir well every 15 mins.
    1. After 30 minutes, add the remaining ½ cup of beer and continue cooking for another 30 minutes (stirring every 15 minutes again). 
    2. After 1 hour on the BBQ, the cheese will be melted and you’ll have a nice, thick, smoked queso dip. 
    3. Serve and enjoy!
    The cooked smoked queso sitting on the charcoal grill.
    Nice, thick queso dip!

    What if I don’t have a charcoal grill? 

    If you don’t have a charcoal grill, don’t worry! It is still possible to get that extra layer of flavor without one. Here are a few different ways we would try…

    • The Shortcut – warm your oven to 225°F and cook your queso as directed in this recipe. To get that smoky flavor, pour 1 teaspoon of liquid smoke over your ingredients along with the first ½ cup of flat beer. If you don’t have a grill, this is still a great way to create a delicious smoked queso dip! 
    • Regular Grill – if you have a propane or natural gas grill, you can actually purchase a special smoke box designed specifically to allow you to smoke things on your gas grill! Here’s an example. Read the manufacturer instructions that come with the smoker box and follow them to create your smoke queso dip!
    • Pellet Smoker – if you have a pellet grill (like a Traeger grill), you can definitely use it for this recipe! Set the temp to 225°F, add hickory wood pellets, and continue on with the recipe as written!
    • Electric Smoker – basically the same things apply here’s with a pellet smoker. Set your temp, add the wood chips of your choice and follow the recipe as written.

    Substitutions

    If you’re looking to make this delicious queso dip but you need to modify the ingredients, here’s a a few of our suggestions.

    • Sausage – If you don’t have any sausage (pork sausage or beef sausage), you can use ground beef instead.
    • Velveeta – Although it will alter the flavor of the dip, you could use other soft cheeses in place of Velveeta (like cream cheese). Either way, you’ll still get the same creamy texture.
    • Colby Jack – You can use Monterey Jack in place of Colby Jack, or even a sharp cheddar cheese… but I’d still make sure to use the block cheese, and shred it yourself, so it tastes better! (Pre-shredded has a filler that can make the cheese, less creamy.)

    Even if you do have to change up a few things, you’ll find that the delicious flavors in this recipe make this the best smoked queso dip ever!

    Variations

    Looking to change it up a bit? Try this!

    • Spicy – If you like the heat, try swapping the Colby Jack cheese for Pepper Jack cheese. You can also add some chopped spicy jalapeños and/or chipotle peppers to take the spice up a big notch!
    • Taco Queso – Looking to add some extra fun to your taco night? Add some taco seasoning to the sausage or beef, continue with the recipe as written and use it in place of your regular taco meat!
    • Cowboy Queso Recipe – I’m not even against smoking this cowboy queso recipe, or at least adding some of the ingredients from that one, to this one for an extra flavor explosion!

    Any of these variations would create a great dip with tons of flavor!

    Smoked queso in aluminum pan
    Delicious smoked queso

    Storage

    This might be my new favorite recipe, and I HIGHLY doubt you’ll have any leftovers (you’ve been warned!). That being said, if you do have leftover queso you can store it in an airtight container in the fridge for 3 days.

    Expert tips and FAQs

    Can I make smoked queso in the slow cooker?

    We’ve never tried this, but we assume it would be possible!

    If we were to try this in the slow cooker, we would add the whole cup of beer (and 1 teaspoon of liquid smoke) to the slow cooker with all the other ingredients and cook it on low for 4-6 hours or until everything looked melty and delicious!

    What should I serve with this smoked queso dip?

    Honestly anything would taste delicious dipped in this, but some of our favorite dippers are tortilla chips, corn chips, or green bell peppers!

    A pita chip being dipped in the smoked queso dip.
    Dip chips or veggies in it!

    Related Recipes

    If you’re looking for the best dip to serve, check out a few other party favorites on the blog like this buffalo bacon blue cheese dip or our easy taco layer dip!

    Recipe

    Smoked Queso dip in a serving dish.
    Print Pin
    5 from 7 votes

    Smoked Queso

    Smoked Queso: With ground sausage, Velveeta cheese, Colby jack cheese, and green chiles this might just be the best smoked queso recipe of all time! The ultimate party dip and a definite crowd pleaser!
    Course Appetizer, Snack
    Cuisine American
    Prep Time 10 minutes minutes
    Cook Time 8 minutes minutes
    BBQ Time 1 hour hour
    Total Time 1 hour hour 18 minutes minutes
    Servings 6 servings
    Calories 745kcal
    Author Jessica Burgess

    Equipment

    • smoker

    Ingredients

    • 1 pound ground sausage
    • 1 pound Velveeta cheese
    • 3 cups Block Colby Jack cheese shredded (Pre-shredded has a coating that makes it less creamy, so we prefer block cheese.)
    • 1- 10 ounce can of Rotel diced tomatoes and green chilies drained
    • 1 cup beer
    • ½ cup red onion chopped, divided
    • 1 teaspoon garlic powder
    • ½ teaspoon ground pepper
    • ½ teaspoon salt

    Optional

    • chopped jalapeños
    • ⅓ cup bacon bits

    Queso Ingredients

    Instructions

    • Open a beer and let it sit out until it's flat and room temperature. Set aside.
    • If your sausage isn't cooked yet you'll need to do that now. Put 1 tablespoon of olive oil in a medium skillet over medium heat, add 2 tablespoons of your chopped onion. Warm up for 2 minutes then cook the ground sausage until there is no more pink.
    • Prepare your BBQ for indirect heat and let it warm up to 225 degrees f. If you're using a charcoal grill, put some hickory wood in the coals to give the dip a nice smoke flavor.
    • Dice your Velveeta cheese, set aside.
    • Shred the Colby Jack cheese, set aside.
    • Chop the red onion, set aside.
    • Add cooked sausage, Velveeta, shredded Colby Jack, Rotel. tomatoes, onion, and spices to a 9×13 BBQ safe dish (I use an aluminum disposable one). Set aside.
    • Once your BBQ has reached the desired temperature, place your 9×13 dish in the center and pour ½ cup of beer into it.
    • Close the lid and cook for 30 minutes, mixing at 15 minutes.
      *NOTE* When mixing, make sure to scrape the sides and bottom so all the flavours are incorporated.
    • After 30 minutes, add the remaining ½ cup of beer and continue cooking for another 30 minutes (stirring every 15 minutes again).
    • After 1 hour on the BBQ, the cheese will be melted and you'll have a nice, thick, smoked queso dip.
    • Serve and enjoy!

    Notes

    STORAGE: This might be my new favorite recipe, and I HIGHLY doubt you’ll have any leftovers (you’ve been warned!). That being said, if you do have leftover queso you can store it in an airtight container in the fridge for 3 days. 

    Nutrition

    Serving: 1serving | Calories: 745kcal | Carbohydrates: 17g | Protein: 47g | Fat: 53g | Saturated Fat: 26g | Polyunsaturated Fat: 5g | Monounsaturated Fat: 16g | Trans Fat: 1g | Cholesterol: 149mg | Sodium: 2507mg | Potassium: 590mg | Fiber: 2g | Sugar: 7g | Vitamin A: 1456IU | Vitamin C: 2mg | Calcium: 912mg | Iron: 2mg

    Pink Chocolate Covered Strawberries

    February 14, 2022

    Pink Chocolate Covered Strawberries in white bowl

    Pink Chocolate Covered Strawberries: Whether it’s for Valentine’s Day or just a sweet treat for someone, these pink dipped strawberries are not only easy but they’re incredibly delicious!

    The holidays aren’t the only reason for having pink chocolate strawberries! Serving them at baby showers, a bridal shower, or any special occasion really, is a great way to have sweet treats, since they’re so easy and so pretty! They’re also one of our favorite romantic desserts, if you’re having a date-night at home soon!

    Strawberries covered in pink chocolate in small white bowls
    Pink Chocolate Covered Strawberries

    Why Make Pink Strawberries?

    When throwing the date night party with friends, we had a chocolate fountain bar, and let me tell you… these pink covered strawberries would have been a PERFECT fit!

    But if I had to do the party all over again, I would make a large batch of these pink chocolate dipped strawberries and package them up in these little berry baskets, and sent them home as party favors for the guests! How cute would that be?

    You may also love making these for a quick after-school snack, a birthday party, or as a gift for someone you love! No matter what it is, they’re going to be an easy recipe that you’ll want to remember for sure!

    [feast_advanced_jump_to]

    You’ll also love these cheesecake-stuffed strawberries!

    Ingredients

    As with all of our dessert recipes here, I knew I wanted to keep these as easy as possible and use as many “tricks” to make these the best result for you!

    For these, we only used 3 ingredients: strawberries, chocolate baking chips, and pink gel food coloring. (You can use red if you’d like.)

    Ingredients for pink chocolate strawberries
    Ingredients
    • 12 fresh strawberries
    • 11 ounce Ghirardelli classic white chips (see more chocolate options below)
    • 1 drop of pink gel food coloring

    See the recipe card at the bottom of the post for full steps and ingredient amounts. Make sure to check out the tips, substitutions, and variations for this recipe, throughout the post for best results!

    Instructions

    Before melting the chocolate, it’s best to prepare everything for dipping.

    1. Wash and remove any brown leaves from strawberries. (See tips below in this post for strawberry care!) Allow strawberries to dry before dipping.
    2. I like to use a large baking sheet (big enough to fit a dozen strawberries) and cover it with parchment paper. Set aside.
    3. In a small microwave-safe bowl (or narrow, heat-proof glass) pour in baking chips and melt according to package directions. (This is usually on half power for a couple of minutes, stopping at 30 second intervals to stir, so it doesn’t burn.)
    4. Once melted, drop one drop of pink food coloring and stir until combined.
    melted white chocolate chips
    Melt white chocolate
    drop of pink food coloring in bowl of white chocolate
    Add one drop pink gel food coloring

    It should be a nice pink color at this point. (Remember one drop goes a long way.) You can continue adding drops of food coloring to reach the level of pink you prefer.

    melted pink chocolate in glass bowl with spoon
    Melted pink chocolate

    Pink Chocolate in Glass

    You can use a bowl but I found that using a short, narrow glass worked a lot better to hold the melted pink chocolate so I could dip the strawberries and cover them easily. (A shallow, wide bowl doesn’t work very well for dipping.)

    Toothpick

    If you have toothpicks on hand, it’s easier and better for the strawberries to dip. This way you don’t accidentally pull off any leaves and the oils from your hands don’t mess with the green leaves.

    1. Simply poke a toothpick in to the top of the strawberry (through the leaf/stem area). This iwill leave a small hole but you won’t be able to notice it. You can use one toothpick and pull it out each time you want to dip a new strawberry but I found using multiple toothpicks made it much easier. (Then I could pull the toothpicks out after they were all dry.)
    pink chocolate in narrow glass with spoon
    Chocolate for dipping in narrow glass
    toothpick inserted in to top of strawberry
    Use a toothpick for dipping
    1. Dip strawberry in to pink chocolate, trying to hold it straight, so the chocolate would be even. NOTE: Be careful not to let the leaves go down in the chocolate.
    strawberry dipped in glass of chocolate
    Dip strawberry in to chocolate
    Chocolate covered strawberry pulling out of chocolate
    Hold to allow dripping chocolate
    1. When strawberries have a chocolate coating, gently slide one side of the strawberry against the rim of the glass, to remove the excess chocolate. (This side of the strawberry will be the bottom.)

    You want to remove any excess chocolate so it doesn’t puddle underneath the strawberry while drying.

    1. Once all excess chocolate has been removed, gently place strawberry on lined baking sheet.
    strawberry being gently pulled alongside of glass
    Carefully slide on edge of glass to remove excess
    Strawberry placed on parchment paper
    Allow to dry
    1. Continue covering strawberries until finished, placing them in a single layer on the baking sheet. Strawberries should be hardened in minutes and then they’re ready for eating!
    multiple pink chocolate covered strawberries on baking sheet
    Allow strawberries to cool

    Substitutions

    In case you can’t find exactly what I used in this recipe, there are other options you!

    • Type of Chocolate: If you don’t have the Ghirardelli white baking chips, you can use a different brand, bakers chocolate, or melting wafers. (Note: we also tried using pink candy melts and although it worked, the flavor just wasn’t as good as the Ghirardelli chocolate.)
    • Food Coloring: You can use red food coloring (gel or liquid) but just make sure to use as little as possible first so you don’t get red chocolate. Tip: You can even stick a toothpick down inside the food coloring and then place the toothpick in to the chocolate to transfer a smaller amount of color, than a drop may provide.
    • Parchment Paper: If you don’t have parchment paper, you can place each strawberry on cupcake liner or palce them on wax paper, aluminum foil or a Silpat mat.
    Pink chocolate covered strawberries on baking sheet
    Pink Chocolate Covered Strawberries

    Variations

    • Coconut Oil: We loved the strawberries just the way they were but you could also put about 2 tablespoons of coconut oil in with the chocolate chips when melting them. This will give the chocolate a thinner consistency. I prefer it without because it’s one less ingredient that you need and I like the texture of the chocolate just by itself.
    • Decorations: If you’d like to decorate your strawberries, more than just with the pink chocolate, you can decorate with sanding sugar, edible glitter, gold luster dust, sprinkles, crushed graham crackers or cookies or top with even more pink, chocolate or white chocolate drizzle with a piping bag, after the dipped chocolate has dried.
    Pink chocolate covered strawberries on pink checkered napkin
    Delicious pink strawberries

    Strawberry Care

    1. When prepping your strawberries, it’s best to wash and prune them before dipping. Remove any brown leaves and discard strawberries that have bruises or a lot of white on them. You want bright red, flawless strawberries for dipping, if you can.
    2. Soak your strawberries in water (just enough to cover them) and preferably, a tablespoon of vinegar for about 5 minutes.
    3. Drain strawberries and place on paper towels and allow them to air dry. If not dipping right away, place strawberries in the refrigerator until ready to dip. Cold strawberries for dipping is ideal so the chocolate will harden faster!

    Storage

    We’ve found that the strawberries are best at room temperature, however, if you won’t be serving them until the next day, the leaves can turn brown faster, sitting out. So refrigerating them may be best.

    Do note that the chocolate can “sweat” if placed in the refrigerator, and although that’s ok, you may want to pull them out of the refrigerator a little while before serving, to allow the “sweat” to dry.

    Also, serving chilled strawberries can make the chocolate harder than you may prefer, when you bite in to them.

    Pink chocolate covered strawberries in small white bowls
    Easy Pink Chocolate Covered Strawberries

    FAQ’s and Expert Tips

    How do you make pink chocolate?

    Simply melt white chocolate and add a drop of pink or red food coloring. If using red, you may want to dip a toothpick in to the coloring, then dip the toothpick in to the chocolate to add small amounts at a time, until you reach the desired pink color.

    Why are my chocolate strawberries sweating?

    Your strawberries can sweat during a drastic temperature change. When refrigerating your strawberries, they can “sweat” after they’re removed to room temperature.

    How far in advance can you make chocolate covered strawberries?

    It’s preferred to make them the day of, preferably a couple of hours in advance. However you can make them a day ahead of time but do note that if left out at room temperature, the leaves can “turn” a bit and not be as green and fresh looking.

    More Valentine’s Day Ideas

    Although you can enjoy pink chocolate-covered strawberries any time of year, they’re especially fun for Valentine’s Day alongside these heart rice krispie treats, this Valentine snack mix, and, of course, a pink colored drink. If you need more ideas to celebrate, here are our favorites:

    • Vanilla mug cake in vintage coffee mug.
      The BEST Vanilla Mug Cake Recipe
    • A slice of Milky Way Cake, sitting on a vintage plate, topped with caramel and Milky Way candy bars.
      Milky Way Cake
    • A slice of Texas sheet cake topped with walnuts, sitting on a wooden spatula, next to the rest of the pan.
      Texas Sheet Cake
    • Cherry chocolate dump cake being spooned out of baking dish.
      Cherry Chocolate Dump Cake

    Recipe

    Pink Chocolate Covered Strawberries in white bowl
    Print Pin
    5 from 7 votes

    Pink Chocolate Covered Strawberries

    Pink Chocolate Covered Strawberries: Whether it's for Valentine's Day or just a sweet treat for someone, these pink dipped strawberries are not only easy but they're incredibly delicious!
    Course Dessert, Snack
    Cuisine American
    Prep Time 5 minutes minutes
    Cook Time 2 minutes minutes
    Cooling Time 5 minutes minutes
    Total Time 12 minutes minutes
    Servings 12 strawberries
    Calories 144kcal
    Author Jessica Burgess

    Ingredients

    • 12 strawberries See post for tips on best strawberries to select
    • 11 ounces Ghirardelli White Chocolate Chips or similar – see post for other options
    • 1 drop pink food coloring or red coloring – see post for tips on alternate options

    Instructions

    • Before melting the chocolate, it's best to prepare everything for dipping.

    Wash and Prepare Strawberries

    • Wash and remove any brown leaves from strawberries. (See tips in this post for strawberry care for best results!) Allow strawberries to dry before dipping.

    Prep Cooling Surface

    • I like to use a large baking sheet (big enough to fit a dozen strawberries) and cover it with parchment paper. Set aside.

    Melting Chocolate

    • In a small microwave-safe bowl (or narrow, heat-proof glass) pour in baking chips and melt according to package directions. (This is usually on half power for a couple of minutes, stopping at 30 second intervals to stir, so it doesn't burn.)

    Making Chocolate "Pink"

    • Once chocolate chips have melted, drop one drop of pink food coloring and stir until combined.
    • It should be a nice pink color at this point. (Remember one drop goes a long way.) You can continue adding drops of food coloring to reach the level of pink you prefer.

    How to Dip Strawberries

    • Simply poke a toothpick in to the top of the strawberry (through the leaf/stem area).
    • Dip strawberry in to pink chocolate, trying to hold it straight, so the chocolate would be even. NOTE: Be careful not to let the leaves go down in the chocolate.
    • When strawberries have a chocolate coating, gently slide one side of the strawberry against the rim of the glass, to remove the excess chocolate. (This side of the strawberry will be the bottom.)
    • Once all excess chocolate has been removed, gently place strawberry on lined baking sheet.
    • Continue covering strawberries until finished, placing them in a single layer on the baking sheet. Strawberries should be hardened in minutes and then they're ready for eating!

    Notes

    Strawberry Care:
    • When prepping your strawberries, it’s best to wash and prune them before dipping. Remove any brown leaves and discard strawberries that have bruises or a lot of white on them. You want bright red, flawless strawberries for dipping, if you can.
    • Soak your strawberries in water (just enough to cover them) and preferably, a tablespoon of vinegar for about 5 minutes.
    • Drain strawberries and place on paper towels and allow them to air dry. If not dipping right away, place strawberries in the refrigerator until ready to dip. Cold strawberries for dipping is ideal so the chocolate will harden faster!
    Storage: 
    We’ve found that the strawberries are best at room temperature, however, if you won’t be serving them until the next day, the leaves can turn brown faster, sitting out. So refrigerating them may be best.
    Do note that the chocolate can “sweat” if placed in the refrigerator, and although that’s ok, you may want to pull them out of the refrigerator a little while before serving, to allow the “sweat” to dry.
    Also, serving chilled strawberries can make the chocolate harder than you may prefer, when you bite in to them.

    Nutrition

    Serving: 1strawberry | Calories: 144kcal | Carbohydrates: 16g | Protein: 2g | Fat: 8g | Saturated Fat: 5g | Polyunsaturated Fat: 1g | Monounsaturated Fat: 2g | Cholesterol: 5mg | Sodium: 24mg | Potassium: 93mg | Fiber: 1g | Sugar: 16g | Vitamin A: 9IU | Vitamin C: 7mg | Calcium: 54mg | Iron: 1mg

    Valentine Rice Krispie Treats

    February 12, 2022

    heart shaped rice krispie treats

    Valentine Rice Krispie Treats: These Valentine’s Day rice krispie treats are made with your favorite heart-shaped cookie cutters or silicone molds and decorated with sprinkles and piped icing.

    Although you can make heart shapes with rice krispies treats any time of year, it’s possibly our favorite, no-bake Valentine’s Day dessert idea and a fun idea for the holiday!

    heart shaped rice krispie treats on white plate
    Valentine Rice Krispie Treats

    Why you’ll love this recipe

    If you love decorating goodies and treats for the different holidays of the year, and if you’re like me, and you don’t consider yourself a whiz in the pastry chef department, you’ll love making this fun recipe. (You’ll also love these easy pink chocolate-covered strawberries then too!)

    See below how I use easy tools to decorate these delicious fun treats! They’re easy treats so the kids can help too!

    [feast_advanced_jump_to]

    Ingredients

    These heart rice krispie treats only require 4 ingredients! (Unless you want to try our rice krispie treats made with milk.) However, if you prefer to decorate with sprinkles, icing, etc. you’ll need those items as well! To make the Valentine’s rice crispy treats that you see here, we only used sprinkles and store-bought piped icing!

    ingredients for Valentine rice krispie treats
    Ingredients
    • 3 tablespoons butter
    • 4 cups mini marshmallows
    • 6 cups rice krispie cereal
    • 1 tablespoon vanilla extract
    • sprinkles, if desired
    • icing, if desired
    • non-stick cooking spray, optional

    See the recipe card toward the end of this post for ingredients and instructions all in one place for these Valentine treats

    Instructions

    1. First, melt butter in large saucepan on low heat.
    2. Next, pour in marshmallow and stir to combine, allowing the low-heat to gently melt the marshmallows. Stir often.
    Melt Butter
    Add marshmallows
    1. Once marshmallows have melted, pour in vanilla extract and stir to combine.
    Pour in vanilla
    1. Next, pour in rice krispies cereal and stir to combine.
    Crispy rice cereal in large sauce pan
    Add in crisp rice cereal
    rice krispies and marshmallows mixed in pot
    Warm, marshmallowy goodness.
    1. Now it’s time to shape the marshmallow mixture in to hearts. (You can use a heart-shaped mold or cookie cutters like I used in our heart sugar cookies. See tips below.)
    heart-shaped silicone mold on counter
    Heart-shaped silicone mold
    1. If using a silicone mold, simply dish out amount of rice krispy mixture and gently press mixture in to mold. If using cookie cutters, you can spray them with cookie spray so the treats do not stick – then place cookie cutter on parchment paper or wax paper and fill cookie cutter with treats. Remove and repeat until mixture is gone.
    2. NOTE: if decorating treats with sprinkles, it’s best to pour sprinkles on to the sweet treats before they harden, so sprinkles will secure in to the marshamallow texture for the perfect treat.
    hand pouring sprinkles on heart-shaped rice crispy treats
    Optional: Sprinkles
    piping icing on to rice crispy treat hearts
    Optional: Piped icing

    Icing Tube

    To keep things super simple, we used Cake Craft Icing Tube’s, in pink and red. We found that these were really easy to use and worked well on these fun treats, so you don’t even have to use a piping bag.

    To use them, you simply attach a piping tip (I used a #3 piping tip)to the tube and can start decorating!

    TIP: Feel free to wait until the rice krispie treat hearts have hardened before applying icing if you prefer.

    Heart shaped treats on white plate with sprinkles on table
    Valentine’s Day Treats

    Substitutions

    Side Note: I bought this heart-shaped silicone mold to use for these rice krispy treats and found that it was my favorite way to make them! However, heart-shaped cookie cutters work just fine too!

    You can use other items to decorate these treats if you prefer. Such as:

    • melted chocolate drizzle (white chocolate chips, milk chocolate chips, etc.)
    • dip hearts in melted chocolate
    • red or pink candy melts

    Variations

    If you want to get super creative and have fun with the rice crispy treat hearts, you can mix in items like we did with our some of our favorite recipes caramel rice krispie treats and cookies & cream treats!

    Heart shaped valentine rice crispy treats
    Heart Shaped Rice Krispy Treats

    Storage

    Store the Valentine's rice krispie treats in an airtight container at room temperature for up to 2-3 days for freshness. (You can enjoy them after 2-3 days but the longer they sit, the harder they can get.)

    hand holding heart rice krispie treat
    Yum!! Valentine Rice Krispy Treats

    Top tip

    How far in advance can I make Rice Crispy Treats?

    It’s best to make them the day of, so they’re as soft as possible. However, you can make them a day in advance, just make sure to store them properly.

    How do you keep Rice Crispy Treats from sticking to your hands?

    Spraying hands with cooking spray before shaping or pressing in to a pan can help prevent marshmallow treats from sticking to your hand. Or, place hand in small plastic baggie, then spray with cooking spray or spread small amount butter on to bag, then press. This way the treats won’t stick to the bag and your hand remains clean.

    Why did my Rice Krispie Treats come out hard?

    When pressing down on rice krispie treats to mold them, don’t press super hard, as this can make your treats hard. Gently press, to shape them for a gooier, treat.

    More Valentine’s Day Ideas

    You must use the category name, not a URL, in the category field.

    Recipe

    heart shaped rice krispie treats
    Print Pin
    5 from 4 votes

    Valentine Rice Krispie Treats

    Valentine Rice Krispie Treats: These Valentine's Day rice krispie treats are made with your favorite heart-shaped cookie cutters or silicone molds and decorated with sprinkles and piped icing.
    Course Dessert
    Cuisine American
    Prep Time 2 minutes minutes
    Cook Time 5 minutes minutes
    Decorating Time 3 minutes minutes
    Total Time 10 minutes minutes
    Servings 10 hearts
    Calories 140kcal
    Author Jessica Burgess

    Equipment

    • heart-shaped silicone mold optional
    • heart-shaped cookie cuttersr optional

    Ingredients

    • 3 tablespoons butter
    • 4 cups miniature marshmallows
    • 6 cups crispy rice cereal
    • 1 tablespoon vanilla extract

    Instructions

    • Begin by melting butter in stovepot on low heat.
    • Next, pour in marshmallow and stir to combine, allowing the low-heat to gently melt the marshmallows. Stir often.
    • Once marshmallows have melted, pour in vanilla extract and stir to combine.Next, pour in rice krispies cereal and stir to combine.
    • Now it's time to shape the rice crispy treats in to hearts.
    • If using a silicone mold, simply dish out amount of rice krispy mixture and gently press in to mold. If using cookie cutters, you can spray them with cookie spray so the treats do not stick – then place cookie cutter on parchment paper and fill cookie cutter with treats. Remove and repeat until mixture is gone. NOTE: if decorate treats with sprinkles, it's best to pour sprinkles on treats before they harded, so sprinkles will secure in to the marshamallow texture.
    • Decorate hearts, if desired. See post for tips on icing and sprinkles.

    Notes

    How far in advance can you make rice crispy treats?
    It’s best to make them the day of, so they’re as soft as possible. However, you can make them a day in advance, just make sure to store them properly.
    How can I keep rice krispie treats from sticking to my hands?
    Spraying hands with cooking spray before shaping or pressing in to a pan can help prevent marshmallow treats from sticking to your hand. Or, place hand in small plastic baggie, then spray with cooking spray or spread small amount butter on to bag, then press. This way the treats won’t stick to the bag and your hand remains clean.
    Why did my rice krispie treats come out hard?
    When pressing down on rice krispie treats to mold them, don’t press super hard, as this can make your treats hard. Gently press, to shape them for a gooier, treat.
    How to Store Rice Krispie Treats
    Store treats in an air-tight container for 2-3 days. Treats can be enjoyed longer than that, however they tend to get harder as the days go on so it’s best to enjoy them quickly.

    Nutrition

    Serving: 1heart | Calories: 140kcal | Carbohydrates: 26g | Protein: 1g | Fat: 4g | Saturated Fat: 2g | Polyunsaturated Fat: 1g | Monounsaturated Fat: 1g | Trans Fat: 1g | Cholesterol: 9mg | Sodium: 47mg | Potassium: 17mg | Fiber: 1g | Sugar: 12g | Vitamin A: 105IU | Calcium: 3mg | Iron: 1mg
    • « Go to Previous Page
    • Page 1
    • Interim pages omitted …
    • Page 15
    • Page 16
    • Page 17
    • Page 18
    • Page 19
    • Interim pages omitted …
    • Page 26
    • Go to Next Page »

    Primary Sidebar

    Jessica Burgess standing in kitchen holding a hummingbird cake.

    Hi, I'm Jessica! - Owner and Creator of the blog and brand, Fantabulosity.

    I’m here to help you make easy comfort food and nostalgic recipes, using simple ingredients, that everyone will love.

    More about me →

    Potluck Recipes

    • A slice of strawberry jello cake, topped with a strawberry slice, sitting on a round plate.
      Strawberry Jello Cake (Easy, Moist Strawberry Cake)
    • Crack green beans on wooden spoon.
      Crack Green Beans
    • Old fashioned potluck cake recipes collage.
      Old-Fashioned Cakes That Still Show Up at Every Potluck
    • Collage of potluck desserts.
      Easy Potluck Desserts (Simple Recipes That Always Get Asked For)
    • Cold Pasta Salad Recipes Collage.
      Cold Pasta Salad Recipes
    • Chicken Casserole recipes image collage.
      20 Chicken Casserole Recipes

    Popular Recipes

    • bread pudding in baking dish
      Bread Pudding Recipe: Easy Old Fashioned Recipe (With Video!)
    • Burger baked in the oven, steamed in aluminum foil, and placed on white plate.
      Burgers in the Oven
    • two tuna salad sandwiches stacked on top of each other
      The BEST Tuna Salad Recipe
    • Sliced banana bread on white platter
      Best Banana Bread
    • Strawberry brownies on white marble cutting board.
      Strawberry Brownies Recipe
    • Cheeseburger Sliders made with Hawaiian Rolls, stacked on top of one another.
      Cheeseburger Sliders

    Footer

    ↑ back to top

    Featured In

    About

    • About Jessica
    • Contact
    • Collaborate
    • Dinner System

    Easy Recipes

    • All Recipes
    • Vintage Recipes
    • Dinner Recipes
    • Desserts

    How to Cook

    • Oven-Baked
    • Stove-Top
    • No Bake
    • Cooking Basics

    Privacy Policy |Accessibility Copyright © 2026 Fantabulosity | Terms & Conditions | FTC
    All recipes, photos, and content are copyrighted and may not be reproduced, republished, or distributed without written permission.

    Rate This Recipe

    Your vote:


    A rating is required
    A name is required
    An email is required