• Skip to primary navigation
  • Skip to main content
  • Skip to primary sidebar

Fantabulosity logo

  • All Recipes
  • Vintage Recipes
  • Holiday
  • Dinner Theme System
  • About
  • Navigation Menu: Social Icons

    • Facebook
    • Instagram
    • Pinterest
    • TikTok
    • YouTube
menu icon
go to homepage
  • Recipes
  • Desserts
  • Dinners
  • Gatherings
  • Holidays
  • About Jessica
    • Facebook
    • Instagram
    • Pinterest
    • TikTok
    • YouTube
  • search icon
    Homepage link
    • Recipes
    • Desserts
    • Dinners
    • Gatherings
    • Holidays
    • About Jessica
    • Facebook
    • Instagram
    • Pinterest
    • TikTok
    • YouTube
  • ×
    Home » Recipes

    Juicy Chicken Drumsticks in the Oven

    Juicy Chicken Drumsticks in the Oven

    September 11, 2021

    Chicken drumsticks baked in oven

    This chicken drumsticks in the oven recipe is not only easy but is full of flavor, baked in only 30 minutes, and uses simple ingredients!

    The butter, garlic, and parmesan cheese are what make up the crispy skin, and the oven baked method them gives them a juicy center that makes them the best, like the top-favorite chicken legs in the air fryer! Or, if you’re a fan of slow cooking, you can make chicken drumsticks in the slow cooker, and then boiling chicken legs can be a super easy way to cook the chicken.
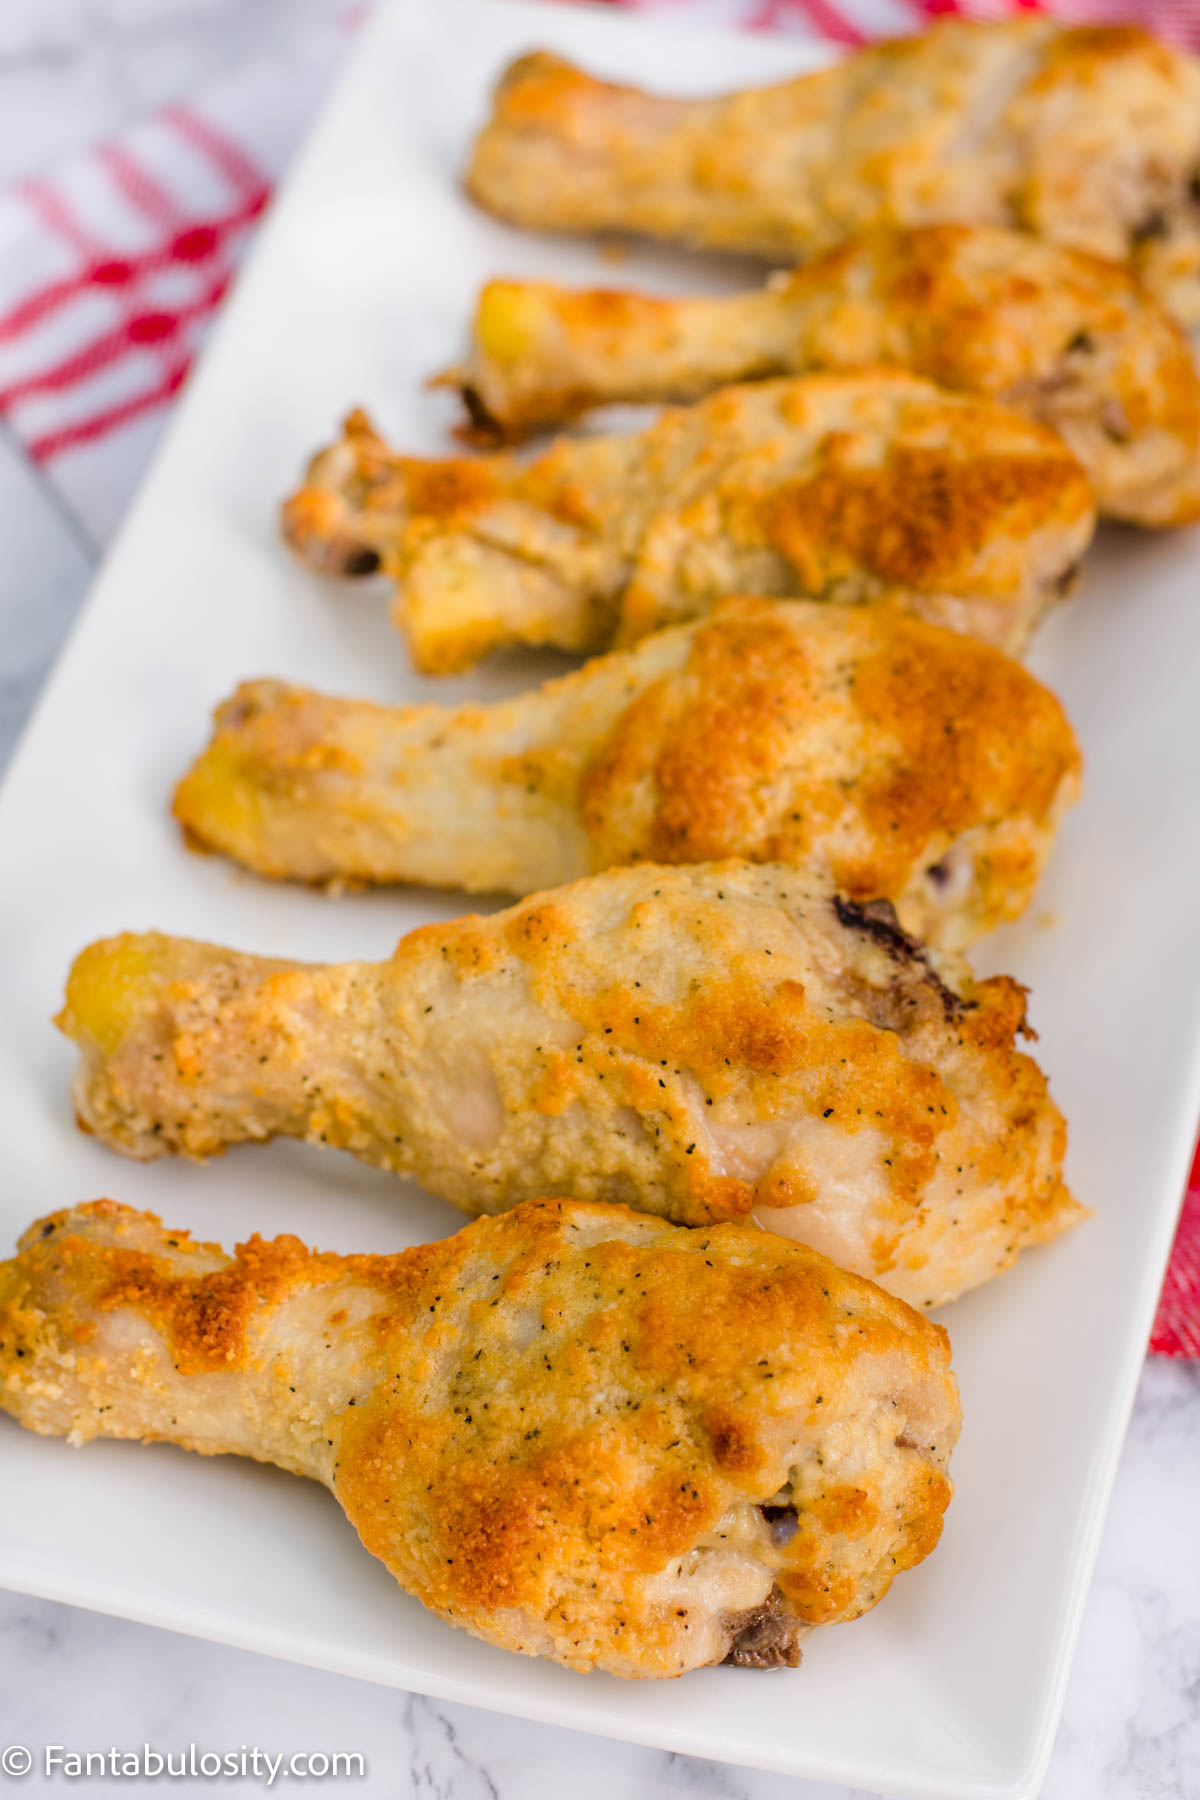
    Chicken Drumsticks Baked in the Oven on white plate

    Why You’ll Love These Baked Chicken Legs

    Chicken legs or drumsticks can be a very affordable protein to grab at the grocery store so they make a great family weeknight dinner or even an main course to make when hosting a crowd!

    Plus, the crispy outside is achieved without using breadcrumbs. However, if you loved breadcrumbs on chicken, these baked chicken cutlets are definitely something to try!

    [feast_advanced_jump_to]

    Ingredients

    Just a few simple ingredients that you probably already have on hand, is all you need to make this perfect chicken recipe, easy!

    See the full recipe card with ingredients amounts and directions, all in one place!

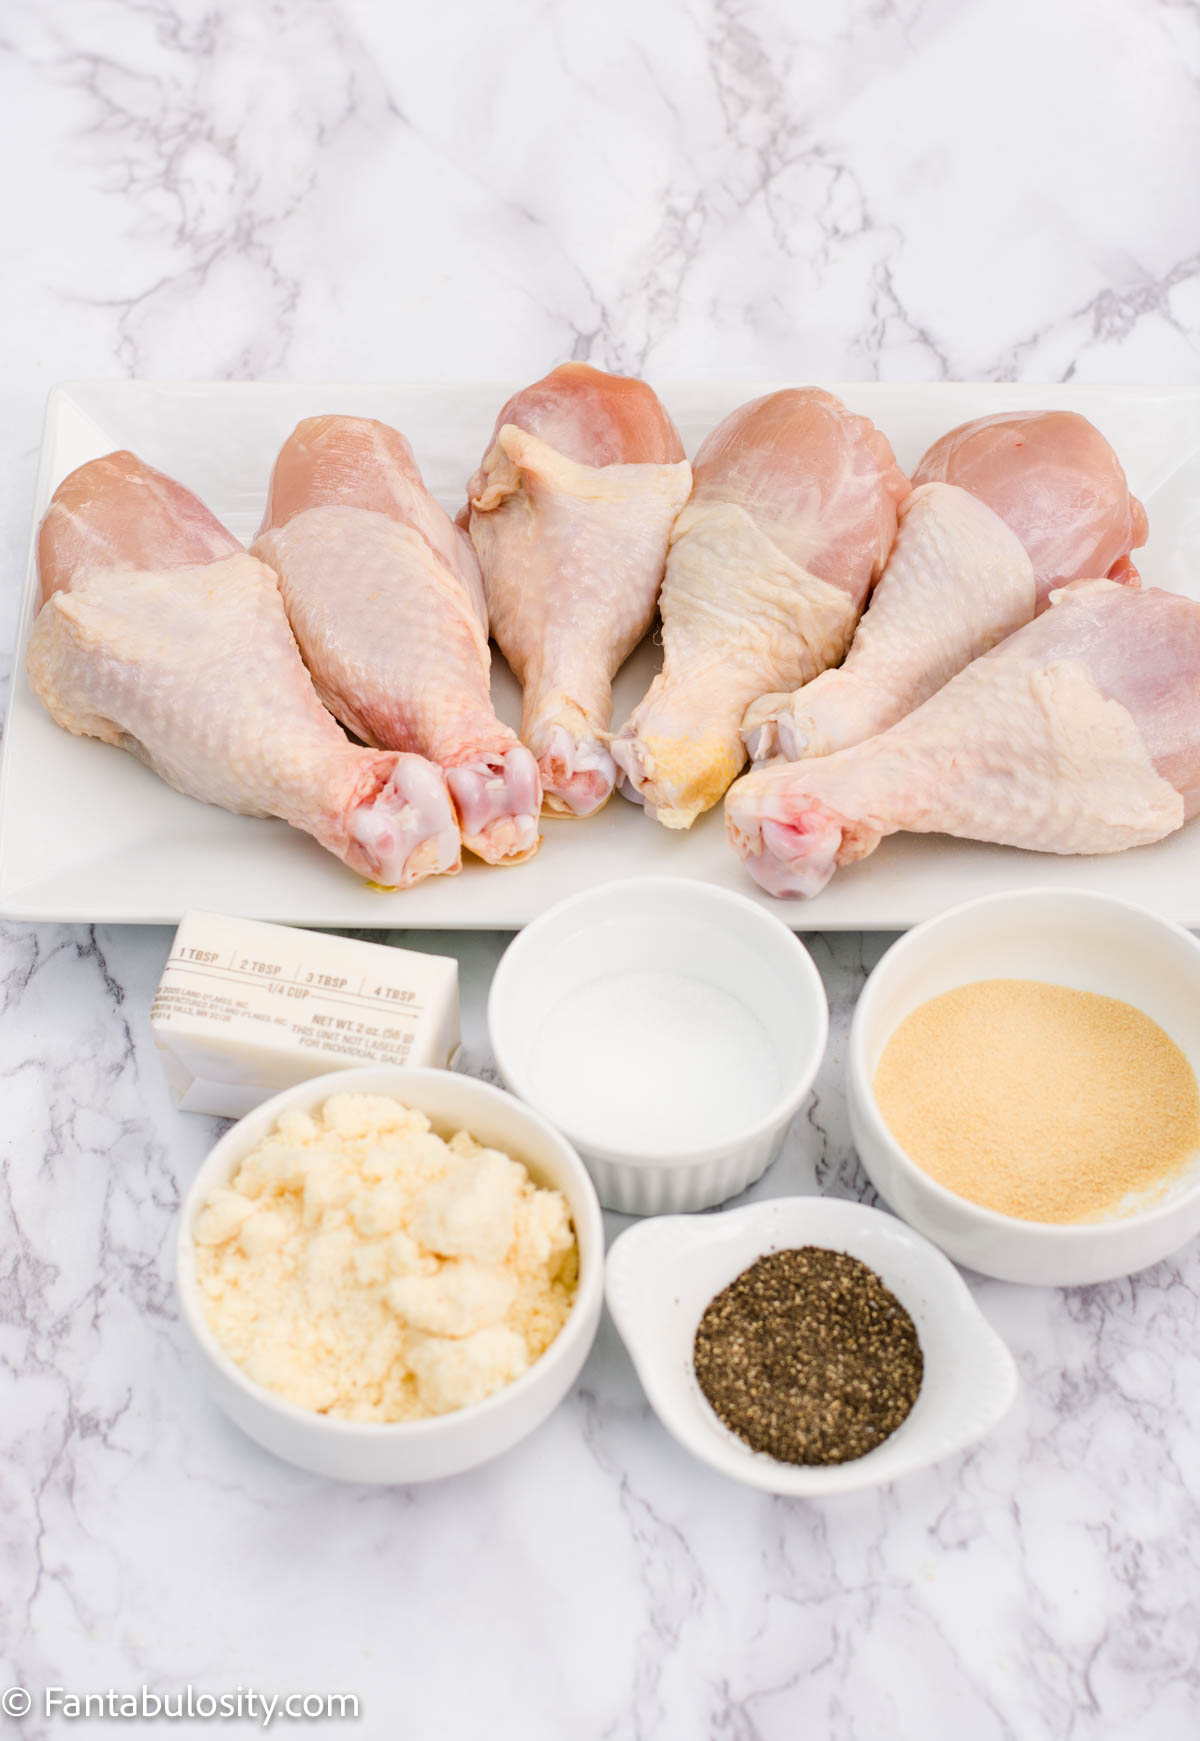
    • chicken legs (drumsticks)
    • grated parmesan cheese
    • butter
    • garlic powder
    • salt
    • black pepper
    Ingredients for Chicken Drumsticks in Oven

    Step by Step Directions for Chicken Drumsticks in Oven

    1. First, preheat your oven temperature to 400° F degree oven (this high temperature will help give the chicken a golden brown color) and cover a rimmed baking sheet with parchment paper.
      (Aluminum foil will work too if that’s what you have on hand.)
    2. While the oven is preheating, melt the butter in a small dish, yet big enough to coat a chicken leg with the “batter” that you’re currently preparing.
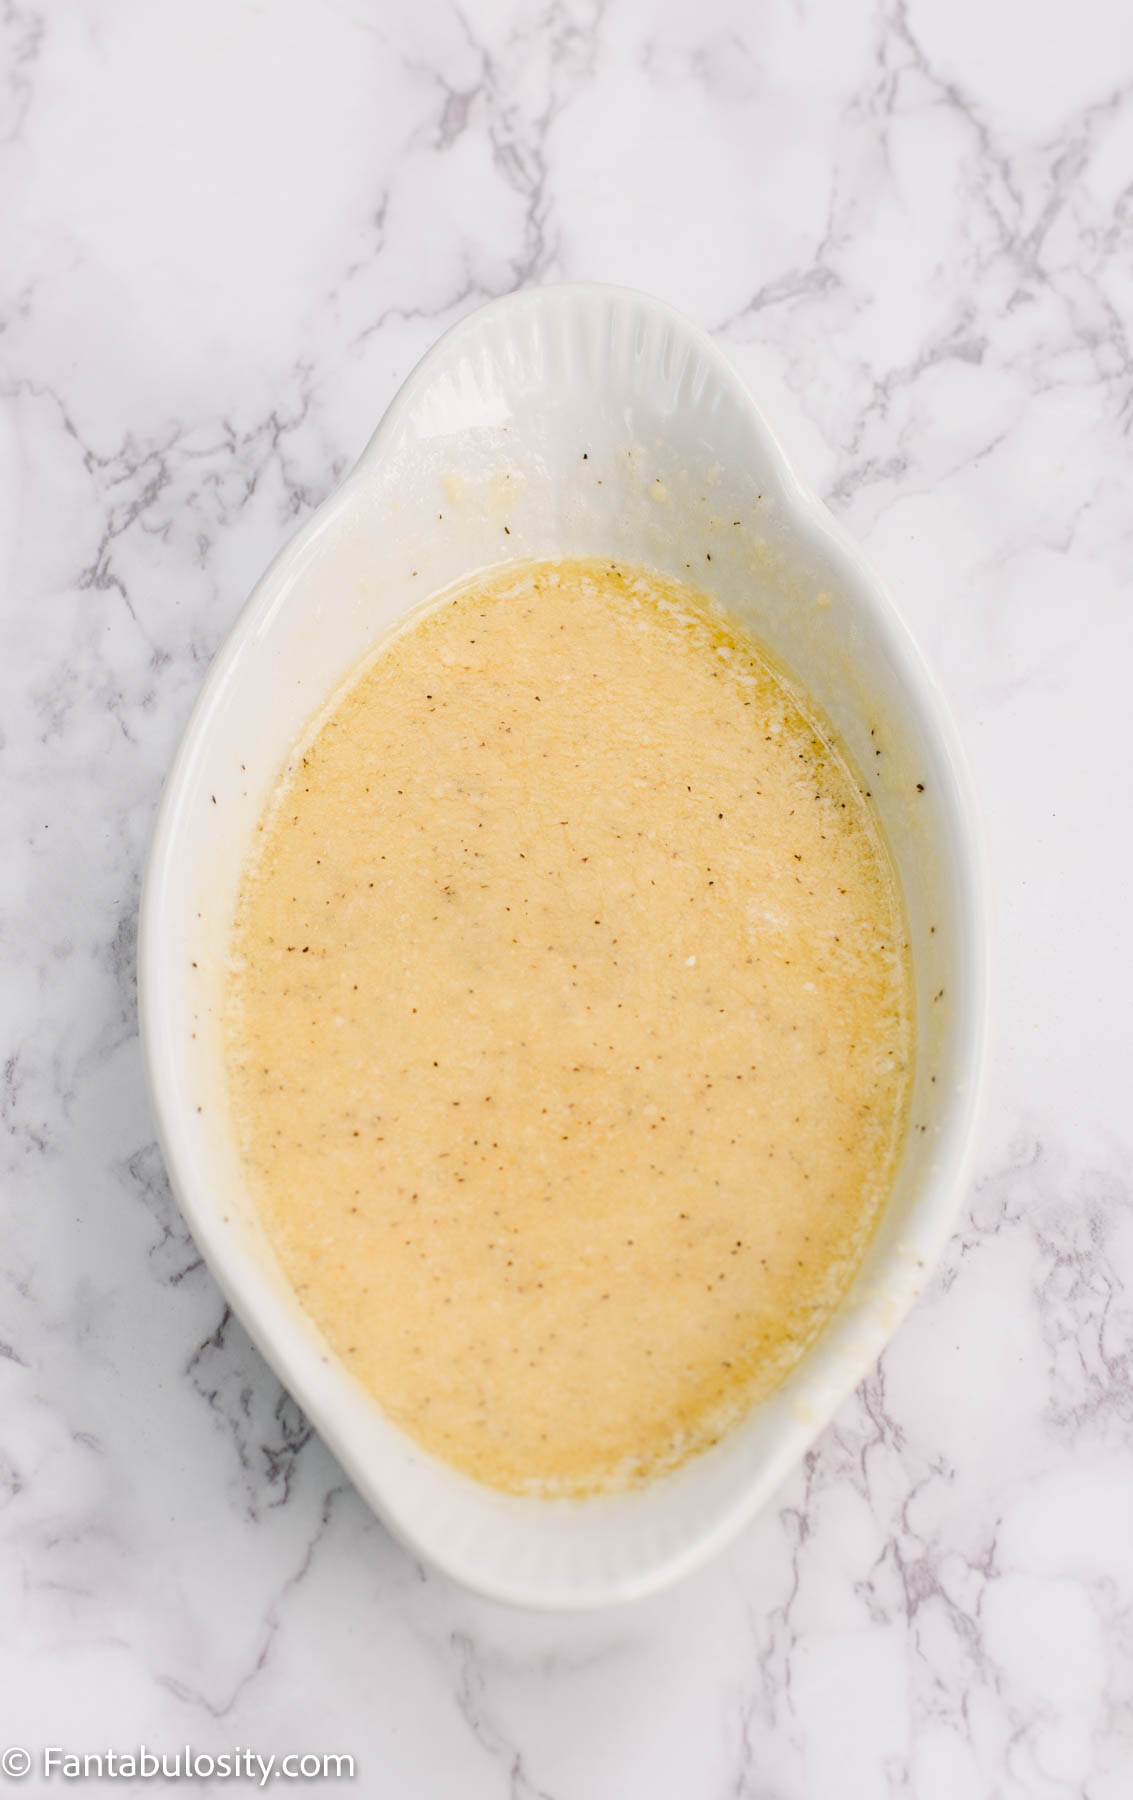
    3. Once the butter has melted, add in the parmesan cheese, garlic powder and salt and pepper. (Image on left, below.)
    4. Mix together the butter mixture until evenly combined. (Image on the right, below.)
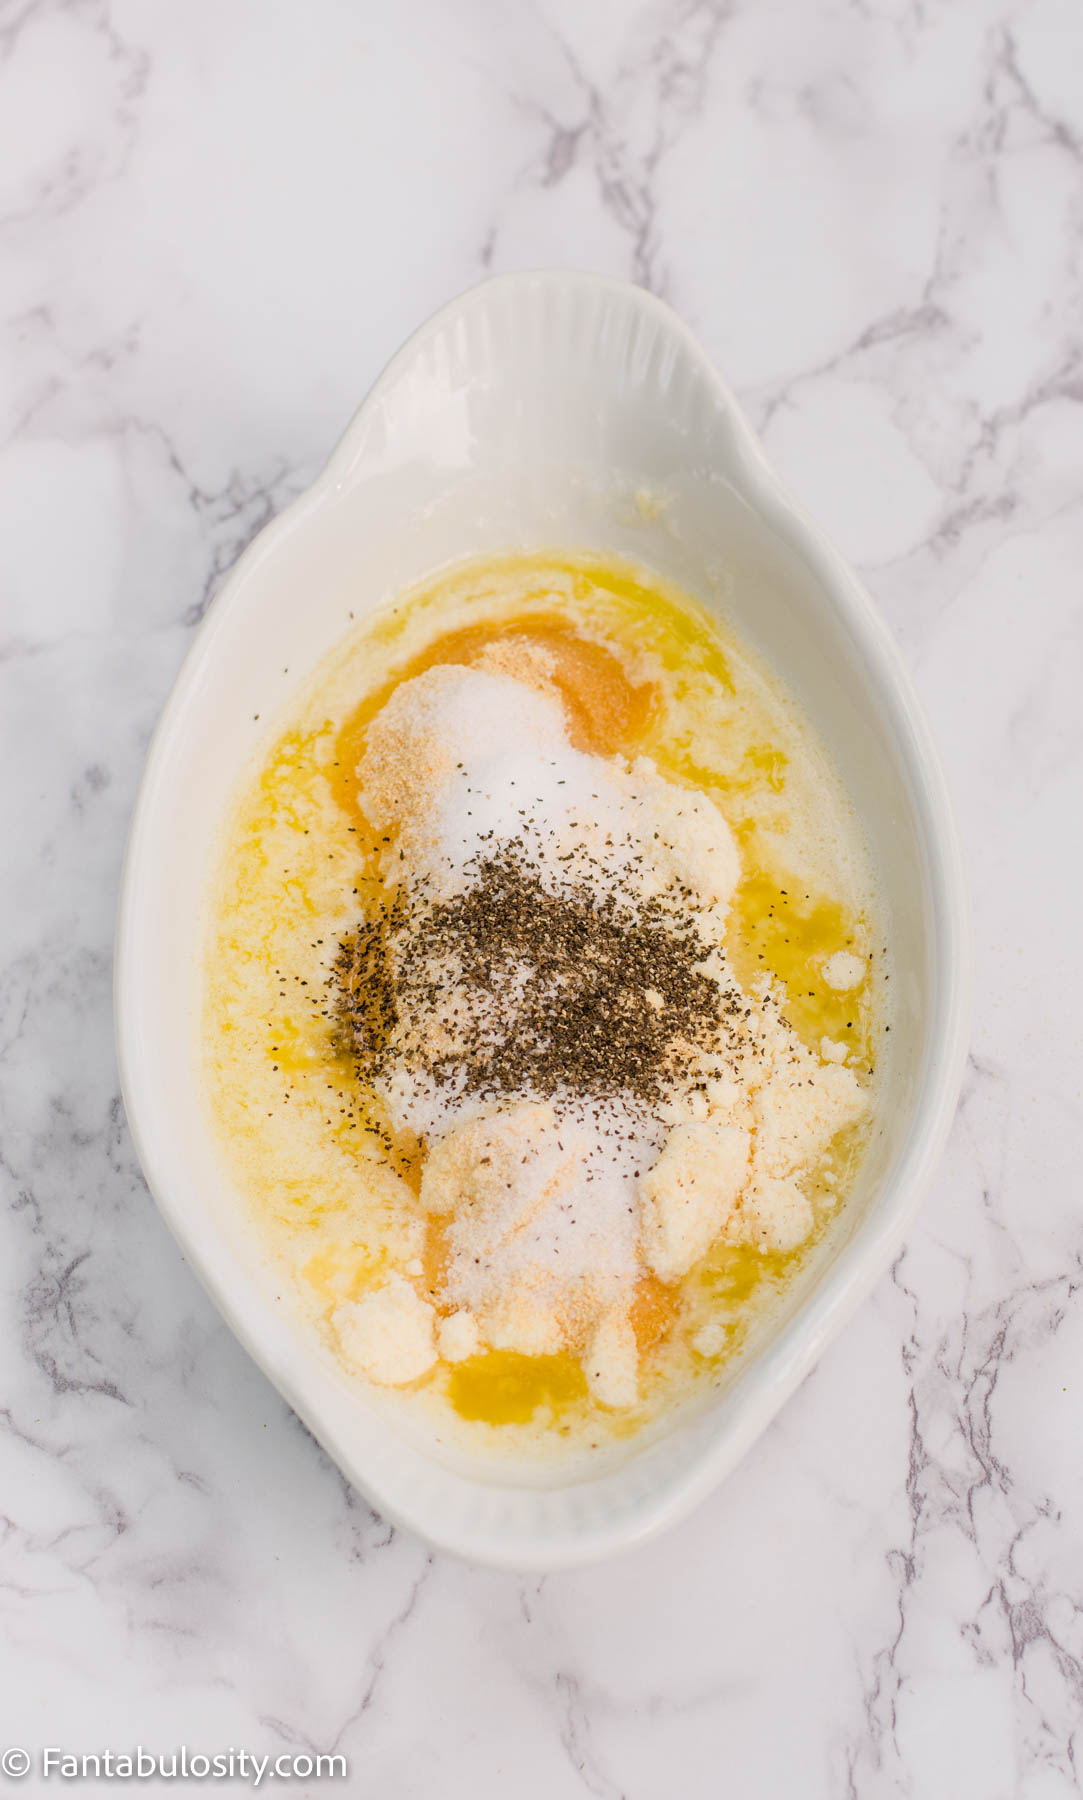
    Garlic Parmesan Chicken Drumsticks Batter
    Butter, parmesan, garlic, salt, pepper
    Mixed batter for chicken drumsticks
    Ingredients mixed together
    1. Take one chicken leg and dip it in to the butter mixture.
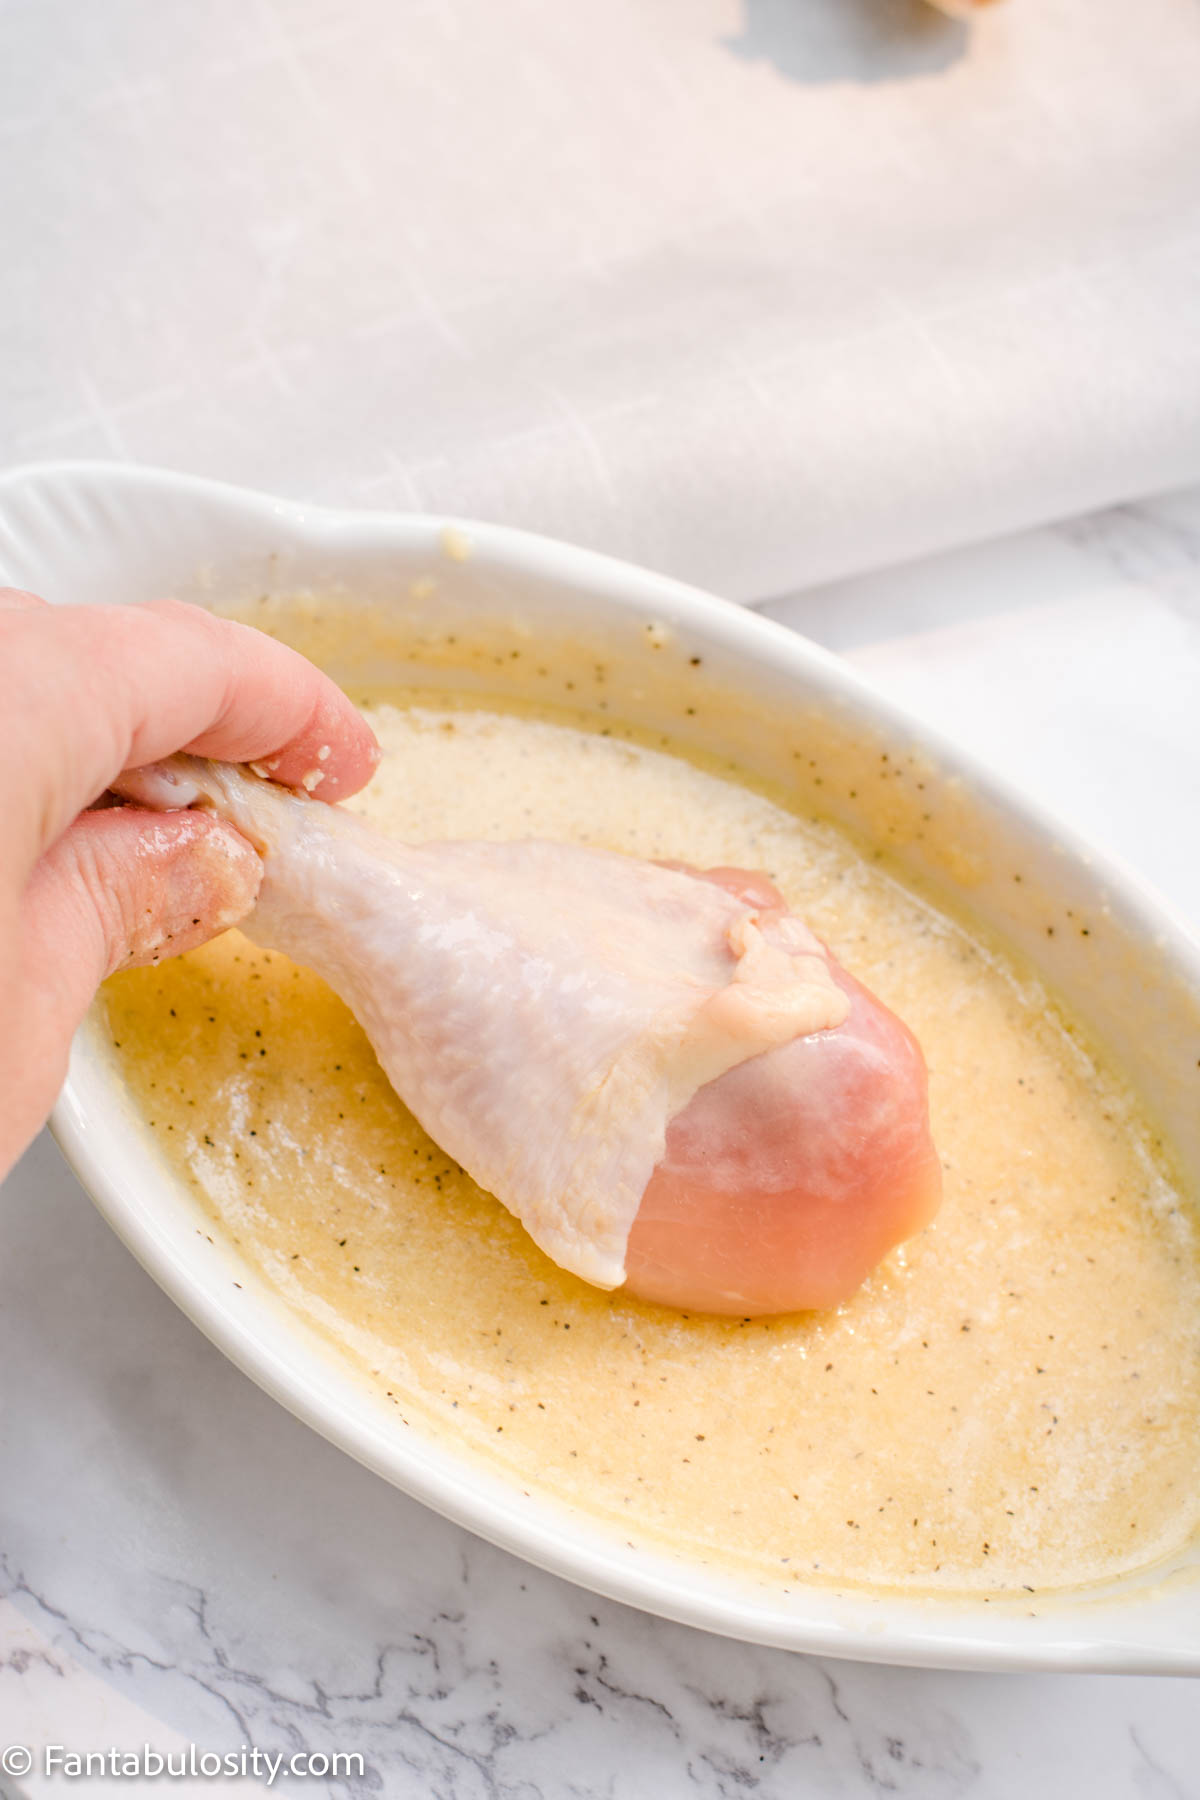
    Dip raw chicken drumstick in garlic parmesan butter
    1. Fully coat the chicken leg with the butter batter.
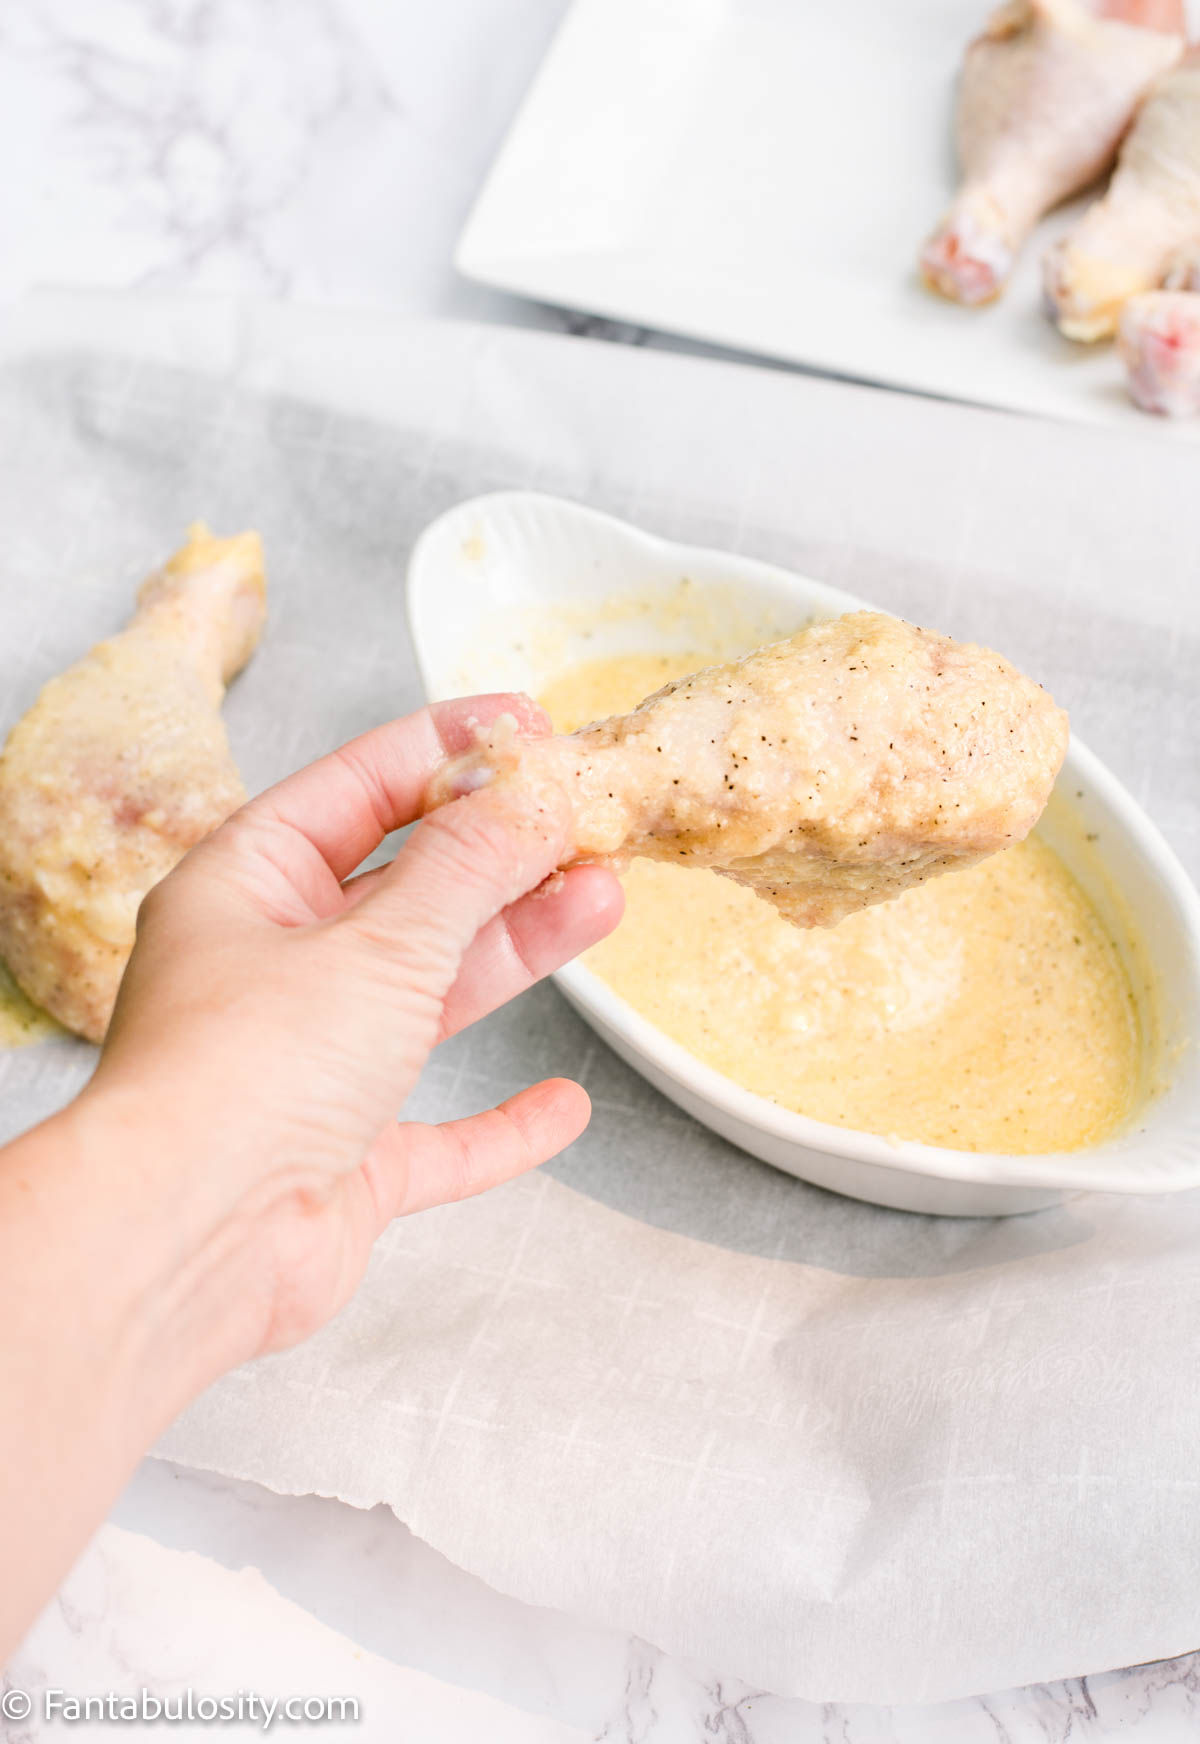
    Fully cover chicken leg with garlic butter batter
    1. Place fully coated chicken legs on to a rimmed baking sheet or sheet pan, in a single layer, making sure they don’t touch one another.

      (The size of the baking sheet that you use will depend on how many chicken legs you’re making. You can make a LARGE batch of these at once, which is great for a crowd but just make sure to double or triple the ingredients for the amount of chicken you’ll be cooking.)
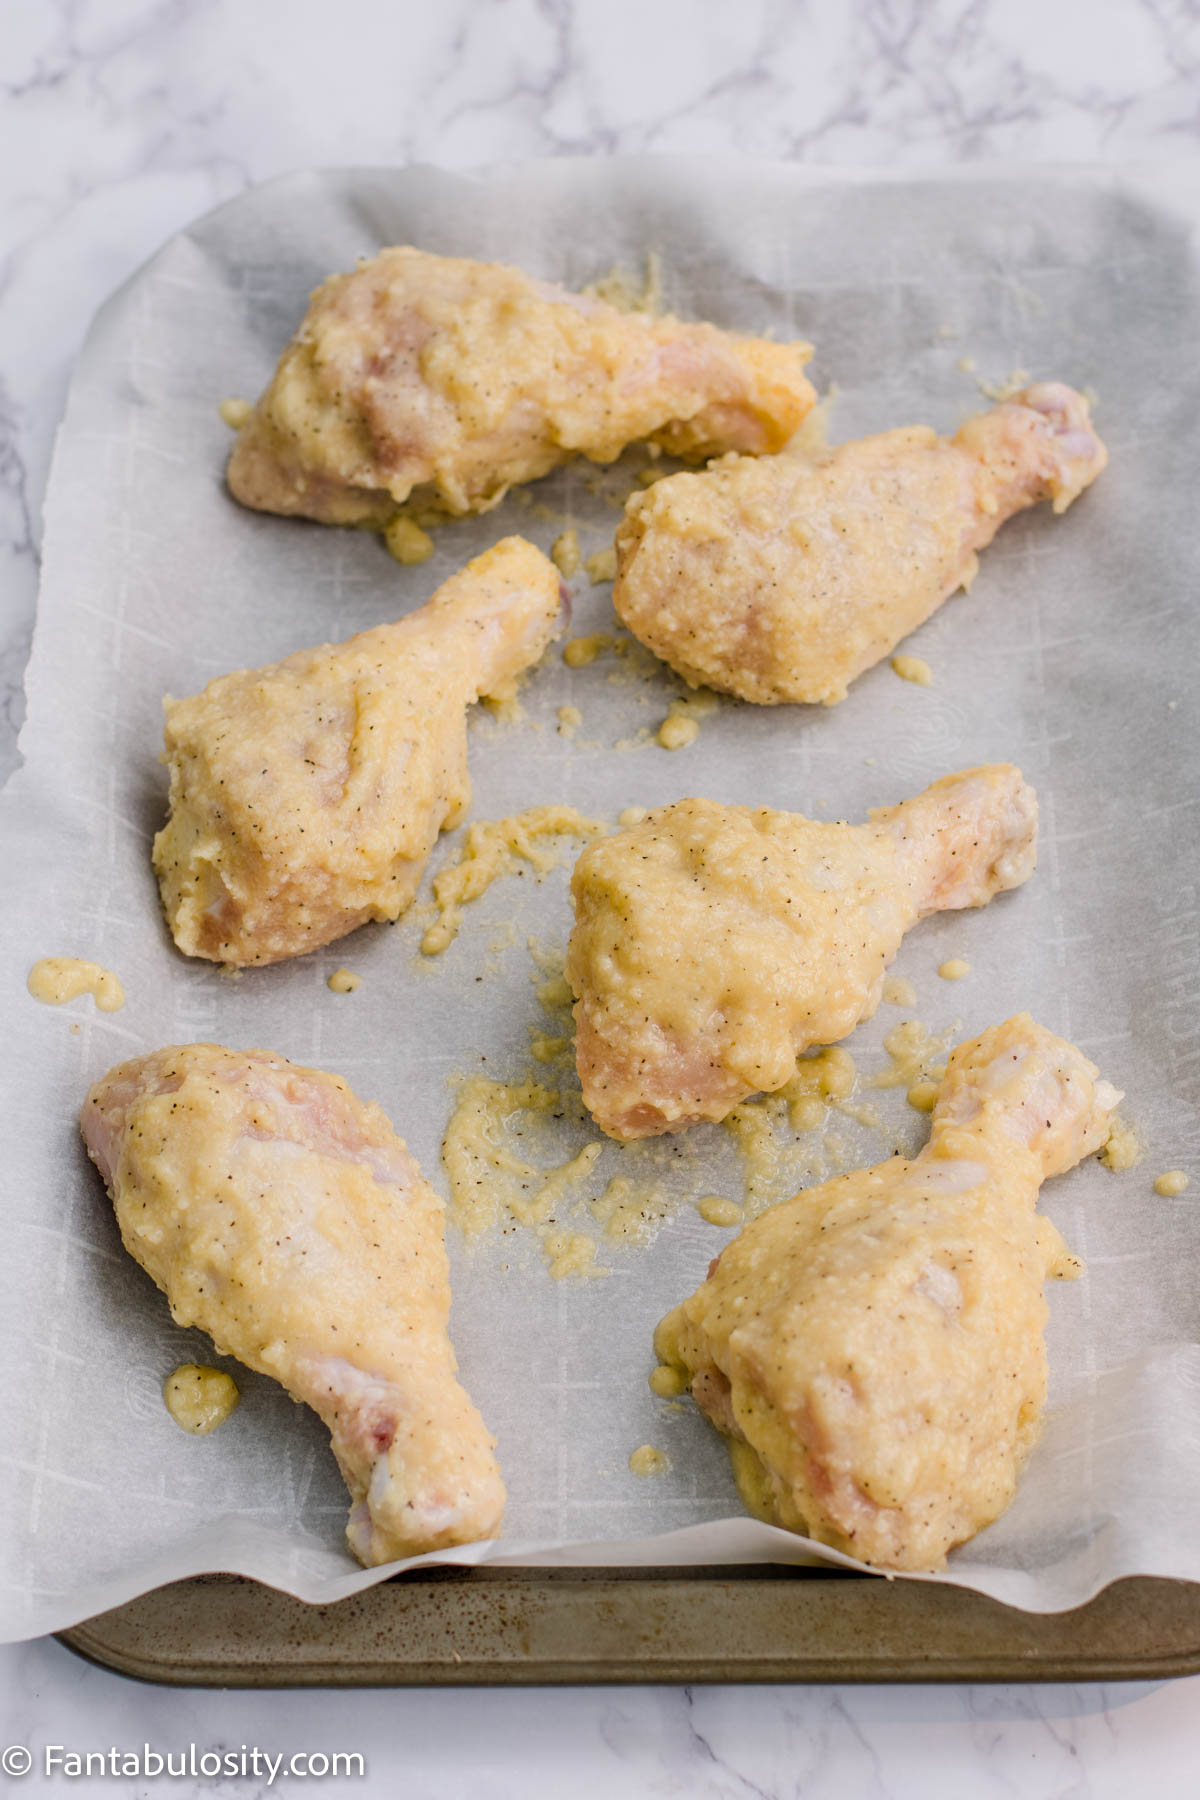
    Cover all chicken drumsticks with butter garlic parmesan coating
    1. Bake the drumsticks in the oven for a cook time of 30 minutes or until the internal temp (checked with a meat thermometer) reaches 165° and it has that crispy chicken skin.
    1. Optional: If desired, remove chicken drumsticks from baking sheet with tongs, and transfer to a baking rack on top of another baking sheet, to allow juices to drip before serving.
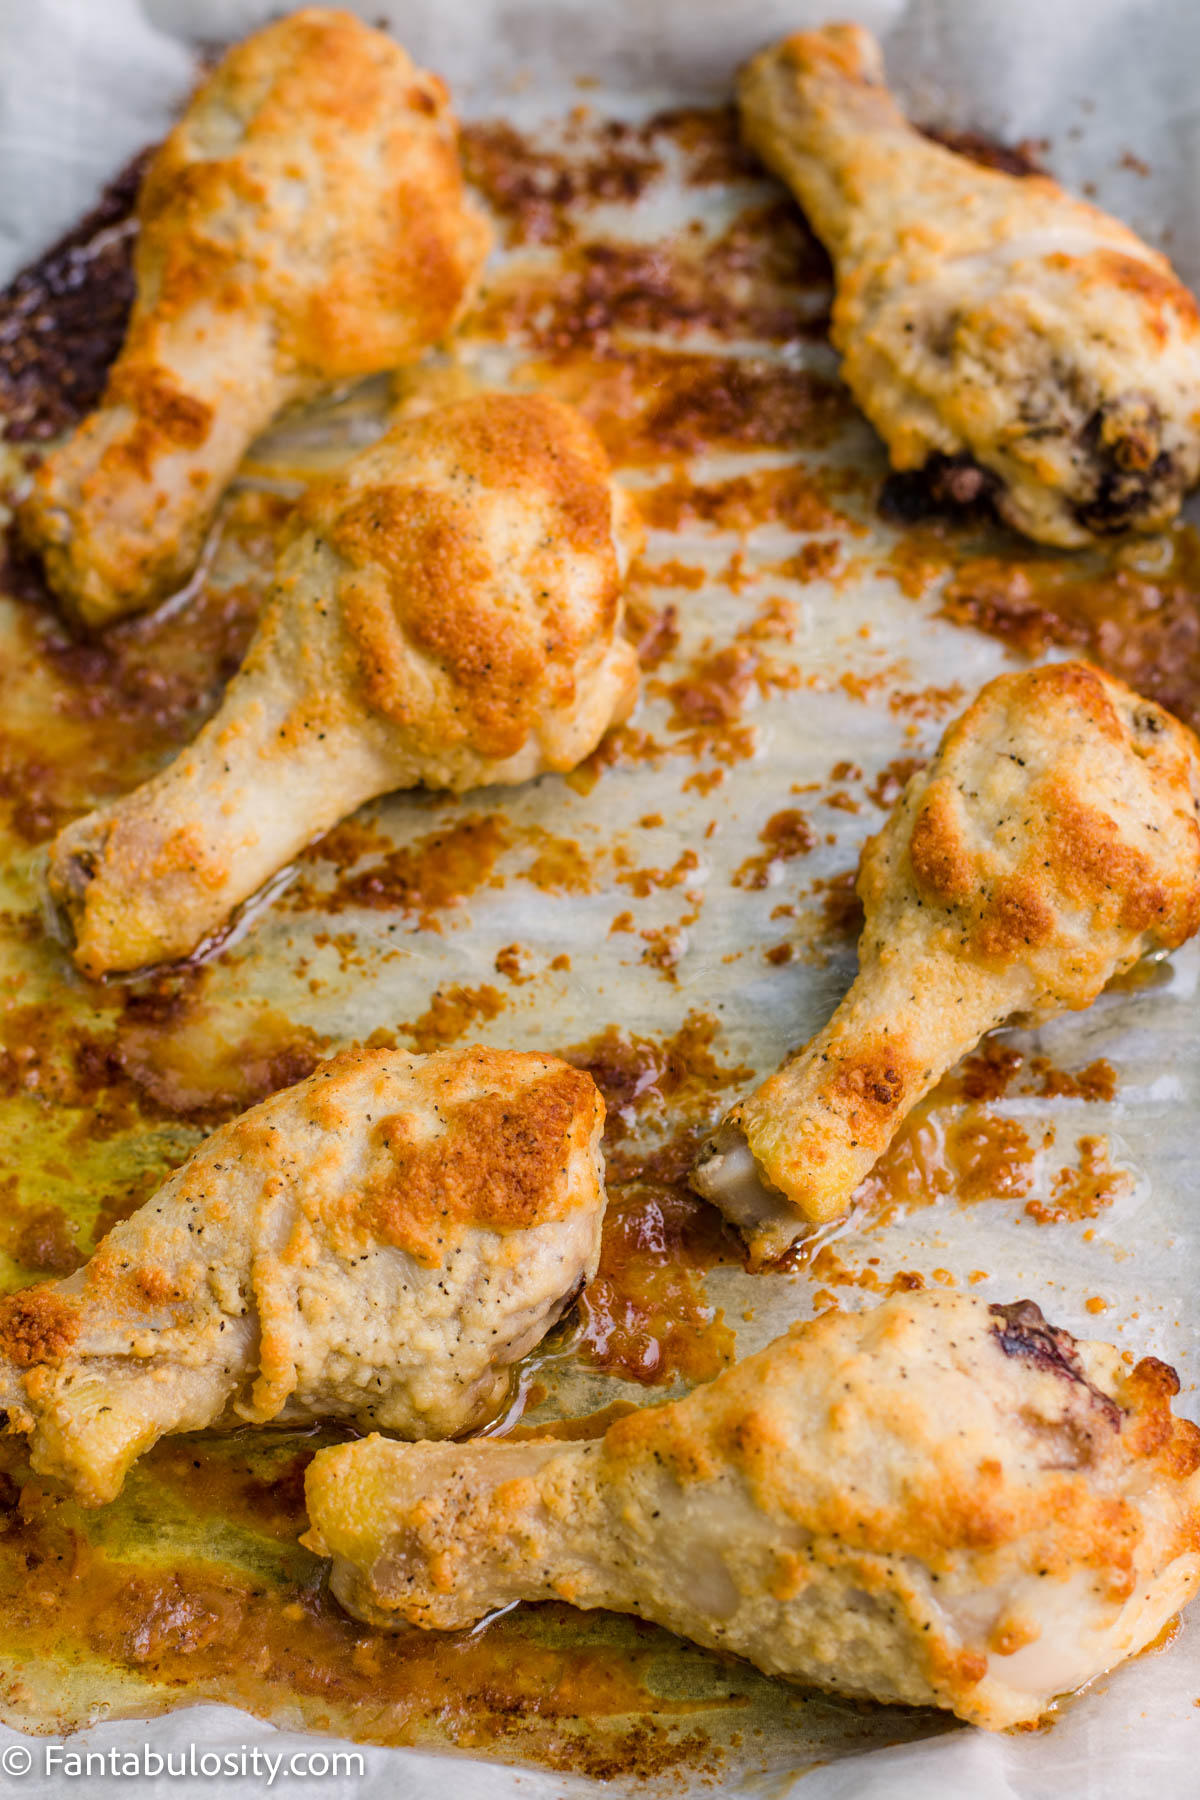
    Baked chicken drumsticks in oven

    FAQ’s and Expert Tips:

    How long does it take for drumsticks to cook in the oven?

    At 400° F, it takes about 30 minutes for the chicken drumsticks to cook through and become a golden brown color.

    Do you cover drumsticks in the oven?

    You can but we don’t and they turn out beautiful, juicy, and just like you see in the photos!

    Do you need to flip drumsticks in the oven?

    You can but it’s not necessary! If you’re hanging around in the kitchen while cooking, you can flip them about halfway through but I like the set it and forget it method and they turn out beautiful every time.

    Why are chicken legs cheap?

    They seem cheap because there’s less meat on a chicken leg than there is, say, a chicken breast. So when planning to feed a crowd, make sure to plan on feed a few per person!

    What to Serve with Chicken Drumsticks

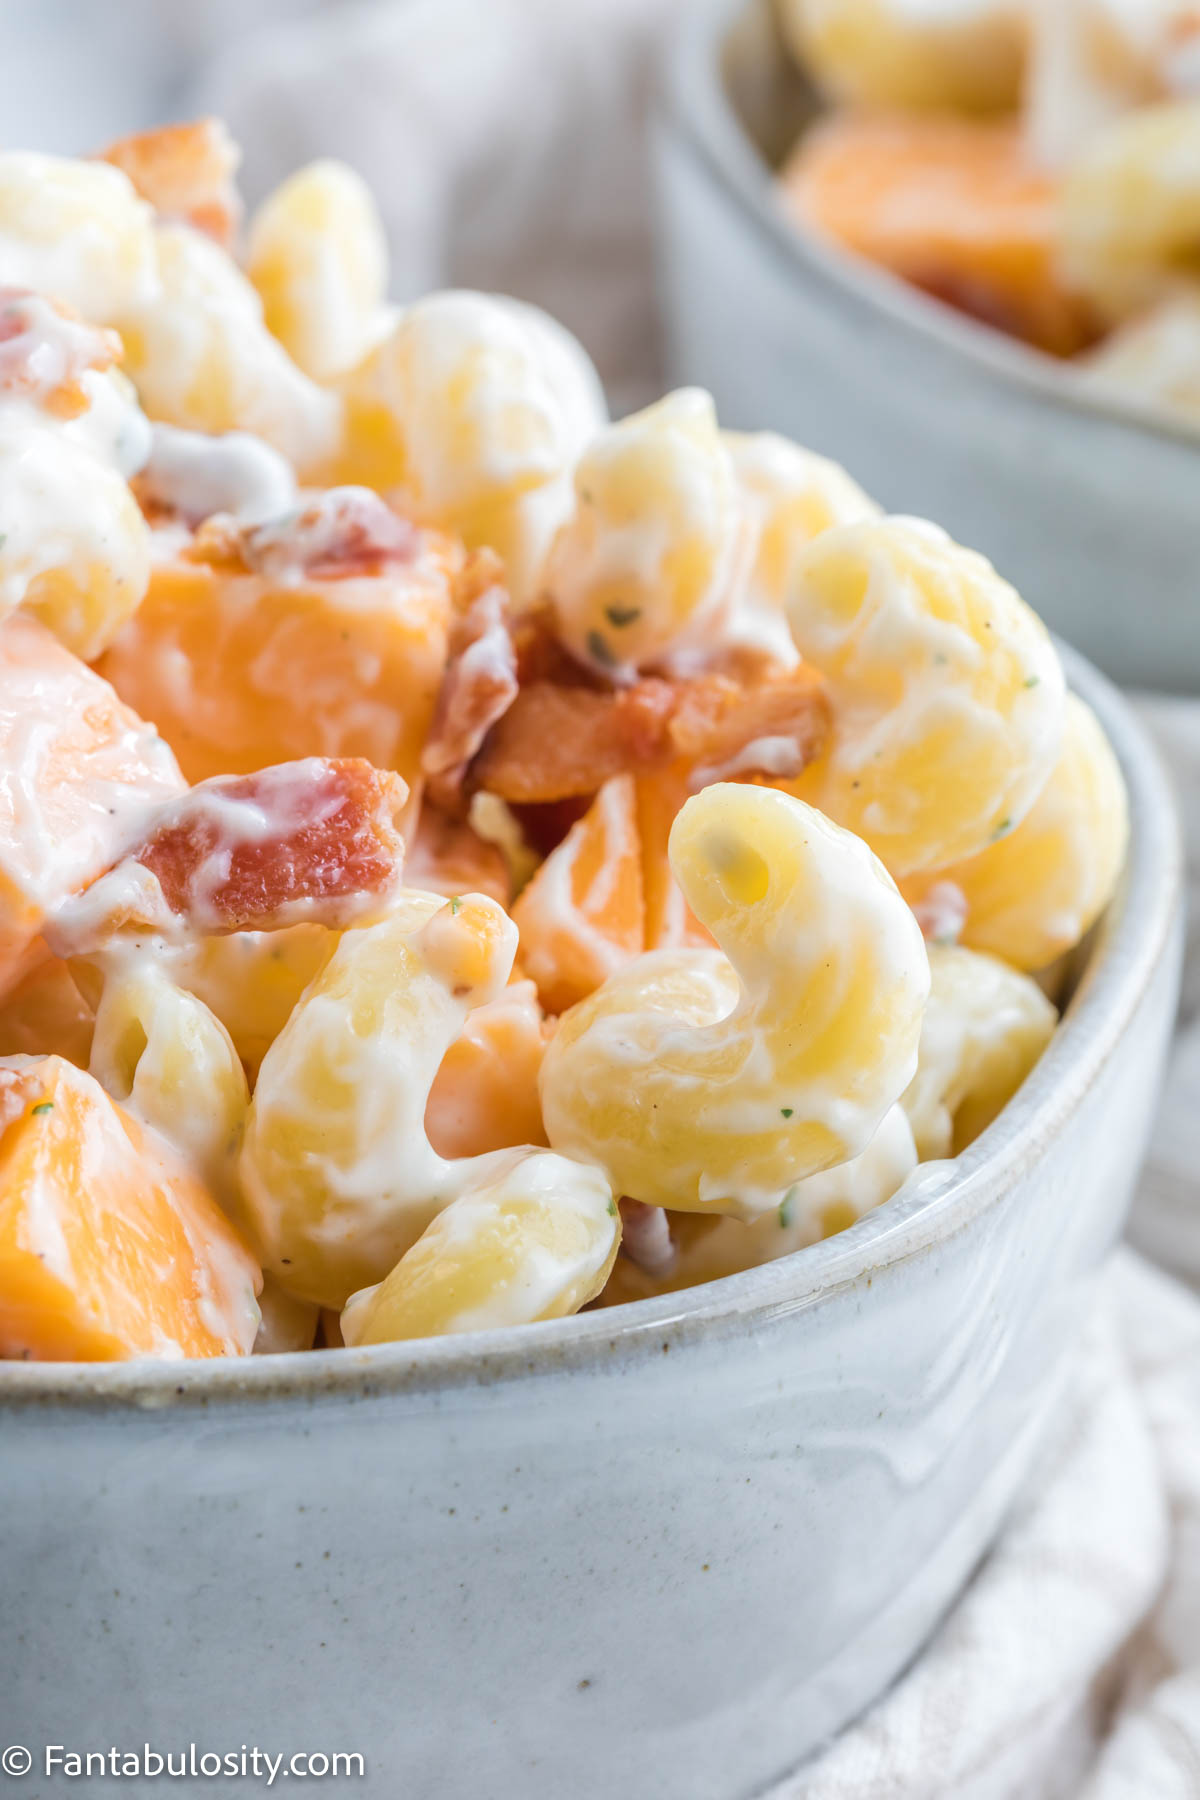
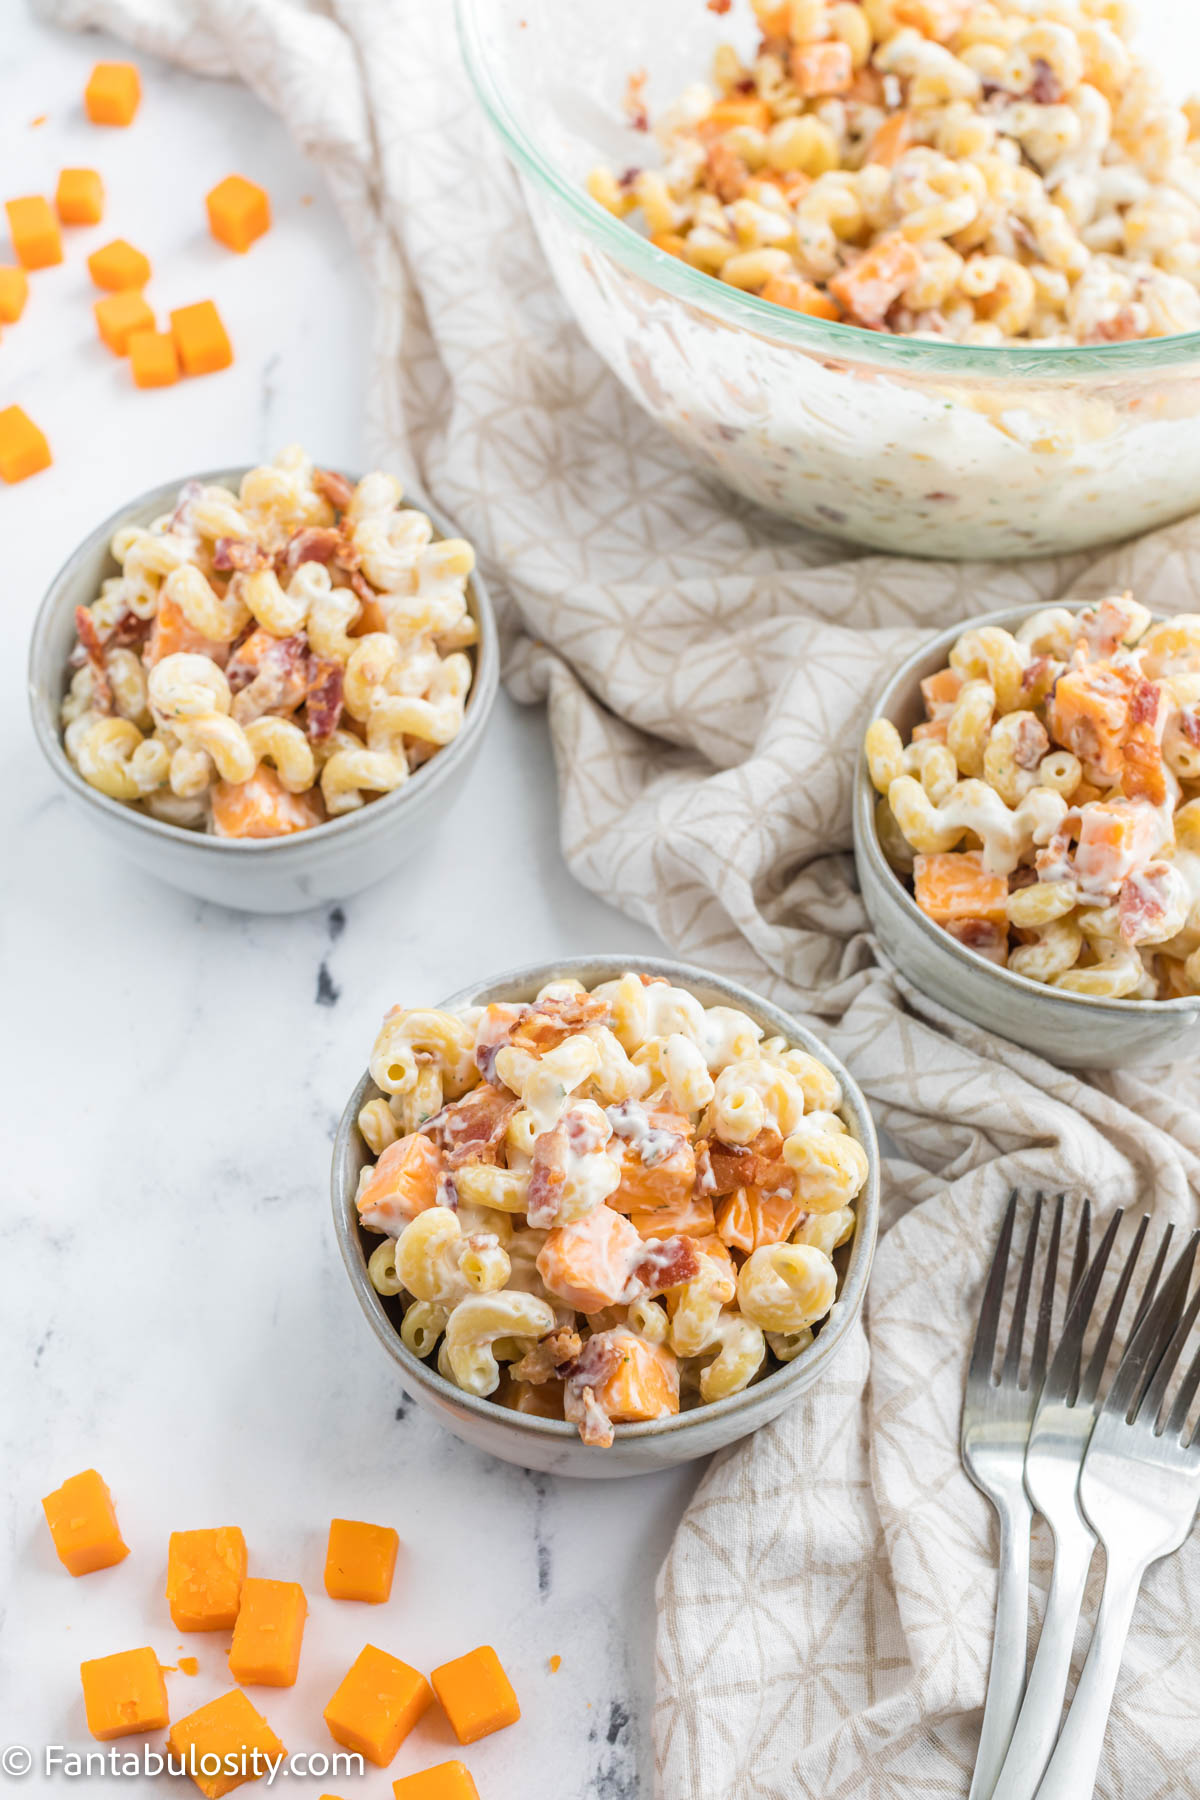
    This easy recipe has become a family favorite for the whole family, on busy weeknights, even for my picky eater! We love serving these chicken drumsticks with easy side dishes like this bacon ranch pasta salad or this side salad recipe!

    Plus, sometimes we love keeping things simple and serving canned green beans or just popping some french fries in the air fryer, or even these convection oven baked potatoes!

    Low Carb Oven Baked Chicken Legs

    What I love so much about this chicken drumsticks recipe, is that if you’re eating low carb, these drumsticks are giving the flavor and crunch of fried chicken but it is much healthier!

    You may prefer to use minced garlic and your own shredded/grated parmesan cheese if it will cut down on the carbohydrates even more.

    Serve them with this cauliflower potato salad for the ultimate low-carb meal!
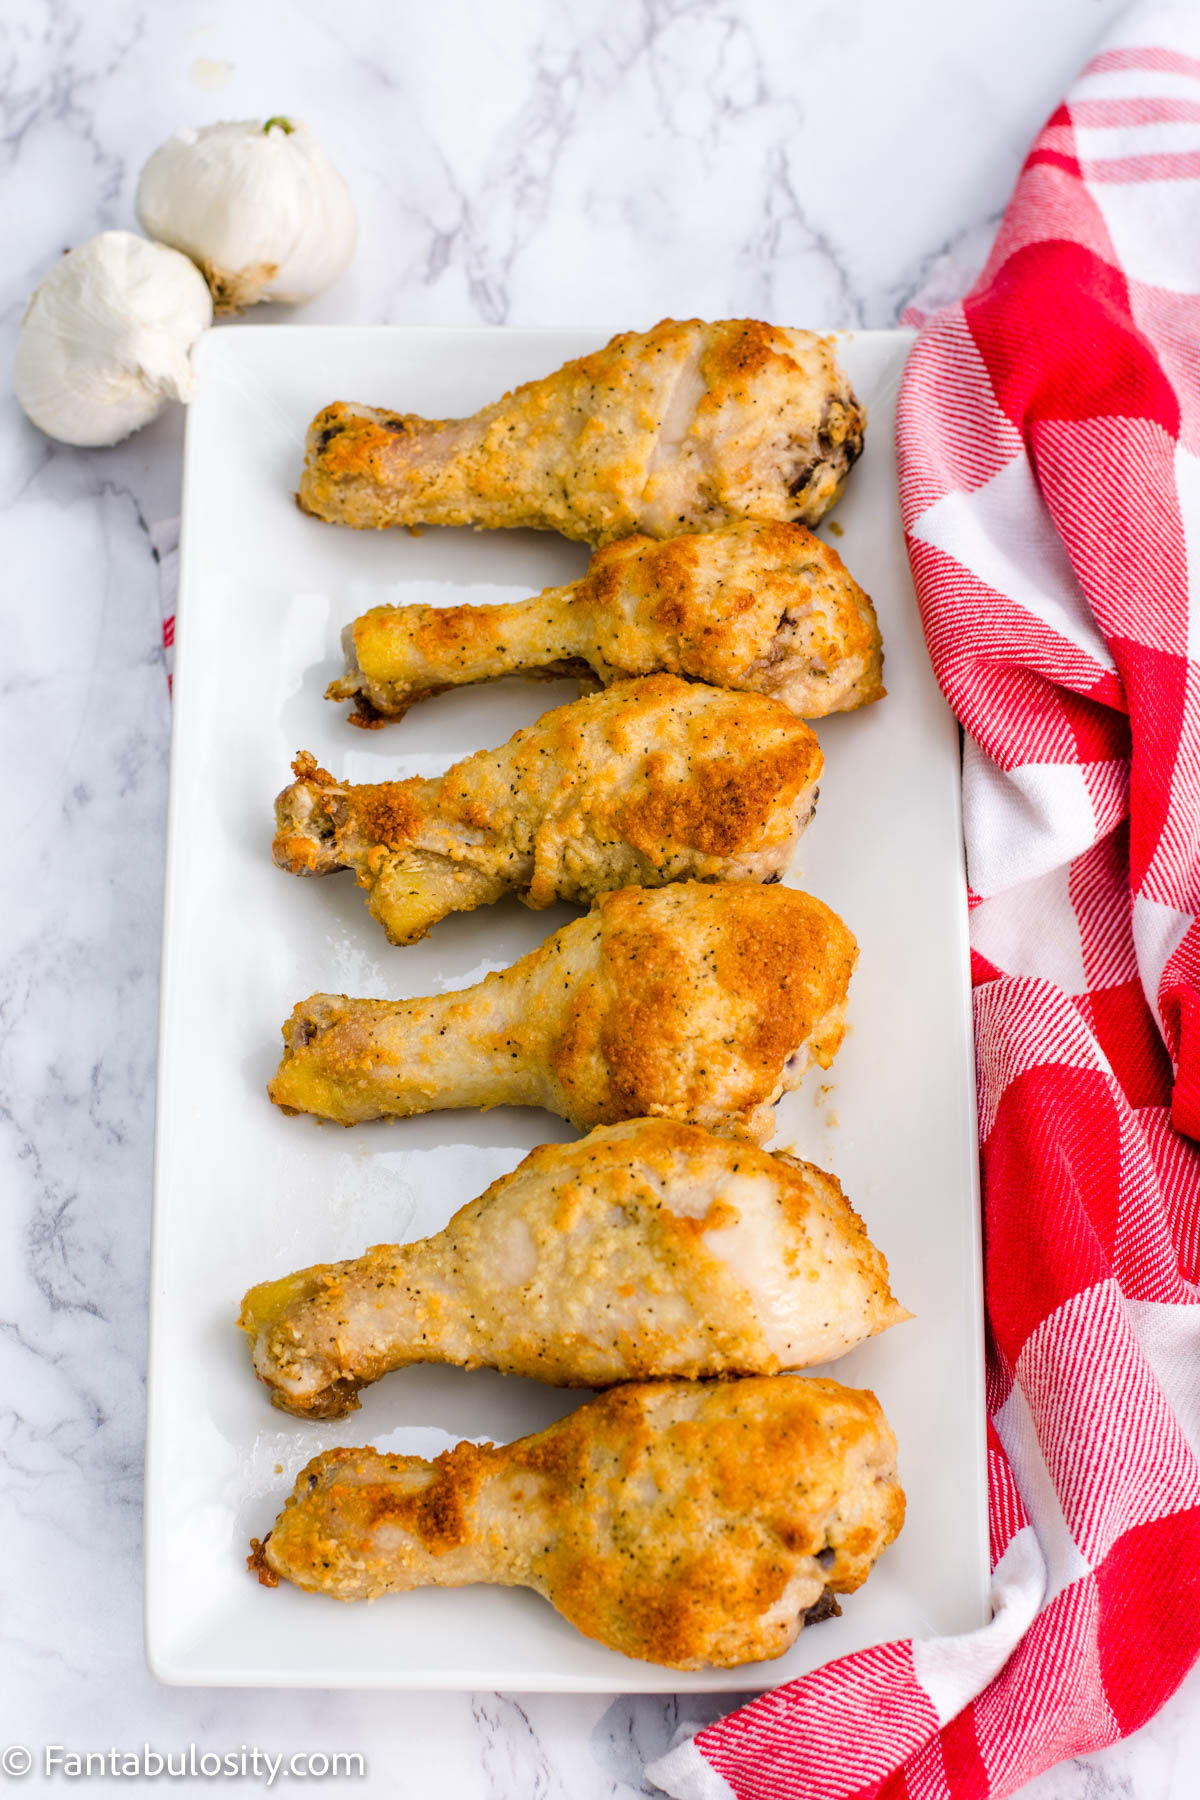
    Chicken drumsticks in oven

    Variation: BBQ Chicken Legs

    Chicken recipes can be super versatile. So if you prefer baked bbq chicken drumsticks, you can do this instead of the garlic parmesan chicken legs I’ve shared with you, for another simple recipe.

    However, instead of coating the chicken legs with bbq sauce before baking, I like to bake them for about 15 minutes first and then coat in bbq sauce, and finish baking for the remaining 15 minutes.

    This way, the bbq sauce doesn’t burn and baking the drumsticks in sauce, gives it that sticky texture that is SO good.

    Storage

    To store leftover chicken legs, store in an airtight container or plastic zip-top bag, in the refrigerator, for up to 3-4 days.

    How to Reheat

    My favorite way to reheat meats like these chicken drumsticks, is by using my air fryer! It gives them that extra crispy skin that they had when they were first baked!

    Pop them in your air fryer for about 5 minutes (could vary for different air fryers) until heated through!

    Or, if you don’t have an air fryer, you can easily put these in the microwave for a few moments or even back in the oven at 350°, for a few minutes until they’re heated through.

    Related Recipes

    Whether you just want to add another chicken recipe to your dinner planner or you love oven-baked recipes, you’re sure to love these too:

    Chicken Recipes

    We LOVE chicken recipes around here, so we know you’ll also love chicken wings in the air fryer, our easy fried chicken, and these healthier chicken bites!

    Oven Baked Recipes
    • A slice of pumpkin cheesecake cake, on a round plate.
      Pumpkin Cheesecake Cake
    • Pumpkin Dump Cake serving on round plate.
      Pumpkin Dump Cake
    • A serving of hummingbird cake on a vintage, round dessert plate.
      Hummingbird Sheet Cake
    • A slice of pineapple sunshine cake on a round plate.
      Pineapple Sunshine Cake

    Make sure to see the 80+ easy dinner recipes to add to your meal planner!

    Recipe
    Chicken Drumsticks in the Oven
    Print Pin
    4.94 from 15 votes

    Juicy Chicken Drumsticks in the Oven

    This chicken drumsticks in the oven recipe is not only easy but is full of flavor, baked in the oven in only 30 minutes, and uses simple ingredients!
    Course Main Course
    Cuisine American
    Prep Time 5 minutes minutes
    Cook Time 30 minutes minutes
    Total Time 35 minutes minutes
    Servings 3
    Calories 1431kcal
    Author Jessica Burgess

    Ingredients

    • 6 chicken legs you can use more if desired (double or triple the recipe with the easy to figure buttons above.)

    Garlic Butter Batter

    • 1 stick salted butter 8 tablespoons
    • 1.5 cup grated parmesan cheese
    • 1 tablespoons garlic powder
    • 1 teaspoon salt
    • 1 dash black pepper

    Instructions

    • Preheat oven to 400°
    • Cover a rimmed baking sheet (large enough to hold 6 — or however many chicken drumsticks you're cooking) with parchment paper. You can also use aluminum foil if that's all you have.
    • In a small, shallow dish, melt the stick of butter.
    • Once butter is melted, add in the parmesan cheese, garlic powder and salt and pepper.
    • Stir until evenly mixed.
    • Take one chicken leg at a time and dip in the butter and seasoning mixture, making sure each leg is fully coated in the butter batter.
    • Place coated chicken drumsticks on the lined baking sheet, in a single layer, making sure the drumsticks not touching one another.
    • Bake in the 400° oven for 30 minutes or until internal temperature is 165° and the skin has a golden brown, crispy texture.
    • Optional: If desired, remove chicken drumsticks from baking sheet with tons, and transfer to a baking rack on top of another baking sheet, to allow juices to drip before serving.
    Video

    Notes

    You can easily double or triple this recipe…
    If you purchased a package of chicken drumsticks, in an 8 pack or larger, feel free to follow this recipe with the same instructions, only adjusting the batter mixture accordingly. (Easily double/triple this recipe by selecting the “2x” or “3x” buttons in the recipe, above the ingredients.)
    How long does it take for drumsticks to cook in the oven?
    At 400° F, it takes about 30 minutes for the chicken drumsticks to cook through and become a golden brown color.
    Do you cover drumsticks in the oven?
    You can but we don’t and they turn out beautiful, juicy, and just like you see in the photos! 
    Do you need to flip drumsticks in the oven?
    You can but it’s not necessary! If you’re hanging around in the kitchen while cooking, you can flip them about halfway through but I like the set it and forget it method and they turn out beautiful every time.

    Nutrition

    Serving: 2legs | Calories: 1431kcal | Carbohydrates: 7g | Protein: 83g | Fat: 119g | Saturated Fat: 56g | Polyunsaturated Fat: 13g | Monounsaturated Fat: 39g | Trans Fat: 2g | Cholesterol: 487mg | Sodium: 2986mg | Potassium: 810mg | Fiber: 1g | Sugar: 1g | Vitamin A: 2357IU | Vitamin C: 1mg | Calcium: 878mg | Iron: 3mg

    The BEST Grilled Beef Tenderloin and Rub Recipe

    September 8, 2021

    Beef Tenderloin Recipe

    This easy beef tenderloin recipe is coated in an amazing rub and is then grilled to perfection!

    Using common pantry ingredients like thyme, rosemary, paprika, salt, and pepper… it creates a rub recipe that is perfect for grilling and provides TONS of flavor, not too dissimilar to this recipe for grilled pork chops.

    Grilled Beef Tenderloin
    [feast_advanced_jump_to]

    I need to thank the creator… the man the myth the legend… Mr. Braxton, for allowing me to share the rub recipe with you all. Without a doubt, this is the BEST Meat rub recipe AND Beef Tenderloin Recipe, we have ever used and I know you’ll love it too!

    If you love tenderloin recipes, don’t miss the roasted pork tenderloin and the fried deer tenderloin recipes!

    We put this spice rub blend on just about every type of meat that we bake in the oven, smoke in the smoker, or grill on the grill! Especially on recipes like smoked chicken tenders, steak cooked in the oven, and have even been known to cook pork steaks in the oven with it! It really adds to the flavor of the meat!

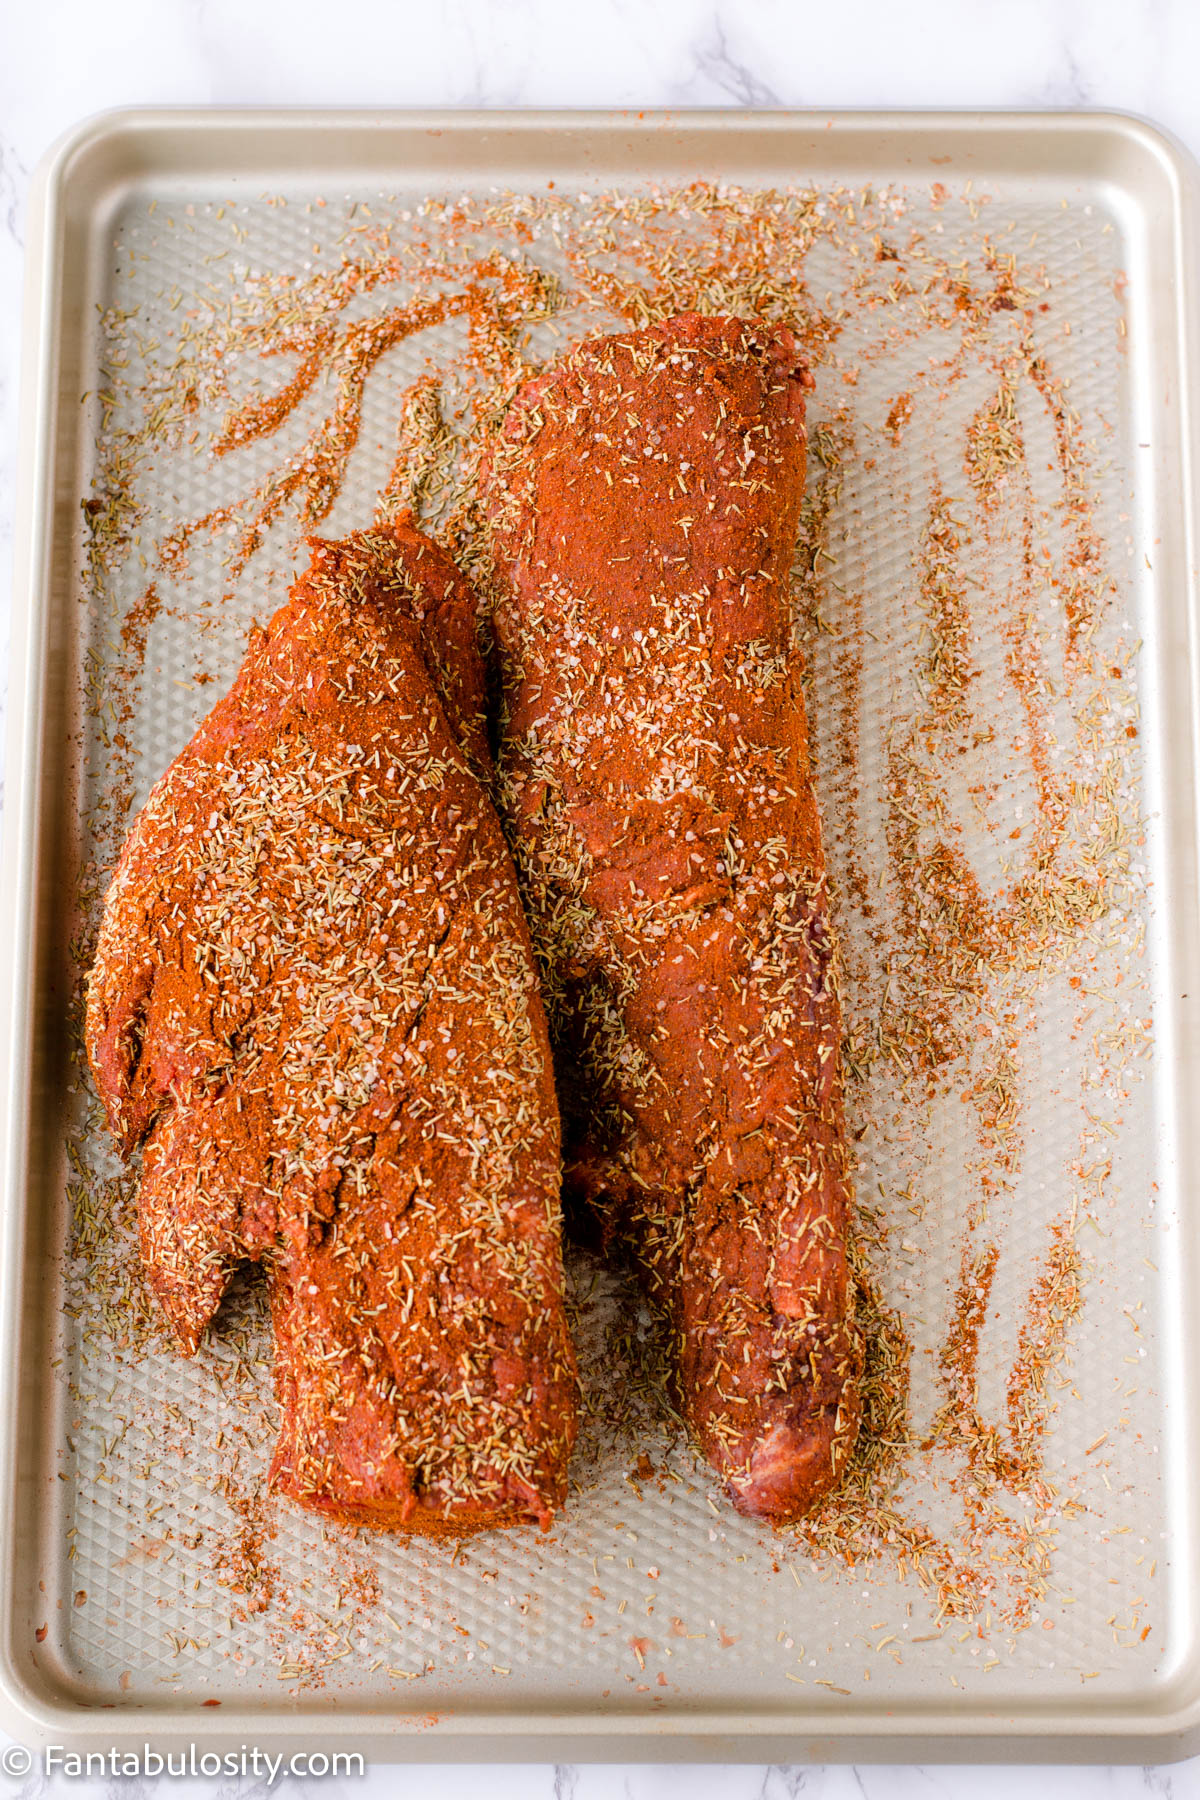
    Rub on Beef Tenderloin

    First, I’ll share the rub recipe with you, and then you can also see the grilled beef tenderloin recipe in the recipe card below!

    The following amount covers a 4-5 lb tenderloin.

    • ¼ cup dried Thyme 
    • 3 Tablespoons Paprika 
    • ¼ cup dried Rosemary
    • ½ tablespoon Kosher Salt (table salt is fine too) 
    • 1 teaspoon Pepper

    (Easily reduce, double, triple, and quadruple, the batch as needed)

    Grilled Beef Tenderloin with Rub

    Why is Beef Tenderloin so Good?

    If you REALLY want to impress the heck out of your guests or have a special occasion to celebrate, like a holiday meal, cooking a beef tenderloin as a main course is an amazing choice.

    It’s a cut of beef that is incredibly tender and is usually one of the most popular cuts of meat that gives amazing flavor!

    It is an expensive cut of meat so we don’t have it TOO often but it’s definitely a great choice when entertaining or for holidays like Christmas!

    And personally, we think grilling a tenderloin is the best way to cook it!

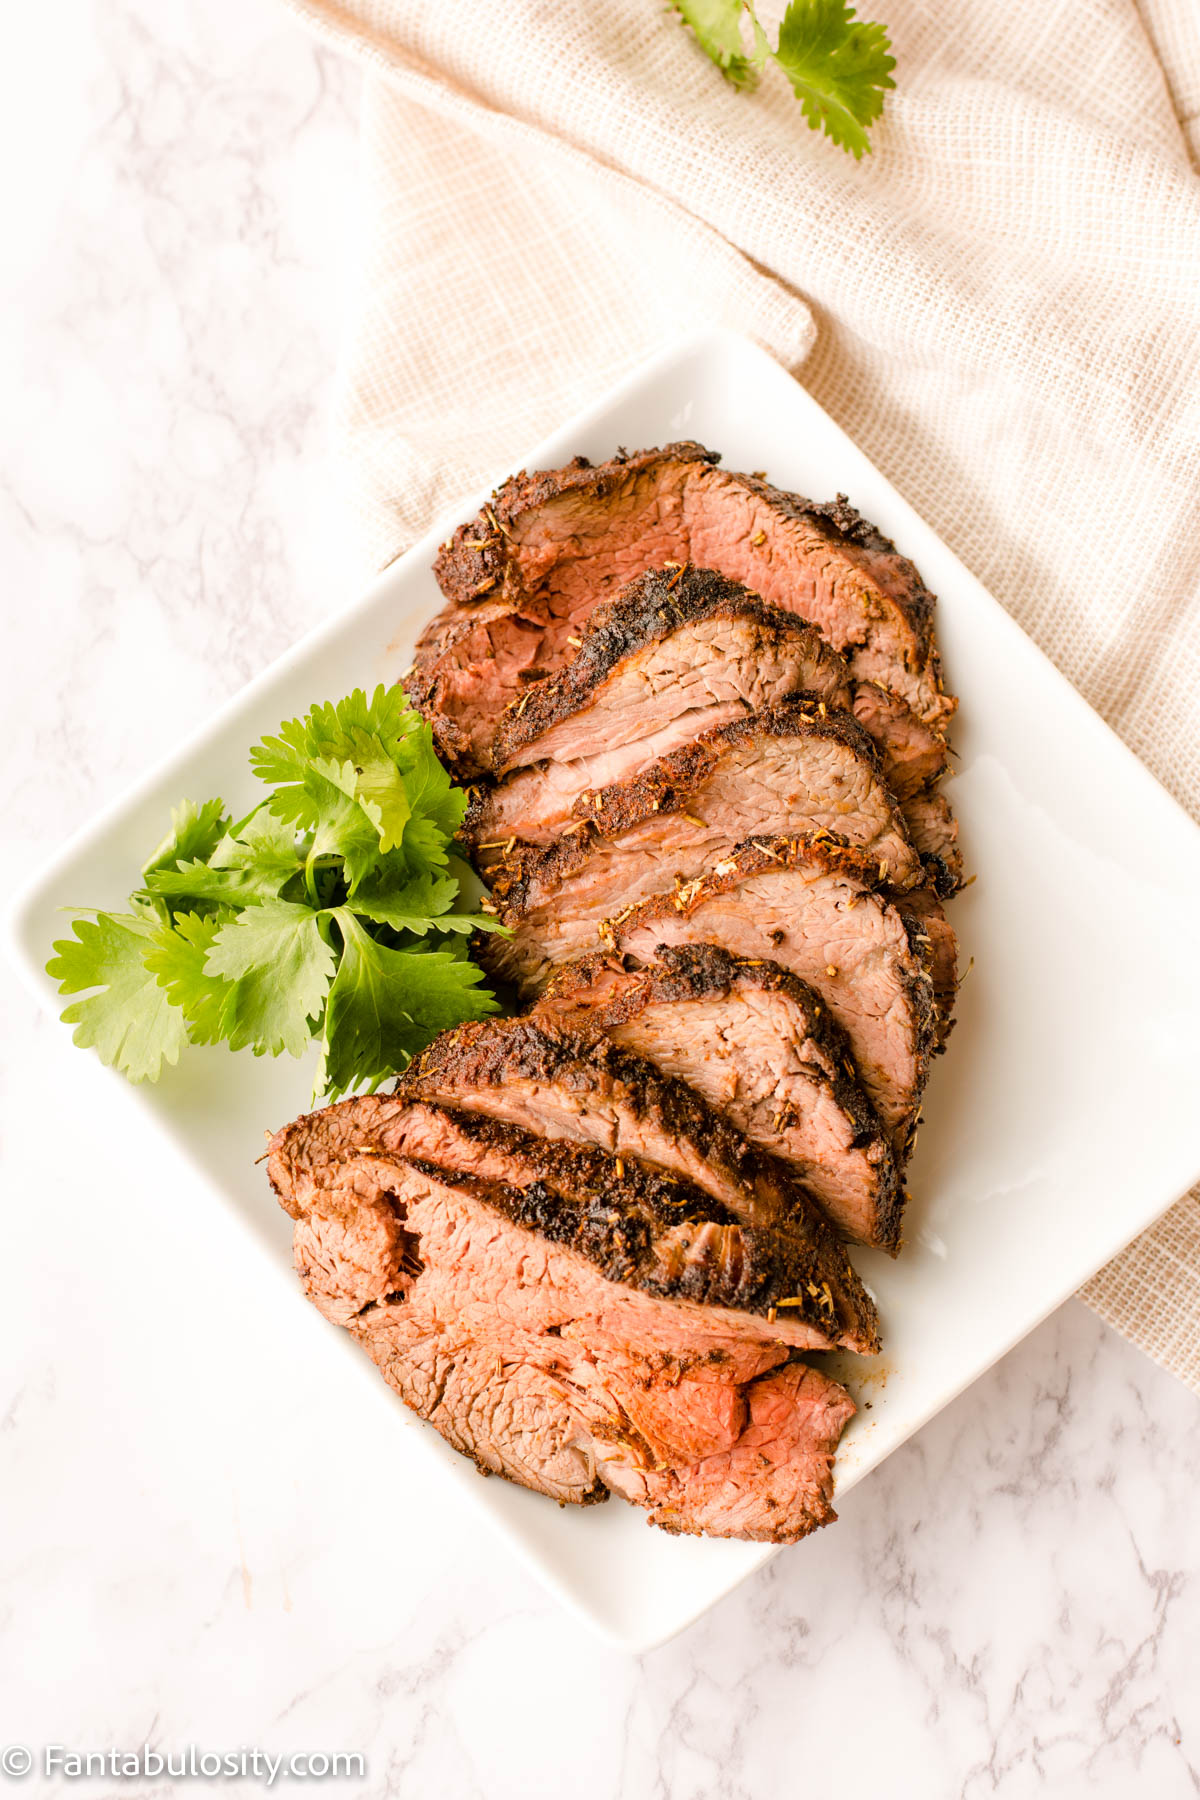
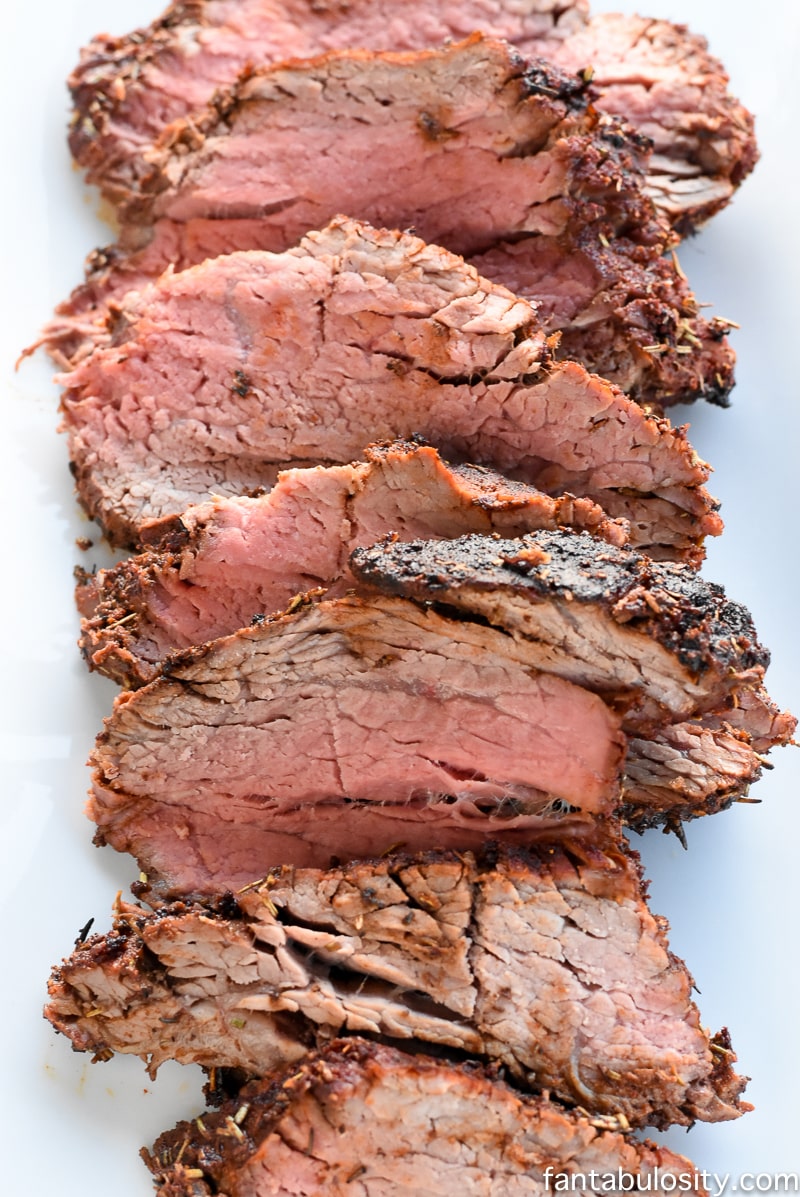
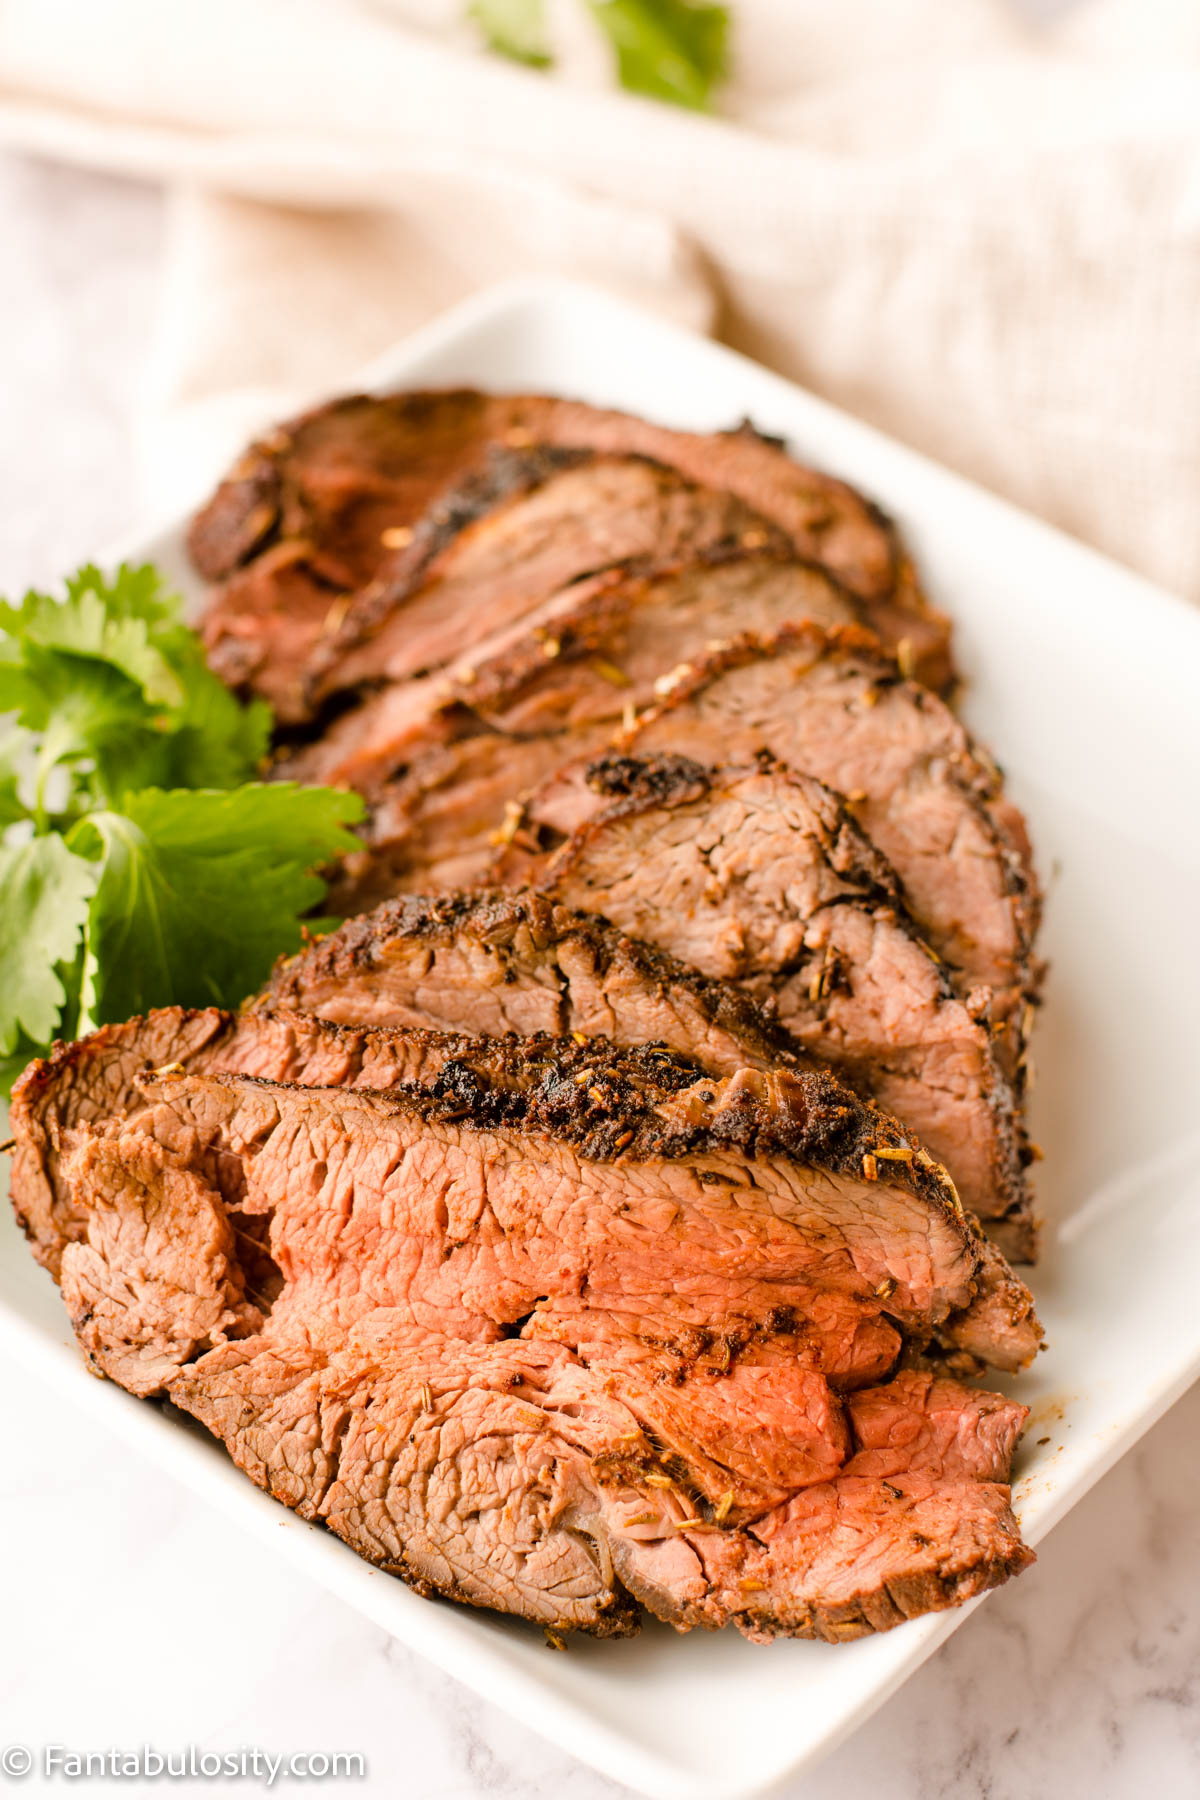
    Sliced beef tenderloin on white platter

    How to Cook Beef Tenderloin on the Frill

    First, if you’re picking up a good beef tenderloin from the butcher, ask if they can cut the silver skin off for you.

    Or, if you’re buying a whole tenderloin, pre-packaged from the grocery story, it’s best to cut off the silver skin and any extra fat it may have on it, before rubbing the spice blend on. See full recipe card at the bottom of this post for easy-to-read instructions!

    1. Preheat grill to 450 degrees
    2. For best results, allow the whole beef tenderloin to come to room temperature (but not a must, if you don’t have the time) before you cook tenderloin.
    3. Rub all sides of the beef tenderloin with the spice rub recipe that I shared above.
    4. Sear the tenderloin over that direct, high temperature on the grill for 15 minutes. This will help give it even more flavor and char and help seal in the juices.
    5. Lower grill temp to 325-350, (we shut two burners off, and leave the other two on) and grill for another 45 minutes over indirect heat.
    6. Pull the tenderloin off of the grill when the internal temperature reaches between 120 and 125 degrees Fahrenheit when checked with a meat thermometer.
    7. Remove from grill and let tenderloin rest, wrapped in aluminum foil for 10-15 minutes, and serve. (On a cutting board, slice in to small pieces and place on a platter to make it easier to serve a crowd!)
    8. This cooking process will result in a "medium-rare" cooked beef tenderloin and we feel like it’s the perfect temperature for tenderloin!
    9. Note: the thickest part of the tenderloin ends up being a medium-rare finish, and the outside edges, a medium temperature.
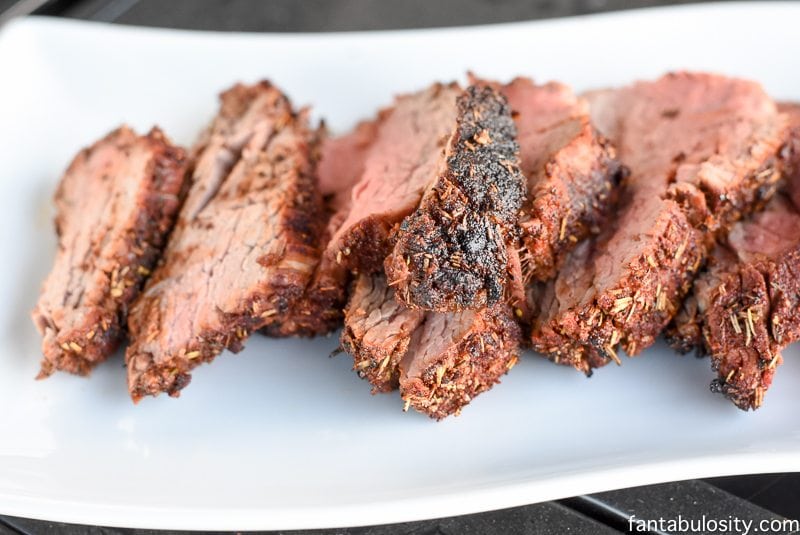
    Sliced pieces of grilled beef tenderloin

    What to Serve with Beef Tenderloin

    If you’re cooking for a crowd, make sure you check out my other easy recipes so you don’t have to stand in the kitchen all day! Or since the grill is already heated up, these grilled seasoned vegetables will be easy to cook alongside the tenderloin.

    But our favorite side dishes to have with beef tenderloin are this side salad recipe, this easy green bean casserole, and this cold pasta salad when we’re having a summer cookout!

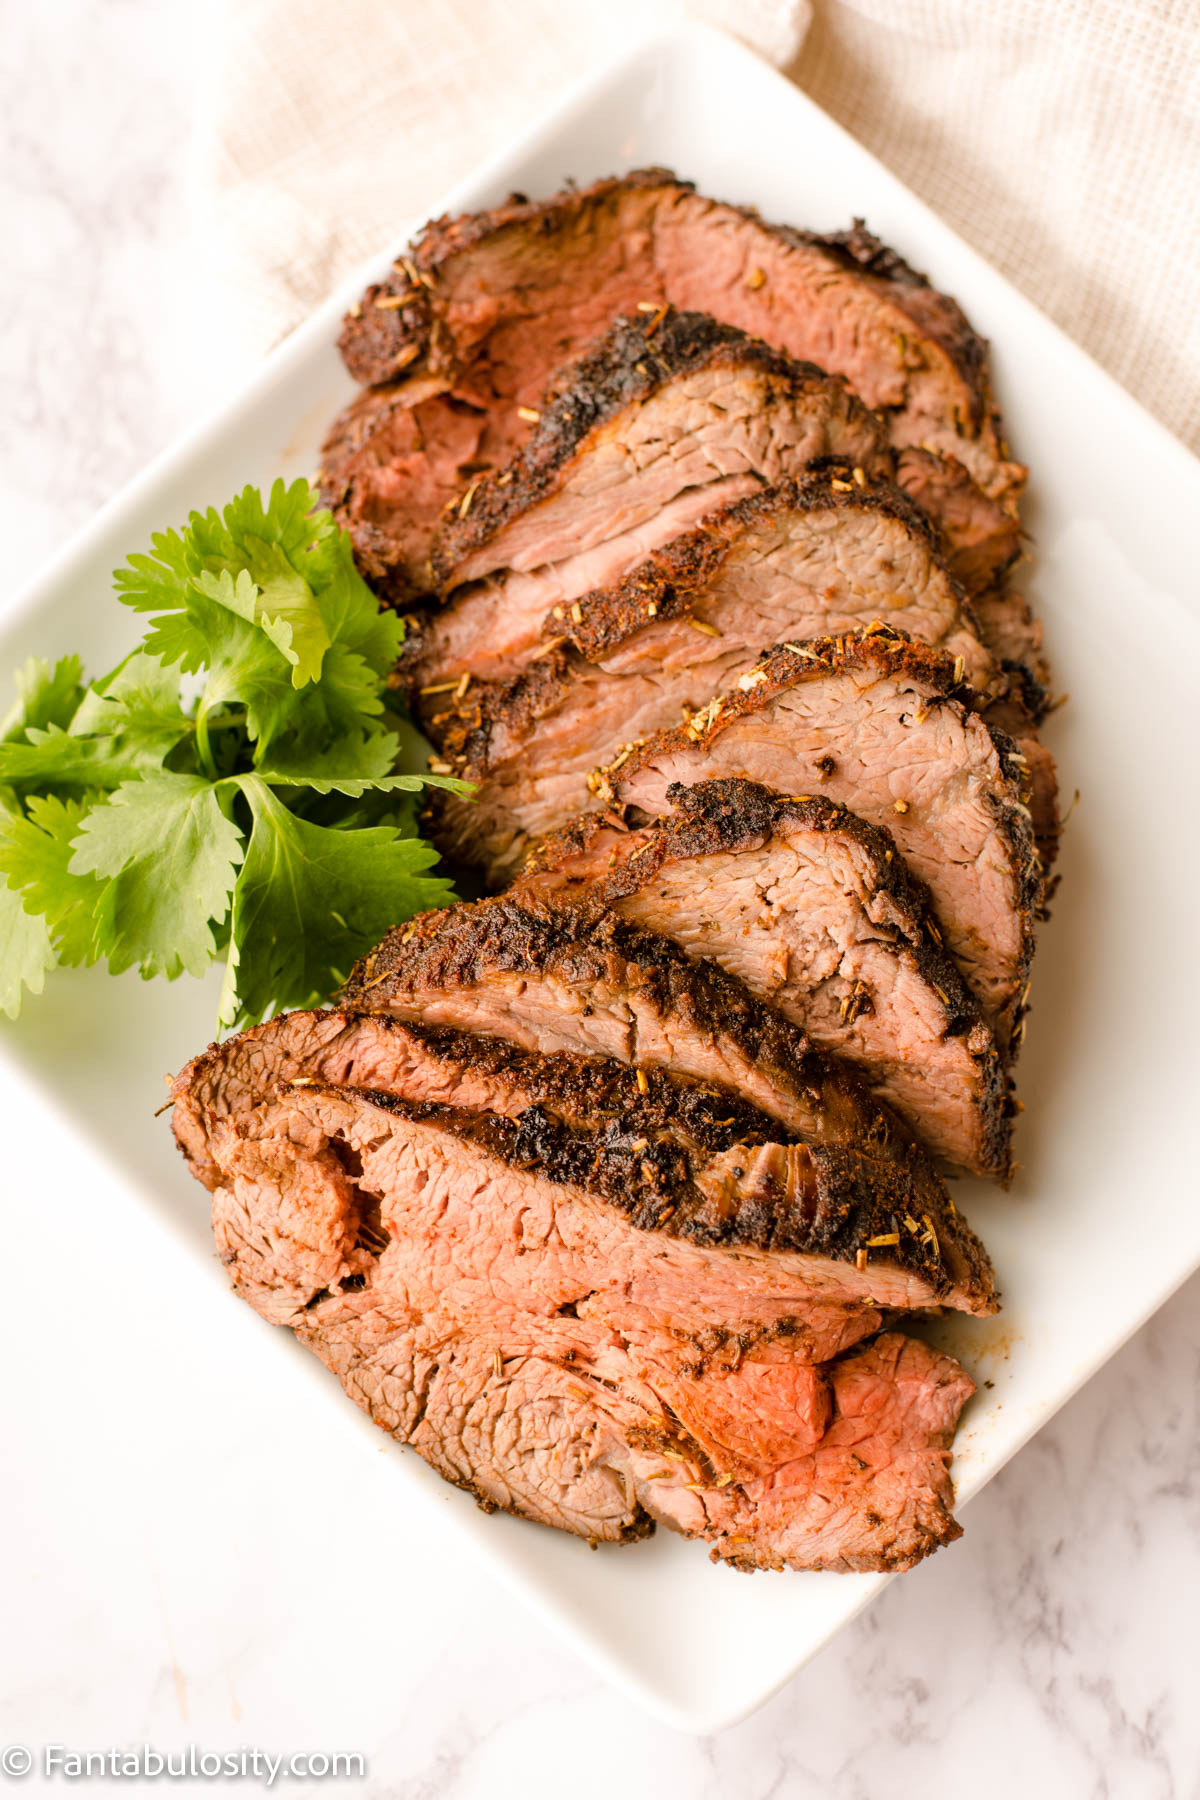
    Beef Tenderloin Sliced on White plate

    More Tenderloin Recipes

    Being huge fans of any kind of meat, especially tenderloin, I want to make sure you also know about this baked pork tenderloin recipe that has amazing flavor and rave reviews!

    But if you’re also a hunter or have venison in the freezer, make sure to check out our deer steak recipes, especially how we fry deer tenderloin and grill venison steaks (or tenderloin) with this deer marinade!

    If you tried this recipe, I’d LOVE to hear and would always love a star review so you can help others decide if this recipe is great too!

    Recipe

    Beef Tenderloin Recipe
    Print Pin
    3.80 from 156 votes

    The BEST Beef Tenderloin

    Beef Tenderloin Recipe: This easy recipe causes our guests to come running when they hear what's on the grill. Using an incredible "rub," this beef tenderloin will be the hero of your table!
    Course Main Course
    Cuisine American
    Prep Time 10 minutes minutes
    Cook Time 1 hour hour
    Resting Time 15 minutes minutes
    Total Time 1 hour hour 10 minutes minutes
    Servings 8 servings
    Calories 631kcal
    Author Jessica Burgess

    Ingredients

    • 4-5 pound beef tenderloin with the silver cut off

    Beef Tenderloin Spice Rub:

    • ¼ cup dried thyme
    • 3 Tablespoons paprika
    • ¼ cup dried rosemary
    • ½ Tablespoon salt
    • 1 teaspoon pepper

    Instructions

    • Preheat grill to 450 degrees
    • Rub all sides of the beef tenderloin with the Braxton Rub Spice Blend
    • Sear the tenderloin over direct heat on the grill for 15 minutes
    • Lower grill temp to 325-350, (we shut two burners off, and leave the other two on) and grill for another 45 minutes over indirect heat.
    • Pull the tenderloin off of the grill when the internal temperature reaches between 120 and 125 degrees fahrenheit.
    • Remove from grill and let sit, wrapped in aluminum foil for 10-15 minutes, and serve.
    • This will result in a “medium-rare” cooked beef tenderloin
    • This cooking time and process gives us thick middle parts that are medium rare, and the outside edges, a medium.

    Notes

    1. On a cutting board, slice in to small pieces and place on a platter to make it easier to serve a crowd!
    2. This cooking process will result in a "medium-rare" cooked beef tenderloin and we feel like it’s the perfect temperature for tenderloin!
    3. Note: the thickest part of the tenderloin ends up being a medium-rare finish, and the outside edges, a medium temperature.

    Nutrition

    Serving: 1serving (about ½ pound of meat) | Calories: 631kcal | Carbohydrates: 2g | Protein: 41g | Fat: 49g | Saturated Fat: 20g | Cholesterol: 158mg | Sodium: 549mg | Potassium: 756mg | Fiber: 1g | Vitamin A: 1315IU | Vitamin C: 0.5mg | Calcium: 31mg | Iron: 6.1mg

    Air Fryer Cinnamon Rolls

    September 7, 2021

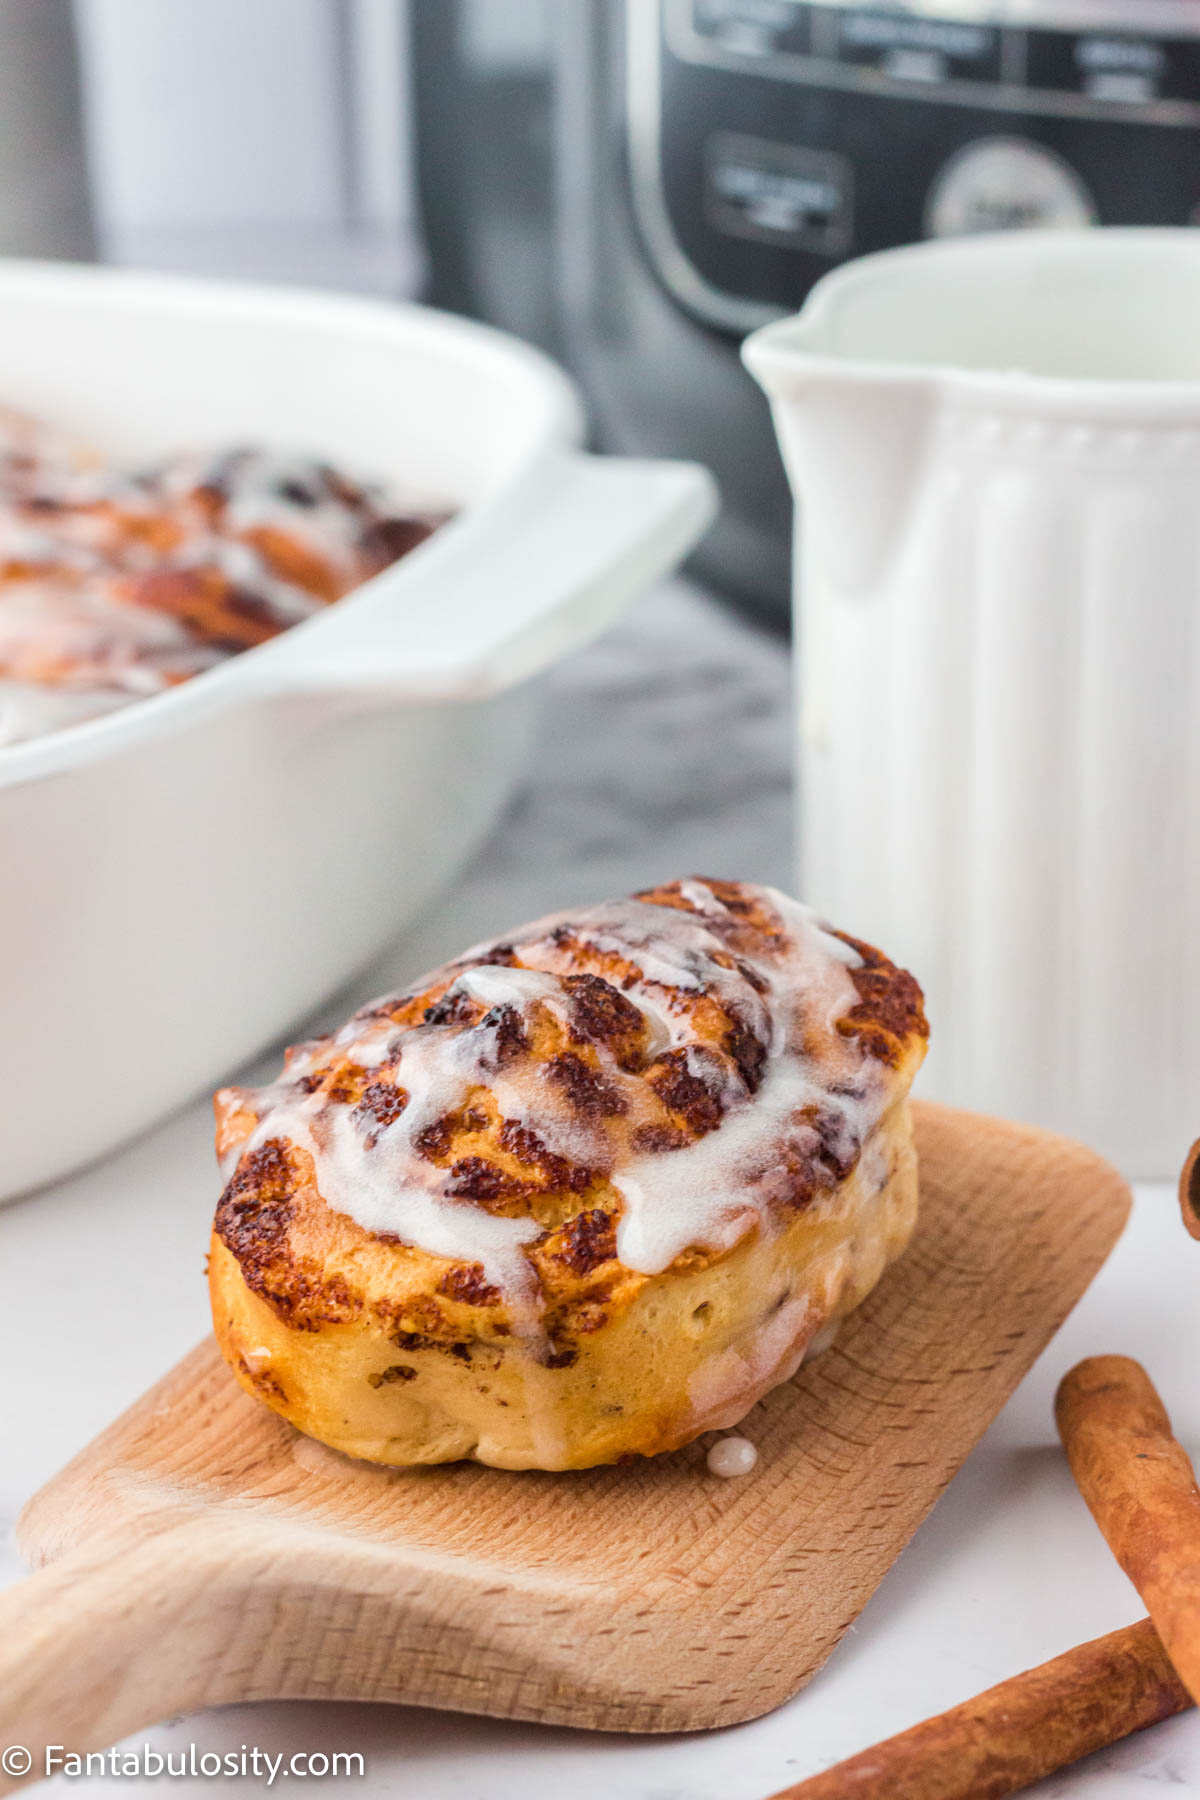
    Air fryer cooked cinnamon roll on a wooden spatula.

    Two ways to make and enjoy air fryer cinnamon rolls! See how to make canned Pillsbury cinnamon rolls in the air fryer and also how to make homemade cinnamon rolls from scratch!

    Quick Overview:

    Homemade Cinnamon Rolls from Scratch – 8 minutes at 350°

    Canned Cinnamon Rolls – 7 minutes at 375° F

    See the full recipe card at the end of this post for instructions for both methods.
    Plus, see the full post for tips for each type of cinnamon rolls for your recipe success!

    Cinnamon rolls that were made in the air fryer

    Whether it’s the summer heat making you want to use the air fryer instead of heating up the whole oven, or you just love using your air fryer for all of your favorite recipes, you’ll love making cinnamon rolls this way!

    [feast_advanced_jump_to]

    While you’re in the kitchen, you’ll also want to consider making this classic coffee cake recipe that’s full of cinnamon flavor or these air fryer apple fritters!

    How to Make Pillsbury Cinnamon Rolls in the Air Fryer

    If you’ve purchased storebought canned cinnamon rolls, like Pillsbury brand (other brands will work too!), it’s really easy to cook them in the air fryer!

    1. Open the can of raw cinnamon rolls
    Pillsbury Cinnamon Rolls uncooked
    1. Preheat air fryer to 375°
    2. Separate the rolls and pllace them in your air fryer basket. (Image below.)
    3. Cook for 7 minutes.
    raw pillsbury cinnamon rolls in air fryer basket
    Uncooked Pillsbury Cinnamon Rolls in Air Fryer Basket
    Cooked canned cinnamon rolls in air fryer basket
    Cooked Pillsbury Cinnamon Rolls in Air Fryer Basket
    1. To make clean-up a breeze, transfer cooked cinnamon rolls to a plate or baking dish before pouring frosting on the tops.
    2. Warm up the frosting that’s provided in the canned cinnamon rolls (usually the packet of frosting can be warmed by placing it in warm water for a few minutes, or you can pour frosting out of packcaging in to a different container and microwave for only a few seconds.)
    3. Pour over your cooked cinnamon rolls. Serve!

    Caution: Hot!

    Place cooked cinnamon rolls on separate dish
    Place Cooked Pillsbury Cinnamon Rolls in Separate Dish
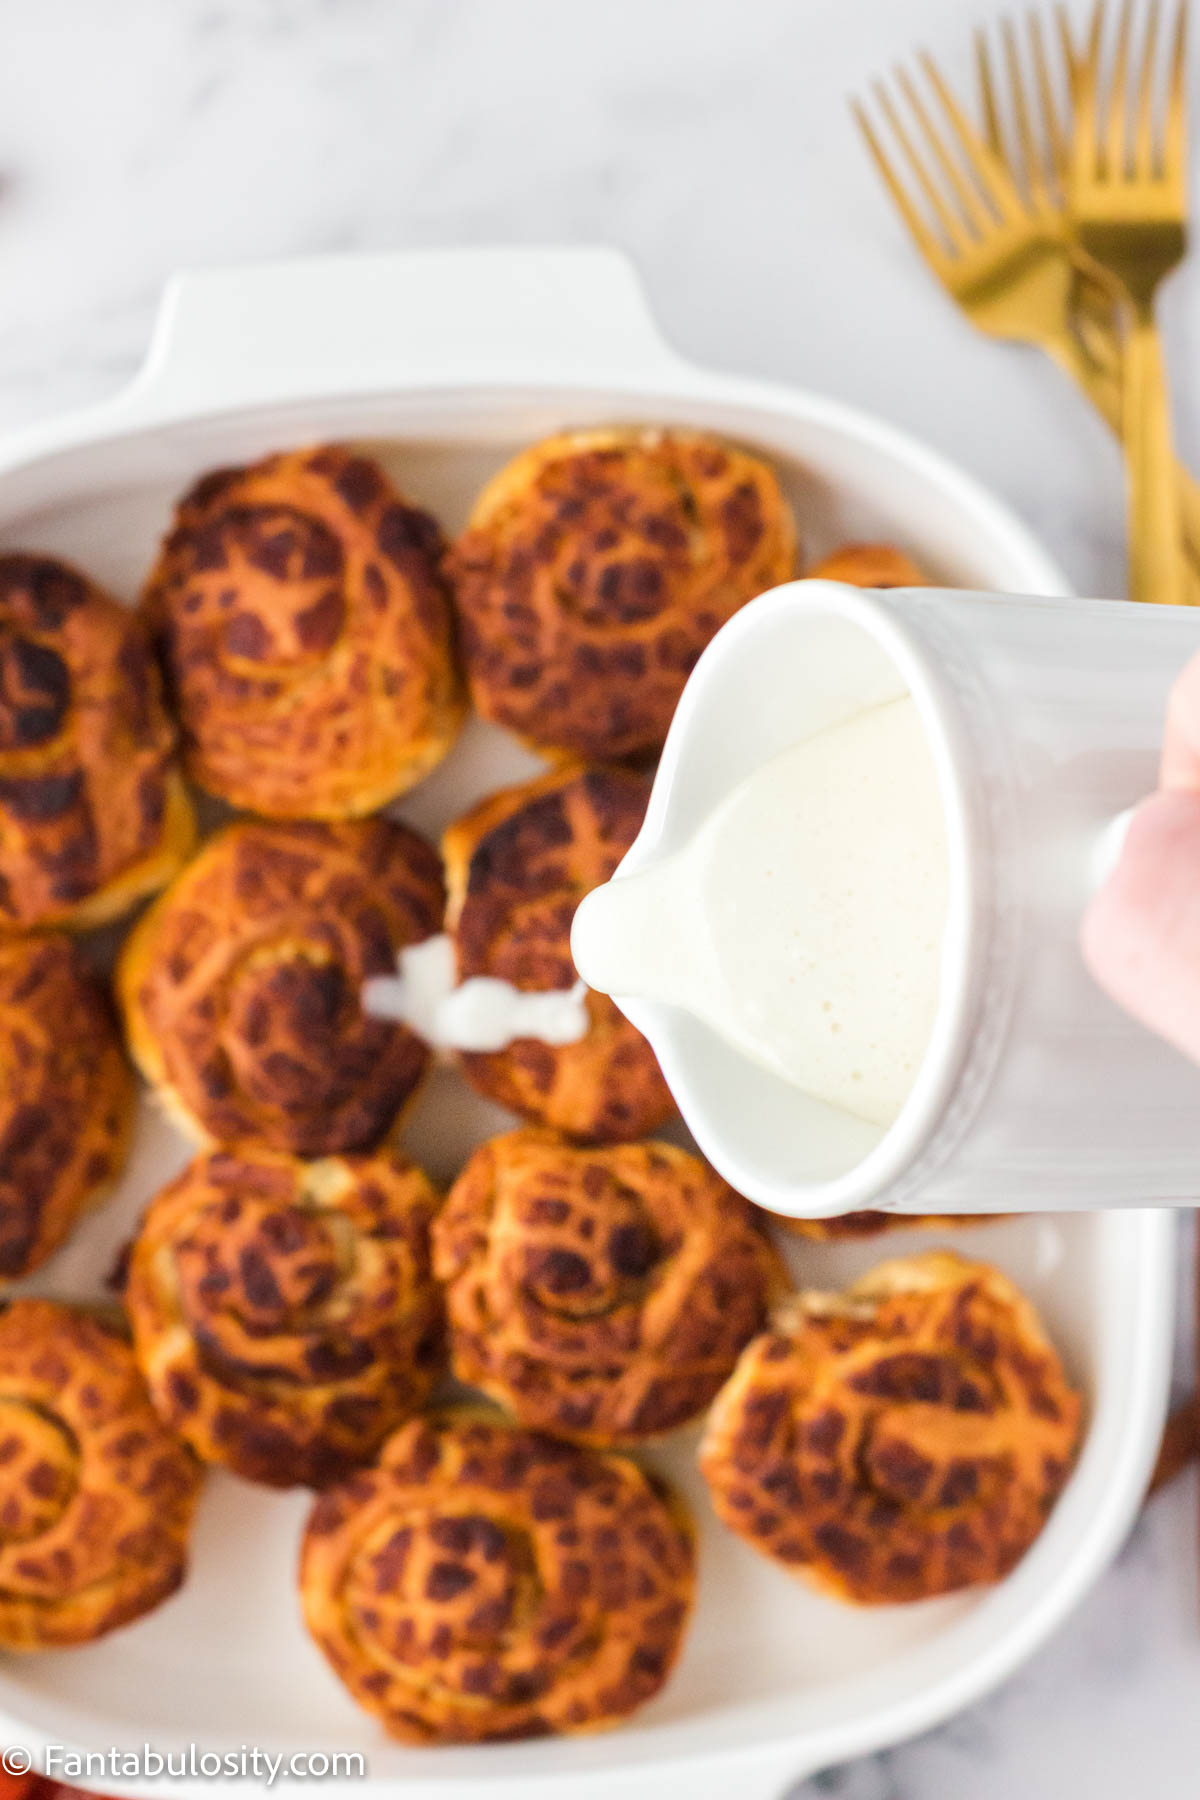
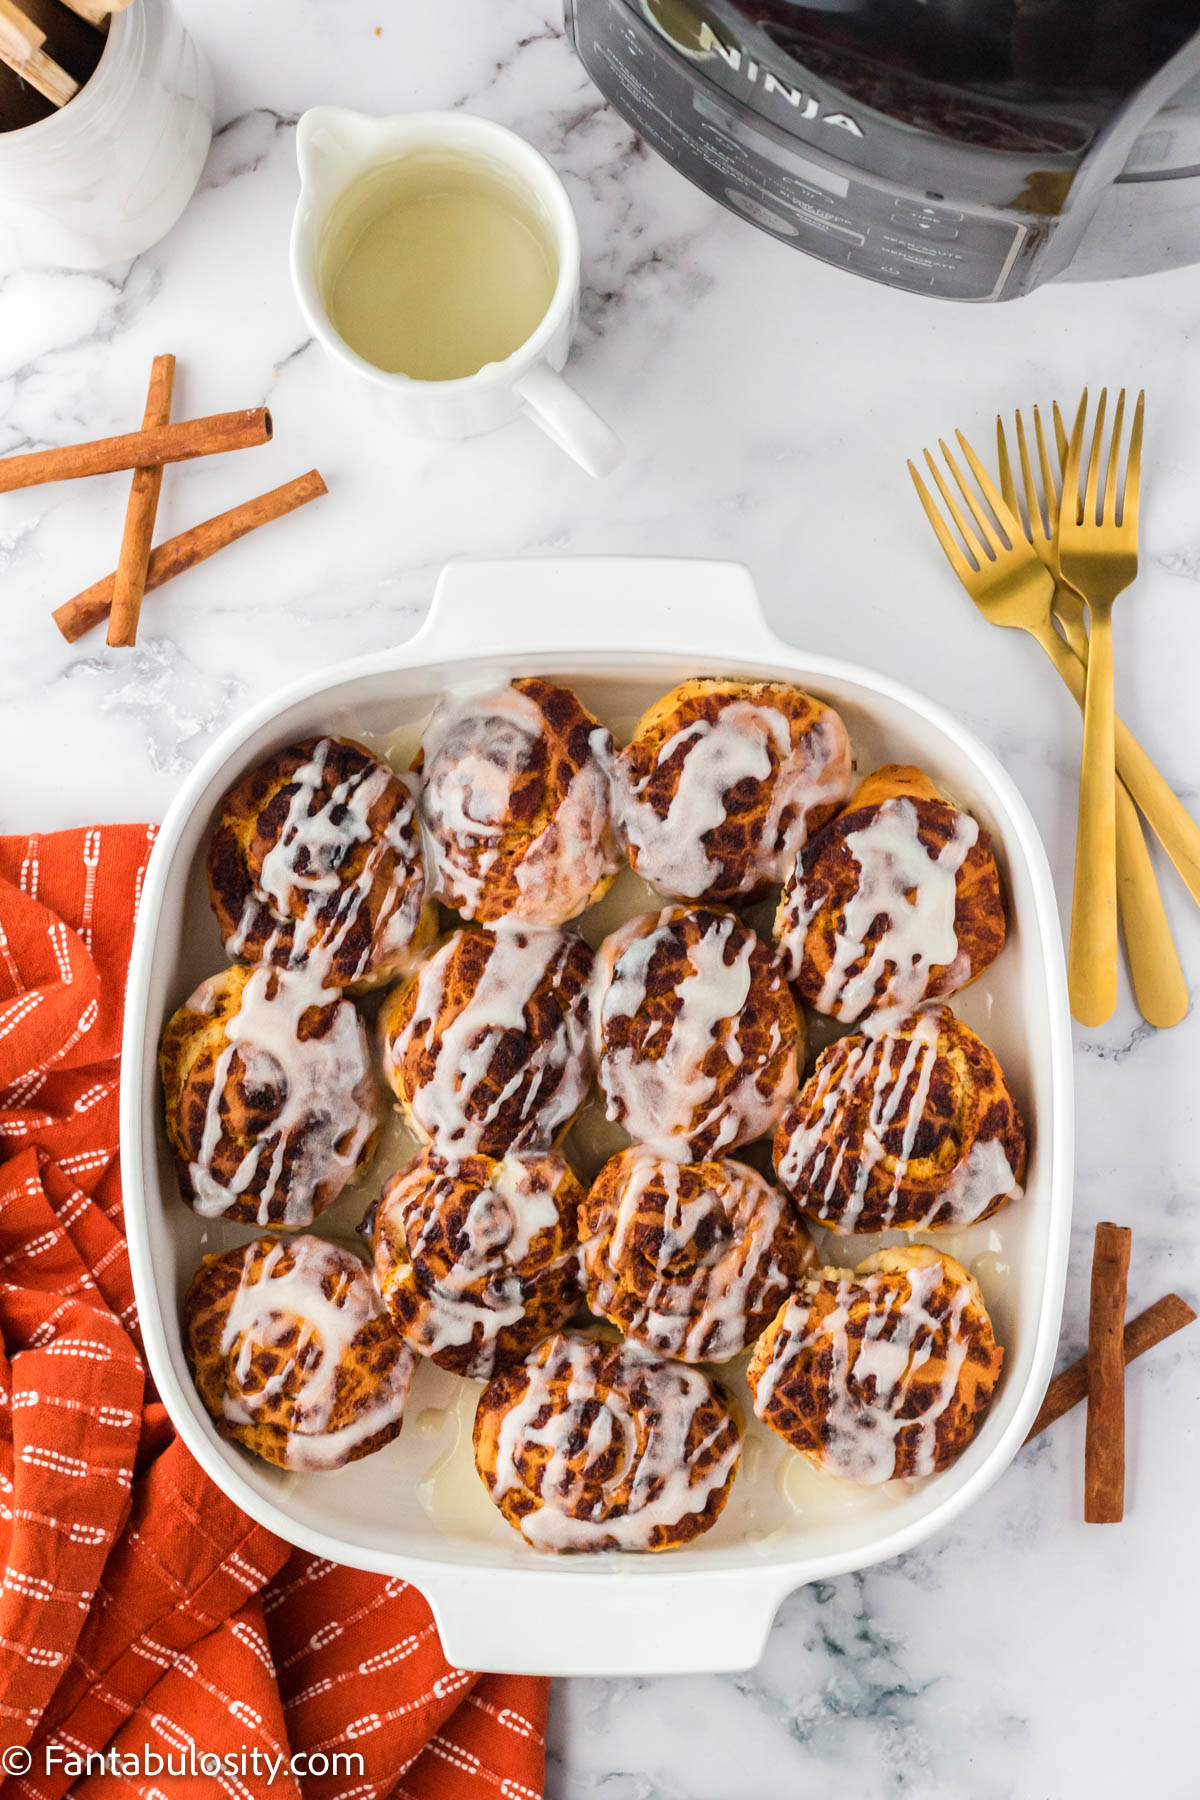
    Pour melted icing on top of Pillsbury cinnamon rolls
    Pour warm icing over the top of Pillsbury Cinnamon Rolls

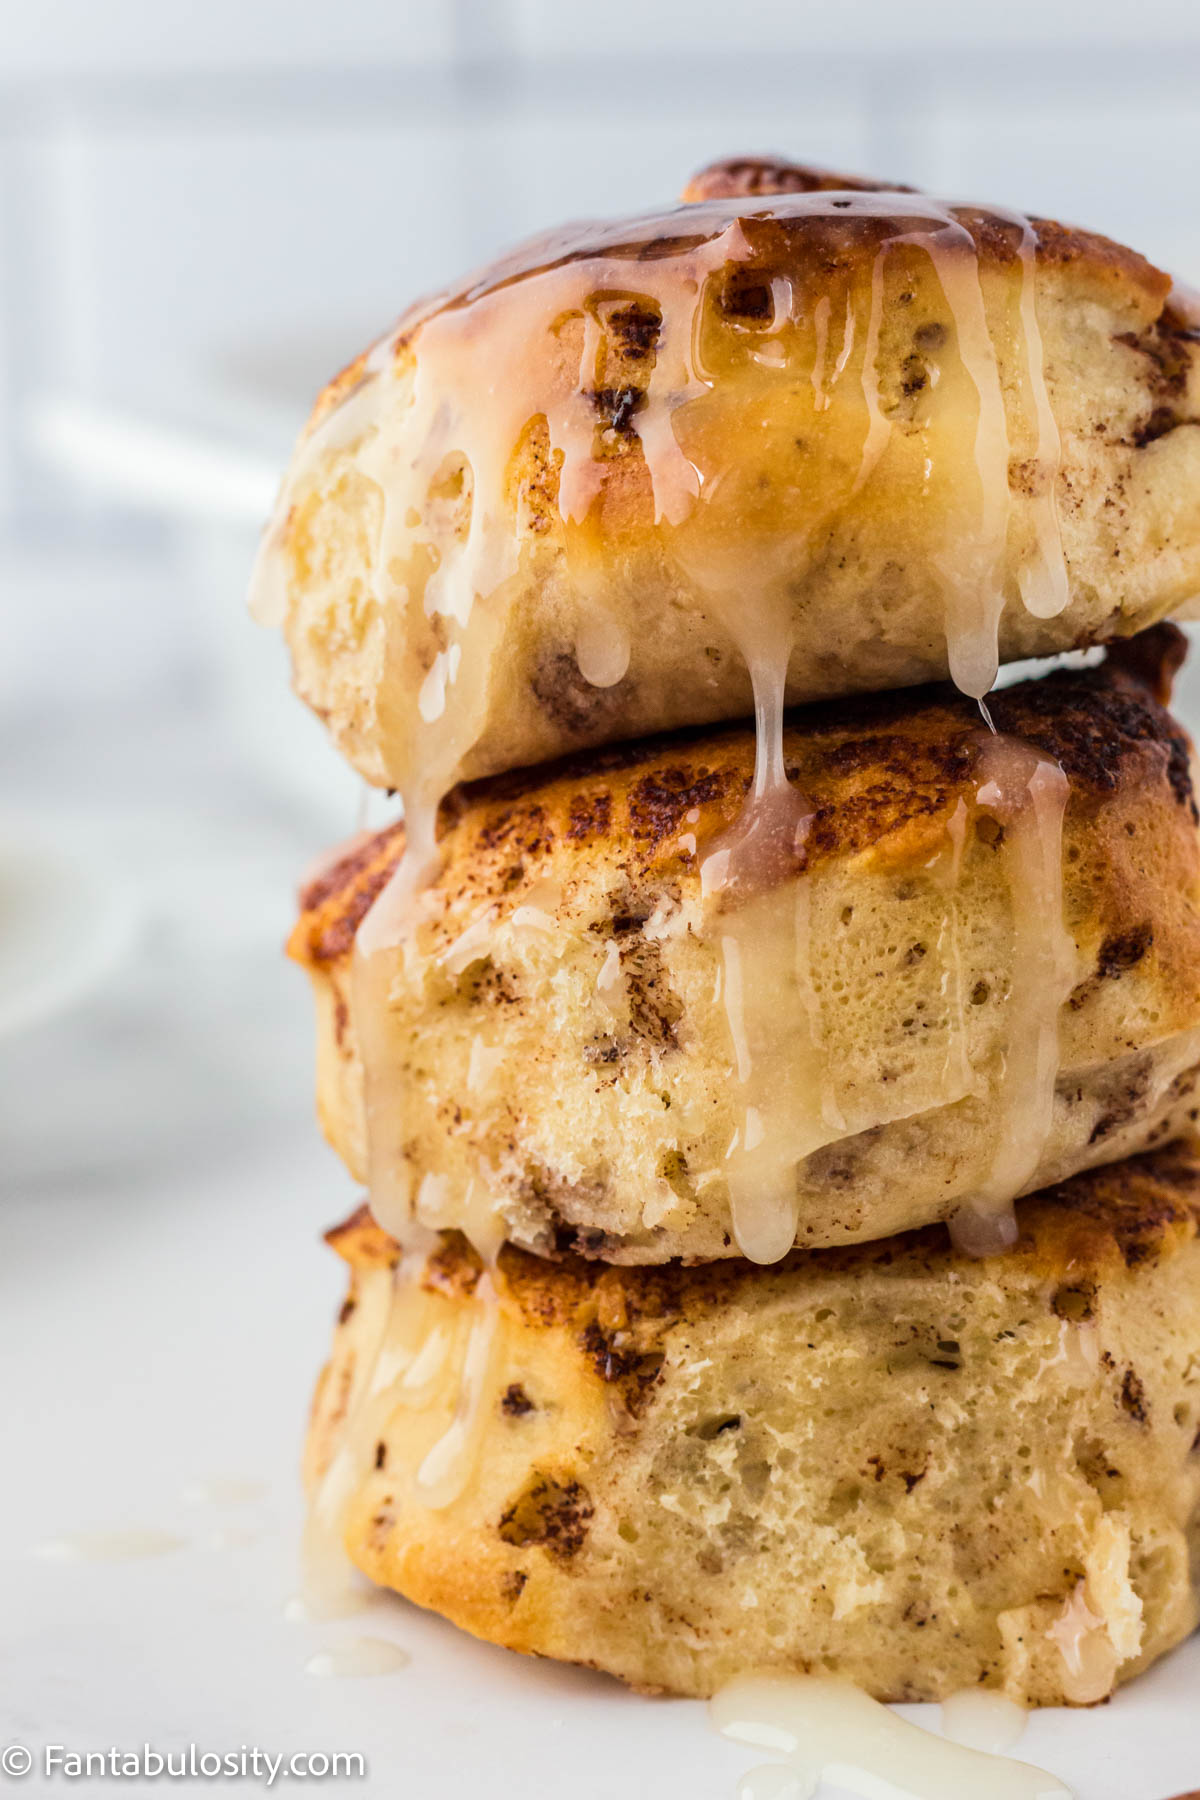
    In only a few minutes you can have delicious canned cinnamon rolls in the air fryer!

    (We have a double batch here, seen below!)

    Pillsbury Cinnamon Rolls Cooked in Air Fryer
    Frosted cooked cinnamon rolls in a separate dish (This is so icing doesn’t get in air fryer basket.)

    How to Make Canned Cinnamon Rolls Better

    Although they’re usually delicious all by themselves, there are ways to take them to the next level if desired. For instance:

    • Add mini chocolate chips before cooking
    • Drizzle chocolate syrup, caramel syrup, butterscotch, marshmallow cream or your favorite sweet sauce!
    • Sprinkle with nuts after frosting cinnamon buns
    • Top with raisins, dried cranberries or your favorite dried fruit
    Air Fryer Pillsbury Cinnamon Rolls
    Pillsbury Cinnamon Rolls Cooked in Air Fryer

    What are the best canned cinnamon rolls?

    According to Spoon University, the 5 best brands of cinnamon rolls are:

    1. Rhodes Anytime Cinnamon Rolls with Cream Cheese Frosting
    2. Immaculate Bakery Organic Cinnamon Rolls
    3. Annie’s Organic Cinnamon Rolls
    4. Pillsbury Grands Flaky Original Cinnamon Rolls with Icing
    5. Trader Joe’s Jumbo Cinnamon Rolls with Vanilla Icing
    Storebought pillsbury cinnamon rolls air fryer

    How to Make Air Fryer Cinnamon Rolls from Scratch

    Cinnamon rolls in the air fryer are a quick and easy way to cook the sweet buns, especially the canned version.
    However, when you have the time to make homemade cinnamon rolls, you’ll LOVE this recipe and it may just become a new favorite breakfast treat!

    If you prefer a gluten-free recipe, you’ll love these gluten-free cinnamon rolls!

    Ingredients

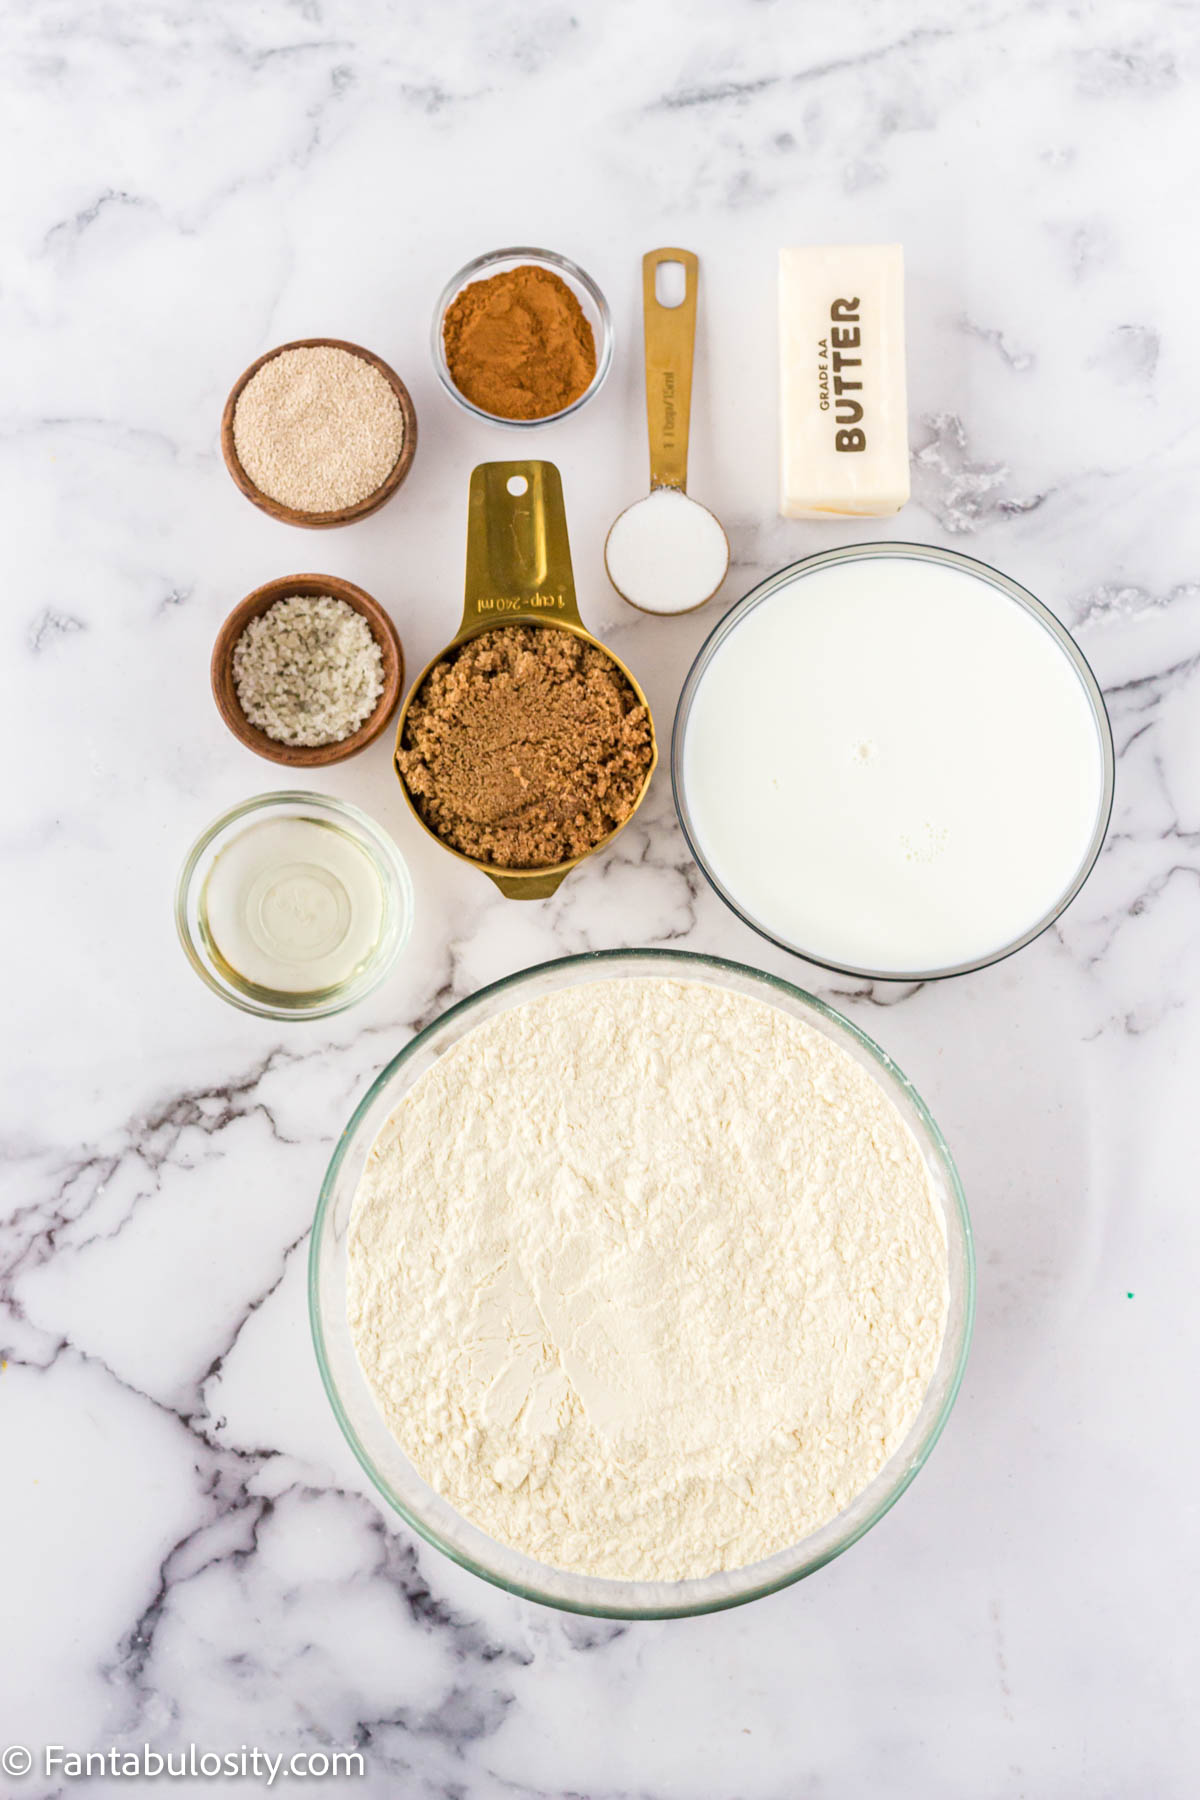
    With only a few ingredients that you probably already have on hand, you can have air fryer cinnamon rolls from scratch, in no time! Here’s what you need:

    air fryer cinnamon rolls ingredients
    • 2 ¼ cups warm milk
    • 2 tablespoons active dry yeast
    • 2 tablespoons white sugar
    • 2 tablespoons vegetable oil
    • 2 teaspoons salt
    • 5 cups white flour
    • 6 tablespoons unsalted butter
    • 1 ½ cups brown sugar
    • 2 teaspoons ground cinnamon

    Full recipe card at the end of this post!

    Instructions for Homemade Cinnamon Rolls

    Not only does this recipe use simple ingredients but it has simple instructions too!

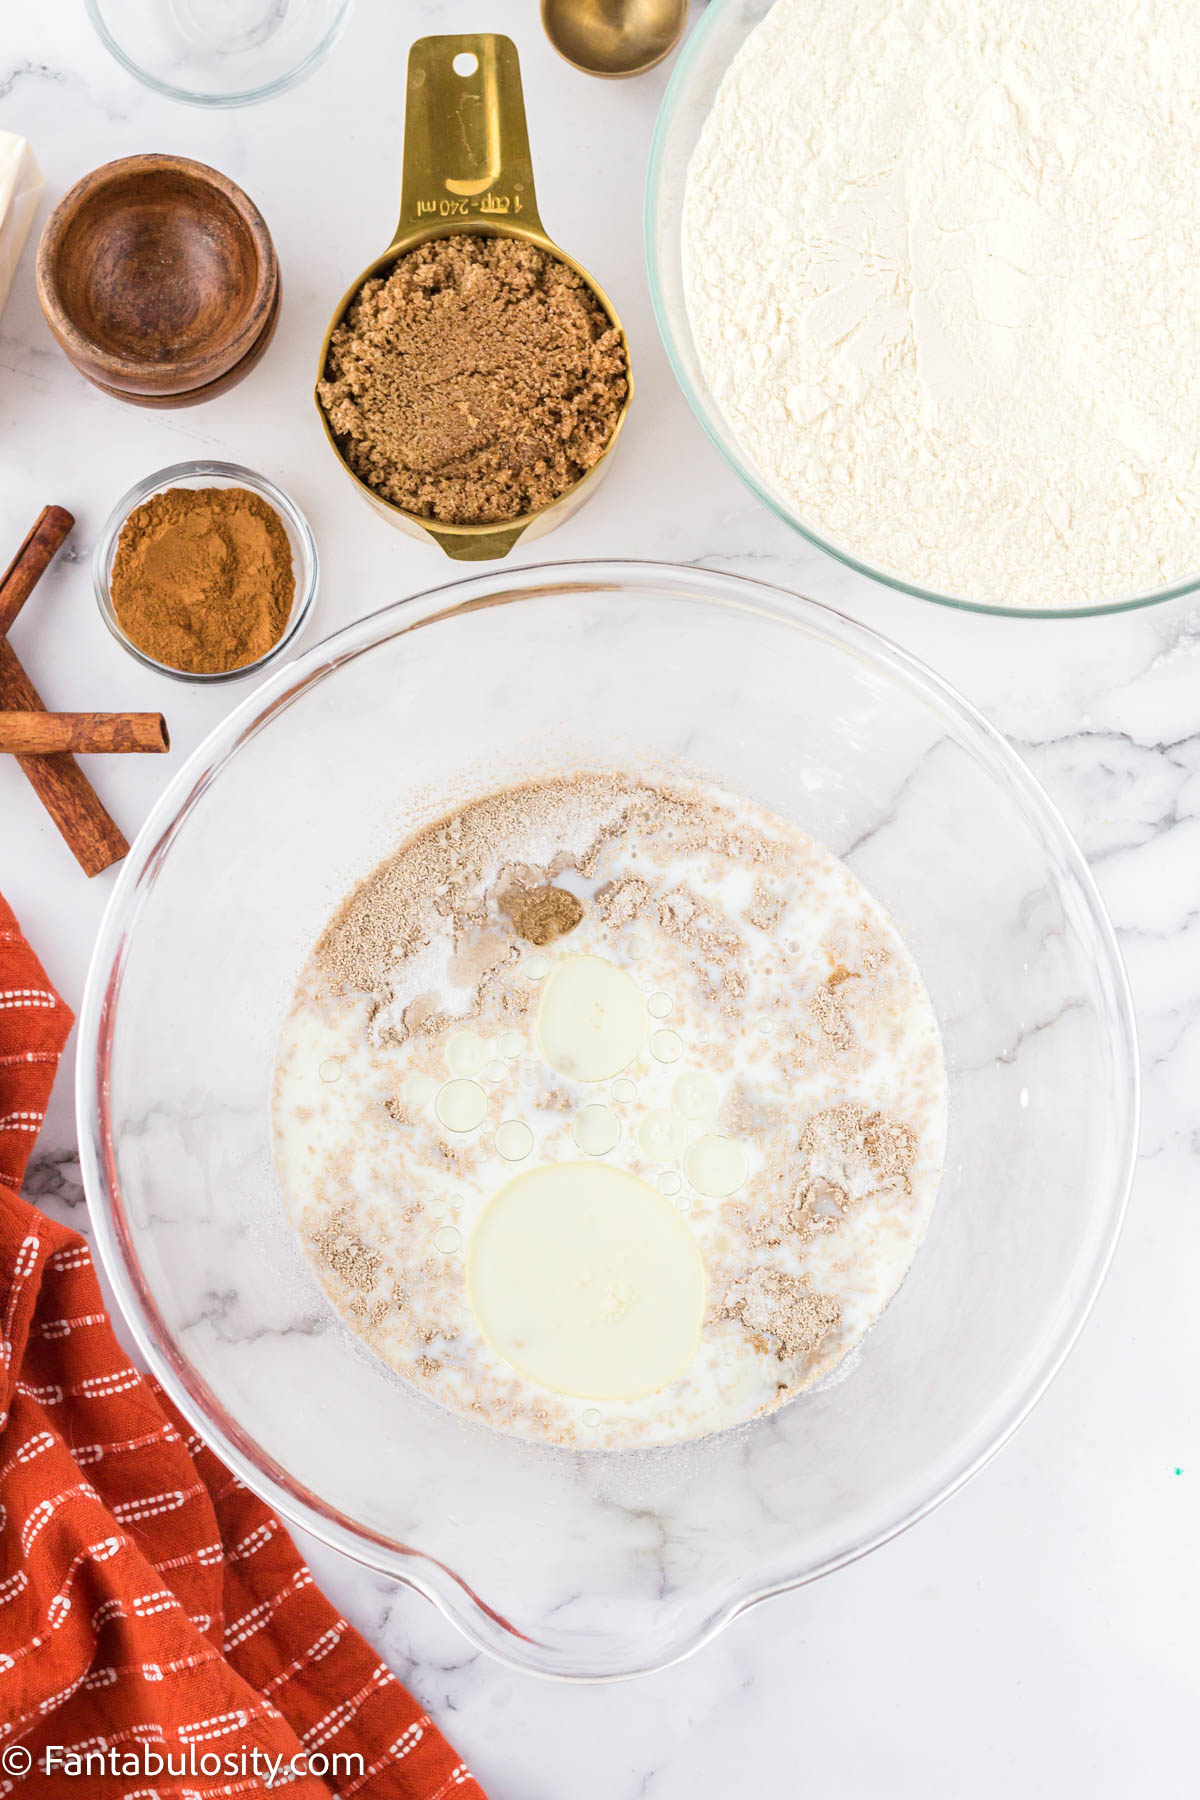
    1. In a large mixing bowl, combine the milk, yeast, oil, white sugar, and salt. Whisk gently until the ingredients are combined and allow to sit for 5 minutes.
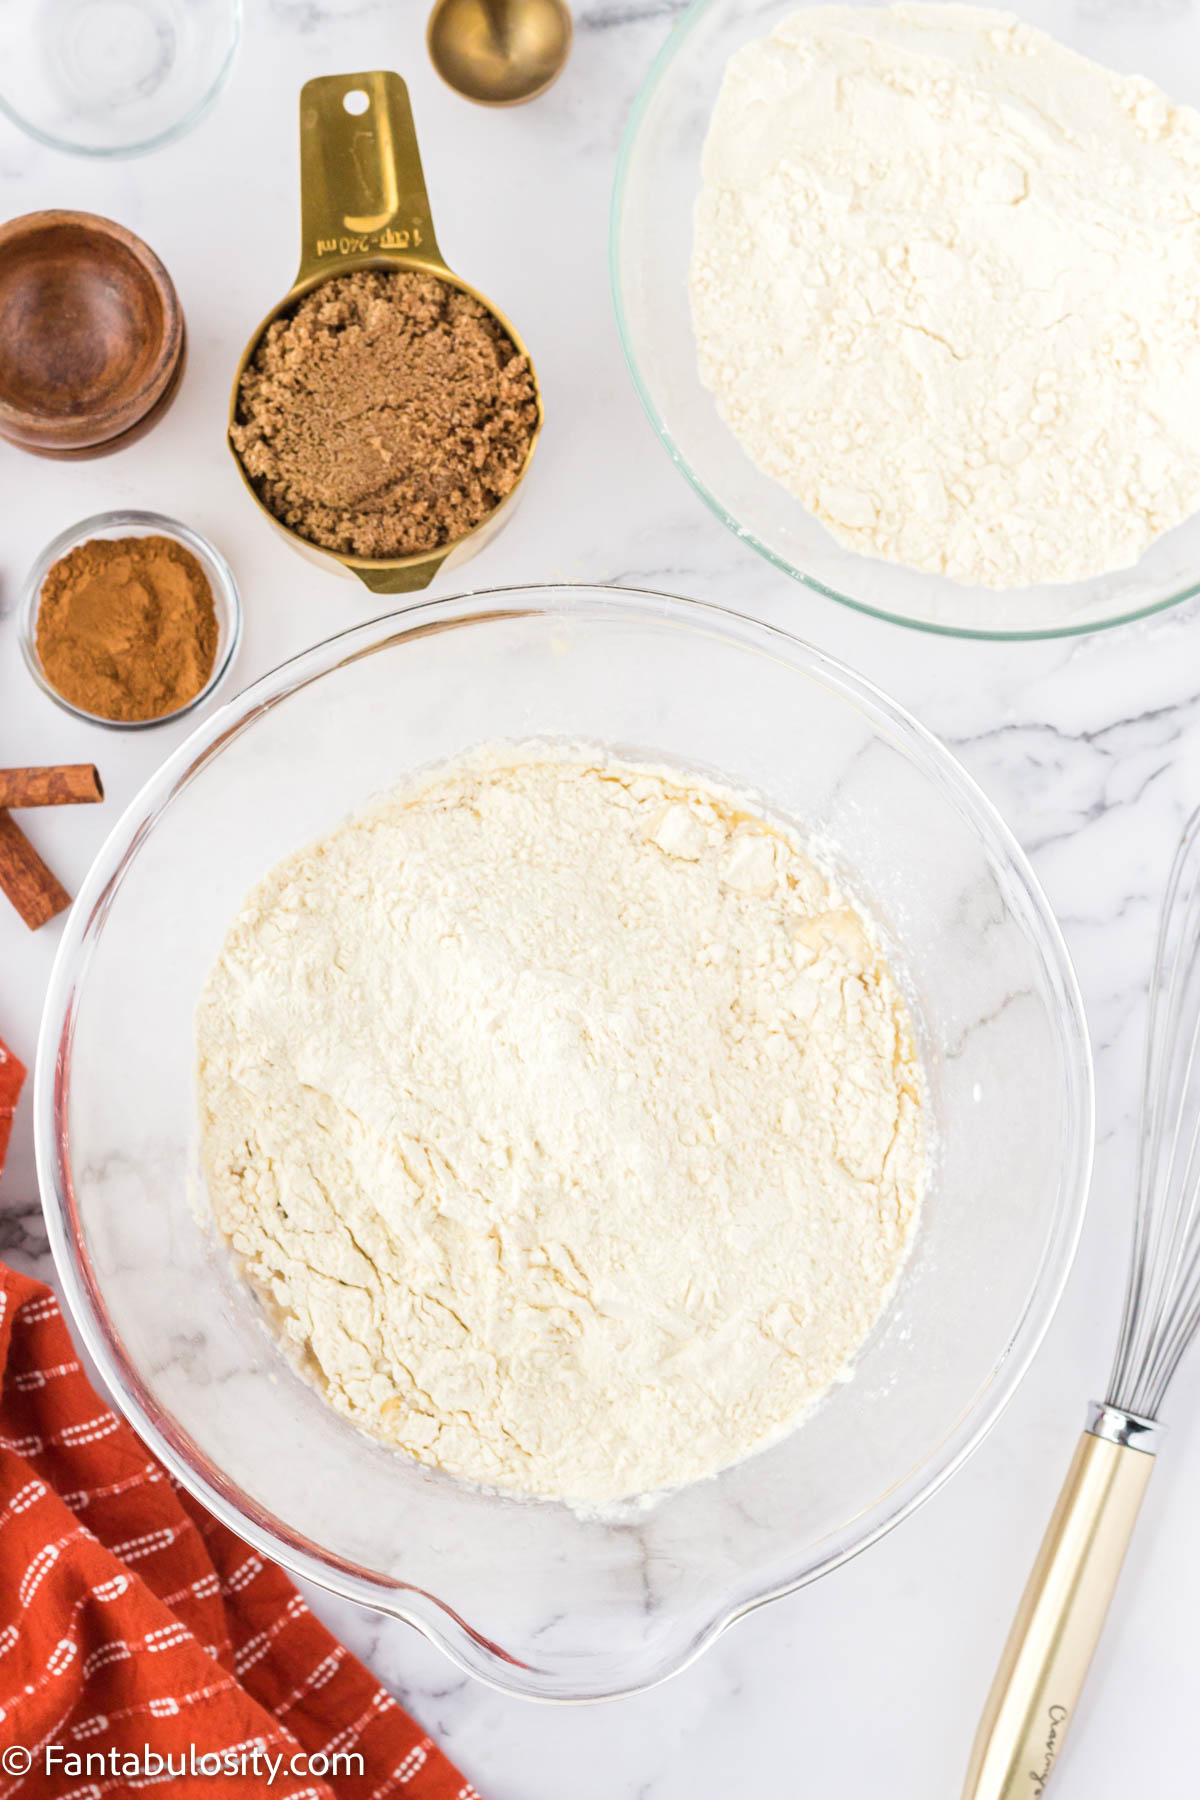
    1. Slowly add in the flour while stirring with a wooden spoon or stand mixer.
    Milk, yeast, oil, sugar, salt
    cinnamon roll ingredients mixed in bowl
    Slowly add in flour
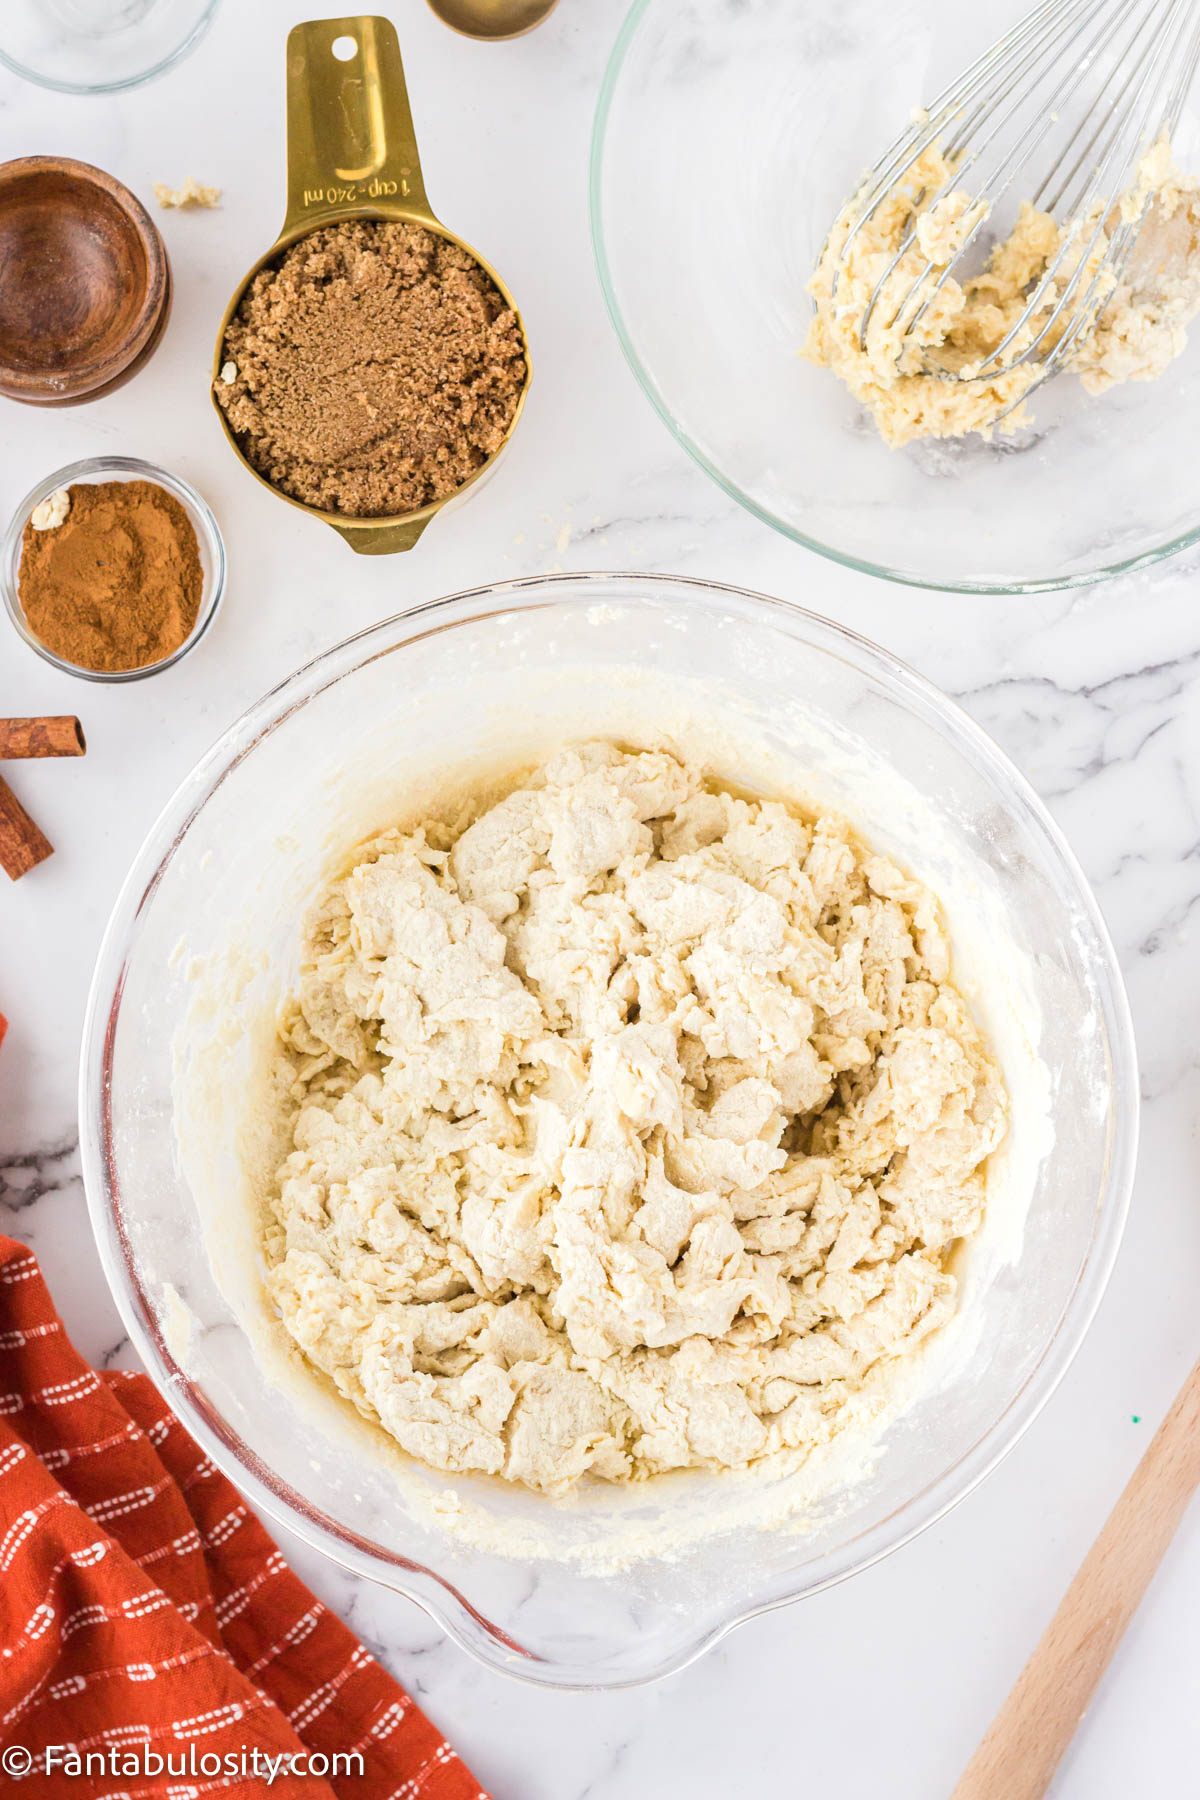
    1. Continue stirring until the flour is mixed evenly with the rest of the ingredients.
    Mix together until evenly combined
    Flour added in and mixed evenly with the milk, yeast, oil, white sugar, and salt.
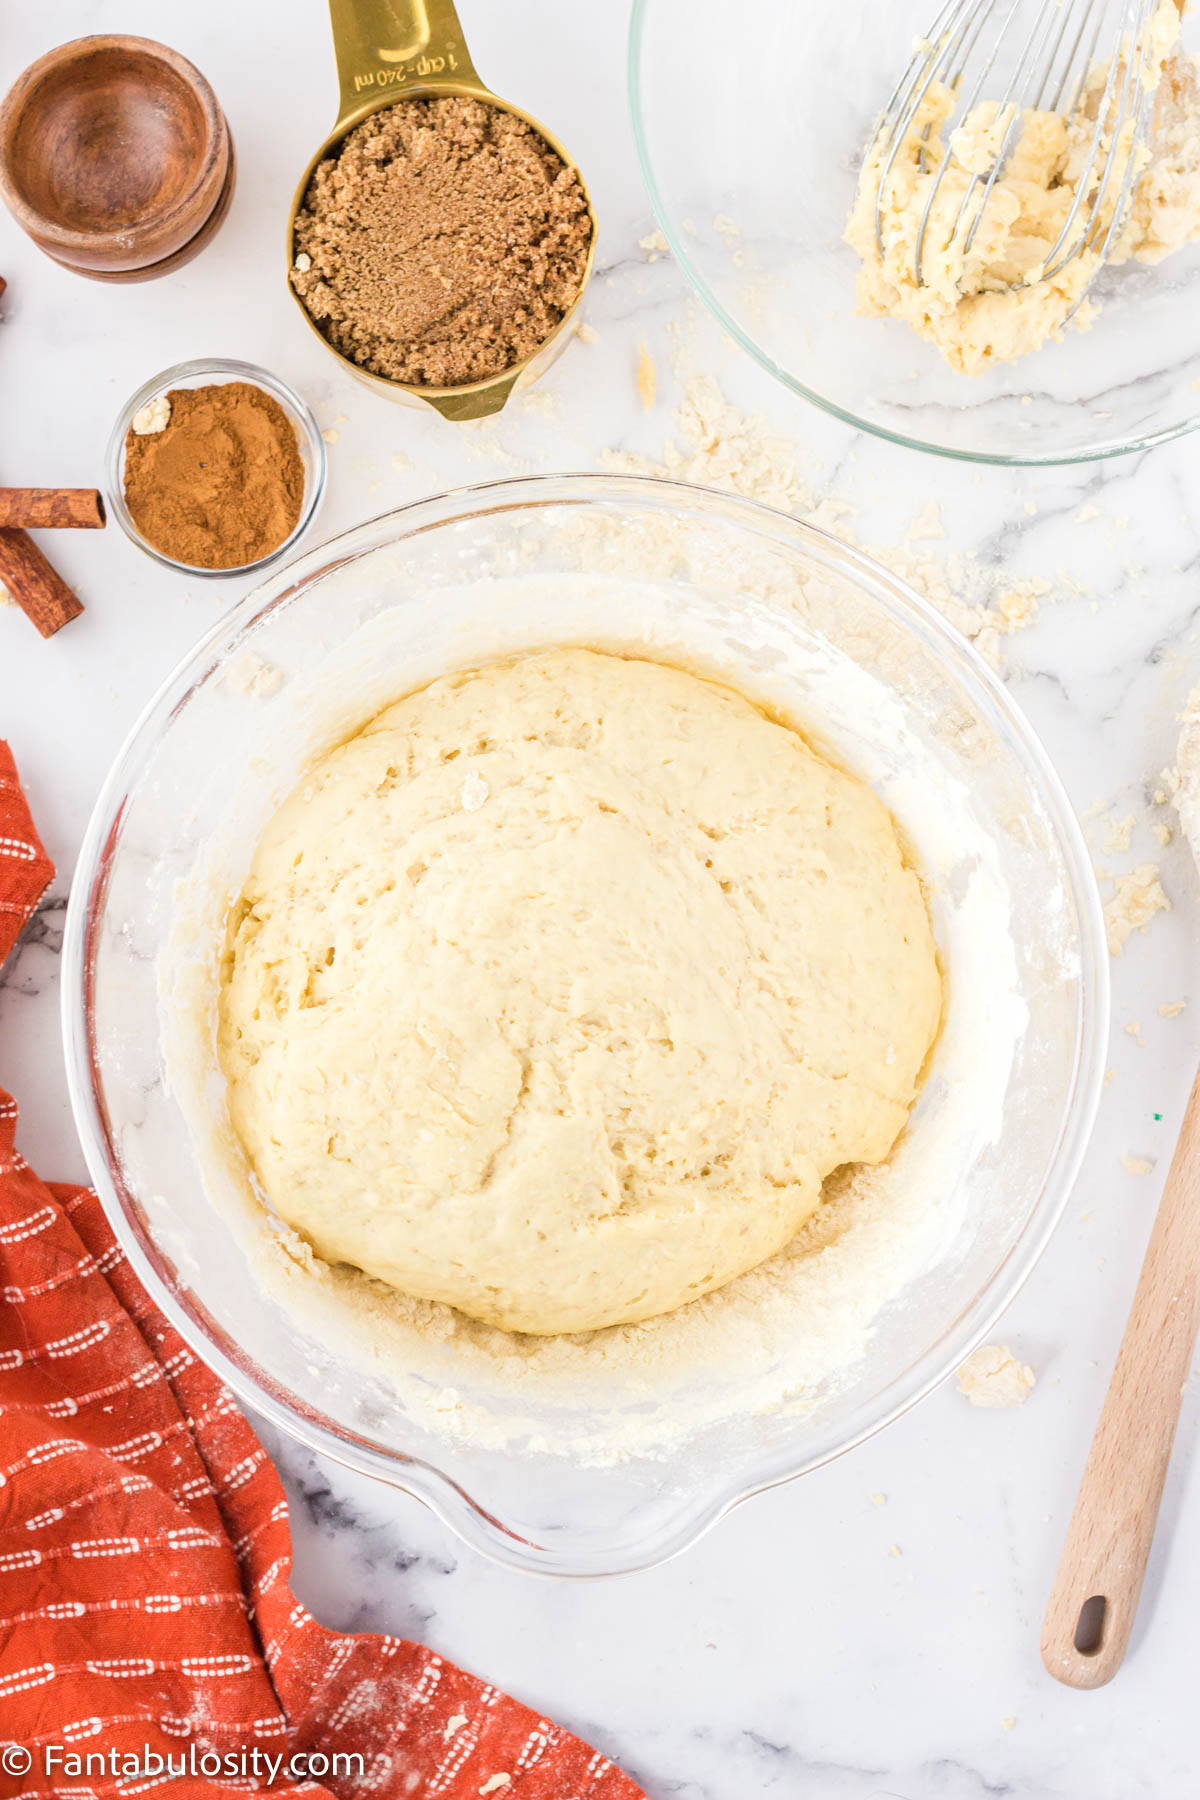
    1. Turn your mixture out onto a lightly floured surface and knead by hand for 5-10 minutes, or until the dough is elastic.
    2. Place the dough back in the mixing bowl and cover with saran wrap. Allow the dough to rise for 30 minutes.
    Turn out on to floured surface
    Turn dough on to surface and knead
    Place dough back in bowl to let rise
    Place back in bowl to rise
    1. Turn the dough onto a lightly floured surface and roll into a long rectangular sheet about ¼ inch thick. Before you begin preparing your filling, preheat the air fryer to 375 degrees F for 5 minutes.
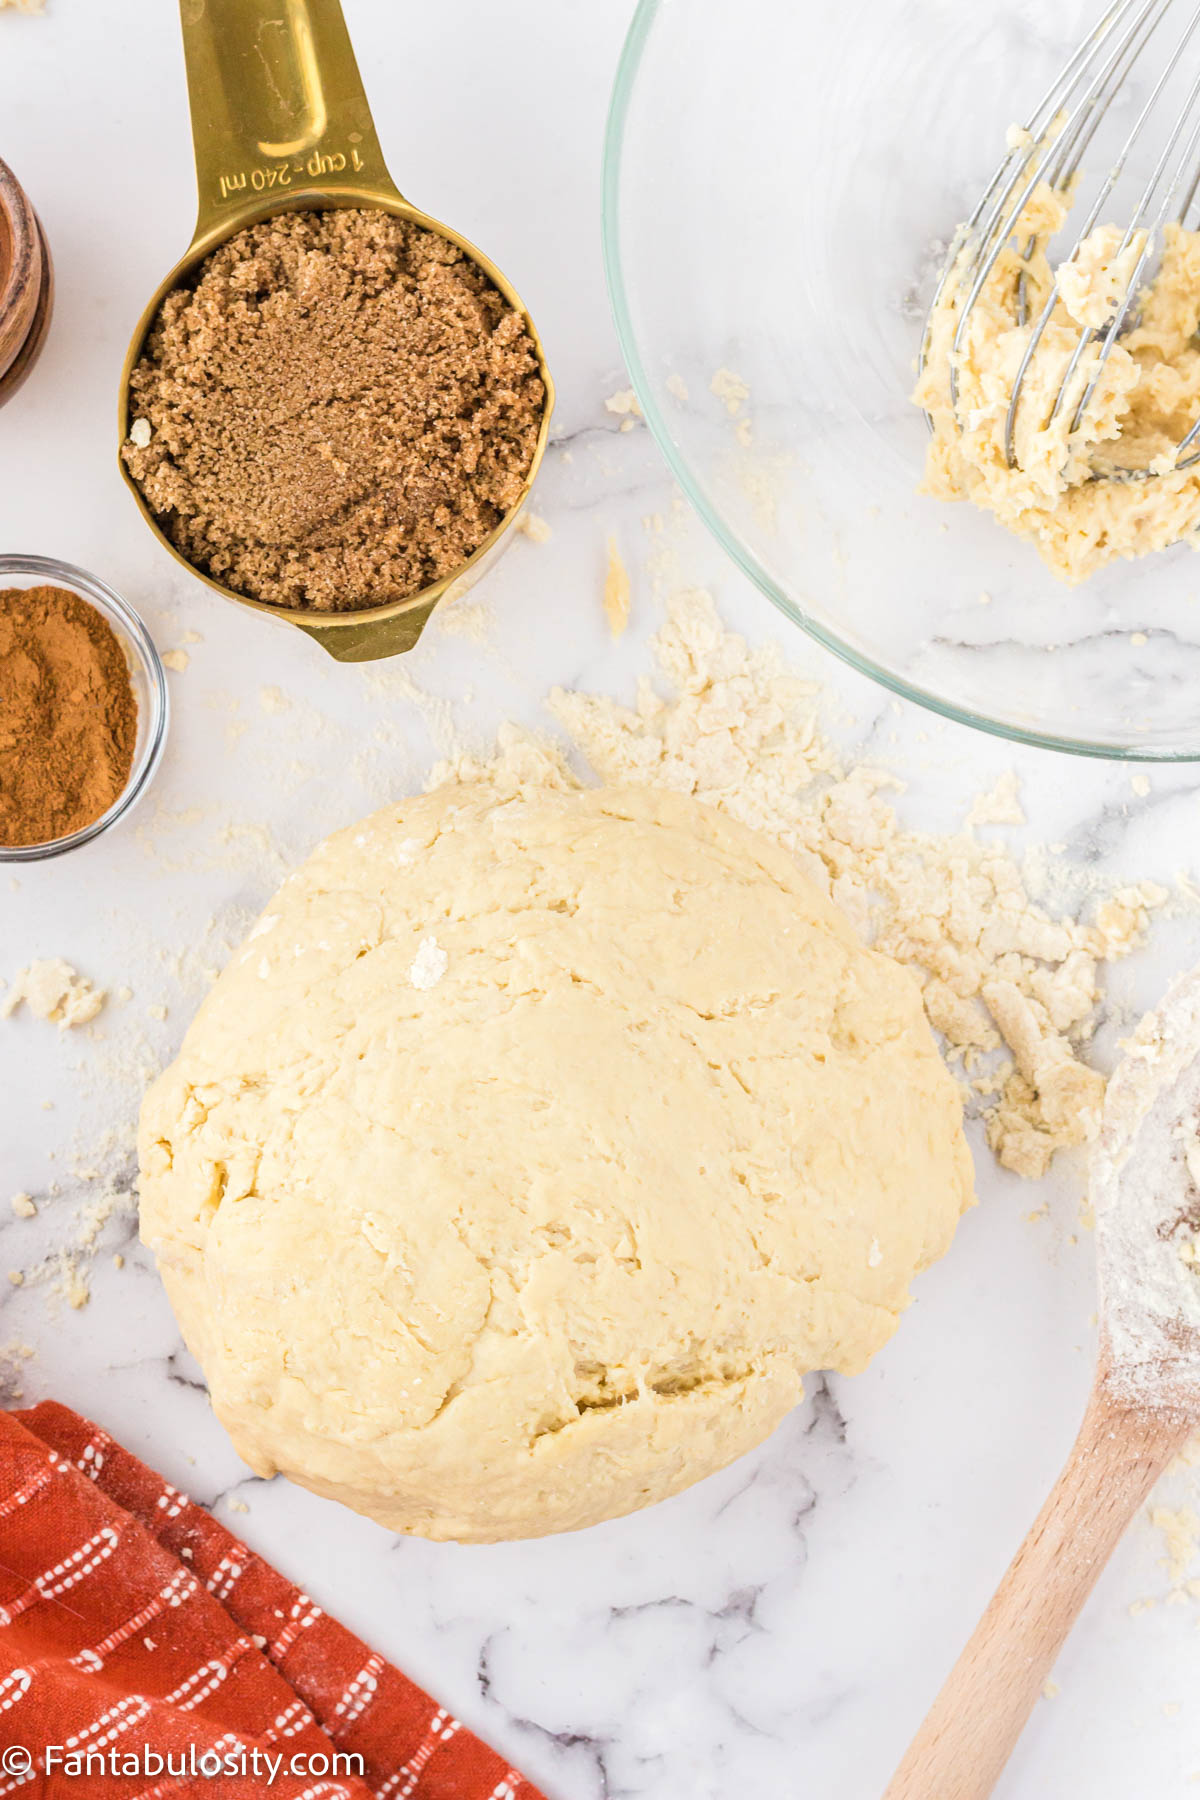
    2. Prepare the filling by melting the butter and combining it with the brown sugar and cinnamon. Spread the filling over the sheet of dough and use a spoon to make sure it is spread evenly.
    Roll out in to rectangular sheet
    Roll out dough in a rectangular shape
    spread filling over dough
    Spread filling on top of dough
    1. Roll the dough into a long tube and cut into even pieces.
    Roll cinnamon rolls in to tube shape and slice
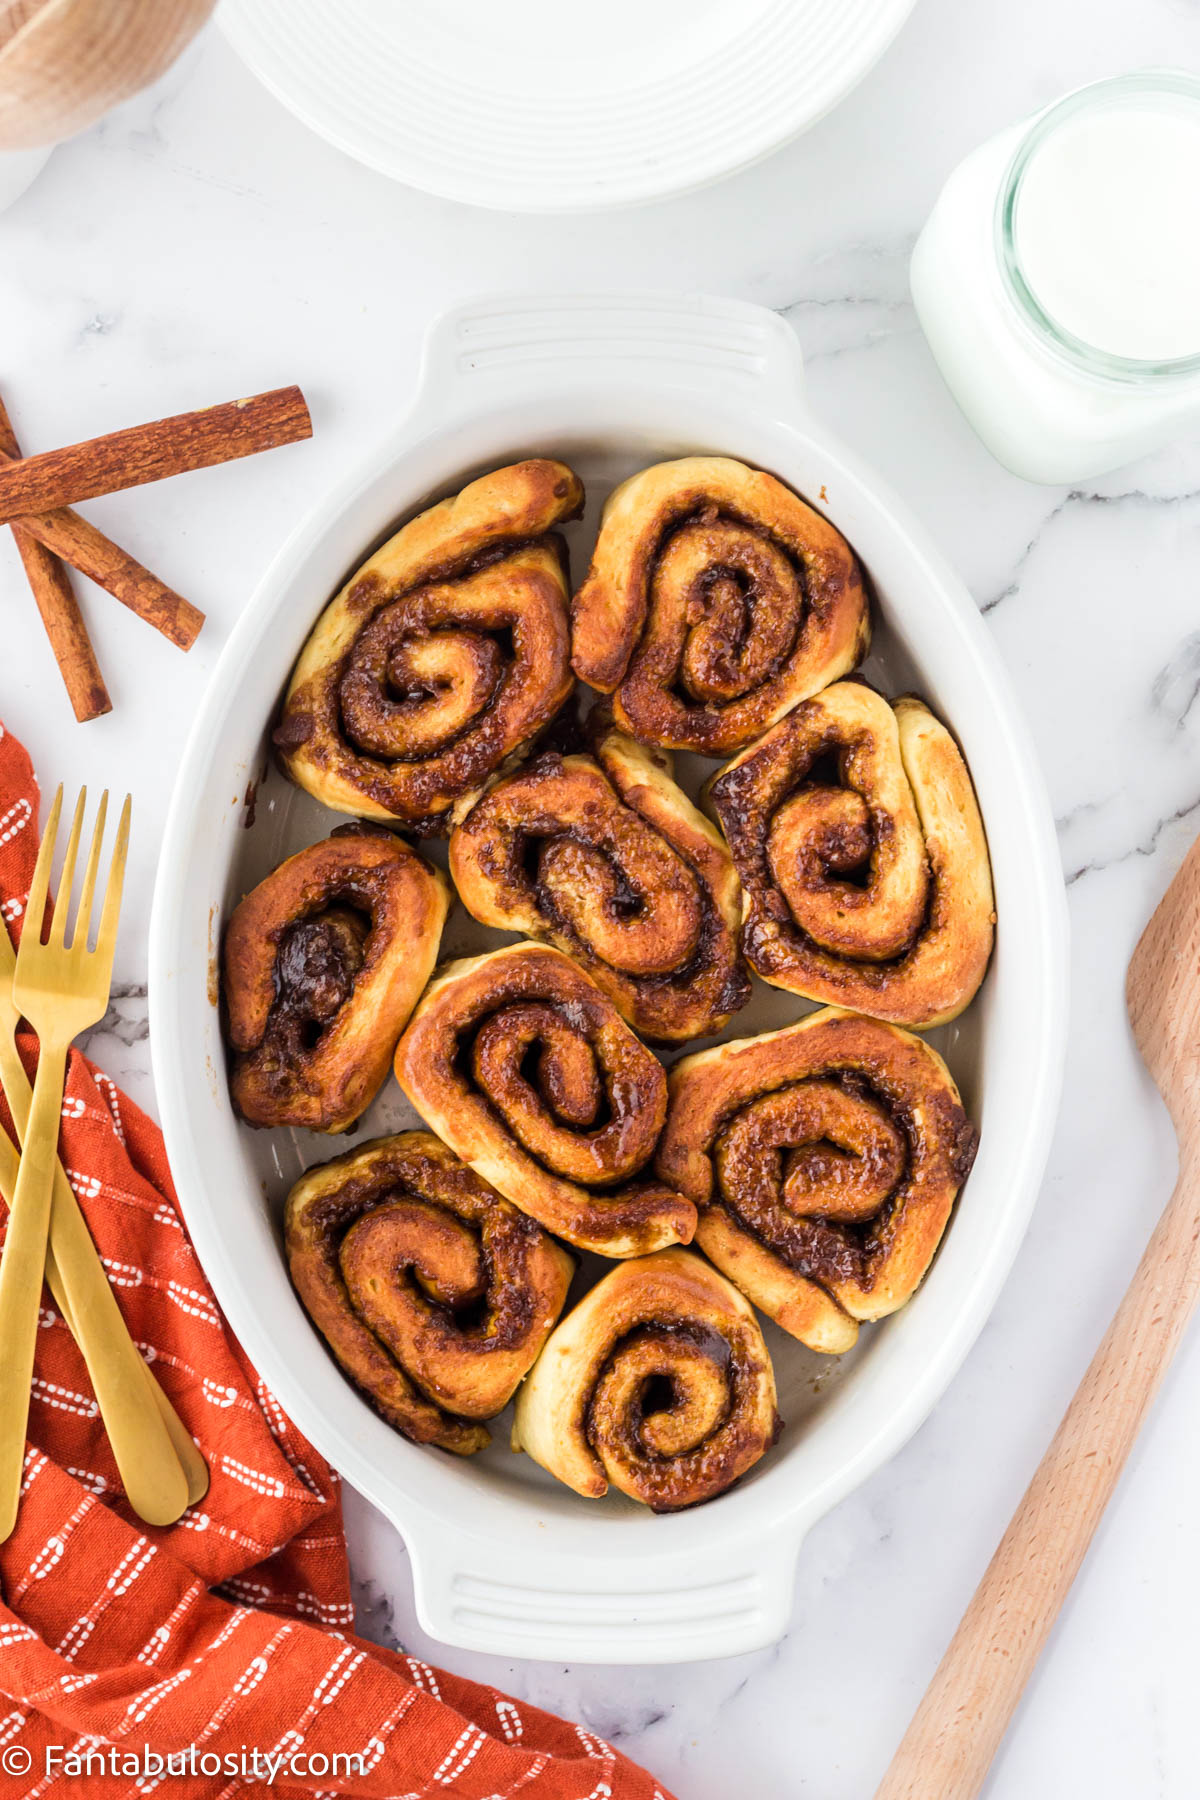
    1. Place as many rolls as will fit in your air fryer basket and cook for 8 minutes at 350 F.
    Cooked Air fryer cinnamon rolls
    1. For easy clean-up, transfer the cooked cinnamon rolls to a baking dish or plate before adding on the frosting.
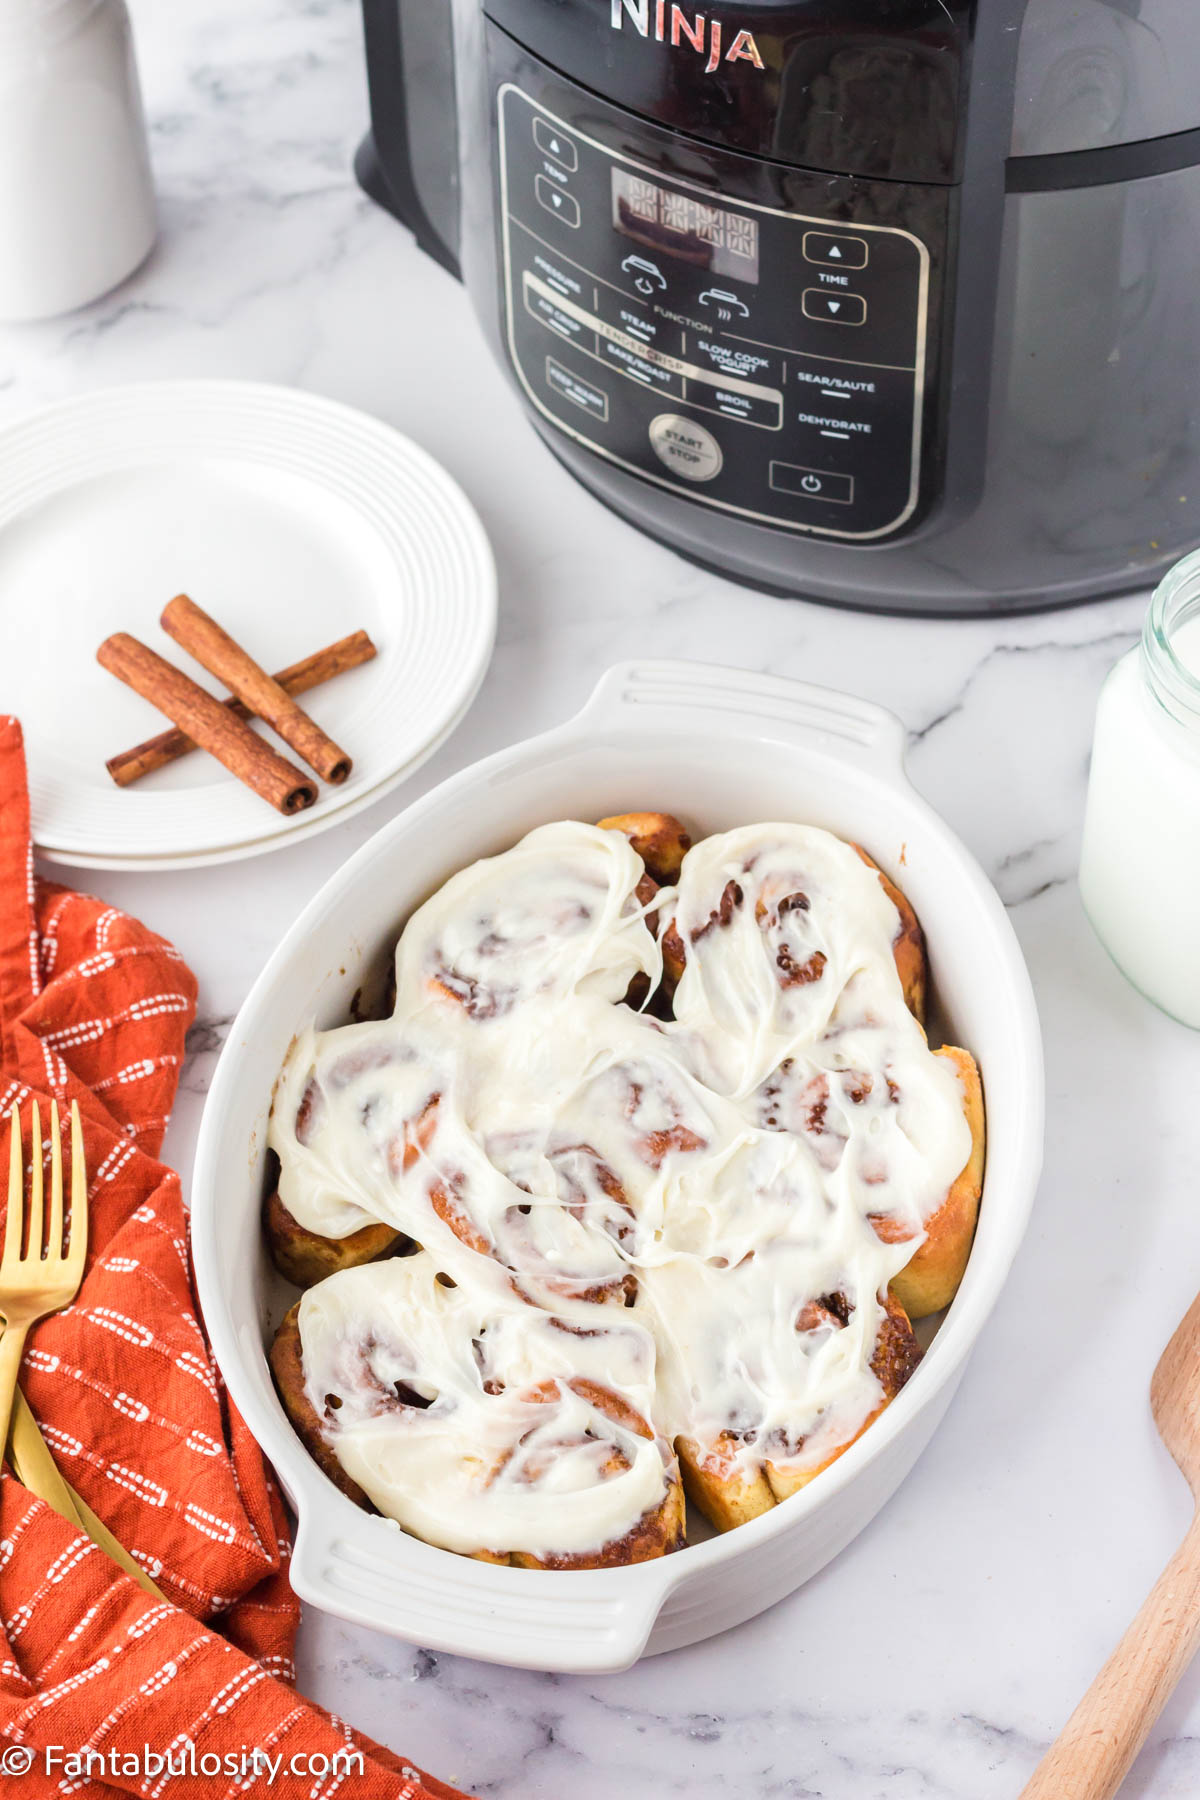
    Cooked air fryer cinnamon rolls in white dish
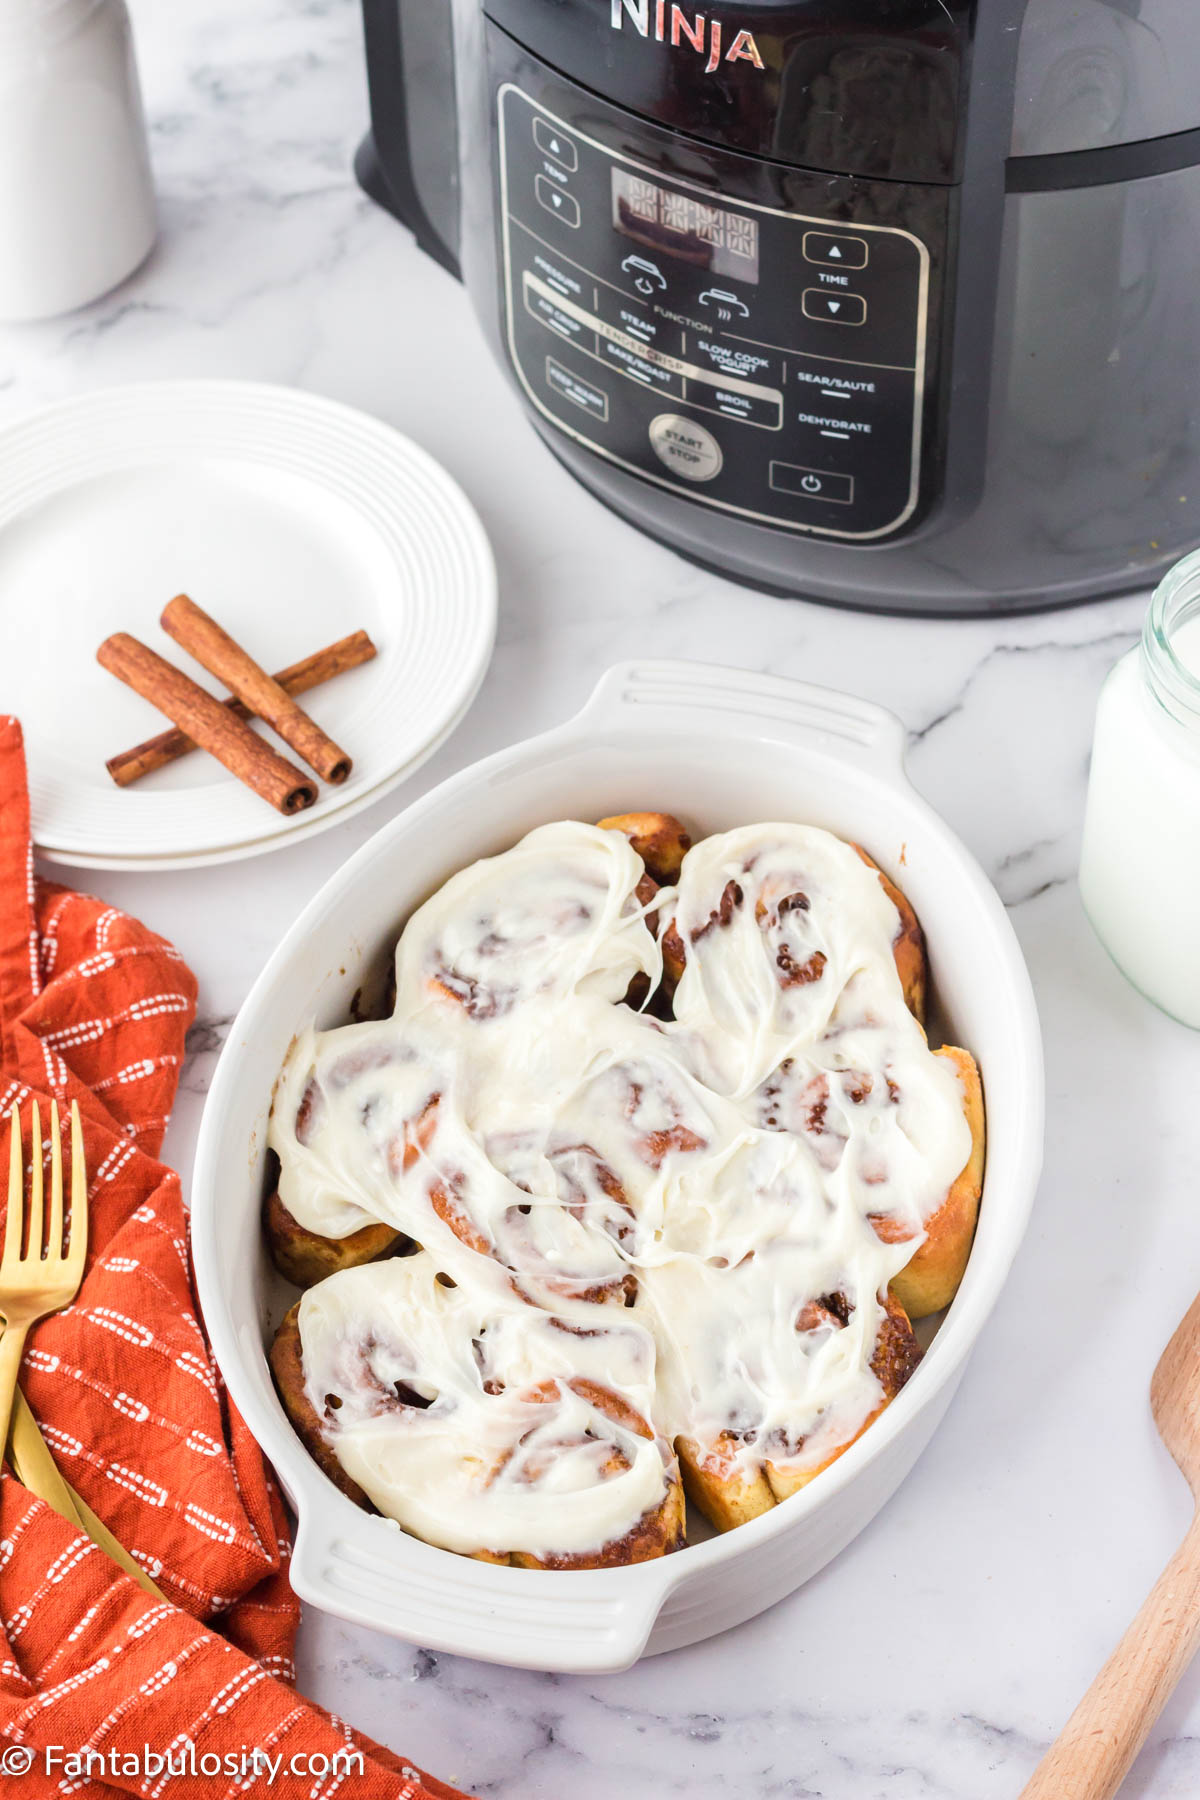
    1. Top the cinnamon rolls with your favorite cream cheese frosting (or our cream cheese frosting recipe, seen below) right after they come out of the air fryer. Allow to cool for 3-5 minutes, serve, and enjoy!
    Brush frosting on cinnamon rolls

    Cream Cheese Frosting Recipe for Cinnamon Rolls

    Feel free to use your favorite store-bought cream cheese frosting, or quickly and easily make this delicious frosting recipe of ours…

    Frosting Ingredients:

    • 8 oz. block of cream cheese (softened)
    • 2 cups of powdered sugar
    • 1 teaspoon vanilla

    Frosting Instructions:

    1. In a small bowl, mix together all three ingredients with a mixer until evenly combined.
    2. Spread over warm cinnamon rolls.
    Cooked air fryer cinnamon rolls
    How do you keep cinnamon rolls from getting hard?

    Store any leftover cinnamon rolls in an airtight container, making sure air cannot get to them to dry them out and make them hard.

    Can cinnamon rolls sit out on the counter?

    They can if they do not have a cream cheese frosting. If frosted with cream cheese frosting, they will need to be refrigerated to maintain safe consumption.

    How to reheat leftover cinnamon rolls

    Place back in the air fryer for just a couple of minutes until heated through. Or, you can place them in the microwave on a microwave-safe plate, in 10-15 second increments until heated through.

    air fryer cinnamon rolls on white plate

    How long are cinnamon rolls good?

    If storing cinnamon rolls in the refrigerator, they can stay fresh for up to one week!

    If they’re made without cream cheese frosting (or with a frosting that doesn’t require refrigeration) you can store them on the counter, in an airtight container, but the lifespan is shorter, and are only good for 2-3 days.

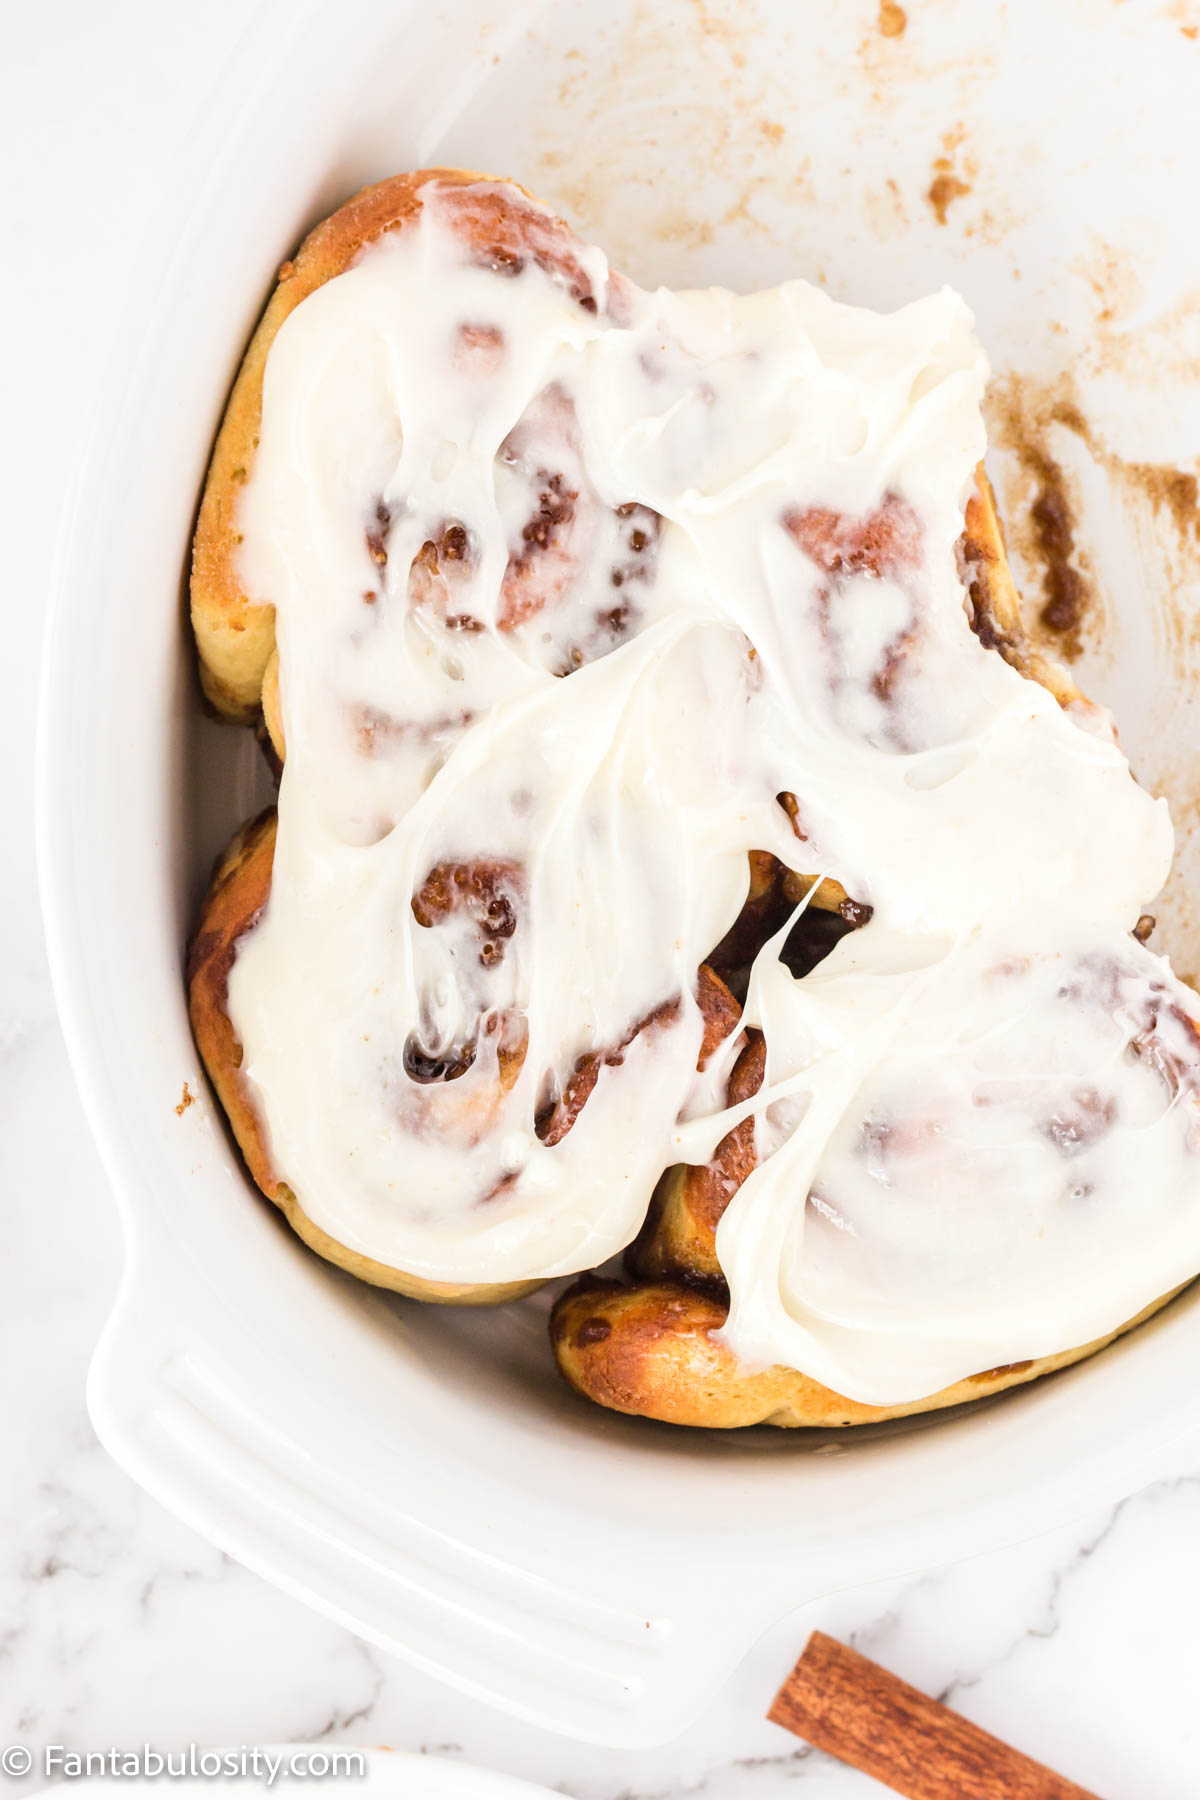
    Cinnamon rolls with white frosting

    What to Serve With Cinnamon Rolls

    If you love using your air fryer for breakfast, then you’ll also love seeing how we make bacon in the air fryer, air fryer hash brown patties from frozen, and air fryer breakfast potatoes, to serve along with these for an entire meal made in one small appliance!

    🍳 More Breakfast Recipes

    If you love cinnamon rolls as much as we do, you’ll also want to make this mini cinnamon rolls recipe. But if you love easy breakfast recipes, then I think you’ll also love these:

    • Cooked, air fried frozen biscuits on white plate, with one biscuit with butter on top.
      Frozen Biscuits in the Air Fryer
    • Jalapeno Sausage Gravy
      Jalapeno Sausage Gravy
    • A close up photo of a stack of cinnamon swirled pancake squares that were baked on a sheet pan
      Sheet Pan Pancakes
    • A close up of a slice of biscuit and gravy casserole.
      Biscuit and Gravy Casserole

    Recipe

    Air fryer cooked cinnamon roll on a wooden spatula.
    Print Pin
    5 from 3 votes

    Air Fryer Cinnamon Rolls

    Two ways to make and enjoy air fryer cinnamon rolls! See how to make canned Pillsbury cinnamon rolls in the air fryer and also how to make homemade cinnamon rolls from scratch!
    Course Breakfast
    Cuisine American
    Cook Time 7 minutes minutes
    Total Time 7 minutes minutes
    Servings 8 cinnamon rolls
    Calories 140kcal
    Author Jessica Burgess

    Equipment

    • air fryer

    Ingredients

    Canned Cinnamon Rolls (Pillsbury)

    • 1 can cinnamon rolls

    Cinnamon Rolls from Scratch

    • 2 ¼ cups warm milk
    • 2 tablespoons active dry yeast
    • 2 tablespoons white sugar
    • 2 tablespoons vegetable oil
    • 2 teaspoons salt
    • 5 cups white flour
    • 6 tablespoons unsalted butter
    • 1 ½ cups brown sugar
    • 2 teaspoon ground cinnamon

    Cream Cheese Frosting

    • 8 ounces cream cheese softened
    • 2 cups powdered sugar
    • 1 teaspoon vanilla

    Instructions

    Canned Cinnamon Rolls

    • Preheat air fryer to 375 F.
    • Place one full package of cinnamon rolls in your air fryer. Cook the cinnamon rolls for 7 minutes at 375 F. D
    • If desired, warm included frosting slightly, and then drizzle the frosting over the cinnamon rolls and allow to cool before serving.
    Homemade Cinnamon Rolls

    • In a large mixing bowl, combine the 2 ¼ cups of milk, 2 tablespoons of yeast, 2 tablespoons of oil, 2 tablespoons white sugar, and 2 teaspoons of salt. Whisk gently until the ingredients are combined and allow to sit for 5 minutes.
    • Slowly add in the 5 cups of flour while stirring with a wooden spoon or stand mixer. Continue stirring until the flour is homogenous with the rest of the ingredients.
    • Turn your mixture out onto a lightly floured surface and knead by hand for 5-10 minutes, or until the dough is elastic.
    • Place the dough back in the mixing bowl and cover with saran wrap. Allow the dough to rise for 30 minutes.
    • Turn the dough onto a lightly floured surface and roll into a long rectangular sheet about ¼ inch thick.
    • Before you begin preparing your filling, preheat the air fryer to 375 F for 5 minutes.
    • Prepare the filling by melting the 6 tablespoons of butter and combining it with the 1 ½ cups brown sugar and 2 teaspoons of cinnamon. Spread the filling over the sheet of dough and use a spoon to make sure it is spread evenly.
    • Roll the dough into a long tube and cut into even pieces.
    • Place as many rolls as will fit in your air fryer basket and cook for 8 minutes at 350 F.
    • Top the cinnamon rolls with your favorite cream cheese frosting (recipe below if needed) right after they come out of the air fryer, allow to cool for 3-5 minutes, serve, and enjoy!

    Cream Cheese Frosting

    • Combine 8 oz. cream cheese, 2 cups powdered sugar and 1 teaspoon of vanilla in a bowl and mix together until evenly mixed.

    Notes

    How do you keep cinnamon rolls from getting hard?
    Store any leftover cinnamon rolls in an airtight container, making sure air cannot get to them to dry them out and make them hard.
    Can cinnamon rolls sit out on the counter?
    They can if they do not have a cream cheese frosting. If frosted with cream cheese frosting, they will need to be refrigerated to maintain safe consumption.
    How to reheat cinnamon rolls?
    Place back in the air fryer for just a couple of minutes until heated through. Or, you can place them in the microwave on a microwave-safe plate, in 10-15 second increments until heated through.
    How long are cinnamon rolls good?
    If storing cinnamon rolls in the refrigerator, they can stay fresh for up to one week!
    If they’re made without cream cheese frosting (or with a frosting that doesn’t require refrigeration) you can store them on the counter, in an airtight container, but the lifespan is shorter, and are only good for 2-3 days.

    Nutrition

    Serving: 1roll | Calories: 140kcal | Carbohydrates: 24g | Protein: 2g | Fat: 4.5g | Saturated Fat: 2.5g | Sodium: 340mg | Sugar: 9g | Iron: 0.9mg

    Related Recipes

    If you love this recipe then you’ll also love these delicious and easy breakfast recipes.

    • slice of cinnamon roll casserole on plate
      Cinnamon Roll Casserole
    • apple cinnamon oatmeal in a small white bowl with apple pieces on top
      Slow Cooker Apple Cinnamon Oatmeal
    • French Toast Sticks
      EASY Cinnamon French Toast Sticks
    • Brioche French Toast slices on white plate with cream and berries
      Brioche French Toast

    Frozen Sweet Potato Fries in the Air Fryer

    August 24, 2021

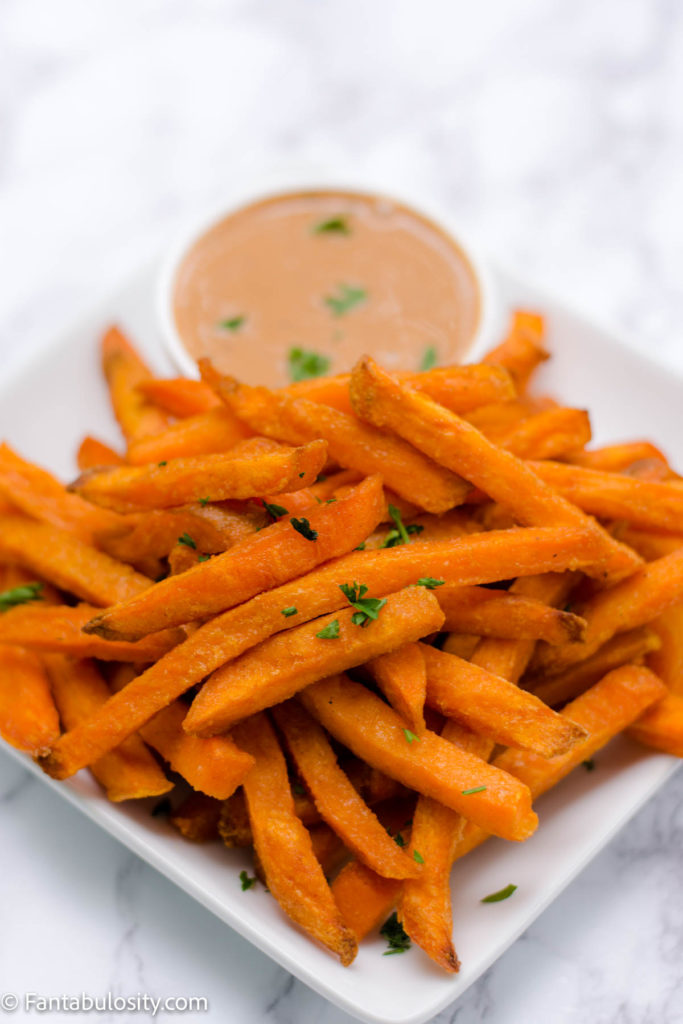
    Cooked frozen sweet potato fries in the air fryer

    How to cook frozen sweet potato fries in the air fryer, so they’re crispy and hot and ready for an easy side dish or easy appetizer, in minutes!

    Quick Overview: 400° F for 10 minutes for cooked-through, crispy fries.
    Keep reading for more tips!

    Cooked frozen sweet potato fries in air fryer

    NOTE: It’s important to note that brands of frozen sweet potato fries and air fryers can vary.
    However this is a guide that should give you the same result that we had (which was a deliciously crispy sweet potato fry, in MINUTES) or it may take one or two minutes less/more, depending on the thickness of your fries and the cook power of your air fryer.

    It’s always best to watch the first time making something new, carefully, so you can get to know your air fryer best.

    What I Used:

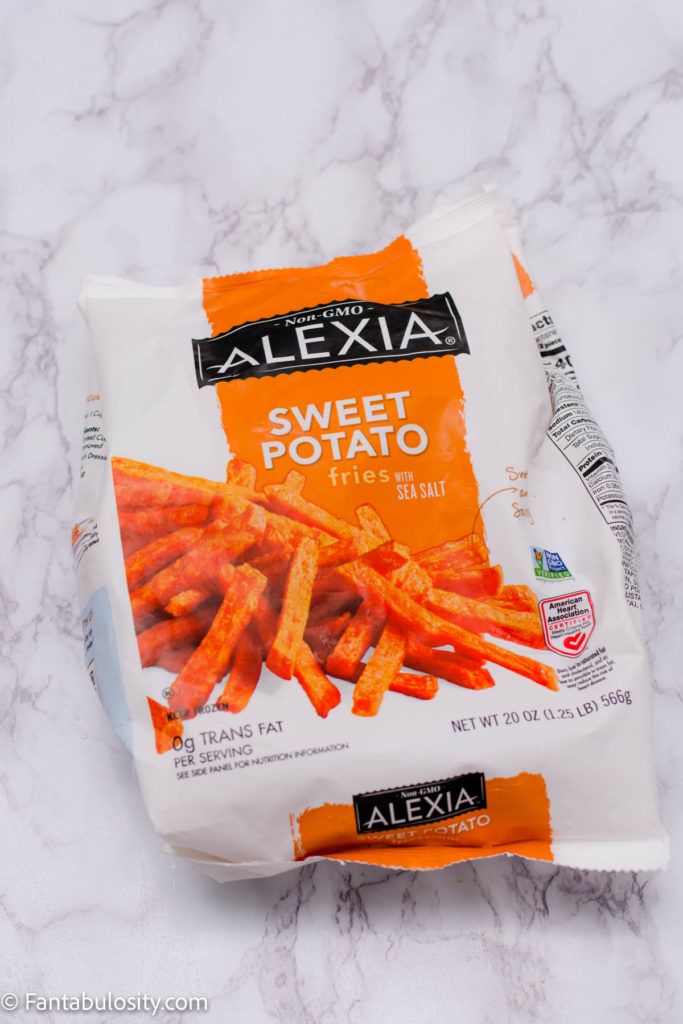
    I used Alexia brand, frozen sweet potato fries and my Chefman air fryer (the egg-shaped, basket type of air fryer).

    After making air fryer breakfast potatoes, air fryer tater tots and frozen hash browns in my air fryer, I had a pretty good idea at what these sweet potato fries were going to take.

    [feast_advanced_jump_to]

    Ingredients

    Although you can add other ingredients to sweet potato fries, we kept things simple and only used the frozen sweet potato fries themselves.

    However, you can add salt, pepper, parmesan cheese, and even a little olive oil if you like but it’s not required – and could possibly even become too soggy if used.

    Bag of frozen sweet potato fries
    Bag of frozen sweet potato fries

    Instructions

    Begin by placing as many frozen sweet potato fries in your air fryer basket, or tray, that you’ll be serving

    NOTE: Most air fryers recommend NOT using non-stick spray in the air fryer baskets or trays due to the fact that it can eat away at the non-stick lining that it may have.

    However, if your air fryer does not have a non-stick coating, it may be best to use non-stick spray or LIGHTLY coat the fries with olive oil so they do not stick while cooking.

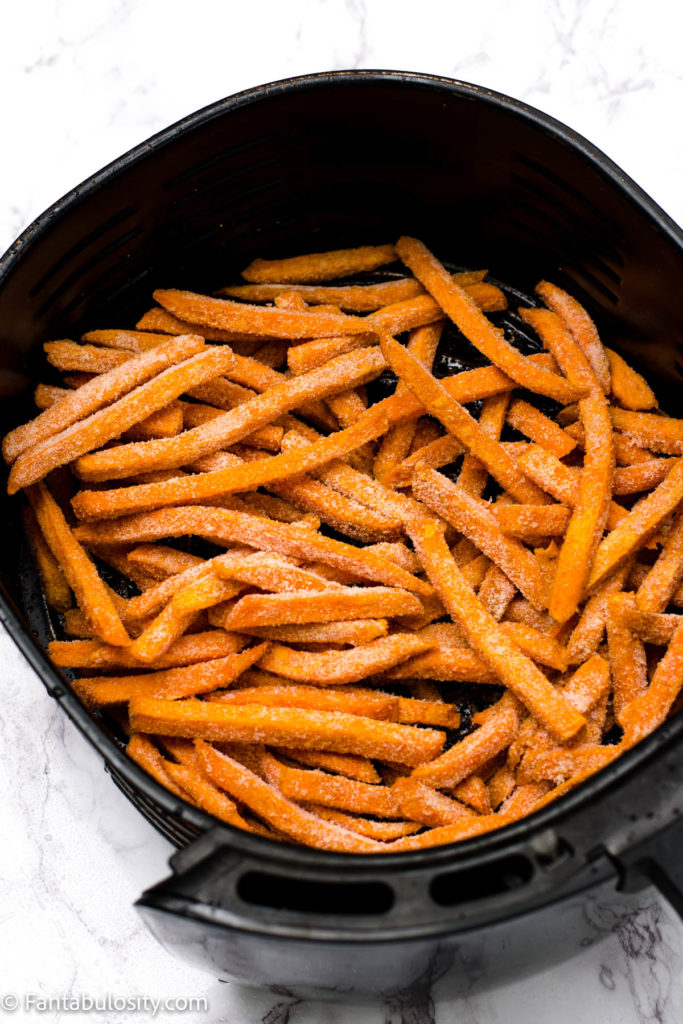
    Frozen sweet potato fries in air fryer basket

    It’s best not to let fries overlap so they cook evenly. However, when cooking the whole 20 oz. bag of Alexia sweet potato fries, they all cooked just fine, even overlapping as shown above.

    How Long to Cook Frozen Sweet Potato Fries in Air Fryer:

    Cook in 400 degree air fryer for 10 minutes.

    Tip: I didn’t preheat my air fryer to save even more time, and this worked just fine. You can preheat yours if you prefer but the cook time may reduce by a couple of minutes. Watch carefully.

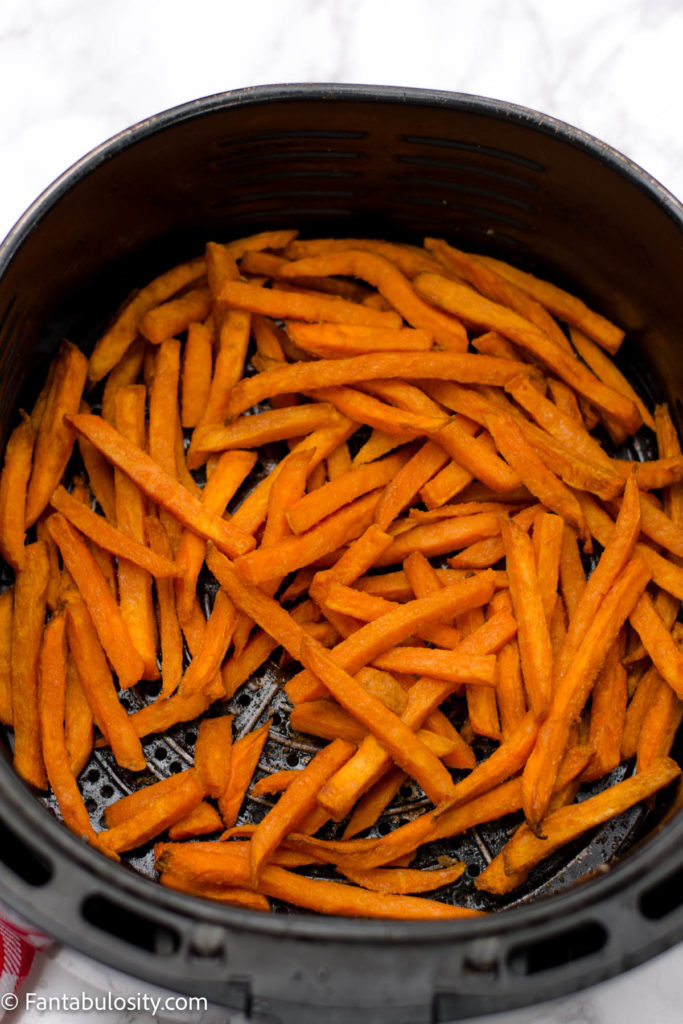
    Cooked sweet potato fries in the air fryer basket
    Cooked sweet potato fries in the air fryer basket

    HINT: If fries are overlapping, you can shake the basket or gently use a spatula to toss the fries at the halfway point, to ensure that the fries are cooked evenly.

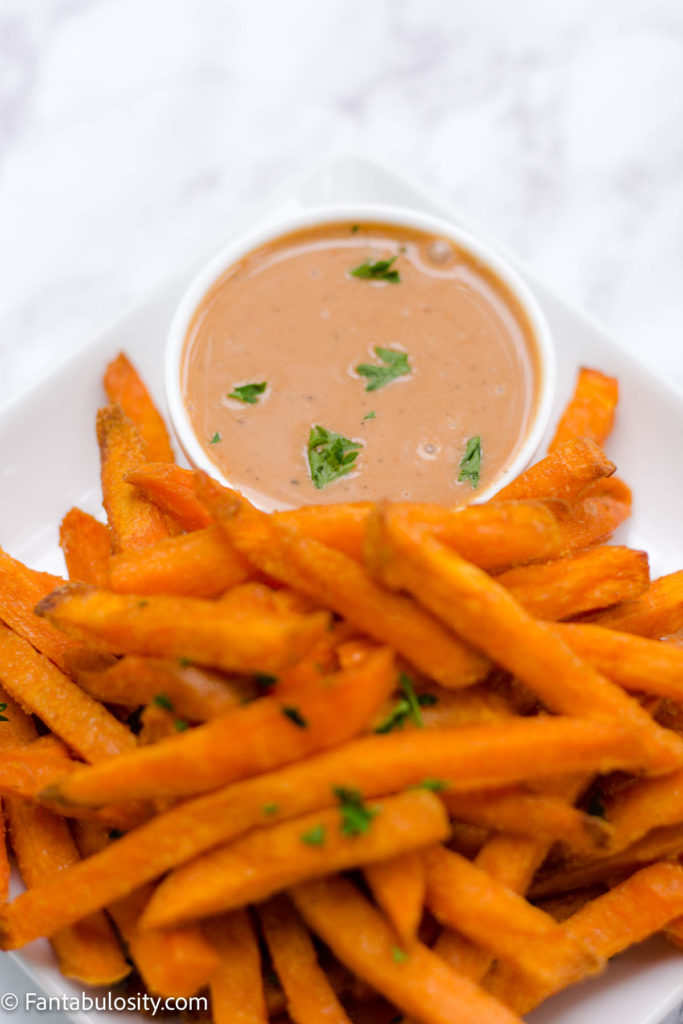
    Side of sauce to go with sweet potato fries
    Serve sweet potato fries with sauces – See post for sauce ideas

    Serve warm!

    You may want to leave the fries in the air fryer, with the power “off” to stay warm if dinner isn’t ready yet! Just be careful not to let them burn if your air fryer is too hot. Sometimes I’ll even pull the basket out a little and leave a small crack so they stay warm but don’t burn.

    Or, if making another air fryer recipe for main course or a lunch idea, you can place these in a separate container and keep in the oven on “warm” until everything else is ready.

    Sweet Potato Fries Dipping Sauce Ideas

    To me, there is nothing better than serving a delicious sauce with fries. But since sweet potato fries are a bit different than regular french fries or even seasoned potato wedges recipe, I wanted to share some favorite sauce recommendations for dipping:

    • marshmallow creme (for real, so good!)
    • Sriracha Dipping Sauce
    • Maple Mustard Dipping Sauce
    • Cilantro Dip
    • Ketchup
    • Honey Mustard
    • BBQ Sauce
    • Ranch
    • Blue Cheese
    • Sweet Yogurt (Such as a vanilla/cinnamon/etc.)
    • Melted Butter

    Garnishes

    If you’re serving sweet potato fries as an appetizer for a party, adding a small garnish can really make sweet potato fries look amazing! Garnishes such as:

    • finely chopped parsley
    • grated or shredded parmesan cheese
    • marshmallow creme drizzle
    • cinnamon and sugar

    Storage

    If there are leftover sweet potato fries, store in an air-tight container or zip-top plastic bag, in the refrigerator.

    Reheating Leftover Sweet Potato Fries

    To reheat, simply use the air fryer at 400°, for about 5 minutes. Just enough to warm through. (Remember, they’re no longer frozen so cooking them for 10 minutes in not necessary and may overcook them.)

    Top Tip

    Always keep a bag or two of frozen sweet potato fries in the freezer for last minute guests, forgotten meal planning, or just for a quick, 10-minute midnight snack idea!

    What to Serve with Sweet Potato Fries

    If you’ll be serving these as a side dish, here are our favorite main dishes that pair with sweet potato fries:

    • Baked Cheeseburgers
    • Air Fryer Fried Shrimp
    • Air Fryer Chicken Wings – Cooked from Frozen
    • Brats in the Air Fryer

    Love making different kinds of fries in the air fryer? Then you’ll also love these waffle fries in the air fryer!

    More Air Fryer Side Dish Recipes You’ll Love:

    • Air Fryer Eggplant Fries
    • Butternut Squash in the Air Fryer
    • Air Fryer Zucchini

    Recipe

    Cooked frozen sweet potato fries in the air fryer
    Print Pin
    5 from 1 vote

    Frozen Sweet Potato Fries in the Air Fryer

    How to cook frozen sweet potato fries in the air fryer, so they're crispy and hot and ready for an easy side dish or appetizer, in minutes!
    Course Side Dish
    Cuisine American
    Prep Time 0 minutes minutes
    Cook Time 10 minutes minutes
    Total Time 10 minutes minutes
    Servings 4 servings
    Calories 81kcal
    Author Jessica Burgess

    Equipment

    • air fryer

    Ingredients

    • 20 oz. frozen sweet potato fries I used Alexia brand – but any will do!
    • salt and pepper if desired

    Instructions

    • Place frozen sweet potato fries in air fryer basket, spreading them out, trying not to overlap them — although some overlap is ok. (See tips in blog post!)
    • Cook fries at 400° for 10 minutes or until fries reach desired crispiness.

    Notes

    Sweet Potato Fries Dipping Sauce Ideas
    To me, there is nothing better than serving a delicious sauce with fries. But since sweet potato fries are a bit different than regular french fries or even potato wedges, I wanted to share some favorite sauce recommendations for dipping:
    • marshmallow creme (for real, so good!)
    • Sriracha Dipping Sauce
    • Maple Mustard Dipping Sauce
    • Cilantro Dip
    • Ketchup
    • Honey Mustard
    • BBQ Sauce
    • Ranch
    • Blue Cheese
    • Sweet Yogurt (Such as a vanilla/cinnamon/etc.)
    • Melted Butter
    Garnishes
    If you’re serving sweet potato fries as an appetizer for a party, adding a small garnish can really make sweet potato fries look amazing! Garnishes such as:
    • finely chopped parsley
    • grated or shredded parmesan cheese
    • marshmallow creme drizzle
    • cinnamon and sugar
    Storage
    If there are leftover sweet potato fries, store them in an air-tight container or ziptop plastic bag, in the refrigerator.
    To reheat, simply use the air fryer at 400°, for about 5 minutes. Just enough to warm through. (Remember, they’re no longer frozen so cooking them for 10 minutes in not necessary and may overcook them.)

    Nutrition

    Serving: 5oz. | Calories: 81kcal | Carbohydrates: 19g | Protein: 1g | Fat: 1g | Saturated Fat: 1g | Polyunsaturated Fat: 1g | Monounsaturated Fat: 1g | Sodium: 52mg | Potassium: 318mg | Fiber: 3g | Sugar: 4g | Vitamin A: 13406IU | Vitamin C: 2mg | Calcium: 28mg | Iron: 1mg

    Instant Pot Turkey Breast

    August 16, 2021

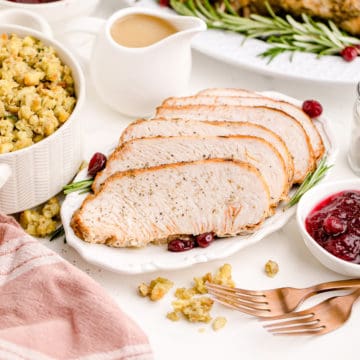
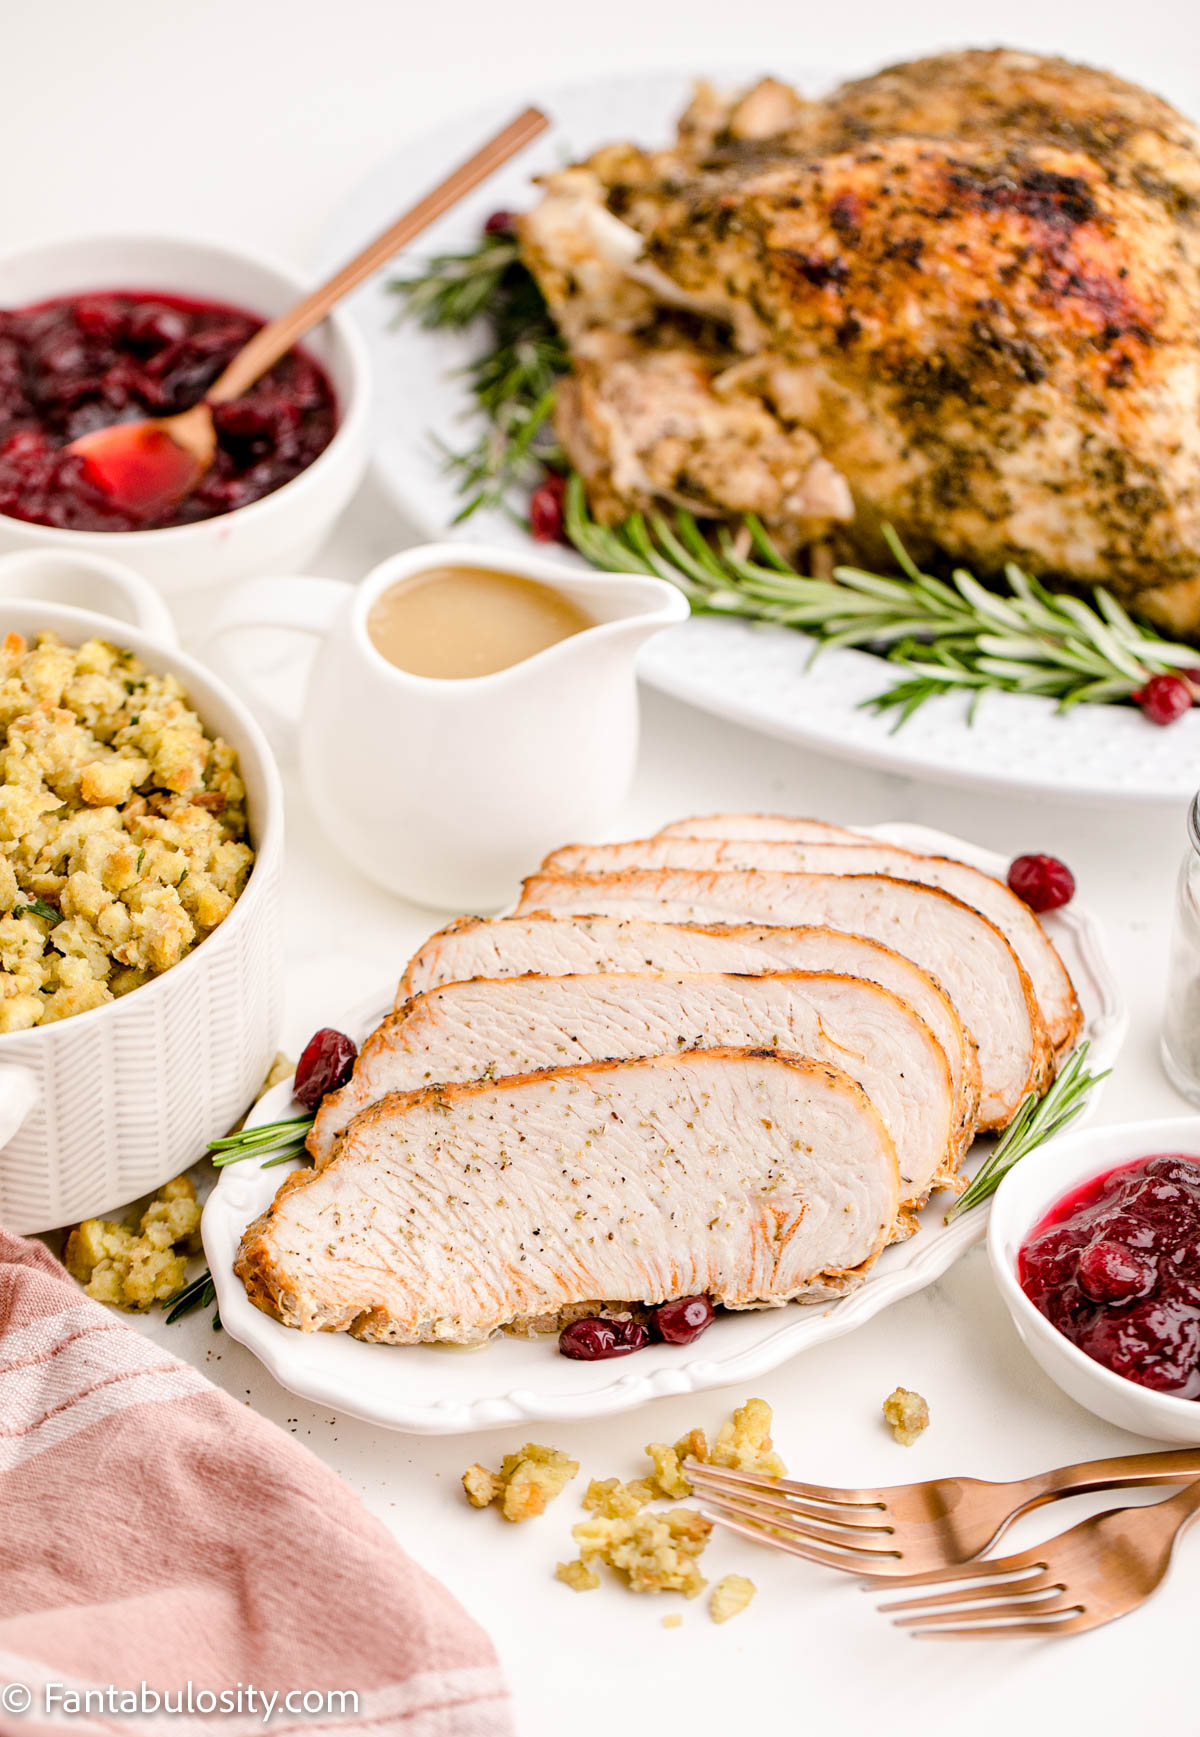
    sliced Instant Pot turkey breast on a white plate with side dishes surrounding

    This instant pot turkey breast recipe with gravy is a delicious alternative for a whole turkey, for Thanksgiving dinner, or any time of year, and it has a cook time of only 40 minutes!

    Instant Pot Turkey Breast on plate with garnishes

    After sharing this delicious air fryer turkey breast recipe with you, I wanted to provide you with how to cook turkey in an Instant Pot (or pressure cooker) too!
    Both cooking styles use different ingredients and have about the same cooking time, so it just depends on which appliance you have and want to use!

    During Thanksgiving, turkey tends to be the main course of choice. However, cooking a whole turkey can be intimidating, and not to mention, way too much food for a small gathering.

    So instead of, say, a roasted creole turkey, a turkey breast can be the best way to make the popular dish, without a ton of leftovers, and can be a lot easier to cook!

    Grab my free Thanksgiving meal planner to help you plan side dishes, easy appetizers, delicious desserts, and drink recipe ideas too!

    [feast_advanced_jump_to]

    Ingredients

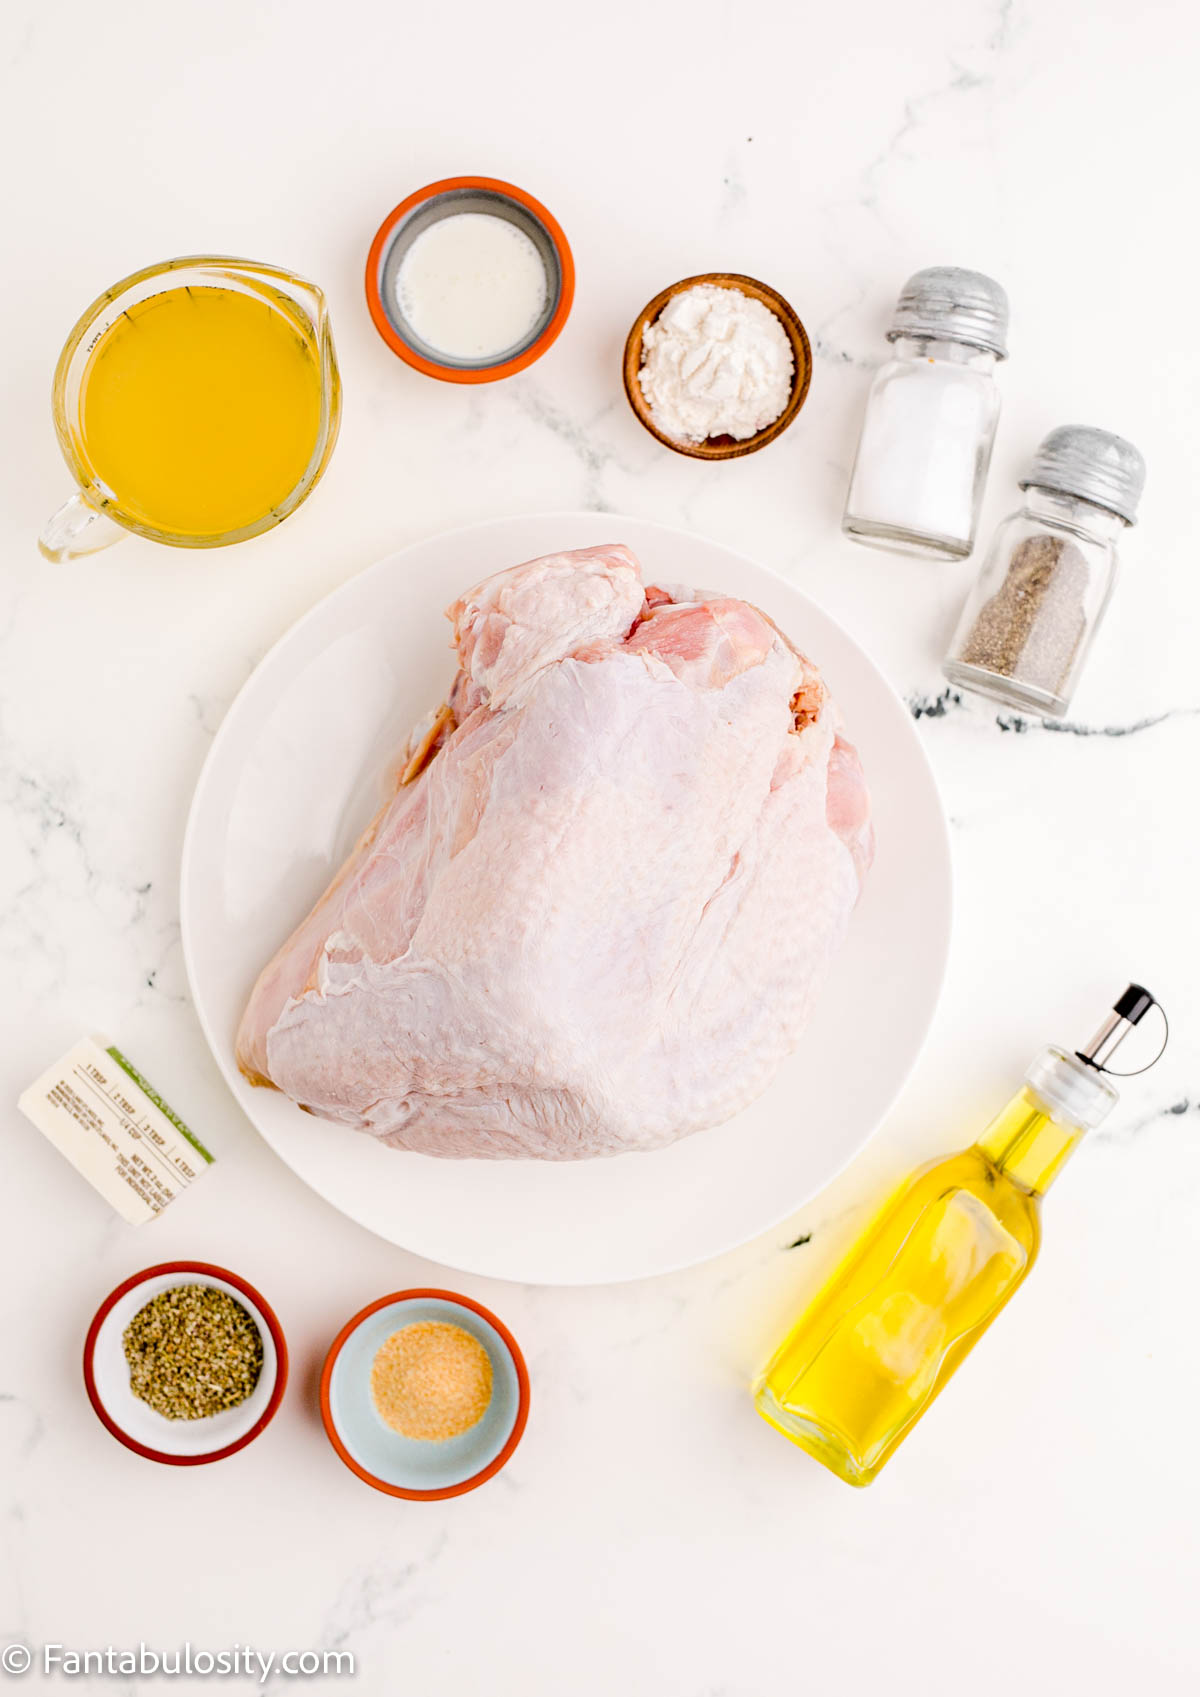
    Ingredients for turkey breast in pressure cooker
    Ingredients for Turkey Breast and Gravy in the Instant Pot

    What I love most about this recipe is that it uses simple ingredients that you probably already have on hand!

    See the full printable recipe card at the bottom of this post for amounts and quantities.

    • Turkey breast (bone-in preferred but can use boneless turkey breast – a bone-in can create a more juicy turkey breast than a boneless breast)
    • Olive oil
    • Salt
    • Pepper
    • Sage
    • Garlic powder
    • Chicken broth (You can also make my homemade chicken broth recipe.)
    • Salted butter
    • Flour
    • Cream

    Step by Step Instructions

    You can find the step-by-step instructions in the recipe card at the bottom of this post. However, I’m also sharing tips and photos to walk you through the cooking process, below:

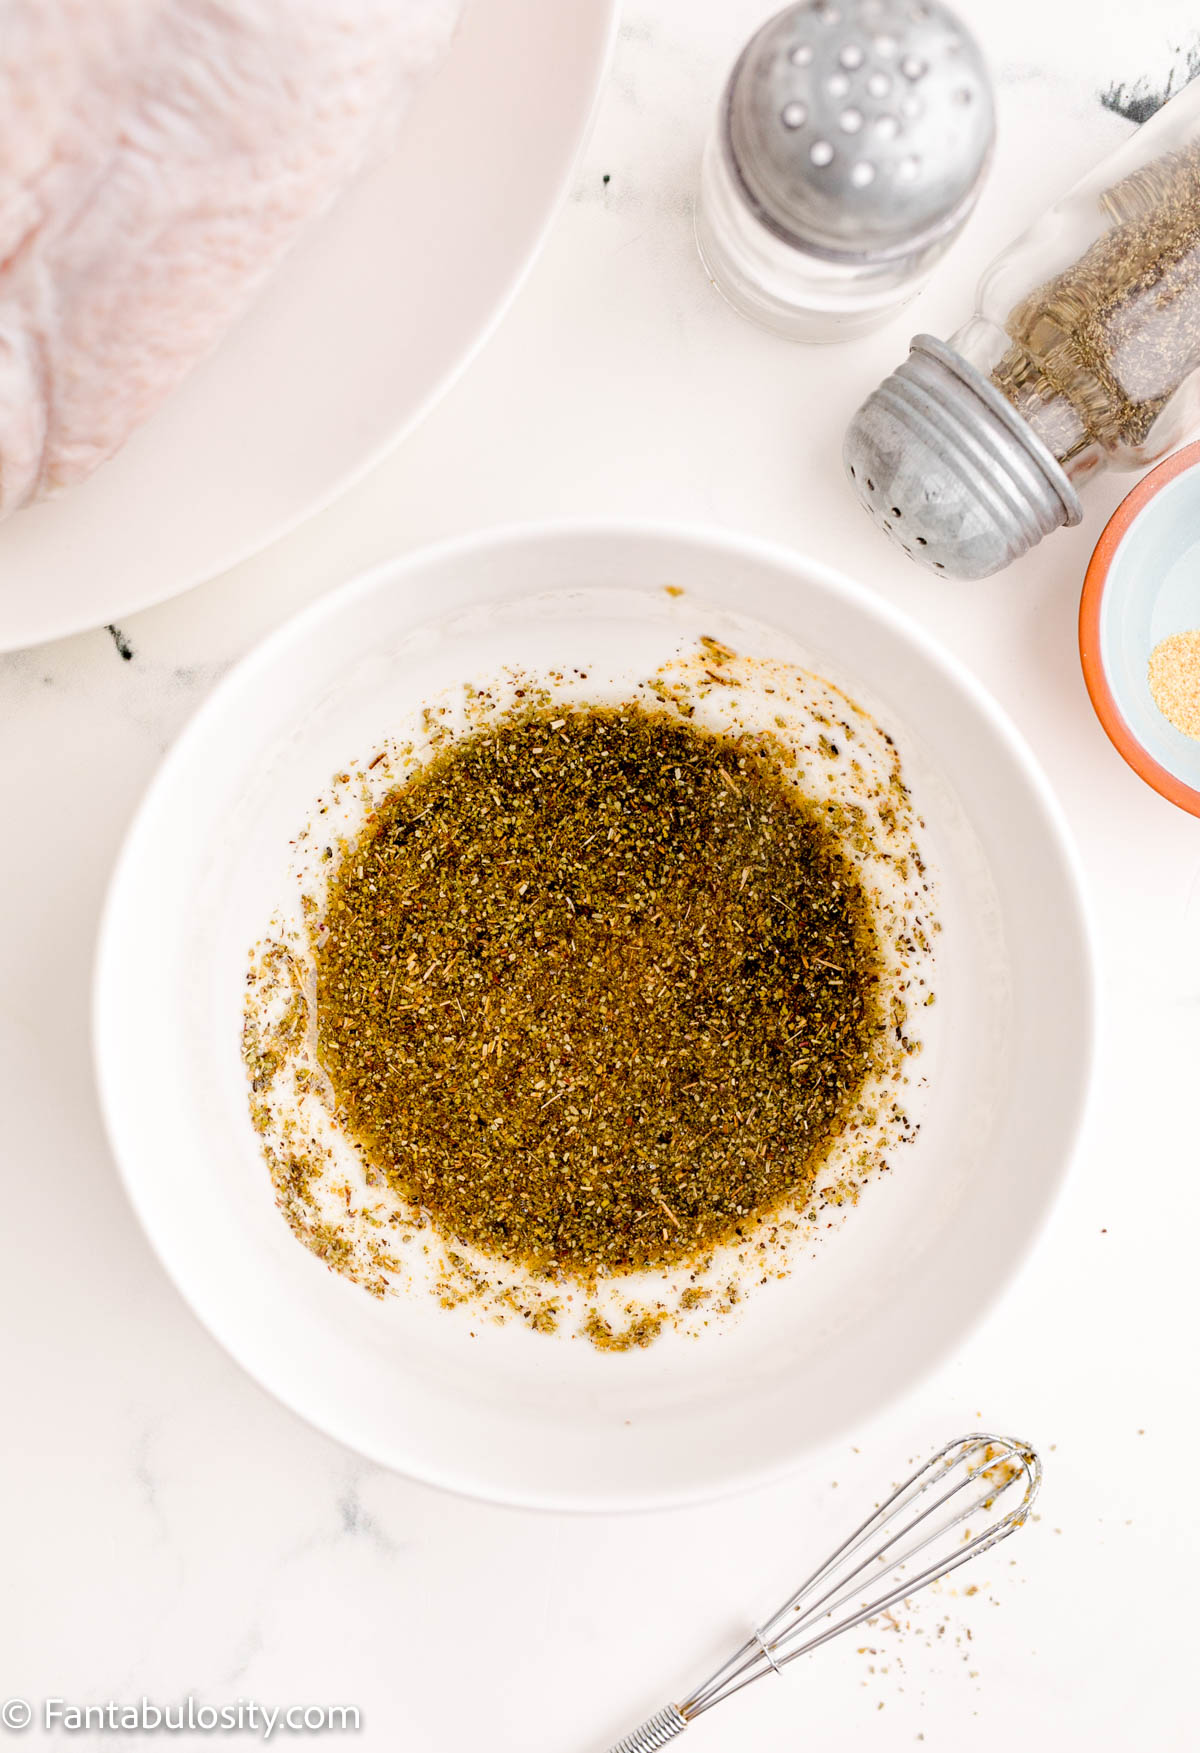
    1. Mix the salt, pepper, sage, garlic powder, and oil in a small bowl, and mix together until evenly combined.
    Mixed spices in bowl for turkey.
    Spices and oil, mixed together
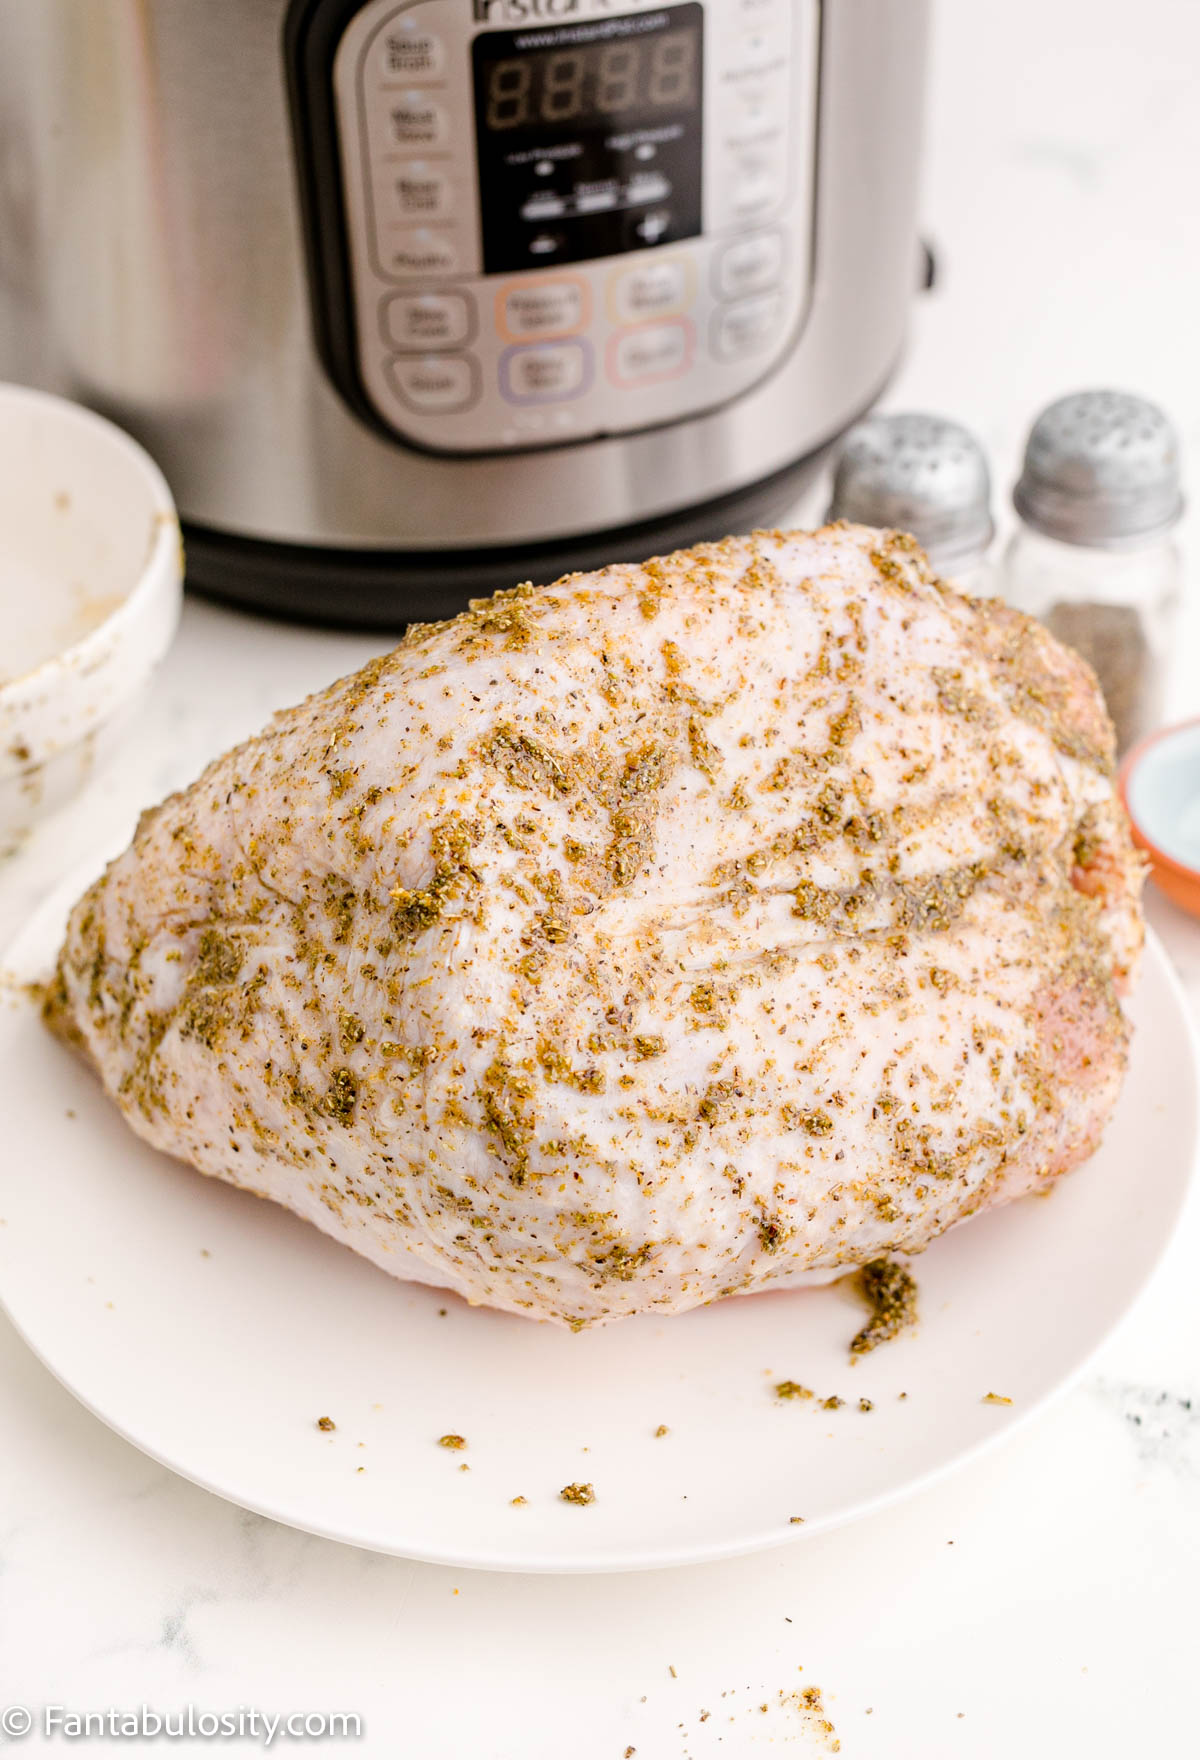
    1. Rub the spice and oil mixture all over the turkey breast, fully coating it, using a brush if you have one, or your hands.
    Spice and herb and oil mixture rubbed all over turkey.
    Spice rubbed turkey breast
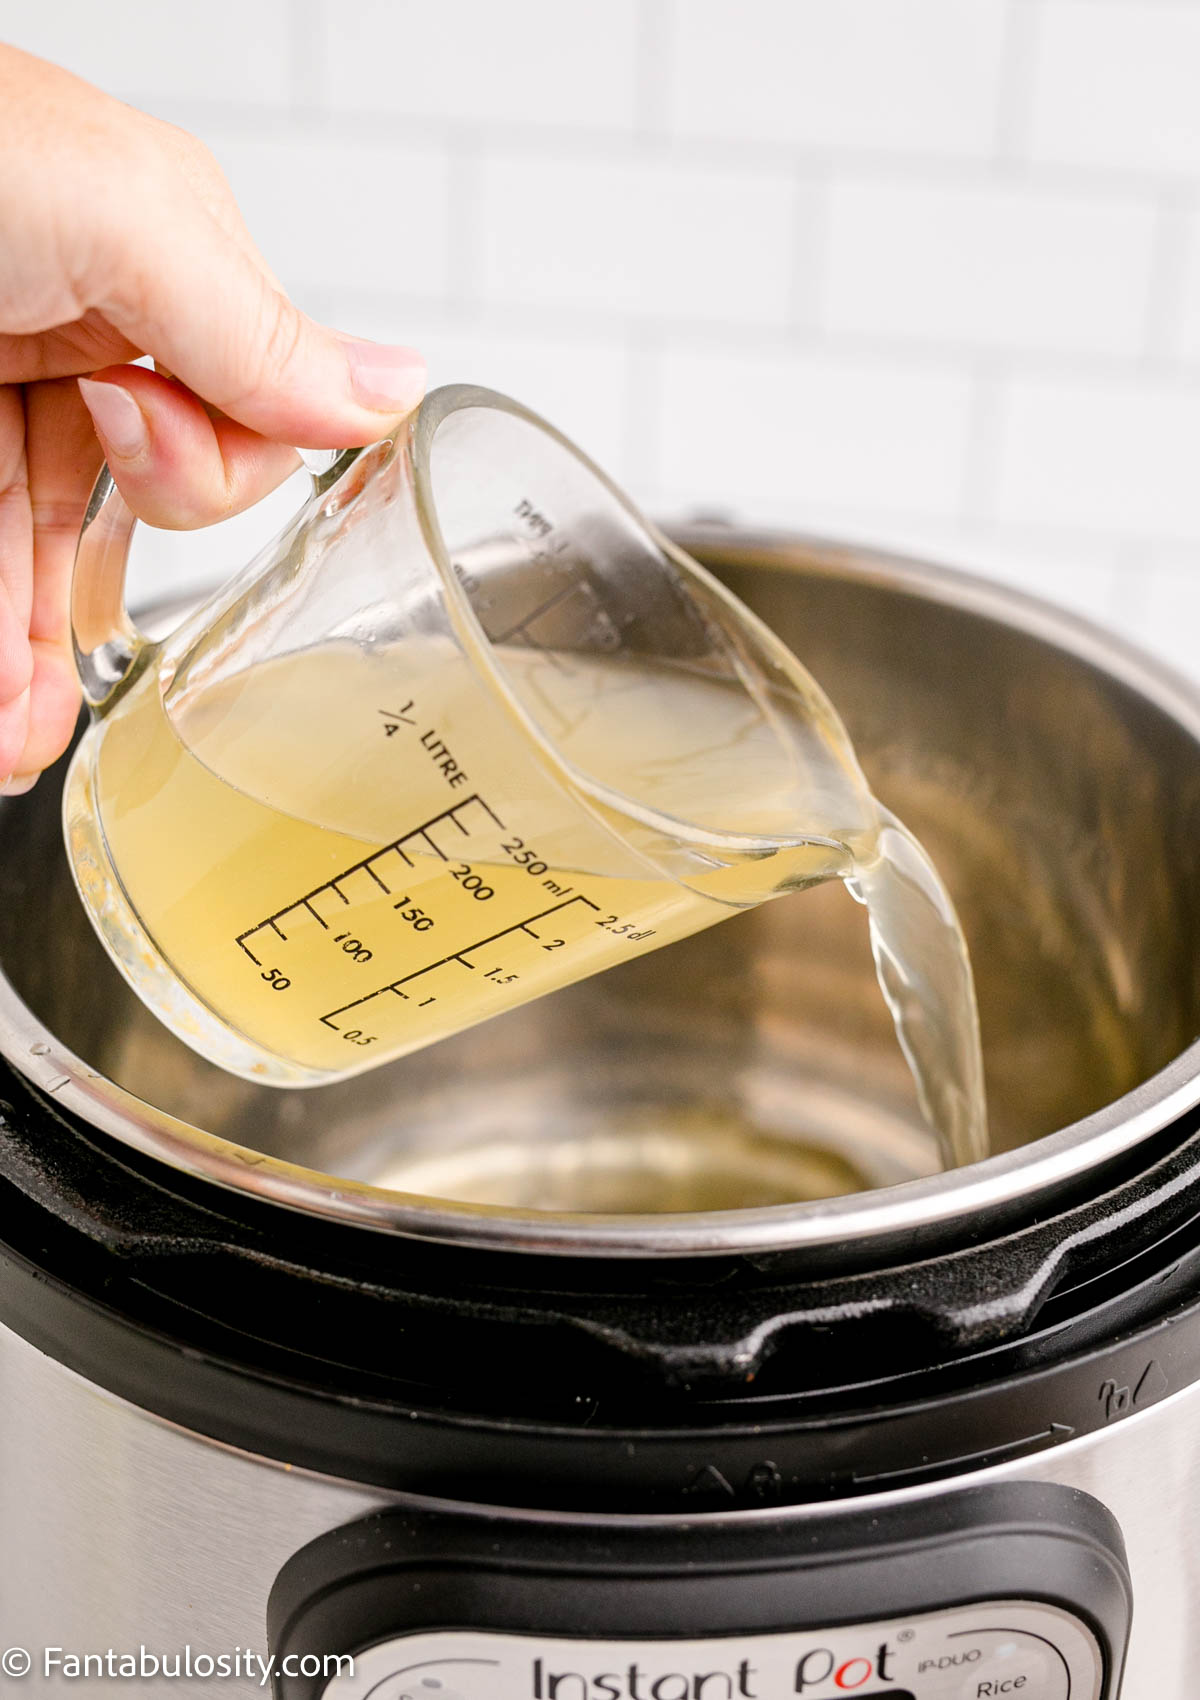
    1. Place 1 cup of chicken broth into the Instant Pot (or electric pressure cooker).
    2. Place the trivet into the instant pot.
    Pouring chicken broth in to Instant Pot.
    Pour chicken broth in to Instant Pot
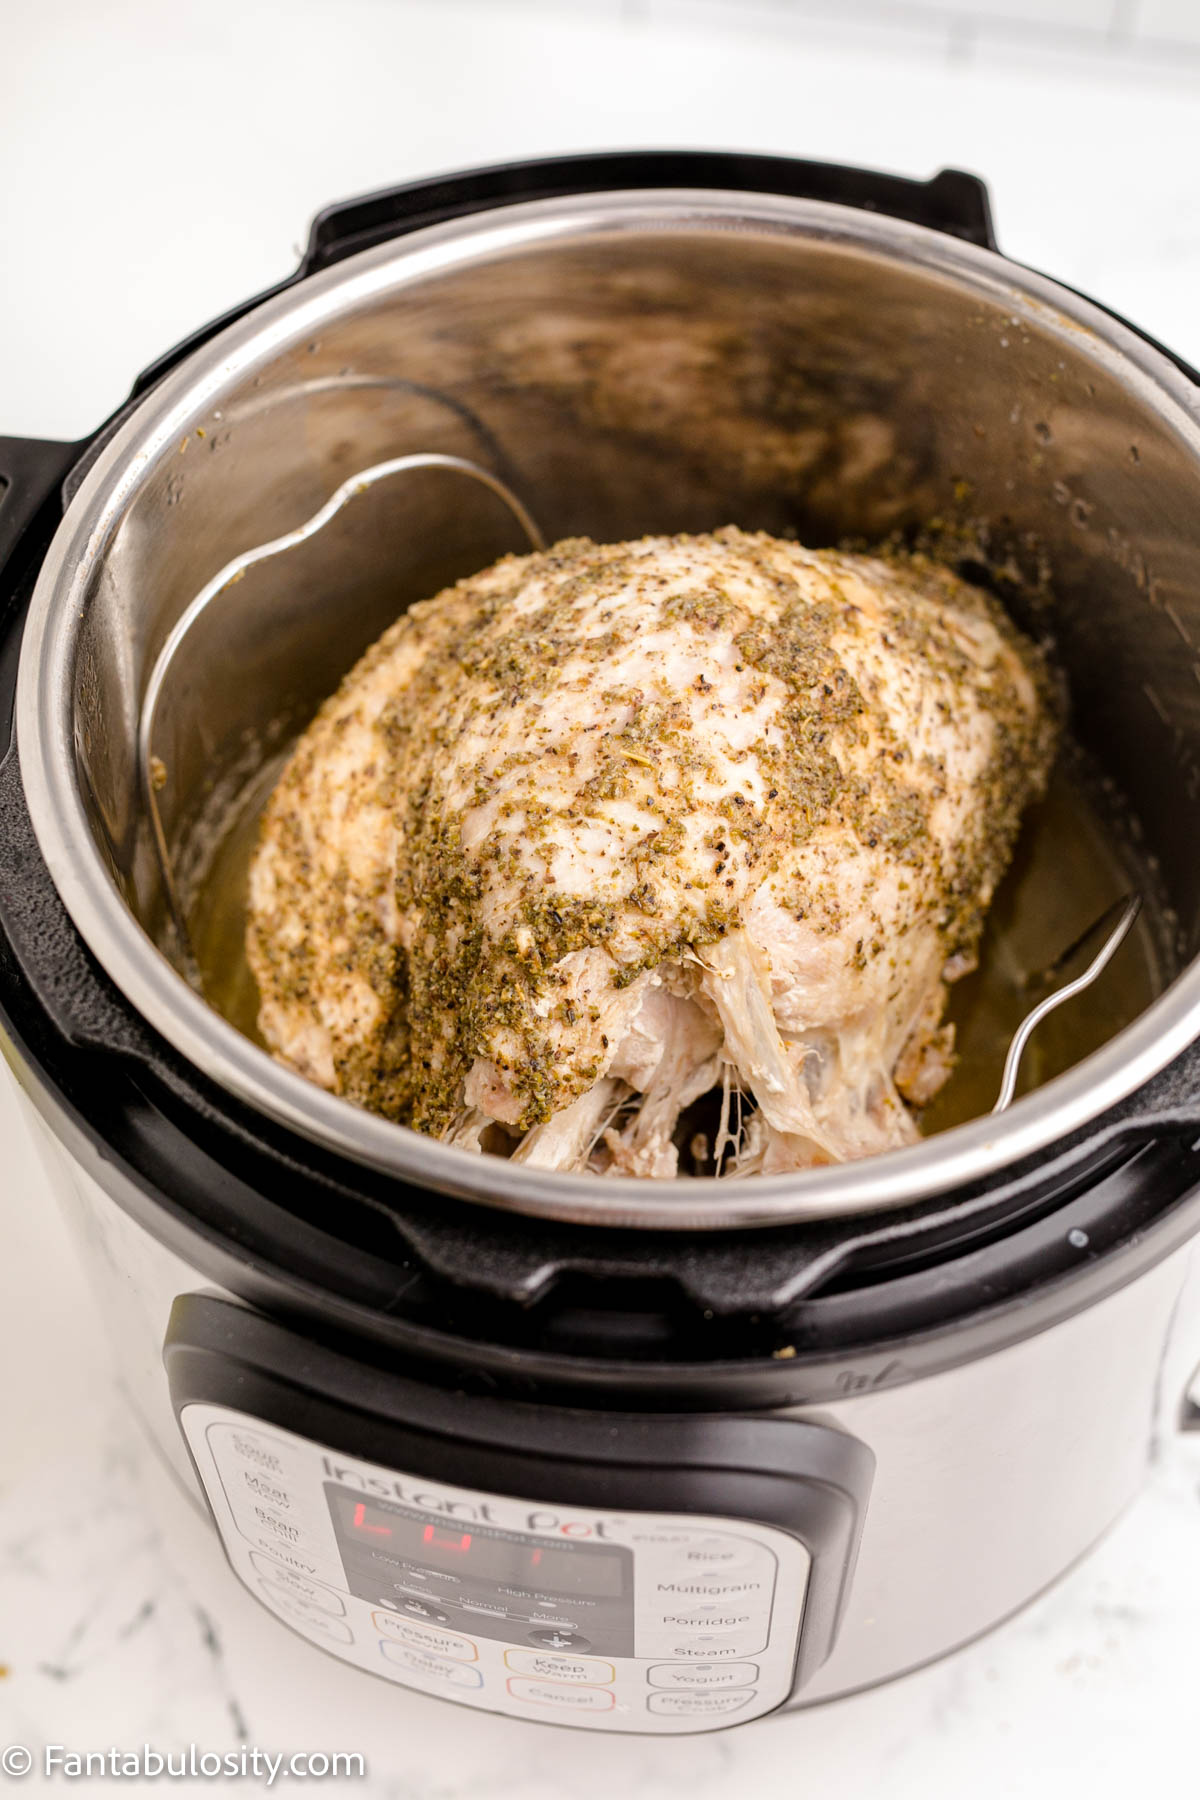
    1. Place the seasoned turkey breast onto the trivet, skin side up.
    2. Set the instant pot to cook for 40 minutes on high pressure.  Then natural release the pressure.
    Turkey breast in Instant Pot.
    Fully cooked turkey breast in Instant Pot
    1. Remove the turkey from the pot and cover with tin foil until ready to serve.  (The internal temperature of turkey breast, checked with a meat thermometer, inserted in the thickest part of the breast – should be 165°.)

      If you would like the turkey skin to be a crispier skin, turn the oven on low broil.  Place the turkey on a baking sheet and broil until the skin is crispy and golden.  Watch constantly as it can change very quickly.  
    Cooked turkey breast in Instant Pot
    Fully cooked turkey breast in Instant Pot

    How to Make Turkey Gravy with Drippings

    If you prefer to make a delicious gravy using the turkey drippings, it’s really easy to do. (You can also use a gravy packet if you have one on hand and don’t want to do the extra steps for gravy.)

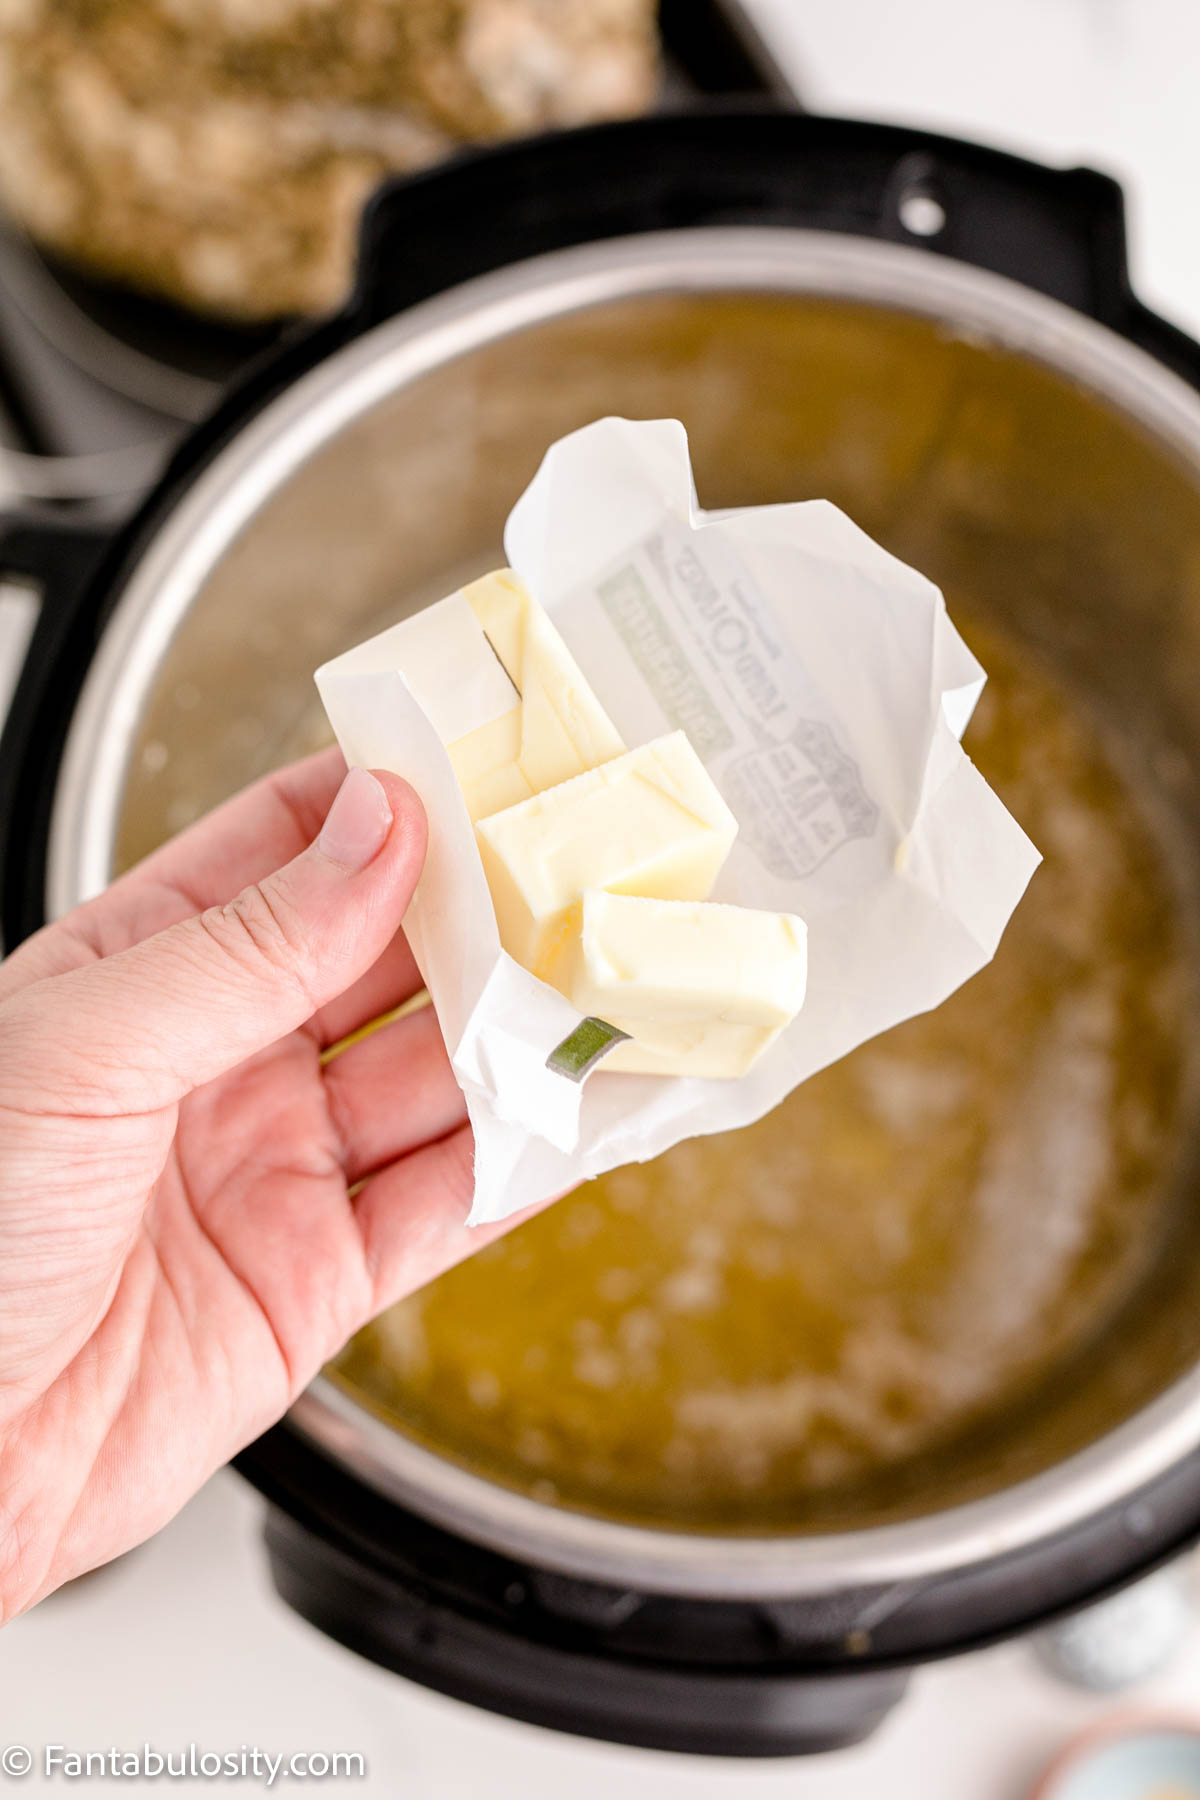
    1. Next, if desired, you can make the gravy.  Turn on the saute function of the instant pot.  Add butter to the liquid in the instant pot. Stir until melted. 
    Butter being added to turkey breast juices.
    Add butter to turkey juices for gravy
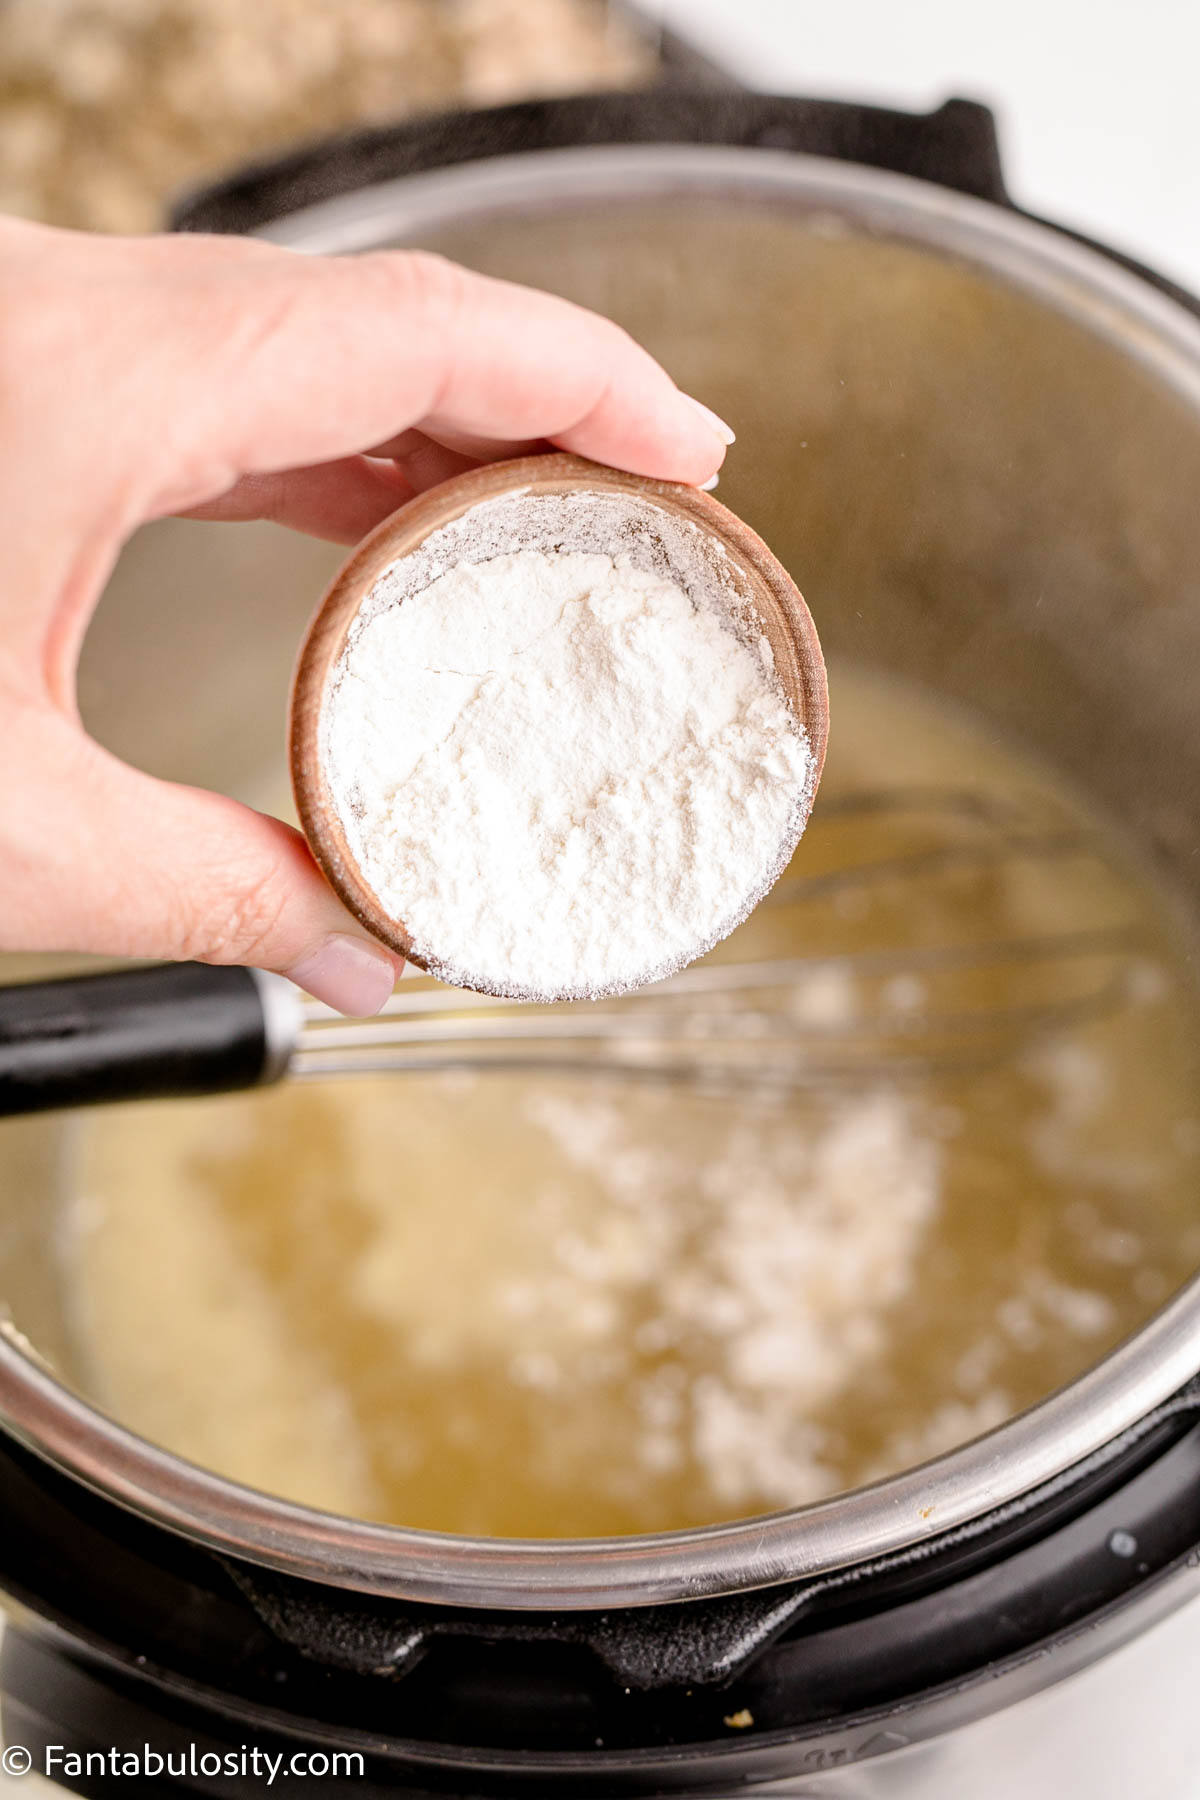
    1. Gradually add flour while whisking constantly.  Cook for 3-5 minutes. 
    Adding flour to juices for turkey gravy.
    Gradually whisk flour in to juices
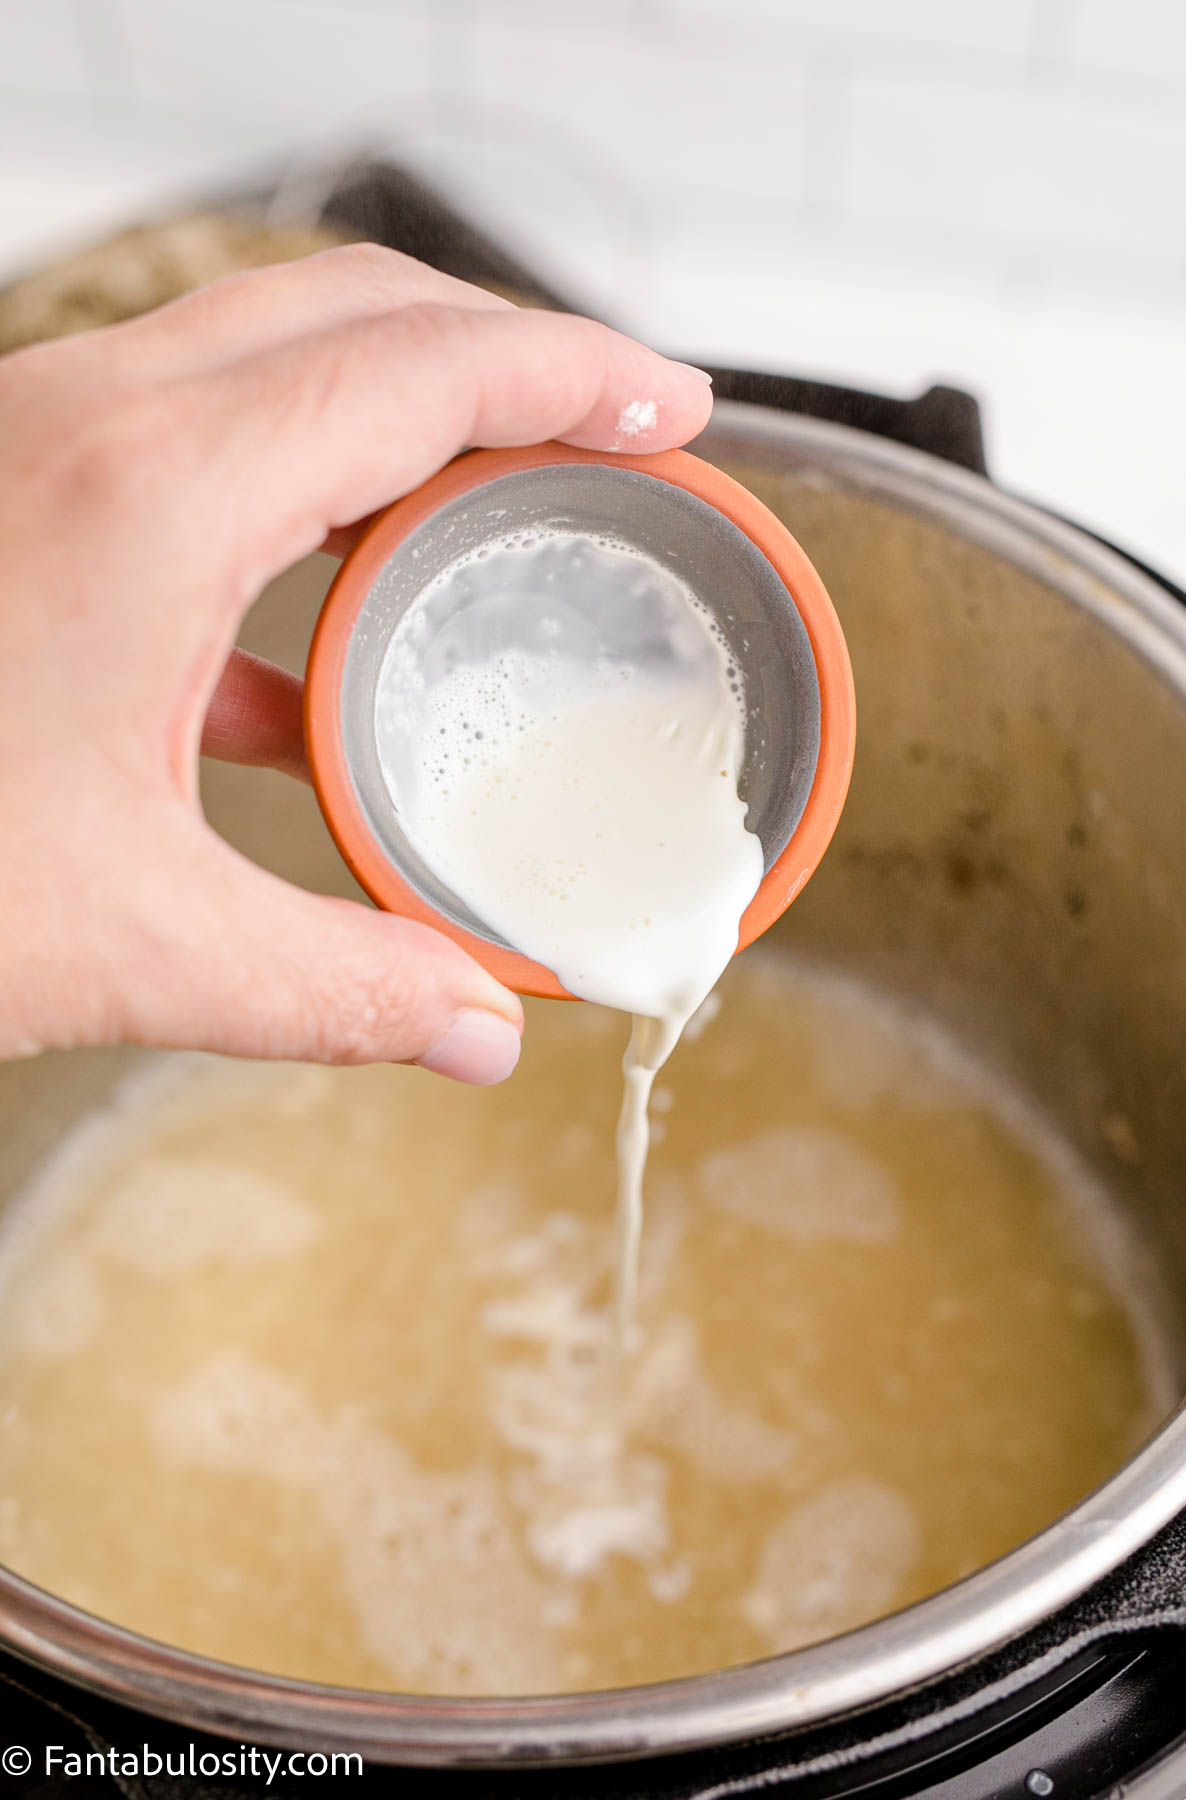
    1. Stir in the cream.  (If there are lumps, an immersion blender works well.) Turn off the heat.  Whisk occasionally, until desired thickness. (It should continue to thicken in the residual heat.)
    Pouring heavy cream in to turkey juices.
    Pour heavy cream in to juices

    You may pour the gravy over the turkey breast or serve it on the side.

    Instant Pot Turkey Breast
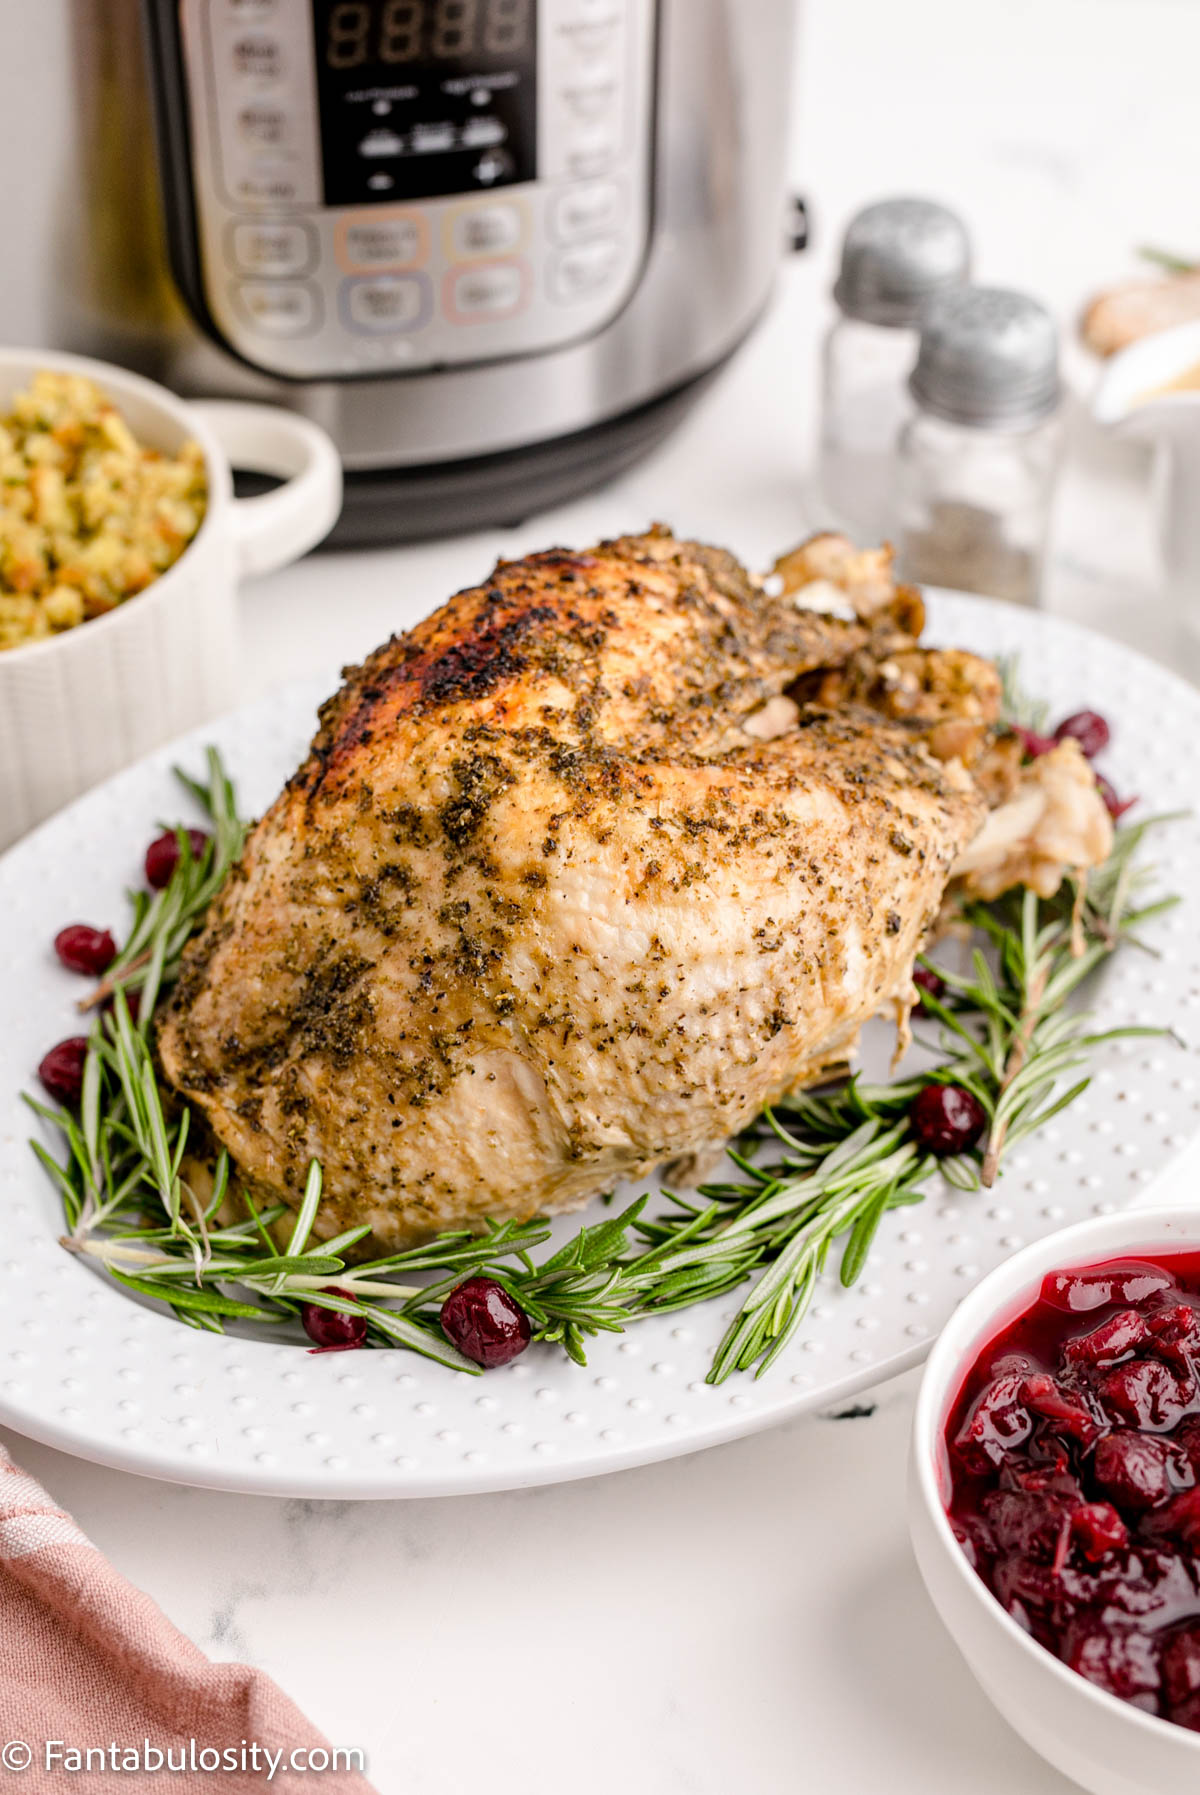
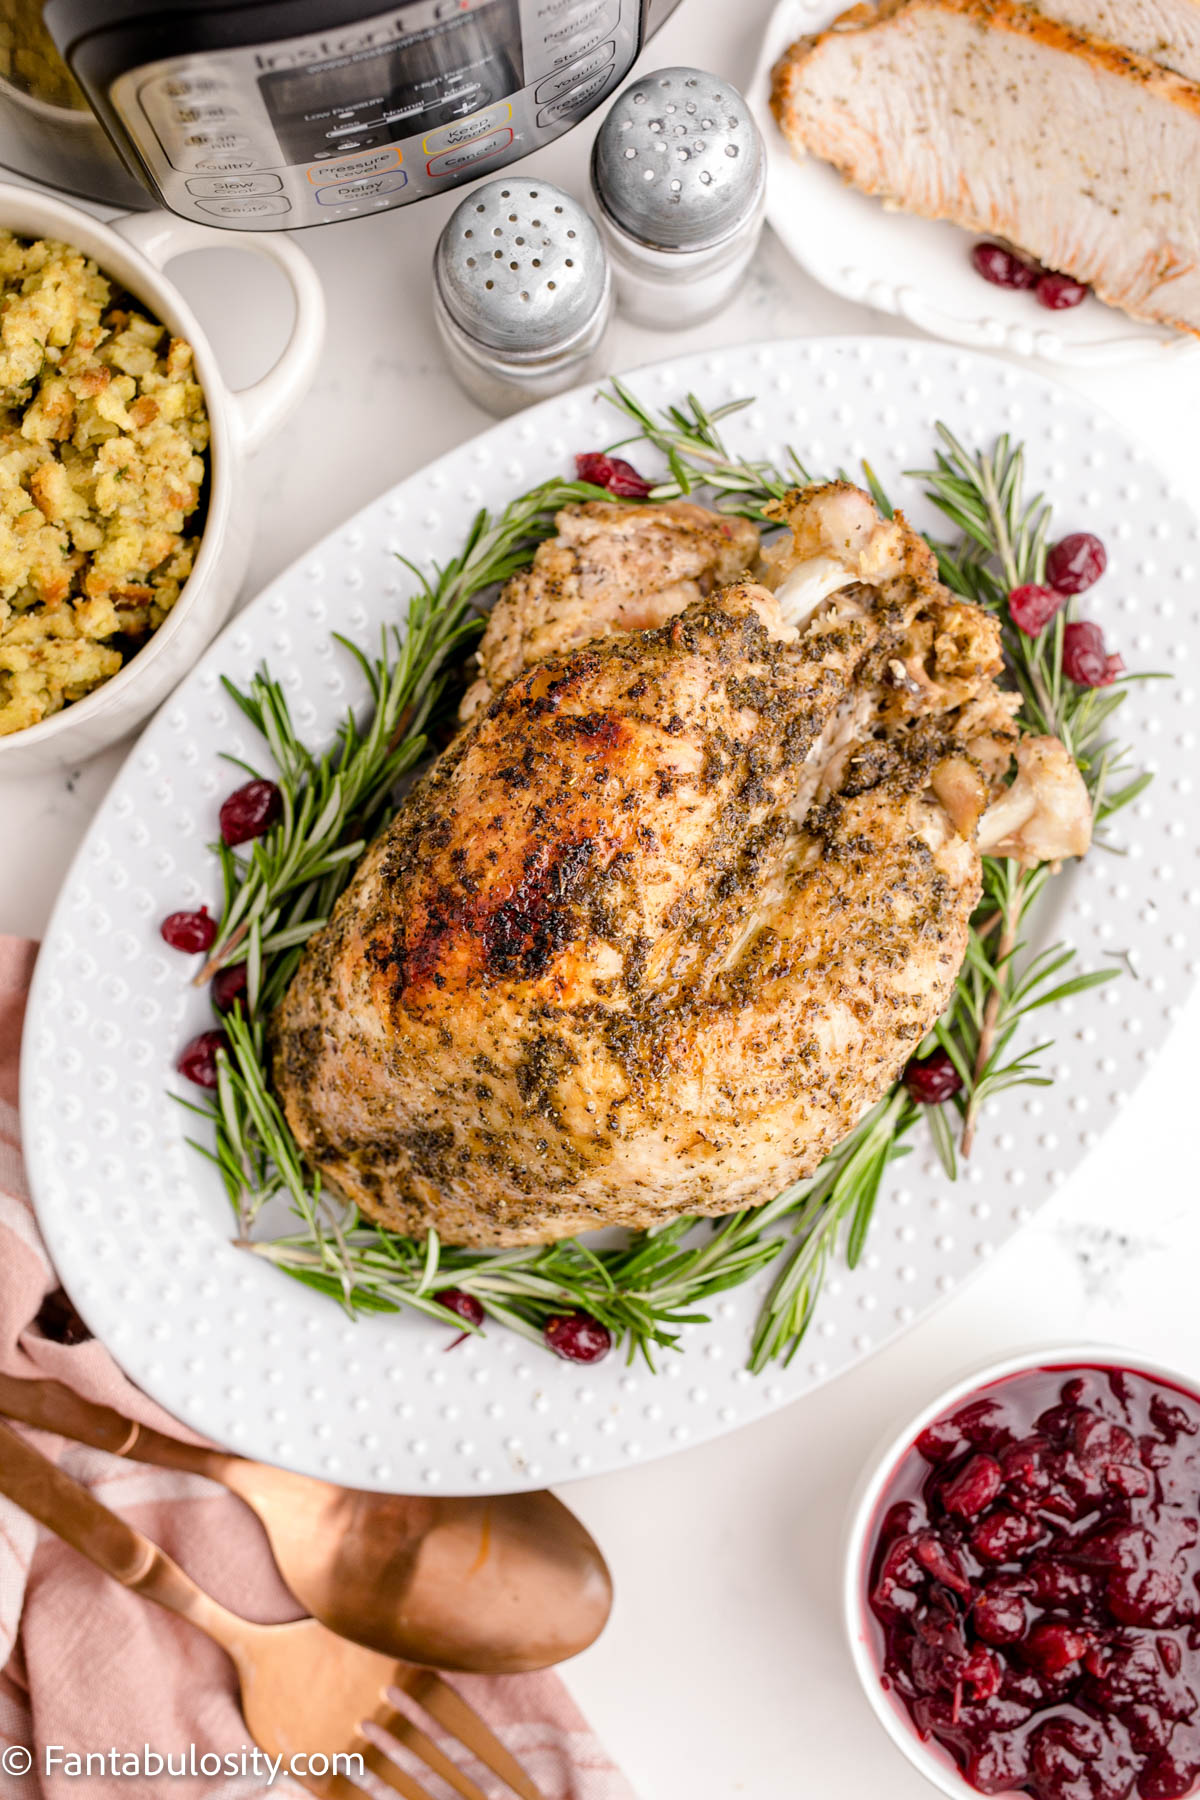
    Turkey breast on a platter with rosemary and cranberries

    What do you Put Around a Turkey?

    If entertaining or hosting a party, placing the turkey breast on a platter surrounded by fresh herbs like rosemary, and also using cranberries, is an easy way to really make the turkey stand out for a turkey dinner!

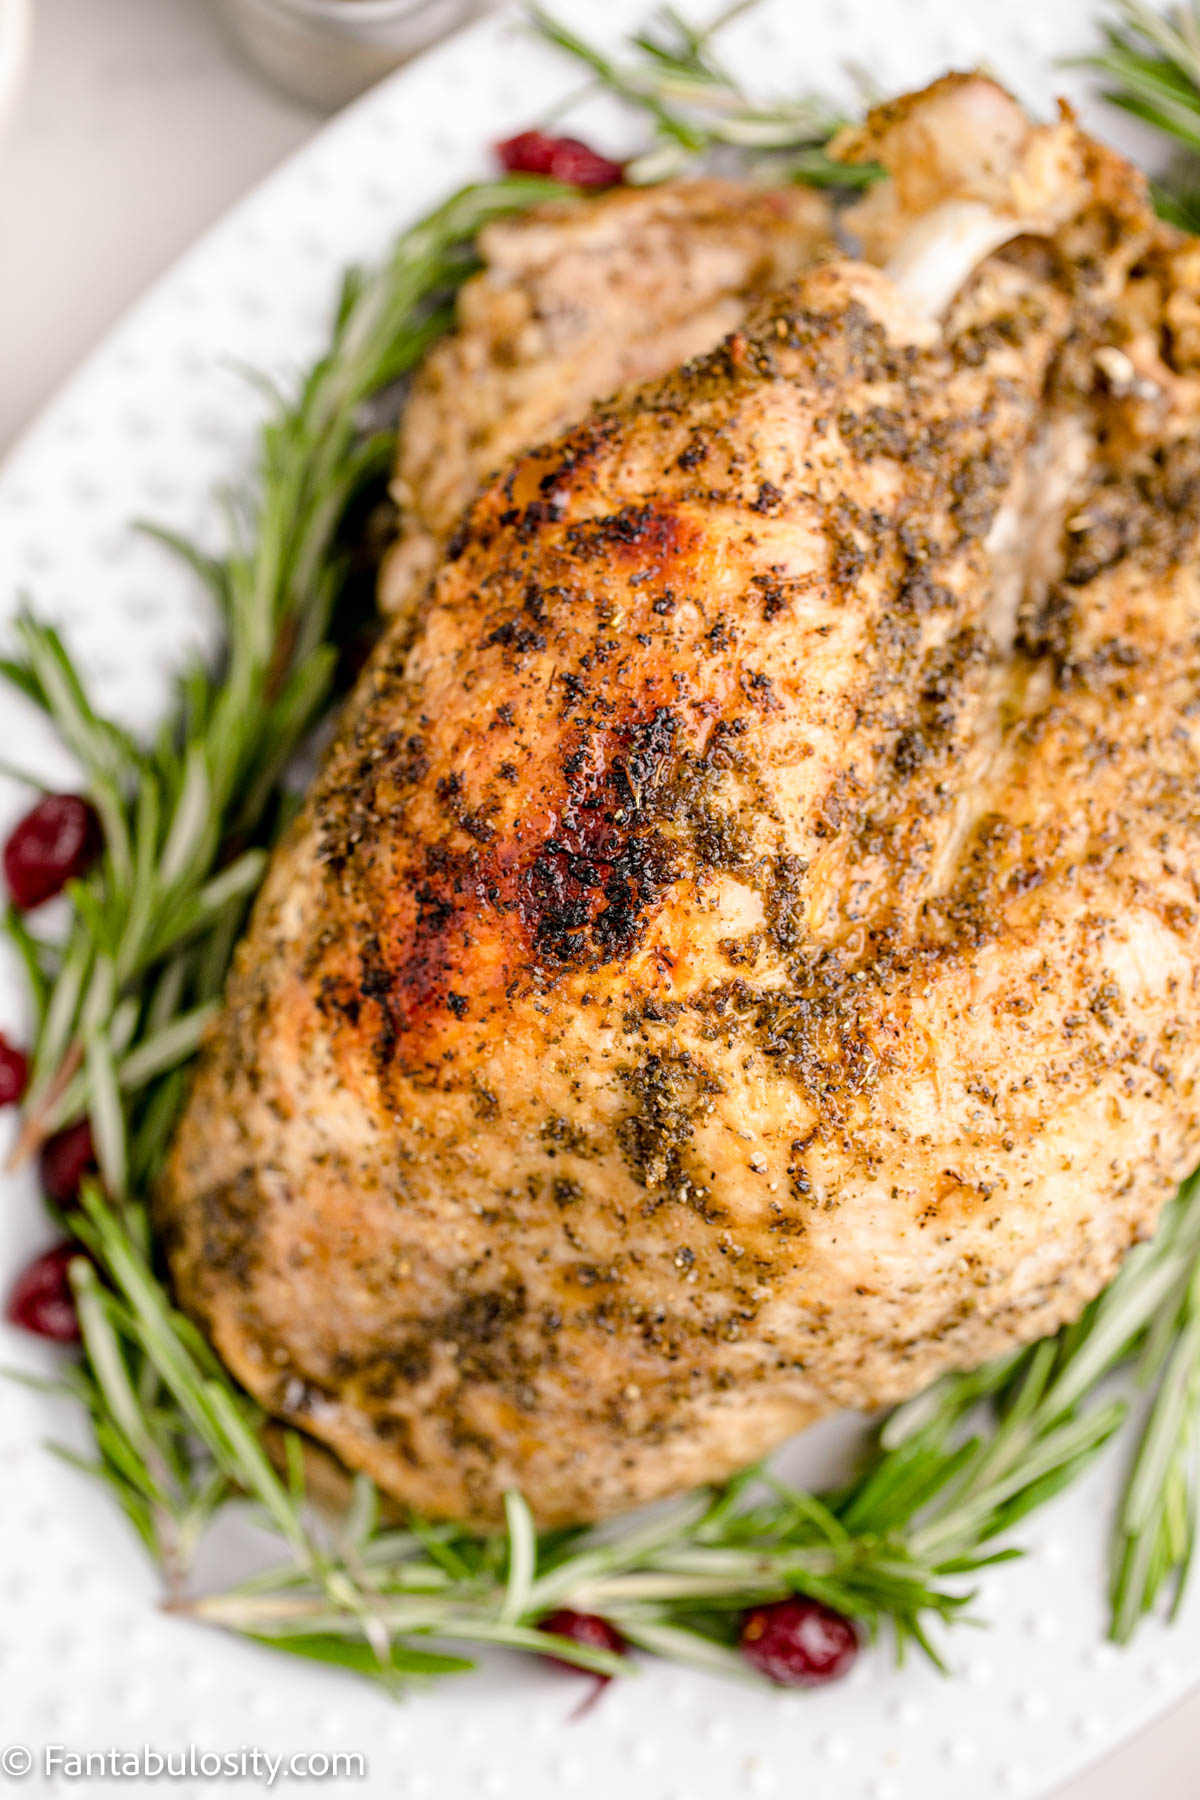
    Isn’t that pressure cooker turkey breast perfect for a small Thanksgiving? That golden brown color is hard to beat!

    Turkey breast cooked on platter with garnish
    Garnished turkey breast with rosemary and cranberries

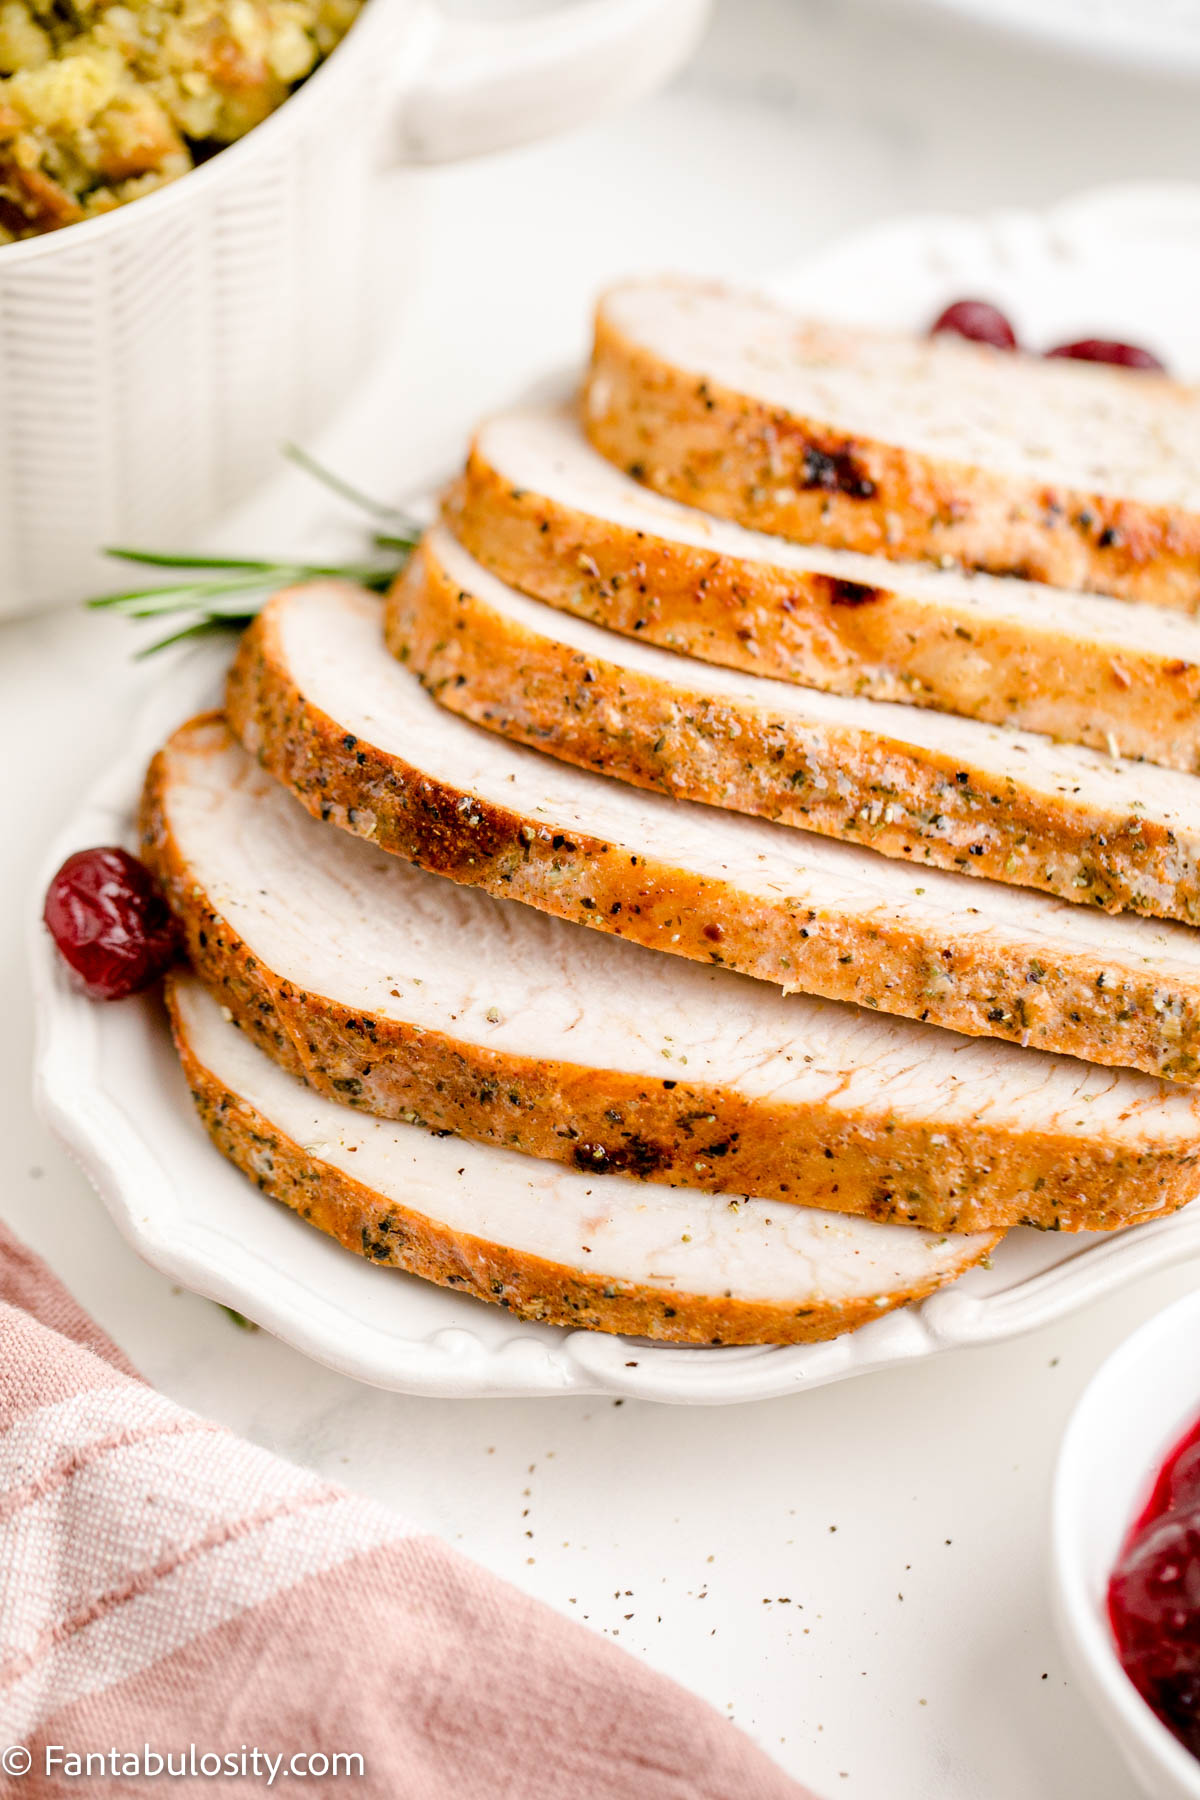
    Sliced Turkey

    If you prefer, and to make things easier around the table, slicing the turkey breast before serving is ideal! Slice turkey breast in to about 1-inch thick, slices and feel free to sprinkle on a few more herbs and spices if desired.

    Sliced turkey breast on table with gravy
    Sliced turkey breast with gravy

    Pressure cooking can create the juiciest turkey breast and is by far a favorite way to make tender turkey breast.

    Can you cook Instant Pot turkey breast from frozen?

    Yes! You will need to increase the cooking time to 50 minutes if cooking a frozen turkey breast.  Or, if you prefer, you can thaw the turkey breast in the fridge overnight and cook as directed in the recipe.  

    Substitutions

    • Can I use butter on the turkey instead of oil?  Yes!  You may either melt the butter or just make sure it is well softened.  
    • You can substitute the sage for poultry seasoning if desired. Use 1 teaspoon of poultry seasoning in place of the sage.

    Expert Tips

    How long does it take per pound to cook a turkey breast in the Instant Pot?

    For best results, it’s recommended to cook a turkey in the Instant Pot for 5-6 minutes per pound.

    Can I use sliced turkey breast for sandwiches?

    Absolutely. Cooking a turkey breast in the Instant pot works great for a dinner, to use for sandwiches or even cut up for salads.

    Should I use a bone-in or boneless turkey breast?

    You can use either but bone-in turkey breast tends to be juicier. Keep in mind that boneless turkey breasts will cook faster than bone-in.

    Seasoned turkey breast on plate
    Beautiful sliced turkey breast

    What to Serve with Turkey Breast

    If you love gravy served on turkey, you’ll love this Thanksgiving gravy recipe!

    If you’re making turkey breast as a Thanksgiving turkey, then you’ll love serving it with this green bean casserole! Or, if serving it for a casual easy dinner, then you will love serving with this side salad or this garlic roasted broccoli. Or, serving cranberry sauce is always a staple side dish that pairs well!

    How to Store Leftover Turkey Breast

    If you have leftover turkey, store it in an air-tight container for 3-4 days. Or, freeze in a freezer-safe bag or container and store in the freezer for 2-3 months.

    For leftover gravy, you can store it in an airtight container for 3-4 days as well.

    Ways to Use Leftover Turkey Breast

    If you’re looking for different ways to use leftover turkey breast, here are easy recipes that turkey can easily be added to:

    • Caesar Salad (using turkey instead of chicken)
    • BBQ White Queso Nachos
    • Chicken and Noodles (instead of chicken)
    • Easy Chicken Noodle Soup Recipe (using turkey instead of chicken)

    Related Recipes

    If you loved this easy recipe, then you’ll love these easy Instant Pot recipes. Instant Pot Chicken and Potatoes, Chicken Thighs in the Instant Pot, and this Instant Pot Chicken and Dumplings are comfort food made easy!

    You’ll especially love spreading this Instant Pot Raspberry Jam on your favorite roll recipe during the holidays!

    Recipe

    sliced Instant Pot turkey breast on a white plate with side dishes surrounding
    Print Pin
    5 from 4 votes

    Instant Pot Turkey Breast

    This instant pot turkey breast recipe with gravy is a delicious alternative for a whole turkey, for Thanksgiving dinner, or any time of year, and it has a cook time of only 40 minutes!
    Course Main Course
    Cuisine American
    Prep Time 10 minutes minutes
    Cook Time 40 minutes minutes
    Pressurizing Time 10 minutes minutes
    Total Time 1 hour hour
    Servings 4 people
    Calories 835kcal
    Author Jessica Burgess

    Equipment

    • Pressure Cooker

    Ingredients

    Turkey Breast

    • 6 pound turkey breast (6-7 pounds will work) thawed | Bone-in preferred but boneless will work!
    • 2 tablespoon olive oil
    • 2 teaspoons salt
    • 2 teaspoons pepper
    • 2 teaspoons sage ground or rubbed (can also use poultry seasoning in place of this)
    • 1 teaspoon garlic powder
    • 1 cup chicken broth

    Gravy Ingredients

    • 2 tablespoons salted butter
    • 2 tablespoons flour
    • 1 tablespoon heavy cream

    Garnish (optional)

    • cranberries
    • rosemary sprigs

    Instructions

    • Mix the oil, salt, pepper, sage, and garlic powder in a small bowl and mix together evenly.
    • Rub the oil and spice mixture evenly over the turkey breast.
    • Place 1 cup of chicken broth into the Instant Pot.
    • Place the trivet into the instant pot and then place the seasoned turkey breast onto the trivet, skin side up.
    • Set the Instant Pot to cook for 40 minutes on high power. 
    • Once the 40 minutes is up, allow the pressure to release naturally.
    • Remove the turkey from the pot and cover with tin foil until ready to serve.  Or, if you would like the turkey skin to brown more and be crispy, turn the oven on low broil.  Place the turkey on a baking sheet and broil until the skin is crispy and golden.  Watch constantly as it can change very quickly.  

    Gravy Instructions:

    • Turn on the saute function of the Instant Pot.
    • Add butter to the liquid that was leftover from the turkey, in the instant pot. Stir until melted. 
    • Gradually add flour while whisking constantly.  Cook for 3-5 minutes.
    • Stir in the heavy cream.  (If there are lumps, an immersion blender works well.)
    • Turn off the heat.  Whisk occasionally, until desired thickness. (It should continue to thicken in the residual heat.)
    • You may pour the gravy over the turkey breast or serve it on the side.

    Notes

    Can I cook a turkey breast in the Instant Pot from frozen?
    Yes! You will need to increase the cooking time to 50 minutes.  Or, if you prefer, you can thaw the turkey breast in the fridge overnight and cook as directed in the recipe.  
    How long does it take per pound to cook a turkey breast in the Instant Pot? For best results, it’s recommended to cook a turkey in the Instant Pot for 5-6 minutes per pound.
    Can I use sliced turkey breast for sandwiches? Absolutely. Cooking a turkey breast in the Instant pot works great for a dinner, to use for sandwiches or even cut up for salads.
    Should I use a bone-in or boneless turkey breast? You can use either but bone-in turkey breast tends to be juicier. Keep in mind that boneless turkey breasts will cook faster than bone-in.

    Nutrition

    Serving: 1serving | Calories: 835kcal | Carbohydrates: 5g | Protein: 148g | Fat: 26g | Saturated Fat: 7g | Polyunsaturated Fat: 4g | Monounsaturated Fat: 11g | Trans Fat: 1g | Cholesterol: 388mg | Sodium: 2832mg | Potassium: 1729mg | Fiber: 1g | Sugar: 1g | Vitamin A: 373IU | Vitamin C: 4mg | Calcium: 116mg | Iron: 4mg

    Beef and Cheese Burritos

    August 10, 2021

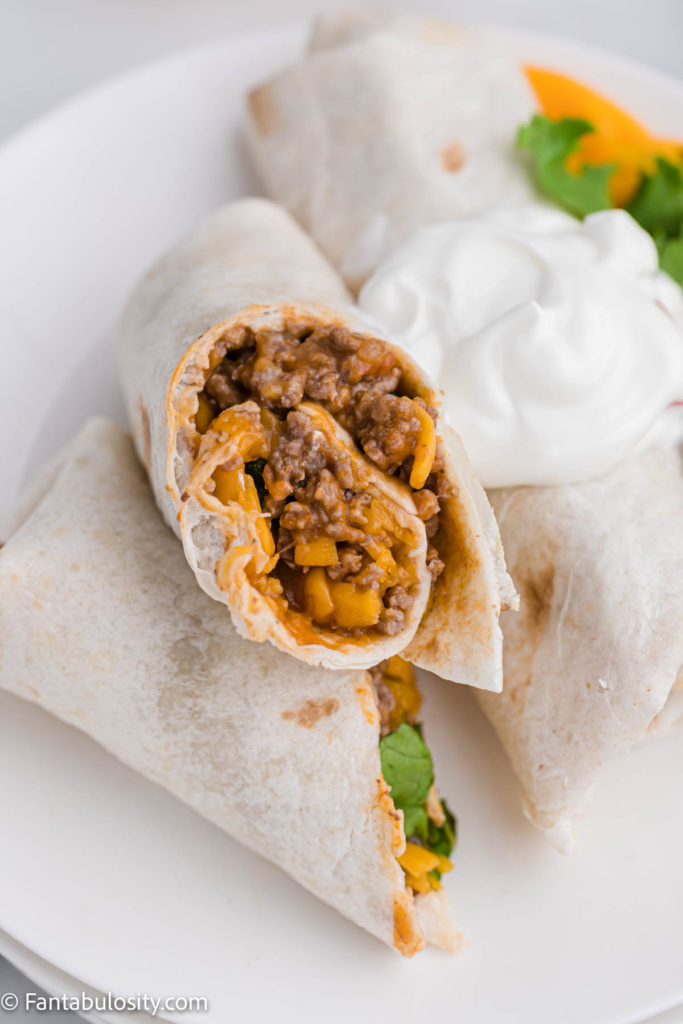
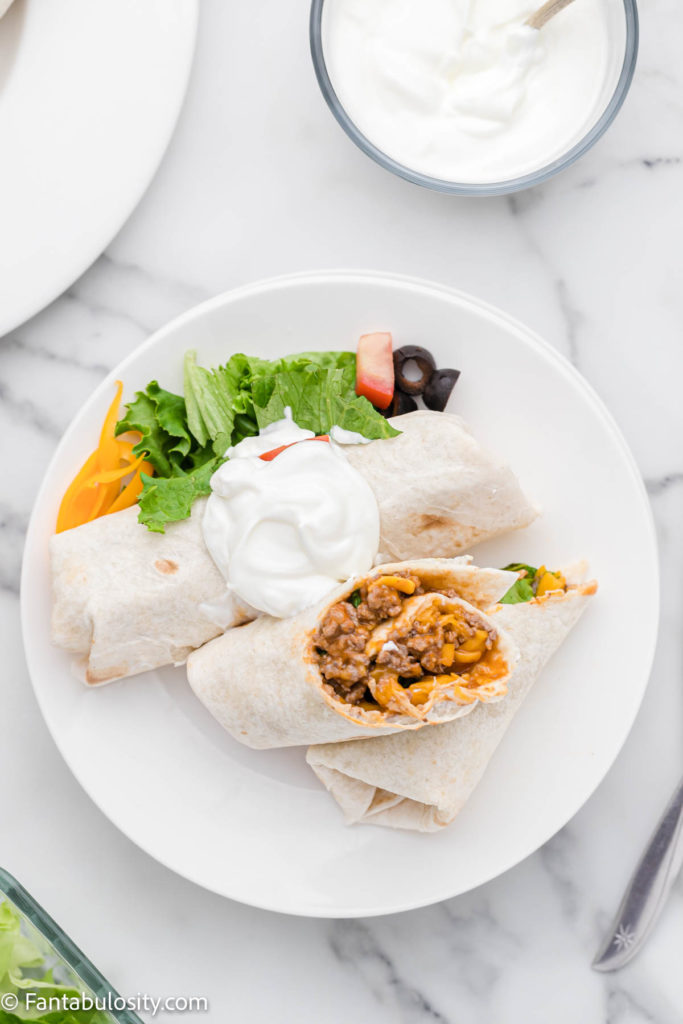
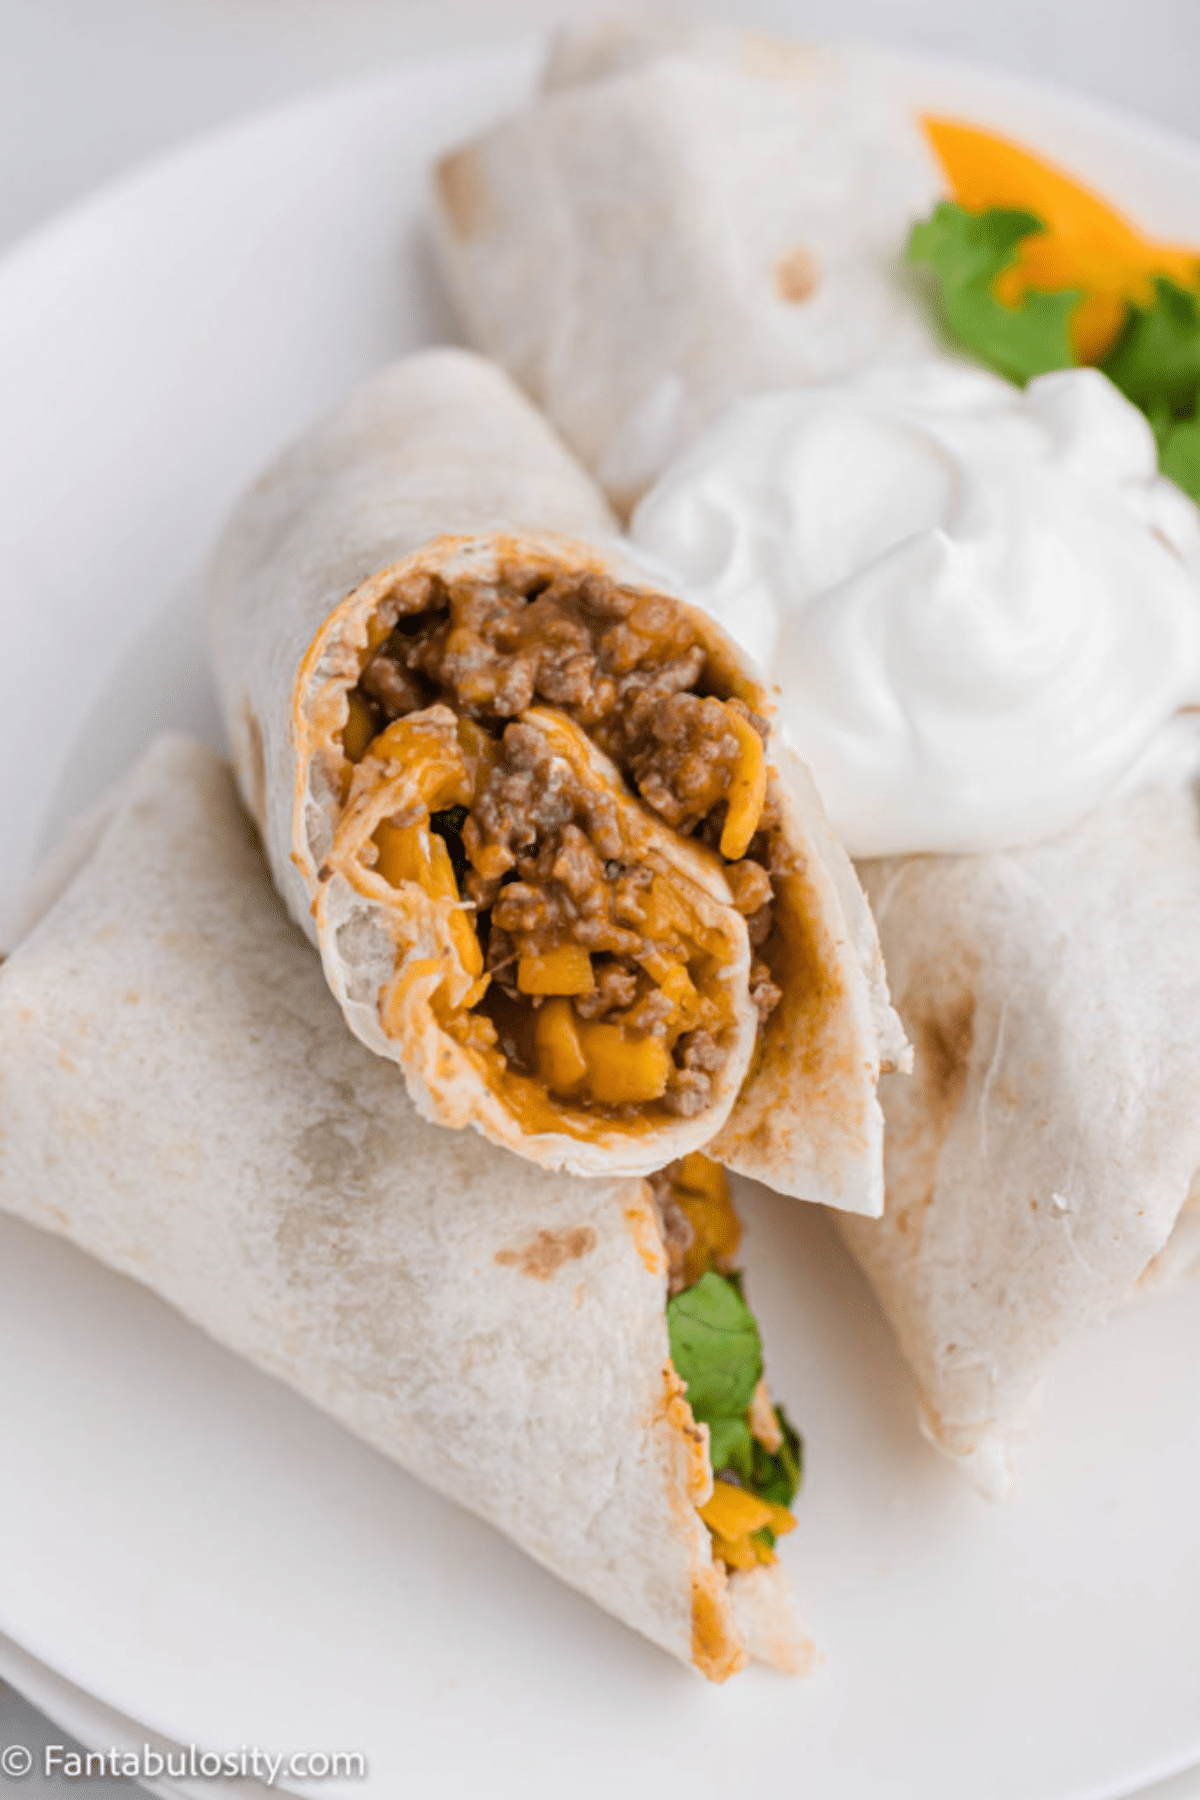
    Beef and Cheese Burritos on plate.

    Beef and Cheese Burritos: An easy recipe using ground beef, canned cheddar cheese, and salsa to make the best burritos at home! Ready in minutes!

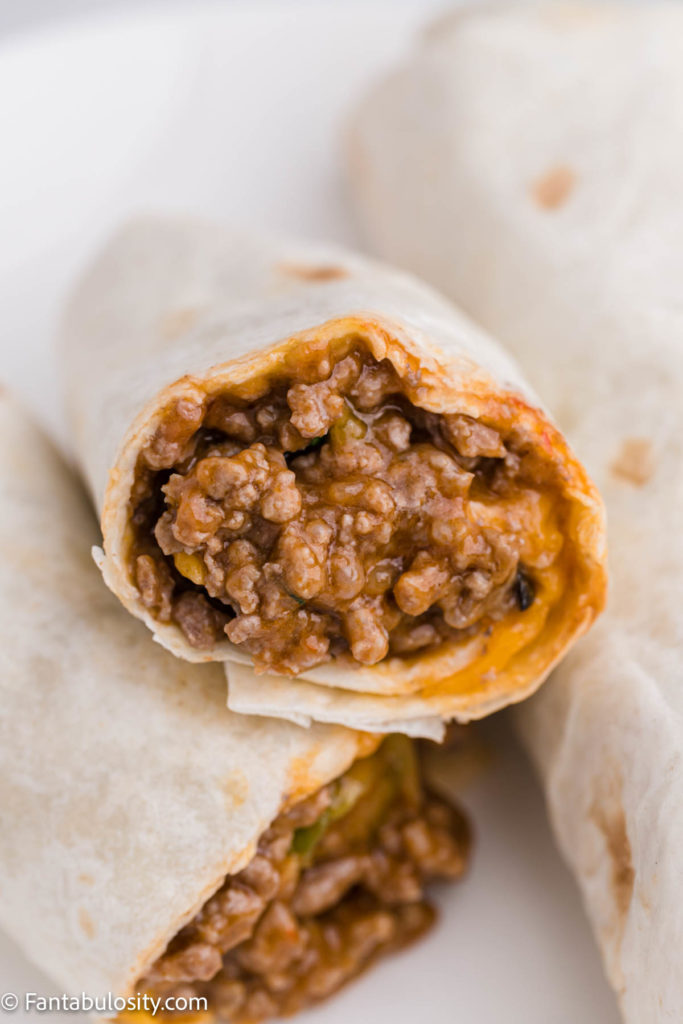
    Beef and cheese burrito

    This is by far one of the easiest main course on the blog, and is even perfect if the craving for Mexican hits, and you don’t have the items on hand to make these chicken street tacos!

    Let me fill you in on a little “weeknight meal,” secret that I have.

    [feast_advanced_jump_to]

    Beef and Cheese Burritos

    I’ll never forget the day my mom made these for the first time, when I was a kid. I ran to the stove, (super hungry, dying to know what we were having for dinner) I looked in the pan, looked up at her, and kinda “snarled” my nose and asked what it was. She said,

    Oh Jess, this is a new recipe I’m trying. I think it will taste better than it looks.

    My mom never lied to me, so I knew I should give it a try.

    I’m SOOOO glad I did. I make this quite often, now that I have a family of my own.

    How to Make This Easy Burrito Recipe:

    This is a great recipe for a quick, weeknight meal when you don’t have anything planned on the menu and you probably already have the ingredients on hand! It’s a 30-minutes or less dinner recipe that you’ll want to add to your meal plan for sure. Or see these easy ground beef dinner recipes so you can meal plan!

    What do you put in a burrito?

    For a classic burrito, you’ll want ground beef and cheese and seasonings like a taco seasoning packet. However, some burritos also include beans, and of course any preferred toppings.

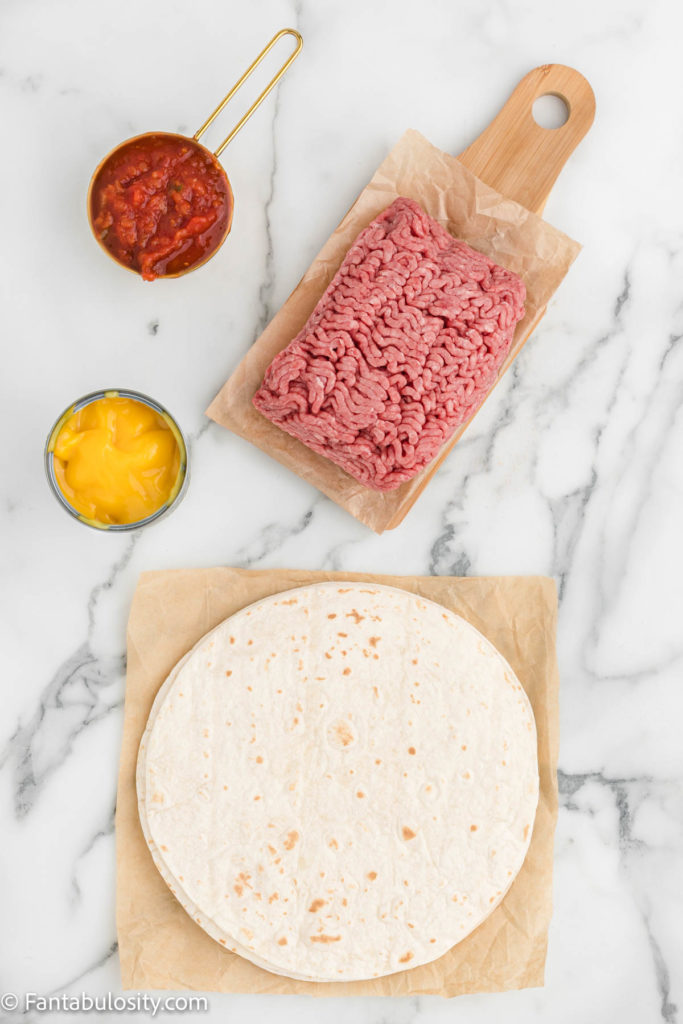
    But for this recipe, you only need 4 ingredients to create the BEST burrito that’s great for lunch or even a busy weeknight.

    Ingredients:

    It only takes 4 ingredients (plus any additional toppings you want) to make these cheesy burritos!

    Ingredients for Beef and Cheese Burritos
    • 1 pound ground beef
    • 10-ounce can cheddar cheese soup undiluted (see notes)
    • ½ cup salsa
    • flour tortillas
    • taco seasoning, optional

    What kind of cheese goes on a burrito?

    First, the kind of cheese that makes this burrito recipe really good, is the cheddar cheese soup that you can find in a can. It’s already a creamy texture that heats right up and gives the burrito the classic flavor that you’re looking for. DO NOT add water to the soup!

    Can you add additional cheese as toppings? Absolutely… but the canned cheddar cheese is definitely enough “cheese” flavor so additional is not necessary.

    What kind of salsa to use for burritos?

    You can use your favorite kind of salsa for this recipe but I’d recommend a red salsa like we used here, instead of a green, Verde type of salsa.

    But it can be “chunky”, “restaurant-style” or any type/brand that you prefer! I’d just make sure it’s a flavorful salsa, instead of a bland type… because using salsa in this recipe replaces the “seasoning” that you may need for other burrito recipes!

    Step by Step Instructions

    1. First, brown 1 lb. of ground beef and cook until done.
    2. When beef is fully cooked, drain the grease if needed.
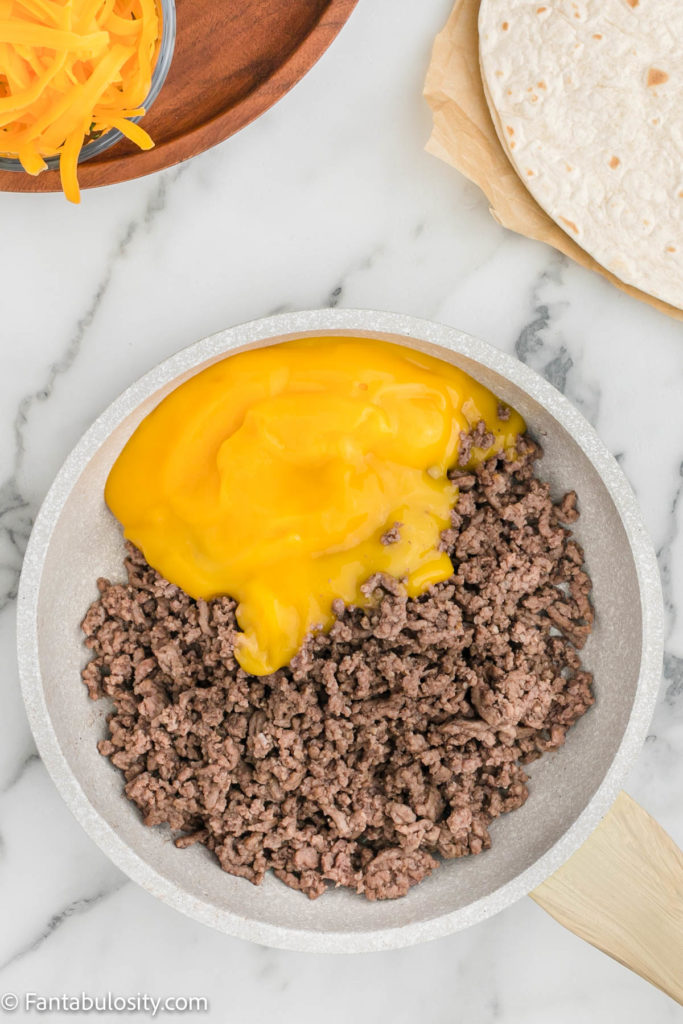
    3. Return the beef to the pan, and add your cheddar cheese soup and stir until well blended. (Image below.)
    Ground beef and cheddar cheese soup in pan
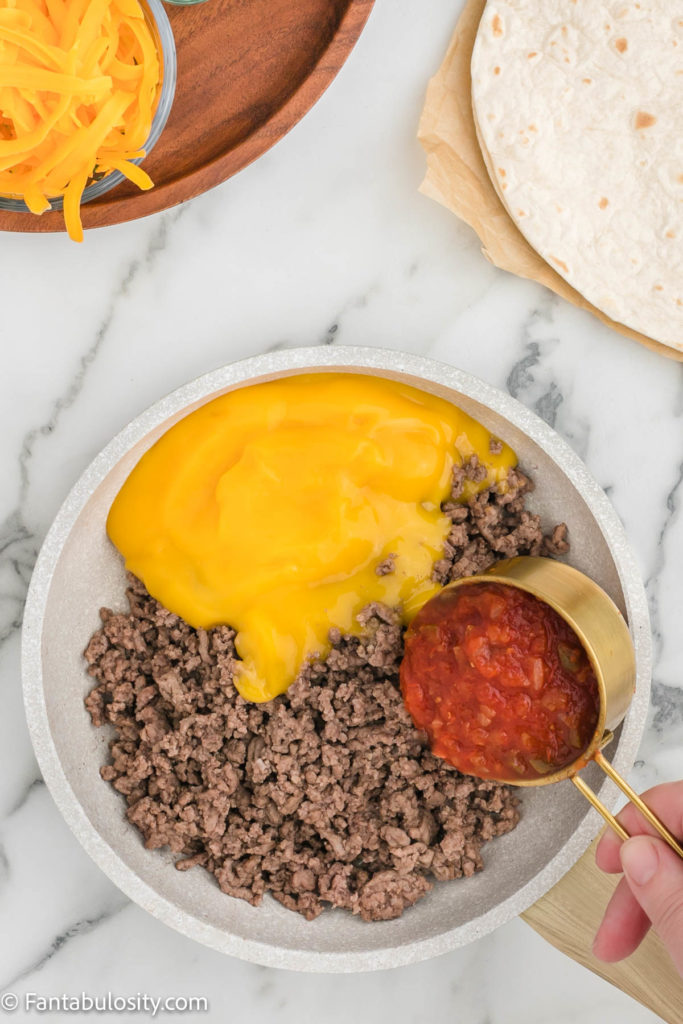
    1. Next, add in your ½ cup of salsa (and taco seasoning if desired) and stir until blended.
    Add salsa in to ground beef and cheddar cheese soup
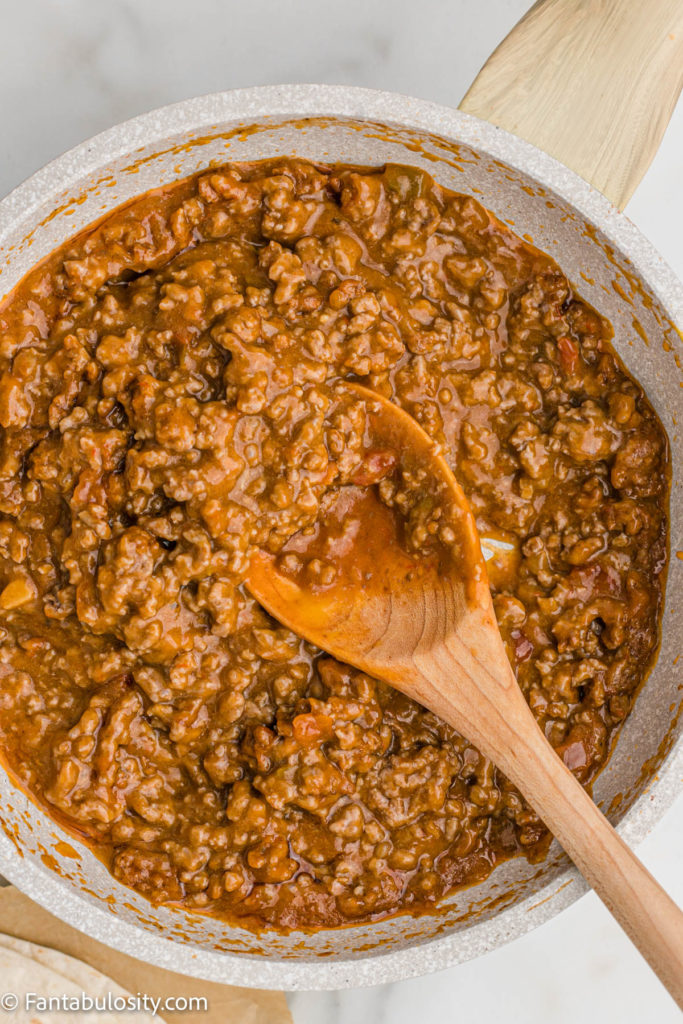
    1. Let the burrito mixture simmer for a couple of minutes to let the cheese and salsa cook into the beef and heat through.
    Beef and Cheese Salsa Burrito Filling
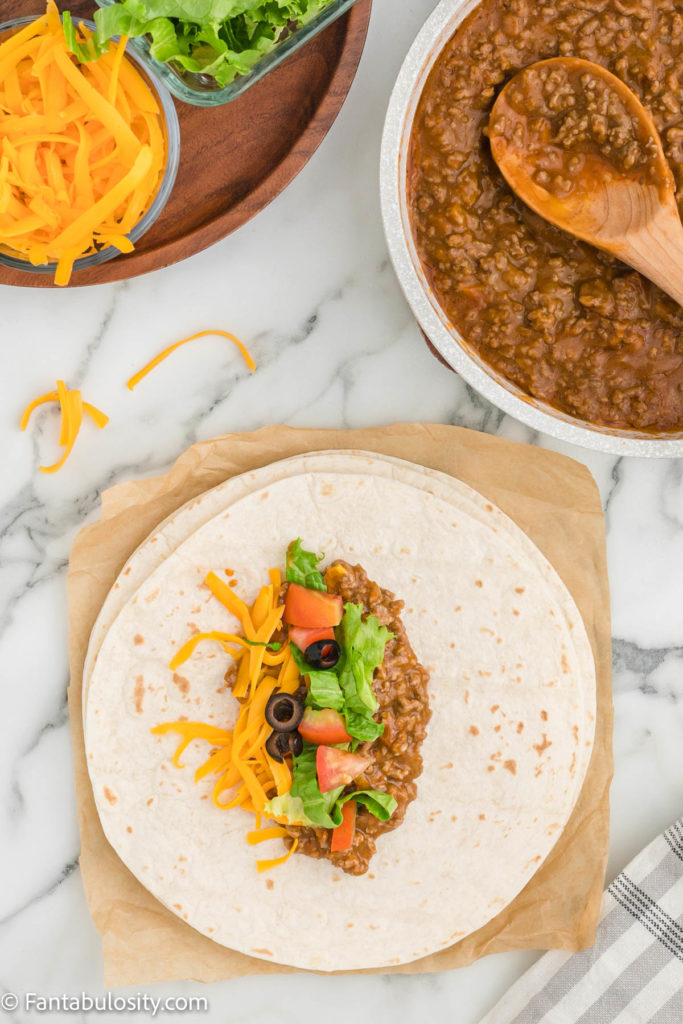
    1. Spoon meat and cheese filling down the center of a warmed tortilla, and load that baby up with your desired toppings, and you’re golden.
    Place beef and cheese burrito filling on tortilla

    Our boys prefer the burritos without toppings and just this cheesy beef mixture and I’m not going to lie… sometimes for a quick snack or lunch, I’ll just do this too and it’s perfect!

    Beef and Cheese Burrito

    Burrito Topping Ideas

    If you need topping ideas for your burritos, these are our favorites! They’re very similar to the taco toppings I recommend too!

    • Cheese, shredded
    • Lettuce, shredded
    • Tomatoes or this easy Pico de Gallo
    • Black Olives
    • White, Red or Green Onions
    • Jalapenos
    • Refried Beans
    • Mexican Rice
    • Extra Salsa
    • Jalapeno Ranch Dressing
    • Taco Sauce
    • Authentic Guacamole
    • Avocados
    • Sour cream
    • Limes, sliced
    • Cilantro
    • Tortilla Chips
    • Fritos
    Beefy Cheese Burrito with toppings

    This literally takes only about 10 minutes to make and our kids LOVE them!

    What to Serve with Burritos

    If you’re looking for side dishes for burritos, this taco layer dip, side salad, and this authentic Mexican rice are all delicious with it!

    How Store Leftover Burritos

    If you have leftover burritos, you can store the burrito meat in an airtight container in the refrigerator for 3-4 days. Store the tortillas separately and build burritos only before serving/eating.

    Related Recipes

    If you love quick and easy dinner recipes like this one, then you’re also going to love this Frito Chili Pie, Dorito Chicken Casserole, and Mozzarella Wraps.

    Then, if you happen to have leftover burrito meat, you can see our favorite ways to use leftover taco meat, because they’re VERY similar!

    Serve this Mexican flan as dessert, to keep the theme going!

    If you enjoyed this post, be sure to follow me on Instagram, Facebook, Pinterest and YouTube! Share a photo of your recipe and use the hashtag #Fantabulosity so I can find it and follow along!

    Recipe

    Beef and Cheese Burritos on plate.
    Print Pin
    4.73 from 18 votes

    Beef and Cheese Burritos

    Beef and Cheese Burritos: An easy recipe using ground beef, canned cheddar cheese soup, and salsa to make the best burritos at home!
    Course Main Course
    Cuisine American, Mexican
    Prep Time 10 minutes minutes
    Cook Time 10 minutes minutes
    Total Time 20 minutes minutes
    Servings 4 servings
    Calories 387kcal
    Author Jessica Burgess

    Ingredients

    • 1 pound ground beef
    • 10 ounce can cheddar cheese soup undiluted (see notes)
    • ½ cup salsa
    • flour tortillas
    • package of taco seasoning if desired, optional for more flavor

    Instructions

    • In a medium skillet, brown ground beef over medium heat and then drain.
    • Add in the can of cheddar cheese soup, and salsa (and taco seasoning if desired).
    • Stir and let cook 1-2 minutes
    • Serve on tortilla and top with additional desired toppings

    Notes

    Can of cheddar cheese soup calls for 1 can of soup plus 1 can of water. Do not add water for this recipe!
    Topping Suggestions:
    • Cheese, shredded
    • Lettuce, shredded
    • Tomatoes or easy Pico de Gallo
    • Black Olives
    • White, Red or Green Onions
    • Jalapenos
    • Refried Beans
    • Mexican Rice
    • Extra Salsa
    • Jalapeno Ranch Dressing
    • Taco Sauce
    • homemade Guacamole recipe
    • Avocados
    • Sour cream
    • Limes, sliced
    • Cilantro
    • Tortilla Chips
    • Fritos

    Nutrition

    Serving: 1burrito | Calories: 387kcal | Carbohydrates: 17g | Protein: 22g | Fat: 24g | Saturated Fat: 9g | Cholesterol: 80mg | Sodium: 512mg | Potassium: 444mg | Fiber: 1g | Sugar: 2g | Vitamin A: 155IU | Vitamin C: 0.6mg | Calcium: 62mg | Iron: 3.3mg

    Fruit Salad with Cool Whip

    August 5, 2021

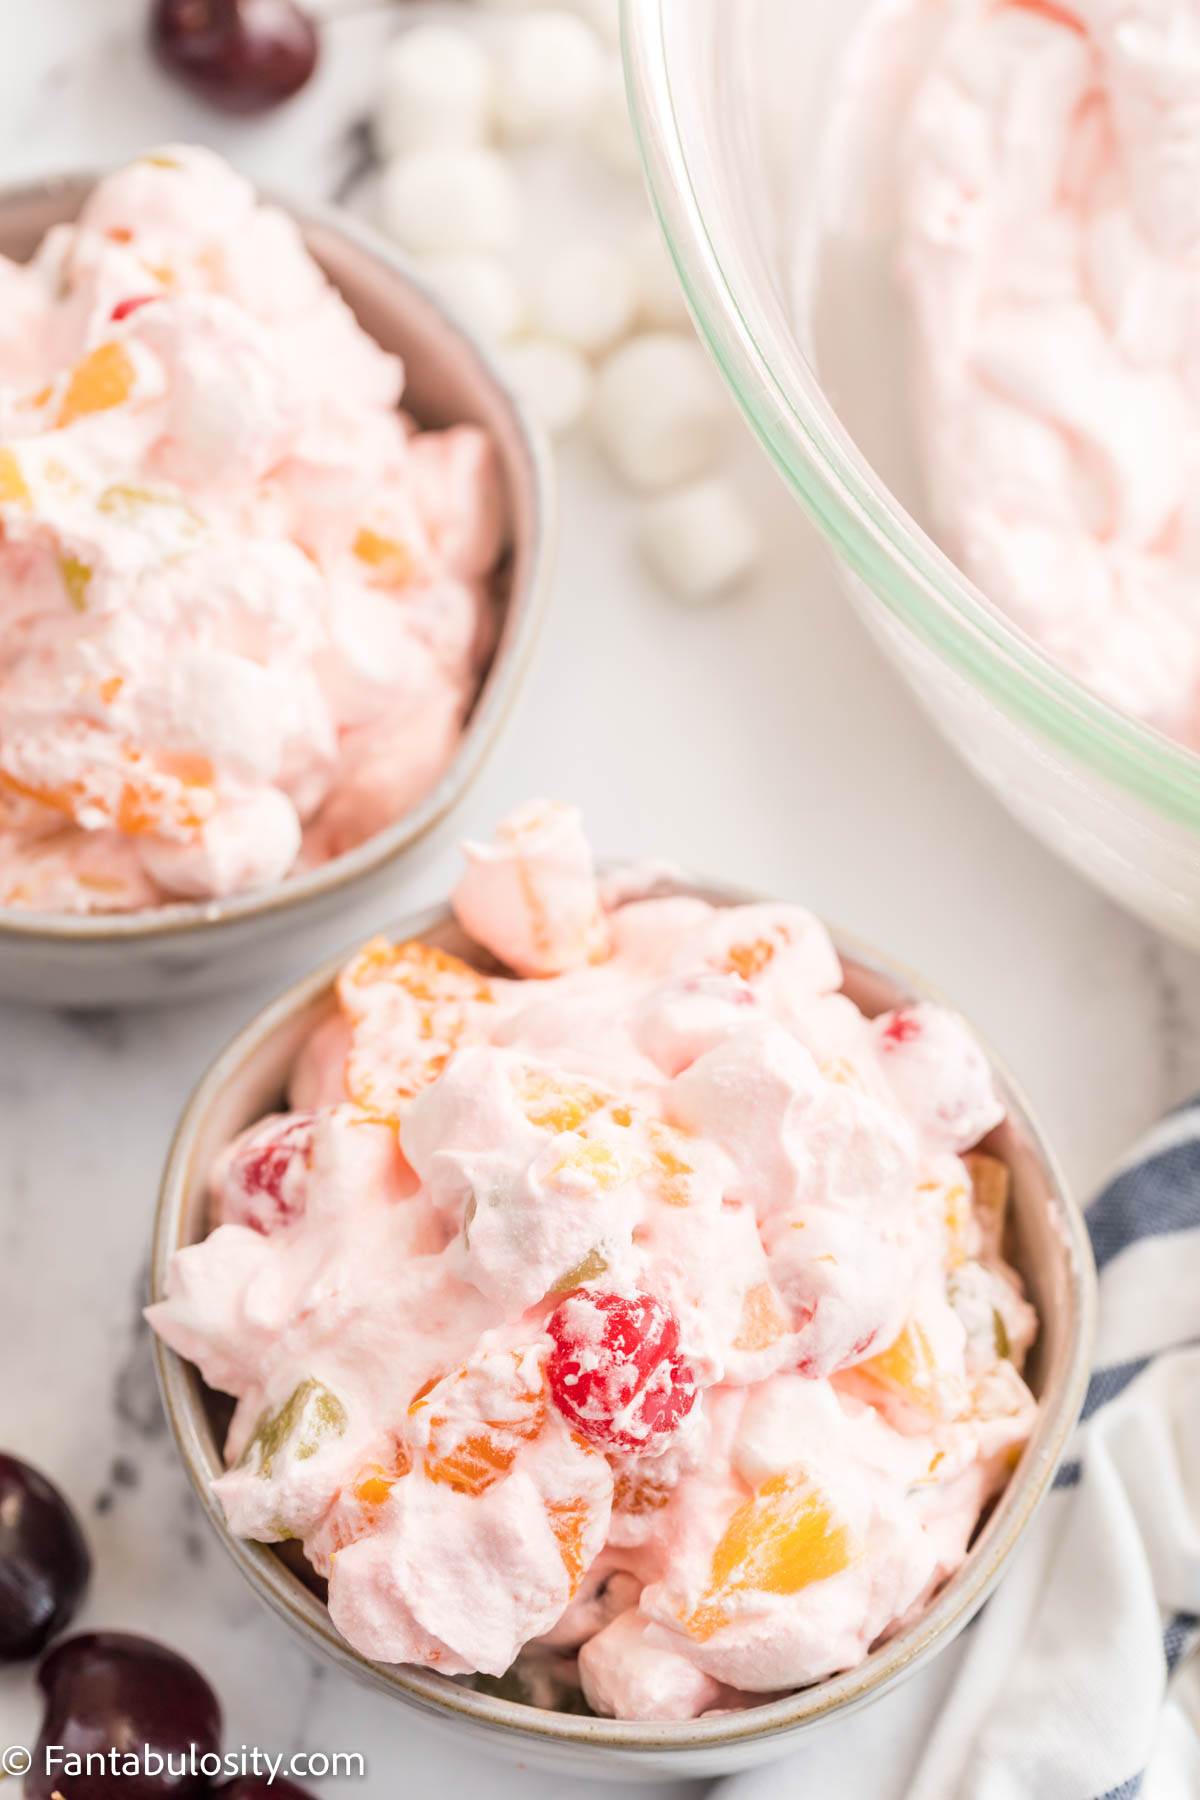
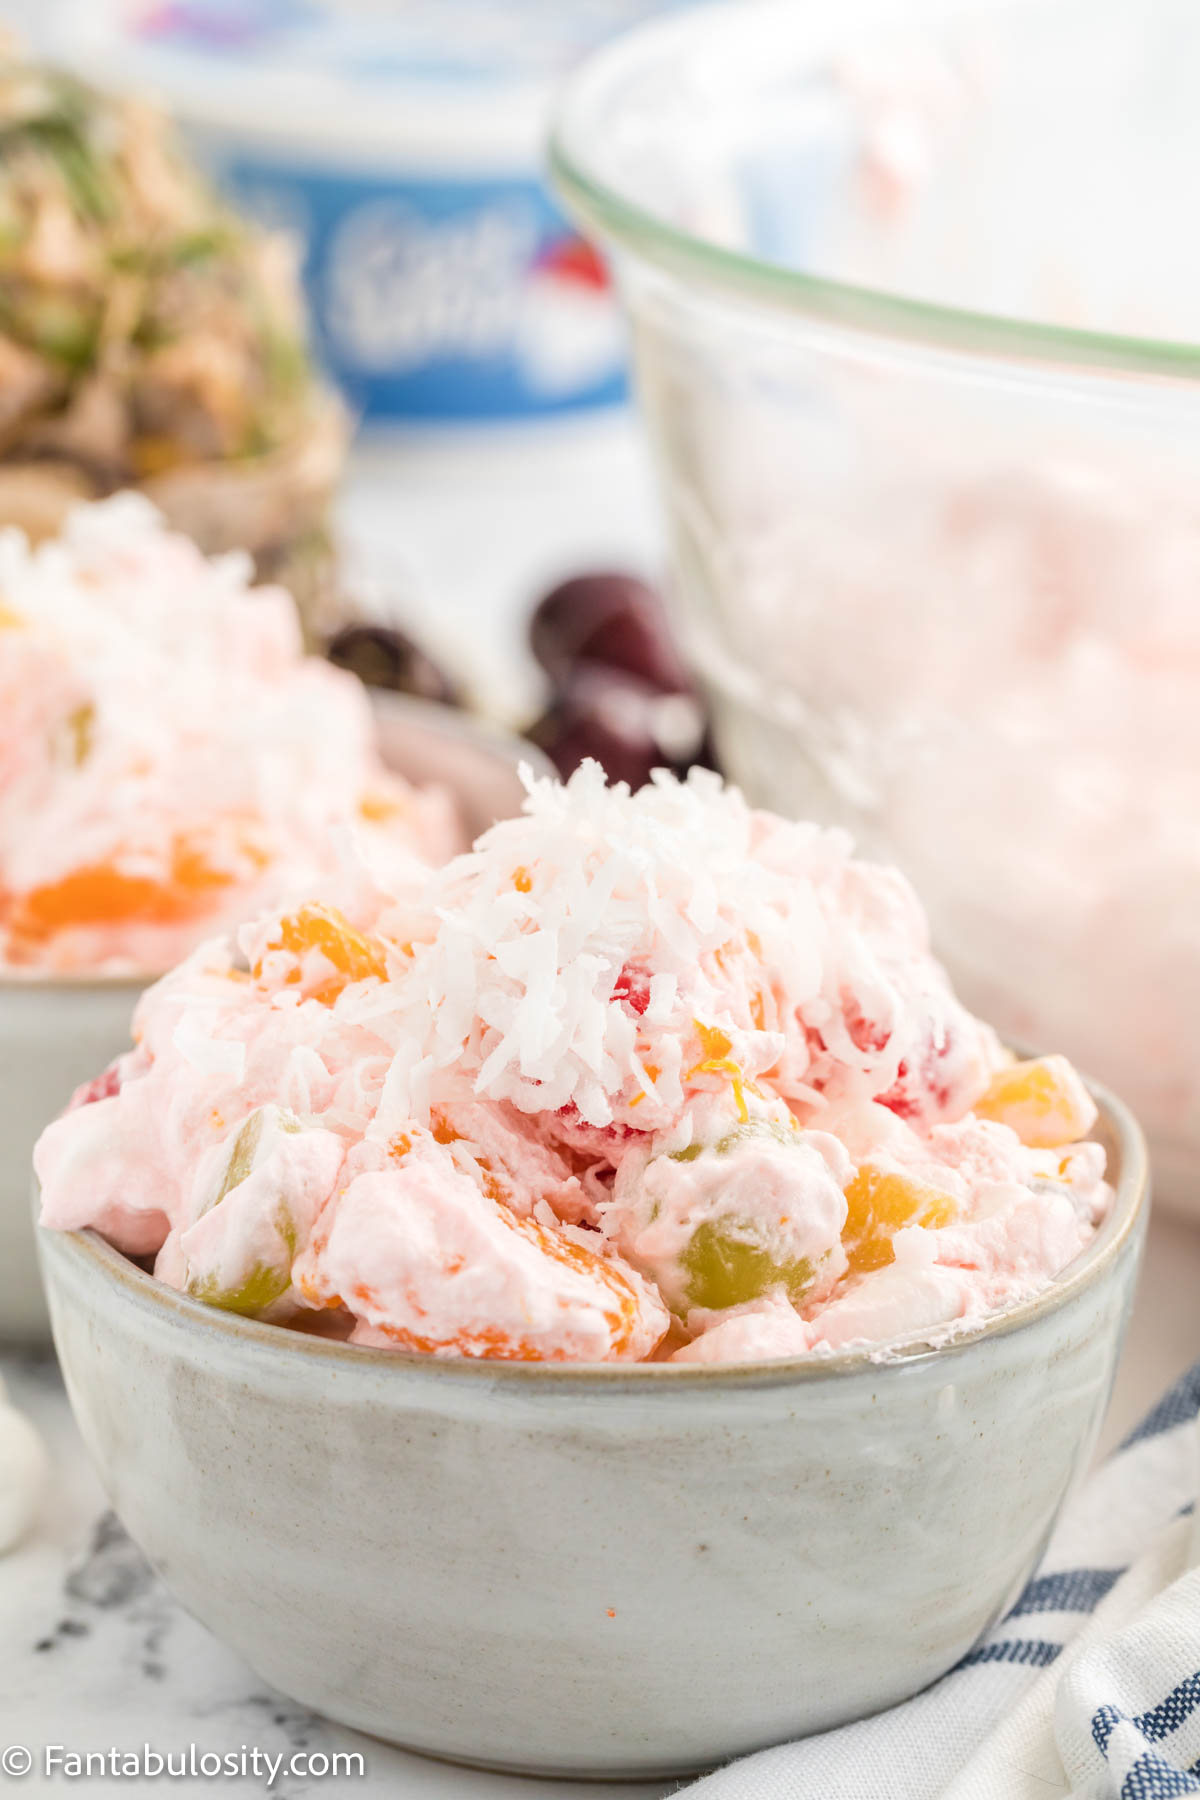
    fruit salad in gray bowl

    Fruit salad with Cool Whip is a quick, creamy dessert salad made with simple ingredients like canned fruit, marshmallows, and whipped topping. This easy recipe comes together in just minutes and is perfect for potlucks, holidays, or everyday snacking.

    This old-fashioned fruit salad (often called ambrosia salad or fluff salad) is sweet, light, and always a crowd favorite. It's one of those recipes that shows up at gatherings and disappears fast.

    Fruit Salad with Cool Whip

    Looking for a dip to serve fruit with? This Cool Whip Fruit Dip may be more of what you’re looking for!

    A 5-Minute Dessert That Always Shows Up at Potlucks

    This is one of those recipes you can throw together at the last minute and still feel good bringing to the table. It's simple, nostalgic, and uses ingredients most people already have on hand.

    The summer months tend to bring on a special occasion where you want to take a side dish or dessert recipe along with you! And things like BBQs, outdoor parties, birthday celebrations, church potlucks, and more, are usually events where guests are asked to bring their favorite recipes. I've made this for everything from summer BBQs to holiday dinners, and it's always one of the first dishes to go

    This easy fruit salad (or dessert fluff or marshmallow fruit salad – whatever you want to call it!) would be the perfect fit for all of your easy recipe, “to-go”, needs, even for the holidays!

    This recipe is in a close running for our family favorite Snicker Salad, honey lime fruit salad and Pistachio Salad for any family gathering, so I’ll let you decide which one is best!

    [feast_advanced_jump_to]

    Frequently Asked Questions

    Is Fruit Salad with Cool Whip the same as Ambrosia Salad?

    Yes! Although there are different variations, the two are very similar and commonly called both.

    Can I use homemade whipped cream instead of Cool Whip for fruit salad?

    You can! You can use any kind of plain whipped topping from the store or you can make your own. However the texture of the Cool Whip tends to be more airy and not as heavy, which is what makes this salad so light and fluffy.

    Can I make fruit salad in advance?

    Yes! If planning to take this to a party or gathering, it’s easy to make this a day in advance if desired. Just chill until ready to serve!

    Is fruit salad with Cool Whip the same as ambrosia salad?

    They're very similar. Both use fruit and a creamy base, although ambrosia often includes coconut and sometimes sour cream.

    Can you make fruit salad with Cool Whip ahead of time?

    Yes! It can be made a day in advance and stored in the refrigerator until ready to serve.

    Do you drain the fruit?

    Yes, most canned fruit should be drained so the salad doesn't become watery.

    Ingredients

    Although you can use all fresh fruits for this recipe, using some canned fruit is convenient, and much faster! (Save the fresh fruit for this fruit board with fruit dip!)

    You can take out what you may not want and you can add in other fruits! It’s a flexible creamy fruit salad recipe so you can change things up as you prefer!

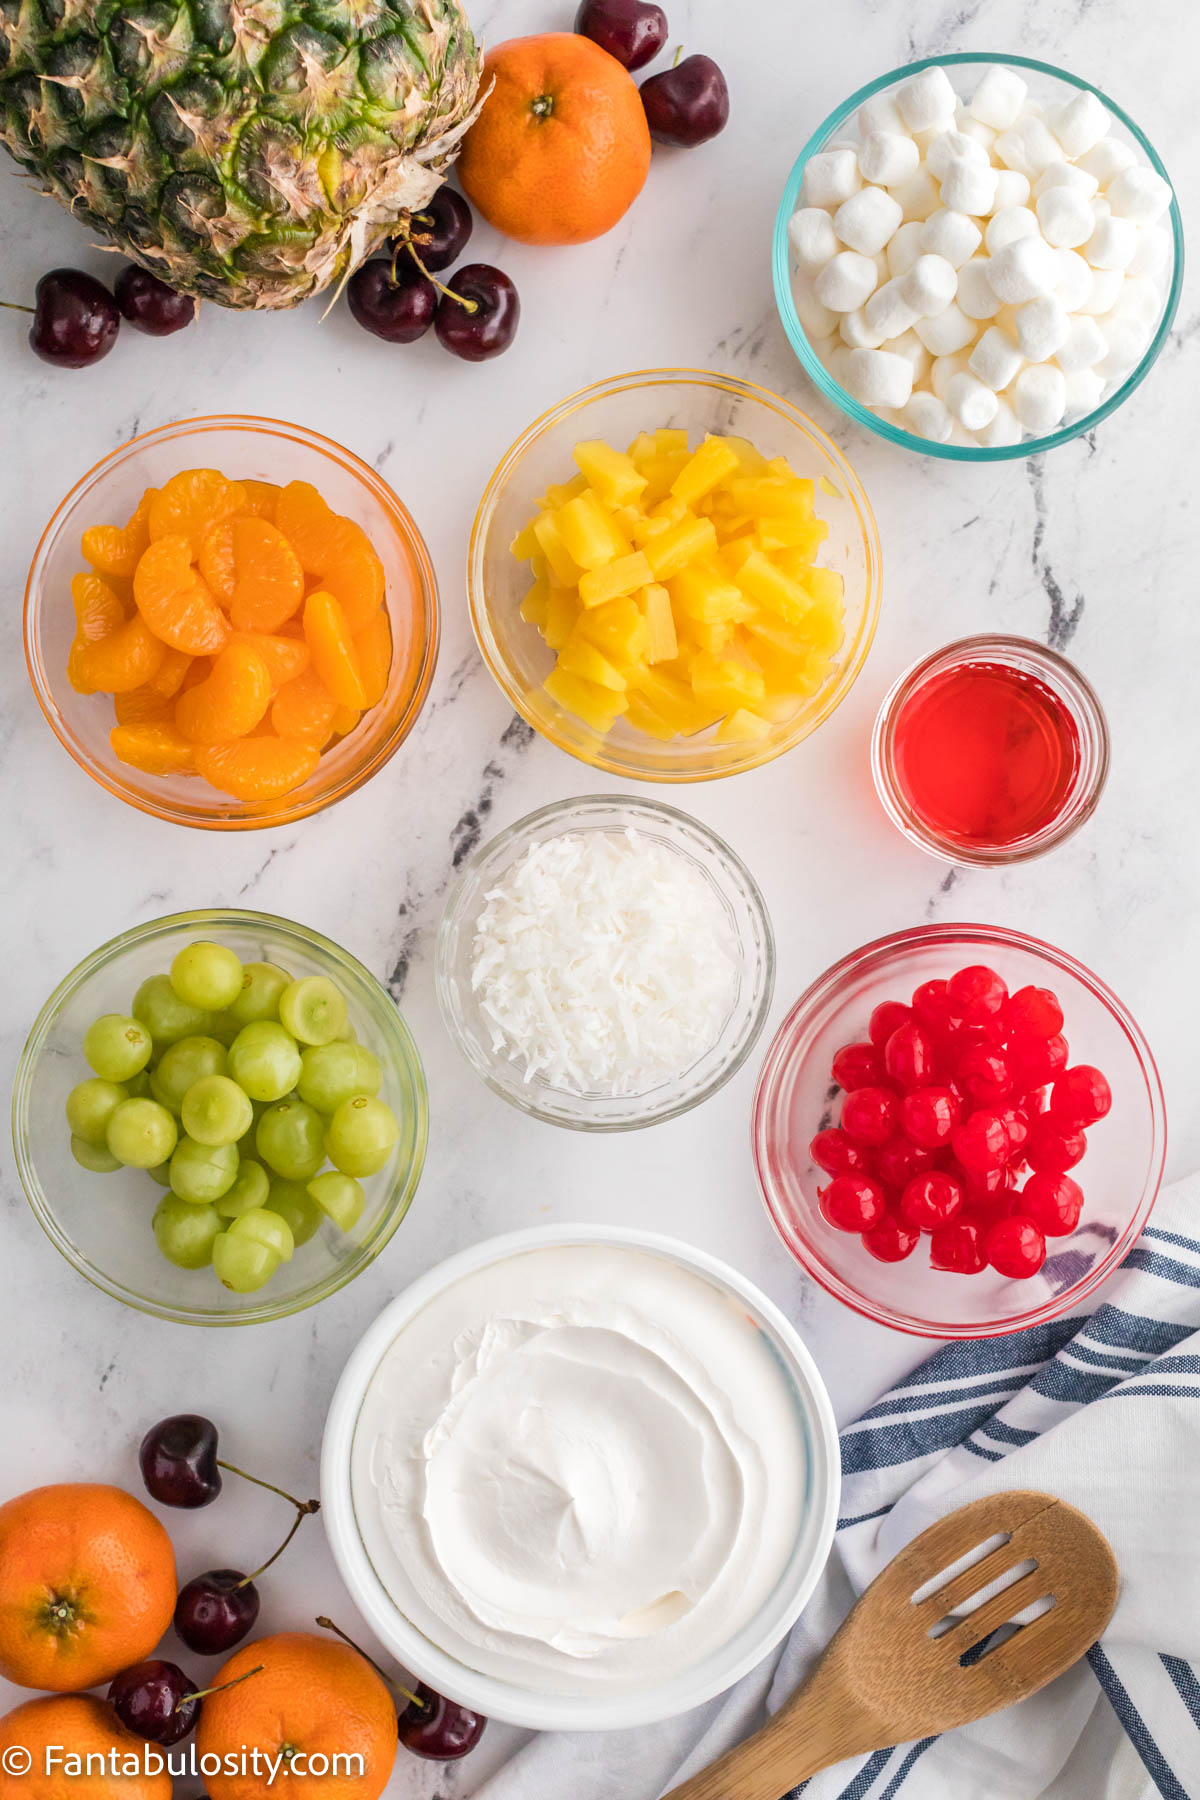
    Ingredients for fruit salad with cool whip
    • Container of Cool Whip
    • jar Maraschino cherries
    • seedless green grapes
    • mini marshmallows
    • can mandarin oranges (we also use these in our Orange Fluff Salad)
    • can pineapple tidbits
    • Optional topping - shredded sweetened coconut flakes

    See the full recipe card below for quantities and full instructions for this old-fashioned recipe.

    Instructions

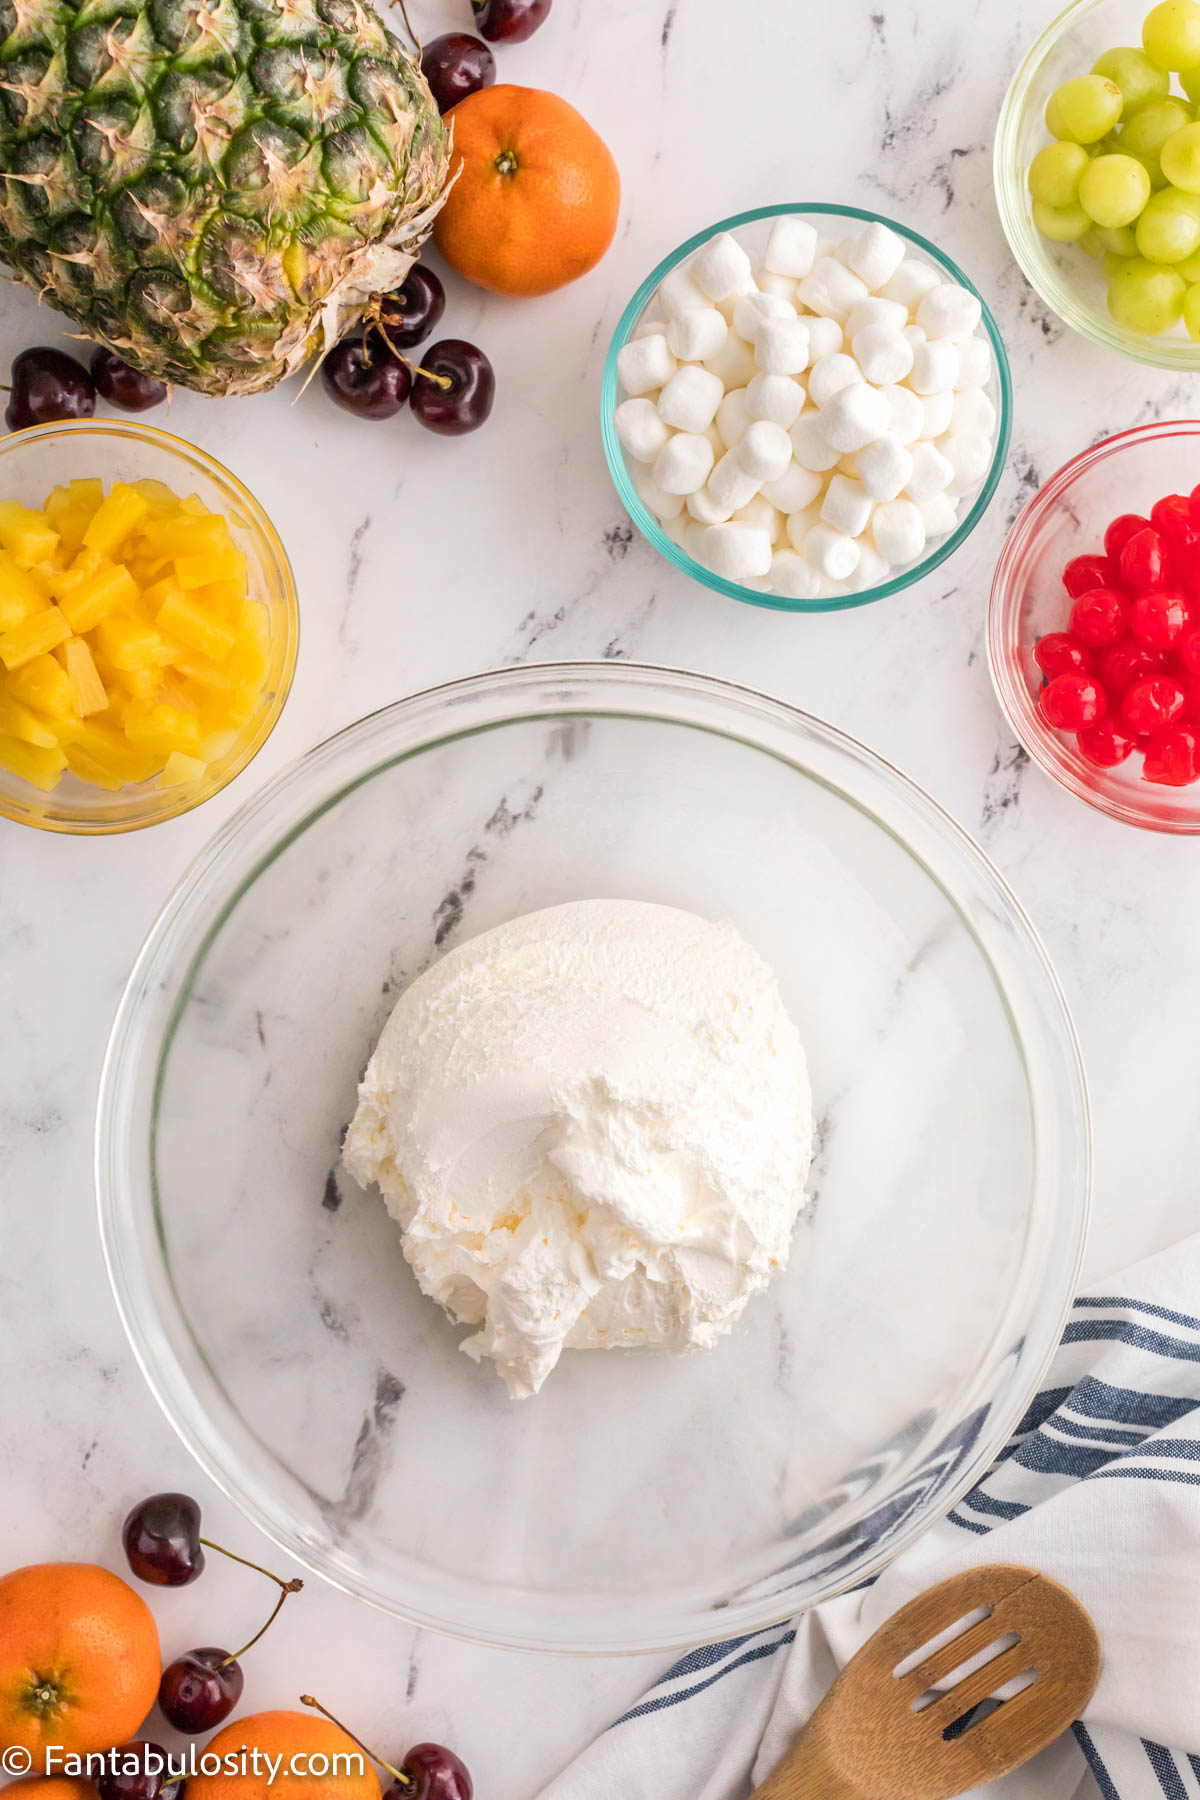
    1. Add the Cool Whip in to a large bowl.
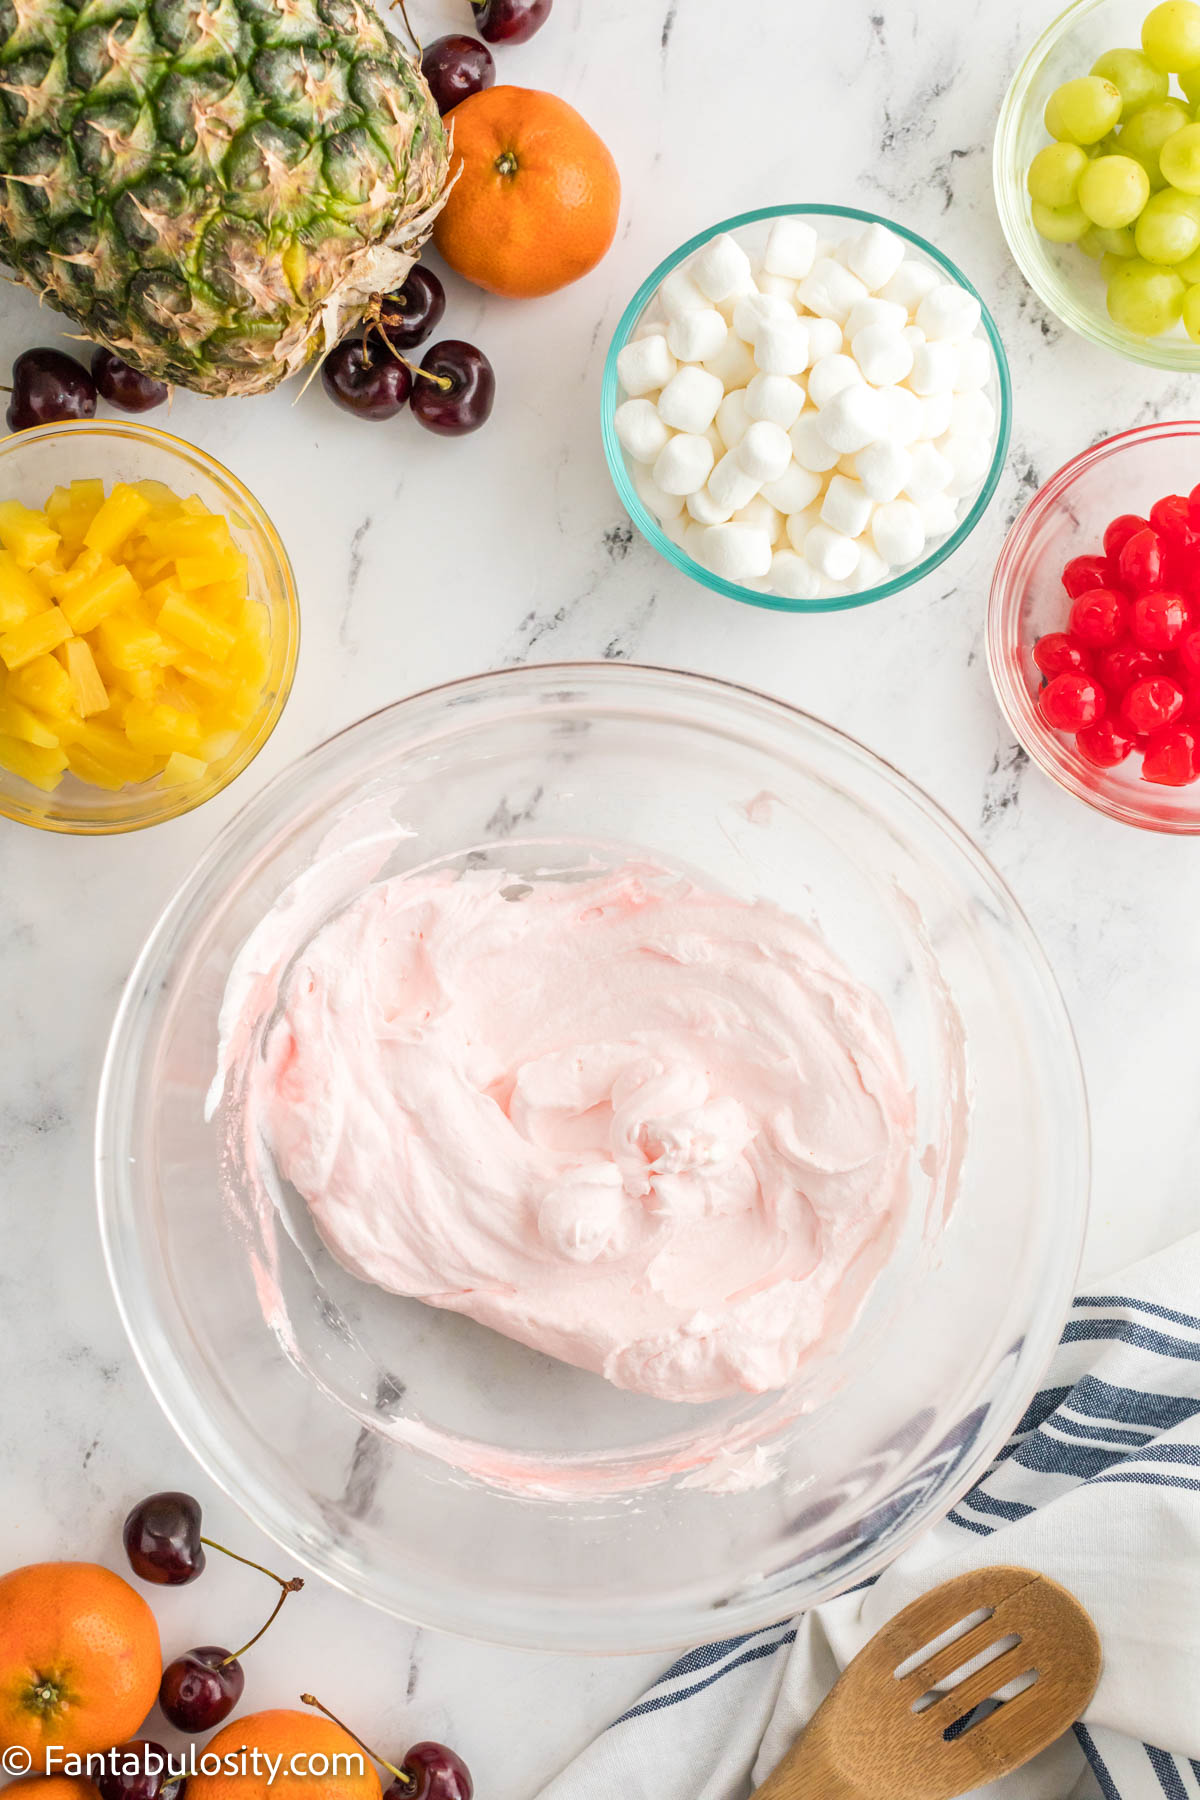
    Cool whip in bowl
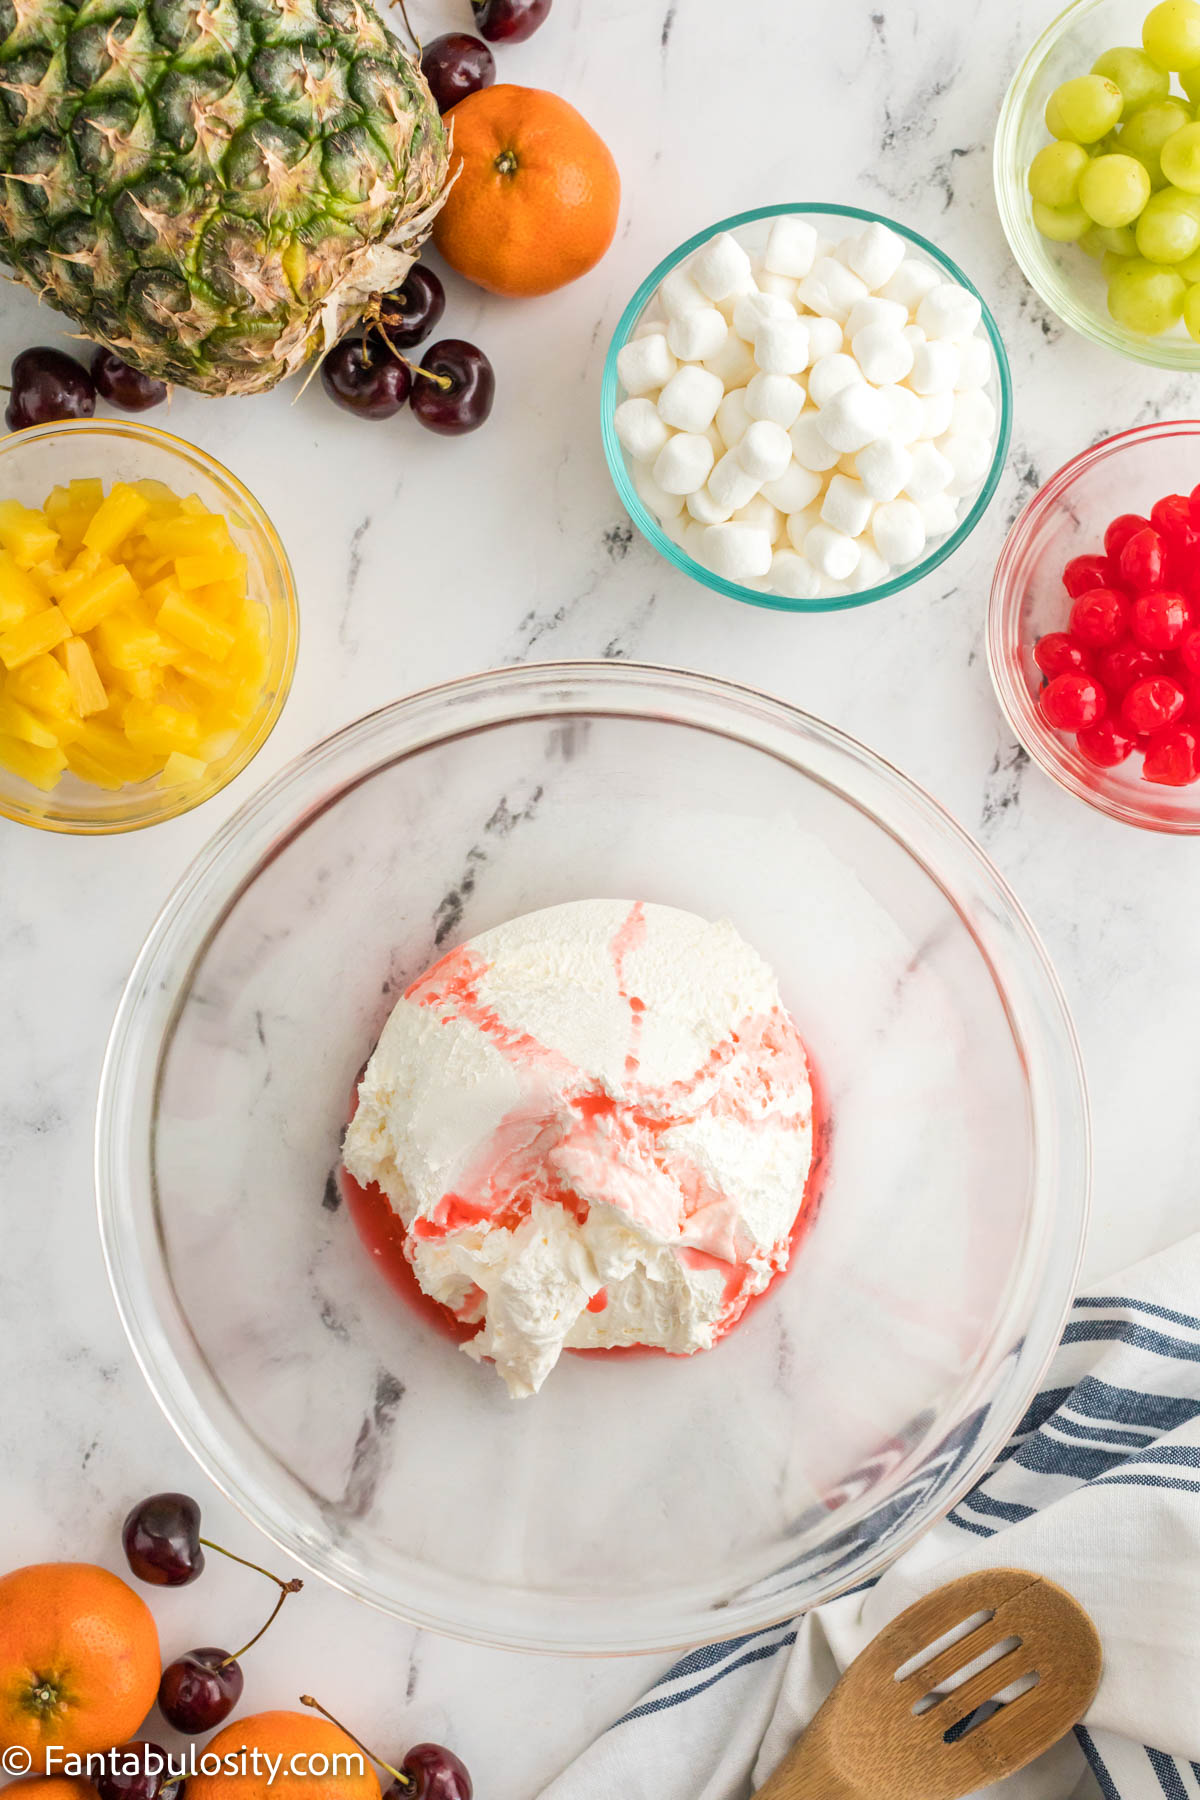
    1. Next, add reserved Maraschino cherry juice, then fold gently until combined.
    Cool whip and cherry juice in glass bowl.
    Reserved maraschino cherry juice.
    Cool Whip with cherry juice mixed, in glass mixing bowl.
    Stir to combine cherry juice.
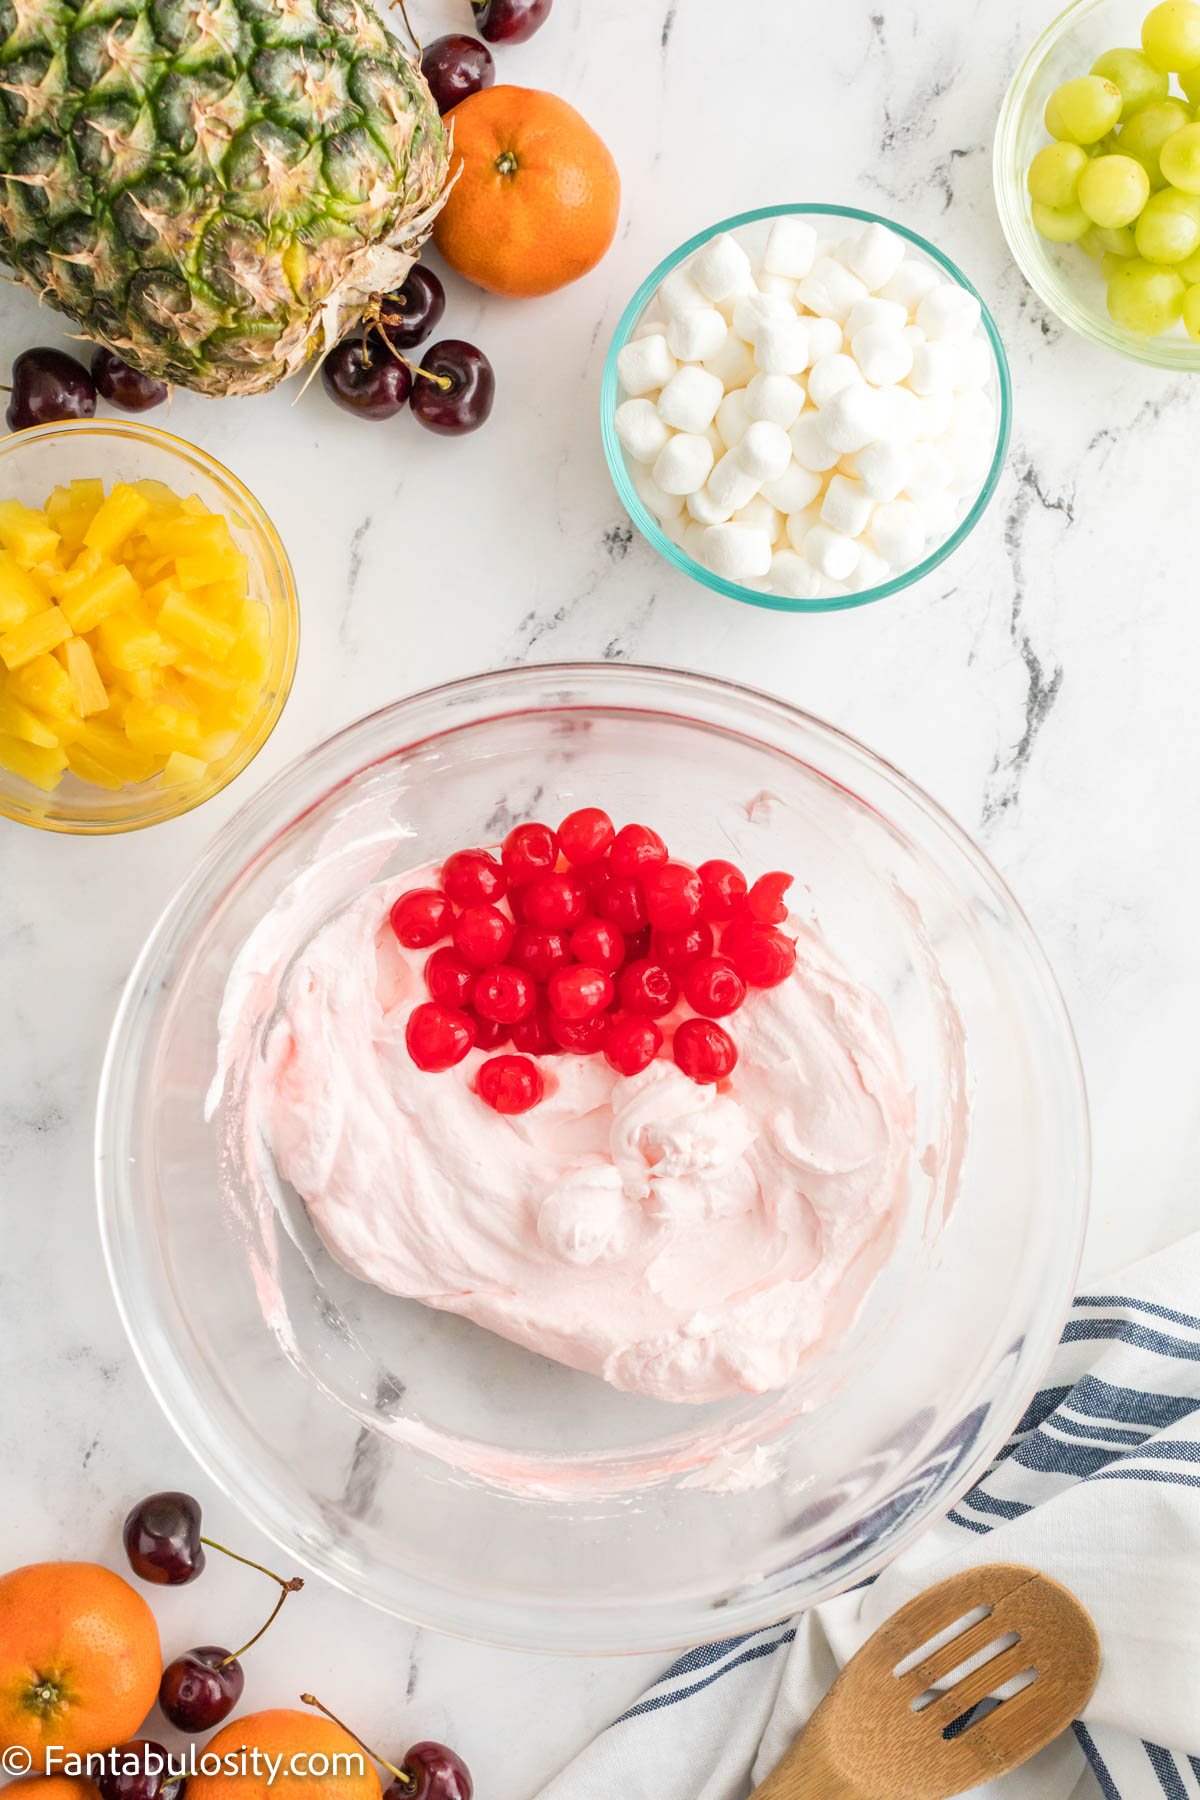
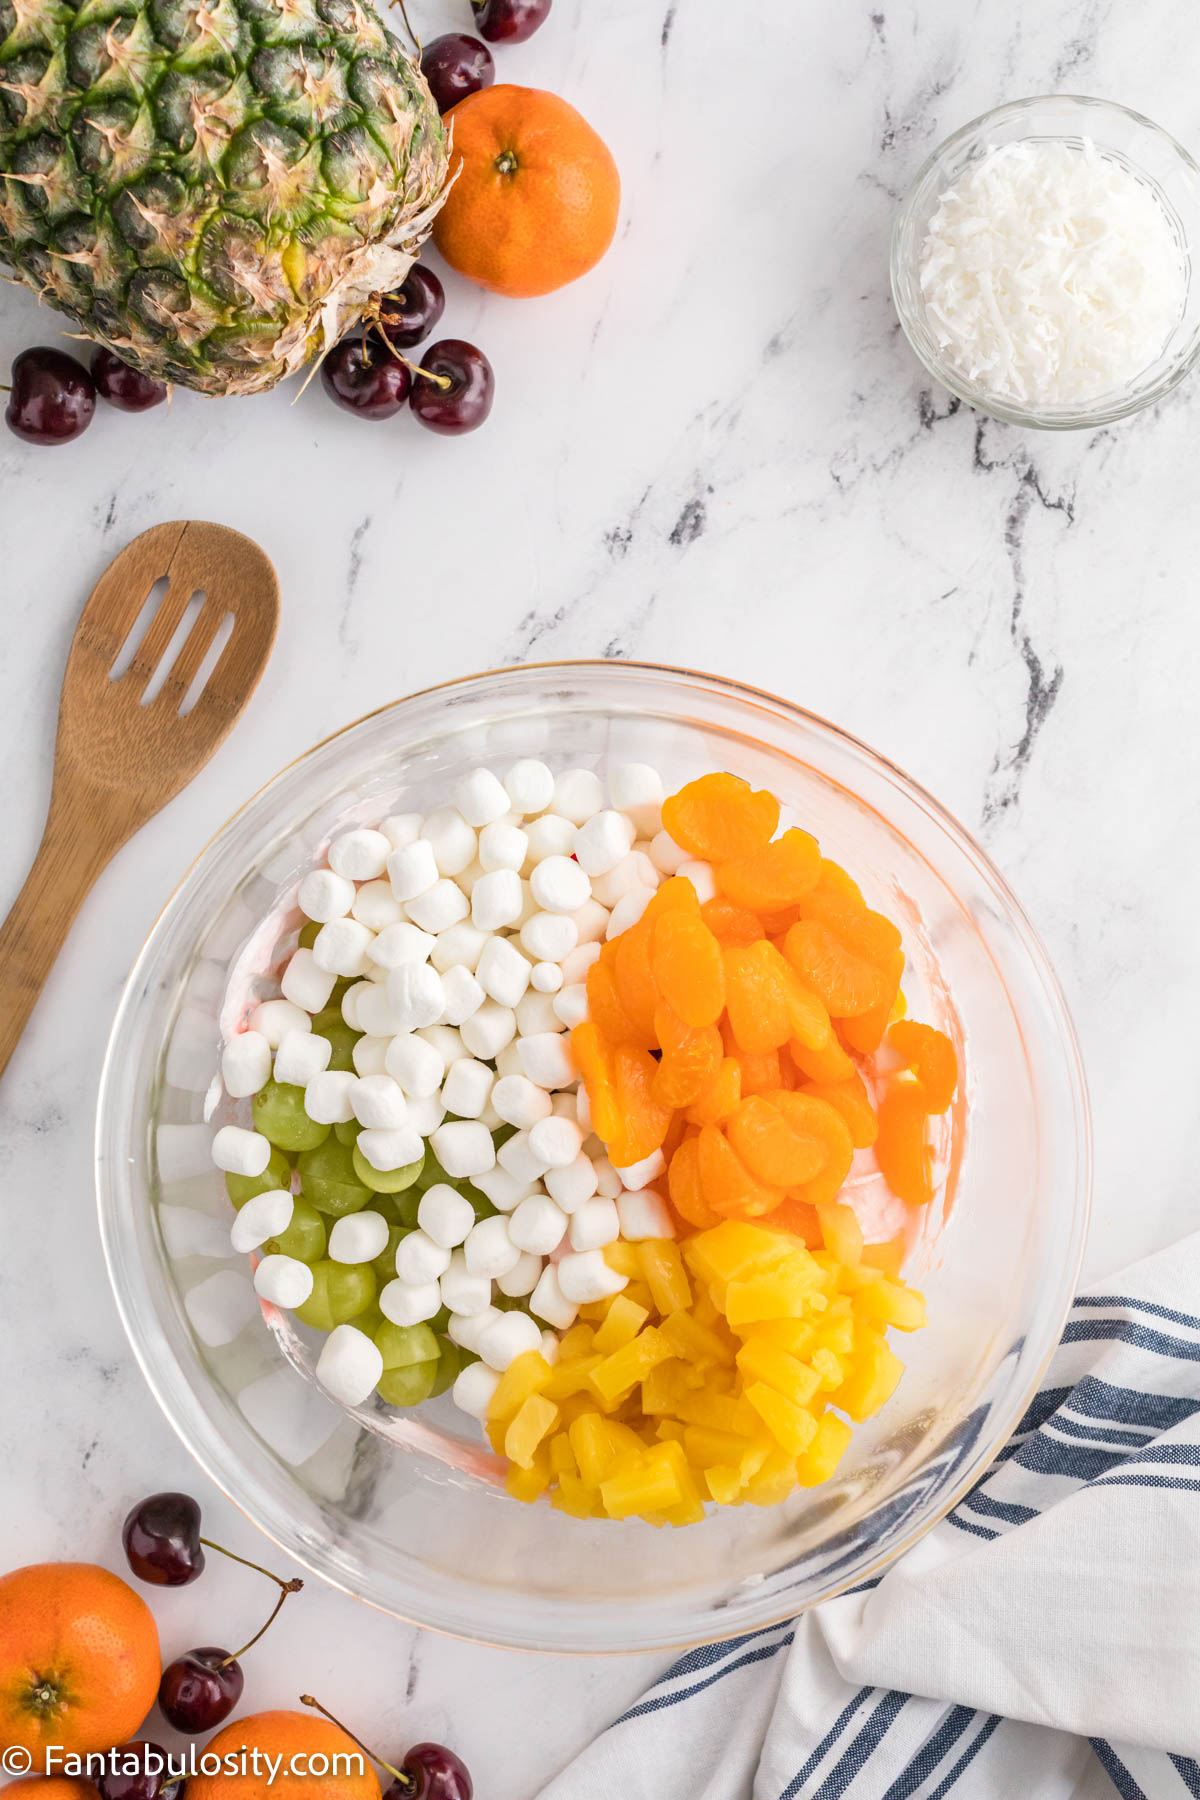
    1. Next, add in fruit and marshmallows.
    Cherries added to Cool Whip mixture in mixing bowl.
    Add Cherries
    Remaining fruit and marshmallows added to mixing bowl.
    Add in other ingredients.
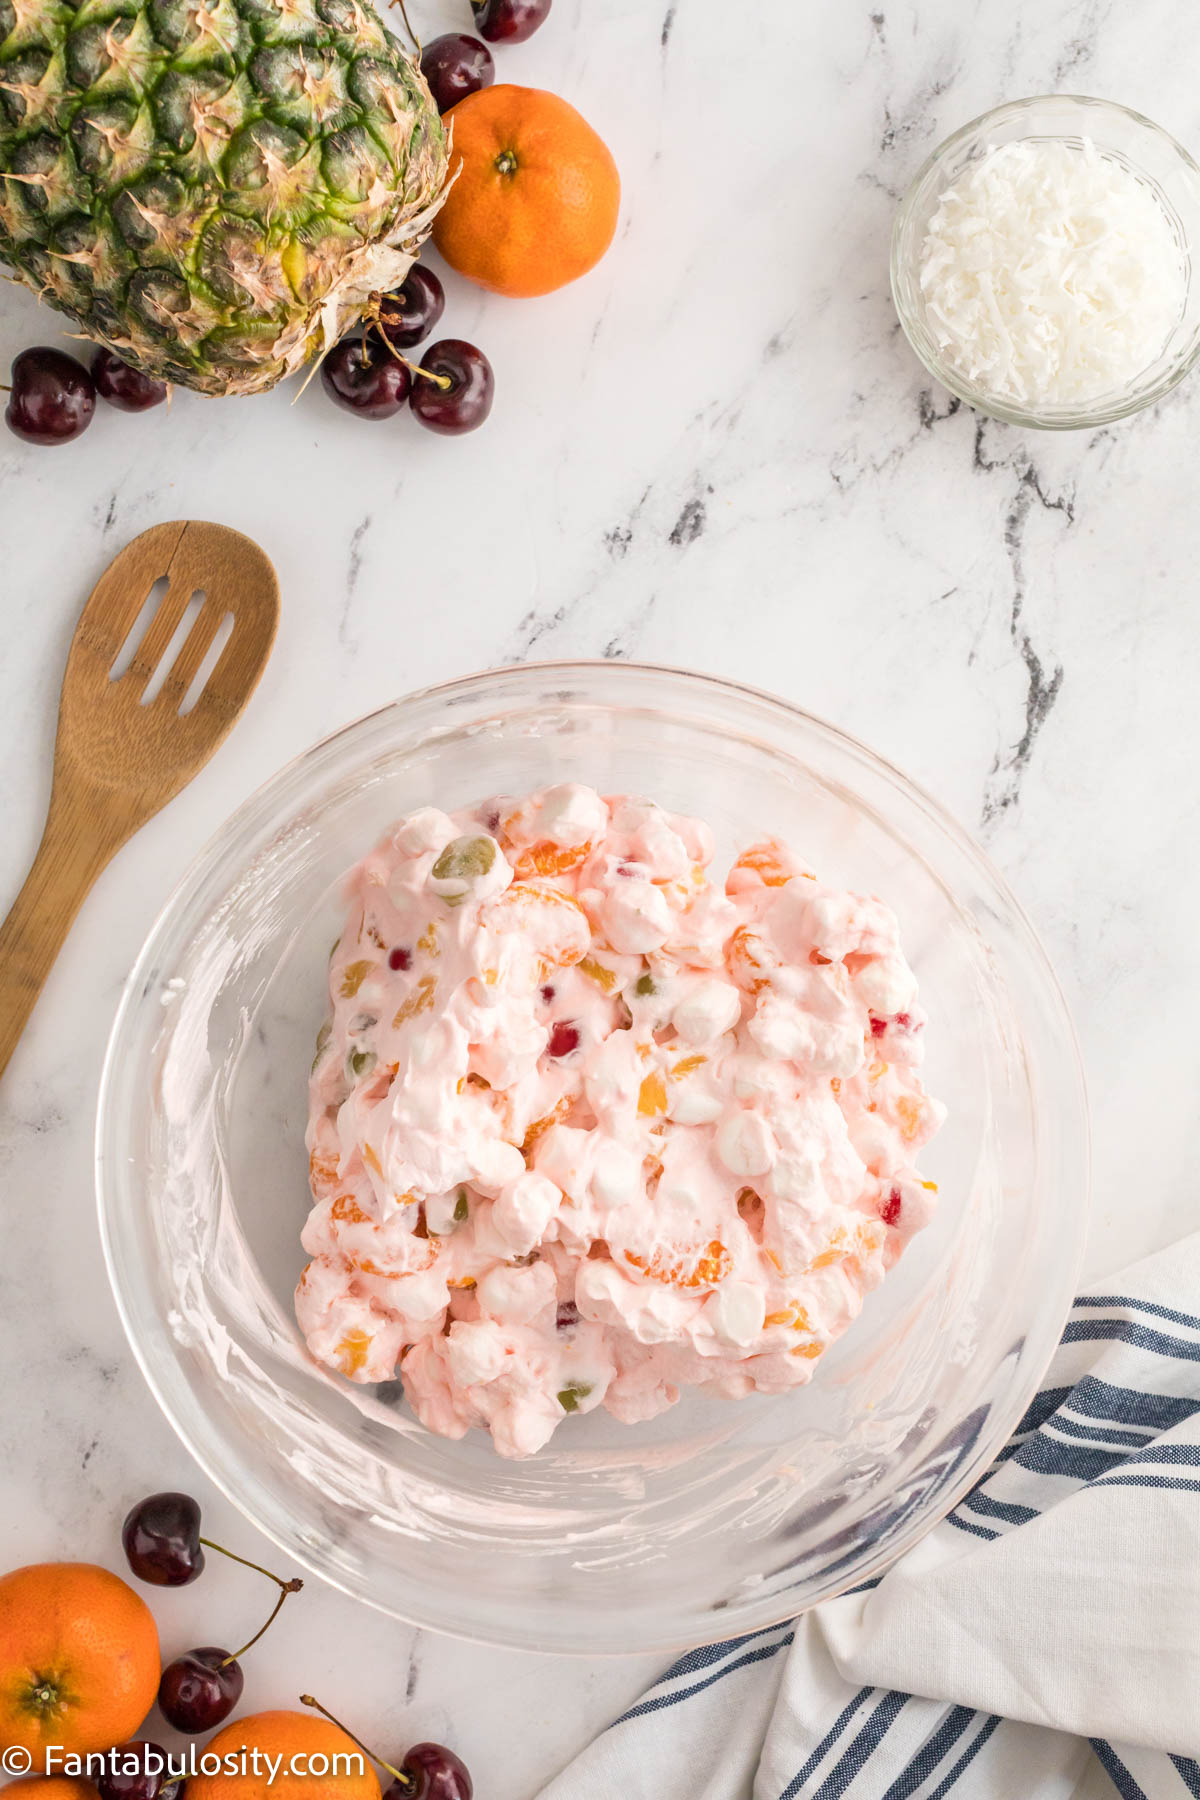
    Ingredients mixed together to make fruit salad with Cool Whip.
    Stir to combine.

    Once combined, you can serve right away, or refrigerate for later! For a fun and creative presentation, serve this fruit salad portioned into these waffle cones that have been dipped in chocolate.

    Fruit Salad with Cool Whip

    Substitutions

    If there are ingredients or different fruit that you’d like to take out or add, you can do so very easily! Here are some other suggestions that we love!

    • fresh strawberries (or other fresh berries)
    • cream cheese
    • pudding mix (like the vanilla pudding mix we used in this apple dessert salad)
    • crushed pineapple instead of wedges
    • canned fruit cocktail (make sure to drain if already using cherry juice)
    • pineapple juice instead of cherry juice (but I LOVE the color the cherry juice gives this recipe!)
    • sour cream (for a more tart flavor – you may want to add some other sweetness to help offset the “sour”.)
    • cottage cheese (it adds a great texture to a salad like this)
    • whipped topping or homemade whipped cream instead of Cool Whip
    • vanilla yogurt
    • flavored mini marshmallows
    Fruit Salad with Cool Whip on a spoon

    Variations

    Although this recipe is delicious without it, you can top it off with shredded sweetened coconut flakes for some added texture and flavor for summer!

    Storage

    If you have leftovers of this delicious fruit salad, you can store it in an airtight container or cover it with plastic wrap, and store in the refrigerator for up to three days.

    Shredded coconut on top of fruit salad

    Related Recipes

    If you love easy, no-bake desserts, you’ll also love this Oreo Pudding Dessert, peanut butter yogurt dip and this No Bake Peanut Butter Pie that are crowd-pleasers!

    More Easy Dessert Salad Recipes

    • Snickers Apple Salad - sweet, creamy, and always a hit
    • Pistachio Salad - a classic pistachio fluff salad
    • Orange Fluff Salad - light, fruity, and perfect for potlucks

    Did you make this? I’d be so grateful if you left a “star” rating below to let me know what you thought! Then, the next time you need a quick and easy recipe, come back to Fantabulosity to browse all of my easy recipes!

    Recipe

    fruit salad in gray bowl
    Print Pin
    5 from 33 votes

    Fruit Salad with Cool Whip

    This Fruit Salad with Cool Whip (or Ambrosia Salad) is not only an easy dessert but you can use canned fruits to create this dessert fluff salad in only 5 minutes!
    Course Dessert
    Cuisine American
    Prep Time 5 minutes minutes
    Cook Time 0 minutes minutes
    Total Time 5 minutes minutes
    Servings 8 servings
    Calories 246kcal
    Author Jessica Burgess

    Ingredients

    • 8 ounces Cool Whip
    • 10 ounces maraschino cherries whole, reserve 3 tablespoons of juice, then drain
    • 1 cup seedless green grapes halved
    • 2 cups miniature marshmallows
    • 10.5 ounces can mandarin orange segments drained
    • 10 ounces can pineapple tidbits drained
    • ⅔ cup shredded sweetened coconut optional

    Instructions

    • Add Cool Whip and reserved Maraschino cherry juice to a large mixing bowl, then fold gently until combined.
    • Add cherries, grapes, marshmallows, orange segments, and pineapple tidbits to the bowl.
    • Toss gently until well mixed and coated.
    • Add optional topping then serve or refrigerate!

    Video

    Notes

    Is Fruit Salad with Cool Whip the same as Ambrosia Salad?
    Yes! Although there are different variations, the two are very similar and commonly called both.
    Can I use homemade whipped cream instead of cool whip?
    You can! You can use any kind of plain whipped topping from the store or you can make your own. However the texture of the Cool Whip tends to be more airy and not as heavy, which is what makes this salad so light and fluffy.
    Can I make fruit salad in advance?
    Yes! If planning to take this to a party or gathering, it’s easy to make this a day in advance if desired. Just chill until ready to serve!
    How do I store leftovers?
    If you have leftovers of this delicious fruit salad, you can store it in an airtight container or cover with plastic wrap for up to 3-days.

    Nutrition

    Serving: 1cup | Calories: 246kcal | Carbohydrates: 48g | Protein: 2g | Fat: 7g | Saturated Fat: 5g | Polyunsaturated Fat: 1g | Monounsaturated Fat: 1g | Cholesterol: 5mg | Sodium: 36mg | Potassium: 223mg | Fiber: 4g | Sugar: 38g | Vitamin A: 349IU | Vitamin C: 14mg | Calcium: 73mg | Iron: 1mg

    Air Fryer Turkey Breast

    July 29, 2021

    Sliced turkey breast cooked in the air fryer.

    Cooking a turkey breast in the air fryer couldn’t get any easier! This juicy turkey breast is perfect for a busy weeknight or even a Thanksgiving meal!

    With simple ingredients, such as butter, salt, pepper, olive oil, and fresh herbs, it results in a juicy center with flavorful crispy skin! Such a great way to enjoy turkey without the hassle of a full bird! You may also love to see how to make a turkey breast in the Instant Pot!

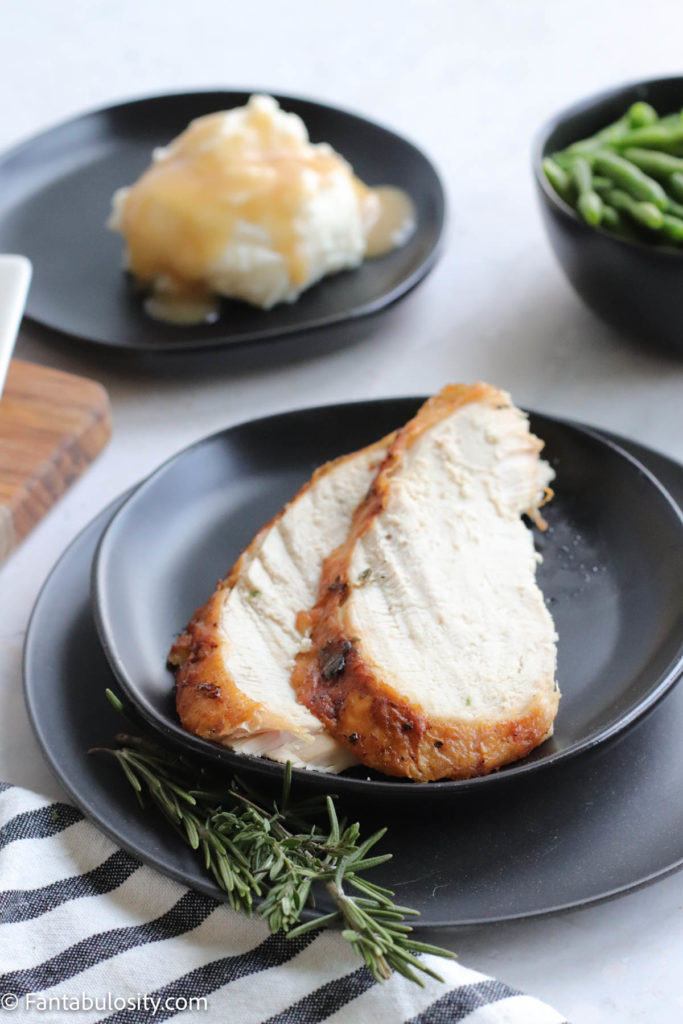
    air fryer turkey breast on black plate with side dishes

    It never fails, when cooking a whole baked turkey recipe, it leaves a ton of leftover turkey, leaving us trying to find ways to use up the rest in other recipes and feeling tired of turkey after a few days, and possibly wasting a lot of great juicy meat.

    Although that’s absolutely ok, and using extra turkey to make things like turkey and noodles (instead of chicken and noodles) or turkey noodle soup recipe, is DELICIOUS… sometimes it’s nice to only have a smaller portion to cook.

    This is where cooking a bone-in turkey breast comes in really handy. You can get the most delicious parts of the bird and not waste any!

    Air Fryer Turkey Breast Recipe

    If you have an air fryer, then you know that the cooking time can be a lot faster for your favorite recipes, without sacrificing flavor. Well this air fryer turkey recipe can also be cooked in less time and is the perfect way to cook it, without getting a dry turkey.

    [feast_advanced_jump_to]

    Should I Use Bone-In or Boneless Turkey Breast?

    When cooking turkey breast, the bone-in usually results in a more flavorful and more juicy bird. A boneless breast is easier for slicing or carving but can definitely be less flavorful.

    So for this easy air fryer turkey breast, we recommend a bone-in.

    Ingredients

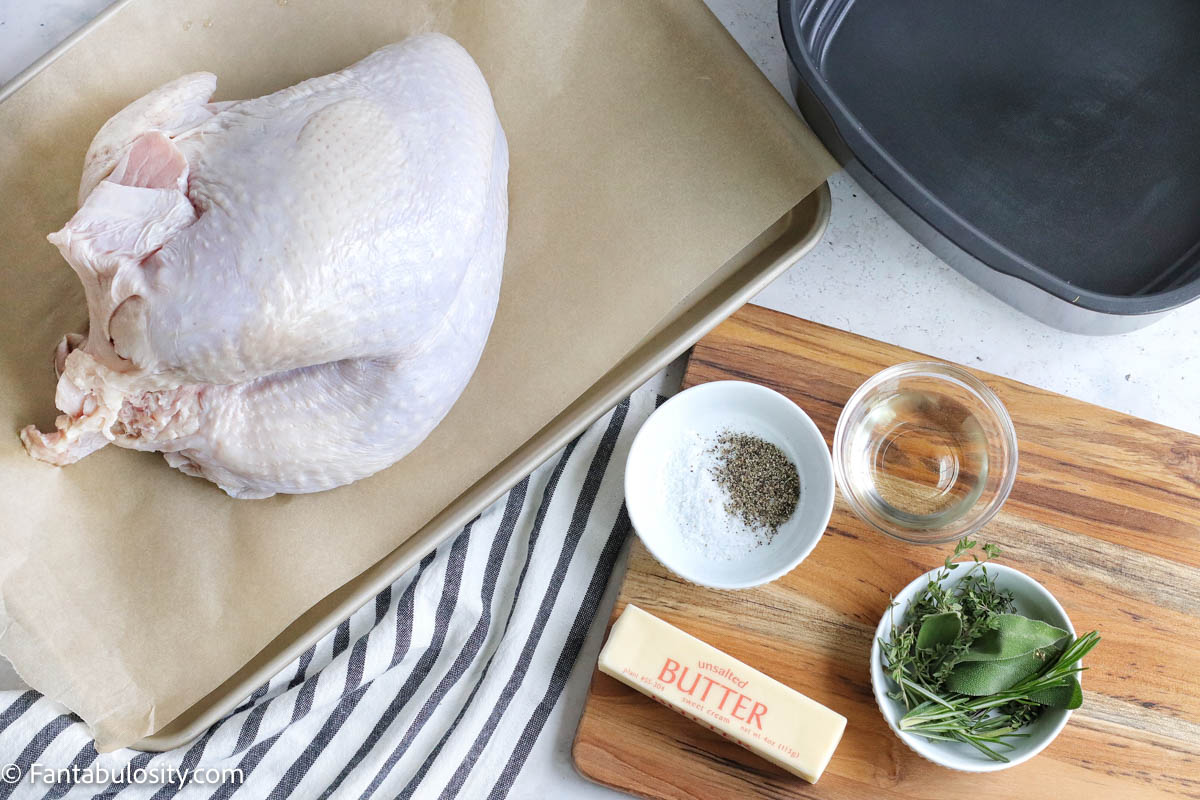
    All you need for this recipe is:

    • Turkey Breast (With Bones)
    • Olive Oil
    • Unsalted Butter
    • Salt
    • Black Pepper
    • Fresh Sage
    • Fresh Rosemary
    • Fresh Thyme
    ingredients for cooking turkey breast in the air fryer
    Ingredients

    You can grab the full printable recipe card with instructions and ingredient quantities at the end of this post!

    Step by Step Instructions

    Step 1: Preheat the air fryer to 400 degrees.

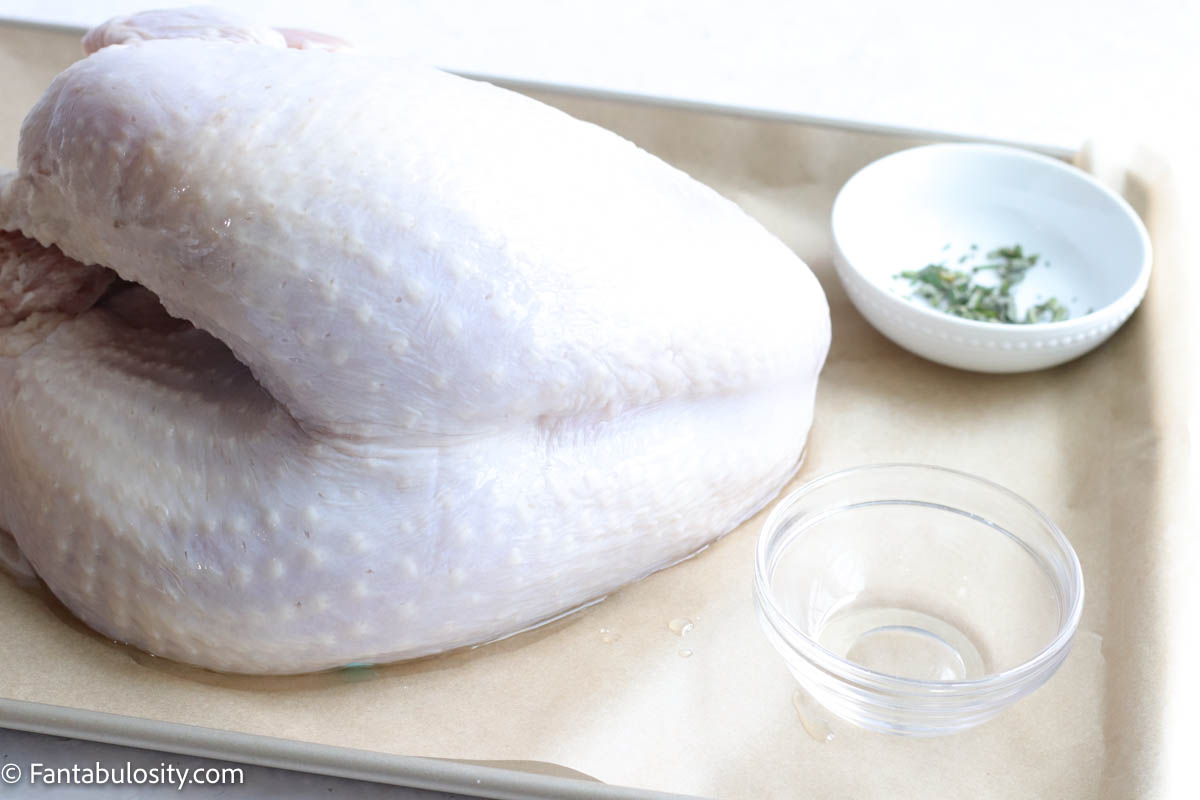
    Step 2: Remove any excess juices around the turkey and transfer to a baking tray or piece of parchment paper - somewhere that you can prep the turkey.

    Turkey breast ready for spices and herbs
    Place turkey on parchment paper to season and prep

    Step 3: Pat the turkey dry with paper towels. (This is helpful for the spices and seasonings to stick to the turkey before and during the cooking process.)

    Step 4: Use your hands to spread the butter just under the skin.

    Step 5: Then, drizzle the olive oil all over the top of the turkey.

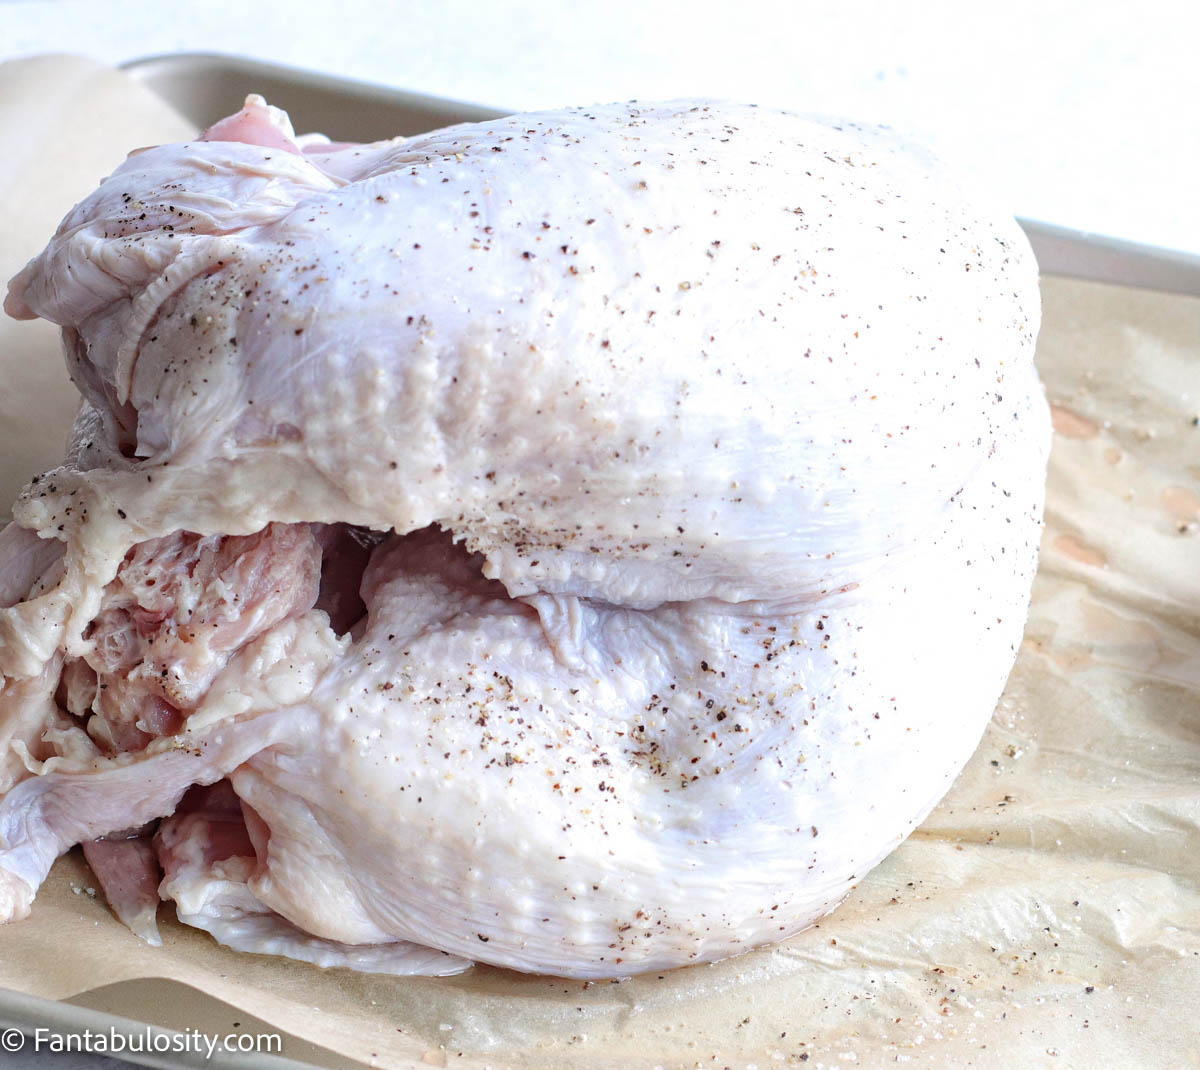
    Step 6: Rub the top of the turkey skin with the salt & pepper. 

    salt and pepper on turkey
    Seasoned, buttered turkey breast

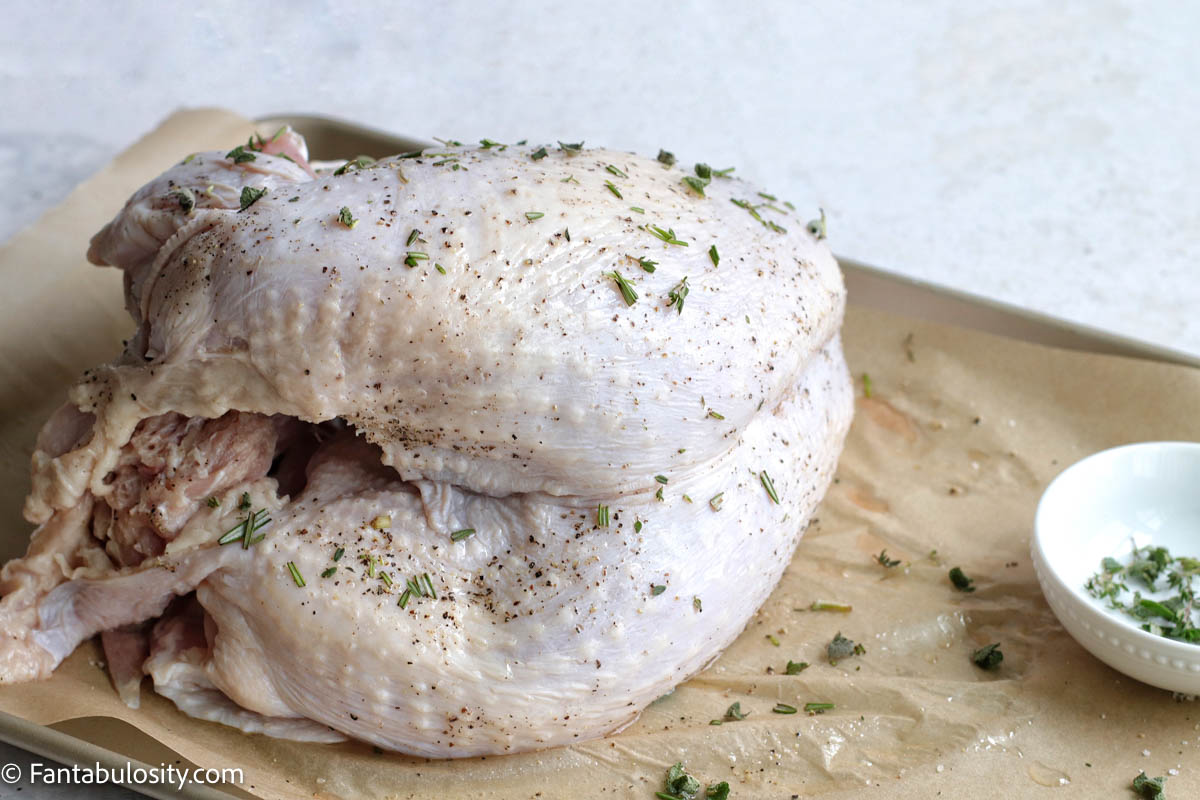
    Step 7: Next, sprinkle the turkey breast with the chopped fresh herbs (sage, rosemary, thyme). Patting them down on the sides of the turkey breast, so, they stick.

    fresh herbs on turkey breast ready for air fryer
    Turkey breast with oils, spices and herbs – ready for cooking

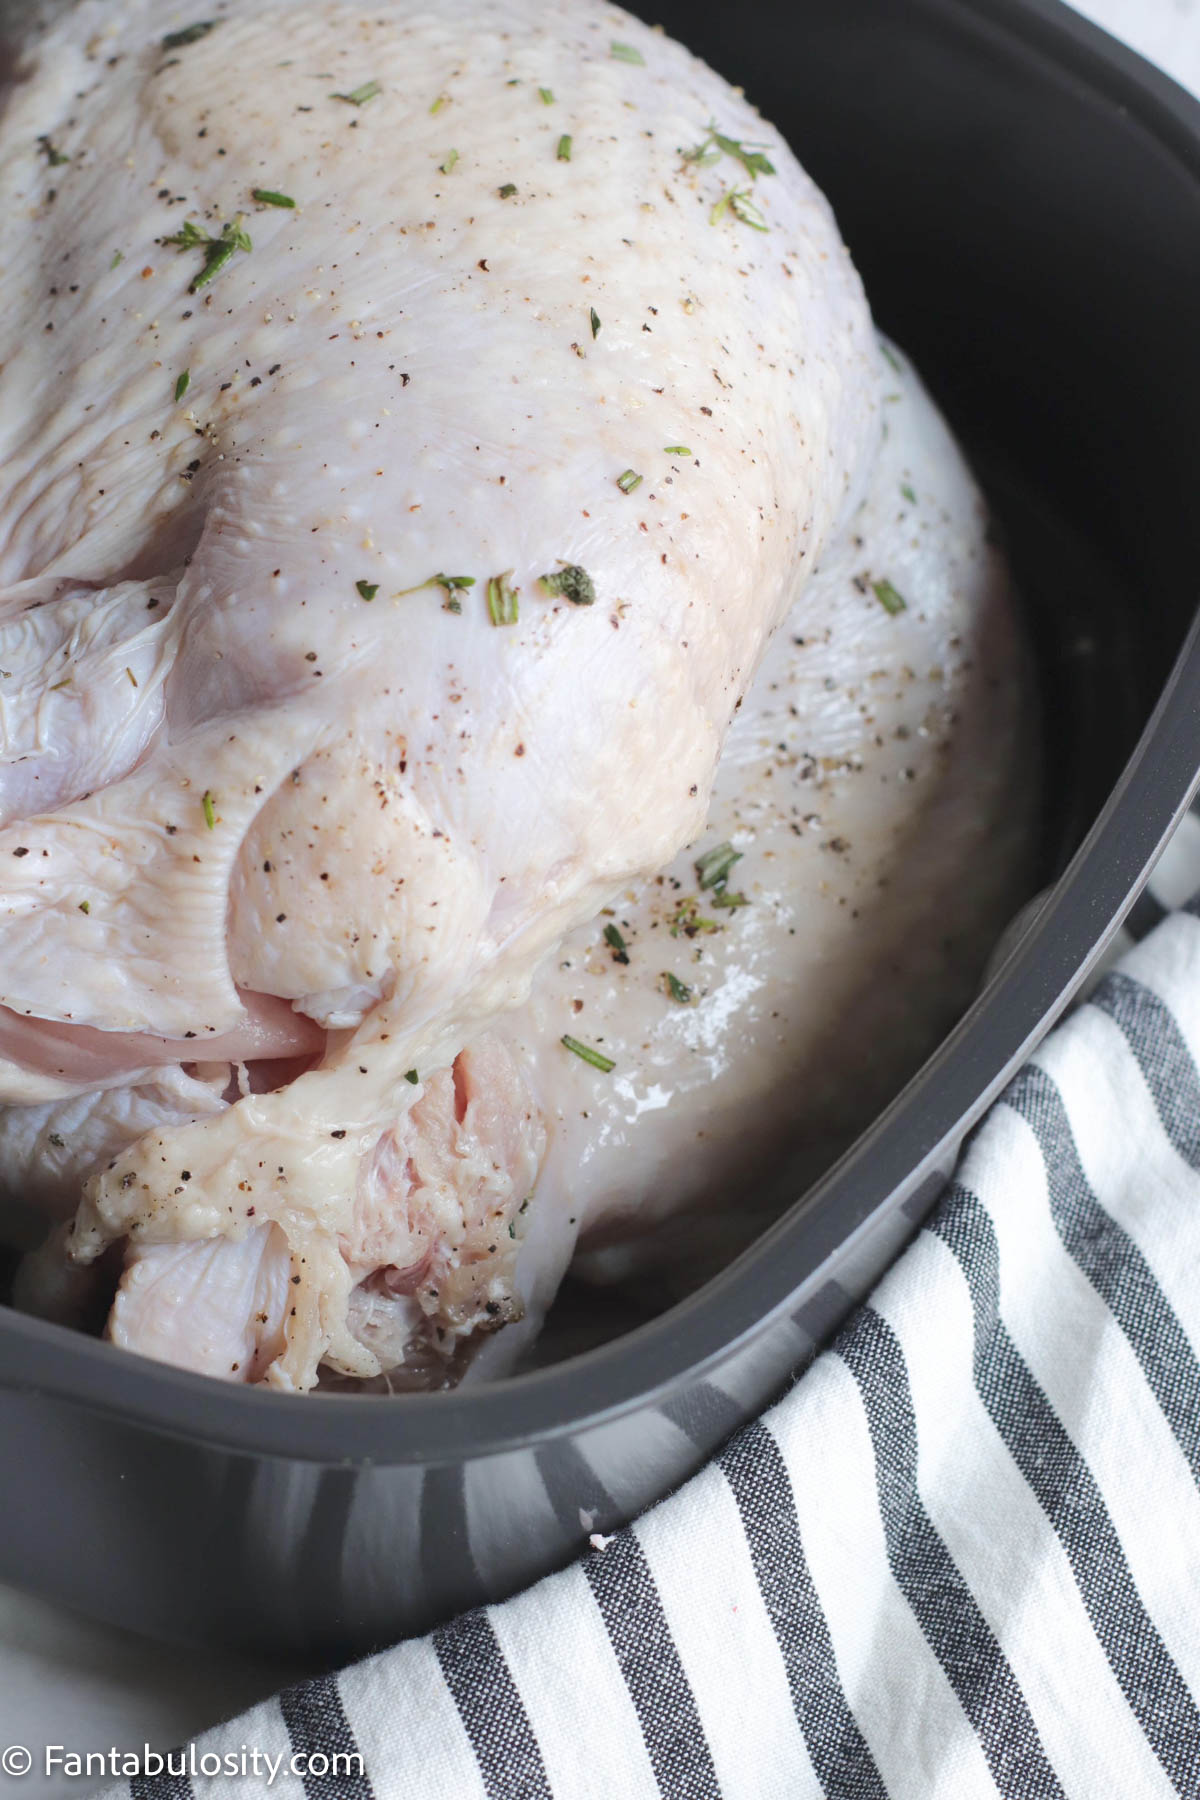
    Step 8: Place the turkey breast into the air fryer and cook at 400 degrees for about 10 minutes.

    uncooked raw turkey breast in air fryer
    Raw turkey breast in air fryer basket

    Step 9: Flip the turkey over and reduce the temperature to 350 degrees cook for an additional 40 minutes.

    You may flip the turkey once more during the last ten minutes if you feel the skin doesn't seem as crispy as you want. 

    The turkey is ready when it reaches an internal temperature of 165 degrees. 

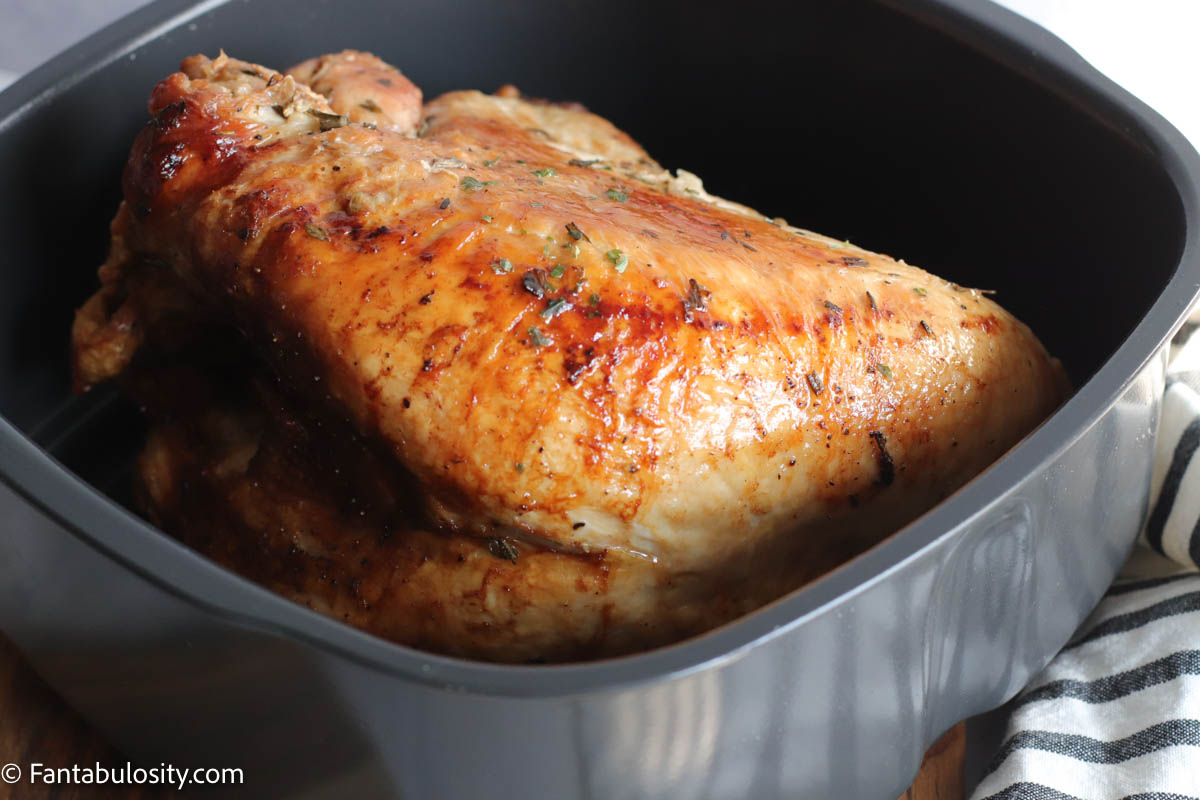
    Cooked turkey breast in the air fryer
    Fully cooked air fryer turkey breast

    Step 10: Remove from air fryer and make sure the turkey rests for 10 minutes before carving!

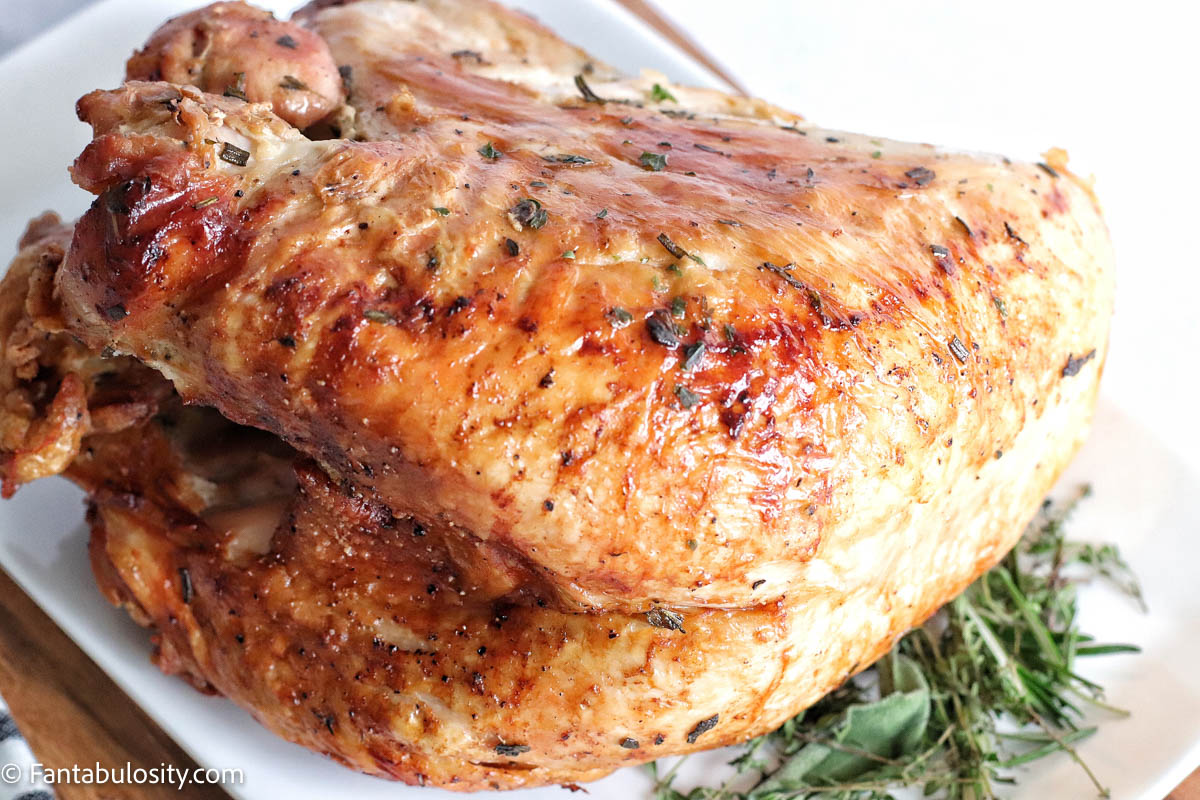
    Air fried turkey breast cooked and on plate
    Golden brown turkey breast

    Top Tips

    When it comes to turkeys I always suggest checking the temperature with a meat thermometer. (We love using this instant read thermometer.)

    Make sure the thermometer is inserted in the middle of the breast meat & not touching any bone. 

    Can I cook a frozen turkey breast in my air fryer?

    You can, but it’s not really recommended. It will take a long time to cook and by the time the middle of the turkey is cooked to a safe temperature, it will create a very dry turkey breast. But it is possible.

    How long does it take to cook a turkey breast in the air fryer?

    For a 5-7 pound, bone-in turkey breast, it takes about 50 minutes to reach a safe, internal temperature of 165°.

    Do I have to brine a turkey before cooking it?

    It’s not mandatory, however placing the turkey in brine can help give it more tender meat, and make it more flavorful and keep it juicier. We use this chicken brine even for turkey breasts!

    Turkey breast cooked in air fryer, carved
    Juicy center of turkey breast

    Substitutions

    If you do not have fresh herbs on hand, you can use dried herbs if necessary, however, it really is better with the fresh.

    You can also use spices such as poultry seasoning, garlic, etc. if you prefer those flavors!

    Equipment

    This recipe will work for any brand or size of air fryer! However, make sure the turkey breast you choose will fit into your air fryer.

    Also, if you choose a very small turkey breast that fits in the Air Fryer basket use that. But if you have a larger turkey breast you can use the air fryer pot or base dish, placing the turkey directly in that! So depending on the size of your air fryer, it can be cooked in the basket or the base.

    air fryer turkey breast on plate
    Carved turkey breast with side dishes

    How to Store Leftover Turkey

    Although turkey breasts are usually smaller than a whole turkey, you may still have leftovers! If you do, you can store it in an airtight container in the fridge for 3-4 days after cooking.

    What to Serve with Turkey Breast

    This green bean casserole is a favorite to serve alongside a turkey breast! But a side salad and something as easy and healthy as this roasted broccoli is a perfect paring!

    More Air Fryer Recipes

    Love using the air fryer as much as we do? Then you’ll also love our other air fryer recipes, such as teriyaki chicken wings, garlic parmesan chicken legs, and burgers in the air fryer.

    Recipe

    Sliced turkey breast cooked in the air fryer.
    Print Pin
    5 from 4 votes

    Air Fryer Turkey Breast

    Cooking a turkey breast in the air fryer couldn't get any easier! This juicy turkey breast is perfect for a busy weeknight or even a Thanksgiving meal!
    Course Main Course
    Cuisine American
    Prep Time 10 minutes minutes
    Cook Time 50 minutes minutes
    Total Time 1 hour hour
    Servings 4 people
    Calories 657kcal
    Author Jessica Burgess

    Equipment

    • air fryer

    Ingredients

    • 5-7 lb turkey breast bone-in
    • 1 tablespoon olive oil
    • 2 tablespoon unsalted butter
    • .5 teaspoon salt
    • .5 teaspoon black pepper
    • 1.5 teaspoon fresh sage chopped
    • 1 tablespoon fresh rosemary chopped
    • 1.5 teaspoon fresh thyme chopped

    Instructions

    • Preheat air fryer to 400°
    • Remove any excess juices around the turkey and transfer to a baking tray or piece of parchment paper - somewhere that you can prep the turkey.
    • Pat the whole outside of the turkey dry with paper towels – this allows the spices and herbs to stick to the turkey better.
    • Use your hands to spread the butter just under the skin, getting in all of the places you can, without ripping a hole in the skin.
    • Then, drizzle the olive oil all over the top of the turkey.
    • Rub the top of the turkey skin with the salt & pepper.
    • Next, sprinkle the turkey breast with the chopped fresh herbs (sage, rosemary, thyme). Patting them down so they stick.
    • Place the turkey breast into the air fryer and cook at 400 degrees for about 10 minutes.
    • Flip the turkey over and reduce the  temperature to 350 degreesand cook for an additional 40 minutes.
    • You may flip the turkey once more during the last ten minutes if you feel the skin doesn't seem as crispy as you want. 
    • The turkey is ready when it reaches an internal temperature of 165 degrees. 
    • Remove from air fryer and allow to rest for 10 minutes before carving!

    Notes

    When it comes to turkeys I always suggest checking the temperature with a meat thermometer. (We love using this instant read thermometer.)
    Make sure the thermometer is inserted in the middle of the breast meat & not touching any bone. 
    Can I cook a frozen turkey breast in my air fryer?
    You can, but it’s not really recommended. It will take a lot longer to cook and the outside may burn/dry out before the middle of the turkey is cooked but it is possible.
    How long does it take to cook a turkey breast in the air fryer?
    For a 5-7 pound, bone-in turkey breast, it takes about 50 minutes to reach a safe internal temp of 165°.
    Do I have to brine a turkey before cooking it?
    It’s not mandatory but it can help give it more tender meat inside and can give it more flavor. But this recipe is delicious even without it! If you do want to soak it in a brine, we love using this chicken brine recipe, even for turkey.

    Nutrition

    Serving: 1serving | Calories: 657kcal | Carbohydrates: 1g | Protein: 122g | Fat: 19g | Saturated Fat: 6g | Polyunsaturated Fat: 3g | Monounsaturated Fat: 7g | Trans Fat: 1g | Cholesterol: 321mg | Sodium: 1460mg | Potassium: 1388mg | Fiber: 1g | Sugar: 1g | Vitamin A: 340IU | Vitamin C: 1mg | Calcium: 92mg | Iron: 3mg

    Lemon Cake Mix Brownies

    July 24, 2021

    Lemon Brownies Recipe with cake mix

    This lemon cake mix brownies recipe is made with a cake mix, and only a handful of other ingredients, creating an easy, gooey brownie dessert that lemon lovers adore!

    lemon cake mix brownies

    This recipe is inspired by the strawberry brownies that have gone viral on Facebook and being a lemon lover myself, I knew a lemon version of the brownies would be so good as well! If you prefer a less dense lemon brownie, then these lemon blondies may be what you want to make instead.

    Quick Overview: Only 6 ingredients, and a prep time in as little as 5 minutes, you’ll have lemon brownies baked in 20 minutes and the optional glaze recipe! If you love making brownie recipes with cake mixes, then you’re also going to love these red velvet brownies!

    Lemon is delicious any time of year but especially in the summer months! And with this summery dessert, you won’t be standing in front of a hot stove and it only has to be in the oven for 18-20 minutes! This lemon poke cake is another great summer recipe because when chilled, it gives a cool bite to your hot summer! Or, to try your hand at a classic, this lemon meringue pie recipe is one to make too!

    A Dense, Ooey Gooey Brownie

    If you’re looking for a cake-style brownie, this won’t be it! This brownie recipe has an ooey-gooey texture and is very dense and rich!

    With a cake recipe, using a cake mix, most call for water, giving it more of an airy, cakey, texture. This recipe does not use water so it creates a thick, brownie batter.

    If you prefer more of a cake-style, adding a little water may be for you but just keep in mind that it may change the bake time, and it may result in just making a lemon cake, instead of a lemon “brownie”.

    [feast_advanced_jump_to]

    Lemon Brownie Ingredients

    The first part of this recipe is for the brownie batter! All you need is:

    • lemon cake mix – Betty Crocker or Pillsbury have been my favorite. I’ve tried Dunkan Hines for this recipe and it didn’t turn out too great.
    • vegetable oil
    • eggs
    • vanilla extract
    Lemon brownies ingredients

    Lemon Glaze Ingredients

    The second part of this recipe is for the optional (but highly recommended) lemon glaze! Here’s all you need for the glaze:

    • powdered sugar
    • fresh lemon juice
    • (milk is optional, to help thin it out if needed)
    Lemon Glaze Ingredients

    See the full, printable recipe card at the bottom of this post to get measurements and instructions!

    Instructions

    1. Spray non-stick cooking spray on an 8×8 baking dish.

    Gather all of your ingredients and a medium-sized mixing bowl.

    lemon cake mix in bowl
    1. Pour the cake mix in to your mixing bowl.
    Pouring vegetable oil in to cake mix
    1. Next, add in the vegetable oil
    Add eggs in to cake mix
    1. Then the two eggs
    Pour vanilla in to cake mix
    1. Finally, the vanilla extract
    Mix cake mix with oil, eggs and vanilla
    1. Mix ingredients together until evenly combined. You should have a thick batter like shown in the image below.
    texture of lemon brownie batter
    1. Press brownie batter in to baking dish, in an even layer, making sure the batter touches the sides.
    Spread lemon brownie batter in to 8x8 baking dish
    1. Place baking dish in preheated oven and set timer for 18 minutes.
    Mix together the lemon juice and powdered sugar
    1. While lemon brownies are baking, mix up the lemon glaze if desired. Mix together the powdered sugar and lemon juice and stir until evenly comined, creating a consistency similar to the image below.
      If glaze is too thick (you didn’t have enough lemon juice, you can add a teaspoon of milk until it reaches the consistency desired.)
    Lemon glaze consistency
    1. Once brownies are finished baking, (they’re finished when you stick a toothpick in to the center and it comes out clean) remove from the oven and place baking dish on a cooling rack so the brownies can begin to cool.
    baked lemon brownies
    1. Once the brownies have cooled (or at least have cooled off enough to where the brownies are just a tad warm still) pour glaze over the top and spread evenly over the brownies.
    Lemon glaze pouring on top of lemon brownies
    1. Allow glaze to harden (it can sit out at room temperature), which should only take about 10 minutes or so.
    lemon glaze on top of lemon brownies
    1. Once the glaze has hardened, it’s safe to cut the brownies and to serve! They’re delicious a LITTLE warm (they need to be cooled off enough so the glaze hardens) but are also delicious room temperature as well.
    slice brownies in to equal size squares

    What to Serve with Lemon Brownies

    The lemon brownies are very rich and can be enjoyed alone but they’re also incredible, topped with a scoop of vanilla ice cream, or even sliced sugared strawberries.

    lemon brownies in baking dish

    How to Store Brownies

    Once the brownies have cooled completely, store any leftovers in an airtight container, on the counter for 3-4 days. They do not have to be refrigerated, although refrigerating can extend the life of the brownie, to at least a week.

    Lemon Brownies Stacked on white plate

    Helpful Tips:

    • If you prefer more of a cake icing for your brownies, you can use canned frosting instead of the lemon glaze.
    • If you prefer a citrus variety, you can zest limes or oranges and incorporate the zest/juices instead of only lemon.

    Related Posts

    This lemon muddy buddies recipe will knock your socks off! It’s another no-bake dessert or snack that lemon lovers go wild for!

    I also think you’ll love these gluten-free lemon bars!

    If your little one loves having their own lemonade stand, then they’ll love having these brownies, muddy buddies, or lemon bundt cake, to sell along with the lemonade!

    Recipe

    Lemon Brownies Recipe with cake mix
    Print Pin
    4.99 from 60 votes

    Lemon Cake Mix Brownies

    This lemon cake mix brownies recipe is made with a cake mix, and only a handful of other ingredients, creating an easy, gooey brownie that lemon lovers adore!
    Course Dessert
    Cuisine American
    Prep Time 5 minutes minutes
    Cook Time 18 minutes minutes
    Cooling Time 10 minutes minutes
    Total Time 33 minutes minutes
    Servings 9 brownies
    Calories 405kcal
    Author Jessica Burgess

    Ingredients

    Lemon Brownies

    • 1 box lemon cake mix Betty Crocker brand (with pudding in the mix) is recommended.
    • ⅓ cup vegetable oil
    • 2 eggs
    • 1 teaspoon vanilla extract

    Lemon Glaze

    • 1 cup powdered sugar
    • 1 juice of 1 lemon
    • 1 teaspoon milk optional, if needing to thin out glaze

    Instructions

    For Brownies

    • Preheat oven to 350 degrees and grease 8×8 baking dish with cooking spray
    • In a medium sized mixing bowl, mix together the cake mix, eggs, oil and vanilla until evenly combined.
    • Press brownie batter (it will be thick) in to the bottom of the baking dish, pressing it to an evenly layer, making sure it's pressed all the way to the sides.
    • Bake at 350 degrees for 18-20 minutes or until a toothpick is inserted in the middle of the brownies and comes out clean.

    Lemon Glaze

    • While baking, mix together lemon glaze if desired. In a small bowl, mix together powdered sugar and juices from lemon (about 2 tbsp). If glaze is not thin enough to pour, you can add milk by the teaspoon until it has reached the desired consistency. (You do not want it too thin or it will not harden.)
    • Remove brownies from oven and place baking dish on cooling rack so it can begin to cool.
    • Once brownies have cooled, pour the lemon glaze on top of the brownies, spreading with a spoon so that it evenly covers the brownies.
    • Let the brownies sit to allow the glaze to harden and cut brownies in to 9 equal squares (unless you prefer smaller) and serve!

    Notes

    Helpful Tips:

    • I have tried using Duncan Hines lemon cake mix for this recipe and I wasn’t a fan of the result. I recommend Betty Crocker for the best result. 
    • If you prefer more of a cake icing for your brownies, you can use canned frosting instead of the lemon glaze.
    • If you prefer a citrus variety, you can zest limes or oranges and incorporate the zest/juices instead of only lemon.

    Nutrition

    Serving: 1brownie | Calories: 405kcal | Carbohydrates: 66g | Protein: 4g | Fat: 15g | Saturated Fat: 9g | Polyunsaturated Fat: 2g | Monounsaturated Fat: 3g | Trans Fat: 1g | Cholesterol: 36mg | Sodium: 479mg | Potassium: 67mg | Fiber: 1g | Sugar: 41g | Vitamin A: 56IU | Vitamin C: 6mg | Calcium: 131mg | Iron: 1mg

    Christmas Tree Cake Dip

    July 19, 2021

    Christmas Tree Cake Dip in white bowl

    Christmas Tree Cake Dip: A festive treat that’s made with cream cheese and nostalgic Little Debbie cakes. Enjoy with graham crackers, animal crackers, or vanilla wafers as a Christmas dessert for your next party!

    Little Debbie Christmas tree cake dip in white bowl

    Making desserts for a large group of people is less stressful when you have easy recipes that make a large number of servings!

    Why You’ll Love This Recipe:

    • It’s Easy: When I said this delectable dip recipe was easy, I wasn’t kidding. It only takes 5 minutes to make and calls for basic ingredients. It’s the perfect last-minute dessert when you don’t want something store-bought.
    • Kid-Approved: There’s nothing better than happy kids around the holiday season. This recipe is 100% kid-approved and I think it’s because there’s something about the scrumptious Christmas tree cakes that kids absolutely LOVE! (Our kids also love this Christmas Chex Mix, and I totally understand why!)
    • Sweet Treat: I haven’t found a holiday dessert that satisfies my sweet tooth better than this one does. The sweetness of the Little Debbies combined with the decadent creamy cream cheese makes this festive dessert dip the perfect special treat. Though grandma’s Christmas cookies will always have a special place in my heart, too.
    • Dessert Bar Idea: It’s the perfect addition if you’re hosting a holiday party and looking to fill a dessert bar or if you just want something for a small gathering on a holiday movie night! (You may also want to make this sugar cookie fudge to go along with this dip if creating a dessert bar!)

    Ingredient Notes

    • Cream cheese – make sure this is softened!
    • Heavy cream – you can use milk instead if that’s all you have on hand.
    • Little Debbie Christmas Tree Cakes – it may be fun to try the Chocolate Christmas Tree Cakes too!
    • Red and green sprinkles – these are optional but add some fun to the dip
    Ingredients for Christmas Tree Cake Dip on white marble counter
    Ingredients

    Step by Step Directions

    1. In a medium sized mixing bowl, add package of cream cheese and heavy whipping cream (First and Second Image Below)
    Cream cheese and heavy cream in glass mixing bowl
    Cream Cheese & Heavy Cream
    Mixed cream cheese and heavy cream in glass bowl
    Mixed Together
    1. Add in a teaspoon of vanilla extract and combine with a hand mixer until smooth (First Image Below)
    2. Break up 4 Christmas tree cakes and lightly mix them into the cream cheese mixture (Second Image Below)
    Vanilla in cream cheese mixture in glass bowl
    Add vanilla and mix
    Broken up Christmas tree snack cakes in mixing bowl
    Add snack cakes
    1. Add sprinkles if desired (Second Image Below) and mix together.
    Mixed cream cheese, vanilla and snack cakes in glass bowl
    Mixed together
    Christmas sprinkles in Christmas tree cake dip
    Add sprinkles
    1. Place dip in a serving bowl and enjoy! (Or see below for tips on how to make this a dessert board or charcuterie board!)
    Christmas tree cake dip in white bowl with Christmas tree shaped snack cakes laying around bowl

    Dessert Dip Charcuterie Board Idea

    If you’re hosting or going somewhere for Christmas, it may be fun to serve this dip with cookies and crackers, on a board, making a dessert charcuterie board for your next party! If you’re looking for Christmas movie night ideas too, this would be the perfect treat!

    No worries if you’re not sure how to make a dessert board… I’ll show you some tips below!

    Christmas tree cake dip in bowl, surrounded by crackers and cookies

    Items for a Dessert Charcuterie Board

    You can use just about any of your favorite dippers like cookies and sweet crackers for a board like this one but here are our favorites, and what you see below:

    • Teddy Grahams: Honey or Cinnamon will work beautifully.
    • Vanilla Wafers: We used the mini wafers but the regular size will work too.
    • Waffle Cookies: These are the round cookies with a waffle pattern (top left corner) and these were actually filled with caramel, which were amazing!
    • Graham Crackers: Like the Teddy Grahams, you can use honey or cinnamon, or even chocolate.
    • Mini Fudge Stripes cookies: You can use full-size Fudge Stripes cookies but we went for the mini to keep the “mini” look!
    • Fresh Fruit: Although we didn’t use fresh fruit on this board, it’s a fantastic option for dessert dip recipes.
    • Gingerbread Cookies: If you’re baking for the holiday, you may love baking and serving these gingerbread cookies with the dip too!

    We simply used the same snack crackers and cookies for both sides of the board to keep things easy!

    Remember when styling a board like this, that’s it’s ok to overlap the items and pile them up. The beautiful thing about these boards is that messy and piled can still look fabulous!

    But you may also love to see my other Christmas Charcuterie Board which has a lot of sweets and candies on it, for more ideas too!

    Wooden charcuterie board with Christmas tree cake dip in the middle, surrounded by cookies and crackers

    Expert Tips and FAQs

    Can I use a food processor to combine the ingredients?

    Yes! You can use a food processor to make this Little Debbie Christmas tree cake dip. Combine cream cheese, heavy whipping cream, and vanilla before adding in the snack cakes and sprinkles. You don’t want to over process your snack cakes.

    What type of sprinkles work best for Christmas dessert dip?

    For this Christmas tree cake dip recipe, I suggest using sprinkles that aren’t too large. Smaller sprinkles will combine and taste better when combined with the creamy texture of the dip. And of course, use red and green sprinkles!

    Can I use cool whip instead of heavy whipping cream?

    If you’re in a bind, you can use cool whip instead of heavy whipping cream. Heavy whipping cream will combine with the above ingredients better than cool whip will, however, it will still work for this recipe.

    Hand holding graham cracker, with dipped cake dip on end

    How Long Does Christmas Tree Dip Last?

    You can keep this Little Debbie Christmas tree dip in the fridge for up to 4 days. You’re going to want to place the festive dip in an airtight container or over the serving bowl with plastic wrap. I would recommend serving this dip fresh or after it’s chilled for a little time.

    christmas tree cake dip

    What to Serve with This Christmas Dip?

    Graham crackers, Nila wafers, pretzels, and animal crackers taste delicious dunked in this festive dip. If you’re looking to really impress at holiday parties, I suggest making cut-out sugar cookies for dipping! Sugar cookies are another easy dessert recipe that never disappoints!

    Can I Use Different Little Debbie Snack Cakes?

    Yes! If want to make a non-festive creamy sweet dessert dip, you can use other seasonal snack cakes like birthday cake snack cakes, zebra cakes, or even chocolate snack cakes. You can switch up this dip to be a birthday cake dip, cookies, cream dip, or chocolate cake dip. There are tons of different Little Debbie cakes so go crazy!

    little Debbie cake dip

    Related Recipes

    I love the Christmas season, especially the holiday food!! It really is the most wonderful time of the year! I have so many Christmas dessert recipes that can be a fun treat for the holiday season and your next holiday party, such as this candy cane pie, these cornflake wreaths, these forest cupcakes, and red velvet cake mix cookies!

    But if you want to get super creative, you’ll love this Christmas Tree Charcuterie Board idea!

    Little Debbie christmas tree cake dip

    Did you make this? I’d be so grateful if you left a “star” rating below to let me know what you thought! Then, the next time you need a quick and easy recipe, come back to Fantabulosity to browse all of my easy recipes!

    Recipe

    Christmas Tree Cake Dip in white bowl
    Print Pin
    5 from 39 votes

    Christmas Tree Cake Dip

    Christmas Tree Cakes Dip: A festive dip that's made with cream cheese and nostalgic Little Debbie cakes. Enjoy with graham crackers, animal crackers, or vanilla wafers!
    Course Dessert
    Cuisine American
    Prep Time 5 minutes minutes
    Total Time 5 minutes minutes
    Servings 6 servings
    Calories 106kcal
    Author Jessica Burgess

    Ingredients

    • 8 ounces cream cheese 1 package, softened
    • 2 Tablespoons heavy whipping cream
    • 1 teaspoon vanilla extract
    • 5 Little Debbie Christmas Tree Cakes 1 box
    • 1 Tablespoon red and green sprinkles each

    Instructions

    • In a medium sized mixing bowl, add package of cream cheese and heavy whipping cream.
    • Add in teaspoon of vanilla extract and combine with a hand mixer until smooth.
    • Break up 4 christmas tree cakes and lightly mix them into the cream cheese mixture.
    • Pour into a serving bowl and garnish with one Christmas Tree Cake and red and green sprinkles. 
    • Serve with graham crackers, cookies, pretzels, or vanilla wafers.

    Video

    Notes

    Can I use Cool Whip instead of heavy whipping cream? 
    If you’re in a bind, you can use Cool Whip instead of heavy whipping cream. Heavy whipping cream will combine with the above ingredients better than Cool Whip will, however, it will still work for this recipe.
    How long does Christmas tree dip last? 
    You can keep this Christmas tree dip in the fridge for up to 4 days. You’re going to want to place the festive dip in an airtight container or over the serving bowl with plastic wrap. I would recommend serving this dip fresh or after it’s chilled for a little time.

    Nutrition

    Serving: 1serving | Calories: 106kcal | Carbohydrates: 9g | Protein: 2g | Fat: 7g | Saturated Fat: 4g | Polyunsaturated Fat: 1g | Monounsaturated Fat: 2g | Cholesterol: 18mg | Sodium: 90mg | Potassium: 34mg | Fiber: 1g | Sugar: 6g | Vitamin A: 225IU | Vitamin C: 1mg | Calcium: 33mg | Iron: 1mg

    Easy Taco Layer Dip Recipe

    July 15, 2021

    taco layer dip recipe

    This taco layer dip is an easy Mexican layered dip to make! It has 7 layers: refried beans, avocado, taco seasoning mixture, shredded cheese, green onions, black olives & cilantro!

    Ready in minutes, and different than our baked taco dip, it is one of the best easy appetizers for any party or to serve while waiting on Dorito chicken casserole to bake in the oven or these cheesy beefy burritos to cook on the stove-top!

    taco layer dip
    [feast_advanced_jump_to]

    What is Taco Layer Dip?

    This popular appetizer has been called MANY different things! Some call it:

    • 7 layer dip
    • Taco dip
    • Seven-layer taco dip
    • Mexican layered dip
    • Ultimate taco tip

    No matter what you call it, it’s ultimately the same appetizer recipe you typically find at parties (especially Super Bowl parties) or to serve along with dishes like chicken street tacos or taco soup!

    It consists of many layers of different ingredients like refried beans, avocado guacamole, tomatoes, black olives, taco seasoning/cream cheese/sour cream, shredded cheese, and more, that you can dip tortilla chips in to, crackers, veggies, or even pile on top of build-your-own nachos for the ultimate dish!

    Layers in taco dip appetizer recipe

    What You’ll Love About This Recipe:

    1. You’ll love that this easy taco dip recipe doesn’t use wild ingredients but rather simple ingredients that you can get at almost every grocery store.
    2. It can be made quickly, so if you need something last-minute it’s a great dish to make and take or make and serve at home with your favorite chips, or even more fun… with these fried tacos!
    3. It has become a popular recipe that so many people love, so you probably won’t have any leftovers with the right crowd!

    What are the layers in a seven-layer dip?

    Although you can substitute ingredients, and even arrange them differently, these are the most common layers in a 7 layer dip:

    1. refried beans
    2. mashed avocado (or guacamole)
    3. taco dip mixture (taco seasoning mixed with cream cheese & sour cream)
    4. shredded cheese (cheddar cheese, fiesta cheese, or desired type)
    5. green onions
    6. fresh tomatoes
    7. black olives

    You can also sprinkle on fresh cilantro if desired!

    See the full printable recipe card at the bottom of this post!

    Ingredients for 7 layer taco dip

    How to make classic seven-layer taco dip

    1. In a small bowl, (yet big enough for cream cheese, sour cream, and taco seasoning) and using a mixer, mix together the cream cheese, sour cream, and taco seasoning mix, set aside.
    Cream cheese in a mixing bolw
    Sour cream and cream cheese in white bowl
    taco seasoning in bowl
    taco seasoning sour cream cream cheese
    taco seasoning, cream cheese and sour cream mixture
    1. In a 9×13 baking dish, casserole dish or serving tray, spread the refried beans on the button.
    refried beans spread in baking dish
    1. Next, carefully add a layer of guacamole or layer of mashed avocado on top of the beans, spread evenly.
    spread mashed avocado or guacamole in dish
    1. For the third layer, gently spread the sour cream mixture on top of the avocado.
    spread taco seasoning mixture on top
    1. Next, layer on the shredded cheese on top of the sour cream/cream cheese mixture.
    sprinkle shredded cheese on top of taco dip
    1. Sprinkle diced green onions on top of cheese.
    sliced green onions on top of taco layer dip
    1. Layer on the diced tomatoes
    diced tomatoes on top of 7 layer dip
    1. Top tomatoes with black olives
    sliced black olives on top of taco dip
    1. Sprinkle on chopped fresh cilantro if desired
    diced fresh cilantro on top of 7 layer taco dip
    1. Serve this cold dip with chips, crackers, veggies like carrots,
    7 layer dip on a chip

    Can you use homemade taco seasoning?

    Absolutely! I used a store-bought package of taco seasoning for this recipe to mix with the cream cheese and sour cream. However, you can use 2 tablespoons of homemade taco seasoning instead of one, 1oz. packet.

    How to store leftover dip:

    The best way to store the dip is in an airtight container. However, if you have a lot left over, you can cover the baking dish with plastic wrap.

    Store in the refrigerator for up to 3 days!

    Taco dip - 7 layer dip recipe

    More toppings ideas:

    If you have some extra toppings you’d like to add or substitute some of the items for, you can easily do that with:

    • cooked ground beef
    • easy pico de gallo
    • chopped bell peppers
    • drained, diced green chilies
    • chopped red onions
    • lime juice (squeeze real lime juices over the top – just not too much or it could become watery)
    • taco sauce (such as Old el Paso, Ortega, Taco Bell)
    • chili powder (sprinkle in to the cream cheese mixture)
    • taco meat
    • cooked shredded chicken (then it would be similar to our taco chicken casserole)
    • storebought or homemade salsa

    We like to use a lot of these same toppings on our walking taco casserole too!

    party appetizer - 7 layer taco dip
    Is 7 layer dip hot or cold?

    Serving 7 layer dip cold is ideal, so the toppings stay crisp and fresh. TIP: keeping tomatoes room temperature before assembling and serving is best, as refrigerated tomatoes lose tons of flavor.

    How long is taco dip good for in the fridge?

    The tip is good in the refrigerator for 3-4 days, as long as it’s covered and stored properly, in an airtight container or covered with plastic wrap.

    How to serve taco dip?

    You can serve it on a platter, in the baking dish it was assembled in or you can even layer the dip in to individual cups for more of a single-serve type of appetizer! Serve with chips, crackers, vegetables such as carrots, cucumbers, peppers, and other crunchy veggies.

    Related Recipes

    If you love dips, then you’re also going to love this homemade cheese dip, Buffalo Bacon Blue Cheese Dip, and this Creamy Reuben Dip!

    If you’re hosting a fiesta, you’ll also want to think about making this queso dip recipe!

    Recipe

    Layers in taco dip appetizer recipe
    Print Pin
    5 from 7 votes

    Easy Taco Layer Dip

    This taco layer dip is an easy Mexican layered dip to make! It has 7 layers: refried beans, avocado, taco seasoning mixture, shredded cheese, green onions, black olives & cilantro!
    Course Appetizer
    Cuisine Mexican
    Prep Time 15 minutes minutes
    Cook Time 0 minutes minutes
    Total Time 15 minutes minutes
    Servings 8 servings
    Calories 417kcal
    Author Jessica Burgess

    Ingredients

    • 8 oz. cream cheese softened
    • 1 cup sour cream
    • 2.25 oz. sliced black olives drained
    • 16 oz. refried beans
    • 2 small tomatoes diced
    • 1 bunch green onions chopped
    • 4 small avocados mashed (or use this guacamole recipe)
    • 1 oz. taco seasoning
    • 1 cup shredded cheese Mexican, fiesta, cheddar or favorite type
    • fresh cilantro chopped, if desired

    Instructions

    • In a bowl, and using a mixer, mix together the cream cheese, sour cream and taco seasoning, set aside.
    • In a 9×13 baking dish, casserole dish or serving tray, spread the refried beans on the bottom.
    • Next, carefully layer the avocado or guacamole on top of the beans, spread evenly.
    • For the third layer, gently spread the sour cream & cream cheese mixture on top of the avocado.
    • Next, layer on the shredded cheese.
    • Sprinkle the chopped green onions on top of cheese.
    • Layer on the diced tomatoes. (Tip: while chopping, remove the seeds/juices so the dip doesn't become watery.)
    • Add the black olives on top of the tomatoes.
    • If desired, sprinkle on chopped fresh cilantro or suggested other toppings in the blog post.

    Notes

    Is 7 layer dip hot or cold?
    Serving 7 layer dip cold is ideal, so the toppings stay crisp and fresh. TIP: keeping tomatoes room temperature before assembling and serving is best, as refrigerated tomatoes lose tons of flavor.
    How long is taco dip good for in the fridge?
    The tip is good in the refrigerator for 3-4 days, as long as it’s covered and stored properly, in an airtight container or covered with plastic wrap.
    How to serve taco dip?
    You can serve it on a platter, in the baking dish it was assembled in or you can even layer the dip in to individual cups for more of a single-serve type of appetizer! Serve with chips, crackers, vegetables such as carrots, cucumbers, peppers and other crunchy veggies.

    Nutrition

    Serving: 1serving | Calories: 417kcal | Carbohydrates: 20g | Protein: 10g | Fat: 35g | Saturated Fat: 13g | Polyunsaturated Fat: 3g | Monounsaturated Fat: 16g | Cholesterol: 57mg | Sodium: 946mg | Potassium: 643mg | Fiber: 10g | Sugar: 5g | Vitamin A: 1431IU | Vitamin C: 16mg | Calcium: 169mg | Iron: 2mg

    This 7 layer dip recipe originally appeared when I created and featured it on TornadoughAlli.com!

    Doritos Chicken Casserole

    July 7, 2021

    doritos chicken casserole on plate

    Dorito Chicken Casserole: An easy, comforting, cheesy recipe that will be on repeat for meal planning during the week!

    Doritos Chicken Casserole

    I don’t know what it is about cheesy casseroles but they seem to always be a family favorite! Like this Broccoli Casserole, Green Bean Casserole, and ham casserole. Or, this Chicken Tater Tot Casserole and this Stove-Top Chicken Stuffing Casserole have been a dinner favorite around here, with other chicken casserole recipes too!

    Get ready for an ultra-easy dinner recipe in this Doritos Chicken Casserole. It's packed full of simple ingredients and delicious flavors.

    If chicken casseroles are your thing, then you’ll also love this Chicken Pot Pie Casserole, this Buffalo Chicken Lasagna, and this Chicken Bacon Ranch Pasta! If beef is more your style, I highly recommend the amazing flavor of a Big Mac Casserole or this Hamburger Hashbrown Casserole for an old, vintage classic.

    Hey Fantabulosity fans! It's Meg from Meg's Everyday Indulgence with another delicious recipe you NEED to try as soon as possible.

    Get ready for an ultra easy dinner recipe in this Doritos Chicken Casserole. It’s packed full of simple ingredients and delicious flavors.

    Why You’ll Love This Recipe

    This Doritos Chicken Casserole hits all these marks. It's ridiculously easy to put together. Simply stir together the ingredients and spread it out in an 8×8 or 9×9 baking pan.

    Top with crushed nacho cheese Doritos for all the flavor and crunchy texture. We use these in our Taco Salad with Catalina Dressing too, and talk about delicious!!

    Although this casserole is baked in a smaller baking pan, it fills to the very top and is packed full of chicken, making it super filling and still worthy of feeding a decent-sized crowd. For even more cozy meal ideas, check out this collection of classic old-fashioned dinner recipes.

    Ingredients for Doritos Chicken Casserole

    Let's break down what you need for this Doritos Chicken Casserole:

    • Cream of chicken soup
    • Sour cream
    • Canned corn
    • Ro-tel
    • Cooked Chicken (You can even make chicken breasts in the slow cooker!)
    • Shredded pepper jack cheese
    • Nacho Cheese Doritos – you’ll also love these in these Doritos Nachos!
    Ingredients for Doritos Chicken Casserole

    Notes about Ingredients:

    • Chicken: You'll need cooked chicken for this Dorito chicken casserole recipe. Leftover chicken works great if you have some hanging out in the refrigerator.

      I love using rotisserie chicken in these types of recipes. It's ready to go, delicious, and costs the same, if not less, than buying the chicken and cooking it yourself. Plus, I’m able to make rotisserie chicken stock out of the carcass and use it for later!

      You can choose to either dice or shred the chicken in this recipe, whichever you prefer.
    • Cheese: The cheese that you use in the recipe is flexible as well. I wanted to add a little kick and some extra flavor so I went with pepper jack cheese.

      If you or your family members don't like spicy food, you can definitely substitute in Monterey Jack or cheddar cheese. It will be a little less spicy but still be packed with flavor.
    • Rotel: The can of Ro-tel (diced tomatoes and green chilies) also adds some spiciness so keep that in mind when you're choosing what cheese to add to the casserole. And it gives so much flavor to the casserole. Get an extra can of Rotel to make this Rotel pasta and this Chicken Spaghetti with Rotel, this week too!
    Get ready for an ultra easy dinner recipe in this Doritos Chicken Casserole. It’s packed full of simple ingredients and delicious flavors.

    How to Make Doritos Chicken Casserole

    This recipe truly couldn't get easier. (Well, this taquito casserole may actually be easier but I digress.) The most time-consuming part of the whole thing is chopping or shredding the chicken.

    Doritos chicken casserole ingredients in a bowl

    After the chicken is prepped, mix all the ingredients except for the Doritos and 1 cup of cheese in a large bowl. Spread the mixture into a baking pan, top with reserved cup of cheese and sprinkle with crushed Doritos.

    Pour ingredients in to a bowl for chicken dorito casserole
    Ingredients mixed together for chicken doritos casserole

    PRO TIP: You'll want to place the casserole on a big baking sheet before placing it in the oven. The casserole dish will be filled to the rim so this is done as a precautionary measure in case it bubbles over a little. That way it will be on the baking sheet and not in the bottom of your oven.

    Pour chicken casserole in to baking dish
    Top Doritos chicken casserole with shredded cheese

    Lastly, cover the dish with foil for the first 25 minutes of baking to prevent the Doritos from burning.

    Doritos Chicken Casserole in baking dish ready for oven

    Doritos Flavors

    For me, the best option for this Doritos Chicken Casserole is the original nacho cheese Doritos. But because I love you I did a little Doritos research to discover some other delicious flavors for topping this casserole.

    I mean, Doritos may be one of my guilty pleasures since childhood so it wasn't a bad gig to take on.

    If you like things really spicy, the Spicy Nacho or Flaming Hot Nacho flavors would be a delicious topping option.

    A more mild option that would be so delicious with the flavor profile going on would be the Taco Doritos. They would mesh really well with the chicken and corn and pepper jack cheese.

    Get ready for an ultra easy dinner recipe in this Doritos Chicken Casserole. It’s packed full of simple ingredients and delicious flavors.

    FAQs

    Here are some common questions that you may have, that we’d love to answer for you:

    Can you make Dorito chicken casserole in advance?

    You can mix everything and place it in the baking dish, except the chips, and refrigerate until ready to bake. It’s not a good idea to add the chips beforehand because they’ll get soggy.

    How do you store Dorito chicken casserole?

    If you have leftover casserole, allow it to fully cool and then cover with aluminum foil or plastic wrap, or place it in an airtight container and then store in the refrigerator for 3-4 days.

    Can you freeze Dorito chicken casserole?

    You can! Make everything as directed until it’s time to put the crushed chips on top. Freeze in a freezer-safe container for 2-3 months. When ready to eat it, place the frozen casserole in the refrigerator and allow it to thaw overnight. When baking, top with chips and bake according to directions.

    The Easy Dorito Chicken Casserole is made with everyday ingredients like Cream of chicken soup, Sour cream, Canned corn, Ro-tel, Cooked Chicken, Shredded pepper jack cheese, Nacho Cheese Doritos #doritos #casserole #chicken

    Need More Dinner Ideas?

    If you're looking for more easy dinners to add to your collection, check out this hamburger hashbrown casserole that is a reader favorite. We think you’ll also love this Kielbasa and Cabbage in the Instant Pot, Lasagna Stuffed Chicken, and this chicken and gravy recipe!

    For an easy game day or party spread, serve this casserole alongside my baked cheeseburger sliders for a crowd-pleasing comfort meal.

    Recipe

    doritos chicken casserole on plate
    Print Pin
    5 from 51 votes

    Doritos Chicken Casserole

    Doritos Chicken Casserole is easy to make for a quick dinner and is a family favorite. Simple ingredients come together for a comforting, hearty meal.
    Course Main Course
    Cuisine American
    Prep Time 10 minutes minutes
    Cook Time 40 minutes minutes
    Total Time 50 minutes minutes
    Servings 6 servings
    Calories 809kcal
    Author Jessica Burgess

    Ingredients

    • 22.6 ounces can cream of chicken soup
    • ½ cup sour cream
    • 15.25 ounce can corn drained
    • 10 ounce can Ro-tel, drained diced tomatoes and green chilies
    • 4 cups diced or shredded cooked chicken
    • 3 cups shredded pepper jack cheese, divided
    • 2 cups crushed Nacho Cheese Doritos

    Instructions

    • Preheat oven to 350 degrees F.
    • In a large bowl, mix together cream of chicken soup, sour cream, corn, Ro-tel, chicken and 2 cups of pepper jack cheese.
    • Spread into an 8×8 or 9×9 baking pan. Set on top of a baking sheet to prevent spills in your oven.
    • Sprinkle remaining cup of pepper jack onto the casserole. Spread the crushed Doritos evenly over the cheese.
    • Cover with foil and bake for 25 minutes. Remove foil and bake another 15 minutes.

    Video

    Notes

    PRO TIP: Place the casserole on a big baking sheet before placing it in the oven, in case it bubbles over while baking.
    How do you store Dorito chicken casserole?
    Allow the casserole to fully cool and then cover with aluminum foil or plastic wrap, or place it in an airtight container and then store in the refrigerator for 3-4 days.
     

    Nutrition

    Serving: 1serving | Calories: 809kcal | Carbohydrates: 50g | Protein: 44g | Fat: 48g | Saturated Fat: 18g | Polyunsaturated Fat: 13g | Monounsaturated Fat: 14g | Trans Fat: 1g | Cholesterol: 130mg | Sodium: 875mg | Potassium: 475mg | Fiber: 4g | Sugar: 4g | Vitamin A: 593IU | Vitamin C: 1mg | Calcium: 571mg | Iron: 2mg

    Marshmallow Cookies with Sprinkles

    July 2, 2021

    Marshmallow cookies stacked with sprinkles.

    Marshmallow Cookies with Sprinkles: Looking for an easy, delicious, and melt-in-your-mouth cookie recipe? These gooey marshmallow cookies are just that!

    I have made dozens of cookie recipes but these fluffy marshmallow cookies have one of the best textures I’ve ever tasted! They are stuffed and topped with mini gooey marshmallows which is why they’re a crowd-favorite dessert recipe, along with these marshmallow popcorn balls!

    mini marshmallow cookies

    Why You’ll Love This Great Recipe

    • Even though these marshmallow cookies are made from scratch, they’re very easy to make! This recipe uses basic ingredients and baking on a cookie sheet is a breeze when you use parchment paper or a silicone baking mat!
    • Since they are made from scratch, they’re simply to-die-for! The golden brown outside and the melted marshmallow inside creates the best texture that you’re going to fall in love with!
    • Since these cookies call for sprinkles, it’s very easy to customize them for any occasion! You can use Christmas sprinkles, Halloween sprinkles, 4th of July sprinkles, etc. to fit any holiday/event!
    marshmallow confetti cookies

    What can I do with a bag of marshmallows?

    Am I the only one who feels like they’re left with a bad of marshmallows after s’mores season is over? I sometimes struggle to figure out how to put them to good use! Some of my go-to dessert recipes that include marshmallows are marshmallow treats, air fryer s’mores, and my no-bake s’mores cheesecake recipe!

    Ingredients Checklist

    • 1 cup butter, cut into cubes
    • ¾ cup brown sugar
    • ½ cup white sugar
    • 2 eggs
    • 1 ½ tsp. Vanilla Extract
    • 1 tsp. Baking soda
    • 1 tsp. Baking powder
    • 2 tbsp. Cornstarch
    • 2 ¾ cups all purpose flour
    • ½ tsp. Salt
    • ½ cup mini marshmallows
    Marshmallow cookies ingredients

    Step by Step Directions

    1. Grease or line two baking sheets with parchment paper.
    2. Heat oven to 350 degrees F (175 degrees C).
    3. In a large mixing bowl, mix flour, cornstarch, baking soda, baking powder, and salt. Set aside (Image 1).
    4. With a hand mixer, (or stand mixer) or medium speed, cream butter until smooth. Add white and brown sugar (Image 2). Mix until light and fluffy.
    5. Add eggs and vanilla extract. Mix until combined (Image 3).
    Marshmallow cookies directions
    1. Add dry ingredients mixture half at a time, mixing in between additions (Image 4).
    2. Roll approx 1.5 tbsp. Of batter into balls and place onto a prepared baking sheet. (Image 5).
    3. Add 3-4 mini marshmallows onto center of the cookie dough (Image 6).
    recipe for marshmallow confetti cookies
    1. Add approx 1.5 more tbsp. Of batter on top of marshmallows and press down (Image 7).
    2. Roll in sprinkles. Place on prepared baking sheets and space 4-5 inches apart (6 per pan) (Image 8).
    3. Flatten slightly and place mini marshmallows on top (Image 9).
    4. Bake 12-15 minutes.
    5. Remove and cool on cooling rack.
    6. Enjoy!
    directions for marshmallow cookies with sprinkles

    Expert Tips and FAQs

    Use marshmallow fluff for filling

    Instead of using mini marshmallows for the inside of the cookies, you can use marshmallow fluff. Marshmallow fluff may spread a bit easier on top of the cookie dough.

    Can I freeze marshmallow cookies?

    Yes you can freeze marshmallow cookies. Once your cookies have cooled to room temperature, you can place them in an airtight container and freeze for up to 3 months. Although your cookies will be best when fresh, freezing is still a great option.

    Can I use large marshmallows?

    Yes you can use large marshmallows but I would recommend ripping them into pieces so they cook evenly. You can fill and top cookies with one large marshmallow ripped into pieces.

    How to Store Leftover Cookies

    If you have leftover cookies, allow them to cool first on a wire rack and then store in an airtight container for up to a couple of weeks, or longer if stored in the refrigerator. If freezing, store in a freezer-safe container for up to 8-12 months!

    Marshmallow cookies without chocolate

    Optional Toppings/Ingredients

    There are seriously so many ways you can customize these mini marshmallow cookies! Chocolate marshmallow cookies, s’mores cookies, and strawberries and cream cookies are all surprisingly easy to make with so many

    • This recipe makes marshmallow cookies without chocolate but if you’re a chocolate lover, you can add some! Simply add mini chocolate chips into the cookie dough balls before baking. Chocolate chip marshmallow cookies are a great marshmallow treat!
    • To make these s’mores cookies, you can roll the cookie dough balls in graham cracker crumbs instead of sprinkles! You’ll want the center of the cookies to be filled with marshmallows and mini chocolate chips as well! (Recipe note – you can use Nutella in the center of the cookies instead of mini chocolate chips).
    • Strawberries and cream is such an underrated flavor! For strawberry marshmallow cookies, you can add diced strawberries on top of each cookie before baking. I would recommend using red sprinkles if you add strawberries for an aesthetic look!
    Marshmallow cookies without chocolate

    Related Recipes

    I find myself baking desserts more often than I probably should but hey, they taste amazing and my kiddos love them! Make sure to check out these easy pink champagne cupcakes, breakfast muffins, delicious brownies, etc. because they are great treats to have on hand and they’re easy to make for parties! Here’s a list of a few of my family and I’s favorite desserts!!

    • Peanut Butter Chocolate Chip Cookies
    • Strawberry Brownies
    • No bake s’mores cheesecake
    • Popcorn balls without corn syrup

    Recipe

    Marshmallow cookies stacked with sprinkles.
    Print Pin
    4.88 from 8 votes

    Marshmallow Cookies with Sprinkles

    Looking for an easy, delicious, and melt in your mouth cookie recipe? These gooey marshmallow cookies are just that!
    Course Dessert
    Cuisine American
    Prep Time 10 minutes minutes
    Cook Time 15 minutes minutes
    Total Time 25 minutes minutes
    Servings 24 cookies
    Calories 174kcal
    Author Jessica Burgess

    Ingredients

    • 1 cup butter
    • ¾ cup brown sugar
    • ½ cup white sugar
    • 2 eggs
    • 1 ½ tsp vanilla extract
    • 1 tsp baking soda
    • 1 tsp baking powder
    • 2 tbsp cornstarch
    • 2 ¾ cups all purpose flour
    • ½ teaspoon salt
    • ½ cup mini marshmallows

    Instructions

    • Grease or Line two baking sheets with parchment paper.
    • Preheat oven to 350 degrees F (175 degrees C).
    • In a large mixing bowl, mix flour, cornstarch, baking soda, baking powder, and salt. Set aside.
    • With an electric mixer, cream butter until smooth.
    • Add white and brown sugar. Mix until light and fluffy.
    • Add eggs and vanilla extract. Mix until combined.
    • Add dry ingredients mixture half at a time, mixing in between additions.
    • Roll approx 1.5 tbsp. Of batter into balls and place onto a prepared baking sheet.
    • Add 3-4 mini marshmallows onto center of the cookie dough.
    • Add approx 1.5 more tbsp. Of batter on top of marshmallows and press down.
    • Roll in sprinkles. Place on baking pans and space 4-5 inches apart (6 per pan).
    •  Flatten slightly and place mini marshmallows on top. 
    • Bake 12-15 minutes. Enjoy!

    Notes

    Use marshmallow fluff for filling
    Instead of using mini marshmallows for the inside of the cookies, you can use marshmallow fluff. Marshmallow fluff may spread a bit easier on top of the cookie dough.
    Can I use large marshmallows? 
    Yes! You can use large marshmallows but I would recommend ripping them into pieces so they cook evenly. You can fill and top cookies with one large marshmallow ripped into pieces.

    Nutrition

    Calories: 174kcal | Carbohydrates: 23g | Protein: 2g | Fat: 8g | Saturated Fat: 5g | Polyunsaturated Fat: 1g | Monounsaturated Fat: 2g | Trans Fat: 1g | Cholesterol: 34mg | Sodium: 170mg | Potassium: 49mg | Fiber: 1g | Sugar: 12g | Vitamin A: 256IU | Calcium: 20mg | Iron: 1mg

    How Many Ounces in a Gallon, Pound, Quart, Cup, Pint, and More Conversions

    July 1, 2021

    baking and cooking conversion cheatsheet

    Having an easy guide for measurement conversions is one of the best ways to feel confident and prepared in the kitchen no matter what recipe you’re following!

    Cooking and baking should be a low fuss, stress-free enjoyable time, and yet there are still those days when we’re in a groove and we need to stop to figure out a measurement conversion.

    So, we search by way of smearing our phones with our messy fingers, time and time again, and even still, the answers can be confusing.

    Anytime I can make things just a little easier and a little more streamlined, I’m all for it. So, I have created a simple, easy-to-follow guide and printable to basic kitchen conversions that you’ll be able to use for both wet and dry ingredients when baking or cooking up a storm. Bonus points for not having to stop along the way!

    [feast_advanced_jump_to]

    Recipe Abbreviations

    Take note of the most common abbreviations you’ll come across in recipes. It’s helpful to know what each of them means.

    • Tbsp = Tablespoon
    • tsp = Teaspoon
    • Oz = ounce
    • fl. oz = Fluid ounce
    • c = Cup
    • qt = Quart
    • pt = Pint
    • gal = Gallon
    • lb = Pound

    Measurement Tools for Both Wet and Dry Ingredients

    Did you know that measuring cups are different for both wet and dry? It can really alter the outcome of your recipe if you’re not using the correct one.

    Measuring Cups for Liquids (Water, Oil, Broth)

    These are usually glass and come with a spout for easing pouring. Once placed on a level surface, it’s easy to see at eye level how much volume the cup is holding and when you’ve reached the correct line.

    Measuring Cups for Dry Ingredients (Flour, Sugar, Oats)

    A set of measuring cups for dry ingredients will have no spout. This makes it easier to spoon and level for accuracy.

    Measuring Spoons

    These are actually the same used for both wet and dry. Woohoo!

    Digital Kitchen Scale

    If you haven’t invested in a digital kitchen scale yet, I highly recommend you do. They are relatively inexpensive and definitely worth it if you spend loads of time in the kitchen.

    It’s the most accurate way to measure the weight of a cup of dry ingredients. Just relying on a cup to find the correct number of ounces, for example, can be tricky. A cup of flour will not equal the same number of ounces as a cup of chickpeas, therefore, using a scale will help with accuracy.

    Don’t forget to zero the scale to account for the weight of the measuring device. This means you weigh the measuring cup empty by placing it on the scale and setting the weight back to zero.

    Measurements, Equivalents, and Conversions

    Unless you’ve been making the same recipe over and over again for years, there’s always a need to read and reread a recipe!

    Baking is much more precise than cooking, but even with cooking, the wrong measurements can lead to disaster. This is why a measurement sheet is a game-changer!

    How many cups are in 1 quart?

    4 cups are equal to 1 quart.

    How many cups are in 1 pint?

    2 cups are equal to 1 pint.

    How many cups are in 1 gallon?

    16 cups are equal to 1 gallon

    How many cups in half gallon?

    8 cups are equal to half (½) gallon

    How many pints are in 1 quart?

    2 pints are equal to 1 quart

    How many ounces in a gallon?

    128 ounces are equal to 1 gallon

    How many ounces in a pound?

    16 ounces are equal to 1 pound

    How many ounces are in a cup?

    8 ounces are equal to 1 cup

    How many ounces in a tablespoon?

    .5 ounces are equal to 1 tablespoon

    How many pints are in a gallon?

    8 pints are equal to 1 gallon

    How many ounces in a half a gallon?

    64 ounces are equal to half (½) gallon

    How many quarts are in a gallon?

    4 quarts are equal to 1 gallon

    How many teaspoons are in a tablespoon?

    3 teaspoons are equal to 1 tablespoon

    How many tablespoons are in a cup?

    16 tablespoons are equal to 1 cup

    How many ml are in a quart?

    946.353 ml are equal to 1 quart

    Converting Liquid Measurements

    • 1 c = 8 fl. Oz = ½ pt = ¼ qt
    • 2 c = 16 fl. Oz = 1 pt = ½ qt
    • 4 c = 32 fl. Oz = 2 pt = 1 qt = ¼ gal
    • 16 c = 128 fl. Oz = 8 pt = 4 qt = 1 gal

    Converting Dry Measurements

    • 1 c = 16 tablespoon = 48 tsp
    • ¾ c = 12 tablespoon = 36 tsp
    • ½ c = 8 tablespoon = 24 tsp
    • ¼ c = 4 tablespoon = 12 tsp
    • ⅛ c = 2 tablespoon = 6 tsp
    • 1/16 c = 1 tablespoon = 3 tsp

    A Simple Chart for 1 Cup Conversions

    • 1 c = 8 fl. oz
    • 1 c = 16 Tbsp
    • 1 c = 48 tsp
    • 1 c = ½ pt
    • 1 c = ¼ qt
    • 1 c = 1/16 gal
    • 1 c = 240 ml

    What does it mean to spoon and level?

    Baking is a science and requires accuracy to get you the best results when baking bread, cakes, donuts, you name it. When you see spoon and level the flour, that means adding spoonfuls of flour to the measuring cup until it’s overflowing and using the backside of a knife to level off the excess, leaving a nice flat surface, level to the top of the cup.

    What does "packed brown sugar" mean?

    It’s a way of making sure you’re getting the exact right amount of sugar needed by pressing the air out of it and making space for even more of it. What you want to do is add it to the cup and instead of leveling off with the back of a knife, you’re going to pack it in there nice and tight. Keep doing this until it reaches the top of the rim.

    Conversion Sheet

    When you need to know how to convert measurements from metric to imperial or vice versa, or even from one unit to another within the same system, having a handy sheet makes things so much easier.

    This sheet is part of my home management binder (that I honestly don’t know how I’d live without) and I’m giving you this printable today in case it’s helpful for you!

    Print it out and keep it inside your cupboard or on your fridge for easy access. This can be especially handy for those new to the kitchen and for kids gaining a little independence and needing to find something without asking. Of course, even the most experienced home cooks need a reminder sometimes.

    Save the Free Conversions Sheet
    baking and cooking measurements free printable

    Does Laser Hair Removal Hurt? My Honest Review

    June 30, 2021

    Laser Hair Removal - Does it hurt?

    Does Laser Hair Removal Hurt? With a few laser hair removal treatments under my belt (literally), here’s my honest review!

    This post has been sponsored by Milan Laser Hair Removal, where I have also received services in exchange for this post. HOWEVER, all thoughts and opinions are my own… as always.

    Laser Hair Removal - Does it hurt?

    Does Laser Hair Removal Hurt?

    Oh it’s the question I’m often asked when sharing on Instagram that I’m paying another visit to Milan Laser Hair Removal.

    Short answer?

    It can. But does it hurt so much I want to stop having treatments? NO WAY!

    Longer answer?

    When I went for my free consultation, the sweet gals told me that it will feel like someone snapping a small rubber band on the skin.

    And you know what? They were right. However, as the treatments progress, the pain CAN get a little more intense than the first time.

    But is it unbearable? No.

    Some areas tend to be a little more sensitive and what’s really nice is that if it gets to be a little too intense for you, you can let them know and they can slow down, which really helps! Also, you can take a pain reliever an hour before treatment to help with any pain that you may worry about experiencing! (I’m going to start doing this, now that I’m a few treatments in.)

    Keep reading to find out how you (yes, YOU!) can get 60% off of your own laser hair removal services, just for being a Fantabulosity reader!

    Does laser hair removal hurt?

    Do Some Areas Hurt More than Others?

    So you may be curious what areas I’m having treated and if certain areas hurt more than others.

    I’m having my lower legs, underarms and Brazilian area treated.

    Do some hurt worse than others? Yes. I don’t feel any pain in the underarm area. The lower legs have a little sting every once in a while. The Brazilian… that’s the one that gets to me the most. Some areas “down there” are perfectly fine. No pain at all. Then there are a couple of areas that make me tense up for about .00000001 seconds and then the “sting” goes away.

    Don’t Let it Stop You

    Like with anything, I think it can really help if you go in with a good mindset!

    If you go in for treatment thinking,

    “This is going to hurt. This is going to be the worst pain ever.”

    – said someone who thinks the worst

    …but rather, think along the same lines that I do, thinking,

    “Hey… I’ve had two babies. One without an epidural. I’ve got this! It’s worth it!”

    – says me.

    …then you’re going to be just fine. Millions of women have had this done, and if they can do it, then that must mean I can do it.

    Plus, the thought of never having to shave again, makes me SWOON and if that means feeling a rubber band sting for a few seconds… then I’m 100% on board.

    Moral of the Story

    Please do not let the fear of “pain” hold you back from having laser hair removal done.

    The results I have received from this already is BEYOND mind-boggling and I’m ecstatic!

    “How Many Sessions are Needed”

    If you’re curious about how many sessions are needed to see results…

    I REALLY recommend that you read my very first blog post about my first visit to Milan Laser Hair Removal where I cover that exact question and share other items you may be wondering about!

    LIFETIME GUARANTEE + UNLIMITED PACKAGE

    So if you've heard or have been to other laser hair removal companies, you may be familiar with the "packages" that some offer. For instance, you buy per session or say, buy a package of three treatments at a time.

    Well, not with Milan.

    With Milan, you pay one price for the body area that you want, and it's an unlimited, lifetime guarantee on that body area.

    So what if, a few years from now, your body goes through some changes (hormones, etc.) and you notice one little hair grow back where you had a treatment?

    You can call Milan, let them know and they'll be glad to bring you back in, (at any location) at NO additional charge, and treat the area again! (Opposed to other companies where you may pay for 3 treatments in one area, and have to pay AGAIN and again to be treated.)

    60% OFF FOR YOU! YES… YOU!!!

    Friends, I don't know HOW this is possible, and I honestly didn't expect this kind of discount for you when I first started talking to them, but you may want to take advantage NOW in case they change their mind! Haha!

    Milan has offered to give you 60% off of your laser hair removal service, for any body area of your choice…. at any Milan Laser Hair Removal location (The ONLY thing you can't apply the 60% off to is a Full Body package).

    So when you call to schedule your consultation, just make sure to give them the code: FANTABULOSITY60 so they know to put it in the system for you! COUPON CODE: FANTABULOSITY60

    Good luck ladies! You’ve got this… and when you go, send me a DM on Instagram and let me know what you think! I’d love to hear from you!

    Instant Pot Polenta

    June 25, 2021

    Easy instant pot polenta

    Instant Pot Polenta is a smooth and creamy dish that’s perfect for busy weeknights. Polenta is quick, easy, and made from corn grits which makes it so versatile!

    This creamy polenta recipe can be made in under 30 minutes with almost no hassle. In fact, polenta is a great replacement for rice or potatoes with dinner! I love serving this instant polenta with this hamburger recipe, grilled ribs, or even pressure cooker pot roast as an easy side dish!

    How to make instant pot polenta
    [feast_advanced_jump_to]

    Why You’ll Love This Recipe

    • This instant pot recipe is so easy and has a cooking time of under 30 minutes! Not only is this basic polenta recipe quick, but cooking with an instant pot leaves almost no mess to clean up, like it may on the stove top.
    • Most people don’t know that polenta pairs well with so many dishes. So if this is your first time making it, I love topping instant polenta with parmesan cheese, butter, and serving it with a main course and you may too! A warm creamy bowl of polenta is perfect on a cold day as a delicious side dish or even a main dish!
    • Not only does polenta taste delicious, but it’s also healthy! Instant polenta is made from corn meal which is a great source of fiber, protein, and is loaded with vitamin A. Swap out potatoes or french fries for this instant pot polenta and you’ll have a healthier side dish!
    • Polenta is easy to find and you can usually find it at your local grocery store or on Amazon! Bob’s Red Mill is a great brand but I’ve yet to find one I don’t like.
    Instant pot polenta

    Is cornmeal the same as polenta?

    Kind of… Polenta is the dish and cornmeal is the main ingredient. Cornmeal used in polenta must be a medium or course grind to make the perfect polenta. You do not want to use corn flour or finely ground cornmeal when making instant pot polenta because it will turn out soggy. For this recipe, you will need one cup cornmeal/polenta!

    Instant pot polenta recipe

    Ingredients Checklist

    This recipe uses simple ingredients that you may already even have on hand:

    • 1 cup polenta
    • 5 cups of water
    • 1 teaspoon salt
    • 2 tablespoon butter
    • ¼ cup grated parmesan
    • 2 tablespoons shredded mozzarella (optional)
    Instant pot polenta ingredients

    Step-by-Step Directions

    1. Add water, polenta, and salt in the INSTANT POT whisk to combine (Image 1).
    2. Seal the Instant Pot lid and select the PORRIDGE setting (or it may say “oatmeal”.) Set the settings to 20 minutes (Image 2).
    3. When the cycle completes, allow the pressure to release naturally for about 10 minutes.
    4. Remove the lid, whisk polenta until smooth Add in butter and cheese and mix properly (Image 3).
    5. Serve the top of the polenta with additional cheese, such as shredded mozzarella, if desired, to create more of a cheesy polenta! Serve warm.
    Instant pot polenta recipe

    Expert Tips and FAQs

    Is polenta Keto?

    A keto diet is a low-carb diet. One serving of polenta is 80 calories, 17 grams of carbohydrates, and 2 grams of fiber. The net carbs in polenta (total carbs – fiber = net carbs) is 15 grams which means one serving of polenta would fit into a keto diet.

    How much water do I use for 1 cup polenta?

    The perfect water to polenta ratio is 4-1. That means for 1 cup of polenta, you will need 4 cups water. To switch things up a tad and add more flavor, you could use vegetable broth or my homemade chicken broth instead of water.

    What do you eat polenta with?

    As stated before, polenta is a great substitute for fries, potatoes, or rice. It’s a healthier and more nutritious side dish. You can eat polenta with baked burgers, short bbq ribs, this baked steak, or even these Instant Pot Chicken Thighs! Or, it’s the perfect base for something like grilled shrimp and it pairs amazing with brussels sprouts!

    Instant pot polenta recipe

    Is polenta good or bad for you?

    I touched on this above, but polenta is a gluten-free complex carbohydrate that has tons of fiber, protein, and vitamins and minerals. This polenta recipe is safe for celiac disease and also fits well into a keto/low-carb diet because of the high about of fiber. Instant pot polenta is a healthier alternative to potoes, white rice, and/or french fries!

    Can I make this instant pot polenta recipe vegan?

    Yes! It would be really easy to make this instant pot polenta recipe vegan. The best way is to swap out traditional butter for olive oil or vegan butter. Instead of using Parmesan Cheese or mozzarella cheese, you can use vegan cheese for the polenta and nutritional yeast for topping. Nutritional yeast has a cheesy flavor without the dairy and is surprisingly delicious!

    Creamy instant pot polenta recipe

    Additional/Optional ingredients

    To make this recipe extra creamy, you could add in ¼-1/2 cup heavy cream. If you chose to do this, you’ll want to add in a smaller amount of water. On top of heavy whipping cream, you can add in fresh herbs and spices to give this recipe extra flavor. Garlic salt, oregano, parsley, basil, and other Italian herbs would taste great.

    How to Store Leftover Polenta

    You can store leftover polenta in an airtight container for 5 days in the refrigerator or around 3 months in the freezer.

    Similar Recipes

    If you like polenta, I would highly suggest trying these baked polenta fries! They’re an easy and healthier alternative to french fries! They’re cheesy, warm, and topped with bacon! Those polenta fries go so well with this homemade chipotle aioli dipping sauce!

    If this is a new recipe you’re trying, I sure hope that you love it as much as we do and the next time you need a quick and healthy side dish, you’ll remember this one! It’s one of our favorite Instant Pot recipes to date! You’ll also love this Instant Pot Risotto and this Instant Pot Cauliflower Soup too, so make sure you head over there to check it out!

    If you love using your Instant Pot for easy recipes like this one, then these Instant Pot Lentils will be something fun to try too!

    Or, see this delicious Instant Pot Dirty Rice recipe that has some cajun flair!

    Recipe

    Creamy Instant Pot polenta
    Print Pin
    5 from 2 votes

    Instant Pot Polenta

    Instant Pot Polenta is a smooth and creamy dish that's perfect for busy weeknights. Polenta is quick, easy, and made from corn grits which makes it so versatile!
    Course Main Course, Side Dish
    Cuisine American
    Prep Time 5 minutes minutes
    Cook Time 20 minutes minutes
    Total Time 25 minutes minutes
    Servings 2 servings
    Calories 489kcal
    Author Jessica Burgess

    Equipment

    • instant pot

    Ingredients

    • 1 cup polenta
    • 5 cups water
    • 1 teaspoon salt
    • 2 tbsp butter
    • ¼ cup parmesan cheese grated
    • 2 tbsp shredded mozzarella optional

    Instructions

    • Add water, polenta, and salt in the INSTANT POT whisk to combine.
    • Seal the lid and select PORRIDGE/OATMEAL function. Set the settings to 20 minutes.
    • When the cycle completes, allow the pressure to release naturally for about 10 minutes.
    • Remove the lid, whisk polenta until smooth Add in butter and cheese and mix properly.
    • Serve hot with shredded mozzarella on top.

    Notes

    You can store the polenta in an airtight container for 5 days in the refrigerator or around 3 months in the freezer.

    Nutrition

    Serving: 1serving | Calories: 489kcal | Carbohydrates: 64g | Protein: 15g | Fat: 19g | Saturated Fat: 11g | Polyunsaturated Fat: 1g | Monounsaturated Fat: 5g | Trans Fat: 1g | Cholesterol: 50mg | Sodium: 1586mg | Potassium: 135mg | Fiber: 1g | Sugar: 1g | Vitamin A: 718IU | Calcium: 246mg | Iron: 1mg

    30+ Ways: What to do with Leftover Taco Meat

    June 24, 2021

    Image collage on how to use leftover taco meat.

    When you have a big batch of leftover taco meat from Taco night or even when hosting a taco bar, sometimes it can be really handy to use it in other dishes or dinner ideas instead of throwing it away!

    leftover taco meat on tortilla chips

    Here is a great list of different ways and great recipes to use a lot of leftover taco meat! Or even a little taco meat if that’s what you have on hand…

    • Taco Soup
    • Taco Salad
    • Fried Tacos
    • Taco Pasta
    • Taco Quesadillas
    • Taco Sliders
    • Taco Nachos
    • Taco Casserole
    • Taco Stuffed Peppers
    • Taco Pizza

    More Recipes You’ll Love

    You’re going to love these Chicken Street Tacos (don’t forget that you can use leftover shredded chicken in the slow cooker for something like these too!), these baked chicken tacos, and of course these Beef and Cheese Burritos and these Easy Chicken Tacos.

    Even if it’s not leftover meat, you can make a batch of these shredded beef tacos in the slow cooker using a chuck roast.

    How to use leftover taco meat

    30+ Ways on What to do with Leftover Taco Meat

    Never throw out leftover taco meat again! Here are 30+ great delicious recipes and leftover taco meat ideas on how to use it up in recipes for easy meals or to store it for later!

    Creamy taco soup serving in white bowl.

    Creamy Taco Soup Recipe

    Taco soup is an easy way to use leftover seasoned meat and you can keep most of the ingredients in the pantry at all-times so you don't have to worry about the ingredients going bad! (Items like canned black beans, kidney beans, chili beans, tomato sauce, etc.)

    Close up of taco salad with Catalina dressing on a fork.

    Taco Salad with Catalina Dressing

    No hard work required on this one! Simply mix together that extra taco meat with a few other ingredients and you just made the most delicious taco salad!

    Fried tacos on wooden cutting board.

    Fried Tacos

    Talk about the ultimate crunchy taco recipe! These deep-fried tacos are not only easy to make but they're full of flavor!

    Close up photo of a bowl brimming with noodles, vegetables and ground beef in a rich red tomato based sauce

    Crock Pot Goulash

    This recipe calls for cooked ground beef, and I can't think of a better way to add some extra flavor to this crock pot goulash recipe!

    Image for Taco Pasta Recipe

    Taco Pasta Recipe

    Taco pasta comes together quickly and is flexible if you have a little or a lot of leftover taco meat.

    BBQ White Queso Nachos on wooden cutting board.

    BBQ White Queso Nachos

    White or yellow queso poured over tortilla chips and your favorite nacho toppings, come together with leftover taco meat for a hearty and quick dinner.

    Taco Chicken Casserole on a plate.

    Taco Chicken Casserole

    Instead of chicken, toss in that leftover taco meat to have a hearty dinner recipe.

    air fryer tater tots - loaded

    Air Fryer Totchos

    These don't have to be made in an air fryer but using leftover taco meat to top tater tots like nachos is a great idea.

    Spoonful of hot taco dip in dish.

    Hot Taco Dip

    Hot taco dip is an appetizer recipe that's delicious served with chips for a party or an easy snack at home.

    Stack of steak quesadillas.

    Steak Quesadilla

    Although these heart quesadillas are made with steak, it's easy to switch out the meat type in this easy recipe.

    Bell peppers stuffed with meatballs and rice.

    Meatball Stuffed Bell Peppers

    Although I used meatballs to stuff these peppers, leftover taco meat to fill peppers up with rice and cheese is delicious.

    Close up of venison spaghetti in

    Venison Spaghetti

    Although it's a regular spaghetti recipe, using taco meat (instead of beef or venison) can add a little flair and give it a kick that just may have you making taco spaghetti from now on, instead of traditional spaghetti!

    Walking Taco Casserole being lifted out of baking dish with spoon.

    Walking Taco Casserole

    Have quite a bit of leftover taco meat leftover? This casserole is a great way to use it up!

    Image for Homemade Chicken Chimichangas (Baked or Pan Fried!)

    Homemade Chicken Chimichangas (Baked or Pan Fried!)

    Chimichangas either baked or pan fried with tender chicken, stuffed Mexican filling all wrapped in a soft but crispy crust on the outside.

    Slice of bacon and sausage quiche on spatula.

    Bacon and Sausage Quiche

    This meaty quiche recipe uses bacon and sausage but switching out the sausage and using taco meat is a great option.

    A tortilla chip is being dipped into a big bowl of cowboy queso.

    Cowboy Queso

    Serving a crowd? Toss the leftover taco ground beef in to this queso recipe to add more texture and flavor.

    A plate holds a serving of crock pot chicken enchiladas that has been topped with sour cream and chives

    Crock Pot Chicken Enchiladas

    Skip the chicken in these crock pot enchiladas and use up that leftover ground beef seasoned with taco seasoning instead.

    Pizza hot dog, on a bun.

    Hot Dog Week: Pizza Dog

    Yes, you CAN top hot dogs with just about anything. Pizza hot dogs use pizza sauce and a meat of your choice. Use leftover taco meat to make a taco hot dog.

    Homemade chili in small bowl with Fritos and cheese on top.

    Simple Chili Recipe

    My mom makes the best, siimple chili recipe that works as a great base for your favorite toppings.

    Image for Mexican Lasagna

    Mexican Lasagna

    Mexican lasagna uses the layers of traditional lasagna, but it’s filled with Mexican-inspired flavors: taco seasoning, ground beef, beans, chiles, cheese and salsa.

    Image for Tostadas

    Tostadas

    This easy Tostada recipe is ready in under 30 minutes and loaded with seasoned ground beef, creamy refried beans, and all the toppings!

    Image for Easy Shepherd's Pie

    Easy Shepherd's Pie

    This shepherd's pie recipe is a classic casserole of Britain and Ireland done American-style. Cook ground beef and savory vegetables, top with mashed potatoes, and bake to perfection.

    Image for Homemade Crunch Wrap Supreme

    Homemade Crunch Wrap Supreme

    A complete DIY Taco Bell copycat version completely homemade, made so much healthier and tastier (and so customizable). So easy, so so good!

    Taco Fries

    Grab seasoned french fries (or your favorite fries) and top with taco meat, cheese and green onion! Bake until the fries are golden brown!

    Fritos, chili, cheese, onions, all piled together in cardboard dish.

    Frito Chili Pie

    Or if you have leftover taco chicken meat, you’ll want to try these chicken fajita wraps!

    More Easy Ways to Use Leftover Taco Meat

    • Add to avocado toast
    • Sprinkle over nachos
    • Add to breakfast burrito
    • Add it to a baked potato
    • Mix into scrambled eggs
    • Add to mac and cheese

    How to Make Popcorn in the Microwave

    June 23, 2021

    Homemade popcorn with butter and seasonings sprinkled on.

    How to make popcorn in the microwave with little effort – a quick and easy way to pop popcorn, without oil, in brown lunch bags and it’s ready in minutes & perfect for movie night!

    If you love snack recipes, get ready because we have some of the best around here, like this homemade chex mix and these chocolate-dipped animal crackers.

    How to Make Homemade Popcorn in the Microwave in a brown paper bag. Without oil!
    [feast_advanced_jump_to]

    I never realized how much better making homemade popcorn was than store-bought. I find that store-bought microwave popcorn packets have a “film” or “waxy” texture to it but I didn’t have a popcorn popper, an air popper and had no idea how to make stovetop popcorn.

    But I didn’t know you could make your own microwave popcorn like this until we had a friend show us how, and now it’s the only way we do it!

    Can you pop plain popcorn in the microwave?

    Absolutely. All it takes is popcorn kernels, brown paper bags and a few minutes to make this paper bag popcorn!

    Then – take it a step further and melt some homemade butter to pour over the top!

    How to Make Homemade Popcorn in the Microwave

    How to Make Homemade Popcorn in the Microwave in a brown paper bag

    The first time we tried doing this in the microwave oven, we ended up with popcorn EVERYWHERE, and it was a huge mess. We had only used one bag, and folded the top over with the opening folded under.

    But, as it cooked, the popped popcorn expanded and caused popcorn to come out of the bag and go all over the place.

    Then my brilliant, yes BRILLIANT husband, came up with an amazing idea for the paper bag method, and it has worked like a charm ever since. I’ll show you how we pop it without a mess! (I’ll show you the “how-to,” through the photos, but there’s also a recipe below!)

    Brown Bag Microwave Popcorn:

    How to Make Homemade Popcorn in the Microwave in a brown bag with no oils

    There are just a few simple steps!

    Grab two brown paper bags, and pour a half of a cup of unpopped kernels in the bottom of one paper bag.

    How to Make Homemade Popcorn in the Microwave in a brown bag with no oils

    Open the other brown paper lunch bag, and slide the top of the bag over the top of the other, creating a closed package for the popcorn to pop in.

    How to Make Homemade Popcorn in the Microwave in a brown bag with no oils
    How to Make Homemade Popcorn in the Microwave in a brown bag with no oils

    Lay the brown bag on it’s side, inside of the microwave and cook.

    How long to Cook Popcorn in the Microwave?

    We have one of those “popcorn,” sensory cook buttons on our microwave, but when prepping this post, I paid attention to the popcorn microwave time, so I could give you a cooking time.

    HOWEVER, each microwave setting can be different so the exact time may vary. So I really recommend to start with 3-4 minutes and listen to how the popcorn pops. When you hear it really slowing down, stop the cooking process and pull it out of the microwave. (CAUTION: HOT!!)

    How to Make Homemade Popcorn in the Microwave in a brown bag with no oils

    When popcorn is finished…

    When the popcorn has stopped popping or the 3-4 minutes is up, simply pull the two bags apart (try to do this over a big bowl, as some popcorn may fall out while separating the two bags).

    How to Flavor Microwave Popcorn

    After trial and error, we’ve also figured out our favorite ways to flavor up the popcorn.

    Doesn’t it drive you nuts when you go to the movies; you sit down in your comfy chair to enjoy the movie, dig in and eat your popcorn… only to find that the popcorn is so bland and nasty after the first layer is gone? (Right, I know that life could be worse. But when that bag of popcorn takes a ¼ out of my child’s college fund, it’s pretty disappointing when the flavor is gone before the movie even starts.)

    So we figured out a way to make the flavor last, and “STICK,” to the popcorn, so we can enjoy every stinking bite… all the way down to the bottom!

    Healthy Homemade Popcorn in the Microwave in a brown bag with no oils

    Popcorn Butter and Seasoning

    First we put a small layer of the popped popcorn in a large bowl. (So as you’re pulling the two bags apart, only pour a small layer of popcorn in the bowl first.)

    How to Make Homemade Popcorn in the Microwave in a brown bag with no oils

    Then grab your favorite popcorn seasoning and sprinkle on a layer, all over the popcorn.

    (Our favorite popcorn seasonings, (Kernel Season’s flavorings are our favorite and you can usually find them at your local grocery store or online) and we sprinkle layers of this in the order I share next.)

    Popcorn Seasoning Ideas

    If you don’t have specific popcorn seasoning on hand, there are many different ways you can season it! Here are some fun ideas that we’ve tried as well, or that others love too so feel free to use your favorite topping!

    • Garlic Salt
    • Nutritional Yeast
    • Brown Sugar
    • Popcorn Salt
    • Garlic Powder
    • Seasoning Salt
    • Kosher Salt
    • Fresh rosemary
    Seasonings on homemade popcorn
    How to Make Homemade Popcorn in the Microwave in a brown bag with no oils

    Then, we grab the Orville Redenbacher’s butter flavor topping, (also our favorite, and sometimes called “fake butter”) and drizzle a layer of butter (as much butter as you prefer) on top of the seasonings. You can also use melted butter!

    Popcorn butter for homemade popcorn
    How to Make Homemade Popcorn in the Microwave in a brown bag and flavors and butter!

    Next, we sprinkle another layer of seasoning. (Sometimes mixing up the flavors for a bit of fun!)

    How to Make Homemade Popcorn in the Microwave in a brown bag and flavors and butter!

    Then it’s time for another small layer of popcorn…

    How to Make Homemade Popcorn in the Microwave in a brown bag and flavors and butter!

    Then repeat the seasoning process! So here’s the order in how we season and make the microwave popcorn better!

    1. Layer of popcorn
    2. Season with favorite seasoning (this could be salt or other fun flavors like we use!)
    3. Drizzle of butter
    4. More seasoning
    5. Another layer of popcorn
    6. Repeat with #2-#5 until all popcorn has been seasoned!
    How to Make Homemade Popcorn in the Microwave in a brown bag and flavors and butter!

    Serve Right Away

    For best results, fresh popcorn has the best flavor if you eat it right away. However, we’ve been known to make a big batch and have some leftover. So once it’s cooled off, we store it in an airtight container and snack on it the next day!

    It does have a different texture but if I’m being honest… it’s actually still REALLY good the next day!

    We’re the “Popcorn People”

    Now, after perfecting the homemade microwave popcorn recipe, we even have family asking for it when they come over because it has become a favorite snack food.

    So the next time you want popcorn, I hope you give this a try! Let me know how you like it! You may just be hooked like we are!

    More Popcorn Recipes and Other Ways to Enjoy Popcorn

    • Popcorn balls recipe
    • Caramel corn recipe
    • Popcorn snack mix

    Originally published: June 2021
    Updated and republished: April 2025

    Recipe

    Homemade popcorn with butter and seasonings sprinkled on.
    Print Pin
    5 from 3 votes

    Homemade Popcorn in the Microwave

    How to Make Homemade Popcorn in the Microwave: A quick and easy way to pop microwave popcorn, without oil, in a brown bag, and it's ready in minutes!
    Course Snack
    Cuisine American
    Prep Time 2 minutes minutes
    Cook Time 3 minutes minutes
    Total Time 5 minutes minutes
    Servings 12 cups
    Calories 26kcal
    Author Jessica Burgess

    Equipment

    • microwave

    Ingredients

    • 2 brown paper bags
    • ½ cup uncooked popcorn kernels We use Orville Redenbacher Corn or even off-brand yellow popping corn.
    • Popcorn Seasoning We LOVE Kernel Season's
    • Popcorn butter topping We LOVE Orville Redenbacher’s

    Instructions

    • Open one brown paper bag, and pour in the cup of kernels.
    • Using the other brown paper bag, open it up and slide it down on top of the other, creating an enclosed bag for it to pop in.
    • Place the bag on it’s side in the microwave and cook for 3-4 minutes, listening for the kernels to slow down.
    • NOTE: Each microwave is different and cooking times may vary. We use our popcorn sensing button, and it pops for about 3 minutes.
    • Remove popcorn from microwave, and gently pull the two bags apart from one another.
    • Caution: HOT!!
    • Pour one layer of the popcorn in to a large bowl.
    • Sprinkle with popcorn seasoning desired
    • Then drizzle popcorn butter on top
    • Repeat with another layer of seasoning.
    • Add another layer of popcorn, and repeat the seasoning process until all of the popcorn has been seasoned.

    Video

    Nutrition

    Serving: 3cups | Calories: 26kcal | Carbohydrates: 5g | Protein: 1g | Fat: 1g | Saturated Fat: 1g | Sodium: 1mg | Potassium: 19mg | Fiber: 1g | Sugar: 1g | Calcium: 1mg | Iron: 1mg

    Best Websites to Buy Dresses

    June 22, 2021

    favorite dresses for the summer months

    As a busy mom always looking for cute cheap summer clothes, dresses tend to lead the pack when it comes to an easy summer wardrobe.

    From cute summer dresses to casual summer dresses for women, I’ve gathered a HOT list of online stores where I tend to always have success when shopping online for mom clothes!

    Top 5 Online Websites for Dresses

    Husband and Wife Family Photos: Pink dress and blue shirt with gray shorts

    H&M

    When I need an affordable, casual t-shirt dress or even a dress that can double as a swimsuit cover-up, I head to H&M. The prices are usually affordable and they have a broad selection of dresses that can work for so many different occasions.

    I actually bought the dress that you see above, at H&M for family photos! It was the casual, yet relaxed-classy look I was going for!

    Chicwish

    Oh how I love Chicwish for dresses! Some of the dresses aren’t really my style but they have such a large selection, that I can usually find a dress for a wedding or special event that we’re going to!

    I actually found this fun flamingo dress at Chicwish a few years ago and I wore it to a business retreat and for a lifestyle brand photoshoot! It was one of those dresses that was a conversation piece everywhere I went! Something like this would also be super cute and fun for a “favorite things party” with your girlfriends… am I right?!

    flamingo dress

    Modcloth

    I have to say, Modcloth is the very first place that I look when I need a new dress. I don’t always find a dress there but when I do… it’s my absolutely FAVORITE! They’re super stylish and I never find anything like it anywhere else.

    Don’t look at just the dresses though… they usually have adorable skirts too! I’m a sucker for an a-line dress and Modcloth usually has multiple to choose from and you can even filter for trending styles to make your search even easier! Being from Montana, I tend to find myself looking for cute dresses to wear with cowboy boots from Modcloth too!

    I snagged this amazing green dress below from Modcloth a few years ago and it was one of my favorites for so many years. Sadly, after a LOT of wear and tear, the zipper broke and it was a sad, sad day. Still not sure why I didn’t fix the zipper and keep the dang thing.

    Green dress from modcloth

    Forever 21

    I may be in my 30’s, almost 40 but this gal STILL shops at Forever 21 for an affordable summer dress.

    They’re usually so cheap that it’s hard to pass them up and it’s also another store I shop at to find swimsuit cover-ups, even if they’re a “dress”.

    This t-shirt dress that I found, in the photo below, was about $7.00 and is the perfect dress for a hot summer day, or to wear over my swimming suit if we go out on the lake!

    Make sure to check out their rompers and jumpsuits too, that can sometimes pass for a dressier occasion.

    T Shirt from Forever21: White with green stripes

    Pink Lily

    Pink Lily is a newer love, where I’ve become obsessed with their denim shorts! But they have super cute dresses too that I love. I’ve even found super cute jumpsuits on their website that can be dressed up or down!

    black jumpsuit from pink lily

    Now, I do also love Target, Red Dress Boutique (where I got my favorite coral dress) and Amazon when shopping for women’s clothes but these featured today were specifically for dresses!

    I so hope you found something that you love! Drop me a note and let me know!

    Instant Pot Cajun Pasta

    June 22, 2021

    Easy instant pot pasta recipe

    Delicious instant pot pasta with a little kick! This cajun pasta is a savory twist on regular pasta. It’s quick, easy, and a family favorite!

    Mastering instant pot recipes was one of the best things I’ve ever done. Instant pot chicken and potatoes, cheeseburger macaroni, and Instant Pot pot roast are on repeat at my house because they’re just so easy!

    Instant Pot Cajun Pasta

    Why You’ll Love This Instant Pot Pasta

    • This recipe is incredibly simple and is an easy dinner recipe that the whole family will love so it’s great for the meal planner! There are no crazy cooking skills required to make this cajun pasta. All you will need is basic ingredients, an instant pot, and only 30 minutes! Can you see why it’s one of my go-to easy family dinners?!
    • So my favorite Instant Pot recipes use tomato sauce. But what’s nice about this one is that it’s a nice switch from the typical meat sauce or marinara sauce pasta recipes, like our Sausage Pasta Bake recipe.
    • It’s easy to cater this recipe to anyone’s eating habits because it’s versatile. You can add celery, peppers, mushrooms, chicken sausage, or use a different type of pasta. To find more about substitutions and add-ins, keep scrolling!
    • This is a relatively healthy dinner as-is and can also be healthified even more! This recipe has a serving of protein, carbs, and fat which makes it a great healthy family dinner. There are also simple steps to make this recipe even healthier, just keep scrolling!
    instant pot pasta recipe

    Ingredient Checklist

    • ½ Tbsp. Butter
    • ½ Tbsp. Olive Oil
    • ½ lb. Andouille Sausage (this would also be amazing in this sausage casserole!)
    • ¼ cup Diced Celery
    • 2 Cloves Garlic, Grated
    • ½ Tbsp. Minced Onion
    • ½ Tbsp. Paprika
    • 1 Tbsp. Cajun Seasoning
    • 2 Cups Chicken Broth (my homemade chicken broth recipe is a great option for this too.)
    • 7 oz. Penne Pasta
    • ½ cup Half and Half
    • ½ cup Parmesan Cheese
    • ⅛ cup Fresh Parsley or basil
    Instant pot cajun pasta ingredients.

    Step by Step Directions

    You can find the full list of ingredients and full printable recipe card at the bottom of this post, however, I love to share tips along the way in case it’s helpful!

    1. Heat your butter and oil using the sauté function on your instant pot. After
      your butter is melted, add sausage and celery and cook until your
      sausage is beginning to brown and your celery is soft (Image 1).
    2. Add your minced onion, grated garlic, Cajun seasoning, and paprika to your
      pot and mix using a wooden spoon until the sausage and celery are coated.
    3. Add your chicken broth and continue to cook while stirring occasionally until
      your chicken broth has reached a slow simmer.
    4. Add pasta into your broth mixture, turn off the sauté function on
      your Instant Pot, place your pressure cooker lid on your pot, set the valve
      to the sealing position, and pressure cook on manual high pressure for 6 minutes (Image 2).
    5. Once your pasta is done cooking, initiate a quick release on your Instant
      Pot. (“Quick release” or “manual release” means to turn the pressure valve to “vent” to release the steam and pressure. Natural release means to allow the Instant Pot to release the pressure on its own, which takes longer and typically makes the food cook longer inside, since it’s pressurizing for a longer time while naturally releasing.)
    6. Once all the pressure has been released, remove the lid and quickly stir in
      your half and half and parmesan (Image 3).
    7. Add parsley to the top of the pasta and serve (Image 4).
    Steps on how to make Instant Pot Cajun Pasta.

    Variations to This Recipe

    There are a few easy things you can do to make this recipe slightly healthier. You can easily throw in veggies like bell peppers, mushrooms, and/or broccoli when you add in your pasta.

    In addition to including more vegetables, you can also use chickpea pasta or another lentil pasta. These types of pasta are more nutrient-dense and have more protein than typical pasta. Those types of pasta cook the same as regular noodles and you can find them at most grocery stores. Or, feel free to use gluten-free pasta as well!

    FAQs

    Can I use different noodles?

    Yes, you can use a different style of noodles. I’ve found that penne gives this instant pot pasta recipe a nice texture and flavor but spaghetti noodles, bowtie, or rigatoni would also work. We even used fettuccini in this Blackened Chicken Alfredo. Each pasta may have different cook times so adjust if needed.

    Can you put uncooked pasta in the instant pot?

    Yes! You put uncooked pasta in the instant pot. For best results and to achieve al dente tender pasta, make sure you follow the directions because it can be tricky to get the perfect pasta texture.

    What can I use instead of Cajun seasoning?

    Creole seasoning is a great substitute for Cajun seasoning. If you do not have Cajun or creole seasoning, you can make your own by combining paprika, salt, garlic powder, black pepper, white pepper, onion powder,
    oregano, and cayenne.

    Instant pot cajun pasta recipe

    How do I Store Leftover Instant Pot Pasta?

    This instant pot spaghetti recipe reheats so well and is great for leftovers the next day! To store this dish, simply put your leftovers in an airtight container and place them in the refrigerator for up to 5 days. To reheat, you can add a splash of milk and parmesan cheese to the pasta and cook on the stove or reheat in the microwave. You could also add more pasta sauce if desired!

    easy Instant pot pasta

    Substitutions and Add-ins

    • Andouille sausage is a slightly spicy sausage that can be hard to find at the grocery store but you can easily swap that out with Polska Kielbasa sausage. For a healthier alternative, you can buy a turkey Polska Kielbasa-style sausage. Or, feel free to change up the meat totally and use ground beef, chicken, ground turkey or leftover meats from the night before!
    • If you like your pasta thick, you can use cream instead of half and half. If you’d prefer to stay away from cream altogether, you can use any type of milk and a thickening agent like corn starch.
    • I don’t know about you, but I ALWAYS top my pasta with shredded parmesan cheese and fresh basil. I think it gives this instant pot pasta extra flavor and texture which is always welcomed in my recipes!
    • If you find that spicy pasta isn’t your favorite, you leave out the cajun seasoning and use seasonings such as garlic powder, paprika, parsley, Italian seasoning, red pepper flakes, and/or onion powder. Simply add these spices along with the rest of the spices in this instant pot recipe.
    Easy instant pot cajun pasta recipe

    More Instant Pot Recipes

    Instant Pot pasta recipes are are comforting, easy and usually a kid and family favorite, especially on busy weeknights. Here are more recipes that you’ll find helpful for busy nights!

    • Another one of my go-to pressure cooker dinners is Instant Pot orange chicken. Not only do I love that recipe, but it’s kid-approved too! If you’re not a fan of orange chicken, instant pot pot roast is another great recipe.
    • I love serving vegetables as a side dish and the instant pot does a wonderful job of cooking them fast and well. Instant pot spaghetti squash, green beans with sausage, and pressure cooked sweet potatoes are all on repeat at my house.

    Recipe

    Instant Pot Cajun pasta in bowl.
    Print Pin
    5 from 4 votes

    Instant Pot Cajun Pasta

    Delicious Instant Pot cajun pasta with a little kick! This cajun pasta is a savory twist on regular pasta. It's quick, easy, and a family favorite!
    Course Main Course
    Cuisine American, Italian
    Prep Time 15 minutes minutes
    Cook Time 15 minutes minutes
    Total Time 30 minutes minutes
    Servings 3
    Calories 680kcal
    Author Jessica Burgess

    Equipment

    • Pressure Cooker

    Ingredients

    • ½ tablespoon Olive Oil
    • ½ tablespoon Butter
    • ½ pound Andouille Sausage
    • ¼ cup Diced Celery
    • ½ tablespoon Minced Onion
    • 2 cloves Garlic Grated
    • 1 tablespoon Cajun Seasoning
    • ½ tablespoon Paprika
    • 7 ounces Penne Pasta
    • 2 cups  Chicken Broth
    • ½ cup Half and Half
    • ½ cup Parmesan Cheese
    • 2 tablespoons Fresh Parsley

    Instructions

    • Heat your butter and oil using the sauté function on your instant pot.
    • After your butter is melted, add sausage and celery and cook until your sausage is beginning to brown and your celery is soft.
    • Add your minced onion, grated garlic, Cajun seasoning, and paprika to your pot and mix until the sausage and celery are coated.
    • Add your chicken broth and continue to cook while stirring occasionally until your chicken broth has reached a slow simmer.
    • Add pasta into your broth mixture, turn off the sauté function on your Instant Pot, place your pressure cooker lid on your pot, set the valve to the sealing position, and pressure cook on high for 6 minutes.
    • Once your pasta is done cooking, initiate a quick release on your Instant Pot.
    • Once all the pressure has been released, remove the lid and quickly stir in your half and half and parmesan. Add parsley to the top of the pasta and serve.

    Notes

    What can I use instead of Cajun Seasoning? 
    Creole seasoning is a great substitute for Cajun seasoning. If you do not have Cajun or creole seasoning, you can make your own by combining paprika, salt, garlic powder, black pepper, white pepper, onion powder,
    oregano, and cayenne.
    How do I store instant pot cajun pasta?
    This instant pot spaghetti recipe reheats so well and is great for leftovers! To store this dish, simply put your leftovers in an airtight container and place them in the refrigerator for up to 5 days. To reheat, you can add a splash of milk and parmesan cheese to the pasta and cook on the stove or reheat in the microwave. You could also add more pasta sauce if desired!

    Nutrition

    Calories: 680kcal | Carbohydrates: 55g | Protein: 32g | Fat: 36g | Saturated Fat: 14g | Trans Fat: 1g | Cholesterol: 95mg | Sodium: 1565mg | Potassium: 690mg | Fiber: 4g | Sugar: 3g | Vitamin A: 2352IU | Vitamin C: 16mg | Calcium: 292mg | Iron: 3mg

    Tips for an All-Inclusive Resort Vacation in Mexico

    June 22, 2021

    Valentine Imperial Maya Resort in Riviera Maya Cancun Mexico

    Tips for an All-Inclusive Resort Vacation in Mexico: The things I wish I knew before going the first time and bonus tips just for fun!

    Valentine Imperial Maya - All Inclusive Resort in Mexico
    Pool Side in the morning at Valentin Imperial Riviera Maya

    Heading to Mexico for an all-inclusive vacation can be SUPER exciting. But it can also be super nerve-wracking if you've never been because you're unsure of what to expect.

    Luckily, my first time in Mexico for a vacation at an all-inclusive resort, I traveled with a friend who had been multiple times, so she knew what to expect and knew the ins and outs.

    But if you're heading there for the first time and you're not sure what to pack or what to expect upon arriving, consider me your virtual best friend that can help! (Plus, get my free printable, Mexico Packing List to help make the planning process even easier!)

    I may not have all the answers for a perfect trip to Mexico but I do have tips that can make your trip more enjoyable and hopefully spare you some trouble.

    NOTE: I’ll be referring to taking an adults only, all-inclusive vacation to a resort where you fly in to the Cancun aiport (CUN). So if you’re arriving elsewhere, some of the tips may differ but this should still be very helpful!

    How do you get the most out of an all-inclusive resort?

    Valentine Imperial Maya All Inclusive Resort in Mexico - Tips for traveling

    I've broken the tips up in to "must-know" tips (or highly suggested tips) and "just for fun" tips to help you get the most out of your all-inclusive vacation. The first set will be those tips that I wish I would have known or so glad that I knew when traveling there for the first time.

    The "just for fun" tips are… well… just that. Fun tips that I've learned along the way that make things even better or more enjoyable. Definitely not necessary but are nice perks and things to remember!

    MUST-KNOW or Highly Suggested Tips:

    • Travel minimally! (Unless you're a fashion blogger. Haha!) But even as a blogger knowing that I could get some crazy fun photos on the beach of any new outfits… I end up wearing a swimming suit and swimsuit cover-up most days. I feel like day clothes are overrated unless you're going on an excursion. So for someone like us, who never leaves the resort, I only take one day outfit (cute shorts/top) just in case we decide on a whim to do some exploring. The same goes for jewelry… I take one pair of earrings that can go with anything and just wear those every night.
    • Call your phone carrier to check on the International phone plan before leaving. Some phone plans will charge roaming fees when traveling to Mexico. Or, you may be able to get a specific, temporary package to cover roaming charges.
    • Print out your itinerary before leaving home so you can reference it in case your phone goes dead at all in the airport or on your way to the resort. It's also handy to have this when filling out the customs form and you need flight number information as well as the resort’s address.
    • We love booking EARLY flights to Cancun. (Like, 6 or 7 am flights.) Knowing we have a few days to nap when we get there, we don't mind waking early, catching a flight and arriving at the resort around 11 am to still enjoy most of the day!
    • Fly out mid-day if possible on the way home. (Sleep in…at least more than you did on the way there.) You don't want to be stressed on your way back home and it's recommended that you arrive to the airport 3 hours early anyway and your resort may be quite a distance from the airport as well. So a 9:00 am flight may sound doable, but just keep in mind how early you may just have to start your day for that kind of flight. Plus, having one more all-inclusive breakfast before you leave is always a nice way to start your day to travel back home. (For instance, on our last trip, we met a couple who had to leave the resort at 2:30 in the morning to catch an early 6 am flight. Yuck.
    • Filling out forms. You will fill out a customs form while on the plan to Mexico. You will then give this form to the person in the "customs" area in the Cancun airport. The form will ask how you're arriving in to Cancun… flight/boat… what airline you used, what hotel/address you're staying at, etc.)
    • Going through customs. When you go through customs on arrival, they'll give you a little slip of paper from the customs form on the plane that you'll need to hang on to and bring back to the airport with you. So don't throw this away! The last time I ran in to a problem with this though (someone was traveling with me that lost theirs) we found out that an Immigration form replacement is $30, and it’s cash only.
    • Ink pens - Sounds crazy right? But you'll be so glad that you brought one or two for filling out the customs form on the plane.
      Having a pen on you so you can fill this out is so much nicer than having to wait and ask a stranger to use theirs and share the same pen with 20 other people.
    • Use a beach bag as a purse for the flight! I LOVE doing this because I love to pack minimalistic. If my beach bag is small enough to qualify and slide under the chair in front of me and big enough to hold my laptop, wallet, passport, small jacket, etc. then I don't have to pack a beach bag in my check-in and I don't need to take my big giant purse that I use every day.
    • Smile, be cooperative and be kind to the airport workers. You'd be surprised how far this can get you if a problem arises. (Check-in bag too heavy, etc.)
    • Room service. Don't feel like going to dinner every night? A lot of resorts have room service 24 hours a day. Order in and relax!
    • Dress codes. Check with the resort for any dress code at the restaurants. Some restaurants have requirements that you'll want to know about before packing. (i.e. elegant dress codes, casual, etc. and what types of clothes fit the different codes.)
    • Sunscreen - Pack that sunscreen! I know it sounds obvious but buying at the resort can be me a lot more expensive. Same for aloe vera gel. That's fantastic to have for a sunburn.
    • How much should you tip at an all inclusive resort? Take $1's for tips - Some resorts will say "please don't tip" or "we don't accept tips" But I'll tell you that I've yet to find one where the employees don't accept them and I've also found that tipping a couple of dollars here and there to waiters/waitresses, bellhops, concierge, etc. can make their day and sometimes even get you superstar service!
    • Take cash. If I were you, I’d still take a bit of cash with you, other than just dollar bills. Our debit card gave us problems while there, so we were thankful we took enough cash to cover emergency purchases or even purchases that we made at the resort.
    • USD and Pesos. Remember that you’ll be dealing with pesos while you’re there, but using USD is just fine! If you visit the spa or purchase something while there, don’t panic when you see what looks like your total is thousands of dollars. That is in pesos and they’ll be able to convert it to USD for you.
    • First aid. Pack items like Motrin, Tylenol, Advil, hangover relief, digestive, heartburn relief, etc. for those "Ooops, I drank too much" moments or if the food/water doesn't settle well with you.
    • Bug spray - sometimes the mosquitos can be an issue, so I always like to bring that with me in case it's heavy mosquito season.
    • Small crossover handbags are super handy for going out for dinner at the resorts if you want to carry your phone or other small belongings with you. This is an adorable, similar nude crossover handbag that I use!
      I recommend a crossover if you do want to take things with you, so it's easier to carry if you decide to stay out afterward for the entertainment, and it's less likely you'll sit the purse down and walk off from it. However… I get to where I don't even take my phone or any belongings with me to dinner and just leave everything in the room. So freeing! But grab that room key… and slip it in to your pocket if you have one!
    • Jewelry. Leave your wedding rings at home or wear a fake ring! The last thing you want is to have a great time and then lose something so special and important!
    • Credit Card. Be prepared to take a credit card with you for extra charges or let your bank know you're traveling if you bank with a small local bank and using a debit card.
    • Phone safety. If you like to have your phone out in the pool/beach area, grab a waterproof case. But surprisingly (even as addicted as I am to my phone/computer) I leave my phone in the room almost all day. If you can, use this time to detox from your phone.
    • Shoes. Take one pair of dress shoes that you can wear with multiple outfits for dinner. (Nude heels are a great color for me because they go with just about anything, and my husband usually takes black/brown dress shoes.)
    • Do I need to bring a beach towel to an all inclusive resort? Beach towels usually aren't necessary to bring with you. You may check with your resort, but don't waste the space in your luggage if your resort provides them.
    • Hairdryer - check with your resort to see if they provide one. Less you have to take, the better.
    • Use the safe in your room. You just never know. When you get to the room, place your passports (and car keys if applicable) in the safe, as well as any other travel documents that you want to keep safe while you're on the trip.
      Don't forget to get your things out of the safe when you leave. If it helps, set a reminder on your phone the night before or morning of departure so you don't get to the airport and realize you've left it behind an hour away at the resort!
    • Pack a swimming suit in your carry-on or purse (beach bag) when flying. This is smart in case your luggage gets lost, or if you arrive at the resort before you can check-in. If your room isn't ready, go to the bathroom, change in to your swimming suit and hit up the pool or beach while you wait for your room to be ready!
    • Books/Magazines - not only are these handy for the airplane ride there when you can't play on the internet to pass the time, but they come in handy for when you need to get up and go somewhere and need something to show that your pool chair/cabana is taken. (I actually prefer to buy magazines in the airport when heading to the resort, so I can leave the magazines behind once I've read them and not have to drag them back home like I would a book.)
    • Digital reads. Not interested in taking books/magazines? Save books/podcasts on to your device before going. It's lucky to fly with an airline that has Wi-Fi so don't assume they all do.
    • Book a shuttle service ahead of time that can pick you up from the Cancun airport and take you to your resort. When you arrive at the airport, there will be a TON of employees for various shuttle services trying to talk you in to riding with them. It's much easier to bypass them and look for the shuttle company you booked. They're expecting you and know exactly where to take you!
    • Arrival expectations. Arriving at the airport in Cancun, you'll have to go through something called "customs". This is where they check your passport, and may ask you a couple of questions of why you're coming in. (i.e. What is your name, where are you staying? How many days will you be visiting, etc.) Once through customs, you'll walk to the baggage claim and pick up any luggage you checked in.
      Most of the time, you then take your luggage through an area where they scan the luggage or even physically open it up and take a look through it to make sure you're not bringing anything illegal in.
      Then, you head outside and soak in that beautiful weather and sunshine to catch a ride to your resort.
    • If you can swing it, book a private shuttle. Sometimes it's not that much bigger of a cost. Sharing a shuttle or transportation ride with strangers can result in stopping at multiple other resorts before getting to yours, taking a lot of time away from your day of vacation!
    • Departure shuttle. While at the resort, confirm your shuttle service back to the airport to know what time to leave the resort on the day of.
    • Departure airport trip. On the way back home (if you live in USA) you'll go through the flight check-in at Cancun airport like normal, go through security and then board your flight. When arriving at your layover (if you don't have a direct flight) you may have to get your luggage at baggage claim, go through security again and go through customs at that airport before boarding your next flight home.
      For instance, if you live in Montana and are flying home from Cancun, but you have a layover in Dallas… you may have to go to Dallas' baggage claim area when laying over to get your luggage and take it through customs so they can check to make sure you didn't bring anything illegal in to the USA. Then, once you're good to go, you can board your plane to your final destination.
      Have a direct flight? Customs will just check your baggage after you have picked it up from the baggage claim at your home airport. Direct flights are definitely a better option if you are able to get one, but isn't as crazy as it may sound unless a flight is delayed.
    • Dry shampoo. Ladies, dry shampoo may be your new best friend if it isn't already! I love being able to use that instead of having to get completely ready for dinner if I've stayed at the pool bar/beach longer than planned.
    • Beach chairs. Most people will tell you to get up early while there if you can or if it's worth it to you, to reserve a pool chair. Some people think it's rude to reserve chairs and some resorts don't even allow it.
      My opinion? I like to get up early some mornings, head down by the pool and pick a place. I put my things down (sometimes sit for a bit and soak up the sun) and then I go to breakfast, leaving my magazines and sunscreen on the chair. This way if something happens to them, it's not the end of the world, but most of the time someone will see that it is taken and they won't sit there. Then, after breakfast, I can come right back and enjoy the chair again. Just be kind. Don't reserve a chair in the morning just in case you want it hours later and leave for an excursion for the day.
    • Don't try to bring back meats, fruits, etc. from your trip. Customs won't allow most of these items.
    • Drink the water? Have you ever heard someone say "Don't drink the water in Mexico?!" We have too. But we always drink the water at the restaurants and in the bottles that are in the hotel minibar. But I've also heard stories of others struggling with drinking water that's not bottled or even brushing your teeth with the sink water. I'm sure it depends on where you go and what resort you stay at, but we have never had problems with this, at four different resorts.
    • Use the "do not disturb" door tag if you have one, for when you're in the room. The housekeepers can make multiple trips to your room in one day to clean and even come in for turndown service. You don't want to get woken up from that precious nap you've been craving!
    Drink station in Mexico at a resort
    Drink Station

    JUST FOR FUN:

    • Can you bring your own cup to all inclusive resort? Some love to take yeti cups for drinking in the pool so their drinks stay colder longer. We prefer to just get a new drink at the bar rather than keep up with a cup and feel like we have to clean it every day.
    • Leave a tip for the housekeeper - sometimes you can get little extras, or possibly your room cleaned sooner
    • Have airline miles or want to go big or go home? Book first class for your flight if you can. There's nothing like going to Cancun and starting your vacation out early by hopping on the flight with ease and enjoying tons of legroom, comfy seats, and cocktails.
    • Nightly entertainment. A lot of resorts have nightly entertainment. Anything from magic shows, dancing, live bands, etc. The pools usually close around 6 in the evening to allow guests to go back to their rooms and get ready for dinner.
    • Spa prep. If going to the spa, a cocktail or two beforehand can help you get extra relaxed.
    • Making a spa appointment on the resort? See if you can go to the spa early and take advantage of their steam room/sauna beforehand!
    Cancun Airport Arrival - All-Inclusive Resort Tips for a vacation
    One more pro-tip: Dress cozy, and in something that could even double as a swimsuit coverup if your room isn’t ready when you arrive! I LOVE this jumpsuit from Pink Lily Boutique!

    Where are you going? I’d love to hear!

    I’ve been to a small handful of different resorts, but I’ve been to the same resorts multiple times! (When you find one that you like it’s hard to try a new one! At least for us!)

    Or if you haven’t booked one yet, this is where I love to book all-inclusive trips as a package with the flight to save money!

    I’ve been to:

    • Excellence Riviera Maya – Our favorite! Also check out how I surprised my husband for his 30th birthday at this resort!
    • El Dorado Casitas and Royale – Both casitas and the royale side
    • Valentin Imperial Riviera Maya
    • ….and another (not all-inclusive) in downtown Cancun that was a timeshare.

    But I’d LOVE to hear where you’ve been and what your favorite is. Or, if you haven’t been yet… let me know where you’re going!

    Pasta with Corn and Tomatoes

    June 21, 2021

    Pasta with corn and tomato sauce is the PERFECT summer pasta recipe!

    In under 30 minutes, this summer pasta recipe is an easy summer recipe to put together and uses delicious ingredients from the garden (or summer vegetables from the grocery store) to create summer flavors in a comfort food dish that everyone will love!

    Similar to this one, our macaroni and tomatoes recipe is easy to make and is a southern classic.

    Pasta with corn and tomato sauce is the PERFECT summer pasta recipe!

    Why You’ll Love this Recipe

    • This recipe uses simple ingredients and it’s a great way to use those summer vegetables in a comfort food dish that’s not too heavy.
    • It’s ready in under 30 minutes so you’re not stuck in the kitchen for a lot of hours and can be made quickly after spending all day outside!
    • This recipe is lighter, compared to a fall or winter pasta recipe, such as this creamy pasta recipe made with cream cheese!
    Mmm! Fettuccine with Corn and Tomatoes. This is a great bbq side dish recipe and perfect if you're looking for vegetarian pasta recipes

    Recipe Ingredients:

    • extra virgin olive oil
    • 3 cloves garlic smashed
    • pinch crushed red pepper flakes
    • 1 pint grape or cherry tomatoes cut in half
    • 1-½ cups chicken or vegetable stock
    • salt and pepper to taste
    • 2 ears corn, kernels cut off the cob
    • 1 box fettuccine
    • ½ cup grated parmigiano reggiano
    • 6 basil leaves, chopped

    Fettuccine with Corn and Tomatoes Recipe

    Although you can use any kind of pasta for this recipe, our favorite is to the use fettuccine. However feel free to substitute for other pasta that you have on hand.

    This is an easy summer pasta recipe that is SOOOO full of flavor!

    Summer Pasta Sauce

    Since this is a light summer recipe, a light summer pasta sauce is key! This sauce is made up of herbs and oils, rather than a hearty tomatoes sauce like so many others call for.

    Vegetarian Pasta

    Using vegetables like corn and tomatoes in this pasta adds the texture this pasta needs without adding meat.

    However if you’d like to add diced chicken or another protein like salmon or this broiled steak recipe, may be delicious as well!

    Sweet Corn Pasta Recipe - This recipe is perfect as a side dish or main dish!

    Step by Step Directions:

    • Bring a large pot of well-salted water to a boil.
    • Coat a large saute pan with olive oil and add the garlic and the crushed red pepper.  
    • Bring the pan to a medium-high heat. When the garlic has turned a golden brown color, remove it and discard.
    • Add the prepared grape tomatoes and half the stock and season with salt. Simmer the pan until the tomatoes have wilted and let off their juices.
    • Add the corn and the remaining stock and simmer until the corn is cooked through.
    • While the corn is cooking add the pasta to the pot of salted boiling water. Cook the pasta until the water comes back to a rolling boil plus 1 minute.  
    • Remove the pasta from the water and add it to the saute pan with the tomatoes and corn. 
    • Add about a half a cup of the pasta cooking water and cook until the water has evaporated and the sauce clings to the pasta.  
    • Remove the pan from the heat. 
    • Toss in the parmigiano reggiano, basil and a big drizzle of extra-virgin olive oil. Stir or toss the pasta vigorously. Parmigiano reggiano is a great cheese that adds saltiness and a nutty flavor. I recommend buying a block of the cheese and grate it yourself because it tastes so much better.
    Easy Summer Side Dishes - This is perfect for a bbq or even a warm weeknight side dish for the family!

    Perfect BBQ Side Dish Recipe

    This would be an amazing side dish for a bbq or potluck for summer. It’s quick and easy and transfers well! It’s even delicious if it’s not piping hot which works out wonderful for outdoor get-togethers.

    Simple Pasta Recipes - This summer corn and tomato fettuccine is perfect!

    Related Recipes

    • Chicken Caesar Pasta Salad
    • Easy Bacon Ranch Pasta Salad
    • Cauliflower Potato Salad

    Recipe

    Pasta with corn and tomato sauce is the PERFECT summer pasta recipe!
    Print Pin
    5 from 1 vote

    Fettuccine with Corn and Tomatoes Recipe

    In under 30 minutes, this summer pasta recipe is easy to put together and uses delicious ingredients from the garden (or summer vegetables from the grocery store) to create summer flavors in a comfort food dish that everyone will love!
    Course Main Course
    Cuisine Italian
    Prep Time 10 minutes minutes
    Cook Time 15 minutes minutes
    Total Time 25 minutes minutes
    Servings 4 servings
    Calories 538kcal
    Author Jessica Burgess

    Ingredients

    • extra virgin olive oil
    • 3 cloves garlic smashed
    • pinch crushed red pepper flakes
    • 1 pint grape or cherry tomatoes cut in half
    • 1-½ cups chicken or vegetable stock
    • salt and pepper to taste
    • 2 ears corn, kernels cut off the cob
    • 1 box fettuccine
    • ½ cup grated parmigiano reggiano
    • 6 basil leaves chiffonade

    Instructions

    • Bring a large pot of well-salted water to a boil.
    • Coat a large saute pan with olive oil and add the garlic and the crushed red pepper.  
    • Bring the pan to a medium-high heat. When the garlic has turned a golden brown color, remove it and discard.
    • Add the prepared grape tomatoes and half the stock and season with salt. Simmer the pan until the tomatoes have wilted and let off their juices.
    • Add the corn and the remaining stock and simmer until the corn is cooked through.
    • While the corn is cooking add the pasta to the pot of salted boiling water. Cook the pasta until the water comes back to a rolling boil plus 1 minute.  
    • Remove the pasta from the water and add it to the saute pan with the tomatoes and corn. 
    • Add about a half a cup of the pasta cooking water and cook until the water has evaporated and the sauce clings to the pasta.  
    • Remove the pan from the heat. 
    • Toss in the parmigiano reggiano, basil and a big drizzle of extra-virgin olive oil. Stir or toss the pasta vigorously. 

    Notes

    Parmigiano reggiano is a great cheese that adds saltiness and a nutty flavor. I recommend buying a block of the cheese and grate it yourself because it tastes so much better.
    Please keep in mind that the nutritional information provided below is just a rough estimate and variations can occur depending on the specific ingredients used. 

    Nutrition

    Serving: 1.5cups | Calories: 538kcal | Carbohydrates: 89g | Protein: 23g | Fat: 9g | Saturated Fat: 3g | Cholesterol: 105mg | Sodium: 366mg | Potassium: 647mg | Fiber: 4g | Sugar: 6g | Vitamin A: 780IU | Vitamin C: 27.6mg | Calcium: 207mg | Iron: 3.2mg

    Mozzarella Wrap with Tomato and Basil

    June 15, 2021

    Mozzarella wrap with tomato and basil

    This mozzarella wrap with tomato and basil makes the perfect summer lunch. It’s easy, refreshing, and light!

    Sometimes the most simple ingredients create the freshest flavors. This recipe along with chicken street tacos, Asian chicken lettuce wraps, and my Italian chopped salad, are my go-to meals on a hot summer day.

    Mozzarella Wrap with Tomato and Basil

    Why You’ll Love This Recipe

    I don’t know about you but the last thing I want to do it take an hour out of my day to make a meal.

    The combination of fresh mozzarella, juicy tomatoes, and fresh herbs does wonders for your taste buds while still allowing you to feel amazing. There’s nothing better than whipping up a simple recipe that happens to be delicious and good for you!

    Mozzarella wrap with fresh basil

    What kind of mozzarella is best for wraps?

    Fresh mozzarella cheese is my favorite ingredient in this recipe. Fresh mozzarella tastes much better than sliced mozzarella because it has more flavor, it’s creamier, and has a smoother texture and you can typically find it at your local grocery store!

    I would highly recommend using fresh mozzarella over sliced but you may used sliced if you’re in a pinch. There’s something about the fresh flavors that make a recipe like this over-the-top!

    Ingredient Checklist:

    • 4 larges Tortillas
    • ½ cup fresh basil leaves
    • 1 medium tomato sliced
    • 1 cup arugula (optional and can sub. for spinach)
    • 8 ounces fresh mozzarella
    • 1 tablespoon olive oil
    ingredients for easy mozzarella wrap

    Step by Step Directions

    1. With a knife or kitchen scissors cut a line starting in the middle of the tortilla.
    2. Slice the tomato and mozzarella, set aside (Image 1).
    3. On the lower left quarter, add the basil leaves (about 3 to 4 leaves per tortilla) (Image 2).
    4. On the upper left corner, add tomato slices (about 3 to 4 slices per tortilla) (Image 3).
    Steps 1-3 of how to make mozzarella wrap.
    1. Now on the other right quarter add the arugula (about ¼ cup per tortilla) (Image 4).
    2. Finally, add the cheese sliced in the last quarter (Image 5).
    3. Starting with the quarter where you placed the basil, fold it over the tomato
      quarter.
    4. Then fold it up on top of the arugula.
    5. Finally, fold it over the cheese quarter.
    6. In a skillet add the olive oil and over medium heat add the tortilla and cook until
      it gets crispy, flip it once (about 3 minutes per side) (Image 6).
    Steps to make mozzarella wrap recipe.

    Expert Tips and FAQs

    How do you assemble a wrap?

    The best way to assemble a wrap so it doesn’t fall apart is the way shown above. When you cut a slice in the tortilla and fold in from the bottom left corner, eventually creating a triangle shape, it holds the wrap together neaty.

    Can I add protein to this recipe?

    Yes! Adding shredded chicken breast, sliced turkey, or sliced chicken would all be great additions to this recipe. To do this, you may need to add less of the other ingredients so your wrap doesn’t get too full.

    What dressings go well with a mozzarella wrap?

    Adding pesto or balsamic vinegar is the perfect way to add extra flavor to this delicious wrap. Adding balsamic vinegar makes this recipe taste like a fresh caprese salad!

    easy caprese wrap recipe

    Is this recipe low-carb?

    This recipe is fairly low-carb when using a traditional tortilla. To make this recipe 100% keto-friendly you can use a low-carb tortilla. Low-carb tortillas can be found at most local grocery stores and make delicious homemade keto cheese wraps. If you like low-carb recipes, you should definitely check out my cauliflower potato salad and low carb chicken tenders!

    Mozzarella wrap with tomato and basil recipe

    Can I use a panini press?

    Yes! If you’d rather cook these tomato basil wraps in a panini press you certainly can. Do note, it may cook faster so make sure you’re keeping a close eye on the caprese wraps to prevent burning.

    More ingredients you can add:

    If you like to mix things up, you can also add other ingredients such as:

    • red peppers
    • black pepper
    • cream cheese (instead of mozzarella)
    • arugula
    • spinach
    easy wrap with mozzarella

    Similar Recipes

    Make sure to check out some of our favorite recipes that are similar to this one, especially this tortilla sandwich!

    Or, this fajitas chicken wrap is another great, easy recipe to make for dinner or lunch!

    • Caprese chicken sandwich
    • Chopped caprese salad
    • Asian chicken lettuce wraps
    • The BEST bruschetta recipe

    Recipe

    easy caprese wrap recipe
    Print Pin
    5 from 8 votes

    Mozzarella Wrap with Tomato and Basil

    This mozzarella wrap with tomato and basil makes the perfect summer lunch. It's easy, refreshing and light!
    Course Main Course
    Cuisine American, Italian
    Prep Time 10 minutes minutes
    Cook Time 8 minutes minutes
    Total Time 10 minutes minutes
    Servings 4
    Calories 299kcal
    Author Jessica Burgess

    Ingredients

    • 4 large tortillas
    • ½ cup fresh basil leaves
    • 1 medium tomato sliced
    • 1 cup arugula optional – sub. spinach
    • 8 oz fresh mozzarella
    • 1 tbsp olive oil

    Instructions

    • With a knife or kitchen scissor cut a line starting in the middle of the tortilla.
    • Slice the tomato and mozzarella, set aside.
    • On the lower left quarter, add the basil leaves (about 3 to 4 leaves per tortilla).
    • On the upper left corner, add tomato slices (about 3 to 4 slices per tortilla).
    • On the other right quarter add the arugula (about ¼ cup per tortilla).
    • Finally, add the cheese sliced in the last quarter.
    • Starting with the quarter where you placed the basil, fold it over the tomato quarter. Then fold it up on top of the arugula. Finally, fold it over the cheese quarter.
    • In a skillet add the olive oil and over medium heat add the tortilla and cook until it gets crispy, flip it once (about 3 minutes per side).

    Notes

    How do you assemble a wrap?
    The best way to assemble a wrap so it doesn’t fall apart is the way shown above. When you cut a slice in the tortilla and fold in from the bottom left corner, eventually creating a triangle shape, it holds the wrap together neaty.
    What dressings go well with a mozzarella wrap? 
    Adding pesto or balsamic vinegar is the perfect way to add extra flavor to this delicious wrap. Adding balsamic vinegar makes this recipe taste like a fresh caprese salad!

    Nutrition

    Calories: 299kcal | Carbohydrates: 18g | Protein: 15g | Fat: 18g | Saturated Fat: 8g | Polyunsaturated Fat: 1g | Monounsaturated Fat: 7g | Cholesterol: 45mg | Sodium: 564mg | Potassium: 189mg | Fiber: 1g | Sugar: 3g | Vitamin A: 916IU | Vitamin C: 6mg | Calcium: 335mg | Iron: 2mg

    Air Fryer Fried Shrimp with Cocktail Sauce

    June 13, 2021

    air fryer fried shrimp on white plate

    These easy, crispy, and juicy air fryer shrimp are one of my favorite recipes and they’re even paired with an Old Bay cocktail sauce recipe! You’re going to be surprised by how easy it is to get restaurant-quality fried shrimp from home!

    Air fryer fried shrimp is delicious and one of my favorite ways to cook shrimp but my classic fried shrimp recipe will always be a staple!

    Air fryer fried shrimp recipe

    Why You’ll Love This Recipe

    • Since this air fryer shrimp recipe is quick and easy, it’s perfect for busy weeknights! I know how easy it is to forget to plan dinner… I would be lost without my air fryer and my air fryer recipes! Being able to make dinner in a flash helps me and my family avoid fast food.
    • These crispy shrimp can be used in different recipes. Some examples are shrimp tacos, a shrimp salad using this side salad recipe, shrimp fried rice recipe, or even topped on pasta! There are so many creative ways to enjoy these juicy shrimp.
    • They’re healthier than traditional fried shrimp! Because these are fried in an air fryer, instead of oil, these shrimp are healthier than classic fried shrimp. If you’re looking for a healthy side dish, I would suggest roasted Brussels sprouts, canned green bean recipes, and/or air fryer asparagus.

    Ingredient Checklist

    • 1.5 - 2 lb bag Frozen Shrimp (Unthawed, XL, and Peeled)
    • 2 cups Seasoned Panko Breadcrumbs
    • 1 cup All-Purpose Flour
    • ½ tablespoon Old Bay Seasoning
    • ½ tablespoon Garlic Powder
    • ½ tablespoon Cornstarch
    • 1 large egg
    • 1 ½ cups of Water
    Ingredients for air fryer fried shrimp

    Step by Step Directions

    1. Prepare shrimp: Make sure they are thawed, peeled, washed, and dried.
    2. Preheat Air Fryer to 375 degrees.
    3. Put the Panko Bread Crumbs in a small bowl. Set aside.
    4. In a large bowl combine the flour, Old Bay, Garlic Powder, and Cornstarch.
    5. Add the egg and water to the bowl.
    6. Whisk until it's all thoroughly combined. You should have a thick and wet batter.
    7. Holding the shrimp by the tail, dip the shrimp individually into the beaten egg batter. Let any excess batter drip off into the bowl (Image 1).
    8. Then dip the shrimp into the Panko bread crumbs. Covering every spot except for the tail (Image 2).
    9. Place shrimp in the Air Fryer basket in a single layer. Shrimp should not touch in the basket of your air fryer (Image 3).
    10. Place basket in Air Fryer. Close. Set time for about 6-8 minutes. Shrimp do not take long to cook.
    11. When the coating is golden brown, that's when they're ready! (Image 4).
    12. Repeat until you've cooked all shrimp.
    Steps to make air fryer shrimp.

    Old Bay Cocktail Sauce

    If you’re serving this air fryer fried shrimp as an appetizer, you have to have cocktail sauce! If you’ve never made homemade cocktail sauce before, you’re going to be surprised by how easy it is.

    Dunking juicy shrimp or air fryer salmon patties into cocktail sauce is one of my favorite things to do! Or the boom boom shrimp sauce would be delicious with this air-fried shrimp, too!

    Air fryer shrimp with cocktail sauce

    Cocktail Sauce Ingredients Checklist

    • ¼ Cup Ketchup
    • 2 teaspoons Horseradish
    • ¾ teaspoon Old Bay Seasoning
    • 1 teaspoon Worcestershire Sauce
    • ½ teaspoon Lemon Juice
    • ½ teaspoon Smoked paprika

    Cocktail Sauce Directions

    1. In a small bowl combine Ketchup, Horseradish, Old Bay Seasoning, Worcestershire, Lemon Juice, and Smoked Paprika.
    2. Mix well until thoroughly combined.
    3. Garnish with fresh Thyme if desired.
    4. Store in the fridge covered and/or in an air-tight container.
    Air fryer fried shrimp recipe

    What Kind of Shrimp Should I Use?

    I like to use jumbo or extra-large shrimp because they shrink while cooking. Using bigger shrimp will ensure they are a decent size when they’re ready to eat. You can use a smaller size, but do note that the cooking time may be faster.

    I find that it’s easier for me to use frozen shrimp and let it thaw rather than buying fresh shrimp. I only prefer that out of convenience and you can use fresh shrimp if desired. The important thing is that your shrimp are uncooked, peeled, with the tail on!

    What Side Dishes for Shrimp

    If you’re looking for easy side dishes that pair well with this shrimp recipe, you’ll love:

    • Sweet Potato Fries in the Air Fryer
    • Baked Potato Wedges
    • Side Salad
    • Air fryer Cheesy Garlic Bread

    Expert Tips and FAQs

    Can I store air fryer fried shrimp?

    Yes, you can store air fryer shrimp in an air-tight container in the refrigerator for no more than one day. For best results, reheat them in the air fryer or the oven. I would highly recommend eating these shrimp fresh because the breading will not be as crispy when reheated.

    What spices go well with air fried shrimp?

    The spices in this recipe are absolutely delicious but feel free to customize them in any way you’d like. Onion powder, smoked paprika, dried green onion, and cajun seasoning are all great options. Just add a ½ Tsp
    or so.

    Can I use different bread crumbs?

    I’ve found that seasoned Panko bread crumbs work best for this recipe but you can use plain or Italian seasoned Panko bread crumbs. For the perfect shrimp, I would suggest using Panko bread crumbs instead of regular bread crumbs.

    Air fryer fried shrimp recipe

    How to Keep Shrimp from Sticking to the Air Fryer Basket

    Depending on what air fryer you use, you may have trouble with your shrimp sticking to the basket of the air fryer. To solve this problem, all you have to do is add a little bit of olive oil spray to the basket before cooking. This will help prevent your shrimp from sticking!

    Easy air fryer shrimp

    Related Recipes

    My husband and I love to use the air fryer for all kinds of easy recipes. Using the air fryer for a quick and easy dinner is not uncommon at our house! We love making Turkey Burgers in the Air Fryer, Frozen chicken wings in the air fryer, and air fryer bratwursts!

    Or, if you love shrimp, then you’re going to really love these baked potatoes with shrimp and Cajun sauce!

    Or if copycat recipes are your things, don’t miss this shrimp on the barbie!

    Recipe

    air fryer fried shrimp on white plate
    Print Pin
    5 from 1 vote

    Air Fryer Shrimp with Cocktail Sauce

    These easy, crispy, and juicy air fryer shrimp are one of my favorite recipes and they're even paired with cocktail sauce! You're going to be surprised by how easy it is to get resturant quality fried shrimp from home!
    Course Appetizer, Main Course, Side Dish
    Cuisine American
    Prep Time 15 minutes minutes
    Cook Time 10 minutes minutes
    Total Time 25 minutes minutes
    Servings 25 shrimp
    Calories 72kcal
    Author Jessica Burgess

    Equipment

    • air fryer

    Ingredients

    Air fryer shrimp

    • 1 ½ – 2 pound frozen shrimp
    • 2 cups seasoned Panko bread crumbs
    • 1 cup all-purpose flour
    • ½ Tablespoon old bay seasoning
    • ½ Tablespoon garlic powder
    • ½ Tablespoon corn starch
    • 1 egg
    • 1 ½ cups water

    Old Bay Cocktail Sauce

    • ¼ cup ketchup
    • 2 Tablespoons horseradish
    • ¾ teaspoon old bay seasoning
    • 1 teaspoon Worcestershire Sauce
    • ½ teaspoon lemon juice
    • ½ teaspoon smoked paprika

    Instructions

    Air Fryer Shrimp

    • Prepare shrimp: Make sure they are thawed, peeled, washed, and dried.
    • Preheat Air Fryer to 375 degrees.
    • Put the Panko Bread Crumbs in a small bowl. Set aside.
    • In a large bowl combine the flour, Old Bay, Garlic Powder, and Cornstarch.
    • Add the egg and water to the bowl. Whisk until it's all thoroughly combined. You should have a thick and wet batter.
    • Holding the shrimp by the tail, dip the shrimp individually into the batter. Let any excess batter drip off into the bowl.
    • Then dip the shrimp into the Panko bread crumbs. Covering every spot except for the tail. 
    • Place shrimp in the Air Fryer basket. Shrimp should not touch in the basket of your air fryer.
    • Place basket in Air Fryer. Close. Set time for about 6-8 minutes. Shrimp do not take long to cook.
    • When the coating is golden brown, that's when they're ready!
    • Repeat until you've cooked all shrimp.

    Old Bay Cocktail Sauce

    • In a small bowl combine Ketchup, Horseradish, Old Bay Seasoning, Worcestershire, Lemon Juice, and Smoked Paprika.
    • Mix well until thoroughly combined.
    • Garnish with fresh Thyme if desired.
    • Store in the fridge covered and/or in an air-tight container.

    Notes

    Can I store air fryer fried shrimp? 
    Yes, you can store air fryer shrimp in an air-tight container in the refrigerator for no more than one day. For best results, reheat them in the air fryer or the oven. I would highly recommend eating these shrimp fresh because the breading will not be as crispy when reheated.
    What spices go well with air fryer shrimp? 
    The spices in this recipe are absolutely delicious but feel free to customize them in any way you’d like. Onion powder, smoked paprika, dried green onion, and cajun seasoning are all great options. Just add a ½ Tsp
    or so.
    Can I use different bread crumbs? 
    I’ve found that seasoned Panko bread crumbs work best for this recipe but you can use plain or Italian seasoned Panko bread crumbs. For the perfect shrimp, I would suggest using Panko bread crumbs instead of regular bread crumbs.

    Nutrition

    Serving: 6shrimp | Calories: 72kcal | Carbohydrates: 8g | Protein: 7g | Fat: 1g | Saturated Fat: 1g | Polyunsaturated Fat: 1g | Monounsaturated Fat: 1g | Trans Fat: 1g | Cholesterol: 75mg | Sodium: 279mg | Potassium: 55mg | Fiber: 1g | Sugar: 1g | Vitamin A: 45IU | Vitamin C: 2mg | Calcium: 53mg | Iron: 1mg

    Easy Lunch Recipes

    June 13, 2021

    Don’t fall into a lunchtime rut with these easy recipes. In this collection you will find something for everyone, from classics like hot ham and cheese, and egg salad, to chopped salads, soups, and everything in between. With this resource at your fingertips, you can skip the fast food drive-thru!

    Easy lunch recipes collage.

    If you’ve found yourself out of leftovers to eat for lunch, here are lunch recipes that are easy!

    Cornbread salad in bowl with tomatoes green onions, and cheese.

    Cornbread Salad without Beans

    This unique salad hits the spot at lunch time. It doesn’t have beans, but it does have the best bbq ranch dressing.

    three bean salad

    Three Bean Salad

    This salad fills you up until dinner with wholesome ingredients. Make this as a part of your meal plan for great lunches.

    Stacked turkey sliders with melted cheese.

    Turkey Sliders

    These little sammys have so much flavor for a filling lunch. Make these as a part of your meal prep and heat them up in the microwave.

    Asian chopped salad.

    Asian Chopped Salad

    This chopped salad has the best Asian dressing with plenty of nuts and citrus for a flavorful and well rounded lunch.

    Close up of grinder salad in white bowl with serving serving utensils.

    Grinder Salad

    Make a grinder salad for lunch and fill up on veggies with plenty of meat for a really good meal!

    Caprese salad in white bowl.

    Chopped Caprese Salad

    This salad is made with simple ingredients for a fresh and fast lunch. It has all of the flavor of caprese in an easy to eat salad form.

    Cucumber salad in platter.

    Creamy Crunchy Cucumber Salad

    This simple salad has the crunchy flavor of cucumbers and onions with the best dressing! Make this for an easy summer salad or make a meal of it.

    Cucumber Hummus Sandwich

    Cucumber Hummus Sandwich by Bree's Vegan Life

    This hummus and cucumber salad sandwich makes for such a wonderful lunch. I know you will enjoy this for lunch, but you might also want to make it for dinner!

    Thai salad in a wooden bowl.

    Thai Noodle Salad Recipe

    This easy salad has carrots, nuts, rice noodles and more to make a really satisfying meal option. With so many veggies, I am sure you will agree this is a great lunch!

    Broccoli crunch salad in bowl, sitting on fabric napkin on table.

    Broccoli Raisin Salad

    This crunchy salad has fruit, veggies and a delicious dressing for a colorful and tasty lunch. Pack this in a lunch box for a filling option.

    Tuna salad sandwich.

    The Best Tuna Salad

    You can't go wrong with a classic like tuna salad for a hearty lunch. Pack this in a picnic, or whip this up for a last-minute lunch.

    Summer side salad in white bowl, with avocado slices on top.

    Summer Side Salad

    Make a summer salad with all of the best ingredients! Avocados, strawberries and dried fruits to make a flavorful and filling option that everyone will love.

    Greek yogurt tuna sandwich.

    Greek Yogurt Tuna Salad by Nibble and Dine

    Make a tuna salad with greek yogurt for the healthiest and most flavorful lunch. Use your favorite bread to make a filling option that tastes amazing after a long morning.

    Tuna pasta salad.

    Tuna Pasta Salad

    Pack tuna into a filling pasta salad for a great summer lunch. This is so easy to make and will be loved by everyone who tries it.

    Bacon ranch pasta salad.

    Bacon Ranch Pasta Salad

    This easy pasta salad has plenty of bacon ranch flavor to make for an interesting lunch option. Pack this for a filling meal that tastes even better the next day.

    Beef and cheese burritos sitting on plate.

    Beef and Cheese Burritos

    These beefy bean burritos have plenty of cheese and salsa for a fast and meal. You can make these ahead of time as a part of your meal planning preparations and skip the drive thru at lunch time.

    Tha chicken wraps stacked on top of one another.

    Thai Chicken Wraps by Dirt and Dough

    Wrap up chicken, veggies, and plenty of Thai dressing for a really delicious lunch option. This packs well for work or can be whipped up at home.

    Zesty Italian Salad in white bowl.

    Zesty Italian Pasta Salad

    This pasta salad has zesty flavors with cheese, pepperoni bites and plenty of peppers. I know you will love this easy lunch option.

    Shrimp macaroni salad in large serving bowl.

    Shrimp Macaroni Salad

    This easy macaroni salad has plenty of succulent shrimp to make a filling mid day meal offering. The flavor gets even better as it rests in the fridge.

    Pea salad in a bowl with a spoon dipping into it.

    Old Fashioned Pea Salad

    Pack a lot of color and flavor into lunch with this classic recipe. I know you will agree the great taste never goes out of style.

    Chicken Caesar Pasta Salad Recipe in a bowl with a cloth

    Chicken Caesar Pasta Salad

    This salad has chunks of chicken, pasta, crunchy lettuce and the best dressing. Make this for a wholesome and satisfying lunch you can pack or enjoy at home.

    Vegetable rice paper rolls on wooden cutting board.

    Vegetable Rice Paper Rolls by A Tasty Kitchen

    These veggie rolls are so delicious and fresh! You will want to make these for a summer lunch to share with friends as you catch up on everything going on in your lives.

    Crab salad in bowl.

    Crab Salad

    Pop this wonderful crab salad on bread, or enjoy it with crackers. Either way I know you are going to love it from the first bite.

    Brooklyn avenue sandwich on plate.

    Brooklyn Avenue Sandwich by Boulder Locavore

    Bring the bold flavors of a New York deli to your kitchen. This sandwich has pastrami, coleslaw and a tasty dressing for a lunch that offers your taste buds a trip!

    Buffalo chicken soup, in soup bowl.

    Buffalo Chicken Soup

    Make a pot of this spicy soup for one unforgettable lunch. It has so much bold flavor that you might want to grab a second bowl.

    Grilled chicken avocado wraps sitting on wooden cutting board.

    Grilled Chicken and Avocado Wraps by All We Eat

    These grilled chicken wraps with avocado slices make for such a good lunch! Wrap these up for a picnic, or enjoy them on your break at work for fresh flavors.

    Bagel pizzas sitting on white background.

    Pizza Bagels

    This recipe couldn't be easier! Make a fast pizza on your favorite bagels for a lunch everyone will want to sink their teeth into.

    Asian noodle dish in bowl with chopsticks.

    Gluten Free Noodle Bowl

    This noodle bowl has broccoli, carrots and sesame seeds for one perfect lunch. This is so flavorful that you won't think about hitting the trendy restaurants for a while.

    Sandwiches stacked for lunch.

    Fresh Veggie Sandwiches by Planted in the Kitchen

    This sandwich skips the meat altogether to make one hearty lunch. Use in season goodies from your garden for the freshest flavor.

    Caprese wraps, being held by a hand.

    Mozzarella Tomato Basil Wrap

    Grab a few simple ingredients like basil, tomatoes and mozzarella cheese and make a wrap of lunch. I know you will love this easy wrap idea for fast food at home.

    Rainbow wrap, sitting on cutting board.

    Rainbow Wrap by Recipes From a Pantry

    Make an easy lunch with all of the colors of the rainbow. This option has so many crunchy veggies that I know you will be satisfied until dinner.

    Southwestern egg roll being dipped in green sauce.

    Southwestern Egg Rolls

    These egg rolls are loaded with corn and black beans for a perfect lunch option. These can be made in the air fryer for a meal that is fuss free yet full of flavor.

    Bell pepper sandwich on plate.

    Bell Pepper Sandwich by The Sugar Free Londoner

    Skip the bun and make a sandwich out of a bell pepper. This is low carb but so flavorful. It has ham, cheese and cream cheese tucked inside. You might find yourself skipping bread more often in favor of this!

    Cauliflower soup with a spoon lifting out a bite.

    Instant Pot Cauliflower Soup

    Let your instant pot handle lunch today. This recipe is so tasty and packed with simple ingredients. This soup gives fast food a whole new meaning.

    Spring mix apple salad in small plate.

    Spring Mix Apple Salad

    This salad starts with spring mix and adds in apples, dried fruit and blue cheese for an unforgettable lunch. It has the best crunch hands down.

    Turkey bacon sandwich on wooden cutting board.

    Bacon Turkey Bravo Sandwich by Cooking With the Curls

    Craving something bold and hearty for lunch? Try this turkey bacon sandwich which always gets accolades.

    Italian sliders stacked on top of one another
    Italian Sandwiches

    Italian Sliders 

    Italian Sliders might be small in size but they bring big flavors to your lunch. Make these to share with the kids or a lunch companion, or make them as a part of your meal preparations. 

    Broccoli cheddar soup.

    Instant Pot Broccoli Cheddar Soup

    Skip the wait at Panera and get the soup you crave in no time. This recipe cooks in the instant pot and offers the best bowl of soup for a midday meal.

    Chicken Bacon Ranch Wraps stacked on wooden cutting board.

    Chicken Bacon Ranch Wraps by Britney Breaks Bread

    These wraps are stuffed with the best chicken bacon ranch flavor. This tastes like it came from a trendy shop, but you will appreciate how easy this wrap is to assemble.

    Italian Chopped Salad Recipe like from Portillo's or Giordanos
    Italian Chopped Salad

    Italian Chopped Salad

    This salad has a little bit of everything in it! Cheese, pasta, lettuce and all of the veggies like tomatoes and onions. Make it with honey mustard dressing for a really filling meal that everyone will love.

    Peanut butter and jelly sandwiches stacked on top of one another
    Peanut Butter and Jelly Sandwiches

    Peanut Butter and Jelly 

    This classic always hits the spot. The real question is, what kind of jelly would you use for a good old fashioned pb&j?

    Best Salad Recipe in White Plate with Red Napkin
    The BEST Salad Recipe

    The Best Side Salad 

    Pile some lettuce high with bacon, cheese and plenty of dressing to make the best side salad. You are going to love this medley of flavors.

    Egg salad on croissant, sitting on plate.

    Easy Egg Salad

    This egg salad is so fluffy and flavorful. You are going to want to make this every week for your lunches at work.

    Curry chicken salad sandwich on round plate.

    Curry Chicken Salad

    Dress up your chicken salad with plenty of curry and mayo for a flavorful sandwich you can enjoy with chips, or a fruit.

    Hot ham and cheese on white plate next to pasta salad
    Hot ham and cheese sandwich

    Hot Ham and Cheese Sandwiches

    This hot ham and cheese sandwich is timeless for good reason. It really hits the spot with simple ingredients. What kind of cheese would you like on your hot ham and cheese?

    Ham salad sandwiches on round plates.

    Old Fashioned Ham Salad

    When was the last time you had ham salad for lunch? This recipe makes for a creamy, meaty sandwich that satisfies with simple ingredients.

    Pinwheel sandwiches on wooden cutting board.

    Easy Pinwheels  

    Pinwheels make a great lunch anytime of the year. This recipe comes together easily to make the best grab and go sandwich bites.

    Caramel Apple Dump Cake

    June 9, 2021

    This caramel apple dump cake recipe is a favorite dessert recipe that consists of using simple ingredients like melted butter, dry cake mix, caramel sauce, cinnamon, canned pie filling, and nuts if desired! Simply pour into a baking dish and bake!

    For more simple desserts like this one, you can browse my full dump cake recipes here.

    caramel apple dump cake on white plate with scoop of vanilla ice cream

    In only 45 minutes, you’ll have a perfect dessert consisting of fall flavors that can be for a busy weeknight, a family get-together or even to take to someone in a care package! Look for more of a summer spin on this recipe? Then try our pineapple sunshine cake, or our carrot spice cake that’s also made with a cake mix!

    [feast_advanced_jump_to]

    Why is it called a dump cake?

    It’s called a dump cake because you literally dump the ingredients in to the baking dish and bake it.

    That’s the beauty of a dump cake and these kinds of easy dessert recipes. An easy dump cake recipe uses cake mixes, fruit fillings (canned pie filling), and other easy ingredients most of the time, making it an easy recipe that will be a crowd pleaser and a cozy dessert that the entire family will love.

    Does Apple Dump Cake need to be refrigerated?

    Dump cake can be served warm, right after baking. If you have leftovers, let it cool and then store it in an airtight container. Then, it can sit out at room temperature for a few days, however, it’s best to refrigerate it so it will stay fresh longer, at about 5 days.

    Do you stir a dump cake?

    Actually, no. The great thing about a dump cake is that you layer on most of the ingredients and pop it in to the oven, with very little effort! For this recipe, you will mix together the first few ingredients but then layer the cake mix and butter on top and then bake.

    Caramel Apple Dump Cake With Cake Mix

    For this recipe, you’ll use a store-bought box cake mix, to keep things even easier! Grab a butter golden cake mix, however feel free to experiment or try a different cake mix if it’s all you have on hand!

    Other Cake Mixes that May Work:

    • homemade cake mix
    • white cake mix
    • yellow cake mix
    • spice cake mix
    • butter pecan cake mix
    • vanilla cake mix

    How to Make a Dump Cake

    As always, there's a full printable recipe card at the bottom of this post, but I'd love to walk you through the recipe with photos and extra tips to help you make this easy apple dump cake.

    Ingredients:

    • 2 cans of 20 or 21 oz. apple pie filling
    • ½ cup caramel sauce (ice cream topping)
    • ½ teaspoon cinnamon
    • 1 box yellow or golden cake mix
    • 2 sticks (1 cup) melted butter
    • ½ cups chopped pecans, if desired
    Ingredients for caramel apple dump cake

    Preheat Oven:

    Preheat your oven to 350 degrees, and spray non-stick cooking spray inside of a 9 inch x13 inch baking dish.

    caramel apple dump cake ingredients in baking dish

    First Layer

    Expert Tip: although you can mix these ingredients in a separate bowl, save a dirty dish and pour and mix apple pie filling, caramel sauce, and cinnamon together in the baking dish, and spread evenly on the bottom.

    spread apple cake ingredients in even layer

    Second Layer

    Next, pour the cake mix right on top of the apple mixture and carefully spread it evenly over the top, covering the top of the apples completely.

    top with cake mix for caramel apple cake

    Last Layer

    Drizzle the melted butter over the cake mix, and spread it gently to cover evenly.

    Optional Layer

    If you prefer nuts you can then sprinkle the chopped pecans on top of the dump cake before baking.

    Sprinkle nuts on top of caramel apple cake if desired

    How Long to Bake Dump Cake

    Bake the caramel apple cake for 45-50 minutes or until golden brown and the apple filling is bubbly around the edges.

    caramel drizzling on top of caramel apple cake

    How to Serve Dump Cake

    Fall desserts and apple desserts in general are amazing with a scoop of vanilla ice cream, and this easy caramel apple dump cake is no different!

    Serve a scoop of cold vanilla ice cream with warm apple dump cake for tons of flavor!

    Melted vanilla ice cream on caramel apple dump cake

    Additional Toppings Ideas

    Feel free to also top or serve this delicious cake with:

    • whipped cream
    • caramel bits
    • extra drizzle of caramel and save extra for that for this caramel cream pie recipe too!

    Related Recipes:

    • Bread Pudding Recipe
    • Caramel Cupcakes with Caramel Buttercream
    • Gooey Butter Cake
    • Peach Cobbler Using Bisquick
    • Easy Cobbler Recipe

    Recipe

    Print Pin
    5 from 13 votes

    Caramel Apple Dump Cake

    This caramel apple dump cake recipe is a favorite dessert recipe that uses simple ingredients like melted butter, dry cake mix, caramel sauce, cinnamon, canned pie filling and nuts if desired! Simply pour into a baking dish and bake!
    Course Dessert
    Cuisine American
    Prep Time 15 minutes minutes
    Cook Time 45 minutes minutes
    Total Time 1 hour hour
    Servings 12 servings
    Calories 188kcal
    Author Jessica Burgess

    Ingredients

    • 2 – 20 ounce cans apple pie filling
    • ½ cup caramel sauce ice cream topping
    • ½ teaspoon cinnamon
    • 15 ounces yellow or golden cake mix
    • 1 cup melted butter
    • ½ cup chopped pecans if desired

    Instructions

    • Preheat oven to 350 degrees in a greased 9 x 13 inch pan, mix the apple pie filling, caramel sauce, and cinnamon together and spread evenly on the bottom.
    • Pour the dry cake mix over the pie filling and spread out evenly.
    • Drizzle the melted butter over the cake mix, and spread it gently to cover evenly.
    • Sprinkle with chopped pecans.
    • Bake at 350°F for 45-50 minutes or until golden brown and the apple filling is bubbly around the edges.
    • Serve slightly warm with ice cream.

    Video

    Notes

    Expert Tip: Although you can mix these ingredients in a separate bowl, save a dirty dish and pour and mix apple pie filling, caramel sauce, and cinnamon together in the baking dish, and spread evenly on the bottom.

    Nutrition

    Serving: 1serving | Calories: 188kcal | Carbohydrates: 6g | Protein: 1g | Fat: 19g | Saturated Fat: 10g | Polyunsaturated Fat: 2g | Monounsaturated Fat: 6g | Trans Fat: 1g | Cholesterol: 41mg | Sodium: 154mg | Potassium: 30mg | Fiber: 0.5g | Sugar: 6g | Vitamin A: 484IU | Vitamin C: 0.1mg | Calcium: 13mg | Iron: 0.1mg

    No Bake Peanut Butter Pie

    June 7, 2021

    No bake peanut butter pie

    No Bake Peanut Butter Pie Recipe: A dessert that takes only 15 minutes to put together and uses simple ingredients like cream cheese, peanut butter, cool whip & store-bought pie crust! It’s one of our top pie recipes to date, especially one of the top, no-bake dessert recipes! (This turtle pie is in a close race though!)

    old fashioned peanut butter pie on white plate

    PLAN AHEAD: Freeze/refrigerate the pie for at least 3 hours (or overnight) before serving, for best results, and soon you’ll have others telling you that this is one of your best dessert recipes! (Just like this no bake peanut butter chocolate bars recipe!)

    Why This Recipe is So Good:

    I don’t know about you but in the summer, the last thing I want to do is stand in a hot kitchen, baking.

    So when I need an easy dessert, cream pies (especially this no bake chocolate pie recipe and this possum pie) are my go-to and this easy peanut butter pie recipe is ALWAYS a hit and one our favorite pies! (And if I’m being honest, it’s not just a dessert that I make in the summer… I’m making it all year long, and it even sits next to this no-bake pumpkin pie during the holidays.) So if you’re a peanut butter lover, buckle up… cause you’re going to love this one!

    How do you Make Peanut Butter Pie From Scratch?

    You’ll use ingredients such as cream cheese, peanut butter, powdered sugar and cool whip for the “peanut butter custard” or filling. So this recipe is made from scratch, except for the crust! But if you’d like to make your own pie crust, I recommend this graham cracker crust recipe! Or, if you’d like to use an Oreo crust (like we used in this Oreo Candy Cane Pie) that would be delicious too!

    Ingredient Checklist:

    I often recommend keeping certain ingredients on hand for staple recipes that you can make in a pinch without going to the store. This classic, old-fashioned peanut butter pie recipe is one of those recipes!

    The ingredients are easy to keep on hand, they stay fresh for a while and it’s a recipe that can easily be whipped up if last-minute guests arrive or if you need something to carry to a potluck! It’s the kind of dessert that disappears at a potluck, right alongside my bread pudding.

    Here’s what you need for this great recipe:
    (The full printable recipe card with instructions can be found at the bottom of this post!)

    • 9-inch graham cracker crust, premade or a homemade crust (Or this Biscoff Pie Crust Recipe)
    • 1 package (8 ounces) cream cheese, softened to room temperature
    • 1 cup creamy peanut butter (use extra peanut butter to make these energy balls)
    • ¾ cup powdered sugar
    • 1 8-ounce container Cool Whip whipped topping, thawed in the fridge overnight
    • If desired, toppings such as chocolate sundae sauce, mini chocolate chips, and Reese's Peanut Butter Cups, chopped
    Ingredients on white table for peanut butter pie

    Substitutions

    If you’re not a fan of peanut butter, you can make this similar Biscoff Pie recipe that uses cookie butter, instead of peanut butter.

    Step-by-Step Directions

    • In a stand mixer or with a hand electric mixer, beat the softened cream cheese and peanut butter until smooth and creamy in a large bowl – scraping the sides and bottom of the bowl occasionally. (Image 1 below.)
    • Add the powdered sugar and beat until mixed together smoothly – again, scraping the sides and bottom of the bowl to make sure it is all incorporated. (Images 2 & 3 below.)
    Collage step by step peanut butter pie recipe
    • Remove bowl from the mixer and fold in the container of Cool Whip in to the peanut butter mixture, with a spatula. (Image 4 below.)
    • Transfer pie filling into the graham cracker crust that’s in the pie plate, and smooth out the top. (Image 5 below.)
    Peanut butter pie - no bake - collage
    • For the top of your pie, you can do a drizzle of this hot fudge sauce recipe or chocolate sauce, mini chocolate chips, and chopped Reese's Peanut Butter cups for the BEST pie. (Or at least we think so!)
    Reeses cups on top of no bake peanut butter pie
    • Place the plastic lid that came with the crust (or use plastic wrap) on the top and chill in the refrigerator or freezer for 3 hours or up to overnight.
    • To serve from the freezer, let it thaw at least 10 minutes before trying to cut into it.
    old fashioned peanut butter pie on white plate

    Expert Tips & FAQs

    How long will peanut butter pie last in the refrigerator?

    Four days! If you have leftovers, store in the refrigerator (you can even store it in the store-bought pie-crust container) for up to four days, with the lid on.

    What crust is best for peanut butter pie?

    Definitely a graham cracker crust! You can use a different kind (baked) if that’s all you have on hand but graham cracker crust is the best for a no-bake, classic peanut butter pie! Some have also mentioned in the comments that they’ve used an Oreo crust and they love that too!

    No bake peanut butter pie recipe with bite on a fork

    What to Serve with This Recipe

    Although this old-fashioned pie is absolutely perfect to have by itself, you can serve it with some of these favorite things:

    • Extra whipped cream (dollops, or piped whipped cream on top can be beautiful too!)
    • Serve alongside a warm cup of coffee
    • A scoop of vanilla ice cream
    • Your favorite cookies, such as peanut butter chocolate chip cookies!
    No bake peanut butter pie in pie dish with slice missing

    More Peanut Butter Recipes

    If you love peanut butter recipes, wait until you try this old-fashioned peanut butter cake! Then you may also love these other easy peanut butter recipes, and this collection of old-fashioned desserts:

    • No bake chocolate peanut butter oatmeal cookies
    • No bake peanut butter chocolate energy balls
    • Edible cookie dough (also a no-bake recipe!)
    • No bake brownie peanut butter cup trifle
    • Chocolate Peanut Butter Salted Caramel Toffee Cake

    Recipe

    No bake peanut butter pie
    Print Pin
    4.97 from 32 votes

    No Bake Peanut Butter Pie

    This no-bake, old fashioned peanut butter pie recipe is a dessert that takes only 15 minutes to put together and uses simple ingredients like cream cheese, peanut butter, cool whip & store-bought pie crust!
    Course Dessert
    Cuisine American
    Prep Time 15 minutes minutes
    Chill Time 3 hours hours
    Total Time 3 hours hours 15 minutes minutes
    Servings 6 people
    Calories 576kcal
    Author Jessica Burgess

    Ingredients

    • 9 inch graham cracker crust premade
    • 8 ounces cream cheese softened to room temperature
    • 1 cup creamy peanut butter
    • ¾ cup powdered sugar
    • 8 ounces Cool Whip whipped topping (One container), thawed
    • Chocolate sauce optional
    • mini chocolate chips optional
    • Reese's Peanut Butter Cups chopped, optional

    Instructions

    • In an electric mixer or with a hand mixer, beat the softened cream cheese and peanut butter until smooth and creamy – scraping the sides and bottom of the bowl occasionally.
    • Add the powdered sugar and beat until mixed together smoothly – again, scraping the sides and bottom of the bowl to make sure it is all incorporated.
    • Remove bowl from the mixer and fold in the container of Cool Whip with a spatula.
    • Transfer pie filling into the graham cracker crust and smooth out the top.
    • Place the plastic lid that came with the crust on the top and chill in the refrigerator or freezer for 3 hours or up to overnight.
    • To serve from the freezer, let it thaw at least 10 minutes before trying to cut into it.
    • If desired, top with a drizzle of chocolate sauce, mini chocolate chips, and chopped Reese's Peanut Butter cups.

    Video

    Notes

    • Plan on chilling the pie for at least 3 hours before serving so the filling can thicken!
    • How long is peanut butter pie good for?
      Four days! If you have leftovers, store in the refrigerator (you can even store it in the store bought pie-crust container) for up to four days, with the lid on.
    • What crust is best for peanut butter pie?
      Definitely a graham cracker crust! You can use a different kind (baked) if that’s all you have on hand but graham cracker crust is the best for a no-bake, classic peanut butter pie!

    Nutrition

    Serving: 1slice | Calories: 576kcal | Carbohydrates: 41g | Protein: 14g | Fat: 42g | Saturated Fat: 14g | Polyunsaturated Fat: 9g | Monounsaturated Fat: 16g | Cholesterol: 48mg | Sodium: 416mg | Potassium: 386mg | Fiber: 3g | Sugar: 30g | Vitamin A: 574IU | Calcium: 98mg | Iron: 1mg

    Strawberry Crumble

    June 6, 2021

    Strawberry Crumble Recipe

    Fresh strawberries with a crunchy oatmeal topping combine to make this perfect quick & easy strawberry crumble.

    It only takes minutes to prep and get it in the oven – and your house will smell decadent as this delicious dessert bakes! However, if you’re looking for a no-bake strawberry dessert, this strawberry icebox cake recipe is easy to make and delicious!

    Strawberry Crumble Recipe with a scoop of vanilla ice cream
    [feast_advanced_jump_to]

    Why You’ll Love this Recipe

    If you love heading to the farmers market to pick up some fresh berries during the summer like we do, then make sure to grab an extra basket for this simple recipe!

    It is the perfect summer dessert (especially during strawberry season) and a way to use that fresh fruit for those weekend BBQs, or even a fun, easy dessert recipe for a weeknight out on the back porch with your family!

    Expert Tips

    This recipe can be baked in the following sized pans:

    • deep dish pie pan
    • 7 x 11 inch (or 18 x 26 cm) – pictured in this recipe
    • 1.5 liter
    • 1.5 quart

    Baking times may vary based on the size of pan you used.

    • Adding sugar to fresh strawberries brings out the natural juices in the strawberries. So, when you pour the strawberries into the bottom of the pan, there will be liquid as well. That's perfectly normal.
    • The strawberry filling thickens as it cools.

    Strawberry Crumble with Oats

    Using oats combined with a few other ingredients helps create that crumbly topping that blends so perfectly with that sweet, smooth strawberry layer!

    Using old fashioned oats are ideal, for that special texture they provide!

    Simple ingredients:

    It doesn’t take much to make this strawberry dessert! In fact, you may already have most of the ingredients on hand!

    Strawberry Layer

    • 5 cups sweet strawberries, cut in to fourths or about 2 lbs
    • 3 tbsp cornstarch
    • ⅓ cup sugar

    Crisp Topping Ingredients

    • ⅔ cup old fashioned oats
    • ¾ cup flour
    • ¼ cup brown sugar
    • ⅓ cup white sugar
    • ½ cup salted butter, melted
    Ingredients for strawberry crumble recipe

    How to make strawberry crumble:

    • Preheat oven to 350 degrees.
    • Prepare the strawberries by cutting off the tops and cutting into fourths. If the strawberries vary a lot in size, try to cut them approximately the same size.
    • Sprinkle the cornstarch and 1⁄3 cup sugar over the strawberries in a medium bowl and toss strawberries until mixed thoroughly. (Image 1 & 2 below.)
    • Set aside the fruit mixture as you mix the crumble topping.
    collage of strawberries in a bowl with corn starch
    • To make the topping, mix together the dry ingredients: oats, flour, brown sugar and white sugar.
      Drizzle over melted butter slowly and mix until everything is coated well. With clean hands, mix together all the ingredients until it is nice and crumbly. (Image 3 & 4 below.)
    crumble topping for strawberry dessert recipe
    • Pour the juicy strawberries mixture in a 7 x 11 inch pan (see note below). (Image 5 below.)
    • Sprinkle the buttery crumble topping over the strawberries. (Image 6 below.)
    strawberry crumble dessert in white baking dish
    • Bake for 35 minutes at 350 degrees, then increase the temperature to 375 and bake about 10-12 minutes more.
    Strawberry crumble baked in white baking dish
    • You'll know the strawberry crumble is done when the mixture is bubbling around the edges and middle, and the crumbs are golden brown.
    strawberry crumble being scooped out with spoon
    • Serve slightly warm with a scoop of vanilla ice cream.
    strawberry crumble with scoop of vanilla ice cream
    Should I refrigerate strawberry crumble?

    Yes! Although it is baked, it is best to store any leftovers in the refrigerator in an airtight container so it will stay fresh for up to 3 days.

    How do you keep crumble topping from getting soggy?

    Using the butter as specified, it will help tie the crumble ingredients together but will also help the ingredients crisp up! If you have leftovers, it’s best to reheat in an oven to allow the crisp to crisp up!

    How do you thicken fruit for crumble?

    The flour will actually help the liquid thicken up to create a consistency that’s desired for a crumble!

    What’s the difference in a strawberry crisp and a crumble?

    A crisp usually has more of a streusel topping and a crumble does sometimes have more of a cake topping. However, they can be very similar!

    Related Recipes

    We are HUGE fans of strawberry desserts around here and if you’ve found that you have too many strawberries, I thought you may also love these other popular recipes like the strawberry brownie recipe, strawberry cheesecake cookies, and the strawberry shortcake cookies! And this strawberry heaven is perfect for when it’s too hot to turn on the oven.

    Or, if you love a good strawberry breakfast recipe, you’ll also love the strawberry stuffed french toast and the strawberry chocolate chip muffins!

    Recipe

    Strawberry Crumble Recipe
    Print Pin
    5 from 4 votes

    Strawberry Crumble

    Fresh strawberries with a crunchy oatmeal topping combine to make this perfect quick & easy strawberry crumble.
    Course Dessert
    Cuisine American
    Prep Time 15 minutes minutes
    Cook Time 45 minutes minutes
    Total Time 1 hour hour
    Servings 6 servings
    Calories 401kcal
    Author Jessica Burgess

    Ingredients

    Strawberry Layer

    • 5 cups strawberries, cut in to fourths or about 2 lbs
    • 3 tablespoon cornstarch
    • ⅓ cup sugar

    Topping Ingredients

    • ⅔ cup old fashioned oats
    • ¾ cup flour
    • ¼ cup brown sugar
    • ⅓ cup white sugar
    • ½ cup salted butter melted

    Instructions

    • Preheat oven to 350 degrees.
    • Prepare the strawberries by cutting off the tops and cutting into fourths. If the strawberries vary a lot in size, try to cut them approximately the same size.
    • Sprinkle the cornstarch and 1⁄3 cup sugar over the strawberries in a medium sized bowl and stir to coat well. Set aside as you mix the crumble topping.
    • To make the topping, mix together oats, flour, brown sugar and white sugar. Drizzle over melted butter slowly and mix until everything is coated well. With clean hands, mix together all the ingredients until it is nice and crumbly.
    • Pour the strawberry mixture in a 7 x 11 inch pan (see note below).
    • Sprinkle over crumb topping.
    • Bake for 35 minutes at 350 degrees, then increase temperature to 375 and bake about 10-12 minutes more. You'll know the strawberry crumble is done when the mixture is bubbling around the edges and middle, and the crumbs are golden brown.
    • Serve slightly warm with a scoop of vanilla ice cream.

    Notes

    This recipe can be baked in the following sized pans:
    • deep dish pie pan
    • 7 x 11 inch (or 18 x 26 cm)
    • 1.5 liter
    • 1.5 quart
    Baking times may vary based on the size of pan you used.
    (The pan pictured is 7 x 11 inches.)
    -Adding sugar to fresh strawberries brings out the natural juices in the strawberries. So, when you pour the strawberries into the bottom of the pan, there will be liquid as well. That’s perfectly normal.
    -The strawberry filling thickens as it cools.

    Nutrition

    Serving: 1serving | Calories: 401kcal | Carbohydrates: 62g | Protein: 4g | Fat: 16g | Saturated Fat: 10g | Polyunsaturated Fat: 1g | Monounsaturated Fat: 4g | Trans Fat: 1g | Cholesterol: 41mg | Sodium: 140mg | Potassium: 250mg | Fiber: 4g | Sugar: 37g | Vitamin A: 487IU | Vitamin C: 71mg | Calcium: 39mg | Iron: 2mg

    Easy Bacon Ranch Pasta Salad

    June 1, 2021

    close up of bacon ranch pasta salad in gray bowl

    Cheese, Ranch, Bacon… all wrapped up in this cold pasta salad is one of our FAVORITE creamy pasta salad recipes to date! Add chicken to make a quick weeknight dinner that’s perfect any time of year!

    bacon ranch pasta in gray bowl
    [feast_advanced_jump_to]

    Why You’ll Love this Recipe

    With spring and summer potlucks and barbecues just around the corner, this Bacon Ranch Pasta Salad is a cold pasta salad recipe that you need on deck. Simple ingredients and prep work make this pasta salad a snap to put together and it just may become one of your favorite summer salads!


    Hey Fantabulosity readers, it's Meg popping in from Meg's Everyday Indulgence. I promise you are going to love today's easy pasta salad – my Bacon Ranch Pasta Salad Recipe

    A good pasta salad is so perfect to have in your wheelhouse. Whether it’s for a potluck dinner, dinner party, barbecue or you’re looking for the perfect side dish for a quick weeknight dinner!

    Recipe Ingredients

    (You can find the full printable recipe card with instructions below too!)

    You only need 6 ingredients for this delicious pasta salad.

    Ingredients for bacon ranch pasta salad
    • 1 lb. short cut pasta -The first of course is the pasta. You can use whatever type of pasta you prefer but I definitely recommend it being a short cut pasta. Elbows, penne, shells, bowtie or my personal favorite, cavatappi, all work really well. We love a fun shaped pasta around here.
    • 1 lb. bacon – What makes this pasta salad its best self, is a whole pound of crispy bacon. It gets cooked up to crispy perfection before being stirred into the pasta salad. A pound may seem like a lot but with a pound of pasta, it's the perfect amount!
    • 1 dry ranch mix
    • 1 cup mayonnaise
    • ¾ cup whole milk
    • 2 cups cubed cheddar cheese – I firmly believe cheese makes most things better and that's very true with this bacon ranch pasta salad. I personally prefer cubed cheese over shredded cheese in a pasta salad. Shredded seems to get a little weird in texture. Dare I say squishy? And who doesn't love a big bite of cheese with their creamy pasta?! It's a way better option in my opinion.

    Salad Dressing Tips

    The ranch flavor comes from a ranch dressing packet, mayo and milk.

    When you mix together the dressing for the pasta salad it will be runny. It'll seem too runny but trust me, it's just right. The magic to this pasta salad is making it ahead of time to allow it to soak up the delicious sauce and thicken up to create a creamy ranch dressing!

    Note: You don't have to make it the night before, but it should be mixed up at least an hour before serving to allow the flavors to mingle.

    Step by Step Directions

    • Bring a large pot of water to a boil. Cook pasta according to the package directions.
    • Meanwhile, heat a large skillet over medium heat. Dice bacon into small pieces and add to the hot skillet. Cook until crisp. Drain on paper towel. 
    • In a large mixing bowl, whisk together the ranch dressing mix, mayonnaise and milk. Set aside. (IMAGE 1)
    • Once pasta is done, rinse well with cold water. Shake as much water off the pasta as possible. Add to the ranch mixture. Add bacon and cheese cubes. Stir well. Let sit in the fridge for at least an hour or up to overnight. Stir again before serving. (IMAGE 2)
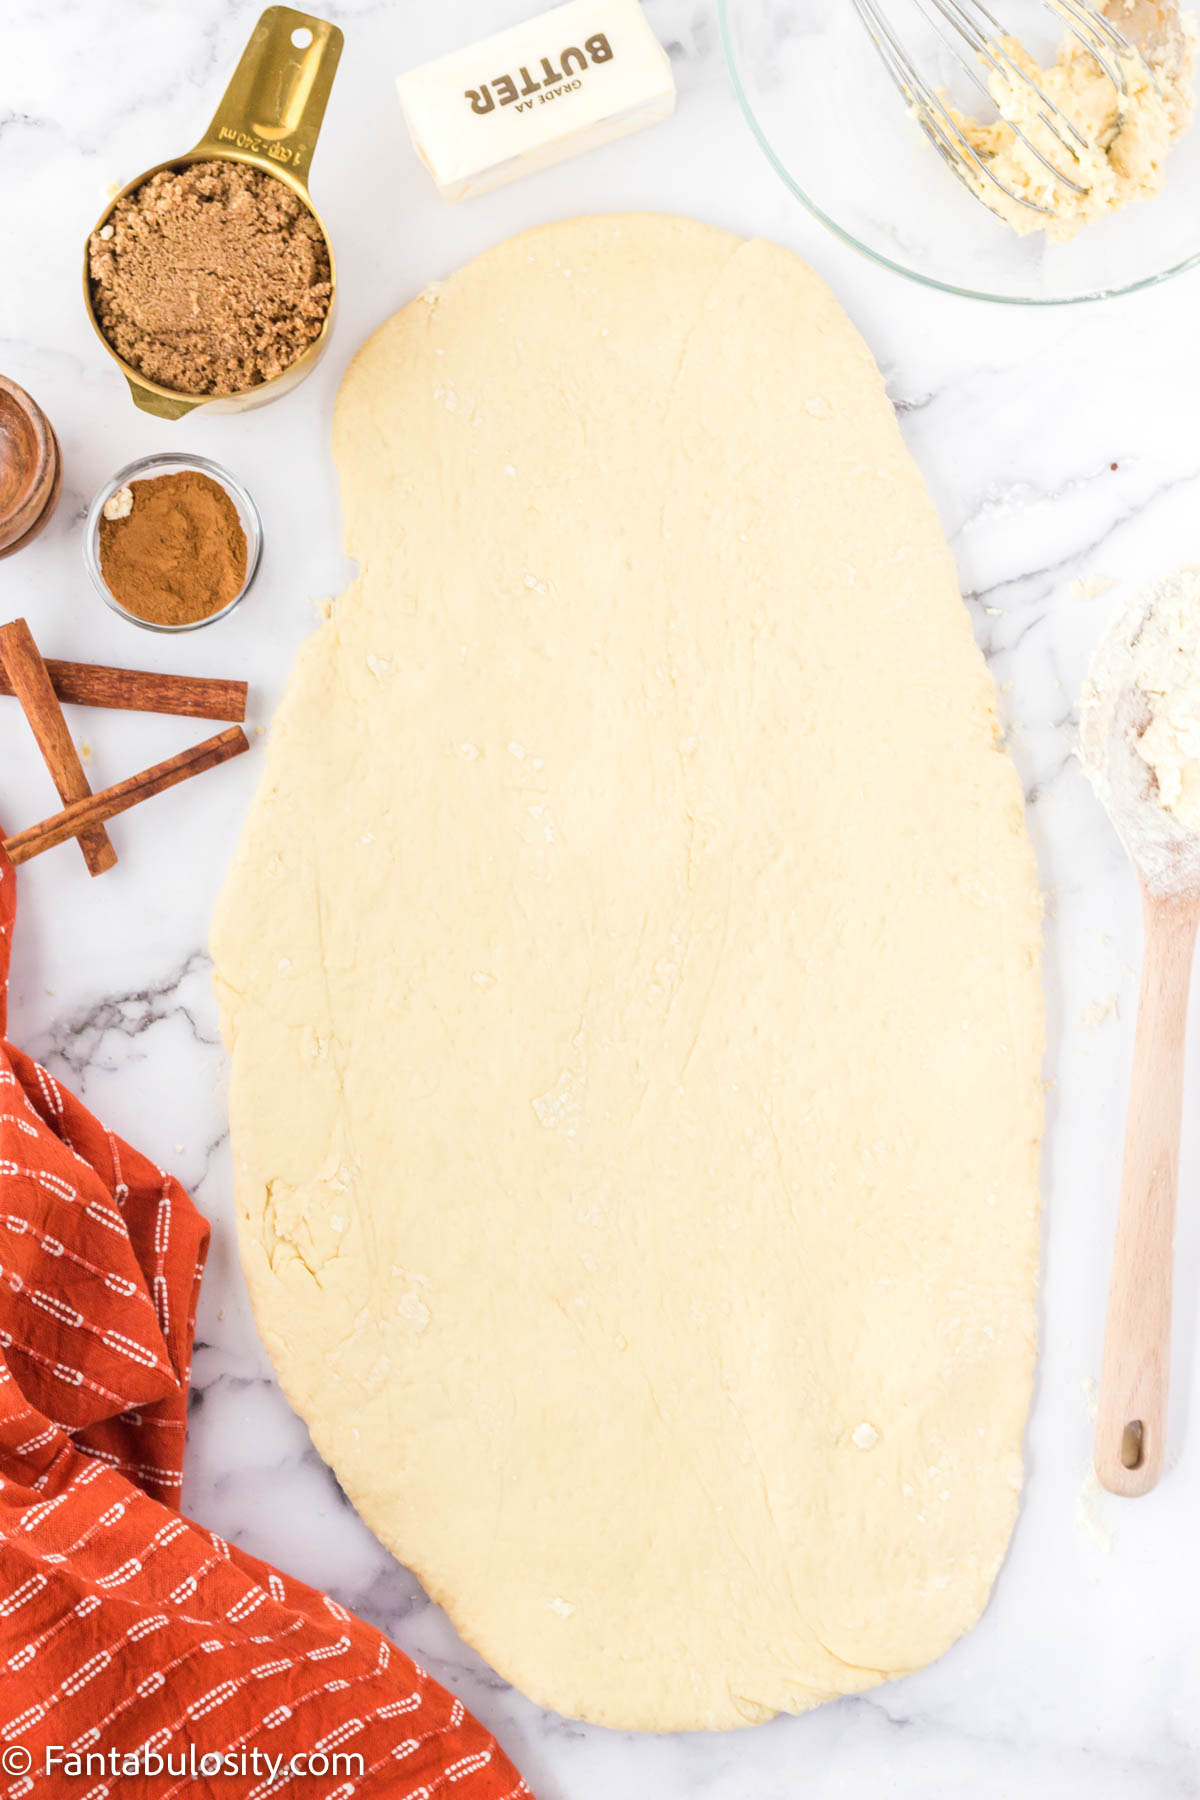
    collage - mix together dressing and stir in pasta

    I love the textures in this pasta salad. The pasta has that little bite, the bacon keeps its crispiness, the cheese is a little chewy and the creamy sauce brings it all together. I am not embarrassed to say I wanted to hide this from my whole family. I didn't but I seriously considered it because it’s a great recipe!

    cold bacon ranch pasta salad in individual servings

    Optional Pasta Salad Mix-In Ideas

    This pasta salad is super basic but I've listed some ideas of additional ingredients you can stir in to make it a little different and cater to your family’s tastes.

    We like the basic ranch, bacon, cheese situation at our house for a side dish idea, but you can stir in sliced black olives, fresh veggies like sweet peas or orange bell pepper, red onions, green onions, garlic powder, onion powder, or diced tomatoes.

    bacon ranch pasta salad in serving bowls

    Chicken Bacon Ranch Pasta Salad

    Know what else I love? Being able to add a protein like chicken to salad recipes or sausage, like in this cowboy pasta salad, and transform it into a jam-packed, heartier dish, or even a main dish recipe!

    Feel free to grab a cooked rotisserie chicken from the grocery store, frozen cooked chicken breast, or even make your own chicken in the Instant Pot to keep this recipe quick and easy but hearty!

    If you're looking forward to warm weather and outdoor gatherings as much as me, keep this bacon ranch pasta salad in mind. It’s one of the easy recipes you’ll want to keep on hand for so many reasons!

    Bacon ranch pasta salad in gray bowls

    You will also love this amazing collection of pasta salads, especially this Italian Pasta Salad, so you can fill your summer meal plan with many different salads!

    Recipe

    close up of bacon ranch pasta salad in gray bowl
    Print Pin
    4.82 from 53 votes

    Bacon Ranch Pasta Salad (with Video)

    This 6 ingredient bacon ranch pasta salad is so simple and delicious. Perfect for potlucks, barbecues or a weeknight side dish. 
    Course Side Dish
    Cuisine American
    Prep Time 1 hour hour 10 minutes minutes
    Cook Time 15 minutes minutes
    Total Time 1 hour hour 25 minutes minutes
    Servings 12 servings
    Calories 510kcal
    Author Jessica Burgess

    Ingredients

    • 1 pound short cut pasta
    • 1 pound bacon
    • 1 ounce ranch dressing packet
    • 1 cup mayonnaise
    • ¾ cup whole milk
    • 2 cups cubed cheddar cheese

    Instructions

    • Bring a large pot of water to a boil. Cook pasta according to the package directions.
    • Meanwhile, heat a large skillet over medium heat. Dice bacon into small pieces and add to the hot skillet. Cook until crisp. Drain on paper towel. 
    • In a large bowl, whisk together the ranch dressing mix, mayonnaise and milk. Set aside.
    • Once pasta is done, rinse well with cold water. Shake as much water off the pasta as possible. Add to the ranch mixture. Add bacon and cheese cubes. Stir well. Let sit in the fridge for at least an hour or up to overnight. Stir again before serving.
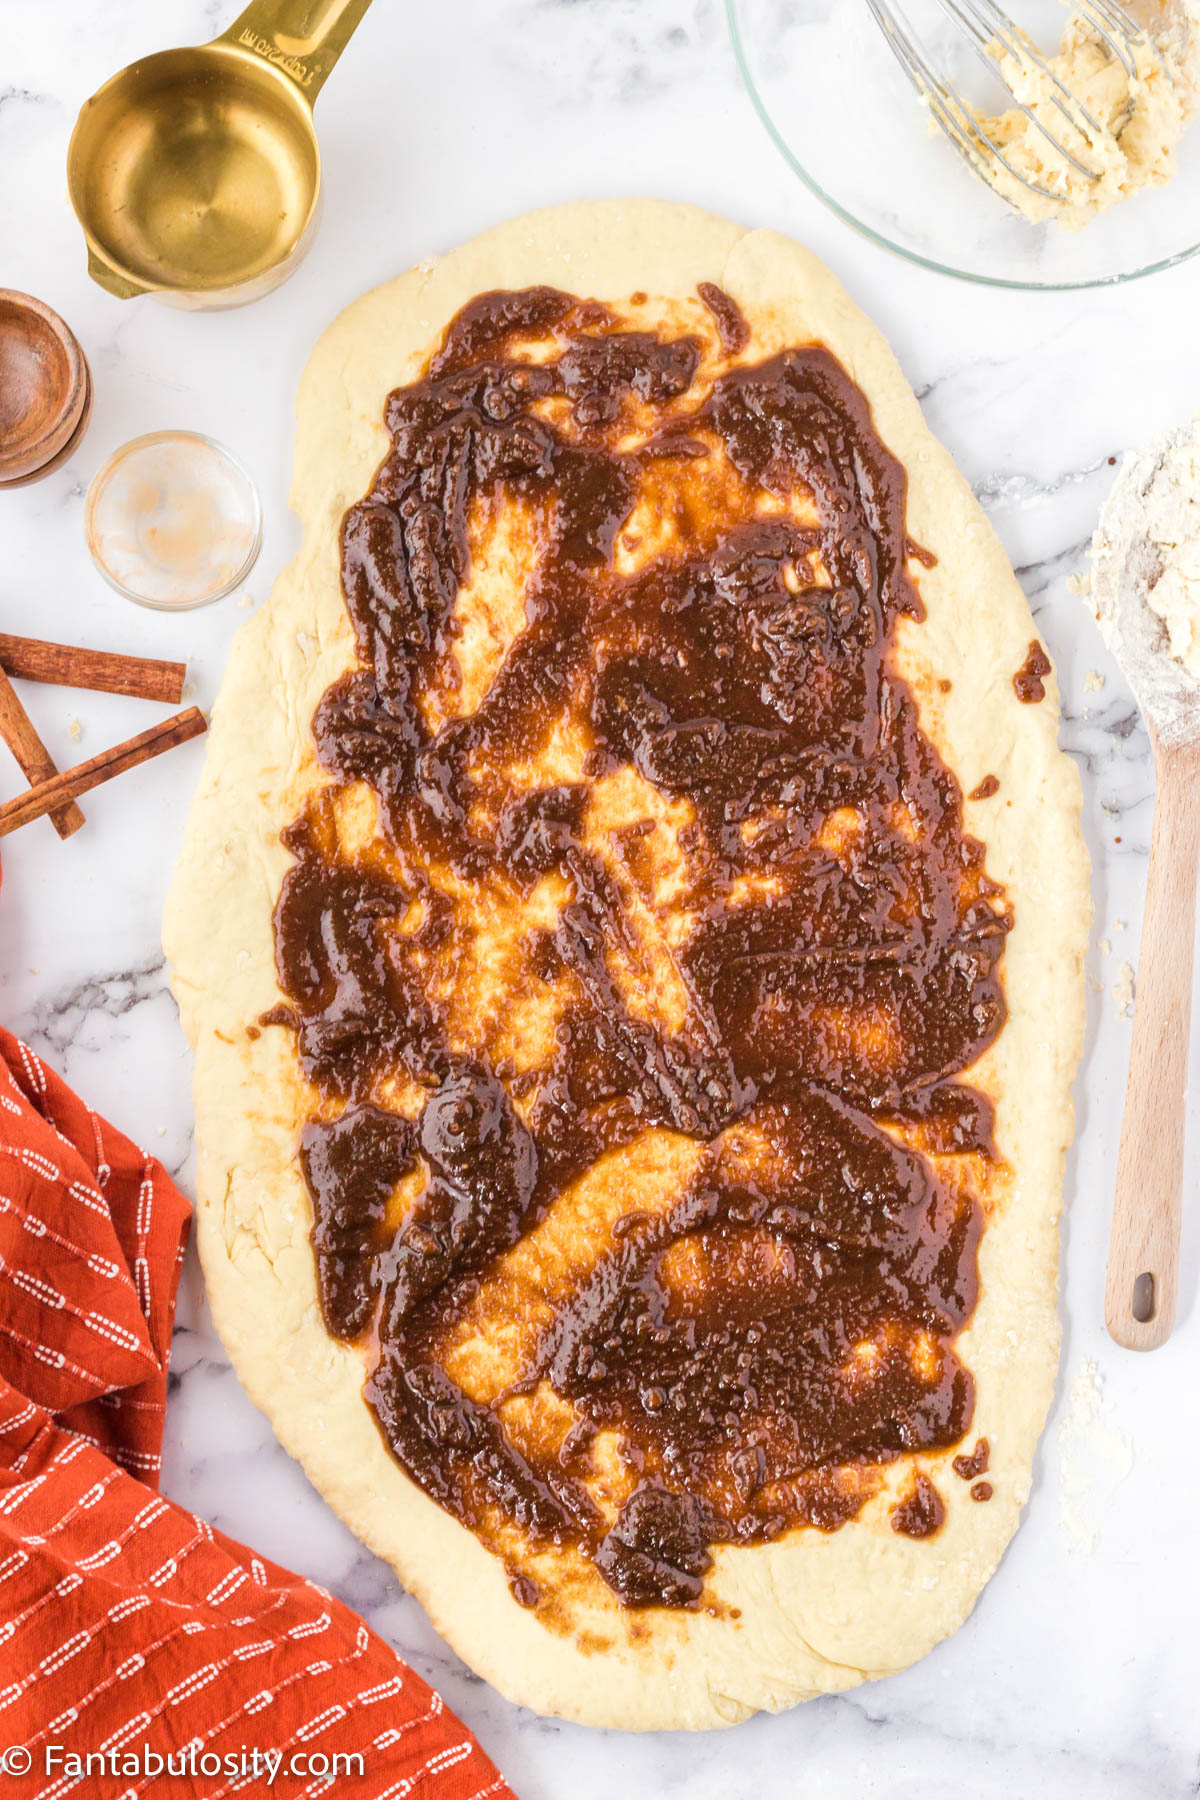
    Video

    Nutrition

    Serving: 1serving | Calories: 510kcal | Carbohydrates: 29g | Protein: 15g | Fat: 36g | Saturated Fat: 11g | Cholesterol: 54mg | Sodium: 500mg | Potassium: 201mg | Fiber: 1g | Sugar: 2g | Vitamin A: 240IU | Calcium: 164mg | Iron: 0.8mg

    Air Fryer Breakfast Potatoes

    May 23, 2021

    Air fryer breakfast potatoes in bowl.

    These air fryer breakfast potatoes (or air fryer home fries) are a really easy side dish recipe that pairs well with almost any breakfast recipe and remind me of the fried potatoes and onions that you can get at your favorite greasy spoon restaurant or at a cafe-style breakfast! (But healthier!)

    What’s not to love about crispy breakfast potatoes without the restaurant wait!? These breakfast potatoes are one of my favorite air fryer recipes!

    Air Fryer Breakfast Potatoes

    My favorite thing to do is serve them with air fryer bacon, canned cinnamon rolls in the air fryer, this biscuits and gravy casserole recipe, or use them in breakfast burritos!

    [feast_advanced_jump_to]

    Why You’ll Love These Crispy Potatoes

    • They’re an easy delicious breakfast side! For this simple recipe, you’re going to need a few simple ingredients, an air fryer, and a small chunk of time. That’s it! This recipe is a breeze and so is the clean-up process and it makes the best breakfast potatoes!
    • The great thing about these is that they’re nostalgic. Maybe it’s just me, but I remember waking up to the smell of breakfast potatoes when I was a kid! This recipe reminds me of a classic, home-cooked breakfast and there’s nothing better than having these topped with this white gravy recipe.
    • They’re restaurant-quality! You’re going to be surprised by how easy it is to achieve the crispy outside and soft middle that restaurant breakfast potatoes have. A delicious breakfast in half the time and cost!

    Ingredient Checklist

    (You can find the full printable recipe card with instructions below too!)

    • 4 cups cubed and peeled Gold Potatoes (about 4-5 medium size potatoes) 
    • 2 tablespoons olive oil (any vegetable oil will work)
    • 2 teaspoons Kosher salt
    • 1 teaspoon onion powder
    • 1 teaspoon Italian seasoning
    • ¼ teaspoon fresh ground pepper
    • Black pepper to taste (optional)
    Air fryer breakfast potatoes ingredients on table.

    Step by Step Directions

    1. Wash potatoes in cold water and peel the potatoes.
    2. Drain potatoes and pat dry with a paper towel.
    3. Cut the potatoes into approximately 1-inch cubes.
    4. In a large mixing bowl, put your cut potatoes and add oil (Image 1 below).
    5. Mix potatoes until all are coated.
    6. Add seasoning and mix until the seasoning is evenly distributed (Image 2 below).
    7. Pour potatoes into the basket of the air fryer (Image 3 below).
    8. Cook at 400 degrees f for a cooking time of 20 to 25 minutes (Image 4 below).
    9. Serve and Enjoy!
    Air fryer breakfast potatoes collage of how to make them.

    Adding Green Peppers and/or Onions to Potatoes

    To make this a more complete recipe, you can add green bell pepper and/or chopped onion to your crispy potatoes. Simply cut and season your vegetables then add them to the air fryer after cooking the potatoes for 10 minutes. You can use any color of bell pepper, but green is my favorite!

    easy air fryer breakfast potatoes

    FAQs

    Can I meal prep air fryer breakfast potatoes?

    Yes! You can cook breakfast potatoes ahead of time but for best results I would recommend reheating them in the air fryer. Reheating your potatoes in the air fryer will keep them crispier than the microwave or oven would.

    Can I use a different type of potato?

    I’ve found that gold potatoes make the best roasted potatoes but you can substitute for red potatoes or Yukon potatoes if needed. Sweet potatoes will also work but they will not give you the same “crispy breakfast potato” taste.

    How can I make my potatoes extra crispy?

    If you’re like me, you like your breakfast potatoes extra crispy! The directed cook time is 20-25 minutes and I would recommend cooking for the full 25 minutes to achieve extra crispy potatoes.

    Making a Breakfast Hash

    A super quick and easy way to turn this into a complete breakfast is to add meat and/or veggies! My boys love it when I add bacon bits, and sausage, and serve it with eggs. I even cook bacon using the air fryer because it’s so easy! (Not going to lie… cooking the potatoes after the bacon in the air fryer, the bacon grease residue on the basket can add a little non-stick, flavor too!) For directions on how to add veggies to this recipe, scroll up on this post!

    easy breakfast potatoes air fryer

    Can I use frozen potatoes in the air fryer?

    Yes! In fact, frozen potatoes will actually cook faster than fresh potatoes. Season your frozen potatoes as directed in this recipe and then cook at 400 degrees F for roughly 15 minutes. Check your potatoes with a fork and if they aren’t soft enough, cook for another 3-4 minutes. You can even make hashbrowns in the air fryer with frozen hashbrowns or frozen sweet potato fries in the air fryer!

    air fryer breakfast potatoes

    Expert Tips

    • The more you dry the potatoes the more they have this buttery taste!
    • At 20 minutes they should be cooked, however, adding a little crisp is ideal so add another 5 minutes for a total cook time of 25 minutes.
    • Use a seasoning you and your family love. This seasoning mix does not overpower the potato but instead complements it. You only need one recipe, and you can serve it alongside anything from an omelet to a ribeye steak.
    • Even if your potatoes aren’t all the same size when diced, the beauty of Air Fryer is that all of them are usually cooked to perfection no matter the size, creating amazing air fryer breakfast potatoes!

    More Air Fryer Breakfast Recipes

    My husband and I love to use the air fryer for all kinds of easy recipes! Making breakfast in the air fryer is not uncommon at our house and here are some of our favorite air fryer breakfast recipes!

    • Bacon in the air fryer
    • Air fryer hash brown patties
    • Air fryer apple chips (an easy recipe and great healthy side to eggs and bacon!)

    Recipe

    Air fryer breakfast potatoes in bowl.
    Print Pin
    5 from 6 votes

    Air Fryer Breakfast Potatoes

    What's not to love about crispy air fryer breakfast potatoes without the restaurant wait! This easy recipe is a great breakfast side dish.
    Course Breakfast, Side Dish
    Cuisine American
    Prep Time 10 minutes minutes
    Cook Time 25 minutes minutes
    Total Time 35 minutes minutes
    Servings 4 servings
    Calories 247kcal
    Author Jessica Burgess

    Equipment

    • air fryer

    Ingredients

    • 4 cups Gold Potatoes cubed and peeled
    • 2 tablespoons olive oil
    • 2 teaspoons kosher salt
    • 1 teaspoon onion powder
    • 1 teaspoon Italian seasoning
    • ¼ teaspoon ground black pepper

    Instructions

    • Wash and peel the potatoes.
    • Pat dry with a paper towel.
    • Cut the potatoes into approximately 1-inch cubes.
    • In a large bowl, put your cut potatoes and add oil.
    • Mix until all the potatoes are coated.
    • Add seasoning and mix until the seasoning is evenly distributed.
    • Put the seasoned potatoes into the air fryer basket.
    • Cook at 400 degrees f for 20 to 25 minutes.
    • Serve and Enjoy!

    Notes

    • The more you dry the potatoes the more they have this buttery taste!
    • At 20 minutes they should be cooked, however, we like it when they are a little crispy. So, we add another 5 minutes for a total cook time of 25 minutes.
    • Gold Potatoes are preferred because it’s a good roasting potato. However, Yukon are excellent as well.
    • Use a seasoning you and your family love. This is our favorite. This seasoning mix does not overpower the potato but instead complements it. You only need one recipe, and you can serve it alongside anything from an omelet to a steak.
    • We have been making roasted potatoes for the longest time. Every time they are not all the same size when I cut them, so some are very crispy and some less. The beauty of Air Fryer is all of them were cooked to perfection no matter the size.

    Nutrition

    Serving: 1cup | Calories: 247kcal | Carbohydrates: 42g | Protein: 5g | Fat: 7g | Saturated Fat: 1g | Sodium: 1178mg | Potassium: 1009mg | Fiber: 6g | Sugar: 2g | Vitamin A: 14IU | Vitamin C: 47mg | Calcium: 40mg | Iron: 2mg

    Air Fryer Asparagus

    May 7, 2021

    Asparagus cooked in the air fryer.

    Air fryer asparagus is a quick and easy vegetable recipe that makes the perfect side dish or appetizer to go along with your favorite main dish.

    With simple ingredients, you can make this easy air fryer asparagus in under 10 minutes, and it’s one of our favorite easy air fryer recipes! You can have this delicious side dish on the table in no time!

    Air fryer asparagus on plate, next to lemon.
    [feast_advanced_jump_to]

    Why You’ll Love This Recipe

    • Asparagus is a dark green vegetable with woody ends which means it’s high in tons of vitamins and minerals. It’s rich in fiber, vitamins A, B2, B1, B6, and C!
    • It’s kid-approved! I know how hard it can be to get your kiddos to eat their veggies but my boys will devour these asparagus spears without complaints!
    • It’s a quick side dish. The asparagus cooks in only 7 minutes! Being a busy mom myself, I know how hard it can be to get dinner on the table in a timely manner. This air fryer asparagus recipe is one of my go-to’s because of how quick and easy it is! If I have more time, I may make bacon wrapped asparagus and cook it in the oven, especially if the air fryer is tied up, making the main dish.

    Can you Cook Asparagus Too Long?

    Yes, you can overcook asparagus. Fresh asparagus may become soggy or mushy if it’s cooked for too long. The best way to avoid this is to make sure you are keeping a close eye on your air fryer asparagus and cook only for the directed cook time. The goal is to have tender stalks and crispy ends!

    healthy air fryer asparagus on a fork, close-up

    Air Fryer Asparagus Ingredients

    • 1 bundle asparagus
    • ⅛ cup olive oil (feel free to try avocado oil too!)
    • ½ tsp garlic
    • ¼ tsp crushed red pepper
    • ½ lemon juiced
    • parmesan cheese for topping (optional)
    ingredients for air fryer asparagus

    Step by Step Directions

    1. Cut one inch off the bottom of the asparagus. Toss in a bowl with olive oil, salt, and red pepper.  (Image 1 and 2)
    2. Preheat the air fryer to 400F. Add the asparagus to the air fryer, place in a single layer, and air fry for 5 minutes, shaking halfway. (Image 3 and 4)
    3. Plate and drizzle with fresh lemon juice from lemon wedges.
    Step by step showing how to make air fryer asparagus.

    Expert Tips and FAQs

    How do I store leftover asparagus stalks?

    The best way to store leftover asparagus is to put it in an airtight container and place it in the refrigerator. Cooked asparagus should last 3-5 days in the refrigerator. To reheat, you can microwave for 1-2 minutes or air fry for 2-4 minutes at 400 degrees.

    Top with lemon zest and black pepper

    My new favorite way to serve these asparagus is topped with lemon zest and black pepper! It adds such a nice flavor and is an easy way to spice up this recipe. If you don’t have fresh lemon zest, you can top with lemon pepper seasoning for the same effect.

    Wrap in bacon

    To make this recipe a main course, you can wrap the asparagus in bacon. Now, you will have to cook the asparagus longer if you do choose to wrap it in bacon, so check out this air fryer bacon recipe for more details on how to cook bacon in the air fryer.

    air fryer asparagus with lemon wedges on a white table with blue napkin

    Breaded Air Fryer Asparagus

    If you prefer your asparagus breaded… I don’t blame you! It’s surprisingly easy to make breaded air fryer asparagus. Before cooking, coat your asparagus in egg wash (1 egg + 1 teaspoon water) and then dip in seasoned bread crumbs/Panko crumbs. You can season your breadcrumbs with salt, pepper, garlic salt, onion powder, and/or other simple spices. Air fry the breaded asparagus at 400 degrees for roughly 8 minutes, flipping halfway through.

    What to Serve with this Recipe

    For a super quick and easy dinner, you can pair this air fryer asparagus as an easy side dish with air fryer salmon patties! Air frying can save you cooking time and clean up time because you’re only dirtying the air fryer basket!

    Asparagus that was cooked in the air fryer.

    Related Recipes

    For more of our best air fryer recipes, you’ll want to also try this Air Fryer Butternut Squash, frozen sweet potato fries, and Air Fryer Zucchini without breading for sure! But we’ve also been known to really put our air fryer to work around here so round out the evening with an entire air fryer dinner, with some of our favorite main dishes in the air fryer!

    Recipe

    Asparagus cooked in the air fryer.
    Print Pin
    5 from 4 votes

    Air Fryer Asparagus

    Air fryer asparagus is a quick and easy recipe that makes the perfect side dish or appetizer!
    Course Appetizer, Side Dish
    Cuisine American
    Prep Time 2 minutes minutes
    Cook Time 5 minutes minutes
    Total Time 7 minutes minutes
    Servings 4
    Calories 61kcal
    Author Jessica Burgess

    Equipment

    • air fryer

    Ingredients

    • 1 bundle asparagus
    • ⅛ cup olive oil
    • ½ tsp garlic
    • ¼ tsp crushed red pepper
    • ½ lemon juiced
    • parmesan cheese for topping optional

    Instructions

    • Cut one inch off the bottom of the asparagus. Toss in a bowl with olive oil, salt, and red pepper.
    • Preheat the air fryer to 400F. Add the asparagus and air fry for 5 minutes, shaking halfway.
    • Plate and drizzle with fresh lemon juice.

    Nutrition

    Calories: 61kcal | Carbohydrates: 1g | Protein: 1g | Fat: 7g | Saturated Fat: 1g | Sodium: 2mg | Potassium: 6mg | Fiber: 1g | Sugar: 1g | Vitamin A: 39IU | Vitamin C: 1mg | Calcium: 1mg | Iron: 1mg

    Chipotle Aioli Recipe

    May 1, 2021

    Chipotle Aioli in small bowl, with a polenta fry dipping in to it.

    This easy Chipotle aioli is so versatile. It’s a great way to add a little heat to hamburgers, salads, sandwiches, or even as a dipping sauce!

    Sometimes I find that I want to add a little extra spicy flavor to my food. This chipotle aioli recipe can be a delicious dressing on salads and also tastes amazing with polenta fries or even these baked potato wedges!

    Easy Chipotle Aioli Dipping Sauce
    [feast_advanced_jump_to]

    Why You’ll Love This Recipe

    • It pairs well with so many recipes! This delicious creamy sauce tastes amazing topped on a baked turkey burger, especially this crispy chicken burger, BLT (like the one in my Fabulously Fast Dinners Cookbook), salad recipes, tilapia fish, and so many more easy recipes! This recipe will become a staple if you like to add a little spice to your food.
    • It’s homemade! Some store-bought chipotle mayo has tons of added sugar and processed ingredients. Making homemade mayo (or aioli recipes in general) allows you to control exactly what goes into your food which can help your overall health.
    • This recipe uses pantry staples. There are no crazy or hard-to-find ingredients in this aioli recipe so it’s very easy to make.

    Recipe Ingredients

    In this Chipotle mayo recipe you’re going to need a few basic ingredients such as…

    • ½ cup mayonnaise
    • ½ lemon, juiced
    • 1-2 chipotles in adobo sauce, minced
    • ½ teaspoon smoked paprika
    • ½ teaspoon garlic powder
    Ingredients for Easy Chipotle Aioli Dipping Sauce

    Step by Step Directions

    1. Mix together the mayonnaise, lemon juice, chipotles, smoked paprika, and garlic powder until smooth. Set aside until ready to serve.
    2. Set aside in a small bowl until ready to serve.
    easy homemade Chipotle mayo

    Expert Tips and FAQs

    How do I store chipotle mayo?

    You can store your leftover chipotle aioli in a sealed jar in the refrigerator for up to 2 weeks. Since this chipotle mayo recipe does contain raw egg (some mayo has raw egg, some have pasteurized, so it’s better safe than sorry) it’s best not to leave it sitting at room temperature for more than 2-3 hours.

    Is this aioli recipe vegan?

    No this recipe is not vegan because traditional mayonnaise contains eggs. If you would like vegan chipotle aioli, you can substitute the traditional mayonnaise for vegan mayonnaise. Vegan mayonnaise can be found at most grocery stores. Then, top your favorite veggie burgers with it for a spicy kick!

    Is Chipotle Aioli the same as Chipotle Mayo?

    Yes! Aioli is simply a fancier name for mayo. Chipotle mayo and chipotle aioli are both zesty sauces with a little kick, that are great for dunking french fries into or spreading on sandwiches.

    What to Serve with Aioli Sauces

    There are so many different ways that this fabulous sauce would pair with other dishes but homemade aioli is my all-time favorite to have with these crispy polenta fries! They’re a delicious and healthier version of French fries!

    You may also love serving this with:

    • onion rings
    • loaded tater tots
    • fish finger tacos
    • baked fish recipes
    • street tacos
    • your favorite Mexican dishes, such as this Taco Bell copycat recipe.

    Related Recipes

    Some of our other favorite recipes that you may love are:

    • Homemade teriyaki sauce is another easy and quick recipe. You’d be surprised by how easy it is to achieve that restaurant-style teriyaki sauce at home!
    • If you think you’d like your baked hamburgers with a spicy sauce, you can top your next burger with this aioli sauce. There’s nothing better than a juicy burger with a kick!

    Recipe

    Chipotle Aioli in small bowl, with a polenta fry dipping in to it.
    Print Pin
    Be the first to rate!

    Chipotle Aioli

    This easy chipotle aioli is so versatile. It's a great way to spice up hamburgers, salads, sandwiches, or even as a dipping sauce!
    Course Side Dish
    Cuisine American
    Prep Time 2 minutes minutes
    Cook Time 3 minutes minutes
    Total Time 5 minutes minutes
    Servings 4 servings
    Calories 199kcal
    Author Jessica Burgess

    Ingredients

    • ½ cup mayonnaise
    • ½ lemon juiced
    • 1-2 chipotle peppers in adobo sauce minced
    • ½ teaspoon smoked paprika
    • ½ teaspoon garlic powder

    Instructions

    • Mix together the mayonnaise, lemon juice, chipotle peppers, smoked paprika, and garlic powder until smooth. Set aside until ready to serve.
    • Set aside until ready to serve.

    Notes

    How do I store Chipotle mayo?
    You can store your leftover Chipotle aioli in a sealed jar in the refrigerator for up to 2 weeks. Since this Chipotle mayo recipe does contain eggs, it’s best not to leave it sitting at room temperature for more than 2-3 hours.
    What to serve with Chipotle aioli
    There are so many great recipes that would pair well with this homemade aioli but my all-time favorite are these crispy polenta fries!! I’ve been making them weekly in my house because they’re a delicious and healthier version of french fries!

    Nutrition

    Serving: 1serving | Calories: 199kcal | Carbohydrates: 2g | Protein: 1g | Fat: 21g | Saturated Fat: 3g | Trans Fat: 1g | Cholesterol: 12mg | Sodium: 226mg | Potassium: 34mg | Fiber: 1g | Sugar: 1g | Vitamin A: 332IU | Vitamin C: 7mg | Calcium: 7mg | Iron: 1mg

    Polenta Fries

    April 27, 2021

    Crispy Polenta Fries with Bacon and Cheese

    These baked polenta fries with a golden brown outside and a gooey middle make the perfect snack, side dish, or appetizer!

    Polenta fries are a great alternative to classic french fries and they taste just as delicious! This recipe requires no frying, no breading, and no fancy equipment. These are one of my favorite side dishes!

    Baked Polenta Fries with Cheese and Bacon
    [feast_advanced_jump_to]

    Why You’ll Love This Recipe

    • It’s so simple! There are only four easy steps to this polenta fries recipe so no experienced cooking skills are required. So if this is your first time making it, don’t worry!
    • These crispy fries pair so well with an oven baked steak and/or oven baked hamburgers that are a great alternative from regular potato fries!
    • These aren’t just plain polenta fries! Cheese was added for that cheesy flavor and bacon was added too, because who doesn’t love bacon? (If you don’t, that’s ok. I still adore you… simply just make this recipe without it!)
    • Clean up is so easy. You’re only dirtying a few dishes which makes the clean-up process a breeze.
    What are polenta fries made of?

    Polenta is coarsely ground corn, and polenta fries is simply a way to use polenta. Mix polenta with a few other ingredients like cheeses, fresh herbs and spices and oils, and then slice in to “fries” and bake!

    Is polenta gluten-free?

    Yes! Polenta is a gluten-free grain that’s made from corn meal. Cornmeal does not contain any wheat or gluten so it’s safe for celiac disease and other gluten intolerances.

    Pre-Cooked Polenta or Instant

    You know me, if it can be made with a shortcut, I’ll probably do it. But I don’t always have pre-cooked (tube of polenta) on hand so it’s nice to have the instant or quick-cooking in the pantry.

    You can use either for this recipe but in order to add the cheeses and the bacon, I’ve provided the recipe below, using the quick-cooking polenta.

    If you have the pre-cooked on hand, grab a cutting board and simply slice in to fries, season accordingly, and bake the same way! (Tip: tubed polenta tends to have moisture so it’s best to gently dry with paper towels before cutting.)

    Ingredient List

    For this recipe, you’re going to need a few basic ingredients such as…

    • Quick-cooking polenta (you can find this & instant polenta at the grocery store too!)
    • Water
    • Minced garlic
    • Bacon (cooked and chopped)
    • Cheddar Cheese
    • Thyme leaves
    • Chives
    • Salt and black pepper, to taste (not pictured) – only a pinch of salt if desired, as the polenta may already be salty!
    • Extra virgin olive oil (not pictured)
    Ingredients to make Baked Polenta Fries

    Step by Step Directions

    1. Bring 2 cups of water to a boil in a medium saucepan. Whisk in the polenta, garlic, thyme, chives, cheddar cheese, bacon, and salt and pepper. Stir until the polenta is thick, about 3 minutes. Turn the heat off, cover the saucepan, and let the polenta sit for 5 minutes. (Image 1)
    2. Line an 8×8 square baking dish with parchment paper. Scoop the polenta into the baking dish and spread it into an even layer. Freeze it for 15 minutes. (Image 2)
    3. Preheat the oven to 425 degrees F and spray a baking sheet with nonstick cooking spray. 
    4. Lift the polenta out of the baking dish and cut into fries about ¼ inch thick. Place the polenta fries on a greased baking sheet and gently toss with olive oil and a sprinkle of salt. (Image 3) Spread the fries in an even layer. Bake for 30 minutes, flipping halfway in between cooking. (Image 4)
    Steps to make bake Polenta Fries

    Can I use Bacon Bits?

    Yes! You can swap out chopped air fryer bacon for bacon bits if needed. The flavor will not be as strong, but it will work in a pinch.

    Crispy baked polenta fries with chipotle aioli

    Party Appetizer

    I absolutely LOVE the look of these when hosting a party. Simple line a basket or wire cone stand (like you see at the restaurants) with something fun like newspaper, or parchment paper, and place fries inside! I can’t wait to serve these at our next burger bar or hot dog bar!

    How Do I Store Leftover Polenta Fries?

    Baked polenta sticks (or fries) can be stored in an airtight container (or a bowl covered in plastic wrap) in the refrigerator for up to 2 days. For best results, rebake your crispy fries for 10-15 minutes in a preheated oven at 400 degrees F. (Or try reheating in your air fryer!)

    The Best Dipping Sauce Ideas

    These crispy polenta fries would pair so well with your favorite sauce, like:

    • marinara sauce
    • chipotle aioli sauce
    • jalapeño ranch
    • spicy cajun aioli
    • basil pesto sauce

    The sauces would add an extra “kick” to this recipe!

    Related Recipes

    • Air fryer egg-plant fries are another delicious alternative to traditional french fries. You’ll be surprised how fast and easy it is to cook up a batch of them with an air fryer! Or try these loaded air fryer tater tots or sweet potato fries!
    • Another one of my go-to side dishes is roasted brussels sprouts. They’re seasoned with garlic powder, salt, pepper, and are to-die-for!

    Recipe

    Polenta fries in a white bowl.
    Print Pin
    5 from 1 vote

    Polenta Fries Baked with Cheese and Bacon

    Crispy, delicious, and salty Polenta Fries make a great appetizer or fun side dish! There's nothing better than crispy baked snacks that are easy to prepare!
    Course Appetizer, Side Dish
    Cuisine American
    Prep Time 25 minutes minutes
    Cook Time 30 minutes minutes
    Total Time 55 minutes minutes
    Servings 6
    Calories 209kcal
    Author Jessica Burgess

    Ingredients

    • 1 cup quick-cooking polenta
    • 2 cloves garlic minced
    • 2 tablespoons fresh thyme leaves
    • 1 tablespoon chopped chives
    • ½ cup shredded cheddar cheese
    • 3 strips bacon cooked and chopped
    • 1 tablespoon extra virgin olive oil

    Instructions

    • Bring 2 cups of water to a boil in a medium saucepan. Whisk in the polenta, garlic, thyme, chives, cheddar cheese, bacon, and salt and pepper. Stir until the polenta is thick, about 3 minutes. Turn the heat off, cover the saucepan, and let the polenta sit for 5 minutes.
    • Line an 8×8 square baking dish with parchment paper. Scoop the polenta into the baking dish and spread it into an even layer. Freeze it for 15 minutes.
    • Preheat the oven to 425 degrees F and spray a baking sheet with nonstick cooking spray.
    • Lift the polenta out of the baking dish and cut into fries about ¼ inch thick. Place the polenta fries on a greased baking sheet and gently toss with olive oil and a sprinkle of salt. Spread the fries in an even layer. Bake for 30 minutes, flipping halfway in between cooking.

    Nutrition

    Serving: 6g | Calories: 209kcal | Carbohydrates: 23g | Protein: 6g | Fat: 10g | Saturated Fat: 4g | Trans Fat: 1g | Cholesterol: 17mg | Sodium: 132mg | Potassium: 103mg | Fiber: 1g | Sugar: 1g | Vitamin A: 411IU | Vitamin C: 8mg | Calcium: 91mg | Iron: 1mg

    How to Make a Bed Like a Hotel

    April 23, 2021

    How to Decorate a Bed like a hotel - white duvet and pillow

    Here’s how to make a bed, as cozy as a hotel, with affordable, easy pieces! For this bedroom style, I use a duvet cover, throw blanket, sleeping pillows, throw pillows, and decorative pillows to create a white, fluffy, perfect bed!

    We spend many hours of our lives, sleeping in our bed so we might as well make it an enjoyable space to crawl in to at night!

    How to make a bed like a hotel - white linens in bedroom
    [feast_advanced_jump_to]

    Why You’ll Love Using This Process to Make the Bed

    Making the bed is one of my least favorite things to do. I often think,

    We’re just getting back in the bed tonight… why make it?

    But when you have an easy way to make a bed beautiful, it’s not something to dread each morning!

    And now, instead of rushing to shut the bedroom door when guests unexpectedly drop by, it’s one less thing to worry about and helps you feel like you have more ofa. tidy home!

    👉🏻 This process of making the bed is easy, affordable and the colors are easy to match just about any room!

    How to Make a Bed Like a Professional

    If you’re decorating your master bedroom, styling a bed for staging a home, or making a bed that’s photo-worthy for a home tour, here are my favorite tips for styling a bed like a professional!

    • Keep it simple – Sometimes less is more. Whether that’s less patterns, colors or the amount of items you put on the bed. I prefer more pillows than some may, and it’s completely ok to use less than what you see here. “Keeping it simple” for me, means using mostly whites, so I don’t have to worry about matching and coordinating colors.
    • Think about “texture” instead of colors – A bed decorated in the same texture is completely fine, however, adding a bit of different textures (like using a cable knit blanket or pillow) helps add depth to a bed and adds a little character without overwhelming it and making it look too busy.
    • Using all white – By using one color (or similar shades of the color white), helps a bed look “clean”. This is why more and more hotels have started using all white on their beds so guests don’t question if a bed is clean or not. They can easily see that there are no stains! Plus, when using all white, you can bleach the comforter, duvet, sheets, etc. safely!

    How to Make a Bed Look Luxurious

    For me, a luxurious bed includes beautiful pillows, and has a clean, sleek look to it! To achieve this look, I use a white fitted sheet, white top sheet, a duvet cover, decorative pillows and down comforters instead of a patterned, colorful comforter.

    The white bedding reminds me of staying in a luxurious hotel, with white, crisp bed linens! I’ve been decorating my bed with white linens for years! See my older post of how I styled our bed a few years ago.

    Start with the Sheets

    The first thing I do is place the sheets on the bed. We’re pretty picky about our bed sheets. We don’t want them too hot, love crisp sheets, and we don’t want them to pull up around the corners of the mattress as we turn at night. It’s easy to get tangled up in bunched-up sheets, which can cause a restless night’s sleep.

    Right now, we’re using and LOVING our Purple sheets that we got with our Purple mattress. They stretch, stay around the corners and feel like a soft t-shirt material but are not hot at night! It’s like magic! (But you don’t have to have a Purple mattress to use their sheets!)

    California King Purple Mattress Review

    When you find a set of sheets that you like, place those on the bed first in this order:

    1. Fitted Sheet – or sometimes called a “bottom sheet”, make sure the fitted sheet is placed on top of the mattress and mattress protector (if using one), and that it’s snug so that it completely covers the corner of the mattress. Then, tuck the sheet under the corner of the mattress to help add that security to the sheet, so it’s less like to pop up in the middle of the night.
    2. Top Sheet – Lay the top sheet on top of the fitted sheet so that it covers the entire mattress, and tuck the corners of the sheet in to the sides of the bed, and foot of the bed, then gently pulling the top of the flat sheet up to the top of the bed to stretch it out, making sure it doesn’t come out of the end of the bed.

    👉🏻 Get Purple sheets like we use here!

    What is a Duvet Cover?

    A duvet cover is simply a thin blanket that usually has a zipper or a line of buttons, at an opening, to allow you to insert a thicker blanket inside that will help make it a fluffy bed linen, cover a comforter that you may want to protect, or simply disguise the color of a blanket you no longer want to use.
    (Be cautious: depending on the duvet cover you use, you may be able to see the comforter through the duvet. This is why I recommend a white down comforter!)

    White Duvet Cover on Bed

    Why would I want to use a duvet instead of a comforter?

    I like to use a duvet so it can easily be washed, without having to wash a whole comforter all of the time. Sometimes when washing a comforter, the “filling” or “stuffing” can take a long time to dry.

    So instead of washing a comforter each week during my laundry routine, I can simply remove the duvet cover and wash that much quicker and more often, than washing a whole comforter.

    How to Put on a Duvet Cover

    As you’ll see in the video I’ve shared in this post, I have finally figured out the easiest way to fill a duvet cover!

    Here’s the step by step process of how I put a duvet cover on my bed:

    1. Important Step: If your duvet is brand new, it can be packaged up, causing it to have deep creases. You’ll want to remove creases and wrinkles before putting it on your bed. So washing/drying and ironing or steaming may be necessary! A wrinkled duvet can really make it look like a messy bed.
    2. Once your duvet cover is ready, turn it inside out and lay it flat on your bed or on a flat space big enough for it to stretch out, like the floor.
    3. Place the comforter (or comforters – I use two down comforters) evenly on top of the duvet cover.
    4. Optional: connect the comforter to the duvet cover. Some duvet covers come with ties on the corners so you can secure the comforter inside of the duvet without it moving around while you sleep. If your duvet cover does not come with ties, you may prefer to get duvet padded clips that work REALLY well at holding the comforter in place.
    5. Once the comforter is secure, simply turn the duvet cover inside out, which will then make the comforter go inside of the duvet as needed!
    6. Place the duvet on the bed, preferably with the “closed” opening at the head of the bed.

    Inserting a comforter in to a duvet cover with the above process, makes it so much easier than trying to insert a comforter in to a duvet, by shoving it inside the duvet without turning it inside out.

    Where to Put Sleeping Pillows

    Make sure your sleeping pillows have pillow cases. Then, the next step is to put the sleeping pillows against the wall or headboard, placing them straight up, to set the tone for the rest of the bed pillows.

    You’ll want pillows all of the pillows to sit as straight-up as they can, instead of leaning back so you can see all of the pillows when you’re looking at the bed, instead of just the bottoms. This is key to all of those beautiful beds you see in magazines or online.

    👉🏻 These are the king size sleeping pillows in the photos

    How to Style Decorative Shams

    Euro Shams: Next, to hide the sleeping pillows (because let’s face it…sometimes they’re not the prettiest after sleeping on them every night) I place 3 Euro shams in front of those. I use 3 because my bed is a California King. If you have a queen size bed, you may only need two.

    TIP: I use 28×28 Euro pillows with 26×26 Euro shams to really fill out the look of the pillow!

    👉🏻 These are the Euro Shams you see in the photos.

    👉🏻 These are the Euro pillows inside of the shams.

    Euro Shams on a California King Size Bed

    Pillow Shams: Next, I place the pillow shams that came with my duvet cover, in front of the Euro shams.

    King Size Pillow Decorative Shams

    How to Style an Accent Blanket on the Bed

    To add a gentle pop of color to my neutral bed linens, and to add some extra warmth for a little extra layer of comfort, having an extra blanket can also help give a good night’s sleep during the winter months.

    Depending on how big your blanket is, (I use a king-size for our California king bed) fold the blanket in to thirds or fourths, creating a narrow fold, and drape it at the foot of your bed. Sometimes I’ll change this up and lay it diagonal, across the bed or I’ll place it evenly across the foot of the bed.

    Cable Knit Throw Blanket for Bed

    How to Use Accent Pillows

    Final step: If you desire some color, extra pillows tend to be an easy and affordable way to change things up, decorate, and add that pop of color, so you don’t have to buy and replace a whole new comforter or sheet set, just because you want to change the look! (i.e. adding holiday pillows, spring colors, winter colors, etc. to help change your room’s theme, without breaking the bank.)

    But, to keep all of the bed linens neutral, I use different shades of white accent pillows and even textured accent pillows.

    1. Square Pillows: Ideally, centering 2 square decorative pillows up against the shams helps narrow the pillows, creating a great base for the final touches (the lumbar pillow).
    2. Lumbar pillow: Lastly, placing a smaller lumbar pillow in the middle of the two square pillows, gives the bed a focal point and the perfect finishing touches!

    👉🏻 These are the square decorative pillows you see in the photos.

    3, white, accent pillows on a bed

    Expert Tips and FAQ’s

    • You don’t have to have a headboard or bed frame to have a beautiful bed. Actually, if you don’t have a headboard, you can easily create the effect that you do have one, by using the Euro shams I mentioned above!
    • Do you have to have a bed skirt? No! Especially if you have a bed frame like mine, where it has beautiful side panels. However, even if your bed doesn’t have “walls” or pretty panels, you can pull the duvet or comforter down to hide the bed rails that you don’t want to show off.
    • I like to use 2 down comforters inside of a duvet cover to give it that extra “weighted” feel while we sleep but to also give it that “fluffy” look like you see on professionally styled beds.
    • I use 28×28 Euro pillows with 26×26 Euro shams to really fill out the look of the pillow!
    • The bed frame you see in this post is from Wayfair and we LOVE it! It was affordable and there are no box springs required!
    • No matter how beautiful your bed is, it’s a good idea to have a comfortable mattress. Make sure you have a quality mattress to sleep on for a good night’s sleep.

    Recipe

    How to Make a Bed Like a Hotel

    How to Decorate a Bed like a hotel - white duvet and pillow
    4.8 Stars (4 Reviews)

    Here's how to make a bed, as cozy as a hotel, with affordable, easy pieces! For this bedroom style, I use a duvet cover, throw blanket, sleeping pillows, throw pillows, and decorative pillows to create a white, fluffy, perfect bed!

    Active Time 10 minutes
    Total Time 10 minutes
    Difficulty Easy

    Materials

    • Sheets
    • Sleeping Pillows
    • Duvet Cover
    • Down Comforter (2)
    • 2 Pillows for Shams
    • 2 Pillow Shams
    • 3 Euro Pillows
    • 3 Euro Shams
    • 2 Square Decorative Pillows
    • 1 Lumbar Pillow
    • Throw Blanket

    Instructions

      1. Fitted Sheet - or sometimes called a "bottom sheet", make sure the fitted sheet is placed on top of the mattress and mattress protector (if using one), and that it's snug so that it completely covers the corner of the mattress. Then, tuck the sheet under the corner of the mattress to help add that security to the sheet, so it's less like to pop up in the middle of the night.
      2. Top Sheet - Lay the top sheet on top of the fitted sheet so that it covers the entire mattress, and tuck the corners of the sheet in to the sides of the bed, and foot of the bed, then gently pulling the top of the flat sheet up to the top of the bed to stretch it out, making sure it doesn't come out of the end of the bed.
      3. Place duvet cover/comforter on the bed. (See post for tips on how to put a duvet comforter on the bed.)
      4. Add the sleeping pillows and place, straight-up, against the headboard or wall.
      5. Arrange 3 Euro-style pillow shams in front of your sleeping pillows to hide them.
      6. Next, place the decorative shams in front of the Euro shams.
      7. Then, if using a decorative blanket, arrange that at the foot of the bed to add a pop of color.
      8. Lastly, add on the accent pillows, centering them to create a focal point of the bed. (Ideally, 2 square pillows and then 1 lumbar pillow centered in front of those two.)

    Notes

    • You don't have to have a headboard or bed frame to have a beautiful bed. Actually, if you don't have a headboard, you can easily create the effect that you do have one, by using the Euro shams I mentioned above!
    • Do you have to have a bed skirt? No! Especially if you have a bed frame like mine, where it has beautiful side panels. However, even if your bed doesn't have "walls" or pretty panels, you can pull the duvet or comforter down to hide the bed rails that you don't want to show off.
    • I like to use 2 down comforters inside of a duvet cover to give it that extra "weighted" feel while we sleep but to also give it that "fluffy" look like you see on professionally styled beds.
    • I use 28x28 Euro pillows with 26x26 Euro shams to really fill out the look of the pillow!
    • The bed frame you see in this post is from Wayfair and we LOVE it! It was affordable and there are no box springs required!
    • No matter how beautiful your bed is, it's a good idea to have a comfortable mattress. Make sure you have a quality mattress to sleep on for a good night's sleep.

    Recommended Products

    As an Amazon Associate and member of other affiliate programs, I earn from qualifying purchases.

    • California King Bed
      California King Bed
    • Duvet Cover & Shams
      Duvet Cover & Shams
    • Down Comforter (Duvet Insert)
      Down Comforter (Duvet Insert)
    • Euro Pillows
      Euro Pillows
    • Euro Shams
      Euro Shams
    • King Size Sleeping Pillows
      King Size Sleeping Pillows
    • Square Decorative Pillows
      Square Decorative Pillows
    • Lumbar Pillow
      Lumbar Pillow
    • Cable Knit Throw Blanket
      Cable Knit Throw Blanket
    © Jessica

    I hope you found this very helpful! If you’re like me, after decorating your bed like a hotel, you’ll find that you spend a little extra time in bed, which may or may not be a good thing.

    Pizza Bagels

    April 11, 2021

    Bagel pizza topped with pepperonis on baking sheet.

    Pizza Bagels: A kid-friendly, quick and easy recipe that’s perfect for new cooks in the kitchen or to make for a fast lunch or dinner!

    Ready to eat in about 15 minutes, these easy bagel pizza bites, along with these French bread pizzas, are a family weeknight dinner and easy to customize for individual topping favorites!

    Pizza Bagels Recipe
    [feast_advanced_jump_to]

    What You’ll Love About Mini Pizza Bagels

    • These mini pizzas are a quick recipe can be made and ready to eat in 15 minutes!
    • The round bagels are perfect for little hands. Those huge triangle pieces from the pizza delivery place are hard for those little hands to hold!
    • If you’re running low on bagels, you can use English muffins too!
    • Topping options are endless!

    I ended up making these ALL of the time as a kiddo (and these pizza dogs) because it seemed as if we always had the ingredients on hand, and it didn’t make a huge mess in the kitchen.

    If you’re looking for a quick and easy recipe to feed your family or if you’re running out of ideas that your teenager can make while they’re home alone, you’ll want to save this recipe for SURE! You can also make the family wax nostalgic by serving up School Lunch Pizza that tastes just like I remember.

    How to Make Pizza Bagels

    Pizza Bagels Ingredients

    First, using a nonstick sheet pan or a sheet of aluminum foil or parchment paper for easy clean up!

    Want to make your own bagels? Storebought bagels are easier but they can be incredibly fresh and delicious when made at home too.

    If the bagels are not sliced yet, go ahead and slice them. Next, lay them out face-up on your baking sheet and spoon the tomato sauce on to the bagels, and spread to fully cover the tops.

    pizza bagels with tomato sauce on a baking sheet

    Sprinkle your cheese over the bagels. As much as you want.
    (To be honest, I like to sprinkle on a LOT because it will fall through the middle and melt and turn a little brown… and then I peel it off of the baking sheet and have a bite of glorious cheese. I think this is the best part!)

    Bagel pizza ingredients - top with cheese

    Sprinkle on your favorite toppings or leave some with just “cheese” for those like it simple!

    Sauce Suggestions:

    If you want to mix things up and use a different sauce, other than marinara sauce or pizza sauce, these are some options to choose from:

    • bbq sauce
    • teriyaki sauce recipe
    • alfredo sauce (like we use in the chicken alfredo pizza in the Fabulously Fast Dinners cookbook!)
    • taco sauce (for a taco bagel pizza)
    • ranch dressing
    • pesto
    • buffalo sauce

    Topping Suggestions:

    • sausage
    • bacon (or this air fried bacon)
    • bell peppers
    • red pepper flakes
    • red onion
    • ham
    • ground beef
    • parmesan cheese
    • taco pizza (see taco topping ideas)
    • chicken bites or air fried buffalo chicken
    • fresh herbs (basil, parsley, cilantro, thyme)
    • steak bites
    • grilled shrimp recipe
    Pepperoni Bagel Pizza Recipe

    I usually only do pepperoni, and I leave a few “cheese,” pizzas for my youngest who’s not a huge fan of pepperoni.

    This is where you can also sprinkle on fun spices and seasonings if you want.

    Bake at 350° for 10 Minutes

    Once your oven has preheated place the baking sheet on the middle rack of the oven and bake at 350 degrees for about 10 minutes!

    In a flash, they’re done and ready to devour.

    Baked bagel pizzas

    Talk about the best recipe for busy weeknights!

    Throw this pizza bagel recipe together in a flash, and you’ve fed your family dinner in a snap. Plus… it’s pizza, so of course, your kids will love it!

    Pizza bagels with pepperoni on a baking sheet
    Bagel pizzas recipe

    Storage

    Once they have cooled off, it’s safe to put them in an air-tight container or even in a ziptop bag. To reheat, you can place back in a 350° oven for about 3-5 minutes, until pizzas are reheated. Or, our favorite way to reheat leftover pizza so it’s not soggy and it tastes just like it did the first time we had it, we use an air fryer!

    What to Serve with Pizza Bagels

    We’re really in to salad recipes around here so I would be doing you a disservice if I didn’t tell you about this scrumptious side salad recipe, that would go LOVELY with these little pizzas.

    Or, if you’re looking for more of a bread side, this easy focaccia bread is so delicious!

    For dipping, you’ll really love this jalapeno ranch dip to serve alongside it! And for the easiest and simplest treat, once the pizza is finished, these chocolate-covered teddy bear graham crackers definitely hit the spot.

    Tips for Best Results:

    • Place parchment paper or aluminum foil on a baking sheet before baking, for easy clean-up!
    • Have fun with the toppings! The great thing about using bagels to make pizza is that they can easily be customized to everyone’s preference, much easier than doing a whole pizza!
    • If you’re hosting a party, a pizza bar is a great idea and one of our favorite food bars when having people over! Simply place all of the topping selections out, have everyone build their own and choose their own toppings, and either rent, buy or borrow a small pizza oven or even use a toaster oven!
    • If your kiddos’ hands are itty bitty, use kitchen shears to cut the bagel pizzas into small bite-size pieces. Heck with trying to use a fork, pizza cutter, or hands. Kitchen shears are my best friend! Or, grab the mini bagels and make them bite-size!

    Recipe

    Bagel pizza topped with pepperonis on baking sheet.
    Print Pin
    5 from 4 votes

    Pizza Bagels

    These pizza bagels are the perfect quick dinner recipe and are great for the pickiest eaters! Pizza night made easy with this recipe.
    Course Main Course
    Cuisine American
    Prep Time 10 minutes minutes
    Cook Time 10 minutes minutes
    Total Time 20 minutes minutes
    Servings 8 pizza bagels
    Calories 172kcal
    Author Jessica Burgess

    Ingredients

    • 4 bagels I buy them in the refrigerated section because they stay fresh longer
    • 1 cup tomato sauce can substitute with pizza sauce
    • 1-½ cup shredded mozzarella cheese

    Toppings (optional):

    • pepperoni can substitute with bacon or sausage

    Instructions

    • Preheat the over to 350 degrees F.
    • Slice the bagels horizontally, in half, and lay them open faced on a sheet of aluminum foil.
    • Spoon sauce onto the tops of the bagels. I usually do a thin layer, because I don’t like a lot of sauce. But you can make them as saucy as you want!
    • Sprinkle a layer of cheese on top of the bagels.
    • Add any additional pizza toppings on the bagels, and spices if you prefer! 
    • Bake the pizzas for 10 minutes, or until cheese is melted.

    Notes

    • If you prefer them a little more brown at the top, broil at the end of the cooking time for just a few seconds! But keep an eye on them so they don’t burn!
    • Place parchment paper or aluminum foil on a baking sheet before baking, for easy clean-up!
    • Have fun with the toppings! The great thing about using bagels to make pizza is that they can easily be customized to everyone’s preference, much easier than doing a whole pizza!
    • If you’re hosting a party, a pizza bar is a great idea and one of our favorite food bars when having people over! Simply place all of the topping selections out, have everyone build their own, and either rent, buy or borrow a small pizza oven or even use a toaster oven!
    • If your kiddos’ hands are itty bitty, use kitchen shears to cut the bagel pizzas into small bite-size pieces. Heck with trying to use a fork, pizza cutter, or hands. Kitchen shears are my best friend! Or, grab the mini bagels and make them bite-size!

    Nutrition

    Serving: 1pizza bagel | Calories: 172kcal | Carbohydrates: 29g | Protein: 7g | Fat: 2g | Saturated Fat: 1g | Cholesterol: 5mg | Sodium: 484mg | Potassium: 159mg | Fiber: 1g | Sugar: 1g | Vitamin A: 180IU | Vitamin C: 2.1mg | Calcium: 49mg | Iron: 1.1mg

    I hope this recipe eases your menu planning! Comment below and me know how they were and what toppings you put on yours!

    Lemonade Stand Ideas

    April 10, 2021

    Lemonade stand sign ideas

    DIY lemonade stand for kids: With this easy tutorial, your kids can have a lemonade stand to use and reuse for years to come!

    Not only will you find the instructions on how to make this, I also share lemonade stand ideas and how to make it super fun!

    DIY Lemonade Stand Ideas

    Post updated April 21, 2021 with new links of where to find supplies!

    DIY Lemonade Stand Ideas

    I’m a bit excited to show you this. It’s been on my “to-do,” list for over a year, and crafting the lemonade stand for the kids, FINALLY happened. I first found a lemonade stand tutorial on Pinterest, and knew I wanted to make it for my kiddos. I immediately bought the supplies, but then they sat in my basement for.ever.

    It wasn’t until my friend came over one day, and said, “JESSICA… it’s time. Let’s finally put this thing together.” Shockingly, it didn’t take long at all, and my kids LOVE it.

    DIY Lemonade Stand

    How to Make a Lemonade Stand

    Now I cannot take all of the credit for this lemonade stand. My crafty friend helped me put this together, so I want to make sure she gets the handy-man award for this one!

    DIY Lemonade Stand Plan Ideas

    Instructions:

    I bought four wooden crates, and spray painted them with aqua spray paint (but use any color you prefer)!

    After the paint dried, we stacked two of them side by side, to nail them all together.

    DIY Lemonade Stand Plan Ideas

    With a hammer and nails, we connected the crates together. The nails we used above worked for some areas but needed bigger nails for the thicker sections.

    DIY Lemonade Stand Plan Ideas

    Connect the four crates, by nailing all of the corners where they connect.

    DIY Lemonade Stand Plan Ideas

    We found two wooden rods at Hobby Lobby, and knew they’d be perfect to hold the banner up above the stand when it was all together. We spray painted those to match the crates.

    There are a few different rod sizes available, but we chose the length that would be tall enough that my kids could still see under it, after the pendents were attached. See below. 

    DIY Lemonade Stand Plan Ideas

    We then hammered on the rods, (one on each side), on the back of the crates.

    DIY Lemonade Stand Plan Ideas
    DIY Lemonade Stand

    Yay! That part was DONE! (Yes, the rods are a little crooked, but as it turns out…that’s because they were crooked when we bought them. So check them before leaving the store.)

    Lemonade Stand Sign Ideas

    I found the CUTEST wooden pennants at Hobby Lobby, on sale, and they went PERFECTLY with the stand. The hardest part was deciding what to spell, and “Sale,” was my favorite phrase, in case we want to sell something different on our “stand,” one day!

    DIY Lemonade Stand Plan Ideas

    Using ribbon (similar white and yellow polka dot ribbon here), we simply threaded each pendant on and tied the ribbon around each rod.

    DIY Lemonade Stand sign ideas

    I may, or may not have found the cutest yellow “poms,” at Hobby Lobby too, and thought they HAD to be included.

    The lemonade stand is complete! Now… when the boys are ready to have a “sale,” we just pull it out of the garage and it’s ready to go! See what all we included on our lemonade stand, on the first day of business….

    Open for Business

    Lemonade Stand Ideas
    DIY Lemonade stand decorating ideas

    What to Sell at a Lemonade Stand Besides Lemonade

    Of course you sell lemonade, at a lemonade stand. But what else can you sell? Here are our favorites:

    • Slices of this lemon poke cake recipe
    • Lemon Cookies (cake mix cookies recipe – just use lemon cake mix instead)
    • Lemon Blondies
    • Slices of vintage lemon pie
    • Lemon Bars
    • Mini Lemon Pies
    lemonade stand - bake sale ideas
    Lemonade stand sign ideas

    • Price sign. (We made our own using a white canvas.)

    lemonade stand bake sale ideas
    lemonade stand drink ideas

    Lemonade Stand Decor and Extras

    • Plastic tumblers with lids – I love using these for any kid-outing too!
    • Fun paper straws I may have an obsession with these, and have them in every color.
    • Beverage Dispenser (Similar)
    lemonade stand drink ideas
    lemonade stand straws
    lemonade stand decorating ideas

    I always have a white colander on my kitchen counter full of lemons, and it made its way out for some lemonade stand decoration! Buy fake lemons HERE!

    lemonade stand ideas for kids

    My little guys were in LOVE with their lemonade stand, and MAY have consumed most of the lemonade and cookies.

    lemonade stand ideas for kids
    lemonade stand ideas
    lemonade stand ideas
    lemonade stand family activity for summer

    Although they ADORE their new lemonade stand, they’re now asking to make another one, but to turn it in to a McDonald’s stand. This.Should.Be.Interesting.

    Supplies Needed to Make Lemonade Stand

    • 4 wooden crates
    • 2 wooden rods (can also get at home improvement or craft store to make sure they’re the right size to be above your kiddo’s head when standing at the stand)
    • Spray Paint
    • Hammer & Nails
    • Wooden pennant (similar wooden pennant – can make your own)
    • Ribbon (similar)
    How to make the perfect lemonade stand for your kids

    BBQ Pork Steaks in the Slow Cooker

    April 10, 2021

    BBQ Pork Steaks

    BBQ Pork Steaks in the Slow Cooker: Cook in the crockpot with your favorite bbq sauce, and it’s one of the best pork steak recipes EVER! Such a quick and easy dinner idea and one of our top favorite slow cooker recipes!

     BBQ Pork steaks in the slow cooker are SO much easier than grilling, and they come out so tender!

    Post updated April 12, 2021

    [feast_advanced_jump_to]

    Why You’ll Love This Recipe

    Friends, we all know that all of the recipes around here are quick and easy recipes, yes? Well, if there was a word to describe that this pork steak recipe was even easier than ANY recipe on this blog, (well besides this slow cooker pulled pork) then I’d say it. So I’m just asking that you take my word for it!

    Or… better yet, take a look at the recipe below, and you’ll SEE how easy it’s going to be.

    Not Enough Time? If you don’t have time for a slow cooker recipe, then check out my Baked BBQ Pork Steaks recipe to speed things up!

    Raw pork steaks in crockpot

    Honestly,  I think the hardest part of this recipe was walking to the deep freezer, to pull the pork steaks out to cook. 

    FAQs

    Do I need to add liquid to slow cooker pork?

    For this recipe, all you need is bbq sauce with the pork steaks. As they cook, they’ll release juices and cook in those so it’s not necessary to add additional liquid.

    How do you cook pork steaks without drying them out?

    Cooking them in the slow cooker with bbq sauce is a GREAT way to have tender, juicy pork steaks!

    Can you cook frozen pork steaks in the slow cooker?

    Yes! You’ll just want to make sure to cook them long enough to reach the safe-eating, internal temperature of 145 degrees, and allow them to rest for 3 minutes before serving. Or cook in the slow cooker until 160°) Cooking from frozen won’t allow you to cut slits in them as the recipe states, but that is ok… they can still be delicious!
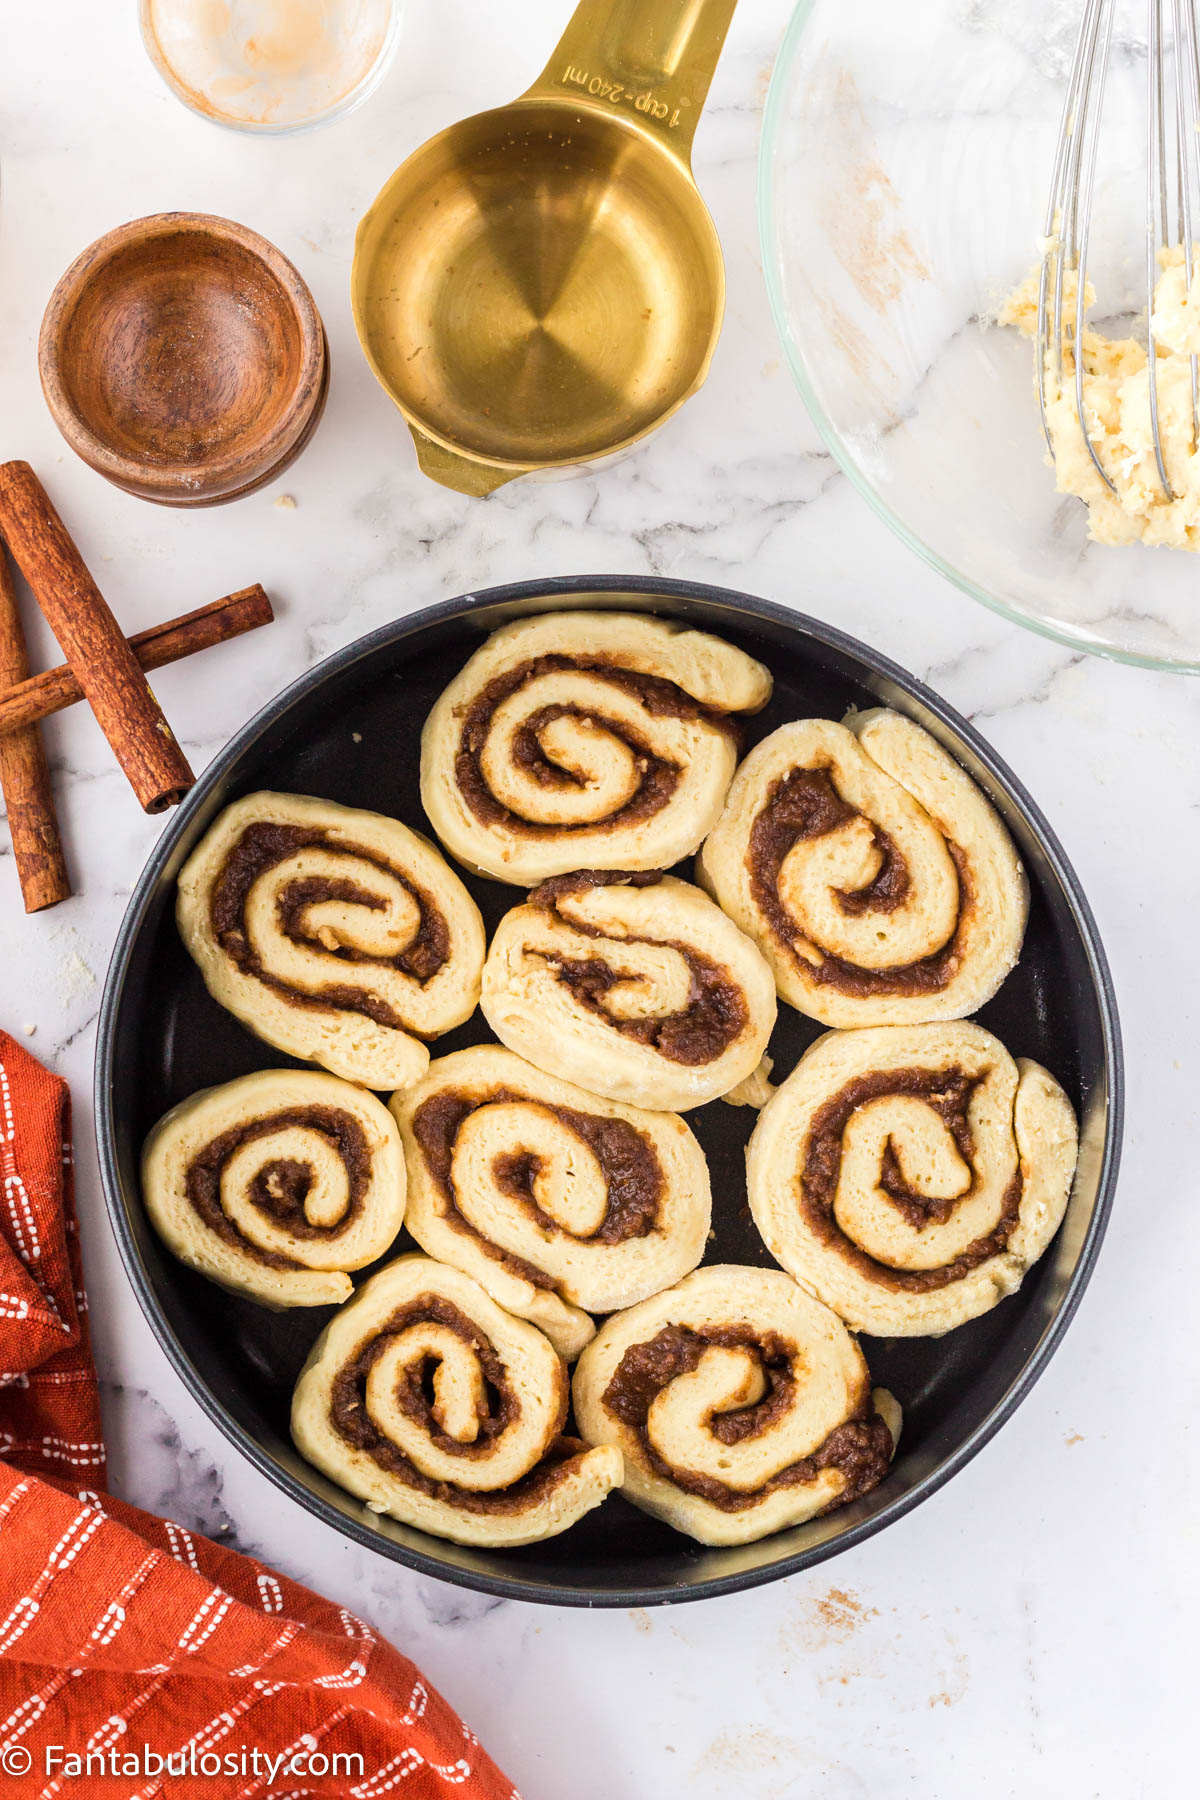
    You’ll find the full recipe card at the bottom of the post, but if you’re a visual person, don’t miss the helpful tips throughout the post!

    How to Cook Pork Steaks

    First, I added a little salt and pepper to the pork steaks, before putting them in the cooker.

    Since my wonderful parents gifted us with half a hog this year, we have an endless large amount of pork in our deep freezer. And because I didn’t think until the last minute to make pork steaks for dinner, I threw those frozen babies right in to the slow cooker.

    bbq sauce poured on top of raw pork steaks in slow cooker

    If the pork steaks had not been frozen, I would have cut a small slit or two in each steak before saucing and cooking to allow some extra flavor and to help cook the steaks a little faster.

    1. Pour a dab of bbq sauce in the bottom of the slow cooker.
    2. Place a steak in the slow cooker and baste with a dab of bbq sauce.
    3. Repeat the process and place another steak in the slow cooker, making sure each steak is covered with sauce.
    4. Cook on low for 4-6 hours, or until steaks are done. (Making sure the internal temp of pork steaks reaches 145 degrees, and allow to rest for 3 minutes before serving or go ahead and cook until the internal temperature reaches 160°. — this temperature has been updated according to the USDA’s recommended temperatures.)
    BBQ pork steaks cooked in the crockpot

    Slow Cooking Makes Tender Pork Steaks

    I’ve always been on a hunt for tender pork steak recipes, and before making these, I knew that cooking meats in the slow cooker, typically made them super tender. But for my husband to stop mid-bite to say,

    “Jessica… these are really, really tender.”

    I’ll have a hard time making these any other way. They were so tender that I’m even considering cooking them again, just to use the meat in a “pulled pork,” style of dish. They turned out to be one of the best pork steak recipes we’ve ever had.

    TIP: Our slow cooker tends to cook SUPER fast. (Even on the “low” setting.) So our pork steaks tend to be “done” after a couple of hours. But when I leave the pork steaks in the crockpot for a while (at least four hours) they’re literally hard to get out, without them falling off of the bone.

     These were SOOO tender! BBQ Pork steaks in the slow cooker are SO much easier than grilling, and they come out so tender!

    What to Serve With Pork Steaks

    We absolutely love having this red skin potato salad (or cauliflower potato salad if doing low carb), baked beans with ground beef, this bbq ranch cornbread salad or to keep it simple, we’ll open up a can of green beans and try one of these ways to make green beans taste better! But when you’re serving pork of any form, it seems like this KFC Coleslaw recipe is always a hit.

    How to Store Leftover Pork Steaks

    If you have leftover pork steaks, once cooled off, store in an air-tight container in the refrigerator for 3-5 days.

    More Steak Recipes

    If you love easy, slow cooker recipes like this one, wait until you have his slow cooker London broil with gravy recipe. It only uses 4 ingredients!

    If you’re a steak lover like those in our house, then you’ll definitely want to check out this popular oven-baked steak recipe, steak bites, and venison steak recipe!

    Recipe

    Crock pot pork steaks covered in bbq sauce.
    Print Pin
    4.39 from 369 votes

    BBQ Pork Steaks in the Slow Cooker

    BBQ Pork Steaks in the Slow Cooker: Cook in the crockpot with sauce, & after a few hours they’ll be so tender they’ll fall off the bone! Definitely one of the quick and easy pork steak recipes!
    Course Main Course
    Cuisine American
    Prep Time 10 minutes minutes
    Cook Time 4 hours hours
    Total Time 4 hours hours 10 minutes minutes
    Servings 4 servings
    Calories 392kcal
    Author Jessica Burgess

    Ingredients

    • 4 pork steaks
    • 1 bottle BBQ sauce we use Sweet Baby Rays
    • salt and pepper to taste

    Instructions

    • Rub salt and pepper on both sides of each pork steak.
    • Using a knife, cut a small slit or two in each steak.
    • Pour a dab of bbq sauce in the bottom of the slow cooker
    • Place a steak in the slow cooker and baste with a dab of bbq sauce.
    • Repeat the process and place another steak in the slow cooker, making sure each steak is covered with sauce.
    • Cook on low for 4-6 hours, or until steaks are done. (Making sure internal temp of pork steaks reach 145 degrees, and allow to rest for 3 minutes before serving.)

    Video

    Notes

    *Our crockpot cooks VERY hot, so there are times that the pork steaks are done in a shorter amount of time. But the longer the pork steaks remain in the slow cooker, they FALL off of the bone.
    • Do I need to add liquid to slow cooker pork? For this recipe, all you need is bbq sauce with the pork steaks. As they cook, they'll release juices and cook in those so it's not necessary to add additional liquid.
    • How do you cook pork steaks without drying them out? Cooking them in the slow cooker with bbq sauce is a GREAT way to have tender, juicy pork steaks!
    • Can you cook frozen pork steaks in the slow cooker? Yes! You'll just want to make sure to cook them long enough to reach the safe-eating, internal temperature of 145 degrees, and allow them to rest for 3 minutes before serving. Or cook in the slow cooker until 160°) Cooking from frozen won't allow you to cut slits in them as the recipe states, but that is ok… they can still be delicious!

    Nutrition

    Serving: 1serving | Calories: 392kcal | Carbohydrates: 43g | Protein: 29g | Fat: 9g | Saturated Fat: 3g | Cholesterol: 89mg | Sodium: 1165mg | Potassium: 748mg | Sugar: 35g | Vitamin A: 240IU | Vitamin C: 0.7mg | Calcium: 45mg | Iron: 1.4mg

    Do you have the dinnertime blues? Let’s get rid of those NOW!

    I’ve heard for so long,

    “Jessica, I just need quick and easy recipes to make my family for dinner, and if you can tell me what to serve with it… that’d be even better.”

    So I did it! I made a cookbook JUST FOR YOU! You don’t want to hesitate, because your dinnertime is about to get a LOT easier.

    Smoked Chicken Brine

    April 6, 2021

    moist smoked cornish hen recipe

    An easy smoked chicken brine recipe that uses common ingredients but gives the perfect flavor for smoked poultry!

    This brine made out of warm water, brown sugar, salt, garlic, and onion, is a MUST when we make cornish hens on the smoker or smoke any type of whole chicken for a major flavor boost and how to keep it juicy and give it extra moisture! This brine combined with the smoke flavor is absolutely delicious!

    Smoked Chicken Brine - raw chicken
    [feast_advanced_jump_to]

    What is a Chicken Brine?

    Brine is a combination of salt and water, and is a great way to make chicken tender and more flavorful but it doesn’t have to stop there! Add fresh herbs, spices, and other ingredients to help enhance the flavor even more!

    Why You’ll Love This Brine

    This recipe is easy and it uses ingredients that you probably already have on hand! Although we use it most of the time for smoking, a brine solution also works great to marinate chicken if baking or grilling. After testing a few different versions, we’ve found this is the best brine to use for chicken!

    Use it for all types of chicken or poultry such as:

    • smoked cornish hens
    • air fryer chicken wings
    • boneless chicken breast
    • smoked chicken tenderloins
    • air fried chicken legs
    • roaster chickens
    • whole chickens
    • chicken halves
    • chicken thighs

    FAQs

    Should I brine chicken before smoking?

    No, you don’t have to but it makes a BIG difference in flavor and can help the chicken stay moist and not dry out as much during the smoking process. A brine is highly recommended for best results!

    Can you brine chicken too long?

    Yes. You can, because it can make it too salty if your brine has a lot of salt in it (as most do) and the texture of the chicken can become mushy if it sits in it for too long.
    How long to brine chicken?

    Timing can depend on the type of chicken and how long to brine it. For instance, a chicken breast may not need as long to brine as a whole chicken. A good gauge to go by is:
    – 2 hours for skinless chicken breasts
    – 4 hours for bone-in chicken
    – 8 hours to 24 hours for a whole, roaster chicken

    How to Make this Flavorful Brining Solution

    I’ve found that these are my favorite ingredients for a smoked cornish hen brine (small chickens) but it also works well for other chicken as well!

    What you’ll need for this brine: (see full recipe card with details and measurements below.)

    • warm water
    • white onion (or yellow if that’s what you have on hand!)
    • kosher salt (table salt will work too)
    • brown sugar
    • minced garlic (I prefer this over cloves but you can chop garlic cloves if you like)
    Collage of chicken brine, brown sugar, garlic, salt, onion
    1. Start by adding warm water to a large pot (big enough for about a gallon of water and still big enough to leave room for the raw meat once it’s placed in.) You want to use warm so the brown sugar will dissolve.
    2. Next, pour in brown sugar
    3. Salt
    4. Minced garlic
    5. Stir to dissolve sugar and salt
    6. Add in white onions
    7. Now it’s ready for your chicken and the brining process! (If you used HOT water, make sure it cools off a bit before adding the chicken. You don’t want to “cook” the chicken in the brine with hot water.)
    8. Place chicken in brine, and cover pot with lid, aluminum foil or plastic wrap and place the pot with the chicken and brine in the refrigerator and let it marinate in the brine (see post for time length depending on type of chicken).
    Chicken brine recipe for smoker - chicken in pot soaking

    Do you rinse chicken after brining?

    This is optional. If you prefer crispy skin, you can wash the brined chicken, pat dry with paper towels, put the chicken on a tray, and place it back in the refrigerator for an hour or so to help the skin dry out a bit.
    NOTE: remove the chicken from the refrigerator about 30 minutes before cooking to allow the chicken to become closer to room temperature so it will cook more evenly.

    Discard excess brine.

    Dry rub on small chickens

    Season with your favorite chicken dry rub recipe and smoke according to your favorite smoked chicken recipe for tons of flavor!

    moist smoked cornish hen recipe

    Side Dishes for Smoking Meat

    If you’re smoking chicken, then you’ll love this secret recipe side salad, smoked stuffed mushrooms, and this Amish potato salad!

    We love using the smoker, so make sure you check out the other dinners made with a smoker, so you can add them to your favorite list of ideas!

    Recipe

    Raw chicken above smoked chicken brine in pot
    Print Pin
    5 from 34 votes

    Smoked Chicken Brine

    Smoked Chicken Brine: An easy smoked chicken brine recipe that uses common ingredients but gives the perfect flavor for smoked poultry!
    Course Main Course
    Cuisine American
    Prep Time 5 minutes minutes
    Cook Time 0 minutes minutes
    Total Time 5 minutes minutes
    Servings 1 gallon
    Calories 948kcal
    Author Jessica Burgess

    Ingredients

    • 1 gallon warm water NOT hot
    • 1 white onion sliced in to quarters
    • ½ cup kosher salt table salt is ok too
    • 1 cup brown sugar
    • ⅓ cup minced garlic

    Instructions

    • Start by adding warm water to a large pot (big enough for about a gallon of water and still big enough to leave room for the raw meat once it's placed in, and you want "warm" water so the brown sugar will dissolve. You don't want "hot" water or it will begin cooking the chicken.)
    • Next, pour in brown sugar, salt, and minced garlic, and stir to dissolve sugar and salt.
    • Add in white onions.
    • Place chicken in brine, and cover pot with lid, aluminum foil or plastic wrap and place the pot with the chicken and brine in the refrigerator and let it marinate in the brine (see recipe notes and post for tips and time length depending on type of chicken).

    Notes

    • Can you brine chicken too long?
    Yes. You can, because it can make it too salty if your brine has a lot of salt in it (as most do) and the texture of the chicken can become mushy if it sits in it for too long.

    • How long do you brine chicken?
    Timing can depend on the type of chicken and how long to brine it. For instance, a chicken breast may not need as long to brine as a whole chicken. A good gauge to go by is:
    – 2 hours for skinless chicken breasts
    – 4 hours for bone-in chicken
    – 8 hours to 24 hours for a whole, roaster chicken

    Nutrition

    Serving: 1gallon | Calories: 948kcal | Carbohydrates: 241g | Protein: 4g | Fat: 1g | Saturated Fat: 1g | Sodium: 56850mg | Potassium: 647mg | Fiber: 3g | Sugar: 219g | Vitamin A: 6IU | Vitamin C: 22mg | Calcium: 439mg | Iron: 3mg

    If you made chicken using this brine recipe, I’d love it if you could help others know your thoughts by leave a star review above in the recipe card!

    Smoked Cornish Hens

    April 3, 2021

    close up of smoked cornish hen

    Smoked Cornish Hens: How to smoke cornish game hens with an easy brine that creates a moist and juicy bird, and a dry rub that gives it a delicious flavor!

    Important: For best results, soak the cornish hens in a chicken brine recipe for the smoker, 24 hours before smoking. Although not required, it makes a BIG difference in flavor!
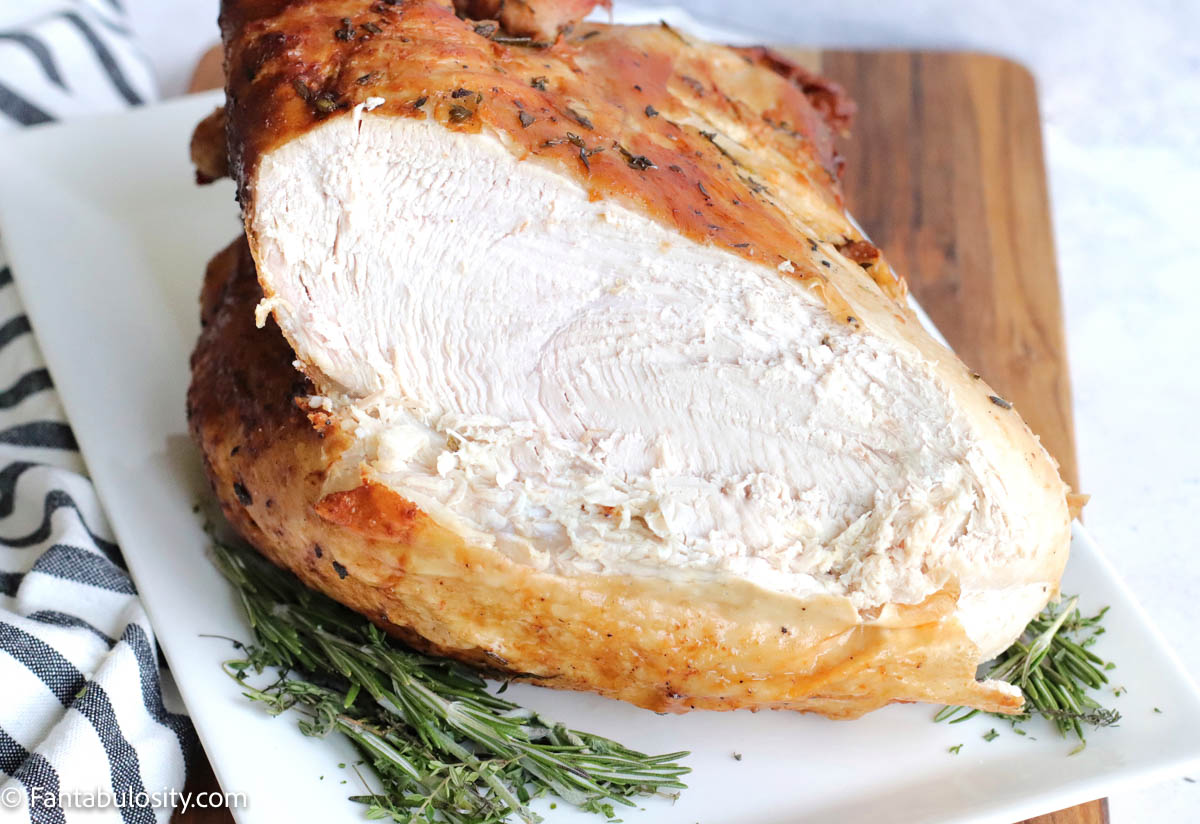

    Quick Overview: Smoke cornish hens at 225° for 2 hours or until the internal temperature reaches 160° and let rest for 10 minutes until temp reaches 165° so it’s safe to eat.

    See full blog post and recipe card below to for more tips to make this fabulous recipe!

    smoked cornish hens
    [feast_advanced_jump_to]

    What are Cornish Hens?

    Cornish hens (usually weighing around 1-2 lbs.) are a small breed of chickens so this is why a chicken brine and dry rub work well for cornish hens as well.

    They’re young chickens so they’re very tender and little birds so they’re easy to serve as individual portions, perfect for a special occasion or to serve on a weeknight!

    They can be found at many grocery stores and the Tyson brand that I use comes without giblets. If the hens you’re using have giblets, remove them before adding to the brine and smoking.
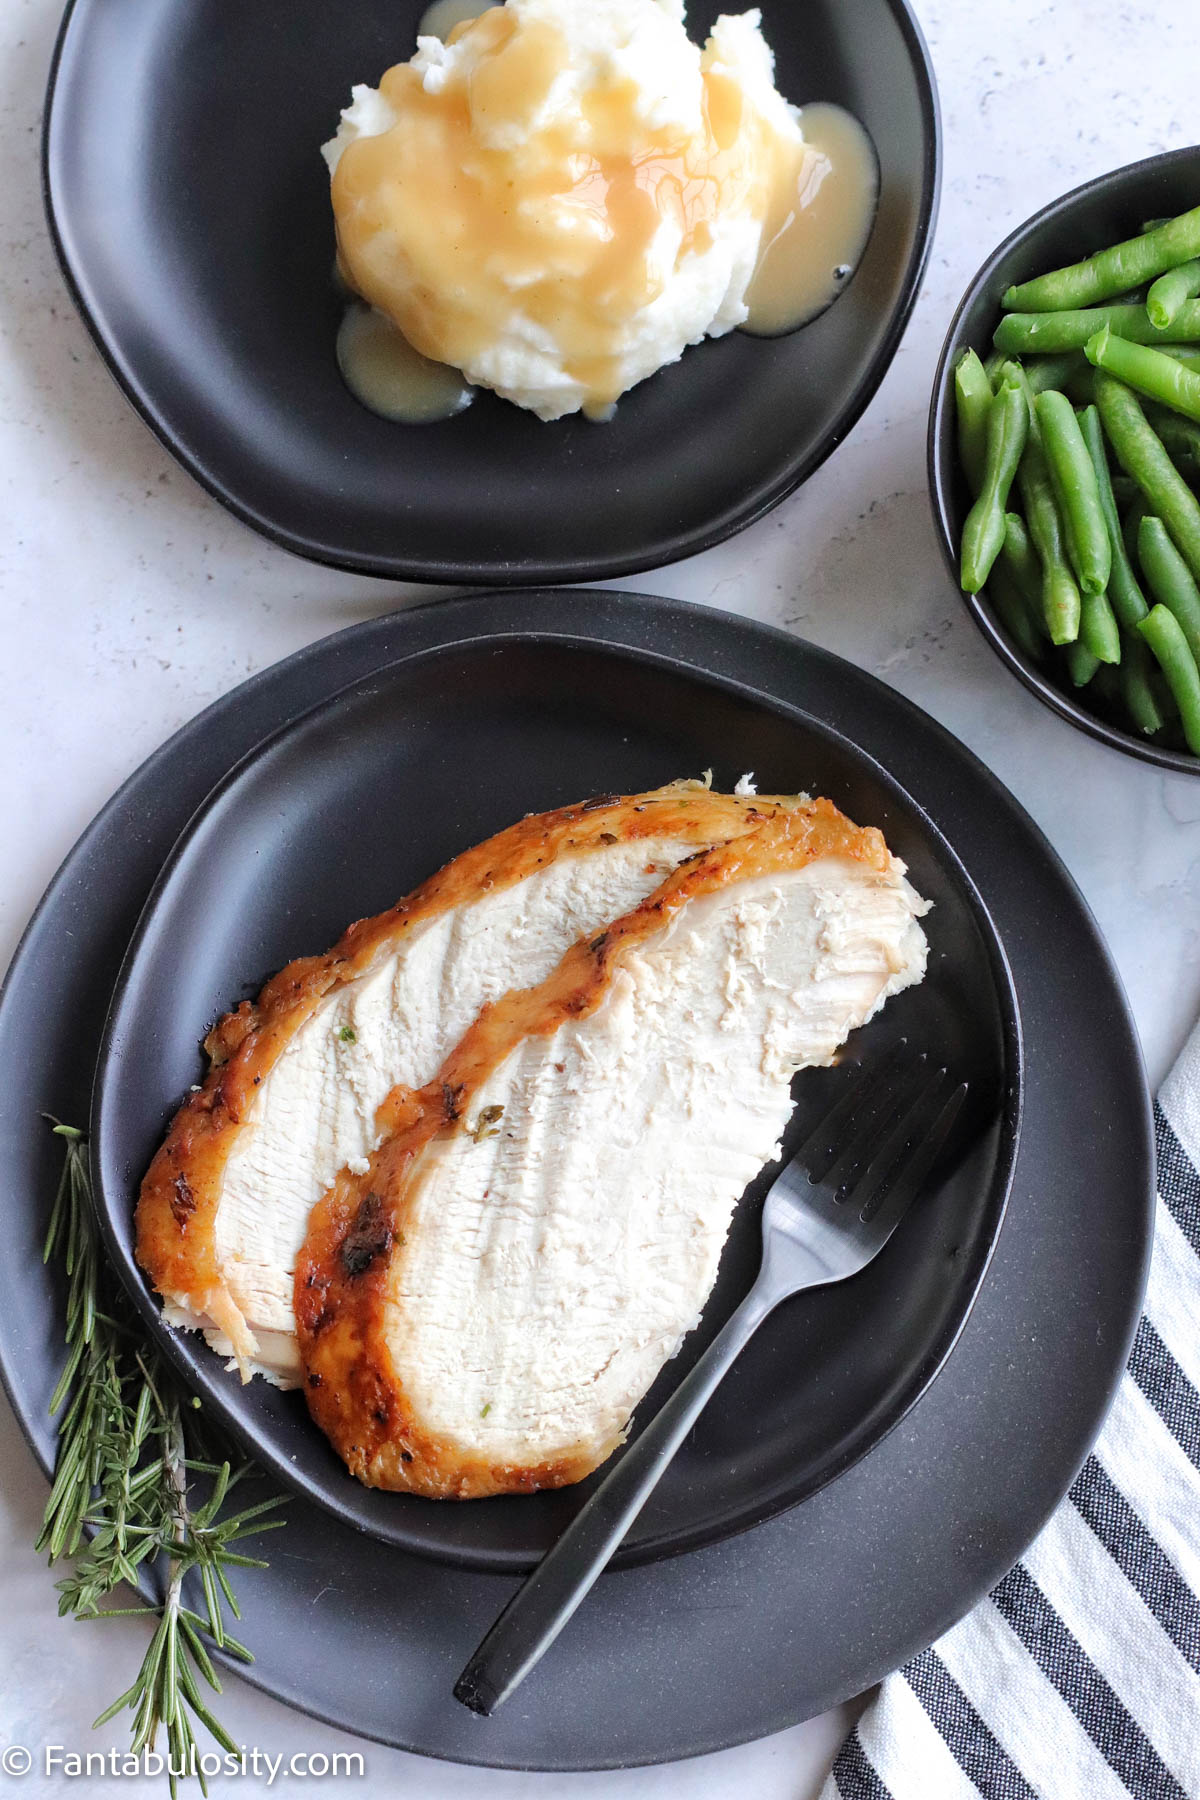
    Cornish Hen Brine

    Although it’s not required, if you have time to make and let your cornish hens sit in a brine solution, it’s highly recommended for a juicy, flavorful hen. (I love doing this for air fried chicken wings, and broiler chickens too!)

    I highly recommend using the brine ingredients in this smoked chicken brine and letting the hens soak for 24 hours. However if you’re pressed for time, at least 2 hours is ideal.

    Once the cornish hens have soaked in the brine, remove birds from the marinade and pat dry.

    Cornish Hen Seasoning and Dry Rub

    No fancy ingredients required! Simply use a mix of the following spices that you probably already have on hand:

    • 1 teaspoon black pepper 
    • ½ Tablespoon salt
    • 2 Tablespoons paprika
    • 1 Tablespoon garlic powder 

    Mix all together in small bowl and completely cover hens with rub.

    smoked bird recipe

    How Long to Smoke Cornish Hens

    Smoking cornish hens in our pellet smoker took a couple of hours. (2 hours)

    Starting the small chickens out at 225°, and cooking for a total of 1.5 hours, and then raising the temperature up to 350° for an additional 15-20 minutes allows the skin to crisp up and lock in those juices.

    NOTE: If internal temperature of hens has not reached 160° after the higher temperature, lower the temperature of the smoker back to 225° and cook until it reaches 160°.

    Smoke until cornish hens reach an internal temperature of 160° and allow to rest until it reaches 165° (75°C) for safe consumption. (See recipe card for more details on resting.)

    Tips for Smoking Cornish Game Hens

    How do you keep Cornish hens from drying out?

    Soaking the hens in a brine helps keep the bird moist and juicy! Also letting the small chickens sit at room temperature for 15-30 minutes before cooking will help it cook evenly and won’t allow the heat to dry out the meat.

    Do you cook Cornish hens breast up or down?

    Breast side down is often recommended, so the juices naturally rest in the breast meat as it cooks. However, breast side up is also perfectly fine and still results in a juicy bird!

    How do I know when my Cornish hen is done?

    When the internal temperature reaches 165° Fahrenheit, in the thickest part of the breast and thigh, it’s safe to eat. However cooking until 160° degrees and letting it rest, covered in aluminum foil, allowing it to reach 165°, is ideal.

    What kind of wood chips or pellets should I use for smoking cornish hens?

    Pecan, apple or cherry are the best choice for smoking cornish hens or chicken. However you can use another flavor if that’s what you have!

    Remove thawed (if they were frozen) cornish hens from packaging.
    If frozen: Move from freezer to the refrigerator a day or two before you brine or smoke them.
    tyson cornish hens to smoke

    Marinate hens in smoked chicken brine for at least 2 hours in the refrigerator, (24 hours preferred) in a large bowl or pot, (I used my 8 Qt. Instant Pot, pot) covered with aluminum foil or plastic wrap.

    Brine for smoked chicken

    Once hens have soaked, remove birds and pat dry with a paper towel, and let sit at room temperature for 15-30 minutes so it will cook evenly and not dry out while smoking. Discard brine.

    Preheat smoker to 225 degrees Fahrenheit.

    smoked chicken rub

    Mix together the spice blend in a small bowl.

    Place hens on a cutting board or baking sheet and cover entire cornish hen, top and bottom.

    Place cornish hen on smoker breast side down or up

    Once smoker has preheated, place hens directly on the smoking rack and close lid, smoking for 1.5 hours.

    After 1.5 hours of cooking time, turn the heat up on the smoker to a high heat of 350°, cooking for an additional 15-20 minutes, or until when using a meat thermometer, and checking the thickest part of the breast and thigh, the internal temperature has reached 160°. This will help give it a crispier skin. (See final cooking steps below.)

    resting cornish hen

    Once the hens have reached 160°, remove from smoker and place on a plater and wrap the hens in aluminum foil, to allow the chickens to rest for about 10 minutes. They should continue to cook once off of the smoker, reaching the safe internal temperature of 165°.

    smoked cornish game hens

    Cornish hens are ready to serve! If desired, garnish with a small handful of fresh herb sprigs like parsley!

    smoked cornish hens

    Cornish hens are small enough to be individual servings, and are not only wonderful for a weeknight dinner with family, they’re also classy enough for a fancy dinner!

    When you’re ready to eat, slice in to that juicy cornish hen!

    moist smoked cornish hen recipe

    What to Serve with Cornish Hens

    This easy salad recipe and this corn casserole are my favorites to serve alongside cornish hens but we also love to round a meal out with cream cheese smoked mushrooms since we already have the smoker heated!

    Favorite Smoked Recipes

    If your smoker is already preheated, there’s no need to waste the pellets or energy reheating later! Meal prep and make other smoker meals, like smoked chicken strips and smoked burgers for easy dinner ideas for the rest of the week!

    Recipe

    close up of smoked cornish hen
    Print Pin
    5 from 13 votes

    Smoked Cornish Hens

    How to smoke cornish game hens with an easy brine that creates a moist and juicy bird, and a dry rub that gives it a delicious flavor!
    Course Main Course
    Cuisine American
    Prep Time 1 day day
    Cook Time 2 hours hours
    Resting Time 10 minutes minutes
    Total Time 1 day day 2 hours hours 10 minutes minutes
    Servings 2 hens
    Calories 935kcal
    Author Jessica Burgess

    Equipment

    • smoker

    Ingredients

    • 2 cornish hens
    • 1 gallon of smoked chicken brine we use this smoked chicken brine recipe

    Smoked Cornish Hen Rub

    • 1 teaspoon black pepper
    • ½ Tablespoon salt
    • 2 Tablespoons paprika
    • 1 Tablespoon garlic powder

    Instructions

    • In a large pot (big enough to marinate cornish hens in a gallon of brine, yet small enough to cover the hens completely and a pot small enough to fit in a refrigerator) mix together the ingredients for the smoked chicken brine.
    • Place cornish hens in brine and refrigerate, covered, for at least 2 hours, but up to 24 hours.
    • Once small hens have marinated in brine, remove and discard brine.
    • With a paper towel, pat the cornish hens dry and let rest at room temperature for 15-30 minutes. (This will help hens cook evenly and not dry out.)
    • Preheat smoker to 225°.
    • While preheating, mix together spice rub ingredients in a small bowl.
    • Rub spice blend all over cornish hens, evenly, covering the tops, bottoms and sides of hens completely.
    • Place hens on smoking racks (breast side down) and smoke for 1.5 hours.
    • After 1.5 hours, turn temperature on smoker up to 350° and cook for an additional 15-20 minutes to crisp up the skin.
    • Check the internal temperature of hens, and remove once the thickest part of the breast and thigh have reached an internal temp of 160°. (NOTE: If internal temperature of hens has not reached 160° after the higher temperature, lower temperature of smoker back to 225° and cook until it reaches 160°.)
    • Place hens on a baking sheet or platter and wrap in aluminum foil, and let rest for about 10 minutes or until the internal temperature reaches a safe temperature to eat, of 165°.

    Notes

    Although it’s not required, if you have time to make and let your cornish hens sit in a brine solution, it’s highly recommended for a juicy, flavorful hen.
    How do you keep Cornish hens from drying out?
     Soaking the hens in a brine helps keep the bird moist and juicy! Also letting the small chickens sit at room temperature for 15-30 minutes before cooking will help it cook evenly and won’t allow the heat to dry out the meat.
    Do you cook Cornish hens breast up or down?
    Breast side down is often recommended, so the juices naturally rest in the breast meat as it cooks. However, breast side up is also perfectly fine and still results in a juicy bird!
    How do I know when my Cornish hen is done?
    When the internal temperature reaches 165° Fahrenheit, it’s safe to eat. However cooking until 160° degrees and letting it rest, covered in aluminum foil, allowing it to reach 165°, is ideal.

    Nutrition

    Serving: 1hen | Calories: 935kcal | Carbohydrates: 7g | Protein: 79g | Fat: 64g | Saturated Fat: 18g | Cholesterol: 455mg | Sodium: 2026mg | Potassium: 1283mg | Fiber: 3g | Sugar: 1g | Vitamin A: 3939IU | Vitamin C: 2mg | Calcium: 74mg | Iron: 5mg

    Air Fryer Turkey Burgers

    March 25, 2021

    Air Fryer Turkey Burgers - stacked with lettuce, tomato, cheese on a bun

    How to cook turkey burgers in the air fryer in only 10 minutes! With a little salt and pepper, this will be another burger recipe you’ll want to add to your meal plan!

    Whether you have fresh ground turkey or fresh or frozen patties from the grocery store, you’ll love this fast and easy recipe for juicy turkey burgers, made in the air fryer! If you don’t have an air fryer, you can still make burgers in the oven, baked turkey burgers in the oven or on burgers on the stove! Lately, we’ve even been loving these mini burgers baked in the oven!

    Air Fryer Turkey Burgers with crispy jalapenos
    [feast_advanced_jump_to]

    Why you’ll love cooking turkey burgers in the air fryer

    • It’s quick and easy
    • With the air fryer basket, the drippings can drip down under the tray so the burgers don’t sit in grease, yet still giving you a juicy, flavorful burger
    • Like with our ground beef burgers in the air fryer, it’s easy to clean-up!
    • Turkey is such a lean meat that the air fryer helps create healthy turkey burgers
    How long do you cook turkey burgers in the air fryer?

    It only takes 10 minutes for fresh turkey patties in the air fryer!

    How to tell if a turkey burger is done?

    When the internal temperature of a turkey burger reaches 165° degrees Fahrenheit, it’s safe to eat.

    How to Cook Frozen Turkey Burgers

    If you have frozen turkey burgers, there’s no need to thaw them out first for a quick dinners! Simply place them in the air fryer basket and cook! However, with the burgers frozen, it’s best to turn the temperature to 375° degrees F. for a cooking time of 15 minutes.

    Jennie-O Turkey Burger Patties

    When I shared how to cook turkey burgers in the oven, I mentioned how I loved pre-pattied and seasoned ground turkey!

    But when it comes to brands, I love buying these patties at the store to make things even easier! It’s a healthy air fryer turkey burger recipe without bread crumbs and perfect for those doing low carb or Keto diets! Plus, the Jennie-O brand patties only have turkey and rosemary extract, leaving things simple yet FLAVORFUL!

    Ingredients for air fryer turkey burgers

    How to make juicy air fryer turkey burgers

    This is a step-by-step to show you how we make this recipe and just how easy air frying them can be!

    1. Place ground turkey burgers in the air fryer basket.
    2. Turn heat to 400° and timer to 10 minutes or until the internal temperature reaches 165° degrees F. with a meat thermometer
    3. When timer ends, if you prefer cheeseburgers, simply place a slice of american cheese on the burgers and place back in air fryer without turning the heat back on. (The leftover heat from cooking should gently melt the cheese to the burger after 1-2 minutes.)
    Step by step of cooking turkey burgers in the air fryer

    Burger topping ideas

    If you love a burger patty by itself, you’re ready to eat! However, if you love to add fun toppings or are looking for new ideas on how to top your burgers, you’ll love the burger bar I styled, where I gave a giant list of burger topping ideas! But some of our favorite toppings are:

    • barbecue sauce
    • red onion
    • bacon
    • tomato
    • lettuce

    For this burger below, I simply added cheese and dried jalapeños to add a kick and a crunch to my burger. It was absolutely DELICIOUS!

    Now if you want to make the ULTIMATE turkey burger, and add some flair… you will love using glazed donuts for the buns like when we made donut burgers!

    Dried jalapenos as a topping idea for air fryer turkey burgers

    What to serve with turkey burgers

    • Everyone loves french fries, sweet potato fries or tots with their juicy burger but if you have time, making these fiesta ranch potato wedges are an amazing partner to the burgers
    • Serving this side salad recipe with turkey burgers is a healthy side dish that will compliment them well!
    • Since you’re using the air fryer anyway, you might as well make these air fryer eggplant fries before the burgers go in! Snack on them while the burgers cook or serve as a side dish!
    turkey burgers cooked in the air fryer

    How to store left over turkey burgers

    If you want to meal prep and plan, making a lot of turkey burgers at once is a great idea! Then, you can simply reheat the burgers later in the air fryer or microwave for a quick lunch or dinner!

    Once cooled, store leftover turkey burgers in an air-tight container in the refrigerator for 3-4 days.

    Turkey burgers cooked in the air fryer

    More easy air fryer recipes you’ll love:

    We’ve become quite fond of cooking dinner in the air fryer, so here are some of our favorites!

    • Cooking chicken legs in the air fryer will be a new favorite! No bread crumbs needed, and you can flavor however you like!
    • Make some air fryer bacon, to top your turkey burgers with!
    • The kids will LOVE these buffalo chicken tenders in the air fryer that uses panko breadcrumbs and whatever sauce they prefer!

    Recipe

    Air Fryer Turkey Burgers - stacked with lettuce, tomato, cheese on a bun
    Print Pin
    5 from 5 votes

    Air Fryer Turkey Burgers

    How to cook turkey burgers in the air fryer in only 10 minutes! With a little salt and pepper, this will be another burger recipe you'll want to add to your meal plan!
    Course Main Course
    Cuisine American
    Prep Time 0 minutes minutes
    Cook Time 10 minutes minutes
    Total Time 12 minutes minutes
    Servings 4 burgers
    Calories 321kcal
    Author Jessica Burgess

    Equipment

    • air fryer

    Ingredients

    • 4 turkey patties or 1 lb ground turkey
    • 1 teaspoon salt as desired
    • dash black pepper or as desired
    • 4 slices of cheese optional

    Instructions

    • Place turkey burger patties in air fryer, in a single layer. (Do not overlap burgers.)
    • Season the patties with salt and pepper as desired.
    • Cook at 400° for 10 minutes or until internal temperature of burgers reach 165° degrees F.
    • If cheeseburgers are desired, place a slice of cheese on each burger and place basket back in to air fryer, without turning on, letting the leftover heat gently melt the cheese to the burger
    • Top burgers with desired toppings! Serve.

    Notes

    If you want to meal prep and plan, making a lot of turkey burgers at once is a great idea! Then, you can simply reheat the burgers later in the air fryer or microwave for a quick lunch or dinner!
    How to store turkey burgers: once cooled, store leftover turkey burgers in an air-tight container in the refrigerator for 3-4 days.

    Nutrition

    Serving: 1burger | Calories: 321kcal | Carbohydrates: 1g | Protein: 32g | Fat: 19g | Saturated Fat: 7g | Trans Fat: 1g | Cholesterol: 129mg | Sodium: 1067mg | Potassium: 28mg | Sugar: 1g | Vitamin A: 333IU | Calcium: 247mg | Iron: 2mg
    • « Go to Previous Page
    • Page 1
    • Interim pages omitted …
    • Page 17
    • Page 18
    • Page 19
    • Page 20
    • Page 21
    • Interim pages omitted …
    • Page 26
    • Go to Next Page »

    Primary Sidebar

    Jessica Burgess standing in kitchen holding a hummingbird cake.

    Hi, I'm Jessica! - Owner and Creator of the blog and brand, Fantabulosity.

    I’m here to help you make easy comfort food and nostalgic recipes, using simple ingredients, that everyone will love.

    More about me →

    Potluck Recipes

    • A slice of strawberry jello cake, topped with a strawberry slice, sitting on a round plate.
      Strawberry Jello Cake (Easy, Moist Strawberry Cake)
    • Crack green beans on wooden spoon.
      Crack Green Beans
    • Old fashioned potluck cake recipes collage.
      Old-Fashioned Cakes That Still Show Up at Every Potluck
    • Collage of potluck desserts.
      Easy Potluck Desserts (Simple Recipes That Always Get Asked For)
    • Cold Pasta Salad Recipes Collage.
      Cold Pasta Salad Recipes
    • Chicken Casserole recipes image collage.
      20 Chicken Casserole Recipes

    Popular Recipes

    • bread pudding in baking dish
      Bread Pudding Recipe: Easy Old Fashioned Recipe (With Video!)
    • Burger baked in the oven, steamed in aluminum foil, and placed on white plate.
      Burgers in the Oven
    • two tuna salad sandwiches stacked on top of each other
      The BEST Tuna Salad Recipe
    • Sliced banana bread on white platter
      Best Banana Bread
    • Strawberry brownies on white marble cutting board.
      Strawberry Brownies Recipe
    • Cheeseburger Sliders made with Hawaiian Rolls, stacked on top of one another.
      Cheeseburger Sliders

    Footer

    ↑ back to top

    Featured In

    About

    • About Jessica
    • Contact
    • Collaborate
    • Dinner System

    Easy Recipes

    • All Recipes
    • Vintage Recipes
    • Dinner Recipes
    • Desserts

    How to Cook

    • Oven-Baked
    • Stove-Top
    • No Bake
    • Cooking Basics

    Privacy Policy |Accessibility Copyright © 2026 Fantabulosity | Terms & Conditions | FTC
    All recipes, photos, and content are copyrighted and may not be reproduced, republished, or distributed without written permission.

    Rate This Recipe

    Your vote:


    A rating is required
    A name is required
    An email is required