• Skip to primary navigation
  • Skip to main content
  • Skip to primary sidebar

Fantabulosity logo

  • All Recipes
  • Vintage Recipes
  • Holiday
  • Dinner Theme System
  • About
  • Navigation Menu: Social Icons

    • Facebook
    • Instagram
    • Pinterest
    • TikTok
    • YouTube
menu icon
go to homepage
  • Recipes
  • Desserts
  • Dinners
  • Gatherings
  • Holidays
  • About Jessica
    • Facebook
    • Instagram
    • Pinterest
    • TikTok
    • YouTube
  • search icon
    Homepage link
    • Recipes
    • Desserts
    • Dinners
    • Gatherings
    • Holidays
    • About Jessica
    • Facebook
    • Instagram
    • Pinterest
    • TikTok
    • YouTube
  • ×
    Home » Recipes

    How to Make Frozen Hash Brown Patties in Air Fryer

    How to Make Frozen Hash Brown Patties in Air Fryer

    March 22, 2021

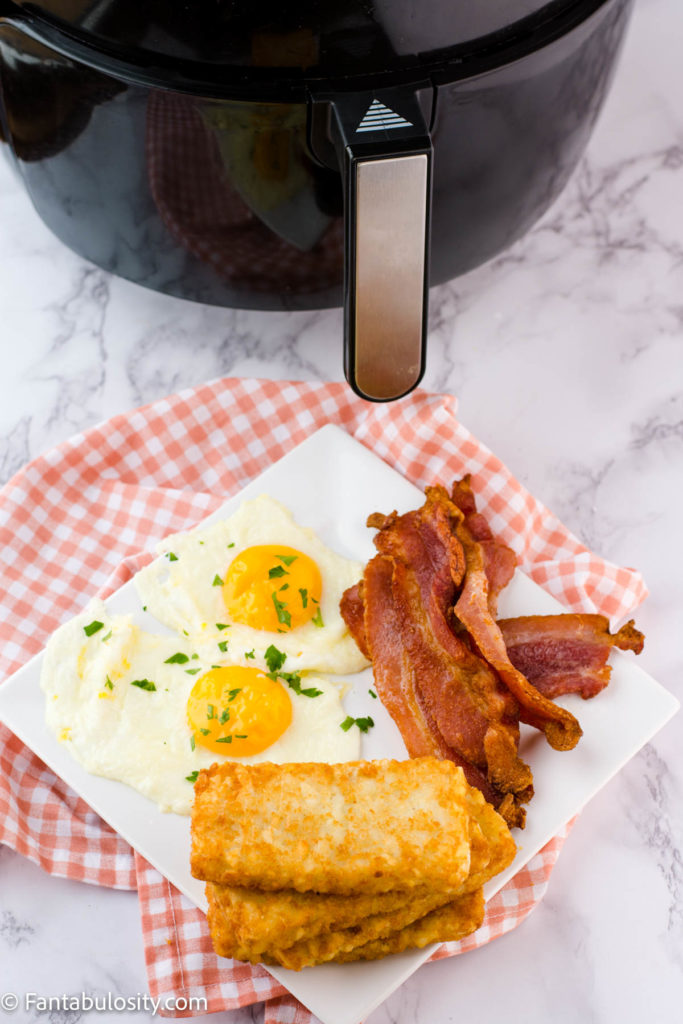
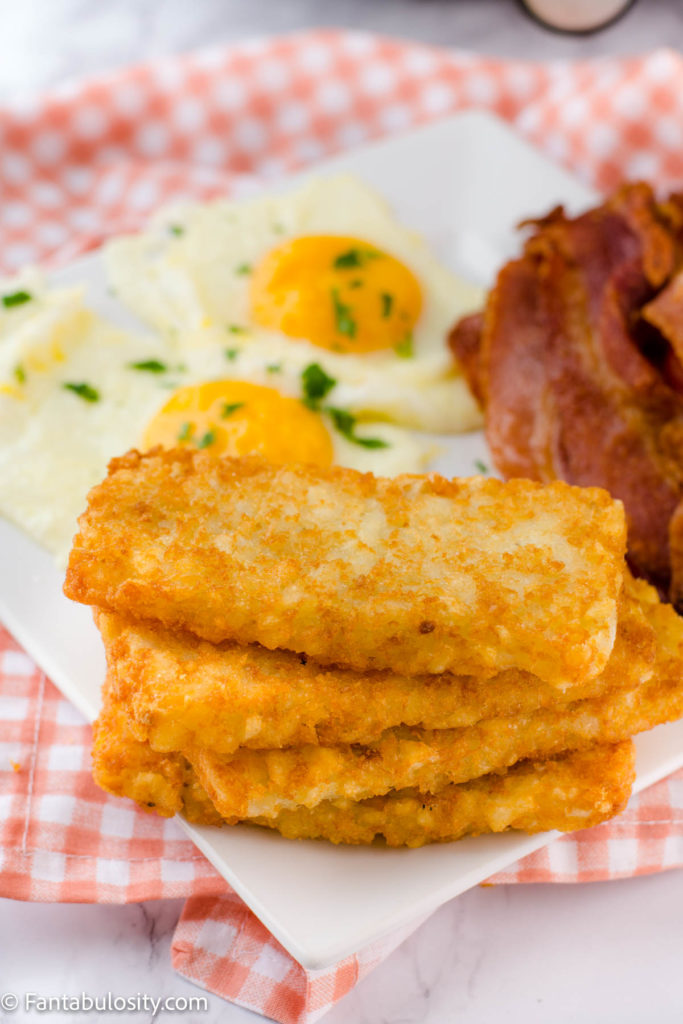
    air fryer hash brown patties on white plate with bacon and over easy eggs

    How to cook frozen hash brown patties in the air fryer in only 10 minutes, without oil for crispy hash browns for breakfast, quick snack, or dinner!

    Hash brown patties are DELICIOUS for breakfast, served alongside air-fried bacon, brioche French toast, fluffy pancakes from scratch, sausage and biscuit dippers, air-fried cinnamon rolls, or biscuits and chorizo gravy! Plus, when cooked in the air fryer, they’re an easy side dish for breakfast!
    hashbrown patties in the air fryer
    [feast_advanced_jump_to]

    Can you cook from frozen in an air fryer?

    Yes! That’s what I love about the air fryer. Being able to cook frozen foods in it like these hash brown patties, french fries, and frozen chicken wings in the air fryer makes it so much easier and faster than waiting on them to thaw them out!

    Why You’ll Love Cooking Air Fryer Hash Browns

    • it’s easy!
    • can cook frozen patties in minutes, no thawing
    • less heat/energy required than baking in a conventional oven
    • no oil required
    • creates crispy patties
    • an amazing side dish for a quick breakfast or dinner
    • ready in only 10 minutes
    hash brown patties, eggs and bacon on plate next to air fryer

    Ideas for Ways to Use Frozen Hash Brown Patties

    Hash brown patties are delicious by themselves as an ideal breakfast side. However, here are some fun ideas on how you can serve and use hash brown patties too!

    • Use them to make a casserole (breakfast casserole, hash brown casserole, potato casserole, etc.). You can crumble them up if you don’t have shredded on hand to use.
    • Melt cheese and bacon on top to create quick “air fryer loaded hash browns” or “hash brown breakfast nachos”.
    • As the “bun” for these burgers in the oven!
    • As a crostini for an easy appetizer for a party food idea.
    • To serve an open-faced sloppy joe on.
    • Serve with simple homemade chili.
    • Use as the “bread” for avocado toast.
    • Hash brown benedict.
    • As the crust for breakfast pizza.

    Dipping Sauces for Hash Browns

    If you prefer to eat the hash browns by themselves, or serving breakfast for a crowd (think “hashbrown bar” or a brunch food bar) and looking for dips besides ketchup, here are some ideas for you:

    • white country gravy
    • spicy ketchup
    • A1
    • smokey sauce (made with sour cream, paprika & spices)
    • fry sauce
    • queso
    • salsa
    • taco sauce
    • Heinz 57

    Instructions:

    Start by placing the individual patties in a single layer in the air fryer basket or in the air fryer oven.

    (Due to the hash browns usually containing a little oil, and if your basket is “non-stick” you shouldn’t have a need to spray the basket or air fryer trays with cooking spray — and actually, some air fryer brands recommend not spraying the basket.)

    However, if you find that your patties are sticking to the basket, you can use a little cooking spray or oil (like olive oil or vegetable oil) preferably in a spritzer, to spray the hash browns.
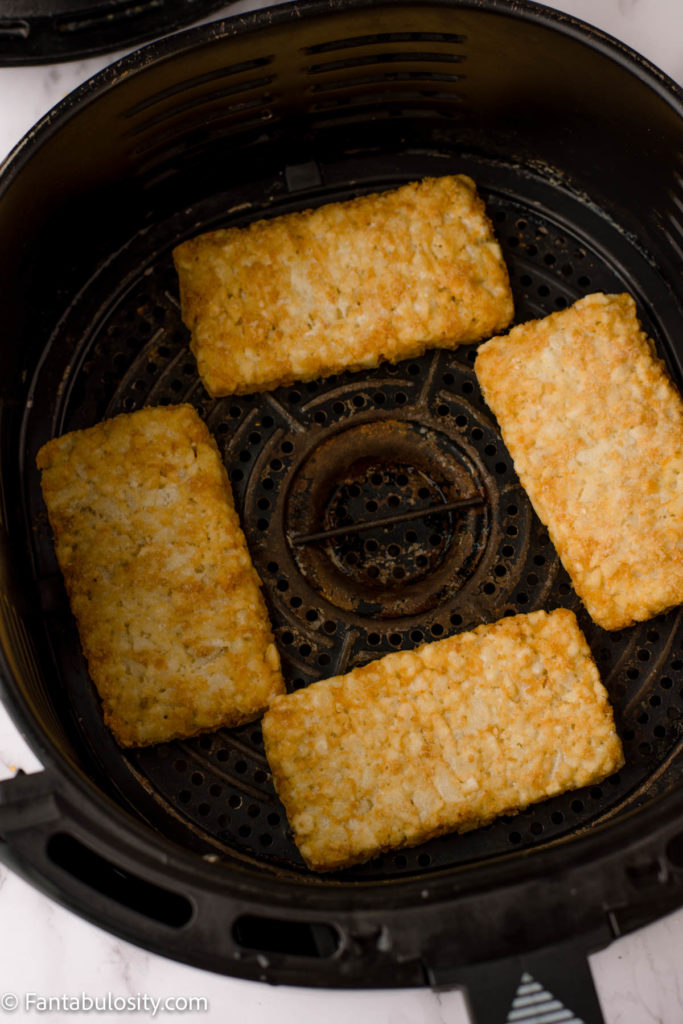
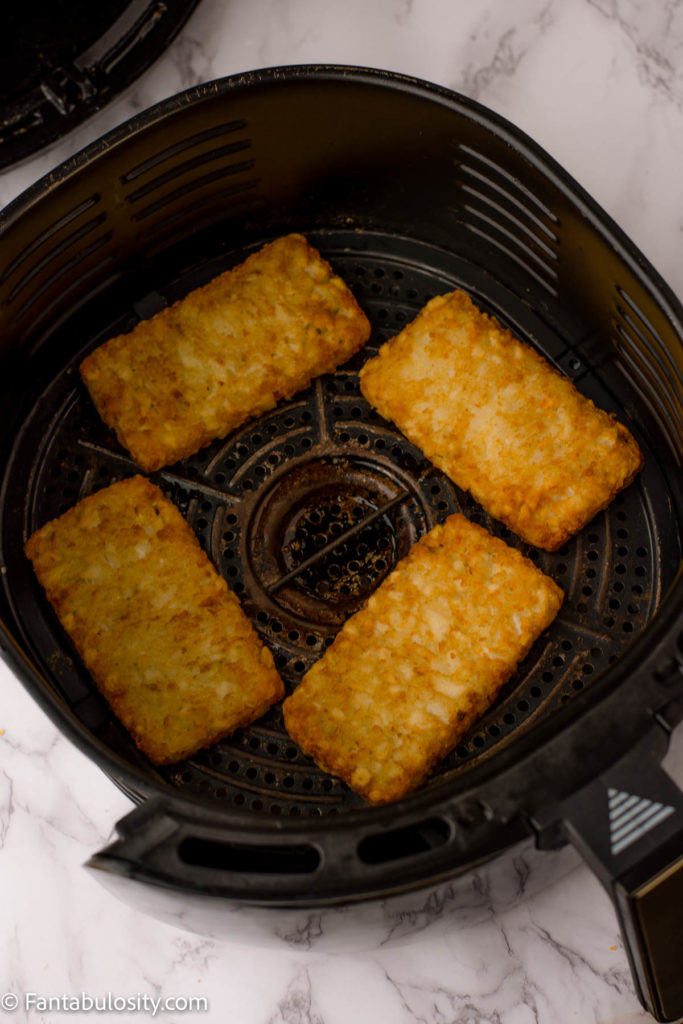
    frozen hash browns in air fryer basket
    Frozen hash brown patties
    cooked hash brown patties in air fryer basket
    cooked air fryer hash brown patties

    Air fry the frozen hash browns at 400° ( degrees F.), with a cook time of 10-12 minutes or until golden brown. (We preferred the 10-minute mark but cooking time can vary depending on your air fryer model and you can increase the cook time by a couple of minutes for extra crispy air fryer hash browns.)

    Sprinkle with salt, if desired, and serve!
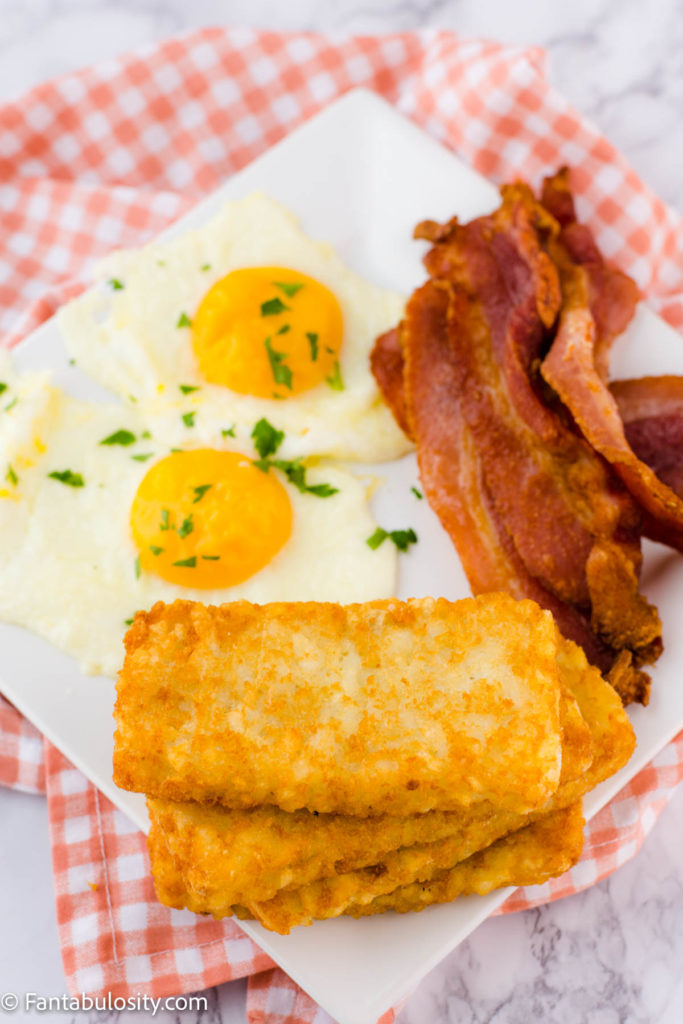
    frozen air fryer hash browns
    How do you store cooked hash browns?

    Allow the leftover hash browns to cool off and come to room temperature. Store them in an air-tight container and place them in the refrigerator until ready to enjoy and reheat later.

    How do you reheat hash browns?

    Reheating hash browns using an air fryer is the best! It gives it the crispy texture like cooking them the first time! You can use a microwave to reheat although it makes them softer.

    How long are hash browns good for in the fridge?

    After they’ve been cooked or thawed out, they good for approximately 4-7 days.

    Can you refreeze cooked hash browns?

    Yes! As long as the hash browns did not sit out at room temperature for more than 2 hours.

    Expert Tips:

    • For best results, when removing the hash brown patties from the basket, use a large plastic (so it’s less likely to scratch the air fryer basket and lining) spatula to remove one hash brown at a time, to reduce the risk of the hash browns falling apart.
    • After cooked, and removed from the air fryer, place the hash browns on a paper towel-covered plate, to soak up any oil.

    What to Serve with Hashbrown Patties:

    These hashbrown patties are delicious, served alongside hearty recipes for breakfast such as this easy biscuit and gravy casserole!

    More Air Fryer Recipes:

    We love air fryer recipes around here but here are easy recipes you may want to try:

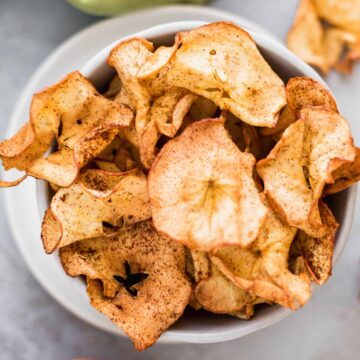
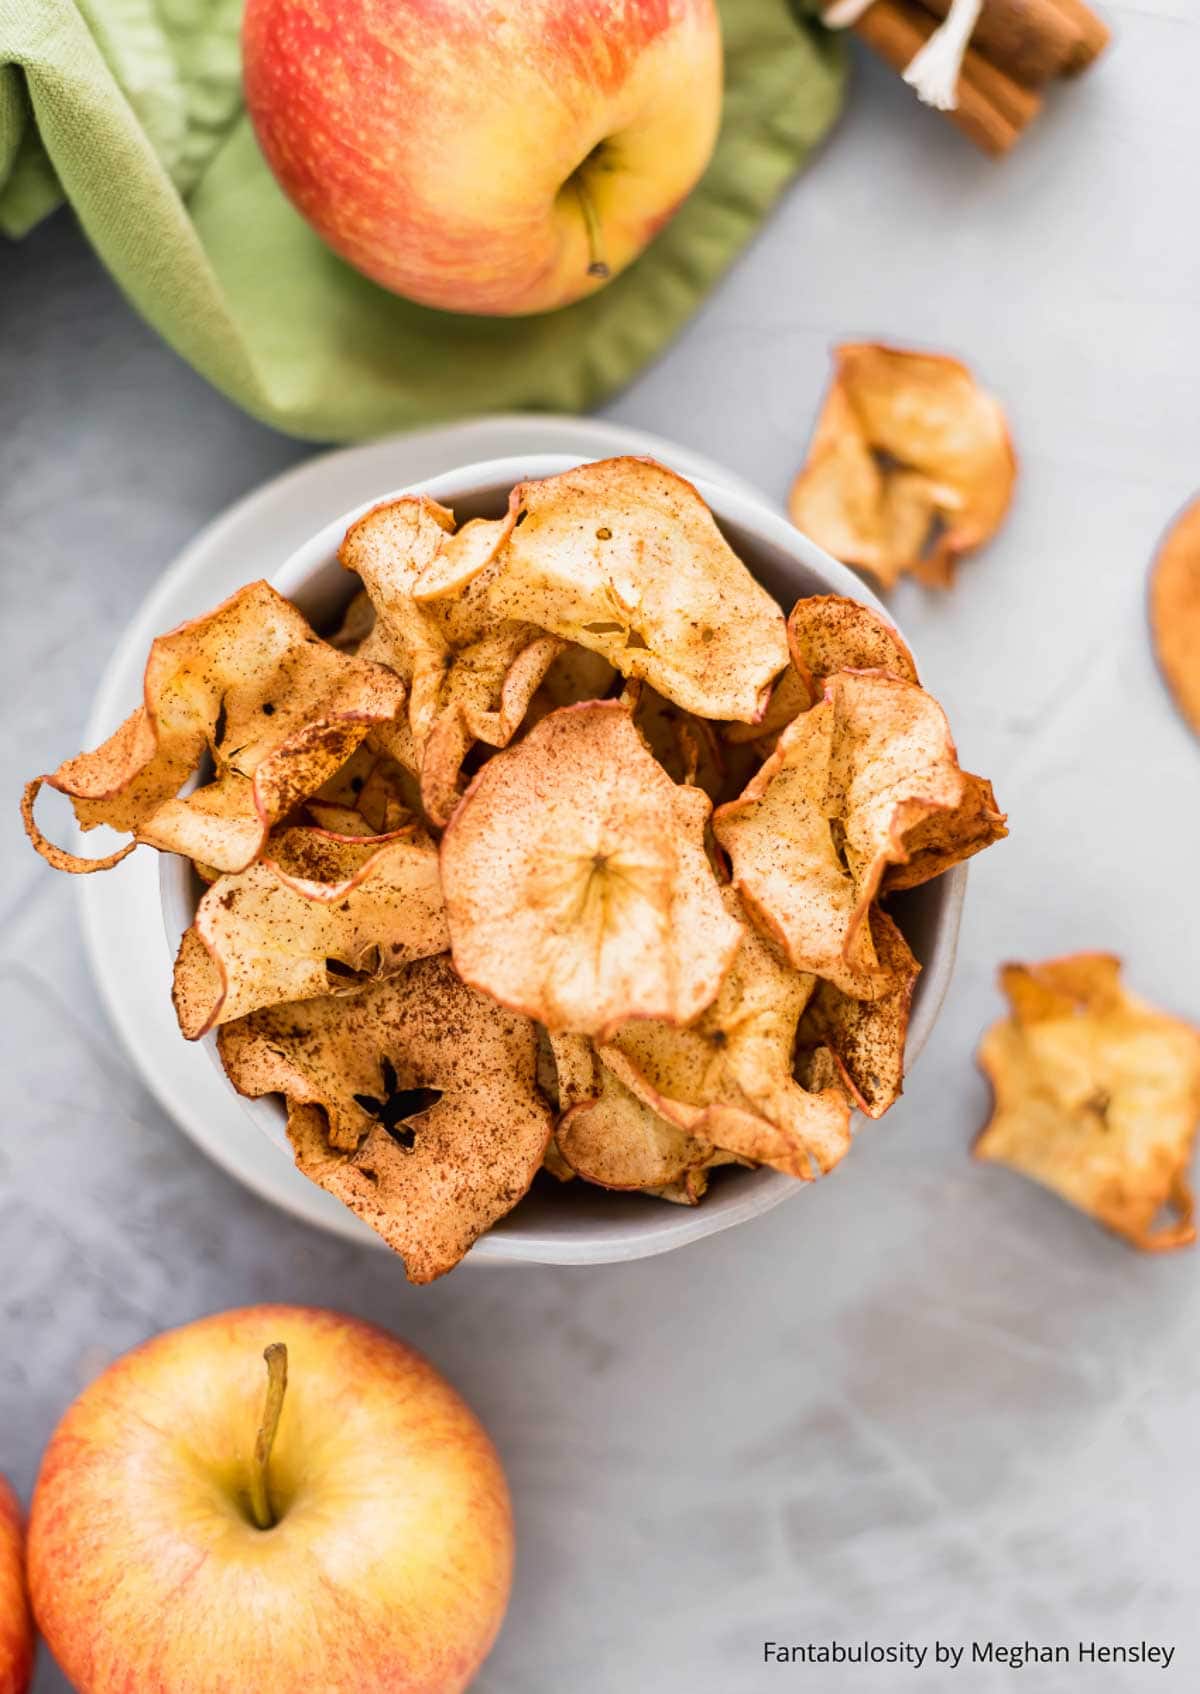
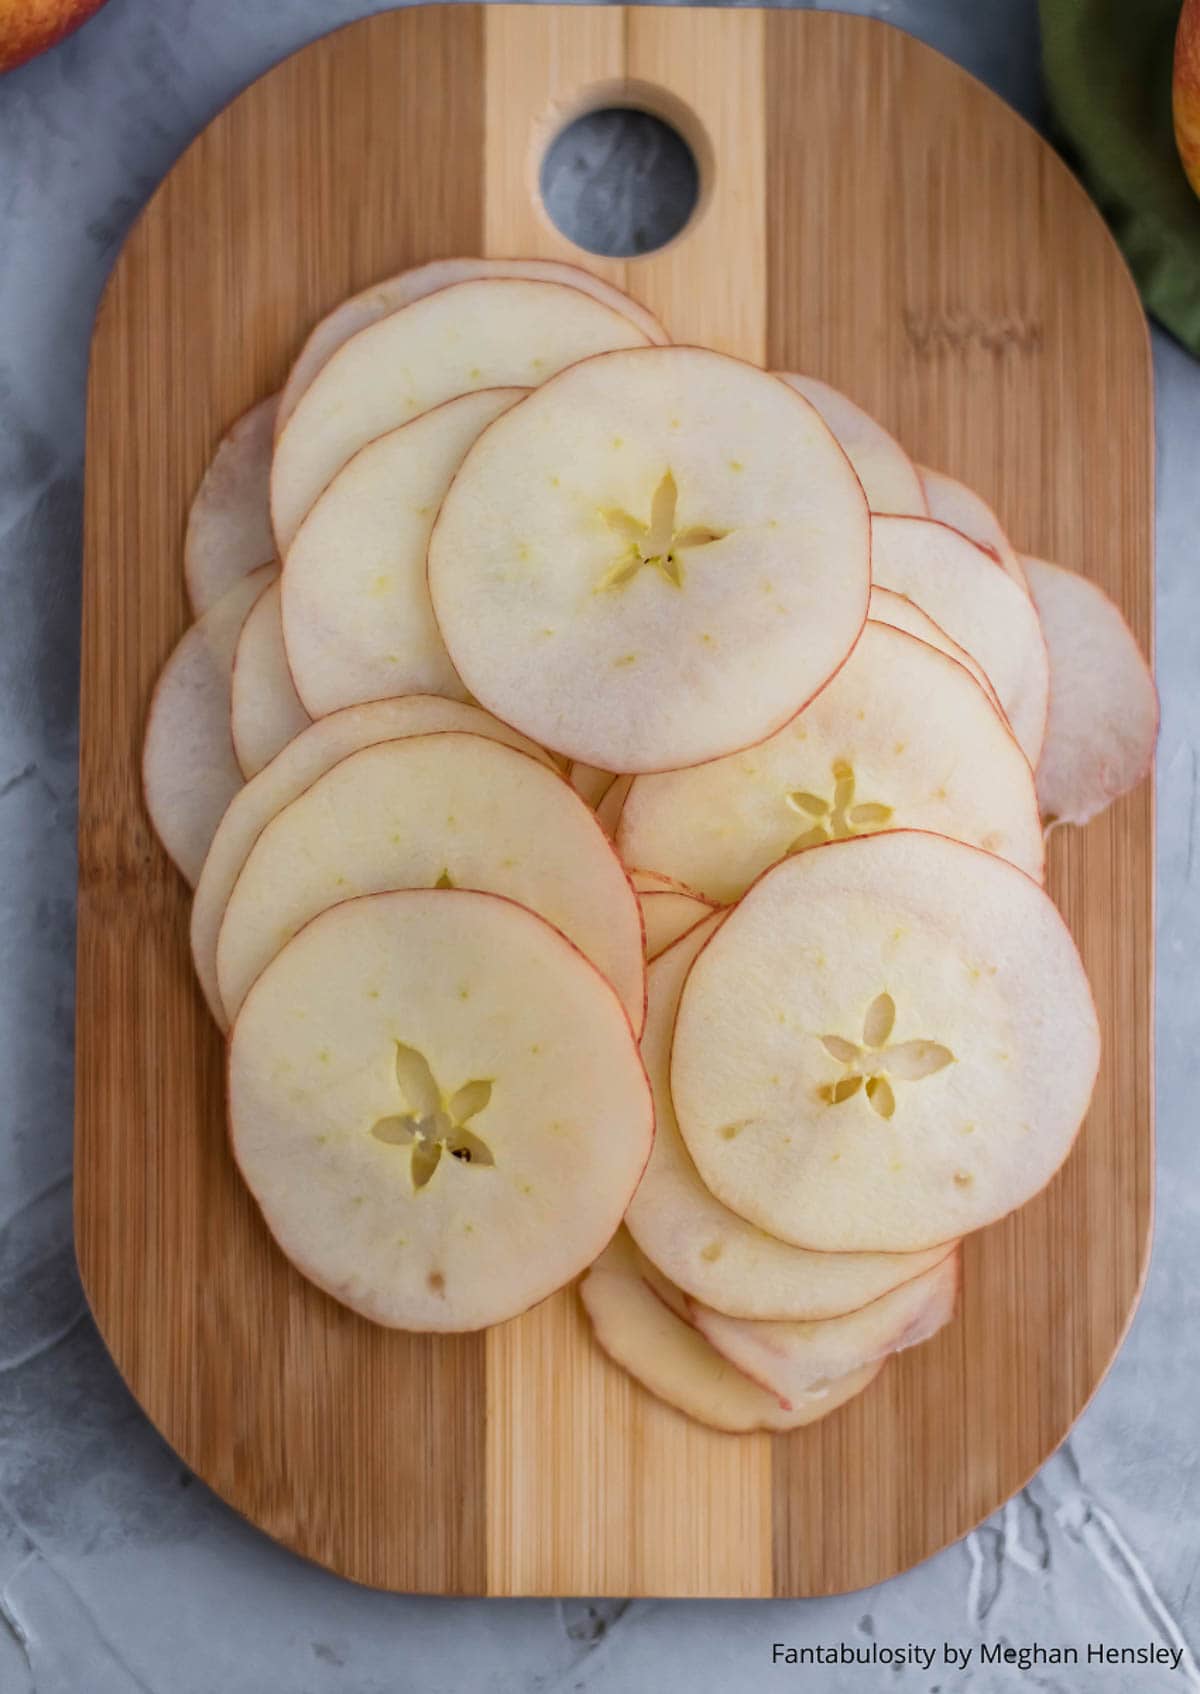
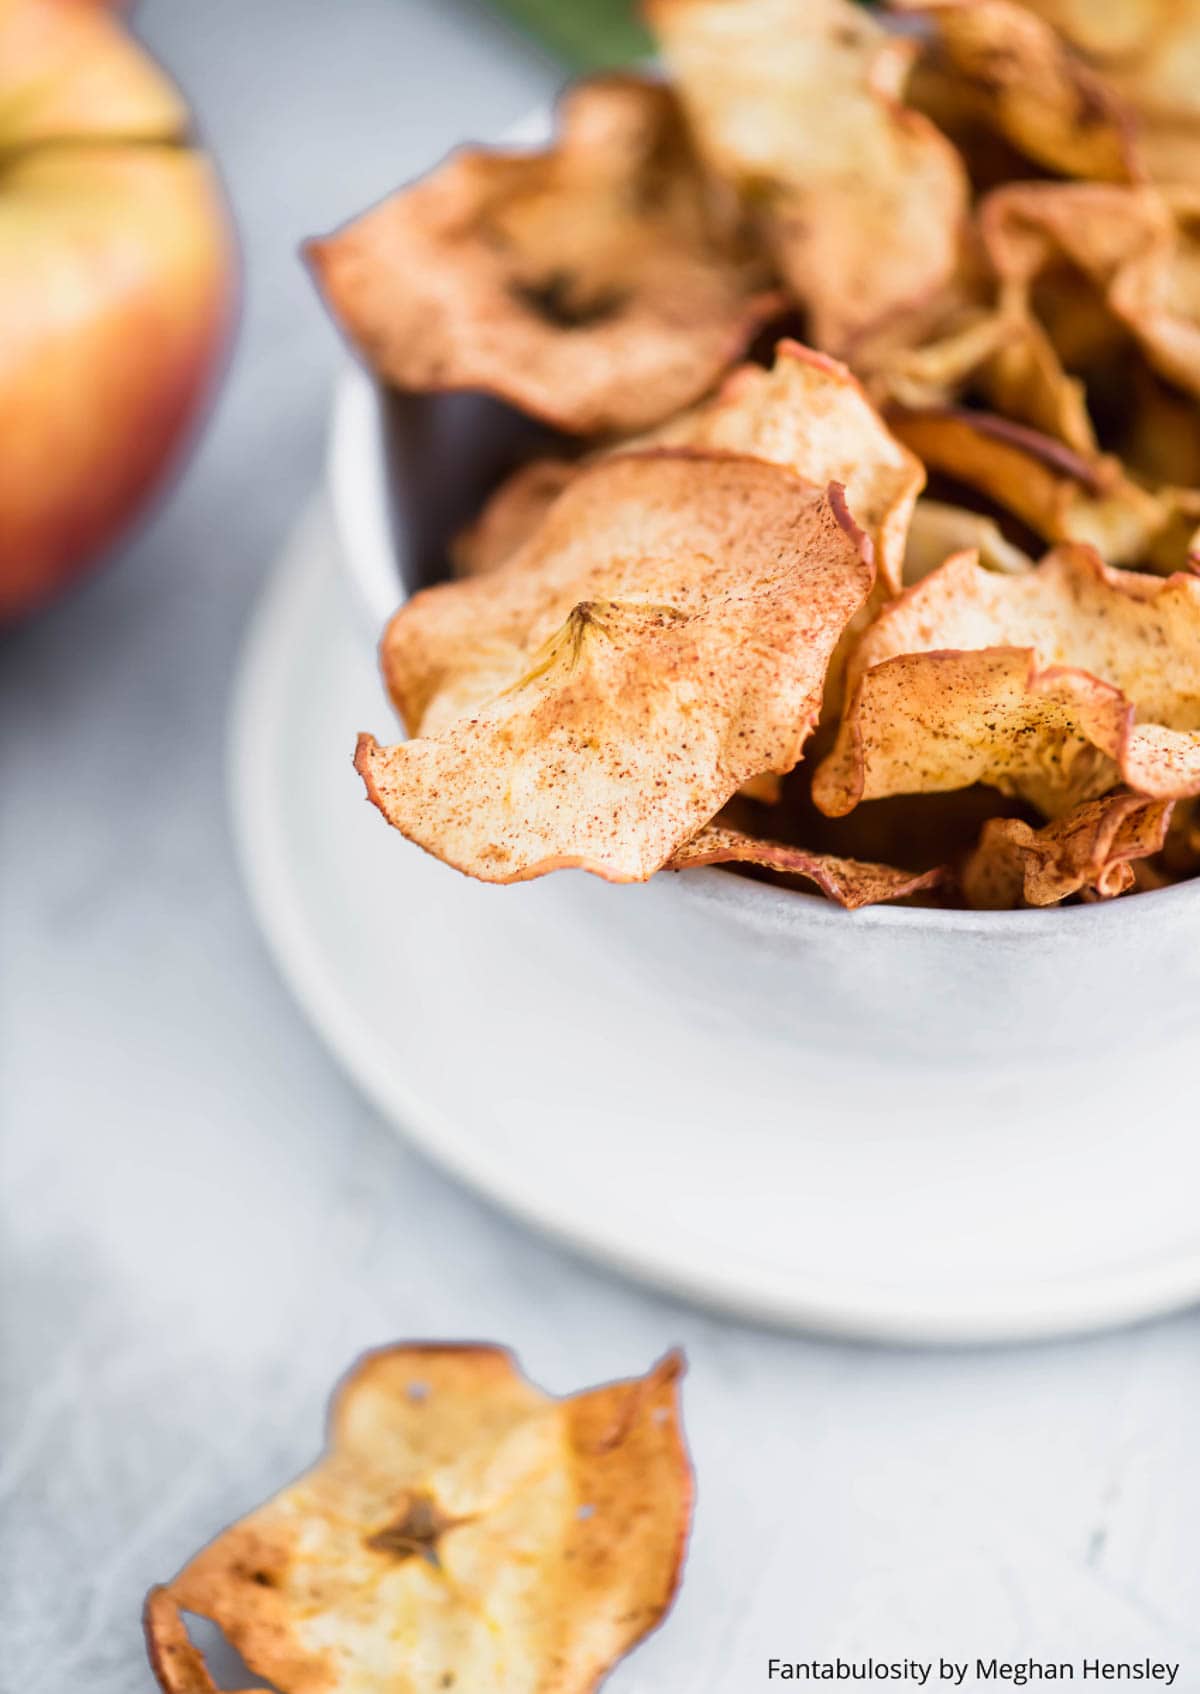
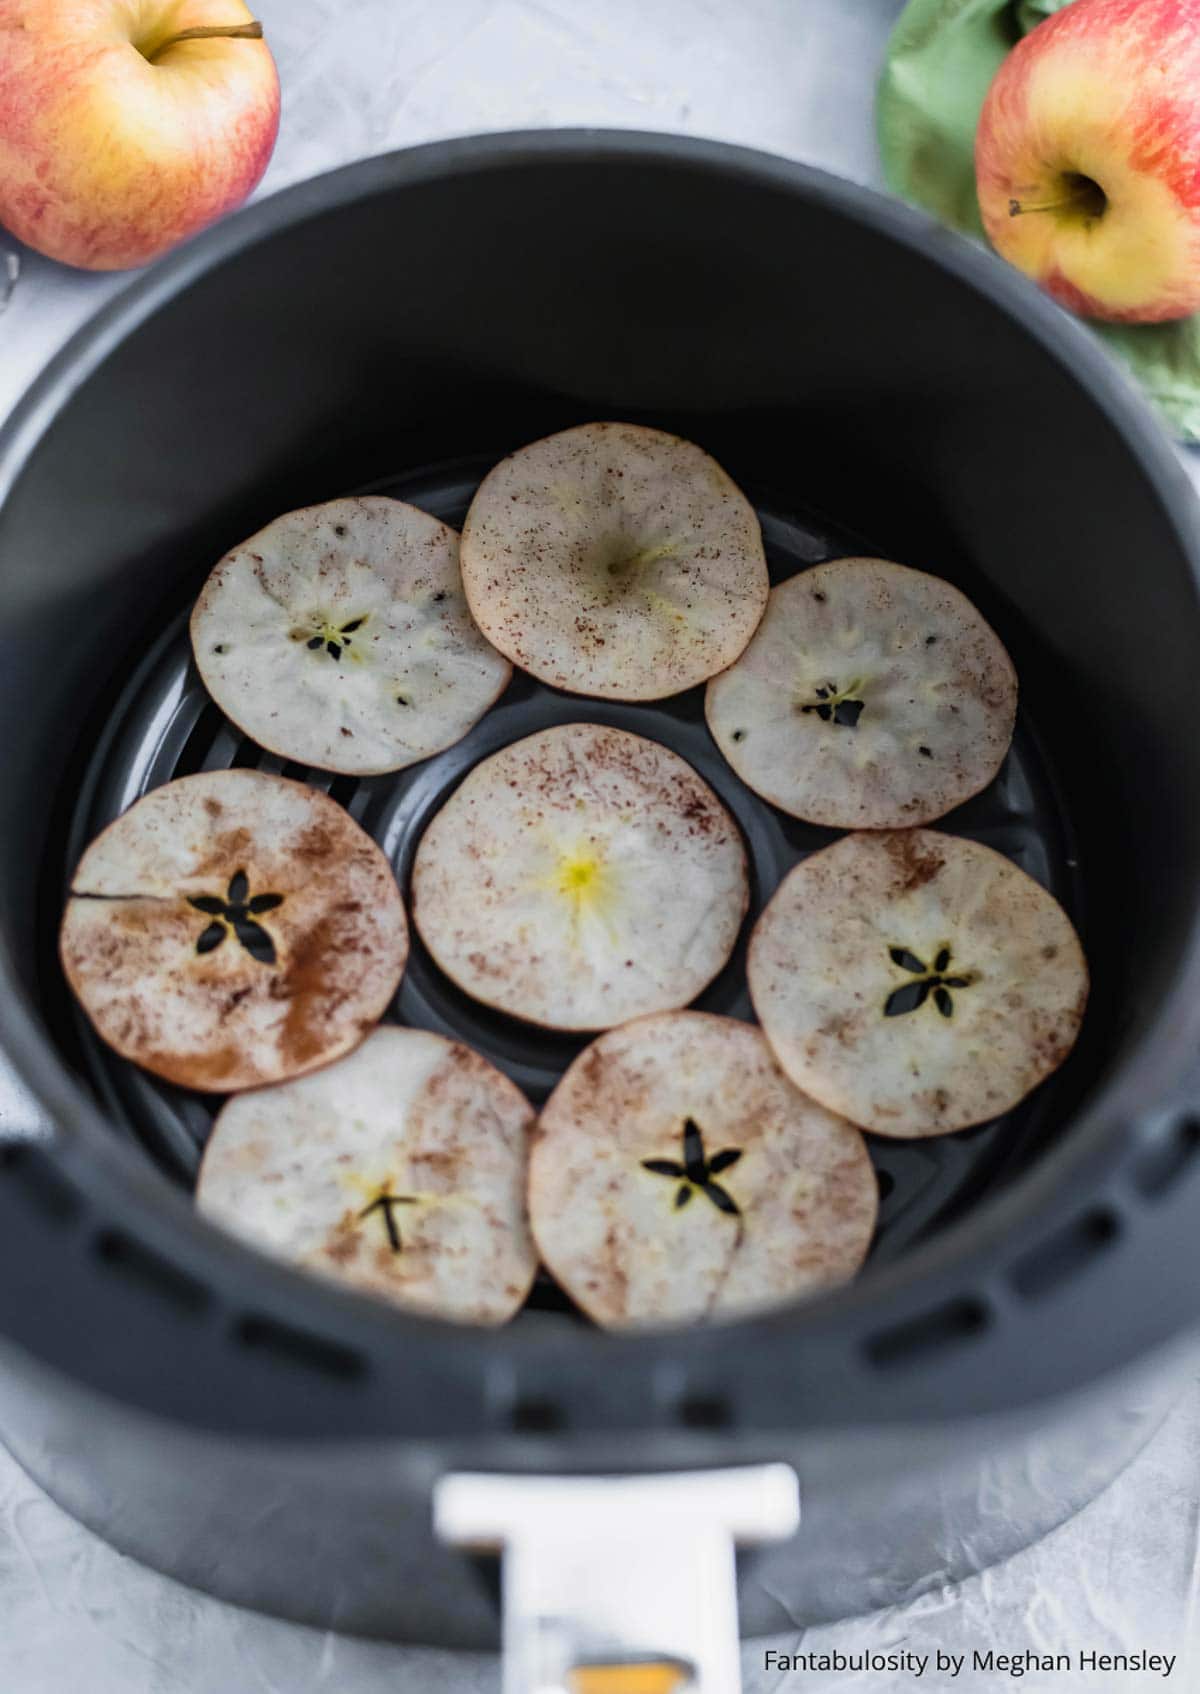
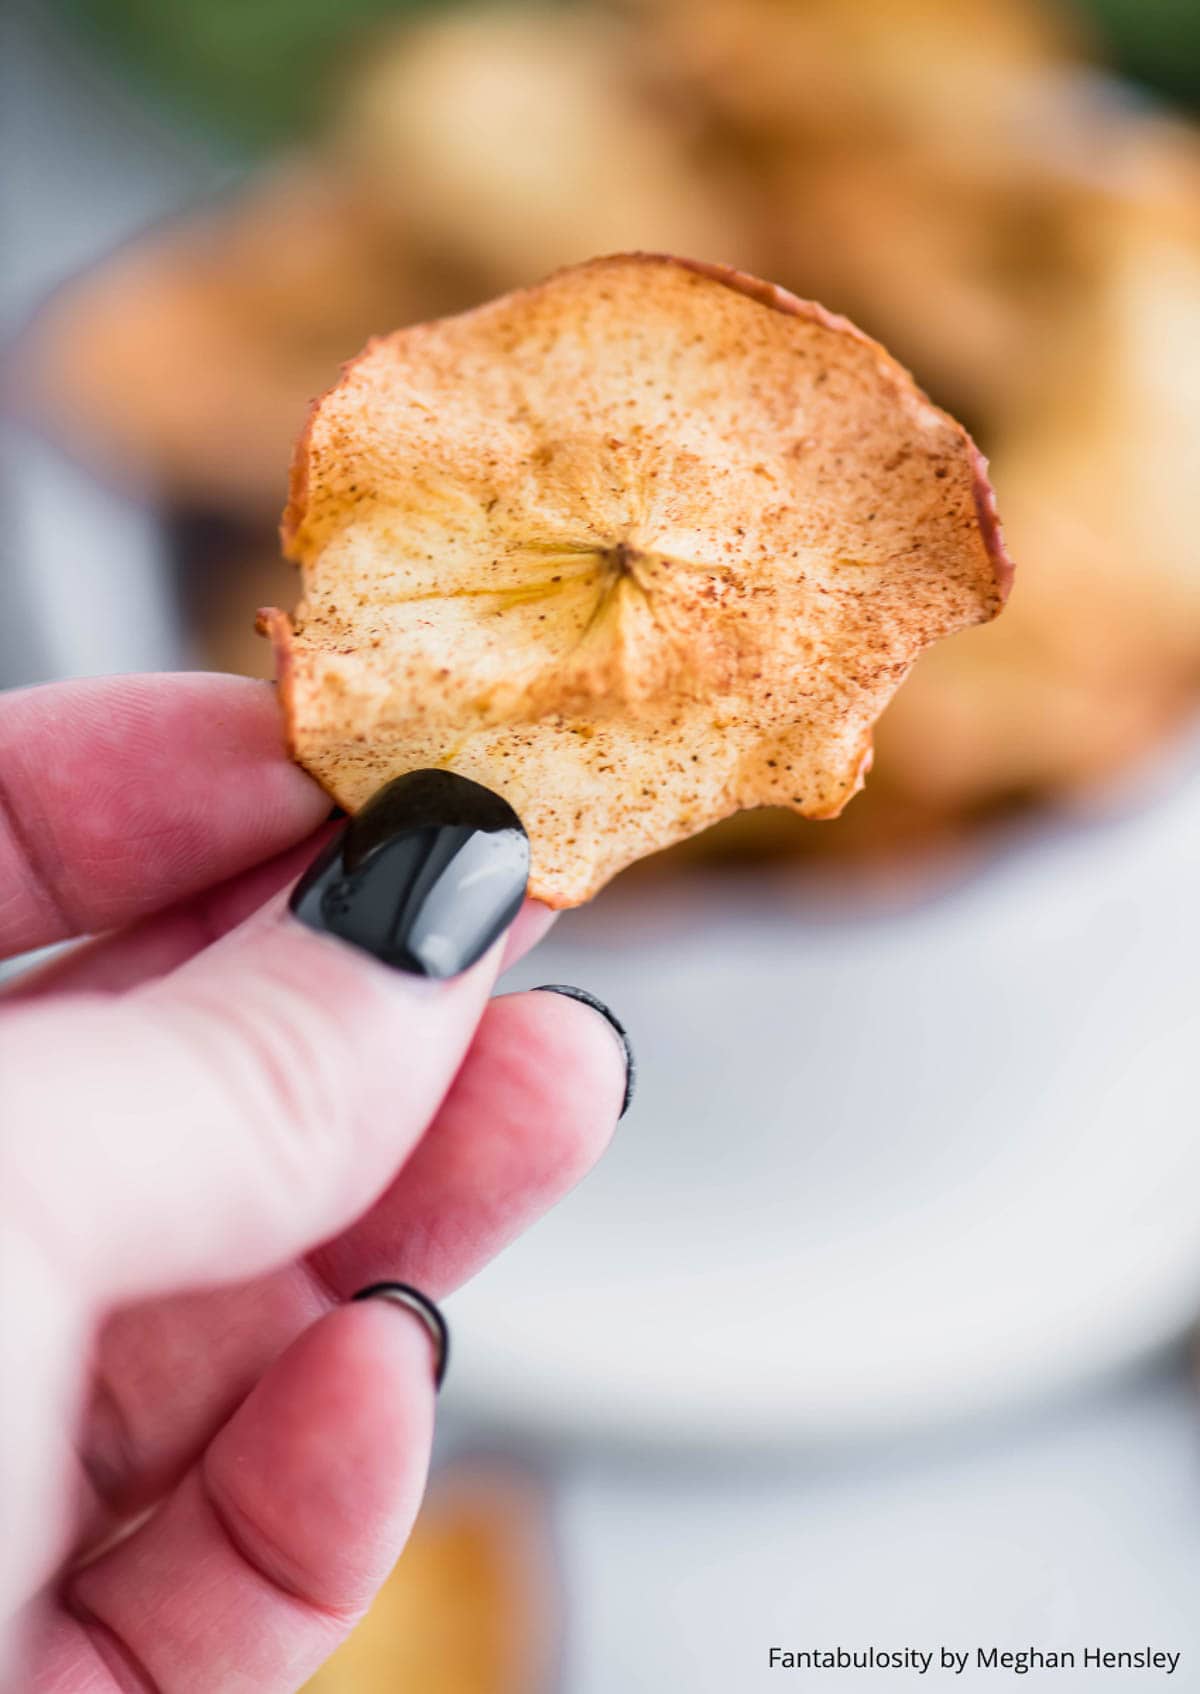
    • Air Fryer Apple Chips
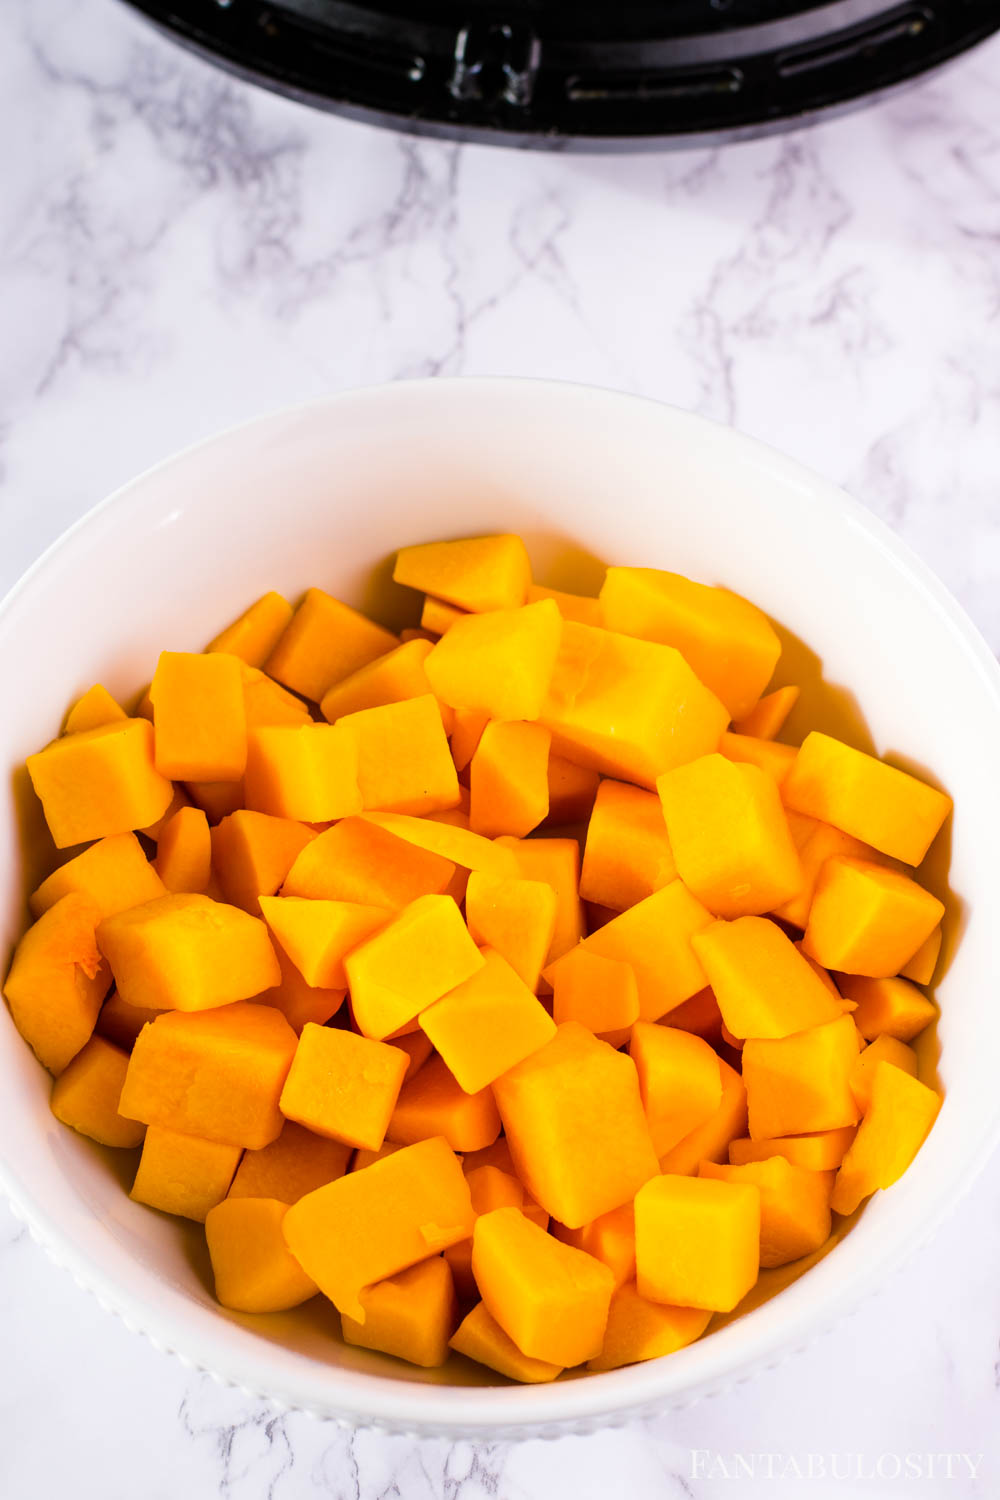
    • Butternut Squash Cooked in the Air Fryer
    • Air Fryer Eggplant Fries
    • Crispy Air Fryer Tofu

    Did you make this? I’d be so grateful if you left a “star” rating below to let me know what you thought! Then, the next time you need a quick and easy recipe, come back to Fantabulosity to browse all of my easy recipes!

    Recipe

    air fryer hash brown patties on white plate with bacon and over easy eggs
    Print Pin
    5 from 4 votes

    Air Fryer Frozen Hash Brown Patties

    How to cook frozen hash brown patties in the air fryer in only 10 minutes, without oil for crispy hash browns for breakfast, quick snack or dinner!
    Course Breakfast
    Cuisine American
    Prep Time 0 minutes minutes
    Cook Time 10 minutes minutes
    Total Time 10 minutes minutes
    Servings 4 servings
    Calories 30kcal
    Author Jessica Burgess

    Equipment

    • air fryer

    Ingredients

    • 4 hash brown patties, frozen or however many can fit in a single layer in the air fryer basket
    • salt if desired

    Instructions

    • Place the frozen hash brown patties in the air fryer basket, in a single layer
    • Cook at 400° for 8-10 minutes or until golden brown and crispy
    • If desired, sprinkle with salt and serve!

    Notes

    • When removing the hash brown patties from the basket, use a large plastic (so it’s less likely to scratch the air fryer basket and lining) spatula to remove one hash brown at a time, to reduce the risk of the hash browns falling apart.
    • After cooked, and removed from the air fryer, place the hash browns on a paper towel-covered plate, to soak up any oil.
    Nutrition

    Serving: 1hash brown | Calories: 30kcal | Carbohydrates: 4g | Protein: 1g | Fat: 2g | Sodium: 45mg | Potassium: 43mg | Fiber: 1g | Calcium: 2mg | Iron: 1mg

    80+ Best Easy Dinners

    March 18, 2021

    Image collage of 80+ easy dinner recipes.

    Here are our best easy dinner recipes from burgers to chicken to soups to salads! Whatever you’re craving you can guarantee it will tasty and easy!

    Need a good dinner recipe that’s easy? What is the best meal to eat for dinner? What should I make for dinner when feeling lazy? Easy dinner recipes for beginners?

    Best dinner recipes image collage.

    Trust me, I know what it’s like to feel like you’re in a rut at dinner time so I’ve combined all of our favorites dinner ideas and you’re sure to find one to help you decide what’s for dinner tonight! Whether it needs to be an easy weeknight dinner for family, healthy dinner recipes, simple dinner recipes, or a comfort food dinner recipe, I’ve got you covered!

    [feast_advanced_jump_to]
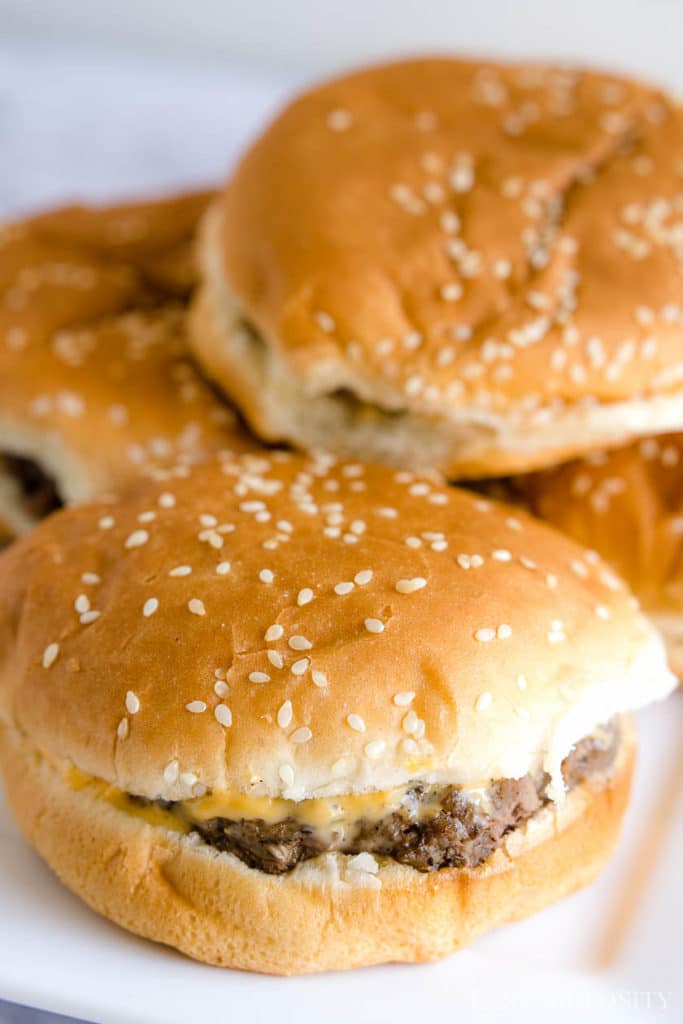
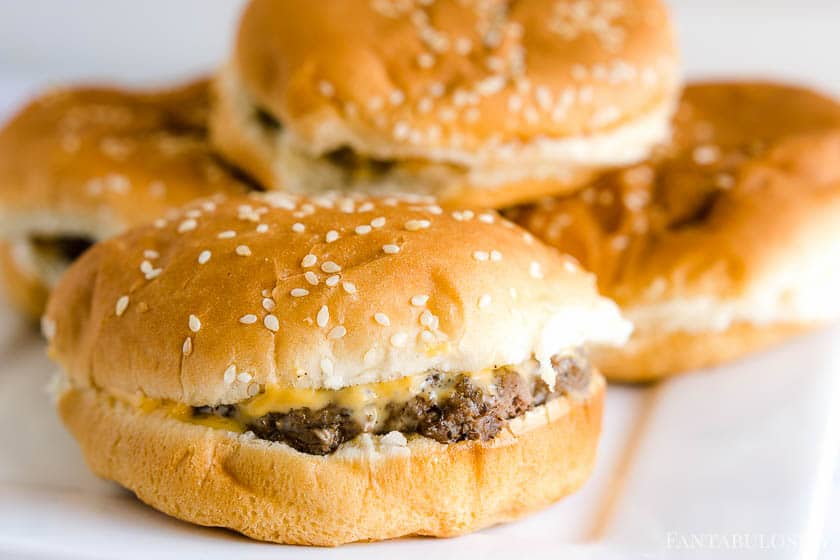
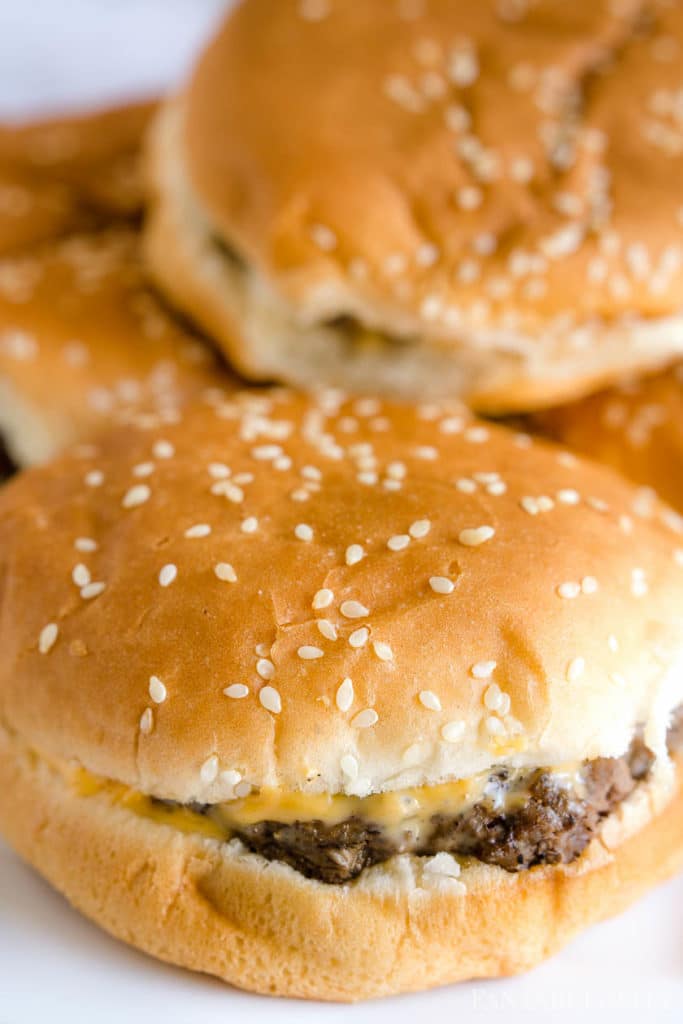
    Cheeseburgers sitting on plate.
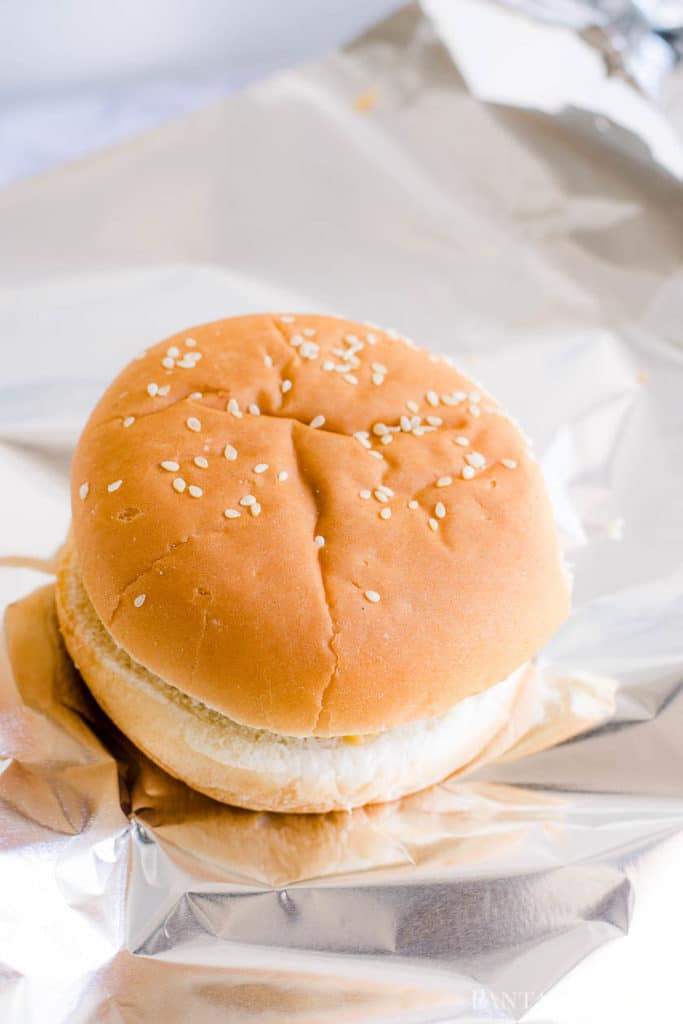
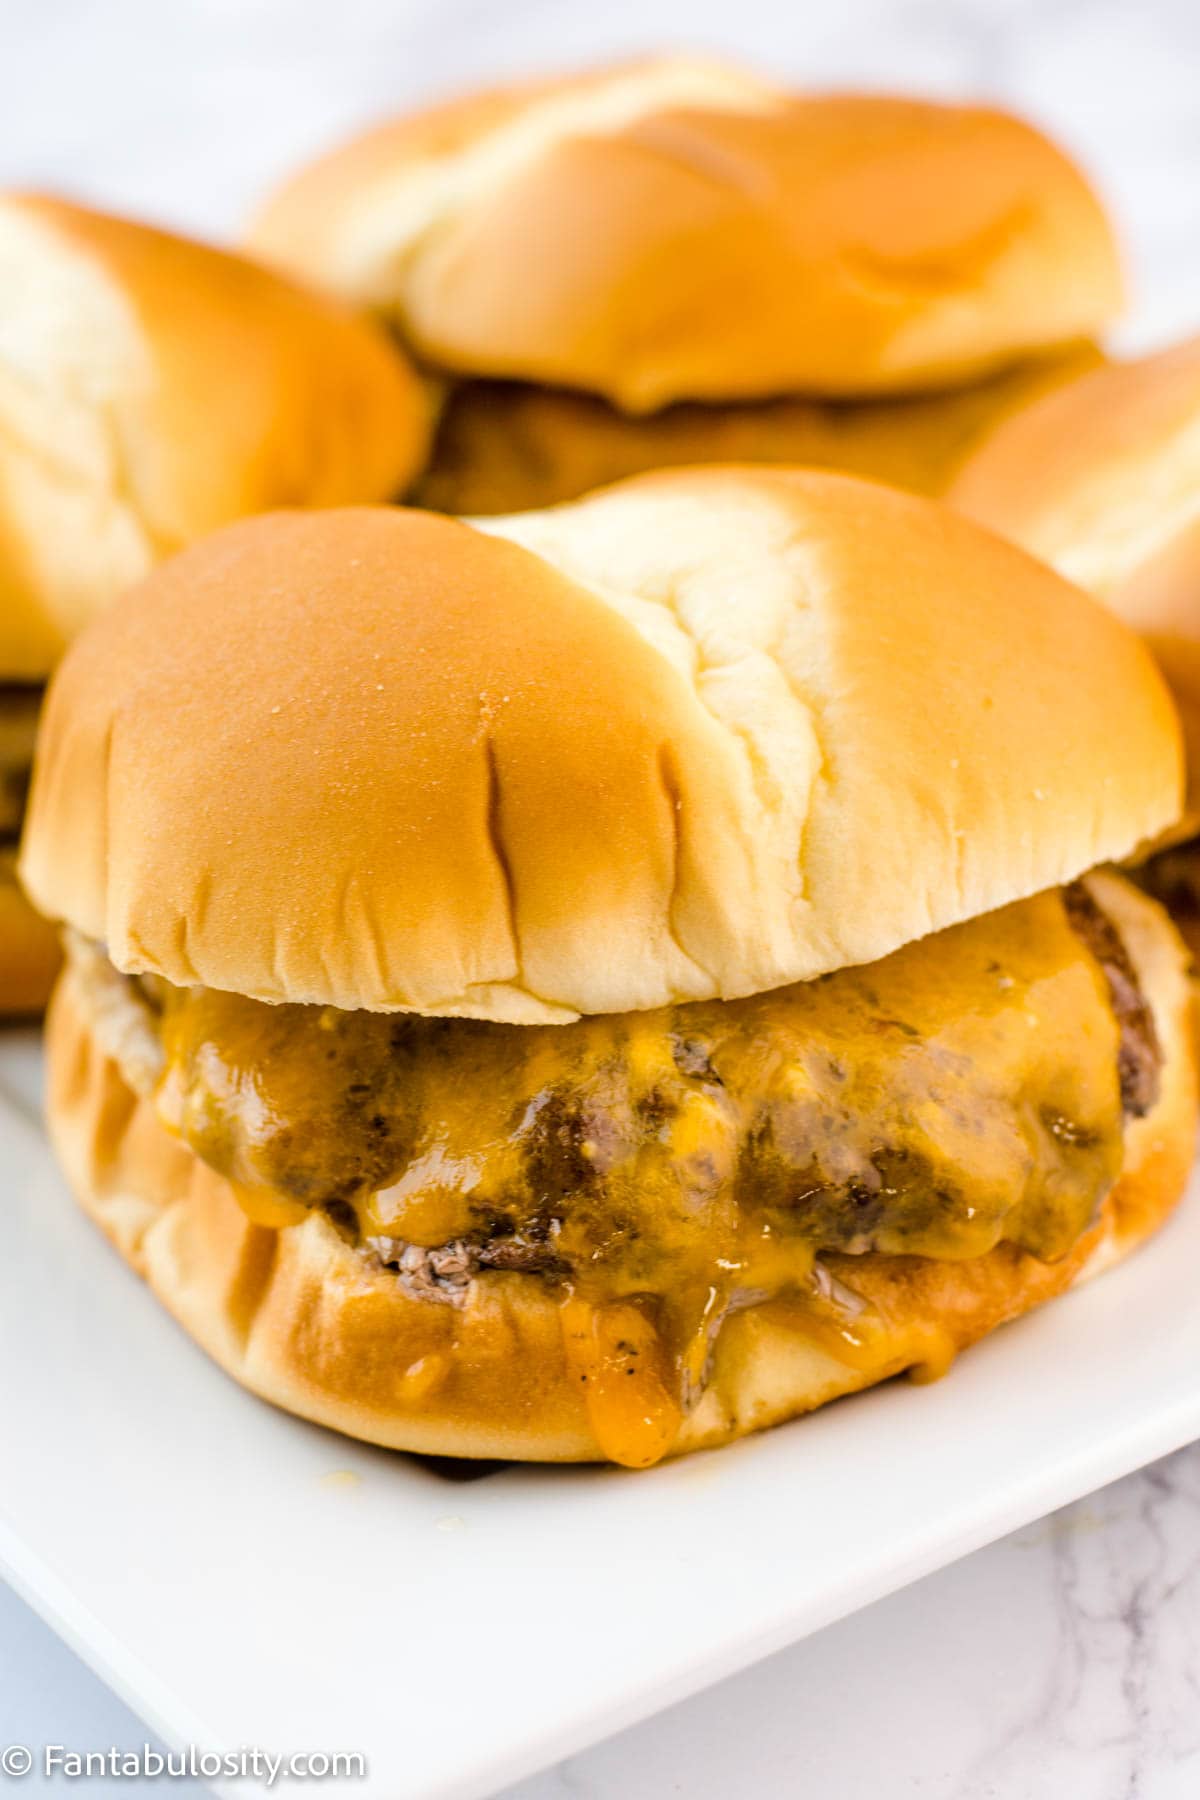
    Hamburgers in the Oven

    Our Popular Easy Dinner Recipes

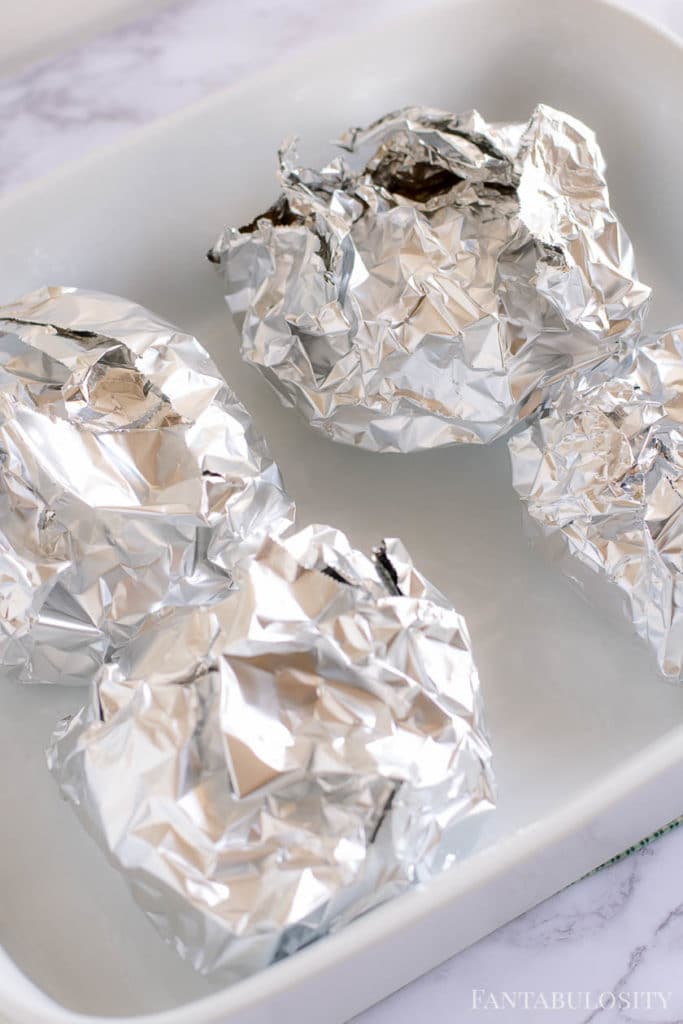
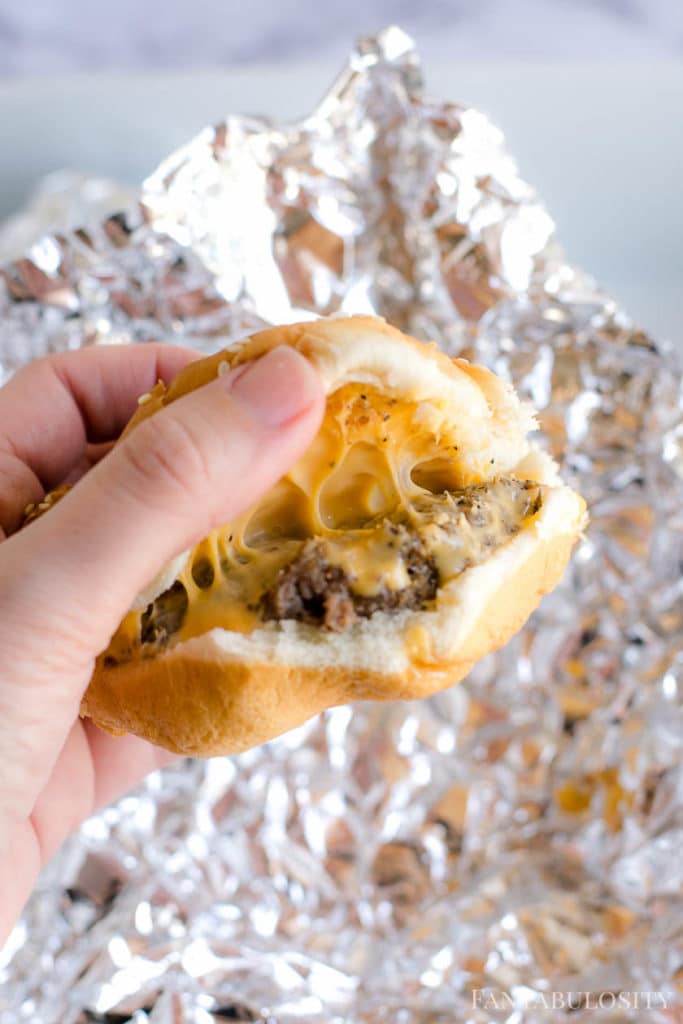
    BEST Burgers in the Oven – With a TRICK!
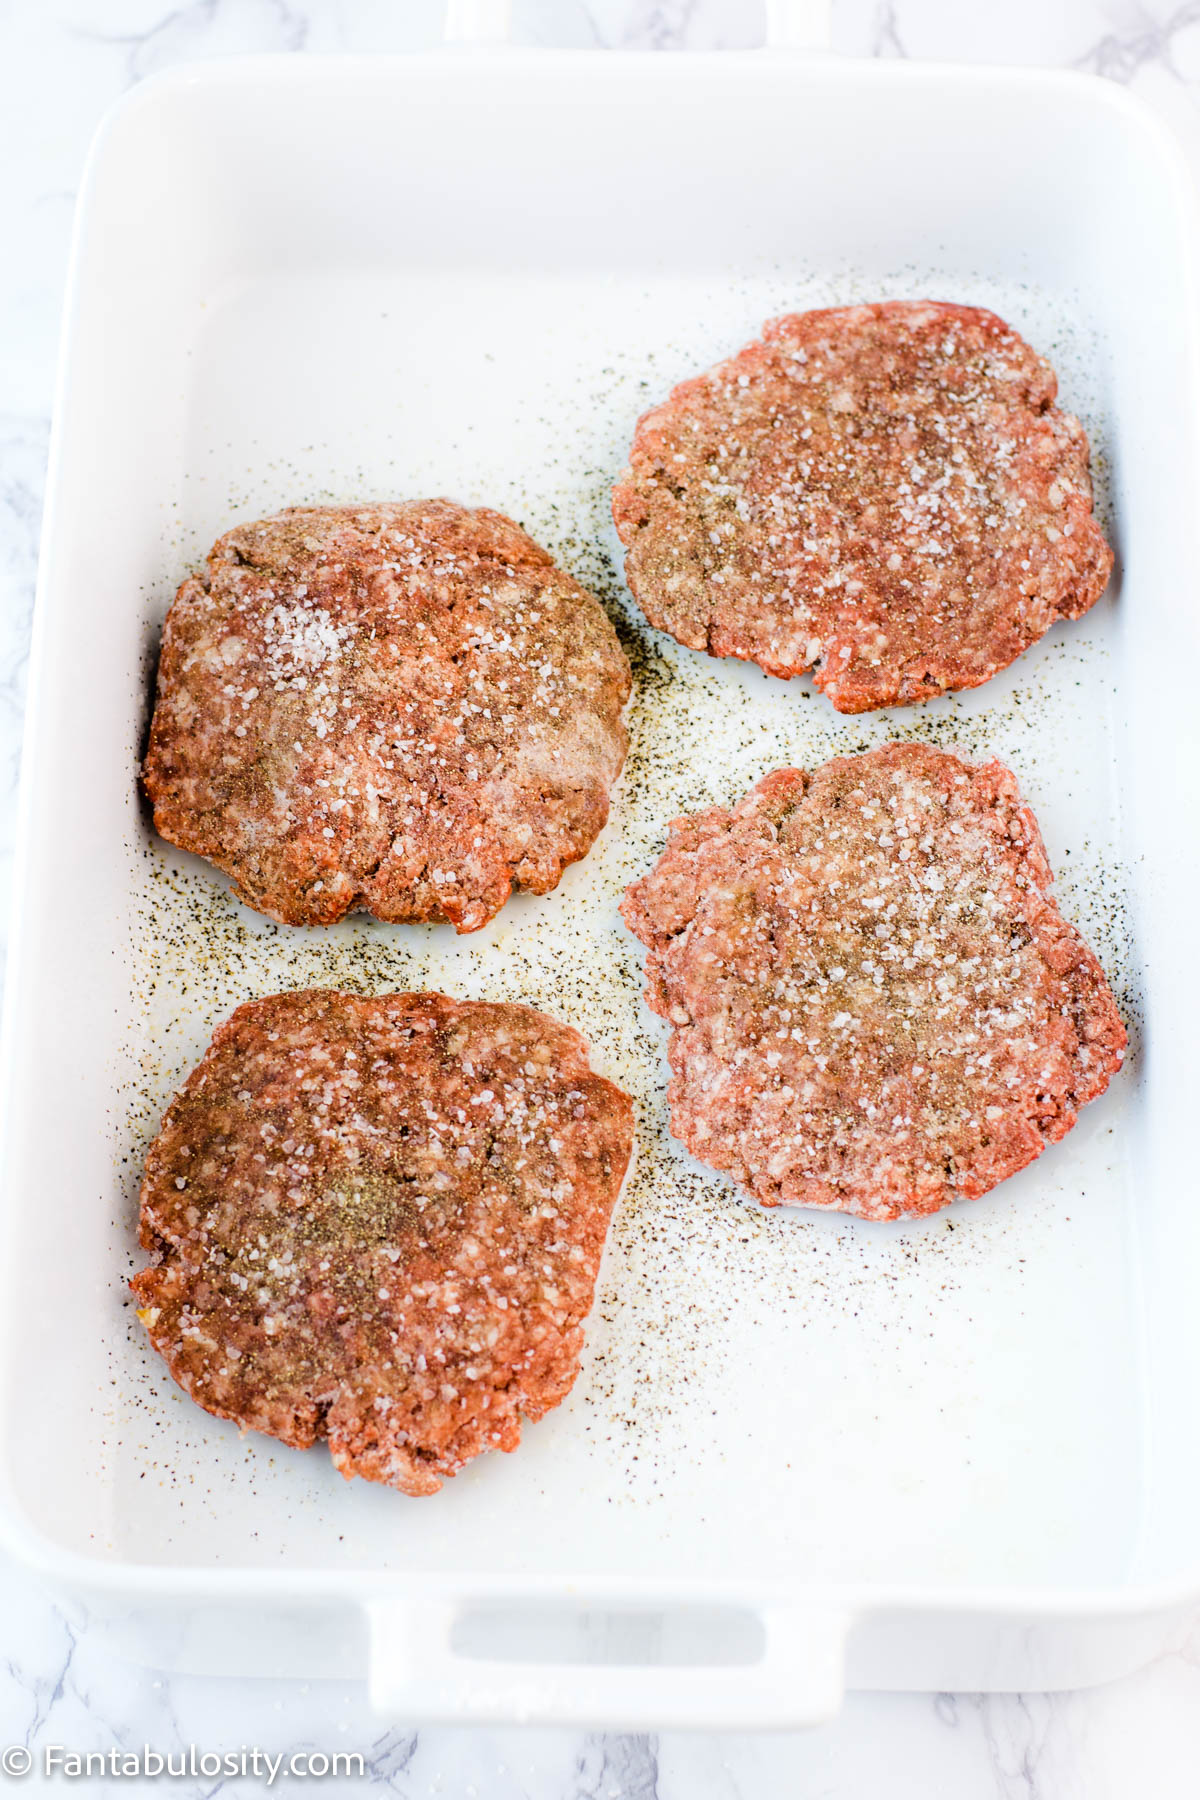
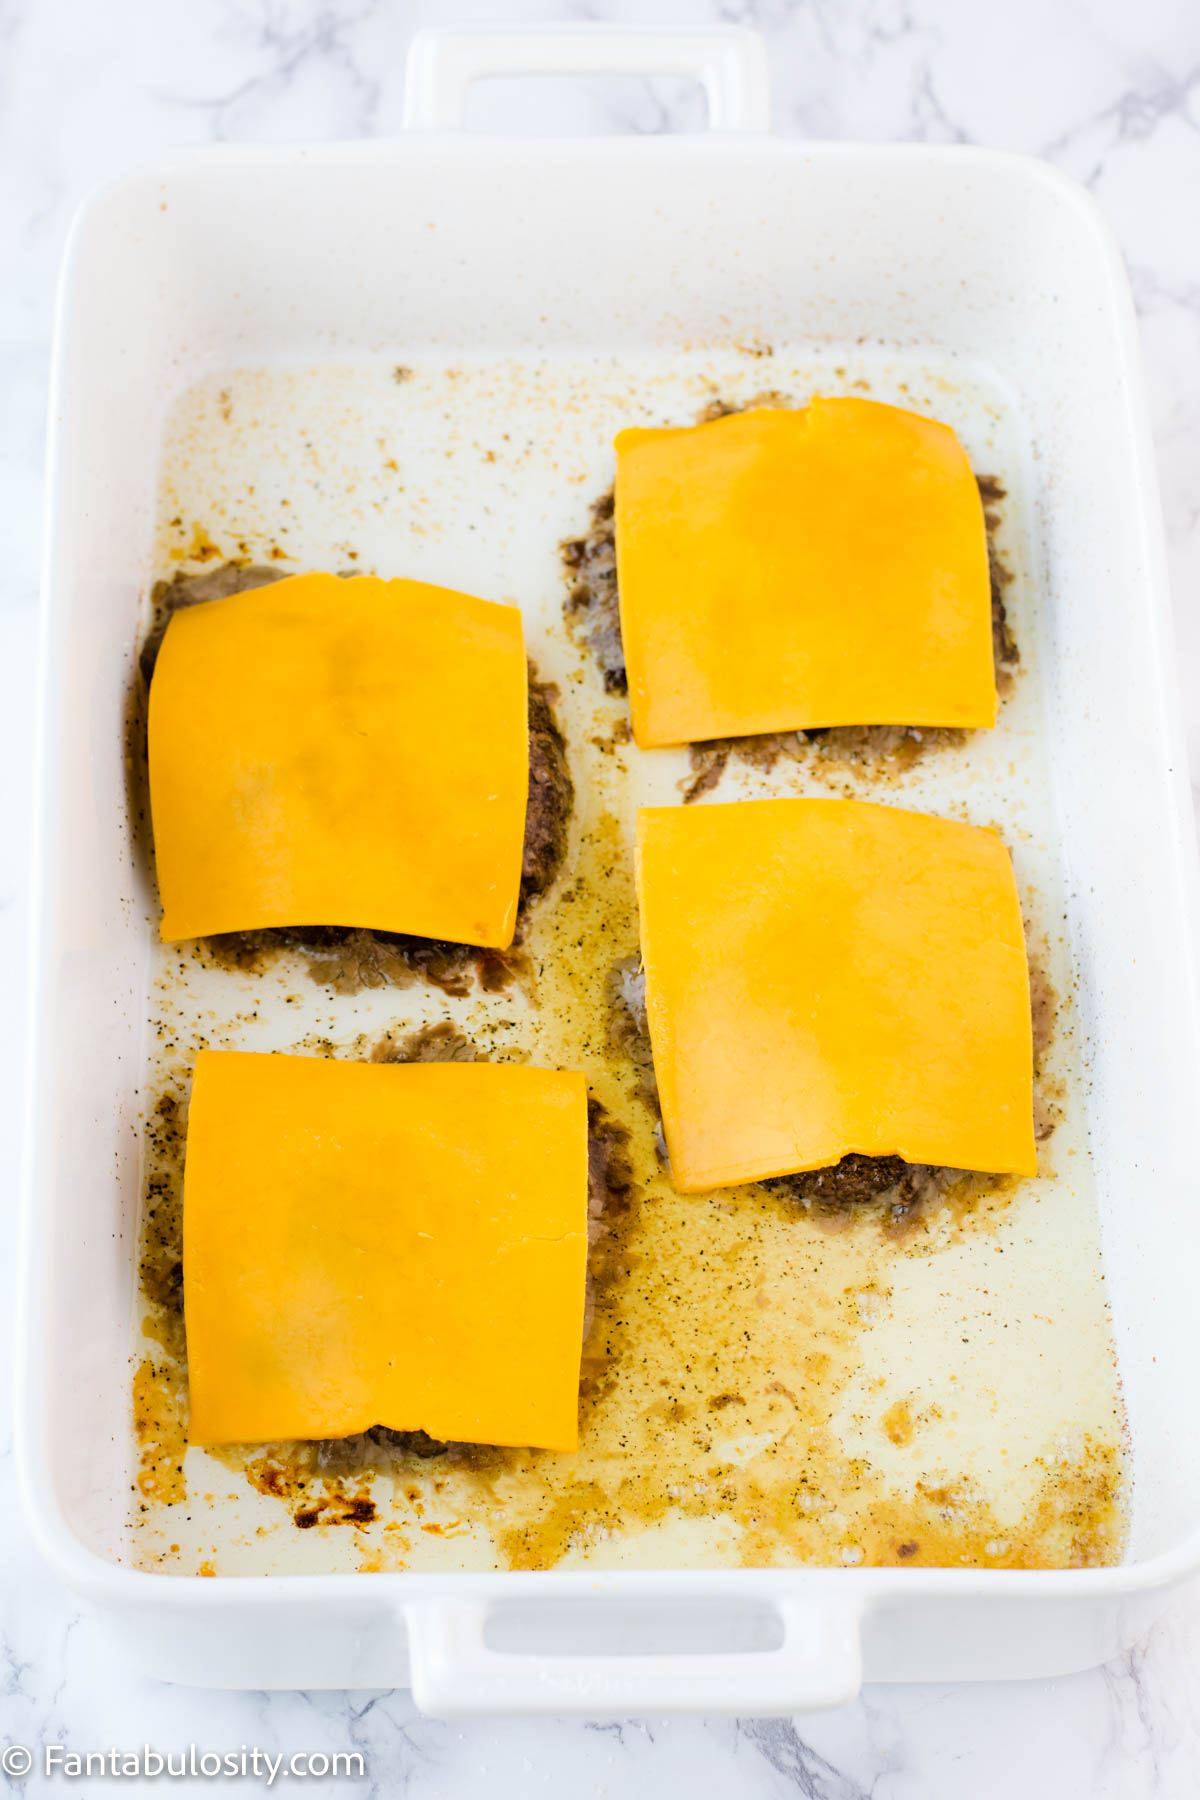
    The ORIGINAL! Cooking burgers in the oven may leave you never wanting to make them any other way! This recipe with the "melt-in-your-mouth" trick that makes all the difference!
    See this burger recipe
    Burger baked in the oven, steamed in aluminum foil, and placed on white plate.
    • Baked Pork Steaks – If you’re from the Midwest you may know exactly what pork steaks are but if not, they’re a steak cut from pork shoulder that you’ll never forget!
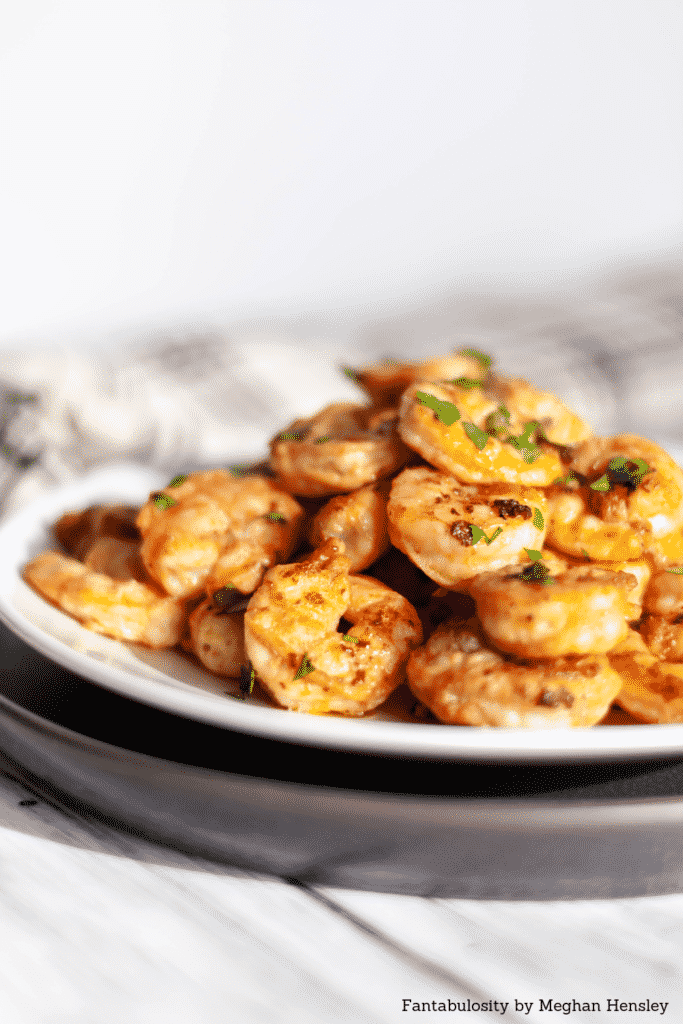
    • Fried Shrimp Recipe – Better than frozen and easier than you may think, this fried shrimp is an easy seafood dinner idea at home!
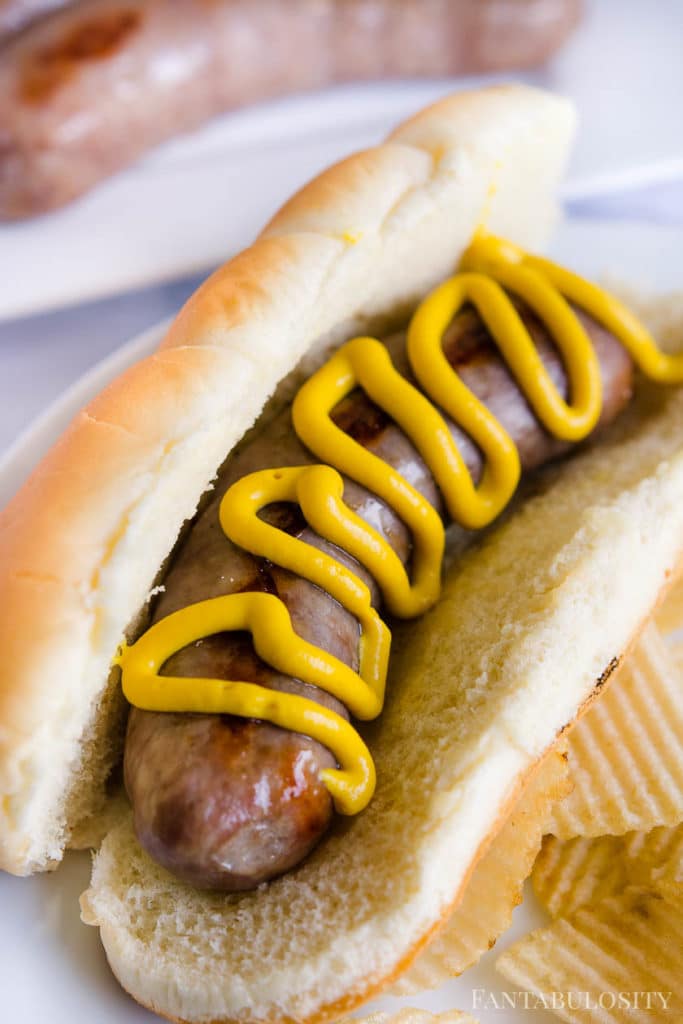
    Brats cooked in the Oven and placed on a bun with mustard
    Bratwurst in the Oven

    Oven-Baked Dinners

    • Brats in the Oven – (Or Baked Italian Sausages) Quite possibly one of the easiest dinners there is. Cook the bratwurst in a baking dish and serve on a bun! Kids and adults all over will be fans of topping their brats with their favorite toppings!
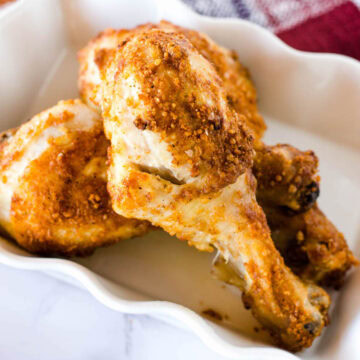
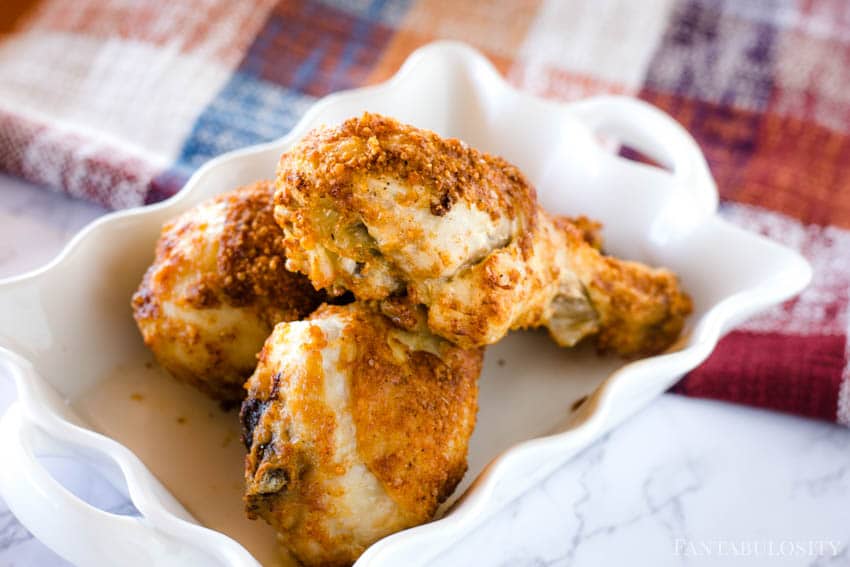
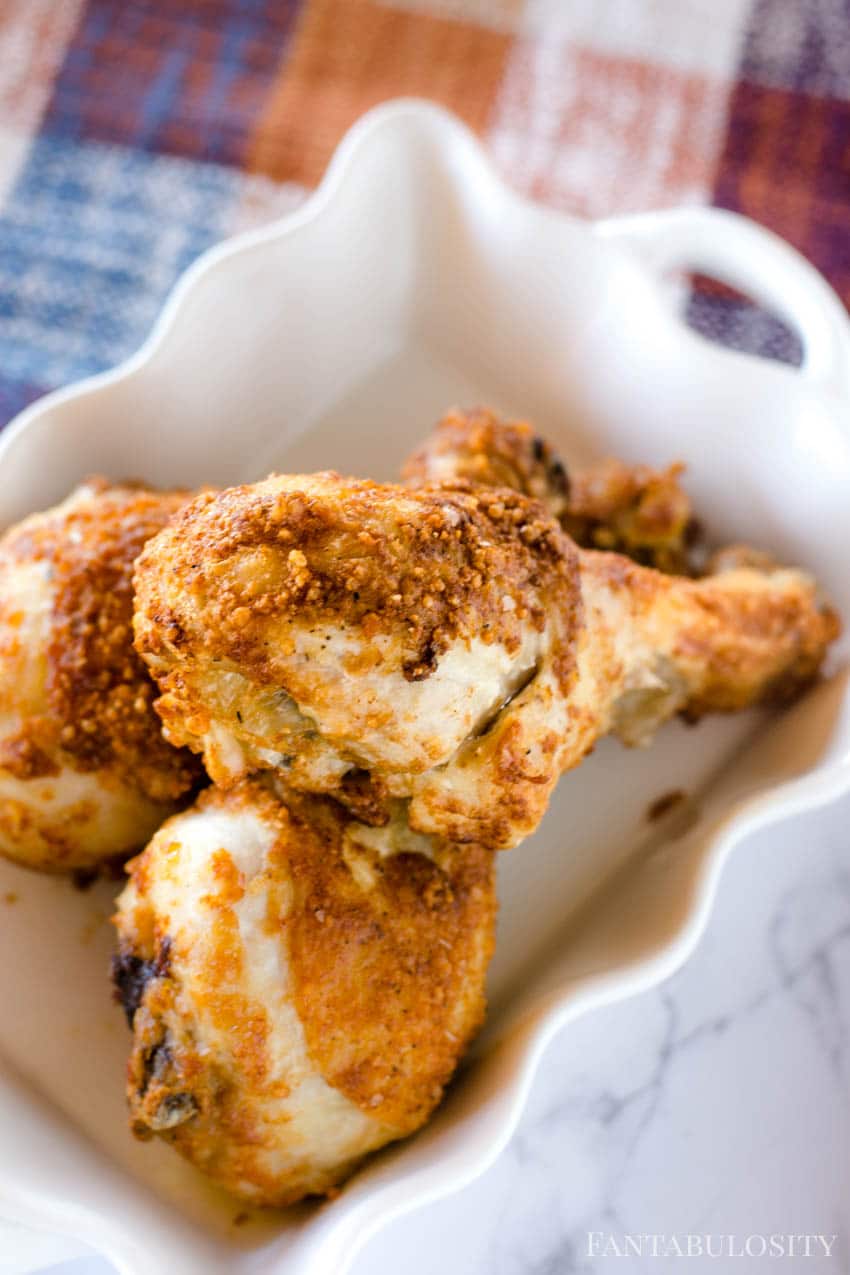
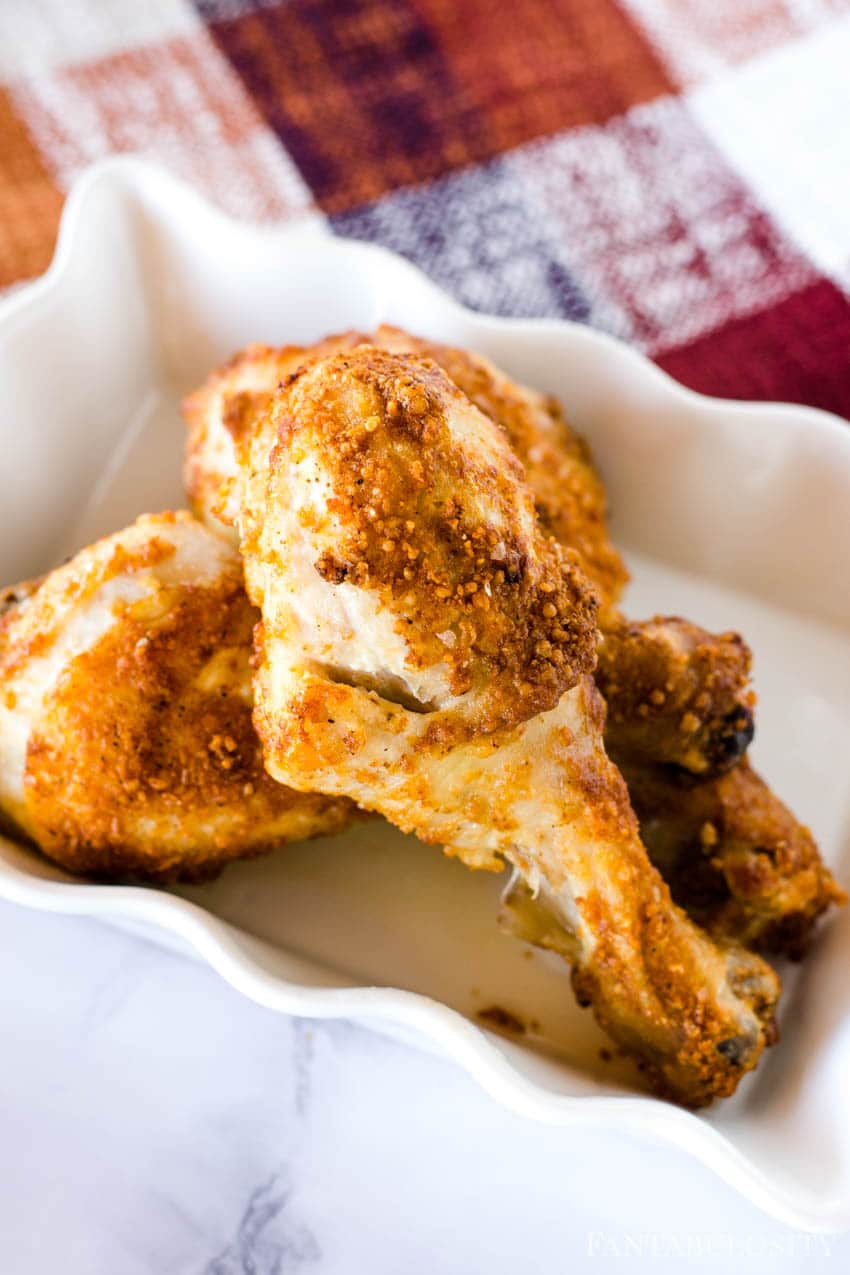
    • Baked Drumsticks in the Oven – With a delicious crispy skin, only using butter, parmesan cheese, garlic and salt and pepper, it’s an easy family favorite!
    • Roasted Pork Tenderloin – Pork tenderloin is such a delicious cut of meat and using a few, common ingredients, this recipe is a soon-to-be a new favorite!
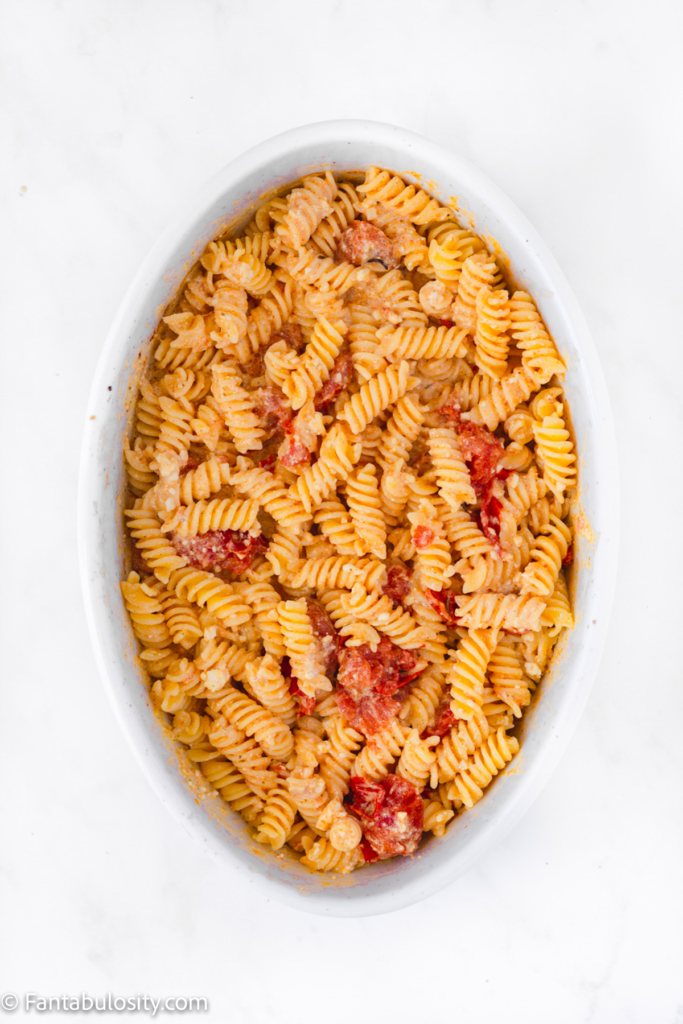
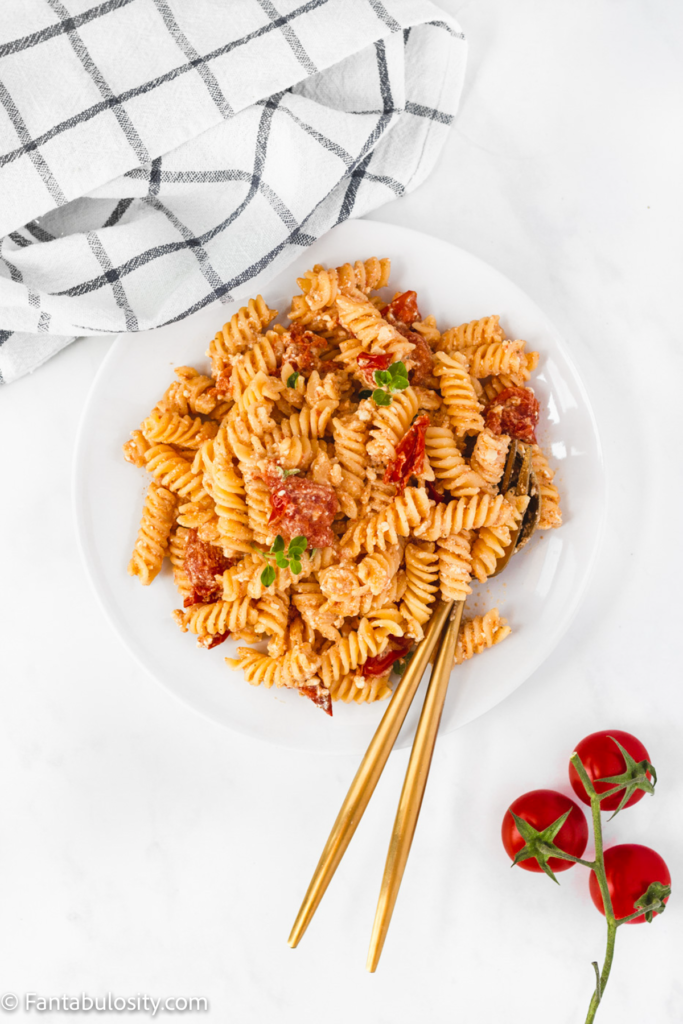
    • Baked Feta Pasta – Known for going viral on TikTok, this pasta dinner idea is easy and it creates in own sauce in one dish!
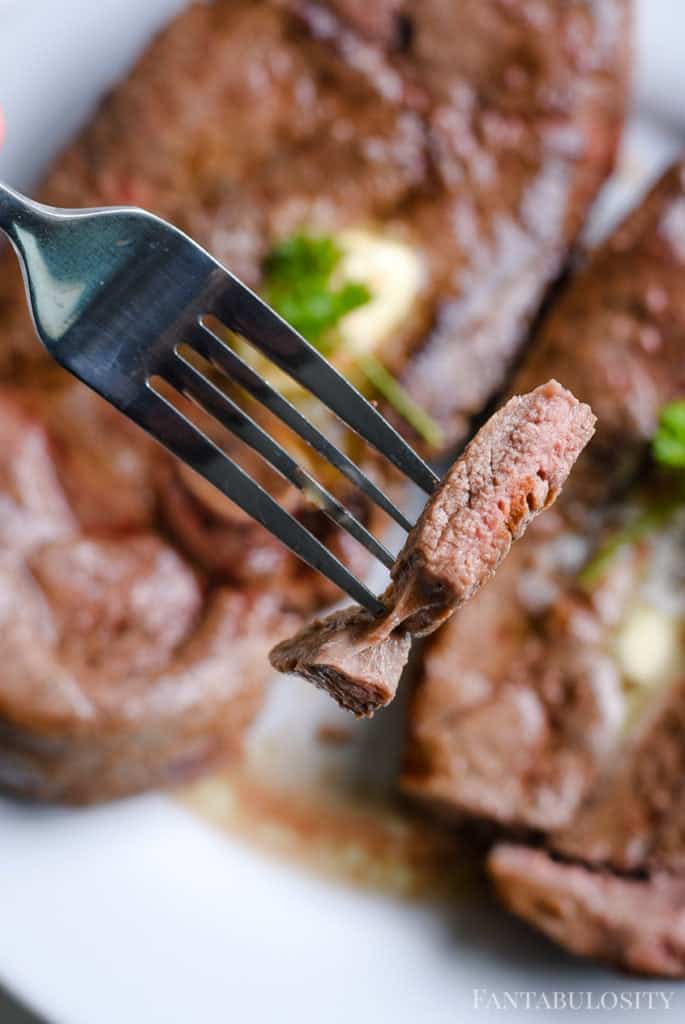
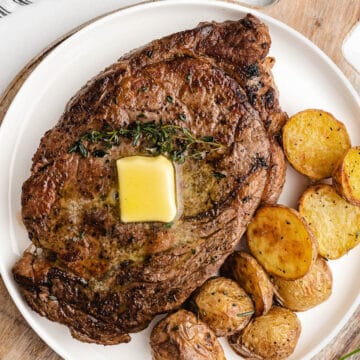
    • Steak in the Oven – Cooking steak like you can get in a restaurant can seem difficult but after trying this easy recipe, you’ll soon prefer cooking your own steak at home!
    • Baked Turkey Burgers – When it’s too cold out to grill, baking lean turkey burgers in the oven is the perfect alternative!
    • Meatball Stuffed Peppers – Talk about EASY! Using frozen meatballs, simply stuff bell peppers with meatballs, rice and cheese to create a delicious twist on stuffed peppers.
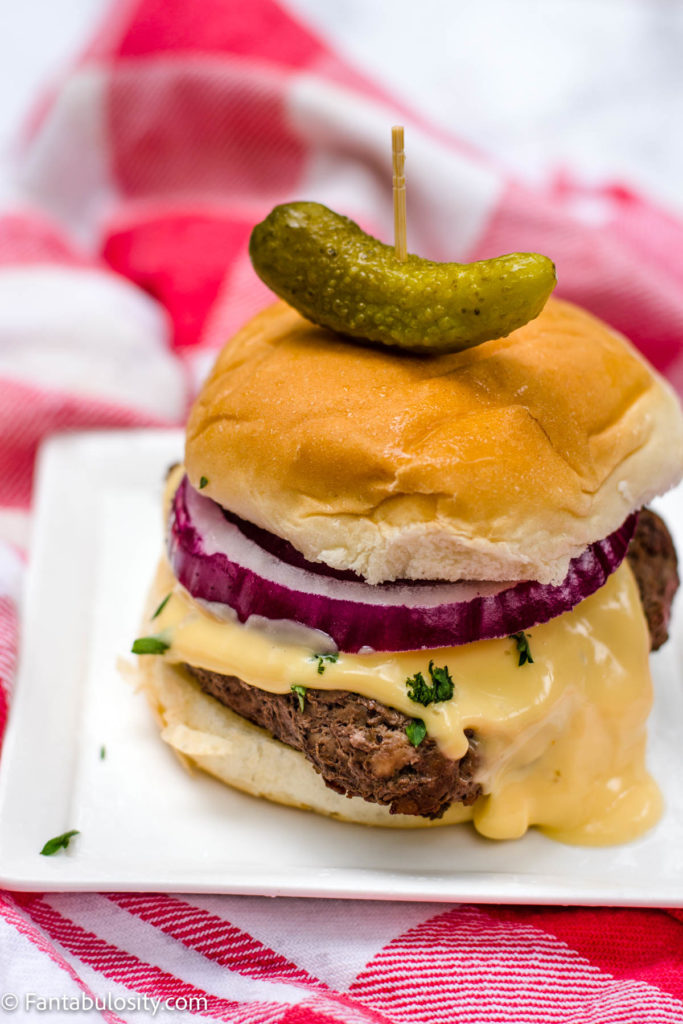
    Burger with nacho cheese, onion and pickle on bun
    Burgers Cooked on the Stove

    Stove Top Dinners

    When you need a quick weeknight meal, or in the middle of summer, sometimes it’s easier to quickly cook something on the stovetop (without using an oven) and be done! Here are our favorite, cheap and easy dinners cooked on the stove!

    • Burgers Cooked on the Stove – Although we love baked burgers, sometimes cooking hamburgers on the stove is much nicer than heating up the kitchen with the oven! This is a quick and easy pan-fried burger with fun topping ideas!
    • Chorizo Gravy (and Biscuits) – Who loves breakfast for dinner!? We do! Make this chorizo gravy and serve it up with frozen biscuits cooked in the air fryer to keep things super easy!
    • Crispy Chicken Burgers (Zinger Burgers) – With that crispy breading on that juicy chicken breast, you’ll wonder why you ever ordered these as fast food!
    • Beef Stroganoff Recipe – This creamy, old-fashioned comfort food dish only takes 30 minutes to make!
    Grilled Shrimp on a white plate
    Grilled Shrimp

    Easy Healthy Dinners

    Looking to incorporate a few more healthy recipes in to your dinner routine? They’re not only healthy but absolutely delicious!

    • Grilled Shrimp – Use this easy marinade recipe to grill shrimp for a healthy, easy dinner recipe that the whole family will love.
    • Crispy Air Fryer Tofu – There’s a secret to making healthy crispy tofu, and this is it!
    • Low Carb Parmesan Chicken Tenders – whether doing Keto or sticking to a low carb diet, almond flour comes to the rescue when craving fried chicken strips.
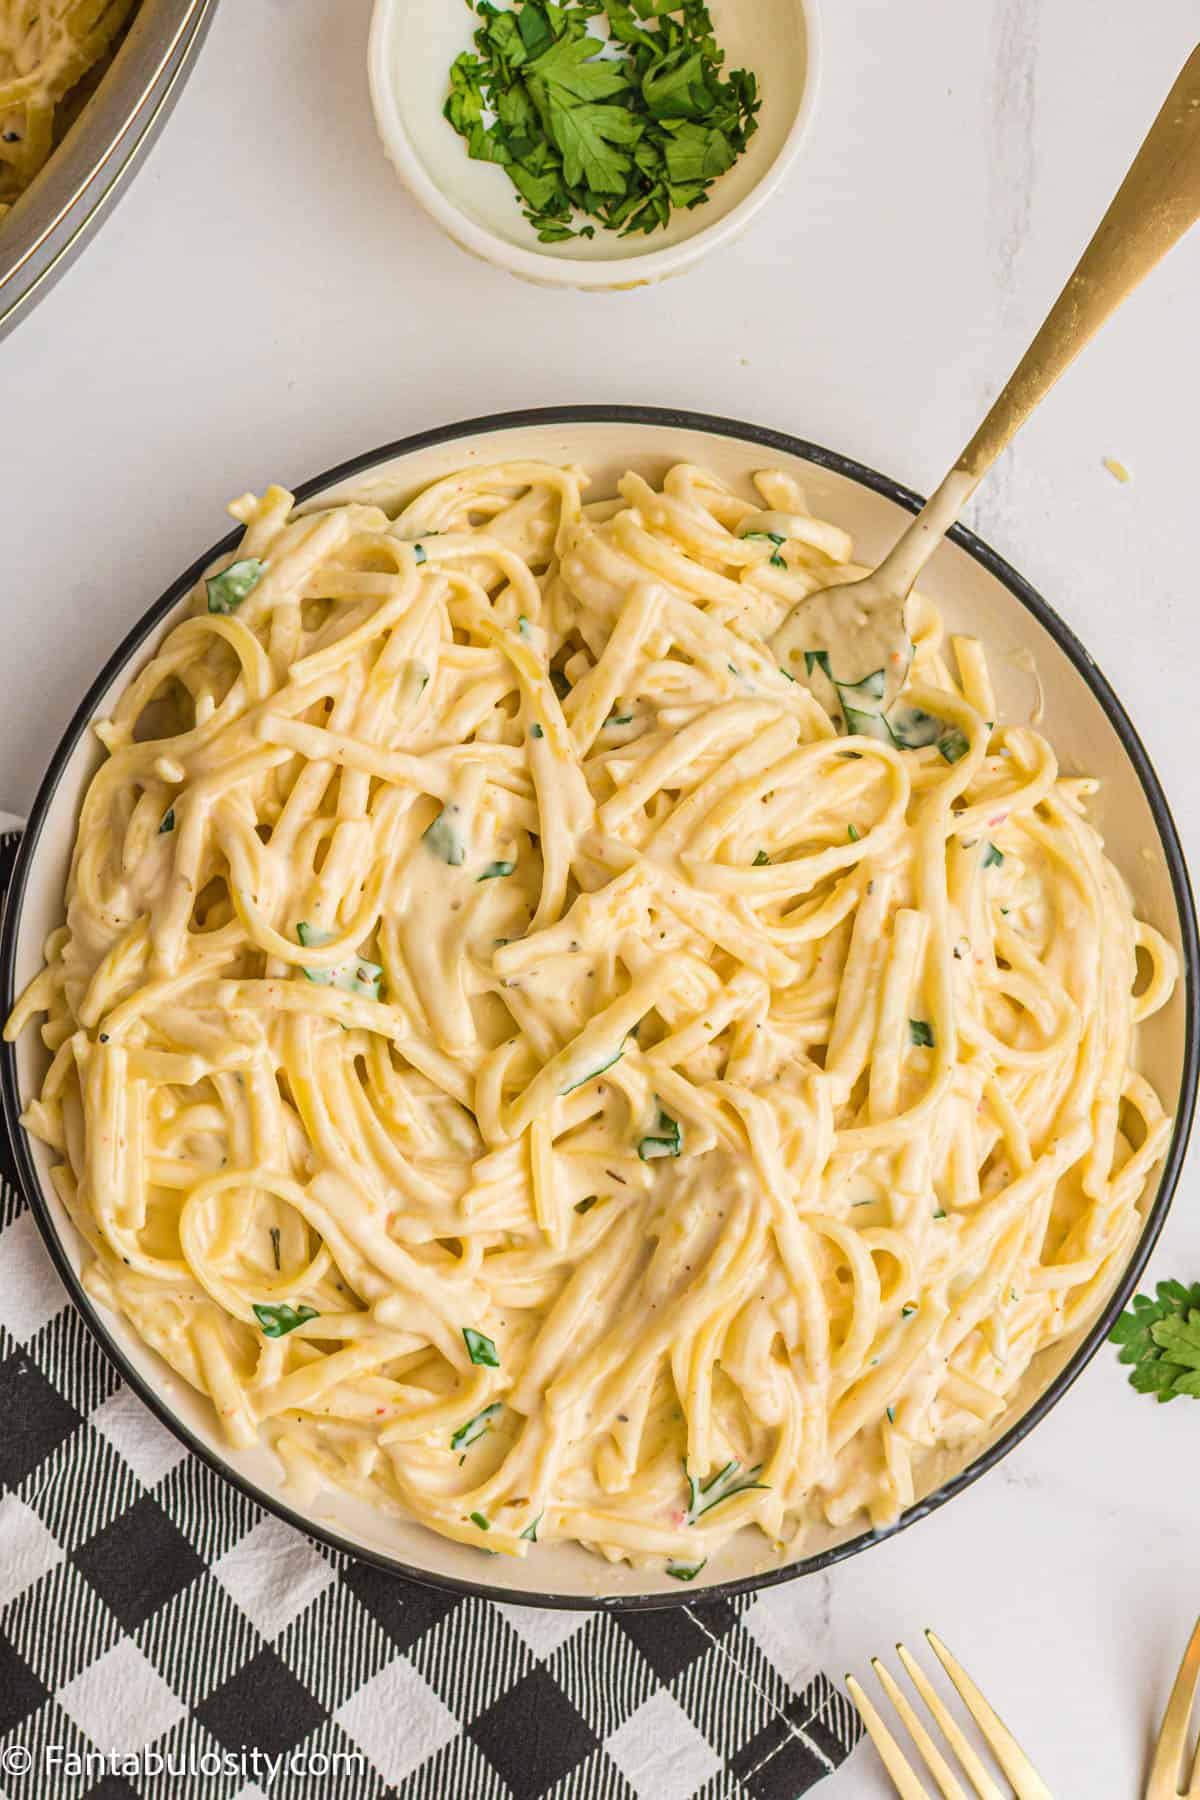
    Cream cheese pasta in stainless skillet.
    Cream Cheese Pasta

    Pasta Dinner Ideas

    When craving comfort food, pasta and all the carbohydrates are at the top of the list! Here are our top favorite pasta dishes!

    • Cream Cheese Pasta – The ingredients are so slim with this one and it’s incredible alone or you can add your favorite protein to it!
    • BBQ Chicken Pasta – After falling in love with a bbq chicken pizza from a local restaurant, this bbq chicken pasta was born and soon became a favorite pasta dish.
    • Buffalo Chicken Lasagna – The popular buffalo chicken dip appetizer doesn’t have to only be for special occasions or parties! Bring the buffalo chicken dip to dinner with this fun twist and turning it in to pasta for dinner!
    • Chili Mac Recipe – The ultimate comfort food. Warm chili combined with pasta and cheeses creates a chili mac recipe that the family will swoon over!
    • Cajun Chicken Alfredo – Love a little spice? Kick things up a notch by adding a cajun spin on chicken alfredo!
    • Chicken & Noodles – In elementary school, “chicken & noodles” day was a favorite for so many kids! It’s easy to make this recipe at home and “throwback” to those school days!
    • 30 Minute Taco Pasta – Need dinner in a pinch? In only 30 minutes this taco pasta is perfect for Tuesday when you’re craving tacos!
    • Lemon Chicken Pasta – The lemon flavor with savory chicken and creamy pasta are a combo that you’ll fall in love with!
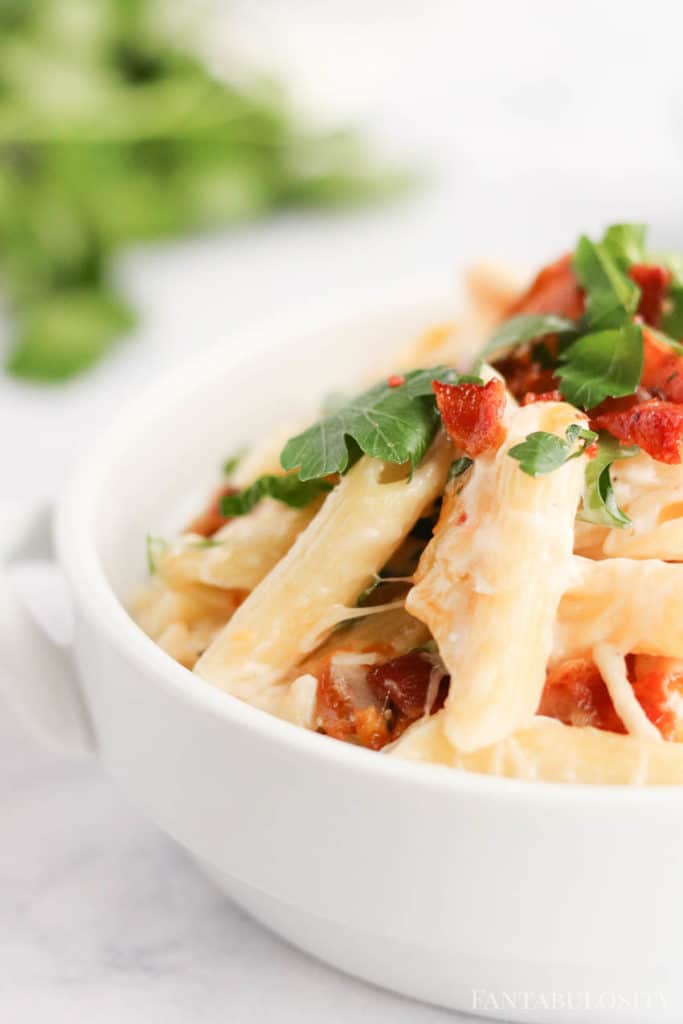
    Chicken bacon ranch pasta in a white bowl
    Chicken Bacon Ranch Pasta

    Easy Weeknight Dinner for Family

    Sometimes meal planning can slip our minds and we need an easy dinner idea, FAST! Here are our favorites for those last-minute dinner needs that you can add to your dinner theme system:

    • Chicken Bacon Ranch Pasta – Combining three loves: bacon, ranch, and pasta… add some chicken and this easy pasta recipe is something the whole family will love!
    • Salt and Pepper Chicken Bites – Sounds simple and too easy to be delicious, right? The browned butter, salt and pepper combine for an unbelievable flavor!
    • Bagel Pizzas – Friday night may usuallly be pizza night but when you need an easy dinner recipe, and QUICK… grab those bagels and pizza toppings and the let kids help!
    • Browned Butter Electric Skillet Burgers – Keep cleanup a breeze by cooking hamburgers in the electric skillet!
    • Frito Chili Pies – If you have leftover chili or can make a big batch to freeze, you can easily pour chili on top of Fritos and make a delicious Frito Chili Pie!
    • Like our bagel pizzas, this French Bread Pizza is easy to make and the kids love being able to use their favorite toppings.
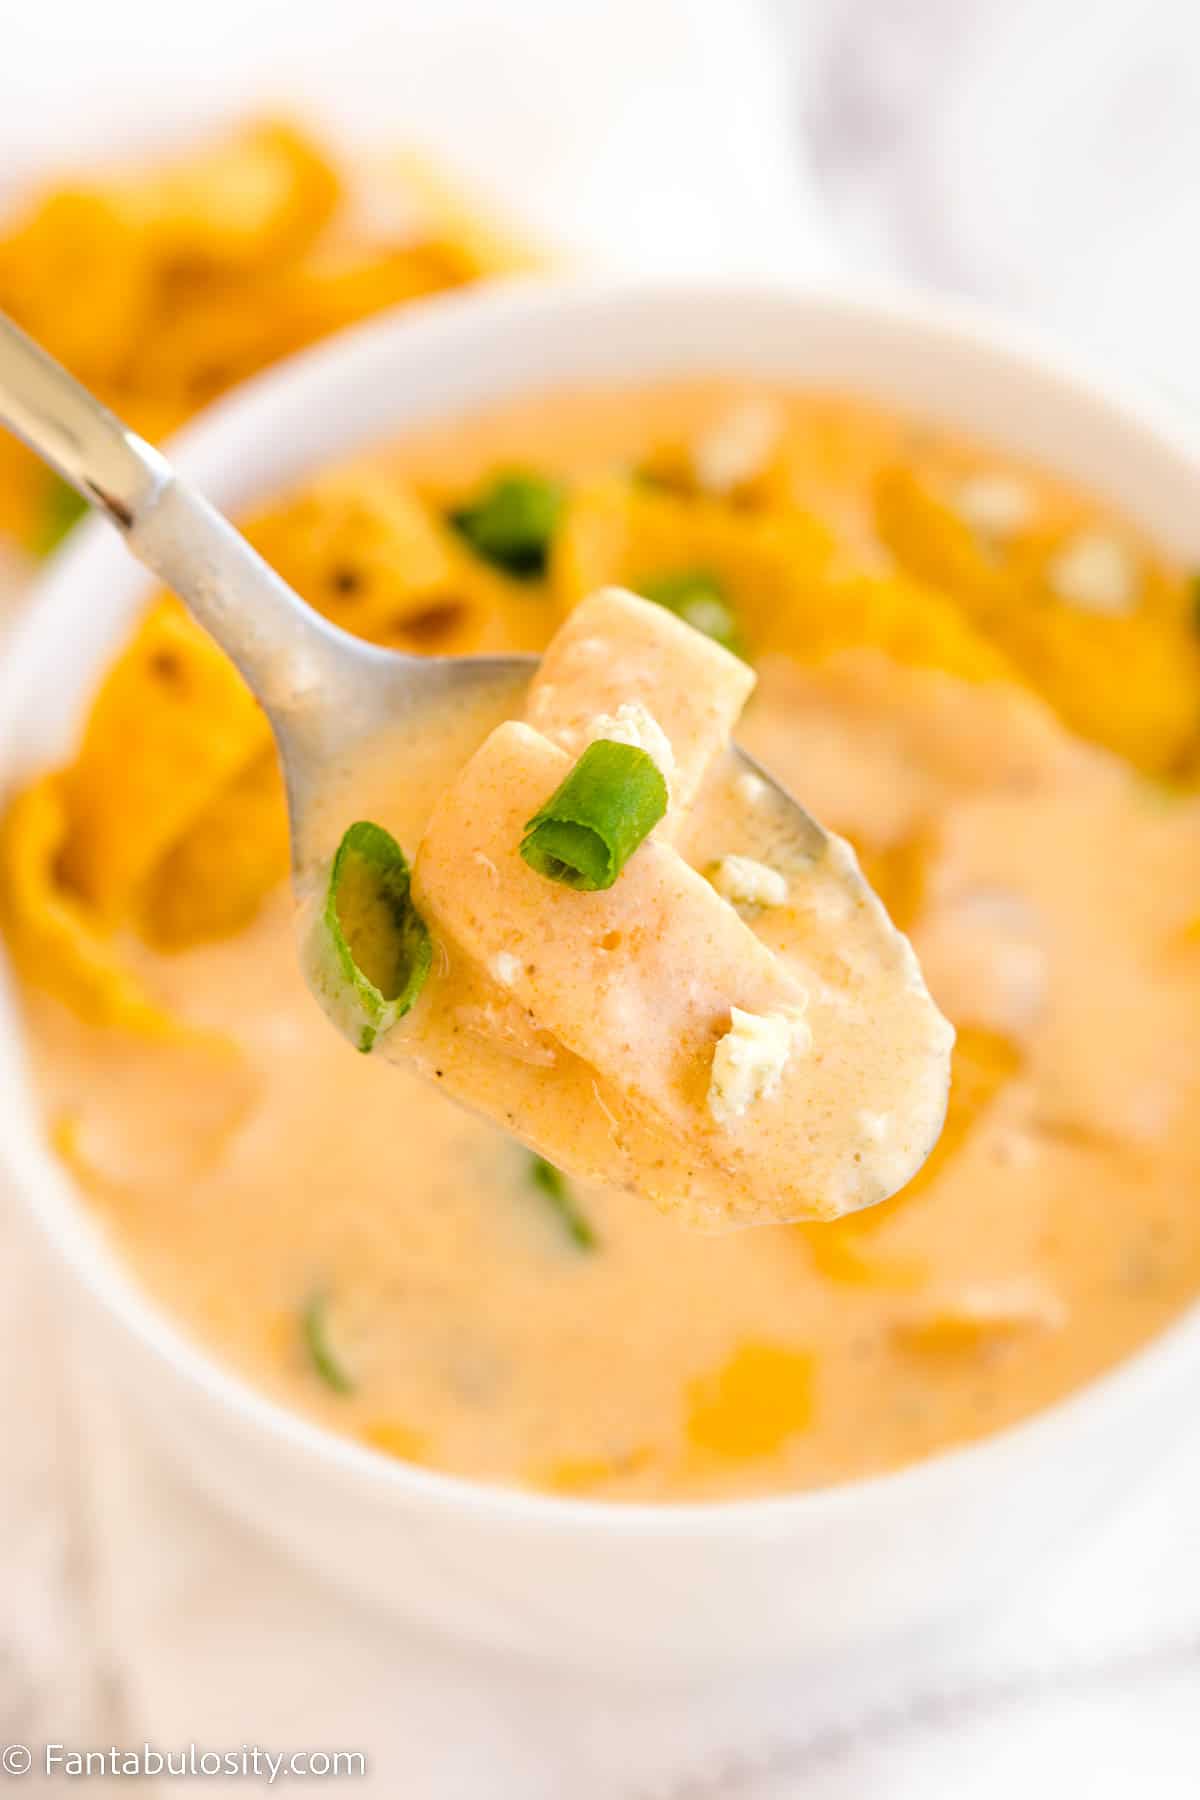
    Buffalo chicken soup on spoon, holding above the bowl
    Buffalo Chicken Soup

    Easy Soup Dinner Ideas

    Soup Recipes are one of my favorite dinner ideas because they can easily be doubled and are great leftover for lunch the next day!

    • Buffalo Chicken Soup – If you’re a fan of the buffalo chicken dip, this soup recipe may just be a new favorite too! Add some corn chips as a fun topping!
    • White Chicken Chili – Cream cheese, ranch seasoning, and a few other common ingredients make a warm, creamy, comforting pot of soup!
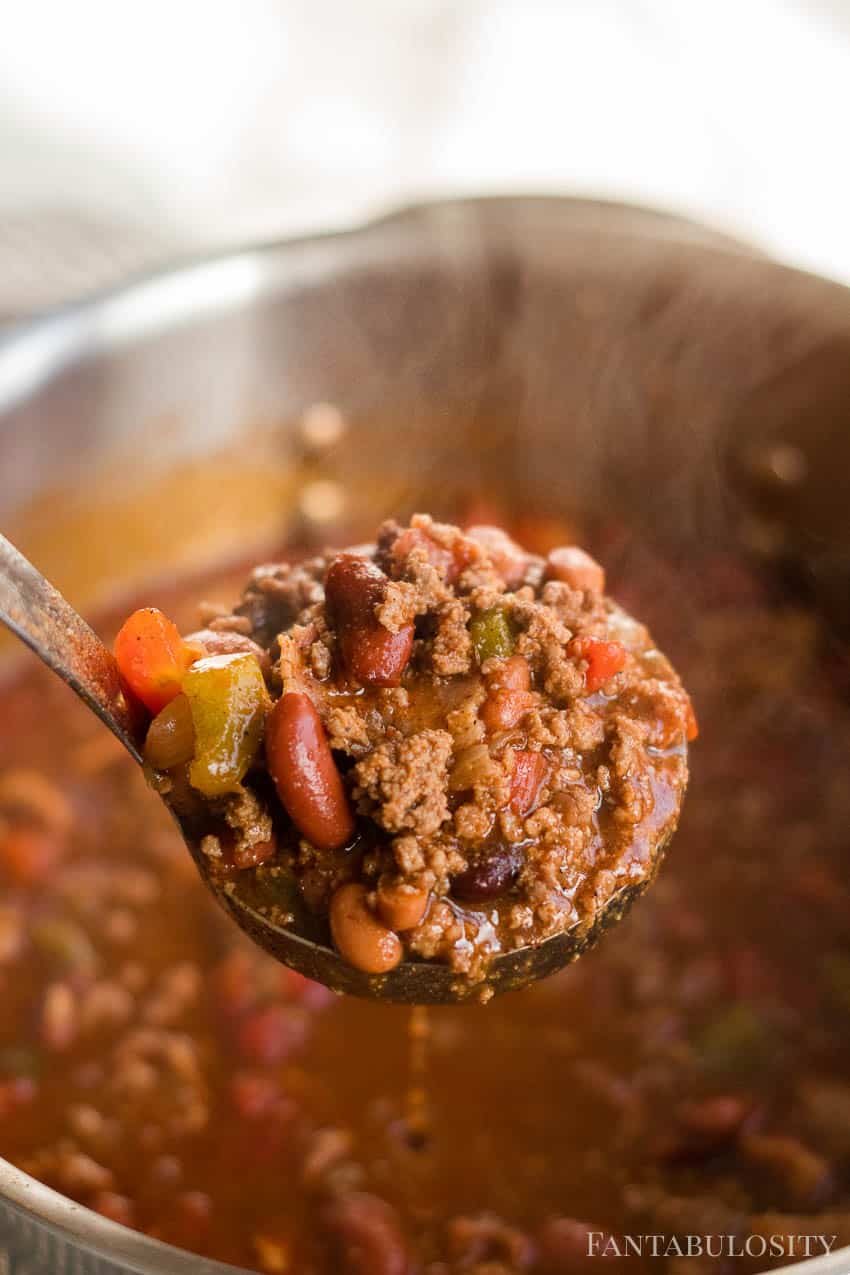
    • Easy Chili Recipe – Whether you’re looking to feed a large crowd or need a chili recipe for your family, this basic chili is a great base for everyone to include their favorite toppings.
    • Homemade Chicken Noodle Soup – The soup that all our friends receive when they’re feeling under the weather. Full of herbs and other easy ingredients, this delicious soup is sure to help someone feel better soon!
    • Easy Potato Soup – That warm, comforting feeling of a bowl of potato soup doesn’t have to take all day to make! Use this recipe to satisfy that potato soup craving without the hassle of peeling potatoes!
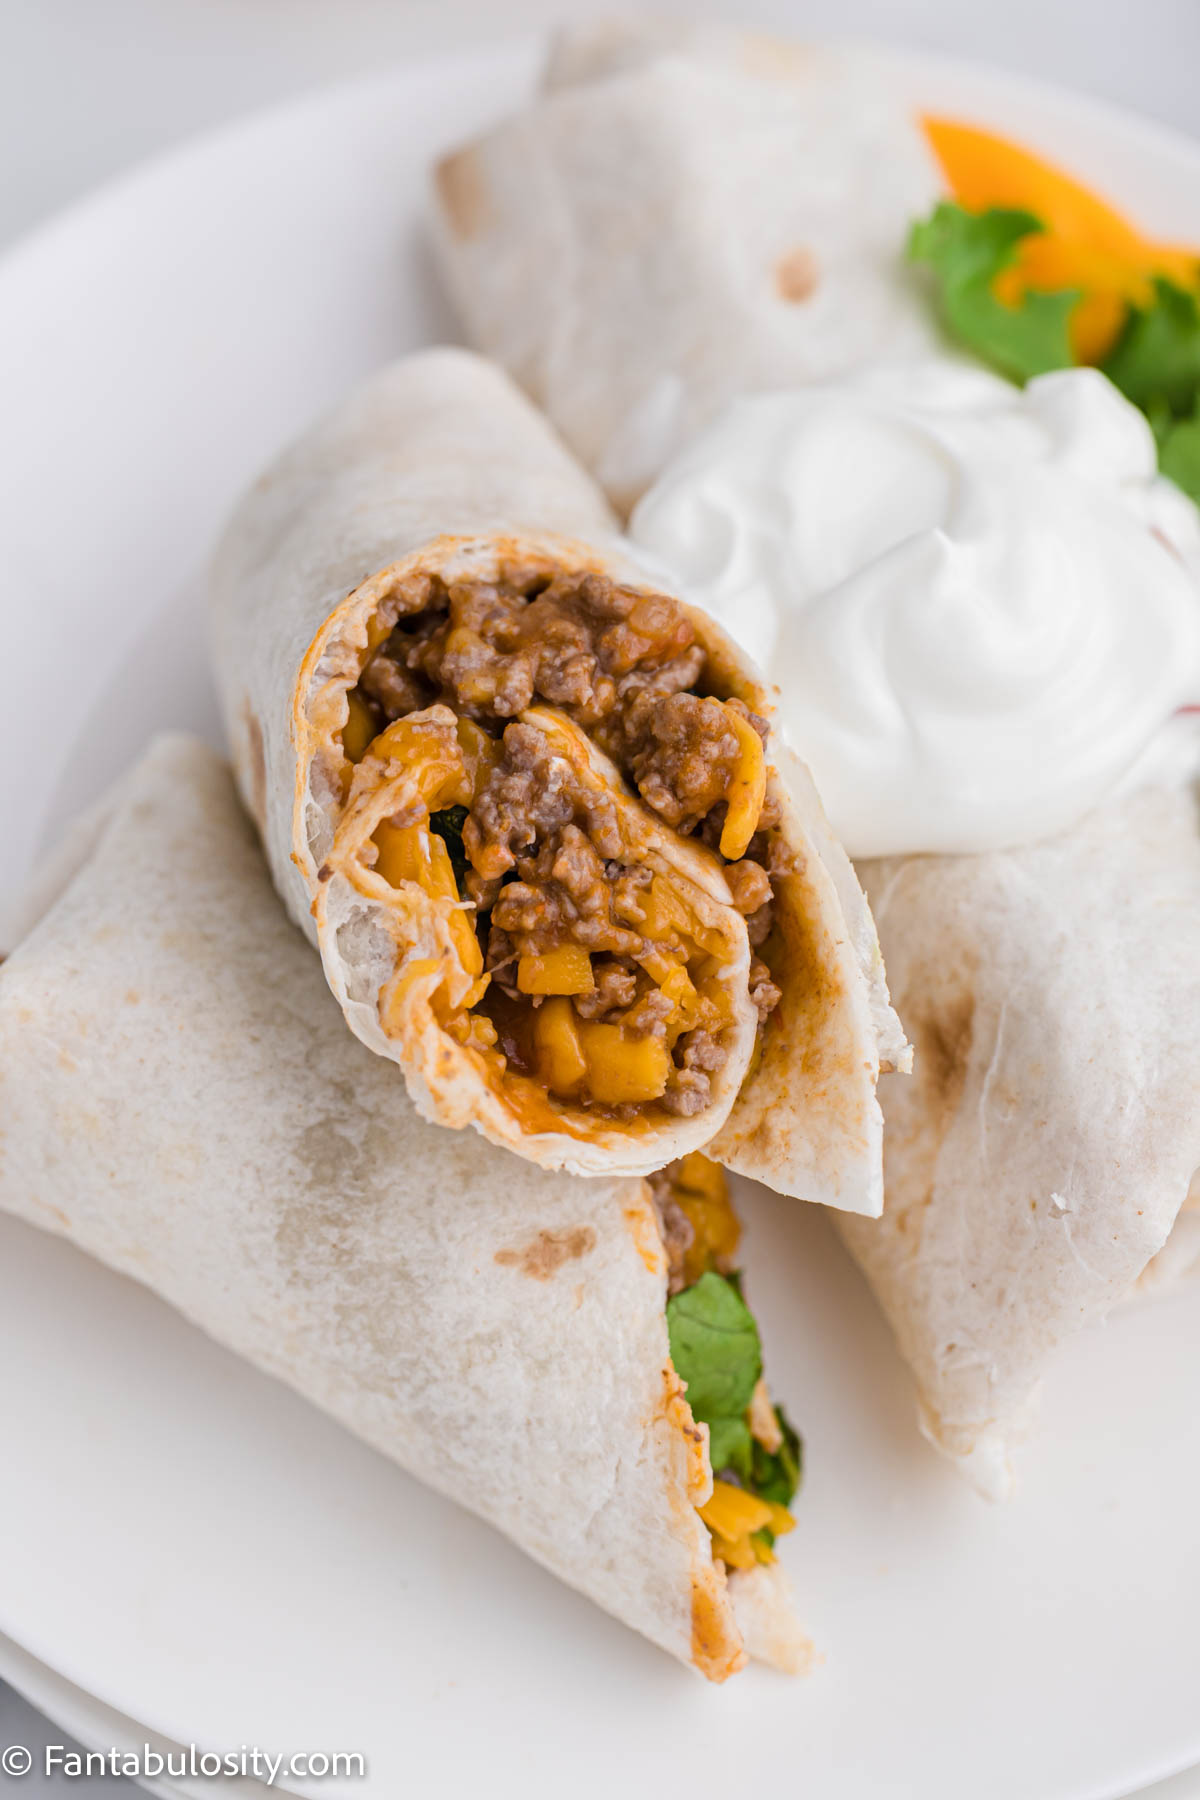
    Beef and cheese burrito on white plate.
    Beef and Cheese Burritos

    Lazy Dinner Ideas

    Not feeling like making dinner but you have to eat? Here are quick and easy recipes to make when feeling lazy!

    • Beef and Cheese Burritos – Keep the items on hand for those last-minute “oops” moments when you need something quick!
    • Steak Bites – They sound fancy but only taste fancy! Simply cut steaks in to small pieces and have delicious, juicy steak bites in minutes!
    • Polish Sausage Alfredo – Polish sausage is a cheap protein to buy and keep on hand. Add it to your favorite pasta and a jar of your favorite alfredo sauce and dinner is served!
    • BBQ White Queso Nachos – Have left over meat to use up? It’s nacho night! Top chips with queso, your favorite toppings and the leftover meat for loaded nachos!
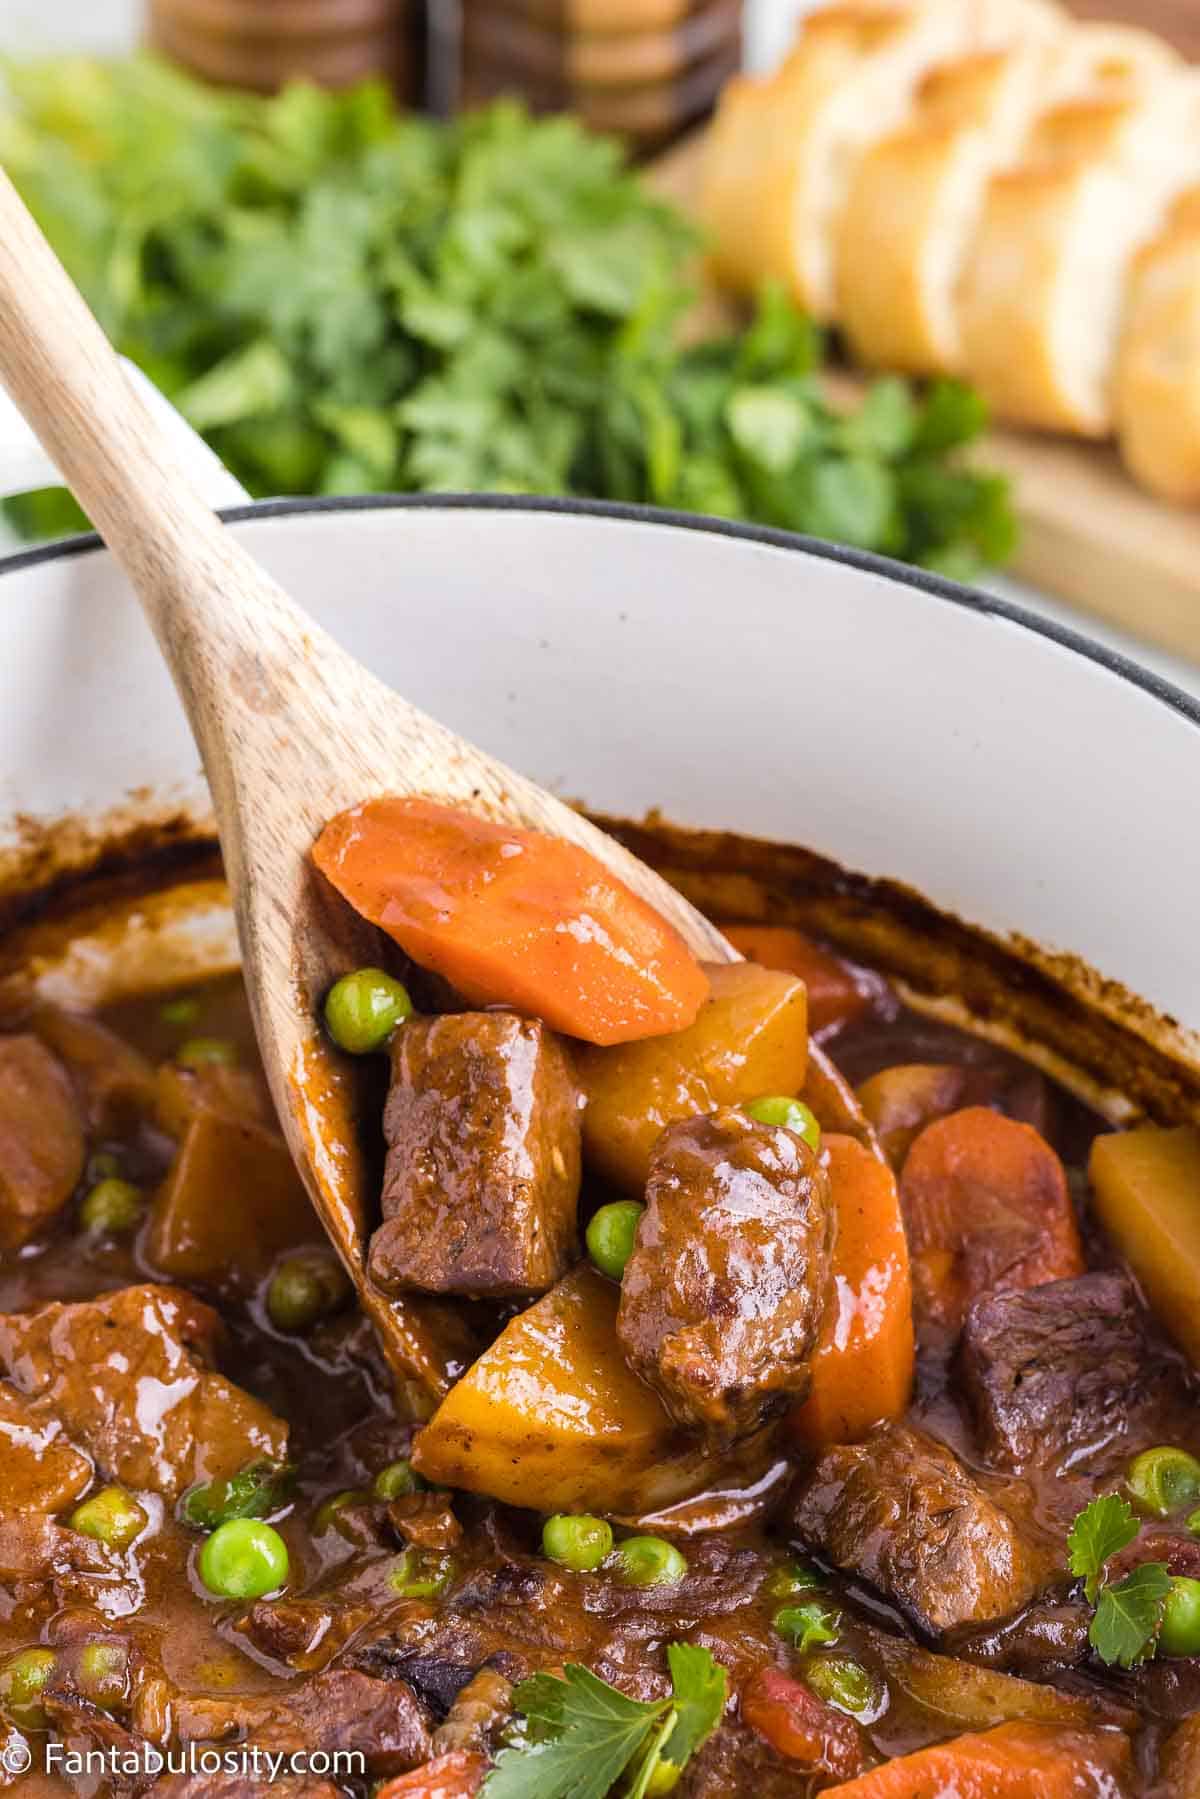
    Spoonful of beef stew being lifted up out of dutch oven.
    Dutch Oven Pot Roast

    One-Pan, One-Dish Dinner Ideas

    One-pan dinners are the BEST when wanting to avoid a ton of dirty dishes! Here are the best and easiest one-dish wonders that you’ll love:

    • Dutch Oven Pot Roast – It doesn’t get much heartier than this on a Sunday afternoon, and it makes it even better because who wants to do a lot of dishes on a Sunday?
    • Baked Pork Chops & Veggies – When you can make the main dish and side dish all at once, you “set it and forget it” until time to eat!
    • Asian Chicken Lettuce Wraps – Cook the ground chicken and add in the remaining ingredients, while serving inside of lettuce wraps. It doesn’t get much easier than that!
    • Taco Soup Recipe – Similar to an 8-can soup, cook the ground beef in the stock pot and dump the remaining canned ingredients in to simmer and then serve!
    • Pizza Monkey Bread – Pizza is everyone’s favorite busy weeknight dinner! Shake things up and make this pizza monkey bread so everyone can grab pieces and dip in to sauce as they please!
    • Instant Pot Frozen Meatballs – Now these don’t have to be enjoyed alone but if you want something quick and hearty, these fit the bill.
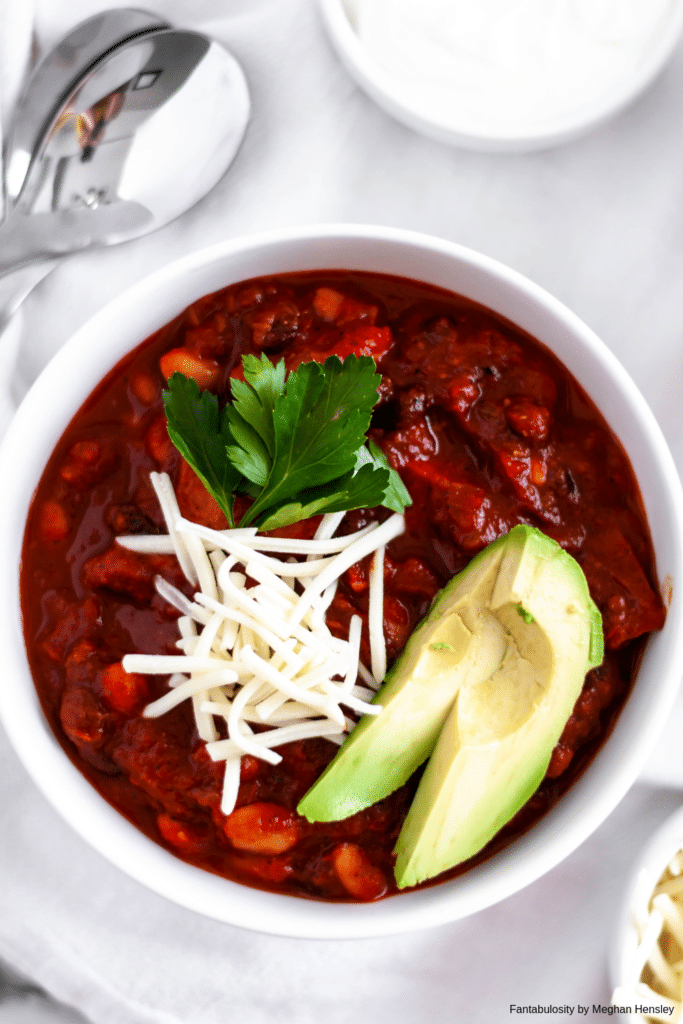
    Vegetarian Chili in a white bowl with avocados on top
    Vegetarian Chili

    Vegetarian Dinner Ideas

    Looking for a meatless Monday dinner recipe? These are the top favorites when you need an easy, vegetarian dish:

    • Vegetarian Chili Recipe – Most chili recipes contain ground beef or venison. But did you know it’s ok to leave that out for a meatless spin? This recipe shows you how!
    • Noodle Bowl – It’s easy, vegan, gluten-free, and vegetarian! Talk about checking things on the list with this delicious vegetarian recipe!
    • Egg Salad Sandwich – Have a lot of eggs to use up? This easy egg salad is great to make a batch of and store in the refrigerator for an easy dinner idea.
    • Asian Chopped Salad – The Asian flavors in this salad pack a punch!
    • Baked Portobello Stuffed Mushrooms – These hearty mushrooms are so incredibly filling that although mushrooms are classified as a side dish, these are easily a main dish recipe!
    • Fried Peanut Butter & Jelly – It’s not your typical pb&j. Toast the bread with butter and serve this popular favorite, warm!
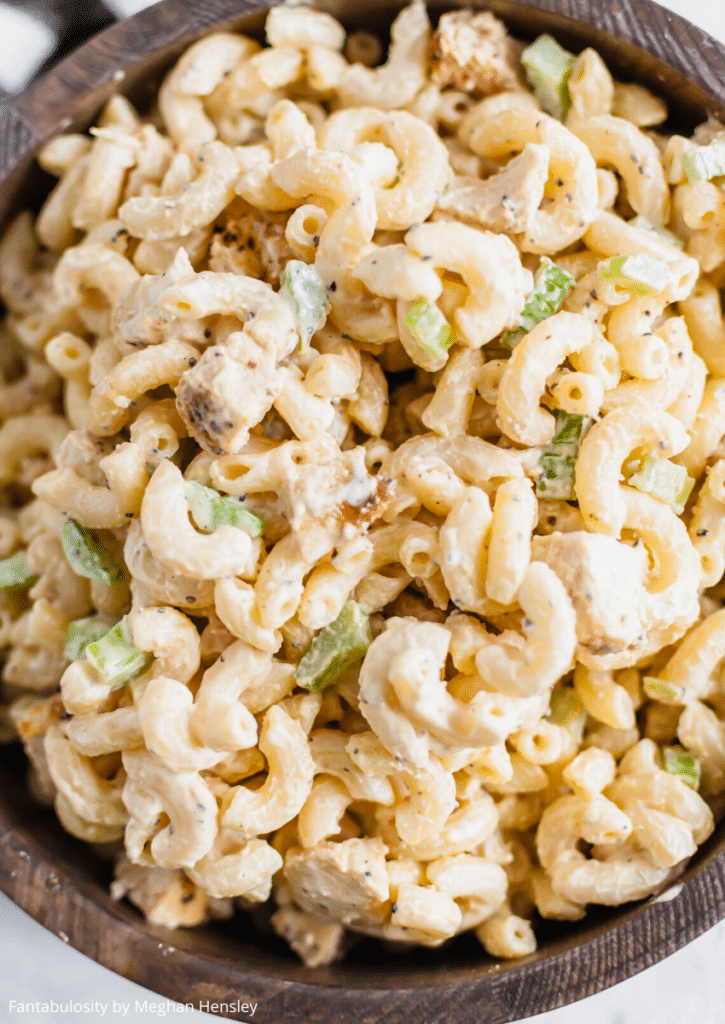
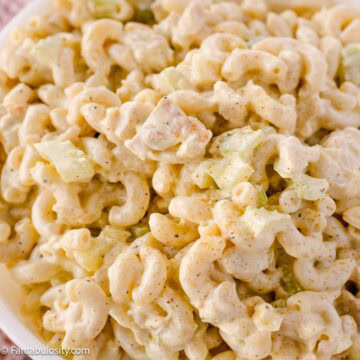
    This simple, pantry staple Chicken Macaroni Salad is just what we need right now. A simple creamy dressing, tossed with tender pasta, chicken, celery and onion that's done in a flash.
    Chicken Macaroni Salad

    Salad Recipes for Dinner

    We are HUGE fans of salads around here so it’s hard to pick our favorites but here are the top that so many make each and every day!

    • Chicken Macaroni Salad – Pasta salads usually fall in the side dish category but not when you can add chicken! This is a summer main dish you won’t want to forget!
    • Italian Chopped Chicken Salad – After having this salad at a popular Italian restaurant in Chicago, it HAD to be replicated at home!
    • Thai Salad Recipe – Tired of the same old salads? The roasted peanuts and other flavors in this salad can help get you out of the same salad routine!
    • Curry Chicken Salad – Chicken salad recipes are easy to come by. But not a curry chicken salad for a sandwich that will impress!
    Frozen Chicken Wings in the air fryer
    Frozen Wings in the Air Fryer

    Air Fryer Dinner Recipes

    Our air fryer is a kitchen necessity these days and here are the top air fryer recipes we have on repeat around here!

    • Frozen Chicken Wings in the Air Fryer – Tired of waiting for frozen chicken wings to thaw out before frying? Wait no more! Air fry wings from frozen in under 30 minutes!
    • Hamburgers in the Air Fryer – Say goodbye to clean-up and babysitting burgers! Hamburgers can be made in the air fryer in minutes and be that same juicy burger you crave!
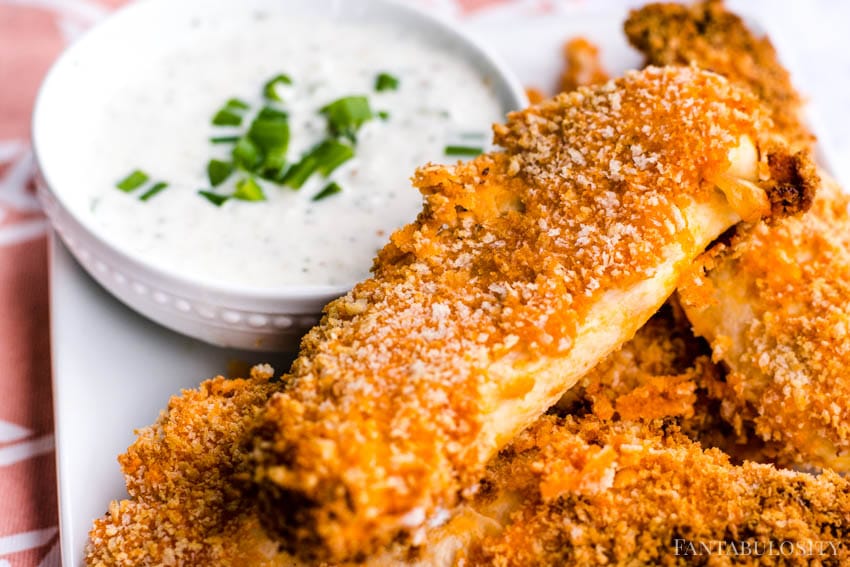
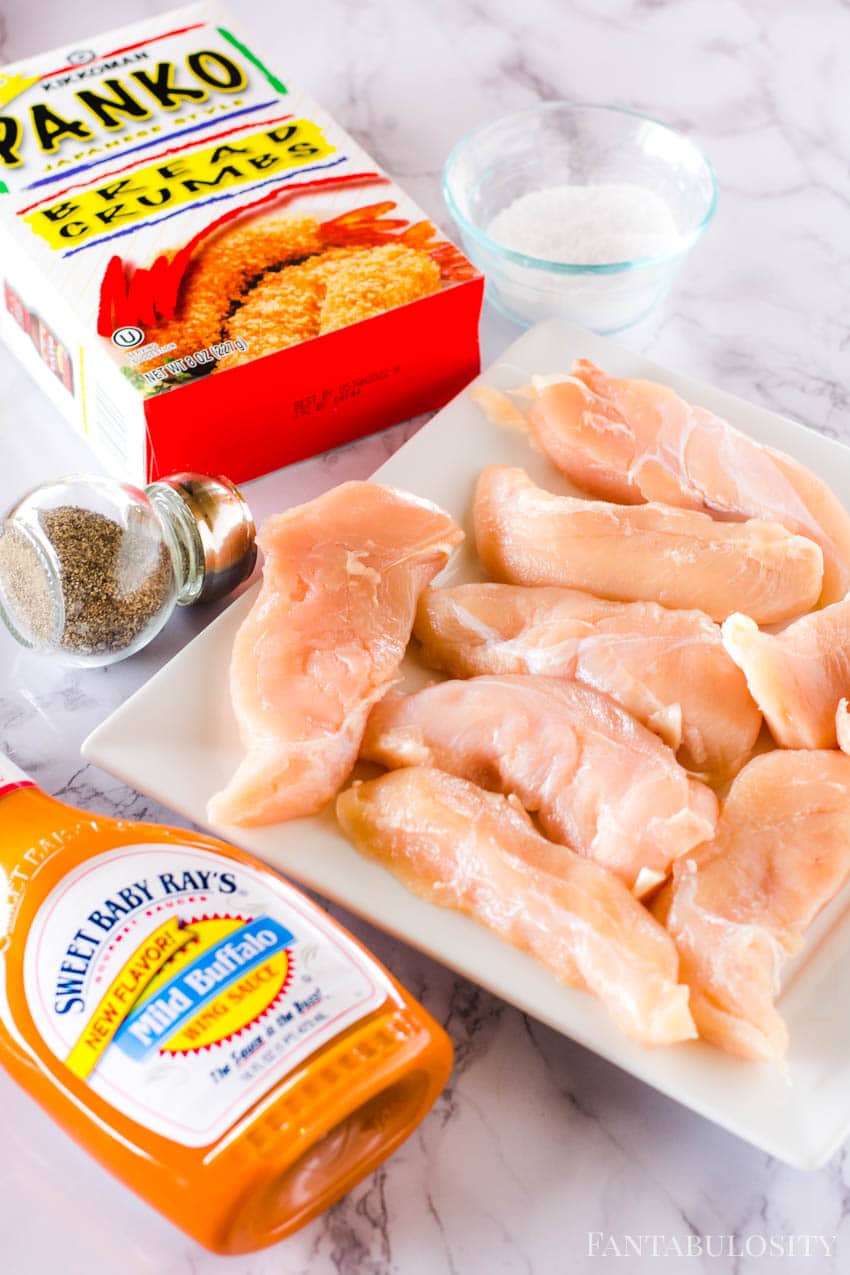
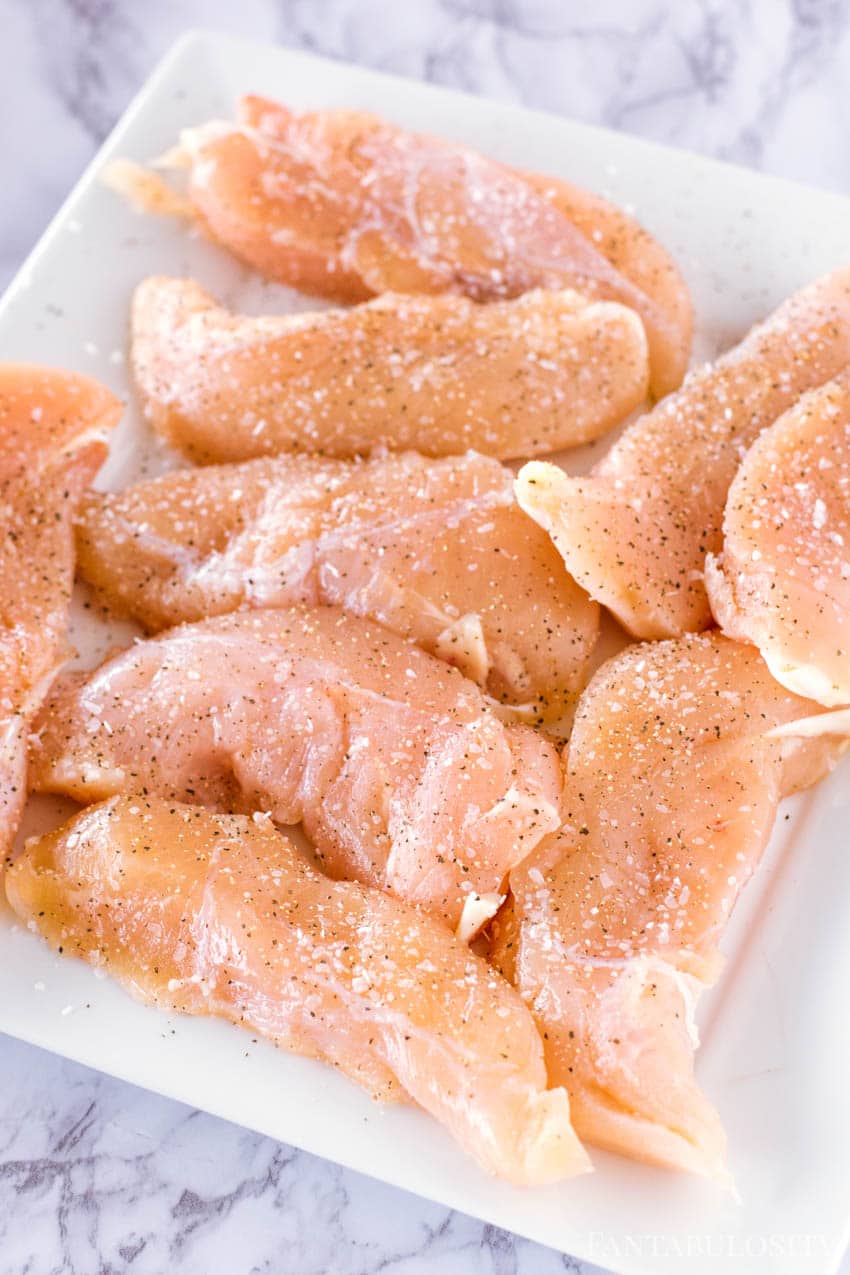
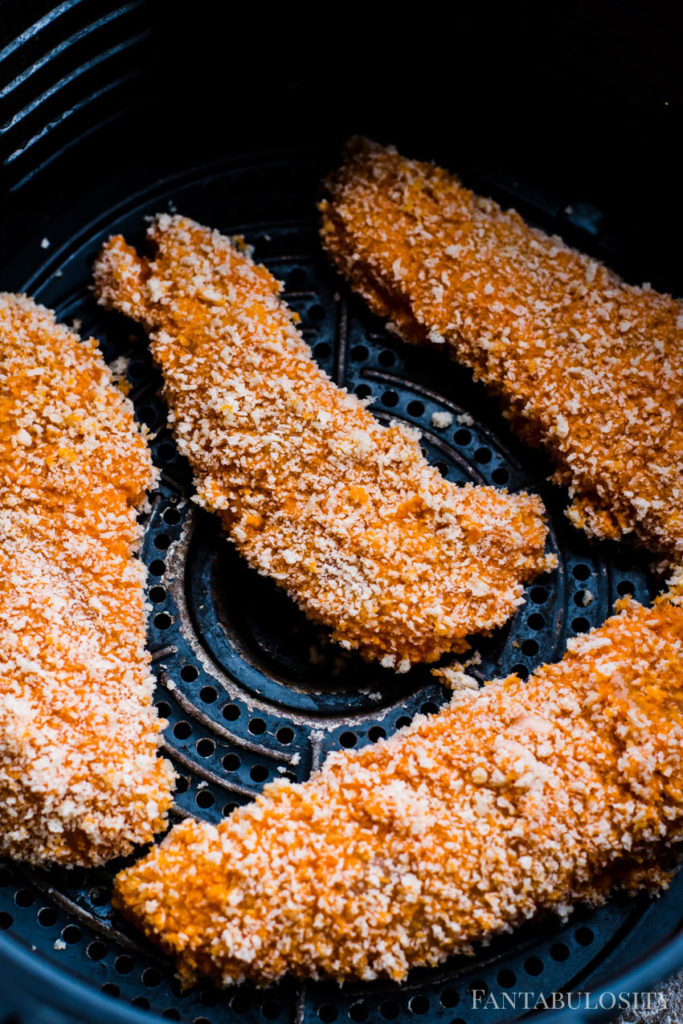
    • Air Fryer Buffalo Chicken Tenders – Using panko crumbs, and your favorite hot sauce, these chicken tenders are crunchy and much healthier than store-bought chicken!
    • Brats in the Air Fryer – Cook brats in the air fryer to serve for dinner right away or to keep in the refrigerator for the family to easily grab and reheat when they need a late-night snack.
    • Chicken Legs in the Air Fryer – No need for a flour breading to get the crunch that you love with chicken legs! The parmesan garlic chicken legs are healthy and tasty!
    • Air Fryer Turkey Burgers – An incredibly easy and healthy dinner that the whole family will love!
    • Air Fryer Tilapia – This easy recipe is made in no-time and has so much fresh flavor, and pairs perfectly with so many delicious side dishes!
    Instant Pot Pot Roast
    Instant Pot Pot Roast

    Instant Pot Dinners

    The Instant Pot is the ultimate one-pot dinner maker and we use it to make dinner at least twice a week. Here are our favorite Instant Pot dinner recipes!

    • Instant Pot Roast – Forget to thaw out your roast for Sunday dinner? No worries. Place this frozen roast right in the Instant Pot and have it ready to eat in 90 minutes!
    • Instant Pot Orange Chicken – No need for take-out with this easy orange chicken recipe at home!
    • Cheeseburger Macaroni in the Instant Pot – Love hamburger helper but want to make it at home, instead of out of the box? The kids will love this easy, creamy, pasta recipe that’s ready in minutes!
    • Instant Pot Chicken and Potatoes – Meat and potatoes… the way to your man’s heart! A simple recipe with herbs that you probably already have on hand!
    • Kielbasa and Cabbage – The pressure-cooked process combines the flavor of this recipe and it’s ready to eat in as little as 4 minutes!
    • Instant Pot French Dip – feel free to use whatever type of roast (beef or venison) that you have on hand for this easy pressure-cooked recipe!
    • Instant Pot Chicken & Dumplings – That hearty Sunday dinner that grandma used to make can now be made using the Instant Pot!
    • Tri Tip in the Instant Pot with Gravy– a cut of beef that can be cooked as a roast with potatoes and carrots for the perfect all-around meal!
    • Chicken Thighs in the Instant Pot – Thighs are a dark meat that’s SO juicy! Combine that with pressure cooking and you have a delicious meal to add to the rotation!
    BBQ Pork Steaks in the slow cooker or crock pot
    Slow Cooker Pork Steaks

    Slow Cooker Dinners

    Slow cookers can make dinnertime a breeze! Set it and forget it is the style and easy and tasty is the goal with these crockpot recipes!

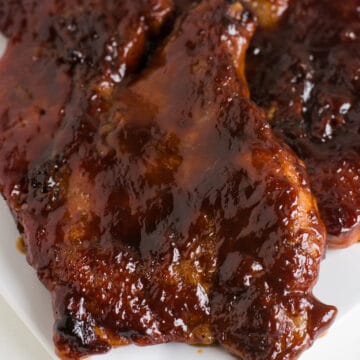
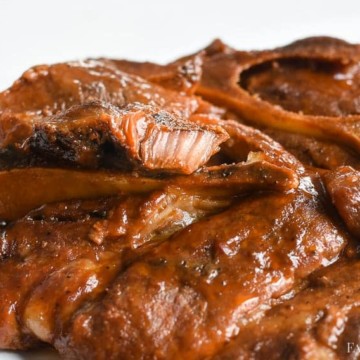
    • Slow Cooker Pork Steaks – Pork steaks are good on the grill but if you want an incredibly tender pork steak, you’ll LOVE these BBQ-covered steaks!
    • Slow Cooker Beef Steak – Using a London broil, this recipe creates a delicious gravy and the whole recipe only takes 4 ingredients!
    • Crock Pot Goulash – Old-fashioned, vintage recipes are a favorite around here, and this Crock Pot Goulash is a perfect fit if you love them too!
    • Slow Cooker Beef Tacos – If you love the beef recipes for your Crock Pot, these Shredded Beef Tacos are a must to make!
    • Crockpot BBQ Meatballs – Who says meatballs are just for parties and to have as appetizers? These are kid-friendly and great to eat on for dinnertime!
    • Venison Chili in the Slow Cooker – Chili gets better when it simmers! This venison chili is simmered and cooked in a slow cooker for the ultimate hearty soup!
    • Slow Cooker Sausage Casserole – A meaty, cheesy, and potato Crock Pot dish that’s a family-friendly meal!
    • Crock Pot Chicken Enchiladas – Made with a few, simple ingredients, the flavors come together for your favorite enchiladas but with the ease of using a slow cooker!
    • Crock Pot Shredded Chicken – Prepare a few different meals with this shredded chicken in the slow cooker!
    • Slow Cooker Jalapeno Chicken – Love spicy? This cheesy chicken is cooked with jalapenos for a kick!
    • Crock-Pot Cube Steak – A more affordable cut of meat, cube steak comes out amazingly tender in this slow cooker recipe, that creates a delicious gravy to top it with!
    • Crock Pot Cherry Coke Pulled Pork – The name in itself describes the amazing flavor this pulled pork recipe has!
    • Slow Cooker Chicken Drumsticks – Chicken legs are an affordable option for dinner and when you combine that with using a slow cooker, this recipe is a great option for an easy dinner!
    Dorito Chicken Casserole on white plate
    Doritos Chicken Casserole

    Easy Casserole Dinners

    Whether it’s for a potluck dinner or a need for an easy weeknight dinner to pop in the oven, these easy casseroles should be on the list!

    • Doritos Chicken Casserole – What kid wouldn’t love their favorite chip combined with other favorites like chicken and cheese! It’s a casserole that so many love!
    • Old Fashioned Chicken and Rice – This classic casserole recipe is not only easy but kid-friendly and an old-fashioned favorite.
    • Tuna Casserole – Speaking of old-fashioned… this tuna casserole is a staple in the kitchen for anyone wanting to make a hearty familiar favorite.
    • Chicken Spaghetti with Rotel – This casserole is loved by so many on Pinterest, and for good reason!
    See All Casserole Recipes

    Ground Beef Dinner Recipes

    Ground beef can make amazing casseroles, tacos, and burgers! Here are some of our favorite ground beef recipes!

    • Juicy Lucy Burgers – Made on the stovetop, these aren’t your average burgers! They’re stuffed with cheese and full of flavor!
    • Cheeseburger Casserole – who doesn’t love a good cheeseburger, especially when you can serve it in casserole form!
    • French Onion Ground Beef Casserole – Love that french onion flavor? This casserole recipe is full of it, with hearty ground beef!
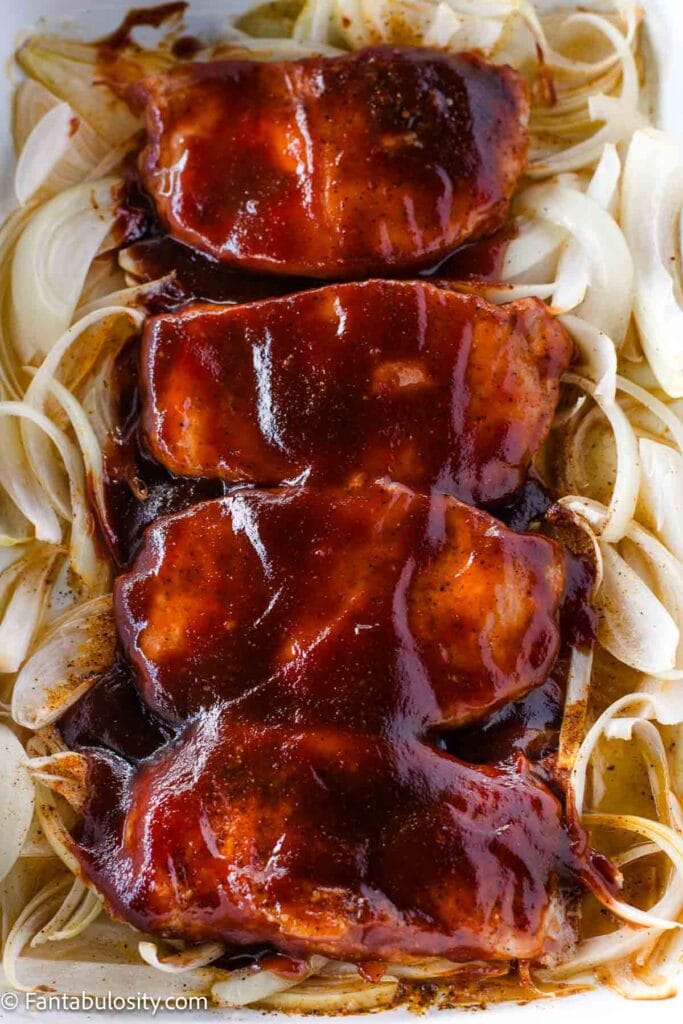
    Baked bbq pork chops on a bed on sliced onions.
    Baked BBQ Pork Chops

    Pork Dinner Recipes

    Whether you had a hog processed or just happen to have a lot of pork in the freezer, these are our favorite pork recipes for an easy dinner idea:

    • BBQ Baked Boneless Pork Chops – BBQ pork, of any kind is delicious, but when they can be baked and tenderized in the oven, it’s a no-brainer and creates a juicy pork chop!
    • Sweet & Smokey Pork Chops – The sweet and smokey flavors in this pork chop recipe is one of our favorite combinations!
    • Fried Boneless Pork Chops – In the south we like almost everything “fried” and pork chops are no different!
    • Chipotle Apple Butter Ribs – Apple butter with pork? You bet. Combine it with a chipotle kick in flavor and it will satisfy your taste buds!
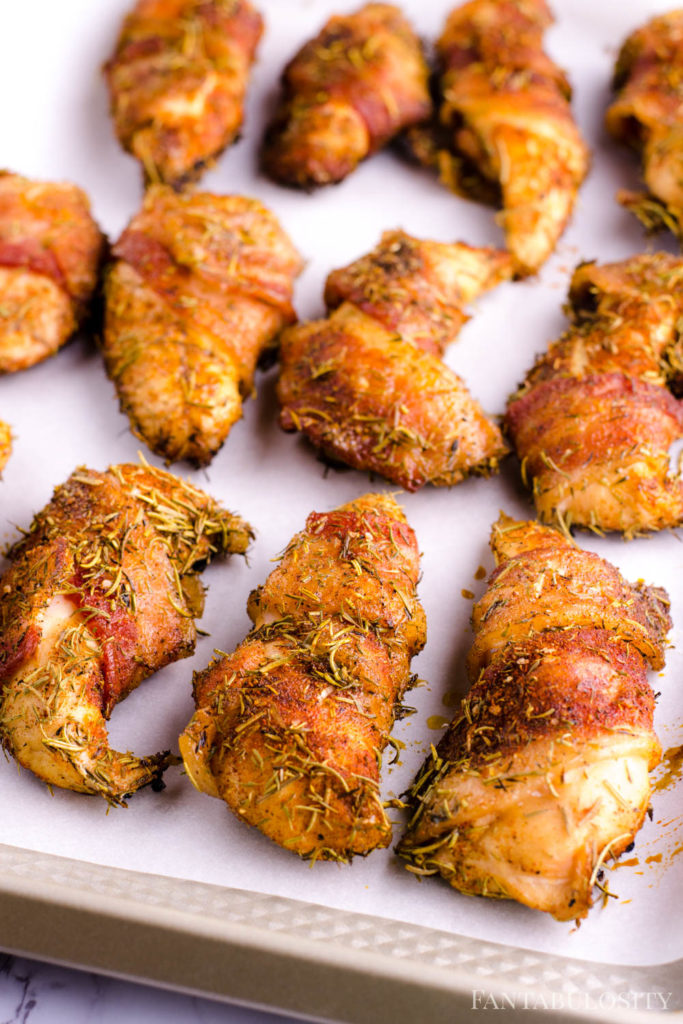
    Smoked Chicken Tenders
    Smoked Chicken Tenders

    Chicken Dinner Recipes

    Chicken is one of the popular ingredients for easy dinner recipes and it’s no exception around here!

    • Smoked Chicken Tenders – If you have a smoker, and you haven’t tried cooking chicken tenders on it yet… this will be a whole new world for you!
    • Chicken Street Tacos – When taco night rolls around, skip the regular tacos made with ground beef and try chicken for a delicious spin!
    • Lasagna Stuffed Chicken – You can never go wrong with stuffed chicken and stuffing it with something like the flavors of lasagna is a flavor combo that so many love!
    • Chilli Chicken – A popular Indian dish at home can satisfy those cravings when you can’t get to your favorite restaurant!
    • Easy Fried Chicken – Sometimes the craving for fried chicken hits just right! This easy recipe walks you through, step-by-step in how to get that delicious fried chicken flavor and crunch!
    • Sweet & Salty Chicken – I’m not sure who doesn’t love a sweet and salty combo! This easy dish is something the whole family will love!
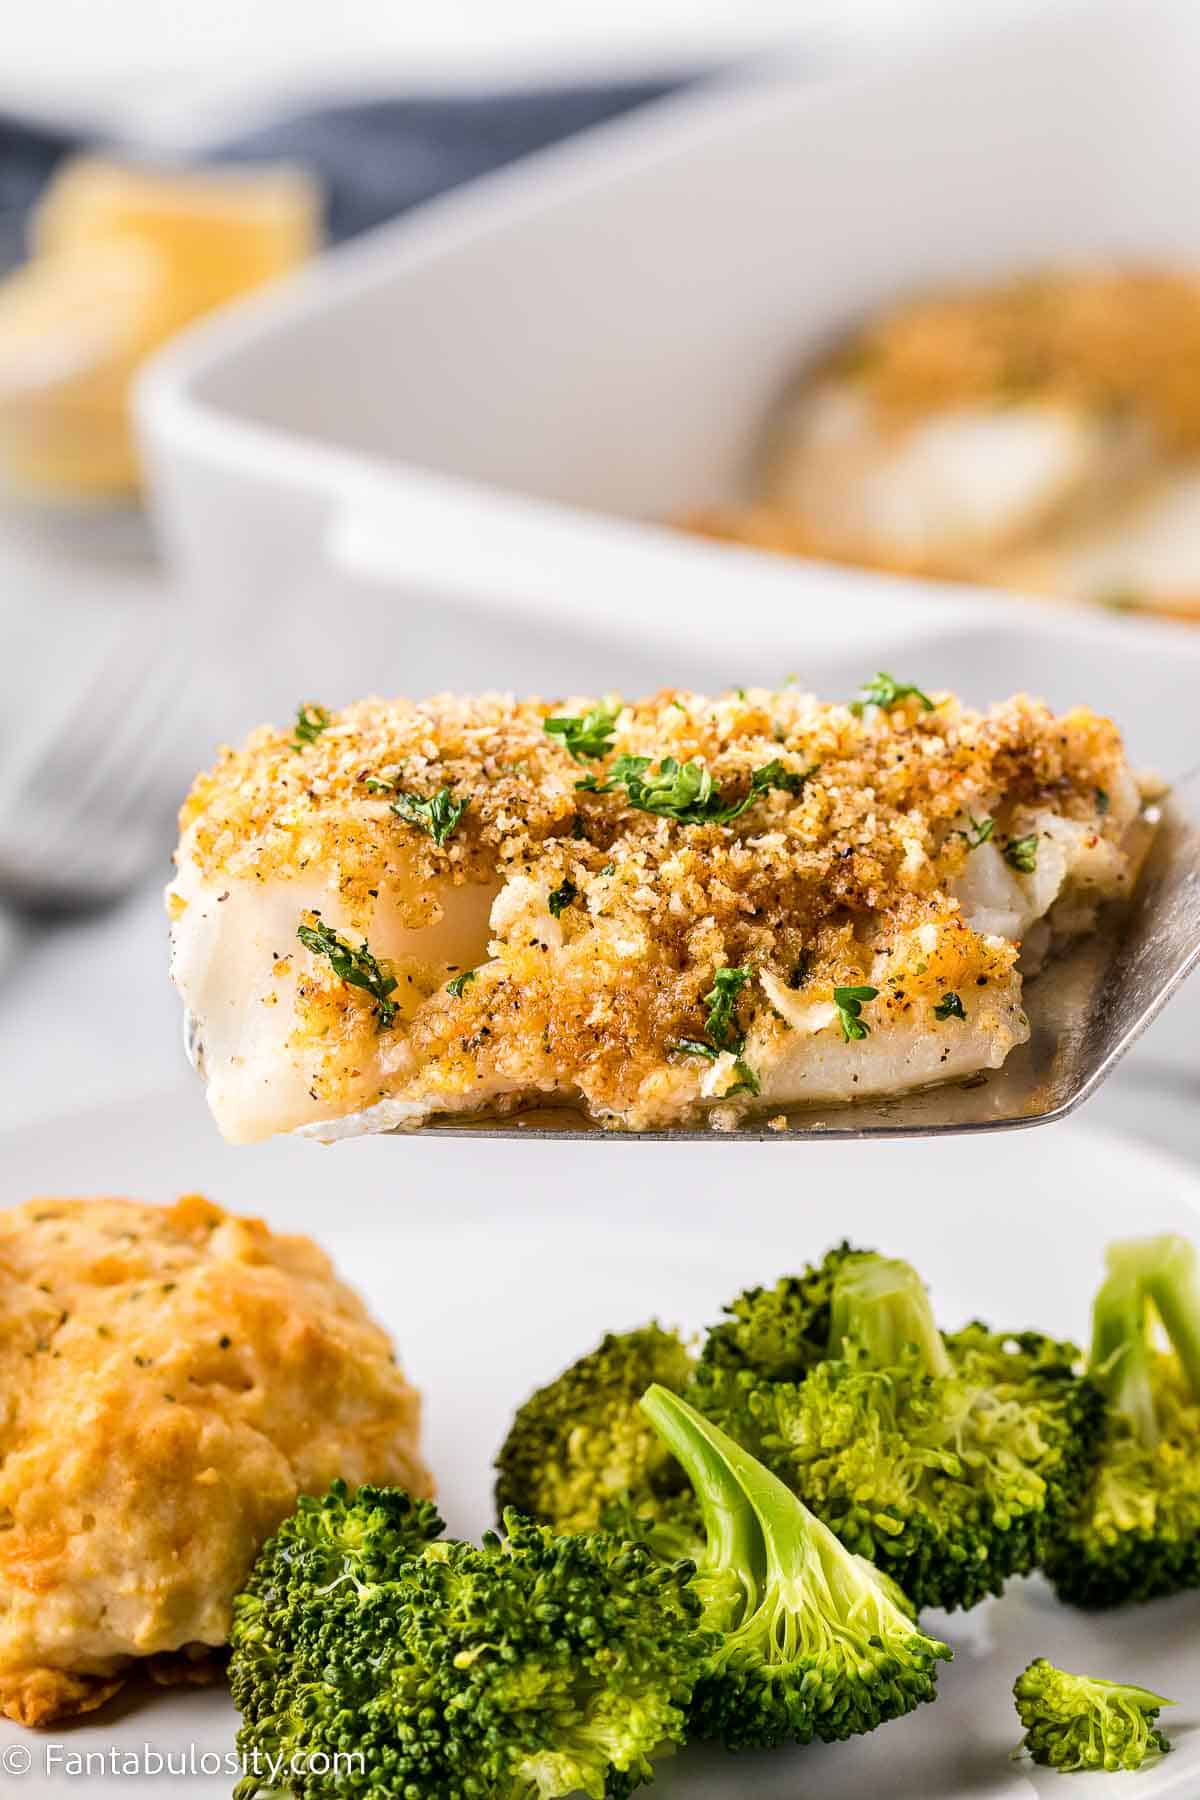
    A piece of baked cod with panko crumbs on a spatula, being held up in the air.
    Panko Crusted Cod

    Seafood Dinner Ideas

    Whether it’s frozen cod, canned salmon, shrimp or your favorite seafood you have on hand, these easy seafood dinner recipes are the best!

    • Panko Crusted Cod – This recipe is not only easy but that crunch on the tender fish is so hard to beat!
    • Salmon Patties in the Air Fryer – As if we didn’t love air fryers enough… being able to use fresh or canned salmon in this recipe makes dinner that much easier!
    • Cilantro Hummus Fish Tacos – Hummus isn’t just for snacking anymore! It’s an ingredient that can be used as a topping and flavor your favorite tacos, especially fish tacos!
    • Easy Crab Bisque – Don’t let the “bisque” word scare you. It sounds fancy but is easy to make at home and don’t worry… let everyone think you spent all day on it!
    • Mediterranean Mussels – You don’t have to wait for date night to have mussels anymore! They’re easy to make at home!
    • Easy Lobster Bisque – If you love lobster but not the price, substitute imitation lobster for this bisque recipe!
    How to cook deer meat: steak tenderloin
    Deer Steak on the Stovetop

    Venison Dinner Recipes

    Whether you’re the hunter or you’ve been gifted venison, you’re sure to find a way to use that deer, here:

    • Deer Steak on the Stovetop – By far our most popular deer recipe, this venison steak, cooked on the stove-top is easy and delicious!
    • Fried Deer Tenderloin – Venison cut in to small pieces and covered in flour, deep-fried in oil, is my all-time favorite dinner recipe, ever.
    • Grilled Deer Steak – Using butter to keep this venison steak juicy, is the key to the perfect venison steak on the grill!
    • Air Fryer Venison – As with other air fryer recipes, cooking venison is a quick and easy option for dinner!

    Roasted Brussels Sprouts

    March 17, 2021

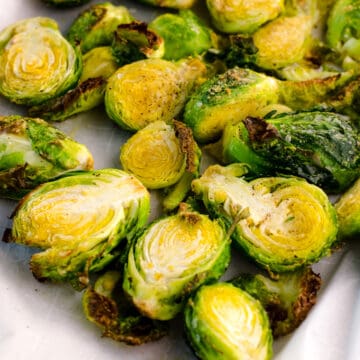
    Roasted brussels sprouts on white plate.

    Roasted brussels sprouts are a staple side dish in our home. Simply seasoned with olive oil, garlic powder, salt, and pepper, this easy recipe goes great with any main course!

    There are tons of fun brussels sprout recipes out there like this roasted brussel sprout recipe with a sweet glaze, that you can make but sometimes keeping things simple, and having a lightly seasoned side dish is the perfect addition to a well-rounded meal.

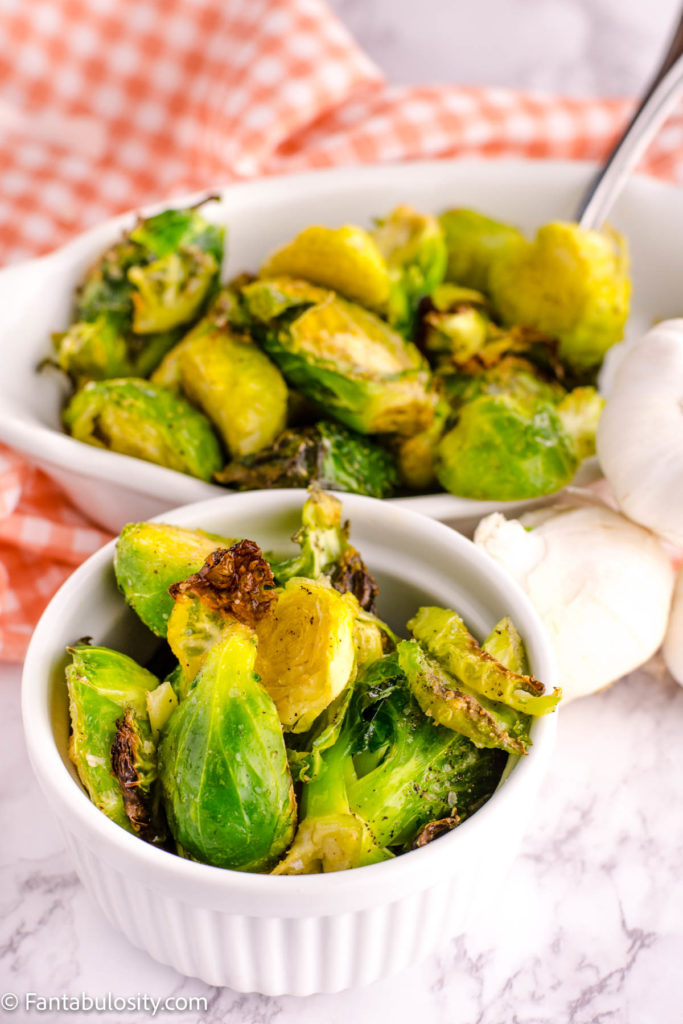
    Roasted Brussels Sprouts in white bowls
    [feast_advanced_jump_to]

    Why You’ll Love This Recipe

    • it’s so easy and quick to whip up as a healthy side dish
    • the way it stands is a great base recipe to add other fun ingredients to if you like, or it’s perfect just the way it is!

    Other ingredients you can add to brussels sprouts

    Additional optional ingredients for brussels sprouts that you can add to this recipe are:

    • bacon
    • balsamic vinegar
    • maple syrup
    • honey
    • cranberries
    • blue cheese crumbles
    • feta cheese crumbles
    • goat cheese
    • parmesan cheese (shaved, grated, shredded)
    • caesar dressing
    • fresh herbs
    • diced onions
    • diced ham
    • lemon juice
    • nuts

    Should you cut Brussel sprouts in half before roasting?

    You don’t have to but we prefer them to be sliced in half. They not only cook faster but the cut side will roast beautifully and crisp up much better.

    How do I roast Brussels sprouts?

    • Preheat oven to 425°.

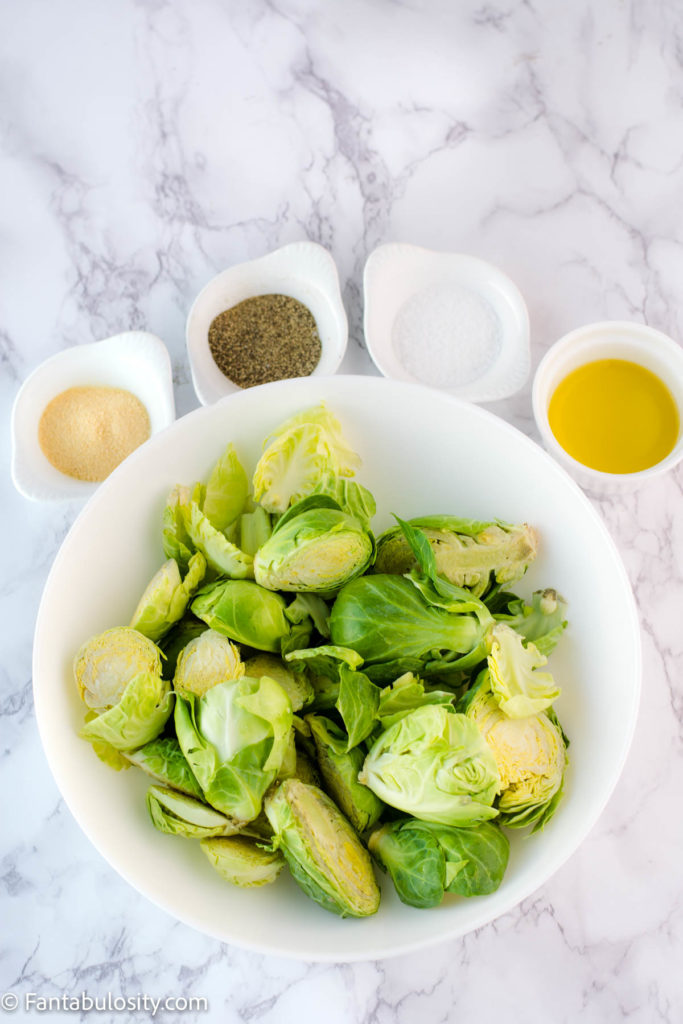
    Gather your ingredients to make this basic brussels sprouts recipes:

    Ingredients:

    • brussels sprouts, sliced in half
    • olive oil
    • garlic powder
    • salt
    • pepper
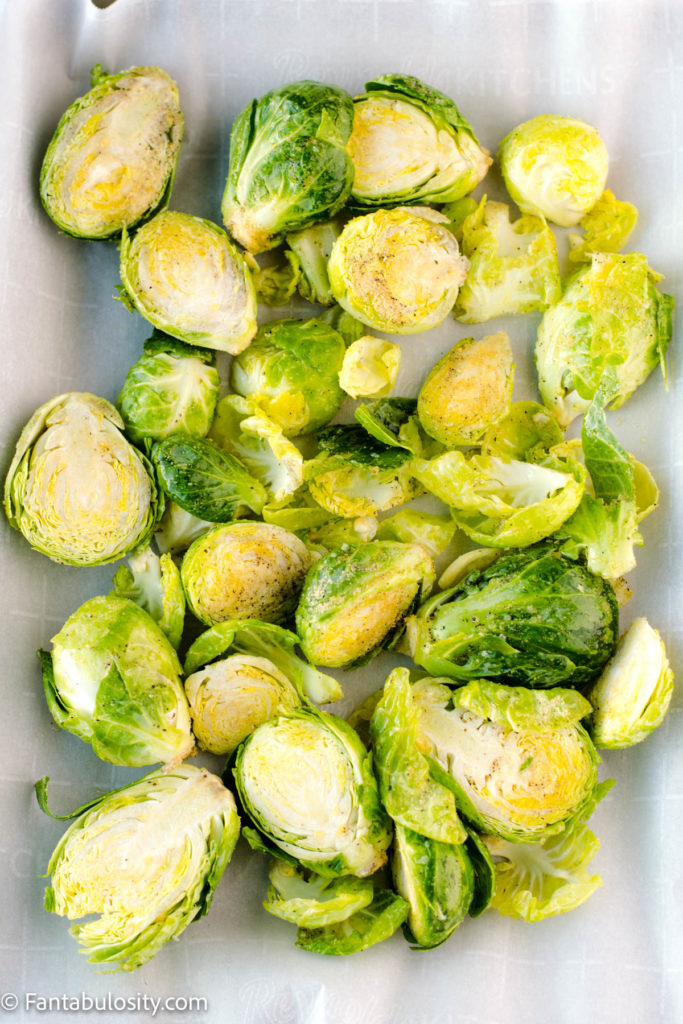
    Ingredients for roasted brussels sprouts
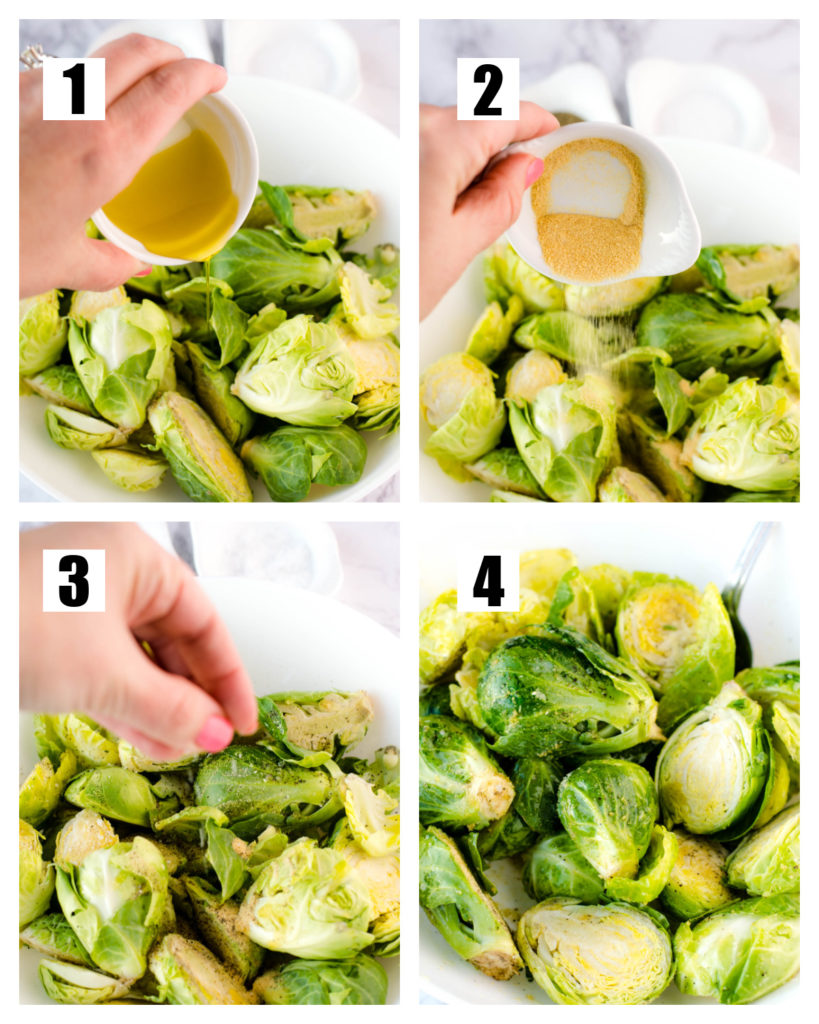
    1. Place clean, sliced brussels sprouts in a large bowl (big enough to stir seasonings and oil to coat them) and pour oil on top.
    2. Add in the garlic powder.
    3. Sprinkle salt and pepper on top
    4. Stir to evenly coat the brussels with oil and spices.
    Step by step - season, oil, brussels sprouts

    Place seasoned brussel sprouts on a baking sheet lined with parchment paper or aluminum foil.

    Place brussels sprouts on parchment paper and baking pan for roasting

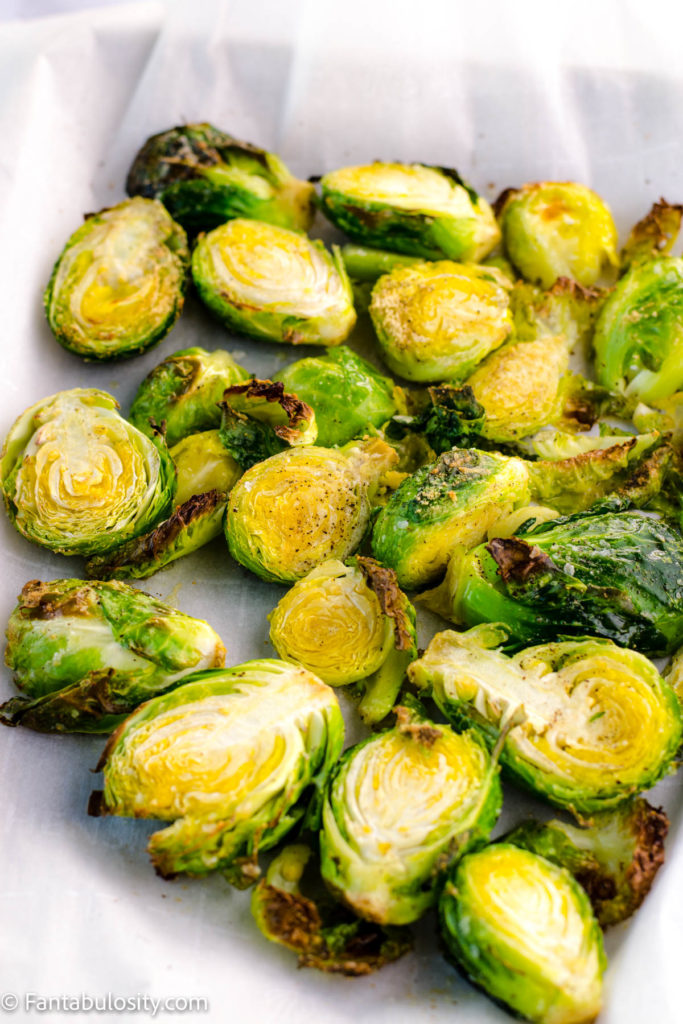
    Bake at 425° for 25-30 minutes, depending on the level of “crisp” you like for brussels.

    Roasted brussels sprouts on baking pan

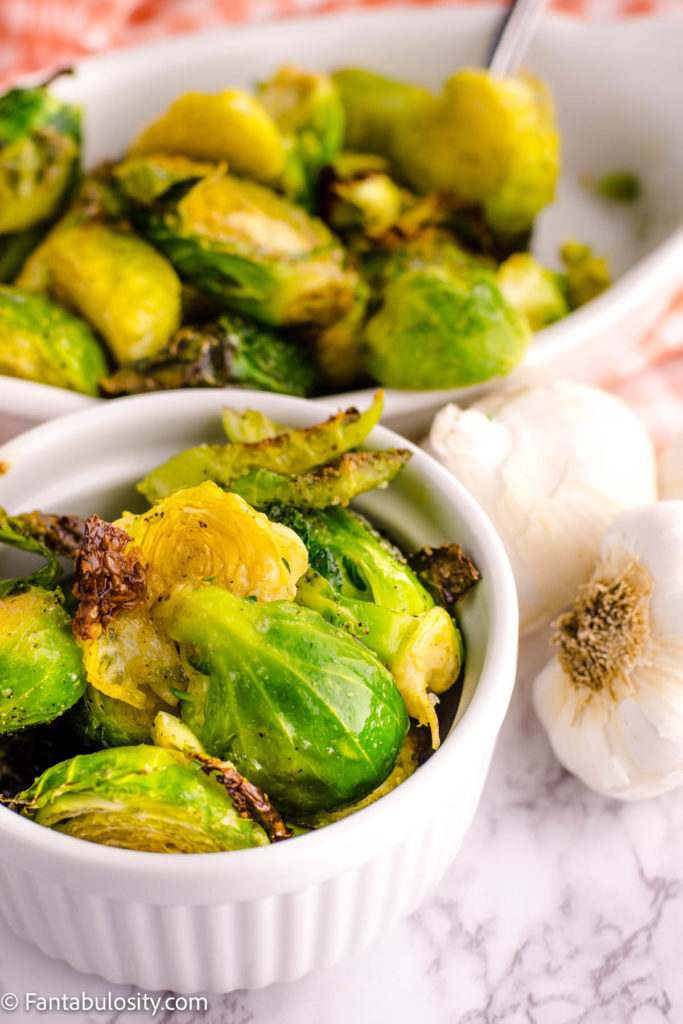
    Serve right away or leave in the oven on “warm” until the rest of the dinner is ready!

    Roasted Brussels Sprouts in serving dish

    What to serve with brussels sprouts

    We love serving roasted brussels sprouts with our oven-baked steak recipe and our bbq baked pork steaks.

    Tips for Making This

    • You can cook brussels sprouts longer to reach more of a crispier texture if you prefer. We actually like them WELL DONE, more-so than what you see here in the photos. The brussels sprouts you see here and with this recipe below, only have a slight crisp or char. We prefer them cooked closer to a 30-minute mark, to give more “crunch” and char flavor.
    • If you plan to add additional ingredients (like from the list of ideas above) to your brussels sprouts, it may be best to either mix-in after the brussels sprouts have finished cooking or toward the end of the cooking process so those ingredients do not cook faster than the sprouts, and burn.
    • Some brussels sprouts can be very large in size. If this is the case, you may want to slice the halves, in half if they’re too big to eat with a fork.

    More recipes you’ll love:

    If you love these then you may also love other healthy side dishes like my roasted broccoli, air fryer butternut squash, and side salad recipe.

    Or, if you’re really in to brussels sprouts like I am, I think you’ll also love this Brussel Sprout Salad!

    Recipe

    Roasted brussels sprouts on white plate.
    Print Pin
    5 from 4 votes

    Roasted Brussels Sprouts

    Roasted brussels sprouts are a staple side dish in our home. Simply seasoned with olive oil, garlic powder, salt, and pepper, this easy recipe goes great with any main dish!
    Course Side Dish
    Cuisine American
    Diet Vegan, Vegetarian
    Prep Time 5 minutes minutes
    Cook Time 25 minutes minutes
    Total Time 30 minutes minutes
    Servings 4 servings
    Calories 100kcal
    Author Jessica Burgess

    Ingredients

    • 12 oz. brussel sprouts washed and sliced in half
    • 2 tablespoon olive oil
    • ½ teaspoon garlic powder
    • ½ teaspoon kosher salt
    • ½ teaspoon pepper

    Instructions

    • Preheat oven to 425°
    • If not already, wash and slice brussels sprouts in half.
    • Place brussels sprouts in large bowl (big enough for stirring to coat with other ingredients).
    • Pour olive oil and seasonings over brussels sprouts and stir to coat evenly.
    • Place seasoned brussels sprouts on a baking sheet that's covered with parchment paper or aluminum foil.
    • Bake at 425° for 25-30 minutes, or until brussels are soft, and to the desired "crisp" that you prefer.

    Notes

    • You can cook brussels sprouts longer to reach more of a crispier texture if you prefer. We actually like them WELL DONE, more-so than what you see here in the photos. The brussels sprouts you see here and with this recipe below, only have a slight crisp or char. We prefer them cooked closer to a 30-minute mark, to give more “crunch” and char flavor.
    • If you plan to add additional ingredients (like from the list of ideas above) to your brussels sprouts, it may be best to either mix-in after the brussels sprouts have finished cooking or toward the end of the cooking process so those ingredients do not cook faster than the sprouts, and burn.
    • Some brussels sprouts can be very large in size. If this is the case, you may want to slice the halves, in half if they’re too big to eat with a fork.

    Nutrition

    Serving: 3oz. | Calories: 100kcal | Carbohydrates: 8g | Protein: 3g | Fat: 7g | Saturated Fat: 1g | Polyunsaturated Fat: 1g | Monounsaturated Fat: 5g | Sodium: 312mg | Potassium: 339mg | Fiber: 3g | Sugar: 2g | Vitamin A: 643IU | Vitamin C: 72mg | Calcium: 37mg | Iron: 1mg

    Chorizo Gravy

    March 15, 2021

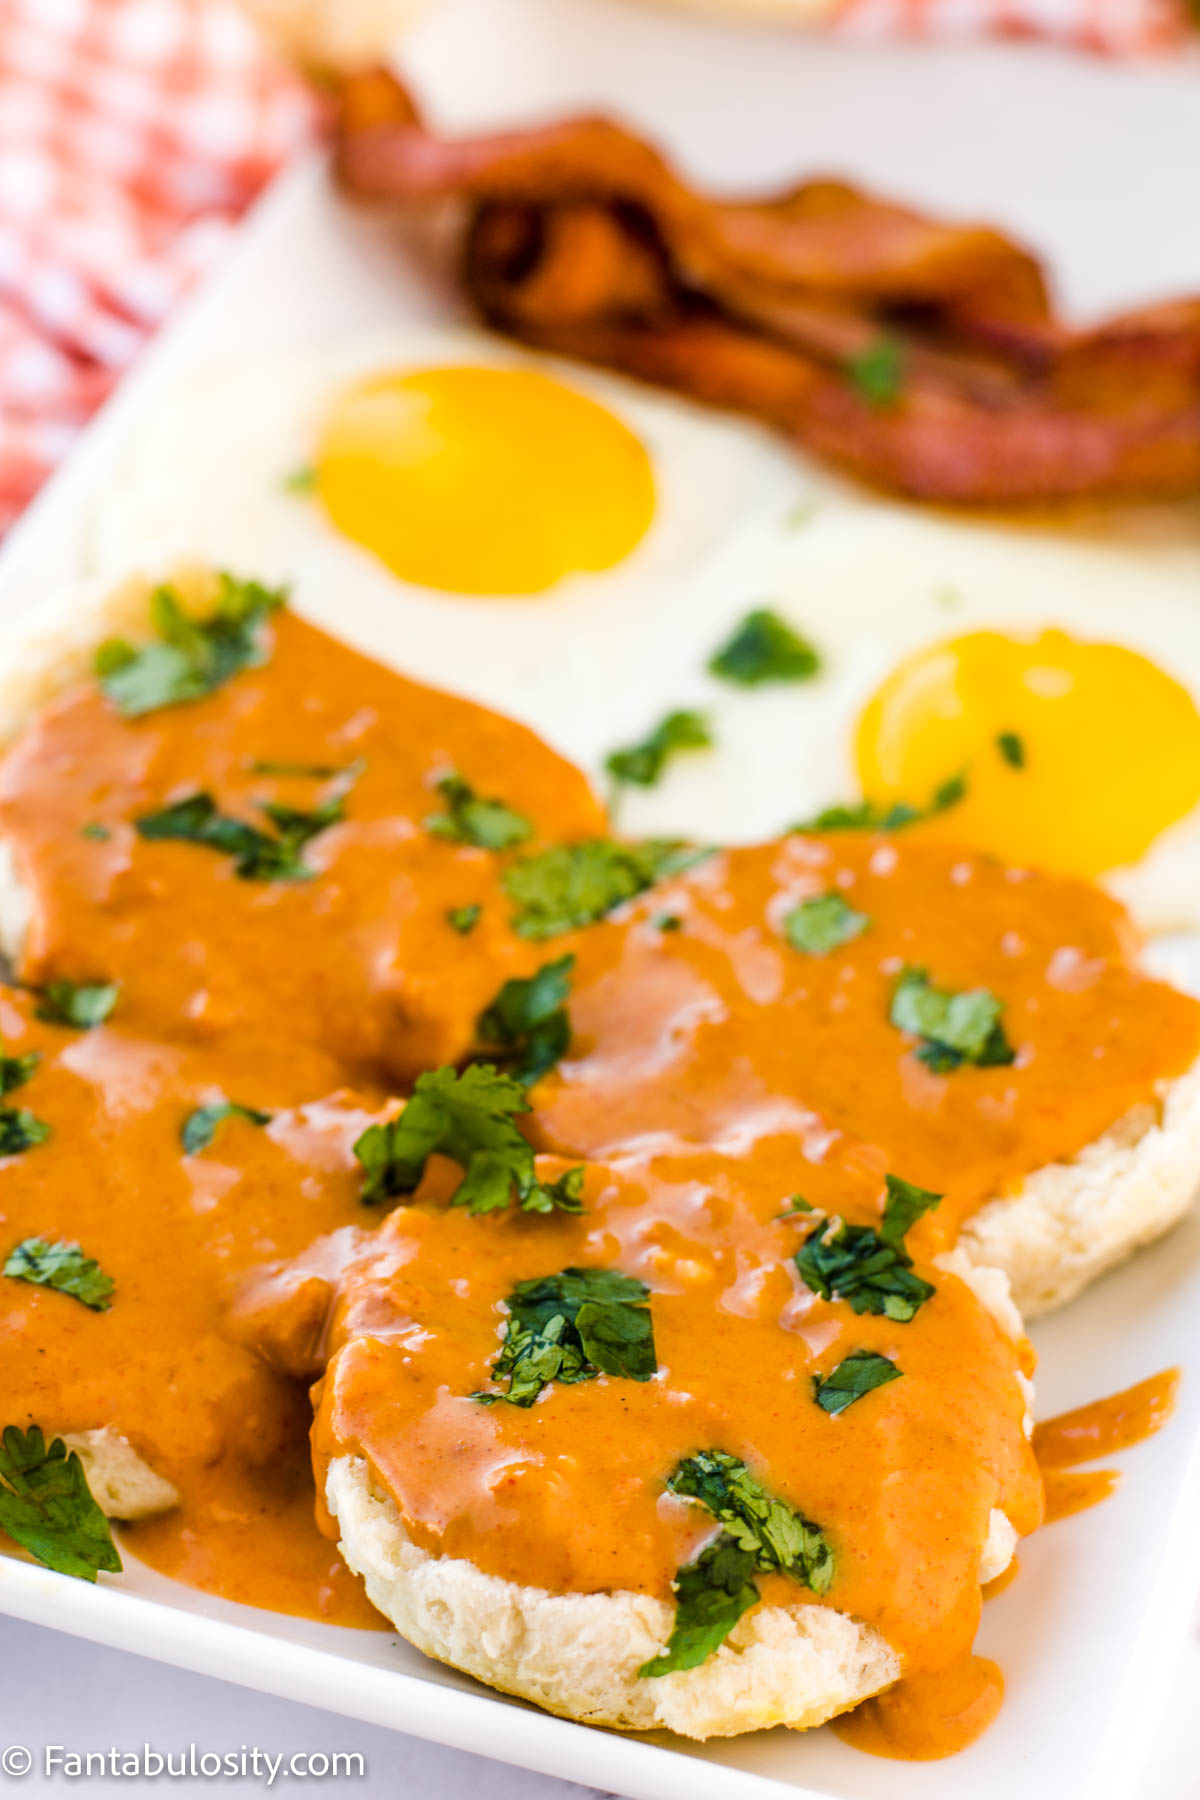
    Chorizo gravy recipe on white plate with over easy eggs

    This easy chorizo gravy recipe adds spicy sausage to classic white gravy, which gives it a “kick” making it the perfect addition to serve on top of homemade biscuits for a hearty breakfast meal.

    When you love sausage gravy but want to step outside of the box with a flavor twist, look no further! This not only became a new favorite gravy to cover biscuits with (especially biscuits cooked in the air fryer) but to also serve on breakfast potatoes, in this biscuit and gravy casserole recipe, poured on top of these garlic biscuits, or on top of country-fried steak!

    Chorizo Gravy Recipe
    [feast_advanced_jump_to]

    Why You’ll Love This Gravy Recipe

    • It’s easy to make and can be ready in about 15-20 minutes!
    • The FLAVOR!!! It’s beautiful in color and since the chorizo is highly seasoned, it seasons the gravy for you!

    What kind of meat is chorizo made of?

    It’s made of pork sausage. So it can be really fun to substitute ground pork sausage with chorizo in certain dishes! So instead of a regular white country sausage gravy, you can have a chorizo sausage gravy!

    What is Chorizo Gravy?

    When we make it, we use simple ingredients like…

    Ingredients:

    • chorizo
    • flour
    • milk
    • garlic powder
    • salt

    This creates a sauce that is seasoned with the chorizo and thickened with flour, making it a great addition for chorizo biscuits and gravy, certain proteins like chicken fried steak, or starches like sliced potatoes or hashbrowns!

    How to Make the Gravy

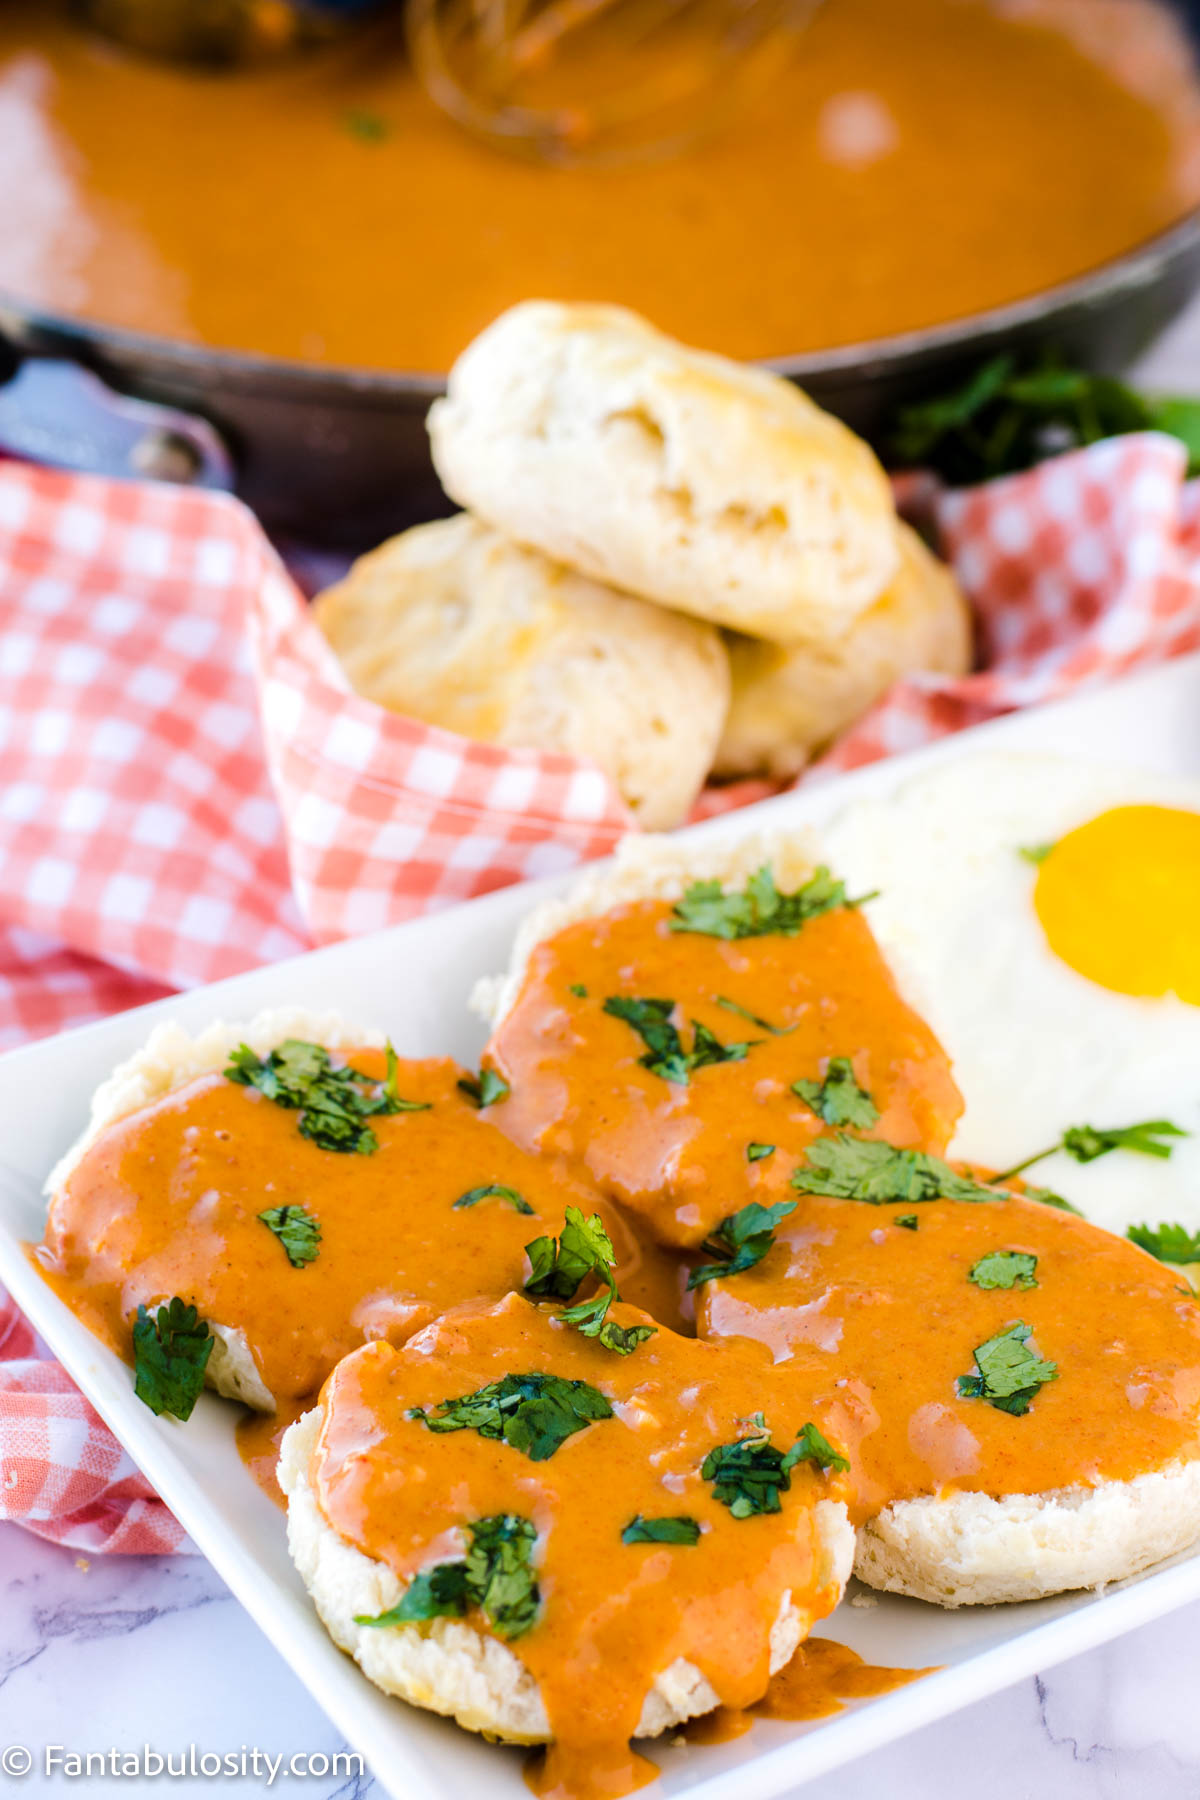
    Biscuits and chorizo gravy
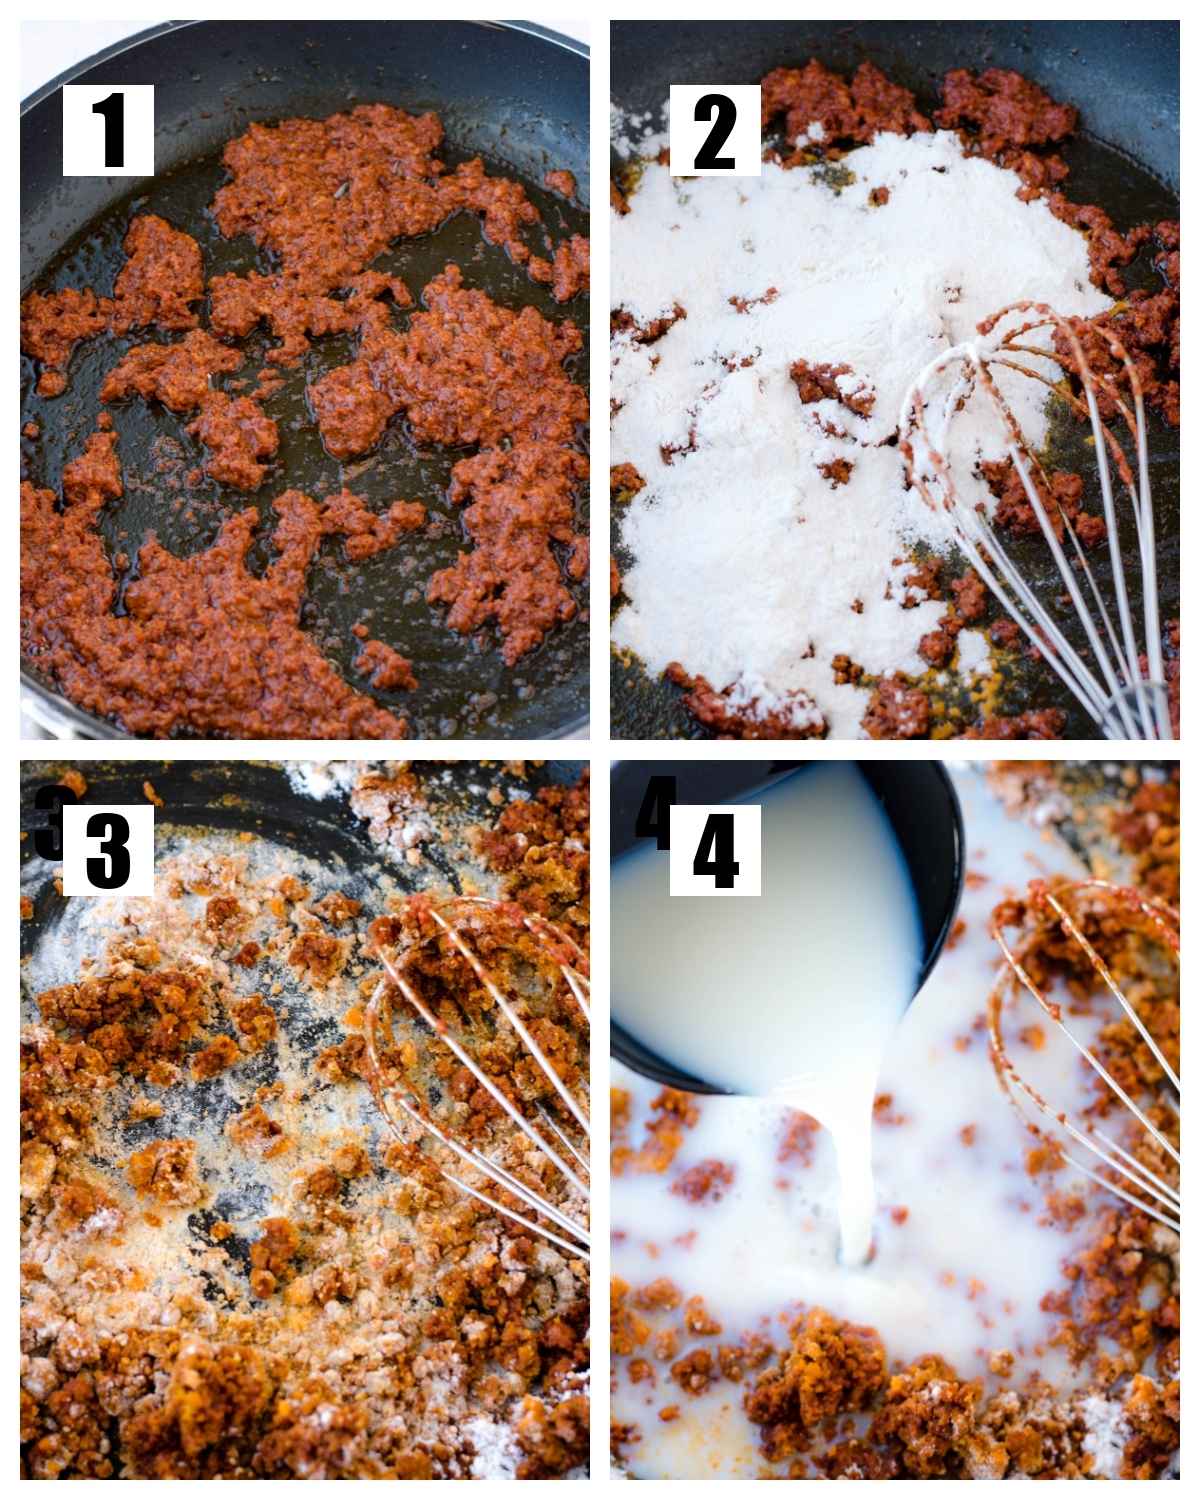
    1. Start by cooking chorizo over low heat in a pan for 10 minutes or until it reaches a minimum temperature of 170°. Do not drain.
    2. Next, add in 2 heaping tablespoons of flour.
    3. Whisk together with the chorizo.
    4. Pour in the milk, garlic powder, and salt.
    Collage showing how to make chorizo gravy.

    Cook over med-high heat, whisking for about 3 min or until thickened, and then serve!

    How to use chorizo gravy

    • on top of biscuits
    • with country fried steak
    • on top of scrambled eggs
    • chicken fried steak
    • fried potatoes or hashbrowns
    • toast
    • on top of a breakfast burrito
    Chorizo gravy on top of biscuits, on a plate with sunny side up eggs, bacon

    Tips for Making This

    • If the gravy gets too thick, add more milk, by the ½ cup until it reaches your desired consistency.
    • If the whole package of chorizo will be too spicy for you, reduce the amount of chorizo you use! It’s flexible and can be changed to reflect your desired spice level.

    More Posts You’ll Love

    • Breakfast Finger Food: Biscuits + Gravy Dippers
    • Air Fryer Bacon
    • Breakfast Sausage Casserole

    Recipe

    Chorizo gravy recipe on white plate with over easy eggs
    Print Pin
    5 from 3 votes

    Chorizo Gravy

    This easy chorizo gravy recipe is filled with flavor and a "kick" that's the perfect addition to serve on top of biscuits for a hearty breakfast meal.
    Course Breakfast
    Cuisine Mexican
    Prep Time 0 minutes minutes
    Cook Time 15 minutes minutes
    Total Time 15 minutes minutes
    Servings 4 servings
    Calories 290kcal
    Author Jessica Burgess

    Ingredients

    • 9 oz. chorizo
    • 2 tablespoon flour *heaping tablespoons
    • 2.5 cups milk
    • ¼ teaspoon garlic powder
    • ½ teaspoon salt or to taste

    Instructions

    • In a skillet (large enough for the gravy to cook in) cook the chorizo or medium heat until done, which is about 10 minutes or until the temperature of the chorizo reaches 170. Do not drain.
    • Add flour, garlic powder and salt, and stir with a whisk until combined.
    • Add milk and whisk frequently, cooking for about 3 minutes or until gravy thickens.

    Notes

    • If the gravy gets too thick, add more milk, by the ½ cup until it reaches your desired consistency.
    • If the whole package of chorizo will be too spicy for you, reduce the amount of chorizo you use! It’s flexible and can be changed to reflect your desired spice level.

    Nutrition

    Serving: 0.5cup | Calories: 290kcal | Carbohydrates: 10g | Protein: 15g | Fat: 20g | Saturated Fat: 9g | Cholesterol: 55mg | Sodium: 1120mg | Potassium: 208mg | Fiber: 1g | Sugar: 8g | Vitamin A: 475IU | Vitamin C: 1mg | Calcium: 173mg | Iron: 1mg

    Homemade Teriyaki Sauce

    March 13, 2021

    This homemade teriyaki sauce recipe is easy and uses common ingredients, giving you the restaurant-style sauce you love!

    Serve it with chicken fried rice, your favorite oven steak recipe, and grilled shrimp, or even toss air fryer chicken wings with it! I make this teriyaki chicken and rice for dinner at least once a week!

    Homemade Teriyaki Sauce Recipe - spoon dripping sauce
    [feast_advanced_jump_to]

    For years I would buy store-bought teriyaki sauce but it never tasted as good as what we’d get when we’d go to our favorite Japanese steakhouse.

    So, I was on a mission to create a homemade teriyaki sauce that didn’t have such a strong ginger taste and just the right amount of sweetness.

    Now, this is the recipe we try to make and keep on hand in the refrigerator in case we need a dipping sauce or want to cook it with something like air fryer salmon, or even these Asian sloppy joes.

    Why You’ll Love This

    • Homemade vs. Store-Bought: If you’re like me and have always wanted to make your own teriyaki sauce because store-bought just doesn’t taste near as good, then you’ll love how easy this recipe is and the flavor!
    • Not a fan of ginger? Perfect. This recipe doesn’t use ginger. HOWEVER, I know almost all teriyaki sauce recipes include ginger so most people want it included. So instead of totally leaving it out, I’m also offering the option of how much ginger to add if you prefer it.

    Ingredients:

    If you’ve never made your own before, you may be surprised at the little amount it takes. Here’s all you need:

    • soy sauce
    • water
    • brown sugar
    • garlic powder (or minced garlic)
    • honey
    • cornstarch

    How to Make This Teriyaki Sauce:

    Steps showing how to make teriyaki sauce.
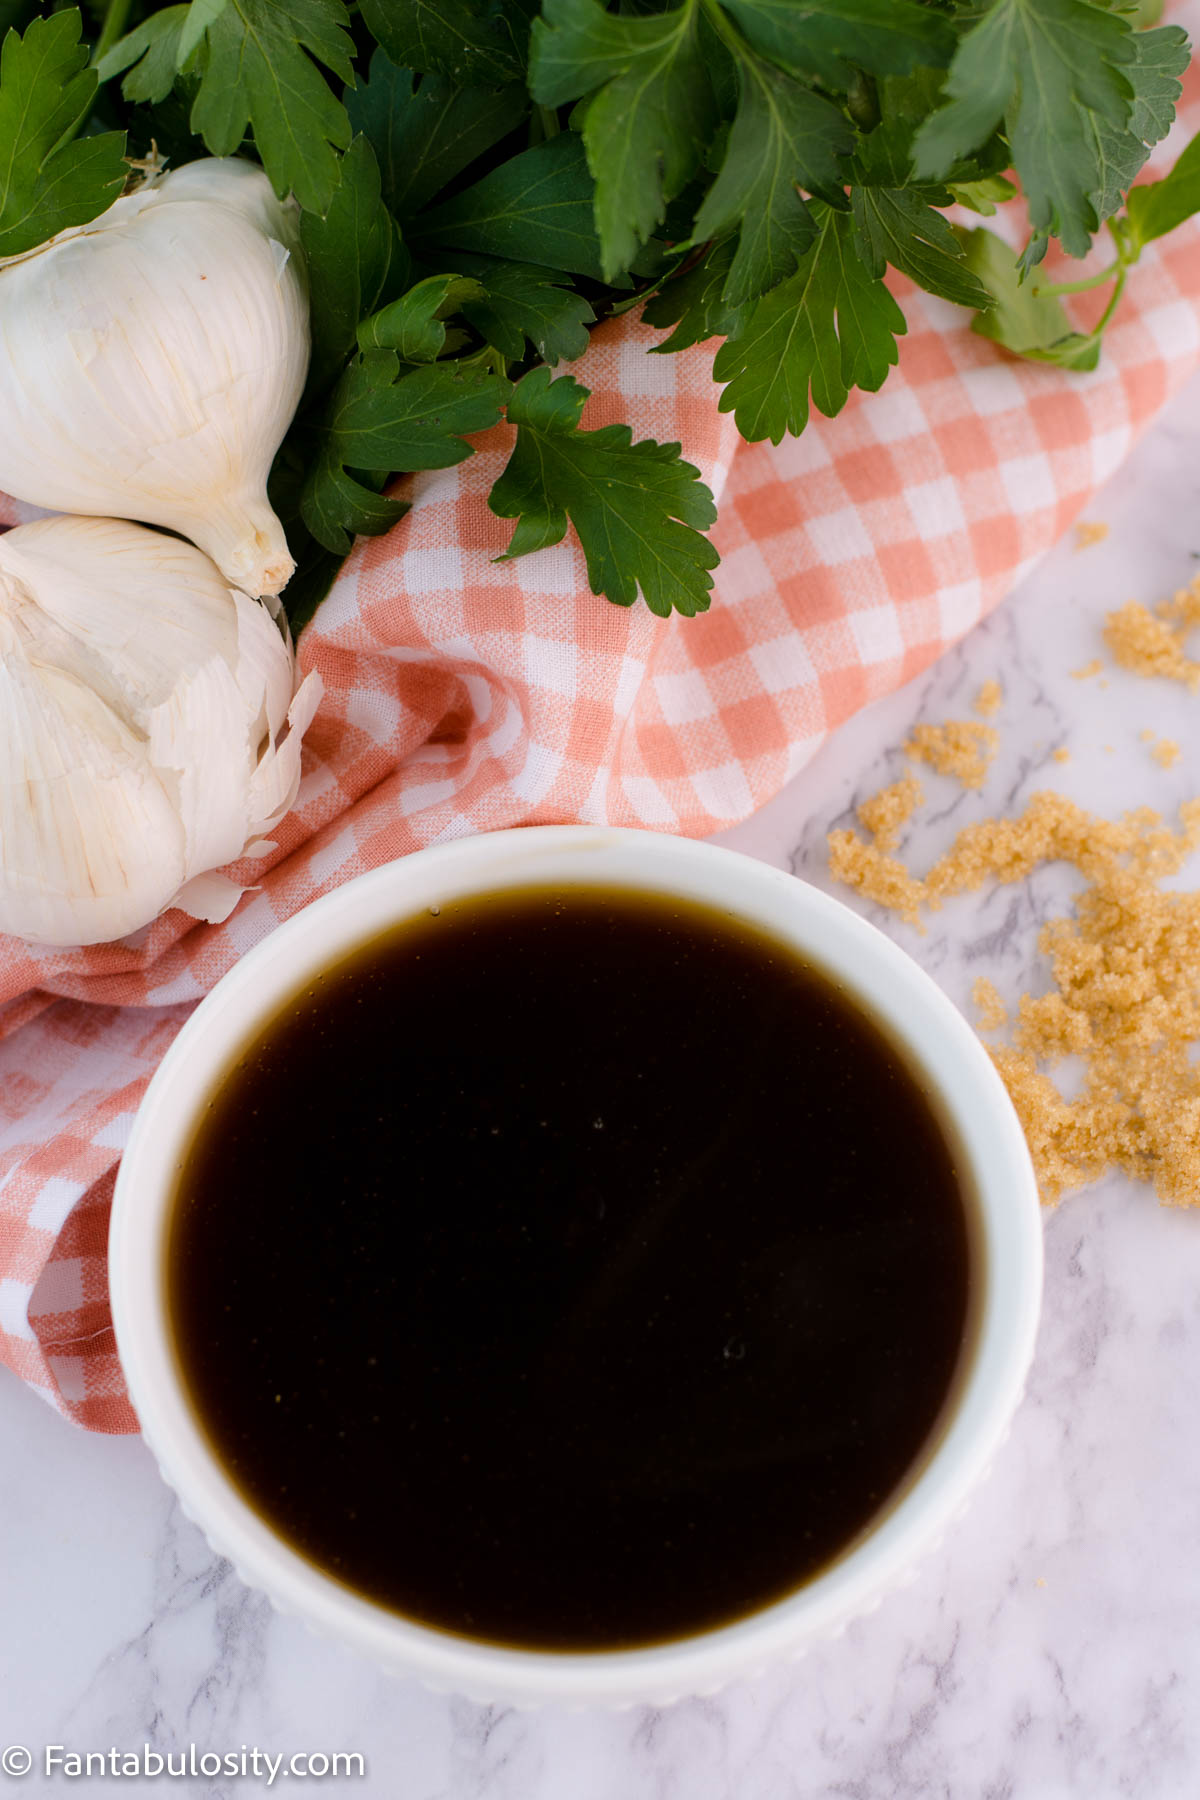
    • In a saucepan, over medium heat, mix together the soy sauce, 1 cup of water, garlic, brown sugar, and honey.

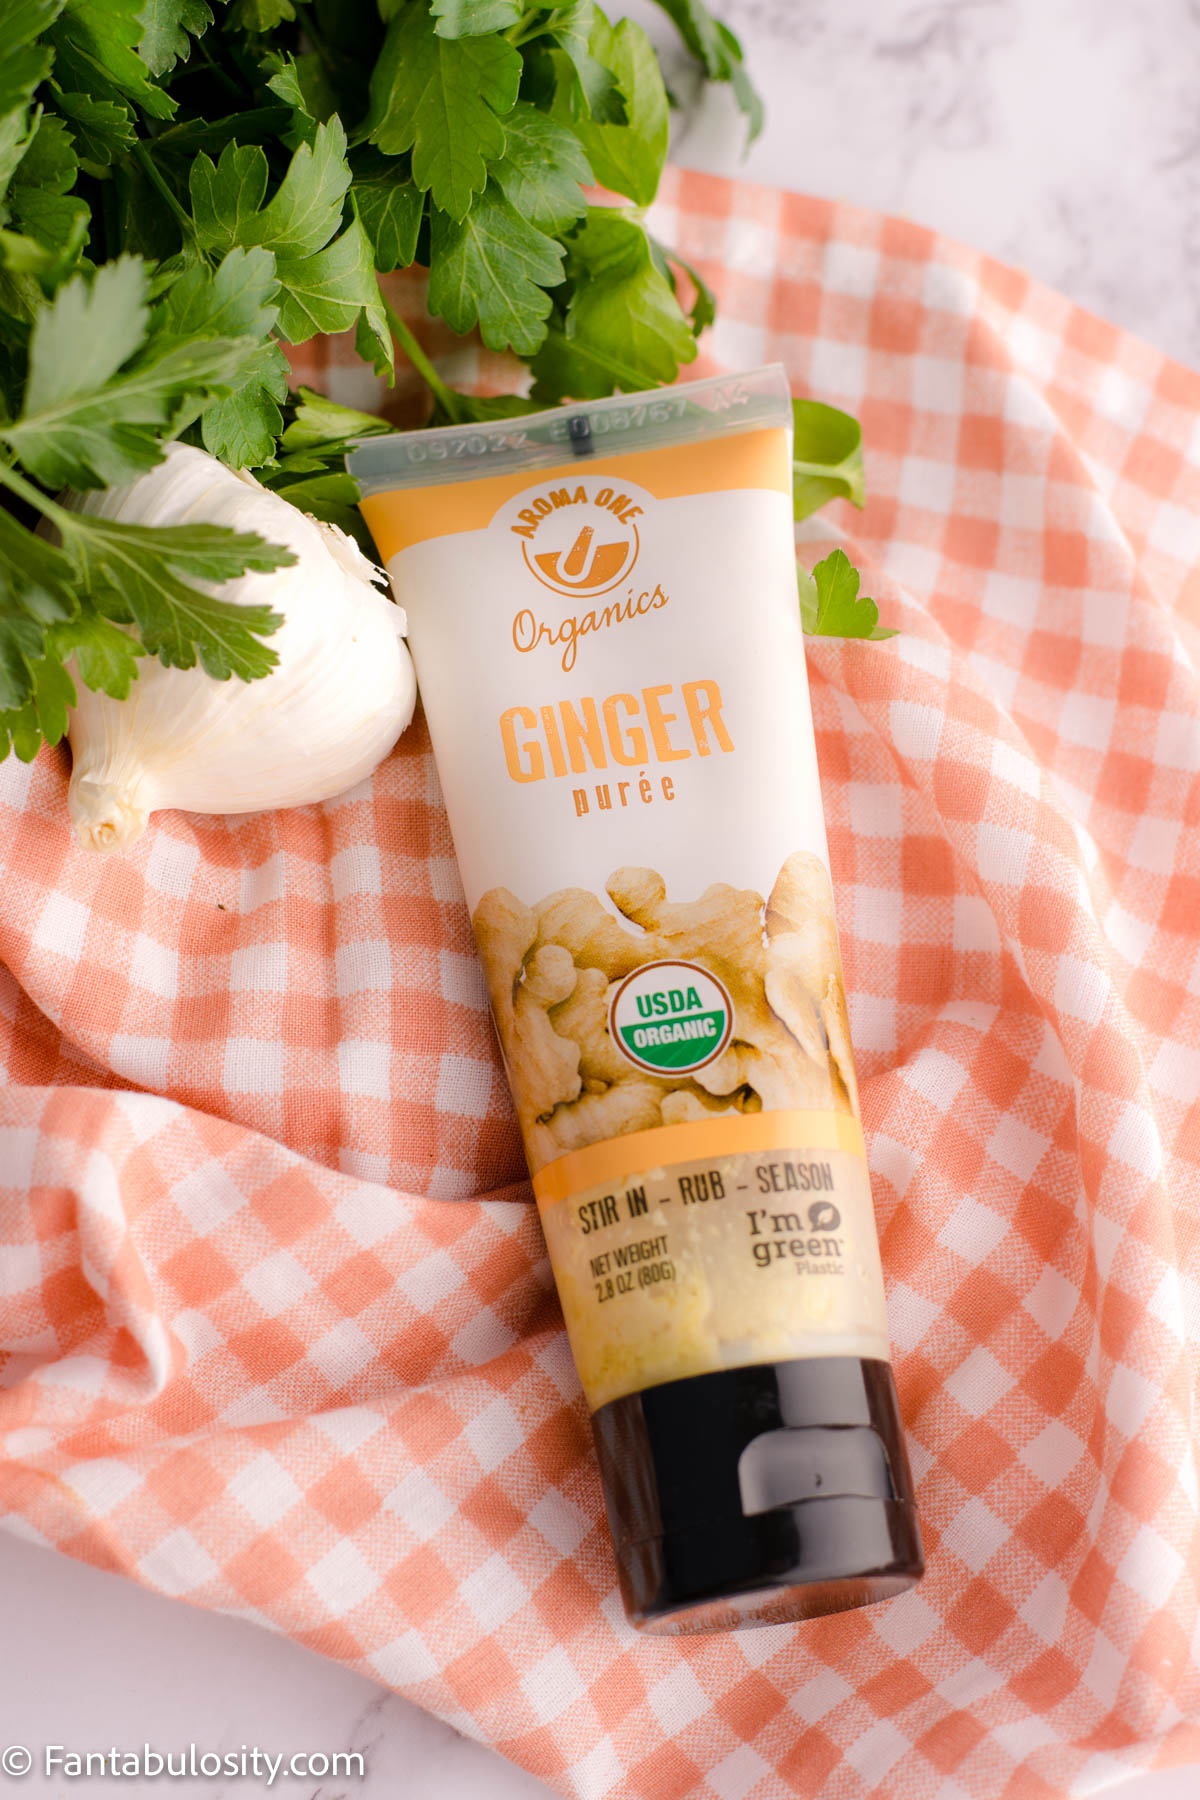
    If you prefer ginger in your teriyaki sauce, add ½ teaspoon of ginger puree (or fresh ginger if you prefer) in at this time as well.

    Ginger paste for teriyaki sauce

    How to Thicken Sauce

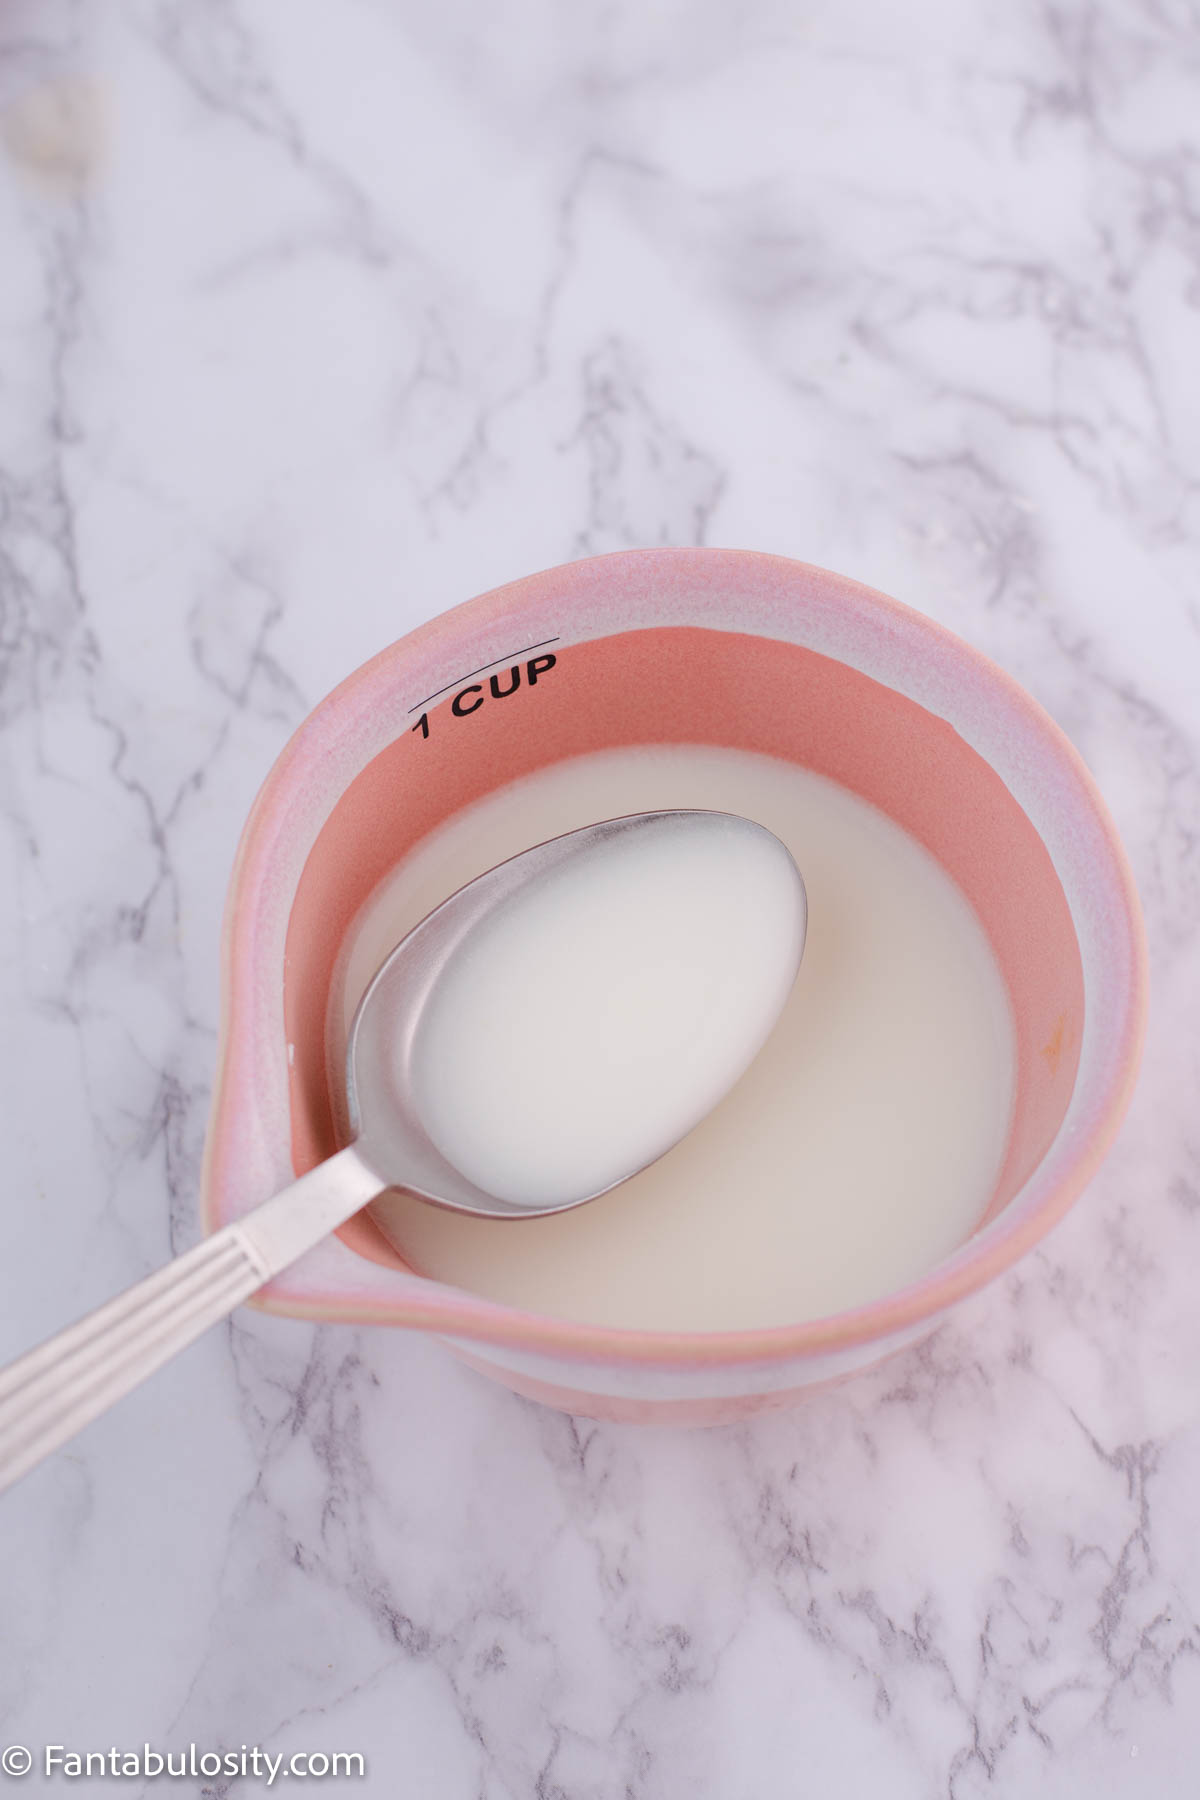
    Mix 2 tbsp. of cornstarch and ¼ cup of cold water together in a small dish, and whisk in to heated teriyaki sauce on the stove top once it has heated through. Cook over medium-low heat, until sauce has thickened.

    Once thickened, it’s ready to serve!

    how to thicken teriyaki sauce: cornstarch and water
    Homemade Teriyaki Sauce recipe

    Spicy Teriyaki Sauce Recipe

    We LOVE spicy foods and adding a little kick to teriyaki sauce is one of our favorite things to do sometimes. Simply keep this recipe the same and just add a bit of your favorite spice.

    Suggested: To add some spice, add a little bit at a time (maybe ¼ tsp.) of chili paste or red pepper flakes in to the sauce while heating, and increase the amounts to reach desired spice level.

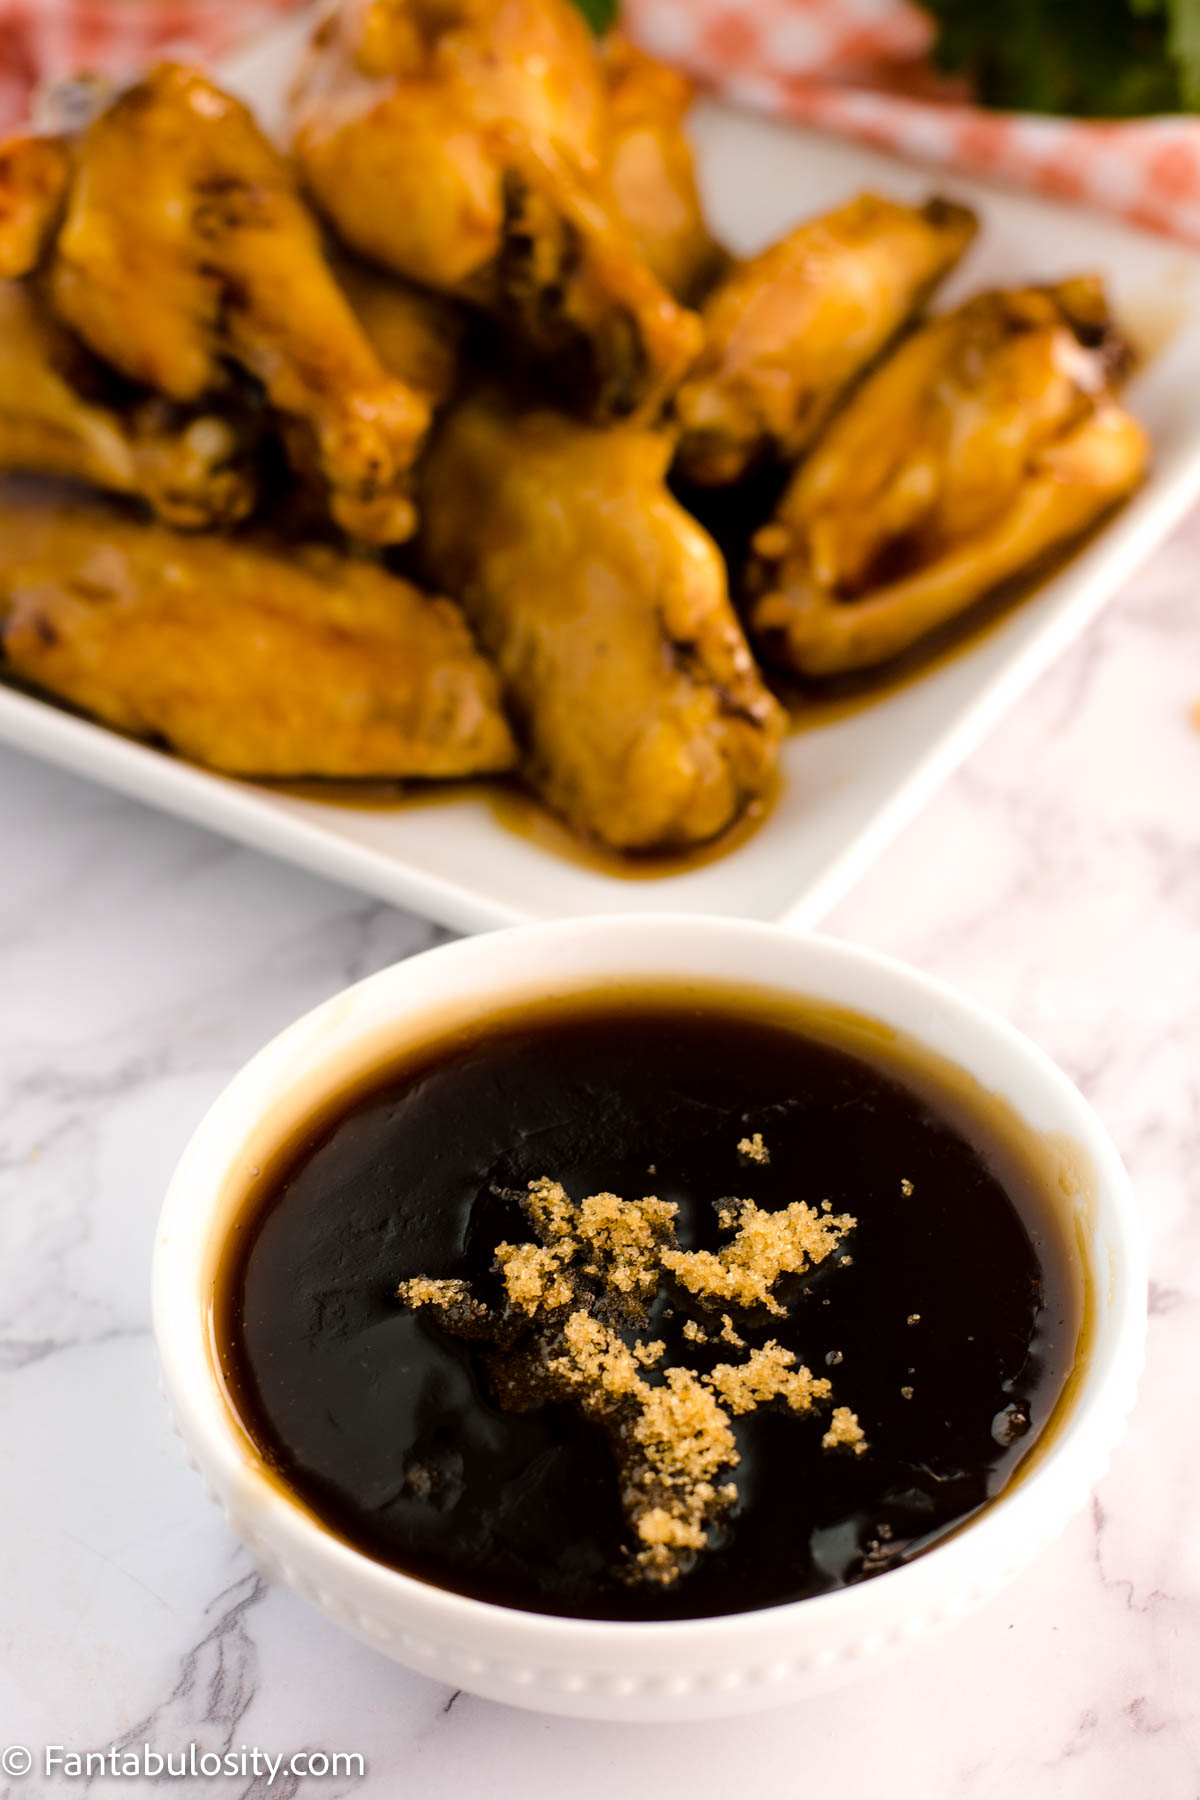
    Homemade teriyaki sauce recipe

    How to Store

    Store in an air-tight container (my favorite is to store it in small mason jars), in the refrigerator.

    How long is homemade teriyaki sauce good for?

    Stored in the refrigerator, homemade teriyaki sauce is good for up to 3-5 days.

    How to Use Teriyaki Sauce

    This sauce is delicious used as a dipping sauce or even to cover your favorite meat or vegetables in. Sauce recipes like this teriyaki and one of my favorites, Chipotle aioli, are staples for dipping.

    • as a dipping sauce
    • great for a marinade
    • on this burger recipe
    • drizzle on salmon (fish)
    • on smoked chicken
    • in a stir-fry (or noodle bowl)
    • on vegetables
    • on grilled shrimp
    • meatballs

    Tips for Making This

    • Sometimes we will double/triple this batch to have a lot on hand for dipping or to make teriyaki chicken wings, salmon, or to drizzle on restaurant style fried rice!
    • Too sweet? – If it’s too sweet, simply reduce the amount of brown sugar.
    • Want more of an acidic teriyaki sauce? Add a splash of rice wine.
    • Prefer a hint of pineapple that some sauces have? Add a splash of pineapple juice (watch sweetness level).

    More Posts You’ll Love

    • Noodle Bowl – Easy, Vegan, Gluten-Free
    • Instant Pot Orange Chicken
    • Air Fryer Crispy Tofu

    Recipe

    Print Pin
    4.91 from 11 votes

    Homemade Teriyaki Sauce

    This homemade teriyaki sauce recipe is easy and uses common ingredients, giving you that restaurant-style sauce you love!
    Course Appetizer
    Cuisine Japanese
    Prep Time 0 minutes minutes
    Cook Time 5 minutes minutes
    Total Time 5 minutes minutes
    Servings 4 servings
    Calories 82kcal
    Author Jessica Burgess

    Ingredients

    • ¼ cup soy sauce
    • 1 ¼ cup water divided (1 cup + ¼ cup)
    • 1 tablespoon honey
    • ¼ teaspoon garlic powder or minced garlic
    • 5 tablespoons brown sugar
    • ½ teaspoon ginger puree optional
    • ¼ teaspoon chili paste optional for spicy teriyaki sauce
    • 2 tablespoons corn starch

    Instructions

    • In a sauce pan, over medium heat,cook the soy sauce, 1 cup of water, honey, garlic, brown sugar. (If desired, also add in ginger and/or chili paste at this time.)
    • In a separate small dish or bowl, mix together the corn starch and ¼ cup cold water. (This will be for thickening the sauce.)
    • When mixture in sauce pan is heated through, whisk in the cornstarch mixture and continue cooking until teriyaki sauce has thickened.
    • Serve right away or once cooled, store in refrigerator.

    Notes

    • Sometimes we will double/triple this batch to have a lot on hand for dipping or to make teriyaki chicken wings, salmon, or to drizzle on this fried rice recipe!
    • Too sweet? – If it’s too sweet, simply reduce the amount of brown sugar.
    • Want more of an acidic teriyaki sauce? Add a splash of rice wine.
    • Prefer a hint of pineapple that some sauces have? Add a splash of pineapple juice (watch sweetness level).

    Nutrition

    Serving: 1.5cups | Calories: 82kcal | Carbohydrates: 19g | Protein: 2g | Fat: 1g | Saturated Fat: 1g | Sodium: 818mg | Potassium: 53mg | Fiber: 1g | Sugar: 15g | Vitamin C: 1mg | Calcium: 18mg | Iron: 1mg

    Frozen Chicken Wings in the Air Fryer

    March 12, 2021

    Frozen Chicken Wings in the air fryer

    Cooking frozen chicken wings in the air fryer is a quick and easy way to enjoy this popular appetizer for game day or just at home for dinner. Cooking time: 25 minutes

    After cooking these crispy air fryer wings, coat them in your favorite sauce or seasonings and dip in your favorite sauce for an at-home treat! They may just become your new favorite air fryer recipe!

    Frozen Chicken Wings in the air fryer
    [feast_advanced_jump_to]

    Why You’ll Love This Air Fryer Chicken Wings Recipe

    We often keep chicken wings in the freezer and don’t always think ahead enough to thaw them out before we want to eat them. So being able to cook frozen wings in the air fryer, and enjoy them in about 25 minutes is a game-changer!

    The best part is when you choose to air fry wings, there’s no need for oil, baking powder or any other ingredients in order to cook them!

    Unlike baking chicken wings, the air fryer allows the excess juices/water to drip down away from the wings, to help create a crispy chicken wing.

    You may also love seeing how we love baking chicken drumsticks in the oven!

    Should I thaw chicken wings before air frying?

    There’s no need to thaw chicken wings before air frying them. This saves so much time and they still come out as crispy chicken wings!

    How do you cook frozen chicken wings in an air fryer?

    For air fryer chicken wings, it’s best to flip at least a couple of times for best results.

    Simply place unseasoned wings directly in to air fryer basket, in a single layer, and then once cooked-through, feel free to use your favorite dry rub and/or favorite sauce. (See below for tips.)

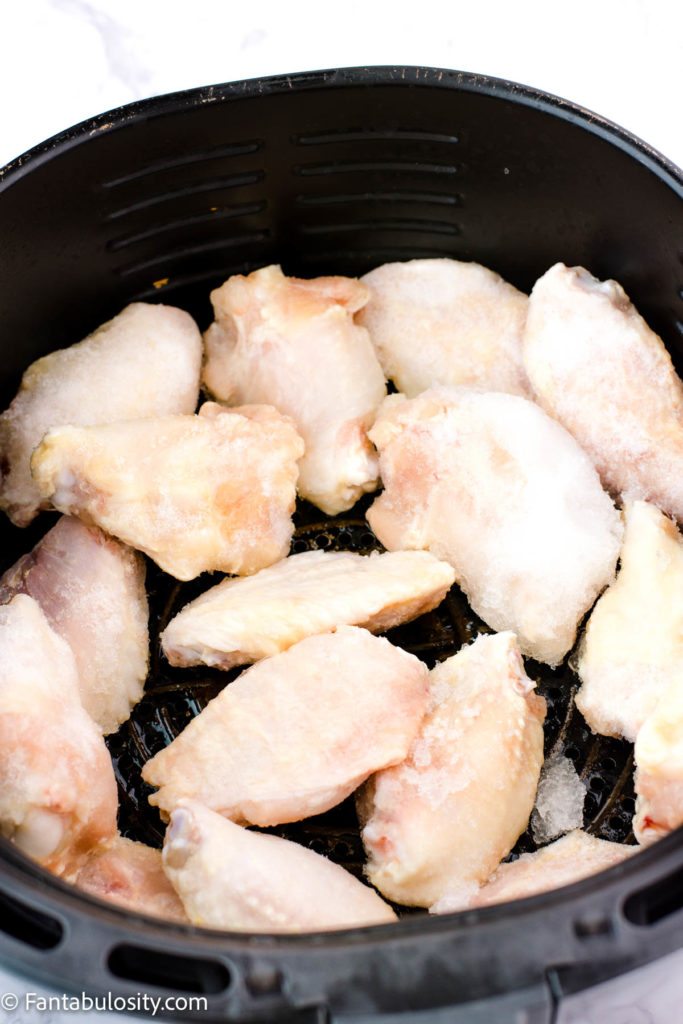
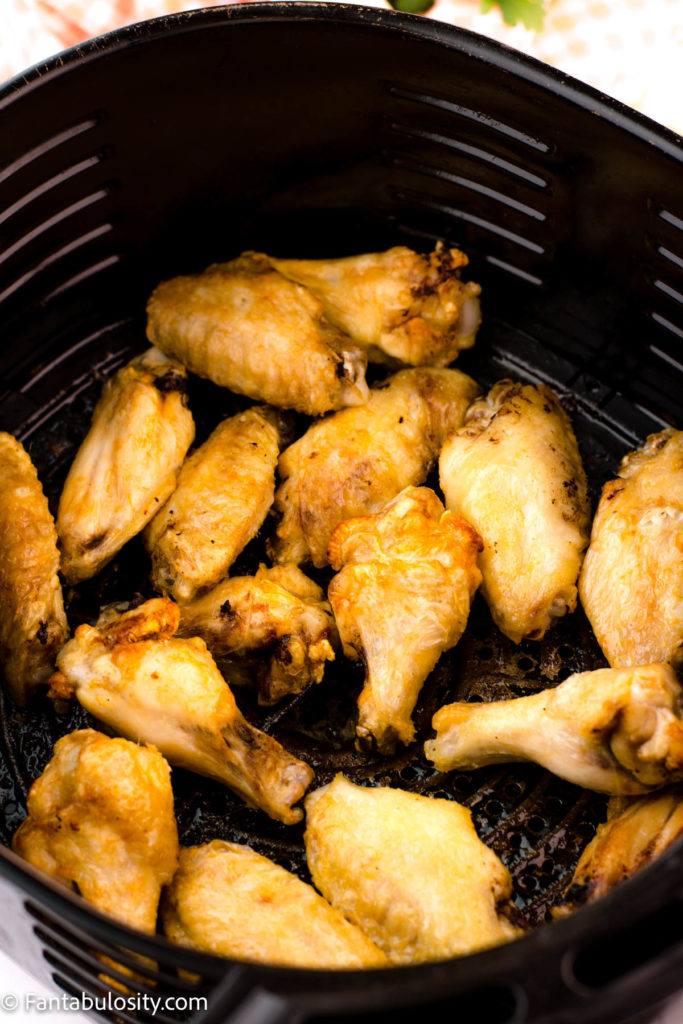
    Frozen chicken wings in air fryer
    Raw, Frozen Chicken Wings
    Partially cooked chicken wings in air fryer
    Partially Cooked Chicken
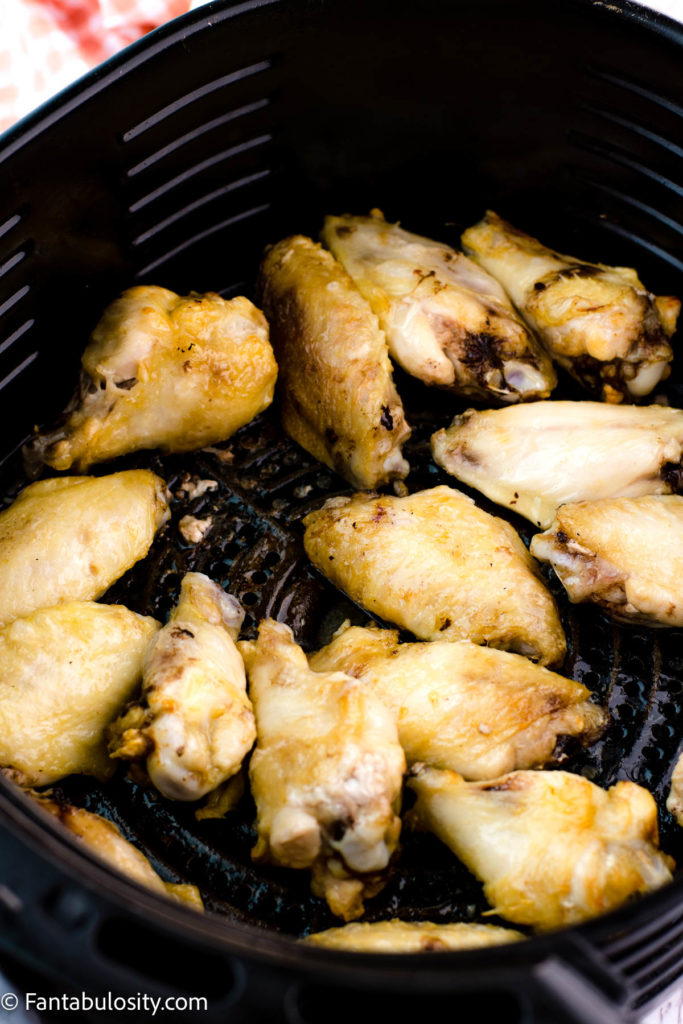
    fully cooked chicken wings in air fryer
    Fully Cooked Chicken Wings

    How long do you cook frozen wings in the air fryer?

    1. Cook the frozen wings at 400° for 10 minutes
    2. Flip, and cook an additional 10 minutes
    3. Flip again, and cook for an additional 5-7 minutes or until internal temperature reaches 165°.
    4. During the last 5-7 minutes, spray wings with cooking spray, if desired, for an extra crispy skin. If desired, spray chicken wings with cooking spray to achieve a crispier skin. This is also a great time to add a “dry rub” to help the seasonings stick.
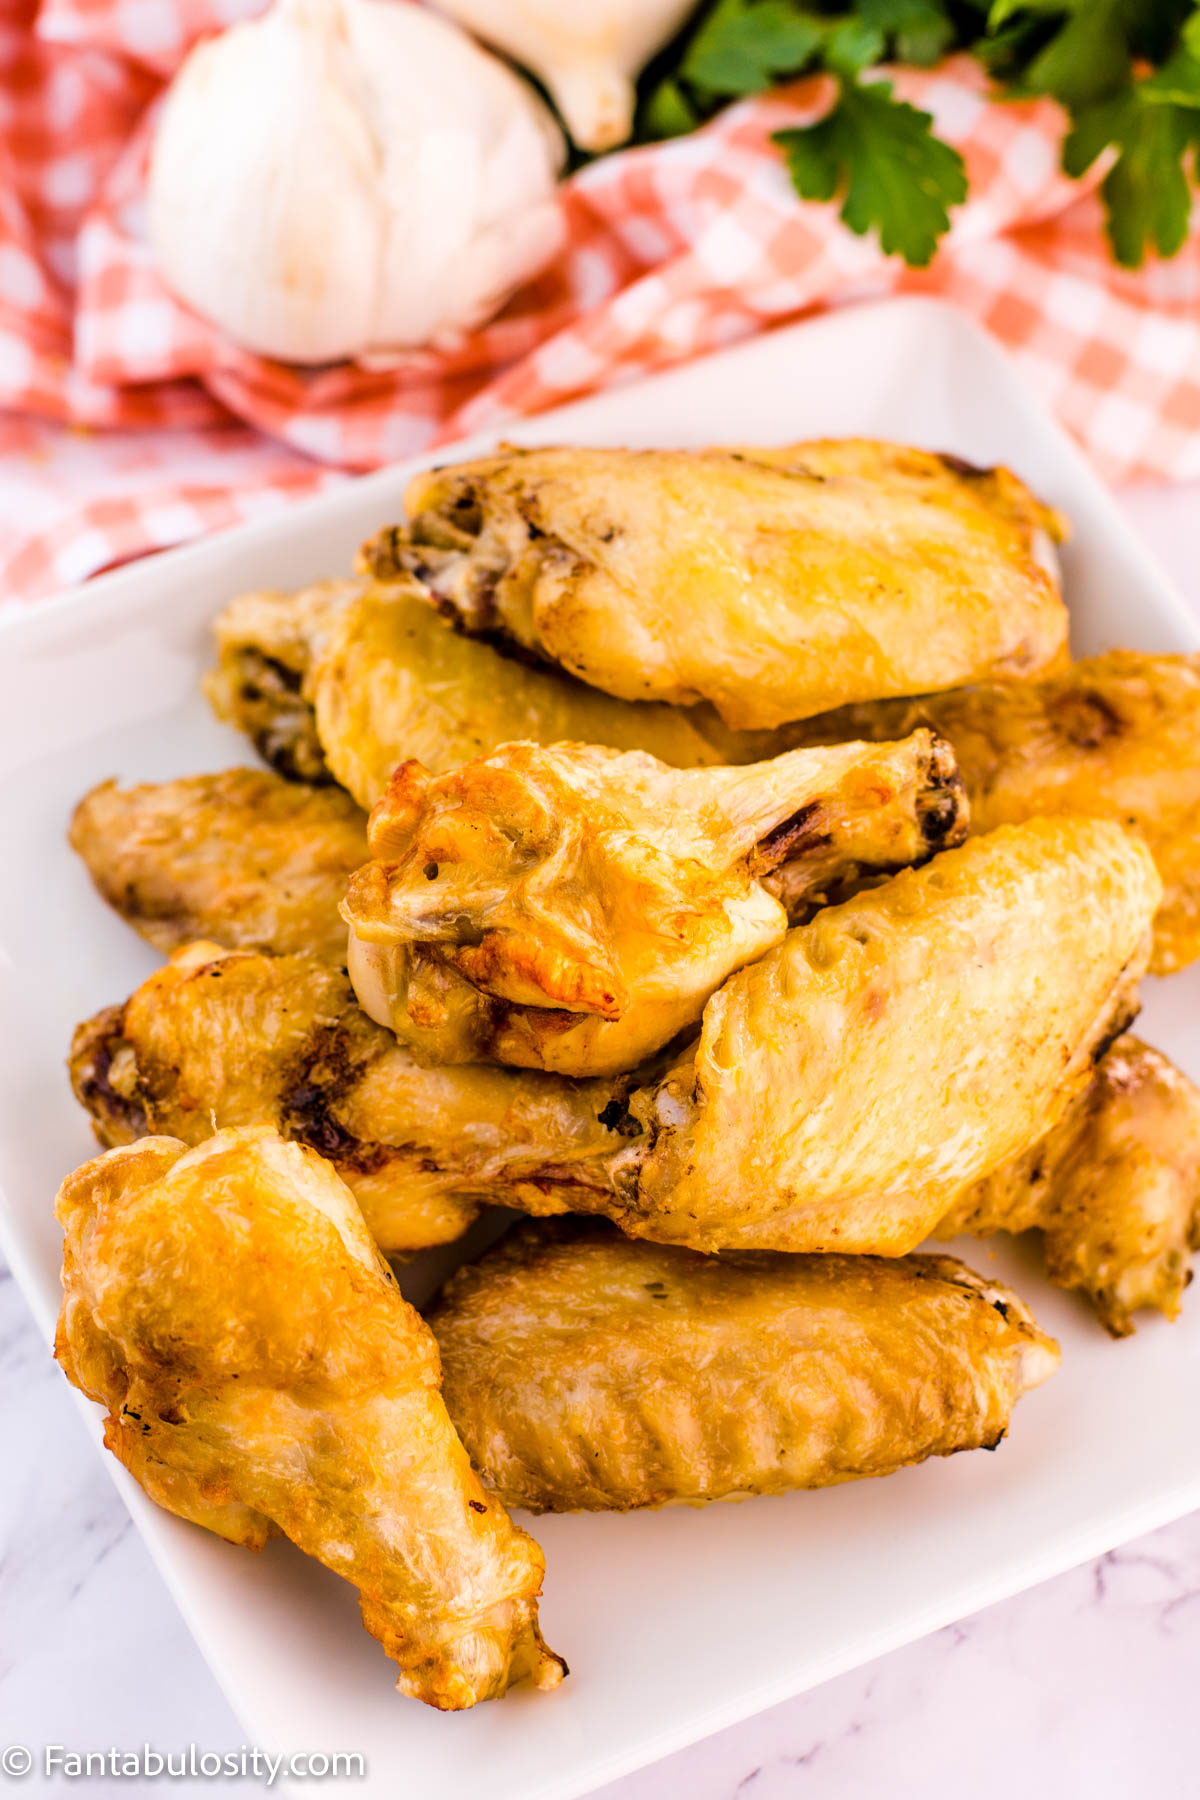
    Unseasoned, cooked chicken wings on a white plate

    Chicken Wings Sauce

    What I love so much about these, is that you can make multiple different batches of delicious wings with different rubs and sauces. Just cook from frozen and then toss with your sauce.

    If you need ideas of different sauces and rubs, here are the top favorites and you can usually find different flavors of wing sauce at the grocery store:

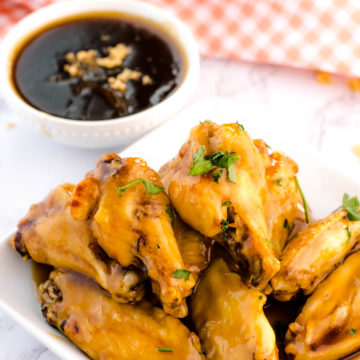
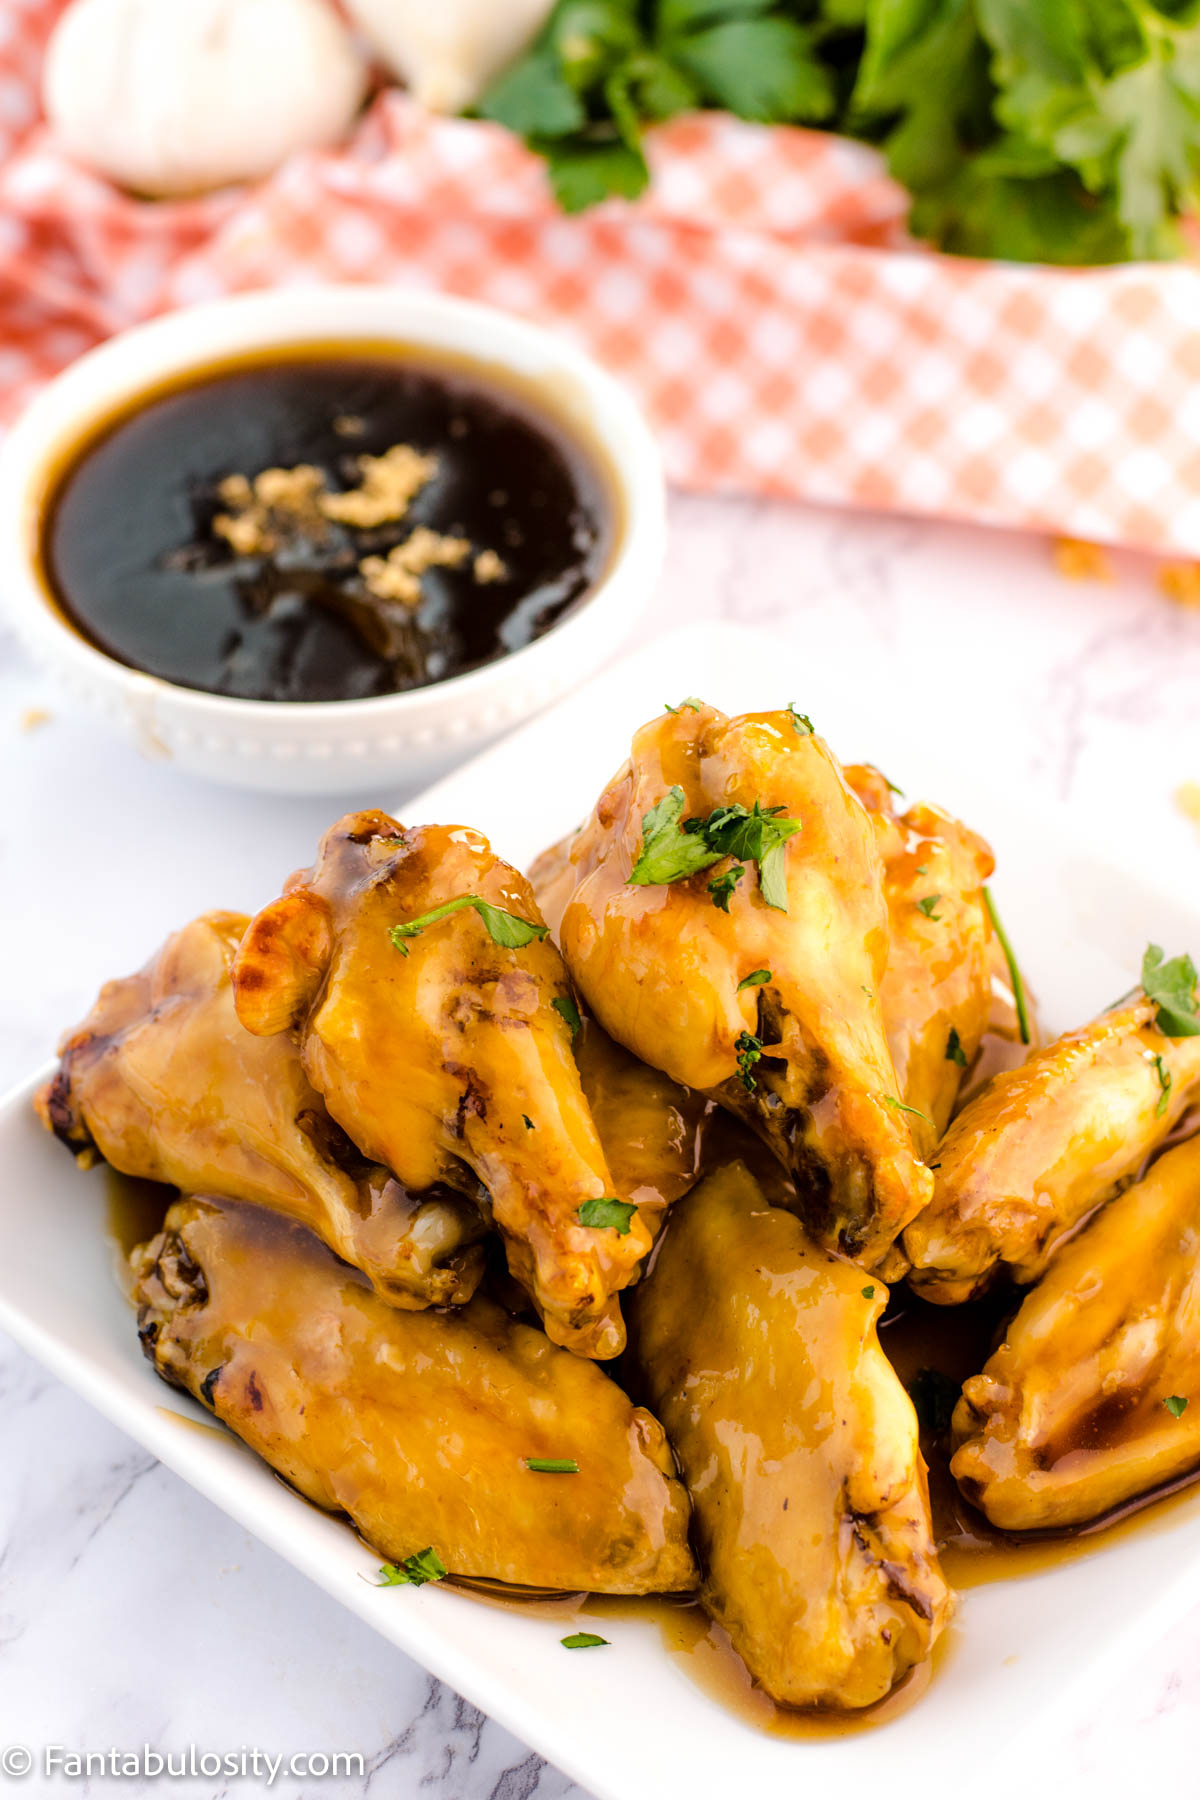
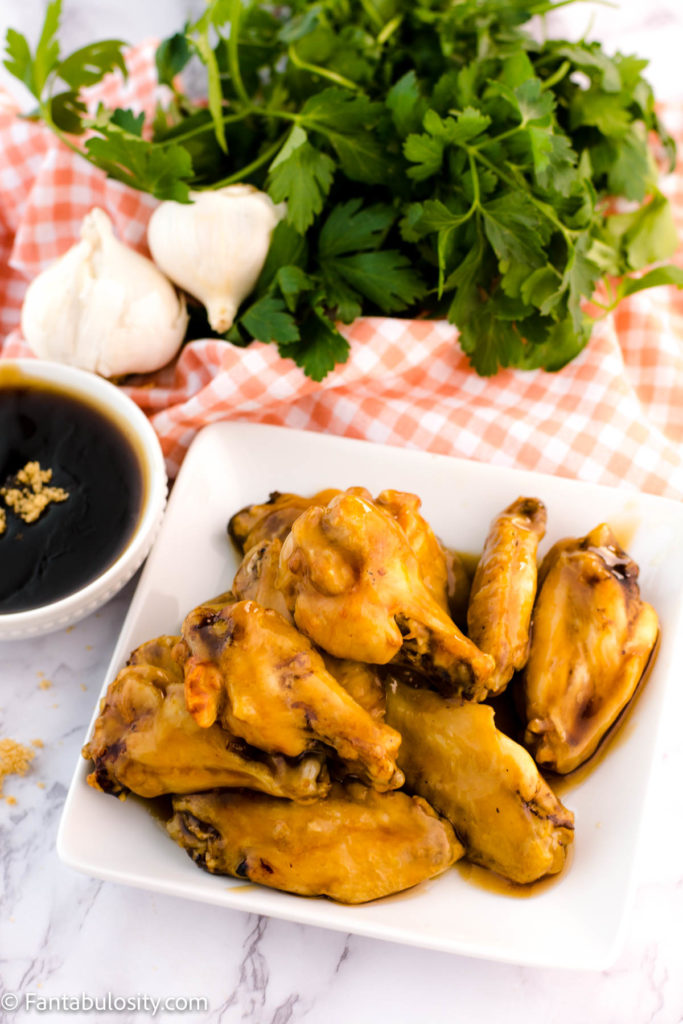
    • Teriyaki Sauce (as seen here on this page) and on my easy teriyaki chicken recipe!
    • Buffalo Hot Sauce
    • Honey Mustard
    • BBQ Sauce
    • Sweet Chili Sauce
    • Garlic Parmesan

    Chicken Wing Rubs & Spices

    Sometimes a dry chicken wing is preferred and here are some favorite spices and rubs to try:

    • garlic salt
    • garlic powder
    • bbq seasoning
    • salt & pepper
    • lemon pepper
    • garlic parmesan
    • Melted Butter & Ranch Seasoning
    • Or if you have time try soaking your wings in this brine for chicken to add even more flavor!
    Teriyaki Chicken Wings in the air fryer

    What to serve with chicken wings

    • blue cheese dressing for dipping
    • jalapeno ranch dressing for dipping
    • teriyaki sauce without ginger for dipping
    • hot sauce for dipping
    • carrots
    • celery sticks
    • chips
    • french fries

    Tips for Making Air Fryer Frozen Chicken Wings

    • Saucing the Wings – I’ve found it’s best to wait on adding sauce until wings have fully cooked through. This way, the sauces and or rubs won’t burn during the cooking process. You can always add the sauce/seasoning and place back in the air fryer basket if you prefer a sticky sauce or warm, cooked-on rub.
    • How Many Wings Can you Cook at Once? The size of your air fryer will determine how many wings you can cook at a time. Just make sure to not overlap the wings so they cook evenly. So you may have to make multiple batches if making a large amount.
    • Can you use wing sections or drummies? This recipe can be used for chicken wing sections or drummies. (Time may vary depending on size/thickness of wings and drummies.)
    • How to store leftover chicken wings – Store leftovers in an airtight container in the fridge for up to 3 days.
    • Can you use the air fryer to reheat cooked chicken wings? Absolutely. Simply place the wings back in the air fryer and cook at 400 for 4-5 minutes or until heated through.

    If you love making chicken in the air fryer, this tutorial for how to cook frozen chicken breasts in the air fryer is definitely something to check out!

    More air fryer recipes you’ll love

    • Air fryer chicken legs
    • Buffalo Chicken Tenders in the Air Fryer
    • Air fryer burgers

    Recipe

    air fryer chicken wings frozen
    Print Pin
    5 from 3 votes

    Frozen Chicken Wings in the Air Fryer

    Cooking frozen chicken wings in the air fryer is an easy way to enjoy this popular appetizer in only 25 minutes. Great for game day or dinner!
    Course Appetizer
    Cuisine American
    Prep Time 0 minutes minutes
    Cook Time 25 minutes minutes
    Total Time 25 minutes minutes
    Servings 4 people
    Calories 427kcal
    Author Jessica Burgess

    Equipment

    • air fryer

    Ingredients

    • 16 frozen chicken wings or however many will fit in your air fryer basket in a single layer
    • sauces and seasonings desired see post for ideas

    Instructions

    • Place frozen chicken wings in a single layer in the air fryer basket
    • Cook wings at 400° for 10 minutes.
    • Flip wings over and cook for another 10 minutes
    • If desired, spray chicken wings with cooking spray to achieve a crispier skin. This is also a great time to add a "dry rub" to help the seasonings stick.
    • Flip again, and cook for an additional 5-7 minutes or until internal temperature of chicken wings reaches 165°
    • Toss wings with favorite dry rub or sauce
    • Serve or place back in to air fryer and warm sauce if desired

    Notes

    • Saucing the Wings – I’ve found it’s best to wait on adding sauce until wings have fully cooked through. This way, the sauces and or rubs won’t burn during the cooking process. You can always add the sauce/seasoning and place back in the air fryer basket if you prefer a sticky sauce or warm, cooked-on rub.
    • How Many Wings Can you Cook at Once? The size of your air fryer will determine how many wings you can cook at a time. Just make sure to not overlap the wings so they cook evenly. So you may have to make multiple batches if making a large amount.
    • Can you use wing sections or drummies? This recipe can be used for chicken wing sections or drummies. (Time may vary depending on size/thickness of wings and drummies.)
    • How to store leftover chicken wings – Store leftovers in an airtight container in the fridge for up to 3 days.
    • Can you use the air fryer to reheat cooked chicken wings? Absolutely. Simply place the wings back in the air fryer and cook at 400 for 4-5 minutes or until heated through.

    Nutrition

    Serving: 4wings | Calories: 427kcal | Protein: 35g | Fat: 31g | Saturated Fat: 9g | Trans Fat: 1g | Cholesterol: 148mg | Sodium: 140mg | Potassium: 300mg | Vitamin A: 283IU | Vitamin C: 1mg | Calcium: 23mg | Iron: 2mg

    Strawberry Cheesecake Cookies

    March 11, 2021

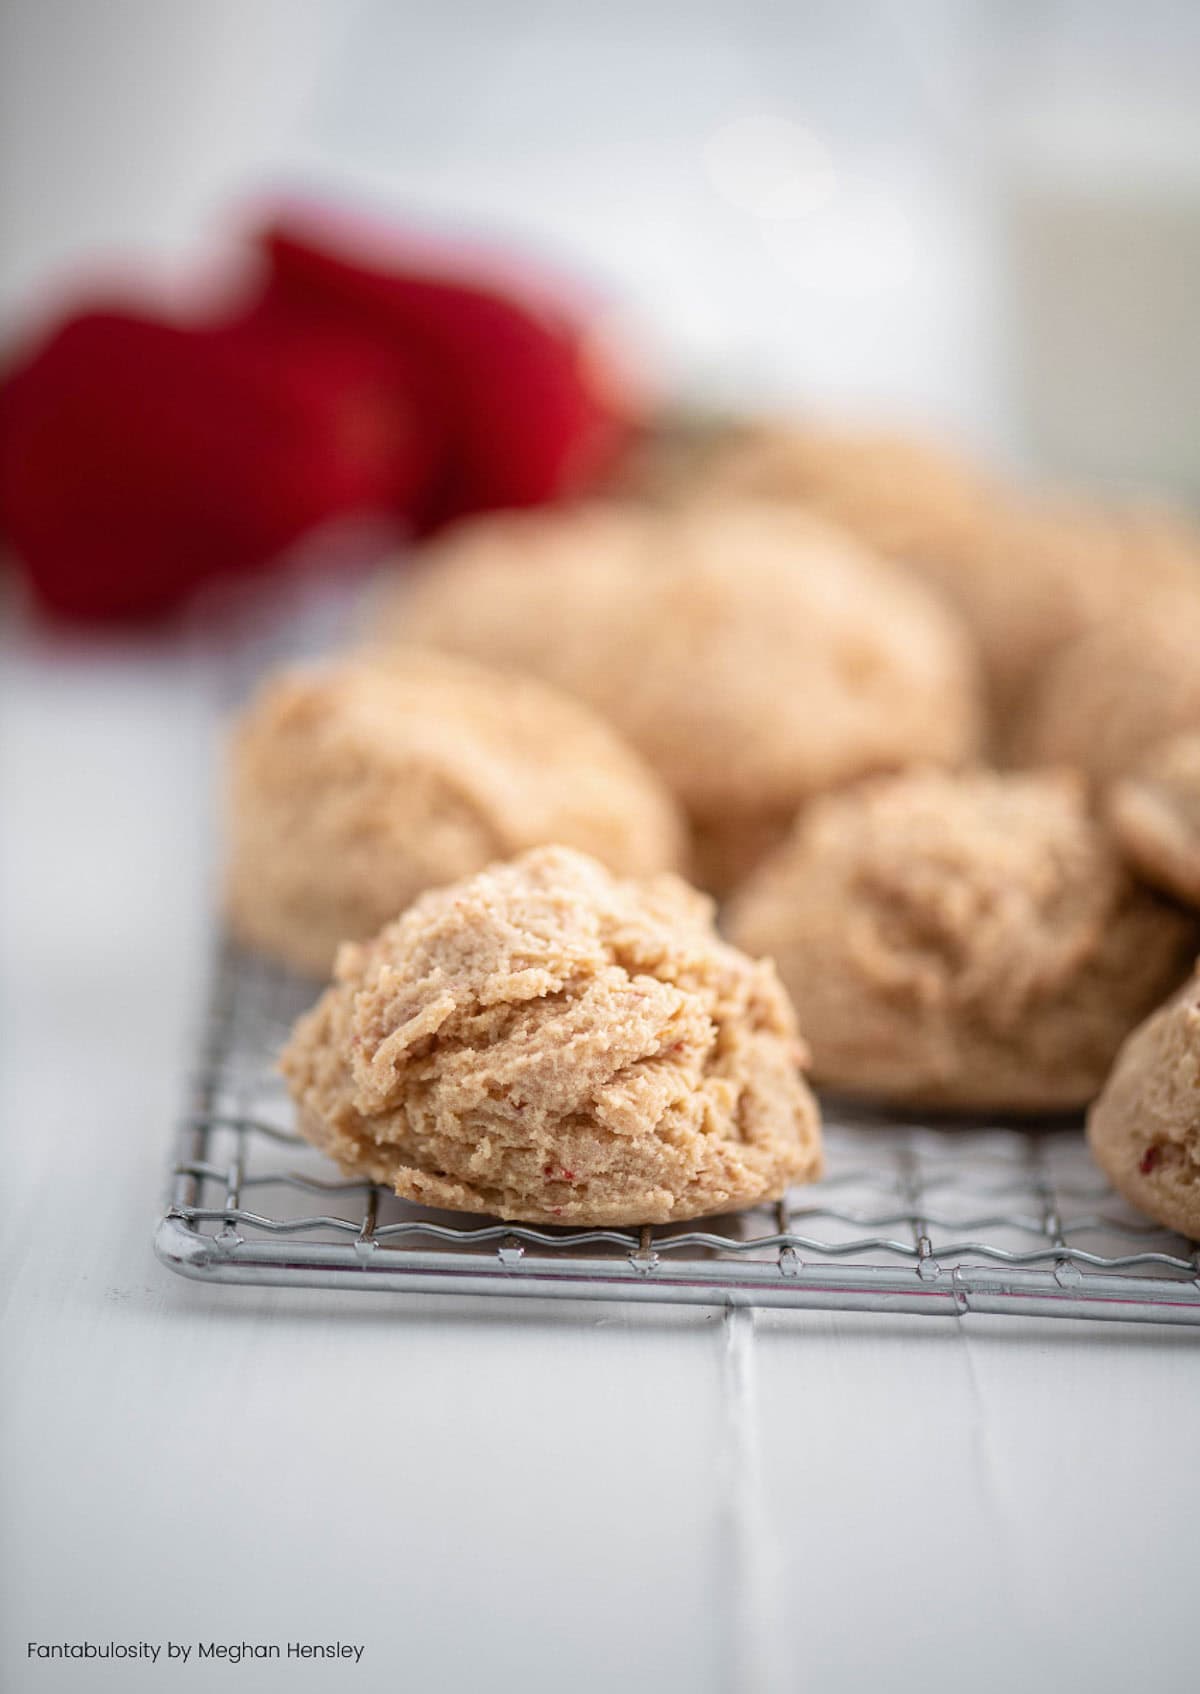
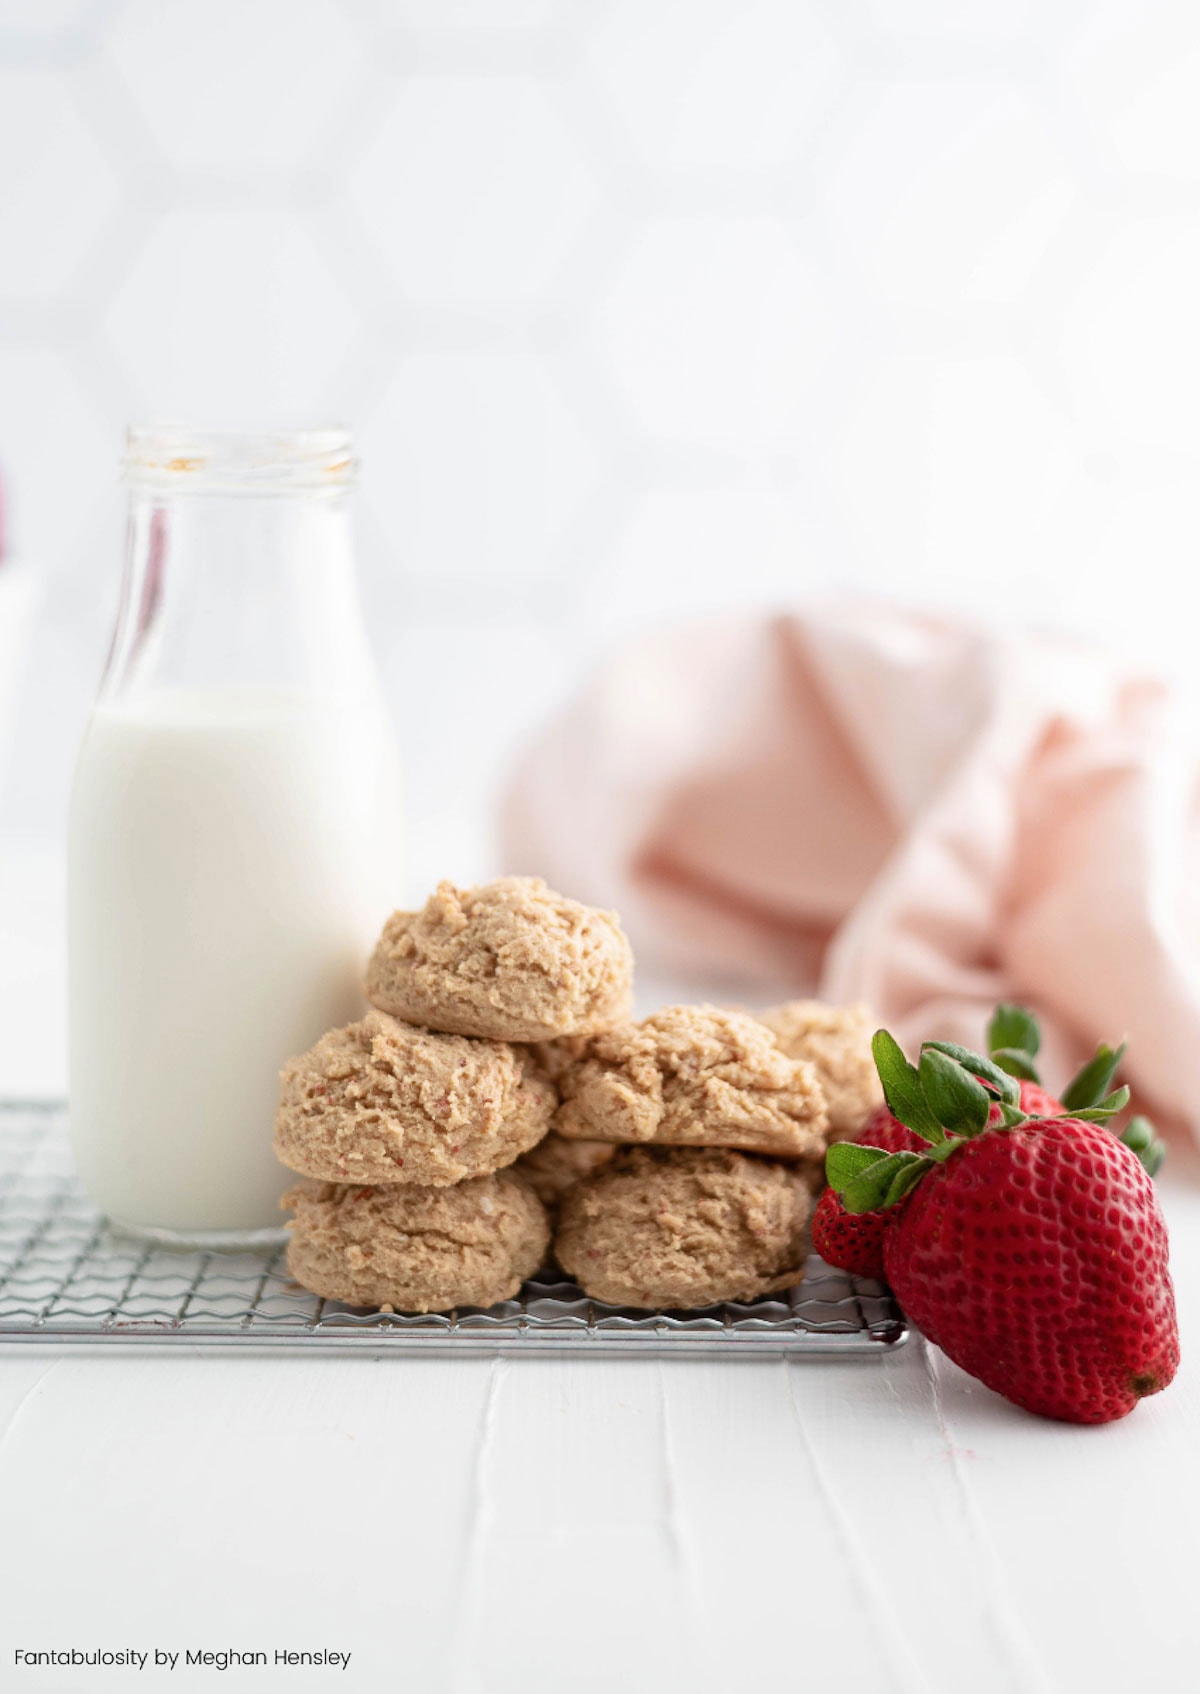
    Strawberry cheesecake cookies stacked on top of one another.

    These Strawberry Cheesecake Cookies will quickly become a new family favorite dessert recipe. They’re subtly sweet, perfectly textured and so delicious!

    Using REAL freeze-dried strawberries, gives the authentic strawberry taste, instead of the artificial strawberry flavoring that so many cookie recipes have. And to be honest, it’s a close favorite to the strawberry crunch cheesecake and these stuffed cheesecake strawberries, that I know you’ll love too! This strawberry cheesecake poke cake is another option that’s rich and creamy.

    Strawberry cheesecake cookies stacked by strawberries.

    Hey friends! Meg popping in from Meg's Everyday Indulgence with another tasty strawberry dessert. Today's treat is reminiscent of strawberry cheesecake but in cookie form. You're going to love the texture in these strawberry cheesecake cookies!

    Strawberry Cheesecake Cookie Recipe

    The texture in these cookies is unlike any cookie I've ever made. The cream cheese in the recipe creates a perfectly soft, creamy texture that reminds me SO much of cheesecake.

    To ensure you keep that perfect texture, make sure not to overbake them. You'll know they are done when they are just lightly golden on the bottom. You don't want them to be golden on top though so keep a close eye on them while baking.

    Ingredients for Strawberry Cheesecake Cookies

    Here's what you'll need to make these cream cheese strawberry cookies:

    • Butter
    • Cream cheese
    • Powdered sugar
    • Egg
    • Vanilla extract
    • All-purpose flour
    • Baking powder
    • Instant cheesecake pudding mix
    • Salt
    • Freeze dried strawberries
    Ingredients for strawberry cheesecake cookies.

    Secret Ingredient

    The cheesecake pudding mix adds so much luscious cheesecake flavor. You just need the dry packet of mix. You do not need to actually make the pudding as directed on the box.

    If you can't find the cheesecake flavor at your grocery store, vanilla or French vanilla pudding mix will also work. It will still add that extra flavor and give the most incredible texture.

    Freeze Dried Strawberries

    Freeze dried strawberries are one of my new favorite baking ingredients. They add so much more strawberry flavor than fresh strawberries. There’s something about the fruity flavor, combined with sweet sugars – similar to these Key Lime Pie Cookies!

    Another bonus: the water in fresh strawberries is known to water down and alter the texture of baked goods. No need to worry about that with freeze-dried strawberries.

    They are pretty easy to find in any grocery store in the dried fruit section.

    Simply pulse them in your food processor or blender until you have a fine powder. You can also put them in a ziplock bag and roll a rolling pin over them to crush them.

    Strawberry cheesecake cookies on cooling rack.

    How to Make These Pretty Speckled Pink Strawberry Cookies

    First, make sure you have your cream cheese, butter and egg at room temperature. This will ensure the cookie dough comes together super smoothly.

    Pulse your freeze dried strawberries in a food processor until you have a fine powder.

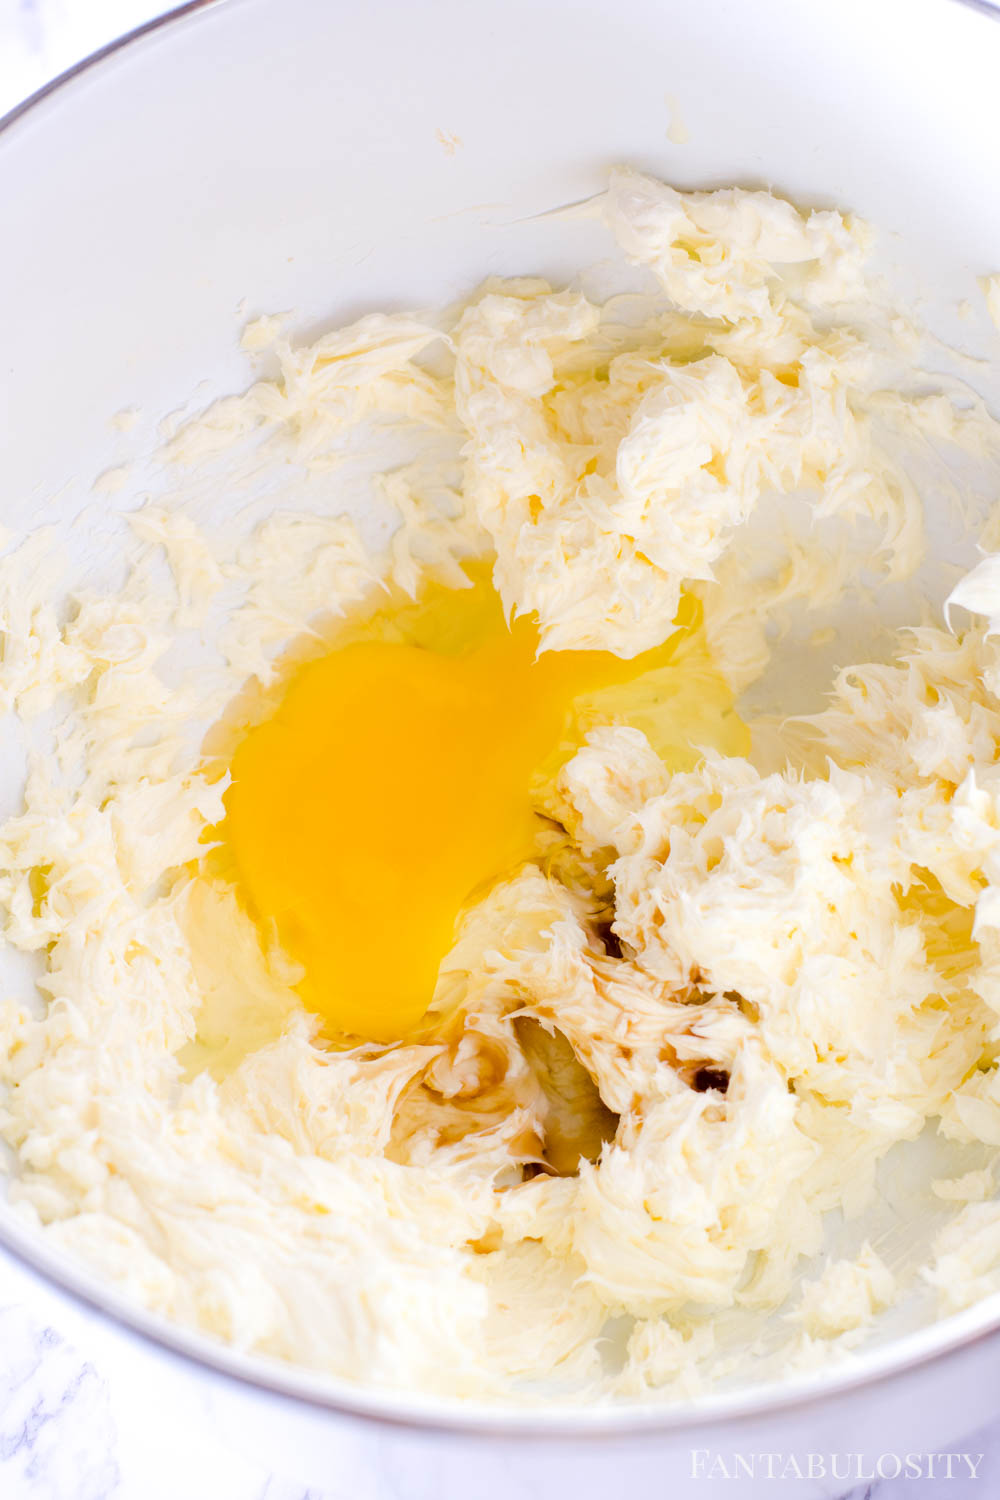
    Add cream cheese, butter and powdered sugar to the bowl of a stand mixer. Cream together until super smooth. Add egg and vanilla and mix again until combined.

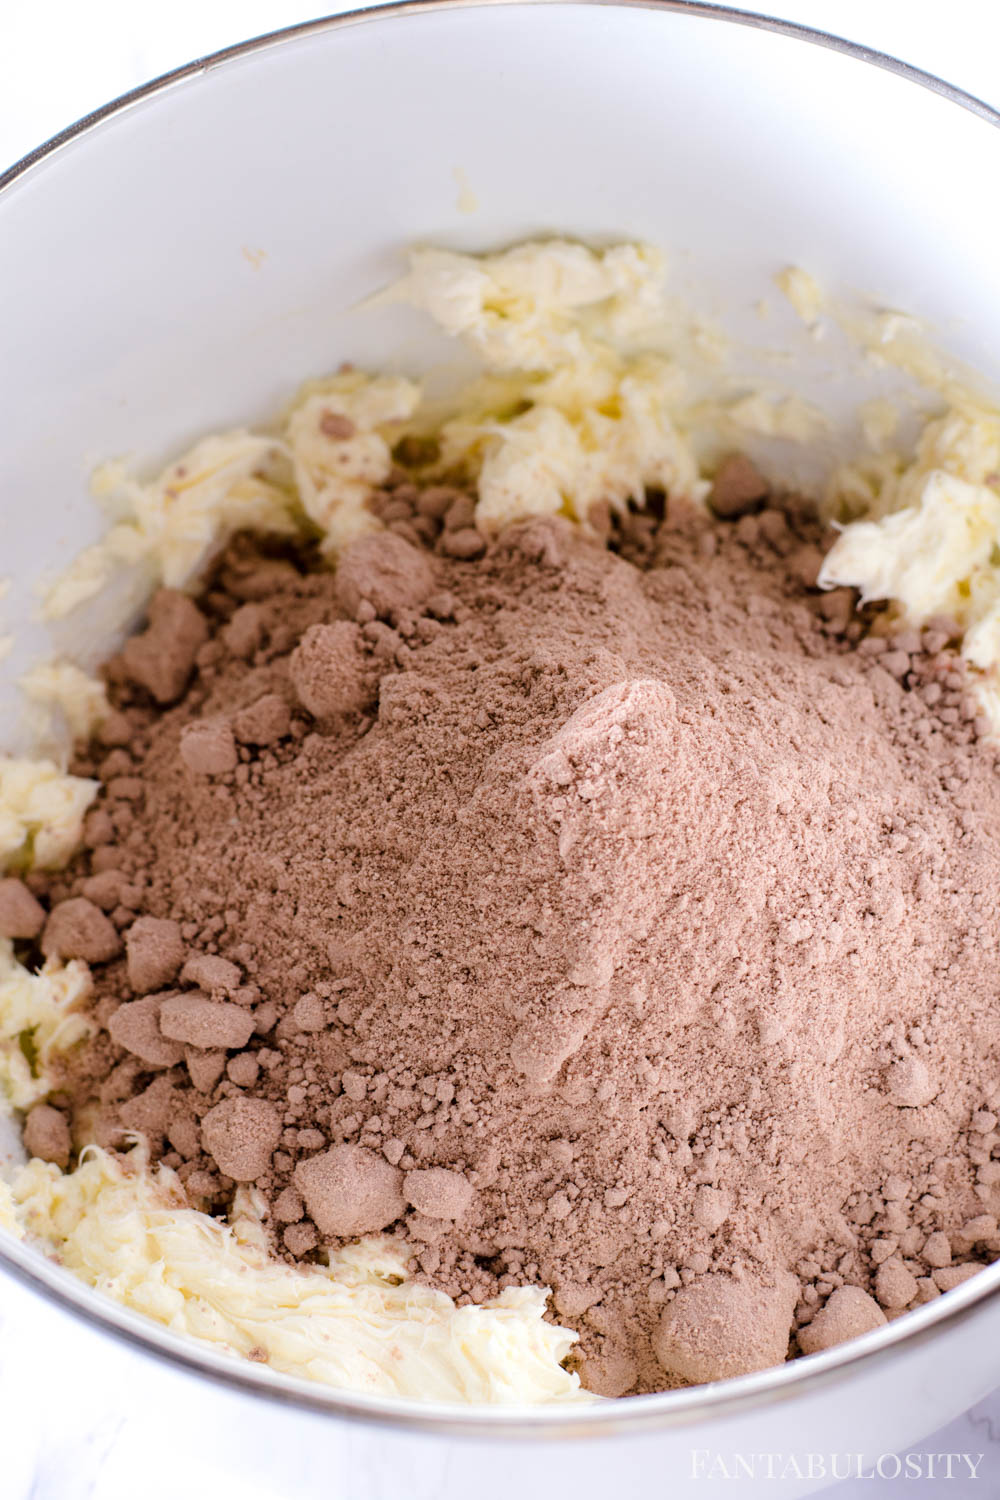
    Add remaining ingredients and mix until the batter just comes together.

    Strawberry cheesecake cookies stacked.

    Bake the Cookies

    Using a cookie scoop, portion out the cookies onto a greased or parchment-lined cookie sheet. They won't spread too much so you can place them a little closer together than you normally would.

    Bake cookies until just golden on the bottom. The color of the tops of the cookies won't change.

    Subtly Sweet Cheesecake Cookies

     I wanted to keep these strawberry cheesecake cookies as close to taste and texture of a cheesecake as I possibly could so they aren't overly sweet.

    The powdered sugar and instant pudding mix bring some sweetness but nothing overwhelming.

    That Cheesecake Texture

    Because of the cream cheese in these strawberry cheesecake cookies, the interior stays super creamy. It's unlike any other cookie I've made.

    It's basically like cheesecake and a cookie had a baby. Slightly dough, creamy, and the perfect amount of sweetness.

    You’ll Also Love These Easy Desserts:

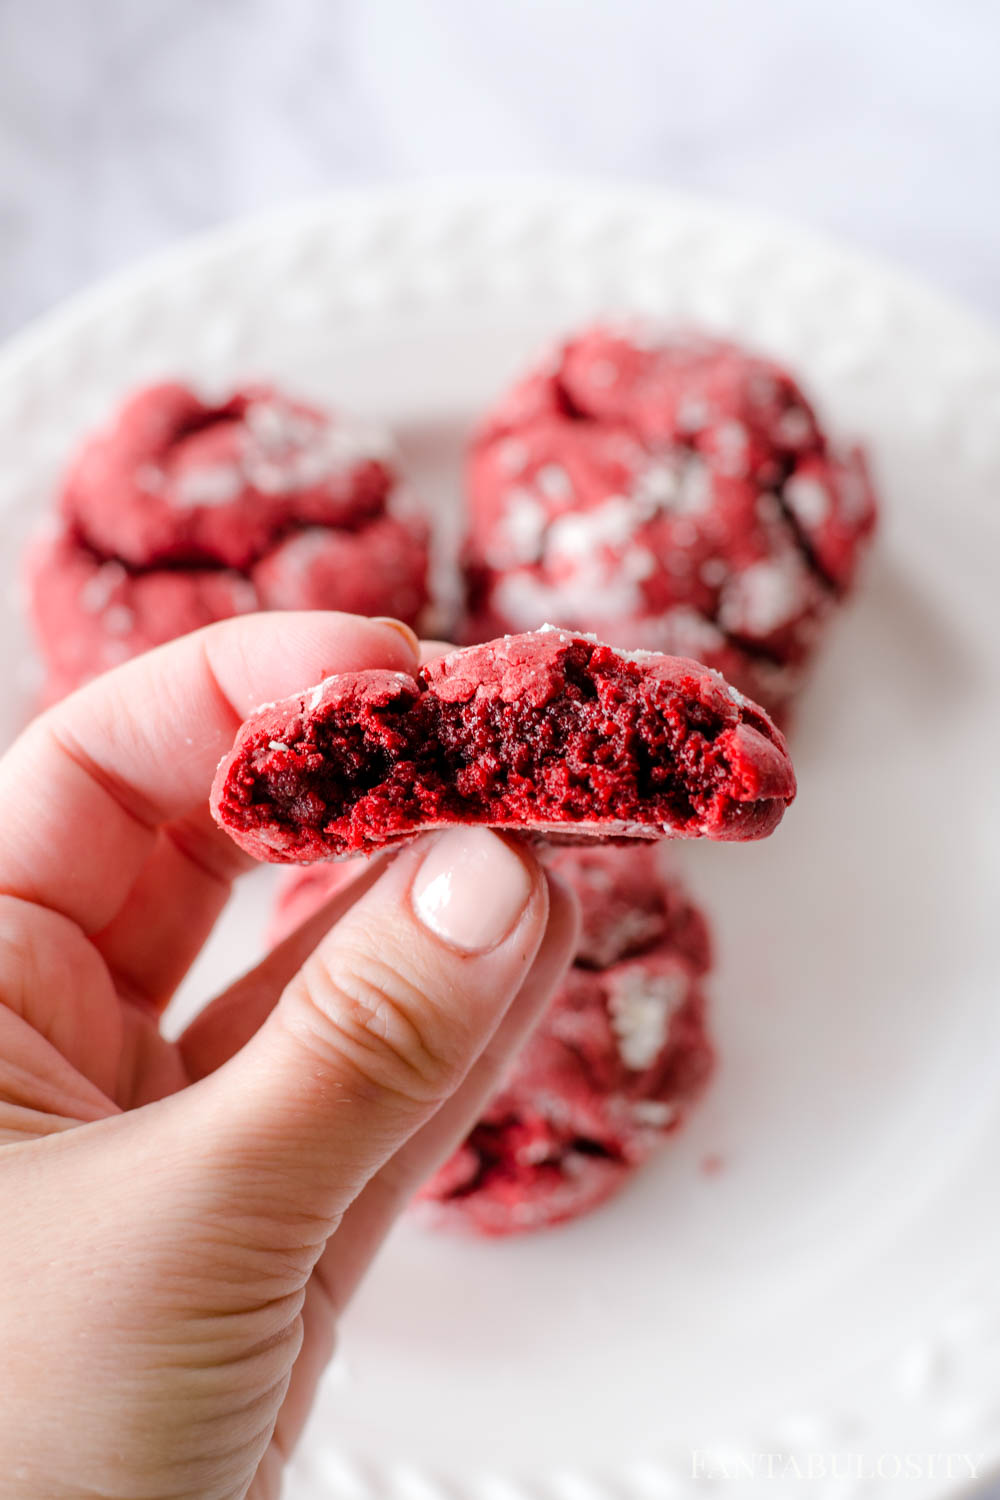
    If you loved these cookies, then you’ll also love these No Bake Cookies, Red Velvet Cake Mix Cookies, Strawberry Malt Cookies and these Lemon Blueberry Cookies!

    Now, if you’re hosting a party, making individual desserts like this walking cheesecake dessert is a great idea too!

    Recipe

    Strawberry cheesecake cookies stacked on top of one another.
    Print Pin
    5 from 5 votes

    Strawberry Cheesecake Cookies

    Subtly sweet, perfectly textured and so delicious, these Strawberry Cheesecake Cookies will quickly become a new family favorite.
    Course Dessert
    Cuisine American
    Prep Time 15 minutes minutes
    Cook Time 10 minutes minutes
    Total Time 25 minutes minutes
    Servings 28 cookies
    Calories 127kcal
    Author Jessica Burgess

    Ingredients

    • 8 ounces cream cheese, room temperature
    • ½ cup butter, room temperature
    • 1 cup powdered sugar
    • 1 large egg, room temperature
    • 1 teaspoon vanilla extract
    • 2 cups all-purpose flour
    • 1 ½ teaspoon baking powder
    • 3.4 ounce instant cheesecake pudding mix
    • ½ teaspoon salt
    • 2 ounces freeze dried strawberries, pulverized into a powder

    Instructions

    • Preheat oven to 350 degrees F. Spray a cookie sheet with nonstick spray or line with parchment paper. Set aside.
    • In the bowl of a stand mixer, add cream cheese and butter. Mix until combined. Add powdered sugar and mix together until well combined. Add egg and vanilla extract. Mix until just combined.
    • Add flour, baking powder, cheesecake pudding mix (just the powder, do not make the pudding), salt and freeze dried strawberry powder. Mix until the dough just comes together.
    • Using a cookie scoop, portion dough onto prepared cookie sheet 1-inch apart. Bake cookies for 10 to 12 minutes, until bottoms are just golden. The tops will still be a pale color. Let cool for 2 minutes on cookie sheet then move to a cooling rack.

    Video

    Notes

    To ensure you keep that perfect texture, make sure not to overbake them. You'll know they are done when they are just lightly golden on the bottom. You don't want them to be golden on top though so keep a close eye on them while baking.

    Nutrition

    Serving: 2cookies | Calories: 127kcal | Carbohydrates: 13g | Protein: 2g | Fat: 8g | Saturated Fat: 4g | Trans Fat: 1g | Cholesterol: 24mg | Sodium: 107mg | Potassium: 54mg | Fiber: 1g | Sugar: 5g | Vitamin A: 220IU | Calcium: 23mg | Iron: 1mg

    Air Fryer Salmon Patties

    March 11, 2021

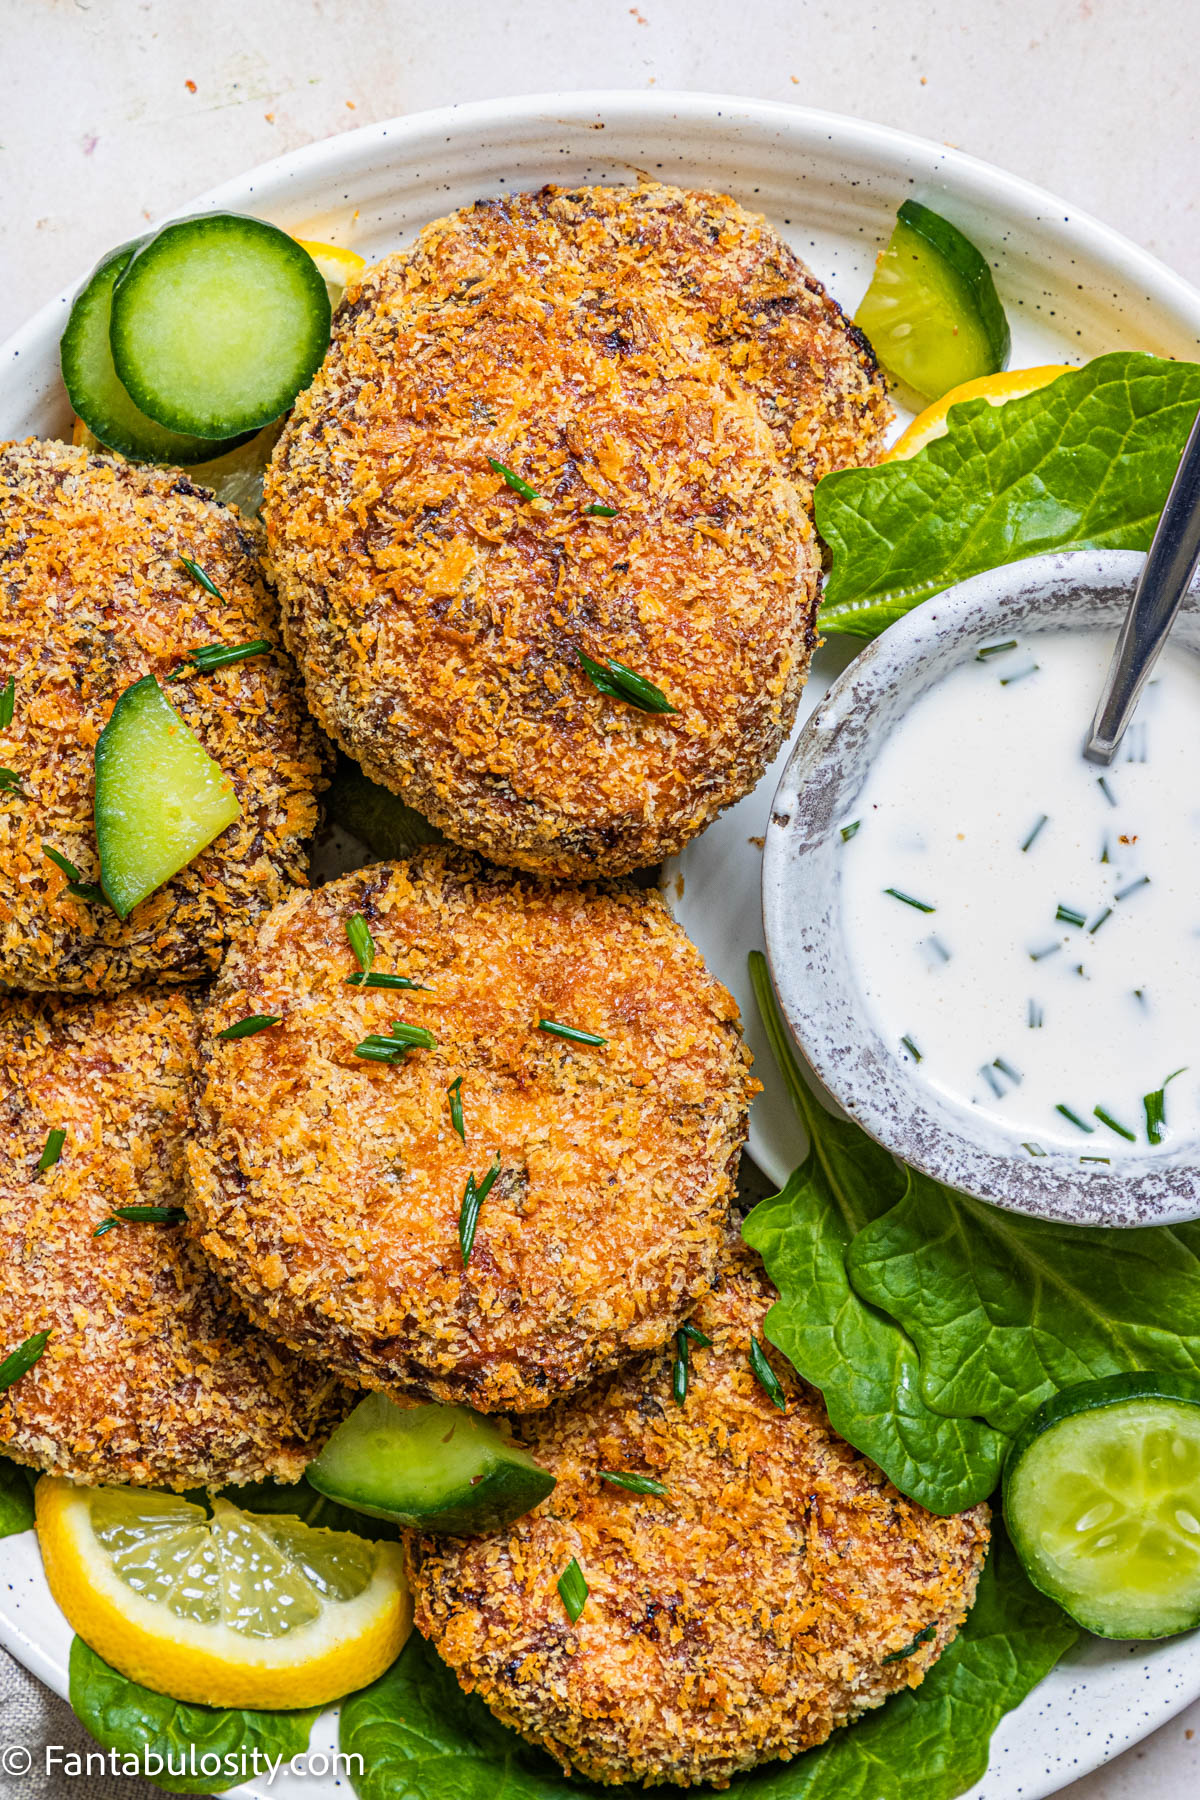
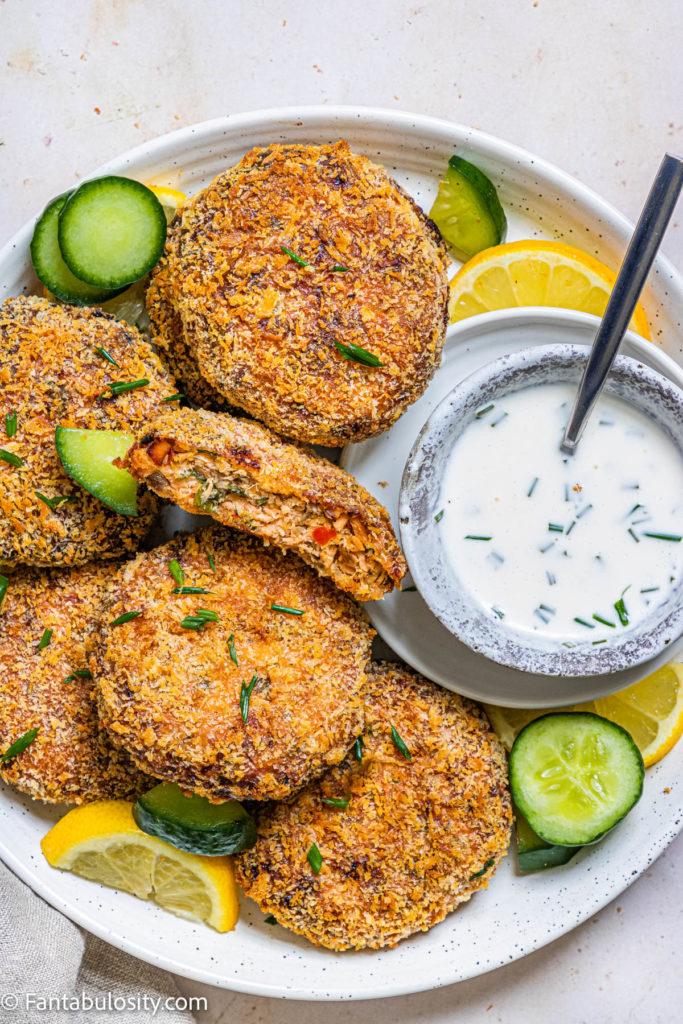
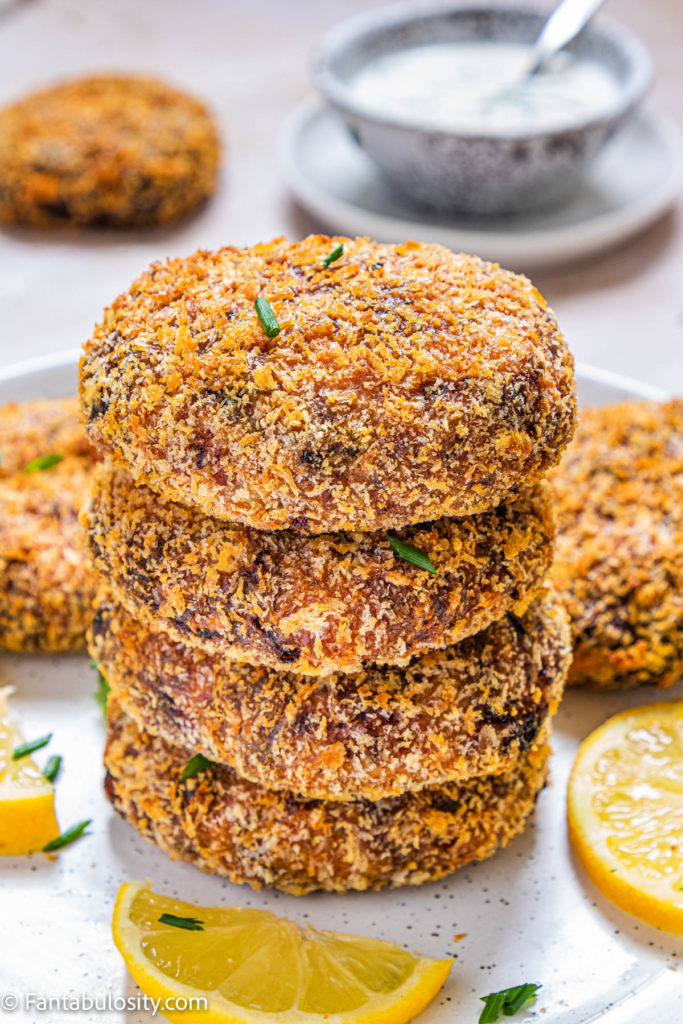
    air fryer salmon patties

    Air Fryer Salmon Patties: Making salmon patties (or cakes) in the air fryer is an easy way to use fresh salmon or canned salmon for a dinner the whole family will love!

    Made with ingredients, such as bread crumbs, green onion, lemon juice, and a few other common items you may have on hand, they’re made and ready to eat in less than 30 minutes, making this one of our favorite air fryer recipes!

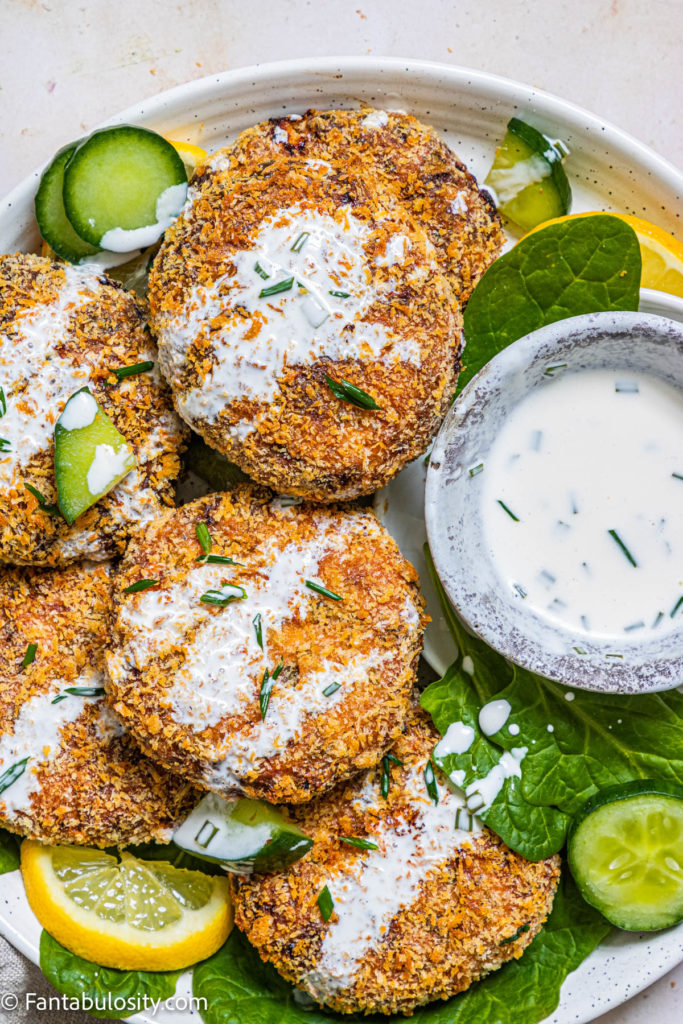
    air fryer salmon cakes on plate with dipping sauce and cucumbers
    [feast_advanced_jump_to]

    I absolutely love using my air fryer but you can also make old-fashioned salmon patties by frying them up. Make your air fryer work all day with air fryer apple fritters and breakfast potatoes.

    Why You’ll Love These

    • This recipe is easy, uses common ingredients, and is ready for dinner in under 30 minutes!
    • You can use canned for fresh salmon. (Can also substitute other fish such as tuna or trout.) If you have leftover fresh salmon, consider making these salmon sliders, as you can make just a small amount at a time!
    • The salmon cakes look fancy (think “crab cakes”) but are easy and kid-friendly!
    • There is an optional spicy mayo dipping sauce recipe attached
    How do I keep my salmon patties from falling apart?

    This recipe uses bread crumbs and eggs to help hold the patties together, so it’s important that those are used.

    How do you know when salmon patties are done?

    When using cooked salmon (which this recipe calls for) as long as the ingredients, such as the egg, have cooked through, and the outside is crispy… it should be done. However, if you need to cook your salmon prior to making these salmon patties, it’s always good to remember that the internal temperature of salmon should be 160°.

    How to Make a Low Carb or Keto Salmon Patty Recipe

    Substituting the bread crumbs for crushed pork rinds and the flour with almond flour can create an air-fryer salmon cakes recipe that’s lower in carbs.

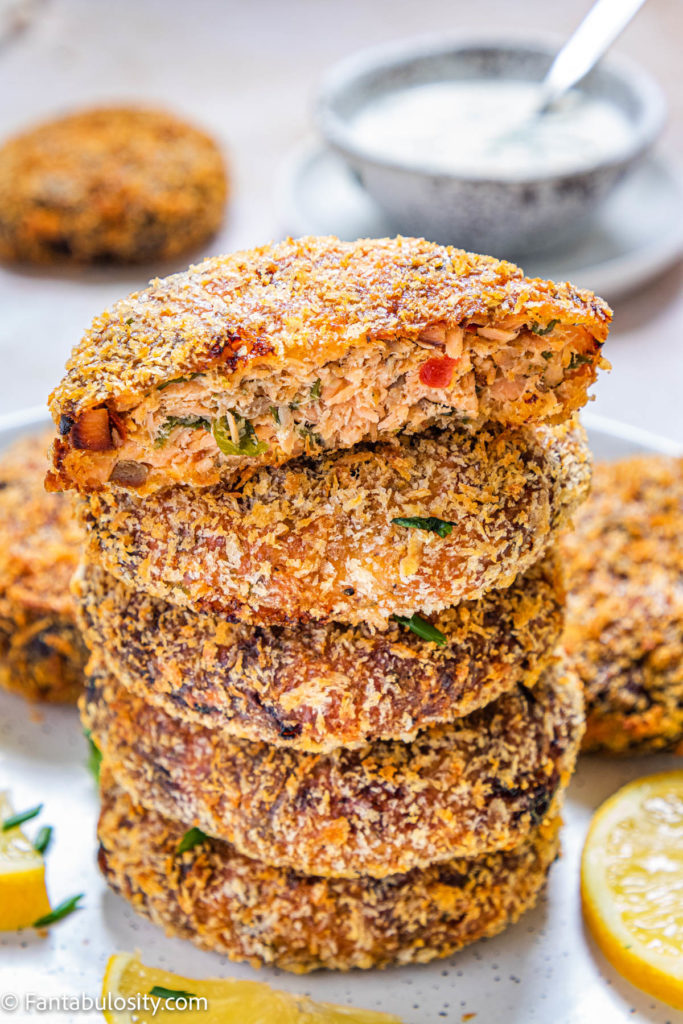
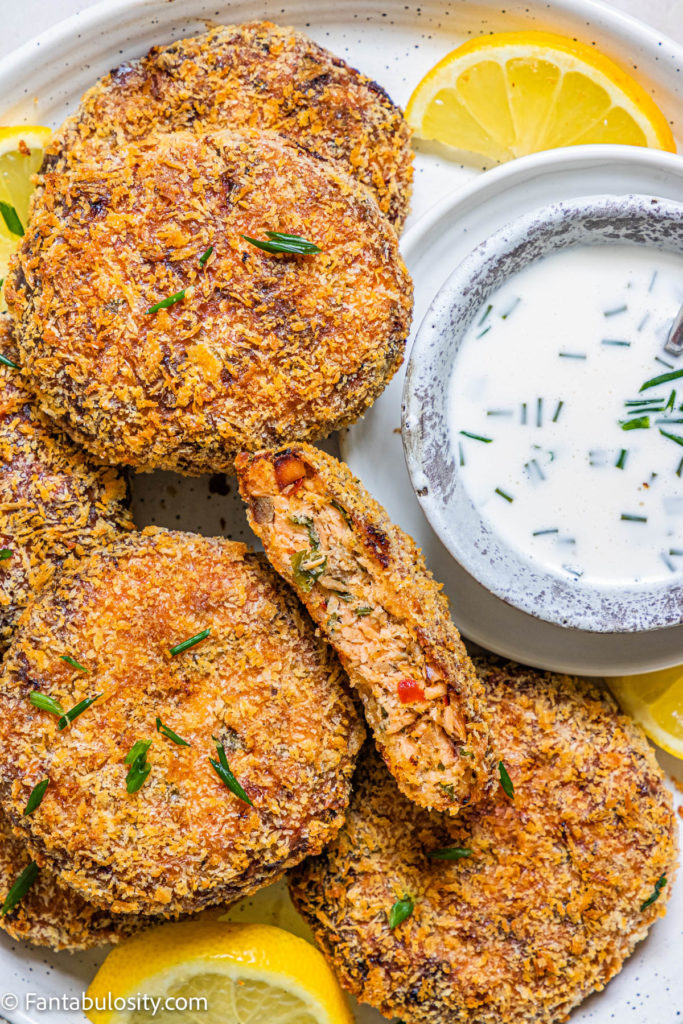
    Salmon Patties stacked showing the inside of the cake

    What Goes Good with Salmon Patties

    Without a doubt, this side salad recipe is perfect to serve alongside these salmon patties!

    However here are some of our other favorite side dishes for salmon cakes too:

    • Garlic Roasted Broccoli
    • Carrot Salad
    • Amish Potato Salad
    • Bean Salad
    • Cornbread Salad
    • Cucumber Salad
    • Baked Fiesta Ranch Potato Wedges
    salmon cakes recipe

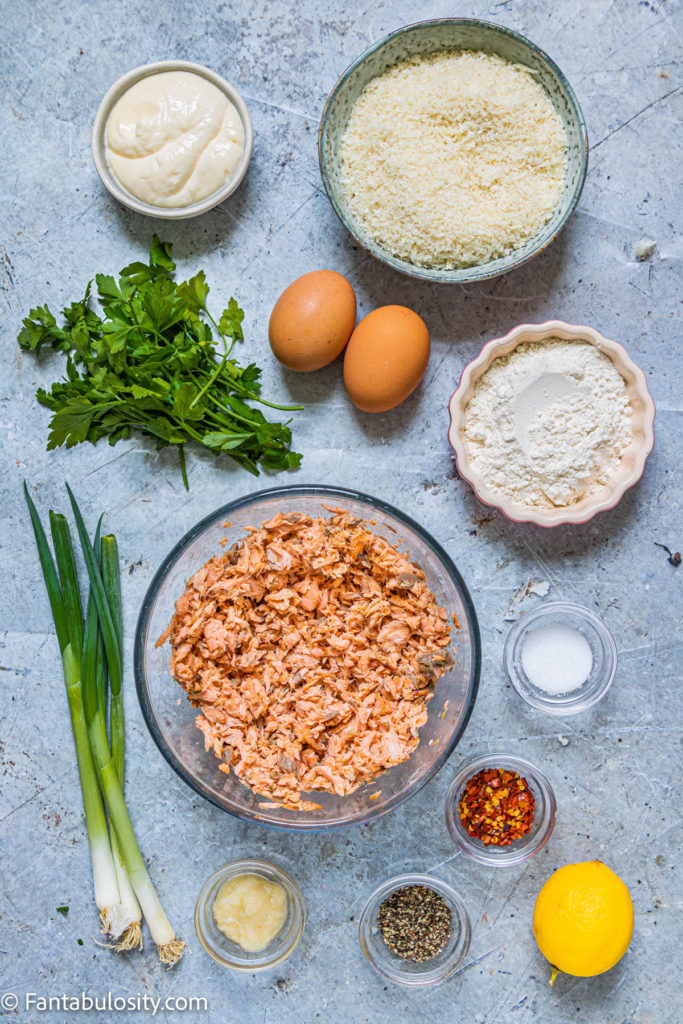
    Salmon Patty Ingredients

    What you’ll need to make salmon cakes:

    • cooked fresh salmon or can of salmon
    • mayo
    • lemon juice
    • garlic
    • green onions
    • fresh parsley
    • chili flakes, optional
    • black pepper
    • salt
    • all-purpose flour
    • eggs
    • panko bread crumbs (we use these in our baked cod recipe too!)

    How to Make This

    First, line a large baking sheet with parchment paper.

    Ingredients for salmon patties
    Salmon patty ingredients
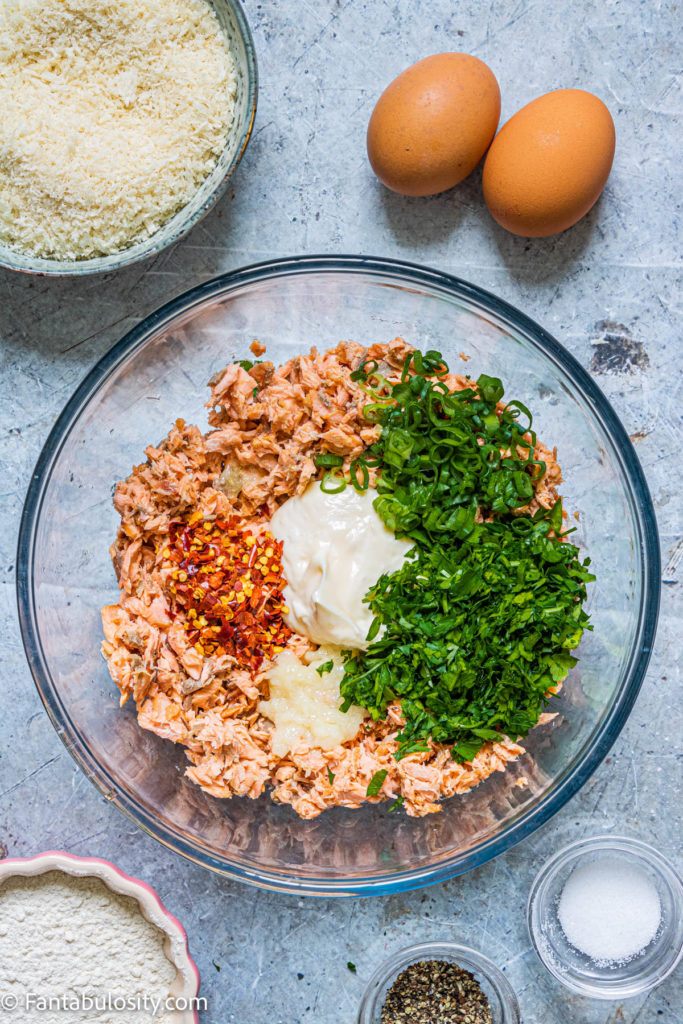
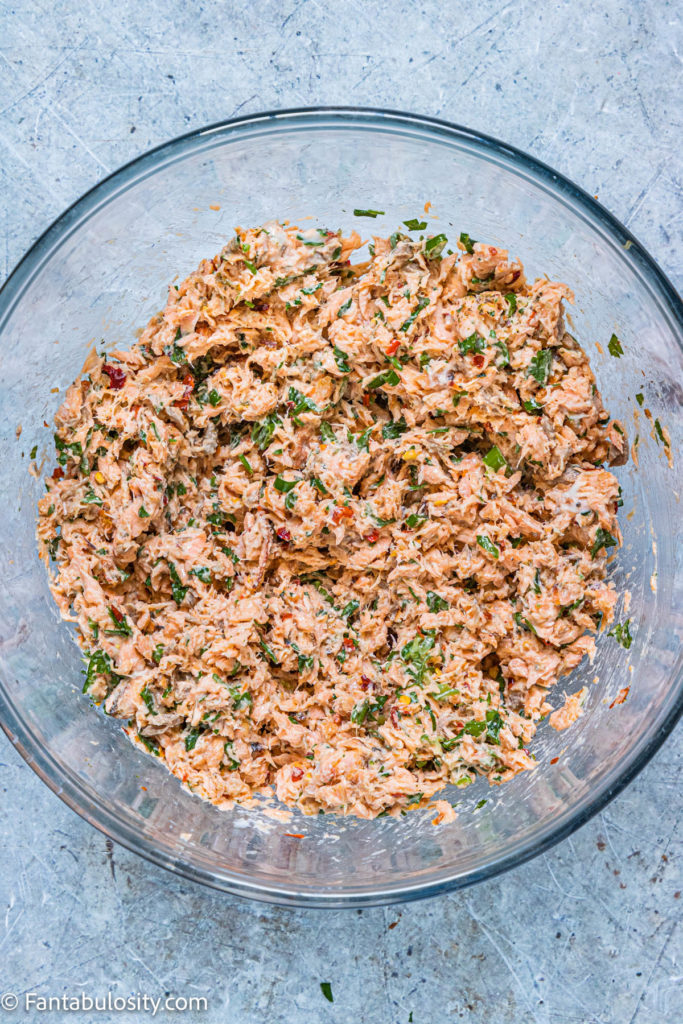
    Ingredients in large mixing bowl for salmon burgers
    Mix together ingredients
    Spices for salmon patties
    Add spices
    Ingredients mixed together in bowl
    Stir in spices with salmon mixture
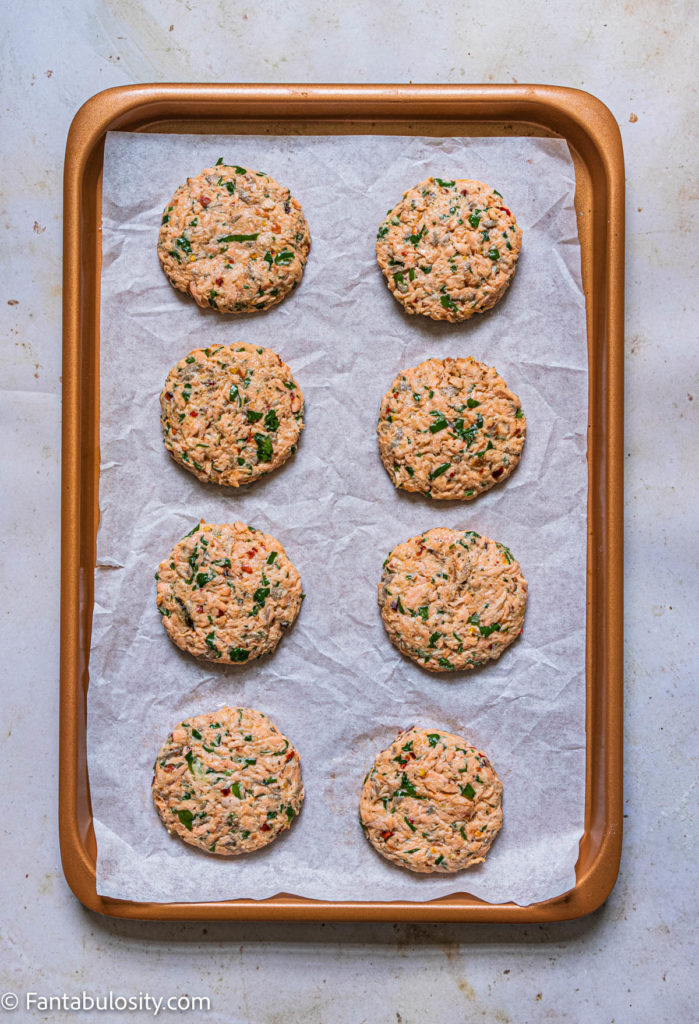
    pattied out salmon cakes on parchment paper and baking sheet
    Patty out salmon cakes for breading
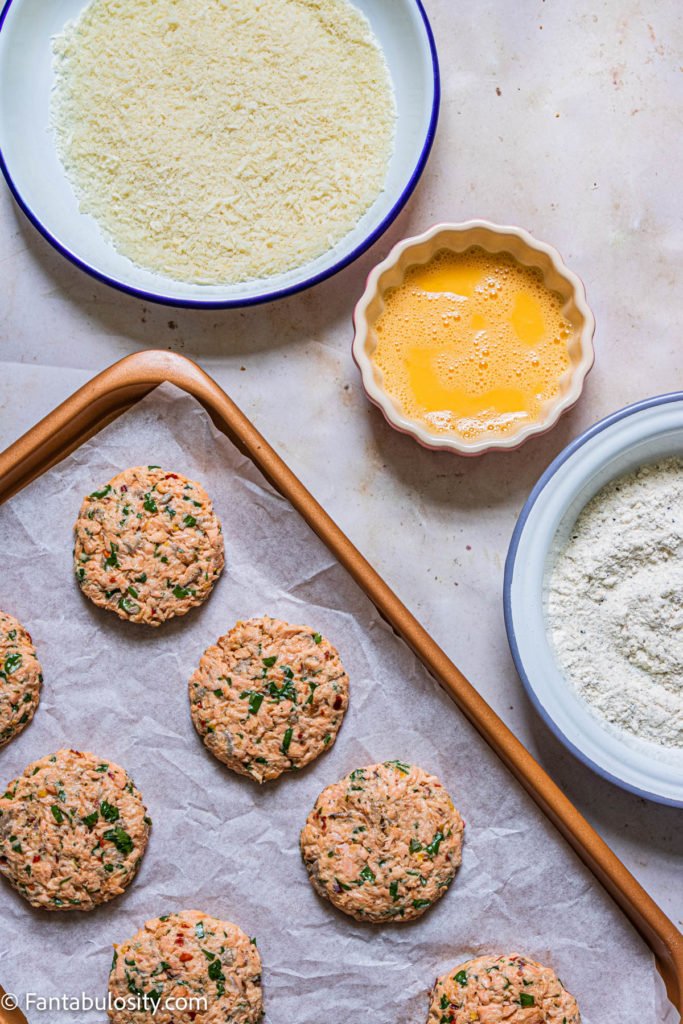
    salmon cakes ready for dredging in flour, bread crumb and egg mixture
    Salmon patties ready for breading
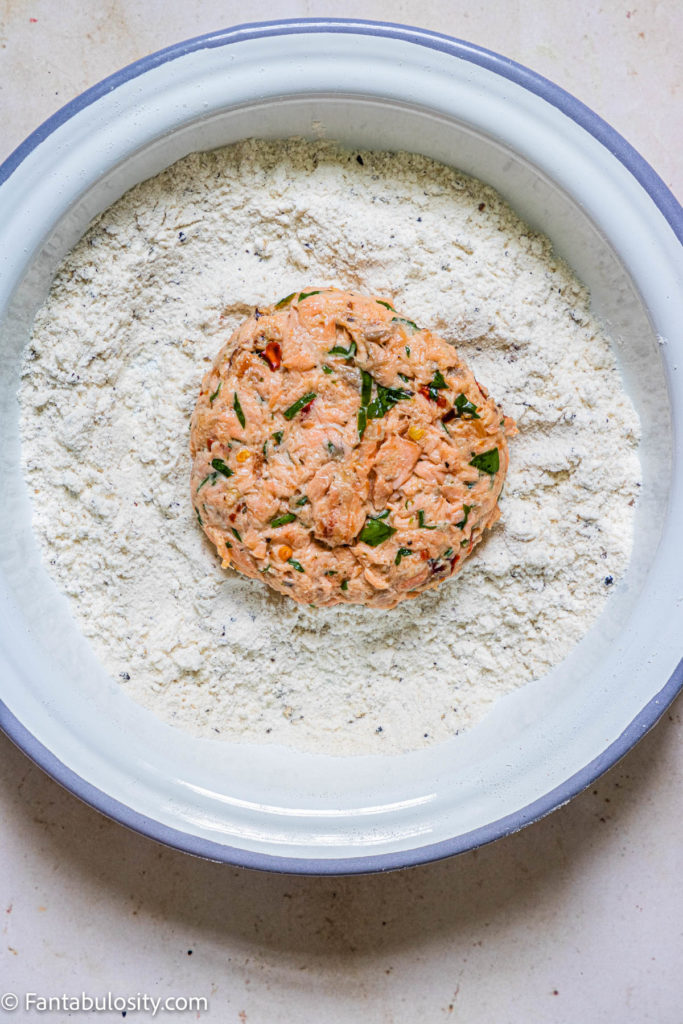
    Pattied out salmon cake dipped in flour
    Coat salmon cake in flour
    flour covered salmon patty dipped in egg
    Dip salmon patty in egg
    salmon patty dipped in bread crumbs
    Coat salmon patty in bread crumbs

    In a large mixing bowl, combine salmon, mayo, lemon juice, garlic, green onions, parsley, chili flakes. Mix well.  

    Shaped the salmon mixture into 8 equal patties, about 2.5 inches in diameter and put on the line baking sheet

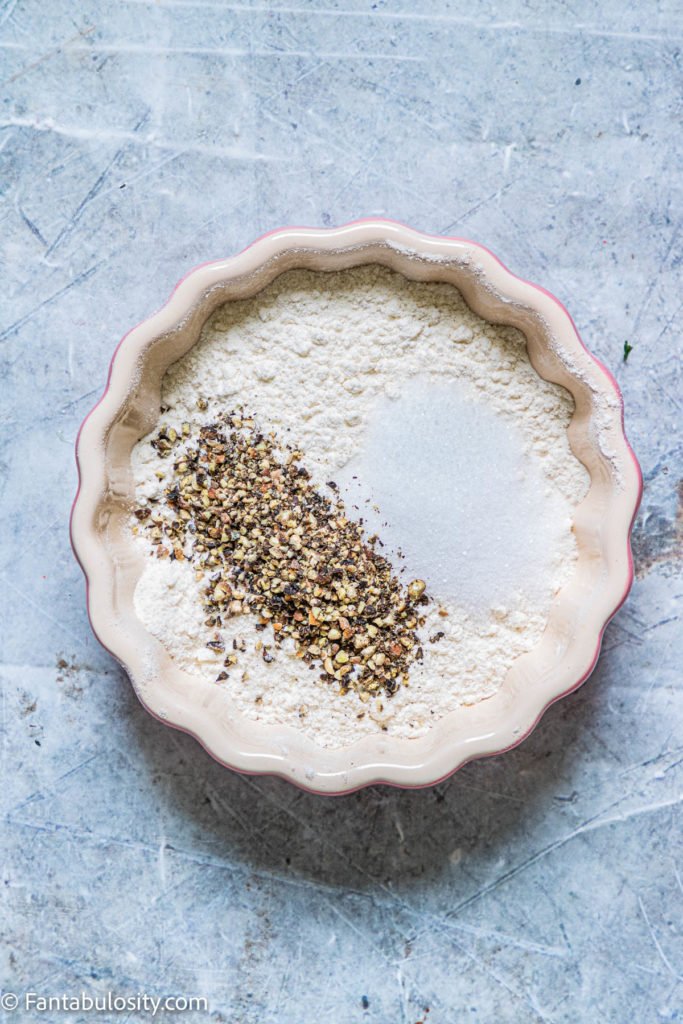
    In a small bowl, combine flour, black pepper and salt.

    Add the beaten eggs to a small bowl and panko breadcrumbs to a medium shallow bowl.

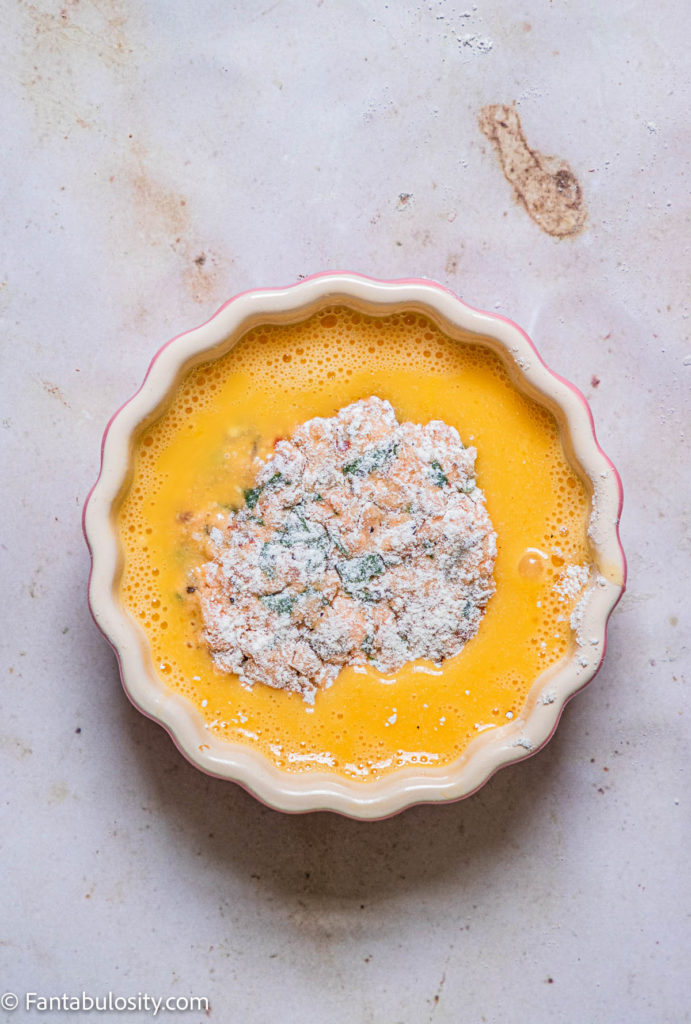
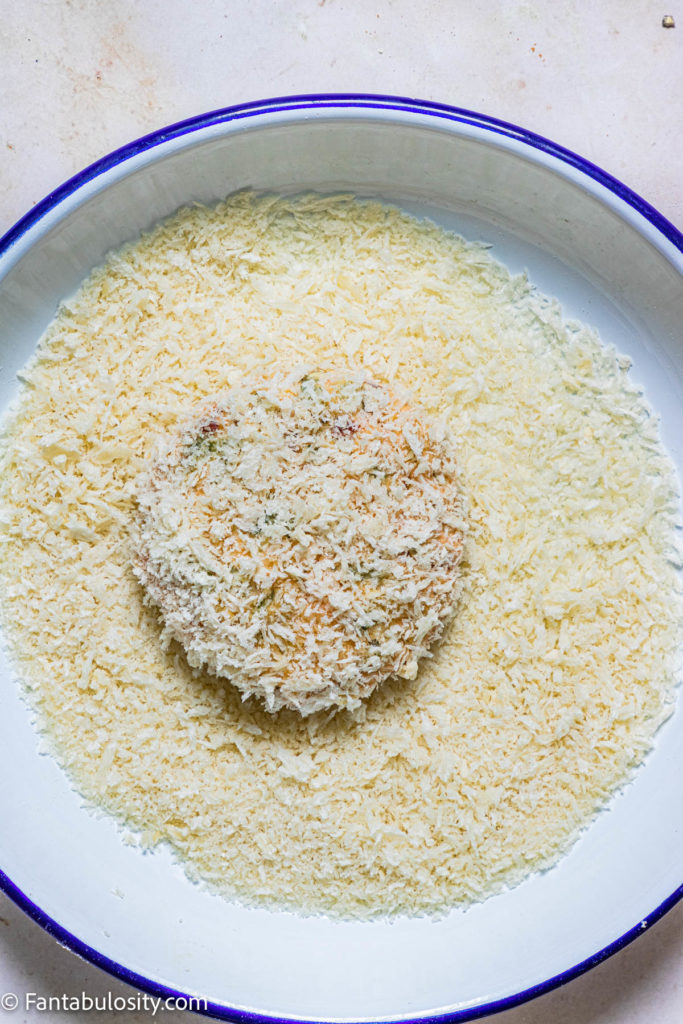
    Working gently, dredge each salmon patty in flour mixture, shake off the excess flour, dip in beaten egg to coat each side, and finally completely coat in breadcrumbs.

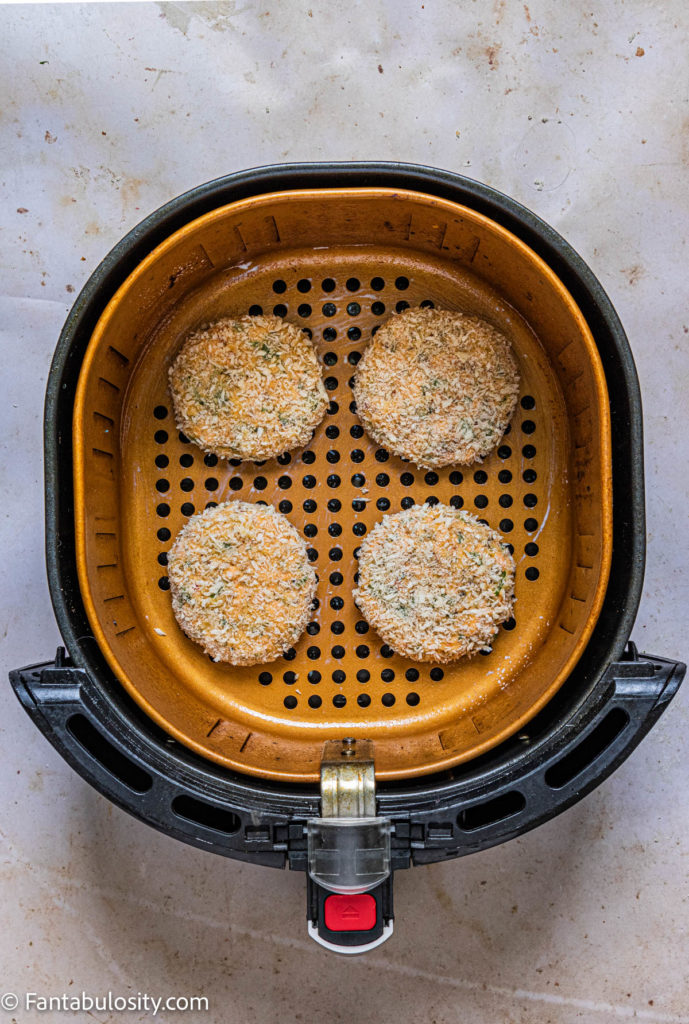
    salmon patties in air fryer basket

    Preheat air fryer to 400°F and spray basket with cooking spray.

    Transfer the salmon patties into the air fryer basket, making sure they are in a single layer.

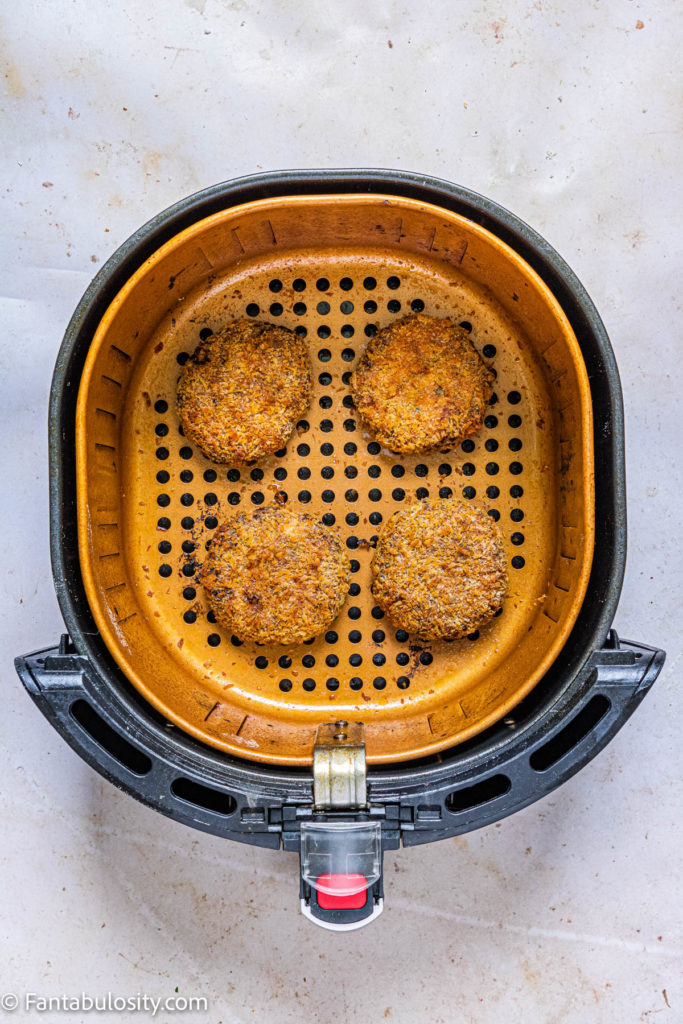
    Cooked salmon patties in a single layer in the air fryer basket

    Air fry for 10-12 minutes or until golden brown. Flip after 7 minutes.

    Air Fryer Salmon Patties stacked on top of one another

    Serve warm with spicy mayo sauce or something like jalapeno ranch dressing or this chipotle sauce, if desired!

    air fryer salmon patties with spicy mayo

    How to Make Spicy Mayo Sauce

    Ingredients for Sauce:

    • mayo
    • lemon juice
    • chopped chives
    • black pepper
    • salt

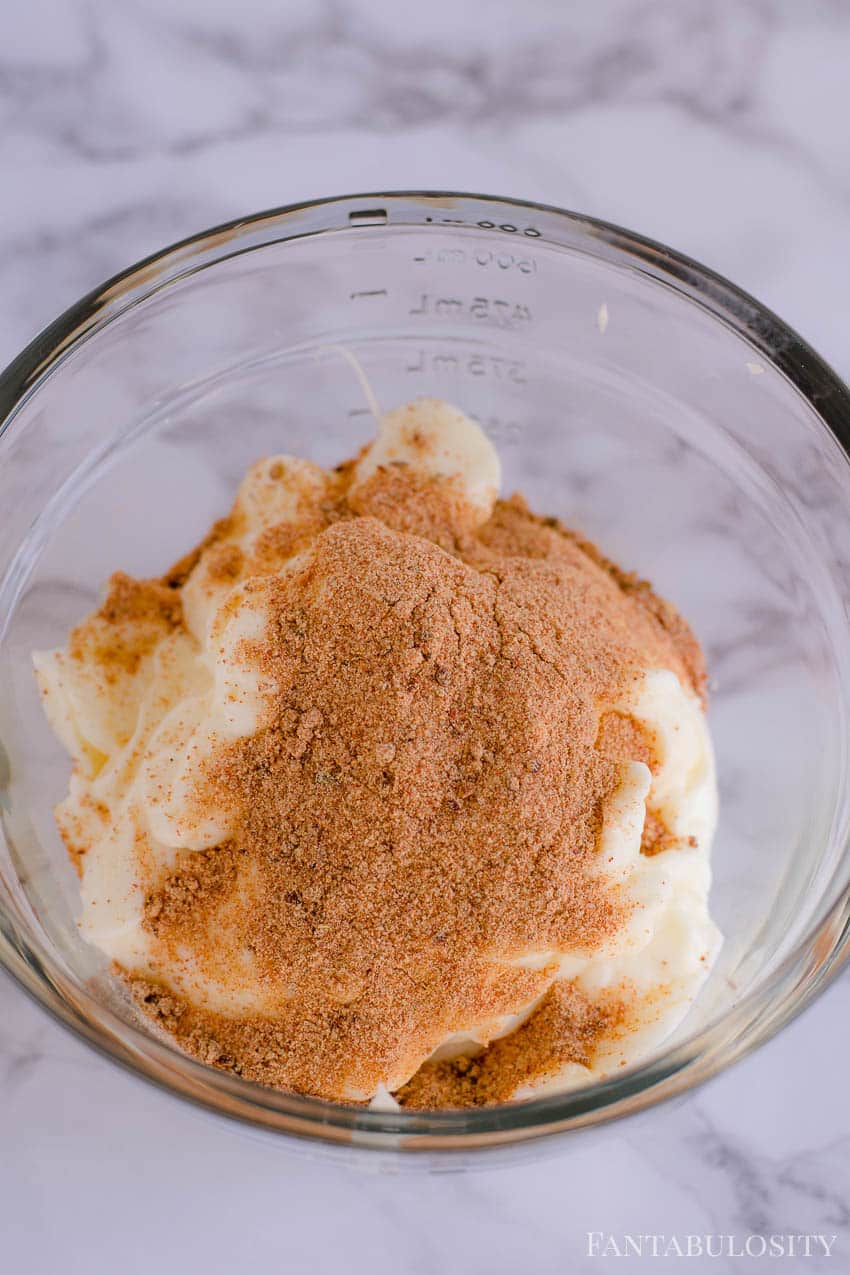
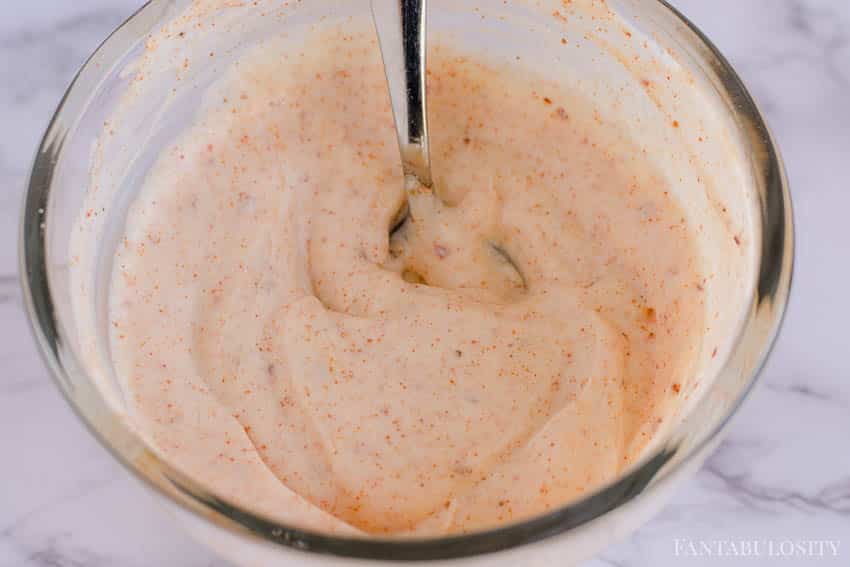
    Directions for Spicy Mayo Sauce:

    Combine all the ingredients for the sauce in a small bowl. Adjust seasonings to taste.

    Tips for Making This

    • Make even sized patties so that they cook evenly at the same time
    • Can use canned salmon instead of fresh salmon if preferred
    • Swap salmon for other fish like tuna or trout
    • Can swap herbs such as used chopped dill instead of parsley
    • Leave out the chili flakes if want them less spicy
    • Can cook the salmon with the skin on. The skin comes of easily when cooked
    • Cooking time may vary depending on the thickness of the salmon patties and the brand of air fryer.
    • If your air fryer is smaller, you will have to cook salmon patties in batches. Do not overcrowd the air fryer.
    • Keeps in the fridge for 3 days in an airtight container or wrapped tightly in plastic wrap.
    • To reheat leftovers, heat them in a preheated air fryer at 375°F for 2 mins.
    Salmon Patties on plate with dipping sauce

    More Air Fryer Recipes You’ll Love

    • Lemon Tilapia in the Air Fryer
    • Air Fryer Venison Steaks
    • Chicken Legs in the Air Fryer
    • Buffalo Chicken Tenders in the Air Fryer

    Or if you have extra salmon, you may want to try this baked lemon pepper salmon or this old fashioned salmon patty recipe.

    Recipe

    air fryer salmon patties
    Print Pin
    5 from 6 votes

    Air Fryer Salmon Patties

    Air Fryer Salmon Patties: Making salmon patties (or cakes) in the air fryer is an easy way to use fresh salmon or canned salmon for a dinner the whole family will love!
    Course Main Course
    Cuisine American
    Prep Time 15 minutes minutes
    Cook Time 10 minutes minutes
    Total Time 25 minutes minutes
    Servings 8 patties
    Calories 241kcal
    Author Jessica Burgess

    Equipment

    • air fryer

    Ingredients

    • 1 lb. cooked salmon fresh or canned, minced with fork
    • ¼ cup mayo
    • 1 tablespoon lemon juice
    • 3 cloves of garlic minced
    • 2 green onions sliced
    • 2 tablespoon fresh parsley
    • 1 teaspoon chili flakes optional
    • ½ teaspoon black pepper
    • ½ teaspoon salt
    • ¼ cup all-purpose flour
    • 2 eggs beaten
    • 1 cup panko bread crumbs

    Spicy Mayo Sauce

    • ¼ cup mayo
    • 1 tablespoon lemon juice
    • 1 tablespoon chopped chives
    • ½ teaspoon black pepper
    • salt as desired

    Instructions

    • Line a large baking sheet with parchment paper.
    • In a large mixing bowl, combine salmon, mayo, lemon juice, garlic, green onions, parsley, chili flakes. Mix well.  
    • Shaped the salmon mixture into 8 equal patties, about 2.5 inches in diameter and put on the line baking sheet
    • In a small bowl, combine flour, black pepper and salt.
    • Add the beaten eggs to a small bowl and panko breadcrumbs to a medium shallow bowl.
    • Working gently, dredge each salmon patty in flour mixture, shake off the excess flour, dip in beaten egg to coat each side and finally completely coat in breadcrumbs.
    • Preheat air fryer to 400°F and spray basket with cooking spray
    • Transfer the salmon patties into the air fryer basket, making sure they are not touching each other. Air fry for 10-12 minutes or until golden brown. Flip after 7 minutes
    • Serve warm with spicy mayo sauce if desired!

    How to Make Spicy Mayo Sauce

    • Combine all the ingredients for the sauce in a small bowl. Adjust seasonings to taste.

    Notes

    Notes
    ·      Make even sized patties so that they cook evenly at the same time
    ·      Can use canned salmon instead
    ·      Swap salmon for other fish like tuna
    ·      Can swap herbs such as used chopped dill instead of parsley
    ·      Leave out the chili flakes if want them less spicy
    ·      Can cook the salmon with the skin on. The skin comes of easily when cooked
    ·      Cooking time may vary depending on the thickness of the salmon patties and the brand of air fryer.
    ·      If your air fryer is smaller, you will have to cook salmon patties in batches. Do not overcrowd the air fryer.
    ·      Keeps in the fridge for 3 days in an airtight container or wrapped tightly in plastic wrap
    ·      To reheat, heat in a preheated air fryer at 375°F for 2 mins.
    –  If looking to make low carb salmon cakes, try substituting the bread crumbs with crushed pork rinds and the flour with almond flour

    Nutrition

    Serving: 1cake | Calories: 241kcal | Carbohydrates: 10g | Protein: 14g | Fat: 16g | Saturated Fat: 3g | Trans Fat: 1g | Cholesterol: 78mg | Sodium: 335mg | Potassium: 346mg | Fiber: 1g | Sugar: 1g | Vitamin A: 297IU | Vitamin C: 4mg | Calcium: 37mg | Iron: 1mg

    Air Fryer Venison

    March 10, 2021

    Air fryer deer meat on platter and hand holding a piece.

    Venison (deer), cooked in the air fryer is an easy and healthy way to cook the wild game steaks and is ready to eat in only 7 minutes!

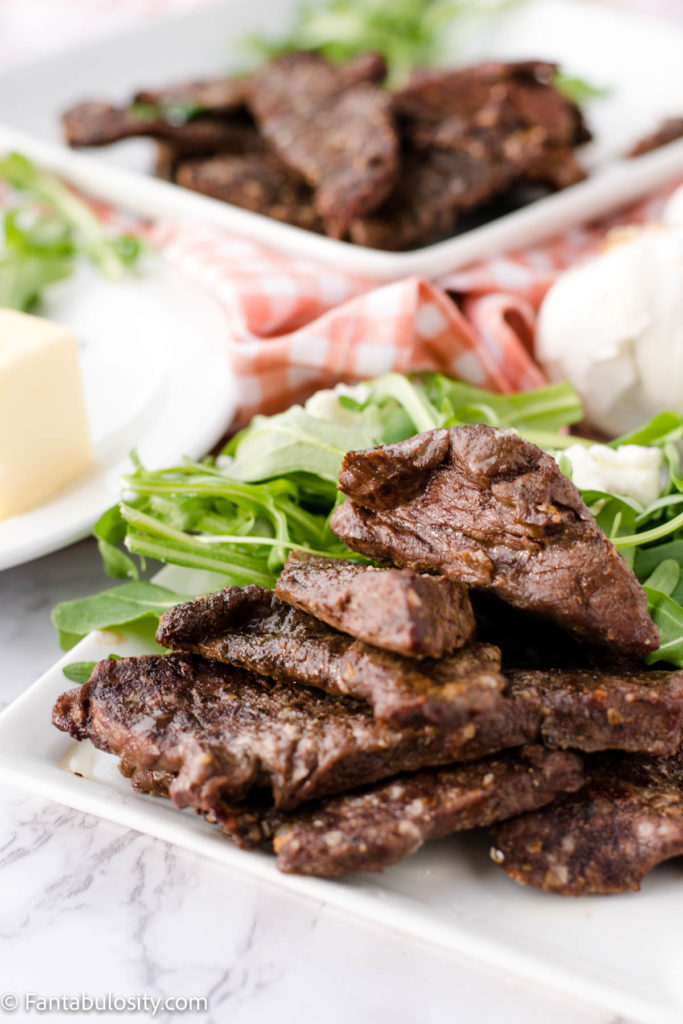
    Air Fryer Venison Steak on a white plate surrounded by salad and butter

    Delicious cuts of venison are dredged in melted butter, sprinkled with salt and pepper, (similar to how to cook steak in the oven), and cooked in a 400° air fryer for a quick and easy way to enjoy it without breading. (If you prefer fried deer meat with breading, you’ll LOVE this fried deer meat recipe!)

    [feast_advanced_jump_to]

    Why You’ll Love This Recipe

    • The butter helps keep the venison juicy during the cooking process and also adds a level of flavor that’s delicious!
    • It’s only 4 ingredients! The venison, butter, salt, and pepper, so you probably already have everything on hand that you need!
    • Depending on how “well-done” you prefer your venison, this can be ready to eat in as little as 5 minutes for medium-rare or up to 7 minutes for a medium steak (which is how we preferred ours).

    Can you cook deer in an air fryer?

    Yes! “How long” you cook it can depend on how “done” you prefer it but no matter how long, it’s still a fast and easy way to cook the venison.

    What is the Best Way to Cook Venison?

    This could be answered in many different ways but here are our thoughts:

    • Air frying deer can be healthier, faster, and an easy way to cook the wild game. This is good for cut-up fryer meat, that will easily fit in to the basket.
    • Cooking venison steaks on the grill with a marinade – there’s no secret that grilling deer meat can give it a flavor of that “char” that we all love so much when it comes to items cooked over an open flame. Plus, using a marinade can help get the “gamey” taste out of venison if it’s not your favorite.
    • Frying Deer Meat in Oil – Although this is our favorite way to enjoy venison steak (bites), getting the oil and flour out, and cooking the fryer meat (tenderloin or backstrap) in small batches, can have a few more steps and more clean-up than air frying.
    • Cooking venison on the stove – with this recipe, it uses the same concept of butter, salt and pepper, as the air-fryer recipe here. However, the big difference between the two recipes is that this one gives the “browned-butter” flavor and it also uses whole cuts of steak, rather than cut up peices of fryer meat or tenderloin or backstrap pieces.

    So when it comes to deciding on the best way to cook venison, it can depend on the cut, and what flavor outcome you desire.

    Common Questions about Venison

    What temp should venison be cooked to?

    When cooking venison it’s recommended to have pink in the middle so it doesn’t get too tough. But a good range of internal temperature to go by is cooking until it reaching 130°-140°. Keep in mind that venison is also a deeper red (compared to beef) so a “medium” deer steak can look really rare and a pink inside is actually more “well done”.

    How do you cook venison without drying it out?

    This is where the butter in this recipe comes in. After testing this recipe in the air fryer the first time, without butter, it gave the venison a very tough texture, making it almost like jerky. Adding the butter allows the deer to stay juicy and cook without drying out.

    Do you have to soak deer meat before cooking it?

    You don’t have to but some do. Some soak it overnight in salt water or vinegar and water can help draw the blood out, to help remove the gamey taste. However we rarely do this, and only tend to when it was an older, tough deer.

    How to Make Venison in the Air Fryer

    This may be one of the easiest venison recipes you’ve ever made and it’s very family-friendly considering it’s cut up and bite-size which is great for little hands if you have kiddos.

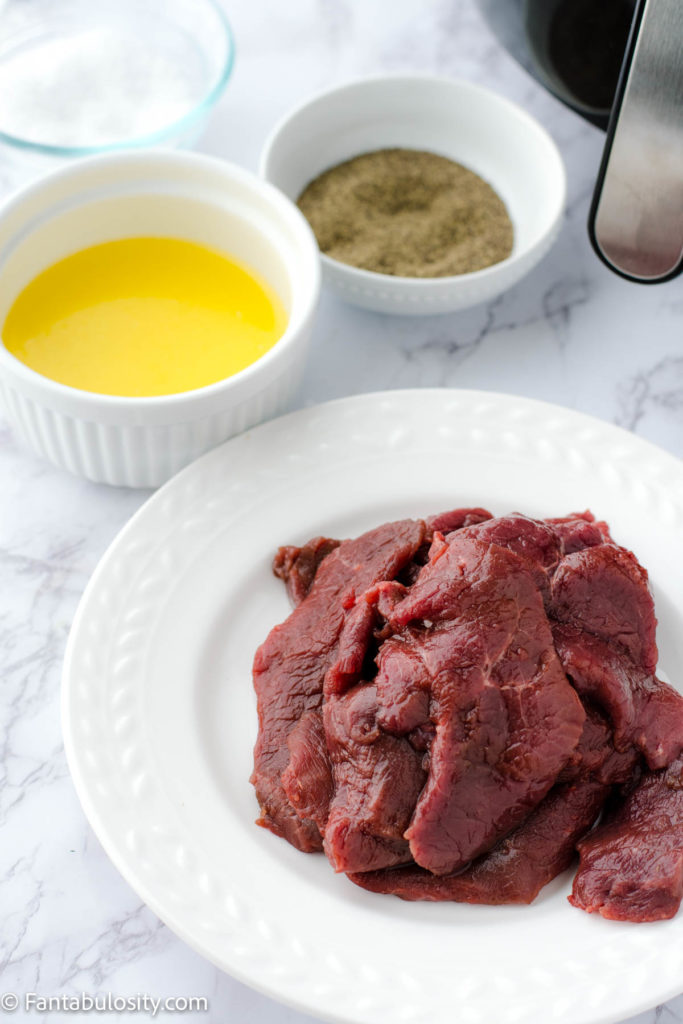
    Ingredients

    For this recipe, we used:

    • Deer meat tenderloin and/or backstrap, that’s sliced into ¼ inch slices.
    • Melted butter – Depending on the amount of venison you’re cooking, you may need more/less butter
    • Salt – kosher salt is our favorite but table salt will work just fine
    • Pepper – black pepper or ground peppercorn medley is our favorite
    Ingredients on a table to make air fryer venison

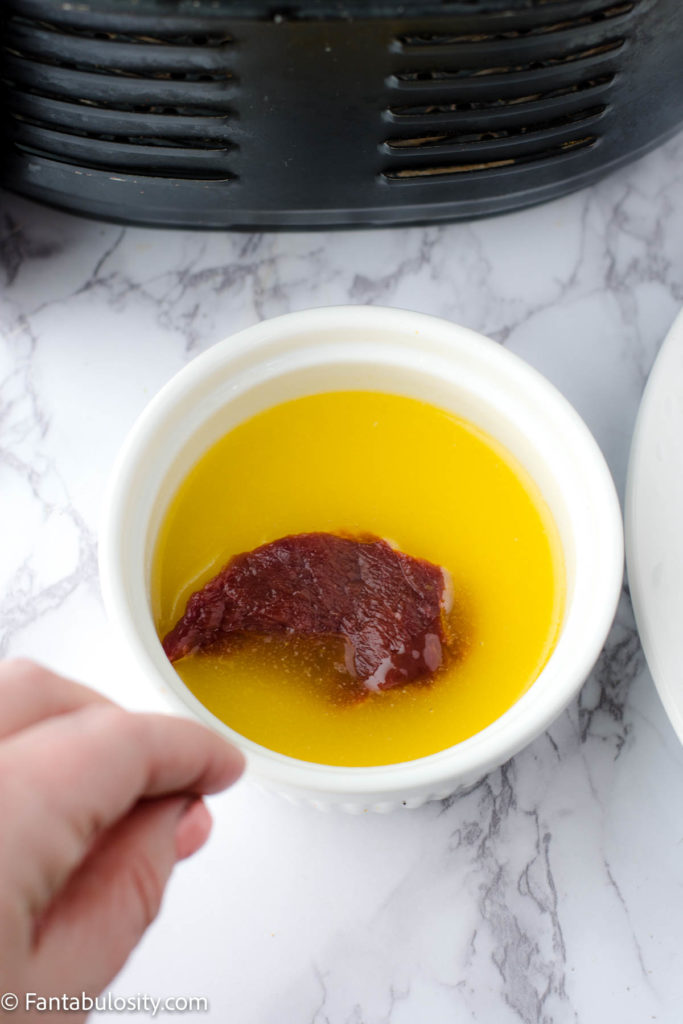
    Start by melting butter in a small, dish and dredge each piece of the deer tenderloin (or fryer deer meat) in to the butter to coat each side.

    Dip venison steaks in to melted butter

    Most air fryers recommend that you avoid spraying the air fryer baskets with cooking spray and there’s no need to for this recipes, especially since the butter-coated venison should keep it from sticking.

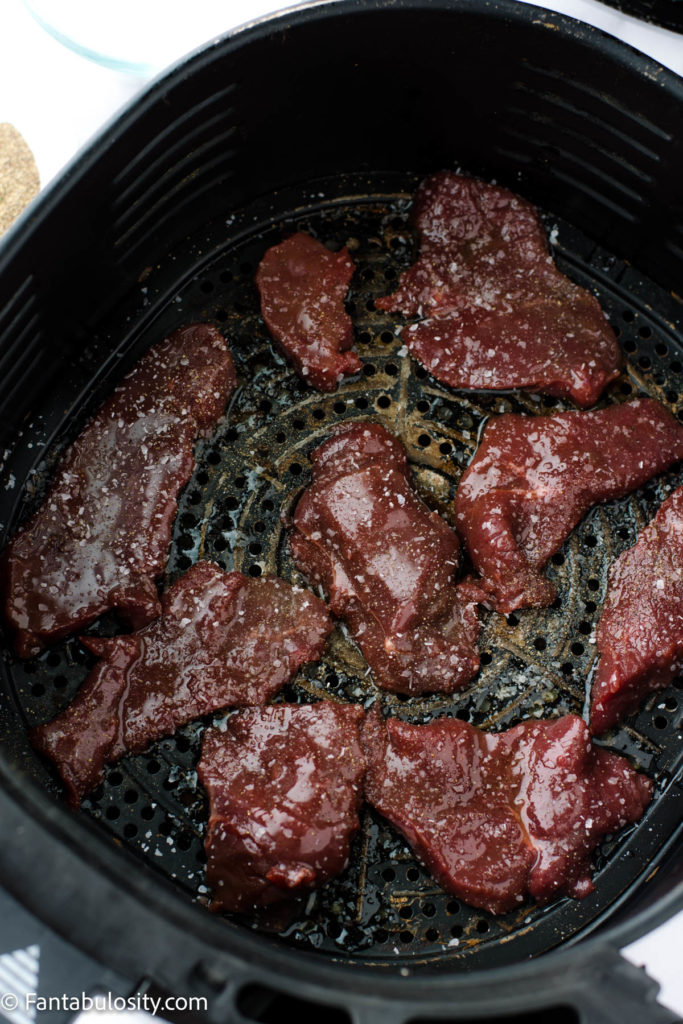
    Place venison in to air fryer basket and sprinkle with desired amount of salt and pepper (keeping in mind whether or not you used salted butter or unsalted).

    Place venison steaks in to air fryer basket

    Cook the venison at 400° for 5-7 minutes (depending on the internal temperature you prefer).

    In my air fryer, we didn’t find a need to have flip it during the cooking process but if you find that yours needs to flipped, flipping half way through would probably be the best solution.

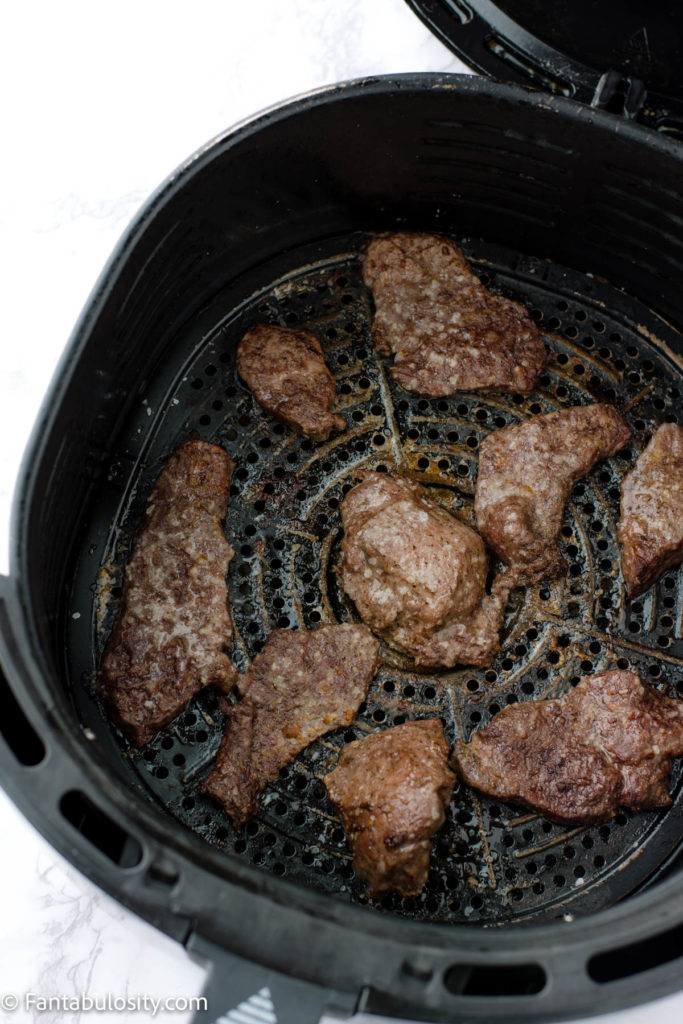
    Cooked deer meat in air fryer basket, after 7 minutes

    Once it has finished cooking, remove from the air fryer and it’s ready to eat!

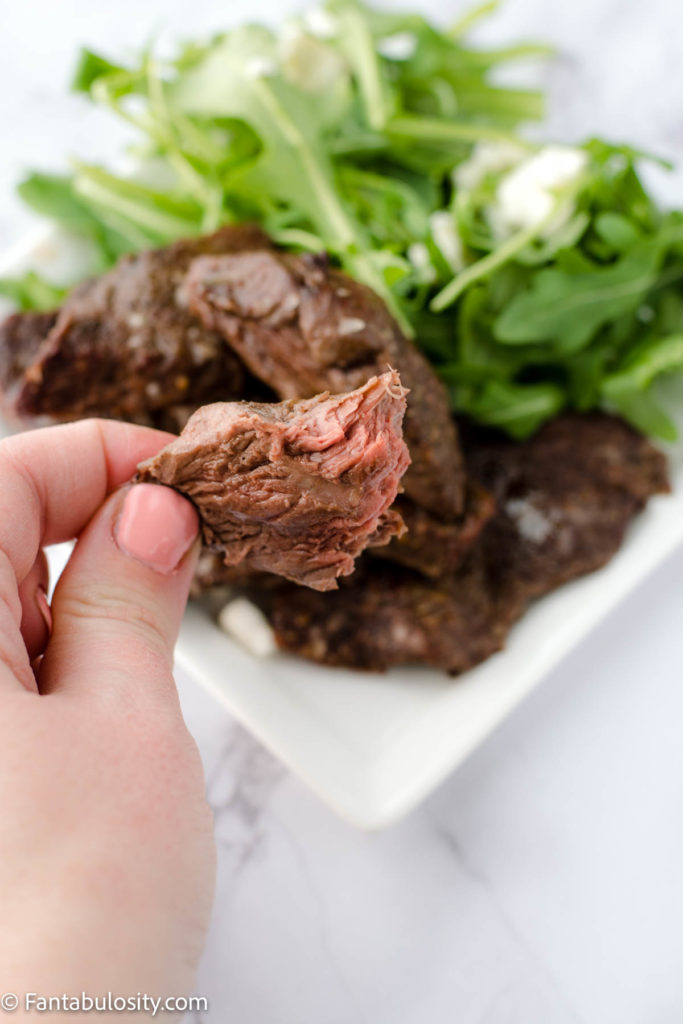
    hand holding a piece of air fryer venison to show pink inside

    Cooking at 400° for 7 minutes gave the thicker pieces of venison this beautiful pink color.

    Be mindful of the thinner pieces that you may have and reducing the cook-time may be more ideal for those.

    Air Fryer Venison Recipe, stacked on a white plate

    What to Serve with Venison

    Side dishes that go great with this are:

    • Best Side Salad Recipe
    • Garlic Roasted Broccoli
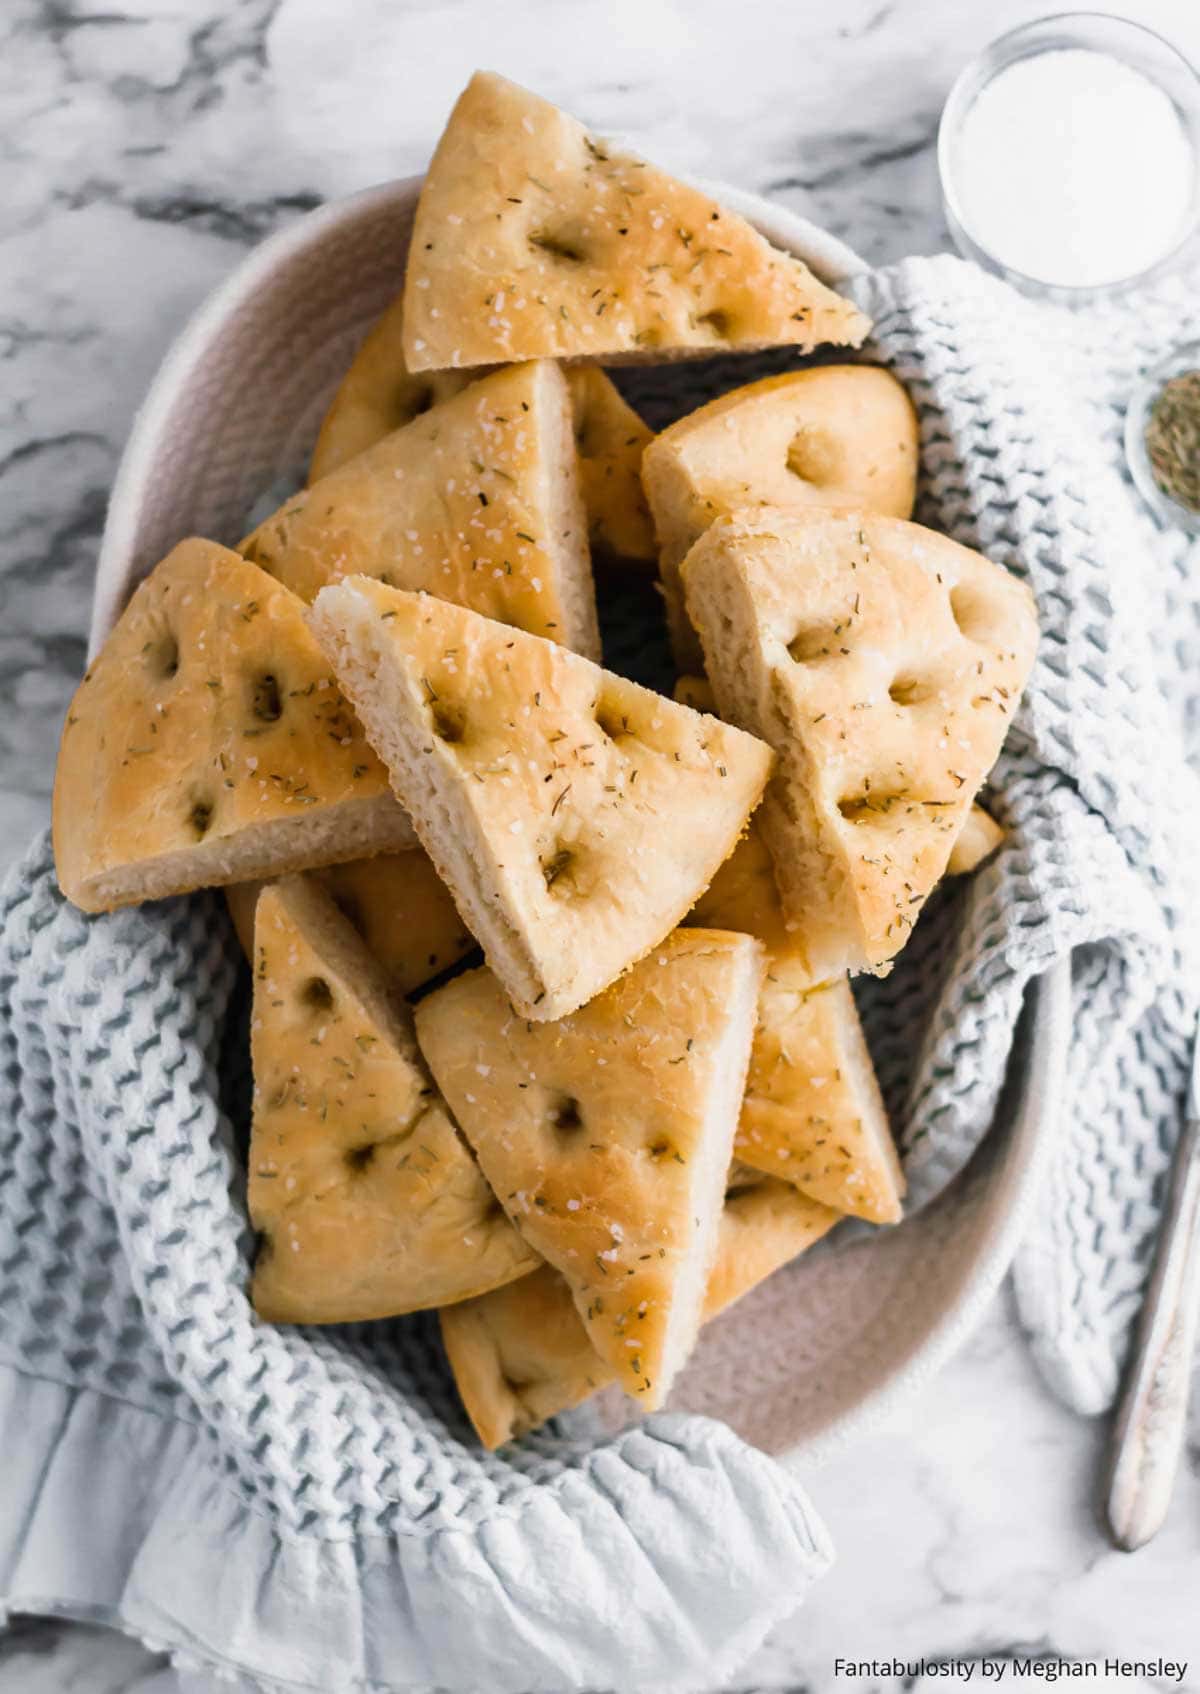
    • Focaccia Bread
    • Instant Pot Sweet Potatoes

    Tips for Making This

    • If possible, make sure venison is closer to room temperature before cooking as cold venison may cook differently in the air fryer. If it is cold, you may need to adjust the cook-time so it’s best to keep an eye on it for your desired “doneness”.
    • Depending on how thick or thin the venison pieces are can make the cooking time vary. If possible, and if you need to cook it in batches (based on the size of your air fryer) try cooking the pieces that are similar in size, together.

    More Posts You’ll Love

    If you love air fryer recipes, you’ll love these too!

    • Brats in the Air Fryer
    • Burgers in the Air Fryer
    • Chicken Legs in the Air Fryer
    • Buffalo Chicken Tenders in the Air Fryer
    • Bacon in the Air Fryer

    Recipe

    Air fryer deer meat on platter and hand holding a piece.
    Print Pin
    5 from 63 votes

    Air Fryer Venison

    Venison (deer) cooked in the air fryer is an easy and healthy way to cook the wild game steaks and is ready to eat in only 7 minutes!
    Course Main Course
    Cuisine American
    Prep Time 0 minutes minutes
    Cook Time 7 minutes minutes
    Total Time 7 minutes minutes
    Servings 4 people
    Calories 238kcal
    Author Jessica Burgess

    Equipment

    • air fryer

    Ingredients

    • 1 pound venison sliced in to ¼ in. slices
    • ¼ cup melted butter salted or unsalted
    • salt as desired (I sprink about a teaspoon for 1 lb.)
    • pepper as desired (I used about ½ teaspoon for 1 lb.)

    Instructions

    • Melt butter in small dish
    • Dredge venison pieces in to melted butter and place in air fryer basket
    • Sprinkle with desired amount of salt and pepper.
    • Cook at 400° for 5-7 minutes, depending on desired internal temperature. See notes.

    Notes

    • Room temperature venison – If possible, make sure venison is closer to room temperature before cooking as cold venison may cook differently in the air fryer. If it is cold, you may need to adjust the cook-time so it’s best to keep an eye on it for your desired “doneness”.
    • What temp should venison be cooked to? When cooking venison it’s recommended to have pink in the middle so it doesn’t get too tough. But a good range of internal temperature to go by is cooking until it reaching 130°-140°. Keep in mind that venison is also a deeper red (compared to beef) so a “medium” deer steak can look really rare and a pink inside is actually more “well done”.
    • Thickness/Cook time: Depending on how thick or thin the venison pieces are can make the cooking time vary. If possible, and if you need to cook it in batches (based on the size of your air fryer) try cooking the pieces that are similar in size, together.

    Nutrition

    Serving: 0.25pound | Calories: 238kcal | Carbohydrates: 1g | Protein: 26g | Fat: 14g | Saturated Fat: 8g | Trans Fat: 1g | Cholesterol: 127mg | Sodium: 159mg | Potassium: 364mg | Sugar: 1g | Vitamin A: 355IU | Calcium: 9mg | Iron: 4mg

    Edible Cookie Dough Recipe

    March 8, 2021

    Edible cookie dough in glass jar.

    This edible cookie dough recipe is safe to eat because it doesn’t have raw eggs or raw flour, and you can even make it without brown sugar if you prefer!

    In only 15 minutes you can have edible cookie dough for a quick no-bake dessert when you’re craving the best part of making chocolate chip cookies! See more easy cookie recipes!

    Edible Cookie Dough in glass jar.
    [feast_advanced_jump_to]

    Why You’ll Love This Recipe

    • It only takes 15 minutes and you’re cookie dough craving is conquered!
    • The instructions on how to “heat treat” flour are included below so you can avoid consuming raw flour (See why this is important below!)
    • This is a great base, so if you're feeling like mixing things up a bit, try using other toppings as well! (See mix-in ideas below!)

    Is it OK to eat edible cookie dough?

    It is ok to eat edible cookie dough if you “heat treat” flour, so it can get rid of the bacteria that some flour is said to contain. This recipe also leaves out any raw egg so you don’t have to worry about E Coli. or Salmonella.

    Do you have to heat flour for edible cookie dough?

    You don’t have to but it is BEST to use heat-treated flour to make your edible cookie dough safer to eat.

    How do you heat treat flour?

    • Preheat oven to 350 degrees. 
    • Line a baking sheet with parchment paper. Evenly spread the flour on it. 
    • Place the flour in the oven and bake for about 8 minutes. 
    • You don't want the flour to brown, but you do want it to reach an internal temperature of 160 degrees.
    • When it's ready, remove it from the oven and allow it to cool completely.
    Flour on baking sheet to use in cookie dough.

    Edible Cookie Dough Without Brown Sugar

    We prefer using brown sugar in this cookie dough recipe but if you prefer to make it without, you absolutely can! Just leave the ingredients the way they’re stated but leave the brown sugar out.

    Ingredients You’ll Need:

    You only need a few common ingredients for this recipe:

    • 2 cups of All-Purpose Flour (Heat Treated - See Below)
    • 1 cup Butter (Unsalted) softened
    • ½ cup White Sugar
    • 1 cup Dark Brown Sugar
    • 1 tablespoon Vanilla Extract
    • 5 tablespoon Milk
    • 1 ½ cups Mini Chocolate Chips 
    Ingredients for edible cookie dough recipe.

    How to Make Edible Cookie Dough

    You’ll want to start by heat treating the flour (with the instructions above).

    In a large bowl, add butter. Using a hand mixer beat it until smooth.

    Next, add the Vanilla Extract, Dark Brown Sugar, and White Sugar.

    Mix that until it's thick, smooth, and fluffy.

    Gradually, add in flour a little at a time. Once all of the flour is mixed it should have an almost crumbly appearance.

    Now add the milk. Mixing again with hand mixer until "dough" is smooth all the way through.

    Steps on how to make edible cookie dough.

    Lastly, fold in chocolate chips with a spatula and any other mix-in’s that you’d love in your cookie dough!

    Chocolate chips added to edible cookie dough.

    What else can you add in to cookie dough?

    If you’re looking to add more than just chocolate chips, here is a list of our favorite ideas for adding to edible cookie dough:

    • m&m’s
    • sprinkles
    • dried fruit
    • white chocolate chips
    • pecans
    • walnuts
    • peanut butter
    • Reese’s cups/pieces
    • brownie chunks
    • crumbled snack cakes/cookies
    • toffee bits
    • butterscotch chips
    • potato chips
    • crushed pretzels
    • or you can even stuff crescent rolls with cookie dough for a double delicious bite!
    Edible cookie dough in a glass jar.

    How do you serve edible cookie dough?

    We personally love to eat it right out of the bowl. However, there are other fun ways you can use it! Here are a great list of ideas:

    • serve it with ice cream
    • place it between two cookies
    • spread between two graham crackers and freeze for an ice cream sandwich
    • place it on top of cupcakes, like these red velvet cupcakes, as frosting
    • make stuffed crescent roll bites

    How long is edible cookie dough good for?

    It can stay fresh, in the refrigerator, for about a week.

    If you prefer to freeze edible cookie dough, try to consume within a month for best taste!

    Tips for Making This Recipe

    • If the flour seems chunky at all or stuck together use a sifter before mixing it with the other ingredients.
    • If you only have salted butter on hand you can make it with that, it will just be a little saltier (as expected) but still delicious!
    • This is a great base dough so if you're feeling creative try mixing in other toppings as well. So many possibilities. See the list above of our favorite ideas!
    • Do not attempt to bake cookie dough it will not come out like a regular cookie: it will be soupy and flat.

    More Posts You’ll Love

    • Cookie Dough Fudge Recipe
    • Peanut Butter Chocolate Chip Cookies
    • Oatmeal Breakfast Cookies

    Recipe

    Edible cookie dough in glass jar.
    Print Pin
    5 from 5 votes

    Edible Cookie Dough

    This edible cookie dough recipe is ok to eat because it doesn't have raw eggs or raw flour, and you can even make it without brown sugar if you prefer!
    Course Dessert
    Cuisine American
    Prep Time 15 minutes minutes
    Cook Time 0 minutes minutes
    Total Time 15 minutes minutes
    Servings 12 people
    Calories 433kcal
    Author Jessica Burgess

    Ingredients

    • 2 cups all purpose flour heat treated (see post for details)
    • 1 cup unsalted butter softened (can use salted if preferred)
    • ½ cup white sugar
    • 1 cup brown sugar omit if preferred
    • 1 Tablespoon vanilla extract pure vanilla extract preferred
    • 5 Tablespoons milk
    • 1½ cups mini chocolate chips

    Instructions

    How to Make Heat-Treated Flour

    • Start by heat treating (cooking) the flour. Preheat oven to 350 degrees. 
    • Line a baking sheet with parchment paper. Evenly spread the flour on it. 
    • Place flour in oven and bake for about 8 minutes .
    • You don't want the flour to brown, but you do want it to reach an internal temperature of 160 degrees.
    • When it's ready remove from oven and allow to cool completely.

    Remaining Ingredients for Edible Cookie Dough

    • In a large bowl, add butter. Using a hand mixer beat it until smooth.
    • Next, add the vanilla extract, brown sugar, and white sugar.
    • Mix that until it's thick, smooth, and fluffy.
    • Gradually, add in flour a little at a time. Once all of the flour is mixed it should have an almost crumbly appearance.
    • Now add the milk. Mixing again with hand mixer until "dough" is smooth all the way through.
    • Fold in chocolate chips with a spatula!

    Notes

    • This recipe makes 12 servings. Feel free to cut the recipe in half if desired.
    • If the flour seems chunky at all or stuck together use a sifter before mixing it with the other ingredients.
    • If you only have salted butter on hand you can make it with that, it will just be a little saltier (as expected) but still delicious!
    • This is a great base dough so if you're feeling creative try mixing in other toppings as well. So many possibilities. See the list above of our favorite ideas!
    • Do not attempt to bake cookie dough it will not come out like a regular cookie: it will be soupy and flat.

    Nutrition

    Serving: 5Tablespoons | Calories: 433kcal | Carbohydrates: 58g | Protein: 4g | Fat: 21g | Saturated Fat: 13g | Trans Fat: 1g | Cholesterol: 45mg | Sodium: 26mg | Potassium: 61mg | Fiber: 1g | Sugar: 41g | Vitamin A: 533IU | Vitamin C: 1mg | Calcium: 56mg | Iron: 1mg

    Baked Feta Pasta Recipe

    March 7, 2021

    Baked Feta Pasta Recipe

    This is the simple baked feta pasta recipe trend that you’ve seen all over TikTok!

    With just a few ingredients like feta, pasta, cherry tomatoes, oil, and a few spices, it’s an easy dinner idea that’s baked and ready in about 30 minutes! Not a fan of the feta? You may like our macaroni and tomatoes recipe too!

    Baked feta pasta in baking dish.

    Simple Baked Feta Pasta Recipe

    This recipe has gone viral all over TikTok and I knew it needed to make an appearance here on Fantabulosity in case you’ve been wanting to make it too!

    Why You’ll Love This Recipe:

    If you haven’t happened across this baked feta pasta online yet, then you may not know much about it. Well, let me tell you… it’s easy, it’s beautiful and it’s delicious!

    With only a few simple, common ingredients, this will create a dish that will probably not only end up on your meal plan but will become the perfect main course to make for guests or a potluck!

    Ingredients for Feta Pasta

    • olive oil – plus more 
    • freshly squeezed lemon juice – optional
    • clove of garlic – minced
    • dried oregano
    • cumin
    • cherry tomatoes
    • block of feta cheese
    • fresh rosemary
    • dried pasta (we use the rotini pasta like we used in this rotini pasta bake.)
    • Salt – to taste
    • Freshly ground black pepper – to taste

    Variations

    If you’re looking to add more protein to this dish, you could consider adding:

    • ground beef
    • ground chicken (like we used in this easy chicken bolognese recipe!)
    • shrimp
    • tofu
    Ingredients to make baked feta pasta from tiktok

    How to Make Baked Feta Pasta

    First, you’ll preheat the oven to 400F. 

    In a small bowl, add the olive oil, lemon juice (if using), minced garlic, dried oregano, and cumin. Mix until combined. Set aside.

    Place the cherry tomatoes into a medium baking dish, then add the olive mixture and toss. Place the feta cheese in the middle of the baking dish and flip it to coat it in oil. Top with fresh rosemary.
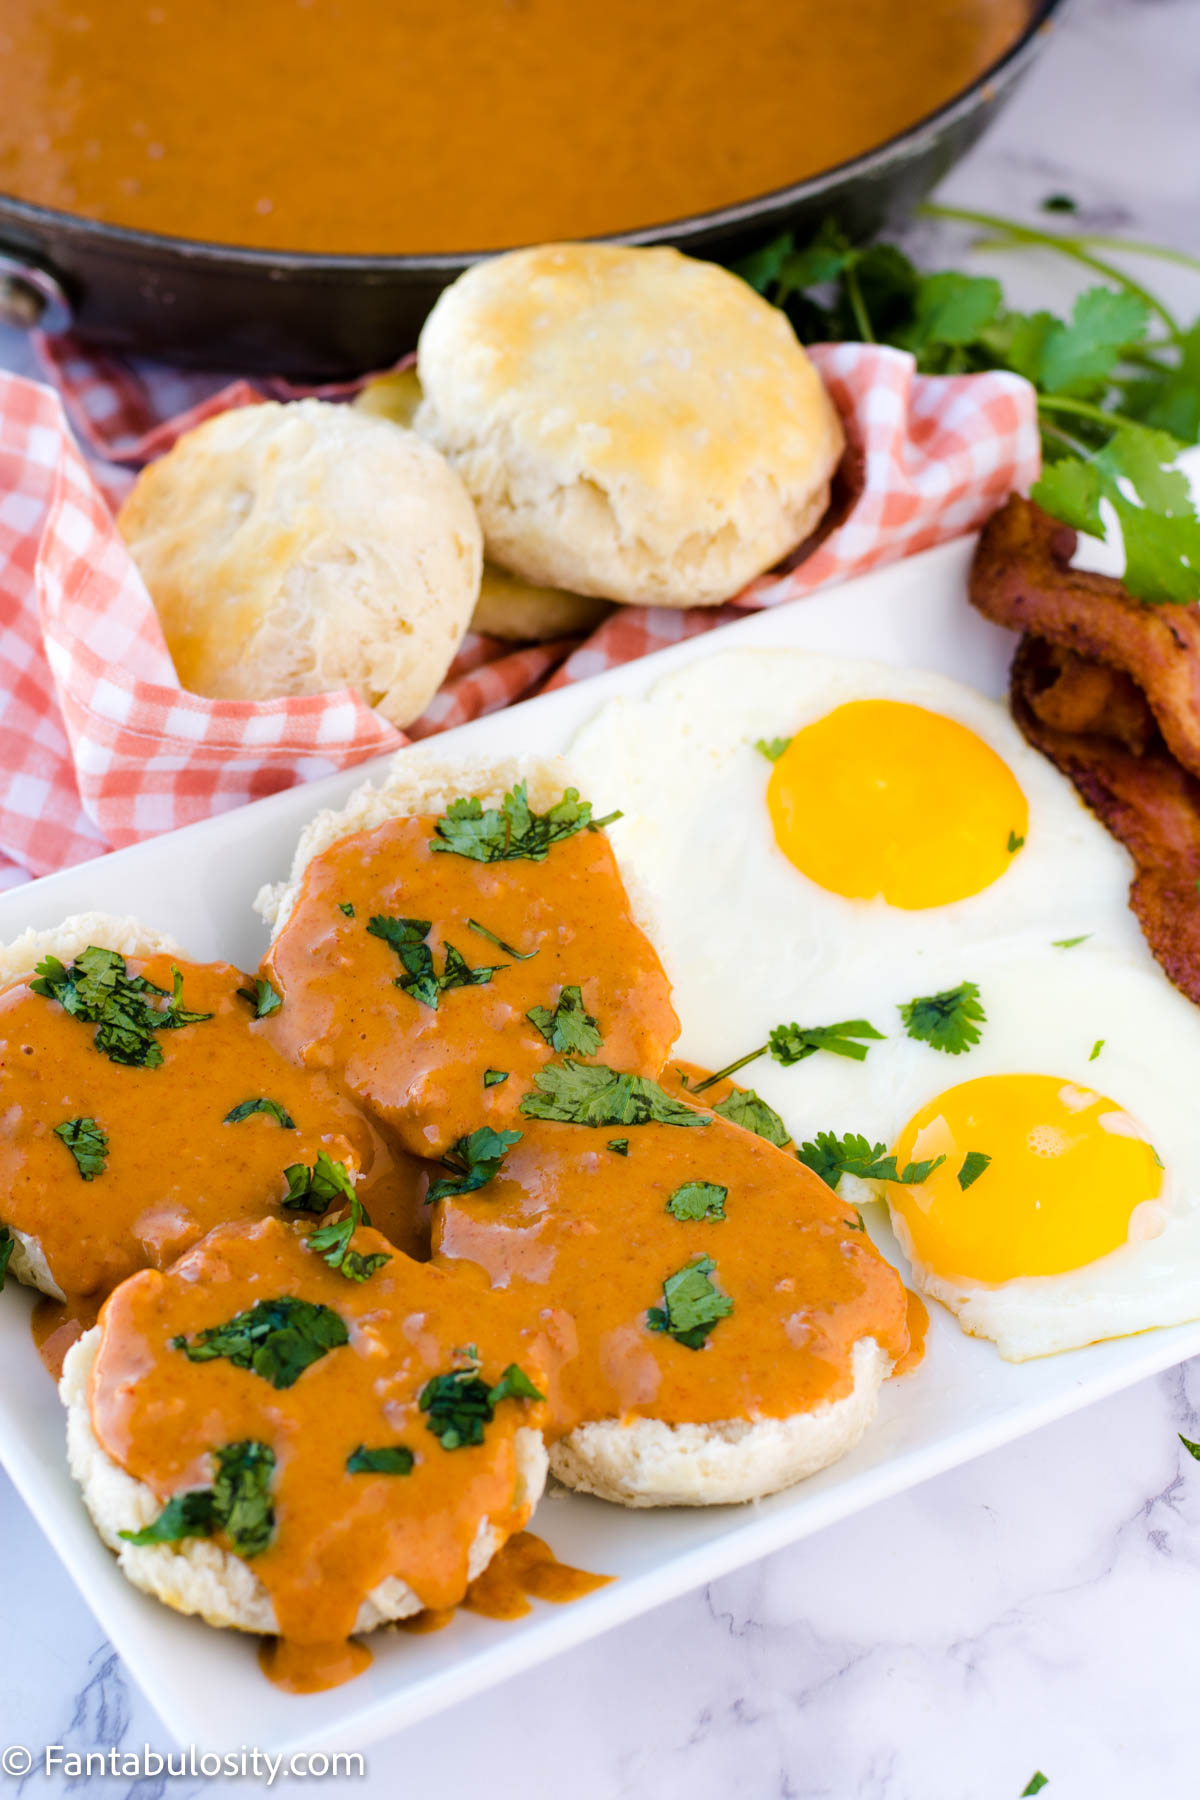
    Feta and tomatoes in a baking dish for pasta
    Feta, oil, spices and tomatoes for baking pasta

    Bake for 30-35 minutes or until the tomatoes have burst.

    Meanwhile, cook the pasta in salted water according to the package instructions (cook until al dente). Drain and toss with ½ tablespoon of olive oil to keep it from sticking and drying out.

    Baked tomatoes and feta cheese in baking dish

    Once the tomatoes have burst, remove the baking dish from the oven and turn off the oven. Use a fork to mash the feta and tomatoes into a creamy sauce.

    Feta cheese and tomatoes mixed together

    Toss in the pasta. Season with salt and pepper, taste and adjust seasonings if desired (salt may not be necessary depending on how salty your feta is).

    Noodles added to feta cheese and tomatoes after baking
    Noodles stirred in to melted cheese and tomatoes in a white baking dish

    Serve immediately!

    Baked feta pasta in baking dish.

    Tips for Baked Feta Pasta

    • To make this recipe gluten-free, simply use gluten-free pasta. It can be made with corn and rice pasta and it will be absolutely delicious!
    • Top with fresh oregano, basil, or red pepper chili flakes if desired.
    Baked Feta Pasta from TikTok Trend on a white plate with gold utensils and napkins

    What to Serve with Baked Feta Pasta

    With this dish, you’re getting in all different aspects of the food pyramid! But if you’re like me, I love having a nice salad to serve alongside pasta. Here are our favorites to serve with this feta pasta:

    • The BEST Side Salad Recipe
    • Italian Chopped Salad
    • Summer Side Salad

    More Pasta Recipes You’ll Love:

    If you love this easy pasta recipe, then you’ll also love these:

    • BBQ Chicken Pasta
    • Buffalo Chicken Lasagna
    • Chili Mac
    • Chicken Bacon Ranch Pasta
    • 30-Minute Taco Pasta
    • Fettucine with Corn and Tomatoes
    • Cajun Chicken Alfredo

    Recipe

    Baked Feta Pasta Recipe
    Print Pin
    5 from 1 vote

    Baked Feta Pasta Recipe

    This is the simple baked feta pasta recipe trend that you've seen all over TikTok! With just a few ingredients like feta, pasta, cherry tomatoes, oil, and a few spices, it's an easy dish that's baked and ready in about 30 minutes!
    Course Main Course
    Cuisine American
    Prep Time 5 minutes minutes
    Cook Time 30 minutes minutes
    Total Time 35 minutes minutes
    Servings 6 servings
    Calories 333kcal
    Author Jessica Burgess

    Ingredients

    • ¼ cup olive oil plus a little extra for tossing
    • ½ tablespoon freshly squeezed lemon juice optional
    • 1 clove garlic minced
    • ½ teaspoon dried oregano
    • ¼ teaspoon cumin
    • 14 oz. cherry tomatoes
    • 8 oz. feta cheese block feta
    • 2 sprigs fresh rosemary
    • 8 oz. dried pasta pasta of your choice
    • salt to taste
    • pepper to taste

    Instructions

    • Preheat the oven to 400F. 
    • In a small bowl, add the olive oil, lemon juice (if using), minced garlic, dried oregano, and cumin. Mix until combined. Set aside.
    • Place the cherry tomatoes into a medium baking dish, then add the olive mixture  and toss. Place the feta cheese in the middle of the baking dish and flip it to coat it in oil. Top with fresh rosemary.
    • Bake for 30-35 minutes or until the tomatoes have burst. Meanwhile, cook the pasta in salted water according to the package instructions (cook until al dente). Drain and toss with ½ tablespoon of olive oil to keep it from sticking and drying out.
    • Once the tomatoes have burst, remove the baking dish from the oven and turn off the oven. Use a fork to mash the feta and tomatoes into a creamy sauce. Toss in the pasta. Season with salt and pepper, taste and adjust seasonings if desired (salt may not be necessary depending on how salty your feta is).
    • Serve immediately! Top with fresh oregano, basil or red pepper chili flakes if desired.

    Notes

    • To make this recipe gluten-free, simply use gluten-free pasta. It can be made with corn and rice pasta and it will be absolutely delicious!
    • Top with fresh oregano, basil, or red pepper chili flakes if desired.
    Nutrition Disclaimer: All nutritional information shared on this site is an approximation. I am not a certified nutritionist and any nutritional information shared on this site should be used as a general guideline.

    Nutrition

    Serving: 1cups | Calories: 333kcal | Carbohydrates: 33g | Protein: 11g | Fat: 18g | Saturated Fat: 7g | Cholesterol: 34mg | Sodium: 432mg | Potassium: 259mg | Fiber: 2g | Sugar: 4g | Vitamin A: 488IU | Vitamin C: 16mg | Calcium: 206mg | Iron: 1mg

    Venison Chili – Stovetop or Slow Cooker Recipe

    February 27, 2021

    Ladle of venison chili coming out of pot.

    This venison chili is one of the easiest ground deer meat recipes that you can make on the stove or in a slow cooker! The addition of the bacon helps give it a flavor that will leave you craving it on those cold winter days!

    Venison Chili

    We absolutely love deer meat recipes and are always looking for new ways to use it, since we live in Montana and my husband is a hunting guide. So if you have a freezer full of venison, adding deer chili to your menu plan is always a good idea! Or, put it on top of Frito’s and make a chili pie!

    [feast_advanced_jump_to]

    Why You’ll Love This Venison Chili

    I love using ground venison to make chili because it’s a great way to use up that deer that can’t be cut in to steaks.

    NOTE: If you’re someone who doesn’t really care for a gamey venison taste, using it in chili is a great way to use it up!

    Want Slow Cooker Venison Chili?

    Similar to our stovetop or slow cooker bean soup, this recipe process below will show you how to cook on the stovetop. However, if you’re planning on making this in the slow cooker… here is what we recommend:

    • Cook the bacon, venison, onions, peppers, and garlic together in a skillet over medium-high heat until the venison and bacon is cooked through.
    • Add it to the slow cooker with the rest of the ingredients.
    • Cook on high heat for about 5 hours or on low heat for about 8 hours. (Temperature settings on different slow cookers may vary. Check periodically for best results!)

    How to Make Deer Chili

    If you’re ready to get started on this venison chili, you can find the full stove-top recipe at the bottom of this post.
    However, I LOVE to show you process photos too in case you like to follow along visually like I do, when making a recipe I find online!

    Ground Venison Recipe - Deer Chili

    First, you’ll chop up your bacon and cook it over medium heat in a large pot for about 10 minutes until done. (Or longer if you prefer a crispier bacon in your chili.)

    Venison Chili Recipe

    Add your onion, garlic and bell peppers and cook for 5 minutes.

    Then, add the ground venison until venison is no longer pink.

    Spices and ingredients for chili recipe

    Stir in the chili powder, cumin, onion powder and salt until the meat is evenly coated.

    Deer chili recipe

    Pour in the tomato sauce, diced tomatoes, chili beans, and kidney beans.

    Venison Recipes

    Stir in the brown sugar…

    How to make deer chili

    Bring to a boil, reduce heat and let simmer for 15 minutes!

    Doesn’t this look amazing?!

    Venison Chili Tip

    If you’re using 100% ground venison, you’ll want to keep all of the bacon grease that cooks out. However, if you are using processed venison, drain the bacon grease because beef or pork may have been added to it during the process, giving it the fat that this recipe needs.

    Venison Chili Recipe

    Side Dishes for Venison Chili:

    If you’re looking for something to serve alongside this deer chili recipe, you love these:

    • Side Salad Recipe
    • Easy Focaccia Bread
    • Caprese Chicken Sandwich
    • or put it on top of these chili cheese corn dogs

    More Chili Recipes You’ll Love:

    • Easy Chili Recipe
    • Vegetarian Chili
    • Chili Mac
    • White Chicken Chili

    More Venison Recipes You’ll Love:

    • Deer Steak on the Stovetop
    • Fried Deer Meat
    • Grilled Deer Steak

    Recipe

    Ladle of venison chili coming out of pot.
    Print Pin
    4.84 from 18 votes

    Venison Chili

    This venison chili is one of the easiest ground deer meat recipes that you can make on the stove or in a slow cooker! The addition of the bacon helps give it a flavor that will leave you craving it on those cold winter days!
    Course Main Course
    Cuisine American
    Prep Time 5 minutes minutes
    Cook Time 20 minutes minutes
    Simmer 15 minutes minutes
    Total Time 40 minutes minutes
    Servings 8 servings
    Calories 514kcal
    Author Jessica Burgess

    Ingredients

    • 12 ounces thick sliced bacon
    • 2 pounds ground venison
    • 1 large yellow onion
    • 1 green bell pepper
    • 3 teaspoons minced garlic
    • 3 tablespoons chili powder
    • 1 ½ tablespoons cumin
    • 1 tablespoons onion powder
    • ½ tablespoons salt
    • 15 ounces can tomato sauce
    • 2 cans 14.5 oz. cans diced tomatoes or similar size
    • 15 ounces can hot chili beans or mild if you’re not in to “hot”
    • 15 ounces can kidney beans
    • 1 tablespoon brown sugar

    Instructions

    • Chop bacon into small pieces.
    • In a large pot, over medium heat, cook bacon about 10 minutes (you can cook it longer if you prefer a crispier bacon).
    • Add chopped onions, bell pepper, and garlic. 
    • Cook vegetable together with the bacon for 5 minutes. 
    • Add the ground venison and cook until the venison is no longer pink.
    •  Stir in the chili powder, cumin, onion powder and salt until the meat is evenly coated. 
    • Pour in the tomato sauce, diced tomatoes, chili beans, and kidney beans. 
    • Stir to combine. 
    • Stir in brown sugar.
    • Bring the chili to a boil and then reduce the heat and let it simmer for at least 15 minutes.

    Notes

    To Make Venison Chili in the Slow Cooker:
    • Cook the bacon, venison, onions, peppers, and garlic together in a skillet over medium-high heat until the venison and bacon is cooked through.
    • Add it to the slow cooker with the rest of the ingredients.
    • Cook on high heat for about 5 hours or on low heat for about 8 hours. (Temperature settings on different slow cookers may vary. Check periodically for best results!)
    TIP: If you’re using 100% ground venison, you’ll want to keep all of the bacon grease that cooks out. However, if you are using processed venison, drain the bacon grease because beef or pork may have been added to it during the process, giving it the fat that this recipe needs.

    Nutrition

    Serving: 2cups | Calories: 514kcal | Carbohydrates: 31g | Protein: 38g | Fat: 27g | Saturated Fat: 10g | Cholesterol: 119mg | Sodium: 1666mg | Potassium: 1350mg | Fiber: 9g | Sugar: 11g | Vitamin A: 1331IU | Vitamin C: 29mg | Calcium: 117mg | Iron: 8mg

    Smoked Stuffed Mushrooms

    February 25, 2021

    Smoked stuffed mushrooms in a platter.

    Smoking stuffed mushrooms takes this popular appetizer recipe to the next level! The cream cheese, common spices, asiago and cheddar cheese… combined with smoke flavor will make your taste buds swoon!

    When we made our baked stuffed portobello mushrooms and fell in love, we KNEW we had to try our hand at smoking stuffed mushrooms too. And you know what? It was a total success. But this time, we used button mushrooms for a different spin, and they turned out to be little morsels of gold!

    smoked stuffed mushrooms
    [feast_advanced_jump_to]

    You can use either button or portobello

    When making this recipe, you can use either button or portobello mushrooms and even choose to leave out the cream cheese stuffing, if you prefer plain smoked mushrooms.

    What Kind of Smoker Can You Use?

    Using a pellet smoker (like a PitBoss, Traeger or any brand that uses wood pellets) is our favorite to achieve the wood smoke flavor. However, using an electric smoker is just fine too!

    Can I add meat or other “fillers” to this recipe?

    Absolutely. This recipe is for a basic, cream cheese stuffed mushrooms (with seasonings and other cheeses) but you can absolutely add items like crab, breadcrumbs etc.

    Are these keto or low-carb?

    The recipe, written the way I have it, is considered a lower-carb recipe, being only around 7 carbohydrates in 5 mushrooms. (Nutrition facts are an estimate, so please use your own judgment.)

    Ingredients:

    • whole, white mushrooms
    • cream cheese
    • shredded asiago
    • shredded cheddar
    • Italian seasoning
    • minced garlic
    • onion powder
    • salt
    • pepper

    How to Make These Smoked Stuffed Mushrooms

    Preheat smoker to 225°, using your preference of wood-pellets if using a pellet smoker. (We prefer hickory pellets because they’re so versatile but apple pellets would also be amazing for smoking vegetables.)

    White button mushrooms for stuffing

    Clean your mushrooms and remove stems. (See “tips” below on how to wash button mushrooms.)

    Clean and remove stems from button mushrooms

    In a medium-size bowl, mix together all of the ingredients except the mushrooms.

    Cheese filling for stuffed mushrooms

    Line a baking sheet with aluminum foil that’s sprayed with cooking spray and place mushrooms in smoker.

    Fill the inside cavity of the mushrooms with the cream cheese mixture.

    Stuff mushrooms with cream cheese

    Smoke in the 225° smoker for 2 hours, or until mushrooms are cooked and cheese has a nice, golden color.

    Smoke the stuffed mushrooms on a cookie sheet

    Can you place mushrooms directly on the grill racks?

    If you do place them directly on the grill, keep an eye on the cook-time as they may cook faster this way and you don’t want them to burn or dry-out.

    Smoked keto stuffed mushrooms with cream cheese

    Tips:

    • When washing mushrooms do not soak them in water because they’ll absorb water. Simply just wipe with a wet, rung-out paper-towel to clean them
    • To make filling the mushrooms easier, microwave the cream cheese mixture for about 30 seconds to make it more smooth and easier to work with
    • Place cream cheese mixture in to a plastic zip-top bag, cutting a hole in the corner, creating a “piping bag”, so you can easily fill the mushrooms.
    Smoked Stuffed Mushrooms with Cream Cheese

    More Smoked Recipes You’ll Love:

    While you’re smoking these mushrooms, you might as well consider smoked queso, smoked chicken tenders, and smoked candied bacon!

    Recipe

    Smoked stuffed mushrooms in a platter.
    Print Pin
    5 from 14 votes

    Smoked Stuffed Mushrooms

    Smoked stuffed mushrooms takes this popular appetizer recipe to the next level! The cream cheese, common spices, asiago and cheddar cheese… combined with smoke flavor will make your taste buds swoon!
    Course Appetizer
    Cuisine American
    Prep Time 10 minutes minutes
    Cook Time 2 hours hours
    Total Time 2 hours hours 10 minutes minutes
    Servings 4 servings
    Calories 274kcal
    Author Jessica Burgess

    Equipment

    • smoker

    Ingredients

    • 16 ounces whole, white mushrooms
    • 8 ounces cream cheese softened
    • ¼ cup shredded asiago
    • ¼ cup shredded cheddar
    • ½ teaspoon Italian seasoning
    • 1 teaspoon minced garlic
    • ½ teaspoon onion powder
    • ½ teaspoon kosher salt or amount of salt desired
    • pepper pinch or desired amount

    Instructions

    • Preheat smoker to 225°
    • Wipe mushrooms clean and remove stems from mushrooms.
    • In a medium bowl, mix together all of the ingredients except the mushrooms. (If needed, warm up the cream cheese mixture for about 30 seconds to make the cream cheese filling more smooth to help with the filling process.)
    • Fill the center of each mushroom with the cream cheese filling and place on a baking sheet, lined with aluminum foil.
    • Cook in preheated smoker for 2 hours or until mushrooms are cooked and cheese filling as a nice golden brown color.

    Notes

    • When washing mushrooms do not soak them in water because they’ll absorb water. Simply just wipe with a wet, rung-out paper-towel to clean them
    • To make filling the mushrooms easier, microwave the cream cheese mixture for about 30 seconds to make it more smooth and easier to work with
    • Place cream cheese mixture in to a plastic zip-top bag, cutting a hole in the corner, creating a “piping bag”, so you can easily fill the mushrooms.

    Nutrition

    Serving: 5mushrooms | Calories: 274kcal | Carbohydrates: 7g | Protein: 11g | Fat: 24g | Saturated Fat: 14g | Cholesterol: 74mg | Sodium: 623mg | Potassium: 460mg | Fiber: 1g | Sugar: 4g | Vitamin A: 885IU | Vitamin C: 3mg | Calcium: 190mg | Iron: 1mg

    Air Fryer Eggplant Fries

    February 24, 2021

    Air fryer eggplant fries dipped in marinara sauce.

    Air Fryer Eggplant Fries are easy to make and ready to eat in 10 minutes with only a few ingredients like bread crumbs, egg, and milk that you may already have on hand!

    These crispy, breaded eggplant strips are a delicious alternative to regular “fries” when you want something healthier as an appetizer or to serve alongside a juicy hamburger!

    Dip eggplant in to marinara sauce
    [feast_advanced_jump_to]

    Why You’ll Love These

    • A healthier option for french fries – When you have a craving for french fries but you’re trying to eat healthy or looking for more veggies to get in to your family’s dinner, substituting these eggplant fries can come to the rescue!
    • Easy to make – Not only do these have the perfect “crunch” but they’re easy to make and can quickly be made on a busy weeknight, to serve alongside your favorite dinner recipe or to serve as an appetizer for a party!

    Do you have to Soak the Eggplant Before Frying?

    No! If you were frying traditionally in oil, then you may want to, as soaking the eggplant in milk will fill the porous holes, not allowing oil to sink in.

    Is Salting Eggplant Necessary?

    Nope! It used to be recommended to salt eggplant before cooking to remove excess liquid but it’s not really necessary anymore.

    Do you have to Peel the Eggplant?

    It’s not necessary and we left the skin on for this recipe because it’s edible. However, if it’s a tough peel, you may want to but I found it really easy to leave it on for these and didn’t mind the texture of the peel.
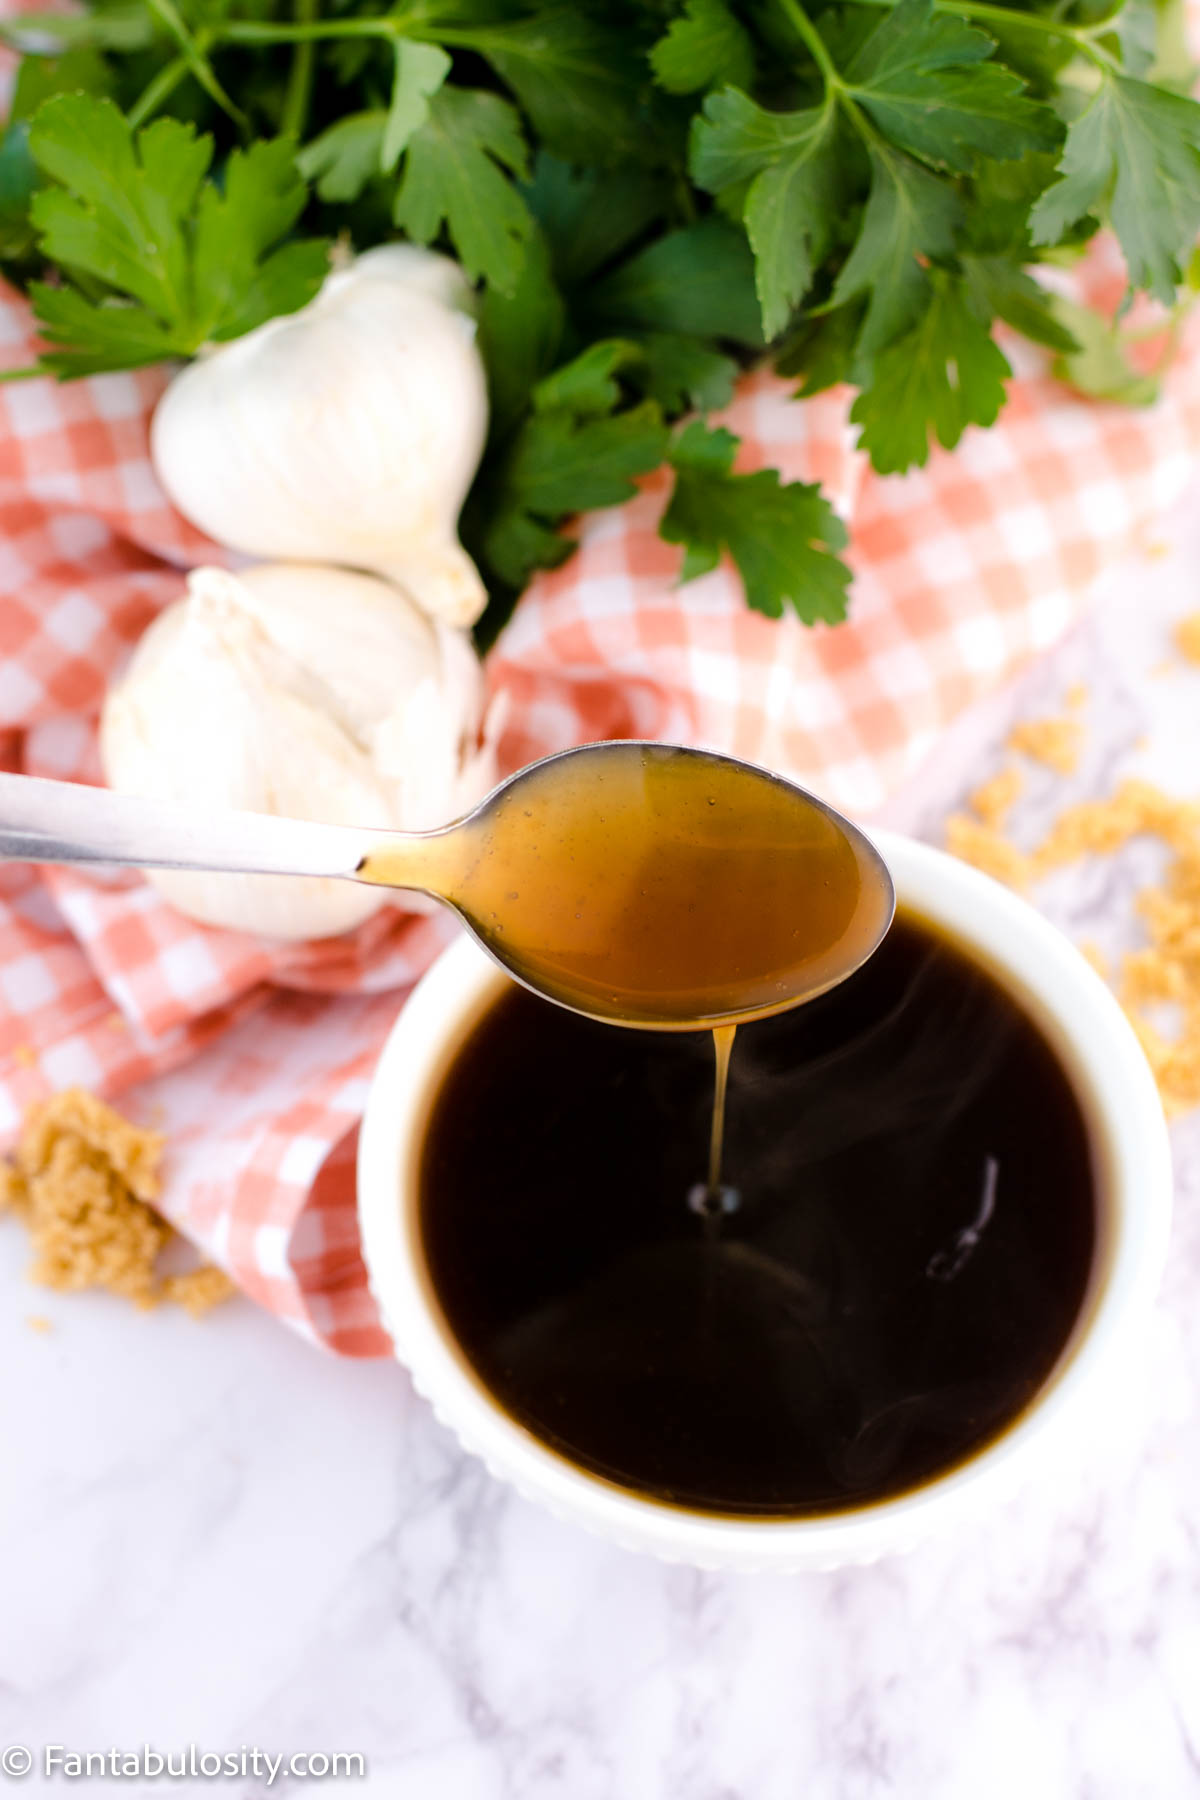
    How to Season

    It doesn’t take much to season these, and feel free to mix things up a bit if you prefer! We like sticking to the simple combo of grated parmesan cheese, and garlic salt.
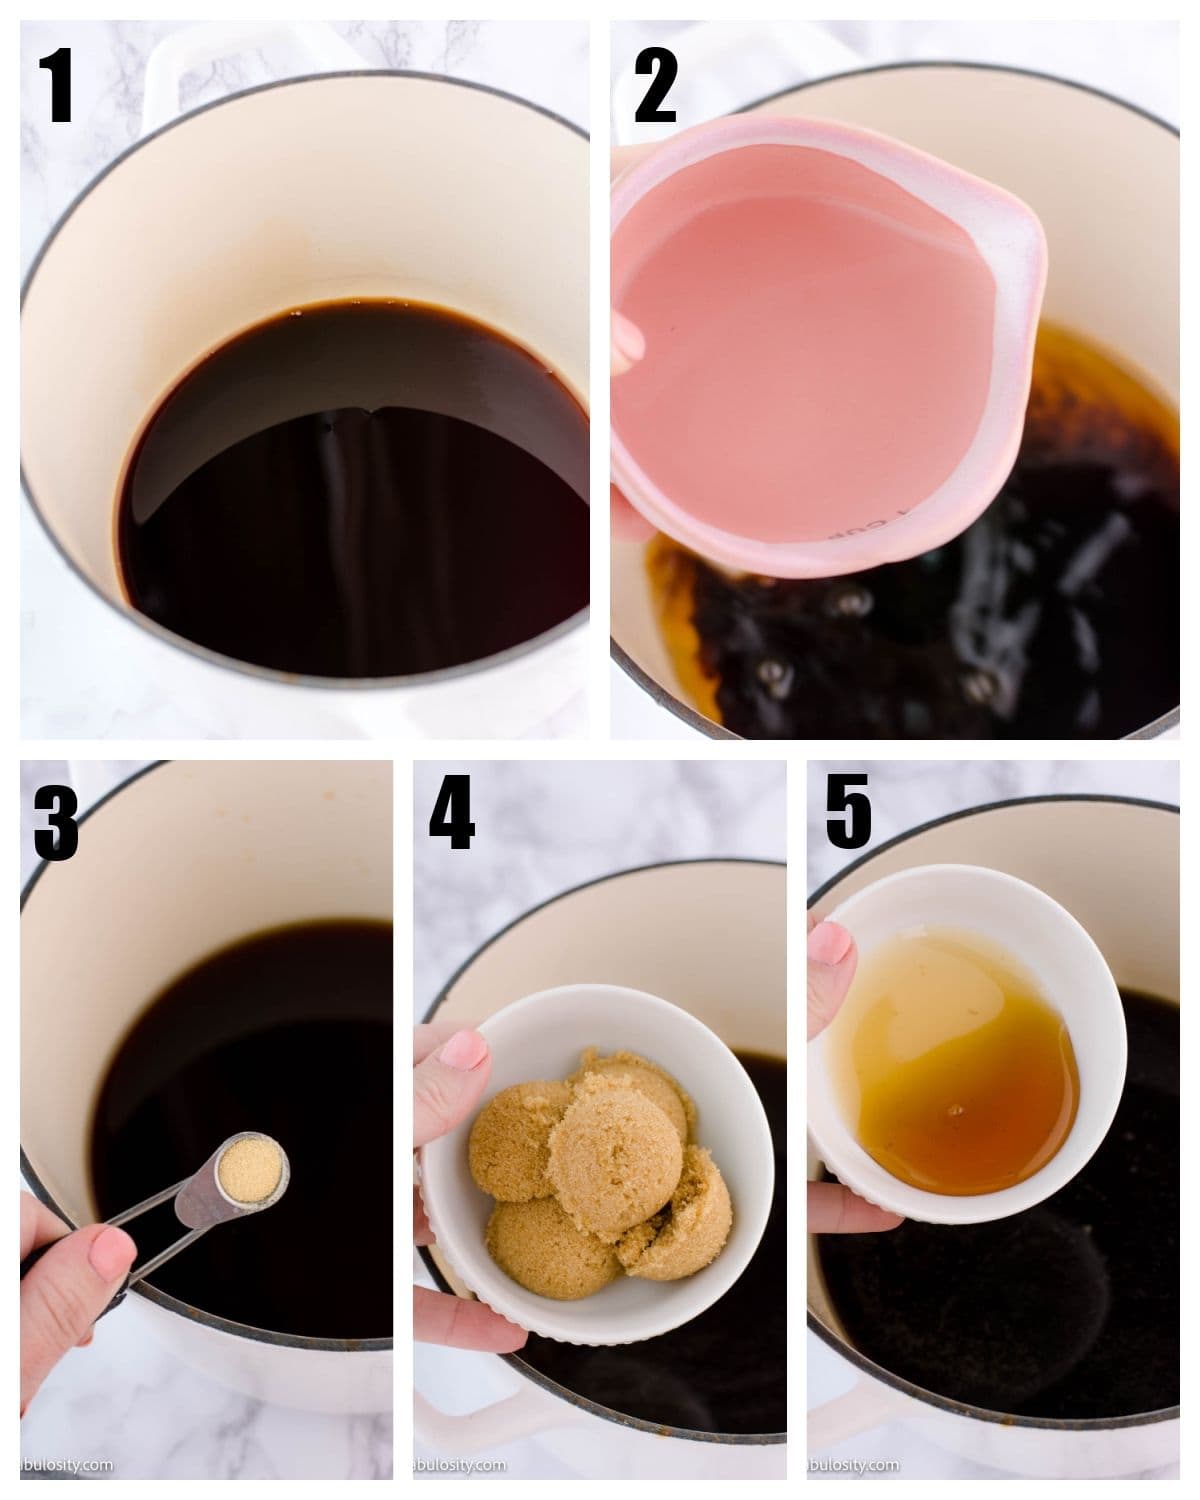
    However, seasonings like seasoned salt, Italian seasoning, garlic pepper and onion powder make great additions too!

    🍆 How to Make Air Fryer Eggplant Fries

    • Wash, dry and slice the eggplant in to ½ inch circles
    • Laying the circles flat, cut the circles in to strips, about ½ in. wide.
    • In two different small dishes, pour bread crumbs in one dish. In the other, mix together the egg and milk.
    • Dip the fries in to the egg/milk wash and then in to the breadcrumbs, making sure the fries are completely coated.
    Step by step of how to make eggplant fries.
    • Place the fries in to the air fryer basket (in a single layer) and cook at 400° for 10 minutes.
    Place eggplant fries in to air fryer in a single layer
    • Serve warm with your favorite dipping sauce!
    Air Fryer Eggplant Fries

    Dipping Sauces for Eggplant Fries

    These definitely don’t have to have a sauce to dip them in but it does make for a great combo if you have a fun option to serve with them! Here are our favorite dipping sauces:

    • marinara sauce
    • spicy aioli
    • ranch dressing (try our jalapeno ranch!)
    • ketchup

    Tips:

    • If you’re looking for a recipe without breadcrumbs, for say a “keto” or low-carb option, try using pork rinds!
    • You can also use panko crumbs instead of breadcrumbs if you prefer.
    • I tested out this recipe, dipping the eggplant in butter and then coating them with breadcrumbs but it resulted in a softer, more “soggy” texture that I wasn’t a fan of. The egg/milk wash gives it more of a crispy texture.
    • In my air fryer, there was no need to flip. If you find that your eggplant fries do not cook evenly, feel free to flip them halfway through.

    More Recipes You’ll Love:

    • 20 Eggplant Recipes
    • 20+ Easy Air Fryer Recipes from TOP Food Bloggers
    • Easy Fried Chicken Recipe
    • Air Fryer Apple Chips
    • Air Fryer Bacon

    Recipe

    Air fryer eggplant fries dipped in marinara sauce.
    Print Pin
    5 from 4 votes

    Air Fryer Eggplant Fries

    Air Fryer Eggplant Fries are easy to make and ready to eat in 10 minutes with only a few ingredients like bread crumbs, egg, and milk that you may already have on hand!
    Course Appetizer, Side Dish
    Cuisine American
    Prep Time 5 minutes minutes
    Cook Time 10 minutes minutes
    Total Time 15 minutes minutes
    Servings 4 people
    Calories 239kcal
    Author Jessica Burgess

    Equipment

    • air fryer

    Ingredients

    • 1 medium eggplant
    • 1 cup bread crumbs
    • ½ cup grated parmesan cheese
    • 1 tablespoon garlic salt
    • 2 eggs
    • ½ cup milk skim, 2% or whole

    Instructions

    • Wash, dry and slice the eggplant in to ½ inch circles
    • Laying the circles flat, cut the circles in to strips, about ½ in. wide.
    • In two different small dishes, pour bread crumbs in one dish. In the other, mix together the egg and milk.
    • Dip the fries in to the egg/milk wash adn then in to the breadcrumbs, making sure the fries are completely coated.
    • Place the fries in to the air fryer basket (in a single layer) and cook at 400° for 10 minutes.
    • Serve warm with your favorite dipping sauce!

    Notes

    • If you’re looking for a recipe without breadcrumbs, for say a “keto” or low-carb option, try using pork rinds!
    • You can also use panko crumbs instead of breadcrumbs if you prefer.
    • I tested out this recipe, dipping the eggplant in butter and then coating them with breadcrumbs but it resulted in a softer, more “soggy” texture that I wasn’t a fan of. The egg/milk wash gives it more of a crispy texture.
    • In my air fryer, there was no need to flip. If you find that your eggplant fries do not cook evenly, feel free to flip them halfway through.

    Nutrition

    Serving: 1serving | Calories: 239kcal | Carbohydrates: 28g | Protein: 13g | Fat: 8g | Saturated Fat: 4g | Trans Fat: 1g | Cholesterol: 96mg | Sodium: 2180mg | Potassium: 402mg | Fiber: 5g | Sugar: 7g | Vitamin A: 303IU | Vitamin C: 3mg | Calcium: 246mg | Iron: 2mg

    Baked Turkey Burgers

    February 21, 2021

    Baked turkey burger on bun with lettuce, tomato, cheese and fiesta mayo.

    Baked Turkey Burgers – Cooking turkey burgers in the oven is EASY! It locks in juices and there’s less mess!

    Baked Turkey Burgers on bun with lettuce and tomato and turkey bacon

    Have a package of ground turkey for burgers? Consider making burger sliders, using ground turkey instead!

    Why You’ll Love These:

    This recipe is incredibly easy and I even give you a quick fun flavored mayo recipe to top it with! Or, if you own an air fryer, you may want to also consider trying these air fryer turkey burgers to see which recipe you prefer!

    You can find the full recipe card below with more details on how to whip up this “gourmet” tasting burger, that doesn’t require a gourmet chef at all!

    You’ll Also Love these Oven-Baked Hamburgers, these Air Fryer Burgers, Smoked Burgers, and these electric skillet burgers.

    Plain Ground Turkey or Pre-Pattied Seasoned

    Pre-Made Turkey Burgers

    For this turkey burger recipe, I wanted to keep things super simple, so I used a pre-pattied ground turkey burger that included spinach and kale.

    But you can absolutely use regular ground turkey for this! However, it’s a lot of fun to mix things up from time to time, just to add some different flavors to the mix!

    Making Your Own Patties: If you’re making your own turkey patties, you can add the seasoning right into the ground turkey before making your patties, but I find that waiting until after I patty them out, I can taste the flavors a LOT more. But whichever way you prefer to season them is just fine!

    Pre-Pattied Burgers: I love the turkey burgers (and any burgers really) that come with paper liners, because it makes separating the patties for easy seasoning and less mess. Here’s how I do it…

    Step by Step Directions

    For the turkey burgers, I wanted to allow the toppings and the fiesta mayo (recipe below) to season the burgers in a BIG way.

    So for seasoning, I kept it simple and just used salt and pepper! (My favorites… kosher salt and peppercorn medley.)

    If you’re using plain ground turkey, I feel that adding salt and pepper is a MUST. Some other additional seasonings I recommend for turkey burgers are:

    • garlic powder
    • garlic pepper
    • a mixture of basil, oregano, parsley
    • onion powder
    • cumin
    • red pepper flakes

    … there are many others you can experiment with, but just keep in mind what seasonings you’re using, so you don’t overpower the burger if you use a sauce like my fiesta mayo recipe below! 

    Grilled or Skillet Cooking

    You can absolutely cook your turkey burgers in a skillet or grill them. I prefer the oven-baked method to cut down on the mess in my kitchen, and when it’s too cold outside to grill. But feel free to cook them how you like!

    So let’s get to what I now call, the “BEST Turkey Burger Recipe“… the Turkey Club Burger. I’ll walk you through the recipe with photos in case you’re a visual person, but feel free to jump to the bottom of the post where I provided a recipe card that you can print and follow the directions in one spot!

    How to Make

    You’ll want to start by preheating your oven to 375 degrees and lining a baking dish with a drizzle of olive oil. (Approximately 1 tablespoon.)

    Seasoned burgers stacked on paper liners

    Season the top of a burger with salt and pepper or desired seasonings (if you wish), grab the paper liner, and flip the burger over on to the baking dish. Peel the paper off and season the other side.

    Turkey burger placed facedown, using the paper liner for a clean release

    Work your way through the other patties in the same way.

    The paper helps keep my hands cleaner while handling raw meat!

    Turkey burgers in white baking dish, seasoned and ready for the oven

    How Long to Cook Turkey Burgers in the Oven

    Pop the baking dish with turkey patties into the preheated 375° oven and bake for 30 minutes, until it reaches an internal temperature of 165 degrees. We do this a lot for our hamburger recipes, and even use this method for our ground venison burgers!

    How to Cook Turkey Bacon

    One of my favorite ways to cook turkey bacon is in the skillet because of “how” I cook it.

    My boys prefer crispy bacon, and with turkey bacon tending to lay flat, I like to form it while it’s cooking to give it the texture that my boys are used to. You can also bake turkey bacon in the oven!

    turkey bacon in skillet

    How to Make Turkey Bacon Crispy

    If cooking in a pan, I start by spraying my skillet with cooking spray and then line the skillet with a few pieces of turkey bacon. Then, flipping the bacon often will help crisp it up.

    Fun trick for frying turkey bacon to make it look like regular bacon - manually curl up bacon

    However, while it’s cooking and I’m flipping, I’ll also “pinch” the bacon with my tongs so it will mimic the bacon texture they’re used to.

    We’re big texture people here if you haven’t guessed.

    Crispy turkey bacon

    After the bacon is finished cooking, and the turkey patties are still baking, this a great time to mix up your fiesta mayo, or any sauce like this chipotle aioli that you plan on serving on your turkey burger club!

    Fiesta Mayo - Hidden Valley Ranch Mix with mayo

    Fiesta Mayo Recipe

    Using a 12 ounce container of mayo and half a packet of Hidden Valley Fiesta Ranch Dips Mix (or similar dressing mix), mix the two together and you have a flavor of a mayo that will knock your socks off.
    (Note, this will create more than you need for this recipe, so feel free to make a smaller batch.)

    TIP: If you LOVE having a sauce like this on hand, feel free to use a 30 oz. container of mayo and a full packet of the dressing mix.

    Fiesta Mayo Recipe mixed together in small bowl

    Topping Ideas for Baked Turkey Burgers

    For this baked turkey club burger recipe, I’m using toppings like the bacon that you saw above, and the following extras:

    • brick cheese
    • tomatoes
    • leaf lettuce
    • fiesta mayo
    • brioche buns
    Ingredients for baked turkey burger club

    Once the burgers have baked for 30 minutes, pull the burgers out of the oven and top each turkey burger with a slice of cheese, and place the baking dish back in the oven for just seconds to allow the cheese to melt.

    Cooked turkey burgers in white baking dish
    Sliced cheese on top of turkey burgers in baking dish

    Once the cheese has melted, remove your baking dish from the oven and top your burger with what you desire!

    Cheese melted on to burgers, ready to eat
    Placing cheese turkey burger on bun

    Like, turkey bacon…

    Add turkey bacon to burger

    tomato…

    Baked turkey club burger with bacon and tomato

    leaf lettuce…

    Bacon lettuce and tomato turkey club burger

    fiesta mayo (or similar sauce)…

    Fiesta Mayo on a baked turkey burger

    then top with a brioche bun, and enjoy!

    Baked Turkey Burgers

    …and I mean it, I have a feeling that you WILL enjoy these as much as we did!

    Baked turkey burger - sliced in half!

    What to Serve with Turkey Burgers

    Side dishes for turkey burgers are similar to those that are great with ground beef burgers. Here are my favorite side dishes for turkey burgers:

    • side salad on white plate drizzled with ranch
      The BEST Side Salad Recipe
    • close up of bacon ranch pasta salad in gray bowl
      Easy Bacon Ranch Pasta Salad
    • Close up of red skin potato salad in white bowl, with wooden spoon.
      Easy Red Skin Potato Salad
    • Close up of cooked carrots covered in a butter brown sugar glaze and garnished with fresh parsley
      Candied Carrots

    Related Recipes

    If you loved making this recipe in the oven, then you’ll also love these hot ham and cheese sandwiches or these favorites:

    • A slice of pumpkin cheesecake cake, on a round plate.
      Pumpkin Cheesecake Cake
    • Pumpkin Dump Cake serving on round plate.
      Pumpkin Dump Cake
    • A serving of hummingbird cake on a vintage, round dessert plate.
      Hummingbird Sheet Cake
    • A slice of pineapple sunshine cake on a round plate.
      Pineapple Sunshine Cake

    Did You Make This?
    Snap a pic and hashtag it #Fantabulosity - I love to see your creations on Instagram and Facebook.

    Recipe

    Baked turkey burger on bun with lettuce, tomato, cheese and fiesta mayo.
    Print Pin
    4.93 from 26 votes

    Baked Turkey Burgers Recipe

    Baked Turkey Burgers – Cooking turkey burgers in the oven is EASY! It locks in juices and there's less mess!
    Course Main Course
    Cuisine American
    Prep Time 10 minutes minutes
    Cook Time 35 minutes minutes
    Total Time 45 minutes minutes
    Servings 4 people
    Calories 871kcal
    Author Jessica Burgess

    Ingredients

    • 4 Turkey Patties or 1 pound ground turkey, formed in to 4 patties plain or choice of flavored
    • salt to taste
    • pepper to taste
    • 4 slices cheese I used “brick cheese”
    • 4 brioche or hamburger buns
    • 4 slices tomato
    • 4 lettuce leaves
    • 4 slices bacon
    • 4 tablespoons fiesta mayo recipe in post, or choice of sauce

    Instructions

    • Begin by preheating your oven to 375 degrees.
    • Line a baking dish (big enough to fit 4 turkey patties without touching) with olive oil
    • Season both sides of turkey patties with salt and pepper if you wish, and place them in baking dish. Bake for 30 minutes.
    • White turkey patties are baking, fry your turkey bacon in a skillet. See above for tips for frying bacon!
    • This is also a good time to mix up your fiesta mayo (or other condiment/sauce you wish to make). 
    • When turkey burgers have reached 30 minutes, the internal temperature of each burger should be 165 degrees, before consuming.
    • If turkey burgers are to 165, place one slice of cheese on each burger and place back in the oven for seconds (or a few minutes) to allow the cheese to melt.
    • Remove burgers from oven and build turkey club by stacking on a brioche bun, bacon, lettuce, tomato and fiesta mayo! Enjoy!

    Notes

    You can use pre-pattied burgers or patty out your own! For 4 burgers, you’ll need at least 1 pound of ground turkey.
    Feel free to use pre-seasoned or regular turkey burgers for this recipe.

    Nutrition

    Serving: 4people | Calories: 871kcal | Carbohydrates: 41g | Protein: 49g | Fat: 54g | Saturated Fat: 22g | Cholesterol: 300mg | Sodium: 1108mg | Potassium: 193mg | Sugar: 1g | Vitamin A: 3135IU | Vitamin C: 8mg | Calcium: 288mg | Iron: 3.1mg

    Burgers in the Oven

    February 20, 2021

    Burger baked in the oven, steamed in aluminum foil, and placed on white plate.

    Burgers in the oven have become the favorite way to cook hamburgers by so many readers since first sharing this recipe years ago! This is the original recipe with the aluminum foil trick that makes these ooey-gooey cheeseburgers a favorite! No more messy stovetops from frying burgers.

    Hamburgers in the oven - baked recipe with cheese

    “Can I cook burgers in the oven?” – It’s asked often!

    YES, and let me tell you… it may be your new favorite way to whip up this family favorite dinnertime go-to! (It has only become a favorite way to make these cheeseburger sliders that have become so popular too!)

    Not only does baking the burgers in the oven make clean-up a breeze (no splattered grease popping all over the stovetop) but this recipe creates the juiciest burger, and has a trick that will keep you going back for more! (We even bake venison burgers in the oven!)

    5 stars

    Featured Comment: I made these burgers today with the special "trick" and let me tell you. Hold on. Sorry I was drooling….. these came out OOEY GOOEY DELICIOUS!!!! – Jeannette Marie Young

    It’s incredibly easy to make baked hamburgers… and the best part? With the trick I’ll show you, you can even make these a little in advance in case you’re serving a big crowd, (like for a burger bar) or aren’t exactly sure what time dinner will actually be served.

    [feast_advanced_jump_to]

    Ingredients

    Here are the basic ingredients for baking hamburgers. The recipe card below includes more tips, seasonings, and toppings ideas.

    • ground beef – The ground beef that I use tends to be very lean. If you use a fatty ground beef there could be a lot of grease in the bottom of the baking dish. Some have found that they prefer placing the burger patties on a rack inside of the dish to help prevent the burgers from sitting in a lot of grease.
    • salt – See below where I go in to more detail on the type of salt I recommend.
    • pepper – See below where I go in to more detail on the type of black pepper I recommend.
    • sliced American cheese – Thick sliced cheese is my favorite and recommended.
    • hamburger buns – You can use your favorite burger buns but I love using sesame buns.

    How to Cook Hamburgers in the Oven

    Bake, uncovered in the preheated oven for 20 minutes, or until an inserted thermometer reaches 160 degrees. No flipping required!

    Keep reading for step-by-step photos, tips, and the full recipe card

    Preheat Oven:

    Preheat your oven to 375 degrees, and spray non-stick cooking spray inside of a baking dish, large enough to hold 4 hamburger patties.

    Note: When cooking, you can definitely do more at a time if you prefer! Just use a larger baking pan or dish – make sure to use one with raised sides so the juices don’t pour out – and the cooking time will stay the same!

    4 Beef Hamburger Patties

    Using 1 pound of ground beef, patty out 4 hamburger patties. (Tip: Thaw out another pound of ground beef to make this old-fashioned favorite, Salisbury steak!)

    Raw hamburger patties ready to bake

    How to Season Hamburgers

    In the BEST Cheeseburger recipe, you saw that I love to fry burgers in browned butter for flavoring and use salt and pepper to season.

    However, when it comes to baking hamburgers, I prefer to only use salt and pepper.

    Feel free to use what you have on hand, or your favorite salt and pepper, but I can’t help but recommend my favorites.

    • Fine Grain Himalayan Salt – When I started researching different salts for healthier options, my friend recommended this salt and I haven’t looked back. It is “saltier” so I don’t have to add as much when cooking, but it is also really tasty! I’m a big fan!
      However, feel free to use my other favorite, kosher salt, or any type of sea salt/table salt.
    • Peppercorn Medley – Oh my favorite pepper in all the land! I love using this with the BEST oven baked steak recipe, and anything “beef” related. You’d be surprised at how much flavor this pepper has over regular black pepper. HOWEVER, feel free to use regular ground black pepper too! It’s tasty too!

    Alternate Seasoning Options

    I don’t know what it is exactly, but this seasoning rocks my world, and I love to put it on just about anything. Especially side dishes like my garlic roasted broccoli and the baked potato wedges.

    So when I have some on hand, I love sprinkling this on my cheeseburgers too! Just be cautious of adding salt, because seasoning like this can have a lot of salt in it! This seasoning is similar to a seasoned salt but I’ve had so many readers also say that they love sprinkling their favorite meat seasonings on these burgers too.

    French Fry Seasoning - a great spice for burgers

    Season on Both Sides

    Over the years, I’ve learned that I prefer when burgers are GENEROUSLY seasoned with salt and pepper.
    (If I had to guess, I’d say I probably use a total of about 2 teaspoon of salt for the four burgers, and then I just make sure I can SEE black pepper all over my burgers.)

    Seasoned hamburger patties with salt and pepper
    I actually used regular black pepper for this photo, because I ran out of my favorite peppercorn medley earlier that day!

    Just when you think it may be too much salt and pepper (because let’s face it… you can always add more, but you can’t really take it away) you can finally actually taste it.

    So season as you desire, but if you find that your burgers didn’t have much flavor this time, add a little bit more next time.

    When you’ve seasoned one side of the burgers, flip the seasoned side down in to the prepared baking dish and season the other side.

    Flip the seasoned burgers over in to the baking dish and season the other side

    How Long to Cook Burgers in the Oven at 375 Degrees

    Bake, uncovered in the preheated oven for 20 minutes, or until an inserted thermometer reaches 160 degrees.

    (For the trick that makes all of the difference when cooking burgers in the oven, scroll down! You won’t regret it!)

    Baked hamburgers in baking dish

    For Cheeseburgers

    If you love cheese on your burgers, grab a slice of American cheese (or your favorite kind) and place one slice on each burger.

    Place back in the oven for about one minute, or until the cheese has melted! (Unless you plan to do the “bun trick” below, and then you can just add the cheese and wait to melt it in the foil.)

    Cheese added to baked hamburgers

    The Trick for Melt-in-Your-Mouth Oven-Baked Burgers

    When I started doing this for my burgers, I feel like I changed my family’s burger-lovin’ life.

    Tear off 4 squares of aluminum foil (just large enough to wrap each individual burger).

    How to make the BEST burger in the oven

    Place the bottom portions of each bun on each sheet of foil, and build the burgers, WITHOUT the extra toppings. Just meat and cheese for now!

    Build the cheeseburger and wrap in aluminum foil

    Wrap up each burger, and place either in a different baking dish, a cookie sheet or even directly on the oven rack… and let heat in the oven for a 2-3 minutes.

    Wrap cheeseburger in aluminum foil and place in oven to steam

    This will allow the cheese and bun to steam/toast, to create the ooey-gooeyness that has become so hard to live without!

    Melted cheese on baked hamburger

    Cooking Hamburgers in Advance

    If you’re cooking for a large crowd, or just want to make a batch early and keep warm until dinnertime, it’s easy!

    Make the burgers like I’ve suggested, and keep the aluminum foil-wrapped burgers in the oven on warm. (Just don’t get the oven too hot, or your buns will get TOO toasty and become hard.) I do this for baking hot dogs in the oven too!

    Hamburgers in the oven with cheese

    How to Cook Frozen Burgers in the Oven

    Yes, you can cook frozen hamburger patties in the oven without thawing them first. This is a great option for busy nights when you forgot to defrost the meat.

    Frozen burger patty baked in the oven and on buns.

    To bake frozen burgers:

    • Preheat your oven to 400°F.
    • Line a baking sheet with foil and place a wire rack on top (optional, but helps grease drip away).
    • Arrange frozen hamburger patties in a single layer. Do not stack.
    Seasoned frozen burger patties in baking dish.
    • Bake for 20-25 minutes, flipping halfway through cooking.
    • Cook until the internal temperature reaches 160°F.

    Frozen burgers typically take about 5-8 minutes longer than fresh patties.

    Should You Thaw Burgers Before Baking?

    You do not need to thaw hamburger patties before baking. However, thawed patties will cook more evenly and develop better browning.

    If cooking from frozen, expect slightly less browning and a little more moisture release during baking.

    When Should You Season Frozen Burgers?

    Because frozen patties are firm at the start, seasoning won't stick well immediately.

    For best results:

    • Bake for about 10 minutes first.
    • Remove from oven.
    • Sprinkle salt, pepper, or seasoning blend on top.
    • Flip and season the other side.
    • Return to oven to finish cooking.

    How Long Do Frozen Burgers Take at Different Temperatures?

    At 400°F → 20-25 minutes
    At 375°F → 25-30 minutes
    At 425°F → 18-22 minutes

    Always cook until the center reaches 160°F.

    How Do You Keep Frozen Burgers from Drying Out?

    • Do not overcook beyond 160°F.
    • Flip halfway through cooking.
    • Avoid pressing down on patties.
    • Let rest 3-5 minutes before serving.

    You can also brush lightly with oil before baking to encourage browning.

    Can You Add Cheese to Frozen Burgers?

    Yes. Add cheese during the last 2-3 minutes of baking so it melts without overcooking the burger.

    Baked burger patties in baking dish with cheese slices on top.

    How to Freeze Hamburger Patties

    Freezing hamburger patties is a great way to meal prep and always have dinner ready. Properly freezing them helps prevent freezer burn and keeps the patties from sticking together.

    Here's how to freeze burger patties the right way:

    1. Form ground beef into evenly sized patties.
    2. Place a small square of wax paper between each patty.
    Hamburger patties placed between pieces of wax paper.
    1. Stack the patties neatly.
    2. Place the stack inside a freezer-safe zip-top bag.
    3. Press out as much air as possible before sealing.

    Lay the bag flat in the freezer so the patties freeze evenly.

    Frozen burger patties in wax paper placed in a ziploc bag.

    How Long Do Frozen Burger Patties Last?

    Properly stored, raw burger patties can last:

    • Up to 3-4 months in the freezer for best quality.
    • Longer if sealed tightly, though texture may decline over time.

    Label the bag with the date so you can rotate older batches first.

    Can You Freeze Cooked Burger Patties?

    Yes. Allow cooked burgers to cool completely, then wrap individually in plastic wrap or foil and place inside a freezer bag.

    Reheat in the oven at 350°F until warmed through.

    Pro Tip for Easy Separation

    Using wax paper between patties makes it easy to pull out only what you need without thawing the entire batch.

    This also keeps the patties from sticking together once frozen.

    Toppings for Burgers

    Feel free to top your burgers with your favorite toppings! Honestly, when they’re cooked like this, I love them plain, with just cheese! (Unless I have some of the french fry seasoning that I’ve shared with you, under the recipe.) Although, topping them like a Cowboy Burger is pretty tasty too!

    But some of the standard favorite toppings are:

    • mustard
    • ketchup
    • onion
    • tomato
    • lettuce
    • pickles
    • mayo
    • bacon (you can cook bacon in the oven too!)
    • pineapples (Yes! They’re so good on a burger, and we love using them on Aloha burgers too!)
    Burger toppings in a basket.

    Above photo from the Burger Bar I styled for a party.

    Sides to Go with Burgers

    Looking for something to serve along with your hamburgers? Here are our favorites:

    • Instant Pot Sweet Potatoes
    • Easy Broccoli Raisin Salad
    • The BEST Side Salad Recipe
    • Fried Mushrooms

    More Hamburger Recipes You’ll Love:

    If you love hamburgers, then you’ll definitely want to see all of the other hamburger recipes that we have. Here are some of our favorites:

    • Smoked Burgers
    • Blue Cheese Burgers
    • Baked Turkey Burgers
    • Crispy Chicken Burger

    Or even if you’re looking for ways to use ground beef, we have suggestions for dinner recipes using ground beef!

    More Oven Recipes

    If you’re looking for another easy oven protein, see our complete guide on how to cook pork chops in the oven, and also check out these favorite recipes:

    • Pork Steaks in the Oven
    • Oven-Baked BBQ Pork Chops
    • Steak in the Oven
    • Brats in the Oven or Sausages in the Oven

    Did You Make This?
    Snap a pic and hashtag it #Fantabulosity - I love to see your creations on Instagram and Facebook.

    Recipe

    Burger baked in the oven, steamed in aluminum foil, and placed on white plate.
    Print Pin
    4.97 from 677 votes

    BEST Burgers in the Oven – With a TRICK!

    The ORIGINAL! Cooking burgers in the oven may leave you never wanting to make them any other way! This recipe with the "melt-in-your-mouth" trick that makes all the difference!
    Course Main Course
    Cuisine American
    Prep Time 5 minutes minutes
    Cook Time 20 minutes minutes
    Optional Toasting 2 minutes minutes
    Total Time 27 minutes minutes
    Servings 4 burgers
    Calories 428kcal
    Author Jessica Burgess

    Equipment

    • 8×8 baking dish
    • aluminum foil – optional, for toasting

    Ingredients

    • 4 beef patties I use 1 pound of ground beef to make 4 patties
    • salt as desired – see blog post for tips
    • pepper as desired – see blog post for tips
    • 4 slices yellow American cheese if desired
    • 4 hamburger buns

    Optional – For Toasting

    • aluminum foil

    Instructions

    • Preheat oven to 375 degrees and spray baking dish with non-stick cooking spray.
    • Generously season one side of the burgers with salt and pepper.
      4 beef patties, salt, pepper
    • Place burger patties in baking dish, spice side down.
    • Sprinkle more salt and pepper on each hamburger (or use a preferred seasoning) if you like!
    • Bake in oven for 20-25 minutes. (If thinner patties, this may not take as long, so it's best to keep an eye on them. When you no longer see "red" coming out of the top, or on the burgers, it could be time to pull them out of the oven.)
    • If desired, place one slice of cheese on each burger and bake an additional minute or until cheese has melted. (Unless you're doing the "bun trick" below and then you can wait to melt the cheese after you've built your burger to place in the aluminum foil.)
      4 slices yellow American cheese

    The TRICK for Ooey Gooey Cheese & a Toasted Bun

    • Place a burger patty on a bottom bun, add a slice of cheese, and top with top bun. Wrap each burger in aluminum foil. (Just enough to wrap the burger completely.)
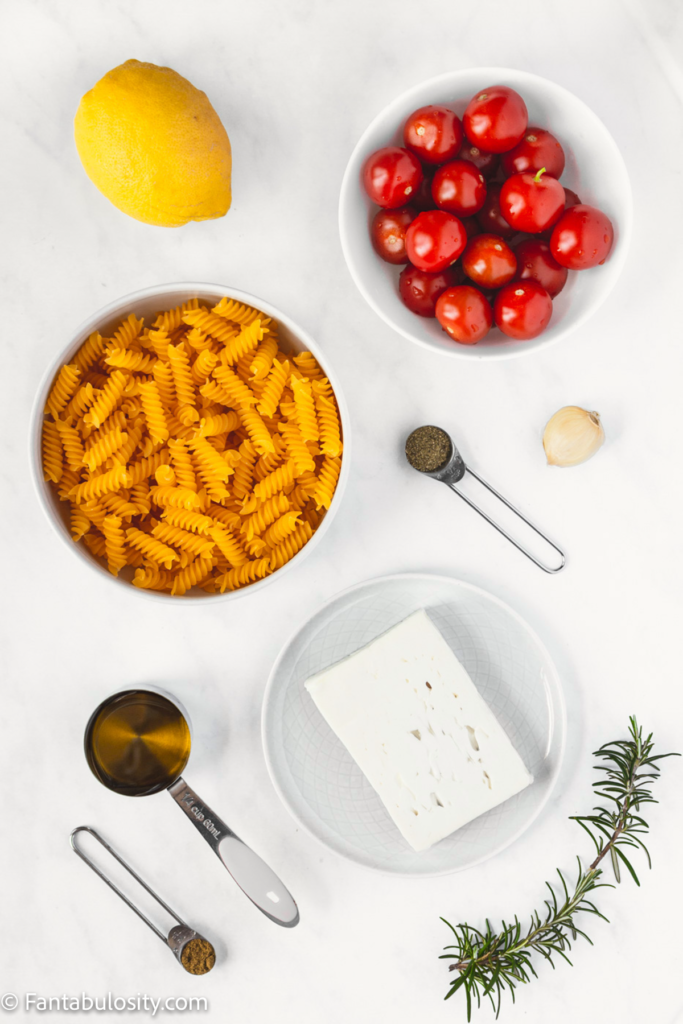
      4 hamburger buns, aluminum foil
    • Place back in oven for 2-3 minutes to allow the cheese to melt in and for the bun to get warm and toasty!
    • Serve and top with any toppings desired!

    Video

    Notes

    Why the Extra “Toasting” Step? Placing the burgers in aluminum foil and baking for a few minutes, allows the cheese to melt in and the bun to toast! This creates almost a steamy, soft… yet toasty bun that is to die for!
    Making burgers for a large crowd? Make them in advance and wrap in aluminum foil like this and keep on warm until ready to serve!
    Salt and Pepper: My favorite salt to use is fine grain Himalayan and my favorite pepper to use is Peppercorn Medley! But you can use table salt or ground black pepper too!

    Nutrition

    Serving: 1burger | Calories: 428kcal | Carbohydrates: 22g | Protein: 25g | Fat: 26g | Saturated Fat: 11g | Cholesterol: 81mg | Sodium: 650mg | Potassium: 386mg | Fiber: 1g | Sugar: 3g | Vitamin A: 198IU | Vitamin C: 1mg | Calcium: 302mg | Iron: 4mg

    Basketball Party Ideas (Food, Decorations & Easy Setup)

    February 9, 2021

    Basketball Party Ideas https://fantabulosity.com

    Basketball party ideas don't have to be complicated to be fun. Whether you're hosting a watch party, a birthday, or just getting friends together for the game, a few simple food ideas and easy setup touches can make it feel special without a lot of work.

    From crowd-pleasing snacks to themed treats and simple decorations, these basketball party ideas will help you pull everything together so you can actually enjoy the party too.

    Basketball Party Ideas https://fantabulosity.com

    Easy Basketball Party Ideas That Everyone Will Love

    Whether you’re hosting a basketball “viewing,” party in your home, or you’re wanting to host a basketball birthday party, you can easily throw in a few fun basketball party-themed goodies, and celebrate in style. I’ve styled a few basketball party ideas in this “Basketball Watch Party,” that may help you along your party planning journey!

    More Party Ideas You’ll Love:

    • Indoor Camping Birthday Party
    • Ice Cream Party Ideas
    • Nautical Birthday Party
    • Crawfish Boil Party

    Basketball Party Ideas

    Have a favorite team? Use their team colors to design your own party, incorporate matching party printables, themed colored fabric (for a table runner), and try to think of foods that match the color scheme you’re going for! In no time, you’ll have a well-style party set-up, you can’t WAIT to show off to your guests.

    Basketball Party Ideas https://fantabulosity.com
    Basketball Party Ideas https://fantabulosity.com
    Basketball Party Ideas https://fantabulosity.com

    I COMPLETELY fell in love with this “Swish,” banner that I found by Yummy Paper, on Etsy. Although the banner caught my eye, there was a WHOLE set of paper printables that they offered, that turned out perfect for the “look,” I was going for.

    Basketball Party Ideas https://fantabulosity.com

    What Food to Serve at a Basketball Party

    When it comes to a basketball party, the food is what everyone remembers. You want things that are easy to grab, easy to eat, and don't require a lot of fuss so you can actually enjoy the game too.

    Think simple, crowd-pleasing foods that you can set out and let guests help themselves.

    Basketball Party Ideas https://fantabulosity.com

    Feeling a bit creative, I thought that I would try to see if I could turn donut holes in to little “basketballs,” and somehow turn regular glazed donuts, in to a “net.” It may or may not look like it… but hey, it was fun. 😉

    Basketball Party Ideas https://fantabulosity.com

    Using rock candy is always an easy way to incorporate your party themed colors, to your table. Even more… use them as drink stirrers, and you’ve just added a bit of flair to a normal drinking class, mason jar, bottle, etc.

    Basketball Party Ideas https://fantabulosity.com

    Oh yes… one of my favorite party snacks EVER. A trail mix. The ingredients for a simple snack mix, can be switched out to what you have on hand, or what colors that you want to match your theme. Believe it or not, it’s always one of my guests favorites too. They always rave at how much they love a simple snack like this.

    Basketball Party Ideas https://fantabulosity.com

    Who wouldn’t love soft pretzels at a party snacking station? Serve them with a fun cheese dip, or honey mustard, and your guests may just fall in love with you!

    Basketball Party Ideas https://fantabulosity.com

    Oh pulled pork sliders. If I’m hosting a party, that’s heavy on the “man,” side… I always try to make sure to incorporate a type of “slider.” They’re easy to handle, filled with meat, and the guys love them. Well… ok… I do too. 😉

    Basketball Party Ideas https://fantabulosity.com

    Getting a little creative in the kitchen the other day, I thought I would try to find a way to use a pound of sausage that I had on hand. Knowing that I wanted one more dish for my party table, I thought I would see if I could easily create a “bite size,” finger-food. Turns out… it’s now one of my FAVORITE appetizer recipes.

    Zesty Sausage Bites

    Recipe below…

    Basketball Party Ideas https://fantabulosity.com

    Instead of using plain ole breadcrumbs for the zesty sausage bites, I thought I’d add a little “kick,” and use Cheez-It Hot & Spicy Grooves. Why not add a little flavor fun to these? I may or may not have also snacked on the Cheez-It Srirarcha Snack Mix, while doing a little party-prep too. 😉

    Zesty Sausage Bites Recipe

    Ingredients:

    • 1 lb ground sausage, uncooked
    • 1 cup shredded cheddar cheese
    • ½ teaspoon salt
    • ¼ cup crushed Cheez-It Hot & Spicy Grooves

    Directions:

    Combine all ingredients, and stir until all ingredients are evenly distributed.

    Roll sausage mixture, in to 1-in balls, and place (about 1-2 inches apart) on a cookie sheet, covered with parchment paper.

    Bake at 350 for 20 minutes.

    Serve!

    I put my Cheez-It Hot & Spicy crackers in a ziptop back, and crushed them in to a fine consistency.

    Basketball Party Ideas https://fantabulosity.com

    After rolling, before baking…

    Basketball Party Ideas https://fantabulosity.com

    Baked, and juices running clear and cheese is melted nicely.

    Basketball Party Ideas https://fantabulosity.com

    To better serve your guests, adding a toothpick to each zesty sausage bite, makes it easier to pick up and handle. I like grabbing fun toothpicks or food picks, to add a touch of “fancy,” if I’m able.

    Basketball Party Ideas https://fantabulosity.com

    Easy Basketball Party Food Ideas

    Finger foods are always the way to go for a basketball-themed party. They're quick to make, easy to serve, and perfect for snacking during the game.

    Some favorites that always work:

    • Sliders (these are always the first thing gone) – these easy cheeseburger sliders on Hawaiian rolls are always a hit. Or, ham and cheese sliders are a kid favorite.
    • Air Fryer Chicken Wings or boneless bites
    • Nachos (like Sheetpan Nachos) or a simple nacho bar (or pick a theme from these food bar ideas)
    • Chips with Rotel Dip, Rotel salsa, or the best guacamole recipe
    • Air fryer pigs in a blanket
    • Homemade Microwave Popcorn for a fun game-day feel

    If you want to keep things really easy, you can mix homemade recipes with a few store-bought options, and no one will know the difference.

    Basketball Party Ideas https://fantabulosity.com

    Snacks Everyone Can Grab and Go

    Having a few quick snacks out makes it easy for guests to munch throughout the party without needing a full plate.

    Things like:

    • Snack mix (This easy Nuts and Bolts recipe) or Chex mix
    • Pretzels and chips
    • Fresh fruit trays
    • Veggie trays with dip

    These are great to set out right away so guests have something to snack on as soon as they arrive.

    Desserts That Fit the Theme

    Dessert doesn't have to be complicated. Simple treats that can be picked up and eaten without utensils are perfect.

    A few easy ideas:

    • Brownies or dessert bars
    • Cookies
    • Cupcakes (you can even decorate them with orange frosting for a basketball look)

    If you already have a favorite easy dessert recipe, this is the perfect time to use it.

    Keep It Simple (and Fun)

    You don't need an over-the-top menu to make a basketball party feel special. A few easy, familiar foods laid out buffet-style will keep everyone happy and let you spend more time enjoying the game instead of being stuck in the kitchen.

    Basketball Party Favor Idea

    Found at almost any party supply store around, are little soft basketballs. These work perfect to giveaway for fun party favors at your basketball party.

    Yummy Paper offered so many fun party printable options, and even had a sign that I could edit and write in whatever I wanted. I decided that I would make one of the signs read, “Thanks for coming, we had a …” and it had a little image of a basketball underneath.

    I placed a container full of small basketballs, and placed it by the sign,  so guests would know to take one home with them, as they left!

    Basketball Party Ideas https://fantabulosity.com

    Of course if you’re not hosting a basketball party, you could always incorporate these fun ideas in whatever basketball plans that you have. When I shared a sneak peek of this party on my Facebook and Instagram the other day, I had a mom say that she couldn’t WAIT to make these basketball donuts for her sons basketball team. What a FUN treat that would be for the kiddos!

    Having a sleepover? Then make sure to check out these slumber party ideas for boys, too!

    Whimsical Purple Party

    February 6, 2021

    Whimsical Purple Passion Tablescape, Fantabulosity

    This post brought to you by IZZE. The content and opinions expressed below are that of Fantabulosity.

    Whimsical Purple Passion Party Tablescape: A gorgeous way to close out Summer, and introduce the Fall colors for any party you style this season!

    Whimsical Purple Passion Tablescape, Fantabulosity

    As you probably saw over on Instagram and Facebook this week, I gave you a little sneak peek of this Whimsical Purple Passion Tablescape that I styled this week. I’ve been wanting to style a party using IZZE Sparkling Water for so long. The bright colors, and the classy look of the bottle, make styling any party so much easier!

    I decided to use the IZZE bottles as the centerpiece for this tablescape to really make the colors pop. Placed on bright white plates, and a simple floral stem, the bottle not only serves as a place setting, but as the drink of choice for the party!

    More Party Ideas You’ll Love:

    • Cozy Tablescape + Girls Night In
    • “Spirits & Sparkles” Party & Entertaining Essentials
    • A Wicked Play Date for Kids – Halloween Party Tablescape
    • “Pretty In Pink” Cereal Bar

    Purple Party Ideas

    Whimsical Purple Passion Tablescape, Fantabulosity
    Whimsical Purple Passion Tablescape, Fantabulosity
    Whimsical Purple Passion Tablescape, Fantabulosity
    Whimsical Purple Passion Tablescape, Fantabulosity
    Whimsical Purple Passion Tablescape, Fantabulosity

    Personalized Place Setting:

    An easy way to add a small personal touch to your place setting, is to grab a simple gift tag, and write your guests name in a beautiful coordinating color. Tie it on with a fun ribbon or twine, and your guests will LOVE the personal aspect and time that you took to make them feel so special and welcome.

    Whimsical Purple Passion Tablescape, Fantabulosity
    Whimsical Purple Passion Tablescape, Fantabulosity
    Whimsical Purple Passion Tablescape, Fantabulosity
    Whimsical Purple Passion Tablescape, Fantabulosity
    Whimsical Purple Passion Tablescape, Fantabulosity
    Whimsical Purple Passion Tablescape, Fantabulosity
    Whimsical Purple Passion Tablescape, Fantabulosity

    This tablescape was created for a whimsical couples dinner party for our friends in our backyard, but could easily be styled for a girl’s night (one of my favorite reasons to host), a baby or bridal shower, and so many more excuses to host!

    Whimsical Purple Passion Tablescape, Fantabulosity

    IZZE Bar Cart

    I’m a sucker for a bar cart at any party. A mobile way to transport beverages, all while adding classy decor, without having to break the bank and decorate a great deal. With the stunning, bright colors of the IZZE bottles, I let the Sparkling Water pretty much decorate my bar cart for me!

    Drink Bar Cart with IZZE drinks. So colorful and pretty! Fantabulosity
    Drink Bar Cart with IZZE drinks. So colorful and pretty! Fantabulosity
    Drink Bar Cart with IZZE drinks. So colorful and pretty! Fantabulosity

    IZZE Sparkling Water:

    I’ve been such a fan of IZZE for so long, and when I saw that they came out with IZZE Sparkling water,  I couldn’t WAIT to incorporate it in to a party tablescape!

    IZZE Sparkling Water has three, true-to-the-fruit flavors: Blackberry Pear, Mandarin Lime and Raspberry Watermelon. My favorite part??? It is USDA Organic Certified-made with organic natural flavors and organic cane sugar (1-2 grams)! Eeeeek! Anytime I can use something that is Organic, makes me feel THAT much better about serving it to my guests and family. Plus, it’s low-calorie, and has just 10 calories per 12-ounce serving.

      IZZE Sparkling Water makes hydration fun and flavorful, helping you to #SparkleBrightly every day! It is definitely a rotating necessity on my store list every week.

    Drink Bar Cart with IZZE drinks. So colorful and pretty! Fantabulosity
    Drink Bar Cart with IZZE drinks. So colorful and pretty! Fantabulosity
    Drink Bar Cart with IZZE drinks. So colorful and pretty! Fantabulosity
    Drink Bar Cart with IZZE drinks. So colorful and pretty! Fantabulosity
    Drink Bar Cart with IZZE drinks. So colorful and pretty! Fantabulosity
    Drink Bar Cart with IZZE drinks. So colorful and pretty! Fantabulosity

    We added a few garnishes to our IZZE Sparkling Water, and it gave it an adorable “touch!”

    Drink Bar Cart with IZZE drinks. So colorful and pretty! Fantabulosity
    Drink Bar Cart with IZZE drinks. So colorful and pretty! Fantabulosity
    Drink Bar Cart with IZZE drinks. So colorful and pretty! Fantabulosity

    I hope you get a chance to style your own Whimsical Purple Passion Tablescape soon. Remember that IZZE Sparkling Water is a MUST when hosting. It made it super easy, and the perfect way to quench our thirst at your end of Summer backyard party!

    How to Make Canned Green Beans Taste Better

    February 4, 2021

    how to make canned green beans taste better

    How to Make Canned Green Beans Taste Better: Canned green beans can easily be kicked up a notch with these simple additions to ignite some flavor in this popular side dish!

    how to make canned green beans taste better

    How to Make Canned Green Beans Taste Better

    We cook dinner more than ever, now that we live in the middle of nowhere here in Montana.

    It’s so much more affordable than driving 30 minutes to the nearest restaurant and to be honest… it has REALLY saved us a lot of money.

    But like so many of you, coming up with a new side dish recipe every now and then can get challenging. And sometimes, when I’ve exhausted the side dish recipes in my cookbook, I just feel like opening up a can of green beans to serve alongside main course. (We LOVE serving green beans alongside this French Onion Casserole.)

    You’ll Also Love:

    • The BEST Green Bean Casserole with Bacon and Cheese
    • Instant Pot Green Beans and Potatoes
    • 3 Bean Salad Recipe – Mexican Side Dish
    • Taco Soup Recipe
    • White Chicken Chili Recipe

    How do you make canned vegetables taste good?

    how to make canned green beans taste better

    Let’s face it… canned green beans can get the job done when you need something quick and easy to serve with chicken, steak or your favorite easy dinner recipe.

    But adding a little spice or “oomph” to canned green beans can make this side dish REALLY stand out and taste good; especially if you’re taking a side dish with you to a family gathering or potluck.

    What can I add to green beans for flavor?

    I have my favorite ingredients and techniques to flavor up our canned green beans but I wanted to ask around in the Fab Society Group and find out what so many of you add to them too, to give you a list of multiple ideas.

    Here’s what you all told me!

    First, this recipe for canned green beans with bacon, is the best recipe in my opinion!

    Cook in this homemade chicken broth and bacon grease. – Jessica B.

    Drain them, put them in a casserole dish, drizzle EVOO and shake lemon pepper on. Super good. Bake at 350 for about 20 minutes! – Kim B.

    Garlic powder and butter. – Tara B.

    Bacon grease, garlic powder, onion powder, seasoned salt, pepper. – Miranda D.

    Onions or onion powder. A key for me is hickory smoked salt. Butter. And chopped bacon if I have some handy. – Kassidy T.

    A beef bouillon cube. – Sarah D.

    I cook in a cast-iron skillet and add butter, salt, worchshire, and a little soy sauce. Sometimes I add a little brown sugar! Cool them until they get a little crispy! – Joni M.

    Just butter and salt & pepper. – Melissa N.

    Butter and season salt. I usually boil mine and then drop them in the skillet before serving to get a little crunch to them. – Jennifer I.

    Butter or bacon grease and garlic salt, cook them down until soft. – Cheyenna H.

    Two slices of bacon in a pot. Let them get almost all the way cooked, pour 2 undrained cans of green beans in pot with bacon. Cook it down until almost all the water is out. About 20 mins. A splash of worchshire sauce and a squirt of spicy mustard. Stir it all up. You won't make them any other way after that. So good. – Erin R.

    Bacon grease, onion bits, garlic powder, liquid smoke, butter, crunchy bacon. – Wanda O.

    My FAV way is in a crockpot with a bit of chicken broth, real bacon, and onion. Let them cook for at least 4 hours – they're heavenly! – Danica K.

    how to make canned green beans taste better

    How long do you cook canned green beans in the microwave?

    If you’re cooking your canned green beans in the microwave, you’re essentially just heating them up since they’re already cooked.

    So if you’re ONLY cooking the green beans, and not doing any of the suggested recipes above, you can open the can and pour the green beans, with their juices, into a microwave-safe container. Heat for 2 minutes or until heated through.

    How long do you boil canned green beans on the stovetop?

    If you prefer cooking or boiling your canned green beans on the stovetop, you’re just going to cook them long enough to heat through.

    When cooking only the green beans (not any of the suggested recipes above), open the can, and pour the green beans, with their juices, in to a small saucepan and cook over high heat. When they start to boil, boil for a few minutes, until the water reduces about halfway, and then they should be ready to eat!

    More Green Bean Recipes You’ll Love:

    • The BEST Green Bean Casserole with Bacon and Cheese
    • Instant Pot Green Beans and Potatoes

    More Side Dish Recipes You’ll Love:

    • Roasted potato salad in serving bowl, topped with cheese, bacon and green onions.
      Roasted Potato Salad
    • Cowboy Pasta Salad in bowl with wooden spoon.
      Cowboy Pasta Salad
    • Dr. Pepper baked beans in a cast iron and wooden spoon spooning out a serving.
      Dr. Pepper Baked Beans
    • A collage of side dishes for sliders.
      Best Sides for Sliders (Easy Recipes Your Family Will Love)

    Air Fryer Apple Chips

    January 27, 2021

    Air fryer apple chips

    Need an easy snack that the whole family will love? This may just be one of the easiest air fryer recipes around!

    Air fryer apples in a bowl, that are coated in cinnamon.

    Hey Fantabulosity readers! Meg from Meg's Everyday Indulgence here with a delicious new recipe to share.

    Are you obsessed with air frying yet? Did you receive an air fryer for Christmas? If you answered yes to either of those questions, you need to try these Air Fryer Apple Chips.

    They are easy and taste so fresh! Let's learn how to make them.

    [feast_advanced_jump_to]

    Ingredients for Air Fryer Apple Chips

    You only need 3 ingredients for these apple chips.

    • Apples
    • Cinnamon
    • Nonstick cooking spray

    That's it! You could even skip the cinnamon if you don't have it on hand.

    Sliced apples for air frying.

    Best Apples to Use for Apple Chips

    You can use any type of apple to make apple chips but I have a few favorites that are perfect for this recipe.

    You definitely want to choose a variety of apple that is super flavorful since it's the star of the recipe.

    If you're looking for a tart apple chip with some sweetness from the cinnamon, granny smith apples are going to be a great option.

    If you want something on the sweeter side, Honeycrisp apples are my personal favorite. Gala and Fujis are also delicious options.

    What Size of Apples?

    Another important factor to consider when choosing your apple is the size. Make sure to pick large apples. The apples shrink considerably when they are in the air fryer so the large the apple slice is the better chip you'll end up with.

    Air fried apple chips in bowl.

    How to Prepare Your Apples

    Start by washing and drying a large apple. Thinly slice the apple. I like to use a mandolin to ensure the slices are super thin.

    If you don't own a mandolin, use a super-sharp knife to cut slices as thinly as you can. This is important because they need to be thin in order to crisp up perfectly.

    Lay the apple slices out in a single layer and pat dry with a paper towel. This is another step in ensuring they get super crispy.

    How to Air Fry the Apples

    Spray the first side of the apples with nonstick cooking spray then add to a large bowl. Toss around and give them another spray.

    Sprinkle with the cinnamon and stir until they are coated evenly.

    Place the apple slices in your air fryer in an even layer. These apple chips will take a few batches to cook.

    Uncooked apple slices in air fryer to make apple chips.

    Air fry at 350 degrees F for 6 to 7 minutes. The time will depend on the thickness of the apple slices. Make sure to pause the fryer and shake the basket every two minutes.

    How Do I Know They Are Done?

    You'll want your apple chips to be a deep golden color. If they start to turn too brown they will taste burnt so make sure to keep a close eye on them during the last few minutes of cooking.

    When you first remove the apple chips they will not feel super crispy but don't worry! As they cool, the apple chips will fully crisp and be totally perfect.

    Hand holding air fried apple chip.

    How to Store Air Fryer Apple Chips

    When you remove the apple chips from the air fryer, let them cool completely in a single layer. Once cooled, store them in an airtight container.

    If you're not eating them right away, make sure to store them right away to ensure they don't lose their crispiness.

    Sweet Air Fryer Treats

    Looking for another sweet treat in the air fryer? Make sure to give these Air Fryer S'mores a go for the ultimate ooey-gooey dessert.

    More Recipes You’ll Love:

    • 20+ Easy Air Fryer Recipes from TOP Food Bloggers
    • 25 Apple Salad Recipes: Side Dishes, Desserts + More!
    • Air Fryer Bacon Recipe
    • Air Fryer Burgers

    Did You Make This?
    Snap a pic and hashtag it #Fantabulosity - I love to see your creations on Instagram and Facebook.

    Recipe

    Air fryer apple chips
    Print Pin
    5 from 3 votes

    Air Fryer Apple Chips

    These Air Fryer Apple Chips are perfect easy and healthy snack the whole family will love. Simple to make with just three ingredients.
    Course Snack
    Cuisine American
    Prep Time 5 minutes minutes
    Cook Time 21 minutes minutes
    Total Time 26 minutes minutes
    Servings 2 servings
    Calories 64kcal
    Author Jessica Burgess

    Equipment

    • air fryer

    Ingredients

    • 1 large apple
    • 1 teaspoon ground cinnamon
    • nonstick cooking spray

    Instructions

    • Wash and dry apple. Using a mandolin or very sharp knife, slice apples into very thin slices. Lay flat on paper towel and pat dry. Spray both sides with nonstick spray and sprinkle with ground cinnamon.
    • Place in single layer in the basket of your air fryer. This will take a few batches. Cook at 350 degrees for 6 to 7 minutes, shaking the air fryer basket every 2 minutes. When you remove them, they will not be entirely crispy. They will crisp as they cool. Allow to cool and enjoy right away or store in an airtight container.

    Nutrition

    Serving: 0.5apple | Calories: 64kcal | Carbohydrates: 17g | Protein: 1g | Fat: 1g | Saturated Fat: 1g | Sodium: 1mg | Potassium: 130mg | Fiber: 4g | Sugar: 12g | Vitamin A: 67IU | Vitamin C: 5mg | Calcium: 31mg | Iron: 1mg

    BBQ Chicken Pasta

    January 25, 2021

    My husband said that I HAVE to make this again. It's so easy, so SURE! BBQ Chicken Pasta Recipe

    BBQ Chicken Pasta: An easy dinner idea that is ready in a flash, especially when using a rotisserie chicken and bottled bbq sauce!

    If you love chicken pasta recipe as much as I do, this Marry Me Pasta is a dish you’ll want to make as soon as possible too!

    My husband said that I HAVE to make this again. It's so easy, so SURE! BBQ Chicken Pasta Recipe
    [feast_advanced_jump_to]
    BBQ Chicken Pasta Recipe

    More Recipes You’ll Love:

    • Pasta Salad Recipe – Cold, Italian Style and SO Easy
    • Easy Bacon Ranch Pasta Salad
    • Cold Pasta Salad Recipes
    • Chicken Bacon Ranch Pasta
    • Chicken and Noodles Recipe

    Tip for a Fast Dinner

    Using rotisserie chicken that you can buy at certain grocery stores, can save TONS of time in the kitchen. (Plus, you can make the most of that rotisserie by boiling the bones and carcass to make a chicken stock.)

    Or, you could cook chicken in the slow cooker to save for future quick recipes like this one!

    One-Pot Dish

    Not only do I love the flavor or this recipe but the fact that it can all be cooked in one-pot, is even better, similar to our Blackened Chicken Alfredo and this crockpot chicken pasta.

    After cooking the bacon, the rest of the ingredients (even the uncooked pasta) can be added right to the same dish and cook together!

    My husband said that I HAVE to make this again. It's so easy, so SURE! BBQ Chicken Pasta Recipe

    This is the glorious deliciousness of the pasta before adding the BBQ sauce and shredded cheese.

    Recipe

    My husband said that I HAVE to make this again. It's so easy, so SURE! BBQ Chicken Pasta Recipe
    Print Pin
    5 from 4 votes

    BBQ Chicken Pasta

    Whip up this quick and easy weeknight meal in under 30 minutes. Cheesy BBQ pasta with bacon and chicken makes the ultimate comfort meal.
    Course Main Course
    Cuisine American
    Prep Time 10 minutes minutes
    Cook Time 15 minutes minutes
    Total Time 25 minutes minutes
    Servings 8 servings
    Calories 439kcal
    Author Jessica Burgess

    Ingredients

    • 3 slices bacon cut in to small pieces
    • 1 cup shredded or chopped rotisserie chicken
    • 2 garlic cloves chopped
    • ½ cup red onion chopped
    • 16 oz penne pasta
    • 3 cups chicken broth
    • ½ cup heavy cream
    • pinch red pepper flakes optional
    • salt and pepper to taste ( I used 1 teaspoon kosher salt & 2 pinches of black pepper)
    • 1 cup BBQ sauce
    • 1 cup shredded mozzarella cheese plus more for garnish; optional
    • fresh parsley for garnish; optional

    Instructions

    • In a large saucepan, cook bacon
    • Add chicken, garlic, and red onion, and cook over medium heat for about 2 minutes to allow everything to cook and flavor together
    • Add in pasta, chicken broth, heavy cream, and spices
    • Bring to a boil, reduce heat, and cover
    • Let simmer for about 15 minutes, or until pasta is tender
    • Add in BBQ Sauce and shredded mozzarella, stirring gently to combine
    • When cheese is fully melted, Serve
    • Garnish with extra BBQ drizzle, shredded mozzarella, and parsley if desired

    Nutrition

    Serving: 1serving (⅛ recipe) | Calories: 439kcal | Carbohydrates: 59g | Protein: 15g | Fat: 15g | Saturated Fat: 7g | Cholesterol: 47mg | Sodium: 851mg | Potassium: 359mg | Fiber: 2g | Sugar: 13g | Vitamin A: 415IU | Vitamin C: 7.6mg | Calcium: 115mg | Iron: 1.4mg

    What to Serve with BBQ Chicken Pasta

    If you’re whipping this up on a busy weeknight, then keeping your side dishes easy is ideal too, right? Here are our favorites to serve with this pasta:

    • The BEST Side Salad (Make a lot the night before and eat on it for a couple of days!)
    • Mozzarella, tomato and avocado salad
    • Frozen Garlic Toast

    Box of Sunshine Gift Ideas

    January 24, 2021

    Sunshine Gift Basket Ideas https://fantabulosity.com

    A Little Box of Sunshine Gift Ideas: A sunshine box is a fun gift to not only give, but to put together! Go on a hunt for all things yellow, and surprise someone special with the gift basket!

    By FAR, my favorite “go-to,” gift right now.

    I couldn’t WAIT to share my Box of Sunshine gift ideas with you. Why? Because not only is this gift absolutely fabulous for ANYONE that you know, I had a blast shopping for it!

    Sunshine Gift Basket Ideas https://fantabulosity.com

    More Gift Basket Ideas

    • Baby Gift Basket
    • 50+ Gift Ideas for Her
    • Best Friend Birthday Gifts
    • Sympathy Gift Idea
    • Gift Basket Ideas – For Men, Women, Babies, Holiday’s & More!
    What is a Sunshine Box?

    A care package created with items that are the color “yellow” to bring the color of “sunshine” to someone’s day!

    How to Make a Sunshine Box?

    You can choose to make it many different ways but they typically are made using boxes, baskets, gift bags or even mason jars!

    What do you put in a box of sunshine?

    Items that are yellow! For example, gum, candy, lotion, candles, stationery, perfume, snacks, and whatever else you think he/she will love! See below for a long list of ideas that are yellow!

    Edible "Sunshine" Gift Ideas (Easy Food Additions)

    If you want to make something for you gift, here are some ideas to help you get started:

    • lemon cookies
    • banana bread
    • lemon blondies
    • lemon puppy chow
    • candy snack mixes

    Little Box of Sunshine Item Ideas

    When you’re on a scavenger hunt through the store, looking for “yellow,” it just makes shopping a bit more fun. (But like I need “more fun” when shopping.)

    When I saw the original idea on Pinterest, ahem, we should totally follow each other by the way —> My Pinterest, I fell in love. BUT… I noticed that most of them were only for people that needed “cheering up.”

    I thought, “Well, I’d love to receive one of those sunshine boxes, as a ‘just because,’ ‘thank you,’ or a ‘birthday gift.” I mean… wouldn’t you? So… I just made the tags to say, “Hello Sunshine,” instead of “You are my sunshine,” or “Let me Brighten up your day.”

    Two Gift Basket Ideas

     So let me tell you what I did with these two Boxes of Sunshine gifts…

    I had a couple of people to “thank,” and I just knew that they would LOVE LOVE LOVE, something like this. Even though they are two different people, who love different things, they’d BOTH love something like this sunshine gift box.

    A BIG “thank you.”

    Someone that works in my husband’s office did an amazing job on a project recently, and he wanted to “thank them,” in a BIG way. So although the sunshine gift box can run on the “affordable gift,” side… I could easily add something to it. Stay tuned for what that was below…

    Sunshine Gift Basket Ideas https://fantabulosity.com

    Here’s how I put this one together, and what I put in it:

    Wooden Crate: I bought this at H&M, and although I don’t think they have it anymore, they have some SUPER cute other boxes and bins in their “home,” section.

    Crate Contents:

    • Yellow/White Dishtowel
    • Ghirardelli Milk Chocolate & Caramel Squares
    • “Good Morning Sunshine,” Mug from Pier 1
    • Juicy Fruit Gum
    • Yellow Nail Polish (I bought mine off of Amazon)
    • Butterfinger Candy Bar
    • Bar of Soap from Pier 1
    • Golden Oreos
    • Izze Sparkling Peach Soda
    • Kleenex’s
    • Personalized Stationery
    • Keebler Cookies
    • Peanut M&M’s
    • “I Love Lemon,” tea
    • Small bag of Lay’s potato chips
    • Sephora gift card (that I attached to yellow scrapbook paper)
    Sunshine Gift Basket Ideas https://fantabulosity.com

    Arranging the Gift Basket:

    I lined the box with the dishtowel and just arranged the goodies the best way I could, so each item was showing. This took a little “stuffing,” and “fill,” per-say, to lift items “up,” and keep them tilted to one side.

    Hello Sunshine Gift Basket with gift card https://fantabulosity.com

    How I added the “BIG,” thank you: So I needed to add a little more “thanks,” to really show her how thankful we were for her hard work.

    To add some “umph,” to this gift, I simply found a gift card to somewhere that I knew she’d like, (The Sephora gift card), and simply just “up’d” the value of the gift by making it the value that we wanted to spend on her gift. Since it was “black,” I taped it to a yellow piece of scrapbook paper. (I also attached the receipt showing the balance of the gift card, to the back of the scrapbook paper, in case she runs in to any trouble at the store, trying to redeem it.)

    A little personal touch…

    To add a little more “thought,” to the gift, adding personalized stationery, is the perfect touch. See that “R,” back there in the back? Yeah.. that’s the stationary.

    Hello Sunshine Gift Basket personalized stationary https://fantabulosity.com

    Gift Tag Free Printable:

    Hello Sunshine Gift Tag for basket! https://fantabulosity.com
    Hello Sunshine Gift Tag for basket! https://fantabulosity.com

    Gift Tag: I actually used my silhouette machine for the tags on these sunshine boxes, but realized that not everyone has one. So to help you all out, I created a little something below for you, and you can simply just “cut,” it out. 🙂

    Get the free printable here: “Hello Sunshine”  Then, just tape it on the crate/basket/box, and you’re good to go!

    "Hello Sunshine" free printable https://fantabulosity.com


    A Pail of Sunshine:

     A bit smaller, as a simple “thank you.”

    We had a friend help us out the other day, just out of the kindness of her heart. She doesn’t realize it, but she came to our rescue, for sure. So to let her know that it didn’t go unnoticed, I wanted to do a little something for her. A box of sunshine was a must.

    Sunshine Gift Pail Ideas https://fantabulosity.com

    This gift had almost all of the contents as the one above, but the pail just wasn’t big enough for everything. Or it would have…

    Oddly enough, this person had the same initial that I used for the other one above, so I had to order an “R,” for that one too. Talk about craziness…

    Sunshine Gift Pail Ideas https://fantabulosity.com

    Big Tip Reveal: How to Make a Gift Basket look fabulous:

    Did you notice that I took almost everything that I could, out of its packaging? The stationery for instance, came with the cards open, laying flat, wrapped in plastic wrap. Yuck! I opened the package, folded the cards, and tied them with a ribbon.

    The mug came in a clear, plastic box. Yuck. I took that out.

    So… long story short… take everything that you can, out of its packaging. It will make a HUGE difference in the overall “look,” of the gift.

    Ahhhh… it feels so good to finally share this Box of Sunshine gift idea with you all. There’s nothing I love more than sharing “fab,” things with you. I just know some of you out there will find this idea helpful, and the perfect gift giving idea for your next “gifting,” reason. 🙂

    Pin them for Later:

    Sunshine Gift Basket or Box Ideas! fantabulosity.com
    Sunshine Gift Ideas! Buckets, Box, Bags, anything woiuld work for this! Love it! https://fantabulosity.com

    How to Care for an Extrovert or Introvert

    January 4, 2021

    How to Care for extrovert

    How to Care for an Extrovert or Introvert: A guide with tips on how to care for both types in the best ways possible!

    My husband and I are two completely different people. He is a major extrovert, always wanting someone or multiple someones around him at all times. Now I, on the other hand… a total introvert.

    I LOVE staying at home the majority of the time, having quiet days and evenings to do whatever I want, without being on someone else’s agenda.

    (I won’t even mention what type of parent I am, “ahem,” a “Helicopter Mom,” but that’s just another personality characteristic that I have developed, that some of you may be able to relate to.)

    How to Care for an Extrovert or Introvert

    There is NOTHING wrong with either personality. In fact, I feel it’s what makes the world go ’round. Heck, I married an extrovert, because I love that very thing about him.

    Do you know what you are? What exactly classifies an extrovert, and an introvert? Whatever you are, I feel it is so very good to know how to treat other people when they are classified as one or the other and with the tips on how to care for each type below, you may find that one resonates with how you like to be cared for, a little more!

    Or, using these two as examples, you may find that one sounds more like you than the other:

    1. Are you annoyed because you have a friend that ALWAYS calls/texts/wants to hang out on a daily basis, but you just need a stinkin’ break? – You may lean more to the “introvert” side of things.
    2. Does it drive you crazy that your husband is someone that likes to stay at home every evening, watching the SAME reality shows, and then nod off to sleep… calling that a perfect night? But for Heaven’s sake… you need to get out of the house!? – Then maybe “extrovert” is more your style.

    What if neither seem to fit? Then maybe you’re an ambivert or a situational extrovert.

    What is an Ambivert and Omnivert?

    An ambivert or what you may also hear called, an “omnivert”, is someone who seems to have both extrovert and introvert tendencies.

    This could depend on what the person is doing. Are they enjoying what they’re doing?
    Not enjoying what they’re doing?
    This can cause, what we’d call an introvert to have extrovert tendencies and an extrovert to have introverted tendencies.

    What is a Situational Extrovert?

    This can go along with an ambivert or an omnivert but a situational extrovert is what I’d explain as someone who has introverted tendencies but can be outgoing and sociable in certain situations.

    For instance, I’m an introvert but can speak in front of large crowds on topics that I’m passionate about or in areas/places that I feel confident in.

    Ways to Care for Introverts and Extroverts

    When I came across these tips from “The Introvert’s Dilemma,” (see original image and website credit info below!) it changed how I think all around!

    It not only helps you understand how to treat others that are so different than you but how they may be feeling about you as well.

    Look at both lists, and let me know what you think. Do you think it’s accurate?  Would you add anything else to the lists?

    How to Care for an introvert
    How to Care for extrovert

    Original image source (below) from The Introvert’s Dilemma, who I can no longer link to because the site is no longer working but I did find an old Facebook page for them!

    How to care for introvert, are you an extrovert, introvert personality tips, extrovert personality tips, Am I an extrovert or an introvert?

    Leave me a comment below with your opinion. Did you find this helpful like I did?

    The BEST Steak Bites

    December 13, 2020

    steak bites in white dish with butter on top

    Steak Bites: With only 4 ingredients you can have the most tender and juicy steak bites that will leave so many begging for the recipe!

    Steak Bites with garlic butter

    The BEST Steak Bites

    I’ve been known to call a handful of some of the recipes on the blog, “the BEST” and that’s truly because that’s how we feel about them.

    Now don’t get me wrong, we love all the recipes on here (or I wouldn’t share them with you) but there are a few that are borderline “life-changing” and this is one of them.

    More of the “BEST” Recipes that you’ll love:

    • How to Cook Steak in the Oven
    • Best Side Salad for Steak
    • Hamburgers in the Oven
    • Bruschetta Recipe
    • Punch Recipe
    • Easy Guacamole Recipe
    • No Bake Cookies

    But let me just tell you… the recipe for steak bites that you just landed on, are so delicious that we have them at least once a week, make them when guests come over and even have others begging for the recipe.

    I’ve been making these for a few years now and haven’t put them on the blog until now because, well, I usually make them when I only have a few minutes to throw something together and they’re cooked so quickly that I’m usually done before I even think to get my camera out. But… I managed to remember the other day and now I’m super excited to be able to share them with you!

    [feast_advanced_jump_to]

    How to Make Steak Bites

    It only takes 4 ingredients for these steak bites and I would almost bet that you already have them on hand.
    (But if you don’t, get my free grocery shopping template and highlight the items you need so you can grab them the next time you’re shopping.)

    You’ll Need:

    • butter (salted preferred but unsalted is just fine too)
    • sirloin steak (with the bones/gristle removed)
    • kosher salt (feel free to use table salt but kosher is so good for this!)
    • pepper (we use peppercorn medley)

    Cut Sirloin Steak in to 1-inch Cubes

    Usually, our sirloin steaks come in about 1.5 lb. packages but your store/butcher may package them different. So for the sake of this recipe, I’ll assume your steak is about 1.5 lbs. but know that this recipe is forgiving so if you have a little less or a little more, it’s ok!

    Cut the sirloin in to about 1-inch pieces and cut off the bone and any white/gristle that you see. (This is key. You don’t want a chewy steak bite. But don’t be hard on yourself… a little is just fine, as you can see in my sirloin below.)

    Cut up raw steak - sirloin cubes

    Season the Steak

    Sprinkle salt and pepper on the steak. (I usually just sprinkle it on the top instead of mixing it to make sure it gets all over it but you can do that if you prefer!)

    Using a Cast Iron Skillet

    Do you have to use a cast-iron skillet for this recipe? No. I’ve used other non-stick pans before (our cast irons were in storage when we moved to Montana) and it just didn’t give the same flavor as a cast-iron. They were good… but not the “THE BEST” like they are with our cast iron skillets.

    Brown the Butter

    Using about 2 tablespoons of butter, melt in a cast-iron over medium-high heat until it starts to brown.

    Melted browned butter in cast iron skillet for steak bites

    Cook on Medium-High Heat

    When the butter has browned, it’s time to add the steak! CAUTION: this butter and skillet are HOT so it should sizzle when the meat is added.

    TIP: I usually stand back and scrape all of the steak off of the cutting board at once with my fish turner spatula JUST in case it splashed a little hot butter out when added.

    Add steak bites to cast iron

    Cook on one side for 30 seconds…

    It doesn’t take long for the steak to get a nice sear in a cast iron (usually about 30 seconds for me) so when you notice the underside of the steak getting that “sear” look, it’s time to flip.

    I usually use my fish turner to flip over quite a few at a time but then go through and flip over any individual pieces that you see that still need to be flipped.

    Cook on other side for 30 seconds.

    Cook on the other side for an additional 30 seconds, or until you see the sear (on at least a few pieces) and then remove from the skillet and place in a serving dish.

    Flip after about 30 seconds or when steak bites start getting a sear

    We like our steak bites about “medium” so know that when you’re removing your steak bites from the skillet, some may still look a little red but they’ll also continue to cook in the serving dish.

    Steak Bites with Garlic Basil Butte

    Sprinkle Additional Kosher Salt (Optional)

    When the steak bites are in the serving dish and still warm, I like to sprinkle on a little additional salt to allow it to “melt” in to the resting steak. It’s definitely optional and depends on how much you put on the steak prior to cooking… but there is something delicious about fresh salt on a juicy steak.

    Steak Bites in a White Dish

    Garlic Butter Steak Bites

    The day I made the steak bites to take photos, I wanted to “jazz” up the photos a bit and use my favorite garlic butter and I have to say… the pieces of steak right under that butter were insanely delicious. So that little garnish may appear on our steak bites from now on.

    How to Make Garlic Butter

    For our garlic butter, I combine:

    • 1 cup butter (softened)
    • ½ teaspoon finely chopped basil (fresh or dried)
    • 1 tablespoon minced garlic
    • ¼ cup parmesan cheese
    • 1 tbsp. garlic salt

    Mix together ingredients and place on top of steaks after cooked!

    Sides to Serve with Steak Bites

    At times, we love having steak bites as an appetizer but we’ll usually have this as a main course alongside our favorite side dishes like:

    • zucchini noodles
    • Roasted Brussels Sprouts
    • air fried zucchini
    • side salad
    • Thai Noodle Salad

    More Steak Recipes You’ll Love:

    If you have a freezer full of beef like we usually do, you may be looking for more ways to cook it! If you have beef, these cube steaks in the Crock Pot are hard to beat!

    • Deer Steak on the Stovetop
    • Grilled Deer Steak
    • Baked BBQ Pork Steak

    If you enjoyed this post, be sure to follow me on Instagram, Facebook, Pinterest and YouTube! Share a photo of your recipe and use the hashtag #Fantabulosity so I can find it and follow along!

    Recipe

    steak bites in white dish with butter on top
    Print Pin
    5 from 4 votes

    Steak Bites

    Steak Bites: With only 4 ingredients you can have the most tender and juicy steak bites that will leave so many begging for the recipe!
    Course Appetizer, Main Course
    Cuisine American
    Prep Time 5 minutes minutes
    Cook Time 2 minutes minutes
    Total Time 7 minutes minutes
    Servings 4 servings
    Calories 205kcal
    Author Jessica Burgess

    Ingredients

    • 1 pound sirloin bones/whites removed
    • 2 tablespoon butter
    • 1 teaspoon kosher salt
    • ½ teaspoon pepper cracked peppercorn medley is our favorite!
    • garlic butter optional, see notes for recipe

    Instructions

    • If your sirloin needs trimmed, remove the bone and cut off all of the white/gristle. Cut steak in to 1 inch cubes and season with salt and pepper.
    • In a cast iron (preferred, but can use regular skillet too — see notes in post), melt butter over medium-high heat until butter starts to turn brown.
    • As soon as butter turns brown, place sirloin in the skillet. The skillet/butter should be hot enough that it sizzles when the meat is added. This is GOOD! The steak is getting it's "sear" that is so flavorful and MAKES this recipe so good!
    • After about 30-60 seconds, check to see if underside of at least one piece is brown (with sear). If it is, flip over all of the pieces so the other side can cook and get the "sear".
    • Cook for another 30-seconds (or until "sear" shows) and quickly remove from skillet in to serving dish.
    • Let the steak rest for a minute, sprinkle on additional kosher salt, if desired, to allow the meat to finish cooking and soak in that flavor. Serve immediately!

    Notes

    See blog post for additional tips on seasoning, and making these the BEST steak bites!
    For optional garlic butter, I use:
    • 1 cup butter (softened)
    • ½ teaspoon finely chopped basil (fresh or dried)
    • 1 tablespoon minced garlic
    • ¼ cup parmesan cheese
    • 1 tablespoon garlic salt
    Mix together ingredients and place on top of steaks after cooked!

    Nutrition

    Serving: 0.25pound | Calories: 205kcal | Carbohydrates: 1g | Protein: 25g | Fat: 11g | Saturated Fat: 6g | Cholesterol: 84mg | Sodium: 697mg | Potassium: 388mg | Fiber: 1g | Sugar: 1g | Vitamin A: 177IU | Calcium: 32mg | Iron: 2mg

    Red Velvet Cake Mix Cookies

    December 9, 2020

    Red Velvet Cake Mix Cookies

    Red Velvet Cake Mix Cookies – How to make a crinkle cookie recipe using a red velvet cake mix, cream cheese, butter, egg, vanilla, and powdered sugar. A delicious treat to our red velvet cupcakes with chocolate chip frosting.

    Hand holding Red Velvet Cake Mix Cookies

    Why You’ll Love These Cookies

    When it comes to cookie recipes it’s hard to find one easier than the no-bake cookies… but even though you have to bake “cake mix cookies”… they’re still at the top of the “easy” category!

    If you love cake mix cookies, then you’re also going to love these Strawberry Shortcake Gooey Butter Cake Mix Cookies, Chocolate Caramel Gooey Butter Cookies, these peanut butter cake mix cookies, and these funfetti cookies!

    [feast_advanced_jump_to]

    Cake Mix Cookies with Butter

    If you’ve ever heard of “gooey butter cake” the texture of this cookie is very similar. It has an ooey-gooey center with a SLIGHT “crisp” on the outside!

    I can’t help but think it’s the butter that gives this cookie the texture that leaves so many asking, “What are those things!?” each time that I make them for a Christmas Favorite Things Party!

    Crinkle Cookies

    Although I may refer to these as “cake mix cookies” they’re also sometimes called “crinkle cookies”. They’re called that because the cookies puff up while baking and develop little “crinkles” or “cracks” in the tops.

    But no fear… once cooled, the cookies stay together and do not crumble!

    Christmas Cookies Made With Cake Mix

    Now, you can have these cookies at ANY time of year. They’d especially be perfect for Valentine’s Day!

    But it seems like so many are always looking for an easy cookie recipe around Christmas, so if you are… this is one for the job! Then, these reindeer cake mix cookies would look perfect alongside the red velvet!

    Easy Cake Mix Cookies

    What I love so much about cake mix cookies is that I normally have all of the ingredients on hand to make them… and you probably do too!

    I also love that cake mix cookies can be made using just about any flavor of cake mix that you have in the pantry! We’ve even used a cake mix to make this rocky road cookie recipe!

    Don’t have “red velvet” right now? No problemo! Add red velvet cake mix to your grocery list and use what you have on hand, using this same recipe, just substituting the cake mix flavor.

    But for the sake of this post, I’m going to go ahead and show you the Red Velvet Cake Mix Cookies that are full of deliciousness!

    How to Make Red Velvet Cookies

    First, preheat your oven to 350° degrees and make sure your butter and cream cheese are softened.

    Butter and Cream Cheese for Red Velvet Cookies

    Next, in a mixing bowl, mix together the softened cream cheese and softened butter with a mixer.

    Mix butter and cream cheese for red velvet cookies

    Then, add in the egg and vanilla and mix until evenly combined.

    Eggs, vanilla, cream cheese and butter

    Pour in the cake mix and (don’t worry if your red velvet cake mix looks brown… that’s normal. It will turn red when mixed).

    Mix together until evenly combined.

    Cake Mix for Red Velvet Cookies

    Note: This red velvet cake mix can stain the heck out of what you’re wearing if it gets on you, so make sure to wear your apron!

    Cake mixture for red velvet cookies

    Pour powdered sugar into a small dish.

    Roll cookies in to balls

    Using a tablespoon or a cookie scoop, scoop a spoonful of cookie dough and use your hands to roll the dough in to a ball.

    Coat cookies in powdered sugar

    Coat each cookie dough ball in powdered sugar and place them at least 2 inches apart on a cookie sheet that’s covered in parchment paper. (Or greased cookie sheet.)

    Place cookies on cookie sheet 2 in apart

    Bake the cookies at 350° for 12 minutes.

    Baked Red Velvet Cookies

    Remove the cookies from the cookie sheet and place on a cooling rack to allow them to fully cool.

    Crinkle red velvet cookies

    The ooey gooey center is AMAZING when eaten warm but I have to say… they’re still gooey in the middle when fully cooled and stay soft and delicious up to a few days after baking too!

    Ooey Gooey Red Velvet Cookies

    If you’re making these cookies for the holidays, I think you’ll also love these Pecan Snowballs because they’re also covered in powdered sugar and super easy to make!

    Did You Make This?
    Snap a pic and hashtag it #Fantabulosity - I love to see your creations on Instagram and Facebook.

    More Easy Dessert Recipes You’ll Love:

    • Spoonful of homemade whipped cream with a bowl of strawberries.
      Homemade Whipped Cream (Just 3 Ingredients, Ready in 5 Minutes)
    • Peanut Butter Sheet Cake with Peanut Butter Icing
    • Vanilla mug cake in vintage coffee mug.
      The BEST Vanilla Mug Cake Recipe
    • A slice of Coca-Cola cake on a vintage plate, sitting next to a Coca-Cola can.
      Coca-Cola Cake (The Old-Fashioned Sheet Cake Everyone Asks For)

    Did you make this? I’d be so grateful if you left a “star” rating below to let me know what you thought! Then, the next time you need a quick and easy recipe, come back to Fantabulosity to browse all of my easy recipes!

    Recipe

    Red velvet cake mix cookie.
    Print Pin
    5 from 10 votes

    Red Velvet Cake Mix Cookies

    Red Velvet Cake Mix Cookies – How to make a crinkle cookie recipe using a red velvet cake mix, cream cheese, butter, egg, vanilla, & powdered sugar!
    Course Dessert
    Cuisine American
    Prep Time 20 minutes minutes
    Cook Time 12 minutes minutes
    Total Time 32 minutes minutes
    Servings 24 cookies
    Calories 176kcal
    Author Jessica Burgess

    Ingredients

    • 8 ounces cream cheese softened
    • ½ cup butter 1 stick, softened
    • 1 egg
    • ¼ teaspoon vanilla extract
    • 15.25 ounces box red velvet cake mix
    • ¾ cup powdered sugar

    Instructions

    • Preheat oven to 350°
    • Mix together cream cheese and butter until combined.
    • Next, add in egg and vanilla in the mixing bowl and mix with butter/cream cheese mixture until combined.
    • Add in the cake mix. (Optional: Refrigerate for 30 minutes for a dough that's easier to work with if desired.)
    • Pour powdered sugar in to a small bowl for rolling.
    • Roll about a teaspoon of dough into balls, and roll into powdered sugar, placing them on to a greased cookie sheet or a cookie sheet covered with parchment paper, about 2 inches apart.
    • Bake at 350 for 12 minutes. Remove cookies from sheet and place on cooling rack. Allow cookies to cool.

    Video

    Nutrition

    Serving: 1cookie | Calories: 176kcal | Carbohydrates: 18g | Protein: 2g | Fat: 11g | Saturated Fat: 5g | Cholesterol: 27mg | Sodium: 228mg | Potassium: 77mg | Fiber: 1g | Sugar: 12g | Vitamin A: 255IU | Calcium: 38mg | Iron: 1mg

    Air Fryer Butternut Squash

    December 5, 2020

    Air fryer butternut squash, diced in small dish.

    Air Fryer Butternut Squash: An easy and healthy recipe that pairs perfectly with so many main dishes or can be a stand-alone lunch or dinner!

    • Prep Time: 5 minutes
    • Cook Time: 20 minutes
    • Serving: 3 cups
    Air Fryer Butternut Squash - Easy Recipe Side Dish

    Air Fryer Butternut Squash

    If you love air fryer recipes as much as we do, then saddle up your machines ladies (and gents) because this new healthy side dish recipe will easily end up on your weekly meal planning sheet like it has ours!

    [feast_advanced_jump_to]

    More Air Fryer Recipes You’ll Love:

    Are you supposed to peel butternut squash before cooking?

    The skin is pretty tough so it is better peeled… but we also like to purchase the pre-cut, cubed, butternut squash that’s usually in the produce section at the grocery store.

    How do you peel a butternut squash?

    If you do have a whole squash and need to peel it, slice off the ends and pop it in the microwave for about 3 minutes. It will really soften the skin and then once it has cooled off enough to touch, you can stand it up on one end and slice the skin off with a knife.

    Or, this video on how to prepare, peel, and cut a butternut squash may be very helpful!

    What does butternut squash pair well with?

    It is a versatile side dish that pairs well with red meats, chicken, and even seafood! Our favorite dishes to serve this with are brats in the oven, Lasagna Stuffed Chicken, the BEST Steak Recipe, or these popular recipes…

    • Burger baked in the oven, steamed in aluminum foil, and placed on white plate.
      Burgers in the Oven
    • Baked BBQ Pork Steaks on white plate
      Pork Steaks in the Oven
    • BBQ Pork Steaks
      BBQ Pork Steaks in the Slow Cooker
    • Oven Baked Steak with Butter and a side of potatoes
      How to Cook Steak in the Oven

    How to cook butternut squash in the air fryer:

    For this recipe, I used a package of pre-cut, cubed butternut squash that comes in about 3 cups of squash. However, this recipe is VERY forgiving so if you don’t have quite that much or more than that, you should be ok!

    If you have a whole butternut squash, scroll up to see how to easily peel yours!

    Uncooked butternut squash for the air fryer

    In a bowl, add cubed butternut squash…

    Smoked paprika for butternut squash

    … the spices: cinnamon, smoked paprika (if you don’t have smoked that’s ok!), salt and pepper.

    Seasonings for butternut squash in air fryer

    Then add in the olive oil and mix together squash is evenly coated with oil and spices!

    Stir butternut squash is evenly covered with spices

    How long do you cook squash in an air fryer?

    You shouldn’t need to coat your air fryer with cooking spray since you’ve coated your squash in olive oil (but I know some air fryers suggest it, so feel free if you want to).

    Cook squash in 400° air fryer for about 20 minutes.
    (You can preheat if you want, but I don’t typically preheat my air fryer so sometimes I like to just add a couple of minutes on at the end if not cooked through.)

    Cook butternut squash cubes in air fryer

    Air fryer temperatures and settings can vary, so just know that your squash is done when it is tender to poke with a fork! (You don’t it crunch typically. I like to have it the consistency of a sweet potato!)

    Butternut Squash Cube cooked in air fryer

    How do you serve air fryer butternut squash?

    Serve your butternut squash warm and immediately after it’s done for best results. But reheated leftovers are just fine too!

    Cooked Butternut Squash in air fryer

    Have dried or fresh parsley hanging around? Sprinkle a little on for color, especially if entertaining!

    Your guests will think you worked super hard on a side dish that took VERY LITTLE effort. (One of my favorite characteristics of cooking!)

    Air Fryer Butternut Squash
    Butternut Squash Air Fryer

    Recipe

    Air fryer butternut squash, diced in small dish.
    Print Pin
    5 from 18 votes

    Air Fryer Butternut Squash

    Air Fryer Butternut Squash: An easy and healthy recipe that pairs perfectly with so many main dishes or can be a stand-alone lunch or dinner!
    Course Side Dish
    Cuisine American
    Prep Time 5 minutes minutes
    Cook Time 20 minutes minutes
    Total Time 25 minutes minutes
    Servings 4
    Calories 80kcal
    Author Jessica Burgess

    Equipment

    • air fryer

    Ingredients

    • 3 cups cubed butternut squash see tips in post for peeling squash
    • 1 tablespoon olive oil
    • 1 teaspoon cinnamon
    • ½ teaspoon smoked paprika optional (and regular paprika is ok too!)
    • 1 pinch salt
    • 1 pinch pepper

    Instructions

    • In a medium-sized mixing bowl, mix together cubed butternut squash with olive oil and spices.
    • Place squash in air fryer basket and cook at 400° for 20 minutes or until squash is tender. (See notes for cooking tips.)
    • Serve warm!

    Notes

    If you do have a whole squash and need to peel it, slice off the ends and pop it in the microwave for about 3 minutes. It will really soften the skin and then once it has cooled off enough to touch, you can stand it up on one end and slice the skin off with a knife.

    Nutrition

    Serving: 1g | Calories: 80kcal | Carbohydrates: 13g | Protein: 1g | Fat: 4g | Saturated Fat: 1g | Sodium: 14mg | Potassium: 370mg | Fiber: 2g | Sugar: 2g | Vitamin A: 11285IU | Vitamin C: 22mg | Calcium: 55mg | Iron: 1mg

    Did You Make This?
    Snap a pic and hashtag it #Fantabulosity - I love to see your creations on Instagram and Facebook.

    More side dishes I think you’ll love:

    • two tuna salad sandwiches stacked on top of each other
      The BEST Tuna Salad Recipe
    • The best guacamole in a small bowl with fresh cilantro on top.
      The BEST Guacamole Recipe
    • Avocado Wontons
    • Chicken macaroni salad in a bowl.
      The BEST Chicken Macaroni Salad

    Cast Iron Brownies

    December 1, 2020

    Cast iron brownies being lifted out of skillet.

    Cast Iron Brownies: A DELICIOUS brownie recipe made in a cast-iron skillet that creates a fudgy brownie that makes the perfect easy dessert!

    Slice of cast iron brownie being lifted out of pan.

    Get ready for the richest, most fudgy brownie recipe around. These Cast Iron Brownies are an easy dessert recipe that’s made in one bowl and done in less than an hour, just like this condensed milk brownie recipe.

    Hey friends! Meg here from Meg's Everyday Indulgence. I felt like you needed some chocolate in your life so I brought along this delicious Cast Iron Skillet Brownie recipe.

    Do you love the edges of brownies but also like a rich, fudgy center?! These brownies are the best of all things in a bite. Each brownie slice has that crisp edge on the sides and bottom while the middle has all the fudginess.

    Can you bake in a cast iron?

    Yes! Actually, cast irons are so great for on the stove-top AND baking. Especially when you need to cook (sear) something and then bake it too!

    Can you eat brownies right out of the oven?

    YES! Warm, hot brownies are my favorite! Just be careful if they’re RIGHT out of the oven because you don’t want to burn your tongue!

    What makes brownies fudgy vs cakey?

    If you want a fudgy brownie, then that means it’s better to have a ratio of more “fat” (so the butter & chocolate) than “flour” in your recipe. If you want more of a “cakey” brownie, you’ll need more of a flour ratio than butter/chocolate.

    Slice of cast iron brownie being lifted out of the skillet.
    [feast_advanced_jump_to]

    Ingredients for Cast Iron Brownies

    • Butter: I use unsalted so that I can control the levels of salt in the recipe.
    • Semi-sweet chocolate chips: We're getting in our chocolate two ways in this recipe. The chocolate chips help add that classic fudgy brownie texture.
    • Granulated sugar and brown sugar: I like a mix of sugars in my brownies. It adds another dimension when both are included.
    • Vanilla extract: Adds a touch of rich vanilla flavor and enhances the chocolate flavor.
    • Eggs: 4 to be exact. These are another requirement for the fudgy factor.
    • All-purpose flour: Just enough to pull the batter together and keep that richness.
    • Cocoa powder: Yields a chewy brownie. With the addition of cocoa powder and melted chocolate, you'll have the best of both worlds.
    • Kosher salt: You always need salt in a sweet baked good. It helps balance out the sweetness so that it's not too overwhelming.
    Scoop of vanilla ice cream on top of brownie.

    How to Make Cast Iron Brownies

    These brownies are made in one bowl. I'll tell you how.

    First, melt your butter in a large bowl. While it's still hot, stir in the chocolate chips. If they don't fully melt. Add back to the microwave for 15 seconds and stir again.

    Let the chocolate mixture cool for 5 minutes before proceeding. This ensures the eggs don't scramble when they are added.

    Whisk in the granulated sugar, brown sugar, and vanilla extract. Add the eggs, one at a time.

    Sprinkle in the dry ingredients then fold just until the batter comes together. Stirring too much will yield tough brownies.

    Lightly oil or spray your 10-inch cast iron skillet. Pour the batter into the skillet and spread evenly. Now it's time to bake.

    Brownie made in a cast iron pan.

    How Will I Know My Brownies Are Done?

    One thing you definitely don't want is an overbaked brownie. At 25 minutes, use a toothpick to check the doneness.

    You don't want the toothpick completely clean or super wet. You're looking for slightly gooey crumbs. That will yield a perfect brownie.

    Slice of brownie removed from cast iron pan.

    Why Use a Cast Iron Skillet?

    First, they distribute and hold heat really well. That means your edges will have the best, crisp texture while the inside of the brownie remains fudgy and dense.

    It's the perfect presentation. No need to cut and place these brownies on a platter when you they are already baked in a beautiful cast iron skillet.

    Cut into slices and serve out of the skillet or go in with a spoon. We don't judge here.

    Brownie Mix-ins and Toppings Ideas

    These brownies are incredibly rich and chocolatey on their own but if you want to get a little crazy, there are lots of fun additions you could try.

    My favorite is adding a scoop of homemade vanilla ice cream on a big 'ole slice while it's still warm. Add a little hot fudge and whipped cream if you're feeling extra indulgent.

    You can also mix in lots of fun ingredients before baking.

    • Chocolate chips
    • Chopped nuts
    • Mini marshmallows
    • Peanut butter cups
    • Crushed cookies
    • Mint chocolate candies
    • M&Ms
    • Cream cheese frosting for brownies

    If you love desserts like this one, then I thought you may also love this skillet cookie! Or, if brownies are your favorite dessert in general, we think you’ll also love these red velvet brownies!

    More Chocolate Desserts to Try:

    • Oreo Cheesecake Recipe
    • Hot Chocolate Muddy Buddies
    • Chocolate Caramel Gooey Butter Cookies
    • Peppermint Mocha Crunch Cake
    • No Bake Nutella Cheesecake with Baked Brownie Crust

    Did You Make This?
    Snap a pic and hashtag it #Fantabulosity - I love to see your creations on Instagram and Facebook.

    Love Easy Recipes?

    I have a TON of easy recipes here on the blog. Here are the most recent…

    • Sliders in a collage, for slider recipes.
      Slider Recipes: 19 Easy Ideas for Dinner, Parties & Game Day
    • Fall Dessert Recipes collage, showing pumpkin, apple and pecan desserts.
      Easy Fall Desserts (38 Cozy Recipes for the Whole Season)
    • Bowl of ham and beans with spoon, and cornbread sitting on side of bowl.
      Ham and Beans Recipe
    • Sliced apple bread with a maple frosting.
      Apple Bread Recipe with Maple Glaze (So Moist and Easy)

    Recipe

    Cast iron brownies being lifted out of skillet.
    Print Pin
    5 from 13 votes

    Cast Iron Brownies

    Cast Iron Brownies: A DELICIOUS brownie recipe made in a cast-iron skillet that creates a fudgy brownie that makes the perfect easy dessert!
    Course Dessert
    Cuisine American
    Prep Time 15 minutes minutes
    Cook Time 30 minutes minutes
    Total Time 45 minutes minutes
    Servings 8 servings
    Calories 587kcal
    Author Jessica Burgess

    Ingredients

    • 1 cup butter
    • ½ cup semi-sweet chocolate chips
    • 1 ⅓ cups granulated sugar
    • ⅔ cup brown sugar
    • ½ Tablespoon vanilla extract
    • 4 large eggs
    • 1 cup all-purpose flour
    • 1 cup cocoa powder
    • 1 teaspoon kosher salt

    Instructions

    • Preheat oven to 350 degrees F. Add butter to a large bowl and melt in the microwave. Add chocolate chips and stir to melt. If they don't fully melt, microwave for another 15 seconds and stir again. Let cool for 5 minutes.
    • Whisk in the granulate sugar, brown sugar and vanilla. Add eggs, one at a time, whisk well between additions. Sprinkle in flour, cocoa powder and salt. Fold until just combine and you can no longer see any flour.
    • Grease a 10-inch cast iron skillet lightly with shortening or vegetable oil. Pour batter into prepared skillet. Bake for 25 to 30 minutes. Check with a toothpick, it should have slightly wet crumbs.
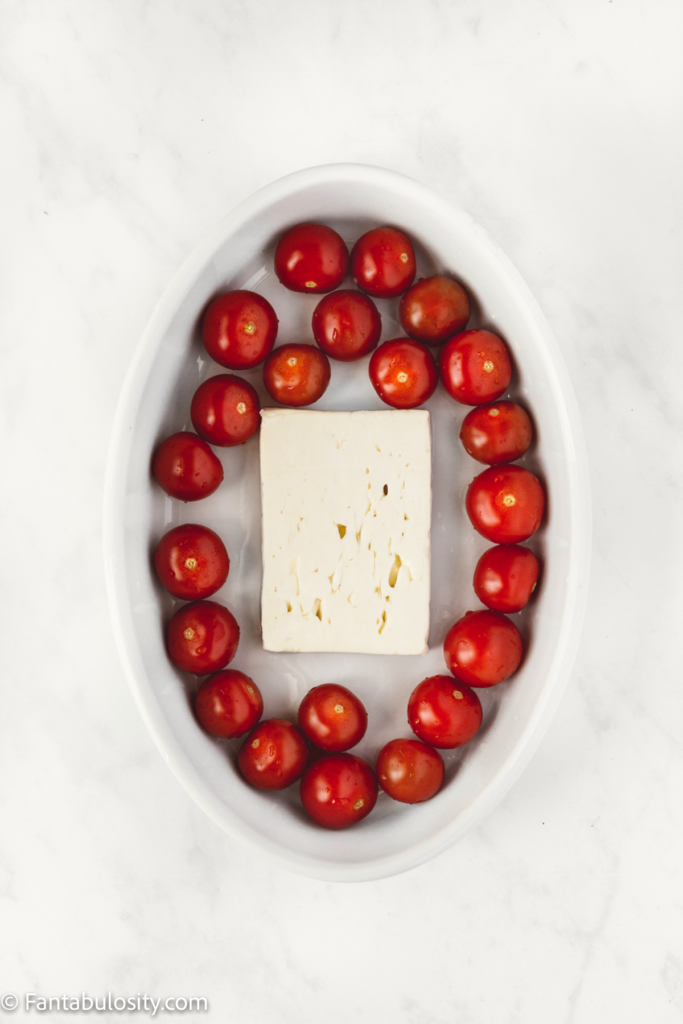
    Nutrition

    Serving: 1slice | Calories: 587kcal | Carbohydrates: 76g | Protein: 8g | Fat: 31g | Saturated Fat: 19g | Cholesterol: 155mg | Sodium: 486mg | Potassium: 310mg | Fiber: 5g | Sugar: 56g | Vitamin A: 844IU | Calcium: 59mg | Iron: 3mg

    Focaccia Bread

    November 22, 2020

    Focaccia bread in a bowl.
    Focaccia Bread: An easy recipe that’s perfect to serve as a stand-alone side, as a sandwich, or even as an appetizer!

    Homemade bread is easier than you think. This focaccia bread is one of the best bread recipes because it uses simple, pantry staples and transforms them into a bread with a soft, fluffy interior and perfectly chewy exterior. A definite crowd-pleaser, that you’ll want to make along with this cheesy bread recipe!
    Focaccia bread in a bowl with a fabric napkin.

    Meg here again from Meg's Everyday Indulgence. With the temperature dropping, it's that time again. Homemade bread season. I'm bringing a focaccia bread recipe today that will quickly become a must-have at your family meals, along with this easy Italian white bread.

    What is Focaccia Bread?

    Focaccia bread is characterized by the little dimples all over the top of the bread. Those dimples are important to prevent the bread from rising too fast as it bakes, keeping it on the thinner side.

    And an added bonus, the dimples catch the delicious olive oil drizzle and herbs that are sprinkled on top which provide great flavor and crunchy texture.

    [feast_advanced_jump_to]

    Focaccia Bread Ingredients

    Like with most bread recipes, the ingredients for this focaccia bread recipe are very simple and probably already stocked in your kitchen.

    • Warm water: you'll want the water between 105 and 115 degrees F. This will ensure the yeast will be activated and start to bubble without killing it.
    • Sugar: Granulated sugar is great to use and helps activate the yeast which feeds on sugar.
    • Active dry yeast: You can either use a packet of yeast or 2 ¼ teaspoons if you buy it in jars.
    • Flaky kosher salt or sea salt: Salt goes into the bread dough and is also sprinkled on top before baking. It provides lots of flavor to the bread. I like using a flaky salt so that you can taste it in each bite and have that yummy little crunch.
    • Olive oil: This is key to getting that delicious golden crust that is perfectly chewy. It also is added to the dough.

    Rosemary Focaccia

    Rosemary is totally optional but it adds another flavor dimension. If you don't care for rosemary or it doesn't go with the meal you are serving, you can definitely leave it out or add different herbs. Thyme, oregano, and basil would all be great options.

    Rosemary focaccia bread in pan.

    Do I Need a Stand Mixer?

    While it's easier and less work to use a stand mixer, you can certainly make this by hand.

    When the recipe states to knead the dough in the mixer, you would simply knead it by hand on a floured surface instead for the same amount of time.

    How to Make Focaccia Bread

    Start by adding the warm water to the bowl of a stand mixer. If you're doing this by hand, add it to a large bowl. Stir in the sugar and yeast until dissolved and allow to rest for 5 minutes. It should be bubbly.

    Add the olive oil and give the mixer a quick spin to incorporate it. Add salt and 3 cups of flour to the mixer and using the dough hook attachment, mix until it comes together. Use a wooden spoon to stir if making by hand.

    Now, add the remaining cup of flour, ¼ cup flour at a time, until a soft dough comes together.

    Knead for 6 to 8 minutes in the mixer or by hand on a floured surface.

    Bread dough in bowl.

    Time to Rise

    Once the dough is kneaded, add it to a large, well oiled bowl for its first rise. You'll want it to double in size, which should take 45 minutes to an hour. The time will depend on the temperature of your room.

    Once risen, punch down the dough and divide it in half.

    Focaccia bread dough rising in bowl.

    Prepare the Baking Pans

    Butter two 9-inch cake pans well. We don't want any sticking here.

    Sprinkle a tablespoon of cornmeal into each of the buttered pans and shake around until the bottoms are coated.  

    Punched focaccia bread dough.

    Second Rise

    Place the dough into the prepared baking pans and press gently to the edges of the pans. It's ok if they don't completely reach the sides, as it rises it will spread.

    Press your fingers gently about halfway down the dough, all over the top. Cover and let rise again, this time about 30 minutes.

    Bread dough in pans for focaccia recipe.

    Final Preparations and Baking

    Once the second rise is complete, repeat the dimpling process with your fingers. Brush each loaf of bread with the remaining olive oil and sprinkle with flaky salt and dried rosemary.

    Now it's time to bake and enjoy. Carefully remove the bread from the pans and slice as desired.

    Oil and rosemary on focaccia bread.

    How to Serve Your Focaccia Bread

    There are so many uses for this bread, starting with eating it warm straight from the pan. Or even better, with a big smear of softened butter.

    It also makes great sandwiches and paninis. I love it as a side to soup and pasta as well.

    If you're serving this as a side to dinner, I recommend cutting each loaf into 8 equal wedges. If you're making sandwiches, cut into fourths then slice those in half and fill with your favorite ingredients.

    Sliced focaccia bread in basket.

    Can you Freeze Focaccia Bread?

    If you find yourself with extra focaccia bread, no worries. It freezes really well and will last in the freezer for about a month.

    Wrap cooled bread tightly in plastic wrap then in foil. Place the wrapped loaf or pieces in a freezer safe bag and place in the freezer.

    When you're ready to use it, grab it out and let it defrost on the counter for about an hour or two.

    What do you eat Focaccia Bread With?

    What do you eat Focaccia Bread With?

    You can eat focaccia bread with just about anything as a side dish! Or, you can use it as a bread for your favorite sandwich. Here are recipes that I think you’ll love this for or with: Caprese Sandwich, Easy Potato Soup
    The Best Egg Salad! Or serve it alongside this creamy pasta recipe!

    Do you eat focaccia hot or cold?

    It’s best warm or room temperature! So if it has been in the refrigerator, it wouldn’t hurt to warm it in the microwave or oven, VERY gently, and not too long or it could get very hard.

    How long does focaccia last in the fridge?

    It can keep up to four days in the fridge but make sure it’s stored in an airtight bag!

    Focaccia bread sliced and stacked on a cutting board.

    More Easy Recipes You’ll Love

    If you loved this bread recipe you’re going to love these:

    • The BEST Banana Bread
    • Easy Old-Fashioned Bread Pudding
    • Cream Cheese Toffee Pumpkin Bread

    Did You Make This?
    Snap a pic and hashtag it #Fantabulosity - I love to see your creations on Instagram and Facebook.

    Recipe

    Focaccia bread in a bowl.
    Print Pin
    5 from 5 votes

    Focaccia Bread

    This focaccia bread uses simple, pantry staples and transforms them into a bread with a soft, fluffy interior and perfectly chewy exterior. A definite crowd pleaser.
    Course Side Dish
    Cuisine American
    Prep Time 2 hours hours 10 minutes minutes
    Cook Time 30 minutes minutes
    Total Time 2 hours hours 40 minutes minutes
    Servings 2 loaves
    Calories 211kcal
    Author Jessica Burgess

    Ingredients

    • 1 package active-dry yeast, or 2 ¼ teaspoon
    • 1 teaspoon granulated sugar
    • 1 ½ cups warm water (105-115 degrees F)
    • 3 Tablespoon olive oil, divided
    • 1 ¼ teaspoon coarse kosher or sea salt, divided
    • ½ teaspoon dried rosemary
    • Cornmeal, for dusting pan

    Instructions

    • In the bowl of a stand mixer (or in a large bowl if making by hand), whisk together the yeast, sugar and warm water until dissolved. Let stand for 5 minutes.
    • Add 2 tablespoons olive oil, 1 teaspoon salt and 3 cups of flour to the yeast mixture. Using the bread hook attachment, mix together until a ragged dough forms. Stir with a wooden spoon if making by hand. Add flour, ¼ cup at a time, until a soft dough comes together. Knead for 6 to 8 minutes in mixer or on floured surface by hand.
    • Spray a large bowl with nonstick spray. Form dough into a ball and place in prepared bowl. Cover with a towel and place in a warm spot to double in size, 45 minutes to 1 hour.
    • Butter two 9-inch cake pans well. Add a tablespoon or two of cornmeal and shake around until the bottom is coated. Discard any excess. After doubled, punch down dough. Divide in half. Press each half the dough into one of the prepared pans until the sides are reached. If it doesn't quite touch the sides, that's fine. Repeat with remaining dough. Using your fingers, stipple the dough by pressing halfway down. Cover again and let rise in a warm place for 40 minutes.
    • Preheat oven to 400 degrees F. Stipple dough again. Brush each with ½ tablespoon of olive oil each. Sprinkle each with ⅛ teaspoon of salt and ¼ teaspoon rosemary.
    • Bake for 25 to 30 minutes, until golden. When done, remove from pans and slice each loaf into 8 equal wedges.

    Nutrition

    Serving: 1slice | Calories: 211kcal | Carbohydrates: 3g | Protein: 0.3g | Fat: 22g | Saturated Fat: 3g | Polyunsaturated Fat: 2g | Monounsaturated Fat: 16g | Sodium: 1204mg | Potassium: 17mg | Fiber: 1g | Sugar: 2g | Vitamin A: 39IU | Vitamin C: 1mg | Calcium: 22mg | Iron: 1mg

    My 6 “Go-To” Beauty Services and Treatments

    November 19, 2020

    Fantabulosity Standing on sacajawea Hotel porch in Montana

    The BEST Beauty Services & Treatments: When needing a little “me” time or self-care, these are my 6 favorite appointments to make!

    This post has been sponsored by Milan Laser Hair Removal, and I have received services in exchange for sharing my experience. HOWEVER, all thoughts and opinions are my own… as always.

    Before diving into my favorite beauty services and treatments, I want to make sure that you know that mental health is a top priority in life for me, and although heading to get a relaxing body treatment or physical service is REALLY, really nice… what plays a big role in my happiness is making sure my values are filled, which are things like:

    • a safe and secure home life
    • the health of my “babies”
    • a great marriage
    • my faith
    • … and more

    So please don’t hear what I’m not saying.

    Beauty services and treatments are, absolutely, a wonderful way to experience a pick-me-up… and are a great way to enjoy life a little more. But after going through such an incredibly hard, emotional time, I don’t know if there’s a service or treatment out there that could have pulled me out of the deep, dark place that I was in.

    But now, after climbing out of that hole and continuing to live life as a busy, work-at-home momma, you better believe a nice day to myself, getting some “self-care” in, is one of my favorite things to do.

    And today, I’m sharing with you, exactly what those are in case you’re looking for some “pick-me-up” activities to do too!

    My 6 “Go-To” Beauty Services and Treatments

    Fantabulosity standing on sacajawea hotel porch in Montana

    When a day comes open, where there’s an opportunity to get out and about, to myself… I immediately think,

    What do I have time for and what can I get in to show myself some love?

    and this is where I begin…

    1. Laser Hair Removal

    Oh friend… if you’re new around here, you may not have heard about this new glorious treatment that I’ve been getting from Milan Laser Hair Removal.

    I had been wanting to have laser hair removal done for YEARS but when I began looking a few years ago, I didn’t know where to go… until I found my Milan. Milan Laser Hair removal isn’t just another “laser hair center”. They’ve become like family.

    When I first went in for a free laser hair removal consultation, I was welcomed by the sweetest and friendliest staff. They made me feel right at home and totally comfortable. (Which comes in nice when you know you’re about to expose yourself to a stranger for some hair removal in an area that only your husband and OB see.)

    After the first treatment, I was HOOKED. The “laser hair before & after” of my armpits alone blew my mind.

    Mental Health + Laser Hair Removal

    In the beginning of this post, I talked about the importance of mental health and there’s something I want to follow-up with on the power combination of mental health and laser hair removal.

    When I met with the gals at Milan, they shared stories with me of men and women (no names, of course) who were living with depression and frustration due to hair-covered areas on their bodies, and dealing with it caused pain, bleeding, and embarrassment.

    But with the help of laser hair removal, their lives have LITERALLY been changed. Removing the hair from those troubled areas on their bodies relieved stress and pain, and brought them so much more joy!

    THIS… this, my friends is something that stuck with me and helps me appreciate just how much getting rid of hair permanently with laser hair removal can do for someone and has made me so much more passionate about sharing laser hair removal with you.

    I may only be having my legs, armpits and Brazilian area treatments to make life more convenient without having to shave but laser hair removal can seriously be a game-changer in someone’s life.

    So if you or someone you know struggles with something like this or if you simply just want laser hair removal to “Say No to Shaving”… I want to share a code with you that will get you 60% off… yes, 60%!!!

    CODE: FANTABULOSITY60

    Visit Milan to see if you have a clinic near you (as of this post going live, they have 100 clinics!!) so you can have a free consultation. Remember to give them the code: FANTABULOSITY60 for your discount on any and all treatment areas you decide on (Heads up: If you should decide to purchase Full Body, you already get such a great discount that my code cannot be applied.)

    P.S. I didn’t tell you yet in this post, although I did when I shared about Milan Laser Hair Removal and in my Laser Hair Removal tips but with Milan, you pay one price for the body area that you want, and it's an unlimited, lifetime guarantee on that body area. That means for one price you can get as many treatments as you need to achieve your hair-free goals at no extra cost. Say bye-bye to that pesky hair ladies. (And men.)

    2. Nails

    What is it about getting your nails done that makes you feel so good? I think for me it makes me feel a little pretty, girly (in this house full of boys) and even makes me feel like I have my life together… which we all know is a farce. But hey, no one is perfect, right?

    When I get my nails done, I opt for the “gel” or the “shellac” and you can almost guarantee I’ll be walking out with a shade of pink. (Even though I sit and look through the color guide for about 20 minutes, pretending that my life depends on picking the right color. – insert eyeroll -)

    Why do I do this? It’s like I can make a business decision in a jiffy, decide in seconds if my kids should or shouldn’t try something new… but by golly, don’t ever ask me to decide on a nail color in less than 20 minutes. I’ll get all flustered and walk out the door!

    3. Pedicure

    So everything I said above about getting my nails done??? Insert it here. Long decision time on nail color and all.

    BUT… I will say that I normally only get a pedicure every 6 months. Why? Because I’m a sucker for seeing how long I can keep that shellac on my toes without looking like something off of a horror movie so I can save money. Not kidding.

    4. Spray Tan (Airbrush)

    I only recently became a fan of spray tanning but when I did it for the first time I knew I’d never go back to a tanning bed. (Side note: I actually worked at a tanning salon for a few months in high school and they wanted us to tan as often as we could so we could “promote” that their beds worked. Looking back, and knowing what I know now, I wish I never would have done that but it is what it is I suppose. I just need to keep an eye on things carefully these days after all of those trips to the fake sun.)

    But a spray tan? Girl… I’m game on. When we’re headed to Mexico or it’s during the summer, you’ll find me tracking down a place that offers airbrush tans — where someone actually sprays your body — yes, your naked body — and you leave in minutes with a beautiful golden color!

    See my post on “How to Prepare for a Spray Tan” here!

    5. Facials

    I’ll admit, I don’t get facials as often as I’d like. But when I do, I feel like my face loves me again, especially after some of these cold, dry, days here in Montana.

    If the spa I visit has a “vitamin C” facial on the menu, that’s my go-to. I love the citrus smells during treatment and I feel it gives my skin a nice boost.

    But let’s get real… the estheticians are recommending “age-reducing” facials for me these days and I’m slowly accepting it for what it is. Haha!

    6. Massages

    Now I LOOOVE a good massage. I don’t get these as often as I’d like either but when I do, I feel like heaven’s gates opened and everything is right in the world.

    Side note: I usually enjoy massages so much, that I get so relaxed and I start moaning high-pitched sighs during treatment…. as I nod off to sleep. It’s super embarrassing but the pure joy I feel during that one hour outweighs any insecurities I have. Besides… they’ve had to have heard/seen worse, right?

    What are YOUR Favorite Beauty Services & Treatments?

    That’s it! Those are my 6 favorite beauty services and treatments! I’d love to hear what yours is!

    I want to try “floating” one day. (Is that what it’s called? I dunno. That thing where you supposedly float on water and relax? I’m terrified of deep water so even if it’s 2 inches deep I may still struggle with fully relaxing.)

    My son has had IV therapy for his epilepsy and I’ve always wanted to try that too, just for hydration purposes but I don’t know if I’ll ever make it happen.

    I’ve also heard that cryotherapy is a big thing right now??? I don’t even know what that is… maybe I should Google it.

    So tell me… what is your favorite.

    And remember…. if you give Milan Laser Hair Removal a call, give them the code: Fantabulosity60 so you get that amazing discount!

    XOXO,

    Christmas Scavenger Hunt Printable Checklist & Ideas

    November 12, 2020

    Christmas Scavenger Hunt Printable Checklist

    Christmas Scavenger Hunt Printable Checklist and Ideas: When you need an activity and/or fun game for the holidays, this is fun for kids of ALL ages!

    Christmas Scavenger Hunt Printable

    Christmas Scavenger Hunt Printable Checklist

    I don’t know if it’s because I think about how we used to play games at Christmas parties when I was a kid… or what it is, but I LOOOOOVE a good Christmas game during the holidays.

    Make one of those games a scavenger hunt and I’m GOLDEN!

    You’ll Also Love:

    • Christmas Bucket List Printable
    • Letter to Santa Printable Template
    • Christmas Gift List Tracker

    This Christmas, for your holiday gatherings, whether that be a large family celebration, a work party or even just a fun little evening with your family, you’re going to love this printable so you can host your own scavenger hunt!

    See how to save this free printable at the bottom of this post!

    Christmas Scavenger Hunt Printable Checklist Ideas

    Scavenger Hunt Ideas

    Wanting to see all of the items on the scavenger hunt printable? They’re the most common items for the holiday season:

    • Santa Hat
    • Candy Cane
    • String Lights
    • Sled
    • Snow Globe
    • Stocking
    • Ugly Sweater
    • Snowflakes
    • Snowman
    • Christmas Tree
    • Nutcracker
    • Angel
    • Mittens
    • Mistletoe
    • Fire Place
    • Elf
    • Wreath
    • Star
    • Bell
    • Santa

    Having a Party?

    If you’re having a party, simply print out multiple copies of this scavenger hunt and either:

    1. Send hunters out and about and give them a time to be back at the starting location with the proof of all the things they’ve found! (Tip: they can either bring back what they’ve found… if possible, or they can take a photo of themselves by/with it!) Whoever has found the most wins a prize!
    2. Keeping it simple and close to home? Plan ahead of time and gather items from the store (a Dollar Tree would work great for this) on this list, to hide around the house and send everyone on a hunt! (Tip: if you don’t have time or don’t want to make a trip to the store, simply go online and print photos of everything on the list and hide the pictures throughout the house!)

    Prize Ideas for the Winner:

    Want to give out prizes for the winner )or winners)? Here are some fun little gift ideas to make your scavenger hunt game even better!

    • Gift cards to restuarant, coffee shop, Amazon, or Target!
    • Small basket of candy, cookies, hot chocolate fixings.
    • A board game.
    • Bath and body products.
    • Candles.
    • Scarf, fuzzy socks.
    • Car detailing kit.
    • Cute stationery, pens, office supplies

    How to Access Your "Scavenger Hunt" Printable…

    Get your Scavenger Hunt Printable HERE!

    Other Christmas Posts You’ll Love:

    Gift Ideas for Teenage Girls

    Gift ideas for teenage girls

    Gift Ideas for Teenage Guys

    Gift ideas for teenage guys

    50+ Gift Ideas for Her

    gift ideas for her

    31+ Gift Ideas for Him

    31+ Gift Ideas for Him: gifts he'll actually love! For husband, dad, brother, or boyfriend! #giftsforhim #gifts

    Hosting a Christmas Party? You’ll Love These Party Ideas:

    Vintage Christmas Party

    Ahh! Such an adorable theme! Vintage Christmas Party Ideas: Truck with Christmas Tree, cupcakes, red green and white, hot chocolate bar

    Milk & Cookies Party

    Milk and Cookies Party Play Date Ideas. Snowman Nutter Butter Truffle

    Grocery List Template – Free Printable

    November 11, 2020

    Grocery List Template

    Grocery Shopping List Template: This adorable and free printable will help you organize your grocery shopping to make things so much easier!


    Grocery List Template

    So I don’t like grocery shopping as much as you do. Yes, sometimes if I get out of the house without the kids to go grocery shopping, it may feel a little like a vacation… but still… I DESPISE grocery shopping.

    And now that grocery pick-up and delivery is a thing, my grocery shopping life is SO much easier. BUT…

    Grocery Shopping List Template

    Are you ready for me to make your grocery shopping life easier even if you do grocery pick-up and/or delivery? Welcome to my FREE GROCERY SHOPPING LIST TEMPLATE!

    Get this free grocery shopping list right away, when you join my email list!

    How to Use my Grocery Shopping Master List:

    Free grocery shopping list template download

    For probably close to 15 years, my mom has been using something that has changed her (and my) daunting grocery shopping trips.

    She created a master copy of a grocery shopping list, and after taking hers and adding a little pink and “fantabulosity flair”, I’m sharing this version with you!

    How to Use the Grocery List Template:

    • Simply select and print.
    • Hang it on the refrigerator door (or wherever your central station is).
    • Highlight the items with a highlighter as needed, as you run out or think of them.
    • Take the list with you to the store when you’re ready.
    • Grab your highlighted items at the store, and you're all set!

    Print, again and again, to keep the same system going!

    Common Grocery Items

    Wondering if this list has common grocery items on it? YES! This list was created with everyday staples with a “family” in mind.

    This list has the main categories you’re used to shopping for like,

    • Household
    • Breakfast Food
    • Bread
    • Deli
    • Dry Ingredients
    • Beverages
    • Dairy
    • Canned Foods
    • Children
    • Frozen Foods
    • Baking Goods
    • Spices
    • …and so much more!

    With individual items under each category like:

    • butter
    • milk
    • cake mix
    • bread
    • shredded cheese
    • salt
    • pepper
    • cereal
    • pop tarts
    • light bulbs
    • paper towels
    • …and so many more everyday items you need!

    My Favorite Ways to Grocery Shop:

    I’m a BIG fan of Walmart Grocery Pickup and Instacart Delivery.

    With two little boys at home… loading up and heading to the grocery store to spend an hour saying “no” to cookies, toys and fruit snacks… doesn’t really sound like a ton of fun.

    So when Walmart grocery pickup and Instacart came to my hometown, I immediately fell in love.

    I can easily place my order online and either head down the street to pick up my groceries, or they show up on my doorstep a few hours later with what I need!

    List for Online Grocery Ordering

    I STILL use this grocery shopping list, even though I’m ordering online.

    I keep the grocery list handy throughout the week, and still mark up the items I need, as I realize we need them.

    But the difference from going to the store, is I simply sit down on my couch while my favorite tv show is on, and I order away by what my list says I need!

    Looking for More Printables?

    Have a specific printable you’d love to see here? Let me know in the comments below. I’m a bit of a printable junkie, so if I know what you want… it will more than likely go on my list to create.

    Instant Pot Orange Chicken

    November 4, 2020

    Instant Pot Orange Chicken in bowl.

    Instant Pot Orange Chicken: Skip the takeout tonight and make your own easy recipe! Done in 30 minutes, it's sure to be a family pleaser.

    Instant Pot Orange Chicken

    I’m so excited you’re here! You’re here so that means you’re interested in Instant Pot recipes, and let me tell you… you’re going to LOVE this one from Meghan…


    Hey Fantabulosity readers! It's Meg from Meg's Everyday Indulgence checking in and bringing a new favorite recipe, Instant Pot Orange Chicken. It's packed with fresh orange flavor and a snap to put together.

    Instant Pot Orange Chicken

    I absolutely love using my Instant Pot, especially on weeknights. It's such an easy way to get dinner on the table and you can make just about anything in it.

    Have a crockpot too? Try this Crockpot Orange Chicken next!

    This Instant Pot Orange Chicken just may be my favorite Instant Pot recipe yet. It uses both the sauté and pressure cooker options on the Instant Pot to cook the orange chicken ensuring the chicken is cooked through and the sauce gets thick and glossy.

    Orange Chicken in the Instant Pot

    More Instant Pot Favorites:

    • Instant Pot Chicken Thighs
    • Instant Pot French Dips
    • Easy Cheeseburger Macaroni in the Instant Pot
    • Instant Pot Chicken and Potatoes
    • Instant Pot Pot Roast

    Why You’ll Love this Recipe:

    There are so many reasons to love this recipe. First, it's done in less than 30 minutes. I know there are a lot of busy moms out there always looking for quick and easy recipes.

    And that means it's quicker to make this than to order and wait for takeout or delivery. Big win.

    Second, it's packed full of so much sweet, bright orange flavor. The key is the use of fresh orange juice and zest. It makes a world of a difference.

    Healthy Instant Pot Orange Chicken

    Plus, it's way healthier than anything you would grab out. Since it isn't breaded and fried, you can feel good about feeding this to your family any night of the week.

    Instant Pot Orange Chicken

    Ingredients for Instant Pot Orange Chicken

    Here’s what you’ll need for this delicious dish:

    • Boneless skinless chicken breast
    • Fresh orange juice
    • Orange zest
    • Soy sauce
    • Brown sugar
    • Rice vinegar (white vinegar can be substituted here)
    • Garlic
    • Red pepper flakes
    • Cornstarch
    • Nonstick cooking spray
    Instant Pot Orange Chicken Ingredients

    Tips on Zesting Your Orange

    The key to perfect orange zest is a microplane. It grates the zest super fine, ensuring it gets in each and every bite.

    Before zesting your orange, make sure to wash the outside just like you would any other type of produce.

    Grate only the orange, outer skin of the orange. Once you get to the white pith, it becomes bitter. You don't want that in your orange chicken.

    Make sure to grate the whole orange to ensure you have lots of fresh orange flavor in your finished dish. There are lots of oils in the skin and they provide TONS of orange flavor.

    Orange Chicken Recipe Made in the Instant Pot

    Start By Searing the Chicken

    Start by cutting your chicken into bite-size pieces and toss it to lightly coat in cornstarch. Plug in your Instant Pot and turn it to sauté mode.

    Once hot, spray liberally with nonstick cooking spray and add the chicken in a single layer. You will probably need to cook the chicken in two batches to make sure you don't overcrowd your pot.

    Make the Orange Sauce

    While the chicken is searing in the Instant Pot, whisk together the sauce ingredients. This will include the fresh orange juice, orange zest, soy sauce, brown sugar, garlic, rice vinegar and red pepper flakes.

    I've included a range of amounts of red pepper flakes to add. If you want things a little spicy, add ½ teaspoon. To kick it up a notch, add a whole teaspoon of red pepper flakes.

    If you're serving to people who don't prefer spicy food, leave it out completely.

    Orange Sauce for Chicken

    Time To Pressure Cook

    Once all the chicken is seared, add it all back to the instant pot and pour the orange sauce over it. Stir to coat then close the lid and seal the valve.

    Set your Instant Pot to high manual pressure for 3 minutes. Once it's done cooking, let it naturally release for 5 minutes then carefully turn the valve to release the remaining pressure.

    Orange Chicken in the Instant Pot

    Thicken the Sauce

    The last step in this Instant Pot Orange Chicken is thickening the sauce.

    In a small bowl, whisk together 1 tablespoon cornstarch and 2 tablespoons cold water. This is called a slurry.

    Set your Instant Pot back to sauté mode and once simmering, add the cornstarch slurry. Stir well and watch it thicken. This will happen pretty quickly so keep a close eye on it so it doesn't get too thick.

    When it's ready, the sauce will be thick and glossy and will coat the chicken nicely.

    Orange Chicken in the Instant Pot

    What to Serve with Instant Pot Orange Chicken

    My favorite way to serve this orange chicken is atop a big helping of white (or brown) rice with a side of veggies.

    My favorite is roasted broccoli but you could do carrots, green beans or even asparagus.

    Recipe

    Instant Pot Orange Chicken in bowl.
    Print Pin
    5 from 2 votes

    Instant Pot Orange Chicken

    Skip the takeout tonight and make your own Instant Pot Orange Chicken. Done in 30 minutes with common ingredients, it's sure to be a family pleaser. The perfect weeknight meal.
    Course Main Course
    Cuisine Chinese
    Prep Time 15 minutes minutes
    Cook Time 15 minutes minutes
    Total Time 30 minutes minutes
    Servings 4 servings
    Calories 331kcal
    Author Jessica Burgess

    Equipment

    • Pressure Cooker

    Ingredients

    • 1 ½ lbs. boneless skinless chicken breast, cut into 1-inch pieces
    • 3 Tbsp. cornstarch
    • nonstick cooking spray

    For the Orange Sauce:

    • ½ cup fresh orange juice + zest from 1 orange
    • ⅓ cup soy sauce
    • ¼ cup brown sugar
    • 1 Tbsp. rice vinegar
    • ½ tsp. minced garlic
    • ½-1 tsp. red pepper flakes
    • 1 Tbsp. cornstarch
    • 2 Tbsp. cold water

    Instructions

    • Heat Instant Pot on saute mode. In a bowl, toss the chicken with 3 tablespoons cornstarch until coated. Once hot, spray pot liberally with nonstick cooking spray. Add half the chicken and sear, about 2 minutes per side. Remove chicken to a plate and repeat with remaining chicken. Add all chicken back to the Instant Pot.
    • Whisk together orange juice, orange zest, soy sauce, brown sugar, rice vinegar, minced garlic and red pepper flakes. Pour over the chicken and stir to coat. Place lid on Instant Pot and seal the valve. Set on high manual setting for 3 minutes. Once cooked, allow pressure to release naturally for 5 minutes then turn valve to release remaining pressure.
    • In a small bowl, whisk cornstarch and cold water together. Change Instant Pot to saute mode. Once simmering, add cornstarch slurry and stir immediately. Continue stirring for 2 to 3 minutes, until sauce is thickened and glossy. Serve over hot rice.

    Nutrition

    Serving: 1serving | Calories: 331kcal | Carbohydrates: 32g | Protein: 39g | Fat: 5g | Saturated Fat: 1g | Cholesterol: 109mg | Sodium: 1293mg | Potassium: 763mg | Fiber: 1g | Sugar: 16g | Vitamin A: 296IU | Vitamin C: 18mg | Calcium: 27mg | Iron: 1mg

    Did You Make This?
    Snap a pic and hashtag it #Fantabulosity - I love to see your creations on Instagram and Facebook.

    More Easy Recipes You’ll Love:

    If you love this easy recipe, then you’re also going to love the top favorites from readers here on the blog:

    • Hamburgers in the Oven
    • Easy Side Dish Recipe
    • Fried Shrimp Recipe

    Air Fryer Buffalo Chicken Tenders

    November 3, 2020

    Air Fryer Buffalo Chicken Tenders: An easy, crispy chicken tender made with 5 ingredients: buffalo sauce, panko crumbs, salt, pepper, and chicken!

    Air Fryer Buffalo Chicken Tenders

    Air Fryer Buffalo Chicken Tenders

    It is NO secret around here about how much I love making air fryer recipes.

    From the moment I pulled it out of the box and made my first batch of chicken wings, to today, sharing my family’s new favorite air fryer recipe… buffalo chicken tenders.

    It only uses 5 ingredients, and cooks in only 10-15 minutes!

    You Will Also Love:

    • Air Fryer Chicken Legs
    • Burgers in the Air Fryer
    • Air Fryer Bacon
    • Air Fryer Zucchini

    How to Make Chicken Tenders in the Air Fryer

    If you’re not a fan of buffalo sauce, or if you simply want to experiment a little bit with the chicken tenders, feel free to use some of the other flavor combinations and seasonings that we also like to use!

    More Breading Options:

    • coating chicken in milk, egg, and then in panko crumbs. (Maybe a little salt and pepper too!)
    • coating the chicken in melted (but cooled) butter and rolled in a mixture of parmesan cheese and garlic powder

    But I’ll be honest… this buffalo chicken tender recipe is our favorite out of all of them! It COULD be because we currently have a mad crush on anything “buffalo” related, like in these buffalo chicken sliders, this buffalo chicken soup recipe and buffalo chicken lasagna… but the fact that this chicken is ready in about 15 minutes is making it the top favorite!

    Ingredients for Chicken Tenders in the Air Fryer:

    You’ll need…

    • 2 cups Panko crumbs (If you have extra, consider making this panko cod recipe too! So good!)
    • 1 cup mild buffalo sauce (we use Frank’s in this and our buffalo dip recipe)
    • 8-9 tenderloins
    • salt and pepper
    Ingredients for Air Fryer Buffalo Chicken Tenders

    To Preheat or Not to Preheat

    So I’m not a fan of preheating my air fryer (<— That’s the air fryer I use.)

    Why? It’s simple. I usually forget to before I start cooking and then I don’t want to wait on it. Ha! (I’m a busy momma… when the kids are hungry, the kids are hungry. Amiright?)

    Anyhow, IF you like to preheat your air fryer, this is the time to do it. Preheat your air fryer to 400 degrees.

    Season and Coat Your Chicken with Panko Crumbs

    Salt and Pepper on Chicken Tenders

    Begin seasoning your chicken tenders with salt and pepper. (Your desired amount… however I sprinkle on about a tablespoon of kosher salt and about a ½ teaspoon of black pepper.)

    air fryer chicken tenders with panko

    Next, coat the chicken tenders in buffalo sauce (I pour the sauce in a shallow dish) and then immediately dip them in a shallow bowl of panko crumbs and fully coat each tender.

    Once coated, place the tenders in to the air fryer basket and cook at 400 degrees for 10 minutes if air fryer is preheated or 15 minutes if not preheated.

    NOTE: Once the timer goes off, check the internal temperature with a meat thermometer of the chicken after cooking to make sure it has reached 165 degrees.

    Buffalo Chicken Tenders in Air Fryer with Panko

    Dips to Serve with Chicken Tenders:

    In case you’re a dip lover like we are, I want to share our favorite dips with you so you can serve them alongside this recipe and even the alternate recipes I mentioned earlier (garlic parmesan, plain, etc.)

    • homemade ranch
    • chipotle aioli sauce
    • blue cheese dip
    • honey mustard
    • bbq sauce
    • copycat Chick-fil-A sauce
    • fiesta ranch (Use the Hidden Valley Fiesta Ranch Seasoning packet to make the dip.)
    • my guacamole recipe
    • melted cheese

    Side Dishes for Buffalo Chicken Tenders

    If dinner is going to be this easy, the side dishes might as well be too, right? Here are our favorite quick and easy side dishes to have with the buffalo chicken tenders:

    • 3 Bean Salad Recipe
    • Baked Fiesta Potato Wedges
    • Apple Salad
    • Creamy Cucumber Salad
    • Garlic Roasted Broccoli

    Recipe

    Print Pin
    5 from 10 votes

    Air Fryer Buffalo Chicken Tenders

    Air Fryer Buffalo Chicken Tenders: An easy, crispy chicken tender made with 5 ingredients: buffalo sauce, panko crumbs, salt, pepper, and chicken!
    Course Appetizer, Main Course
    Cuisine American
    Prep Time 5 minutes minutes
    Cook Time 15 minutes minutes
    Total Time 20 minutes minutes
    Servings 4 servings
    Calories 233kcal
    Author Jessica Burgess

    Equipment

    • air fryer

    Ingredients

    • 8 chicken tenderloins
    • 2 cups panko crumbs
    • 1 cup buffalo sauce
    • salt as desired
    • pepper as desired

    Instructions

    • If you prefer to preheat your air fryer, preheat it to 400 degrees.
    • Coat the chicken tenders with your desired amount of salt and pepper. (I use about 1 tablespoon of kosher salt about ½ teaspoon of pepper.)
    • Pour buffalo sauce in to a small, shallow dish.
    • Pour panko crumbs in another shallow dish.
    • Begin dipping each chicken tender in to buffalo sauce, then immediately in to panko crubms.
    • Once fully coated, place each chicken tender in to air fryer basket. (Depending on the size of your air fryer, you may need to do multiple batches.)
    • Cook on 400 degrees for about 10 minutes if air fryer has been preheated and about 15 minutes if not preheated…. flipping half way thorugh cooktime.
    • When cook time has completed, check the internal temperature of the chicken with a meat thermometer, making sure it has reached 165 degrees.
    • Serve with your favorite sauce! (See notes in blog post for dip ideas and side dish sugestions!)

    Video

    Nutrition

    Serving: 2tenders | Calories: 233kcal | Carbohydrates: 22g | Protein: 25g | Fat: 4g | Saturated Fat: 1g | Cholesterol: 64mg | Sodium: 2175mg | Potassium: 429mg | Fiber: 1g | Sugar: 2g | Vitamin A: 30IU | Vitamin C: 1mg | Calcium: 60mg | Iron: 2mg

    Did You Make This?
    Snap a pic and hashtag it #Fantabulosity - I love to see your creations on Instagram and Facebook.

    Air Fryer Buffalo Chicken Tenders

    What do you think?

    I’d love to hear from you below! What is your favorite dip? What did you love about these? Have any other fun ideas!

    Instant Pot Corn on the Cob

    October 4, 2020

    Corn on the cob that was cooked in the Instant Pot.

    Instant Pot Corn on the Cob: With a 2-minute cook time (4 minutes for frozen corn) and using water OR broth, this recipe is an easy side dish!

    This corn on the cob is a perfect side dish for my Baked BBQ Pork Steaks, Air Fryer Chicken Legs, and Roasted Pork Tenderloin.

    Corn on the Cob

    Instant Pot Corn on the Cob

    Alright, if you love your Instant Pot, you’re going to fall head over heels with it after you have corn on the cob in it.

    No more watered down, corn on the cob flavor… but rather a flavor and texture that every corn on the cob deserves! When we make this Instant Pot polenta recipe too, we’re always amazed at the flavor a simple cook method can do!

    How long do you steam corn on the cob in an Instant Pot?

    2 minutes. Yes really! Well, in a pressure cooker it’s not really “steaming” but more of a “pressure”, but that’s it.

    Now, the Instant Pot (or pressure cooker) will have to come to pressure and that may take a few minutes, depending on what cooker you have… but the actual cook-time is just 2-minutes and you can’t beat that.

    How to Cook Corn on the Cob in the Instant Pot

    It is SOOO easy!

    First, place your trivet in the Instant Pot and add in your ears of corn. (As many as you can fit but this recipe uses 4-5 ears.)

    Corn on the cob in the Instant Pot

    Next, pour in 1 cup of water or stock (broth, such as chicken, vegetable, broth, etc.)

    Chicken stock or water pour in to Instant Pot

    Place the lid on, turn the knob to “seal” and cook on “high pressure” for 2 minutes. (See below for notes on if you plan to cook these with the husks on instead.)

    Instant pot corn on the cob with tongs

    When the timer ends, quick-release the pressure and remove the lid when the pin drops, making it safe to remove the lid.

    Corn on the cob with butter

    Frozen Corn on the Cob in the Instant Pot

    “Can you cook frozen corn on the cob in the Instant Pot?”

    YES! Cook it for 4 minutes on high pressure instead of the 2 minutes!

    Instant Pot Corn on the Cob with Husks

    “Can you cook corn on the cob in the Instant Pot WITH husks?”

    You definitely can. If you decide to, you may need to trim the ends (so it fits in the pot) and cook on high pressure for 4 minutes instead of the 2 minutes!

    Corn on the cob on a white plate

    Instant Pot Corn on the Cob with Milk and Butter

    If you’ve heard of the DELICIOUS “milk and butter corn on the cob” recipe that has floated around for years (and typically is found more in the south) then you may want to give this version a try too!

    • Take 4 cups water and 2 cups of milk and pour in to the Instant Pot. (No trivet needed!)
    • Place one stick of butter in pot as well, and turn on the “saute” function to allow the butter to melt, stirring often, just until melted. Turn off the saute function.
      (Or, melt butter in the microwave and then pour in to the Instant Pot and no “saute” function is needed.)
    • Place corn on the cob in pot, seal lid, and cook on high pressure for 4 minutes.
    • When the timer is up, let the pot natural release for about 5 minutes and then manually release until the pin drops, making it safe to remove the lid.

    More Instant Pot Recipes

    If you love Instant Pot recipes, you’ll love our favorites like, Instant Pot Cauliflower Soup and:

    • Instant Pot Green Beans and Potatoes
    • Instant Pot Pot Roast
    • Kielbasa and Cabbage in the Instant Pot
    • Instant Pot Chicken and Potatoes
    • Instant Pot Sweet Potatoes
    • Cheeseburger Macaroni in the Instant Pot
    • Instant Pot French Dip

    Recipe

    Corn on the cob that was cooked in the Instant Pot.
    Print Pin
    5 from 1 vote

    Instant Pot Corn on the Cob

    Instant Pot Corn on the Cob: With a 2-minute cook time (4 minutes for frozen corn) and using water OR broth, this recipe is an easy side dish!
    Course Side Dish
    Cuisine American
    Prep Time 12 minutes minutes
    Cook Time 2 minutes minutes
    Total Time 14 minutes minutes
    Servings 4 corn on the cob
    Calories 77kcal
    Author Jessica Burgess

    Equipment

    • Instant Pot (Pressure Cooker)

    Ingredients

    • 4-5 cobs Corn on the Cob or however many can fit in to your Instant Pot
    • 1 cup water or broth or stock (maybe a little more for an 8 qt. Instant Pot)

    Instructions

    • Place trivet in Instant Pot and place ears of corn on top of the trivet, making sure the lid will be able to close, you can add as many that will fit.
    • Pour in water (or stock).
    • Pressure cook on high for 2 minutes and then quick release!
    • Serve!

    Notes

    MORE Flavor: Adding stock (chicken, vegetable, beef, or any flavor of broth) will add more flavor to your corn on the cob but definitely not necessary!
    For Frozen Corn on the Cob: Fresh corn on the cob would ALWAYS be nice but living in the mountains, frozen is how I roll most of the time!
    If you have frozen corn on the cob, follow the same directions, just cook for 4 minutes instead of the 2 minutes!
    Pressure cooking the corn WITH husks? Trim the ends and cook for 4 minutes instead of 2 minutes!

    Nutrition

    Serving: 1cob | Calories: 77kcal | Carbohydrates: 17g | Protein: 3g | Fat: 1g | Saturated Fat: 1g | Sodium: 16mg | Potassium: 243mg | Fiber: 2g | Sugar: 6g | Vitamin A: 168IU | Vitamin C: 6mg | Iron: 1mg

    Pin this image below to Remember if for when you need it:

    Corn on the cob in the instant pot

    Christmas Bucket List Printable and More Ideas!

    October 1, 2020

    Christmas Bucket List

    Christmas Bucket List Printable: A fun way to come up with new ideas for the holiday season with this free printable!

    Christmas Bucket List

    Christmas Bucket List Ideas

    I am such a sucker for Christmas and holiday traditions.

    The hot cocoa, decorations, Christmas music, and the list goes on. But I wasn’t always this way… especially during the hard times that we went through but after going through so much trauma, the holiday season makes me giddy!

    So watch out… we’re going to tackle this year’s Christmas bucket list pretty hard and this bucket list is going to come in super handy and I thought you’d like it too!

    Christmas Bingo

    Now, you can use this printable (access it at the bottom of this post) as just a guide for your holiday season, giving you something festive to do each day as a count-down but if you want to add a little extra fun (hence the “bingo” verbiage) get a few families/friends together and see who can bingo first!

    Have every person (family/group) chip in money, gift card, small prizes, etc. and whoever “bingo’s” first, wins the goodies!

    TIP: Make sure that one of the rules is to take a photo of each activity to show proof that it was actually done! Plus… some of the activities could be super easy to do, so maybe add a little extra rule saying that they can only “bingo” after completing 15 or so.

    For a bigger list of Christmas and holiday activities, make sure to scroll on down to read them below!

    christmas bucket list printable and ideas

    Christmas Bucket List

    For more of a “bucket list” approach, simply perform one of the Christmas activities and mark it off with a fun “dobber” when complete. For instance, you could grab some of those super cute, glittery pom-poms and glue it on each item that you complete.
    Or, use something like Christmas candy like gumdrops or the green, silver, and red Hershey kisses!

    List of Christmas Traditions and Ideas

    Now, in case a printable is not your thing, here’s a quick list of ideas that you can do this holiday season. The first 25 ideas you’ll find on the printable and the additional 25 are extra ideas you can incorporate in to your holiday season just for fun too!

    1. Hot Cocoa
    2. Make Holiday Playlist
    3. Family Game Night
    4. Read Christmas Books
    5. Make a DIY Christmas Wreath
    6. Make a Christmas Craft
    7. Decorate Windows
    8. Send Letter to Santa
    9. Christmas Movies
    10. Wear Holiday PJ’s
    11. Perform Random Acts of Kindness
    12. Make a DIY Snow Globe
    13. Decorate the Christmas Tree
    14. Ride a Sled
    15. Visit Santa
    16. Donate Toys
    17. Go Ice Skating
    18. Hang Stockings
    19. Build a Snowman
    20. Make a Gingerbread House
    21. Take a Family Portrait
    22. Ugly Sweater Day
    23. Sing Christmas Carols
    24. Make Cookies for Santa
    25. Exchange Gifts

      More Christmas Activity Ideas NOT on the Christmas Bucket List Printable:
    26. Send out Christmas Cards
    27. Make Cards and Color Coloring Pages for Nursing Home Residents
    28. Drive Around and Look at Christmas Lights
    29. Make an Advent Calendar
    30. Ride a Horse and Carriage
    31. Feed the Homeless
    32. Put up Christmas Lights on the Outside of the House
    33. Go to Church
    34. Host a Christmas Party
    35. Kiss Under the Mistletoe
    36. Ring the Bell for Charity
    37. Make Snowflakes Out of Paper
    38. Polar Express Experience
    39. Drink Eggnog
    40. Make Popcorn Garland
    41. Secret Santa (gift exchange at work, friends, family)
    42. Eat Candy Canes
    43. Go Shopping at the Mall
    44. Make Gift for Delivery Drivers
    45. Cut Down a Christmas Tree
    46. Go to a Christmas Show (Musical, Ballet)
    47. Roast Chestnuts on Open Fire
    48. Gift Wrapping Girls Night with Friends
    49. Cookie Swap
    50. Attend a Christmas Festival

    More Christmas Ideas for Your Holiday Season:

    If you loved this list of ideas, then you’ll also love the other Christmas related party ideas and activities you’ll find here on the blog:

    How to Host a Favorite Things Party

    See how to throw the ultimate holiday party (favorite things party) with your closest gal pals!

    Favorite Things Party Ideas

    Winter Cupcakes

    Make this super cute dessert, even by grabbing vanilla store-bought cupcakes! See the how-to to make winter cupcakes here!

    Oh my gosh, how easy and cute! Winter Tree Forest Cupcakes

    White Christmas Party

    Using all-white decor, foods, plates, and more… made this party one of the easiest parties to style! See the ideas for a white Christmas party here!

    White Christmas Party Ideas Rumchata Cocktails https://fantabulosity.com

    How to Access Your Free Christmas Bucket List Printable…

    I hope you love this printable bucket list (bingo) printable! You can grab it with the button below:

    Get Your Bucket List Printable HERE!

    Air Fryer Chicken Legs

    September 28, 2020

    Chicken legs that were cooked in the air fryer.

    An easy air fryer chicken legs recipe, showing how long to cook them and even an optional quick (no-flour) breading recipe that’s perfect for low-carb eaters!

    Air fryer recipes have become a fan favorite around here and now, these are ranking at the top of our list!

    These chicken legs (or drumsticks) are amazing when cooked in the air fryer and with this recipe, they’re cooked and ready to eat in only 35 minutes! Choose between two different ways to season with this recipe: bbq & garlic parmesan!

    You’ll also love this baked chicken drumsticks recipe, how to boil chicken legs, and this slow cooker chicken legs recipe as a back-up!

    Air Fryer Chicken Legs

    Air Fryer Chicken Legs

    Oooooh my goodness. Don’t you just love it when a recipe accidentally turns out to be a new favorite in your house?

    Well chicken legs in the air fryer are just that in our home. After experimenting with a large pack of chicken legs the other day, and sharing a video of it on my Instagram stories, this recipe has now become a favorite in kitchens everywhere!

    Need an air fryer? This Chefman air fryer is our favorite!

    Why You’ll Love This Recipe:

    • Chicken legs are usually very affordable.
    • Like chicken wings, you can flavor these chicken legs with your favorite seasonings, rub, or sauce, especially this homemade teriyaki recipe that we’ve been using lately!
    • “Chicken on a stick” (what my son calls them) are very kid-friendly!
    • If you have time, you can place your chicken legs in a brine recipe to add some extra flavor!

    Tips:

    What’s the Difference in Chicken Legs and Drumsticks?

    According to Atomic Wings, a chicken leg has two parts to it. A thigh and a drumstick. But I often see/hear most people call the drumstick a “leg”.

    Do you have to use flour to fry chicken legs in the air fryer?

    No! That’s what’s great about this recipe. They’re made without flour but still have a crispy, crunchy texture and it’s perfect for low carb (keto) eaters!

    Can you put raw chicken in an air fryer?

    Yes! The great thing about air fryers (I use this air fryer!) is that they’re great for reheating, cooking frozen items, and cooking raw meat, quickly!

    What temperature do you air fry chicken legs?

    We’ve found that cooking chicken legs in our air fryer on 400° is our favorite and allows the chicken to get that crispy outside!

    How long do drumsticks take in the air fryer?

    If you’re planning on making these, know that all air fryers can be different. With my air fryer, I cooked them at 400° for 20-25 minutes. When you’re cooking them, make sure to check the internal temperature to see if they have reached 165°, which is when they should be done and safe to eat.

    air fryer chicken legs with a parmesan garlic butter breading

    Can you air fry chicken without flour?

    Yes! It’s really easy to toss chicken legs in to the air fryer and cook them as plain as you like them, WITHOUT breading! The cook time will not change (from the recipe below with the garlic parmesan crust) but you may just want to put some sort of olive oil or something similar so they don’t stick to your air fryer “rack” or basket, depending on the model of air fryer you’re using.)

    Garlic Parmesan “Breading” or BBQ Chicken Legs

    Or, if you’re interested in the “breading” see the recipe card or video below for the different ways I seasoned and/or breaded them!

    Chicken Legs in the Air Fryer Video Tutorial:

    While experimenting with these chicken legs the other day, I shared with my Instagram audience in my stories and I thought it may be helpful for you to watch along. Feel free to skip down below to get the recipe card asap!

    NOTE: In the video, I split the batch of chicken legs, and cooked half with a garlic parmesan butter “breading” and the other half with a bbq seasoning/sauce.

    Recipe for Garlic Parmesan Chicken Legs – Low Carb!

    To get this “golden brown” chicken leg, like you see below, it’s incredibly easy and is also “low-carb” so when something looks this good AND is an ideal option when cutting carbs… that’s a “win” in my book!

    air fryer chicken legs in white dish

    Ingredients for Garlic Parmesan Legs

    It’s super easy, all you’ll need for this version is,

    • butter (melted, but not hot)
    • garlic powder
    • parmesan cheese
    • salt and pepper
    • chicken legs

    For the full recipe and amounts of ingredients, see the recipe card below!

    “BBQ” Air Fryer Chicken Legs

    In the video that I shared above, I mentioned that I was also making bbq chicken legs. With that, I attempted to whip up a bbq sauce that a dear friend shared with me but using just regular, store-bought bbq sauce is perfectly fine!

    But if you’d like to try making a fun spin on bbq sauce, you can play with the following ingredients to see if you like the combo my friend uses:

    • Sweet Baby Rays (Original)
    • Honey
    • A1
    • Garlic Pepper
    BBQ Sauce Air Fryer Chicken Legs

    To make bbq legs, you’ll want to cook them withOUT BBQ sauce for at least 20 minutes and then coat them in bbq sauce and cook for the remaining 5 minutes.

    If you cook with the sauce on, the sauce can burn.

    Can I just coat the legs with sauce after the total cook time?

    You can, but there’s something so magical about cooking them IN the sauce for the last few minutes. It gives the legs a “sticky” texture and really lets the flavoring soak in to the chicken.

    Side Dishes to Serve with Chicken Legs

    If you’re looking for something to serve as a side dish with these chicken legs, we love the following:

    • Instant Pot Sweet Potatoes (or your favorite way to cook them!)
    • Low Carb Potato Salad
    • Bacon Ranch Pasta Salad

    More Air Fryer Chicken Recipes

    If you love chicken as much as we do, you’ll also love cooking chicken in the air fryer with this buffalo chicken tenders recipe.

    Recipe

    Chicken legs that were cooked in the air fryer.
    Print Pin
    5 from 8 votes

    Air Fryer Chicken Legs

    Air Fryer Chicken Legs: A recipe showing how long to cook and even an optional quick (no-flour) breading recipe that's perfect for low-carb eaters!
    Course Main Course
    Cuisine American
    Prep Time 10 minutes minutes
    Cook Time 25 minutes minutes
    Total Time 35 minutes minutes
    Servings 8 legs
    Calories 408kcal
    Author Jessica Burgess

    Equipment

    • air fryer

    Ingredients

    • 8 chicken legs (drumsticks)
    • ½ cup grated parmesan cheese
    • 1 stick butter salted, 8 tablespoons
    • 1 tablespoon garlic powder
    • 1 teaspoon salt
    • dash pepper

    Instructions

    • NOTE: I have purchased LARGE chicken legs before, and the measurements in this recipe only covered 3 chicken legs and the cook time of 20 minutes was not nearly enough. So reducing the temperature of the air fryer and cooking for a longer period of time may also be necessary if using large chicken legs. (A temperature of 400 degrees may burn the butter/parmesan crust if cooked at a high temp for too long.)
    • Melt butter in shallow dish and add in parmesan cheese, garlic powder, salt and pepper. Stir to combine.
    • Dip chicken legs in butter mixture and coat all over.
    • Place chicken legs (in a single layer, do not stack on top of one another) in to air fryer.
    • Cook on 400 degrees for 20-25 minutes. 
    • Air fryers can be different. Make sure internal temp of chicken legs have reached 165 degrees.

    Video

    Notes

    For PLAIN (no garlic parmesan) you can simply cook the legs in the air fryer without the spices and seasonings. NOTE: you may want to coat the legs in a little olive oil to prevent sticking.
    For BBQ Chicken Legs, see notes in blog post for tips to make them the best!

    Nutrition

    Serving: 2legs | Calories: 408kcal | Carbohydrates: 1g | Protein: 24g | Fat: 34g | Saturated Fat: 14g | Cholesterol: 156mg | Sodium: 596mg | Potassium: 284mg | Fiber: 1g | Sugar: 1g | Vitamin A: 526IU | Vitamin C: 1mg | Calcium: 84mg | Iron: 1mg

    The BEST Summer of Our Lives. So Far.

    September 9, 2020

    Family Photo Montana

    This summer has been the absolute best summer we have ever experienced. If you’re not sure what I’m talking about, then the “We Moved. To Montana.” blog post is something that you’ll want to read, and my Instagram highlight folders are LOADED with stories of our recent Montana adventures!

    But let’s just say that moving to Montana for the summer was something that “just felt right”.

    All Good Things Must Come to an End. Or Should They?

    We always knew that living at the ranch in Montana was just for the summer months, and to be honest, we weren’t sure WHAT we were going to do after the summer was over.

    • Would we go to Texas where it’s warm in the winter — you’re lookin’ at a gal that doesn’t handle the “cold” very well.
    • Would we entertain the idea of moving to Seaside Florida where I always said I wanted to go?
    • Or would we randomly select some state that we would try out for a while and just wing it?

    But the closer we got to the end of the summer, my husband and I really began to have serious conversations about where we should go and where we wanted to raise our “babies”.

    We’ve always known that God brought us to Montana for the summer, for some reason… even though we weren’t sure exactly what that reason was, so we kept our minds open in case God would give us a clear signal of where to head to next.

    Why Did God Send Us to Montana?

    Well, I’d be lyin’ if I said,

    “Oh! It’s as clear as day… it was because __________ (fill in the blank).”

    because there’s not ONE particular reason that stands out.

    But I DO know that in these few short months:

    • we grew closer as a family. — THIS… this right here is worth more than gold and I don’t think we would have had this kind of growth in the same atmosphere we were in. (Although we miss the heck out of our extended family.)
    • we were able to spend more time with our closest family and friends than we ever have, (so many came to visit us!) and it is something that our family will NEVER forget.
    • I saw my little boys learn so many new things and experience way more than I ever imagined they would.
    • my heart melted every single time that I saw my husband’s face light up with joy, being in the place that he loves, especially after watching him go through so much hell these last few years.
    • I was able to meet so many new people, share our story with them, and LISTEN. Listen to their story and (what I hope) be a glimmer of hope and inspiration for what they’re going through.
    • we are feeling refreshed, recharged, and ready to build a life somewhere with a whole new perspective on life.

    So did God send us out here for all of these reasons? None of these reasons? I don’t know. But I know in my heart that it still feels right and God’s not done with us yet… whether that’s in Montana or somewhere else.

    → Update: Are we still living in Montana? You may want to see this.

    So Now What?

    I’ll never forget the first time I looked at my husband this summer and said,

    “Honey, please don’t make me leave.”

    After the confused look appeared on his face, he said,

    “Leave where? Here? Montana?”

    “Yes. Montana. I think my heart belongs here. Maybe not forever — but let’s see how it goes, especially after I try and survive a winter here.” Haha.

    He smiled (almost as big as the smile when I told him last year that I wanted to visit Montana) and said, “Jessica, we don’t have to. Let’s try it out, see how we like it, and go from there.”

    Let the House Hunting Begin

    Since we didn’t have a TON of time to house hunt and we didn’t want to rush in to anything, we decided to try and find a place that we could rent for the winter. Hopefully, this will give us an idea if we DO want to stay in Montana “forever” or at least help us decided where in Montana we want to settle down.

    We’re Not Picky But…

    After going through so much of what we went through these last few years, we’ve realized that “stuff” is not what makes us happy. So when it came to “house hunting” our only “must” was that it was furnished… because we left all of our stuff behind when we made the trip out west.

    So as long as it had furniture, things to cook with, electricity, water, and HEAT… ALLLLL THE HEAT (for this winter) we were golden!

    So we were incredibly thankful when a couple of wonderful property managers nearby found us a home that we could rent for a little while, that was furnished.

    Eeeek!! Look at those mountains and that mountain view from our back yard!

    Photo courtesy of the previous real estate listing.
    Photo courtesy of the previous real estate listing.

    It’s a beautiful home and although I’m itching to get back to my own cookware and dishes, haha, we are so, so lucky to have found a home and not only a home… but a home that’s big enough to homeschool in, big enough to have my own “office space” and a kitchen that’s going to be a JOY to cook more recipes in, for the blog! Woot!

    “But What About Those Beautiful Views You Used to Have?!”

    Don’t worry. If you loved following along and seeing the beautiful sunsets, snow-covered mountains, “adventure Mondays” and all the things I’m sharing… you’ll be seeing plenty more of that!

    We will pay a visit to the ranch occasionally (my husband is going to guide a few elk hunts this fall — so make sure to follow him on The Dude Blog) and we are SURROUNDED by beautiful mountain views in this new house, and we can even see them from inside the house! This gal is looking so forward to a fire in the fireplace, hot coffee and staring at the mountains! (Along with writing blog posts to share with you too of course!)

    A Montana Blogger

    If I can imagine what you’re thinking, you may be saying,

    “Jessica, how can you just bounce around like this? Live in a new place suddenly, just up and move and do these types of things?”

    Well, as a “planner”, normally you’d think this would stress me out. But I have to tell you…

    The joy that I feel, being able to blog (work, and make an income) just about anywhere I go and being able to homeschool our kids (wherever we feel is a good and healthy atmosphere) along with the opportunity to experience this unbelievable place… all fill one of my core values in life, and that, for me, is “freedom”.

    So although this may seem “random” or like we’re “flying by the seat of our pants”… we’re really not. We’re building a life. It may not look like the typical “life”, but that’s ok with me. At least for now and at this stage in our marriage/family life.

    What’s next? Well it’s safe to say I’m now going to be a Montana blogger. No matter what our plans are for housing, (or dream is to have our main home be here in Montana but possibly a home in Alaska where my husband is a guide part of the year) we will more than likely always call Montana “home” because it’s where we are the happiest.


    I truly do still feel like God is working on something in our lives and since He makes waaaaay better decisions than I ever do, I’ll choose to be patient, open my eyes/ears and listen for God to tell us our next step.

    Finding True Joy

    I shared with you a very real and personal post on Instagram the other day about my “values” and what that means for discovering the “real joy” we’ve experienced lately. So I thought I’d share that post with you here too because it ties in so perfectly with today’s post… and it may just help tie some things together.

    View this post on Instagram

    I've never wanted you to think that everything is, well, "fantabulous" all the time for me and that it should be for you. But I have wanted to encourage you to LIVE your best life, and make it more fantabulous… in a way that YOU desire. So what is it that YOU want in life? What do YOU value? For me? To make life feel a little more "fantabulous" each day, I value: • faith • freedom • financial security • family • certainty …and to ensure that that these find a way in to my life, I have to work on it. Be held accountable. Intentional. Organized. Encouraged. Because when those "values" are met, my life is overwhelmed with joy. Real joy. Not just fabricated joy. I so want this for you too. The type of joy that YOU desire. It doesn't have to mean that we have the same values. Your joy can look like many different things. But until you figure out what that true joy is, what you really value in life… what you really WANT out of life… you can't really work towards it. And I want to help you figure out what that looks like for you. I want to help hold you accountable, be your cheerleader, encourage, explore, define and inspire you to live your best life. A life that you desire. There are only a couple more days to join our small group of like-minded gals in the 2-month, Fab Society Workshop where we are going to focus on YOU! Can you imagine 2 whole months of a community of women, focusing on ways to help you discover happiness and where you can play a part in helping them find theirs too? This workshop is built by a busy gal, for busy gals. I know you don't have extra time in your day so we operate in a way that's there for you, when you need. Our LIVE videos can be joined, or can be replayed. (We'll meet LIVE multiple times and the meetings will be held at various times – mornings, afternoons and evenings – and they will NOT be mandatory to attend. Come to the meetings that you can, or watch the replays when you have time!) Our exclusive Facebook group is private, and a place where you can come, 24-7 for support, without judgement. You can also expect teachings, real-life, the behind-the-scenes, of what I did wrong (continued in comments)

    A post shared by F A N T A B U L O S I T Y (@fantabulosity_blog) on Sep 9, 2020 at 5:27am PDT

    Jalapeno Ranch Dip (Or Dressing!) Recipe

    August 26, 2020

    Jalapeno Ranch Dip in small crock.

    Jalapeno Ranch Dip: An easy recipe using sour cream, mayo, spices, and jalapenos that can be used as a salad dressing or a dip!

    Jalapeno Ranch Dip or Dressing

    Let me just be frank…

    Dip is my love language. (Alright, it’s one love language of about 50 love languages.) And if you want to get on my good side, well let’s just say you can forget the fancy-pantsy gifts and just serve me a dip like this blue cheese dip recipe or this jalapeno dip.

    Just bring me a good dip, a BRAND NEW bag of LIME tortilla chips and we’ll be best friends for life. (I kind of wish I was kidding, but I dare you to give it a try and we’ll see if I’m lyin’ or dyin’.)

    So when I heard of this thing called “jalapeno ranch dip” (some of you may have fallen in love with a version of it at a restaurant called “Chuy’s“) I kind of fell head over heels and I’d be doing you a disservice if I didn’t share this recipe with you. Let’s get to it…

    How to Make Jalapeno Ranch Dip

    It’s oh so easy friend… so grab your ingredients and you’ll have somewhere to dip that chip in no-time.

    Here’s how:

    Spices

    In a food processor, food blender or if you have a Nutri Ninja, throw in two tablespoons of fresh cilantro (ok, don’t throw the fresh cilantro… it’s too good to mistreat)…

    add in the cilantro in to food processor
    fresh cilantro

    …next add in 1 teaspoon salt and 1 teaspoon pepper.

    Add ingredients in to food processor
    salt and pepper

    Then, pour in 1 teaspoon garlic powder…and then it’s time for the wet stuff.

    Add garlic pepper in to dip
    garlic powder

    Mayo and Sour Cream

    On top of the spices, add in ¾ cup of mayo and ¾ cup sour cream to give it that creamy goodness.

    Add mayo and sour cream to dip
    Add the mayo
    Add the sour cream in to the dip
    Add sour cream

    Star of the Show – Jalapenos

    Without the next ingredient, this is just a cilantro dip. And although I do love cilantro a LOT… adding in an 8 oz. jar of jalapenos (with juice) will knock your socks off and turn this in to the jalapeno ranch dip you’re craving!

    Add jalapenos to ranch dip

    Mix the ingredients all together until well-blended and then it’s ready for devouring!

    Mix together the ingredients in the food processor

    Pour in to your favorite dip dish (or in to an air-tight container if not eating right away) and grab chips, veggies or whatever your little heart desires to dip in it!

    Jalapeno Ranch Dip or Dressing

    For Jalapeno Ranch “Dressing”

    Now, if a jalapeno ranch dressing is more your style, that’s a-ok and it’s delicious too! However, you may want to add a little milk to give it a thinner consistency (totally optional) and you’ll want to refrigerate it for at least 3 hours before topping your salad with it. (Hence the reason why I usually have this as a dip because I can’t wait that long.)

    Jalapeno Ranch Dressing in a mason jar

    Best Salads for Jalapeno Ranch Dressing

    I’m a BIIIIIG salad girl, and you’ll usually find me creating a new salad around here, so I wanted to share some of my favorite salad recipes, especially one of my favorite side salad recipes! This cornbread salad with ranch dressing would be AMAZING using this jalapeno ranch too!

    How Long to Store Jalapeno Ranch

    Store the jalapeno ranch dip/dressing in a mason jar or air-tight storage container for up to 3 weeks!

    Jalapeno Ranch Dip or Dressing in a purple bowl

    More Dip Recipes You’ll Love:

    Love “jalapeno” anything? Me too. You’ll especially love this jalapeno artichoke dip recipe if you’re entertaining!

    If you love dips as much as we do, then I know you’ll also love this homemade cheese sauce, The BEST Guacamole, and this Easy Aioli!

    Recipe

    Jalapeno Ranch Dip in small crock.
    Print Pin
    5 from 5 votes

    Jalapeno Ranch Dip

    Jalapeno Ranch Dip: An easy recipe using sour cream, mayo, spices, and jalapenos that can be used as a salad dressing or a dip!
    Course Appetizer
    Cuisine American
    Prep Time 5 minutes minutes
    Total Time 5 minutes minutes
    Servings 4 servings
    Calories 388kcal
    Author Jessica Burgess

    Equipment

    • Food Processor

    Ingredients

    • 2 tablespoon fresh cilantro chopped
    • 1 teaspoon salt
    • 1 teaspoon pepper
    • 1 teaspoon garlic powder
    • ¾ cup mayo
    • ¾ cup sour cream
    • 8 oz. jalapeno peppers with juice

    Instructions

    • In a food processor or Nutri Ninja, combine all the ingredients until blended well.
    • Dip is ready to be served!
    • Store in a mason jar or other container that you prefer for up to 3 weeks in the refrigerator.
    • NOTE: If using for dressing, see recipe notes about refrigeration and the optional addition of milk for a thinner consistency.

    Video

    Notes

    For a Dressing Recipe: If you choose to use this as a dressing, you’ll want to refrigerate it for a few hours and you may need to thin it out with milk for the consistency that you desire.

    Nutrition

    Serving: 1serving | Calories: 388kcal | Carbohydrates: 5g | Protein: 2g | Fat: 41g | Saturated Fat: 10g | Cholesterol: 40mg | Sodium: 1831mg | Potassium: 179mg | Fiber: 2g | Sugar: 3g | Vitamin A: 1273IU | Vitamin C: 6mg | Calcium: 64mg | Iron: 1mg

    Did You Make This?
    Snap a pic and hashtag it #Fantabulosity - I love to see your creations on Instagram and Facebook.

    Laser Hair Removal Tips

    August 14, 2020

    Milan Laser Hair Removal Treatment Room

    Laser Hair Removal Tips: Nervous? Not sure what to expect? Did you have your first treatment and not sure what’s next? These will help!

    This post has been sponsored by Milan Laser Hair Removal, where I have also received services in exchange for this post. HOWEVER, all thoughts and opinions are my own… as always.

    Laser Hair Removal Tips: Treatment Room

    Well, as I admitted in my “How to Prepare for a Romantic Weekend with your Husband” blog post, “grooming thyself” is something that I recommend when preparing for some time away with the one you love.

    However… not only is grooming important for those moments, but we would also like it to be easier to do or take care of, every other day of the year too, right? (See my top favorite beauty treatments!)

    Well, if you also read about my first experience with laser hair removal, then you know I’m already a big fan. I chose Milan Laser Hair Removal for my treatments and I would recommend it over and over again. The results, the friendliness of the staff and the drastic drop in time that I spend shaving is already a perk.

    So if you read that post and you found yourself still having a lot of questions like:

    • “Is laser hair removal painful?”
    • “What kind of aftercare is required with laser hair removal?”

    Or would love some tips to make it the best experience ever… then I’ve got ya covered. And if I don’t cover what you’re wondering, I’m just an email or comment away! Besides, someone else may have that question too!

    Plus, keep reading to find out how you (yes, YOU!) can get 60% off of your own laser hair removal services, just for being a Fantabulosity reader!

    Laser Hair Removal Tips

    For those of you who haven’t had a laser hair removal procedure yet and are a little nervous or just have some questions about how it works, here’s what you can expect.

    What to Expect:

    • Is laser hair removal painful?
      I’ve had two treatments on my bikini area and underarms, and I’ll be honest… it didn’t hurt for me like I’ve heard some others say. HOWEVER, I also found out that the strength of the laser gets stronger as the treatments carry on, and it can depend on the area being treated.
      The awesome ladies at Milan also shared with me that if you are concerned about the pain, you can take Motrin or Ibuprofen an hour before a treatment to help take the edge off any potential discomfort (What kind of pain is it? Read my first post to find out exactly what I thought!)
    • Is it awkward?
      Well, that depends on you and the body area that you're having treated. Are you getting your bikini area treated and are super shy? You may find it awkward until you arrive.
      The staff is so friendly and they don’t make you feel nervous or awkward at all. But… if it makes you feel better, they’ll give you a stress ball to help alleviate some of the tension you might feel. Or, here’s a tip… I use this time to check in with my friends through text. It keeps my mind off of what’s going on and for giggles, I tell them what I’m currently doing so they’re the ones that feel awkward. #friendshipgoals
    • Different hair can mean different things.
      For the most part, the laser that is chosen (the alex or the yag) is based on skin tone. Different hair color may be a consideration when increasing the power of the laser- but as long as the hair is not white, gray, or peach fuzz the laser will work on it! If you're not sure if laser hair removal will work on your hair color… it’s best to have a free consultation so that you can find out if it's a good option for you!!

    How to Prepare for Laser Hair Removal:

    Laser Hair Removal Equipment

    There are a few things to keep in mind when you’re prepping for your treatments.

    • Always wear sunscreen! For safety reasons, sun-kissed or tan (or sun fried — eeeeek!) skin can not be treated. If you show up with tan lines or skin that is different from its natural-to-you color, you will be unable to receive a treatment.
    • Don’t apply self-tanner anywhere close to the time that you go and don’t have it lingering on your skin. Why? Becauses elf-tanner actually does tan people. The chemical in self-tanner reacts to skin cells and darkens them. In a lot of ways, it's the same concept as going out into the sun. The laser targets the color in the root of your hair. Tanned skin makes it harder for the laser to pinpoint the root of your hair and this decreased ability to target just the root of the hair could lead to a burn. Read my spray tanning tips to find out the best ways to make your tans last!
    • The shave (and exfoliate). A common misconception is that you shouldn’t shave a while before your treatment to allow the hair to grow out. But, are you ready for this?
      The better the shave, the better the treatment. It’s best to shave the day of or the day before a treatment because it allows the laser to focus all the energy beneath the surface of the skin. It is absolutely true. So shave the area of treatment before your appointment!
    • Have Clean skin, and make sure that there’s not any product applied before your treatment for safety.
    • Medication complications. This is another reason why going to your consultation is so important! Please feel comfortable sharing any medication you are on. Certain medications like oral Accutane or some antibiotics could also lead you to be photosensitive and could lead to being burned. The providers have seen every kind of medication imaginable on health history forms - so please don’t be embarrassed to tell them anything.

    Aftercare:

    • Exfoliation is key. You need to shed the hair that was "killed" from the treatment. Exfoliating before and a few days after helps the treatment be more effective and get rid of any hair stuck under the surface. Exfoliation is effective from a washcloth or you can go as far as using a sugar scrub!
    • Follow your individual treatment plan! Every person's hair is different so every laser hair removal plan is unique. Milan's Unlimited Package is great in that whether you need 7 treatments or more, you will find your hair removal plan to be tailored to your needs. Staying consistent in your treatments is the best way to truly get “hair-free” as quickly as possible.
    • You COULD see some temporary discoloration. Some people do experience flushing after treatments. Flushing is temporary and typically goes away in 20-30 mins. (Some people get treated on their lunch breaks and then are good to go back to work after!) And I didn’t notice any discoloration during my treatments but I still felt I should mention it because everyone is different.
    • You can go to the gym afterward or carry on about your day! Laser hair removal is one of the easiest and safest cosmetic treatments a person can do! There’s no downtime! (Although you’ll more than likely find me heading next door to Target after I complete a treatment, rather than heading to the gym.)
    • Plucking/bleaching/waxing in-between? NO! Please no waxing, tweezing, etc. The hair follicle needs to be intact in order for the laser to find it and deactivate the food supply from it. If you pull it out, your treatments are not effective! Typically they want people to wait 4 weeks from their last tweezing or waxing before their treatment.

    A Look Inside Milan Laser Hair Removal

    I feel like I’m headed in for a spa treatment every time.

    It’s so clean, and welcoming and I feel right at home.

    Waiting room Milan Laser Hair Removal Town and Country Missouri

    First, the waiting room is so inviting and I love that they offer a complimentary soda or sparkling water while you wait. (Hey, it doesn’t take much to please this gal who rarely gets out to treat herself to some pampering.)

    Now, if this is your first time, then you’ll go on a tour and then spend some time in a consultation room.

    If you’ve already had your consultation, you’ll head right on back to the treatment room and get ready for your service!

    You can bet on fresh clean linens, a robe (or wrap) and a pair of safety glasses waiting for you.

    The technician will ask you a few questions before getting started (he/she needs to make sure that her notes are still the same or that nothing has changed since your last visit, so they can select the proper settings on the laser for your treatment).

    Milan Laser Hair Removal Treatment Room
    Laser Hair Removal Tips: Treatment Bed

    Once you’ve answered the pre-treatment questions, it will be time to kick back and wait for your treatment, just like I did below.

    Side note: Just ignore those ugly green toenails. It’s a long story and it involves my husband, a pedicure, and a misunderstanding. I’ll explain more in the Fab Society where I tend to share the more personal details with my closest gal pals… so you may want to join that waiting list now so you don’t miss it.

    Getting laser hair removal done - Brazilian

    But those glasses? Those are required during your treatment to protect your eyes. (I’d definitely rather wear cute glasses from Befitting, haha, but it’s about protection, not style.)

    60% OFF for YOU! Yes… YOU!!!

    Friends, I still don't know HOW this is possible, and I honestly didn't expect this kind of discount for you when I first started talking to them, but you may want to take advantage NOW in case they change their mind! Haha!

    Milan has offered to give you 60% off of your laser hair removal service, for any body area of your choice…. at any Milan Laser Hair Removal location. So when you call to schedule your consultation, just make sure to give them the code: FANTABULOSITY60 so they know to put it in the system for you! I am THRILLED to say that some Fantabulosity readers have already taken advantage and I’ve even received messages like:

    So make sure you give them the coupon code: FANTABULOSITY60 when you call to set up your appointment!

    Coupon Code: FANTABULOSITY60

    Still Have Questions?

    If you’re still wondering about something specific or are on the fence, let me know. If I don’t know the answer, I have a direct line to my favorite Milan gals and I’m happy to ask them for you!

    How to Glue a Puzzle

    August 10, 2020

    How to Glue a Jigsaw Puzzle

    How to Glue a Puzzle: A tutorial on how to safely glue and secure a jigsaw puzzle together! Frame it, gift it, hang it on the wall, or simply store it easily!

    Puzzle Glued and on Fireplace mantle

    When my sister came to visit us in Montana, she brought the sweetest hostess gift, a jigsaw puzzle.

    It was a puzzle of Montana, which was GENIUS because Montana was new to our family but it’s now also a keepsake to remember our incredible summer here, spending time with family and friends.

    While they were in, most of the family would crowd around the table and put a few pieces together in the evening or when it was raining out.

    Family around table putting puzzle together

    I think from now on, this will be my “go-to” hostess gift when we travel to visit others.

    If you’re looking for more gift ideas, you’ll love these “gift ideas for her” and these “gift ideas for him“.

    How to Glue a Puzzle

    Once the puzzle was together, my oldest was ITCHING to glue it. He was so excited to see the puzzle, complete, and hanging up on the fireplace mantle.

    So we made a trip to Target, grabbed a bottle of Mod Podge, and a large presentation board.

    Once we got home, we had the puzzle glued and mounted on the fireplace mantle in no time and I wanted to show you how we did it in case you have your own puzzle to glue!

    Frequently Asked Questions:

    Do you glue the front or the back of the puzzle?

    We glued the front AND the back to be safe! If you’re framing the puzzle, you could possibly get away with just the front or the back.

    How do you preserve a puzzle?

    Using a puzzle glue is an option, but Mod Podge can be found in many stores and online, and this tends to be the go-to because it dries clear and holds well!

    How many coats of Mod Podge do you need for a puzzle?

    Two coats should work just fine, but we do three to be safe!

    Items Needed to Glue a Puzzle:

    • Wax Paper (Or aluminum foil)
    • Mod Podge
    • Something Sturdy to Place Under Puzzle (I used a hefty piece of presentation poster board.)
    • Foam Paint Brush

    Notes for Gluing a Puzzle:

    • Since the kiddos were helping, I decided to transfer the puzzle from the coffee table in the living area, to the front porch. (No one needs a Mod Podged living room.)
    • As you’ll see in my video tutorial below, I used a “presentation” board but this is not a “must”. However, I wanted something sturdy to be able to transfer the puzzle from the coffee table on to wax paper for gluing. We plan to do a lot of puzzles so I figure I can use this over and over and perhaps even for a homeschool project soon.
    • When picking out a sturdy piece of board, make sure it’s larger than the puzzle you want to glue.

    Instructions for Gluing a Jigsaw Puzzle:

    Time needed: 2 hours

    How to Glue a Puzzle: A tutorial on how to safely glue and secure a jigsaw puzzle together! Frame it, hang it on the wall, or simply store it easily!

    1. Wax Paper

      Begin by tearing off a piece of wax paper that’s large enough to fit under the puzzle. (The wax paper I used wasn’t wide enough for my puzzle, so I had to rip off two pieces. You may have to do the same!)

    2. Place Wax Paper on Board

      Place the wax paper on top of the sturdy board.

    3. Transfer the Puzzle on to Board & Wax Paper

      Holding the board/wax paper level with the table or surface that you’re transferring it from, carefully slide the puzzle on top of the wax paper.
      NOTE: If your puzzle is on the floor, you may not need the board. Try to place the wax paper next to the puzzle and slide it on to the wax paper from there.

    4. Start Gluing the Puzzle

      Once the puzzle is safely on the board, you can start the gluing process.

    5. Foam Brush, Light Coat of Mod Podge

      Using a foam brush (you can use another type of paintbrush, but I prefer the foam) dip the brush in to the mod podge. (You can poor Mod Podge on to a paper plate as well, but dipping worked just fine for us.)

    6. Light Coat – First Coat

      Gently brush a light coat of Mod Podge on to the entire top of the puzzle.

    7. First Coat, Air Dry 30 minutes

      Let air dry. Depending on how thick the coat of Mod Podge is, a good wait time is approximately 30-60 minutes.

    8. Test and Apply 2nd Coat if Needed

      Gently test your puzzle (carefully raise up the edges) to see if a second coat is needed. If you have the time and Mod Podge, I say a 2nd coat never hurts.

    9. Flip to the Back of the Puzzle & Apple Coat of Mod Podge

      Once the second coat has dried, carefully flip the puzzle over and apply another coat of Mod Podge to the backside.

    10. Let Air Dry

      Let coat of glue dry and your puzzle should be good to go! (Still being careful not to be rough with the puzzle… because with anything you glue, it could still come apart if forced.)

    11. Your Puzzle is Ready for Framing or Hanging!

      Your puzzle is ready for framing, hanging or storing!

    Video Tutorial on How to Glue a Puzzle with Mod Podge

    In case you’d also like to watch a quick, 7-minute video on how we glued our puzzle with Mod Podge, you can see that below!

    Now, our puzzle leans up on the fireplace mantle and when we move, it can easily go with us!

    The next step is to frame it, but we’re waiting for the perfect one!

    How to Glue a Jigsaw Puzzle - Puzzle on fire place

    If you LOVE Crafting and DIY, You’ll Also Love:

    • DIY Floral Terrarium
    • DIY Sangria Kit – Gift Idea
    • Farmhouse Sign Tutorial- “Gather”

    Pin this Image to Remember it:

    How to Glue a Puzzle
    • « Go to Previous Page
    • Page 1
    • Interim pages omitted …
    • Page 18
    • Page 19
    • Page 20
    • Page 21
    • Page 22
    • Interim pages omitted …
    • Page 26
    • Go to Next Page »

    Primary Sidebar

    Jessica Burgess standing in kitchen holding a hummingbird cake.

    Hi, I'm Jessica! - Owner and Creator of the blog and brand, Fantabulosity.

    I’m here to help you make easy comfort food and nostalgic recipes, using simple ingredients, that everyone will love.

    More about me →

    Potluck Recipes

    • A slice of strawberry jello cake, topped with a strawberry slice, sitting on a round plate.
      Strawberry Jello Cake (Easy, Moist Strawberry Cake)
    • Crack green beans on wooden spoon.
      Crack Green Beans
    • Old fashioned potluck cake recipes collage.
      Old-Fashioned Cakes That Still Show Up at Every Potluck
    • Collage of potluck desserts.
      Easy Potluck Desserts (Simple Recipes That Always Get Asked For)
    • Cold Pasta Salad Recipes Collage.
      Cold Pasta Salad Recipes
    • Chicken Casserole recipes image collage.
      20 Chicken Casserole Recipes

    Popular Recipes

    • bread pudding in baking dish
      Bread Pudding Recipe: Easy Old Fashioned Recipe (With Video!)
    • Burger baked in the oven, steamed in aluminum foil, and placed on white plate.
      Burgers in the Oven
    • two tuna salad sandwiches stacked on top of each other
      The BEST Tuna Salad Recipe
    • Sliced banana bread on white platter
      Best Banana Bread
    • Strawberry brownies on white marble cutting board.
      Strawberry Brownies Recipe
    • Cheeseburger Sliders made with Hawaiian Rolls, stacked on top of one another.
      Cheeseburger Sliders

    Footer

    ↑ back to top

    Featured In

    About

    • About Jessica
    • Contact
    • Collaborate
    • Dinner System

    Easy Recipes

    • All Recipes
    • Vintage Recipes
    • Dinner Recipes
    • Desserts

    How to Cook

    • Oven-Baked
    • Stove-Top
    • No Bake
    • Cooking Basics

    Privacy Policy |Accessibility Copyright © 2026 Fantabulosity | Terms & Conditions | FTC
    All recipes, photos, and content are copyrighted and may not be reproduced, republished, or distributed without written permission.

    Rate This Recipe

    Your vote:


    A rating is required
    A name is required
    An email is required