• Skip to primary navigation
  • Skip to main content
  • Skip to primary sidebar

Fantabulosity logo

  • All Recipes
  • Vintage Recipes
  • Holiday
  • Dinner Theme System
  • About
  • Navigation Menu: Social Icons

    • Facebook
    • Instagram
    • Pinterest
    • TikTok
    • YouTube
menu icon
go to homepage
  • Recipes
  • Desserts
  • Dinners
  • Gatherings
  • Holidays
  • About Jessica
    • Facebook
    • Instagram
    • Pinterest
    • TikTok
    • YouTube
  • search icon
    Homepage link
    • Recipes
    • Desserts
    • Dinners
    • Gatherings
    • Holidays
    • About Jessica
    • Facebook
    • Instagram
    • Pinterest
    • TikTok
    • YouTube
  • ×
    Home » Recipes

    Instant Pot Chicken and Potatoes

    Instant Pot Chicken and Potatoes

    July 8, 2020

    Instant Pot Chicken and Potatoes

    This is the best and the easiest Instant Pot Chicken and Potatoes recipe you can find. Quick, simple, and yet so delicious.

    Cooking potatoes in the Instant Pot is a BREEZE and if you haven’t tried mashed potatoes in the Instant Pot yet, we just know you’re going to love that too! They’re both an alternative way to cook fried potatoes, which is a popular side dish that can go with so many dinners too.
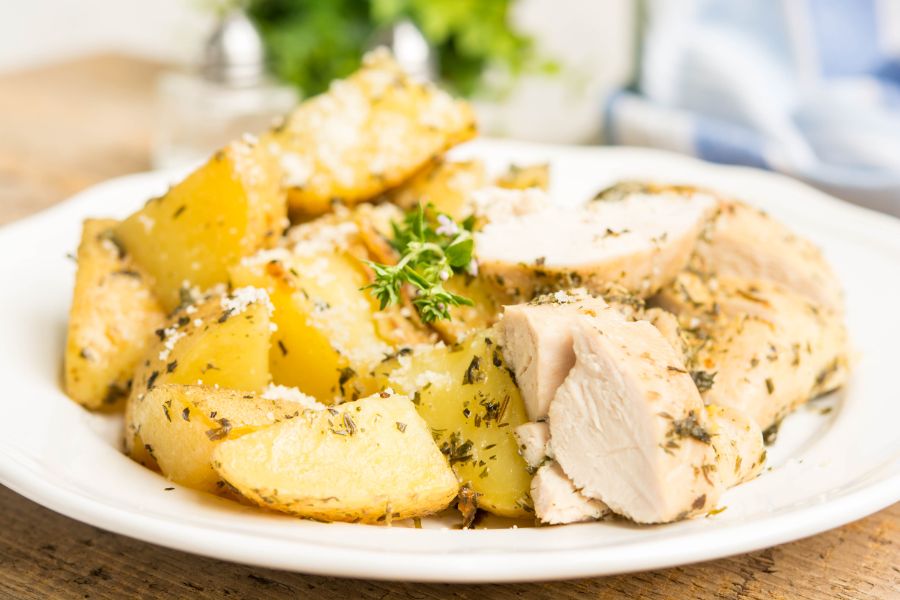
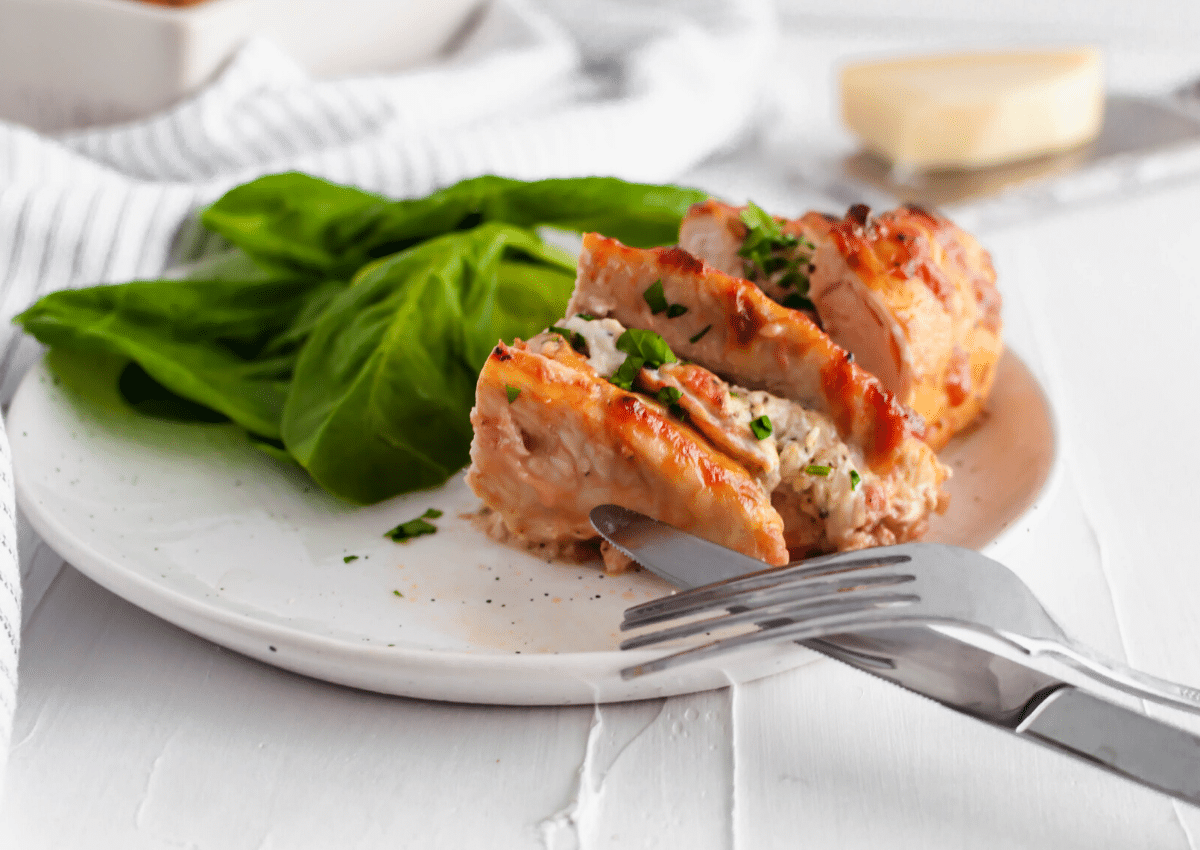
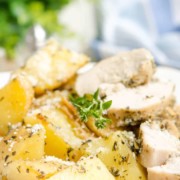
    Instant Pot Chicken and Potatoes served on a white plate

    Friends, I am super excited to share a new recipe with you today for your Instant Pot!

    We absolutely LOVE our Instant Pot recipes around here because it can make dinner time and everyday cooking so much easier.

    You’ll also love:

    • These Lemon and Herb Chicken Thighs
    • Our Instant Pot Green Beans and Potatoes
    • Delicious Instant Pot French Dip
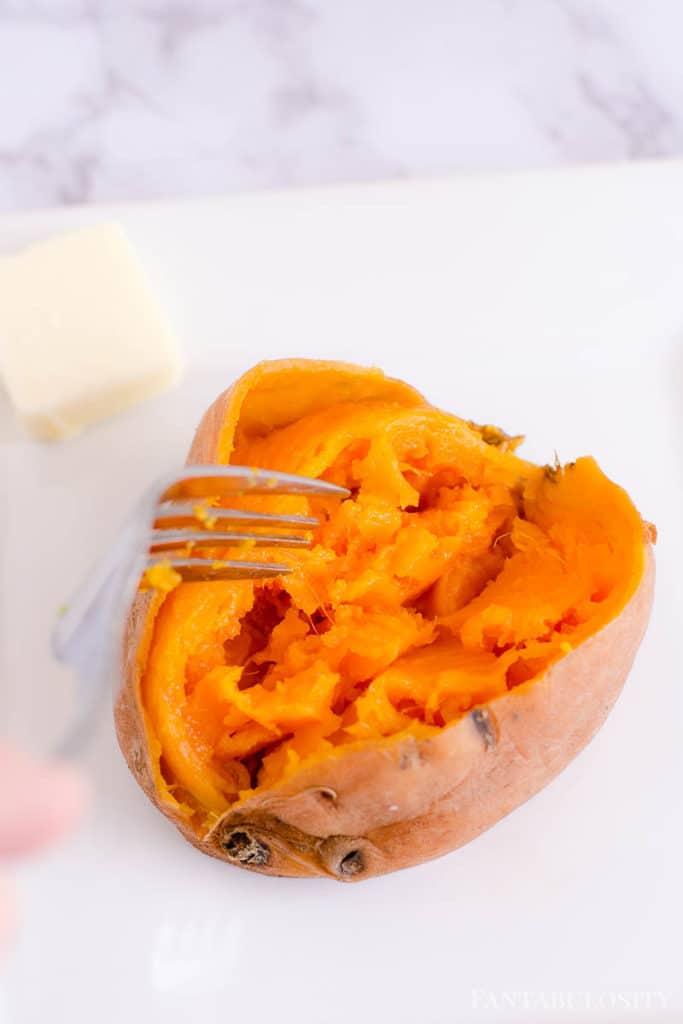
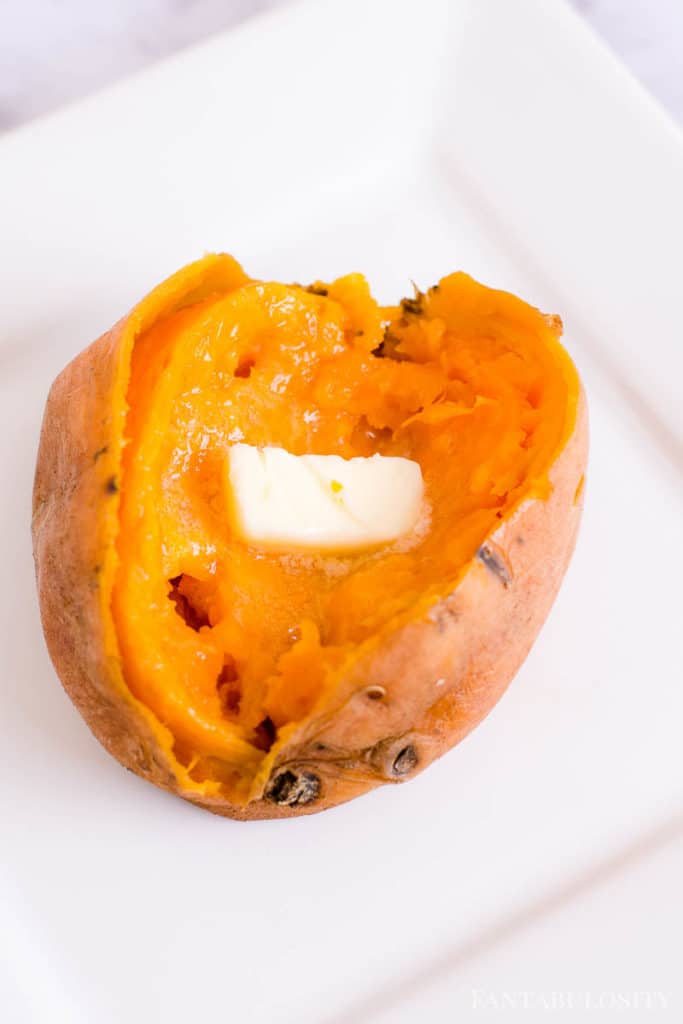
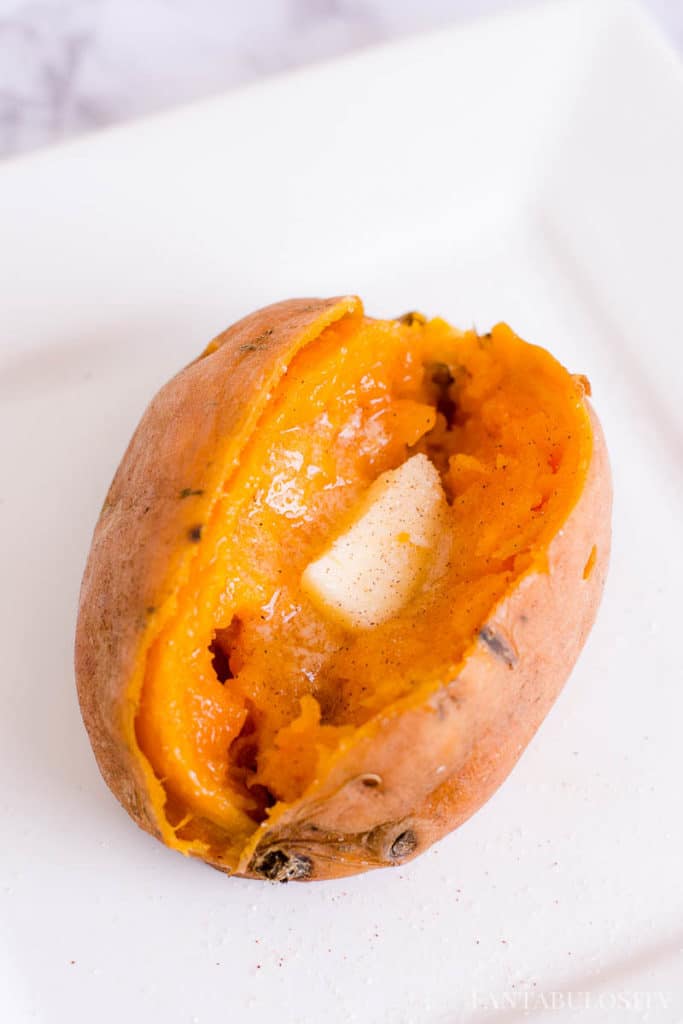
    • Easy Instant Pot Sweet Potatoes

    Not only is this Instant Pot recipe going to be one that you’ll want to pin to your Pinterest boards but we have a guest sharing it with you that I couldn’t WAIT for you to meet!

    Let’s welcome Corrie Cooks today who is so kind to share this recipe with us! So let’s get to it!

    Instant Pot Chicken and Potatoes

    Juicy chicken breasts and tender potatoes with a bit of parmesan is an ideal one-pot dinner you can make in only 25 minutes!

    It cannot get easier than this as we are sure you have all the ingredients in your pantry already.

    Which potatoes to use?

    We used new potatoes, but you can go with golden or red potatoes. Just make sure they are small enough.

    Can I use frozen chicken?

    Yes, you can use frozen chicken, just thaw overnight. I do not recommend going with frozen chicken in the Instant Pot since the potatoes will cook faster and the chicken will stay raw.

    Can I use chicken thighs instead of breasts?

    Absolutely. The chicken thighs are the juiciest part of the chicken. If using one, decrease cooking time by 5 minutes. Just make sure you are using really small potatoes or small cuts of potatoes. This ensures all is cooked the same.

    What about spice blend?

    This recipe uses Mediterranean herbs. Still, you can use any types of herbs and spices you like.

    How to make the chicken and potatoes recipe

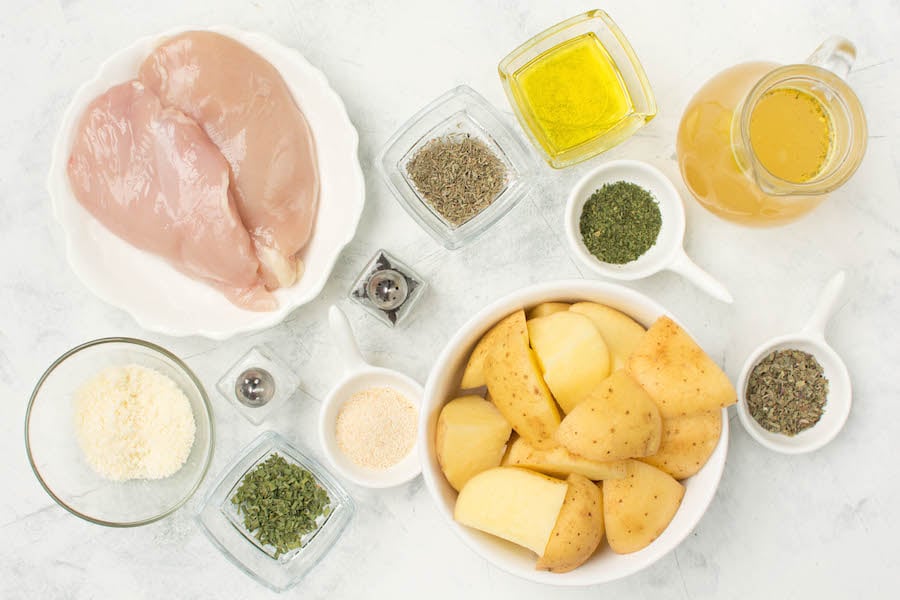
    Gather all the ingredients:

    • 2 chicken breasts skinless and boneless
    • 1 lb new potatoes cut into chunks
    • 2 tablespoon olive oil
    • Salt and pepper to taste
    • ½ teaspoon garlic powder
    • ½ teaspoon dried basil
    • 1 teaspoon dried parsley
    • ½ teaspoon dried thyme
    • ½ cup chicken stock
    • 2 tablespoon freshly grated parmesan

    In a large bowl, toss chicken, potatoes, and olive oil.
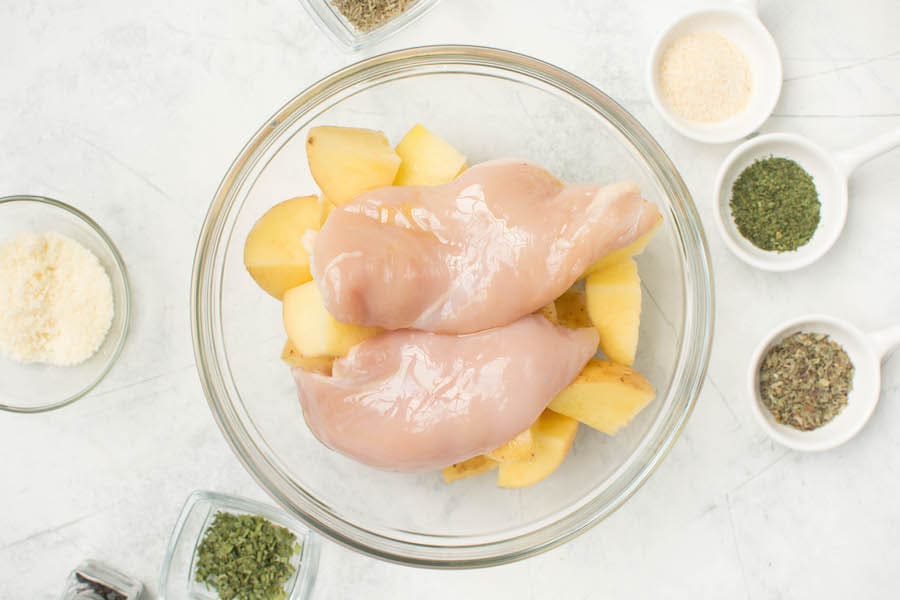
    chicken in a bowl with potatoes

    Season with salt and pepper. Add herbs and toss to combine.
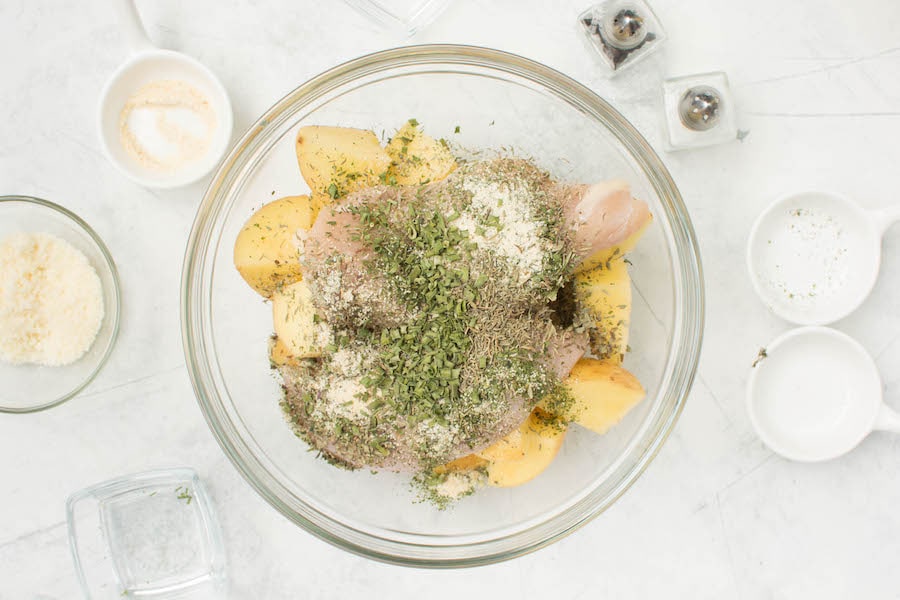
    chicken potatoes and herbs in bowl

    Transfer the mixture into the Instant Pot. Add stock. Make sure potatoes are on the bottom and chicken is on the top of the potatoes.
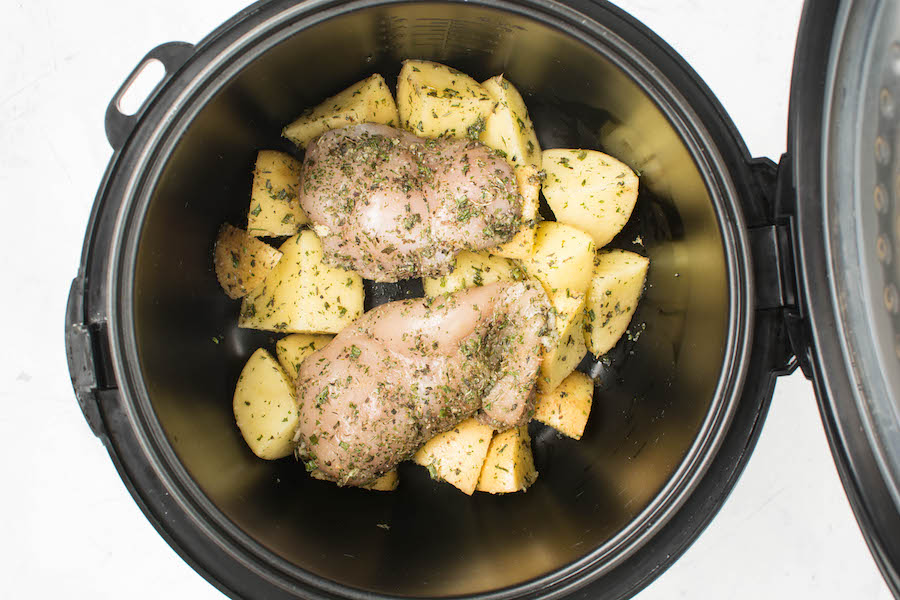
    chicken potatoes in instant pot

    Lock lid into place. Select Manual and set to High pressure for 15 minutes. Once the cooking cycle is done, perform a quick pressure release.

    Sprinkle the potatoes and chicken with parmesan and serve.
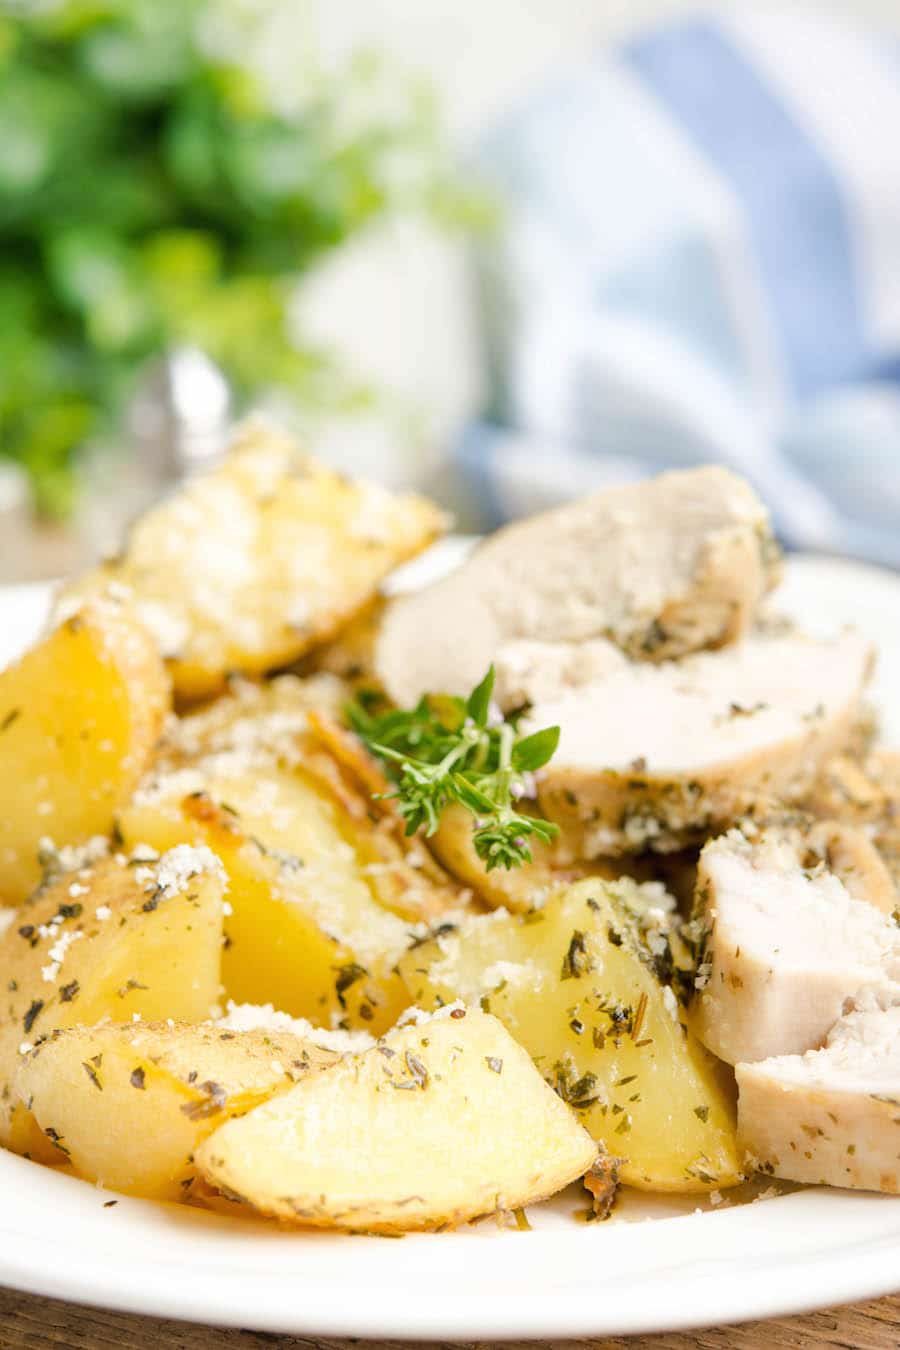
    Instant Pot Chicken and Potatoes

    What Sides to Serve with This?

    The good thing about this dish is that the main dish and side dish are wrapped up in one pot!

    Thank you so much Corrie Cooks for sharing this with us today! We hope to have you again soon!
    Don’t forget to check out ALL of the Instant Pot recipes over there to add to your meal plan this week!

    Looking for More Easy Recipes for Dinner?

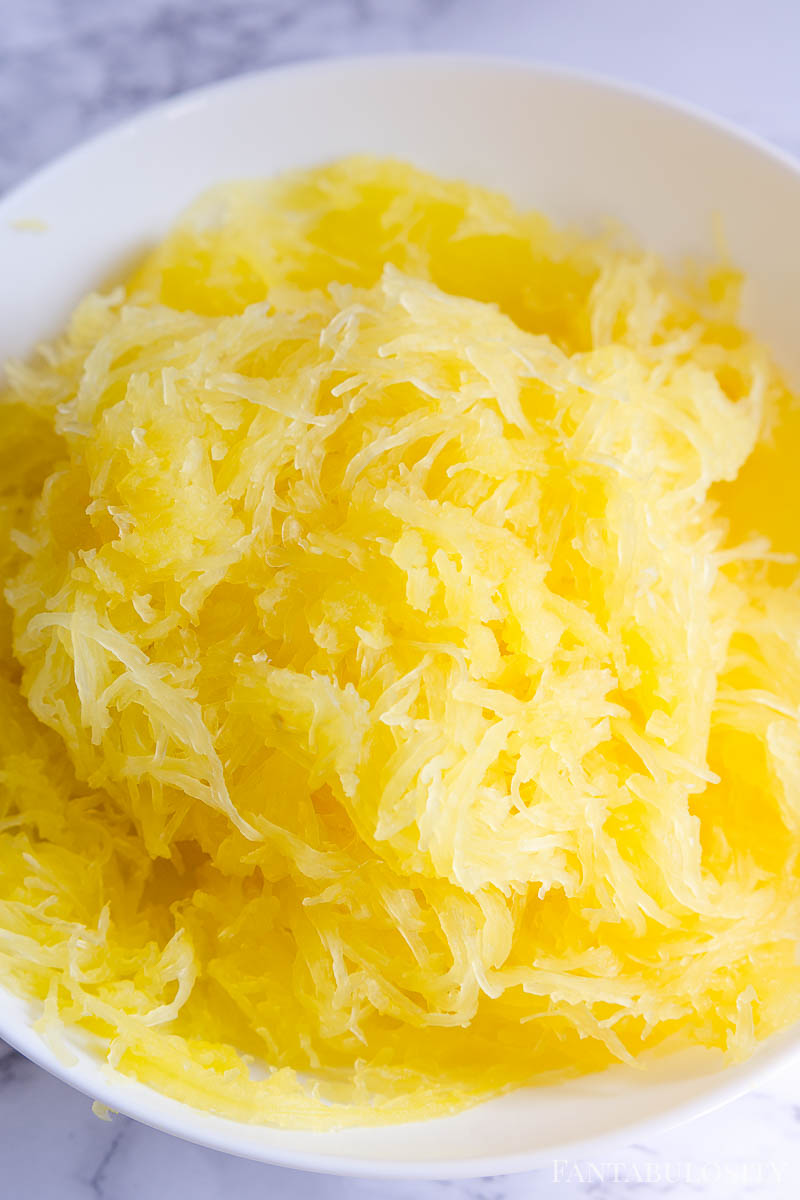
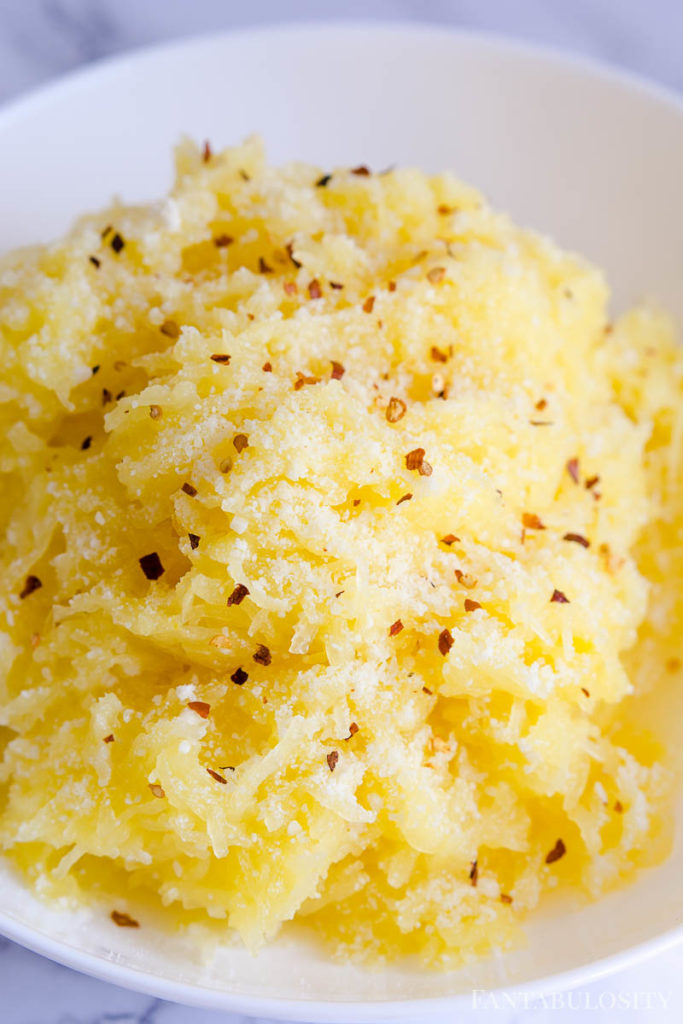
    If you love easy Instant Pot dishes like this one, then you’re also going to love this Instant Pot Risotto and this Instant Pot Spaghetti Squash!

    Recipe
    Instant Pot Chicken and Potatoes
    Print Pin
    4.98 from 35 votes

    Instant Pot Chicken and Potatoes

    This is the best and the easiest Instant Pot Chicken and Potatoes recipe you can find. Quick, simple, and yet so delicious.
    Course Main Course
    Cuisine American
    Prep Time 10 minutes minutes
    Cook Time 15 minutes minutes
    Total Time 25 minutes minutes
    Servings 2 servings
    Calories 603kcal
    Author Jessica Burgess

    Equipment

    • Pressure Cooker

    Ingredients

    • 2 chicken breasts skinless, boneless
    • 1 lb new potatoes cut in to chunks
    • 2 tablespoon olive oil
    • salt to taste
    • pepper to taste
    • ½ teaspoon garlic powder
    • ½ teaspoon dried basil
    • 1 teaspoon dried parsley
    • ½ teaspoon dried thyme
    • ½ cup chicken stock
    • 2 tablespoon fresh grated parmesan

    Instructions

    • Toss the chicken and potatoes with salt, pepper and olive oil in a large bowl.
    • Add herbs and toss to coat.
    • Place the potatoes in the Instant Pot. Place the chicken on top of the potatoes.
    • Pour in the chicken stock.
    • Close the lid and cook at high pressure for 15 minutes.
    • Once the cooking is done, perform a quick pressure release.
    • Open the lid and sprinkle with parmesan.
    • Serve and enjoy!
    Nutrition

    Serving: 2chicken breasts | Calories: 603kcal | Carbohydrates: 43g | Protein: 56g | Fat: 22g | Saturated Fat: 4g | Cholesterol: 151mg | Sodium: 439mg | Potassium: 1854mg | Fiber: 5g | Sugar: 3g | Vitamin A: 111IU | Vitamin C: 47mg | Calcium: 100mg | Iron: 3mg

    Debt Payoff Tracker Printable

    June 24, 2020

    debt payoff tracker printable

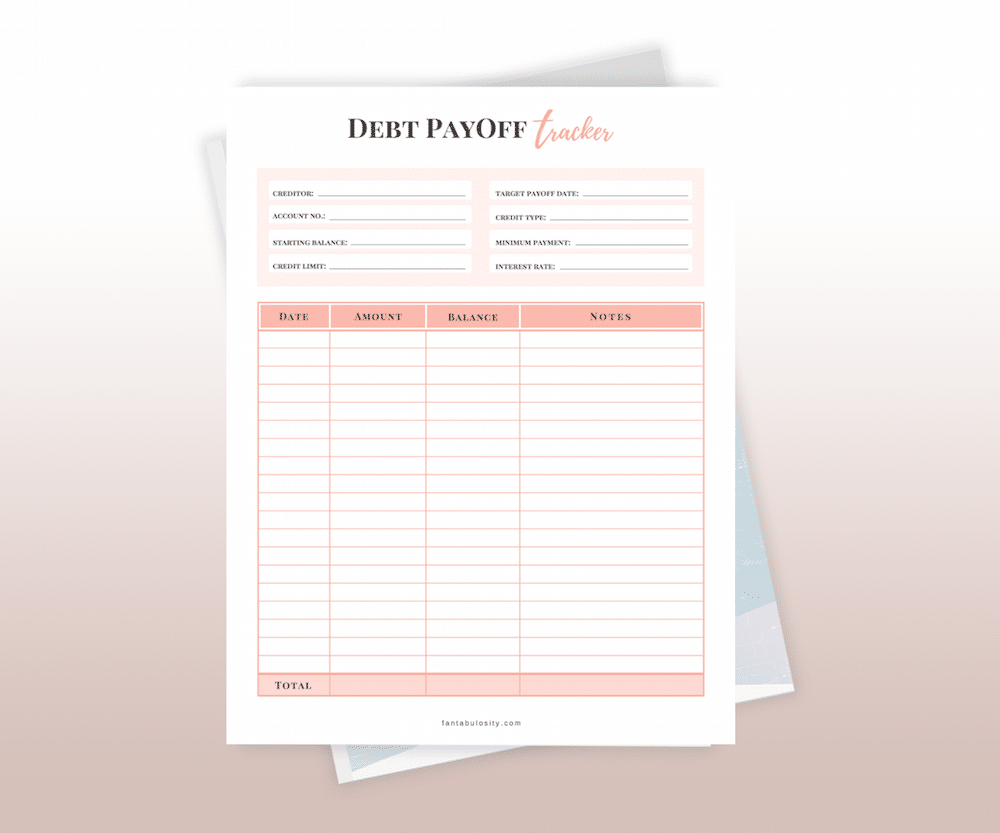
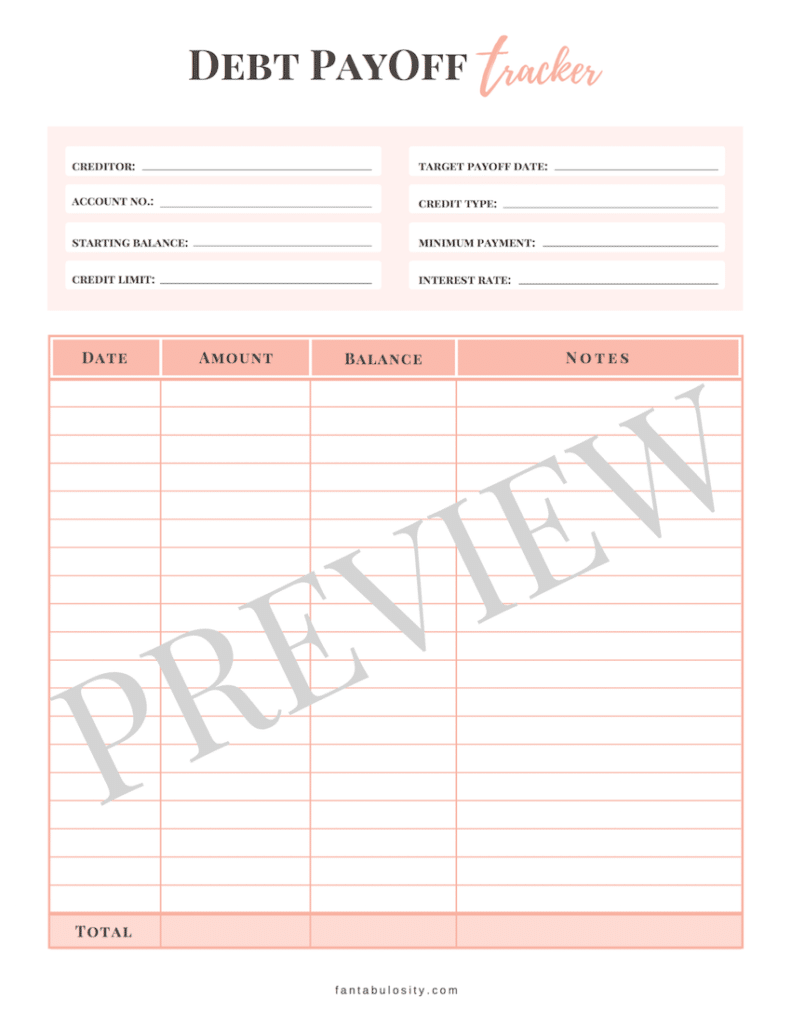
    Debt Payoff Tracker Printable: A free printable to help you grasp the big picture and breakdown of your current loans! Digital version also available!

    debt payoff tracker printable

    If you’re like me, the words “finances”, “loans” or “bills” can make you cringe. I mean, who loves getting a bill in the mail? Or even more… thinking about what is owed on something?

    But that’s part of life and we have to face it, right? Right. So we might as well make it as easy on ourselves as we can and do the best that we can to make it a little more enjoyable.

    Have you read my post or watched the video on My Home Finance Routine and the Tools I can’t Live Without yet? You’re sure to find tips to help make your home finance life a little easier there too!

    Debt Payoff Tracker Printable

    Debt payoff tracker printable

    The other day, I asked you all on Facebook and Instagram what printable you’d LOVE to have next and I have to tell you… you all have some AMAZING ideas!

    So now I have a whole list of printables to have created for you and I’ll be rolling them out as soon as they’re finished! (But feel free to keep messaging me, letting me know what you’d like to see. I’m a printable junkie so I’m always happy to add to the list!)

    One Fantabulosity reader suggested that we create a “debt payoff or loan payoff” printable and I thought that was GENIUS!

    Being able to see the “big picture” of what is owed, all across the board, reduces my stress level and anxiety, like crazy! Because not knowing exactly what is owed, by when, and how much, can create this panic feeling that is so unnecessary!

    So having a debt payoff printable to help keep track of this is exactly what I needed and I couldn’t wait to share it with you all too!

    How to Use the Debt Payoff Printable

    This printable is designed to focus on one loan, so you can keep track of it for months!

    There are sections on the printable to also help with quick-reference items, like:

    • creditor
    • account number
    • starting balance
    • interest rate
    • credit limit
    • minimum payment
    • interest rate
    • target payoff date

    I don’t know about you but I often find myself needing those items, whether it’s for tax purposes or updating documents… so having them handy on this printable is something that I can quickly check and refer to as needed! (Rather than digging in my file folders, trying to find the original loan paperwork.)

    How to Use the Free Version:

    If printing this free copy, simply save and print out as many copies as you need, for as many loans that you want to keep track of.

    Have a finance binder or file folder?

    Simply 3-hole punch the copies and insert them in to your binder or slip each copy in to your folder.

    Then, each month you can turn to, or pull out the printable and add to the list!

    Fillable PDF Option

    If you’d prefer a digital version immediately, where you can save it to your computer and TYPE in your info every month instead, then you’ll want to get your hands on the “Fantabulous Home” Home Management Binder that also includes 50+ printables to help you organize your life and home!

    Get the Free Debt Payoff Printable HERE!

    Air Fryer S’mores

    June 13, 2020

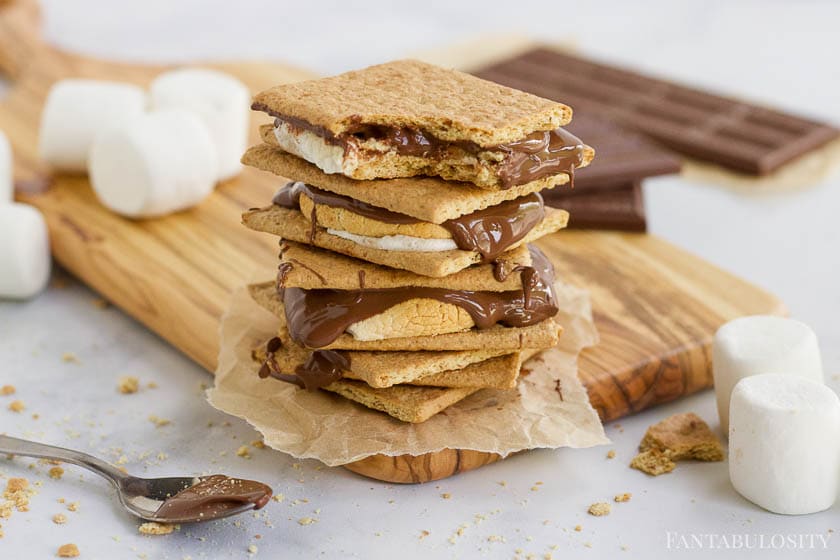
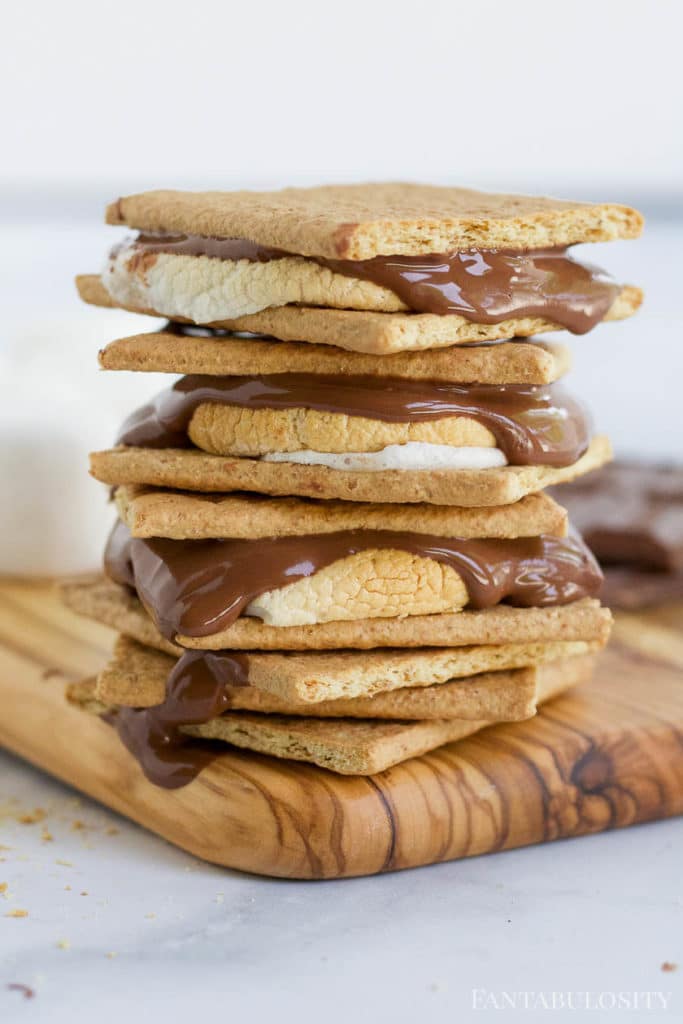
    Air fryer smores stacked on top of one another.

    Air Fryer S’mores: There’s a TRICK to get the s’mores to stop blowing around inside while cooking. PLUS find out what temperature to cook smores at for that golden brown campfire dessert!

    Airy Fryer Smores, stacked on a wooden cutting board

    Well you may be able to tell by now that we LOVE s’mores, since sharing the No-Bake S’mores Cheesecake and White Chocolate Pumpkin S’mores. But you know what I DON’T love? Rainy… cold days, outside.

    BUT… what I do love (especially when in Montana) is hanging around the fire inside on the days when we can’t be out soaking in the fresh air.

    And for some reason, my little guys think we have to have s’mores at LEAST once a week… and that doesn’t always work out like they planned when it’s raining outside.

    So I finally have a solution to conquer their s’mores cravings when a bonfire isn’t doable.

    Air Fryer S’mores

    Can I get a “hallelujah” for the person that invented the air fryer?

    Trust me. I thought an air fryer was just a big hype and didn’t really make that big of a difference in the kitchen… until I got one.

    More Air Fryer Recipes You’ll Love:

    • Air Fryer Burgers – Remember those rainy days I was telling you about when wanting to make s’mores? Same thing. Raining? Cold? Skip the grill outside and whip up these beauties in only 10 minutes!
    • Air Fryer Bacon – Um… life-changing. I can’t even begin to explain how delicious bacon is in the air fryer. It’s the perfect texture, makes clean-up a breeze, and so.much.more!
    • Looking to get an air fryer? Here are the Air Fryer reviews I researched and shared with you, hoping you can find your favorite!
    • 20+ Easy Air Fryer Recipes from Top Bloggers – And I’ve got you taken care of. This list will kickstart your air fryer journey or fill up your weekly meal plan!

    Perfect for a Crowd!

    Want to serve s’mores for a lot of people, without a campfire? (Think, indoor party, birthday party for kids, etc.) You can cook multiple at a time in an air fryer. How fun would this be for an indoor camping birthday party!?

    How to Make S’mores in the Air Fryer

    So before we dive in, (but feel free to jump to the bottom of this post for the recipe card) I want to make sure you know about the “trick” that will make your s’more life, “s’more” much easier. (Ha! I know, I know. I gotta stop with the dad jokes.)

    TIP: How to Keep S’mores from Blowing Around in Air Fryer

    I know that things can blow around and get all messy inside of an air fryer. (Trust me. I had a run-in with a slice of cheese on top of a burger one day and it did NOT go well. Put it this way… the cheese one.)

    So when making s’mores in the air fryer, the last thing that you want is the marshmallow fall down or blow off of the cracker and end up melting and toasting in to the fryer.

    The trick to keeping it in place? It’s super easy. Ready for this?
    Cut just a small amount of the marshmallow off the bottom. This allows the marshmallow to stick to the graham cracker and stay in place, even with the circulation of air!

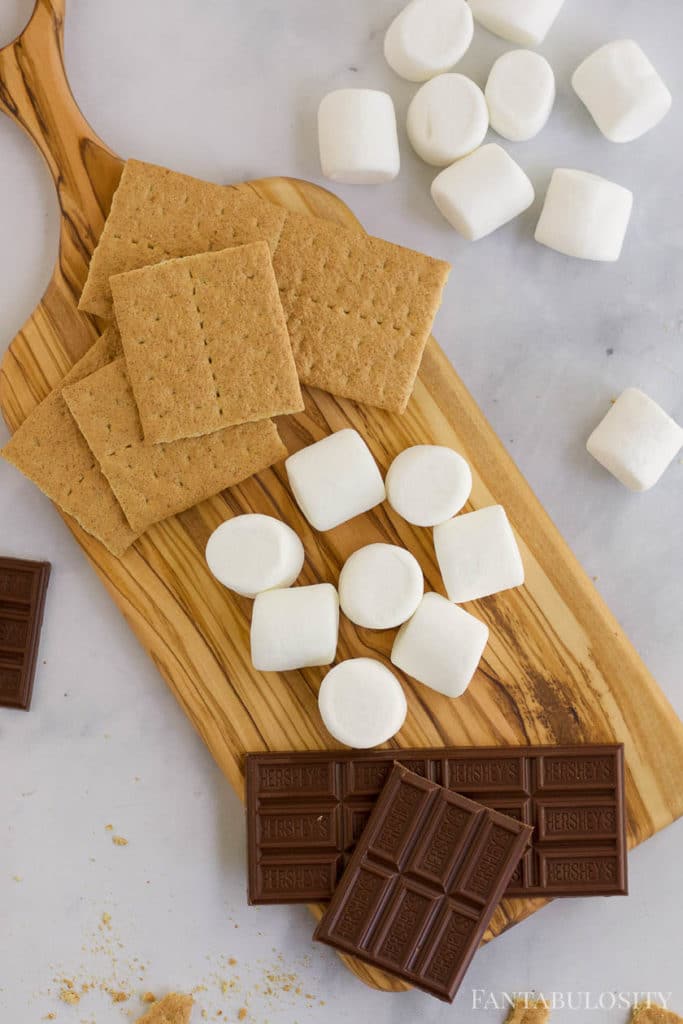
    Ingredients:

    • Graham Crackers
    • Jumbo Marshmallows
    • Hershey Bars
    Ingredients for air fryer smores

    Different Types of S’mores?

    Feel free to mix things up when making s’mores. For instance:

    For the Graham Crackers: Try chocolate graham crackers, cinnamon graham crackers or cookies! (I mean, can you imagine a sugar cookie or chocolate chip cookie instead? Oh mylanta.)

    When it comes to Marshmallows: Try flavored marshmallows or mini marshmallows for extra golden crisp edges! I even saw the other day that they have chocolate filled marshmallows now!

    For the Chocolate: Try replacing the regular chocolate with peanut butter cups, caramel-filled chocolate squares, white chocolate, cookies n cream Hershey bars or decadent dark chocolate!

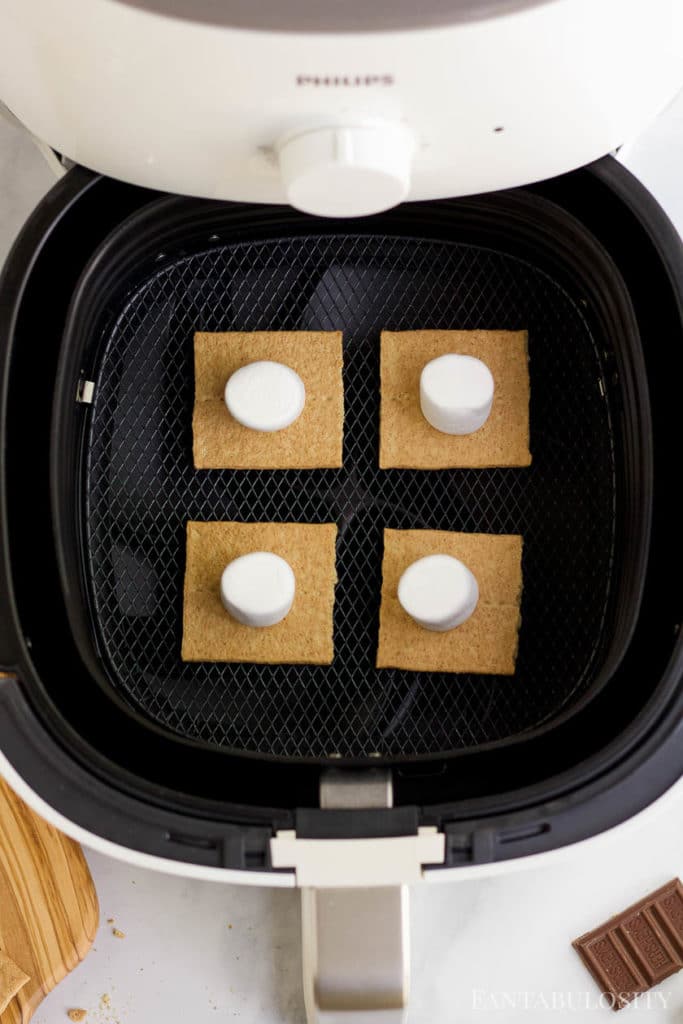
    Step 1: Space graham crackers far enough apart!

    Simply place graham cracker halves evenly on the cooking rack but be sure to space them evenly apart. When the marshmallows cook, they will expand and puff up a bit, so you want to make sure not to cram them together too closely.

    Marshmallows on graham crackers in air fryer

    Step 2: Toasting the Marshmallows

    Next, cut just a small amount of the marshmallow off the bottom. (See “tip” above if this is new news!) and place a marshmallow on top of each graham cracker.

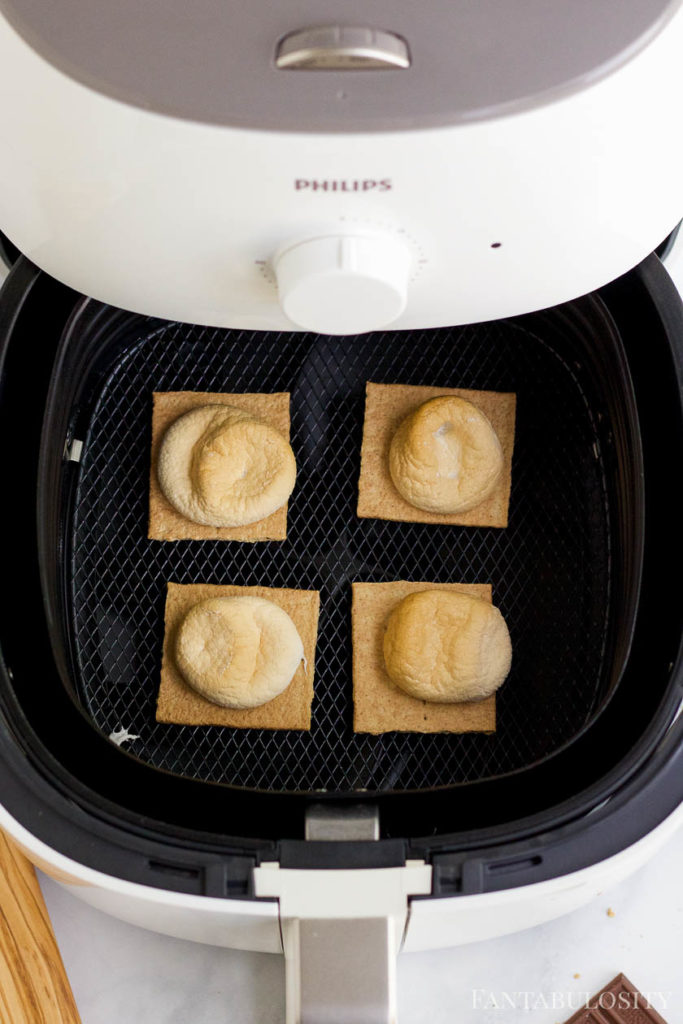
    Cook at 375 for about 7 minutes or until the tops of the marshmallows start to turn golden brown.

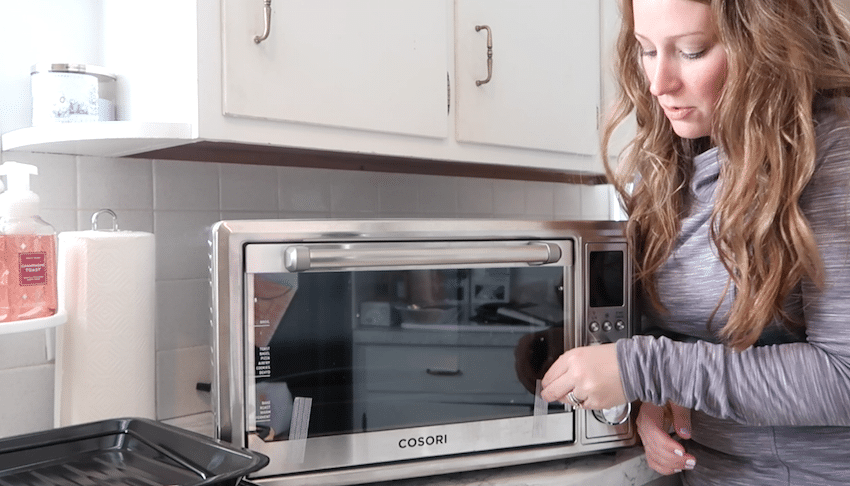
    NOTE: The cooking time may vary depending on your air fryer model. For instance, a toaster oven air fryer can roast marshmallows in as little as 30 seconds. But most standard air fryer models take at least 5 minutes. I would highly recommend peeking at your s'mores starting at the 5-minute mark.
    Buy the air fryer used in this post HERE!

    Toasted marshmallows on graham crackers in air fryer

    Look. At. This. Golden. Goodness!

    When you cook marshmallows in the air fryer, they have an even, golden crust and give you melty, gooey goodness all the way through. Now, if you love a burnt marshmallow… of course, be my guest and cook it a little longer… but I personally think it’s hard to beat that rich, golden color and flavor! Whew!

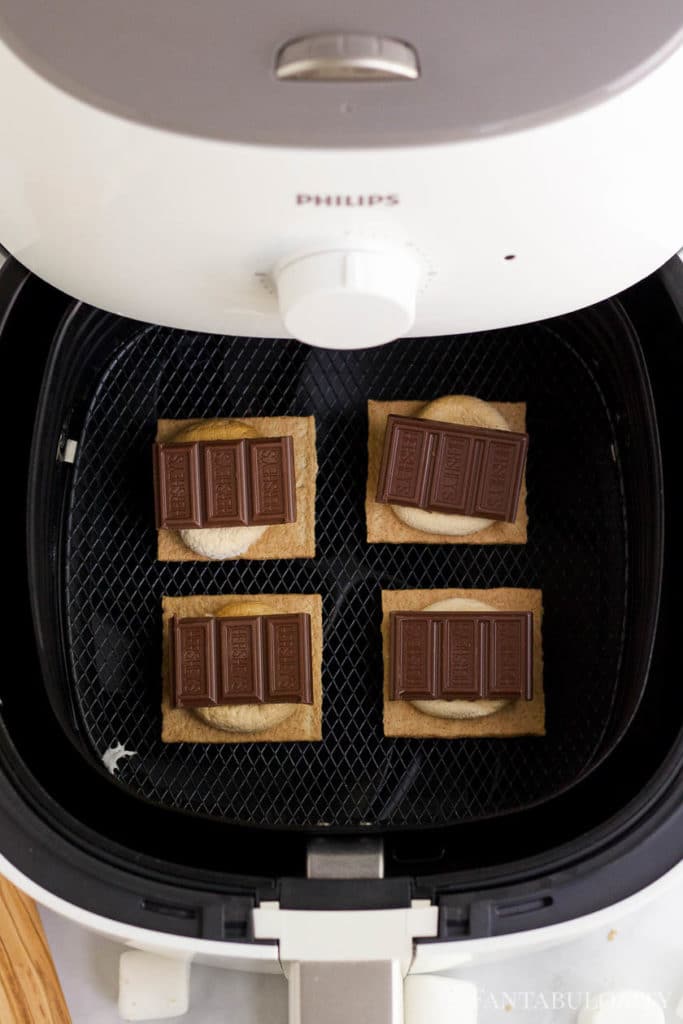
    Hershey bars on graham crackers and marshmallows for smores

    Step 3: Add on the Chocolate

    Next, add the desired amount of chocolate and top with the other graham cracker half. At this point your smores are complete, but let’s take it to the next level and place them back in the air fryer for another two minutes to get that chocolate nice and melted!

    Air fryer smores on wooden cutting board

    I mean… come on. I’m not sure it gets any better than these little beauties!

    Are you ready to make your own? You can find the full, printable recipe card instructions below, and feel free to PIN THIS RECIPE so you have it for when you need it again!

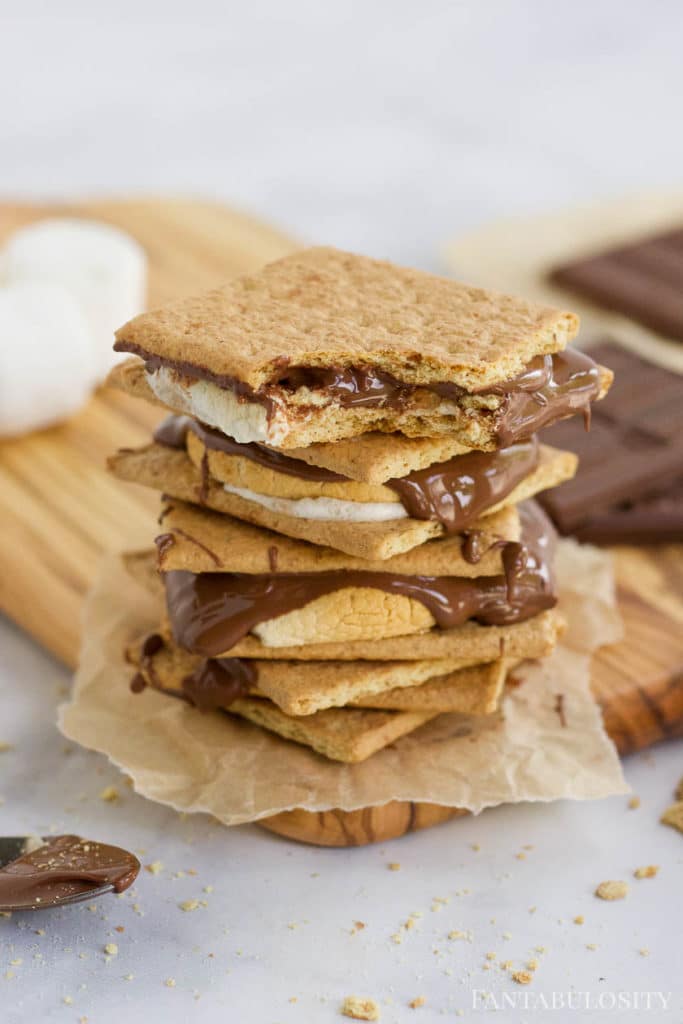
    Smores made in the air fryer, stacked with a bite taken
    Hosting and want to make an impression with your s’mores? Serve them on this gourmet, unbleached parchment paper HERE!

    Recipe

    Air fryer smores stacked on top of one another.
    Print Pin
    4.75 from 4 votes

    Air Fryer Smores

    Air Fryer Smores: There's a TRICK to get the smores to stop blowing around inside while cooking and find out what temperature to cook smores at for that golden brown campfire dessert!
    Course Dessert
    Cuisine American
    Prep Time 2 minutes minutes
    Cook Time 8 minutes minutes
    Total Time 10 minutes minutes
    Servings 4 servings
    Calories 141kcal
    Author Jessica Burgess

    Equipment

    • air fryer

    Ingredients

    • 4 graham crackers broken in half
    • 4 large marshmallows
    • 1 milk chocolate bar, divided we prefer Hershey's!

    Instructions

    • Place four graham cracker halves inside the air fryer basket
    • TRICK: Cut a small slice off the bottom of each marshmallow, and stick it to the graham cracker. This will keep it secure during cooking.
    • Cook at 375 degrees for about 7-8 minutes, or until the marshmallow is golden brown.
    • Add the desired amount of Hershey's chocolate and top with the other graham cracker.
    • Place back in the air fryer for another 2 minutes or until the chocolate begins to melt.

    Notes

    *Please note, cooking time may vary depending on your air fryer model. For instance, a toaster oven air fryer can roast marshmallows in as little as 30 seconds. But most standard air fryer models take at least 5 minutes. I would highly recommend peeking at your s'mores starting at the 5-minute mark.
    Want to Mix Things Up? Try these variations…
    • Graham Crackers: Try chocolate graham crackers, cinnamon graham crackers or cookies
    • Marshmallows: Try flavored marshmallows or mini marshmallows for extra golden crisp edges
    • Chocolate: Try replacing the regular chocolate with peanut butter cups, caramel-filled chocolate squares, white chocolate or dark chocolate. (Or any leftover Halloween candy you may have on hand!)

    Nutrition

    Serving: 1smore | Calories: 141kcal | Carbohydrates: 26g | Protein: 2g | Fat: 4g | Saturated Fat: 2g | Cholesterol: 1mg | Sodium: 120mg | Potassium: 41mg | Fiber: 1g | Sugar: 15g | Vitamin A: 14IU | Calcium: 26mg | Iron: 1mg
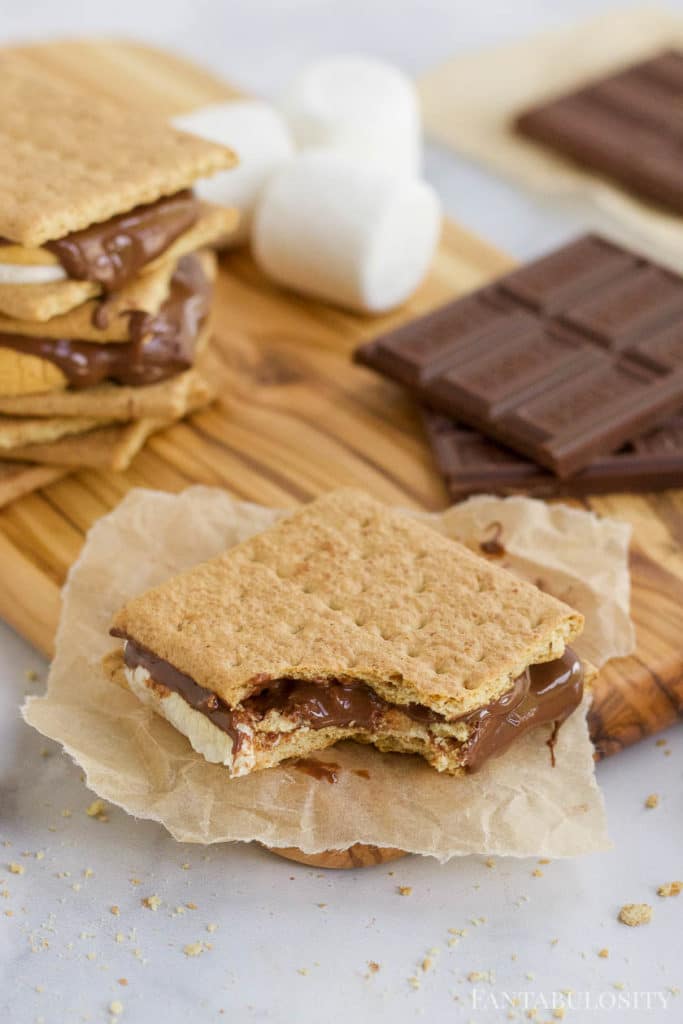
    Air fryer smores recipe with bite taken out

    More Easy Dessert Recipes You’ll Love:

    • Cookie Dough Fudge
    • The BEST No Bake Cookies
    • Snicker Apple Salad
    • Oreo Cheesecake

    Pin the Image Below to Remember it:

    We Moved. To Montana.

    June 9, 2020

    Montana Blogger with Family

    Where do I even begin?

    Montana Blogger with Family

    Let me channel my inner Sophia from Golden Girls…

    “Picture it. Montana. May, 2020.”


    It was a pretty big surprise to our family and friends a couple of months ago when we told them we were leaving “home” and I think an even bigger surprise to others when I announced one morning on Instagram and Facebook that we packed up everything and moved that very morning.

    I think people thought we’d never leave home and usually, when someone is making a big life change like this, it gets talked about quite a bit… at least for a while, before it happens.

    Well… not us.

    We pretty much kept our plans of moving out west, on the down-low.

    A Quick Video of Our Story, in a Nutshell

    In case you prefer listening, instead of reading!

    → Did we stay in Montana? Update on Living in Montana

    Why the Move?

    It’s the question we’ve been asked the most since spilling the beans, and well… the answer’s not a simple one, but it IS an interesting one, to say the least.

    A Hellacious Three Years

    Before I start to give the details on why we moved, I think it’s important that you know that the last three years of our lives have been, well, hell.

    Why didn’t I say anything?

    Well I kind of did, but in a private, “heads up” kind of way, because I love to be transparent and real with you all… but telling you everything that was going on, just wasn’t something I was ready to do.

    In today’s world, it’s so easy for your private life to suddenly become “everyone’s” business if you let it (and honestly, even if you don’t let it… sometimes it can still feel like everyone is in your business) and, as I’m sure you would in the same situation, I wanted the one place I had online to be a place of joy and inspiration where I could escape, rather than be a dark, uncertain and scary place like our life was at that time.

    And honestly…

    I’m still not ready to talk about that dark and scary time. Mentally, I’m in a good spot, and going back to dredge up any details of the insanity that was taking place in our lives, may allow my emotional state to go backward… and that’s not something I’m willing to do today.

    Will I share the details in the future? Maybe. Because I think a lot of GOOD can come from the bad and the EVIL that lirk upon us in today’s world and sharing those things may just help explain why we as humans can start to feel so low, attacked and defeated… and it also may allow for a chance for us to connect and relate to one another in some way and even play a role in the part of the healing process for everyone involved.

    I Would Have Rather Poked my Eyeballs Out…

    In high school, my husband and I (boyfriend at the time of course) spent some time visiting my husband’s favorite place on earth…a ranch in Montana that the family of his childhood best friend, owned.

    Fast forward a few years in to our 20’s, and we were making more and more trips out to big sky country for long weekends.

    And although I LOVED the views… I just wasn’t in love with Montana. To be honest… I despised going to Montana.

    Why? There are a few reasons, but I blame it mostly on the time in our lives and our immaturity at the time, rather than the state itself.

    But although my horrible feelings toward Montana were all self-inflicted… I still felt so strongly that I didn’t want to visit much and definitely didn’t want to live there. Actually, I would have rather poked my eyeballs out.

    My husband? Well, it was a place where he could go and feel like he could leave the hustle and bustle, get back to his roots, and was a place where he actually felt “home” and happy.

    So needless to say, he would just about give his right-arm to live there, at least during the summer and fall, so it was always something he dreamed about… but knew that I’d never be on board with moving there, so he pretty much let the dream go.

    He Said “Mountains”

    And then… God.

    Man, you know it’s going to be a good story when it begins with “And then… God”. Am I right?

    During the three years of awfulness, I found myself on a roller coaster of emotions.
    (My husband did too of course, and I might as well tell you now that he’s going to share his story one day too, so just know that this is MY viewpoint, which does NOT take away from how my husband or boys suffered or may have been feeling during this time too. It definitely affected our entire family, but they’ll be able to tell their stories one day.)

    Anywho, back to “And then… God.”

    I Felt Like I Was Done. Really Done.

    I couldn’t get out of bed. I didn’t want to get out of bed. What was the point? If I stayed in bed, I could ignore that “life” was actually happening outside of our home and no one could see me in there.

    I even made it to where the boys could hang out in the bedroom with me most of the day and we’d watch their favorite tv shows, just so I could lay in bed and hope the tv kept them entertained for me.

    Some days I managed to get up and feel like I could actually make dinner, but the fear of someone looking in our windows (not that people were actually doing that… it just felt like everyone was watching) would send me right back to my “safe place” (the bedroom) and then it would turn out to be another pb&j night for the boys because that didn’t take as much time or effort.

    Some of the days would be so dark that I’d even find myself wondering if everyone around me would be better off if God would just take me right then and there.

    I mean, I had a blog that could generate income without me so they’d be taken care of, and maybe my boys would no longer have to deal with a stressed-out mom who didn’t know how to live life anymore.
    Looking back, I know that’s not the case at all, but if you’ve ever been so “low”, those are the types of thoughts that go through your head and it’s a scary, scary feeling.

    5-Minute Closet Prayers

    During these roller coasters of emotions, I found a few things that would help drag me out of the darkness… at least for a little while, and one of those things was my “5-minute closet prayers”.

    Some days, the pain and hurt would be so overwhelming that I’d physically get up and go hide in my son’s closet (so the boys couldn’t see me) and just cry. I’d cry out to God… beg Him… plead for his mercy and ask Him to just take all of the bad away.

    During those moments, I wanted to “hear” God speak to me like so many had claimed He had done before but I found myself getting really frustrated, wondering what “hearing” God actually looked and sounded like.

    I mean, would it be like in the movies where God’s voice sounded like Morgan Freeman and the message would be clear as day?

    I even asked my pastor what it was like… and what he said didn’t click for me. But I was longing for it. Begging God to speak to me, and to open my heart and ears so I could hear whatever He wanted me to hear.

    I’m not going to lie… some days, it felt like I was just talking to the clothes hanging up in that closet, and some days it felt like God was actually listening because I felt some sort of peace come over me; at least enough peace to make me feel like I could go back out and put a fake smile on my face so the boys could have some sort of normalcy.

    But then one day, I heard it.

    I heard…and I FELT… God speak to me.

    What Does That Feel Like?

    Well I’m not sure if everyone feels this way, but for me… it was a sense of calm. A sense of peace… and a sense of feeling in my heart and even a feeling of goosebumps.

    Is this how everyone feels? I have no idea. But it was a feeling so strong that I can’t deny and can’t explain HOW it could be anything different.

    So What Did He Say?

    He simply said “mountains”.

    “Mountains?”

    It was a random thought that came to my mind and left me asking,

    “Where did that come from?” and “What in the world do ‘mountains’ have to do with anything right now?”

    And that right there was another sign to me that it was God because it was the most random thought I’d ever had and it made no sense whatsoever to me at that moment.

    I also felt like it was a very private thought and that I wasn’t supposed to say anything about it to anyone.
    (Maybe that’s because as an imperfect human, I would have felt “silly” for telling someone that I felt like God spoke to me. In a closet. With a random word. Or that maybe it wasn’t the right time to say anything to anyone.)

    So, naturally, as I feel any person would do… I shoved the word “mountains” and the feelings down inside and went about my day.

    Well, that was until God kept putting the word “mountains” in front of me and it was completely undeniable.

    It was everywhere!

    The word “mountains” was in a song that I heard over and over again in the car… (“Do it Again” by Elevation Worship)

    A 4-week message at church during this time had the theme “Moving Mountains” that spoke so deeply to the situations that we were dealing with.

    And even “little” things like fortune cookies mentioning moving mountains or seeing commercials on tv talking about the mountains… it was as if God was using modern-day ways to keep reminding me of what He told me in the closet that day.

    He Said “Mountains in Montana”

    Then, during one, very unromantic evening while watching LIVE PD with my husband (I know, I know) it was as if God knew it was the perfect moment to speak to me again and He said,

    “You need to be in the mountains in Montana.”

    The feeling was so real, it was as if someone walked up to me and slapped me in the face.

    “Ex-queeze me?”

    “Um… I don’t like Montana.”

    I could feel my self arguing internally with my thoughts, and resisting any type of suggestion that I was supposed to be in the cold, mountain air, in a place that I despised.

    But it was a feeling so strong that I couldn’t keep it quiet or to myself any longer.

    So I looked over to my husband and said,

    “You’re going to think I’m crazy… but I think we’re supposed to live in Montana for a little while.”

    It was as if those words fell out of my mouth without any control over what I wanted to say and what I didn’t want to say.

    He looked at me like I was a crazy person because he KNEW how much I despised Montana and wondered what in the heck was going on.

    But it was at that moment that I explained to him about hearing God talk to me about the mountains and how I had a feeling we were supposed to be in Montana, in the mountains, for some reason.
    I wasn’t sure why we were supposed to go but it must be God’s plan because there was no way on earth I’d be willing to go, let alone have it be my idea to move to Montana… if it wasn’t God giving me the peace to do so.

    Needless to say, my husband beamed with light.

    You see, during these last three years, his favorite place on earth (the ranch that he grew up loving so much) actually sold and a little piece of his heart went with it. He knew that there was no way he’d ever be able to go back to that place that he dreamed of spending more time at one day… but he made peace with the idea that he would just hold on to the memories and would hopefully find a new place in Montana to visit.

    So with the excitement and quite honestly… the “shocked” feeling… my husband picked up the phone and called a friend (who was actually still the manager of the ranch in Montana) and said,

    “Well, I don’t believe I’m saying this… but my wife said she wants to live in Montana for a little bit. Maybe this summer when the boys get out of school? Do you happen to know of anyone renting out a house for the summer in the area or know of something we may be interested in? We just want to be in Montana, doesn’t really matter where.

    to which his friend replied,

    “Well as a matter of fact I do. The new owners of the ranch (my husband’s dream place) asked me last week if I knew of anyone that may be interested in renting out the main house on the ranch this summer.”

    (Keep in mind that this is the ranch that my husband thought he’d never get a chance to see, let alone, stay at again.)

    What?! How is this even possible? Why would they even want to rent this out? This was a new thing. They’ve never done this on the ranch before!

    But it was as if almost every question we had, there was a logical answer.

    It was as if God drew a road map out and guided us along the path that we were supposed to take.

    And considering the life that we had been living the last couple of years at the time, we just knew that this opportunity was too good to be true and that it could (and probably would) slip away from us.

    So we knew that if we just kept our heads down and kept listening to God and following His plan for us, that this dream may actually become a reality.

    Soon, not only did I have peace about going to Montana… I had an excitement about going to Montana. A feeling I had never had before. I just KNEW that He was making all of this happen for some reason; a reason that I didn’t know…but I knew it was because He wanted us here.

    So What is the Reason?

    Well, at the time of writing this post, we’ve been here 2 weeks now, and you know what? I have no idea yet.

    I’m not sure if it’s to help someone here specifically…

    Or if it’s to reach out and help others online and being here will give us a better opportunity to connect with others more easily…

    Or even if it’s just to use this time to reflect and rebuild our lives and get it to a place that will make us stronger than ever to help others.

    No matter the reason, I feel strongly that it is to help someone, in some way, and being here has only magnified that we are right where we are supposed to be.

    It just feels right and although I find myself wondering,

    Jessica, why WOULDN’T it feel right? You’re on a beautiful ranch, in one of the most beautiful places on earth…

    …that’s not what it is. Sure, it’s beautiful and so far the experiences have been insanely dream-worthy… but the feeling of being right where we are supposed to be, has never felt so clear.

    Are We Crazy?

    Well, it depends on who you ask, I’m sure.

    Trust me… we’ve heard everything from,

    “Wait… you don’t know how long you’re staying in Montana?”

    “You don’t know where you’re going to go after the summer is over?”

    “You don’t really even know why you’re there?”

    And to be honest… my type “A” personality would normally question the same things and even rebel in what we’re doing.

    But for some reason, I’m just going with the flow and seeing where God takes us and leads us.

    Because if I can hear him so clearly in that little bitty closet that day… I can surely hear Him, a little closer to heaven, high up on a mountain top.

    Can you believe I found this shirt last week with my sister… IN MONTANA!?

    Want a Closer Look in to Our Story?

    I’d LOVE to have you in our free, Fab Society Facebook group where we talk about all things, marriage, life, parenting, meal planning, and ALL the things. Plus, I tend to share a little more over there in our private group because… well… you’re my gal pals!

    Want to be Part of the Fab Family?

    If you don’t want to miss our story, make sure you’re subscribed to my newsletter where I’ll email out all the details when it’s time!

    How to Prepare for a Spray Tan

    June 8, 2020

    how to prepare for a spray tan

    How to prepare for a spray tan: Tips and the ins and outs about how it works, how long it lasts, how much it costs, airbrush vs. machine and more!

    Tips for a Spray Tan - Woman posing in street

    How to Prepare for a Spray Tan

    I LOVE a good spray tan. I have pale skin and there’s something about instantly glowing and feeling so much better about how you look in shorts and a swimming suit. (Speaking for myself of course… not saying that this determines someone’s beauty.)

    I wanted to write this post to share all of the things I’ve learned over the years about spray tanning because I’ve heard from so many of you that you want to know more about how it works, how long it lasts, what’s the best way to make it last and so much more.

    And although I’m no tanning connoisseur by any means, I did work in a tanning salon in high school, have tried the spray tanning machines, and have also tried the “by hand” technique. Now, I by FAR, prefer the “by hand” technique, but no matter if you’re using the machine or if you’re going for an airbrush spray tan soon, these tips will help you prepare for it and hopefully result in a longer-lasting glow! Then, make sure to see my favorite beauty treatments!

    Spray Tan Tips

    I’m going to break down the tips in a “what you need to know”, “before”, “during” and “after” format, so you’ll be prepared for it from the get-go!

    What to Know Before You Go…

    How much is a spray tan?

    Just like with anything, prices can vary. However, I’ve priced them in many different states, and the airbrush, custom, “by-hand” spray tanning seems to range from $25-$40.

    How long does a spray tan last?

    Depending on how you care for your tan and your skin tone, it can last anywhere from 5-10 days.

    Do I have to get naked for a spray tan?

    Chances are, if you’re female and the tanning artist is female, yes you will be naked.
    If you’re male… you’ll more than likely have to keep your underwear or shorts on.
    Is it awkward? Well, if it’s a professional salon, they do their very best to not make you feel awkward. But even so, it can be a bit intimidating, so what I do is tell myself:
    “They see a lotta naked bodies… you’re just another body.”

    • After your tan, you’ll notice a darker color and you should continually get darker after a few hours. So know that you’ll be REALLY dark until you shower off that top layer of tan, 6 hours later.
    • Try not to schedule anything afterward, but if you do… it’s ok to go out and about (unless it’s raining!), just be cautious of what you touch/sit on, etc.
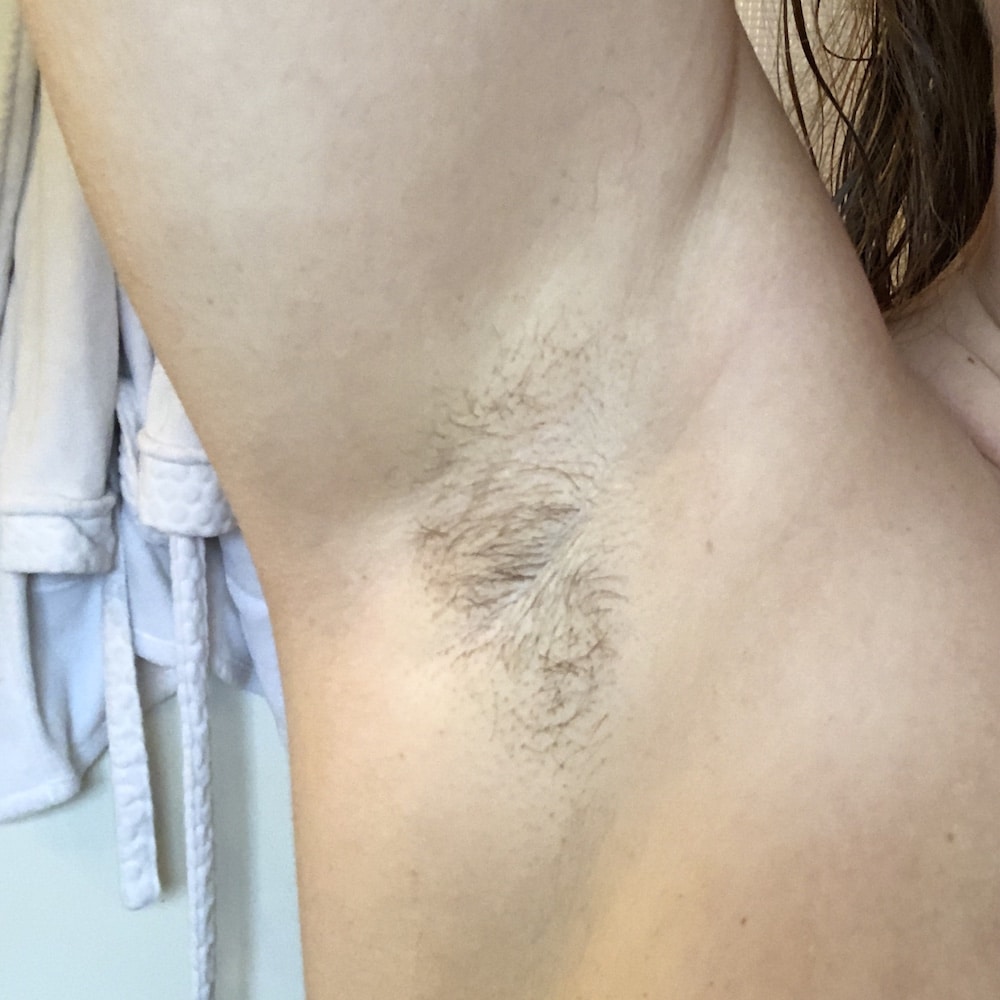
    Before Spray Airbrush Tan
    Before showering after spray tan
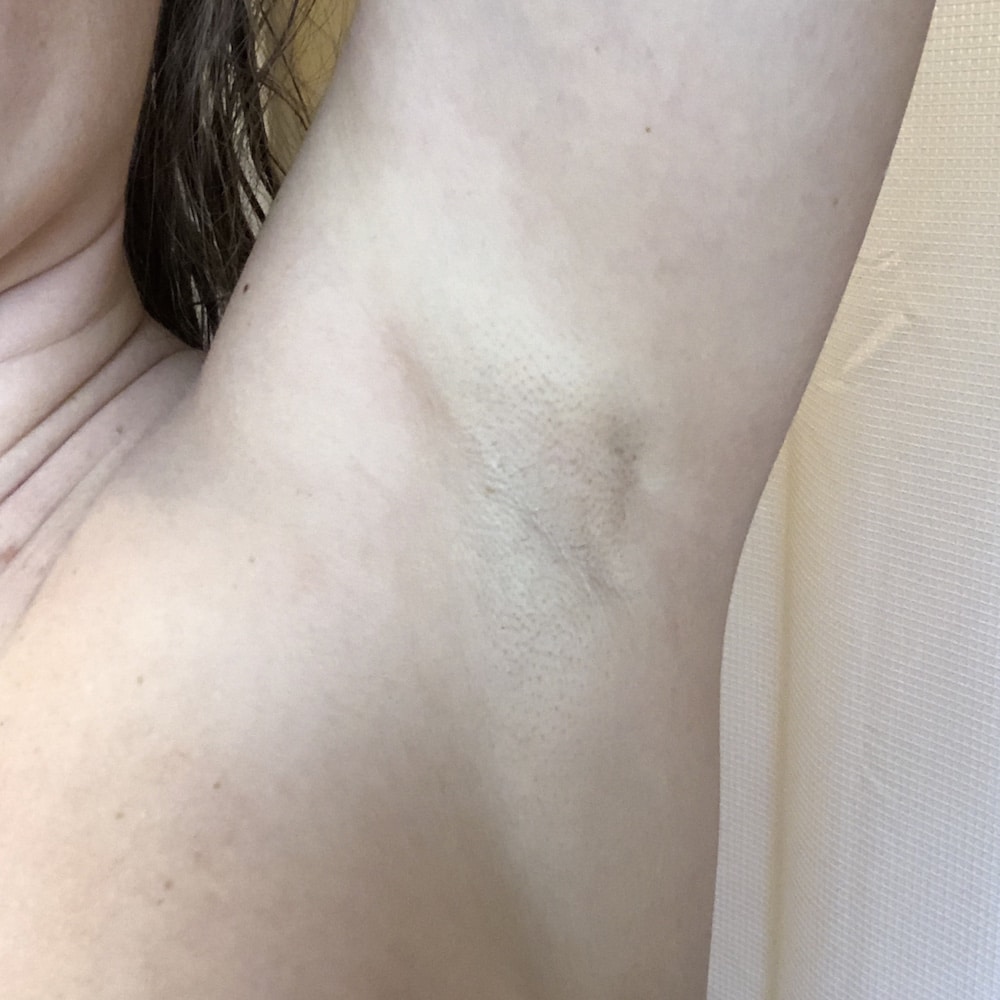
    After shower of spray tan
    After shower with spray tan
    • When you do shower, you’ll see brown/black wash off in to the shower/tub. Don’t worry! This is normal.
    • Spray tans fade quickly with activities like massages with oils, swimming in pools/lakes/hot baths, etc. So if you’re looking to really extend the life of your tan, it may be best to avoid what you can. But ideally, we get spray tans for when we are going to spend time in places like pools/ocean, etc.
      Just know that the tan may not last as long as it would without partaking in those activities… but it won’t remove it all at once and color the water or area around you or anything like that, so don’t let that be a concern!
    • Still use sunscreen! The spray tan will not protect from sunburns!

    Pre Spray Tan Tips

    When you make an appointment, make sure to think ahead of time (a couple of days) so you can plan and do a few things to help make the best of your spray tan. For instance,

    • Do the spray tan 2 days before your event/trip/etc. This gives the tan time to settle in and give that natural glow. (Although I even love the look of the tan, the day after!)
    • Do not apply makeup, lotions, or anything beforehand on the day of but DO moisturize the night before and even days before if you can. No deodorant (or the spray may react with it and turn your armpits purple).
    • Exfoliate within 24 hours with an exfoliating scrub (not oil-based), gloves, or even just use brown sugar!
    • Moisturize the rough areas beforehand and exfoliate! (Heels, elbows, etc.)
    • Shave the night or morning before, just try not to use an oil-based shaving cream. If you wax, do so at least 24 hours prior to your tan. If you’re currently undergoing laser hair removal, you should refrain from spray tanning all together!
    • Do you get manicures and pedicures? Do them at least a day in advance. Rubbing, exfoliating and other services can remove the spray tan from the areas they focus on if you do them after your tan.
    • Still feel unsure? Call and talk to someone at a spray tan location if needed. They are usually super helpful!
      If you’re in the St. Louis area, I LOVE LOVE LOVE Vegas Tan. But we just moved to Montana so I’ll be trying out some new locations and hope to have some reviews soon!

    Tips When Going to Spray Tan

    • Wear loose clothing and try not to wear a bra afterward! So lose/baggy and dark clothing is ideal. I’m a goof and wore tight yoga pants on my first visit. It turned out to be ok, but I was a nervous wreck.
    • Don’t wear jewelry… but if you do, take it off before the tan.
    • Is it raining that day? Park close if you can, take an umbrella, and wear clothes covering your skin! (Long sleeves, pants, full-covering shoes, etc.) My husband and I went when it was raining and we had a few raindrop spots on our arms that weren’t horrible, but still showed and we wished they hadn’t.

    After Spray Tan Tips

    Spray tan 2 days after

    Aftercare of your spray tan can be just as important as the pre-care if you really want to extend the life of your tan. Here are my tips for after…

    • Wait to shower, workout or do any activity that will cause you to sweat, until at least 6 hours after the treatment. (Unless your salon recommends a different time. Different tanning solutions and procedures can make this vary, but this is what I’ve commonly found.)
    • Try not showering AS much. I know that may sound “gross” but just don’t take a hot bath, just for the heck of it, if you want you tan to last longer. Or, even if it comes to your normal, regular showering… just taking care of the areas that need it may be a trick to getting around feeling clean, without scrubbing off the tan.
    • Try not to scrub or use rough cleansers or a loofah. Hand wash is ideal!
    • Stay moisturized after the spray tan to extend the life of your tan. Use an unscented moisturizer or moisturizer designed to prolong the life of your tan. Lotions from places like Bath and Body Works and Victoria Secret are not ideal and can break down the spray tan.
    • After your shower, don’t rub the towel super hard against your skin. Pat drying is best!

    I sure hope this helps you if you’re preparing to go for a spray tan soon! If you’re scared (or still scared) to go try it, just remember that it doesn’t last forever and if you’re thinking of getting it done for a major event or trip, maybe go once a month or so before, to make sure you like it and want to have it done before something special!

    Have you Had a Spray Tan Before?

    Do you love spray tanning? What tips do you have that I haven’t mentioned? I’d love to hear! DM me on Instagram HERE!

    Air Fryer Bacon

    April 16, 2020

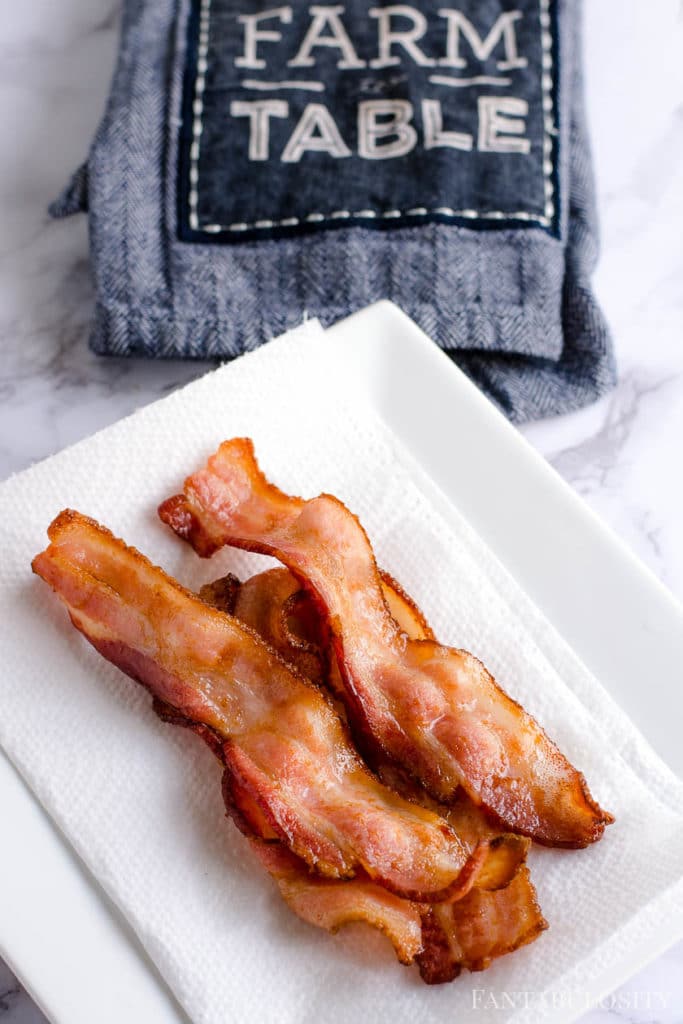
    bacon that was air fried, on paper towels

    Air Fryer Bacon – Cooking bacon in the air fryer doesn’t get easier and I’m showing you how and for how long to cook bacon based on your texture preference!

    You’ll love making bacon this way to eat by itself or to include in other recipes like this breakfast egg roll recipe! You can add it to sandwiches as well, maybe some Breakfast Bagel Sliders?

    Air Fryer Bacon on a papertowel

    Air Fryer Bacon

    I’ll admit… for years, I hated frying bacon. The mess, the popping of hot grease all over my hands when flipping. The burning, the smoke. It became something I would dread but would keep doing it because who doesn’t love to EAT bacon? Plus, I absolutely love serving it alongside my favorites like biscuits and chorizo gravy (or for something quick and easy, white gravy recipe) and brioche french toast.

    So I heard about cooking bacon in the oven. I gave it a try, it was better than frying it on the stovetop, but the pan was such a pain in the butt to clean, I’d have to be SUPER careful pulling the pan out of the oven so the grease didn’t slosh (is that a word?) around and spill… it just wasn’t that much better.

    But then. THEN I got the air fryer.

    When I first got the Chefman air fryer, I was grabbing everything in sight to see if it would taste better or make things easier. Everything from air fryer cheeseburgers to imitation crab meat. (The crab meat was interesting, but I probably wouldn’t do it again.)

    Well let me tell you… cooking bacon in the air fryer has CHANGED my LIFE. For real. Not only is it so much easier to cook and clean up, it gives the bacon a texture that I dream about now. If you haven’t jumped on the air fryer train yet, maybe you have a George Foreman kicking around? Bacon works there, too!

    More Air Fryer Recipes You’ll Love:

    • Air Fryer Burgers
    • 20+ Air Fryer Recipes
    • Air Fryer Brats

    So let me dive in and fill you in on how to cook bacon in the air fryer in case you have one and want to give it a try, or in case you’re thinking about getting an air fryer and want to see what this bad boy can do.

    How to Cook Bacon in the Air Fryer

    It is so incredibly easy to make this, so feel free to scroll down and head right to the printable recipe card for the instructions, but I thought I’d give you tips along the way, different cooking times/outcomes, and bacon details to help make you the air fryer bacon extraordinaire.

    What Kind of Bacon is Best

    Well, we could start a riot if I sat here and claimed that there is a brand/type of bacon that is the best in the world. So I think I’ll refrain from that and just list out OUR favorite bacon details.

    • thick-cut
    • applewood
    • hickory
    • peppered
    • butcher shop fresh bacon
    • whatever’s the cheapest (For real, sometimes I can’t pass up the super cheap bacon when I see packages out there that are $10. But man that $10 bacon is good. Ammiright?)
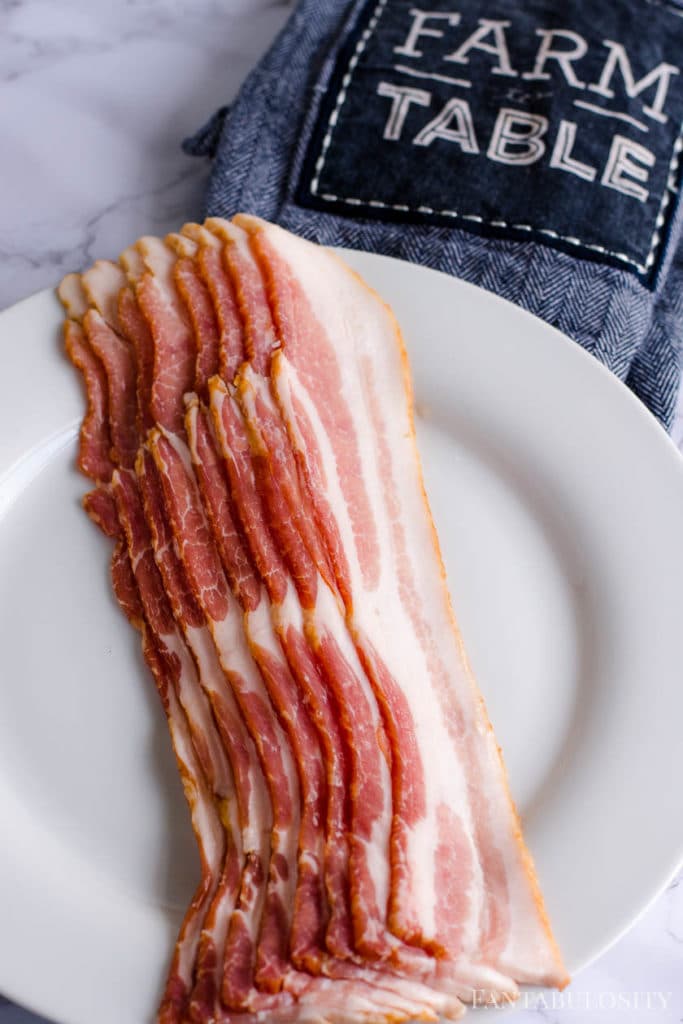
    Raw uncooked thick bacon on a white plate

    Separate the Bacon

    Most bacon comes stuck together like in the photo above. So I recommend you open the package and pull it all apart, right away. It will be much easier to grab a slice as you’re cooking multiple batches.

    How Many Pieces of Bacon at a Time?

    Depending on the size of your air fryer, will depend on how much you can cook at a time.

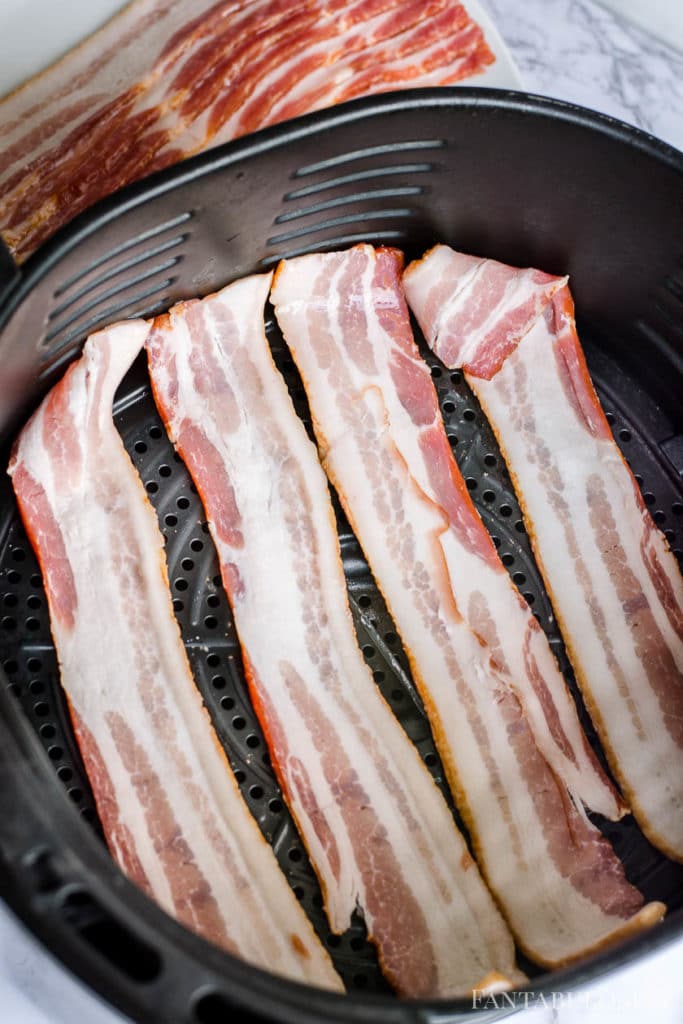
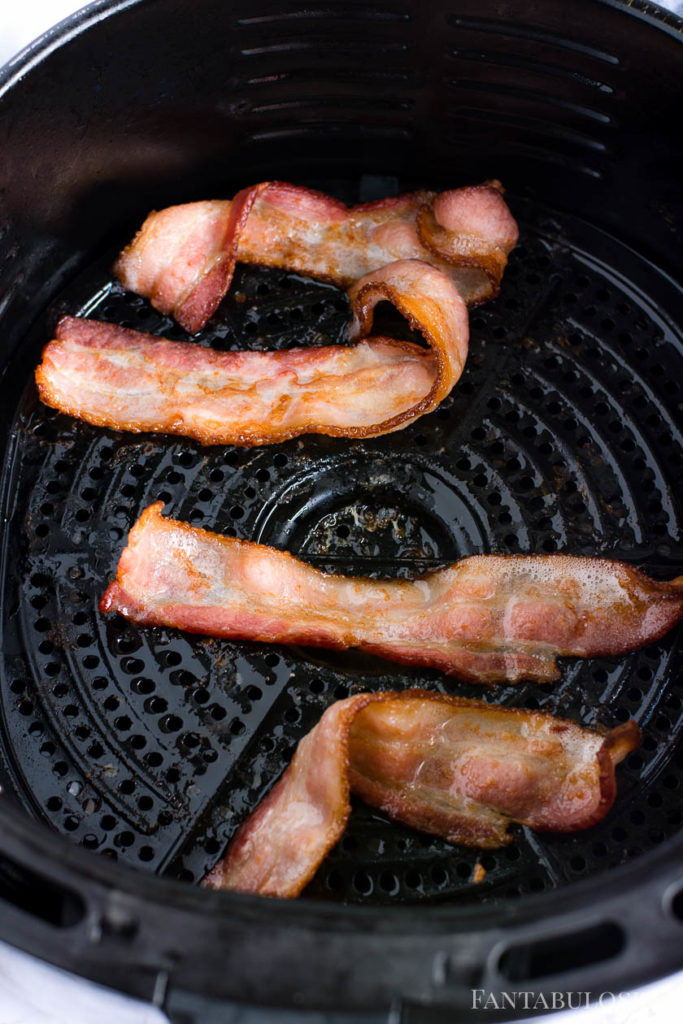
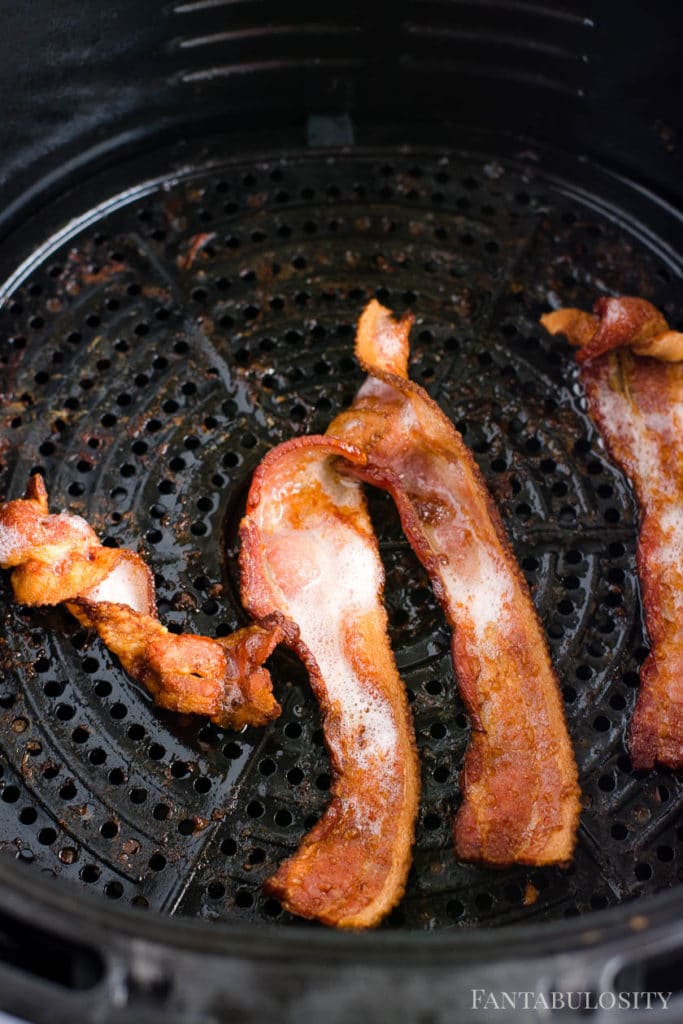
    With mine, I can cook about 4 pieces at a time. (Possibly 5-6 if they’re smaller.) However, you don’t want the bacon to overlap, or there will be pieces of the bacon that won’t cook.

    Do I Have to Spray NonStick Spray in the Air Fryer?

    My air fryer recommends that I don’t use a nonstick cooking spray. It says that it can damage the nonstick surface. (But I’m not going to sit here and lie, saying I’ve never done that.)

    For bacon, I don’t spray it because even though the bacon can and has stuck just a little bit, it’s never bad enough to need to spray.

    Uncooked raw bacon in air fryer

    How Long to Cook Bacon in Air Fryer

    Depending on how you like your bacon, will depend on how long you want to cook it.

    For us, we have two people in our house that want floppy bacon, and two people that want crispy/crunchy bacon.

    So, this is another reason I love cooking bacon in the air fryer because I can cook it differently for different preferences around here.

    What Temperature to Cook Bacon in the Air Fryer

    I’ve found that I prefer cooking bacon on 400°. It’s high, so it cooks faster, which is ideal when I have two little boys starving in the morning.

    Floppy/Crispy Bacon

    Note that air fryers can be different so cook times and temperatures will vary. It’s best to keep an eye on it the first time you cook bacon in the ai fryer so you can get an idea of how yours works.

    First Photo: As you’ll see in the photo collage below, I cooked the first batch of bacon at 7 ½ minutes to get the “done”, yet floppy bacon.

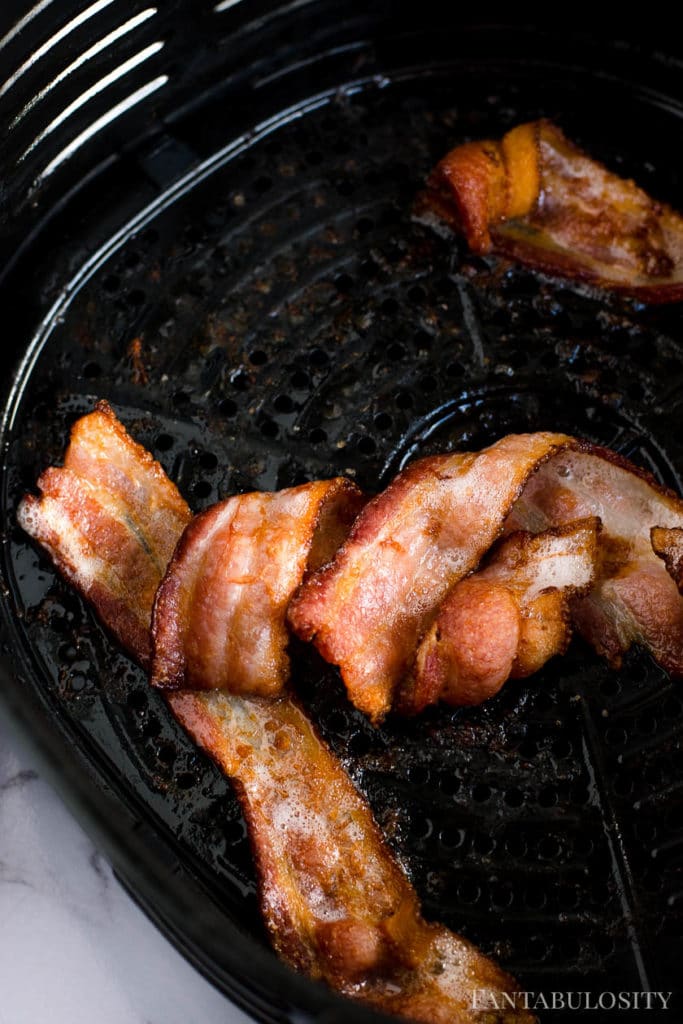
    Second Photo: If you’ll notice, the second photo has the same cook time as the first. This is because the air fryer is cold and needs to heat up for the first run but the bacon in the 2nd batch cooks faster because the air fryer has already been heated up.

    So the “7 ½ minute” bacon will be a little more done than the first round. I mention this because I want you to keep in mind that when you’re doing multiple batches, your bacon may take less time, the more you cook.

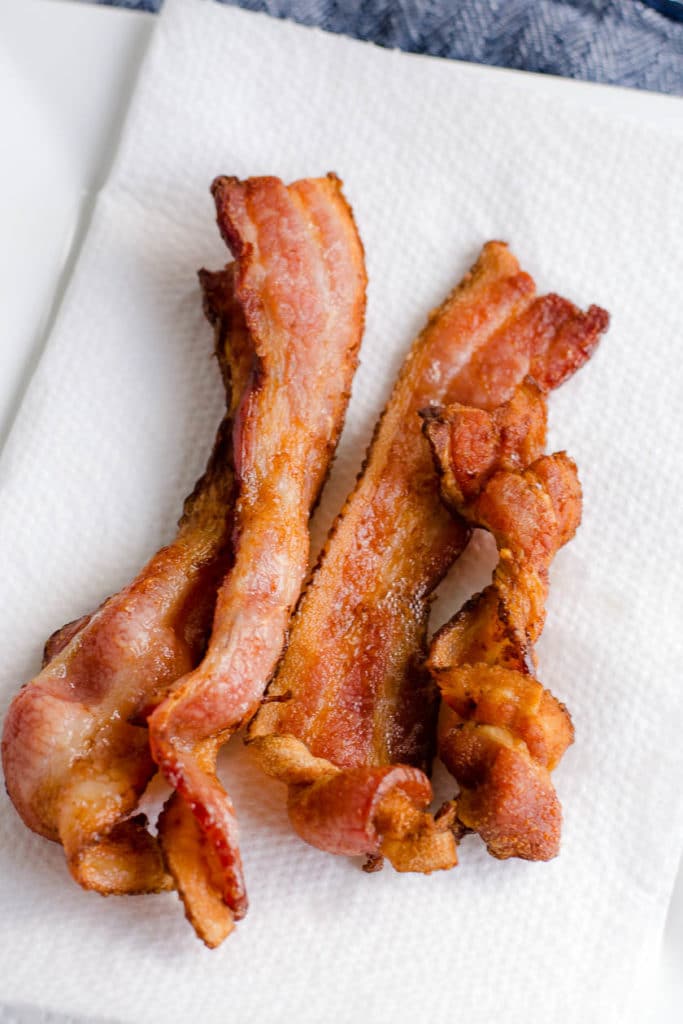
    Third Photo: I cooked that batch of bacon at 8 ½ minutes. This gave a crispy bacon result (my fave!).

    7.5 minutes bacon cooked in the air fryer
    7.5 minutes – 1st Batch
    2nd batch - heated air fryer - 7.5 minutes
    7.5 minutes – 2nd Batch
    8.5 minutes bacon cooked in air fryer
    8.5 minutes – 3rd Batch
    Bacon cooked for 7.5 minutes in air fryer
    7.5 minutes – 1st Batch
    2nd batch of air fryer bacon cooked at the 7.5 minute mark
    7.5 minutes – 2nd Batch
    Bacon cooked in the air fryer for 8.5 minutes - crispy
    8.5 minutes – 3rd Batch

    Crispy Bacon Tip

    One thing that I want to mention before we get in to the “tip” is that cooking the bacon in the air fryer (or at least in my air fryer) I love that the grease drips down in the bottom and the bacon doesn’t sit in the grease.

    I believe this helps give the bacon flavor/texture that I love so much!

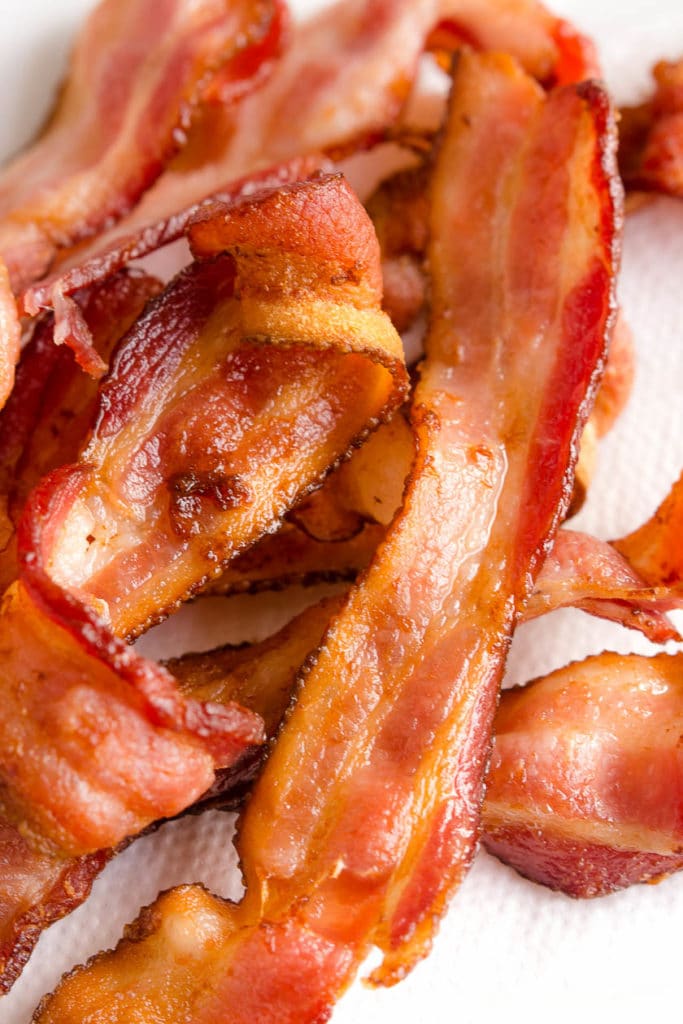
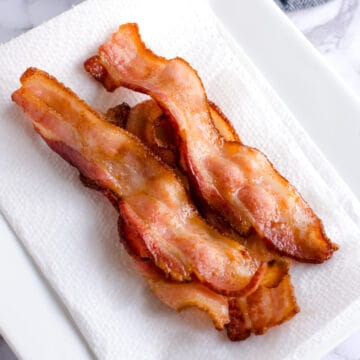
    The TIP: Whether or not you cook your bacon in a pan, oven or air fryer… when the bacon is done, you can remove the bacon and place it on a plate, on top of a paper towel. This allows the grease to soak up, and gives more of a crispy texture!

    air fryer bacon

    Recipes for Bacon

    If you’re looking for different ways to use your bacon (if you’re not planning on eating it outright) here are recipes you’ll adore! Personally, I even love adding a few slices on a biscuit after cooking biscuits in the air fryer!)

    • Bacon Brioche Sandwich
    • Mini Waffle Breakfast Sandwiches
    • Chicken Bacon Ranch Pasta
    • Easy Bacon Ranch Pasta Salad
    • Easy Broccoli Raisin Bacon Salad
    • Italian Chopped Salad
    • The BEST Side Salad Recipe
    • BLT Hot Dog
    • Baked Turkey Burgers (with bacon)
    • Chicken Bacon Ranch Crescent Bites
    • The BEST Green Bean Casserole with Bacon and Cheese
    • Roasted Brussel Sprouts with Bacon and Cranberries

    Easy Breakfast Recipes You’ll Love

    We love having air fryer apple fritters with bacon, but you’ll also love these:

    • The BEST Pancakes Recipe
    • Biscuit and Gravy Casserole with Eggs
    • Cinnamon Roll Casserole

    Recipe

    bacon that was air fried, on paper towels
    Print Pin
    5 from 4 votes

    Air Fryer Bacon

    How to cook bacon in the air fryer, for floppy or crispy! Plus, cook as much as you can fit in your air fryer!
    Course Breakfast
    Cuisine American
    Cook Time 7 minutes minutes
    Total Time 7 minutes minutes
    Servings 4 pieces
    Calories 92kcal
    Author Jessica Burgess

    Ingredients

    • 4 slices bacon

    Instructions

    • Line air fryer basket with slices of bacon, making sure they don't overlap. (The sides can be touching.) Depending on the size of your air fryer basket, will depend on how many slices you can cook at one time.
    • Cook for 7.5 minutes at 400 degrees for floppy bacon. Cook 10 minutes for crispy bacon. (Or cook until the desired crispiness is reached, as different brands of air fryers can vary for cook time.)

    Notes

    Different brands and models of air fryers can make the cooktime vary. If this is your first time that you’re making bacon in the air fryer, it’s best to check it at about 7 minutes to make sure it’s to your desired doneness. 

    Nutrition

    Serving: 1slice | Calories: 92kcal | Carbohydrates: 0.3g | Protein: 3g | Fat: 9g | Saturated Fat: 3g | Polyunsaturated Fat: 1g | Monounsaturated Fat: 4g | Trans Fat: 0.03g | Cholesterol: 15mg | Sodium: 146mg | Potassium: 44mg | Vitamin A: 8IU | Calcium: 1mg | Iron: 0.1mg

    Easy Crab Bisque

    April 16, 2020

    Quick Crab Bisque! Holy Moly this is good! https://fantabulosity.com

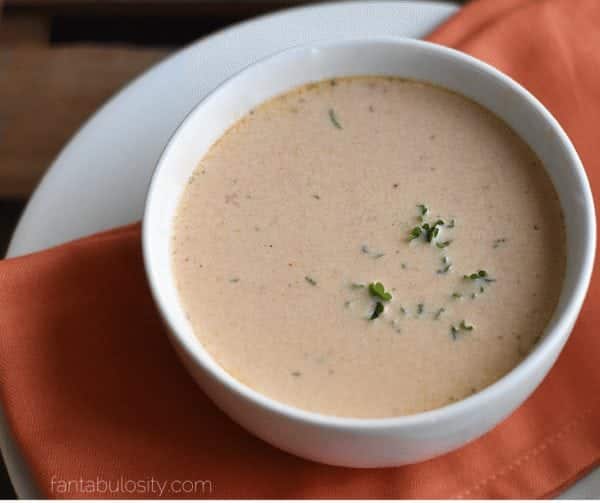
    Easy Crab Bisque: A not-so-gourmet, but tastes gourmet, bisque that you can make at home with real crab or imitation crab meat!

    Easy Crab Bisque - in a white bowl, orange napkin

    My Lobster Bisque recipe has gone a bit “viral,” on Pinterest these last few months, and I can understand why. It is ridiculously good.

    So the other day when I went to make it again, I remembered that I had crab meat in the fridge that I needed to use instead.
    It was a container that my husband found in the store that had diced, steam-cooked crab meat, ready to go, and we just knew we’d find something to make with it…

    and I did…

    More recipes you’ll love:

    • Best Chicken Noodle Soup
    • Taco Soup Recipe
    • Loaded Ranch Potato Soup
    • Buffalo Chicken Soup
    • Easy Lobster Bisque

    Easy Crab Bisque

    I’ll be honest, over the years and being a food blogger in general… I’ve come across a lot of crab bisque recipes online but they look SUPER difficult to make and require a ton of ingredients.

    Are they delicious? I’m sure they are. But if I’m going to spend an arm and a leg on dinner, I prefer to head out to a nice restaurant and have someone make it for me. Ammiright?

    So when I decided to whip crab bisque up, I knew I wanted to keep things simple.

    I’m so happy to say that this recipe was SO good, and I knew it had to make an appearance here on the blog because I know how much you all love a good, easy, recipe… and especially one that tastes like it took forever in the kitchen. (Especially this clam chowder soup recipe!)

    How to Make Easy Crab Bisque

    You can find the full recipe with ingredients and instructions at the bottom of this post!

    Crab Bisque Ingredients

    You can count on this being just like all of the other easy recipes here on Fantabulosity that use everyday ingredients.

    This recipe uses: (see the recipe card below for the measurements and instructions!)

    • garlic cloves
    • petite diced tomatoes with juice
    • low sodium chicken broth (You could make my homemade chicken broth, and control the sodium.)
    • Old Bay seasoning
    • black pepper
    • crab meat (you can substitute with imitation like we do in this crab pasta bake, but we LOVE real crab meat if we have it)
    • heavy cream
    • flour & butter for a roux if you want a “thicker” bisque
    • fresh parsley chopped, optional

    Easy, right? Odds are, you may even have most of the ingredients on hand anyway! That’s perfect for those of you that have crab on hand and you’ve found your way here by searching of a way to use it! Hopefully no need to head to the store before you make this!

    How do you thicken crab bisque?

    We’re a fan of making a roux to go in the crab bisque, to thicken it a little. And although “roux” sounds like a fancy word, it’s super easy, so don’t worry about that.

    I recommend that you start with just a little because you can always add a little more here and there. So starting with about 2 tablespoons of flour and 2 tablespoons of butter, heat them together, stirring, until butter has melted all of the way and the two are mixed evenly.

    Next, add the flour/butter mixture to the bisque and let it sit 1-2 minutes until soup thickens.

    Still not thick enough? Make another batch of roux and repeat until the bisque reaches it’s desired thickness!

    What do you serve with crab bisque?

    Our favorite side dish with ANY soup is the BEST Side Salad Recipe. It never disappoints and it compliments a dinner in one of the tastiest ways possible!

    But other side dishes that go well with crab bisque too are:

    • Apple Salad (more so like a dessert, or it can be invited to the dinner table!)
    • Pico de Gallo and Chips
    • Caprese Sandwich Recipe
    • Drop biscuits with garlic and cheese

    Recipe

    Quick Crab Bisque! Holy Moly this is good! https://fantabulosity.com
    Print Pin
    4.73 from 11 votes

    Easy Crab Bisque

    This soup recipe is super simple to make. Fresh crab in a tomato cream broth. Pair with warm bread for the ultimate comfort meal.
    Course Soup
    Cuisine American
    Prep Time 15 minutes minutes
    Cook Time 45 minutes minutes
    Total Time 1 hour hour
    Servings 8 servings
    Calories 287kcal
    Author Jessica Burgess

    Ingredients

    • 1 garlic clove minced
    • 2 14.5-ounce cans petite diced tomatoes with juice
    • 1 32-ounce carton low sodium chicken broth
    • 1-2 Tablespoons Old Bay seasoning to taste
    • ¼ cup fresh parsley chopped
    • 1 teaspoon black pepper
    • 16 ounces crab meat chopped (you can substitute with imitation but I recommend real crab meat)
    • 1 pint heavy cream

    Optional Roux (if you prefer a thicker bisque):

    • 2 Tablespoons flour
    • 2 Tablespoons butter room temperature

    Instructions

    • In a large bowl, add all ingredients, except crab meat heavy cream. Stir together to mix.
    • In a blender, pour ⅓ of the soup mixture, and blend for about 5 seconds. Pour into a soup pot.
    • Add another ⅓ of soup to the blender, and blend for 3 seconds. Empty into the soup pot.
    • Pour remaining unblended soup into the blender. Give one or two short pulses, just barely blending the soup. (you want each ⅓ to blend less and less for a better consistency.)
    • Pour remaining soup into the pot. Add the crab meat.
    • Cook soup over low-medium heat for about 45 minutes, stirring occasionally.
    • After 45 minutes, stir in heavy cream.

    Optional Roux (if you choose to omit, skip to last step):

    • Heat flour and butter in a small pan until mixed, and then add to bisque. Whisk together and let sit 1-2 minutes until soup thickens.
    • Serve immediately.

    Nutrition

    Serving: 1serving (2/8 recipe with roux) | Calories: 287kcal | Carbohydrates: 3g | Protein: 11g | Fat: 25g | Saturated Fat: 15g | Cholesterol: 112mg | Sodium: 523mg | Potassium: 170mg | Vitamin A: 1140IU | Vitamin C: 6.9mg | Calcium: 72mg | Iron: 0.7mg

    P.S. I myself like a thicker bisque, so I make about 2 sets of roux to get it to the consistency that I like.

    Can you freeze crab bisque?

    Absolutely! You can freeze leftovers or make a double batch to freeze and enjoy later.

    Freezing in freezer bags or mason jars are great options.
    (Just note: when freezing in mason jars, be sure to let the soup cool down a bit and don’t crowd the jars in the freezer, as they’ll need a little room to expand as it freezes. You don’t want to have crab bisque all over the inside of the freezer!)

    I so hope you enjoy this recipe and I’d love to hear in the comments below if you made it!

    Pin it to Remember it:

    Easy Crab Bisque! Holy Moly this is good! https://fantabulosity.com

    A Face Deffuzer? Yep, Let’s Get Rid of that Peach Fuzz.

    April 15, 2020

    How to remove peach fuzz from your face

    How to Remove Peach Fuzz: Using a face deffuzer I had to see for myself if this thing would remove peach fuzz and now you can too!

    How to Remove Peach Fuzz

    It really took me a while to get the guts to try this face defuzzer out.

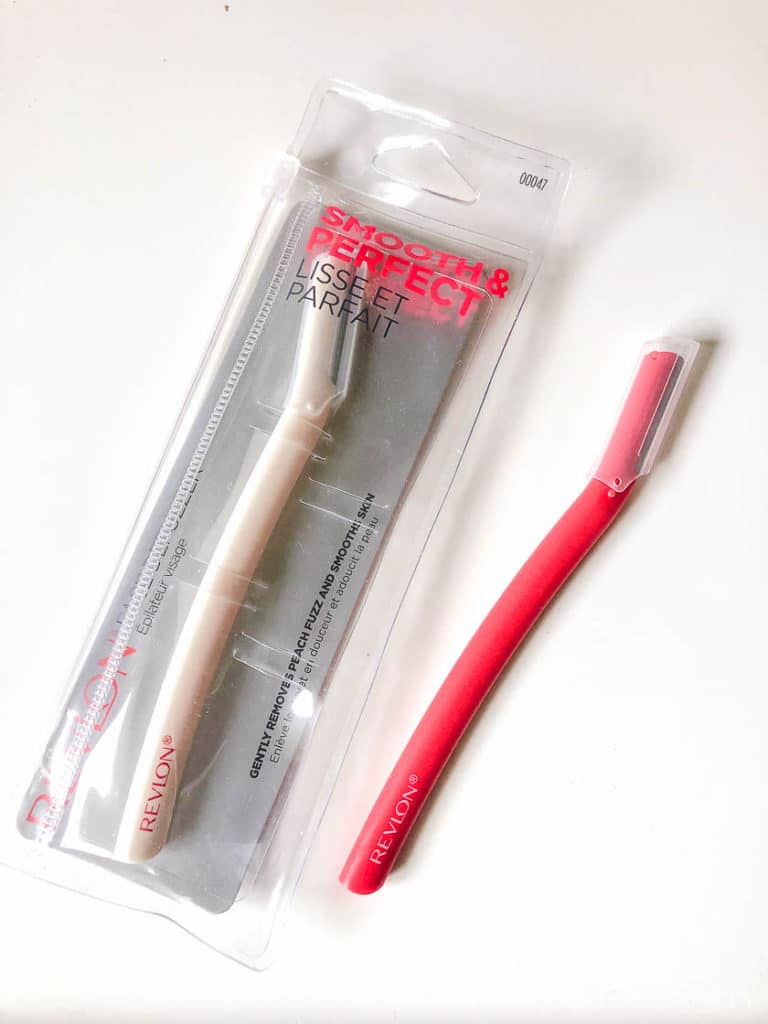
    Revlon Face Defuzzer

    I had a friend gift one to me at a recent favorite things party and I was a bit nervous to try it, even though she was VERY convincing when telling me why it was her favorite.

    Will I Regret Doing It?

    Why was I nervous? Well, I was afraid if I did it once, I’d have to keep doing it because it would grow back dark or grow in thicker.

    But after asking around in the Creating Your Happy Facebook group, so many of you said that you use something similar too and swear by it!

    It was just the push that I needed to give it a try.

    So in true Fantabulosity fashion, I propped up the camera and filmed my first try so you could see exactly what it was like and hopefully it will help you decide if you want to try it too!

    VIDEO: Using the Face Defuzzer

    In Case You Can’t Watch Right Now

    I know what it’s like to be somewhere and you just want to know what happened, but you can’t hear or watch the video right this second.

    So I thought I’d recap what happened in the video, in case it helps.

    • How to use the face defuzzer: In a downward motion, gently slide the blade down your face.
    • Dry or Wet? My friend wets her face when she uses the tool or she gets little scratches and lines. However, the Revlon packaging says to use on dry, clean skin. So defuzzers may vary.
    • Do I like the face defuzzer? I do!
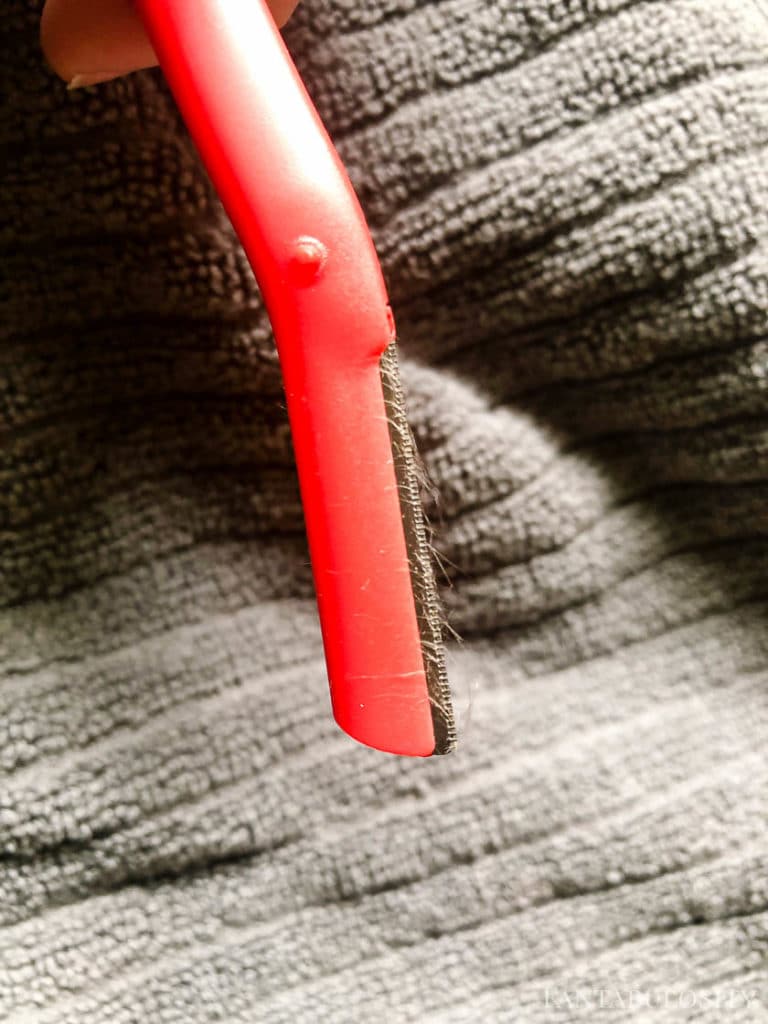
    • Does it remove peach fuzz? Oh yes, and it’s gross. But kind of nice to see what all is coming off of my face.
    Peach fuzz removed from face - with tool
    • Is my face smoother? To be honest, I didn’t really feel THAT much of a difference, but I’ve heard so many people say that they can tell it helps with exfoliating and removing dead skin as well as peach fuzz. But to see all of the peach fuzz come off, I’m now a fan.
    • Did I get a 5 o’clock shadow? Not yet at least. 🙂

    Revlon Face Defuzzer Tool

    So what do you think? Is the Revlon Face Defuzzer something you’ll try too? Do you already use something like this? Tell me all the things. I’m curious to know if I’ve been hiding under a rock and this thing should have been in my makeup bag for years now.

    Where to Buy a Face Defuzzer

    I found the Revlon Face Defuzzers on Amazon HERE, but they can be found at Walmart or Target too!

    Removed peach fuzz from face

    You’ll Also Love:

    • Laser Hair Removal
    • Applying eyelashes for the first time
    • See inside of my makeup bag

    Applying Eyelashes as a Beginner Video

    April 6, 2020

    Applying fake eye lashes

    Heavens no, this is NOT the eyelash tutorial you’ve been looking for. However, if you’ve been intimidated by applying eyelashes, this may ease your concern!

    Applying eyelashes for the first time

    You’ll also want to check out:

    • Laser Hair Removal
    • My Favorite Makeup Products – VIDEO
    • How to Get Beach Waves in Your Hair – VIDEO

    Applying Eye Lashes as a Beginner

    So I did it. I’ve been wanting to try applying false lashes for the first time but was super intimidated by it so I kept putting it off.

    “Will I rip my real eyelashes off?”

    “Will it fall off, mid-sentence, while I’m having coffee with a friend?”

    Those were real thoughts I had going through my head until I decided to just grow a set of … ahem… and pull my big girl panties up and roll with it.

    Eyelash Video

    So in Fantabulosity fashion, I couldn’t do this alone. I knew that I had to get this on video so I could share the hot mess attempt with you, and in turn, hopefully encourage you to attempt it too if you’ve been putting it off.

    After the video, you can see the list of items I used and the links of where to buy them in case you’d like to try what I used too!

    Eyelashes, Glue & Tools

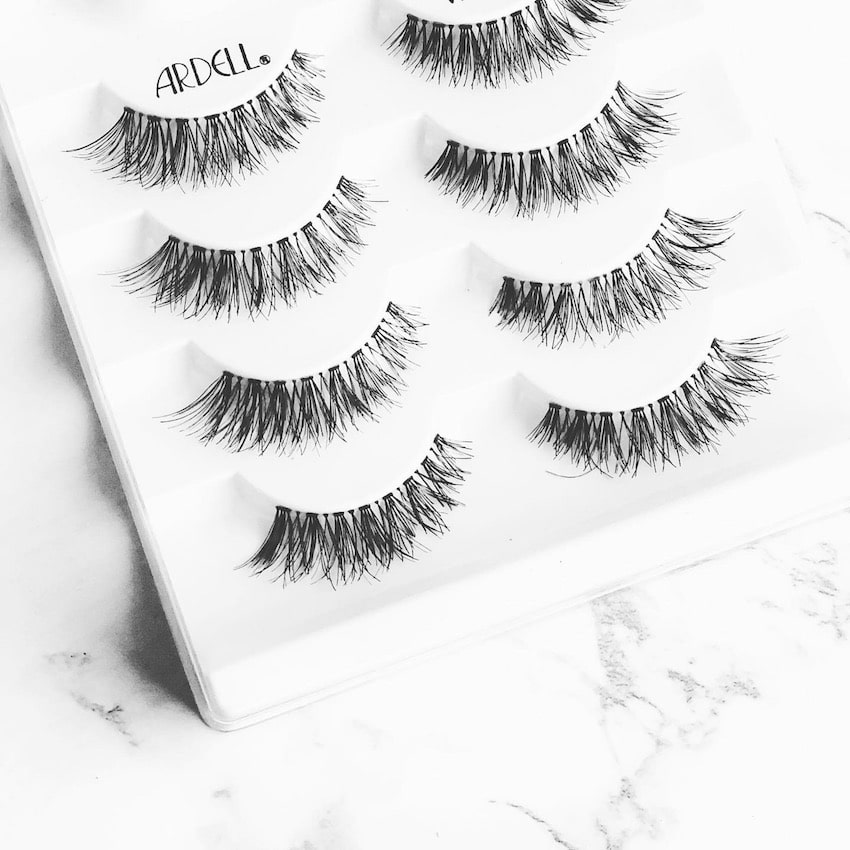
    ardell false fake eyelashes in package

    Now, although I had no idea what in the heck I was doing when applying them, I DID do my research on products by asking my makeup stylist what to use (You know, the one who showed me how to cover the dark circles under my eyes?) so I at least started on the right foot with that. But other than that, I was winging it!

    Here’s what I used:

    • Ardell Eyelashes  (I used the “wispies” but plan to use the “natural” next time to see how I like those!)
    • Callas Eyelash Glue
    • Ardell Eyelash Applicator
    • Eyeliner
    • Mascara

    So Tell Me…

    Are you well experienced in applying eyelashes? What are your favorite products? I’d love to hear and try them out!

    Or are you a beginner too? I’d love to hear if you’re going to try it now!

    Drop me a note in the comments or email me and we’ll chat about it! I love making new friends!

    Air Fryer Burgers

    April 4, 2020

    Air Fryer Burgers: In 10 minutes you’ll have juicy burgers that will make you wonder why you ever cooked them on the stove!

    We are BIG fans of making recipes in the air fryer around here and even love switching things up when it comes to burgers, such as these juicy turkey burgers in the air fryer!

    Air Fryer Burgers
    [feast_advanced_jump_to]

    “Can you cook a hamburger in the air fryer?”

    Why yes you can, and you may wonder why you waited so long to try it, now that you’re about to find out just how easy it is and how good the hamburgers (or cheeseburgers) are when they’re done!

    Now don’t get me wrong, hamburgers in the oven and pan-fried burgers are also a favorite way to cook them, and I do cook them that way when my air fryer is tied up cooking french fries or potato wedges. But cooking them in the air fryer is another easy dinner idea!

    If you’re a burger fan, you’ll also love Smoked Burgers and Baked Turkey Burgers!

    How to Cook Burgers in the Air Fryer

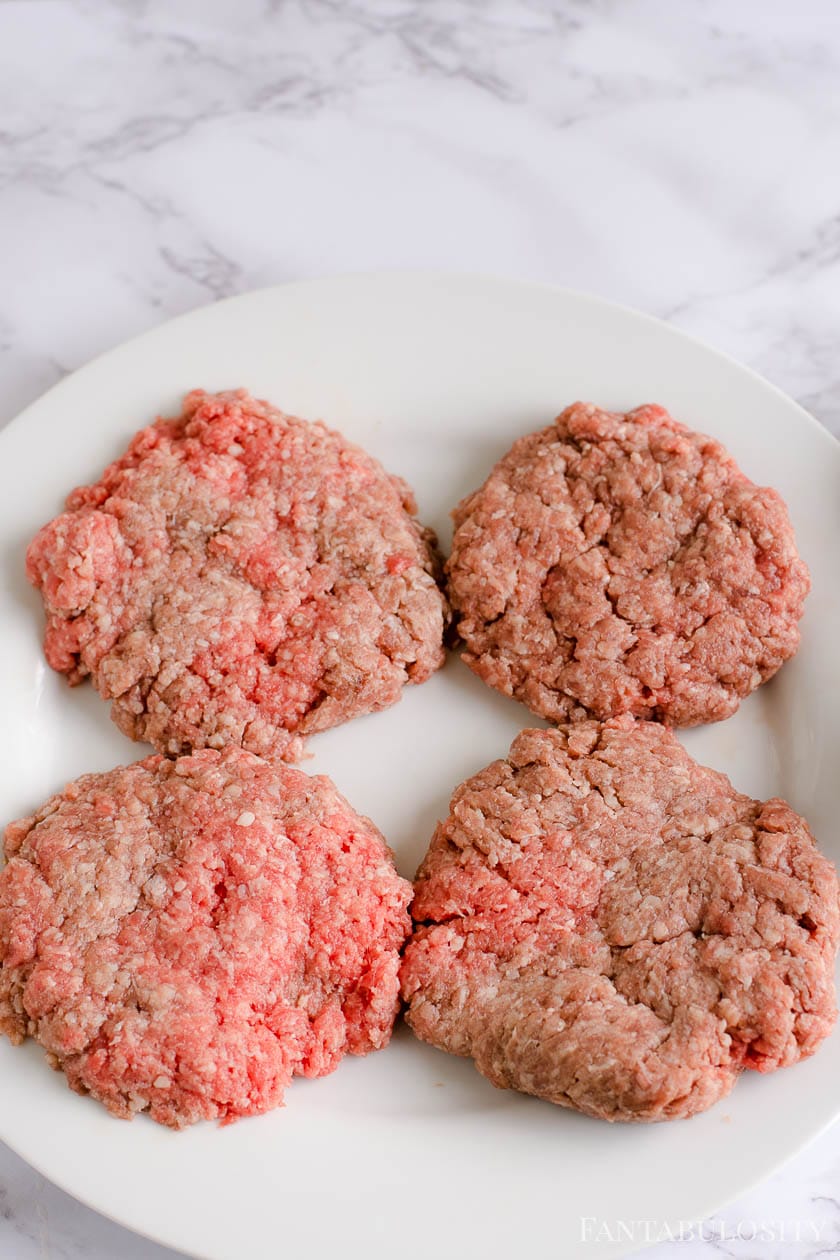
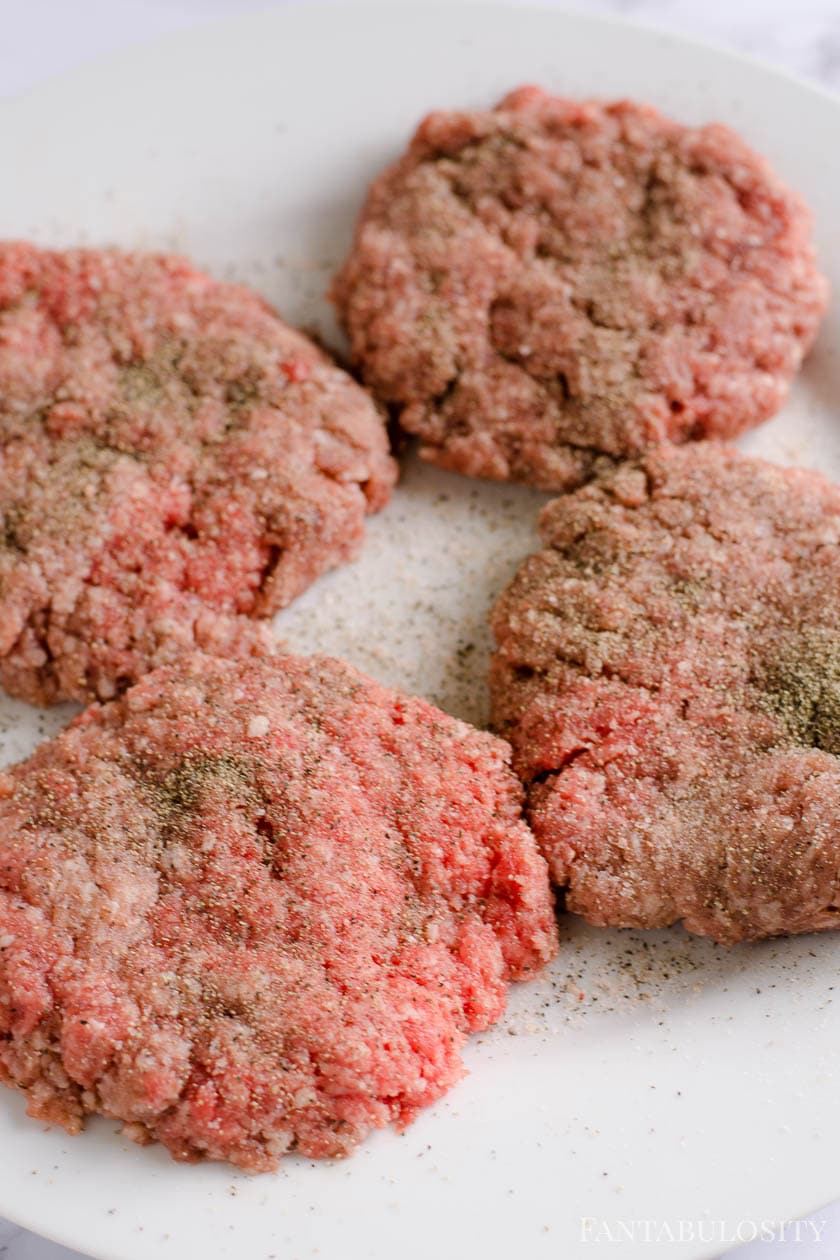
    If you’re starting with a pound of ground beef, patty out 4 burgers (or 3 larger patties) and place on a plate to season.

    Raw hamburger patties ready to bake

    Season one side of the burgers with salt and pepper, to taste. (We prefer to use kosher salt and peppercorn medley, however table salt/Himalayan salt or ground black pepper will do!)

    Seasoned hamburger patties with salt and pepper

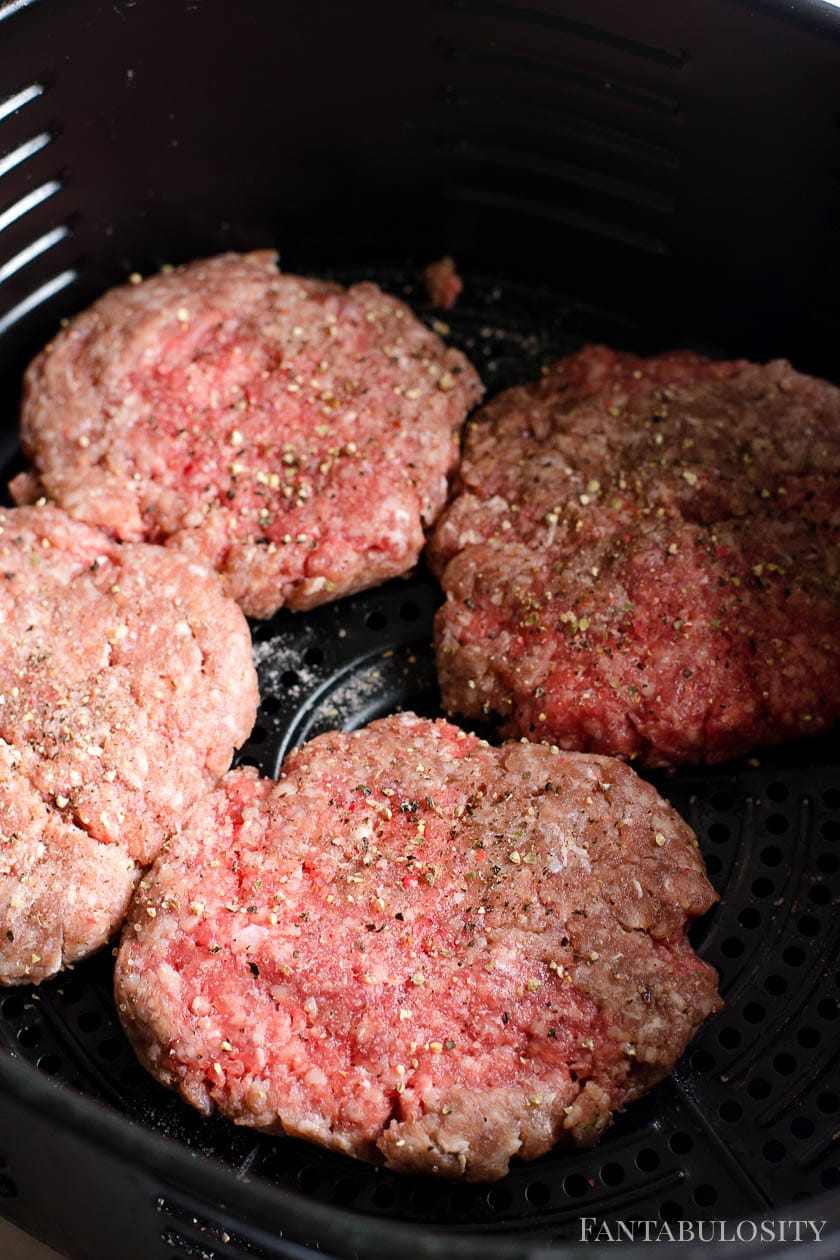
    Place the burgers in the air fryer basket (our Chefman air fryer is non-stick so no cooking spray is required), seasoned side down.

    Then, season the top-facing side of the patties with salt and pepper as well.

    Seasoned burgers in the Air Fryer

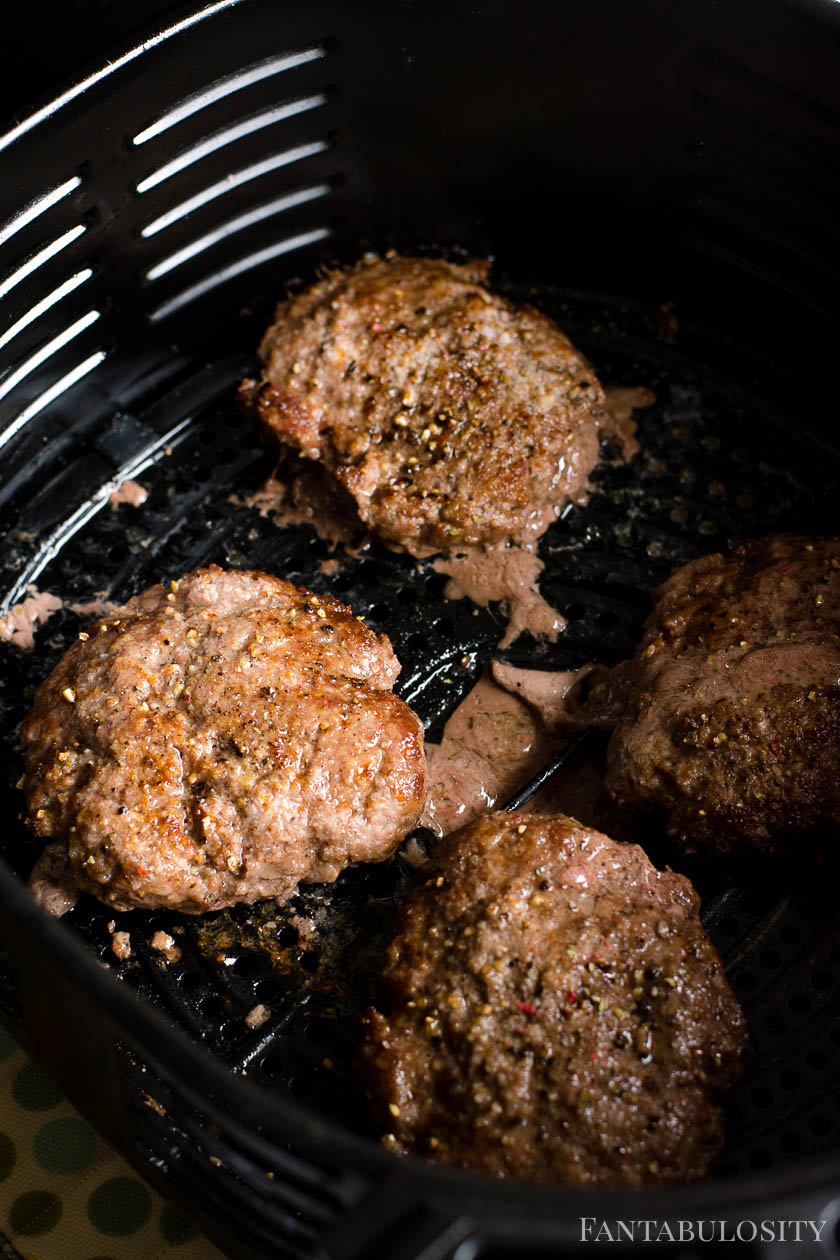
    How long does it take to cook a hamburger in an air fryer?

    Each air fryer can be different, but with our Chefman air fryer, we love our burgers cooked at 400 degrees for about 10 minutes. You may find that yours needs to cook a little longer or not as long.

    Do I need to flip the burgers?

    We find in our air fryer that we don’t need to flip the burgers! However, this may vary depending on the type of fryer you’re using.

    Cooked burgers in the air fryer

    The TRICK: Toast and Steam the Burgers

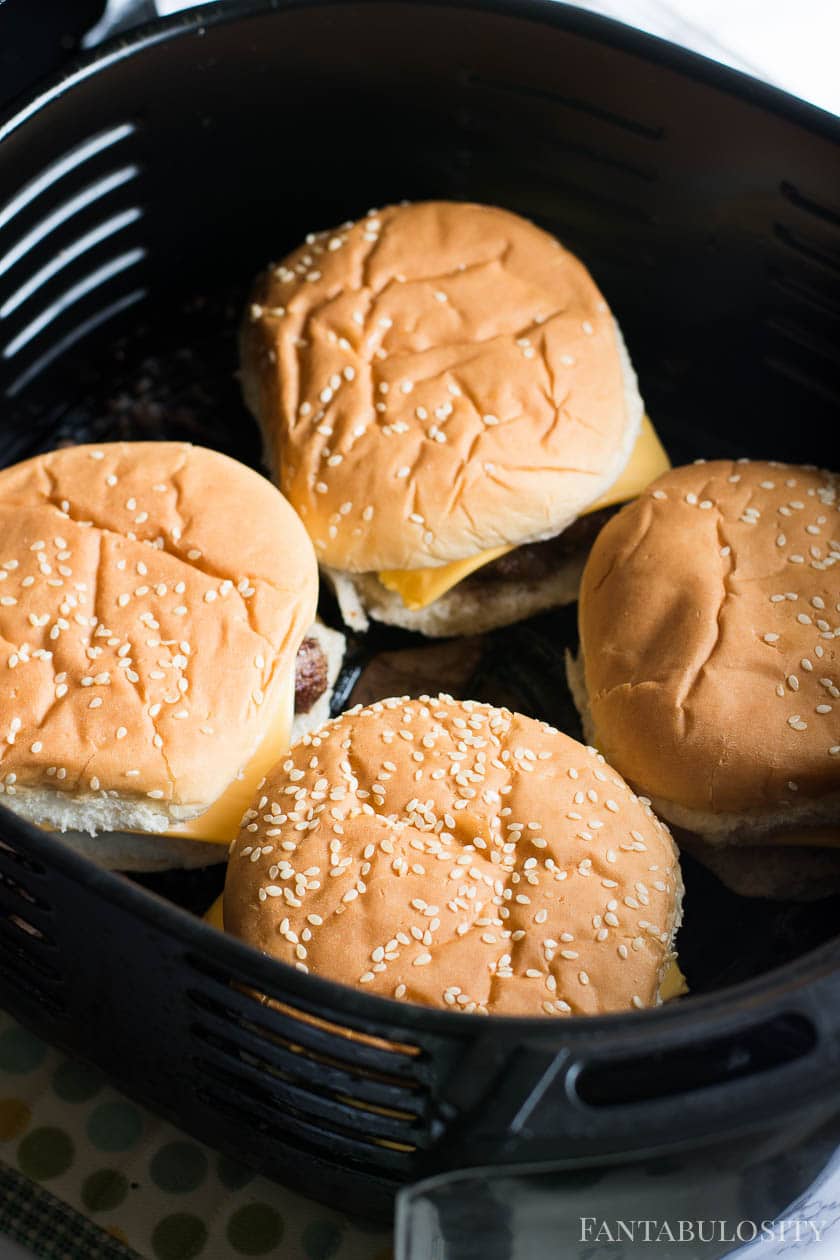
    One of our favorite things to do with burgers is to remove the burgers after cooking and build the burger with cheese and a bun.

    After assembling the burgers, we place them back in the air fryer (if it’s still warm) and let them sit for about a minute. (We do NOT turn the air fryer on because it can make the buns/cheese fly around. So we just let the heat from the previous cooking session, melt the cheese and toast the bun!)

    Note: If you’re making a burger like our Aloha Burgers, you may want to wait to put the pineapple on, and other ingredients until after toasting.

    Toasted Cheeseburgers in the air fryer

    What should the internal temperature for hamburgers be?

    Some like a little pink left in their hamburgers, but we prefer our burgers to be fully cooked. (Not well done and dry, but at least with no pink showing.)

    But the internal temperature of burgers should reach at least 160°.

    Burgers with cheese on a white plate

    What to Serve with Air Fryer Burgers

    Well, we’re HUGE fans of this side salad recipe because it goes with EVERYTHING! But here are a few other side dish recipes that we think go really well with burgers:

    • Bacon Ranch Pasta Salad – whip up the bacon in the air fryer before the burgers and add it to this pasta salad and to the burgers!
    • Grab some chips and dip them in this guacamole recipe that is a Fantabulosity favorite!
    • Garlic roasted broccoli is a healthy side dish option that is super easy and can cook in the oven while the burgers are cooking in the air fryer!

    How to Reheat Leftover Burgers in the Air Fryer

    To simply reheat fully cooked burgers, cook for 3-5 minutes at 400° or until hamburgers are heated through.

    Air fryer burgers

    Frozen Air Fryer Burger Patties

    If your burgers are frozen, you can still cook them in the air fryer. However, (depending on the thickness) I would reduce the temperature of the air fryer from 400° to 375° and cook for about 15 minutes, checking to see if they’re cooked through, to an internal temp of 160°.

    More Burger Recipes

    Love hamburger recipes? Then you’ll love these smoked burgers, donut burgers, waffle burgers, and for a different kind of burger… the crispy chicken burger!

    More Air Fryer Recipes

    If you love easy air fryer recipes like this one, then you’ll also love these:

    Recipe

    Print Pin
    5 from 22 votes

    The Juiciest Air Fryer Burgers

    Air Fryer Burgers: In 10 minutes you'll have juicy burgers that will make you wonder why you ever cooked them on the stove!
    Course Main Course
    Cuisine American
    Prep Time 5 minutes minutes
    Cook Time 10 minutes minutes
    Toasting Time 1 minute minute
    Total Time 16 minutes minutes
    Servings 4 burgers
    Calories 231kcal
    Author Jessica Burgess

    Equipment

    • air fryer

    Ingredients

    • 4 hamburger patties (We use 1 pound to make 4 burgers)
    • salt to taste
    • pepper to taste
    • 4 hamburger buns
    • 4 slices cheese optional

    Instructions

    • Season both sides of hamburger patties with desired amount of salt and pepper.
    • Place burgers inside of air fryer, making sure not to overlap the burgers. (We don't use non-stick spray due to the air fryer having a non-stick coating.)
    • Set air fryer temperature to 400° and the timer to 10 minutes.
    • OPTIONAL: Once the timer is up, assemble burgers on to buns with a slice of cheese and place back in to the warm air fryer for an additional minute to steam and toast the burgers. (Do not turn the air fryer on, as it may cause the buns and cheese to blow around and not melt/toast together.)

    Video

    Notes

    Do I need to flip the burgers?
    We find in our air fryer that we don’t need to flip the burgers! However, this may vary depending on the type of fryer you’re using.
    How do I store Leftover Burgers?
    No matter if you have cooked burger patties or fully assembled burgers on a bun, store them in an airtight container (or wrapped up really well in aluminum foil) in the refrigerator for up to 3-4 days.

    Nutrition

    Serving: 1burger | Calories: 231kcal | Protein: 17g | Fat: 18g | Saturated Fat: 7g | Polyunsaturated Fat: 1g | Monounsaturated Fat: 8g | Cholesterol: 60mg | Sodium: 84mg | Potassium: 304mg | Calcium: 8mg | Iron: 2mg

    Whipped Coffee – Dalgona

    March 29, 2020

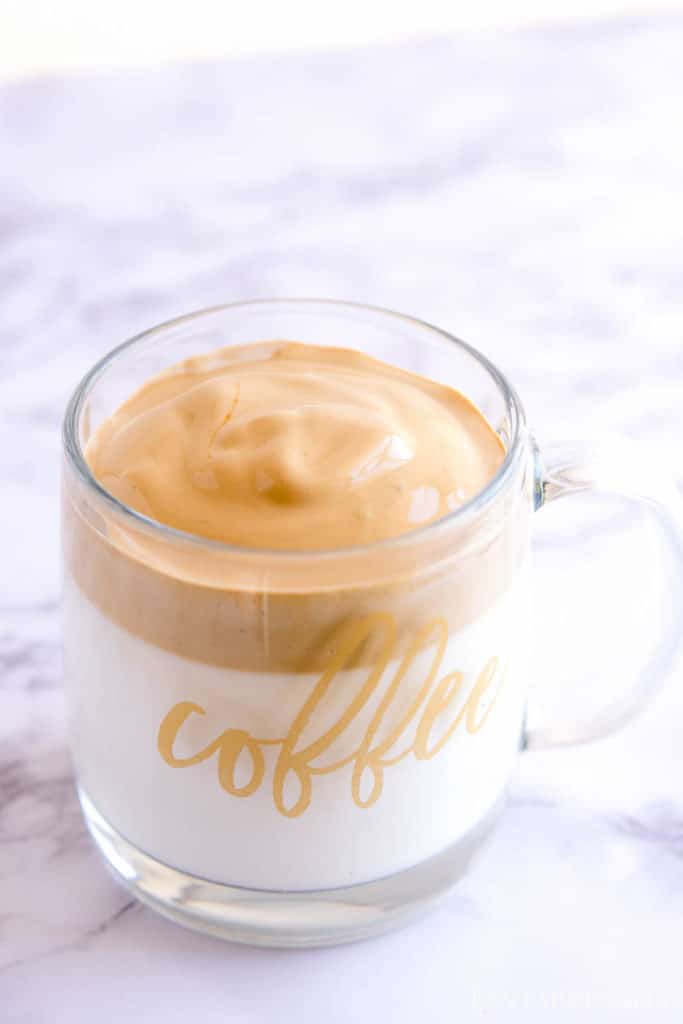
    Whipped coffee dalgona in a clear coffee mug.

    Whipped Coffee – Dalgona: 2 tablespoons of instant coffee, 2 tablespoon of sugar, 2 tablespoon of water and milk is all you need for this creamy coffee shop goodness!

    Whipped Coffee in a clear mug

    You’ll Also Love:

    • How to Make Iced Coffee
    • DIY Chocolate Melts
    • The BEST Punch Recipe

    If you’re like me, you’ve seen all the rage for whipped coffee (also called dalgona) all over Facebook, TikTok, and Instagram. So after seeing so many fall in love with it over and over again, I knew it was time to try it in my own kitchen!

    I was NOT disappointed and can’t wait to make it again and again and put more spins on this coffee recipe at home! You’ll also love this iced caramel latte too!

    It’s so easy… here’s all you need…

    How to Make Whipped Coffee

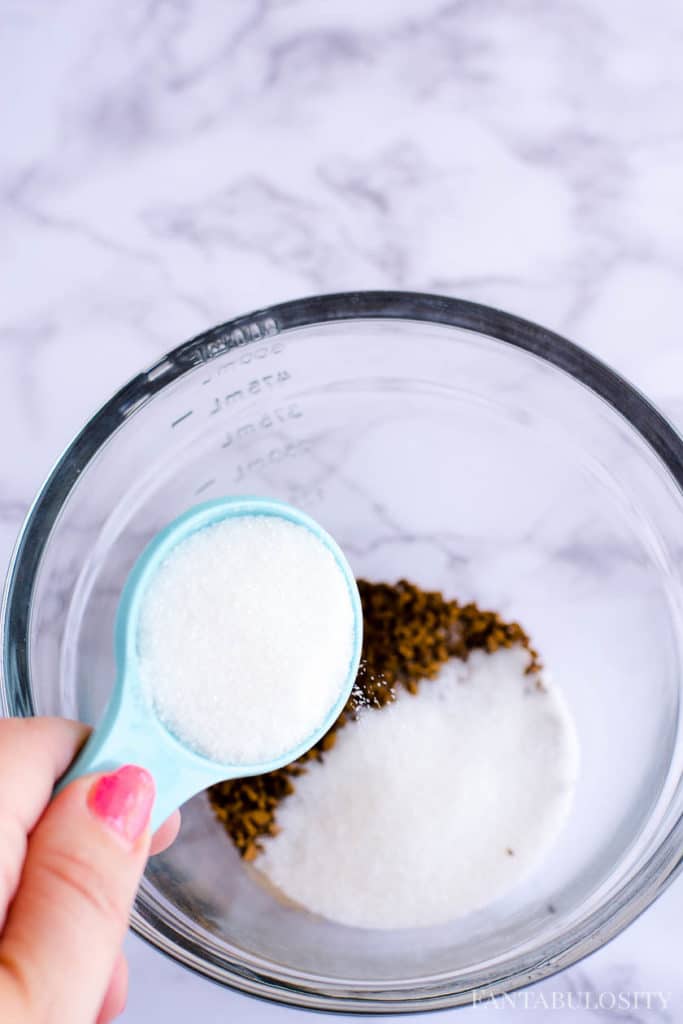
    When making whipped coffee, just remember 2+2+2 and that will help a lot!

    To make the meringue-like topping, you’ll only need:

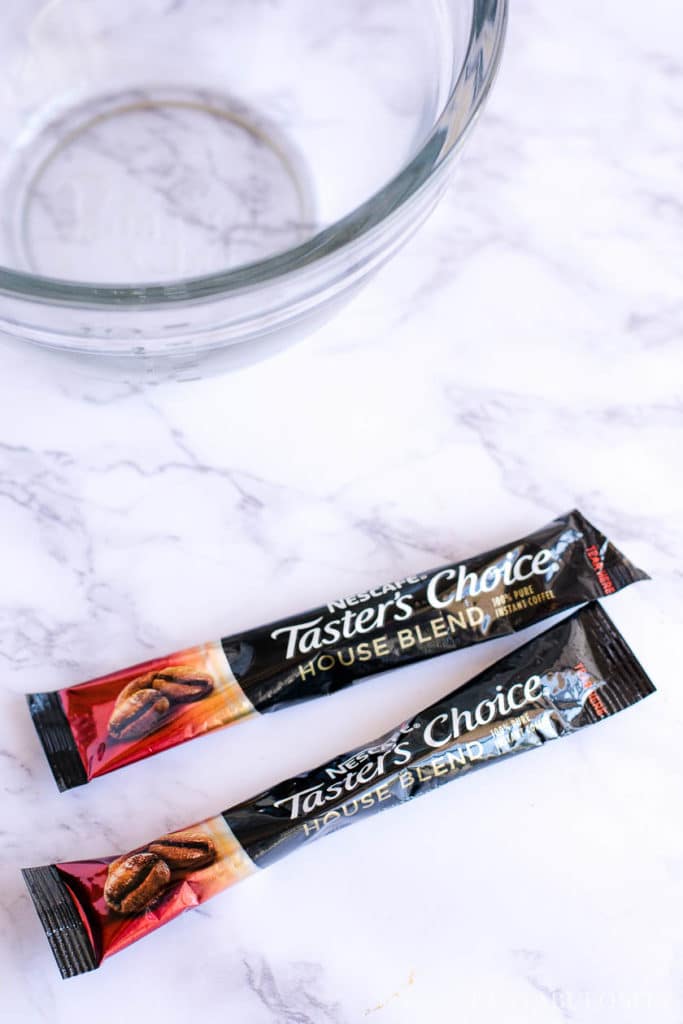
    • 2 tablespoons instant coffee
    • 2 tablespoons white sugar
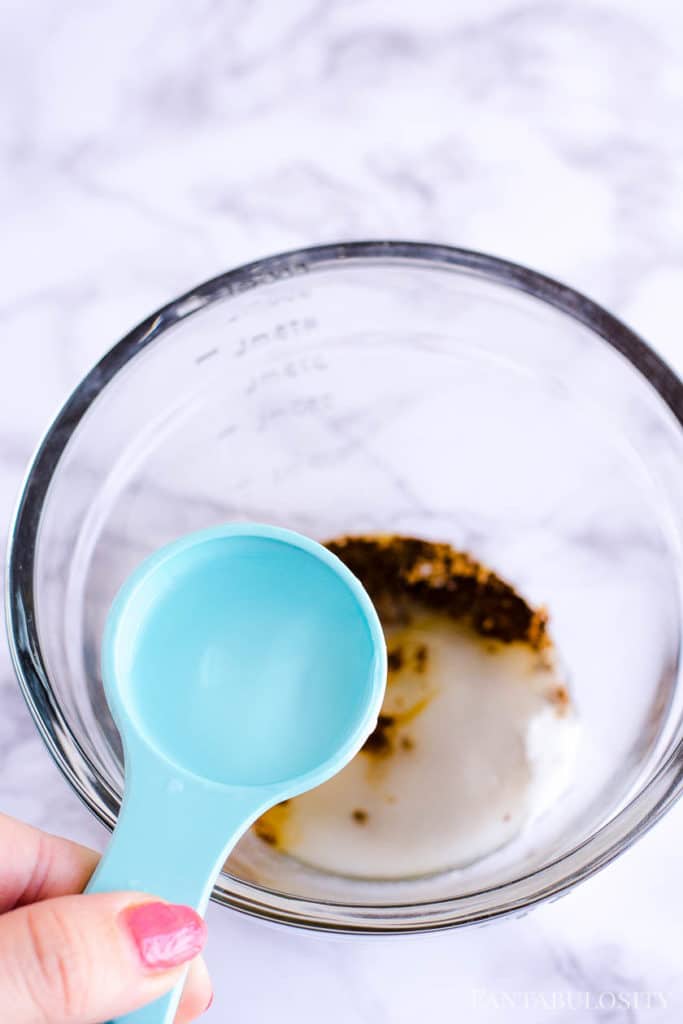
    • 2 tablespoons water

    Then, you’ll fill a coffee cup up about ¾ of the way with milk. I used whole milk because that’s what we had on hand, but almond, skim or whatever milk you use should be just fine!

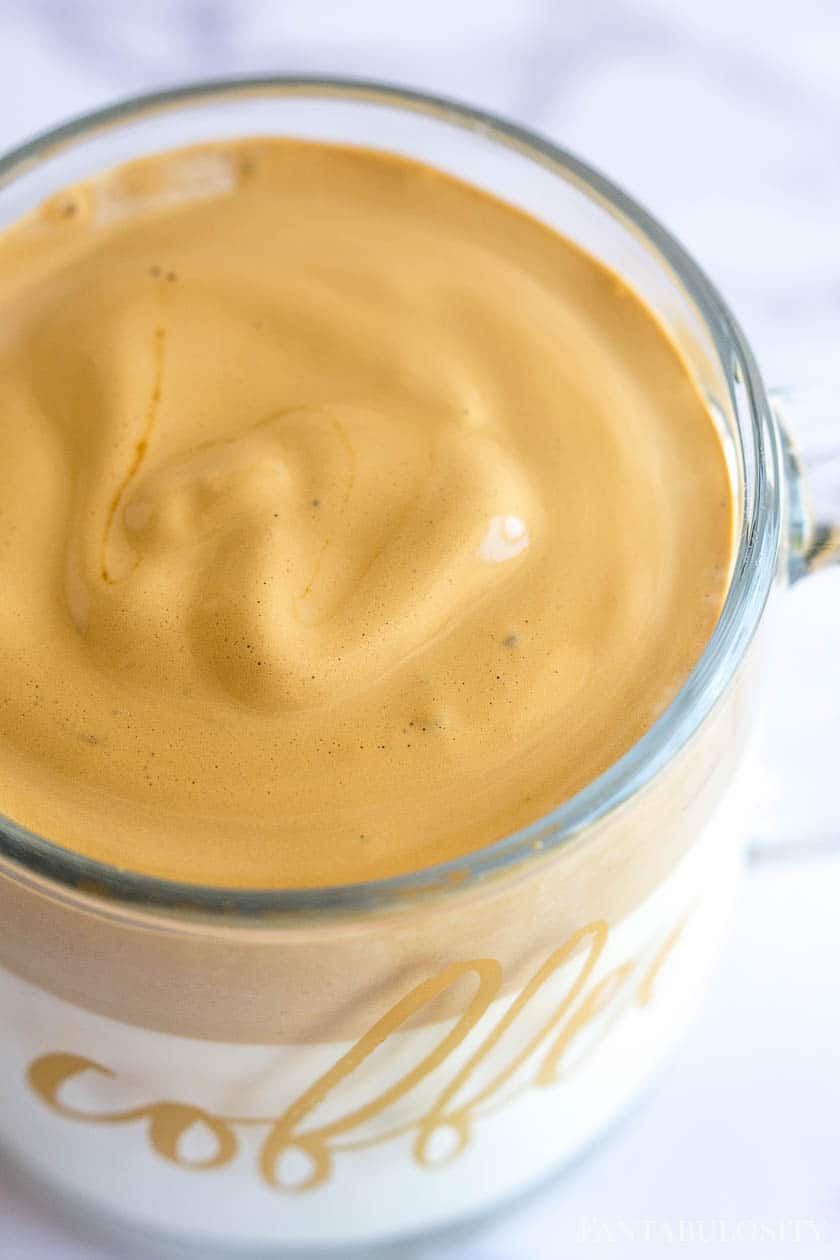
    Whipped Coffee Topping

    Whipped Coffee (A meringue like topping)

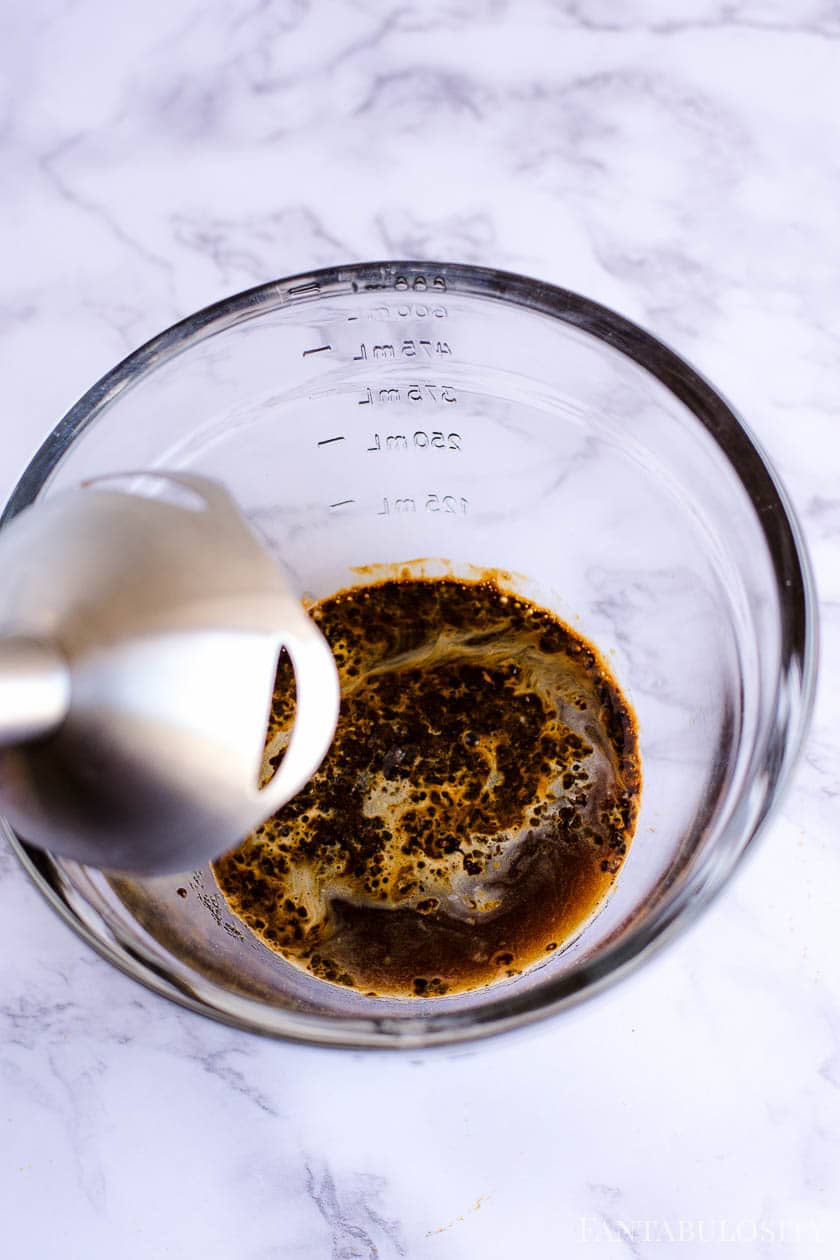
    In a small bowl, mix together the coffee, sugar, and water using a hand mixer or hand blender, mix together for about 4-7 minutes. (The longer, the thicker it will get.)

    Mixing together instant coffee, sugar and water

    If you want to do it by hand, you can use a whisk, but this may take a bit longer, and I heard that if you only use half of the water at first when hand whisking, it gives it a bit of a jump-start for the thickening process. After about a minute or two of mixing, add in the remaining tablespoon of water and mix until desired consistency!

    Ready to Serve!

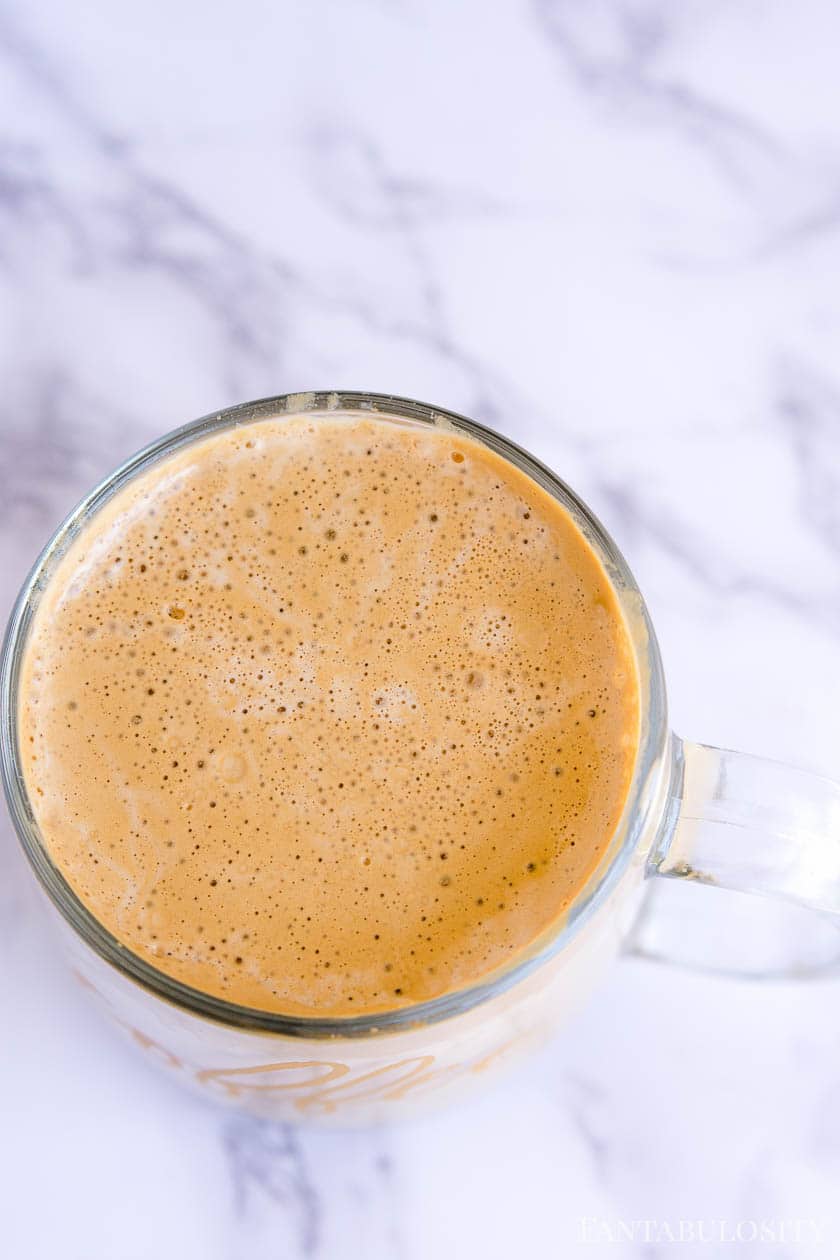
    Whipped Coffee Dalgona

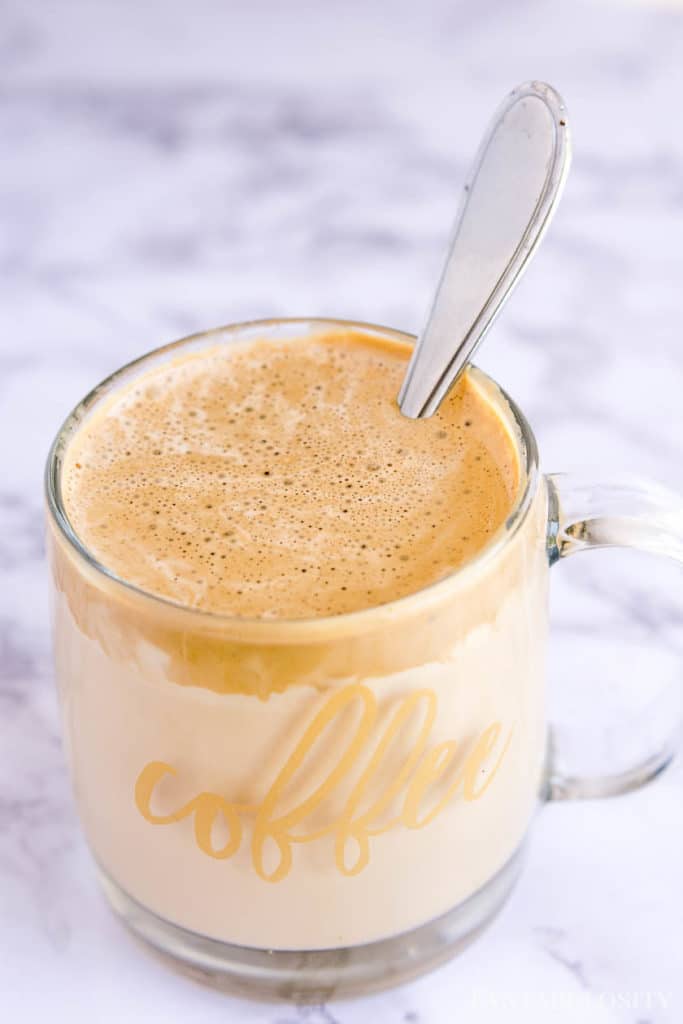
    Once the topping is to the desired consistency, spoon out the coffee topping on to the cup of milk and enjoy, or use a spoon to blend the topping in with the milk for a creamy coffee consistency!

    NOTE: If you don’t want to use all of the topping for one cup, simply save it in a container for the next day!

    Hot or Cold?

    I have only had this as cold as the milk provides, but you can also serve it over ice or even enjoy it warm!

    Related Recipes

    If you love coffee drinks, you’re going to also love this chai tea latte recipe too!

    Recipe

    Whipped coffee dalgona in a clear coffee mug.
    Print Pin
    5 from 2 votes

    Whipped Coffee

    Whipped Coffee – Dalgona: 2 tablespoons of instant coffee, 2 tablespoon of sugar, 2 tablespoon of water and milk is all you need for this creamy coffee shop goodness!
    Course Drinks
    Cuisine Asian
    Prep Time 10 minutes minutes
    Total Time 10 minutes minutes
    Servings 1 serving
    Calories 232kcal
    Author Jessica Burgess

    Ingredients

    • 2 tablespoon instant coffee
    • 2 tablespoon white sugar
    • 2 tablespoon water
    • 6 oz. milk or amount desired

    Instructions

    • In a small bowl, mix together the instant coffee, sugar and water for about 4-7 seconds, or until peaks are formed. (Or until you've reached your desired consistency.)
    • In the coffee cup that you plan to drink out of, pour milk in to cup, about ¾ of the way full.
    • Spoon on the amount of whipped topping you prefer (I used all of it!).
    • Enjoy as is, or take a spoon and gently mix the topping in with the milk to create a creamy coffee beverage, and serve!

    Video

    Notes

    Over Ice/Warm: You can also pour this over ice or you can warm up your cup of milk before adding the topping and create a warm beverage!

    Nutrition

    Serving: 1cup | Calories: 232kcal | Carbohydrates: 40g | Protein: 7g | Fat: 6g | Saturated Fat: 3g | Cholesterol: 17mg | Sodium: 79mg | Potassium: 578mg | Sugar: 33g | Vitamin A: 276IU | Calcium: 206mg | Iron: 1mg

    Shortcut Quick Questions

    If you’re unable to read the full post, here are the most popular questions others have when wanting to learn how to make whipped coffee.

    Whipped Coffee Ingredients?

    Thi recipe uses instant coffee, sugar, water, and milk

    Do I have to use ALL of the topping this makes?

    Nope. You can even cut this recipe in half if you like, or make extra and save it to have whipped coffee a couple of days in a row!

    Can I use regular coffee instead of instant coffee?

    You can, but it’s not idea. Filtering out the grounds, may be a pain, it may take longer to get the texture of the topping you like and it may not have as strong of a flavor.

    Can I make warm whipped coffee?

    You bet! Warm-up your milk before adding on the topping. If you want to warm up the whipped topping, carefully do so as it may lose it’s texture.

    Did You Make This?
    Snap a pic and hashtag it #Fantabulosity - I love to see your creations on Instagram and Facebook.

    Love Easy Recipes?

    Apple Carrot Juice & Additional Mix-In Ideas

    March 28, 2020

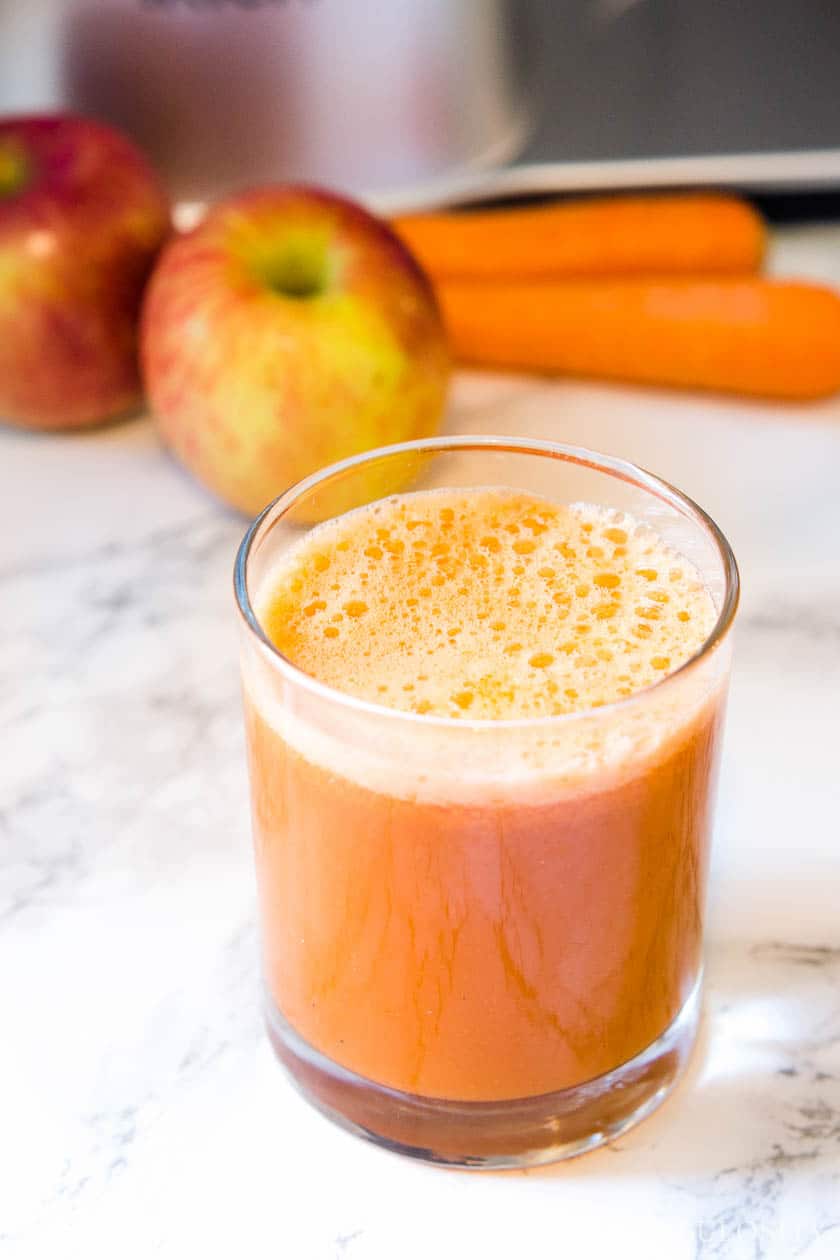
    Short glass of carrot and apple juice sitting on counter.

    Apple Carrot Juice: A quick look at the apple and carrot juice that my family loves and other fruits and veggies that we love to add in at times!

    We have been juicing for YEARS. Not every day, not even every month at times… but we do love adding a quick juice recipe in to our routine every once in a while to help give ourselves a boost.

    What is Carrot Apple Juice?

    Juicing carrot apple juice can be as easy as it sounds; juicing carrots and apples. The amount that you use will depend on how much juice you’re looking to make.

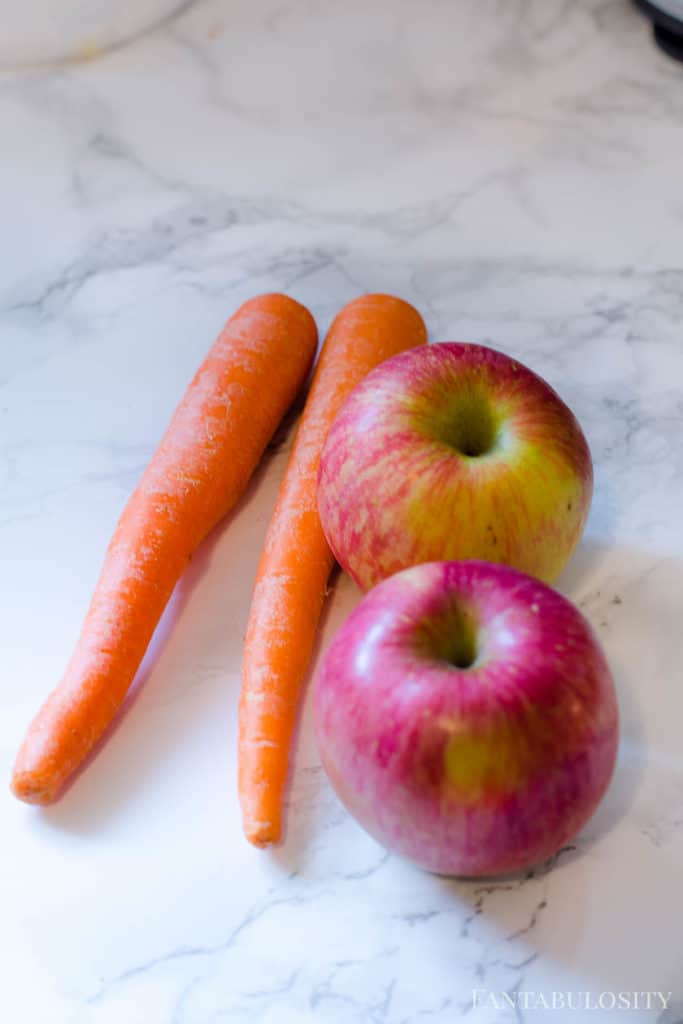
    For one glass, I like to use two carrots and two apples. This doesn’t mean that you have to only use carrots and apples but believe it or not, just the two of those together taste amazing.

    Type of Juicer to Use

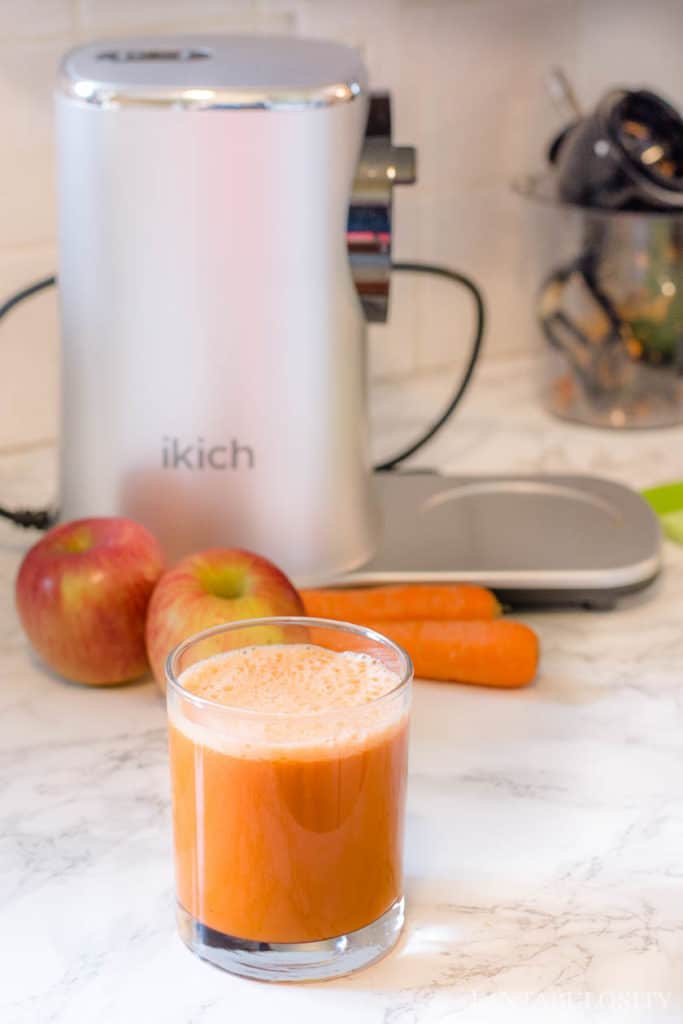
    I’ve used both types of juicers; a masticating juicer and a centrifugal juicer. Either is fine and you’ll still be able to make apple carrot juice.

    Juicing Recipes

    Although there are a TON of juicing recipes out there, I wanted to give you some additional fruit/veggie ideas that you could add to a basic apple/carrot juice if you like.

    Along with juice, you can add (yet, not limited to):

    • oranges/halos (although peelings these are recommended, as the peel can give a bitter taste to the juice)
    • spinach
    • kale
    • grapes
    • beets
    • celery
    • blueberries
    • pears
    • plums
    • grapefruit
    • pineapple
    • lemons/limes (use with caution, not to use too much or it may hurt your belly and really overpower the juice)
    • peaches (those are super pulpy, causing a thicker texture)
    • strawberries (these also tend to create a thicker, “juice” or pulp.

    Have Fun and Experiment!

    Over the years I’ve had so much fun experimenting and trying new things. Sure, some things don’t taste that great in it, or sometimes we find out that we can’t believe we hadn’t tried that yet!

    Just remember that if you’re trying something new and adding in a new ingredient to your juice, maybe set aside most of the apple-carrot juice and mix in the new ingredient separately in to a small glass. That way, if you don’t like the addition of the new ingredient, your entire batch of carrot-apple juice isn’t ruined!

    Hosting in Your Future?

    Having a fresh juice bar for your guests is so fun and something they don’t expect! I have friends that LOVE having a healthy option when we get together, and this is one of my favorite things to offer!

    Fresh Juice Bar Brunch Party

    Read more about my fresh juice bar ideas!

    Have more apples? Try these air fryer apples for a fun snack!

    Recipe

    Short glass of carrot and apple juice sitting on counter.
    Print Pin
    5 from 1 vote

    Apple Carrot Juice

    Apple Carrot Juice: A quick look at the apple-carrot juice that my family loves and other fruits and veggies that we love to add in at times!
    Course Drinks
    Cuisine American
    Prep Time 5 minutes minutes
    Total Time 5 minutes minutes
    Servings 1 serving
    Calories 239kcal
    Author Jessica Burgess

    Equipment

    • juicer

    Ingredients

    • 2 carrots
    • 2 apples

    Instructions

    • Wash carrots and apples
    • Depending on the size of your juicer, you may need to cut the fruit/veggies in order to fit. (Peeling/coring/taking out seeds should not matter, and typically, leaving those on is just fine!)
    • Turn on your juicer and place carrots/apples (one at a time) in to the juicer.
    • Once all is juiced, stir and enjoy!
    Notes

    No need to peel the carrots for juicing.
    See blog post for other ideas of what fruits and veggies you can add to this carrot and apple juice for a spin on different flavors and juicing recipes!

    Nutrition

    Serving: 8ounces | Calories: 239kcal | Carbohydrates: 62g | Protein: 2g | Fat: 1g | Saturated Fat: 1g | Sodium: 88mg | Potassium: 780mg | Fiber: 12g | Sugar: 44g | Vitamin A: 20578IU | Vitamin C: 24mg | Calcium: 62mg | Iron: 1mg

    A Letter to My Friends: I’m Sorry I’ve Gone Missing

    March 21, 2020

    Letter to my friends: Woman wearing pink dress in the middle of a field
    Letter to my friends: Woman wearing pink dress in the middle of a field

    This post has been sitting in my drafts since July of 2017 and I never published it because it didn’t feel right. I couldn’t explain why at the time, why I didn’t put it out for the world to see… but looking back now, in 2020, I totally get it. It kind of goes hand in hand with my “God, I’m exhausted and I’m done trying to fix it” post.

    It wasn’t the right time because I wasn’t the same person back then as I am now and it would have been published for the wrong reasons.

    It was written with a whole different mindset than I have now and I’m so incredibly thankful to be aware of this.

    However, I felt it is appropriate to publish now because although it has the same words… it has a new meaning. I’ll explain more below.

    So What Was the Wrong Reason for Writing This Letter in 2017?

    I wrote this originally as an apology to my friends (or who I thought were my friends – but more to come on that later) in hopes that they’d forgive me for not being the Jessica that they were used to…a redeemed chronic people pleaser here.

    I even had an editor look over the blog post back in 2017 to make sure it was written “ok” and that it wouldn’t hurt anyone’s feelings when I published it.

    Now don’t get me wrong… I’m all about doing things for your friends and being there for them and being a kind person… and not being someone to hurt others.

    But that’s not what this letter was about. This post that I wrote was about making sure I still looked “good” to them and so they (hopefully) wouldn’t talk bad about me behind my back anymore… since I had supposedly “changed”.

    So with that said, let’s dive in to my 2017 post and then at the end, I’ll share more about what I’ve discovered since and I’d LOVE to hear from you how you can relate.


    2017 – Post/Letter to my Friends

    You could put my face on a milk carton.  When it comes to describing my current stage of life in regards to my friendships with even my closest of gal pals… you can say “I’ve gone missing.” I promise it’s not an act of being unkind. It’s a season.

    This Season of Life is Full

    A letter to my friends : Time for girlfriends

    I’m in my thirties, a mom of two littles, and my oldest is getting ready to start kindergarten.  The closer it gets to August. The pit in my stomach gets bigger and bigger, thinking about how our days are limited of when we can come and go as we please on any day of the week. I find myself spending countless hours each day, trying to diminish the pit by squeezing in as much play, and laid back activities as we can before the next stage of life hits.

    For the last year or so, my husband and I have been so incredibly dedicated, focusing on reaching a level of connection that some marriages unfortunately never reach.  We attend marriage counseling once a week to set aside dedicated time to discuss important topics and to build a state of love and respect for one another that we never realized we could reach.

    I’m a working momma, running my own business at home.  Emails, deadlines, hand-on creative projects for brands, and dreams of my own that I’m working towards fulfilling.

    A letter to my friends about being busy: Family photo of a boy mom

    I’m a major advocate of spending time with friends.  The connections, closeness, and relatability that can come from girl time is so good for the soul.

    But lately, I’ve been silent with texts and checking in. I’ve missed birthday parties. I’ve fallen short on planning that girls dinner that I’ve been saying I want to have for weeks now. I’ve slacked on planning the annual girls night party in my home. (And other ridiculous things we women tell ourselves that defines “being a good friend.” But more on that at a later date.)

    Owning the Season

    So if I feel so strongly about the importance of girl time, why do my friends probably think I’ve gone missing?

    Because I’ve decided to take the reigns of my current season of life and control how I fill each and every day:

    — I’m being intentional about spending time at home with my “babies” before sending them out the door with a backpack.

    — I’m taking advantage of every moment to nurture my marriage.

    — I’m wrapping my arms around every incredible opportunity coming my way, to grow and improve my business.

    Marriage - Focusing and working on a relationship

    After being able to put my current state of mind in to words, I couldn’t help but journal my feelings about my absence, in a letter to my friends…

    A Letter To My Friends:

    Dear Friends,

    I’m so sorry I’ve gone missing.  It’s not anything you’ve done.  It’s something I have done.  You’d be so proud of me, really. I’ve taken the reigns on items in my life that are priceless and that long for my attention.

    Unscheduled days of fun with my kids before school starts; Intentional time to work on my marriage to reach a deep connection that I never knew could exist; and capturing a turning point in my business that could be something incredible for my family.

    This doesn’t mean that you’re not important to me. You’re so very important to me. I cherish our friendship, deep heartfelt chats, and hilarious stories when we spend time together.  So please don’t take my absence as a hidden message of some horrible meaning or change of heart.  Please understand that this is good.  When I spend time focusing on the items that can benefit from my dedicated attention, you’ll see the love overflow in to the other areas of my life and flourish beyond measure. Know that I adore pollinating our friendship when I’m fueled on this end.

    It’s a season, and I can’t wait to be there for you when you go through a season.

    Signed,

    Your friend that’s still here…”

    Who’s There on the Flipside

    So although my friends are incredibly important to me, it’s a season. It’s a season in life that I’ve chosen to be intentional about and focus on the items that are super important to me. This doesn’t mean that my friends aren’t important. This doesn’t mean that “I’m putting my friends on the back burner.”  But it does mean that it’s a time in my life that I’m going to be intentional about, that may leave my friends saying,

    What in the world is going on with her?

    During times like this, it’s so incredible to see who’s there after a season we have in life. Who’s there to say “Hey I’ve missed you. Tell me all about it.” And most importantly “I understand, and don’t judge you one bit.” Those are the little golden nuggets in life that can make a friendship something to cherish.

    End of Letter – Now Present Day 2020

    The words in the letter that I wrote are still true. I still believe them and feel like they have merit.

    But you see, when I wrote that letter, those words were meant to be “excuses” in hopes that my friends would still like me, even though I chose my family over them in that moment. I’d even go so far to say that I felt “bad” that I was choosing my family over them. It’s like you could almost feel me saying,

    “Please don’t forget about me and forgive me. Please still be my friend when I’m done putting my family first.”

    Today, I’m ashamed I felt that way.

    After going through such a difficult time these last 3 years (more to come on that later, as soon as I can figure out how to tell the long story) I’ve realized what’s important:

    God, my husband, my kids, and my family.

    Don’t hear what I’m not saying (my favorite quote by my favorite pastor, Bryan Mills) friends are important. In fact,

    “God has created us to need people.”

    Erwin Mcmanus

    But real, true, genuine friends are important.

    I encourage you today to really look at those you’re investing your time with… and what priorities you have set for yourself.

    quote about seasons in life - "We all go through seasons in life. Hold on to the friend who's with you through the "time change". - Jessica Burgess of Fantabulosity

    Now, today, I could write the same letter and send it out to my friends… but it would be to the friends that would read it and think:

    “We get it. You’re going through a season and doing what’s important right now. We’ll be here on the flipside and during it if you need me.”

    And you know what? I have those friends now. I’m so thankful for those friends and will NEVER ever let that go unappreciated.

    It is my mission to also be that friend for them and to be understanding even when it doesn’t make sense.

    Instant Pot Green Beans and Potatoes

    March 2, 2020

    Instant Pot Green Beans and Potatoes in a white serving dish

    Instant Pot Green Beans and Potatoes: In only 5 minutes, this flavorful side dish is ready to serve alongside your favorite steak, chicken, ham or protein of choice!

    Instant Pot Green Beans and Potatoes in a white serving dish

    One of our favorite side dish recipes to date, and an EASY one at that, along with our SUPER popular green bean casserole with cheese and bacon! With only a 5-minute cooking time in the Instant Pot, fresh green beans and red potatoes combined with some of our favorite spices and condiments pack a punch that any potluck or family dinner would be lucky to have on the table.

    [feast_advanced_jump_to]

    More Instant Pot Side Dishes You’ll Love:

    We know you’ll also love Instant Pot mashed potatoes, Instant Pot Spaghetti Squash, Instant Pot Sweet Potatoes, and Amish Potato Salad in the Instant Pot!

    Having green beans and potatoes is a HUGE hit during the summer months when your garden or the produce stand is in full force.

    However, don’t limit this side dish to just a few months out of the year. The grocery store should always have fresh green beans and red (or new) potatoes so you can whip this up.

    Key Ingredients

    Fresh Green Beans: Can you use canned green beans? I’m sure you can, but I wouldn’t go to the trouble of pressuring them in the Instant Pot. Save them and use these tricks to make canned green beans taste better, and check out these crack green beans!

    You could simply pressure just the potatoes with the spices and butter/bacon grease and then cook/warm the canned green beans in the microwave or on the stovetop and combine afterward.

    Red Potatoes: Can you use baking, Idaho, russet, or new potatoes instead?

    Sure. I don’t see why not. I’d just make sure to cut the potatoes into 1-inch cubes before pressuring.

    Also, I only use about 4 large red potatoes when I make this dish, but you could add a couple more and have more of an even potato-to-green bean ratio if you like. I prefer to have more green beans than potatoes to encourage more greens in my family.

    TIP: Use any leftover potatoes to make these fried potatoes and onions to go along with your favorite main dish tomorrow night.

    Add Protein:

    What I absolutely LOVE about this recipe is that you can easily add chicken and make it a rounded-out dinner!

    Chicken: However, instead of cooking the chicken, green beans and potatoes all together in the instant pot, I prefer to cook my salt and pepper chicken bites and then add that in to the green beans and potatoes later!

    Ham: Looking for a way to use that leftover ham from Easter? Well if you’re not wanting to make the ham casserole recipe, then this is another perfect way to use it up!

    If the ham is cooked, feel free to add that in to the Instant Pot with the green beans and potatoes to allow the ham flavor to soak in to the other ingredients!

    How to Make Green Beans and Potatoes in the Instant Pot

    Make sure to see the FULL, printable recipe card toward the bottom this post for easy reference!

    Chicken Broth

    If you’ve had the chance to make my Kielbasa and Cabbage in the Instant Pot, then you know my new love for the chicken broth base I’ve been using lately in my recipes.

    This recipe is NO different and I use this powder/water combination to create the chicken broth that adds a lovely flavor to my recipes.

    However, using homemade chicken broth, store-bought broth in a container/can is just fine too!

    You’ll want to use 2 cups of chicken broth and pour it in to the bottom of the Instant Pot pot.

    Instant chicken broth in a measuring cup for green beans

    Potatoes Cut in to 1-Inch Cubes

    Wash and cut your potatoes in to 1-inch cubes. Place the potatoes in to the Instant Pot, in to the chicken broth.

    Chopped red potatoes for the instant pot pressure cooker
    Red potatoes in Instant Pot

    Fresh Green Beans

    If your green beans are not washed, go ahead and wash them before cooking.

    If using garden-fresh green beans, I do take the time to pinch off the ends before washing/cooking. However, if I’m using green beans from the store, the ends are usually off and I can just throw them in as is.

    Long raw, uncooked green beans

    Place the green beans on top of the potatoes inside of the Instant Pot.

    Green beans in instant pot with broth

    Butter and Bacon Grease – Optional

    Although completely optional, if you’re not avoiding ingredients like butter and/or bacon grease… I HIGHLY recommend adding it for some “umph” and extra flavor.

    Because who doesn’t love butter and bacon?

    I use about 4 tablespoons of salted butter and place the 4 pieces on top of the green beans.

    Frozen Bacon Grease

    When making bacon for breakfast, I like to save the grease and freeze it in a freezer-safe container for recipes like these! It comes in VERY handy for that bacon flavor when you may not have the bacon.

    Or, feel free to cook bacon and add the cooked bacon to the green beans and potatoes before cooking! TIP: If adding bacon to this recipe, place the cooked bacon on top of everything, so when it heats, the grease will drop down in to the beans and potatoes! Yumm-O!

    Spices:

    Use salt and pepper as desired, just keep in mind that sometimes chicken broth, butter and bacon grease may already have salt added.

    Also note that you can always add salt later, but you can’t take it away. So I’ll usually add salt and pepper and then taste afterward to see if it needs a little more.

    Adding poultry seasoning is definitely something that you can do without in this recipe, but it adds such a nice touch of flavor. So if you do have it, sprinkle about a teaspoon on with the salt and pepper!

    Cooked green beans and red potatoes in the Instant Pot Pressure Cooker

    Serve!

    Ideally, you want to serve this dish right away after it finishes cooking. Reheating and letting it sit can result in soggy green beans.

    However, if you’re heading to a potluck or family dinner, making this in the morning and keeping it on warm works just fine, and I’ve done this several times!

    Enjoy!

    What to Serve Green Beans and Potatoes with:

    The beauty of this recipe is that it can be served with just about anything! But here are a few of my favorite recipes to serve this as a side dish with…

    • The BEST Steak Recipe in the Oven
    • Easy Hamburgers in the Oven
    • Roasted Pork Tenderloin
    • Baked BBQ Pork Steaks
    • Creole Roasted Turkey
    • Grilled Shrimp with Easy Marinade
    • Grilled Deer Steak
    • Easy Fried Chicken
    • Chipotle Apple Butter Ribs
    • The BEST Beef Tenderloin
    • Sweet and Smokey Grilled Pork Chops

    If you have an Instant Pot, check out these recipes too!

    • Instant Pot Pot Roast – Using a frozen roast too!
    • Instant Pot Hard Boiled Eggs
    • Cheeseburger Macaroni in the Instant Pot
    • Instant Pot Chicken and Dumplings

    Recipe

    Instant Pot Green Beans and Potatoes in a white serving dish
    Print Pin
    5 from 24 votes

    Instant Pot Green Beans and Potatoes

    Instant Pot Green Beans and Potatoes are a healthy side dish that can easily be turned in to a main dish by adding chicken or ham if desired!
    Course Side Dish
    Cuisine American
    Diet Vegetarian
    Prep Time 5 minutes minutes
    Cook Time 5 minutes minutes
    To pressure 5 minutes minutes
    Total Time 15 minutes minutes
    Servings 12 servings
    Calories 170kcal
    Author Jessica Burgess

    Equipment

    • instant pot

    Ingredients

    • 2 cups chicken broth
    • 4 large red potatoes
    • 36 oz. fresh green beans I use 3 12 oz. bags
    • 1 teaspoon poultry seasoning
    • 4 tablespoon butter
    • 2 tablespoon bacon grease if desired: see notes in blog post
    • salt to taste
    • pepper to taste

    Instructions

    • Cut potatoes in to about 1-inch cubes
    • Pour chicken broth in to Instant Pot and then add in the potatoes
    • Next, pour all of the green beans on top of the potatoes.
    • Place butter, bacon grease and spice on top.
    • Secure the lid on to the Instant Pot and turn the nozzle to the sealed position.
    • On manula high pressure, turn the timer to 5 minutes.
    • When the timer is up, manually release the pressure.
    • Once the valve has fallen, it is safe to remove the lid.
    • GENTLY stir the green beans and potatoes to mix the seasonings evenly. (Gently mix being careful not to destroy the soft and fragile potatoes.)
    • Serve!

    Nutrition

    Serving: 1serving | Calories: 170kcal | Carbohydrates: 26g | Protein: 4g | Fat: 7g | Saturated Fat: 3g | Polyunsaturated Fat: 1g | Monounsaturated Fat: 2g | Trans Fat: 0.2g | Cholesterol: 13mg | Sodium: 206mg | Potassium: 748mg | Fiber: 4g | Sugar: 5g | Vitamin A: 717IU | Vitamin C: 21mg | Calcium: 48mg | Iron: 2mg

    Did you just get an Instant Pot, or thinking of getting one?

    Using an Instant Pot can be very intimidating at first. Here’s the video of my unboxing and first use. If I can do it, you can do it!

    Did You Make This?
    Snap a pic and hashtag it #Fantabulosity - I love to see your creations on Instagram and Facebook.

    Slow Cooker BBQ Meatballs

    February 26, 2020

    Slow Cooker BBQ Meatballs

    Slow Cooker BBQ Meatballs: Using frozen meatballs, grape jelly, sriracha, and bbq sauce, you’ll have a crowd-favorite appetizer in just two hours! Serve these crockpot little smokies along with them, and you’ll be the party pleaser!

    Slow Cooker BBQ Meatballs

    Slow Cooker BBQ Meatballs

    I’ve been making these meatballs for some time now, but it was only recently that I made them as an appetizer for a family Christmas celebration.

    It was then that my family RAVED about the meatballs and I knew that I had to grab some photos so I could share the recipe with you all.

    Since then, meatballs have become a favorite around here, so make sure you get this easy Swedish meatball recipe and these frozen meatballs in the Instant Pot too!

    Fully Cooked Frozen Meatballs

    Although it doesn’t matter which brand of meatballs you use, trust me when I say that the fully cooked Farmrich Homestyle Meatballs MAKE this recipe. I just haven’t found another brand that measures up and “Italian” style meatballs don’t have the right flavor to go with the ingredients either.

    So if you’re able, grab Farmrich Homestyle Meatballs… and if you can’t, grab something similar, just not an Italian style. (Italian-style meatballs are made more for spaghetti sauces to have with pasta, to put in these meatball stuffed peppers, etc.)

    Frozen meatballs - Farmrich

    Pour Frozen Meatballs in to Crockpot

    You can find the full recipe card towards the bottom of this post, but I also like to walk through each step in case you’re more of a visual person like I am.

    First things first, pour the frozen meatballs in to the slow cooker.

    Frozen meatballs in the slow cooker

    BBQ Sauce

    Although you can use your favorite bbq sauce, our go-to is Sweet Baby Rays BBQ sauce. (We always use the original, but feel free to experiment with their other flavors if you wish.)

    If you ONLY have bbq sauce on hand, it’s absolutely ok to just use that for your meatballs. So consider this one of the best last-minute snacks to feed surprise guests because the meatballs can sit in the freezer and the bbq sauce can sit in the pantry.

    HOWEVER, to make the meatballs a little more glorious, keep reading for the two other ingredients that you’ll want to add in for the meatballs that my family loves.

    Sweet Baby Rays BBQ Sauce for Meatballs

    Pour in the entire 18 oz. bottle of bbq sauce. If using a different size/brand, you don’t have to use 18 oz. exactly.

    It’s ok to have a little bit more, little bit less. But the 18 oz. works really well with the measurements of the other ingredients, yet it is very forgiving if not using the same bottle I do.

    Grape Jelly BBQ Meatballs

    I know it sounds crazy, but the sweetness of the grape jelly with the saltiness of the meatballs and bbq sauce, it is the perfect combination of flavor!

    Add ½ cup of grape jelly in with the bbq sauce and meatballs.

    BBQ Sauce and Jelly for slow cooker meatballs

    A Bit of Spice – Sriracha

    We absolutely LOVE sriracha around here. (We even put it on avocado toast!) Don’t be scared of the heat… it’s not going to burn you up like adding hot sauce, but rather it’s just the kick that this salty/sweet meatball recipe needs!

    However, if you are a bit scared of adding some heat, you can leave it out or cut back on the Sriracha.

    But if you’re ready to rock n roll with it, add ¼ cup of Sriracha to the bbq sauce, jelly and meatballs.

    Sriracha, jelly and bbq sauce meatballs

    Mix Evenly and Cook

    Grab a long-handled spoon and mix together the meatballs and the sauces until evenly mixed.

    Place the lid on the slow cooker and cook on high for 2 hours (watching closely in case your slow cooker likes to burn or cook uber fast!) or cook on low for 3-4 hours… or until the meatballs are heated through!

    Slow Cooker Meatballs - frozen with jelly

    Potluck, Party Food, Easy Dinner

    As I mentioned earlier, having frozen meatballs and the sauces on hand is the perfect last-minute snack to make when unexpected guests arrive.

    However, being “The Meatball Girl” may just be your new name when it comes to the potlucks and parties you’re invited to. They’re easy to make ahead of time, transport and sit on “warm” during an event!

    BUT… don’t forget about the easy weeknight dinner idea that these meatballs can provide.

    “What Can I Fix with BBQ Meatballs?”

    Whip these up with a side salad and you have a quick dinner that may just become a weekly favorite!

    Or serve them alongside quick and easy side dishes like:

    • Sweet Potatoes in the Instant Pot
    • Broccoli Raisin Salad
    • Carrot Salad
    • Baked Potato Wedges
    • Tomato Mozzarella Avocado Salad
    Grape Jelly BBQ Meatballs

    BBQ Pork Steaks in the Slow Cooker

    BBQ Meatballs in the slow cooker, made with grape jelly and sriracha

    Recipe

    Slow Cooker BBQ Meatballs
    Print Pin
    4.86 from 14 votes

    Slow Cooker BBQ Meatballs

    Slow Cooker BBQ Meatballs: Using frozen meatballs, grape jelly, sriracha and bbq sauce, you'll have a crowd favorite in just two hours!
    Course Appetizer
    Cuisine American
    Prep Time 5 minutes minutes
    Cook Time 2 hours hours
    Total Time 2 hours hours 5 minutes minutes
    Servings 9 servings
    Calories 380kcal
    Author Jessica Burgess

    Equipment

    • slow cooker

    Ingredients

    • 28 oz. fully cooked frozen meatballs approx 56, ½ oz bite-sized meatballs
    • 18 oz bottle of bbq sauce We prefer Sweet Baby Rays Original
    • ½ cup grape jelly
    • ¼ cup Sriracha

    Instructions

    • Pour frozen meatballs in to a slow cooker
    • Pour remaining ingredients on top of meatballs and stir until mixed in evenly
    • Cook on high for 2 hours or low for 3-4, or until meatballs are heated through.

    Nutrition

    Serving: 6meatballs | Calories: 380kcal | Carbohydrates: 36g | Protein: 15g | Fat: 19g | Saturated Fat: 7g | Cholesterol: 63mg | Sodium: 813mg | Potassium: 406mg | Fiber: 1g | Sugar: 28g | Vitamin A: 144IU | Vitamin C: 8mg | Calcium: 35mg | Iron: 1mg

    Laser Hair Removal St. Louis

    February 9, 2020

    Laser Hair Removal Before and After

    Laser Hair Removal St. Louis: An inside look at the BEST place for treatments and why. Plus a sneak peek at what just ONE visit did!

    This post has been sponsored by Milan Laser Hair Removal, where I have also received services in exchange for this post. HOWEVER, all thoughts and opinions are my own… as always.


    Friends, I have been anxiously waiting to tell you about a new, life-changing service that I have started and have fallen in LOVE with, and has become one of my favorite beauty treatments!

    Laser hair removal.

    I know that some of you have considered laser hair removal or some of you WILL consider laser hair removal after reading this. Here's an inside look at my first visit and why you'll want to hear all about it!

    Plus, keep reading to find out how you (yes, YOU!) can get 60% off of your own laser hair removal services, just for being a Fantabulosity reader!

    For years I have thought about and have wanted to try laser hair removal.

    I even went for a consultation years ago and decided to move forward with it, but the business closed shortly after and I was never able to take advantage of it.

    Laser Hair Removal in St. Louis

    Well if you’ve been around here for a while, you may know that I live in Missouri and close to the St. Louis area. I tend to find myself going to St. Louis for my hair appointments, shopping at the mall, and having a date night with my husband.

    So when it came time to consider a company that specializes in laser hair removal, St. Louis was a no-brainer.

    Milan Laser Hair Removal

    Let me introduce you to my new friend… Milan Laser Hair Removal. I’m dead serious when I say “friend”. I have fallen in love with their team, their services and most importantly… their values.

    Milan Laser Hair Removal has (at the time of this post) over 70 locations in the United States. So even if you’re not in the St. Louis area, odds are you may have one near you (or worth the trip) and they’re STILL growing and expanding into new markets.

    Why do I love them so much already?

    Because from the moment I talked to Stacey, at the Town and Country location here in Missouri, I felt so welcome and heard.

    I told Stacey about my areas of interest, and she communicated with me in such a way that I was counting down the days until my consultation and first appointment.

    Fast forward to the day of my first visit and I was greeted with the friendliest staff.

    I was the only one in the foyer/lobby at the time (which I later found out that they try to do this on purpose… how cool is that?) and I immediately felt like I was home.

    No nervousness and no awkward feelings like I didn’t belong. I felt like family.

    First Laser Hair Removal Treatment

    I mentioned earlier that I spoke with Stacey on the phone about my areas of interest for laser hair removal when setting up my first appointment.

    Those areas of interest were the following:

    • legs (half or full)
    • Brazillian
    • Bikini
    • Armpits

    They do offer more body areas, but those were the top picks for me on the day of my visit, I told the staff that I had decided to get the Brazillian treatment and let me tell you… if anyone would be anxious about getting laser hair removal, let alone a BRAZILLIAN… it would have been me.

    But I never once felt awkward, scared, or out of place with Milan.

    What to Expect at Milan Laser Hair Removal on Your First Visit

    Upon walking in the door, Milan was CLEAN, bright and super welcoming.

    Stacey took me on a tour of the clinic, explained the process and welcomed me into the consultation room where we chatted about how laser hair removal works, why it works, Milan’s background and payment options.

    After the consultation, it was time for my first treatment!

    Before and After Photos of Laser Hair Removal Treatment

    I REALLY REALLY REALLY wish I could show you the before and after of my first treatment of the Brazillian, but let’s get real… anyone and everyone can come visit me here on Fantabulosity and showing that area off to anyone and everyone really isn’t my cup of tea.

    HOWEVER, Stacey is a genius and she asked if I’d be willing to do a treatment on one armpit so I could see just how well it works for those, even after one visit.

    I’m so glad she did this because now I can show you a before and after of my armpits.

    Now, do know that Stacey said the armpits tend to show bigger results after the first treatment, more so than the Brazillian does.

    So what are you looking at below?

    I had my treatment on January 7, 2020. I did not shave either armpit until after I took these photos on January 24th, 2020. (Yes, my husband kept asking me when I was going to shave it, but I had to keep watching it because it amazed me with how much different it was than the other, haha!)

    Honestly, in the armpit with less hair… was what my armpit used to look like a day or two after shaving, not 17 days after shaving.

    Laser Hair Removal Before and After
    Laser Hair Removal After - St. Louis

    What about the Brazillian area?

    Well I can tell you that I do already notice a difference down there. It’s a little spotty, (some areas not growing back as much/as fast) and the hair that has regrown is MUCH softer. I can’t wait for the next treatment, so I can see how much more of a difference it has.

    Does Laser Hair Removal Hurt?

    I’ll admit… I was totally afraid that it was going to hurt like crazy, but I told myself,

    "Jessica, you’ve had two babies… one being without an epidural. You can do this."

    But you know what? My first treatment wasn’t bad at ALL! And it didn’t last long enough to even complain about it! Here’s more about “Does laser hair removal hurt?”

    What does it feel like?

    The Milan staff told me before we started that it would feel like the snap of a rubber band. I agree with that, and I’d even go to say that it feels like a “small” rubber band snap.

    But you know what else? Before we started, I thought it would feel like a rubber band snap on each little hair follicle at a time. This is probably why I thought it would take so much longer than it did, and I thought I’d be pretty tired of that feeling after getting each individual pore treated down there. BUT THAT’S NOT HOW IT WORKS!

    The tool that they use covers an area about the size of a quarter, so it gets multiple hair follicles at one time! I was so excited about this, and it made such a difference.

    How Often and How Many Treatments are Needed?

    They told me at Milan to expect 7-10 treatments, and that each treatment would be about 5 weeks apart.

    After the initial visit with the consultation, the appointments don’t take very long at all!

    As a matter of fact, if I know I’m going to be in the St. Louis area, I could easily call and see if they have an opening for a treatment, and I could pop-in and go about my day, running my other errands.

    It’s definitely not something that you have to plan your whole day around, and you could feel free to run errands before/after, or like me… do some shopping since there’s a HomeGoods and Target right next door to my location! Hallelujah!

    Lifetime Guarantee + Unlimited Package

    So if you’ve heard or have been to other laser hair removal companies, you may be familiar with the “packages” that some offer. For instance, you buy per session or say, buy a package of three treatments at a time.

    Well, not with Milan.

    With Milan, you pay one price for the body area that you want, and it’s an unlimited, lifetime guarantee on that body area.

    So say a few years from now, your body goes through some changes (hormones, etc.) and you notice one little hair grow back where you had a treatment.

    You can call Milan, let them know and they’ll be glad to bring you back in, (at any location) at NO additional charge, and treat the area again! (Opposed to other companies where you may pay for 3 treatments in one area, and have to pay AGAIN and again to be treated.)

    60% OFF for YOU! Yes… YOU!!!

    Friends, I don’t know HOW this is possible, and I honestly didn’t expect this kind of discount for you when I first started talking to them, but you may want to take advantage NOW in case they change their mind! Haha!

    Milan has offered to give you 60% off of your laser hair removal service, for any body area of your choice…. at any Milan Laser Hair Removal location. So when you call to schedule your consultation, just make sure to give them the code: FANTABULOSITY60 so they know to put it in the system for you!

    COUPON CODE: FANTABULOSITY60

    Stop Putting Yourself on the Backburner. I did, and it Feels Amazing Already.

    I’m not sure I’ve ever been THIS excited to share something with you. You know when I believe in, or fall in love with something, I don’t want to keep it from you. Well, Milan is no exception, and I can’t WAIT for you to do laser hair removal along with me. With 60% off, I’m hoping it either gives you the push to finally do this for yourself if you’ve been kicking it around, or I hope it’s something new that you’ve found that you can do for YOURSELF.

    I know what it’s like to put yourself on the backburner, saving the time and money for your kids and husband.

    But I can’t tell you how refreshed and GOOD I felt even after my first treatment. It wasn’t just because of the thought that I’ll never have to shave again… but because I finally did something for myself again. I want this for you too.

    Easy Peach Turnovers

    January 31, 2020

    Peach turnover with drizzle on plate.

    Easy Peach Turnovers: Using canned peach pie filling and puff pastry dough, these may just be the easiest breakfast or dessert you can make!

    easy peach turnovers

    Easy Peach Turnovers

    If you love easy breakfast recipes, or you need a quick dessert to serve after dinner, these peach turnovers are going to rock your world!

    Not only are they easy, but they use everyday ingredients, can be made in a pinch and are so comforting, yet impressive to look at!

    Only 3 Ingredients:

    Would you believe that this recipe only takes three ingredients! (Unless you also prefer to drizzle a sweet icing over the top as shown below!)

    What you’ll need:

    • Puff Pastry
    • Canned Peach Pie Filling (like we use in this cake mix peach cobbler recipe)
    • Egg

    It’s the perfect easy recipe to make for guests, or for the kids on a lazy weekend!

    Try other pie fillings like:

    • Apple
    • Cherry
    • Blueberry
    • Chocolate pie filling
    • Lemon pie filling
    • Strawberry
    • Blackberry

    Try Mixing in Other Ingredients with the Above Fillings:

    • Pecans/Nuts
    • Cheese
    • Cream Cheese
    • Chocolate Chips
    • Coconut
    • Caramel
    • Peanut Butter
    • Nutella
    • Strawberry or Grape Jam
    • Savory Ingredients: Sausage, ham, eggs, bacon, cheese, rice, taco meat, etc.

    How to Make Turnovers with Puff Pastry

    easy peach turnovers recipe

    Full, printable recipe card towards the end of this post!

    I’m not sure if there’s anything better than a puff pastry or crescent rolls when it comes to making a quick recipe.

    We’ve used puff pastry to make appetizers, like these Rotel Chicken Empanadas and crescent rolls to make these Chicken Bacon Ranch Crescent Bites.

    They make baking so easy and they’re really versatile.

    So when it comes to making a turnover, I’ll reach for puff pastry ANY day!

    Preheat your oven to 350 degrees F. and prepare a baking sheet with nonstick spray and/or parchment paper

    puff pastry dough

    To begin making the turnovers, roll out the puff pastry dough and pinch the seams together if necessary and then cut into 4 equal squares.

    peach filling for turnovers

    Next, add 1 heaping tablespoon of peach filling to the center of each square.

    egg wash on edges of puff pastry

    Place some of the egg white on two joining sides of the square to help hold the turnover together.

    sealing edges with fork

    Next, roll the opposite side over the filling and press down the sides to seal.

    pressed edges on turnovers

    Using a fork, press along the sides of the pastry.

    turnovers on baking pan

    Place the turnovers on the prepared baking sheet and bake at 350 degrees for 25-30 minutes or until the dough is golden brown.

    peach turnovers on cooling rack

    OPTIONAL Turnover Glaze:

    Definitely not required for these peach turnovers to taste amazing, but it adds a sweet touch when you can also add a slight drizzle of a powdered sugar glaze.

    What You'll Need:

    • powdered sugar
    • margarine or butter
    • vanilla
    • milk or half-and-half

    for this easy, basic powdered sugar glaze from Pillsbury!

    drizzle on peach turnovers

    What to Serve Turnovers With:

    If you’re hosting a party or brunch and need to serve your guests more than turnovers, making this easy quiche recipe is classy, yet so easy you’ll wonder why you don’t make it for your family on repeat!

    simple turnovers with pie filling

    More Recipes

    If you love how easy this recipe was, or simply love fruit recipes, then you’ll also love this mango and peach pie, these Easy Blueberry Turnovers, and this Snickers Apple Salad.

    But if you’re looking for easy breakfast recipes, then you’ll want to check out this Brioche French Toast and these Easy Blueberry Pancakes!

    peaches inside of puff pastry

    Recipe

    Peach turnover with drizzle on plate.
    Print Pin
    5 from 9 votes

    Easy Peach Turnovers

    Easy Peach Turnovers: Using canned peach pie filling and puff pastry dough, these may just be the easiest breakfast or dessert you can make to tackle that sweet tooth!
    Course Breakfast, Dessert
    Cuisine American
    Prep Time 10 minutes minutes
    Cook Time 25 minutes minutes
    Total Time 35 minutes minutes
    Servings 8
    Calories 346kcal
    Author Jessica Burgess

    Ingredients

    • 1 package package puff pastry 2 sheets
    • 1 21 oz. canned peach pie filling
    • 1 egg beaten

    Instructions

    • Preheat your oven to 350 degrees F. and prepare a baking sheet with nonstick spray and/or parchment paper
    • Roll out the puff pastry dough and pinch the seams together if necessary. Cut both sheets into 4 equal squares.
    • Add 1 heaping tablespoon of peach filling to the center of each square.
    • Place some of the egg white on two joining sides of the square to help hold the turnover together.
    • Roll the opposite side over the filling and press down the sides to seal.
    • Using a fork, press along the sides of the pastry.
    • Place on prepared baking sheet and bake for 25-30 minutes or until the dough is golden brown.
    • Serve warm and enjoy!
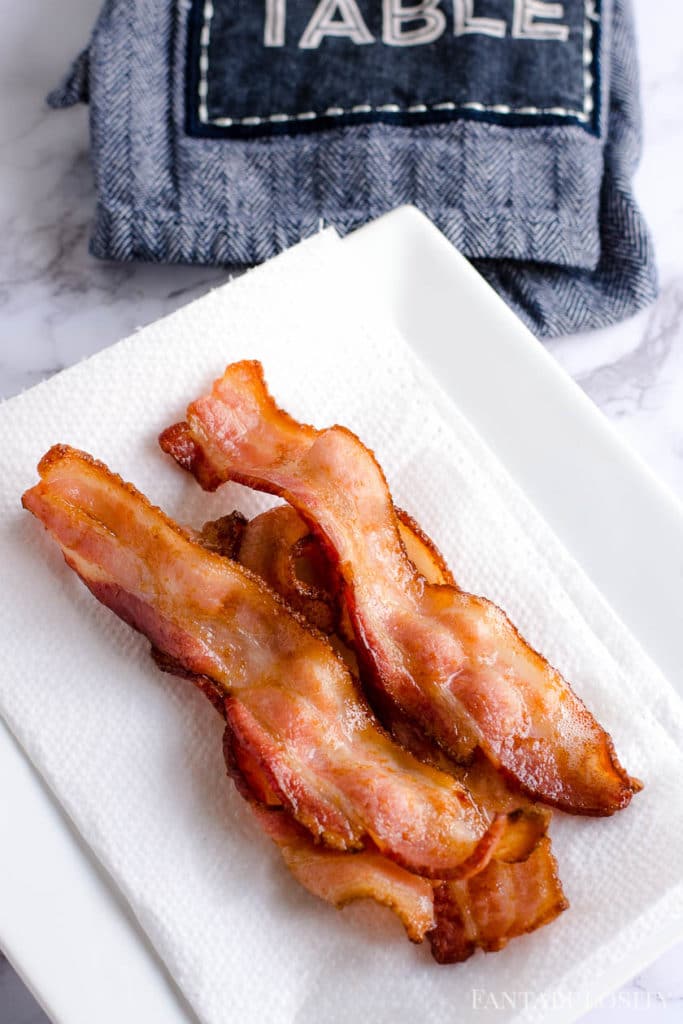
    Notes

    Feel free to use a different type of pie filling to make a variety of turnovers! For example, strawberries, blueberry turnovers, apples, etc.!

    Nutrition

    Serving: 1turnover | Calories: 346kcal | Carbohydrates: 28g | Protein: 5g | Fat: 24g | Saturated Fat: 6g | Cholesterol: 20mg | Sodium: 160mg | Potassium: 45mg | Fiber: 1g | Sugar: 1g | Vitamin A: 30IU | Calcium: 9mg | Iron: 2mg

    Lasagna Stuffed Chicken

    January 24, 2020

    Get ready for some major comfort food. Lasagna Stuffed Chicken is packed with three cheeses and red sauce for the ultimate low carb meal.

    Lasagna Stuffed Chicken: This low carb recipe is packed with three cheeses and red sauce in chicken breastsfor the ultimate easy dinner idea!

    Since sharing the Buffalo Chicken Lasagna, I knew you all would love this Lasagna Stuffed Chicken recipe too!

    Get ready for some major comfort food. Lasagna Stuffed Chicken is packed with three cheeses and red sauce for the ultimate low carb meal.

    Hey there! Meg here popping in from Meg's Everyday Indulgence with your new favorite dinner recipe, Lasagna Stuffed Chicken.

    We're talking all the best things about lasagna stuffed into boneless skinless chicken breasts and you’ll especially love this if you’re eating low carb these days!

    Get ready for some major comfort food. Lasagna Stuffed Chicken is packed with three cheeses and red sauce for the ultimate low carb meal.

    What You Need for Lasagna Stuffed Chicken Breasts

    This dish may sound fancy but you only need a handful of super simple and accessible ingredients to make it.

    • Boneless skinless chicken breasts
    • Kosher salt
    • Pepper
    • Ricotta cheese
    • Mozzarella cheese
    • Parmesan cheese
    • Italian seasoning
    • Spaghetti sauce
    • Fresh parsley (if you’re fancy like that)

    As you can see, the grocery list couldn't get easier and will take you just a few minutes to grab the necessary ingredients.

    Get ready for some major comfort food. Lasagna Stuffed Chicken is packed with three cheeses and red sauce for the ultimate low carb meal.

    How to Make Lasagna Chicken

    In just a few simple steps you can have this delicious, cheesy chicken in the oven. You can find the full, step-by-step, printable recipe below, but I wanted to walk you through the process too!


    Start by laying your chicken on a cutting board and cutting a slit through the middle, like your cutting it into two thin pieces. But be sure not to cut all the way through as you want it to be a pocket for the cheesy goodness.

    Season the Chicken

    Season the chicken evenly with salt and pepper and set aside. If you love using Himalayan salt like Jessica, that’s a great choice too!

    Lasagna Filling

    Next, mix together the ricotta, mozzarella, and parmesan cheese. Stir in your favorite Italian seasoning to add some major flavor. (Love cheese and chicken together? This cheesy chicken is a recipe to try next!)

    Stuffing the Chicken

    Open up your chicken and spread each one with a tablespoon of spaghetti sauce. You can use your favorite store-bought jarred variety or make your own.

    Next, divide the ricotta mixture evenly into 4 and spread it on top of the spaghetti sauce. Close the chicken and place in a greased 8×8 baking pan.

    Once all the chicken is prepared and in the pan, spread with the remaining spaghetti sauce and top with more shredded mozzarella and parmesan cheese.

    Bake the Chicken

    Cover the dish with foil and into the oven it goes. The chicken will bake covered for half the time to ensure the cheese doesn't get too brown.

    Get ready for some major comfort food. Lasagna Stuffed Chicken is packed with three cheeses and red sauce for the ultimate low carb meal.

    How Long to Cook

    The amount of time you will need to cook your Lasagna Stuffed Chicken will depend on the thickness of your chicken. Times are included in the recipe below but you may need a little more or less time.

    Your best bet to get perfectly cooked chicken is a digital meat thermometer. I swear by them anytime I cook meat or poultry. There are some great ones out there that you can set to beep when a certain temperature has been reached.

    To use a thermometer in this recipe, place the probe in the thickest part of your chicken and set it to 165 degrees for perfectly cooked chicken.

    Get ready for some major comfort food. Lasagna Stuffed Chicken is packed with three cheeses and red sauce for the ultimate low carb meal.

    Low Carb Meal

    To keep things really easy for dinner and low carb, serve it with Jessica's famous side salad or garlic roasted broccoli.

    The Whole Family Will Love It

    With a lineup of chicken and three different cheeses, this meal is sure to be a family pleaser.

    This Lasagna Stuffed Chicken works great as a meal prep option as well if you take your lunch to work each day. It makes enough for Monday through Friday leaving one day to treat yourself. The perfect balance in my opinion.

    You may need to hide it in the back of the fridge to make sure it lasts all week.

    Recipe

    Get ready for some major comfort food. Lasagna Stuffed Chicken is packed with three cheeses and red sauce for the ultimate low carb meal.
    Print Pin
    5 from 1 vote

    Lasagna Stuffed Chicken

    Get ready for some major comfort food. Lasagna Stuffed Chicken is packed with three cheeses and red sauce for the ultimate low carb meal.
    Course Main Course
    Cuisine American
    Prep Time 10 minutes minutes
    Cook Time 50 minutes minutes
    Total Time 1 hour hour
    Servings 4 servings
    Calories 577kcal
    Author Jessica Burgess

    Ingredients

    • 4 large boneless skinless chicken breasts
    • 1 tsp. kosher salt
    • ½ tsp. black pepper
    • ¾ cup ricotta cheese
    • 2 cups shredded mozzarella, divided
    • ½ cup parmesan, divided
    • 1 Tbsp. Italian seasoning
    • ¾ cup spaghetti sauce, divided
    • Nonstick cooking spray
    • Fresh parsley, finely chopped, optional

    Instructions

    • Preheat oven to 425 degrees F. Spray an 8×8 baking pan with nonstick spray and set aside. Lay chicken on a cutting board. Cut a slit into the chicken, creating a pocket (be sure not to cut all the way through). Continue with remaining chicken. Season both sides with salt and pepper. Set cutting board aside.
    • In a bowl, stir together the ricotta, ½ cup mozzarella cheese, ¼ cup parmesan cheese and Italian seasoning.
    • Spread 1 tablespoon of spaghetti sauce inside each piece of chicken. Evenly divide the ricotta mixture into 4 sections. Fill each piece of chicken with a ricotta mixture. Place in the prepared baking pan with the filled side of the chicken facing up. Gently spread ½ cup spaghetti sauce onto the chicken. Top with remaining mozzarella and parmesan cheese. Cover lightly with foil and bake for 25 minutes. Remove foil and bake another 15 to 20 minutes, until the chicken reaches 165 degrees. Top with fresh parsley if desired.

    Nutrition

    Serving: 1chicken breast | Calories: 577kcal | Carbohydrates: 8g | Protein: 71g | Fat: 28g | Saturated Fat: 15g | Polyunsaturated Fat: 2g | Monounsaturated Fat: 8g | Trans Fat: 0.03g | Cholesterol: 221mg | Sodium: 1549mg | Potassium: 1130mg | Fiber: 2g | Sugar: 3g | Vitamin A: 1014IU | Vitamin C: 6mg | Calcium: 606mg | Iron: 3mg

    Need More Easy Dinner Ideas?

    If you're looking for more delicious and easy dinners, make sure to check out Jessica's recipe archives. Some of my current favorites are easy hamburgers in the oven, barbecue baked boneless pork chops, salt and pepper chicken bites and cheeseburger macaroni in the instant pot.

    Pin it to Remember it:

    It’s easy to forget where you found something, so pin it on Pinterest so you’ll have it the next time you’re looking for something for your low carb menu or for just a simple recipe to make for your family!

    Low carb lasagna Stuffed Chicken is packed with three cheeses and red sauce for the ultimate easy dinner! #lowcarb #lasagnastuffedchicken #lowcarbchicken

    Cosori Toaster Oven Air Fryer Review

    January 15, 2020

    Cosori Toaster Oven

    Cosori Toaster Oven Air Fryer Review: This is WAY more than just a toaster oven! It will dehydrate, ferment, air fry, bake, and so much more!

    Cosori had given me this toaster oven in exchange for a review!

    COSORI 12-in-1 Oven Air Fryer Combo, Convection Toaster with Dehydrator & Rotisserie

    I’ve had a “toaster oven” on my wish list for some time. But if you’re like me, I was a little overwhelmed with the variety and options out there.

    There are…

    • Toaster ovens.
    • Toaster ovens with air fryer capabilities.
    • Small toaster ovens.
    • Big toaster ovens.
    • Toaster ovens that clean the house too.
      ok… maybe not that last one, but how nice would that be?

    Then Cosori reached out to me and asked if I’d give their 12-in-1 toaster oven a try, and since I KNOW just how curious you are about all kinds of small appliances… it was a no brainer.


    HOWEVER… as those of you in the Fab Family know…I never ever write about or do publish reviews on products that I don’t truly love.
    Trust me, there are products out there that have been sent to me, and if it wasn’t a winner, it was sent back without recommendation.

    But since you’re seeing this post and video review below, then that means I’m a fan of this toaster oven. And even though I’ve only made toast with it so far, here’s why I love it, and why I think I’ll love the rest.

    If you’re not in a place to catch the video above, here’s what I love about this Cosori Toaster Oven so far.

    What I Love About It:

    • It’s sleek design
    • It does SOOO much. (See below what all it can do!)
    • I can cook multiple pieces of toast at one time, rather than just two in my small toaster.
    • I can keep foods warm when dinner is done and waiting on dinnertime.
    • Toasting and cooking small items instead of warming up my big oven is a WIN!

    What All It Can Do:

    I’m honestly amazed at all that it can do. As I mention in the video, it does take up some counter space, however, it’s not any bigger than other toaster ovens my friends have.

    But taking in to consideration that it can do so many of the things that I have other small appliances for… I could get rid of those and just keep this “all-in-one” appliance and then it makes a ton of sense.

    Here’s what all it can do, and what it has presets for:

    • Pizza – this is perfect for those frozen pizzas my kids (and I) love so much or to make bagel pizzas!
    • Roast – Roasting a pork tenderloin in this thing is on my to-do list!
    • Airfry – French fries and chicken wings are going to be a must!
    • Toast – Love having the space to make multiple pieces of toast at once. It will come in super handy on school mornings!
    • Bagel – Same as the toast, I can’t wait to make everyone a bagel at ONCE especially when I’m hosting a bagel bar!
    • Bake – How cool to be able to bake things like cake recipes and muffins in this and not heat up the whole house!
    • Broil – perfect setting for those open-face sandwiches, toasting garlic bread or broiling the bread for the BEST bruschetta recipe!
    • Cookies – I can’t wait to use this to bake these peanut butter chocolate chip cookies with my kids, using this setting!
    • Rotisserie – This thing will cook up to a 5lb chicken! I’m going to love being able to make these to eat on for days in salad recipes, pasta, tacos, and more!
    • Dehydrate – we LOVE deer meat around here, so making jerky with the dehydrator is something we’re looking forward to!
    • Ferment – for all of you homemade bread lovers and DIY yogurt fans, I hear you’ll LOVE this setting!
    • Keep Warm – this function is going to be a lifesaver for when my family is late coming home from jiu-jitsu training and dinner is waiting on them!

    Where to Buy this Toaster Oven

    You can find this exact toaster oven on Amazon and as a Prime member, that’s my favorite place to scored small appliance deals for sure!

    Buy this Toaster HERE!

    What is a Brain Dump? Plus a Free Template Worksheet!

    January 3, 2020

    Brain Dump Template Worksheet

    Brain Dump: How a brain dump works and a free template worksheet to help gather those loose thoughts and how to take action.

    Brain Dump

    Whether it’s in my blogging business or in my personal life, creating a brain dump can SAVE me. It saves my sanity and helps out so much with organizing and launching new projects.

    What is a Brain Dump?

    Well if you’re like me and can relate to the saying,

    If you ever want to know what a woman’s mind is like, imagine a browser with 3,241 tabs open. All.The.Time.

    Someecards

    then you know that you can have a gazillion thoughts going through your head every minute.

    The kids. The House. Your marriage.
    Work. His work. Bills. The list goes on.

    So when a “brain dump” comes in to the picture, it means we take all of those swirling thoughts in our heads and jot them down on paper!

    Suddenly, we can feel relief because we aren’t trying to remember all of the things currently rolling through our minds. Plus, it allows us a place to look back on to be reminded of the things that we need to do or become aware of.

    How do you Create a Brain Dump?

    A brain dump can be created in different ways. Here are my favorite ways to create them:

    • pen and paper (in a notebook, on a post it, in a planner, etc.)
    • template or worksheet (see below for your free printable!)
    • On the “notes” app or similar app on a cell phone
    • On a computer using a Word doc, Google docs, etc.
    • On a “mind map” website or something like Trello!

    How do you Use a Brain Dump?

    Of course you can do a brain dump of anything and everything you want (jot down all of the thoughts you currently have) and leave it at that. That in itself can be incredibly helpful to ease stress, and take a little off of our plate.

    But managing or pinpointing what kind of brain dump you want to do, can add a whole other level of satisfaction. I like to divide them in to two different categories; “Feelings” brain dumps and “actionable” brain dumps.

    Feelings:

    A brain dump can actually be really helpful when it comes to feeling overwhelmed with thoughts.

    For instance, if your mind is swarming with negative thoughts, depression, and anxiety, jotting down all of these thoughts can make us feel SO much better!

    Somehow, being able to release those thoughts on paper can help release our ties to those feelings in some incredible way.

    Actionable:

    I like to take all of the items on my brain dump and organize them even more. Some of these “actionable” items can look like this:

    Personal Life: School Activities, Doctor Appointments, Date Nights, Birthday Parties, etc.

    Our lives can get so busy, between managing school activities, practices, date nights, dinner with friends, paying bills, cleaning the house, family gatherings and so much more… it can be easy to feel overwhelmed with everything we have to do.

    Listing these items out can help us be more aware of what needs to be done, or what needs attention and that in itself can reduce the anxiety of the “unknown” feeling.

    Work-Life: Creating Products, Preparing Speeches, Event Planning, etc.

    For work, creating a brain dump can come in incredibly helpful if working on a big project, preparing for a big meeting, planning a big event… or even when it feels like there are a ton of items that need to be completed by a deadline… sometimes jotting down all of the things to do, ideas and or thoughts, can be helpful.

    Plus, do you ever have those spur-of-the-moment ideas or thoughts when driving down the road or while out to dinner with friends? Sometimes it’s hard to remember them when it comes time to actually work on something.
    So later, when we can refer to our brain dump that has all of those genius ideas on it, we don’t have to rely on just our memory!

    Taking Action and/or Organizing a Brain Dump

    Once your brain dump is complete, if you want to take it an extra step, a great strategy is to:

    “Feelings” Brain Dump Action:

    • talk to someone about the feelings you’re experiencing
    • take some time for YOU to reflect on those feelings
    • journal about those feelings

    “Actionable” Brain Dump Organization:

    • prioritize them in order of importance
    • schedule the appointments
    • list items in a planner, or in/on a calendar as to-do’s on certain days
    • take action on the small, doable steps that can be completed easily and right then
    • delegate to-do’s to those who can complete them

    Free Brain Dump Worksheet

    Although a blank sheet of paper will work just fine, I love being able to have a free printable for you to go along with your mind dumping process. Why? Well because I know how intimidating staring at a blank sheet of paper can be.

    So when we have a cute printable to guide us or unconsciously give us permission to jot all of our thoughts down, it can make a BIG difference.

    I’ve created the free “brain dump” printable for you. I’ve left it blank and have given you plenty of space to write in what you wish.

    Brain Dump Printable

    Get Your Free Template HERE!

    To snag this brain dump worksheet, see button below…and then print it over and over, as you wish!

    Get Access!

    Want more of detailed brain dump worksheet?

    I have a desire to create more of a detailed, guided worksheet for you, to help you organize your thoughts and help you pull out those deep ideas that you may be stored inside.

    If this is something you’d be interested in having as well, let me know in the comments below and I’ll start working on it!

    More Organization and Free Printable Posts You’ll Love:

    • Daily Planner Worksheet
    • Free Grocery Shopping List
    • Importance of Time Management
    • 7 Ways to Trick Yourself in to Getting Things Done

    95+ Pancake Toppings Ideas

    January 1, 2020

    Pancake Toppings Ideas

    Pancake Toppings: A list of popular toppings for pancakes that include favorites syrups, fruits, savory, healthy toppings like keto, and more!

    We LOVE pancake recipes around here and find it fun to mix things up from time to time with toppings and “mix-ins”.

    Usually, we’ll see what we have on hand in the pantry or the freezer and then experiment and see what kind of pancakes we can come up with!

    So if you’re looking for pancake toppings ideas for a weekend breakfast or if you’re hosting a pancake bar for a party, then this list will come in VERY handy, but don’t forget to check on what you already have on hand, and see what kind of creations you can come up with!

    Pancake Recipes You’ll Love:

    • Easy Homemade Pancakes
    • Easy Blueberry Pancakes
    • Cinnamon Sheet Pan Pancakes
    • Butternut Squash Pancakes
    • Pumpkin White Chocolate Pancakes

    Pancake Toppings Ideas

    Some items can serve as a topping, can be mixed right in to the pancake batter or belong in multiple categories! So you actually may see duplicate items in each section.

    Syrups

    • Maple Syrup
    • Fruit Flavored Syrup (i.e. blueberry)
    • Agave Syrup
    • D’Vash Syrups
    • Honey
    • Caramel Sauce (Check out this low carb/no sugar syrup I used for my son's keto diet)
    • Chocolate Syrup
    • Molasses

    Condiments

    • Butter
    • Nutella
    • Peanut Butter
    • Almond Butter
    • Cashew Butter
    • Jelly/Jam/Marmalade
    • Fruit Compote
    • Apple Butter
    • Yogurt

    Fruit Toppings

    • Strawberries
    • Peaches
    • Blackberries
    • Blueberries
    • Yogurt covered blueberries
    • Raspberries
    • Sugared cranberries
    • Bananas
    • Lemon Zest
    • Kiwi
    • Mango
    • Apples
    • Apple Pie Filling
    • Cherry Pie Filling
    • Chocolate Pie Filling
    • Lemon Pie Filling
    • Strawberry Pie Filling
    • Pumpkin (See my Pumpkin White Chocolate Pancakes with White Chocolate Maple Syrup recipe)

    Sugary Toppings for Pancakes

    • Powdered Sugar
    • White Sugar
    • Brown Sugar
    • Whipped Cream
    • Cream Cheese & Powdered Sugar “Frosting”
    • Sprinkles
    • Marshmallows
    • Swerve

    Candy

    • M&M’s
    • Snickers
    • Reese’s Cups
    • Butterfinger
    • Peppermints/Candy Canes
    • Dark Chocolate
    • Gummy Bears/Worms
    • Poprocks

    Crunchy, Crumbles, Baking Goodies

    • Milk Chocolate Chips
    • White Chocolate Chips
    • Butterscotch Chips
    • Toffee Bits (Heath)
    • Sugared Pecans
    • Flaked, Sweetened Coconut
    • Marshmallows
    • Graham Cracker Crumbs
    • Crushed Cookies (Oreo’s, Gooey Butter, Nutter Butters, etc.)
    • Crushed Brownies
    • Cookie Dough
    • Cereal (Fruity Pebbles, Corn Flakes, Lucky Charms, Honey Bunches of Oats, etc.)

    Extracts

    To mix in with syrups, whipped cream, etc.

    • Peppermint Extract
    • Almond Extract
    • Lemon Extract
    • Orange Extract
    • Butter Extract

    Healthy Pancake Toppings

    • Swerve
    • Fruit (See fruit ideas above.)

    Keto Pancake Toppings

    • Swerve
    • Bacon
    • Flavored Extracts (See flavor ideas above.)
    • Sugar-Free Syrup
    • Low-Carb Maple Syrup

    Nut Toppings

    • Pecans
    • Walnuts
    • Macadamia
    • Pistachios
    • Slivered Almonds
    • Sugared Pecans (Try the White Chocolate Sugar Pecans)

    Seeds + Grains

    • Oats
    • Chia Seeds
    • Flax Seed
    • Granola

    Spices

    • Cinnamon
    • All Spice
    • Hot Cocoa Mix
    • Flaked Sea Salt

    Savory Toppings

    • Crumbled Bacon
    • Egg
    • Ricotta
    • Spinach

    Veggie + Floral

    • Butternut Squash (See my Butternut Squash Pancakes that my kids love!)
    • Sweet Potatoes
    • Edible Flowers
    • Fresh Mint

    More Pancake Toppings?

    Did I miss your favorite? I’d love to hear what you enjoy on your pancakes so I can add it to the list!

    Drop a note in the comments, or let me know via Facebook or Instagram!

    Love Breakfast Recipes?

    I do too, and that means you’ll find a LOT in our breakfast recipe archives!

    But some of the reader favorites are:

    • Baked French Toast
    • Cinnamon Roll Casserole
    • Easy French Toast Sticks
    • Brioche French Toast

    Pin this image to remember it!

    Pancake Toppings Ideas - a list of the most popular and more!

    Importance of Time Management

    December 21, 2019

    Importance of Time Management

    Importance of Time Management: Whether in your personal life, home, or in the workplace, this is why time management is so important!

    Importance of Time Management

    I have a lot of faults, but I will say that time management and organization come very naturally for me, and I swear I get it from my mom. That woman is an amazing individual and I grew up learning from the best.


    You May Also Love:

    • 6 Ways to Make Your Desk Work More Productive
    • 7 Ways to Trick Yourself in to Getting Things Done
    • Morning Routine for a Mentally & Physically Productive Day
    • What I Use to Stay Organized

    I honestly didn’t realize I had time management skills until I became an adult and began working with others and becoming more aware of deadlines.

    But please don’t think I’m bragging or perfect with time management. I promise I struggle in many other areas to justify my time management skills and I do slip up occasionally with mismanaging my time. It’s just that time management is one of my strengths.

    And since I’ve come to realize over the years just how important time management can be, in MANY different areas in life, I want to share what I know, so it can help YOU!

    11 Reasons Why Time Management is So Important

    Why is it important? Here are some of my favorite reasons why:

    1. Take Control of Your Time and Not Let it Take Control of YOU.

    When time management is incorporated into your life, you can take control of your time, and not let it take control of you.

    Do you ever feel scattered? Feeling scattered can be what you feel when there are many things going on, and you’re letting them “come at you” freely, without routine or without complete awareness.

    Being in control of your time, scheduling, planning and being more aware of what’s coming and/or happening, can really reduce the amount of anxiety and stress that you may feel. Which leads me to my next perk of managing your time.

    2. It can Lower Stress

    Life can be stressful! I don’t care if you’re someone who has a lot going on, or doesn’t have a lot going on… life can still be stressful. But when you DO have a lot going on, causing you to live a busy schedule, it can be a recipe for disaster.

    Busy Schedule + No Time Management = STRESS

    So if even a little time management can be put in to place, it can lower stress… and that’s what we all want, right?

    3. Procrastination is the Enemy

    Rather than managing your time wisely, procrastinating can cause a ton of chaos and anxiety later.

    Procrastinating does feel good in the moment, but eventually, things will catch up and everything will be due at once with little time to devote to it.

    4. To Be Effective in Everyday Life

    Can we get through life without time management? Of course.

    But having time management skills can help us be EFFECTIVE in everyday life. Effective with things like tackling items on our to-do lists, managing our homes so things don’t pile up, at the workplace and meeting deadlines, etc.

    5. To be Considerate of Others

    When thinking of all the reasons of the importance of time management, being considerate of others is at the top of my own list. Meetings, coffee dates with friends, respecting our spouse, and so many other people in our lives!

    Others have lives too, so when we’re 30 minutes late to the meeting, solely because of the lack of our own poor time management, it’s disrespectful and can give the impression that we think what we have going on is more important than what they have going on in life.

    I don’t know about you, but I never want anyone I care about to feel like I don’t care enough about what they have going on, and that their life should revolve around mine.

    6. Can Make More Time for What Matters

    I’ve talked about “love languages” quite a bit around here, and mostly when it comes to the subject of marriage.

    If your spouse absolutely loves when you make time for them, having time management skills, to where it helps you make time for your spouse… can CHANGE your marriage. (In a good way!)

    When my husband was working a ton of hours each day, running here and running there, I felt like I would end up on the back burner quite a bit because he’d often let work and life control his days.

    But with a little time management under his belt, using the self-management checklist (that’s a freebie in my printable library, exclusive to Fantabulosity Family) each day, he began to regain control of his time and make more time for me and our kiddos!

    7. Financially Beneficial

    Time management skills can actually benefit us financially too! If we don’t manage our time with bill paying, we can be late paying bills, that can generate and accrue interest, late fees, etc. So managing your time can actually SAVE money!

    8. Freedom for What We DO Want

    Quite possibly my favorite reason to discuss the importance of time management, is because it can give us the freedom of time to do things for ourselves and others.

    When our time is managed, it can free up minutes or even hours in our days/weeks to focus on things that we’ve been putting off for so long.

    Perhaps it’s joining a class we’ve been wanting to join, or taking Friday’s off because we were efficient with our time Monday through Thursday.

    If “freedom” is an important value of yours, time management just may be the key to your success with that!

    9. Get More Done + Make Things Easier

    Get more done, and get it done easier? You bet! When your time is managed and controlled, you can get a lot more done and not necessarily work as hard, completing things!

    For instance, if a project is planned out or scheduled, you go in knowing that you are there to work on that project and only that project which can keep you from thinking about all of the other things you need to get done.

    Focusing on one thing to do at a time, can mean you’ll complete it faster, efficiently and it makes it MUCH easier to complete when your brain isn’t trying to play tug of war with all of the other things you have to get done too.

    10. Clear Thinking

    When we feel less scattered because our time is managed more, we have less brain fog, more clarity and the “rushed” feeling tends to subside! It goes back again to having control of your time, rather than letting your time have control of YOU!

    11. Workplace Perks

    When it comes to the workplace, using time management skills can speak volumes to co-workers, leaders, etc.

    Managing your time can be viewed as a great characteristic and can encourage promotions, pay raises and advancements in your career!

    How to Manage Time?

    So HOW can we manage our time? Well, that post is soon to come. I’ll be sharing my favorite tips and tricks to manage our time, with realistic strategies and techniques to implement into our daily lives!

    But here’s a quick note to leave you with.

    If you do something for 21 days, it could create a habit. (Unless it’s a BIG change or habit that you’re trying to break/start.)
    However, it can take as little as 21 days to make a change.

    So start small! What small thing can you implement in to your daily life NOW to try and incorporate more time management skills in to your life?

    Remember, baby steps can be the key to success. No step is too small, as long as it’s in the right direction.

    Pin it for Later:

    Pin this image on Pinterest to remember it later, so you can come back to it to refresh your memory!

    importance of time management

    Gift Ideas for Toddler Boys

    December 17, 2019

    Gift ideas for toddler boys

    Gift Ideas for Toddler Boys: Whether you’re looking for birthdays, Christmas, or just a special present for a little boy, these are our favorite ideas!

    With little boys in my immediate family, church family and group of friends… it’s so nice to have a big list of gift ideas for when we get a birthday party invitation or it’s time to buy for Christmas!

    More Articles I Think You’ll Love:

    • “I wish I didn’t have to tell my toddler…”
    • Camping Birthday Party Ideas
    • Toddler Lunch Ideas

    Gifts for Toddler Boys

    So after asking all of you super smart Facebook fans and shopping around online, I’ve compiled this list of AMAZING gift ideas for little guys.

    I’m always updating this list and adding new favorites, so make sure to bookmark this page or pin it, in case you need to refer to it for the little boys in your life!

    You May Also Love:

    • Gift Ideas for Teenage Guys
    • Gift Ideas for Teenage Girls
    • Gift Ideas for Her
    • Gift Ideas for Him
    • Gift Ideas for Teachers

    • Cars, Trucks, Emergency Vehicles, Dump Trucks – I’m not sure I know a little boy who doesn’t love playing with these types of toys!
    • Pretend Shaving Kit – Just like “dad” he’ll be able to shave his little face too!
    • Train Table – Oh the hours of fun a train table provided for my littles! It’s an investment that paid for itself over and over.
    • Washable Markers and Crayons – “Washable” is the keyword there!
    • Power Car – He feels so big, being able to drive his own car around the house!
    • Balls – I love this little variety set of balls, so he can play whatever sport he feels like!
    • Keyboard – Not only does this piano let the little one play his favorite music, but it teaches fine motor skills, comes with animal sounds, drum sounds, a record function, and parents… a volume control button! YES please!
    • Dinosaurs – Dinosaurs are a little boy staple and the love continues on through childhood!
    • Magnets – Count on hours of playtime with magnets like these, while they build their favorite creations!
    • Playskool Action Figure Heros – He gets to feel so big by having his own superheroes, but they’re made for little hands!
    • Army Men and GI Joes – OLDER TODDLERS ONLY (3 years and older) – The childhood staple! Every little boy needs these!
    • Lego Duplo – If you start him on Lego’s young, odds are he’ll still love Lego’s all throughout his childhood. (Or at least that was the story in our house!)
    • Lego Junior Sets – OLDER TODDLERS ONLY (3 years and older) – When he gets a little older in his toddler years, he’ll love moving up from Duplo to the “junior” sets!
    • Camping Play Set – Not too hip on going out in to the wilderness to camp? Me either! That’s why I love being able to give this camping set so he can camp out in the living room!
    • LCD Writing Board – This toy is used on a daily basis in our house, and is by far one of my favorite gifts to give now!
    • Character Shirts – Little boys LOVE having their favorite tv show characters on their shirts!
    • Backpack – My little guy LOVED having his own backpack like his big brother. He couldn’t wait to pack it when it was time to go somewhere for the day!
    • LeapFrog RockIt – This has AMAZING reviews and gives the little guy an opportunity to play on his own gaming device like his siblings/friends!
    • A trip to Chuckie Cheese, Six Flags, the zoo, bounce house, movies or somewhere he LOVES to visit!
    • Savings Account – Start him off right with a savings account that can sit there while he grows up and learn the importance of setting money back for later!

    Did I Miss Something?

    I'm sure there are SO many other items out there that a toddler boy would love, and I want to hear about it! Drop a note in the comments and let me know what it is so I can add it to this one to help others out!

    Pin it to Remember it!

    This list is frequently updated, so “pin” this image below or bookmark it to check back anytime you need a gift for a little boy!
    Gift Ideas for Toddler Boys that they'll actually love!

    How to Host a Favorite Things Party (Easy Gift Exchange + Setup Guide)

    December 4, 2019

    Favorite Things Party Ideas

    Wondering how to host a favorite things party? From setting up the gift exchange to creating a simple, fun atmosphere, this guide walks you through everything you need to plan a stress-free girls night your guests will love.

    Looking for what to serve? Don't miss these favorite things party food ideas!

    Favorite Things Party Ideas

    After planning my son’s “Woodland Friends Birthday Party,” I immediately started thinking about planning another, and the Favorite Things Party was born.

    ——> Stop right here if you need a free party planning checklist! Then come back and check out how I host a Favorite Things shindig!

    Favorite Things Party Ideas-Champagne Bar Ideas https://fantabulosity.com

    How to Host a Favorite Things Party

    I gotta say, that I went in to planning my first “Favorite Things Party,” empty-handed. 

    I googled…

    • “Favorite Things Party Ideas,”
    • “How To Host a Favorite Things Party,”
    • “How Does a Favorite Things Party Work.” 

    All of those gave me great tips, ideas, and tricks, but I have to say I still did it my own way, which is the beauty of it.

    Favorite Things Party Ideas

    See my Christmas Favorite Things Party, and even consider having a Christmas movie-themed party!
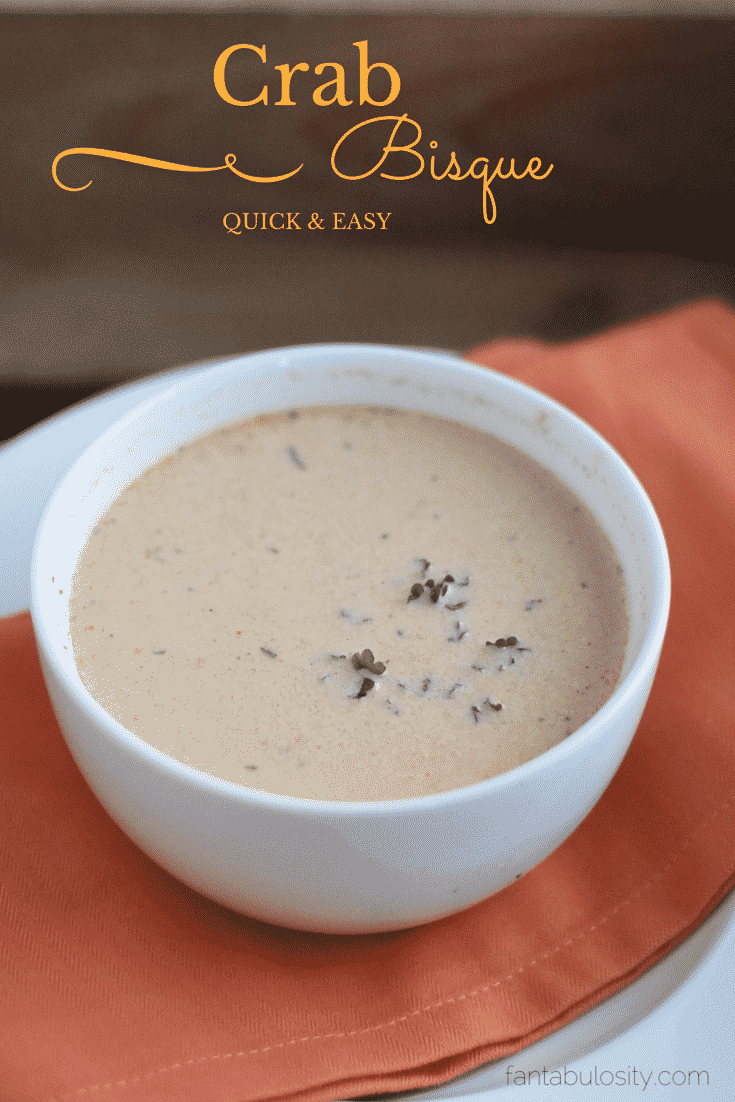
    Martini Bar Ideas fantabulosity.com Red apple martini and White Chocolate Peppermint Martini

    …and the Summer Favorite Things Party!
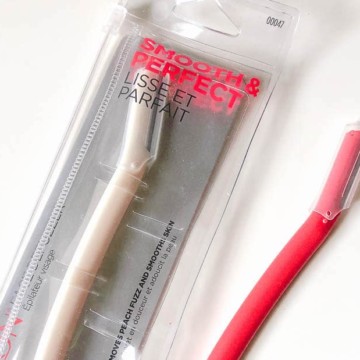
    favorite things party ideas

    Now back to THIS Favorite Things Party…

    Favorite Things Party Ideas-Champagne Bar Garnishes https://fantabulosity.com

    Favorite Things Party Ideas

    The planning of my favorite things party, all started with my favorite drink. Champagne.

    DRINK IDEAS

    I thought and thought about creating a signature drink for the evening, but the more I thought about it, the more I was loving the idea of letting everyone get creative and serve up their own bubbly, by creating a Champagne Bar!

    I provided:

    • fruit garnishes (blueberries, blackberries & raspberries)
    • fruit juices
    • chocolates

    I coated the rims of the champagne glasses with gold sprinkles, and not only did that make it super cute… but we all loved the extra “sweetness,” with every sip.

    I also provided different types of champagne, in case we had “Sweet,” lovers, and “Dry,” lovers. Which… I’m glad we did, because I had a healthy mix of both “tastes” attend.

    It didn’t take long for the girlies to get in the champagne. I always knew we were friends for a reason. 🙂

    Favorite Things Game & Gift Station

    How to do a favorite things gift exchange party

    I knew I wanted to designate a space for my guests to immediately drop off their gifts when they came in the door. No one wants to carry and “babysit,” gifts all night.
    (For Heaven’s sake we left the kids at home. We needed to drop our bags and get a glass of champagne in our hands… quickly!) 

    I used my fireplace as a landing zone for the gifts. This worked out beautifully because this is where I had everyone gather when it was time for the favorite things gift exchange, so we didn’t have far to go.

    I also made sure to provide a sign, explaining to everyone what they needed to do when dropping off the gifts. (Don’t worry… I’ll fill you in on how I had everyone play the game, below.)

    Favorite Things Party Ideas-Gifts

    So my color scheme for the Favorite Things Cocktail party was easy. White.Black.Gold. The colors I think of when I think of Kate Spade goodies.

    Favorite Things Party Ideas-Cocktail Party. White, Black, Gold decorations

    The Menu

    I was so excited to finally throw a party that could have a cocktail party “feel,” to it. I’ve thrown a ton of kids parties, so it was Momma’s turn.

    Favorite Things Party Ideas-Cocktail Party Menu https://fantabulosity.com

    I did mention to the catering manager, that I wanted to take the goodies, and put them in my own, small “tasting,” dishes.

    So I just took what they gave me, and divided it all up into the small dishes. My guests LOVED the small tasting dish options! Besides… who wouldn’t love miniature plates and forks? They’re simply just too cute.

    Food on table for Favorite Things Party
    Favorite Things Party Ideas-3
    Favorite Things Party Ideas=Cocktail Party Menu Ideas https://fantabulosity.com

    The strawberry-spinach salad was a no-brainer for this party. It’s classy, AND delish.

    Favorite Things Party Ideas-Food Ideas, spinach & strawberry salad https://fantabulosity.com

    Buy the little square plastic dishes we used for the salads here: Mini Square Cubes

      Small, itty-bitty Snicker cake bites were a perfect dessert idea for the party, and were a huge hit. Everyone loved them… and I may have had 5 {ahem 15} myself.

    Favorite Things Party Ideas-Food and Menu Ideas- Cake Bites https://fantabulosity.com

    Pictured below: Gooey Butter Cake

    Favorite Things Party Ideas-Dessert Idea; Gooey Butter Cake in Mini Spoons https://fantabulosity.com

    Favorite Things Party Gift Ideas

    Let’s move on to the purpose of the night. The Favorite Things Gift Exchange!!! Here are my girls gathering in the living area, ready to give and receive!

    Favorite Things Party Ideas-Girls night cocktail party! https://fantabulosity.com
    Some of my favorite gifts to give at a Favorite Things Party, are:

    • cake stands
    • mascara
    • drink dispenser
    • coffee frother
    • dry shampoo
    • bakers twine

    How a Favorite Things Party Works

    • Each guest brings a set number of their favorite items
    • Gifts are usually within a set budget
    • Names are drawn for gift distribution
    • Guests leave with a variety of new favorite things

    Well here’s how we did it. Remember above how everyone wrote their names down on three different pieces of paper? I had them put all three pieces of paper into the bowl when they were done.

    Each person would take turns, going up to the front of the group… grab the three gifts that they brought, and draw three names out of the bowl.

    Those three people would get the “drawers,” three favorite things! I had everyone explain why those were their favorite things, and it just gave it a little more of a personal touch!
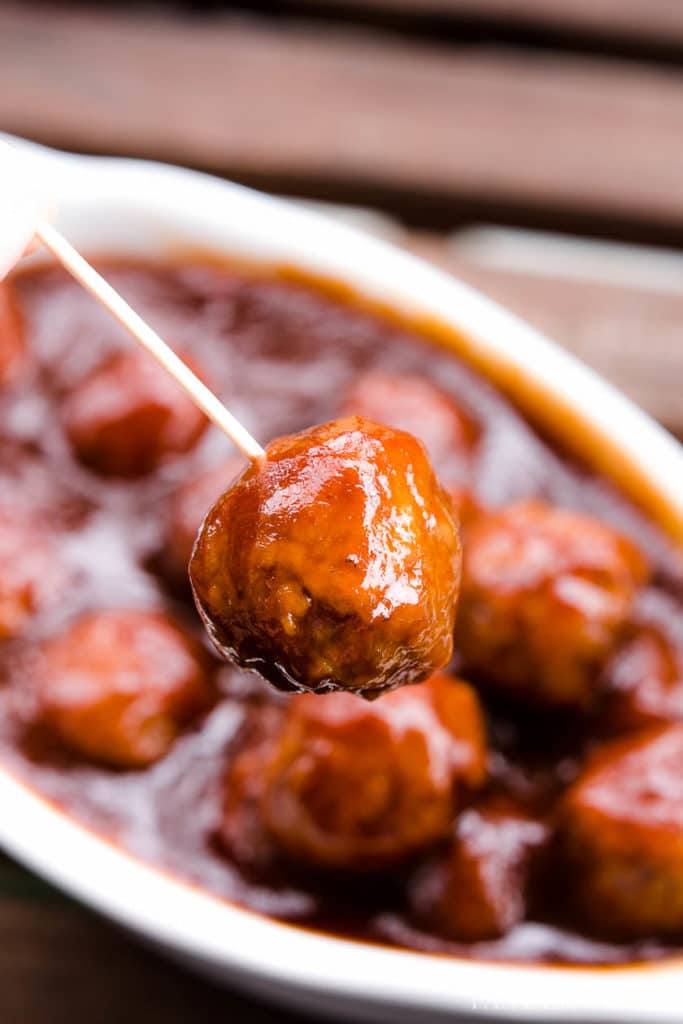
    Now… some guests brought three different favorite items, and some people brought 3 of the same favorite items. Either way worked fantabulous! (P.S. We also did a price limit. Each gift could not exceed $10.)

    Favorite Things Party Rules (Simple Version)

    • Set a price limit
    • Decide how many gifts each guest brings
    • Choose how gifts are exchanged
    • Keep it simple and fun

    Girls will be Girls… with Champagne

    I have NO idea what I was doing here, but I can tell you that I was having a fab time with that big ole grin on my face.

    Favorite Things Party Ideas https://fantabulosity.com
    Favorite Things Party Ideas-Gift Giving! https://fantabulosity.com

    I must say… the best part of the night was sitting back and watching everyone cut loose and have a good time.

    It’s a rare occasion when just the girls can get together to mingle, have a cocktail (or two) and actually get some “me,” time… so seeing smiles on my guest’s face all night, was truly the highlight of it all.

    Favorite Things Party Ideas- https://fantabulosity.com

    More Party Activity Ideas

    If your party is hosted during the holidays and you’re looking for something else to do besides the gift exchange, going on a Christmas scavenger hunt would be a super fun idea too!

    Or, if you’re thinking of making fun party favors or fun little gifts for everyone, I loved making these hangover kits for the gals.

    To see more of the shindigs & parties I have hosted:

    • Cowboy Pasta Salad in bowl with wooden spoon.
      Cowboy Pasta Salad
    • Old fashioned potluck cake recipes collage.
      Old-Fashioned Cakes That Still Show Up at Every Potluck
    • Collage of potluck desserts.
      Easy Potluck Desserts (Simple Recipes That Always Get Asked For)
    • Image collage of dump cake recipes.
      Best Dump Cake Recipes (Easy, Crowd-Pleasers)

    31+ Gift Ideas for Men

    November 28, 2019

    Gift ideas for him: Husband, boyfriend, dad, brother, friend

    Gift Ideas for Men: For the one that’s hard to buy for, you’re sure to find something here your husband, dad, boyfriend, brother, and friend will love!

    Gift ideas for him: Husband, boyfriend, dad, brother, friend

    I don’t know what happened this year but for some reason, I found it SUPER easy to find gift ideas for the men in my life for birthdays, Christmas, anniversary, Father’s Day and so much more.
    Get my favorite gift ideas for her, the teenage girls, teenage guys, toddler boys and gift ideas for teachers in your life too!


    And last year for Christmas, my sister encouraged us to start a new family tradition, by buying small gifts for every member of the family, to fill up HUGE stockings for each of us, and it was SO.MUCH.FUN.

    Nothing big. Nothing fancy. Just small gifts that we think each family member will love.

    Then, one by one, we go in a big circle and take turns opening each individual gift so we can all see what each person got.

    So many laughs, so many memories.

    So with this new tradition, this meant that a WHOLE lot of men got added to my Christmas Gift Tracker (get your free gift tracker download here).

    Here is a list of all of the goodies I’ve found lately that the men loved and would love and I hope you find some FABULOUS ideas for the men in your life too!

    Many of these links contain affiliate links.

    Gift Ideas for Men

    • "Take it Easy" Gift Idea – Every guy on your list will love an excuse to relax!
    • “You’re Red Hot” Gift Idea – Looking for something to give your husband or boyfriend? Tell him you think he’s “Red Hot” with all of these red goodies!
    • "Open When" Printable Gift Cards – A DIY option and a heartfelt one at that. This is the gift that keeps on giving!

    Featured Items:

    • Smart Meat Thermometer – if you’re buying for someone who loves to cook and especially smoke meat, like we do, then he’ll LOVE this smart wireless meat thermometer!
    • Gravity Memory Foam Pillow – This pillow will change this guy’s sleeping world! What better gift to give, than the gift of a good night’s sleep? Gift him this memory foam pillow that’s customizable… yes really! The inserts move around to give you the “feel” you need for the night!
    • Weighted Robe – After a long hard day, imagine him being able to take a hot shower and cover-up in a weighted robe! YES! The weight of the neckline helps induce relaxation and it’s absolutely GENIUS! 
    • Heated Jacket (Weargraphene) – This has to be one of my favorite gift ideas for a man! (Especially my husband who always finds himself outside in the cold when he’s hunting or working on the ranch!) Good news: You can also use code: FB10 to get 10% off, sitewide!
    man wearing black heated jacket
    Heated Jacket
    • Supplements for men – From vitamins to pre-workout, the man in your life will love trying something new or getting something he doesn’t have to buy himself next month!
    • Does he love being a couch potato? He’ll love this couch potato gift basket idea!
    • Yeti Cooler – Whether he spends time at sporting events, hunting or just needs a cooler for a long road trip, he’ll love having a new cooler!
    • Yeti Rambler Tumbler – Want to get him a Yeti but a cooler is over your budget? This tumbler is something he can never have too many of!
    • A Ball Cap – The trucker hats are in style and he’ll stand out from the crowd with the different styles and colors Patagonia hats have!
    • Kabob Grilling Baskets – Have a griller? How easy will it be to secure kabobs now?
    • Tickets to a sporting event from Stubhub – It’s the gift that will continue to give after opening! Grab tickets to a football, basketball, baseball or hockey game and watch his eyes light up!
    • Cornhole Set – it’s one of the most addicting games out there right now. He’ll love playing this with his buddies and at family functions!
    • Concert Tickets from Stubhub – have a music lover? Check the concerts in his area coming up and see if he has a favorite show coming soon!
    • Work Boots – A nice pair of work boots will send him back to work in the new year with a smile on his face!
    • Cognac Belt– A belt that looks AMAZING on a business suit and is super popular this year!
    • North Face Puffer Vest – This vest is a staple in so many closets and one that you can never have too many of!
    • Weighted Blanket – This is on so many wish lists this year and for good reason! He’ll be sleeping better in no time!
    • Wireless AirPods – For those long car rides or working in the office, he’s going to LOVE having these new AirPods to listen to podcasts or his favorite music!
    • 75 Inch Vizio Tv – What guy wouldn’t LOVE to see this under (or heck, beside) the tree this year! 75 inches of his favorite sporting event or tv show? You may just be his new favorite person after getting this tv this year!
    • Roku Streaming Stick – Help make it easier to watch his favorite things on tv this year!
    • Capital Gains: Smart Things I Learned Doing Stupid Stuff – Chip Gains – Chip Gains is loved by so many and his book is so encouraging that no matter what your guy does for a living, he’ll love reading this book!
    • Adidas Cologne – there are SO many expensive cologne options out there, but this Adidas cologne is SO SO good and super affordable!
    • XBox – Have a gamer on your list? Feed his gaming addiction with a new XBox this year!
    • Nikon DSLR Camera – Has he shown interest in taking photos? This camera a FANTASTIC starter DSLR camera!
    • Car Detail Kit – A man and his truck/car/RV… no matter what he drives he’ll love having this on hand to keep it clean!
    • Pajama Set – He’ll love lounging in his chair on the weekends wearing one of these pajama sets!
    • Watch – A timeless accessory, a watch is always a safe bet!
    • Fantasy Football Gear – You’ll be speaking his love language by gifting him with something fun to take to his next fantasy football meeting!
    • Leatherman Tool – It’s the tool that can do all.the.things! Something he can keep in his glovebox toolbox, it will come in handy when he needs a little help!
    • Wireless Garage Door Opener – I’ve had this and LOVE it! It’s so nice to be able to see if your garage door is opened/closed even when you’re not home. Plus, get notifications if your door opens!
    • Jersey for His Favorite Sports Team – Give him a new shirt to wear to support his favorite team this season or to wear when he goes to the game to root them on!
    • Gift Certificate for Carwash in Town – A lot of carwashes now have membership options and they run GREAT deals during the winter months. Grab him a gift certificate for when the weather warms up!
    • A basket of his favorite snacks/drinks – Do a little research and find out what his favorite goodies are and he’ll be snacking well in to the new year!
    • Scratch offs – This is a gift that could give him WAY more! Plus, it’s a great option if you have a specific dollar amount to give because you can get anywhere from 1 to 100 (or more) of these!
    • Alcohol – Is he a scotch drinker? Whiskey? Beer? Grab his favorite mixer and he’ll be able to crack in to them right after opening!
    • Gift Certificate to his Favorite Restaurant – Once the leftovers are gone from the holiday celebrations, give him a chance to visit his favorite place to get a steak/burger!

    Did I Miss Something?

    I'm sure there are other items out there that the man in your life would love and I want to hear about it!

    Drop a note in the comments and let me know what it is so I can add it to this one to help others out!

    Pin it to remember it:

    50+ Gift Ideas for Her

    November 24, 2019

    gift ideas for her

    Gift Ideas for Her: Shopping for a sister, mom, best friend, teacher or another gal in your life, just got a whole lot easier!

    gift ideas for her

    Gift ideas are sort of my jam, but I’ll admit, I struggled a bit when trying to find gift ideas when I created the gift ideas for teenage girls and teenage guys, so I had to enlist in some help from my niece and nephew.

    When creating the list, gift ideas for teachers, it was much easier because I went to Facebook and asked teachers themselves what they’d like to receive as gifts and even better… what they don’t want to receive as gifts.

    But this one… gift ideas for her… THIS one was much easier and a lot of fun to put together. I simply “shopped” for myself and found all sorts of goodies that I’d like to receive!

    You may also love “Gift Ideas for Him” if you have a guy to buy for this year!

    P.S. Did you get my free printable Christmas Gift List download yet? You'll want to get your hands on that pronto!

    Gift Ideas for Her

    From totes to kitchen utensils, to clothes and cake stands, this ever-evolving list is often updated with the latest finds and gift ideas that gals will love for her birthday, as Christmas gifts, or even Mother’s Day!

    What does mom really want for Mother’s Day? You may be surprised!

    Simply select the image of the items and it will take you right to the store to snag it!

    Many of these links contain affiliate links, and I may have received some products listed here for free, so I can try it out first, so I know what to recommend.

    Shoppable Favorites for Women

    [show_boutique_widget id=”892037″]

    More Gift Ideas She’ll Love

    If you love more of a DIY gift approach, you’ll love these gift ideas that are easy to create and are reader favorites!

    DIY Sangria Kit

    So easy to put together, and the drink dispenser can be used again and again! Perfect for housewarming, Christmas gift, or a just because!

    Aw, how cool is this! DIY Gift Idea: Sangria for Friends, housewarming, for women, new neighbor, anyone! Who wouldn't love this!? They can even use the drink dispenser again and again!
    DIY Sangria Kit Gift Idea

    Sunshine Gift

    A sunshine box is a fun gift to not only give but to put together! Go on a hunt for all things yellow, and surprise someone special with the gift basket!

    Sunshine Gift Basket or Box Ideas! fantabulosity.com

    Spa Basket

    A Spa at Home Gift Basket Idea: A box full of goodies for someone special to experience a day of pampering at home when they can't get out to the spa!

    Spa at Home gift basket idea for her. So easy and so cute!

    Take it Easy Gift Basket

    Take it Easy Relaxation Gift Basket Idea for Men or Women: This simple gift idea is perfect for any man or woman for ANY occasion! Who wouldn't love a basket with an excuse to relax!

    gift basket idea for her

    “You’re Sweet” Gift Basket

    This "You're Sweet," gift idea can be used in SO many ways. Hostess Gift, a gift idea for best friend, neighbor gift, co-worker, and so much more.

    "You're Sweet" Gift Idea. This is PERFECT for a hostess gift idea, or gift idea for best friend! fantabulosity.com

    17 Gift Ideas for Teachers That They’ll Actually LOVE!

    November 21, 2019

    gift ideas for teachers - wrapped presents

    Gift Ideas for Teachers: Male or Female, Christmas, End of School Year, Daycare, New Teachers, Appreciation and Thank You gifts all teachers will love!

    Gift ideas for teachers - wrapped presents

    Gift Ideas for Teachers

    Each year, I find myself trying to think of gift ideas for my son’s teachers for Christmas, and even other holiday’s throughout the year.

    It’s not that I forget to add them to my Christmas gift tracker, but rather I just don’t know what his/her “likes” are, or what they may need.

    While giving should be about the “thought that counts”, I still want to give gifts that he/she can actually use or that they’ll actually like. You with me?

    More Gift Ideas You’ll Find Helpful:

    • Gift Ideas for Teenage Guys
    • Gift Ideas for Her
    • Gift Ideas for Him
    • Gift Ideas for Teachers
    • Best Friend Birthday Gifts
    • Gift Basket Ideas
    • 30th Birthday Gift Ideas for Him
    • DIY Gift Ideas

    BEST Gift Ideas for Teachers

    So what better way to find out what teachers ACTUALLY want, than to just ask them!

    On the Fantabulosity Facebook page, I polled teachers and asked them to share the BEST gifts they’ve ever received and any other advice they wanted to give!

    After this incredible list of the BEST gift ideas, you’ll also find tips for gifting to teachers and even some VALUABLE feedback from real teachers, sharing what they DON’T want and some important things to remember, whether it’s for:

    • A male or female
    • School or Daycare
    • Christmas
    • Valentine’s Day
    • Appreciation/Thank you
    • First Day of School
    • or just because!

    Now let’s get to the gift ideas!

    Gifts for Teachers

    • A DIY gift can be so fun and thoughtful, and this homemade bath salts gift, is something a teacher would love!
    • Coffee throughout the year – find out her favorite coffee and sprinkle coffee deliveries throughout the year!
    • Alcohol (You wouldn’t believe how many raised their hand for this! Just don’t send it to school WITH your children.) Wine, beer, cocktail mixes, martini set, etc.!
      This Sangria Kit is one of my favorites!
    • Gift Cards for Amazon, coffee shop, local restaurant for lunches, massage/spa, or to Walmart/Target for school supplies!
    • Heartfelt note about how she/he has impacted your child’s life.
    • Books for the classroom
    • Have the kids in the classroom make a scrapbook with pictures of themselves and leave little notes about why they loved being in his/her class.
    • Tote bag – to carry school items, back and forth from home.
    • A movie night gift box – Filled with items like a Redbox gift card with a box of brownie mix, microwave popcorn, drinks, and a blanket. This can be used with his/her whole family.
    • Pens/notebooks
    • Sunshine Gift Basket
    • Teacher Survival Kit
    • Spa Gift Basket
    • Gift basket of candies/snacks

    Advice from Teachers on Gift Giving:

    While asking teachers what their favorite gifts from students were, I had a few teachers get real and honest about things and I thought it would be helpful to share those here too!

    • No homemade crafts – Teachers, especially elementary teachers have pictures drawn for them all of the time, and run out of room quickly! Although some do love homemade crafts, maybe steer from them unless you know for sure!
    • Trinkets get overwhelming – You know what these are. “The best teacher” signs and “#1 teacher pencil organizers”. Although so sweet, maybe opt for a gift card so they can buy their own trinkets!
    • Don’t forget special education teachers, office staff, custodial, lunchroom crew, etc.
      Gifts always seem to go to the homeroom teachers but the other teachers can play a big role in your child’s life. If they do… maybe a small gesture or gift would make their day!

    Last-Minute Gift Ideas

    Hey, I’m right there with you sometimes. The holiday snuck up on you and you totally forgot to get the teachers a gift.

    It’s alright because I’m going to help you tackle this!

    If you have at least a couple of days, Amazon prime 2-day shipping to the RESCUE! Here are the top-picks for quick, last-minute gift ideas for the teachers in your life.

    More Gift Ideas You’ll Love:

    • “Take it Easy” Gift Idea
    • “You’re Sweet” Gift Basket
    • “Open When” Printable Gift Cards

    Did I Miss Something?

    I'm sure there are other items out there that a teacher would love and I want to hear about it!

    Drop a note in the comments and let me know what it is so I can add it to this one to help others out!

    Pin it to remember it:

    gift ideas for teachers that they'll actually love

    Gift Ideas for Teenage Guys

    November 18, 2019

    Gift Ideas for Teenage Guys

    Gift Ideas for Teenage Guys: Instead of giving the guy who has everything a handful of cash again this year, here are gift ideas he may love!


    Gift Ideas for Teenage Guys

    Why are teenage boys so hard to shop for?

    With two boys of my own, I’m not sure I’m looking forward to gift-buying when they get older. Course, when it’s your own kids, it may be easier than buying for a boyfriend, brothers, nephews, cousins, friends, etc.

    So to help those of you out with great gift ideas for teenage guys, I’ve done a little research and have given you a GREAT list of ideas to choose from!

    P.S. Did you get my free printable Christmas Gift List download yet? You’ll want to get your hands on that pronto!

    Ok, so let’s get to the items I’ve found online for you to help make your Christmas shopping a little easier.

    Note that most of these gift ideas are from Amazon, just because if you’re familiar with Fantabulosity, you know I survive on Amazon prime, and I’m assuming you may too.

    However, you may also find some items here from Target, Nike, and Urban Outfitters!

    Many of these links contain affiliate links.

    Gifts for Teenage Guys

    • MoonPod – PERFECT for gamers or a guy who loves to relax in his room or in front of the tv on the weekends! Sit, lay, recline… it does it all!
    Moon Pod on floor with little boy
    • Bluetooth Beanie Hat – With as many podcasts, YouTube videos and TikTok videos that teenagers are watching these days, this Bluetooth beanie hat will come in handy during the colder months!
    • Cornhole Game Set – Cornhole is a game for all ages, but more and more teenagers are playing this on the weekends with their friends!
    • Drone – No matter if they want to catch amazing views on the senior trip or if they need a hobby for the weekend, a drone will be the perfect addition!
    • Nike White Tennis Shoes – White tennis shoes are HOT this season and so many boys are wearing them!
    • Vineyard Vines Tees – As with teenage girls, some guys like to wear this style too!
    • Skateboard – Have a vsco guy on your list? If he doesn’t have a skateboard, odds are he’d love one!
    • Phone Case – As much as teenage guys use their phones, a phone case is a safe bet!
    • Bluetooth Speaker – Make listening to music easier while hanging out with friends with this Bluetooth speaker!
    • Under Armour Socks – Whether it’s for football practice or just to wear with his new slides, he’ll love a new pair of Under Armour socks!
    • YETI Hopper Sidekick Dry – When he’s going for a long day of soccer games, send him with this YETI bag to keep goodies in, instead of a typical cooler/lunch box.
    • Yeti Trucker Hat – Does he love hats? A Yeti hat may just be on his wishlist!
    • Personal Charging Hub – Help keep him organized with this charging hub, to charge his phone and all of his electronics!
    • Phone Charger – Speaking of charging a phone, no one can have too many phone charges. Give him something that he can actually use!
    • Roku Streaming Stick – If he’s going off to college or needs something for the den, this streaming stick will help him watch whatever he loves to binge out on!
    • Cordless Electric Shaver – Like it or not, he may be ready to shave! Give him something nice to use, to learn on.
    • Apple AirPods with Charging Case – A HOT gift for the last year has been Apple Airpods and almost any guy would love these!
    • Gas Gift Card – He’s driving to visit his girlfriend, back and forth to practice or just to hang out with his buds… he’ll love using a gas gift card instead of his savings account!
    • Favorite Things – Arrange some of his favorites in to a reuseable container like a tackle box, plastic storage container for his dorm room or a basket! (sunflower seeds, jerky, candy, socks, scratch off’s, fast food gift cards, etc.) Need an idea for your boyfriend? This Red Hot gift basket idea may be your style!

    Did I Miss Something?

    I'm sure there are SO many other items out there that a teenage guy would love, and I want to hear about it!

    Drop a note in the comments and let me know what it is so I can add it to this one to help others out!

    Or, this is a great list for toddler boys if you have another little guy to buy for.

    What About Gift Ideas for Teenage Girls?

    Oh I have that list too! Head over to see the 23+ Gift Ideas for Teenage Girls!

    Thanksgiving Meal Planner Template

    November 17, 2019

    Thanksgiving Meal Planner Printable Download and Template

    Thanksgiving Meal Planner Template: This free printable organizer will help keep your holiday meal planning organized!

    Thanksgiving Meal Planner Printable Download for FREE

    About three years ago, (I’m writing this in 2019) I had a friend reach out and say,

    [I need] a planner for cooking holiday meals. Ingredients, order of cooking, something to organize 3 days of cooking. When/how/where. So you don’t go “oh crap I needed one more pie crust, and whoops I forgot to cook the hashbrown casserole.” It needs to be computer based so it can be printed.

    So, I held on to that note from her and copy/pasted it in to my Trello account (because I’m kind of a crazy person like that, and love to have thought/ideas organized for when I need them) and I dug it out today when the creative bug hit me.

    Thanksgiving Meal Planner Printable

    With Thanksgiving right around the corner, I decided to put my “creative bug” to good use and finally create a Thanksgiving “schedule” template that you can print for your upcoming dinner!

    I wanted to create (and still may at some point) a very thorough Thanksgiving schedule, with more suggestions, recipes, cooking tips, etc. but I thought I’d keep it simple for those of you who want something NOW!
    (Because what I have swarming around in my head is a BIG deal, and would take a lot of time.)

    More Thanksgiving Articles You’ll Love:

    • “Thankful for” place card printables
    • Creole Roasted Turkey Recipe
    • Green Bean Casserole with Cheese and Bacon
    • Old-Fashioned Pecan Pie
    • Orange Sherbet Punch

    3-Page Printable Meal Organizer

    In this free printable, you get 3 sheets total, and I want to help walk you through how to use them and why I made two versions of the meal plan scheduler.
    But, if you’re ready to just get right to it, head to the pink box towards the bottom of this post where you can enter your email to get access to the entire printable library, including this Thanksgiving Meal Planner!

    Thanksgiving Meal Planner Printable
    Thanksgiving Meal Planner

    2 Meal Plan Scheduler Versions

    To try and accommodate those of you who tend to make the Thanksgiving staples AND who tend to stray from the traditional recipes, I’ve created two different versions of the scheduler.

    Thanksgiving Meal Planner Template Printable
    1. Scheduled, Suggested Items + Room for More!
      With this printable sheet above, you can see that I have the most popular Thanksgiving dishes and recipes included. I’ve also noted when and on what days you should prepare/think about them!
    2. Blank, Fill-in Meal Planner
      With this blank meal planner below, it’s for those of you who don’t really stick to the traditional Thanksgiving dishes. OR, perhaps you want to use the first one, and then use this second one for overflow for extra items you’ll be serving
    Thanksgiving Meal Planner Schedule Template

    So good news… when you get this Thanksgiving meal planner, you’ll get both files so you can decide to either print one or both!

    Recipe Organization Printable

    Along with the first two printables, you also get this 3rd recipe planner printable, so you can jot down the different ideas or recipes you plan to make for each portion of the Thanksgiving dinner!

    Thanksgiving Dinner Planner
    • Appetizers
    • Entrees
    • Sides
    • Desserts
    • Drinks

    Thanksgiving Grocery Shopping List

    If this is your first time here, then you may not know about the free grocery shopping list printable that I created for you a long time ago!

    Free grocery shopping list printable download

    So rather than re-create a grocery list just for this meal plan, I thought I’d introduce you to my ever-so-favorite (and popular) free grocery shopping list, so that way you can use it forever and ever, rather than just for Thanksgiving!

    Head here to get the grocery shopping list printable!

    How to Access Your Free Thanksgiving Meal Planner…

    It’s simple! Just select the button below to get your printable right now!

    Get Your Thanksgiving Meal Planner HERE!

    Non-Traditional Thanksgiving Dishes

    Our family hasn’t really had FULL traditional, Thanksgiving food in a few years (except for the roasted turkey!) so I knew there may be more out there like us, who don’t want a Thanksgiving meal planner filled with dishes that they won’t use/need so I wanted to keep things simple, flexible and straight to the point!

    Our Thanksgiving dinners lately have usually included items like:

    • low carb recipes – for family members doing keto
    • easy appetizer recipes – like my easy guacamole and fried mushrooms because we all love finger foods that we can snack on all day!
    • side salad – because it’s our favorite for any family gathering.
    • soup recipes – like buffalo chicken soup, because we try to squeeze it in, in the colder months as much as we can since we love it so much.
    • main course – like fried deer meat. It’s a family favorite and with deer season so close to Thanksgiving, it works out perfectly!

    Are you a big Thanksgiving tradition follower when it comes to meal planning or do you like to switch things up sometimes? I’d love to hear in the comments below!

    Did You Use This?
    Snap a pic and hashtag it #Fantabulosity — I love to see your creations on Instagram, Facebook, and Twitter!

    Orange Sherbet Punch

    November 16, 2019

    This 3 ingredient Orange Sherbet Punch is perfect for all your upcoming holiday parties. Whip up a batch and watch it disappear.

    Orange Sherbet Punch: This 3 ingredient punch using lemon lime soda (or 7up) is perfect for all your upcoming parties and the holidays!

    This 3 ingredient Orange Sherbet Punch is perfect for all your upcoming holiday parties. Whip up a batch and watch it disappear.

    Orange Sherbet Punch

    Hey Fantabulosity readers! I know how much you loved Jessica’s family-favorite, BEST Fruit Punch recipe, so it was time to have another punch favorite, orange sherbet punch! Or if you want to make a punch recipe without ice cream, this orange fall punch recipe is delicious too!

    Sherbet or Sherbert?

    I’m going to admit… I spelled and said sherbet, like SHERBERT, for YEARS! Who’s with me? I really hope I’m not alone.

    But it turns out, according to Writing Explained, Sherbet is the answer!

    More Recipes You’ll Love

    • Iced Coffee Recipe
    • 2 Ingredient Cran-Apple Martini
    • Peppermint Vanilla Latte

    It's Meg from Meg's Everyday Indulgence and I'm so super excited to be sharing another delicious recipe with you today, Orange Sherbet Punch.

    It's perfect for holiday parties, birthday parties, special dinner ideas, and everything in between.

    This 3 ingredient Orange Sherbet Punch is perfect for all your upcoming holiday parties. Whip up a batch and watch it disappear. All you need is orange sherbet, lemon lime soda and orange juice.

    Orange Sherbet Punch with 7up

    Adding a lemon-lime soda like 7up, sprite or ginger ale to a punch is crucial, in my opinion.

    It helps break up the sugary-syrupy texture that ice cream and orange juice, at least in this recipe, creates.

    ORANGE SHERBET PUNCH INGREDIENTS

    Here's what you need to make orange sherbet punch:

    • Orange sherbet
    • Orange juice
    • Lemon-Lime Soda, like 7up or Sprite

    Easy, right?

    TIP: If you're making it in a punch bowl, add the orange juice and lemon-lime soda and carefully stir together. You want to keep as many bubbles in the punch as possible so gentle stirring is key.

    Also, before you plan on making the punch, it's important to make sure your lemon-lime soda is chilled so that everything is cold and ready for serving. Nobody wants a kind of warm party punch.

    Add in the Orange Sherbet

    Next, add the orange sherbet by the scoopful into the punch bowl. Let the punch sit for a few minutes to allow the sherbet to soften a bit before serving.

    The extra punch of orangey goodness that the orange juice provides really puts this punch above and beyond the typical sherbet punch.

    This 3 ingredient Orange Sherbet Punch is perfect for all your upcoming holiday parties. Whip up a batch and watch it disappear. All you need is orange sherbet, lemon lime soda and orange juice.

    How to Serve Punch:

    You have two options for serving this punch.

    First, you can make a big batch in a punch bowl. This is a great option if you're having a big gathering where it will disappear quickly.

    If it's just your family or maybe you need a late-night treat, you can make it by the glass as well.

    The amounts for both options are included in the recipe card below.

    Party Punch

    I love having paper straws on hand for drinking this punch. You can use plain paper straws or find festive ones that coordinate with your party. I love a good theme.

    You can dress up your punch by adding thin slices of oranges to the rims of your punch glasses. It's a simple way to fancy up this super simple punch.

    This 3 ingredient Orange Sherbet Punch is perfect for all your upcoming holiday parties. Whip up a batch and watch it disappear. All you need is orange sherbet, lemon lime soda and orange juice.

    Can I Substitute Another Sherbet Ice Cream Flavor?

    If you aren't able to find orange sherbet, don't you worry!

    You can change up the recipe with a variety of sherbet options. Lime, raspberry, pineapple or rainbow sherbet would all pair deliciously with the orange juice and lemon-lime soda.

    I haven't tried these options personally but I know the citrus of the liquid ingredients would taste really lovely with all of the sherbet flavors listed.  

    Can I Make this an Alcoholic Punch

    You sure can my friends. I think a white rum, pineapple rum or vodka would be a great addition to this orange sherbet punch.

    Another option is to keep the alcohol to the side and your guests can choose if they want their punch spiked.

    If there are kids around, be sure to keep it out of their reach and clearly label which option is safe for them to drink.

    This 3 ingredient Orange Sherbet Punch is perfect for all your upcoming holiday parties. Whip up a batch and watch it disappear. All you need is orange sherbet, lemon lime soda and orange juice.

    PERFECT ALL YEAR LONG

    Make sure you keep your refrigerator and freezer stocked with these three ingredients because I guarantee you're going to enjoy this easy punch recipe throughout the year!

    More Drink Recipes

    • Fall punch in a drink dispenser with orange slices and cinnamon sticks.
      Apple Cider Punch
    • Fruity Ice Cubes in glass, showing fresh herbs and fruit inside of round ice cubes.
      Fruity Ice Cubes (Balls)
    • fruit punch in glass with orange slice
      Fruit Punch Recipe
    • Multiple images of summertime drinks in a collage.
      Summer Drink Recipes

    Recipe

    orange sherbet punch recipe
    Print Pin
    5 from 6 votes

    Orange Sherbet Punch

    This 3 ingredient Orange Sherbet Punch is perfect for all your upcoming holiday parties. Whip up a batch and watch it disappear. All you need is orange sherbet, lemon lime soda and orange juice.
    Course Drinks
    Cuisine American
    Prep Time 10 minutes minutes
    Total Time 10 minutes minutes
    Servings 12 servings
    Calories 19kcal
    Author Jessica Burgess

    Ingredients

    For Large Batch Serving:

    • 2 liter bottle lemon lime soda, chilled
    • 2 cups orange juice
    • ½ gallon orange sherbet

    For Single Serving:

    • 1 cup lemon lime soda
    • ¼ cup orange juice
    • 1 scoop orange sherbet

    Instructions

    • For large batch serving: Add lemon lime soda and orange juice to a large punch bowl. Stir very gently. Scoop sherbet into the punch and allow to sit for 3 minutes before serving.
    • For single serving: Pour lemon lime soda and orange juice into a glass. Gently swirl. Add a scoop of orange sherbet.

    Nutrition

    Serving: 1glass | Calories: 19kcal | Carbohydrates: 4g | Protein: 0.1g | Fat: 0.1g | Saturated Fat: 0.1g | Polyunsaturated Fat: 0.01g | Monounsaturated Fat: 0.03g | Cholesterol: 0.1mg | Sodium: 5mg | Potassium: 16mg | Fiber: 0.1g | Sugar: 4g | Vitamin A: 13IU | Vitamin C: 3mg | Calcium: 4mg | Iron: 0.02mg

    Gift Ideas for Teenage Girls

    November 11, 2019

    Gift ideas for teenage girls - pink christmas tree

    Gift Ideas for Teenage Girls: Shopping for your daughter, niece or friend just got a lot easier with these popular gift ideas!

    Gift Ideas for Teenage Girls

    Oh how I had fun shopping around online for gift ideas for teenagers! I did have to recruit a little help (ok, a LOT of help) from my niece on this post to make sure I actually recommended gift ideas that the teenage girls in your life would actually like!

    Have others to buy for? Here are more gift ideas you’ll love

    • Gift Ideas for Teenage Guys
    • Gift Ideas for Her
    • Gift Ideas for Him
    • Gift Ideas for Teachers
    • Best Friend Birthday Gifts
    • Gift Basket Ideas
    • 30th Birthday Gift Ideas for Him
    • DIY Gift Ideas

    From trending girl gifts to everyday necessities that any girl would love, you’re sure to find something here to complete your gift buying list!

    P.S. Did you get my free printable Christmas Gift List download yet? You’ll want to get your hands on that pronto!

    Ok, so let’s get to the items I’ve found online for you to help make your Christmas shopping a little easier.

    Note that most of these gift ideas are from Amazon, just because if you’re familiar with Fantabulosity, you know I survive on Amazon prime, and I’m assuming you may too.

    However, you may also find some items here from Target, Uncommon Goods, and Anthropology!

    Many of these links contain affiliate links.

    Gifts for Teenage Girls:

    • 60Pcs Premium Velvet Hair Scrunchies – Oh I love how scrunchies have made a comeback. This contains 60 pcs and she’ll surely be able to pick a color that she loves with this set!
    • adidas Women’s Adilette Aqua Slide Sandal – I feel a bit of nostalgia with these too, and the pastel colors are adorable!
    • Cute VSCO Laptop Vinyl Stickers for Water Bottles – So apparently young girls are loving adding stickers to their water bottles these days, and this set is just one of many available!
    • Hydro Flask Travel Coffee Flask – Oh but not just any water bottle! A Hydro Flask is what she wants this year!
    • Burt’s Bees 100% Natural Moisturizing Lip Balm – Good ole Burt’s Bees never gets old. She’ll love this as a stocking stuffer or just to balance off another gift you’re getting her!
    • Fairy Lights – She’ll love these to decorate her room to show off as the background in her SnapChat or TikTok videos!
    • Crocs Classic Clog – How are these back in style!? I love it. They are and they’re SO hot right now.
    • Madden Girl Women’s Brando Slide-On Sandal – I feel like a broken record here, but what in the world!? I totally wore these in the 90’s and grinned when I saw teenage girls wearing them with their socks!
    • VSCO String Wave Bracelet – The string bracelets are HUGE and she probably wants a 100 of them to wear at once on her arm. Pick her favorite color (or get a variety) and surely she’ll be in love!
    • Bright Fuzzy Socks – Well you don’t have to be a teenage girl to love fuzzy socks. (I actually owe this idea to my teenage nephew, as he likes buying fuzzy socks for his girlfriend for her birthday and Christmas!)
    • DIY Journaling Set – Girls are loving the DIY things right now, where they can get crafty and create new things. I thought this DIY journaling set was flipping adorable!
    • Vineyard Vines Tees – I’m sure you’ve noticed the girls wearing the oversized t-shirts, with the shorts, crocs and carrying their hydro flasks… well a popular t-shirt right now for teenage girls tends to be a Vineyard Vines tee and they have super cute styles right now!
    • Lightess Cinema Light Box – For a little room decor, she’ll love creating messages on these before her friends come over for a visit!
    • Phone Case – Who doesn’t need a new phone case? Or a backup at least!? Snoop around and figure out her favorite color and see if they have a phone case in her shade!
    • Charging Hub – How handy is this charging station for her phone and other accessories!?
    • Roku Streaming Stick – On the higher end of a Christmas gift as far as price, I think is an affordable way to give her the option to watch a TON of tv in her room!
    • DIY Lip Balm Kit – A mix of the lip balm and DIY ideas above, a lip balm kit would be fun to create favorite flavors and scents!
    • Inflatable Lounger Air Sofa – Whether she’s staying with a friend, going camping with the family or she needs a quick nap in between soccer games, she’ll love this air sofa!
    • KODAK Smile Instant Print Digital Camera – Teenage girls are too young to remember our polaroid days, so they’re loving the instant print digital camera!
    • Apple AirPods with Charging Case – On the more expensive side of gift ideas, I don’t know if there’s a teenage gal out there that wouldn’t LOVE these. Heck, I wish I could get some of these this year!
    • Weighted Blanket – These are all the rage right now, and even if it’s just a trend, it has been said that they can help with anxiety and help you sleep better!
    • Starbucks Gift Card – What girl wouldn’t love to be able to hop over to Starbuck’s to get her favorite treat without having to ask mom and dad for money!?
    • Candy – Don’t just grab a bag of candy off of the shelf at the store. Buy a few different kinds in the same color, or buy her favorites and build a candy basket in a cute container that she can reuse, like a make-up bag or jewelry box!

    Did I Miss Something?

    I’m sure there are SO many other items out there that a teenage girl would love, and I want to hear about it! Drop a note in the comments and let me know what it is so I can add it to this one to help others out!

    What About Gift Ideas for Teenage Boys?

    If you also have a teenage guy on your list, you’ll find this list of gift ideas for teenage boys super helpful too!

    Cookie Dough Fudge

    November 11, 2019

    Chocolate Chip Cookie Dough Fudge

    Cookie Dough Fudge: This recipe is easy to whip up for a quick dessert or to serve guests at a holiday party! With only a few simple ingredients, this recipe is perfect to save for an easy dessert go-to!

    Cookie Dough Fudge with chocolate chips

    Cookie Dough Fudge

    Welcome to my little space on the Internet where I LOVE enticing those of you that have a sweet tooth as much as I do with as many easy dessert recipes that I can!

    Once every few months, I get a specific craving for edible cookie dough… but if I’m wanting to make something that’s a little easier to share with others, I’ll whip up this cookie dough fudge!


    If it’s quick, easy, uses everyday ingredients, and has chocolate in it, then you can bet that it’s going to be a favorite around here. (Have you tried these cookie dough stuffed crescent roll bites, yet?)

    Which brings me to one of the best things since sliced bread… cookie dough fudge.

    Fudge with Chocolate Chips?

    I mean, cookie dough? Fudge? Chocolate chips? All combined in one easy, no-bake dessert recipe? Sign me up to bring dessert to every pot luck from now on.

    The slight crunch of the chocolate chips inside of this smooth, creamy fudge is the perfect texture in almost every, stinking, bite.

    Fudge with Chocolate Chips
    Fudge with Chocolate Chips

    White Chocolate Cookie Dough Fudge

    Sounds too good to be true, right? Well not only does this fudge resemble a cookie dough flavor, but it also has the flavors of white chocolate, because of the addition of the melted white chocolate mixed in!

    Cookie Dough Fudge with Chocolate Chips stacked
    Cookie Dough Fudge is the perfect dessert for parties!

    How to Make Chocolate Chip Cookie Dough Fudge?

    It’s incredibly easy, and if you’re not a pro in the kitchen, you’re in luck. No baking required (just a microwave) and you probably already have most of the ingredients on hand.

    Ingredients for Fudge:

    • .5 cup butter 1 stick – softened
    • ¾ cup sugar
    • 1 tsp vanilla
    • 1 cup flour
    • ¼ tsp salt
    • 1.5 cups mini chocolate chips
    • 14 oz. can of sweetened condensed milk
    • 1.5 cups white chocolate melted

    You’ll start by making sure you’ve greased a 9-inch pan and have lined it with parchment paper.

    Next, with a stand or hand mixer, mix together the butter, sugar, and vanilla until smooth.

    Heat the Flour:

    Place the flour in a microwave-safe bowl, and microwave the flour until it’s hot, about 1 ½ minutes and add the flour and salt to the creamy mixture.

    Melt the Chocolate:

     Melt the white chocolate in the microwave at 10-second intervals, stirring between, until melted.

     While that’s melting, stir the chocolate chips into the mixing bowl. 

    Once the white chocolate has melted, add the sweetened condensed milk to the chocolate and stir until smooth. 

    Combine the Two Bowls of Ingredients:

    Add mixture to the mixing bowl of the flour mixture, and mix it on low until completely blended.

    Setting the Fudge

    Pour Fudge into the square pan, and press evenly into the pan with a spatula, or the back of a large spoon.

    Refrigerate:

    Refrigerate for at least 2 hours, or longer if needed, until the fudge is firm, and set.

    Cut fudge into 1 to 2-inch squares, and place on a plate or platter to serve.

    Cut the Cookie Dough Fudge
    Cut in to bite-size, one serving pieces

    Easy Dessert for Parties

    Oh friend… this fudge is not just for the holidays. Especially cookie dough fudge. I think that flavor is more of a summer-time flavor that is great all-year-round. So combining and ever so popular flavor like cookie dough with a popular holiday treat, then it’s a game-changer.

    Taking fudge to a party or serving it at your own party is ideal due to the lack of silverware, utensils or plates needed for this dessert.

    It’s a grab-and-go style and can even be made ahead of time, which is a HUGE perk when planning and hosting a party.

    Cookie Dough Fudge on a white farmhouse table
    A dessert that can be made in advance!

    Related Recipes

    If you love recipes like this, then you’ll really love this Butterbeer Fudge recipe that’s a kid and family favorite around here too!

    Recipe

    Fudge with Chocolate Chips
    Print Pin
    5 from 8 votes

    Cookie Dough Fudge

    Cookie Dough Fudge: This recipe for cookie dough fudge with chocolate chips is easy to whip up for a quick dessert or to serve guests at a holiday party!
    Course Dessert
    Cuisine American
    Prep Time 15 minutes minutes
    Cook Time 2 hours hours
    Total Time 2 hours hours 15 minutes minutes
    Servings 24 1-in squares
    Calories 232kcal
    Author Jessica Burgess

    Ingredients

    • .5 cup butter 1 stick – softened
    • ¾ cup sugar
    • 1 teaspoon vanilla
    • 1 cup flour
    • ¼ teaspoon salt
    • 1.5 cups mini chocolate chips
    • 14 oz. can of sweetened condensed milk
    • 1.5 cups white chocolate melted

    Instructions

    • Spray a 9-inch square pan with cooking spray, and line the bottom with parchment paper. 
    • In the mixing bowl of a stand mixer, mix the butter, sugar, and vanilla until smooth. 
    • Place the flour in a microwave-safe bowl, and microwave the flour until it's hot, about 1 ½ minutes. 
    • Add the flour and salt to the mixing bowl and mix until smooth. 
    •  Melt the white chocolate in the microwave at 10-second intervals, stirring between, until melted.
    •  Stir chocolate chips into mixing bowl. 
    • Add the sweetened condensed milk to the melted white chocolate, and stir until smooth. 
    • Add the White Chocolate mixture to the mixing bowl, and mix on low until completely blended.
    • Pour Fudge into the square pan, and press evenly into the pan with a spatula, or the back of a large spoon.
    • Refrigerate for at least 2 hours, or longer if needed, until the fudge is firm, and set.
    • Cut fudge into 1 to 2-inch squares, and place on a plate or platter to serve.

    Notes

    Fudge may be kept in the refrigerator for up to 6 days.

    Nutrition

    Serving: 1square | Calories: 232kcal | Carbohydrates: 32g | Protein: 3g | Fat: 11g | Saturated Fat: 7g | Cholesterol: 19mg | Sodium: 94mg | Potassium: 91mg | Fiber: 1g | Sugar: 27g | Vitamin A: 190IU | Vitamin C: 1mg | Calcium: 78mg | Iron: 1mg

    Did You Make This?
    Snap a pic and hashtag it #Fantabulosity - I love to see your creations on Instagram and Facebook.

    Christmas Gift List Template

    November 11, 2019

    Christmas Gift List Printable

    Christmas Gift List Printable: Keep gift buying organized with a free printable tracker template that has fill-in-the-blank bullet points to manage gifting!

    Christmas Gift List Printable on clipboard with pink pretty decor

    Christmas Gift List Template

    Hi there! Pen and paper kinda gal here.

    Don’t get me wrong, I love a good spreadsheet and digital organizer like Trello (actually, I couldn’t survive without Trello) but there is something about writing things out with a fun pen and cute sheet of paper or a printable, which is why I created my home management binder too!

    So if you’re like me and love a good pen to paper kind of organization every once in a while, then I want to share my Christmas Gift List with you, to help you manage and keep track of the Christmas gifts you’re buying for friends/family this year!

    You’ll Also Love:

    • Buffalo Check “NOEL” Printable Decor
    • Free Buffalo Check Gift Tag Printables
    • Free Grocery List Template
    • Daily Planner Printable
    • Blank Calendar Printable
    • “Open When” Printable Gift Cards

    Gift List Printable

    Christmas Gift Tracker List Printable

    When designing this printable, I wanted to keep things clean and simple, and use my favorite color, coral, to match all of the other printables created here on Fantabulosity!

    How to Use the Gift Printable Checklist

    Simply jot down all of those that you need/want to buy for, and then list out any ideas that you have.

    Once you’ve purchased or gathered the item(s) you’re giving them, mark through it!
    There’s something so satisfying about crossing something off a list, don’t ya think?

    Christmas Gift List Bullet Journal

    I know so many of you are fans of bullet journaling, so I’m hoping that this printable is an easy addition to your own journal if you have a way of including it.

    8.5 x 11 Portrait Size

    This printable is designed to be printed and used loosely or can be added to a three-ring binder. However, sizing it down should work just fine if you have a smaller binder/journal you’d like to add it to.

    Just check your computer’s settings to make these adjustments.

    How to Access Your Free Gift List

    It’s simple! Just select the button below to get your free gift list printable!

    Get Your Free Gift List

    Did You Use This?
    Snap a pic and hashtag it #Fantabulosity — I love to see your creations on Instagram, Facebook, and Twitter!

    If Christmas is On Your Mind, Then You’ll LOVE These Other Related Posts Too!


    How to Host a Favorite Things Party

    If you’re looking for a fun party (or a low-key gathering with friends) a favorite things party is incredibly fun! Read how I host this party and play the gift exchange game!

    Fleece Blankets with ribbon and spruce sprigs and tags. Favorite Things Party Ideas - How to Host Favorite Things Party Favors

    Tips for Creating a Holiday Place Setting

    I love personalizing a place setting for guests. It can help a guest feel more welcome when things are in someone else’s home, and can help make them feel a little more special! See how I designed this fun holiday place setting for Coca-Cola!

    Tips for Creating a Holiday Place Setting

    Customizable Place Card Printables

    Talk about personalization! With these free customizable place card printables, you can type in your guest’s name, print out and wrap around a cloth napkin! Such an easy way to add a sweet gesture during the holidays! Use the “I’m thankful for” option or the “Welcome” option for your very own table!

    Holiday welcome place cards

    Pin it To Remember it!

    Christmas Gift List Printable - Great for bullet journaling and organization #christmas #giftlist #checklist #organizer

    Instant Pot Spaghetti Squash

    November 6, 2019

    Spaghetti squash that was cooked in the Instant Pot, and has red pepper and parmesan cheese on top.

    Instant Pot Spaghetti Squash: A quick tutorial on how to cook spaghetti squash in the Instant Pot in as little as 9 minutes!

    Instant Pot Spaghetti Squash

    Oh how my world has been rocked.

    I don’t know if I’ve been this excited since I fell in love with the garlic roasted broccoli or the first time I made Instant Pot polenta or sweet potatoes in the Instant Pot!

    I’m not going to lie… I always bypassed the spaghetti squash in the grocery store because I felt intimidated by it, and in no way did I think I’d actually like what was inside. (Kind of like the first time I hear of cauliflower soup… I didn’t know how amazing it actually was!)

    Whole Spaghetti Squash
    Whole Spaghetti Squash – Wash Before Cutting in Half

    But when I got the Instant Pot, it’s like I put my brave hat on and started experimenting to see what kinds of things I could cook and how they’d turn out.

    Well I am BEYOND excited to tell you that I was pleasantly surprised when this spaghetti squash came out lookin’ fine as can be after only 9 minutes.

    Is Spaghetti Squash Healthy?

    According to Healthline, spaghetti squash is low in calories but high in fiber, vitamin C, manganese, and vitamin B6. So it’s a popular healthy side dish recipe in our house!

    How to Cut a Spaghetti Squash

    As you’ll see in my video and the photos, I cut the spaghetti squash vertically, from end to end.
    However, I’ve since heard that you can cut horizontally for a longer “noodle”. But I liked the “noodles” the way they were and will continue to cut horizontally.
    NOTE: Be VERY careful when cutting because the skin is so thick and you’ll need to use a sharp knife.

    Can you freeze cooked spaghetti squash?

    You can! Cook as directed, and then allow to cool. Once cooled, store in freezer container/bags and store up to 8 months.

    Can you cook a whole spaghetti squash in the Instant Pot?

    You can! Like the recipe below, use one cup of water, place squash on trivet and turn the vent to the “sealing” position and pressure on high for 12 minutes. When timer ends, quick-release, remove squash, slice in half and remove seeds. Using a fork, pull the insides to create spaghetti-like strands.

    I even went so far to add some parmesan, garlic, and butter to it, but that recipe will come later!

    How to Cook Spaghetti Squash in Instant Pot

    For now, we’re only going to go over how to cook spaghetti squash in the Instant Pot, because you may choose to use it differently after it’s finished cooking!

    How to Cut Spaghetti Squash

    As you’ll see in the video tutorial I’ve provided here or the image below, I just use a very sharp knife, and being VERY careful, I cut the end with the stem off and then cut the squash in half, vertically.

    Spaghetti Squash Cut in Half - Scoop out the Inside Pulp and Seeds
    Spaghetti Squash Cut in Half – Scoop out the Inside Pulp and Seeds

    Scoop Out the Inside of Spaghetti Squash

    Next, before placing in your Instant Pot (or pressure cooker) scoop out the inside of each half of the squash, removing all of the strands and seeds. Discard.

    Add Water

    Pour one cup of water in to your Instant Pot and place the trivet inside.

    1 cup of water for pressure cooker
    1 cup of Water

    Next, place the two halves of the spaghetti squash inside of the pot, on top of the trivet.

    Pressure Cook on High

    Once the squash is inside the pot, place the lid on and turn the vent to the “sealing” position.

    Turn the timer to 9 minutes and pressure on “high”.

    NOTE: Finding the perfect cook time to recommend can be a struggle depending on the size of the spaghetti squash that you have. Also, be cautious of the size of squash you purchase, and the size of your Instant Pot, pot.

    Cooked Spaghetti Squash in the Instant Pot
    Cooked Spaghetti Squash in the Instant Pot

    Quick-Release

    When the timer runs out, quick-release by turning the vent from “sealed” to “venting” using a hand-towel, potholder, or my favorite heat-resistant gloves you see below.

    These have changed my world in the kitchen! I’ll wear these for recipes that require quick-release but I’ll also wear them when I’m lifting the trivet out of the pot!

    Red Heat Resistant Gloves
    My favorite heat resistant gloves

    Creating the “Spaghetti” out of the Squash

    Still wearing your heat resistant gloves (or dish towel/potholder) hold on to one end of the spaghetti squash.

    Using a fork, scrape out the inside of the spaghetti squash
    Using a fork, scrape out the inside of the spaghetti squash

    Using a fork, turn the fork upside down and begin at the vertical end of the squash and begin to scrape the cooked pulp towards you. This will create a “spaghetti” and “noodle” like texture!

    Instant Pot Spaghetti Squash
    Cooked, pulled spaghetti squash

    Watery Spaghetti Squash

    TIP: If you find that your spaghetti squash is watery (this squash can be watery at times) it may not hurt to place it in a colander to let it drain before serving/mixing with the sauce.

    If spaghetti squash cools while draining, briefly toss over heat while mixing with the other ingredients if desired.

    How to Serve Spaghetti Squash

    Our favorite way to serve spaghetti squash is simple. Butter, garlic, parmesan cheese, and a dash of red pepper flakes!

    Spaghetti Squash with Butter and Garlic
    Garlic Butter Sauteed Spaghetti Squash

    However, you can use spaghetti squash:

    • with this chicken bolognese sauce recipe (here is an Instant Pot tomato sauce recipe that you may love too!)
    • warm with oil, lemon, salt, fresh herbs (along with other favorite seasonings)
    • bake with cheeses to mimic a pasta bake
    • cold pasta salad

    Recipe

    Spaghetti squash that was cooked in the Instant Pot, and has red pepper and parmesan cheese on top.
    Print Pin
    5 from 1 vote

    Instant Pot Spaghetti Squash

    Instant Pot Spaghetti Squash: A quick tutorial on how to cook spaghetti squash in the Instant Pot in as little as 9 minutes!Instant Pot Spaghetti Squash: A quick tutorial on how to cook spaghetti squash in the Instant Pot in as little as 9 minutes!
    Course Side Dish
    Cuisine American
    Diet Vegan, Vegetarian
    Prep Time 1 minute minute
    Cook Time 9 minutes minutes
    Total Time 10 minutes minutes
    Servings 4 servings
    Calories 75kcal
    Author Jessica Burgess

    Equipment

    • Pressure Cooker

    Ingredients

    • 1 cup water
    • 1 spaghetti squash

    Instructions

    • Wash outside of spaghetti squash
    • Place trivet inside of Instant Pot, pot and pour 1 cup of water in to pot
    • Slice the stem-end of the spaghetti squash off and then slice the squash in half, vertically. You'll need a sharp knife and bee VERY careful as this can be dangerous since the outside is so thick and difficult to cut.
    • Using a spoon, scoop out the inside strands and seeds. Discard.
    • Place the two halves inside of the pot, facing one another.
    • Place the lid on, and turn the vent to the "sealing" position.
    • Pressure cook on "high" and set the timer for 9 minutes.
    • When the timer ends, quick-release the vent (I use my favorite heat-resistant gloves for this) until the valve lowers.
    • Once valve has went down, remove the lid and squash and transfer them to a plate or cutting board.
    • Using a fork, turn the fork upside down and begin scraping the insides of the squash by starting at the vertical-top part of the squash and pulling the fork towards you. This will create a "spaghetti-like" texture.
    • Serve warm with desired seasonings, sauces, spices.

    Video

    Notes

    BE VERY careful cutting the spaghetti squash in half. This can be very dangerous!

    Nutrition

    Serving: 1serving | Calories: 75kcal | Carbohydrates: 17g | Protein: 2g | Fat: 1g | Saturated Fat: 1g | Sodium: 44mg | Potassium: 261mg | Fiber: 4g | Sugar: 7g | Vitamin A: 290IU | Vitamin C: 5mg | Calcium: 56mg | Iron: 1mg

    Did You Make This?
    Snap a pic and hashtag it #Fantabulosity - I love to see your creations on Instagram and Facebook.

    Love Instant Pot Recipes?

    Then you’ll LOVE the others I have here on Fantabulosity!

    • Instant Pot Pot Roast
    • Kielbasa and Cabbage in the Instant Pot
    • Cheeseburger Macaroni in the Instant Pot
    • Instant Pot Chicken and Dumplings
    • Amish Potato Salad in the Instant Pot
    • Sweet Potatoes in the Instant Pot

    Cheeseburger Macaroni in the Instant Pot

    November 5, 2019

    Cheeseburger Macaroni in the Instant Pot

    Cheeseburger Macaroni in the Instant Pot: A homemade “hamburger helper” dinner ideas that can be quick for a family meal using items that you may even have on hand!

    Hey there quick meal idea lovers. I’m right there with you, hence the reason I finally took the plunge and bought the Instant Pot. Oh yes, this version of hamburger mac and cheese on the stovetop, can be made in a pressure cooker too!

    Cheeseburger Macaroni in the Instant Pot

    After staring at my pantry the other day, I decided I wanted to experiment a little bit with the Instant Pot, and now you’re looking at the result. After we realized how quick and easy it was, I knew I had to share it with you.

    I wasn’t sure if I’d ever like another “cheeseburger” dinner as much as we love the baked cheeseburgers but this dish is an amazing easy dinner idea when the comfort food craving calls! (We also think you’re going to love this cheeseburger subs recipe too, if you’re a cheeseburger fan.)

    Cheeseburger Macaroni in the Instant Pot

    Not only is there a ton of flexibility that you can have with this recipe, but the ease of throwing it all together was also my FAVORITE part.

    Cheeseburger Macaroni recipe in the Instant Pot

    Answering Your Cheeseburger Macaroni Questions:

    Can I use Velveeta instead of canned cheddar cheese soup?

    I haven’t tried this, but I don’t see why you couldn’t substitute it. I’d just make sure to use about 10 oz. of Velveeta (cut up into cubes, like we did in this Rotel Dip, and maybe add a little bit of milk — maybe ¼ cup??? – guessing here) since the canned cheese is a little more liquified than the block cheese. If you try this, let us know!

    How do you defrost ground beef in the Instant Pot?

    Want to use frozen beef? You totally can, because I do too! I typically either forget to thaw it out, or I decide at the last minute to make something with it. I made this using frozen ground beef, although provided directions for thawed beef too!
    But when I’m totally on my game and remember to thaw ground beef out naturally, you definitely find me making The BEST Cheeseburger recipe, where I use browned butter and basic ingredients/methods to make them the juiciest burgers I’ve ever had! So if you were on your game today, or just snagged some ground beef from the grocery store, you may want to make this cheeseburger recipe too!

    Instant Pot Hamburger Helper

    Now, I LOVE a good boxed, Hamburger Helper dinner from the grocery store. But what I REALLY love about this recipe is that it’s similar, super easy… (no, everything doesn’t come in a box) but the flavor of this dish is way more powerful!

    Other Instant Pot Recipes You’ll Love:

    • Kielbasa and Cabbage in the Instant Pot
    • Instant Pot Pot Roast – Even using a FROZEN roast!
    • Instant Pot Chicken and Dumplings
    • How to Cook Hard Boiled Eggs in the Instant Pot
    • Sweet Potatoes in the Instant Pot

    Easy Cheeseburger Macaroni Recipe…

    When sharing this recipe with you, I’m keeping in mind that a lot of you may desire a different level of seasonings and spices and I want to keep it as easy as possible.

    So expect this to be a very basic recipe that could use extra spices and flavors… or cheese. You can NEVER go wrong with adding more cheese!

    However, here are a few things I’d suggest doing additionally to really add flavor to it so it doesn’t come out bland.

    Items to Add to Cheeseburger Macaroni

    • Garlic Pepper (It’s my absolute favorite, to sprinkle on to the top of each serving, but not for my kids.)
    • Extra shredded cheese on top of each serving is a MUST in my book.
    • Add milk after cooking if you prefer it more creamy.
    • Salt and Pepper as desired, but remember… you can always add more, but you can’t take it out.
    • Sour Cream (Reader Suggested)
    • Hot Sauce – I haven’t tried this yet, but I could definitely go for this on my serving.
    • Can of diced tomatoes and green chilies! (Reader Suggested)
    • Bacon or bacon bits for super easy additions! (Reader Suggested)

    Left Over Cheeseburger Macaroni?

    If serving this leftover, you may want to add a little milk to it before reheating, just to recreate a creamy texture.

    Cheeseburger macaroni recipe in the instant pot

    I so hope you love this recipe. We ate on this for a couple of days and I’m already looking forward to making it again because it was so quick. It one of our favorite ground beef recipes that we turn to a lot.

    This recipe is not only a great family dinner idea to meal plan with, (get your meal planning printable in the home management binder) but it serves as the perfect dish to deliver to someone in a meal care package to eat on for a few days!
    Maybe just send along a little extra milk too, so they can add a bit to enhance the creaminess when reheated!

    If you’re into quick and easy recipes, then you’ll LOVE to blog the recipe archives here on the blog, OR make dinnertime insanely easy, and grab my “Fabulously Fast Dinners” cookbook where I’ve done all of the dinner time planning for you!

    More Comfort Food Recipes

    If you love comfort food, then you’re in the RIGHT place. Here we believe that food is love. So when you either want to show yourself some love, or make something comforting for someone you love, then browse our favorite easy-to-make recipes!

    But I’ve picked out some of our favorite comfort dishes here…

    This Cheeseburger Casserole has all the flavors of a cheeseburger but in a dish that’s perfect for a family weeknight meal, or even a care package!

    If you have extra elbow macaroni noodles, you can use them in this old-fashioned macaroni and tomatoes recipe!

    30-Minute Taco Pasta Recipe – This 30-minute Taco Pasta Recipe makes the perfect weeknight dinner! If you are a busy mom looking for a simple, quick, and healthy recipe that can be made in under 30 minutes, this taco pasta recipe is for you.

    Chili Mac Recipe – In less than 30 minutes, and a few simple ingredients, this chili mac using ground beef, beans, tomato sauce, chili powder, cumin, elbow macaroni, and cheese, will soon become a new favorite spin on a chili recipe! But similar to chili mac, this slow cooker goulash recipe is always a great choice!

    For even more cozy meal ideas, check out this collection of classic old-fashioned dinner recipes.

    Recipe

    Cheeseburger Macaroni in the Instant Pot
    Print Pin
    4.50 from 113 votes

    Cheeseburger Macaroni in the Instant Pot

    Cheeseburger Macaroni in the Instant Pot: A "hamburger helper" style dinner idea that can be quick for a family meal using items that you have or can keep on hand!
    Course Main Course
    Cuisine American
    Prep Time 5 minutes minutes
    Cook Time 10 minutes minutes
    Total Time 15 minutes minutes
    Servings 6 servings
    Calories 663kcal
    Author Jessica Burgess

    Ingredients

    • 1 lb lean ground beef drain after cooking if using a fatty beef
    • 16 oz elbow macaroni uncooked
    • 10.5 oz can of cheddar cheese soup
    • 3 cups broth chicken or vegetable (Recently updated from 2.5 cups to 3)
    • 3 cups shredded cheddar cheese
    • 2 teaspoon garlic powder
    • 2 teaspoon onion powder
    • salt and pepper as desired
    • garlic pepper seasoning optional

    Instructions

    • If ground beef is frozen, pour 1 cup water into the Instant Pot, put on the lid, make sure the valve is on “seal”, and select 25 minutes on “high” manual mode. Ground beef should be fully cooked before moving forward.
    • If starting with thawed ground beef, turn the “saute” setting on and cook the ground beef, garlic powder, and onion powder until beef is no longer pink.
    • Next add in broth, elbow macaroni, can of cheddar cheese soup and salt/pepper if desired.
    • Lock lid and close the valve to “seal” and cook for 4 minutes on manual “high” setting. The pressure cooker will take about 5 minutes to seal, 4 minutes to cook and then quick release the valve to let the pressure out.
    • Add in 2 cups of shredded cheddar and stir until melted.
    • Divide and sprinkle on remaining shredded cheddar on to each serving, for extra cheesy goodness! 
    • Tip: Get creative by sprinkling on seasonings like garlic pepper seasoning, hot sauce, and anything else that you love, to add more flavor!

    Notes

    This recipe is a basic cheeseburger macaroni recipe. You may want to add seasonings and other flavors to kick it up a notch with flavor. I wanted to keep it very basic for kids! If in doubt, add more cheese! You can never go wrong with more cheese! 

    Nutrition

    Serving: 1serving (about 1-½ cups) | Calories: 663kcal | Carbohydrates: 64g | Protein: 41g | Fat: 25g | Saturated Fat: 14g | Cholesterol: 108mg | Sodium: 1136mg | Potassium: 729mg | Fiber: 3g | Sugar: 4g | Vitamin A: 1015IU | Vitamin C: 0.2mg | Calcium: 449mg | Iron: 3.3mg

    Did You Make This?
    Snap a pic and hashtag it #Fantabulosity - I love to see your creations on Instagram and Facebook.

    Buffalo Chicken Lasagna

    November 3, 2019

    Buffalo Chicken Lasagna

    Buffalo Chicken Lasagna: Comfort food at its finest, this cheesy lasagna brings the popular buffalo chicken dip appetizer to dinner as a main dish!

    When it comes to needing a dinner idea, there are a TON of options out there. But when you can make something like this buffalo chicken comfort food dish, it stands out from the crowd and is such a nice change of pace from the same old thing!

    Love buffalo chicken? Make these buffalo chicken sliders alongside this dinner, and you’ll have a hearty, spicy meal!

    Buffalo Chicken Lasagna

    I’ve been such a fan of the buffalo chicken dip appetizer for quite a few years now and then quickly also fell in love with the buffalo chicken soup and these air fryer buffalo chicken tenders!


    So when I found myself craving buffalo chicken dip that day, I knew that I MUST find a way to turn it into a main dish… and this recipe was born!

    Buffalo Chicken Lasagna

    I had never made anything like this, so I started experimenting with what I had on hand at home, and if you ask me… it may just be the best lasagna I’ve ever made. Well, along with this other chicken lasagna recipe of course.

    Buffalo CHEESY Chicken Lasagna Recipe

    Why is it so good? Well it could possibly be because it is LOADED with cheese. Do you have to put as much cheese in it as I did? Nah, but I can tell you that I didn’t regret the amount I put in.

    What Kind of Cheese do you Use for Lasagna?

    I used what I had on hand, so feel free to mix it up when you make yours, but I used:

    • mozzarella
    • provolone
    • cheddar

    You could also use:

    • ricotta (like when we used ricotta for our lazy lasagna soup recipe!)
    • all mozzarella
    • Colby & Monterey
    • fiesta blend
    • Italian style
    • Parmesan
    • pepper jack (for extra heat)
    • sliced cheese would also work and melt just fine!

    What Kind of Hot Sauce do you Use for Buffalo Chicken Recipes?

    This is a no-brainer. Frank’s Hot Sauce is our favorite to use for any “buffalo chicken” recipe that we make. Frank’s also makes a buffalo wing sauce that I’d like to try instead of the traditional hot sauce, so let me know if you give this a try!

    Easy Chicken Lasagna

    After making this myself, I saw a few other chicken lasagna recipes online that used quite a few ingredients and that required making a roux.

    I’m big on making things as easy as possible so I was glad this turned out DELICIOUS by simply using what I had on hand and required little effort.

    Tips for Making it Easy

    • Use a Rotisserie Chicken (then save the bones for this rotisserie chicken stock recipe!)or use slow cooked chicken breasts!
    • Have fun and be flexible with the types of cheese
    • Allow it to cool after baking for about 15 minutes so it’s easier to cut/serve.

    How to Make Buffalo Chicken Lasagna

    When making ANY lasagna, I like to cook a few extra noodles in case they fall apart during the cooking process, so although you’ll only need 9 for this recipe, it may not hurt to cook a couple of extras.

    • Cook the lasagna noodles al dente, according to package directions.
    Cooked Lasagna Noodles
    Cooked Lasagna Noodles

    Lasagna Filling

    In a mixing bowl, mix together the softened cream cheese, ranch dressing, and hot sauce.

    Cream Cheese, Ranch Dressing, hot sauce in bowl for buffalo chicken lasagna filling
    Hot Sauce, Cream Cheese, Ranch Dressing

    I used my hand mixer to do this, but you may be able to mix it with a fork if your cream cheese is really soft???

    Buffalo Chicken Lasagna Sauce Filling
    Blended cream cheese, ranch dressing (or blue cheese) hot sauce

    Next, add in your crumbled blue cheese and stir with a spoon until mixed in.

    Add blue cheese crumbles to lasagna filling
    Add in blue cheese – stir

    Assemble the Lasagna

    In a greased 9×13 baking dish, spread a thin layer of the buffalo sauce mixture into the bottom to keep the noodles from sticking to the dish.

    Spread thin layer of sauce in bottom of baking dish for buffalo chicken lasagan
    Spread thin layer of sauce in baking dish

    Step 1 of Layering: Next, place three lasagna noodles on the top…

    Layer on al dente lasagna noodles for buffalo chicken lasagna
    Layer on 3 lasagna noodles

    Step 2 of Layering: Sprinkle on a third of the shredded cooked chicken.

    Sprinkle on cooked rotisserie chicken for the lasagna

    Step 3 of Layering: Using a fourth of the shredded cheese, sprinkle on top of the chicken.

    Layer on the shredded cheese
    Layer on shredded cheese

    Step 4 of Layering: Spread a third of the buffalo sauce mixture on top of the shredded cheese.

    Repeat layers for buffalo chicken lasagna
    Repeat the layering process – sauce, noodles, chicken, cheese

    Repeat Layers: Repeat the layers until you have used all of the noodles and…

    Uncooked Buffalo Chicken Lasagna ready to be baked
    Buffalo Chicken Lasagna assembled, ready for cheese topping.

    …top the lasagna with the last ¼ of the cheese remaining.

    NOTE: Don’t feel like you have to follow this layering process exactly. Lasagna is forgiving, so feel free to switch it up or layer how you prefer. I just recommend to definitely top with shredded cheese for that “golden glow” on the top after baking!

    Top Buffalo Chicken Lasagna with Shredded Cheeses
    Top with remaining cheeses – ready for baking!

    How Long to Bake Chicken Lasagna

    With the noodles and chicken already cooked, the lasagna doesn’t have to cook through for “doneness” but rather to melt all of the cheeses and heat through.

    Preheat the oven and bake at 350° for about 35 minutes, uncovered.

    Cover with aluminum foil and continue baking for another 10 minutes.

    Buffalo Chicken Lasagna
    Baked Buffalo Chicken Lasagna

    Allow to Rest Before Serving:

    Once the lasagna has finished baking, remove from oven and allow it to rest for at least 15 minutes to allow the cheeses to adhere to the noodles and sauce, for easier cutting/serving.

    Buffalo Chicken Lasagna
    As you can see above, I cut/served the lasagna while hot, so it’s MUCH harder to serve this way. Allow the lasagna to cool for at least 15 minutes, if possible, for easier serving.

    How to Serve Lasagna

    If desired, sprinkle with parmesan cheese and parsley! If you’re feeling extra brave, drizzle with extra Frank’s Hot Sauce or even ranch/blue cheese dressing!

    Buffalo Chicken Lasagna in a serving dish
    Sprinkle with parmesan cheese or parsley if desired!

    Side Dishes for Lasagna

    We can’t forget a side dish for this comfort food classic! Our favorites to have with lasagna are:

    • The BEST Side Salad Recipe
    • Italian Chopped Salad
    • Tomato Mozzarella Tomato Salad
    • Garlic Roasted Broccoli
    • Caprese Chicken Sandwich
    • Fried Peanut Butter & Jelly

    Related Recipes

    If you love pasta dishes like this one, then you’ll also love this lemon chicken pasta recipe!

    Recipe

    Small white dish full of buffalo chicken lasagna serving.
    Print Pin
    4.89 from 9 votes

    Buffalo Chicken Lasagna

    Buffalo Chicken Lasagna: Comfort food at it's finest, this cheesy lasagna brings the popular buffalo chicken dip appetizer to dinner as a main dish!
    Course Main Course
    Cuisine American
    Prep Time 20 minutes minutes
    Cook Time 45 minutes minutes
    Resting Time 15 minutes minutes
    Total Time 1 hour hour 20 minutes minutes
    Servings 10 servings
    Calories 937kcal
    Author Jessica Burgess

    Equipment

    • oven
    • hand mixer

    Ingredients

    • 2 packages cream cheese softened
    • 2 cups ranch dressing
    • 2 cups hot sauce we like Frank's Hot Sauce
    • 5 oz. blue cheese crumbles
    • 4 cups cooked, shredded chicken we debone a whole rotisserie chicken
    • 4 cups mozzarella cheese shredded
    • 2 cups cheddar cheese shredded
    • 2 cups provolone shredded (optional)
    • 9 lasagna noodles

    Instructions

    • Preheat oven to 350°.
    • Cook lasagna noodles al dente according to package directions.
    • Meanwhile, in a mixing bowl, mix together the cream cheese, ranch dressing and hot sauce with a hand mixer.
    • Stir in blue cheese crumbles.
    • In a greased 9×13 baking dish, spread a thin layer of buffalo sauce mixture in to the bottom.
    • Drain your noodles, and layer 3 of the cooked lasagna noodles into the baking dish.
    • Spread on a third of the buffalo sauce mixture.
    • Sprinkle on a third of the cooked, shredded chicken
    • Sprinkle on a third of the shredded cheeses
    • Repeat the layering process using all of the noodles and end with cheese on top!
    • Bake uncovered for 35 minutes, then cover with aluminum foil and bake for an additional 5-10 minutes.
    • Remove from oven and let rest for 10-15 minutes before cutting to allow the cheeses and filling to cool a bit for easier serving.

    Video

    Notes

    We cook an extra couple of lasagna noodles in case we have some fall apart while cooking/assemlby.
    Feel free to reduce the shredded cheese or substitute the flavors of cheese!
    TIP: If possible, allow baked lasagna to cool for about 15 minutes for easier serving. Not allowing the lasagna to rest is ok, it’s just much harder to serve with the hot, melted cheese.

    Nutrition

    Serving: 1serving | Calories: 937kcal | Carbohydrates: 27g | Protein: 44g | Fat: 73g | Saturated Fat: 31g | Cholesterol: 197mg | Sodium: 2947mg | Potassium: 477mg | Fiber: 1g | Sugar: 5g | Vitamin A: 1591IU | Vitamin C: 38mg | Calcium: 739mg | Iron: 2mg

    Did You Make This?
    Snap a pic and hashtag it #Fantabulosity - I love to see your creations on Instagram and Facebook.

    Fabulously Fast Dinners

    Love Easy Dinner Recipes?

    I do too. I share some of my easy recipes here on Fantabulosity. Feel free to pin them to your favorite Pinterest boards so you have them when you need them!

    Pin it to Remember it:

    Buffalo Chicken Lasagna Recipe

    Instant Pot Sweet Potatoes

    November 1, 2019

    Sweet potatoes in the Instant Pot.

    Instant Pot Sweet Potatoes: A side dish that can be served cut in half, cubed, or made to use in a casserole or baby food!

    Sweet potatoes can be such an easy side dish for so many main courses. Baking sweet potatoes or even using the air fryer to make sweet potato fries are staples in our house!

    Instant Pot Sweet Potatoes

    After visiting a local steak house for lunch the other day, and ordering a side salad a sweet potato, (great light lunch combo by the way) I fell in love all over again with sweet potatoes.

    I had forgotten how easy they are to bake in the oven as an easy side dish and knew my boys would love to have them added to the mix for weeknight dinners, along with this Instant Pot cauliflower soup and these Instant Pot mashed potatoes!

    But if I’m making a weeknight dinner, you better believe I want to save time. So when I decided to experiment with cooking sweet potatoes in the Instant Pot, I was so excited to cut the time in half and STILL have delicious, fluffy sweet potatoes!

    How to Cook Sweet Potatoes in a Pressure Cooker

    It really is as easy as you think!

    With or Without Steamer Basket

    Since I have an Instant Pot for a pressure cooker, I use the steamer basket that I bought to go with it. However, if you want to cook them without the steamer basket, you can use the trivet that came with yours if you have one, or something similar.

    TIP: It’s best to have something inside like the steamer basket or trivet to elevate the potatoes, so they don’t sit on the bottom of the pot. You want them to evenly steam.

    Small Sweet Potatoes

    I recommend grabbing small sweet potatoes from the grocery store, because the bigger they are, the harder time you’re going to have trying to cram them into the pressure cooker.

    4 raw sweet potatoes to cook - how to cook in a pressure cooker

    2-Ingredients

    That’s it! That’s all you’ll need. Two ingredients.

    • water
    • sweet potatoes

    Pressure Cook on HIGH for 20 Minutes

    You can find the full recipe card below to print/pin for your future reference, but I wanted to share tips/photos along the way in case you like to follow along closely like I do when browsing recipes online!

    Add 1 cup of water to the inside of the stainless steel pot of your Instant Pot (or pressure cooker).

    Steamer Basket: If you’re using a steamer basket, place the 4 washed potatoes inside of the basket and lower into the Instant Pot.

    Trivet: If using a trivet, place it in the bottom of the Instant Pot and place the washed potatoes on top of the trivet.

    How to cook sweet potatoes in the Instant Pot
    Place raw sweet potatoes in the Instant Pot

    Place and secure the lid on to the pressure cooker, adjust the steam release handle to “sealing” and select to pressure on “high” and set the timer to cook for 20 minutes.

    Natural Release

    When the timer reaches “0”, allow the Instant Pot to naturally release the pressure. (This took 10 more minutes for me.)

    When the float valve lowers, it is safe to remove the lid and serve the potatoes how you wish!

    Cooked Sweet Potatoes in an Instant Pot
    Cooked Sweet Potatoes

    Safely Remove from Instant Pot

    The sweet potatoes will be HOT so use tongs or my favorite heat resistant gloves to remove them from the Instant Pot, and when handling to cut in half!

    Cooked Sweet Potatoes on a white plate
    Cooked, fluffy sweet potatoes

    Toppings for Sweet Potatoes

    If you want to serve your sweet potatoes by cutting them in half and topping with your favorite toppings here are a few of our favorite topping ideas:

    • butter
    • sugar
    • brown sugar
    • cinnamon
    • marshmallows or marshmallow topping
    • salt/pepper
    Sweet Potatoes with Butter on a white plate

    More Sweet Potato Recipes

    We love cooking sweet potatoes many other ways. If you do too, you may also love these roasted sweet potatoes and these candied sweet potatoes!

    Or, if Thanksgiving is near, this easy sweet potato pie recipe is one to hang on to!

    Sweet Potato with Cinnamon and Sugar
    Cinnamon and Sugar Topping

    Instant Pot Mashed Sweet Potatoes

    Now, if you prefer mashed sweet potatoes, you can definitely keep things quick by using the Instant Pot or pressure cooker too!

    • Wash, peel and cube your sweet potatoes in to about 1-in cubes.
    • Add one cup of water
    • Place cubed potatoes in a steamer basket or right inside the pot with the water.
    • Seal, and pressure cook on high for 10 minutes.
    • This time, manually release the pressure. (CAREFUL WITH THE STEAM.)
    • Drain your potatoes and transfer them to a large mixing bowl.
    • Mash the sweet potatoes with a hand mixer or potato masher, along with butter (I like to use about 3-4 Tbsp), cinnamon and brown sugar to taste (maybe a little salt if not using salted butter) unless you’re planning on using the mashed Instant Pot sweet potatoes for a sweet potato casserole, or one of our favorite ways to use them in Sweet Potato Casserole Bread Pudding or Sweet Potato/Butternut Squash Pancakes

    More Instant Pot Recipes You’ll Love:

    • How to Use an Instant Pot (How to Cook Chicken Breasts)
    • Amish Potato Salad in the Instant Pot
    • Chicken and Potatoes in the Instant Pot
    • Kielbasa and Cabbage in the Instant Pot
    • Instant Pot Pot Roast (From a Frozen Roast!)
    • Instant Pot Chicken and Dumplings
    • Cheeseburger Macaroni in the Instant Pot

    Recipe

    Sweet potatoes in the Instant Pot.
    Print Pin
    5 from 11 votes

    Instant Pot Sweet Potatoes

    Instant Pot Sweet Potatoes: A side dish that can be served cut in half with butter and sugar, cubed or made to use in a casserole or baby food!Instant Pot Sweet Potatoes: A side dish that can be served cut in half, cubed or made to use in a casserole or baby food!
    Course Side Dish
    Cuisine American
    Prep Time 10 minutes minutes
    Cook Time 20 minutes minutes
    Natural Release 10 minutes minutes
    Total Time 40 minutes minutes
    Servings 4 potatoes
    Calories 447kcal
    Author Jessica Burgess
    Cost $3.00

    Equipment

    • Pressure Cooker

    Ingredients

    • 4 Small Sweet Potatoes Washed
    • 1 cup water

    Instructions

    • Add one cup of water to Instant pot
    • Put potatoes in steamer basket or on trivet.
    • Set to "pressure cook" on high and set timer for 20 minutes. (May take about 5-10 minutes to come to pressure. May need to pressure longer if using LARGE potatoes, however, large potatoes wouldn't fit in my pressure cooker.)
    • When the timer is up, allow to natural release. (This can take about 10 minutes)
    • When the float valve goes down, safely remove the lid.
    • Sprinkle with butter and cinnamon/sugar if desired!

    Video

    Notes

    Be careful using large sweet potatoes, as they may not fit in the Instant Pot well and may take longer to cook.

    Nutrition

    Serving: 1potato | Calories: 447kcal | Carbohydrates: 105g | Protein: 8g | Fat: 1g | Saturated Fat: 1g | Sodium: 299mg | Potassium: 1752mg | Fiber: 16g | Sugar: 22g | Vitamin A: 73772IU | Vitamin C: 12mg | Calcium: 156mg | Iron: 3mg

    If you love easy recipes, then you definitely don’t want to miss all of the quick and easy recipes here on Fantabulosity!

    Kielbasa and Cabbage in the Instant Pot

    October 20, 2019

    Cabbage and kielbasa cooked in the Instant Pot.

    Kielbasa and Cabbage in the Instant Pot: A quick and easy sausage and cabbage recipe that only takes 4 minutes in the pressure cooker.

    I truly didn’t think that cooking kielbasa and cabbage could get any easier, but the Instant Pot made me a believer with this recipe as well.

    If you love cooking with the Instant Pot, then you’ll also love our favorite Instant Pot Pot Roast recipe and the Cheeseburger Macaroni that our kids adore.

    Quick Kielbasa and Cabbage Recipe

    When I set out to make this recipe, I knew I wanted to keep it as simple as it could be, and hoped that the few flavors I did use, would result in a TON of flavor… and I was RIGHT! We also add kielbasa to this slow cooker sausage casserole, and it has so much flavor!

    Now, although it’s also quick to make sausage and cabbage on the stovetop, using the Instant Pot not only made it faster, but I believe it trapped in flavors that I don’t get when cooking on an open stovetop.

    How to Make Kielbasa and Cabbage

    You can find the full recipe and printable recipe card at the bottom of this post, but I’d love to walk you through with steps/photos for extra tips too!

    Cabbage

    Wash and chop up a head of cabbage, discarding the core. If you aren’t sure how to core a cabbage, I found a great how-to core a cabbage video tutorial for you that will help, even if you don’t have the type of cabbage I’m using in this post.
    Although, I did core mine a little different than they did. It just depends on what tickles your fancy.

    Chop up your cabbage into bitesize pieces and set aside.

    Sliced Head of Cabbage to use in kielbasa and cabbage recipe in the instant pot
    Head of cabbage to chop

    Chicken Broth

    You can use regular store-bought chicken broth, homemade chicken broth or even make this instant chicken broth base that I’ve started using… because my mom did.

    That woman is a queen of cooking, so I always love to take notes in her kitchen!

    Chicken broth powder mixed with water for kielbasa and cabbage
    Chicken Broth

    Kielbasa (Smoked Sausage)

    Now for this recipe, I like to switch things up for the kielbasa at times, and grab a fun new smoked sausage if it’s on sale or a new flavor!

    I normally use kielbasa (hence the reason this is the recipe for kielbasa and cabbage) but when I bought the ingredients to take the photos this time, I couldn’t resist the andouille smoked sausage.

    Andouille tends to have a spicy kick to it, so if you have young eaters or those who aren’t fans of some “kick” then you’ll want to stick to kielbasa, polish sausage or regular smoked sausage.

    Andouille Sausage to use in this kielbasa cabbage instant pot recipe
    I chose to use andouille sausage instead of kielbasa when taking photos this time and it was GREAT too!

    Chop your kielbasa in to small, bite-size pieces and set aside!

    Chopped smoked sausage - kielbasa
    Chop your kielbasa (or smoked sausage)

    Butter

    In the Instant Pot, pot… pour your chicken broth and add a stick of sliced butter.

    Chicken broth and butter in instant pot
    Add chicken broth and butter to Instant Pot

    Next, pour your cabbage in to the pot, making sure to leave enough room for the sausage and enough room for the lid to screw on.

    If you have a really large cabbage, it could result in too much cabbage for the pot, so eyeing it is best.

    Chopped cabbage in instant pot
    Place chopped cabbage in Instant Pot

    Layer on the kielbasa, again, making sure there’s enough room for the lid to screw on. Ideally, you don’t want to stuff the pot so full that the food is touching the lid. So filling the pot to about the level I have here below will work!

    TIP: Placing the kielbasa or smoked sausage on top is KEY! During the cooking process, the juices from the meat drip down in to the cabbage for ultimate flavor!

    Chopped kielbasa and cabbage in the Instant pot to cook
    Place chopped kielbasa in the pressure cooker

    How Long to Cook Kielbasa and Cabbage in the Instant Pot

    You ready for the hard part? Place the lid on, turn the nozzle to seal, pressure cook on high, and turn the timer to 4 minutes.
    (Four minutes gives the cabbage a nice texture of cooked, but not soggy! However, if you prefer a super soft cabbage, you may want to do another minute.)

    Not hard at all, right?

    When the timer goes off, you want to “quick-release” the pressure, but turning the nozzle to “vent”! NOTE: This can burn your hand, so take precaution and use a dish towel or my all-time favorite heat resistant gloves for this!

    Do NOT remove the lid of the Instant Pot until the float valve goes down!

    Once you take the lid off, soak in the smells of dinnertime!

    Cooked kielbasa and cabbage in the pressure cooker
    Cooked kielbasa and cabbage

    Salt and Pepper (Optional)

    The kielbasa will have salt in it, so you may not need as much salt as you’d normally want, so salt and pepper to taste!

    We use this Himalayan salt (it’s our all-time favorite now because it’s fine grain and lasts for a really long time) and regular ground black pepper for this recipe.

    Salt and Pepper for smoked sausage and cabbage recipe
    Salt and Pepper
    Sprinkle salt and pepper on to cabbage and kielbasa
    Sprinkle in salt and pepper, to taste

    Mix together the kielbasa, cabbage, and spices and it’s ready to serve/eat!

    Kielbasa and Cabbage in the Instant Pot
    Kielbasa and Cabbage, ready to eat!

    What do you Serve with Kielbasa and Cabbage?

    Side Dishes for Kielbasa and Cabbage

    • Caprese Chicken Sandwich
    • Apple Salad
    • Garlic Roasted Broccoli
    • Baked Potato Wedges
    • Frozen Store-Bought Garlic Toast
    Kielbasa and Cabbage in the Instant Pot
    Kielbasa and Cabbage in the Instant Pot

    How to Store Leftover Kielbasa and Cabbage

    Kielbasa and Cabbage Recipe
    Cooked in 4 minutes and ready to eat!

    This kielbasa and cabbage recipe does do pretty well, leftover. Know that the cabbage may get a little softer after reheating, but that’s why I also like having a crisper cabbage… to allow for leftovers!

    Kielbasa and Cabbage in a white bowl, on a fork
    Perfect leftover too!

    Recipe

    Cabbage and kielbasa cooked in the Instant Pot.
    Print Pin
    4.95 from 38 votes

    Kielbasa and Cabbage in the Instant Pot

    Kielbasa and Cabbage in the Instant Pot: A quick and easy sausage and cabbage recipe that only takes 4 minutes in the pressure cooker.
    Course Main Course
    Cuisine American
    Prep Time 5 minutes minutes
    Cook Time 4 minutes minutes
    Total Time 9 minutes minutes
    Servings 4 servings
    Calories 264kcal
    Author Jessica Burgess

    Ingredients

    • 1 head of cabbage cored and chopped
    • 1 13.5 oz kielbasa or smoked, polish sausage (more than 13.5 is ok!)
    • .5 cup salted butter sliced
    • 1 cup chicken broth
    • salt to taste
    • pepper to taste

    Instructions

    • Chop up cabbage in one 1 inch pieces. Set aside.
    • Cut up kielbasa in to ½ in – 1 in. pieces. Set aside.
    • Add chicken broth to the instant pot, and cut up a stick of butter in to slices and add to chicken broth.
    • Add in chopped cabbage, making sure to leave enough room for kielbasa.
    • Top with kielbasa, leaving enough room for the lid, and so the sausage does not touch the lid! No need to stir.
      (As the kielbasa cooks, the drippings will cook down in to the cabbage.)
    • Put the lid on, and turn the dial to "seal" and pressure cook on "high". Set the timer to 4 minutes.
    • When the timer ends, safely turn the vent to release the pressure (I use these heat resistant gloves). When the float valve goes down, it's safe to remove the lid.
    • Sprinkle salt and pepper to taste (I used about 1 teaspoon salt and ½ teaspoon black pepper) and stir.
    • Serve immediately or remove from Instant Pot insert, so the cabbage stops cooking and doesn't get mushy!

    Video

    Nutrition

    Serving: 2cups | Calories: 264kcal | Carbohydrates: 13g | Protein: 3g | Fat: 23g | Saturated Fat: 15g | Cholesterol: 61mg | Sodium: 461mg | Potassium: 433mg | Fiber: 6g | Sugar: 7g | Vitamin A: 932IU | Vitamin C: 87mg | Calcium: 101mg | Iron: 1mg

    How to Sell on Amazon for Beginners

    October 7, 2019

    Family Business - How to sell on amazon - husband wife child sitting around table

    How to Sell on Amazon for Beginners: A work from home or side hustle that’s easier than you think, selling products online with these tools!

    How to Sell on Amazon for Beginners

    I am BEYOND honored to have a friend here today, sharing her knowledge and tips with us about how her family got started selling on Amazon and still to this day, sells products on Amazon!

    Let me build the scene for you (You know my inner Sophia from Golden Girls has to come out every now and then… “Picture it, 1922… Sicily…” )

    Listening to Pat Flynn’s podcast a couple of months ago, I happened across an episode that had a couple being interviewed, chatting about their success with selling on Amazon, and the dreams they’ve achieved while doing so.

    I was so impressed with them and fell in love with their story.
    So much so, that I got up the courage to reach out to them and ask if I could help share their story/products here on Fantabulosity with those of you who have dreamed of selling on Amazon too!

    More Articles I Think You’ll Love:

    • How to Make Money Online: 7 REAL Ways that are AUTHENTIC to you!
    • How to Start a Blog
    • 5 Ways You Can Outsource Your Business

    The Selling Family – Selling on Amazon

    Family Business - How to sell on amazon - husband wife child sitting around table

    Would you believe that Jessica from The Selling Family, emailed me back within no time?
    I couldn’t believe it… someone that I had decided that was pretty much a celebrity, answered my email and responded to it in a flash!

    I knew in that instant, that she and her husband were something special.


    After chatting through email a few times, Jessica said that she would love to share with Fantabulosity readers, some of her story and tips for those of you who are considering selling products on Amazon!

    So without further ado, I am honored to have Jessica here, answering some of the questions I thought you all might like the answers too when it comes to selling on Amazon.


    Hi Jessica! Thank you SO much for joining us. Here are some of the top questions that I have for you, that I think Fantabulosity readers will want to get the scoop on…

    “Why did you start selling on Amazon?”

    I started selling on Amazon shortly after losing my full-time job in 2008. I was working for a company in the housing industry and there was major downsizing because of the recession. It was actually my husband, who was a manager at the same company, who had to let me go!

    We were not in a place to live on one income so I knew I needed to find work right away. Luckily, I had been selling on eBay on the side so I had some experience there.

    I took my last corporate paycheck and spent all of it at yard sales.
    I sold all of the yard sale finds on eBay and that's how I ended up in the business of online reselling.

    Replacing A Corporate Income

    It only took me a few months on eBay to replace my old corporate income! By using my profits to buy more inventory, I was able to quickly grow the business. But it was also starting to take a lot of my time.

    That's the thing about eBay. Each time you want to sell an item, you have to take a photo of it, create a listing, pack it up when it sells, drive it to the post office, and wait to see if there are any customer complaints or returns.

    You're really limited by the number of hours you have each day. Especially since you also need time to go out and look for more inventory to sell.

    In the summer of 2010, I started chatting with a group of eBay sellers who were trying their hand at selling on Amazon.

    Now this might sound crazy to you now, but back then Amazon really was just a place for books. So sellers were going to thrift stores and library sales, picking out used books, and reselling them on Amazon. They'd make maybe $1 per book so they'd do this all day long.

    I wasn't all that interested in selling books. I tried it, but it just wasn't for me. But what did interest me about Amazon was their fulfillment program for third-party sellers called Fulfilled By Amazon (FBA). I had a feeling that with FBA, I'd be able to grow and scale my business that much faster.

    I was right about my hunch. By 2011, I was making enough money that I was able to help my husband Cliff retire from his corporate job. We've been running an Amazon business together as a family ever since.


    “How does it work? Do you buy things at the store and ship them to Amazon or to each customer?”

    Here's the big difference between Amazon FBA and basically everything else out there for reselling.

    With FBA, you don't ship directly to the customer. Instead, you buy your inventory and you ship it in bulk to an Amazon Fulfillment Center. They have these all over the country.

    Once Amazon has your inventory at one of their warehouses, they handle most of the work.

    • They store your inventory in their warehouses
    • They pack the items and ship them to customers (usually with free 1-day Prime shipping!)
    • And they even handle returns and customer service issues.

    This is great because it means you can run a reselling business without looking like a hoarder! With eBay, I always had inventory and packages scattered all over the house.

    But the real benefit is how much time it saves. Instead of packing up individual shipments and driving to the post office, I just create one or two big boxes at a time and send them to Amazon. It means that I get to spend more time buying inventory and less time doing busy work.

    Now there are a lot of ways to buy inventory for reselling on Amazon FBA. But the primary ways that I find inventory are through Retail Arbitrage and Online Arbitrage.

    Retail Arbitrage and Online Arbitrage

    With Retail Arbitrage, I am driving to local retail stores, looking at inventory, and then buying items that I can resell for a profit on Amazon. Technology has made this process so much easier because there are smartphone apps that tell you which products are winners and which ones aren't worth selling.

    deodorant  in the store - buy and sell online
    Grabbing products like this Deoderant at a retail store, and selling it for more than what you’ve purchased it at, is key!

    And unlike shopping at yard sales, when I'm doing Retail Arbitrage, I have the ability to get 5-10 of an item at any given store. If it's a hot seller, I drive across town hitting different locations to buy more. Given the choice, I'd rather sell 25 of the same item than 25 different items.

    When I do Online Arbitrage, it's really similar, but I'm shopping at retail websites instead of retail stores. So maybe I spend an afternoon browsing barnesandnoble.com looking for profitable inventory.

    I keep shopping for inventory until I have enough to create a shipment to send off to an Amazon warehouse.

    Free 7-Day Email Course

    If you want to learn more about how this all works, I have a free 7-day email course that covers the basics. This will introduce you to Retail Arbitrage and show you how to find profitable inventory. If you're having a hard time believing that someone would pay more for an item on Amazon than they would at Walmart, this is the course for you!

    “Do you have to be super tech-advanced to be successful or start an Amazon business?”

    Amazon requires less technical skill than blogging (this is based on my experience with both). You don't have to create a website because you get to use Amazon.com to sell your inventory.
    So you don't need the design, SEO, and hosting tech skills that are standard in the blogging world.

    But, of course, you need some tech basics. You'll need to sign in to Amazon's Seller Central dashboard daily to check your sales and your pricing. You may have to occasionally download a report into a spreadsheet to check on something. You should definitely be very comfortable with a laptop or desktop computer, your smartphone, and a printer.

    And, as I mentioned earlier, there are a lot of apps and extensions that make Amazon selling a lot easier. If you're comfortable downloading and using apps on your phone and Chrome extensions on your computer, then you're off to a good start.

    “Can you do it part-time? Or does it take a full-time workload to make it work?”

    This is my favorite thing about doing Retail Arbitrage with Amazon FBA: you can do it 8 hours a week or 80. It's like you get to choose how much money you want to make and act accordingly.

    It's the kind of business model where the more you put into it, the more you get out of it. So if you want to make an extra $500 a month to put towards savings, you could do this super part-time.

    But I know plenty of people who support their families doing Retail Arbitrage full-time. When Cliff and I were fully focused on our Amazon business, we were profiting over $100,000 per year. And that was with about 20-hour workweeks.

    There are a lot of ways to scale this business for growth if that's your big vision. But I have plenty of students who are thrilled to make a part-time income "just" by shopping at Target on the weekends 🙂

    “Could you get in to creating your own product and then drop-ship? Or is that more advanced?”

    On Amazon, creating your own product is called Private Label. This is a popular business model, but it's not one that I recommend to new sellers. And, personally, it's not a business model that I'm interested in exploring.

    One great thing about Retail Arbitrage, besides the flexibility, is that you can get started for less than $1,000. But if you need to find a supplier in China to Private Label a product for you, it's going to take a bigger investment up front.

    Private Label vs. Retail Arbitrage

    When I'm buying inventory at Big Lots or Walmart, I can buy just one or two of an item to test how it sells on Amazon. But with a Private Label supplier, you're going to need to buy a large quantity upfront. Plus, you'll have to pay for shipping overseas.

    The other big unknown with Private Label is you don't know if your item will sell. You need to plan on paying for PPC Advertising to get Amazon customers to find your products. That's not something I have to worry about because I know that Amazon shoppers are already looking for items like Clorox toilet wands and Betty Crocker brownie mix.

    All that being said, a lot of people do start with Retail Arbitrage and then add Private Label selling once they are more comfortable with the Amazon platform.

    As for dropshipping, you never have to worry about that if you use FBA. Dropshipping can be pretty risky (and is usually against the rules on Amazon). So with FBA, just ship your items to Amazon and they'll handle shipping to the customer. If you're really someone who never wants to touch inventory, there are ways to do this with Online Arbitrage that don't involve dropshipping.

    “What is one thing you wish you would have known when you started?”

    It's funny, because people get jealous when they find out I've been selling on Amazon for 10 years. They say, "it must have been so easy!" because there were fewer sellers online.

    It's true that there were fewer sellers, but there were also fewer buyers. And it was basically the technological dark ages! Now there are so many amazing tools and apps that make Amazon selling easier and more profitable.

    So it's hard for me to even compare Amazon then and now. But there is one thing I wish I could have done differently. I wish I could have reinvested more of my profits back into the business.

    I had to take money out of every Amazon payment to pay myself. That was just the reality of getting our personal bills paid each month. But now I encourage my students to try to reinvest all of their profits back into the business for the first three months. That's how you can really grow your business quickly.

    I really felt like I was just winging it back then because there weren't any systems to follow. Amazon was still the untested new thing, especially outside of books, so I just had to figure it out as I went.

    Which is exactly why I started blogging about Amazon FBA. I just wanted people to know about this amazing business opportunity (especially since most of my IRL friends thought it sounded crazy!).

    A lot of people probably think that online reselling is just a hobby, but I want to make sure that people know that this is a real, legitimate business.

    Work at Home Mom Dream…

    Amazon is such a wonderful business model for moms because of the flexibility and freedom that it allows. Cliff and I get to work together, homeschool our son, and travel as a family all because of Amazon FBA. If you're looking for a more flexible way to make money while working from home, FBA could be a great fit.

    Ready to Start Selling on Amazon?

    If you're ready to get started, I have an online course that walks you step-by-step through the process of starting and growing your business. Amazon FBA is a whole lot easier if you have a tested system to follow, and that's what I teach in my Amazon Boot Camp.

    It amazes me how many people could benefit from an Amazon FBA business and they just don't know that it exists. So thanks for giving me the opportunity to share more about it 🙂

    Thank you Jessica!

    Thank you so much for sharing all of this with us Jessica. I had NO idea about so much of this, but have been super curious. I’m not going to lie… I’m REALLY considering selling on Amazon myself because I would love to be able to have “shopping” as a staple part of my business!

    Have more questions for Jessica? Drop them in the comments below! I’d love to hear them too!

    Related Posts

    If you loved this post on how to sell on Amazon, you may also love my other posts on blogging and online business!


    Pin the Image Below to Remember It:

    How to be a Good Wife… the Lessons We’ve Learned

    September 16, 2019

    Husband and wife married on the beach

    How to be a good wife: Lessons learned over the years from wives all around, with tips and tricks that make their marriage work!

    Husband and wife married on the beach

    Am I the perfect wife? No.

    Do I know a perfect wife? No.

    But I do believe I am a good wife, and that I know a lot of good wives out there.

    How to Be a Good Wife

    I also know that we can definitely screw up and have flaws (we all do) and still be a good wife. (You’ll also love reading “How to Improve Your Relationship in 30 Seconds Each Day!”)

    A good wife can also be defined in many different ways, by different people.

    For instance, my husband may say there are different characteristics that make up a good wife, then what Billy, John, and David who live down the street say. (I have no idea if a Billy, John or David live down the street… so don’t be offended if you think I’m talking about your husband.)

    You may also love our other marriage posts like: “How to Respect Your Husband” and How to Make Your Husband Want to Come Home

    I have also learned a LOT in my marriage, and I’ve polled those of you in the “Fab Society” group on what lessons you have learned while being a wife, so I’m hoping what we have to share with you today, will help in some way.

    Now, even if you’re not visiting this post for help… and just happened across this post, I truly hope something still resonates with you.

    I know there were some things that others suggested that made me more aware and intrigued with what would happen if I would incorporate them into my marriage.

    What are the Tips to be a Good Wife?

    So again, although you may not agree with all of them, these are lessons we’ve learned and things that we’ve noticed in our (the Fantabulosity community) marriages, so we hope that something will speak to you today and help!

    Do you have to do all or any of these to be a good wife? Absolutely not. They’re just great lessons we’ve learned that work in our marriages and we’re hoping one or all will help you in some way.


    Below, I’ve compiled real-life answers from other wives, so you’ll notice some will look just like Facebook comments… because they are!

    Be sure to let us know below or in the Creating Your Happy group if this helps!

    28 Tips to Be a Good Wife

    1. God first. There’s a reason this is #1. It never fails. When God is put first in our marriage, everything else flows a lot easier. Even if only one of you is putting God first, it’s amazing what He (God) can do.

    2. During a really difficult time in our marriage, I felt like I gave, gave and gave some more, even when I didn’t want to, because I wasn’t feeling loved in return. I didn’t walk away easily, and I’m thankful for that, because I believe our marriage is stronger now because of it.

    But listen… I’ll be honest, there was a time when I couldn’t give anymore. I stopped trying and I was done. But more to come on that later.
    Also, don’t get me wrong…My husband has never physically abused me. So I’m not saying that if you are being abused, that you should stay. If you are being abused, get help immediately.

    3. We marry our dads. Not really, but we tend to carry over any behaviors we grew up with … and unintentionally live like our husbands have the same traits as our fathers, or live like they SHOULD have the same traits.

    4. It’s hard. Can I just leave it at that? Because it is. It’s just hard. It takes work and no two people are the same, so when we come together as one, it may take some changing and reshaping to fit the pieces together.

    5. When he’s upset and we can’t seem to get along, I’ve realized that sometimes it’s not about me or even something specific that happened with us. There could be something going on that I don’t understand or that I don’t even know about. I was so thankful when my husband helped me write “What to do when your husband doesn’t come home” because it helps explain a lot of things that I didn’t realize as his wife.

    6. We all have a love language and learning what his is, is crucial and a game-changer. When we speak our spouse’s love language, he will feel more loved than when we show it in other ways. Plus, sometimes we tend to show love in our own love language, rather than his. So what’s a love language? I went in to more on this in The Secret Weapon in our Marriage.

    7. Although I feel better when I “throw up” on him (vent, complain, and be negative about the unimportant things in life) he then feels it, and then I feel bad about that.

    It’s like I have a temporary relief but regret minutes later. So unless it’s an important matter or I’m really struggling with something, I try to work through it instead of dumping it off on to him.

    8. Pray about it before spouting about it. When something is bothering me, or in the heat of the moment, it is MUCH easier said than done, but taking a minute to pray about it does two things:
    a. helps me think through things while giving me a breather
    b. God will sometimes speak to me in those moments, and I’ll have a better way to approach a tough conversation with my husband.

    9. “Don't have big conversations on midnight week” – Facebook reader
    This can also be explained as “don’t have big conversations when one has had a stressful/long week/day. Timing can mean everything! Which leads to the next recommendation from a Facebook reader that made me chuckle…

    10. “We have a rule-no important chats when hungry, horny, or tired.” – Facebook Reader
    This made me laugh out loud. I love it! But I’m not sure if there are moments in the day that one of us isn’t feeling one of these. Haha!

    11. “That I take him for granted way too often. If I were to slow down every once in a while I would see that he is always by my side.” – Facebook Reader

    12. “We are a team. Our marriage comes first then the kids. I was doing so much that I felt like he was an intruder so to speak.” – Facebook Reader

    13. “Small stuff doesn't matter. If something is bothering you (ie: dishes, laundry, etc.) just do them because it's not affecting your partner. In ten minutes after they're done, it's not going to matter anymore.” – Facebook Reader

    14. “If you have expectations for how an event or procedure is going to go in regards to your husband – make them known beforehand. He then has the opportunity to live up to the expectations you have set rather than fail your unsaid threshold.” – Facebook Reader

    15. “Just celebrated our 18th wedding Anniversary and I have learned many lessons over the years. I think the most important is not giving up during the bad/hard times and compromise!” – Facebook Reader

    16. “People always say you will have good years and bad and we have experienced both but have never given up on each other or our marriage in the bad years! Statistics of interracial marriage is higher than the average divorce rate due to culture differences especially when raising children. We have to compromise often and meet in the middle with a solution!” – Facebook Reader

    17. “A couple of things… When you are frustrated or upset with your spouse, sometimes you have to look deep down inside and realize that it might be your thought process or you could really be the cause of your own frustration, then communication is the key.
    It is all a give and take, but you and your spouse have to put your marriage first before kids, jobs, etc… (well besides God) It is SO hard to do that, but the family starts with husband and wife….. AND realize that there is a difference between joy and happiness. You won’t always be happy every day but you can still be unhappy or face hard times, and have joy.” – Facebook Reader

    18. “I've learned to not take everything personal. It's hard because when he is going thru stuff and lashes out at me then it's easy to think many negative thoughts. Sometimes you have to step back and redirect your thoughts to something positive on purpose.” – Facebook Reader

    19. “LOVE this! We are constantly changing as people. We change jobs, locations, friends, family, new people enter your life, and some people exit out of your life–all of this changes you and your spouse. You have to be willing to change together.
    We never go to bed angry, we always talk it out no matter what. Never say the word divorce, ever. We disagree on irrelevant things at times, which can get heated because we both want to be right and don’t back down from wanting to be right and have decided to agree to disagree and let the little stuff go. We are a team and we work toward our goals together.” – Facebook Reader

    20. “Pick your battles! I remember a lady complaining that her husband put the roll of toilet paper on the wrong way for 25 years! The other person said to her-"so he is finally doing it right"? She answered and said "NO, but after 25 years I decided to stop complaining about it!” – Facebook Reader

    21. “True forgiveness.” – Facebook Reader

    22. “RESPECT. I believe is truly what has kept my husband & I together through good and bad times. We can agree to disagree by respecting each other's views and coming together to work as a team. That can mean taking a break to come back together and discuss further & let emotions settle so we can mutually agree (compromise).
    Along with all the above great comments. TEAMWORK. that necessarily doesn't always mean 50/50.. I have my low days & he picks it up or vice versa. TIME. Making time to spend with each other. COMMUNICATION. Always talking & really listen to each other. Not making Assumptions… SELF CARE. this is so important in order to make my relationship healthy. We need to take care of ourselves spiritually, mind & body.” – Facebook Reader

    23. “We’re still newlyweds I suppose so I have a lot to learn but I’ve learned a lot about truly being open with someone else, especially about the things that cause me anxiety – like sharing finances with someone has been great mostly but also it’s such a mindset change to be open about talking about money. That’s just one example but there are a ton of things I’ve learned to really share that I would have kept to myself before.” – Facebook Reader

    24. “Oh Gosh where do I start! After 37 years I probably could write a book … It's ok to be wrong, it's not important to be right, he is my biggest supporter & best friend… Respect Respect Respect. 
    Don't nag, he may or may not get projects or chores done but our relationship is more important than any silly ole project. 
    Food really does make him happy! 
    Don't go to bed mad, you won't be able to sleep anyway. 
    I'm not his employee so I ask to not be treated like one and Life is great.” – Facebook Reader

    25. “It gets easy to nag so try not to do that and show some interest in things that he loves.” – Instagram Reader

    26. “Always be encouraging and give praise for the things he does. That is what keeps a guy going.” – Instagram Reader

    27. “Treat your spouse the way you want to be treated.” – Instagram Reader

    28. “Never EVER put down your spouse in front of other people!” – Instagram Reader

    29. “Listen to husband instead of railroading him into thinking what you want him to think.” – Facebook Reader


    I am BEYOND thankful for all of you who have shared your favorite tips for being a good wife. Thank you so much!

    If you’ve loved reading this or if you’d love to add something to our list, be sure to let us know in the comments! Share the love and help a fellow wife!

    You May Also Love:

    • 5 Ways to Prepare for a Romantic Weekend Getaway
    • When Your Husband’s Not Affectionate Anymore
    • When Your Husband Cheats and How to Make it Through
    • « Go to Previous Page
    • Page 1
    • Interim pages omitted …
    • Page 19
    • Page 20
    • Page 21
    • Page 22
    • Page 23
    • Interim pages omitted …
    • Page 26
    • Go to Next Page »

    Primary Sidebar

    Jessica Burgess standing in kitchen holding a hummingbird cake.

    Hi, I'm Jessica! - Owner and Creator of the blog and brand, Fantabulosity.

    I’m here to help you make easy comfort food and nostalgic recipes, using simple ingredients, that everyone will love.

    More about me →

    Potluck Recipes

    • A slice of strawberry jello cake, topped with a strawberry slice, sitting on a round plate.
      Strawberry Jello Cake (Easy, Moist Strawberry Cake)
    • Crack green beans on wooden spoon.
      Crack Green Beans
    • Old fashioned potluck cake recipes collage.
      Old-Fashioned Cakes That Still Show Up at Every Potluck
    • Collage of potluck desserts.
      Easy Potluck Desserts (Simple Recipes That Always Get Asked For)
    • Cold Pasta Salad Recipes Collage.
      Cold Pasta Salad Recipes
    • Chicken Casserole recipes image collage.
      20 Chicken Casserole Recipes

    Popular Recipes

    • bread pudding in baking dish
      Bread Pudding Recipe: Easy Old Fashioned Recipe (With Video!)
    • Burger baked in the oven, steamed in aluminum foil, and placed on white plate.
      Burgers in the Oven
    • two tuna salad sandwiches stacked on top of each other
      The BEST Tuna Salad Recipe
    • Sliced banana bread on white platter
      Best Banana Bread
    • Strawberry brownies on white marble cutting board.
      Strawberry Brownies Recipe
    • Cheeseburger Sliders made with Hawaiian Rolls, stacked on top of one another.
      Cheeseburger Sliders

    Footer

    ↑ back to top

    Featured In

    About

    • About Jessica
    • Contact
    • Collaborate
    • Dinner System

    Easy Recipes

    • All Recipes
    • Vintage Recipes
    • Dinner Recipes
    • Desserts

    How to Cook

    • Oven-Baked
    • Stove-Top
    • No Bake
    • Cooking Basics

    Privacy Policy |Accessibility Copyright © 2026 Fantabulosity | Terms & Conditions | FTC
    All recipes, photos, and content are copyrighted and may not be reproduced, republished, or distributed without written permission.

    Rate This Recipe

    Your vote:


    A rating is required
    A name is required
    An email is required