• Skip to primary navigation
  • Skip to main content
  • Skip to primary sidebar

Fantabulosity logo

  • All Recipes
  • Vintage Recipes
  • Holiday
  • Dinner Theme System
  • About
  • Navigation Menu: Social Icons

    • Facebook
    • Instagram
    • Pinterest
    • TikTok
    • YouTube
menu icon
go to homepage
  • Recipes
  • Desserts
  • Dinners
  • Gatherings
  • Holidays
  • About Jessica
    • Facebook
    • Instagram
    • Pinterest
    • TikTok
    • YouTube
  • search icon
    Homepage link
    • Recipes
    • Desserts
    • Dinners
    • Gatherings
    • Holidays
    • About Jessica
    • Facebook
    • Instagram
    • Pinterest
    • TikTok
    • YouTube
  • ×
    Home » Recipes

    Cheeseburger Casserole

    Cheeseburger Casserole

    February 10, 2022

    Cheeseburger Casserole

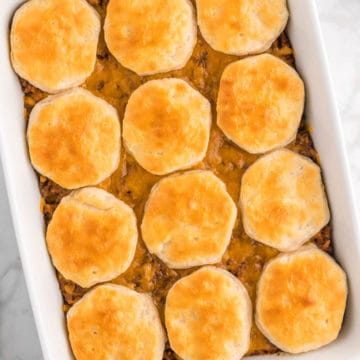
    This easy cheeseburger casserole recipe is the perfect busy weeknight meal. Ground beef, spices, and cheese are topped with biscuits to create a hearty casserole that the whole family will love!

    Cheeseburgers may just be our favorite dinner around here, and with our popular cheeseburgers in the oven recipe, I knew you’d love this casserole too! But if you’re a cheeseburger fan, you may also love our cheeseburger sliders and these cheeseburger subs, which are hard to beat!
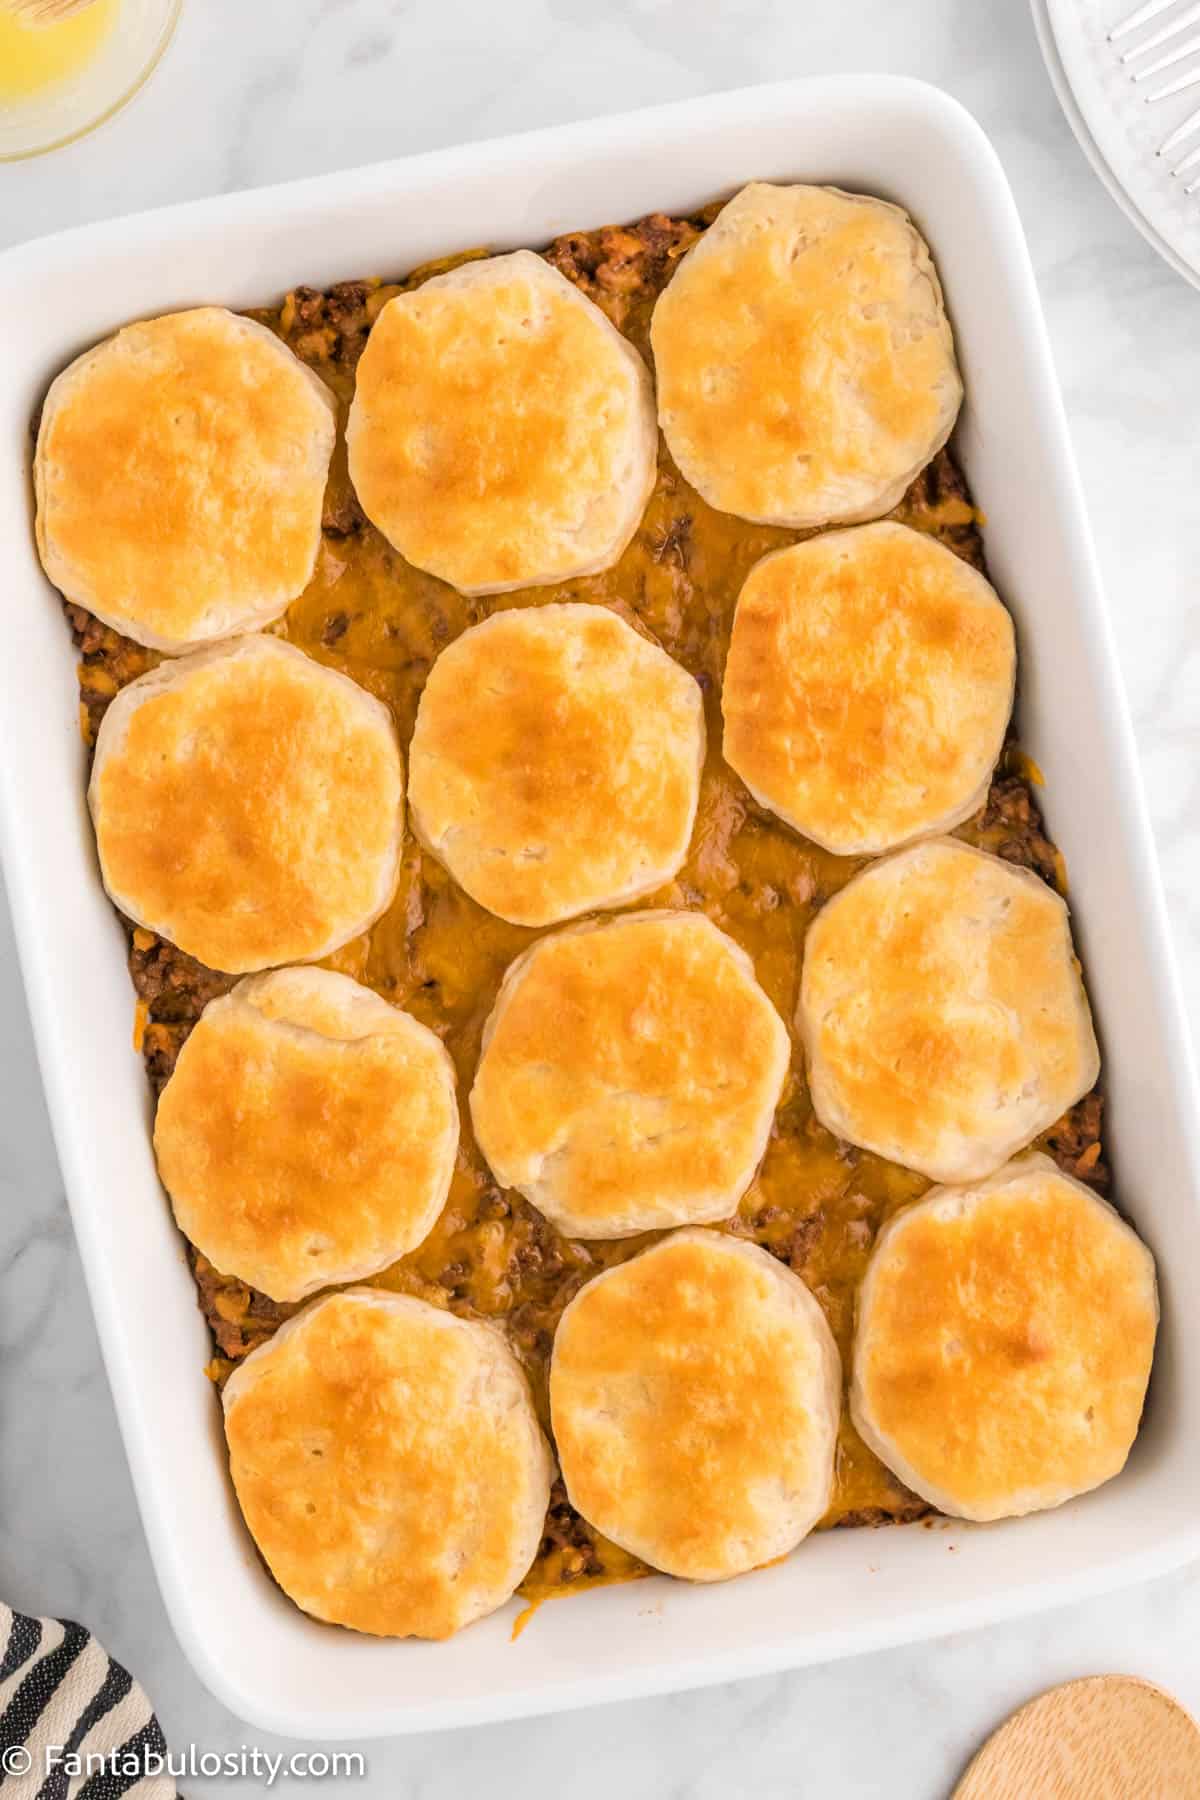
    Cheeseburger Caserole

    Swap out the seasoning and make yourself a Big Mac Casserole for that iconic Golden Arches experience. You can also make Cheeseburger Sliders for more of a grab-and-go meal.

    Why You’ll Love This Recipe

    So of course this easy cheeseburger casserole goes right to the top of my list of favorite casseroles! (Well, along with this french onion beef casserole and this Doritos chicken casserole of course.)

    Most hamburger casserole recipes have some sort of meat sauce/noodle mixture, so I was super excited when I could share a cheeseburger casserole without pasta! (Much like this walking taco casserole too!)

    You’ll also love this similar hashbrown hamburger casserole, classic beef stroganoff recipe, and this chicken pot pie casserole!

    [feast_advanced_jump_to]

    Ingredients

    This recipe uses simple ingredients that even your picky eaters will be ok with!

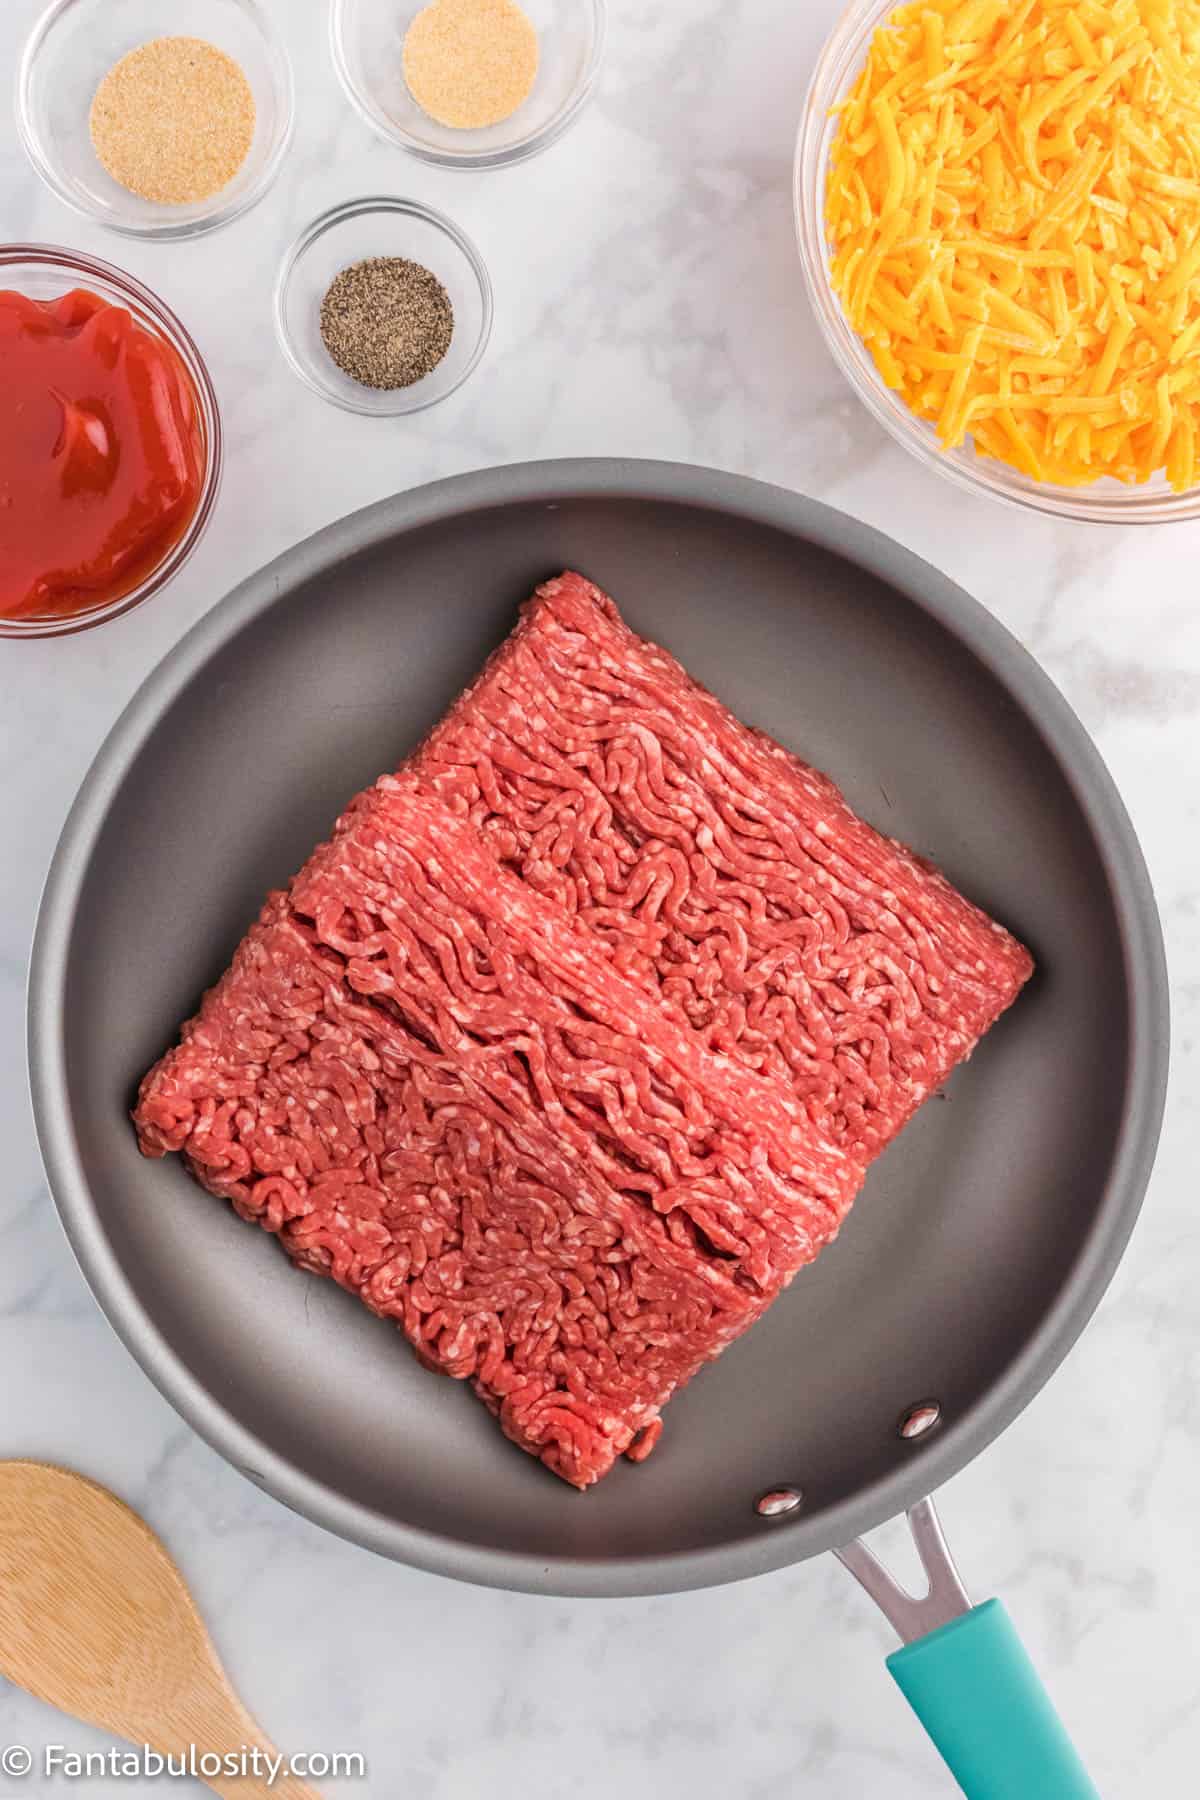
    • 2 pounds ground beef (See our other ground beef recipes.)
    • ⅔ cup ketchup
    • 2 teaspoons onion powder
    • ½ teaspoon garlic powder
    • ½ teaspoon black pepper
    • 3 cups cheddar cheese shredded and divided
    • 1 can refrigerated biscuits like Pillsbury Grands
    • 1 tablespoon salted butter melted

    Jump to the printable recipe card right now or keep scrolling to see how you can make this easy recipe (where we basically create a cheeseburger in casserole form)!
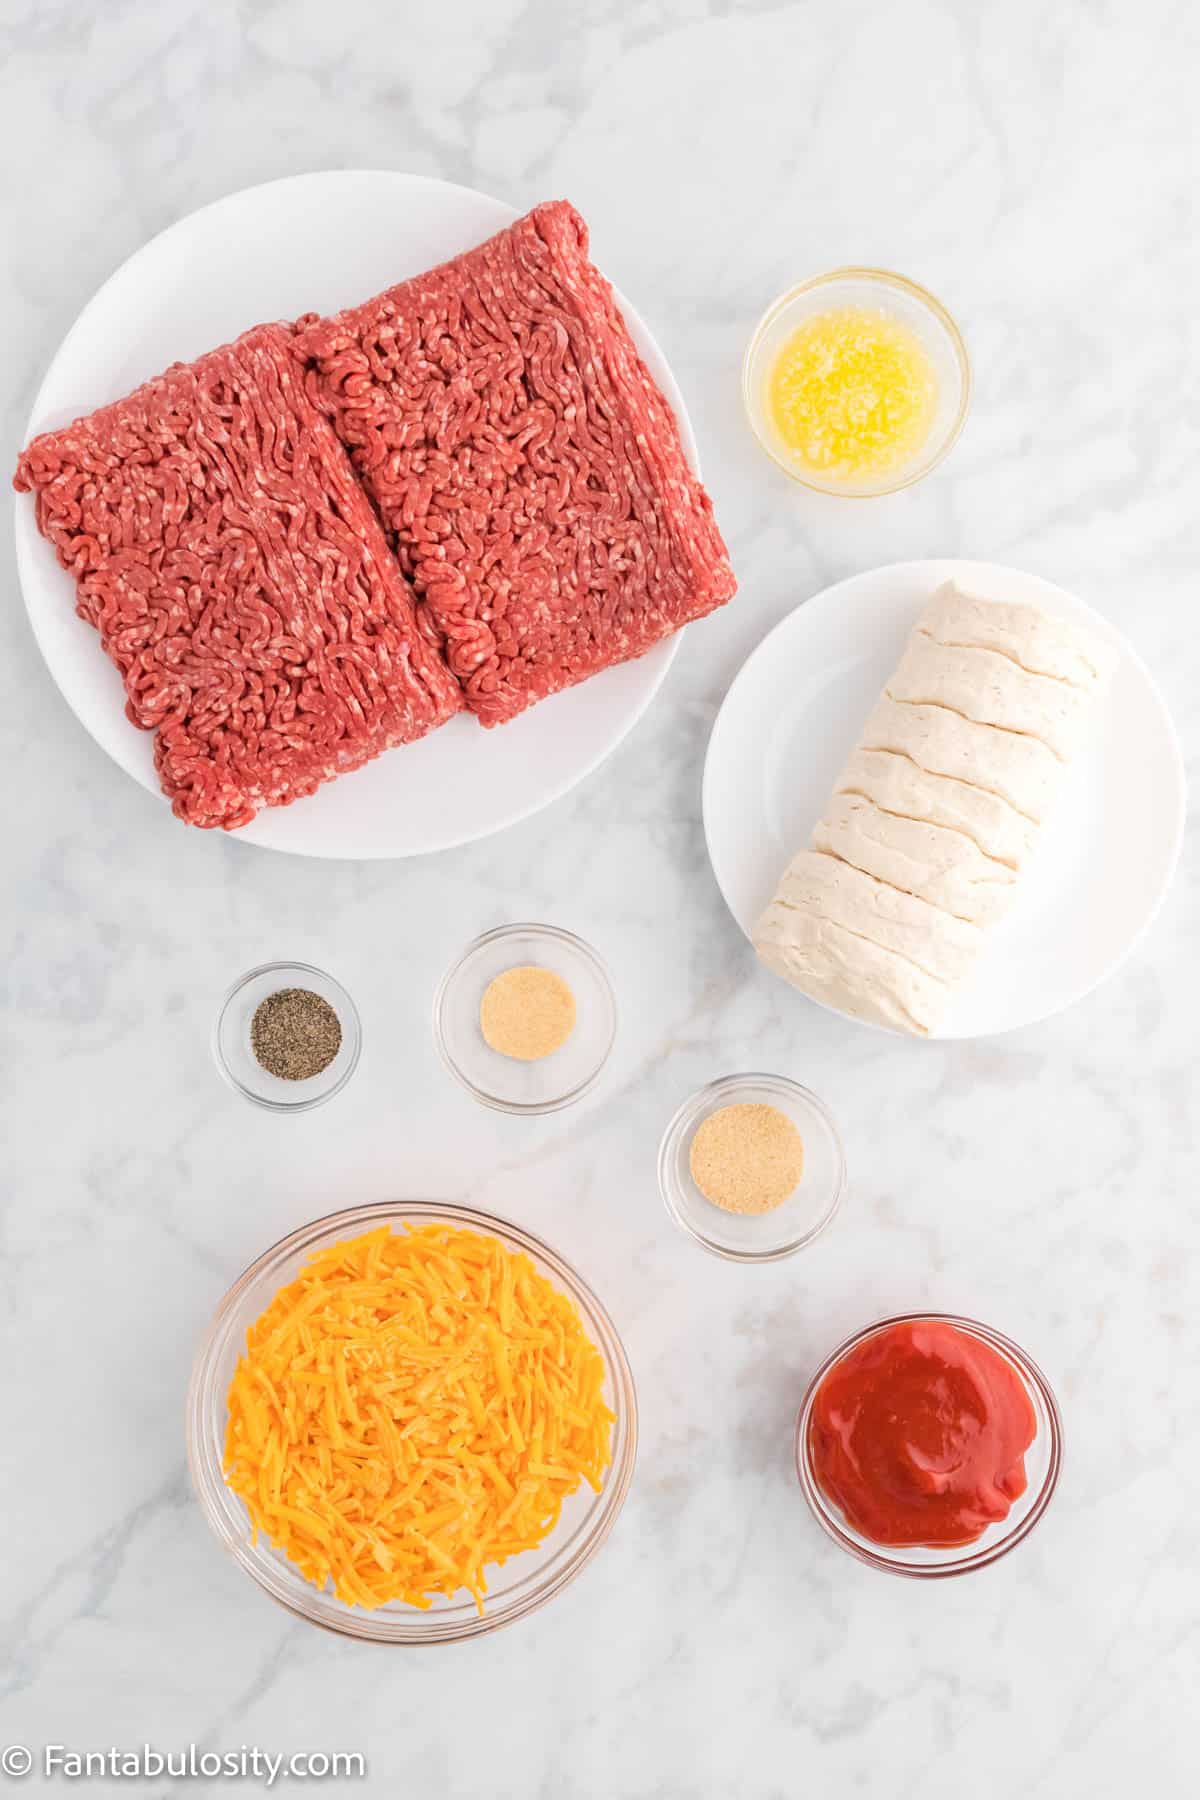
    A picture of the ingredients you need to make a cheeseburger casserole.

    Instructions

    1. Heat oven to 425° F. Grease a 9×13 casserole dish or spray it with cooking spray.
    2. Brown ground beef in a large skillet over medium-high heat (breaking it up with a wooden spoon as you go) until no longer pink; drain off fat. If you are using extra-lean ground beef (or turkey), you can put a bit of olive oil in the pan to keep it from sticking. 
    A 9x13" baking dish that's been sprayed with cooking spray.
    Spray/grease the 9×13 pan.
    2 lb ground beef in a large nonstick skillet.
    Brown the beef.
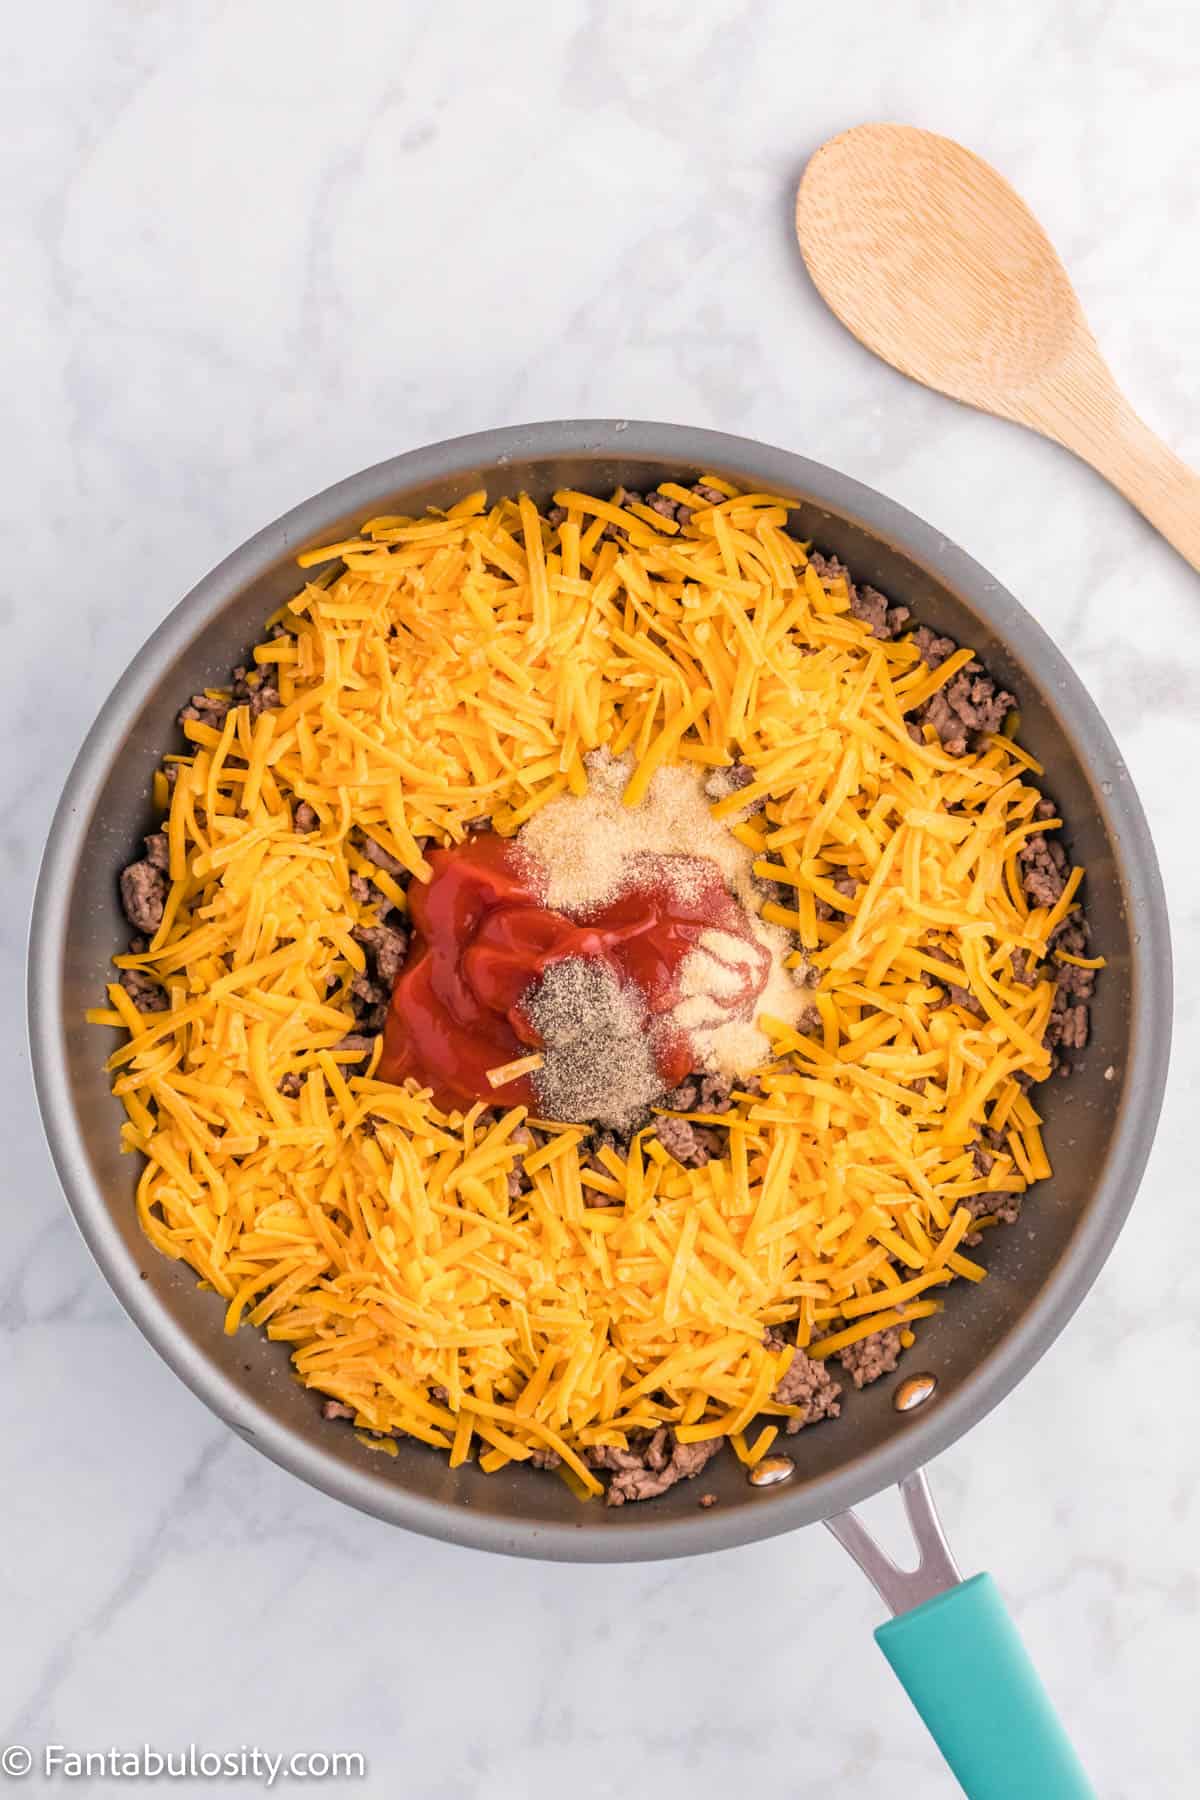
    1. Add ketchup, onion powder, garlic powder, ½ teaspoon pepper, and 2 cups of shredded cheese. Stir well to combine. 
    Ketchup, spices and 2 cups of cheese added into the nonstick skillet with the cooked beef.
    Add everything but 1 cup of cheese.
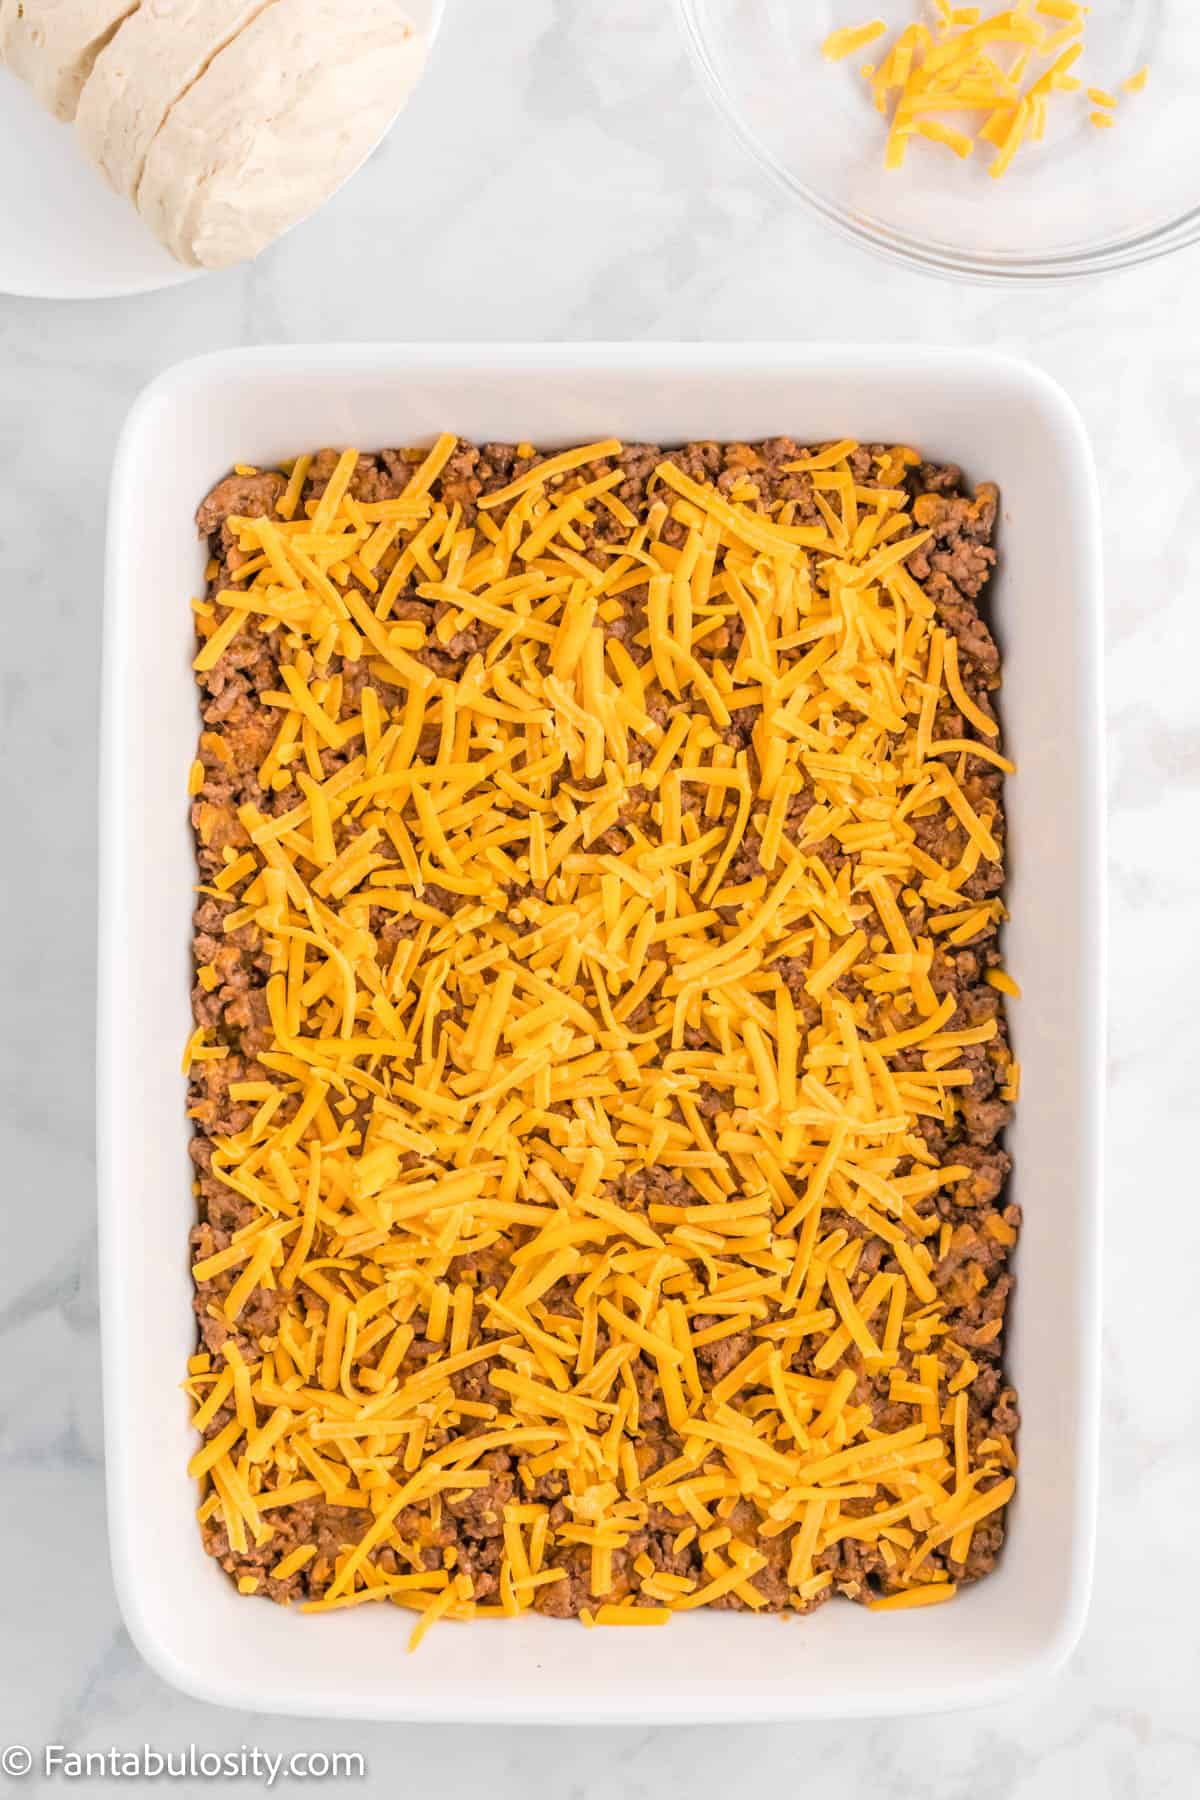
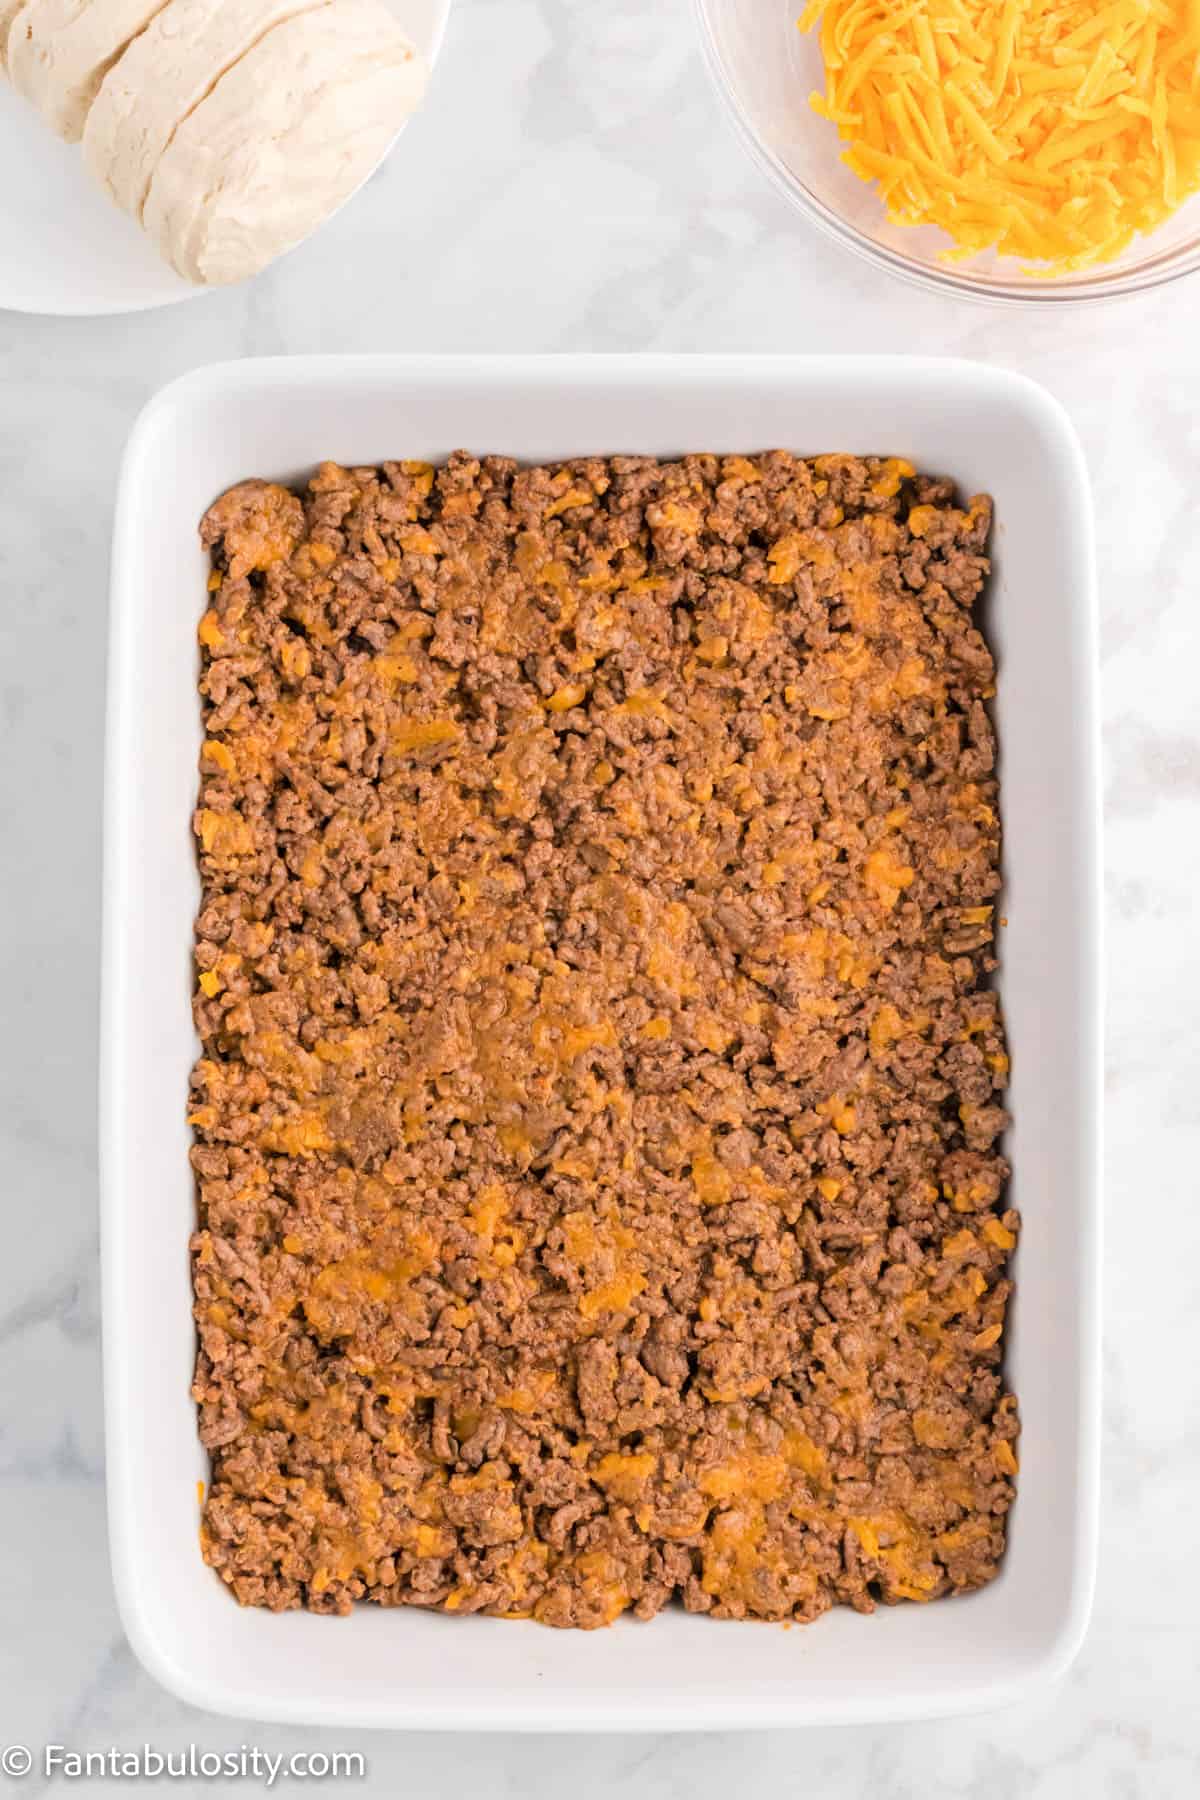
    1. Scoop mix into the prepared 9×13″ baking dish and spread evenly. Top beef mixture with remaining one cup of cheese. 
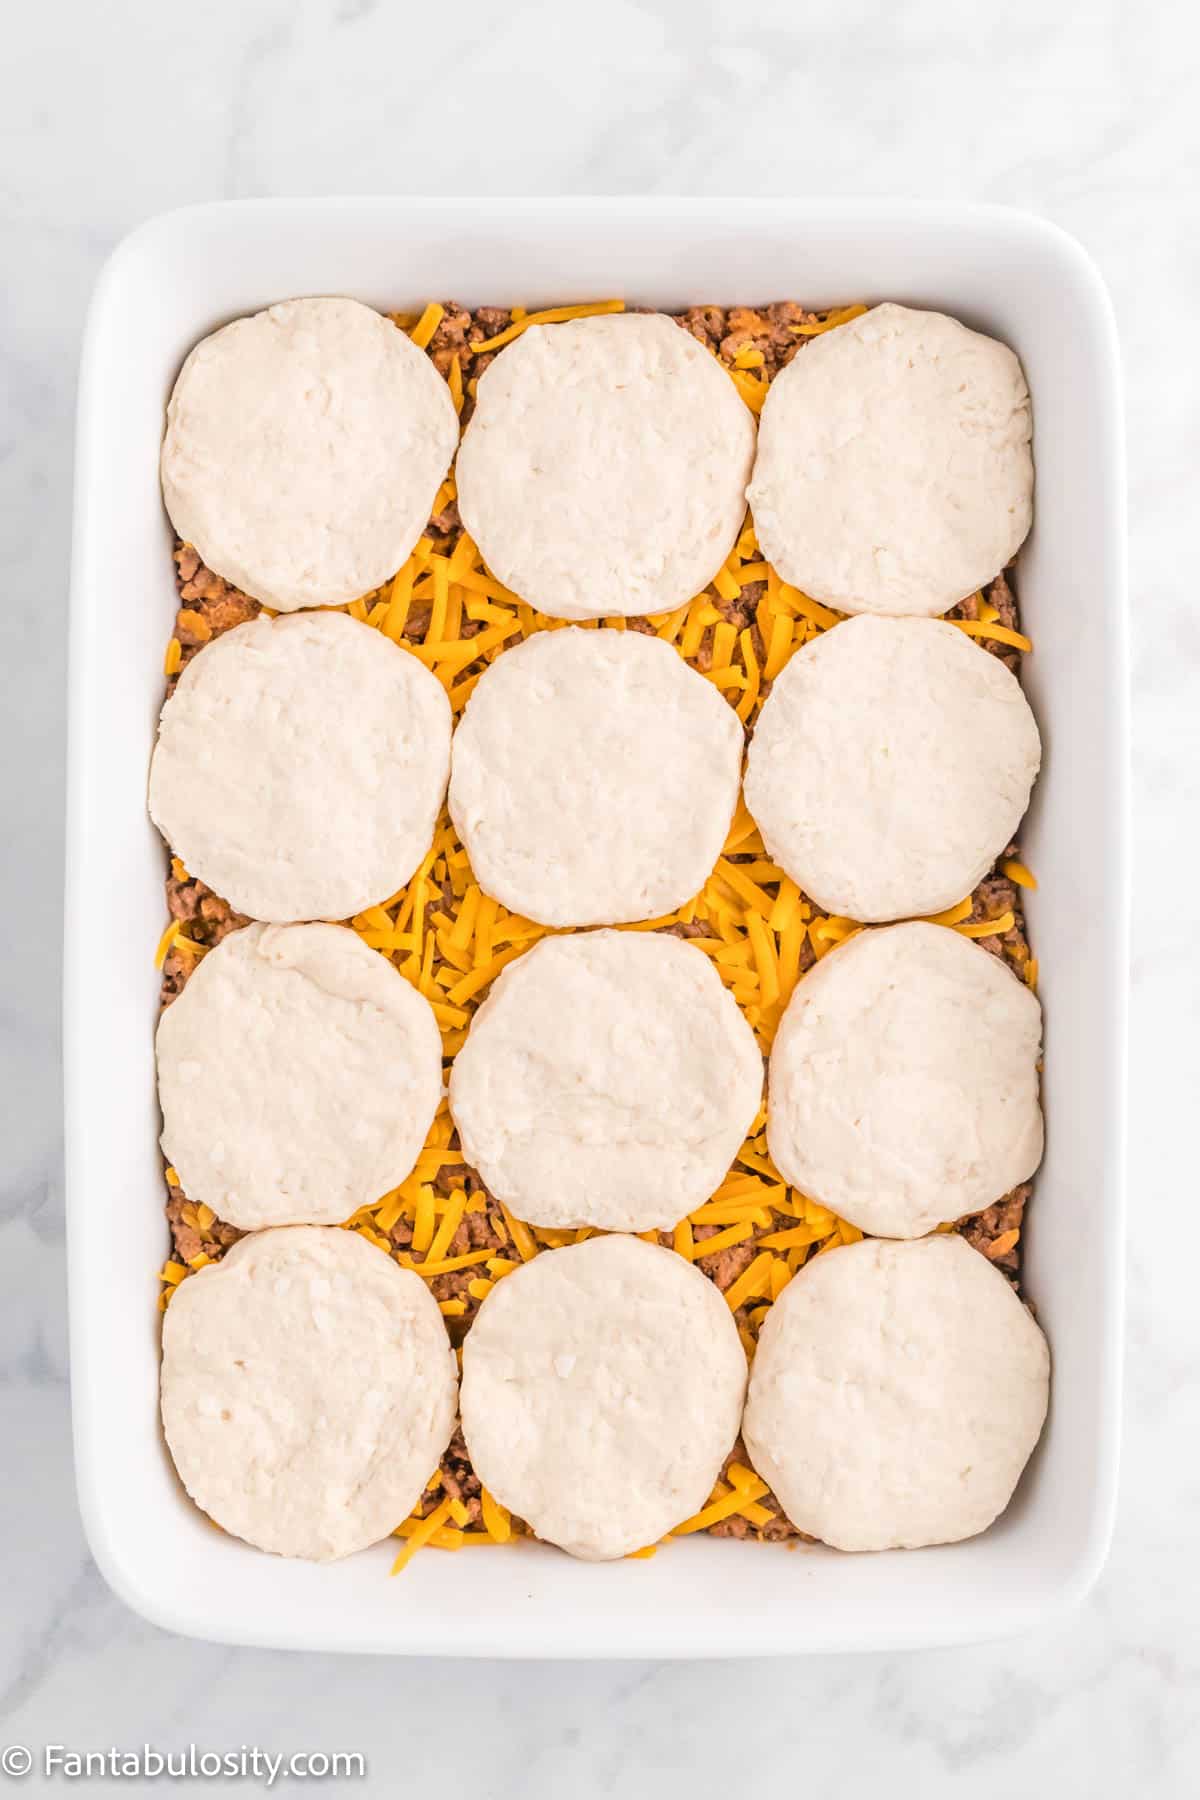
    2. Split 6 biscuits in half through the middle so you’ve got 12 thin rounds. Splitting them keeps the biscuit layer from staying doughy underneath. Lay the tops and bottoms over the casserole in a single layer, covering as much as you can. If your can came with extras, set them aside for another use.
    The cooked beef and cheese mixture pressed into the prepared 9x13 pan.
    Press meat into pan.
    The remaining 1 cup of cheese scattered over the beef mixture.
    Sprinkle cheese over top.
    1. Arrange biscuits on top of the casserole (should fit 12 biscuits). 
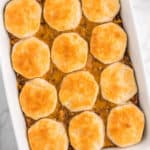
    12 biscuits (that have been split in half) layered on top of the casserole.
    Layer biscuits on top.
    1. Bake for 10 to 15 minutes or until biscuits are golden brown and cooked through. 
    A pastry brush brushing melted butter on top of the biscuits after the cheeseburger casserole has been cooked.
    Brush butter on top and enjoy!
    1. Brush melted butter on top of the biscuits and serve.
    Biscuit and cheeseburger casserole on spatula

    Substitutions

    What substitutions can you make in this baked cheeseburger casserole? Quite a few actually!

    • Beef – you can replace this with ground turkey, pork or really any other ground meat.
    • Cheese – you could use other American cheese in place of cheddar, or even a soft cheese like Velveeta.
    • Biscuits – if you don’t have any refrigerated biscuits on hand, you can make boxed biscuits or biscuits from scratch and drop them by the teaspoon full on top of the casserole instead.
    • Spices – you could use fresh chopped onion and garlic in place of the dried spices called for in this recipe.
    • Ketchup – you can use tomato sauce (or tomato paste thinned out with a bit of water) in place of the ketchup in this recipe to reduce the sugar content a bit.
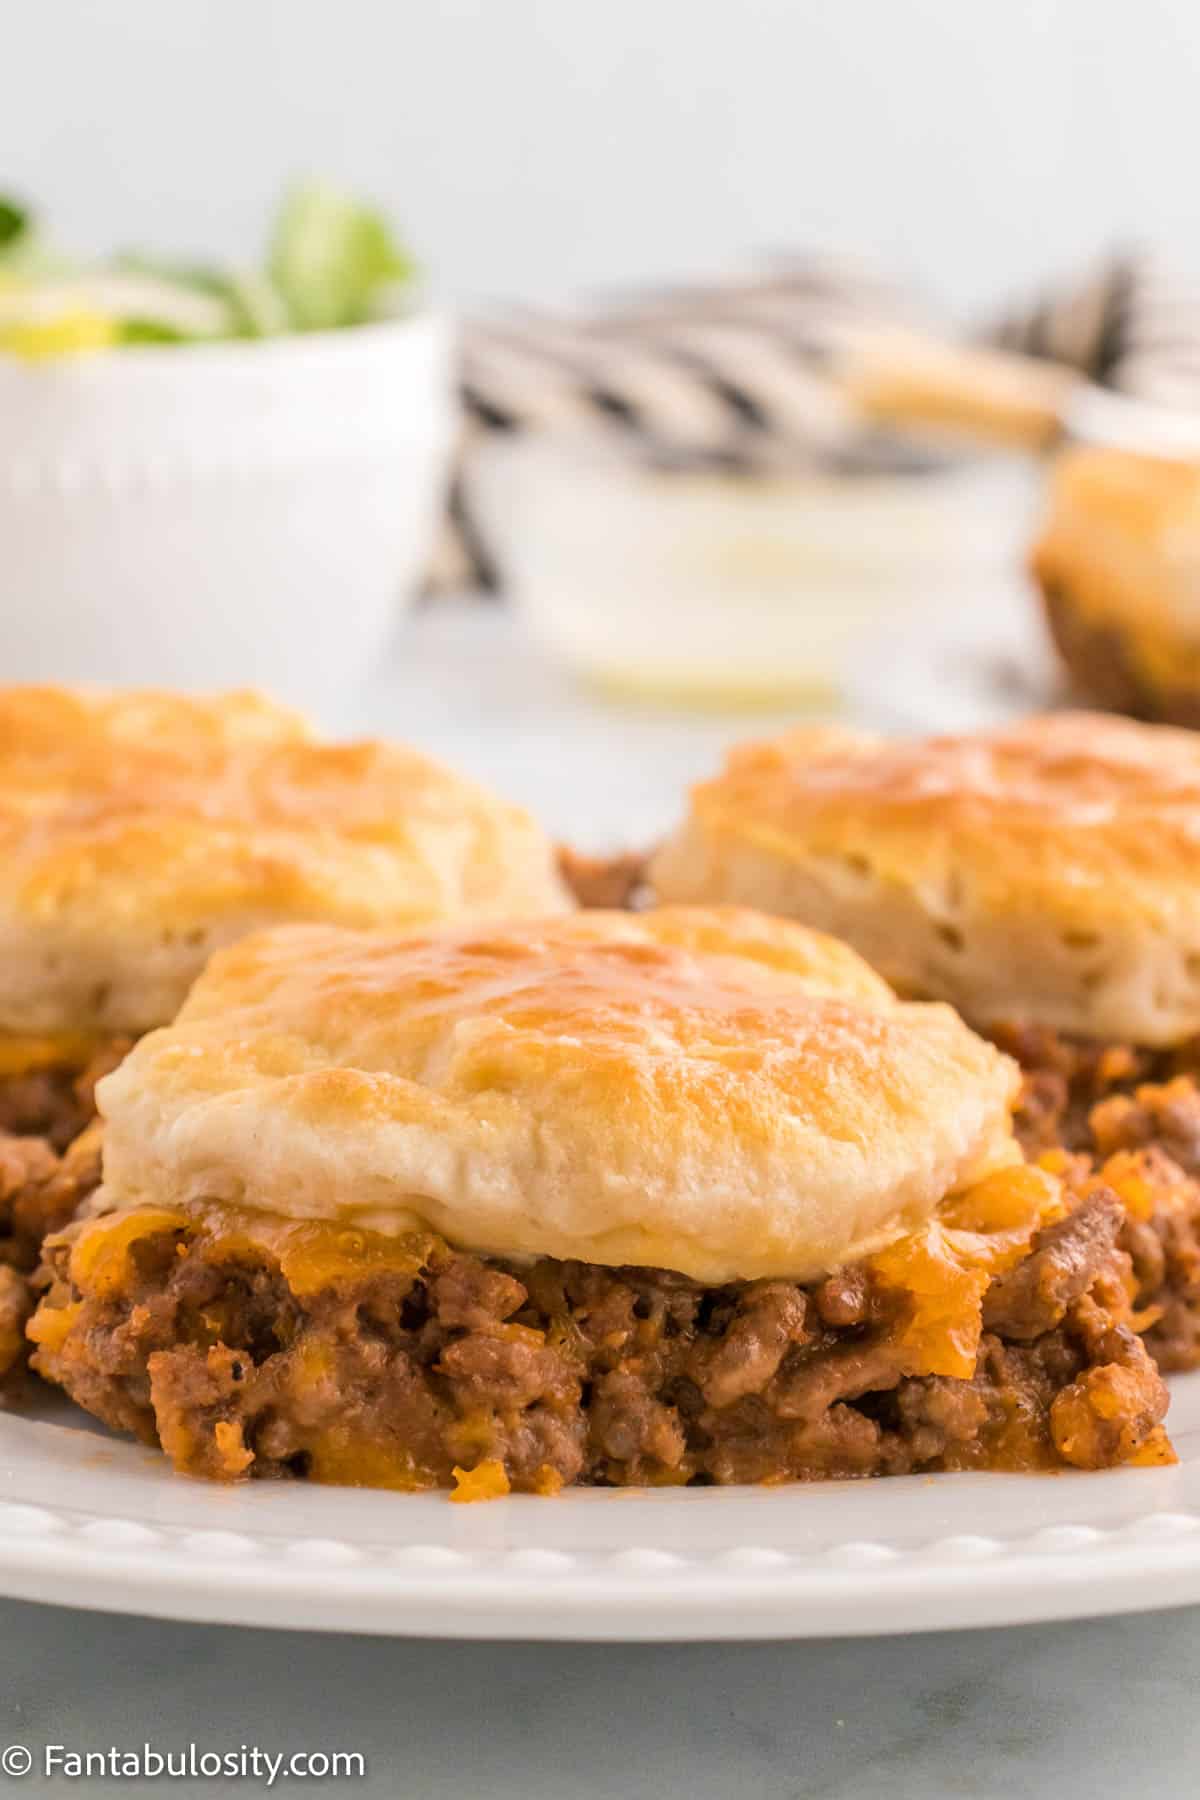
    Cheeseburger casserole on white plate

    Variations

    If you’ve made this casserole and you loved it, try one of these variations the next time you make it!

    • Spice It Up – if you like Mexican recipes or spicy food in general, try replacing the ketchup in this recipe with a spicy salsa and the cheddar cheese with a pepper jack cheese!
    • Bacon cheeseburger casserole – chop some bacon and cook it at the same time as your ground beef to turn this into a bacon cheeseburger casserole. You could also add some crumbled bacon to the cheese you put on top of the meat mixture! (Some of these ingredients are similar to our tater tot casserole too!)
    • Sour Cream and Onion – if you want to get really wild, try mixing some chopped green onions and crushed sour cream and onion potato chips in with the cheese. Then serve your sour cream and onion cheesy casserole with a dollop of sour cream on top!
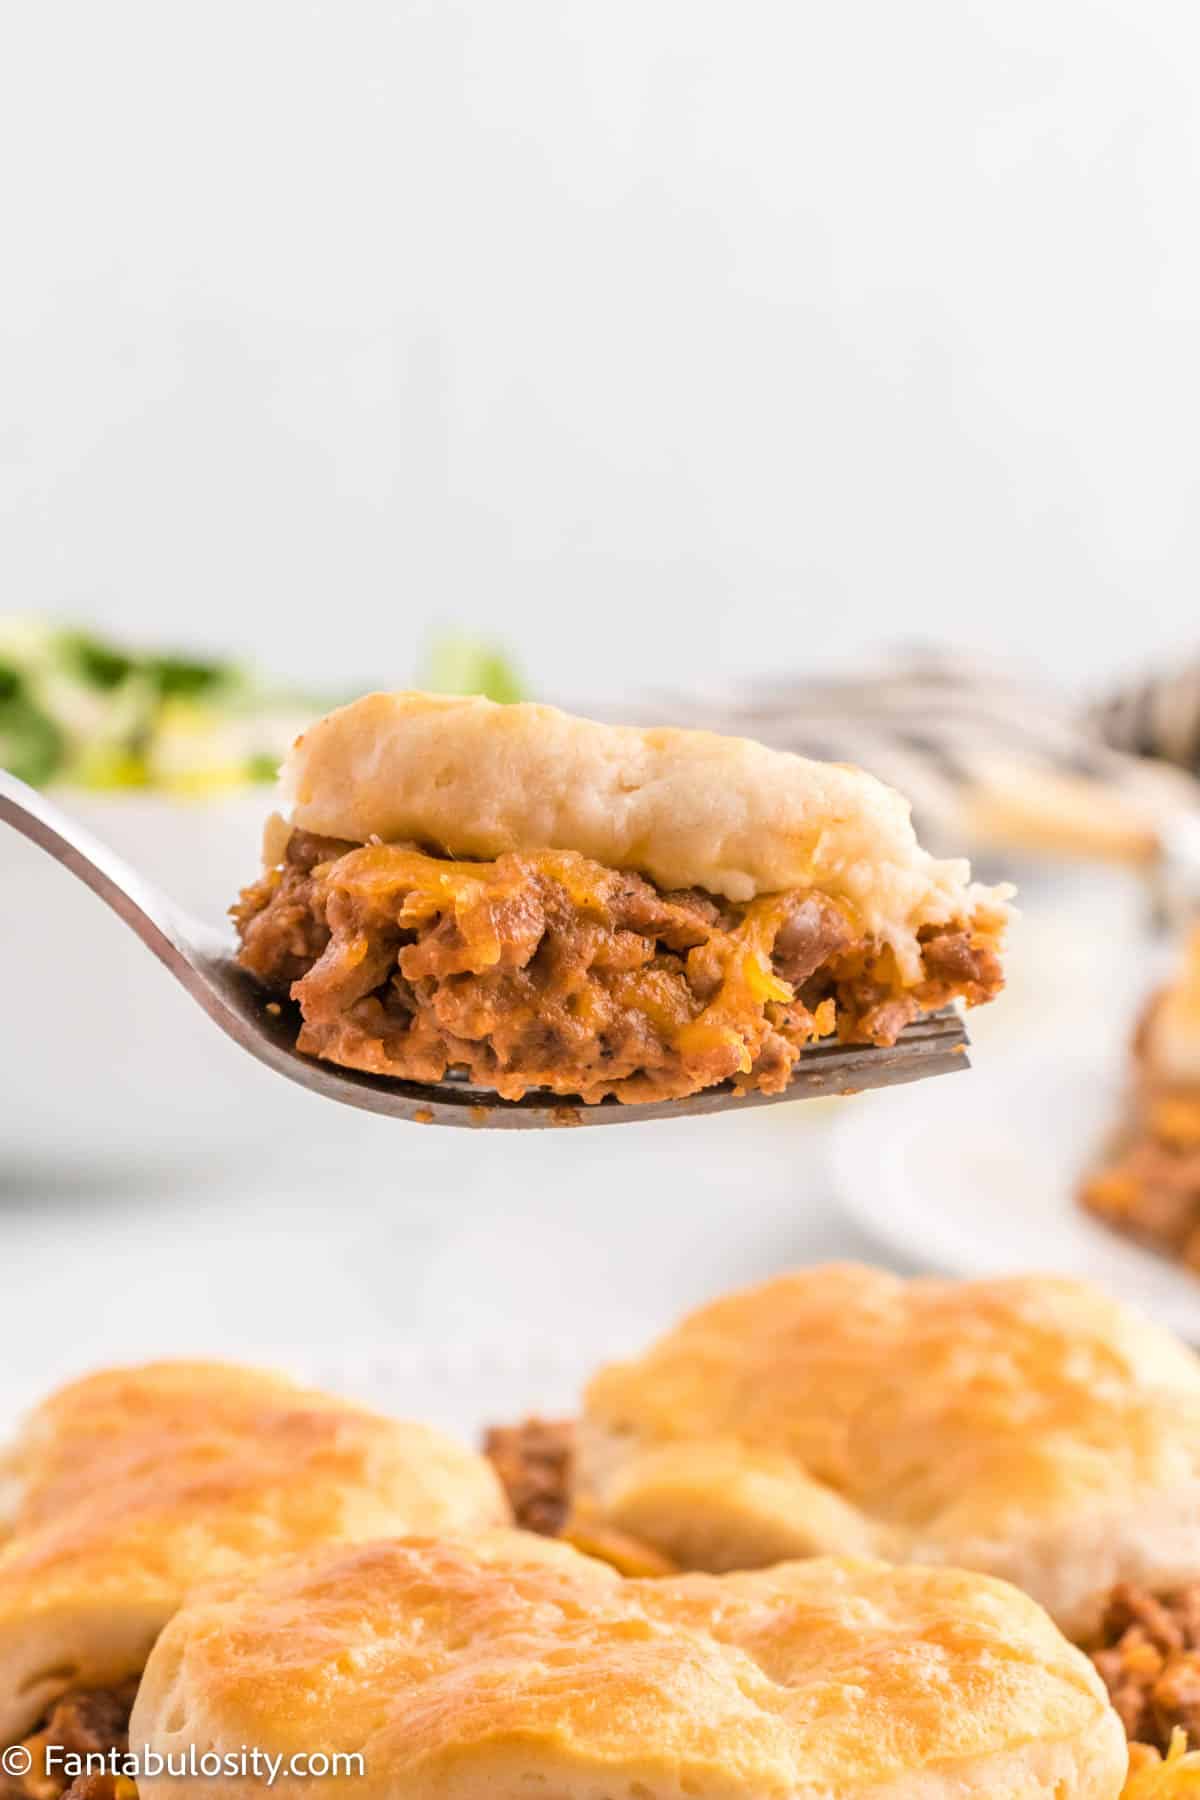
    Fork full of a bite of cheeseburger casserole

    Storage

    STORAGE: Store in an airtight container in the refrigerator for up to three days.

    Expert Tips and FAQs

    What else to add to cheeseburger casserole? (bacon, etc.)

    This is not only a great recipe because it’s delicious but also because it’s so flexible! You can mix in basically anything you like to make this casserole exactly how your entire family wants it to be.

    – Cook up some chopped bacon with the ground beef if you like.
    – Add in some vegetables or cauliflower rice to give it a nutritional boost.
    – Mix in some red pepper flakes or chili powder to give it a kick. – If you aren’t on a keto diet, you could boil some elbow macaroni in a large pot of salted water, drain it and add it to the meat mixture, too!

    Can you freeze cheeseburger casserole?

    Yes, you sure can. The only change we would make is to be sure you put this in a freezer safe container. We would suggest an aluminum 9×13 pan if you are going to freeze it.

    When you are ready to cook it, let the casserole thaw in the fridge for 24 hours and then cook according to the recipe instructions.

    How many biscuits do I need, and why split them?

    You’ll use 6 biscuits, split in half to make 12 thin rounds. Splitting them helps the topping cook all the way through instead of staying doughy underneath. Biscuit cans come in different counts, so if yours has a couple extras, just save them for another meal.

    What to Serve with Cheeseburger Casserole

    Wondering what to serve with cheeseburger casserole? We think it would go great with our easy side salad (there’s a secret that makes this one THE BEST one ever)!

    Or, you can serve this with crack green beans and candied carrots.

    Related Recipes

    If you’re looking for more easy dinner recipes check out our other ground beef recipes like this homemade hamburger helper in the instant pot or this 30 minute taco pasta recipe! Or, similar ingredients come together to make a creamy stovetop dinner in this hamburger mac and cheese!

    Recipe

    Cheeseburger Casserole
    Print Pin
    4.96 from 22 votes

    Cheeseburger Casserole

    Cheeseburger Casserole: This easy cheeseburger casserole recipe is the perfect busy weeknight meal. Ground beef, spices, and cheese are topped with biscuits to create a hearty casserole that the whole family will love!
    Course Main Course
    Cuisine American
    Prep Time 20 minutes minutes
    Cook Time 15 minutes minutes
    Total Time 35 minutes minutes
    Servings 8 servings
    Calories 707kcal
    Author Jessica Burgess

    Ingredients

    • 2 pounds ground beef
    • ⅔ cup ketchup
    • 2 teaspoons onion powder
    • ½ teaspoon garlic powder
    • ½ teaspoon black pepper
    • 3 cups cheddar cheese shredded and divided
    • 1 can refrigerated biscuits like Pillsbury Grands
    • 1 tablespoon salted butter melted

    Instructions

    • Heat oven to 425° F. Grease a 9×13 casserole dish or spray it with cooking spray.
    • Brown ground beef in a large skillet over medium-high heat (breaking it up as you go) until no longer pink; drain off fat. If you are using extra-lean ground beef (or turkey), you can put a bit of olive oil in the pan to keep it from sticking.
    • Add ketchup, onion powder, garlic powder, ½ teaspoon pepper, and 2 cups of shredded cheese. Stir well to combine. 
    • Scoop mix into the prepared 9×13" baking dish and spread evenly. Top beef mixture with remaining one cup of cheese. 
    • Split 6 biscuits in half through the middle so you've got 12 thin rounds. Splitting them keeps the biscuit layer from staying doughy underneath. Lay the tops and bottoms over the casserole in a single layer, covering as much as you can. If your can came with extras, set them aside for another use.
    • Arrange biscuits on top of the casserole (should fit 12 biscuits).
    • Bake for 10 to 15 minutes or until biscuits are golden brown and cooked through. 
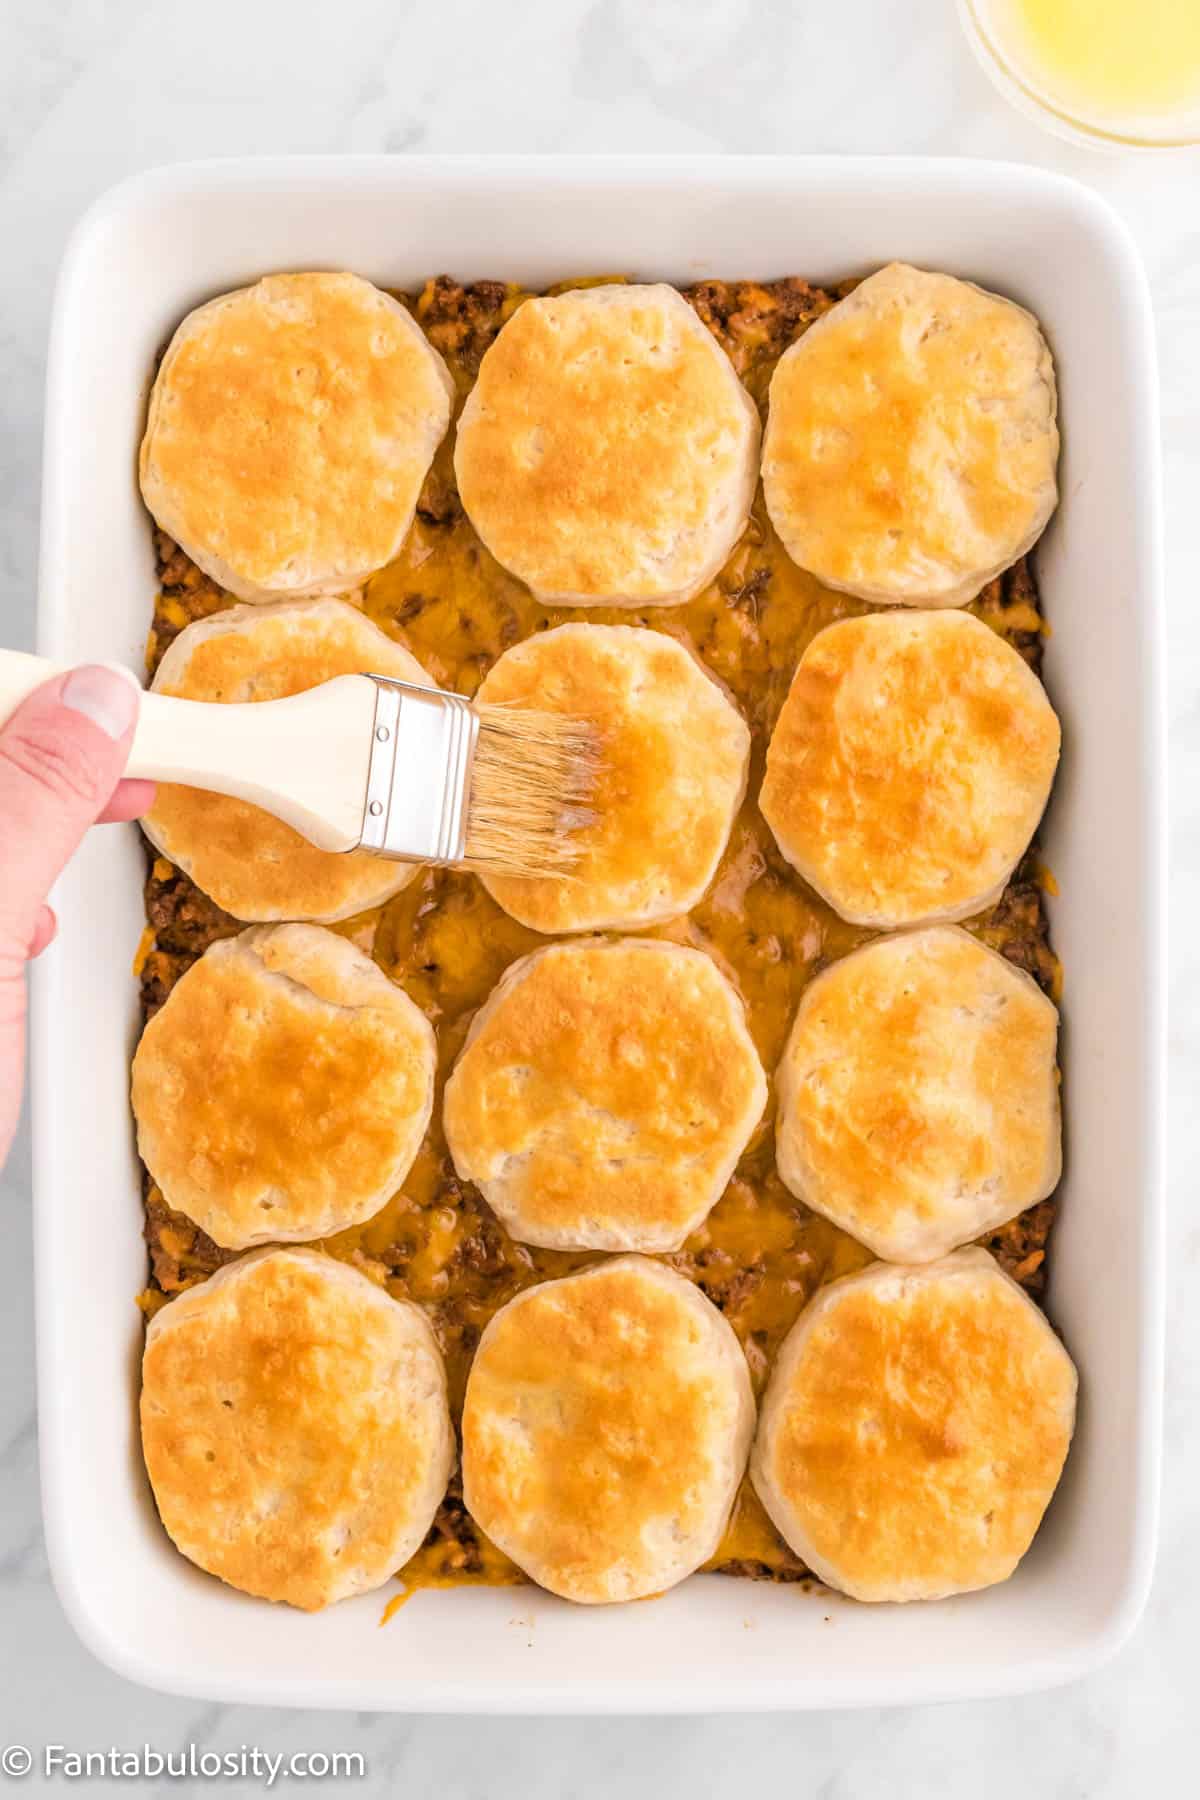
    • Brush melted butter on top of the biscuits and serve.

    Notes

    STORAGE: Store in an airtight container in the refrigerator for up to three days.
    You can freeze this casserole, too! Assemble it in a freezer safe container, cover it with foil and label it. When you are ready to cook it, let the casserole thaw in the fridge for 24 hours and then cook according to the recipe instructions.

    Nutrition

    Serving: 1serving | Calories: 707kcal | Carbohydrates: 34g | Protein: 34g | Fat: 48g | Saturated Fat: 20g | Polyunsaturated Fat: 5g | Monounsaturated Fat: 18g | Trans Fat: 1g | Cholesterol: 129mg | Sodium: 1078mg | Potassium: 549mg | Fiber: 1g | Sugar: 7g | Vitamin A: 573IU | Vitamin C: 1mg | Calcium: 360mg | Iron: 5mg

    Lucky Charms Pancakes

    February 8, 2022

    lucky charms pancakes

    Lucky Charms Pancakes: Add some of your favorite cereal to pancakes to add fun flavor and color, especially with this optional white chocolate syrup!

    Pancakes may just be one of our favorite breakfast recipes around here and adding one of our favorite cereals to it, takes them to a whole new level; like when we added Oreos in pancakes!

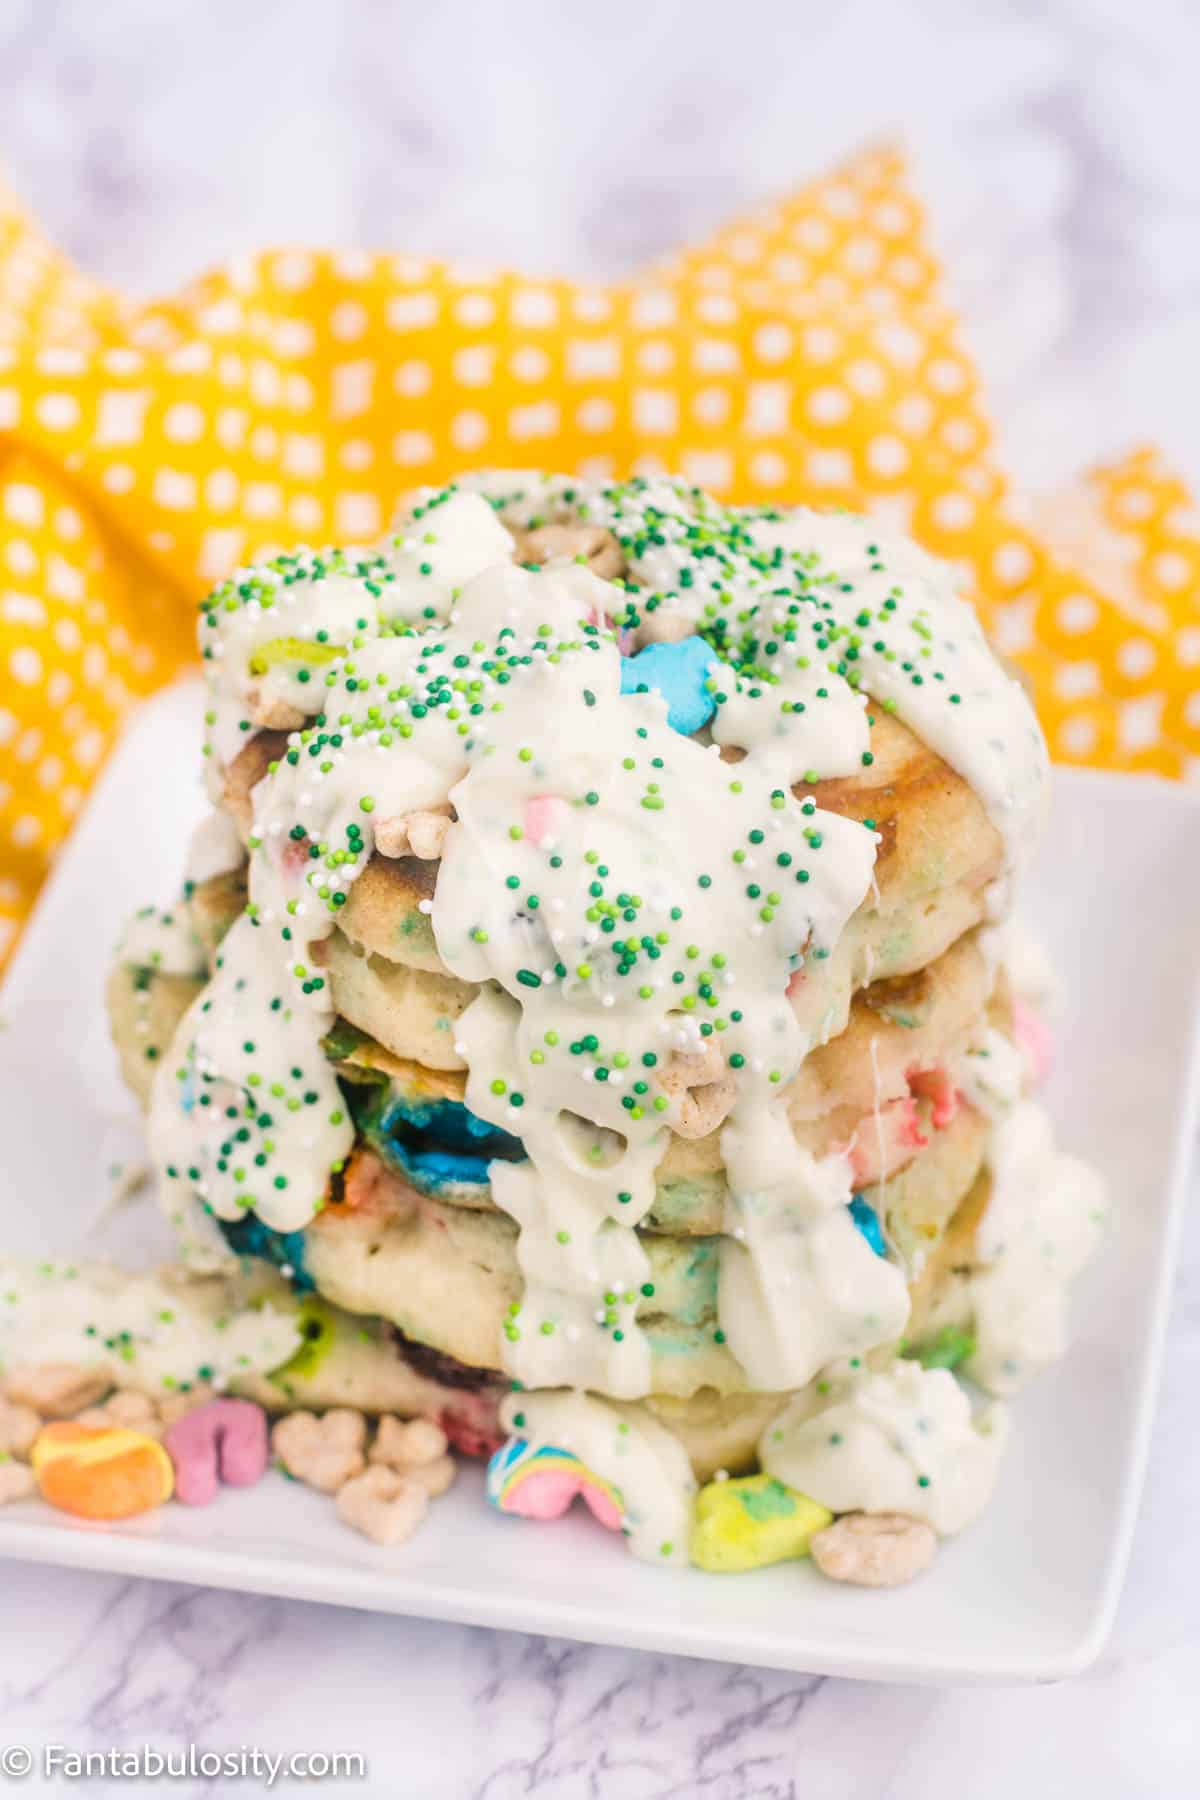
    stacked lucky charms pancakes with chocolate syrup
    Lucky Charms Pancakes

    Why You’ll Love This Recipe

    Lucky Charms pancakes are fun any time of year but they’re especially fun for St. Patrick’s Day! We love making those on the morning of and these Lucky Charms treats in the afternoon!

    If desired, you can also drop a little green food coloring in your pancake batter, to make green pancakes for the holiday if you like! (Remember, a little goes a long way!)

    [feast_advanced_jump_to]

    Ingredients

    We like to keep things easy around here, so we give two options for making the pancake batter, so you can pick which one is best for you!

    • pancake batter – see notes below
    • Lucky Charms cereal (you can use the leftovers for this Luck of the Irish Charcuterie!)
    • butter
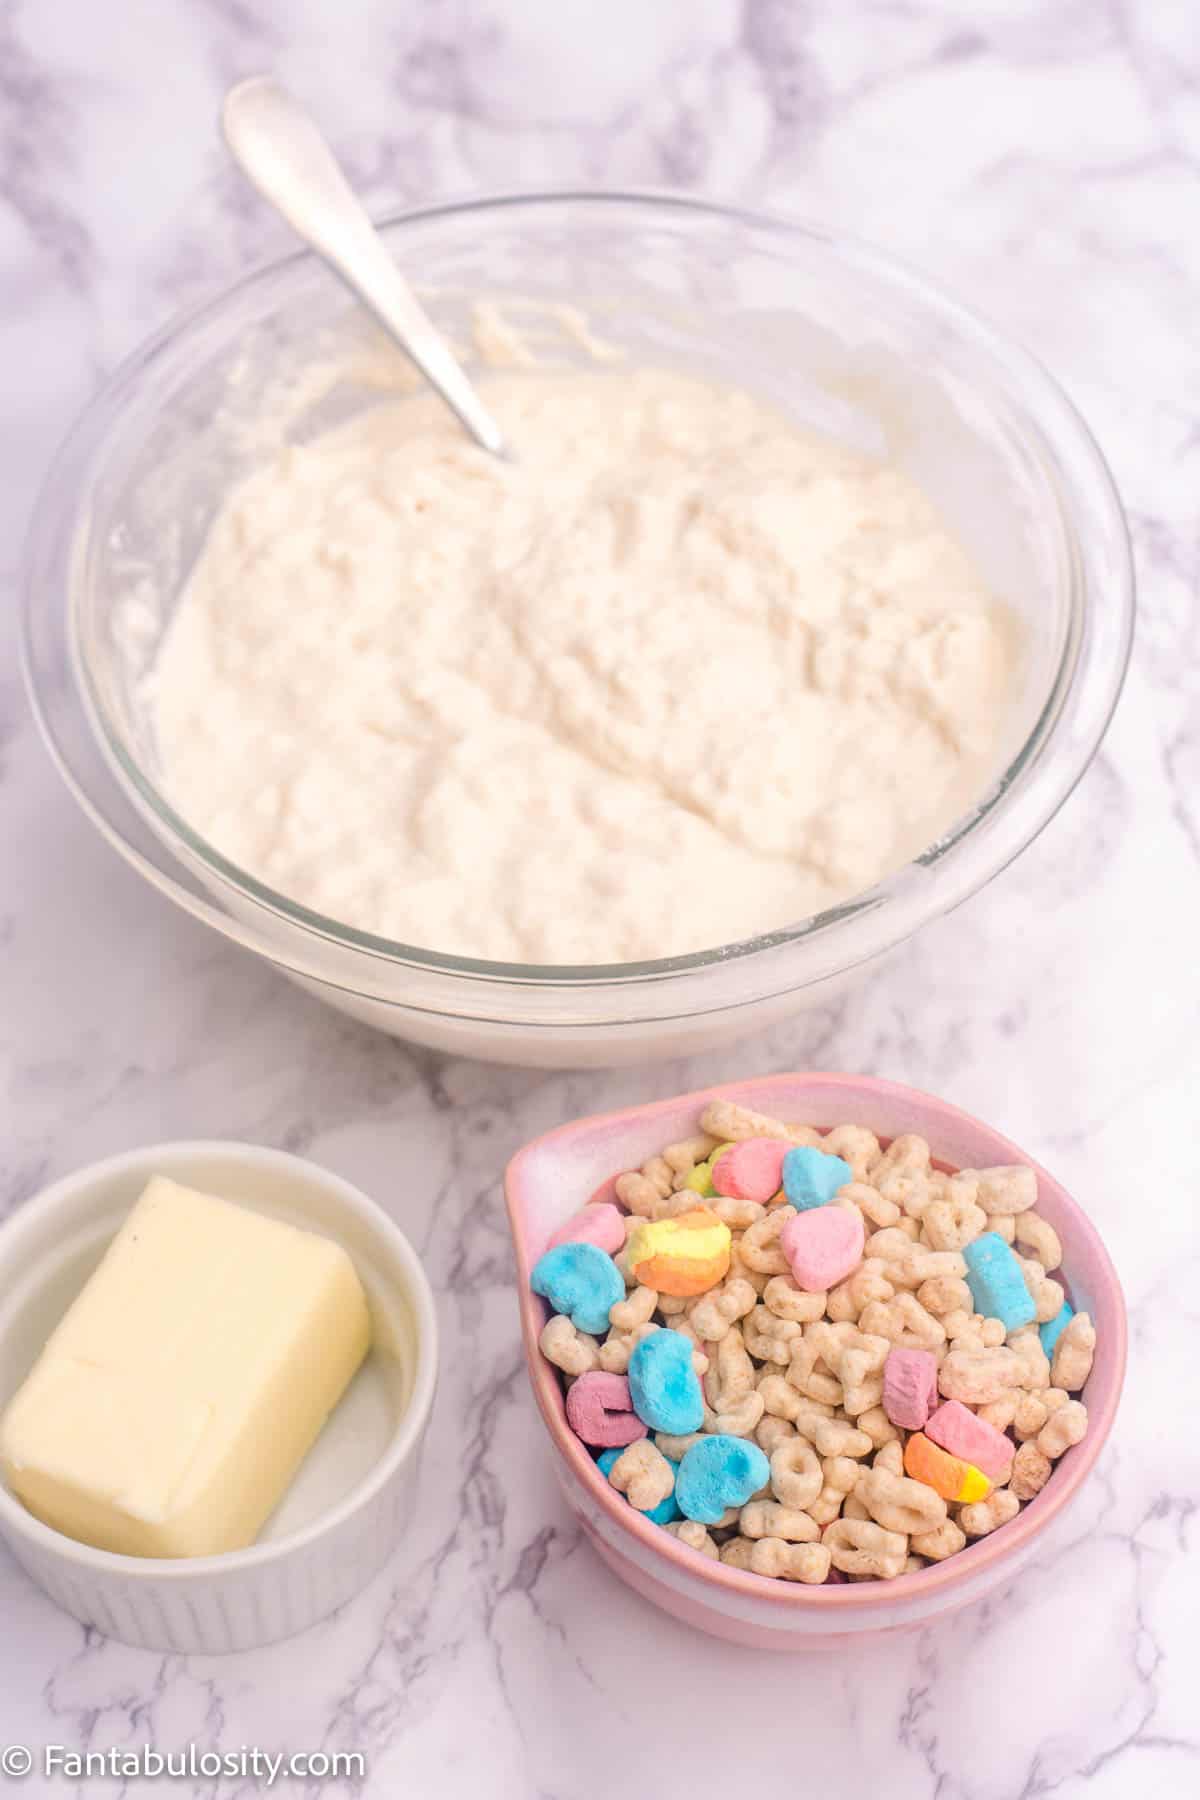
    Ingredients for Lucky Charms pancakes

    See the full recipe card for quantities and full instructions.

    Homemade Pancake Batter or Pancake Mix

    You can either make your pancake batter from scratch for a homemade pancake experience, using my favorite fluffy pancakes recipe (up until the point before cooking them) or you can use a pancake mix and make the batter according to package directions! For pancakes from scratch pancakes, you’ll need:

    • 1-½ cups all purpose flour
    • 3-½ teaspoon baking powder
    • 3 tablespoon sugar
    • 1-¼ cups whole milk or buttermilk for buttermilk pancakes (Or almond milk pancakes!)
    • 1 egg
    • 3 tablespoon melted salted butter
    • 1 teaspoon vanilla extract

    For pancake mix, my favorite is Krusteaz pancake mix, as it gives a fluffy texture and a flavor, close to that homemade pancake we all love! Plus, it only requires water, and that means it uses way fewer ingredients than a from-scratch recipe.

    No matter which way you choose to make your pancake batter, this is where the fun comes in, to make the lucky charms pancakes!

    Instructions:

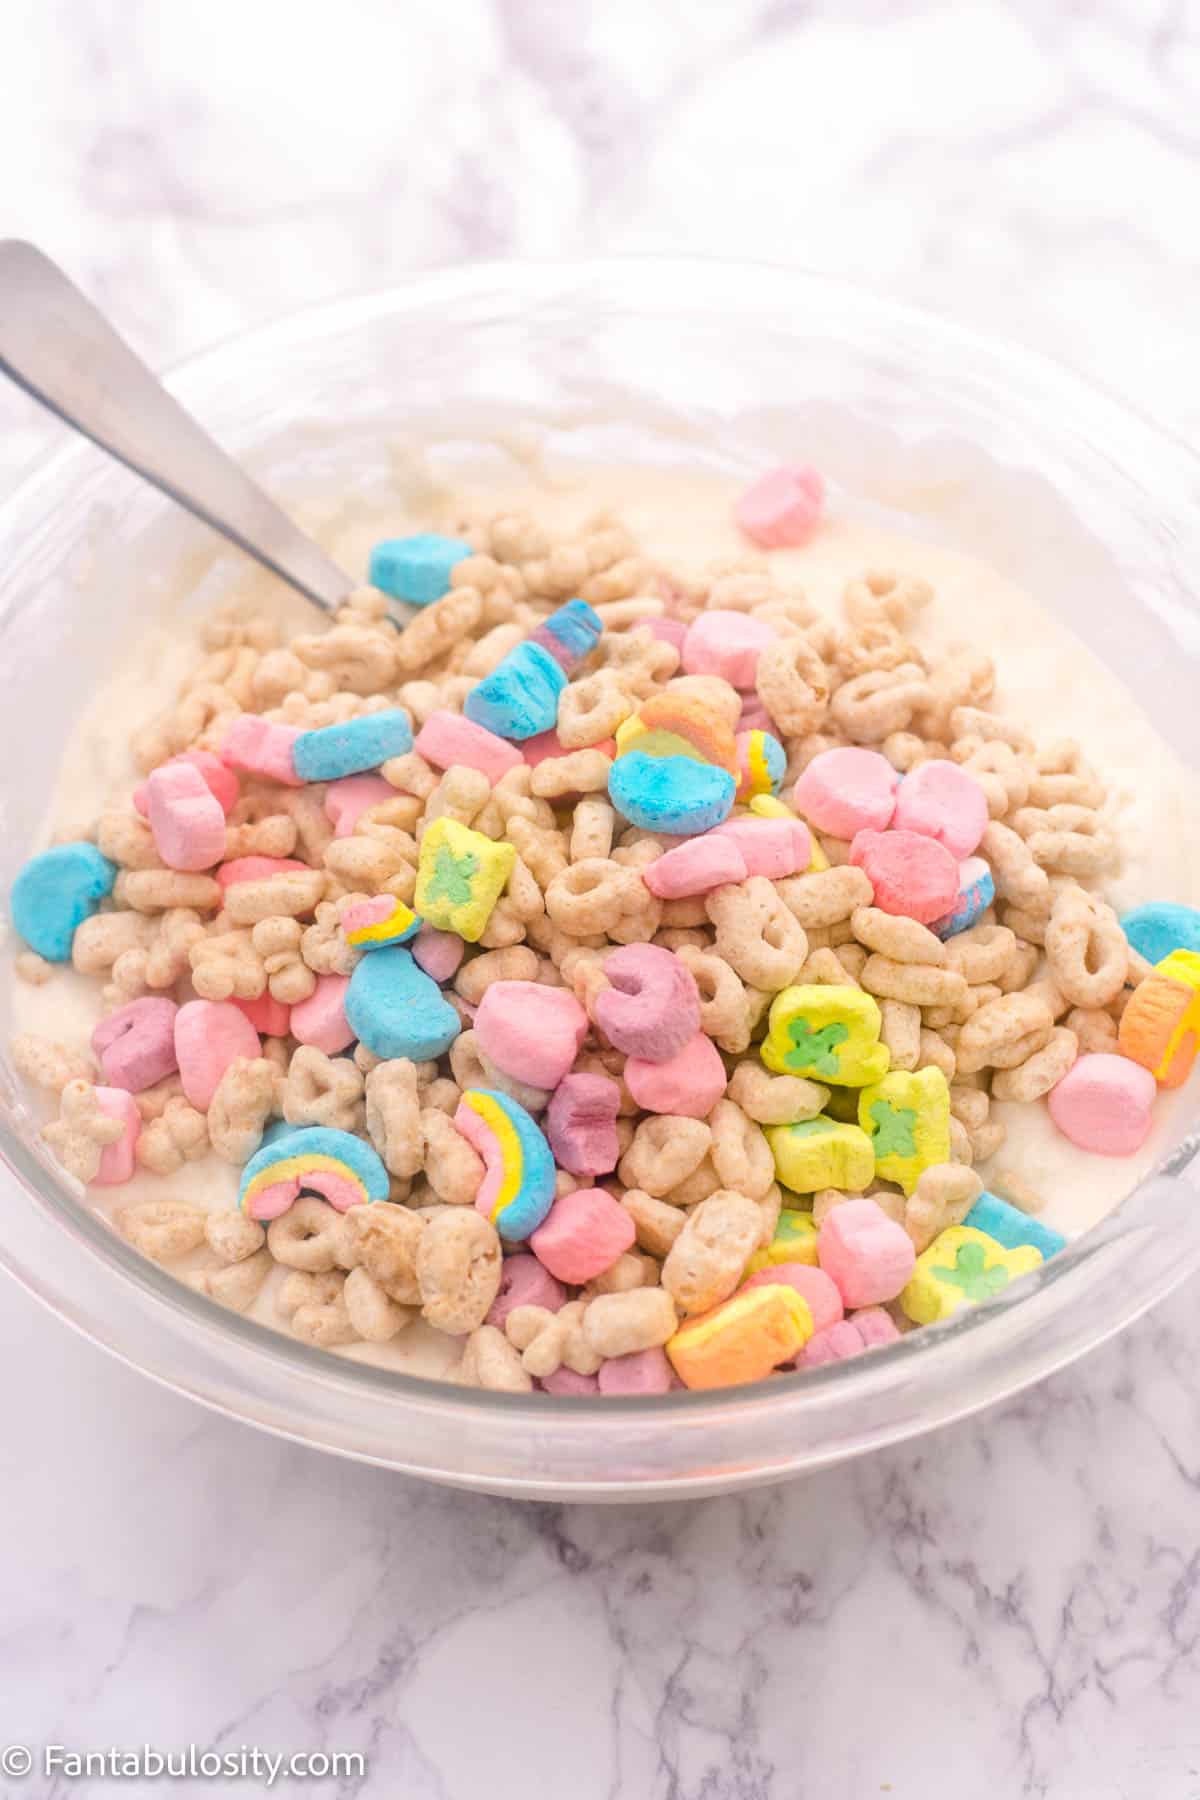
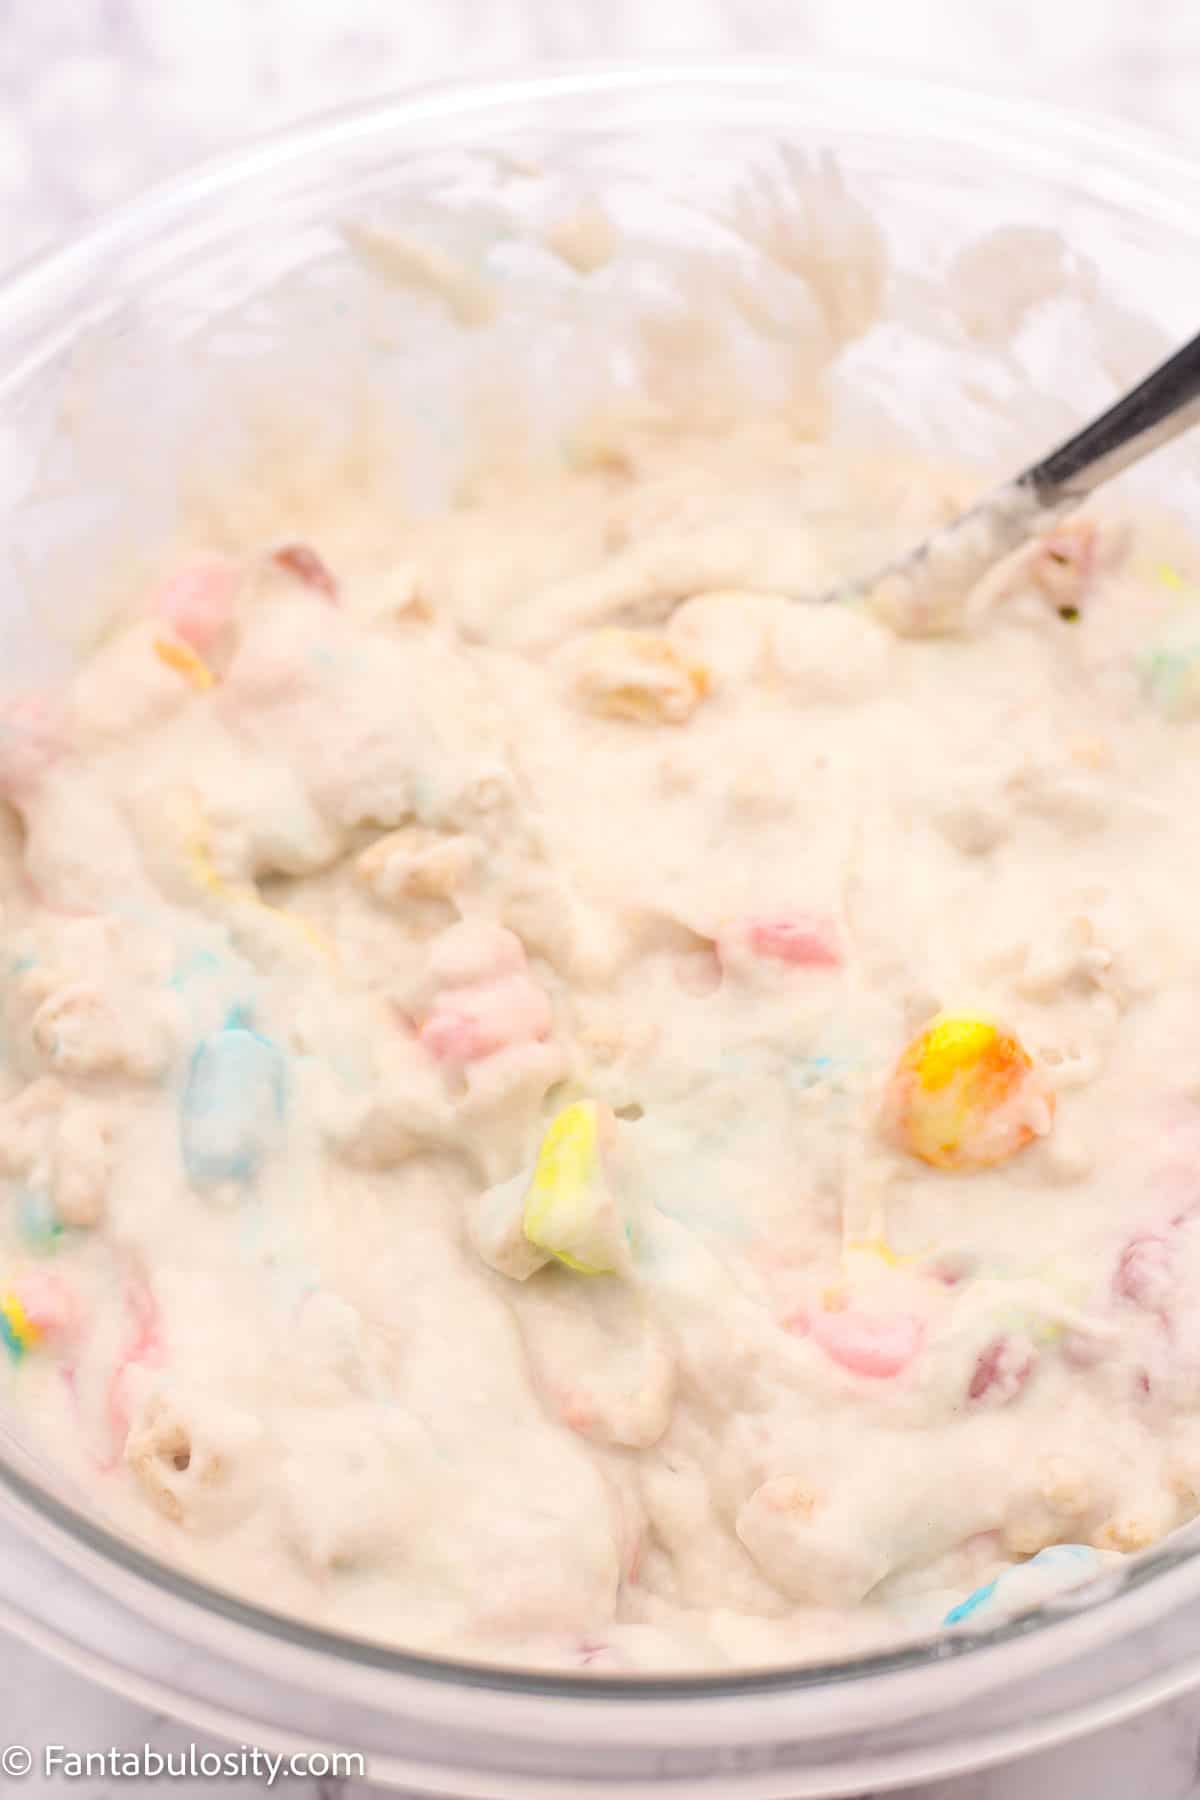
    1. After you’ve mixed together your pancake batter in a large bowl, pour in 1 cup of Lucky Charms and mix together with a spoon. (You don’t want to over-mix the batter, as it can make flat pancakes.)
    Add in Lucky Charms to pancake batter
    Pour 1 cup of Lucky Charms in to batter
    Pancake batter in bowl with Lucky Charms cereal
    Batter mixed with cereal
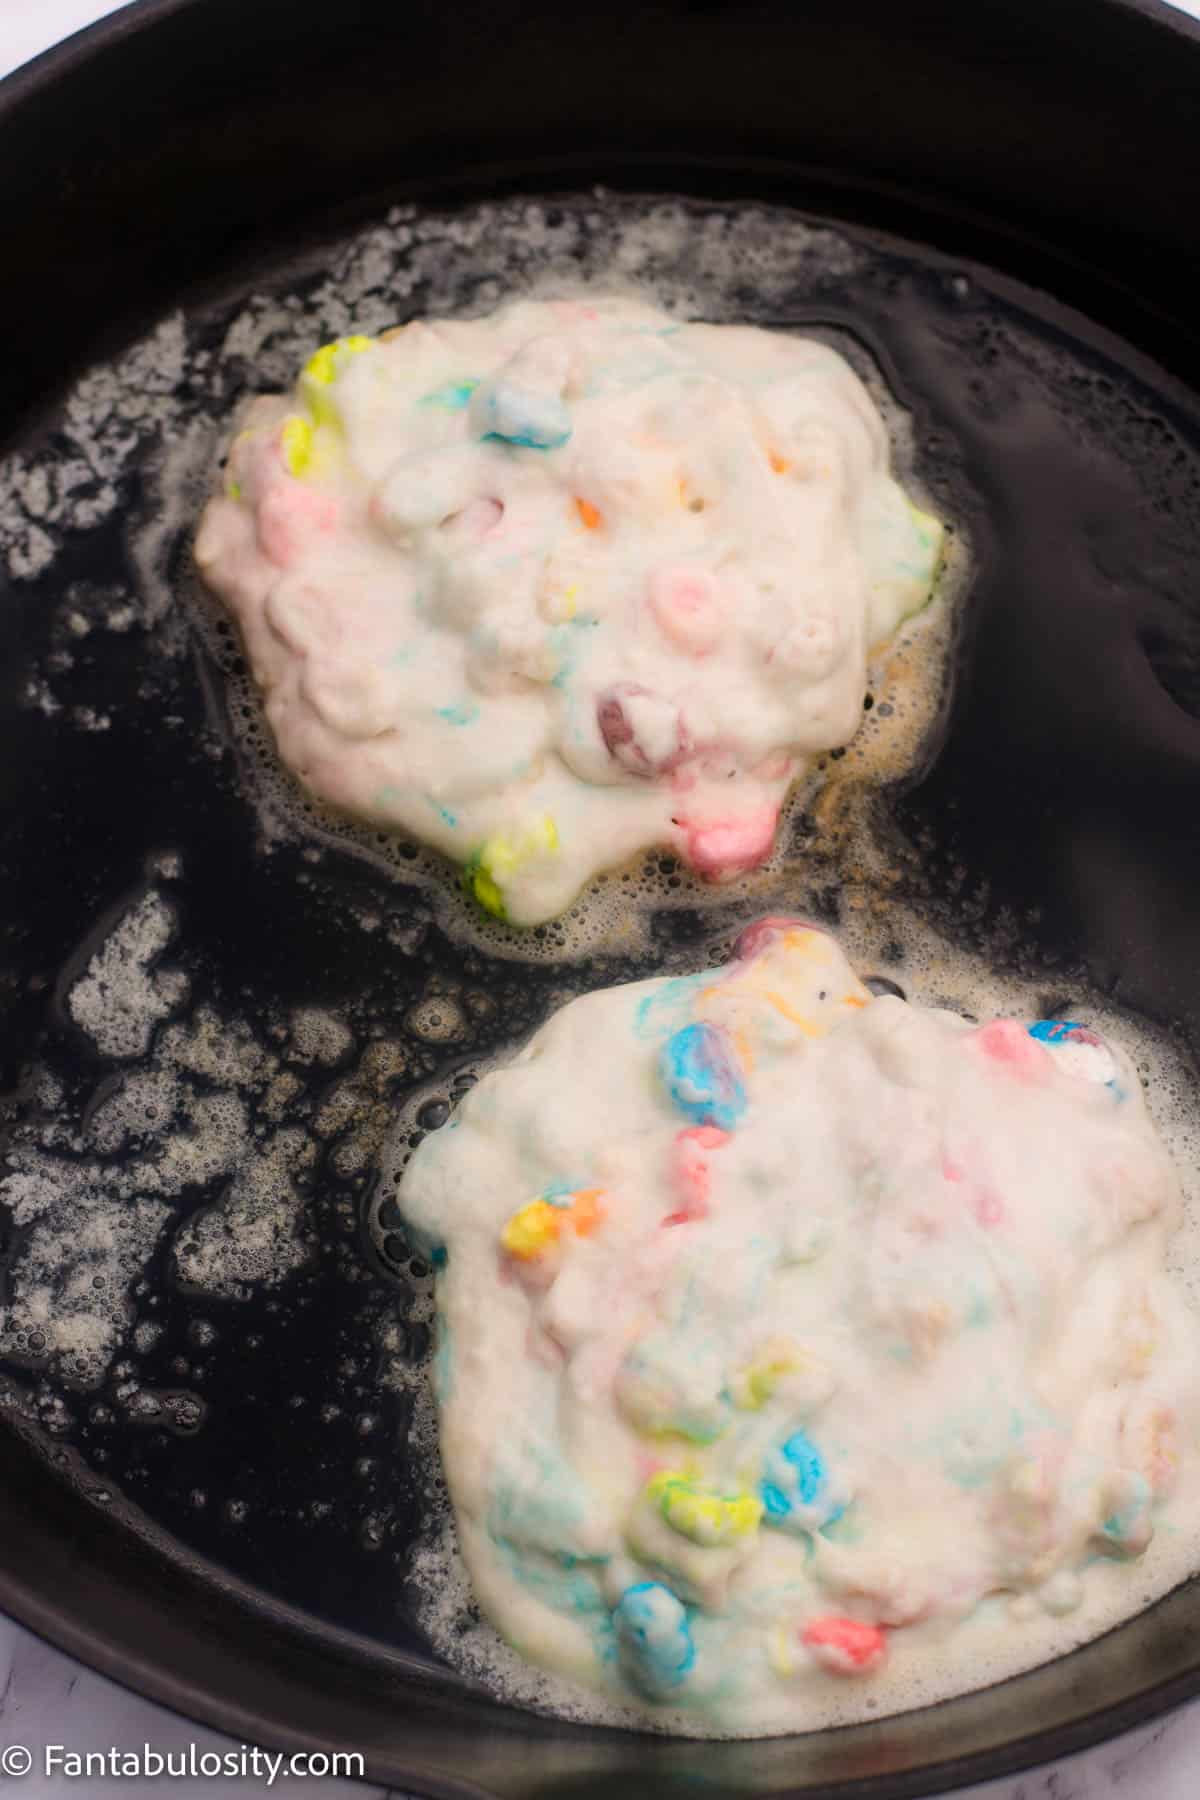
    1. In a frying pan, or on a hot griddle, melt butter over low-medium heat
    2. Next, scoop out a portion of pancake batter to pour on to the melted butter. (I like to use an ice cream scoop and scoop out about a scoop and a half, for one pancake.)
    Melted butter in skillet with pancakes cooking
    Lucky Charms pancakes cooking in skillet
    1. Once small bubbles start to form on the top of the pancake batter while cooking, it’s time to flip to cook the other side.
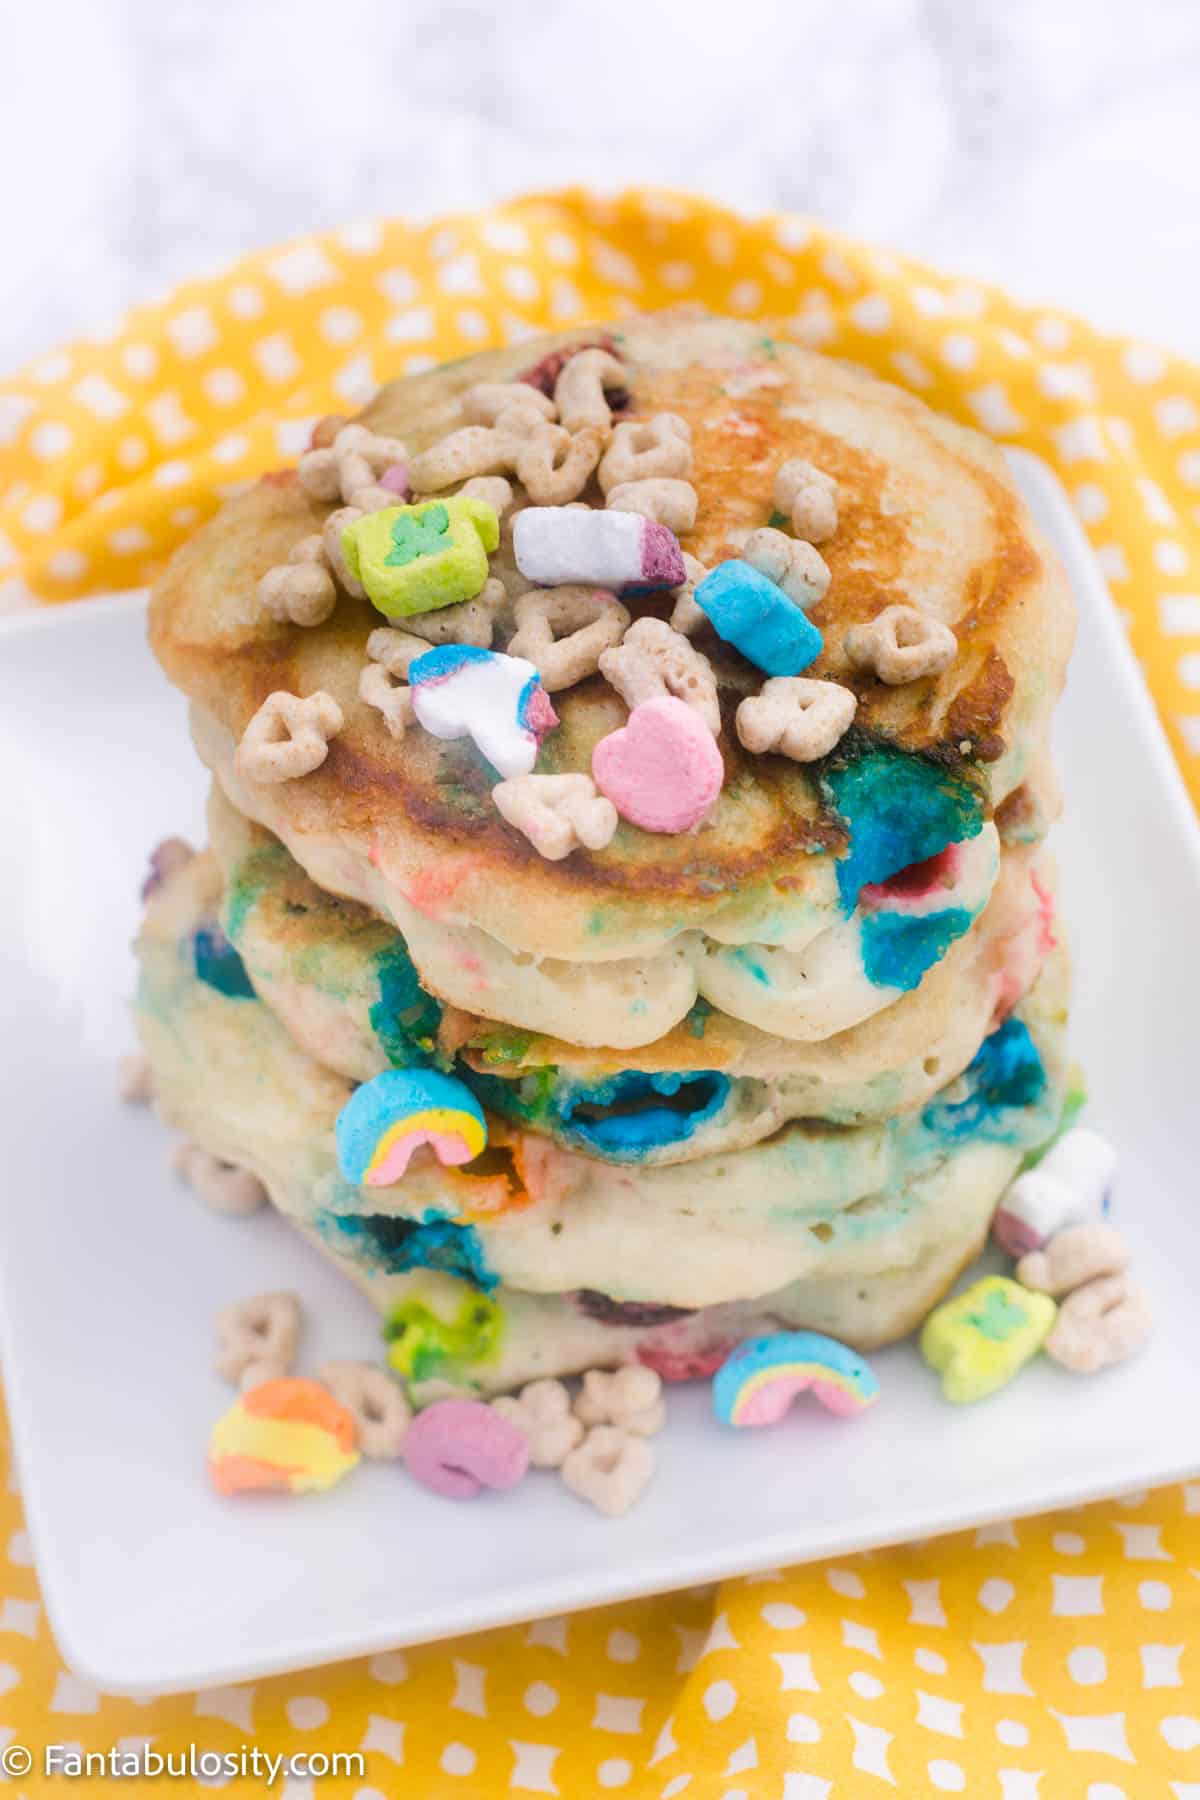
    2. When the other side has cooked (about 2-3 minutes or so) the pancakes should be removed from the pan or griddle and on to a serving tray/plate. (If you’re new to making pancakes though, it may be best to check by gently lifting up on the bottom of the pancake with a spatula, to check that the bottoms are golden brown.)
    Stacked Lucky Charms Pancakes on white plate

    Expert Tip

    If you can only make a couple of pancakes at one time, stack the cooked pancakes on top of one another, so it holds the heat in.

    White Chocolate Syrup

    You can of course stop here and use regular pancake syrup but if you’re wanting to really top off your pancakes with something fun, consider making this white chocolate “syrup” which is just melted chocolate with green sprinkles. When we made the pumpkin pancakes with white chocolate maple syrup, my world was changed so I knew it had to happen on these too!

    This is super fun for St. Patrick’s Day, and if you’re not making them for the holiday, you could even just use the white chocolate or you could add your favorite color of sprinkles in!

    How to Make White Chocolate Syrup

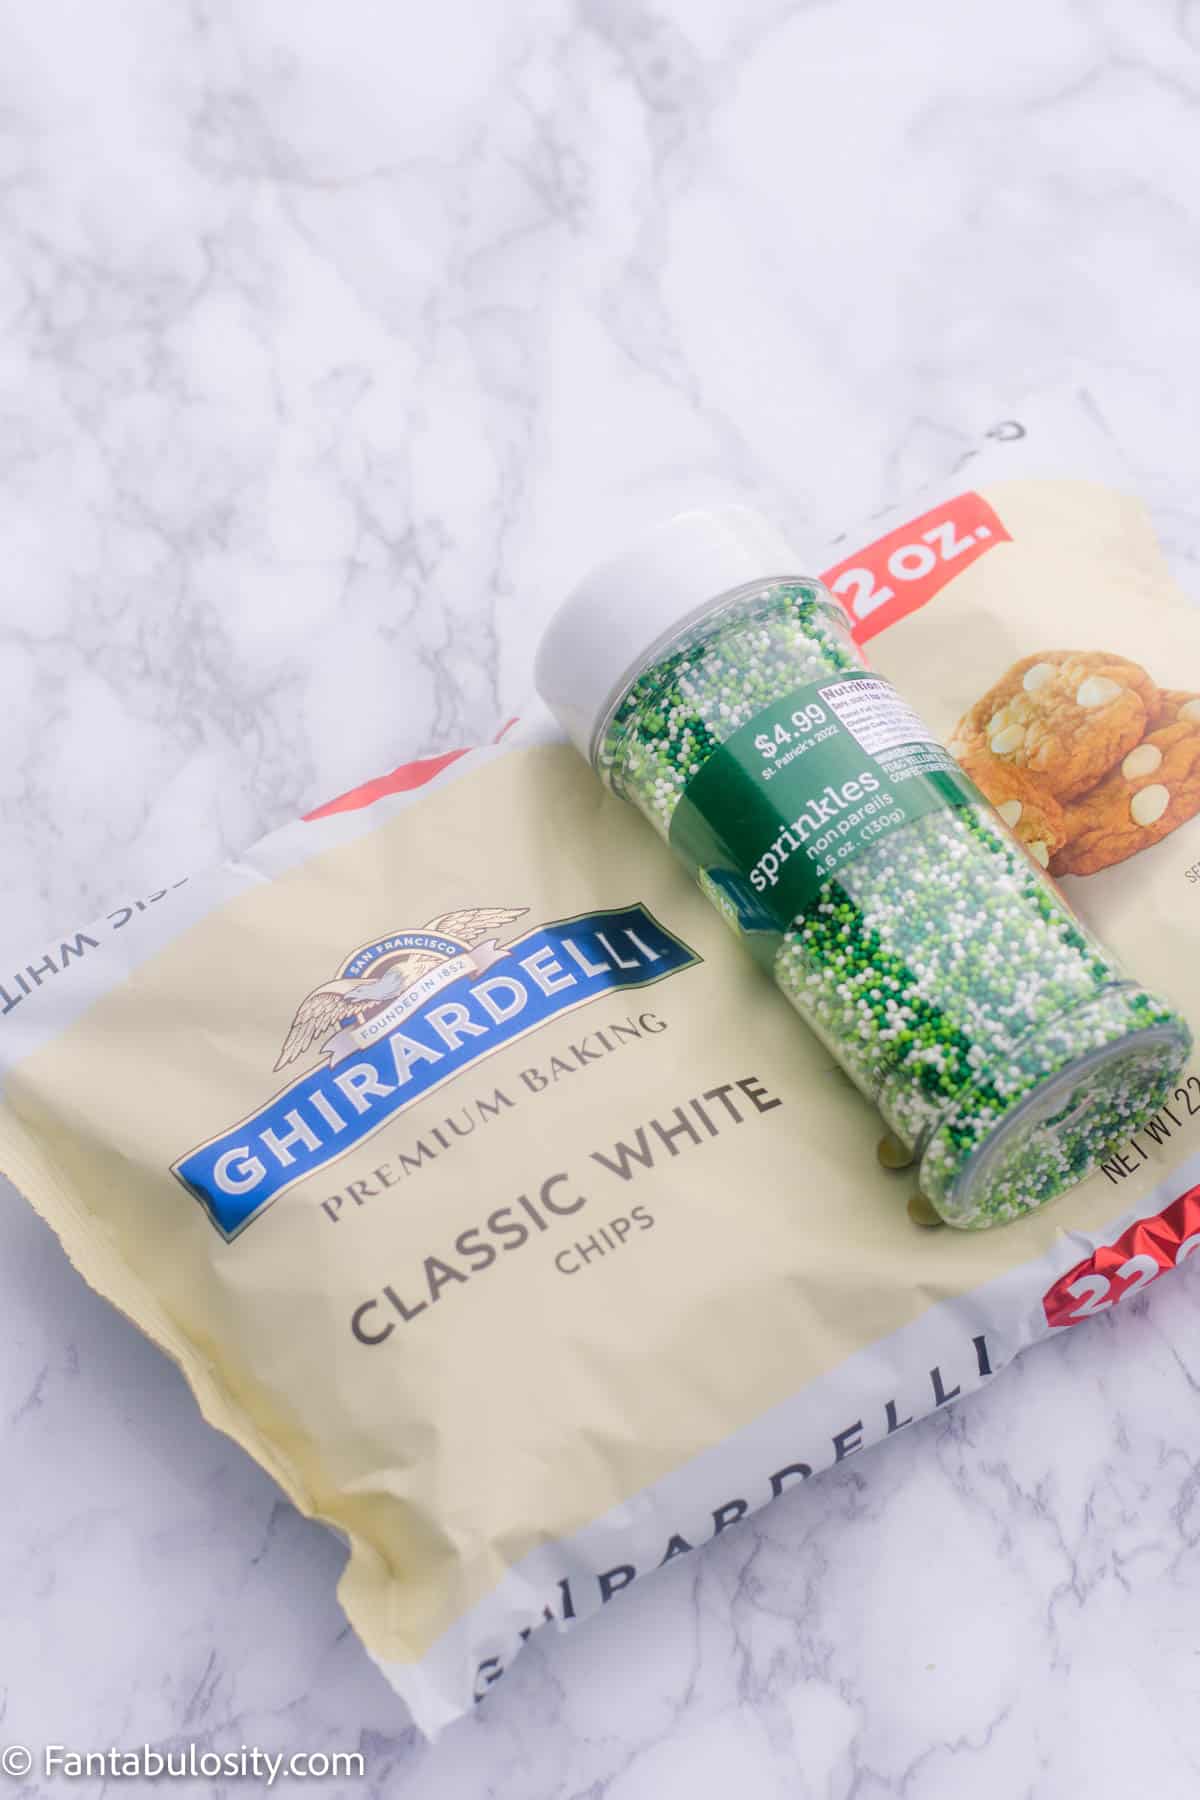
    If you’d like to make what we used, we simply melted Ghirardelli’s classic white chips and then added green sprinkles for St. Patrick’s Day.

    However, you can absolutely skip the sprinkles or even use your favorite color of sprinkles! Lucky Charms have so many fun colors so any color that’s in the cereal would be a super fun color for sprinkles too!

    white chocolate chips and green sprinkles on table
    All you need for white chocolate syrup

    Other Tested Chocolate “Syrup” Options:

    You can absolutely use your own favorite white chocolate syrup or white chocolate sauce to top these cereal pancakes.

    NOTE: I did try adding some milk to the chocolate chips to thin it out a bit but I just didn’t like the consistency. Then I realized that if you pour the melted chocolate on top of a stack of pancakes, the warmth of the pancakes with help keep the chocolate melted, and tastes absolutely incredible.

    I also tried using the Ghirardelli White Chocolate sauce and although it was tasty, it just didn’t give the bright-white “look” of the syrup that looks so tasty, paired with those green sprinkles.

    Cereal Milk Syrup

    Or, if you want to get REALLY WILD and experiment… make a bowl of Lucky Charms (with milk) and let it sit for a bit. Then, reserve the cereal milk to mix with powdered sugar to create a Lucky Charms “glaze” to use in the syrup instead. It may just give it that extra flavor we all look forward to, after eating our Lucky Charms!

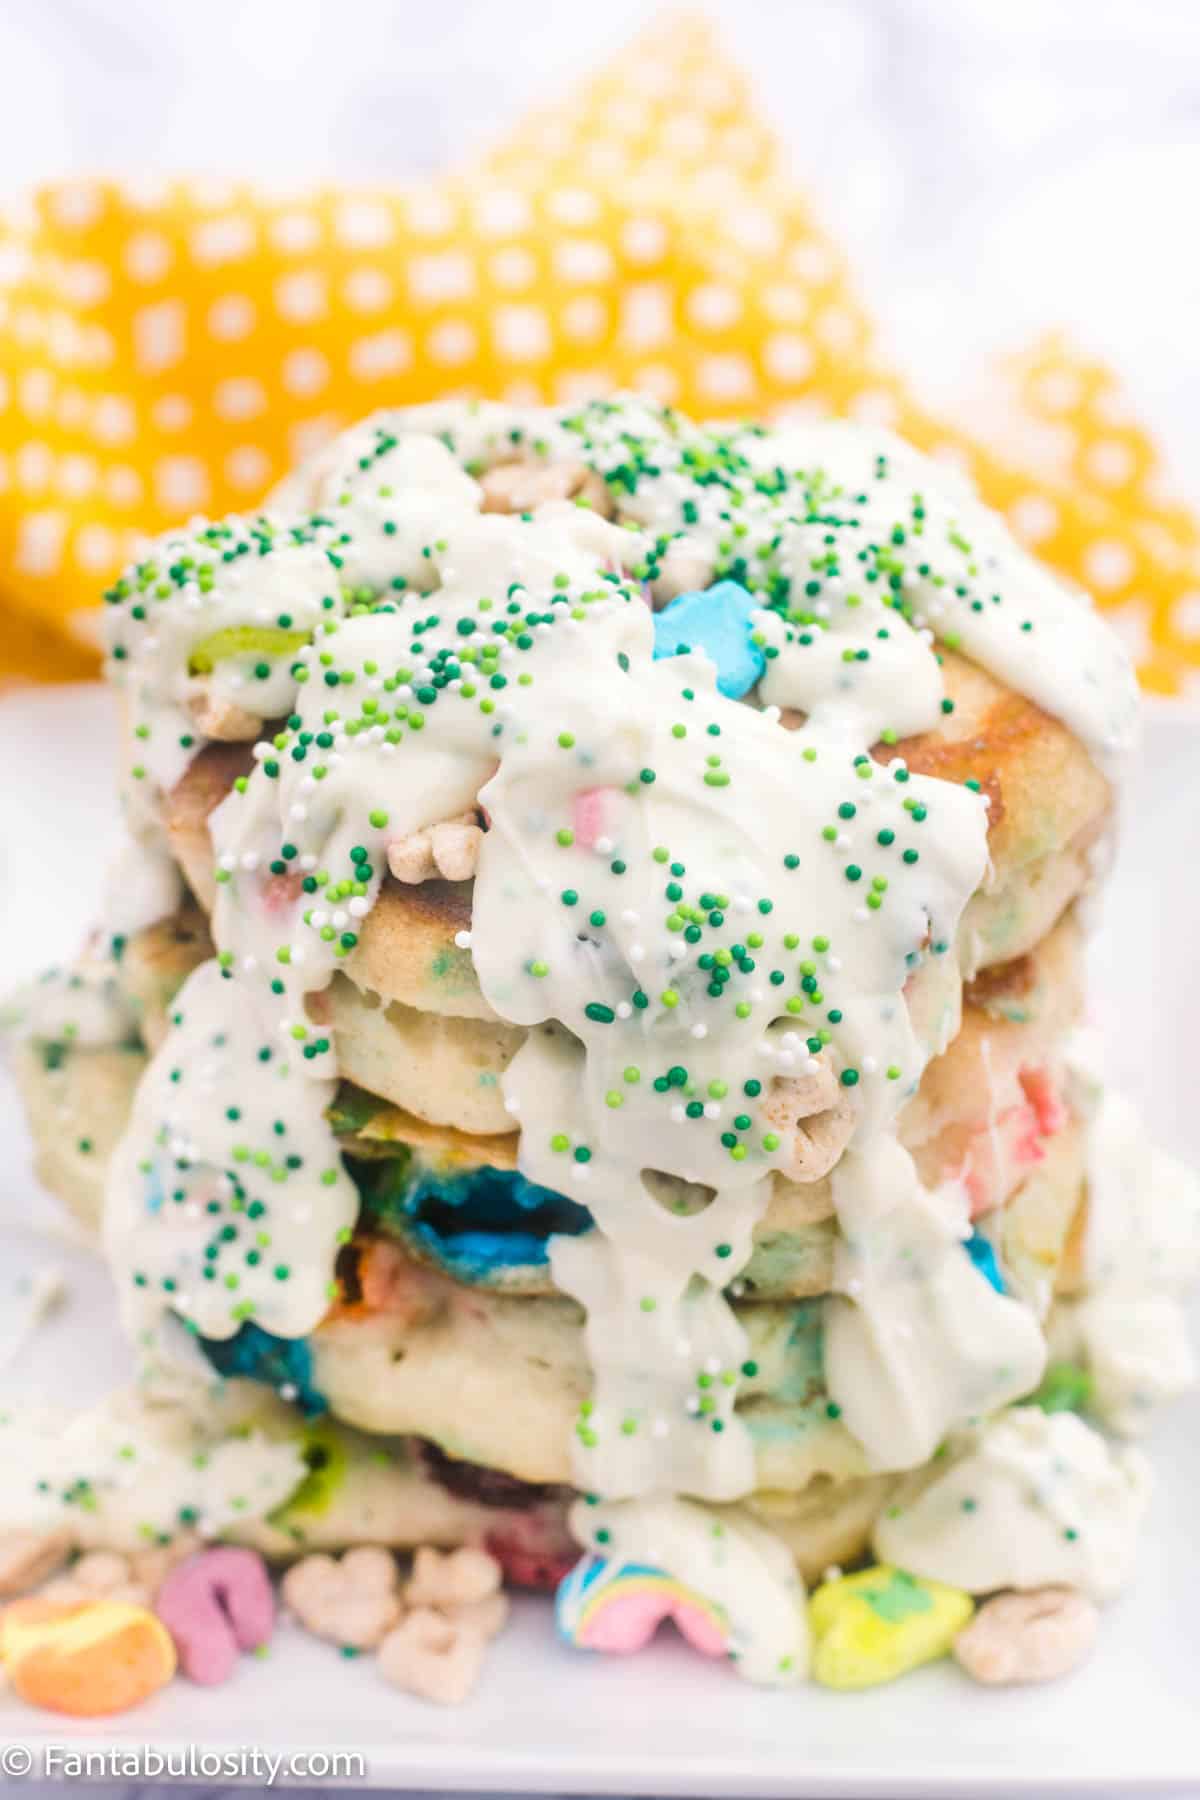
    lucky charms pancakes with white chocolate syrup
    White chocolate “syrup” on pancakes

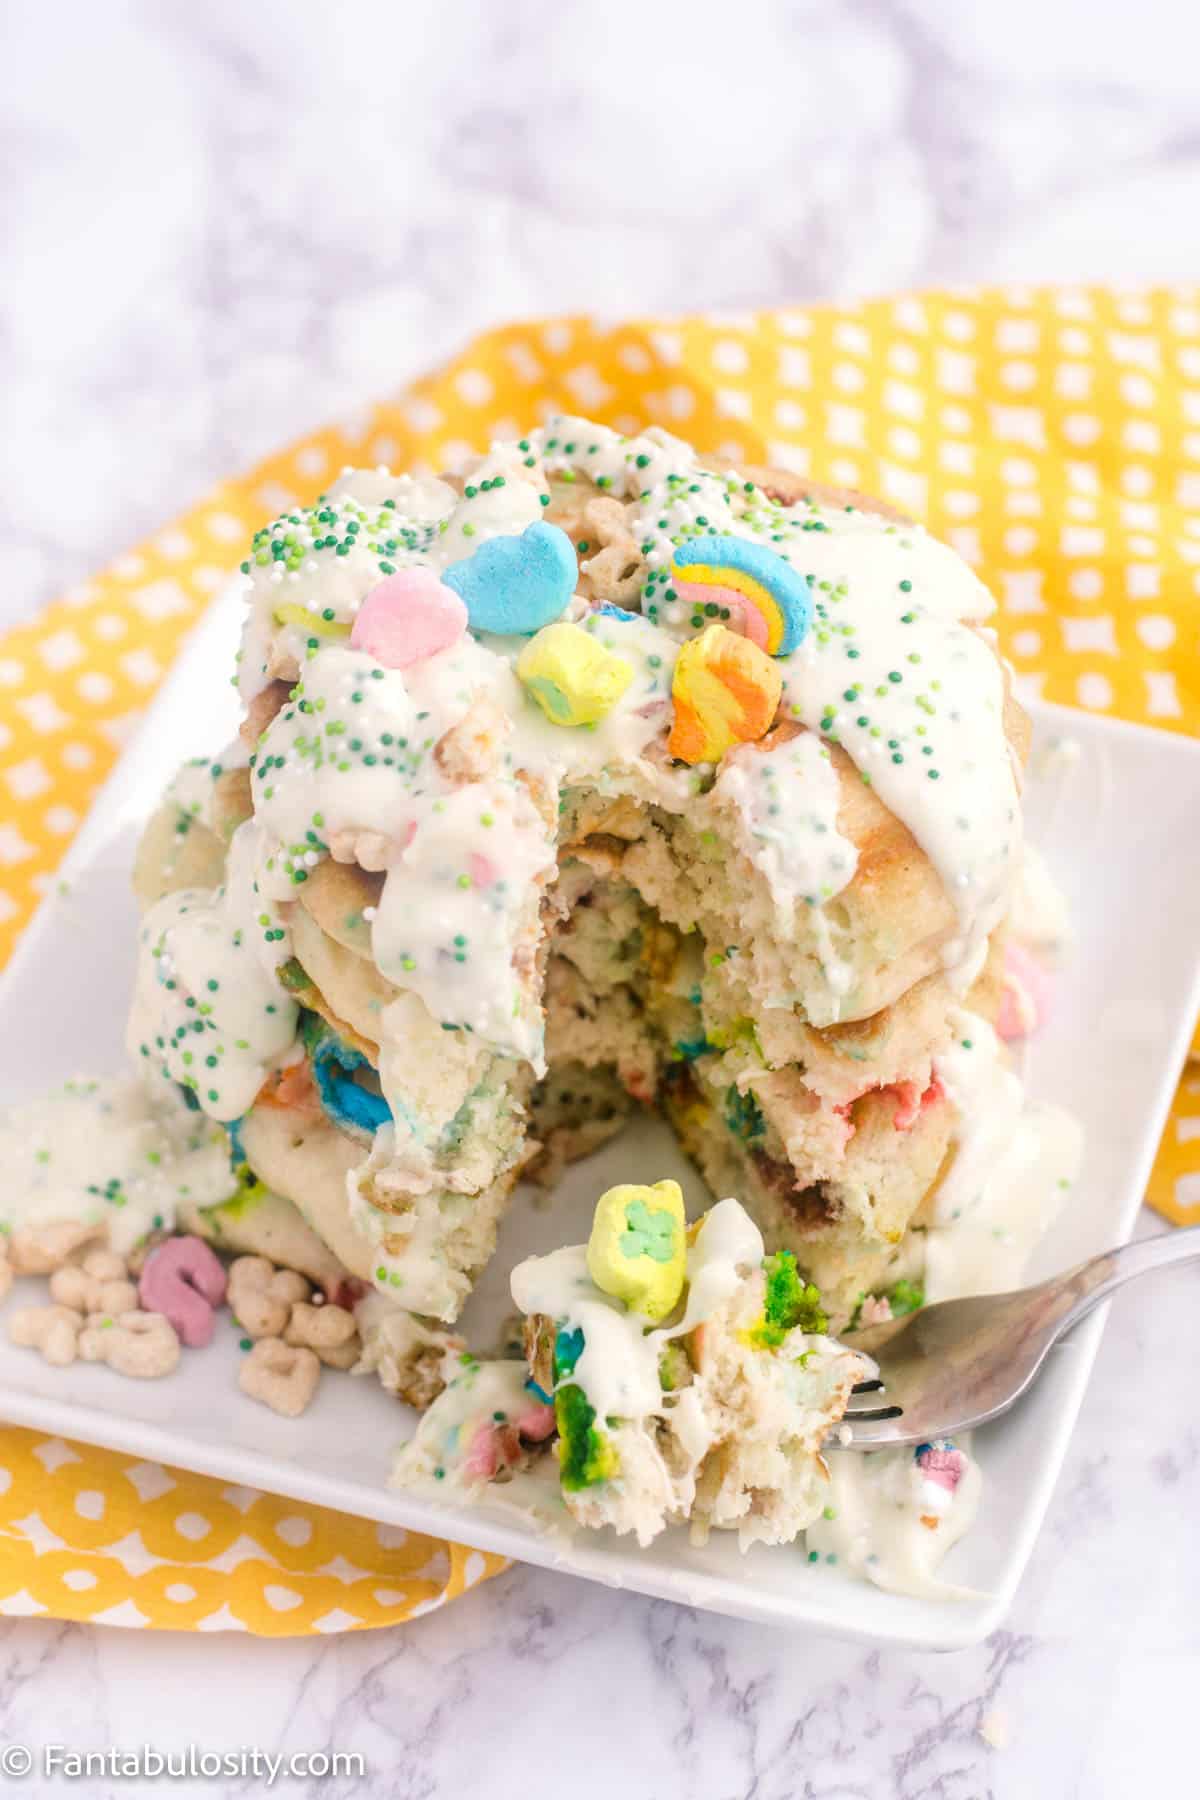
    Top pancakes with extra Lucky Charms marshmallows and cereal pieces, if desired, and serve!

    Bite taken out of stack of lucky charms pancakes
    Magically delicious flavor in every bite!

    More Topping Ideas

    Looking to add different toppings? Make sure to check out these 95+ pancake topping ideas that we have. Or here are our other specific favorite toppings for these:

    • regular mini marshmallows
    • crushed cookies
    • mix in peanut butter with the white chocolate syrup
    • cream cheese icing
    • whipped cream
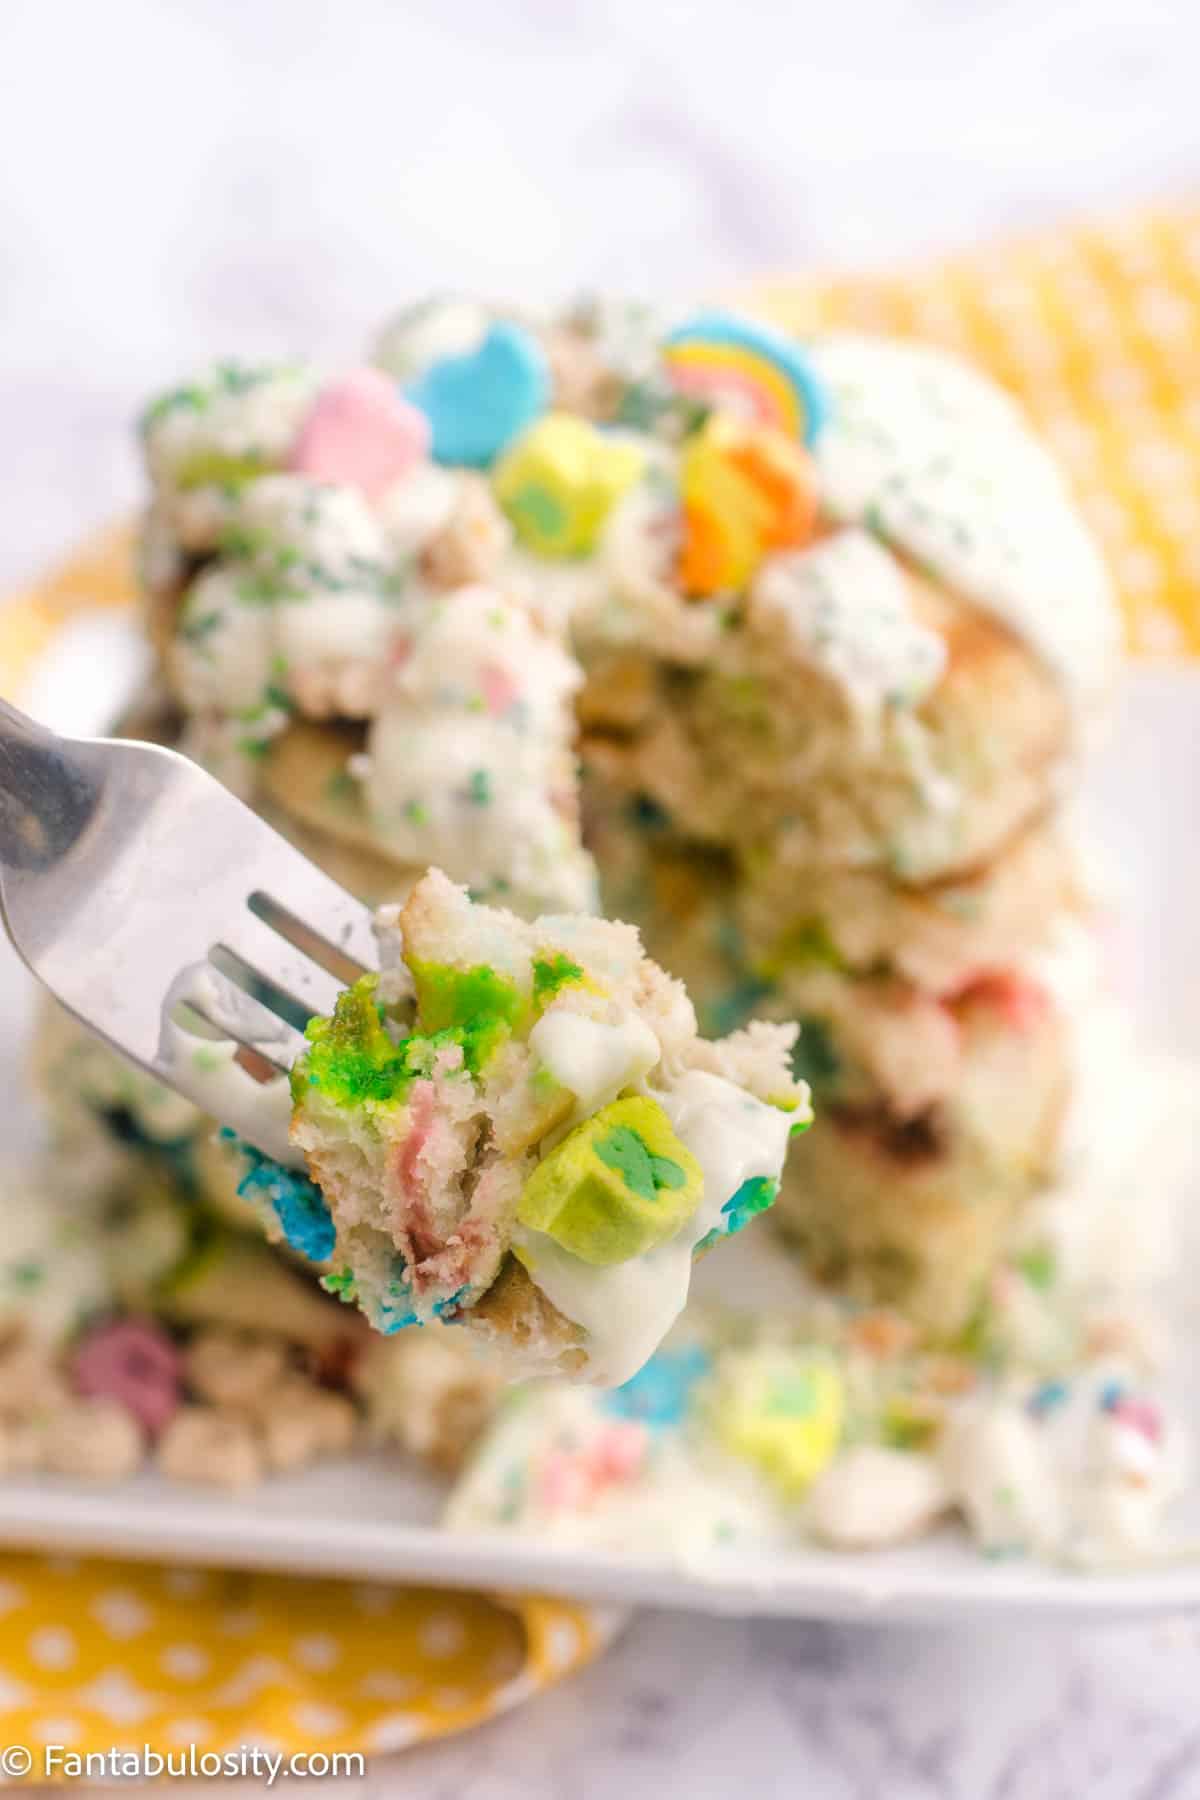
    Close-up of bite of pancakes
    A delicious bite that’s FULL of flavor!

    Storage

    If you have leftover pancakes, it’s best to store them, without syrup, in an airtight container, in the refrigerator for 3-4 days.

    More Pancake Recipes

    I so hope you enjoy one of our favorite Lucky Charms recipes! Make sure to check out these other favorite delicious pancakes to add to your favorites:

    • Blueberry Pancakes
      Easy Blueberry Pancakes
    • Pumpkin Pancakes with Pancake Mix
    • Butternut Squash Pancakes stacked with butter on top.
      Easy 5 Minute Butternut Squash Pancakes
    • Pancake Toppings Ideas
      95+ Pancake Toppings Ideas

    Recipe

    lucky charms pancakes
    Print Pin
    5 from 3 votes

    Lucky Charms Pancakes

    Lucky Charms Pancakes: Add some of your favorite cereal to pancakes to add fun flavor and color, especially with this optional white chocolate syrup!
    Course Breakfast
    Cuisine American
    Prep Time 5 minutes minutes
    Cook Time 5 minutes minutes
    Total Time 10 minutes minutes
    Servings 6 pancakes
    Calories 263kcal
    Author Jessica Burgess

    Ingredients

    If Making Pancakes from Scratch:

    • 1 ½ cups all purpose flour
    • 3 ½ teaspoon baking powder
    • 3 tablespoon sugar
    • 1 ¼ cups milk buttermilk or regular, whole milk (2% or skim will be fine too!)
    • 1 egg
    • 3 tablespoons melted salted butter
    • 1 teaspoon vanilla extract

    If Making Pancakes from Store-Bought Mix:

    • 2 cups Pancake Mix We use Krusteaz but make according to your brand's directions.
    • 1 ⅓ cups Water

    Mix-Ins and Toppings

    • 1 cup Lucky Charms cereal
    • 2 tablespoons butter used for melting in frying pan or griddle
    • 2 cups Ghirardelli white chocolate baking chips
    • 1 tablespoon green sprinkles Optional, or desired color!

    Instructions

    • In a mixing bowl, mix together the flour, baking powder, and sugar.
    • Next, add in the milk, egg, 3 tbsp. melted butter and vanilla.
    • Using a whisk, lightly mix the batter blending the ingredients. Do not overmix. Lumps are good! 
    • Pour in the one cup of Lucky Charms cereal and gently stir to combine.
    • Melt a tablespoon of butter in the pan over low-medium heat (unless using griddle and it's large enough to fit more pancakes, then you'll want to melt enough butter to coat the cooking surface.)
    • Using an ice cream scoop, scoop out a scoop and a half of batter to make one pancake.
    • When bubbles start to form on top of cooking pancakes, it's time to flip to the other side.
    • Cook an additional two minutes until the bottom is a light golden brown, and the centers look cooked.
    • Remove panakes from cooking surface and stack them on top of one another, on a plate or serving dish, to retain the heat while remaining pancakes cook.
    • One all pancakes are cooked, you can top with your favorite syrup and serve.

    White Chocolate Syrup

    • Following the package directions, gently melt the chocolate chips. If melting in the microwave, it's usually recommended to place chips in a microwavable bowl, and cook for 2 minutes on half-power, stopping every 30 seconds to stir. DO NOT OVER COOK THE CHIPS as they'll scorch and burn.
    • Once chocolate has melted and is smooth, pour in most of the sprinkles and stir to combine.
    • Pour syrup over pancakes, quickly, before chocolate hardens, and sprinkle with remaining sprinkles and/or Lucky Charms.

    Notes

    Storage
    If you have leftover pancakes, it’s best to store them, without syrup, in an airtight container, in the refrigerator for 3-4 days.

    Nutrition

    Serving: 1pancake | Calories: 263kcal | Carbohydrates: 40g | Protein: 6g | Fat: 9g | Saturated Fat: 5g | Polyunsaturated Fat: 1g | Monounsaturated Fat: 2g | Trans Fat: 1g | Cholesterol: 47mg | Sodium: 124mg | Potassium: 362mg | Fiber: 1g | Sugar: 12g | Vitamin A: 466IU | Vitamin C: 2mg | Calcium: 195mg | Iron: 3mg

    Valentine Snack Mix

    February 6, 2022

    Cupid Crunch - Valentine's Snack

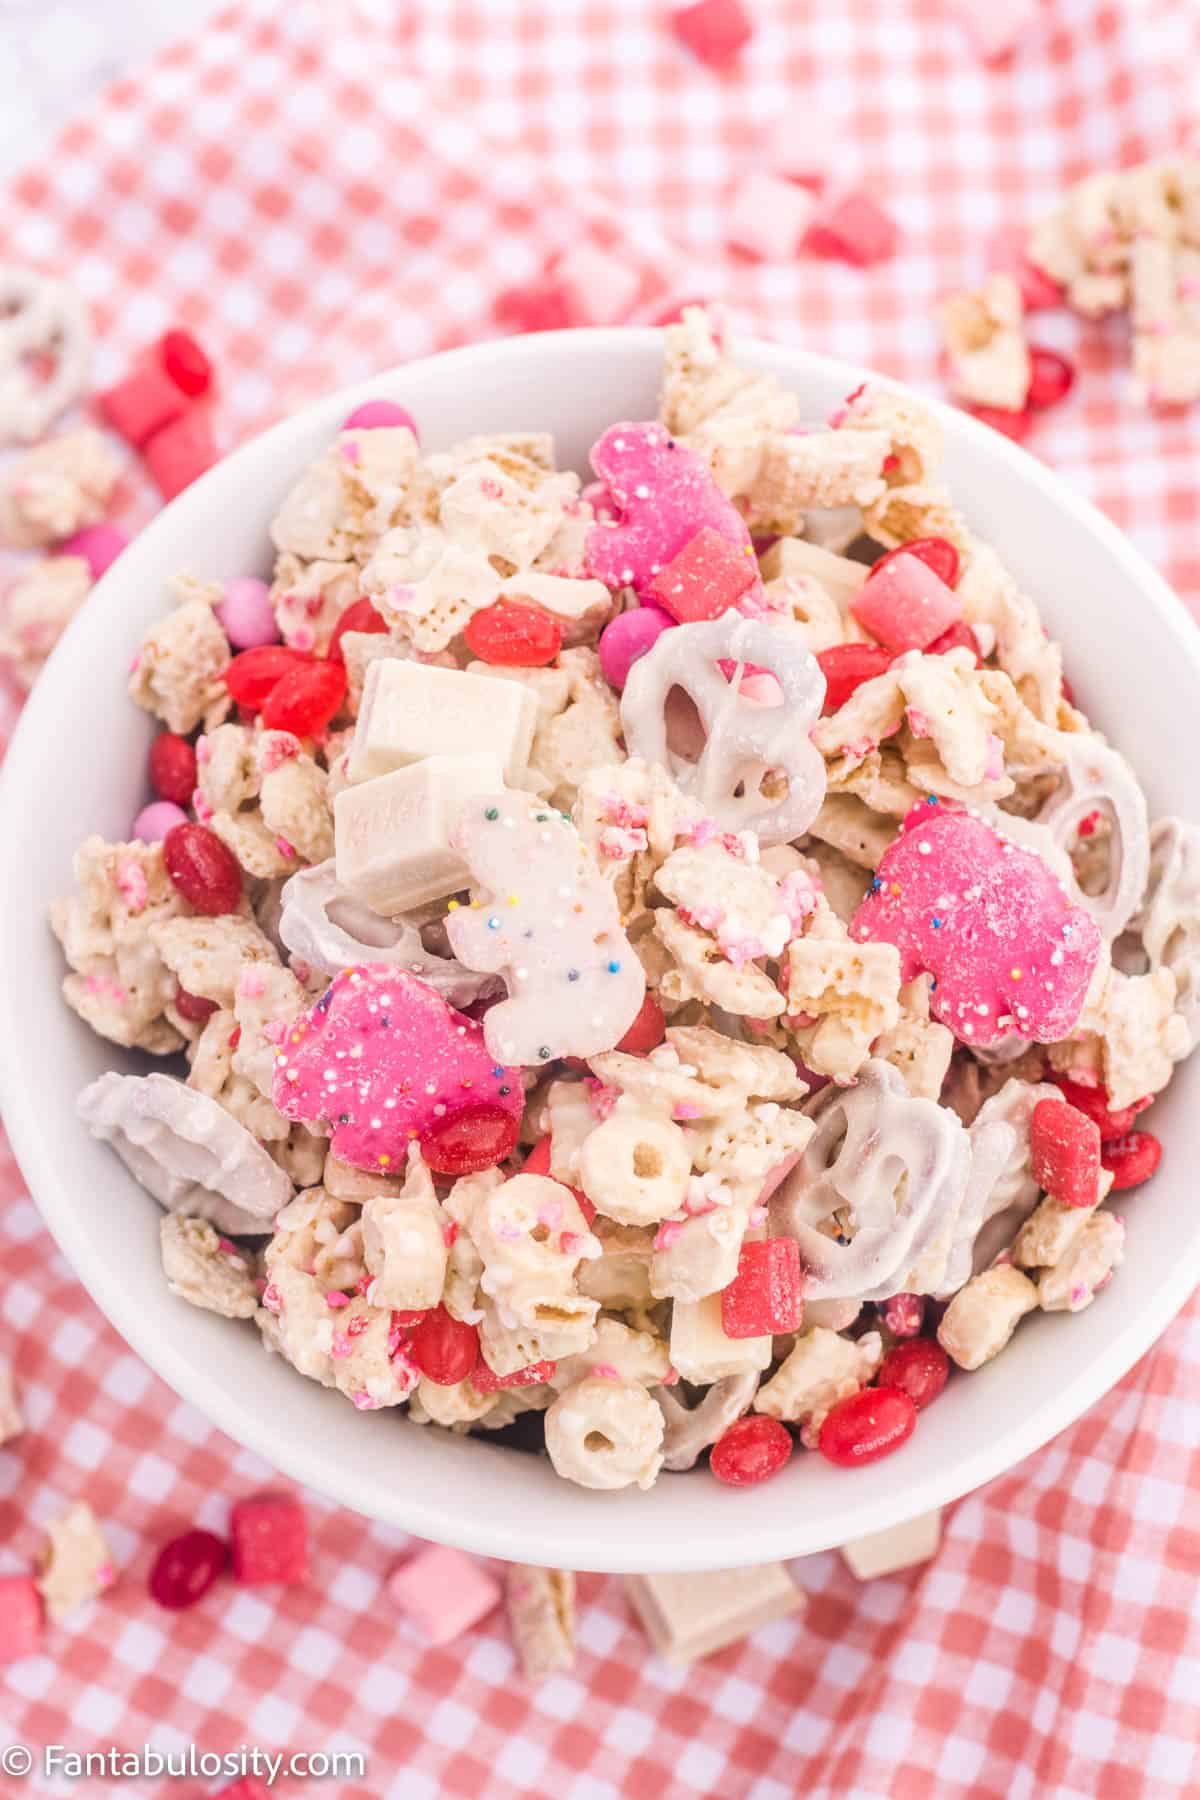
    Valentine Snack Mix: A mixture of melted white chocolate, dry cereal, sprinkles, cookies, and candies make this one of our favorite Valentine snacks!

    Plus, it’s a delicious easy dessert treat that can be customized to use your favorite Valentine’s Day candy!

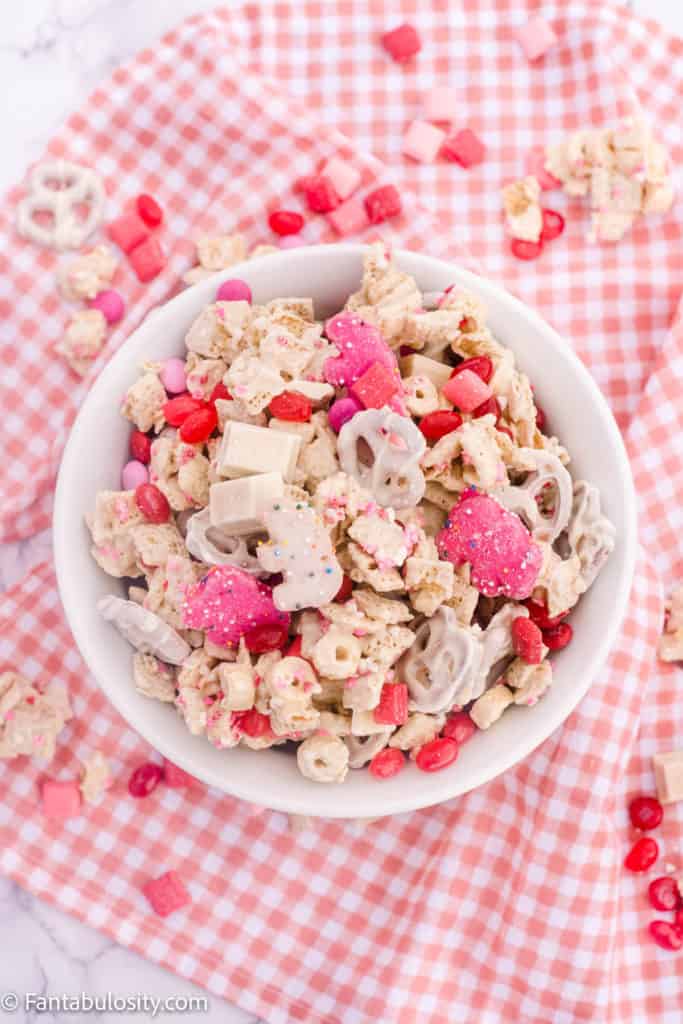
    white chocolate covered treats in white bowl
    Valentine Snack Mix

    It seems like there’s a “Chex mix” recipe for every holiday out there! Whether it’s a savory homemade Chex mix recipe or a sweet snack mix, it’s usually an easy recipe that’s versatile that can be customized to fit the holiday colors and flavors! (We even made an Easter snack mix, a Christmas mix recipe, and a Sriracha Honey Chex Mix!)

    When it comes to Valentine snack mix recipes, it’s fun to add red and pink to a white chocolate-covered “base” that can consist of dry cereal, pretzels, or even something like popcorn!

    But for this recipe, since we love our hot chocolate muddy buddies so much around the holidays, and our lemon puppy chow in the spring, we knew we wanted something similar for a Valentine muddy buddy mix.

    [feast_advanced_jump_to]

    Ingredients

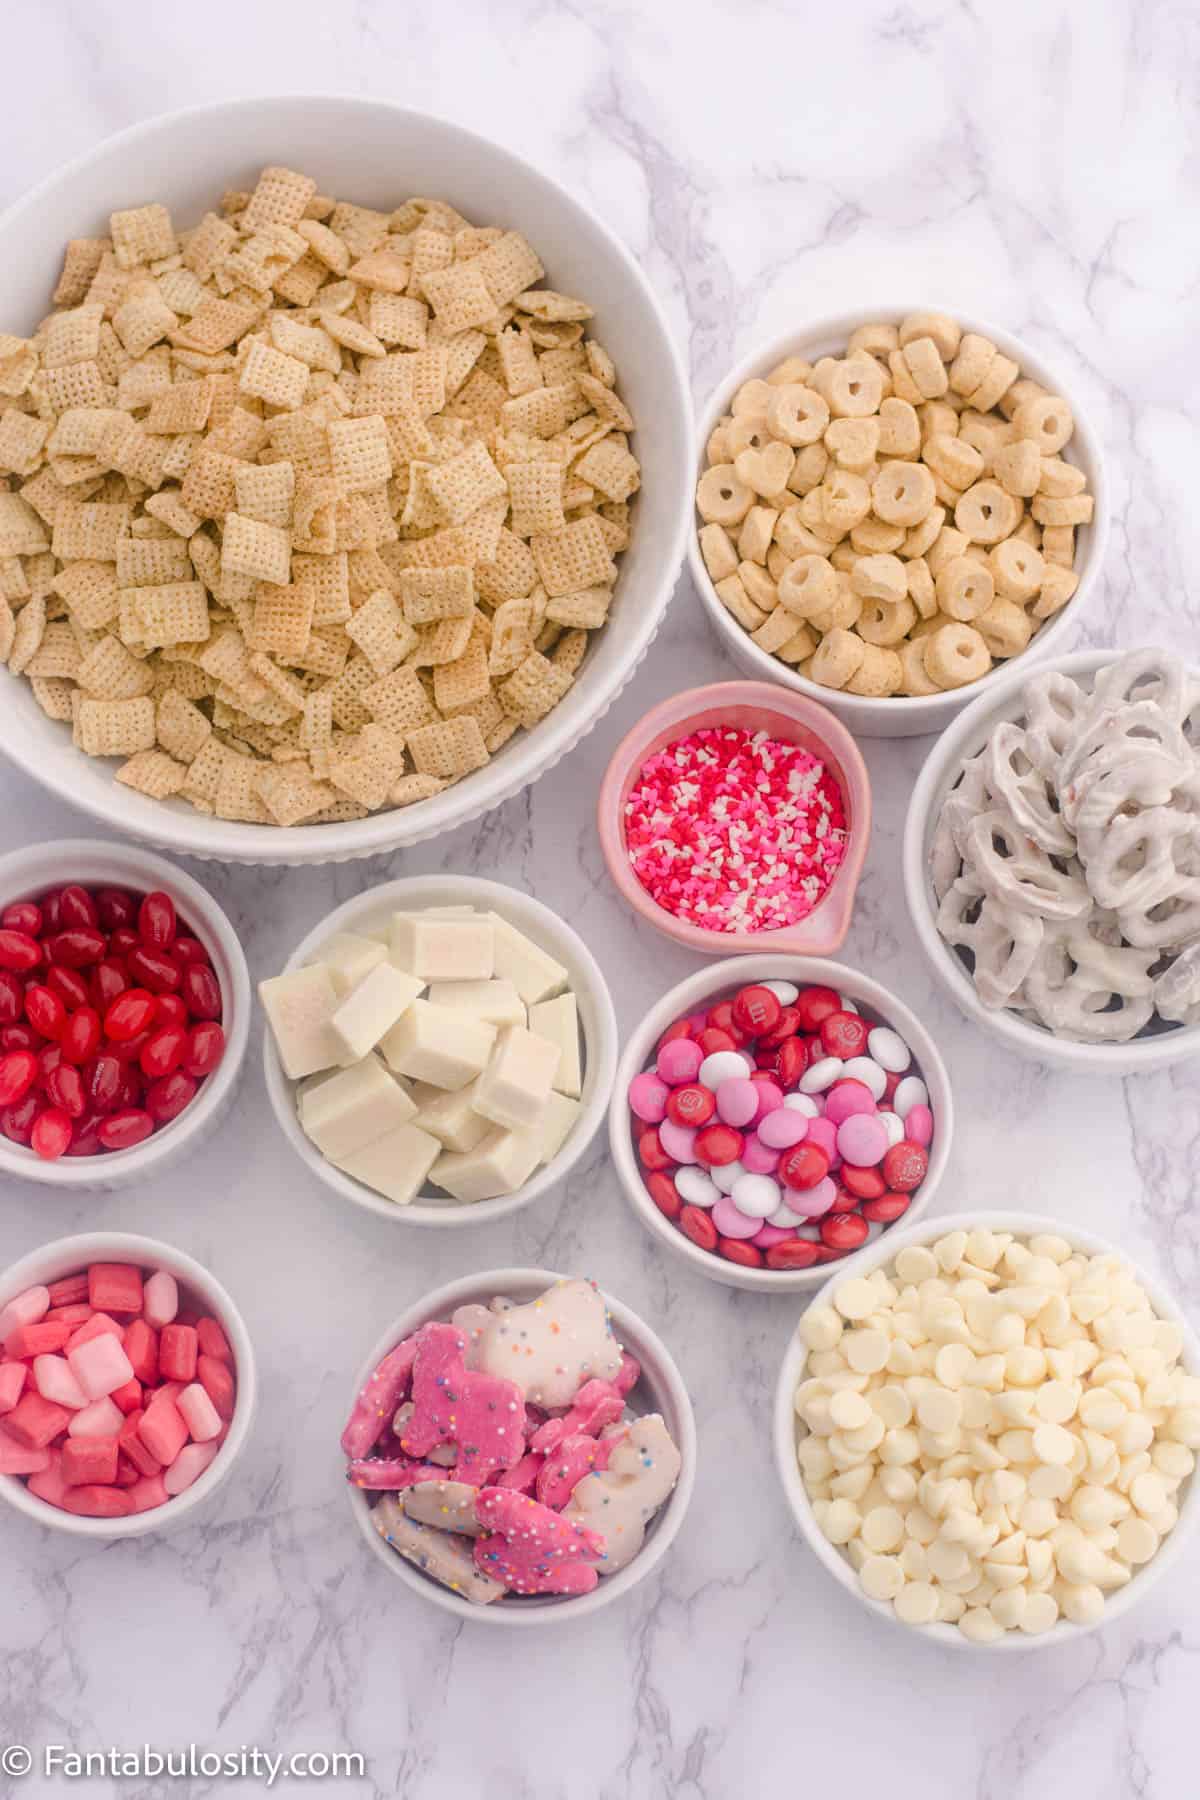
    This Valentine’s Day snack mix is made using melted white chocolate, two types of dry cereal, other dry snacks, sprinkles, and your favorite red, pink and white candies.

    White Chocolate:

    Although you can use white almond bark, I REALLY recommend using Ghiradelli white chocolate baking chips or the vanilla melting wafers for this. Almond bark is absolutely ok to use and this will still turn out delicious… but Ghiradelli chocolate is INCREDIBLE.

    Cereal:

    • Rice Chex (Any Chex cereal will do but we prefer Rice Chex)
    • Kashi Honey Toasted (It has circles and HEARTS! How perfect is that for Valentine’s Day!)

    Cookies, Pretzels, Sprinkles, Candy:

    This is where it can get really fun! I know that sometimes it can be hard to find the exact type of ingredients that I used in this recipe so know that you can mix things up to either fit what you have on hand or what kind of flavors you prefer!

    For this recipe, we used:

    • Valentine’s Day Sprinkles (We bought ours from Walmart but you can usually find them at Target, Hobby Lobby, or similar stores too! Or, snag some on Amazon if you have time for delivery!)
    • White Chocolate Covered Pretzels – you can use regular pretzels and mix that in with the cereal if you prefer. Note: this will reduce the amount of chocolate coating on cereal mixture, so you may want to melt more chocolate than suggested.
    • Mini White Chocolate Kit Kats – if you can’t find the “mini’s” you can break up regular size Kit Kats in to small pieces.
    • Starburts “FaveREDS” Jelly Beans – if you love Jelly Beans but can’t find the Starburst brand, you can pick out the pink and reds from regular jelly beans. Or, order Jelly Belly’s online!
    • Valentine M&M’s – like the jelly beans above, if you can’t find the Valentine mix, you can usually find the colors you need online but around Valentine’s Day, you can usually find them in grocery stores or Target!
    • “FaveReds” Starburst Mini’s – You can usually find these all year long but you can also use regular size Starbursts, or you could even cut the regular size in half if you prefer a smaller bite for this mix.
    • Circus Animal Cookies – these are the perfect colors for this mix! But feel free to use regular animal crackers if you can’t find this kind. We love using these in so many desserts, like our Circus Animal donuts because they had the perfect flavor and pop of color for some fun!
    Ingredients on table for snack mix
    Feel free to change up any of the ingredients!

    See the recipe card below, for full ingredient amounts and instructions!

    Instructions

    Prep:

    1. First, thinking ahead, grab a large baking sheet and cover it completely with parchment paper. Or, you can pull out a large sheet of parchment paper (big enough all of the cereal will fit on it after covered with chocolate) and place it on a flat surface like a kitchen counter. This will be used after mixing the melted chocolate and cereal.

    Melting the Chocolate:

    1. Next, melt the chocolate baking chips in a large bowl (large enough that the cereal will fit in it after the chocolate is melted).

    To melt the chocolate chips or melting wafers, it’s best to refer to the package directions as they can all be different.

    However, most of the time, it’s recommended when melting in the microwave, to melt the chocolate on half-power for 2 minutes, stopping and stirring the chocolate every 30 seconds. DO NOT OVERCOOK – as the chocolate will “burn” and won’t melt smooth.

    Combine Chocolate and Cereal:

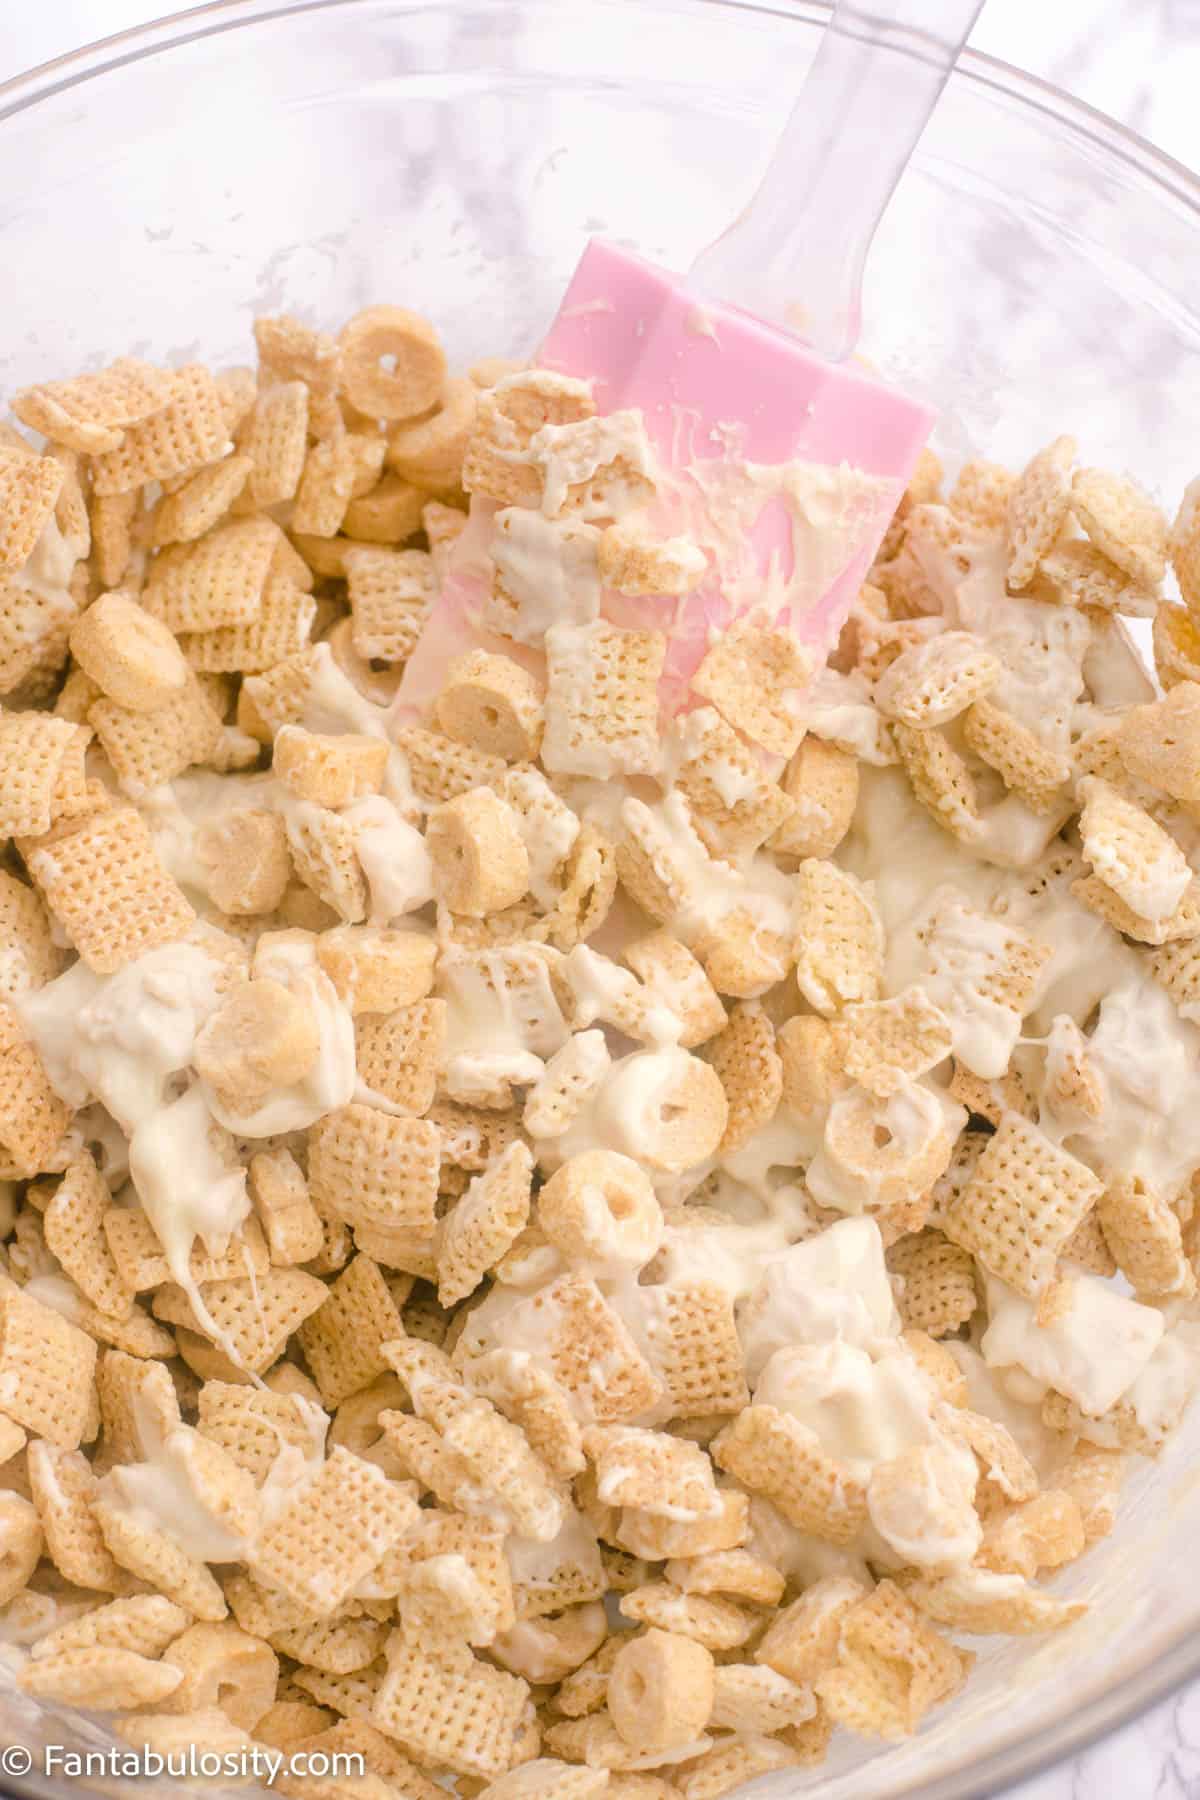
    1. Once chocolate is completely melted, pour dry cereal in to bowl of white chocolate and carefully stir to mix, trying to make sure all of the cereal becomes covered.
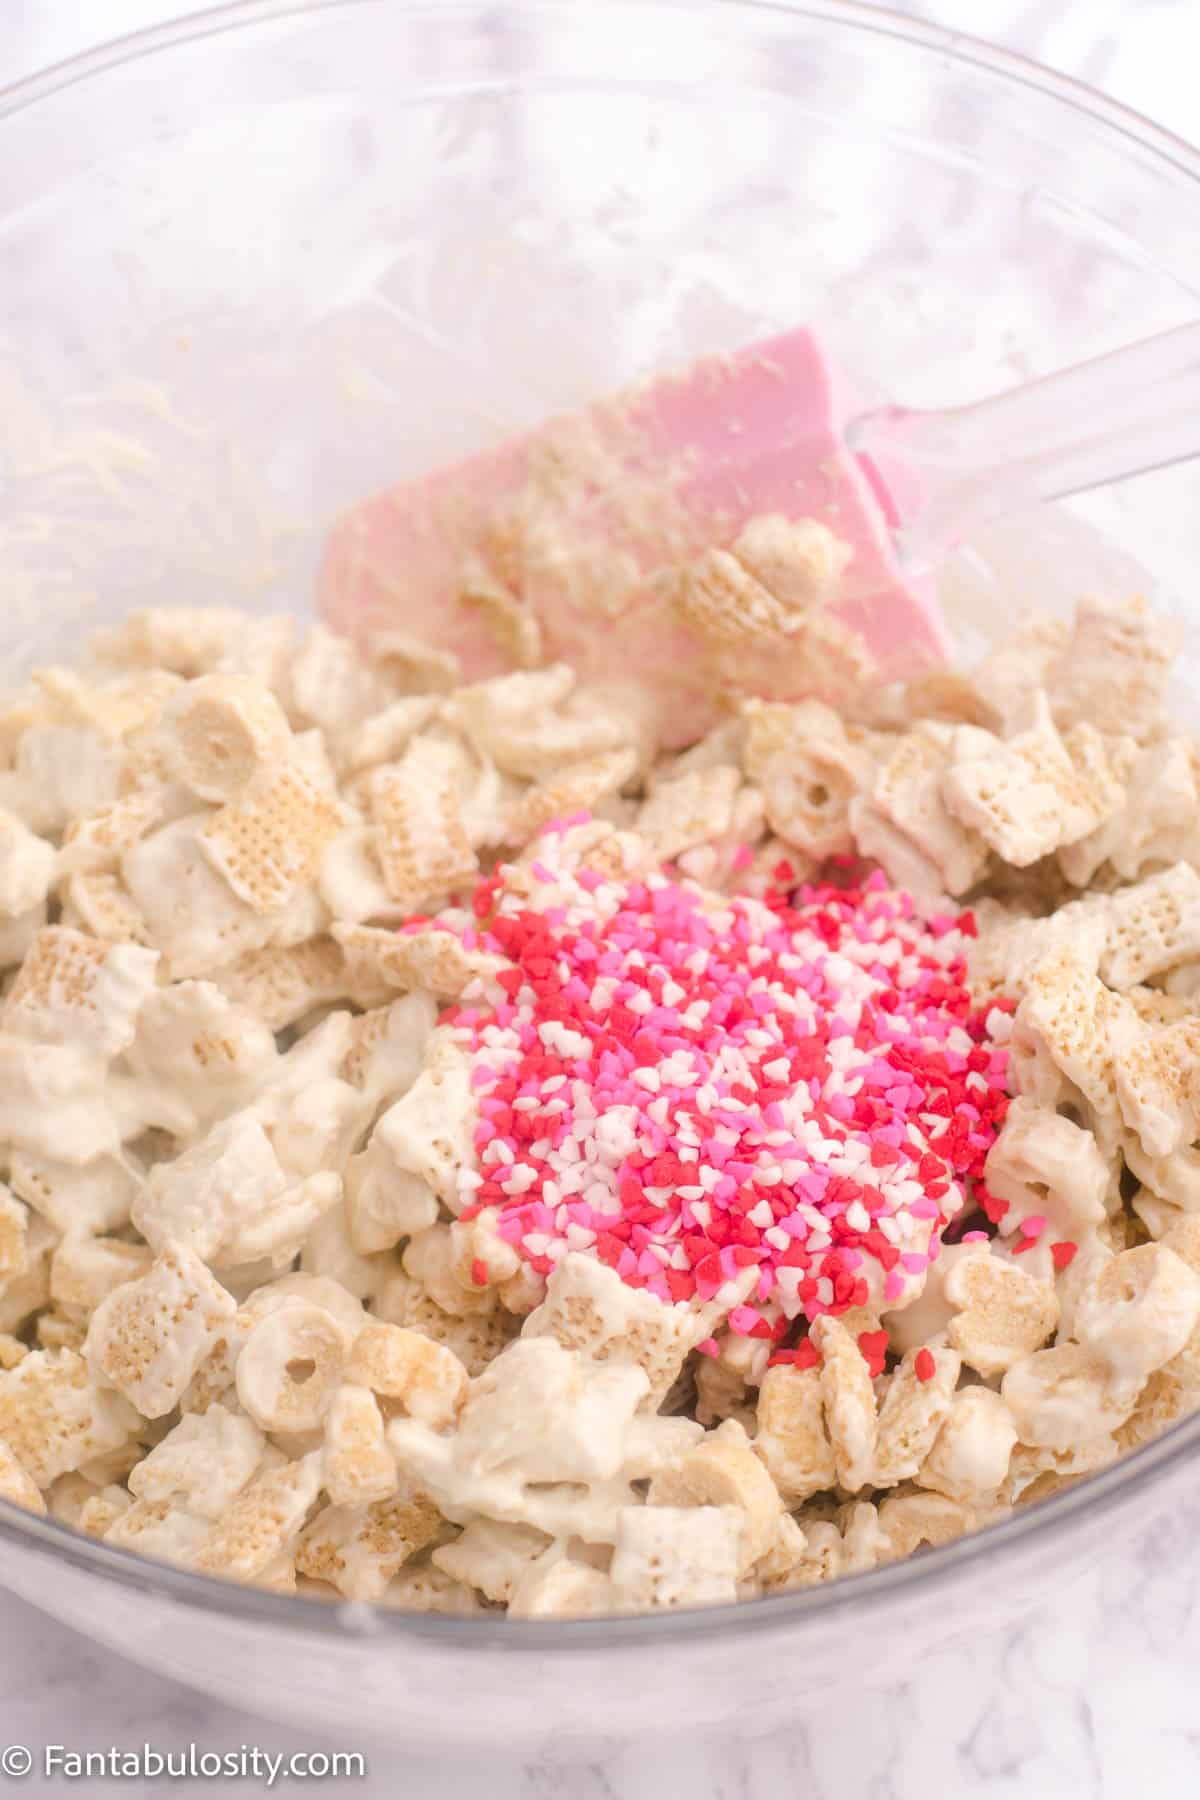
    2. Next, pour in half of the sprinkles, and stir.
    chex cereal with melted white chocolate
    Mix cereal in with melted white chocolate
    Valentine sprinkles with cereal mixture
    Add sprinkles before chocolate hardens

    Add Half of the Sprinkles

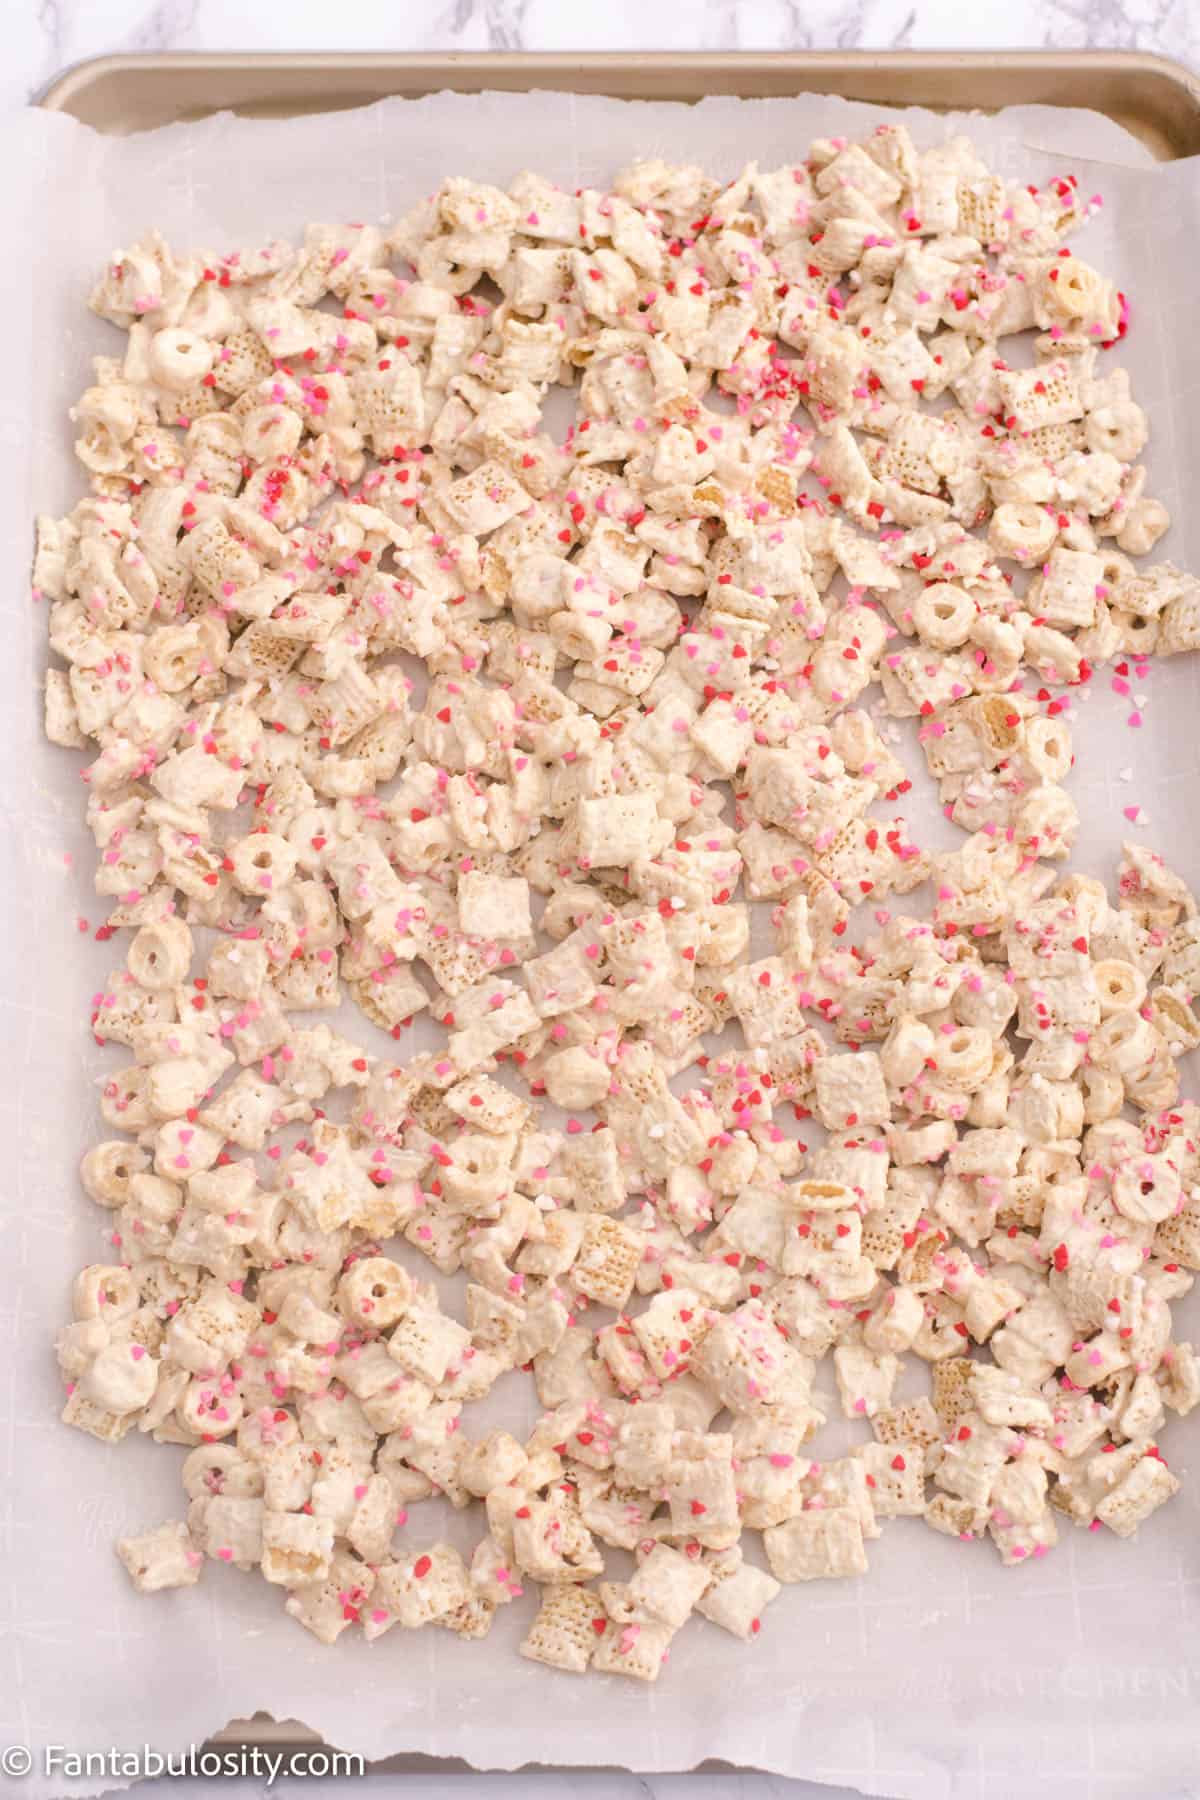
    1. Once mixed, pour out the white chocolate mixture on to parchment paper and spread out so most of it is in a single layer. (It’s ok if some of it’s still touching – you’ll be breaking it up in to small pieces anyway once it has hardened.)
    2. Sprinkle the remaining sprinkles on the top of the cereal before the chocolate hardens.
    cereal chocolate mixture on baking sheet
    Spread out on parchment paper to dry

    Cooling Time:

    1. Allow cereal to “dry” (about 10 minutes) and then break up the cereal in to small bite-size pieces. (Remember, this is a snack mix so it’s ok if some of cereal is stuck together but large pieces are harder to eat when snacking.)

    Add Remaining Ingredients:

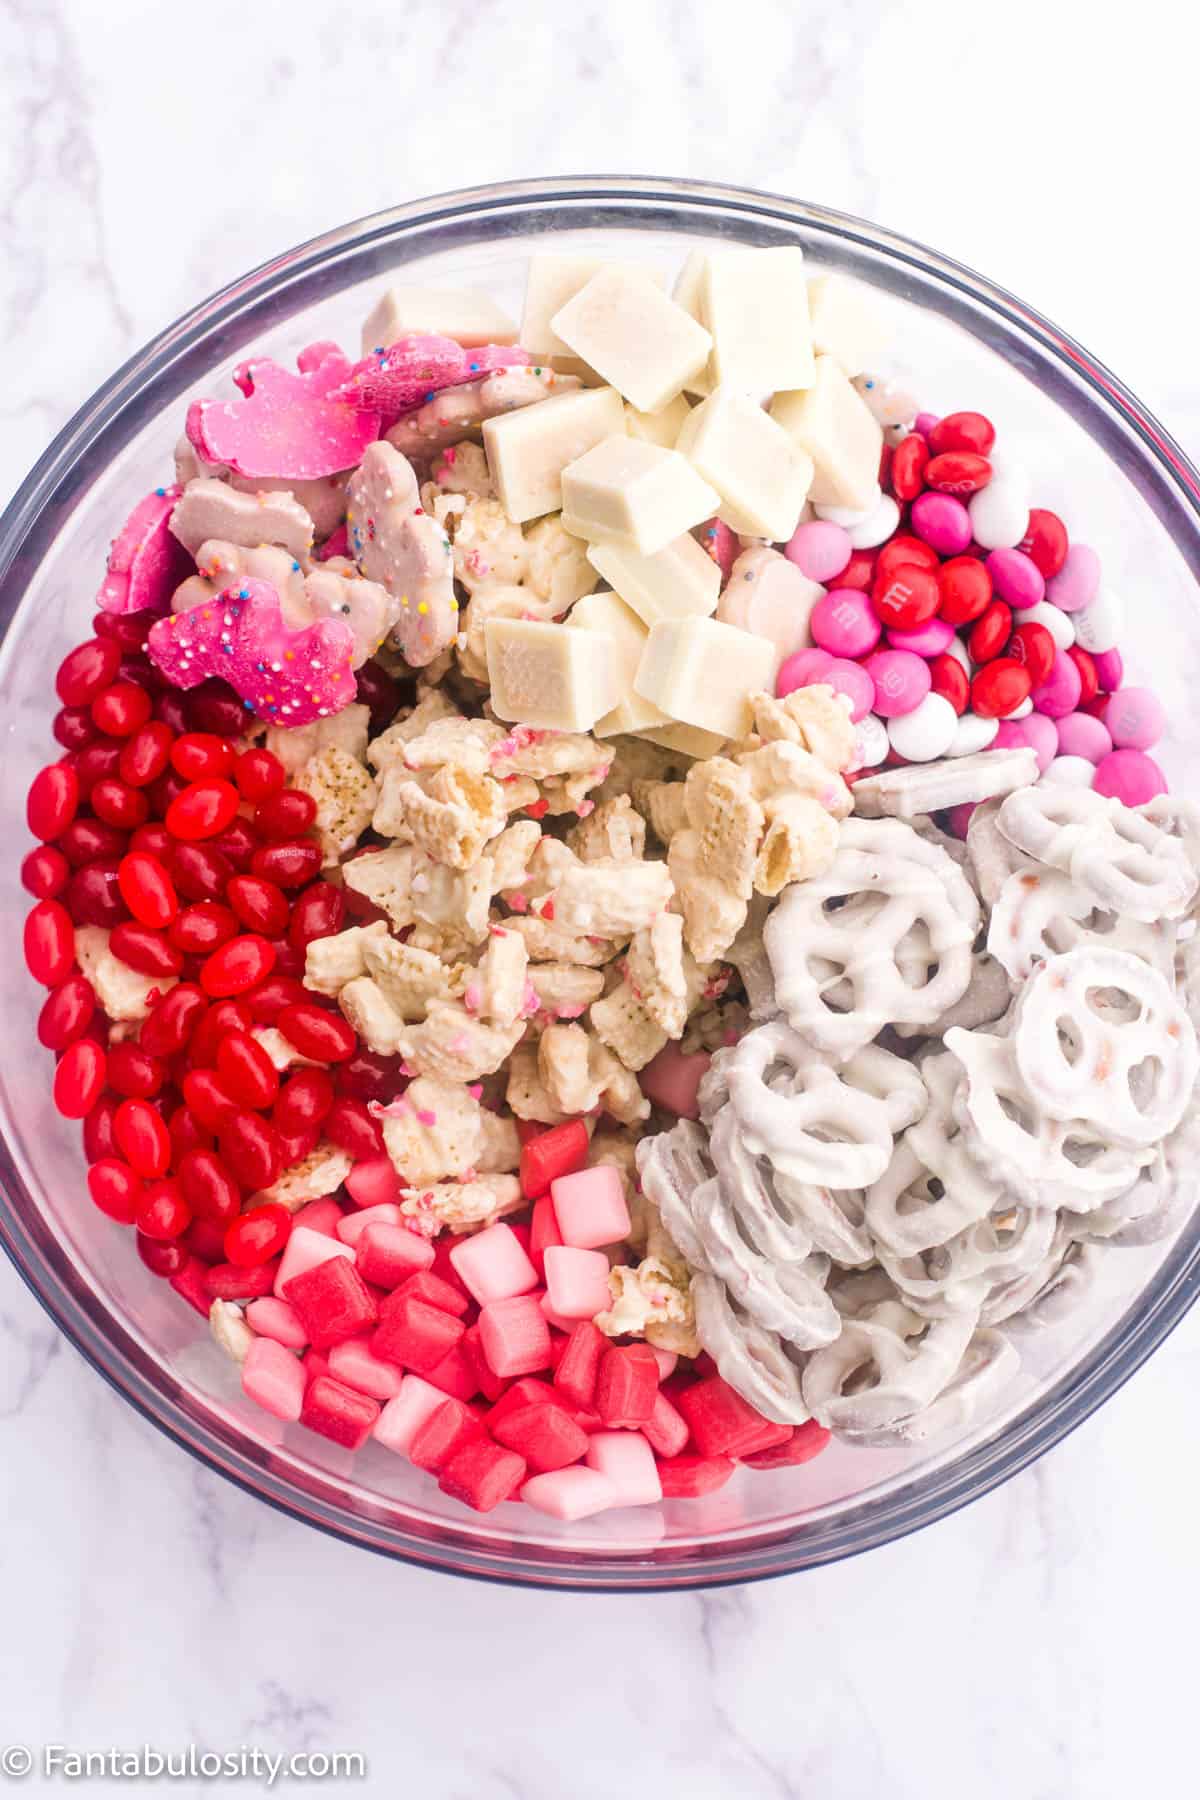
    1. Next, it’s time to add in the remaining ingredients. (Candies, cookies, pretzels, etc.)
    all ingredients in large bowl
    Mix in remaining ingredients
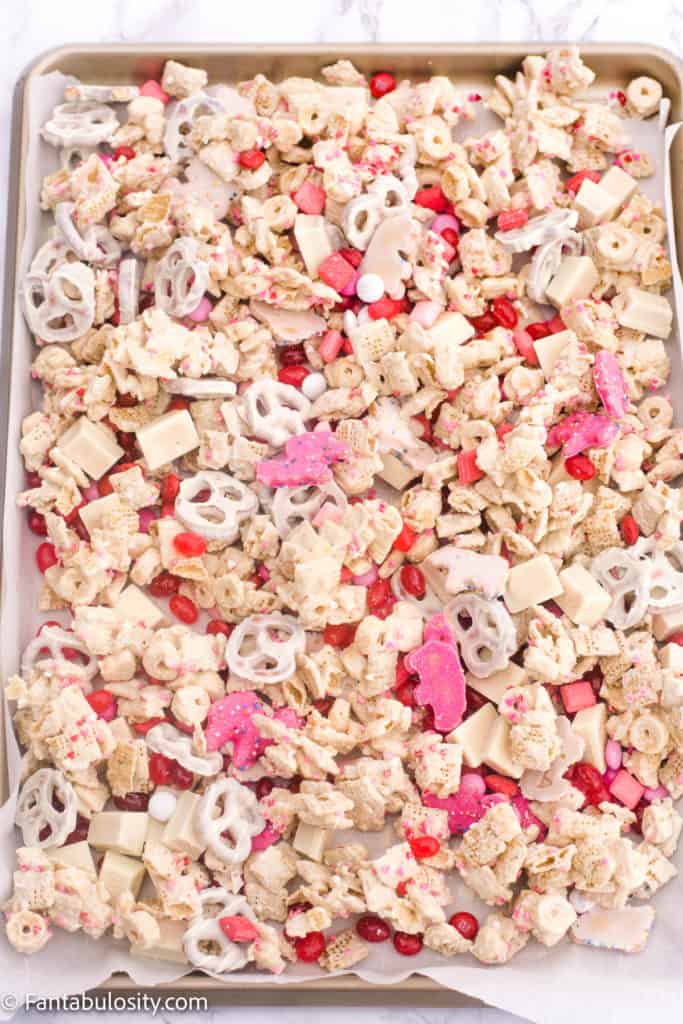
    1. You can either mix it all together in the large bowl or you can pour the candies and cookies on top of the broken pieces of cereal and mix it with your hands.
    finished valentine snack mixture

    How to Serve this Valentine Chex Mix Recipe:

    There are a lot of fun ways you can serve this!

    • You can leave this easy treat out on a baking sheet for everyone to graze on. Maybe next to these heart-shaped cookies!
    • Pour it in a large serving bowl that can be included on a buffet line with other desserts, if entertaining.
    • Divide it in to multiple smaller bowls or dishes, and place them in different areas if hosting guests, for an easy party treat, so they can easily munch on it, no matter which room they’re in!
    • Divide the white chocolate snack mix in to small snack bags, or plastic bag, and tie it with a cute tag, and deliver this sweet treat to your friends and family for the perfect Valentine's Day snack!
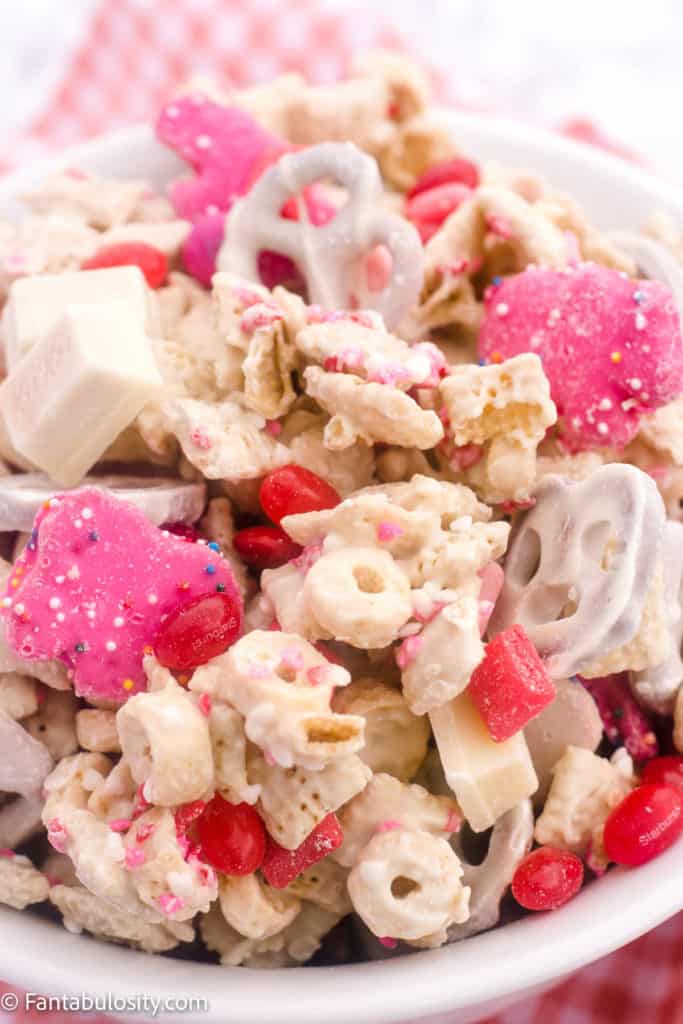
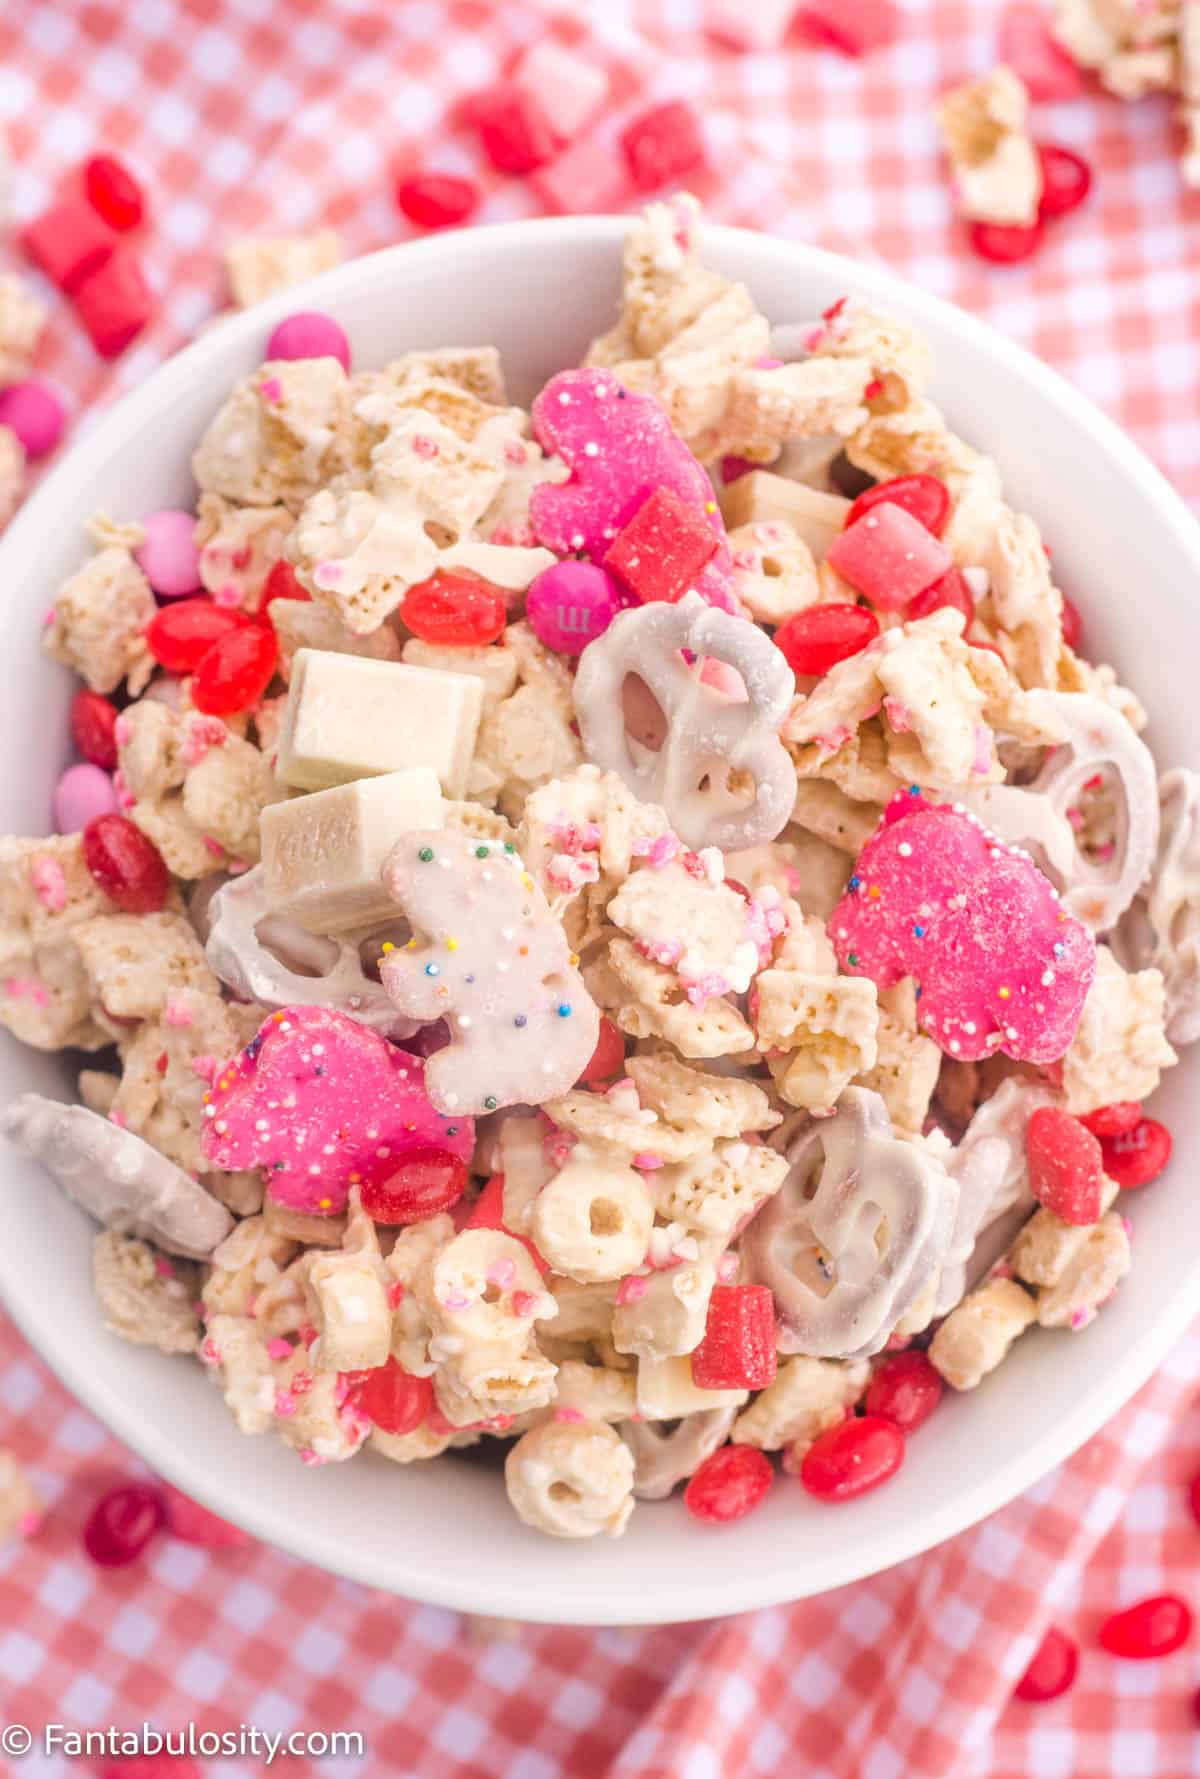
    cupid crunch snack mix in bowl
    White chocolate Chex mix

    Substitutions

    As mentioned earlier, this recipe is very forgiving so feel free to substitute items to make it your favorite! For instance:

    • Corn Chex instead of Rice Chex
    • Cheerios instead of Kashi cereal
    • Cinnamon Toast Crunch cereal
    • Golden Grahams cereal
    • Different, pink and red candies
    • Almond bark instead of baking chips
    • Popcorn instead of cereal
    • Different cookies or animal crackers
    • Add in mini marshmallows
    • Mix in peanut butter with chocolate
    Valentine's Day Snack in bowl
    Valentine’s Day Snack Idea

    Variations

    If you love the look and sound of this mix, and want to change it up to fit the holiday you’re making it for, head to the store and see if you can find candies/cookies/snacks in the color you’re aiming for. For instance, green candies for St. Patricks Day, red and green for Christmas, etc.

    Storage

    Store in a covered, airtight container at room temperature for 3-4 days. 

    What can you do with leftover Valentine’s candy?

    Whether you have leftover Valentine’s candy and you’re wanting to make this snack mix with it, or you have leftover candy after making this recipe, there are a LOT of ways you can use it up! Here are some of our favorites:

    • Make this similar recipe but substitute popped popcorn for the cereal.
    • Mix in to ice cream
    • Top fluffy homemade pancakes with syrup and chocolate candies
    • Add the chocolate candies to cookies such as these brownie mix cookies

    More Valentine’s Day Ideas

    Looking for more ways to spread the love this year? Here are a few of our Valentine’s Day favorites:

    You must use the category name, not a URL, in the category field.

    Recipe

    Cupid Crunch - Valentine's Snack
    Print Pin
    5 from 4 votes

    Valentine Snack Mix

    Valentine Snack Mix: A mixture of melted white chocolate, dry cereal, sprinkles, cookies, and candies make this one of our favorite Valentine snacks!
    Course Dessert, Snack
    Cuisine American
    Prep Time 5 minutes minutes
    Cook Time 2 minutes minutes
    Drying Time 10 minutes minutes
    Total Time 17 minutes minutes
    Servings 15 servings
    Calories 367kcal
    Author Jessica Burgess

    Ingredients

    • 1 ½ cups white chocolate chips we prefer Ghirardelli (See post for other suggestions)
    • 3 cups Rice Chex cereal can use corn Chex but rice is preferred
    • 1 cup Kashi Honey Toasted Oat Cereal can use Cheerios if desired but Kashi has "hearts"!
    • 5 oz. white fudge covered pretzels We used "Flipz" brand and the 5 oz. bag
    • 1 7.6 bag of mini white chocolate Kit Kat's
    • 1 cup Circus Animal cookies The pink and white sprinkled animal crackers
    • ½ cup "Cupid Mix" M&M's red and pink variety of M&M's
    • ½ cup FaveREDS mini Starbursts
    • ½ cup FaveREDS Starburst jelly beans
    • ¼ cup Valentine sprinkles

    Instructions

    • First, thinking ahead, grab a large baking sheet and cover it completely with parchment paper.
    • Next, melt the chocolate baking chips in a large bowl (large enough that the cereal will fit in it after the chocolate is melted) following the package directions for melting. (Most will be to melt on half-power for 2 minutes, stirring every 30 seconds. Do NOT overcook.)
    • Once chocolate is completely melted, pour dry cereal in to bowl of white chocolate and carefully stir to mix, trying to make sure all of the cereal becomes covered.
    • Next, pour in half of the sprinkles, and stir.
    • Once mixed, pour out chocolate covered cereal on to parchment paper and spread out so most of it is in a single layer. (It's ok if some of it's still touching – you'll be breaking it up in to small pieces anywhay once hardened.)
    • Sprinkle the reamaining sprinkles on the top of the cereal before the chocolate hardens.
    • Allow cereal to "dry" (about 10 minutes) and then break up the cereal in to small bite-size pieces. (Remember, this is a snack mix so it's ok if some of cereal is stuck together but large pieces are harder to eat when snacking.)
    • Next, it's time to add in the remaining ingredients. (Candies, cookies, pretzels, etc.)
    • You can either mix it all together in the large bowl or you can pour the candies and cookies on top of the broken pieces of cereal and mix it with your hands. Serve!

    Notes

    Substitutions
    As mentioned earlier, this recipe is very forgiving so feel free to substitute items to make it your favorite! For instance:
    • Corn Chex instead of Rice Chex
    • Cheerios instead of Kashi ceral
    • Cinnamon Toast Crunch cereal
    • Different, pink and red candies
    • Almond bark instead of baking chips
    • Popcorn instead of cereal
    • Different cookies or animal crackers
    How to Store:
    Store in a covered, air-tight container at room temperature for 3-4 days. 

    Nutrition

    Serving: 0.5cup | Calories: 367kcal | Carbohydrates: 60g | Protein: 5g | Fat: 13g | Saturated Fat: 6g | Polyunsaturated Fat: 1g | Monounsaturated Fat: 4g | Trans Fat: 1g | Cholesterol: 8mg | Sodium: 306mg | Potassium: 138mg | Fiber: 2g | Sugar: 31g | Vitamin A: 213IU | Vitamin C: 7mg | Calcium: 83mg | Iron: 5mg

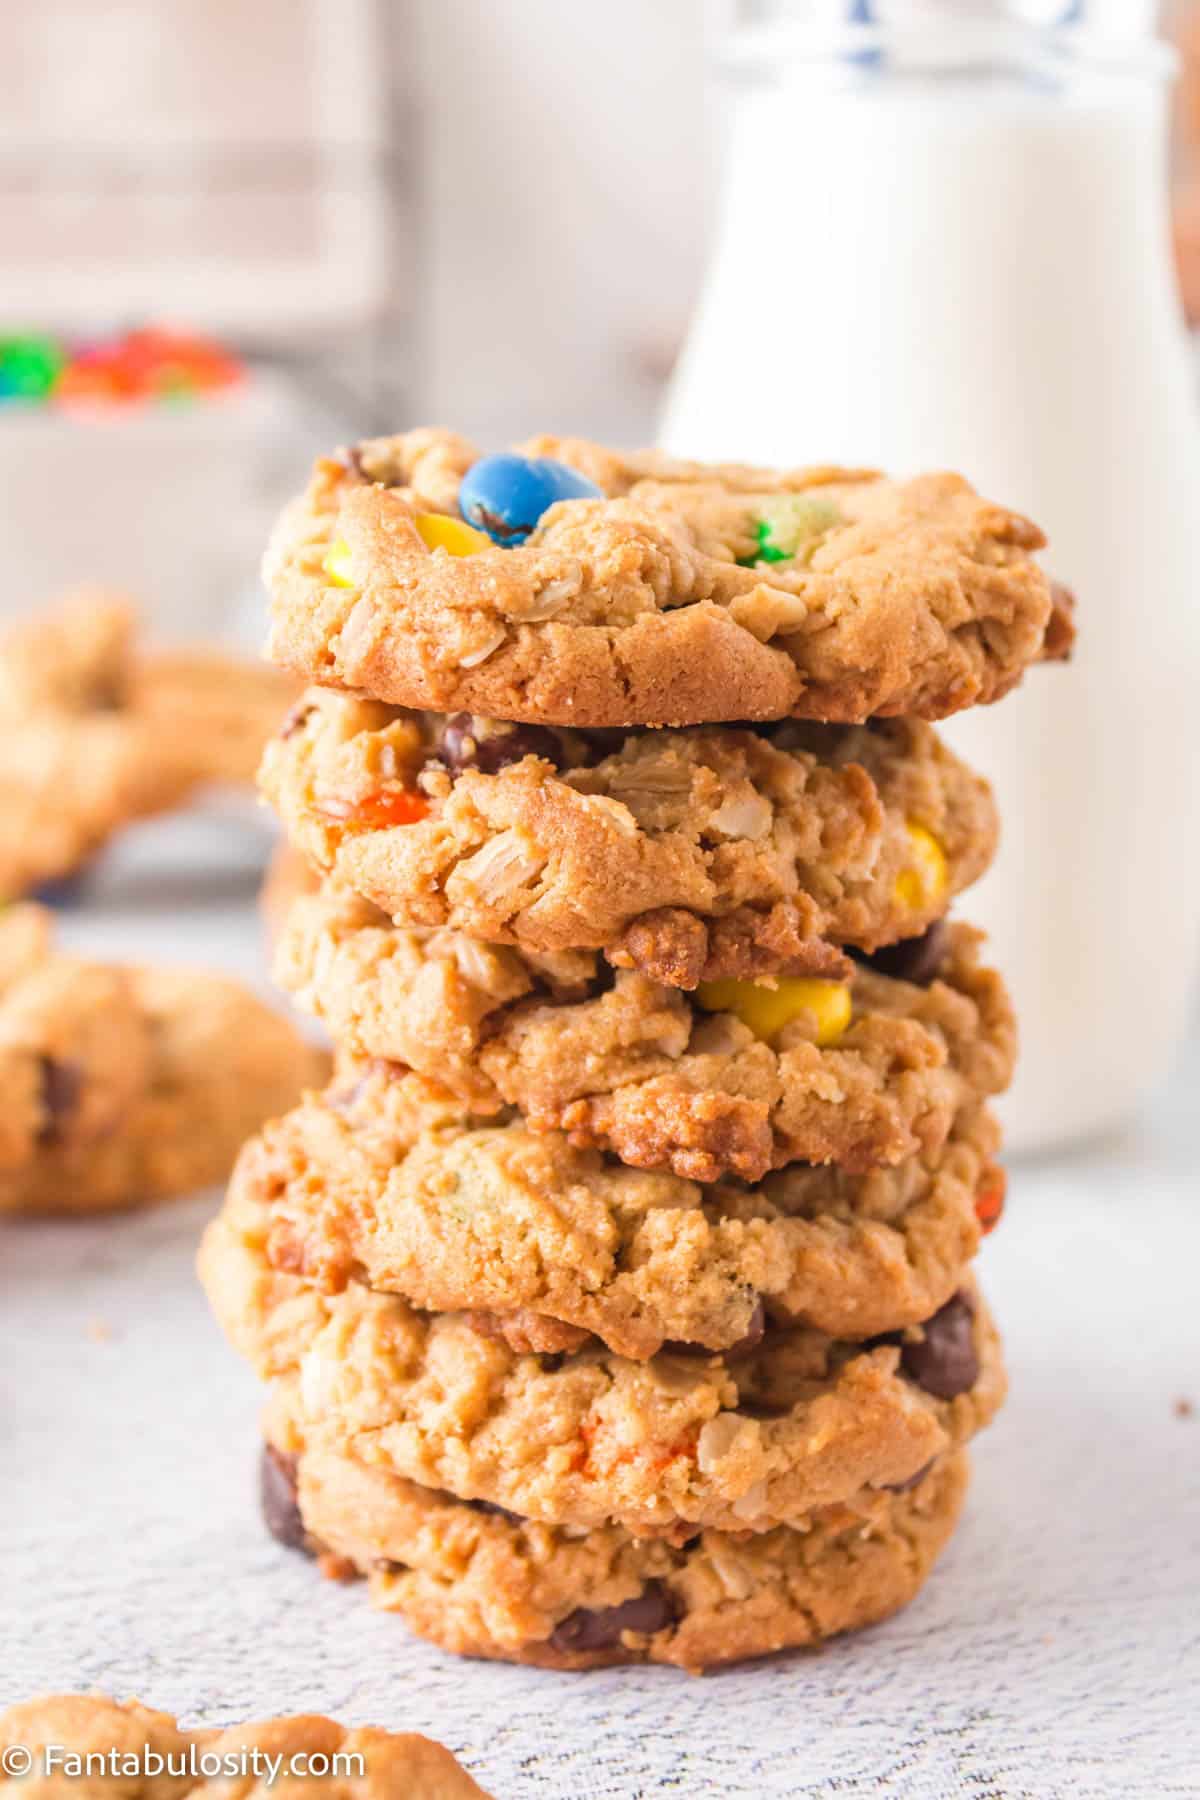
    Monster Cookies

    February 4, 2022

    Monster Cookies

    Monster Cookies: These chewy monster cookies are made with oats, chocolate chips, M&M’s, and a few other staple ingredients, making them the best monster cookies ever!

    If you need desserts that slice easily and feed a crowd, take a look at my potluck desserts collection.

    monster cookies on table with m&m's
    Monster Cookies Recipe

    Why You’ll Love This Recipe

    There are a lot of different ways to make classic cookies like a chocolate chip cookie. Some give you crunchy cookies, some give you fudge cookies, some make cake-like cookies…

    This monster cookies recipe gives you a cookie that’s chewy on the inside and crispy on the outside (those are the best cookies, in my opinion). It’s the best monster cookie recipe there is; it’s basically peanut butter oatmeal cookies with chocolate chips and extra M&M in them…yum!

    [feast_advanced_jump_to]

    What is a monster cookie made of?

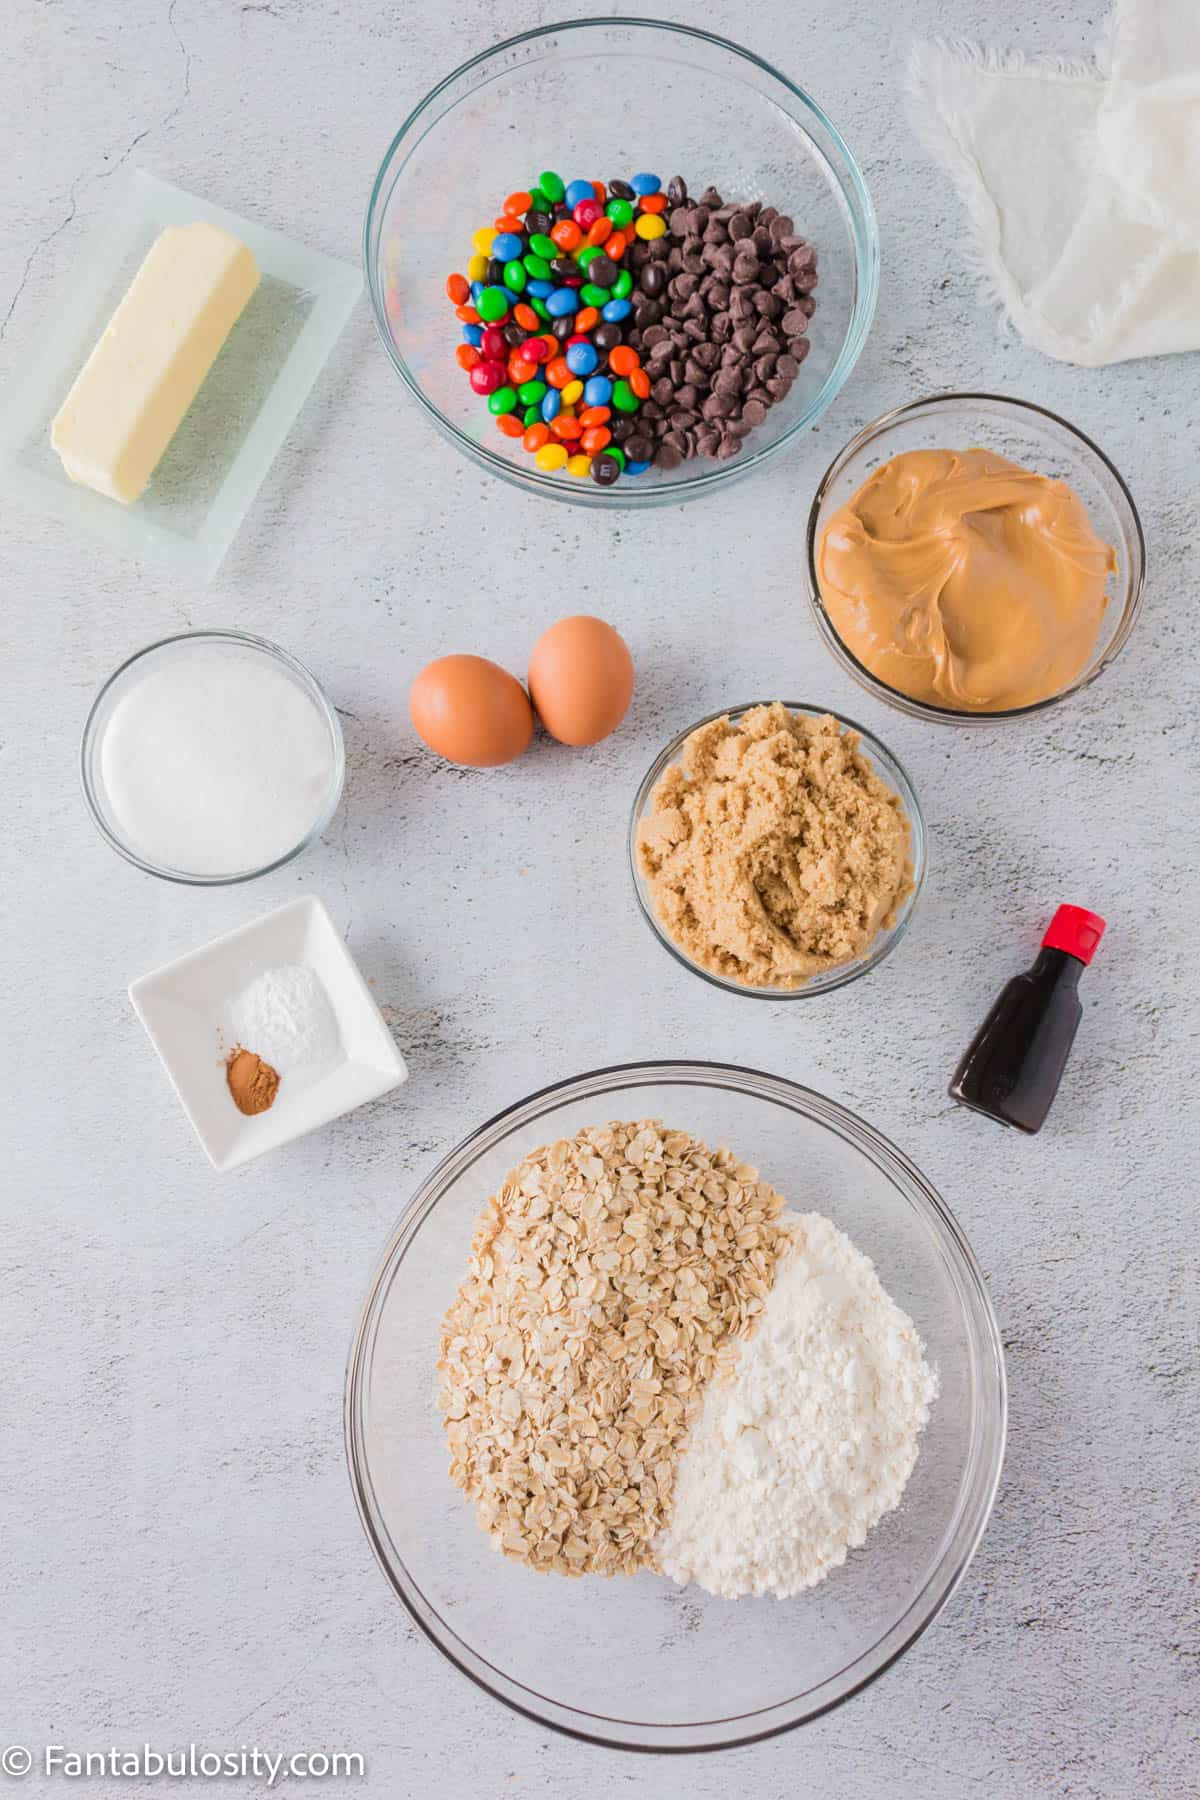
    It’s always a good idea to gather your ingredients before you start baking (to make sure you aren’t missing anything). This is what you’ll need to make your monster cookies.

    • 1 cup all purpose flour
    • 1 ½ cups quick-cooking oats *
    • 1 teaspoon baking soda
    • ¼ teaspoon ground cinnamon
    • ⅛ teaspoon salt
    • ½ cup chocolate chips
    • ½ cup chocolate M&Ms (or mini M&M)
    • ½ cup salted butter softened at room temperature
    • 1 cup light brown sugar
    • ½ cup granulated sugar
    • 1 ¼ cup creamy peanut butter *
    • 2 large eggs
    • 1 teaspoon vanilla extract
    • Optional: 1 ½ tablespoon cookie scoop (Oxo or similar)
    Ingredients for monster cookies.
    Ingredients

    How to make monster cookies

    1. Heat oven to 350 F.
    2. Line a baking sheet with parchment paper or a silicon mat.
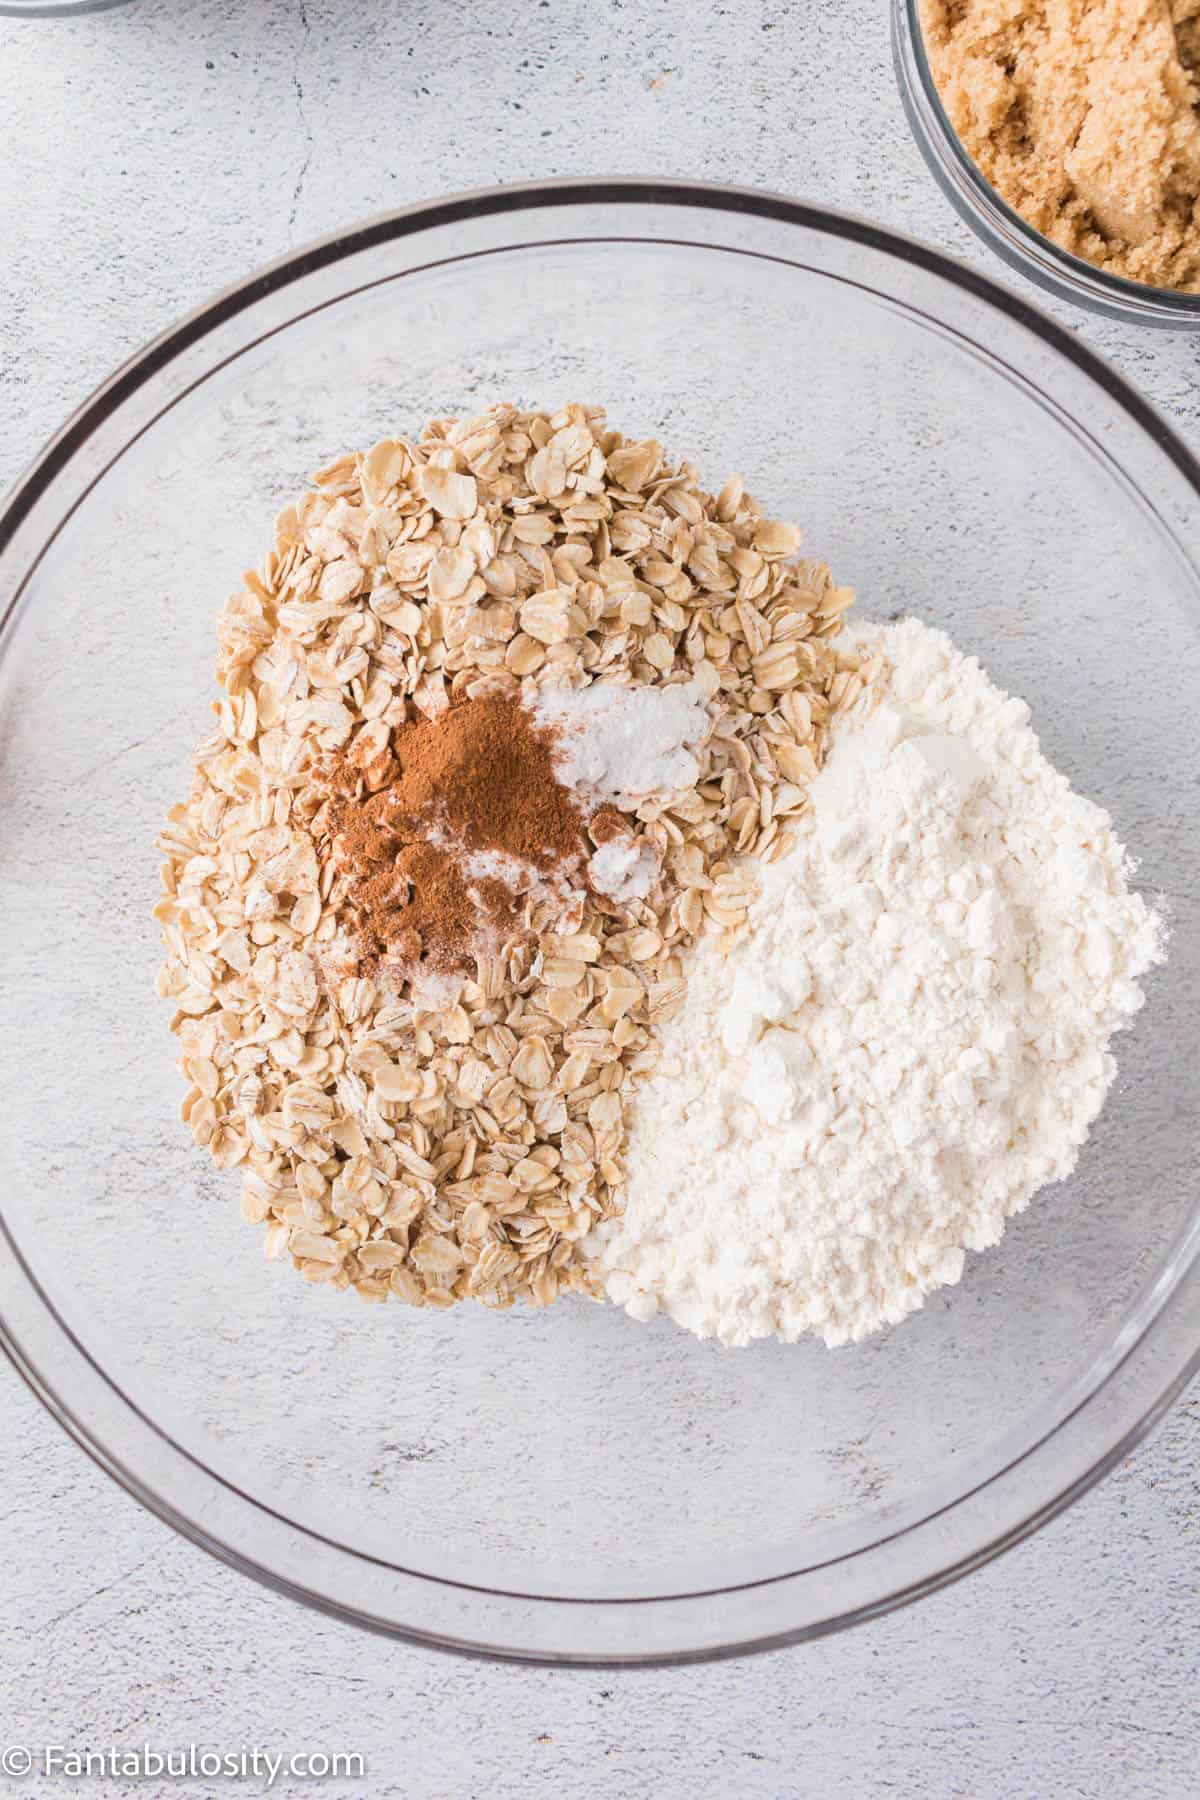
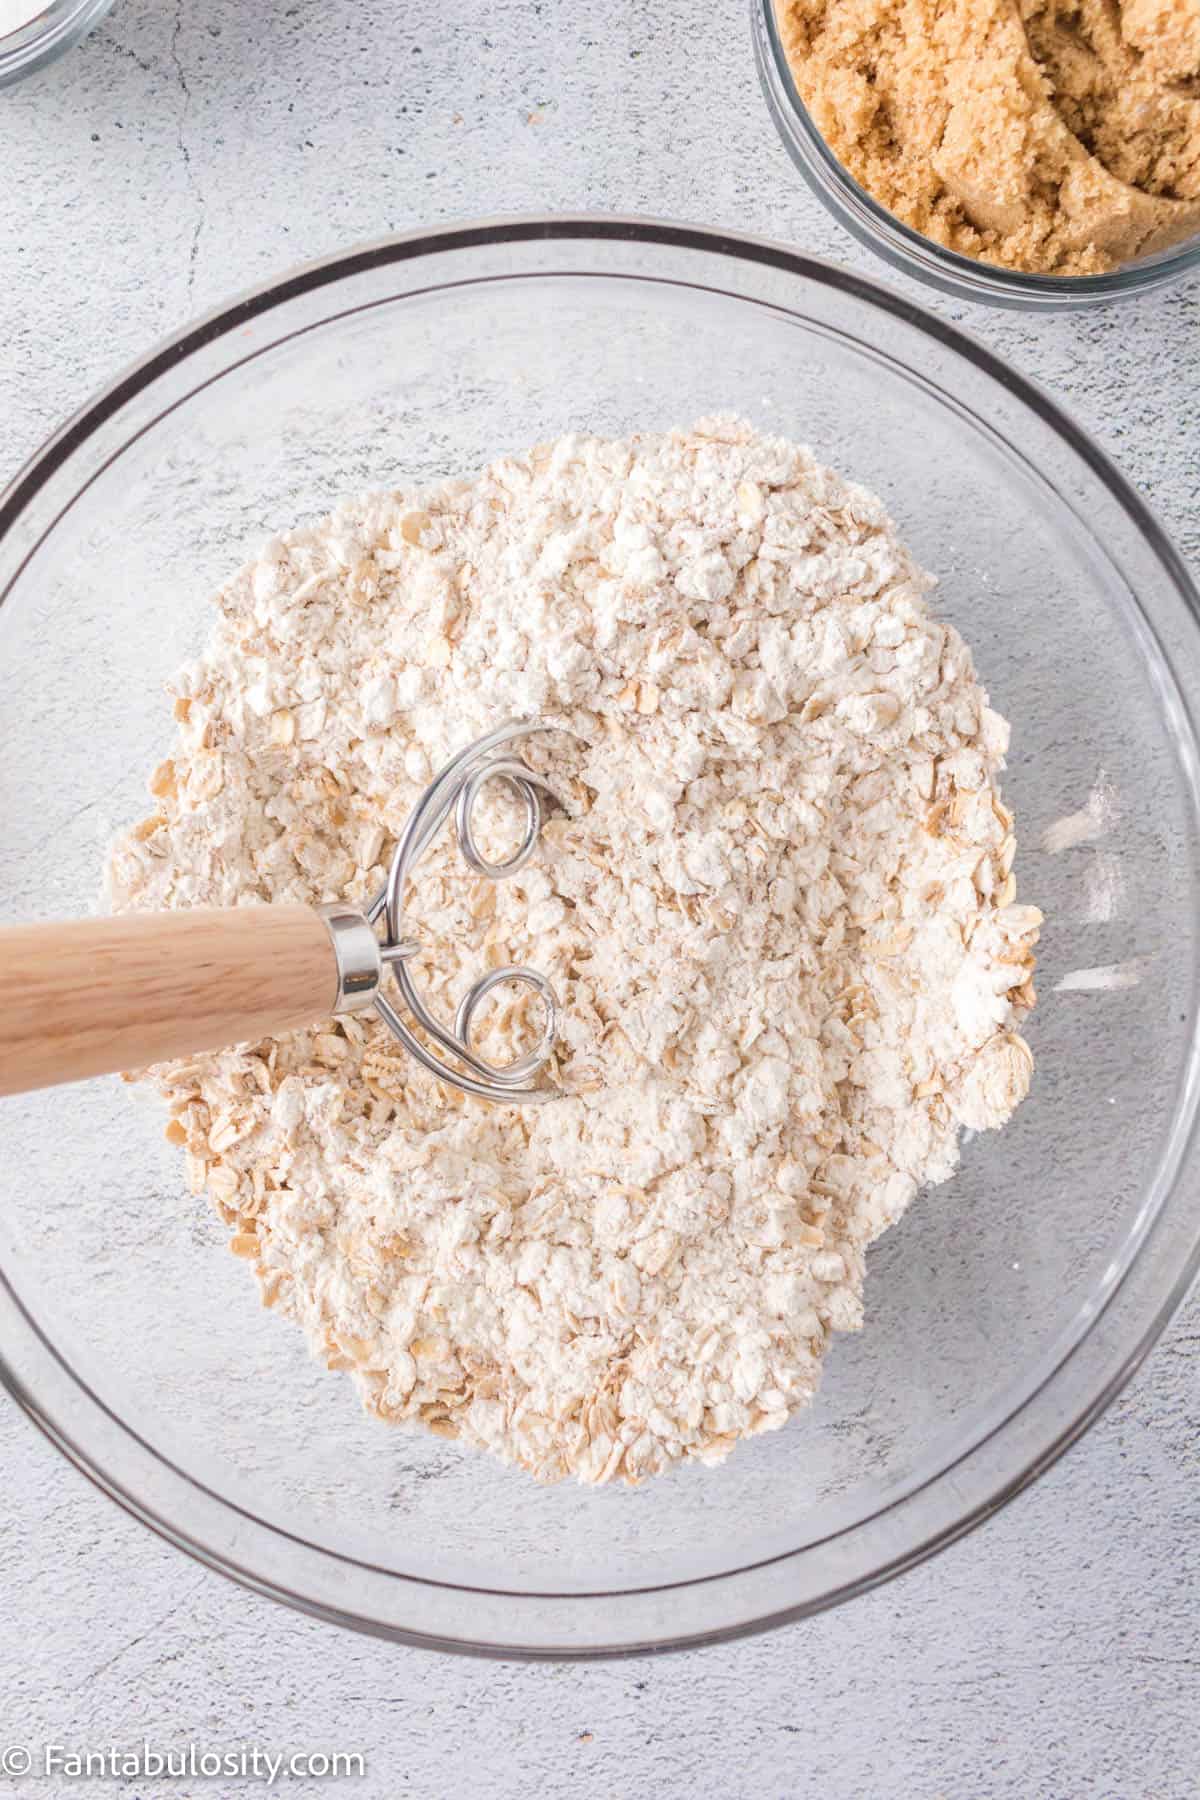
    3. In a large bowl, combine dry ingredients (flour, oats, baking soda, cinnamon, and salt). Mix well.

    Quick cooking oats are the best ones to use in this recipe. You can use old fashioned oats, but they will change the texture of the cookie and make it a lot more chewy.

    Flour, oats, cinnamon, baking soda and salt combined in a large bowl.
    Add dry ingredients to bowl.
    Dry ingredients mixed together in a glass bowl.
    Combine together.
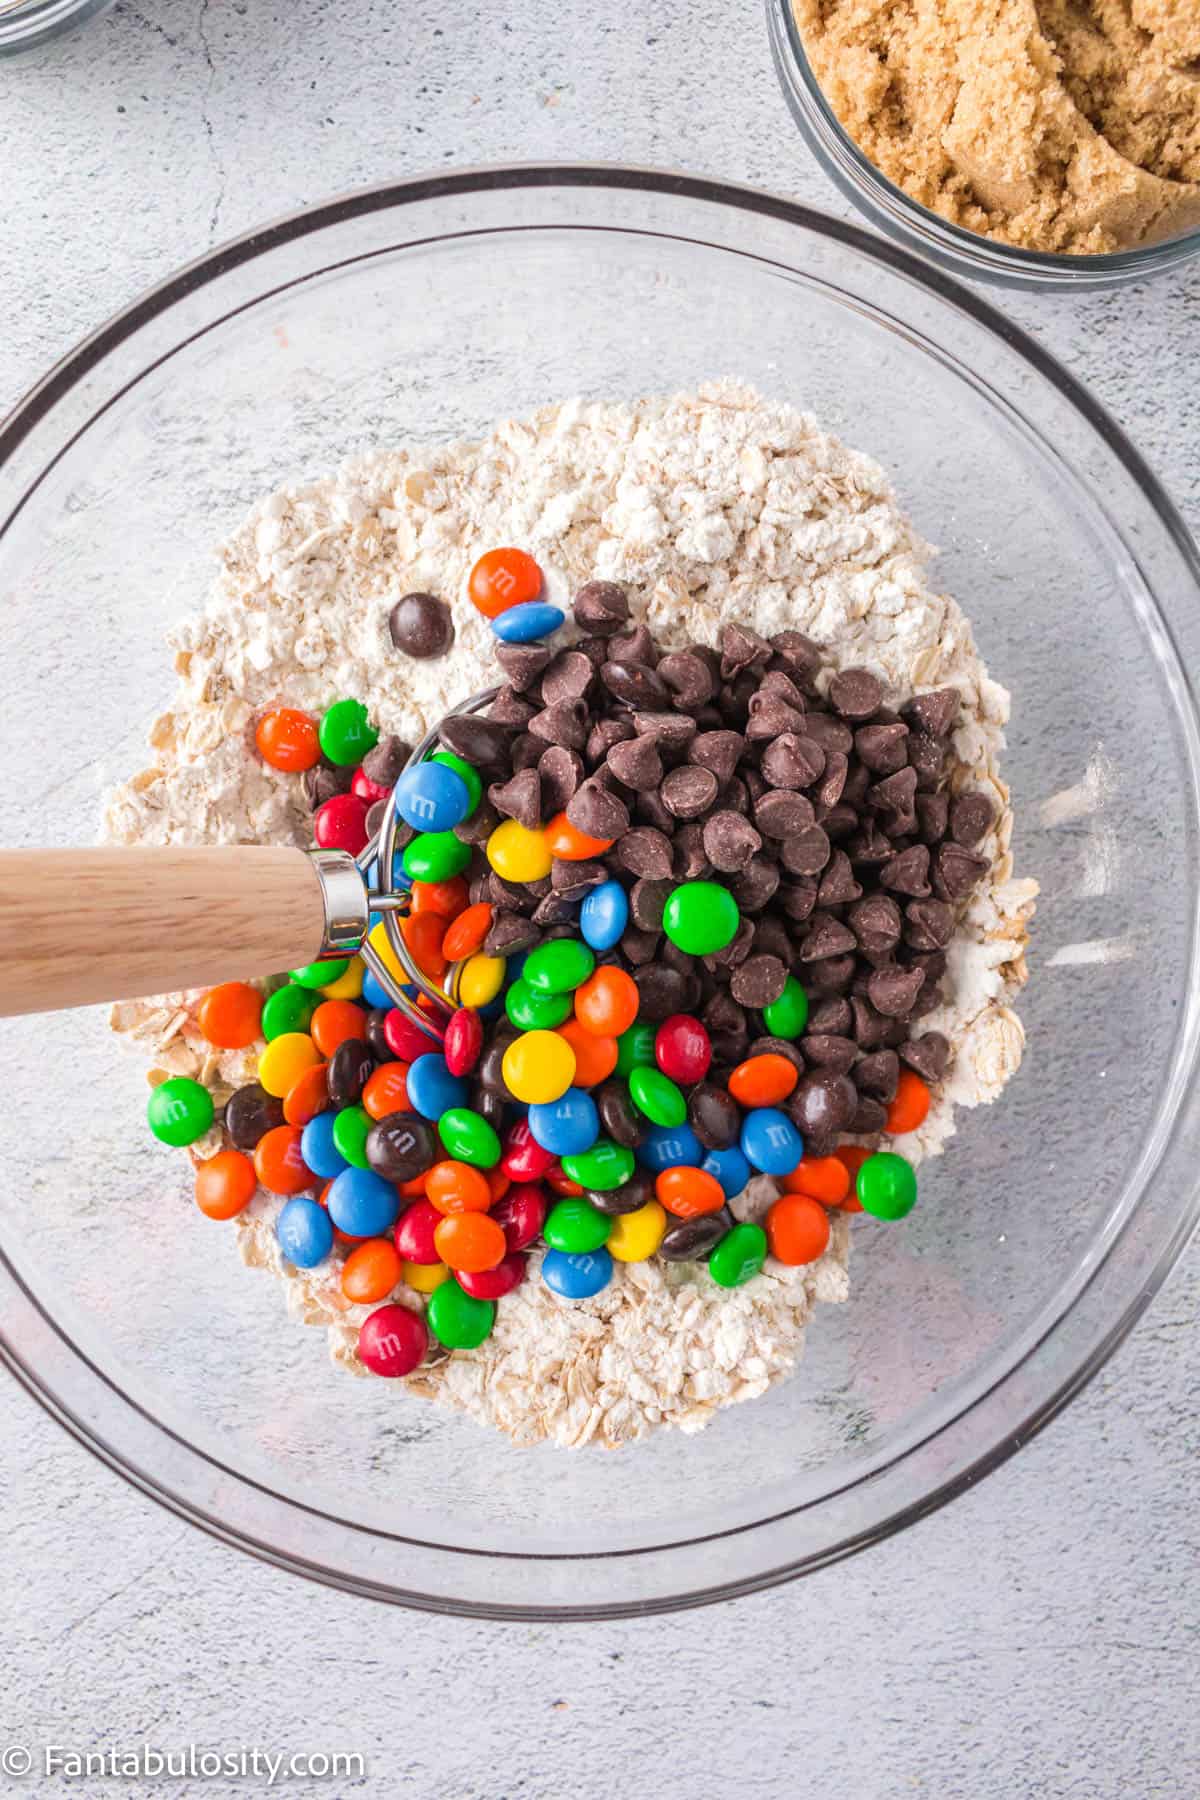
    1. Add the chocolate chips and the M&M chocolate candies to the flour mixture. Mix until they are coated. Set aside.
    Chocolate chips and m&ms added on top of the dry ingredients.
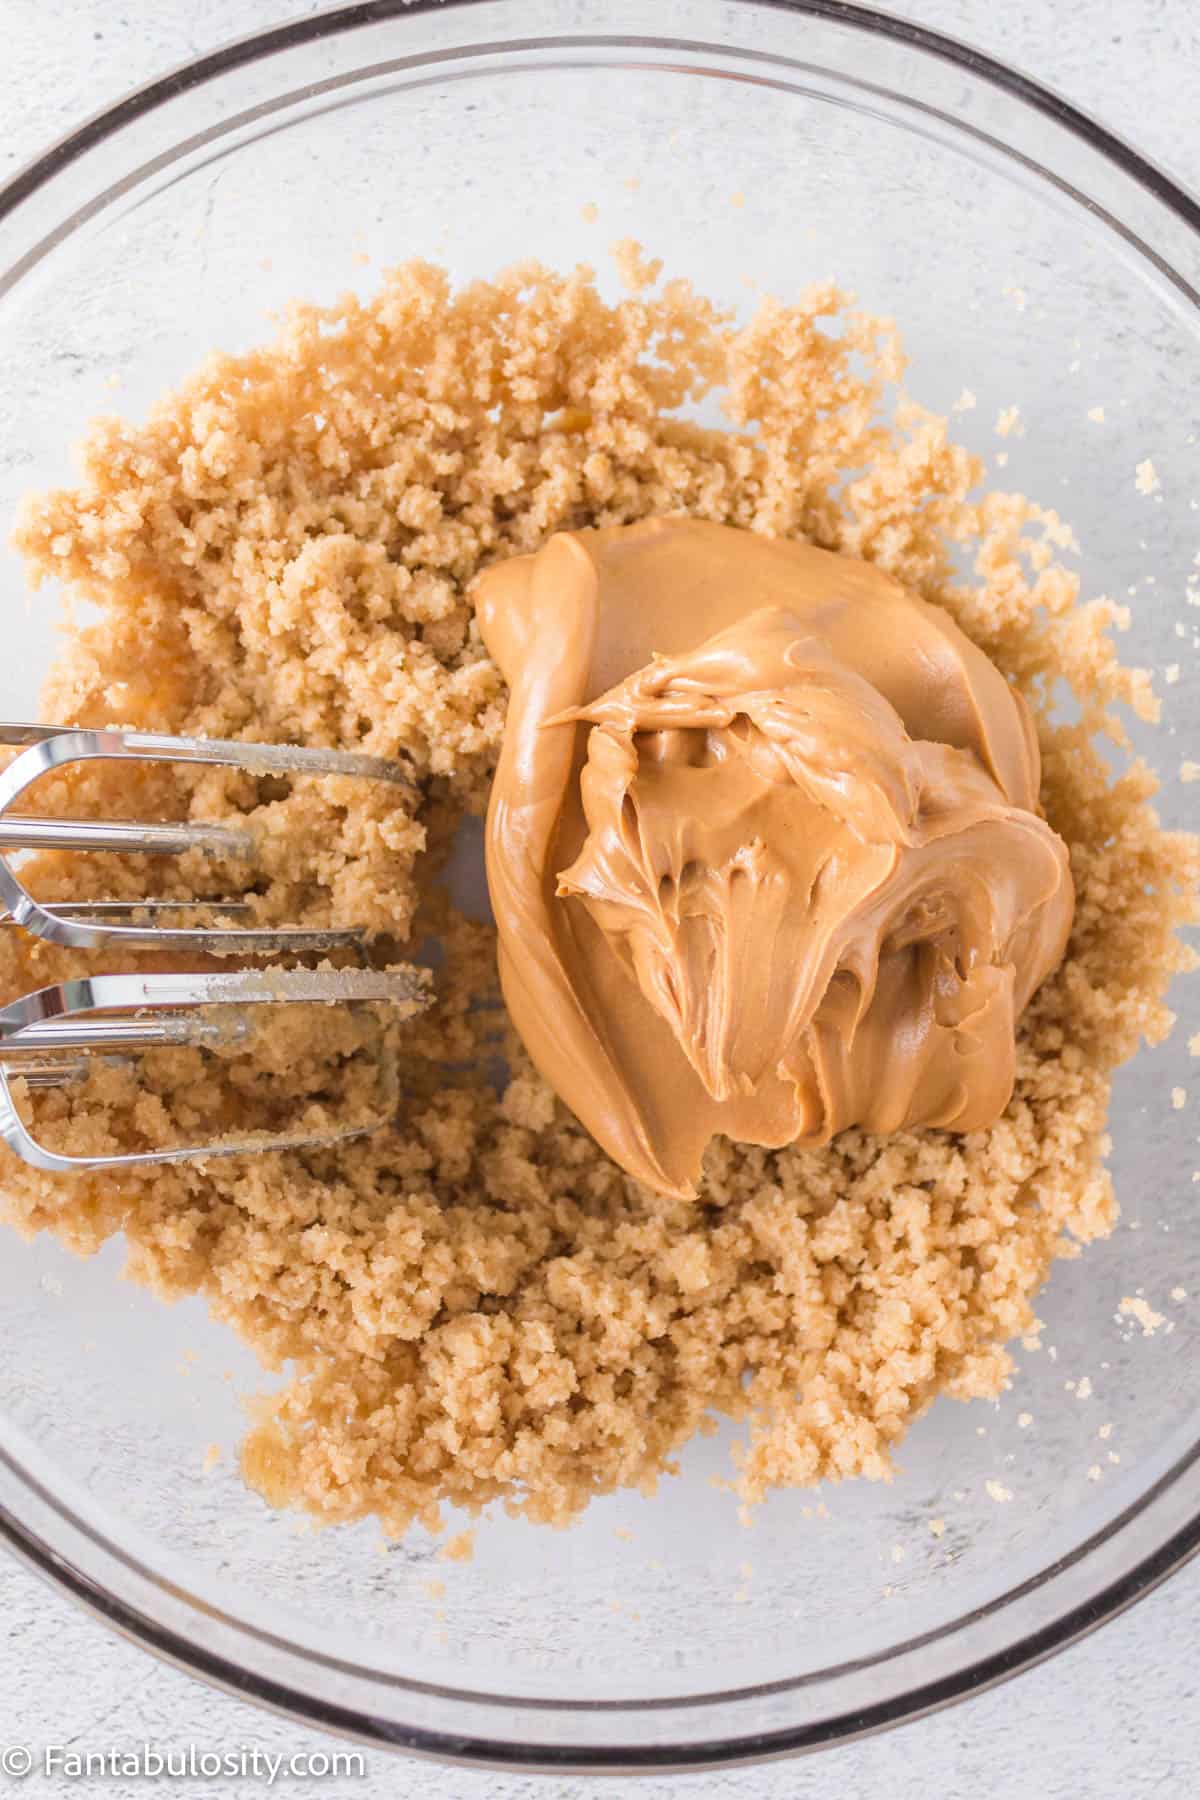
    1. In a large mixing bowl, use an electric mixer or hand mixer to mix butter and sugar together on medium speed (you can also do this with a stand mixer). Mix until it’s combined and you have a thick dough.  
    2. Add the peanut butter and vanilla, and mix on low speed until combined

    You can use either creamy peanut butter or chunky peanut butter for this recipe, but natural peanut butter/nut butters don’t work very well.

    Peanut butter added to the bowl with the butter and sugar mixture (now combined).
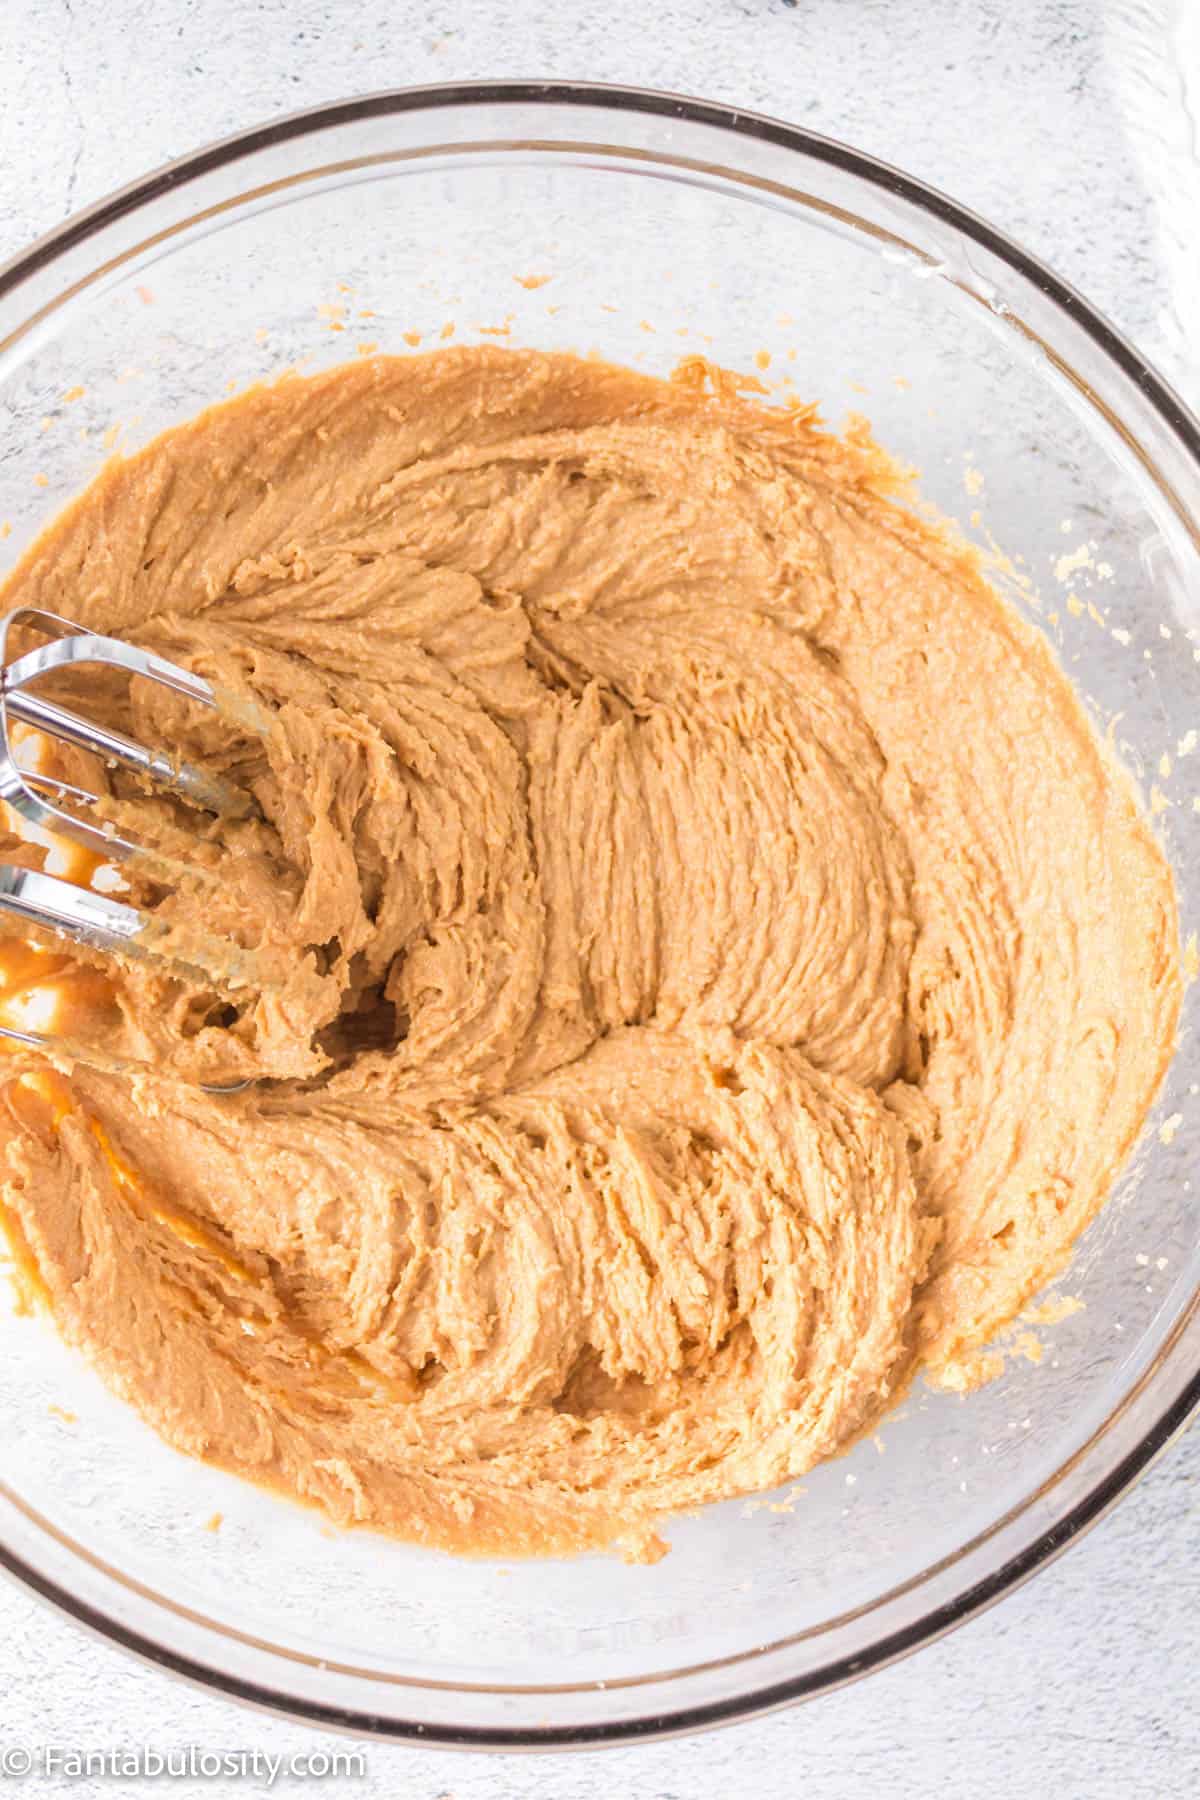
    1. Add the eggs, one at the time, mixing in between each one. 
    The peanut butter, butter and sugar mixture after it is all combined.
    Add eggs and mix.
    1. Next add about ⅓ of the flour mixture to the wet ingredients. Mix until the flour is all incorporated. Repeat until all the flour is mixed into the wet ingredients. You will have a thick dough. 
    Thick monster cookie dough in a bowl, all combined.
    1. Take a cookie scoop and scoop 1 ½ tablespoons of dough into a ball. Place the balls of dough on the prepared cookie sheets leaving 1 ½ to 2-inch space in between them as they will spread. Place a couple M&Ms on top of the cookie to make it look pretty, if you like.

    You can use an ice cream scoop instead of a smaller scoop, but that will result in giant monster cookies and you will need to adjust the baking time (they will need to bake longer than the recipe says- watch them closely to see when they are done). 

    1. Bake in the preheated oven for 12-14 minutes until the edges are set and the cookie is golden brown. The middle will still be soft as these are thick cookies, but keep in mind they will continue to firm up as they cool. 
    Balls of rolled dough on a cookie sheet with parchment paper on it.
    Place rolled dough on prepared baking sheet.
    1. Leave the cookie on the pan for 3 to 4 minutes then transfer to a wire rack.
    2. Enjoy your chewy monster cookies!
    A plate of baked monster cookies.
    Enjoy your chewy cookies!

    Variations

    You could play around with the type of candy and chocolate pieces you add into this recipe to create a totally different cookie with the same yummy peanut butter cookie base!

    • Christmas monster cookies – add in red and green M&Ms to make these super festive and fun!
    • Fancy -instead of milk chocolate chips, add in ¼ cup of white chocolate chips and ¼ cup of dark chocolate chips!
    • Peanut butter monster cookies– if you want to play up the peanut butter flavor in this cookie, try replacing the chocolate chips with ¼ cup of butterscotch chips and ¼ cup of peanut butter chips. You could also replace the M&Ms with Reese Pieces!
    • Monster mash – if you want to turn these into Halloween cookies, you can replace the M&Ms with orange and black seasonal ones OR try using candy corn instead of M&Ms (we haven’t tried this, but it sounds tasty)!

    No matter what you add into it, this monster cookie recipe is the best recipe to whip up for after-school snack, that bake sale, or just because!

    Equipment

    To get 46 cookies from this recipe, we used a 1 ½ tablespoon cookie scoop. (size medium).

    You could also use a tablespoon and get a heaping scoop for each dough ball, or an ice cream scoop (but if it makes larger dough balls you will need to let it cook a bit longer).

    Storage

    Keep them in an airtight container at room temperature for 4 to 5 days or in the fridge for up to 1 week.

    stacked monster cookies
    Delicious Monster Cookies

    FAQs

    Can Monster cookie dough be frozen?

    Yes! You can freeze the uncooked dough.

    I like to form them into a ball, freeze them for 20 minutes on a plate lined with parchment paper then put them into a plastic freezer bag or freezer-safe container. Doing it this way they all freeze individually, and it is easier for me to pick only a few out when I am ready to cook them.

    You can store these dough balls in the freezer for up to 6 weeks (which is perfect if you want to be able to whip up fresh cookies for company in mere minutes- just pop these in the oven and voila!).

    How do I bake frozen monster cookie dough?

    You have two options for baking frozen dough balls…

    1. You put them on the prepared baking sheet and let them thaw, then you cook them as the recipe states, or

    2. You lower the oven temperature by 15°, put the frozen dough on the prepared baking sheet and bake it for 3-5 minutes longer than the recipe says (watching closely at the end to see when they are done).

    Should refrigerated cookie dough be brought to room temperature before baking?

    This really depends on the recipe. Some recipes call for refrigeration of the dough because it helps the cookies hold their shape.

    As a general rule, cold dough won’t spread as much as room temperature dough will. If you refrigerate this monster cookie dough, you can choose to bake it from chilled or let it warm back up to room temperature before baking.

    *Note: You don’t have to adjust the baking time for dough that is cold from the fridge, ONLY for frozen dough.

    Expert Tips

    This recipe makes a LOT of cookies, which is a good thing because chewy chocolate cookies are basically everyone’s favorite type of cookie!

    Freeze some dough for later OR package these cookies up nicely and give them as a gift to your friends and neighbours!

    Related Recipes

    If you’re looking for other yummy dessert recipes that can feed a crowd, check out these strawberry cheesecake cookies and these Double Tree Chocolate Chip Cookies!

    Recipe

    Monster Cookies
    Print Pin
    5 from 5 votes

    Chewy Monster Cookies

    Monster Cookies: These chewy monster cookies are made with oats, chocolate chips, M&M's, and a few other staple ingredients, making them the best monster cookies ever!
    Course Dessert
    Cuisine American
    Prep Time 10 minutes minutes
    Cook Time 14 minutes minutes
    Total Time 24 minutes minutes
    Servings 46 cookies
    Calories 130kcal
    Author Jessica Burgess

    Equipment

    • 1 ½ tablespoon cookie scoop (Oxo or similar)

    Ingredients

    • 1 cup all purpose flour
    • 1 ½ cups quick-cooking oats *
    • 1 teaspoon baking soda
    • ¼ teaspoon ground cinnamon
    • ⅛ teaspoon salt
    • ½ cup chocolate chips
    • ½ cup chocolate M&Ms
    • ½ cup salted butter softened at room temperature
    • 1 cup light brown sugar
    • ½ cup granulated sugar
    • 1 ¼ cup creamy peanut butter *
    • 1 teaspoon vanilla extract
    • 2 large eggs

    Instructions

    • Heat oven to 350 F.
    • Line a baking sheet with parchment paper or a silicon mat.
    • In a large bowl, combine dry ingredients (flour, oats, baking soda, cinnamon, and salt). Mix well. 
    • Add the chocolate chips and the M&Ms to the flour mixture. Mix until they are coated. Set aside.
    • In a large mixing bowl, use an electric mixer or hand mixer to mix butter and sugar together on medium speed (you can also do this with a stand mixer). Mix until it's combined and you have a thick dough.  
    • Add the peanut butter and vanilla, and mix on low speed until combined
    • Add the eggs, one at the time, mixing in between each one. 
    • Add about ⅓ of the flour mixture to the wet ingredients. Mix until the flour is all incorporated. Repeat until all the flour is mixed into the wet ingredients. You will have a thick dough. 
    • Take a cookie scoop and scoop 1 ½ tablespoons of dough into a ball. Place the balls of dough on the prepared baking sheet leaving 1 ½ to 2-inch space in between them as they will spread. 
      You can use an ice cream scoop instead of a smaller scoop, but that will result in larger cookies and you will need to adjust the baking time until they look fully cooked.
    • Bake in the preheated oven for 12-14 minutes until the edges are set and the cookie is golden brown. The middle will still be soft as these are thick cookies, but keep in mind they will continue to firm up as they cool. 
    • Leave the cookie on the pan for 3 to 4 minutes then transfer to a cooling rack.
    • Enjoy your chewy monster cookies!

    Video

    Notes

    *Quick oats work best for this recipe. If you use old-fashioned oats it affects the texture of the cookie. 
    *You can use creamy peanut butter or chunky peanut butter for this recipe, but we would not recommend using natural peanut butter or other natural nut butters (they don’t work well in this recipe).
     
    STORAGE: Keep them in an airtight container at room temperature for 4 to 5 days or in the fridge for up to 1 week.
     
    FREEZING: You can freeze the uncooked dough.
    I like to form them into a ball, freeze them for 20 minutes on a plate lined with parchment paper then put them into a plastic freezer bag or freezer safe container. Doing it this way they all freeze individually, and it is easier for me to pick only a few out when I am ready to cook them.
    You can store these dough balls in the freezer for up to 6 weeks (which is perfect if you want to be able to whip up fresh cookies for company in mere minutes- just pop these in the oven and voila!).

    Nutrition

    Serving: 1cookie | Calories: 130kcal | Carbohydrates: 15g | Protein: 3g | Fat: 7g | Saturated Fat: 3g | Polyunsaturated Fat: 1g | Monounsaturated Fat: 2g | Trans Fat: 1g | Cholesterol: 14mg | Sodium: 87mg | Potassium: 68mg | Fiber: 1g | Sugar: 10g | Vitamin A: 83IU | Vitamin C: 1mg | Calcium: 15mg | Iron: 1mg

    “You Are my Sunshine, Valentine” Classroom Valentines

    January 31, 2022

    CLASSROOM VALENTINES WITH FREE PRINTABLE! "You are my Sunshine Valentine" Heart Sunglasses, Valentines for Classroom or classmates for preschool; non-candy, healthy idea https://fantabulosity.com

    Valentine Sunglasses: Such a fun classroom idea for Valentine’s Day that’s a great alternative to sugar and sweets!

    Red heart-shaped sunglasses with "You are my sunshine valentine" printable
    Valentine’s Day Sunglasses

    If you’re like me, I’m always trying to think of a way to create non-candy-related items for my son’s school treats, for classroom parties. They get SOOO much candy at school parties, and we are literally struggling on a daily basis at home afterward, explaining to my son why he can’t sit and just eat… and eat… and eat… candy.

    So one year, I was determined to come up with Valentine’s Day treat idea, that his classmates would love but wouldn’t be just another sugary treat!

    Valentine Sunglasses

    Heart shaped sunglasses with yellow printable of a sun.

    Perfect for everyone in the classroom, you can buy little heart-shaped sunglasses, usually as party-favors, very affordably!

    Then, you can simply secure one of the little free printables I’ve provided below!

    Now, you have a classroom valentine treat that the kiddos will love that’s not full of sugar.

    Red heart-shaped sunglasses on table with yellow sun cut-out
    Classroom Valentine Idea

    Free Printable Options

    When I first made these Valentine’s, I loved the idea of having the “sun” as the free printable tag to attach to the sunglasses.

    However, I’ll be totally real…

    Cutting out all of those little suns, with the little rays… can be a bit tedious. Possible, doable, but tedious.

    So I wanted to create a second option for you, that would be easier to cut out and is just as cute!

    Sun Printable

    Such an adorable free printable tag and if you don’t mind cutting around all of the sun rays, you can get this sun printable tag here!

    You are my sunshine, valentine free printable.

    Heart-Shaped Printable

    A much easier tag to cut out, these heart-shaped tags include the same message, with that “yellow” pop of color that looks adorable to tie in the color of the sun! You can get the heart-shaped tag here!

    yellow hearts printable
    Yellow heart shaped free printable tags

    How to Assemble Sunglasses

    You can either tie the tag on the sunglasses with adorable bakers twine, or you could even grab “glue dots,” and stick the tag on the sunglasses that way!

    Tape will work as well, it just didn’t stick as well as I’d like when I tried it.

    More Valentine’s Day Ideas

    While you’re on the hunt for Valentine’s Day ideas, you’ll also love this “Booking it Over Here to Tell You…” valentine’s idea and the “You’re the Apple of my Eye” Valentine idea! Unless you don’t mind the sweets, then you’ll also love this Valentine’s snack mix!

    Recipe

    Yield: 12

    "You Are my Sunshine, Valentine" Classroom Valentines

    red sunglasses with yellow sticker
    No Ratings

    Heart-shaped sunglasses with free printable tag, for a classroom Valentine's Day idea!

    Active Time 30 minutes
    Total Time 30 minutes
    Difficulty Easy

    Materials

    • heart-shaped sunglasses
    • free printable tags
    • glue dots

    Tools

    • scissors
    • printer

    Instructions

    1. Purchase as many heart-shaped sunglasses as you need.
    2. Print off the free printable tag of your choice. (See blog post for options and link to download.)
    3. Cut out each tag (sun or the heart) and simply secure each tag on to a pair of sunglasses! (We prefer using glue-dots but can also use string to tie them on.)
    © Jessica
    Category: Valentine's Day

    Strawberry Crunch Cheesecake

    January 29, 2022

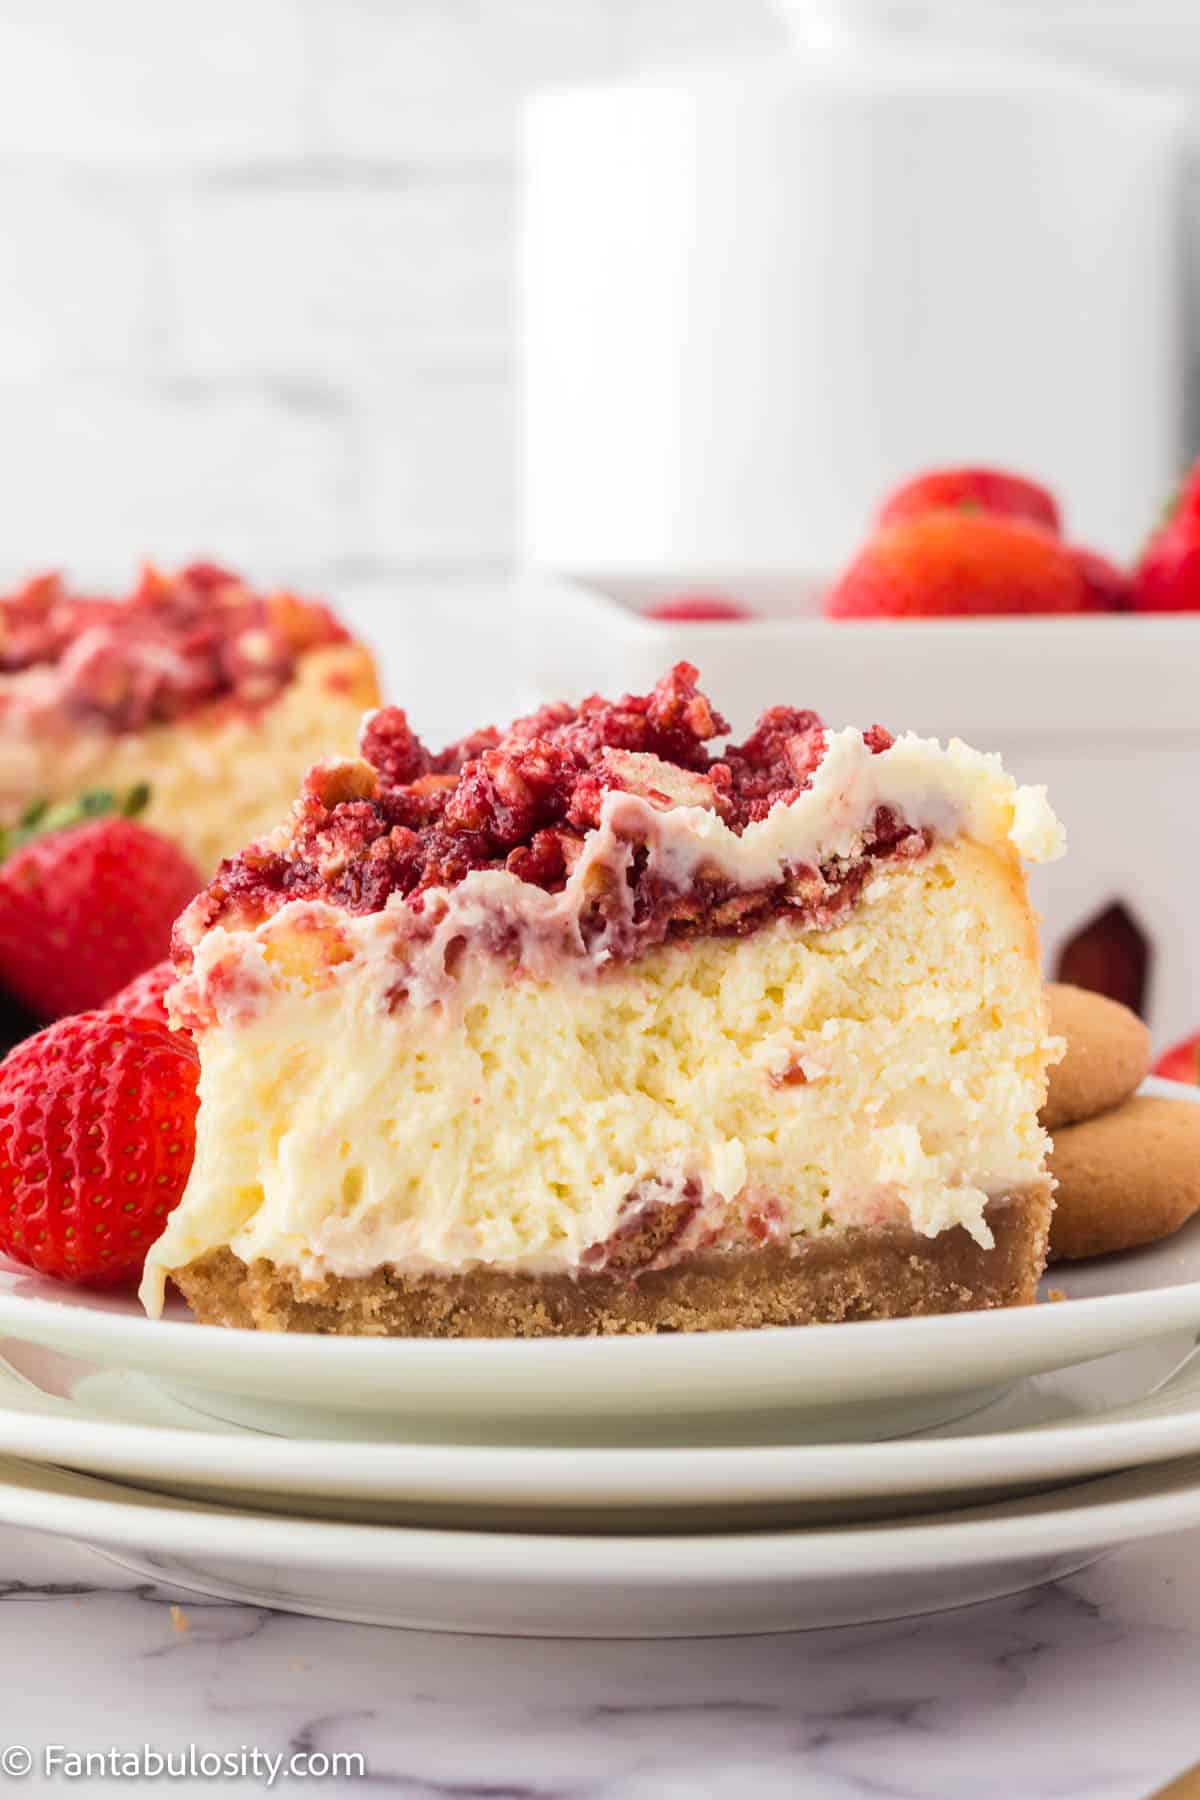
    Strawberry Crunch Cheesecake

    Strawberry Crunch Cheesecake: Inspired by strawberry crunch ice cream bars like Scooter Crunch, this cheesecake has a sweet, crunchy, delicious crumble topping that sets it apart from other cheesecakes!

    You will also absolutely LOVE these cheesecake filled strawberries, and this strawberry cream cheese cake.

    Strawberry crunch cheesecake.

    Why You’ll Love This Strawberry Crunch Cheesecake Recipe

    If strawberry crunch was your favorite ice cream bar growing up, you will love this cheesecake. This dessert combines creamy cheesecake goodness with the nostalgic crunch and flavor of those ice cream bars (and when you can have two of your favorite things in one, that’s a win)!

    We know that making a baked cheesecake can be intimidating and takes a bit of time, but we also know you can do it! If you want something a little easier to prepare, this cream cheese and strawberry dump cake is a great way to get that cheesecake flavor you love, using a store-bought cake mix.

    If you do want to start with a no-bake cheesecake and build up to this one, check out our easy no-bake s’mores cheesecake or no-bake Oreo cheesecake.

    Just be sure to come back and give this one a try after!

    [feast_advanced_jump_to]
    Strawberry crunch cheesecake.

    Ingredients

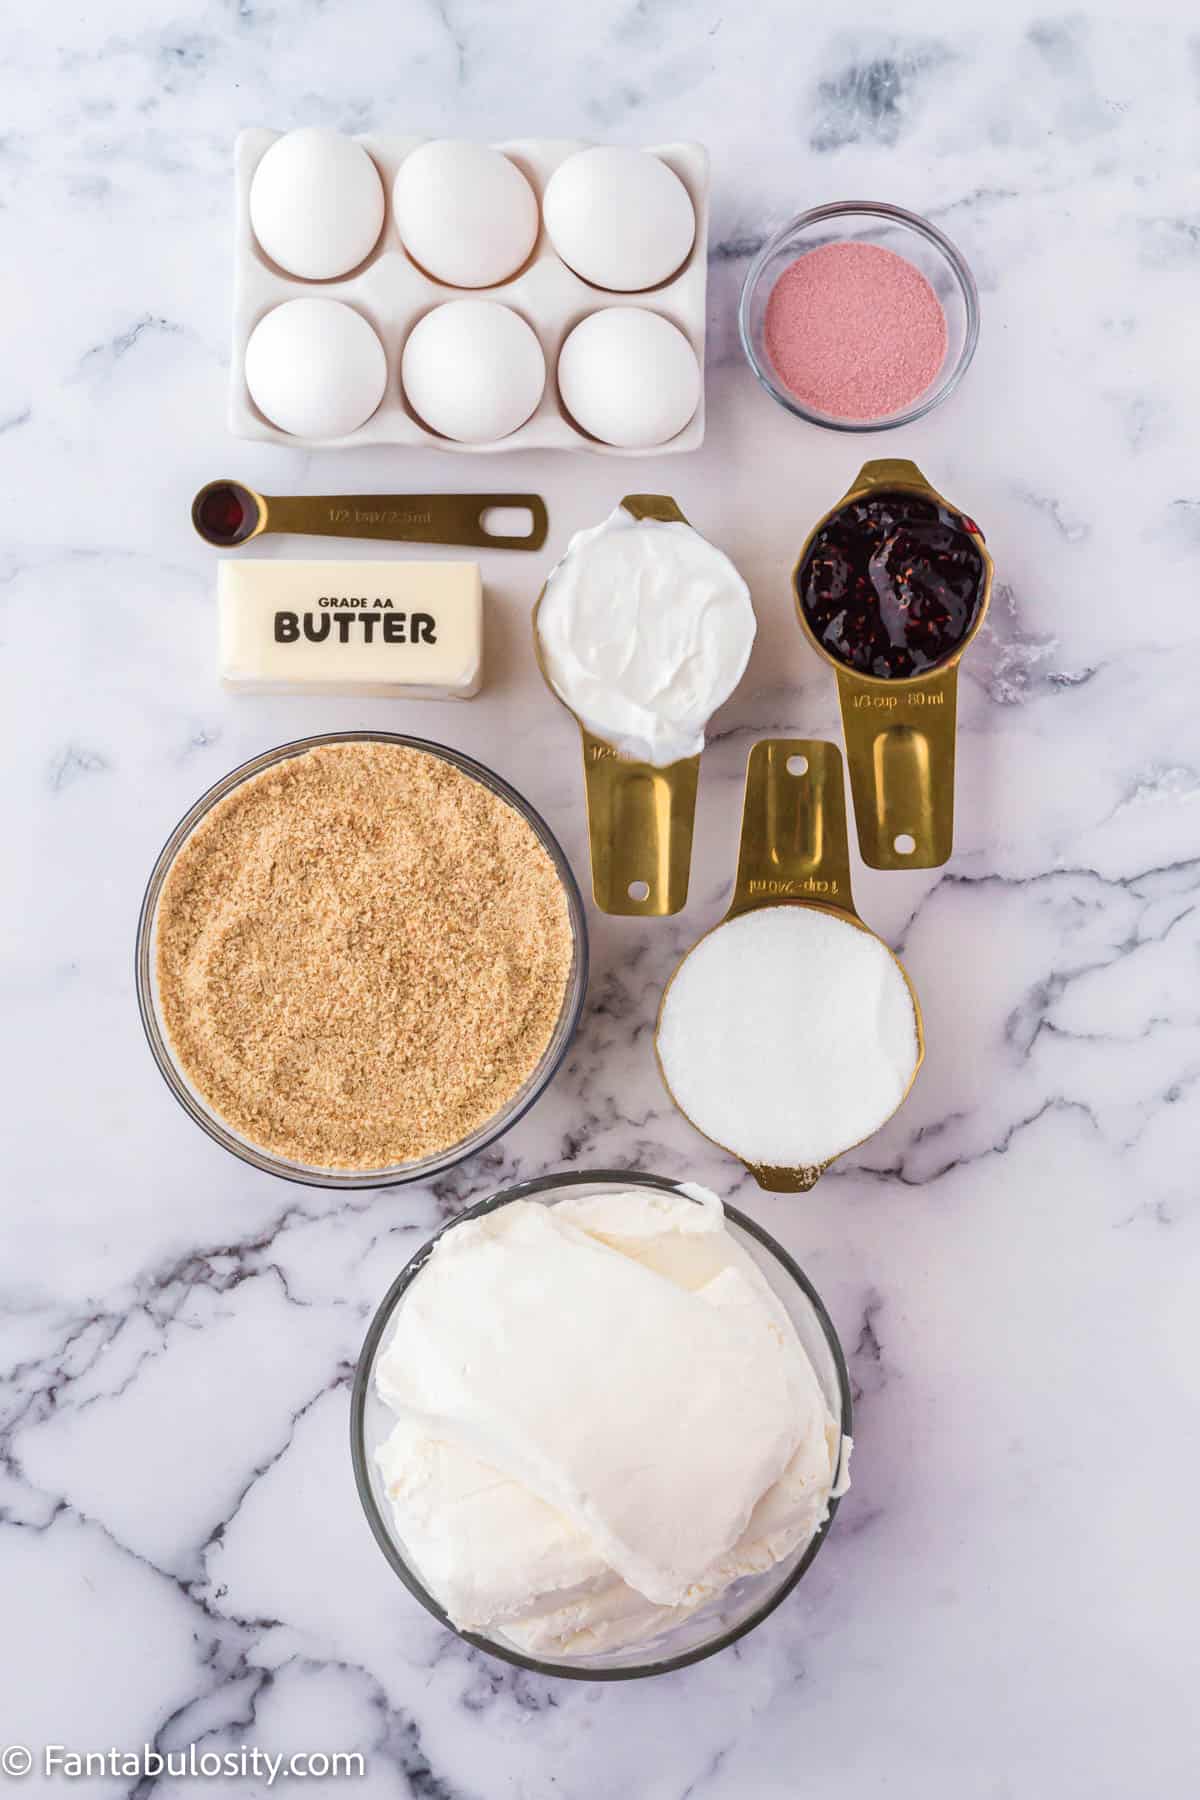
    The first step you need to take is to gather up all of your ingredients. You’ll need:

    • 4 – 8 oz blocks of cream cheese, room temperature
    • 4 large eggs
    • ½ cup sour cream
    • ½ teaspoon vanilla extract
    • 1 cup white sugar
    • 1 ½ cups vanilla wafer cookies*, finely crumbled
    • ½ cup unsalted butter, melted
    • 1 tablespoon strawberry Jell-O powder
    • ⅓ cup strawberry preserves
    • 1 ½ vanilla wafer cookies*, roughly crumbled
    • 9″ springform cheesecake pan

    *for the substitutions: you can use golden Oreos instead of vanilla wafers

    Ingredients for strawberry crunch cheesecake

    Instructions

    1. Preheat the oven to 350 degrees Fahrenheit and fill a cookie sheet with ¼ inch of water. Spray just the bottom of a 9″ springform pan with cooking spray (otherwise your cheesecake crust may stick to the pan).
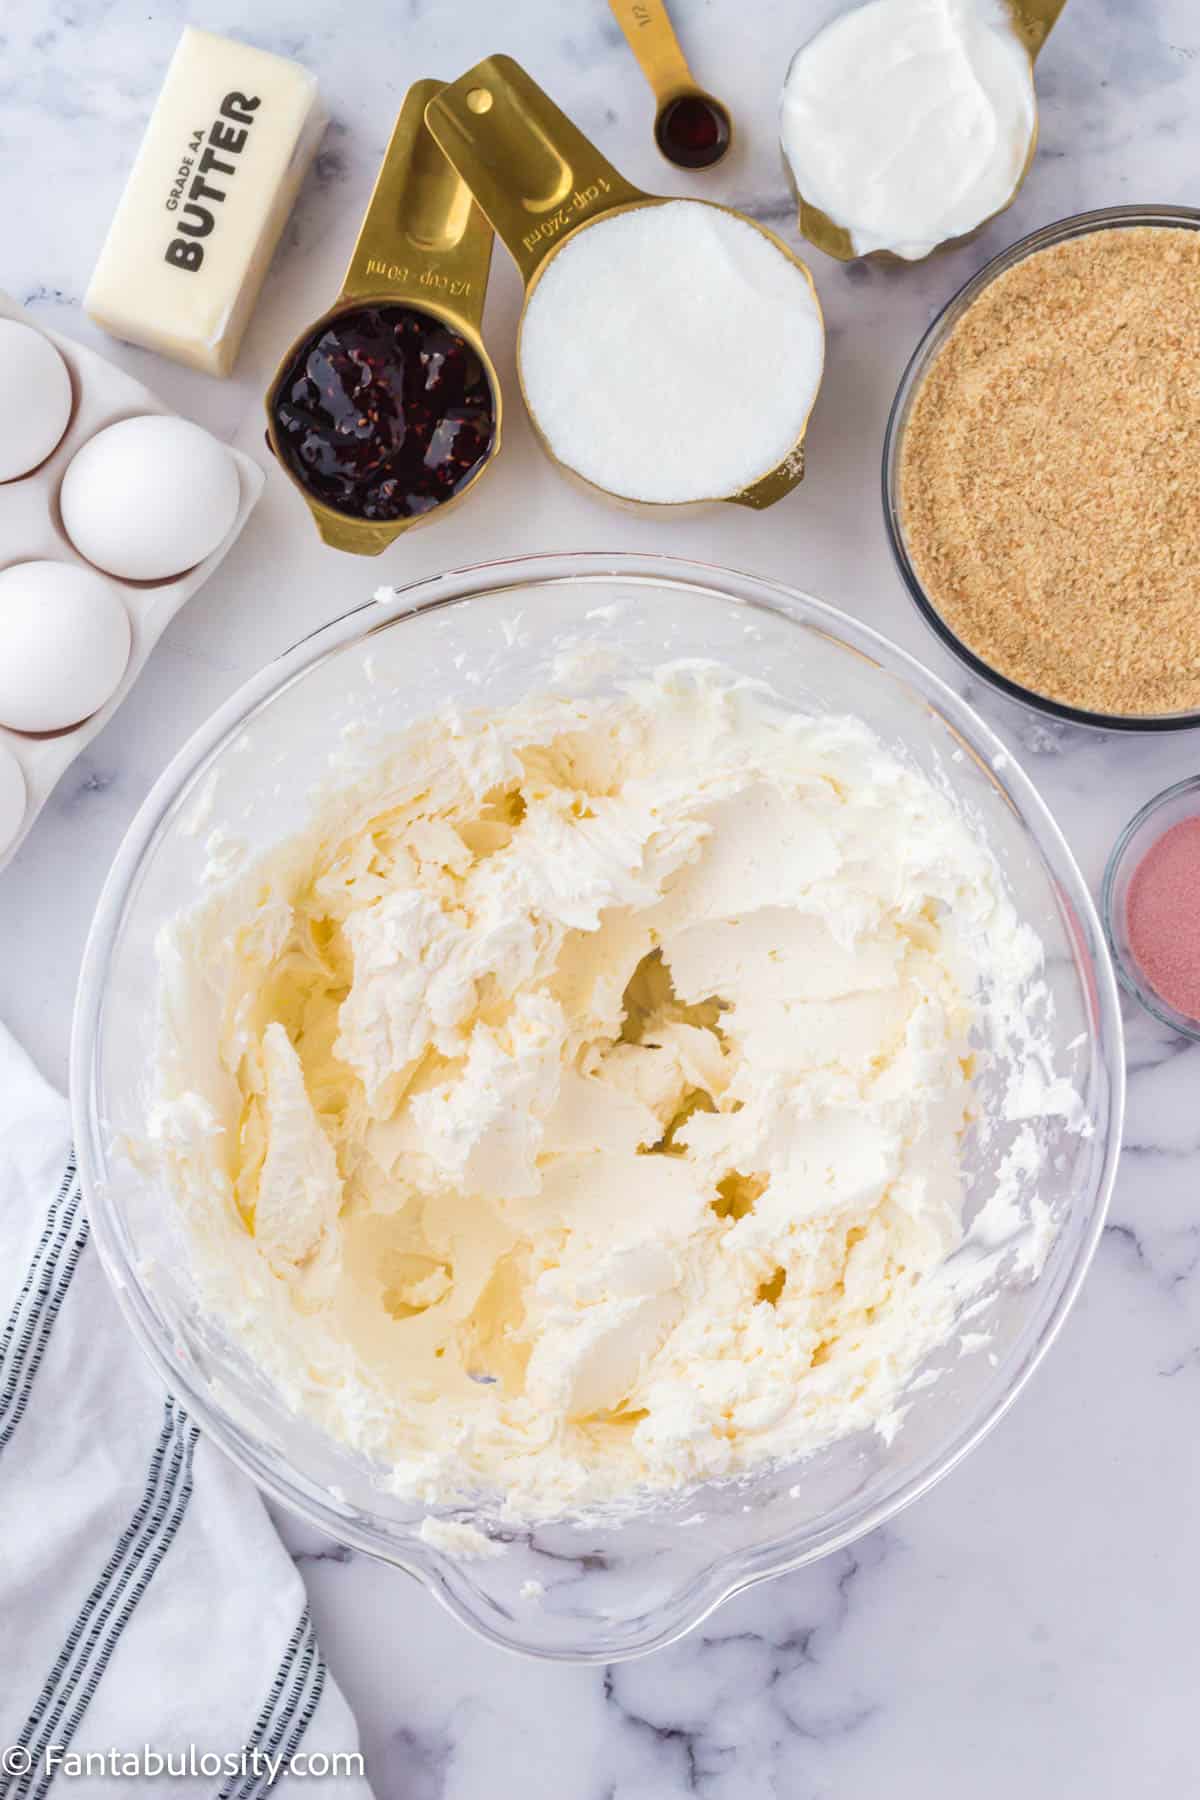
    2. In a large bowl or the bowl of a stand mixer, whip all 32 ounces cream cheese until it is soft and smooth. This will take 3-5 minutes depending on the temperature of your cream cheese.
    Cream cheese beaten in mixing bowl.
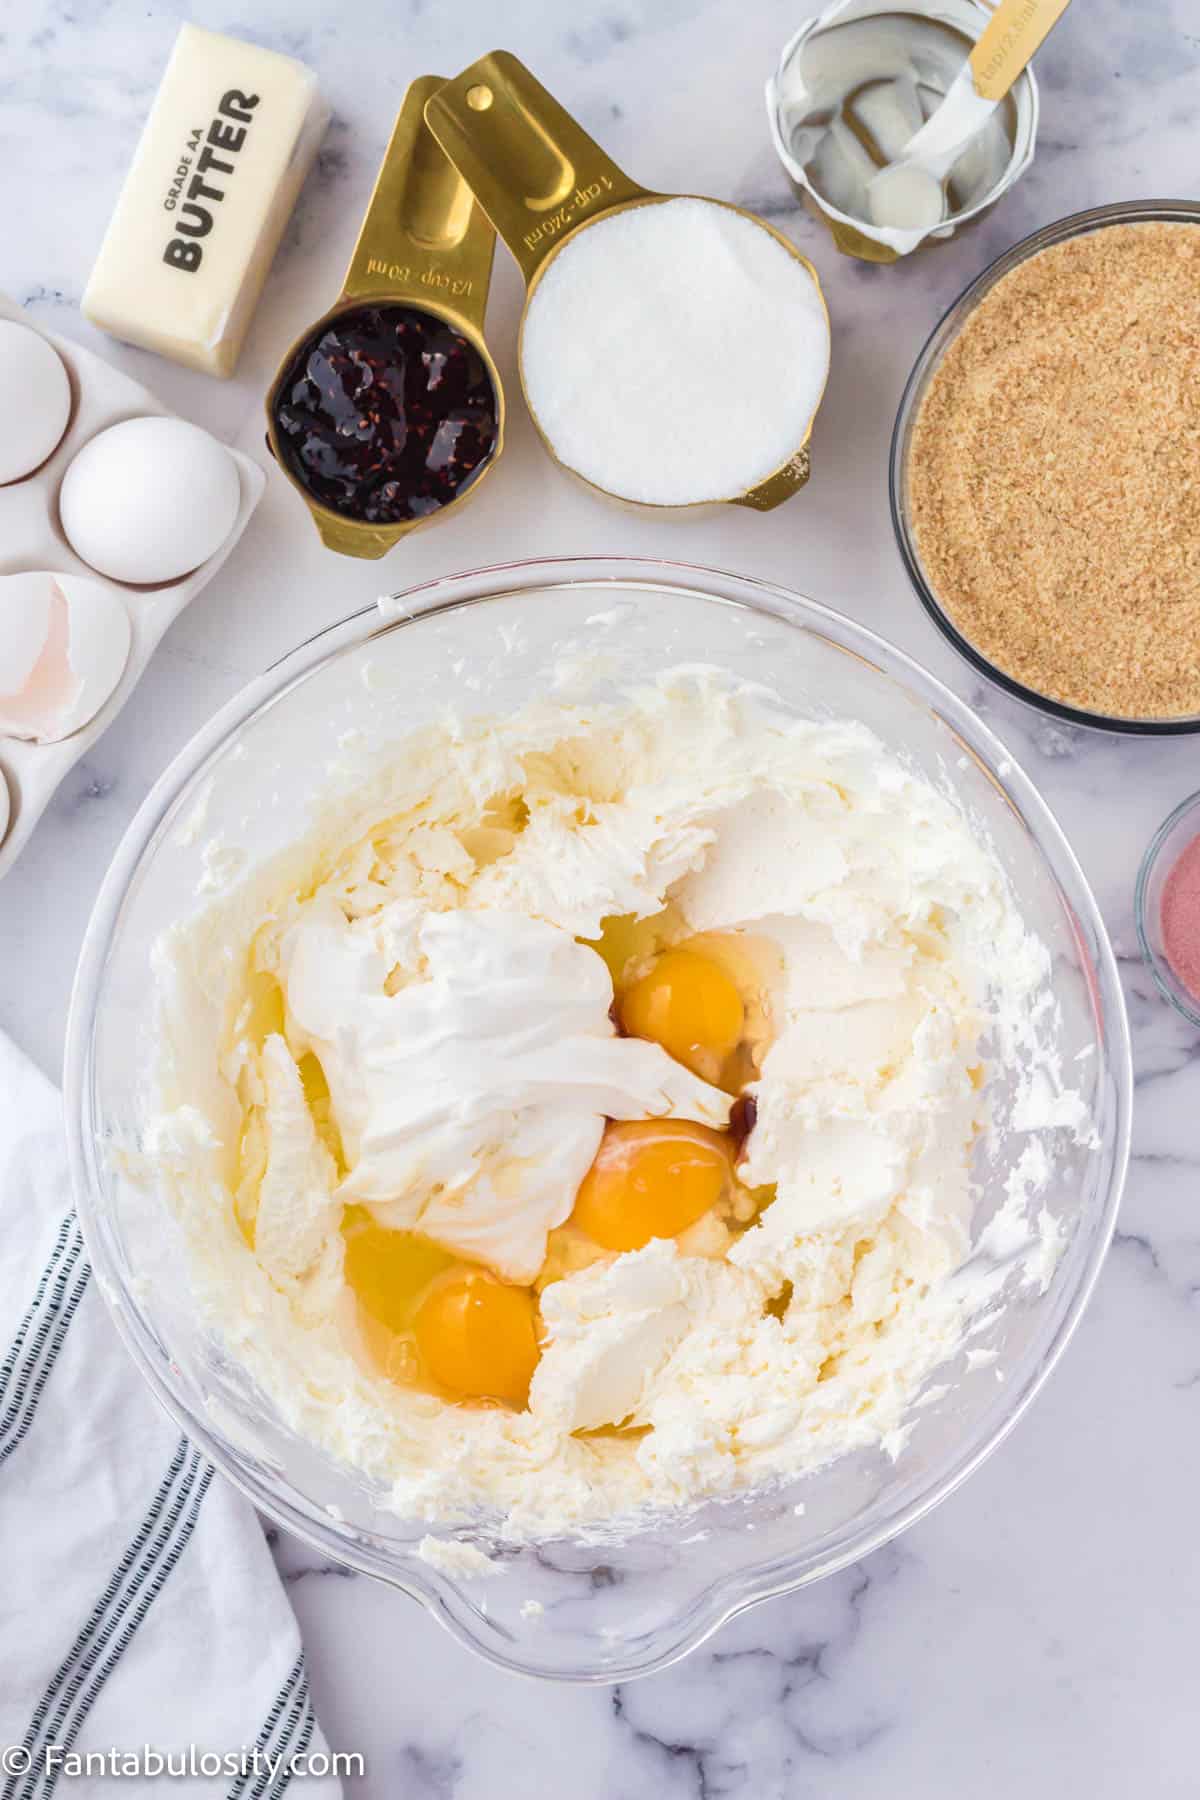
    1. Next, add in the 4 eggs, ½ cup sour cream, and ½ teaspoon vanilla extract and whisk until the ingredients are well combined and smooth.
    Eggs, sour cream and vanilla to cream cheese in cheesecake batter.
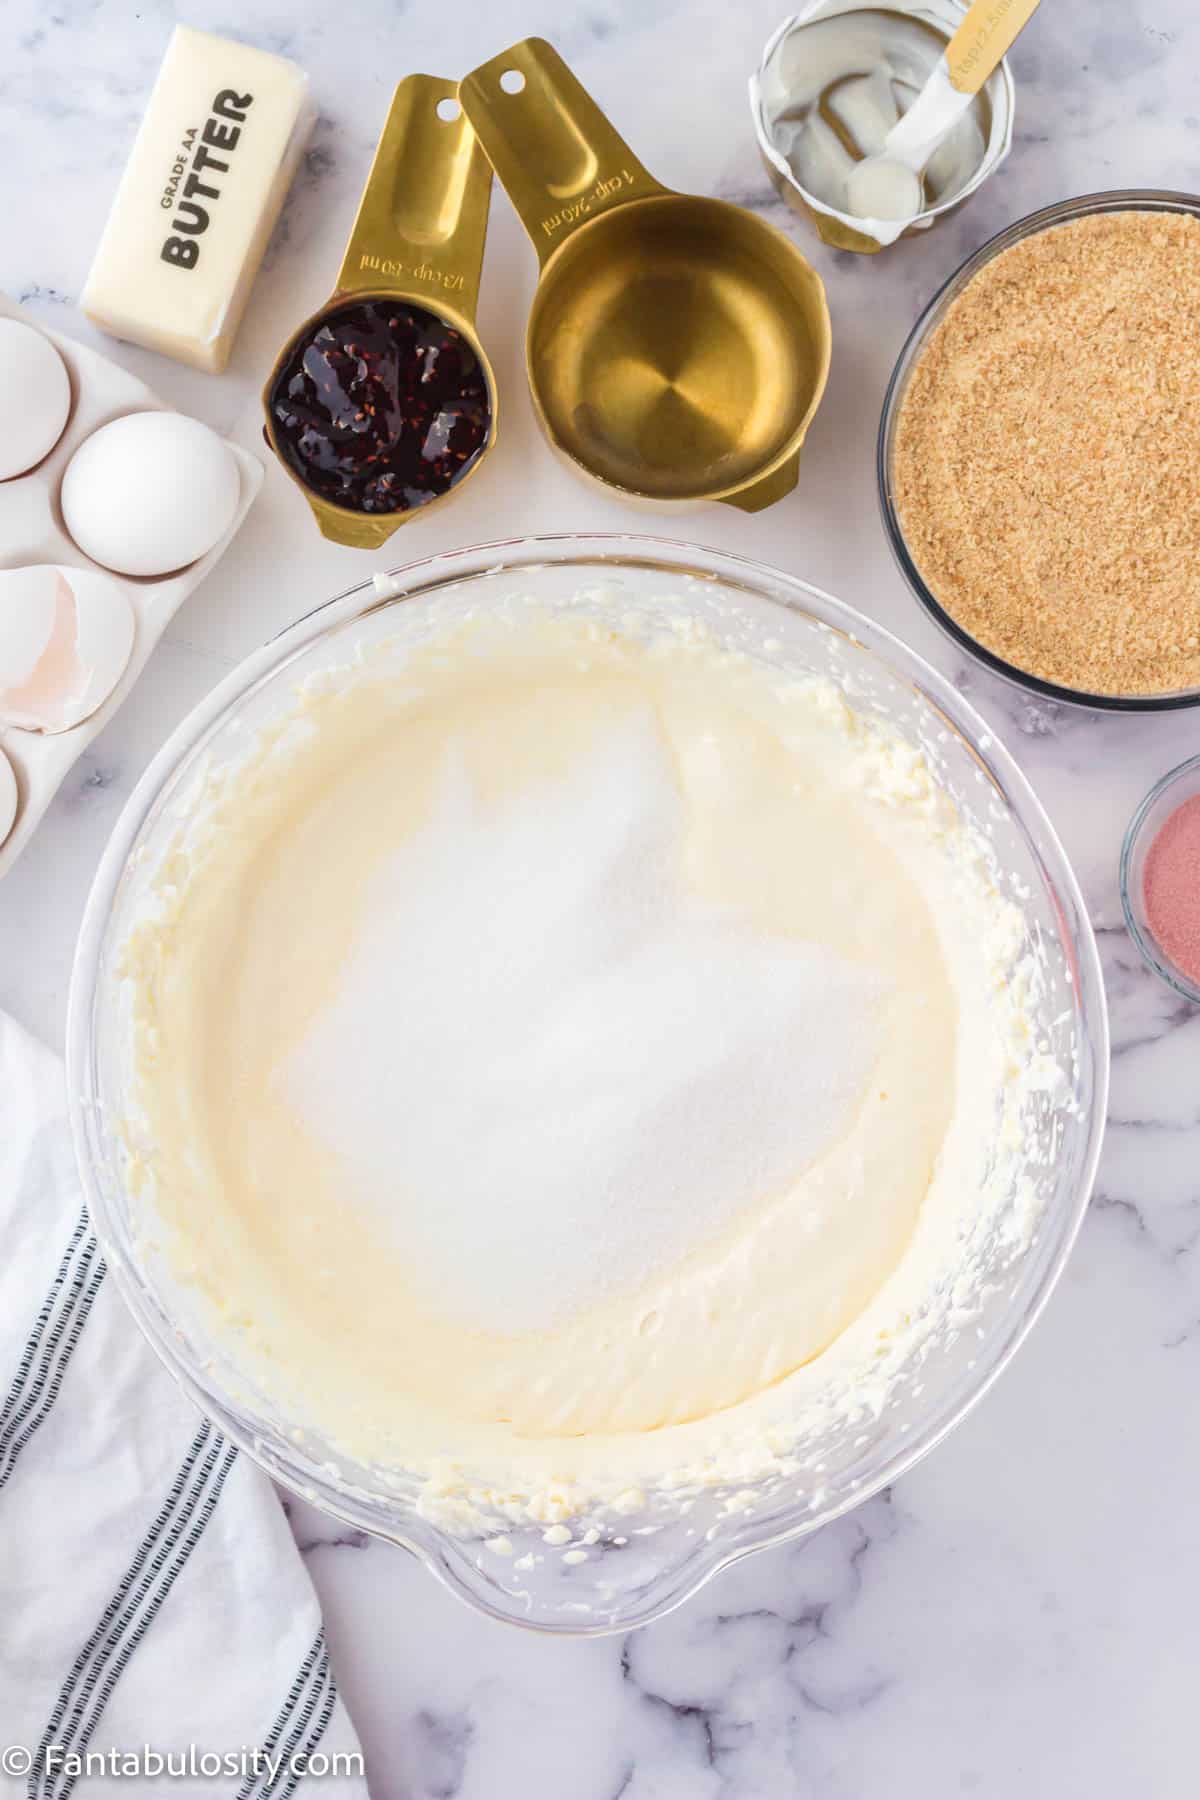
    1. Then, add in the cup of sugar and whisk again until it is fully incorporate into the cheesecake batter.
    Sugar added to cheesecake mixture.

    How to Make Cheesecake Crust

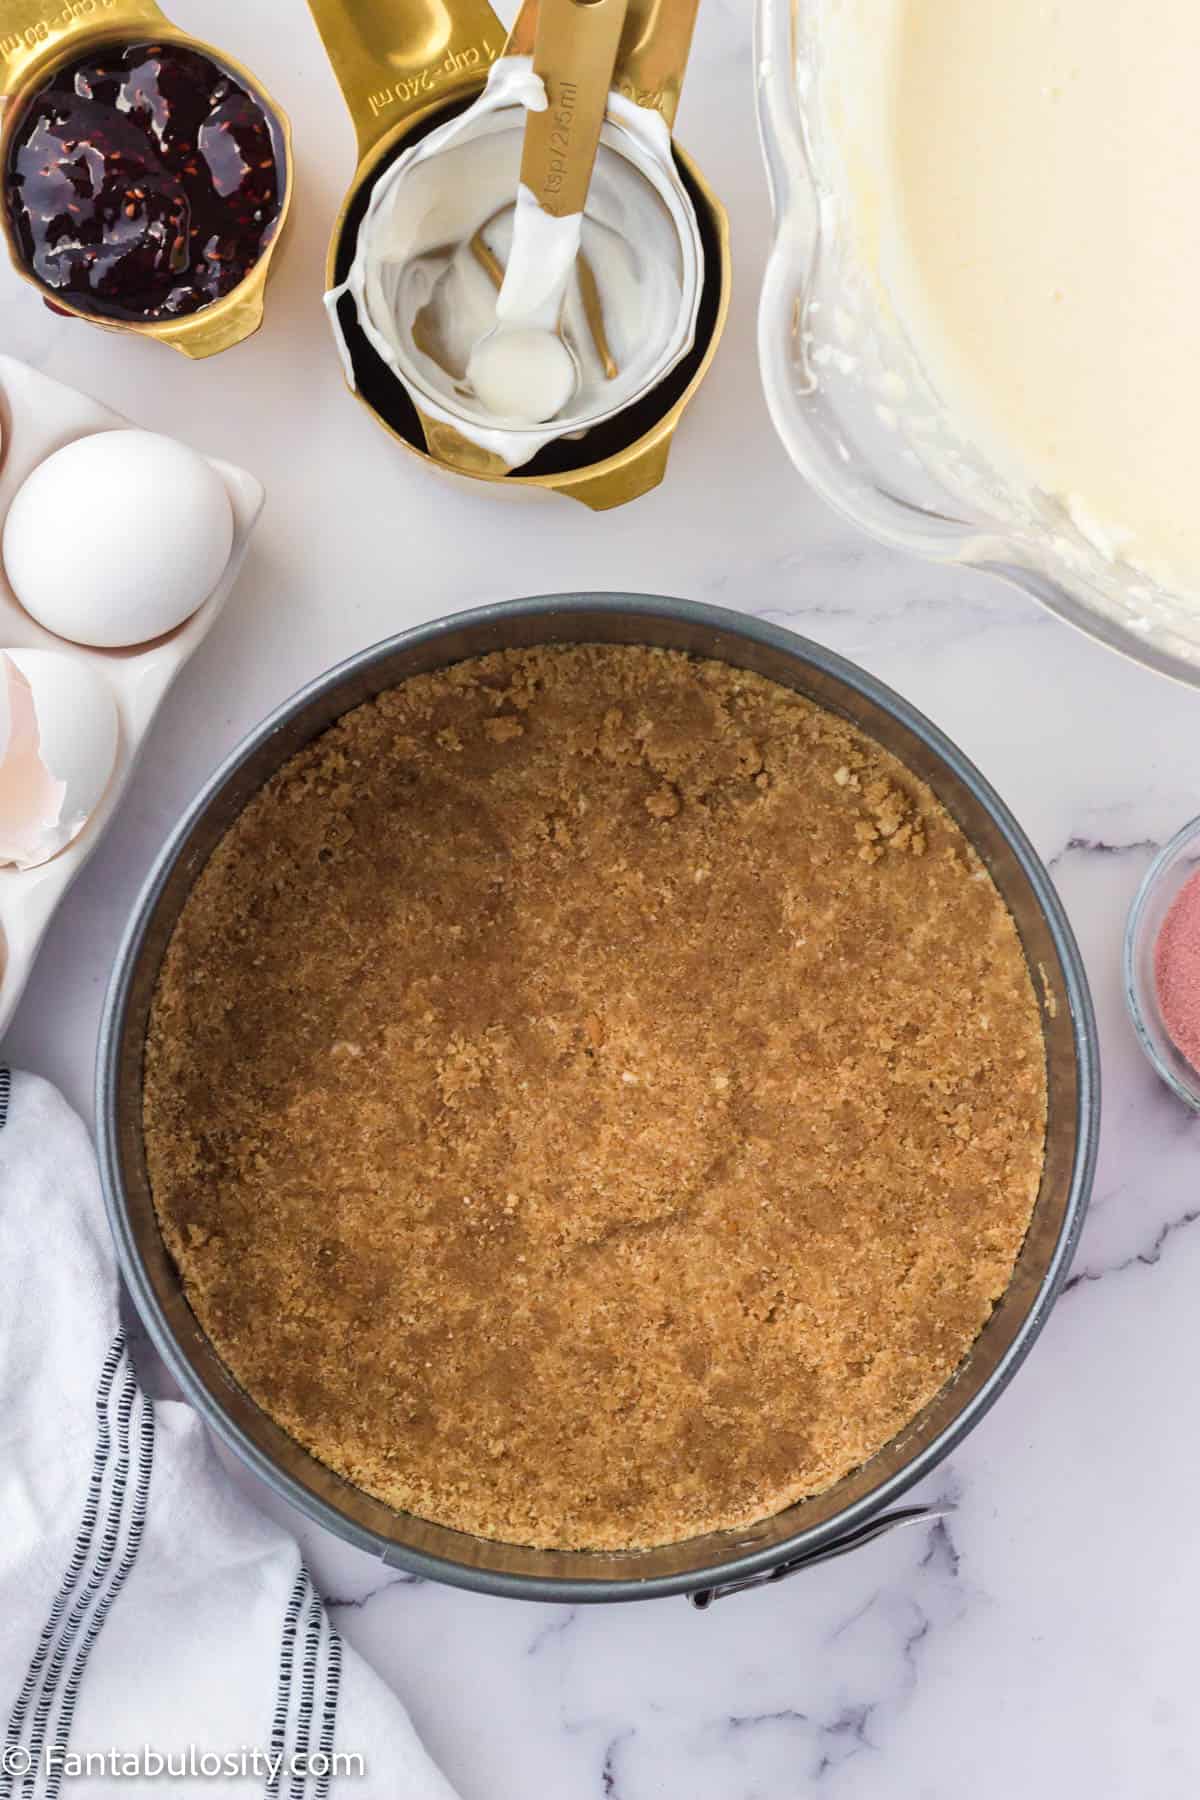
    1. In a separate mixing bowl, combine the melted butter and the finely crumbled vanilla wafers (or golden Oreo cookie crumbles) until a sandy mixture forms.
    2. Spread the cookie mixture into the bottom of a 9-inch spring form pan. Use a cup to press the crust down firmly. 
    Sandy crust mixture pressed into the bottom of the springform pan.
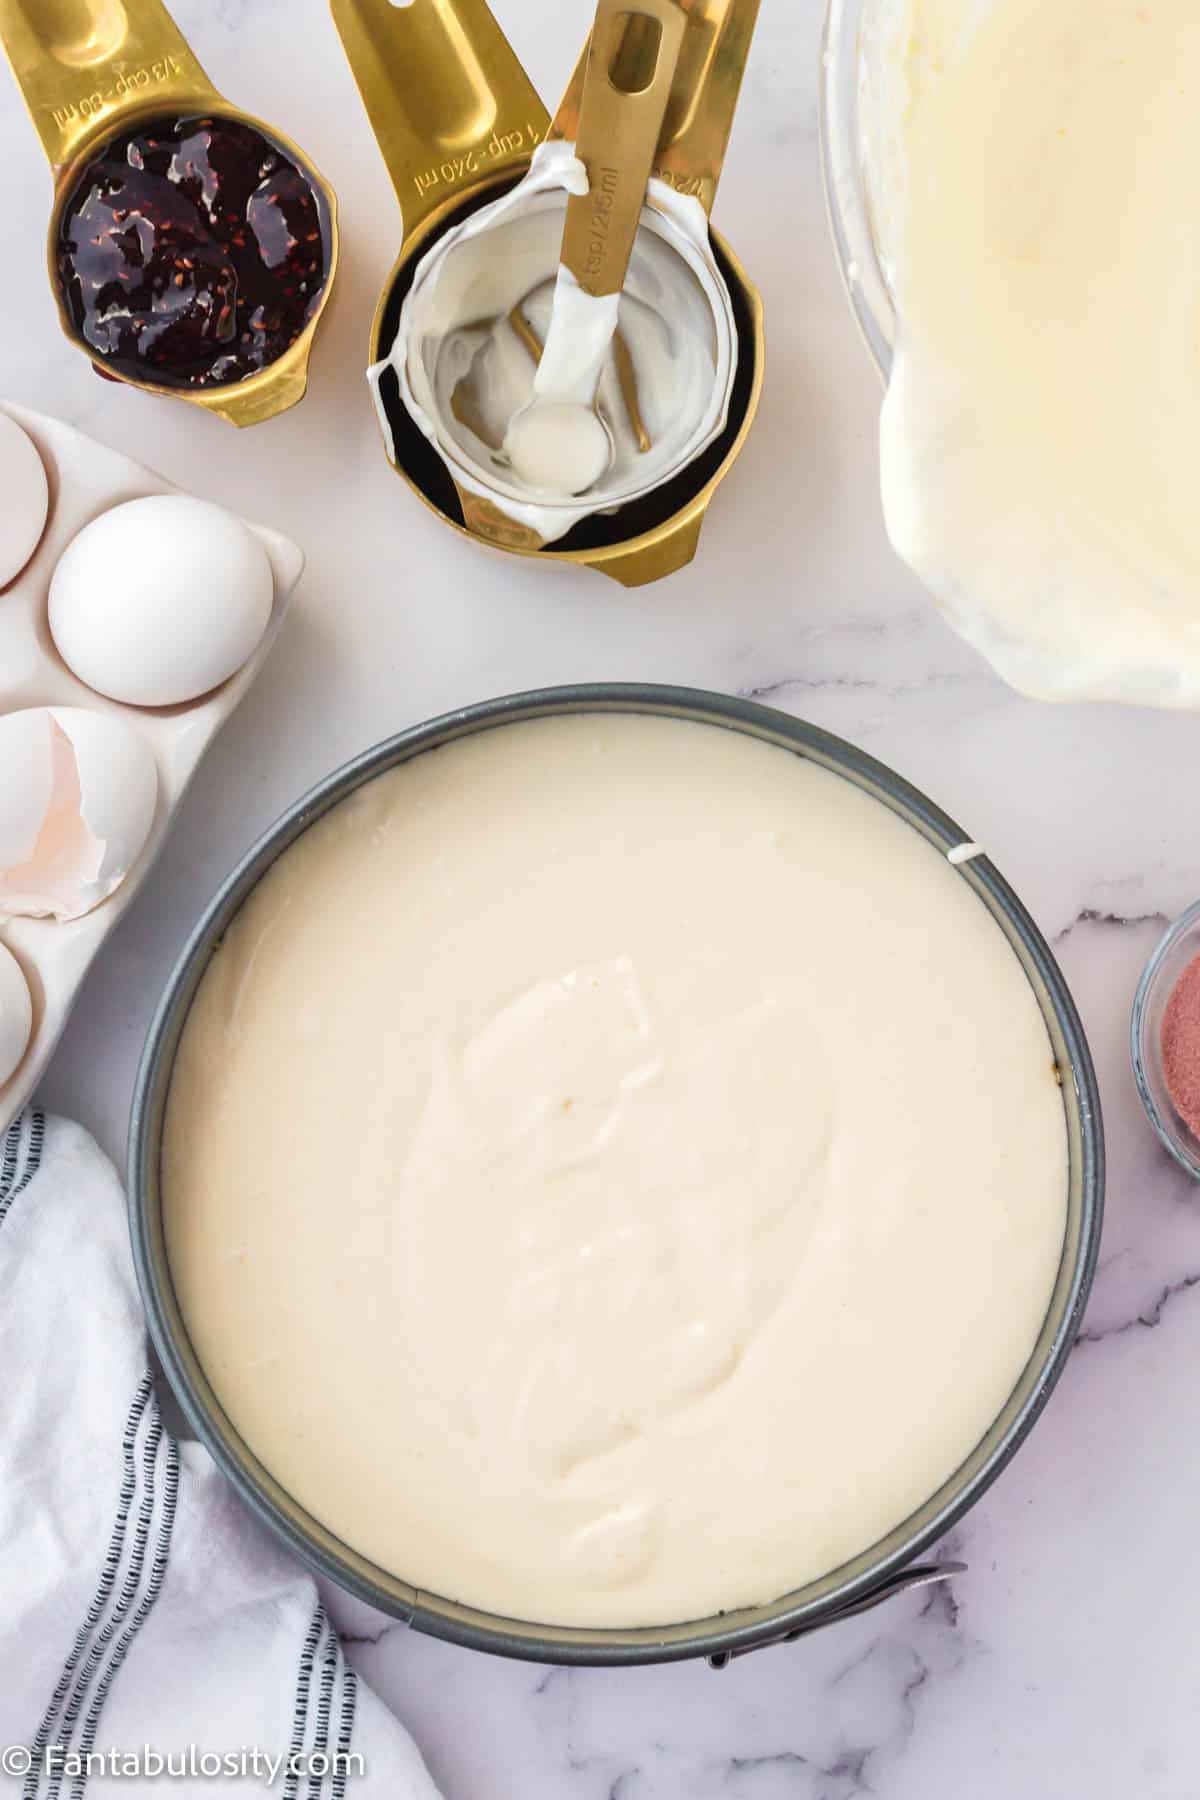
    1. Pour the cream cheese filling on top of the vanilla wafer crust (or golden Oreo crust) and place the springform pan onto your baking sheet that has ¼ inch of water in it.

    Pro Tip: Place some aluminum foil under the bottom of the springform pan and up the edges a little bit to help keep the water from seeping into the pan while you bake strawberry cheesecake. 

    Cheesecake batter poured over graham cracker crust.
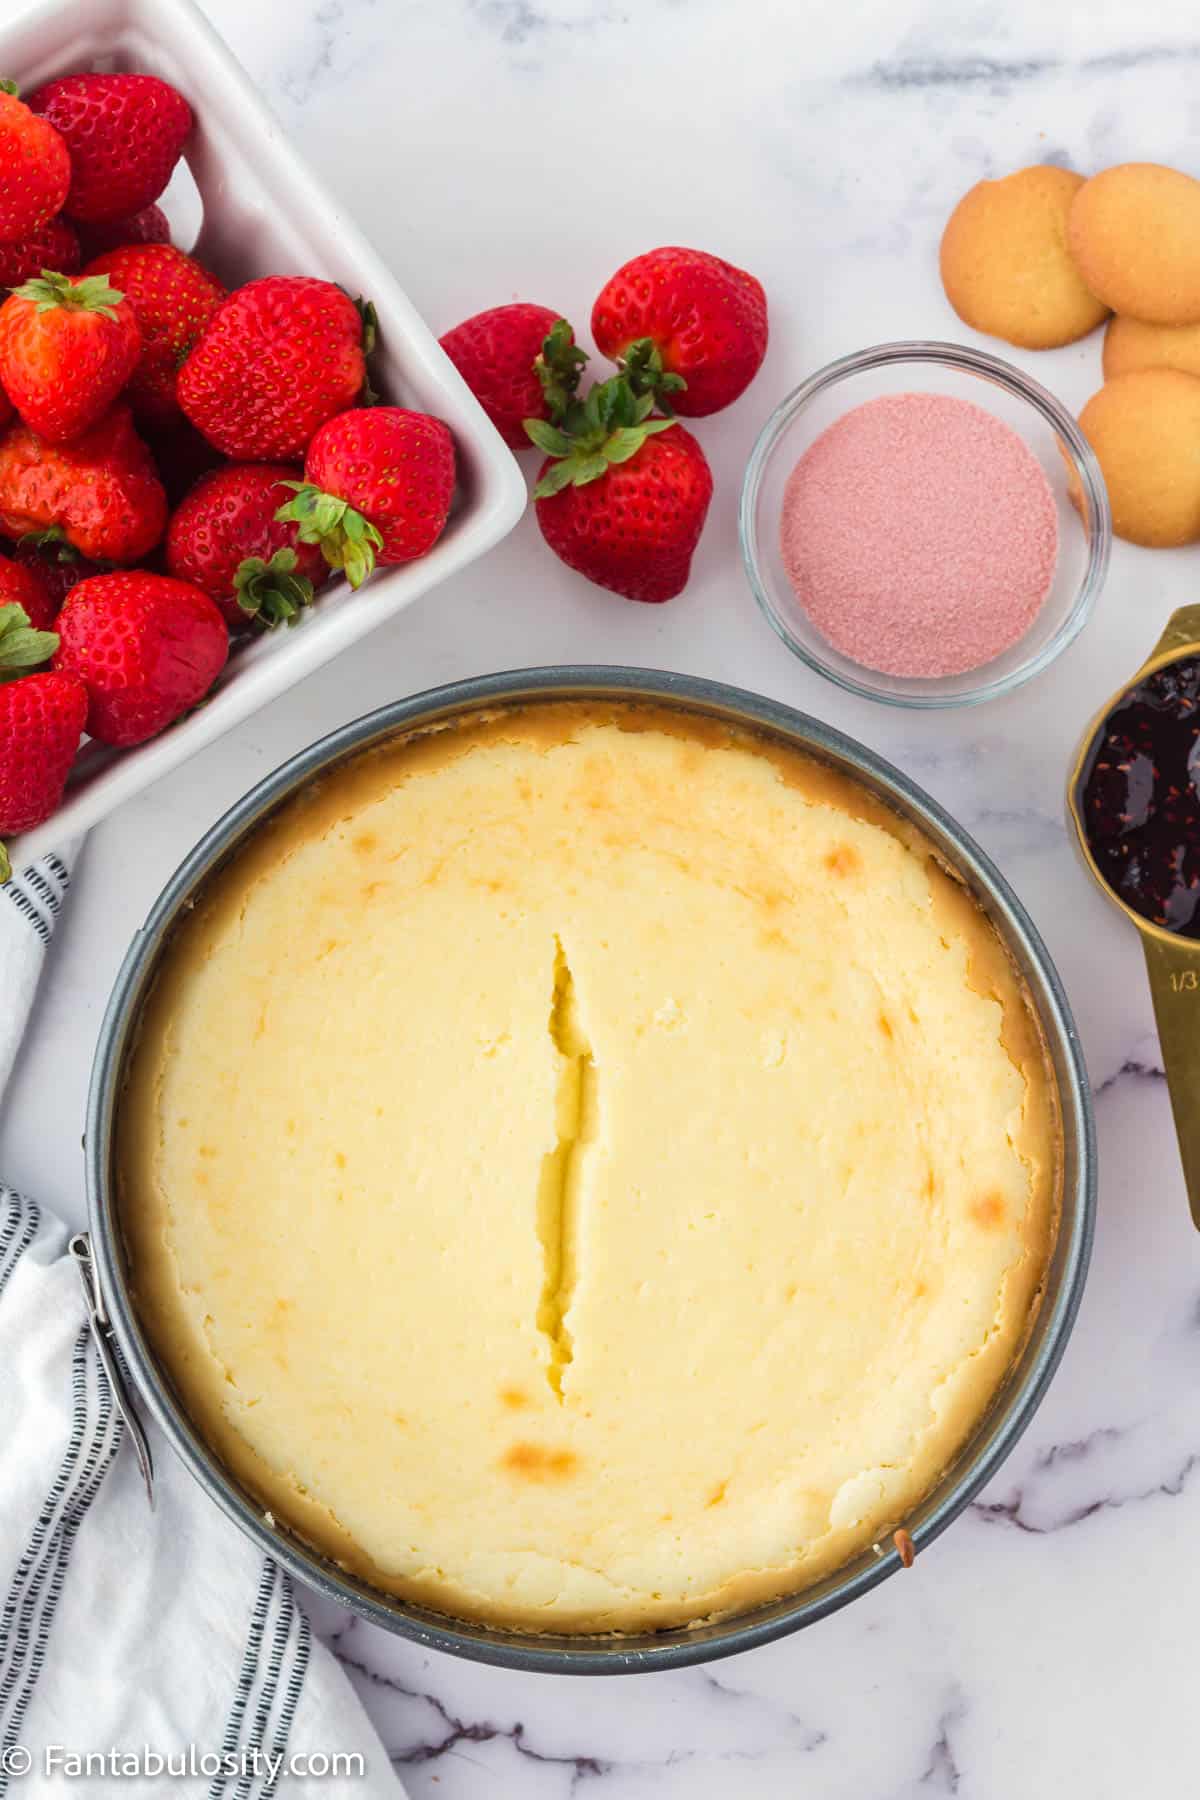
    1. Bake the cheesecake for 50 minutes (or until the middle is only slightly jiggly). 
    2. Allow the cheesecake to cool for 1 hour on the counter and then allow it to cool for another hour in the fridge.
    Baked cheesecake in pan.
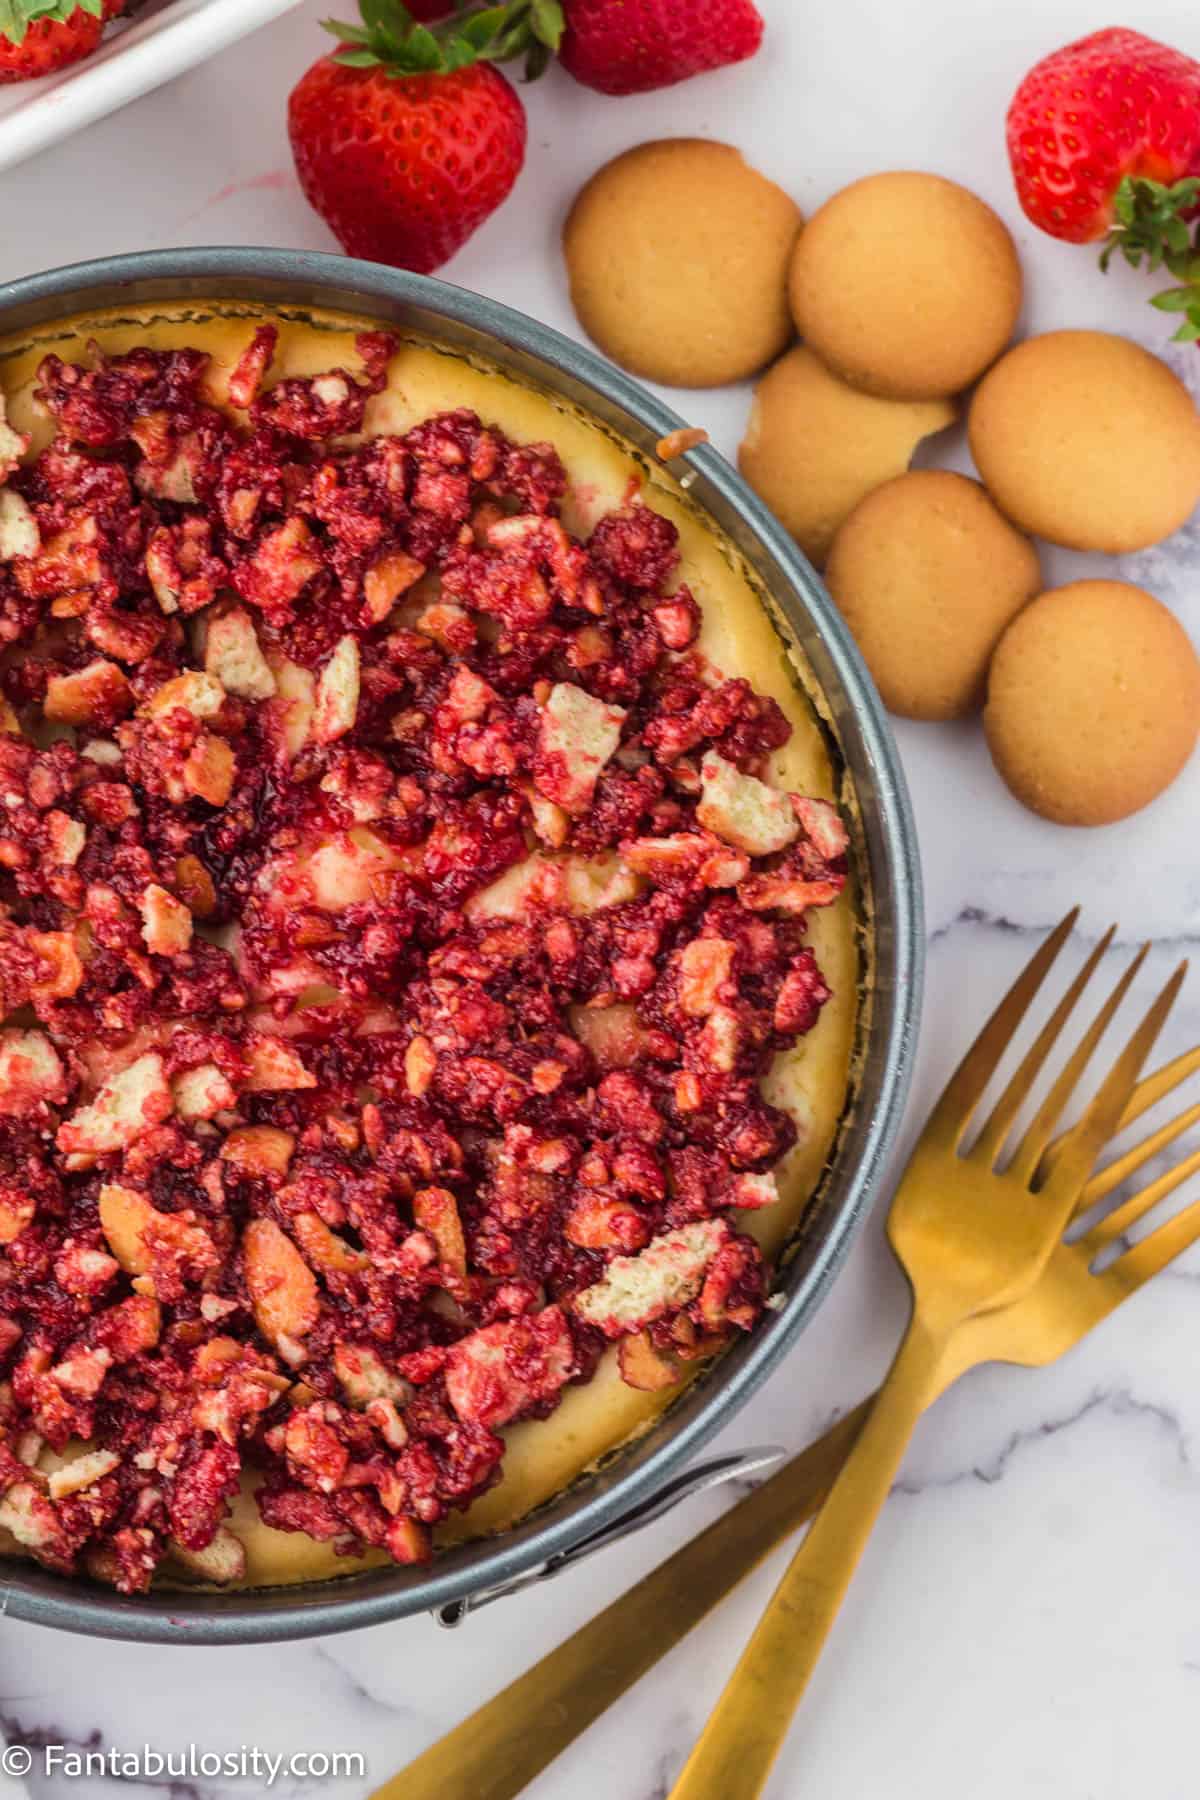
    1. Once the cheesecake has cooled, prepare your strawberry topping by combining the strawberry preserves, strawberry powder, and the course crumbs of either your vanilla wafer or golden Oreo cookies. 
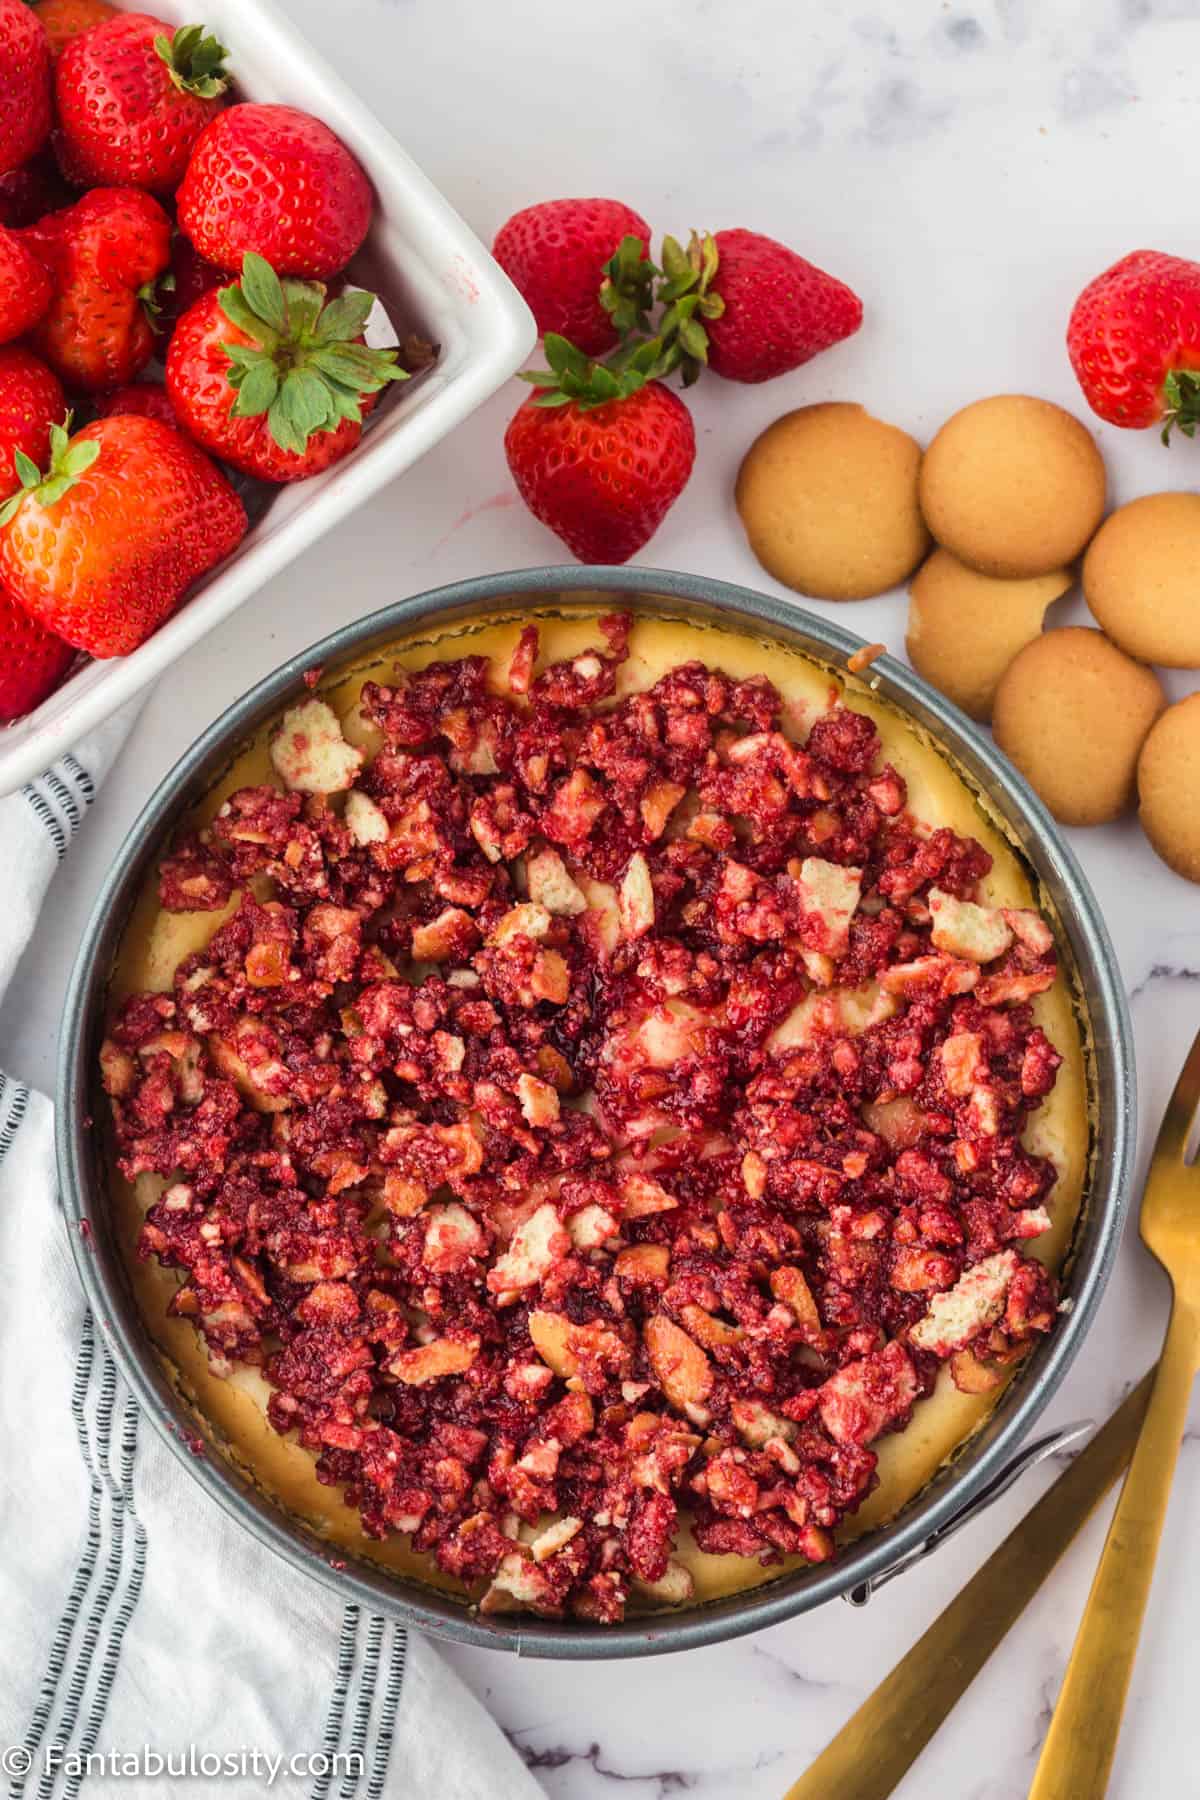
    Strawberry cheesecake crunch in baking pan.
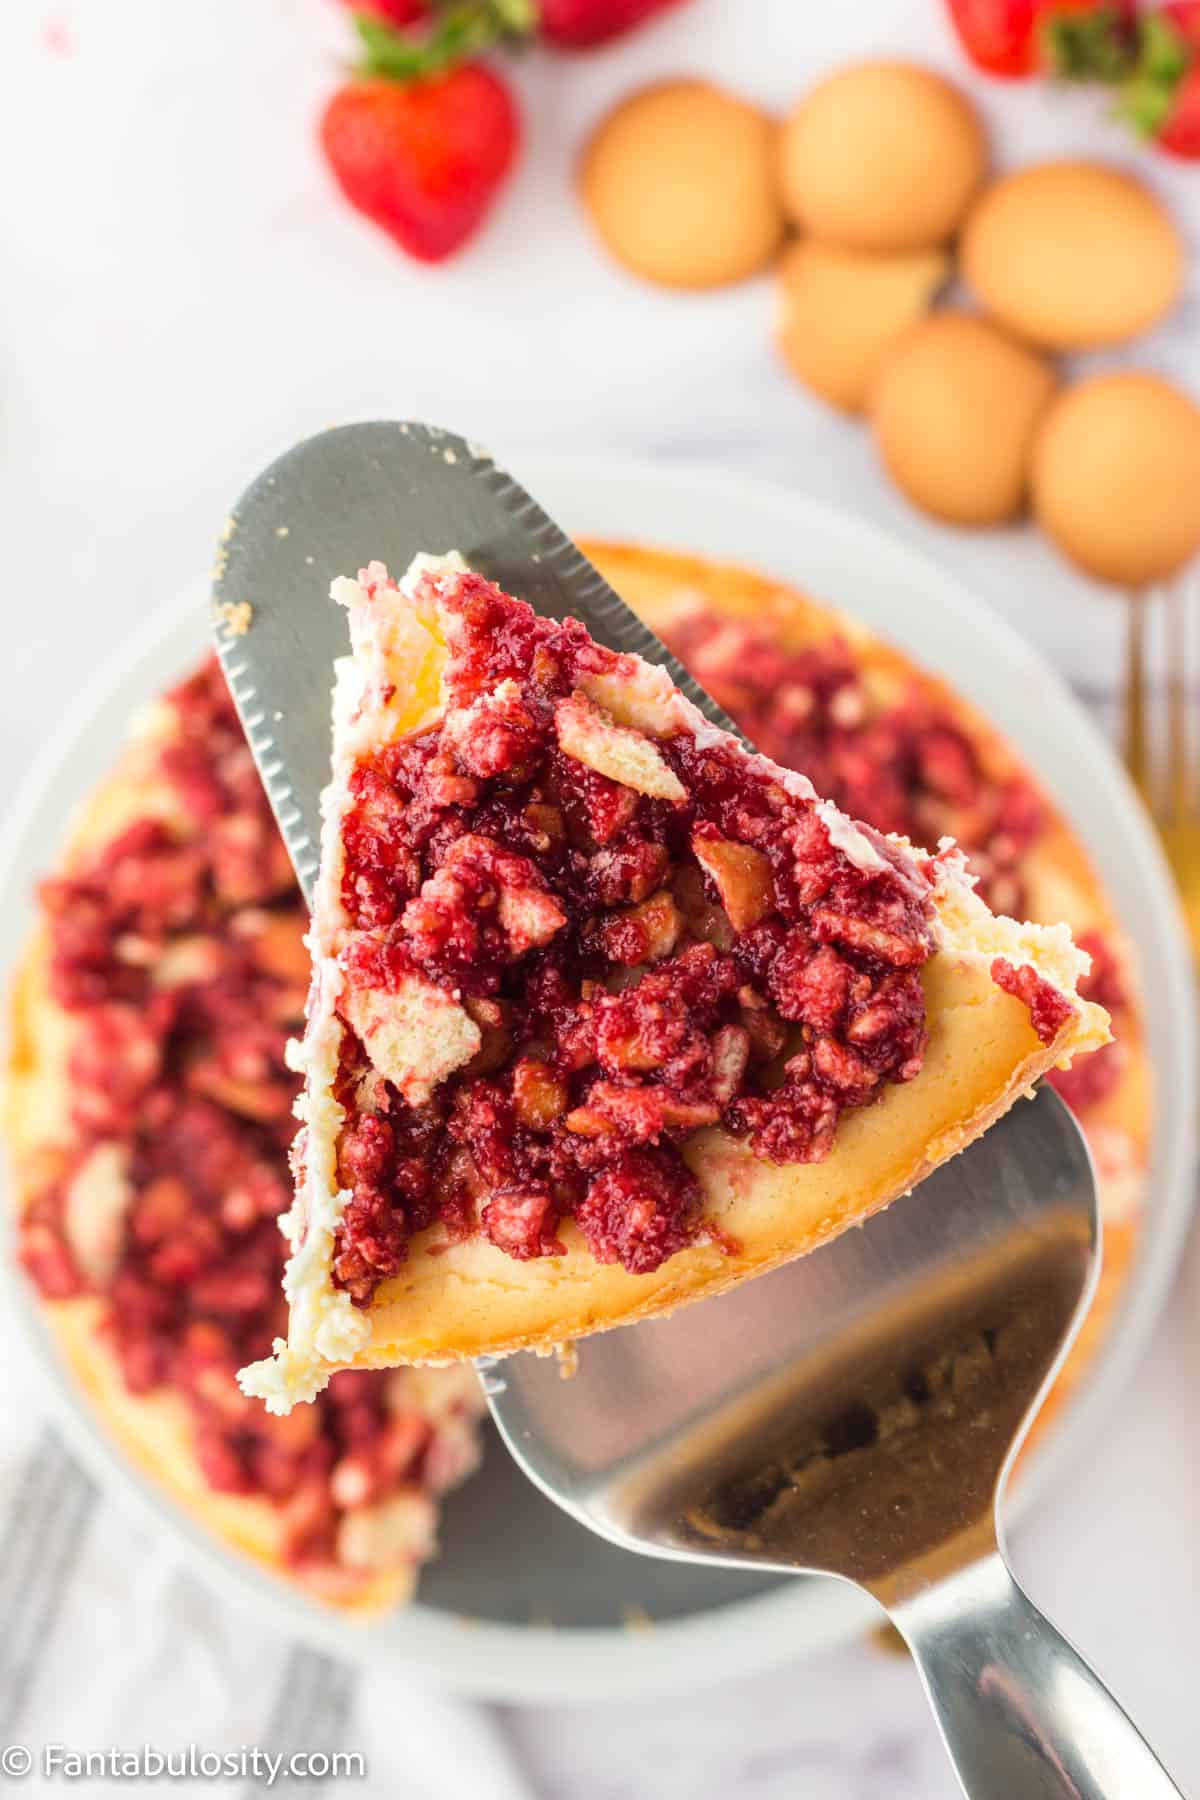
    1. Sprinkle the crumble over the top of the cake, serve, and enjoy your delicious dessert!
    Slice of strawberry crunch cheesecake on metal spatula.

    Substitutions

    Here are a few ways you can substitute the ingredients called for in this recipe…

    • Vanilla Wafers – You could crumble up golden Oreo cookies instead! Use a food processor (if you have one) to create fine crumbs for the crust and course crumbs for the topping. You could also use graham crumbs (or food process some graham crackers) instead of vanilla wafers to create a more traditional graham cracker crust.
    • Sour Cream -If you are out of sour cream, you could substitute greek yogurt in its place.
    • Strawberry Preserves– You can mash fresh strawberries until you have ⅓ cup or strawberry puree in place of the strawberry preserves. This will make the topping less sweet as preserves are made with a lot of sugar (but will still give you the natural sweet strawberry flavor).

    Craving more strawberry? These easy strawberry brownies are another quick favorite that always disappears fast.

    Variations

    This is a strawberry crunch cheesecake, but you could easily swap the strawberry preserves and strawberry gelatin powder out for another fruit!

    • Raspberry – use raspberry Jell-O powder and preserves
    • Peach – use peach Jell-O powder and peach preserves
    • Orange – use orange Jell-O powder and orange marmalade instead of preserves

    …you get the idea, right? There are so many options!

    Equipment

    For this recipe, you will need a springform pan. You can find these at most big box stores or baking stores or online here.

    Storage

    If you do have leftovers, cover the top of the springform pan in plastic wrap and store this cheesecake in an airtight container in the fridge. This will help keep your cheesecake fresh and help it last up to one week.

    If you want to enjoy your cheesecake at room temperature later, just let it warm up on the counter before eating.

    Cheesecake topped with strawberry crunch topping, still in cheesecake pan.

    Expert Tips and FAQs

    How do I know when my cheesecake is done?

    Baking a cheesecake can be tricky. It’s easy to overbake or underbake this delicious dessert. In order to ensure it is fully baked when you take it out of the oven, give your spring form pan a slight jiggle. If the middle of the cheesecake moves more than a tiny bit, you will want to leave it in a little longer. If it does not move at all, you know the cheesecake is over-baked. You want the middle of the cheesecake to jiggle slightly.

    What is strawberry crunch made of?

    The strawberry topping for cheesecake (the best part, in our opinion) is made by combining strawberry preserves, Jell-O powder, and the roughly chopped cookies. You simply sprinkle this crumble over the top of your baked cheesecake, serve it, and enjoy!

    Do I need to use a cheesecake pan/springform pan for this recipe?

    If you plan to make cheesecake regularly, we would highly recommend getting a springform pan. Springform pans open up so you can remove the sides of the pan from the cheesecake and off of the base, making it SO easy to cut and serve your cheesecake.

    If you don’t have one and don’t plan to get one, you can find tutorials online for baking cheesecake in a regular cake pan (like this one).

    Are preserves the same thing as jam?

    Preserves are made with chopped up fruit instead of just the fruit juice, but many people make jam this way too. For this recipe, look for a jam that is thick and has seeds still in it (meaning it was made with whole fruit and not just juice).

    Is strawberry crunch the same as strawberry shortcake cheesecake?

    Although they sound the same, these are actually slightly different things. This cheesecake (strawberry crunch) has a cheesecake filling and a crunchy strawberry topping on top of the cheesecake.

    A strawberry shortcake cheesecake cake would have layers of shortcake in it in addition to the cheesecake. Both of these sweet treats make a delicious strawberry cake, it just depends on what you are looking for (crunch or cake).

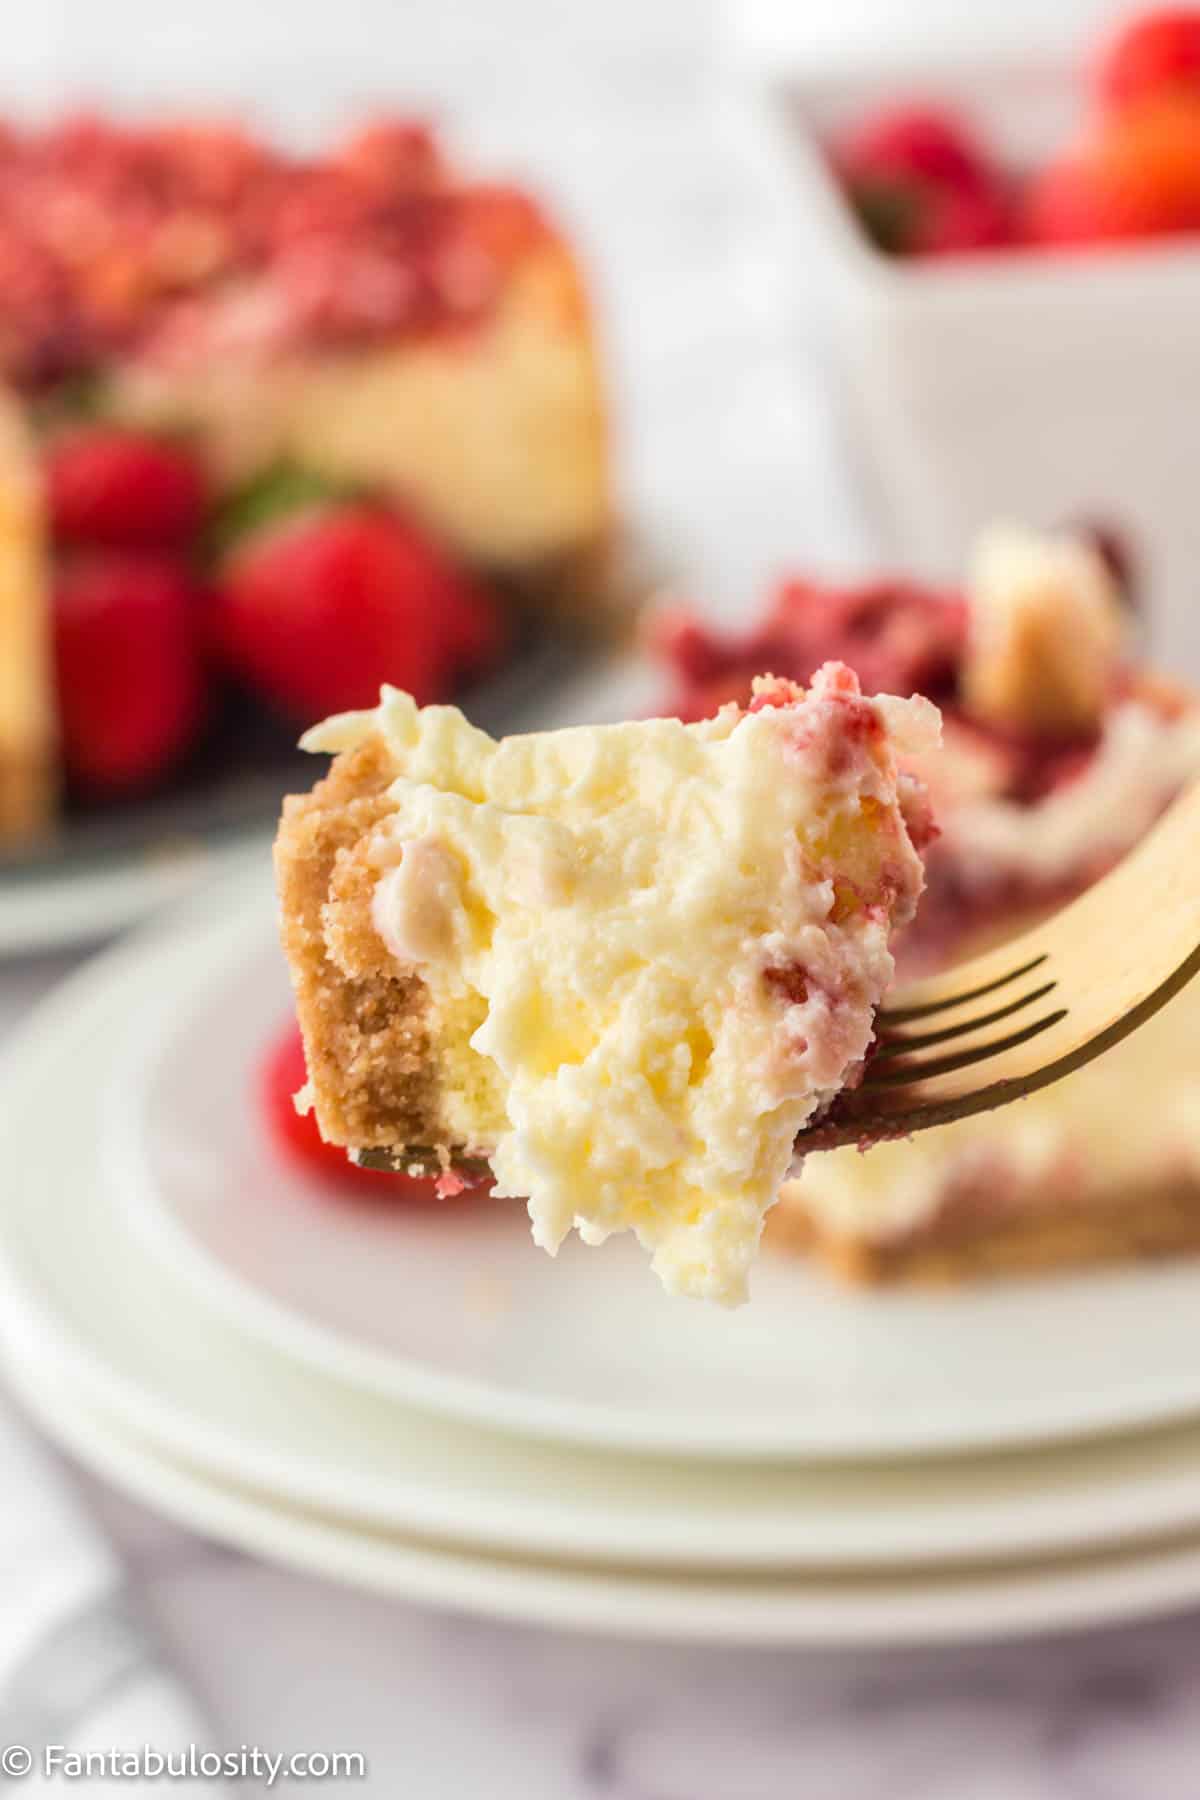
    Bite of cheesecake on fork.

    Related Recipes

    If you enjoyed this recipe, try our other strawberry desserts like this easy strawberry crumble or strawberry cheesecake cookies! Or, if hosting a party, this fun walking cheesecake dessert is so fun!

    Recipe

    Strawberry Crunch Cheesecake
    Print Pin
    5 from 5 votes

    Strawberry Crunch Cheesecake

    Strawberry Crunch Cheesecake: Inspired by strawberry crunch ice cream bars, this cheesecake has a sweet, crunchy, delicious crumble topping that sets it apart from other cheesecakes!
    Course Dessert, Snack
    Cuisine American
    Prep Time 10 minutes minutes
    Cook Time 50 minutes minutes
    Cool Time 2 hours hours
    Total Time 3 hours hours
    Servings 12 slices
    Calories 529kcal
    Author Jessica Burgess

    Equipment

    • 9" springform pan

    Ingredients

    • 4 – 8 ounce blocks of cream cheese room temperature
    • 4 large eggs
    • ½ cup sour cream
    • ½ teaspoon vanilla extract
    • 1 cup white sugar
    • 1 ½ cups vanilla wafer cookies* finely crumbled
    • ½ cup unsalted butter melted
    • 1 tablespoon strawberry Jell-O powder
    • ⅓ cup strawberry preserves
    • 1 ½ vanilla wafer cookies* roughly crumbled

    Instructions

    • Preheat the oven to 350 degrees Fahrenheit and fill a cookie sheet with ¼ inch of water. Spray just the bottom of a 9" springform pan with cooking spray (otherwise your cheesecake crust may stick to the pan).
    • In a large bowl or the bowl of a stand mixer, whip all 32 ounces cream cheese until it is soft and smooth (if using a stand mixer, use the paddle attachment and start on a low speed, slowly moving to high speed). This will take 3-5 minutes depending on the temperature of your cream cheese.
    • Add in the 4 eggs, ½ cup sour cream, and ½ teaspoon vanilla extract and whisk until the ingredients are well combined and smooth.
    • Add in the cup of sugar and whisk again until it is fully incorporate into the cheesecake batter.
    • In a separate mixing bowl, combine the melted butter and the finely crumbled vanilla wafers (or golden Oreo cookie crumbles) until a sandy mixture forms.
    • Spread the cookie mixture into the bottom of a 9-inch spring form pan. Use a cup to press the crust down firmly.
    • Pour the cream cheese filling on top of the vanilla wafer crust (or golden Oreo crust) and place the springform pan onto your baking sheet that has ¼ inch of water in it.
      Tip: Place some aluminum foil under the bottom of the springform pan and up the edges a little bit to help keep the water from seeping into the pan while you bake strawberry cheesecake.
    • Bake the cheesecake for 50 minutes (or until the middle is only slightly jiggly).
    • Allow the cheesecake to cool for 1 hour on the counter and then allow it to cool for another hour in the fridge.
    • Once the cheesecake has cooled, prepare your strawberry topping by combining the strawberry preserves, strawberry powder, and the course crumbs of either your vanilla wafer or golden Oreo cookies.
    • Sprinkle the crumble over the top of the cake, serve, and enjoy your delicious dessert!

    Video

    Notes

    *for the subsitutions: you can use golden oreos instead of vanilla wafers
     
    STORAGE: While many people enjoy eating their cheesecake at room temperature, you will want to be sure to cover the top of the springform pan in plastic wrap and store this cheesecake in an airtight container in the fridge. This will help keep your cheesecake fresh and help it last up to one week.
    If you do want room temperature cheesecake, just let it warm up on the counter before eating it.

    Nutrition

    Serving: 1slice | Calories: 529kcal | Carbohydrates: 38g | Protein: 8g | Fat: 40g | Saturated Fat: 22g | Polyunsaturated Fat: 3g | Monounsaturated Fat: 10g | Trans Fat: 1g | Cholesterol: 171mg | Sodium: 339mg | Potassium: 163mg | Fiber: 1g | Sugar: 29g | Vitamin A: 1401IU | Vitamin C: 1mg | Calcium: 98mg | Iron: 1mg

    Caramel Rice Krispie Treats

    January 28, 2022

    Caramel Rice Krispie Treats

    Caramel Rice Krispie Treats: The classic recipe we all know and love with a caramel twist! This quick, easy recipe has a creamy, dulce de leche taste and more chewy consistency than regular Rice Krispie treats!

    We’ve made versions of this no bake recipe before (Oreo Rice Krispie Treats), but this is our new favorite. That caramel takes this to a whole new level!

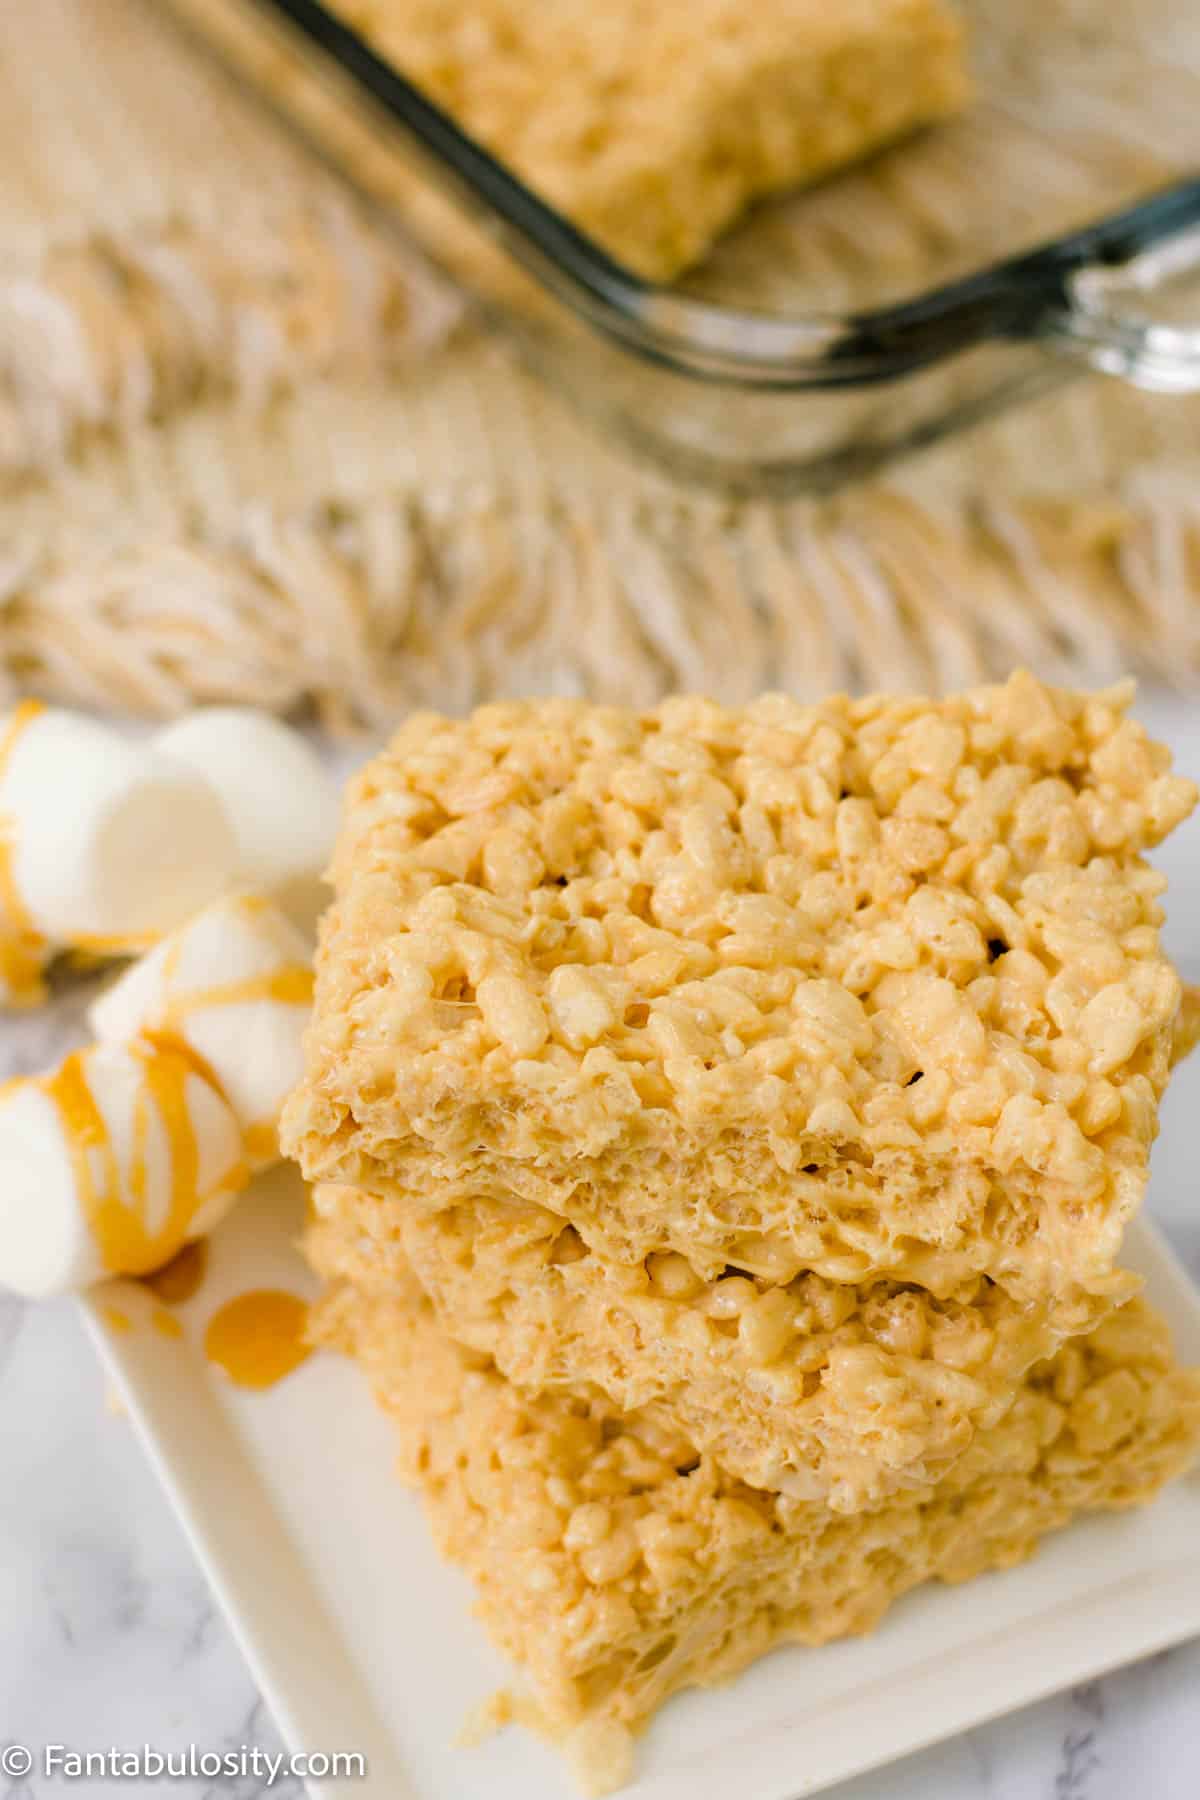
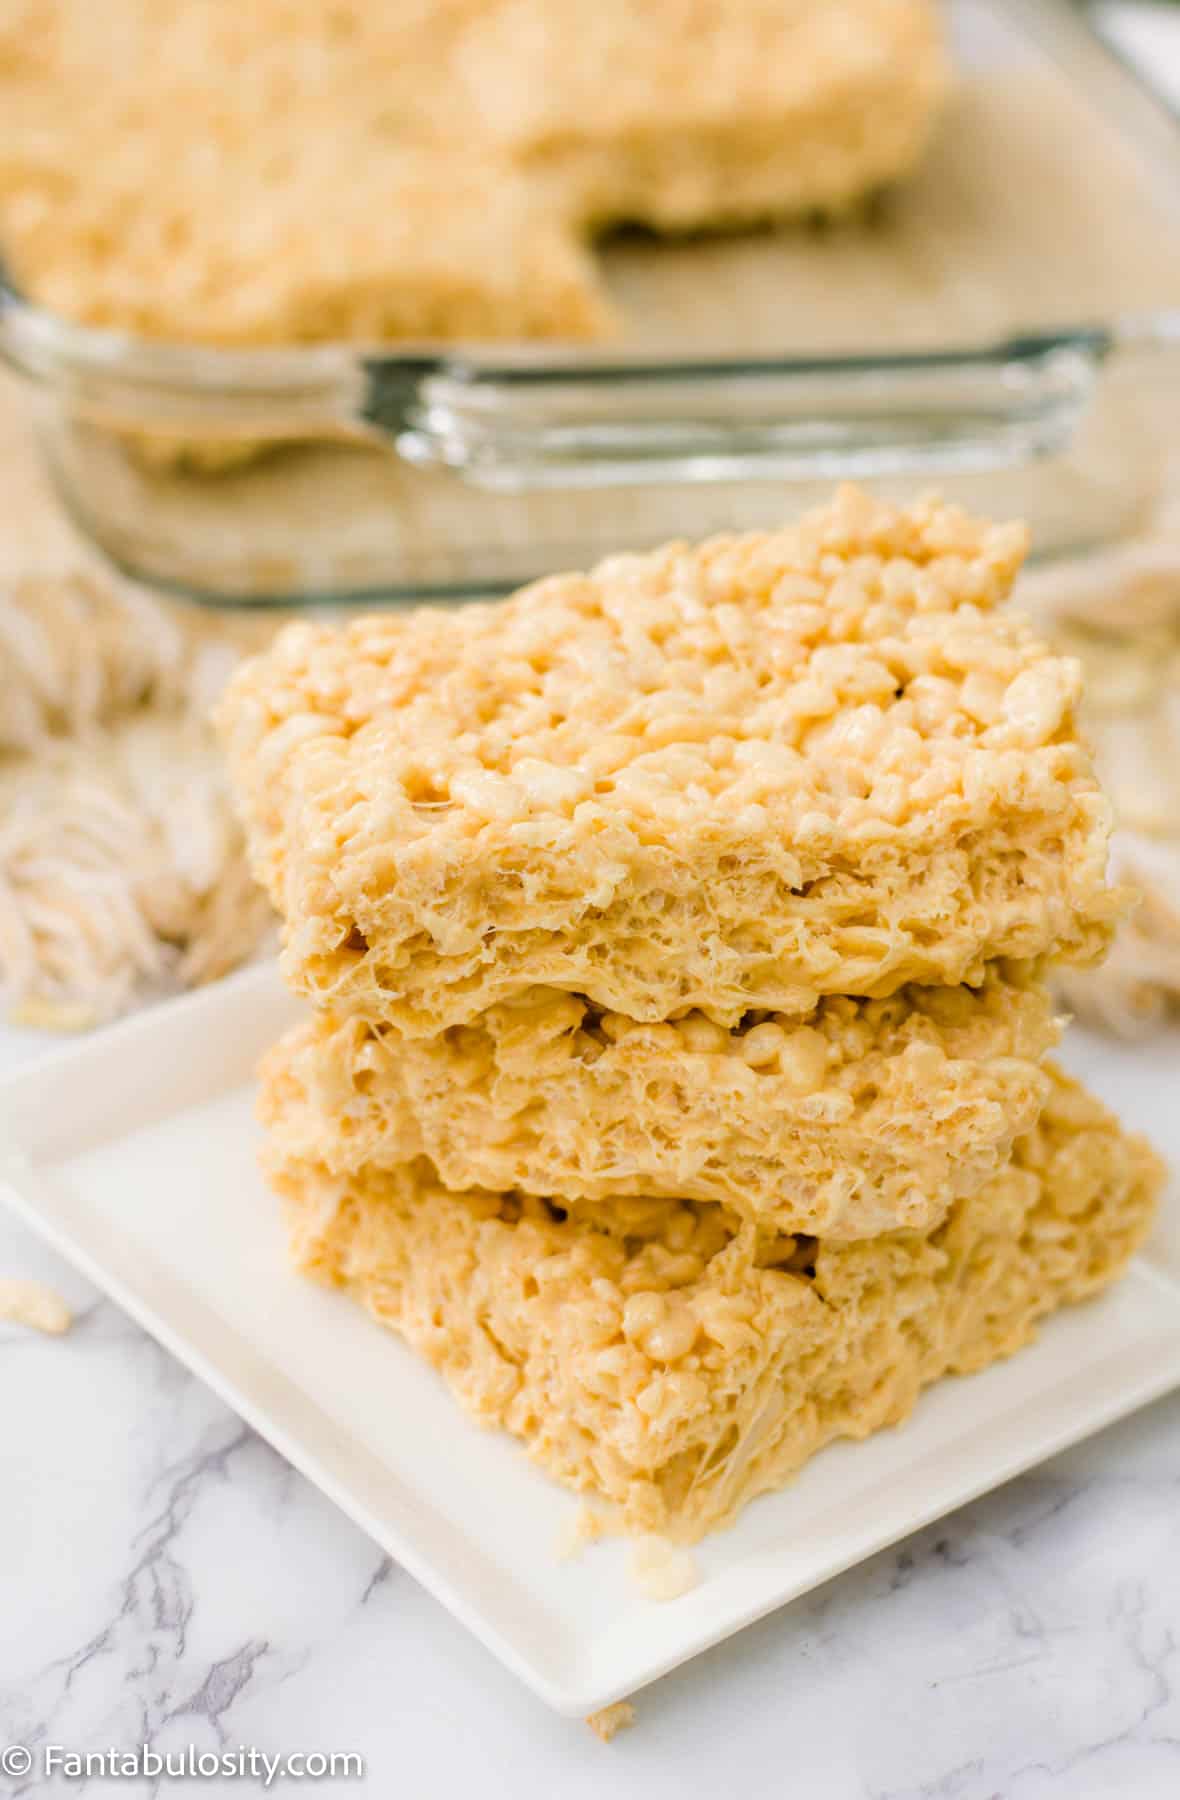
    stacked caramel rice krispy treats on white plate
    Caramel Rice Krispie Treats

    Why You’ll Love This Recipe

    We all have nostalgic memories of eating crispy treats when we were little, but Rice Krispy treats aren’t just for kids! This next level Krispie treat recipe is a delicious twist on the traditional Rice Krispie treat that your whole family can enjoy. (We’ve had so much fun experimenting with the traditional treats around here. From Fruity Pebble treats to Lucky Charms treats recipes!

    The caramel flavor isn't overpowering- it's a creamy, dulce de leche flavor and has a nice, chewy consistency. That little bit of caramel flavor pairs perfectly with the iconic marshmallow flavor!

    If you like a good Rice Krispie treat and you’re a fan of creamy caramel, you’re going to love these caramel Rice Krispies!

    [feast_advanced_jump_to]

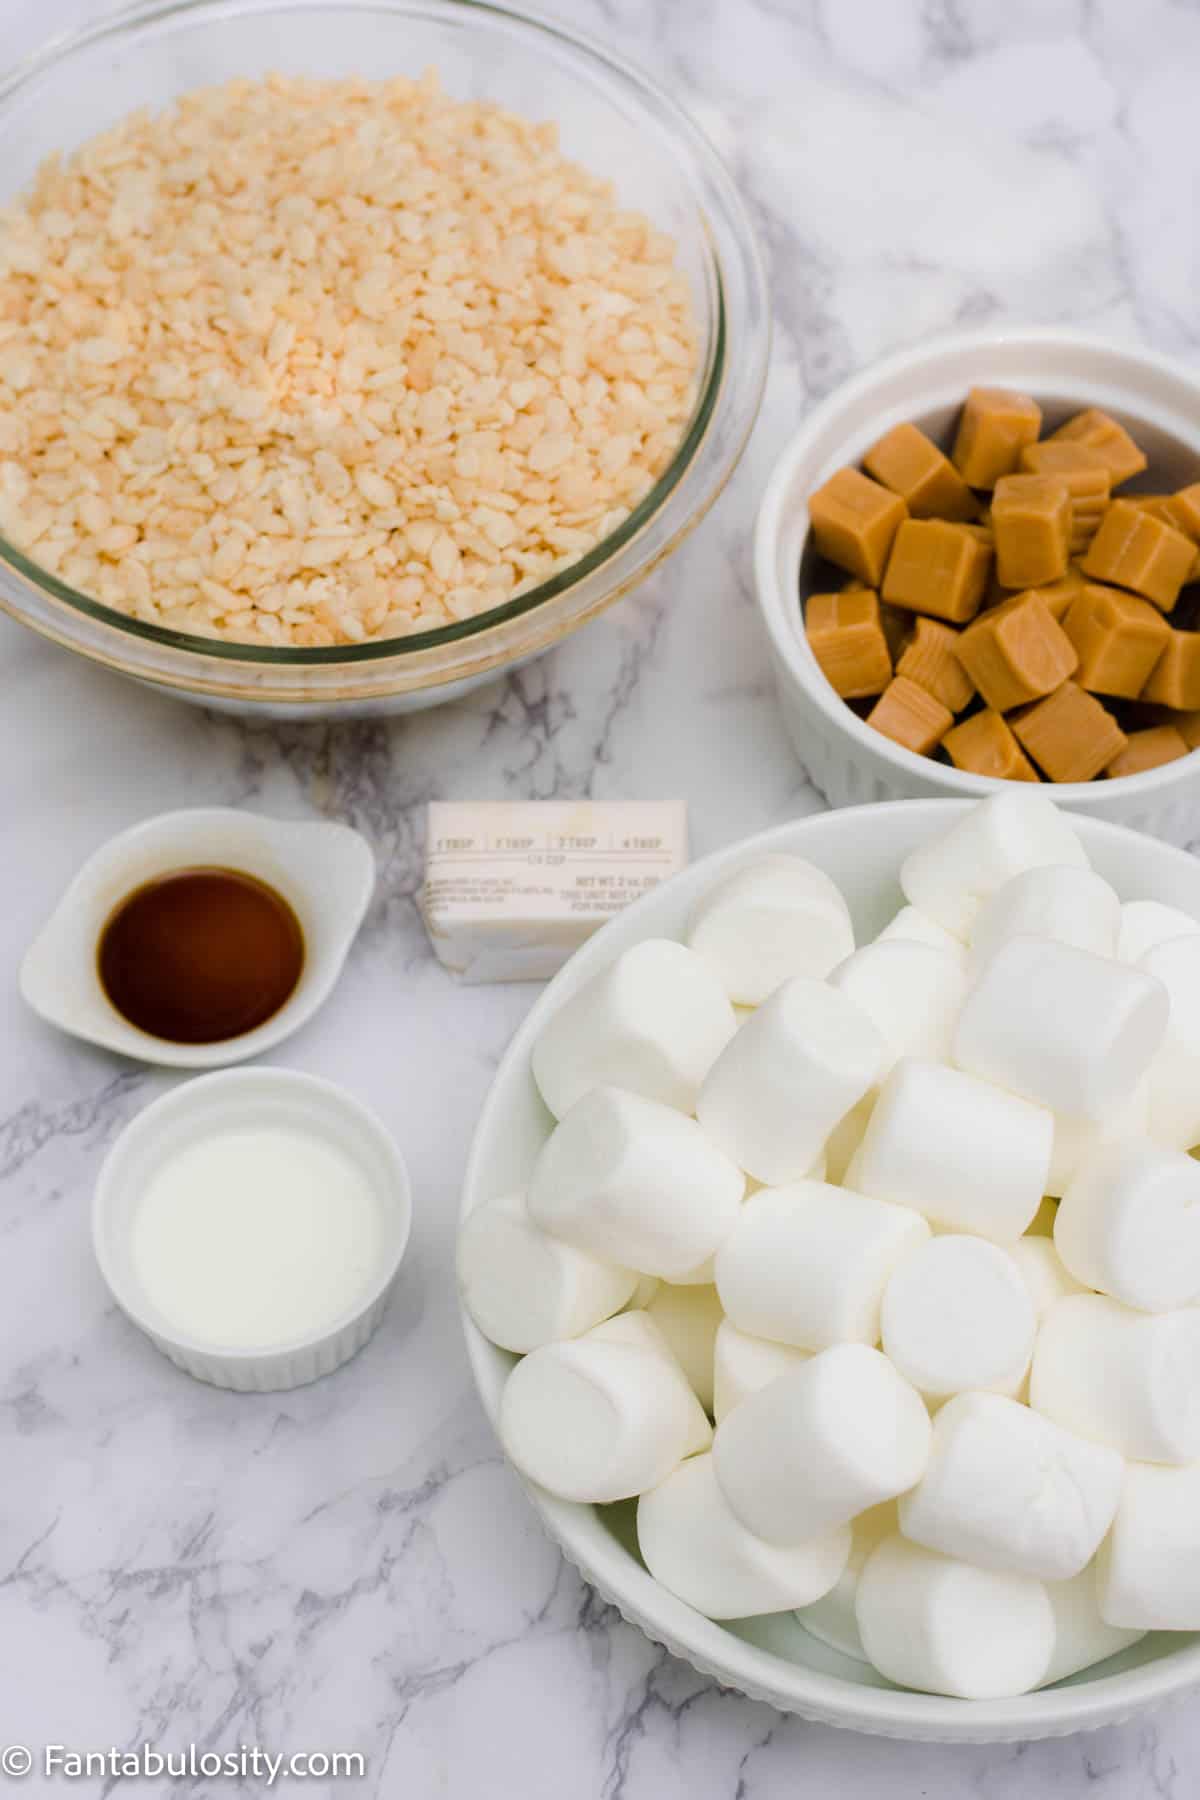
    Ingredients for Caramel Rice Krispie treats

    You only need the following ingredients to make these yummy caramel treats!

    • 1 package caramels (11 oz., unwrapped)
    • ¼ cup butter
    • Package 16 oz. big marshmallows (or mini marshmallows) – I’ve even used marshmallow fluff in rice krispie treats.
    • 1 teaspoon vanilla
    • 2 tablespoons milk
    • 6 cups rice krispies

    You can jump to the recipe card to get the condensed version of this recipe, or keep reading to see step by step photos and instructions!

    Ingredients for caramel Rice Krispie treats
    Ingredients

    Instructions to Make Caramel Rice Krispies

    1. Grease 9×13 baking pan with butter or cooking spray (alternatively, you could line the 9×13 with a piece of parchment paper). 
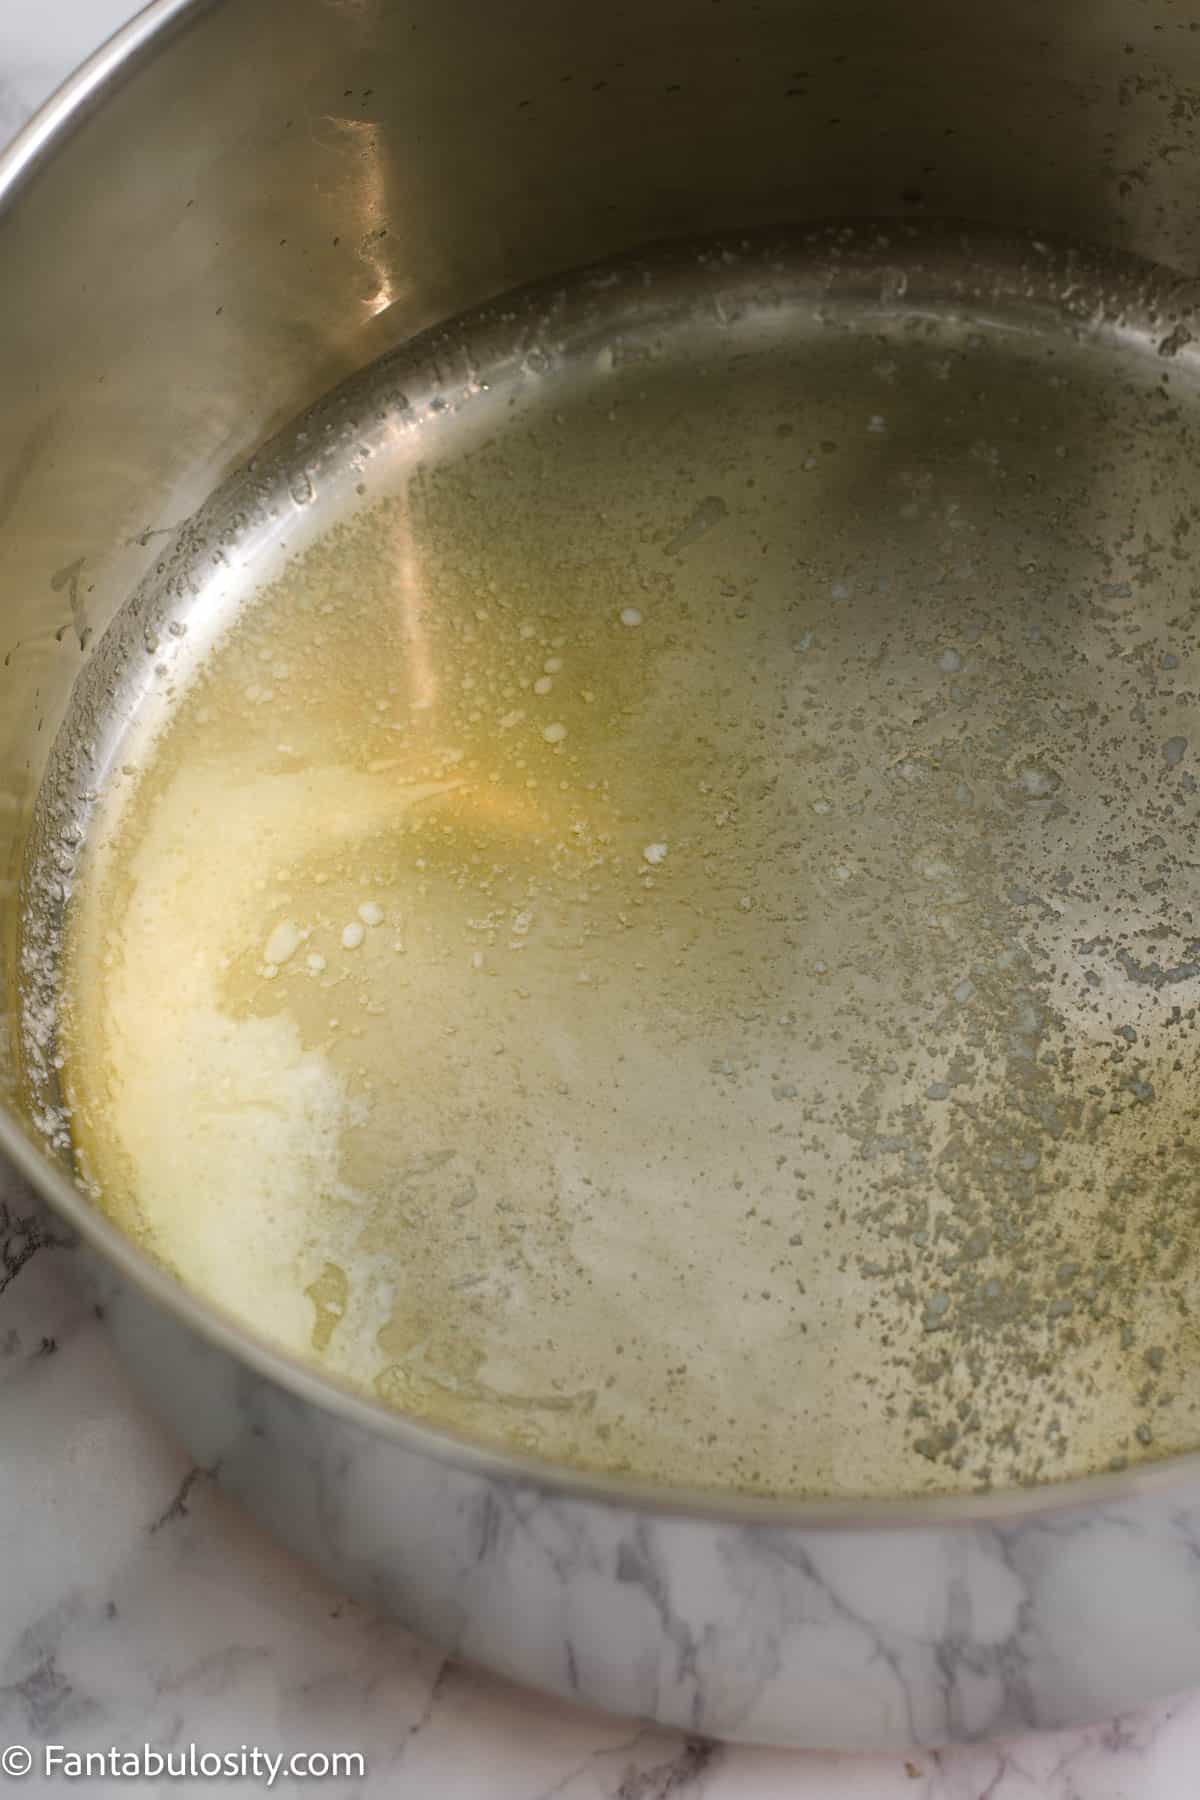
    2. Melt butter over low heat in a stock pot (make sure it’s a big enough pot to add in the 6 cups of rice krispies eventually). 
    Melt the butter over low heat in a big stock pot.
    Melt butter.
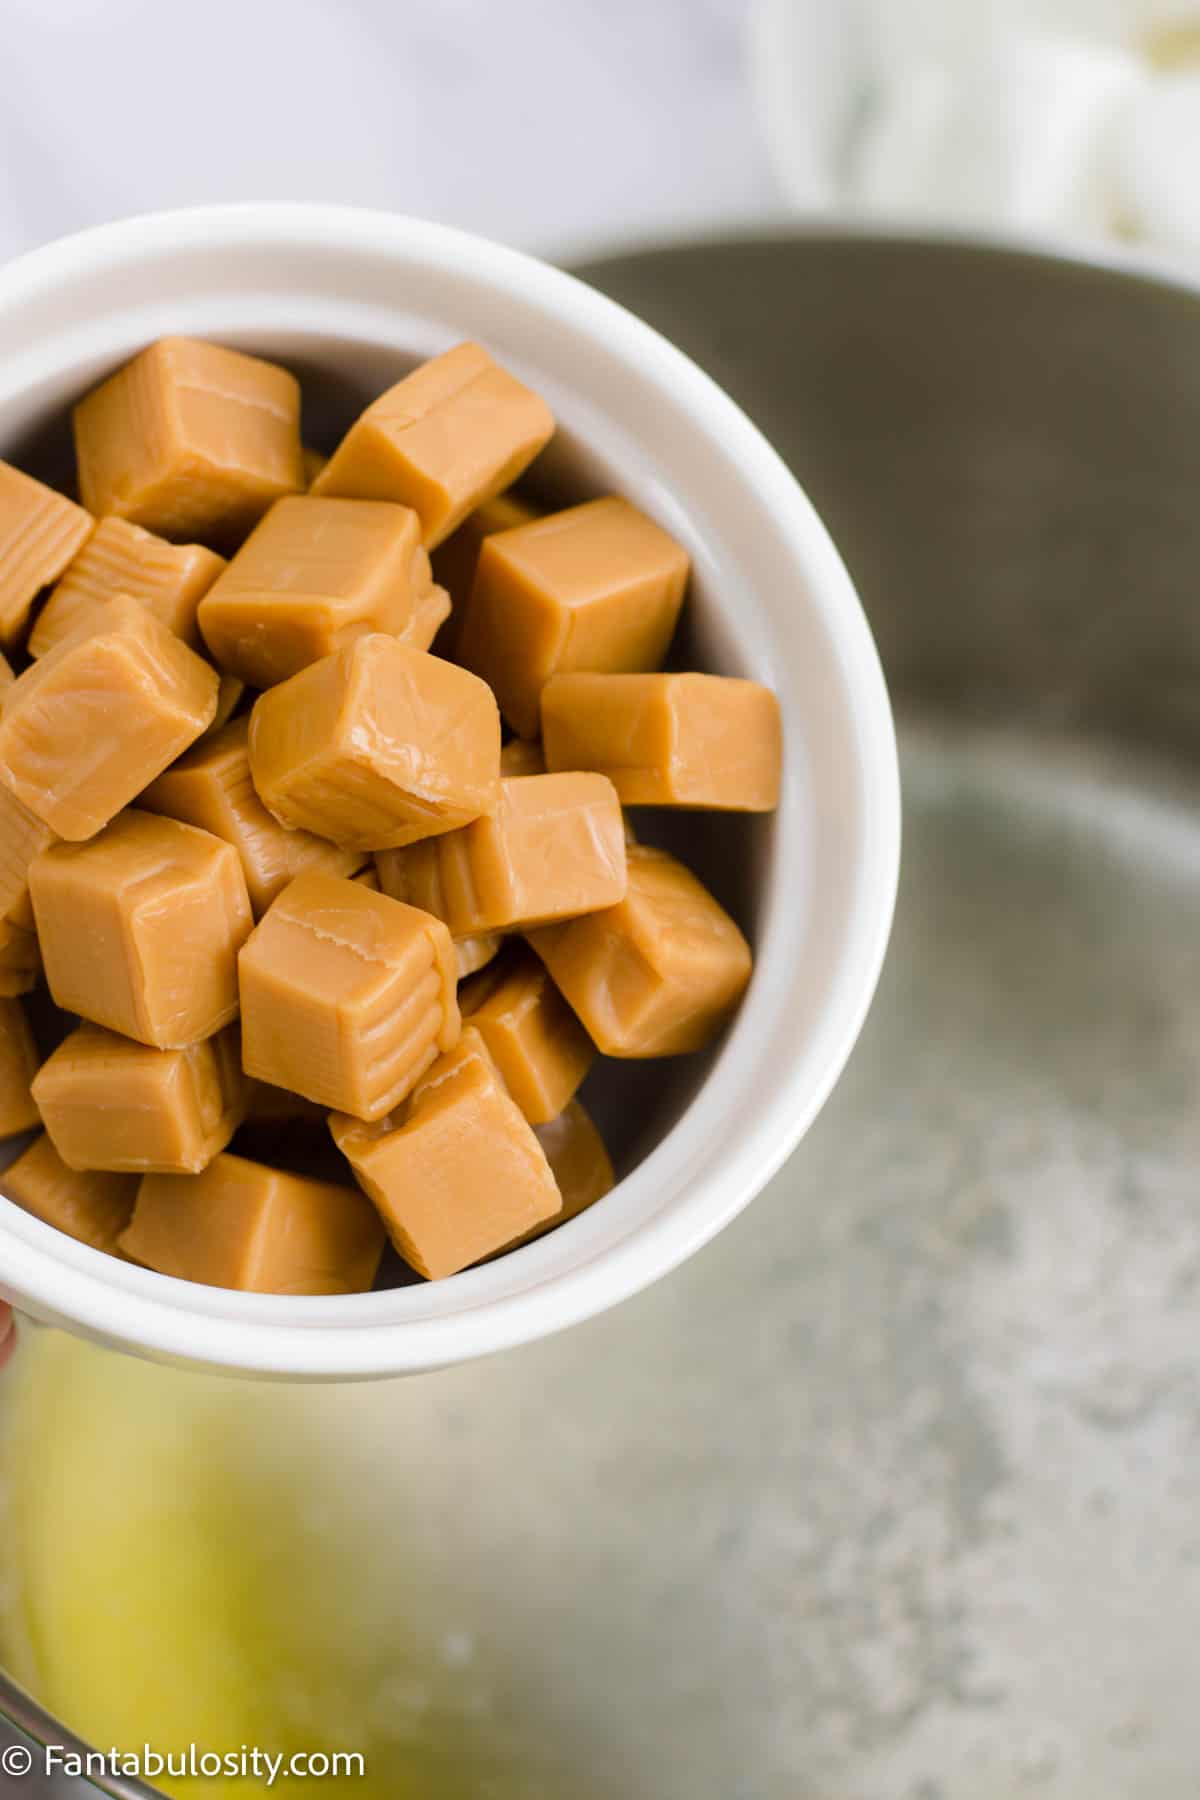
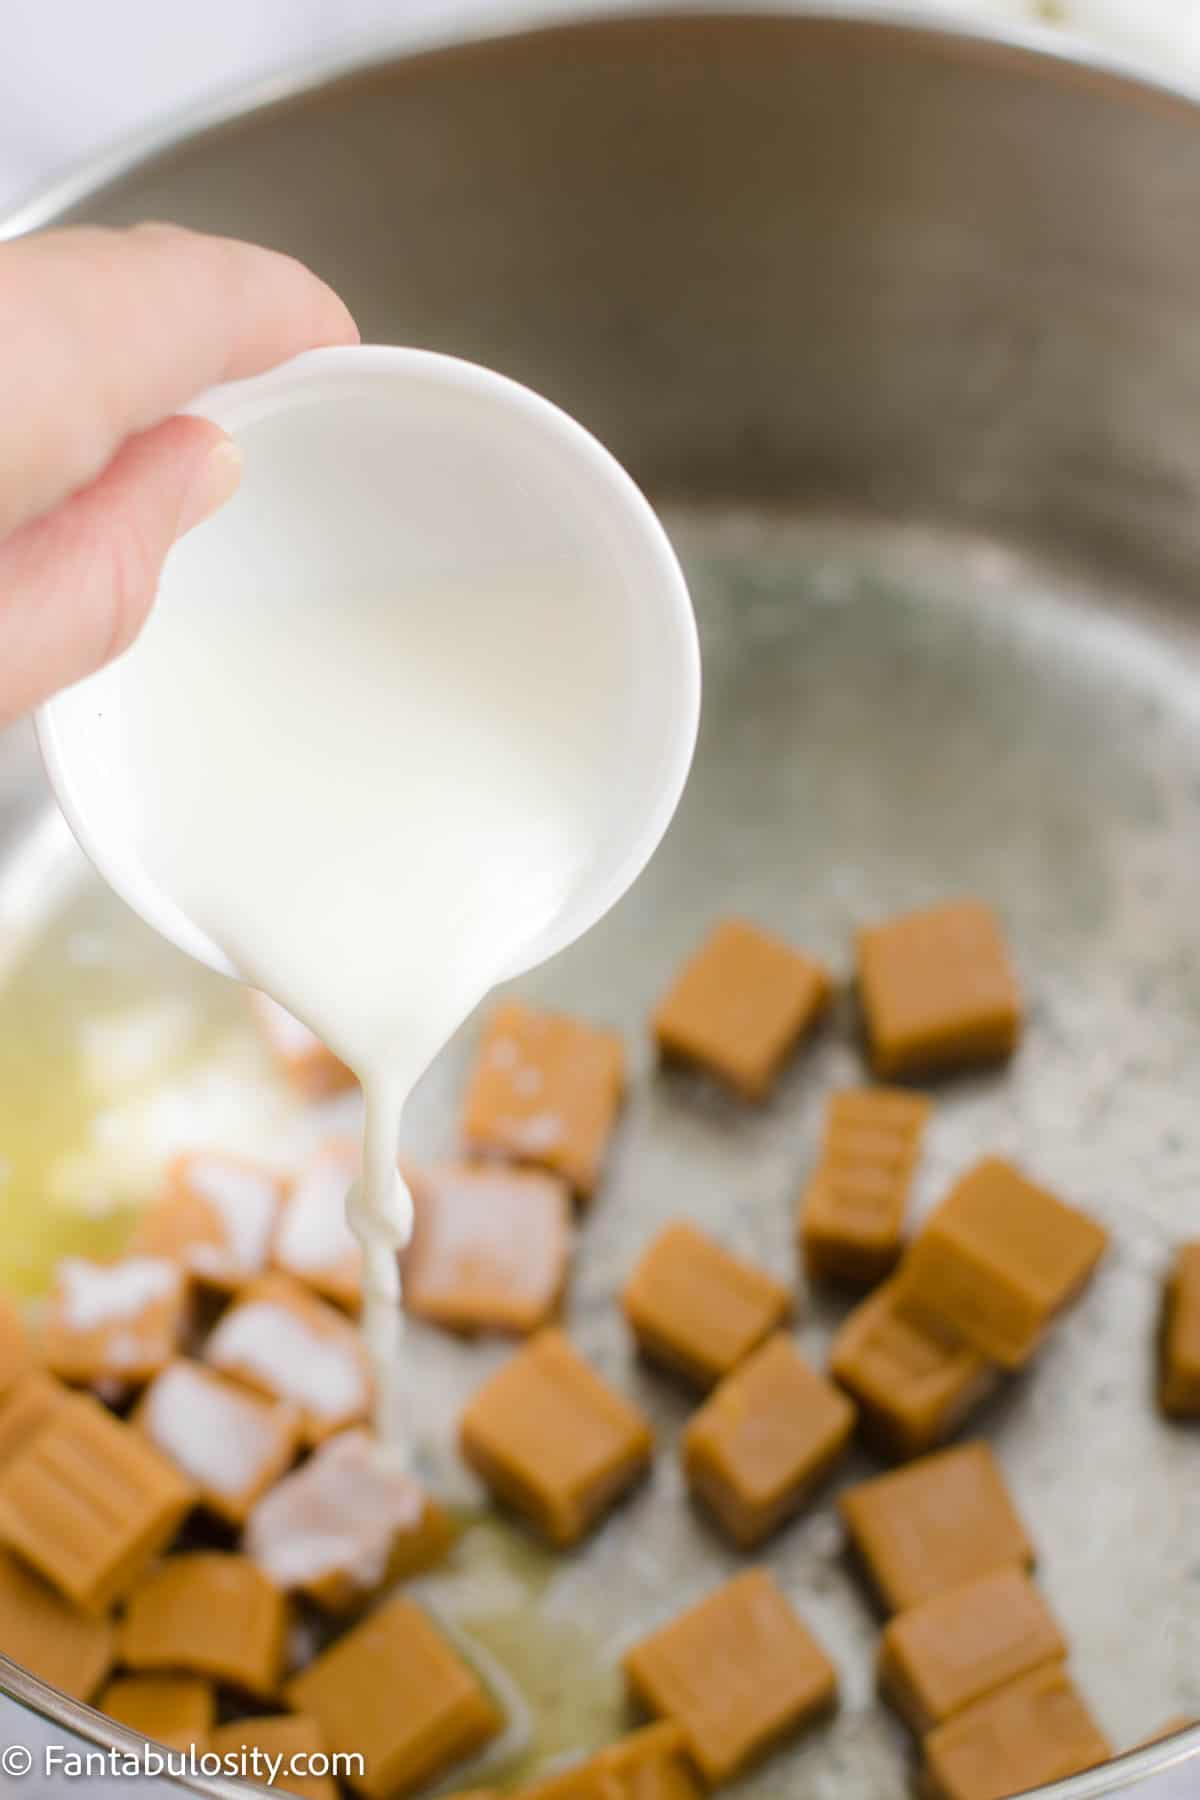
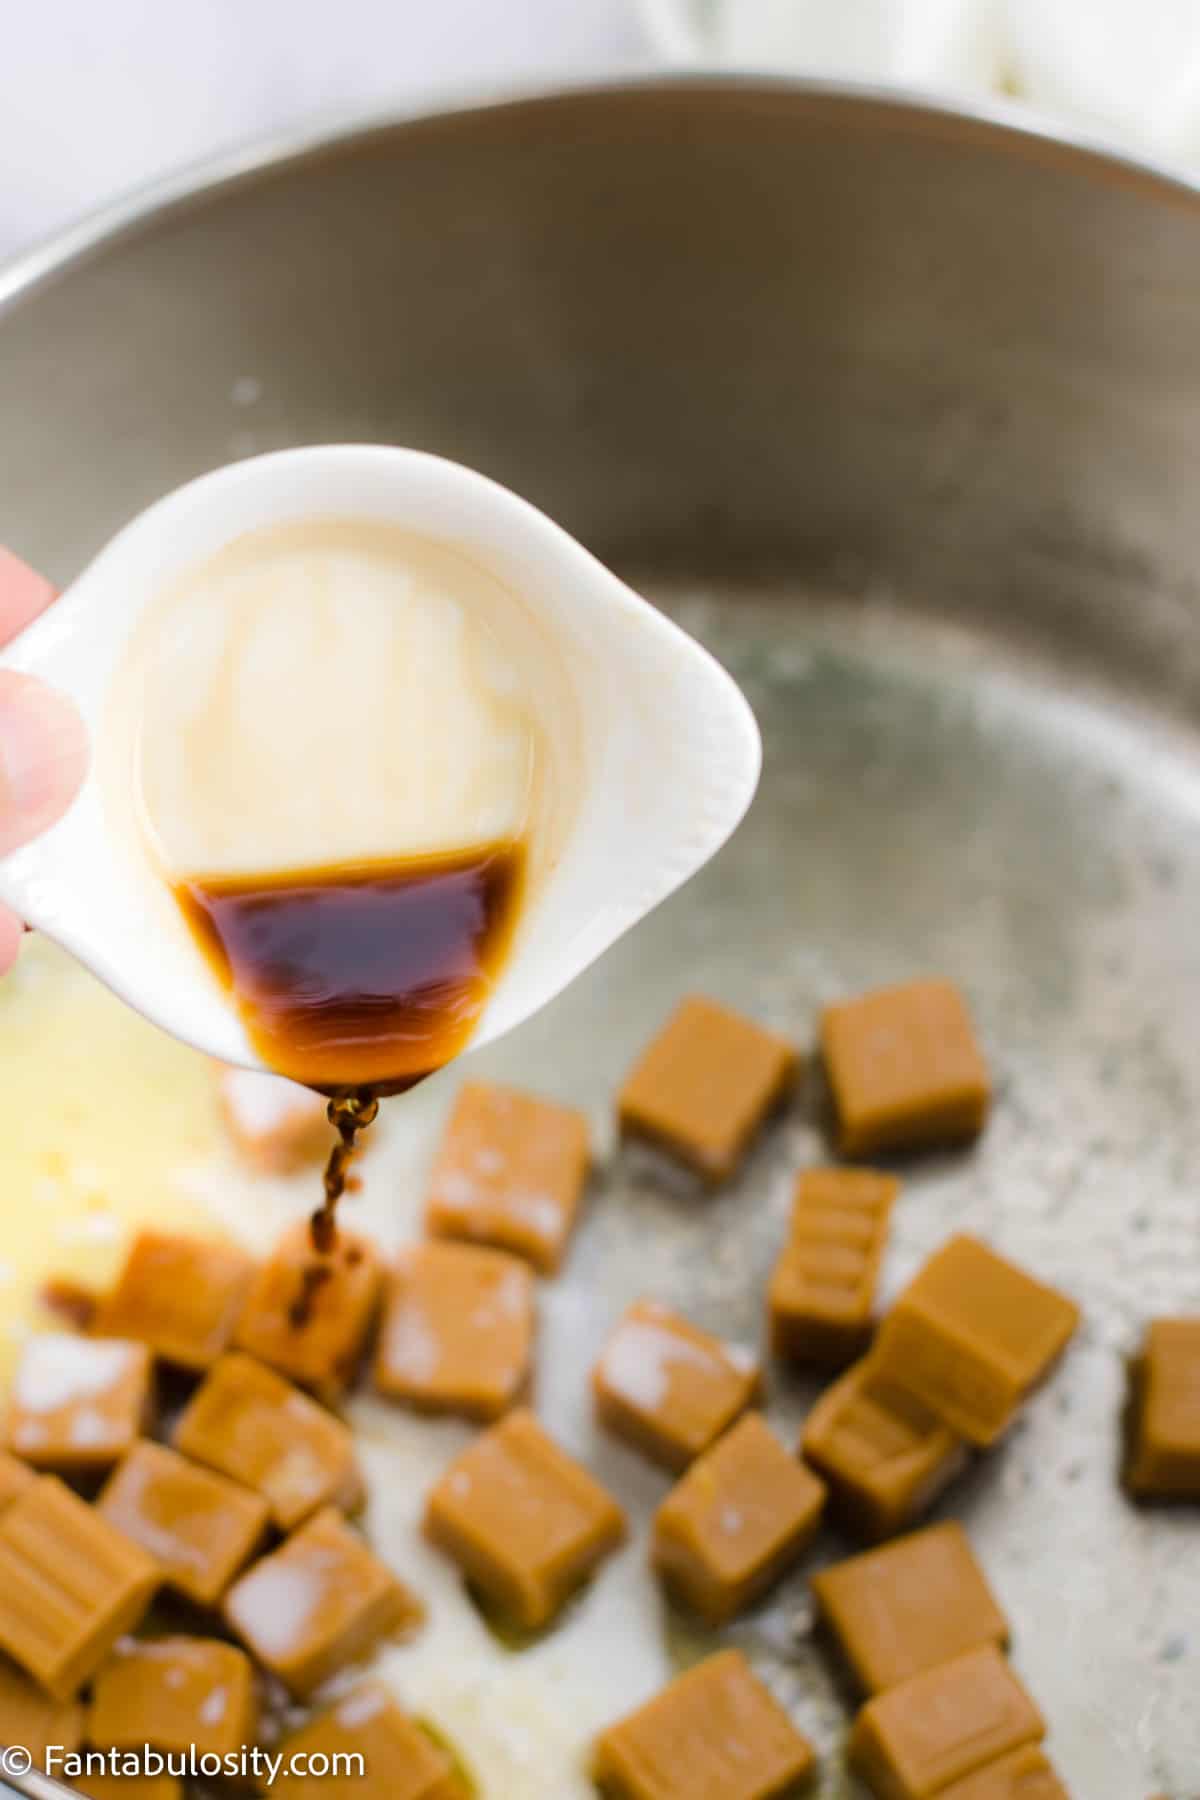
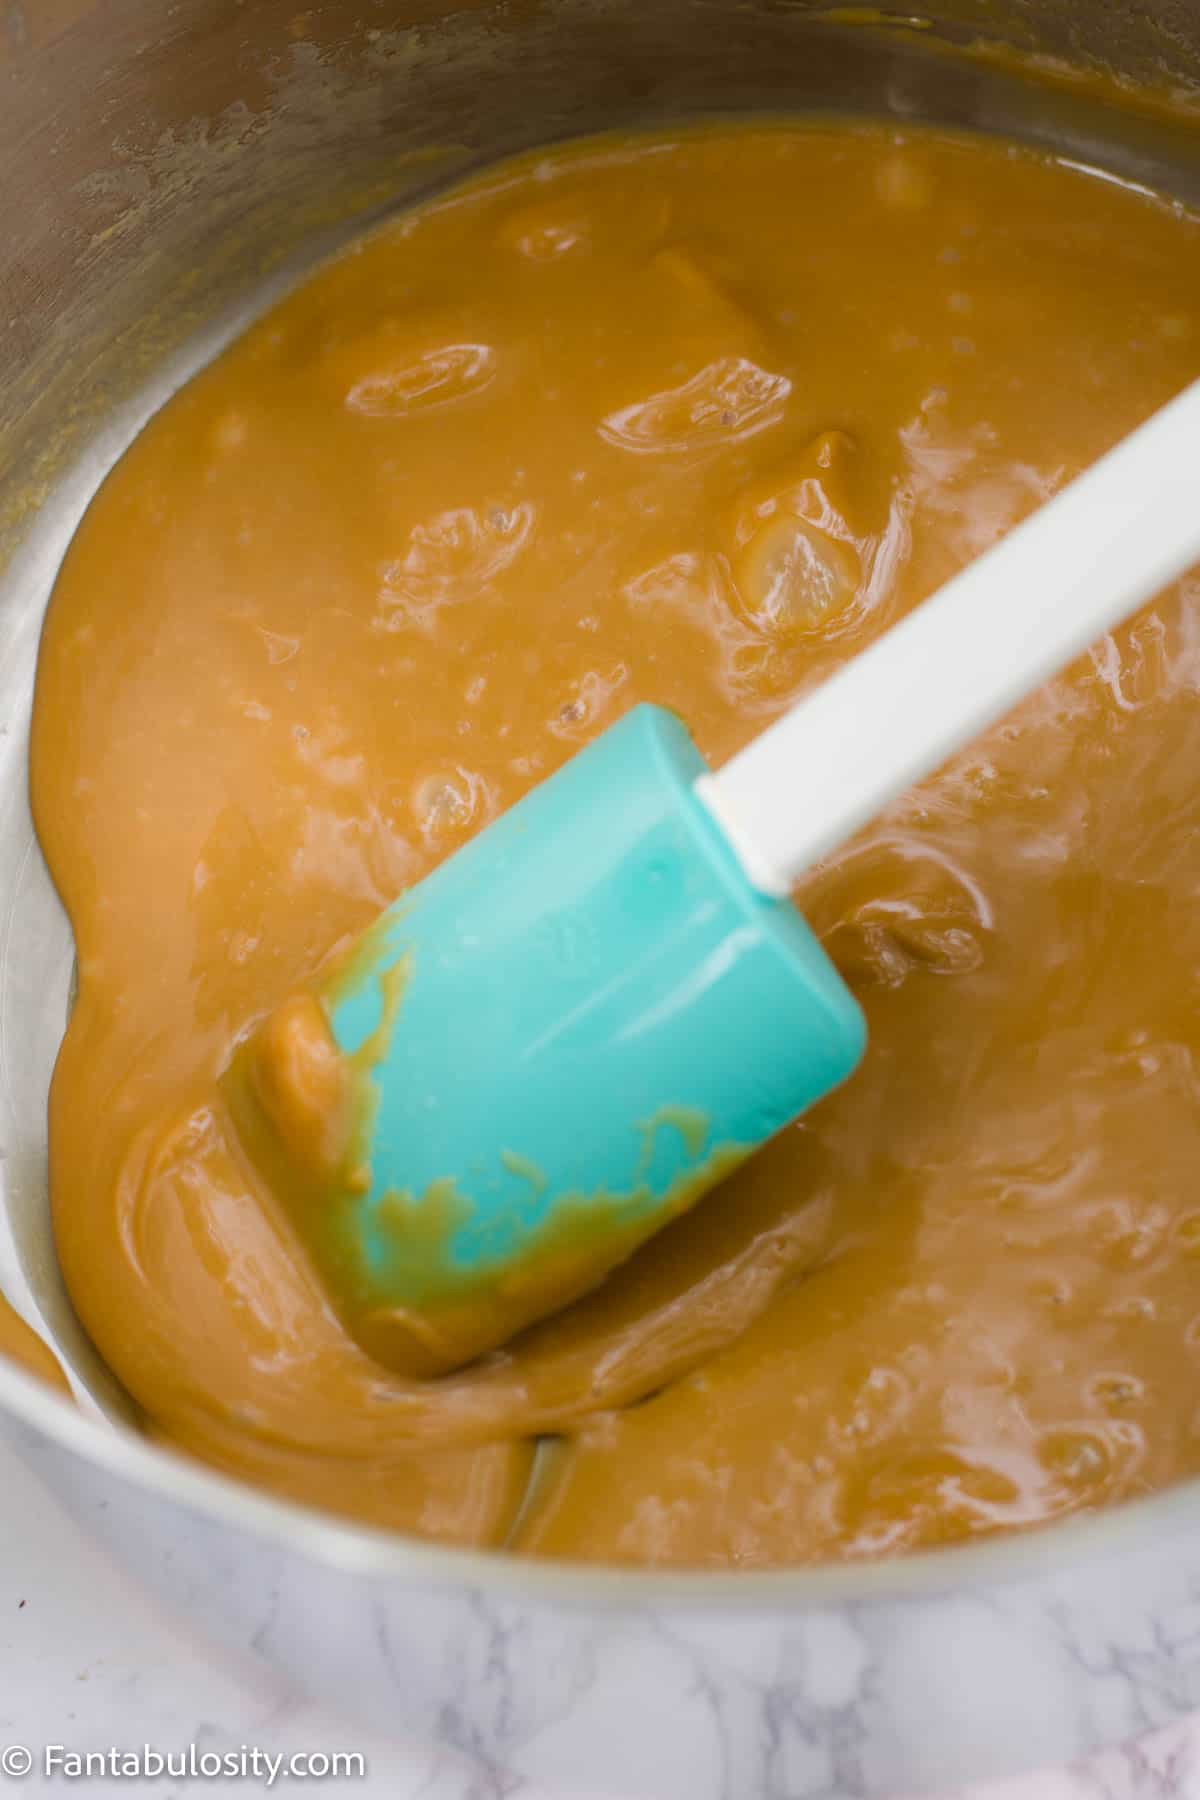
    1. Add milk, caramels, and vanilla to your melted butter. Melt over low heat, stirring often (use a rubber spatula to help scrape the sides of the post every once in a while).
    Add caramels to butter.
    Add caramels.
    Add milk to saucepan.
    Add milk.
    Add vanilla to saucepan.
    Add vanilla.
    Melt over low heat, stirring often.
    Stir till melted.
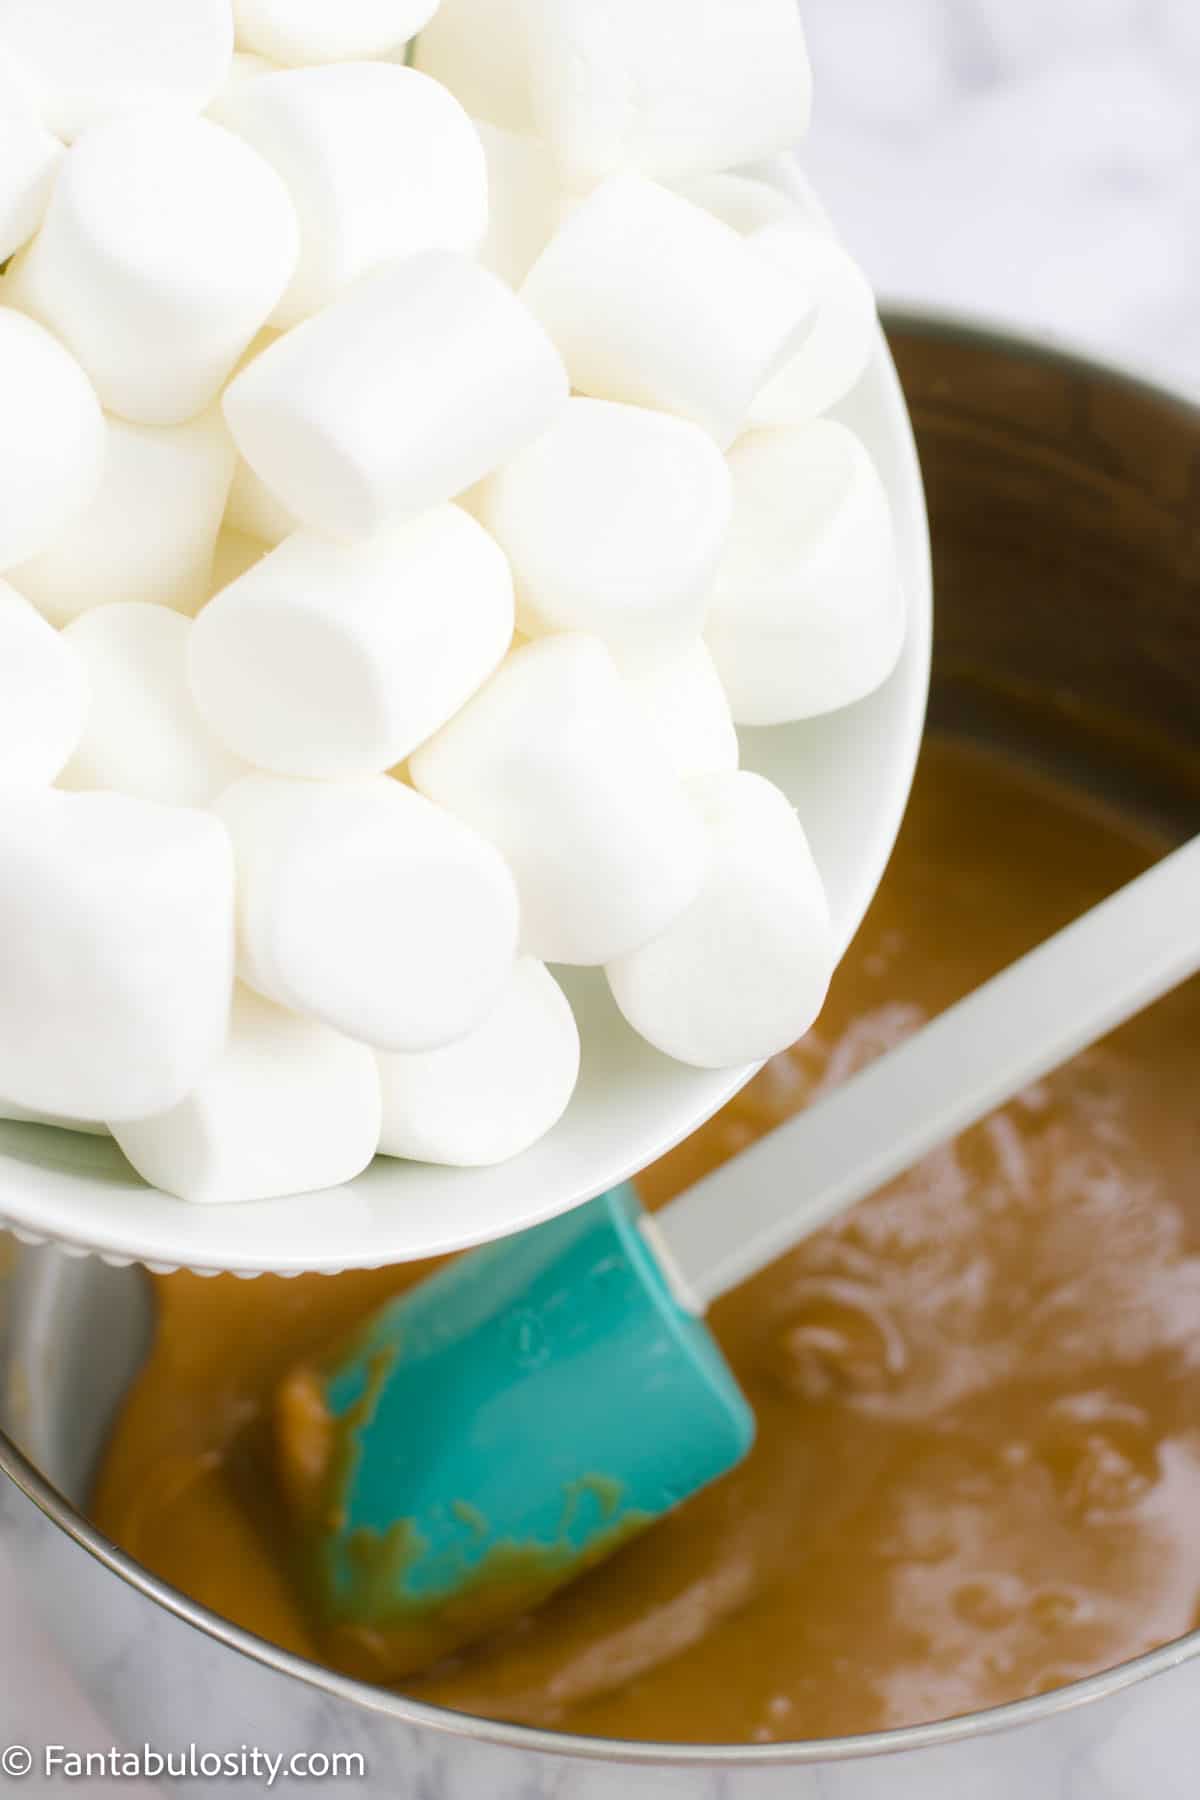
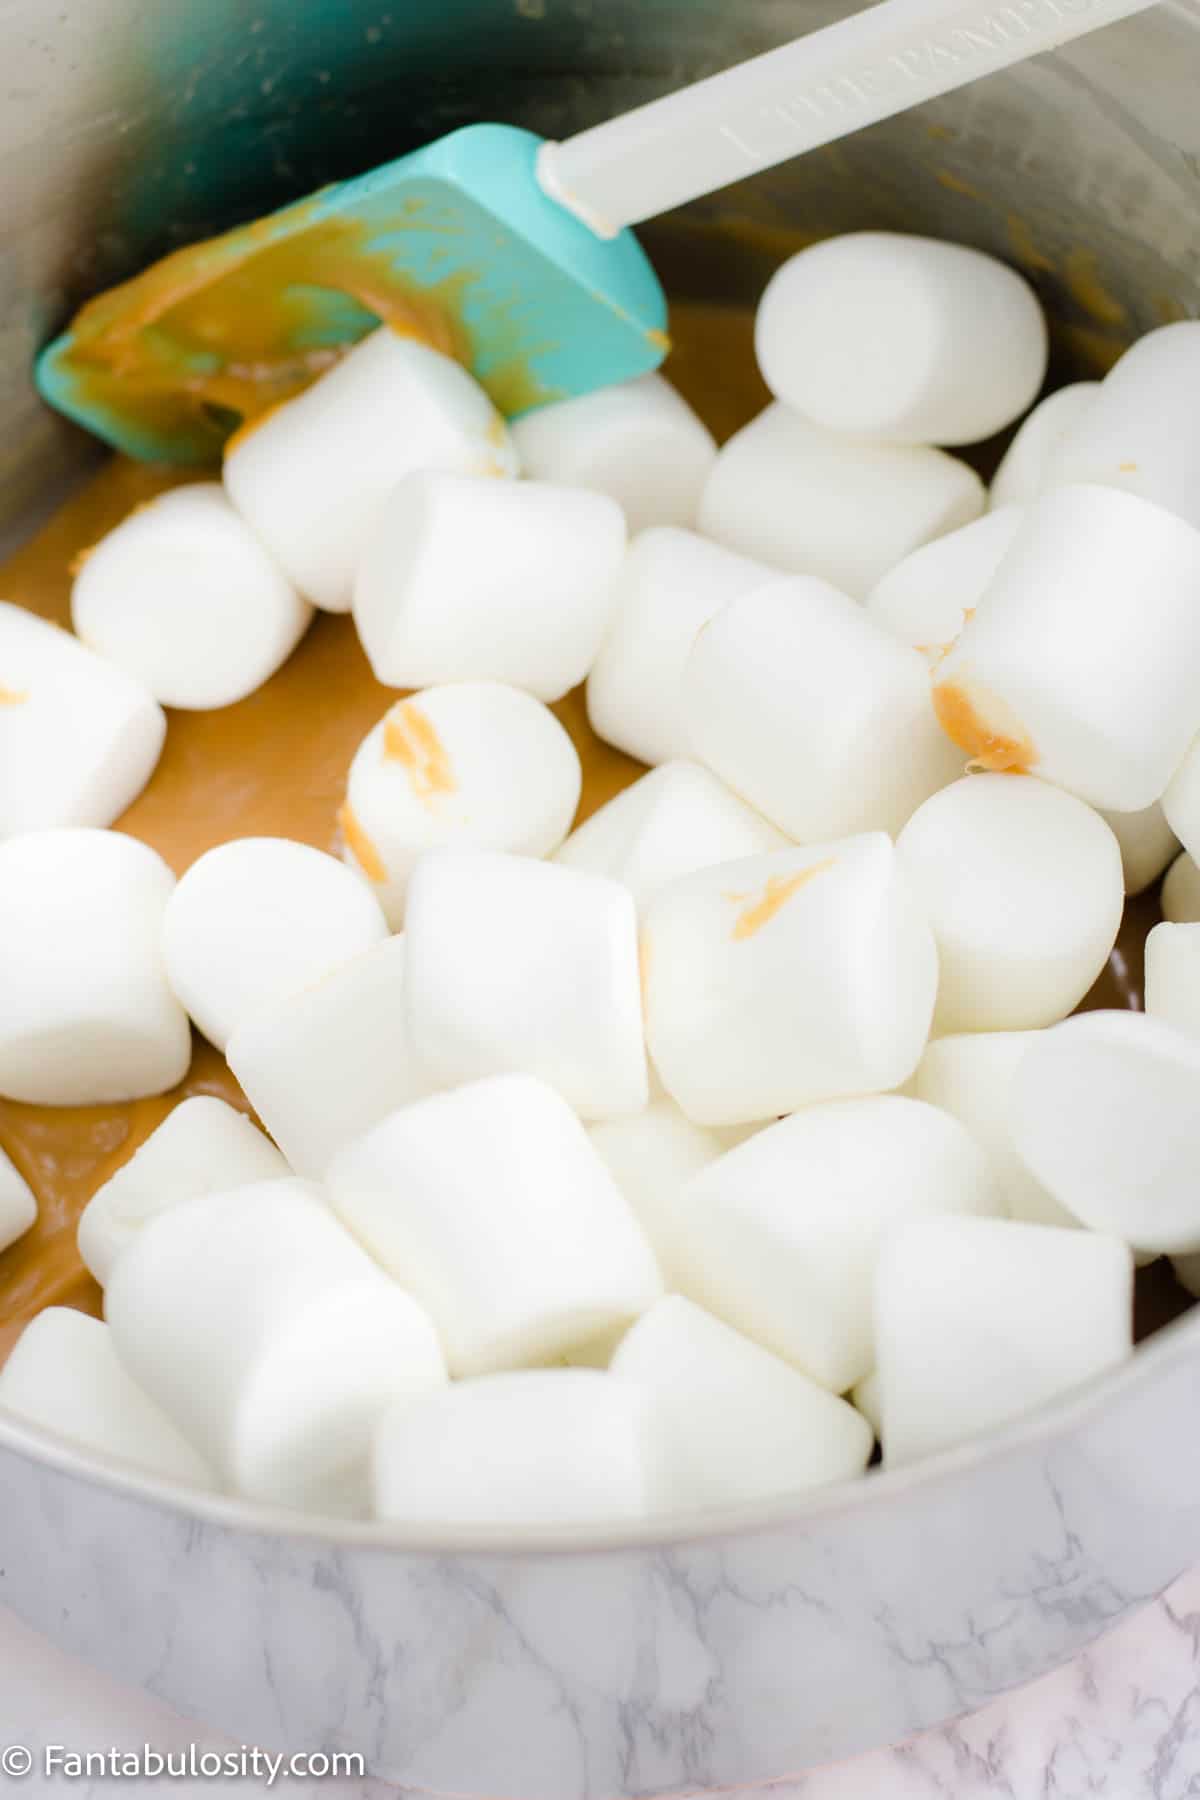
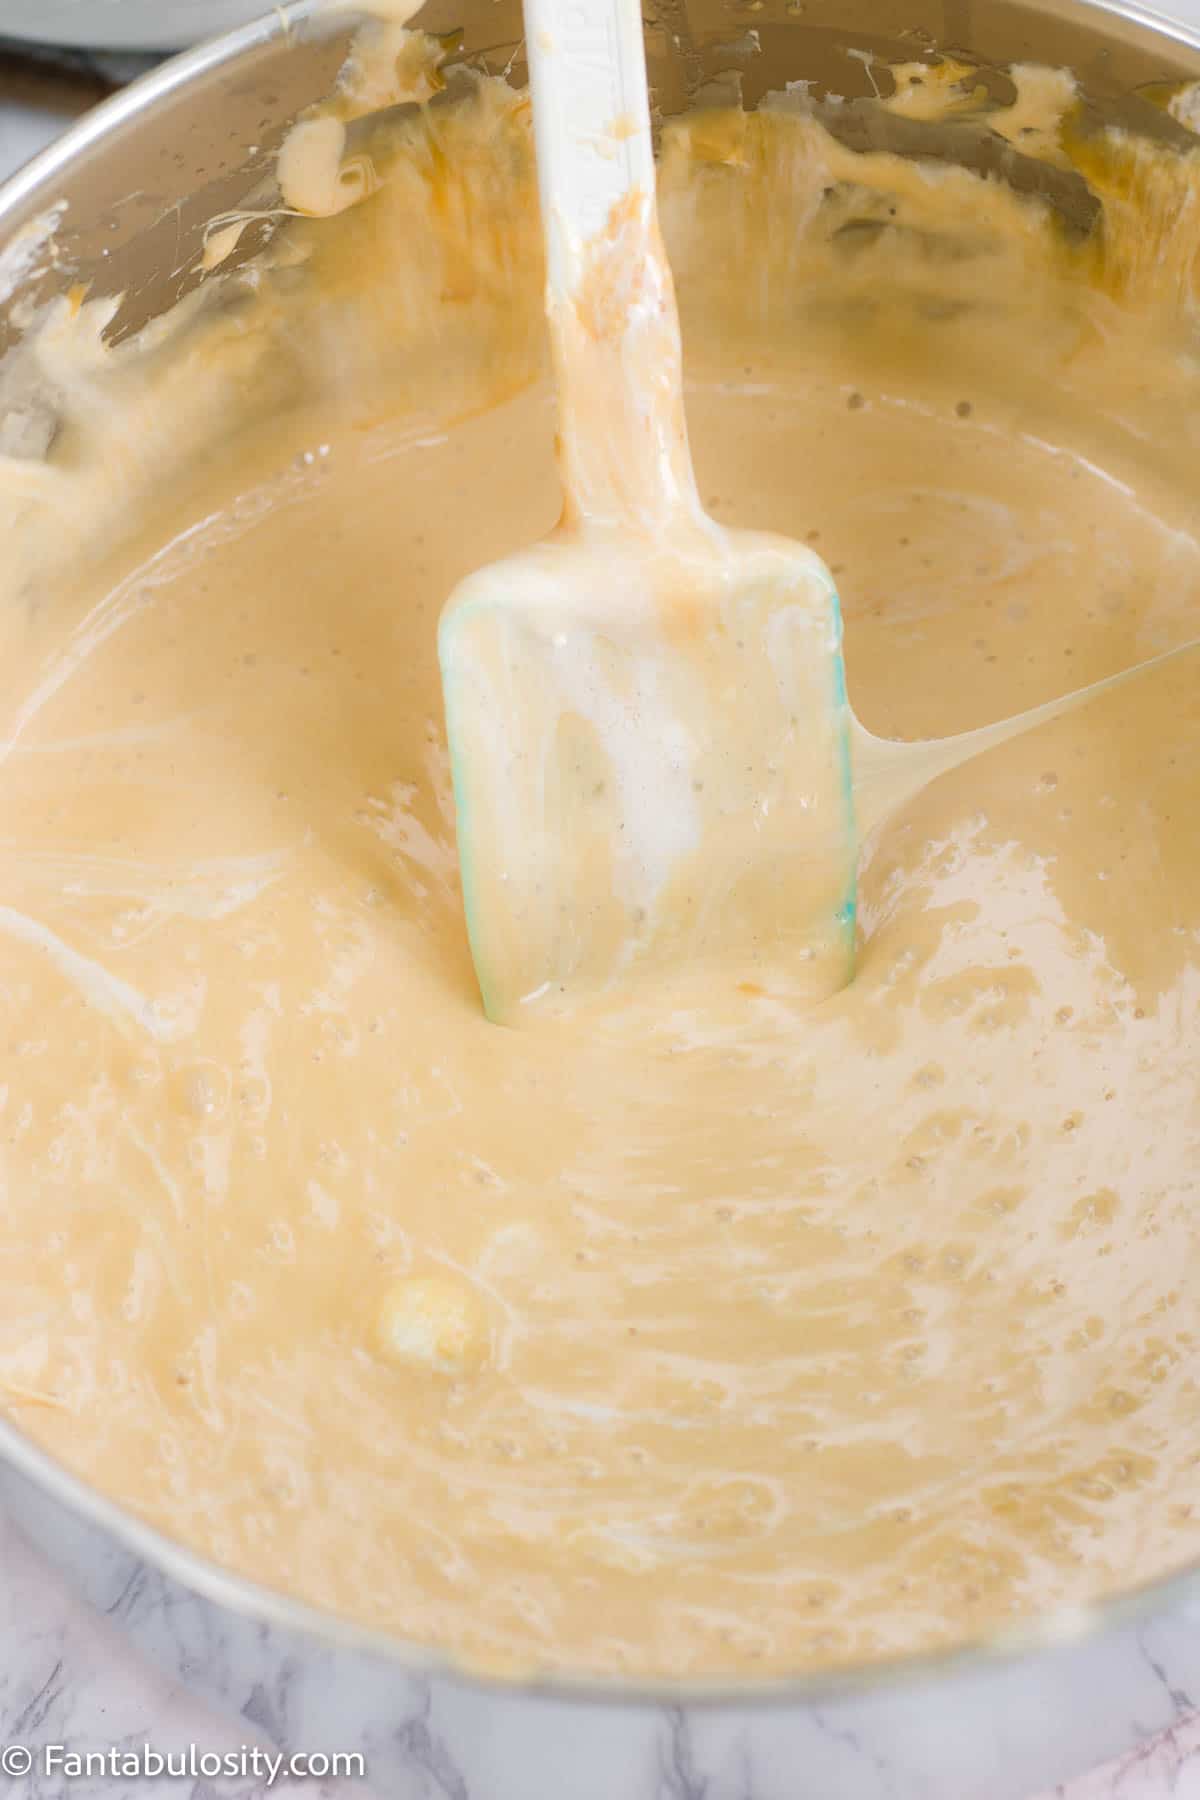
    1. Next, add in your marshmallows and continue cooking over low heat. Stir often until you melt marshmallows completely (be careful, hot caramel and marshmallows can easily burn if you get them on yourself). 
    Add marshmallows.
    Add marshmallows.
    Stir together.
    Cook on low.
    Stir until fully melted.
    Stir often till melted.
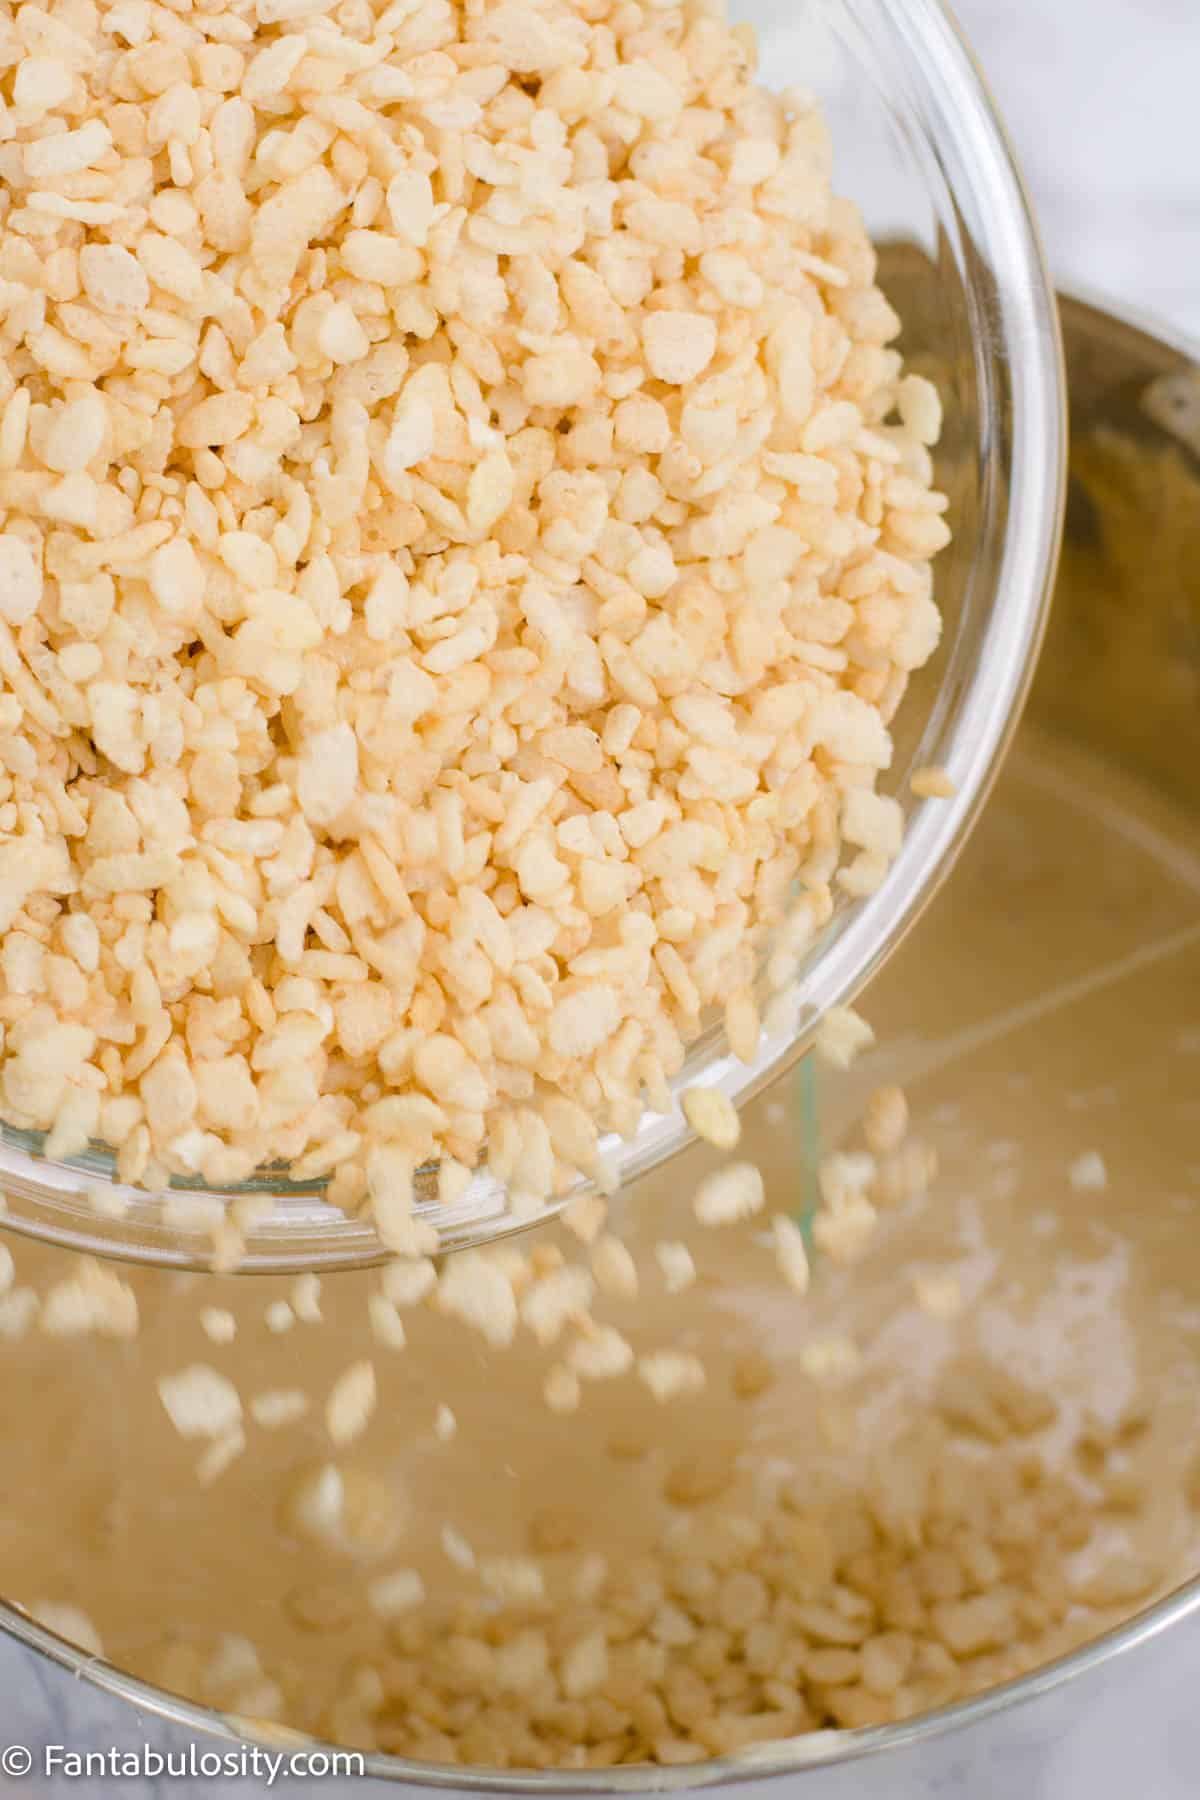
    1. Lastly, add your Rice Krispies to the marshmallow mixture in the pot and quickly stir them in to mix evenly.
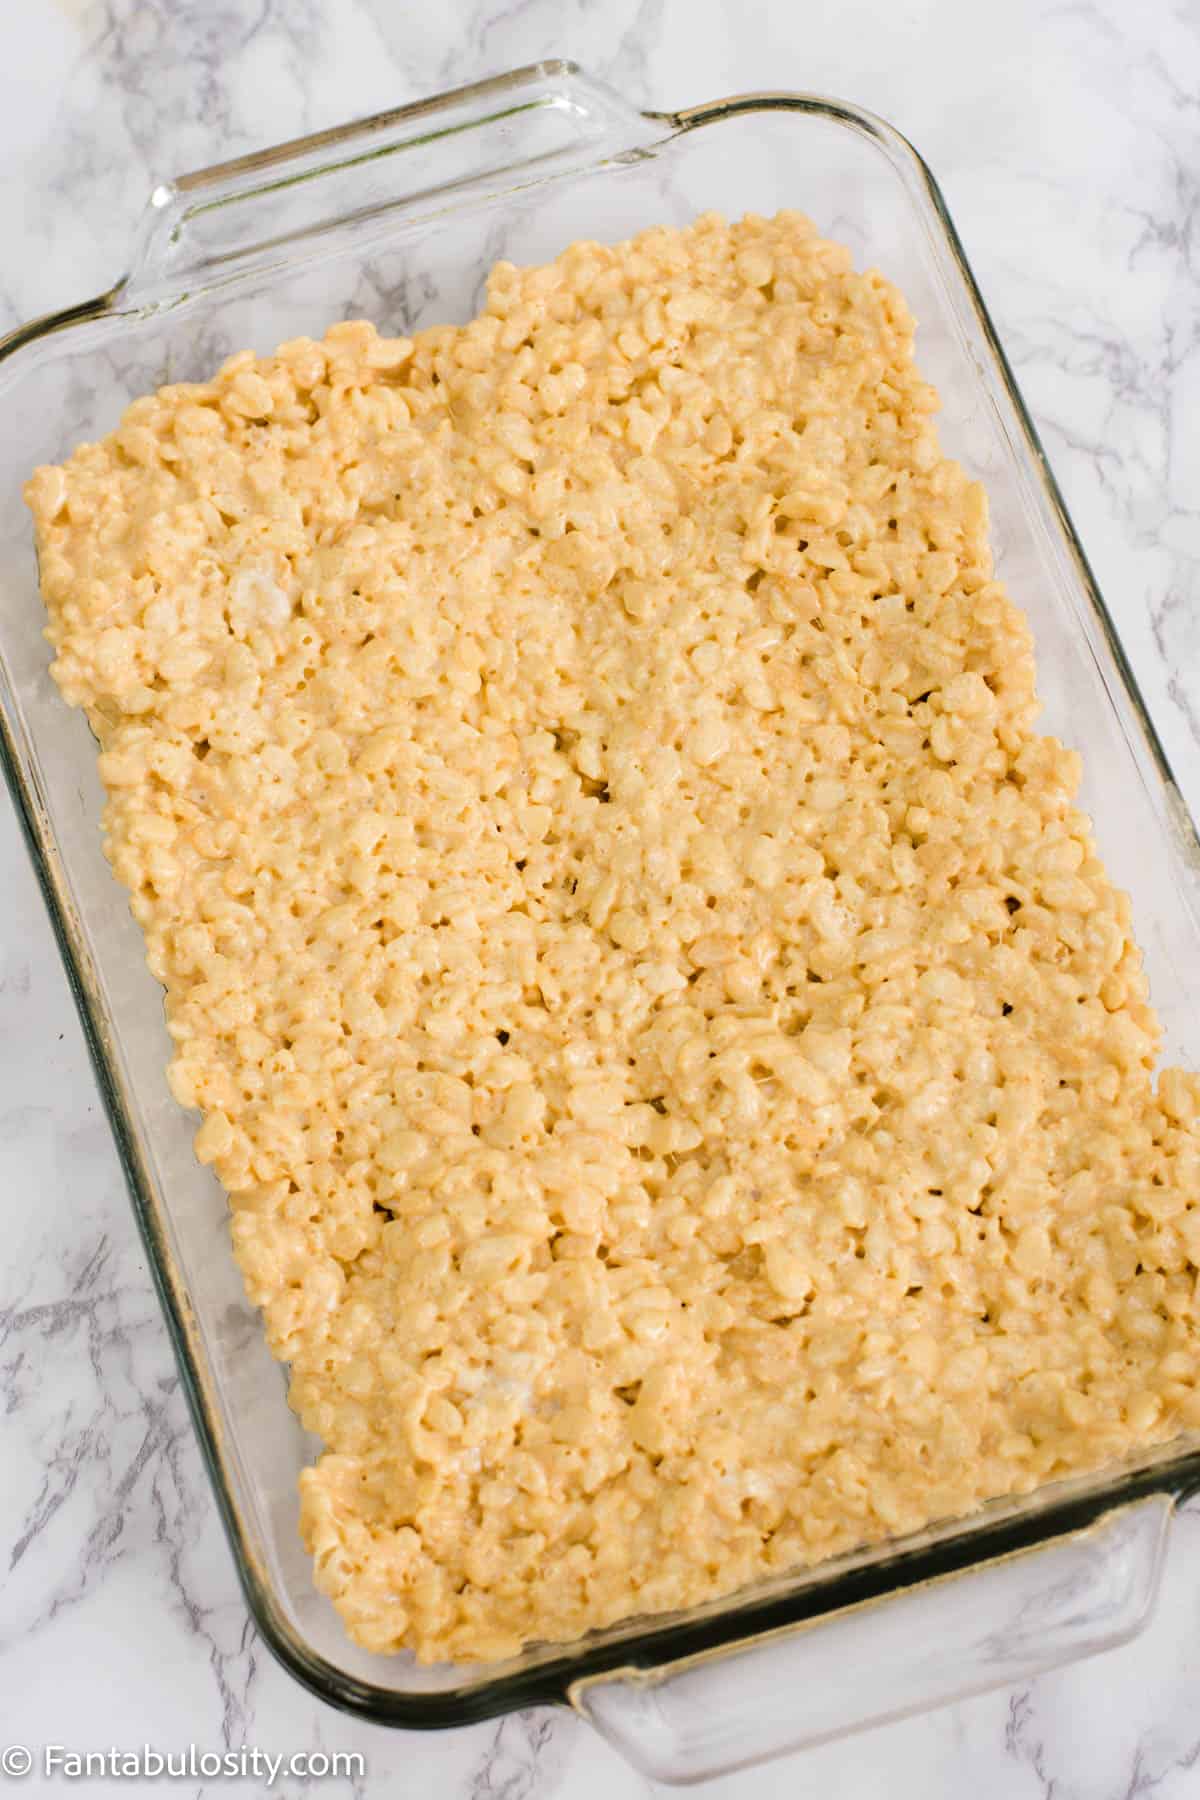
    1. Pour your Rice Krispies mixture into your prepared pan and press mixture into an even layer using a lightly buttered spatula.

    * Sometimes the Rice Krispies stick to the spatula and make it hard to press the mixture evenly into the pan. If this happens, try this- get a glass of ice cold water and set it beside you. Dip a metal spoon into the ice water so it’s cold and then use that to press the mixture down into the pan. If it starts sticking again, dip it back into the glass of ice water to chill the spoon again.

    Add Rice Krispies, stir together.
    Add cereal and stir quickly.
    Pour into greased 9x13 and press into the pan.
    Press into pan.
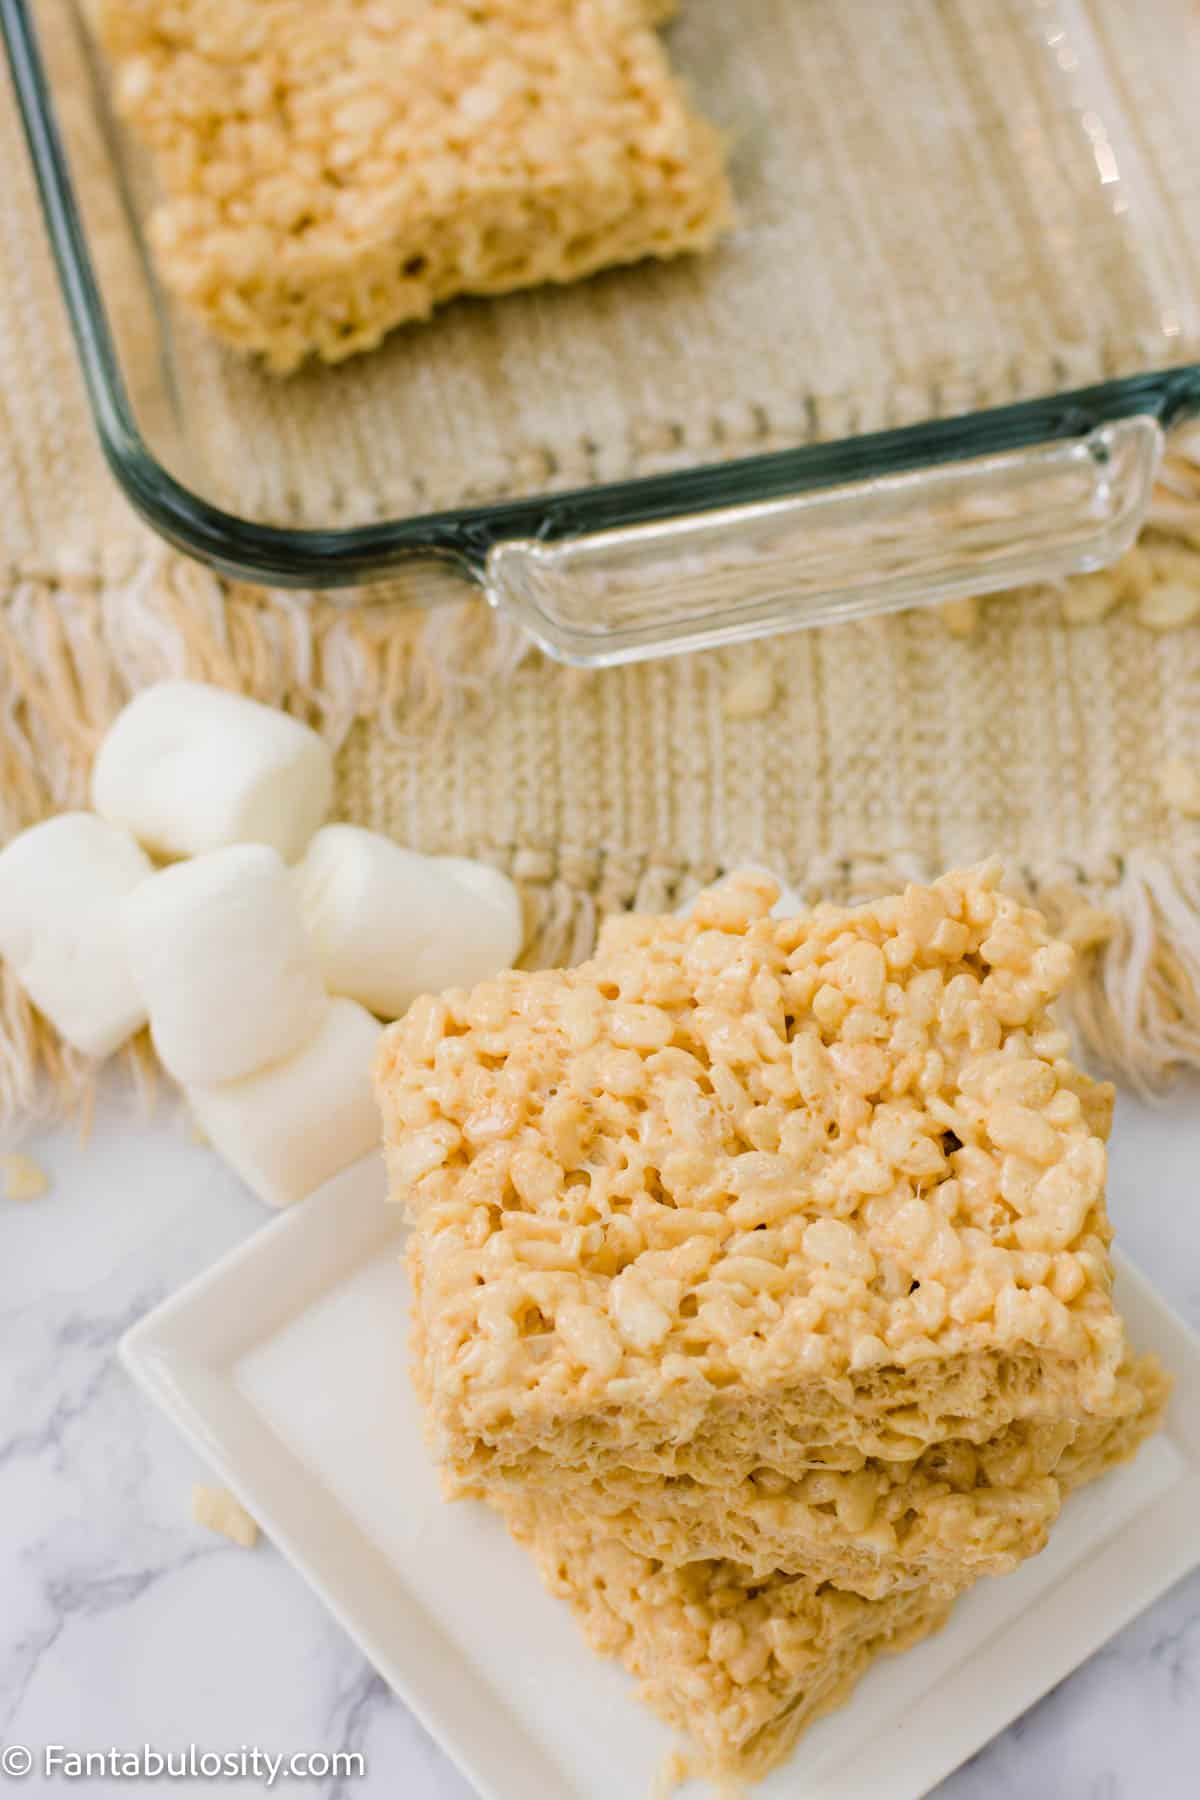
    1. Let your Rice Krispies cool and then cut into 12 squares and serve! You can drizzle some caramel sauce on top of the bars as a decoration if you like. 
    Let cool fully, then cut into squares and serve.

    Let cool, cut into squares.
    Caramel Rice Krispie Treats
    Serve & enjoy!

    Substitutions

    Here are a few helpful substitutions for you in case you are out of one of the ingredients…

    • Marshmallows- if you don’t have larger marshmallows, you can replace them with approximately 9 cups marshmallows of other sizes or 1 jar of marshmallow fluff.
    • Butter- if you don’t have butter on hand, margarine will work in a pinch.

    Variations

    Although this recipe is delicious just as it is, there are lots of ways you can change it up and make it your own.

    • Add Salt -Are you a salted caramel fan? Me too! Sprinkle some coarse sea salt or flaky sea salt on top of these treats and turn them into salted caramel Rice Krispie treats!
    • Chocolate – If you’re a chocolate fan, spread some melted chocolate chips on top of the Rice Krispie layers and make chocolate caramel Rice Krispie treat!
    • Cereal Swap – Have you ever tried making cereal bars with other cereals? If not, put it on your “to try” list for next time! You can use any of your favourite cereals in place of the Rice Krispies called for in this recipe to create a brand new treat (Lucky Charms, Cheerios, the options are endless)!
    Caramel Rice Krispie Treats
    Caramel Rice Krispie Treats

    Storage

    These are best if enjoyed the day they are made, but you can store your leftover caramel Rice Krispie treats in an airtight container at room temperature for 3-5 days. 

    You could also wrap each of the individual cereal bars in plastic wrap OR leave the entire 9×13 of Rice Krispie bars uncut and tightly cover the whole pan with plastic wrap to maximize freshness.

    Expert Tips and FAQs

    Why are my Rice Krispie treats so hard?

    Using too high of heat is usually the reason for hard Rice Krispie squares. If the marshmallow and caramel get too hot, the sugar will start to change into more of a hard candy.

    For the best results, we recommend keeping your heat to low (even though it takes a bit longer). If you do use medium heat, watch very closely to make sure you aren’t overcooking! We don’t recommend medium-high heat as this is very likely to burn your Rice Krispies…and no one likes a burnt dessert recipe.

    Can I make Rice Krispie squares in the microwave?

    Yes! Making these treats in the microwave is a great alternative to the stove top method if you are short on time. Here’s what you do…

    – In a microwave safe large bowl, heat your butter, caramel and marshmallows on high for 3 minutes, stirring after each minute.
    – Stir in vanilla and Rice Krispies until well coated with the caramel/marshmallow mixture.
    – Using a lightly buttered spatula (or the cold spoon method we mentioned above), press mixture into a 9×13″ pan so it’s an even layer.
    – Allow to cool slightly then cut into squares.

    Related Recipes

    If you liked our caramel twist on this old favorite, you’re in luck! We have SO many other recipes for you to try that are bursting with caramel flavor, like our caramel corn recipe or our caramel cupcakes with caramel buttercream frosting!

    Or if you’re a big caramel fan, you’ll also love this caramel cream pie recipe.

    Recipe

    Caramel Rice Krispie Treats
    Print Pin
    5 from 5 votes

    Caramel Rice Krispie Treats

    Caramel Rice Krispie Treats: The classic recipe we all know and love with a caramel twist! This quick, easy recipe has a creamy, dulce de leche taste and more chewy consistency than regular Rice Krispie treats! 
    Course Dessert, Snack
    Cuisine American
    Prep Time 20 minutes minutes
    Total Time 20 minutes minutes
    Servings 12 squares
    Calories 90kcal
    Author Jessica Burgess

    Ingredients

    • 1- 11 ounce package of caramels unwrapped (Kraft caramels work well)
    • ¼ cup butter
    • 1- 16 ounces package of marshmallows (or mini marshmallows)
    • 1 teaspoon vanilla extract
    • 2 tablespoons milk
    • 6 cups Rice Krispies (or other crispy rice cereal)

    Instructions

    • Grease 9×13 baking pan with butter or cooking spray (alternatively you could line the 9×13 with a piece of parchment paper).
    • Melt butter over low heat in a stock pot (make sure it's a big enough pot to add in the 6 cups of rice krispies eventually).
    • Add milk, caramels, and vanilla to your melted butter. Melt over low heat, stirring often (use a rubber spatula to help scrape the sides of the post every once in a while).
    • Next, add in your marshmallows and continue cooking over low heat. Stir often until you melt marshmallows completely (be careful, hot caramel and marshmallows can easily burn if you get them on yourself).
    • Lastly, add your Rice Krispies to the marshmallow mixture in the pot and quickly stir them in to mix evenly.
    • Pour your Rice Krispies mixture into your prepared pan and press mixture into an even layer using a lightly buttered spatula.
      * Sometimes the Rice Krispies stick to the spatula and make it hard to press the mixture evenly into the pan. If this happens, try this- get a glass of ice cold water and set it beside you. Dip a metal spoon into the ice water so it is cold and then use that to press the mixture down into the pan. If it starts sticking again, dip it back into the glass of ice water to chill the spoon again.
    • Let your Rice Krispies cool and then cut into 12 squares and serve! You can drizzle some caramel sauce on top of the bars as a decoration if you like.

    Notes

    STORAGE: These are best if enjoyed the day they are made, but you can store leftovers in an airtight container at room temperature for 3-5 days. 
    MICROWAVE OPTION: Making these treats in the microwave is a great alternative to the stove top method if you are short on time. Here’s what you do…
    – In a microwave safe large bowl, heat your butter, caramel and marshmallows on high for 3 minutes, stirring after each minute.
    – Stir in vanilla and Rice Krispies until well coated with the caramel/marshmallow mixture.
    – Using a lightly buttered spatula (or the cold spoon method we mentioned above), press mixture into a 9×13″ pan so it’s an even layer.
    – Allow to cool slightly then cut into squares.

    Nutrition

    Serving: 1square | Calories: 90kcal | Carbohydrates: 12g | Protein: 1g | Fat: 4g | Saturated Fat: 3g | Polyunsaturated Fat: 1g | Monounsaturated Fat: 1g | Trans Fat: 1g | Cholesterol: 10mg | Sodium: 109mg | Potassium: 23mg | Fiber: 1g | Sugar: 2g | Vitamin A: 1054IU | Vitamin C: 9mg | Calcium: 5mg | Iron: 4mg

    How to Grill Frozen Burgers

    January 24, 2022

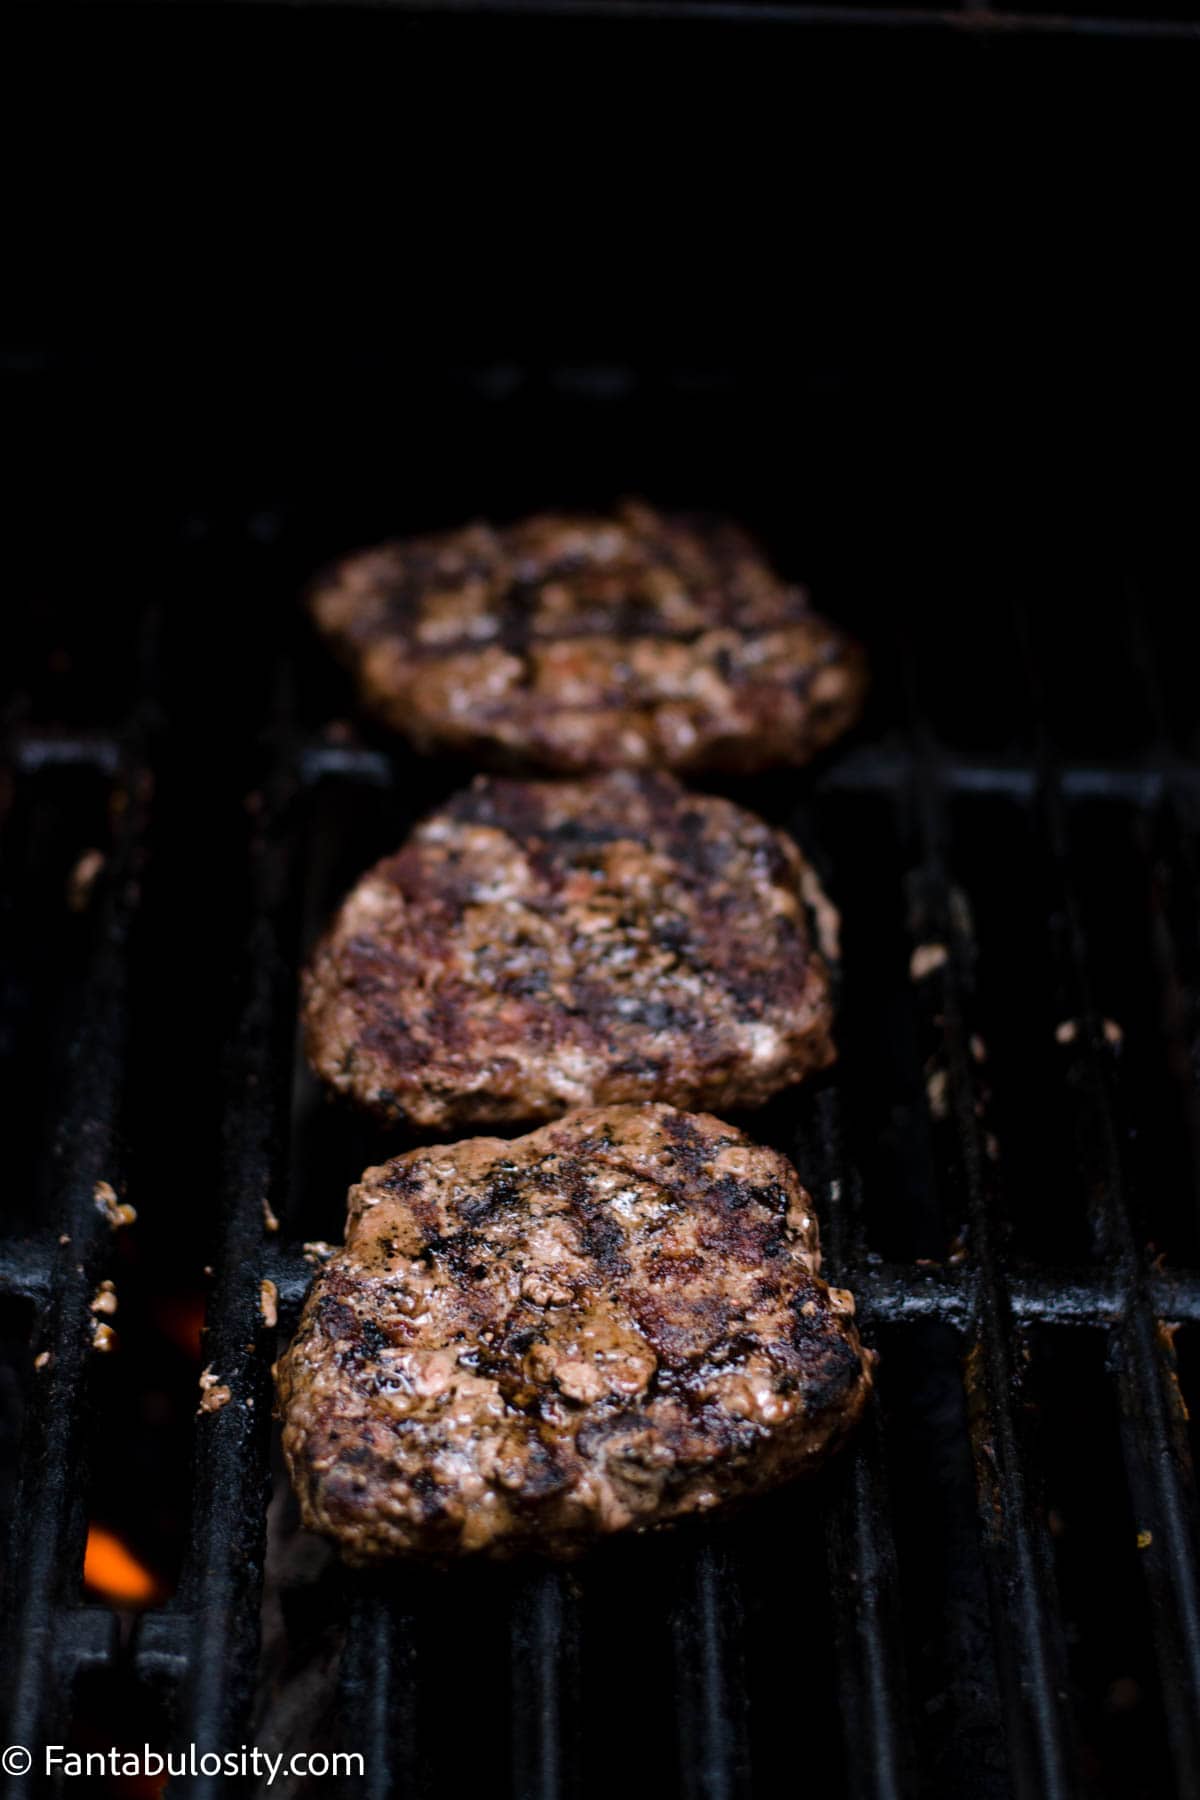
    cooked burger patties on the grill

    How to Grill Frozen Burgers: No need to thaw these ground beef, frozen patties! With a cooking time of only 20 minutes on the gas grill, you’ll have perfect burgers ready for lunch or quick dinner!

    We love trying new ways to cook beef patties around here, with baking burgers in the oven being one of them but sometimes you just crave those grill marks!

    Grilled beef patties on grill

    During spring and summer, there’s nothing like firing up the gas grill or charcoal grill, to cook some burgers.

    But sometimes, if you forget to thaw frozen burger patties out or if you need something at the last minute, throw a frozen hamburger on the grill and you can still have delicious burgers in no time!

    [feast_advanced_jump_to]

    Ingredients

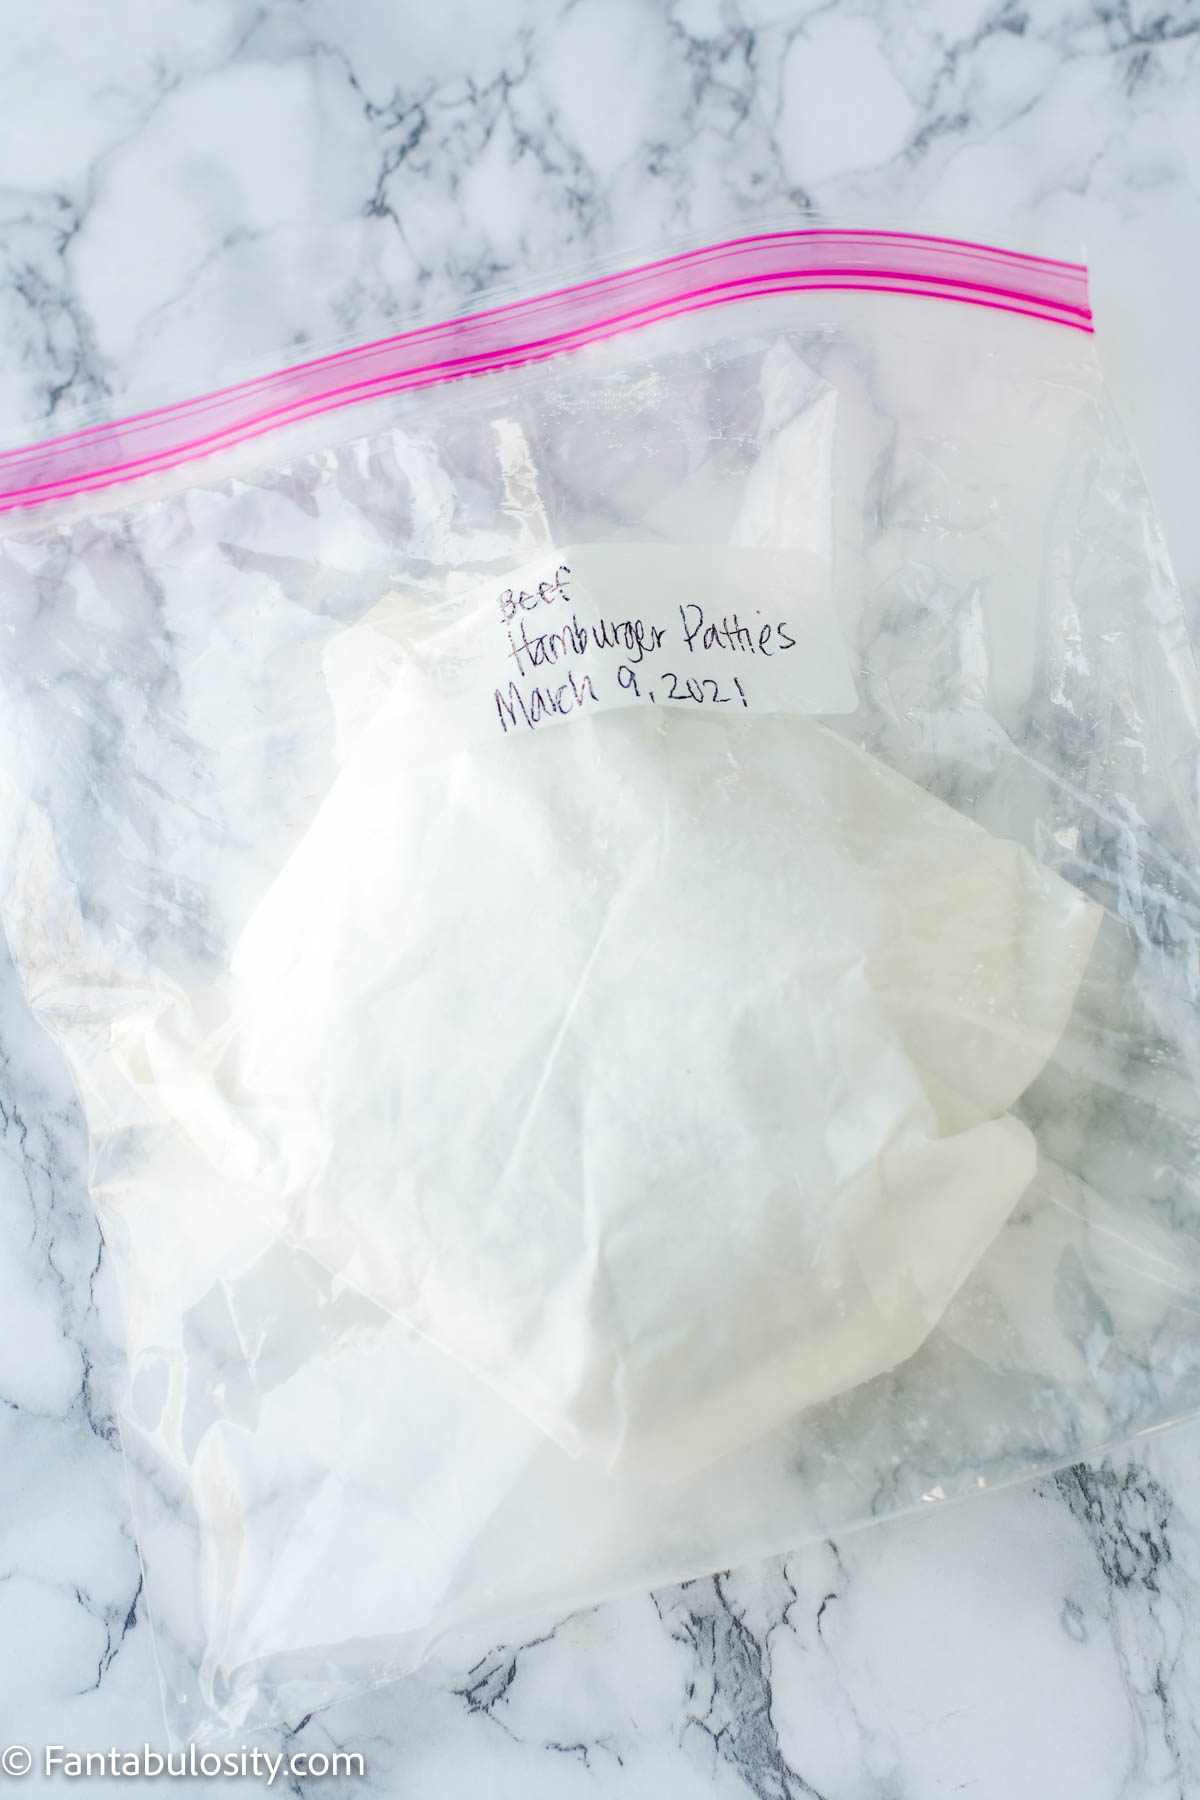
    Sometimes I love buying ground beef in bulk, shape it in to burger patties, and then freeze them, so I can quickly throw a frozen hamburger patty on the grill for a fast dinner. (See image below.)

    Frozen burger patties wrapped in bag

    Bubba Burger

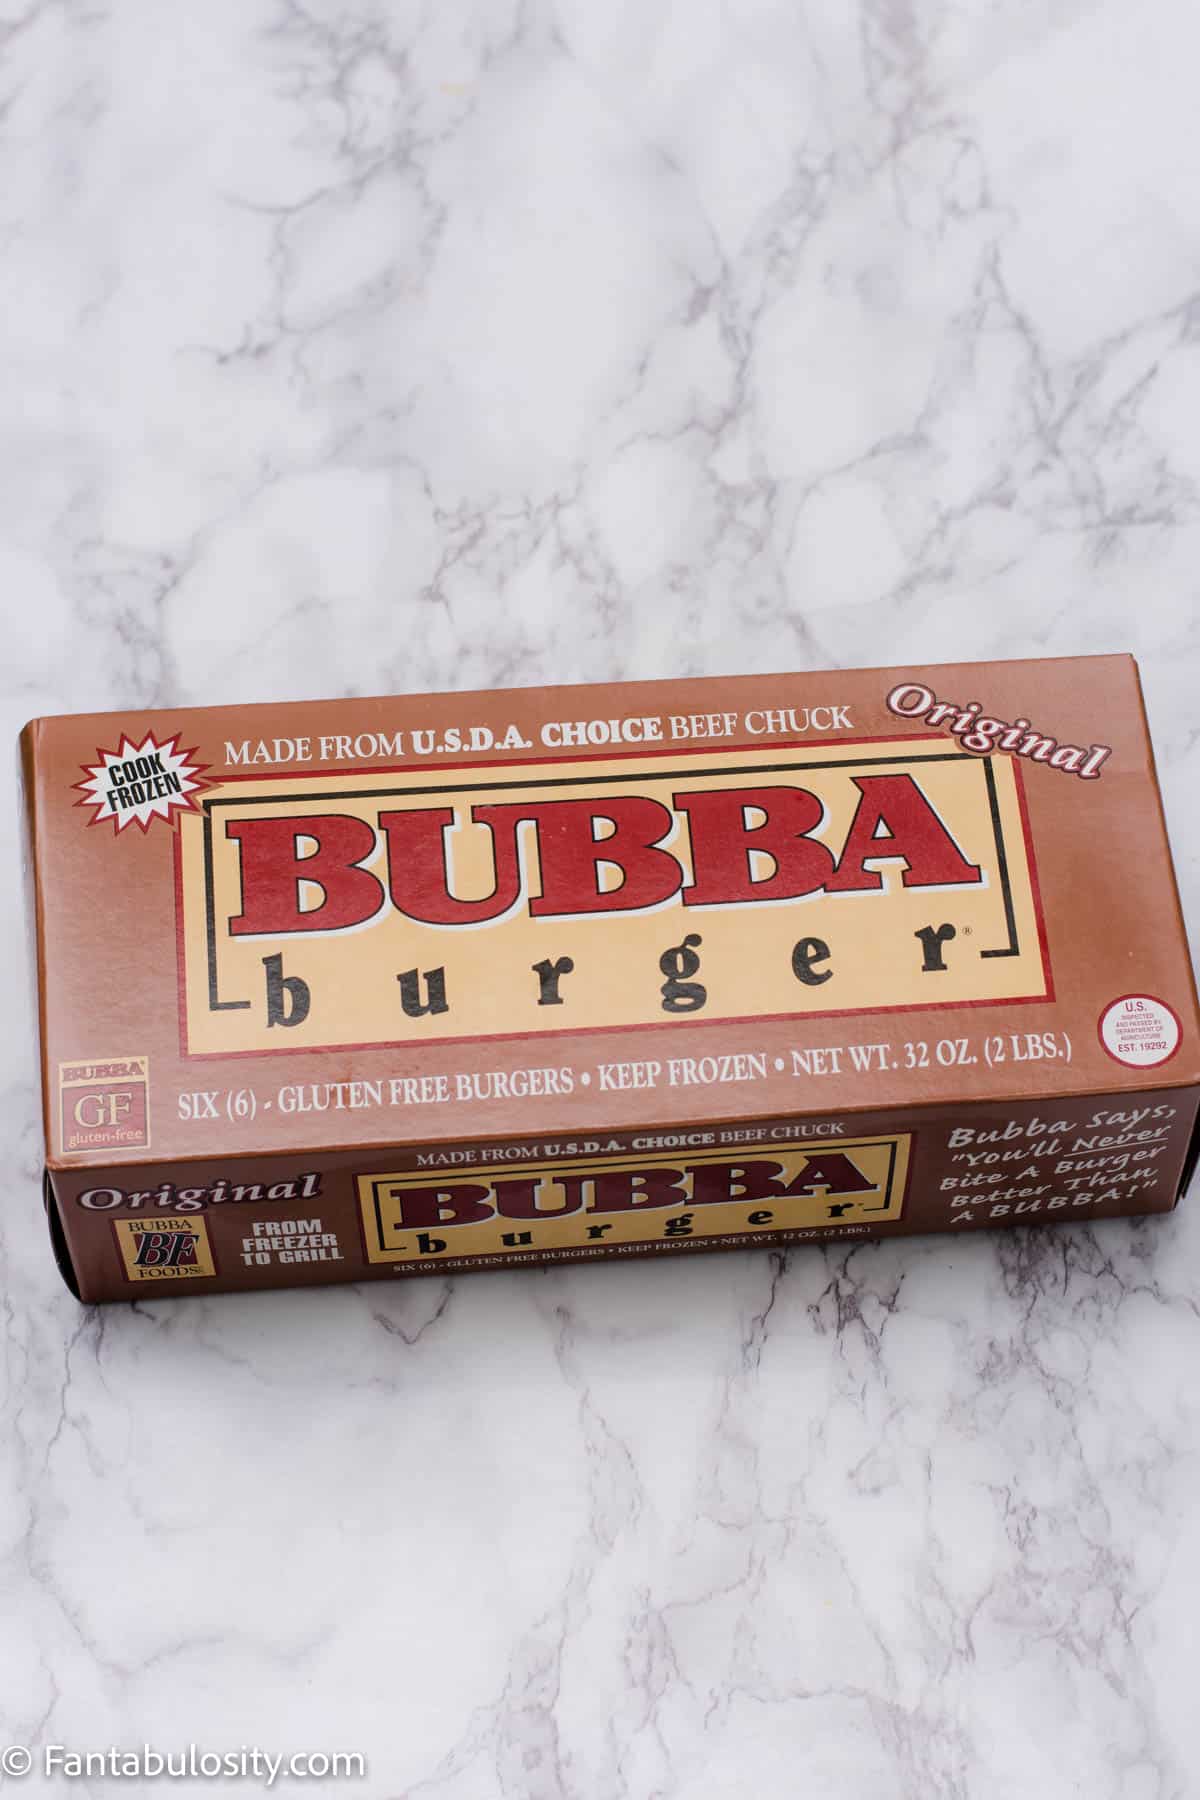
    However, I know buying frozen Bubba Burger patties is really popular in many households so I thought I would use those for this recipe, to really try and nail down the cook time and instructions for you!

    Bubba Burgers in Box on Counter

    What you’ll need:

    • frozen beef patties (as many as you’d like to cook or that will fit on your grill)
    • salt
    • pepper

    See recipe card for quantities.

    Instructions

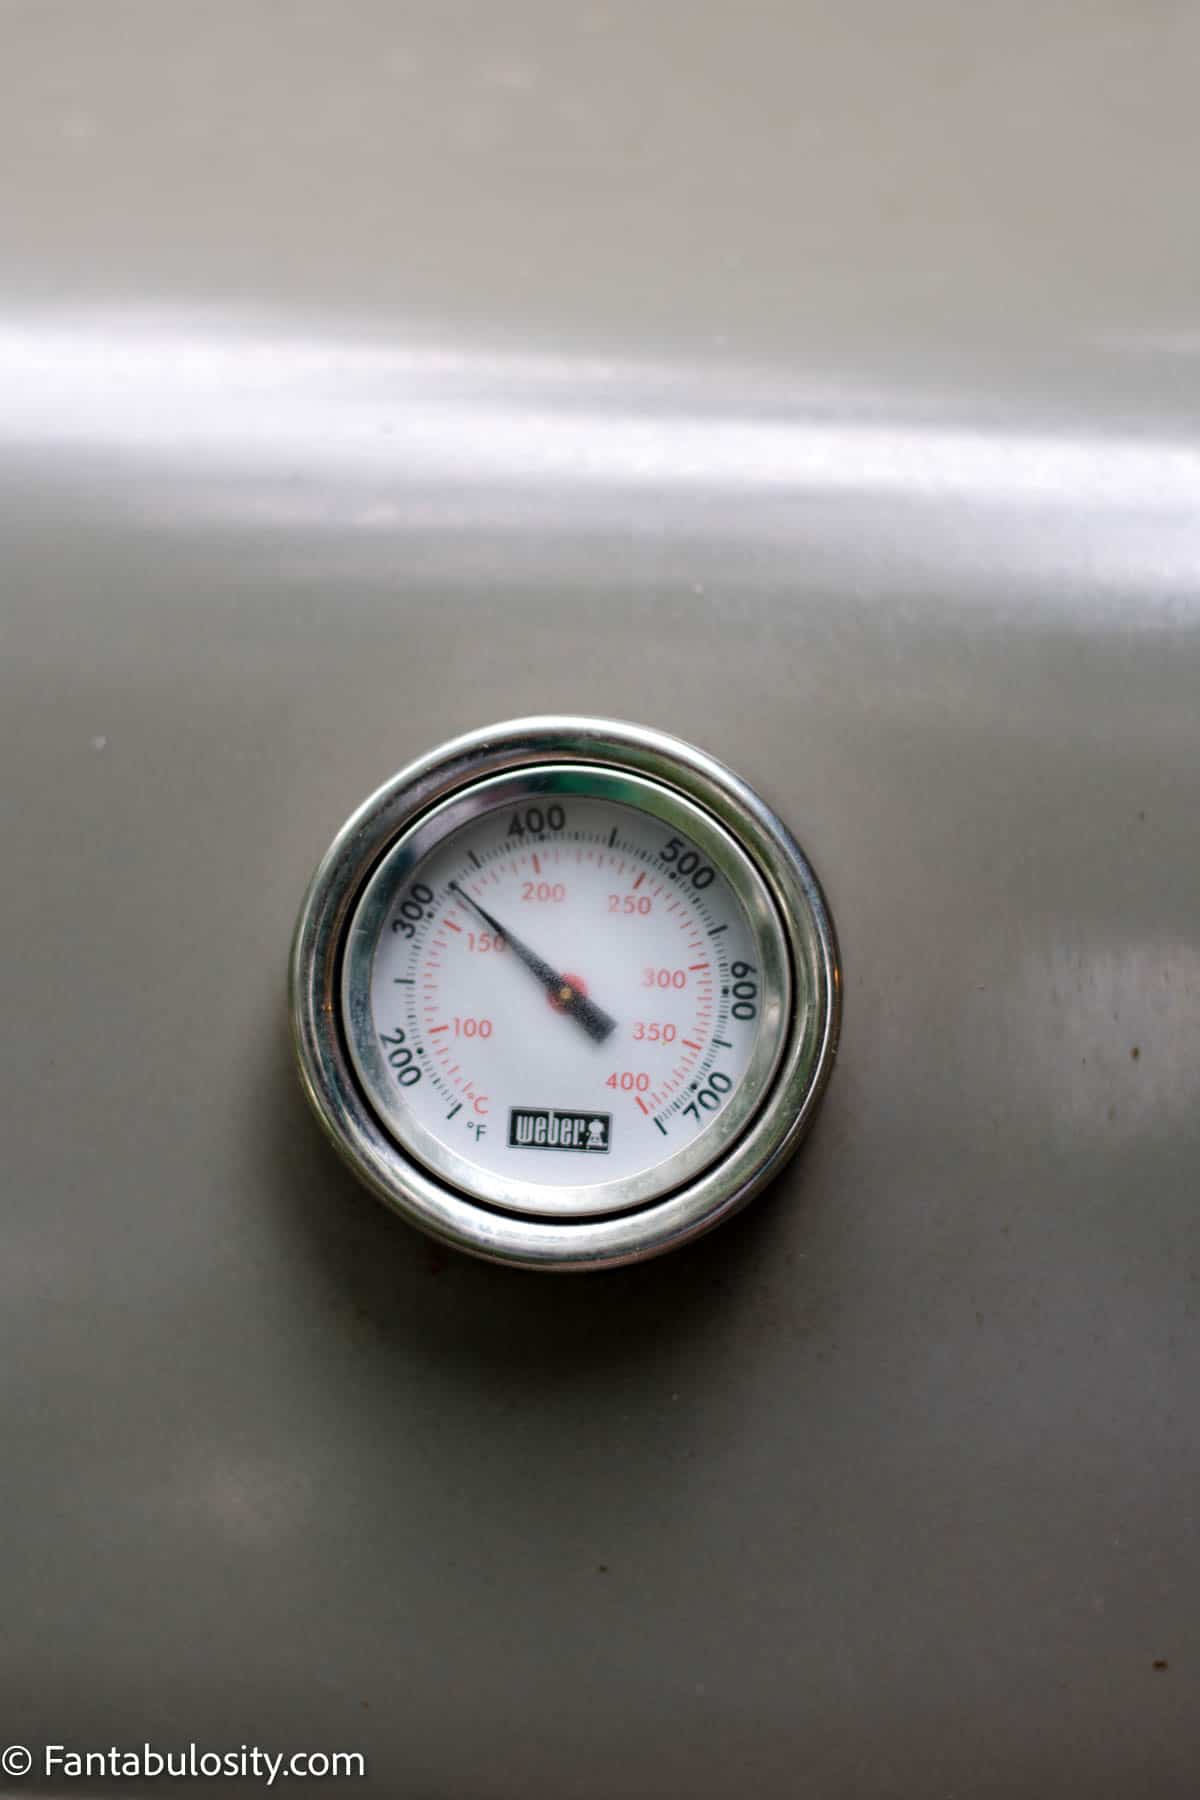
    Preheat your gas grill to about 325°.

    Grill thermometer at 325 degrees

    If your patties are frozen together, you can use a butter knife to carefully slide in between the patties to gently pry the frozen burger patty apart from one another.

    When the temperature of the grill has reached 325°, it’s ready for the burgers.

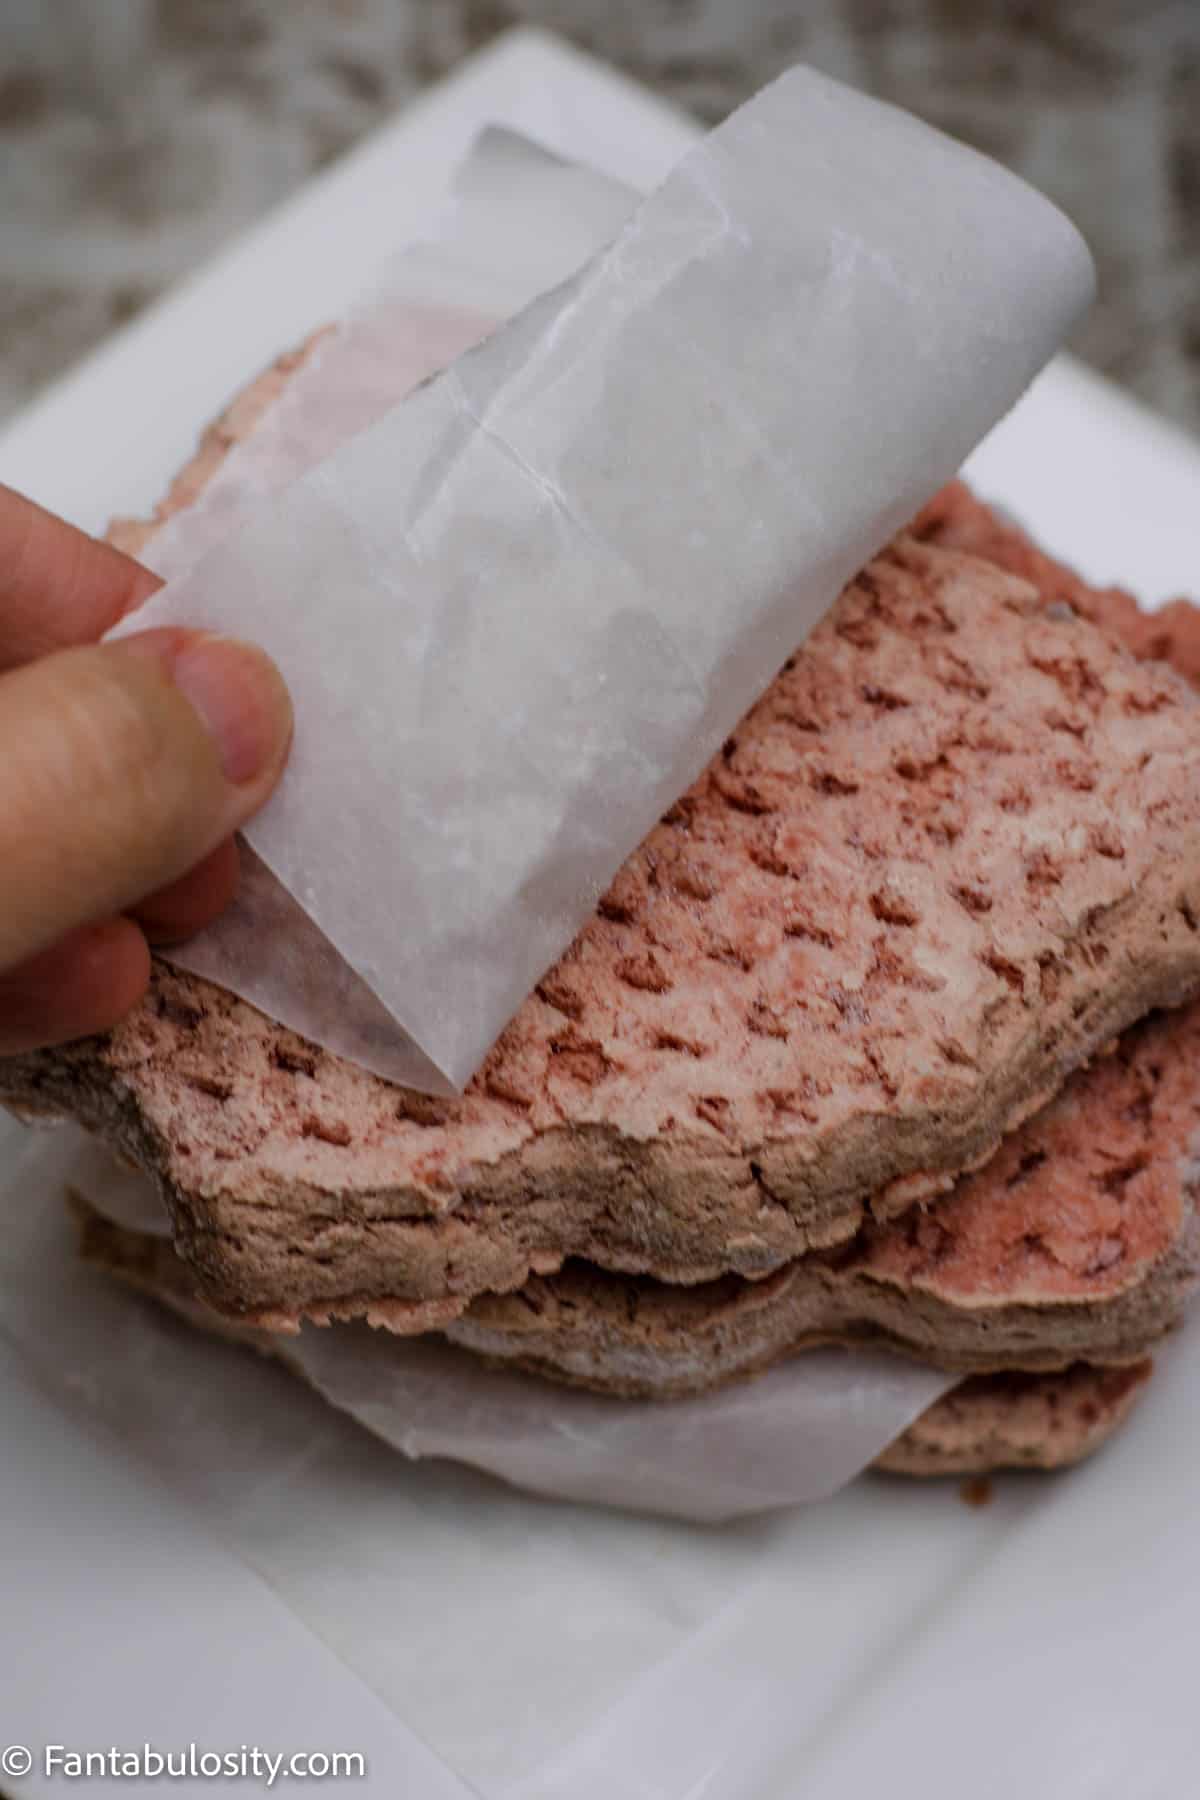
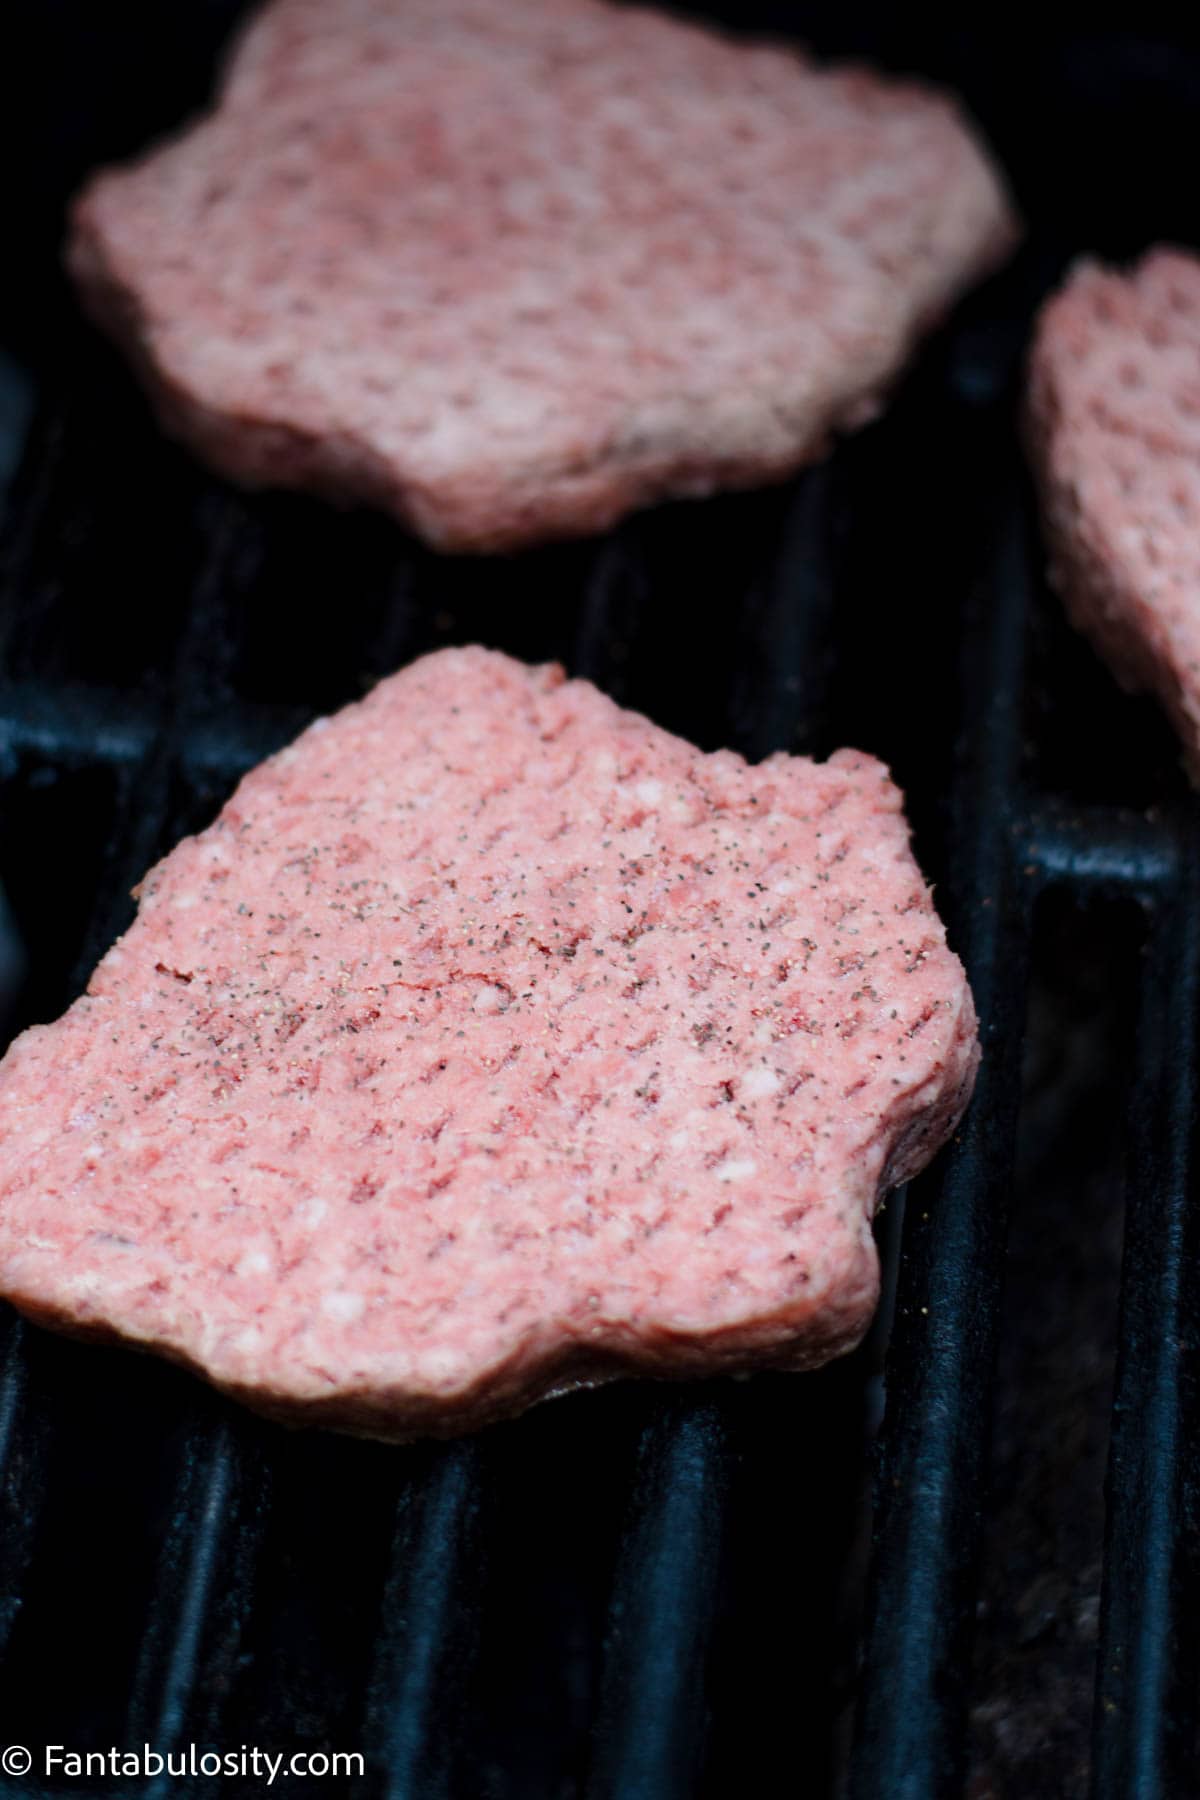
    If you’re using Bubba Burger patties, remove the number of beef patties that you’d like to cook, from the package and place them on the hot grill, making sure the sides don’t touch.

    Remove the white paper from frozen burger patties
    Remove paper

    Season

    After about 5 minutes of cooking, this is a good time to sprinkle with salt and pepper if desired. (Or desired seasonings.)

    Sprinkling the seasoning on after about 5 minutes of cooking, allows the spices to sink in to the beef more than it would it seasoning patties while completely frozen.

    Salt and pepper on burger patties after thawed
    Salt & Pepper

    How Long to Grill Frozen Burgers

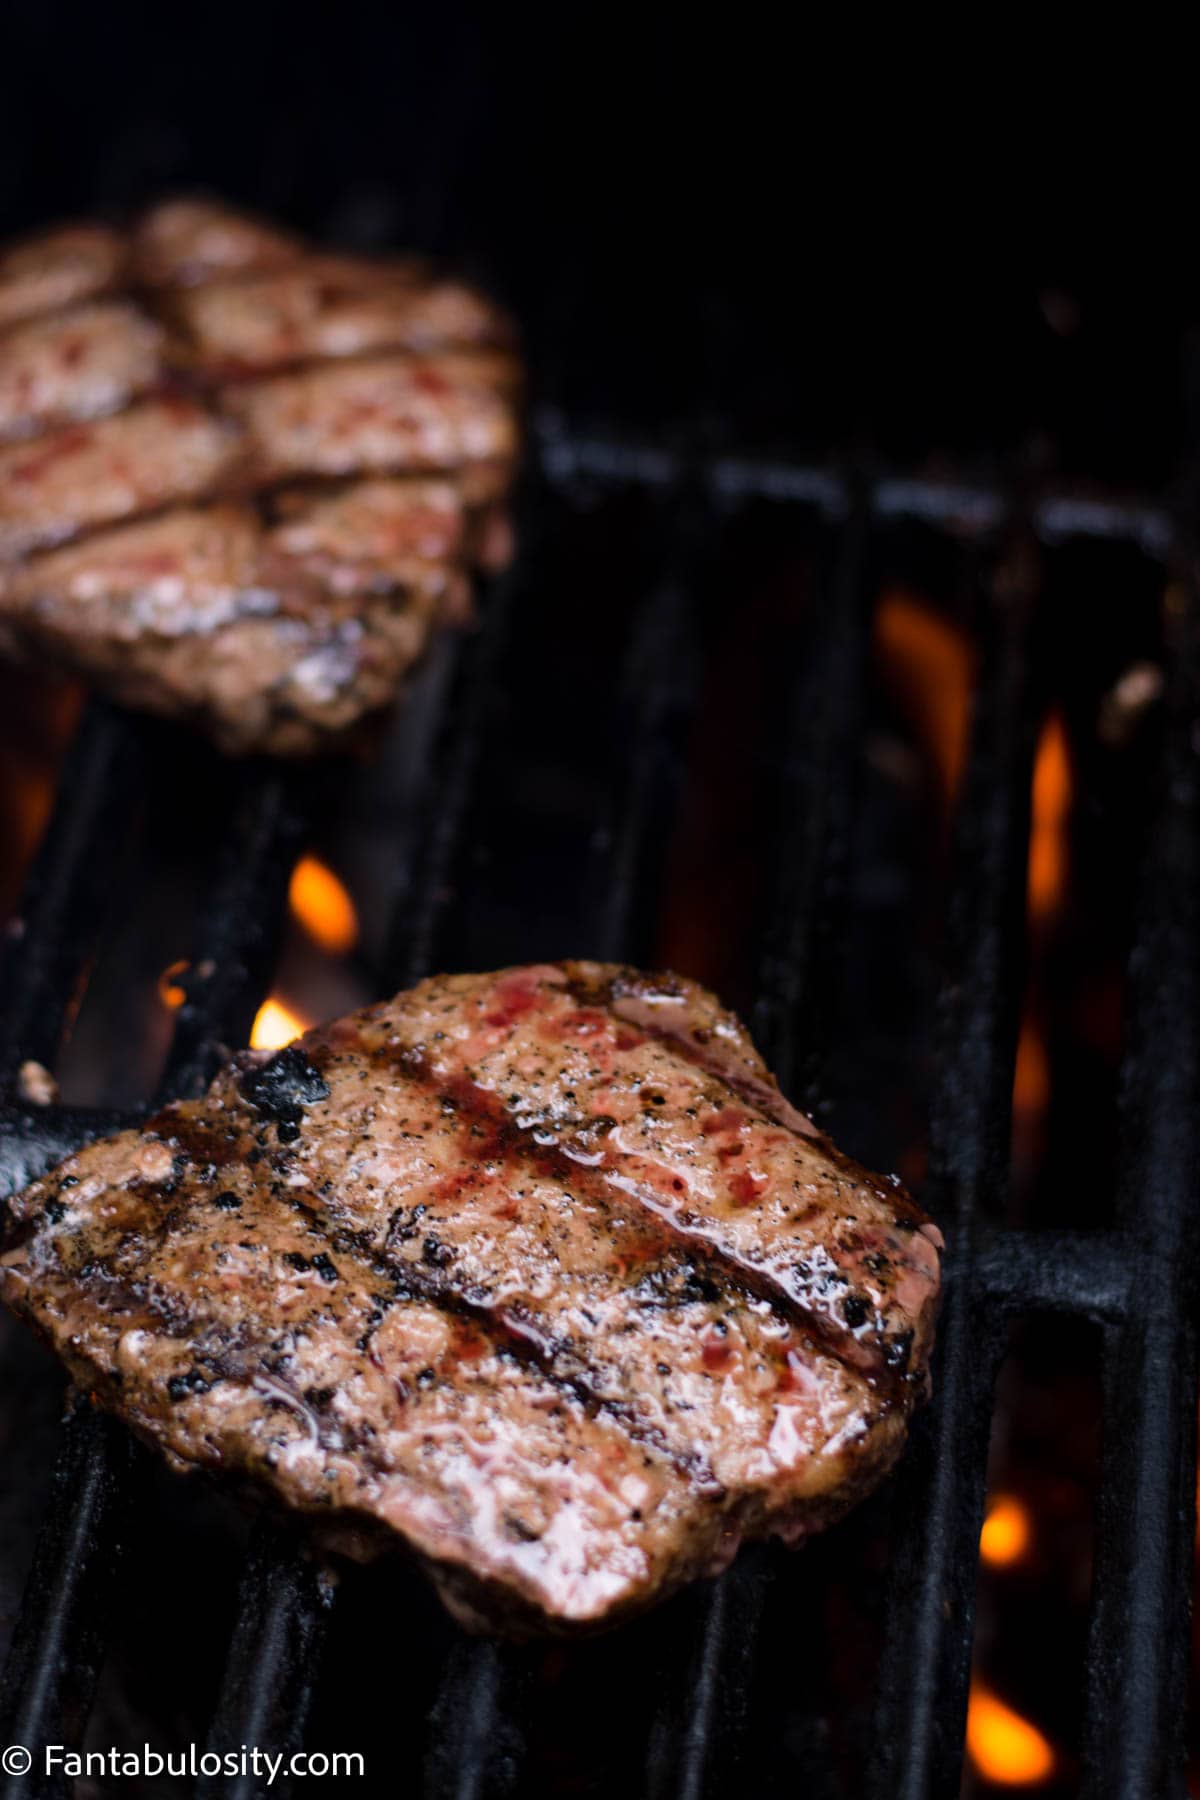
    Since the burgers are frozen, it’s best to flip the patties every 5 minutes or so, to allow for even cooking, so one side doesn’t burn before completely thawed throughout.

    Cook burgers for a total of about 20 minutes (flipping every 5 minutes) or until the juices run clear.

    Burger patties with red juices rising to top
    Red juices rising to surface

    TIP: You can place the burgers over direct heat, just be cautious that this could cause flare ups, as the juices start to thaw and drip through the grill grate.

    burgers moved away from direct flame

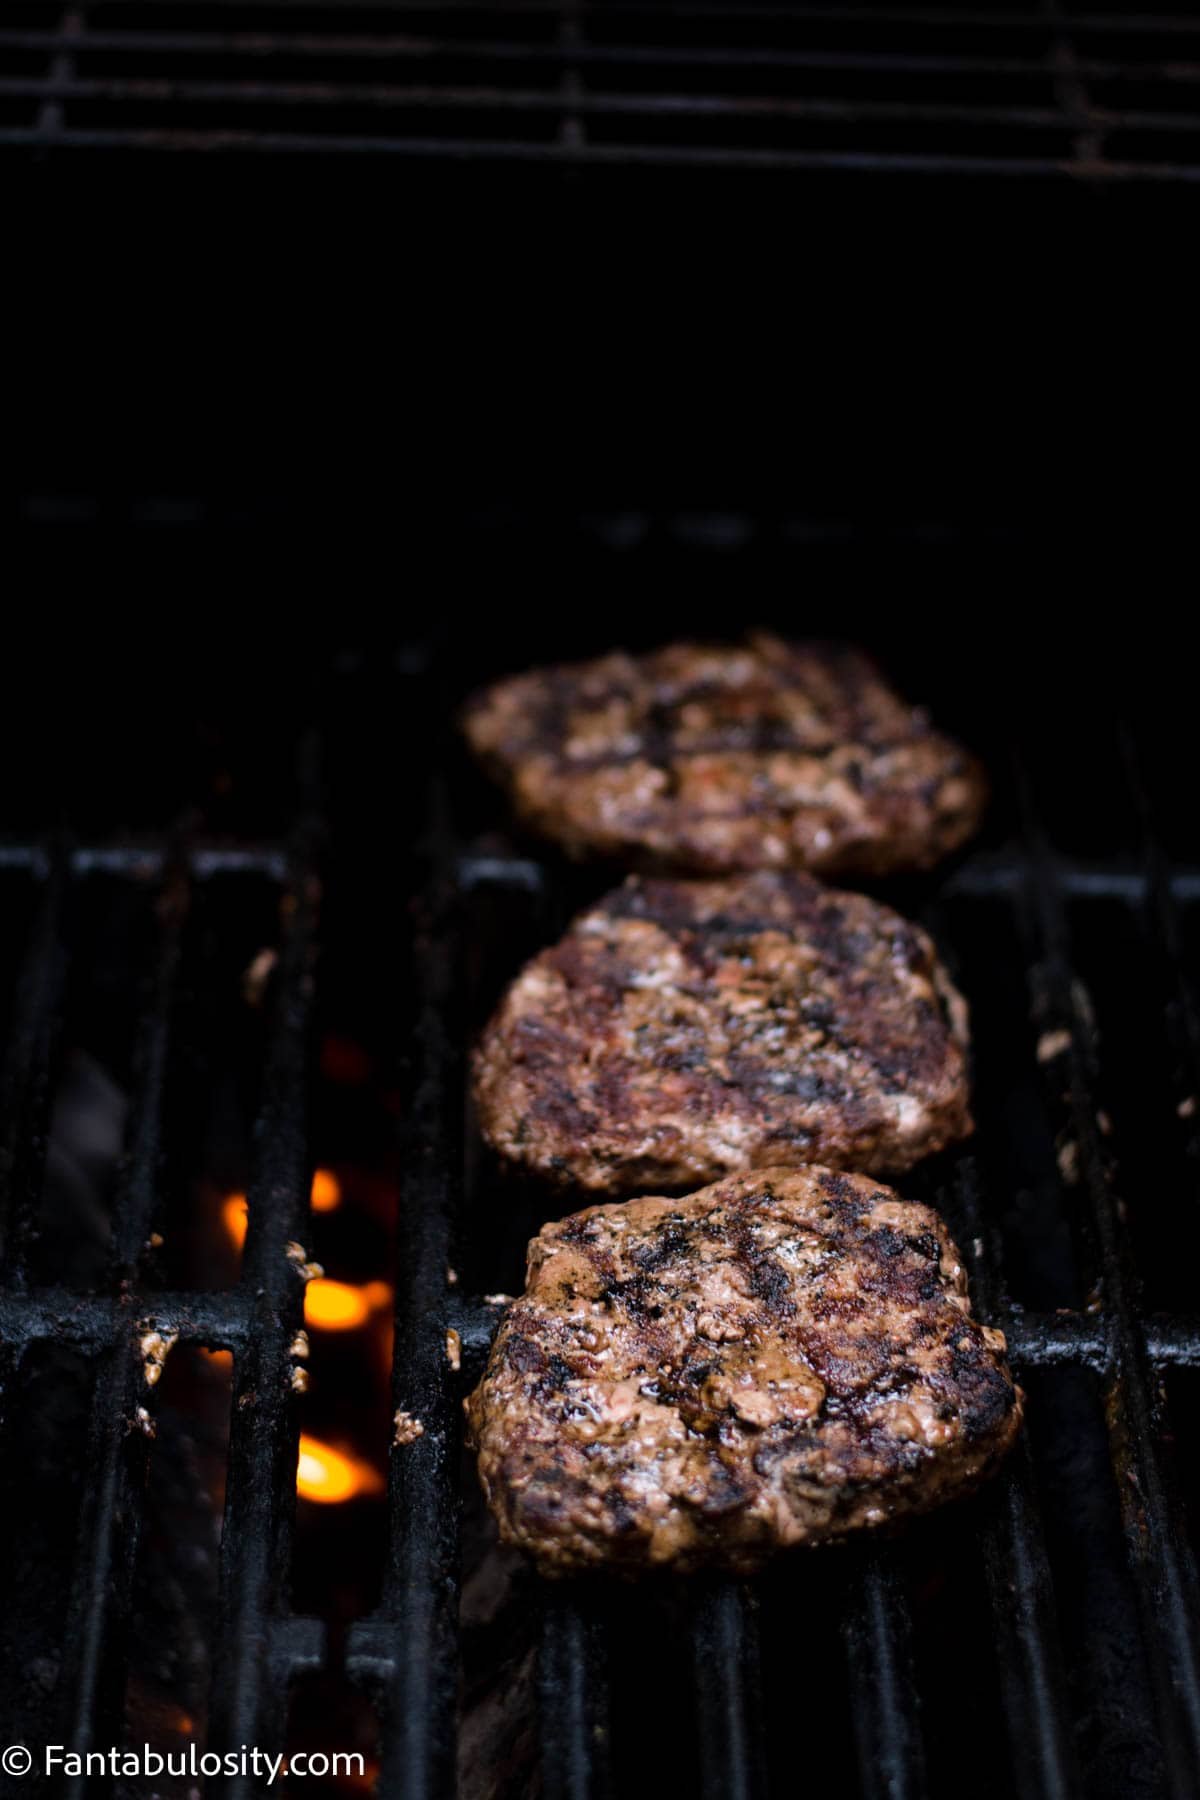
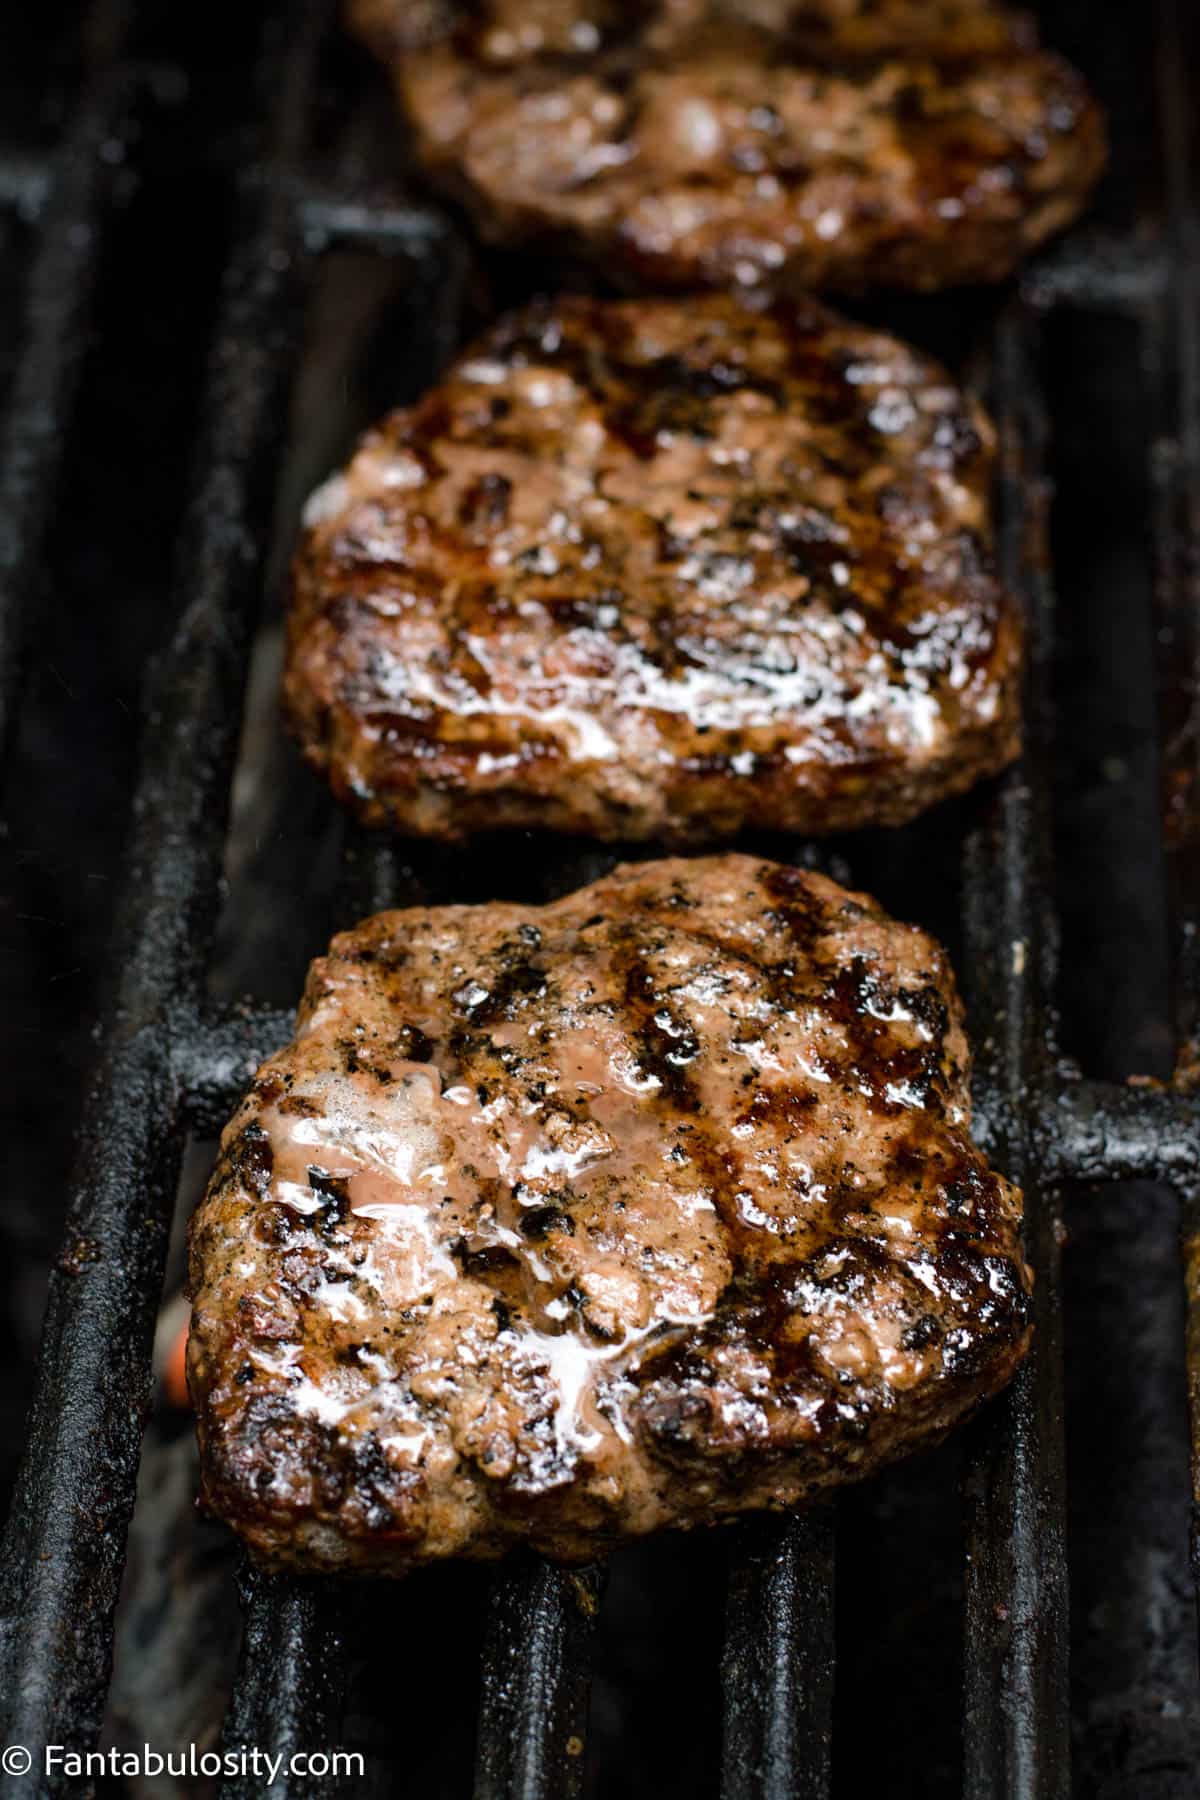
    Once the burgers reach a safe internal temperature of 161° with a meat thermometer, they’re safe to eat.

    They should have that brown color, instead of the raw, “red” color.

    Fully cooked burger patties on grill

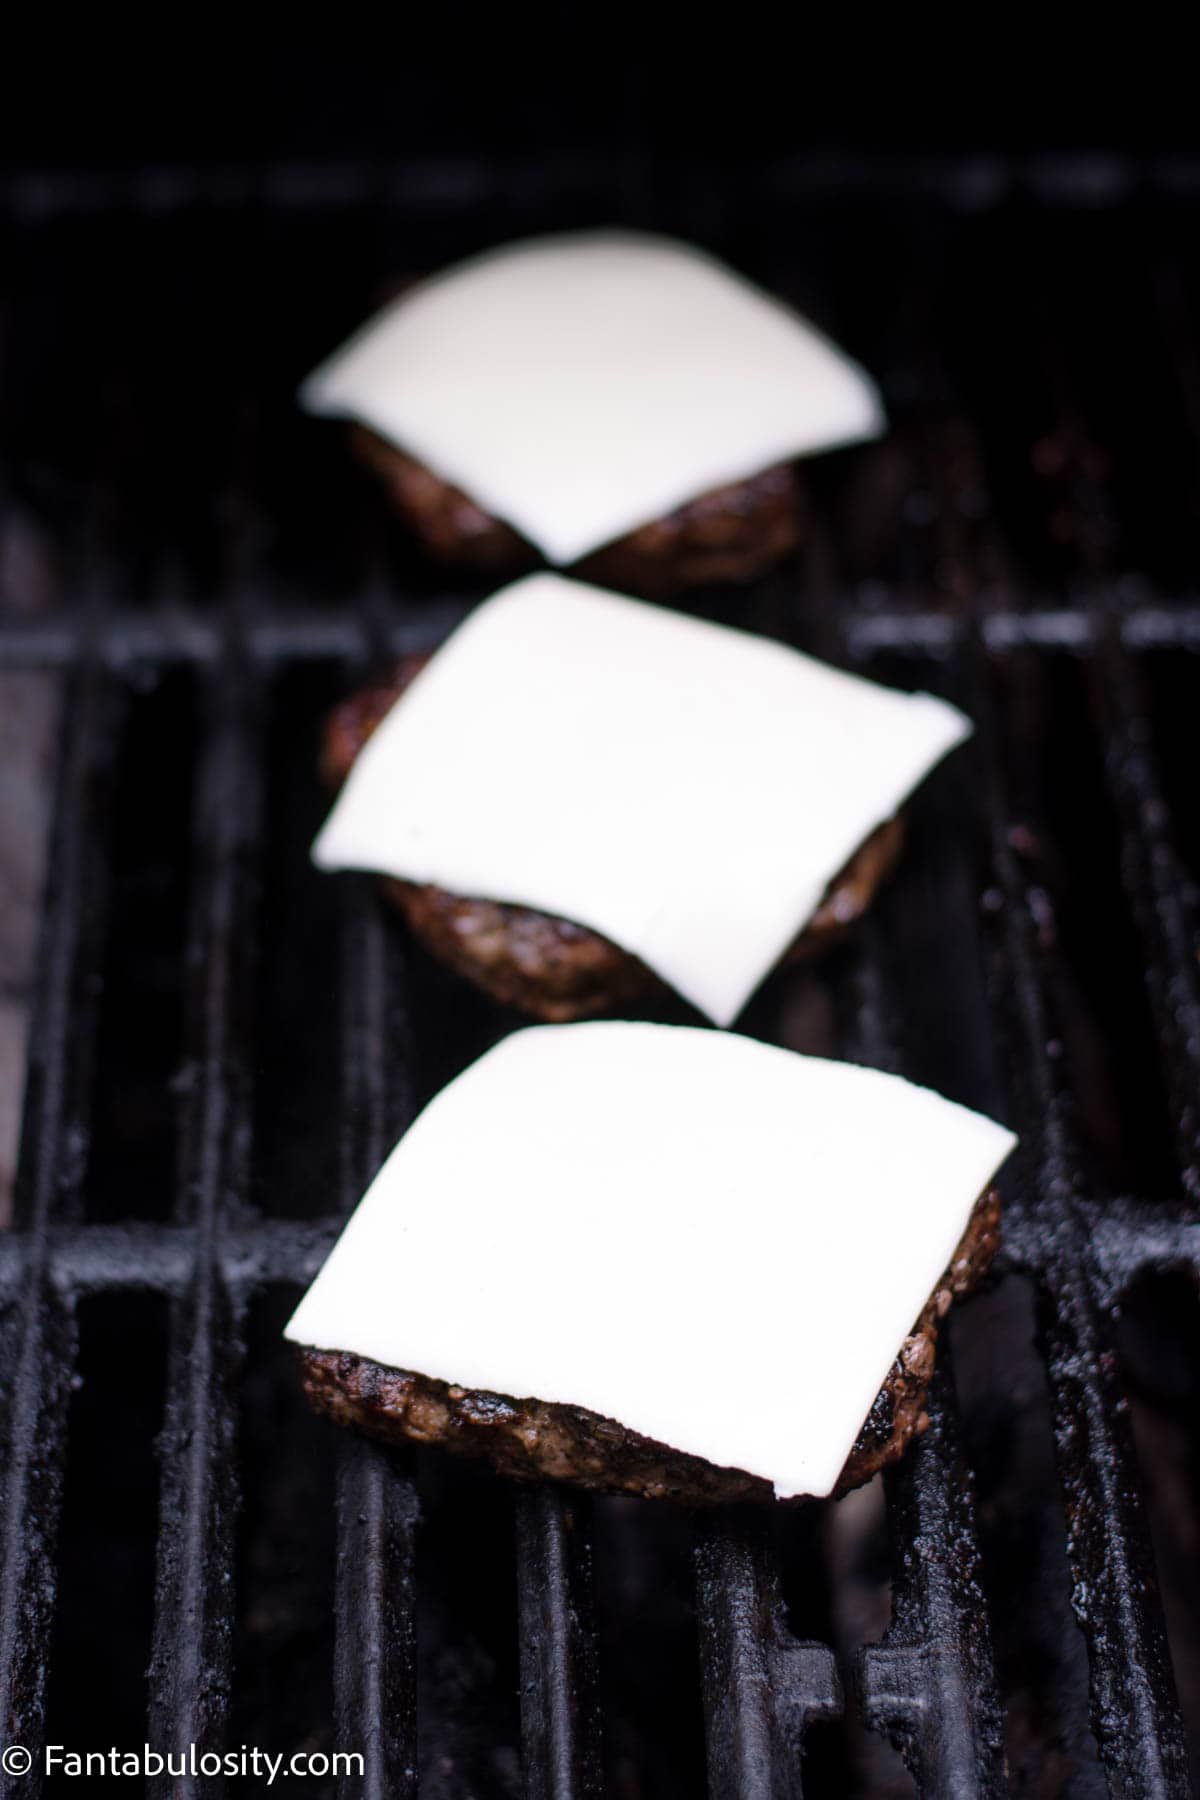
    If you prefer a cheeseburger cooked on a grill, this is a great time to add cheese slices to the patties. (Or if you prefer barbecue sauce on your burger, you can also use this time to coat the burger with sauce.)

    Place a slice of cheese on the patties, close the lid and turn the grill off. The remaining heat will gently melt the cheese on to the patties.

    Sliced American cheese on burgers while on grill

    Remove from grill after about 2 minutes or until cheese has melted.

    TIP: Don’t forget to shut the gas off to the grill!

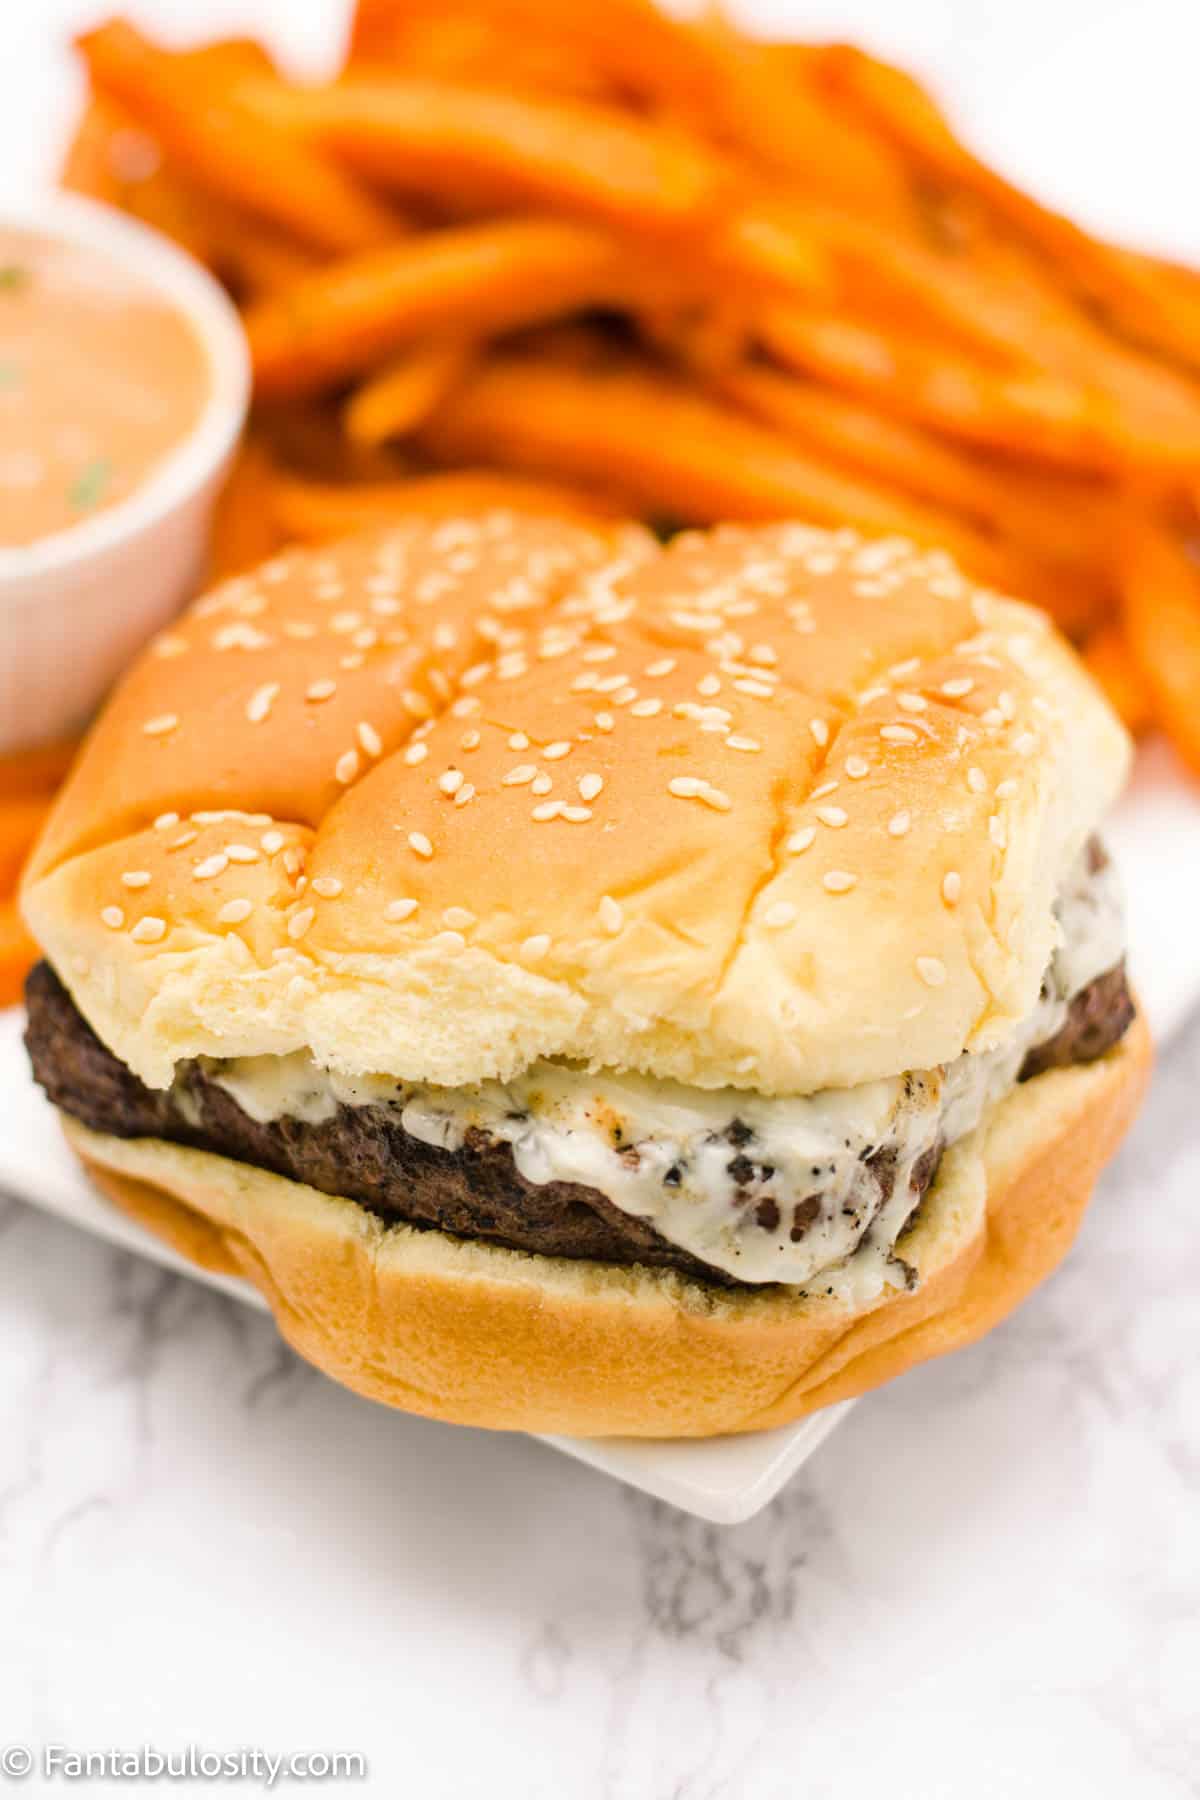
    Cooked from frozen burger patties on bun, next to sweet potato fries

    If desired, place patties on hamburger buns with your favorite toppings and conquer that burger craving!

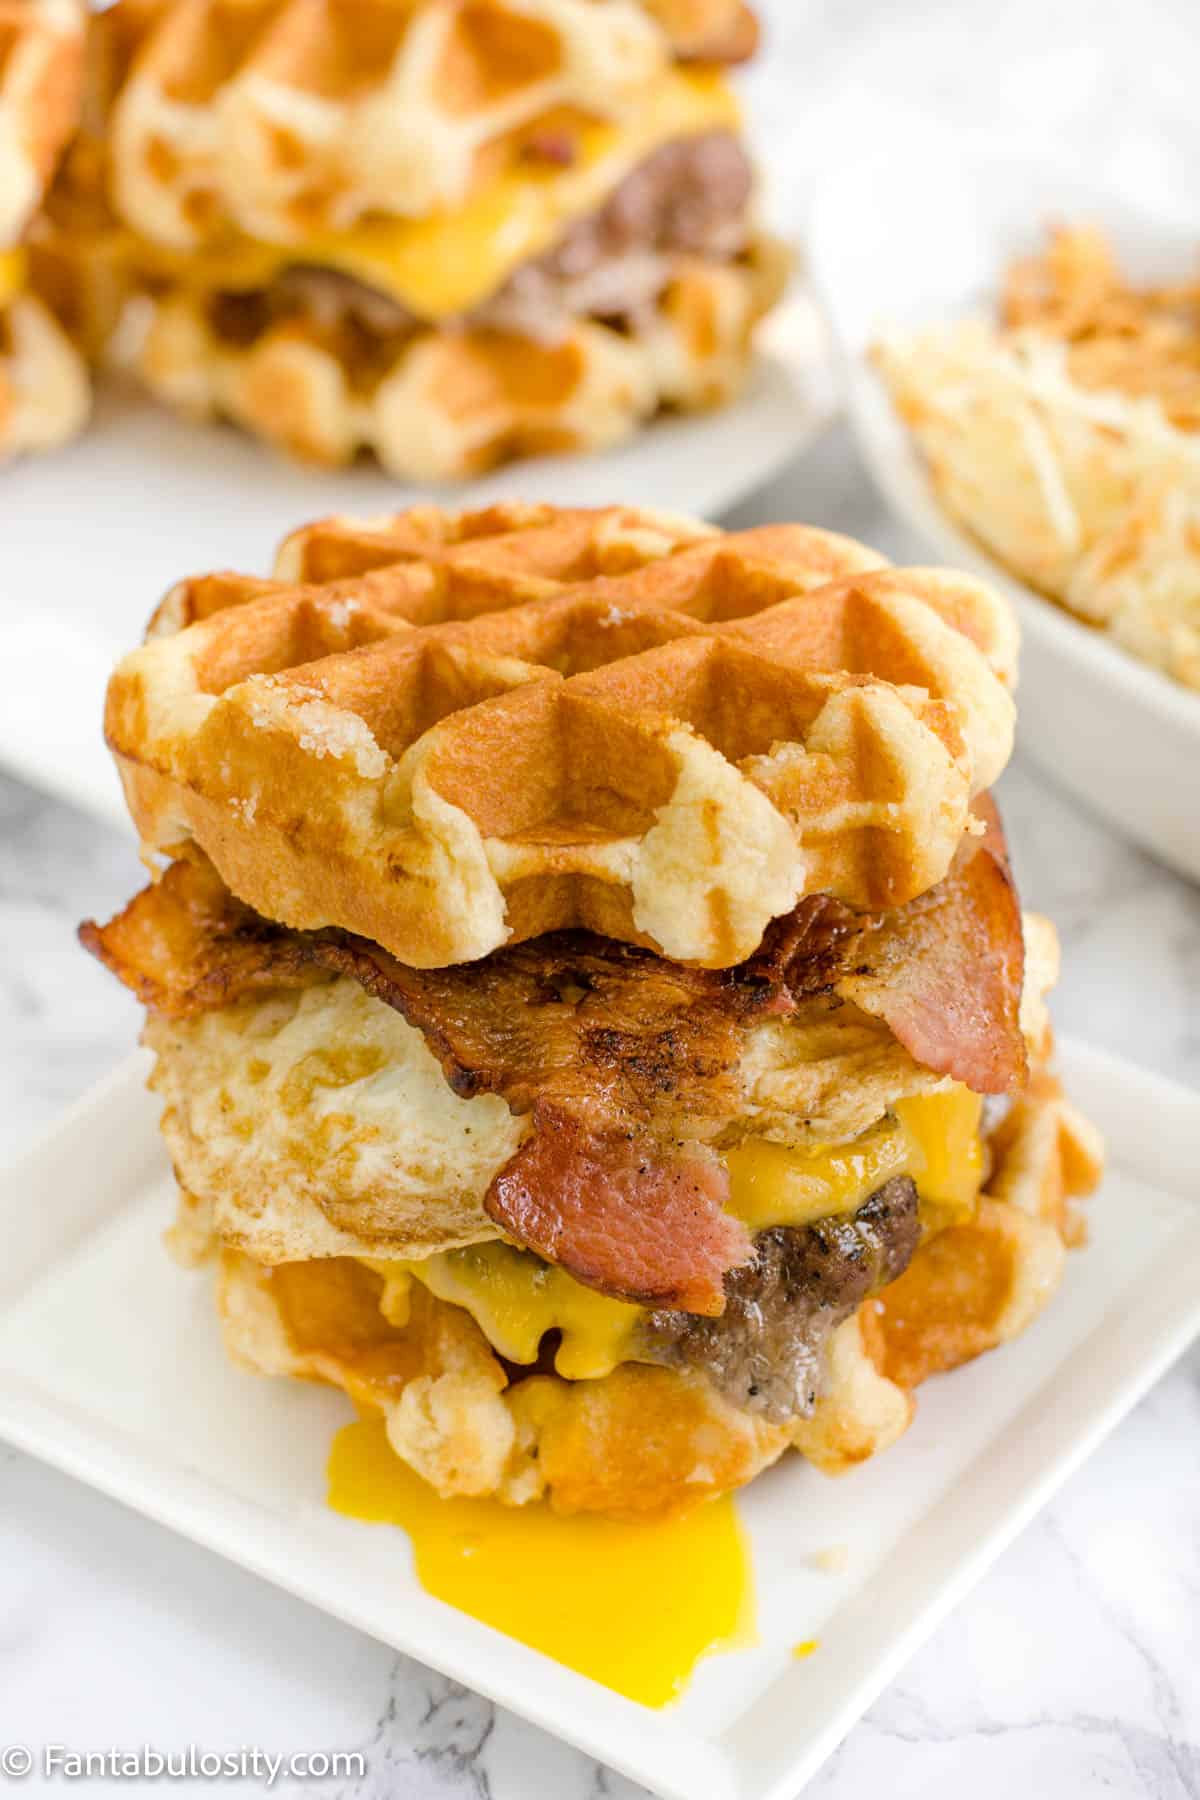
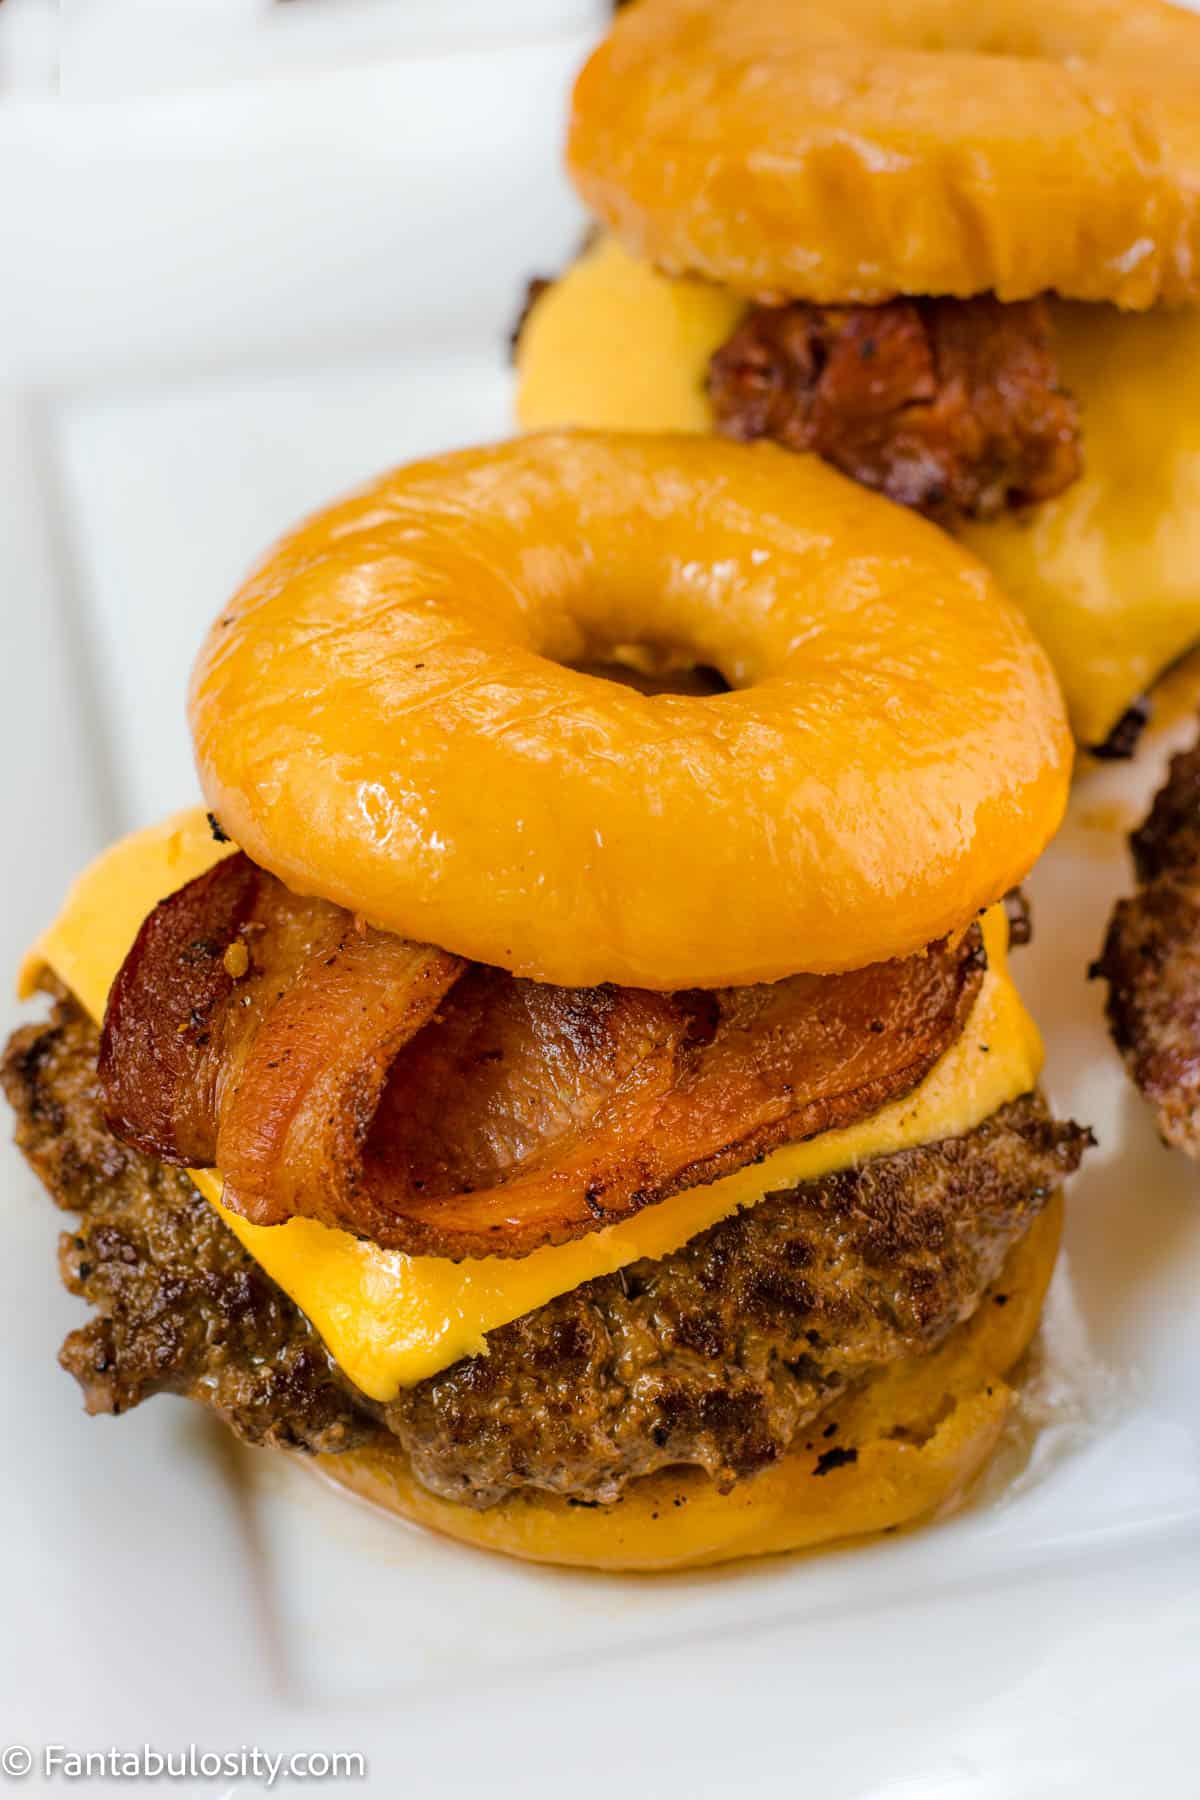
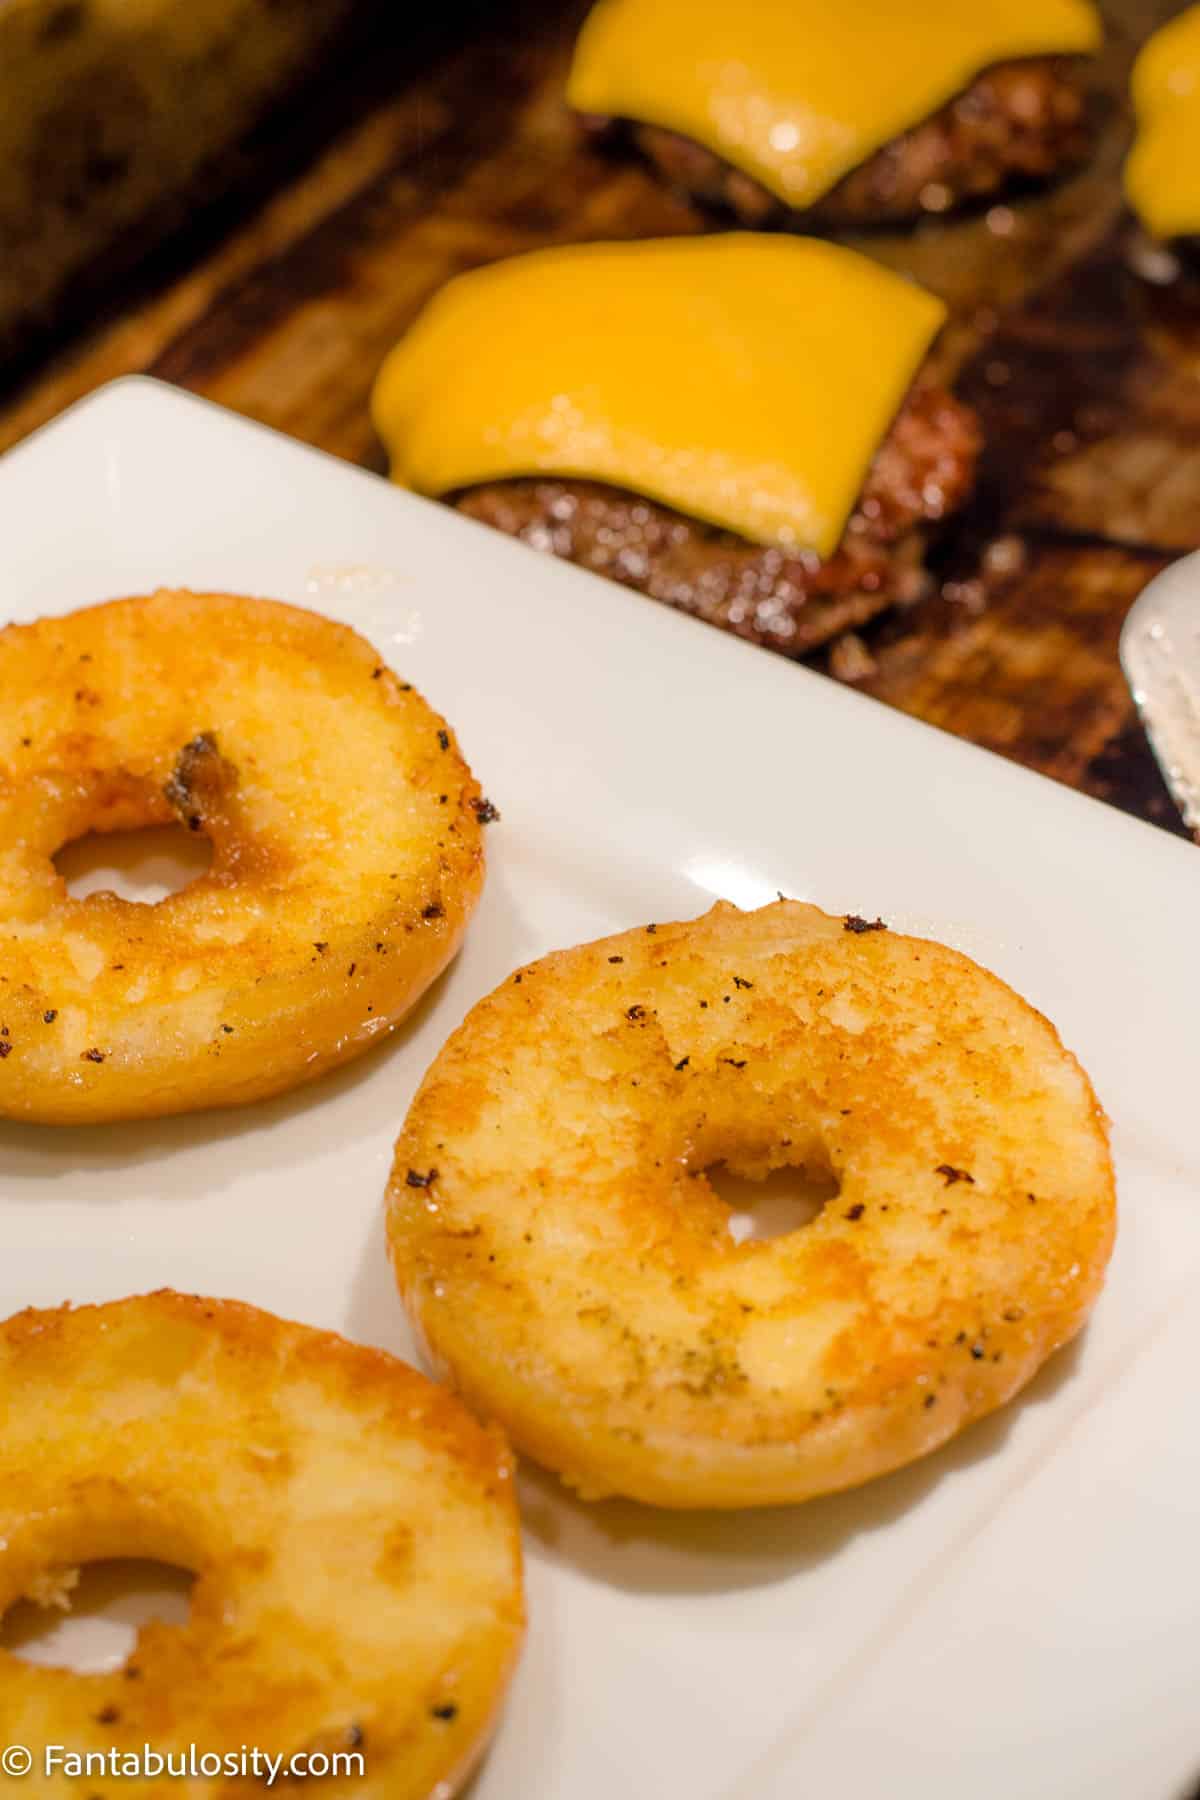
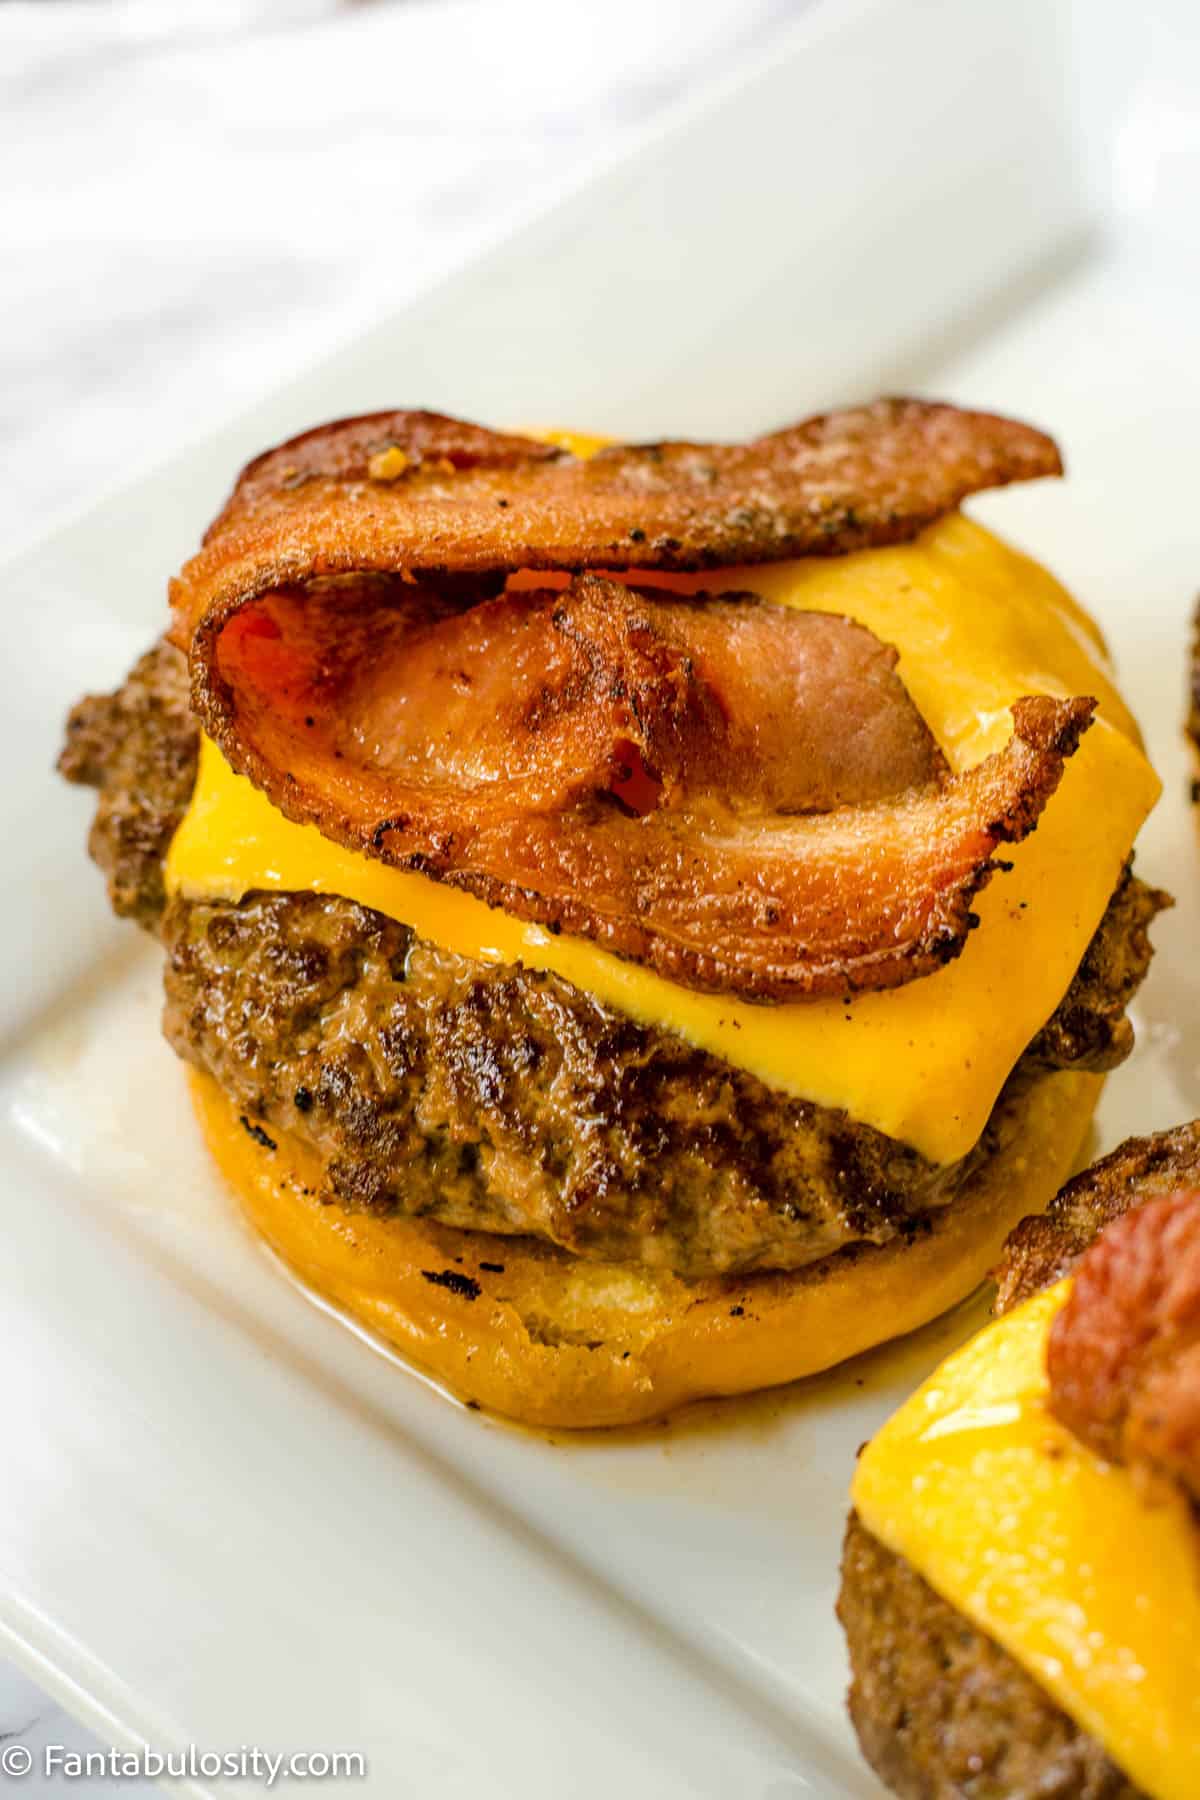
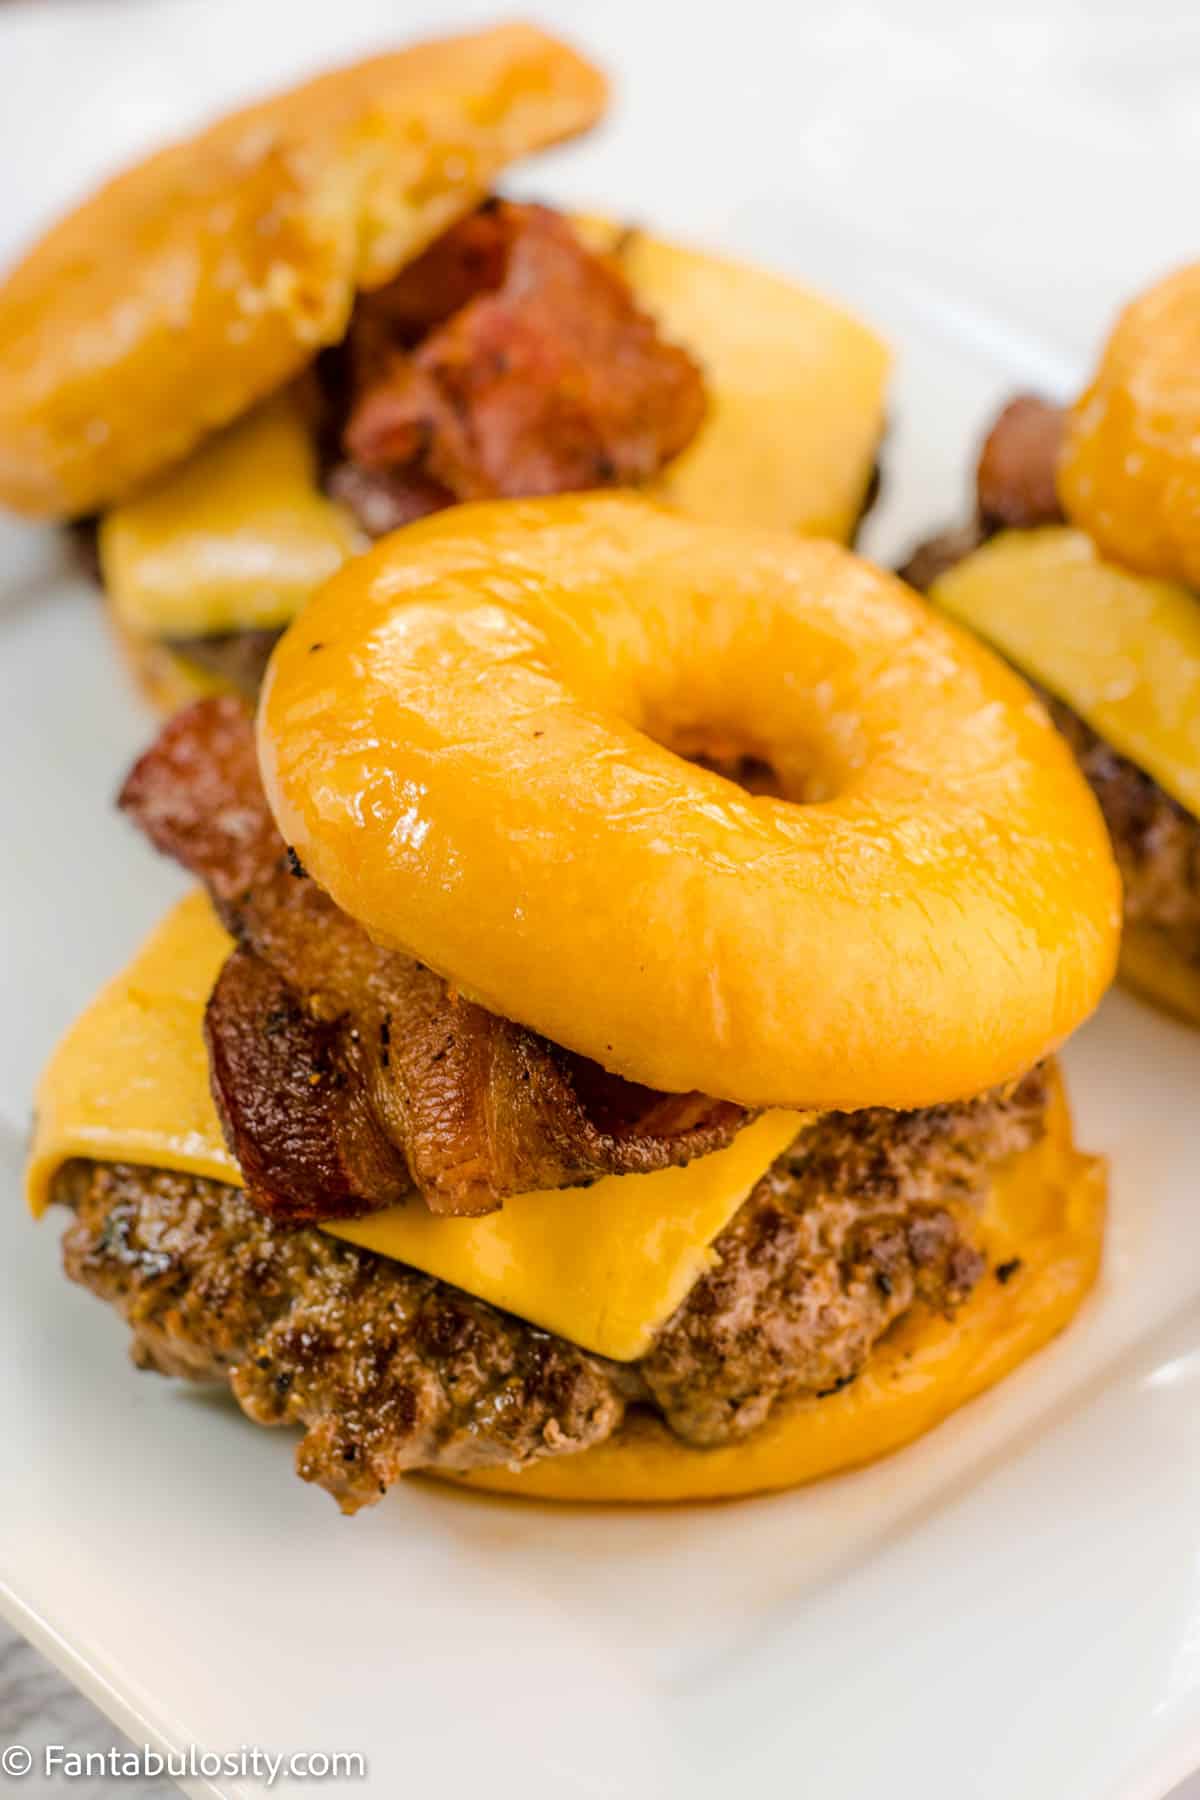
    Or, get wild and serve the juicy burger patties on donuts like we did with our donut burgers or use waffles for the buns like we did with the waffle burgers!

    Burger Topping Ideas

    Looking for ideas on what to top your burger with? Some of our favorites are:

    • ketchup
    • mustard
    • sliced onion
    • pickles
    • lettuce
    • tomato
    • top them with onion rings and bbq sauce like in our easy cowboy burgers!

    You’ll LOVE all of the extra fun topping ideas that we shared when we styled our Burger Bar!

    Substitutions

    Curious about veggie burgers, turkey burgers or different types of meat? Or what about beef burgers, that aren’t Bubba Burger brand?

    You can still follow the same cooking process but be cautious as the thickness of the burger may vary. For best results, watch closely as they cook but you should also be able to cook most patties from frozen, on the grill as well.

    Variations

    Want to make the juiciest grilled burgers? While the burgers are cooking, brush occasionally with melted butter! This will not only give them more flavor but will help make any burger juicier!

    Storage

    Have burgers leftover? Once burgers have cooled, simply store in an airtight container, in the refrigerator for 3-4 days.

    To reheat, you can place the burgers in the microwave, or if you have an air fryer, you’ll love cooking (reheating) air fryer burgers!

    Top Tip

    To make these burgers especially good, follow our favorite process of assembling the burger on the bun, then wrapping in aluminum foil for a few minutes, to allow the bun to “steam” for an extra juicy burger!

    You can place the aluminum foil wrapped burger back on the still-warm grill, to allow the heat to steam the burgers and buns.

    Related Recipes

    If you love burgers, you’ll also love how we cook burgers on the stove, our smoked burgers, and these Hawaiian rolls cheeseburger sliders, along with this Aloha Burgers recipe that always seems to be a hit!

    Recipe

    cooked burger patties on the grill
    Print Pin
    5 from 5 votes

    How to Grill Frozen Burgers

    How to Grill Frozen Burgers: No need to thaw these ground beef, frozen patties! With a cooking time of only 20 minutes on the gas grill, you'll have perfect burgers ready for lunch or dinner!
    Course Main Course
    Cuisine American
    Prep Time 10 minutes minutes
    Cook Time 20 minutes minutes
    Total Time 30 minutes minutes
    Servings 6 burgers
    Calories 2kcal
    Author Jessica Burgess

    Equipment

    • Grill gas grill

    Ingredients

    • 6 frozen burger patties such as Bubba Burger patties
    • 2 teaspoon salt or as desired
    • 1 teaspoon black pepper or as desired

    Instructions

    • Prehat the grill to 325°.
    • Discard any paper separation that may be between the frozen burger patties and place burgers on grill grate, making sure sides do not touch. Close grill lid.
    • After about 5 minutes of cooking, sprinkle on salt and pepper if desired. (Note: you wait for the burgers to thaw a bit before seasoning so it will "stick" to the patties.)
    • Cook for a total of about 20 minutes, flipping every 5 minutes or so until juices run clear.
    • If the flames from the fire flares up, move the burgers away from the direct heat to finish cooking.
    • When the internal temperature of the burgers reach 160°-161°, it's safe to eat!
    • OPTIONAL: If cheese is desired, place a slice of cheese on each patty, close the lid and turn the grill burners off to allow the leftover heat to gently melt the cheese. TIP: Don't forget to turn the gas off!

    Nutrition

    Serving: 1burger | Calories: 2kcal | Protein: 1g | Fat: 1g | Saturated Fat: 1g | Polyunsaturated Fat: 1g | Monounsaturated Fat: 1g | Cholesterol: 1mg | Sodium: 1mg | Potassium: 3mg | Calcium: 1mg | Iron: 1mg

    Bacon Wrapped Dates with Blue Cheese

    January 21, 2022

    Bacon Wrapped Dates with Blue Cheese

    Bacon Wrapped Dates with Blue Cheese: What do you get when you combine dates blue cheese and bacon? An easy appetizer that’s the perfect addition to your next dinner party or holiday meal!

    Bacon Wrapped Dates with Blue Cheese in white dish

    We have so many yummy appetizer recipes on the blog, but the bacon appetizers always find a special place in my heart (like this baked brie with maple syrup and bacon)!

    Why You’ll Love This Recipe

    My husband came home from the ranch after guiding last year, and said the chef, David, made the most delicious bacon-wrapped dates that were stuffed with blue cheese. So, after telling me what he thought they were made of, I wanted to see if I could re-create them for us, and although I have no idea if I did… these turned out DELICIOUS and are now my favorite, easy appetizer, go-to!

    You can whip up this delicious appetizer for your holiday party, cocktail party, birthday party, party-because-it’s-Tuesday…you get the idea. There’s no bad time to make a batch of these blue cheese-stuffed dates wrapped in bacon, and they are sure to be one of your favorite appetizers in no time!

    [feast_advanced_jump_to]

    Ingredients

    You only need three simple ingredients to make this yummy finger food (and when you’re making bacon recipes, you don’t need much more than that)!

    • 12 ounces pitted dates
    • 1 lb bacon, sliced in half
    • 2-3 ounces blue cheese crumbles (use the leftover blue cheese to make these blue cheese burgers!)

    You can jump to the recipe card right now to get all the instructions, or you can keep reading for a step-by-step tutorial on making these bacon-wrapped dates with blue cheese!

    Ingredients for bacon wrapped dates with blue cheese
    Ingredients

    How to Make Bacon-Wrapped Dates

    1. Preheat your oven to 375°F and line a baking sheet with parchment paper or aluminum foil sprayed with cooking spray. If you are using a nonstick baking sheet you may not need to line it, but we would still recommend giving the baking sheet a spray with cooking spray so the bacon doesn’t stick. 
    2. Using a sharp paring knife, gently slice dates lengthwise, not cutting all the way through. This creates a "pocket" for the blue cheese crumbles.
    Sweet dates, sliced halfway open.
    Slice each date lengthwise.
    1. Stuff the cavity of each date with as many blue cheese crumbles as will fit in the center of the dates.
    2. Next, take the half-slice of bacon and cover the opening of the date with the piece of bacon and begin rolling the slice of bacon around the date, securing the blue cheese inside.
    3. Take a toothpick and slide it through the bacon slice, securing the bacon on both sides of the stuffed date.
    Stuff as many blue cheese crumbles into the cavity of the date as possible.
    Stuff with blue cheese.
    Wrap a half slice of bacon around your stuffed date and secure it with a toothpick.
    Wrap with half slice of bacon.
    1. Place bacon-wrapped dates on a rimmed baking sheet or baking dish, and bake in your preheated oven for 30 minutes. Turn dates over at the 20-minute mark to help the bacon cook evenly. 
    Place wrapped dates on parchment lined baking sheet.
    Place on baking sheet.
    Bake dates at 375°For 30 mins, turning over at 20 min mark.
    Bake 30 mins.
    1. When the bacon slice is fully cooked (we like to cook it until we have crispy bacon) they're done. Transfer to a serving platter while warm and enjoy!

    Substitutions

    This recipe is delicious as is, but if you require modifications here are a few ideas…

    • Dairy Free- instead of blue cheese, you could check your local grocery store for a dairy-free alternative! If you can’t find blue cheese, you can use a dairy free cream cheese or even goat cheese in its place.
    • Pork-Free- if you don’t eat pork, you could use turkey bacon or chicken bacon instead (just be sure that it is very well secured with the toothpick as those types of bacon have more shape to them than pork bacon).
    Bacon wrapped dates piled up in white dish
    Bacon Wrapped Dates with Blue Cheese

    Variations

    This recipe only has three ingredients, but there are so many ways you could change it up if you wanted to get creative!

    • Bacon – There are a lot of different flavors you could experiment with here. Try a maple bacon for a sweeter twist, or a smoky bacon for a more savory take.
    • Cheese – We love a good blue cheese, but not everyone does. This recipe would be just as delicious with any other soft cheese, though. Try cream cheese (maybe something with herbs or another flavor in it to up the flavor profile), goat cheese, brie, ricotta, feta; the options are endless.
    • Brown Sugar – This recipe doesn’t add any sort of sauce or spice to the wrapped dates, but you certainly could. After you wrap the strip of bacon around the date you could roll the entire thing in brown sugar before securing it with the toothpick. This would create a sweet, caramelized exterior…mmm.
    • Balsamic Vinegar – You could also try drizzling balsamic vinegar on after you place dates on your lined baking sheet. This would be especially good if you stuffed the date with feta cheese first. The combinations of the salty bacon, creamy cheese and savoury vinegar would be delicious!

    If you try any of these variations, be sure to leave us a comment and let us know!

    Storage

    Store these bacon-wrapped dates in an airtight container in the fridge for up to a week.

    You could also freeze your bacon-wrapped dates in a single layer in a freezer-safe, airtight container for up to a month (they might last longer, but after a month, they won’t be as fresh).

    hand holding date on toothpick
    Bite-Size Bacon Wrapped Date

    Expert Tips and FAQs

    What cheese goes with dates?

    The strong flavor of the blue cheese in this recipe pairs nicely with the dates, but other cheeses would be tasty as well! You could try any creamy cheese in place of the blue cheese (cream cheese, goat cheese, ricotta, feta or really any other soft cheeses that you like)!

    What can you use dates for other than wrapping them in bacon?

    Sweet dates are like a little bite of dessert, and because of that they pair nicely with so many things.

    Dates make a great addition to salads, are the main ingredient in a lot of vegan dessert recipes, and are a great snack all on their own. Dates would also make a great addition to a charcuterie board as one of your “sweet” items!

    What food pairs well with dates?

    Dates are very sweet, so they pair really well with salty foods or strong flavours. You could serve dates alongside cured meats (for example, as part of a charcuterie platter) or with other bold flavors like citrus, cinnamon, or ginger.

    Hand holding date with bite taken out to see blue cheese center

    Related Recipes

    If you liked this easy recipe and you are looking for more easy appetizers for your next party, you’ll love this simple cheese ball recipe and these baked portobello mushrooms!

    Recipe

    Bacon Wrapped Dates with Blue Cheese
    Print Pin
    4.34 from 6 votes

    Bacon Wrapped Dates with Blue Cheese

    Bacon Wrapped Dates are filled with delicious blue cheese, then wrapped in bacon and baked for a delicious appetizer for any party!
    Course Appetizer
    Cuisine American
    Prep Time 5 minutes minutes
    Cook Time 30 minutes minutes
    Total Time 35 minutes minutes
    Servings 12 dates
    Calories 254kcal
    Author Jessica Burgess

    Ingredients

    • 12 ounces dates pitted (medjool dates work well)
    • 1 lb bacon sliced in half
    • 2-3 ounces blue cheese crumbled

    Instructions

    • Preheat your oven to 375°F and line a baking sheet with parchment paper or aluminum foil sprayed with cooking spray. If you are using a nonstick baking sheet you may not need to line it, but we would still recommend giving the baking sheet a spray with cooking spray so the bacon doesn't stick.
    • Using a sharp knife, gently slice dates lengthwise, not cutting all of the way through. You're creating a "pocket" for the blue cheese crumbles.
    • Stuff the cavity of each date with as many blue cheese crumbles as will fit in the center of the dates.
    • Next, take the half-slice of bacon and cover the opening of the date with the piece of bacon and begin rolling the slice of bacon around the date, securing the blue cheese inside.
    • Take a toothpick and slide it through the bacon slice, securing the bacon on both sides of the stuffed date.
    • Place bacon wrapped dates in a single layer on a rimmed baking sheet or baking dish, and bake in your preheated oven for 30 minutes. Turn dates over at the 20 minute mark to help the bacon cook evenly.
    • When the bacon slice is fully cooked (we like to cook it until we have crispy bacon) they're done. Transfer to a serving platter while warm and enjoy!

    Notes

    STORAGE: Store these bacon wrapped dates in an airtight container in the fridge for up to a week.
    You could also freeze your bacon wrapped dates in a single layer in a freezer safe, airtight container for up to a month (they might last longer, but after a month they won’t be as fresh).


    Nutrition

    Serving: 1date | Calories: 254kcal | Carbohydrates: 22g | Protein: 6g | Fat: 16g | Saturated Fat: 6g | Polyunsaturated Fat: 2g | Monounsaturated Fat: 7g | Trans Fat: 1g | Cholesterol: 28mg | Sodium: 317mg | Potassium: 273mg | Fiber: 2g | Sugar: 18g | Vitamin A: 53IU | Vitamin C: 1mg | Calcium: 38mg | Iron: 1mg

    White Chicken Chili with Cream Cheese

    January 20, 2022

    White chicken chili in white bowl

    White Chicken Chili with Cream Cheese: This easy soup recipe is perfect for a weeknight main course or for lunch on a Sunday. Made with simple ingredients, it’s ready in only 25 minutes!

    If you love creamy soup recipes like this, then you’re going to want to make this easy clam chowder after this one!

    white chicken chili in bowl surround by rolls
    Delicious white chicken chili
    [feast_advanced_jump_to]

    What You’ll Love About this Recipe

    Not only is this chicken chili a recipe that’s perfect for those last-minute dinner ideas, but it’s also something that you can keep ingredients on hand for when you’ve forgotten to run to the store to grab something to make, after a busy day!

    It has the perfect kick of flavor with using the canned tomatoes and green chilies but it’s not too spicy, so it can be something the whole family will love, and will possibly become a family favorite! (But if you love “spicy” then you’ll love this spicy soup recipe!)

    Or, if you’re looking for a warm, comforting dish for game day, you may want to mix things up from a classic chili, since it tends to be a crowd-pleaser!

    Ingredients

    What makes this an easy recipe, is the fact that it uses simple ingredients, and they can all be cooked in one pot; keeping dishes to a minimum!

    Here’s what you’ll need:

    • 2-3 chicken breasts cut up in to small pieces (or deboned rotisserie chicken – then boil the rotisserie for stock)
    • 8 ounces of a block of cream cheese
    • 1  15-ounce can black beans rinsed and drained
    • 1 15-ounce can corn undrained
    • 1 15-ounce can diced tomatoes with green chilis undrained
    • 1 package ranch dressing mix seasoning
    • 1 teaspoon ground cumin
    • 1 teaspoon onion powder
    • 2 Tablespoon milk

    You can jump to the Chicken Grilled Cheese to see the full recipe now or keep reading to see how easy it is to make this creamy soup!

    ingredients for soup on white table
    Ingredients for Chicken Chili

    How to Make White Chicken Chili

    In a large stock pot on the stovetop, cook your cubed chicken over medium heat until it’s done. (It will be done with the inside of the chicken is white, and no longer pink.)

    Raw chicken pieces in soup pot
    Cook chicken pieces

    I don’t use any oil but you’re more than welcome to if you prefer dropping a tablespoon or so of olive oil.

    Cooked chicken pieces in soup pot
    Cooked chicken

    Once the chicken is fully cooked, add the remainder of the ingredients in to the pot.

    Remainder of ingredients in pot
    Pour remaining ingredients in

    Heat the white chili over medium heat, stirring often to evenly combine the ingredients and so it will “melt,” the cream cheese.

    Don’t worry, it looks mighty thick at this stage but as the juices from the corn and Rotel, mix with the melted cream cheese and milk, it combines to make a beautiful, creamy texture.

    Chili ingredients in pot, stirred
    Mix together

    Once heated through, and the cream cheese has fully melted, serve this warm creamy white chicken chili in a bowl and dig in! You can even reduce the heat to a simmer and let the chili simmer for a few minutes to allow the flavors to incorporate even more.

    Soup being heated in pot
    Soup heating through in pot

    Substitutions

    To make things easier or if you only have certain ingredients on hand, here are some of our favorite substitutions:

    • Chicken: Feel free to make this white chili recipe using shredded chicken from a rotisserie chicken from the grocery store, or even buy frozen, pre-cooked chicken to keep on hand! Or, you an even use leftover chicken!
    • Tomatoes & Green Chilies: I refer to the tomatoes and green chilies as “Rotel”, some here in this recipe but any brand will do!

    Variations

    Looking to customize this soup a little more to your liking? Here are some topping ideas (which are very similar to the ones that we include in our traditional chili recipe) and extra ingredients that may be delicious if you’d like to experiment! (We haven’t tried these yet, only because we love the recipe just the way it is!)

    • Chicken Broth: (Or chicken stock.)This is meant to be a thicker soup but feel free to add chicken broth if you’d like for it to be a little more thin, especially if you use heavy cream instead of milk. You can even try my easy chicken broth recipe.
    • Bacon: I do love bacon in just about everything so I can’t imagine that adding a couple of slices of bacon to this white chicken chili would be a bad idea. To keep things simple, cook the bacon in with the chicken! To be honest, I wouldn’t even drain the bacon grease if it’s just a tablespoon or so… that may just be delicious!
    • Green Onions: Although there is already onion powder in this recipe, I believe adding some chopped green onion, whether you add it in with the remaining ingredients, or you simply serve on top, it would be a delicious addition!
    • Sour Cream: For you sour cream fans out there, a small dollop of sour cream on top, just before serving, would be a nice touch!
    • Shredded Cheddar Cheese: Shredded cheddar, or even a fiesta blend shredded cheese would add some wonderful additional flavor, just like it does with other chili recipes or how I add it to the top of these chili cheese corn dogs.
    • Fresh Cilantro: I LOVE adding a bit of greenery to the top of soup as a garnish, and cilantro would be the fresh herb of choice for this recipe!
    White chicken chili in white bowl with rolls & parsley surrounding

    What to Serve with this Chili:

    This peanut butter and syrup sandwich is one of our all-time favorite side dishes to serve with a bowl of this white chicken chili, along with a nice green side salad! Or, you can also serve items such as:

    • tortilla chips
    • saltines
    • corn chips
    • slices of homemade Italian bread

    How to Store Leftover White Chicken Chili?

    If you happen to have leftover chili, store cooled-off chili in an airtight container and place in the refrigerator for 3-4 days.

    Simply reheat chili in the microwave or on low heat in a sauce pan, on the stove-top.

    Love Chili Recipes?

    If you think this recipe was a huge hit, then make sure you also try our easy chili recipe, this Frito chili pie, and this chili mac!

    Recipe

    White chicken chili in white bowl
    Print Pin
    5 from 4 votes

    White Chicken Chili with Cream Cheese

    White Chicken Chili with Cream Cheese: This easy soup recipe is perfect for a weeknight dinner or for lunch on a Sunday. Made with simple ingredients, it's ready in only 25 minutes!
    Course Main Course
    Cuisine American
    Prep Time 5 minutes minutes
    Cook Time 20 minutes minutes
    Total Time 25 minutes minutes
    Servings 4 servings
    Calories 331kcal
    Author Jessica Burgess

    Ingredients

    • 2-3 chicken breasts cut up in to small pieces (or deboned rotisserie chicken)
    • 8 ounces cream cheese
    • 15 ounce can of black beans rinsed and drained
    • 15 ounce can of corn undrained
    • 15 ounce can of diced tomatoes with green chilies undrained
    • 1 package ranch dressing mix seasoning
    • 1 teaspoon cumin
    • 1 teaspoon onion powder
    • 2 Tablespoons milk

    Instructions

    • In a large stock pot on the stove, cook your cubed chicken over medium heat until done.
    • Lower to medium heat, and add in remaining ingredients.
    • Stir until cream cheese has melted, and heated through.
    • Serve warm.

    Nutrition

    Serving: 1serving (¼ recipe) | Calories: 331kcal | Carbohydrates: 3g | Protein: 27g | Fat: 22g | Saturated Fat: 11g | Cholesterol: 135mg | Sodium: 317mg | Potassium: 515mg | Sugar: 2g | Vitamin A: 795IU | Vitamin C: 1.3mg | Calcium: 74mg | Iron: 1mg

    Circus Animal Cookie Donuts

    January 13, 2022

    Circus Animal Cookie Donuts

    Circus Animal Cookie Donuts: Cake mix donuts with frosted circus animal cookies inside, it doesn’t get more fun than this! With just 5 simple ingredients you can have these tasty cake donuts ready to go for breakfast or a birthday party in under 20 minutes!

    Move over bunny in the hole cake donuts, I think this circus animal cookie dessert takes the cake (hehe, get it?) for the best dessert this Easter. These bright colors just scream springtime!

    Stacked circus animal Cookie Donuts, next to a glass of milk
    Circus Animal Cookie Donuts

    Why You’ll Love This Recipe

    Have you had circus animal cookies before; you know, the pink and white frosted cookies in the shape of circus animals?

    If you have, then I bet your mouth is watering right now just thinking about them. If you’ve never had them, you’ll just have to trust me that they are SO good!

    These homemade baked donuts are so easy to make, and the crushed circus animal cookies inside add a super fun and flavorful twist!

    You’ll also love these red velvet donuts and these chocolate brownie donuts!

    [feast_advanced_jump_to]
    Circus Animal Cookie Donut with bite taken out
    Surprise: Circus Animal Cookies Inside!

    Ingredients needed for these baked donuts

    5 ingredients- that’s it, that’s all you need to make this fun baked donut recipe!

    • 1 box yellow cake mix, dry
    • 2 cups mashed ripe bananas*
    • 1 cup crushed frosted animal crackers
    • 1- 16 oz container vanilla or cream cheese frosting
    • Colored sprinkles

    You’ll also need cooking spray and a ziplock bag or pastry bag.

    Ingredients on white table to make donuts
    Ingredients for pink donuts

    Instructions for this easy baked donut recipe

    1. Preheat your oven to 425° F and grease a donut baking pan.
    2. In a large mixing bowl, mash the ripe bananas with a fork or potato masher.
    Bananas mashed in bowl
    Mash the bananas.
    1. Stir in the dry yellow cake mix until just combined. Gently fold in the crushed circus animal crackers.
    Add the cake mix and stir to combine.
    Add cake mix.
    Stir in the crushed circus animal cookies.
    Fold in crushed animal cookies.
    1. Pour the mixture into a large ziplock bag. Cut the tip off of one corner of the bag and pipe the batter into each donut cavity until it’s about ⅔ full.
    Pipe your donut batter into your greased donut pan.
    Put batter in a ziplock bag.
    Fill each donut hole ⅔ full with batter.
    Fill each donut cup ⅔ full.
    1. Bake in the preheated oven for 7-8 minutes, or until the donuts are cooked through and a toothpick inserted in the donut comes out clean.
    2. Allow the donuts to cool in the pan for 5-10 minutes before transferring them to a wire cooling rack.
    Bake 7-8 mins at 425°F.
    Bake 7-8 mins.
    Cool 5-10 mins in the pan, then transfer to a cooling rack.
    Cool 5 mins in pan, transfer to cooling rack.
    1. Add the frosting to a microwave-safe bowl and warm in the microwave for 10-20 seconds until it’s a runny consistency (this makes dipping easier).
    2. Dip each donut upside down into the frosting and return to the cooling rack right-side up. Immediately add colored sprinkles on top of the donuts before the frosting sets. 
    3. Allow to fully cool before serving, enjoy!
    Melt your icing in the microwave so it's a runny consistency.
    Melt icing.
    Circus Animal Cookie Donuts
    Dip donut in icing then add sprinkles.

    Substitutions

    If you are out of bananas, you may try substituting 2 cups of applesauce for the bananas.

    For those of you who eat a gluten-free diet, try using Pillsbury’s Gluten Free Funfetti Mix instead of the yellow cake mix and folding in crushed gluten-free animal cracker-like Kinnikritters.

    We haven’t tried this yet, so if you do please let us know how it goes in the comments below!

    Variations

    I realize that the pink and white circus animal cookies are not available in all countries.

    If you don’t have these cookies where you live, you could experiment with other kinds of cookies! You could also experiment with the icing for the top of the donuts. Chocolate, lemon, cherry…the frosting options are endless!

    Circus Animal Cookie Donuts
    Animal Cookie Donuts

    Equipment

    You’ll need to have a donut pan or two in order to make these baked cake donuts. You can order a donut pan online, but you should also be able to find it at your local Walmart or other similar stores.

    Storage

    Store these oven-baked donuts in an airtight container for up to 1-2 day at room temperature, or 5-7 days in the refrigerator.

    Circus Animal Cookies Donuts
    Circus Animal Cookie Donuts

    Expert Tips and FAQs

    I can’t find circus animal cookies, what else can I use?

    If you don’t have these cookies where you live, you could experiment with other kinds of cookies!

    I think a birthday cake Oreo cookie would be a fun substitute for the circus animal cookies, but you can always walk down the cookie aisle at your local grocery store and find something fun to test out!

    Where can I get a cake donut pan?

    You can order a donut pan online (as mentioned above), but you should also be able to find it at your local Walmart or other similar stores.

    Can I use homemade frosting instead of store-bought?

    Absolutely! If you would prefer, you can make 16 ounces of your favorite frosting and use that to ice your donuts. You will still need to warm it up in the microwave a bit so it is dippable consistency.

    One note here- any buttercream frosting recipe should work for this, but a meringue or marshmallow frosting would most likely not be a good choice.

    Related Recipes

    If you enjoyed these circus animal cookie donuts, you’ll love these birthday cake donuts from my friend Karina, or our other donut recipes like our donut burger recipe and our donut bread pudding! Or, if your kids just love animal-inspired treats, these Teddy Bear Graham crackers dipped in chocolate will fit the bill.

    Recipe

    Circus Animal Cookie Donuts
    Print Pin
    5 from 1 vote

    Circus Animal Cookie Donuts

    Circus Animal Cookie Donuts: Cake mix donuts with frosted circus animal cookies inside, it doesn't get more fun than this! With just 5 simple ingredients you can have these tasty cake donuts ready to go in under 20 minutes!
    Course Dessert
    Cuisine American
    Prep Time 10 minutes minutes
    Cook Time 8 minutes minutes
    Total Time 18 minutes minutes
    Servings 12 donuts
    Calories 280kcal
    Author Jessica Burgess

    Equipment

    • donut baking pan like this one

    Ingredients

    • 1 box yellow cake mix dry
    • 2 cups ripe bananas* mashed
    • 1 cup frosted animal crackers
    • 1- 16 ounce can vanilla or cream cheese frosting
    • coloured sprinkles
    • cooking spray
    • ziplock bag or piping bag

    Instructions

    • Preheat your oven to 425° F and grease a donut baking pan.
    • In a large mixing bowl, mash the ripe bananas with a fork or potato masher.
    • Stir in the dry yellow cake mix until just combined. Gently fold in the crushed circus animal crackers.
    • Pour the mixture into a large ziploc bag. Cut the tip off of one corner of the bag and pipe the batter into each donut cavity until it's about ⅔ full.
    • Bake in the preheated oven for 7-8 minutes, or until the donuts are cooked through and a toothpick inserted in the donut comes out clean.
    • Allow the donuts to cool in the pan for 5-10 minutes before transferring them to a wire cooling rack.
    • Add the frosting to a microwave safe bowl and warm in the microwave for 10-20 seconds until it's a runny consistency (this makes dipping easier).
    • Dip each donut upside down into the frosting and return to the cooling rack right-side up. Immediately add colored sprinkles on top of the donuts before the frosting sets. 
    • Allow to fully cool before serving, enjoy!

    Notes

    *2 cups of applesauce can be substituted for the bananas.
     
    STORAGE: Store in an airtight container for up to 1-2 day at room temperature, or 5-7 days in the refrigerator.

    Nutrition

    Serving: 1donut | Calories: 280kcal | Carbohydrates: 54g | Protein: 3g | Fat: 6g | Saturated Fat: 2g | Polyunsaturated Fat: 1g | Monounsaturated Fat: 3g | Trans Fat: 1g | Cholesterol: 4mg | Sodium: 417mg | Potassium: 129mg | Fiber: 2g | Sugar: 25g | Vitamin A: 33IU | Vitamin C: 2mg | Calcium: 99mg | Iron: 2mg

    Chicken Grilled Cheese

    January 10, 2022

    Chicken Grilled Cheese Sandwich

    Chicken Grilled Cheese: Grilled cheese sandwiches are a classic, but adding chicken takes it to a new level! Keep this simple recipe on hand for those busy weeknights when you don’t know what to make for dinner.

    Chicken Grilled Cheese Sandwich

    Did you know that April 12 is National Grilled Cheese Day? Not like you need an excuse to eat a yummy grilled chicken and cheese sandwich, but make sure you mark that date in your calendar and try out this recipe (or our caprese chicken sandwich, which is also fantabulous)!

    Why You’ll Love This Recipe

    I think most of us love a good grilled cheese sandwich, but a grilled cheese chicken sandwich (or a chicken and cheese toastie, for the British blog readers out there)?

    I’m a big fan of simple meals that still have some protein in them, (like this tuna salad sandwich recipe) and this one fits the ticket. You all know I think great food doesn’t have to be complicated!

    I also love that it’s flexible- you could use leftover chicken from that rotisserie chicken you had for dinner last night (then don’t forget to save the rotisserie carcass to make chicken stock!) or you could cook up some chicken breasts in the slow cooker and use that instead. You may also want to make this chicken club sandwich with any other chicken breasts you may have too!

    Honestly, this whole sandwich is super customizable…hence the HUGE list of variations we shared a bit farther down.

    [feast_advanced_jump_to]

    Ingredients

    Rustic bread, chicken, and a mixture of different cheeses…I mean, need I say more? These chicken grilled cheese sandwiches use simple ingredients to make a sandwich that’s tasty!

    • 2 tablespoons butter softened
    • 8 slices white bread rustic-style
    • 1 cup chicken cooked and shredded
    • 4 ounces cream cheese softened
    • 1 cup mozzarella cheese sliced
    • 1 cup Monterey Jack cheese sliced
    • 2 teaspoons parsley fresh, diced

    Make sure you scroll to the recipe card below, to see the full recipe now, or keep reading to see how easy it is to make these chicken grilled cheese sandwiches!

    Ingredients for Chicken Grilled Cheese Sandwich
    Ingredients

    Variations

    There is no limit to the different ways you can change up a grilled cheese sandwich. This recipe uses chicken, mozzarella cheese, and Monterey Jack cheese to create a tasty sandwich, but there are so many other combinations you could try!

    Experimenting with different cheeses and add-ins is also a great way to use up whatever’s left in your fridge (reducing food waste, saving yourself from a shopping trip, it’s a win-win). Or, change up the bread; make your own Italian white bread, use store bought rustic bread or go all out and buy a fancy sourdough loaf.

    • Bbq Chicken Grilled Cheese- use bbq chicken, slices of cheese that are spicy (think pepper jack cheese), and some sliced red onion. Serve with barbecue sauce for dipping (or sour cream, if you need to tone down the spice).
    • Grilled Buffalo Chicken Sandwiches – use spicy buffalo chicken and a cheese mixture like mozzarella and colby jack. You could serve this with a side of bleu cheese dressing and some carrot sticks.
    • Gourmet Grilled Cheese- try marinating a skinless chicken breast in a balsamic vinegar marinade, and then grilling or baking your chicken. Use a hearty bread (the best bread for this one would be a rye or crusty artisanal bread). Butter your bread, spread some cream cheese (maybe Boursin) and add your shredded grilled chicken. Add some mozzarella cheese, fresh basil, fresh spinach and a slice of tomato on top of the chicken and top with another slice of bread. Cook and enjoy!
    • Kid Friendly Chicken Grilled Cheese- use American cheese (like Kraft slices), white bread, and however much chicken your little one will eat. Serve it with a side of potato chips and some ketchup.

    How to Make a Chicken Grilled Cheese

    1. Heat a large skillet on the stovetop over medium heat. 
    2. Spread butter on one side of each of the slices of bread you have cut in half, then place them butter-side down and spread cream cheese on the other side of each slice of bread.
    Slices of bread being covered with butter.
    Butter one side of each slice of bread.
    Bread being covered with cream cheese for a chicken grilled cheese.
    Cover the opposite side of each slice with cream cheese.
    1. Top 4 slices of the cream cheese covered bread with ¼ cup shredded chicken. 
    2. Then, top the chicken with parsley and slices of mozzarella cheese in a single layer. 
    3. Top the mozzarella cheese with a single layer of sliced Monterey Jack cheese. 
    Chicken added to bread for a chicken grilled cheese.
    Add chicken.
    Cheese added to chicken grilled cheese sandwich.
    And finally the cheeses.
    1. Top that slice of cheese with the remaining bread slices (cream cheese side in, butter side out). 
    Top with another piece of toast (butter side out).
    1. Place the sandwiches, one at a time, into the heated pan. 
    2. Cook sandwiches for about 4 minutes on each side or until the outside of the bread is golden brown. During the last 60 seconds, cover the pan to help the cheese melt. 
    Chicken grilled cheese in a skillet.
    Cook 4 mins per side.
    1. Transfer the sandwich to a plate with your choice of side. I’ll serve the kids potato chips or steak fries, and for myself, I like to make a side salad. Enjoy!
    Chicken Grilled Cheese Sandwich on round plate.

    Sauces to Serve with Grilled Cheese

    If you have kids, I bet that the go-to grilled cheese dip in your house is ketchup. The kiddos can have their ketchup, but I think there’s a better way for this chicken grilled cheese sandwich.

    Here are a few I would suggest trying:

    • Barbecue sauce (pick your favorite BBQ sauce)
    • Spicy buffalo sauce- you can even make your own buffalo sauce! It’s basically just melted butter, hot sauce and garlic powder. If you prefer to use a recipe, you could try this buffalo sauce recipe. Side note: if you enjoy buffalo sauce with this chicken grilled cheese sandwich, you really need to try this buffalo chicken lasagna!
    • Ranch dressing (for those who prefer a milder flavor)
    • Blue cheese dressing, for those who like to live on the wild side

    I’m a fan of spice so I like my chicken grilled cheese with a side of extra buffalo sauce, but there’s no wrong answer here!

    Chicken Grilled Cheese Sandwich

    The basic formula for a great grilled cheese sandwich is to have nice thick slices of bread, lots of melted cheese and to make sure you cook it until both the top of the sandwich and the bottoms of the sandwiches are a nice golden brown color. The rest is totally up to you!

    Storage

    Grilled cheese sandwiches don’t typically keep well (they have a tendency to get soggy). Your best bet is to enjoy these sandwiches right after you’ve made them, but if you have leftovers try wrapping them in a paper towel and then in tin foil and storing them in the fridge. When you’re ready to eat them, heat them up in a skillet over medium heat again until they are toasty and melty.

    Chicken Grilled Cheese Sandwich
    The BEST grilled cheese!

    Expert Tips and FAQs

    What cheese goes best with chicken?

    This is really a matter of personal preference, although it does depend a bit on what type of chicken you are using.

    If you are using bbq chicken, you could use a more mild cheese like cheddar cheese or mozzarella.

    If you are using a chicken breast without strong seasonings, try spicing up your sandwich by using more adventurous cheeses (think spicy habanero or bleu cheese)!

    The combinations are endless and there really isn’t a wrong kind of cheese to choose. Have fun with it!

    What can I add to grilled cheese to make it better?

    We think that the addition of cheese to a grilled cheese already makes it better, but if you want to take it a step further you could try experimenting with the fat on the outside. This recipe calls for buttering the outside of your bread, but you could try using mayonnaise instead of a twist on this old classic!

    How can I add flavor to my grilled cheese?

    How can you add flavor, let me count the ways..

    In all seriousness, you can add flavor to a grilled cheese in three basic ways:
    – changing up the cheeses
    – dipping it in a sauce
    – adding in another ingredient

    We have a bunch of dipping sauce recommendations in this blog post as well as cheese and add-in suggestions in the variations section, above, in this post. Check it out!

    What’s the best way to cook a grilled cheese sandwich?

    Ooh, good question. There isn’t really a “best way”, but there are a lot of different ways!

    Air Fryer- If you have one, try it out! Preheat your air fryer to 400F, place your assembled sandwich, buttered side down, into your air fryer basket. Cook it for 4-6 mins, flipping halfway through (it’s not required, but it will make sure that your sandwich is golden brown on both sides).

    Panini Press- This should create a flatter sandwich with a crunchy, golden exterior with those tell-tale panini lines. I haven’t tried this one personally, so let me know in the comments section if you do!

    Baked- Preheat oven to 450F. Assemble your sandwich following the recipe, then place on a greased or foil-lined baking sheet. Bake for 5 mins, flip sandwiches over and bake another 5 mins or until the sandwich is golden brown and the cheese is melted. Watch your sandwich cook when you get near the end of the time so you don’t burn it.

    Related Recipes

    If you enjoyed this chicken grilled cheese sandwich, you might like some of our other sandwich recipes like this hot ham and cheese, this Hawaiian breakfast sandwich or this bacon brioche sandwich.

    Recipe

    Chicken Grilled Cheese Sandwich
    Print Pin
    5 from 6 votes

    Chicken Grilled Cheese

    Chicken Grilled Cheese: Grilled cheese sandwiches are a classic, but adding chicken takes it to a whole new level!
    Course Main Course, Snack
    Cuisine American
    Prep Time 4 minutes minutes
    Cook Time 8 minutes minutes
    Total Time 12 minutes minutes
    Servings 4 sandwiches
    Calories 498kcal
    Author Jessica Burgess

    Ingredients

    • 2 tablespoons butter softened
    • 4 slices white bread rustic-style, cut in half
    • 1 cup chicken cooked and shredded
    • 4 ounces cream cheese softened
    • 1 cup mozzarella cheese sliced
    • 1 cup Monterey Jack cheese sliced
    • 2 teaspoons parsley fresh, diced

    Instructions

    • Heat a large skillet on stove top over medium heat.
    • Spread butter on one side of each of the slices of bread you have cut in half, then place them butter-side down and spread cream cheese on the other side of each slice of bread.
    • Top 4 slices of the cream cheese covered bread with ¼ cup shredded chicken.
    • Top the chicken with parsley and slices of mozzarella cheese in a single layer.
    • Top the mozzarella cheese with a single layer of sliced Monterey Jack cheese.
    • Top that slice of cheese with the remaining bread slices (cream cheese side in, butter side out). 
    • Place the sandwiches, one at a time, into the heated pan.
    • Cook sandwiches for about 4 minutes on each side or until the outside of the bread is golden brown. During the last 60 seconds, cover the pan to help the cheese melt.
    • Transfer sandwich to a plate with your choice of side (potato chips or steak fries would be delicious) and enjoy!

    Notes

    STORAGE: Grilled cheese sandwiches don’t typically keep well (they have a tendency to get soggy). Your best bet is to enjoy these sandwiches right after you’ve made them, but if you have leftovers try wrapping them in a paper towel and then in tin foil and storing them in the fridge. When you’re ready to eat them, heat them up in a skillet over medium heat again until they are toasty and melty.
     
    VARIATIONS: There are so many ways you could change up this chicken grilled cheese recipe. Check out the variations section of this post for some ideas!

    Nutrition

    Serving: 1sandwich | Calories: 498kcal | Carbohydrates: 26g | Protein: 22g | Fat: 34g | Saturated Fat: 19g | Polyunsaturated Fat: 2g | Monounsaturated Fat: 9g | Trans Fat: 1g | Cholesterol: 104mg | Sodium: 723mg | Potassium: 168mg | Fiber: 1g | Sugar: 4g | Vitamin A: 986IU | Vitamin C: 1mg | Calcium: 513mg | Iron: 2mg

    Honey Lime Fruit Salad

    January 5, 2022

    Honey Lime Fruit Salad

    Honey Lime Fruit Salad: A refreshing fresh fruit salad that’s always a hit! Serve this fruit salad as a healthy dessert or as a sweet side dish for any occasion. We’ve even included this fresh fruit salad recipe in our top favorite recipe ideas for a picnic.

    Honey lime fruit salad
    Fruit Salad with Honey Lime Dressing

    Why you’ll love this recipe

    This is the best fruit salad recipe for a hot summer day! It’s a family favorite because it’s the perfect fruit salad for a crowd! The honey lime dressing is what makes this the perfect side dish or healthy dessert.

    I also love making this fruit salad with cool whip when I’m craving a creamy fruit salad.

    [feast_advanced_jump_to]

    Ingredients

    Honey lime fruit salad ingredients
    Ingredients for Fruit Salad
    • Honey
    • Orange juice
    • Lime juice
    • Strawberries
    • Oranges
    • Kiwi
    • Bananas
    • Pineapple
    • Blueberries
    • Grapes (black seedless)
    • Mint leaves (optional)
    • Splash of pure vanilla extract (optional)

    See recipe card toward the bottom of this post for quantities instructions all in one place!

    Instructions

    Orange juice, lime juice, honey
    Fruit Salad Dressing
    1. In a small bowl, mix together orange juice, honey and lime juice, (and vanilla if desired), set aside.
    Fruit in bowl
    Fruit in bowl for dressing
    1. Wash, slice fruits and mix together in a large bowl.
    dressing pouring in to fruit salad
    Honey Lime Orange Dressing Pouring in to Fruit
    1. Pour "dressing" over fruit mixture and toss!
    simple fruit salad recipe
    Honey Lime Fruit Salad
    1. Serve right away or let marinate in the refrigerator for up to an hour.

    Hint: The bananas are usually the first to "turn" but the dressing acts as a preserve so it helps keep the bananas from turning brown so fast!

    Substitutions/Variations

    This recipe is very forgiving so feel free to add in or swap out any fruit to your liking! Here are a few of my favorite fruits to add to this easy fruit salad recipe!

    • Raspberries & Blackberries – There’s nothing better than a combination of fresh raspberries and blackberries! They make a great addition to this fresh fruit salad!
    • Clementines – Clementines are easy to peel and don’t need to be cut which is a great (less messy) swap for oranges! Besides, mandarin oranges are just so cute!!
    • Peaches – Adding peaches to this salad would be perfect for a summer cookout! Peaches are ripe and ready to eat during the summertime which is the perfect time to enjoy them!
    • Poppy Seeds- Feel free to add 1-2tbsp of poppy seeds to the honey lime dressing! Poppy seeds add texture and taste delicious topped on fruit salad!
    • Lime Zest or Lemon Zest – For extra flair, zest lime or lemon on top!
    homemade fruit salad recipe
    Fruit Salad with Citrus Dressing

    Top tip

    The honey acts as a "sweetener" to help offset fruits that may be a bit tart. But if you find that the fruit salad is still tart, you can mix in 1 teaspoon of brown sugar with an additional teaspoon of orange juice and pour/stir in with fruit salad to add a touch more sweetness.

    How do you store fruit salad?

    You can store this honey lime fruit salad in an airtight container in the fridge for up to 4 days. If you plan on storing your fruit salad, I would recommend omitting the bananas as they will get brown if stored for days.

    homemade fruit salad recipe
    Honey Lime Fruit Salad

    What are the best fruits to mix together?

    For best results for this honey lime fruit salad recipe, you should mix fruits with different colors and textures but avoid mixing fruits that are too acidic (like grapefruits).

    Fresh strawberries, pineapple, red grapes, fresh blueberries, mandarin oranges, and other fresh/in season fruit makes the best fruit salad!

    Or, if you’re looking to make a fruit salad at Christmas, you’ll love this Christmas Fruit Salad!

    Recipe

    Honey Lime Fruit Salad
    Print Pin
    5 from 9 votes

    Honey Lime Fruit Salad

    Honey Lime Fruit Salad: A refreshing fresh fruit salad that's always a hit! Serve this fruit salad as a healthy dessert or as a sweet side dish for any occasion!
    Course Breakfast, Dessert, Salad, Side Dish
    Cuisine American
    Prep Time 15 minutes minutes
    Cook Time 15 minutes minutes
    Total Time 30 minutes minutes
    Servings 8
    Calories 147kcal
    Author Jessica Burgess

    Ingredients

    • ⅛ cup honey
    • ½ cup orange juice
    • juice of ½ lime
    • 16 oz Strawberries
    • 2 Oranges
    • 2 Kiwis
    • 2 Bananas
    • 8 oz Pineapple
    • 8 oz Blueberries
    • 8 oz Grapes Black seedless
    • Mint leaves Optional
    • Splash Vanilla extract Optional

    Instructions

    • In a small bowl, mix together orange juice, honey and lime juice, (and vanilla if desired), set aside.
    • Wash, slice fruits and mix together in a large bowl.
    • Pour "dressing" over fruit mixture and toss!
    • Serve right away or let marinate in the refrigerator for up to an hour.

    Nutrition

    Calories: 147kcal | Carbohydrates: 37g | Protein: 2g | Fat: 1g | Saturated Fat: 1g | Polyunsaturated Fat: 1g | Monounsaturated Fat: 1g | Sodium: 3mg | Potassium: 463mg | Fiber: 5g | Sugar: 27g | Vitamin A: 201IU | Vitamin C: 99mg | Calcium: 42mg | Iron: 1mg

    This fruit salad recipe was first published on Tornadough Alli.

    Strawberry Buttercream with Jam

    January 4, 2022

    Strawberry Buttercream frosting recipe

    Strawberry Buttercream with Jam: If you like strawberries, you’ll love this easy strawberry buttercream frosting! It’s made with only 3 ingredients and takes less than 10 minutes to make!

    This is the buttercream frosting that we used in the sugar cookie sandwiches and it was DELICIOUS! So I know you’ll love it in those and you’ll also love it on other cupcakes or cakes too!

    Strawberry Buttercream frosting
    Strawberry Buttercream with Jam

    Why you’ll love this recipe

    This fun and fruity twist on classic buttercream frosting is perfect for Valentine’s day, a girl’s baby shower, or any pink-themed party! I love topping this buttercream recipe on my pink champagne cupcakes or my strawberry shortcake cookies!

    Another one of my favorite strawberry recipes is my strawberry brownies! That’s another great recipe for valentines day, birthday parties, or holiday parties.

    strawberry frosting without strawberries
    Use jam for strawberry frosting

    Strawberry Frosting without Strawberries

    You can make fluffy strawberry buttercream frosting without fresh strawberries! Using strawberry preserves or strawberry jam, you can easily make delicious strawberry buttercream frosting. Although, adding real strawberries is always a good idea!

    [feast_advanced_jump_to]

    Ingredients

    Strawberry Buttercream with jam
    Ingredients for strawberry frosting
    • Butter
    • Strawberry jam
    • Powdered sugar

    See recipe card for quantities.

    Instructions

    Strawberry Buttercream frosting
    Mix butter and jam
    1. Add butter and jam to a large bowl.
    Strawberry buttercream frosting
    Butter and jam mixture
    1. With an electric mixer or stand mixer, mix together the butter and fruit spread until evenly mixed.
    how to make strawberry buttercream frosting
    Add in the powdered sugar
    1. Slowly, and in small batches, add in the powdered sugar to the butter/jam mixture, turn the mixer on “low”, and gently mix together until evenly combined.
    easy strawberry buttercream frosting
    Whip with mixer

    NOTE: You may need to stop mixing halfway, to scrape the inside of the mixing bowl to incorporate any powdered sugar that needs mixed in.

    Substitutions

    There are different ways to spice up this buttercream recipe and make it your own! Here are a few of my favorite ideas.

    • Fresh strawberries – Adding chopped strawberries to this recipe would add texture and who doesn’t like fresh strawberries!?
    • Food coloring – If you’re going for a red or darker pink, you can always add food coloring to this easy buttercream frosting. This is the perfect way to give cookies or cupcakes an aesthetic look.
    • Lemon zest – Fresh strawberry frosting combined with lemon zest is the perfect topping on cupcake or cookies during the summer!
    strawberry buttercream frosting
    Strawberry Buttercream Frosting

    Does strawberry buttercream frosting need to be refrigerated?

    You can leave buttercream frosting out for three days but if you’re going to let it sit for longer, you should refrigerate in an airtight container. You can also store buttercream frosting in the freezer for up to 1 month if you want to save frosting for later!

    easy buttercream frosting recipe
    Sugar cookies with buttercream frosting

    Why did my strawberry buttercream separate?

    If your strawberry buttercream separates it means that your fat and liquid were at different temperatures. If any ingredients are too warm or too cold then your frosting might separate. It’s best to use room temperature butter and jam to ensure the perfect frosting!

    More Recipes You’ll Love

    If you love having easy recipes like this one on hand, I think you’ll really love this Instant Pot Raspberry Jam and

    Recipe

    Strawberry Buttercream frosting recipe
    Print Pin
    5 from 48 votes

    Strawberry Buttercream with Jam

    Strawberry Buttercream Frosting with Jam: Made with only 3 ingredients and less than 10 minutes to make, this strawberry buttercream frosting is made with jam for amazing flavor!
    Course Dessert
    Cuisine American
    Prep Time 10 minutes minutes
    Total Time 10 minutes minutes
    Servings 24
    Calories 245kcal
    Author Jessica Burgess

    Ingredients

    • 1 cup butter 2 sticks
    • ½ cup strawberry jam
    • 4 cups powdered sugar

    Instructions

    • Add butter and jam to a large bowl.
    • With an electric mixer or stand mixer, mix together the butter and fruit spread until evenly mixed.
    • Slowly, and in small batches, add in the powdered sugar to the butter/jam mixture, turn the mixer on "low", and gently mix together until evenly combined.
    • NOTE: You may need to stop mixing halfway, to scrape the inside of the mixing bowl to incorporate any powdered sugar that needs mixed in.

    Notes

    Why did my strawberry buttercream separate?

    If your strawberry buttercream separates it means that your fat and liquid were at different temperatures. If any ingredients are too warm or too cold then your frosting might separate. It’s best to use room temperature butter and jam to ensure the perfect frosting!

    Nutrition

    Calories: 245kcal | Carbohydrates: 30g | Protein: 1g | Fat: 14g | Saturated Fat: 6g | Polyunsaturated Fat: 3g | Monounsaturated Fat: 4g | Trans Fat: 1g | Cholesterol: 20mg | Sodium: 139mg | Potassium: 21mg | Fiber: 1g | Sugar: 27g | Vitamin A: 236IU | Vitamin C: 1mg | Calcium: 5mg | Iron: 1mg

    Oreo Cupcakes and Oreo Buttercream Frosting

    December 29, 2021

    Oreo Cupcakes with Oreo Buttercream Frosting

    Oreo Cupcakes and Oreo Buttercream Frosting: These cookies and cream style cupcakes are full of Oreo cookies and are sure to be a hit with Oreo lovers and cupcake lovers alike!

    These easy Oreo cupcakes are high on our list of favorite Oreo desserts, right up there with our easy no bake Oreo cheesecake and our cookies and cream cinnamon rolls!

    Oreo Cupcakes with Oreo Buttercream Frosting

    Why You’ll Love This Recipe

    These chocolate Oreo cupcakes are a dream- moist chocolate cupcakes with Oreo crumbs inside, topped with an Oreo buttercream frosting…yum! It’s all the amazing cake goodness you’re craving in a small, cupcake-sized package.

    Whether you’re looking for a creative cupcake to serve at birthday parties or just a fun way to incorporate your favorite cookie into a dessert, these delicious cupcakes are just the thing you need!

    [feast_advanced_jump_to]

    Oreo Cupcakes Ingredients

    A cookie lovers dream, these delicious Oreo cupcakes require only a few simple ingredients to make!

    • 1- 15.25 oz Betty Crocker milk chocolate cake mix
    • 1 cup Oreo cookies crushed into small pieces
    • 3 large eggs
    • ½ cup water room temperature
    • ¾ cup milk
    • ⅓ cup vegetable oil
    • 1 teaspoon vanilla extract
    Oreo cupcake ingredients.

    Cookies & Cream Buttercream Ingredients

    • 1 cup salted butter (2 sticks)
    • 1 cup Oreo cookies finely blended into crumbs
    • ½ teaspoon vanilla extract (optional)
    • 3½ cups powdered sugar
    Ingredients for cookies and cream buttercream frosting.

    How to Create Fluffy Cupcakes with Oreos

    1. Preheat oven to 350 degrees F.
    2. Line cupcake tins with paper liners. Set aside.
    3. In a large bowl, mix dry ingredients (cake mix and crushed Oreos). Mix until all the Oreo pieces are coated with dry cake mixture.
    Combine dry ingredients in a large mixing bowl.
    Combine dry ingredients.
    Combine dry ingredients.
    Coat all cookie pieces with cake mix.
    1. Add wet ingredients (eggs, water, milk, oil and vanilla extract). Mix with a hand mixer until all the ingredients are incorporated (you could also make this with a stand mixer and paddle attachment).
    Wet ingredients added to mixing bowl.
    Add wet ingredients.
    Oreo cupcakes batter in glass mixing bowl.
    Combine.
    1. Scoop the cupcake batter into the prepared muffin tins. 
    Oreo cupcakes batter scooped in to scoop, over mixing bowl.
    Scoop batter into prepared tins.
    Oreo cupcake batter in muffin tin.
    Bake 14-17 mins.
    1. Cook in a preheated oven for 14 to 17 minutes or until a toothpick comes out clean when inserted in the middle. NOTE: Your cooking time may vary if you use a different cake mix.
    Oreo cupcakes, baked.
    Bake 14-17 mins.
    1. Let the cupcakes cool completely on a cooling rack before frosting.
    Oreo cupcakes.

    How to make Oreo buttercream frosting

    1. In a medium bowl, cream the butter until soft. 
    Ingredients for cookies and cream buttercream frosting.
    Frosting ingredients
    Butter in glass mixing bowl.
    Put butter in bowl.
    Butter and sugar creamed until all soft.
    Cream till soft.
    1. Add powdered sugar about ½ cup at the time and beat butter and icing sugar with the hand mixer on low speed, adding more as soon as the powdered sugar is completely combined each time. Continue until all 3 ½ cups of powdered sugar is mixed with the butter.
    Add powdered sugar, ½ cup at a time to mixing bowl.
    Keep adding & blending.
    Butter and cream together in mixing bowl.
    1. Crush the Oreo cookies (like we did with this Oreo mousse) by putting them in a blender or food processor (the whole Oreo cookie). Blitz them until you have cookie crumbs- you don’t want any big chunks at all for the frosting or you will not be able to pipe a swirl onto the top of the cupcake without the piping tip becoming blocked. 
    2. Add the crushed Oreos to your frosting and mix until all incorporated. 
    Cookies added to cupcake frosting.
    Add Oreo crumbs.
    Cookies and cream buttercream frosting in mixing bowl.
    Mix together.
    1. Once cupcakes are completely cooled, pipe the frosting using a piping bag or ziplock bag with the corner cut. Top the frosting with an Oreo cookie cut in half or a mini Oreo cookie and some chocolate chips. Enjoy!
    Oreo cupcake with piping bag, piping frosting on.
    Pipe frosting on cooled cupcake.
    Oreo cupcake with cookies and cream buttercream frosting.

    Substitutions

    If you are missing an ingredient or can’t use one, here are a few substitutions you can try…

    • Milk -> you can use a non-dairy milk in its place
    • Olive oil -> you can use vegetable oil or even melted butter
    • Eggs -> a cornstarch paste should work in place of an egg for this recipe, but we haven’t tested that so let us know if you do! Simply mix together 3 tablespoon cold water and 1 tablespoon of cornstarch for each egg you need to replace (so for this recipe, 9 tablespoon cold water and 3 tablespoon of cornstarch) and use it in place of the egg in the recipe.

    Variations

    You could make endless variations of this recipe by switching up the cake mix or the frosting you use!

    • Try topping these cupcakes with cream cheese frosting like we did on our cookies and cream cinnamon rolls
    • Instead of a chocolate cake mix, try using a white cake mix to create moist vanilla cupcakes with Oreo frosting
    • Try using this cookies and cream buttercream on top of other recipes, like our easy & fudgy cast iron brownies!
    • Looking to lighten up these cupcakes? Mix together some cool whip and Oreo crumbs and use this as a frosting instead!
    • Try serving these cupcakes with a scoop of ice cream on the side!

    If you want to create a really delicious chocolate cupcake, try mixing ½ teaspoon of espresso powder and a pinch of salt into the room temperature water called for in these Oreo cookie cupcakes. The espresso and salt help to amp up the chocolate flavor!

    If you are wanting to create a super moist cupcake, try replacing the oil in this recipe with sour cream (this will also result in slightly more dense cupcakes).

    You could also add a fun twist to this recipe by placing a regular size Oreo cookie on the bottom of each cupcake liner before topping it with cupcake batter and baking.

    No matter what variations you try, the end result is going to be the best Oreo cupcakes ever!

    Oreo cupcake with cookies and cream buttercream frosting.

    Equipment

    If you have a disposable piping bag or want to purchase them to have on hand, then great! If you don't though, I've had fairly good success with using freezer bags. Taste of Home has a detailed tutorial on their website that explains it nicely!

    You’ll also need a cupcake pan to make this recipe. If you don’t have one yet, it’s definitely worth investing in! Having a cupcake pan in the kitchen is a decision you will not regret. You can likely grab a cupcake pan/muffin tin at your local grocery store, but if you are an online shopper you can also grab this cupcake pan.

    Inside of cookies and cream cupcakes

    Storage

    Store the Oreo cupcakes with Oreo buttercream frosting in an airtight container on the counter for 3 days or in the fridge for up to 1 week.

    The unfrosted cupcakes can be frozen in an airtight container or bag for up to two months, but the buttercream does not stand up well to freezing.

    Expert Tips and FAQs

    Can I just use a boxed cake mix to make chocolate cupcakes with Oreo buttercream instead of making them Oreo cupcakes?

    Of course! Although the cupcake recipe listed here is delicious, you could easily make any sort of cupcake you like and top it with the cookies and cream buttercream part of this recipe!

    Can I freeze these Oreo cookie cupcakes?

    Yes and no. You CAN freeze the cupcakes themselves in an airtight plastic freezer bag or container for up to two months (just thaw them completely on the counter before frosting).

    However, we would NOT recommend freezing the Oreo buttercream frosting. Buttercream tends to separate when frozen and when it thaws it has a different, less appealing texture.

    Can I make this Oreo cupcake recipes ahead of time?

    Yes! The fully frosted cupcakes can be kept in an airtight container on the counter for 3 days or up to 1 week in an airtight container in the fridge.

    If you store them in the fridge, we would recommend letting them reach room temperature again before serving. We find cake tastes better that way.

    Oreo cupcakes stacked on cake stands

    Related Recipes

    Did you love our Oreo cupcakes and Oreo buttercream frosting (aka the best Oreo cupcake recipe ever)? Then you’ll love our mint chocolate cupcake recipe, caramel cupcakes with caramel buttercream frosting or these super fun red velvet cupcakes with creamy chocolate chip frosting!

    Don’t forget about breakfast because you’ll love making these Oreo pancakes too!

    Plus, if you’re an Oreo fan in general, then you’ll love all of these Oreo recipes too!

    Recipe

    Oreo Cupcakes with Oreo Buttercream Frosting
    Print Pin
    5 from 3 votes

    Oreo Cupcakes and Oreo Buttercream Frosting

    Oreo Cupcakes and Oreo Buttercream Frosting: These cookies and cream style cupcakes are full of Oreo cookies and are sure to be a hit with Oreo lovers and cupcake lovers alike! 
    Course Dessert, Snack
    Cuisine American
    Prep Time 15 minutes minutes
    Cook Time 17 minutes minutes
    Total Time 32 minutes minutes
    Servings 15 cupcakes
    Calories 494kcal
    Author Jessica Burgess

    Ingredients

    Oreo Cupcakes

    • 1- 15.25 oz Betty Crocker milk chocolate cake mix
    • 1 cup Oreo cookies crushed into small pieces
    • 3 large eggs
    • ½ cup water room temperature
    • ¾ cup milk
    • ⅓ cup vegetable oil
    • 1 teaspoon vanilla extract

    Oreo Buttercream Frosting

    • 1 cup salted butter (2 sticks)
    • 1 cup oreo cookies finely blended into crumbs
    • ½ teaspoon vanilla extract (optional)
    • 3½ cups powdered sugar

    Instructions

    Making the Ultimate Oreo Cupcakes

    • Preheat oven to 350 degrees F.
    • Place cupcake liners into a muffin tin. Set aside.
    • In a large bowl, mix dry ingredients (cake mix and crushed Oreos). Mix until all the Oreo pieces are coated with dry cake mixture.
    • Add wet ingredients (eggs, water, milk, oil and vanilla extract). Mix with a hand mixer until all the ingredients are incorporated (you could also make this with a stand mixer and paddle attachment).
    • Scoop the cupcake batter into the prepared muffin tins.
    • Cook in a preheated oven for 14 to 17 minutes or until a toothpick comes out clean when inserted in the middle. NOTE: Your cooking time may vary if you use a different cake mix.
    • Let the cupcakes cool completely on a cooling rack before frosting.

    Making the Creamy Frosting

    • In a medium bowl, cream butter until soft. 
    • Add powdered sugar about ½ cup at the time and beat butter and icing sugar with the hand mixer on low speed, adding more as soon as the powdered sugar is completely combined each time. Continue until all 3 ½ cups of powdered sugar is mixed with the butter.
    • Crush the Oreo cookies by putting them in a blender or food processor (the whole Oreo cookie). Blitz them until you have cookie crumbs- you don't want any big chunks at all for the frosting or you will not be able to pipe a swirl onto the top of the cupcake without the piping tip becoming blocked.
    • Add the crushed Oreos to your frosting and mix until all incorporated.
    • Once cupcakes are completely cooled, pipe the frosting using a piping bag or ziplock bag with the corner cut. Top the frosting with an Oreo cookie cut in half or a mini Oreo cookie and some chocolate chips. Enjoy!

    Notes

    VARIATIONS: If you want to create a really delicious chocolate cupcake, try mixing ½ teaspoon of espresso powder and a pinch of salt into the room temperature water called for in these Oreo cookie cupcakes. The espresso and salt help to amp up the chocolate flavor!
    If you are wanting to create a super moist cupcake, try replacing the oil in this recipe with sour cream (this will also result in slightly more dense cupcakes).
    You could also add a fun twist to this recipe by placing a regular size Oreo cookie on the bottom of each cupcake liner before topping it with cupcake batter and baking.
    SUBSTITUTIONS:
    • Milk -> you can use a non-dairy milk in its place
    • Olive oil -> you can use vegetable oil or even melted butter
    • Eggs -> a cornstarch paste should work in place of an egg for this recipe, but we haven’t tested that so let us know if you do! Simply mix together 3 tablespoon cold water and 1 tablespoon of cornstarch for each egg you need to replace (so for this recipe, 9 tablespoon cold water and 3 tablespoon of cornstarch) and use it in place of the egg in the recipe.

    Nutrition

    Serving: 1cupcake | Calories: 494kcal | Carbohydrates: 52g | Protein: 3g | Fat: 31g | Saturated Fat: 12g | Polyunsaturated Fat: 6g | Monounsaturated Fat: 12g | Trans Fat: 1g | Cholesterol: 71mg | Sodium: 323mg | Potassium: 98mg | Fiber: 1g | Sugar: 43g | Vitamin A: 452IU | Calcium: 30mg | Iron: 2mg

    Instant Pot Mashed Potatoes

    December 27, 2021

    Instant Pot Mashed Potatoes

    Instant Pot Mashed Potatoes: A quick and easy mashed potatoes recipe that’s made in under 25 minutes! This recipe is perfect for holiday meals or a busy weeknight dinner as an easy side dish.

    Instant Pot Mashed Potatoes

    When we found out how much you loved the Instant Pot Chicken and Potatoes, we knew mashed potatoes had to be next, in our Instant Pot Recipes archives.

    Why You’ll Love This Recipe

    Easy Instant pot mashed potatoes are a classic side dish and potato recipe that everyone enjoys. You can bring these potatoes to holiday parties, potlucks, and barbecues, or serve them at family dinners, along with this party potatoes recipe!

    I like to serve these pressure cooker mashed potatoes with sweet and smoky pork chops, this steak recipe, or a crispy chicken burger (just like KFC!). You can also serve these mashed potatoes with vegetables like asparagus cooked in the air fryer and oven-roasted broccoli!

    [feast_advanced_jump_to]

    Ingredients

    Ingredients for Instant Pot Mashed Potatoes

    For potatoes:

    • 3 pounds Russet potatoes halved
    • 2 cups of water
    • 1 tablespoon kosher salt
    • 1 stick salted butter
    • 1 teaspoon garlic powder
    • 1 teaspoon celery seed
    • ¼ teaspoon black pepper
    • ½ cup milk
    • ½ cup sour cream

    For topping:

    • Bacon bits
    • Chopped chives
    • Colby jack cheese

    Instructions:

    1. Clean the potatoes skin and cut them in halves or quarters depending on the size.
    2. Place the trivet (or mesh steamer basket) in the bottom of the Instant Pot and add the water, potatoes, and salt in the Instant Pot.
    Cut potatoes in Instant Pot
    1. Set to manual preset, on high pressure for 13 minutes.
    2. While it is cooking, place the butter, garlic powder, celery seed, black pepper in a medium sized saucepan and on medium heat melt the butter and mix until all spices are combined.
    3. Once the butter is all melted remove from heat and set aside.
    Cooked potatoes in instant pot
    Cut potatoes
    1. Once the Instant Pot is done, turn the valve for quick release.
    Cooked potatoes in bowl
    Cooked cut potatoes
    1. Pull the potatoes out (discard excess water) and place them in a large mixing bowl.
    Pour juices from pot in to bowl
    Butter mixture with spices
    1. Pour the butter mixture onto the potatoes.
    mix potatoes with mixer in bowl
    Mix and mash potatoes and spices
    1. Mash potatoes with a potato masher or a hand-mixer.
    Sour cream in bowl of potatoes
    Add sour cream
    1. Once the mixture is all combined, add the sour cream and milk. Mix until combined.
    creamed potatoes in bowl
    Creamy mashed potatoes
    1. Serve as desired and add toppings!

    Hint: To know if the potatoes are fully cooked, insert a fork into them while they are in the instant pot. If you can easily insert the fork, they are done!

    Creamy instant pot mashed potatoes
    Instant Pot mashed potatoes

    Which potatoes are best for mashed potatoes?

    For best results, you want to use starchy potatoes when making electric pressure cooker mashed potatoes. Russet or yukon gold potatoes are the best kind of potatoes to use because they are fluffier and smoother than red potatoes.

    Instant Pot Mashed Potatoes in bowl with parsley
    Mashed potatoes from Instant Pot

    What can I put on top of mashed potatoes?

    There are a lot of different ways you can spice mashed potatoes up! Here are a few of my favorite ways to add flavor to instant pot mashed potatoes.

    • Cheese – You can top mashed potatoes with cheddar cheese, a little sour cream, cream cheese, etc. Adding more cheese to mashed potatoes is never a bad idea!
    • Fresh herbs and spices – Fresh chives, parsley, rosemary, thyme, kosher salt, black pepper, garlic salt, garlic powder, and onion powder are all great extra herbs and spices to top on mashed potatoes.
    • Bacon – Feel free to throw on crispy bacon or bacon bits on your instant pot mashed potatoes!
    • Steak and Gravy – If you’re looking for a hearty rounded meal, this slow cooker steak recipe, is incredible on top of mashed potatoes.

    How do you store mashed potatoes after cooking?

    You can store pressure cooker mashed potatoes in the fridge for up to 3-5 days. Make sure that you use an airtight container when refrigerating so your potatoes stay fresh for a longer period of time.

    What happens if you don’t peel potatoes for mashed potatoes?

    Pressure cooked potatoes have very thin skin that easily mashes and combined with the rest of the potatoes. Leaving the skin on is one of the easiest methods for cooking mashed potatoes. Also, the potato skin has vitamins, fiber, and other nutrients that you don’t want to miss out on!

    Substitutions

    If you have heavy cream, feel free to substitute it for the milk for even creamier mashed potatoes. (However, keep in mind that heavy cream is thicker, so to thin them out some, you may want a dash of milk if necessary to reach the consistency you’re looking for.)

    Even though discarding the water, you can use chicken broth in place of the water for the flavors to incorporate in to the potatoes while cooking and you could even use a small amount of the chicken broth if you’re looking for a way to thin out the potatoes more. My homemade chicken broth recipe is a great option for this.

    More Easy Recipes

    If you love easy side dishes like this one, then you’ll also love the Instant Pot Amish Potato Salad, these slow cooker potatoes, and these baked potato wedges! Or if you’re looking for another Instant Pot recipe side dish, then this Instant Pot Parmesan Risotto is a great choice!

    Recipe

    Instant Pot Mashed Potatoes
    Print Pin
    5 from 5 votes

    Instant Pot Mashed Potatoes

    A quick and easy mashed potatoes recipe that's made in under 25 minutes! This recipe is perfect for holiday meals or busy weeknight dinners!
    Course Side Dish
    Cuisine American
    Prep Time 10 minutes minutes
    Cook Time 13 minutes minutes
    Total Time 23 minutes minutes
    Servings 8 servings
    Calories 276kcal
    Author Jessica Burgess

    Equipment

    • Pressure Cooker

    Ingredients

    Mashed Potatoes

    • 3 lbs Russet potatoes (or yukon golds) halved
    • 2 cups water
    • 1 tablespoon kosher salt
    • ½ cup salted butter 1 stick
    • 1 teaspoon garlic powder
    • 1 teaspoon celery seed
    • ¼ teaspoon black pepper
    • ½ cup milk
    • ½ cup sour cream

    Toppings

    • bacon bits
    • chopped chives
    • colby jack cheese

    Instructions

    • Clean the potatoes skin and cut them in halves or quarters depending on the size.
    • Place the trivet (or mesh steamer basket) in the bottom of the Instant Pot and add the water, potatoes, and salt in the Instant Pot.
    • Set to manual preset, on high pressure for 13 minutes.
    • While it is cooking, place the butter, garlic powder, celery seed, black pepper in a medium sized saucepan and on medium heat melt the butter and mix until all spices are combined.
    • Once the butter is all melted remove from heat and set aside.
    • Once the Instant Pot is done, turn the valve for quick release.
    • Pull the potatoes out (discard water) and place them in a large mixing bowl.
    • Mash the potatoes with a potato masher or a hand-mixer.
    • Pour in the butter mixture and mix until blended.
    • Once the mixture is all combined, add the sour cream and milk. Mix until combined.
    • Serve as desired and add toppings!

    Notes

    How do you store mashed potatoes after cooking?
    You can store pressure cooker mashed potatoes in the fridge for up to 3-5 days. Make sure that you use an airtight container when refrigerating so your potatoes stay fresh for a longer period of time.

    Nutrition

    Serving: 1cup | Calories: 276kcal | Carbohydrates: 32g | Protein: 5g | Fat: 15g | Saturated Fat: 9g | Polyunsaturated Fat: 1g | Monounsaturated Fat: 4g | Trans Fat: 1g | Cholesterol: 40mg | Sodium: 1004mg | Potassium: 762mg | Fiber: 2g | Sugar: 2g | Vitamin A: 471IU | Vitamin C: 10mg | Calcium: 66mg | Iron: 2mg

    Instant Pot Chicken Thighs – Lemon and Herb

    December 10, 2021

    Instant Pot Chicken Thighs- Lemon and Herb

    Instant Pot Chicken Thighs- Lemon and Herb: A delicious recipe to try for a busy weeknight meal your whole family will love!

    This chicken recipe may just become one of your new favorite Instant Pot recipes and would pair nicely with side dish like white rice or brown rice and our Italian chopped salad.

    Instant Pot Chicken Thighs- Lemon and Herb

    Why You’ll Love This Recipe

    Did you just get a new Instant Pot? Pressure cooking for the first time can be intimidating, but this easy recipe is a great place to start! Pressure cooker chicken thighs have so much flavor, and they are quick and easy to make!

    This would be a great recipe to use for meal prepping (say, in something like these chicken quinoa bowls) because it is quick, tasty and tastes just as good the next day as it does the day you make it.

    Make these juicy chicken thighs as your main dish and one of your favorite rice recipes as a side and you’ll have yummy lunches prepped for the whole week!

    If you don’t have an Instant Pot but are looking for a quick way to use your chicken thighs, you’ll love these baked bacon wrapped chicken thighs!

    [feast_advanced_jump_to]

    Ingredients

    This recipe calls for simple ingredients that you can find at any grocery store- easy peasy!

    • 2 pounds chicken thighs approx 9-10, skin on, bone in
    • 1 ½ teaspoons salt
    • ¼ teaspoon black pepper
    • 1 teaspoon dried thyme
    • 1 teaspoon dried oregano
    • 2 tablespoons oil high heat oil like avocado or olive oil
    • 4 cloves garlic
    • 2 cups chicken broth
    • 2 lemons (or ¼ cup fresh lemon juice)
    • 3 teaspoons cornstarch
    Ingredients for Instant Pot Chicken Thighs- Lemon and Herb

    Instructions

    1. Rinse your thighs in cold water and then pat dry with paper towel. Place the thighs onto a large plate in a single layer. 
    Chicken thighs, rinsed and patted dry.
    1. In a small bowl, add the salt, black pepper, dried thyme and dried oregano and stir together. 
    2. Pour the spice mixture over the chicken thighs, turning them over and ensuring that they are completely coated in spice.
    Add spice mix to chicken thighs.
    Make sure your thighs are evenly and completely coated in spices.
    1. Set your Instant Pot on high-heat sauté mode. Pour in the oil and allow it to heat up, then place your spice covered chicken thighs into the pot. 
    2. Mince the cloves of garlic; set aside. 
    3. Sauté the chicken for 2.5 minutes on each side, then add the minced garlic into the bottom of the pot. (Garlic is placed in the pot after the chicken has browned to avoid burning)
    Heat oil in Instant Pot on saute mode.
    Place chicken thighs in the bottom of the pan.
    Cook on saute mode for 2.5 minutes per side.
    Flip chicken thighs and cook other side.
    1. Pour in the chicken stock and the lemon juice; scrape the bottom of the pot with a wooden spoon to get all of the browned bits of chicken and garlic off the bottom so you don’t lose all of that great flavor. 
    2. Place the instant pot lid on the pot and set to cook on high pressure for 8 minutes. 
    3. After the 8 minute cook time has finished, let the instant pot pressure cooker sit and naturally release pressure for 2 minutes before doing a “quick release” (switching the pressure valve to the open position and allowing all of the remaining pressure to escape).
    Add chicken stock to the Instant Pot.
    Add lemon juice.
    1. Now combine your cornstarch in a small bowl with 3 tablespoons of the lemon chicken sauce from the pot. Mix together to form a cornstarch slurry. 
    2. Pour the slurry into your instant pot with the chicken and broth. Set your Instant Pot to the sauté function on high for 4 minutes, stirring constantly until the sauce thickens. 
    Cook on high pressure for 8 minutes, natural release for 2 minutes and then quick release the remaining pressure.
    1. Serve alone or with something like this creamy lemon pasta, and enjoy!

    Fresh Vs. Frozen Chicken Thighs Instant Pot

    If you would prefer to purchase frozen chicken thighs for this recipe, we would recommend that you let them thaw completely in the fridge overnight before making this recipe.

    Thawed chicken thighs allow for the spice mixture to stick better (and it helps you get all that flavor). If you made this recipe with frozen chicken thighs, the spices would not stick very well and you would lose a lot of the flavor in the finished product.

    Instant Pot Chicken Thighs- Lemon and Herb

    Substitutions

    Sometimes you run out of an ingredient and need to make a substitution. We have a few suggestions for you below…

    • Minced garlic- can be replaced with 1 teaspoon of garlic powder
    • Dried thyme and dried oregano- can be replaced with 2 teaspoon of Italian seasoning

    Note: If you need to decrease the calories in the recipe, you could try using boneless skinless chicken thighs instead of skin on, bone-in or even chicken breasts (if you prefer white meat over dark meat).

    Variations

    If you want to try a variation of this recipe, try swapping the sauce!

    Rinse and dry your thighs as directed. Instead of putting spices on them, simply heat the Instant Pot and oil as the recipe states and then cook them for 2.5 mins per side as directed. Once this browning step is finished, you can top them with your favorite honey garlic sauce and continue cooking as the recipe outlines (8 mins on high pressure, 2 min natural release, quick release) for delicious honey garlic chicken thighs!

    You could also try this variation with our homemade teriyaki sauce with soy sauce to make teriyaki chicken thighs!

    We haven’t tried these variations, but we think that they would be super fun to try next time we make these instant pot chicken thigh recipes! These would all make delicious, quick meals!

    Chicken thighs cooked in the instant pot

    Equipment

    We used an Instant Pot for this recipe, but you could make it with other brands of pressure cookers as well. Always be sure to check meat to ensure it is cooked to the minimum internal temperature of 165 F, regardless of which cooker you use.

    Storage

    Store your cooked chicken thighs in an airtight container in the refrigerator.

    Expert Tips and FAQs

    How long should you cook chicken thighs in Instant Pot?

    The answer to this depends on the type of chicken thigh you are using. If you are using boneless thighs, cook on high for 8 minutes (or 12 minutes for frozen, boneless thighs).

    If you’re using bone-in thighs, cook on high for about 10 minutes (or 15 minutes for frozen bone-in thighs). In this recipe, we stopped the cook time at 8 minutes but allowed the Instant Pot to natural release for 2 minutes (during which time the chicken will continue to cook).

    Why is my instant pot chicken tough?

    If your chicken is rubbery and tough, it’s likely that it is undercooked. Try closing your Instant Pot back up and setting it for 1 min cook time on high pressure, then do a quick release. Check your chicken again to see if it is more tender and repeat if necessary (avoiding over cooking if possible)!

    What happens if you cook chicken too long in instant pot?

    Since you are cooking with liquid and pressure, it can be easy to wonder, “Can you overcook chicken thighs in instant pot?”

    The answer, unfortunately, is yes you can. Overcooked pressure cooker chicken thighs will be dry and less flavourful, and sadly there is no way to correct the issue once it’s happened. That is why this recipe calls for 8 minutes of cooking time and 2 minutes of natural release before a quick release- to allow the chicken to cook without become overcooked and dry!

    Related Recipes

    If you liked this instant pot chicken thighs recipe then you’ll love our other easy instant pot recipes like this easy Instant Pot orange chicken or this Instant Pot cajun pasta!

    Recipe

    Instant Pot Chicken Thighs- Lemon and Herb
    Print Pin
    5 from 6 votes

    Instant Pot Chicken Thighs – Lemon and Herb

    Instant Pot Chicken Thighs- Lemon and Herb: A delicious recipe to try for a busy weeknight meal your whole family will love!
    Course Main Course
    Cuisine American
    Prep Time 7 minutes minutes
    Cook Time 17 minutes minutes
    Instant Pot Pressurizing Time 7 minutes minutes
    Total Time 31 minutes minutes
    Servings 5 servings
    Calories 81kcal
    Author Jessica Burgess

    Equipment

    • instant pot

    Ingredients

    • 2 lbs chicken thighs approx 9-10, skin on, bone in
    • 1 ½ teaspoons salt
    • ¼ teaspoon black pepper
    • 1 teaspoon dried thyme
    • 1 teaspoon dried oregano
    • 2 tablespoons oil high heat oil like avocado or olive oil
    • 4 cloves garlic
    • 2 cups chicken broth good quality
    • 2 lemons (or ¼ cup fresh lemon juice)
    • 3 teaspoons cornstarch

    Instructions

    • Rinse your thighs in cold water and then pat dry with paper towel. Place the thighs onto a large plate in a single layer.
    • In a small bowl, add the salt, black pepper, dried thyme and dried oregano and stir together.
    • Pour the spice mixture over the chicken thighs, turning them over and ensuring that they are completely coated in spice.
    • Set your Instant Pot on high-heat sauté mode. Pour in the oil and allow it to heat up, then place your spice covered chicken thighs into the pot.
    • Mince the cloves of garlic; set aside.
    • Sauté the chicken for 2.5 minutes on each side, then add the minced garlic into the bottom of the pot. (Garlic is placed in the pot after the chicken has browned to avoid burning)
    • Pour in the chicken stock and the lemon juice; scrape the bottom of the pot with a wooden spoon to get all of the browned bits of chicken and garlic off the bottom so you don't lose all of that great flavor.
    • Place the instant pot lid on the pot and set to cook on high pressure for 8 minutes.
    • After the 8 minute cook time has finished, let the instant pot pressure cooker sit and naturally release pressure for 2 minutes before doing a "quick release" (switching the pressure valve to the open position and allowing all of the remaining pressure to escape).
    • Now combine your cornstarch in a small bowl with 3 tablespoons of the lemon chicken sauce from the pot. Mix together to form a cornstarch slurry.
    • Pour the slurry into your instant pot with the chicken and broth. Set your Instant Pot to the sauté function on high for 4 minutes, stirring constantly until the sauce thickens.
    • Serve and enjoy!

    Notes

    Fresh vs. Frozen: If you would prefer to purchase frozen chicken thighs for this recipe, we would recommend that you let them thaw completely in the fridge overnight before making this recipe.
    Thawed chicken thighs allow for the spice mixture to stick better (and helps you get all that flavor). If you made this recipe with frozen chicken thighs, the spices would not stick very well and you would lose a lot of the flavor in the finished product.
    Nutrition Disclaimer: All nutritional information shared on this site is an approximation. I am not a certified nutritionist and any nutritional information shared on this site should be used as a general guideline.

    Nutrition

    Serving: 1serving | Calories: 81kcal | Carbohydrates: 7g | Protein: 1g | Fat: 6g | Saturated Fat: 1g | Polyunsaturated Fat: 2g | Monounsaturated Fat: 4g | Trans Fat: 1g | Cholesterol: 2mg | Sodium: 1045mg | Potassium: 157mg | Fiber: 2g | Sugar: 1g | Vitamin A: 28IU | Vitamin C: 30mg | Calcium: 32mg | Iron: 1mg

    Instant Pot Cauliflower Soup

    December 8, 2021

    Instant Pot Cauliflower Soup

    Instant Pot Cauliflower Soup: This cauliflower soup recipe uses simple ingredients and can be made in just over 20 minutes. A healthy soup that will be a hit with the whole family!

    Bake up some easy Italian white bread and make a green salad (like this Italian chopped salad) to pair with this instant pot cauliflower soup and you’ll have a meal that’s both hearty and healthy! It’s definitely one of our favorite Instant Pot recipes to date!

    Instant Pot Cauliflower Soup

    Why You’ll Love This Recipe

    There’s nothing better in the winter months than a bowl of soup, am I right? Hot soup just hits differently in cold weather.

    When you think of soup, you probably think of classic soup recipes (like a good creamy potato soup or a chicken noodle soup recipe). But it’s time to expand your collection of soup recipes and add this one in because I bet it will become one of your favorite soups in no time! Especially, using the Instant Pot to make soup! It’s quick and delicious! (You’ll also love this Instant Pot Broccoli Cheddar Soup!)

    Not only is it a healthy meal (it contains a full head of fresh cauliflower!), it’s also super quick to make since it’s an instant pot recipe! Since this creamy soup is relatively low carb, I think it could even be considered a “keto cauliflower soup” (but I’m not a keto expert by any means, so you’ll have to double-check that for yourself).

    [feast_advanced_jump_to]

    Ingredients for Cauliflower Instant Pot Soup

    You only need a handful of ingredients to create this instant pot cauliflower soup.

    • 2 tablespoons butter (salted, unsalted or you can use extra virgin olive oil)
    • 1 cup onion, diced
    • ¼ cup bacon bits
    • ½ teaspoon garlic salt (or 1 teaspoon garlic powder and ½ teaspoon salt)
    • ¼ teaspoon ground black pepper
    • ⅛ teaspoon ground thyme
    • ½ teaspoon sweet paprika
    • 1 teaspoon Italian seasoning
    • 5 cups cauliflower florets (a large head of cauliflower)
    • 3 cups chicken broth (or my homemade chicken broth – could also use vegetable broth)
    • 1 ½ cups heavy cream
    • ½ cup parmesan cheese
    Ingredients for Instant Pot Cauliflower Soup

    Substitutions

    This soup could be turned into a vegetarian soup or vegan soup with a few simple changes:

    • Use vegetable broth instead of chicken
    • Omit the bacon bits
    • Use extra virgin olive oil instead of butter
    • Use coconut milk in place of heavy cream
    • Use nutritional yeast in place of parmesan cheese

    Variations

    The best part about soup recipes is that they are so customizable! Even though this soup will taste fantastic the way it is, there are a number of ways you can change up the recipe or the serving suggestion to create a different experience.

    • Try serving this creamy soup recipe with a side of crusty bread or in bread bowls.
    • If you are looking for more depth of flavor, try swapping the parmesan cheese for a sharp cheddar cheese! The cheddar cheese is also a more distinct flavor- so if you aren’t a big fan of cauliflower, add some additional cheese and you likely won’t taste the cauliflower at all.
    • If you want to give your cauliflower soup a more creamy texture, try using cream cheese in place of the heavy cream.
    • Garnish your Instant Pot creamy cauliflower soup with a dollop of sour cream, some grated cheese (parmesan or cheddar) and some chopped green onion!
    • Some other optional toppings you could try next time- red chili flakes, crispy fried onions, or some extra bacon bits.

    Instructions for Pressure Cooker Cauliflower Soup

    1. Set your Instant Pot to the saute setting and then add butter, diced onion, and bacon bits.
    2. Cook and stir until the butter is melted and the onions are softened and have turned a golden brown, scraping the bottom of the pot as you go. (You don’t want to get the burn notice.)
    Saute bacon, butter and onion in instant pot.
    Saute bacon, butter, onion.
    1. Add the rest of the ingredients (minus the cream and cheese): garlic salt, ground black pepper, ground thyme, sweet paprika, and Italian seasoning. Mix this well until the seasoning is coating the onions.
    Spices for instant pot cauliflower soup.
    Add spices.
    1. Add the cauliflower florets and mix until it is well combined with the onion/bacon mixture.
    Stir cauliflower until it is coated in bacon and onion mixture.
    Add cauliflower & mix.
    1. Next, pour in the chicken broth and stir to mix everything together. 
    2. Close the lid and set on your instant pot on high pressure for 8 minutes.
    3. Once the 8 minutes has passed, open the pressure valve to “vent” and let your Instant Pot “quick release” (be careful, that steam will be HOT so it’s best to wear an oven mit or use a towel to help block the hot steam). Once the instant pot has finished the quick release, open the lid.
    4. Carefully use an immersion blender to blend the soup until it is smooth (you don’t want hot liquid to splash you. If you don’t have an immersion blender, you can also pour it in to a blender and blend this way!)

    *NOTE* If you are planning to freeze a portion of your soup do it at this point before adding the cream and the cheese. Use a freezer-proof container and you can freeze individual portions for up to 2 months. When thawing the soup, put it in the fridge overnight. Then place in a saucepan and warm up to the desired temperature, stirring occasionally. Then add the cheese and the cream. Stir.

    Use immersion blender to blend instant pot cauliflower soup smooth.
    Blend with immersion blender.
    1. Add the cream and the parmesan cheese to the pot and then use your immersion blender until you attain a nice smooth texture. 
    2. Serve and enjoy!
    Add parmesan cheese to instant pot.
    Add parmesan.
    Add cream and parmesan cheese to instant pot.
    Add cream, blend.
    Instant Pot Cauliflower Soup

    What to Serve with This Soup

    Personally, my favorite way to serve this Instant Pot cauliflower soup is with a dollop of sour cream, some extra bacon bits, and some cheese on top (not exactly low calorie, but oh it’s delicious)!

    Then, if you’re able, you’ll want to make these Garlic Bisquick Drop Biscuits to go with this soup!

    soup in white bowl with cheese and green onions

    Equipment

    We used an Instant Pot to make this soup, but you could easily use other brands of pressure cooker.

    Storage

    Store any leftover soup in an airtight container in the fridge for 4-5 days.

    This soup freezes well, but the best way to do it is to freeze it before you add the cream and cheese (as those two ingredients will not freeze well and will change the texture when it thaws). Use a freezer-proof container and freeze individual portions for up to 2 months.

    When thawing the soup, put it in the fridge overnight. Then place it in a saucepan and warm it up to your desired temperature, stirring occasionally. When it has warmed up, add the cheese and the cream and stir.

    Expert Tips and FAQs

    How do you fix bland cauliflower soup?

    The most common culprit of bland soup is under-salting. Try adding more salt (just a pinch at a time, tasting between each addition). You could also try some of the variations we have listed above to make your soup a bit more fun and flavourful!

    How to thicken cauliflower soup?

    If you’ve blended your soup with an immersion blender and added the cheese and cream but it’s still too runny for your taste, try adding a cornstarch slurry.

    Make sure your Instant Pot is on saute mode. Mix 1 tablespoon of cornstarch and 2 tablespoon of cold water in a small dish and slowly add it to your soup, stirring constantly to avoid lumps forming. Keep stirring until the soup has thickened as much as you would like it to, then turn off the Instant Pot.

    How long does cauliflower soup last in the fridge?

    Cauliflower soup stored properly in an airtight container should last 4-5 days in the refrigerator.

    Related Recipes

    If you loved this low-carb soup recipe then you’ll also love our cauliflower potato salad and our low carb parmesan chicken tenders! Or, with a similar texture, this loaded potato soup recipe is so easy and delicious!

    Or, if you’re a fan of soup recipes like this, I have a feeling you’ll also like this roasted red pepper soup!

    Recipe

    Instant Pot Cauliflower Soup
    Print Pin
    5 from 2 votes

    Instant Pot Cauliflower Soup

    Instant Pot Cauliflower Soup: This cauliflower soup recipe uses simple ingredients and can be made in just over 20 minutes. A healthy soup that will be a hit with the whole family!
    Course Main Course, Soup
    Cuisine American
    Prep Time 15 minutes minutes
    High Pressure, Quick Release 8 minutes minutes
    Total Time 23 minutes minutes
    Servings 8 servings
    Calories 268kcal
    Author Jessica Burgess

    Equipment

    • instant pot

    Ingredients

    • 2 tablespoons butter salted, unsalted or you can use extra virgin olive oil
    • 1 cup onion diced
    • ¼ cup bacon bits
    • ½ teaspoon garlic salt or 1 teaspoon garlic powder and ½ teaspoon salt
    • ¼ teaspoon ground black pepper
    • ⅛ teaspoon ground thyme
    • ½ teaspoon sweet paprika
    • 1 teaspoon Italian seasoning
    • 5 cups cauliflower florets large head of cauliflower
    • 3 cups chicken broth could also use vegetable broth
    • 1 ½ cups heavy cream
    • ½ cup parmesan cheese

    Instructions

    • Set your Instant Pot to the saute setting and add butter, diced onion, and bacon bits.
    • Cook and stir until the butter has melted and the onions are softened and have turned golden brown. Make sure to scrape the bottom of the pot as you go because you don't want to get a "burn" notice.
    • Add the rest of the ingredients (minus the cream and cheese): garlic salt, ground black pepper, ground thyme, sweet paprika, and Italian seasoning. Mix well until the seasoning is coating the onions.
    • Next, add the cauliflower florets and mix until it is combined with the onion/bacon mixture.
    • Pour in the chicken broth and stir everything together.
    • Next, close the lid and set your instant pot on high pressure and set the timer for 8 minutes.
    • Once the 8 minutes has passed, open the pressure valve and let your Instant Pot "quick release" to let out the remaining pressure (be careful, that steam will be HOT). Once the instant pot has finished the quick release, open the lid.
    • Carefully use an immersion blender to blend the soup until it is smooth (you don't want hot liquid to splash you but if you don't have an immersion blender, you can use a regular blender and then pour back in to the pot.)
      *NOTE* If you are planning to freeze a portion of your soup do it at this point before adding the cream and the cheese.
    • Add the cream and the parmesan cheese to the pot and then use your immersion blender until you attain a nice smooth texture.
    • Serve and enjoy!

    Notes

    FREEZING SOUP: Be sure to set aside any portion of your soup that you plan to freeze BEFORE you add the cream and cheese. Use a freezer proof container and you can freeze individual portions for up to 2 months. When thawing the soup, put it in the fridge overnight. Then place in a saucepan and warm up to desired temperature, stirring occasionally. Then add the cheese and the cream. Stir.
     

    Nutrition

    Serving: 1serving | Calories: 268kcal | Carbohydrates: 9g | Protein: 7g | Fat: 23g | Saturated Fat: 13g | Polyunsaturated Fat: 2g | Monounsaturated Fat: 6g | Trans Fat: 1g | Cholesterol: 73mg | Sodium: 761mg | Potassium: 344mg | Fiber: 3g | Sugar: 2g | Vitamin A: 861IU | Vitamin C: 38mg | Calcium: 140mg | Iron: 1mg

    Caramel Cupcakes With Caramel Buttercream Frosting

    December 7, 2021

    Caramel Cupcakes with Caramel Buttercream Frosting

    Caramel Cupcakes With Caramel Buttercream Frosting: These easy caramel cupcakes from scratch are topped with caramel icing and they are bursting with caramel flavor!

    Caramel Cupcakes with Caramel Buttercream Frosting

    Cupcake recipes are a favorite dessert at our house, but this caramel cupcake recipe is extra fun with that caramel-swirled icing on top! It looks impressive, and it’s actually very simple to create, like this caramel sheet cake, and similar to our Biscoff cupcakes.

    Then don’t miss this caramel cream pie recipe too, that’s full of caramel flavor.

    Why You’ll Love These Caramel Cupcakes

    If you’ve been following the blog for a while, you know that around here we have no shortage of party ideas! Whether it’s for a special event like a birthday baking party or your favorite holiday, or just an excuse to spend time with family and friends, you’ll find lots of yummy party food ideas here on the blog to inspire you.

    But in my humble opinion, every party needs cake (because I know I’m not the only one who loves sweet treats)! Big, multi-level cakes are fun but they take a lot of time, and a fair bit of skill, to put together.

    Cupcake recipes, however? They are cute, tasty, and super easy!

    You’ll especially love these cookies and cream cupcakes and these pink champagne cupcakes.

    The best cupcakes are the ones that look and taste super impressive but secretly are super simple to make…and that’s where these caramel cupcakes come in. I think these might just be the best caramel cupcakes you’ll ever make!

    You’ll also love these these red velvet cookie dough cupcakes if you’re looking to make a variety!

    [feast_advanced_jump_to]

    Ingredients

    This caramel cupcake recipe uses simple, everyday ingredients

    • ¾ cup white sugar
    • ½ cup brown sugar
    • ½ cup unsalted butter, softened
    • 2 large eggs
    • 2 teaspoons vanilla extract
    • 1 ½ cups all-purpose flour
    • 1 teaspoon baking powder
    • a pinch of salt
    • ½ cup whole milk

    Ingredients for Caramel Buttercream Frosting

    • ½ cup unsalted butter, softened
    • 1 cup powdered sugar
    • ½ cup caramel sauce
    Ingredients for caramel cupcakes with caramel buttercream frosting.
    Cupcake ingredients.

    How to Make Caramel Cupcakes

    1. Heat oven to 350 F / 180 C and either spray your muffin cups with non-stick cooking spray or line them with cupcake liners and set aside.
    2. In a large bowl, combine sugar, brown sugar, softened butter and vanilla extract. Cream the butter and sugar mixture with a handheld electric mixer (or beat with a stand mixer on medium speed), scraping the sides of the bowl with a rubber spatula as needed, till the mixture is light and fluffy and everything is incorporated well.
    3. Add the eggs into the butter mixture one at a time, mixing after each addition.
    Add egg to the butter mixture.
    Add eggs, one at a time.
    1. In a medium bowl, add in the flour, baking powder, and salt; mix and set aside.
    Combine dry cupcake ingredients.
    Combine dry ingredients.
    1. Alternate adding the dry ingredients and the ½ cup of milk to the butter/sugar/egg mixture, beginning and ending with dry ingredients. Mix just until combined after each addition- you want everything to be incorporated well, but avoid over-mixing.
    Combine dry and wet ingredients.
    Alternate adding dry ingredients and milk.
    1. Divide batter evenly between each of the paper liners, filling each one ¾ full. Bake for 22-25 mins or till a toothpick inserted in the middle comes out clean and the cupcake is beginning to turn golden brown on top.
    2. Once baked, remove the cupcakes from the muffin tray and let them cool down completely on a wire rack while you make the frosting.
    Fill lined muffin tin with cupcake batter.
    Fill paper liners.

    How to Make Caramel Buttercream Frosting

    1. In a large mixing bowl or the bowl of a stand mixer, beat the butter and sugar together on medium-high speed till it’s smooth and creamy.  
    1. Add 1-2 tablespoon of caramel to the butter and sugar and beat it again till it’s incorporated well.

    Note – you can add more or less caramel depending on the taste and color you want (more caramel will create a deeper caramel flavor and color).

    Beat together caramel buttercream ingredients.

    How to Create the Buttercream Swirl

    1. Take plastic wrap and lay it on your working table; now carefully spread a thick line of caramel buttercream frosting down the center.
    2. Next to the line of buttercream, make another, thinner line with the caramel sauce.
    3. Fold the plastic wrap over the buttercream and caramel sauce, ensuring both ends are twisted closed tightly. 
    4. Cut open one end of the plastic wrap and insert this wrapped frosting in the piping bag (or ziplock bag- see FAQs), making sure the open side is towards the large open star tip nozzle. 
    5. Use this to create a swirl of icing on top of the caramel cupcake and enjoy! If you need a bit of extra guidance on how to pipe a swirl of frosting on each cupcake, watch this video.
    Alternate caramel buttercream and caramel sauce on plastic wrap.
    Buttercream and caramel.

    Substitutions

    These caramel cupcakes are delicious just the way they are, but if you are looking for substitutions we have a few ideas for you.

    • Caramel Sauce– you could use dulce de leche instead of caramel sauce, or make your own homemade caramel sauce recipe.
    • Cupcakes– if you have a box mix for vanilla cupcakes, you could easily use that in place of the cupcakes from scratch in this recipe. OR you could use chocolate cupcakes (from a box or from scratch) instead!
    • Frosting– you could replace the buttercream frosting in this recipe with your favorite Swiss meringue buttercream recipe and swirl it with the caramel sauce to keep that caramel-like flavor!
    Caramel cupcake with caramel buttercream frosting in a swirl.
    Caramel cupcakes with caramel buttercream frosting.

    Salted Caramel Cupcakes

    Craving a salty treat? You can easily turn these cupcakes into salted caramel cupcakes by sprinkling some sea salt on top of the cupcakes when you are done icing them! And if you are a really big fan of that salty flavor, you can add a pinch of salt to your caramel sauce to make it more of a “salted caramel sauce” too!

    Storage

    Store your frosted caramel cupcakes in an airtight container in the fridge for up to a week.

    Expert Tips and FAQs

    Can I use salted butter instead of unsalted?

    Yes, you sure can! If you do use salted butter, you can omit the “pinch of salt” called for in the recipe (unless you are going for more of a salted caramel flavor).

    What can I use instead of a piping bag to ice cupcakes?

    If you have a disposable piping bag or want to purchase them to have on hand, then great! If you don’t though, I’ve had fairly good success with using freezer bags. Taste of Home has a detailed tutorial on their website that explains it nicely!

    Can I store caramel cupcakes at room temperature?

    Buttercream frosting that’s made with butter should be refrigerated.

    If you are hoping to make these ahead and store them at room temperature, we would recommend you store the cupcakes (unfrosted) in an airtight container at room temperature and the buttercream in an airtight container in the fridge.

    When you are ready to frost the cupcakes, let the buttercream warm up a bit and beat again until it is light and fluffy and then frost away!

    Caramel cupcake with caramel buttercream frosting in a swirl.

    Related Recipes

    If you loved these Caramel Cupcakes with Caramel cream frosting, you’ll also want to try our Chocolate Peanut Butter Salted Caramel Toffee Cake and our Caramel Apple Dump Cake!

    Or if you’re looking for a super fun, wintery vibe for your cupcakes, see how we took a simple herb to make a winter cupcake that is absolutely adorable!

    Recipe

    Caramel Cupcakes with Caramel Buttercream Frosting
    Print Pin
    4.91 from 10 votes

    Caramel Cupcakes with Caramel Buttercream Frosting

    Caramel Cupcakes With Caramel Buttercream Frosting: These easy caramel cupcakes from scratch are topped with caramel icing and they are bursting with caramel flavor! 
    Course Dessert, Snack
    Cuisine American
    Prep Time 30 minutes minutes
    Cook Time 25 minutes minutes
    Total Time 55 minutes minutes
    Servings 12 cupcakes
    Calories 397kcal
    Author Jessica Burgess

    Ingredients

    Cupcakes

    • ¾ cup white sugar
    • ½ cup brown sugar
    • ½ cup unsalted butter softened at room temperature
    • 2 large eggs
    • 2 teaspoons vanilla extract
    • 1 ½ cups all-purpose flour
    • 1 teaspoon baking powder
    • A pinch of salt
    • ½ cup whole milk

    Caramel Buttercream Frosting Swirl

    • ½ cup unsalted butter softened at room temperature
    • 1 cup powdered sugar
    • ½ cup caramel sauce

    Instructions

    Cupcakes:

    • Heat oven to 350 F / 180 C and either spray your muffin cups with non-stick cooking spray or line them with cupcake liners and set aside.
    • In a large bowl, combine sugar, brown sugar, softened butter and vanilla extract. Cream butter and sugar mixture with a handheld electric mixer (or beat with a stand mixer on medium speed), scraping the sides of the bowl with a rubber spatula as needed, till the mixture is light and fluffy and everything is incorporated well.
    • Add the eggs into the butter mixture one at a time, mixing after each addition.
    • In a medium bowl, add in the flour, baking powder, and salt; mix and set aside.
    • Alternate adding the dry ingredients and the ½ cup of milk to the butter/sugar/egg mixture, beginning and ending with dry ingredients. Mix just until combined after each addition- you want everything to be incorporated well, but avoid over mixing.
    • Divide batter evenly between each of the paper liners, filling each one ¾ full. Bake for 22-25 mins or till a toothpick inserted in the middle comes out clean and the cupcake is beginning to turn golden brown on top.
    • Once baked, remove the cupcakes from the muffin tray and let them cool down completely on a wire rack while you make the frosting.

    Caramel Buttercream Frosting:

    • In a large mixing bowl or the bowl of a stand mixer, beat the butter and sugar together on medium-high speed till it's smooth and creamy.  
    • Add 1-2 tablespoons of caramel to the butter and sugar and beat it again till it's incorporated well.
      Note – you can add more or less caramel depending on the taste and color you want (more caramel will create a deeper caramel flavor and color).

    Swirls:

    • Take plastic wrap and lay it on your working table; now carefully spread a thick line of caramel buttercream frosting down the center.
    • Next to the line of buttercream, make another, thinner line with the caramel sauce.
    • Fold the plastic wrap over the buttercream and caramel sauce, ensuring both ends are twisted closed tightly.
    • Cut open one end of the plastic wrap and insert this wrapped frosting in the piping bag (or ziplock bag- see FAQs), making sure the open side is towards the large open star tip nozzle.
    • Use this to create a swirl of icing on top of the caramel cupcake and enjoy!

    Notes

    To Pipe A Frosting Swirl: You can watch this video for guidance on how to make a swirl on top of each cupcake. 
    For Frosting: You can add more or less caramel depending on the taste and color you want (more caramel will creat a deeper caramel flavor and color). 
    Storage: Buttercream frosting that’s made with butter should be refrigerated. If you are hoping to make these ahead and store them at room temperature, we would recommend you store the cupcakes (unfrosted) in an airtight container at room temperature and the buttercream in an airtight container in the fridge.
    When you are ready to frost the cupcakes, let the buttercream warm up a bit and beat again until it is light and fluffy, and then frost.

    Nutrition

    Serving: 1cupcake | Calories: 397kcal | Carbohydrates: 53g | Protein: 3g | Fat: 20g | Saturated Fat: 11g | Polyunsaturated Fat: 2g | Monounsaturated Fat: 5g | Trans Fat: 1g | Cholesterol: 69mg | Sodium: 88mg | Potassium: 106mg | Fiber: 1g | Sugar: 34g | Vitamin A: 537IU | Vitamin C: 1mg | Calcium: 50mg | Iron: 1mg

    Homemade Marble Cake

    December 6, 2021

    Easy Marble Cake Recipe

    Chocolate Marble Cake: An easy marble cake recipe with chocolate frosting that’s perfect for any occasion. Marble cake may look fancy, but it’s simple and delicious!

    Quick overview: This two-layer marble cake is made from scratch but you can speed things up by using vanilla and chocolate boxed cake mix. However, I wouldn’t skip on the homemade buttercream frosting!

    Easy Marble Cake Recipe

    Why You’ll Love This Recipe

    I love bringing classic marble cakes to birthday parties so the kids get to enjoy a taste of vanilla AND chocolate cake! It always seems to be a crowd-pleaser, it’s a moist cake and is so easy to make! (Although it’s a hard toss-up between this marble cake and this cherry chip cake!)

    If you’re a fan of the chocolate and vanilla combination, you would love this Ding Dong cake and this Milky Way Cake too! It’s a rich chocolate cake with a creamy filling that tastes just like a Hostess cupcake.

    [feast_advanced_jump_to]

    Ingredients

    • 4 egg whites
    • 1 ½ cups granulated sugar, divided (4 Tablespoons mixed with egg whites, the rest mixed with flour etc.)
    • 2 ¼ cups flour
    • 1 cup buttermilk
    • ⅔ cup vegetable oil
    • 1 Tablespoon baking powder
    • 1 teaspoon salt
    • 1 teaspoon vanilla


    Chocolate Cake additional ingredients:

    • ¼ cup unsweetened cocoa powder
    • 2 Tablespoons granulated sugar
    ingredients for marble cake

    Instructions

    Step 1: Preheat the oven to 350 degrees. Grease and flour 2 – 8 inch round cake pans.

    Step 2: Beat the egg whites until soft peaks form. Add 2 Tablespoons of sugar to the egg whites and beat on high power. Add another 2 tablespoons of sugar and beat again until fully incorporated. Set this aside.

    egg whites in mixing bowl

    Step 3: In a large bowl at low speed, beat the remaining sugar with flour, buttermilk, vegetable oil, baking powder, salt, and vanilla extract.

    sugar, flour, buttermilk, ingredients in mixing bowl

    Step 4: Divide this mixture into 2 separate bowls. In one bowl, beat in half of the egg white

    Egg whites going in batter

    Step 5: In the other bowl, beat in cocoa powder and 2 Tablespoons granulated sugar on low speed. Then, beat in the other half of the egg whites.

    Marble Cake recipe from scratch

    Step 6: Spoon half of the vanilla batter into each of the cake pans. (Here and there, spaces between are where we will be putting the chocolate cake batter.) Then spoon half of the chocolate batter into each cake pan.

    Vanilla cake batter

    Step 7: Drag a butter knife through the batter to swirl the chocolate mixture with the vanilla mixture, for the marble effect.

    Using butter knife, swirl the cake batter

    Step 8: Bake for 25 minutes. Let cool on wire rack.

    Baked chocolate marble cake

    Step 9: Place the first layer on a plate or cake stand and cover with chocolate buttercream frosting, then top with the second layer of cake and finish by frosting the top and edges of the cake. The cake layers will have that delicious buttercream in each bite!

    Chocolate buttercream spread on first later of marble cake

    Why do they call it “marble cake”?

    It’s called marble cake because there are two different colored batters marbled together. This idea originated from German immigrants! Marble cakes are normally a mixture of chocolate and vanilla cake batter but you can also marble vanilla cake with red velvet cake!

    What is the difference between a boxed cake and a cake made from scratch?

    A cake made from scratch is simply going to taste better: rich, buttery, and moist with loads of sweet flavors. A boxed cake might taste flat, sugary, and slightly chemically. Boxed cake mix works great when you’re in a pinch, but cake from scratch is always a good idea.

    Vanilla and Chocolate Marble Cake

    Can you use a bundt pan instead of a round pan?

    Yes you can use a bundt pan instead of round cake pans. For best results, do not overfill the bundt pan with the separate batters. It’s a good idea to leave ½″ to ¼″ at the top to allow the cake to rise. If you have remaining batter, you can make marbled cupcakes.

    Topping and Serving Ideas

    There are a few sweet ways to spice up this vanilla-marbled cake if you’re looking for something different!

    • Add chocolate chips to the chocolate cake batter
    • Frost with peanut butter frosting
    • Top with crushed Oreos
    • Top with melted dark chocolate
    • Serve with vanilla or chocolate ice cream
    • Serve with whipped cream
    • Or if you love ganache, we used a chocolate ganache on these mini chocolate cakes.

    How to Store Leftover Cake

    This cake is ok to sit out at room temperature. However, if you do frost it with the chocolate buttercream recipe we recommend, it would be best to refrigerate it, as it contains milk and butter.

    Store in an airtight container for 3-4 days.

    Related Recipes

    If you loved this easy cake recipe, then you’ll also love this easy pumpkin poke cake, this peppermint mocha cake, and this chocolate toffee caramel cake too! Or if chocolate cakes are your favorite, this Depression Cake is one to make for sure!

    Recipe

    Easy Marble Cake Recipe
    Print Pin
    5 from 1 vote

    Easy Homemade Marble Cake

    An easy, moist homemade marble cake recipe with a delicious homemade chocolate buttercream frosting that's out of this world!
    Course Dessert
    Cuisine American
    Prep Time 20 minutes minutes
    Cook Time 25 minutes minutes
    Total Time 45 minutes minutes
    Servings 10 people
    Calories 385kcal
    Author Jessica Burgess

    Ingredients

    Vanilla Cake

    • 4 egg whites
    • 1 ½ cups granulated sugar, divided (4 Tablespoons mixed with egg whites, the rest mixed with flour etc)
    • 2 ¼ cup flour
    • 1 cup buttermilk
    • ⅔ cup vegetable oil
    • 1 tablespoon baking powder
    • 1 teaspoon salt
    • 1 teaspoon vanilla

    Chocolate Cake Additional Ingredients

    • ¼ cup unsweetened cocoa powder
    • 2 tablespoon granulated sugar

    Chocolate Buttercream Frosting

    • Chocolate Buttercream Frosting Get our favorite recipe HERE!

    Instructions

    • First, preheat your oven to 350 degrees. Then, grease and flour 2 – 8 inch round cake pans.
    • Next, beat the egg whites until soft peaks form. Add 2 Tablespoons of sugar to the egg whites and beat on "high" power. Add another 2 tablespoons of sugar and then beat again until it is fully incorporated. Set aside.
    • In a large bowl on low speed, beat the remaining sugar with flour, buttermilk, vegetable oil, baking powder, salt, and vanilla extract.
    • Divide the mixture into 2 separate bowls. In one bowl, beat in half of the egg whites.
    • In the other bowl, beat in the cocoa powder and 2 Tablespoons of granulated sugar on low speed. Then, beat in the other half of the egg whites.
    • Spoon half of the vanilla cake batter into each of the pans. (Leaving spaces between sections of batter in the cake pans, because this is where we will be putting the chocolate cake batter.) Then spoon half of the chocolate batter into each pan in the empty spaces. (See photos in blog post for example.)
    • Drag a butter knife through the batter to swirl the batter for the marble effect.
    • Bake for 25 minutes and let cool on wire rack.
    • Place the first layer on a plate or cake stand and cover with chocolate frosting, then top with the second layer of cake and finish by frosting the top and edges of the cake.

    Notes

    How to store leftover cake
    This cake is ok to sit out at room temperature. However, if you do frost it with the chocolate buttercream recipe we recommend, it would be best to refrigerate it, as it contains milk and butter.
    Store in an airtight container for 3-4 days.

    Nutrition

    Serving: 1slice | Calories: 385kcal | Carbohydrates: 57g | Protein: 5g | Fat: 16g | Saturated Fat: 3g | Polyunsaturated Fat: 9g | Monounsaturated Fat: 4g | Trans Fat: 1g | Cholesterol: 3mg | Sodium: 280mg | Potassium: 237mg | Fiber: 1g | Sugar: 34g | Vitamin A: 40IU | Calcium: 88mg | Iron: 2mg

    Easy Air Fryer Tilapia Recipe

    December 1, 2021

    Lemon air fryer tilapia.

    Easy Air Fryer Tilapia Recipe: A quick, easy and healthy weeknight dinner? Try making this delicious air fryer tilapia with fresh lemon juice and lemon wedges, that’s one of our healthier air fryer recipes for sure!

    Lemon air fryer tilapia.

    Why You’ll Love This Recipe

    This simple recipe is a great option for those nights where you don’t know what to cook for dinner but you know you want it to be something that’s good for you and your family.

    I think we all know that air fryer recipes save you a ton of mess (like when you use it to make Air Fryer Bacon or Air Fryer Turkey Breast instead of dirtying a bunch of baking sheets and roasting pans), but they are also time savers! This easy air fryer tilapia recipe comes together in just 16 minutes!

    If your picky little ones don’t eat much fish, this easy air fryer tilapia recipe, with its simple seasoning and mild fish flavor, is a great way to introduce fresh fish to your whole family (even if they do decide to smother it in ketchup in the end).

    Serve this flaky white fish with a side of wild rice and some Instant Pot Green Beans and Potatoes for a quick, delicious dinner.

    [feast_advanced_jump_to]

    Ingredients

    This easy, air-fried tilapia doesn’t require much- fresh tilapia (or frozen), some olive oil, freshly squeezed lemon juice and a few seasonings are really all it takes!

    • 1 pound tilapia filets (if buying frozen filets, you will need to thaw them first so the spices can stick better)
    • 1 tablespoon olive oil (or any vegetable oil you prefer)
    • 1 teaspoon freshly squeezed lemon juice (can use concentrated lemon juice if you need)
    • 1 teaspoon garlic powder
    • ½ teaspoon salt
    • ½ teaspoon lemon pepper (you can make your own like in this recipe)
    • lemon slices (optional)
    • fresh parsley (optional)
    Lemon air fryer tilapia, fresh out of the air fryer.

    How to Make Tilapia in Air Fryer

    1. In a small bowl, combine the olive oil and the lemon juice. Set aside.
    2. In a separate small bowl, mix the garlic powder, salt, and lemon pepper until combined. Set aside.
    Spices in a bowl.
    Spices.
    Mixed spices to put on lemon air fryer tilapia.
    Mixed spices.
    1. Place your fish filets on a plate and pat them dry with a paper towel.
    2. With a pastry brush, brush the oil on the filets. Take a paper towel, dip it in the leftover oil mixture and coat the bottom of the air fryer basket.

    Tip: If you don’t have a pastry brush, no problem! You can pour the oil mixture over the filet and coat the filets with your fingers.

    Raw, thawed tilapia.
    Fish filets.
    Brush the tilapia fillets with olive oil and lemon juice.
    Brush with oil/lemon.
    1. Once all the filets are well coated with the oil, sprinkle the seasoning evenly on the filets and gently press it into the filets (do NOT rub the seasoning in- because the fish contains a good amount of water if you rub the seasoning in it will turn into a paste and will not look very appetizing). 
    Raw fillets of tilapia with spices on them.
    Pat on spices.
    1. Place the filets in the air fryer. Only place as many in as you can fit while still leaving enough room around the filets for air to flow (you may want to put the rest of your fish filets back in the fridge to keep them cool until you can cook them). If you overcrowd the basket you may run into an uneven cook.
    2. This step is optional: I took some fresh, chopped parsley and sprinkled it over the filets. If you want to, you can also add 1 lemon slice (cut in half) on each tilapia filet before you cook it in the air fryer basket.  
    Raw tilapia in then air fryer basket, covered in spices.
    Add parsley.
    Raw tilapia in the air fryer basket with lemon wedges.
    Add lemon wedges.
    1. Cook the tilapia in your Air Fryer on manual setting at 400 degrees F for 6 to 8 minutes (or until the internal temperature of the filet reaches 145 degrees F). 
    2. Repeat steps 6,7,8 if you need to make multiple batches (the number of batches you need to do will depend on the size of your fillets and the size of your air fryer).
    Lemon air fryer tilapia, fresh out of the air fryer.
    Fry 6-8 mins.
    Easy air fryer tilapia, ready for dinner!
    Enjoy!

    Substitutions

    If you are missing a few ingredients or can’t eat tilapia…

    • If you don’t have garlic powder you can replace it with onion powder
    • You can replace the tilapia with any white flesh fish: swai, halibut, etc. (We love making panko-crusted cod too!) All white fish needs to be cooked to an internal temperature of 145 degrees F. You may need to adjust the cooking time according to the type of fish and size of filet.

    Variations

    If you want to make this recipe your own, try playing around with the lemon juice called for in the recipe! Most all citrus will pair nicely with any white fish, so get creative and try using fresh-squeezed orange or lime juice instead of lemon.

    You could also play around with the spices a bit. If you like spicy foods, you could replace the lemon pepper with cajun seasoning (or a homemade blend of chili powder, cayenne pepper, and paprika made to your liking).

    Lemon pepper could also be replaced with 1 teaspoon of Italian seasoning and ¼ teaspoon ground black pepper for a twist on this air fryer fish recipe that still has a mild flavor!

    If you do try a different type of citrus or spice, be sure to leave us a comment and let us know how it turned out!

    Equipment

    For this recipe, we used a Cosori 5.8 QT air fryer. You could use any air fryer though, like a Ninja Foodi, Instant Vortex, or any of the other ones you can find with a quick Google search.

    Storage

    For the best results, store your leftover tilapia in an airtight container in the refrigerator.

    Expert Tips and FAQs

    Can raw fish go in air fryer?

    Yes! You can most definitely cook fish in the air fryer from raw. We recommend rubbing a bit of oil onto the bottom of the basket first, just to help keep the fish from sticking.

    How long does fish take in the air fryer?

    As a general rule, fish takes about 10-12 minutes to cook in the air fryer depending on the size of your filets. In this recipe, the tilapia fish used should cook in 6-8 minutes at 400 degrees F. It’s always a good idea to use a meat thermometer to check the internal temperature of any meat to ensure it’s done properly, though. For fish, the internal temperature you are looking for is 145 degrees F (63 degrees C).

    What temp should tilapia be cooked to?

    Tilapia is a white fish and should be cooked to an internal temperature of 145 degrees F (63 degrees C).

    What can I do with leftover tilapia?

    The best way to use leftover tilapia, in our opinion, is to make fish tacos! Simply warm up your tilapia, pile it in a corn tortilla with your favorite taco ingredients and enjoy! If you need some inspiration, check out our Cilantro Avocado & Hummus Fish Tacos.

    Related Recipes

    If you loved this easy air fryer tilapia recipe, you’ll also love our other healthy air fryer recipes like these Air Fryer Salmon Patties and this Crispy Air Fryer Tofu Recipe! Or if you love fish recipes this lemon pepper salmon recipe is easy to make too!

    Recipe

    Lemon air fryer tilapia.
    Print Pin
    5 from 6 votes

    Easy Air Fryer Tilapia

    Looking for a quick, easy and healthy weeknight dinner? Try making this delicious air fryer tilapia with fresh lemon juice and lemon wedges! 
    Course Main Course
    Cuisine American
    Diet Low Calorie
    Prep Time 10 minutes minutes
    Cook Time 6 minutes minutes
    Total Time 16 minutes minutes
    Servings 4 servings
    Calories 143kcal
    Author Jessica Burgess

    Equipment

    • air fryer

    Ingredients

    • 1 pound tilapia filets If buying frozen, they will need to be thawed
    • 1 tablespoon olive oil or any vegetable oil of your liking
    • 1 teaspoon lemon juice fresh squeezed
    • 1 teaspoon garlic powder
    • ½ teaspoon salt
    • ½ teaspoon lemon pepper
    • lemon slices optional
    • fresh parsley optional

    Instructions

    • In a small bowl, combine the olive oil and the lemon juice. Set aside.
    • In a separate small bowl, mix the garlic powder, salt, and lemon pepper until combined. Set aside.
    • Place your fish filets on a plate, pat dry with paper towels.
    • With a pastry brush, brush the oil on the filets. Take a paper towel, dip it in the leftover oil mixture and coat the bottom of the air fryer basket.
      *If you don't have a pastry brush, no problem! You can pour the oil mixture over the filet and coat the filets with your fingers.
    • Once all the filets are well coated with the oil, sprinkle the seasoning evenly on the filets and gently press it into the filets (do NOT rub the seasoning in- because the fish contains a good amount of water if you rub the seasoning in it will turn into a paste and will not look very appetizing).
    • Place the filets in the air fryer. Only place as many in as you can fit while still leaving enough room around the filets for air to flow (you may want to put the rest of your fish filets back in the fridge to keep them cool until you can cook them). If you overcrowd the basket you may run into an uneven cook.
    • This step is optional: I took some fresh, chopped parsley and sprinkled it over the filets. If you want to, you can also add 1 lemon slice (cut in half) on each tilapia filet before you cook it in the air fryer basket.  
    • Cook the tilapia in your Air Fryer on manual setting at 400 degrees F for 6 to 8 minutes (or until the internal temperature of the filet reaches 145 degrees F).
    • Repeat steps 6,7,8 if you need to make multiple batches.

    Notes

    SAFETY TIP: Tilapia is a white fish and should be cooked to an internal temperature of 145 degrees F (63 degrees C). 
    SUBSTITUTIONS: If you don’t have garlic powder you can replace it with onion powder, and you can replace the tilapia with any white flesh fish: swai, halibut, etc. 
    Out of lemon juice? Try using orange juice or lime juice instead. 
    Don’t have lemon pepper (or any lemons to make it with)? Try using 1 teaspoon of Italian seasoning and ¼ teaspoon of black pepper in its place .

    Nutrition

    Serving: 1serving | Calories: 143kcal | Carbohydrates: 1g | Protein: 23g | Fat: 5g | Saturated Fat: 1g | Polyunsaturated Fat: 1g | Monounsaturated Fat: 3g | Cholesterol: 57mg | Sodium: 350mg | Potassium: 356mg | Fiber: 1g | Sugar: 1g | Vitamin A: 1IU | Vitamin C: 1mg | Calcium: 13mg | Iron: 1mg

    Southern Broccoli Casserole

    November 29, 2021

    Southern broccoli casserole with cheese

    Southern Broccoli Casserole: This simple recipe uses everyday ingredients and has an unbelievable flavor, using Cheez-It® crackers, shredded sharp cheddar, and cream of chicken soup!

    Quick Overview: Only a few minutes to mix and pour in a casserole dish, and 30 minutes to bake, this creamy broccoli casserole is an easy side dish that’s perfect for the holidays or to serve with other easy dinner recipes!

    Scoop of broccoli casserole on spatula
    Cheesy, Southern Broccoli Casserole Recipe

    Why you’ll love this recipe

    Whether it’s for Thanksgiving or Christmas, you can almost imagine you’ll find a broccoli casserole at the table. (But in all honesty, you’ll probably want to make this all year long, and not just for the holidays!)

    Inspired by our green bean casserole that has gone VIRAL on Pinterest year after year, I knew it was time to make a broccoli casserole that you’d love too.

    With this recipe, you’ll not only love the creaminess but it uses cream of chicken soup instead of cream of mushroom and uses a Cheez-It® cracker topping instead of a Ritz cracker topping.

    Talk about FLAVOR, and better than any other broccoli casserole we’ve ever had!

    [feast_advanced_jump_to]

    Ingredients

    As you can see below, this recipe uses easy ingredients that you may even already have on hand. But if not, most grocery stores will have what you need to make this!

    ingredients for broccoli casserole
    Ingredients for Broccoli Casserole

    See the easy-to-read, full recipe card, for ingredients amounts and instructions, toward the bottom of this post!

    • frozen broccoli (we bought the packaged, steamable broccoli to keep this easy and it did not dissapoint.)
    • eggs, lightly beaten
    • white onion
    • mayonnaise
    • can of cream of chicken soup (do not prepare)
    • melted butter
    • shredded sharp cheddar (we used the block and shredded it — way better than pre-shredded in our opinion!)
    • Cheez-It® crackers
    • salt and pepper

    Broccoli Casserole with Cream of Chicken Soup?

    Yes. I know it’s popular to use cream of mushroom but trust me on this one. It’s delicious with cream of chicken!

    But what about broccoli casserole with Ritz?

    I know it… Ritz crackers are good too. But hear me out. We already know that cheese is good in this casserole. Why not add more cheese with the crunch of the cracker that we all love!

    Besides, if you have Ritz Crackers, you may want to save them to use in this Ritz Chicken Casserole!

    Instructions

    1. First, preheat your oven to 350 degrees F.
    2. Next, pour frozen broccoli in to microwavable bowl. Microwave long enough (took about 3 minutes for us) to take the chill off and thaw.

      NOTE: If any water, left from the condensation of the frozen broccoli settles in the bottom of the bowl, discard the water. If not the water can make the casserole “soupy” and can make the cheese curdle. You can even take an additional step and allow the broccoli to sit on paper towels to drain as much water as possible.
    3. Next, pour the broccoli, onion, cream of chicken soup, melted butter, eggs, salt and pepper, and mayonnaise in to a large mixing bowl.
    ingredients in mixing bowl
    Ingredients in mixing bowl
    1. Mix together until evenly combined.
    mayo, cream of chicken, broccoli, onion, spices
    Mixed ingredients in bowl
    1. Pour in one cup of the shredded sharp cheddar, saving the remainder to sprinkle on top in a step below. (NOTE: You can use pre-shredded cheese for ease but if you have time, shredding your own block cheddar will create a creamier casserole!)
    shredded cheese in broccoli mixture
    Add shredded cheese
    1. Stir to blend in the shredded cheddar.
    Cheese mixed in to broccoli mixture
    Shredded cheddar mixed in
    1. Pour broccoli casserole mixture in to a greased (we used cooking spray but you can use butter) 9×13 baking dish. Using a spatula, spread the mixture evenly in the dish, making it a level surface.
    Pour broccoli mixture in to baking dish
    Pour in to greased baking dish
    1. Sprinkle the reamining cheese on top, evenly covering as much of the casserole as you can.
    Top with remaining shredded cheese
    1. Crush your Cheez-It® crackers. (We simply put them in a plastic ziptop bag, sealed it and mashed them with our hands.) You can mash them until small crumbs or crush “lightly” leaving some large crackers still intact for some fun crunch.
    2. Evenly spread crushed crackers all over the top of the casserole.
    Top with cheeze-its
    Top with crushed cheeze-its
    1. Bake in the pre-heated oven for 30-40 minutes or until casserole is cooked all the way through and bubbly.
    Bake broccoli casserole in oven

    How to Serve

    Serve this southern broccoli casserole, warm, as a side dish to your favorite dinner.

    Or, feel free to add chicken to this casserole and make it a one-pot meal.

    Serving of broccoli casserole
    Cheesy, warm broccoli casserole

    Can broccoli casserole be made in advance?

    It can. But please note that we have found if we want to make this in advance, we prefer assembling everything but the crackers, as they can sit in the refrigerator, and become “soft” or “stale” removing the delicious “crunch” factor from the casserole when cooked.

    If making in advance: assemble everything in to the baking dish, EXCEPT the crackers, cover, and refrigerate until ready to bake. Just before baking, top casserole with crushed crackers and bake as normal.

    Bite of broccoli casserole on fork
    Warm, gooey, cheesy bite
    How to store leftover broccoli casserole

    If you have leftovers, this can be amazing the next day. Simply cover the broccoli casserole dish with plastic wrap, or transfer to an airtight container and refrigerate.

    How long is broccoli casserole good for?

    If properly refrigerated, the casserole should be good to eat for 3-4 days after baking.

    Can I freeze broccoli casserole?

    Absolutely! If freezing cooked leftovers, transfer to a freezer-safe dish when casserole has FULLY COOLED. Freeze for up to 6 months.

    If freezing an entirely fully cooked casserole, for use later, it’s best to bake in a freezer-safe/oven-safe dish, so you do not have to transfer containers to freeze.

    If freezing an uncooked casserole, assemble in a freezer-safe and oven-safe container, so the casserole can thaw in the refrigerator overnight before baking, and the dish can simply go in to oven once thawed, without transfering dishes.

    Broccoli casserole in dish and plate
    Serve broccoli casserole warm

    Substitutions

    • If you’re used to using/having Ritz crackers on top, that’s absolutely ok to use instead of Cheez-It® crackers. We’ve just found that we love the “cheesier” flavor the Cheez-It® crackers provide.
    • Don’t want to shred your own cheese? No problem. You can use the pre-shredded. We just prefer the creaminess of the block cheese, when shredded. The pre-shredded cheese in the store can sometimes have a powdery “film” to prevent sticking and can sometimes dry-out the flavor. Honestly, when I bought the shredder attachment for my Kitchen-aid mixer to help me with this, it was a game changer!
    • Cream of mushroom soup instead of cream of chicken? Sure. That’s a traditional ingredient. However we LOVE the flavor of the cream of chicken more than the mushroom but you can use either one!
    Cheese, buttery broccoli casserole close up
    Cheesy, buttery, broccoli casserole

    Variations

    Want to try different flavors or ingredients in your broccoli casserole! Go for it!

    You can switch up the flavor of cheese, Cheez-It® crackers, soup, type of broccoli (fresh instead of frozen), etc. Please note that some changes can vary the cook-time and may alter the results. So please keep that in mind and test!

    Top tip

    If feeding a large crowd, placing your baked, southern broccoli casserole in to a slow cooker on “warm” may be an ideal situation. We’ve yet to test this but although it would remove the rectangular, “casserole” appearance, a serving could easily be scooped out of the slow cooker and on to a plate when time to eat. (If you’re short on oven-space and need a warming solution.)

    Related Recipes

    If you loved this recipe, then you’ll also love the super popular Doritos casserole, creamy ranch chicken and tater tot dish, ham casserole, and the corn casserole recipe that we have with the holidays!

    Recipe

    Southern broccoli casserole with cheese
    Print Pin
    5 from 12 votes

    Southern Broccoli Casserole

    Southern Broccoli Casserole: This simple recipe uses everyday ingredients and has an unbelievable flavor, using Cheez-It® crackers, shredded sharp cheddar, and cream of chicken soup!
    Course Side Dish
    Cuisine American
    Prep Time 10 minutes minutes
    Cook Time 30 minutes minutes
    Total Time 40 minutes minutes
    Servings 8 servings
    Calories 575kcal
    Author Jessica Burgess

    Ingredients

    • 6 cups frozen, steamable broccoli *see notes
    • 10.5 ounce can condensed cream of chicken soup
    • 1 cup mayonnaise
    • ½ stick butter (unsalted) melted (if using salted, don't use as much salt below)
    • 2 eggs lightly beaten
    • ½ onion finely chopped
    • ½ teaspoon salt (omit some if using salted butter)
    • ¼ teaspoon black pepper
    • 1 ½ cups sharp cheddar cheese shredded (shred your own if you can – see post for details)
    • 1 ½ cups Cheez-It® crackers crushed

    Instructions

    • Preheat oven to 350° F
    • Remove frozen broccoli from packaging and place in microwave-safe bowl. Microwave for 3-4 minutes or until thawed. (Does not have to be fully steamed/cooked – it will continue to cook in oven.)
      NOTE: if water has gathered in bottom of bowl, from condensation of frozen broccoli, discard water as this could make your casserole "soupy" and the cheese may curdle. You can even take an additional step and allow the broccoli to sit on paper towels to drain as much water as possible for best results.
    • In large mixing bowl, mix together thawed broccoli, soup, mayo, butter, eggs, onion, salt, and pepper. Stir to evenly combine.
    • Pour only one cup of the shredded cheese in to the broccoli casserole mixture, and stir to combine.
    • Pour broccoli casserole mixture in to a greased 9×13 baking dish and spread evenlly using the back of a spoon or a ladle.
    • Using the remainder of the shredded cheese, sprinkle on top of casserole, trying to sprinkle and cover the entire casserole.
    • Next, sprinkle the crushed Cheez-It® crackers all over the top of the casserole, trying to cover it entirely.
    • Place dish in oven and bake for 30-40 minutes or until heated through and bubbly! Serve.

    Notes

    How to store leftover broccoli casserole
    If you have leftovers, this can be amazing the next day. Simply cover the broccoli casserole dish with plastic wrap, or transfer to an airtight container and refrigerate.
    How long is broccoli casserole good for?
    If properly refrigerated, the casserole should be good to eat for 3-4 days after baking.
    Can I freeze broccoli casserole?
    Absolutely!
    If freezing cooked leftovers, transfer to a freezer-safe dish when casserole has FULLY COOLED. freeze for up to 6 months.
    If freezing an entire fully cooked casserole for use later, it’s best to bake in a freezer-safe/oven-safe dish, so you do not have to transfer containers to freeze.
    If freezing an uncooked casserole, assemble in a freezer-safe and oven-safe container, so casserole can thaw in the refrigerator overnight before baking, and so the dish can simply go in to the oven once thawed, without transferring dishes.

    Nutrition

    Serving: 1cup | Calories: 575kcal | Carbohydrates: 35g | Protein: 13g | Fat: 42g | Saturated Fat: 13g | Polyunsaturated Fat: 13g | Monounsaturated Fat: 9g | Trans Fat: 1g | Cholesterol: 105mg | Sodium: 864mg | Potassium: 270mg | Fiber: 3g | Sugar: 2g | Vitamin A: 892IU | Vitamin C: 61mg | Calcium: 256mg | Iron: 1mg

    Nuts and Bolts Recipe

    November 28, 2021

    Nuts and Bolts mix in wooden bowl

    Nuts and Bolts Recipe: Or sometimes called “Texas Trash” or simply a homemade chex mix recipe, this seasoned snack is perfect for the holidays or to eat all year long!

    homemade nuts and bolts recipe

    Why You’ll Love This Recipe

    Although you can eat this snack ANY time of year, for some reason it’s an absolute favorite recipe for around the holidays!

    So if you love a salty snack to snack on, this should be it! (Well, next to these spicy ranch crackers and this Sriracha snack mix.) So much better than storebought or pre-packaged chex mix, this “nuts and bolts” snack is a savory treat! However, if you love more of a sweet mix, you’ll love these hot chocolate muddy buddies!

    [feast_advanced_jump_to]

    Ingredients

    This recipe uses simple ingredients! See which ones below…

    ingredients for homemade chex mix
    Ingredients for homemade check mix
    • 3 cups Rice Chex
    • 3 cups Corn Chex
    • 3 cups Cheerios
    • 2 cups pretzel sticks
    • 1 cup mixed nuts
    • 6 tablespoon butter – melted
    • 1 teaspoon onion powder
    • 1 teaspoon garlic powder
    • 2 teaspoon seasoned salt (we used Season All)
    • 2 tablespoon Worcestershire sauce

    See the full recipe card toward the bottom of this post for ingredients and instructions all in one place!

    Instructions

    1. Preheat the oven to 250 degrees F.
    2. In a large bowl, combine Rice Chex, Corn Chex, Cheerios, pretzel sticks and mixed nuts.
    place cereal, chips and crackers in bowl
    Place ingredients in large bowl
    1. Top with melted butter and Worcestershire sauce.
    2. Add remaining dry seasonings, toss well.
    3. Spread onto two large baking sheets. Cook for approximately 45-50 minutes, tossing every 15 minutes.
    spread nuts and bolts on cookie sheet
    1. Remove from oven and let cool. ENJOY!
    Nuts and Bolts baked and ready to eat
    Ready for snacking

    How to Serve Homemade Chex Mix

    If you’re hosting a holiday party, it’s a fantastic way to allow guests to snack on before or after a meal.

    Simply place the “nuts and bolts” in a few small bowls and place them around the room where everyone will be hanging out. You can even place small plates or clear cups, along with a scoop or tongs, next to the bowls so guests can grab and go!

    If making it to snack on at home, you can keep it in one container, and my favorite is a large mason jar or cookie jar!

    Seasoned chex mix on table
    Easy snacking

    How to Store Leftover Chex Mix

    Store any, cooled, leftover snack mix in an airtight container. It can stay on the counter for up to 4-6 weeks! (If it lasts that long!)

    texas trash in wooden bowls
    If desired, place in multiple bowls for snacking

    Substitutions

    If you only have or can only find similar ingredients to the ones listed, that’s absolutely ok!

    For instance, if you can only find twist pretzels instead of sticks, or even flavored pretzels, that should be just fine! (Do note if you use flavored pretzels like honey mustard, etc. it could alter the taste (and saltiness) of the entire recipe so use flavored or seasoned ingredients cautiously.

    Only have Rice Chex? Or only have Corn Chex? Use two of the same kinds! Although we prefer a mixture of the two different kinds, it’s not the end of the world if you can only use one kind.

    Note: Using a honey nut Cheerio may add more of a sweetness and may not be a good flavor combination with the savory ingredients.

    Snack Gift Idea

    Love how easy this is to make? Double or triple the recipe (see easy to calculate buttons below in the recipe card) and make a large batch to give as gifts for teachers, mail carriers, delivery drivers, co-workers, and more!

    Package it up in adorable kraft window bags and tie with a ribbon and use these free gift tags!

    Recipe

    Nuts and Bolts mix in wooden bowl
    Print Pin
    5 from 3 votes

    Nuts and Bolts Recipe

    Nuts and Bolts Recipe: Or sometimes called "Texas Trash" or simply a homemade chex mix recipe, this seasoned snack is perfect for the holidays or to eat all year long!
    Course Appetizer, Snack
    Cuisine American
    Prep Time 5 minutes minutes
    Cook Time 45 minutes minutes
    Total Time 50 minutes minutes
    Servings 11 cups
    Calories 255kcal
    Author Jessica Burgess

    Ingredients

    • 3 cups Rice Chex
    • 3 cups Corn Chex
    • 3 cups Cheerios
    • 2 cups pretzel sticks
    • 1 cup mixed nuts
    • 6 tablespoons melted butter
    • 1 teaspoon onion powder
    • 1 teaspoon garlic powder
    • 2 teaspoons seasoned salt or Season All
    • 2 tablespoons Worcestershire sauce If you can, use Lea & Perrins (Other brands have a "twang" that doesn't make it as good)

    Instructions

    • Preheat the oven to 250 degrees F.
    • In a large bowl, combine Rice Chex, Corn Chex, Cheerios, pretzel sticks and mixed nuts.
    • Top with melted butter and Worcestershire sauce.
    • Add remaining dry seasonings, toss well.
    • Spread onto two large baking sheets. Cook for approximately 45-50 minutes, tossing every 15 minutes.
    • Remove and let cool. ENJOY!

    Notes

    How to Store
    Store any, cooled, leftover snack mix in an airtight container. It can stay on the counter for up to 4-6 weeks! (If it lasts that long!)

    Nutrition

    Serving: 1cup | Calories: 255kcal | Carbohydrates: 30g | Protein: 5g | Fat: 14g | Saturated Fat: 5g | Polyunsaturated Fat: 2g | Monounsaturated Fat: 6g | Trans Fat: 1g | Cholesterol: 16mg | Sodium: 802mg | Potassium: 189mg | Fiber: 3g | Sugar: 2g | Vitamin A: 793IU | Vitamin C: 6mg | Calcium: 95mg | Iron: 8mg

    Big Fat Chewy Chocolate Chip Cookies

    November 26, 2021

    Big Fat Chewy Chocolate Chip Cookies.

    Big Fat Chewy Chocolate Chip Cookies: Made all in one bowl, these soft chewy chocolate chip cookies are quick, easy and sure to be one of your absolute favorites!

    This one is right up there with The Best No Bake Cookie Recipe and our Easy Peanut Butter Cookie Recipe– an instant classic!

    Big Fat Chewy Chocolate Chip Cookies.

    This is one of those desserts that travels well and works great for potlucks. You can find more potluck desserts here.

    Why You’ll Love This Recipe

    I absolutely LOVE when a recipe can be made all in one bowl. I mean really, why make more dishes than you need to? These soft chocolate chip cookies fall in the category of “one bowl recipes” and I’m thrilled!

    Not only is this chewy cookie recipe easy and made all in one bowl, it’s also so yummy. I think this might just be one of my new favorite recipe when it comes to chocolate chip cookies!

    [feast_advanced_jump_to]

    Ingredients for Big Fat Chewy Chocolate Chip Cookies

    Like all good cookie recipes, this chewy chocolate chip cookie recipe uses simple ingredients that most of us have on hand at all times, much like the ingredients in this chocolate chip cookie pie. No need to run out and grab anything special, just pop in the kitchen and whip them up!

    • ⅓ cup white sugar
    • 10 tablespoons butter, softened
    • ⅔ cup brown sugar, packed
    • 1 egg
    • 2 teaspoons vanilla extract
    • 2 ⅓ cup all purpose flour
    • 2 teaspoons baking powder
    • 1⁄2 teaspoon baking soda
    • 1 teaspoon salt
    • 12-ounces milk chocolate chips
    Ingredients for big fat chewy chocolate chip cookies.
    White & brown sugar, an egg, butter, flour, vanilla, salt, baking powder & soda and some chocolate chips are all you’ll need!

    Instructions

    Ready to see how easy it is to make this chewy chocolate chip cookies recipe? Let’s go!

    1. Grease cookie sheets or line them with parchment paper and then set them aside.
    2. In a large mixing bowl, (or in the bowl of a stand mixer) beat together the white sugar, brown sugar, and room-temperature butter until light and fluffy.
    White sugar, brown sugar and softened butter in a large bowl.
    butter, white sugar and brown sugar
    Creamed butter and sugar.
    Beat together
    1. Add the egg and vanilla and beat until smooth. 
    Add vanilla and egg to your creamed butter and sugar mixture.
    egg and vanilla.
    Mix the vanilla and egg into the creamed butter and sugar mixture.
    Beat until smooth.
    1. Add the dry ingredients (flour, baking powder, baking soda, and salt). Beat until everything is well combined. 
    Add dry ingredients to the butter/sugar/egg/vanilla mixture.
    Add the dry ingredients and mix until well combined.
    1. Stir in the chocolate chips (the dough will be a bit crumbly but it should come together when you work it into a ball with your hands). 
    Stir in your chocolate chips.
    Stir in your chocolate chips
    Cookie dough ready to be rolled out.
    work it into a ball with your hands
    1. Make balls of cookie dough using a ¼ cup measuring cup and then drop cookie dough onto your prepared baking sheet. 
    2. Place the cookie sheets in the refrigerator for 30 minutes.
    ¼ cup scoop of chocolate chip cookie dough.
    Roll in to a ball
    Scoop ¼ cup of dough out and roll it into a ball.
    Place dough balls on baking sheet
    1. While the dough is chilling, preheat the oven to 350 degrees f. 
    2. When the chill time is over, bake the cookies for 15 minute in your preheated oven or until the middle is set (doesn’t look jiggly when you give the cookie sheet a bit of a shake) and the edges begin to brown. 
    Big fat chewy chocolate chip cookies that are set in the middle and golden brown on the edges.
    Bake your cookies for 15 mins at 350° or until the middle is set and the edges are golden brown.
    1. Remove from the oven (don’t forget your oven mitt) and let your cookies cool for a couple of minutes on the baking sheets before carefully transferring them to a wire rack to cool completely. Enjoy!
    Big fat chewy chocolate chip cookies.
    Let your cookies cool for a few minutes, then enjoy!

    Variations

    The options for customizing your chocolate chip cookies are ENDLESS. Here are a few of our favourites…

    • Add nuts! If you like a bit of crunch in your cookies, add in some of your favorite chopped nuts.
    • Make them festive with sprinkles. You can mix them right into the dough or push a few sprinkles into the top of each cookie before you chill the dough. You could do pink and red for Valentine’s Day, red and green for Christmas, orange and black for Halloween…
    • Switch up the chocolate. Instead of using all milk chocolate chips, try a mixture of white chocolate, milk chocolate, and semisweet chocolate chips (totaling the same weight that is called for in the recipe).
    • Change the cookie. These sugar chocolate chip cookies are a fun variation for similar ingredients too.

    Storage

    Store your big fat chewy chocolate chip cookies in an airtight container and they should keep for up to a week on the counter.

    You could also freeze them! After your cookies have cooled completely, place them in a freezer-safe, airtight container or ziplock freezer bag and freeze for up to a month.

    Expert Tips and FAQs

    How do you keep chocolate chip cookies soft?

    There are a few things you can do to keep your cookies soft for as long as possible. First of all, make sure you aren’t over mixing them or baking them too long. Secondly, store them in an airtight container. And lastly, you can put a slice of bread into the container with your cookies! I know it sounds strange, but the cookies will absorb moisture from the bread and stay soft and fresh for longer!

    What chocolate is best for chocolate chip cookies?

    This is a matter of preference. The most common chocolate chip to bake with is semisweet, but some people love milk chocolate (and others love a darker chocolate or even a white chocolate). All of them will taste delicious, it just depends on what your favourite type of chocolate is!

    How do you make chocolate chip cookie mix better?

    If you are looking to make a super decadent and delicious chocolate chip cookie, we recommend trying the following:
    – always use butter and not margarine
    – make sure your butter is at room temperature
    – don’t skip the chilling time
    – use real vanilla extract and not imitation

    If this has become your new favorite chocolate chip cookie recipe too, then keep in mind that my favorite thing to do is to package these up and they would make GREAT holiday gifts, and would be even better than those in the specialty shops!

    Related Great Recipes

    If you like chocolate chip cookies, you are going to love this peanut butter chocolate chip cookie recipe, these banana chocolate chip cookies, and this Cookie Dough Fudge! Or, eat a cup of cookie dough with this Edible Cookie Dough recipe!

    Recipe

    Big Fat Chewy Chocolate Chip Cookies.
    Print Pin
    5 from 10 votes

    Big Fat Chewy Chocolate Chip Cookies

    Big Fat Chewy Chocolate Chip Cookies: Made all in one bowl, these soft chewy chocolate chip cookies are quick, easy and sure to be one of your absolute favorites!
    Course Dessert
    Cuisine American
    Prep Time 15 minutes minutes
    Cook Time 15 minutes minutes
    Chill Time 30 minutes minutes
    Total Time 1 hour hour
    Servings 14 cookies
    Calories 273kcal
    Author Jessica Burgess

    Ingredients

    • ⅓ cup white sugar
    • 10 tablespoons unsalted butter softened at room temperature
    • ⅔ cup brown sugar
    • 1 egg
    • 2 teaspoons vanilla extract
    • 2 ⅓ cups all purpose flour
    • 2 teaspoons baking powder
    • ½ teaspoon baking soda
    • 1 teaspoon salt
    • 12 ounces milk chocolate chips

    Instructions

    • Grease your cookie sheets or line them with parchment paper and then set aside.
    • In a large mixing bowl, beat together the white sugar, brown sugar, and room temperature butter until light and fluffy.
    • Add the egg and vanilla and beat until smooth.
    • Next, add in the dry ingredients (flour, baking powder, baking soda, and salt) and beat until everything is well combined.
    • Stir in the chocolate chips (the dough will be a bit crumbly but it should come together when you work it into a ball with your hands).
    • Next, make balls of cookie dough using a ¼ cup measuring cup and then drop cookie dough onto your prepared cookie sheets.
    • Place the cookie sheets in the refrigerator for 30 minutes.
    • While the dough is chilling, preheat the oven to 350 degrees f.
    • When cookies are finished chilling, bake the cookies for 15 minute in the preheated oven or until the middle is set (which means the cookies don't look jiggly when you give the cookie sheet a little shake) and the edges begin to brown.
    • Let your cookies cool for a couple of minutes on the baking sheets before gently transferring them to a wire rack to cool completely. Enjoy!

    Notes

    VARIATIONS: Instead of using all milk chocolate chips, try a mixture of white chocolate, milk chocolate and semisweet chocolate chips (totalling the same weight that is called for in the recipe).
    STORAGE: Store your big fat chewy chocolate chip cookies in an airtight container and they should keep for up to a week on the counter. 
    You could also freeze them! After your cookies have cooled completely, place them in a freezer safe, airtight container or ziplock freezer bag and freeze for up to a month. 

    Nutrition

    Serving: 1cookie | Calories: 273kcal | Carbohydrates: 39g | Protein: 3g | Fat: 12g | Saturated Fat: 7g | Polyunsaturated Fat: 1g | Monounsaturated Fat: 2g | Trans Fat: 1g | Cholesterol: 37mg | Sodium: 219mg | Potassium: 102mg | Fiber: 1g | Sugar: 22g | Vitamin A: 267IU | Calcium: 41mg | Iron: 1mg

    Easy Peanut Butter Cookie Recipe

    November 25, 2021

    Peanut butter cookies with the classic criss-cross pattern on top.

    Easy Peanut Butter Cookie Recipe: Sometimes you just need those classic, soft peanut butter cookies (complete with the criss-cross pattern on top, of course). You can make this easy, from-scratch cookie recipe on a moment’s notice, they’re that simple! But if you love short-cuts, then you’ll also love these peanut butter cake mix cookies!

    And if you like peanut butter, you really need to check out this Old Fashioned Peanut Butter Pie recipe, this No Bake Dessert: Brownie Peanut Butter Cup Cheesecake Trifle, or this Peanut Butter Sheet Cake with Peanut Butter Icing.

    Easy peanut butter cookies.
    The best peanut butter cookies!

    Why you’ll love this recipe

    We love a quick, easy and tasty cookie recipe around here, and this soft peanut butter cookie recipe is definitely that!

    I’ve seen so many different variations on classic peanut butter cookies, but I’m kind of an old fashioned girl at heart so of course my favorite would be old fashioned peanut butter cookies (you won’t find any chocolate chips, raisins or nuts in this one)!

    These easy peanut butter cookies are soft and not crunchy at all. If that’s what you’re into, keep reading!

    [feast_advanced_jump_to]

    Ingredients

    This recipe calls for 8 super simple ingredients – I can almost guarantee that you have them all in your kitchen already!

    • 1 ½ cups all purpose flour
    • ½ cup unsalted butter
    • 1 cup creamy peanut butter
    • ½ cup brown sugar
    • ½ cup white sugar
    • 1 teaspoon vanilla extract
    • 1 large egg, brought to room temperature
    • ¾ teaspoon baking powder
    • Powdered sugar (optional)
    Ingredients to make easy peanut butter cookies.
    Peanut butter, flour, white sugar, brown sugar, vanilla, egg, and butter are all you need to make this easy recipe!

    Instructions to Make Peanut Butter Cookies from Scratch

    1. Preheat your oven to 350°.
    2. Sift the all purpose flour and baking powder together in a small bowl and set aside.
    3. Cream the butter and both sugars (white and brown) in a stand mixer with the paddle attachment on medium speed for 4-5 minutes or until it looks light and fluffy.
    Brown sugar, white sugar and butter in the bowl of a stand mixer.
    Add butter and both sugars
    Sugar and butter after being combined.
    Mix on medium speed
    1. Add the peanut butter to the butter and sugar mixture and mix on low until combined.
    Butter, sugar and peanut butter in the bowl of a stand mixture after being combined.
    Add the peanut butter to the butter and sugar mixture and mix on low speed until combined.
    1. Next, add in the egg and vanilla, mixing until just combined.
    2. Add the sifted flour mixture into the peanut butter mixture and mix until just incorporated.
    Peanut butter mixture in a bowl with the dry ingredients added to it.
    Add the sifted flour mixture to the peanut butter mixture and mix until just combined.
    1. Using a cookie scoop (or a tablespoon), scoop out your dough and roll it into golf ball sized balls. Place dough balls on a parchment lined baking sheet.
    2. Flatten your peanut butter cookie dough balls with the tines of a fork in a crisscross pattern.

    Hint: You can dip your fork into some powdered sugar before pressing it into the dough to avoid having the fork stick to your dough balls!

    Peanut butter cookie dough rolled into dough balls and on a parchment lined baking sheet.
    Use a cookie scoop to scoop out dough
    A fork being dipped in powdered sugar before being used to flatten a peanut butter cookie dough ball.
    Hint: Dip your fork in powdered sugar
    A fork flattening a peanut butter cookie dough ball to create a criss-cross pattern.
    Flatten each dough ball with a fork, creating a crosshatch pattern on top.
    1. Bake for 8-10 min in your 350° oven or until your cookies start to look golden brown on the edges.
    2. Allow the cookies to cool on a baking sheet and then move them to a wire rack to cool completely.

    Note: If you want a softer peanut butter cookie, only let them cool on the baking sheet for a minute or two. If you prefer a firmer cookie, let them cool on the baking sheet for 5 minutes before moving to the wire rack.

    Baked peanut butter cookies, flattened on a parchment lined cookie sheet with a crosshatch pattern on top.
    Easy peanut butter cookies.
    A plate of easy peanut butter cookies with a glass of milk in the background.
    Enjoy!

    Pour yourself a glass of milk, fill up a plate, and enjoy!

    Substitutions

    Typically, peanut butter cookie recipes call for creamy peanut butter BUT that doesn’t mean you can’t switch it up. If you like a bit of texture in your cookies feel free to substitute crunchy peanut butter instead of creamy.

    If you need a peanut-free cookie, you can substitute the peanut butter for another type of nut butter (sunflower, almond, hazelnut, etc.) or a nut-free peanut butter. Just be sure to read labels closely to ensure you aren’t exposing yourself or your guests to any of their allergens.

    Variations

    If you aren’t as much of a fan of old-fashioned cookie recipes as I am (no judgment here, all cookies are good cookies), you can try these Peanut Butter Chocolate Chip Cookies for a new twist on an old classic!

    Storage

    Store your peanut butter cookies in an airtight container for up to a week.

    These cookies also freeze well. Place them in an airtight, freezer-safe container (or a large ziploc freezer bag) and freeze for up to a month. When you are ready to eat them, let them thaw at room temperature and enjoy!

    Expert tips and FAQs

    What’s the best peanut butter for peanut butter cookies?

    Typically, peanut butter cookie recipes call for creamy peanut butter BUT that doesn’t mean you can’t switch it up. If you like a bit of texture in your cookies feel free to substitute chunky peanut butter instead of creamy.

    It is possible to use natural peanut butter for peanut butter cookies, but since the consistency of natural peanut butter is so different from creamy peanut butter you may notice a difference in the finished product. You may need to experiment a bit with the recipe and try adding a bit more flour until you reach the desired consistency.

    Why do you put fork marks on top of peanut butter cookies?

    Since peanut butter cookies are quite dense, flattening them with a fork helps them cook more evenly. While you might be able to get away with only flattening them once, the criss-cross/crosshatch pattern you get from flattening it twice ensures a consistent thickness across the cookie (and it looks pretty, too)!

    How do you get the perfect fork marks on top of peanut butter cookies?

    The main reason for messy fork marks on top of your peanut butter cookies is that the fork tends to stick to the thick dough.

    To fix this, simply dip your fork in powdered sugar (aka icing sugar) before you flatten each dough ball! Be sure to re-dip before each time you flatten to make sure your fork doesn’t stick and create messy marks on your cookie dough ball.

    Related Recipes

    If you love easy cookie recipes, then you’ll also love these no-bake chocolate oatmeal peanut butter cookies and these red velvet cake mix cookies too!

    Recipe

    Peanut butter cookies with the classic criss-cross pattern on top.
    Print Pin
    5 from 5 votes

    Easy Peanut Butter Cookie Recipe

    Sometimes you just need those classic, soft peanut butter cookies (complete with the criss-cross pattern on top, of course). You can make this easy cookie recipe on a moment's notice, they're that simple!
    Course Dessert, Snack
    Cuisine American
    Prep Time 7 minutes minutes
    Cook Time 10 minutes minutes
    Total Time 17 minutes minutes
    Servings 24 cookies
    Calories 163kcal
    Author Jessica Burgess

    Ingredients

    • 1 ½ cups all purpose flour
    • ½ cup butter unsalted
    • 1 cup creamy peanut butter
    • ½ cup brown sugar
    • ½ cup white sugar
    • 1 teaspoon vanilla extract
    • ¾ teaspoon baking powder
    • 1 large egg room temperature
    • powdered sugar (optional)

    Instructions

    • First, preheat your oven to 350°.
    • Next, mix (sift with a fork) the all purpose flour and baking powder together in a small bowl and set aside.
    • In a stand mixer, mix the butter and both sugars (white and brown) with the paddle attachment on medium speed for 4-5 minutes or until it looks light and fluffy. (You can use a hand mixer as well if that's what you prefer!)
    • Add the peanut butter to the butter and sugar mixture and mix on low until combined.
    • Next, add in the egg and vanilla, and mix until just combined.
    • Add the sifted flour mixture into the peanut butter mixture and mix until just combined.
    • Using a cookie scoop (or a tablespoon), scoop out the dough and roll it into golf ball, sized balls. Place dough balls on a parchment lined baking sheet. (Or you can use a silicone baking mat that we love using for our cookie recipes!)
    • Next, using a fork, gently press the tines in to each peanut butter cookie dough balls with the tines of a fork making a crisscross pattern.
    • Bake for 8-10 min in your 350° oven or until your cookies start to look golden brown on the edges.
    • Allow the cookies to cool on a baking sheet and then move them to a wire rack to cool completely.

    Notes

    HINT: You can dip your fork into some powdered sugar before pressing it into the dough to avoid having the fork stick to your dough balls!
     
    NOTE: If you want a softer peanut butter cookie, only let them cool on the baking sheet for a minute or two. If you prefer a firmer cookie, let them cool on the baking sheet for 5 minutes before moving to the wire rack.
     
    STORAGE: Store your peanut butter cookies in an airtight container for up to a week.
    These cookies also freeze well. Place them in an airtight, freezer safe container (or a large ziploc freezer bag) and freeze for up to a month. When you are ready to eat them, let them thaw at room temperature and enjoy!

    Nutrition

    Serving: 1cookie | Calories: 163kcal | Carbohydrates: 17g | Protein: 4g | Fat: 10g | Saturated Fat: 4g | Polyunsaturated Fat: 2g | Monounsaturated Fat: 4g | Trans Fat: 1g | Cholesterol: 18mg | Sodium: 88mg | Potassium: 89mg | Fiber: 1g | Sugar: 10g | Vitamin A: 129IU | Calcium: 12mg | Iron: 1mg

    Sugar Cookie Sandwiches

    November 21, 2021

    Sugar cookie sandwiches recipe

    Sugar Cookie Sandwiches: These frosting filled cookie sandwiches are filled with a strawberry buttercream that’s easy to make, using simple ingredients!

    Quick Overview: Use a sugar cookie mix to speed things up and make this homemade strawberry frosting using only butter, strawberry fruit spread (or jam), and powdered sugar. (And sprinkles if you prefer!)

    This is a sponsored conversation written by me on behalf of Tastefully Simple®, however, the opinions and text are all mine!

    sugar cookie sandwiches with sprinkles

    At Christmas time, sandwich cookies are super popular but I absolutely LOVE them for any time of year, and even Valentine’s Day! If desired, they’re an easy recipe and so fun to customize with sprinkles to match a party or special occasion that you’re hosting or to use Christmas sprinkles for a holiday theme!

    For this recipe, we wanted to tie in our favorite strawberry flavors, to make a strawberry buttercream filling but if you prefer chocolate filling, you can use this chocolate buttercream recipe!

    [feast_advanced_jump_to]

    Ingredients

    You can make your own sugar cookie recipe or use your favorite sugar cookie mix.

    ingredients for sugar cookie sandwiches

    See the full recipe card with ingredient amounts and instructions toward the bottom of the post!

    Sugar Cookies

    So if you’re using this sugar cookie mix, make sure to gather any ingredients that specific cookie mix recipe needs. You could also make these chocolate chip sugar cookies if you’re looking for a non-traditional sugar cookie.

    Cookie Filling Ingredients

    For the strawberry filling, there is nothing better than this quick, homemade strawberry buttercream recipe. It’s smooth, is the perfect consistency for a cream center and the flavor is out of this world!

    Here’s what you’ll need:

    • strawberry spread or jam
    • powdered sugar (or confectioners' sugar)
    • butter
    • sprinkles, if desired
    Fruit spread, butter and powdered sugar
    Powdered sugar, fruit spread, butter

    See the recipe card for full details, ingredients, and instructions, all in one place!

    Instructions

    1. First, preheat your oven to the temperature recommended by your sugar cookie recipe or sugar cookie mix. For the Tastefully Simple® Ah, Sugar Sugar!™ Mix, it’s 350°.
    2. Next, prepare your baking sheet. We use the Tastefully Simple® Baking Mat but you can use parchment paper or place the cookies right on a baking sheet.
      (The orange cloth you see pictured below, is the cleaning cloth that comes with the baking mat for best results for caring for the mat.)
    1. Mix together the sugar cookie mix, according to package directions.
    Sugar cookie dough mixed in bowl
    Sugar cookie dough
    1. Roll out SMALL sugar cookies, in to about 1 inch balls. (It may feel a little odd to make them so small but when filling with frosting, and topping with another sugar cookie, you’ll be glad you made the cookies smaller.)
    2. Place the sugar cookie balls on the baking sheet, about 2 inches apart and bake cookies according to package directions.
    Sugar cookie dough balls on cookie sheet
    Rolled sugar cookie dough on baking sheet

    How to Make Strawberry Buttercream

    1. Making sure your butter is softened, add the butter and fruit jam (or spread) to a mixing bowl and cream butter with jam until evenly mixed, using a stand mixer or a hand, electric mixer until evenly combined.
    Butter & Jam Mixed Together
    Butter and Fruit Spread Mixed
    1. Next, add in the powdered sugar and mix together on low speed, until you no longer see powdered sugar and it is evenly mixed. (You may need to stop the mixer so you can scrape down the sides of the bowl of a stand mixer half way through, mixing to incorporate all of the powdered sugar.)
    Powdered sugar, jam and butter
    Strawberry Frosting

    How to Assemble Sugar Cookie Sandwiches

    1. When the cookies are finished baking, allow them to fully cool on cooling rack, before piping on the filling, or this could cause the buttercream to thin out and/or melt.
    2. When ready, place the strawberry frosting in to a piping bag (or you can simply spread on the filling if you do not feel comfortable using a piping bag), and pipe about a tablespoon of frosting on to the bottom of one cookie.
    Strawberry filling in sugar cookie
    Strawberry Frosting on Cookie
    1. Next, grab the second cookie and place the bottom side of the cookie on top of the buttercream, creating a frosting-filled cookie sandwich.
    2. Gently push down to allow the creamy filling to push to the edges, so the buttercream is flush with the sides of the cookies.
    Strawberry Frosting Filled Sugar Cookies

    Sprinkle Cookies

    If you prefer to decorate your sugar cookie sandwiches, you can carefully (do not squeeze the cookie too hard, as too much of the buttercream frosting could “ooze” out and drip down) pick the cookie sandwich up, turn sideways and gently roll the sandwich sideways in to a small dish of sprinkles… where the sprinkles will “stick” to the frosting. (See images below.)

    Dip sugar cookie sandwich in sprinkles
    Dip sugar cookie sandwich in sprinkles

    For Christmas, the red and green sprinkles look amazing paired with the pink frosting! Or, use your favorite colors of sprinkles for any type of look!

    Hand holding sugar cookie sandwich with sprinkles

    When you take a bite, the soft sugar cookie will “give”, allowing a delicious bite of cookie and frosting all in one bite!

    Bite taken out of sugar cookie sandwich

    Can I use different cookies for this recipe?

    Of course! Tastefully Simple® also has my favorite Peanut Butter Bliss™ Cookie Mix that gives a soft, perfectly round cookie, that’s delicious with this strawberry buttercream filling.

    You can also use other popular cookies such as snickerdoodle cookies or gooey butter cookies!

    Strawberry frosting filled cookies

    Storage

    If you have leftover sugar cookie sandwiches, it is recommended to refrigerate them, in an airtight container, since the buttercream filling is made with butter and fruit spread, which normally recommends refrigeration.

    Expert Tips and FAQs

    • When rolling out the sugar cookies, try to keep them as close to the same size as possible. Since you will be assembling them in to “sandwiches” it’s easier if the two cookies are close in size, so the filling won’t overlap.
    • Make sure the sugar cookies have fully cooled before assembling or the warm cookie could cause the buttercream to “thin out”, resulting in a mess.
    Do I need to use food coloring for sugar cookie sandwiches?

    You can use food coloring for the filling but we didn’t find it necessary as we loved the color the strawberry fruit spread provided.

    Can I turn these in to ice cream sandwiches?

    Absolutely! Once assembled, simply freeze the cookie sandwiches in an airtight container and enjoy frozen!

    What can I use to decorate these cookies instead of sprinkles?

    If you prefer, you can leave them without sprinkles or use something else such as mini chocolate chips, nuts, or crushed candy pieces.

    More Cookie Recipes

    If you’re making a cookie platter or a few different types of cookie recipes, you’ll also love this chocolate cherry cookie recipe, these key lime cookies, and these red velvet cake mix cookies! And if you are a fan of sugar cookies, these sugar cookies shaped as ice cream cones are a must.

    Recipe

    Sugar cookie sandwiches recipe
    Print Pin
    5 from 5 votes

    Sugar Cookie Sandwiches

    Sugar Cookie Sandwiches: These frosting filled cookie sandwiches are filled with a strawberry buttercream that's easy to make, using simple ingredients!
    Course Dessert
    Cuisine American
    Prep Time 15 minutes minutes
    Cook Time 13 minutes minutes
    Total Time 28 minutes minutes
    Servings 14 sandwiches
    Calories 420kcal
    Author Jessica Burgess

    Ingredients

    • sugar cookie mix & the ingredients required on package You'll be making sugar cookies according to the package directions, as all cookie mixes can be different. (We use Tastefully Simple® Ah, Sugar Sugar® Cookie Mix)
    • 1 cup butter 2 sticks (salted or unsalted)
    • ½ cup strawberry fruit spread or jam We use Tastefully Simple® Rhubarb Strawberry Fruit Spread
    • 4 cups powdered sugar
    • sprinkles if desired

    Instructions

    Sugar Cookies

    • Preheat oven to the temperature the sugar cookie mix directions call for.
    • Make sugar cookie dough according to package directions. STOP following directions, once dough has been created, just before rolling.
    • Using curved hands, roll sugar cookie dough in to about 1 inch balls, creating smooth, even balls of dough. (Ideally, you'll want them to be the same size as possible, as you'll be pairing them together for sandwiches.)
      NOTE: They may look and feel really small before baking but you don't want really large cookies when making sandwich cookies.
    • Bake the cookies according to the package directions, (we baked them for 13 minutes for Tastefully Simple® Ah, Sugar Sugar!® Mix)

    Strawberry Buttercream Filling

    • While cookies are baking, using a stand mixer or hand mixer, mix together the butter and fruit spread until evenly mixed.
    • Slowly, and in small batches, add in the powdered sugar to the butter/jam mixture, turn the mixer on "low", and gently mix together until evenly combined. NOTE: You may need to stop mixing halfway, to scrape the inside of the mixing bowl to incorporate any powdered sugar that needs mixed in.

    Assemble the Cookie Sandwiches

    • Remove the cookies from the oven and allow them to cool completely before adding frosting.
    • If desired, place strawberry buttercream in to a piping bag with a wide tip. (This is not required. You can easily spread the frosting on to the cookies if that's easier.)
    • Once cookies have cooled completely, turn one sugar cookie upside down, with the bottom of the cookie facing up. Pipe on (or spread on) about a tablespoon of strawberry buttercream in to the center of the cookie.
    • Top with another cookie (placing the bottom of the cookie on top of the buttercream) creating a cookie sandwich.
    • Gently push town to allow the buttercream to push to the edges, so the buttercream is flush with the sides of the cookies.

    If Sprinkles are Desired

    • If decorating the sugar cookie sandwiches, after piping, carefully roll sides of cookie sandwiches in to a small dish that's filled with your favorite sprinkles.

    Nutrition

    Serving: 1sandwich | Calories: 420kcal | Carbohydrates: 52g | Protein: 1g | Fat: 24g | Saturated Fat: 10g | Polyunsaturated Fat: 6g | Monounsaturated Fat: 7g | Trans Fat: 1g | Cholesterol: 35mg | Sodium: 238mg | Potassium: 35mg | Fiber: 1g | Sugar: 47g | Vitamin A: 405IU | Vitamin C: 1mg | Calcium: 8mg | Iron: 1mg

    Turkey Cookies

    November 18, 2021

    Turkey cookies on a plate.

    Turkey Cookies: Kids of all ages are going to love these easy Oreo Thanksgiving turkey cookies! These adorable turkey cookies taste as good as they look! And, I’m sure they would love to make these adorable ice cream cone sugar cookies.

    thanksgiving oreo turkey cookies on white plate

    Why You’ll Love These Turkey Cookies

    Move over pumpkin pie, there’s a new dessert making its way to the Thanksgiving table! Your guests are going to love these Oreo turkey cookies, and do you know what the best part is? They are so stinking easy to put together!

    In fact, these cute little guys would be a great way to include younger kids in the Thanksgiving dinner preparations.

    If your kiddos like fun cookie recipes like this, they’ll also love what we did with these Minion cookies!

    [feast_advanced_jump_to]

    Ingredients

    If you’re looking for a fun project to get you in the holiday spirit, look no further. You can create these easy Oreo Thanksgiving turkey cookies with just a few simple ingredients you should be able to find at your local grocery store!

    • 8 Golden Oreos
    • 32 pieces of candy corn (Use any leftover candy corn on this Candy Corn Cake!)
    • ⅓ c + 8 chocolate candy melts (to make the chocolate frosting)
    • 16 small edible candy eyeballs
    • 8 Reese's Pieces in yellow or orange
    • Red frosting (I used Wilton Red Decorating Icing, but you could use any other brand or even make your own as long as it is thick and not runny)
    • Piping bag or ziplock bag (optional)
    Candy corn, candy melts, candy eyes, Reese's pieces, Golden Oreos and red decorating icing.
    Candy corn, candy melts, candy eyes, Golden Oreos, Reese’s Pieces and red frosting are all you need!

    Instructions

    Steps 1-3 of how to make turkey cookies.
    1. Open each of the Golden Oreos gently by slightly twisting them. Try to keep all of the cream on one side if possible. 
    1. Melt the ⅓ cup of chocolate candy melts according to the package instructions. Once the chocolate is smooth and creamy, drape a piping bag or ziplock bag over your hand and fill it with half of the melted chocolate. If you aren’t sure how to do this, there are some really helpful videos on YouTube (just search “How to fill a piping bag").
    2. Using kitchen shears, cut the tip of the bag at a diagonal angle making a small hole.
    Steps 1-4 of how to make turkey cookies.
    1. Pipe 4 small lines onto the cream side of the opened Oreos approximately ¼" apart and immediately place 4 candy corn onto the lines (pointed tip facing inward). 
    2. Pipe additional chocolate back and forth across the pointed tips of the candy corn.
    3. Immediately place the other side of the opened Oreo cookie on top of the chocolate. The melted chocolate hardens fairly fast, so you will need to move quickly. 
    4. Next, pipe some of the melted chocolate onto the middle of the top of the Oreos.

    Tip: If the chocolate has hardened again, you can place it back in the microwave for 20 seconds at 50% power to re-melt.

    Steps 8-11 of how to make turkey cookies.
    1. Place one of the reserved chocolate candy melts on top. You may need to refill your piping bag with additional melted chocolate.
    2. Next, pipe two small dots onto the chocolate candy melt and place the edible candy eyeballs onto the chocolate.
    3. Pipe a line in the middle of the candy melt just below the eyes.
    4. Attach a yellow or orange Reese's Pieces. You will need to hold it for about 5 seconds to let the chocolate set and harden a bit. 
    1. Lastly, make a little red curved line starting at the Reese's Pieces beak and going down about ½".

    Now, your adorable turkey cookies are ready to be "gobbled" up! 

    Oreo turkey cookies on a plate.

    Substitutions

    If you or someone you know is following a gluten-free diet, you can find gluten-free Oreo-type cookies in the natural aisle of most grocery stores or online. Kinnikinnick KinniTOOS Gluten-Free Vanilla Sandwich Cookies would be an excellent substitution for the Golden Oreos in this recipe.

    Storage

    If you put your Oreo turkey cookies in an airtight container, they should keep for up to a week.

    Expert Tips and FAQs

    What do I do if I can’t find any chocolate candy melts?

    If you can’t find the candy melts called for, you could replace them with mini Golden Oreos or even with Hershey’s chocolate kisses (if you use a chocolate kiss, skip the Reese’s Pieces beak) for your turkey’s face and use melted chocolate chips as your edible glue.

    What can I use instead of a piping bag or ziplock bag?

    If you don't have a piping bag or ziplock bag handy, you could use the tip of a knife or a toothpick to spread the melted chocolate. 

    Related Recipes

    If you loved this Easy Oreo Thanksgiving Turkey Cookie recipe, then you will probably want to check out some of the other Thanksgiving posts on the blog like this FREE Thanksgiving meal planner, these Free Printable Place Cards, or this Instant Pot Turkey Breast recipe!

    Recipe

    Turkey cookies on a plate.
    Print Pin
    5 from 4 votes

    Turkey Cookies

    Kids of all ages are going to love these easy Oreo Thanksgiving turkey cookies! These adorable turkey cookies taste as good as they look!
    Course Dessert, Snack
    Cuisine American
    per cookie 3 minutes minutes
    Total Time 24 minutes minutes
    Servings 8 cookies
    Calories 119kcal
    Author Jessica Burgess

    Ingredients

    • 8 Golden Oreos
    • 32 pieces candy corn
    • ⅓ cup chocolate candy melts
    • 8 pieces chocolate candy melts set aside, do not melt these
    • 16 small, edible candy eyeballs
    • 8 Reese's Pieces yellow or orange
    • Red frosting Wilton Red Decorating Icing or similar
    • Piping Bag or Ziplock Bag

    Instructions

    • Open each of the Golden Oreos gently by slightly twisting them. Try to keep all of the cream on one side if possible. 
    • Melt the ⅓ cup of chocolate candy melts according to the package instructions. Once the chocolate is smooth and creamy, drape a piping bag or ziplock bag over your hand and fill it with half of the melted chocolate. If you aren't sure how to do this, there are some really helpful videos on YouTube (just search "How to fill a piping bag").
    • Using kitchen shears, cut the tip of the bag at a diagonal angle making a small hole. Pipe 4 small lines onto the cream side of the opened Oreos approximately ¼" apart and immediately place 4 candy corn onto the lines (pointed tip facing inward).
    • Pipe additional chocolate back and forth across the pointed tips of the candy corn and immediately place the other side of the opened Oreo cookie on top of the chocolate. The melted chocolate hardens fairly fast, so you will need to move quickly. 
    • Next, pipe some of the melted chocolate onto the middle of the top of the Oreos and place one of the reserved chocolate candy melts on top. You may need to refill your piping bag with additional melted chocolate. 
      Tip: If the chocolate has hardened again, you can place it back in the microwave for 20 seconds at 50% power to re-melt. 
    • Pipe two small dots onto the chocolate candy melt and place the edible candy eyeballs onto the chocolate.
    • Pipe a line in the middle of the candy melt just below the eyes and attach a yellow or orange Reese's Pieces. You will need to hold it for about 5 seconds to let the chocolate set and harden a bit. 
    • Lastly, make a little red curved line starting at the Reese's Pieces beak and going down about ½". Your little turkeys are ready to be "gobbled" up! 

    Notes

    WHAT DO I DO IF I CAN’T FIND ANY CHOCOLATE CANDY MELTS?
    If you can’t find the candy melts called for, you could replace them with mini Golden Oreos or even with Hershey’s chocolate kisses (if you use a chocolate kiss, skip the Reese’s Pieces beak) for your turkey’s face and use melted chocolate chips as your edible glue.
     
    WHAT CAN I USE INSTEAD OF A PIPING BAG OR ZIPLOCK BAG?
    If you don’t have a piping bag or ziplock bag handy, you could use the tip of a knife or a toothpick to spread the melted chocolate. 

    Nutrition

    Serving: 1cookie | Calories: 119kcal | Carbohydrates: 18g | Protein: 1g | Fat: 5g | Saturated Fat: 2g | Polyunsaturated Fat: 1g | Monounsaturated Fat: 2g | Sodium: 55mg | Potassium: 38mg | Fiber: 1g | Sugar: 13g | Calcium: 6mg | Iron: 1mg

    Baked Brie with Maple Syrup and Bacon

    November 17, 2021

    Baked Brie with Maple Syrup and Bacon

    Baked Brie with Maple Syrup and Bacon: Gooey molten cheese with crunchy bacon and sweet maple syrup on top make this easy, three-ingredient appetizer pretty hard to resist!

    If hosting, serve this alongside this homemade chex mix and you’ll be set!

    Baked Brie with Maple Syrup and Bacon
    Baked Brie with Maple Syrup and Bacon

    Why You’ll Love This Brie Recipe

    This recipe is super quick and easy, but it looks so impressive! Whether you are looking for a holiday appetizer, a game day snack or just a tasty treat for when company comes over, this delicious appetizer is sure to be a crowd-pleaser!

    If you are planning a party, having easy appetizers is key to keeping guests happy and not overwhelming you, the host!

    There are tons of theme ideas there on the blog to inspire you, such as party favor ideas, gift ideas and food ideas (like this simple cheese ball or this smoked candied bacon). So fun!

    [feast_advanced_jump_to]

    Ingredients

    I love that this easy appetizer only requires three simple ingredients and 20 minutes to make. This is the perfect recipe to keep in mind for last-minute entertaining this holiday season!

    You’ll need:

    • 3 strips of bacon
    • 3 tablespoon of maple syrup
    • 8 ounce wheel of brie cheese        
    Brie, bacon and maple syrup is all you need.
    Brie, bacon and maple syrup is all you will need to make this easy appetizer.

    Instructions

    1. Preheat your oven to 325 degrees f.
    2. Cut off the top rind of the brie cheese (if you are having trouble cutting the top off, try freezing your wheel of brie for a few minutes and then shaving off the top rind while it’s partially frozen). To prepare the maple bacon topping, cut the bacon strips into small pieces (dice it).
    3. Once you have a preheated oven, place the brie cheese on a parchment lined, rimmed baking sheet, and bake for 8-10 minutes, or until the cheese is soft and just starting to melt.
    A wheel of brie on a parchment lined baking sheet.
    Place your wheel of brie (with the top cut off) on a parchment lined baking sheet.
    1. While the cheese is baking, cook the diced bacon bits in a skillet over medium heat until they become crispy. When they are crispy, remove the bacon bits from the pan and place them on a paper towel to soak up some of the grease. Carefully remove the pan from the burner and drain off the bacon grease.
    2. Right before serving, add the bacon bits back to the pan on medium heat and pour maple syrup over the bacon. Stir them together until they are warm and the bacon is completely coated in maple syrup.

    Tip: If you cook the maple syrup and bacon for too long, it caramelizes and gets SUPER sticky (making it hard to get out of the pan).

    To make sure that doesn’t happen, wait until the brie is almost finished baking before adding the maple syrup to the pan with the bacon and then put it on the hot brie immediately after it finished cooking and you’ve slid it onto the serving platter. 

    Bits of bacon cooking in a pan.
    Pour maple syrup over your crispy bacon bits in a pan and stir together.
    1. When the brie has finished cooking, carefully slide the parchment paper and brie onto a serving platter and top the warm brie with the maple bacon mixture. Serve with crostini or crackers and enjoy!
    A melted wheel of brie on a parchment lined baking sheet.
    Bake your brie until it is warm and melted.
    Baked Brie with Maple Syrup and Bacon
    Top your warm brie with the maple bacon mixture.

    Variations

    There are SO many different ways you can serve a warm wheel of brie. This recipe is delicious just the way it is, but if you are looking to change things up a bit you could try adding some chopped, soft dried figs into the pan along with the bacon in step 4.

    Or, try also sprinkling a little bit of brown sugar on top for some extra sweetness!

    Love nuts? Try adding pecans instead of bacon for a maple pecan brie!

    Storage

    I don’t expect there will be much of this recipe left (any recipe with melted cheese is always a big hit in our house), but on the off chance that you do have some to store you can place it in an airtight container and store it in the fridge for 2-3 days.

    When you are ready to reheat it, simply put it back on a parchment lined baking sheet and warm it in an oven preheated to 325 degree f until the brie starts to look melty again (melty? melted? Who cares- it’s warm, baked cheese!).

    Expert tips and FAQs

    Can you bake already cut brie?

    Absolutley! If you have cut brie around and want to try this recipe, I would recommend baking it in a shallow, oven-proof dish with parchment in the bottom instead of on a baking sheet (in case it runs a bit more than a complete wheel would).

    Follow the rest of the recipe as it’s written, but instead of sliding the parchment onto a serving platter simply serve the maple syrup and bacon topped brie right in the oven-proof dish you baked it in!

    What do you serve baked brie with?

    Ooooh, my friend, the options are endless. You can serve baked brie with basically any type of cracker, crostini or even baguette slices or other bread slices! You can also serve baked brie alongside apple slices and fresh cut veggies.

    If you’re looking to get fancy, you could put all of the options listed above together on a cutting board with your baked brie for a charcuterie style snack!

    What crackers go best with baked brie?

    This is personal preference, really, but the best cracker for a baked brie would be one that is sturdy enough to hold the cheese without breaking and that has a subtle flavour that won’t compete with the flavours in the recipe. You could eat baked brie with a simple Ritz cracker, a multigrain Breton cracker, or any number of other crackers from your grocery store’s cracker aisle!

    Can you eat the outer layer of brie?

    Yes, you can! The outer rind of a wheel of brie not only protects and holds the soft cheese inside together, it also adds flavour.

    What meat goes best with brie cheese?

    We are kind of partial to bacon with brie (if you hadn’t guessed), but if you are putting baked brie on a charcuterie snack plate there are lots of other meats that pair nicely with it. Some classic charcuterie meats include prosciutto, salami, and sopressa (which you should be able to find in your grocery’s deli or at the nearest Italian grocery store).

    What can I do with a slice of brie cheese?

    Why, eat it of course! Just teasing. There are a lot of different ways to eat sliced brie. You could eat it on its own, pair it with a cracker or slice of bread, add it into a sandwich, or slice it and put it on a salad!

    Baked Brie with Maple Syrup and Bacon

    Related Recipes

    If you love this recipe then you’ll also love this post on how to make a cheese board, and this yummy caperese grilled cheese recipe!

    Recipe

    Baked Brie with Maple Syrup and Bacon
    Print Pin
    5 from 11 votes

    Baked Brie with Maple Syrup and Bacon

    Baked Brie with Maple Syrup and Bacon…the name says it all! Gooey molten cheese with crunchy bacon and sweet maple syrup on top make this easy, three-ingredient appetizer pretty hard to resist!
    Course Appetizer, Side Dish, Snack
    Cuisine American
    Prep Time 10 minutes minutes
    Cook Time 10 minutes minutes
    Total Time 20 minutes minutes
    Servings 8 servings
    Calories 149kcal
    Author Jessica Burgess

    Ingredients

    • 3 strips bacon
    • 3 tablespoons pure maple syrup
    • 8 ounce wheel of brie

    Instructions

    • Preheat the oven to 325 degrees f.
    • Cut off the top rind of the brie cheese. To prepare the maple bacon topping, cut the bacon strips into small pieces (dice it).
    • Once the oven is preheated, place the brie cheese on a parchment lined pan and bake for 8-10 minutes, or until the cheese is soft and just starting to melt.
    • While the cheese is baking, cook the diced bacon bits in a skillet over medium heat until they become crispy. When they are crispy, remove the bacon bits from the pan and place them on a paper towel to soak up some of the grease. Carefully remove the pan from the burner and drain off the bacon grease.
    • Right before serving, add the bacon bits back to the pan on medium heat and pour maple syrup over the bacon. Stir them together until they are warm and the bacon is completely coated in maple syrup.
    • When the brie has finished cooking, carefully slide the parchment paper and brie onto a serving platter and top the warm brie with the maple bacon mixture. Serve with crostini or crackers and enjoy!

    Notes

    TIPS: If you are having trouble cutting the top rind off of your brie, try freezing your wheel of brie for a few minutes and then shaving off the top rind while it is partially frozen.
    If you cook the maple syrup and bacon for too long, it caramelizes and gets SUPER sticky (making it hard to get out of the pan). To make sure that doesn’t happen, wait until the brie is almost finished baking before adding the maple syrup to the pan with the bacon and then put it on the hot brie immediately after it finished cooking and you’ve slid it onto the serving platter. 
    STORAGE: I don’t expect there will be much of this recipe left (any recipe with melted cheese is always a big hit in our house), but on the off chance that you do have some to store you can place it in an airtight container and store it in the fridge for 2-3 days. 
    When you are ready to reheat it, simply put it back on a parchment lined baking sheet and warm it in an oven preheated to 325 degree f until the brie starts to look melty again (melty? melted? Who cares- it’s warm, baked cheese!). 

    Nutrition

    Serving: 1serving | Calories: 149kcal | Carbohydrates: 5g | Protein: 7g | Fat: 11g | Saturated Fat: 6g | Polyunsaturated Fat: 1g | Monounsaturated Fat: 4g | Trans Fat: 1g | Cholesterol: 34mg | Sodium: 234mg | Potassium: 76mg | Sugar: 5g | Vitamin A: 171IU | Calcium: 61mg | Iron: 1mg

    Hello Dolly Bars

    November 7, 2021

    hello dollies bars stacked on white plate

    Hello Dolly Bars are an easy recipe made using butterscotch chips, graham cracker crumbs, sweetened condensed milk, melted butter, almonds, semi-sweet chocolate chips, and coconut flakes! It’s a dessert recipe that’s easy to make and you’ll be hooked on them!

    Butterscotch is an ingredient that adds such a pop of flavor, like in these butterscotch brownies, and they’d compliment these Hello Dollies bars perfectly on a dessert tray!

    Hello Dollies Bars stacked up on white plate

    This is one of those desserts that fits right in at a gathering. You can find more potluck desserts here.

    Why You’ll Love These Hello Dollie Bars

    These golden brown bars are sweet treats that are full of so much flavor in each bite! They’re also the perfect easy dessert or even snack idea if you need something on the go.

    [feast_advanced_jump_to]

    Ingredients

    See the full recipe card with instructions toward the bottom of this post!

    What makes these magic cookie bars so great, is that the ingredients are simple, and most can be stored in the pantry; making it a dessert recipe that can be made at the last minute because you can have the ingredients stocked up in the pantry!

    What you’ll need for these Hello Dollies:

    • ½ cup melted salted butter
    • 1 ½ cups graham crumbs
    • 1 can sweetened condensed milk
    • 1 cup semi-sweet chocolate chips
    • 1 cup butterscotch chips
    • 1 cup flaked or shredded coconut
    • 1 cup chopped almonds   

    Substitutions

    Don’t have all of the ingredients on hand? Or do you prefer a different kind of ingredient? No problem! Here are our favorite substitution ideas for these bar cookies:

    • Peanut butter chips instead of butterscotch
    • White chocolate chips, dark chocolate chips or milk chocolate chips instead of semisweet
    • Gluten-free graham crackers can easily be substituted
    • You can use aluminum foil instead of wax paper or parchment paper
    • Unsalted butter can be used instead of salted but you may do a pinch of salt in the graham cracker mixture to help offset the sweetness.
    • Add in toffee chips for some extra crunch in this recipe
    hello dollies ingredients

    Instructions

    1. Preheat oven to 350 degrees.
    2. Prepare a 9 x 13 inch baking dish or baking pan, by greasing it or lining it with parchment paper or wax paper. (The parchment paper makes cleanup so much easier!)
    3. In a medium-sized mixing bowl, stir to combine the crushed graham crackers and melted butter. 
    batter in bowl for magic bars
    1. Press the graham cracker crumb mixture in the bottom of the prepared 9 x 13 inch pan to create the buttery graham cracker crust.
    base layer in baking dish for magic bars
    graham cracker butter layer
    1. Slowly pour over the entire can of sweetened condensed milk so it covers the graham crust.
    sweetened condensed milk layer
    sweetened condensed milk layer
    1. Sprinkle with coconut (reserving a bit for the top), sprinkling as evenly as possible across the top of the sweetened condensed milk.
    Sprinkled coconut flakes layer
    1. Next, it’s time to create a layer of chocolate chips. First, sprinkle on the butterscotch chips.
    butterscotch chips for next layer
    1. Sprinkle with semi-sweet chocolate chips.
    semi-sweet chocolate chips layer
    1. Sprinkle on chopped nuts, trying to spread them out as evenly as possible.
    nuts layer on seven layer bars
    Chopped nuts layer
    1. Lastly, add the last little bit of coconut flakes to the top.
    added additional coconut flakes
    Top with additional coconut
    1. Bake at 350 degrees for 25-30 minutes, or until the top is starting to get golden brown.
    2. Cool pan on a wire rack for 15 minutes (at least) before removing the squares with the parchment paper.
    Baked hello dolly bars
    Baked 7 Layer Bars
    1. Once completely cooled to room temperature, slice into 24 slices and serve the dessert bars or store in an airtight container.
    Hello Dolly Bars Cut in to Squares
    magic cookie bar pieces

    This simple recipe may just become your new favorite dessert! It’s easy, and delicious and you can even package them up to give as great gifts!

    hello dollies cookies bars stacked

    Storage

    This gooey bar dessert is even good leftover and are great treats for later!

    Store any cooled bars in an airtight container and consume within 4-5 days.

    seven-layer bar on paper

    FAQs and Expert Tips

    Why are they called Hello Dolly Bars?

    In the 1960’s the musical “Hello Dolly” was very popular and it was the same time that these “magic” bars were introduced and were given the “hello dolly” name.

    Do Hello Dollies Bars need to be refrigerated?

    No! They can sit out at room temperature on the counter for a few days! But they can also be refrigerated if you prefer, to help them stay fresh longer.

    What’s the difference between 7-layer bars, magic bars and hello dolly bars?

    They are essentially all the same things but are just called different things by some! The bars are considered “magic” since the layers can easily melt together and hold in place.

    Related Recipes

    Love butterscotch desserts? Don’t miss this no bake butterscotch pie recipe.

    If you love this easy dessert idea, then you’ll also love the Cookies N Cream Rice Krispy Treats, these Butterscotch Brownies, Cornflake brownies, and this edible cookie dough!

    Recipe

    Hello dollies bars stacked
    Print Pin
    5 from 4 votes

    Hello Dolly Bars

    Hello Dolly Bars, or sometimes called "magic bars" or "7 layer bars", this easy recipe is made using butterscotch chips, graham cracker crumbs, sweetened condensed milk, melted butter, almonds, semi-sweet chocolate chips, and coconut flakes!
    Course Dessert
    Cuisine American
    Prep Time 10 minutes minutes
    Cook Time 25 minutes minutes
    Total Time 35 minutes minutes
    Servings 24 bars
    Calories 230kcal
    Author Jessica Burgess

    Ingredients

    • ½ cup melted salted butter unsalted is ok too
    • 1 ½ cups graham cracker crumbs crushed graham crackers
    • 1 can sweetened condensed milk 14 ounce can
    • 1 cup semi-sweet chocolate chips see post for substitution ideas
    • 1 cup butterscotch chips see post for substitution ideas
    • 1 cup flaked coconut sweetened (or shredded coconut)
    • 1 cup chopped almonds

    Instructions

    • Preheat oven to 350 degrees.
    • Prepare a 9 x 13 inch baking dish by greasing it or lining it with parchment paper.
    • In a medium sized bowl, stir to combine the graham crumbs and melted butter.
    • Press graham crumb mixture in the bottom of the prepared 9 x 13 inch pan which will create a buttery, graham cracker crust.
    • Pour the entire can of sweetened condensed milk over the graham crust.
    • Sprinkle with coconut (reserve a little for the top), then sprinkle a layer of butterscotch chips, chocolate chips, nuts and then the reamaining shredded coconut.
    • Bake at 350 degrees for 25-30 minutes, or until the top is starting to get golden brown.
    • Cool the pan on a wire rack for 15 minutes (at least) before removing the squares with the parchment paper.
    • Once completely cooled to room temperature, slice into 24 slices and serve!

    Video

    Notes

    Storage Tips
    Leftover bars do not need to be refrigerated. They can be stored in an airtight container for up to 3 days. However, if you do want to keep them fresh, longer, you can place them in the refrigerator.

    Nutrition

    Serving: 1bar | Calories: 230kcal | Carbohydrates: 25g | Protein: 3g | Fat: 13g | Saturated Fat: 7g | Polyunsaturated Fat: 1g | Monounsaturated Fat: 4g | Trans Fat: 1g | Cholesterol: 17mg | Sodium: 119mg | Potassium: 165mg | Fiber: 2g | Sugar: 19g | Vitamin A: 173IU | Vitamin C: 1mg | Calcium: 70mg | Iron: 1mg

    Air Fryer Totchos

    November 6, 2021

    air fryer tater tots - loaded

    Loaded tater tots in the air fryer (or Air Fryer Totchos) are easy to make, especially when you can cook frozen tater tots, leaving very little prep!

    For the best air fryer tater tots, make LOADED tater tots or “tater tot nachos” in the air fryer, with delicious toppings, and it may just become one of your new favorite air fryer recipes!

    air fryer tater tots loaded with toppings
    Loaded Tater Tots – Or “Tater Tot Nachos”

    Why You’ll Love This Easy Recipe:

    Whether you need to add to your list of favorite snack recipes, or you need an easy appetizer recipe for game day, movie night, or even if you just need a great side dish, these golden brown tots, loaded with cheese, jalapenos, pico de gallo and your favorite toppings, may be the best thing to ever come out of your air fryer basket!

    [feast_advanced_jump_to]

    Ingredients

    The best part of these “tater tot nachos”, as we like to call them sometimes, is that you can add your favorite toppings and you don’t have to stick to the ingredients below but it’s definitely our favorite combination!

    • 4 slices bacon, cut in to ½ inch pieces
    • 1 pound tater tots, frozen
    • ½ cup shredded colby jack (or shredded cheddar cheese)
    • 1 jalapeno, sliced
    • 2 green onions, sliced
    • ¼ cup of pico (This easy pico de Gallo is great!)
    • ¼ cup sour cream
    Ingredients for loaded tater tots
    Ingredients for Loaded Tater Tots

    Instructions

    1. Place the uncooked bacon strips into the air fryer at 400°F for 11 minutes until the bacon is crispy. If the bacon is not cooked through, you might need to add a few minutes, depending on your air fryer.
    Uncooked bacon in air fryer
    Uncooked bacon pieces
    Cooked bacon in air fryer basket
    Cooked bacon in air fryer
    1. Remove the bacon from the basket and place in a bowl/plate that’s covered with paper towels, to set aside until the air fryer tater tots are done cooking.

      Add the tater tots in to the air fryer basket. (Ideally, a single layer is recommended, although a little overlap is ok since you’ll be shaking the basket. However it’s best not to put a large amount of tots in the fryer to prevent undercooking.) Set the air fryer to 400°F for 15 minutes, shaking the basket halfway through to stir the tater tots.
    frozen tater tots in air fryer
    Frozen tater tots
    cooked tater tots in air fryer
    Cooked tater tots
    1. Sprinkle the tater tots with the bacon and cheese. Set the air fryer to 400°F for 2 minutes until the cheese is melted. 
    Bacon and Tater Tots
    Shredded cheese on tater tots
    Shredded Cheese on Tots
    Melted cheese on tater tots
    Melted Cheese on Tater Tots
    1. Remove the tots from the air fryer and top them with your favorite toppings! Like

    Slices of jalapenos…

    Add jalapenos on loaded nachos

    Chopped green onions…

    Green onions on top of tater tots

    Fresh pico de gallo…

    Pico de gallo added to loaded nachos

    Or sour cream!

    sour cream on top of tater tots

    Topping Ideas for Tater Tots

    If you’re looking for more topping ideas for tater tots, here are other favorites you may love:

    • My easy Guacamole recipe
    • Salsa
    • Lettuce
    • Queso
    • Black Olives
    • Refried Beans
    • Pulled pork
    • Chicken bites
    • Leftover steak bites
    • Chili
    • Jalapeno ranch
    • Garlic powder
    • Onion powder
    Loaded tater tots in the air fryer

    What Goes Well with Loaded Tater Tots

    Although these “tater tot nachos” can be a meal themselves, it’s also fun to serve other favorite appetizers and side dishes with them. Like this taco layer dip and this frito chili pie that has similar toppings!

    Dipping Sauces for Tater Tots

    Dipping tater tots in to your favorite dipping sauce can also be a great option! For instance:

    • honey mustard
    • barbecue sauce
    • ranch dressing

    More Air Fryer Recipes You’ll Love

    If you love using your air fryer, then you’ll also enjoy this easy tutorial for air fryer bacon, air fryer tofu, air fryer bacon and these air fryer hamburgers!

    Loaded Tachos

    Variations

    Love the idea of loaded tater tots but want more ideas? Consider the following ideas to use in place of tater tots!

    • Cauliflower tater tots
    • Veggie tots
    • French fries
    • Sweet potato fries or sweet potato tots
    • Homemade tater tots
    • Leftover tater tots
    • Potato puffs
    • Air fryer Hashbrowns
    • Air fryer breakfast potatoes
    Loaded tater tots Recipe
    Can you make loaded tater tots ahead of time?

    The longer these tater tots are sitting around, the more they lose their crispy texture, so I recommend eating these while they are hot. 

    Is there a way to cut down on the cooking time, so I don't have to wait so long to enjoy these?

    The quickest way to make these is by using pre-cooked bacon so you can skip the bacon cooking process.

    How do I get the crispiest tater tots?

    For crispy air fryer tater tots, using an air fryer is recommended for maximum crispness! However if you don’t have an air fryer, cooking them in the oven on 425°, on a baking sheet in a single layer, for 19-21 minutes is the next best. Microwaving tater tots can give more of a soggy texture though so that’s not recommended.

    Air Fryer Used for This Recipe

    The air fryer used for this recipe is a Ninja Foodie. However, using your favorite air fryer is perfectly fine! Please note that for different, larger air fryer or smaller air fryers, the cook time can vary.

    So it’s best to watch to see when the air fryer tots are golden brown for best results!

    Storage

    If you have leftover tots, if they have toppings on them, they could get soggy. However, it’s worth it to place them back in the air fryer to reheat and warm back up for ultimate crispiness!

    Recipe

    Air fryer totchos.
    Print Pin
    5 from 4 votes

    Air Fryer Totchos

    Air Fryer Totchos: Crispy tater tots made in the air fryer, then topped with favorite toppings such as cheese, green onions, jalapeños, and bacon!
    Course Appetizer, Main Course, Snack
    Cuisine American
    Prep Time 5 minutes minutes
    Cook Time 26 minutes minutes
    Total Time 31 minutes minutes
    Servings 2 servings
    Calories 789kcal
    Author Jessica Burgess

    Ingredients

    • 4 slices bacon cut in to ½ inch pieces
    • 1 pound frozen tater tots
    • ½ cup shredded colby jack cheese or shredded cheddar cheese
    • 1 jalapeno sliced (can use pickled jalapeños)
    • 2 green onions sliced
    • ¼ cup pico de gallo store-bought or this pico de Gallo recipe
    • ¼ cup sour cream

    Instructions

    • Place the bacon into the air fryer at 400°F for 11 minutes until the bacon is crispy. If the bacon is not cooked through, you might need to add a few minutes, depending on your air fryer.
    • Remove the bacon from the basket and add in the tater tots.
    • Set the air fryer to 400°F for 15 minutes, shaking the basket halfway through to stir the tater tots.
    • Sprinkle the tater tots with the bacon and cheese. Set the air fryer to 400°F for 2 minutes until the cheese is melted. 
    • Remove the tots from the air fryer and top them with the jalapeno, green onions, pico de gallo, and sour cream. 

    Notes

    Want more toppings for your tater tots? Try these favorites:
    • My easy Guacamole recipe
    • Salsa
    • Lettuce
    • Queso
    • Black Olives
    • Refried Beans
    • Pulled pork
    • Chicken bites
    • Leftover steak bites
    • Chili
    • Jalapeno ranch
    • Garlic powder
    • Onion powder

    Nutrition

    Serving: 1serving | Calories: 789kcal | Carbohydrates: 65g | Protein: 19g | Fat: 53g | Saturated Fat: 19g | Polyunsaturated Fat: 8g | Monounsaturated Fat: 22g | Trans Fat: 1g | Cholesterol: 75mg | Sodium: 1686mg | Potassium: 821mg | Fiber: 5g | Sugar: 5g | Vitamin A: 861IU | Vitamin C: 29mg | Calcium: 299mg | Iron: 2mg

    Peanut Butter and Syrup Sandwich

    October 29, 2021

    Peanut butter and syrup sandwich sliced in half, stacked on top of each other.

    This peanut butter and syrup sandwich recipe is the perfect side dish for this simple chili recipe or your favorite soup recipe or a great, sweet lunch idea!

    The maple syrup adds another layer of sweetness to your already favorite, peanut butter sandwiches! See below how much syrup pairs great with creamy peanut butter or crunchy peanut butter for this sandwich!

    peanut butter and syrup sandwich

    Why You’ll Love These

    Sometimes a peanut butter sandwich is just the sweet treat we crave. But when you can add a simple ingredient to uplevel this popular sandwich, why not!?

    We absolutely love adding small changes to common recipes to keep things fun and exciting! Like when we made fried peanut butter and jelly sandwiches or even when we made donut burgers!

    [feast_advanced_jump_to]

    Ingredients

    As I’m sure you can guess, it doesn’t take much, or any surprising ingredients to make this peanut butter and syrup sandwich!

    So what does it take?

    • ¼ cup peanut butter 
    • 1 tablespoon syrup
    • 2 slices of bread (we prefer white bread)

    Or double the ingredients and make a thicker sandwich, closer to what you see here in the photos!

    Ingredients for peanut butter and syrup sandwich

    Instructions

    I know it sounds simple to make a peanut butter sandwich but if you missed “how to make a peanut butter and jelly the right way” you may want to see our favorite “trick” so we don’t rip the bread! It has been really fun to hear how you all make your pb&j’s too!

    1. We like to combine the peanut butter and the syrup in a small bowl before spreading on to the bread. But of course you can just spread the peanut butter on and then drizzle maple syrup on top of the peanut butter if you prefer.
    Peanut butter and syrup mixed together in white bowl
    1. When you’re ready to serve the sandwiches (making them too soon and leaving them out can cause your bread to get stale) spread the peanut butter and syrup mixture on to one slice of bread.
    2. Then, simply top with another slice of bread and it’s ready to eat or serve along side your favorite soup!
    Peanut butter and syrup sandwich on plate with red napkin

    Substitutions

    If you’re not a fan of peanut butter or syrup, here are substitutions (like other nut butters) you can experiment with to see if you like that more:

    • Honey – this can be used instead of syrup which will still give it a sweetness you’re looking for!
    • Chocolate Syrup
    • Caramel Syrup
    • Almond Butter
    • Nutella – We absolutely loving using Nutella on our favorite things like on these Nutella sugar cookies!
    • Cashew Butter
    • Seed Butter – you may be able to find a pumpkin seed butter or even a sunflower butter to use instead of peanut butter.

    Variations

    Want to do a little more on your peanut butter and syrup sandwiches? Here are some fun ideas to add to it:

    • Spicy – add some chili pepper
    • Crunch – crushed potato chips, crushed nuts, coconut flakes
    • Sweet – marshmallows (like we added to this marshmallow pb& j) or mashmallow fluff
    • Jelly – Add your favorite jelly or jam (For instance: orange marmalade, grape jelly, strawberry jelly)
    • Cook sandwiches – instead of eating the sandwiches room temperature, you can cook them over medium heat (like you do in this chicken grilled cheese) and once golden brown, serve! The melty peanut butter, combined with the now warm syrup just may be the best way to consume this sandwich!

    What to Serve with Peanut Butter Sandwich

    Usually, the peanut butter sandwich is served alongside a main course but it can definitely be the hero of a meal with its own side dishes! For instance, the sweet potato fries would pair perfectly, a handful of potato chips or get in some veggies with canned green beans!

    More Recipes You’ll Love

    If you love sweet treats like this, then you’ll love our easy French toast recipe and this no-bake peanut butter pie!

    Recipe

    Peanut butter and syrup sandwich sliced in half, stacked on top of each other.
    Print Pin
    5 from 8 votes

    Peanut Butter and Syrup Sandwich

    This peanut butter and syrup sandwich recipe is the perfect side dish for chili or your favorite soup or a great, sweet lunch idea!
    Course Breakfast, Main Course, Side Dish, Snack
    Cuisine American
    Prep Time 5 minutes minutes
    Cook Time 0 minutes minutes
    Total Time 5 minutes minutes
    Servings 1 sandwich
    Calories 584kcal
    Author Jessica Burgess

    Ingredients

    • ¼ cup peanut butter creamy or crunchy
    • 1 tablespoon maple syrup
    • 2 slices bread we prefer regular white bread

    Instructions

    • In a small bowl, mix together the peanut butter and syrup until evenly combined. (Or you can simply spread the peanut butter on the bread and then drizzle the syrup on top, however mixing it together gives the sandwich a more evenly distributed flavor combo.)
    • Once mixed, using a spoon, carefully spread the peanut butter-syrup mixture on one slice of bread.
    • Top with the remaining slice of bread and serve! (Or see additional ideas, toppings, etc. in the blog post!)

    Video

    Notes

    Substitutions
    If you’re not a fan of peanut butter or syrup, here are sub substitutions (like other nut butters) you can experiment with to see if you like that more:
    • Honey – this can be used instead of syrup which will still give it a sweetness you’re looking for!
    • Chocolate Syrup
    • Caramel Syrup
    • Almond Butter
    • Nutella 
    • Cashew Butter
    • Seed Butter – you may be able to find a pumpkin seed butter or even a sunflower butter to use instead of peanut butter.
    Variations
    Want to do a little more on your peanut butter and syrup sandwiches? Here are some fun ideas to add to it:
    • Spicy – add some chili pepper
    • Crunch – crushed potato chips, crushed nuts, coconut flakes
    • Sweet – marshmallows 
    • Jelly – Add your favorite jelly or jam (For instance: orange marmalade, grape jelly, strawberry jelly)
    • Cook sandwiches – instead of eating the sandwiches room temperature, you can cook them over medium heat (like you would a grilled cheese) and once golden brown, serve! The melty peanut butter, combined with the now warm syrup just may be the best way to consume this sandwich!

    Nutrition

    Serving: 1sandwich | Calories: 584kcal | Carbohydrates: 54g | Protein: 22g | Fat: 34g | Saturated Fat: 7g | Polyunsaturated Fat: 10g | Monounsaturated Fat: 16g | Trans Fat: 1g | Sodium: 589mg | Potassium: 566mg | Fiber: 6g | Sugar: 21g | Vitamin A: 1IU | Vitamin C: 1mg | Calcium: 127mg | Iron: 3mg

    Waffle Burger

    October 24, 2021

    Waffle Burger on white plate with small bowl of syrup

    This waffle burger is a combination of savory and sweet, and is one of the most ultimate bacon cheeseburgers you’ll ever have!

    Quick Overview: An easy recipe, made with a burger patty, golden brown waffle, topped with melted cheese, bacon slices and an over easy egg.

    Waffle Burger

    Waffle burgers are one of our favorite recipes to splurge on when looking for an easy breakfast idea or dinner idea.

    When we made donut burgers, the combination of the two were incredible so we immediately started thinking of new fun hamburger recipes!

    [feast_advanced_jump_to]

    Why You’ll Love This Recipe

    Not only are waffle burgers fun to look at, the flavors of the sweet waffle, combined with the savory burger, bacon, egg and cheese, can be a nice surprise!

    Plus, it’s fun to create your own combinations with what kind of waffles you use, how you cook your egg, different types of bacon and more, so you can make this as easy as you’d like or get really creative, making everything from scratch.

    Ingredients

    For this recipe, we like to keep things easy and use a lot of pre-made ingredients but feel free to make your waffles from scratch and even use pre-pattied burgers if you’d like!

    For the full ingredients list and instructions, please see full recipe card toward the bottom of this post.

    • waffles
    • burger patties
    • sliced American cheese
    • slices of bacon
    • egg
    • salt
    • pepper
    • syrup (if desired)
    Waffles in package with other ingredients in background

    Waffles

    When I can find these pre-packaged pastry Belgian waffles in the bakery section, I grab them specifically for this waffle cheeseburger because they are absolutely delicious! They’re soft, yet they have a small sugary “crunch” to them that adds the greatest texture to this soft, pillowy burger/egg combo.

    However you can use any waffle you’d like! For instance:

    • Storebought waffles
    • Frozen waffels (like an Eggo waffle)
    • Homemade waffles with a waffle maker
    • Blueberry waffles
    • Chocolate chip waffles
    • Cheese waffle
    • Chocolate Waffles
    Waffle burger ingredients

    Burgers

    When it comes to the burgers, you can make them with your preferred method. Our favorite way is to bake burger patties.

    However, you may prefer to use a frying pan and cook burgers on the stove, on the grill, burgers in the smoker, in the air fryer burgers, in an burgers in an electric skillet, or grill burgers from frozen, etc. Any cooking method is perfectly fine!

    Eggs

    The egg is totally optional but if you’d like to add an egg to this recipe, we love the using an over-easy egg. However, you may also prefer a fried egg, sunny side or over medium egg!

    Bacon

    If using bacon for this recipe, thick cut bacon is a favorite however you can use any type of bacon that you have on hand or that you prefer.

    It can be fun to also try different bacon seasonings like:

    • maple bacon
    • honey bacon
    • peppered bacon
    • brown sugar bacon
    Waffle burger assembled on white plate

    Step-by-Step Instructions

    1. First, if making your waffles homemade, you’ll want to do that first, so they’re ready to use as buns when your burger patties, bacon and eggs have been cooked. If making yoru own and using a Belgian waffle iron, here is a really easy Belgian Waffle tutorial if it’s helpful. (Just make sure to pay attention to how many waffles your recipe calls for, so you have enough waffles for the burgers. You’ll need 2 waffles per burger and this recipe makes 3 burgers – so 6 waffles are needed.)

    If using storebought or frozen waffles, you can wait to warm them up when it’s time to build the burger.

    1. If you’re wanting to bake the burgers like we do, place ground beef burger patties in greased baking dish, and place in a 375° oven, and bake for 20-25 minutes or until the juices run clear.
    seasoned burger patties in baking dish
    1. While burger patties are baking, this is a great time to prepare your eggs and your bacon.
    2. For the bacon, you can cook your bacon with your favorite method. Our favorite is to cook bacon in the air fryer, however you can cook bacon in a skillet on the stove, bake it in the oven, or even cook it for a few minutes in the microwave.
    3. If making over-easy eggs, simply melt a little butter in a skillet on medium heat and gently crack egg in to skillet. Allow egg to cook for a few minutes and once the whites of the egg are no longer runny, gently turn the egg over and allow the yolk-side of the egg to cook for about one minute. Carefully remove from skillet and set-aside. (Keep warm if possible.)
    4. If making cheeseburgers, once the burgers have finished baking, place a slice of cheese on each fully cooked burger and with the oven turned off, allow the leftover heat to gently melt the cheese on to each patty. Once the cheese melts, remove from oven after cheese has melted. (Approximately 2-3 minutes.)
    Cooked burgers with cheese, over easy eggs, and bacon
    1. Once all of the burger “layers” are cooked and ready, it’s time to assemble this waffle burger!
    2. Take one waffle, and top with cheeseburger. Next, add on the over-easy egg, and top with bacon.
    3. Place second waffle on top and if desired, serve without syrup. (See syrup step below.)
    Close up image of waffle buns on cheeseburger
    1. If serving with syrup, warm up your maple syrup for best results. Then, gently pour over the assembled waffle burger and serve with a fork!
    Syrup pouring on to waffle burger

    TIP: If serving with syrup, it’s best to use a plate with raised sides as this can get deliciously messy, quick!

    Syrup dripping down top of waffle burger

    Substitutions

    Want to switch some things out? Feel free to! You may even find it fun to switch out the beef patty for sausage patties, or a crispy chicken breast like we did for our zinger burgers!

    📖 Variations

    Feel free to also add your favorite toppings to this burger! Here are some additional ideas of what to add to your new favorite burger!

    • jalapeno pepper
    • black pepper
    • crispy fried onions
    • onion ring
    • ham
    • Canadian bacon
    • sausage

    What to Serve with Waffle Burgers

    If making a meal out of these burgers, it’s fun to serve them with air fryer hashbrown patties or air fryer breakfast potatoes.

    Storage

    If you have leftovers, it’s best to store each item, separately, so the ingredients will not become soggy.

    Store items in airtight containers or plastic ziptop bags, in the refrigerator and simply reheat when ready to eat again.

    Related Recipes

    If you love fun burger recipes as much as we do, then I think you’re going to also really love this burger that has pineapples on it!

    Recipe

    Burger using waffles as buns.
    Print Pin
    5 from 4 votes

    Waffle Burger

    This waffle burger is a combination of savory and sweet, and is one of the most ultimate bacon cheeseburgers you'll ever have!
    Course Breakfast, Main Course
    Cuisine American
    Prep Time 3 minutes minutes
    Cook Time 30 minutes minutes
    Total Time 33 minutes minutes
    Servings 3 burgers
    Calories 956kcal
    Author Jessica Burgess

    Ingredients

    • 1 pound ground beef or 3 pre-pattied burger patties
    • 3 slices bacon
    • 6 waffles
    • 3 slices American cheese
    • 3 eggs
    • butter optional for cooking egg
    • salt if desired
    • pepper if desired
    • ½ cup maple syrup if desired

    Instructions

    Waffles

    • First, if making homemade waffles, you'll want to do that first, so they're ready to use as buns when your burger patties, bacon and eggs have been cooked. Here is a really easy Belgian Waffle tutorial if choosing to make your own. (Just make sure to pay attention to how many waffles your recipe calls for, so you have enough waffles for the burgers. You'll need 2 waffles per burger and this recipe makes 3 burgers – so 6 waffles are needed.)
    • If using storebought or frozen waffles, you can wait to warm them up when it's time to build the burger.

    Burgers

    • Shape ground beef in to 3 burger patties and sprinkle with salt and pepper (pinch of each on each burger, if desired) and place in greased baking dish.
    • Bake in a 375° oven for 20-25 minutes or until the juices run clear.
    • If making cheeseburgers, once the burgers have finished baking, place a slice of cheese on each fully cooked burger and with the oven turned off, allow the leftover heat to gently melt the cheese on to each patty. Once the cheese melts, remove from oven after cheese has melted. (Approximately 2-3 minutes.)

    Bacon

    • While burgers are baking, you can cook your bacon with your favorite method. Our favorite is to cook bacon in the air fryer, however you can cook bacon in a skillet on the stove, bake it in the oven, or even cook it for a few minutes in the microwave. If cooking in a skillet, cook low and slow for about 10 minutes – flipping halfway through. (Crispy bacon is ideal!)

    Eggs

    • If making over-easy eggs, simply melt a little butter in a skillet on medium heat and gently crack egg in to skillet.
    • Allow egg to cook for a few minutes and once the whites of the egg are no longer runny, gently turn the egg over and allow the yolk-side of the egg to cook for about one minute. Carefully remove from skillet and set-aside. (Keep warm if possible.)

    Assemble the Waffle Burger

    • Once all of the burger "layers" are cooked and ready, it's time to assemble this waffle burger!
    • Take one waffle, and top with cheeseburger.
    • Next, add on the over-easy egg, and top with bacon.
    • Place second waffle on top and if desired, serve without syrup.
    • If serving with syrup, warm up your maple syrup for best results. Then, gently pour over assembled waffle burger and serve with a fork!

    Video

    Notes

    Feel free to also add your favorite toppings to this burger! Here are some additional ideas of what to add to your new favorite burger!
    • jalapeno pepper
    • black pepper
    • crispy fried onions
    • onion ring
    • ham
    • Canadian bacon
    • sausage

    Nutrition

    Serving: 1burger | Calories: 956kcal | Carbohydrates: 65g | Protein: 43g | Fat: 57g | Saturated Fat: 22g | Polyunsaturated Fat: 6g | Monounsaturated Fat: 22g | Trans Fat: 2g | Cholesterol: 325mg | Sodium: 1075mg | Potassium: 721mg | Fiber: 1g | Sugar: 35g | Vitamin A: 1509IU | Calcium: 493mg | Iron: 9mg

    The BEST Corn Casserole

    October 23, 2021

    Corn Casserole Recipe

    This corn casserole recipe is the perfect side dish for a holiday meal, uses simple ingredients, and is a favorite recipe loved by so many!

    Quick Overview: This recipe uses canned corn, canned cream corn, butter, sour cream, and Jiffy cornbread mix.

    Corn Casserole serving on white plate

    This easy recipe is a savory side dish for your holiday table but is delicious any time of year! If you love corn recipes, then you’ll definitely want to make this corn dip too, that’s great for entertaining.

    Serve this recipe alongside other holiday side dish recipes like our broccoli casserole, our popular green bean casserole and this side salad that has over 400 reviews!

    [feast_advanced_jump_to]

    Why You’ll Love This Recipe

    This great side dish has become a holiday staple that is starting to show up on many holiday dinner tables each year (even though it’s great all year long and any party). It’s easy to make, uses simple ingredients, and gives that comfort food flavor we all love!

    Ingredients

    With this recipe only using a few, simple ingredients, it can be a dish that’s easy to take along to a holiday gathering or make alongside your favorite holiday main dishes.

    • Jiffy corn muffin mix (or similar package dry corn bread mix)
    • salted butter (unsalted will work too but maybe add a dash of salt!)
    • sour cream
    • whole kernel corn (drained – making sure to get out as much water, moisture as possible.)
    • creamed corn (or cream-style corn), which is also the star ingredient in this sweet cornbread recipe.
    corn casserole ingredients
    Corn Casserole Ingredients

    Step-by-Step Instructions

    Preheat oven to 350 degrees.

    First, melt the butter in a small microwaveable dish.

    Then, grab a medium bowl, or one large enough to hold all of the ingredients in the ingredients list.

    Pour in all of the cans of corn, sour cream, and the melted butter in to bowl and stir to combine.

    Corn, butter, sour cream in mixing bowl

    Next, add in the Jiffy cornbread mix.

    Add in cornbread muffin mix - Jiffy to corn mixture

    Stir to combine and mix until evenly mixed.

    Corn muffin mix, mixed in with ingredients in mixing bowl
    Stir in Jiffy corn bread mix until evenly combined

    Grease an 8×8 (or 9×9) baking dish (or casserole dish) with cooking spray, and pour in corn casserole mixture.

    Corn casserole mix placed in greased baking dish

    Place the baking dish on a middle rack in the oven, and bake in a 350° oven for 40-45 minutes or until golden brown. (Note: When I bake in a dish other than glass, it takes about 50-55 minutes for it to fully bake. You will know it’s ready when the sides are turning golden brown and you see bubbling.)

    Baked corn casserole in baking dish
    Baked corn casserole

    What to Serve with this Creamy Corn Casserole

    This buttery casserole is one of our favorite side dishes and a perfect compliment on our Thanksgiving table (or any time of year) to main course like Instant Pot Turkey Breast or this Creole Turkey!

    Corn casserole plated serving on white plate

    Variations

    If desired, you can add additional toppings or mix-ins to make this easy corn casserole recipe even more fun! For instance:

    • Cheddar Cheese
    • Green Onions
    • Diced Jalapenos
    • Red Bell Pepper
    • Green Bell Pepper
    • Diced Onions
    • Heavy Cream – a dash of this could make it creamier but be cautious of too much liquid changing the texture/cooktime.
    • Cream of Chicken Soup – Could be a great addition if you do not have cream-style corn and can offer additional flavor but be cautious of the cooking time and texture difference it could result in.

    Sometimes it can be nice to add a crunch, veggie, or a hint of other flavors, like how we added corn in to this Doritos casserole!

    How to Store Leftovers

    If you have leftovers of this creamy jiffy corn casserole, wait until it cools to about room temperature and store in an airtight container, in the refrigerator for up to 5 days.

    Easy corn casserole recipe on plate with fork

    Tips and Expert FAQ’s

    What can I substitute for Jiffy corn muffin mix?

    If you don’t have corn muffin mix, you can follow this cornbread substitute!

    Why is my corn casserole runny?

    If your corn casserole is runny, it could be because of the extra moisture that was in your corn kernels. If you want to try baking it longer to see if it thickens, make sure to cover the baking dish with aluminum foil, not to burn the top.

    How can I make a sweet corn casserole?

    This recipe is a little on the sweeter side, than the savory side. However if you want it extra sweet, you can add in about a teaspoon of white granulated sugar when mixing together the corn, butter and sour cream.

    If you love corn dishes, we think you’ll also love this Mexican corn salad that’s good as a side or even perfect as a holiday dish!

    Recipe

    corn casserole serving on one white plate
    Print Pin
    5 from 20 votes

    The BEST Corn Casserole

    This corn casserole recipe is the perfect side dish for a holiday meal, uses simple ingredients, and is a favorite recipe loved by so many!
    Course Side Dish
    Cuisine American
    Diet Vegetarian
    Prep Time 5 minutes minutes
    Cook Time 40 minutes minutes
    Total Time 45 minutes minutes
    Servings 9 servings
    Calories 334kcal
    Author Jessica Burgess

    Ingredients

    • 1 stick butter melted (½ cup)
    • 1 can cream-style corn 14.75 oz.
    • 2 cans Whole Kernel Corn 15 oz. each – Drained
    • 1 cup sour cream
    • 1 box Jiffy Corn Muffin Mix 8.5 oz.

    Instructions

    • Preheat your oven to 350°.
    • In a small, microwaveable dish, melt butter. (Usually about 15-30 seconds is long enough.)
    • In a large mixing bowl, pour in drained corn, cream-style corn, sour cream and melted butter. Stir to combine.
    • Pour in corn bread mix and stir to evenly combine.
    • Pour in corn mixture in to a GREASED, 8×8 or 9×9 square baking dish.
    • Place dish on middle rack in oven and bake at 350 degrees for 40-45 minutes or until golden brown. (Note: When I bake in a dish other than glass, it takes about 50-55 minutes for it to fully bake. You will know it's ready when the sides are turning golden brown and you see bubbling.)

    Video

    Notes

    How to Store Leftovers
    If you have leftovers of this creamy jiffy corn casserole, wait until it cools to about room temperature and store in an airtight container, in the refrigerator for up to 5 days.

    Nutrition

    Serving: 1serving | Calories: 334kcal | Carbohydrates: 37g | Protein: 5g | Fat: 20g | Saturated Fat: 10g | Polyunsaturated Fat: 2g | Monounsaturated Fat: 6g | Trans Fat: 1g | Cholesterol: 41mg | Sodium: 578mg | Potassium: 210mg | Fiber: 2g | Sugar: 8g | Vitamin A: 545IU | Vitamin C: 4mg | Calcium: 49mg | Iron: 1mg

    Fluffy Chocolate Buttercream Frosting

    October 18, 2021

    Fluffy Chocolate Buttercream Frosting

    This fluffy chocolate buttercream frosting is the best chocolate frosting for cakes, cupcakes, or your favorite icing topped desserts!

    Quick Overview: This recipe uses shortening, butter, cocoa powder, powdered sugar, vanilla, and milk and it makes enough for 24 cupcakes or a 2-layer cake.

    Fluffy Chocolate Buttercream Frosting

    The right frosting can make or break your favorite birthday cake recipes, homemade brownies or these cupcake recipes! So it’s crucial to use the best chocolate buttercream frosting that you can!

    This chocolate buttercream frosting recipe pairs perfectly with an easy marble cake, a yellow cake, vanilla cake, A chocolate cake recipe, sheet cake, chocolate Oreo cupcakes or one of your favorite cakes or favorite recipes. Dare I even say a chocolate quick bread too?

    Dessert recipes are full of opportunities to add icing too, so this is definitely a staple you’ll want to keep on hand!

    You’ll also love this strawberry buttercream frosting with jam!

    [feast_advanced_jump_to]

    ❤️ Why You’ll Love This Chocolate Frosting Recipe

    It uses everyday ingredients and will result in a delicious, creamy, chocolatey buttercream flavor and is a great recipe that’s perfect for beginner bakers and experienced bakers!

    🤔 What is the difference between icing frosting and buttercream?

    Frosting is made using ingredients such as butter to make it a thicker consistency. Icing can be much thinner, that’s wonderful on cookies. However, the two terms interchange quite a bit so sometimes you’ll hear them referred to as the same thing.

    🥣 What are the three types of buttercream?

    There are three types of buttercream:

    1. American Buttercream – the recipe provided below is considered an American buttercream. It uses a few simple ingredients to make a delicious creamy chocolate buttercream
    2. Swiss Meringue Buttercream – has a cooked, egg-white base with sugar and vanilla added.
    3. Italian Meringue Buttercream – is similar to Swiss meringue but is sweeter!

    🧾 Ingredients

    It takes just a few simple ingredients to make this fluffy frosting!

    Make sure to scroll towards the bottom of this post to see the full list of ingredients/instructions all in one place!

    • 1 cup vegetable shortening (solid)
    • ¾ cup (1 ½ sticks) softened salted butter (you can use unsalted butter but you may want to add a pinch of salt.)
    • 1 cup unsweetened cocoa powder (for that chocolate flavor)
    • 4 cups powdered sugar (sometimes called confectioner’s sugar)
    • 1 teaspoon vanilla extract
    • 3-4 tablespoons milk (you can use heavy cream if you like but remember it’s thicker than milk so it may take a little more than regular milk to thin it out.)
    ingredients on white table for chocolate buttercream

    👩🏻‍🍳 Instructions

    To make this homemade frosting, you’ll first cream the shortening and butter together. This is just the beginning of this butter chocolate cream goodness that will be the end result!

    shortening and butter in mixing bowl
    Mix together the butter and the shortening

    For best results, make sure to use room temperature butter as this could cause a different texture for your buttercream.

    Butter and shortening creamed in bowl
    After butter and shortening are mixed.

    Add the cocoa powder and vanilla to the butter and shortening.  Mix this together. 

    Add the cocoa in to the butter and shortening
    Add the cocoa to make the butter icing chocolate

    The cocoa is what makes the butter icing chocolate!

    Pour in the vanilla to the butter mixture
    Vanilla extract is added
    Cocoa powder in mixing bowl
    Cocoa and vanilla ready for mixing
    Cocoa powder mixed in with the butter and shortening
    Mixed cocoa & vanilla with butter & shortening

    Next, on low speed, mix in 2 cups of powdered sugar.

    powdered sugar pouring in to chocolate
    Add 2 cups powdered sugar
    Powdered sugar & chocolate
    Mixed 2 cups powdered sugar with chocolate

    Then, beat in 1-2 Tablespoons of milk to keep the frosting from getting too dry as you combine.

    Pour in milk to frosting to thin
    Add 1-2 tablespoons milk to chocolate frosting
    Milk mixed with chocolate frosting
    Mix Chocolate Buttercream

    Once that is incorporated add the rest of the powdered sugar. Stir in a bit more milk until light and fluffy.

    Add in milk and powdered sugar
    Add remaining powdered sugar and milk and mix until evenly combined

    Look at how beautifully that easy chocolate buttercream frosting turned out! Now it’s ready for your favorite cake!

    Chocolate buttercream icing

    This frosting creates a beautiful texture for frosting a cake, almost giving it a whipped, look but a creamy, buttercream taste!

    Cake covered with chocolate buttercream frosting
    Perfect for frosting a chocolate cake

    💡 FAQs and Expert Tips

    How do you make chocolate buttercream less grainy?

    This could be because of a few things. It could be the type of sugar used. This is why using powdered sugar is ideal, instead of granulated sugar.

    Why is my buttercream frosting not fluffy?

    It could need mixed more! Whipping it more can result in a fluffier frosting!

    Why does my chocolate buttercream look curdled?

    This is usually due to the reason that the butter was cold when making the frosting. It is best to use room-temperature butter.

    Fluffy Chocolate Buttercream Frosting

    📖 Substitutions

    If you do not have milk on hand, you can use heavy cream but do note that heavy cream is thicker and could require more, to thin it out than whole milk or other types of milk.

    ✅ Variations

    If you prefer a vanilla buttercream, simply leave out the unsweetened cocoa. This could require you to use more powdered sugar to get the consistency right — nothing that more powdered sugar would make it sweeter! Or if you’re looking for some pizazz… you could also make this cookies and cream frosting recipe too!

    ❄️ Storage

    If you find that you have more frosting than you need, you can store it in an airtight container in the refrigerator for up to 3 weeks!

    Did you know you can even freeze your frosting? You can! If it is frozen correctly (airtight, freeze-proof container) it can be frozen for up to 3 months! Let is thaw to room temperature and then whip before using.

    🍫 Love Chocolate?

    I do too! So you’re going to LOVE this hot fudge cake and this chocolate cream cheese pie. Or, you could even make this buttercream frosting and spread it on these mini chocolate cakes instead of using the ganache!

    Recipe

    Fluffy Chocolate Buttercream Frosting
    Print Pin
    5 from 12 votes

    Fluffy Chocolate Buttercream Frosting

    This fluffy chocolate buttercream frosting is the best chocolate frosting for cakes, cupcakes, or your favorite icing topped desserts! Makes enough for a 2 layer cake or 24 cupcakes
    Course Dessert
    Cuisine American
    Prep Time 10 minutes minutes
    Cook Time 0 minutes minutes
    Total Time 10 minutes minutes
    Servings 6
    Calories 1174kcal
    Author Jessica Burgess

    Ingredients

    • 1 cup vegetable shortening
    • ¾ cup softened salted butter
    • 1 cup unsweetened cocoa powder
    • 4 cups powdered sugar
    • 1 teaspoon vanilla extract
    • 3-4 tablespoons milk

    Instructions

    • First, over medium speed, cream the shortening and butter together. (You can use a hand mixer or a stand mixer.)
    • Next, add in the cocoa powder and vanilla.  Mix together until evenly combined.
    • On low speed, mix in 2 cups of the powdered sugar.
    • Then, beat in 1-2 tablespoons of milk to keep the frosting from getting too dry as you combine.
    • Once that is mixed together, add in the rest of the powdered sugar and stir in a bit more milk until the frosting is light and fluffy.  

    Notes

    Can you use heavy cream instead of milk?
    If you do not have milk on hand, you can use heavy cream but do note that heavy cream is thicker and could require more, to thin it out than whole milk or other types of milk.
    Have leftover frosting?
    If you find that you have more frosting than you need, you can store it in an airtight container in the refrigerator for up to 3 weeks!
    Can you freeze frosting?
    Did you know you can even freeze your frosting? You can! If it is frozen correctly (airtight, freeze-proof container) it can be frozen for up to 3 months! Let is thaw to room temperature and then whip before using.

    Nutrition

    Serving: 3tablespoons | Calories: 1174kcal | Carbohydrates: 111g | Protein: 3g | Fat: 84g | Saturated Fat: 29g | Polyunsaturated Fat: 23g | Monounsaturated Fat: 28g | Trans Fat: 5g | Cholesterol: 62mg | Sodium: 487mg | Potassium: 287mg | Fiber: 5g | Sugar: 96g | Vitamin A: 721IU | Calcium: 39mg | Iron: 2mg

    Simple Cheese Ball Recipe

    October 17, 2021

    Cheeseball covered in nuts on platter.

    This classic cream cheese ball recipe is not only easy but uses simple ingredients and is an easy party appetizer or snack craving!

    Quick Overview – Ingredients include: cream cheese, sour cream, ranch dressing seasoning, sharp cheddar cheese, garlic powder, salt, pepper, and pecans.

    Easy cheese ball on plate

    Around the holidays, or on game day, a homemade cheese ball is hard to beat because it’s an easy recipe and a crowd pleaser!

    Fun Football Cheese Ball: If you’re making a cheese ball for anything football party-related, you’re going to love making this in to a shape like we did with this football cheeseball!

    [feast_advanced_jump_to]

    Ingredients

    Using only 8 simple ingredients, you can have the cheese ball made in minutes! Plus, you may already have the ingredients on hand, and those are always the best kind!

    • 2- 8 oz packages cream cheese, softened to room temperature
    • ¼ cup sour cream
    • 1 packet ranch dressing  mix (We love Hidden Valley brand)
    • ½ teaspoon garlic powder
    • Salt and pepper to taste
    • 2 cups sharp cheddar cheese, grated
    • 1 cup chopped pecans
    cheese ball ingredients

    Make sure to see the full recipe card with instructions toward the bottom of this post to make this classic cheese ball!

    How to Make this Easy Cheese Ball

    Once you’ve gathered your ingredients, you’re halfway to diving in to your easy cheese ball recipe!

    1. Begin by placing the cream cheese and sour cream in the bowl of a stand mixer or large mixing bowl, so you can mix with a hand or electric mixer.
      Cream together until mixed together well.
    mix cheeseball ingredients together
    1. Add the ranch dressing mix powder and spices. Mix again.
    1. Add the cheddar cheese and mix until well incorporated, creating a creamy texture.
    Mix in cheeses in to cheese ball
    1. Lay a large piece of saran wrap on the counter and spoon the cream cheese mixture into the center of it, piling it into a pile in the center.
    2. Grab up the edges of the plastic wrap to the middle, and using your hands, smooth the mixture into a ball shape.
    3. Place the plastic wrap covered cheeseball in the freezer for 30 minutes to chill.
    Make cheeseball round
    1. Pour the chopped pecans onto a single layer on a baking sheet or cutting board. Roll the chilled cheese ball in the pecans until it is completely, and evenly covered.
    2. Transfer the cheese ball onto a plate (the plate that you want to serve it on is ideal) and cover with plastic wrap. Chill for at least 1 hour more in the refrigerator before serving. 
    3. Serve this delicious cheese ball with your favorite crackers or your favorite items to dip! (See ideas of what to serve with a cheese ball, below!)
    Crackers around cheese ball on plate

    Variations:

    Now although this is a really good cheese ball recipe, it’s a great “base” if you have other favorite ingredients that could be added to it. Here are some of our favorite variations and mix-in’s to add in sometimes!

    • Green Onions – Chop the greens of one or two bunches of green onions (depending on how much you LOVE green onions) in to small pieces and either mix-in to the mixture of cream cheese and other ingredients before shaping.
      Or, instead of coating the ball in nuts, coat the outer coating of the cheeseball with chopped green onions instead. (You can do both, but mix together the green onions and nuts before rolling or neither will stick to the ball, if one is applied separately.)
    • Different Cheeses – We think shredded cheddar is the best cheese for this but if you’re not a fan of shredded cheddar, feel free to use additional or a substitute cheese! For instance, shredded fiesta blend, mozzarella, white cheddar, sharp cheese, blue cheese, pepperjack, etc.
    • Bacon – Using bacon bits, or cook some bacon (our favorite quick and easy way is by making air fryer bacon) and once cooled, chop it in to small pieces and add in to the cheeseball mixture or coat the outside of the ball with it for a bacon ranch cheese ball.
    • Condiments – Sometimes it’s fun to add some spice or “zing” to the cheese ball. Some of our favorites are:
      • hot sauce
      • worcestershire sauce
    • Spices/Herbs – Feel free to add your favorite spices and or herbs to this recipe as well. For instance:
      • onion powder
      • a little salt (you don’t want it too salty – the ranch seasoning also has salt)
      • cayenne pepper
      • red pepper
      • greek seasoning
      • fresh herbs (like rosemary, fresh parsley, chives, etc.)
    • Different Shapes – Have fun with your cheeseball! If you’re making one for the holidays, sporting event, charcuterie board, etc., consider something like these:
      • Rudolph the Reindeer – To turn a plain cheese ball into Rudolph the red nosed reindeer, add pretzel ears, black olives for the eyes (olives cut in half), and add a cherry tomato (cut in half) for the nose, right before serving!
      • Football – Instead of making a perfect “ball” shape, consider shaping the ball by narrowing the ends, making it a football shape like I did for this football party!
      • Mini Cheese Ball Bites – Instead of making one big ball, consider making small bite-size cheese balls that would look amazing with a pretzel stick, sticking out the top for an easy fingerfood option, for your next holiday party.

    What Type of Dish to Serve a Cheese Ball on:

    You can serve your cheese ball on a regular plate. However if you’re serving Thanksgiving dinner, hosting any holiday parties or holiday gatherings like New Years Eve, Christmas party, etc. you may want to place the cheese ball on a gorgeous platter or in a marble dish!

    What to Serve with a Cheese Ball

    If you’re making a cheese ball, it’s mainly considered a “dip” so it’s best to also provide items for dipping! Here are some of our favorites to serve alongside a classic cheeseball.

    • pita chips
    • tortilla chips
    • celery sticks
    • carrot sticks
    • other fresh veggies (radishes, cucumbers, etc.)
    • buttery crackers (like Ritz)
    • wheat thins
    • corn chips
    • slices of smoked sausage, etc.

    Storage

    If you have leftovers of this homemade cheeseball, store in an airtight container and place in the refrigerator for up to 2 weeks! This is one of the reasons why it’s one of the best make-ahead appetizers.

    More Easy Appetizer Recipes

    If you love easy appetizers like this one, then you’ll also love this easy taco layer dip, buffalo bacon blue dip, and this creamy reuben sandwich dip!

    Recipe

    Cheeseball covered in nuts on platter.
    Print Pin
    5 from 6 votes

    Simple Cheese Ball Recipe

    This classic cream cheese ball recipe is not only easy but uses simple ingredients and is an easy party appetizer or snack craving!
    Course Appetizer
    Cuisine American
    Prep Time 10 minutes minutes
    Chill Time 2 hours hours
    Total Time 2 hours hours 10 minutes minutes
    Servings 24
    Calories 142kcal
    Author Jessica Burgess

    Ingredients

    • 16 oz. cream cheese (2 – 8 oz. pacakges) softened to room temperature
    • ¼ cup sour cream
    • 1 package ranch dressing seasoning mix We love Hidden Valley
    • ½ teaspoon garlic powder
    • salt to taste
    • pepper to taste
    • 2 cups grated sharp cheddar cheese
    • 1 cup chopped pecans

    Instructions

    • Place the cream cheese and sour cream in the bowl of a stand mixer or in mixing bowl for hand mixer. Cream together until mixed together well.
    • Add ranch dressing mix powder and spices. Mix again.
    • Add the shredded cheddar cheese and mix until well incorporated.
    • Lay a large piece of saran wrap (big enough that you'll be able to wrap around the entire cheese ball, on the counter, and spoon the cheese ball mixture into the center of it, piling it in to the center.
    • Gather up the edges of the plastic wrap to the middle, and using your hands, smooth the mixture into a ball.
    • Place the plastic wrap covered cheeseball in the freezer to chill for 30 minutes.
    • Pour the chopped pecans onto a single layer on a baking sheet or cutting board. Roll the chilled cheese ball in the pecans until it is completely covered.
    • Transfer the cheese ball onto a plate and cover with plastic wrap. Chill for at least 1 hour more in the refrigerator before serving.
    • Serve with an assortment of crackers or favorite items! See blog post for suggestions!

    Notes

    What to Serve with a Cheese Ball:
    • pita chips
    • tortilla chips
    • celery sticks
    • carrot sticks
    • other fresh veggies (radishes, cucumbers, etc.)
    • buttery crackers (like Ritz)
    • wheat thins
    • corn chips
    • slices of smoked sausage, etc.
    How to Store Leftover Cheese Ball:
    If you have leftovers of this homemade cheeseball, store in an airtight container and place in the refrigerator for up to 2 weeks! This is one of the reasons why it’s one of the best make-ahead appetizers.

    Nutrition

    Serving: 1serving | Calories: 142kcal | Carbohydrates: 2g | Protein: 4g | Fat: 13g | Saturated Fat: 6g | Polyunsaturated Fat: 1g | Monounsaturated Fat: 4g | Cholesterol: 32mg | Sodium: 209mg | Potassium: 58mg | Fiber: 1g | Sugar: 1g | Vitamin A: 366IU | Vitamin C: 1mg | Calcium: 92mg | Iron: 1mg

    Donut Burger

    October 12, 2021

    Donut Burger - Luther Burger

    This donut burger (or sometimes called the Luther Burger) is made with buttered and toasted glazed donuts (Krispy Kreme or your favorite kind), a beef patty, cheese, and bacon, to give you one of the most delicious hamburger recipes you’ve ever had.

    Quick Overview: Cook your burger patties your favorite way (ours is baking hamburgers in the oven) top with cheese, cooked bacon, and build cheeseburger using the buttery toasted glazed donuts as the buns. You can also cook bacon on a George Forman at the same time you cook burgers another way. (Cook time depends on which burger cooking method you choose! See below!)

    Donut burger - hamburger patty on krispy kreme glazed donuts

    Grab the paper towels! It’s a sticky, juicy, and glorious burger recipe with the butter, bacon (and bacon grease) sweet donuts, and more that gives this so much flavor!

    Inspired by the waffle burger, this sweet and salty combo is a family favorite! The sweetness of the “bun” combined with the savory flavor in everything else, is incredible! I believe that’s also why these cheeseburger sliders have become such a popular recipe too!

    What is a Luther Burger?

    According to Wikipedia, the Luther Burger is a hamburger using glazed donuts as the bun. But honestly, when I saw it for the first time, I just called it a donut burger and KNEW I had to have it.

    Who created the Luther Burger and where did it come from?

    Word has it that it originated from a pub called, “Mulligan’s” in Decatur, Georgia, and was named after R&B singer Luther Vandross.

    What kind of donut do you use to make a donut burger?

    So many think a glazed donut is the best donut to use for this recipe but you can use any kind you like! You can use a glazed from Krispy Kreme or something else fun like a blueberry cake doughnut, or even a chocolate iced donut from your favorite bakery! Have fun with it!

    [feast_advanced_jump_to]

    How do you Make a Donut Burger?

    Although the most popular way to make doughnut cheeseburgers is with glazed donuts, melted cheese and cooked bacon, you can add traditional hamburger toppings if you like as well!

    Slice your donuts in half, to make a top and bottom bun, spread butter on the “insides” of the donut buns and toast in a skillet.
    Cook your burger patty, cook the bacon, melt the cheese, and you have a burger at home that you’d normally only see at something like a food truck or state fairs!

    See the full ingredients list, instructions and recipe card, below!

    Ingredients

    If you have leftover donuts from the bakery, you may have all of the ingredients on hand to whip up this special treat! Or, make a quick trip to the bakery, donut shop or grocery story to grab these beauties!

    You’ll need:

    • glazed donuts (some love using Krispy Kreme donuts)
    • hamburger patties (or one pound of ground beef – see more ground beef recipes)
    • sliced american or cheddar cheese
    • strips of bacon (thick cut bacon is best!)
    • salt
    • black pepper

    See the recipe card below for quantities.

    Donut Burger Ingredients for Cheeseburgers

    What can I use instead of donuts?

    Love the idea of donuts for buns but need a substitution? Try the waffle burger” or create a “cake burger” or a “cookie burger”, “fluffy pancake burger”, and the list goes on!

    Instructions

    Although you can cook your burger patties any which way you prefer, the process for making donut burgers is simple!

    How to Cook Burger Patties

    No matter which method you prefer… we love seasoning the burger patties with salt and pepper. (As long as they’re thawed. If frozen, it’s best to cook a little first to thaw them out so the seasonings will stick to the burgers.)

    Burger Cook Method:

    The following ways to cook burgers are all easy ways and great for making burgers to make your donut burgers:

    • Oven Baked Burgers
    • Burgers on the StoveTop
    • Smoked Burgers
    • Air Fryer Burgers
    • Electric Skillet Burgers
    • Flattop burgers
    • Grilled Burgers – this is how we like making our Aloha Burgers too!
    Season burgers with salt and pepper

    Once seasoned with salt and pepper (or your favorite seasonings) you can cook them your preferred way. (See instructions below for a simple skillet method.)

    Cook burgers on skillet or cooktop

    Over medium heat, cook burger patties for 3-5 minutes on each side or until the juices run clear.

    Flipped burger patties cooking

    What Kind of Cheese to Use

    If you prefer cheese on your doughnut burger, you can use any cheese you prefer. Here are our favorites to use:

    • American cheese
    • cheddar
    • pepper jack cheese
    • Colby jack

    Place a slice of cheese on each burger until melted.

    Burgers with cheese slices
    If desired, add cheese to burger patties

    How to Cook the Bacon

    If you choose to have bacon on your donut burger, you can cook the bacon with your favorite method. We prefer to cook bacon in the air fryer or in the oven. (You can even cook turkey bacon in the oven.) However, you can cook bacon in a skillet or even cook it in the microwave as well!

    Want to really kick things up a notch? Consider making this smoked candied bacon for a flavor that will change your life!

    Once cooked, set aside and keep warm.

    Cooking bacon for burgers

    How to Toast the Glazed Donuts

    Using a bread knife, carefully slice the donuts in half, to make a top and bottom bun out of one donut.

    Glazed donuts for hamburger buns

    Although you can simply use the sliced donuts as they are, I really recommend spreading butter on the inside of the donuts and then placing them in a skillet and toasting them, to warm them up with a little extra butter taste.

    Cook buttered donuts

    The buttered donuts will only need to cook over low-medium heat for a few minutes (2-3 minutes) or just enough give the buttered side a golden color.

    Toasted glazed donuts

    How to Build a Donut Burger

    Take the warm glazed donuts, and top one half of the donut (buttered side up) with the meat patty and a slice or two of cooked bacon.

    Cheeseburgers with bacon on donuts

    Then, take the other half of the donut and place on top of the burger, buttered side down.

    Donut Burger with Cheese and Bacon

    Additional Burger Toppings

    If you’d like to add other toppings, we’ve gathered traditional burger toppings ideas, as well as additional fun toppings for a donut butter! Feel free to add your favorite condiments or these as well:

    • fried egg
    • sriracha
    • hot sauce
    • maple syrup
    • sausage patties
    • lettuce
    • onion
    • jalapenos
    • peanut butter
    • potato chips
    • mustard
    • honey mustard
    • ketchup

    Storage

    If you have leftover ingredients, it’s best to store the items separately and reheat them individually, and then build the burger.

    Our favorite way to reheat burgers and bacon is with the air fryer. But only reheating the toasted donuts on a skillet again is recommended.

    What to Serve with Donut burgers

    If serving this burger for a breakfast recipe, they’re amazing with hash brown patties or air fryer breakfast potatoes. Or, try baking sausage patties in the oven for a meaty side dish.

    If serving this for lunch or main course, this burger recipe goes amazing with potato wedges or sweet potato fries.

    More Recipes You’ll Love

    If you love this recipe, you’ll also love this bacon brioche sandwich, these sausage and crescent roll breakfast dippers, and this baked turkey burger recipe! Or if you’re really in to fun burgers, make sure you check out this Hawaiian Burgers recipe that’s delicious and easy to make!

    Recipe

    Print Pin
    5 from 9 votes

    Buttery Glazed Donut Burger

    This donut burger (or sometimes called the Luther Burger) is made with buttered and toasted glazed donuts (Krispy Kreme or your favorite kind), a beef patty, cheese, and bacon, to give you the most delicious, burger recipe you've ever had.
    Course Breakfast, Main Course
    Cuisine American
    Prep Time 5 minutes minutes
    Cook Time 10 minutes minutes
    Total Time 15 minutes minutes
    Servings 3 burgers
    Calories 748kcal
    Author Jessica Burgess

    Ingredients

    • 1 pound ground beef or 3 hamburger patties
    • 3 glazed donuts
    • 3 slices american cheese or preferred cheese
    • 3 slices bacon
    • 2 tablespoons butter spreadable butter works best
    • 1 tablespoon butter optional, for cooking burgers
    • .5 teaspoon salt or preferred amount
    • .5 teaspoon pepper or preferred amount

    Instructions

    Prepare Burger Patties

    • Begin by patting out 3 burger patties, out of 1 pound of ground beef (or use 3 pre-pattied burgers)
    • Season burger patties with salt and pepper.

    Cook Burger Patties

    • If cooking in a skillet (see blog post for other cook methods) over medium heat, melt 1 tablespoon of butter in a skillet large enough to hold all of your burger patties.
    • Place seasoned burgers in skillet and cook for 3-5 minutes and then flip. Cook for an additional 3-5 minutes or until the juices run clear.
    • If making cheeseburgers, melt cheese on top of cooked burgers and set aside.

    Cook Bacon

    • If topping with bacon, cook bacon to desired doneness. (see post for favorite cook methods) If cooking bacon in same skillet, cook on low heat for 10 minutes, flip and cook other side for 5-10 minutes until fully cooked. Set aside.

    Prep Donut Buns

    • Slice glazed donuts in half, creating a top "bun" and bottom "bun".
    • Spread the insides of the donuts with butter, preparing for toasting.
    • In a clean skillet (or simply pour out bacon grease and meat drippings out of first skillet) and place buttered-side down on skillet, over medium heat. Toast for 2-3 minutes on the buttered side until golden brown.

    Assemble Donut Burger

    • Place cheeseburger on top of bottom bun, top with bacon and top with other glazed bun half. Repeat for remaining donut burgers. Top with additional ingredients if desired. (See blog post for more ideas.)

    Video

    Nutrition

    Serving: 1burger | Calories: 748kcal | Carbohydrates: 12g | Protein: 34g | Fat: 62g | Saturated Fat: 28g | Polyunsaturated Fat: 3g | Monounsaturated Fat: 22g | Trans Fat: 3g | Cholesterol: 173mg | Sodium: 1142mg | Potassium: 487mg | Fiber: 1g | Sugar: 4g | Vitamin A: 558IU | Calcium: 253mg | Iron: 3mg

    Jalapeno Sausage Gravy

    September 27, 2021

    Jalapeno Sausage Gravy

    This jalapeno sausage gravy, or spicy sawmill gravy, can be made using chorizo or regular ground sausage for the perfect hint of heat over these easy biscuits, or country-fried steak! It’s a spicy spin on a classic white gravy recipe.

    If you love the idea of using chorizo but are not a fan of jalapenos, then you may love this chorizo gravy recipe version! Dip breakfast pigs in a blanket in this gravy, or pour over breakfast potatoes for an amazing breakfast!

    jalapeno sausage gravy

    On a cool fall morning or winter morning, there’s nothing better than a warm breakfast casserole or a hot plate of gravy and biscuits with a side of air fried bacon! But when you can kick things up a notch from regular gravy, by making something like this jalapeno chorizo gravy… I highly recommend it!

    [feast_advanced_jump_to]

    Ingredients

    When making regular sawmill gravy, using flour, meat drippings and milk are key. So we’ll start by using the basic ingredients as when making sawmill gravy, yet adding a few special other touches to give it the “heat” this spicy sausage gravy needs!

    • ground pork chorizo sausage or regular pork breakfast sausage 
    • diced jalapeno, canned or fresh jalapeño pepper
    • all purpose flour
    • milk
    • cumin
    • garlic powder
    • salt

    Substitutions

    • If you’d like to substitute chorizo for regular pork sausage, you definitely can! You can even use uncooked sausage patties if you like! Just break them up! (If they’re fully cooked sausage patties, this will not produce the drippings that will be great in this recipe. So you may want to also add bacon fat or butter!)
    • Have bacon fat (bacon grease) too? Go ahead and add that in with sausage drippings for extra flavor!
    • If you’d like, you can use unsalted butter or salted butter (or even spicy butter) with the drippings, but it’s not required.
    • Not a fan of jalapenos? Try using green chilies or green onions instead!
    • Don’t have whole milk on hand? You can use 2% or skim if that’s what you have… just know that the consistency of the gravy COULD be a little more thin.

    See recipe card down below for measurements and instructions!

    Instructions

    When making sawmill gravy, cooking your sausage first, will allow drippings to gather in the skillet (or cast iron) which will come in handy for the gravy — so keep those drippings!

    1. Begin by adding jalapenos and chorizo (or sausage) to a large skillet and cook on low heat for at least 10 minutes or until the sausage has reached 170 degrees. (You want it fully cooked before adding flour and milk.)
    2. Once chorizo has cooked for a minimum of 10 minutes, add in the all purpose flour. Using a whisk or wooden spoon, mix together the flour, sausage and jalapenos. Cook for at least 2 minutes – under cooking the flour can result in a gravy that tastes like flour.
    chorizo and jalapenos in cast iron pan
    Chorizo sausage and jalapenos
    adding flour to sausage
    Adding flour to sausage
    1. Pour in the milk, and using your whisk or spoon, mix all together while trying to scrape up any meat/flour bits that are sticking to the pan. Trust me… this is where the goodness comes from. Turn the the heat up to medium heat.
    mixing flour in with chorizo
    mixing in flour with sausage
    add milk in to sausage and flour
    adding milk in to sausage and flour
    1. Next, add in cumin, garlic powder and salt. Whisk to combine.
    Chorizo and jalapeno gravy
    Jalapeno and Sausage Gravy
    1. Increase heat to medium-high heat, whisking frequently to avoid the gravy sticking and burning to the bottom of the pan. Do this until gravy has thickened! Turn off heat/remove from heat once it has thickened. (If gravy has not thickened after 5-10 minutes, see tips below!)
    Jalapeno Sausage Gravy

    What to Serve with this Gravy

    You can pour this gravy over breakfast biscuits or even kick things up a notch and pour some over these cheddar biscuits! Then, cook breakfast sausage in the oven for some protein in the morning!

    Jalapeno Sausage Gravy

    You may want to consider switching out regular gravy for this jalapeno gravy in this biscuit and gravy casserole!

    Equipment

    I’ve found that I’ve had the best luck with making gravy in my cast-iron skillet. Although it’s not required, it makes a beautiful gravy each time due to the nature of the pan, compared to using a non-stick skillet.

    Storage

    If you have leftover breakfast gravy, you can store it (once cooled) in an airtight container in the refrigerator for 3-4 days. When ready to use it, make sure to heat it enough to kill any bacteria that has formed while being stored.

    Use leftover gravy to top buttermilk biscuits (try a jalapeño biscuit!) or an english muffin with, or to serve on top of your favorite breakfast steak and poached eggs!

    FAQs and Expert Tips

    • If your gravy has not thickened after 5-10 minutes, you can try these two tips:
      • grab a small separate bowl, and spoon a ladle full of hot gravy in to the bowl, with another tablespoon of flour and stir until combined. Pour mixture from small bowl back in to skillet and whisk and continue cooking until gravy has thickened.
      • whisk together two teaspoons of cornstarch and two teaspoons of water in a separate small bowl. Pour mixture from small bowl in to the skillet and whisk and continue cooking until gravy has thickened.
    Why does my gravy taste like flour?

    If your gravy tastes like flour it’s because the flour didn’t cook long enough. When adding the flour, it’s best to let the flour “turn” colors just a bit before adding the milk. But when cooking with chorizo, it can be hard to see the change in color so cooking it for a couple of minutes on low should work!

    Why is gravy lumpy?

    If your gravy is lumpy it could be because flour was adding to the milk instead of milk adding to the flour. Or, the gravy could have been whisked more while cooking. Sometimes when gravy sits, without being stirred, the gravy can stick to the pan, causing lumps when stirred. Or, keep in mind if using jalapenos or sauage in your gravy, it will be lumpy due to those ingredients and it may not be lumps due to flour.

    What can I add to gravy to give it more flavor?

    In this jalapeno chorizo gravy, it will definitely have flavor… especially with the addition of cumin and garlic powder. However you can also add your other favorite seasonings if desired, like: seasoned salt, black pepper, fresh sage, small onion, garlic salt, red pepper flakes, chili powder, white pepper, etc.

    Related Breakfast and Brunch Recipes

    If you love breakfast as much as we do, then you’ll also love these breakfast and brunch favorites: Hash Brown Patties in the Air Fryer, Mini Waffle Breakfast Sandwiches, and the BEST Homemade pancakes from scratch!

    Recipe

    Jalapeno Sausage Gravy
    Print Pin
    5 from 5 votes

    Jalapeno Sausage Gravy

    This jalapeno sausage gravy, or spicy sawmill gravy, can be made using chorizo or regular ground sausage for the perfect hint of heat over biscuits, or country fried steak!
    Course Breakfast, Side Dish
    Cuisine American, Mexican
    Cook Time 15 minutes minutes
    Total Time 15 minutes minutes
    Servings 4 servings
    Calories 143kcal
    Author Jessica Burgess

    Ingredients

    • 3 ounces ground pork chorizo sausage If using pork sausage instead, you can use 8 oz. or desired amount. Chorizo is SPICY so we cut back on the chorizo more than regular sausage.
    • ½ teaspoon diced canned jalapenos or fresh – can be adjusted for spicier or not as spicy
    • 2 tablespoons all purpose flour *heaping tablespoons
    • 2 ½ cups milk whole preferred but other will work
    • ½ teaspoon cumin
    • ½ teaspoon garlic powder
    • 1 teaspoon kosher salt more/less depending on preference – table salt can be used as well

    Instructions

    • Cook chorizo and jalapeños in a skillet (preferably a cast-iron if you have it) over low heat for 10 minutes or until the sausage reaches a minimum temperature of 170 F. If using regular pork sausage, cook over low heat for about 10 minutes or until the sausage has turned a gray/brown, with no pink showing. Do not drain.
    • Add flour to sausage and jalapeno mixture. Whisk together, scraping the cooked bits of chorizo and jalapeños up from the cast-iron.
    • Add milk to flour and meat mixture, whisk together. Turn the heat up to medium heat.
    • Next, add in cumin, garlic powder and salt.
    • Whisk together and turn burner to high and let bubble until thickened. Turn heat down to low or "off" and serve.
    Notes

    The spice level in this recipe is kid-friendly if they like a little heat but if you like a lot of heat, add more jalapeños by the half teaspoon until your desired heat preference! Serve over biscuits, chicken fried steak, or with your favorite dish!

    Nutrition

    Serving: 1serving | Calories: 143kcal | Carbohydrates: 11g | Protein: 7g | Fat: 8g | Saturated Fat: 5g | Polyunsaturated Fat: 1g | Monounsaturated Fat: 1g | Cholesterol: 30mg | Sodium: 971mg | Potassium: 216mg | Fiber: 1g | Sugar: 8g | Vitamin A: 368IU | Vitamin C: 4mg | Calcium: 180mg | Iron: 1mg

    Free Place Card Template: “Welcome” & “Thankful For”

    September 25, 2021

    Thanksgiving Place Card Holder

    Free Place Card Template: “Welcome,” and Thanksgiving Place Cards that are perfect for the holidays!

    I’m more than excited to share a little goodness with you to help make entertaining in your home this year a bit easier! We entertain a lot in our home, and I’m always looking for ways to make a dinner party of 2, or a holiday party of 200, a little more personable.

    Fall Dining Room Decorating Ideas

    More Thanksgiving and Entertaining Ideas

    If you’re hosting, some of our favorite hosting stapes are this side salad, fruit punch recipe, this easy bread pudding, and this Thanksgiving meal planner!

    Free Place Card Template

    Now listen… I hear ya on the “money-saving,” techniques that we all try to accomplish during party planning and hosting. So that’s why we wanted to create something that could be created in your own home, at the last minute, and could be personalized for your guests.

    Customizable Name Cards. Free Printable!

    • Do you have a printer?  Perfect. You can just open it up in Adobe Reader, select the center, and type in a name. Print it on white card stock, kraft-colored card stock, or whatever your little heart desires. (I personally think the kraft card stock looks so classy and really “pops,” on white cloth napkins.) 

    • Cut out the name card (napkin ring), and secure it around a cloth napkin.

    • Place silverware in under the name card, and you’re good to go!

    TIP: To change the font of the name that you enter, on a MAC, select inside the box, and push “command E” and a box should pop up, allowing you to change the font.

    On a PC, “Control E,” should do the same.

    Customizable Name Cards. Free Printable!

    Does your silverware need some spiffing up before the holiday? Here’s how to remove rust from silverware!

    How to Secure the Name Card:

    I had a little bit of time, so I decided that I wanted to punch a hole in each end of the name card, pull ribbon through the holes, creating a bow in the back (or bottom side) of the napkin.

    Customizable Name Cards. Free Printable!

    If you’re pressed for time, you could easily tape the back, or staple it! Quick and Easy.

    Also, if you have kiddos, you'll also love this Cute Thanksgiving Turkey Craft that they can make and place on the place setting, and make these Oreo turkey cookies while you’re at it!

    Holiday Place Setting

    If you’re planning to use these for Christmas, try adding an evergreen stem, and a few red berries, to really make it all “pop,” with color!

    So CUTE! DIY Holiday Place Card FREE customizable printable!

    I literally just placed the stem and berries inside the place card holder. You could tape them, glue them, etc. if you felt like you needed to secure them more!

      If you're planning to use these for Christmas, try adding an evergreen stem, and a few red berries, to really make it all "pop," with color!

      If you're planning to use these for Christmas, try adding an evergreen stem, and a few red berries, to really make it all "pop," with color!

    Customizable Name Cards. Free Printable!

    Customizable Name Cards. Free Printable!

    For Thanksgiving, or for a “thankful,” occasion, here’s a  “thankful for,” place card, that you can customize and use for your dinner party! 

    Customizable Name Cards. Free Printable!
    Customizable Name Cards. Free Printable!

    I can’t WAIT to see how you’ve used these name cards. Make sure to send me a photo! 🙂

    Get YOUR PRINTABLE PLACE CARDS BELOW:

    —–> Get the Thanksgiving and Welcome Name Cards HERE!

    To Enter the Name of your Guests:

    The link above will open into a new browser. Make sure you then save the place cards to your computer so you have the ability to type in the names.

    If Using a Phone:

    Note that if you’re wanting to access these printables with your phone, your phone may not allow you to save them and type in your guest’s names.

    However, you can select the link to save the place cards above and print them from your phone. Then, you’d be able to handwrite in the name of your guests.

    TIP: Email them from your phone to yourself, or to a friend to save them on a computer later so you can customize and enter the names later!

    Customizable Name Cards. Free Printable!

    How to Cook Turkey Bacon in the Oven

    September 15, 2021

    Turkey bacon that was baked in the oven.

    An easy way to cook turkey bacon in the oven! Bake it until floppy or crispy to get the perfect bacon, just the way you like it! Top a baked turkey burger, serve it alongside these pancakes from scratch or eat it just the way it is!

    Quick Overview: Bake at 400° F: – See post for tips on how to make this the BEST!

    For crispy bacon – 18 to 20 minutes (flipping half way)

    For floppy bacon – 10 to 12 minutes (flipping half way)

    turkey bacon cooked in the oven on baking sheet

    Now honestly, I’m an air fryer bacon girl at heart. However baking bacon in the oven is just as easy and some even feel it’s the best way to cook bacon!

    When it comes to turkey bacon, even though it is different than regular bacon (pork), cooking it in the oven is delicious but you’ll want to watch it differently than you do pork bacon.

    I’ll share all the tips in the post to make this healthy option the very best!

    [feast_advanced_jump_to]

    Why You’ll Love This

    • Turkey bacon has fewer calories than traditional bacon (pork bacon)
    • You can have a sheet pan of bacon in minutes if cooking for a large crowd, especially on busy mornings
    • I’ve broken down cooking times for you, so you can make this bacon recipe according to your taste preference!

    Ingredients

    Brand of Turkey Bacon: If using turkey bacon like Butterball turkey bacon (below), you can see that it’s smoked and cured. Some think it’s ok to eat this like it is… but it’s best to cook this bacon for the times recommended in the recipe card below for best results.

    Other brands like, Applegate turkey bacon that is uncured bacon, definitely needs to be cooked before consuming.

    Butterball Turkey Bacon in Package

    You’ll Need

    • The amount of oven baked turkey bacon that you want to cook
    • A rimmed cookie sheet (or baking sheet) large enough to hold the amount of bacon, without the slices overlapping
    • Parchment paper to cover baking sheet
    • Paper towel – to place the cooked bacon on after pulling out of the oven

    Step by Step Instructions

    1. Preheat oven to 400 degrees fahrenheit
    2. Begin by covering your sheet pan with parchment paper. This will help make it an easy cleanup.
    3. Next, line the bacon strips on to the pan, in a single layer, making sure there is no overlap.
      (Some use a baking rack to cook bacon in the oven to help the juices drip down while cooking. You can definitely do this but I don’t mind doing it without. It’s just less sheet pans to clean.)
    Turkey bacon on parchment paper on baking sheet
    1. Place bacon in preheated oven and set a timer for a cook time of 10 minutes.
      What you see below is my turkey bacon slices, cooked for 10 minutes. You can either remove them at this point for a floppy bacon or keep cooking for a crispy turkey bacon.

      If you’re wanting crispier bacon, flip the bacon at the 10-minute mark and bake for an additional few minutes, watching to see it reach the level of crispiness that you prefer.

      NOTE: it may be crispier than it looks! Pulling a piece out and trying a taste-test — careful HOT! — is my best tip. Because once it cools, it becomes crispier than it looks.)
    baking turkey bacon in oven
    1. Once the pieces of bacon have reached the perfect turkey bacon, texture or crispiness, you can pull it out of the oven.
    2. Place strips of turkey bacon on a plate that is covered with paper towels and serve!

    Crispy vs. Floppy Turkey Bacon

    As you can see in the images below, the crispy bacon on the left was cooked in a 400° oven for 18 minutes.

    In the photo on the right, the bacon was pulled out of the oven only after 10 minutes.

    Crispy turkey bacon in the oven.
    Crispy turkey bacon
    Floppy turkey bacon in the oven
    Floppy turkey bacon

    FAQs and Tips

    • Remember, turkey bacon is more of a thin cut than some thicker cut, regular pork bacon slices, so it can cook in less time.
    • You can also cook turkey bacon in the microwave oven, in a frying pan or even have air fryer turkey bacon.
    • Slices of turkey bacon can be a healthy alternative to pork belly slices.
    • Sprinkle black pepper on top of slices of bacon before baking for some extra flavor

    Storage

    Store leftover turkey bacon in an airtight container in the refrigerator for 4 to 5 days.

    Recipes for Turkey Bacon

    If you’re looking for new ways to use your turkey bacon, you’ll love enjoying it by itself, on a tuna salad sandwich, on a breakfast sandwich like this brioche bacon and egg sandwich, in these bacon egg rolls, on these cute mini waffle breakfast sandwiches, or in a healthy broccoli salad!

    What to Serve Turkey Bacon With:

    If you’re looking for more breakfast recipes to serve along with this bacon, then you’ll love this biscuits and gravy casserole!

    More Oven-Baked Recipes

    If you love oven-baked recipes, then you’re really going to love these baked cheeseburgers, pork steaks, and chicken legs in the oven!

    Recipe

    Turkey bacon that was baked in the oven.
    Print Pin
    5 from 5 votes

    How to Cook Turkey Bacon in the Oven

    An easy way to cook turkey bacon in the oven! Bake it until floppy or crispy to get the perfect bacon, just the way you like it! Top a baked turkey burger, serve it alongside these pancakes from scratch or eat it just the way it is!
    Course Breakfast, Side Dish
    Cuisine American
    Diet Gluten Free, Low Fat
    Prep Time 2 minutes minutes
    Cook Time 12 minutes minutes
    Total Time 14 minutes minutes
    Servings 24 slices
    Calories 25kcal
    Author Jessica Burgess

    Equipment

    • oven

    Ingredients

    • 24 slices turkey bacon
    • black pepper if desired

    Instructions

    • Preheat oven to 400°
    • Line rimmed cookie sheet (large enough to hold all of the bacon you wish to cook) with parchment paper, in a single layer.
    • Place bacon in oven and set a timer for 10 minutes.

    For floppy turkey bacon slices

    • Remove turkey bacon from oven. Using tongs, place turkey bacon slices on a plate that is covered in paper towels to soak up any bacon grease. Enjoy!

    For crispier bacon slices

    • Carefully slide out oven rack and flip slices over (using tongs), and slide rack back in to bake longer, cooking an additional 5 minutes or so until desired crispiness has been reached.
    • NOTE: Watch bacon slices carefully, to make sure they do not overcook and burn. Also, bacon will be crispier than it looks while baking in the oven. You may want to pull a piece out to test it before deciding to cook longer.

    Notes

    FAQ’s and Tips
    • Remember, turkey bacon is more of a thin cut than some thicker cut, regular pork bacon slices, so it can cook in less time.
    • You can also cook turkey bacon in the microwave oven, in a frying pan or even have air fryer turkey bacon.
    • Slices of turkey bacon can be a healthy alternative to pork belly slices.
    • Sprinkle black pepper on top of slices of bacon before baking for some extra flavor
    Storage
    Store leftover turkey bacon in an airtight container in the refrigerator for 4 to 5 days.

    Nutrition

    Serving: 1slice | Calories: 25kcal | Protein: 2g | Fat: 2g | Saturated Fat: 1g | Polyunsaturated Fat: 1g | Monounsaturated Fat: 2g | Cholesterol: 10mg | Sodium: 135mg | Potassium: 55mg | Calcium: 1mg | Iron: 1mg

    Chicken Bacon Ranch Pasta

    September 14, 2021

    scoop of chicken bacon ranch pasta

    Chicken Bacon Ranch Pasta: A comforting baked dish casserole recipe that’s an easy dinner idea to make with everyday ingredients that the whole family will love on a busy weeknight!

    Using ingredients like crispy bacon, chicken breasts, and creamy ranch dressing, makes this a delicious pasta recipe, the ultimate comfort food in only 30 minutes. Ready for this in sandwich form too? This chicken bacon ranch sandwich recipe and these crack chicken sandwiches are other amazing easy dinners.

    Spoonful of chicken bacon ranch pasta

    Why You’ll Love This Recipe

    You all… I had NO idea how much you were going to love the bacon ranch pasta salad recipe.

    I mean, I don’t blame you. When you combine ranch and bacon with ANYTHING, it’s going to be amazing… but adding it to pasta (carbs) is the ultimate combination.

    So when realizing how much you loved it, (and this cream cheese pasta) I knew it was time to add a warm bacon and ranch pasta to the mix, and even a little chicken to make it a bit hearty to classify it as a main dish.

    The chicken-bacon-ranch pairing can also be stuffed into slider rolls as an appetizer or lunch.


    Easy Ingredients

    If this is your first time here, I must tell you that we LOVE easy recipes that use everyday ingredients. This recipe is no different. It uses:

    • Penne pasta (or pasta of choice) – I use rotini in this crockpot Parmesan garlic chicken pasta and this Marry Me Chicken Pasta recipe.
    • Chicken (boil/bake & shred or use a rotisserie chicken for ease, and then make a chicken stock out of the rotisserie chicken!)
    • Jarred Alfredo sauce (my favorite is Bertolli) or you can make my easy Alfredo sauce instead.
    • Ranch dressing
    • Bacon
    • Shredded cheddar cheese
    • Shredded mozzarella cheese
    • Green onions, (if desired)
    • Fresh parsley (if desired)
    Ingredients for chicken bacon ranch pasta recipe

    Use Chopped Bacon – How to Bake Bacon (if desired)

    If you don’t already have cooked bacon, you’ll want to cook the bacon before baking this pasta dish, and since you’ll need the oven hot anyway, it’s easy to place the bacon in a cool oven on a baking sheet.

    Bake at 425˚ until bacon is crisp. Then lower the heat of the oven to 350˚ so it’s ready to bake the pasta. (Or, you can cook bacon in the air fryer if you prefer.)

    Cook bacon in the oven and cool off to chop

    After the bacon has cooled a bit, go ahead and chop in to bacon pieces and set aside.

    Chopped bacon on a cutting board

    What Kind of Chicken to Use

    You can absolutely use any kind of chicken that you want to for this recipe but make sure it’s cooked chicken before mixing it with the other ingredients and before baking. Some suggestions are:

    • chicken breast
    • rotisserie chicken
    • leftover chicken

    What Kind of Pasta to Use

    Penne is LOVELY for this recipe, but feel free to use your favorite short pastas or whatever you have on hand.

    Farfalle or bowtie pasta is another favorite that we have here, and it looks super pretty if you’re feeding a crowd.

    Cook pasta according to package directions, (usually al dente) drain and pour cooked pasta into a large bowl with the chicken, alfredo sauce and ranch dressing and mix gently until combined.

    Pouring penne in to a stockpot to boil

    Step by Step Directions

    • To finish off this easy chicken bacon ranch pasta, pour mixture into a greased 9×13 in. baking dish and evenly spread it out.
    • To add some depth to this dish, add ½ cup sharp cheddar cheese along with the mozzarella for some added cheesy “oomph”.
    Pasta in a baking dish with cheddar cheese

    Bacon and Bake

    Sprinkle the chopped bacon on top, cover with aluminum foil, and bake at 350˚ for 10 minutes.

    Sprinkled bacon on top of chicken bacon ranch pasta in baking dish

    Uncover and bake for an additional 10 minutes or until the cheese has melted.

    Fresh herbs sprinkled on top of bacon chicken ranch pasta

    Now you have an easy recipe for dinner tonight, that the entire family will love!

    Garnish Ideas

    Garnish with fresh parsley if you wish, but it’s not required.

    We also love topping this with parmesan cheese and adding green onions – or you can even add broccoli, similar to my chicken and broccoli alfredo recipe.

    Chicken Bacon Ranch Pasta in White Bowl

    Substitutions

    If you want to mix things up or if you’re out of some of the ingredients for this recipe, it’s really easy to substitute items! For instance:

    • Use monterey jack cheese
    • Add cream cheese (like in our cream cheese pasta recipe) or sour cream and ranch dressing mix
    • Store bought bacon bits instead of cooking bacon
    • Whole wheat pasta
    • Use crab meat instead of chicken, like we did in this crab casserole recipe.

    How to Bake a Freezer Pasta Meal:

    Do you love making pasta dishes as a freezer meal? Whip up this chicken bacon ranch alfredo pasta recipe and instead of baking, cover with aluminum foil (or however you prep your freezer meals) and place in the freezer.

    Now I’ve yet to try this myself with this recipe, so I’m assuming that this should work just as great as the other freezer pasta meals. So if you try this, I’d LOVE to hear how it did for you and what worked.

    Thaw in the fridge (may take up to 48 hours) or thaw in the microwave on defrost setting. Bake at 350 degrees according to instructions.

    If cooking frozen, bake for 60 minutes at 350˚ (time may vary, so check it after 30-45 minutes depending on your oven – mine cooks super fast and hot- with foil on. Then remove foil and bake another 10 minutes to brown the cheese.

    How to Store

    If you have leftovers of this delicious pasta dish, you can store it in an airtight container and in the refrigerator for 3-4 days. Simply reheat in the microwave or place back in the oven on 350° until heated through.

    What to Serve with Chicken Bacon Ranch Casserole

    If you’re looking for a delicious side dish, some of our favorite recipes to serve with this easy pasta recipe, are this side salad, garlic bread and this focaccia bread!

    More Pasta Recipes

    Pasta recipes are sort of our “thing” around here. They’re easy and most use everyday ingredients that we usually have on hand. So you’re also going to love this ham casserole, cheeseburger macaroni in the Instant Pot, and this creamy chicken and noodles recipe! Or keep frozen ravioli in the freezer to make this ravioli bake when you’re not sure what to make for dinner.

    Or, one of our recent favorites to have for dinner, is this garlic parmesan linguine.

    You’ll Also Love:

    If you love the combination of these flavors, then you’re really going to love this grilled cheese with chicken, Chicken Bacon Ranch Crescent Bites, and these Chicken Casserole Recipes!

    Did you make this? I’d be so grateful if you left a “star” rating below to let me know what you thought! Then, the next time you need a quick and easy recipe, come back to Fantabulosity to browse all of my easy recipes!

    Recipe

    scoop of chicken bacon ranch pasta
    Print Pin
    5 from 3 votes

    Chicken Bacon Ranch Pasta

    Chicken Bacon Ranch Pasta: A comforting baked dish casserole recipe that's easy to make with everyday ingredients that the whole family will love on a busy weeknight!
    Course Main Course
    Cuisine Italian
    Prep Time 10 minutes minutes
    Cook Time 20 minutes minutes
    Total Time 30 minutes minutes
    Servings 6 servings
    Calories 816kcal
    Author Jessica Burgess

    Ingredients

    • 1 lb penne pasta or favorite pasta, cooked al dente
    • 2 cups cooked shredded or diced chicken rotisserie chicken or leftover chicken for ease!
    • 15 oz jar alfredo pasta sauce we like Bertolli
    • ½ cup ranch dressing
    • 8 slices cooked bacon chopped
    • ½ cup shredded cheddar cheese
    • 2 cups mozzarella cheese
    • 3 tablespoon fresh parsley optional
    • green onions if desired

    Instructions

    • Preheat oven to 350 degrees and grease a 9×13 pan.
    • Cook penne pasta according to directions and drain.
    • In a large mixing bowl, pour in the pasta, chicken, alfredo sauce and ranch dressing and mix gently until combined.
    • Pour mixture into baking pan and top with the cooked chopped bacon and cheeses. 
    • Cover with aluminum foil and bake for 10 minutes. Remove cover and bake for an additional 10 minutes or until cheese is melted. 
    • Garnish with fresh parsley and green onions if desired, and serve. 
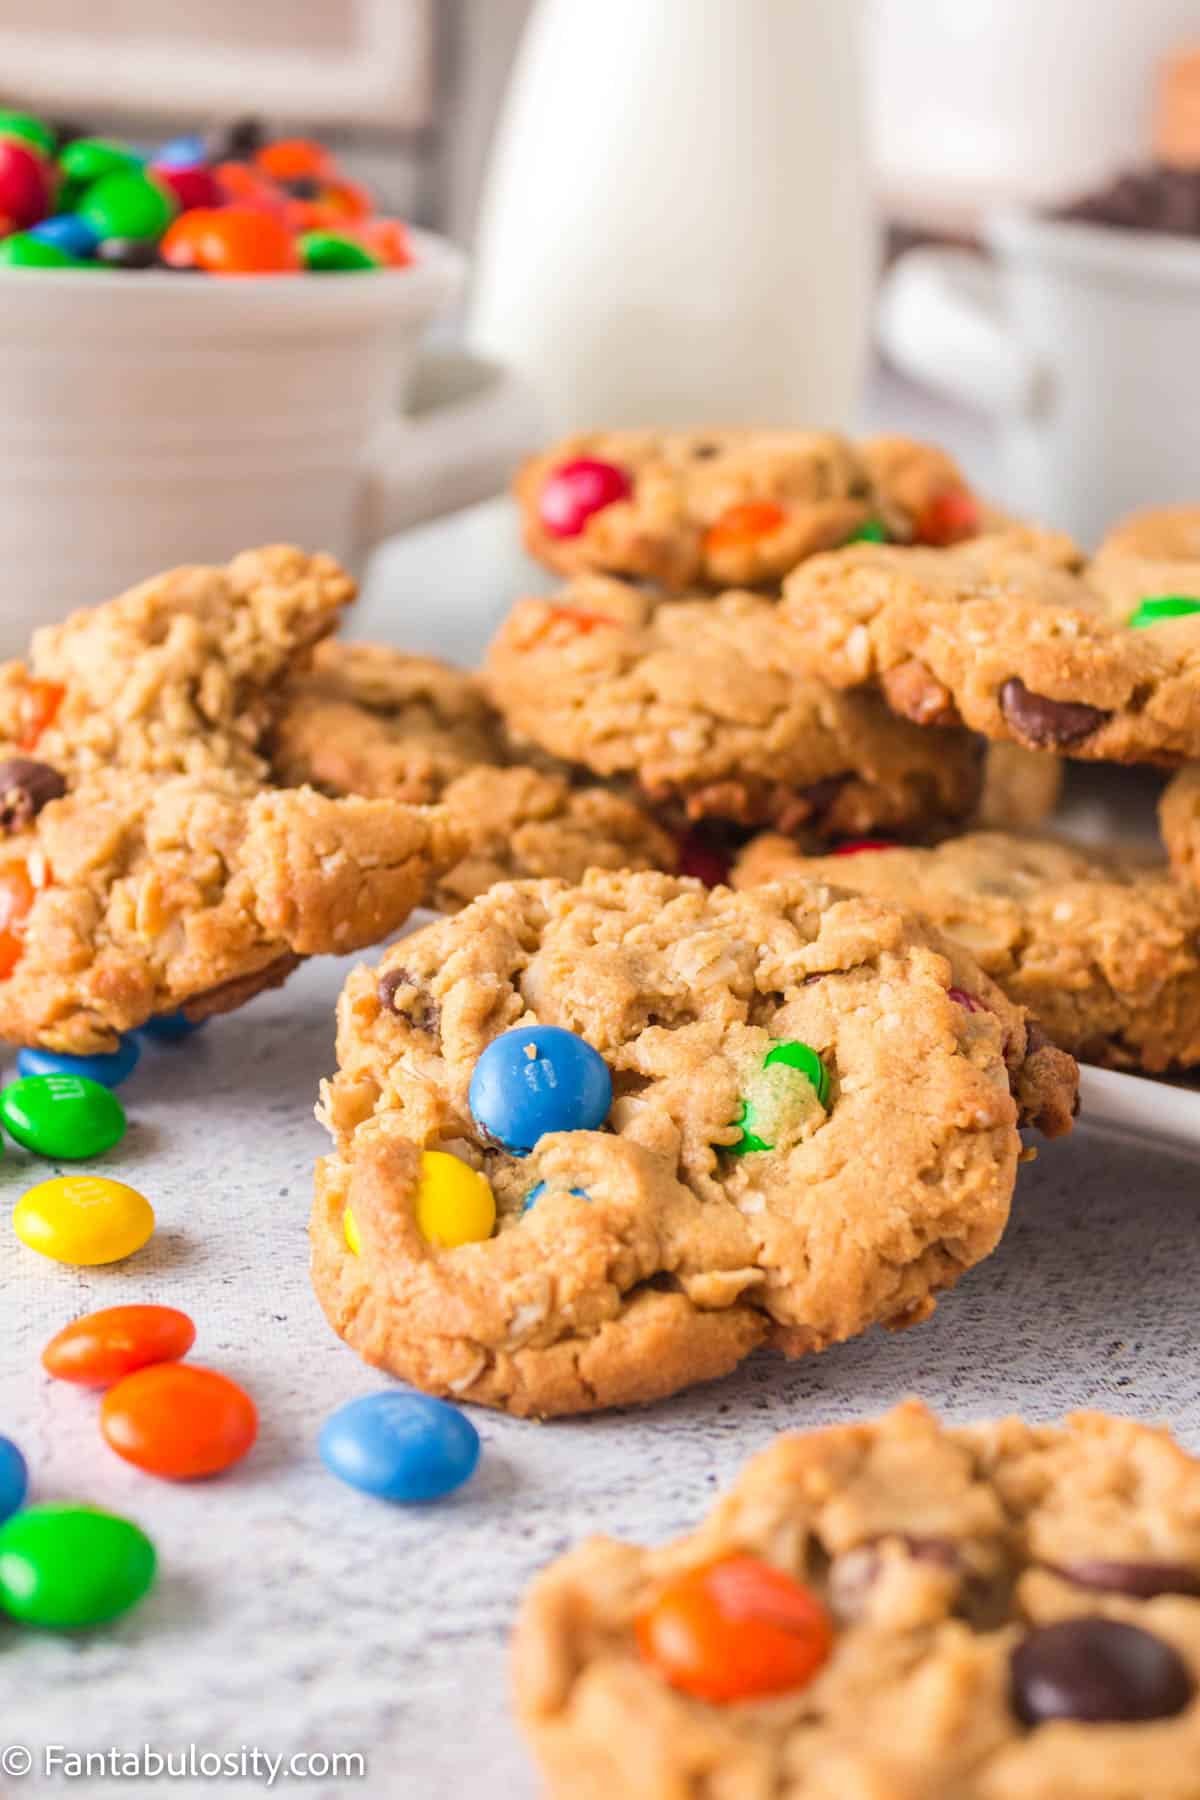
    Notes

    Substitutions
    If you want to mix things up or if you’re out of some of the ingredients for this recipe, it’s really easy to substitute items! For instance:
    • Use monterey jack cheese
    • Add cream cheese or sour cream and ranch dressing mix
    • Store bought bacon bits instead of cooking bacon
    • Whole wheat pasta
    Freezer Pasta Meal
    Do you love making pasta dishes as a freezer meal? Whip up this recipe and instead of baking, cover with aluminum foil (or however you prep your freezer meals) and place in the freezer.
    Now I’ve yet to try this myself with this recipe, so I’m assuming that this should work just as great as the other freezer pasta meals. So if you try this, I’d LOVE to hear how it did for you and what worked.
    How to Bake a Freezer Pasta Meal:
    Thaw in the fridge (may take up to 48 hours) or thaw in the microwave on defrost setting. Bake at 350 degrees according to instructions.
    If cooking frozen, bake for 60 minutes at 350˚ (time may vary, so check it after 30-45 minutes depending on your oven – mine cooks super fast and hot- with foil on. Then remove foil and bake another 10 minutes to brown the cheese.
    How to Store
    If you have leftovers of this delicious pasta dish, you can store it in an airtight container and in the refrigerator for 3-4 days. Simply reheat in the microwave or place back in the oven on 350° until heated through.

    Nutrition

    Serving: 1serving | Calories: 816kcal | Carbohydrates: 61g | Protein: 30g | Fat: 48g | Saturated Fat: 19g | Cholesterol: 125mg | Sodium: 1200mg | Potassium: 321mg | Fiber: 2g | Sugar: 4g | Vitamin A: 545IU | Vitamin C: 3.5mg | Calcium: 283mg | Iron: 1.7mg

    More Easy Recipes

    For more everyday recipes, browse and “pin” your favorites in our easy recipes!

    • « Go to Previous Page
    • Page 1
    • Interim pages omitted …
    • Page 16
    • Page 17
    • Page 18
    • Page 19
    • Page 20
    • Interim pages omitted …
    • Page 26
    • Go to Next Page »

    Primary Sidebar

    Jessica Burgess standing in kitchen holding a hummingbird cake.

    Hi, I'm Jessica! - Owner and Creator of the blog and brand, Fantabulosity.

    I’m here to help you make easy comfort food and nostalgic recipes, using simple ingredients, that everyone will love.
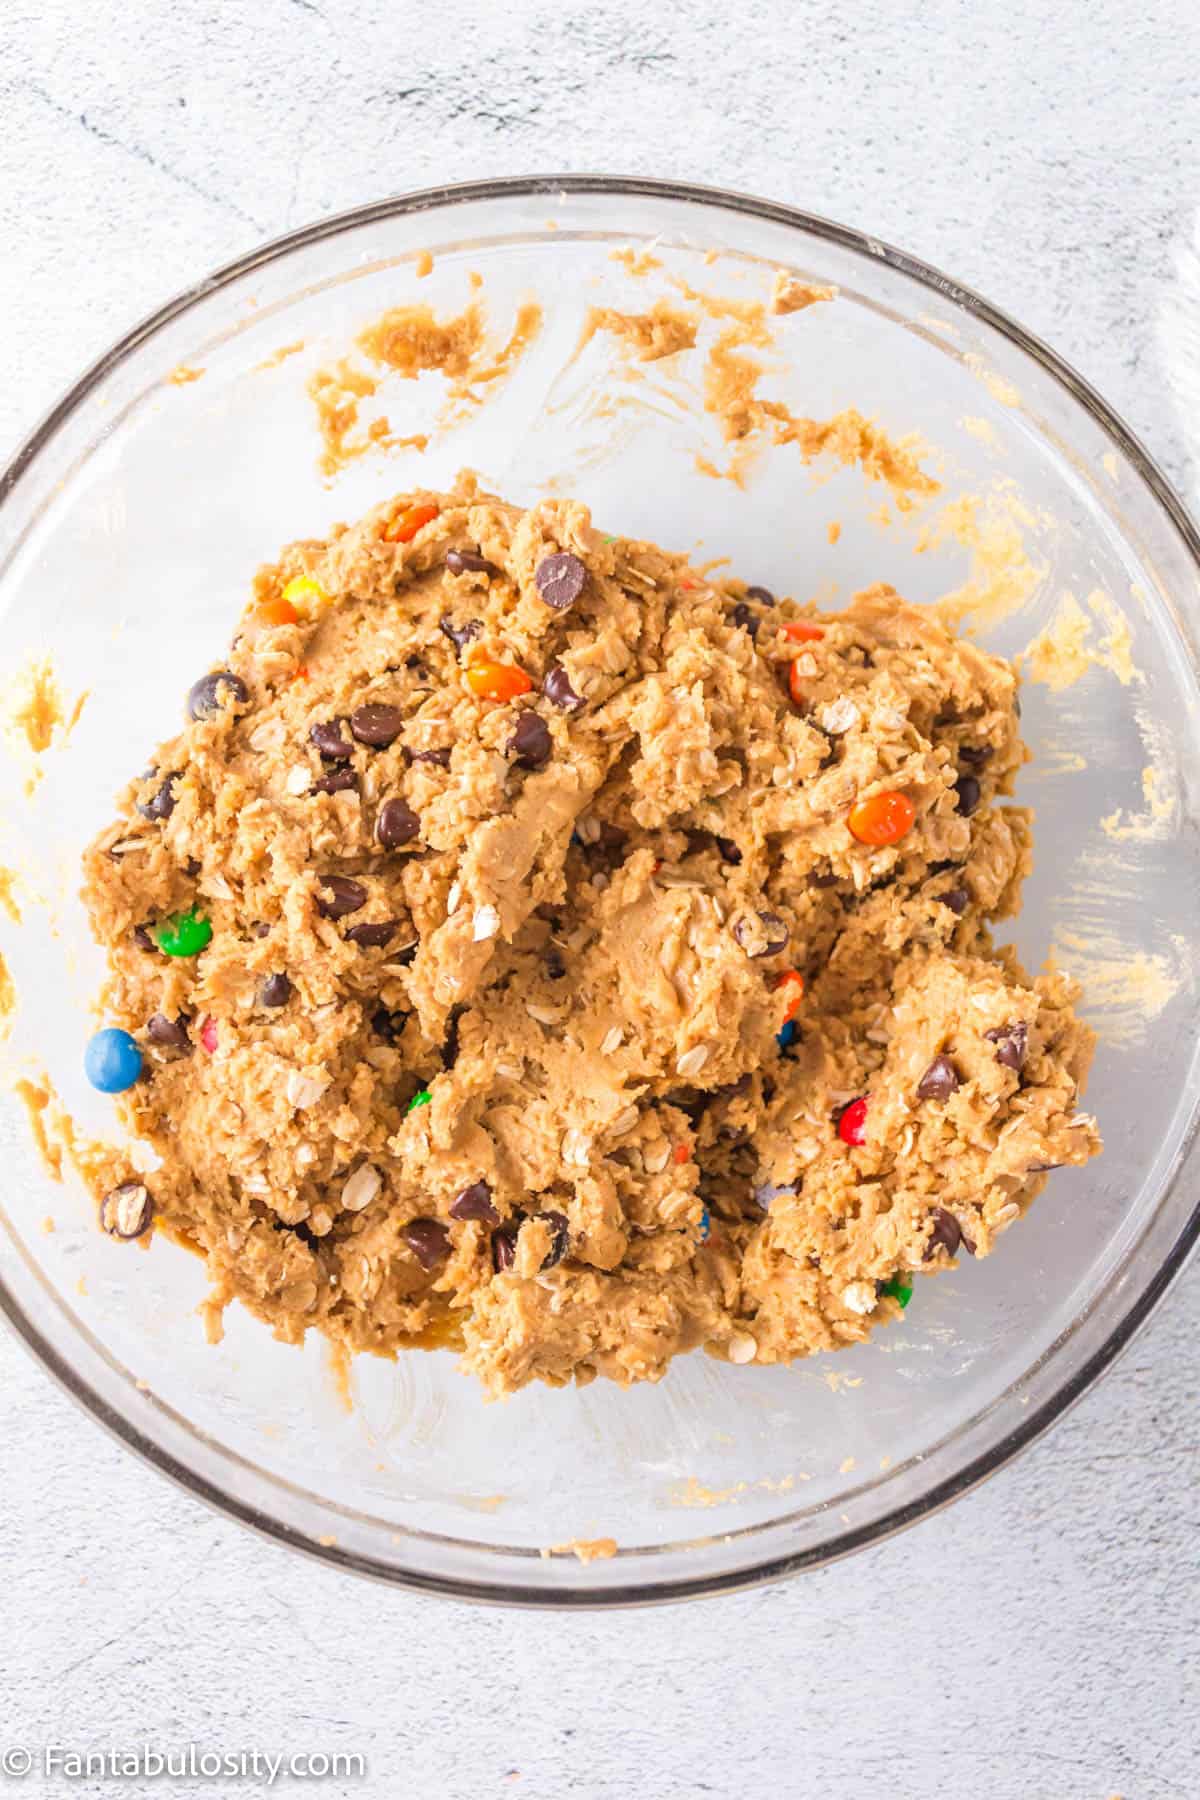
    More about me →

    Potluck Recipes

    • A slice of strawberry jello cake, topped with a strawberry slice, sitting on a round plate.
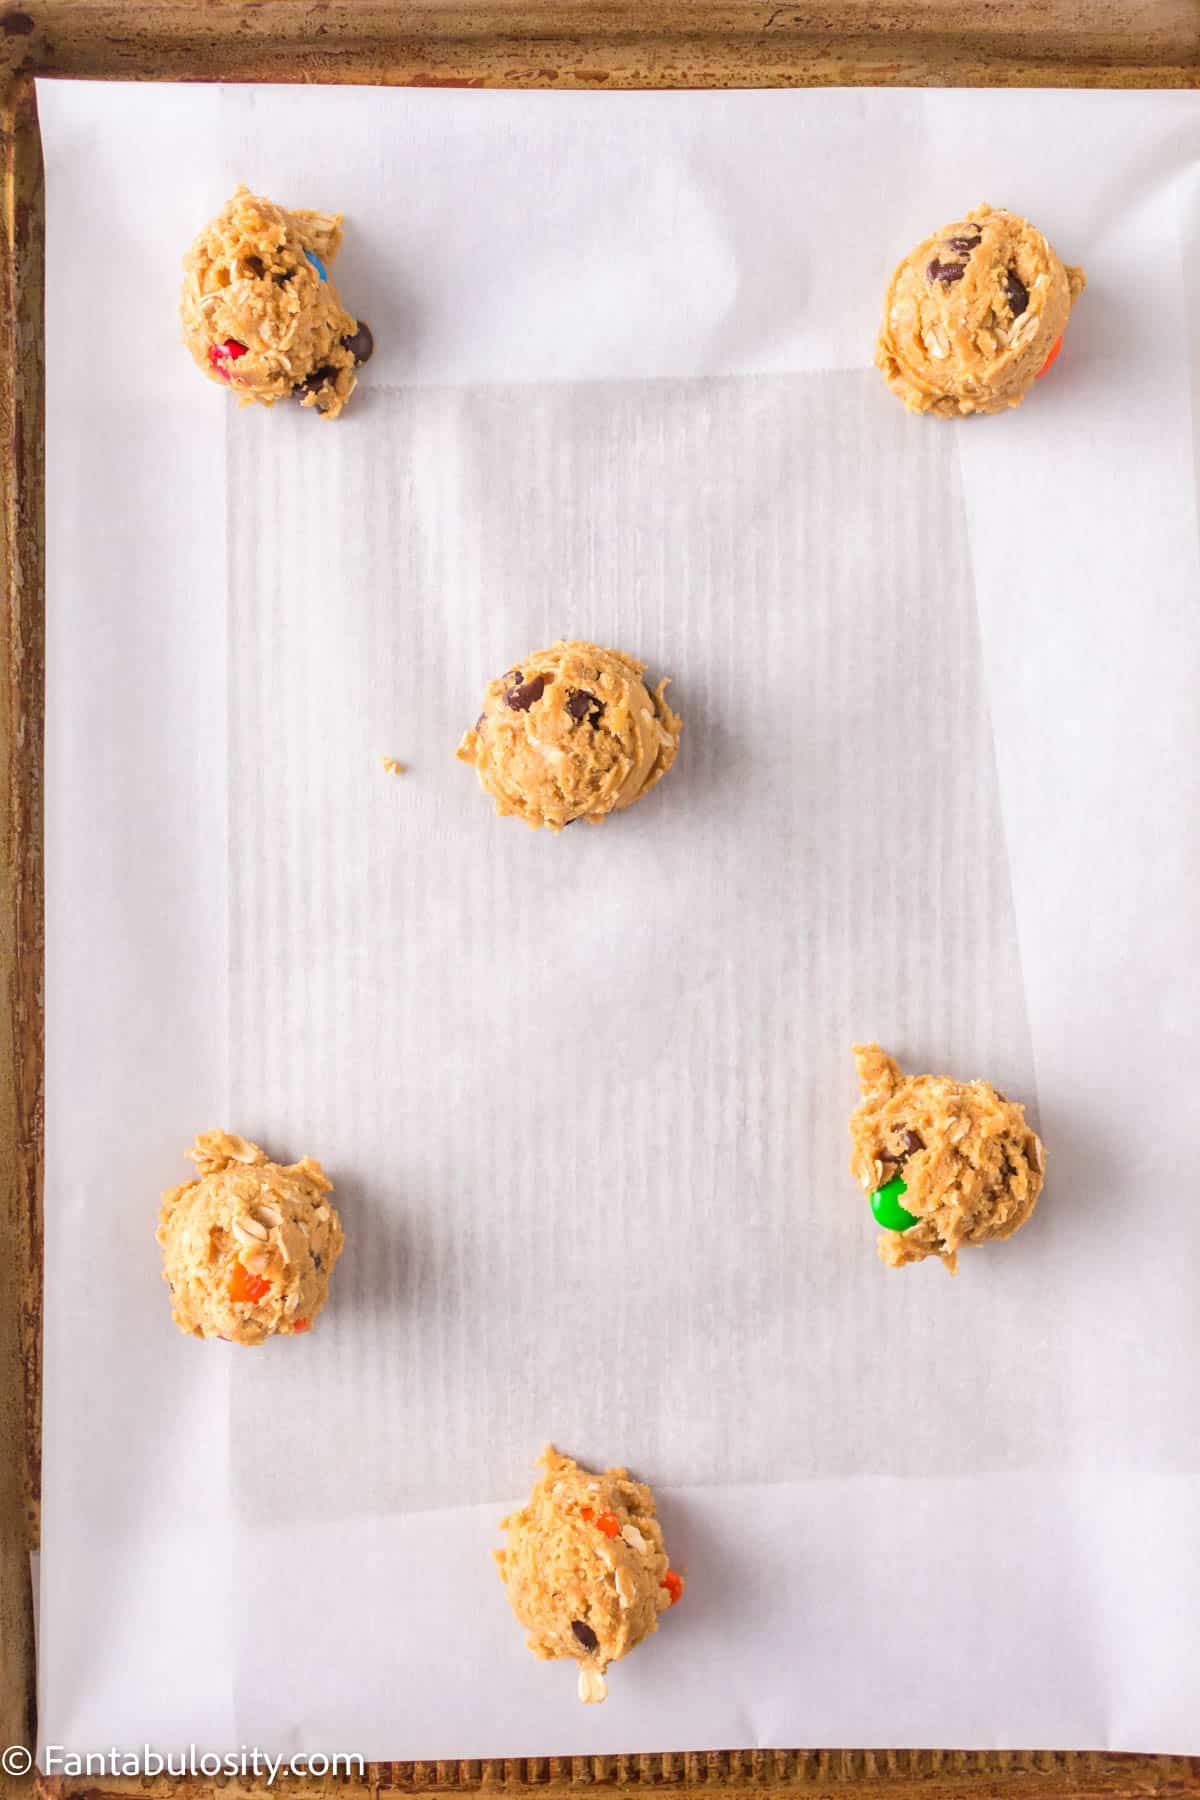
      Strawberry Jello Cake (Easy, Moist Strawberry Cake)
    • Crack green beans on wooden spoon.
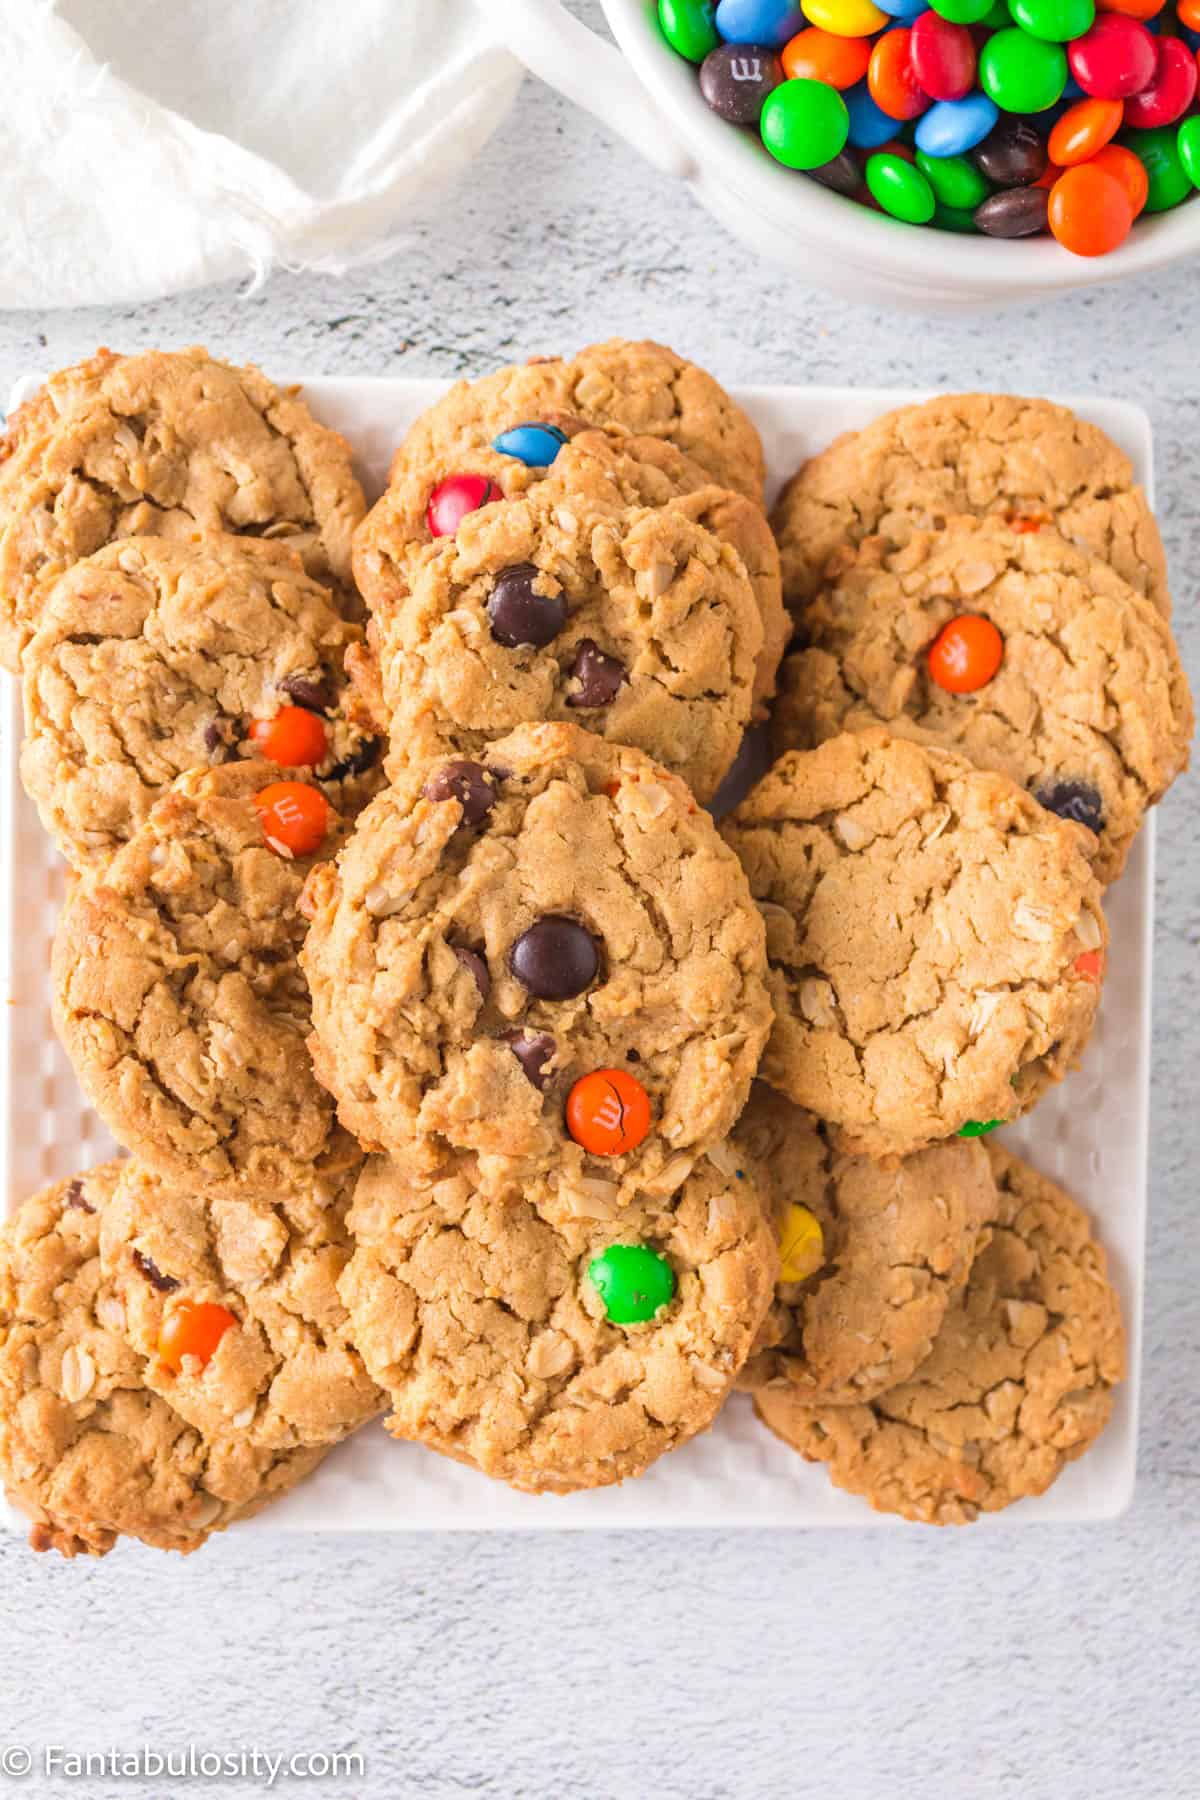
      Crack Green Beans
    • Old fashioned potluck cake recipes collage.
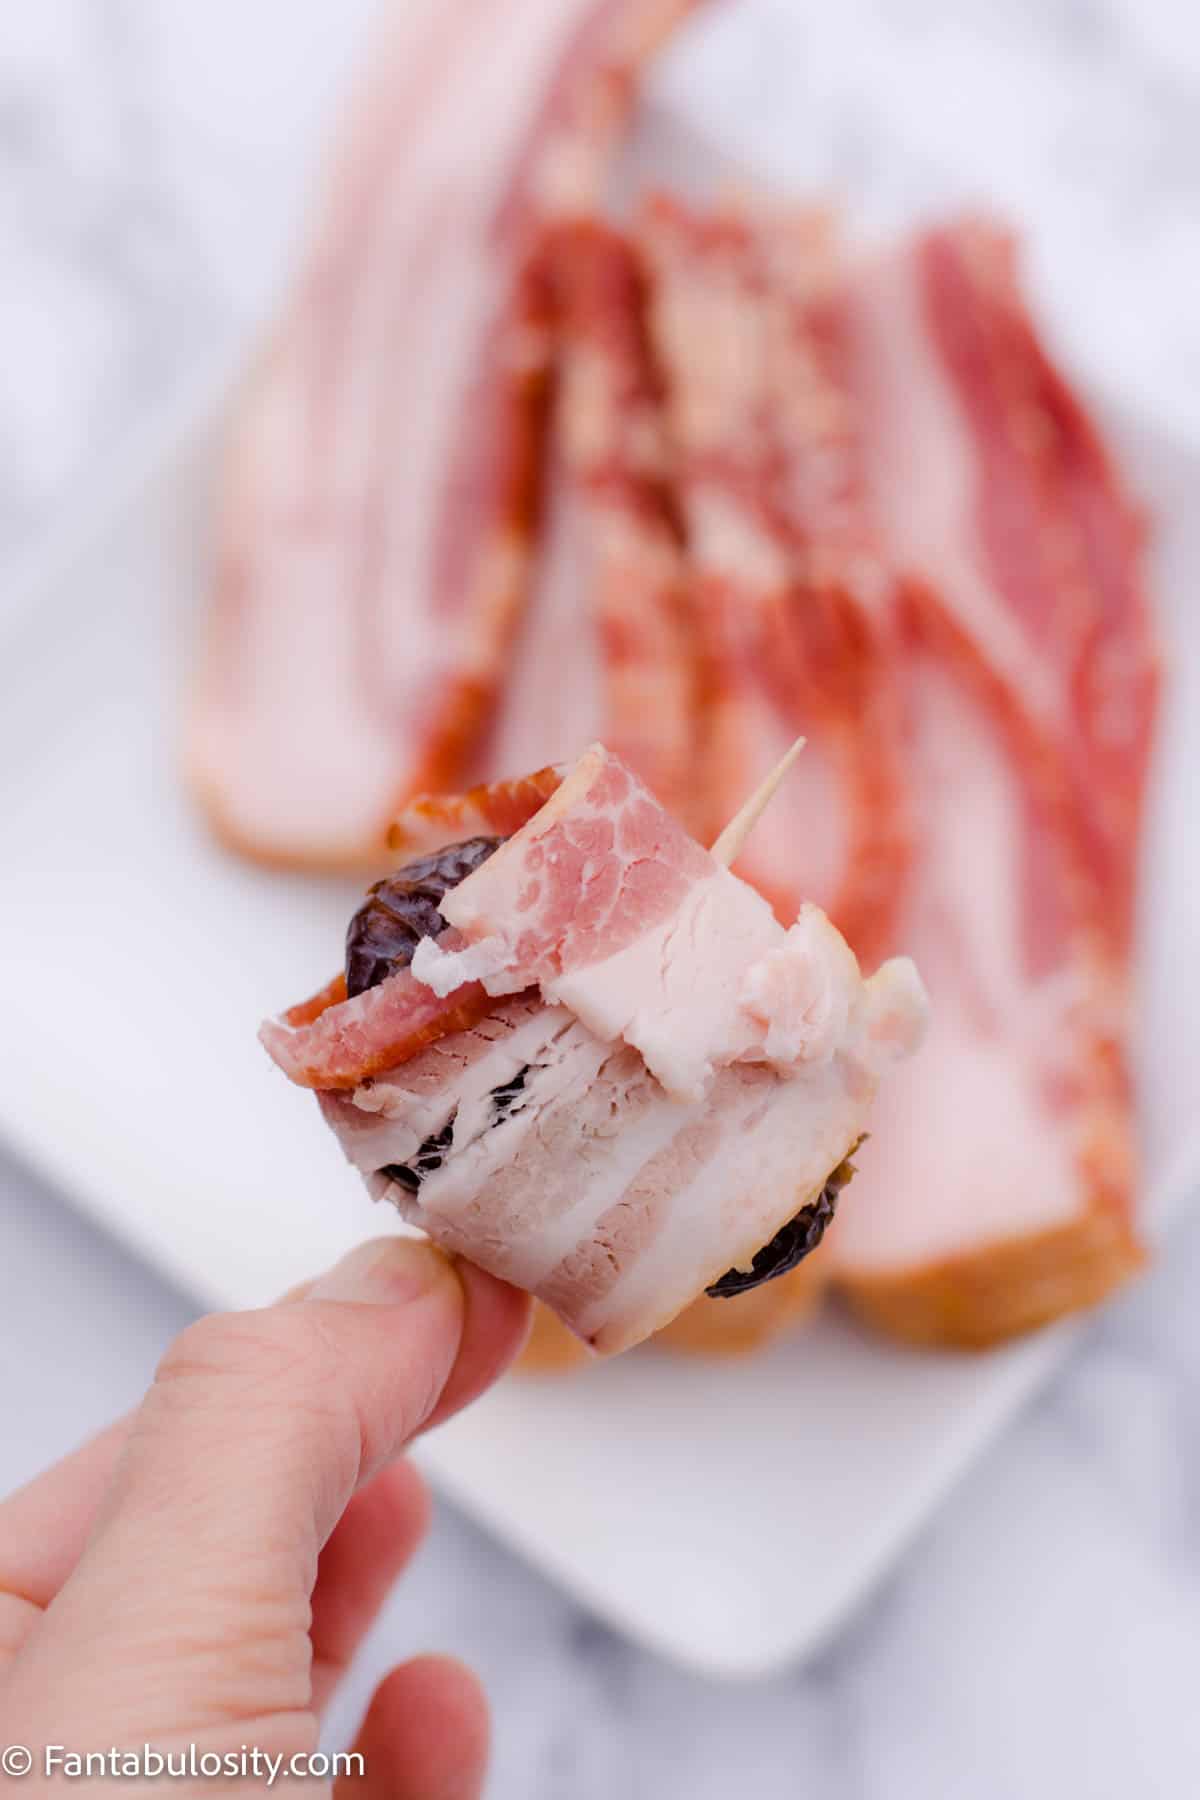
      Old-Fashioned Cakes That Still Show Up at Every Potluck
    • Collage of potluck desserts.
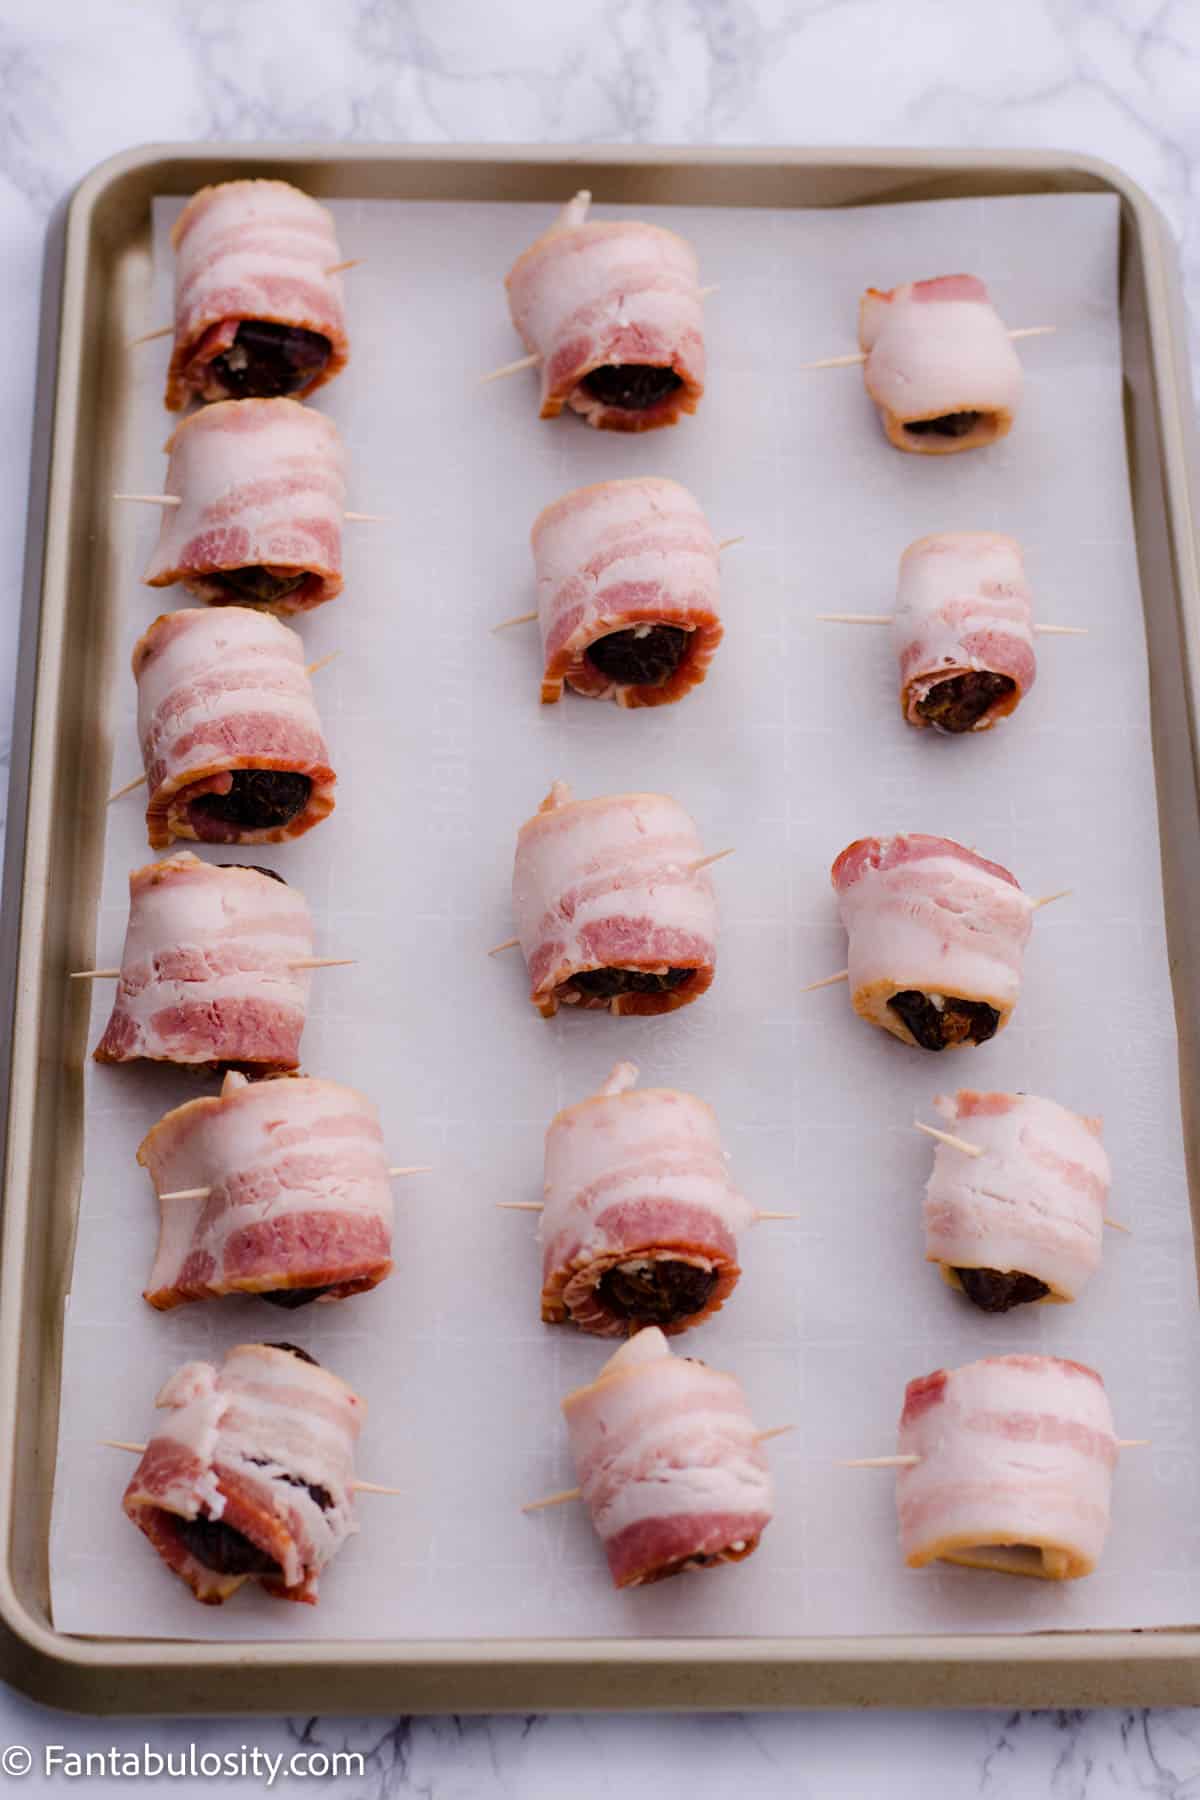
      Easy Potluck Desserts (Simple Recipes That Always Get Asked For)
    • Cold Pasta Salad Recipes Collage.
      Cold Pasta Salad Recipes
    • Chicken Casserole recipes image collage.
      20 Chicken Casserole Recipes

    Popular Recipes

    • bread pudding in baking dish
      Bread Pudding Recipe: Easy Old Fashioned Recipe (With Video!)
    • Burger baked in the oven, steamed in aluminum foil, and placed on white plate.
      Burgers in the Oven
    • two tuna salad sandwiches stacked on top of each other
      The BEST Tuna Salad Recipe
    • Sliced banana bread on white platter
      Best Banana Bread
    • Strawberry brownies on white marble cutting board.
      Strawberry Brownies Recipe
    • Cheeseburger Sliders made with Hawaiian Rolls, stacked on top of one another.
      Cheeseburger Sliders

    Footer

    ↑ back to top

    Featured In

    About

    • About Jessica
    • Contact
    • Collaborate
    • Dinner System

    Easy Recipes

    • All Recipes
    • Vintage Recipes
    • Dinner Recipes
    • Desserts

    How to Cook

    • Oven-Baked
    • Stove-Top
    • No Bake
    • Cooking Basics

    Privacy Policy |Accessibility Copyright © 2026 Fantabulosity | Terms & Conditions | FTC
    All recipes, photos, and content are copyrighted and may not be reproduced, republished, or distributed without written permission.

    Rate This Recipe

    Your vote:


    A rating is required
    A name is required
    An email is required