• Skip to primary navigation
  • Skip to main content
  • Skip to primary sidebar

Fantabulosity logo

  • All Recipes
  • Vintage Recipes
  • Holiday
  • Dinner Theme System
  • About
  • Navigation Menu: Social Icons

    • Facebook
    • Instagram
    • Pinterest
    • TikTok
    • YouTube
menu icon
go to homepage
  • Recipes
  • Desserts
  • Dinners
  • Gatherings
  • Holidays
  • About Jessica
    • Facebook
    • Instagram
    • Pinterest
    • TikTok
    • YouTube
  • search icon
    Homepage link
    • Recipes
    • Desserts
    • Dinners
    • Gatherings
    • Holidays
    • About Jessica
    • Facebook
    • Instagram
    • Pinterest
    • TikTok
    • YouTube
  • ×
    Home » Recipes

    Peppermint Cupcakes

    Peppermint Cupcakes

    October 25, 2022

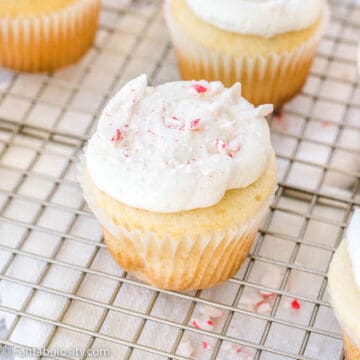
    Peppermint cupcakes on baking rack

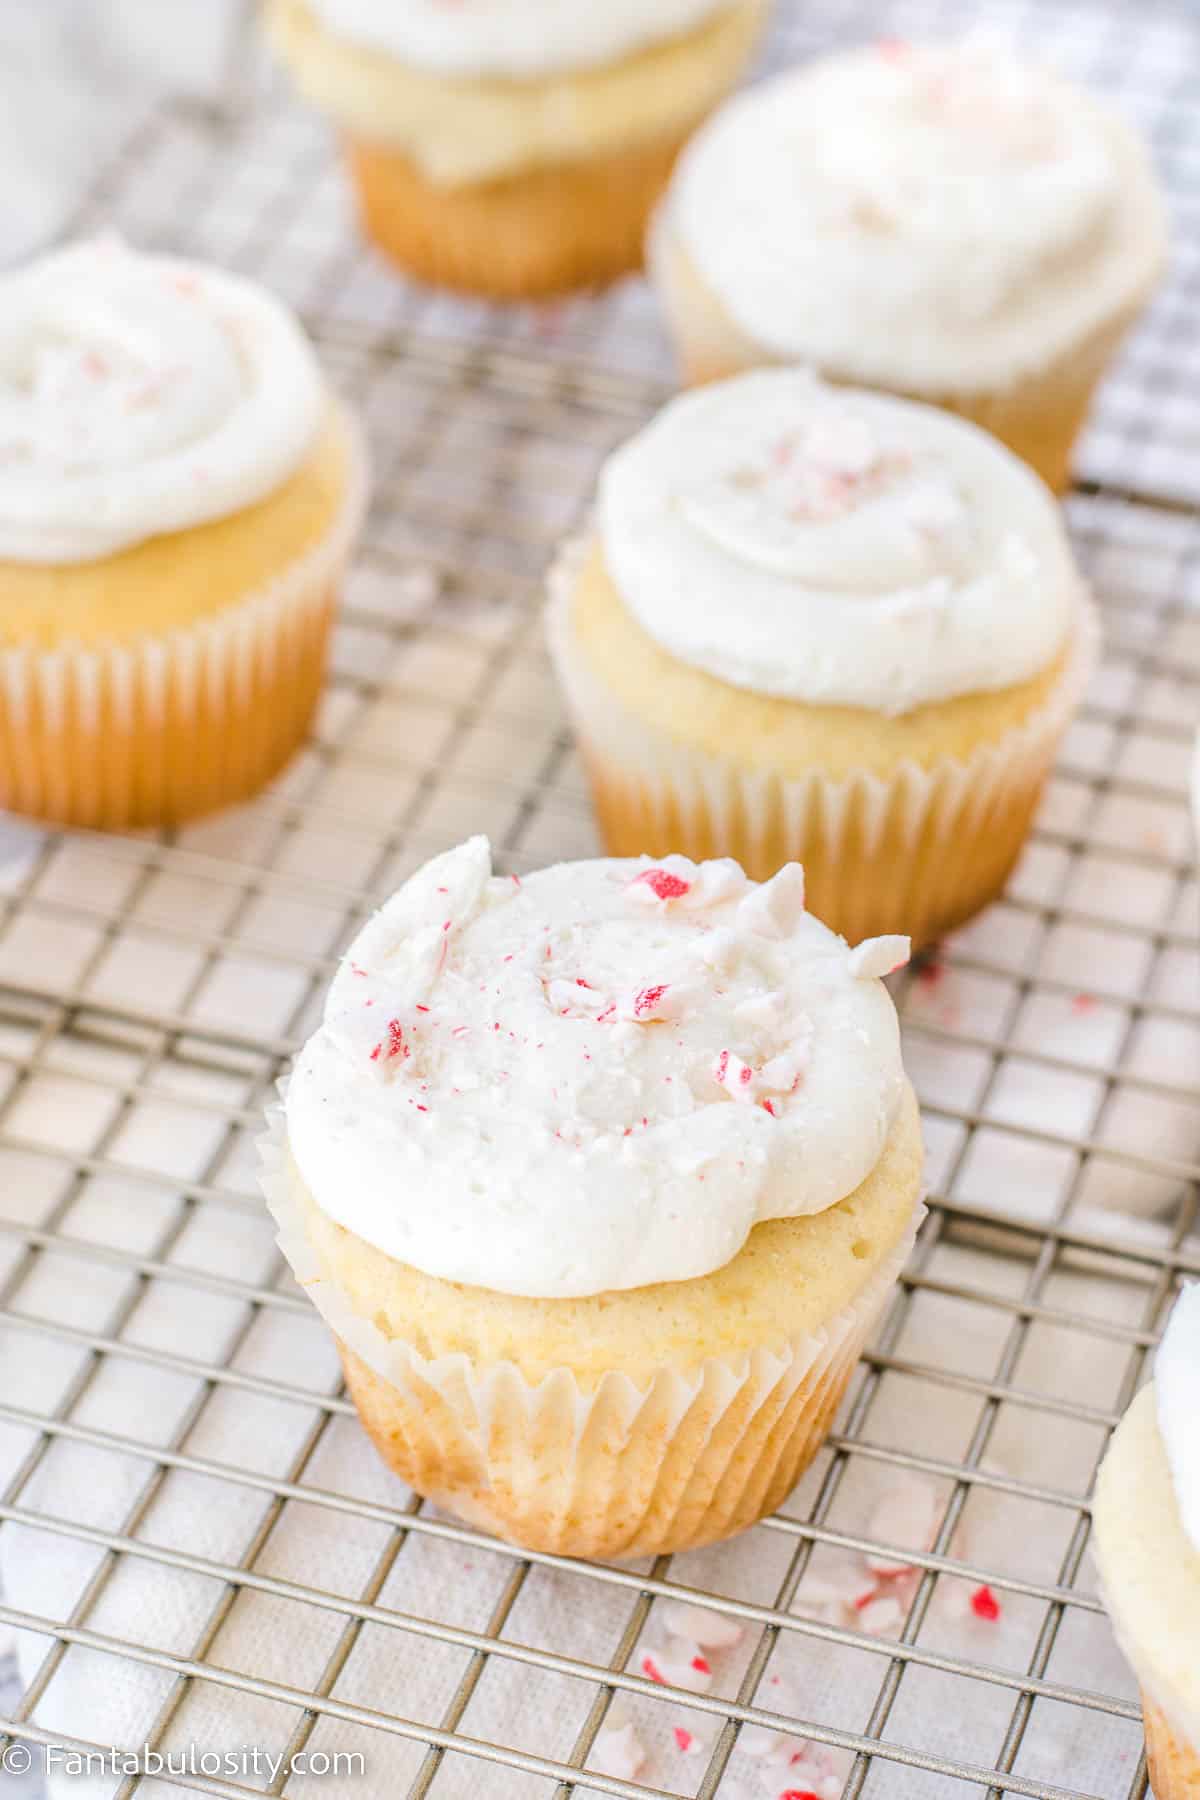
    Peppermint Cupcakes: A white cake mix that uses simple ingredients to make the cupcakes better than a boxed mix, with peppermint extract added for the perfect touch of flavor! Then, if desired, a homemade buttercream frosting with peppermint candies on top!
    Peppermint cupcakes on baking sheet
    Peppermint Cupcakes

    When one of our favorite chocolate cakes with peppermint went over so well, I knew it was time to add something like this to our easy dessert recipes. But this time, I wanted it to be a batch of cupcakes since so many seem to love our cupcake recipes too!

    Why you’ll love these:

    • They use a cake mix! But…I do a few things to it, to make them better than a cake mix cupcake recipe! I also love using a cake mix for this other holiday, eggnog tres leches cake.
    • The vanilla cupcake has a hint of peppermint flavor (like in our chocolate mint cupcakes) that gives an almost “cooling” feel when you bite in to it. They’re perfect any time of year but especially around the holiday season, or for holiday parties!
    • With the peppermint cupcake topped with this homemade buttercream and crushed peppermint candies, it’s a flavor combination that can’t be beat!
    • They’re perfect when entertaining for Christmas! The peppermint flavor, individual little cakes… it just makes perfect sense! (If you love peppermint, you’ll also want to try this candy cane pie recipe!)

    Ingredients:

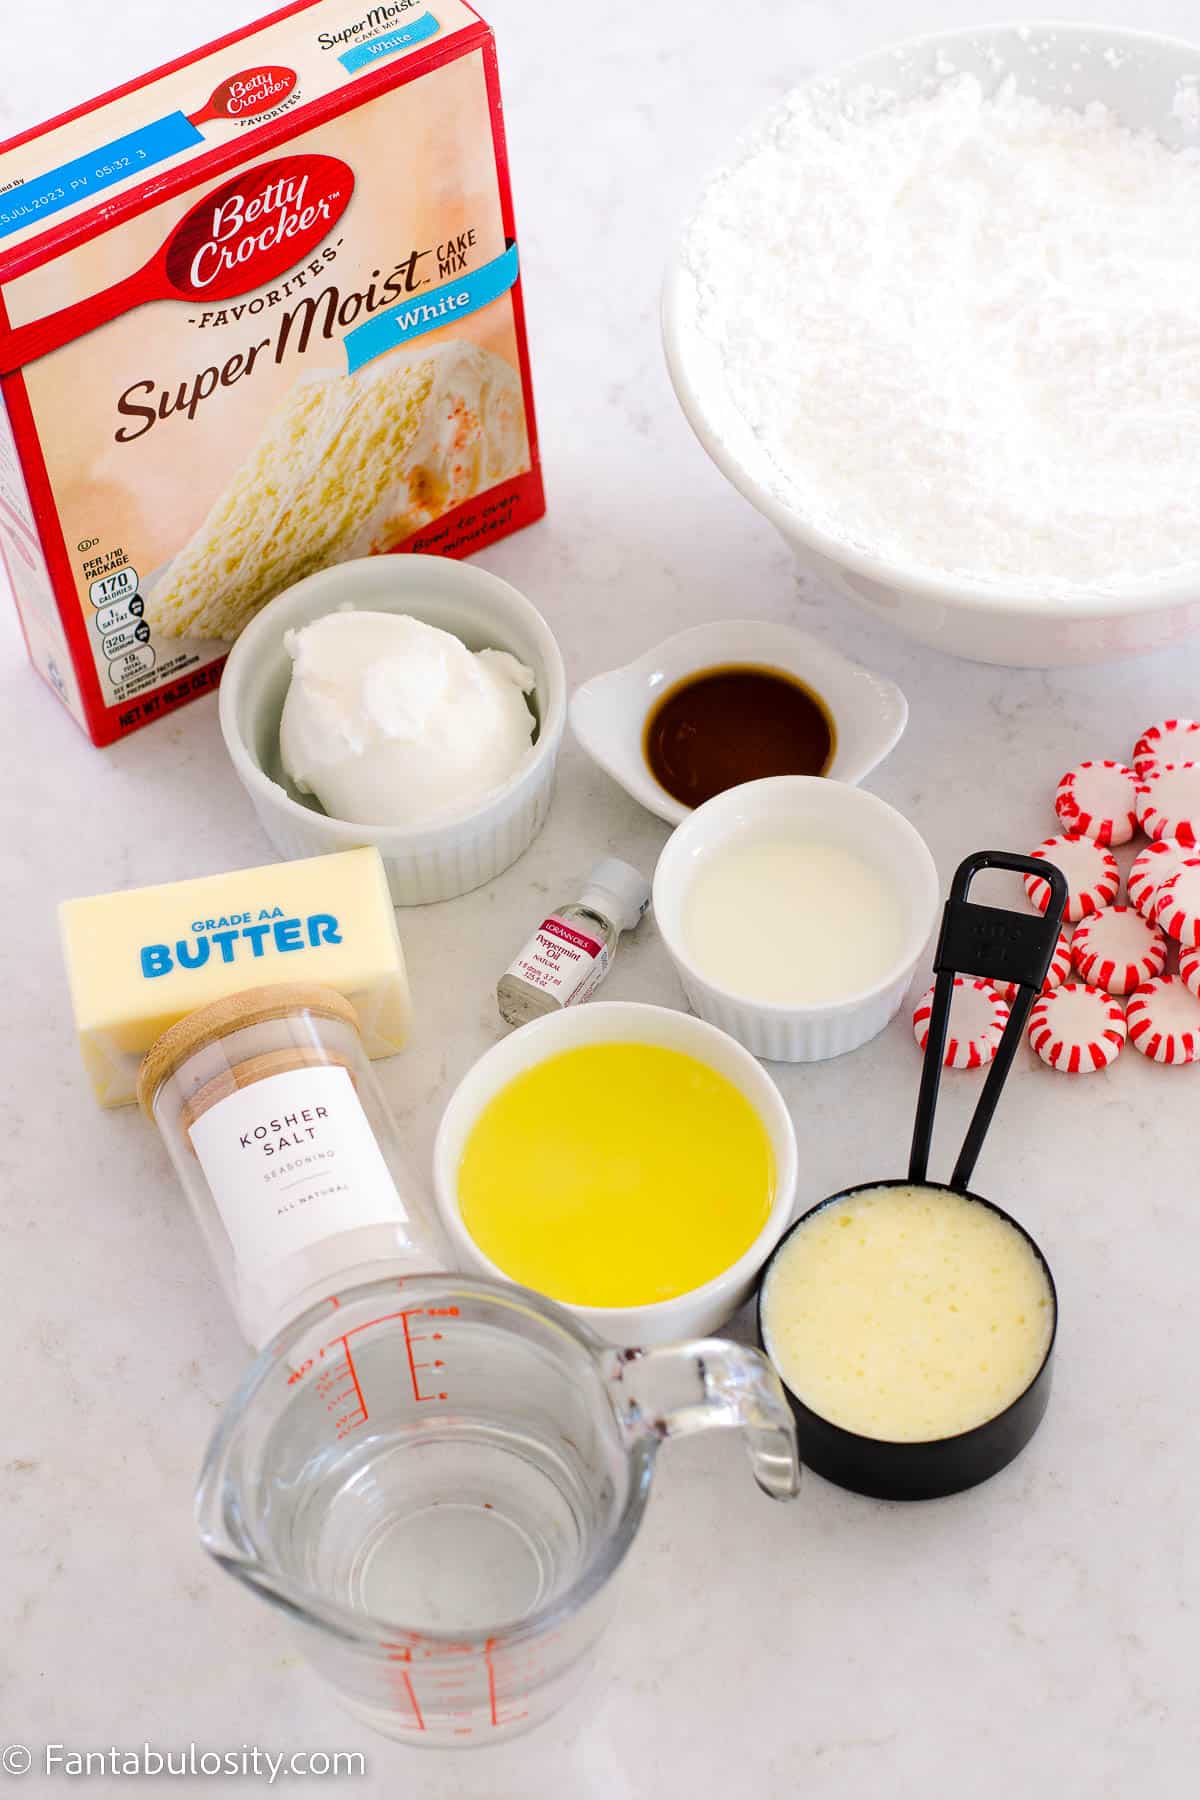
    This recipe uses simple ingredients, that you can find at almost any grocery store!

    Cupcake Ingredients

    • 16.25-ounce white cake mix
    • ½ cup melted butter
    • 3 egg whites
    • 1 cup water
    • 1 teaspoon of peppermint extract

    Buttercream Frosting Ingredients

    • ½ Cup Vegetable Shortening½
    •  Cup Unsalted Butter (1 stick softened)
    • 4 Cups Powdered Sugar (sifted)
    • 2 Tablespoons Milk (or heavy cream)
    • 1 teaspoon vanilla extract
    • Pinch of salt
    • About 20 peppermint candies
    Ingredients for peppermint cupcakes
    Ingredients

    Substitutions and Variations

    • Peppermint Extract: We do not put peppermint extract in to the buttercream, as we think the peppermint in the cupcakes and the crushed peppermint candies on top of the cupcake, are the perfect amount of flavor. However, feel free to add a small drop (it’s very powerful!) to the buttercream for a strong peppermint flavor to make a peppermint frosting. You may even want to try our mint buttercream recipe for these!
    • Cupcake Flavor: You can use a yellow cake mix, or even chocolate to make chocolate peppermint cupcakes if you prefer. If using something other than a white cake mix, you can use the egg yolks too, instead of just the egg whites.
    • Melted butter vs. Oil for Cupcakes: If you don’t have butter for the cupcakes, you can use vegetable oil.
    • Peppermint Candies: Feel free to use crushed candy canes, or even mini candy canes for a special Christmas idea!

    Instructions

    First, you’ll want to make the cupcakes. Then, while the cupcakes are cooling, it’s a great time to make the buttercream frosting.

    TIP: If you plan to make this buttercream frosting recipe, go ahead and get the stick of butter out, so it can be softening while you’re baking the cupcakes.

    How to make the cupcakes:

    1. Preheat oven to 350 degrees and line muffin tin with cupcake liners.
    2. In a large bowl, pour in cake mix, melted butter, egg whites, water, and peppermint extract.
    3. Mix on medium speed for 2 minutes. (If using a Kitchenaid mixer, use the paddle attachment if you have it. (I only had my whisk attachment, so I used that. Using this makes the cupcakes airier too.)
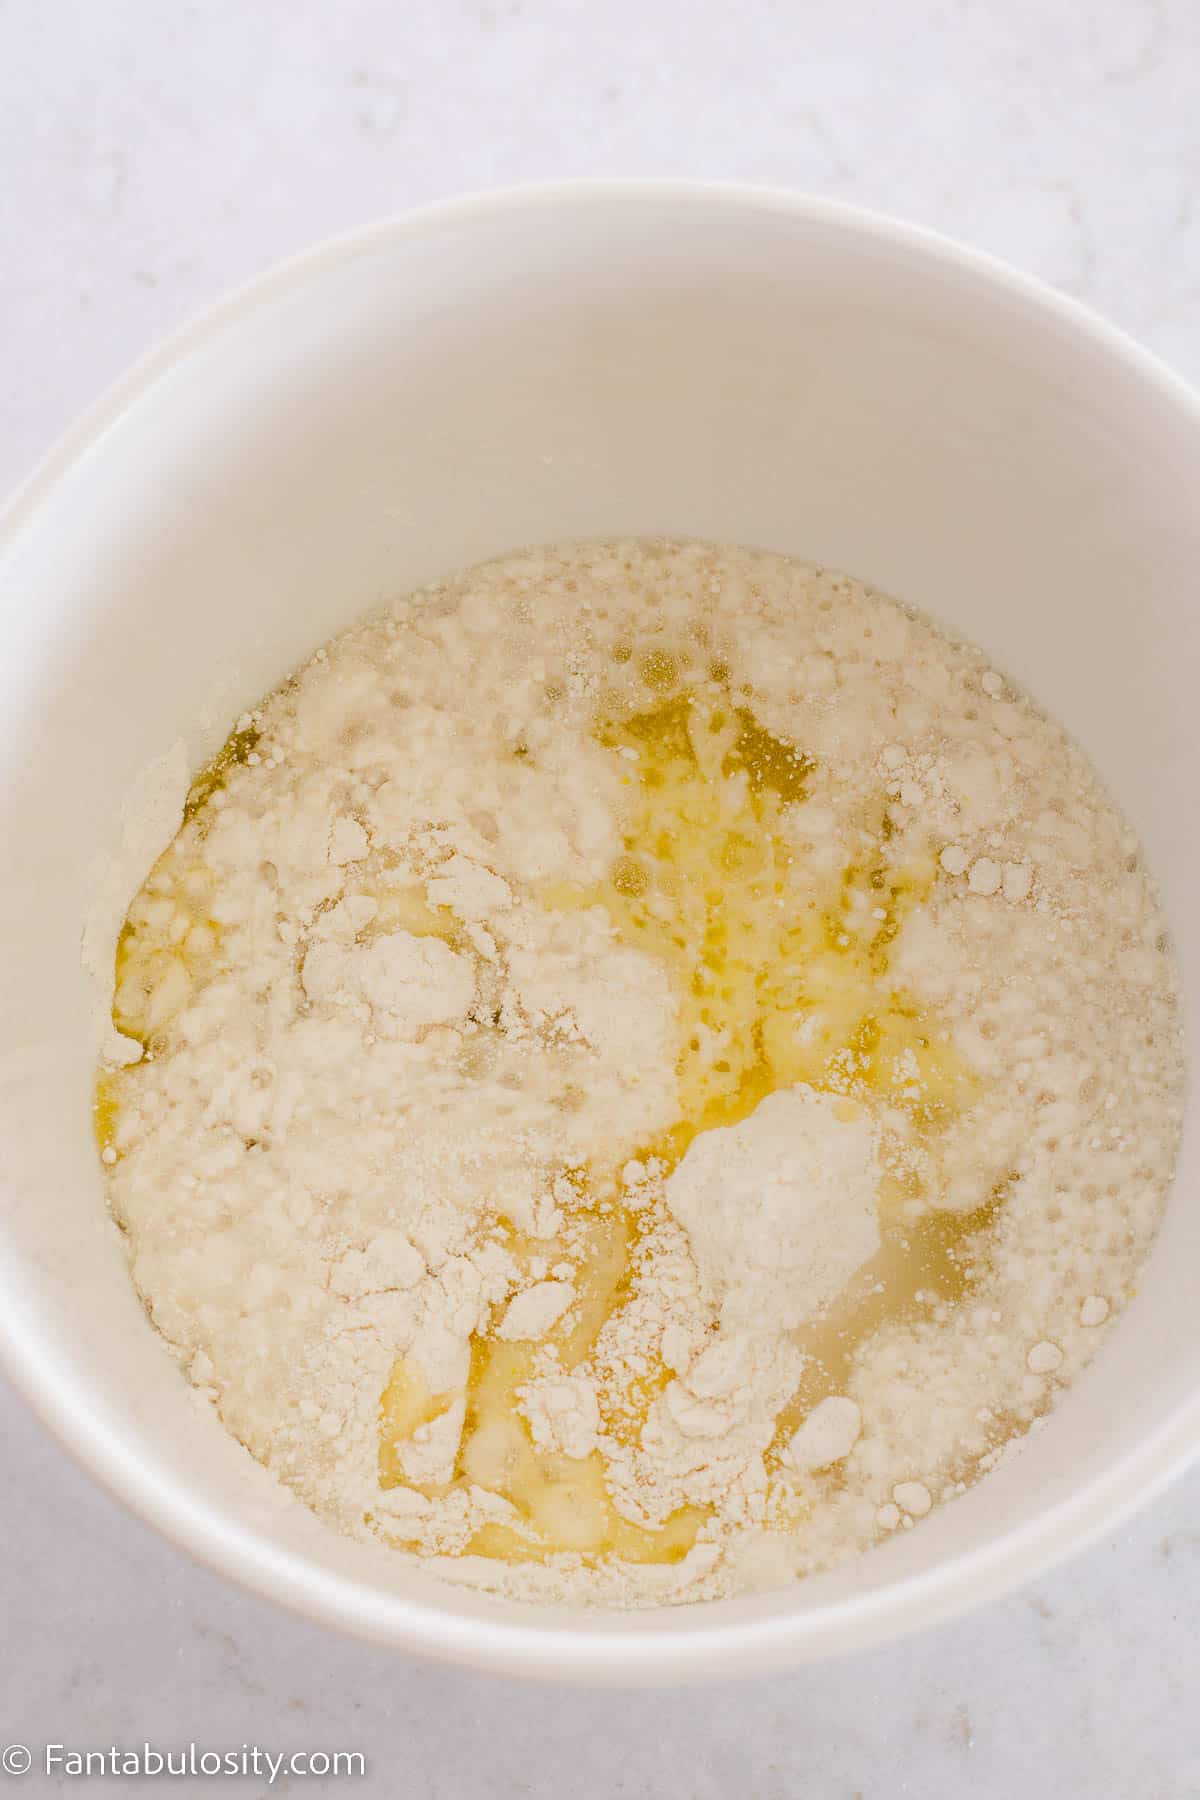
    cake mix and butter in white mixing bowl
    Make cupcakes
    Cupcake batter in mixing bowl
    Cupcake Batter
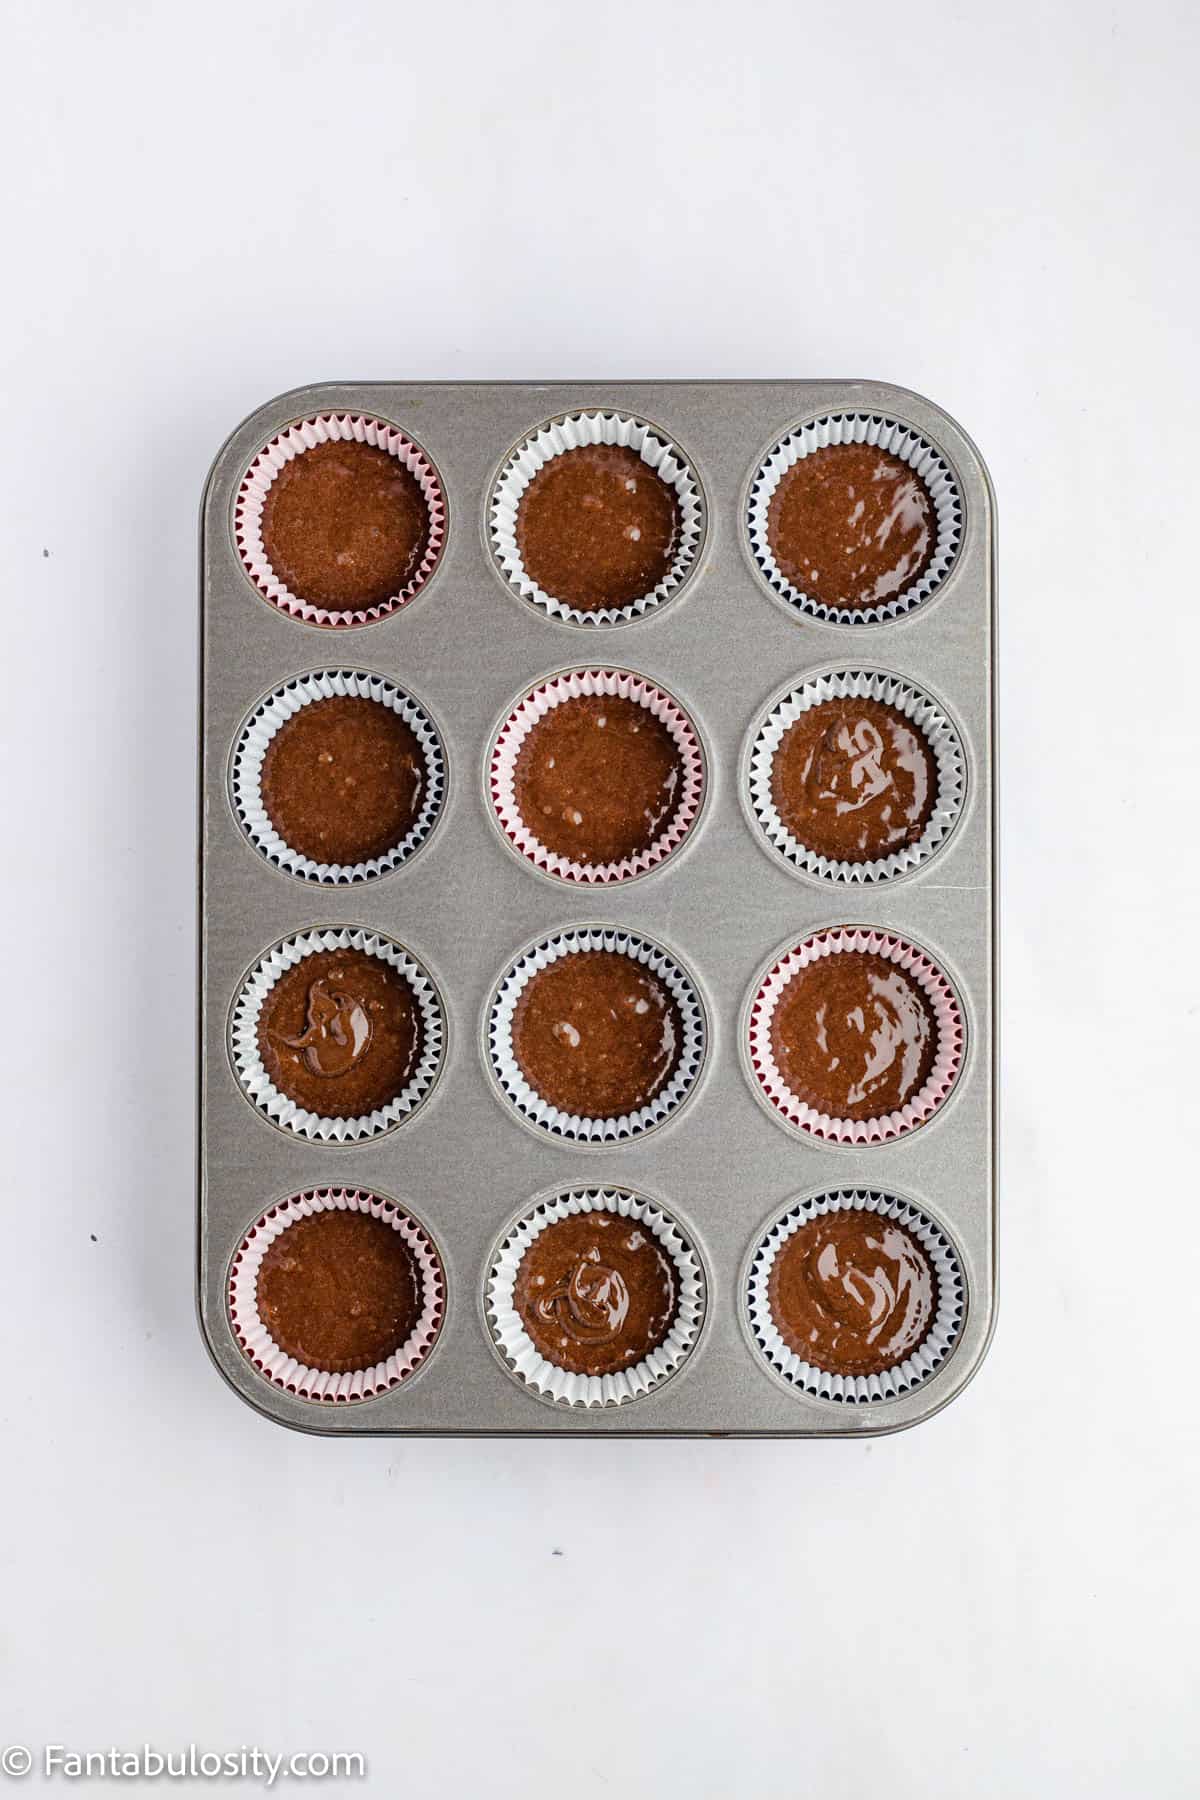
    1. Pour about 3 tablespoons of cupcake batter in to each cupcake liner, in the muffin cups. (Or ⅔ full.) I use a cookie scoop for this to make it easier.
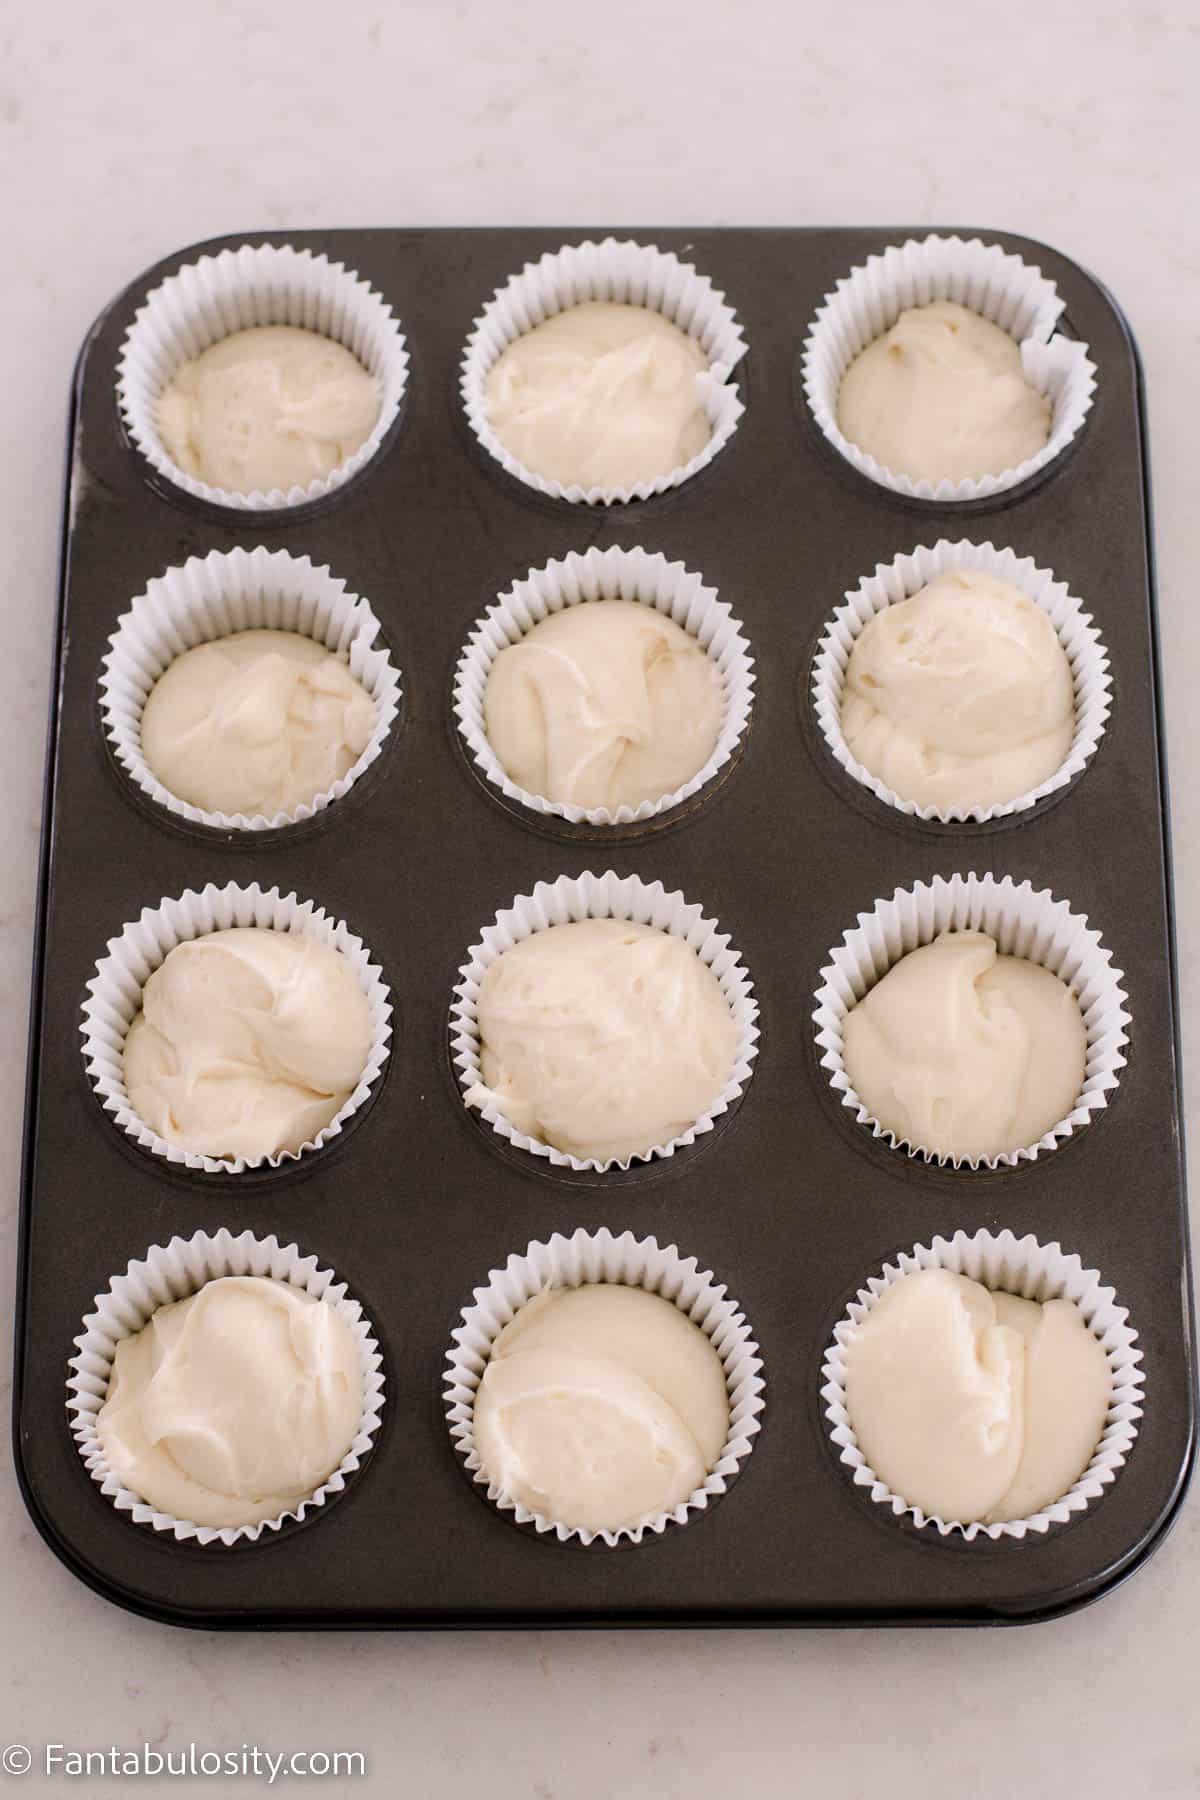
    cupcake batter in cupcake pan
    Pour batter in liners
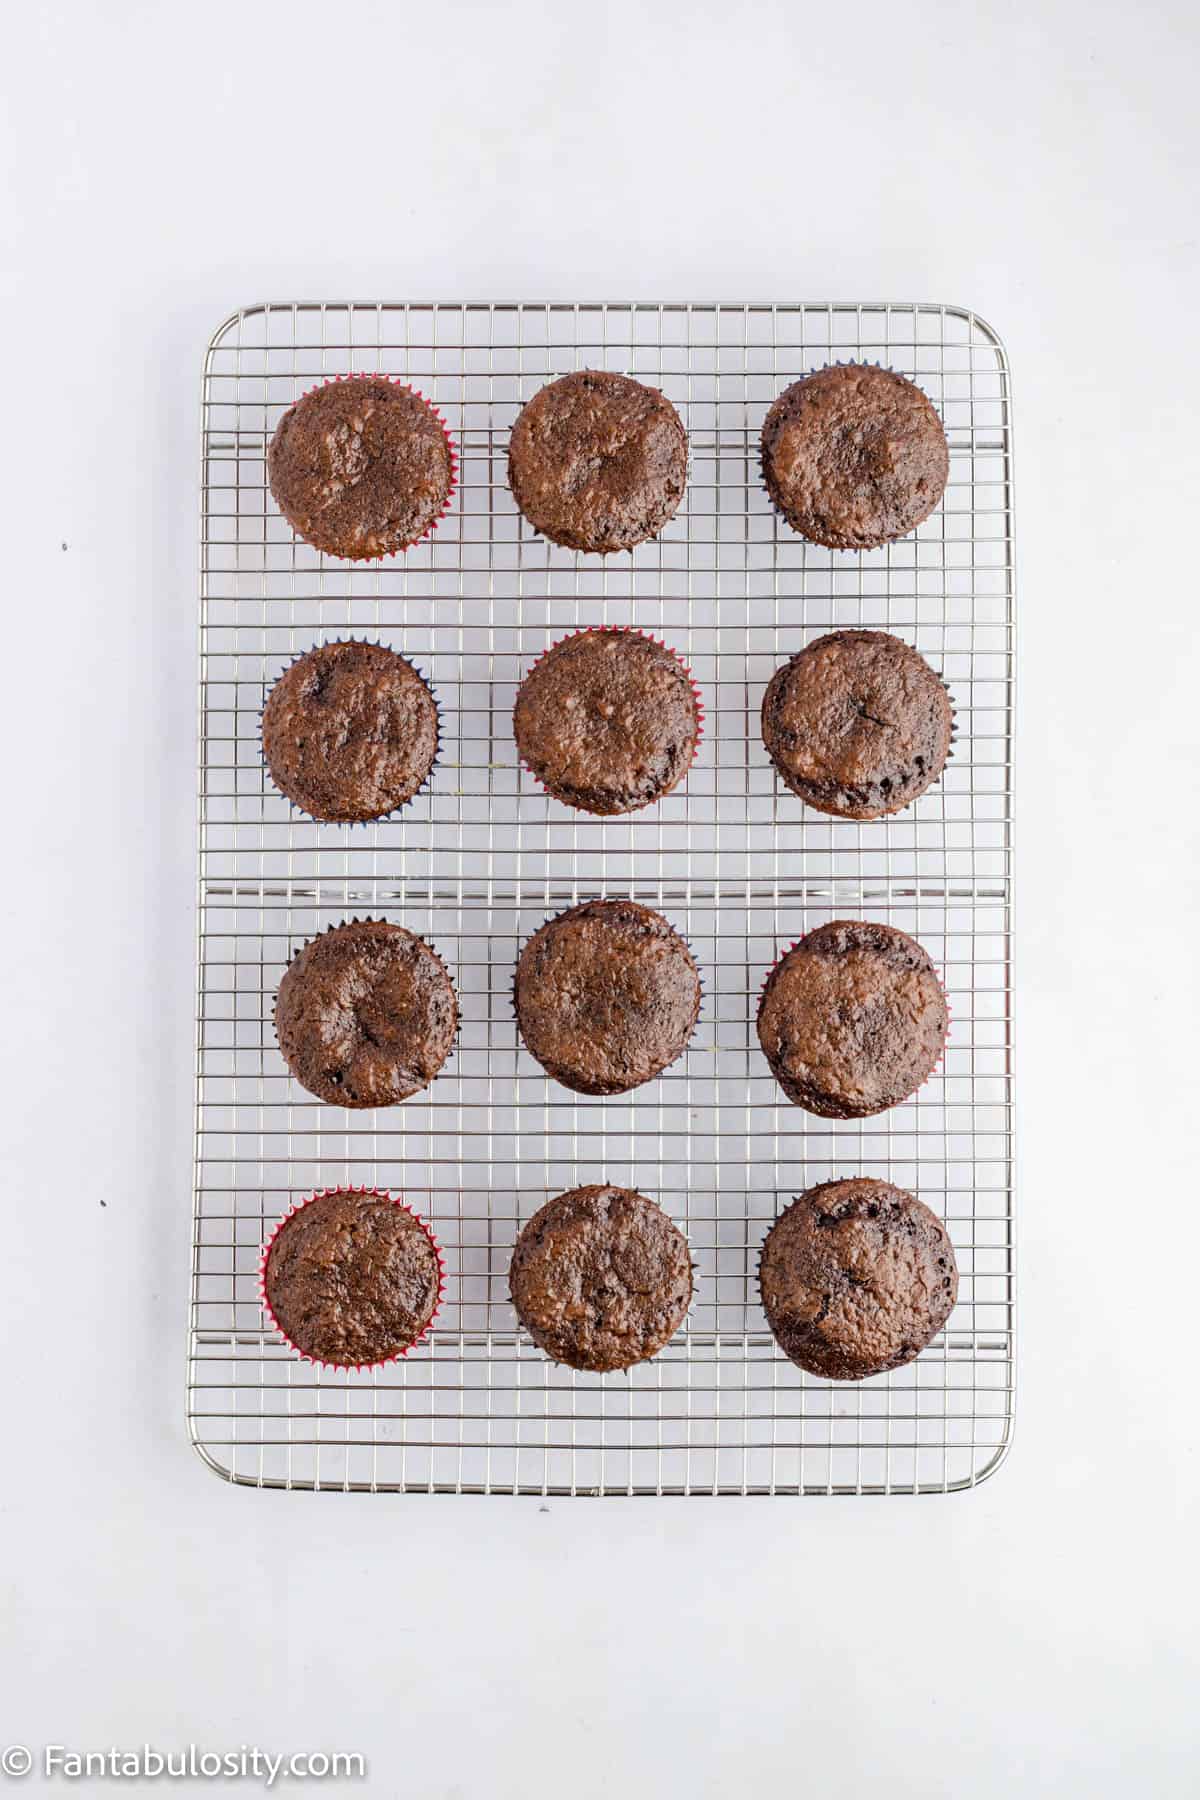
    1. Bake the cupcakes for 12 minutes or until the tops of the cupcakes bounce back when your finger gently touches them. If it leaves an indention, the cupcakes need to bake longer.

      Remove from the cupcake pan and place cupcakes on a wire rack to cool to room temperature.
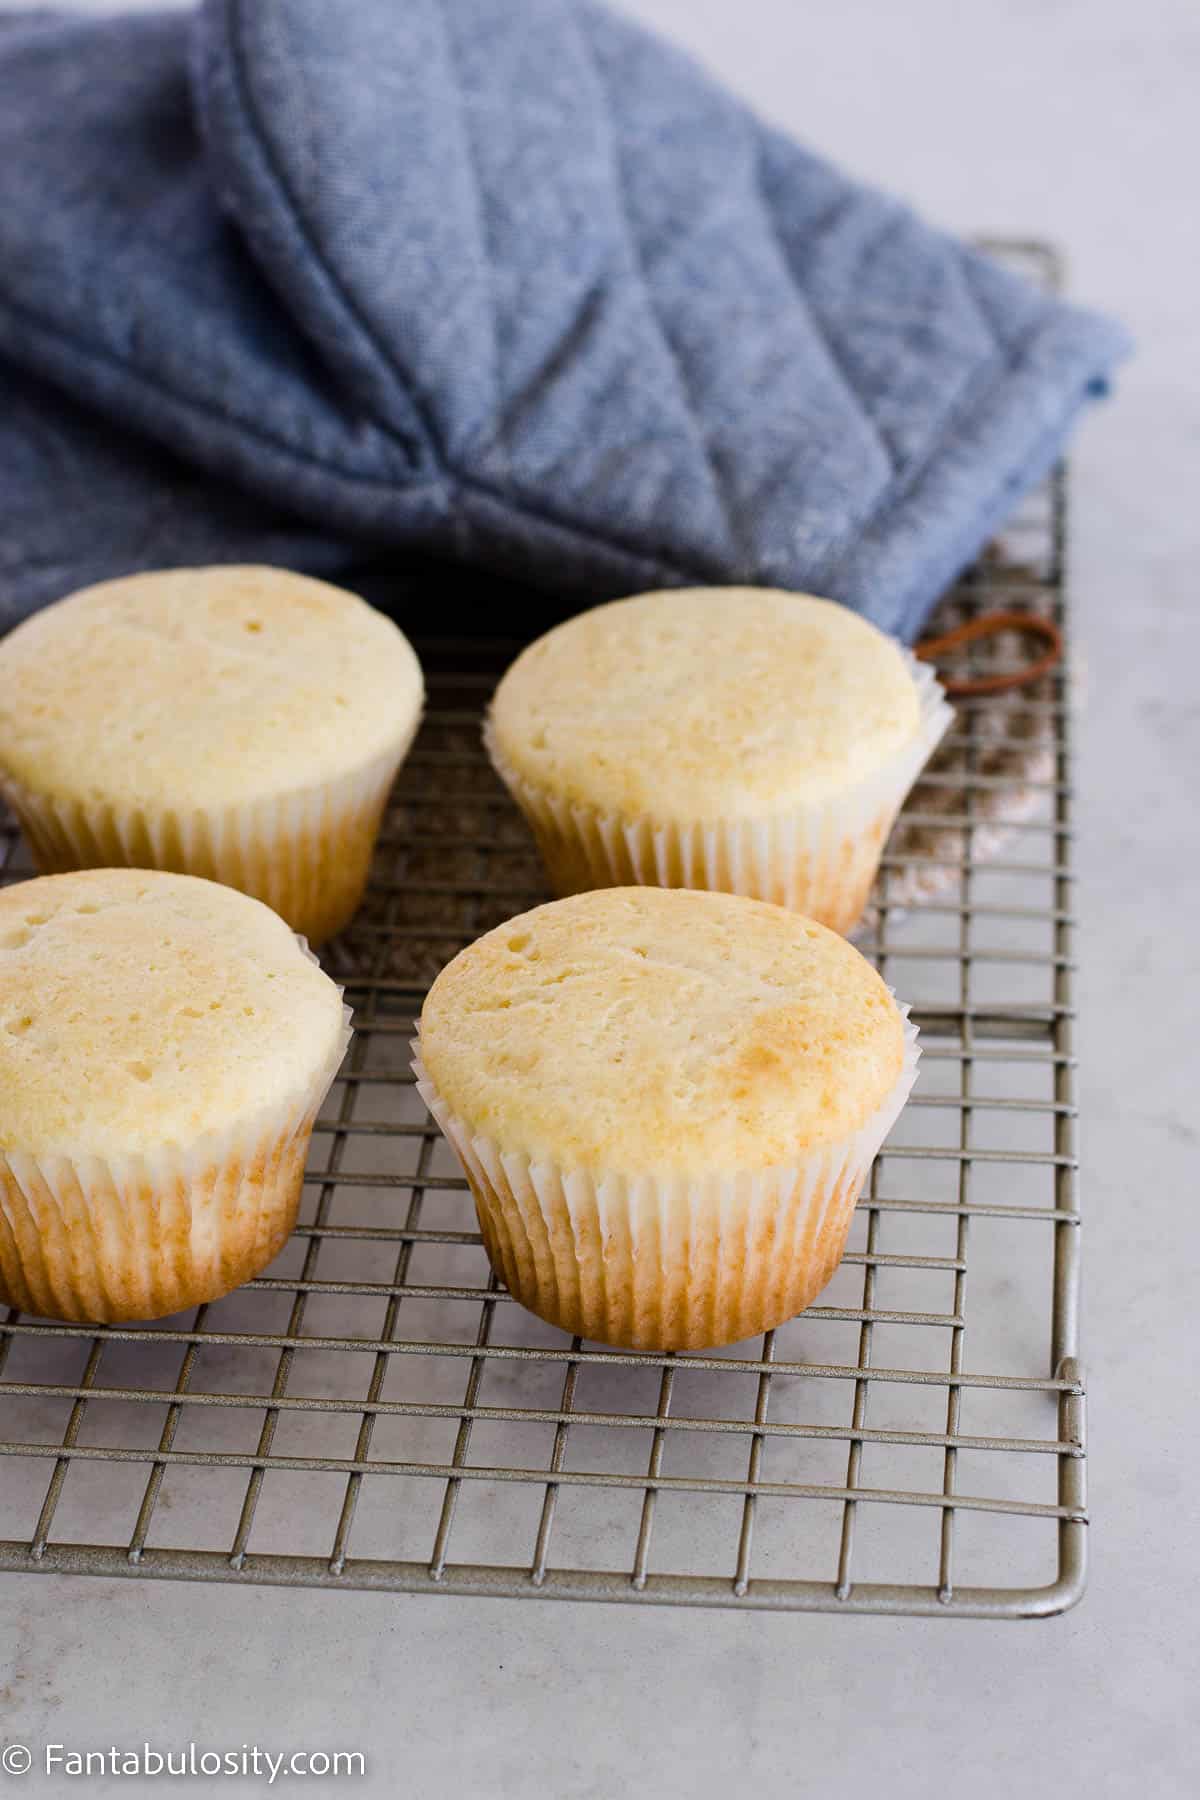
    baked cupcakes on cooling rack with oven mit behind them
    Baked peppermint cupcakes

    How to make the buttercream frosting:

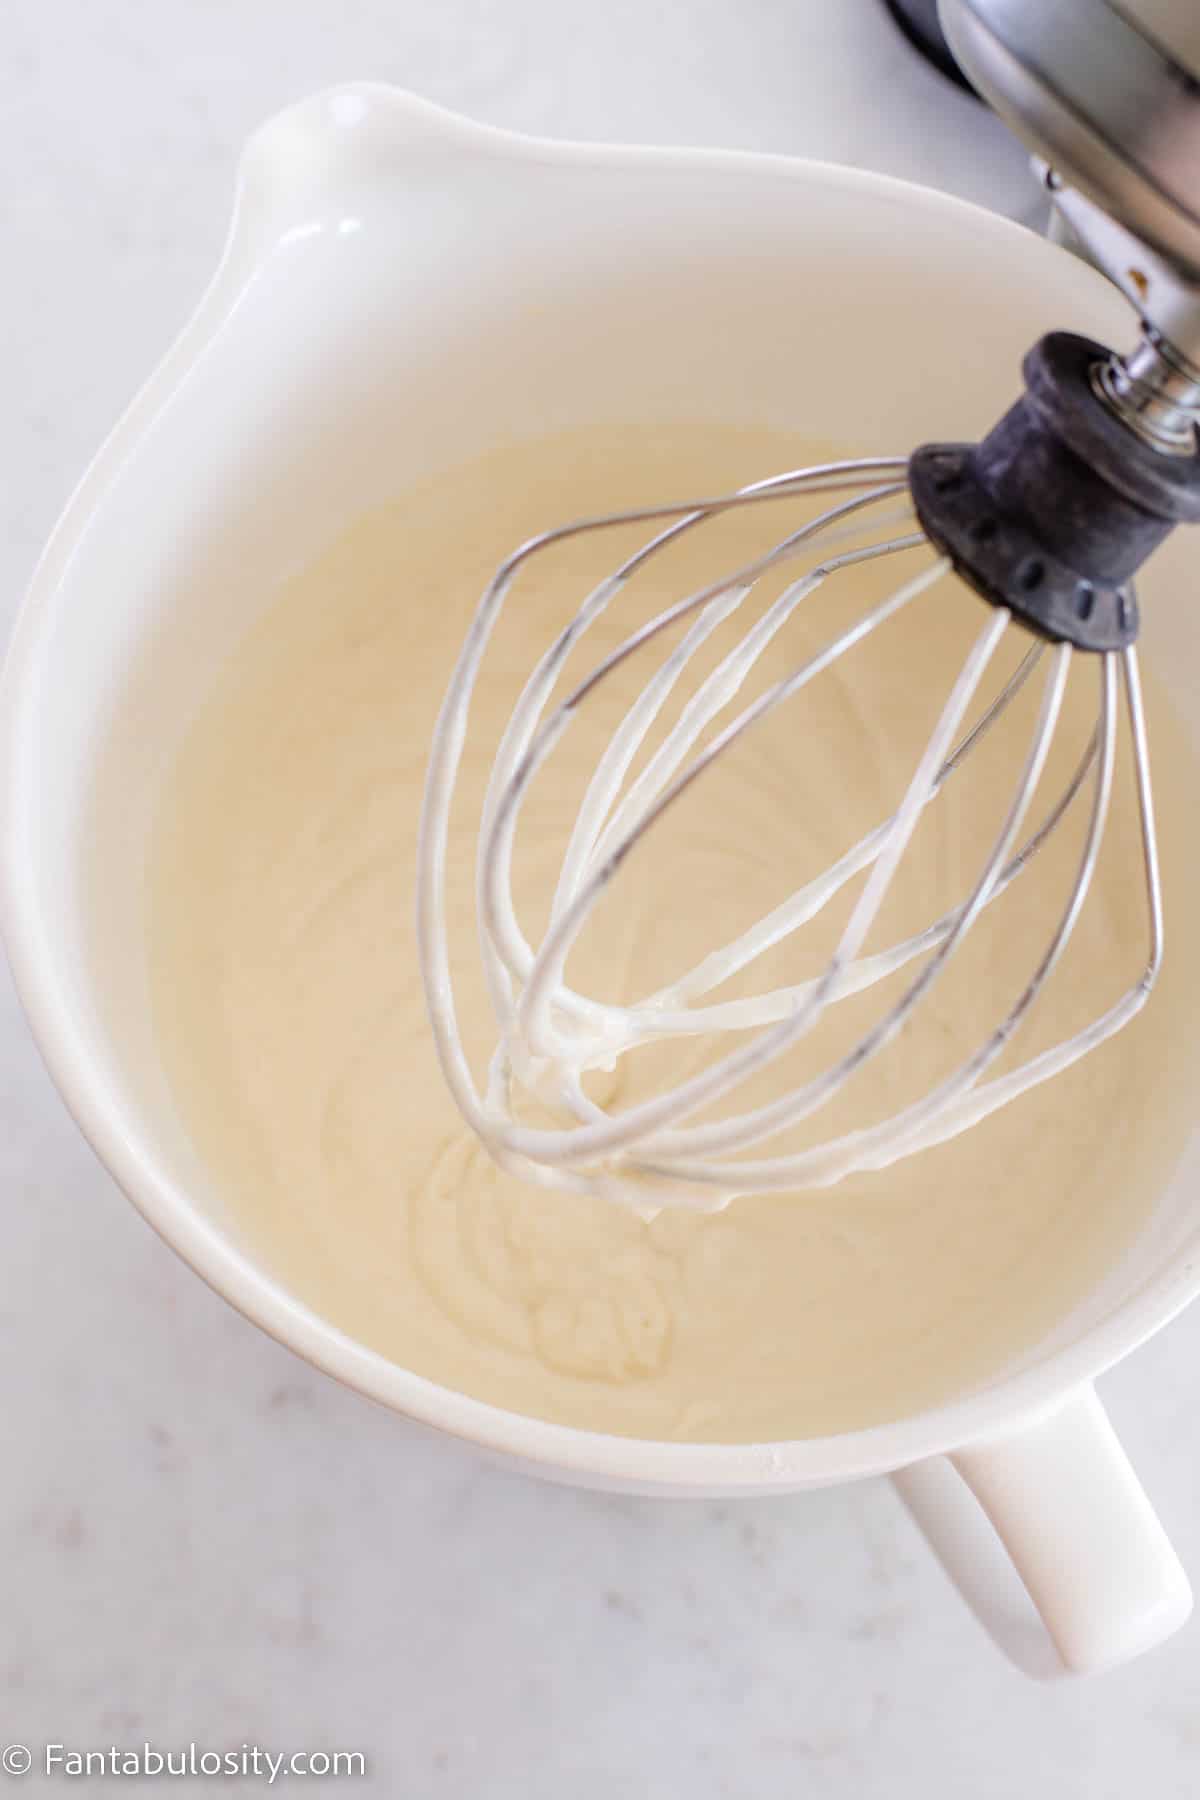
    1. In a large mixing bowl, mix together the stick of softened butter and shortening until light and fluffy. You may need to use a rubber spatula to scrape down the sides a couple of times to make sure the ingredients blend evenly. (Make sure to turn the mixer off before scraping.)
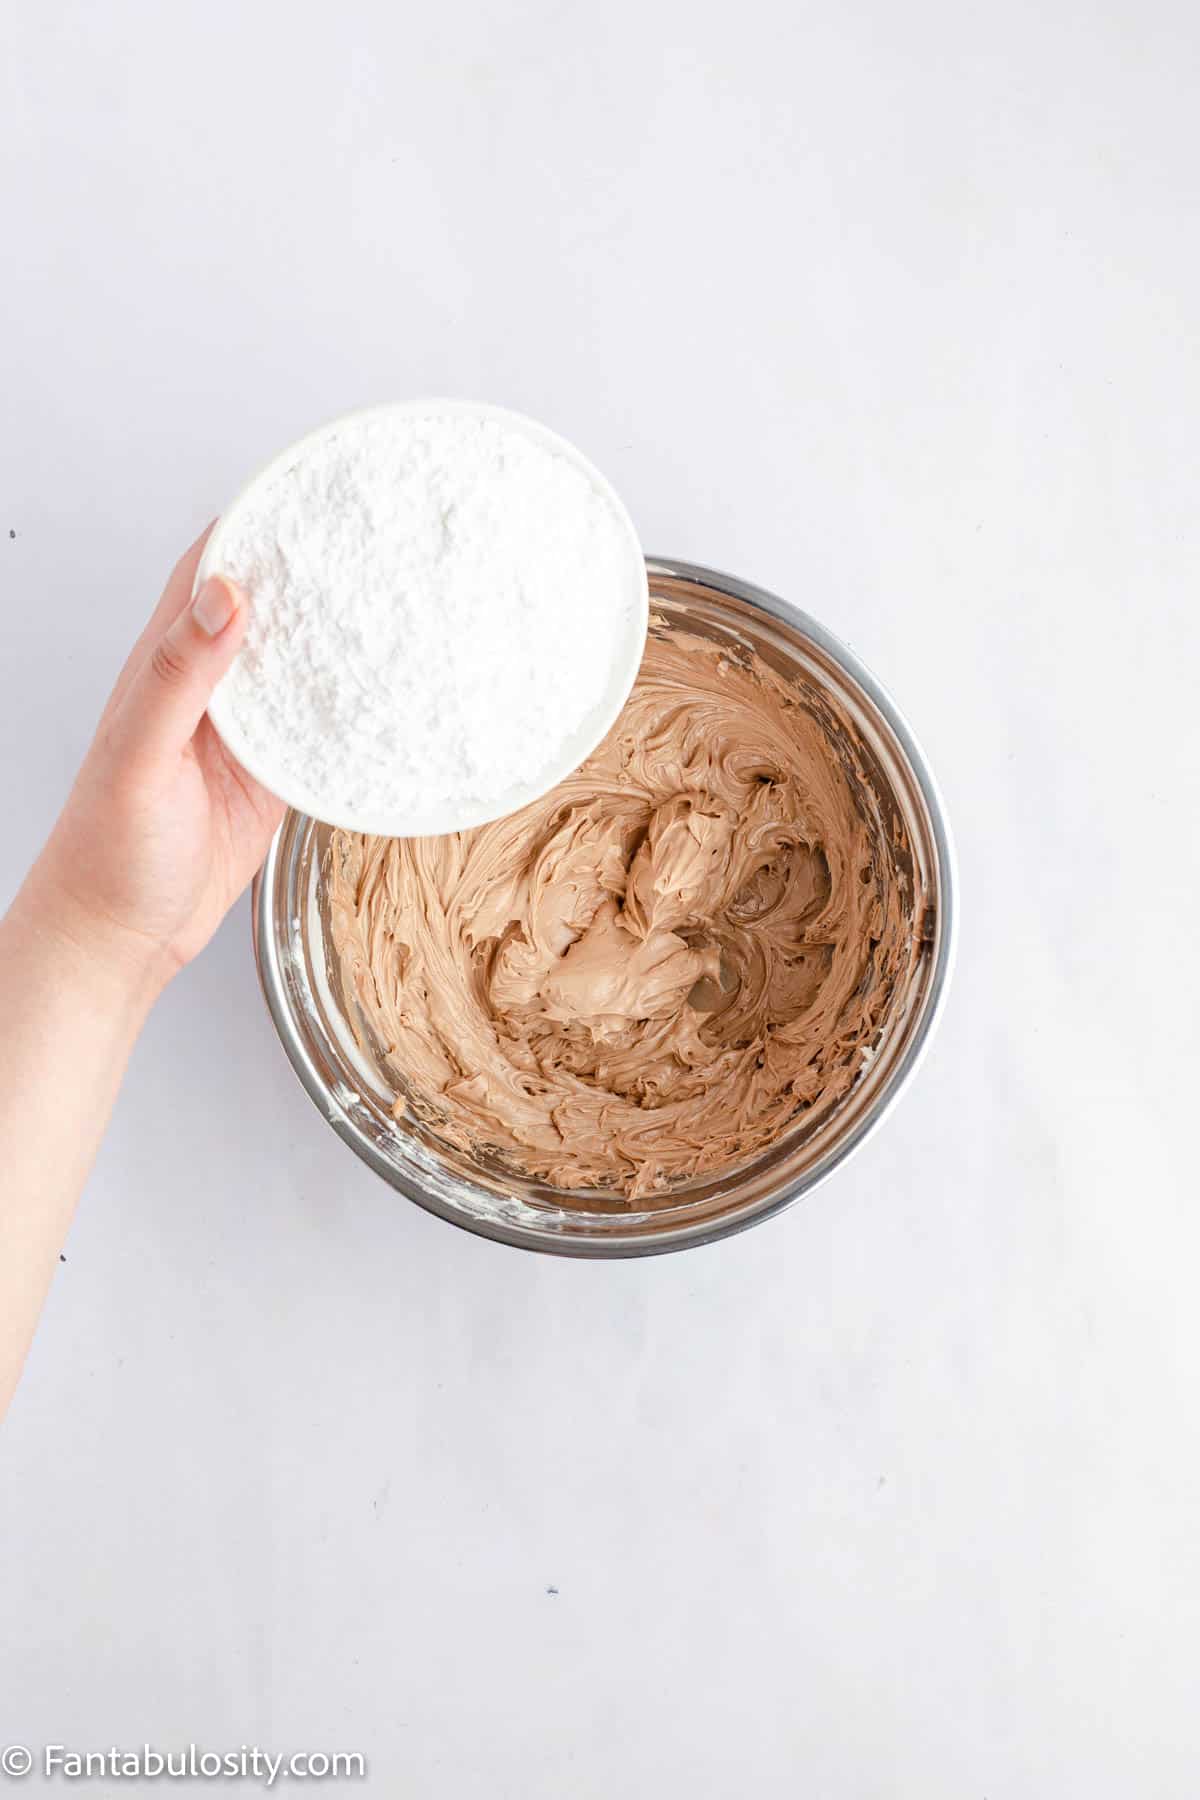
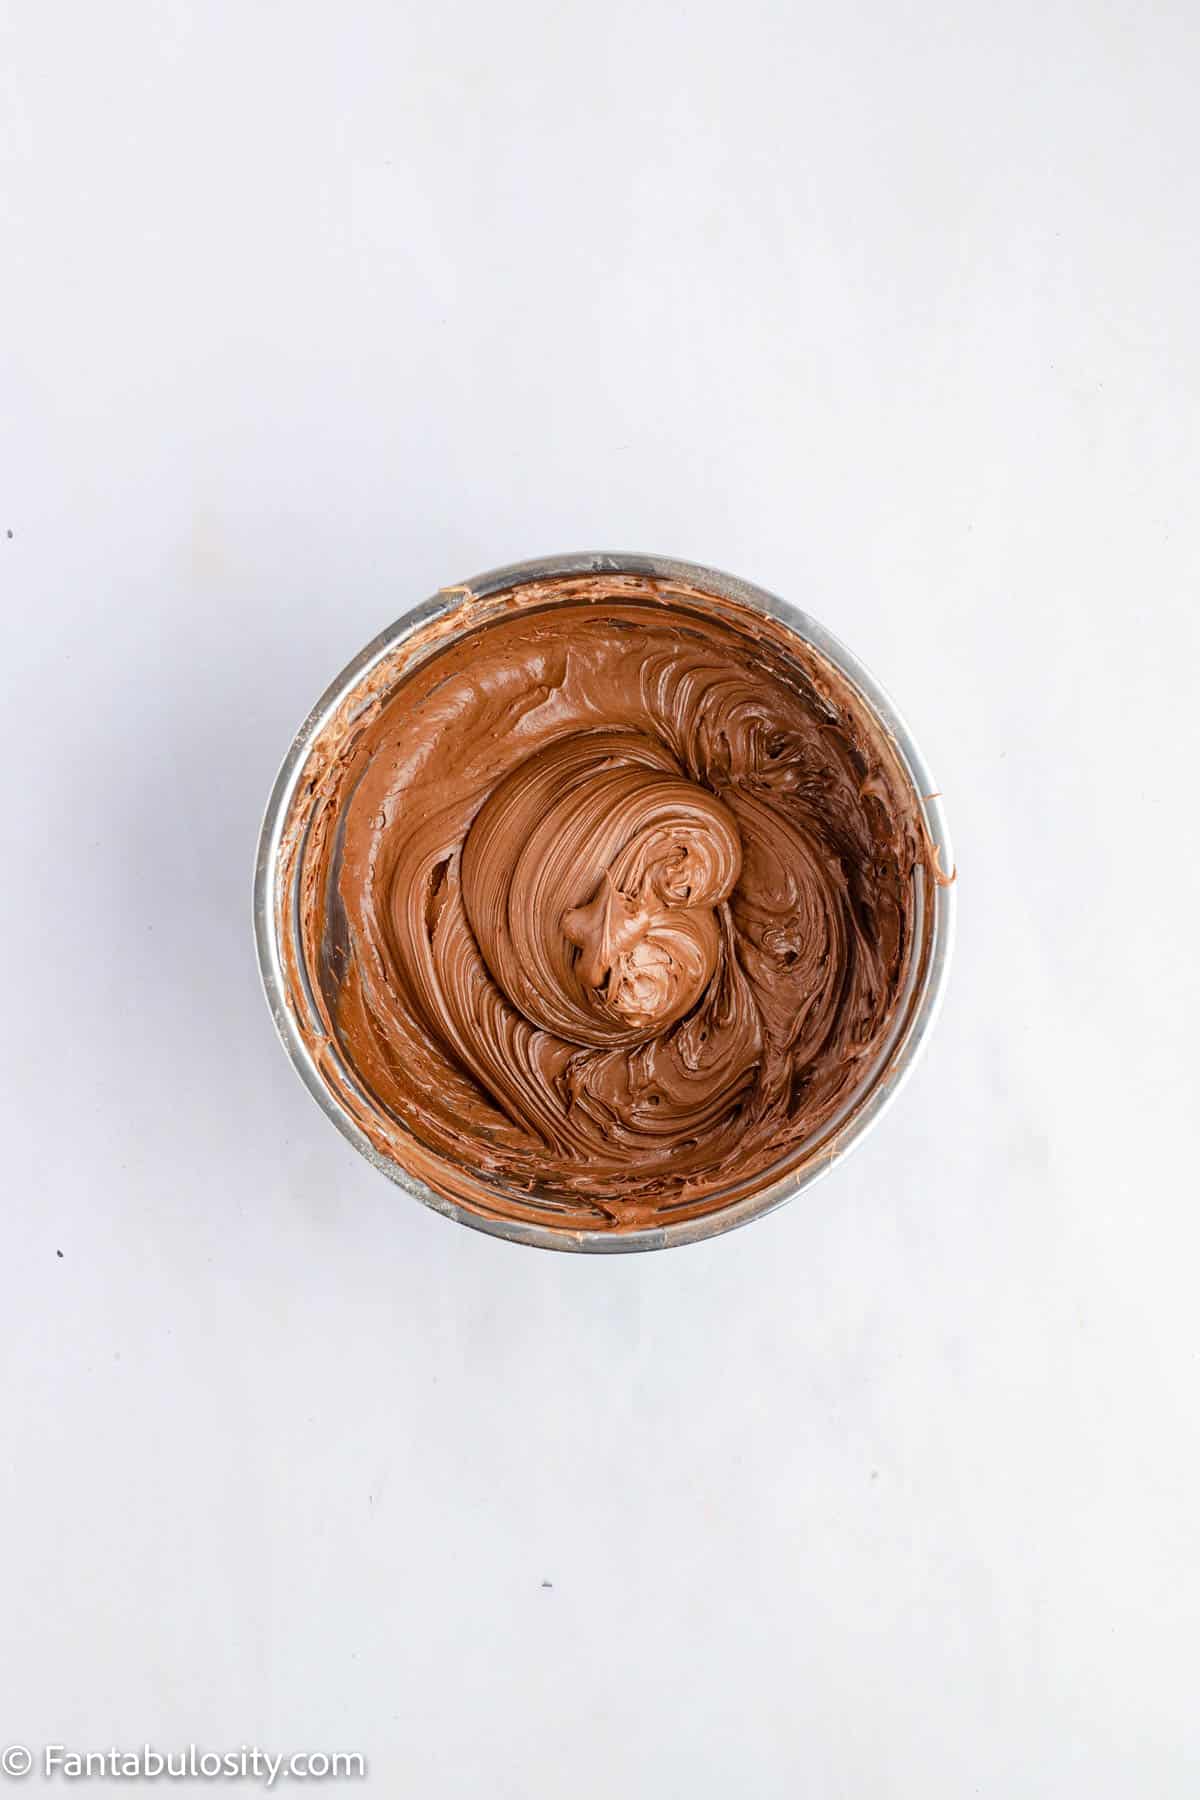
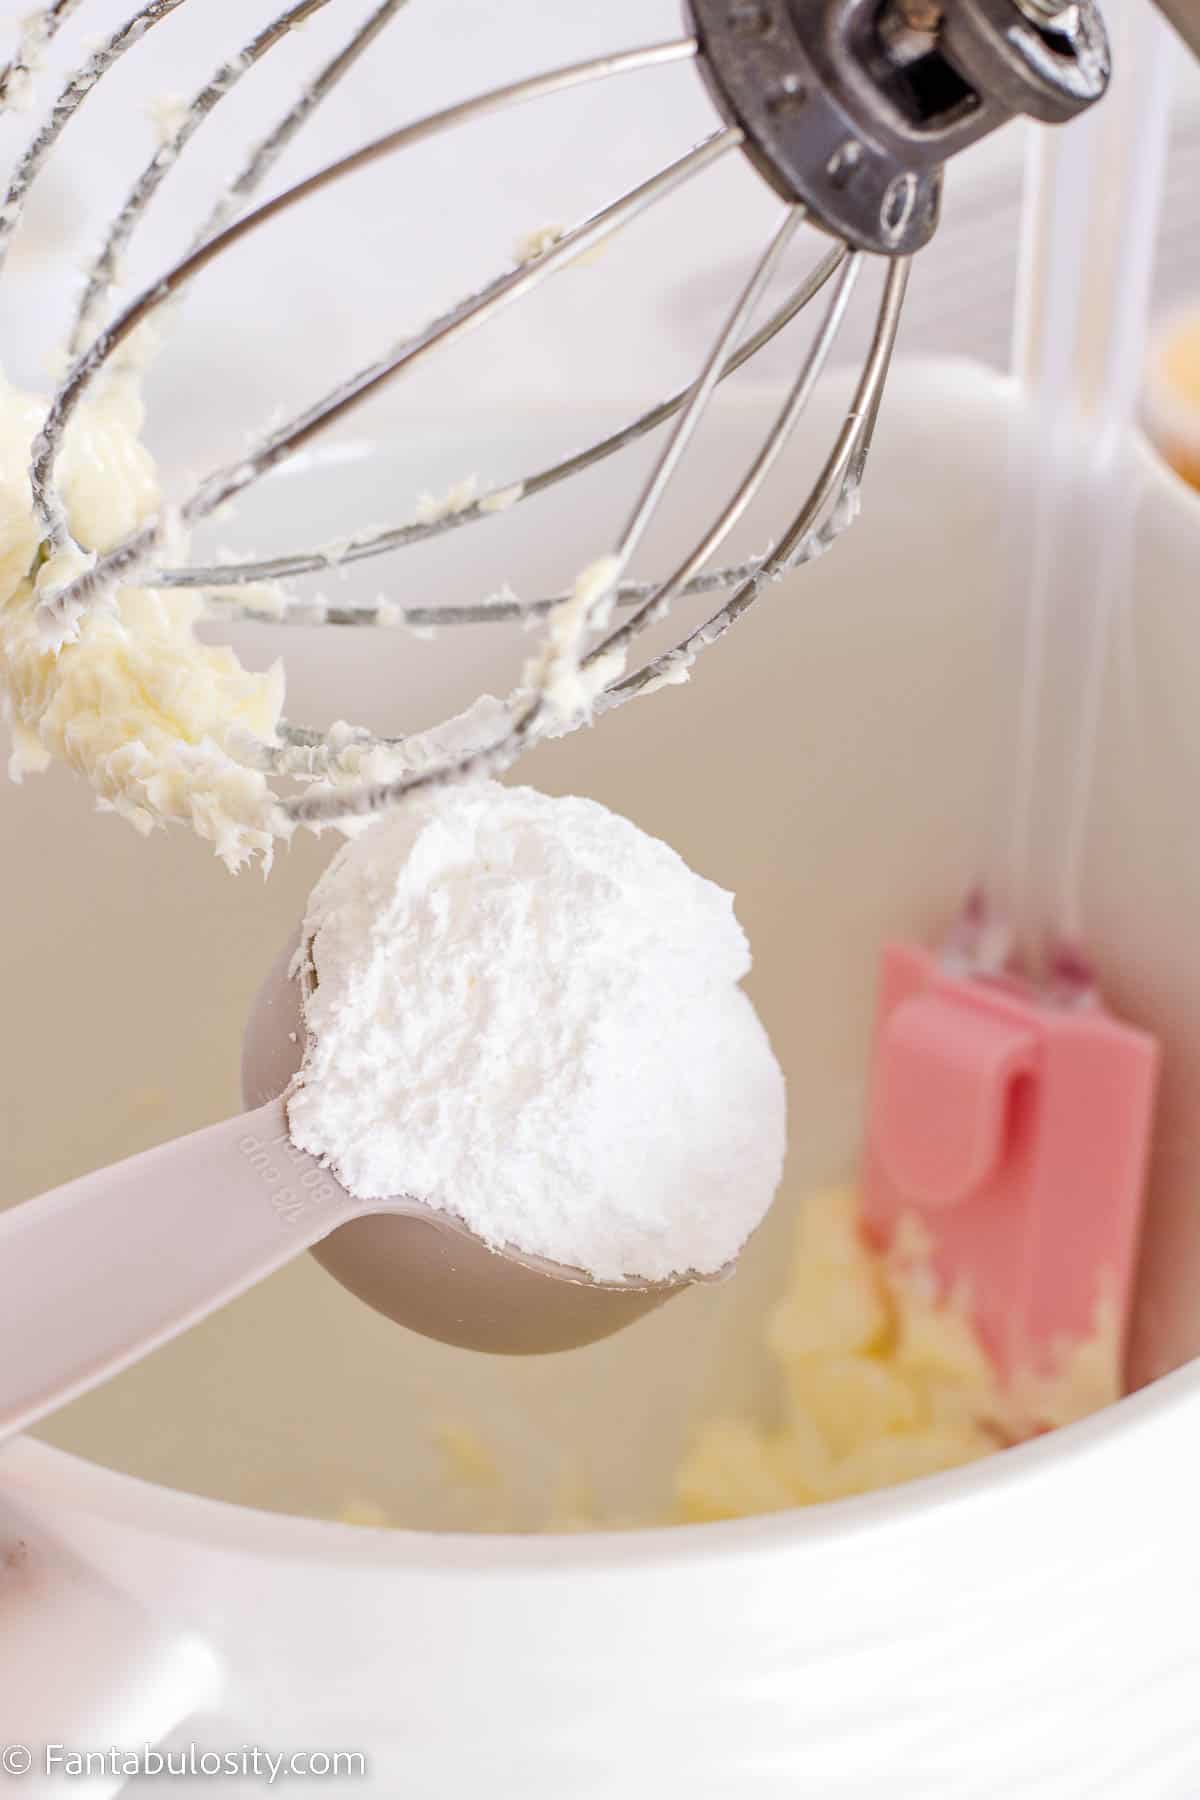
    2. Next, start adding the powdered sugar, making sure the mixer is on low speed, for about 1 cup at a time, mixing together completely before adding the next cup of sugar. Do this until all of the powdered sugar has been mixed in.
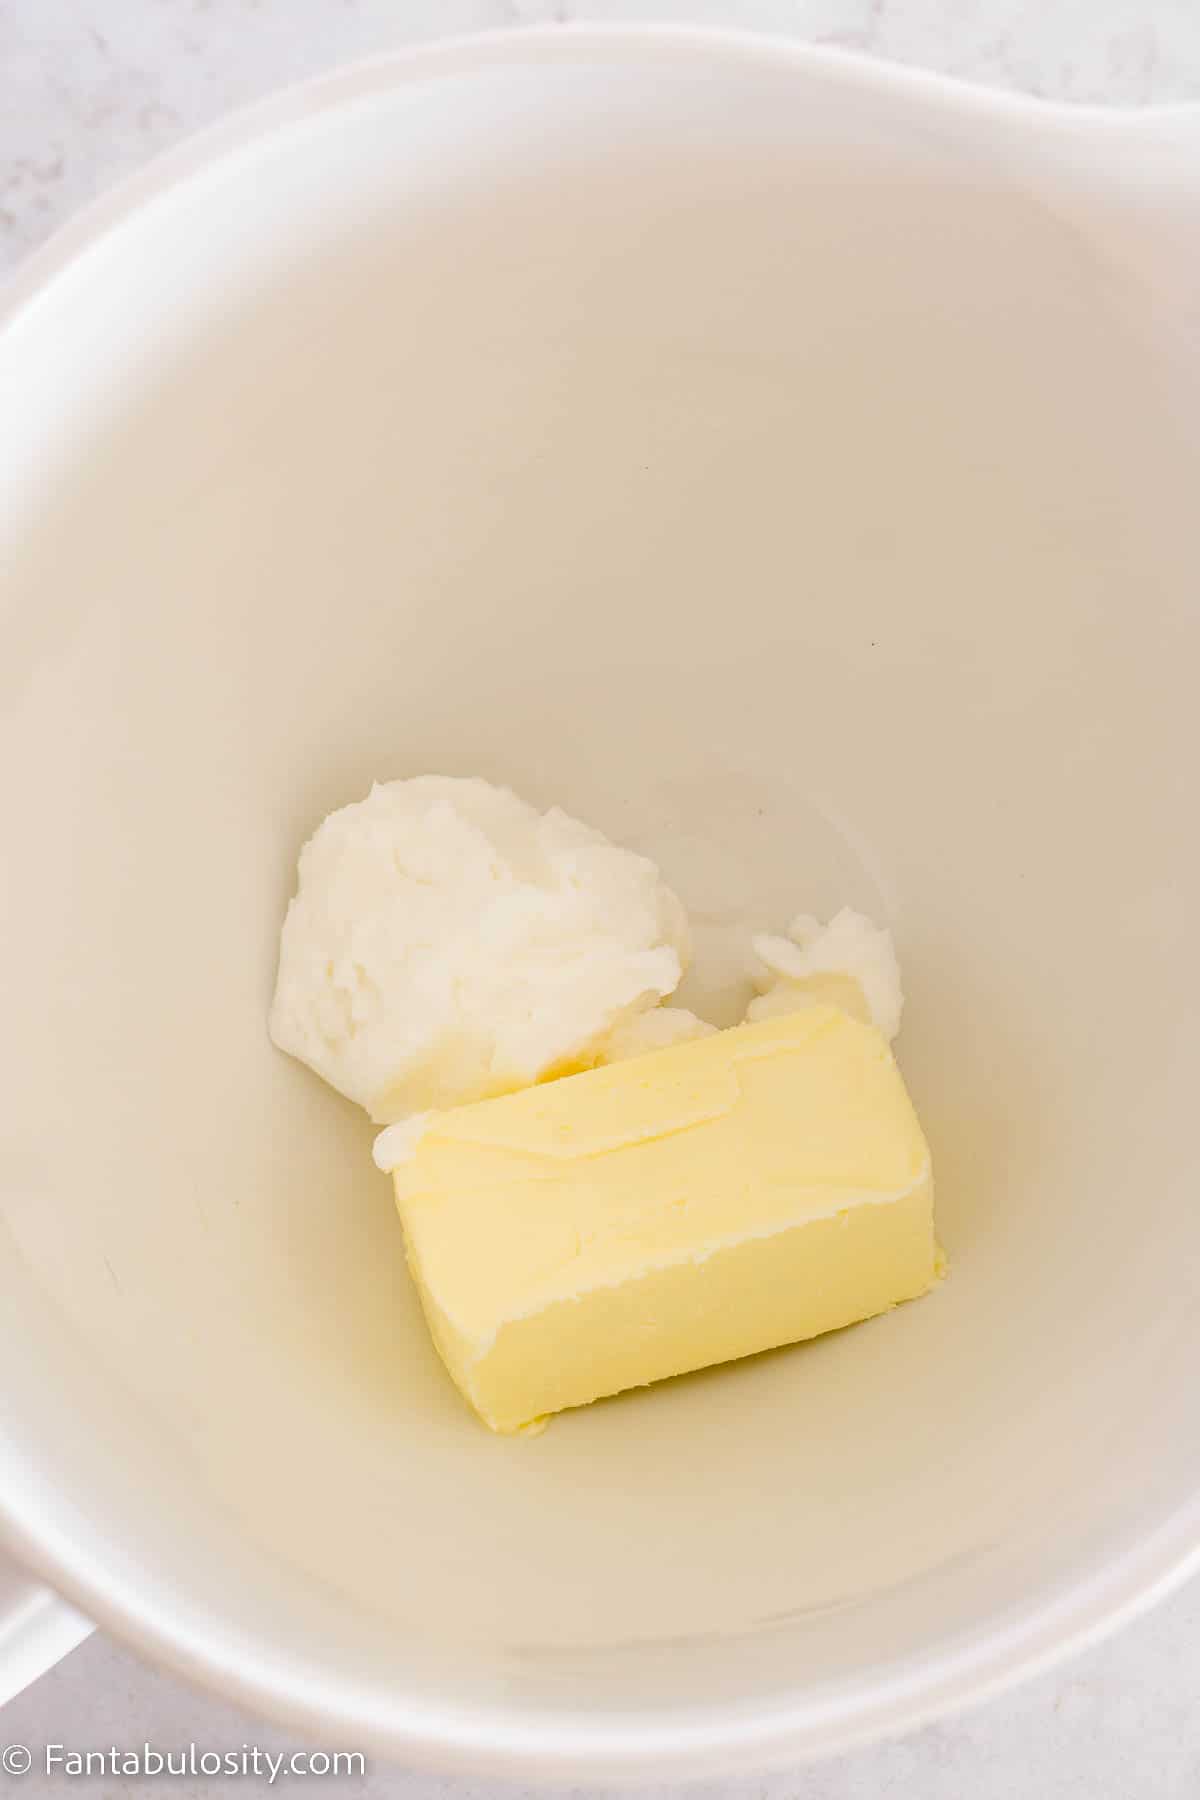
    butter and crisco in mixing bowl
    Butter & Crisco
    Powdered sugar pouring in to mixing bowl
    Add powdered sugar
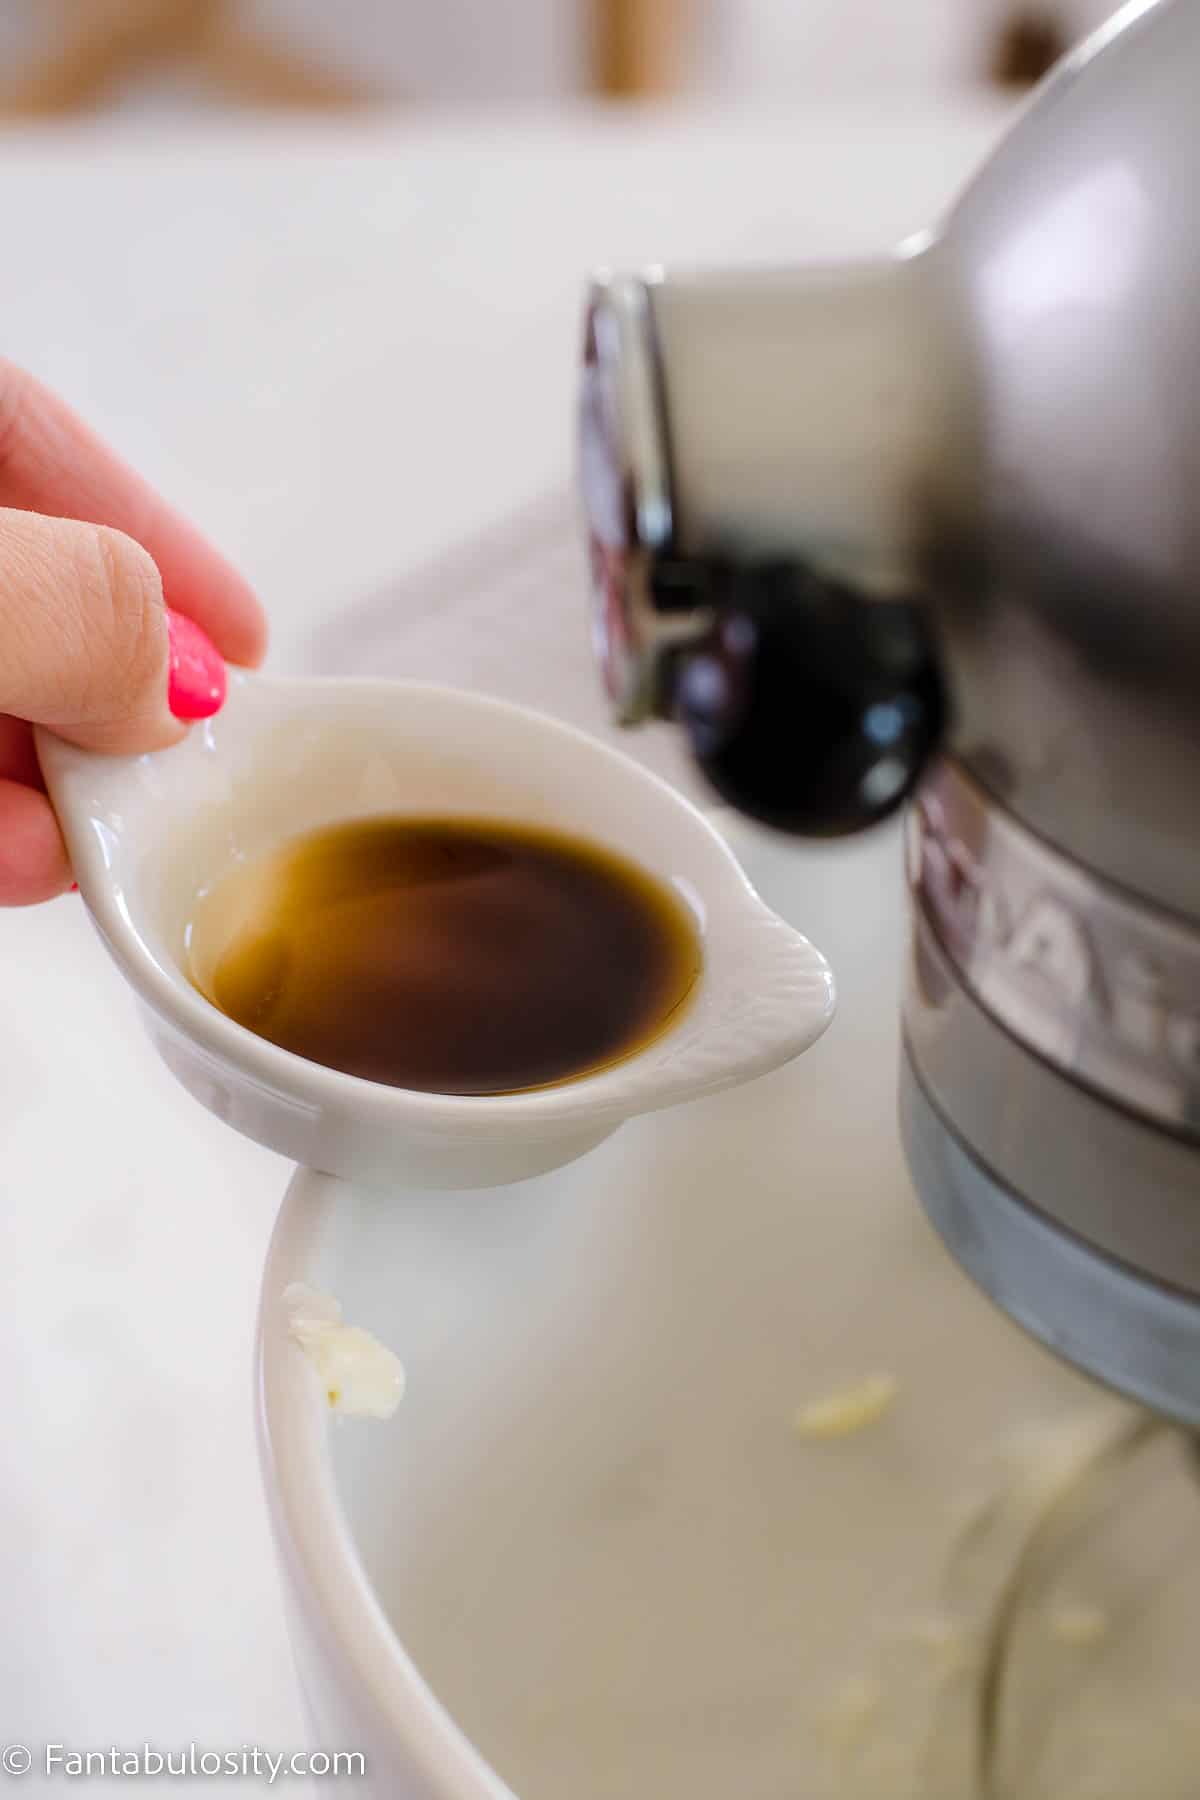
    1. Add in vanilla extract, and mix in completely.
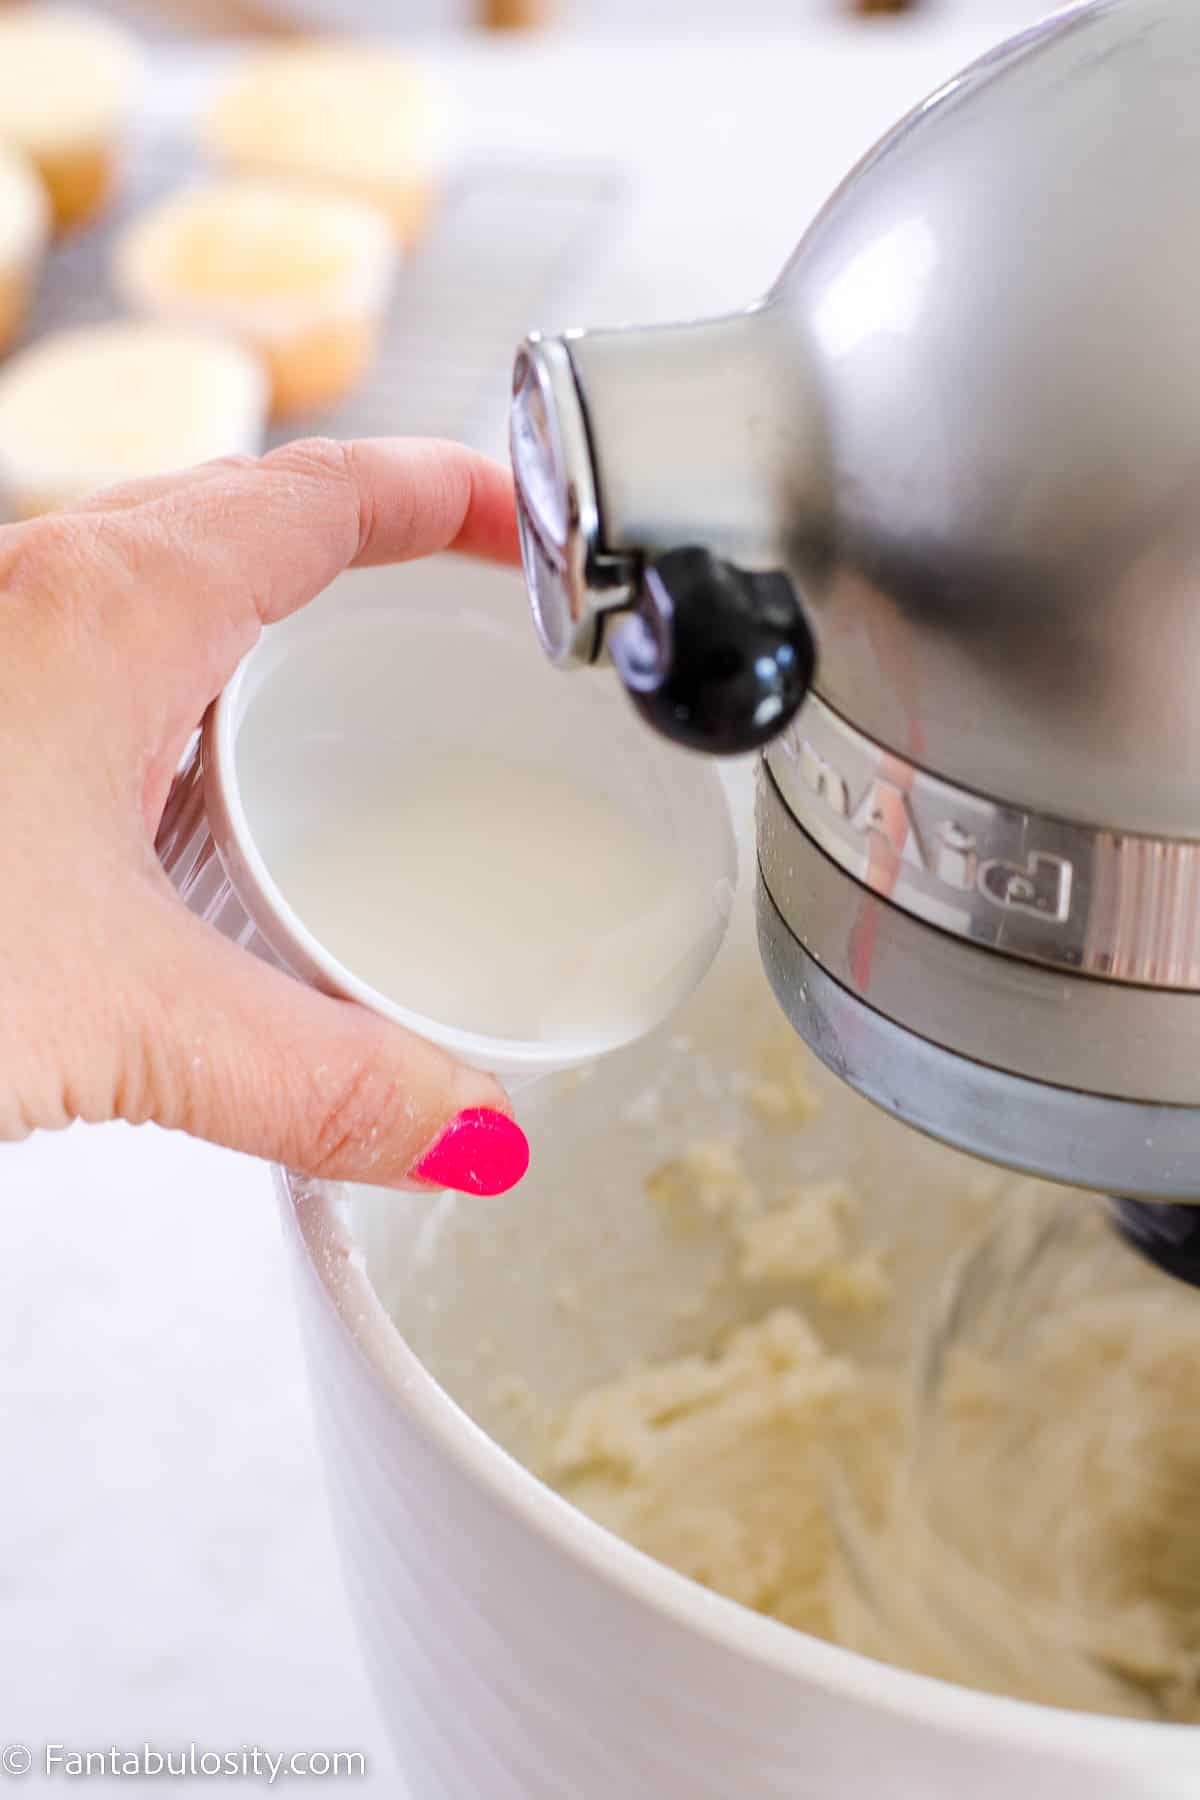
    2. Then, pour in the milk and mix on medium-high speed until the buttercream looks fully combined and fluffy.
    vanilla pouring in to mixing bowl
    Add vanilla
    Milk pouring in to mixing bowl
    Add milk
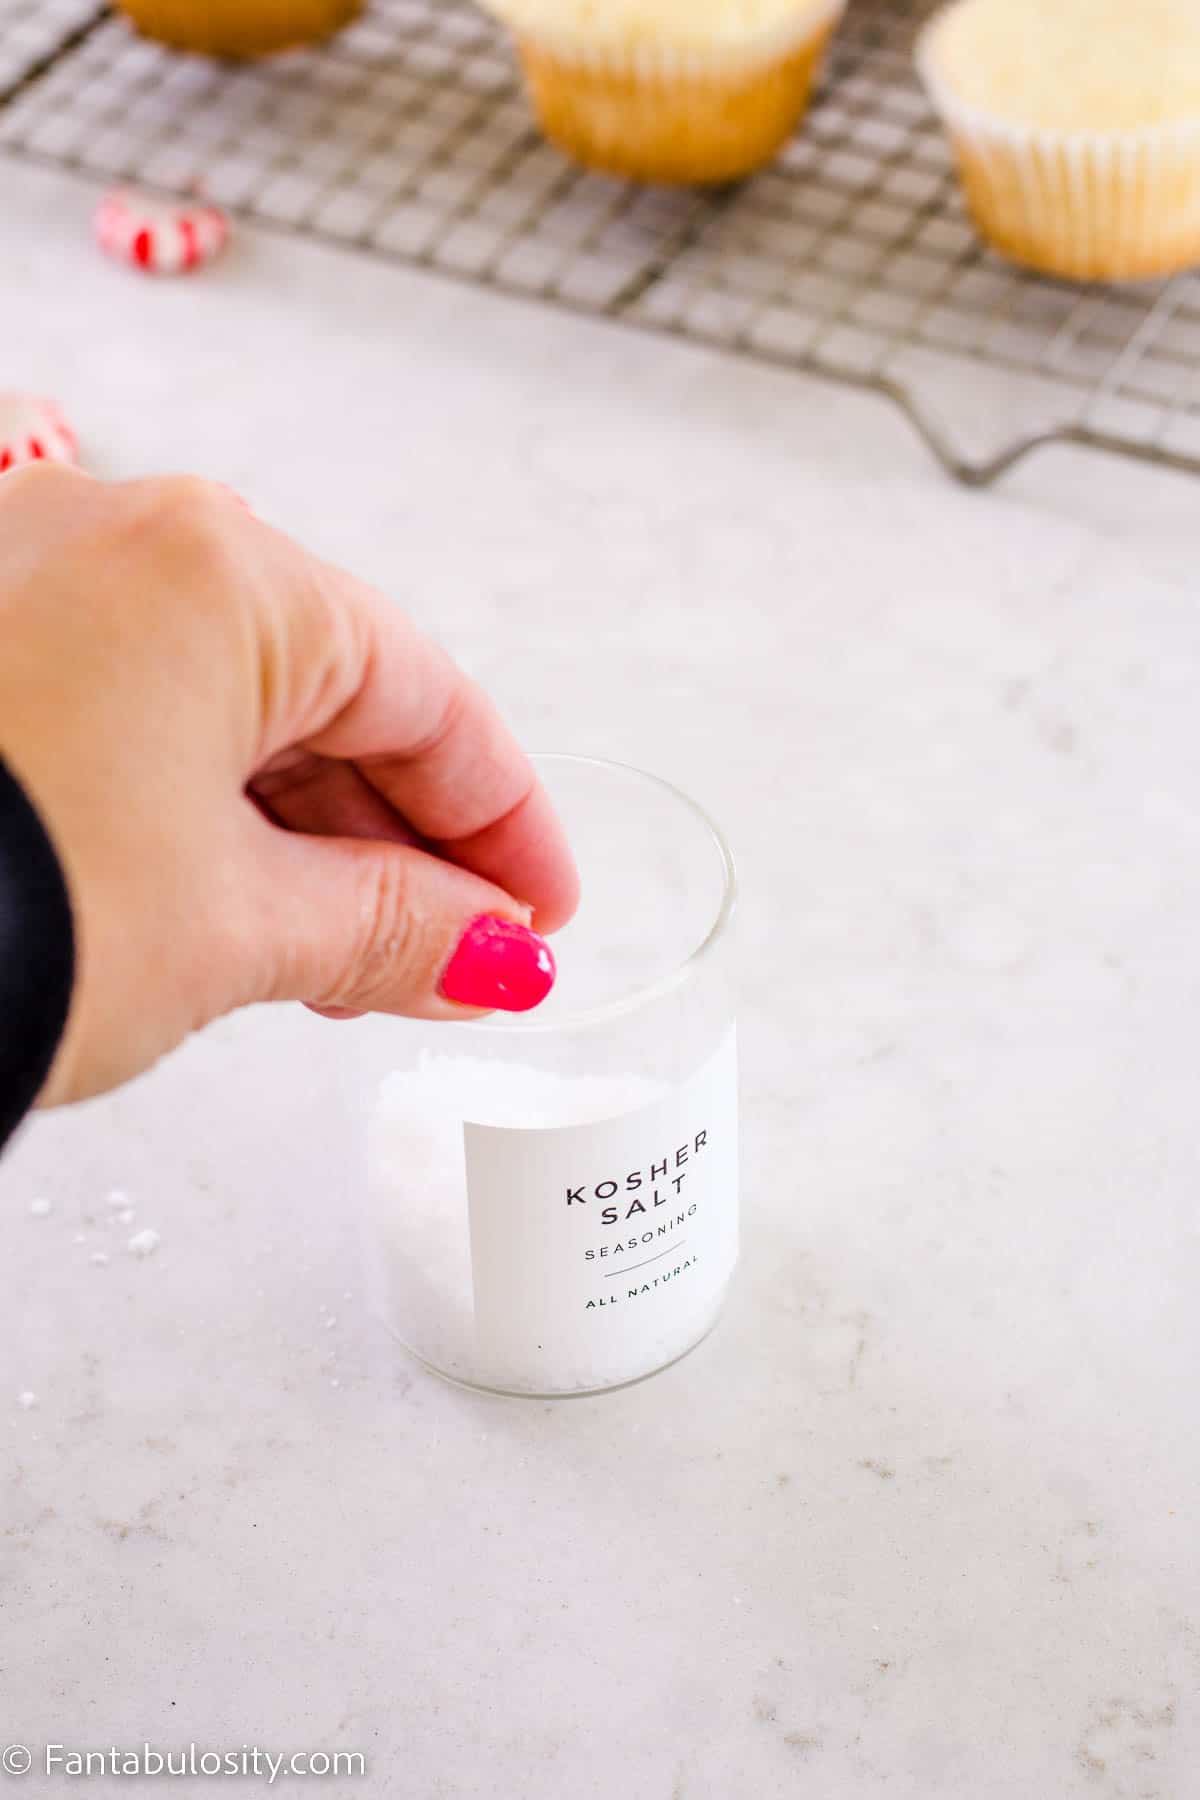
    1. Optional: Although optional, I do recommend adding a pinch of salt and mixing it in to the buttercream.
    hand pinching salt for buttercream
    Add salt
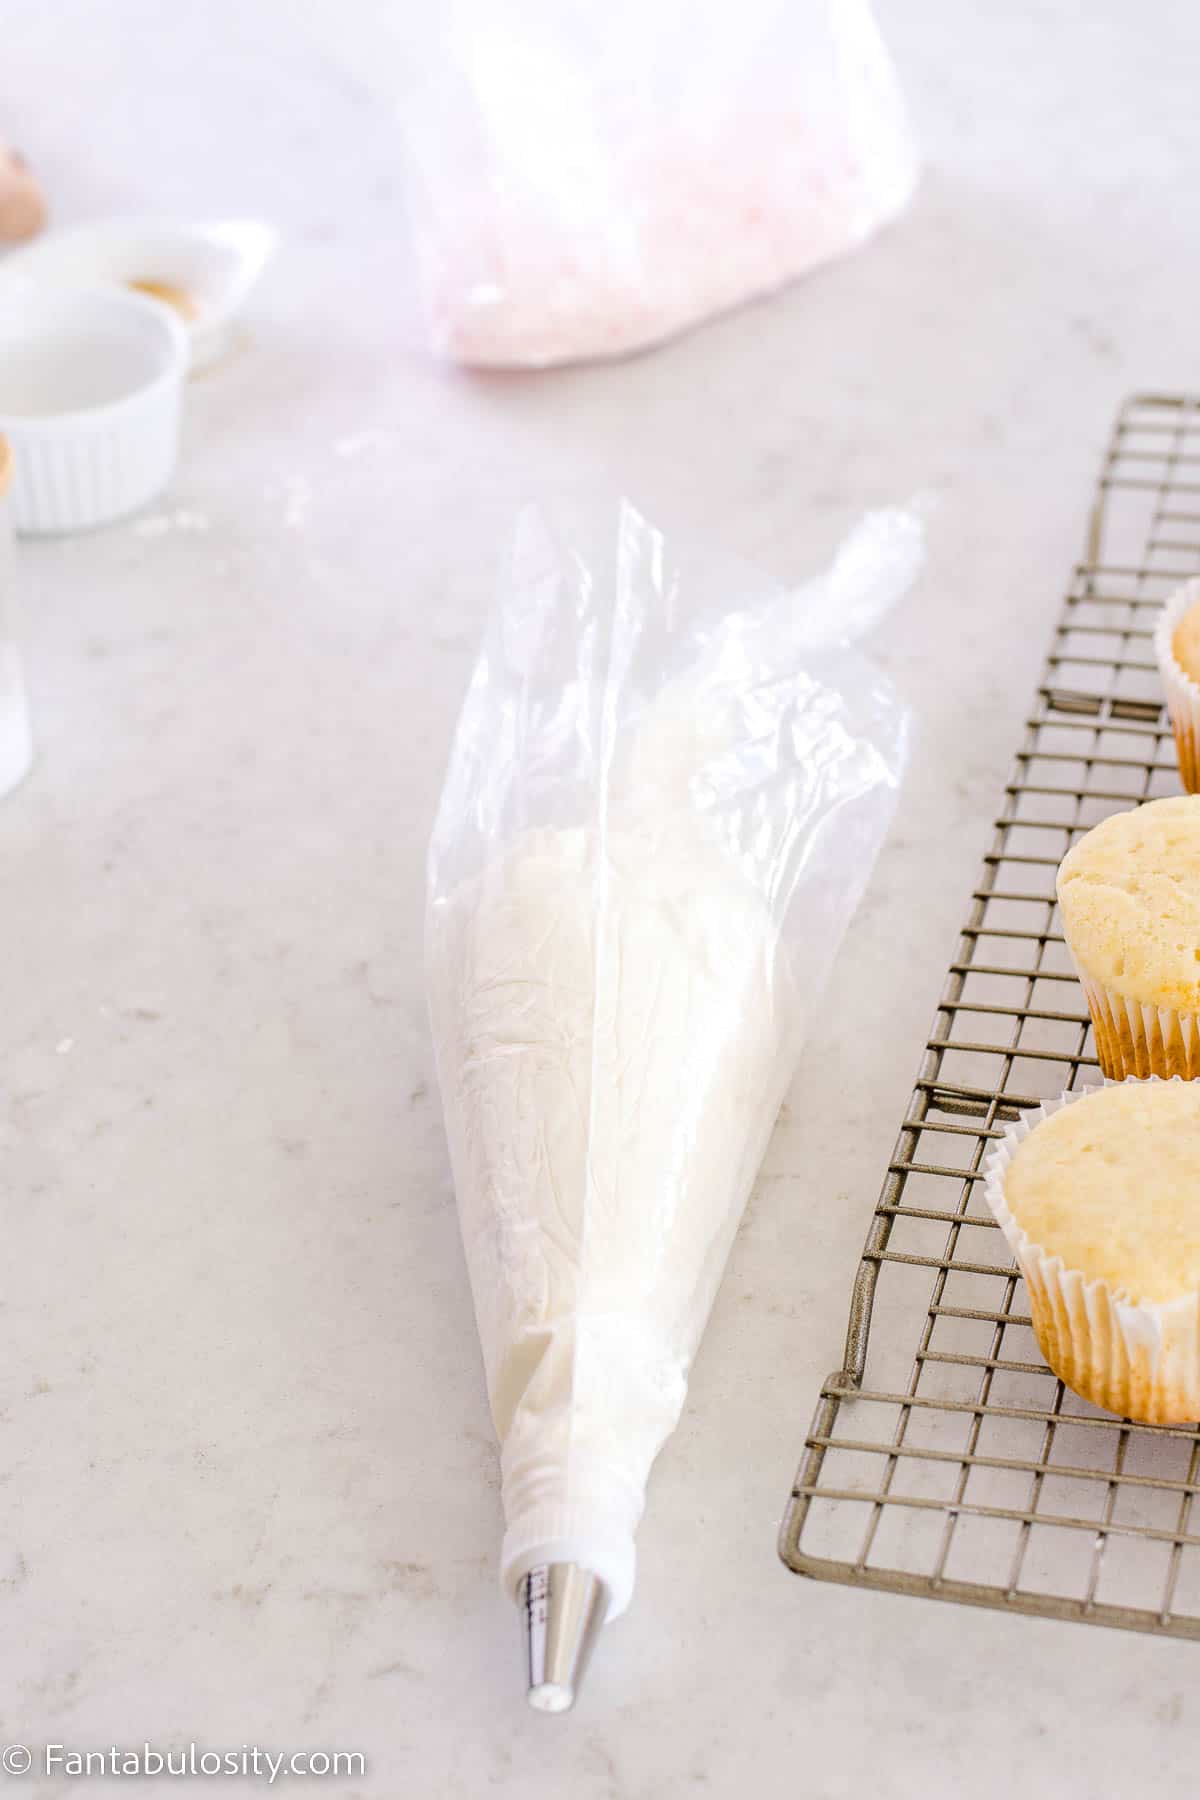
    Buttercream frosting in piping bag
    Buttercream in piping bag
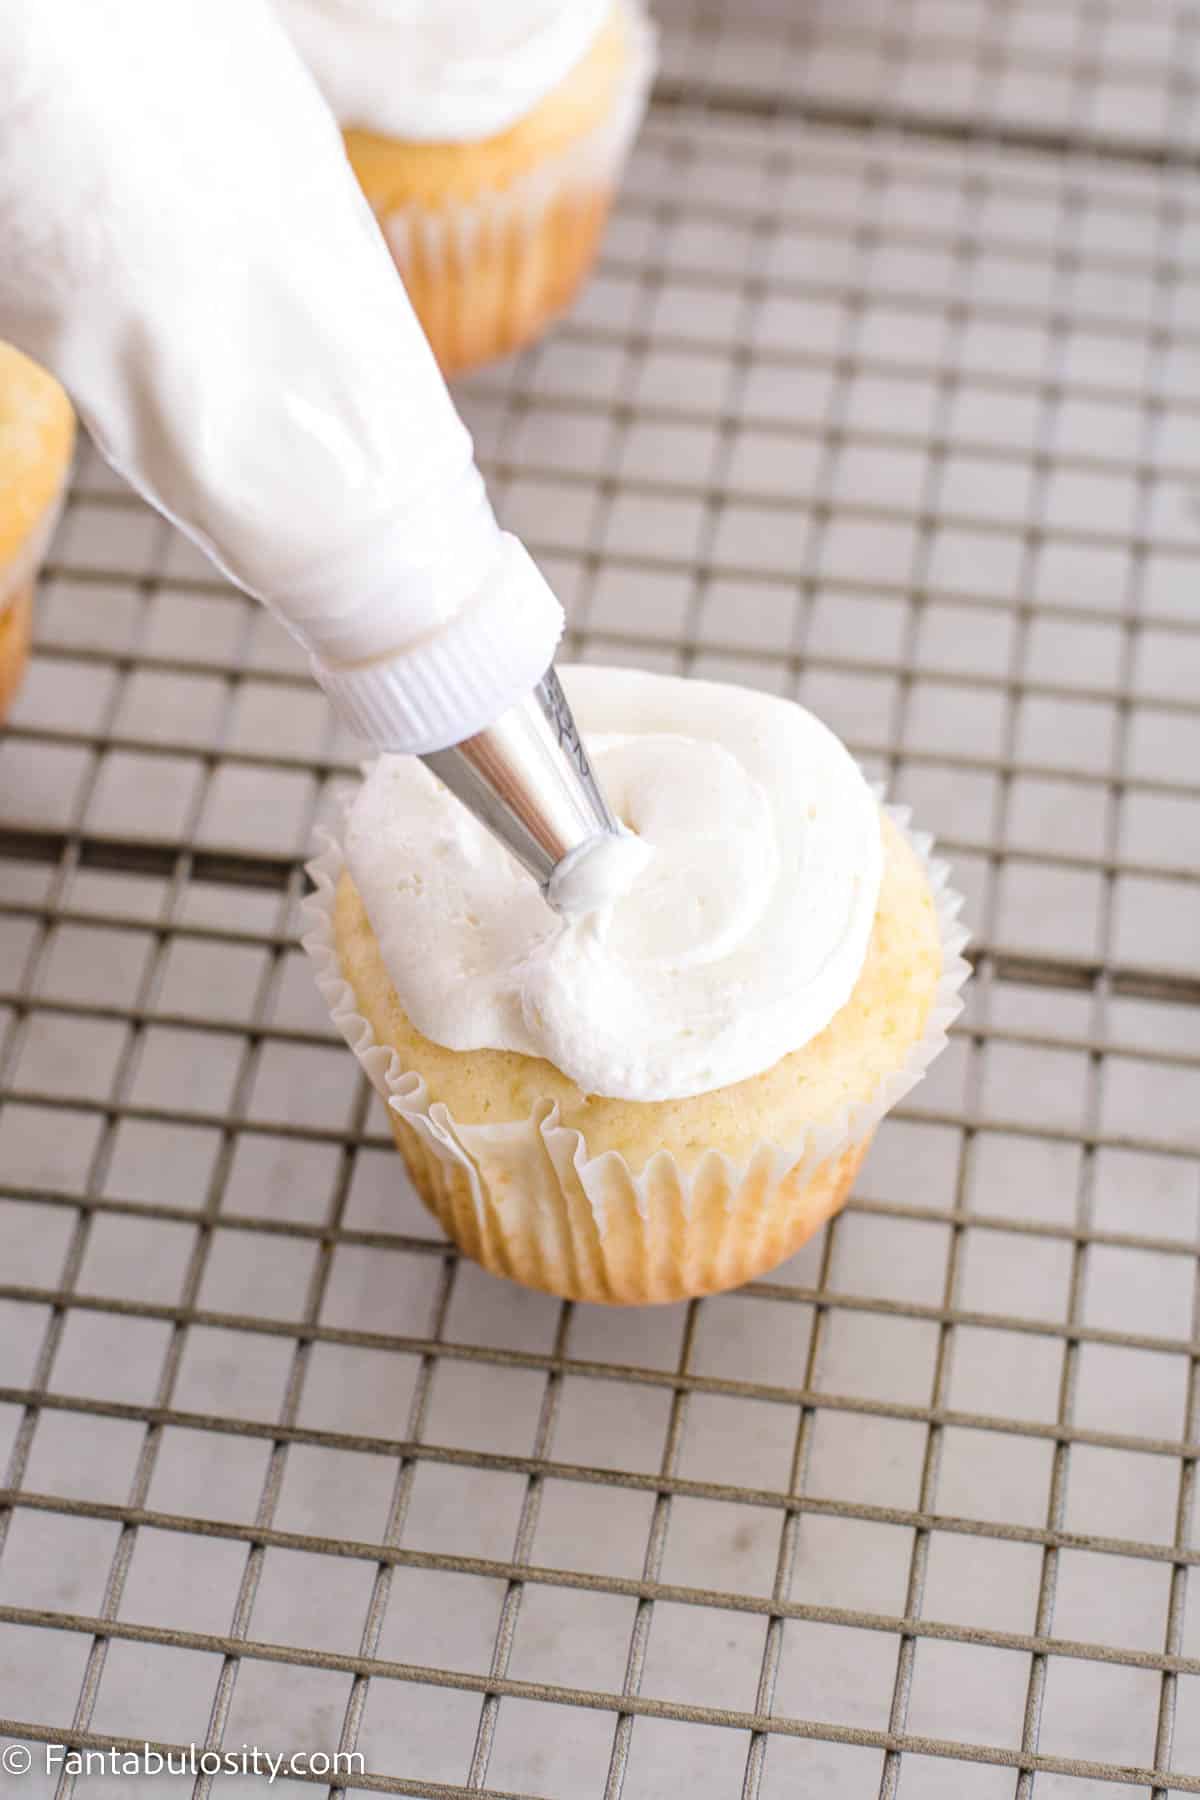
    1. If you have a piping bag, it’s time to place the buttercream in to a large piping bag, and begin piping the frosting on to the cupcakes. You can spread the frosting on to the cupcakes instead, if that’s what you prefer!
    Buttercream piping on to cupcake
    Add buttercream
    Peppermint candies on top of cupcakes
    Add peppermints
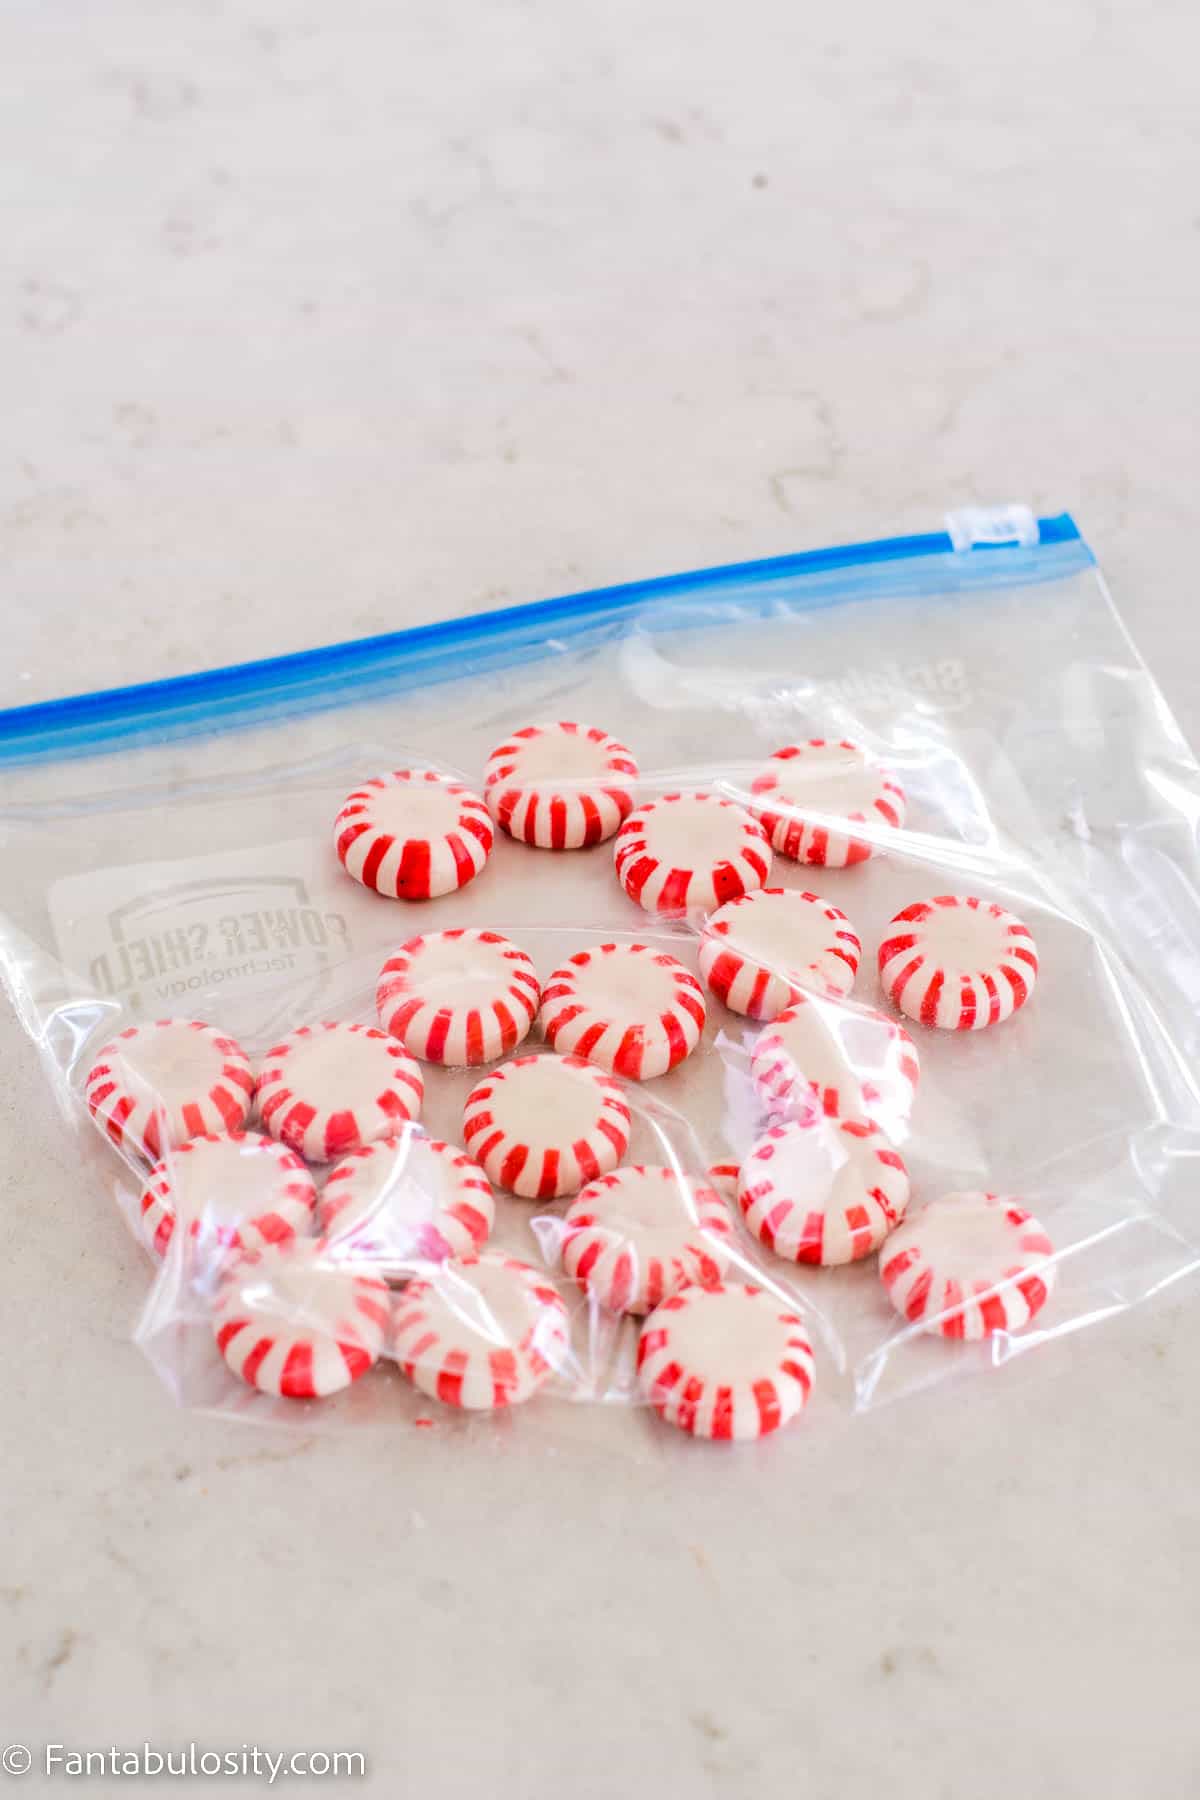
    1. Unwrap peppermint candies and place them in to a small plastic, sealable bag, and crush them until fine.
    Peppermint candies in plastic bag
    Crush peppermints
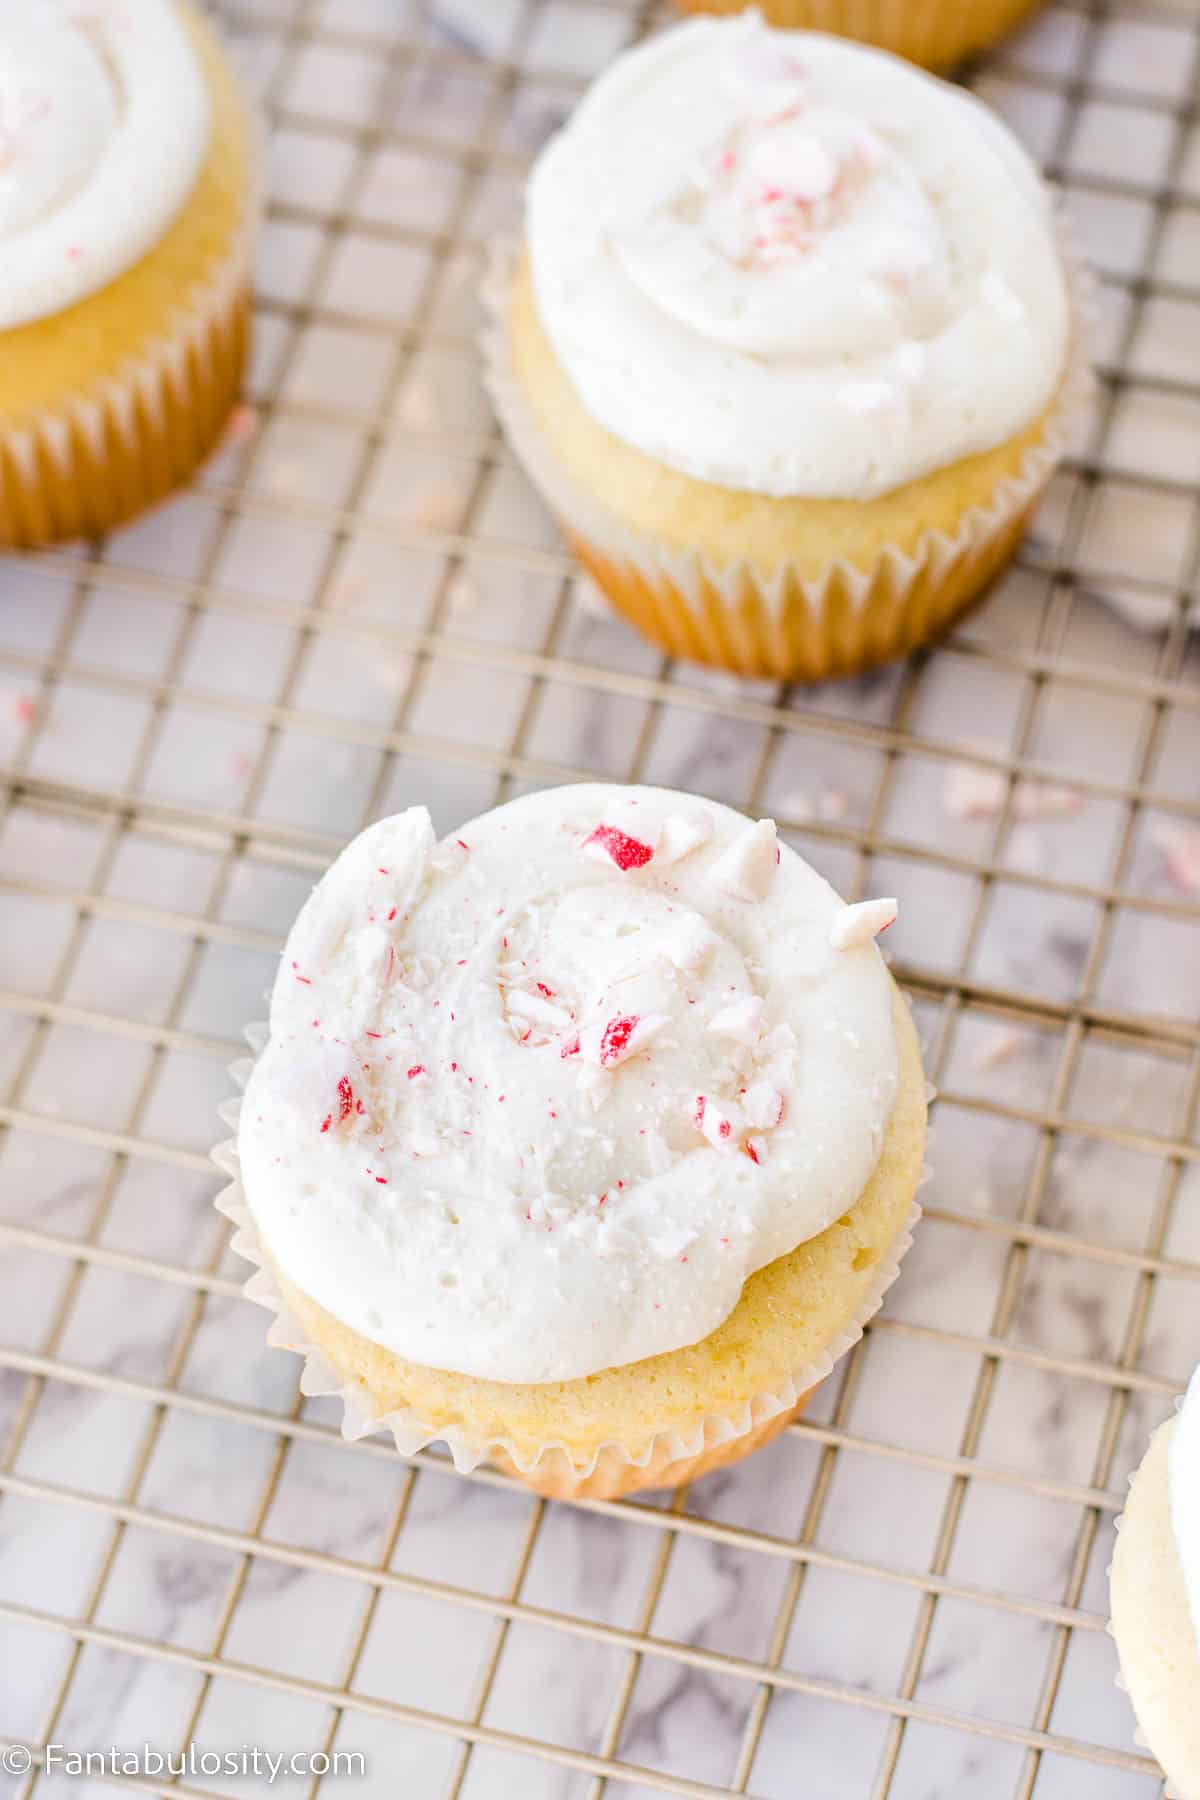
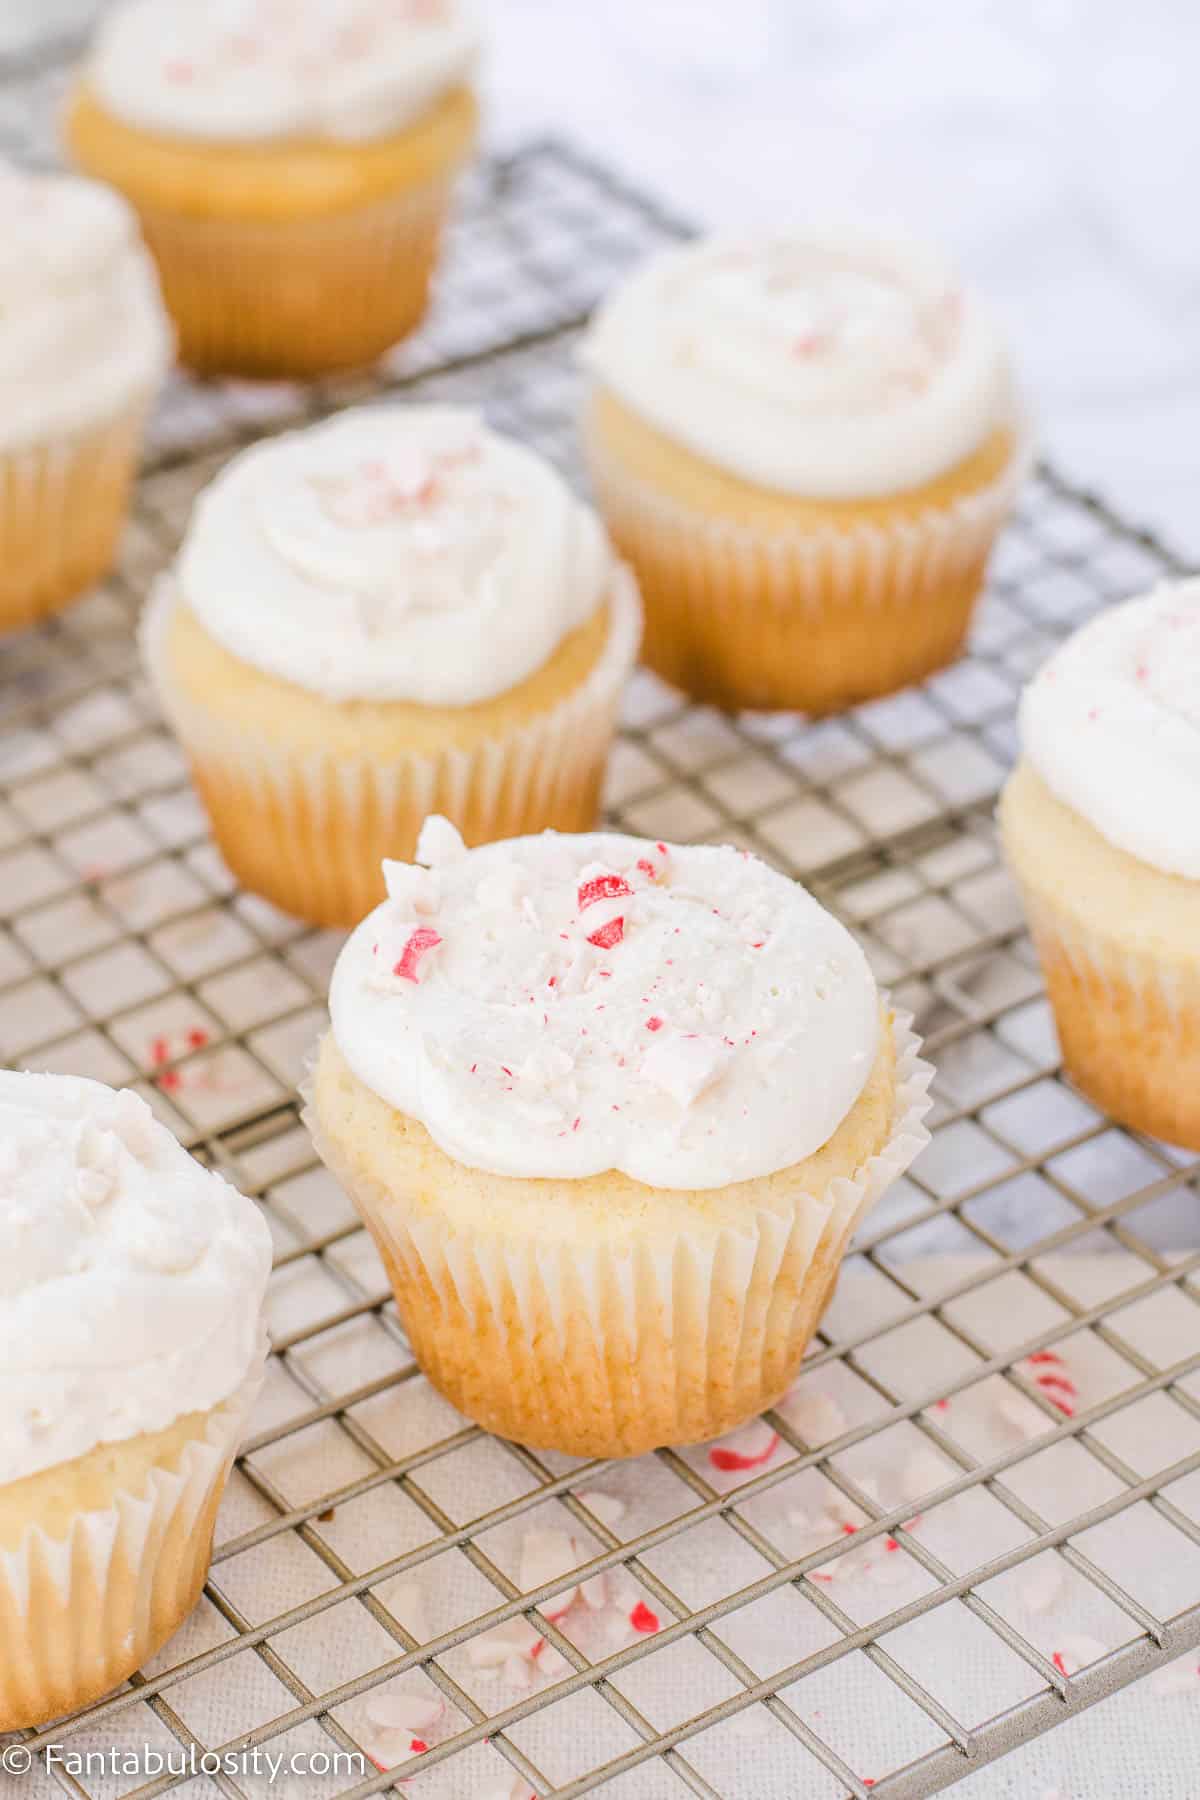
    1. Sprinkle the crushed peppermint candies on top of the buttercream, on the cupcakes.
    Peppermint cupcakes on baking rack
    Finished Peppermint Cupcakes

    Storage

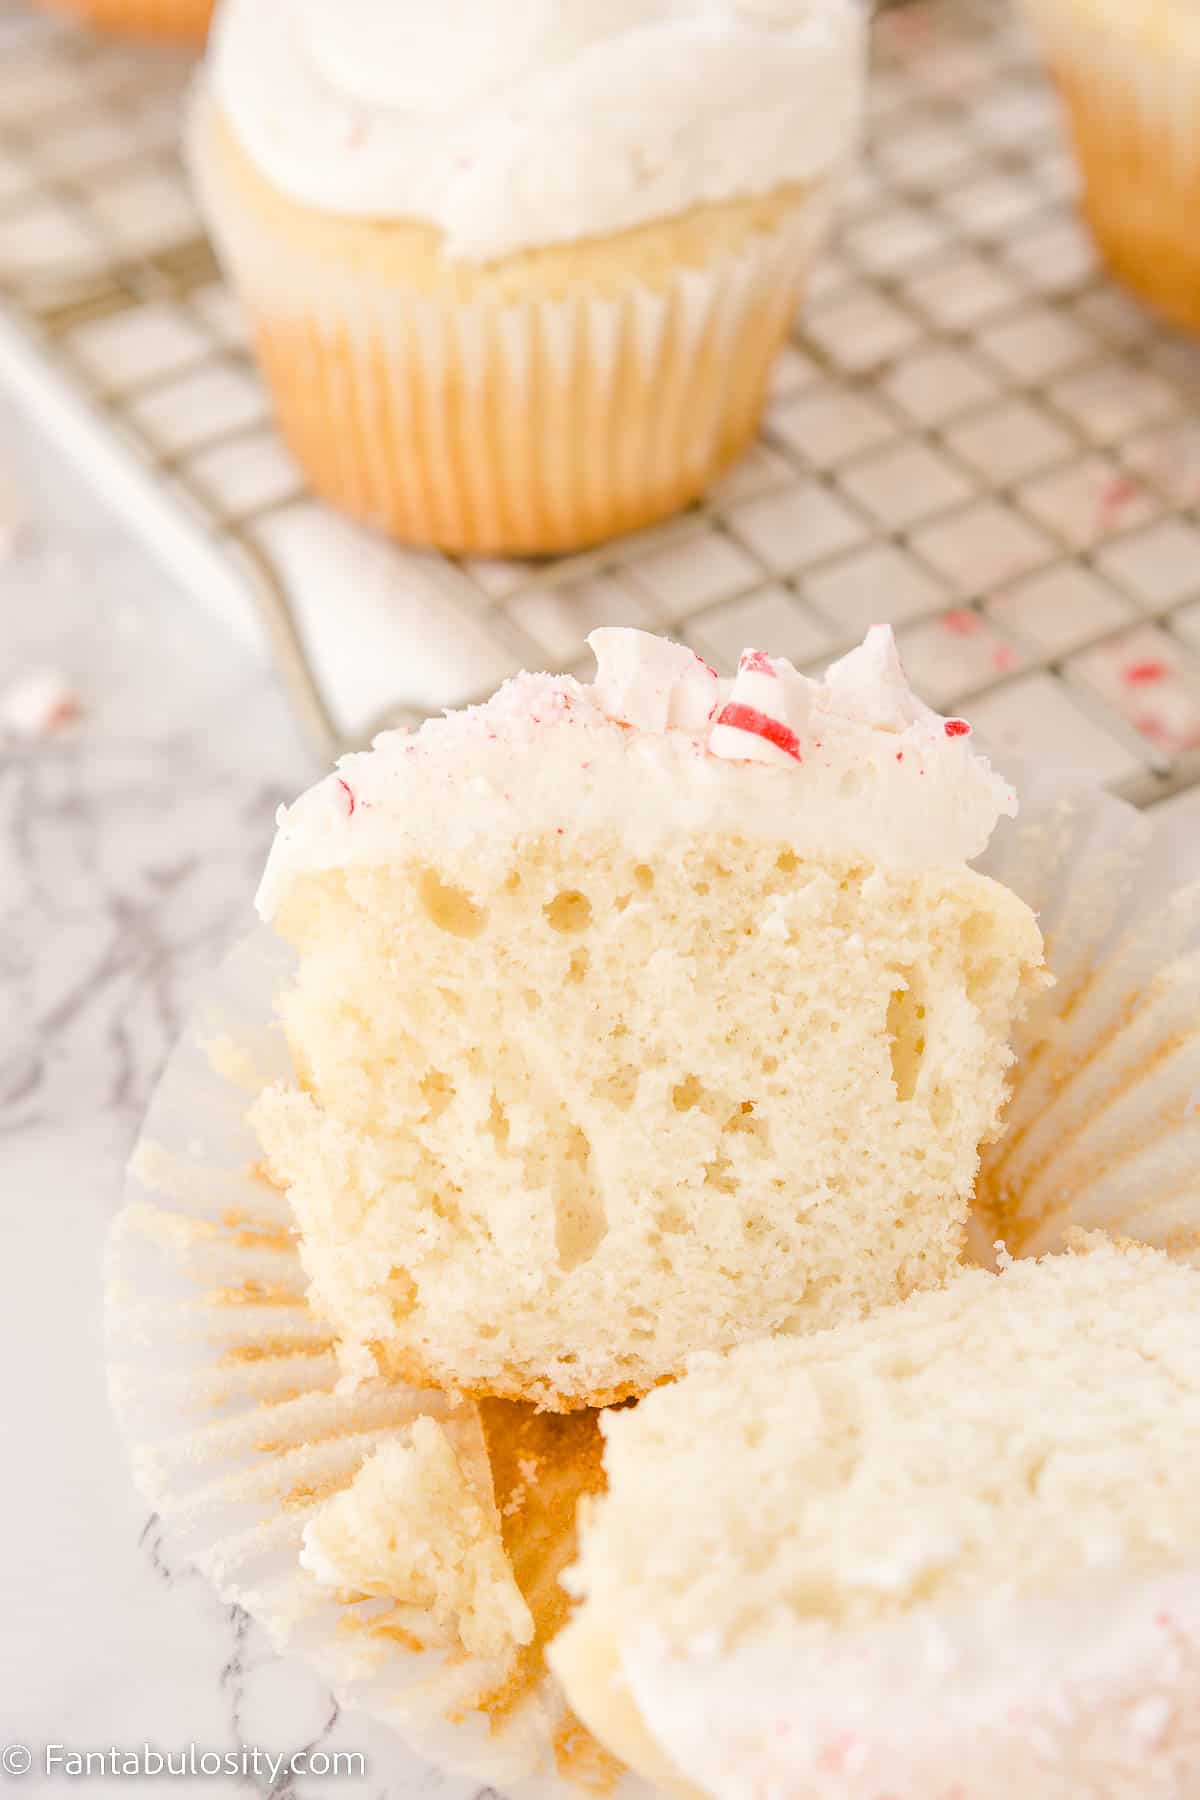
    If you have leftover cupcakes, leaving them out will result in the cupcakes and buttercream getting hard. It’s best to place them in a single layer in an airtight container, and place in the refrigerator (since it has milk in the buttercream).

    Peppermint cupcake sliced in half
    Airy peppermint cupcakes

    Related Recipes

    If you’re a fan of peppermint recipes, you’re going to love this peppermint latte recipe and these chocolate-dipped waffle bowls that are rimmed in peppermints, which are perfect to serve desserts in!

    Or, for an easy Christmas no-bake dessert recipe, you’re going to love this Christmas Tree Cake Dip!

    Did you make this? I’d be so grateful if you left a “star” rating below to let me know what you thought! Then, the next time you need a quick and easy recipe, come back to Fantabulosity to browse all of my easy recipes!

    Recipe

    Peppermint cupcakes on baking rack
    Print Pin
    5 from 5 votes

    Peppermint Cupcakes

    Peppermint Cupcakes: A vanilla cake mix that uses simple ingredients to make the cupcakes better than a boxed mix, with peppermint extract added for the perfect touch of flavor! Then, if desired, a homemade buttercream frosting with peppermint candies on top!
    Course Dessert
    Cuisine American
    Prep Time 20 minutes minutes
    Cook Time 12 minutes minutes
    Total Time 32 minutes minutes
    Servings 24 cupcakes
    Calories 275kcal
    Author Jessica Burgess

    Ingredients

    Peppermint Cupcake Ingredients

    • 16.25 ounce box white cake mix
    • ½ cup melted butter
    • 3 egg whites
    • 1 cup water
    • 1 teaspoon peppermint extract

    Buttercream Ingredients

    • ½ cup vegetable shortening
    • ½ cup unsalted butter softened
    • 4 cups powdered sugar sifted
    • 2 Tablespoons milk or heavy cream
    • 1 teaspoon vanilla extract
    • pinch of salt optional
    • 20 peppermint candies

    Instructions

    How to Make the Peppermint Cupcakes

    • Preheat oven to 350 degrees and line the cupcake pan (or muffin tin) with cupcake liners.
    • In a large mixing bowl, pour in the cake mix, melted butter, egg whites, water, and peppermint extract, and mix on medium speed for 2 minutes.
    • Pour about 3 tablespoons of cupcake batter in to each cupcake liner. (Or ⅔ full.)
    • Bake the cupcakes for 12 minutes or until the tops of the cupcakes bounce back when your finger gently touches them. If it leaves an indention, the cupcakes need to bake longer.
      Remove from the cupcake pan and place cupcakes on a wire rack to cool.

    How to Make the Buttercream Frosting

    • In a large mixing bowl, mix together the stick of softened butter and shortening until light and fluffy. You may need to use a rubber spatula to scrape down the sides a couple of times to make sure the ingredients blend evenly.
    • Next, start adding the powdered sugar, about 1 cup at a time, mixing together completely before adding the next cup of sugar. Do this until all of the powdered sugar has been mixed in.
    • Add in vanilla extract, and mix in completely. Then, pour in the milk and mix in until buttercream looks fully combined and fluffy.
    • Optional: Although optional, I do recommend adding a pinch of salt and mixing it in to the buttercream.
    • If you have a piping bag, it's time to place the buttercream in to the piping bag, and begin piping the frosting on to the cupcakes. You can spread the frosting on to the cupcakes instead, if that's what you prefer!
    • Unwrap peppermint candies and place them in to a small plastic, sealable bag, and crush them until fine.
    • Sprinkle the crushed peppermint candies on top of the buttercream, on the cupcakes. Serve!
    Nutrition

    Serving: 1cupcake | Calories: 275kcal | Carbohydrates: 40g | Protein: 1g | Fat: 13g | Saturated Fat: 6g | Polyunsaturated Fat: 2g | Monounsaturated Fat: 4g | Trans Fat: 1g | Cholesterol: 20mg | Sodium: 172mg | Potassium: 23mg | Fiber: 0.2g | Sugar: 31g | Vitamin A: 238IU | Calcium: 47mg | Iron: 0.4mg

    Chocolate Chip Cheese Ball with M&M’s

    October 24, 2022

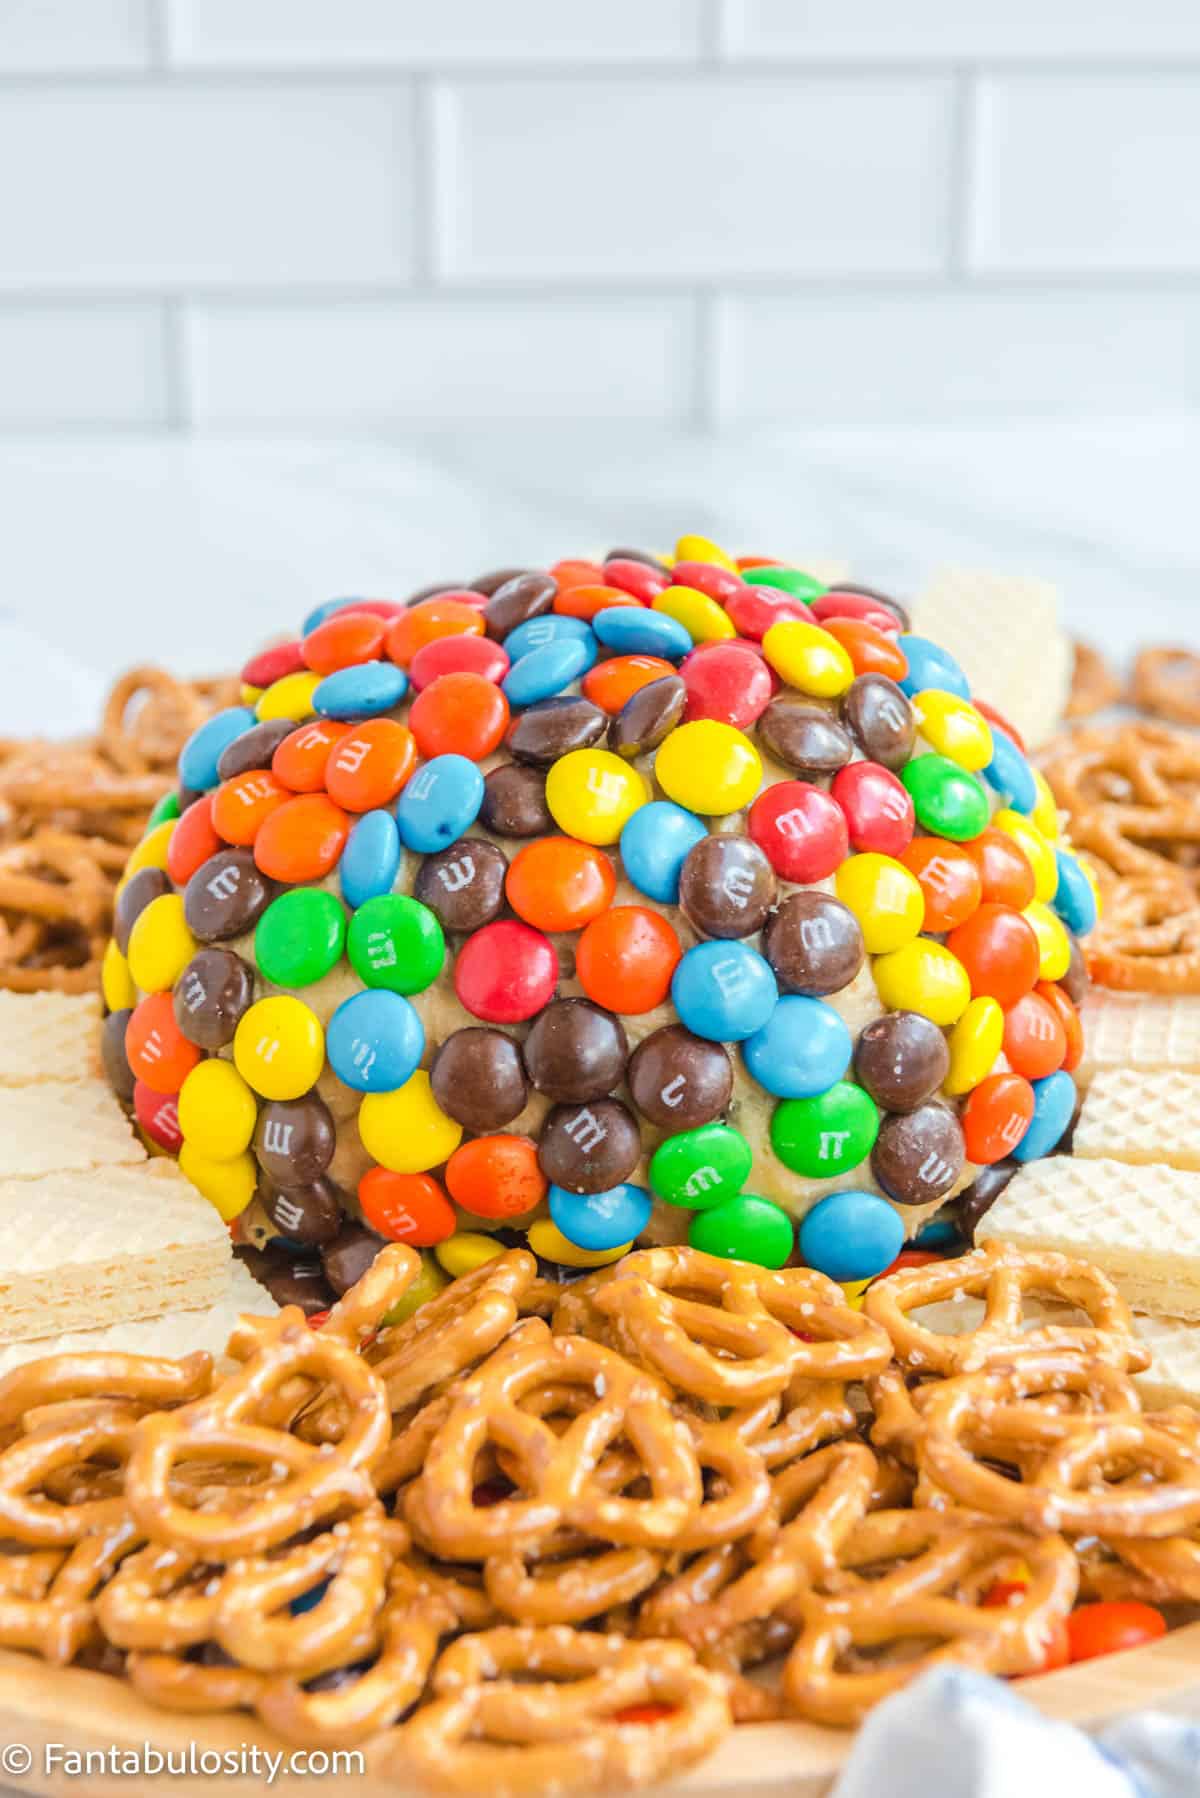
    A sweet cheeseball that has bee rolled in colorful M&M's is centered with pretzels and sugar wafer cookies waiting for dipping

    Chocolate Chip Cheese Ball with M&M’s: The inside of this easy, no bake dessert cheese ball tastes like peanut butter chocolate chip cookie dough and the outside is covered in colorful M&M’s!

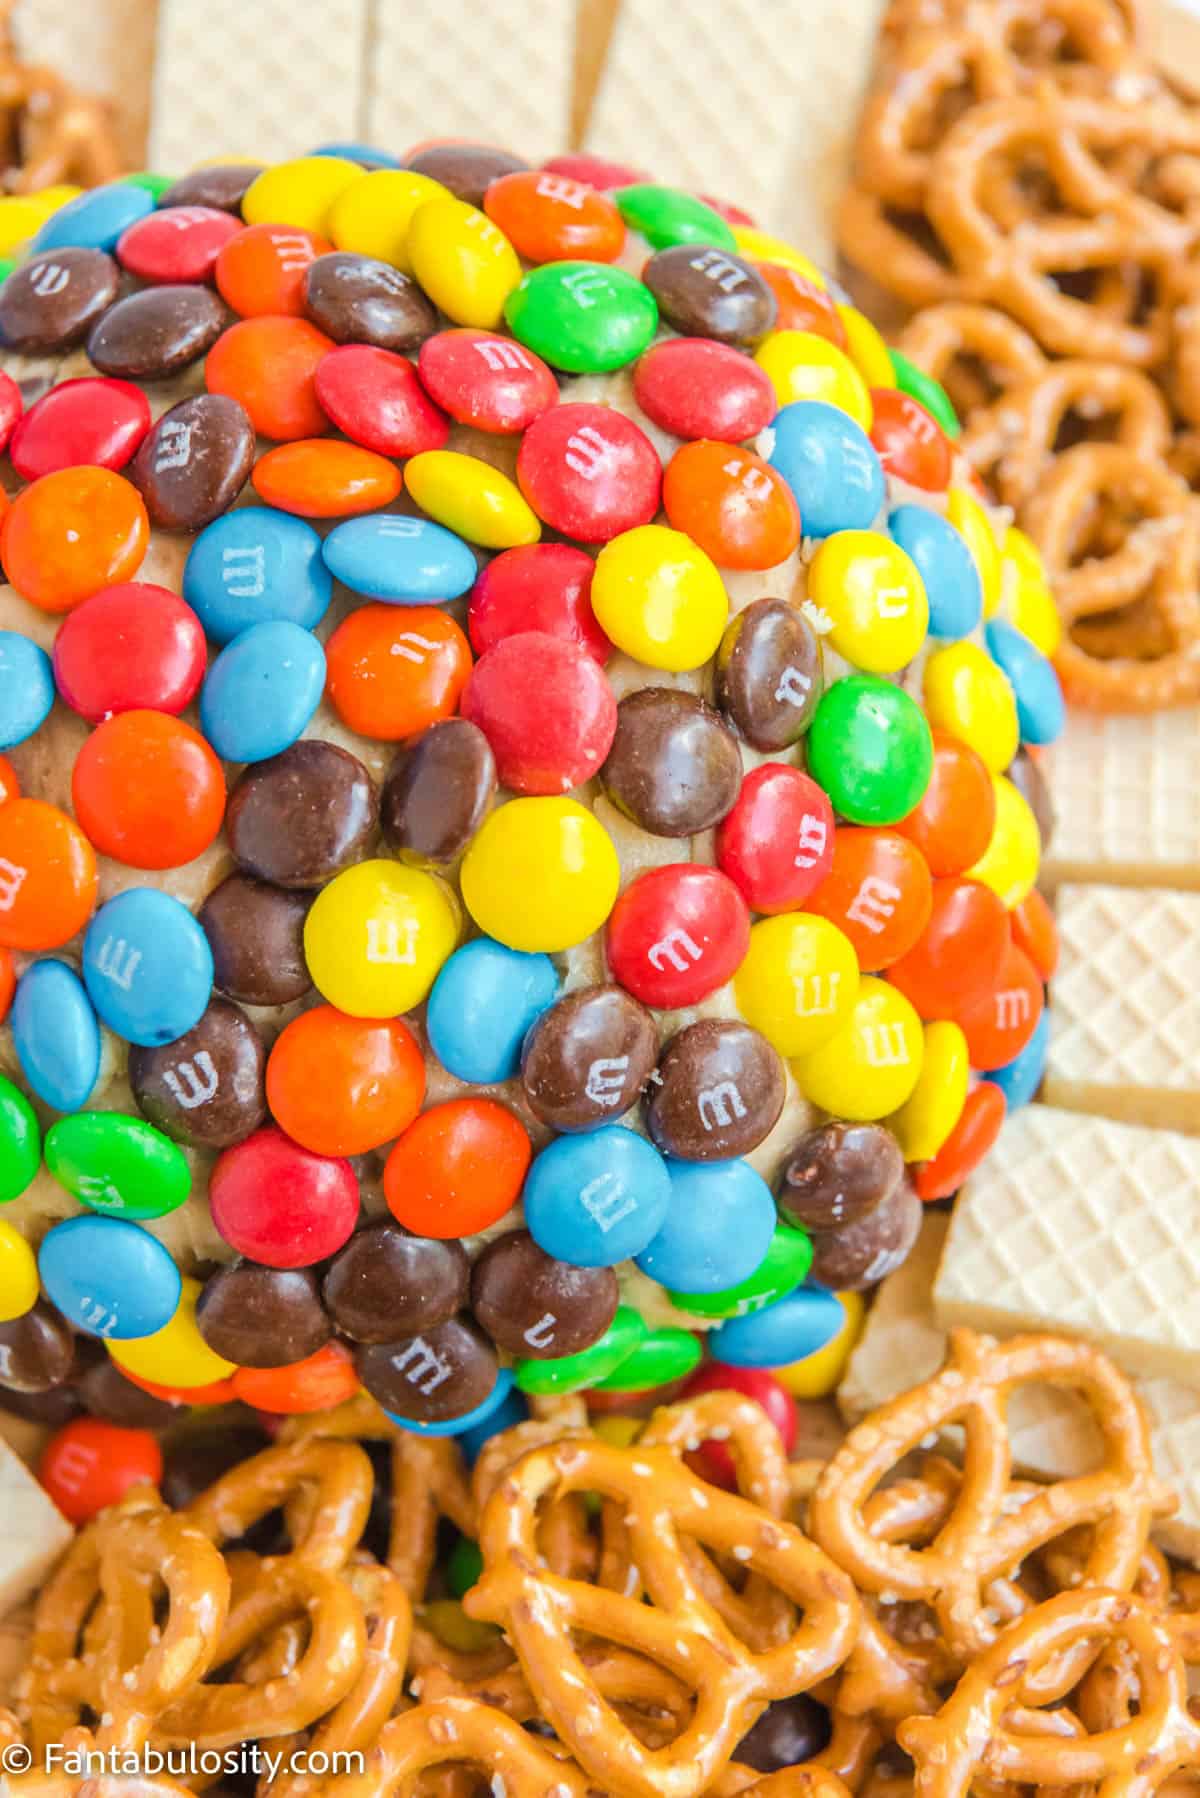
    A sweet dessert cheese ball covered in colorful M&Ms is surrounded by pretzel twists and vanilla sugar wafer cookies

    Why You’ll Love This Recipe

    Oh my word! This no bake chocolate chip cream cheese dessert is pretty much a mash-up of some of my favorite things: cheesecake, peanut butter chocolate chip cookies and M&Ms!

    This may be shaped like a ball, but it has the same wonderful dippability as those sweet dessert dips (such as this fruit dip with marshmallow fluff) that everyone loves! So if you love chocolate chip dip or cheesecake dip, then this dessert is going to be your favorite sweet treat!

    This sweet dessert cheese ball can be prepped the day before your event. So, this is a time-saving, no fail recipe for those special occasions like a birthday party, baby shower or holiday party.

    [feast_advanced_jump_to]

    Ingredients

    With simple ingredients that can be found at your local grocery store (and most likely, your pantry!) this chocolate chip cheeseball recipe is a must make!

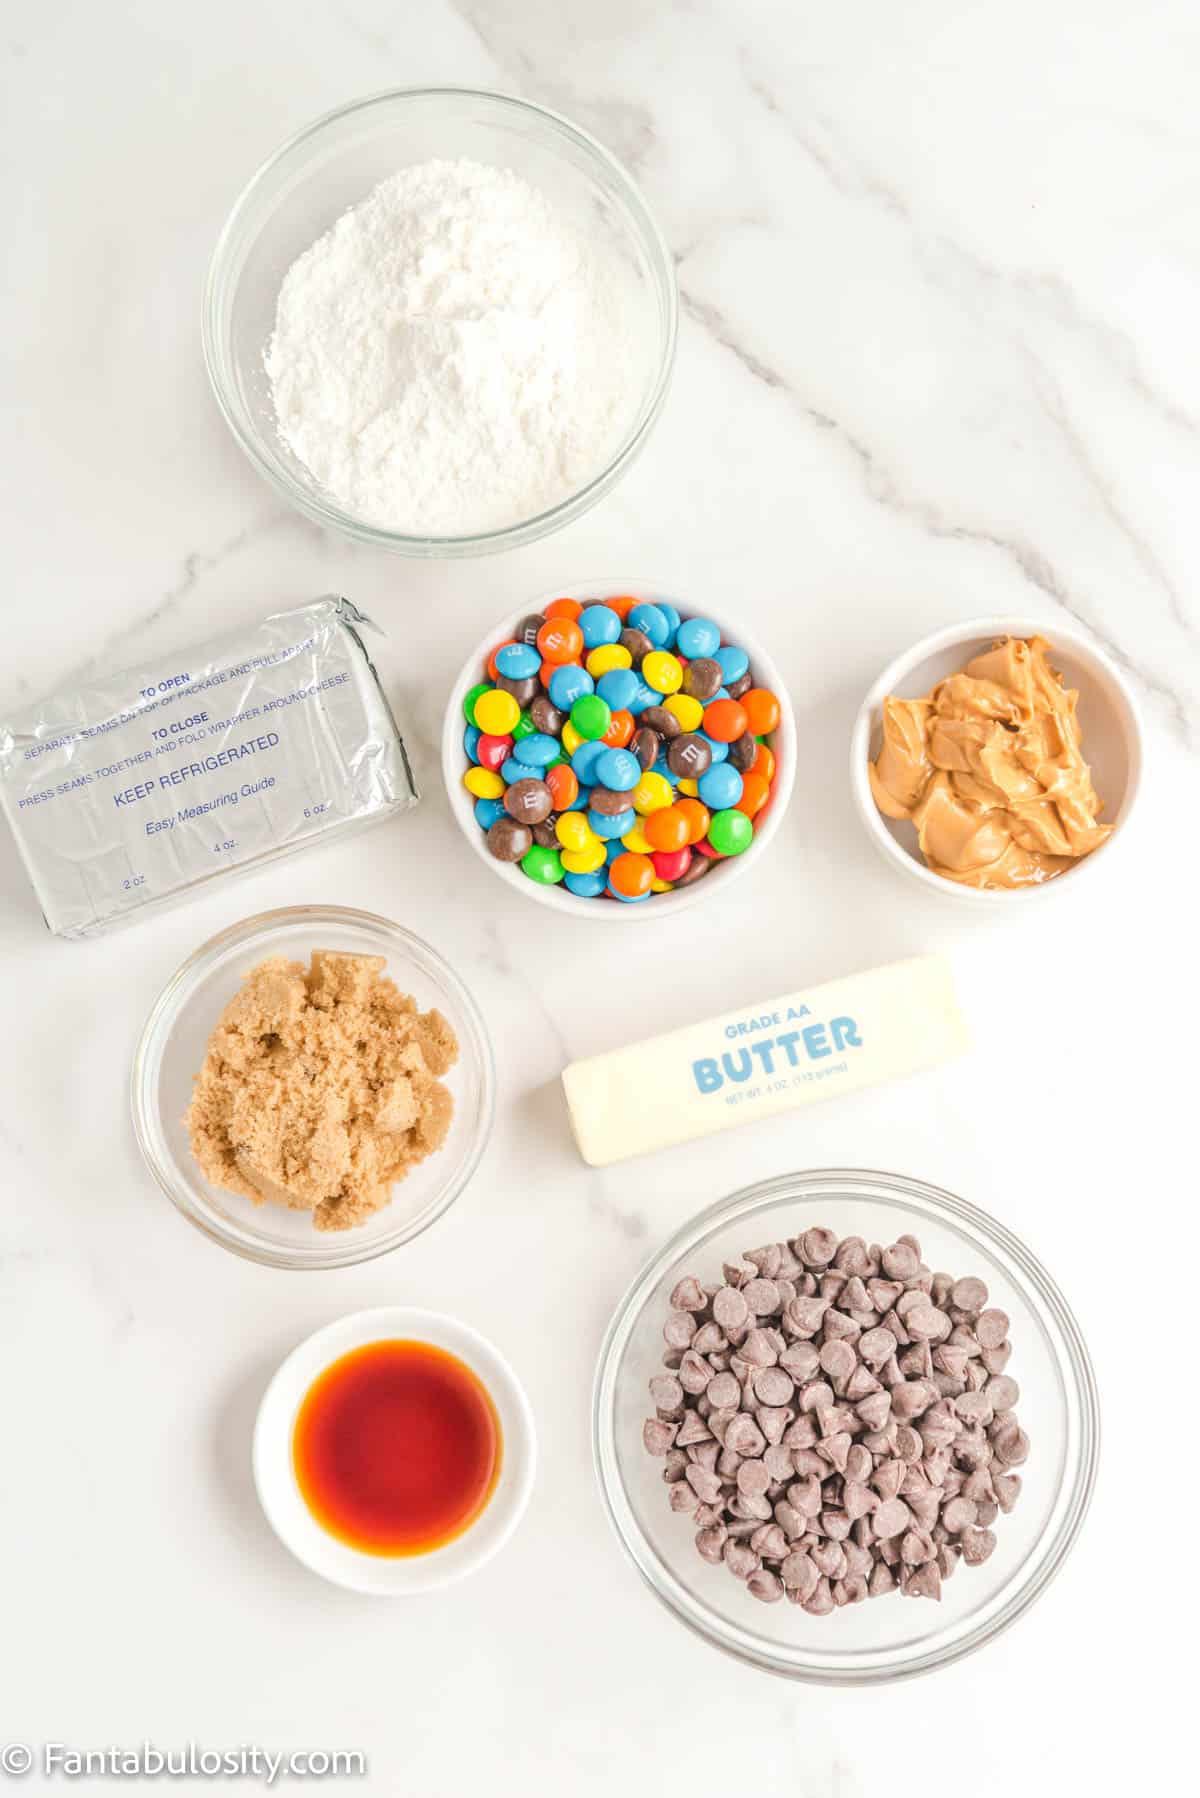
    A block of cream cheese, a stick of butter and bowls of chocolate chips, peanut butter, powdered sugar are displayed on a white marble background
    The sweet ingredients
    • 8 oz. cream cheese, softened at room temperature
    • 1 stick (½ cup) unsalted butter, softened at room temperature
    • ⅓ cup brown sugar
    • ⅓ cup creamy peanut butter
    • ½ teaspoon pure vanilla extract
    • 1 cup powdered sugar
    • ¾ cup semi-sweet chocolate chips
    • 1 cup M&M’s for coating

    See the printable recipe card below for ingredients, instructions, nutrition information and detailed recipe notes.

    Instructions

    If you’ve made a savory cheese ball, then you’ll be right at home making a sweet dessert version. If you’ve never made a cheese ball before, the step-by-step instructions with pictures below will make you a pro in no time.

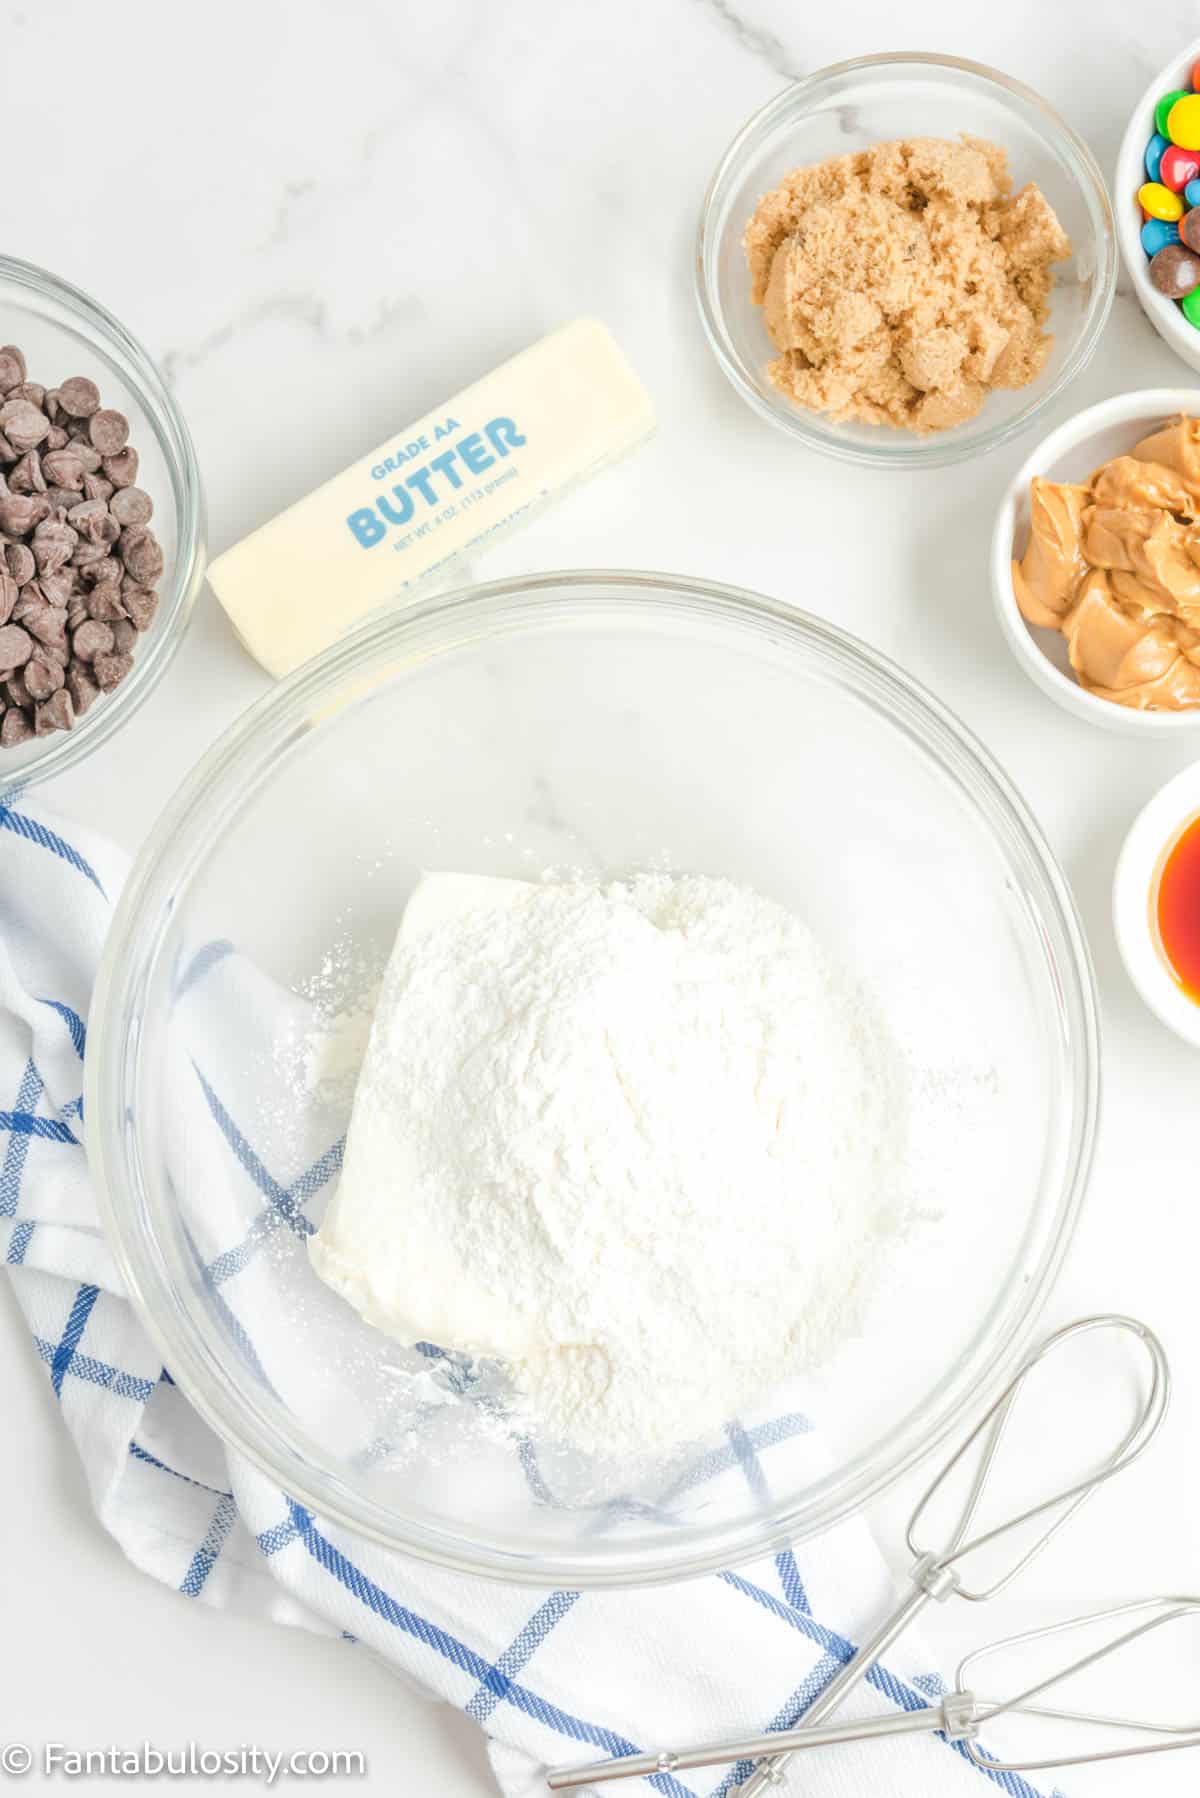
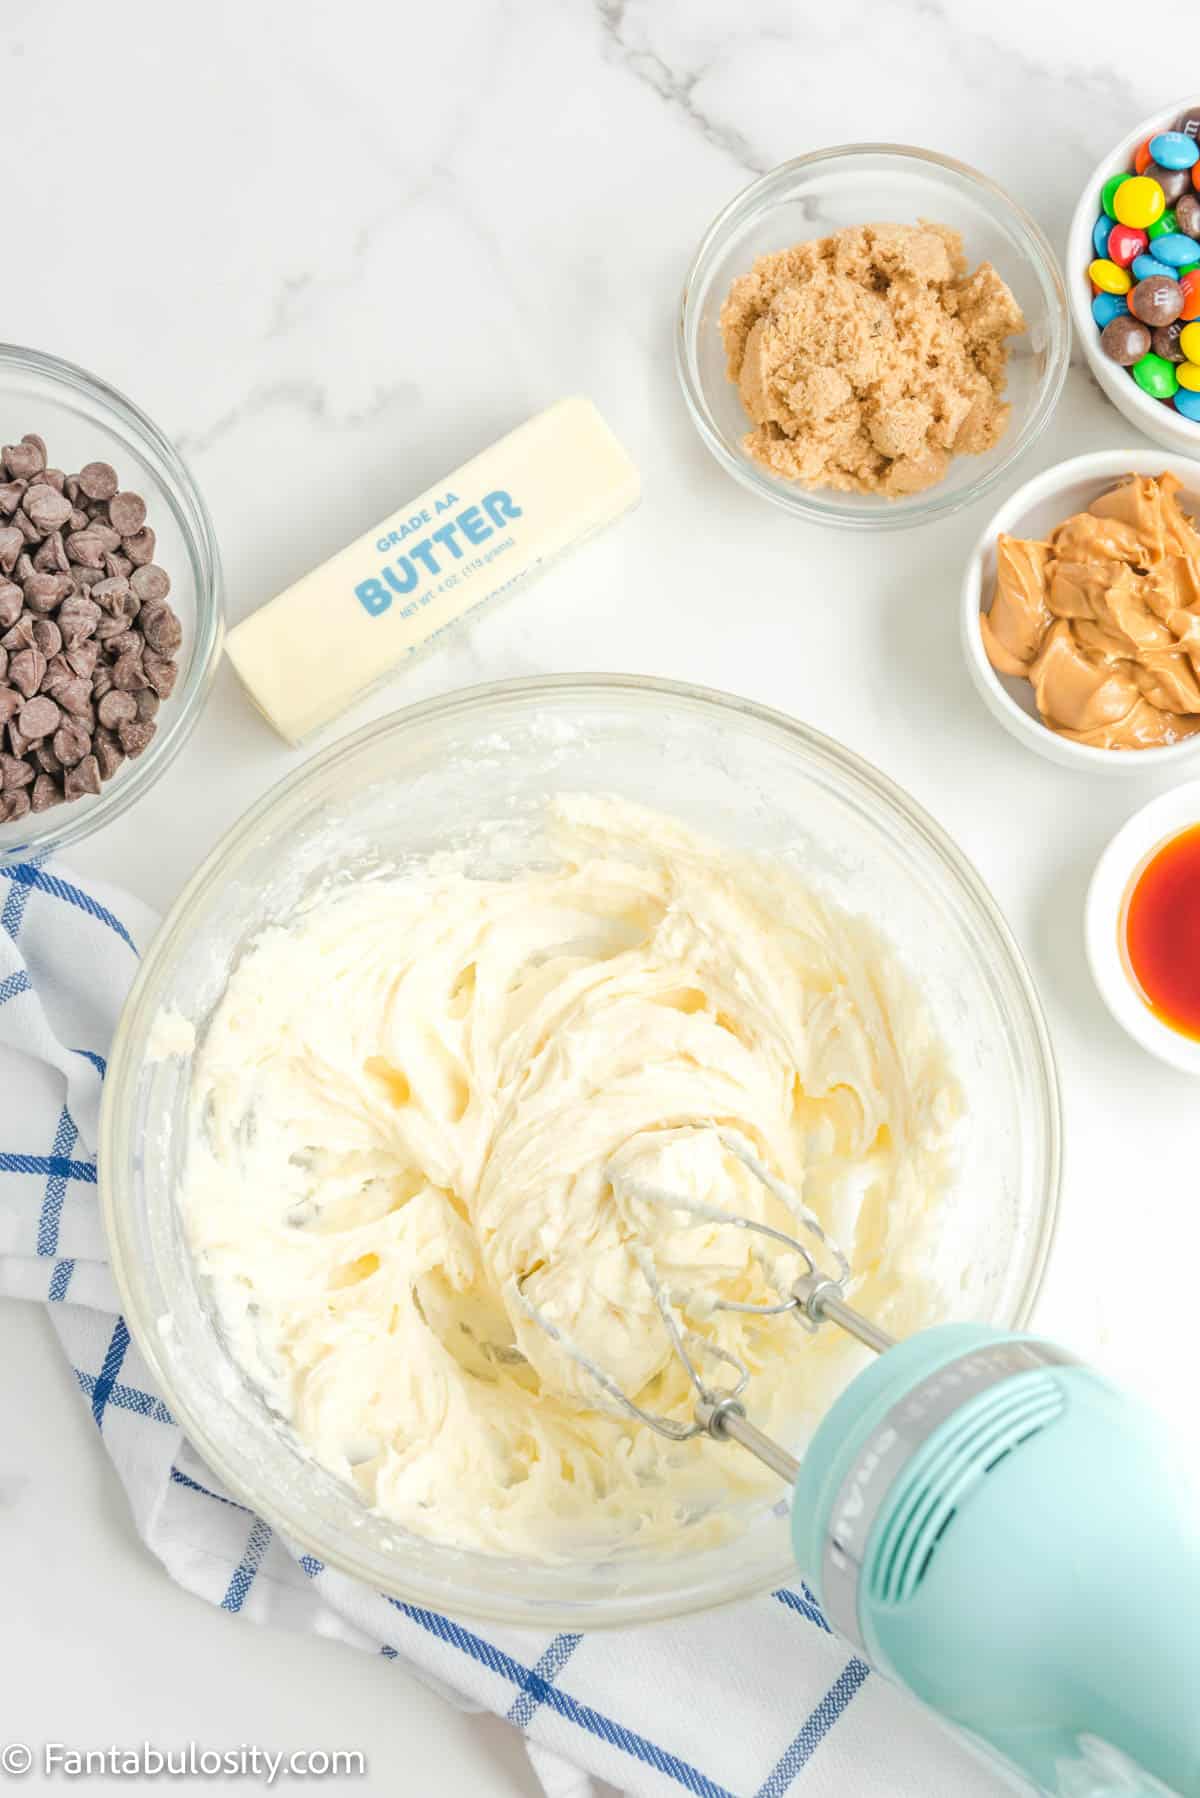
    1. First, in a large mixing bowl, cream the cream cheese and powdered sugar with a hand mixer until they are well combined.
    A glass mixing bowl holds a block of cream cheese and powdered sugar
    Cream cheese & powdered sugar
    A hand mixer is creaming together cream cheese and powdered sugar in a glass mixing bowl
    Mix well
    1. Add butter, vanilla, and brown sugar and mix again.
    2. Then, add peanut butter and chocolate chips to the cream cheese mixture and mix until well combined.
    A stick of butter, vanilla extract and brown sugar have been added to a mixing bowl with a cream cheese mixture and a hand mixer is poised to mix it all together
    Add butter, vanilla and sugar
    Peanut butter and chocolate chips have been added to a fluffy sweet cream cheese mixture in a glass mixing bowl and a hand mixer is waiting to mix it all together
    Add peanut butter and chocolate chips
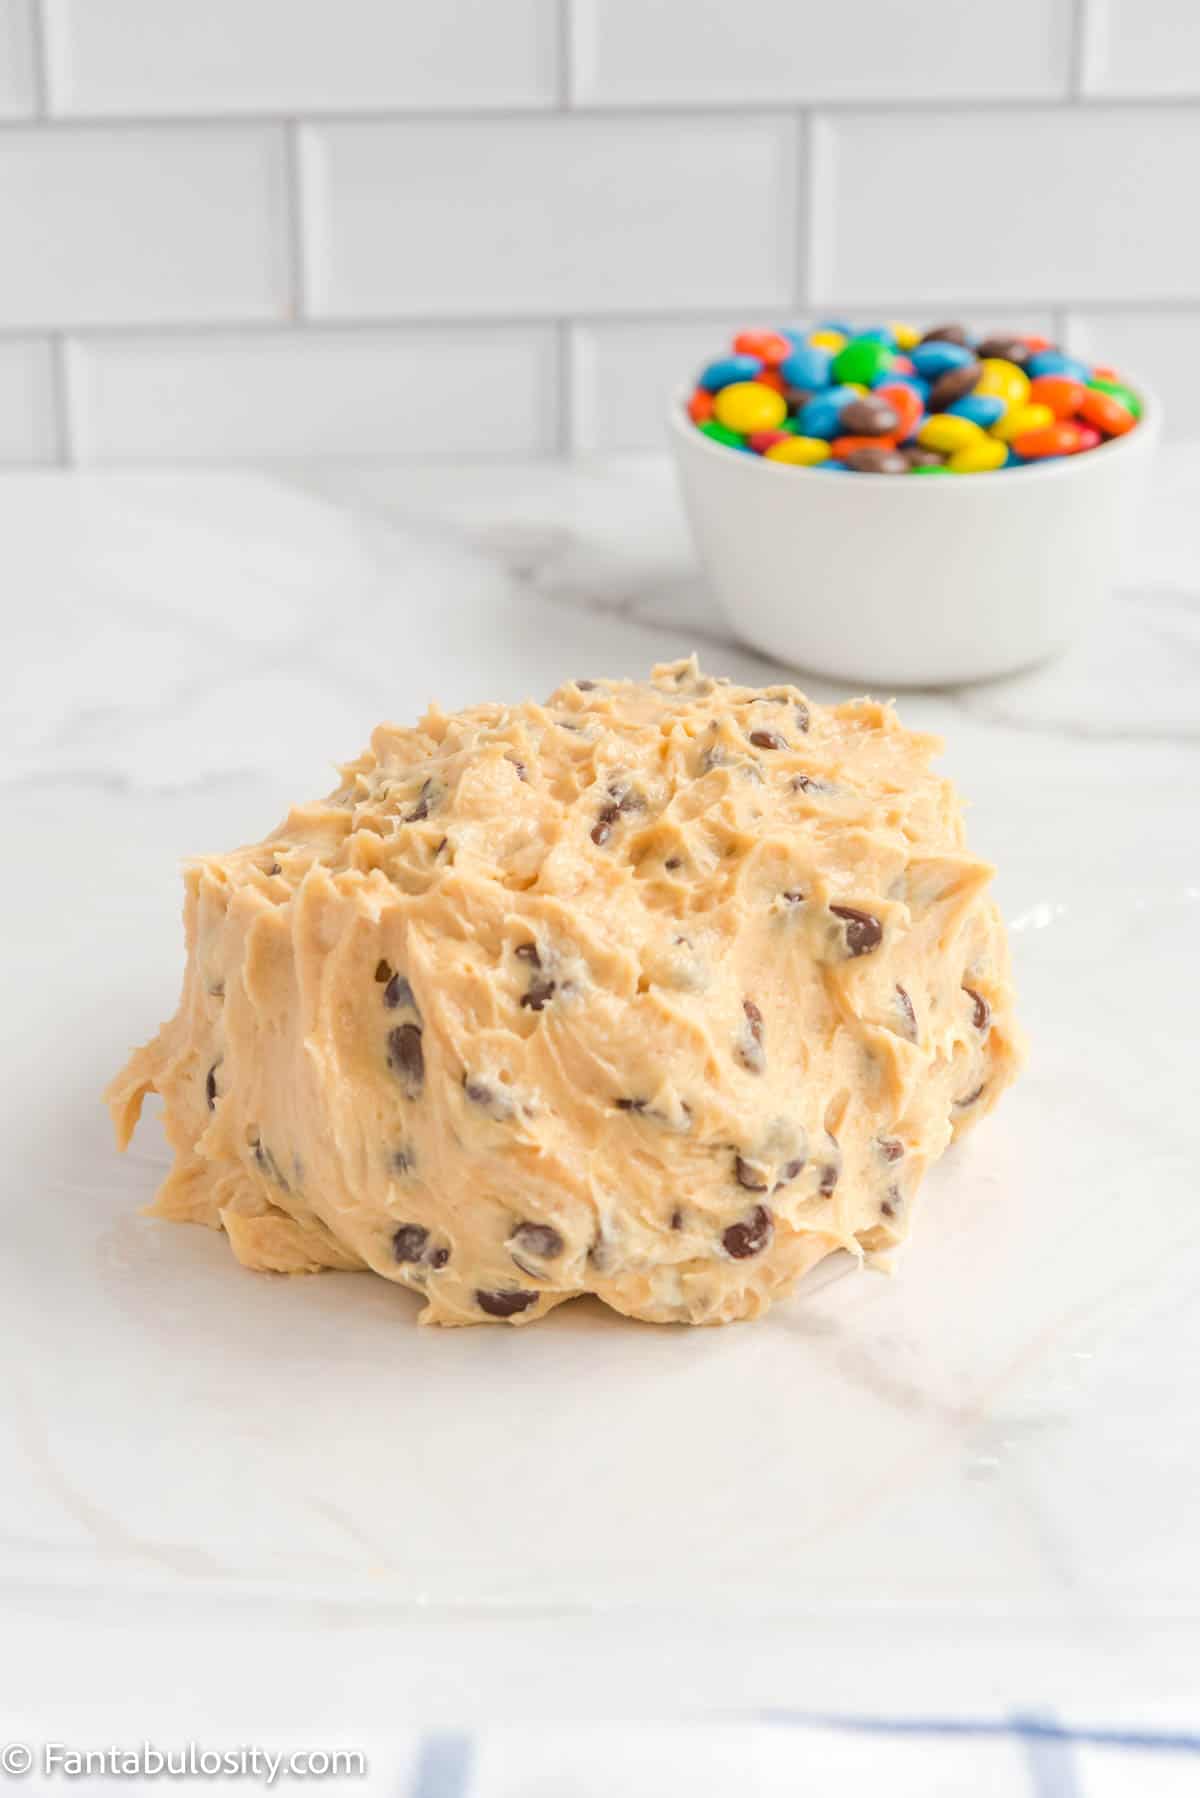
    1. Now, lay a large piece of plastic wrap or wax paper on your counter or a flat work surface. Using a rubber spatula, gather the cream cheese mixture from the bowl and form it into a ball using your hands. (This may get messy but continue to work it until it makes a solid shape.)
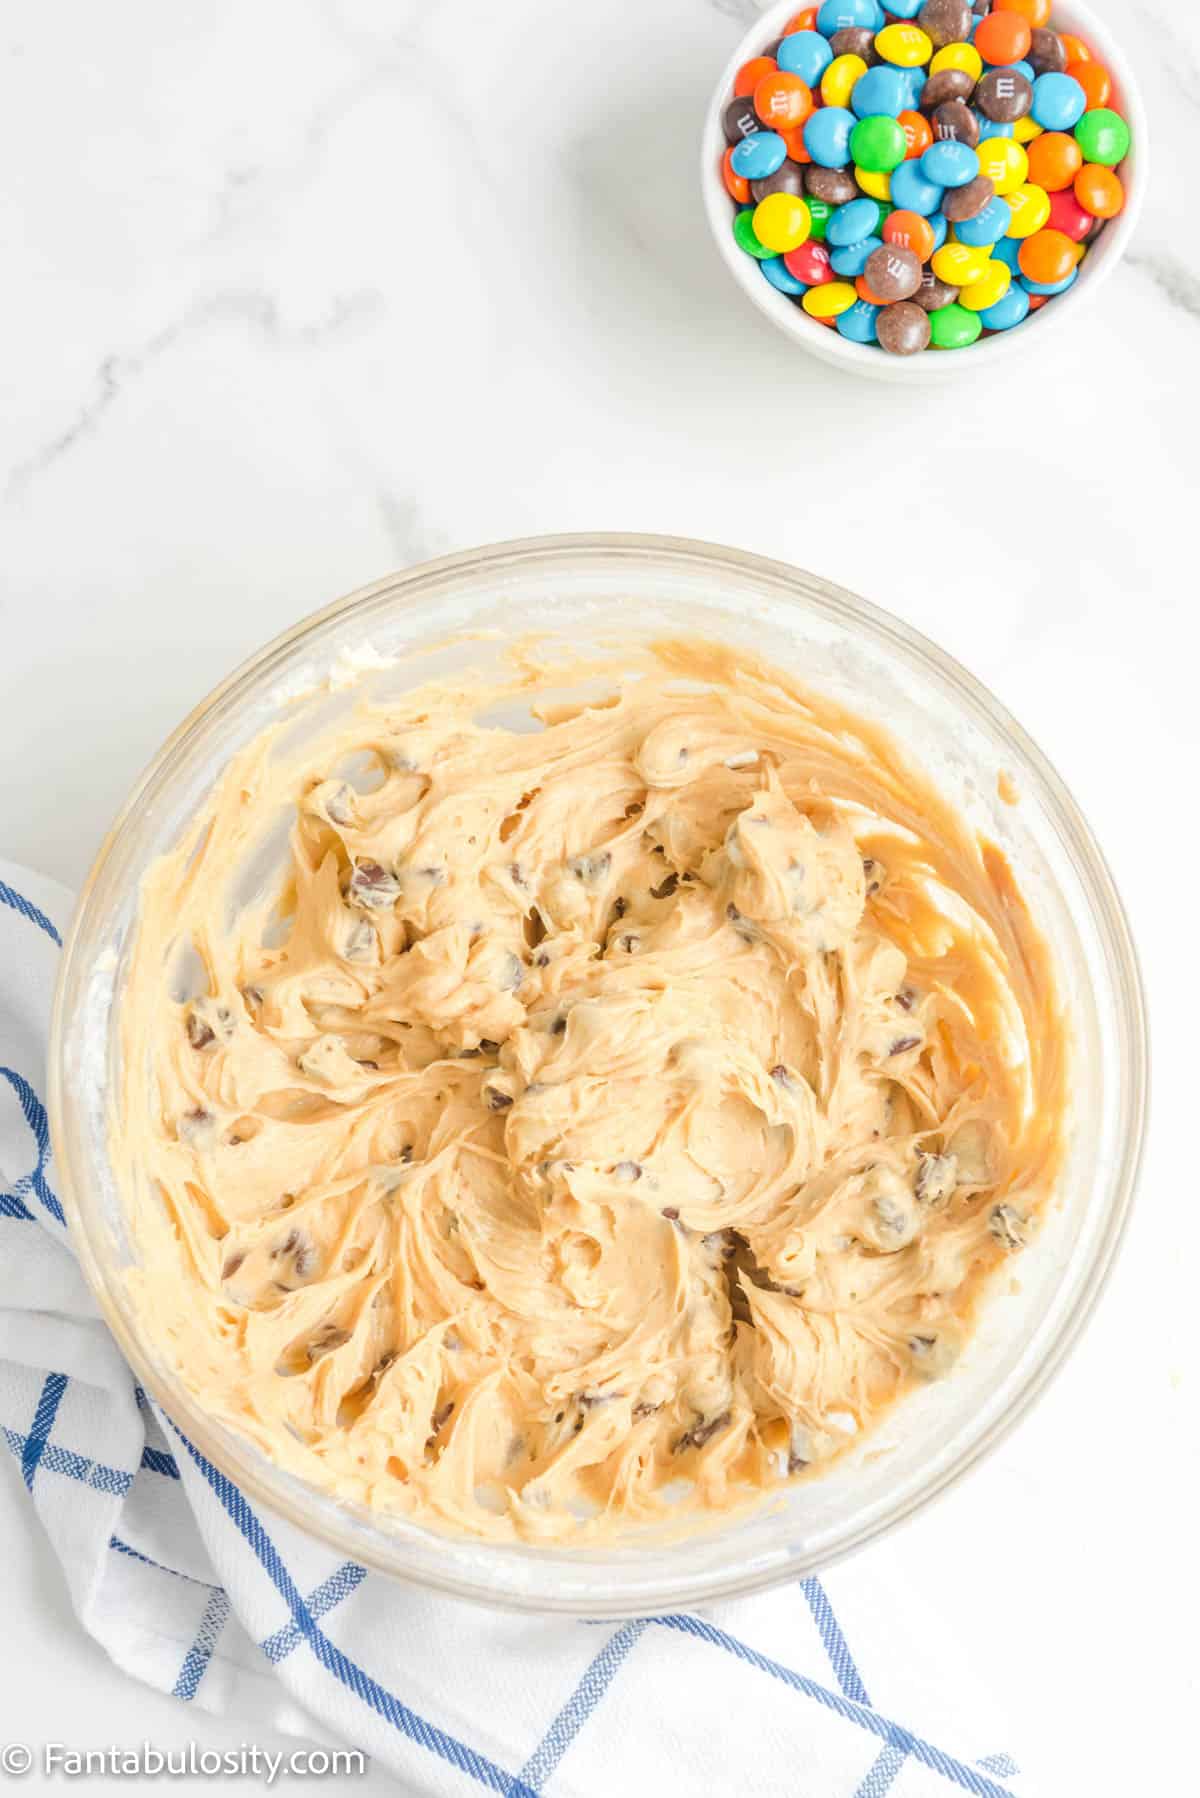
    A glass mixing bowl holds a fluffy caramel colored mixture of cream cheese, peanut butter, chocolate chips, brown sugar, vanilla and powdered sugar
    creamy cookie dough mixture
    A sweet cream cheese mixture made with peanut butter and chocolate chips is formed into a ball
    shape into a ball
    1. Next, wash your hands and wrap the dessert cheese ball tightly in plastic wrap.
    2. Chill the wrapped ball for 1 hour in the refrigerator.
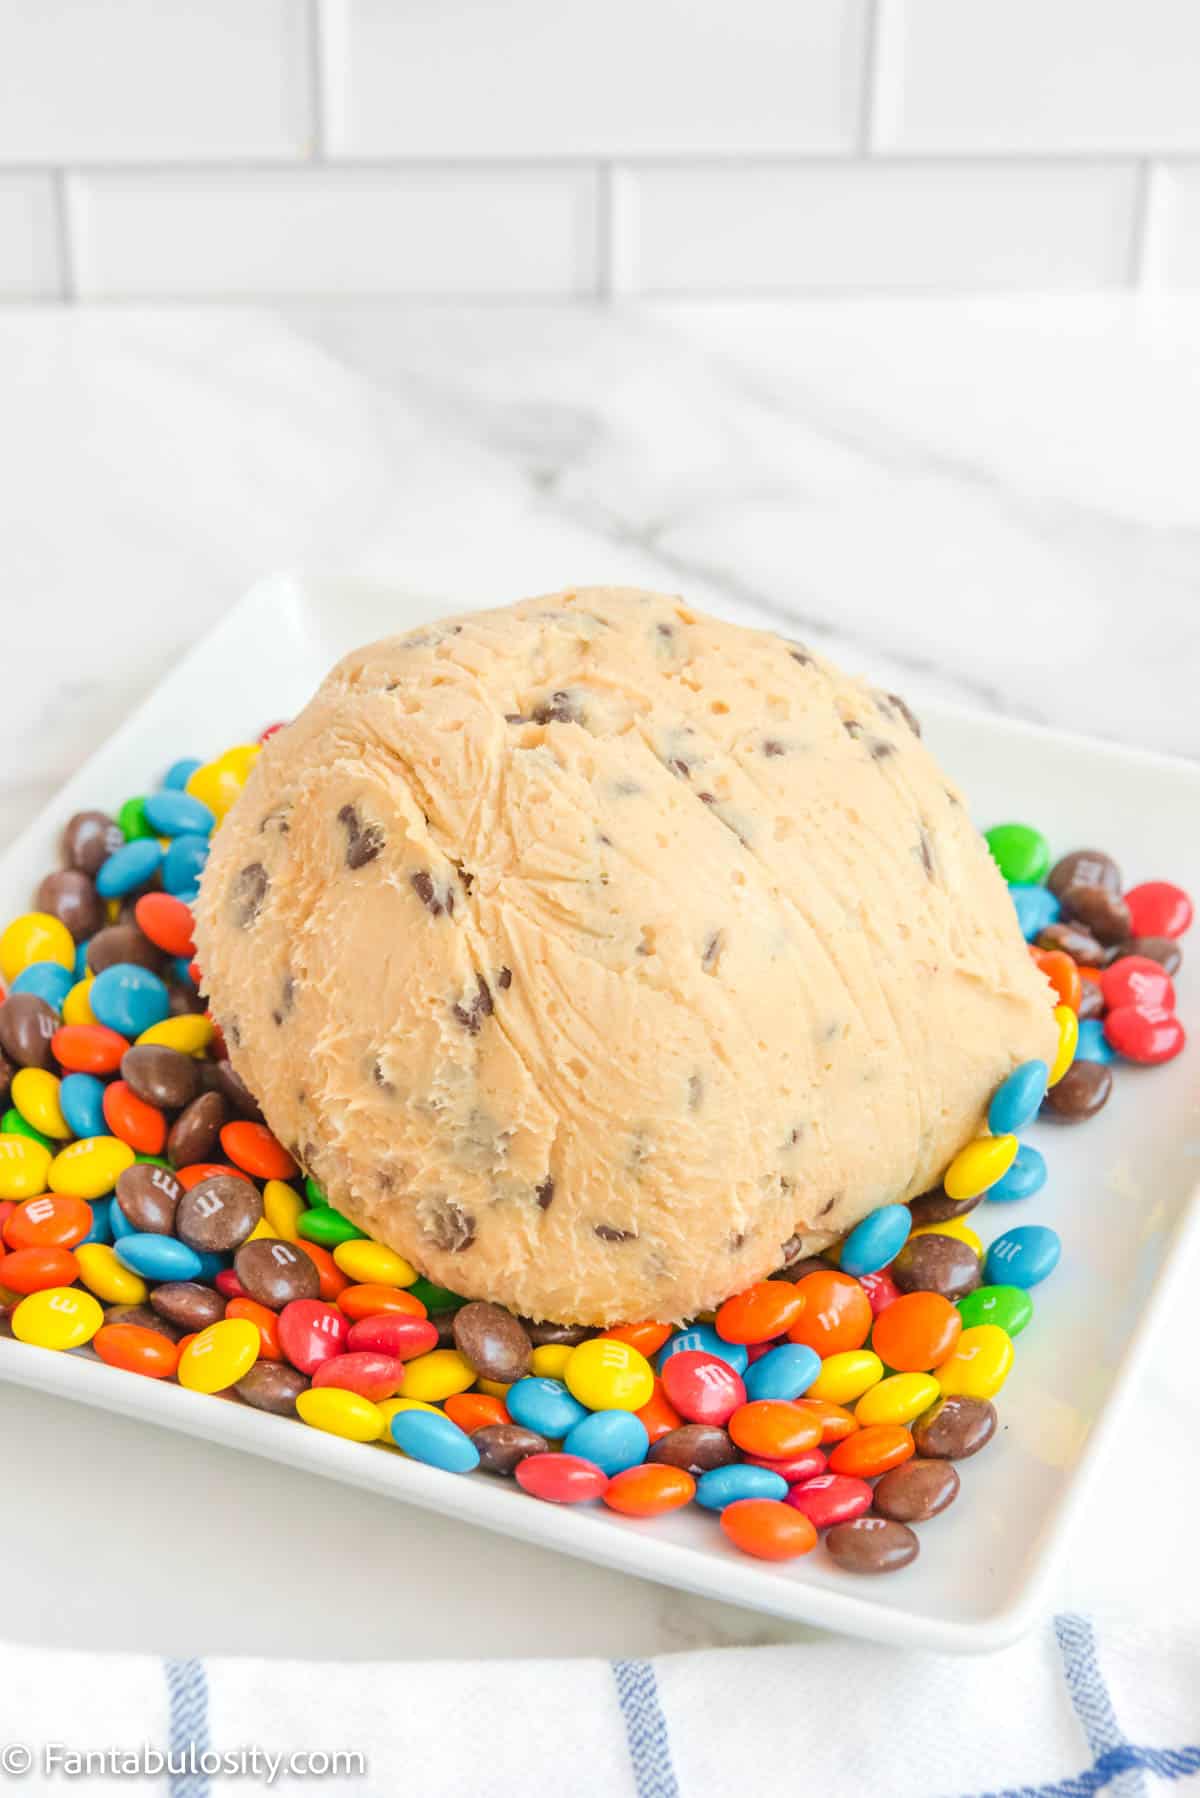
    3. Just before serving, spread the M&M’s on a plate or in a shallow dish. Unwrap the dessert cheese ball and roll it in the M&M’s to cover the surface. You can manually press M&M’s into any spots that still need to be covered.
    Sweet dessert cheese ball mixture has been formed into a ball and wrapped in plastic wrap
    wrap tightly & chill
    A chilled dessert cheese ball is resting on a white plate of colorful M&Ms
    roll in M&Ms
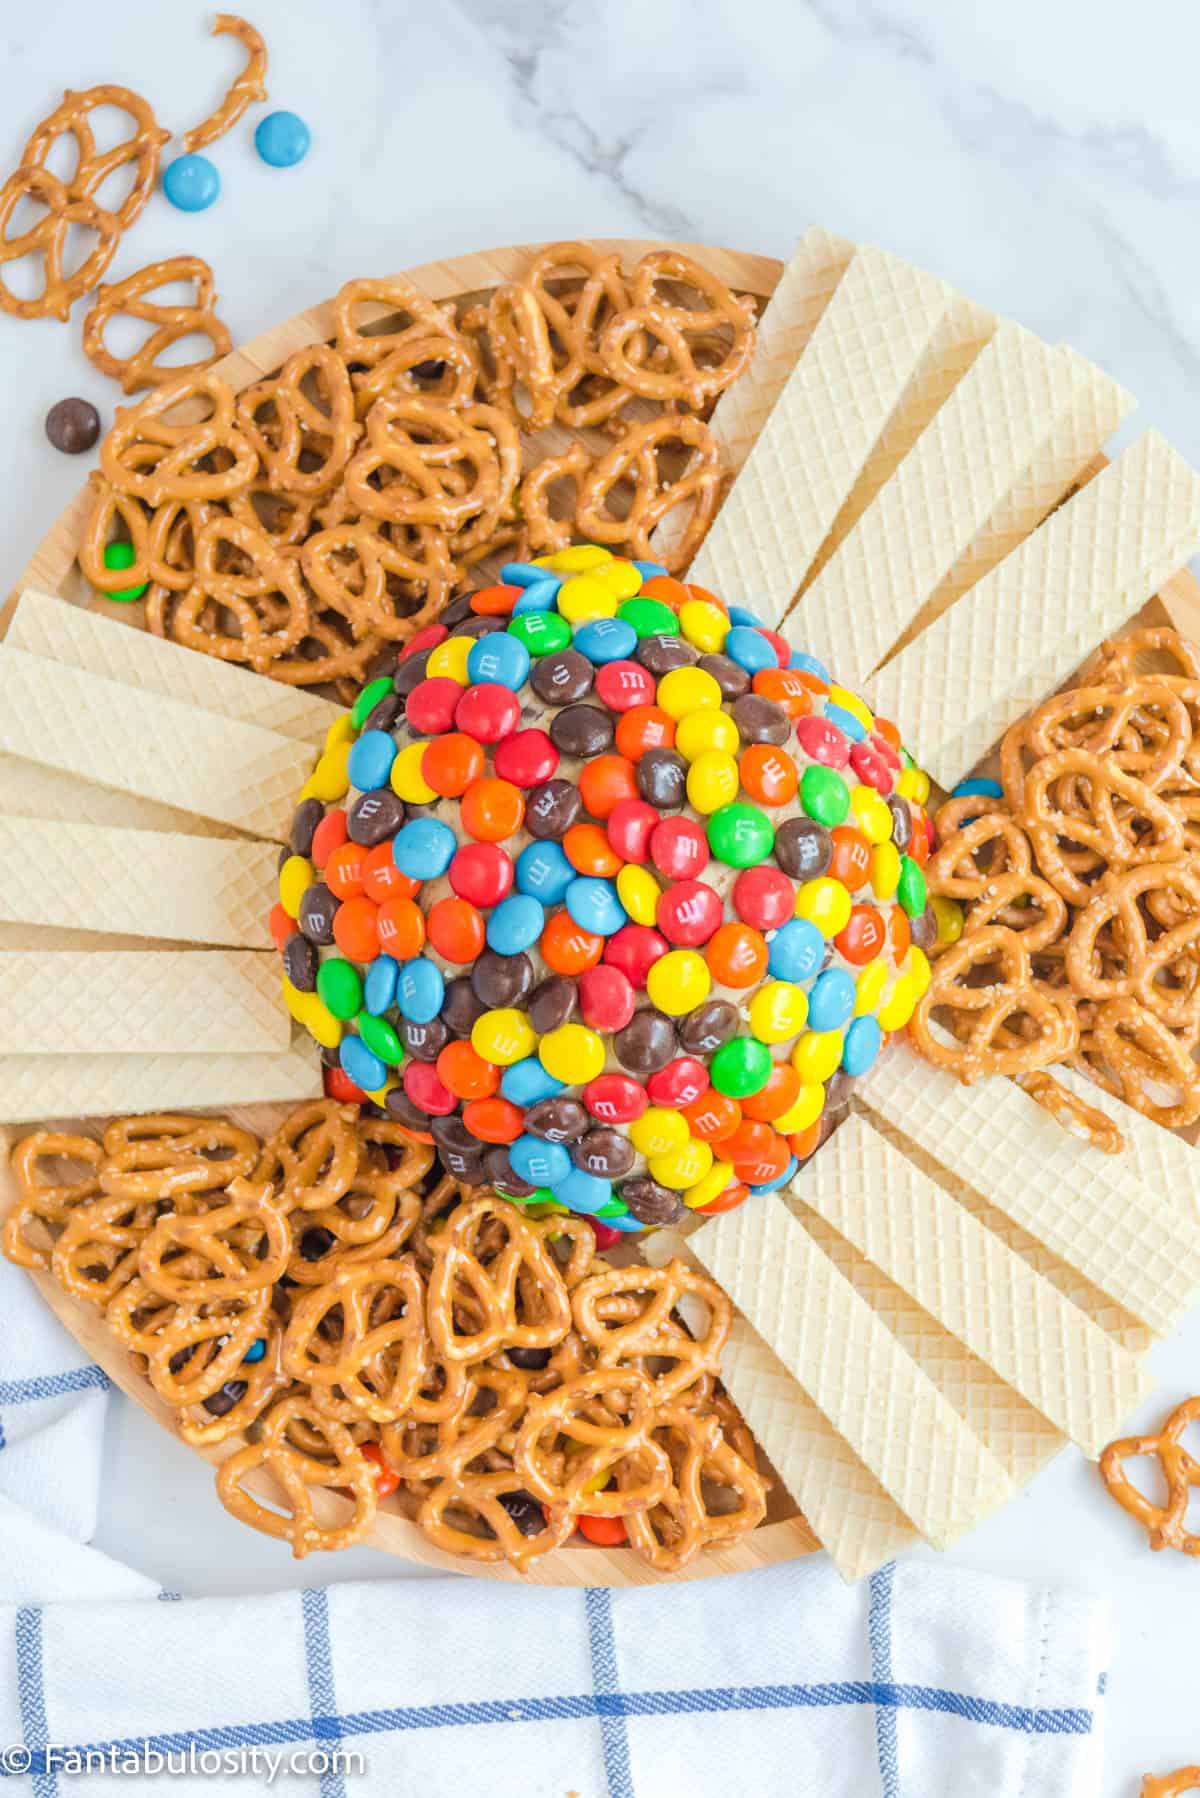
    1. Finally, place the dessert cheese ball in the center of a serving tray and add your favorite cookies, crackers, pretzels or fruit for dipping.
    Birdseye photo of a dessert cheese ball covered in colorful M&Ms plated with pretzels and vanilla sugar wafer cookies
    Easy cheese ball recipe

    Substitutions & Variations

    This is such an easy dessert cheeseball recipe that you’ll make it again and again. Here are a few ways to adjust the recipe for your preferences and get creative!

    • We used full-fat cream cheese, but you can use lower fat cream cheese to save a few calories.
    • You can use crunchy peanut butter instead of the creamy peanut butter we used for this sweet cheese ball.
    • Switch up the chips! Instead of regular semi-sweet chocolate chips, you can add the same amount of mini chocolate chips, white chocolate chips, peanut butter chips or butterscotch chips.
    • For additional texture and flavor, add ⅓ cup-½ cup of chopped pecans, chopped honey roasted peanuts, graham cracker crumbs (trust me!) or toffee bits to the cream cheese mixture.
    • We served this easy dessert with pretzels and sugar wafer cookies. Try serving it with different dippers like vanilla wafers, graham crackers, chocolate graham crackers, chocolate chip cookies, Ritz crackers, Teddy grahams, apple slices or strawberry halves.
    • To make this a no bake Christmas dessert, use seasonal red and green colored M&M’s! For Halloween, look for spooky orange and black M&M’s. Pastel Easter or Spring M&M’s are perfect for springtime sweet cheese balls. You can even order special colors of M&M’s online to match the colors or theme of any event you are hosting.
    • Try rolling this dessert cheese ball in mini M&M’s, dark chocolate M&Ms, the caramel flavored M&M’s or even peanut butter M&M’s.
    • Finally, you can roll the cream cheese mixture into mini sweet cheese balls for a bite-sized version of this sweet treat. If you are making mini dessert cheese balls, then we would recommend using miniature chocolate chips in the filling and mini M&M’s for the coating.
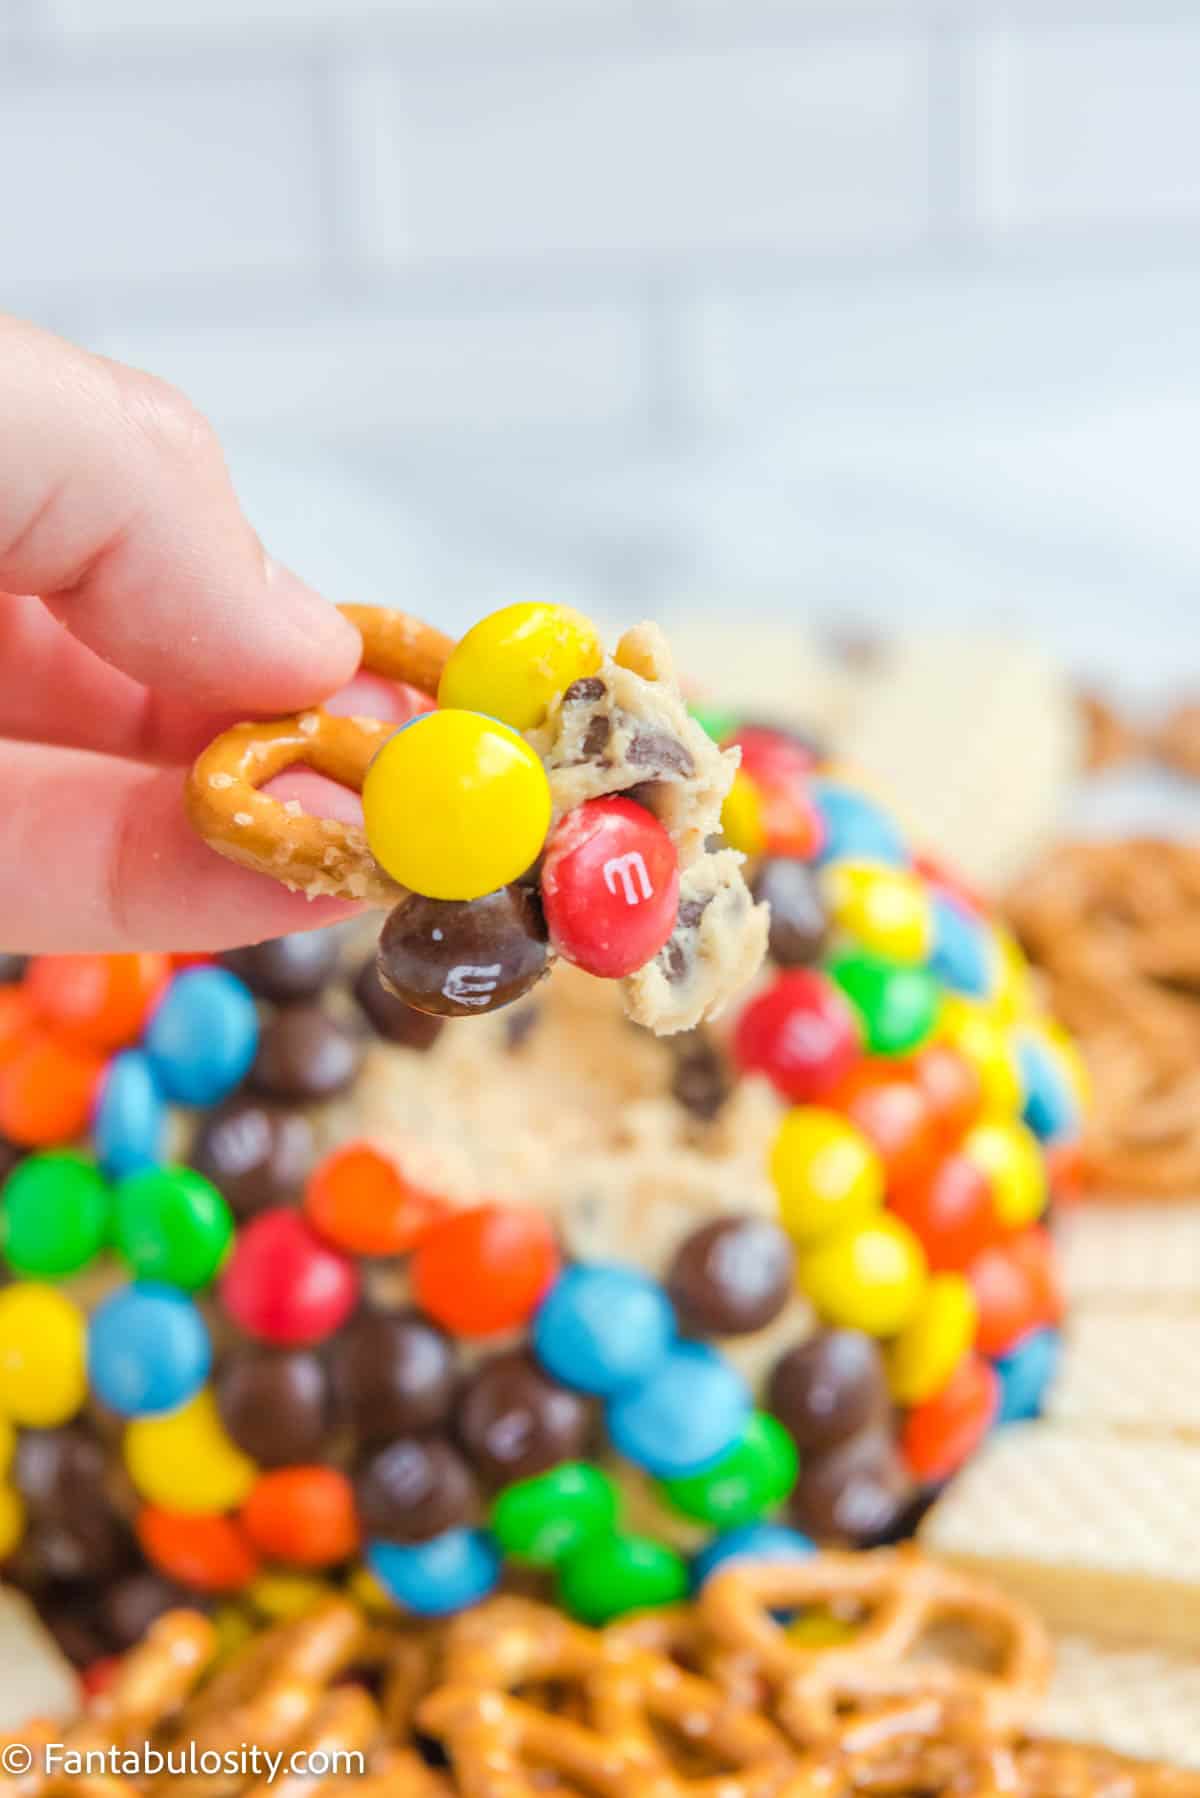
    A hand is holding a pretzel twist that has been dipped into a sweet cream cheese peanut butter chocolate chip mixture
    Dessert cheese ball

    What to Serve with this Dessert Ball

    So many things can go great with a dessert cheeseball like this. Here are our favorites:

    • graham crackers
    • Teddy Graham’s (especially these Chocolate covered Teddy Grahams)
    • cookies
    • apples
    • vanilla wafers
    • Biscoff cookies (and then use the rest to make these delicious Biscoff truffles.)

    Storage

    Wrap any leftover chocolate chip dessert cheese ball in plastic wrap and then aluminum foil and refrigerate for up to 1 week. The colors from the M&M’s may run a bit from the condensation, but it will still taste delicious.

    If you want to freeze this M&M cheese ball, I recommend wrapping the uncoated dessert ball in plastic wrap, then aluminum foil, and popping it in the freezer for up to 4 weeks. To serve, thaw overnight in the refrigerator and then roll it in the M&M’s.

    A close up photo of a dessert cheese ball covered in colorful M&Ms and served with pretzels and cookies for dipping
    Sweet cream cheese dessert

    Related Recipes

    Chocolate chip lovers, this no bake dessert dip called Booty Dip will definitely satisfy that sweet tooth! And for my cheesecake fans, our Cheesecake Stuffed Strawberries are the no bake treats for you! Don’t worry peanut butter people, this no bake Peanut Butter Pie will knock your peanut butter loving socks off!

    Did you make this? I’d be so grateful if you left a “star” rating below to let me know what you thought! Then, the next time you need a quick and easy recipe, come back to Fantabulosity to browse all of my easy recipes!

    Recipe

    A sweet cheeseball that has bee rolled in colorful M&M's is centered with pretzels and sugar wafer cookies waiting for dipping
    Print Pin
    5 from 3 votes

    Chocolate Chip Cheese Ball with M&M’s

    Chocolate Chip Cheese Ball with M&M's: The inside of this easy, no bake dessert cheese ball tastes like peanut butter chocolate chip cookie dough and the outside is covered in colorful M&M's!
    Course Dessert
    Cuisine American
    Prep Time 10 minutes minutes
    Chilling Time 1 hour hour
    Total Time 1 hour hour 10 minutes minutes
    Servings 12 servings
    Calories 304kcal
    Author Jessica Burgess

    Ingredients

    • 8 ounces cream cheese softened at room temperture
    • 8 tablespoons unsalted butter softened at room temperture
    • ⅓ cup brown sugar
    • ⅓ cup creamy peanut butter
    • ½ teaspoon pure vanilla extract
    • 1 cup powdered sugar
    • ¾ cup semi-sweet chocolate chips
    • 1 cup M&Ms for coating

    Instructions

    • First, in a large bowl using a hand mixer, combine cream cheese and powdered sugar. Mix until well combined.
    • Add butter, vanilla and brown sugar and mix again.
    • Then, add the peanut butter and chocolate chips to the cream mixture and mix until well combined.
    • Now, lay a length of plastic wrap on your counter or a flat work surface. Using a rubber spatula, gather the cream cheese mixture from the bowl and form it into a ball using your hands. (This may get messy but continue to work it until it makes a solid shape.)
    • Next, wash your hands and wrap the dessert cheese ball tightly in plastic wrap.
    • Chill the wrapped ball for 1 hour in the refrigerator.
    • Just before serving, spread the M&M's on a plate or in a shallow dish. Unwrap the dessert cheese ball and roll it through the M&M's to cover the surface. You can manually press M&M's into any spots that still need covered.
    • Finally, place the dessert cheese ball in the center of a serving tray and add your favorite cookies, crackers, pretzels or fruit for dipping.

    Video

    Notes

    • You can make this ahead of time and chill this treat overnight. Before rolling it in the M&M’s, let the cheese ball sit for about 10 minutes before unwrapping it.
    • To store any leftovers, wrap the cheesecake ball in plastic wrap, then aluminum foil. Store it in the refrigerator for up to a week.
    • If you want to freeze this M&M cheese ball, I recommend wrapping the uncoated dessert ball in plastic wrap, then aluminum foil and popping it in the freezer for up to 4 weeks. To serve, thaw overnight in the refrigerator and then roll it in the M&M’s.

    Nutrition

    Serving: 1serving | Calories: 304kcal | Carbohydrates: 25g | Protein: 4g | Fat: 22g | Saturated Fat: 12g | Polyunsaturated Fat: 2g | Monounsaturated Fat: 7g | Trans Fat: 0.3g | Cholesterol: 40mg | Sodium: 94mg | Potassium: 140mg | Fiber: 1g | Sugar: 21g | Vitamin A: 495IU | Calcium: 36mg | Iron: 1mg

    Delicious Swedish Meatballs

    October 23, 2022

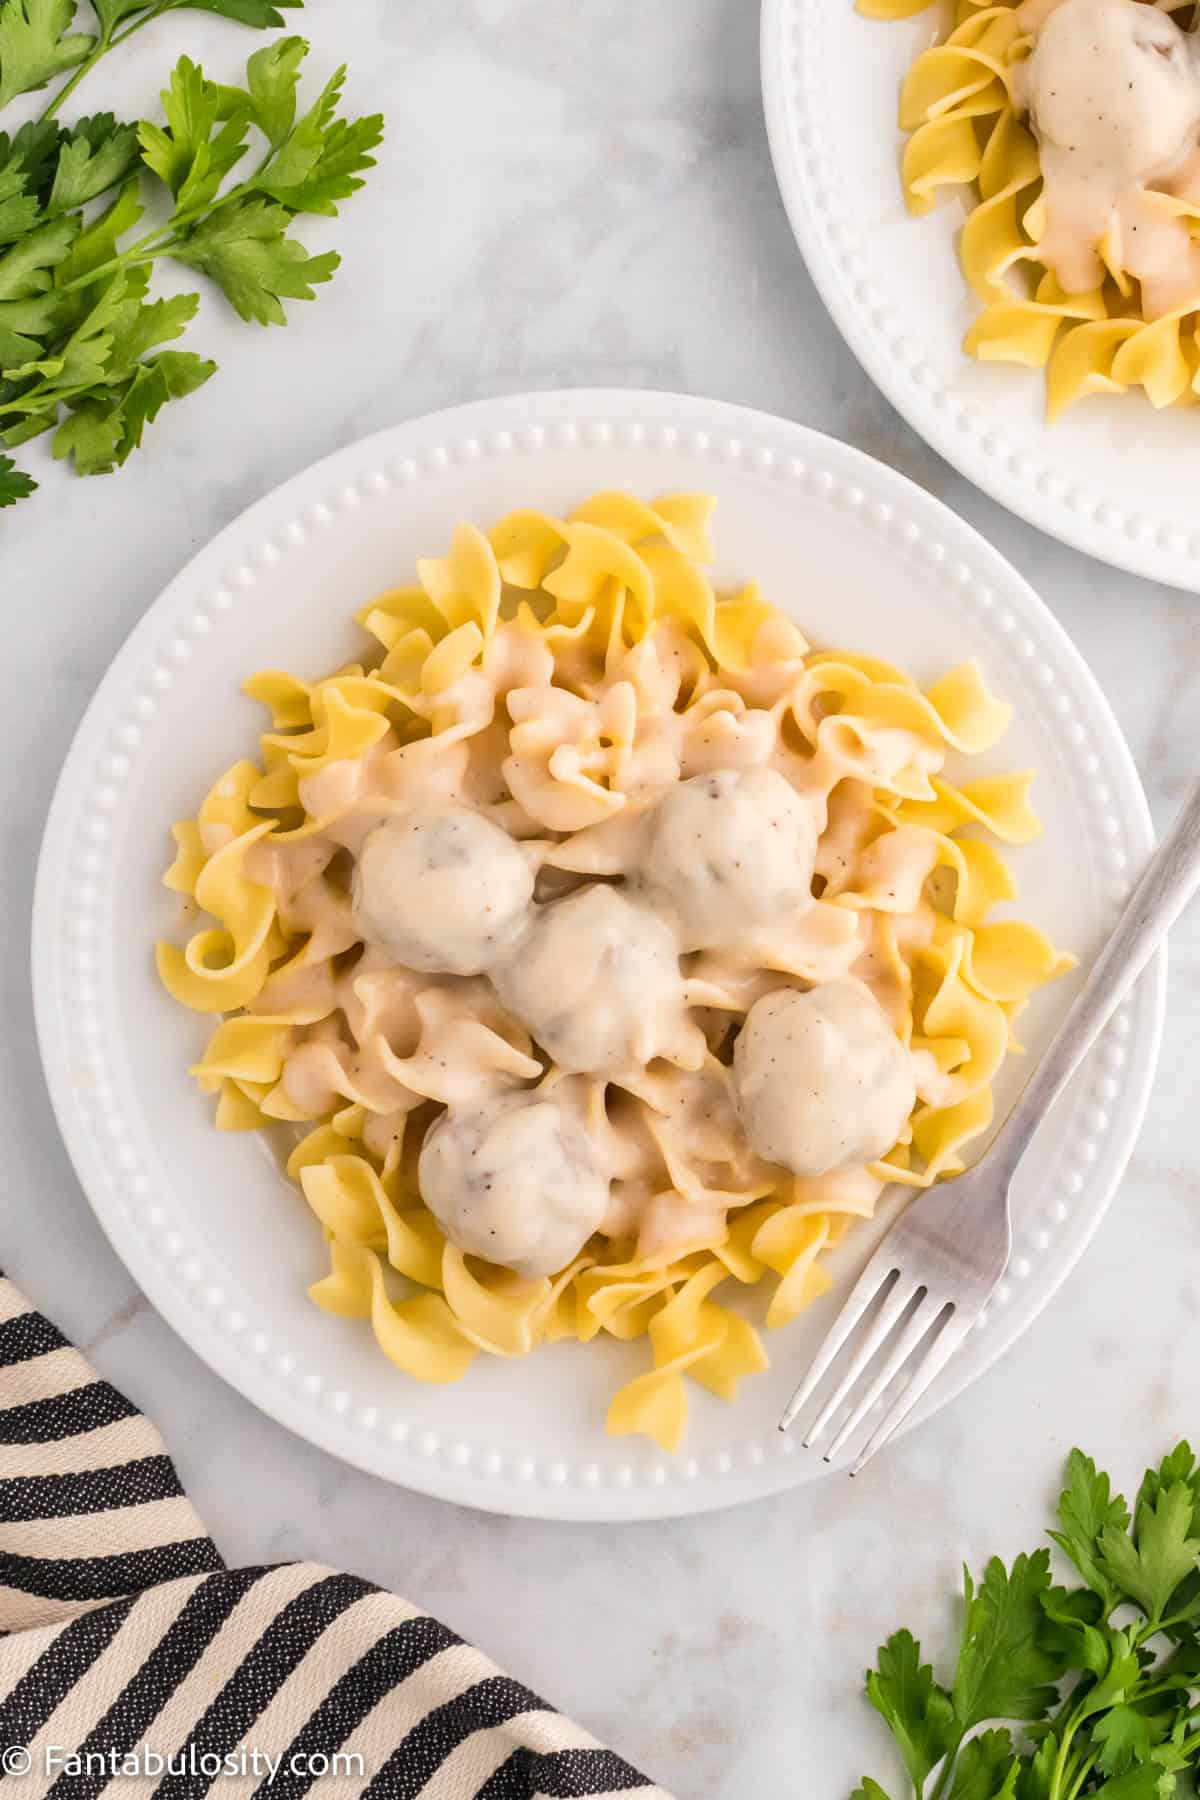
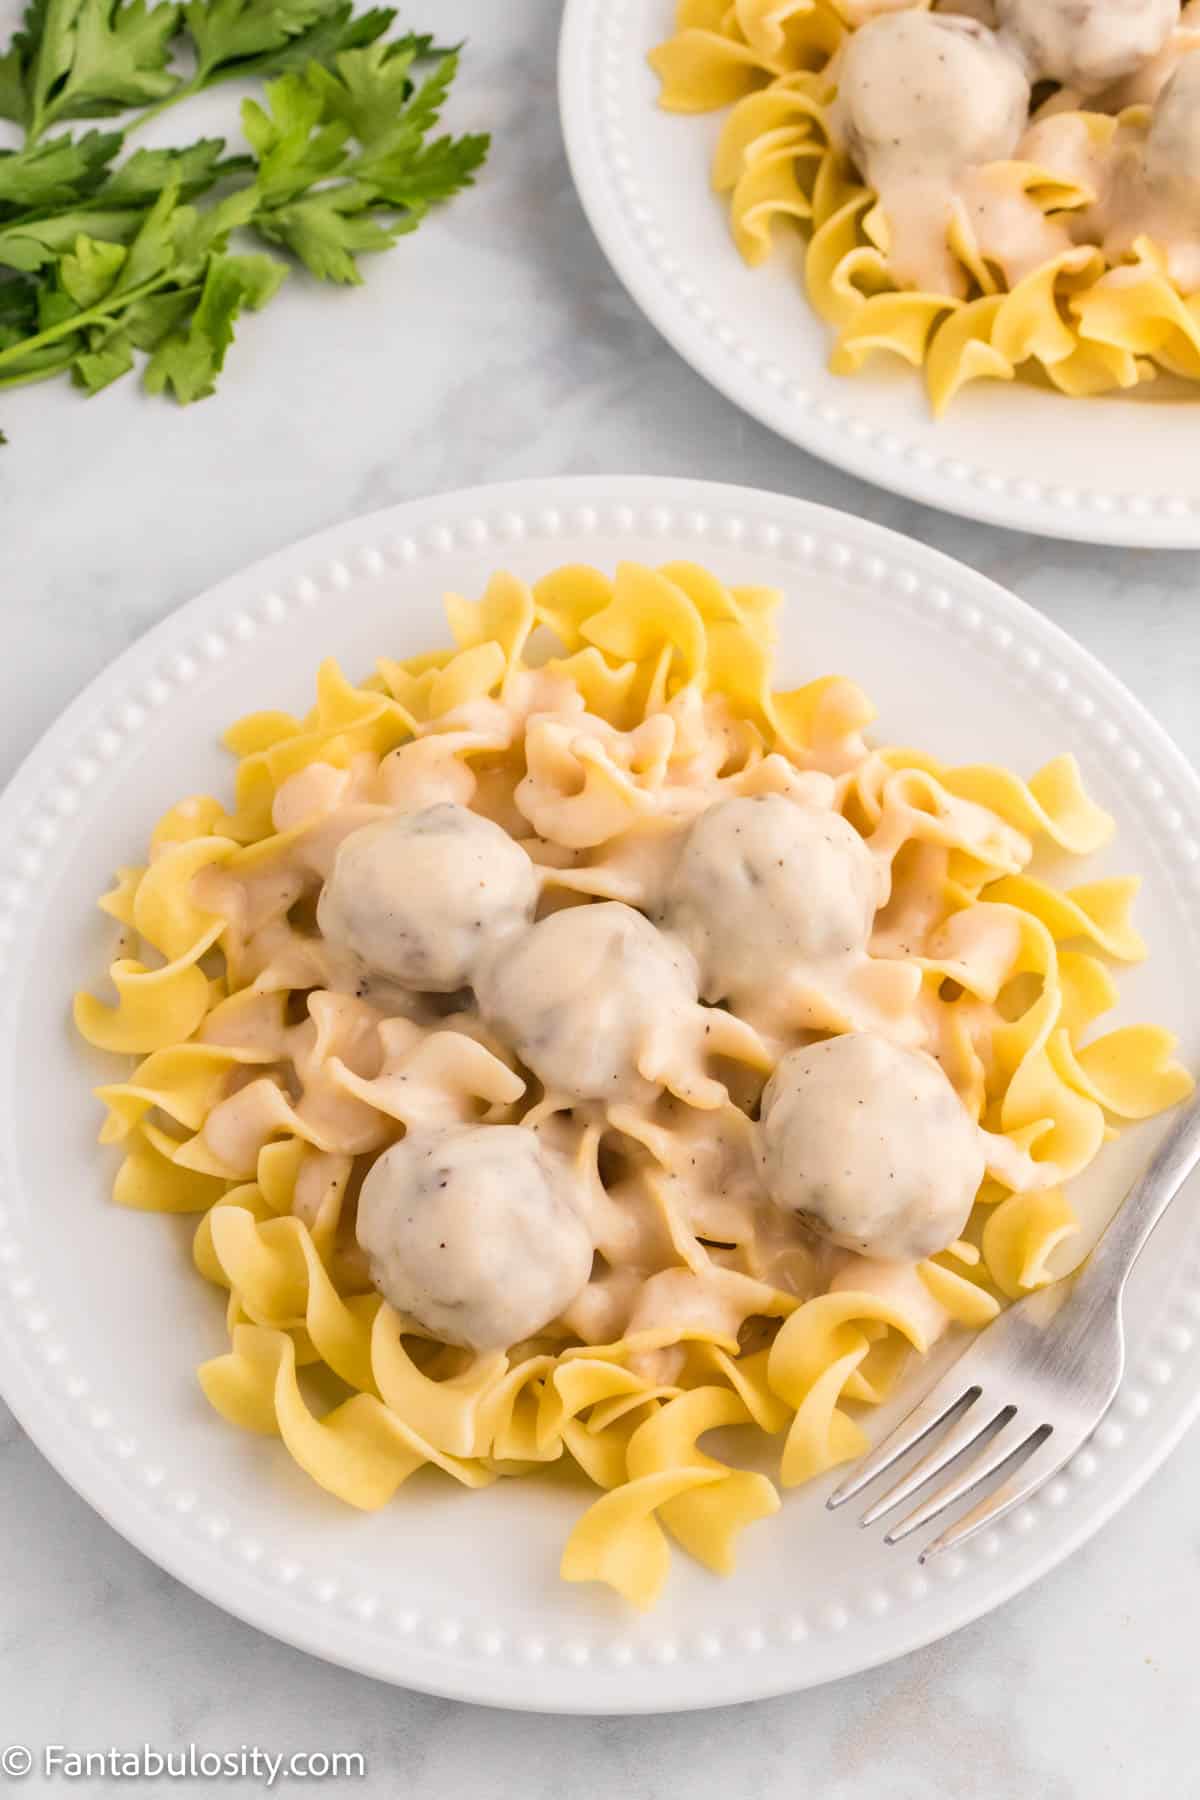
    Close up photo of a white plate full of cooked egg noodles topped with meatballs in a creamy sauce

    Delicious Swedish Meatballs: Tender homemade beef meatballs are tossed in a luscious cream sauce that can be served over noodles, rice or mashed potatoes in this classic comfort food recipe!

    A white plate holds cooked egg noodles topped with baked meatballs in a creamy sauce

    When I am planning main course for our family, meatballs are the star of some of my favorite recipes. These Easy Meatballs Stuffed Bell Peppers are one of our favorites for a quick week night meal. Our saucy Slow Cooker BBQ Meatballs make a great meatball sub on a toasted roll or by themselves. Now, I’m so excited to share this easy Swedish meatball recipe with you!

    Why You’ll Love this Recipe for Swedish Meatballs

    This is quick and cozy comfort food in under an hour! Who needs IKEA meatballs when you can make them at home?

    You only need one bowl, one baking dish and one skillet to make this recipe. Less dishes mean more time spent with your friends and family!

    If you need to feed a crowd, you can easily double or triple this recipe for Swedish meatballs.

    Serve them over mashed potatoes, egg noodles or rice for even more deliciousness, like we did with this chicken and gravy recipe!

    [feast_advanced_jump_to]

    Ingredients

    Recipes with simple ingredients are my favorite! All of the ingredients for this meatball recipe can be found at your local grocery store.

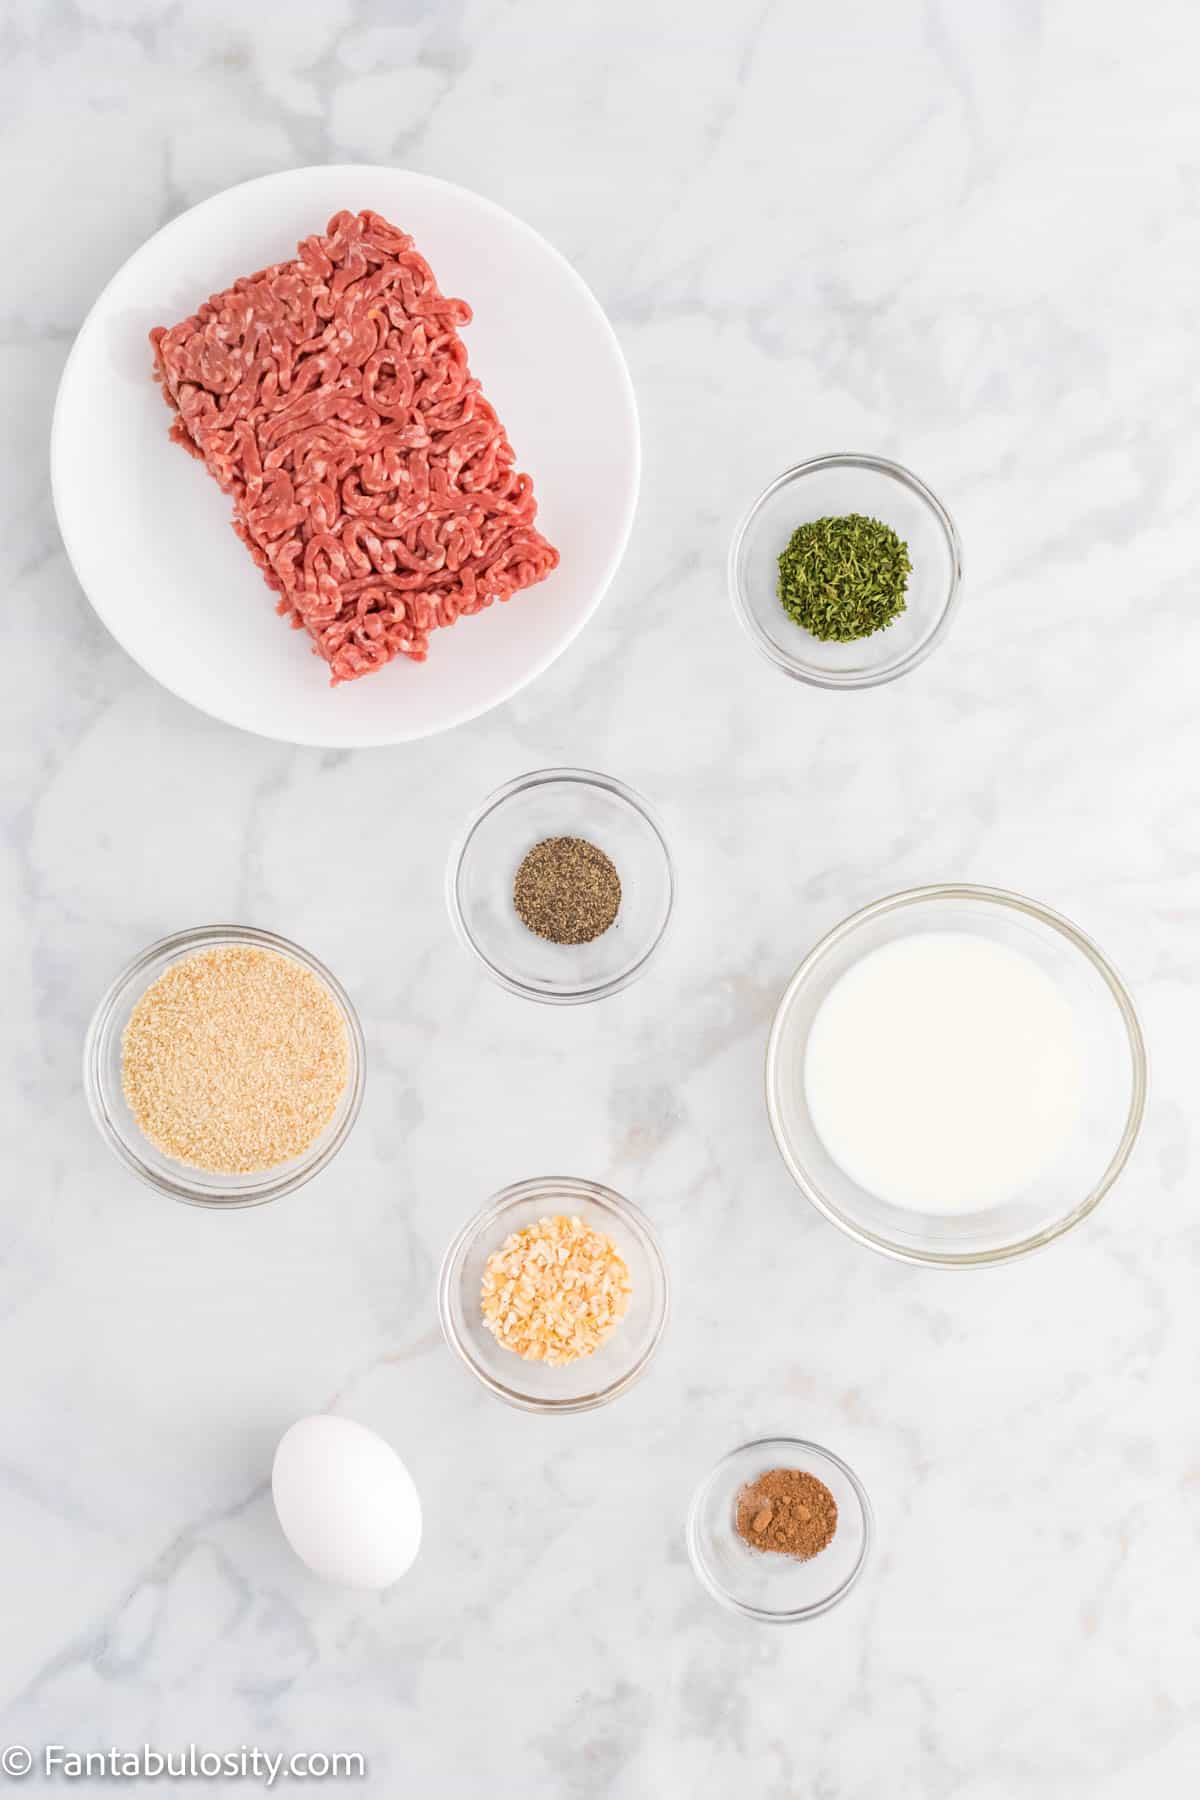
    Ground beef, an egg, bowls of spices and milk are displayed on a white marble background

    For the traditional Swedish meatballs:

    • ½ lb. ground beef
    • 1 large egg
    • 3 tablespoons of milk
    • ¼ cup plain bread crumbs
    • 1 tablespoon onion flakes
    • ½ tablespoon dried parsley
    • ¼ teaspoon black pepper
    • ⅛ teaspoon ground nutmeg
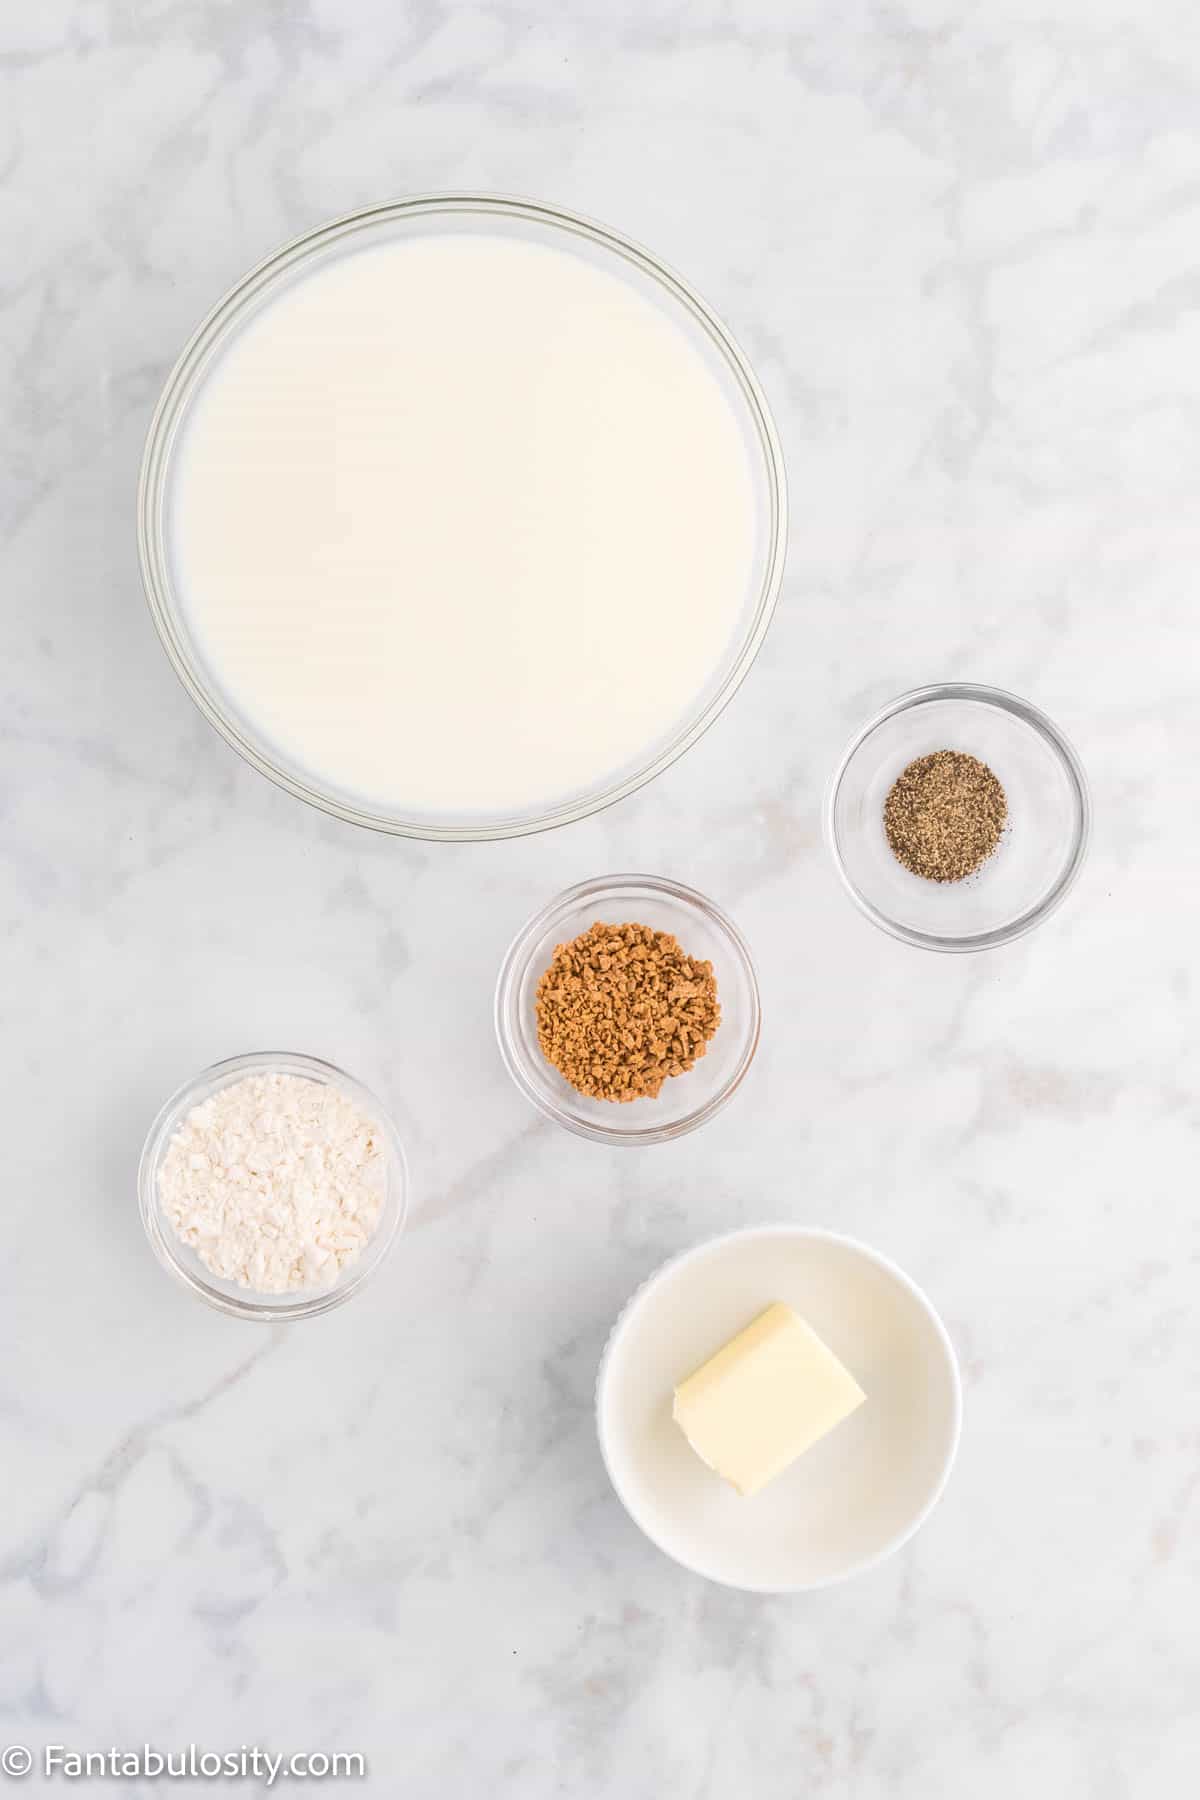
    Milk, butter, flour and bowls of spices are displayed on a white marble background

    For the Swedish meatball sauce:

    • 3 tablespoons salted butter
    • 3 tablespoons flour
    • 3 teaspoons beef bouillon powder (or 3 beef bouillon cubes)
    • ¼ teaspoon black pepper
    • 3 cups milk

    See the printable recipe card below for recipe instructions, nutrition information and detailed recipe notes.

    Instructions

    Is this is your first time making homemade meatballs, it is easier than you think. (Now, we love a good frozen meatball recipe too but when you have time to make homemade like these… it’s hard to beat.)

    We’ve got step-by-step instructions with photos so you can make these Swedish meatballs at home!

    To make the meatballs:

    1. First, preheat your oven to 400 degrees F. Prepare a 9×13 baking dish with non-stick cooking spray.
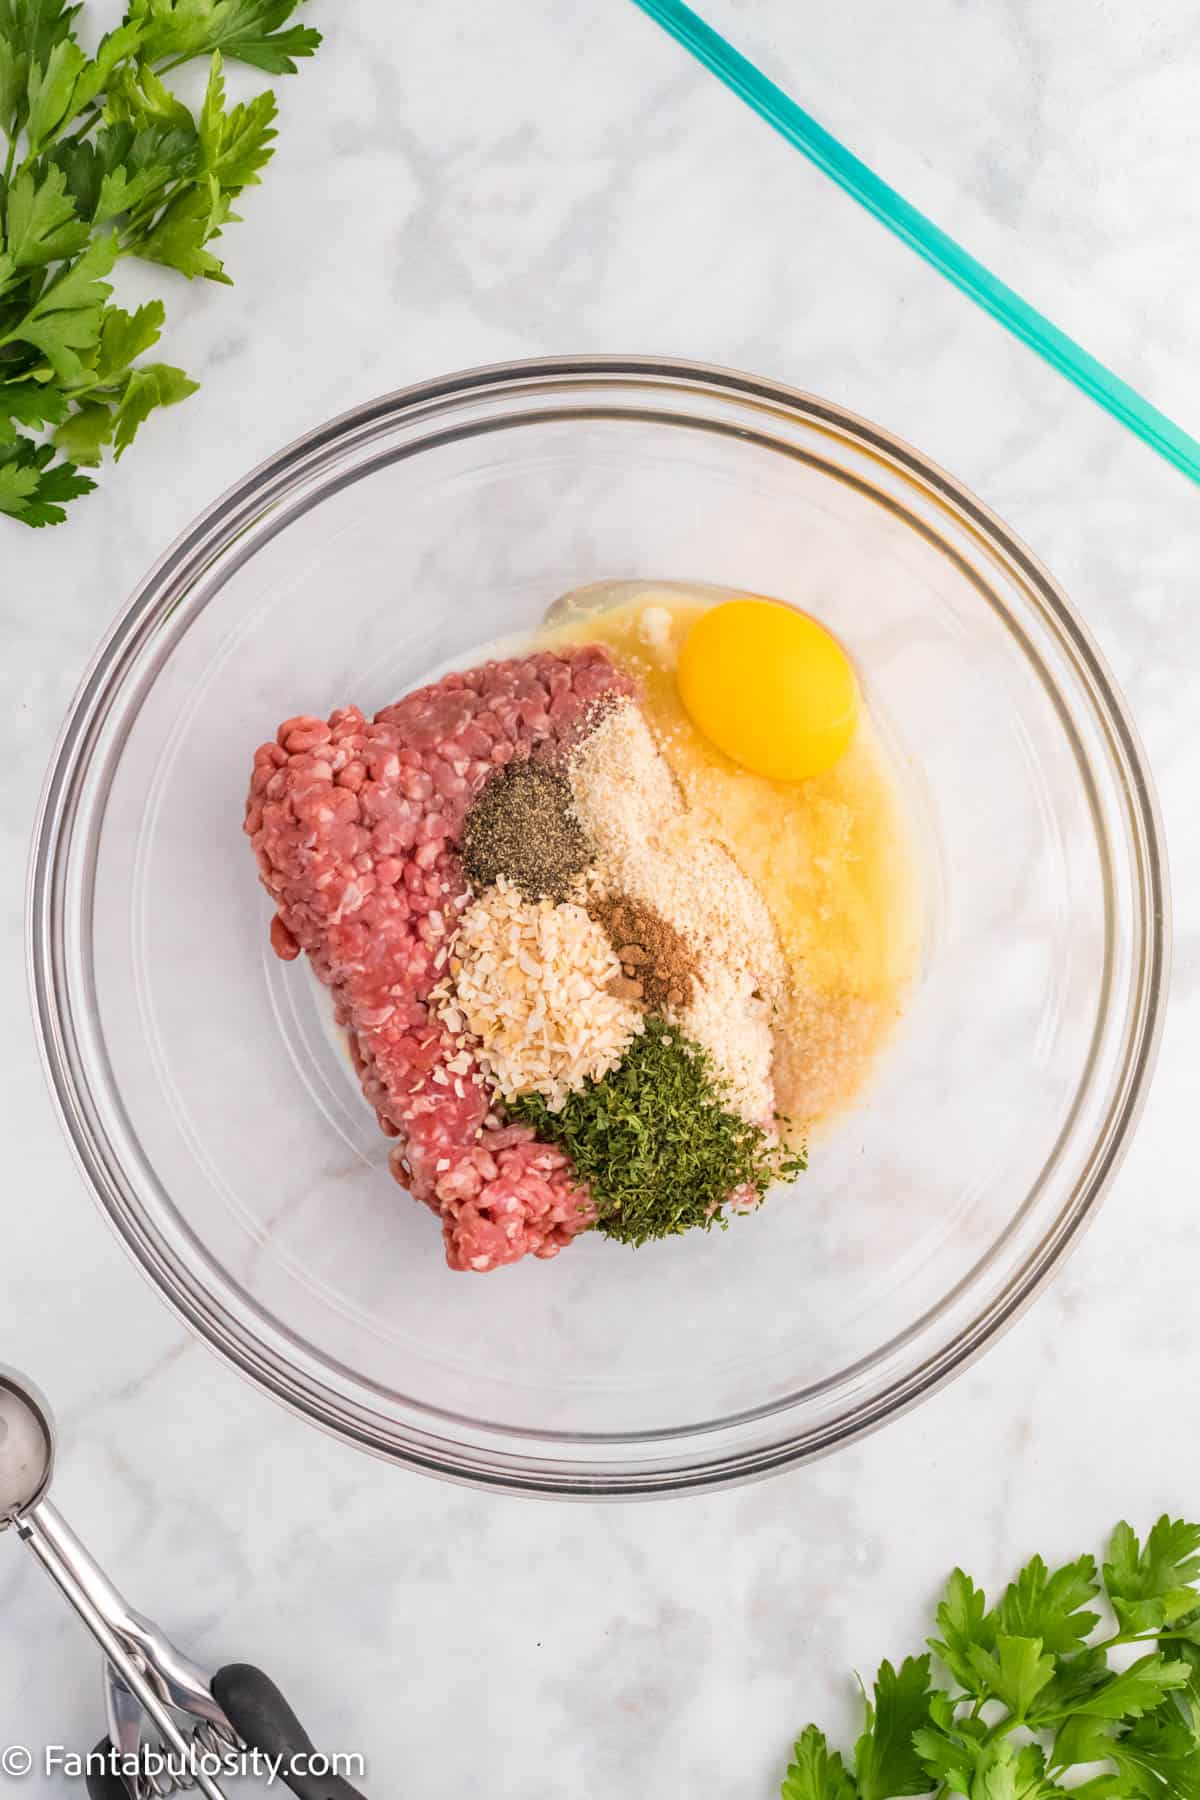
    2. In a large bowl, use your hands or a spoon to mix together the beef, egg, milk, bread crumbs, onion flakes, dried parsley, black pepper and nutmeg until it is well combined.
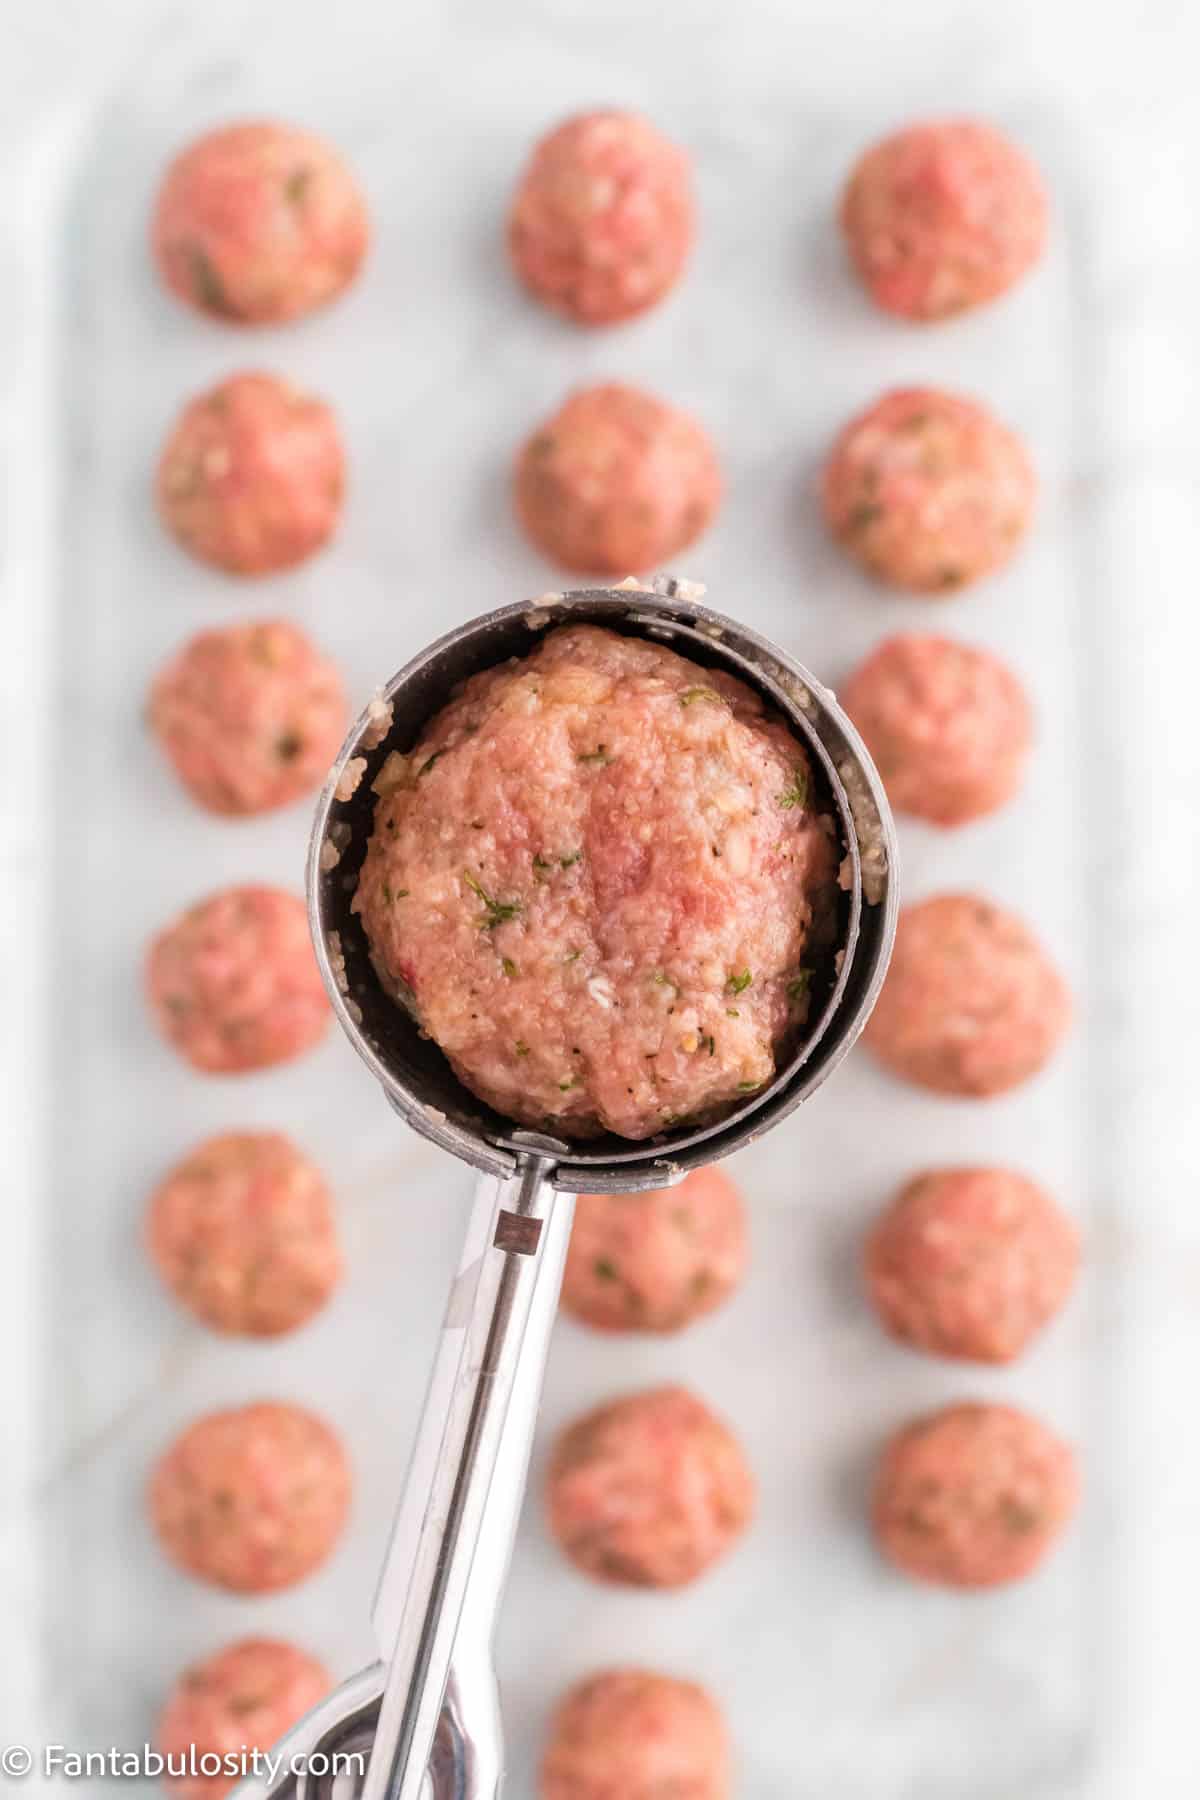
    3. Next, use a spoon or a cookie scoop to shape the mixture into small (1-inch) meatballs. This recipe makes between 20 and 22 meatballs.
    4. Now, place the uncooked meatballs in the prepared baking dish and bake for about 20 minutes or until the center of the meatballs is no longer pink. You can also brown the meatballs in a large skillet with a tablespoon of olive oil until cooked through. If you cook the meatballs in a skillet, make sure to rotate the meatballs so they brown on all side and stay relatively round. Once cooked, set the meatballs aside and keep them warm.
    A glass mixing bowl holds ground beef, bread crumbs, an egg and spices to mix to make meatballs
    Combine meatball ingredients
    A cookie scoop in the foreground holds a scoop of meatball mix and a tray full of shaped meatballs is shown in the background
    Shape meatballs

    For the cream sauce:

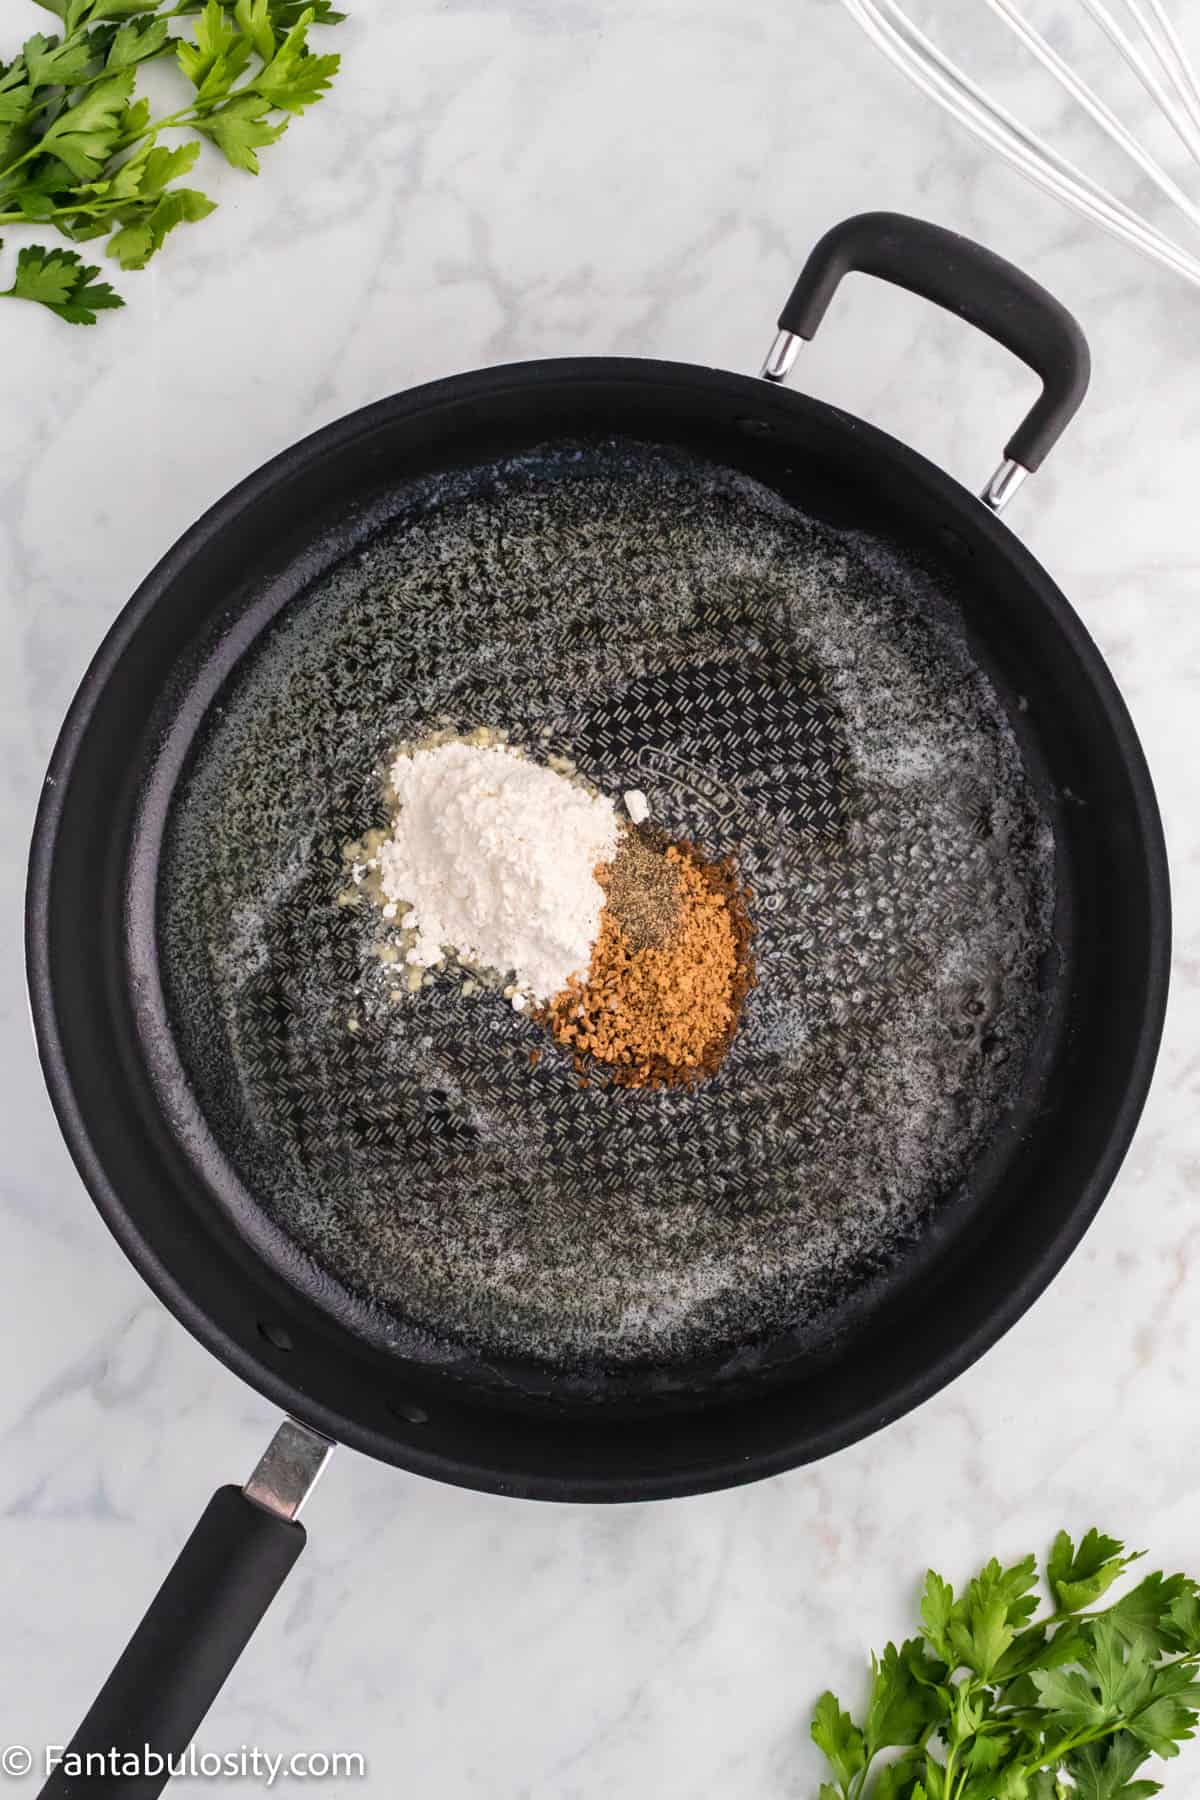
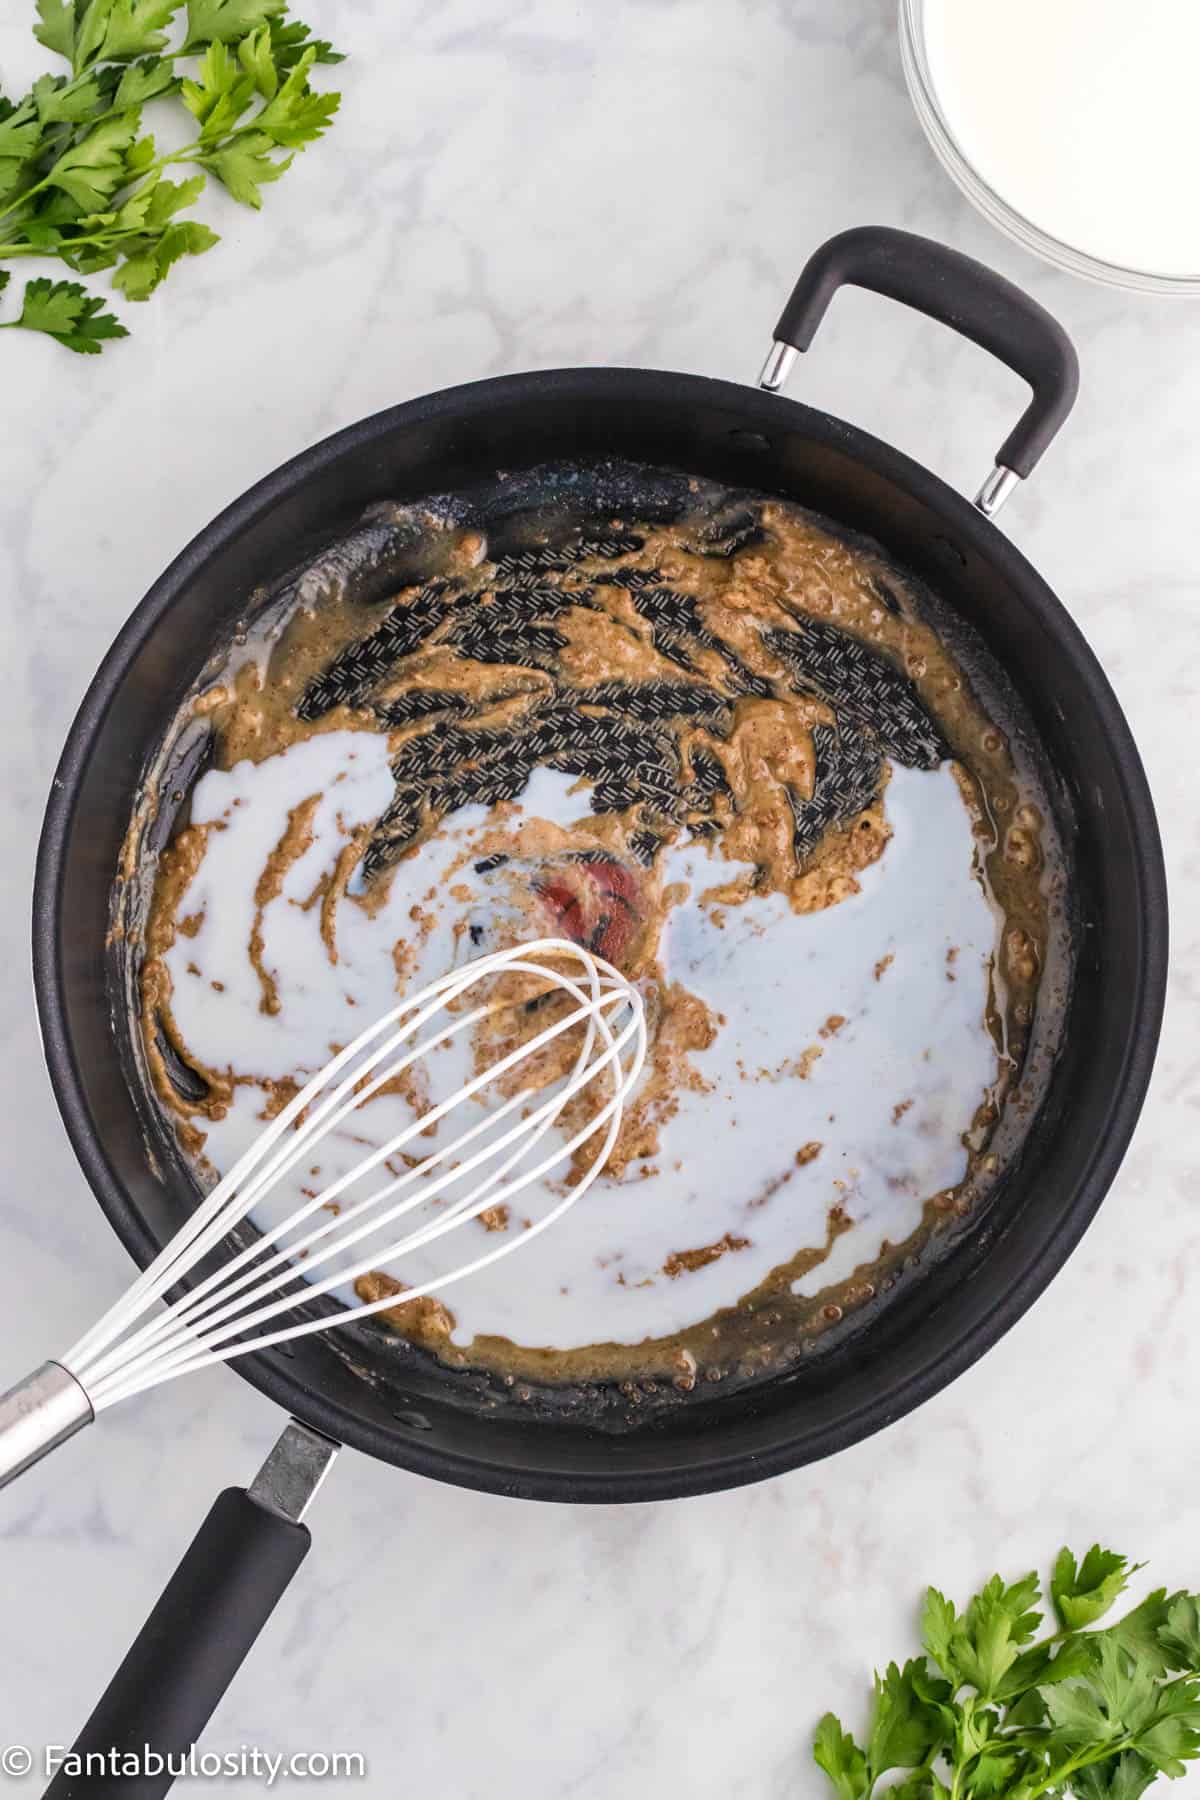
    1. In a large skillet with sides, melt the butter over medium-high heat. Remove the pan from the heat and add the flour, bouillon powder and black pepper to the melted butter. Whisk until well combined. Add the milk slowly, whisking into a sauce that is well blended and smooth.
    2. Return the pan to medium heat and cook, stirring constantly, until the cream sauce starts to boil. Boil for about 1 minute and continue stirring. Remove the pan from the heat.
    A large black skillet has melted butter, flour and nutmeg
    Melt butter and add flour and bouillon
    A whisk is poised above a large black skillet that holds the beginning of a cream sauce
    Whisk in milk slowly until smooth
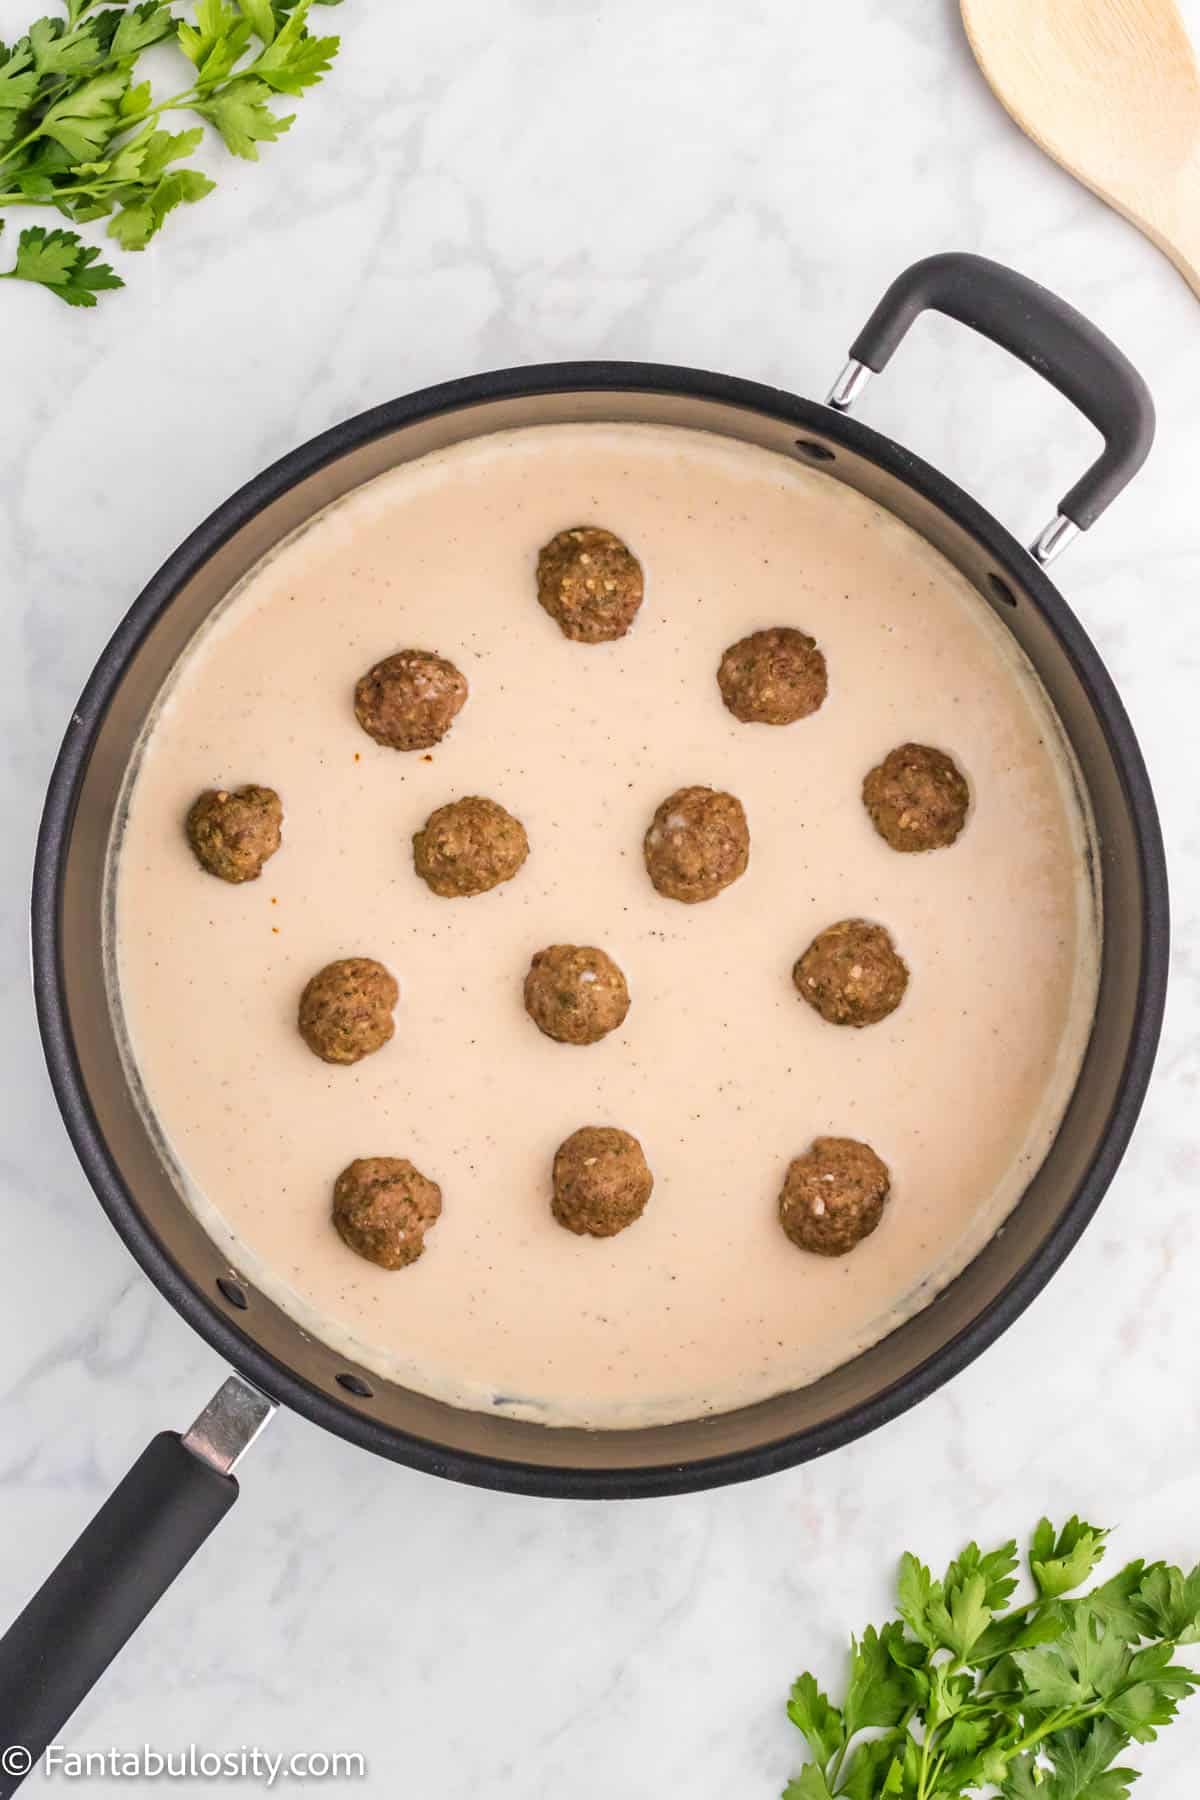
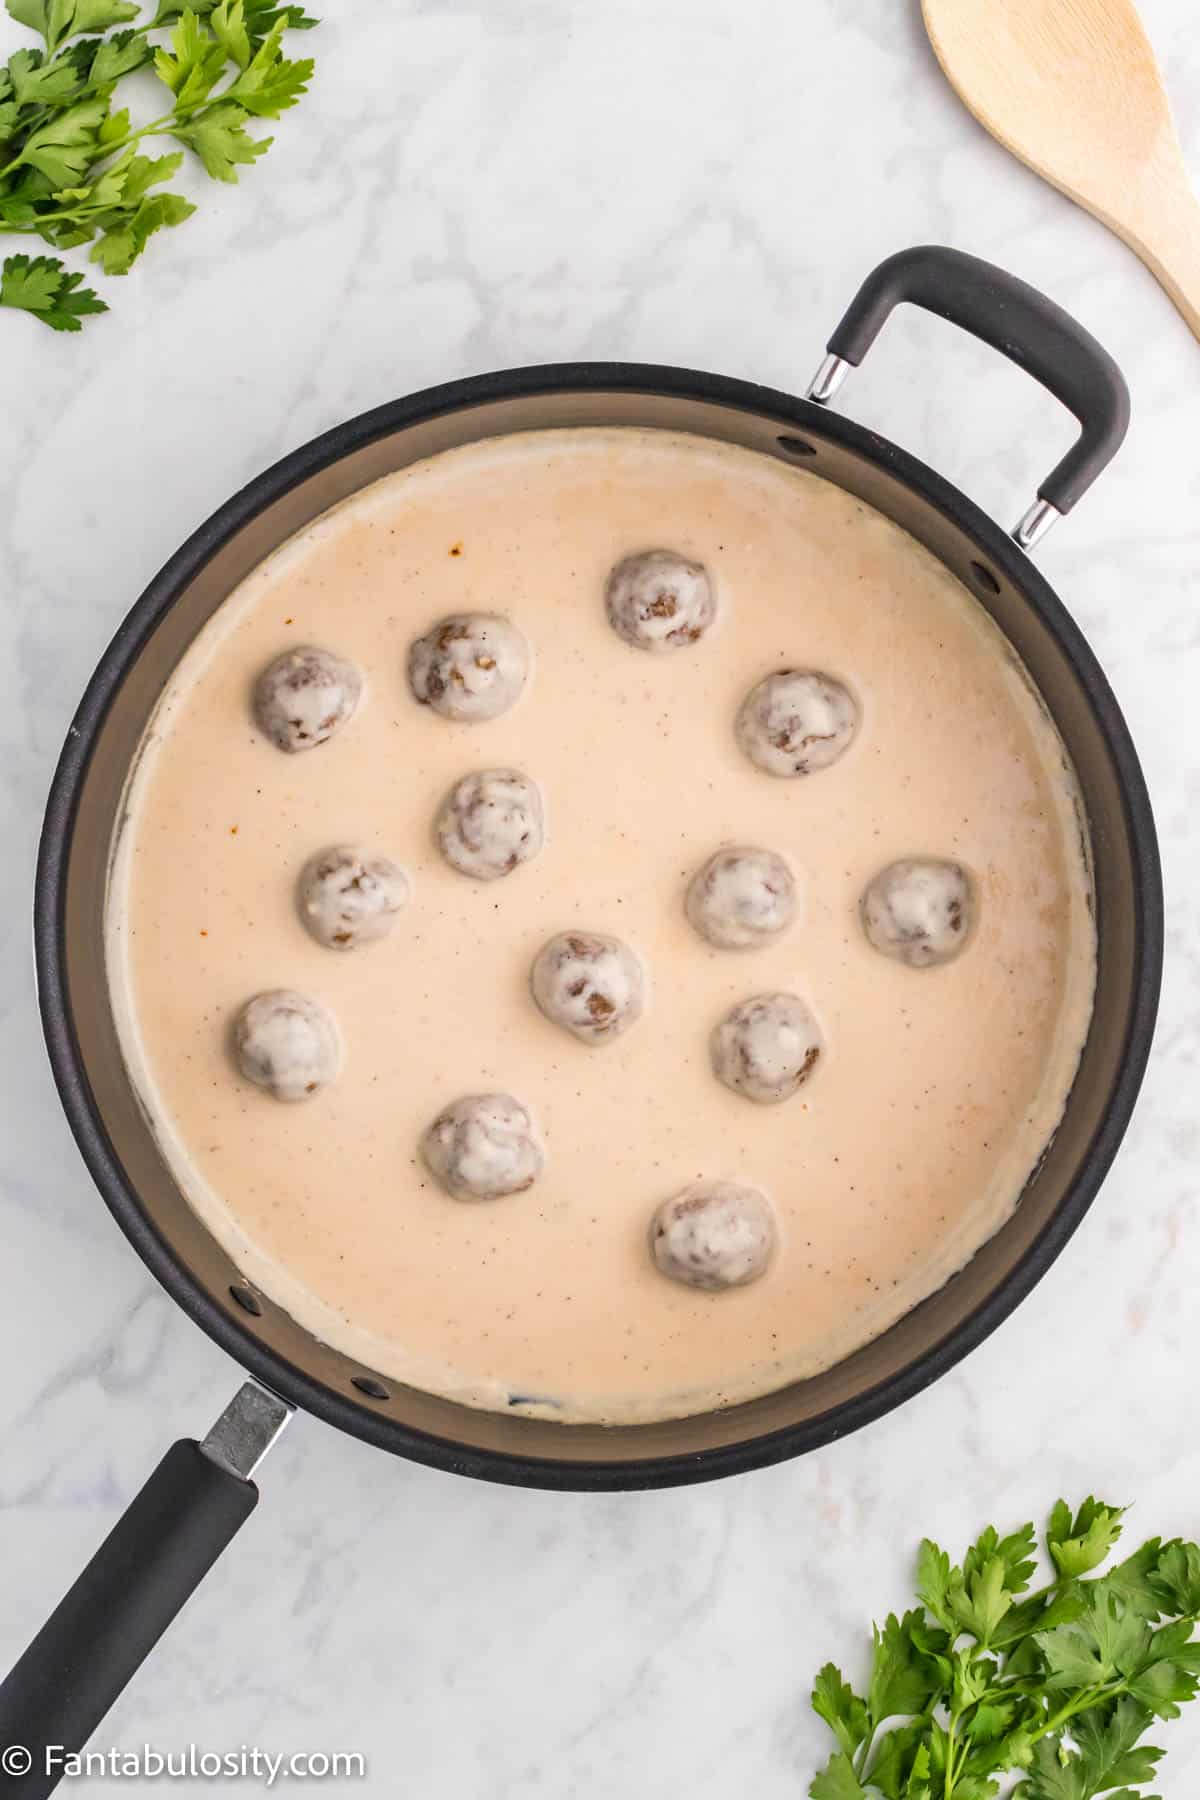
    1. Next, add the cooked meatballs to the pan of sauce. Stir to help completely coat the meatballs with the sauce.
    Cooked meatballs have been added to a large black skillet full of a rich creamy sauce
    Place cooked meatballs in the sauce
    Cooked meatballs have been coated in thick creamy sauce and are simmering in a large black skillet
    Creamy Swedish meatballs
    1. Finally spoon the Swedish meatballs and sauce over hot egg noodles, rice or mashed potatoes.

    Just look at that luscious, creamy sauce! The butter makes it shiny and smooth and the beef bouillon adds a depth of flavor that really complements the flavorful meatballs. You may never make meatballs any other way again!

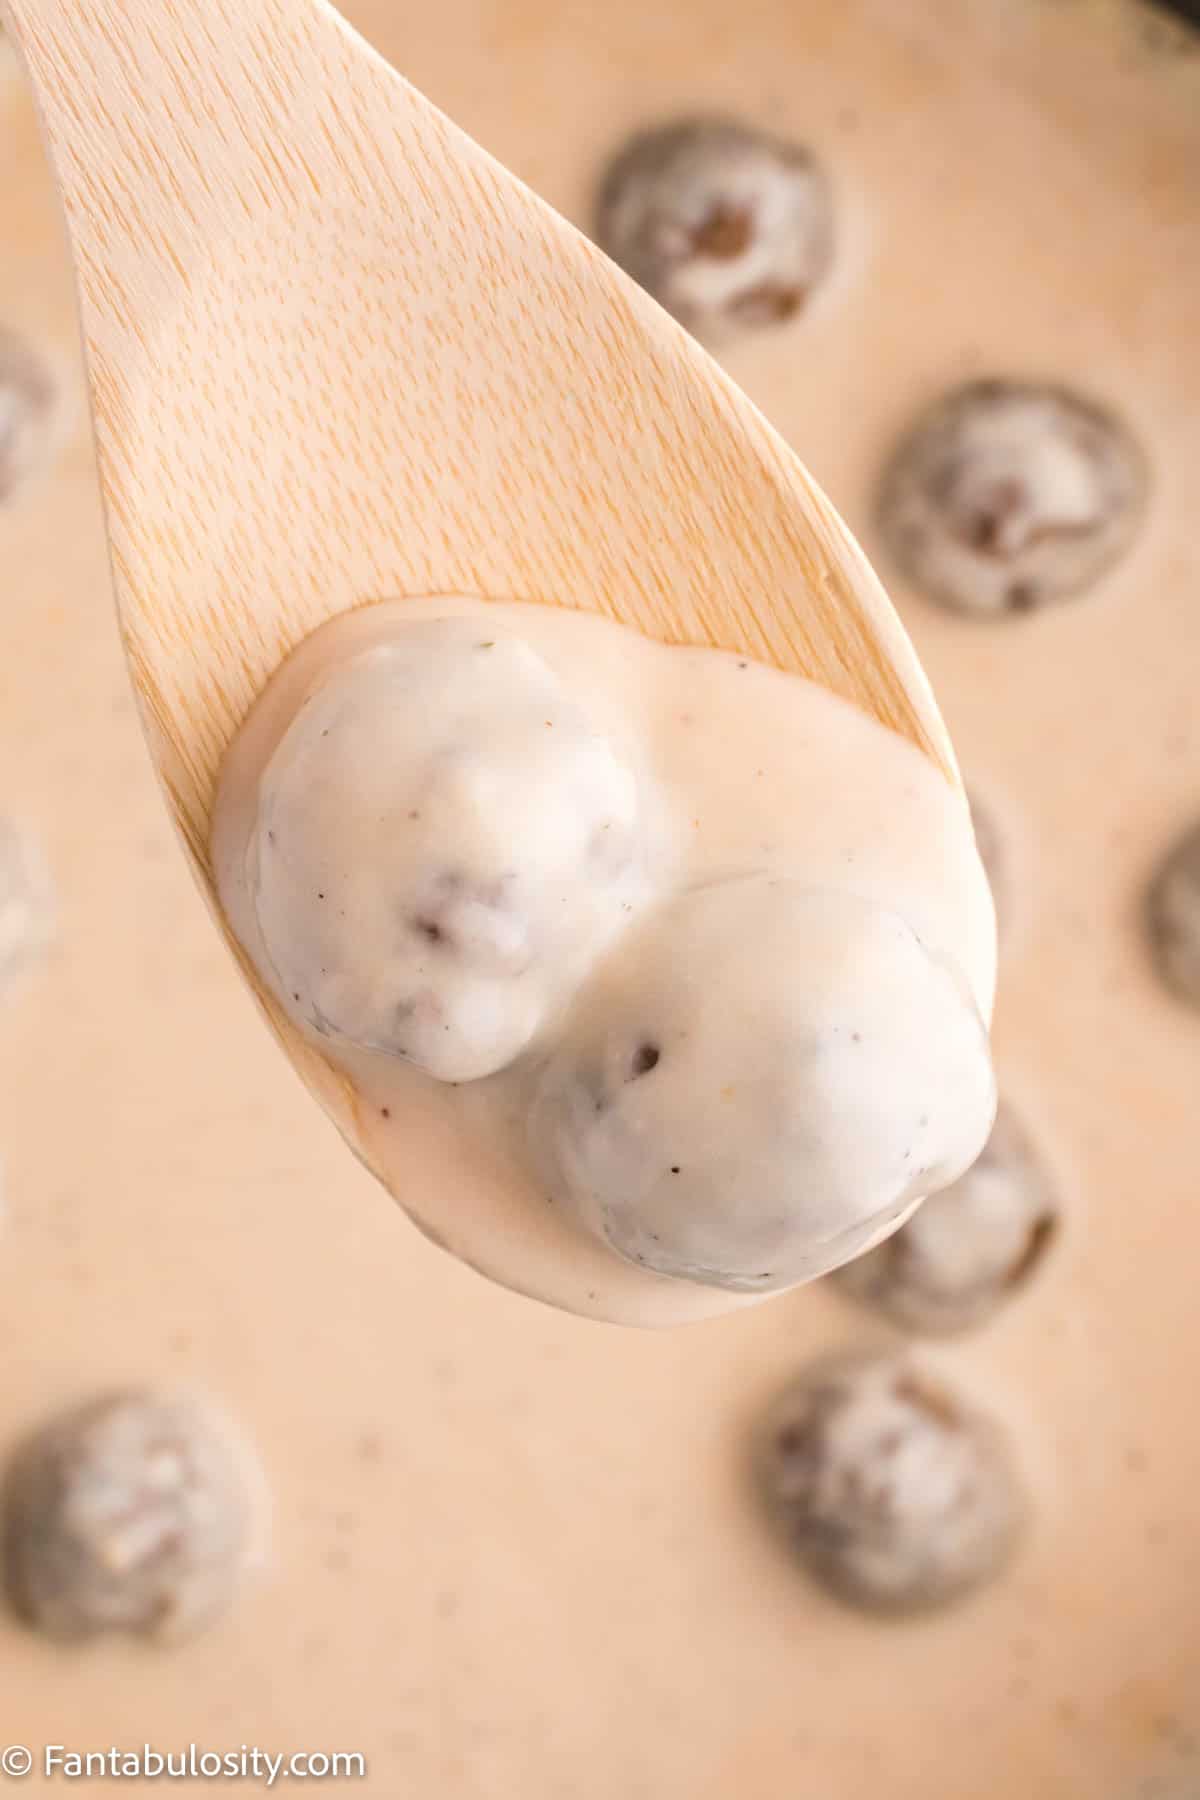
    A wooden spoons holds two meatballs and a rich cream sauce above a pan containing the sauce and more meatballs

    Variations

    Our recipe is a classic Swedish meatballs and creamy gravy sauce recipe. But, that doesn’t mean that you can’t switch it up to meet your family’s dietary needs or preferences. Or, if you just want to try something new, we’ve got some creative additions to the sauce that you may love!

    • While we used ground beef for these juicy meatballs, you can use a mixture of ground beef + ground pork, ground pork, ground chicken or ground turkey.
    • If you use ground pork, chicken or turkey for the meatball mixture, you can use chicken bouillon powder instead of beef.
    • For a thinner sauce, use broth (beef broth or chicken broth (it can even be my homemade chicken broth recipe) depending on the ground meat you use) for some of the milk.
    • For an even creamier sauce, use heavy cream in place of some of the milk.
    • To amp up the flavor of the sauce, add a dash or two of Worcestershire sauce, a teaspoon of Dijon mustard or a dollop of sour cream.
    Swedish meatballs and sauce top cooked egg noodles on a white plate

    Swedish Meatballs FAQs

    How are Swedish meatballs different from regular meatballs?

    While Swedish meatballs are made with similar ingredients to regular meatballs (ground meat, eggs and bread crumbs), Swedish meatballs are typically smaller and have warm spices like nutmeg and allspice added.

    What is Swedish meatball sauce made of?

    The sauce is made with a base of melted butter and flour, seasoned with pepper and beef bouillon (or sometimes broth) and thickened with milk to a rich, creamy consistency.

    What goes good with Swedish meatballs?

    Traditionally, Swedish meatballs are served over buttered noodles or Instant Pot mashed potatoes. Lingonberry jam or cranberry sauce are a great accompaniment to provide some tartness to cut the rich sauce. You can also serve vegetables alongside the Swedish meatballs like green beans, roasted broccoli or fresh pickled cucumbers.

    Storage

    Store any leftover meatballs and sauce in an airtight container in the refrigerator for up to three days.

    A close up photo of a white place holding cooked egg noodles and tender Swedish meatballs and cream sauce

    Top Tips

    Using a small cookie scoop results in evenly sized, perfect meatballs for this recipe.

    For easy clean up while make these delicious Swedish meatballs, wear gloves while mixing up the meat and line the baking dish with aluminum foil.

    More Comfort Food Classics

    Chicken and Dumplings made in the Instant Pot are the heart of warm and cozy comfort food, and so are these chicken and noodles! Our Creamy Beef Stroganoff Recipe is old-fashioned comfort food ready in just 30 minutes, like these Old-Fashioned Salisbury Steaks!

    Did you make this? I’d be so grateful if you left a “star” rating below to let me know what you thought! Then, the next time you need a quick and easy recipe, come back to Fantabulosity to browse all of my easy recipes!

    Recipe

    Close up photo of a white plate full of cooked egg noodles topped with meatballs in a creamy sauce
    Print Pin
    5 from 3 votes

    Easy Swedish Meatballs

    Easy Swedish Meatballs: Tender homemade beef meatballs are tossed in a luscious cream sauce that can be served over noodles, rice or mashed potatoes in this classic comfort food recipe!
    Course Main Course
    Cuisine European
    Prep Time 15 minutes minutes
    Bake/Cook Time 30 minutes minutes
    Total Time 45 minutes minutes
    Servings 4 servings
    Calories 410kcal
    Author Jessica Burgess

    Ingredients

    For the meatballs

    • ½ pound ground beef
    • 1 large egg
    • 3 tablespoons milk
    • ¼ cup plain breadcrumbs
    • 1 tablespoon onion flakes
    • ½ tablespoon dried parsley
    • ¼ teaspoon black pepper
    • ⅛ teaspoon ground nutmeg

    Ingredients for the sauce

    • 3 tablespoons salted butter
    • 3 tablespoons flour
    • 3 teaspoons beef bouillon powder or 3 beef bouillon cubes
    • ¼ teaspoon black pepper
    • 3 cups milk

    Instructions

    To make the meatballs

    • Preheat your oven to 400 degrees F. Prepare a 9×13 baking dish with non-stick cooking spray.
    • Using your hands or a spoon, mix together the beef, egg, milk, bread crumbs, onion flakes, dried parsley, black pepper and nutmeg until well combined.
    • Next, use a spoon or cookie scoop to shape the mixture into small (1 inch) meatballs. This recipe makes about 20-22 meatballs.
    • Now, place the meatballs in the prepared baking dish and bake for about 20 minutes or until the center of the meatballs is no longer pink. You can also brown the meatballs in a skillet with a tablespoon of oil until cooked through. If you cook them in a skillet, make sure to rotate the meatballs so they brown on all sides and stay relatively round. Set the meatballs aside and keep them warm.

    How to make the cream sauce

    • In a large saucepan or skillet with sides, melt the butter over medium high heat. Remove the pan from the heat and add the flour, bouillon powder and black pepper. Whisk until well combined. Add the milk slowly, whisking into a sauce that is well blended and smooth.
    • Return the pan to medium heat and cook, stirring constantly, until the cream sauce starts to boil. Boil for 1 minute and continue stirring. Remove the pan from the heat.
    • Next, add the cooked meatballs to the pan of sauce. Stir to help completely coat the meatballs with the sauce.
    • Finally, spoon the Swedish meatballs and sauce over hot egg noodles, rice or mashed potatoes.

    Notes

    • We recommend making 1 inch meatballs because that size cooks through in the center without becoming too brown on the outside.
    • For the best results, eat this dish while the sauce is hot because it thickens quickly and may form a skin over the top as it cools.
    • Store any leftover meatballs and sauce in an airtight container in the refrigerator for up to three days.

    Nutrition

    Serving: 5meatballs | Calories: 410kcal | Carbohydrates: 20g | Protein: 20g | Fat: 28g | Saturated Fat: 14g | Polyunsaturated Fat: 1g | Monounsaturated Fat: 9g | Trans Fat: 1g | Cholesterol: 133mg | Sodium: 638mg | Potassium: 521mg | Fiber: 1g | Sugar: 11g | Vitamin A: 651IU | Vitamin C: 1mg | Calcium: 280mg | Iron: 2mg

    Brioche Croutons

    October 22, 2022

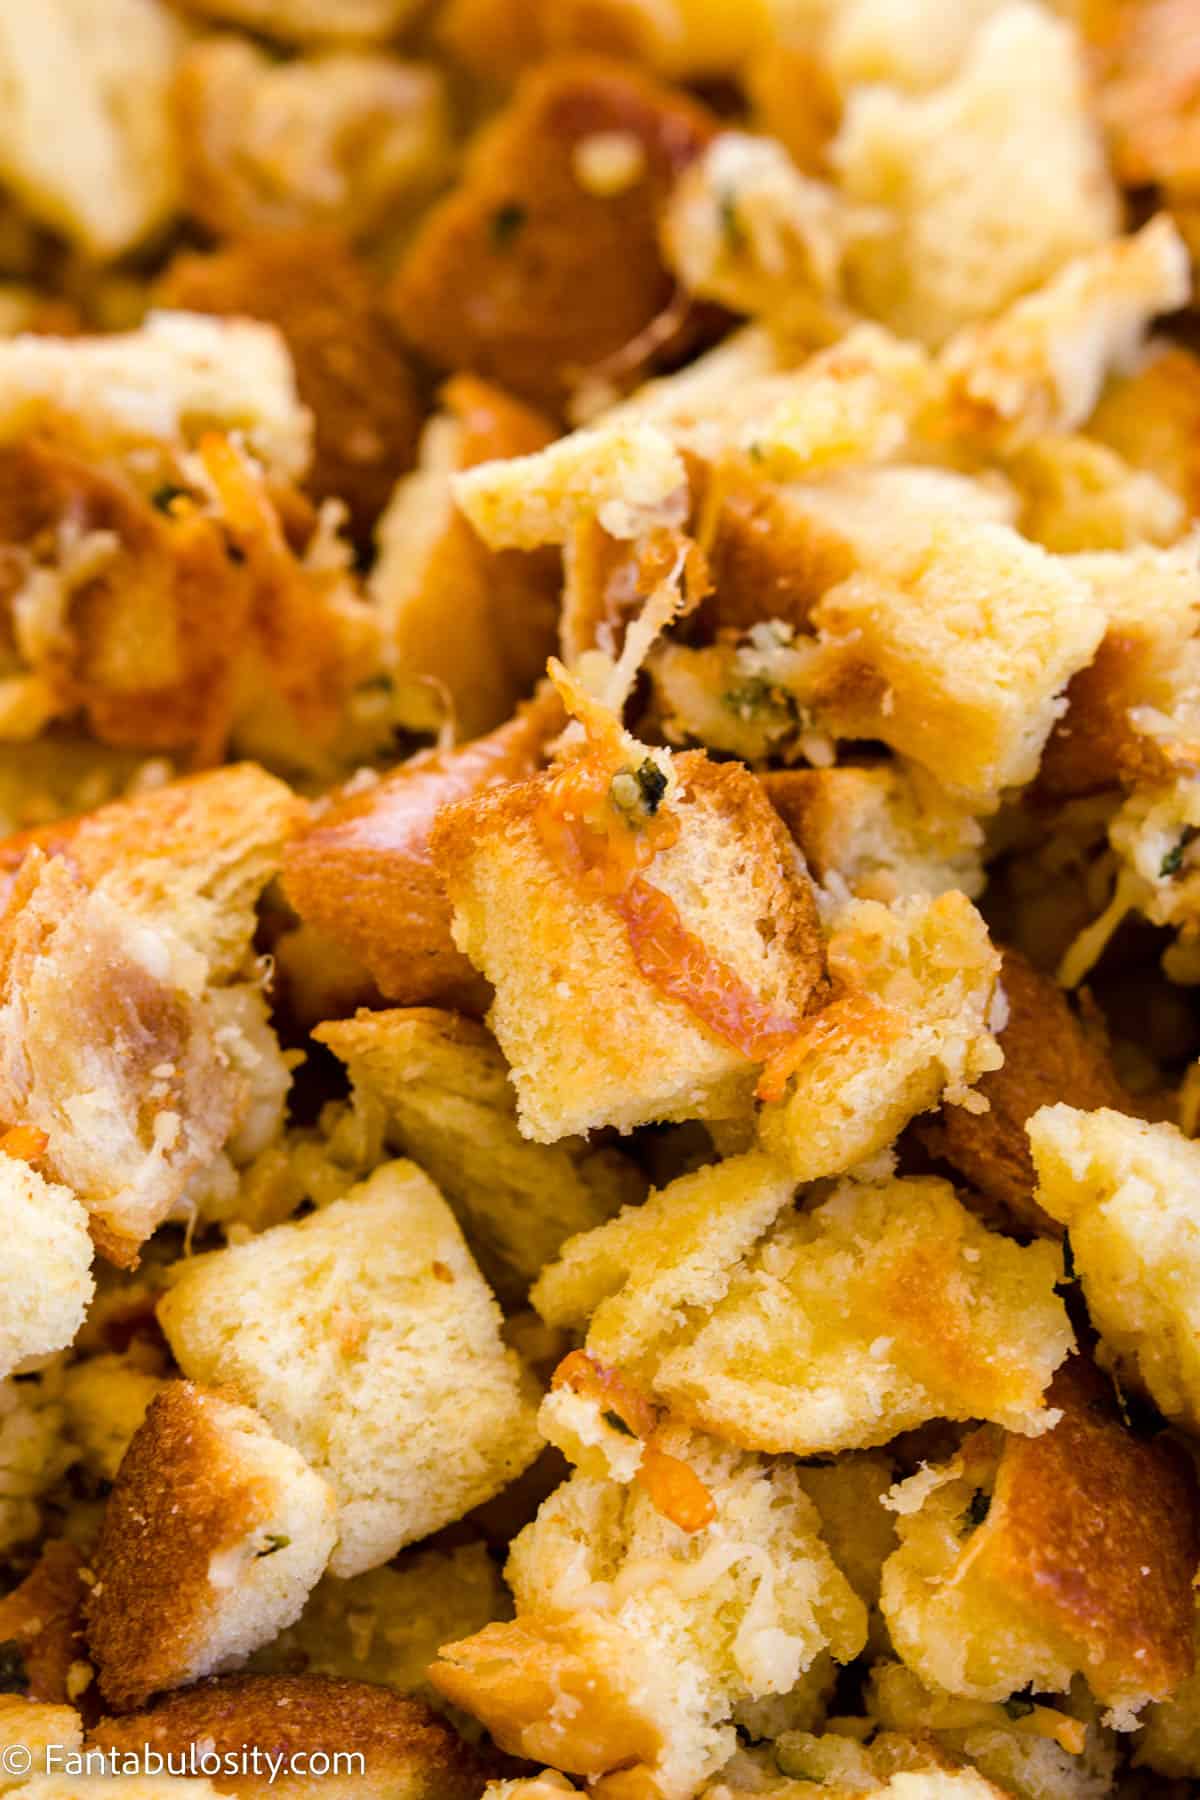
    close up of brioche croutons

    Brioche Croutons: The absolute BEST croutons because of the brioche bread, garlic, butter, parmesan cheese and fresh basil! Simple ingredients, and ready in only 20 minutes!

    Brioche croutons with parmesan cheese on cookie sheet

    Are homemade croutons better than storebought?

    Oh yes. 100% yes. Now this is coming from a gal who can sit and eat an entire bag of storebought croutons like a bag of potato chips.

    But when you have homemade croutons on your favorite salad recipes and soup recipes, you’ll understand my love for the homemade, seasoned, little cubes of bread.

    Why You’ll Love Brioche Croutons

    I love regular croutons (as in, croutons made out of regular bread instead of brioche) and have had some of the most delicious croutons at restaurants… but there’s just something about this brioche croutons recipe that’s hard to beat.

    The brioche bread already has such a buttery and a tad “sweet” taste, that drives so much flavor! Combine those flavors with the added savory ingredients in this homemade croutons recipe, and you’ll love it as much as I do!

    [feast_advanced_jump_to]

    Ingredients

    This recipe uses simple ingredients, or has easy subsitutions (see those below) so you can make these croutons in minutes, and have them ready for your classic caesar salad in no time!

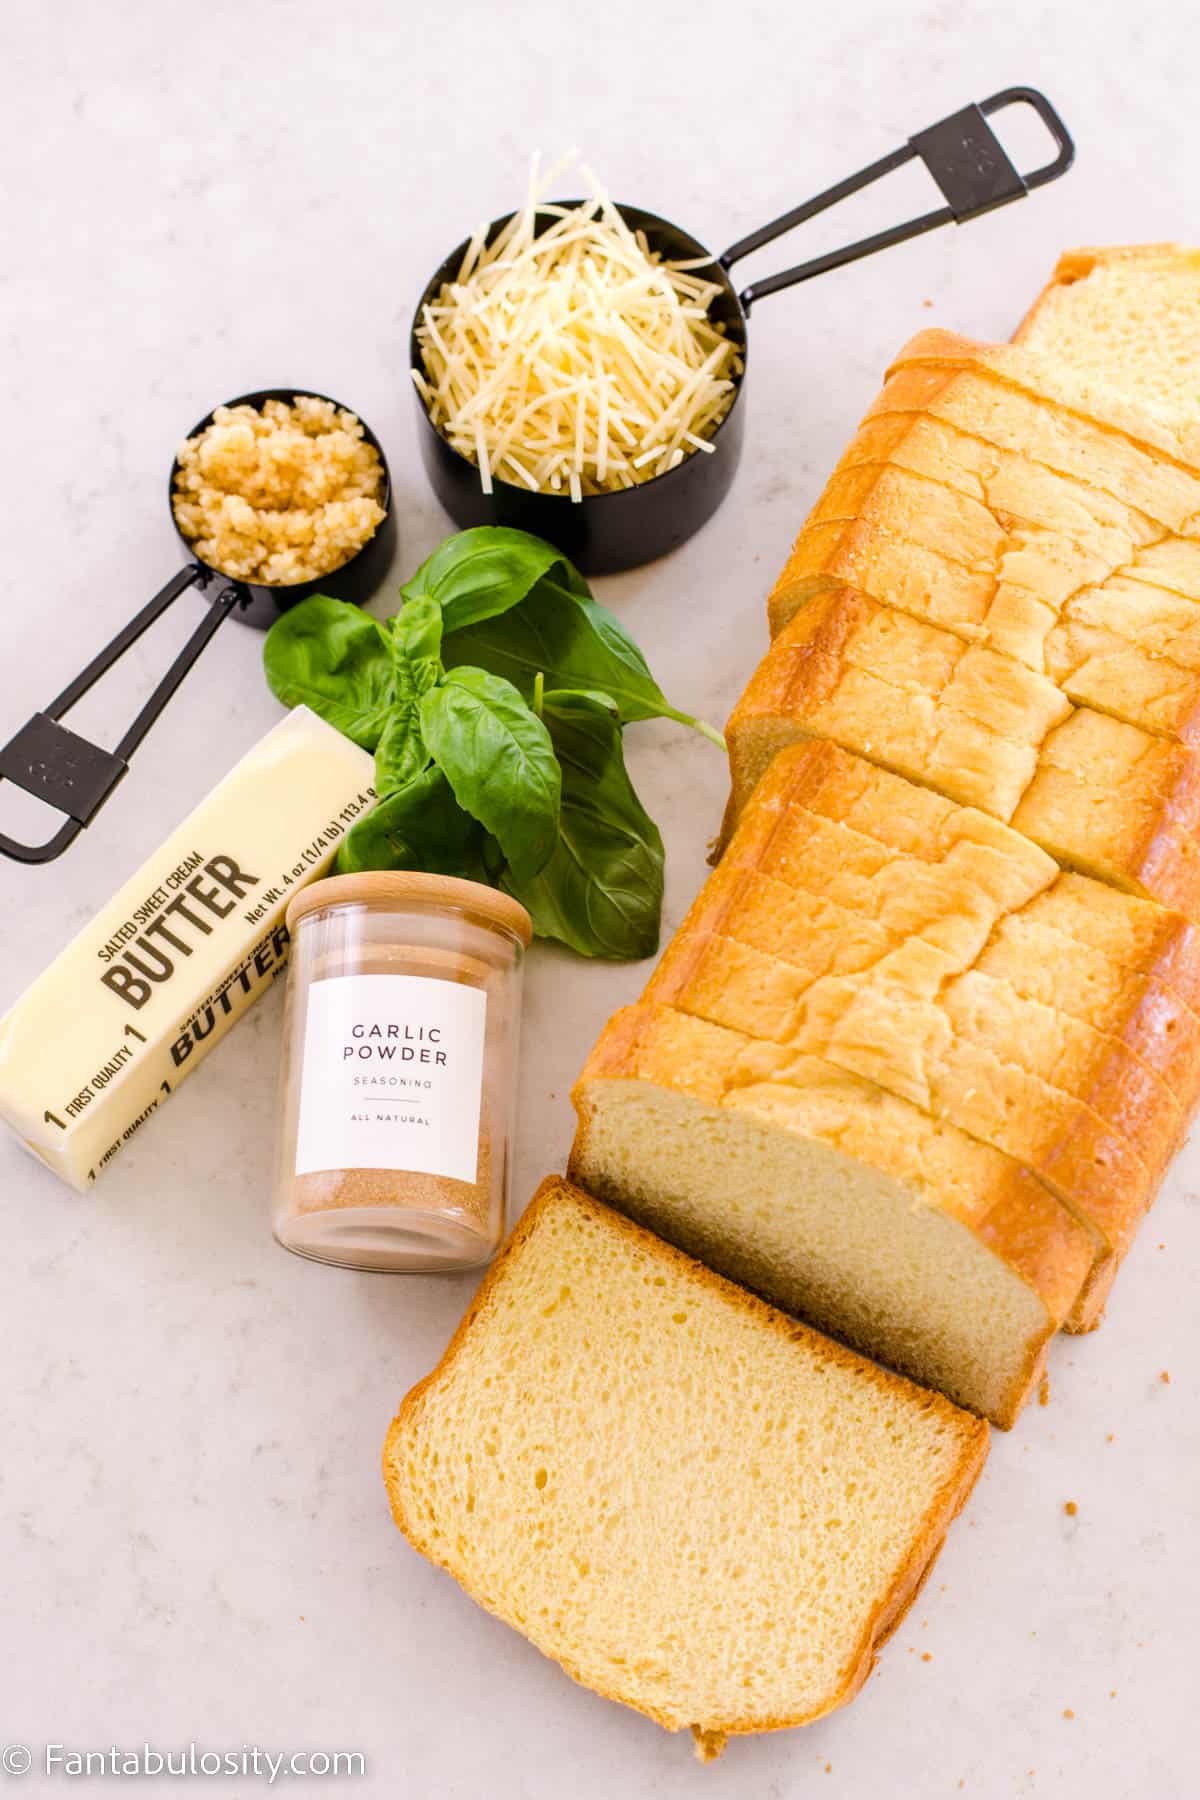
    ingredients for brioche croutons
    • 1 loaf brioche bread (1 pound)
    • ½ cup butter (salted or unsalted – just be mindful of any added salt)
    • ¼ cup minced garlic
    • ½ cup shredded parmesan cheese
    • 1 teaspoon garlic powder
    • 8 leaves fresh basil, chopped
    • sprinkle of salt, if desired

    See the printable recipe card toward the bottom of this post for ingredients and instructions all in one place!

    Instructions

    Making homemade croutons is incredibly easy! Here’s how to make them:

    1. Prehat oven to 350 degrees.
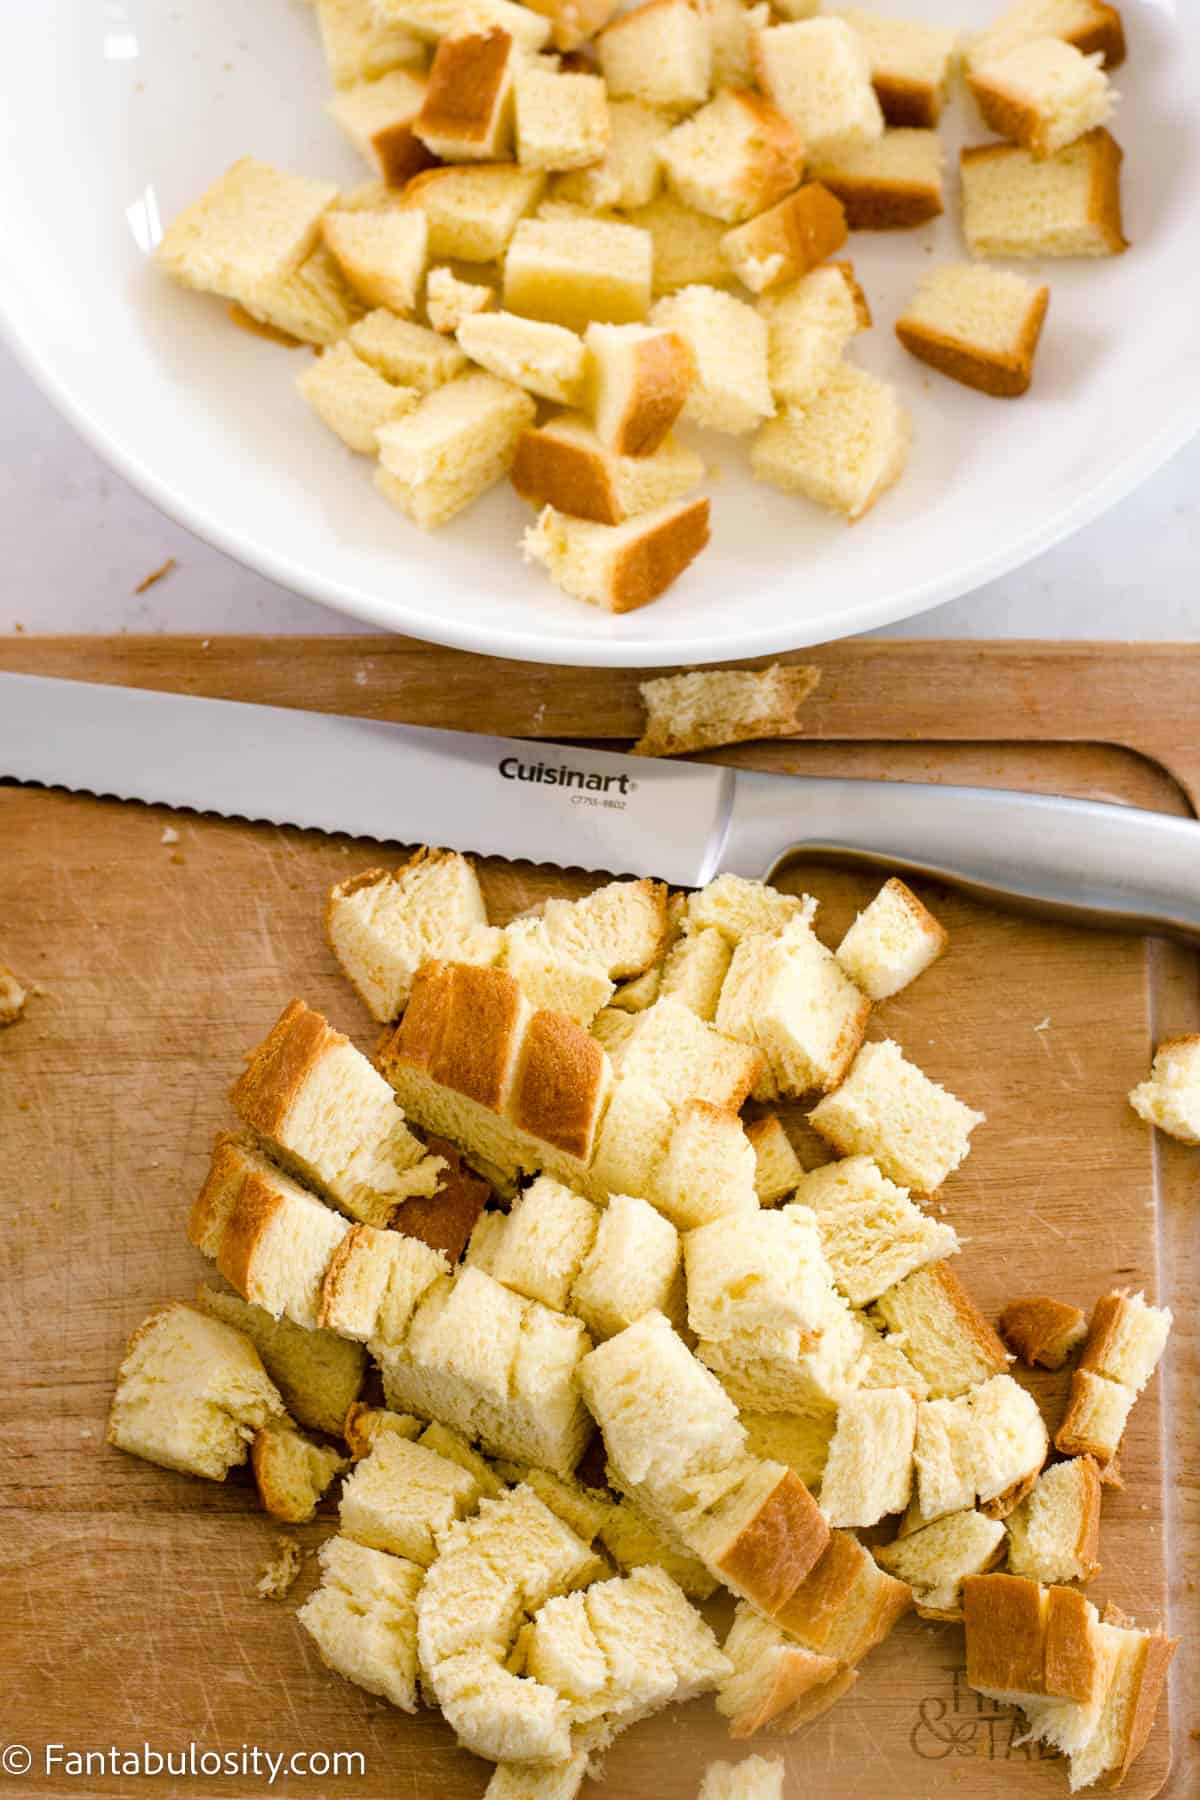
    2. Begin by cutting your brioche bread in to about 1 inch cubes. (Don’t worry if it’s not exact. Also, if you prefer smaller croutons, you can cut them smaller!)
    3. Place the bread cubes in a large bowl. (Make sure the bowl is large enough for stirring later.)
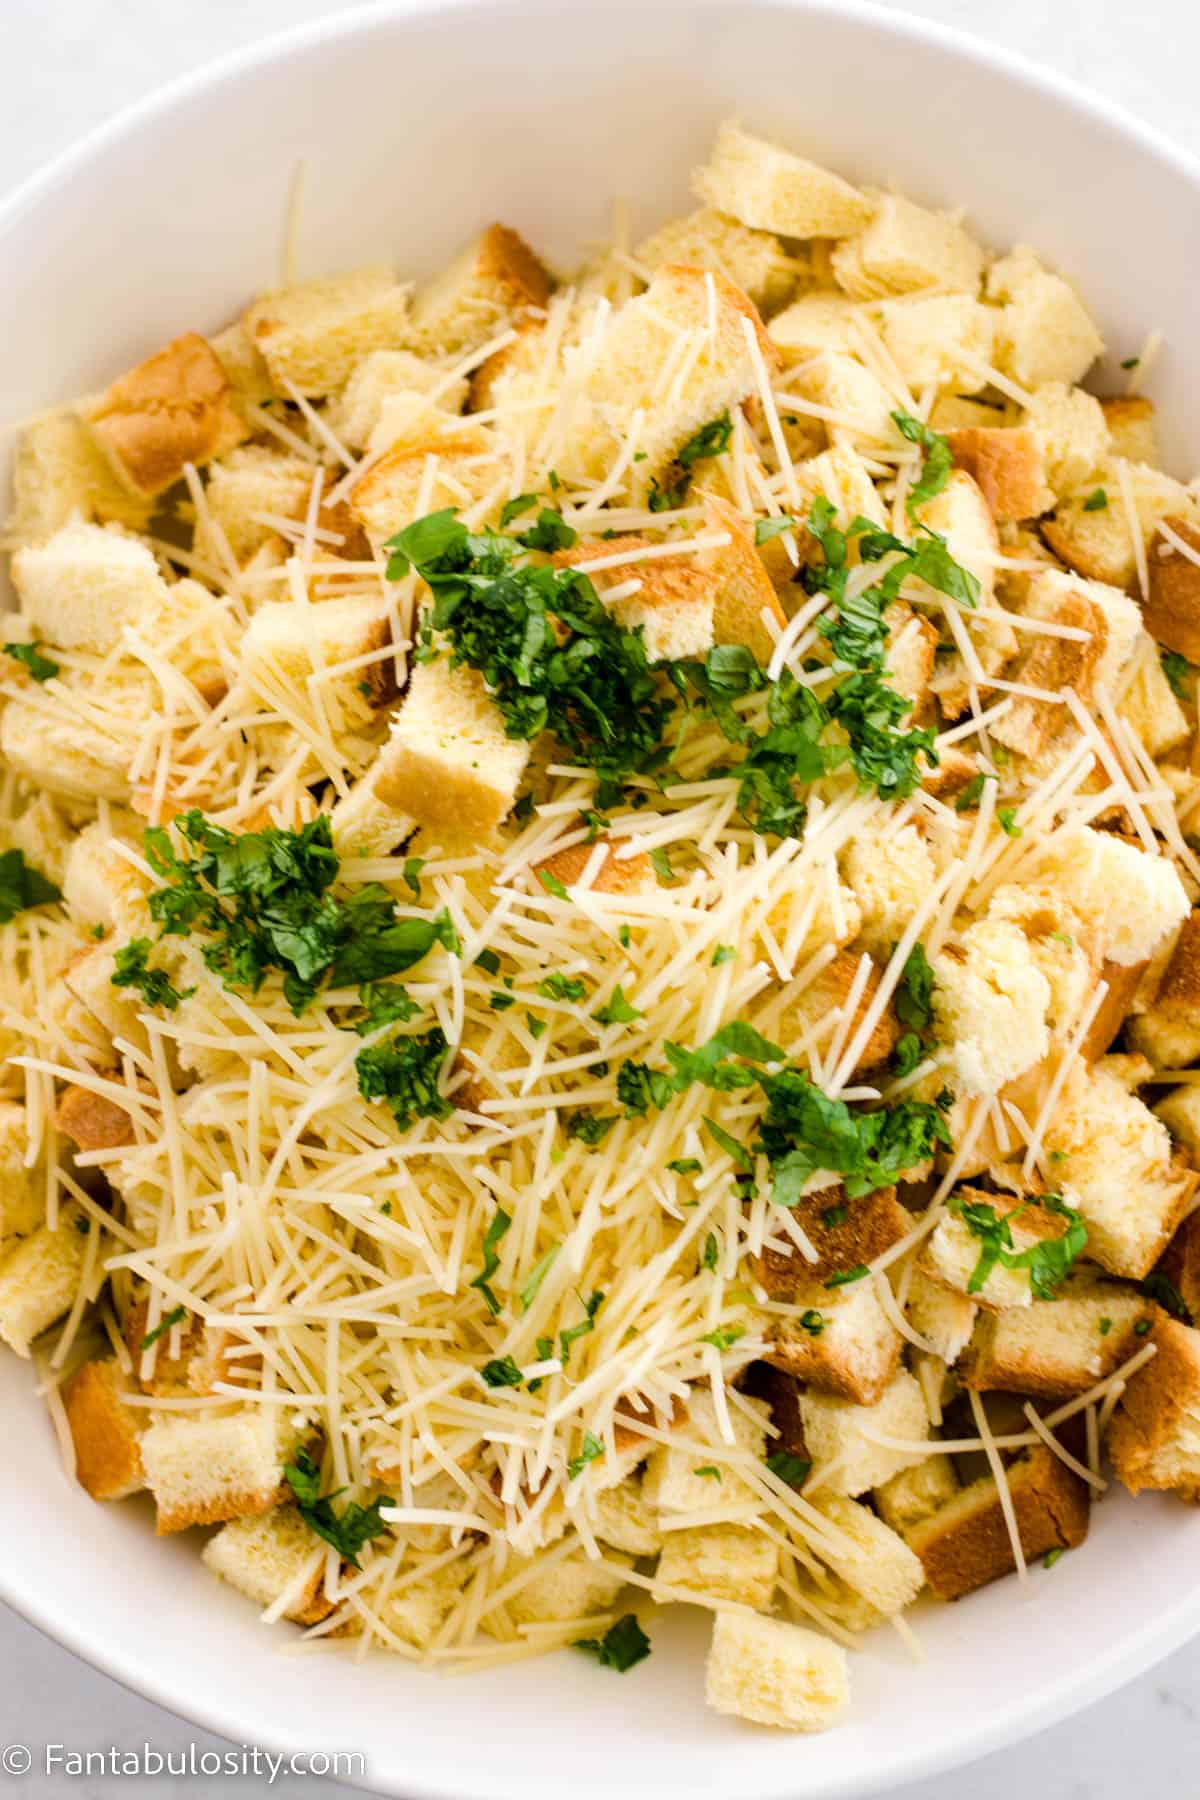
    4. Next, add shredded parmesan cheese, garlic powder, and fresh basil to bread. Stir to combine.
    Brioche bread cut in to cubes on cutting board
    Cut in to cubes
    brioche cubes, cheese, basil and seasonings in white bowl
    Add cheese, seasonings and basil
    1. Add butter and minced garlic to a microwave safe dish and microwave for 2 minutes or until butter has melted. Stir and pour over bread.
    butter and garlic in measuring cup
    Make garlic butter
    garlic butter pouring in to bread cubes
    Pour butter over bread
    1. With a rubber spatula, carefully stir to coat bread with buttery mixture and other ingredients until it looks like most of the bread as been coated.
    2. Next, pour buttered and seasoned bread in a single layer, on to a baking sheet pan that’s lined with parchment paper or a silicone mat.
    buttered and seasoned bread cubes in white bowl
    Stir to combine
    Bread cubes on baking sheet
    Spread on baking sheet
    1. Bake in a 350 degree oven for 20-25 minutes, flipping the croutons, half way through. (We did 20 minutes for the croutons that you see here. However if you prefer a crispier crouton, you may want to check on them at 20 minutes and cook for an additional 5 minutes or until they reach the desired crispiness that you prefer. Be careful not to burn!)
    Baked croutons on baking sheet
    Baked croutons
    1. If desired, sprinkle a little salt on after baking. (I use kosher salt or flaked sea salt but you can also use table salt.) Then serve warm or allow to cool before serving on a cold dish like a salad!

    This makes about 8 cups of croutons!

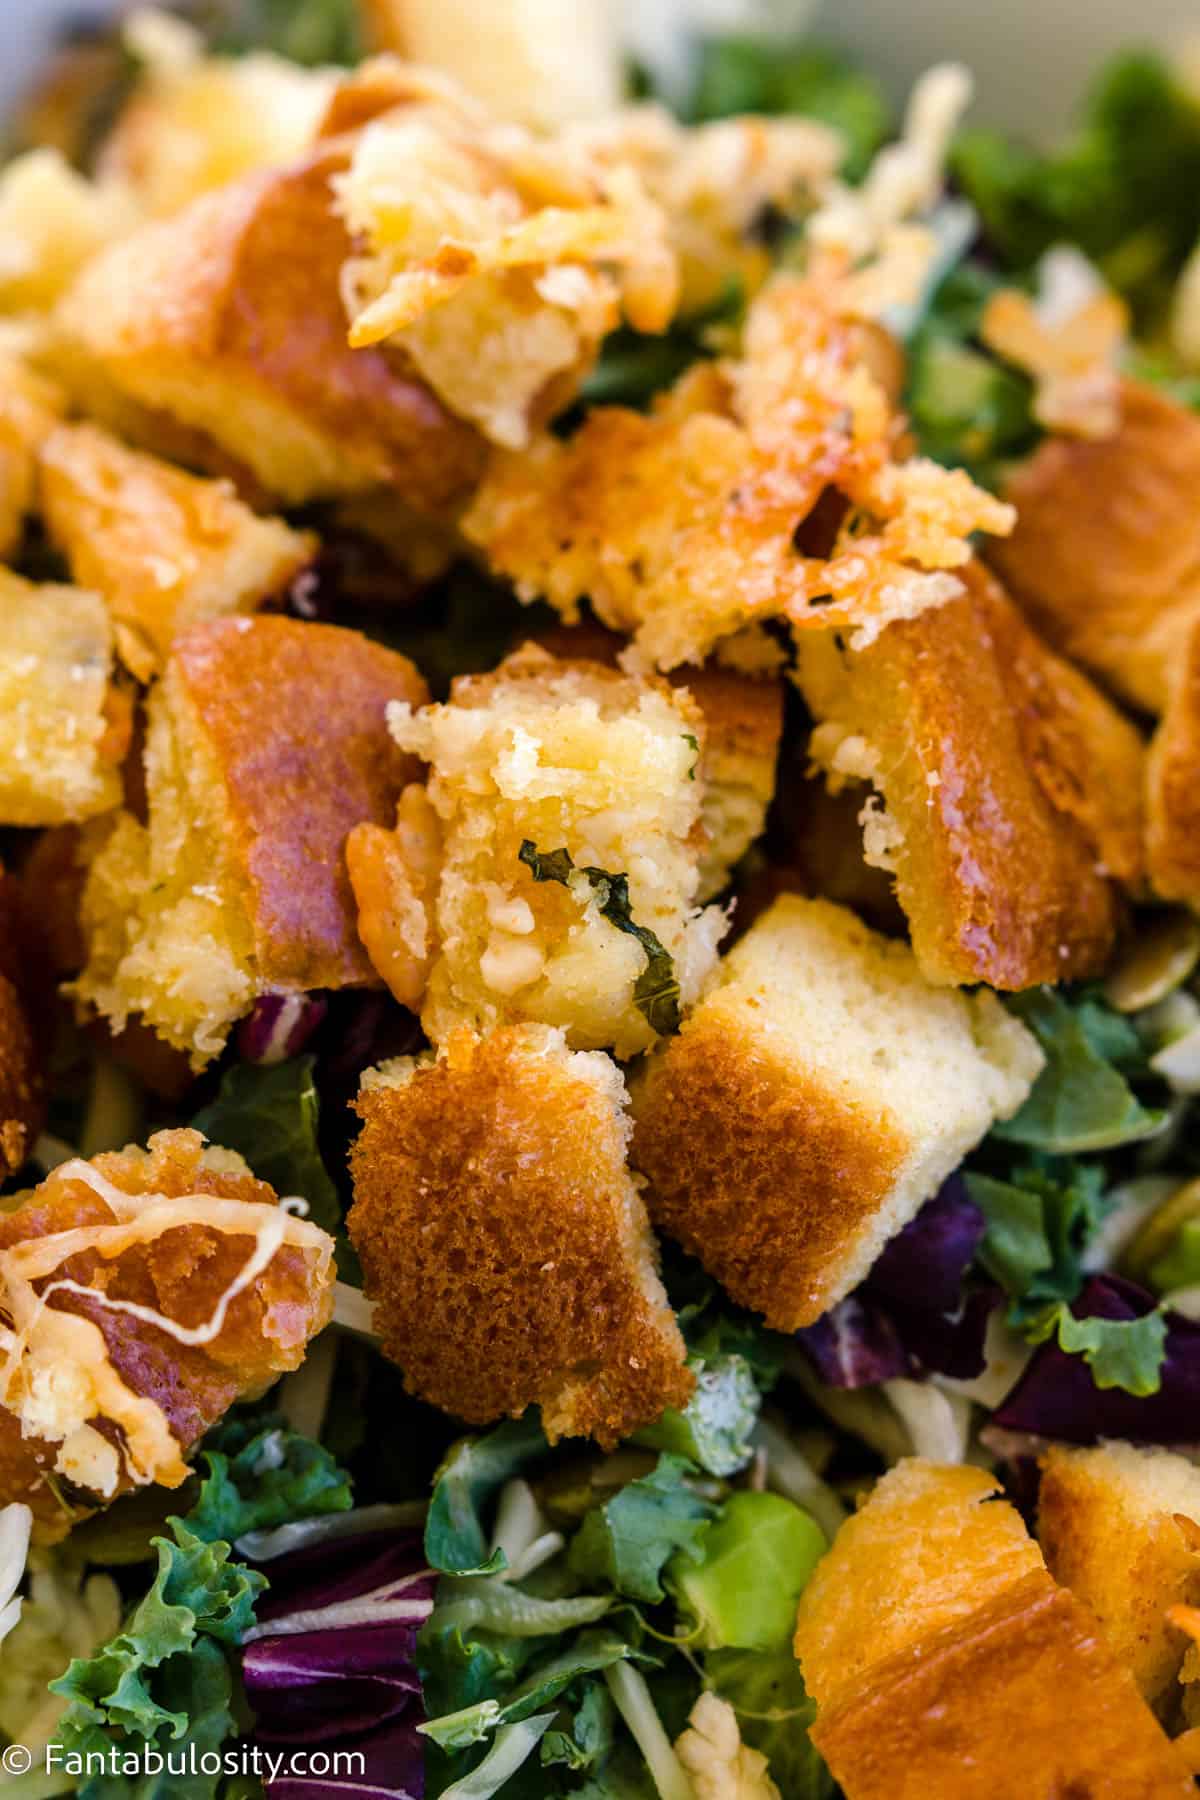
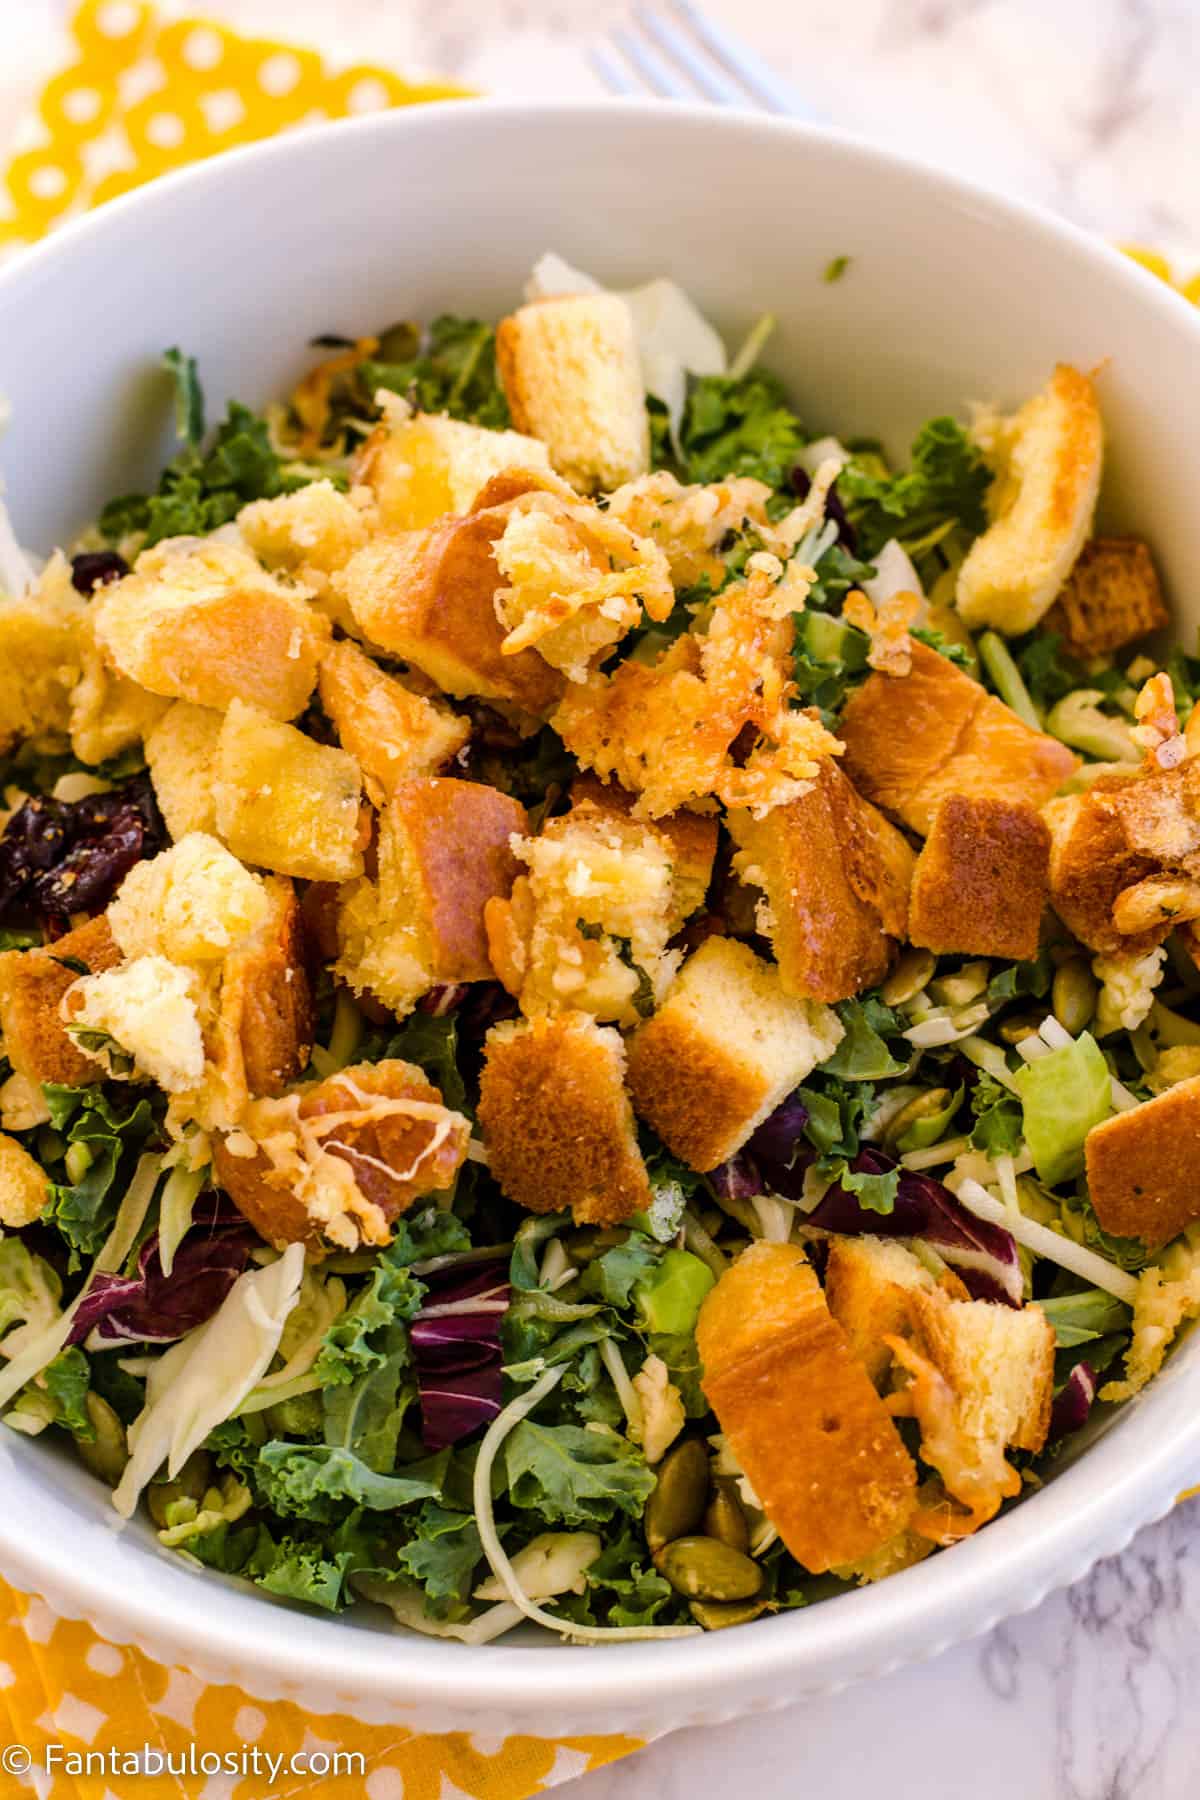
    brioche croutons on salad
    Serve on salad or soup

    Substitutions

    • Basil – If you don’t have fresh basil, it’s ok to use about 1 tablespoon of dried basil.
    • Garlic – if you don’t have minced garlic, you can use chopped garlic or a little more garlic powder.
    • Bread – this recipe is specifically for brioche croutons, meaning you’ll use brioche bread. However you can also follow this same recipe for a different type of bread.
    • Seasonings – there is so much flavor with the garlic butter and basil but you can also use other seasonings if you’d like. Such as, black pepper, Italian seasoning, etc.

    Variations

    I’ve made this recipe two different ways, and wanted to include a variation that you may prefer as well.

    Extra Buttery Croutons

    If you don’t mind a croutons that’s not crispy, and love a big buttery flavor, then you may want to try the other way that I make these!

    • Keep the ingredients the ingredients and instructions the same, except for the butter! Melt 2-3 cups of butter instead of ½ a cup. This will make the bread soak up way more butter and may prevent the croutons from becoming super crispy but talk about FLAVOR!
    Brioche croutons on green salad with yellow napkin
    Homemade Croutons

    How to Store Croutons

    Store the croutons, after they have fully cooled, in an airtight container or ziptop bag at room temperature for up to 5 days. If you line the bag or container with a paper towel, it can help trap the moisture to prevent the croutons from getting soggy.

    You can also store them in the refrigerator for 6-7 days, or even in the freezer for up to 4-6 weeks! (Freezer Tip: flash freeze croutons on the baking sheet and then transfer to a plastic freezer bag or container and place back in the freezer so the don’t stick to one another.)

    NOTE: They do soften after being stored so if you plan to use leftovers, you may want to toss them back in the oven to crisp up or even in an air fryer for a quick refresh if you want them super crispy.

    FAQ’s and Expert Tips

    If the croutons are not as crispy as you prefer, you can allow them to sit out for a few hours/overnight and they will become more stale (crispy), or simply allow them to sit out for a few hours to harden.

    Recipes to go with Croutons

    I have a feeling you may already have an idea of what you want to put croutons. However, if you need some ideas, we love croutons on this side salad, this buffalo chicken soup, this clam chowder recipe, and on this chili recipe!

    Recipe

    close up of brioche croutons
    Print Pin
    5 from 8 votes

    Brioche Croutons

    Brioche Croutons: The absolute BEST croutons because of the brioche bread, garlic, butter, parmesan cheese and fresh basil! Simple ingredients, and ready in only 20 minutes!
    Course Appetizer, Side Dish
    Cuisine American
    Prep Time 5 minutes minutes
    Cook Time 20 minutes minutes
    Total Time 25 minutes minutes
    Servings 8 cups
    Calories 377kcal
    Author Jessica Burgess

    Ingredients

    • 1 pound brioche bread
    • ½ cup butter salted or unsalted
    • ¼ cup minced garlic
    • ½ cup shredded parmesan cheese
    • 1 teaspoon garlic powder
    • 8 leaves fresh basil chopped
    • salt if desired

    Instructions

    • Prehat oven to 350 degrees.
    • Begin by cutting your brioche bread in to about 1 inch cubes, and place the bread cubes in a large bowl.
    • Next, add shredded parmesan cheese, garlic powder, and fresh basil to bread. Stir to combine.
    • Add butter and minced garlic to a microwave safe dish and microwave for 2 minutes or until butter has melted. Stir and pour over bread.
    • With a rubber spatula, carefully stir to coat bread with buttery mixture and other ingredients until it looks like most of the bread as been coated.
    • Next, pour the buttered and seasoned bread on to a baking sheet that's lined with parchment paper or a silicone mat.
    • Bake in a 350 degree oven for 20-25 minutes or until they've reached the golden brown color that you prefer. Flip the croutons, half way through the cooking process.
    • If desired, sprinkle a little salt on the croutons after baking. Serve warm or allow to cool before serving.

    Notes

    If the croutons are not as crispy as you prefer, you can allow them to sit out for a few hours/overnight and they will become staler (crispy), or simply allow them to sit out for a few hours to harden.

    Nutrition

    Serving: 1cup | Calories: 377kcal | Carbohydrates: 28g | Protein: 9g | Fat: 26g | Saturated Fat: 16g | Polyunsaturated Fat: 0.5g | Monounsaturated Fat: 3g | Trans Fat: 0.5g | Cholesterol: 132mg | Sodium: 451mg | Potassium: 32mg | Fiber: 0.1g | Sugar: 0.1g | Vitamin A: 916IU | Vitamin C: 1mg | Calcium: 119mg | Iron: 1mg

    Hawaiian Roll Breakfast Sliders

    October 21, 2022

    A close up photo of a stack of breakfast slider sandwiches

    Hawaiian Roll Breakfast Sliders: Everyone’s favorite Hawaiian rolls are stuffed with sausage, bacon, eggs, and cheese brushed with a butter maple glaze and then baked until warm and toasty! Breakfast may never be the same again!

    Then, after breakfast, make these cheeseburger sliders or these salmon sliders for a hearty dinner. Or these roast beef sliders are amazing for a party appetizer or an easy lunch recipe.

    Breakfast slider sandwiches are stacked on a plate making it easy to see sausage, bacon, eggs and cheese on toasted Hawaiian rolls

    Breakfast recipes are a pretty big deal around here, and we think you’re also going to love making this Biscuit and Gravy Casserole and the breakfast egg rolls after these sliders but we also have something for every breakfast lover.

    Hawaiian rolls work for breakfast and dinner both. See the full list of slider recipes.

    Why You’ll Love This Recipe

    Hawaiian roll breakfast sliders with sausage, fluffy eggs, bacon and cheese tucked into a sweet roll are a delicious way to take breakfast on the go.

    These make-ahead breakfast sliders can also be frozen and reheated to make breakfast on those busy mornings a breeze.

    The sweet and savory flavors of these breakfast sandwiches make them a perfect addition to a breakfast buffet or brunch party, especially paired with something like these cheesy hashbrowns. And I’m pretty sure that you will be the MVP when you show up with these tailgate breakfast sliders.

    [feast_advanced_jump_to]

    Ingredients

    Our Hawaiian roll breakfast sliders are made with basic breakfast ingredients, so there is nothing fancy or intimidating about this breakfast sliders recipe.

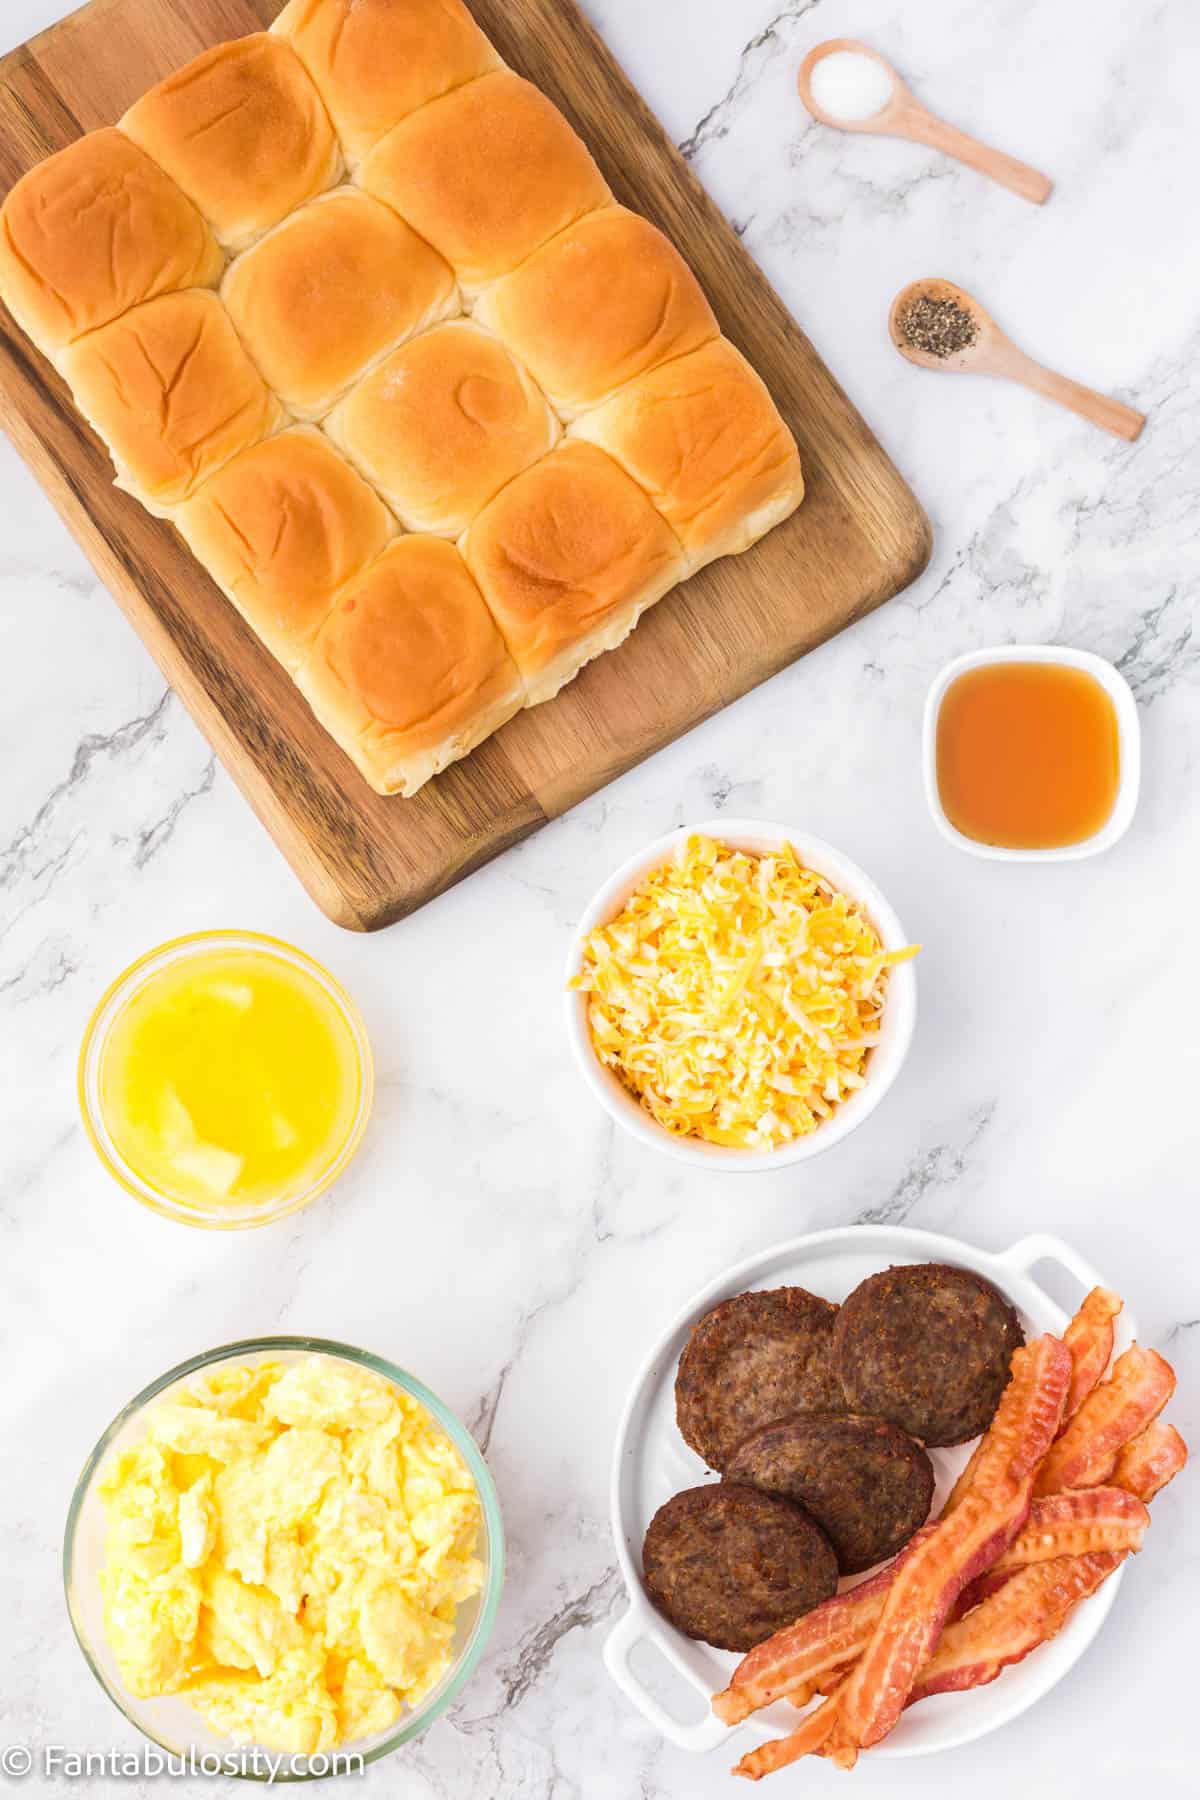
    Hawaiian rolls, cooked bacon and sausage, scrambled eggs and shredded cheese are displayed on a white marble background

    We’ve included some notes about the ingredients below that you may find helpful! See the printable recipe card below for ingredients, nutrition information, and detailed recipe notes.

    • 12 King’s Hawaiian rolls – we used the smaller rolls, not the larger slider buns.
    • 12 breakfast sausage patties, cooked (It’s easy to cook sausage patties in the oven since you’ll have to preheat the oven anyway!)
    • 12 eggs, scrambled
    • 6 strips of bacon, cooked (It’s fast to cook bacon in the air fryer or cook bacon in the oven too!)
    • 2 cups of shredded Colby jack cheese – pre-shredded or shred your own!
    • ¼ cup melted butter – salted or unsalted works!

    Instructions

    When I say a recipe is simple, I mean it. We’ve got pictures and step-by-step instructions below to walk you through preparing this delicious breakfast recipe.

    1. First, preheat your oven to 350 degrees F and spray an 8×10-inch baking dish with non-stick cooking spray.
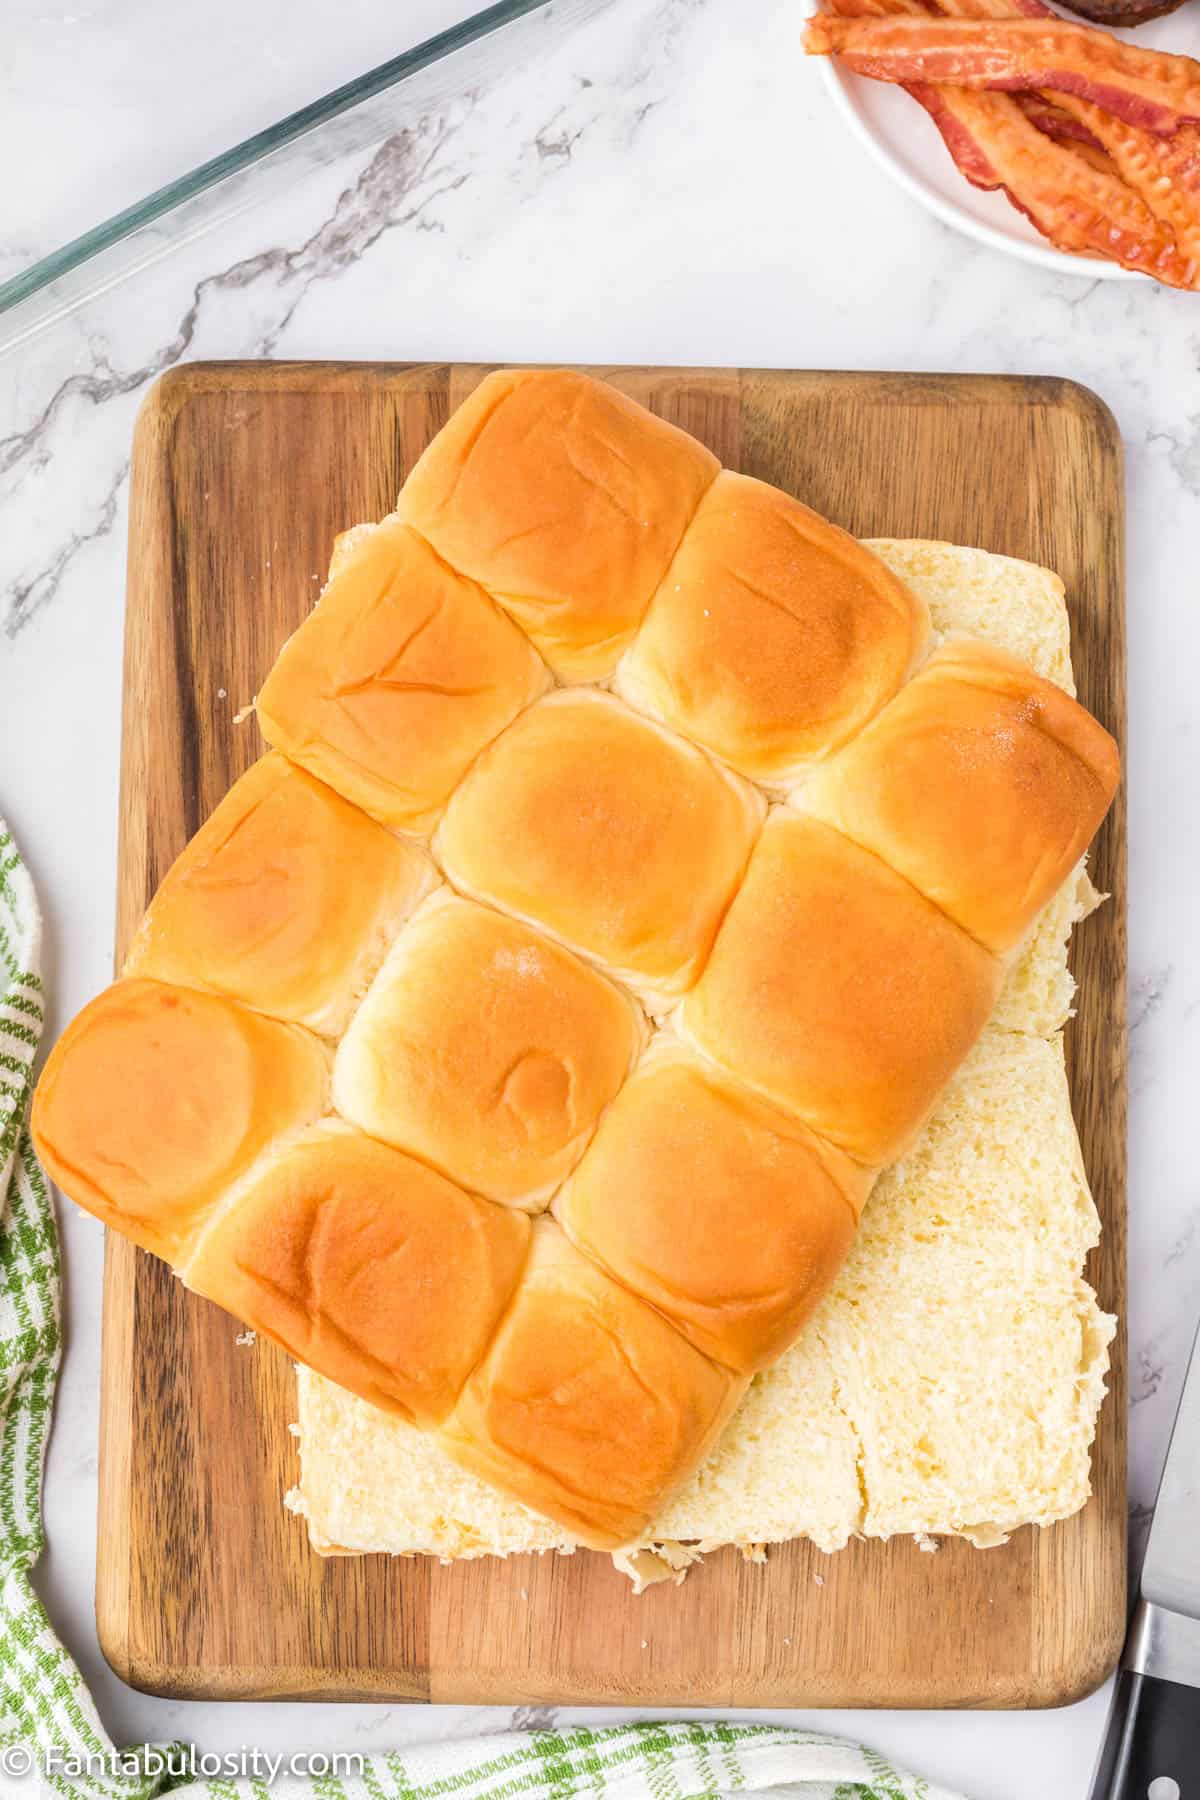
    2. Using a bread knife (or a serrated knife), slice the soft Hawaiian rolls horizontally while keeping the tops and bottoms of the rolls connected together.
    12 Hawaiian rolls have been cut horizontally and are resting on a wooden cutting board.
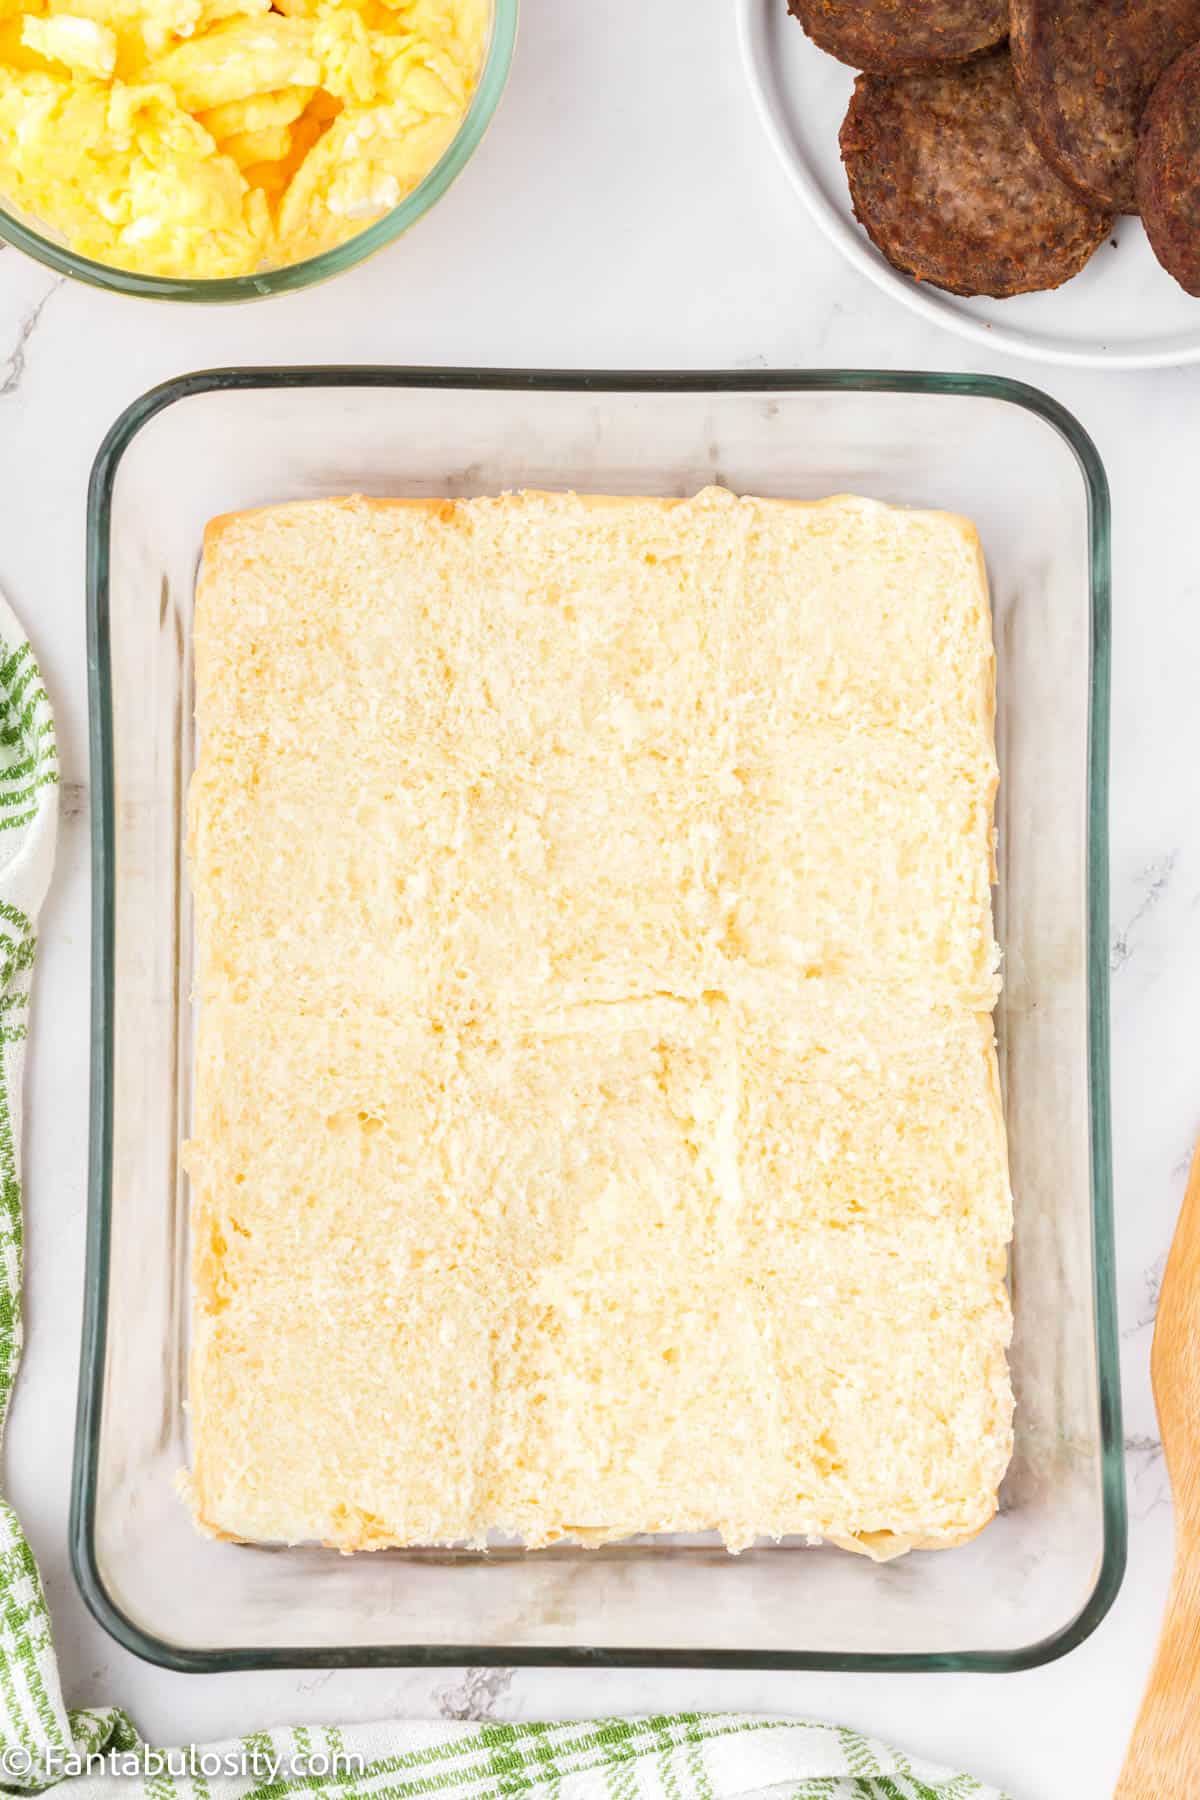
    1. Place the bottom of the rolls in the baking dish.
    The bottom halves of 12 Hawaiian rolls have been placed in a 9x13 inch baking dish to begin the assembly of breakfast slider sandwiches.
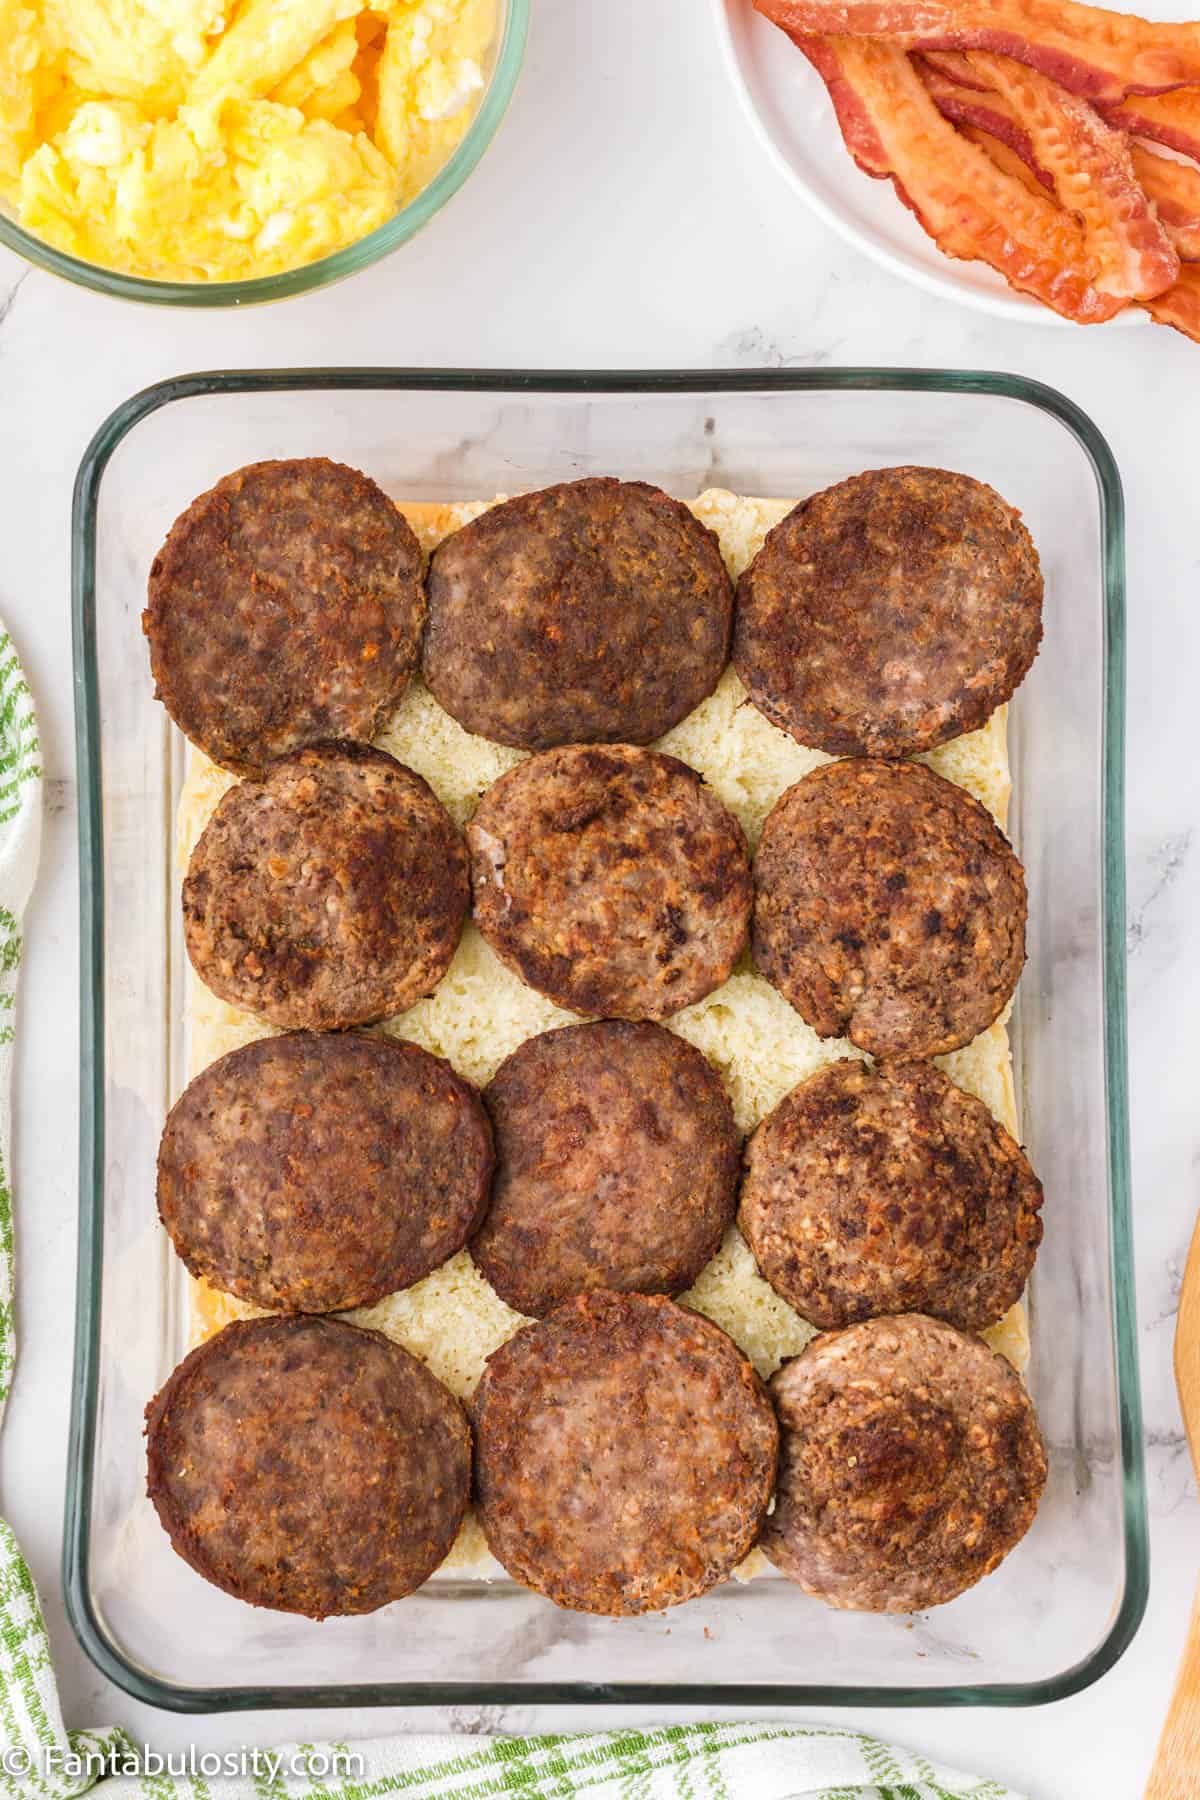
    1. Next, place the breakfast sausage patties over the rolls in a single, even layer.
    Cooked breakfast sausage patties have been layered on the bottom halves of Hawaiian rolls to start building breakfast sliders.
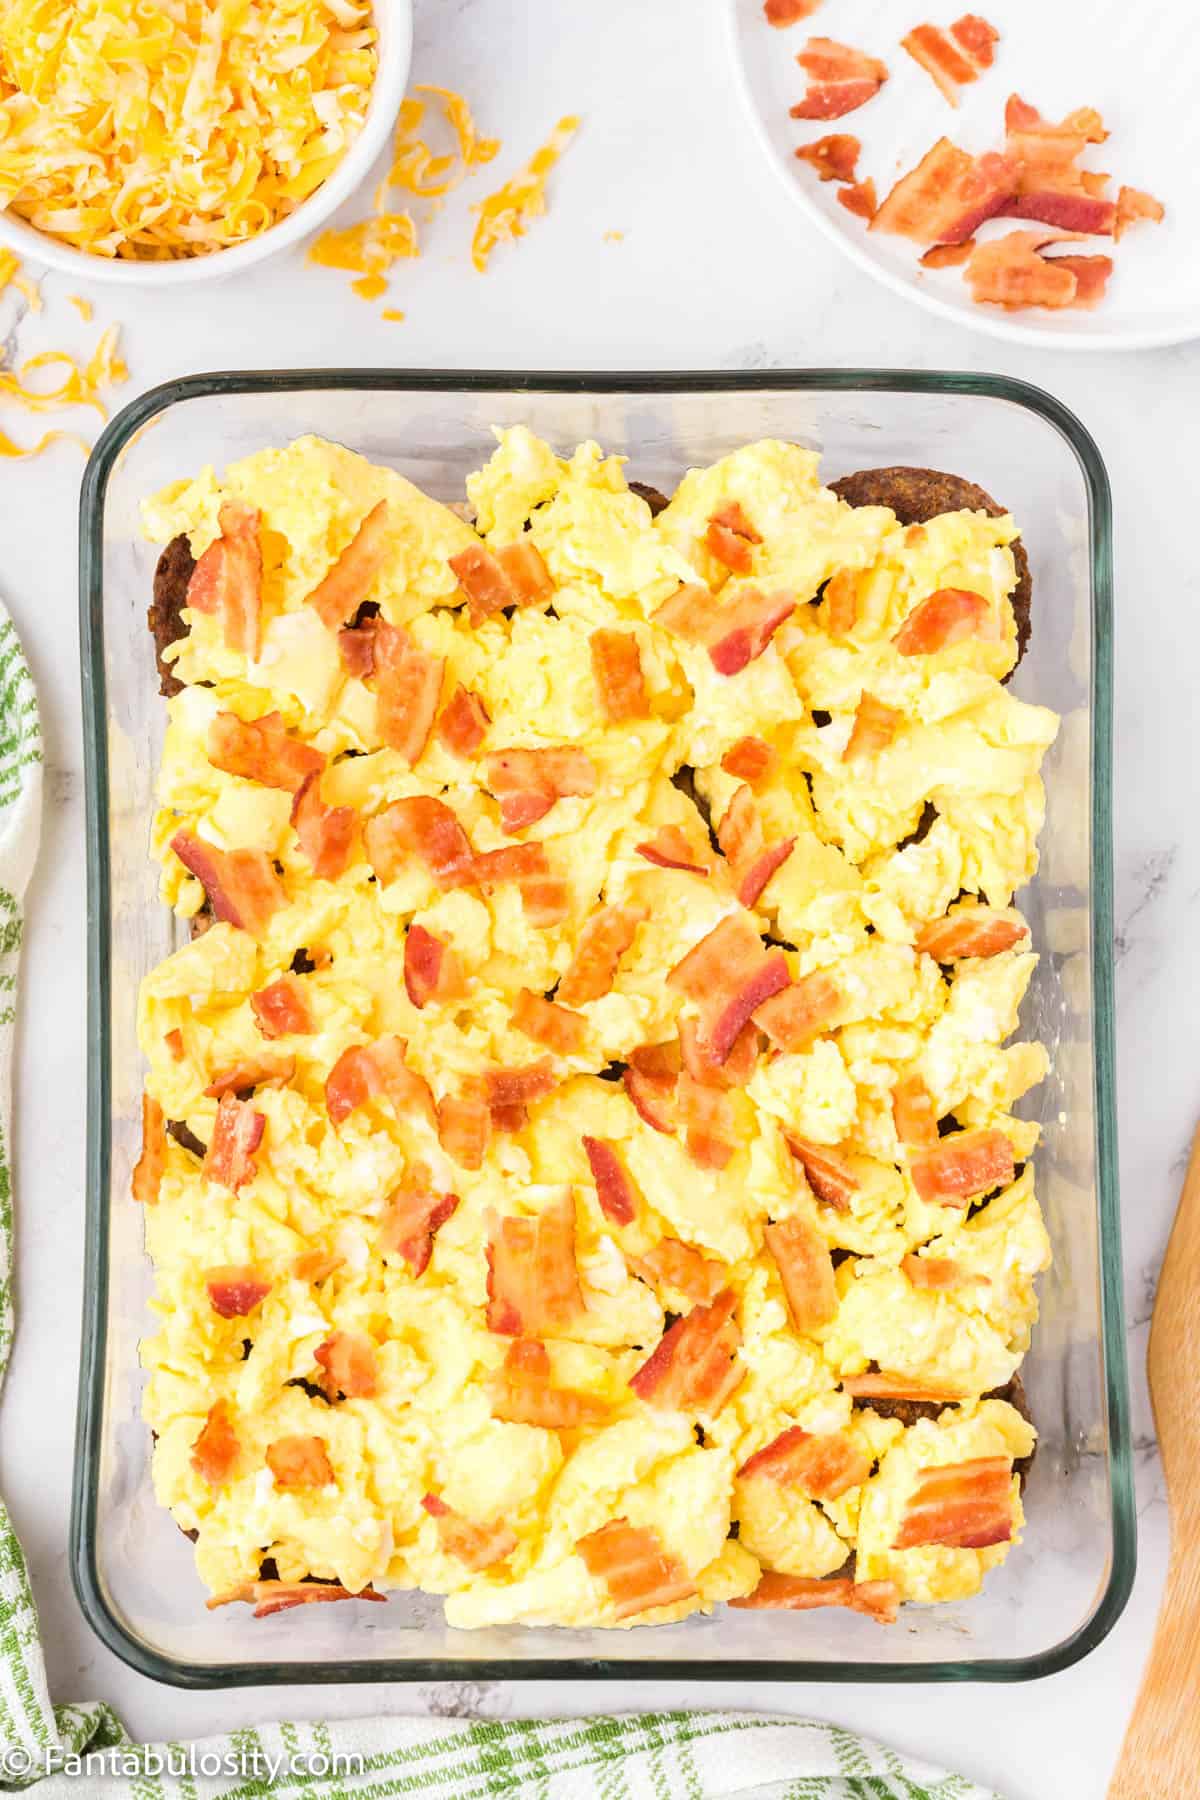
    1. Now, top the sausage patties with the scrambled eggs and sprinkle the eggs with salt and pepper.
    Cooked, crumbled bacon has been added to the breakfast slider sandwiches that are being assembled in a glass baking dish.
    1. Next, crumble the bacon and sprinkle it evenly over the eggs.
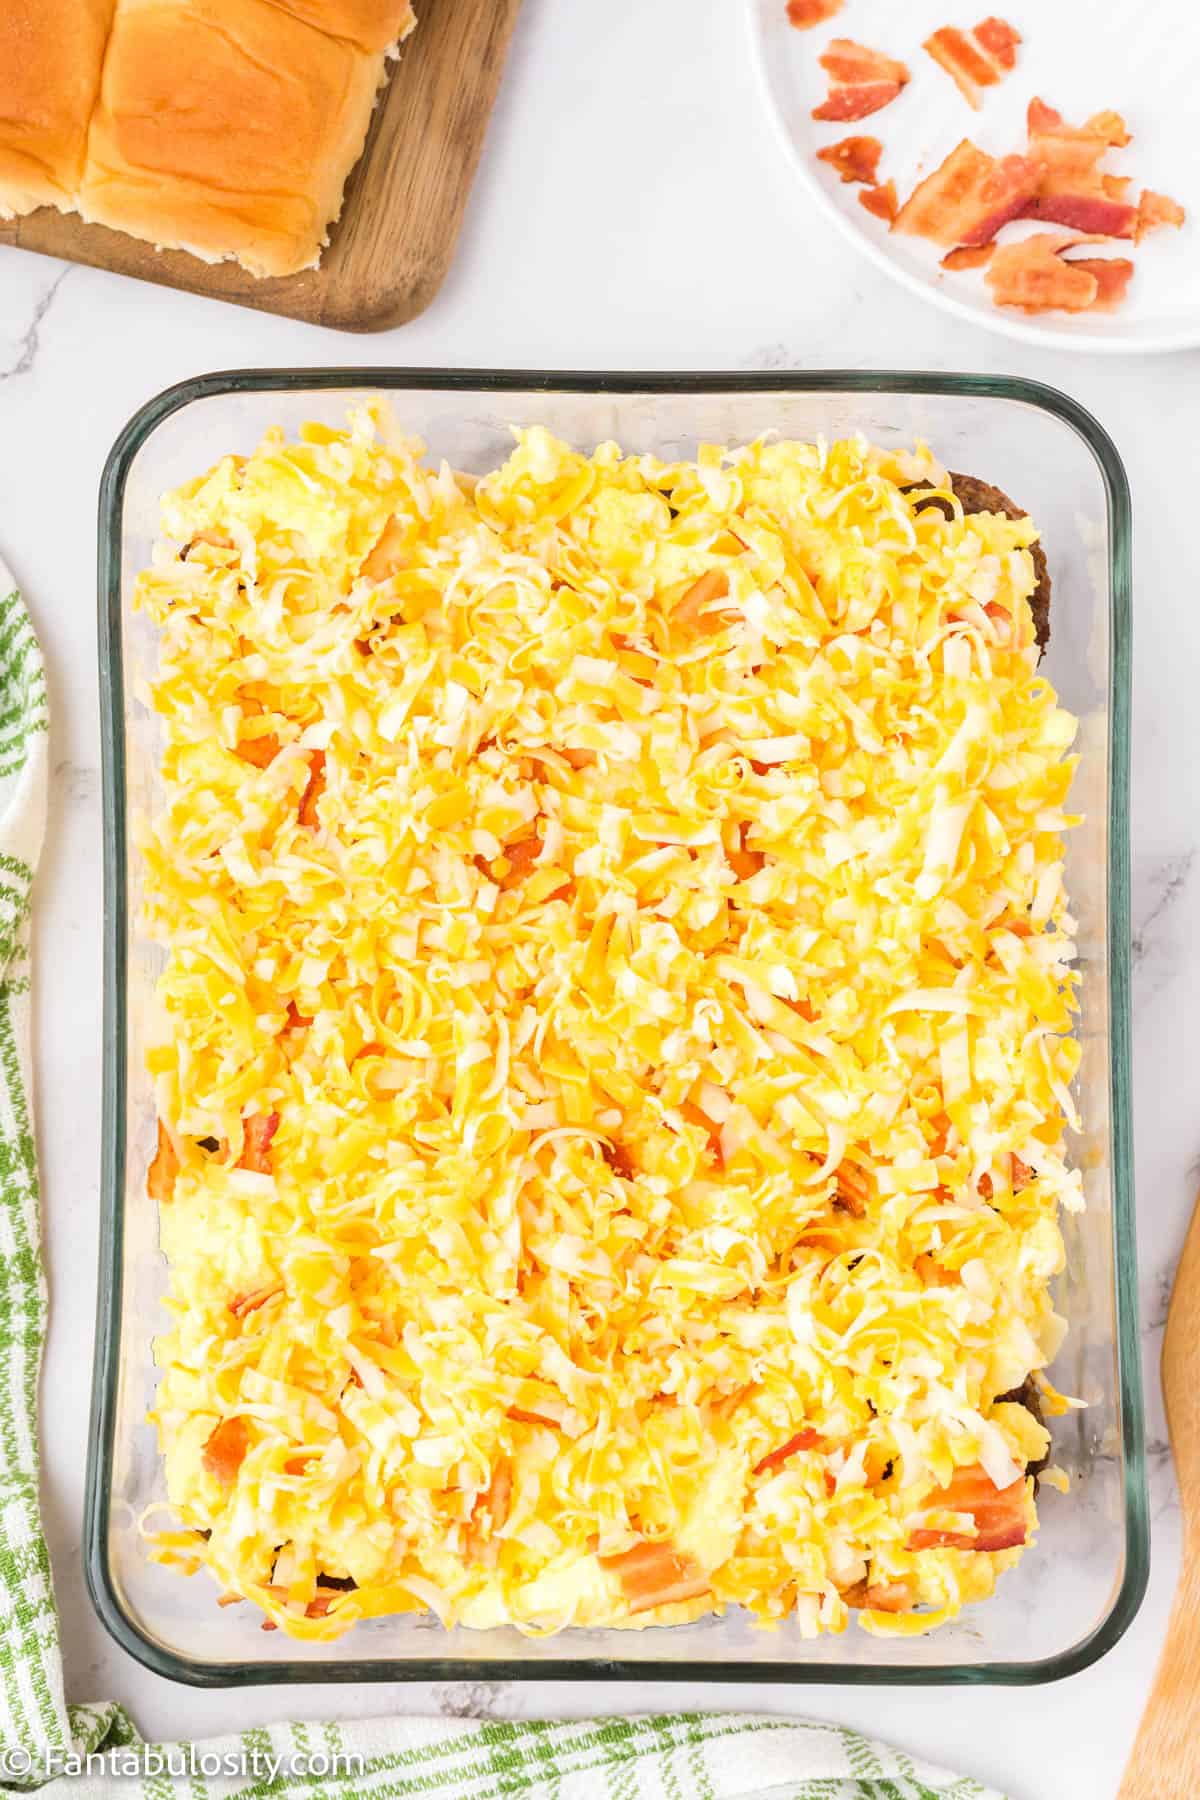
    2. Top the eggs and crispy bacon crumbles with an even layer of shredded Colby jack cheese.
    A layer of shredded cheese has been added to the breakfast slider sandwiches being assembled in a glass baking dish.
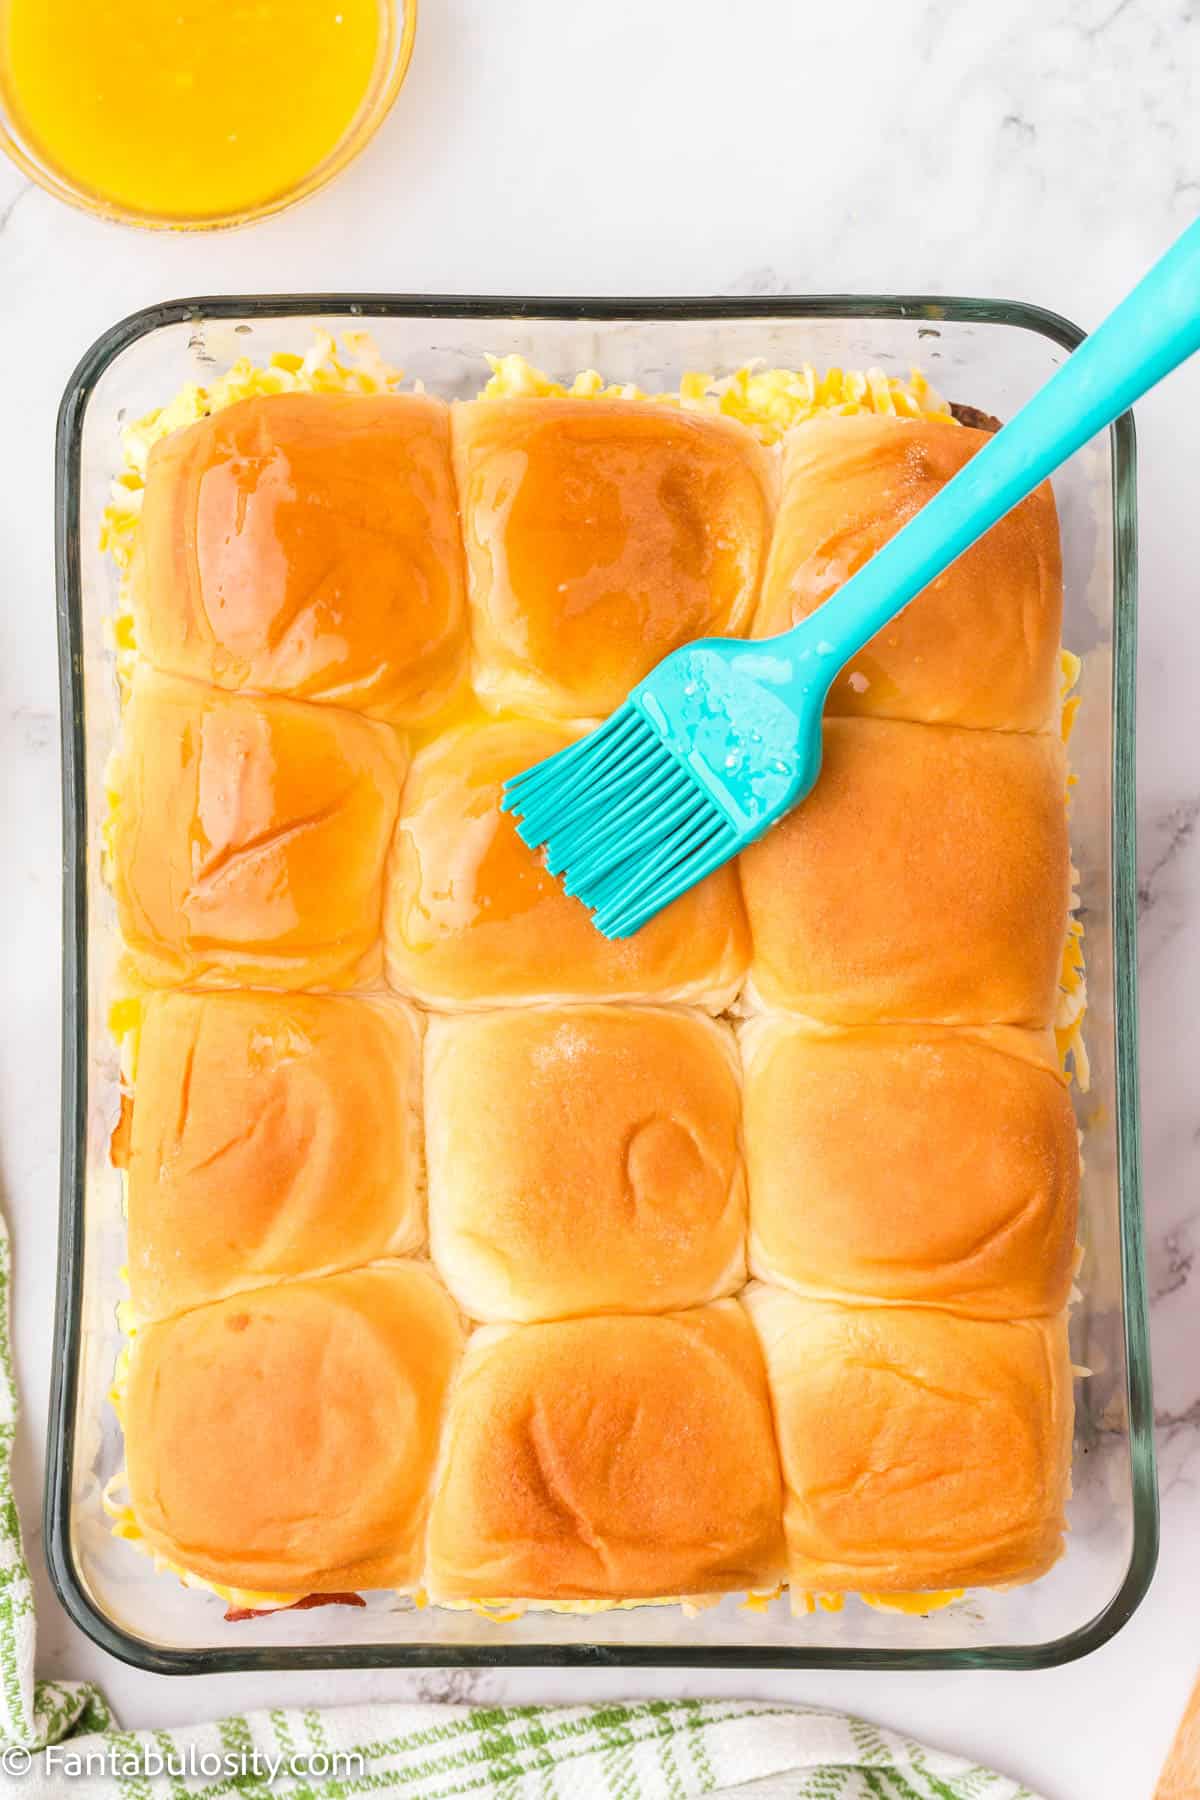
    1. Place the tops of the Hawaiian dinner rolls on top of the cheese.
    2. Now, combine the melted butter and maple syrup in a small bowl. Liberally brush the butter and syrup mixture over the tops of the rolls.
    A silicone brush is brushing melted butter over the tops of 12 breakfast sliders in a glass baking dish.
    1. Finally, bake the sliders uncovered for 15-20 minutes or until the tops of the rolls are golden brown and crispy.
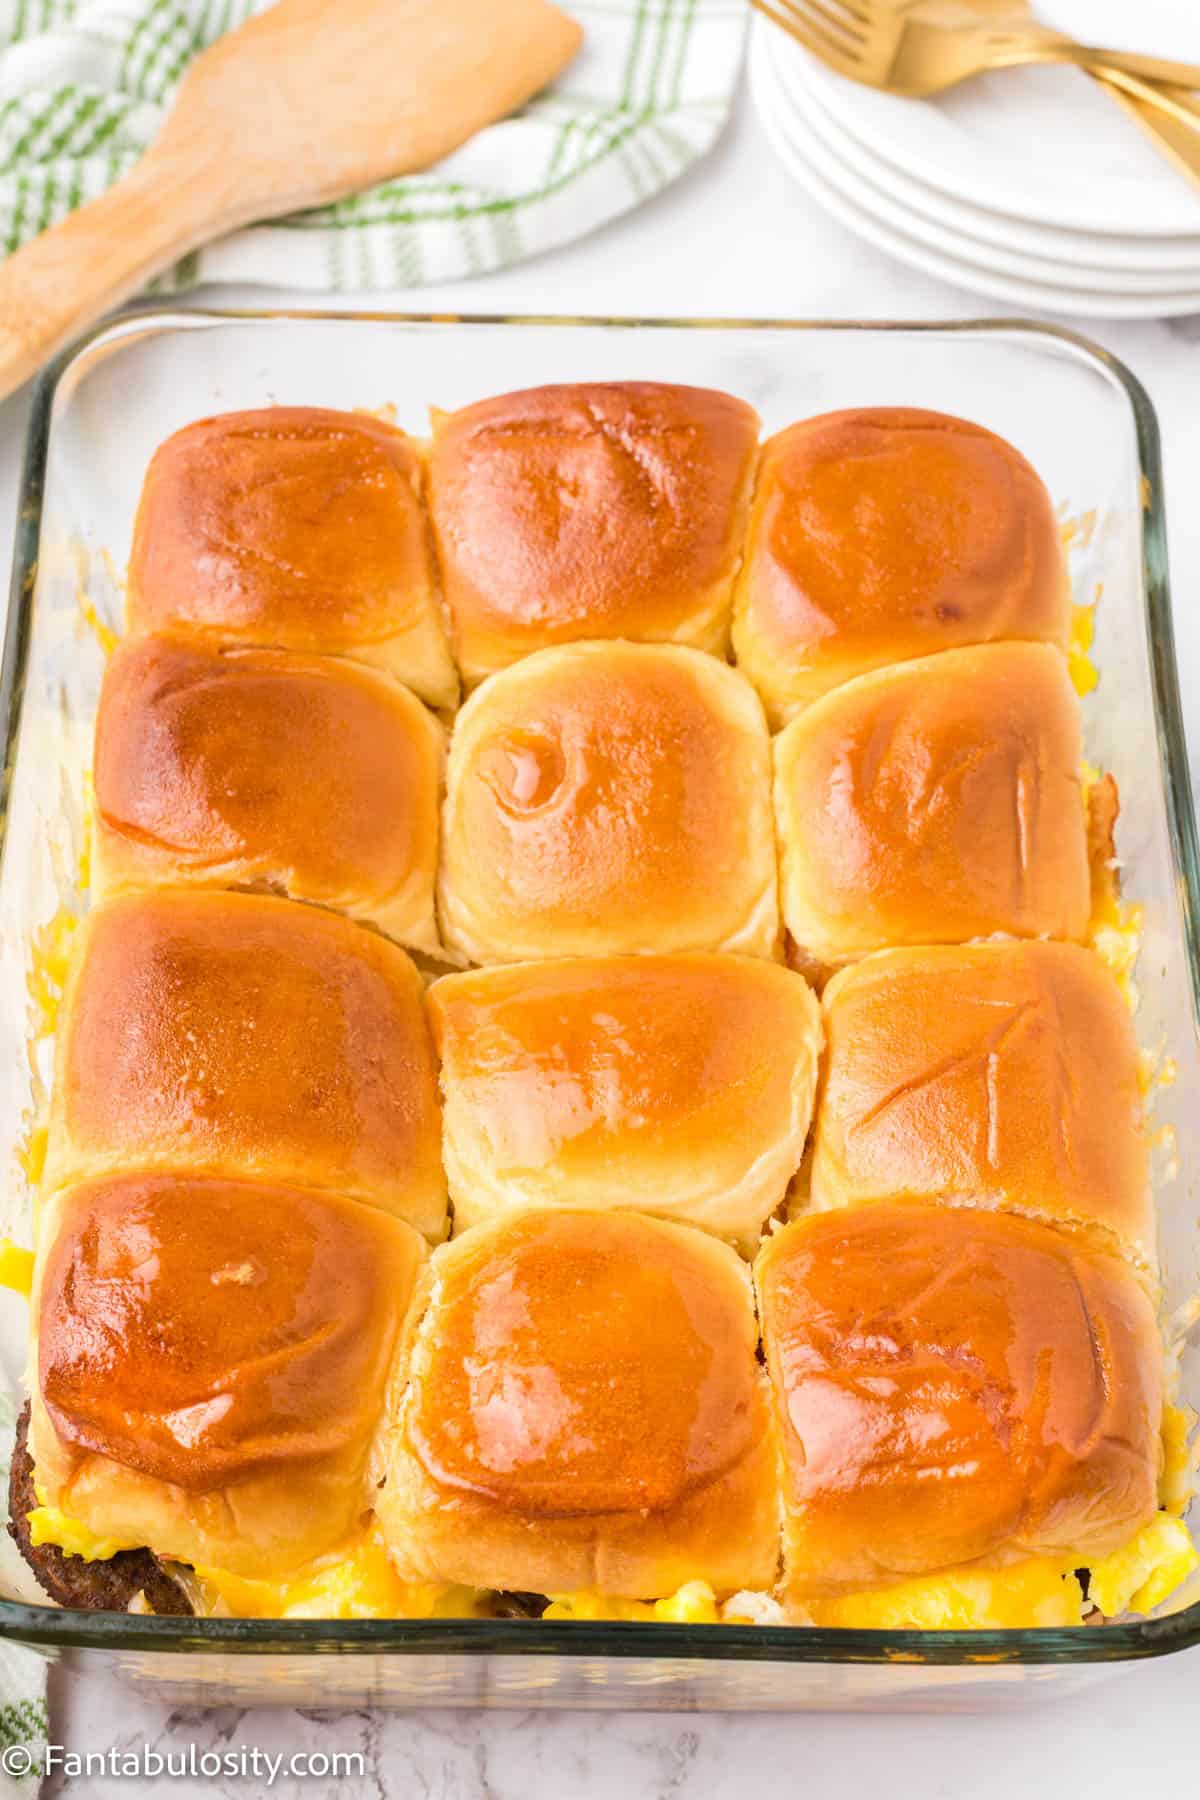
    A glass baking dish is filled with breakfast sliders with toasted buns

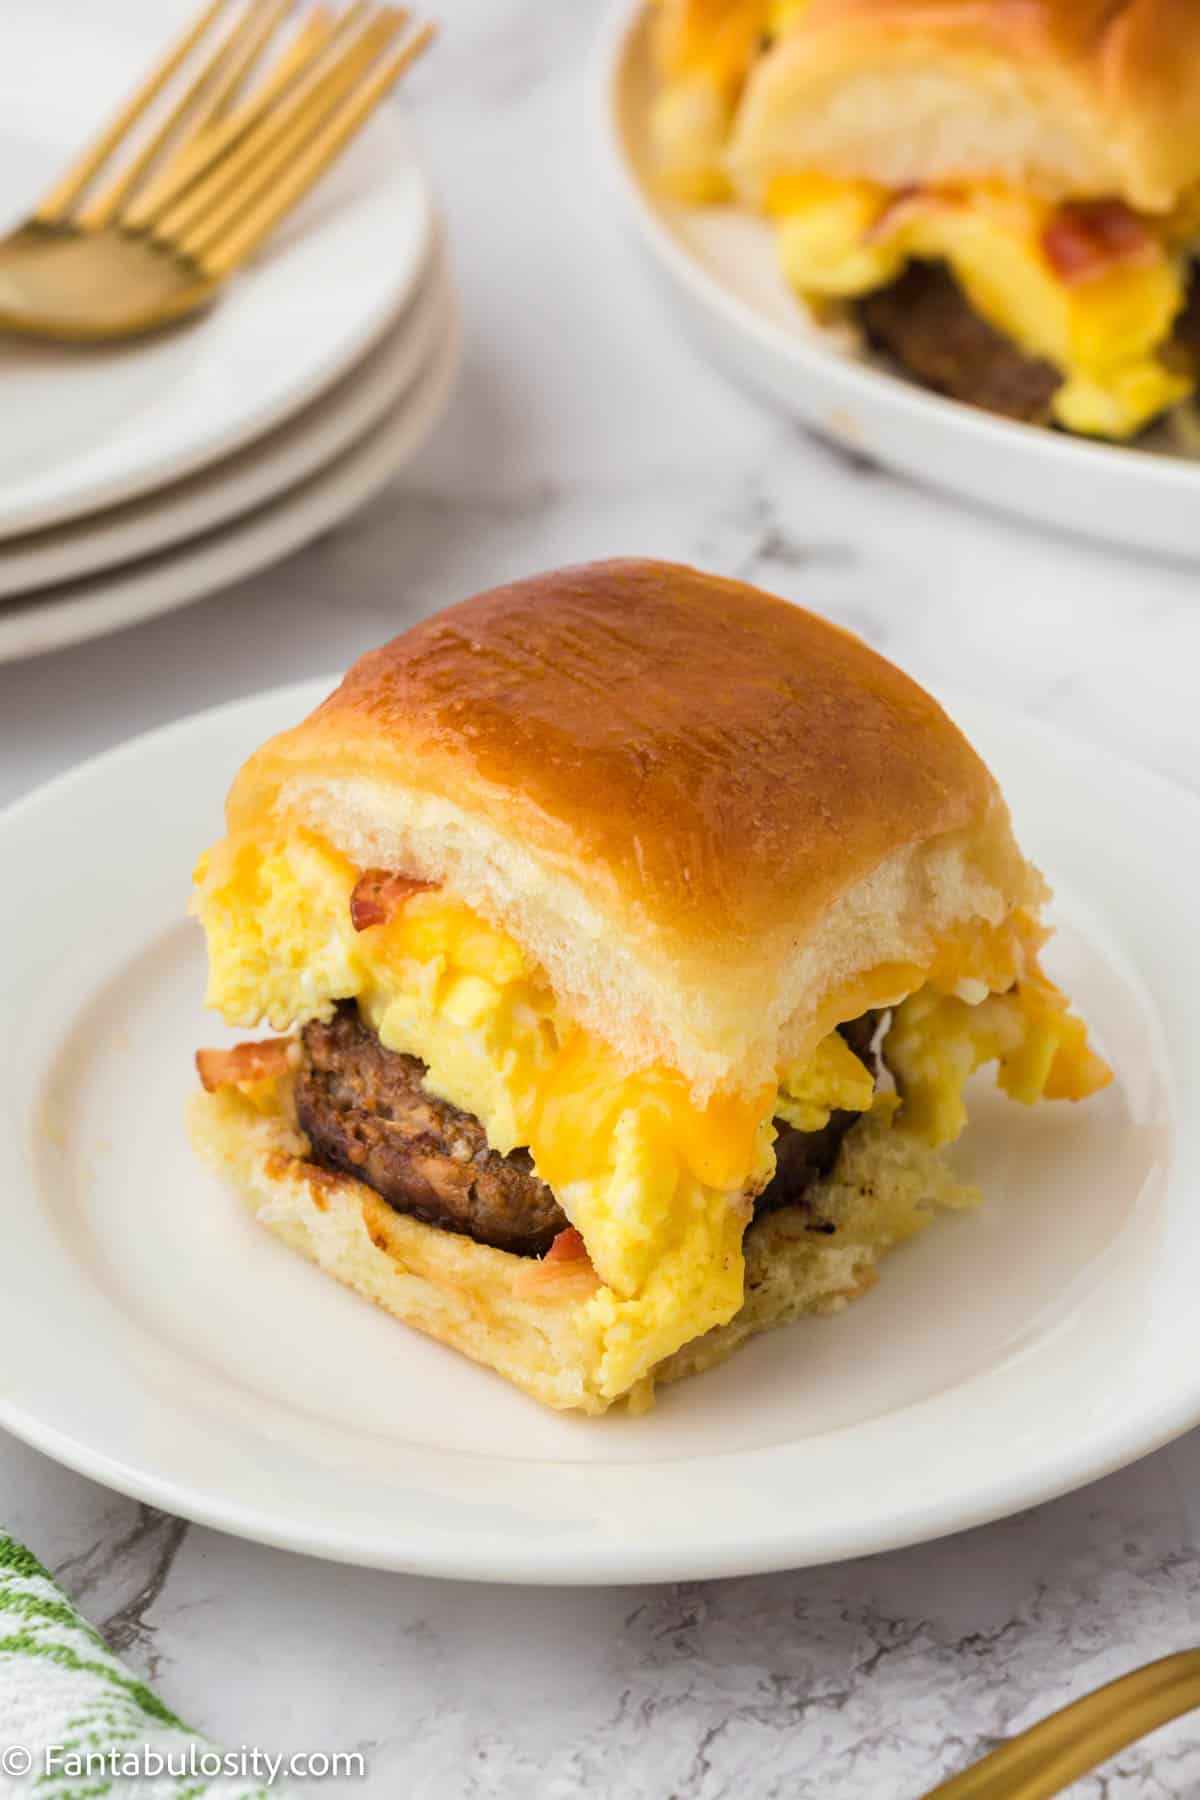
    Cut the individual sliders apart and serve them warm. You are going to love the sweet maple butter glaze and the savory meat, melty cheese, and eggs inside a tender, toasted Hawaiian roll. I mean, what’s NOT to love about these Hawaiian roll breakfast sliders?!

    A single breakfast slider sandwich is balanced on a wooden serving spoon

    Variations

    Burger sliders are always a crowd favorite at any backyard get-together, right? There IS just something about your favorite things tucked in a soft Hawaiian roll. So, it’s time to give the people what they want and make this breakfast version!

    Here are a few ways to adjust our basic recipe to fit your family:

    • Buns – You can use regular slider buns instead of Hawaiian rolls if you’d like. But once you’ve had the sweet roll paired with a salty protein (like in this cheeseburger sliders and this cheesy sloppy joe sliders recipe) it’s hard to use anything else!
    • Breakfast meat – We used pork sausage patties and bacon for these sweet and savory breakfast sliders. Feel free to use turkey sausage, slices of deli ham, ham slices, fried chicken (similar to our crispy chicken sliders) browned and crumbled breakfast sausage (the ground pork sausage in the tube) or Canadian bacon. Or, make something similar to our fried bologna and egg sandwich, by using bologna!
    • Cheese – Our family loves Colby Jack cheese for this recipe, but try shredding provolone, Swiss, cheddar cheese, American, Monterey Jack or even pepperjack cheese. (Pre-shredded cheese actually has an added non-stick coating that prevents it from sticking together, so it doesn’t melt as well. Trust me on this one!)
    • Butter glaze – The maple syrup butter glaze is probably my favorite thing to brush on the tops of the rolls. However, you can make the butter sauce more savory if you use Dijon mustard, Worcestershire sauce, everything bagel seasoning or poppy seeds instead of the maple syrup.
    A white plate in the center of the photo holds a breakfast sandwich made with a Hawaiian roll. Additional plates and sandwiches are seen in the background.

    FAQs

    What can I use in the glaze for breakfast sliders if I don’t have any maple syrup?

    You can substitute brown sugar, honey or agave syrup for the maple syrup in the butter glaze.

    What can I use instead of non-stick spray for baking?

    You can line the baking dish with parchment paper for another non-stick option, like butter or oil.

    I added salt and pepper when I scrambled the eggs. Should I still add the salt and pepper in the recipe?

    No. If you add seasoning when you scramble eggs, omit the salt and pepper listed in the recipe. Otherwise, you may have really salty sliders.

    Can breakfast sliders be eaten warm or cold?

    These sliders can be eaten warm or cold, but they are at their best when they are hot and toasty right from the oven!

    What should I serve with breakfast sliders?

    I don’t think anyone will turn down bacon cooked in the air fryer or air fryer crispy breakfast potatoes. Fresh fruit is a great side for breakfast slider. We think this Honey Lime Fruit Salad, Apple Salad or an easy-to-assemble Fruit Board are perfect for breakfast or brunch!

    Storage

    Store any leftover Hawaiian roll breakfast sliders in an airtight container in the refrigerator for up to 3 days.

    To freeze, wrap individual sliders in plastic wrap, then aluminum foil, and place them in a freezer bag or freezer-safe container for up to 4 months. Thaw them in the refrigerator before reheating and serving the sliders.

    Related Recipes

    If you are looking for breakfast sandwich recipes, you have hit the jackpot!

    • A classic Bacon Egg and Cheese Sandwich is always a great choice.
    • Our Hawaiian Breakfast Sandwich with a fruity twist may surprise you.
    • Mini Waffle Breakfast Sandwiches are bite sized, but they are big on flavor.
    • If you are craving a hearty, sweet and savory breakfast sandwich, try our Waffle Burger or Donut Burger!

    Did you make this? I’d be so grateful if you left a “star” rating below to let me know what you thought! Then, the next time you need a quick and easy recipe, come back to Fantabulosity to browse all of my easy recipes!

    Recipe

    A close up photo of a stack of breakfast slider sandwiches
    Print Pin
    5 from 7 votes

    Hawaiian Roll Breakfast Sliders

    Hawaiian Roll Breakfast Sliders: Everyone's favorite Hawaiian rolls are stuffed with sausage, bacon, eggs and cheese and brushed with a butter maple glaze and then baked until warm and toasty!
    Course Breakfast
    Cuisine American
    Prep Time 10 minutes minutes
    Cook Time 20 minutes minutes
    Total Time 30 minutes minutes
    Servings 12 sliders
    Calories 457kcal
    Author Jessica Burgess

    Ingredients

    • 12 Hawaiian Rolls
    • 12 breakfast sausage patties cooked
    • 12 eggs scrambled
    • ½ teaspoon salt
    • 1 teaspoon black pepper
    • 6 slices cooked bacon
    • 2 cups colby jack cheese shredded
    • ¼ cup melted butter
    • 2 tablespoon maple syrup

    Instructions

    • First, preheat your oven to 350 degrees F and spray an 8×10 casserole dish with non-stick cooking spray.
    • Using a bread knife, slice the Hawaiian rolls horizontally while keeping the tops and bottoms connected to each other.
    • Place the roll bottoms in the casserole dish.
    • Next, place the breakfast sausage patties over the rolls in a single even layer.
    • Now, top the sausage patties with the scrambled eggs and sprinkle the eggs with salt and pepper.
    • Next, crumble the bacon and sprinkle it evenly over the scrambled eggs.
    • Top the eggs with an even layer of shredded Colby jack cheese.
    • Place the roll tops on top of the cheese.
    • Now, combine the melted butter and maple syrup. Liberally brush the butter and syrup mixture over the tops of the rolls.
    • Finally, bake the sliders uncovered for 20 minutes or until the tops of the rolls are golden brown and crispy. Cut the sliders apart and serve warm.

    Notes

    • Store any leftover sliders in an airtight container in the refrigerator for up to 4 days.
    • You can wrap and freeze individual breakfast sliders in an airtight, freezer safe container or freezer bag for up to 3 months. Thaw them completely in the refrigerator before reheating and serving the sliders.  

    Nutrition

    Serving: 1slider | Calories: 457kcal | Carbohydrates: 18g | Protein: 22g | Fat: 33g | Saturated Fat: 14g | Polyunsaturated Fat: 3g | Monounsaturated Fat: 12g | Trans Fat: 0.3g | Cholesterol: 242mg | Sodium: 750mg | Potassium: 227mg | Fiber: 0.04g | Sugar: 6g | Vitamin A: 611IU | Vitamin C: 0.3mg | Calcium: 185mg | Iron: 1mg

    Toddler Lunch Ideas

    October 21, 2022

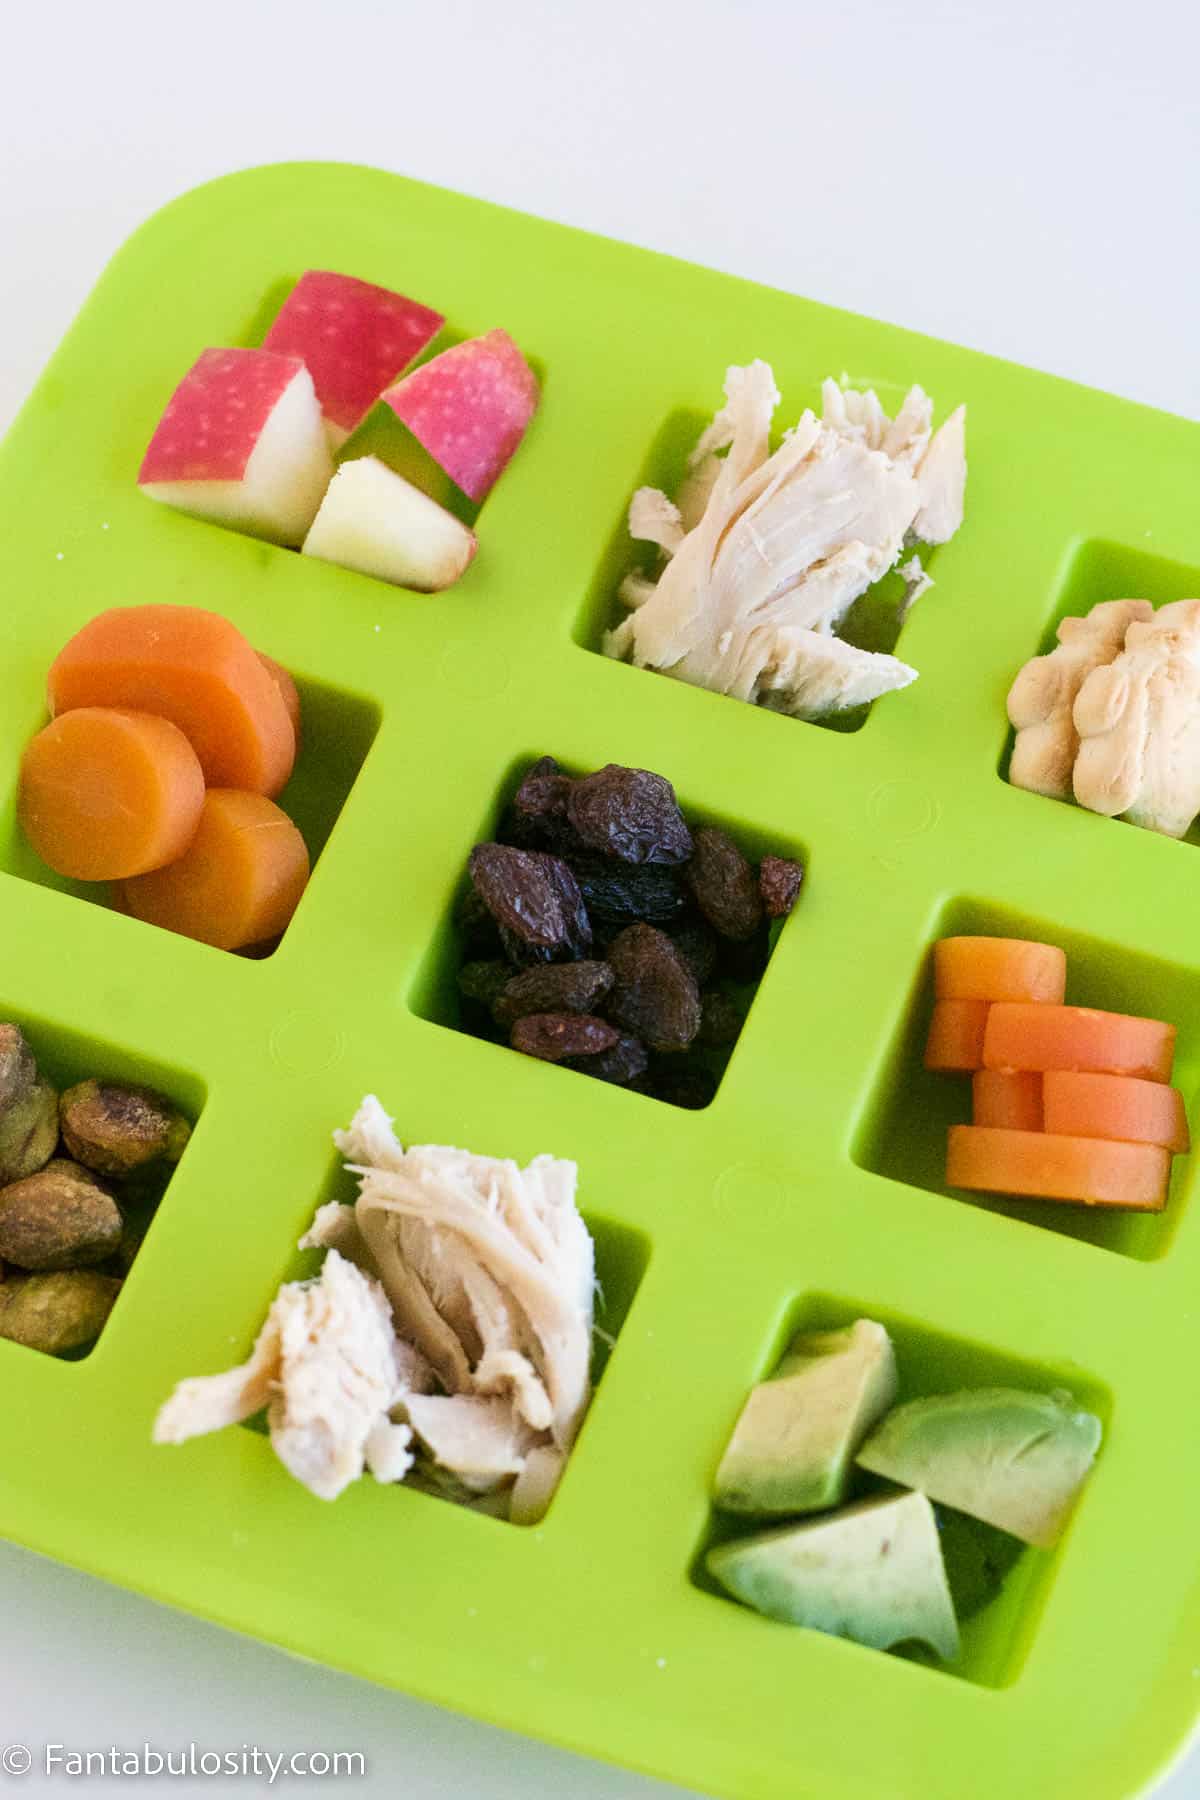
    Toddler foods in ice cube tray

    Toddler Lunch Ideas: If you’re on a mission to find an easy toddler lunch idea, you’ll not only find a list of ideas but a list of great recipes, too!

    toddler lunch idea in ice cube tray

    What you see in the photo above, in the ice cube tray:

    • Avocado
    • Chicken
    • Nuts
    • Carrots
    • Raisins
    • Animal Crackers
    • Apple Slices, or favorite fruit
      More Ideas that Would Fit in the Tray:
    • Pita Bread
    • Bell Peppers
    • Black Beans
    • Sweet Potatoes
    • Whole Grain Crackers
    • Carrot Sticks
    • Tortilla Chips
    • Snap Peas
    • Cheese slices or cubes

    I have had a picky eater in the world! Trust me, I could TOTALLY put him in a contest for the pickiest eater, and win… hands down. His favorite diet consisted of PB&J’s, grilled cheeses, green beans, and carrots. Repeat.

    After a recent medical scare with him, it was time to change my son’s eating habits.
    So I’m sharing quick lunch ideas that rotate through our house, for normal toddler lunches, in hopes it helps you get through the toddler lunch “funk,” that you may be in. You may also find some snack ideas if you’re traveling on a road trip with your toddler!

    I’m also going to share some of the best recipes from of my blogging friends in case you’re looking to add more ideas to your rotation!

    Tips for Toddler Lunches

    • Ice Cube Trays: It’s kind of like a more organized way to create a small charcuterie board or a lunch bento box. I don’t know about you but when I arrange small amounts of different varieties of food on a platter, my kids seem to eat more of it! But with little ice cube trays, it’s easier to keep things separated for little hands, and we really think it’s a good idea.
    • Fun Shapes: Use fun-shaped cookie cutters to cut out fun shapes of foods to make eating veggies fun! For instance, cut a cucumber in half, the long way, and use a narrow cookie cutter (for example, a “train”) and the cucumber may be eaten more than normal!
    • Hidden Veggies: Using a blender, food processor, or juicer to mash up or minimize the vegetables or new foods your toddler may not like, is a great way to sneak them in to their favorite foods!
    • Dips for vegetables or crackers: Sometimes adding a simple dip can encourage young toddlers to try more; such as ranch dressing, almond butter or seed butter, cottage cheese, cheese dip, and greek yogurt.

    Toddler Meal Idea List

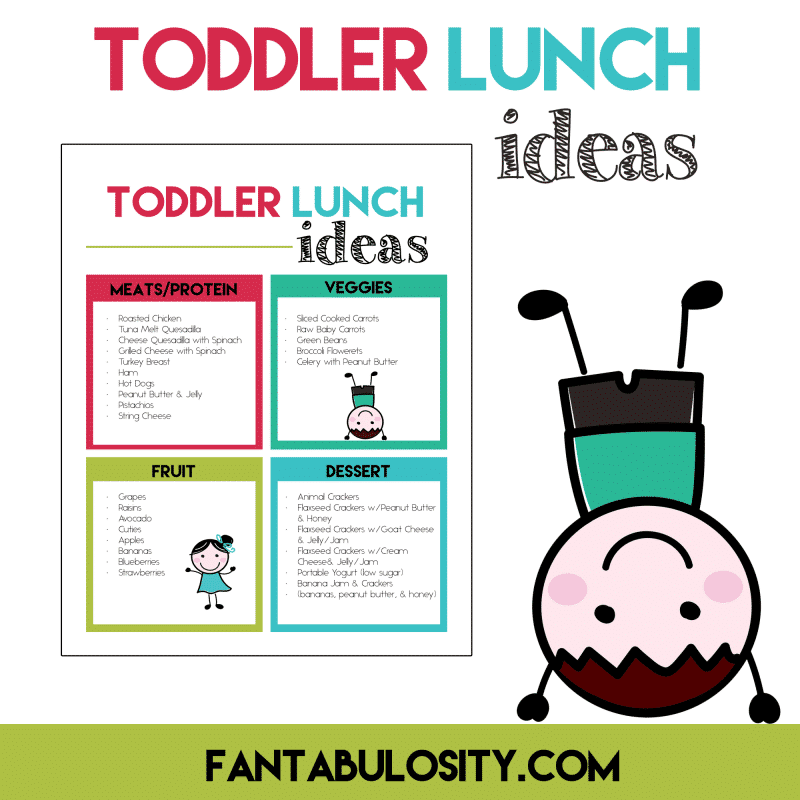
     I’ve also provided a free printable of toddler lunch ideas, in case you’d like to print this. Keep it handy for those days when your brain is fried and you don’t feel like getting creative in the kitchen. Plus… take a look at it, before you make your grocery shopping list, and add the items you need to get.

    Download the List HERE!
    Toddlerlunchpreview

    DISCLAIMER: Keep in mind that some of the food items that I mention, may not tickle your fancy. I get that. Before my son was diagnosed with epilepsy, and we took him to a nutritionist, I would have turned my nose up at some of these items as well. For instance… “hot dogs,” “lunch meat,” “chicken nuggets,” etc. But my little 4 year old, chosen vegetarian, was really lacking in the protein department, so I’ve since then, tried incorporating some meats in to his lunches. I just try to only buy the hot dogs and lunch meat without nitrates, artificial flavorings, etc., to do the best that I can with healthy toddler lunch ideas.

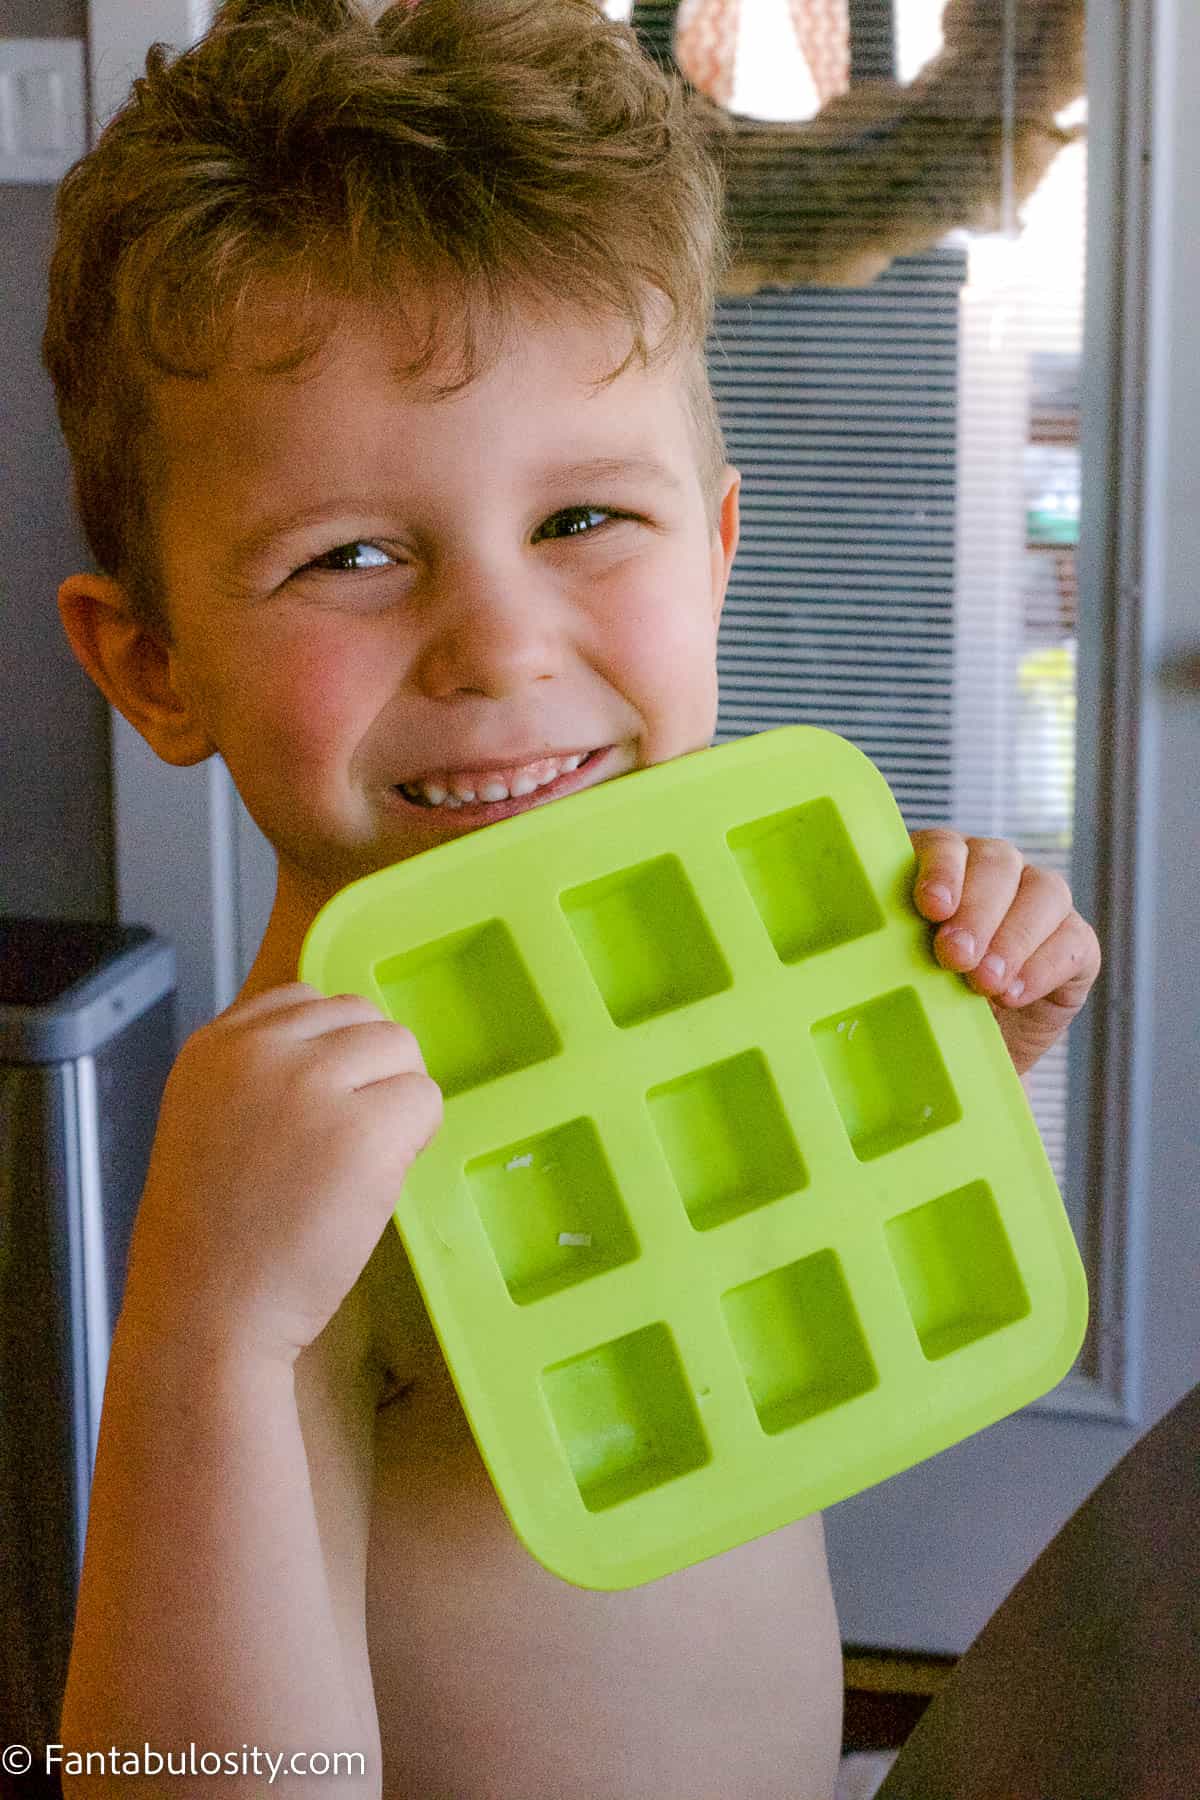
    Eeeek! Look how sweet he is! This is the first time he used the new plate. He ate every bit of his goodies, without a fight. (But he couldn’t take his eyes off of his favorite show on tv, long enough for me to get a photo.) 🙂

    Toddler holding ice cube tray
    Toddler Favorite!

    Toddler Lunch Recipes

    See some of our favorite lunch ideas for toddlers, from some of my favorite blogging friends that are a great option for lunches:

    How to Make a Peanut Butter and Jelly Sandwich
    How to Make a Peanut Butter and Jelly Sandwich: Did you know that there's a certain way to make a pb&j even better? It's true. Keep reading!
    Peanut Butter and Jelly Recipe
    Close up of peanut butter and jelly sandwich
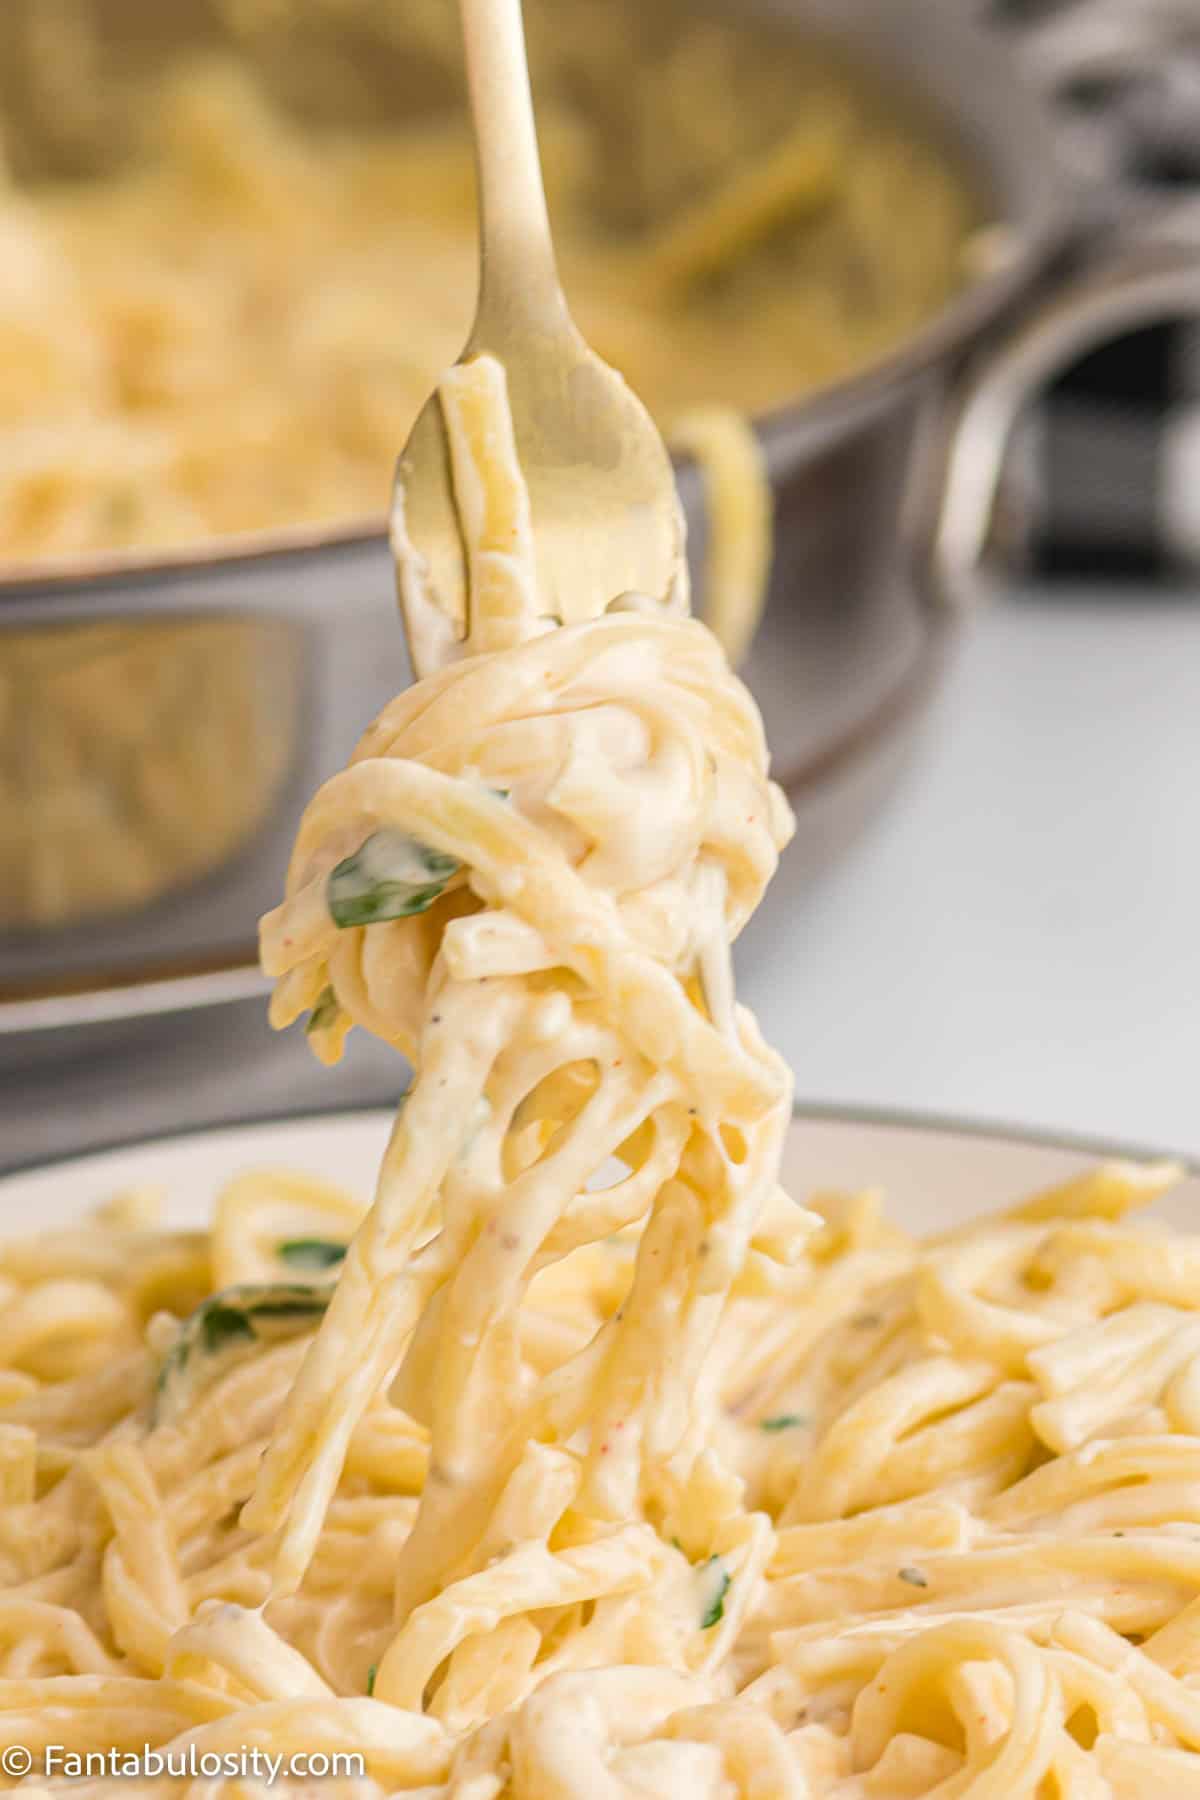
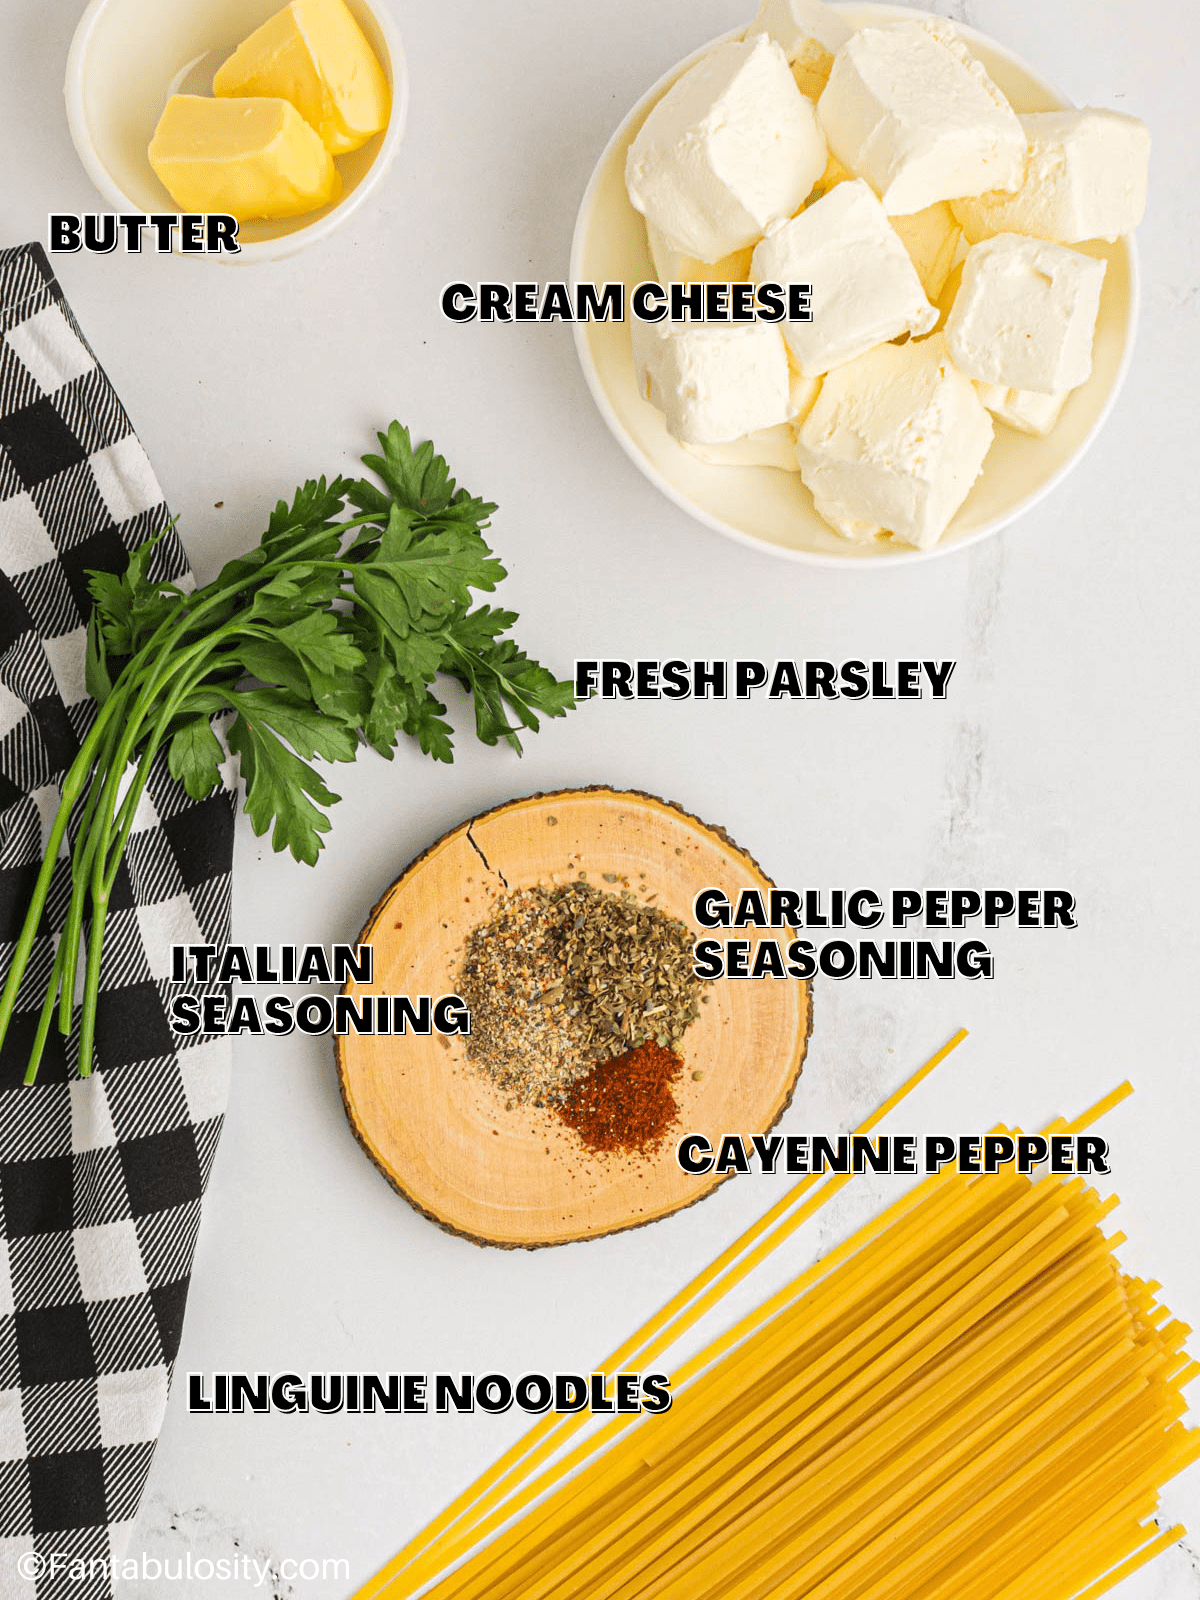
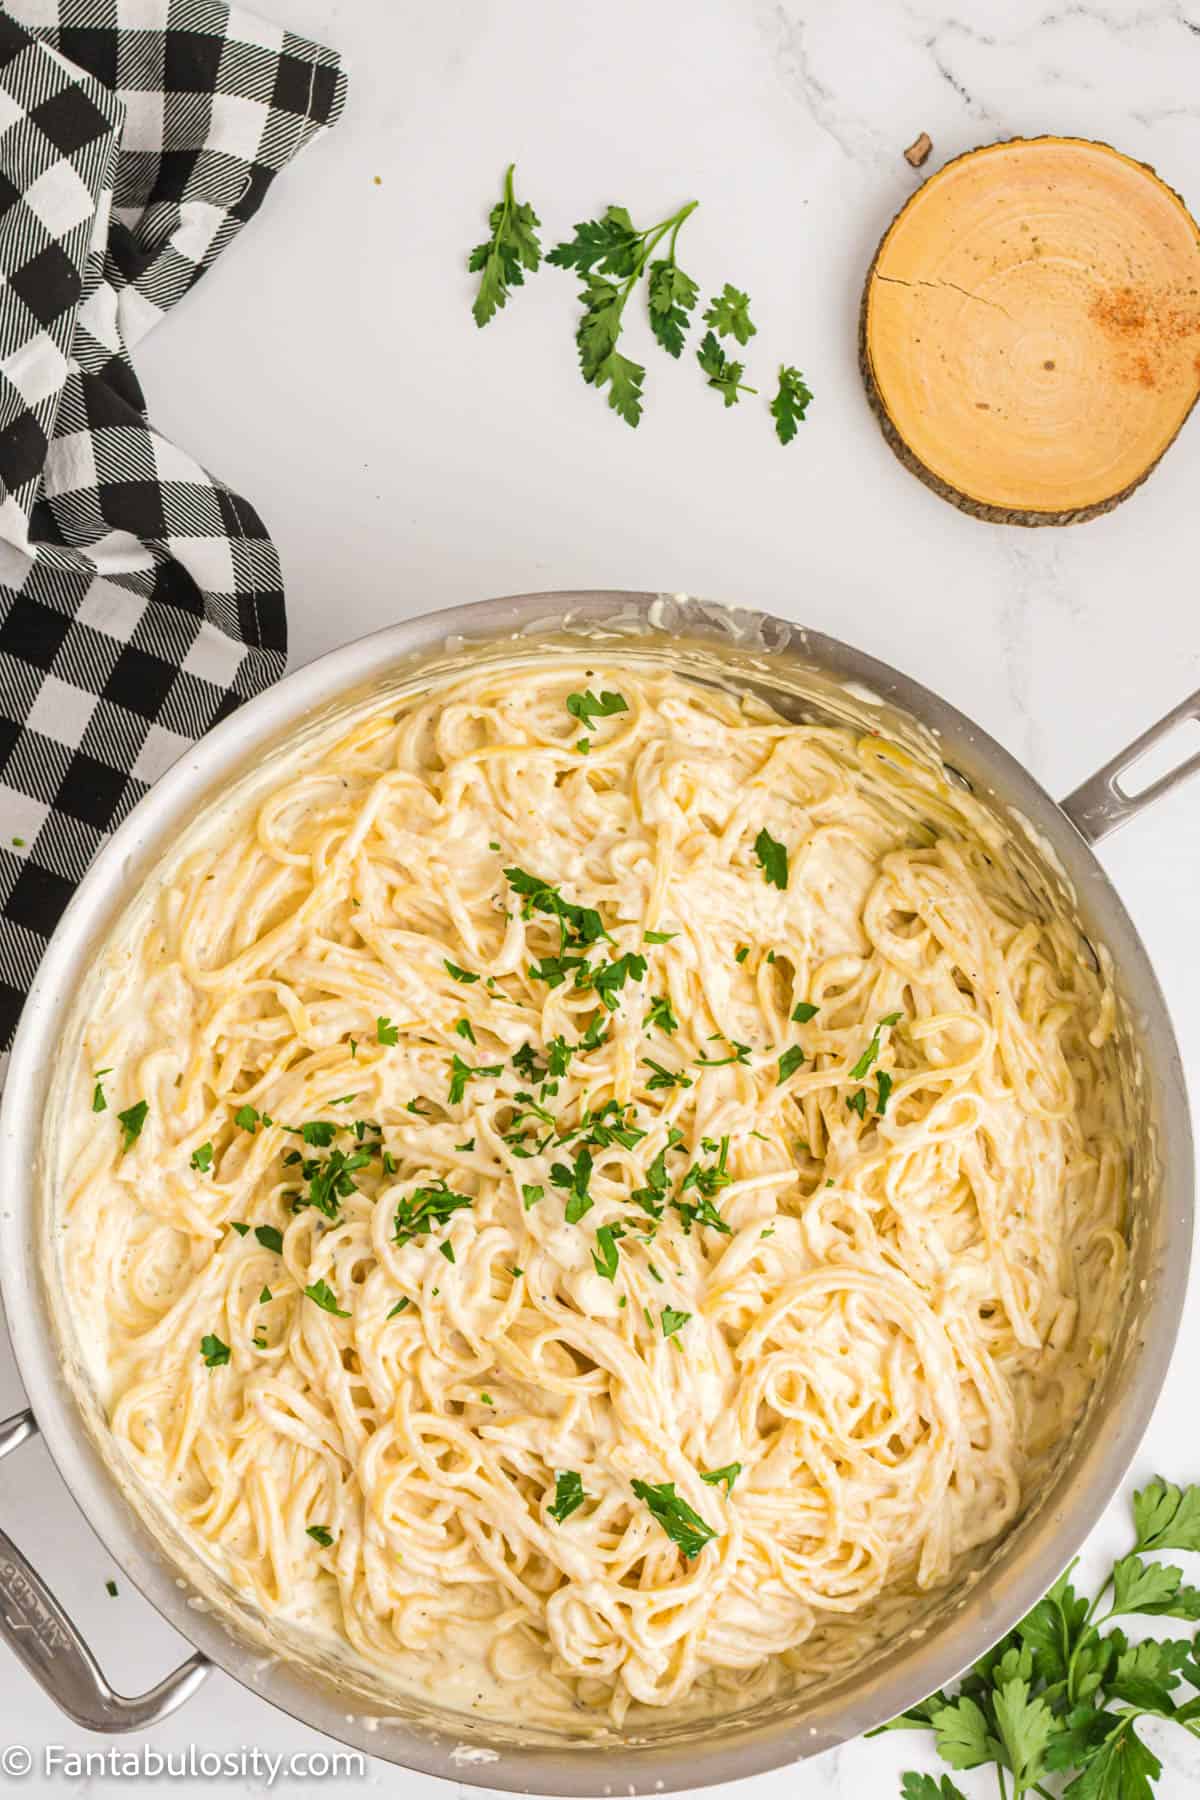
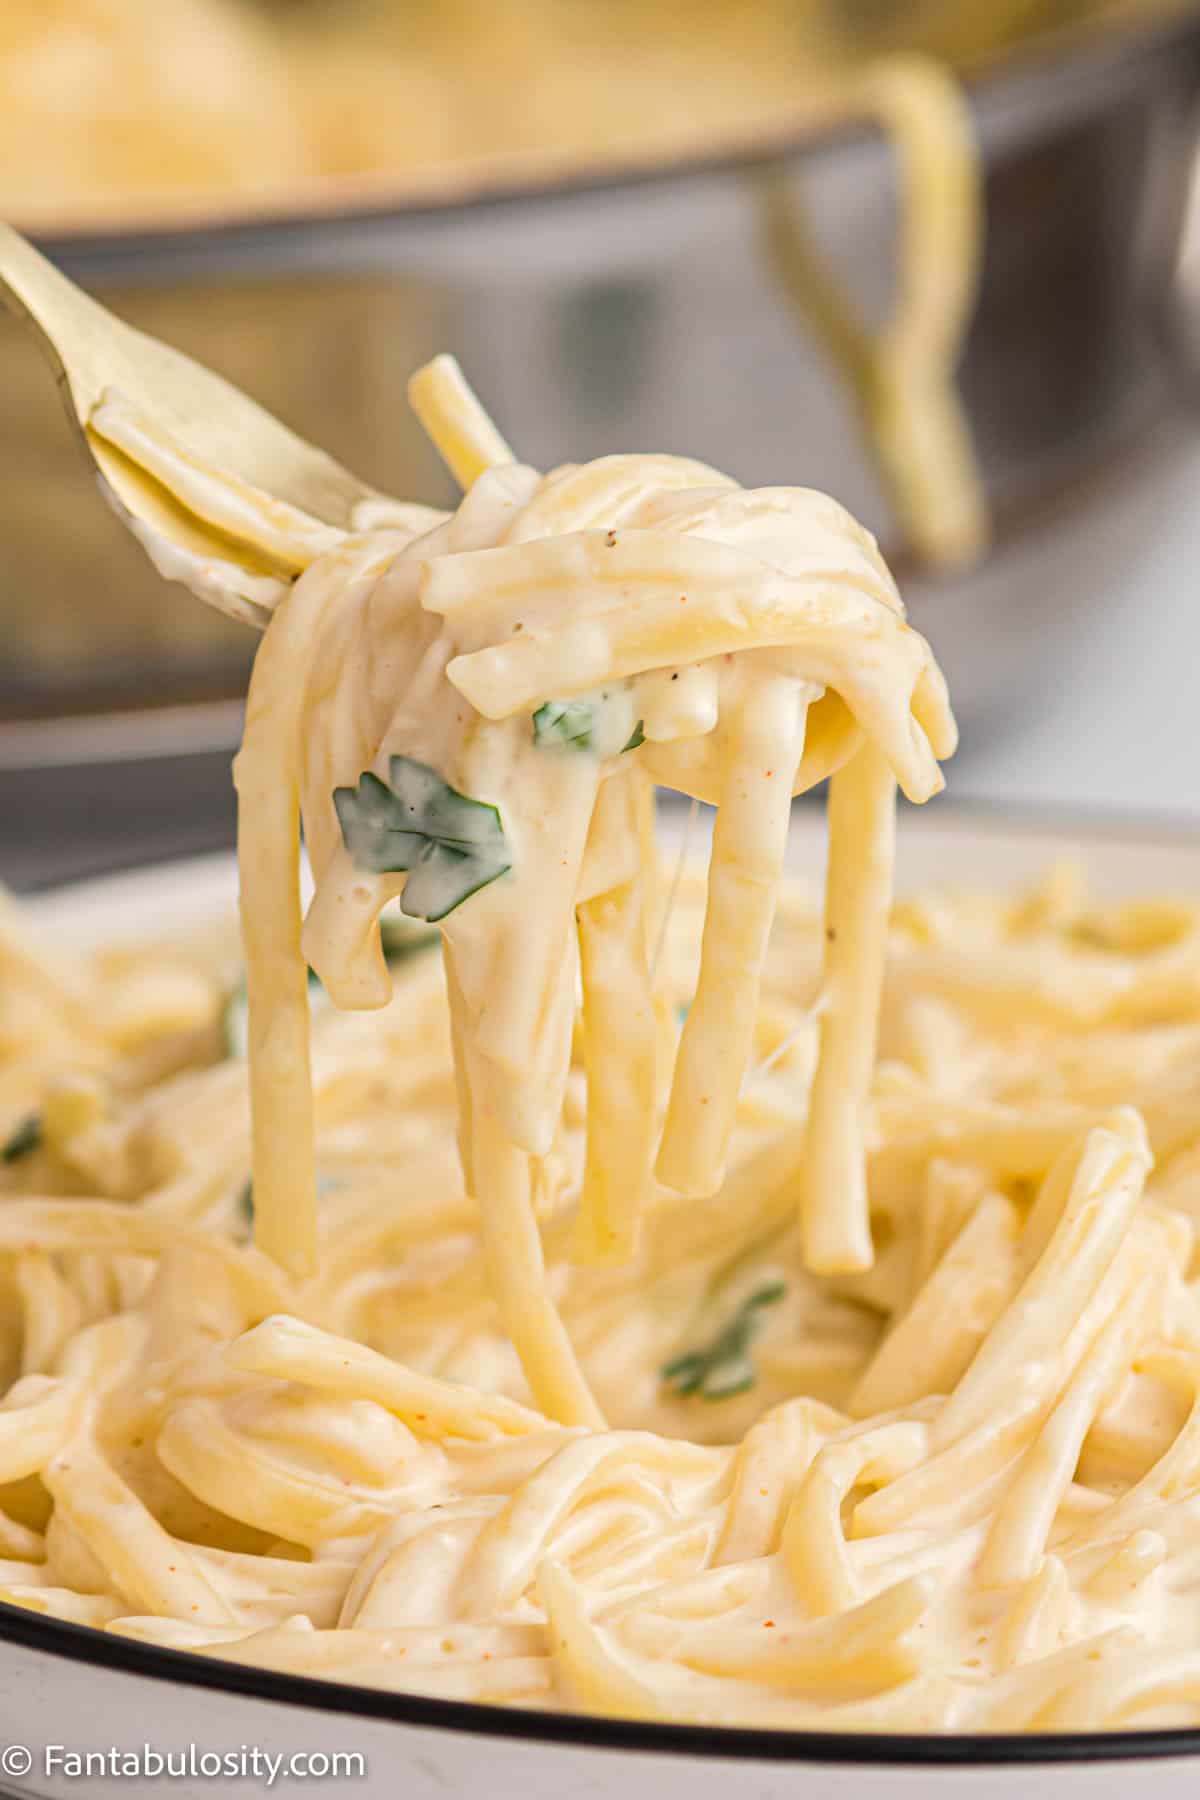
    Cream Cheese Pasta
    Cream Cheese Pasta: This linguine covered in cream cheese pasta sauce is the perfect recipe for a busy weeknight dinner! It's ready in 20 minutes, & only calls for 7 simple ingredients
    Cream Cheese Pasta Recipe
    Cream Cheese Pasta being scooped up and held above the plate.
    Mozzarella Wrap with Tomato and Basil
    You can also make a cheese quesadilla with just cheese and tortillas.
    Mozzarella Wrap
    easy caprese wrap recipe
    Pizza Monkey Bread
    This pepperoni pizza monkey bread is a delicious blend of bread, parmesan cheese, marinara sauce, pepperoni, mozzarella cheese and italian seasoning, baked in a bundt pan creating a delicious appetizer recipe!
    Pizza Monkey Bread Recipe
    pizza monkey bread
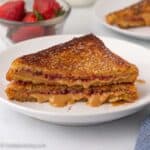
    Fried Peanut Butter and Jelly Sandwich
    A fried peanut butter and jelly sandwich is your classic pb&j, cooked on the stovetop with butter, giving it a crispy outside with a warm and gooey inside.
    Fried Peanut Butter and Jelly
    Fried peanut butter and jelly sandwich, sliced on white plate.
    Hot Ham and Cheese Sandwiches
    Hot Ham and Cheese Sandwiches: Hamburger buns, slices of cheese, and your favorite ham, toasted in the oven to create an easy lunch or dinner idea!
    Hot Ham and Cheese Recipe
    Hot ham and cheese sandwich on white plate
    Fresh Fruit Salad
    Honey Lime Fruit Salad: A refreshing fresh fruit salad that's always a hit! Serve this fruit salad as a healthy dessert or as a sweet side dish for any occasion!
    Honey Lime Fruit Salad
    Honey Lime Fruit Salad
    Hard-Boiled Eggs
    Instant Pot Hard Boiled Eggs: So quick, easy and it made the shells peel off so easily, with the 5, 5 & 5 method!
    Instant Pot Hard Boiled Eggs Tutorial
    sliced hard boiled eggs on plate
    Pizza Bagels
    These pizza bagels are the perfect quick dinner recipe and are great for the pickiest eaters! Pizza night made easy with this recipe.
    Easy Pizza Bagels Recipe
    Bagel pizza topped with pepperonis on baking sheet.
    Fried Bologna and Egg Sandwich
    Fried Bologna and Egg Sandwich: A couple of bologna slices, an egg, a couple of slices of bread, and a pat of butter, and you're set for a delicious breakfast recipe!
    Fried Bologna Sandwich Recipe
    Fried Bologna and Egg Sandwich
    Peanut Butter and Syrup Sandwich
    This peanut butter and syrup sandwich recipe is the perfect side dish for chili or your favorite soup or a great, sweet lunch idea!
    Peanut Butter and Syrup Recipe
    Peanut butter and syrup sandwich sliced in half, stacked on top of each other.
    Homemade Spaghetti O's (Allergy-Free, Gluten-Free, Vegan)
    These homemade spaghetti O's are allergy-free, gluten-free, and vegan! A super easy lunch or dinner that's kid-friendly and mom-approved!
    Check out this recipe
    Ham and Pea Pasta
    This Ham and Pea Pasta is a delicious change from the traditional mac and cheese. Filled with bits of ham and frozen peas and can be ready in just 20 minutes!
    Check out this recipe
    Veggie Muffins
    These veggie muffins taste sweet and chocolaty but they're loaded with hidden vegetables. They're an easy way to sneak some extra nutrients into a picky toddler's lunch.
    Check out this recipe

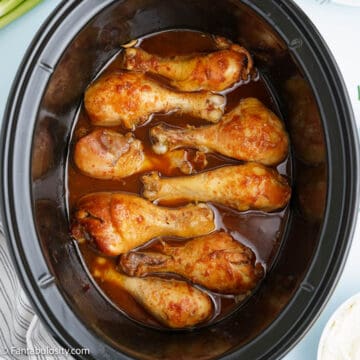
    Slow Cooker Chicken Drumsticks

    October 20, 2022

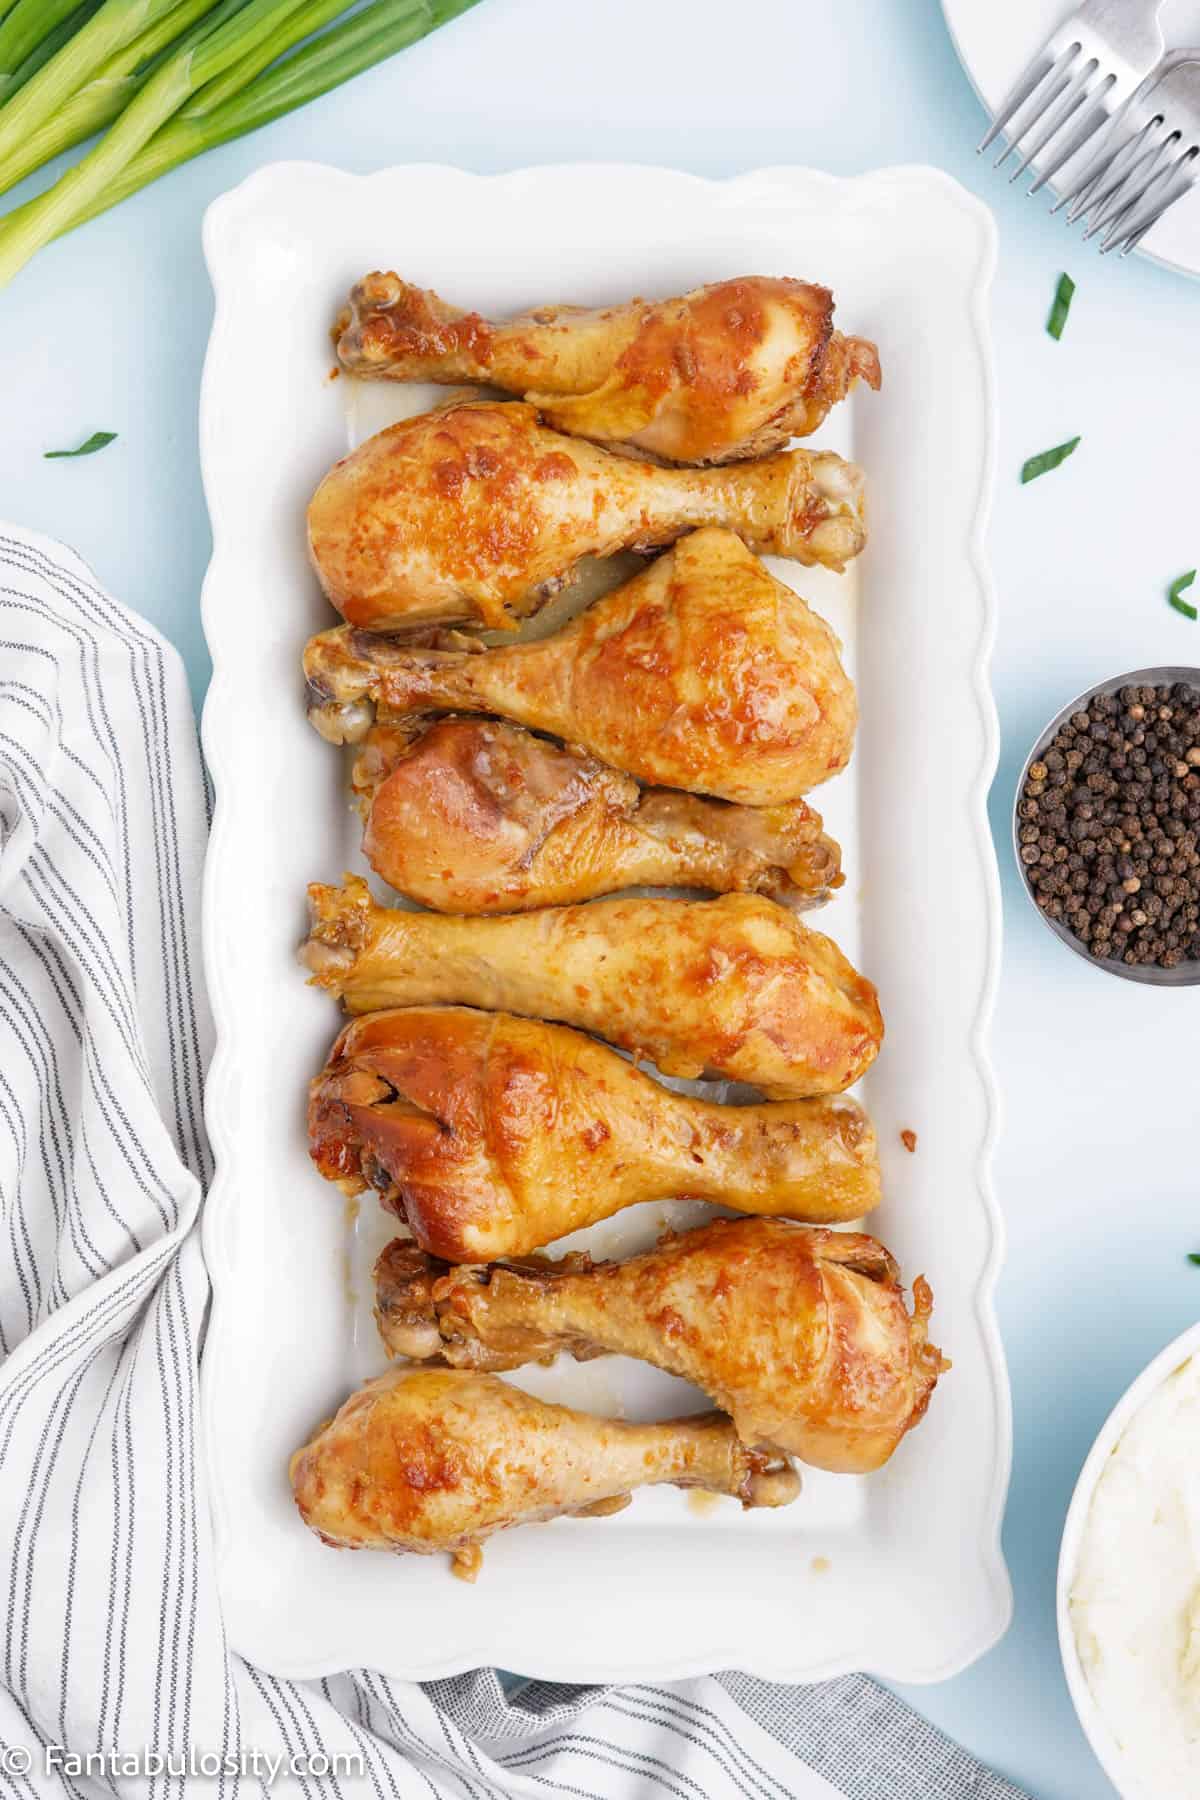
    Eight cooked chicken drum sticks are swimming in a sauce in a black crock pot

    Slow Cooker Chicken Drumsticks: Budget-friendly chicken drumsticks are cooked low and slow in a savory sauce until they fall off the bone tender!

    If you love chicken in the slow cooker, this Crock Pot Jalapeno Chicken and this crockpot chicken pasta, need to be next on your list!

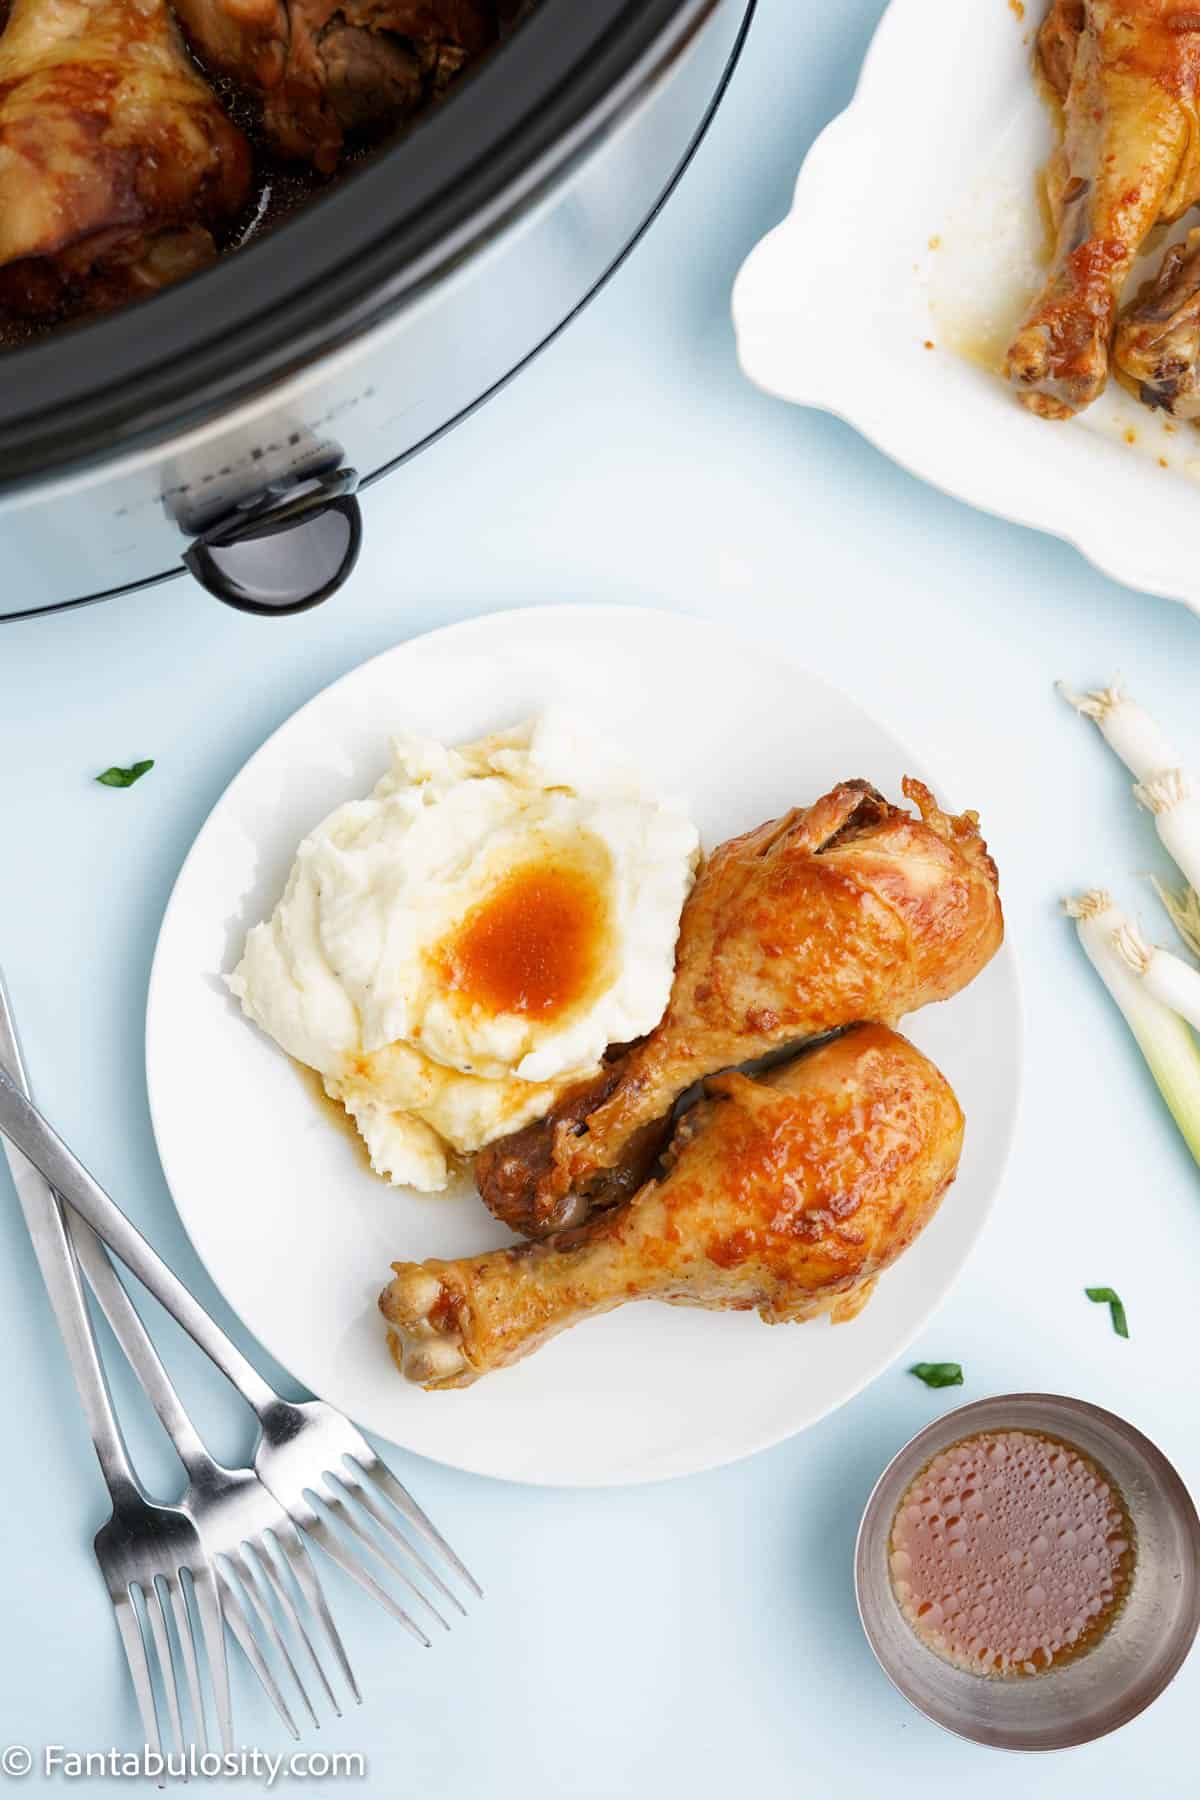
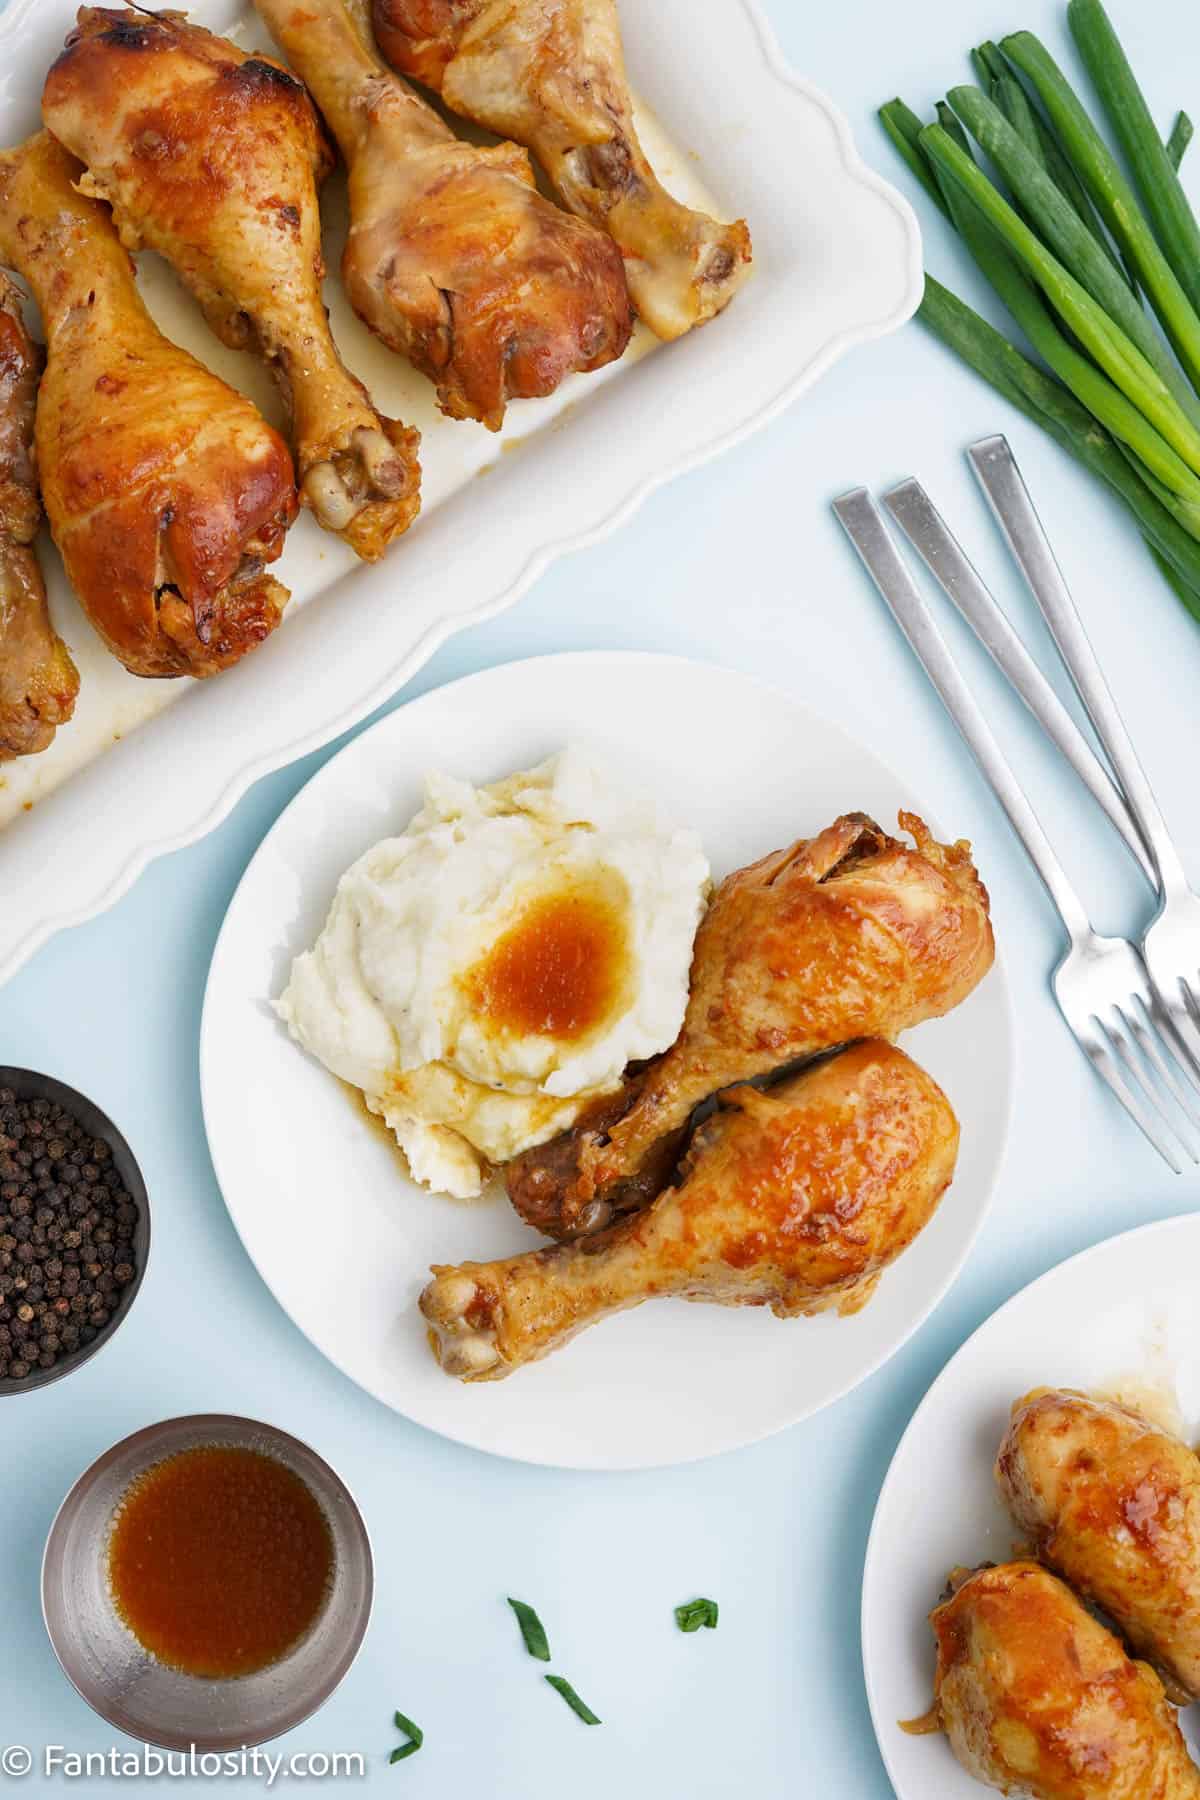
    A white plate in the center of the photo holds two chicken drumsticks and mashed potatoes while a crockpot is off to the left and a platter of chicken is visible in the right corner

    As I’m sure you know, slow cooker recipes are my jam! These Slow Cooker BBQ Meatballs are perfect for a party appetizer or game day spread. And don’t get me started on these super tender BBQ Pork Steaks in the Slow Cooker! Now, I’m super excited to add this recipe for crock pot chicken legs to our dinner rotation.

    Why You’ll Love This Recipe

    Since these crock pot chicken drumsticks are made with just 5 ingredients and 5 minutes of prep time, you can definitely add this to your easy family recipes file, along with these slow cooker chicken enchiladas.

    Chicken drumsticks are a budget-friendly cut of chicken, so this easy crock pot recipe is an inexpensive way to feed the whole family! I don’t know a more kid-friendly dinner recipe than slow cooker drumsticks.

    If you are looking for a healthy chicken drumstick slow cooker recipe, you’ll be happy to hear that our recipe has no butter or olive oil.

    [feast_advanced_jump_to]

    Ingredients

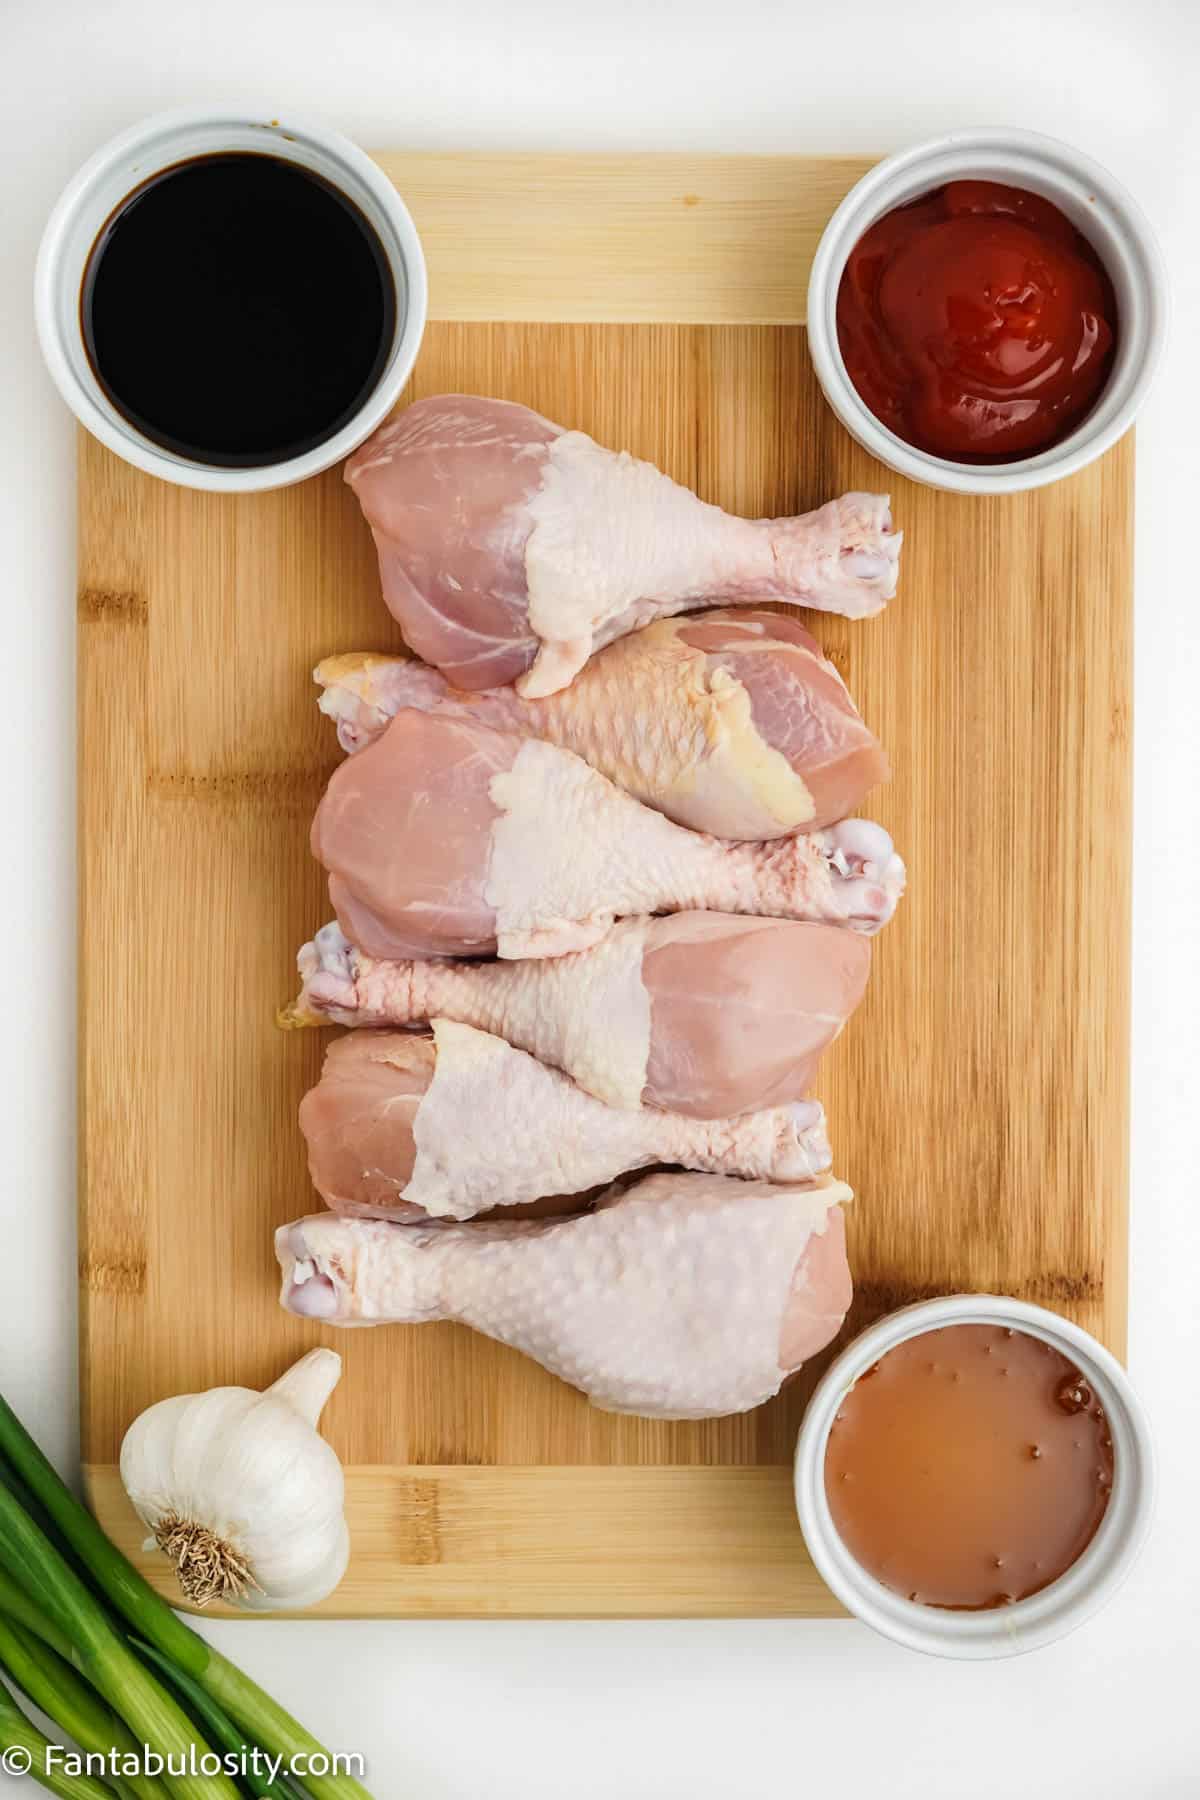
    This chicken drumsticks recipe only has 5 simple ingredients. And, you probably have every one of them in your kitchen right now! If not, your local grocery store should have everything you need to make these crockpot chicken legs.

    A wooden cutting board holds a bulb of garlic, bowls of sauces and 6 raw chicken drumsticks
    • 3 pounds of chicken drumsticks (about 6-8 drumsticks depending on the size)
    • ½ cup honey
    • ½ cup soy sauce
    • ½ cup ketchup
    • 1 teaspoon garlic, minced
    • Optional: sesame seeds, sliced green onion or parsley for garnish

    See the printable recipe card below for ingredients, nutrition information and detailed instructions.

    Instructions

    I am a firm believer in crock pot recipes for busy weeknight dinners. If you want a “set it and forget it” meal, then this slow cooker chicken recipe definitely fits the bill. Here are the instructions and step-by-step photos for our crockpot drumsticks.

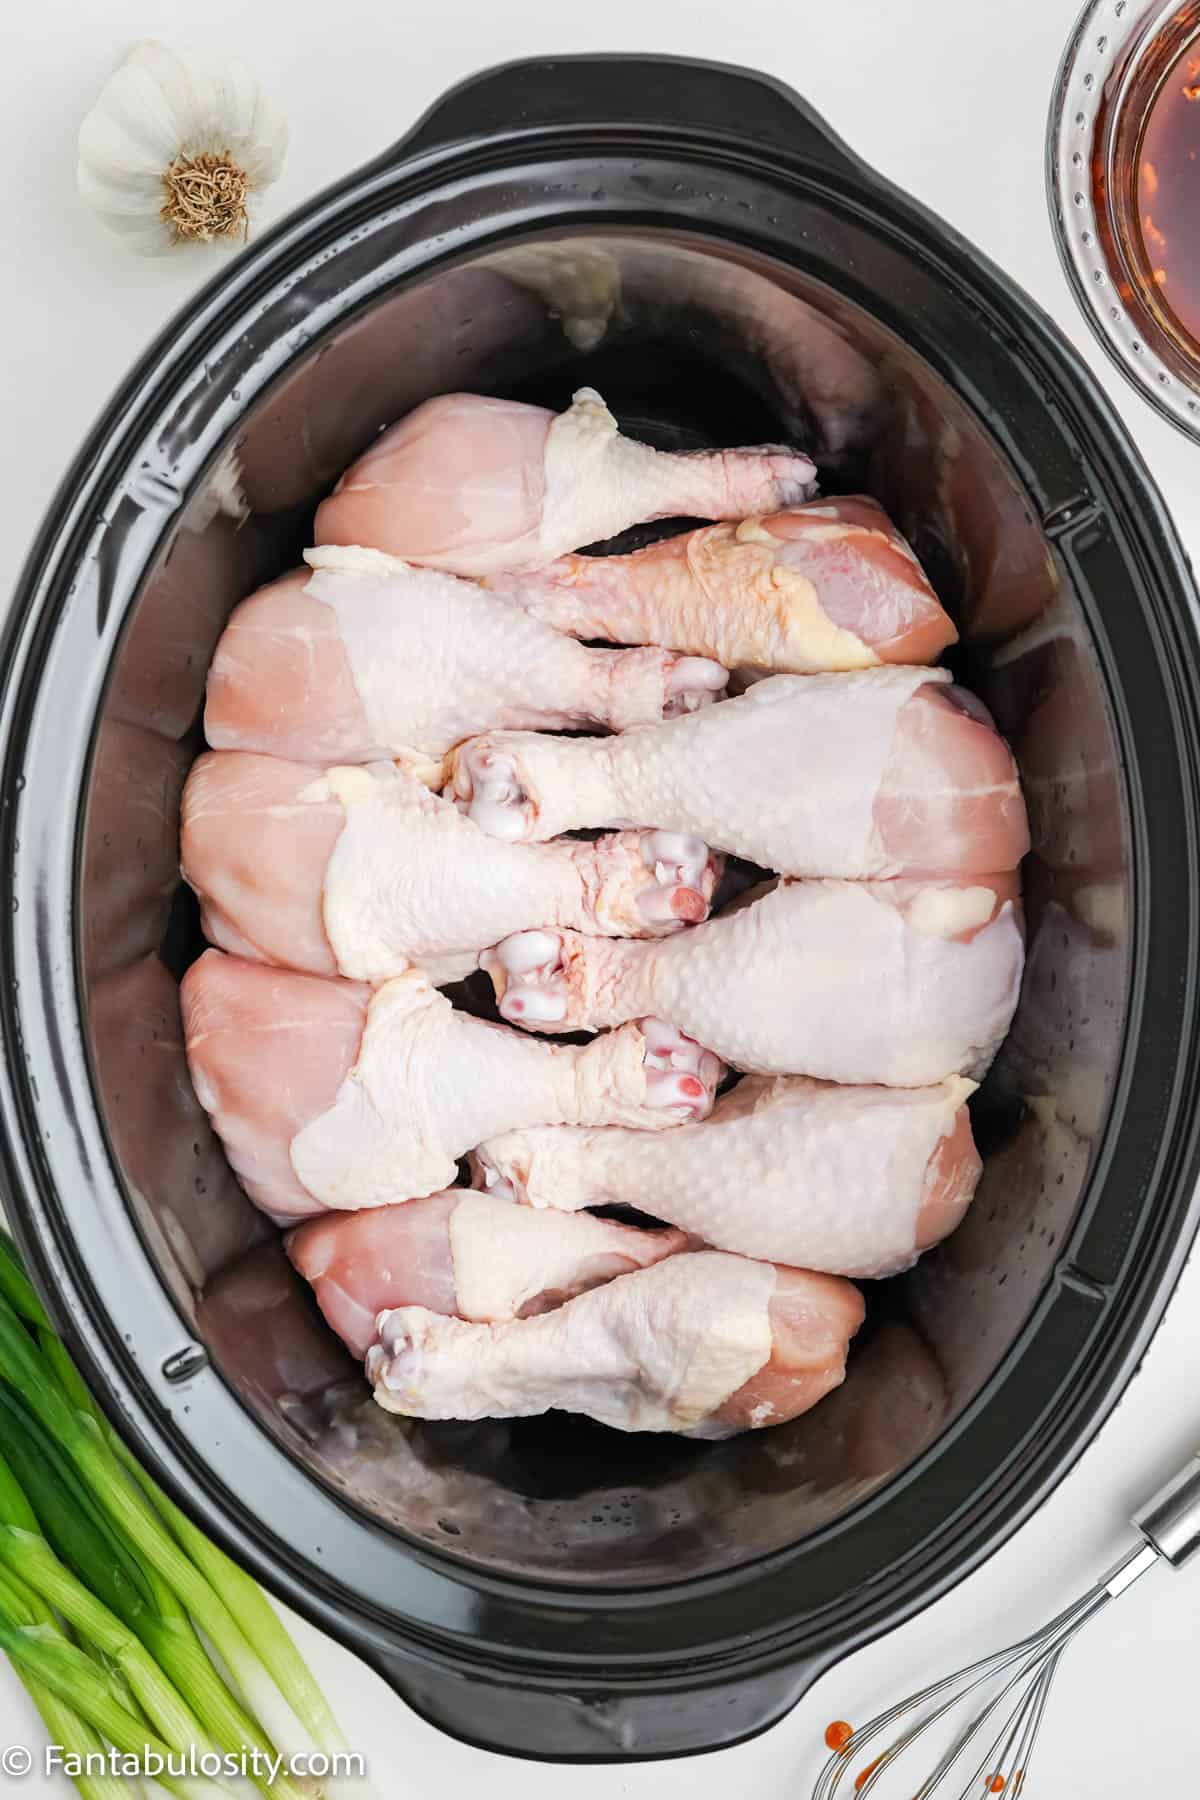
    1. First, prepare the slow cooker with nonstick spray and place the chicken legs in a single layer inside of the slow cooker insert.
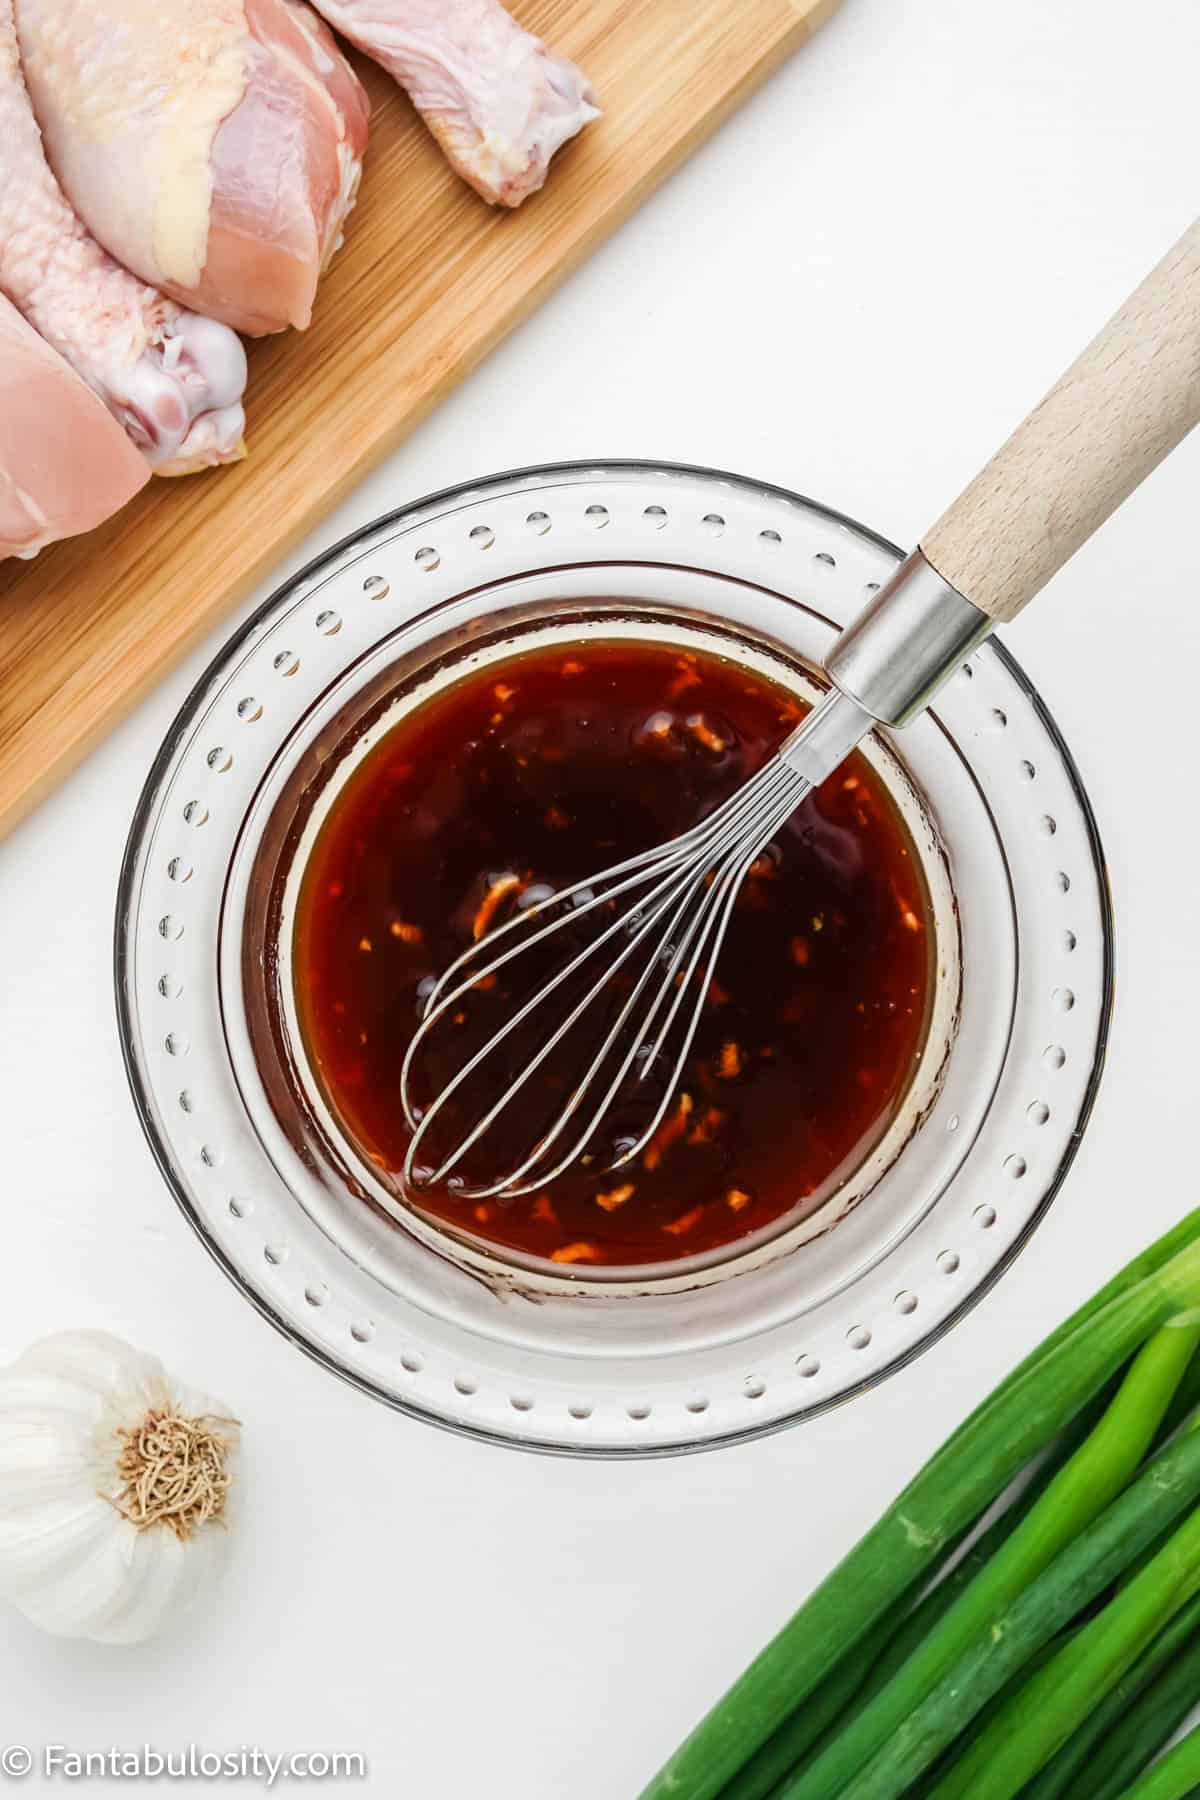
    2. In a small bowl, whisk the honey, soy sauce, ketchup, and garlic together.
    10 raw chicken drumsticks are tucked into a black crockpot
    raw chicken
    A whisk is resting in a glass mixing bowl that holds a dark brown sauce with bits of garlic
    sauce
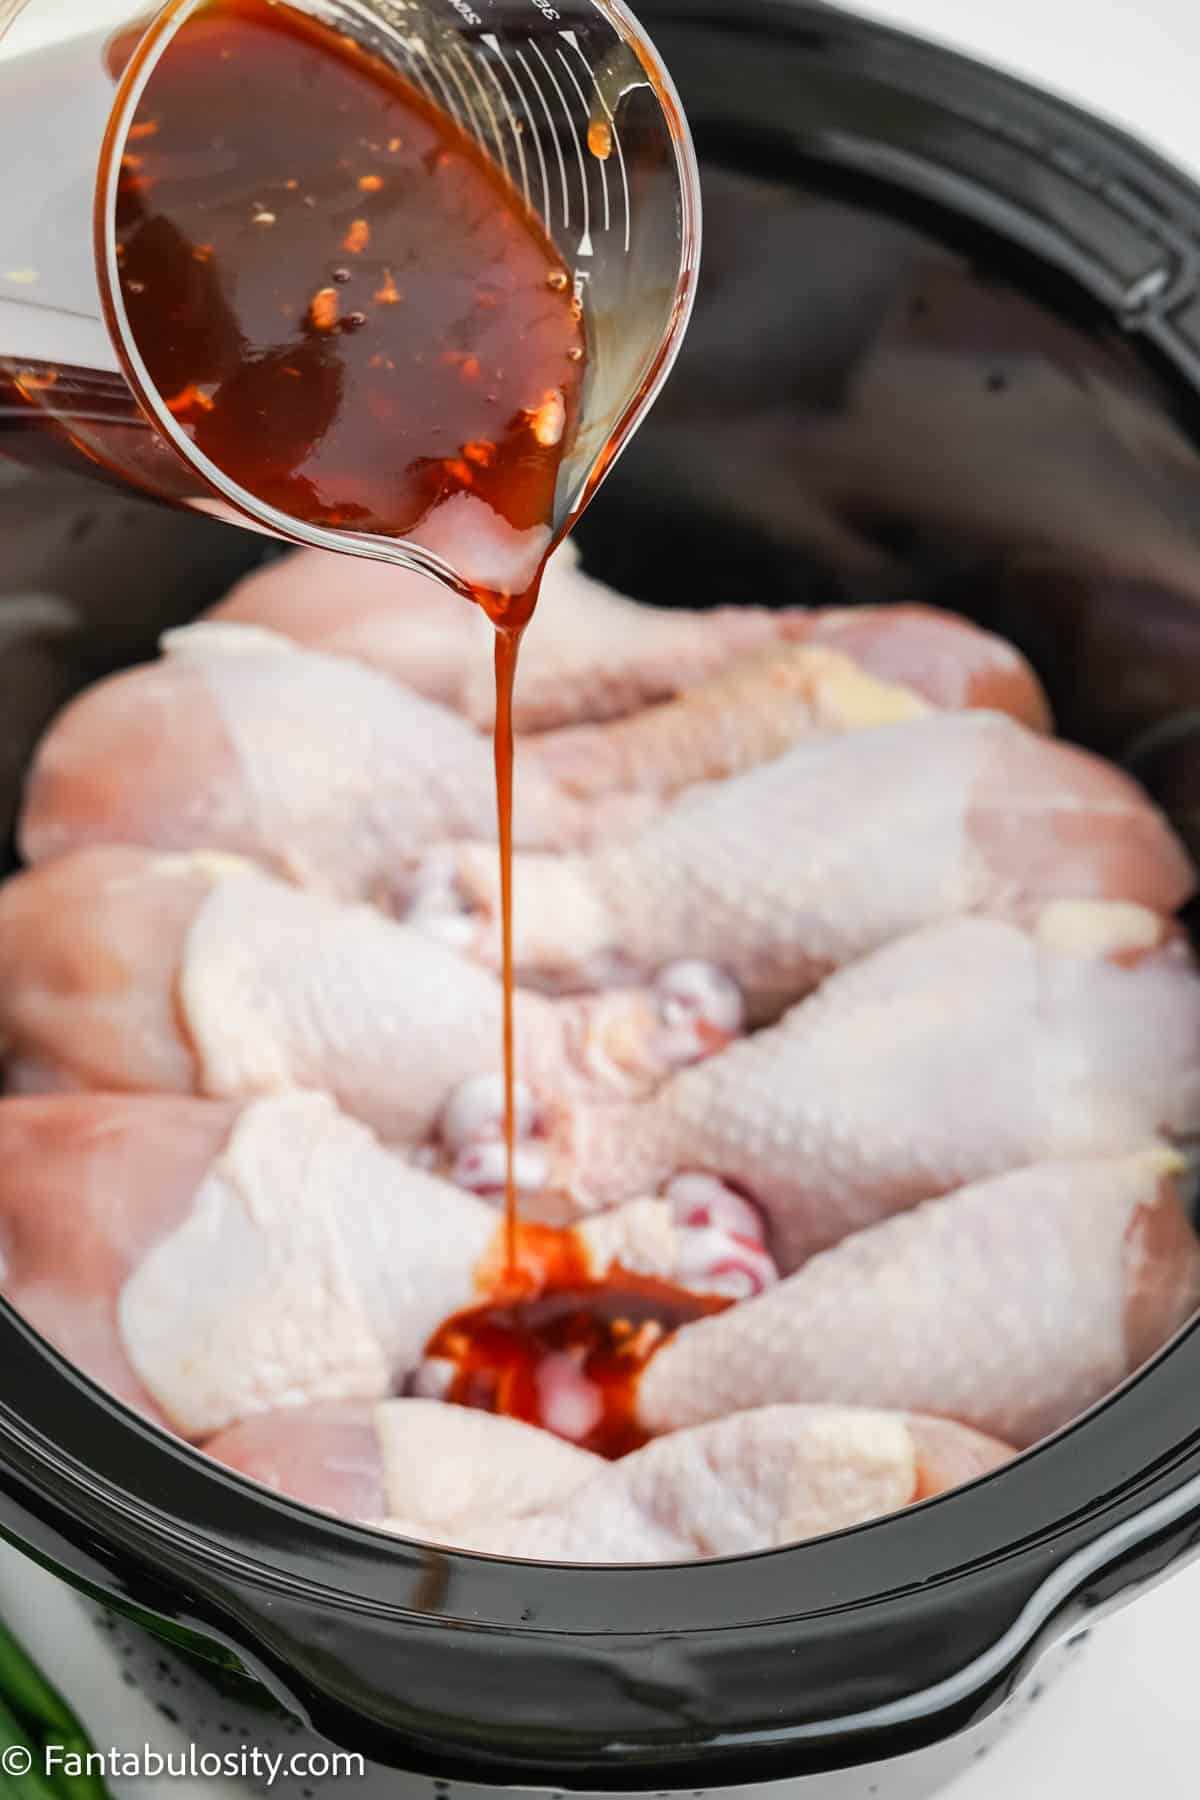
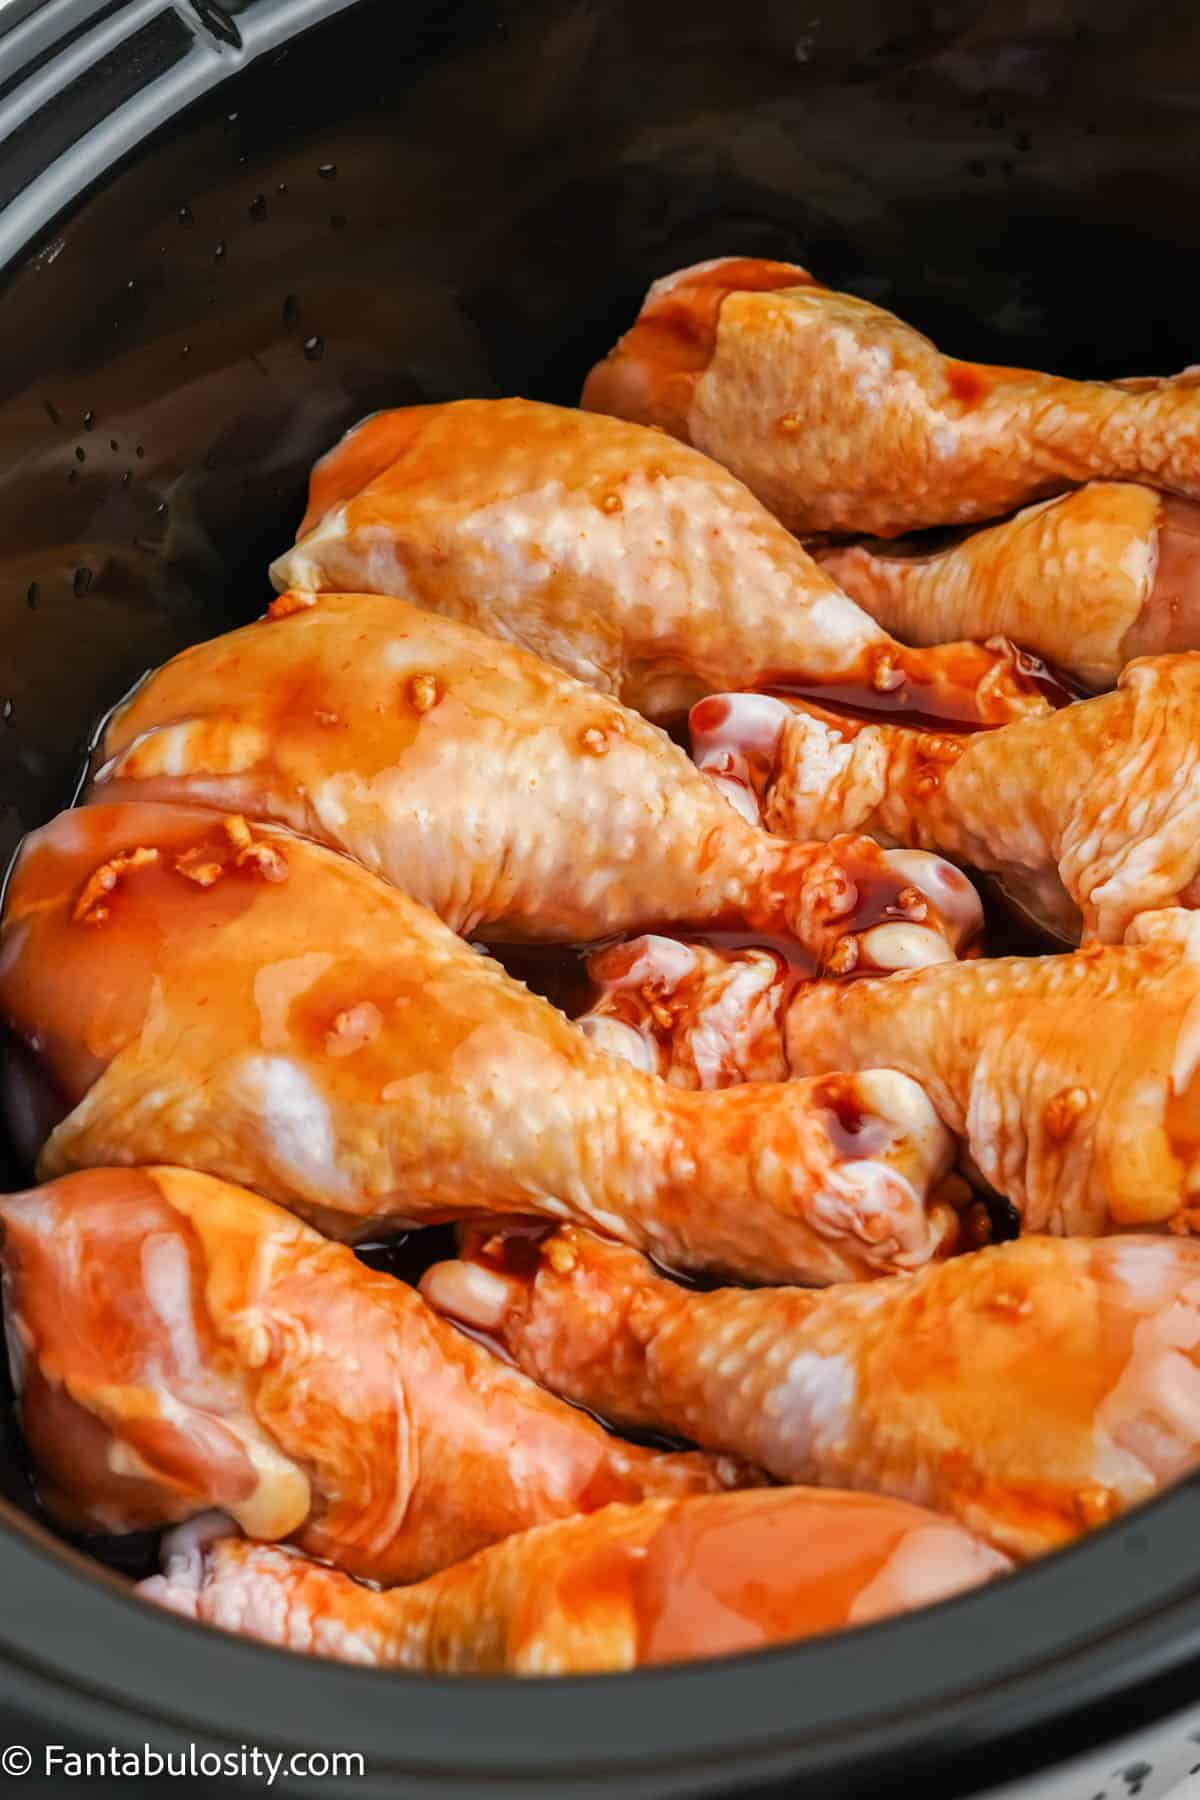
    1. Next, pour the sauce over the chicken and toss the drumsticks in the sauce to evenly coat them.
    A dark reddish brown sauce is being poured over raw chicken drumsticks in a crockpot
    pour sauce
    Raw chicken drumsticks have been tossed in a deep reddish brown sauce and are sitting in a crockpot waiting to be cooked
    ready for cooking
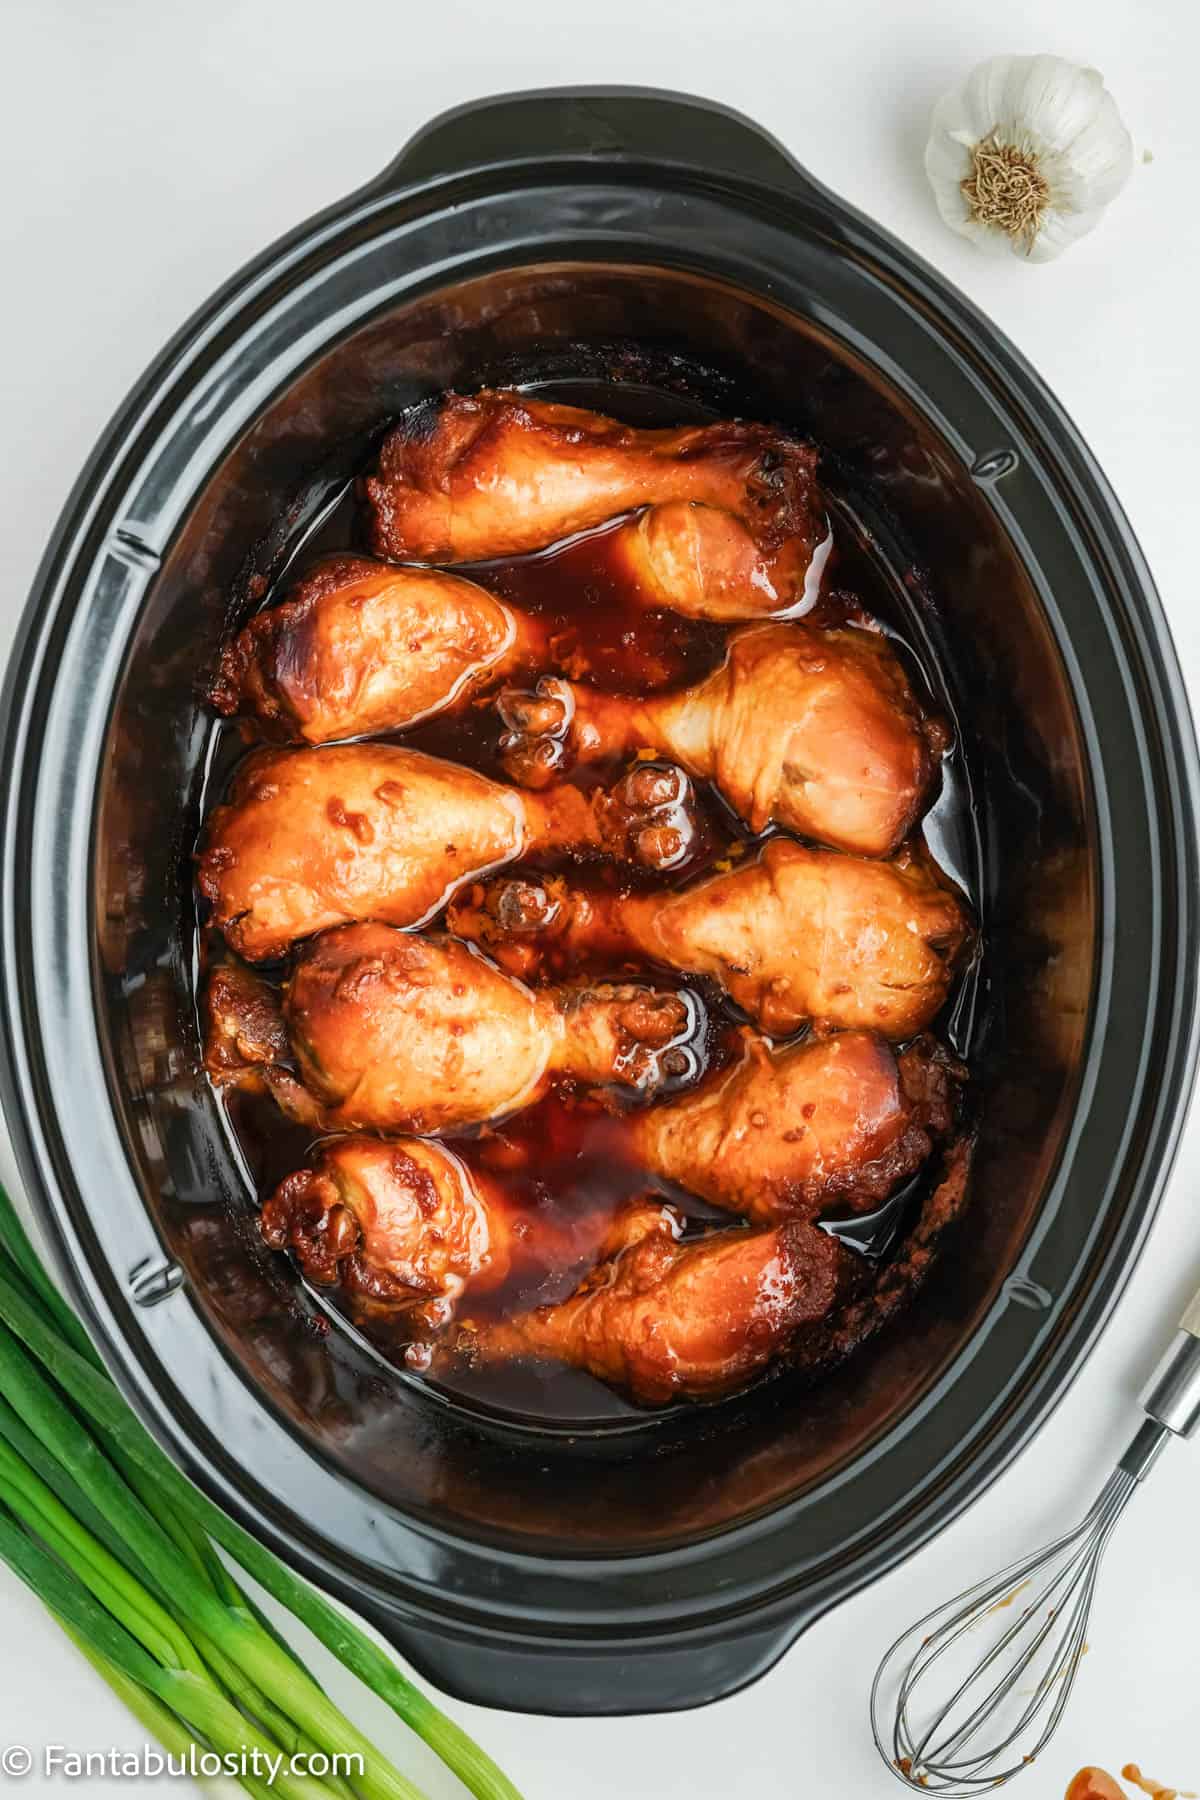
    1. Cook the chicken drumsticks for 3-4 hours on high or 5-6 hours on low in your slow cooker.
    2. Finally, remove the chicken from the slow cooker and serve.
    A black crockpot holds cooked chicken drumsticks swimming in a dark reddish brown sauce

    Now, I don’t mind classic crockpot chicken drumsticks with BBQ sauce. But this sauce… a definite must to make. The honey is a natural sweetener, the soy sauce brings a depth and richness, the garlic adds a savory zing and the ketchup adds a tang that brings it all together.

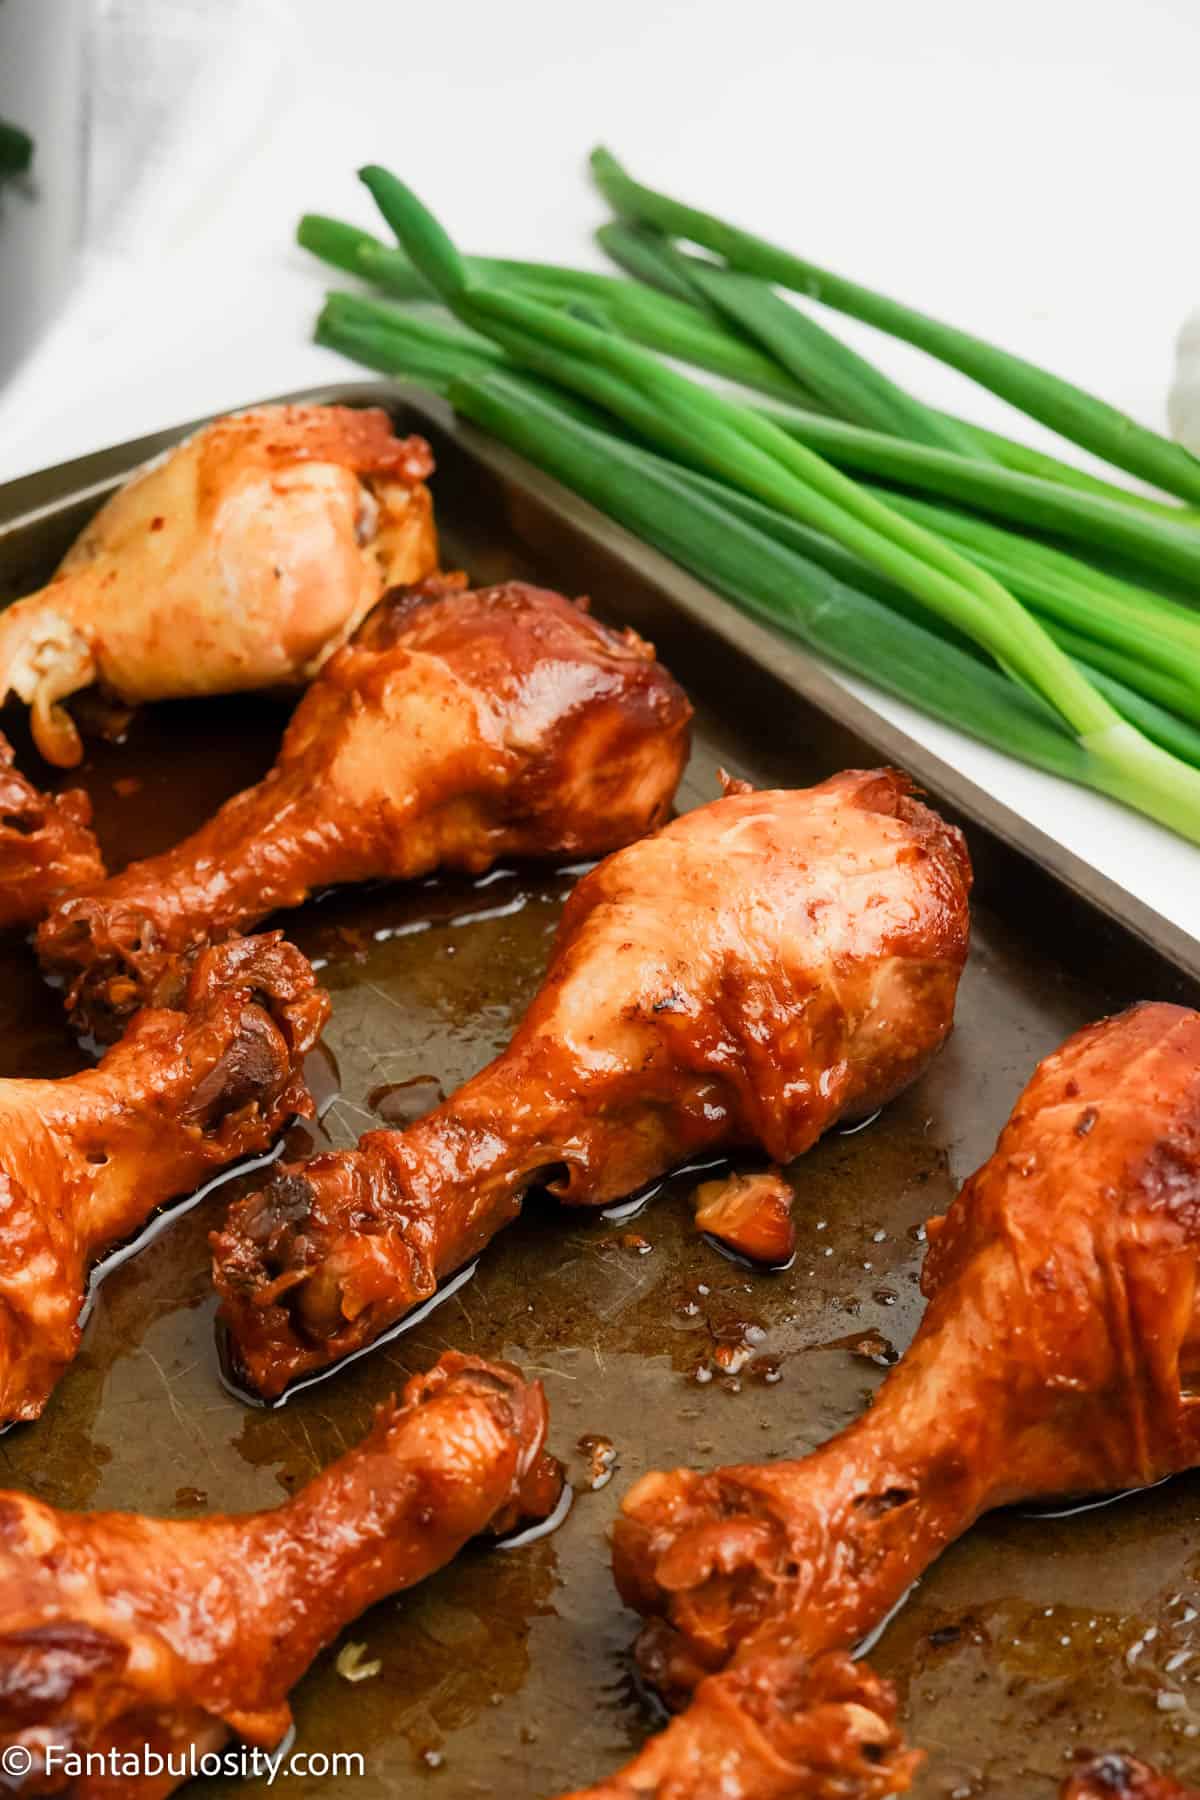
    Finish Off in the Oven (Optional)

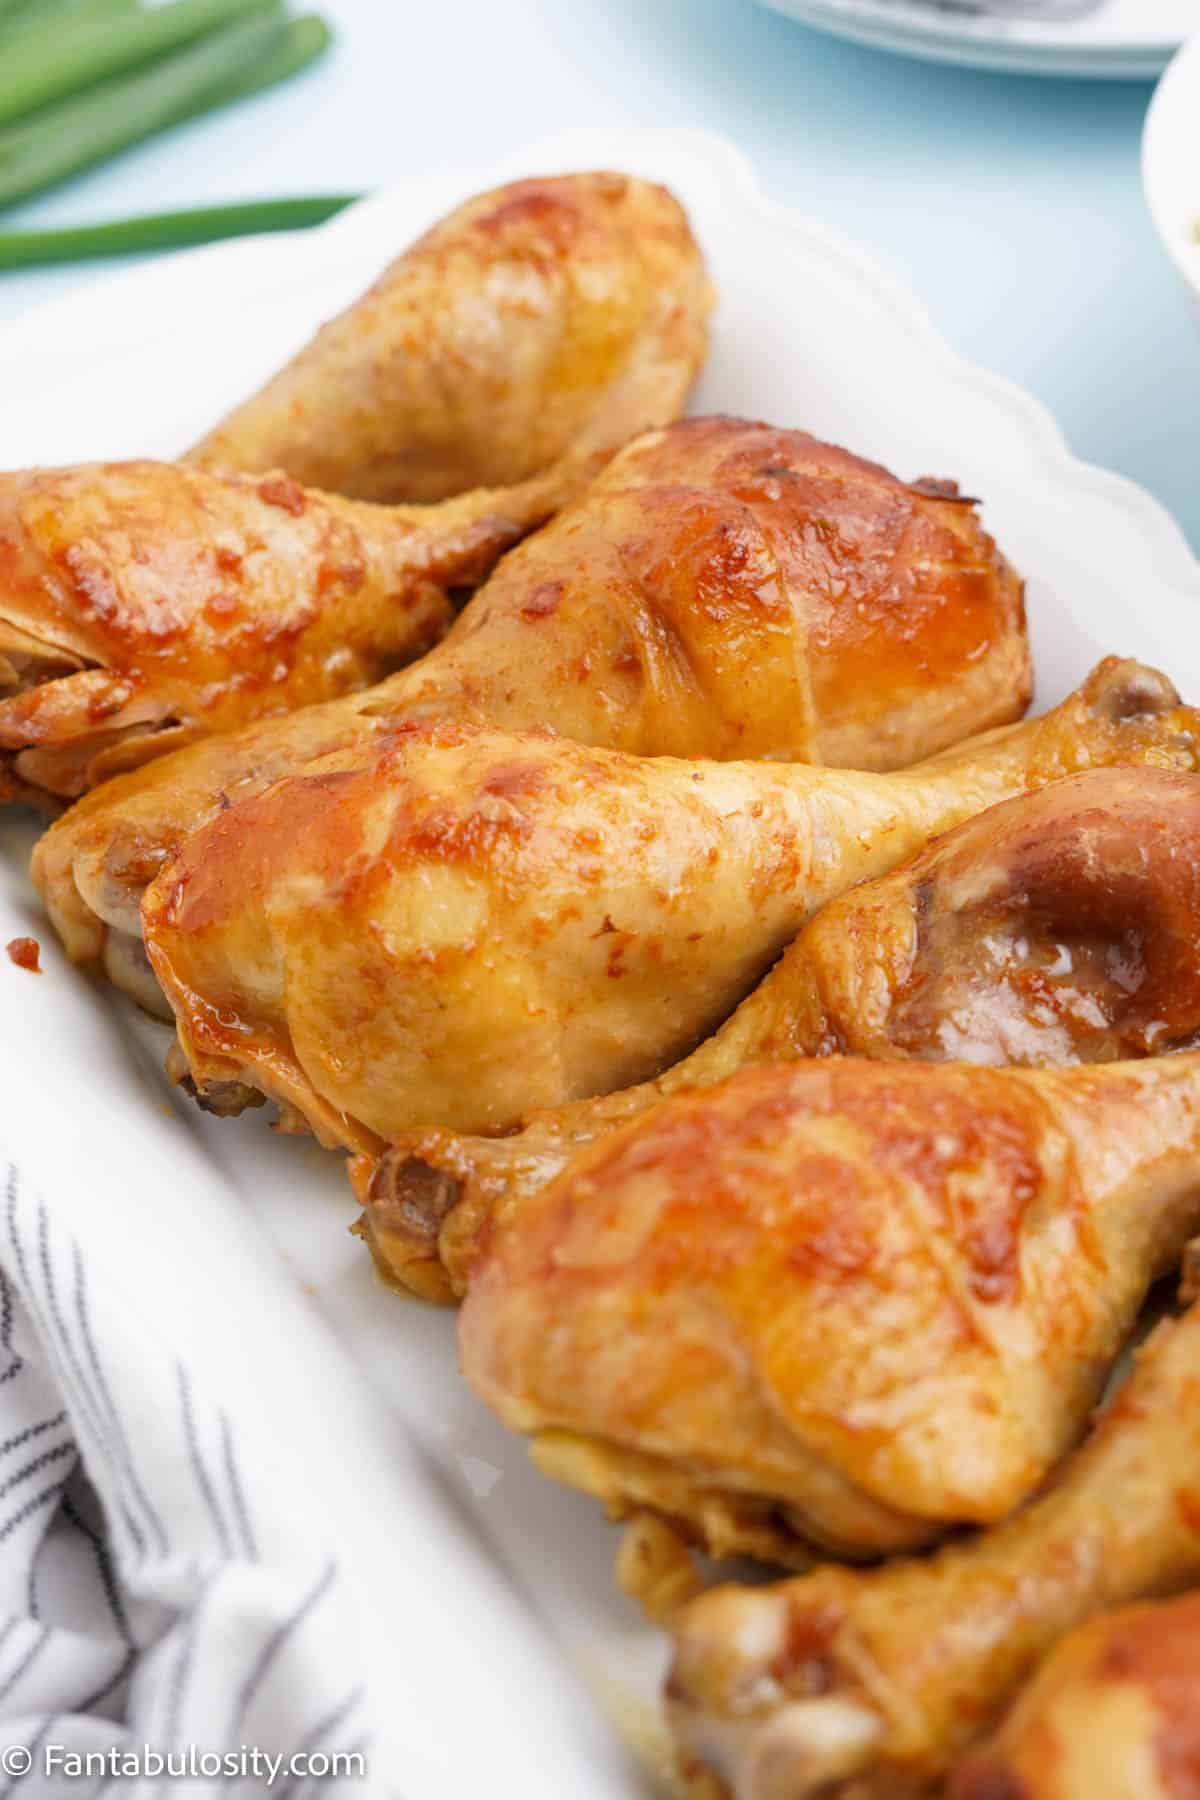
    If you’d love for them to have more of a crispy skin, something you can do is place them in the oven a baking sheet and cook on “broil” for just a couple of minutes to crisp them up! (See below)

    Cooked chicken drumsticks on baking sheet

    Variations & Substitutions

    We love sharing ways to adjust our recipes to fit the ingredients you have on hand and providing creative alternatives and suggestions to fit your family’s preferences.

    • Type of Chicken: You can use bone-in chicken thighs, chicken wings or chicken breasts for this recipe, too. Adjust the cooking time based on the cut of chicken you use and check it periodically. I use chicken tenderloins in this Orange Chicken Crockpot recipe, too.
    • Soy Sauce: If you prefer, use low-sodium soy sauce or liquid aminos in place of the soy sauce in this recipe.
    • Honey: While we used honey, you could substitute maple syrup or brown sugar in the sauce to add sweetness.
    • Seasonings: This 4-ingredient sauce is delicious as is, but you can also season this chicken with your favorite spices to add additional flavor. Try garlic powder, black pepper, onion powder, a spice rub or even a little chili powder for some heat.
    • Garnish: To serve, you can garnish the slow cooker chicken legs with sesame seeds, sliced green onions or fresh parsley.
    • Cook method: Even though this is a slow cooker chicken legs recipe, you can also boil chicken legs if you need a simple way to make the legs!
    Cooked drumsticks are displayed on a white serving tray surrounded by a bowl of mashed potatoes, a stack of plates and several forks

    FAQs

    Is it safe to cook raw chicken on low in a slow cooker?

    Absolutely! The temperatures in a slow cooker (both the low and high settings) are safe to cook chicken according to the USDA.

    Is it better to slow cook chicken on low or high?

    This really depends on how much time you have before you need to serve your meal. Either setting is safe as long as the chicken reaches 165 degrees F.

    How long does it take for drumsticks to fully cook?

    I know I’ve said it before, but it depends. The length of time will vary with the size of your drumsticks. Check the doneness periodically with a meat thermometer to ensure that they are fully cooked.

    What can I serve with slow cooker chicken drumsticks?

    You can serve this with traditional side dishes like Instant Pot mashed potatoes or white or brown rice. Cauliflower rice or homemade fried rice also goes well with these juicy chicken drumsticks. We also suggest rounding out the meal with our favorite side salad, roasted broccoli or these candied carrots.

    A close up photo of cooked chicken drumsticks on a white serving platter

    Storage

    Leftover slow cooker chicken drumsticks can be stored in an airtight container in the refrigerator for up to 4 days.

    To freeze leftover chicken, remove the chicken from the bone and store it in freezer bags with the air removed for up to 2 months.

    A white plate holding two chicken drumsticks and a serving of mashed potatoes is surrounded by a serving platter of chicken and another plate of food
    Crock pot chicken drumsticks recipe

    Top Tip for Food Safety

    Use a meat thermometer inserted into the thickest part of the drumstick and make sure the internal temperature reaches 165 degrees F to ensure that the chicken is fully cooked. Cooking time will depend on the size of your chicken drumsticks, so check them periodically for the best results.

    More Slow Cooker Dinner Recipes

    Our easy Slow Cooker Shredded Chicken is a star for meal prep. You can use it for tacos, nachos or pulled chicken sandwiches. This Slow Cooker Pulled Pork is made with cherry cola – it is savory and sweet and SO delicious! We even make Venison Chili in the slow cooker for those chilly Fall and winter nights.

    Did you make this? I’d be so grateful if you left a “star” rating below to let me know what you thought! Then, the next time you need a quick and easy recipe, come back to Fantabulosity to browse all of my easy recipes!

    Recipe

    Eight cooked chicken drum sticks are swimming in a sauce in a black crock pot
    Print Pin
    5 from 10 votes

    Slow Cooker Chicken Drumsticks

    Slow Cooker Chicken Drumsticks: Budget friendly chicken drumsticks are cooked low and slow in a savory sauce until they are fall-off-the-bone tender!
    Course Main Course
    Cuisine American
    Prep Time 5 minutes minutes
    Cook Time 4 hours hours
    Total Time 4 hours hours 5 minutes minutes
    Servings 8 drumsticks
    Calories 338kcal
    Author Jessica Burgess

    Equipment

    • slow cooker

    Ingredients

    • 3 lbs chicken drumsticks
    • ½ cup honey
    • ½ cup soy sauce
    • ½ cup ketchup
    • 1 teaspoon garlic minced

    Instructions

    • First, prepare the slow cooker with non-stick cooking spray and place the chicken legs inside of the slow cooker insert.
    • In a small bowl, whisk the honey, soy sauce, ketchup and garlic together.
    • Next, pour the sauce over the chicken and toss evenly to coat.
    • Cook the chicken drumsticks on high for 3-4 hours or low for 5-6 hours.
    • Finally, remove the chicken from the slow cooker and serve.

    Optional

    • If you'd like to crisp up the chicken drumsticks, you can place them on a baking sheet and place in the oven that's set to "broil" for just a couple of minutes!

    Notes

    • You can use bone in thighs or chicken breasts if you prefer.
    • Leftover slow cooker chicken drumsticks can be stored in an airtight container in the refrigerator for up to 4 days.
    • To freeze, remove the chicken from the bone and store it in freezer bags with the air removed for up to 2 months.

    Nutrition

    Serving: 1drumstick | Calories: 338kcal | Carbohydrates: 23g | Protein: 23g | Fat: 17g | Saturated Fat: 5g | Polyunsaturated Fat: 4g | Monounsaturated Fat: 7g | Trans Fat: 0.1g | Cholesterol: 87mg | Sodium: 1028mg | Potassium: 304mg | Fiber: 0.2g | Sugar: 21g | Vitamin A: 239IU | Vitamin C: 3mg | Calcium: 20mg | Iron: 2mg

    Melting Snowman Cheesecake Cups

    October 18, 2022

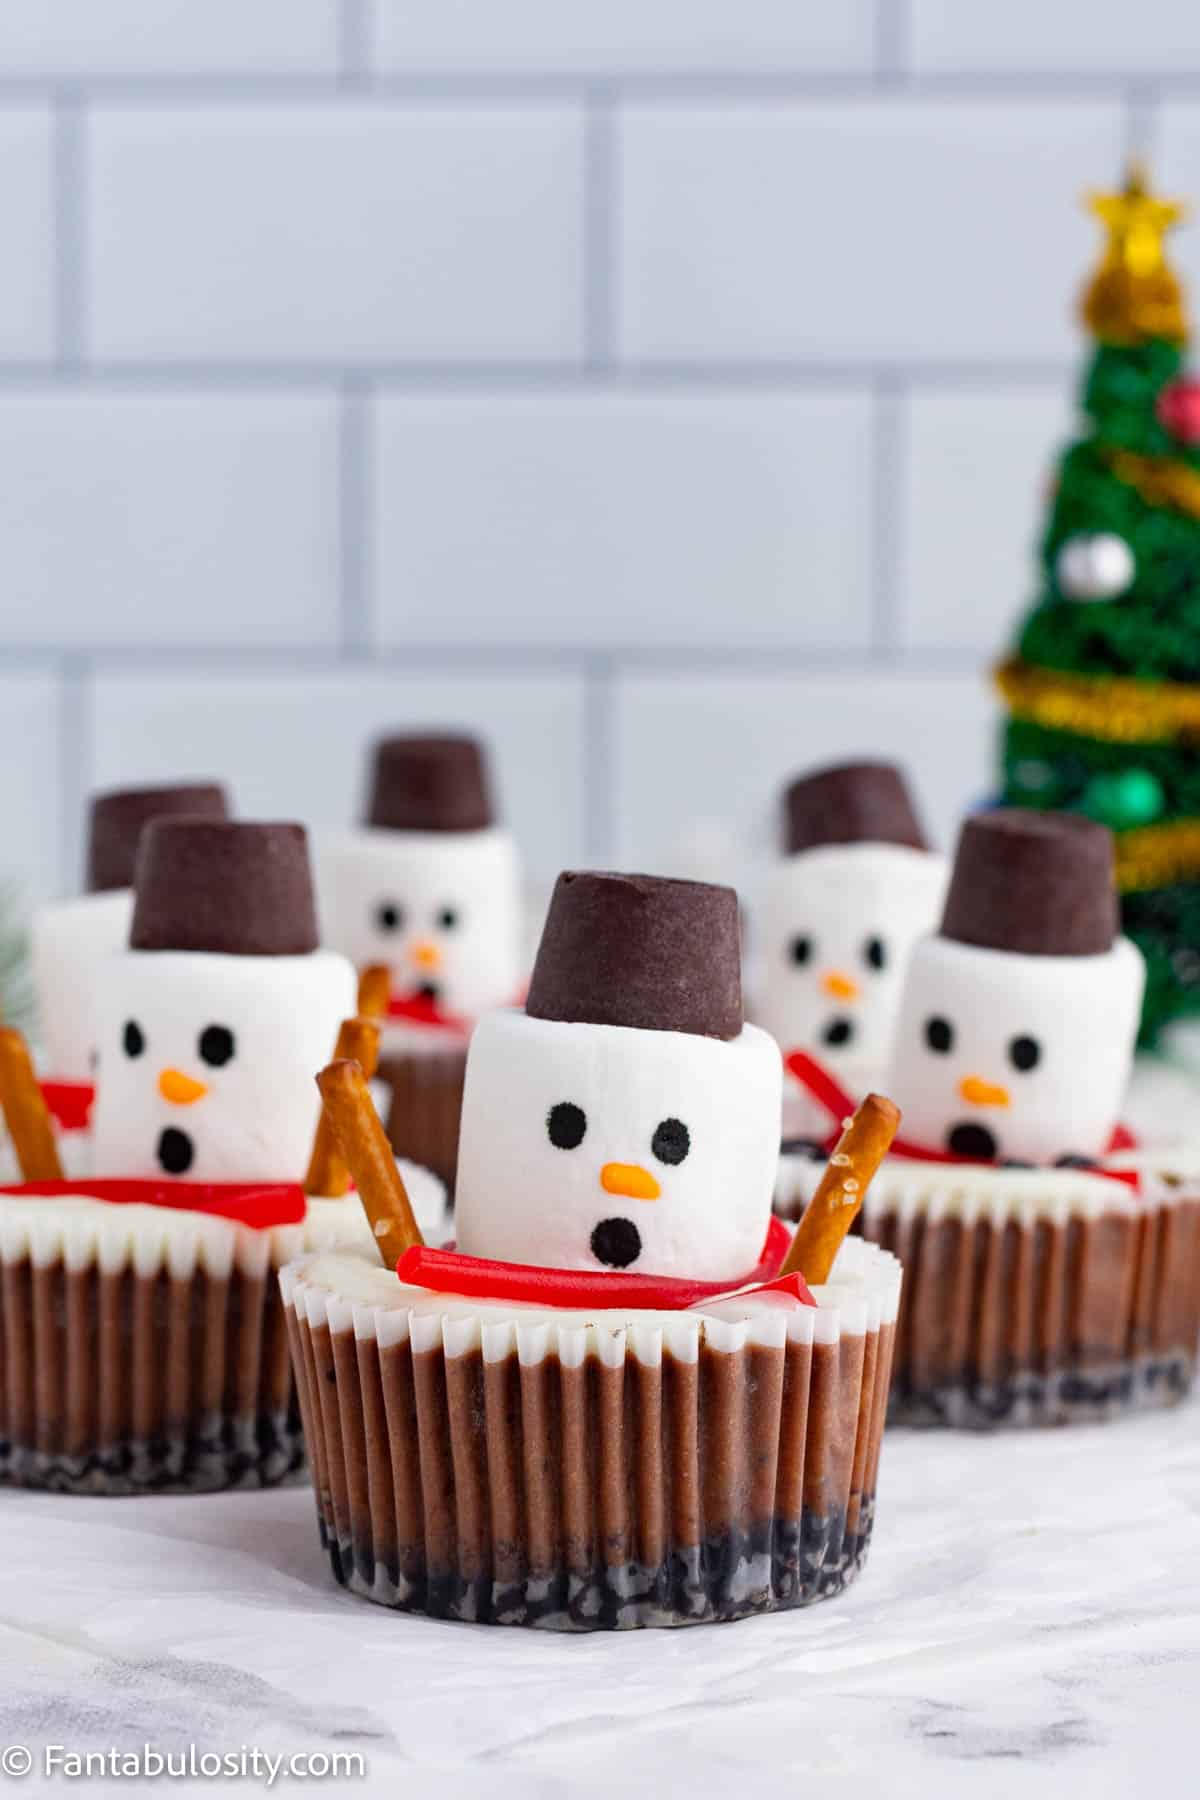
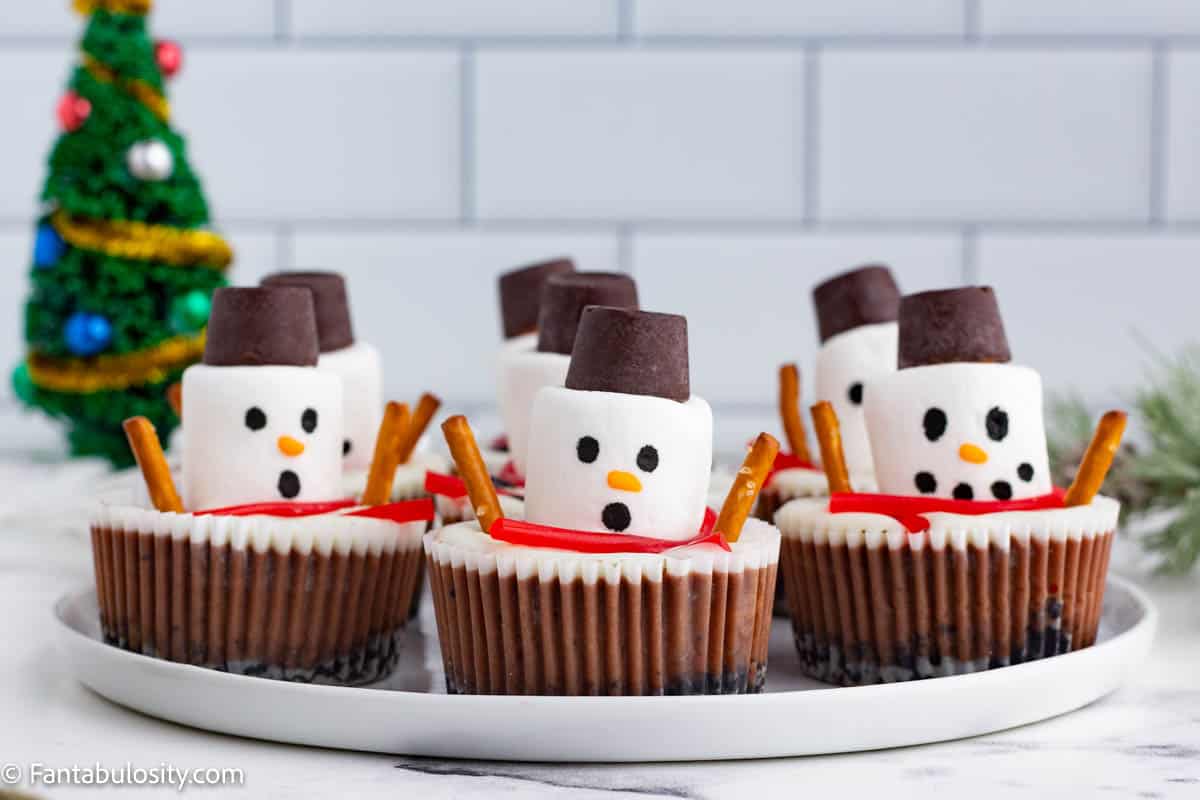
    Cheesecake cups are decorated to look like melting snowmen

    Melting Snowman Cheesecake Cups: A rich cookie crust, creamy chocolate cheesecake and adorable melting marshmallow snowman decorations make these festive holiday treats absolutely irresistible!

    A batch of chocolate cheesecake cups have been decorated to look like melting snowmen
    Melting Snowman Cheesecake Cups

    We are no stranger to easy desserts here at Fantabulosity, especially cheesecake. In fact, there are more than a dozen cheesecake recipes! These mini cheesecakes decorated to look like melting snowmen are a great addition to your holiday season baking list! (Check out all of our of no-bake recipes for when you’re in time crunch, too.)

    Why you’ll love this recipe

    You may have seen similar melted snowman treats like original melting snowman cookies or melting snowman Oreo cookie balls. I’ve even made Nutter Butter snowmen, but this melting snowman recipe is made with homemade chocolate cheesecake!

    This is one of my favorite desserts to make with kids for a holiday party! Older children can help mix the cheesecake and melt and pipe the ganache. Little hands can easily draw the faces, add the licorice scarves, the pretzel arms and the candy top hats.

    While these are absolutely perfect for any holiday gathering, you don’t have to stop at Christmas. You can make these snowmen cheesecakes all winter long!

    [feast_advanced_jump_to]

    Ingredients

    A quick walk down the baking aisle of your local grocery store is all you need to pick up the ingredients for this melting snowman recipe.

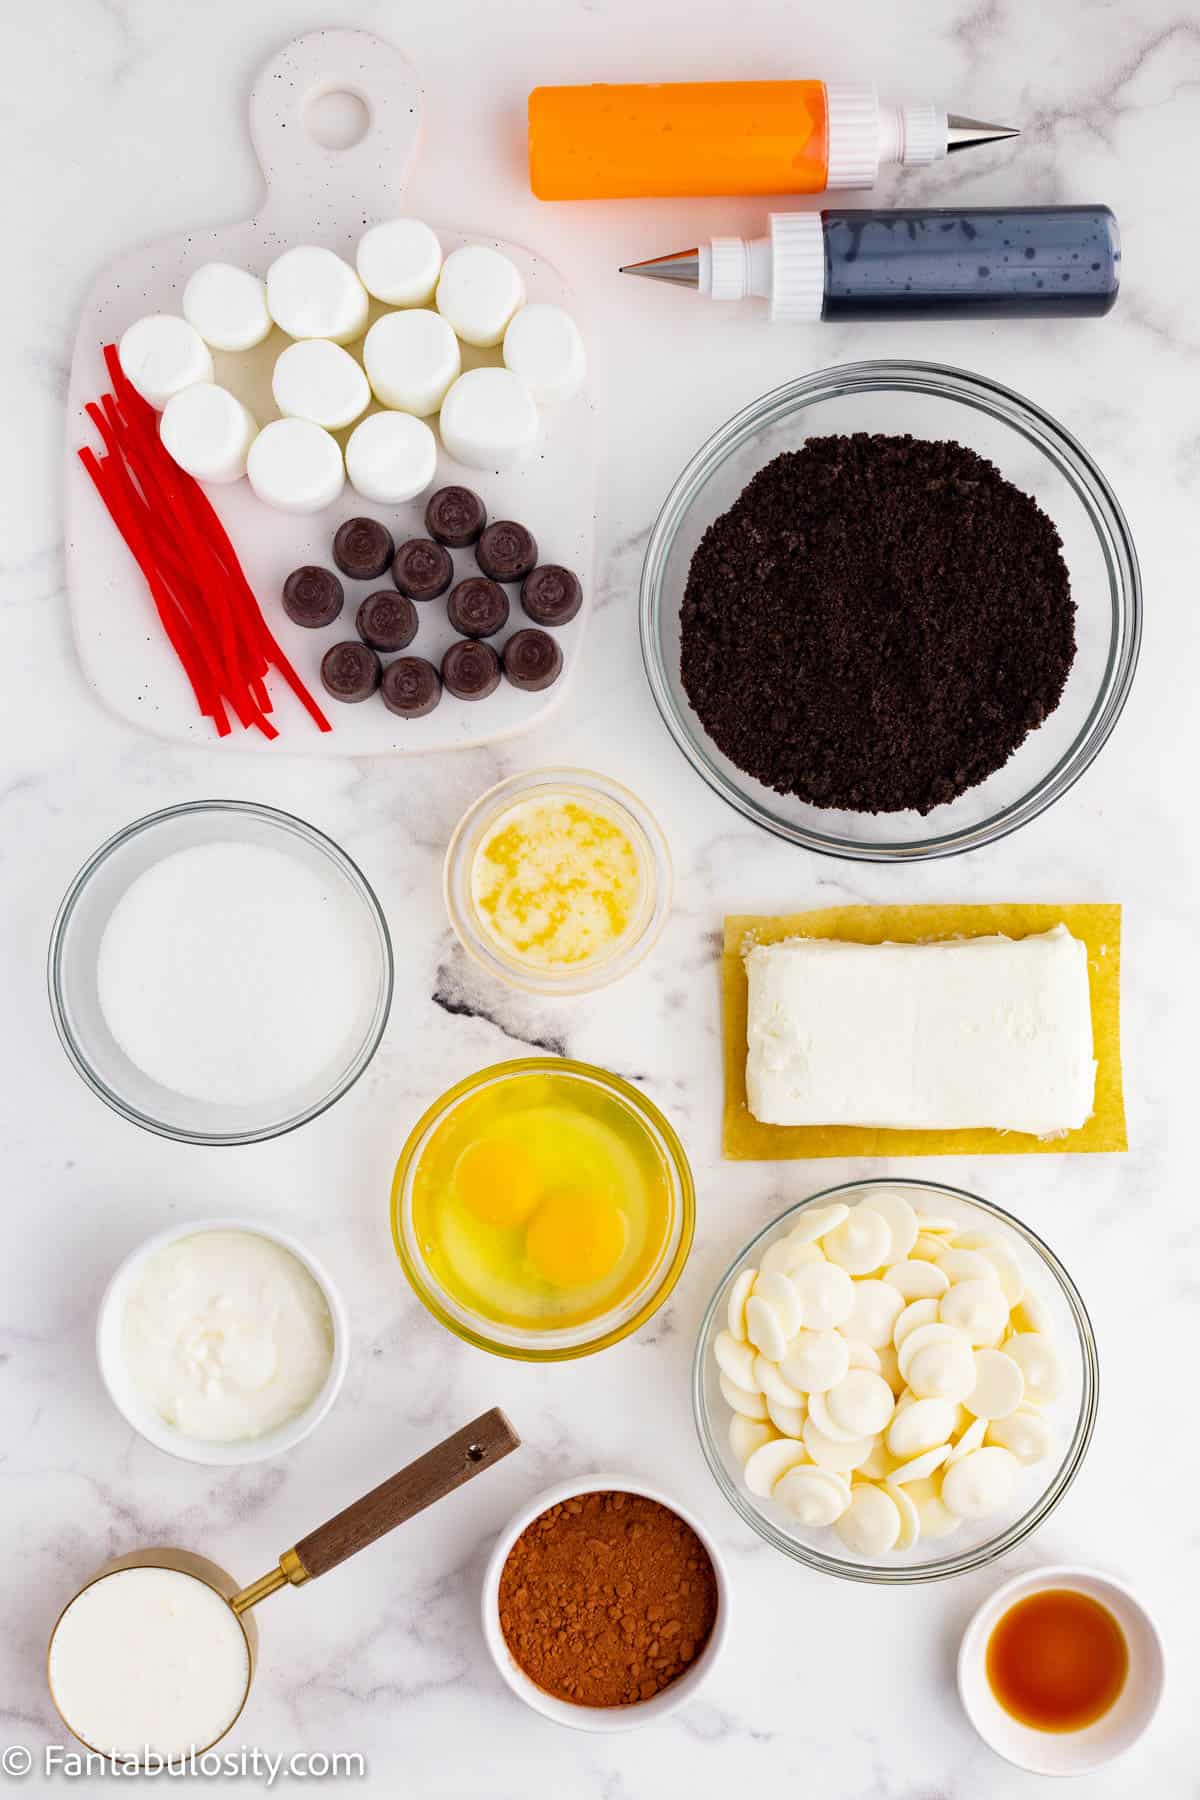
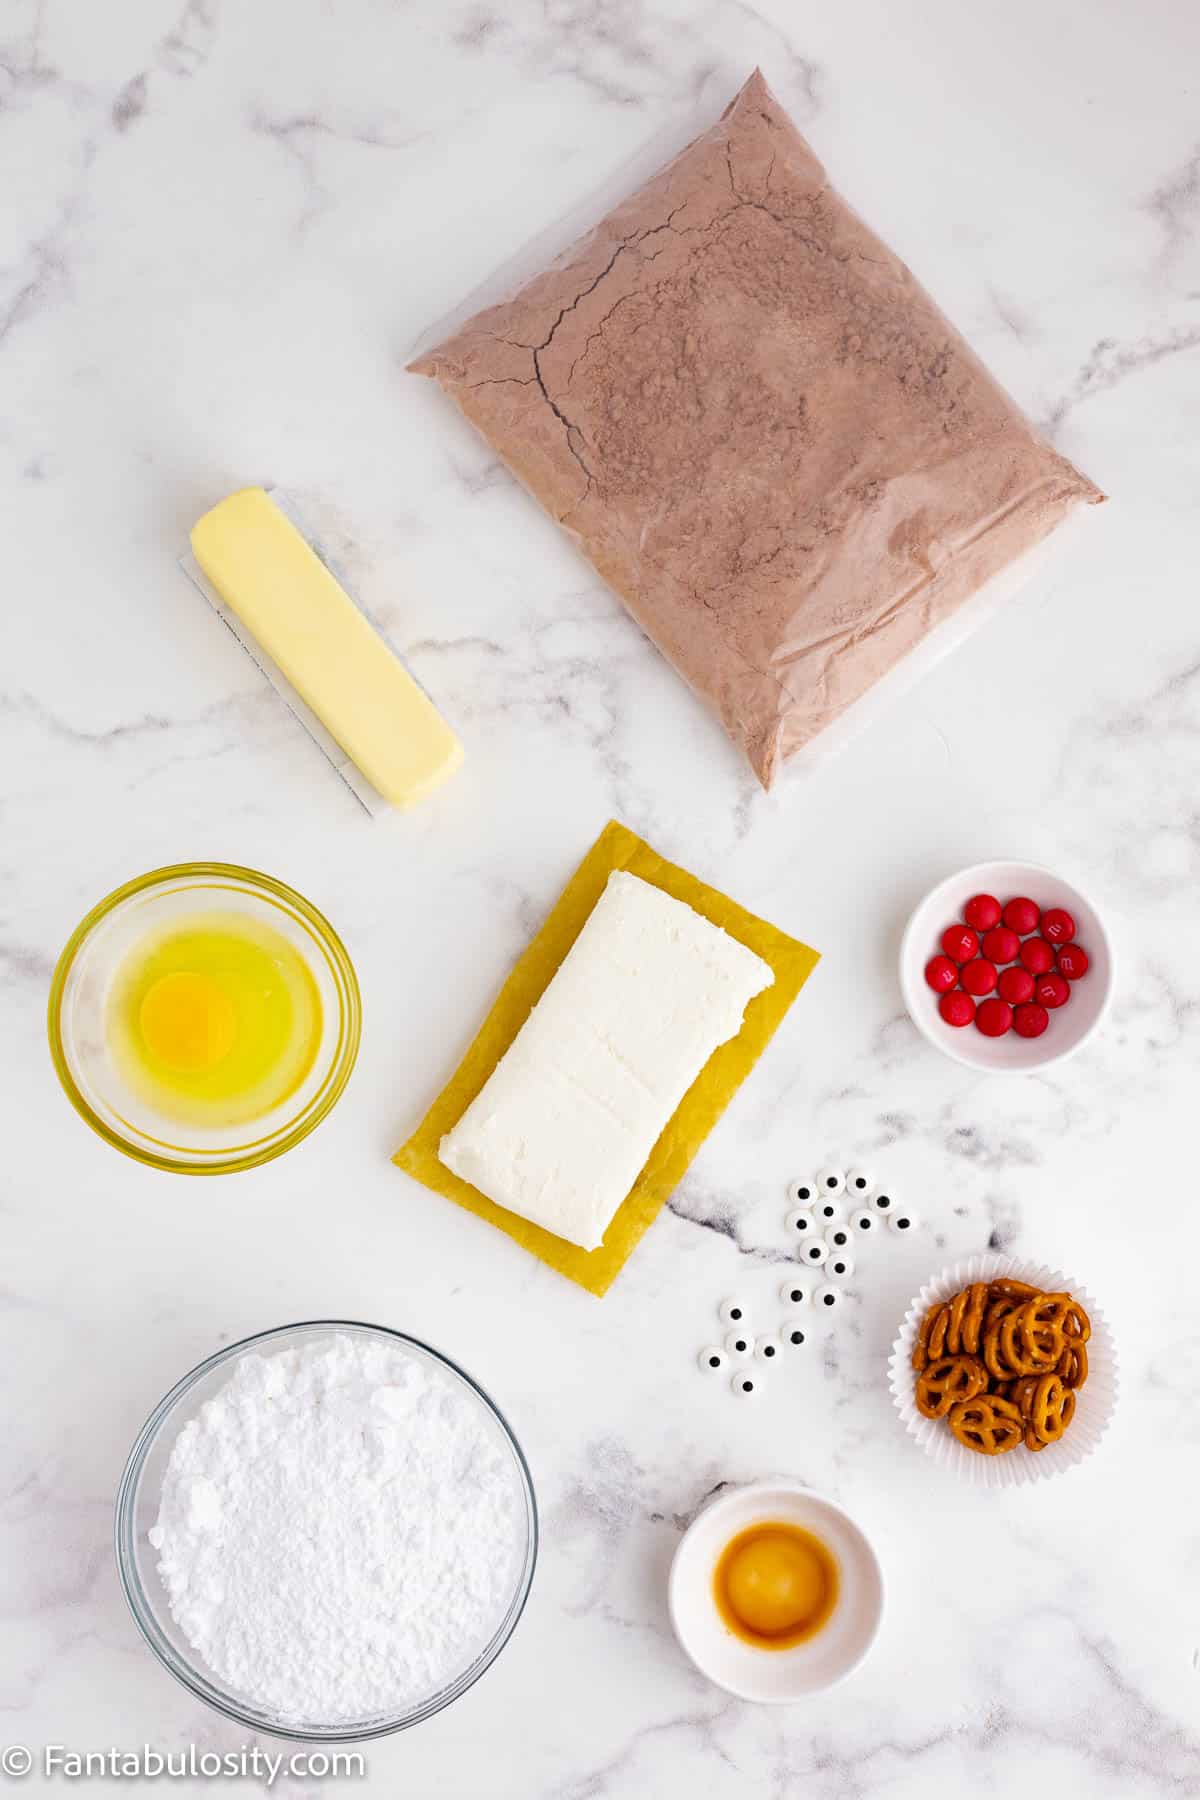
    The ingredients for Melting Snowman Cheesecake Cups are displayed in bowls on a white marble background
    Ingredients

    For the Oreo cookie crust

    • 2 cups Oreo cookie crumbs
    • 10 tablespoons butter, melted

    To make the chocolate cheesecake filling

    • 2 blocks (16 oz) cream cheese, softened to room temperature
    • ⅓ cup granulated sugar
    • 2 large eggs, room temperature
    • ¼ cup sour cream
    • 1 teaspoon vanilla extract
    • 6 tablespoons cocoa powder

    For the white chocolate ganache

    • 2 cups white chocolate melting wafers
    • ¼ cup heavy whipping cream

    Melting snowman decorations

    • 12 jumbo marshmallows
    • 12 Rolos, uwrapped
    • 12 pretzel sticks
    • 12 strands of pull apart red licorice candy
    • orange icing
    • black icing

    See the printable recipe card below for ingredients, nutrition information and detailed recipe notes.

    Instructions

    With our step-by-step instructions and the photos below, making homemade cheesecake with snowman decorations is actually easier than you think.

    To make the Oreo cookie crust

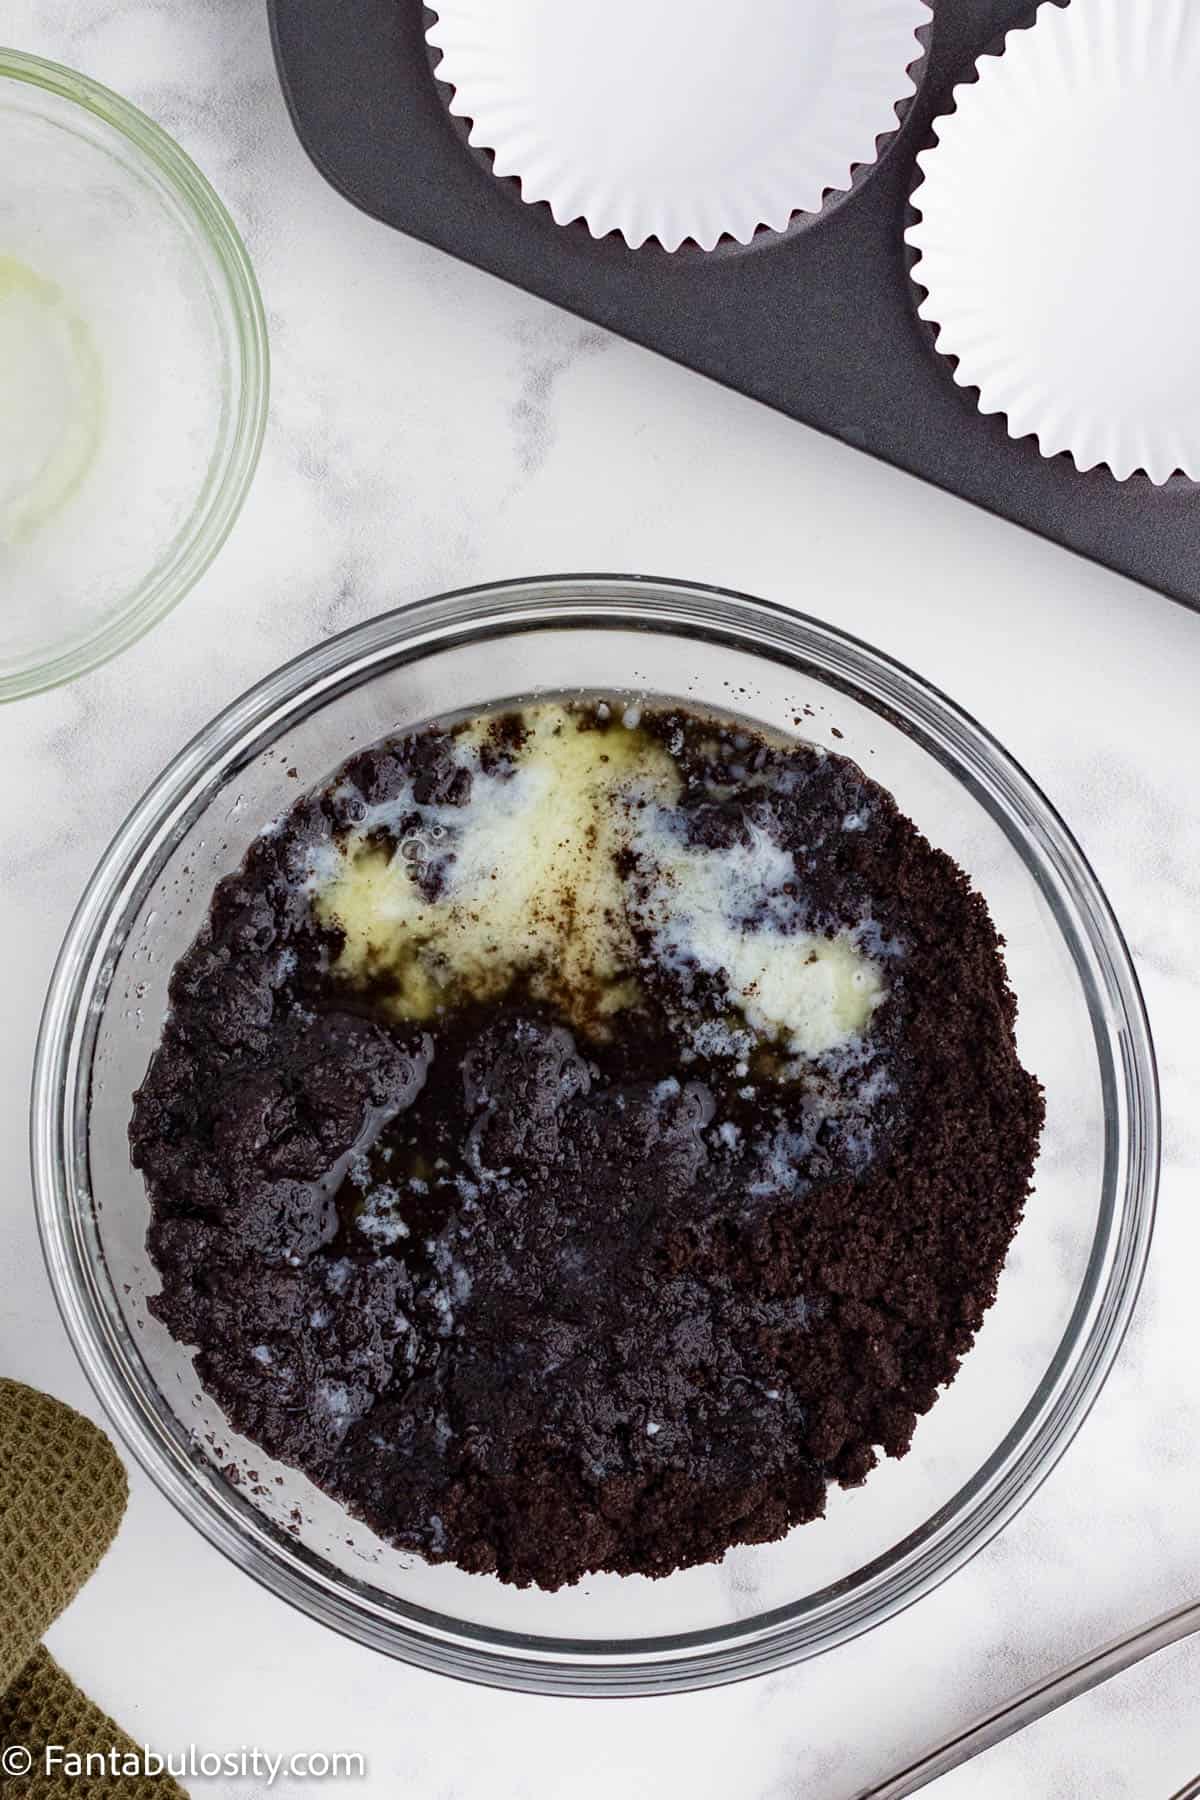
    1. In a large mixing bowl, combine the Oreo cookie crumbs and the melted butter.
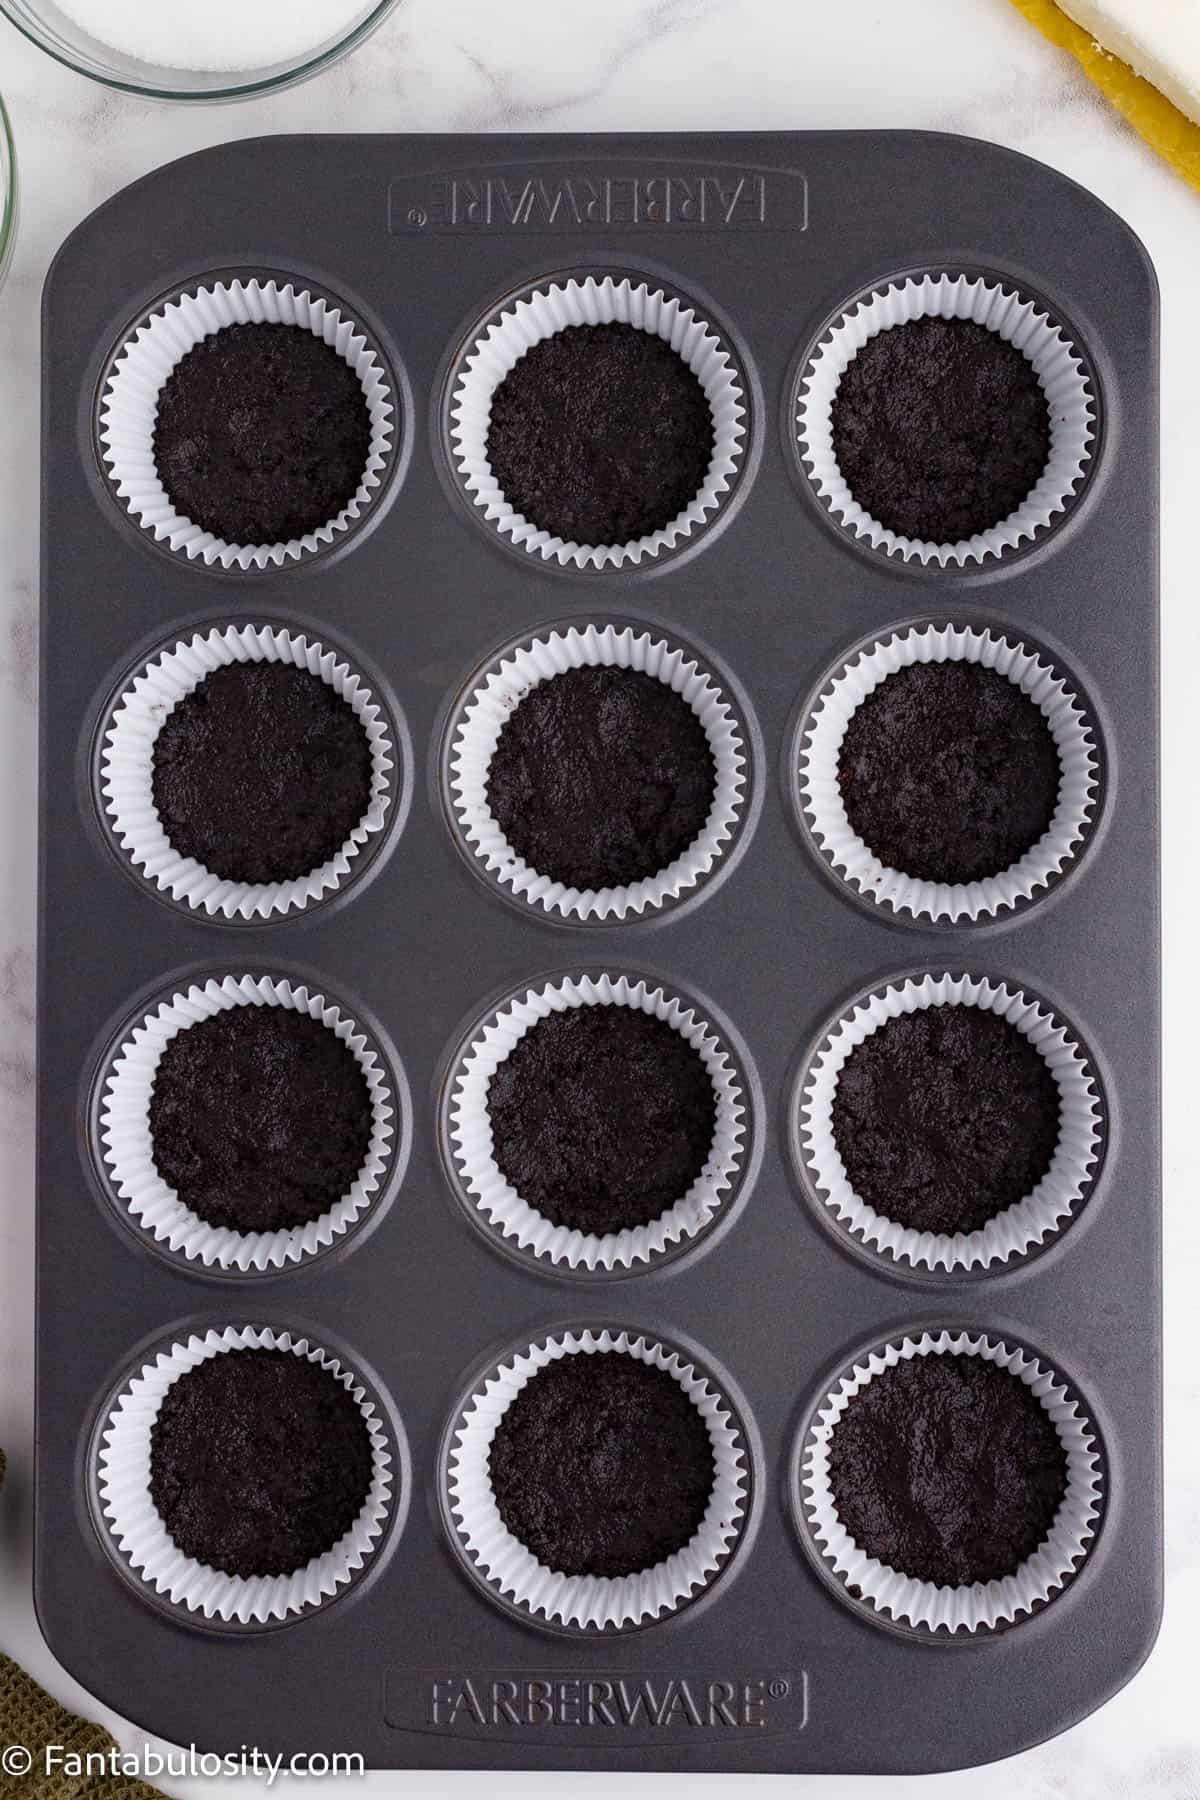
    2. Then, scoop about 1 tablespoon of the cookie crust mixture into each muffin cup. Use your fingertips to press the mixture into an even layer untl it is firmly packed.
    3. Bake the cookie crust for 5 minutes and allow it to cool.
    4. Reduce the oven temperature to 325 degrees F.
    Make the cookie crust
    A metal cupcaketin holds 12 cupcake papers with an Oreo cookie crust pressed into the bottom
    Press the crust in the pan

    For the chocolate cheesecake filling

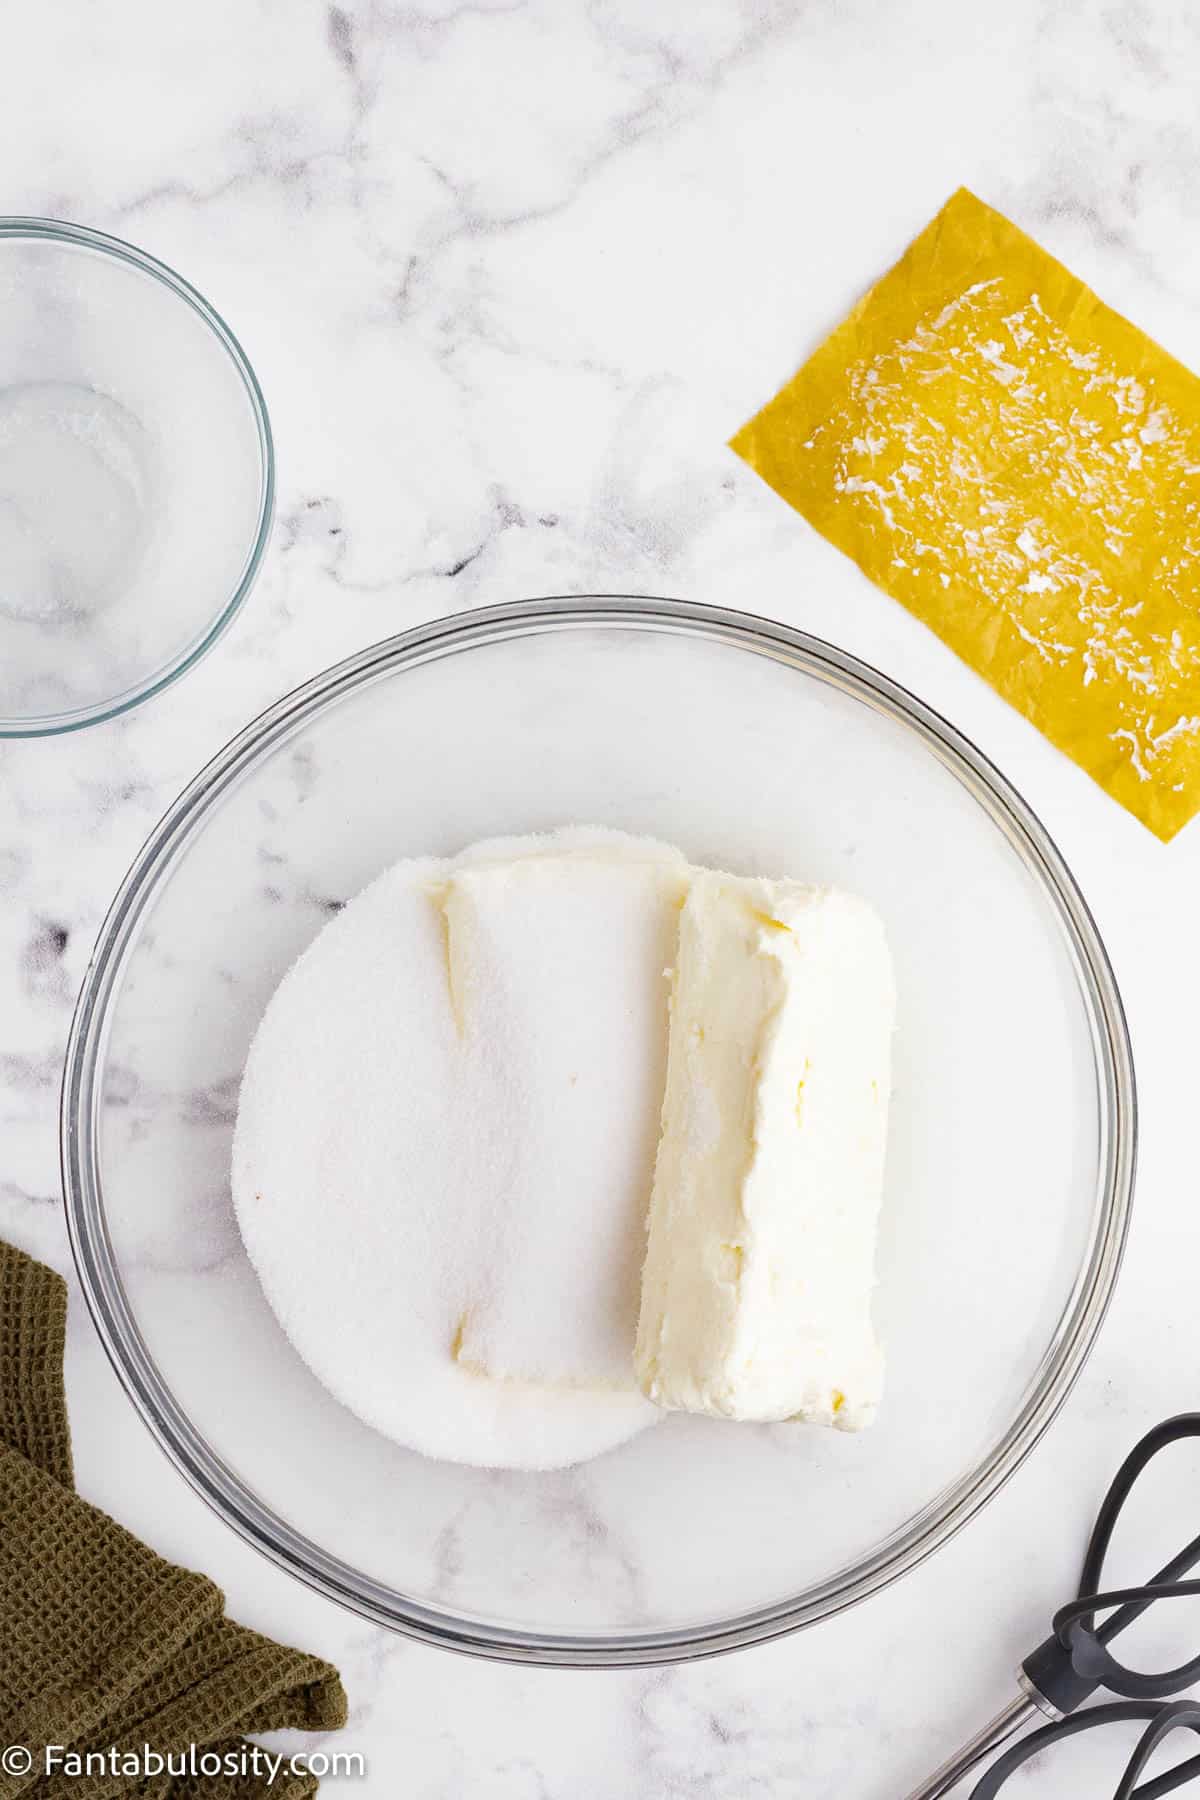
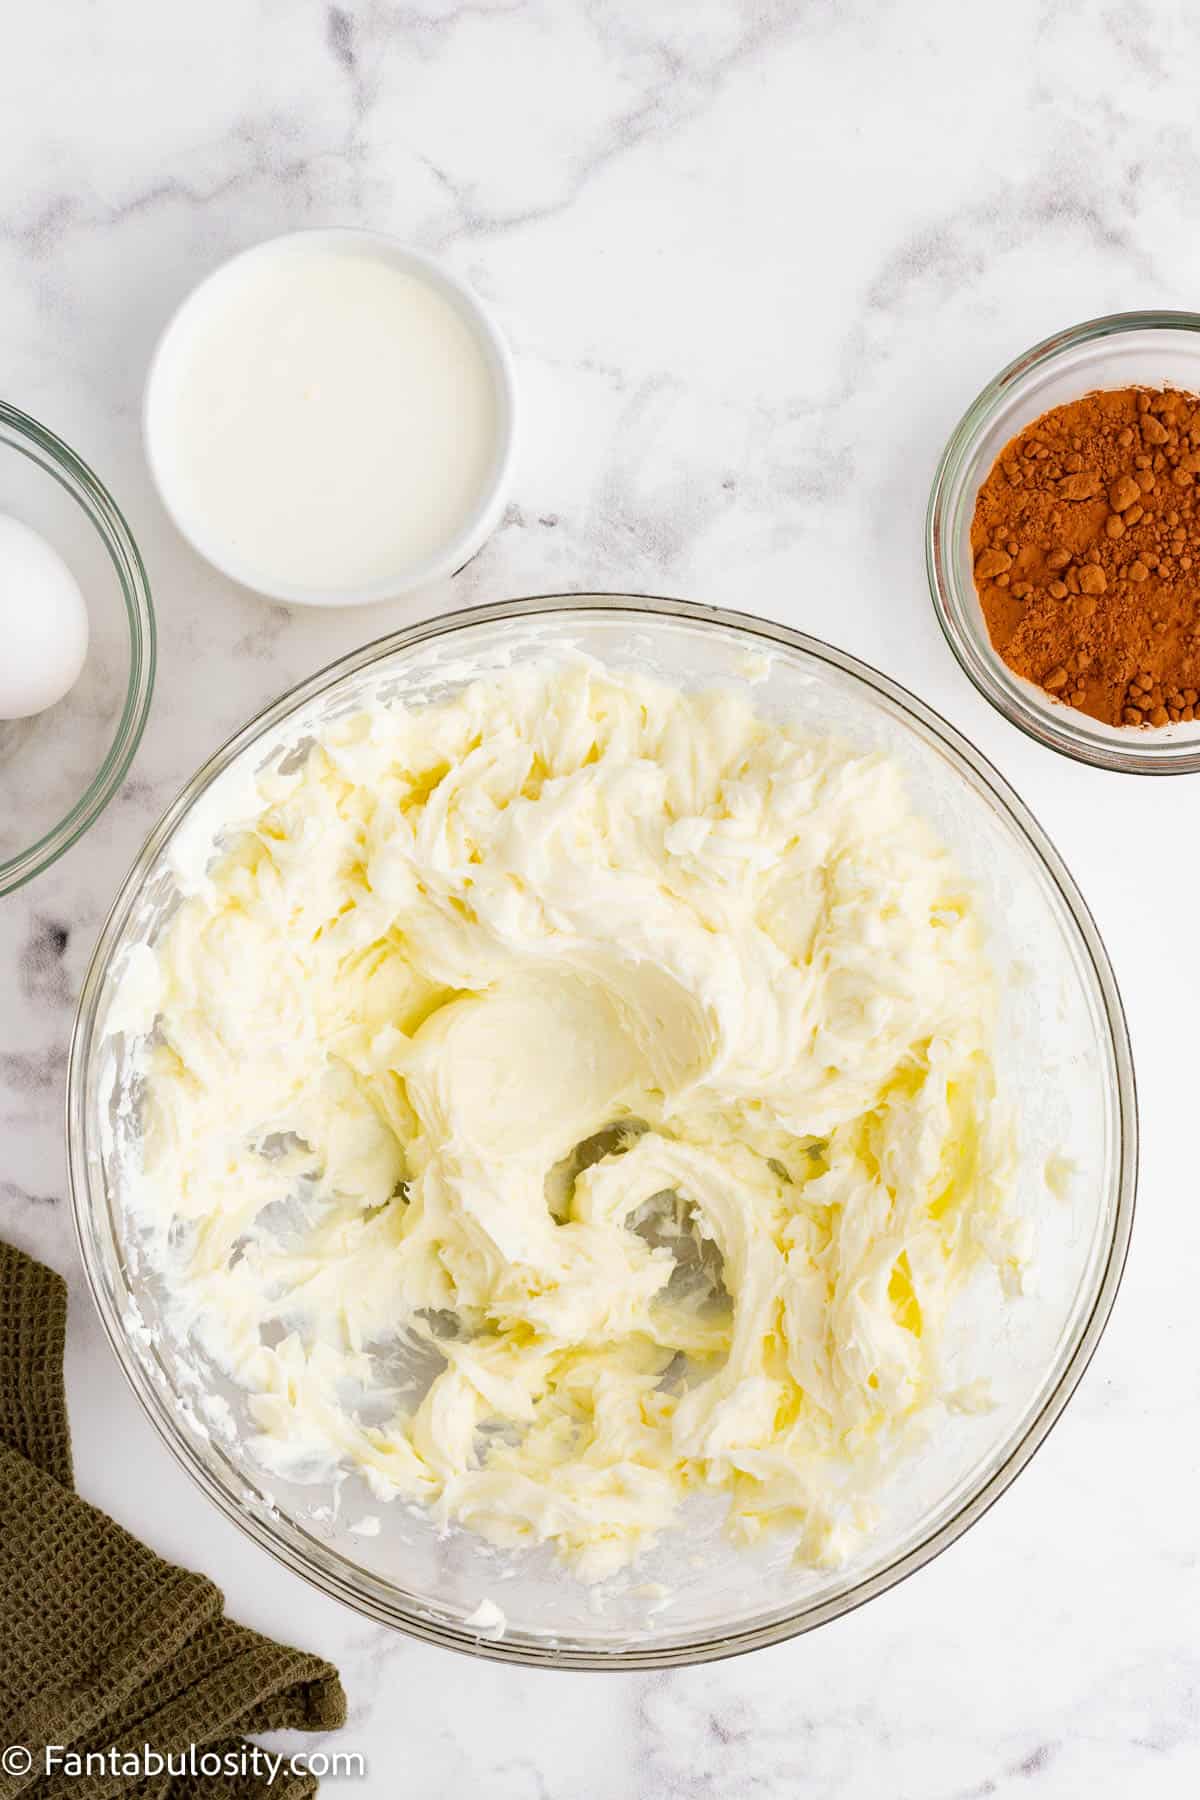
    1. In another large bowl, mix cream cheese and sugar using a hand mixer on low speed until well combined, light yellow and fluffy.
    A glass mixing bowl holds granulated sugar and cream cheese ready to be mixed
    Cream cheese and sugar
    Cream cheese and sugar has been whipped until fluffy in a glass mixing bowl
    Cream together until fluffy
    1. Now, add the eggs, sour cream and vanilla extract and mix for about 2 minutes.
    2. Add the cocoa powder to the cream cheese mixture and mix well until combined.
    Eggs, sour cream and vanilla extract have been added to a cream cheese mixture in a large glass mixing bowl
    Add eggs, sour cream and vanilla extract
    Cocoa powder has been added to a cheesecake filling in a glass mixing bowl
    Add the rich cocoa powder
    1. Next, using a cookie scoop, scoop the cheesecake filling into each cupcake liner until it is full to the top.
    2. Bake the cheesecake cups for 20-22 minutes.
    A glass mixing bowl holds a creamy chocolate cheesecake mixture that will be baked on top on Oreo cookie crust
    Creamy cheesecake filling
    A metal cupcake tin holds 12 baked chocolate cheesecake cups
    Baked cheesecake cups
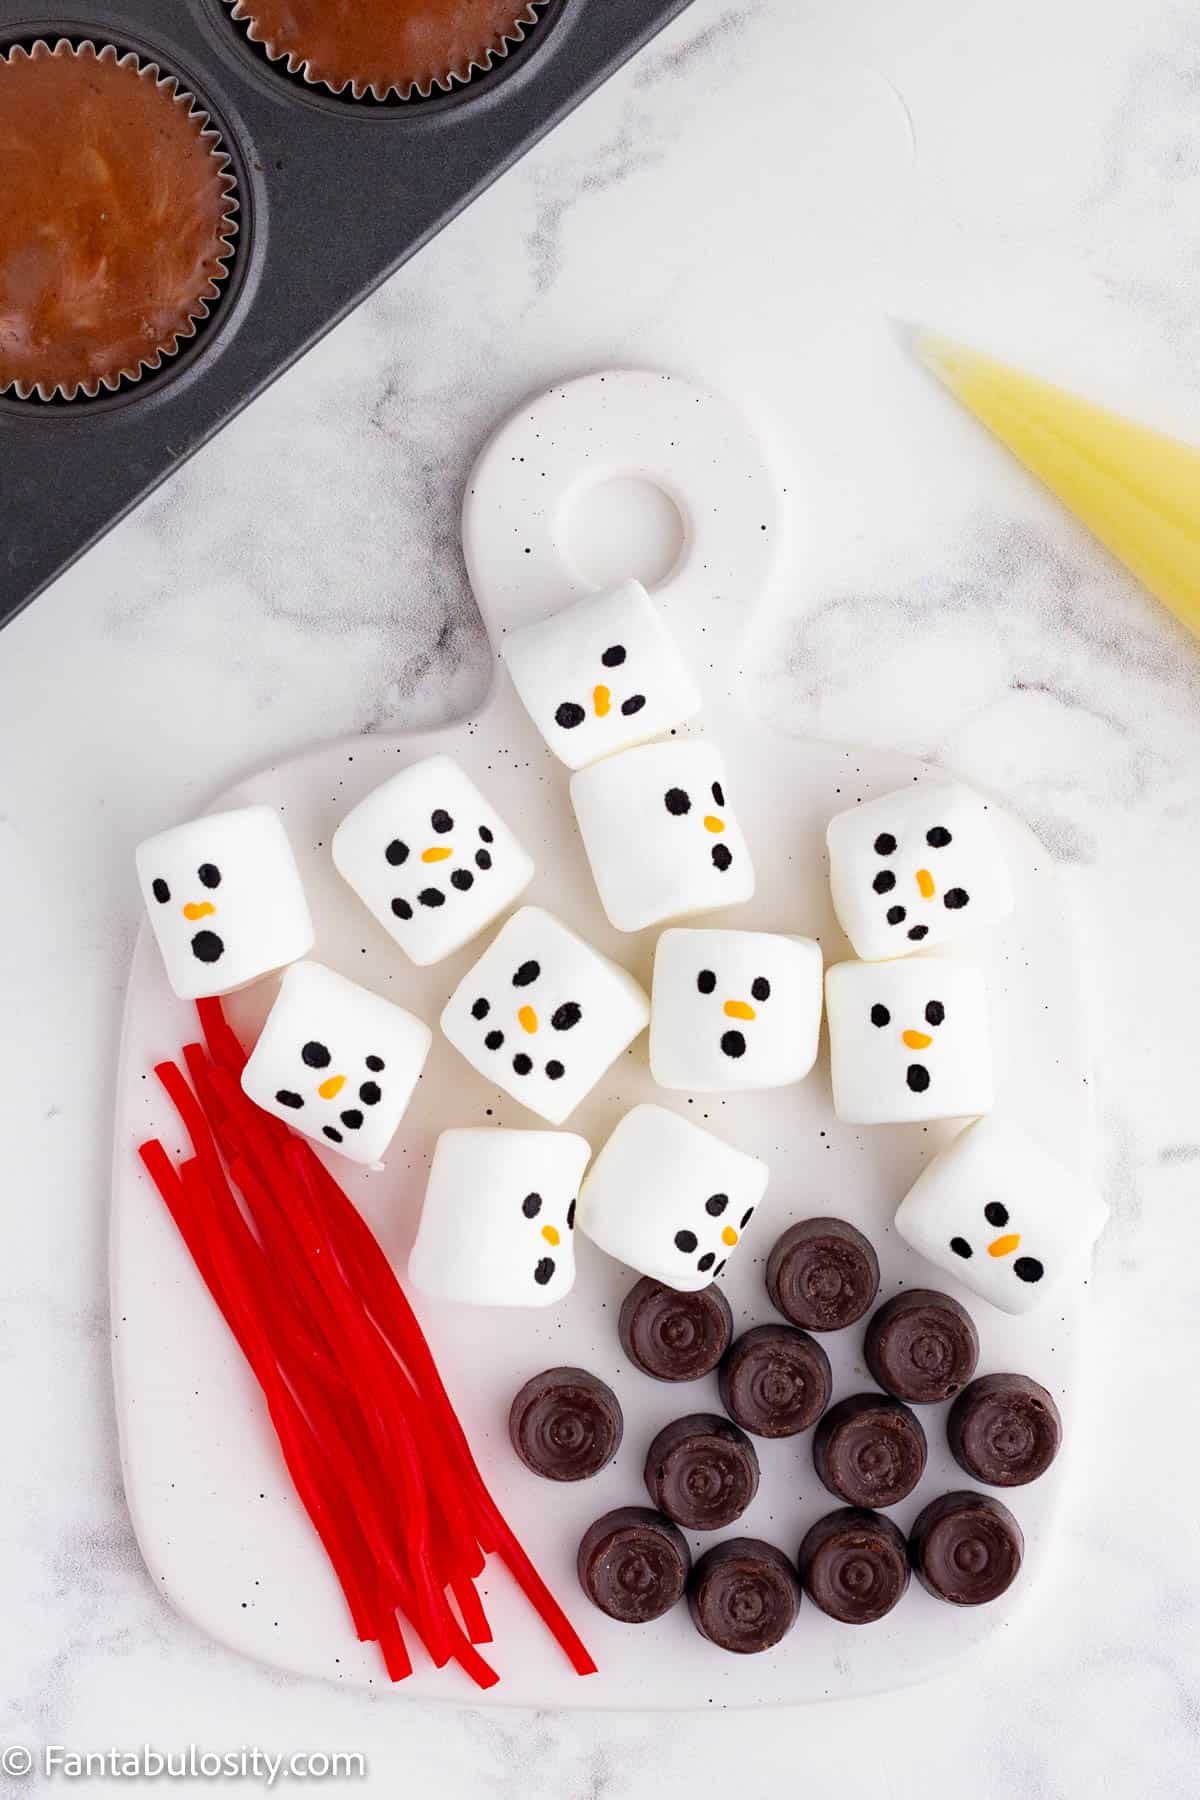
    1. While the cheesecake is baking, use the black and orange icing to add eyes, a carrot nose and a mouth to each jumbo marshmallow. Set the marshmallow faces aside.

    To make the white chocolate ganache

    1. In a medium mixing bowl, melt together the white chocolate and heavy cream. You can do this in 30 second intervals in the microwave or over a water bath. Continue whisking the white chocolate mixture until the ganache is smooth.
    A glass mixing bowl holds creamy white chocolate ganache
    Melted white chocolate ganache
    Snowman faces

    Decorate the melting snowman cheesecake cups

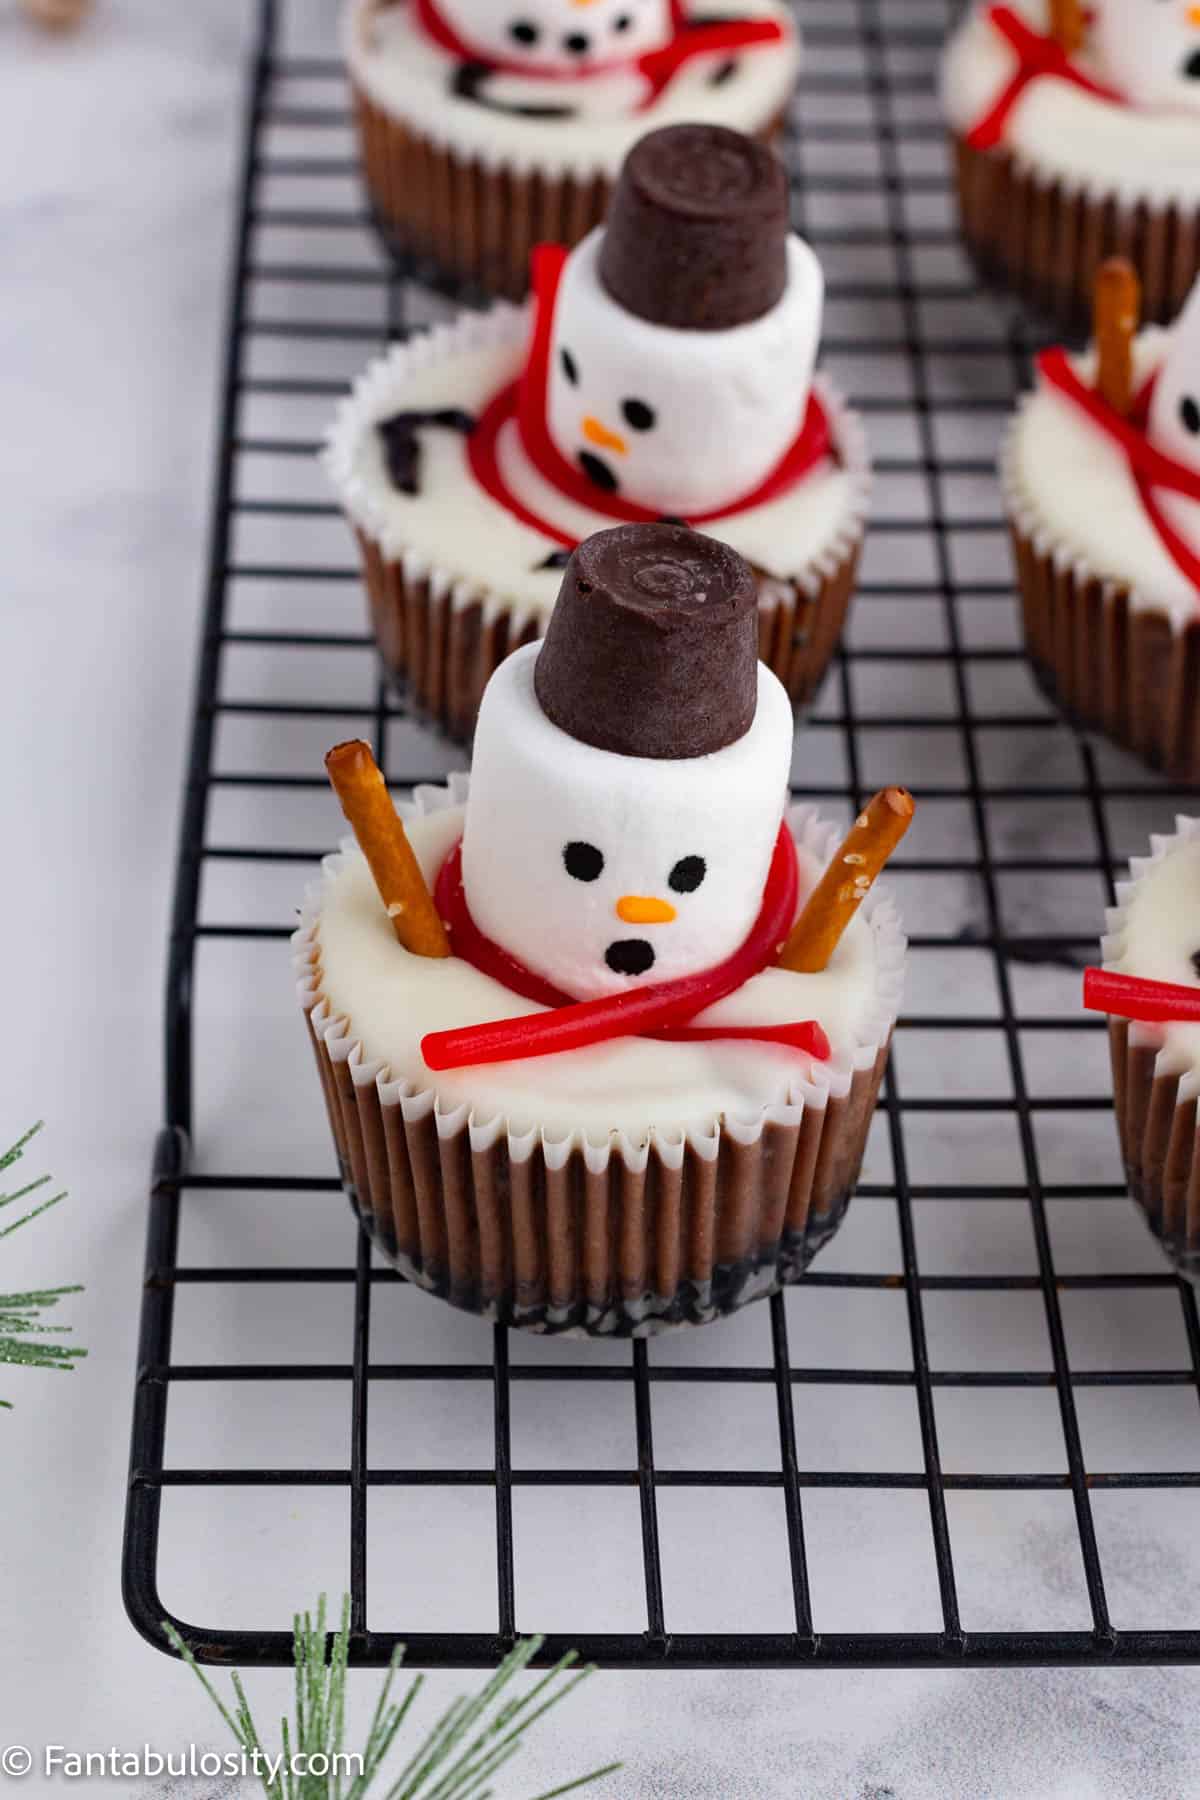
    1. First, transfer the ganache to a piping bag and pipe ganache onto the top of each cheesecake cup into a smooth circle. (Once you pipe the ganache, work quickly to place the other decorations before the ganache sets.)
    2. Then, place a marshmallow towards the back of each cheesecake cup with the face looking forward.
    3. Wrap a strand of red licorice around the marshmallow and cross it in front of the marshmallow for the scarf.
    4. Now, break each pretzel stick in half and place the halves on either side of the marshmallow to make the snowman’s arms.
    5. Repeat for each snowman cheesecake cup.
    6. Next, use some of the icing to attach the Rolo to the top of each marshmallow for a hat.
    7. Finally, let the cheesecake cups cool and the decorations set. We recommend refrigerating the cheesecake overnight.
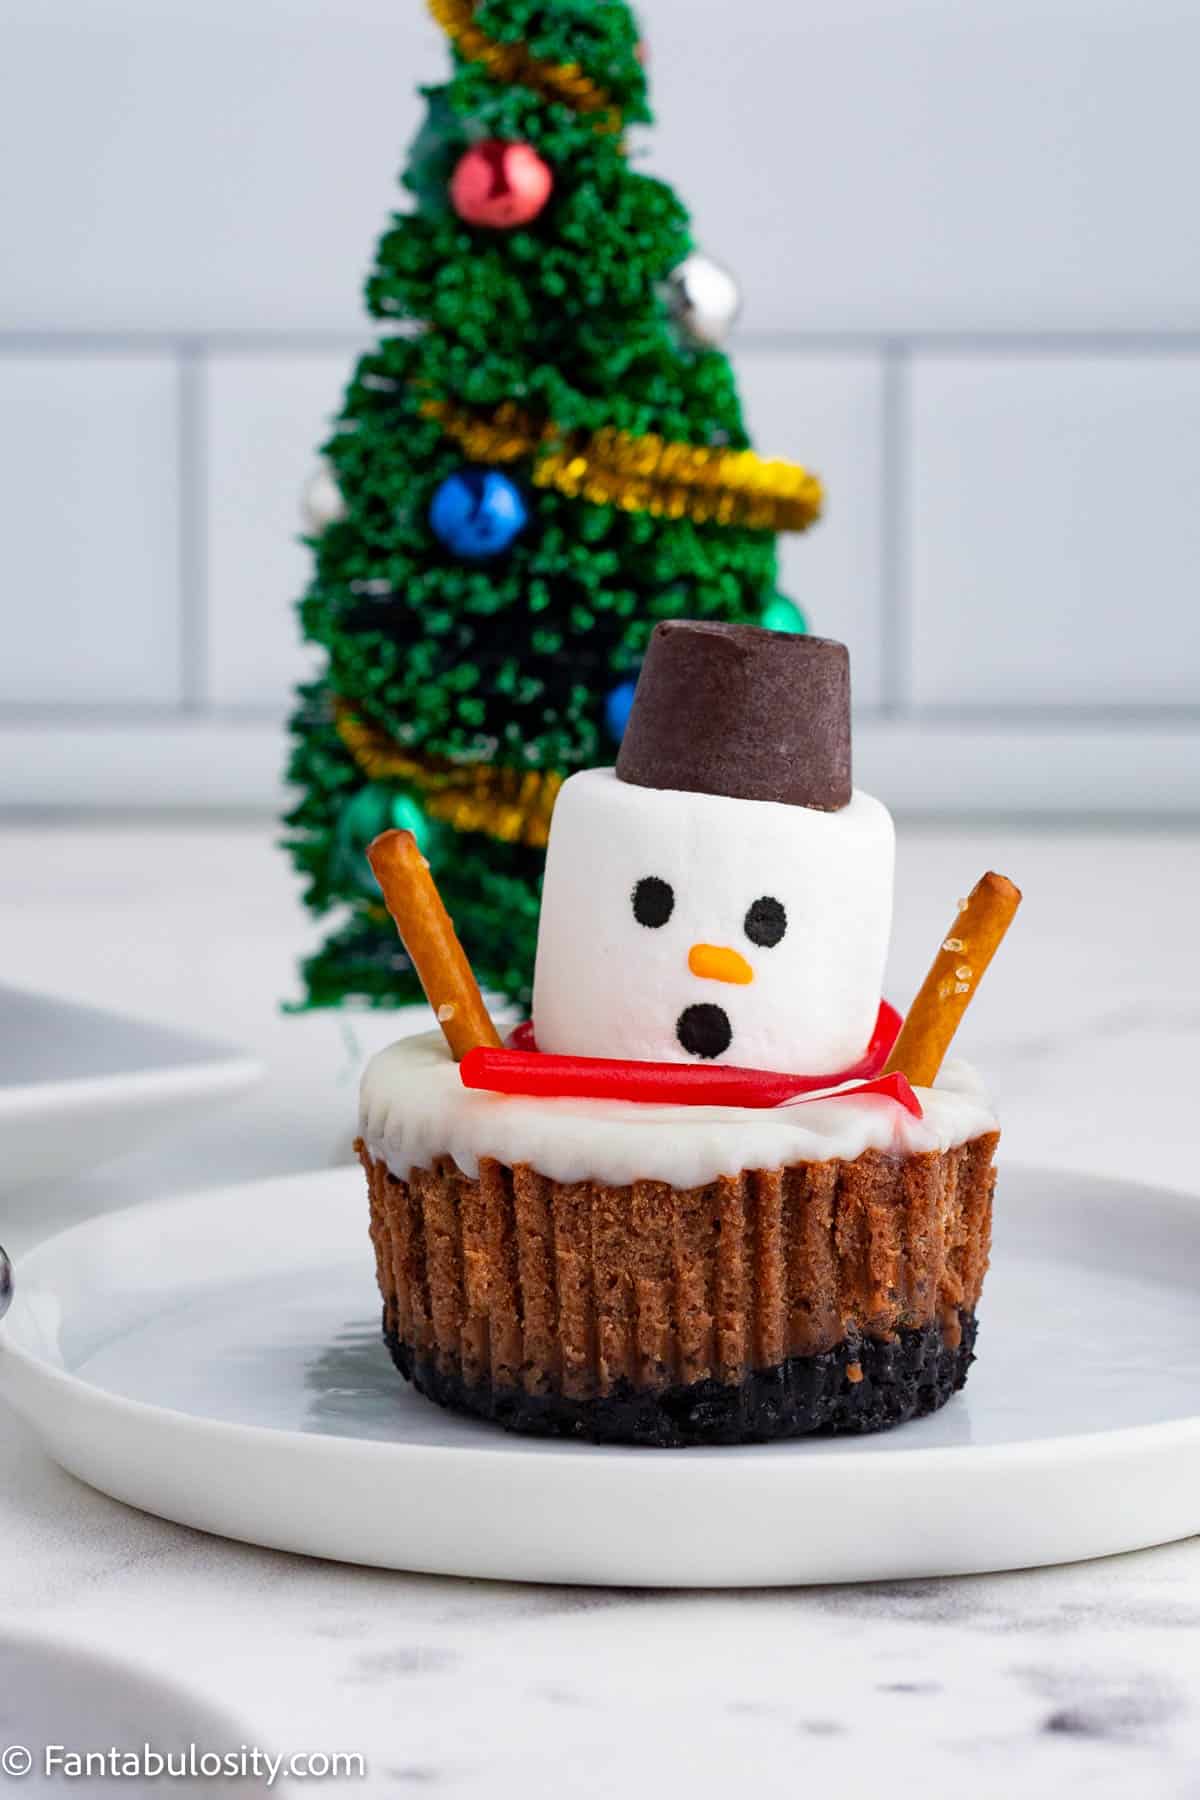
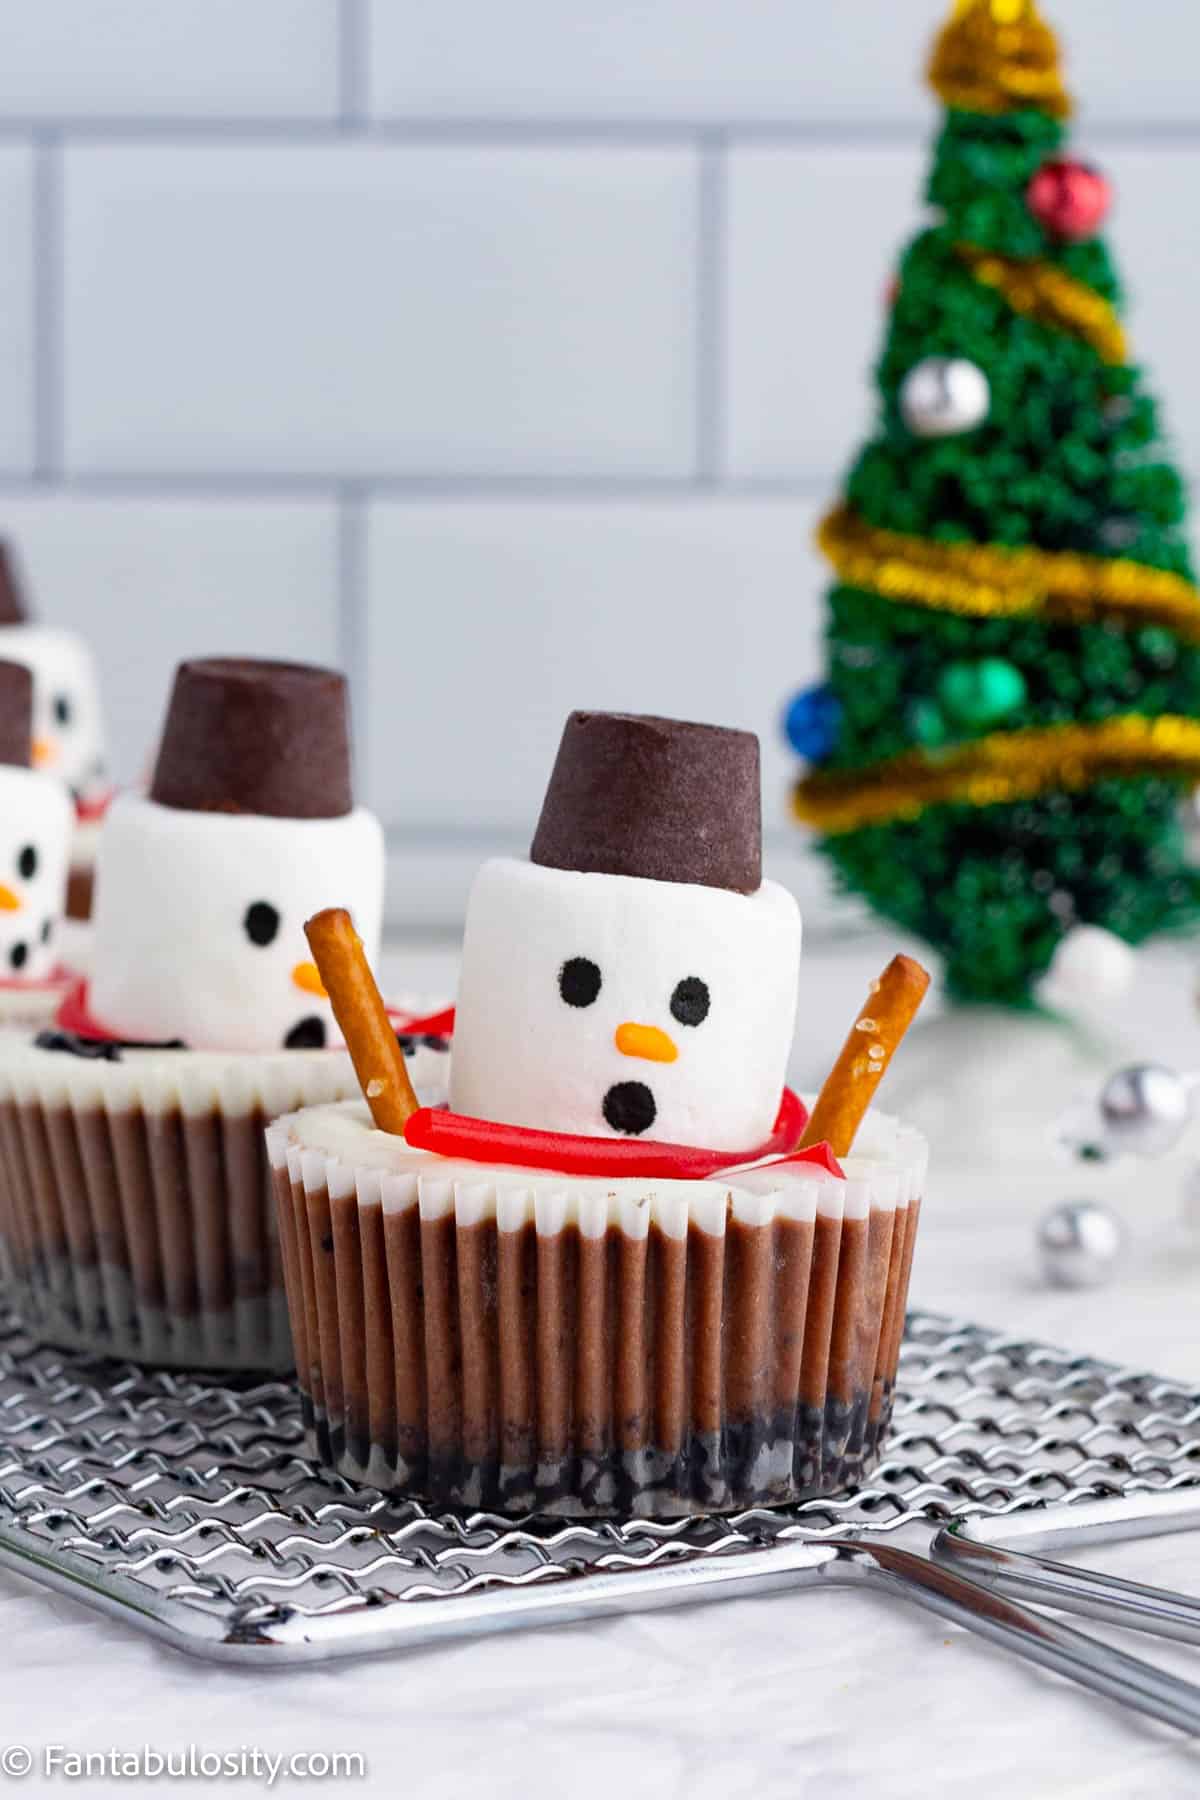
    A close up photo of chocolate cheesecake cups decorated to look like adorable melting snowmen with pretzel stick arms, a rolo hat and red licorice scarf
    Melted snowmen cheesecake

    These snowmen cheesecakes are the perfect pairing for a Peppermint Latte or mug of hot chocolate with chocolate melts.

    A white plates holds several chocolate cheesecake cups that are decorated to look like melting snowmen. In the background, a small Christmas tree sits off to the left
    Adorable snowman cheesecakes

    Substitutions & Variations

    If you need an alternative to an ingredient, prefer different candy or don’t have time to make ganache, here are a few suggestions so these little snowmen make it to your holiday dessert table.

    • Use your favorite flavor of Oreos to make the cookie crust. Mint oreos would be delicious to complement the chocolate cheesecake.
    • We used white melting wafers for the ‘melted snow’ on the top of each melting snowman dessert, but you can use vanilla almond bark, white vanilla frosting, white candy coating, whipped cream or whipped topping like Cool Whip to create the snow.
    • There are a few different ways you can decorate the melting snowmen faces:
      • Instead of icing, you can use food safe food coloring markers to draw the eyes and nose on the marshmallow.
      • Another option is to use mini chocolate chips, black sprinkles or black jimmies (long sprinkles) for the eyes.
      • Orange sprinkles, orange jimmies (long sprinkles) or any small orange candy can be used for the carrot nose.
    • Use a mini peanut butter cup or an unwrapped chocolate kiss for the top hat if you are not a big fan of Rolo candies.

    I mean, is there anything cuter than these little guys?! I love that you can see the layers of chocolate Oreo crust, chocolate cheese cake, white chocolate snow all topped with an adorably worried snowman.

    A chocolate cheesecake cup decorated to look like a melting snowman rests on a white plate. Behind the snowman cheesecake, a small Christmas sits in the center.
    Super cute Christmas snowman dessert

    How to Store Melting Snowman Cheesecake Cups

    You can store these snowman cheesecake cups in an airtight container in the refrigerator for up to 5 days.

    To freeze them, place the cheesecake cups in an airtight, freezer safe container and freeze for up to 2 months. When you are ready to serve them, let them thaw and enjoy!

    Close up photo of chocolate cheesecake cups decorated to look like melting snowmen with rolo hats, pretzel arms, licorice scarves and surprised faces
    Christmas cheesecake

    Top tips

    • To make Oreo cookie crumbs, whiz the cookies up in your food processor until they are fine crumbs or put them in a large zip-top bag and crush them with a rolling pin.
    • To avoid lumps in the filling of this sweet treat, make sure the ingredients are at room temperature.
    • Be careful not to overbeat the cream cheese mixture as it will incorporate too much air and cause cracking while the cheesecake bakes.

    More Sweet Holiday Treats

    If you love holiday dessert recipes as much as we do, then be sure to try our festive Christmas Chocolate Chip Dessert Cheese Ball, these Rudolph cookies, this addictive Christmas Tree Cake Dip and these nostalgic Christmas Cornflake Wreaths!

    Did you make this? I’d be so grateful if you left a “star” rating below to let me know what you thought! Then, the next time you need a quick and easy recipe, come back to Fantabulosity to browse all of my easy recipes!

    Recipe

    Cheesecake cups are decorated to look like melting snowmen
    Print Pin
    5 from 4 votes

    Melting Snowman Cheesecake Cups

    Melting Snowman Cheesecake Cups: A rich cookie crust, creamy chocolate cheesecake and adorable melting marshmallow snowman decorations make these festive holiday treats absolutely irresistible!
    Course Dessert
    Cuisine American
    Prep Time 15 minutes minutes
    Cook Time 22 minutes minutes
    Decorating Time 15 minutes minutes
    Total Time 52 minutes minutes
    Servings 12 cheesecakes
    Calories 677kcal
    Author Jessica Burgess

    Ingredients

    For the Oreo cookie crust

    • 2 cups Oreo cookie crumbs
    • 10 tablespoons butter melted

    To make the chocolate cheesecake filling

    • 16 ounces cream cheese (2 blocks) softened to room temperature
    • ⅓ cup granulated sugar
    • 2 large eggs room temperature
    • ¼ cup sour cream
    • 1 teaspoon pure vanilla extract
    • 6 tablespoon cocoa powder

    For the white chocolate ganache

    • 2 cups white chocolate melting wafers
    • ¼ cup heavy whipping cream

    Melting Snowman Decorations

    • 12 jumbo marshmallows
    • 12 Rolos unwrapped
    • 12 pretzel sticks
    • 12 strands pull apart red licorice candy
    • orange icing
    • black icing

    Instructions

    • Preheat your oven to 350 degrees F. Line a muffin pan with cupcake papers.

    To Make the Oreo cookie crust

    • In a large mixing bowl, combine the Oreo crumbs and melted butter.
    • Scoop about 1 tablespoon of the cookie crust mixture into each muffin cup. Use your fingertips to press the mixture into an even layer until it is firmly packed.
    • Bake the cookie crust for 5 minutes and allow it to cool.
    • Reduce the oven to 325 degrees F.

    For the chocolate cheesecake filling

    • In a large mixing bowl, combine cream cheese and sugar using a mixer on low speed until well combined.
    • Now, add the eggs, sour cream and vanilla extract and beat for about 2 minutes.
    • Add the cocoa powder to the cream cheese mixture and mix until well combined.
    • Next, using a cookie scoop, scoop the cheesecake filling into each cupcake liner until full to the top of the liner.
    • Bake the cheesecake cups for 20-22 minutes.
    • While the cheesecake is baking, use the black and orange icing to add eyes, a carrot nose and a mouth to each jumbo marshmallow. Set the marshmallow faces aside.

    To make the white chocolate ganache

    • In a medium mixing bowl, melt together the white chocolate and heavy cream. You can do this in 30 second intervals in the microwave or over a water bath. Continue whisking the white chocolate mixture until the ganache is smooth.

    Decorate the cheesecake cups with a melted snowman

    • First, transfer the ganache into a piping bag and pipe ganache onto the top of each cheesecake cup into a smooth circle. (Once you pipe the ganache, work quickly to place the other decorations before the ganache sets.)
    • Then, place a marshmallow face towards the back of each cheesecake cup with the face looking forward.
    • Wrap a strand of red licorice around the marshmallow and cross it in front of the marshmallow for the scarf.
    • Now, break each pretzel stick in half and place the halves on either side of the marshmallow to make the snowman's arms.
    • Repeat for each snowman cheesecake cup.
    • Next, use some of the icing to attach a Rolo to the top of each marshmallow for a hat.
    • Finally, let the cheesecake cups cool and the decorations set. We recommend refrigerating the cheesecake overnight.

    Notes

    • To avoid lumps in the filling, make sure the ingredients are at room temperature.
    • Be careful not to overbeat the cream cheese mixture as it will incorporate too much air and cause cracking while the cheesecake bakes.
    • You can use food safe food coloring markers to make the face instead of icing.
    • Store these melting snowman cheesecake cups in an airtight container and refrigerate for up to 5 days.
    • To freeze, place the cheesecake cups in an airtight, freezer safe container and freeze for up to 2 months. When you are ready to serve them, let them unthaw and enjoy.

    Nutrition

    Serving: 1cheesecake cup | Calories: 677kcal | Carbohydrates: 71g | Protein: 8g | Fat: 42g | Saturated Fat: 22g | Polyunsaturated Fat: 2g | Monounsaturated Fat: 12g | Trans Fat: 4g | Cholesterol: 104mg | Sodium: 455mg | Potassium: 226mg | Fiber: 2g | Sugar: 47g | Vitamin A: 948IU | Vitamin C: 0.2mg | Calcium: 100mg | Iron: 2mg

    Rudolph Reindeer Cake Mix Cookies

    October 17, 2022

    Round chocolate cookies have been decorated with candy eyes, a red candy and small pretzel twists to look like reindeer

    Rudolph Reindeer Cake Mix Cookies: You will love these chewy fudgy chocolate cookies (that start with a cake mix!) that are decorated to look like adorably festive reindeer faces!

    A round white plate holds 6 round chocolate cookies that have been decorated to look like reindeer faces

    Desserts at Christmas are a non-negotiable for me (Calories don’t count at this time of year, right?!) and seeing these cookies on a cookie tray with these pecan snowball cookies, is one of my favorite sights to see during Christmas!

    This Peppermint Sugar Cookie Cake is a show stopper, and this sweet Christmas Tree Cake Dip is perfect for any holiday party.

    Not to mention these pretty Tree Forest Winter Cupcakes look like they are topped with snow-sprinkled Christmas trees, and these cute reindeer face cookies are the newest addition to our Christmas dessert spread!

    Why You’ll Love This Recipe

    These cookies start with a chocolate cake mix! (Just like in our gooey butter chocolate cake mix cookies and these cake mix peanut butter cookies!)

    Cake mix cookies are so versatile! There is no fussy measuring, there are SO many flavor options and you probably already have all of the ingredients to make these cookies in your kitchen. We’ve made funfetti cake mix cookies, red velvet cake mix cookies, vanilla cake mix cookies, strawberry cake mix cookies, and even made a cookie from brownie mix!

    If you are looking for holiday treats for students, whether it is a cookie decorating party for the kids or a homeschool co-op activity, this is the perfect recipe. Each batch makes about 30 cookies and the decorations are simple to add for even little hands. (And honestly, crooked eyes and noses are pretty much the cutest things!)

    Do I need to even mention … chocolate! Each chewy cookie tastes like a brownie in cookie form. If you’re a chocoholic like I am, add ½ cup of chocolate chips to the dough for chocolate chocolate cake mix cookies!

    [feast_advanced_jump_to]

    Ingredients

    With such simple ingredients, these Rudolph Reindeer Cake mix cookies are great to have on hand for the next snow day!

    Bowls of ingredients, butter, cream cheese and candy eyes are displayed on a white marble background
    Ingredients for easy Rudolph cookies
    • ½ cup (1 stick) of butter, softened
    • 8 oz. (1 block) of cream cheese, softened
    • ¼ teaspoon vanilla extract
    • 1 large egg
    • One 15.25 oz. devil’s food cake mix
    • 2 cups powdered sugar
    • 60 candy eyes
    • 30 red M&Ms for the reindeer noses
    • 60 mini pretzel twists for reindeer antlers
    • Icing or frosting to adhere the decorations

    See the printable recipe card below for ingredients, nutrition information and detailed recipe notes.

    Instructions

    We think Christmas cooking ideas (like cake mix cookies) shouldn’t be difficult. So, here are the step-by-step instructions with pictures to make this easy cookie!

    1. First, preheat your oven to 350 degrees F. Line several baking sheets with parchment paper or silicone baking mats.
    2. In a large bowl, cream the butter and cream cheese together until smooth.
    3. Next, add the vanilla extract and egg and mix well to combine.
    A stick of butter and a block of cream cheese are shown in a large metal mixing bowl
    A light yellow creamy mixture is shown in a large metal mixing bowl
    1. Now, add the dry cake mix to the creamed mixture. Stir until well blended. The dough will be a little thick.
    A boxed chocolate cake mix has been added to a light yellow creamy mixture in a large metal mixing bowl
    Deep brown chocolate cookie dough is shown in a large metal mixing bowl
    1. Using a small cookie scoop, scoop out the dough and form it into 1 inch balls.
    2. Drop each cookie dough ball into a ball of powdered sugar and roll it around to coat it.
    A metal cookie scoop is shown with a scoop of deep brown cookie dough
    A deep brown chocolate ball of cookie dough has been placed in a glass bowl of powdered sugar
    1. Next, place the sugar coated cookie dough balls on the lined cookie sheet about 2 inches apart.
    2. Now, bake the cookies for 10-13 minutes. They should be baked through, but not too crispy.
    A metal baking sheet lined with parchment paper holds 12 ball of chocolate cookie dough that have been rolled in powdered sugar
    A metal baking sheet lined with parchment paper holds 12 baked chocolate cookies
    1. Allow the cookies to cool completely. Use icing or frosting to attach two mini pretzels to the top of each cookie for antlers. Add two candy eyes and a red M&M in the center of each cookie for Rudolph’s nose.
    A metal baking sheet lined with parchment paper holds 12 round chocolate cookies in various stages of being decorated to look like reindeer
    Adorable reindeer faces
    1. Finally, let the cookies rest for about 5 minutes so the icing is set and enjoy!
    A black mesh cooling rack holds 12 round chocolate cookies that have been decorated to look like reindeer faces
    Rudolph Reindeer Christmas Cookies

    Whether you’re making just Rudolph or the whole reindeer gang, here are a few way to change up this recipe to suit your family and get creative!

    Substitutions

    • We used full fat cream cheese for this cake mix cookie recipe, but you can use reduced fat cream cheese.
    • Any 15.25 oz. chocolate cake mix will work in this recipe for reindeer face cookies. Grab an extra chocolate cake mix to make these Rocky Road Cookies for fun too!
    • While we love classic vanilla extract, you could use almond extract or even peppermint extract for a mint chocolate cake mix cookie. Peppermint extract is pretty strong, so we suggest reducing the amount of extract a bit.
    • You can add up to ½ cup of your favorite add-ins to this dough. Semi-sweet chocolate chips, white chocolate chips, toffee bits, crushed candy canes, cinnamon chips, crushed pretzels and toasted pecans are some of our favorites!

    Variations

    • Make reindeer sandwich cookies (reindeer whoopie pies) by covering one undecorated chocolate cake mix cookie with frosting and topping it with a reindeer face cookie. I think this is such a cute idea!
    • Another fun idea is to make reindeer sugar cookies. Just frost a sugar cookie with chocolate frosting and then add the antlers, eyes and nose. (You can use the same method to frost chocolate rice krispie treats for reindeer rice krispie treats.)
    • Make each reindeer cookie into a fun cookie pop! While the cookies are still warm, slide a lollipop stick or popsicle stick into the cookies. (Press the warm cookie around the stick if necessary to keep it stable.) Decorate and enjoy!
    A single round chocolate cookie decorated to look like a reindeer face is leaning against a bottle full of milk
    Christmas Cake Mix Cookies

    Decorate Rudolph Reindeer Cake Mix Cookies

    Aren’t these the cutest Christmas cookies?! They are so simple to decorate as described in the original recipe, but here are some alternatives for some of the ingredients we used.

    • Instead of candy eyes, you can use white chocolate chips or white M&Ms. Or, use white frosting in a piping bag to pipe on white eyes.
    • You can use a cinnamon red hot candy or small pieces of maraschino cherries for Rudolph’s nose if you prefer that to a red M&M. If you have leftover red hot candies, save them to make this Christmas Chex Mix with them!
    • A brown m&m will make the perfect nose for Dasher and Dancer and all of the other reindeer.
    • Use standard sized pretzel twists for larger pretzel antlers.

    I’m pretty sure if you leave these Rudolph Reindeer Cake Mix Cookies out on Christmas Eve, it will guarantee you a spot on Santa’s nice list!

    A birdseye photo of several round white plates holding round chocolate cookies that have been decorated to look like Rudolph the Red Nosed Reindeer
    Super cute cookies

    Storage

    How long do homemade cookies stay fresh? These cookies, like most homemade cookies, will stay fresh when stored in an airtight container at room temperature for up to 5 days.

    To freeze these reindeer cookies, let them set and place them in a plastic freezer bag or airtight freezer-safe container for up to 3 months.

    A close up photo of a white plate holding several round chocolate cookies that have been decorated to look like reindeer faces
    Fun Christmas Cookies

    More Fun Easy Christmas Cookies

    Get those cookie jars and cookie trays ready! Here are some simple Christmas cookie recipes the whole family will enjoy: nostalgic Cornflake Wreaths, classic Cut Out Sugar Cookies, the BEST no bake cookies and these adorable Christmas Gingerbread Cookies. Happy cookie making!

    Did you make this? I’d be so grateful if you left a “star” rating below to let me know what you thought! Then, the next time you need a quick and easy recipe, come back to Fantabulosity to browse all of my easy recipes!

    Recipe

    Round chocolate cookies have been decorated with candy eyes, a red candy and small pretzel twists to look like reindeer
    Print Pin
    5 from 3 votes

    Rudolph Reindeer Cake Mix Cookies

    Rudolph Reindeer Cake Mix Cookies: Chewy fudgy chocolate cookies (that start with a cake mix!) are decorated to look like charming reindeer faces.
    Course Dessert
    Cuisine American
    Prep Time 10 minutes minutes
    Cook Time 13 minutes minutes
    Total Time 23 minutes minutes
    Servings 30 cookies
    Calories 138kcal
    Author Jessica Burgess

    Ingredients

    • ½ cup butter softened (1 stick)
    • 8 oz cream cheese softened (1 block)
    • ¼ teaspoon vanilla extract
    • 1 large egg
    • 1 15.25 oz devil's food cake mix
    • 2 cups powdered sugar
    • 60 candy eyes
    • 30 red M&Ms
    • 60 mini pretzel twists
    • icing

    Instructions

    • Preheat the oven to 350 degrees F. Line several baking sheets with parchment paper or silicone baking mats.
    • In a large mixing bowl, cream the butter and cream cheese together until light and fluffy.
    • Next, add the vanilla extract and egg and mix well to combine.
    • Now, add the dry cake mix to the creamed mixture. Stir until well blended. The dough will be a little thick.
    • Using a cookie scooper, scoop out the dough and form it into 1 inch balls.
    • Drop each cookie dough ball in a bowl of powdered sugar and roll it around to coat it.
    • Place the sugar coated cookie dough balls on the lined baking sheets, about 2 inches apart.
    • Now, bake the cookies for about 10-13 minutes.
    • Allow the cookies to cool completely. Use icing or frosting to attach two pretzel twists to the top of each cookie for antlers. Add two candy eyes and a red M&M for the reindeer nose.
    • Finally, let the cookies rest for about 5 minutes so the icing is set and enjoy!

    Video

    Notes

    • You can use chocolate chips for the eyes if you can’t find the candy eyes.
    • Cinnamon red hot candies make a great alternate for the red reindeer noses.
    • Any 15.25 oz. chocolate cake mix can be used for this recipe.
    • You can make the dough and store it in the refrigerator for up to 1 week.
    • Store the baked cookies in an airtight container at room temperature for up to 5 days. To freeze these cookies, place them in a ziploc bag or freezer safe airtight container for up to 3 months. Thaw the cookies overnight and enjoy!

    Nutrition

    Serving: 1cookie | Calories: 138kcal | Carbohydrates: 19g | Protein: 2g | Fat: 6g | Saturated Fat: 4g | Polyunsaturated Fat: 0.4g | Monounsaturated Fat: 2g | Trans Fat: 0.1g | Cholesterol: 22mg | Sodium: 200mg | Potassium: 40mg | Fiber: 0.4g | Sugar: 9g | Vitamin A: 207IU | Vitamin C: 0.3mg | Calcium: 14mg | Iron: 1mg

    Brioche French Toast

    October 15, 2022

    Brioche French Toast slices on white plate with cream and berries

    Brioche French Toast: Simple ingredients and just a few minutes yield a sweet, buttery, special breakfast main dish everyone will love. It’s an easy recipe that you’ll be able to make over and over again!

    Soon, you too will think this is the best french toast recipe!

    2 slices of brioche french toast on white plate
    Brioche French Toast

    Images were retaken by Fantabulosity and post updated on October 16, 2022.


    Hi lovely Fantabulosity readers! Meg here from Meg's Everyday Indulgence. I'm so excited to be back and sharing my new favorite breakfast recipe, Brioche French Toast.

    Why You’ll Love this Recipe

    First, this luxurious french toast is really simple to make. We're talking 15 minutes max which even makes this a contender for school mornings, or even on the weekends when you want to make breakfast, but don’t want to spend a ton of time in the kitchen!

    Second, the ingredients couldn't get easier for this delicious french toast. I'm even betting you have everything in your house already except for the brioche bread. Brioche may seem fancy but it's surprisingly easy to find.

    What is Brioche French Toast?

    Brioche French Toast is a french toast recipe made using brioche bread. A few simple ingredients make a custard mixture, kind of with the same flavor of egg custard pie that you coat on buttery brioche bread and cook on the stovetop.

    Brioche is a French bread that contains lots of eggs and butter! Good start right? (The whole family is going to love it!)

    Because of the higher amount of those ingredients, the bread is much richer, softer and more tender than your average loaf.

    It's often braided and has a dark golden sheen. If you've never had it before, you need it in your life. Using brioche to make this French toast added a whole new level of buttery, rich goodness and is even delicious to use as breakfast toast.

    I'll never make French toast with any other bread again. That's how epic brioche is in this recipe.

    Ingredients

    • 6 slices brioche bread slices (Regular bread, fresh bread or stale bread also works great but it’s not necessary – however we think brioche is the best bread.)
    • 4 large eggs
    • ¾ cup whole milk (You can also use heavy cream)
    • ¾ tsp. ground cinnamon
    • ½ tsp. vanilla extract
    • pinch of kosher salt
    • butter, for cooking
    ingredients for brioche french toast on table
    Ingredients

    Instructions

    1. Start off by preheating your griddle or a big skillet over medium heat. That way it's hot and ready to go when you're done with the super quick process of dipping the French toast.

    Now that you have your griddle heating up, it's time to assemble the French toast.

    Egg Wash for Dipping

    I like to use a pie plate or cake pan for this step (or a similar shallow dish). Because they are shallow, there's a lot of surface for dipping and it just makes the process easier.

    1. Crack the eggs in your pie plate and whisk them up with a fork. Once the eggs are uniformly yellow, add the milk, cinnamon, vanilla and a pinch of salt.
    eggs in pie plate
    eggs
    cinnamon, milk and vanilla added to eggs
    Add spices, vanilla & milk
    1. Mix until evenly combined.
    french toast batter mixed together
    Mix until combined
    1. Add the thick slices of bread to the egg wash, let it soak for a few seconds, and then flip and let it soak again.
    Dipping bread in to egg mixture
    Coat bread
    1. Melt about a tablespoon of butter in the hot skillet. When melted, it’s ready for a coated slice of brioche bread. (Or however many will fit in the skillet or on the griddle at one time.)
    butter melting in hot skillet
    Melt butter
    1. When the french toast is ready, and fully coated (meaning, the bread feels really soft and the egg wash has soaked in a bit — it doesn’t have to be super-soaked), add it to your hot, buttered griddle or skillet to cook in batches.
    French toast in cast iron skillet
    Cook
    1. Cook for a few minutes per side, until golden brown, and breakfast is served. You now have a homemade french toast recipe that you can count on!
    Cooked french toast stacked on white plate

    French Toast Topping Ideas

    There are so many ways you can serve this Brioche French Toast. If you like to keep things classic, go with pure maple syrup or a dusting of powdered sugar.

    If you want to get a little fancy, add whipped cream, fresh berries or other fresh fruit, or even chocolate chips as topping options. The best part about this recipe is that everyone can add their favorites! Here are some other favorite toppings to give you some ideas:

    • brown sugar
    • fruit syrup
    • chocolate drizzle
    • caramel drizzle
    • melted butter
    French toast with whipped cream and berries

    You could even set it up as a little food bar with a line up of options for your family or guests to mix and match as they please if you’re hosting a breakfast or brunch and need party ideas!

    Serve this Brioche French Toast with some eggs and delicious oven-cooked bacon. You'll quickly become the go-to home for Saturday brunch.

    French toast with bite taken out of it
    Brioche French Toast Recipe

    Storage and Leftovers

    If you happen to have leftovers, it’s best to store leftover french toast in an airtight container or plastic bag, and place in the refrigerator for 3-5 days.

    Related Recipes:

    If you love french toast recipes, then you’re also going to love this baked french toast casserole, these EASY french toast sticks, the crazy-delish stuffed strawberry cream cheese french toast, my regular french toast, and similar easy breakfast recipe… cinnamon roll casserole!

    Recipe

    Brioche French Toast slices on white plate with cream and berries
    Print Pin
    5 from 7 votes

    Brioche French Toast

    Become the star of brunch with this Brioche French Toast. Simple ingredients and just a few minutes yields a sweet, buttery breakfast main dish everyone will love.
    Course Breakfast
    Cuisine American
    Prep Time 5 minutes minutes
    Cook Time 10 minutes minutes
    Total Time 15 minutes minutes
    Servings 6 slices
    Calories 114kcal
    Author Jessica Burgess
    Cost $8

    Equipment

    • Griddle or large skillet

    Ingredients

    • 6 slices brioche bread
    • 4 large eggs
    • ¾ cup whole milk
    • ¾ tsp. ground cinnamon
    • ½ tsp. vanilla extract
    • pinch of kosher salt
    • butter, for cooking

    Instructions

    • Preheat a griddle or large skillet over medium heat. Meanwhile, add eggs to a pie plate, cake pan or shallow bowl. Whisk well with a fork. Add milk, cinnamon, vanilla and salt and whisk again.
    • Dip brioche bread in the egg mixture. Let soak for 2 seconds per side. Spread the hot griddle with butter then add dipped brioche. Cook each slice for 1 to 2 minutes per side, until golden.

    Notes

    Brioche bread can be easily found these days in the grocery store! Take a look in the bakery section first, in case that’s where they keep it!
    TIP: Double the recipe and freeze extras for a quick and easy weekday breakfast!

    Nutrition

    Serving: 1slice | Calories: 114kcal | Carbohydrates: 4g | Protein: 9g | Fat: 7g | Saturated Fat: 3g | Cholesterol: 216mg | Sodium: 101mg | Potassium: 139mg | Fiber: 1g | Sugar: 3g | Vitamin A: 380IU | Calcium: 93mg | Iron: 1mg

    Sausage and Egg Casserole

    October 14, 2022

    sausage and egg casserole being lifted out of baking dish

    Sausage and Egg Casserole: This easy recipe is filled with all your favorite breakfast ingredients: sausage, tater tots, eggs, cheese, and more! Perfect for Christmas morning or even busy mornings!

    You only need about 15 minutes to put this casserole together.

    Sausage and Egg Casserole being lifted out of baking dish

    Using similar ingredients, these breakfast egg rolls are a fun twist that you’ll also love!

    Meg here with another great recipe to share this month! We are big fans of breakfast recipes at my house and I hope you feel the same. (I also made this Instant Pot breakfast casserole too, in case you love Instant Pot recipes too!)

    Why You’ll Love This Breakfast Casserole

    I am all for breakfast food at any time of the day. How do you all feel about breakfast for dinner? We partake in it often at my house because it makes everyone happy and when that happens you just have to go with it.

    Breakfast casserole is definitely one of my go-to options when I need an easy, filling option for a great breakfast or dinner. Or sometimes I’ll even switch it out for this breakfast casserole with biscuits and gravy or this ham and cheese croissant bake, if we’re in the mood for something heavier!

    Let's talk about how easy this casserole is to make. It’s really similar to the easy quiche recipe that Jessica made but has a different spin on things with the hashbrowns, really tying in the breakfast flavor!

    The most work you put into the prep is cooking the sausage to brown, crispy perfection. And the great thing is you can prep all the remaining ingredients while the sausage is cooking.

    TIP: While this is baking, you could put frozen biscuits in the air fryer to serve them alongside this casserole.

    Ingredients for Breakfast Casserole

    This casserole is filled with simple ingredients, and it's just so good.

    Ingredients for sausage and egg casserole
    Ingredients
    • Breakfast sausage – we love using Jimmy Dean but any brand will do.
    • Tube crescent dough sheets – or crescent dough rolls with seams pressed together
    • Tater tots – frozen tater tots cut in half or hash browns
    • Shredded cheddar cheese – shredding block cheese can create a creamier casserole but pre-shredded is just fine.
    • Milk – 2% or whole preferably

    Make sure to check the recipe card below for the full list of ingredients and instructions.

    Substitutions and Variations

    Although this recipe is delicious just the way it is, here are some ideas you can try if you’d like to:

    • Sausage: I use ground sausage for this recipe but if you’re in a pinch and you only have sausage links, you can use those too! Just bake sausage links in the oven and chop them up!
    • Add-ins: You can add chopped bell peppers, mushrooms, fresh spinach, dry mustard or your favorite casserole additions!
    • Cheese: Feel free to change up the type of shredded cheese or even add more! Pepper jack cheese is a great way to add a small kick of flavor!

    Instructions

    Not only does this recipe use simple ingredients but it’s simple to put together, too! Here’s how:

    Crescent Dough

    First, a layer of flaky crescent dough. I mean, it can't be bad if it starts with bread. Am I right?!

    I love using the crescent sheets in the tube but if your store doesn't carry them, simply press together the seams of crescent rolls into the bottom of the baking dish.

    crescent rolls spread in to baking dish
    Crescent rolls
    Sausage in baking pan on top of crescent rolls
    Add sausage & tater tots

    Sausage

    Next up is of course breakfast sausage which adds lots of bulk to the casserole.

    When I tested the recipe, I tried it the first time with regular 'ole breakfast sausage and it was delicious. The second time I went with spicy and I loved it even more. I think maple would be crazy good too.

    So, the moral of this story is, use your favorite variety of sausage. All options are great choices.

    Cheese sprinkled on baking dish
    Add cheese

    Tater Tots

    I think my favorite addition to this casserole is the mini tater tots. First, because mini things are so dang cute and always seem to taste better.

    Second, because they add that yummy, starchy potato goodness. I like that there's bigger chunks of potato rather than the usual shredded hash brown option. Again, if you can't find the mini version at your store, regularly sized tater tots will work too.

    Eggs and Cheese

    And like any good breakfast casserole, there's a healthy amount of eggs and cheese to round it all out. Because it just can't be casserole without cheese.

    eggs in bowl before whisking
    Crack eggs
    Eggs whisked in bowl
    Whisked eggs

    My cooking mantra is all about taking simple, easy to find ingredients and turning them into something different and special and this casserole is the epitome of that stance.

    eggs poured over casserole
    Pour eggs over casserole

    Casserole for a Crowd

    This recipe makes a big, hearty 13×9 pan full of breakfast casserole so you can feed a decent sized crowd with this one.

    Now that the holidays are upon us, I love casseroles like this for holiday mornings because they'll keep your crew full until the big meal.

    Another big selling point is that it doesn't take much work to put together in the morning since the last thing you need on a holiday is more food prep.

    Baked Sausage and Egg Casserole
    Baked Casserole

    Can you make breakfast casserole ahead of time?

    You could cook the sausage and whisk up the eggs the night before so all you would have to do in the morning is a quick assembly.

    Whether you're having a big holiday breakfast, a simple weeknight meal or brunch with your friends, this Sausage Breakfast Casserole is a great main dish option.

    Serving of casserole being lifted out of dish with spatula

    How to Store Leftover Breakfast Casserole

    If you have leftover casserole, allow it to fully cool to room temperature and then cover with plastic wrap, aluminum foil or a lid or store in a smaller airtight container. Place in the refrigerator and enjoy for 3-5 days.

    Reheat it the next morning by place it back in the oven for a little bit (covered) or reheat small portions in the microwave!

    Bite of sausage and egg casserole on fork

    What to Serve with Breakfast Casserole

    If you’re looking for something to serve with this dish, we love having this fresh fruit salad with it, as well as something sweet, like these blueberry buttermilk muffins.

    More Breakfast Recipes You’ll Love

    A recipe, similar to this one, in sandwich form is this breakfast sliders recipe! You’ll also love this Bacon Avocado Toast, this French Toast Casserole and the super popular Cinnamon Roll Casserole!

    Try baking sausage patties in the oven too, for an easy breakfast side dish!

    Or, if you love using your slow cooker, especially for brunch recipes, you’ll love these crock pot cheesy potatoes!

    Did you make this? I’d be so grateful if you left a “star” rating below to let me know what you thought! Then, the next time you need a quick and easy recipe, come back to Fantabulosity to browse all of my easy recipes!

    Recipe

    sausage and egg casserole being lifted out of baking dish
    Print Pin
    5 from 8 votes

    Sausage and Egg Casserole

    Sausage and Egg Casserole: This easy recipe is filled with all your favorite breakfast ingredients: sausage, tater tots, eggs, cheese, and more! Perfect for Christmas morning or even busy mornings!
    Course Breakfast
    Cuisine American
    Prep Time 15 minutes minutes
    Cook Time 1 hour hour
    Total Time 1 hour hour 15 minutes minutes
    Servings 10 servings
    Calories 440kcal
    Author Jessica Burgess

    Ingredients

    • 1 pound breakfast sausage
    • 8 ounce tube crescent dough sheets (or crescent dough rolls with seams pressed together)
    • 2 cups mini tater tots (or regular tater tots cut in half)
    • 2 cups shredded cheddar cheese
    • 1 ½ cups milk (2% or whole preferably)
    • 9 large eggs
    • ½ teaspoon kosher salt
    • ¼ teaspoon pepper

    Instructions

    • Preheat oven to 350 degrees. Heat a large skillet over medium heat. Crumble the sausage into the hot skillet and cook until browned and crispy. Drain fat.
    • Meanwhile, spray a 13×9 baking dish with nonstick spray. Press crescent dough into the bottom of the prepared dish. Sprinkle tater tots and cooked sausage over the dough. Sprinkle with cheese.
    • In a large bowl, whisk together the eggs, milk, salt and pepper. Pour egg mixture over the sausage mixture. 
    • Cover with foil and bake for 30 minutes. Remove foil and bake another 25-30 minutes, until cooked through and slightly browned. 

    Nutrition

    Serving: 1serving | Calories: 440kcal | Carbohydrates: 18g | Protein: 20g | Fat: 32g | Saturated Fat: 13g | Polyunsaturated Fat: 5g | Monounsaturated Fat: 11g | Trans Fat: 0.1g | Cholesterol: 225mg | Sodium: 927mg | Potassium: 309mg | Fiber: 1g | Sugar: 4g | Vitamin A: 541IU | Vitamin C: 2mg | Calcium: 235mg | Iron: 2mg

    Letter to Santa Template

    October 13, 2022

    letter to santa example

    Letter to Santa Template: A free printable template that makes writing a letter to Santa Claus easy, cute, and fun for kids for the holiday season for their Christmas wish list. Make it a tradition to fill out during a Christmas movie night, and really get in the Christmas spirit!

    Letter to santa template
    Letter to Santa Template

    Santa Letter Printable

    Writing letters to Santa Claus is one of our FAVORITE holiday activities every year, along with making these Pecan Snowball Cookies! (It’s also a fun thing to do when there has been really good behavior.)

    When the time of year rolls around, I print out this blank letter so they can start jotting down their Christmas wishes so we can keep track of them, early on! It’s even a fun list for older kids to keep track of their wishes too.

    So to add a little fun to the Christmas tradition, I LOVE having this free printable letter to Santa template that we can print off, over and over every year for the kiddos to fill out. It’s a simple letter, that’s easy for kids to fill out, (or easy for you to help younger children fill out) and a super cute letter at that!

    Each kiddo can fill out their own letter, every year, so make sure to save this to your Pinterest account!

    Tip: If you want to, take a photo or save a copy of the Christmas letter and put it in their memory books each year. It’s such a great way to look back at the last year or previous years.

    How to Mail a Letter to Santa

    After the letter(s) have been filled out and they’re ready, I absolutely love how the United States Post Office provides instructions on how to mail a letter to Santa! (You can also check your local library to see if they offer a drop-off location for letters!)

    They give the address of where to mail it to, and more details, making it extra special for kids at Christmas time! (Don’t forget to include your full name and return address!)

    More Printables You’ll Love:

    But first, if you’re looking for printables to help make the Christmas season even easier, make sure to take a look at our Christmas Bucket List printable, this Christmas scavenger hunt, and this Christmas Gift List free download, too!

    Or, if you love making your own printables, see how you can design your own birthday invitations and printables in Canva!

    How to Access Your Free Printable “Letter to Santa” Template:

    It’s easy! Just grab your free letter here:

    Download Letter to Santa Here!

    More Christmas-Related Posts You’ll Love

    If you’re feeling crafty, you’ll love making these DIY “Let it Snow” Christmas ornaments too!

    Looking for more Christmas ideas? Then you’ll love some of our favorite holiday activities, treats, Christmas crafts, decorations, parties and more…like:

    • fruit punch in glass with orange slice
      Fruit Punch Recipe
    • bread pudding in baking dish
      Bread Pudding Recipe: Easy Old Fashioned Recipe (With Video!)
    • I can SO do this!!! Coffee Bar Party: "You've Warmed My Heart," theme! LOVE what she did as a random act of kindness with her guests! DIY Coffee bar ideas galore, and SO easy! fantabulosity.com
      Coffee Bar Ideas for a Party (What to Serve + Easy Setup Guide)
    • Winter cupcakes sitting on kitchen counter.
      Tree Forest Winter Cupcakes

    Merry Christmas! I’m so appreciative of you for visiting Fantabulosity today!

    Easy Christmas Gingerbread Cookies Recipe

    October 12, 2022

    A white plate holds brightly decorated cut out gingerbread cookies in the shapes of gingerbread people, snowflakes, candy canes and Christmas trees

    Easy Christmas Gingerbread Cookies Recipe: This classic gingerbread cookie recipe results in sturdy, perfectly spiced cookies to decorate for the holiday season!

    Love gingerbread fun for Christmas time? We do too. So we’ve also shared how to make gingerbread ornaments (you don’t want to eat those!) to give out as gifts or to hang on your own tree!

    A white plate holds brightly decorated cut out gingerbread cookies in the shapes of gingerbread people, snowflakes, candy canes and Christmas trees

    It’s cookie season! Holiday cookie exchanges are on our calendar and plates of Christmas cookies are wrapped up for friends, family and neighbors. Easy Cutout Sugar Cookies, Cornflake Wreaths, reindeer cookies, Snowball Cookies and these Chocolate Cherry Cookies are some of my favorite cookies to make for the holidays. And now, I can add these festive gingerbread cookies to our baking list!

    Why You’ll Love This Easy Christmas Gingerbread Cookies Recipe

    Is there anything that smells like Christmas more than the smell of freshly baked gingerbread cookies? Your kitchen will smell absolutely scrumptious as these cookies bake.

    This is the perfect cut-out cookie recipe to make for any themed holiday party. (You know how much I love hosting themed parties!!) You can make a herd of gingerbread reindeer for a reindeer-themed party, cut out gingerbread houses for a gingerbread decorating party or roll out some snowmen for a sweet snowman themed get together.

    Decorating these crisp, delicious gingerbread cookies is a family activity for holiday memory-making. Kids of all ages will love adding frosting, sprinkles, and their favorite candy to these tasty cookies. In the summer, we love making ice cream cone sugar cookies together.

    [feast_advanced_jump_to]

    Ingredients

    What are the ingredients for a gingerbread man? Well, regardless of the shape you choose for these cookies, the base is a sturdy cookie dough with the warm flavors of molasses and spices like ginger, cloves, and cinnamon.

    Bowls of ingredients and cookie cutters are displayed on a white marbled background
    Ingredients
    • ½ cup shortening
    • ½ cup granulated sugar
    • ¼ teaspoon salt
    • 1 egg
    • ½ cup molasses
    • 1 tablespoon white vinegar
    • 2 ½ cups all-purpose flour
    • ¾ teaspoon baking soda
    • ½ teaspoon ground cinnamon
    • ½ teaspoon ground cloves
    • ½ tablespoon ground ginger

    See the printable recipe card below for ingredients, nutrition information and detailed recipe notes.

    Instructions

    This easy Christmas gingerbread cookies recipe is simple to follow, especially with the detailed instructions and pictures below.

    1. In the bowl of a stand mixer or in a large mixing bowl using a hand mixer, cream together the shortening, sugar and salt on medium speed until smooth.
    2. Next, add the egg, molasses and white vinegar to the bowl and mix well to combine.
    Sugar and shortening and shown in a metal mixing bowl
    Cream shortening, sugar & salt
    A metal mixing bowl holds a creamed mixture, an egg and molasses ready to be mixed
    Mix wet ingredients
    1. Now, in a separate large mixing bowl, sift together the flour, baking soda, ground cinnamon, ground cloves, and ground ginger.
    2. Add the dry ingredients a little at a time to the wet ingredients and mix well between each addition. The dough will be thick and smell absolutely glorious!
    A glass mixing bowl holds flour and various spices
    Sift dry ingredients
    A metal mixing bowl holds light brown gingerbread dough
    Gingerbread cookie dough
    1. Cover and chill the gingerbread dough for at least 2 hours. The dough should be cold to allow it to be rolled out properly.
    2. Preheat the oven to 350 degrees F. Line several baking sheets with parchment paper or silicone mats and set them aside.
    3. Cut two squares of parchment paper at least 1 inch bigger than the size of the cookie cutters you are using. (Mine were about 3 inch cookie cutters.) These two sheets of parchment paper are going to be used to roll out the dough for each cookie, cut the shape and transfer the cookie to the lined baking sheet.
    4. For each cookie take a 1 inch ball of dough and place it in the center of one square of paper.
      You may want to sprinkle a little flour on the square first, just to make it easier to transfer. Then place the other square on top of the dough and then roll out the dough while it’s between the two pieces.
    5. Remove the top piece of paper and press the cookie cutter into the flattened dough and remove the excess dough from around the cookie cutter, leaving the cut out cookie on a parchment square. Remove the cookie cutter.
    Gingerbread dough is being removed from around a cookie cutter to reveal the shape made from a cookie cutter
    Cut out the shape
    1. Now, take the parchment square that the cookie is on, and flip the cut out cookie onto the parchment-lined baking sheet and peel the top paper off. This process ensures the cookie keeps it shape and will bake with clean edges.
    Deep brown cookie dough has been cut into the shape of a gingerbread man
    Cover with parchment
    A sheet of parchment paper is being lifted to reveal a cut out christmas cookie underneath
    Transfer using parchment
    1. Repeat for the remaining dough, spacing the cookies about 1 inch apart.
    2. Bake for 5-6 minutes just until firm. The cookies will become crunchy if they are overbaked, so just keep an eye on them in the oven.
    A baking sheet lined with parchment paper holds 12 cut out gingerbread cookies ready to be baked
    Ready to bake
    A metal baking sheet lined with parchment paper holds a dozen baked unfrosted gingerbread cookies
    Baked cookies
    1. Allow the cookies to cool completely and decorate with the icing and candies of your choice.
    A baking sheet lined with parchment paper holds beautifully decorated Christmas cookies
    Ginger molasses cookies

    How to Decorate Cutout Cookies

    • While royal icing may sound intimidating, I’ve got a great post on cookie decorating for beginners that will break it down and help you create cute decorated gingerbread cookies!
    • If you prefer, you can use a simple 2 ingredient glaze. Whisk 2 cups of powdered sugar with 2-4 tablespoons of milk (or gingerbread coffee creamer, eggnog or any other festive flavored liquid) until it is a smooth, spreadable glaze.
    • For an easy, family-friendly option, use purchased frosting and cookie icing tubes.
    • Use your favorite candy to decorate. Here are some festive suggestions:
      • Mini M&Ms or cinnamon red hot candies for ornaments on the Christmas trees and buttons for the gingerbread people.
      • Sugar pearls or silver dragees to accentuate the snowflakes.
      • Sprinkles and jimmies to add definitions to the stripes on candy canes.
      • Mini chocolate chips for eyes and buttons on the gingerbread man cookies.

    Substitutions

    Gingerbread cookies recipes are a lot like people: there are different varieties and all of them are great! Some recipes may call for light brown sugar, lemon juice or vanilla extract. While we think we’ve nailed down the best gingerbread cookie recipe, here are a few other options for this recipe.

    • If you like a little heat, try adding a small amount (¼ teaspoon) of ground black pepper to the dough. Some people think it enhances the flavor of the other spices. What do you think?
    • If you don’t want to use cookie cutters to make decorative shaped cookies, you can roll the dough and cut it into squares using a knife or use a drinking glass to make round gingerbread cookies.

    Should gingerbread cookies be hard or soft?

    Ah, the great gingerbread debate. In my opinion, it depends on your preference and what you are making with the cookies. For example, if you are making a gingerbread house, the finished cookies need to be crisp and well baked. And cut out cookies need to be a little more baked to stand up to frosting and decorations. But, if you like chewy gingerbread cookies or if you don’t plan to decorate them, then you can roll the dough a little thicker and adjust the baking time accordingly. Whether you want soft gingerbread cookies or ginger cookies with a little snap, this traditional gingerbread cookie recipe will taste amazing!

    A hand is holding a Christmas tree shaped gingerbread cookie with bright frosting and pearl sugar ornaments
    Gingerbread cut-out cookies

    Storage

    How long do homemade gingerbread cookies last? You can store undecorated baked gingerbread cookies in an airtight container at room temperture for 2-3 weeks. Once they are decorated, the cookies do soften. So we recommend storing the decorated gingerbread in an airtight container for up to 1 week.

    If you need to freeze the baked gingerbread cookies once they have cooled, wrap each cookie in plastic wrap and store them in an airtight container for up to 2 months.

    Brightly piped and decorated Christmas cookies shaped like gingerbread, snowflakes, trees and candy canes are displayed on a white background
    Easy gingerbread cookies

    Related Recipes

    Holiday entertaining is one of my favorite things about this time of year. So, whip up a bowl of this fun Christmas Tree Cake Dip, make these melting snowman cheesecake cups, add a festive Pinwheel Christmas Tree Appetizer to your party menu and shake up a round of these Red Apple Martinis and you’ll be rockin’ around the Christmas tree!

    Did you make this? I’d be so grateful if you left a “star” rating below to let me know what you thought! Then, the next time you need a quick and easy recipe, come back to Fantabulosity to browse all of my easy recipes!

    Recipe

    A white plate holds brightly decorated cut out gingerbread cookies in the shapes of gingerbread people, snowflakes, candy canes and Christmas trees
    Print Pin
    5 from 5 votes

    Easy Christmas Gingerbread Cookies Recipe

    Easy Christmas Gingerbread Cookies Recipe: This classic gingerbread cookie recipe results in sturdy, perfectly spiced cookies to decorate for the holiday season!
    Course Dessert
    Cuisine American
    Prep Time 1 hour hour
    Cook Time 5 minutes minutes
    Cool Time 2 hours hours
    Total Time 3 hours hours 5 minutes minutes
    Servings 45 cookies
    Calories 67kcal
    Author Jessica Burgess

    Ingredients

    • ½ cup shortening
    • ½ cup granulated sugar
    • ¼ teaspoon salt
    • 1 egg
    • ½ cup molasses
    • 1 tablespoon white vinegar
    • 2 ½ cups all purpose flour
    • ¾ teaspoon baking soda
    • ½ teaspoon ground cinnamon
    • ½ teaspoon ground cloves
    • ½ tablespoon ground ginger

    Instructions

    Making the Cookie Dough

    • In a large mixing bowl using a hand mixer (or a stand mixer bowl), cream together the shortening, sugar and salt on medium speed until smooth.
    • Next, add the molasses, white vinegar and egg to the bowl and mix well to combine.
    • Then, in a separate large mixing bowl, sift together the flour, baking soda, ground cinnamon, ground cloves and ground ginger.
    • Add the dry ingredients, a little at a time, to the wet ingredients, and mix well between each addition. Note: the dough will be thick.
    • Cover and chill the gingerbread dough in the refrigerator for at least 2 hours. The dough needs to be cold to allow it to be rolled out properly.

    Cutting Out the Cookie Shapes

    • Preheat the oven to 375 degrees F. and line several baking sheets with parchment paper or silicone mats and set them aside.
    • Remove the dough from the refrigeratorand keep the dough in 1 big pile.
    • Cut two squares of parchment paper that are at least 1 inch bigger than the size of the cookies cutters you plan on using. (The cutters seen in this recipe are about 3 inch cookie cutters.)
      These two sheets of parchment paper are going be used to roll out the dough for each cookie, and for transferring to the baking sheet.
    • For each cookie take a 1 inch ball of dough and place it in the center of one square of paper.You may want to sprinkle a little flour on the square first, just to make it easier to transfer. Then place the other square on top of the dough and then roll out the dough while it's between the two pieces.
    • Remove the top piece of paper and press the cookie cutter into the flattened dough and remove the excess dough from around the cookie cutter, leaving the cut out cookie on a parchment square. Remove the cookie cutter.
    • Now, take the parchment square that the cookie is on, and flip the cut out cookie onto the parchment-lined baking sheet and peel the top paper off. This process ensures the cookie keeps it shape and will bake with clean edges.
    • Repeat for the remaining dough, spacing the cookies about 1 inches apart.

    Baking the Cookies

    • Bake for 5-6 minutes just until firm. The cookies will become crunchy if they are overbaked, so keep an eye on them in the oven.
    • Allow the cookies to cool and decorate with icing and candies of your choice.

    Video

    Notes

    • When peeling the parchment paper off of the cookie, start from the bottom and peel the paper back nearly horizontally in the opposite direction. This angle will prevent the dough from sticking as much.
    • If you prefer, you can roll the dough out in a large thicker square and cut out multiple cookies at once and transfer them gently to the baking sheets with a thin offset spatula. The parchment paper method described above just helps the cookies keep their shape better. 
    • While the dough is rolled out relatively thinly, the cookies will puff up nicely in the oven.
    • You can make the dough ahead of time! Store it in an airtight container and keep it in the refrigerator or up to 3 days.
    • Store undecorated baked cookies in an airtight container at room temperature for 2-3 weeks. After icing or frosting has been applied, store the cookies in an airtight container and eat within a week.

    Nutrition

    Serving: 1cookie | Calories: 67kcal | Carbohydrates: 10g | Protein: 1g | Fat: 2g | Saturated Fat: 1g | Polyunsaturated Fat: 1g | Monounsaturated Fat: 1g | Trans Fat: 0.3g | Cholesterol: 4mg | Sodium: 34mg | Potassium: 65mg | Fiber: 0.2g | Sugar: 5g | Vitamin A: 5IU | Vitamin C: 0.001mg | Calcium: 10mg | Iron: 1mg

    Sliced Caramel Apples on a Stick

    October 11, 2022

    Sliced caramel apples on sticks, on white plate with different toppings

    Sliced Caramel Apples on a Stick: If you’re like me, I’m always looking for activities for my kids to do, especially around the holidays and when it comes to Halloween… candy apples and this pumpkin patch recipe are our faves!

    caramel apples on a stick, covered in candy
    Caramel Apple Slices on a Stick

    We started the tradition of making homemade caramel apples back in 2015, when my kiddos were just little bitty (as seen below) and even years later, they still love it! I truly hope to carry this tradition on for years to come because it’s a great way to keep them entertained and to share a moment in the kitchen together.

    Halloween Activities for Kids
    Halloween Activities for Kids

    Why you’ll love making caramel apple slices instead of the whole apple:

    • Slices are so much easier to handle for small hands (perfect for kiddos) and are such a fun treat!
    • It’s a much better way to decorate them, flat, as opposed to whole apples that are round and toppings can easily slide off when dipping the entire caramel apple.
    • Many more opportunities for different flavors! Instead of decorating one whole apple with the same toppings, many different varieties can be made with individual slices, making different caramel apple pops!
    Ingredients for sliced caramel apples on a stick
    Ingredients

    Items Needed:

    • Apples (as many as you’d like but we a bag of caramel bits, we had caramel left over after using a whole bag of apples, which was about 8!)
    • Caramel candies or caramel bits for easy melting (so you don’t have to unwrap all the caramels)
    • Toppings: This is where it gets fun! See topping ideas below!
    • Water for melting the caramels (check directions on package for amounts)
    • Lollipop sticks, popsicle sticks or wooden skewers
    • Wax paper: This comes in so handy when placing the apples on it, so it doesn’t stick when dry.
    • Wet Paper Towels: Because let’s face it… we’re playing with caramel so it will get on our hands and it will be easier to have these ready to go!

    How to Make Caramel Apple Slices

    For easy caramel apple slices, simple follow the steps below in this easy recipe:

    1. First, wash, slice, and allow apple slices to dry. You’ll want to make sure your apple slices are thick enough for a stick to be inserted in to the sides, without pushing through the white part of the apple.

    TIP: I run water over the apple slices after cutting them, to prevent browning. However, you want to make sure your slices are dry before dipping in caramel or the caramel will not stick. Some use a little lemon juice mixed in water to soak the apple slices to prevent browning as well, if slicing them ahead of time.

    sliced apples on parchment paper
    Sliced apples
    1. Next, insert a stick in to the center side of each apple slice
    Sticks in apple slices for dipping
    Insert sticks
    1. If using caramel bits, simply follow the instructions on the bag for melting the caramel. You will more than likely need to add water to these as well.

      If using individually wrapped caramels, there should also be directions on the packaging for how to melt them. However, if there are not, you can unwrap each piece of candy, place them in a large glass mixing bowl, and add about 2 tablespoons of water (or milk for creamier caramel) for melting. Melt the caramels in the microwave in 1-minute intervals, stirring between, until melted. (Be careful not to overcook caramel.)

      You may also prefer to melt the caramel on the stove top, using a double boiler but I found the microwave to be our favorite method.
    Water pouring over caramel bits in a bowl
    Melt caramel
    1. When the caramel has melted, the apples are ready for dipping! Simply grab an apple slice that’s on a stick, and dip in the bowl of caramel, making sure at least one side is covered. (Or both sides of the apple if you prefer!)
    2. Lift up the apple above the bowl, and allow the excess to drip off, before placing on wax paper.
    Apple slices being dipped in melted caramel
    Dip apples
    1. Once dipped, place on a sheet of wax paper. (You can even place the wax paper on a cookie sheet, baking sheet or sheet pan, for easy transporting.) Shortly after, start adding your favorite toppings. (We allow each apple slice to cool a few seconds to prevent as many toppings from sliding off, even though, as you can tell, when the kids are involved… toppings are going to go everywhere anyway.)
    apple slices decorated by kids
    Kids decorating!
    1. Allow caramel apple slices to dry for about 15 minutes, and enjoy!!
    apple slices dipped in caramel with toppings
    Caramel Apple Slices on a Stick

    Caramel Apple Topping Ideas

    Have so much fun with choosing toppings for your adorable caramel apple slices! Here are some of our favorite ideas:

    • Candy (M&M’s, Reese’s Cups, crushed candy bars)
    • Cookies (Oreos, Biscoff, Sugar, etc.)
    • Peanut Butter (Melt to make more a drizzle)
    • Chocolate fudge, chocolate drizzle or Caramel Drizzle
    • Chopped nuts (Make sure to check the ice cream topping section at the store for the perfect kind!)
    • Mini Marshmallows
    • Sprinkles
    • Mini Chocolate Chips
    • Candy Eyes (for that Halloween fun!)
    Reeses cups on caramel apple
    Reeses apple

    Substitutions and Variations

    You can absolutely change things up if you prefer for this fun fall treat. For instance:

    • Instead of melted caramel, you may have fun using melted chocolate!
    • Using milk instead of water in the caramel can create a more creamy caramel.
    • Different types of apples – You can use whichever crisp apples you think are the best apples! We used Fuji but you can use any kind that you like! Red Delicious, pink lady, and even Granny Smith Apples or other tart apples are fun to use too!
    sprinkles on caramel apple slice
    Sprinkles Apple

    How to Store Caramel Apple Slices

    We recommend storing any leftover apples in the refrigerator, in a single layer. Leaving them out at room temperature will cause the apples to turn brown, and the caramel will begin to thin out and spread out.

    Oreo and peanut butter on caramel apple
    Oreo and Peanut Butter Apple

    Related Posts

    If you love an easy recipe for fall, you’re going to love this caramel apple dump cake! It’s so easy, so comforting and so delicious! Or, try these caramel apple nachos for an easy fun twist on a classic! We have a lot of great fall recipes here on the blog for you to browse for the time of year, that the whole family will love!

    If your kids are loving this for Halloween, then they’ll also love these no bake mummy Halloween treats!

    Recipe

    Sliced caramel apples on sticks, on white plate with different toppings
    Print Pin
    5 from 5 votes

    Sliced Caramel Apples on a Stick

    Sliced Caramel Apples on a Stick: Such a fun and easy way to make caramel apples for more variety and an easy way to enjoy a caramel apple pop in the fall!
    Course Dessert, Snack
    Cuisine American
    Prep Time 10 minutes minutes
    Total Time 10 minutes minutes
    Servings 8 servings
    Calories 244kcal
    Author Jessica Burgess

    Equipment

    • 32 lollippop sticks wooden skewers or popsicle sticks
    • large glass mixing bowl or microwaveble bowl

    Ingredients

    • 8 apples
    • 11 ounces caramel bits or caramel candies
    • water or milk for creamier caramel
    • preferred toppings see post for ideas

    Instructions

    • First, wash, slice, and allow apple slices to dry. You'll want to make sure your apple slices are thick enough for a stick to be inserted in to the sides, without pushing through the white part of the apple.
    • Next, insert a stick in to the center side of each apple slice
    • If using caramel bits, simply follow the instructions on the bag for melting the caramel. You will more than likely need to add water to these as well. I microwaved ours for 1 minute, stirred, and then microwaved one more time and then were melted.
    • When the caramel has melted, the apples are ready for dipping! Simply grab an apple slice that's on a stick, and dip in the bowl of caramel, making sure at least one side is covered. (Or both sides of the apple if you prefer!)
    • Lift up the apple above the bowl, and allow the excess to drip off, before placing on wax paper.
    • Once dipped, place on a sheet of wax paper. Shortly after, start adding your favorite toppings.
    • Allow caramel apple slices to dry for about 15 minutes, and enjoy!!

    Notes

    We recommend storing any leftover apples in the refrigerator, in a single layer. Leaving them out at room temperature will cause the apples to turn brown, and the caramel will begin to thin out and spread out.

    Nutrition

    Serving: 1apple | Calories: 244kcal | Carbohydrates: 55g | Protein: 2g | Fat: 3g | Saturated Fat: 1g | Polyunsaturated Fat: 1g | Monounsaturated Fat: 1g | Cholesterol: 3mg | Sodium: 97mg | Potassium: 278mg | Fiber: 4g | Sugar: 44g | Vitamin A: 115IU | Vitamin C: 9mg | Calcium: 65mg | Iron: 0.3mg

    Clam Chowder Recipe

    October 10, 2022

    A close up photo of a spoon of clam chowder with bacon bits and parsley

    Clam Chowder Recipe: This classic clam chowder recipe uses pantry staples to make a comforting creamy soup full of tender clams that is ready to eat in just 40 minutes!

    Quick Overview: Ready to eat in only 40 minutes and it uses simple ingredients!

    A bowl of chowder is garnished with bacon bits, oyster crackers and parsley in the center of the photo

    Now that you’ve got this rich, thick clam chowder recipe for your meal plan, check out some of our favorite easy soup recipes for main course during soup season: the BEST chicken noodle soup, hearty taco soup, and Instant Pot broccoli cheddar soup!

    Why You’ll Love This Chowder Recipe

    Just like our lobster bisque and crab bisque, this delicious clam chowder recipe is a big hit with seafood lovers!

    Is there anything better than homemade soup? A loaf of crusty bread and a big pot of chowder ready to garnish with all of your favorite toppings will whisk you right away to the east coast.

    Made with simple ingredients from your pantry and grocery store, this New England style clam chowder goes from the stove top to table top in under an hour!

    [feast_advanced_jump_to]

    Ingredients

    These ingredients are all easy to find and prep, so don’t be intimidated if this is the first time you are making homemade clam chowder.

    The ingredients for clam chowder are displayed on a white marble background
    Ingredients
    • 2 cups russet potatoes, peeled and diced – if you have more on hand, consider this baked potato soup recipe too.
    • 1 cup yellow onions, finely chopped
    • 1 cup leeks, sliced into half moons (or green onions if that’s all you have!)
    • ½ cup celery, finely chopped
    • ¾ cup butter
    • ¾ all-purpose flour
    • 1 quart half-and-half
    • 1 ½ teaspoons salt
    • ½ teaspoon granulated sugar
    • dash black pepper
    • Two 6.5 oz cans of minced clams in clam juice, do not drain clams

    Substitutions

    Here are a few easy substitutes for some of the ingredients we used in this recipe:

    • If you don’t have russet potatoes, Yukon gold, yellow potatoes and white potatoes are good alternatives.
    • Don’t have half and half? You can use equal parts whole milk and heavy cream as well.
    • Use can use white pepper in this recipe if you want a slightly milder pepper flavor.
    • Did you accidentally drain the clams? Don’t worry! You can use bottled clam juice or even use some of my homemade chicken broth to add with the water to cook the veggies in.
    • Not sure about leeks or don’t have any? No problem. You can also use green onions if you prefer.

    Variations

    While I’m a little partial and think this is the best clam chowder recipe, don’t be afraid to try some of the variations below!

    • Get creative with your toppings! Red pepper flakes add heat, crispy french fried onions add texture and Goldfish crackers come in tons of flavors that complement this chowder!
    • Add vegetables and more seafood. This creamy chowder is perfect to add corn to for a clam and corn chowder. Chowders can easily become seafood stews with the addition of lobster meat and shrimp.

    See the printable recipe card below for the full instructions, nutritional information, and notes for this clam chowder soup recipe.

    Instructions

    Our creamy clam chowder recipe is easy to follow, especially with the step by step photos below!

    1. In a large pot or Dutch oven, add the potatoes, onions, leeks and celery. Pour the juice from the canned clams over the vegetables. Add water until the vegetables are completely covered and stir. Bring to a boil, then reduce the heat to medium-low and simmer for 10-15 minutes or until the vegetables are tender.
    2. While the vegetables are cooking, this is a good time to make the roux. Begin by melting the butter in a large saucepan over medium heat. Next, using a whisk, gradually blend the flour with the butter to make a roux.
    A dutch oven holds cubed potatoes, diced onions and sliced leeks ready to be boiled
    Cook vegetables
    In a large saucepan, butter and flour are being whisked to make a roux
    Make a roux
    1. Slowly add the half and half and continue whisking to get rid of any lumps. Let this mixture come to a slight bubble and continue cooking until the roux mixture becomes thick and creamy.
    2. Once the vegetables are done cooking and tender, add the roux to the large pot with the vegetables and mix well.
    Half and half has been added to a flour and butter roux in a large sauce pan as the base of chowder
    Add half and half
    A cream, flour and butter mixture has been added to a dutch oven with boiled potatoes, leeks and onions
    Add roux to vegetables
    1. Add the salt, sugar, and pepper to the pot and stir to combine.
    2. Finally, add the minced clams and stir until the ingredients are well combined and the chowder is heated through.
    Salt and pepper have been added to a dutch oven full of a creamy soup base filled with potatoes, leeks and onions
    Add seasonings
    Two cans of drained, minced clams have been added to a dutch oven filled with a creamy white soup base
    Add clams

    Are you drooling like I am over this creamy, dreamy New England clam chowder?

    A red dutch oven full of creamy clam chowder is centered in the photo surrounded by soft rolls for dipping
    Ready to serve

    Serve the clam chowder with your favorite toppings: fresh chopped parsley, oyster crackers, shredded cheese, or cooked bacon bits.

    A bowl of chowder is garnished with bacon bits, oyster crackers and parsley in the center of the photo
    Bowl of chowder

    The best bowls of clam chowder are served hot and topped with anything that makes you happy! Now, dig in!

    Close up of a spoon of clam chowder held over a bowl of the same soup garnished with parsley, bacon bits and oyster crackers
    Creamy Clam Chowder

    What to Serve with This Chowder

    So many things go well with this chowder but these Bisquick garlic cheese biscuits are our favorite! They’re easy to make and so good for dipping in!

    Close up of a bowl of creamy soup topped with oyster crackers, bacon bits and parsley

    Chowder FAQs

    Is clam chowder actually made with clams?

    While you could omit the clams and just use a bottle of clam juice, we absolutely love the clam flavor and texture that clams give to this chowder.

    How do you thicken clam chowder or how do I make my clam chowder thicker?

    The butter and flour roux are a natural thickener for chowder. You can also use starchier potatoes like russet potatoes that will break down slightly and thicken the chowder as well.

    Is clam chowder supposed to be thick or thin?

    This is really up to your personal preference. For thinner chowder, add the half and half mixture in the recipe to the pot of vegetables before it starts to bubble.

    What goes well with clam chowder?

    Here are a few of our favorite things to serve with this delicious chowder: a fresh green salad, cornbread, sourdough bread, grilled cheese sandwiches, steamed vegetables and corn on the cob.

    Storage

    Store any leftover chowder in an airtight container in the refrigerator for 3-4 days. (Anyone else like soup better the next day anyway?)

    More Soup Recipes

    We love chowders and soups around here. I think you’re going to also love this buffalo chicken soup, this easy chili recipe and this white chicken chili that’s so hearty and comforting!

    Did you make this? I’d be so grateful if you left a “star” rating below to let me know what you thought! Then, the next time you need a quick and easy recipe, come back to Fantabulosity to browse all of my easy recipes!

    Recipe

    A close up photo of a spoon of clam chowder with bacon bits and parsley
    Print Pin
    5 from 8 votes

    Easy Clam Chowder Recipe

    This classic clam chowder recipe uses pantry staples to make a comforting creamy soup full of tender clams that is ready to eat in just 40 minutes!
    Course Appetizer, Side Dish
    Cuisine American
    Prep Time 15 minutes minutes
    Cook Time 25 minutes minutes
    Total Time 40 minutes minutes
    Servings 6 servings
    Calories 571kcal
    Author Jessica Burgess

    Ingredients

    • 2 cups russet potatoes peeled and diced
    • 1 cup yellow onion finely chopped
    • 1 cup leeks or green onions sliced into half moons
    • ½ cup celery finely chopped
    • ¾ cup butter
    • ¾ cup all purpose flour
    • 1 quart half and half
    • 1 ½ teaspoons salt
    • ½ teaspoon granulated sugar
    • dash ground black pepper
    • 2 6.5 ounce cans minced clams in clam juice do not drain

    Instructions

    • In a large pot or dutch oven, add the potatoes, onions, leeks and celery.
      Next, pour the juice from the canned clams over the vegetables, and add water until the vegetables are completely covered and stir.
    • Bring the mixture to a boil, and then reduce the heat to medium-low and let it simmer for about 10-15 minutes or until the vegetables are tender.
    • While the vegetables are cooking, melt the butter in a large saucepan over medium heat.
      Then, using a whisk, gradually mix the flour with the butter to make a roux.
    • Slowly add the half and half to the roux and continue whisking to get rid of any lumps that it may have.
      Let the mixture come to a slight bubble and continue cooking until the roux mixture becomes thick and creamy.
    • Once the vegetables are tender, add the cream mixture (roux) to the large pot with the vegetables and mix well.
    • Add the salt, sugar and pepper and stir again until combined.
    • Finally, add the minced clams and stir until all ingredients are well combined and the chowder is heated through. Serve this clam chowder with your favorite toppings and add-ins!

    Notes

    • The half and half mixture will thicken quickly once it starts to bubble, so remove it from the heat once it becomes thick and there are no more lumps.
    • For thinner chowder, add the half and half mixture to the pot of vegetables before it starts to bubble.
    • For extra flavor, you can add additional can of clams to the chowder.
    • If you enjoy larger pieces of clam, used chopped clams instead of minced clams.
    • To avoid rubbery clams, add them to the chowder to warm through just before serving.
    • Store any leftover chowder in an airtight container in the refrigerator for 3-4 days.

    Nutrition

    Serving: 1serving | Calories: 571kcal | Carbohydrates: 33g | Protein: 8g | Fat: 41g | Saturated Fat: 26g | Polyunsaturated Fat: 2g | Monounsaturated Fat: 11g | Trans Fat: 1g | Cholesterol: 116mg | Sodium: 874mg | Potassium: 528mg | Fiber: 2g | Sugar: 9g | Vitamin A: 1555IU | Vitamin C: 8mg | Calcium: 203mg | Iron: 2mg

    Buffalo Chicken Soup Recipe

    October 7, 2022

    buffalo chicken soup in white bowl with green onions and chips

    Buffalo Chicken Soup Recipe: A creamy, comforting soup that has all of the best flavors of the popular buffalo chicken dip appetizer and buffalo wings.

    buffalo chicken soup in white bowl

    When soup season rolls around, this is the first creamy soup that I make! Then next, it’s the lasagna soup recipe that’s equally delicious!

    Why You’ll Love This Creamy Buffalo Chicken Soup

    • This became a new favorite soup for my family, quickly! I’m not talking just my immediate family either… I mean, my whole extended family! I made it for them one day and they haven’t been able to stop making it themselves, ever since, and I know you’re going to love it too.
    • This recipe uses uncooked chicken but you can use leftover chicken if you have any on hand, a rotisserie chicken (and then you can make this rotisserie chicken stock recipe out of the bones), or whatever chicken you prefer!
    • It’s all the flavors of buffalo chicken, in soup form, that is amazing by itself or paired alongside these buffalo chicken sliders! Or, to tame the heat, you can make a sandwich like this tuna salad sandwich, chicken grilled cheese or this peanut butter and syrup sandwich.

    Ingredients

    This soup uses simple ingredients and you may even have all (most) of them on hand! Here’s what you need:

    • 4 cups chicken broth (you can make my homemade chicken broth)
    • 8 ounces cream cheese cut in to sections
    • ⅓ cup buffalo sauce (I like Frank’s Red Hot but you can use your favorite brand of hot sauce)
    • 1 cup heavy cream
    • 1 stick of butter (½ cup)
    • salt and pepper to taste
    • 1 pound of uncooked whole chicken breasts
    • ⅓ chopped celery
    • roux – optional (2 tablespoons of butter & 2 tablespoon flour or 1 teaspoon of xanthan gum)
    • corn chips optional; we use Fritos
    ingredients for buffalo chicken soup
    Ingredients

    Substitutions and Variations

    • Chicken: Don’t want to cook chicken? No problem! Use canned chicken or even a rotisserie chicken! If you like meal prepping, you will love this easy shredded chicken in the slow cooker for soup recipes like this!)
    • Dairy: We use heavy cream for this recipe but you can use milk if you prefer; whole, 2%, skim, etc.
    • Hot Sauce: We love using Frank’s hot sauce but you can use any type that you liked. I’d just stay away from green hot sauce, or different flavors of hot sauce until you’re for sure that you’d like it in the soup. Regular hot sauce really captures that traditional buffalo chicken flavor.
    • Seasonings: We love this just the way it is but as always, feel free to experiment with other ingredients if you have your favorites! For instance, using cumin, garlic powder, and onion powder, may be fun to try in this recipe!

    Instructions:

    1. Cut chicken in to small pieces and place it, along with the chopped celery, in a large pot (you can drizzle a little olive oil in the stock pot to prevent sticking if you prefer) and cook over medium heat until the chicken has fully cooked through.
    raw chicken in stock post
    Cook chicken
    celery added to chicken in pot
    Add celery
    1. When the chicken is fully cooked, it’s time to add the heavy cream, broth, butter, buffalo sauce and cream cheese. Stir in and turn to low and allow everything to melt and combine, stirring occasionally.
    Cooked chicken and celery in stock pot
    Cooked chicken
    butter, cream, hot sauce added to stock pot
    Add butter, cream and sauce

    You can serve the soup right away after everything has melted but it’s best, if you have time, to allow the soup to simmer for at least 10 minutes or so, to allow all of the flavors to blend together.

    How to Make Buffalo Chicken Soup Thicker

    If you prefer a thicker soup, this is when you can add a roux or xanthan gum.

    Xanthan Gum

    On the day I made the soup to take photos for the blog, I used xanthan gum. If you’d like to try that, I recommend starting with a teaspoon first and allow it to simmer to see if it’s thick enough.

    I’ve added a tablespoon in the past and it was too much. It was really thick, and kind of lost that “soup” texture and became a chowder texture. But xanthan gum is a great choice, especially if you’re doing a low-carb diet.

    Roux

    If you prefer a thicker soup, you can make a roux in a separate pan (cooking 2 tablespoons of butter & 2 tablespoon flour for a few minutes and then whisk in to buffalo chicken soup) and then heat soup until thickened.

    xanthan gum added to soup
    Add xanthan gum if desired
    pepper added to soup
    Add pepper

    After allowing the soup to simmer for a few minutes, it’s ready to serve!
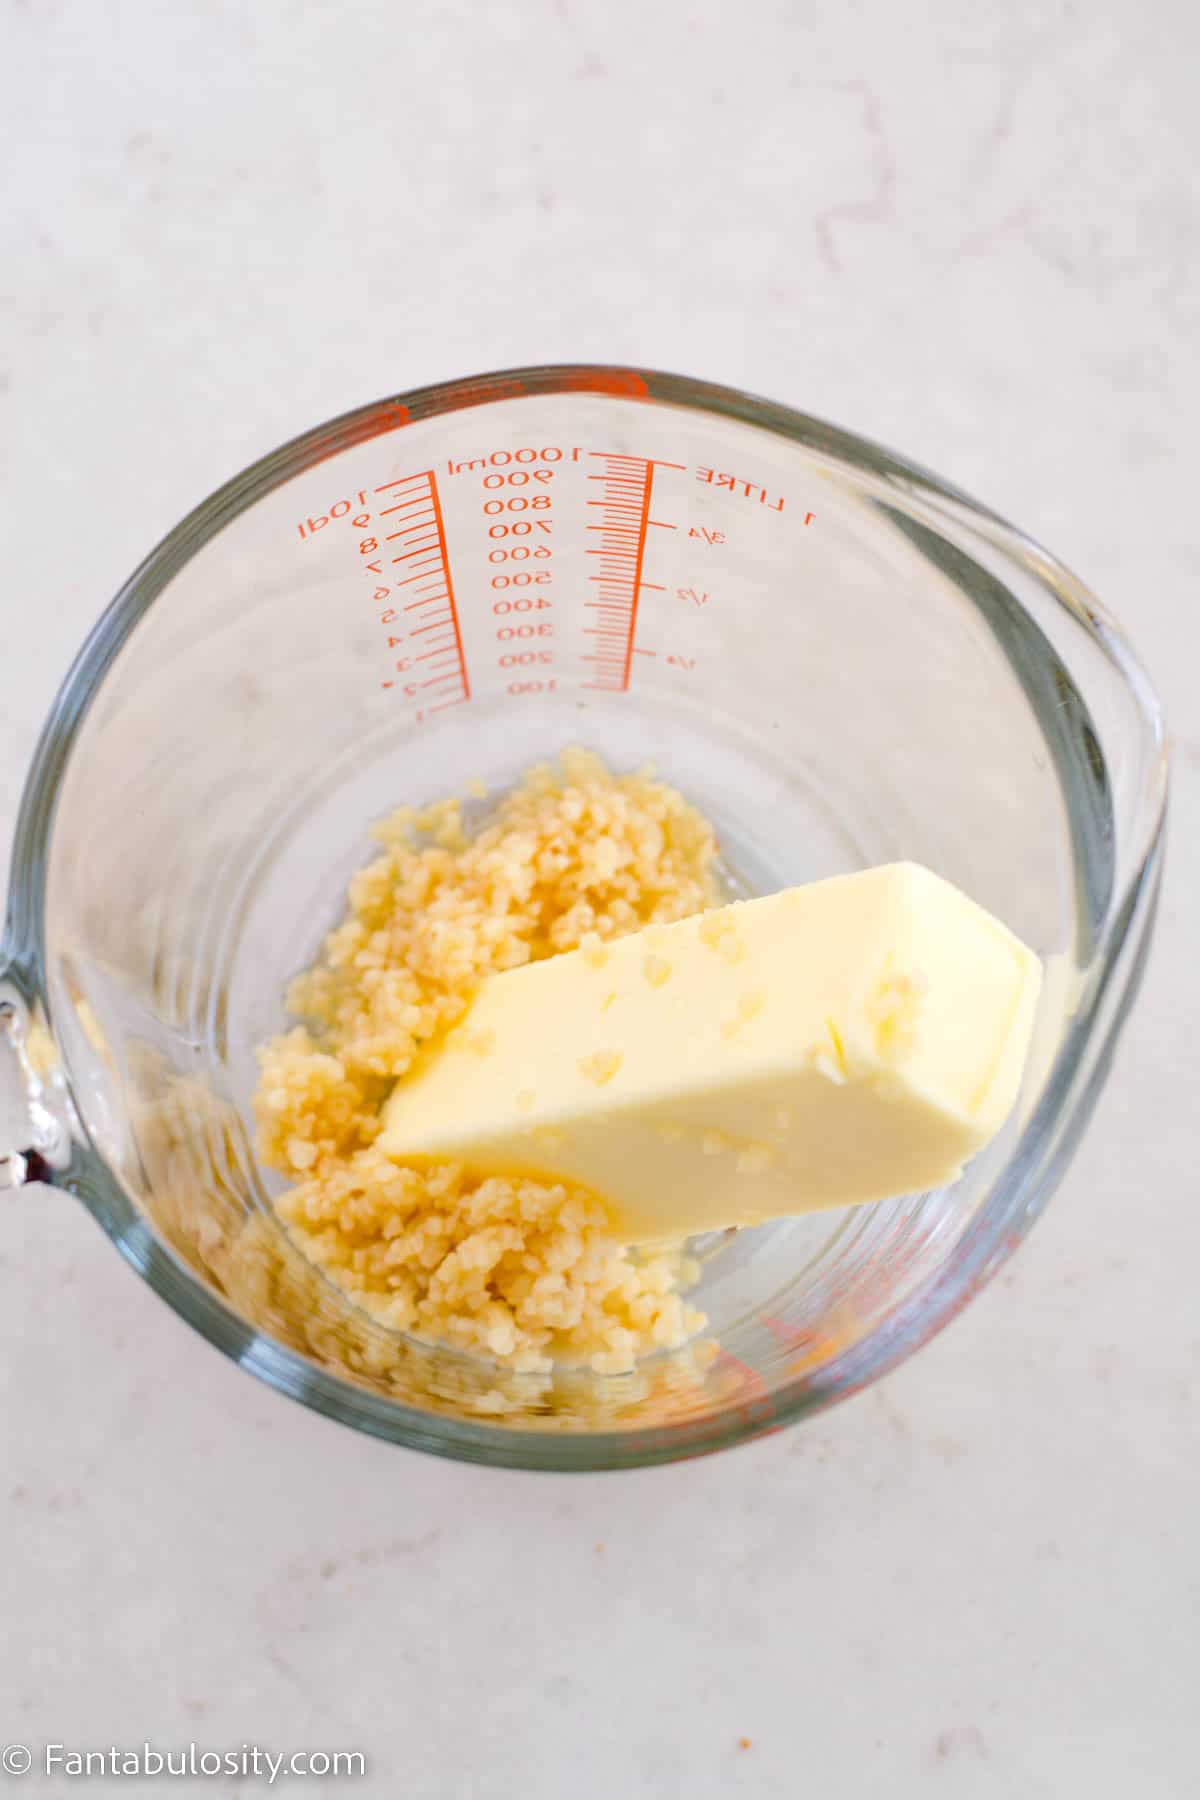
    buffalo chicken soup in a ladle
    Simmer soup

    Topping Ideas

    The soup is absolutely wonderful by itself but we do love adding our favorite toppings! Here are topping ideas if you’d like to add some too:

    • Fritos (corn chips)
    • Chopped green onions
    • Blue cheese crumbles
    • Hot sauce drizzle
    • Sour cream
    • Blue cheese dressing or ranch dressing drizzle
    • Croutons (you will love this easy homemade croutons recipe!)
    Buffalo chicken soup in white bowl with toppings
    Add toppings

    What Side Dishes Go With Soup?

    If you’re looking for a side dish to serve with this buffalo chicken soup recipe, our favorites (besides the sandwiches that I mentioned above) are this side salad, focaccia bread, or this Italian Chopped Salad.

    Buffalo chicken soup on spoon, holding above the bowl

    How to Store Leftover Soup

    If you have leftover soup, allow it to fully cool and then place in an airtight container and store in the refrigerator for 3-5 days.

    Can you freeze buffalo chicken soup?

    I do! I simply put it in to containers and free single portions so we can pull a container out, thaw, and enjoy!

    Related Recipes

    If you love hearty soups like this one, you’re also going to love this and this easy white chicken chili, crab bisque, and this easy chicken noodle soup!

    If you’re craving the famous dip now, I highly recommend this crockpot buffalo chicken dip!

    Did you make this? I’d be so grateful if you left a “star” rating below to let me know what you thought! Then, the next time you need a quick and easy recipe, come back to Fantabulosity to browse all of my easy recipes!

    Recipe

    buffalo chicken soup in white bowl with green onions and chips
    Print Pin
    4.43 from 7 votes

    Buffalo Chicken Soup

    Buffalo Chicken Soup Recipe: A creamy, comforting soup that has all of the best flavors of the popular buffalo chicken dip appetizer and buffalo wings.
    Course Soup
    Cuisine American
    Prep Time 10 minutes minutes
    Cook Time 20 minutes minutes
    Total Time 30 minutes minutes
    Servings 6 servings
    Calories 391kcal
    Author Jessica Burgess

    Ingredients

    • 4 cups chicken stock
    • 8 ounces cream cheese cut in to sections
    • ⅓ cup buffalo sauce I like Frank’s Red Hot
    • 1 cup heavy cream
    • ½ cup butter (1 stick)
    • salt and pepper to taste
    • 1 pound chicken breasts
    • ⅓ cup chopped celery
    • corn chips optional; we use Fritos
    • roux (2 tablespoons of butter & 2 tablespoons flour) Or Xanthan Gum – OPTIONAL, for a thicker soup

    Instructions

    • Cut raw chicken in to small pieces and place it in to a stock pot with the chopped celery. (You may also want to add a drizzle of olive oil so the chicken does not stick but this is optional.) Cook over medium until the chicken if fully cooked. (This usually takes about 4-5 minutes.)
    • Next, add the chicken stock, cream cheese, buffalo sauce, cream, and butter in soup pot.
    • Over medium heat, stirring often, heat until the cream cheese is melted and evenly distributed throughout. (I did use a whisk at times to help it along.)
    • Add salt and pepper and stir until combined.
    • Allow to simmer an additional 10 minutes and then serve unless you prefer a thicker soup, and then see next steps.

    Thicker Soup

    • If you prefer a thicker soup, you can make a roux in a separate pan (cooking 2 tablespoons of butter & 2 tablespoon flour for a few minutes and then whisk in to buffalo chicken soup) and then heat soup until thickened.
      Or, you can use xanthan gum to thicken it instead. Simply add about a teaspoon to the soup, stir and then allow to simmer for a few minutes to thicken. If it's still not thick enough, you can continue adding more xanthan gum until it has reached the thickness you prefer.
    • Top with your favorite toppings and serve! (See post for topping ideas!)
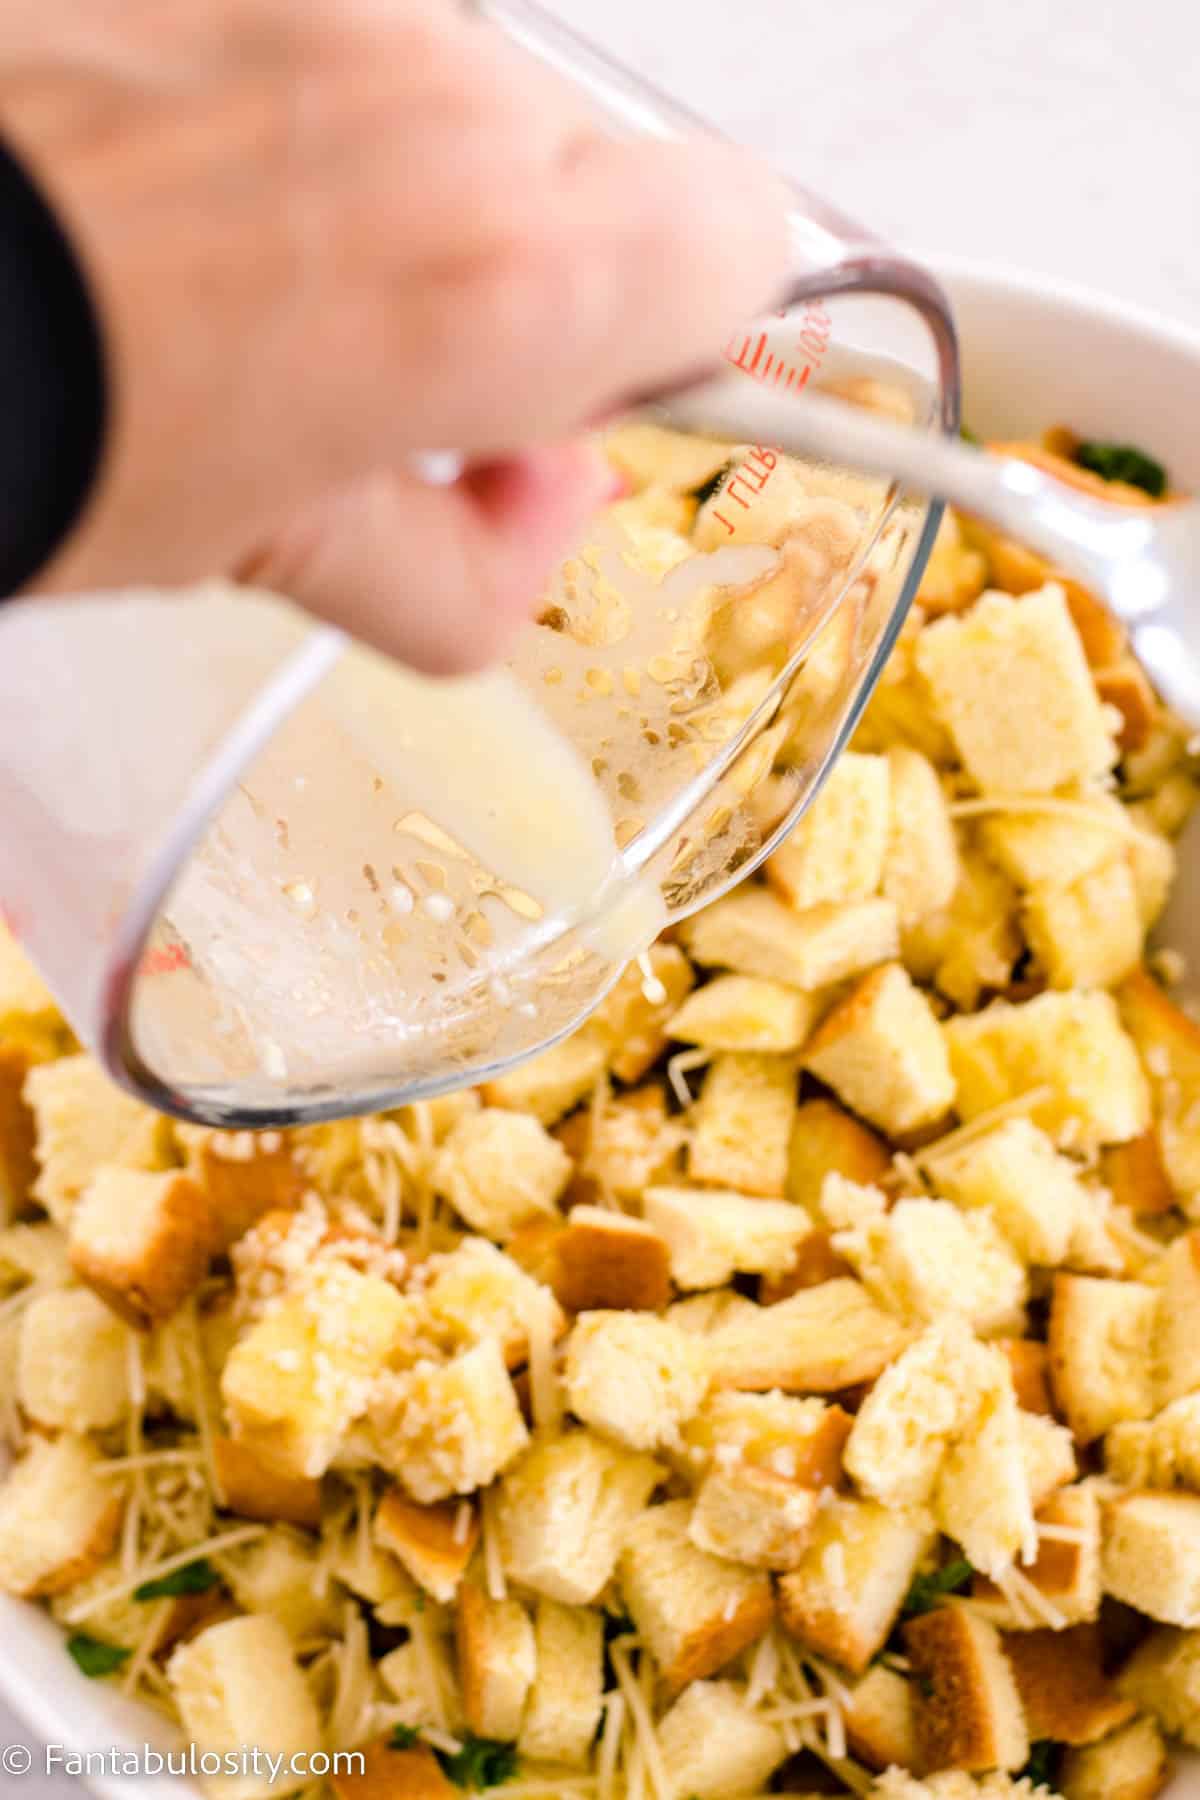
    Notes

    How to store leftover soup
    If you have leftover soup, allow it to fully cool and then place in an airtight container and store in the refrigerator for 3-5 days.
    Can you freeze buffalo chicken soup?
    I do! I simply put it in to containers and free single portions so we can pull a container out, thaw, and enjoy!

    Nutrition

    Serving: 1serving (⅙ recipe) | Calories: 391kcal | Carbohydrates: 8g | Protein: 17g | Fat: 31g | Saturated Fat: 15g | Cholesterol: 117mg | Sodium: 820mg | Potassium: 383mg | Sugar: 4g | Vitamin A: 935IU | Vitamin C: 1.4mg | Calcium: 86mg | Iron: 1mg

    Chicken Tater Tot Casserole

    October 6, 2022

    Close up photo of a spoonful of a creamy chicken and cheese casserole topped with crispy browned tater tots

    Chicken Tater Tot Casserole: Packed with tender shredded chicken, cheddar cheese, crispy bacon, golden tater tots, and tangy ranch seasoning, this cozy baked chicken casserole recipe will become a family favorite!

    Love using other starchy items besides noodles in a casserole? Give this Stove-Top Stuffing Chicken Casserole recipe a chance because it’s full of deliciousness too! These two are definitely some of our popular casserole recipes.

    chicken tater tot casserole serving on spoon

    We love any dish made with the glorious combination of cheese, bacon and ranch mix, (like this chicken bacon ranch pasta) and this is a favorite casserole recipe for an main course, for sure!

    Casseroles are the ultimate comfort food for any meal of the day. For breakfast, you’ll love making this Sausage, Egg & Cheese Breakfast Casserole, and lunch is the perfect time for a hearty Chicken Pot Pie Casserole. We even have a Broccoli Casserole and Corn Casserole to serve alongside dinner. Finally, wrap up the day with a warm, gooey Cinnamon Roll Casserole topped with ice cream!

    Why you’ll love this casserole recipe

    There’s not an easier dinner recipe for busy days and busy weeknights than this casserole. (Well, maybe this one and this chicken and gravy recipe.) Just mix up the chicken mixture, pop it in a baking dish, and dinner is done in under an hour!

    This one bowl, one dish tater tot casserole is perfect for using leftovers, too. Use the leftover chicken from shredded slow cooker chicken and the leftover air fryer bacon from breakfast.

    A casserole is a great way to feed a crowd or large family because this chicken and tater tot casserole yields at least 8 generous portions!

    [feast_advanced_jump_to]

    Ingredients

    As you can see, this cheesy chicken tater tot casserole is made with familiar ingredients that you can grab on your next trip to the grocery store.

    Bowls of shredded chicken, cooked bacon, sour cream, chicken soup, shredded cheese, tater tots and a packet of ranch dressing are displayed
    Ingredients
    • 3 cups cooked shredded chicken
    • 1 ½ cups sour cream
    • One 10oz. can condensed cream of chicken soup
    • One 1 oz. packet of ranch dressing seasoning mix
    • 1 cup cooked bacon, chopped into bite sized pieces
    • 2 cups shredded cheddar cheese, divided
    • 32 oz. bag of frozen tater tots, divided

    See the printable recipe card below for ingredients, instructions and detailed recipe notes.

    Instructions

    If you love easy recipes, you have come to the right place today! You will only need one mixing bowl, one baking dish and a spatula or spoon, so let’s get cooking!

    1. First, preheat your oven to 350 degrees F and prepare a 9×13 baking dish or casserole dish with nonstick cooking spray. Reserve ½ cup of the shredded cheese and a few handfuls of the frozen tater tots for the top of the casserole.
    2. Then, in a large bowl, add the chicken, sour cream, soup, ranch powder, cooked bacon and 1 ½ cups of the shredded cheese. Mix until well combined.
    Cooked shredded chicken is in a large glass mixing bowl
    Shredded chicken
    In a large glass mixing bowl, a spatula stirs together chicken, bacon, ranch seasoning, cream of chicken soup, shredded cheeese and sour cream
    Mix casserole ingredients
    1. Next, add the remaining frozen tater tots and fold them into the chicken mixture.
    Frozen tater tots have been added to a glass mixing bowl with a creamy chicken mixture
    Add frozen tater tots
    Tater tots have been stirred into a creamy cheesy chicken mixture for a comforting casserole
    Mix well
    1. Now, add the casserole mixture to the prepared baking dish and spread it evenly. Place the reserved frozen tater tots in a single layer on top of the mixture. Then, sprinkle the top of the casserole with the remaining ½ cup of shredded cheese.
    A white baking dish holds the unbaked contents of a creamy cheesy casserole ready to be baked
    Spread in baking dish
    In a white baking dish, frozen tater tots top the unbaked cheesy chicken filling of a comforting casserole
    Top with tater tots & cheese
    1. Finally, bake the chicken bacon ranch tater tot casserole for 45 minutes or until the tater tots on top are golden brown and the whole thing is hot and bubbly. Serve and enjoy!
    Golden brown tater tots and melted cheese crown the top of a baking dish of creamy cheesy chicken casserole
    What goes good with tater tot casserole?

    We love to serve this chicken bacon ranch tater tot casserole with mixed vegetables, roasted broccoli, canned green beans or candied carrots. A big green salad would also be a complimentary side dish.

    What meat goes with tater tots?

    I think tater tots are an easy staple to serve alongside oven baked burgers and hot dog recipes, most chicken dishes, and with BBQ or grilled meats.

    Whatever you decide to serve alongside this creamy dreamy casserole, I know your whole family is going to love it! I believe they’ll also love this taquito casserole too!

    A fork holds a bite of creamy cheesy chicken casserole above a plate portion of the same meal
    Easy dinner recipe

    Substitutions

    If you need alternatives to the ingredients that we used for this casserole, here are a few suggestions that you’ll find helpful:

    • You can also make this casserole with cooked ground beef instead of chicken.
    • We made this chicken tater tot casserole with cream of chicken soup. But, you can use a can of cream of mushroom soup, a can of cheddar cheese soup or your favorite condensed cream soup variety.
    • To save a few calories, you can make this casserole with low fat versions of the sour cream and cheese or substitute turkey bacon as well.

    Variations

    Here are a few of our favorite creative ways to put a delicious twist on this recipe for creamy chicken tater tot casserole!

    • Spice it up! Use shredded pepper jack cheese to add a little heat to this traditional tater tot casserole. Or, serve this with your favorite hot sauce so you can add as much or little heat as you would like.
    • Make it buffalo! Toss the shredded chicken in your family’s favorite buffalo sauce and substitute blue cheese crumbles for half of the shredded cheese and you’ve got a buffalo chicken tater tot casserole on your hands!
    • Serve with a topping bar! Let your family choose from a variety of toppings like chopped green onion, different cheeses, crispy french fried onions, bacon bits, fresh herbs, and extra sour cream.
    Birdseye photo of serveral plated servings of a creamy cheesy chicken casserole and a baking dish of the same meal
    Chicken Tater Tot Casserole

    Storage

    You can store any leftover casserole in an airtight container in the refrigerator for up to 5 days.

    Can I freeze cooked tater tot casserole? Yes! Cover the entire baked dish tightly with foil or plastic wrap or freeze individual servings in airtight containers. You can freeze this for 3-4 months.

    How to freeze the assembled casserole before baking. First, cover the prepared casserole tightly with aluminum foil or plastic wrap or store it in a freezer friendly covered dish for up to 3-4 months in the freezer. Then, when you are ready to bake it, remove the foil/lid and bake it in a 350 degree oven for about 60 minutes.

    Birdseye photo of a white baking dish with a creamy cheesy chicken casserole with several servings scooped out and plated
    Cheesy tater tot casserole

    Top tip

    If you don’t have time to cook and shred boneless skinless chicken breasts or chicken thighs, grab a rotisserie chicken from your grocery store deli. (Then, see how to get the most out of your rotisserie chicken.)

    More Comforting Casseroles

    We are no strangers to casseroles around here. We think you’ll love our flavorful Taco Chicken Casserole, and this cozy French Onion Beef Casserole. Not to mention, how much you’ll love our homey Ham & Swiss Casserole!

    Did you make this? I’d be so grateful if you left a “star” rating below to let me know what you thought! Then, the next time you need a quick and easy recipe, come back to Fantabulosity to browse all of my easy recipes!

    Recipe

    Close up photo of a spoonful of a creamy chicken and cheese casserole topped with crispy browned tater tots
    Print Pin
    5 from 5 votes

    Chicken Tater Tot Casserole

    Our Chicken Tater Tot Casserole is packed with chicken, cheddar cheese, bacon and tangy ranch seasoning. This cozy baked casserole recipe will become a family favorite!
    Course Main Course
    Cuisine American
    Prep Time 10 minutes minutes
    Cook Time 45 minutes minutes
    Total Time 55 minutes minutes
    Servings 8
    Calories 634kcal
    Author Jessica Burgess

    Ingredients

    • 3 cups cooked shredded chicken
    • 1 ½ cups sour cream
    • 1 10 oz. can condensed cream of chicken soup
    • 1 packet ranch dressing mix seasoning (1 oz.)
    • 1 cup cooked bacon chopped into bite sized pieces
    • 2 cups shredded cheddar cheese divided
    • 32 oz frozen tater tots divided

    Instructions

    • First, preheat the oven to 350 degrees F and prepare a 9×13 baking dish with non-stick cooking spray. Reserve ½ cup of the shredded cheddar cheese and a few handfuls of the frozen tater tots.
    • Then, in a large bowl, mix together the chicken, sour cream, soup, ranch powder, cooked bacon and 1 ½ cups of the shredded cheese until well combined.
    • Next, fold the remaining frozen tater tots into the chicken mixture.
    • Now, add the casserole mixture to the prepared baking dish and spread it evenly. Place the reserved tater tots on top of the mixture. Sprinkle the top of the casserole with the remaining ½ cup of shredded cheese.
    • Finally, bake for 45 minutes or until the tater tots on top are golden brown and casserole is hot and bubbly.

    Notes

    • No need to thaw the tater tots for this recipe – they are used frozen.
    • You can use cooked turkey bacon, low fat cheese and low fat sour cream to save a few calories.
    • If you prefer, you can use cream of mushroom soup or a can of cheddar cheese soup in the casserole filling.
    • Store any leftovers in an airtight container in the refrigerator for up to 5 days.
    • To freeze, cover the entire baked dish tightly with foil or plastic wrap or freeze individual servings in airtight containers for 3-4 months.
    • You can also freeze the assembled casserole before baking. Cover the prepared casserole tightly with aluminum foil or plastic wrap or store it in a freezer friendly covered dish for up to 3-4 months in the freezer. When you are ready to bake it, remove the foil/lid and bake it in a 350 degree F oven for about 60 minutes.
     

    Nutrition

    Serving: 1serving | Calories: 634kcal | Carbohydrates: 35g | Protein: 27g | Fat: 44g | Saturated Fat: 16g | Polyunsaturated Fat: 7g | Monounsaturated Fat: 15g | Trans Fat: 0.04g | Cholesterol: 113mg | Sodium: 1208mg | Potassium: 549mg | Fiber: 3g | Sugar: 2g | Vitamin A: 589IU | Vitamin C: 8mg | Calcium: 267mg | Iron: 1mg

    Pumpkin Cheesecake Bars

    October 4, 2022

    A stack of desserts bars with a graham cracker crust and swirled pumpkin cheesecake filling are in the center of the photo

    Pumpkin Cheesecake Bars: These decadent Fall dessert bars feature a buttery graham cracker crust and a layer of rich creamy swirled pumpkin pie cheesecake!

    The pumpkin combined with the cheesecake flavors is a combo that’s hard to pass up. We even have mini pumpkin cheesecakes and this pumpkin cheesecake cake that should be next on your list of fall desserts to make!

    A stack of desserts bars with a graham cracker crust and swirled pumpkin cheesecake filling are in the center of the photo

    Desserts are a huge hit at our house. Especially cheesecake! From baked versions like Coconut Cheesecake and Strawberry Crunch Cheesecake to no bake cheesecake recipes like our No Bake Cherry Cheesecake and S’mores Cheesecake, we love cheesecake in any form. Now, we’re sharing cheesecake in pumpkin bars!

    Why You’ll Love This Recipe

    It’s pumpkin season! Get ready for all of the pumpkin recipes, pumpkin treats and pumpkin flavor. These pumpkin bars are no exception. They have a generous swirl of pumpkin pie cheesecake that will cure that pumpkin craving.

    Since this cheesecake is baked in a 9×13 baking dish, you don’t have to fuss with a springform pan or a water bath.

    These easy cheesecake bars are a delicious alternative to this no-bake pumpkin pie for Thanksgiving dessert. I know we’ll be making them all holiday season, as well as this sweet potato pie recipe!

    [feast_advanced_jump_to]

    Ingredients

    These pumpkin cream cheese bars use simple, easy to find ingredients that can be picked up on your next grocery store run. Here are the ingredients for BAKED pumpkin bars:

    Bowls of ingredients, sticks of butter and eggs are displayed on a white marble background
    • 3 cups graham cracker crumbs
    • ½ cup (1 stick) unsalted butter
    • 16 oz. (2 blocks) cream cheese, softened to room temperature
    • ½ cup sour cream
    • 1 cup granulated sugar
    • 2 large eggs
    • 1 teaspoon salt
    • 1 cup pumpkin puree
    • 2 ½ teaspoons pumpkin pie spice

    See printable recipe card below for ingredients, nutrition information and detailed recipe notes.

    Instructions

    With the easy step-by-step instructions and photos below, even the most inexperienced bakers can have a pan of these decadent dessert bars ready today!

    See below for “No Bake” instructions instead!

    Steps 1-4 of how to make pumpkin cheesecake bars.
    1. Preheat your oven to 350 degrees F. Prepare a 9×13 baking dish with nonstick cooking spray and set aside.
    2. In a medium sized mixing bowl, melt the butter in the microwave. Then, combine it with the graham cracker crumbs until it forms a wet, sandy mixture. Spread the graham cracker mixture evenly into the bottom of the 9×13 pan and press it down firmly to form a crust. Set the dish aside.
    1. In a large mixing bowl, use a hand mixer to whip the cream cheese until it is smooth. Now, mix in the sour cream and granulated sugar until they are fully incorporated.
    2. Then, add the eggs to the cream cheese mixture and mix once more until smooth and the eggs are fully combined. Pour ¾ of the cheesecake mixture over the graham cracker crust.
    Steps 5-7 for making pumpkin cheesecake bars.
    1. Add the pumpkin to the remaining cheesecake mixture, add the salt, pumpkin puree and pumpkin pie spice and mix it until combined.
    2. Dollop spoonfuls of the pumpkin cheesecake mixture all over the top of the plain cheesecake layer. Use a butter knife to swirl the two mixtures together.
    1. Next, bake the cheesecake for 35-40 minutes or until the center is only slightly jiggly.
    2. Turn off the oven and allow the cheesecake to cool for 30 minutes in the oven. Then, put it in the fridge and allow it to cool for 1 ½ hours.
    3. Finally, cut the cooled cheesecake into squares, serve, and enjoy!
    A hand holds a white and orange swirled pumpkin dessert bar

    Serve them on a pretty platter for an impressive dessert on Thanksgiving! (And save the leftover cut-away pieces to snack on until that turkey is done!)

    Substitutions & Variations

    Don’t have sour cream? Can’t find graham cracker crumbs in the grocery store? We’ve got easy alternatives and some fun ways to switch up this classic recipe for pumpkin cheesecake bars.

    • If you don’t have sour cream, you can replace it with plain greek yogurt.
    • Have you ever made homemade pumpkin pie spice? It is a great way to adjust the individual spices (more cinnamon, less ginger, etc.) to your taste and you can absolutely use it in this recipe.
    • Feel free to make your own graham cracker crumbs if you don’t want to buy them. Simply place your graham crackers in a large ziploc bag and use a rolling pin to crush them into fine crumbs.
    • We made this recipe with a traditional graham cracker crust. However, you can make the crust with your favorite cookies and crumbs! Use vanilla wafers for a mild vanilla crust. Amp up the spice by using cinnamon graham cracker crumbs. Crushed gingersnap cookies make an incredible gingersnap crust to compliment the pumpkin in this recipe. Chocolate and pumpkin are a surprisingly delicious combination, so you can try using chocolate graham crackers crumbs for the crust, too.
    • Finally, there are plenty of ways to top these creamy pumpkin cheesecake bars. Homemade whipped cream or whipped topping, crunchy streusel, pumpkin pie granola, scoops of ice creams and caramel sauce are some of our favorite suggestions!

    Storage

    Should you refrigerate pumpkin bars? How long do pumpkin bars last? Store these Fall dessert bars in an airtight container in the refrigerator for up to 5 days.

    Top Tips

    • Allowing the cheesecake to cool in the oven before moving the dish to the fridge helps minimize cracks forming in the top of the cheesecake.
    • I like to use a plastic knife to cut these cheesecake bars into squares. For some reason, a plastic knife doesn’t seem to stick to the cheesecake filling as much, and results in cleaner edges for the cut pumpkin cheesecake squares.
    A wooden spatula holds an orange and white swirled dessert bar above a pan of the same swirled dessert

    No Bake Pumpkin Cheesecake Bars

    Now, this is not a no bake dessert and these are not no bake pumpkin bars. BUT, you can use the same crumb + butter crust and make a no bake filling.

    Here’s How: To make an easy fluffy filling, whisk 1 small box of pumpkin spice flavored instant pudding into 1 cup of cold milk and then fold in 1 small tub of Cool Whip for a creamy dreamy no bake pumpkin dessert. Sprinkle the top with pumpkin pie spice and refrigerate until you are ready to serve.

    More Pumpkin Recipes

    We are no stranger to pumpkin desserts around here! Our Pumpkin Streusel Muffins are bakery-style muffins with a decadent streusel topping and an icing drizzle. This Pumpkin Caramel Poke Cake is a super simple 4 ingredient pumpkin dessert! If no bake is more your speed, our Pumpkin Fluff Dip is a crowd pleaser for all of your Fall get togethers.

    Did you make this? I’d be so grateful if you left a “star” rating below to let me know what you thought! Then, the next time you need a quick and easy recipe, come back to Fantabulosity to browse all of my easy recipes!

    Recipe

    A stack of desserts bars with a graham cracker crust and swirled pumpkin cheesecake filling are in the center of the photo
    Print Pin
    5 from 12 votes

    Pumpkin Cheesecake Bars

    These decadent Pumpkin Cheesecake Bars have a buttery graham cracker crust and a layer of rich, creamy swirled pumpkin pie cheesecake! Perfect for the fall season and Thanksgiving.
    Course Dessert
    Cuisine American
    Prep Time 15 minutes minutes
    Cook Time 40 minutes minutes
    Rest Time 2 hours hours
    Total Time 2 hours hours 55 minutes minutes
    Servings 12 bars
    Calories 393kcal
    Author Jessica Burgess

    Ingredients

    • 3 cups graham cracker crumbs
    • ½ cup unsalted butter
    • 16 ounces cream cheese (2 blocks) softened to room temperature
    • ½ cup sour cream
    • 1 cup granulated sugar
    • 2 large eggs
    • 1 teaspoon salt
    • 1 cup pumpkin puree
    • 2 ½ teaspoons pumpkin pie spice

    Instructions

    • Preheat your oven to 350 degrees F. Prepare a 9×13 baking dish with nonstick cooking spray and set aside.
    • In a medium sized mixing bowl, melt the butter in the microwave and combine it with the graham cracker crumbs until it forms a wet, sandy mixture. Spread the graham cracker mixture evenly into the bottom of the 9×13 pan and press it down firmly to form a crust. Set the dish aside.
    • In a large mixing bowl, use a hand mixer to whip the cream cheese until smooth.
    • Now, mix in the sour cream and granulated sugar until they are fully incorporated.
    • Then, add the eggs to the cream cheese mixture and mix once more until is smooth and the eggs are fully combined. Pour ¾ of the cheesecake mixture over the graham cracker crust.
    • To the remaining cheesecake mixture, add the salt, pumpkin puree and pumpkin pie spice and mix it until combined.
    • Dollop spoonfuls of the pumpkin cheesecake mixture all over the top of the plain cheesecake mixture. Use a butter knife to swirl the two mixtures together.
    • Next, bake the cheesecake for 35-40 minutes or until the center is only slightly jiggly.
    • Turn off the oven and allow the cheesecake to cool for 30 minutes in the oven. Then, put it in the fridge and allow it to cool for 1 ½ hours.
    • Finally, cut the cooled cheesecake into squares, serve and enjoy!

    Notes

    For a No Bake Version of Pumpkin Bars:
    You can use the same crumb + butter crust and make a no bake filling.
    Here’s How: To make an easy fluffy filling, whisk 1 small box of pumpkin spice-flavored instant pudding into 1 cup of cold milk and then fold in 1 small tub of Cool Whip or 8oz. of the storebought cheesecake filling for a creamy dreamy no bake pumpkin dessert. Sprinkle the top with pumpkin pie spice and refrigerate until you are ready to serve.
    More Notes: 
    • Use the bottom of a glass to press the graham cracker crumb mixture into the baking dish to form a firm, sturdy crust.
    • I like to use a plastic knife to cut these cheesecake bars into squares. (For some reason, it doesn’t seem to stick to the cheesecake filling so much!) If you use a regular knife, wipe it clean after every cut to keep the edges of the bars neat.
    • Allowing the cheesecake to cool in the oven before moving the dish to the fridge helps minimize cracks forming in the top of the cheesecake.
    • Store these cheesecake bars in an airtight container in the refrigerator for up to 5 days.

    Nutrition

    Serving: 1bar | Calories: 393kcal | Carbohydrates: 37g | Protein: 5g | Fat: 26g | Saturated Fat: 14g | Polyunsaturated Fat: 1g | Monounsaturated Fat: 7g | Trans Fat: 0.3g | Cholesterol: 95mg | Sodium: 468mg | Potassium: 158mg | Fiber: 1g | Sugar: 24g | Vitamin A: 4027IU | Vitamin C: 1mg | Calcium: 78mg | Iron: 1mg

    Cowboy Queso

    October 2, 2022

    A tortilla chip is being dipped into a big bowl of cowboy queso.

    Cowboy Queso: This cowboy queso dip is loaded with cheese, sausage, beans and more and makes the perfect appetizer at a party or side dish for a southern-inspired meal!

    Ready in less than 30 minutes, this dip is quick and easy, and oh so satisfying.

    A tortilla chip is being dipped into a big bowl of cowboy queso.

    Why You’ll Love This Recipe

    Cheesy queso like this is a personal favorite of mine (like this jalapeno artichoke dip), but it has also proven to be a cowboy favorite- it’s loaded with black beans, three different kinds of cheese, Rotel tomatoes, chorizo sausage, and a bunch of other delicious (but simple) ingredients! My cowboy pasta salad has similar ingredients and makes a great side or main dish.

    This cowboy queso with chorizo is also the ultimate party dip or game day dip, along with this hot taco dip. Serve this up with some salty tortilla chips and watch it disappear at your next gathering! (Or you can make this Rotel cheese dip that only requires 3 ingredients.)

    [feast_advanced_jump_to]

    Ingredients

    Grab these simple ingredients next time you’re at the grocery store and whip up a batch of this Texas queso in less than 30 minutes!

    • ½ pound chorizo sausage, casing removed
    • 8 ounces Velveeta cheese
    • 8 ounces shredded cheddar cheese (I used a 3 cheese blend)
    • 4 ounces cream cheese
    • 1 – 12 ounce can evaporated milk
    • 1 can rotel drained
    • 1 can black beans, rinsed and drained
    • 1 can corn drained
    • 1 – 4 ounce can green chilies, chopped
    • juice from one lime
    • chopped cilantro and diced avocado for garnish (optional)
    • tortilla chips for serving
    The ingredients needed to make cowboy queso on a counter with labels on the image.
    Ingredients

    See the printable recipe card below for ingredients and instructions all in one place!

    Instructions

    1. In a large skillet over medium heat, add the sausage and cook, breaking up into small pieces.
    Pork sausage being cooked in a large skillet.
    Cook chorizo.
    1. Add the Velveeta cheese, shredded cheese, cream cheese, and evaporated milk and stir until all the cheese is completely melted.
    Shredded cheese, cream cheese, and velvet cheese being added to the skillet.
    Add the cheeses & evaporated milk.
    1. Stir in the rotel, black beans, corn, and chopped green chilies with your wooden spoon and allow to cook 3-4 minutes, or until everything is heated through (you can reserve some black beans and corn for topping if desired).
    Rotel, black beans, chiles, and corn being stirred into the skillet.
    Add beans, corn, chiles, and Rotel.
    1. Remove from heat, stir in the lime juice, then garnish with chopped cilantro, avocado, corn, and black beans if desired.
    Cowboy queso in a large skillet garnished with lime wedges, cilantro, and a few black beans.
    Garnish & serve!
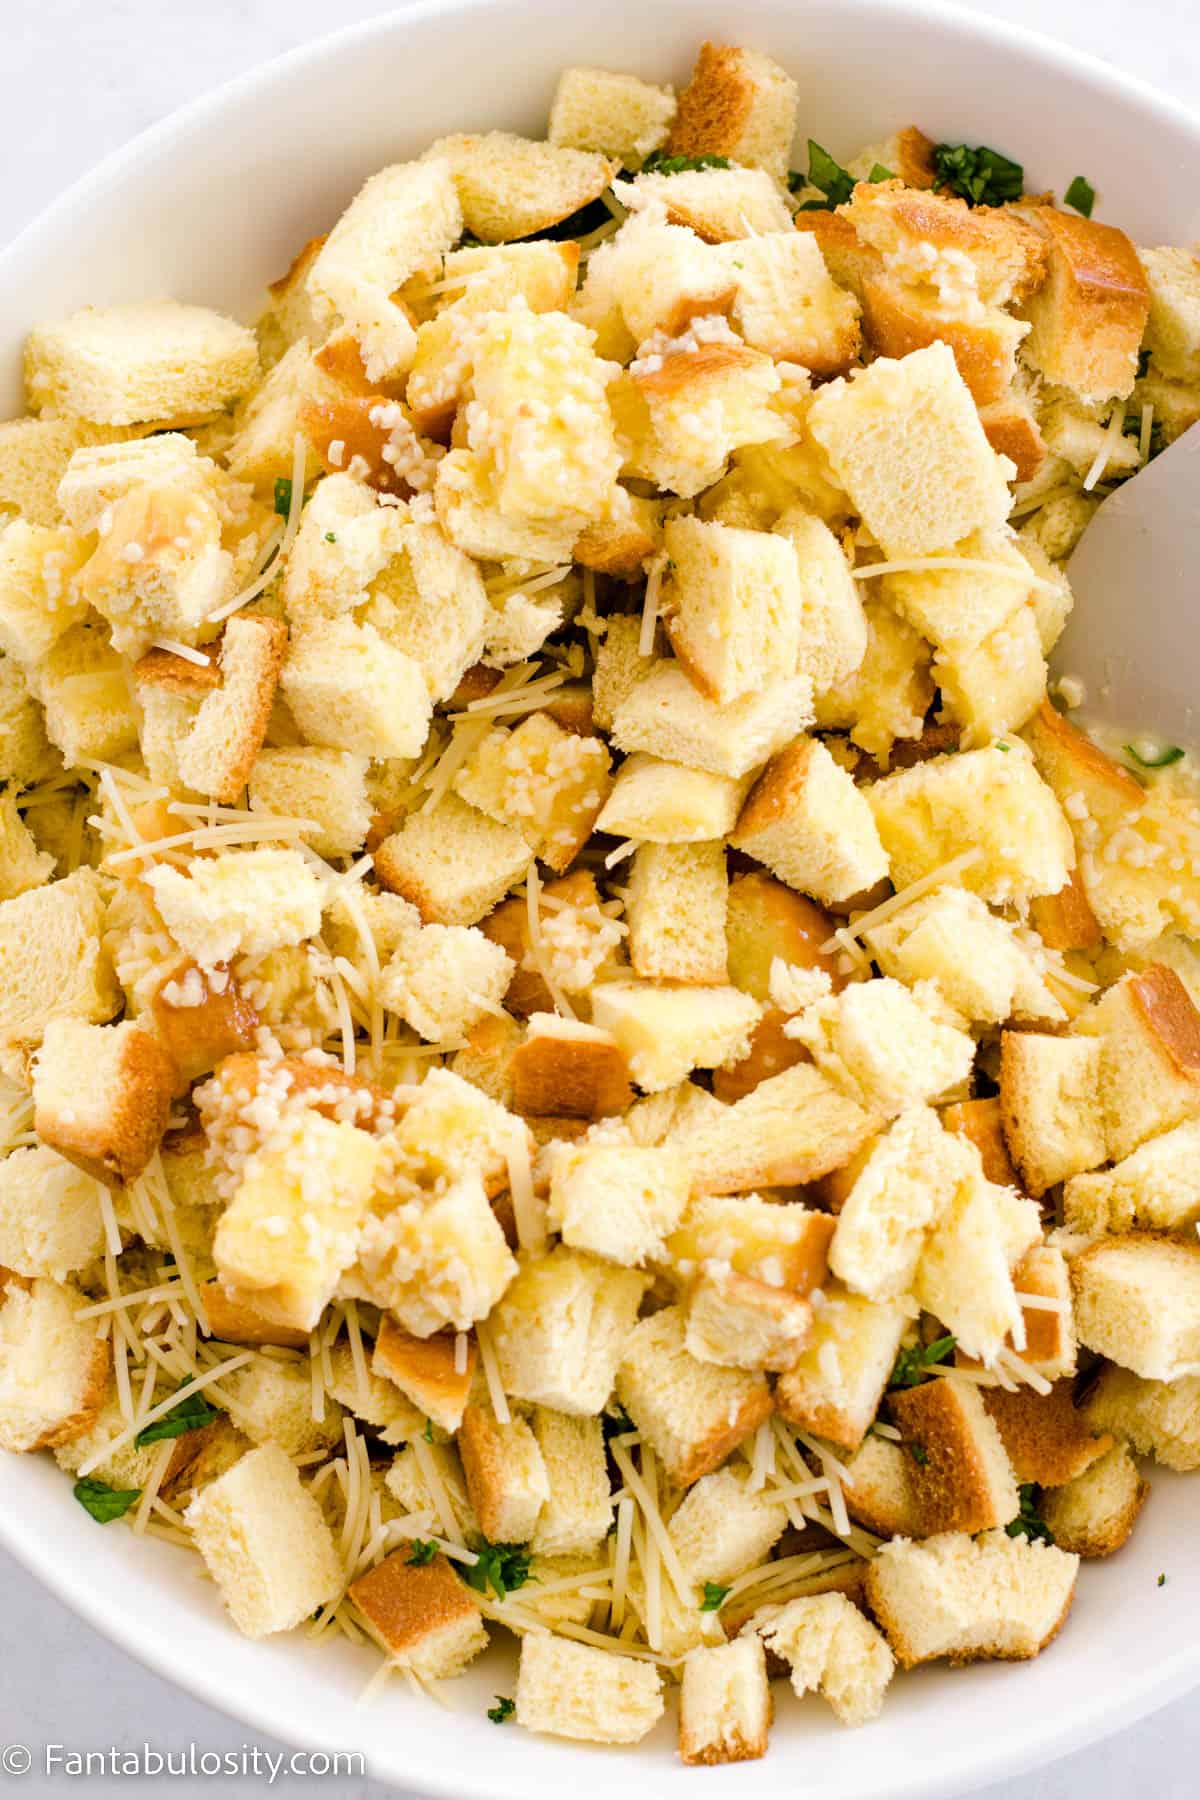
    1. Serve warm with tortilla chips.
    Close up of a tortilla chip being dipped in cowboy queso.
    Perfect with tortilla chips.

    Substitutions

    This queso cheese dip is pretty versatile. If you need to make an ingredient swap, you can do that without too much difficulty. For example:

    • Chorizo – if you don’t have/don’t want to use chorizo (a spicy pork sausage), you can use ground beef instead. Alternatively, you could omit the meat altogether! It will be delicious either way. (We love Chorizo so much, we even put it in our gravy – like in this jalapeno gravy and this chorizo gravy!)
    • Beans – instead of black beans, you could use kidney beans (or chili beans if you want to add a bit of extra spice).
    • Green Chiles – instead of green chilies, you could use chopped jalapeno peppers. Again, you could omit this altogether if you don’t want any spice and the dip would still be cheesy and delicious.
    • Corn – instead of a can of corn, you could use cooked fresh corn.
    • Evaporated Milk – instead of evaporated milk, you could use heavy cream.
    A close up of cowboy queso dip.
    Cheesy, melted goodness!

    Variations of This Dip Recipe

    Another beautiful thing about appetizer dips is that they can be changed up easily to create a customized dish! Try these…

    • Cheese – you can swap the cheddar cheese for a tex mex cheese blend for extra flavor and heat. You could also swap it out for 2 cup pepper jack cheese, which has a little heat.
    • Spicy – if you like a lot of spice, you can add some red pepper flakes in your dip, a pinch of ground cayenne pepper, swap the cheese for the tex mex as suggested above, and even add some extra green chiles or other hot pepper!
    • Meat – you can add a second ½ pound of meat (like ground beef cooked with some homemade taco seasoning) into this dip if your cowboy crew likes things really hearty.
    • Beans – if you like beans, go bean crazy! Add in some kidney beans, chili beans, pinto beans…the more the merrier.
    • Onion – fry up some red onion in butter and mix that into your cowboy queso for some extra flavor.

    What to Serve with This Cowboy Queso

    We love serving this recipe alongside something like these crock pot chicken enchiladas or this taco chicken casserole!
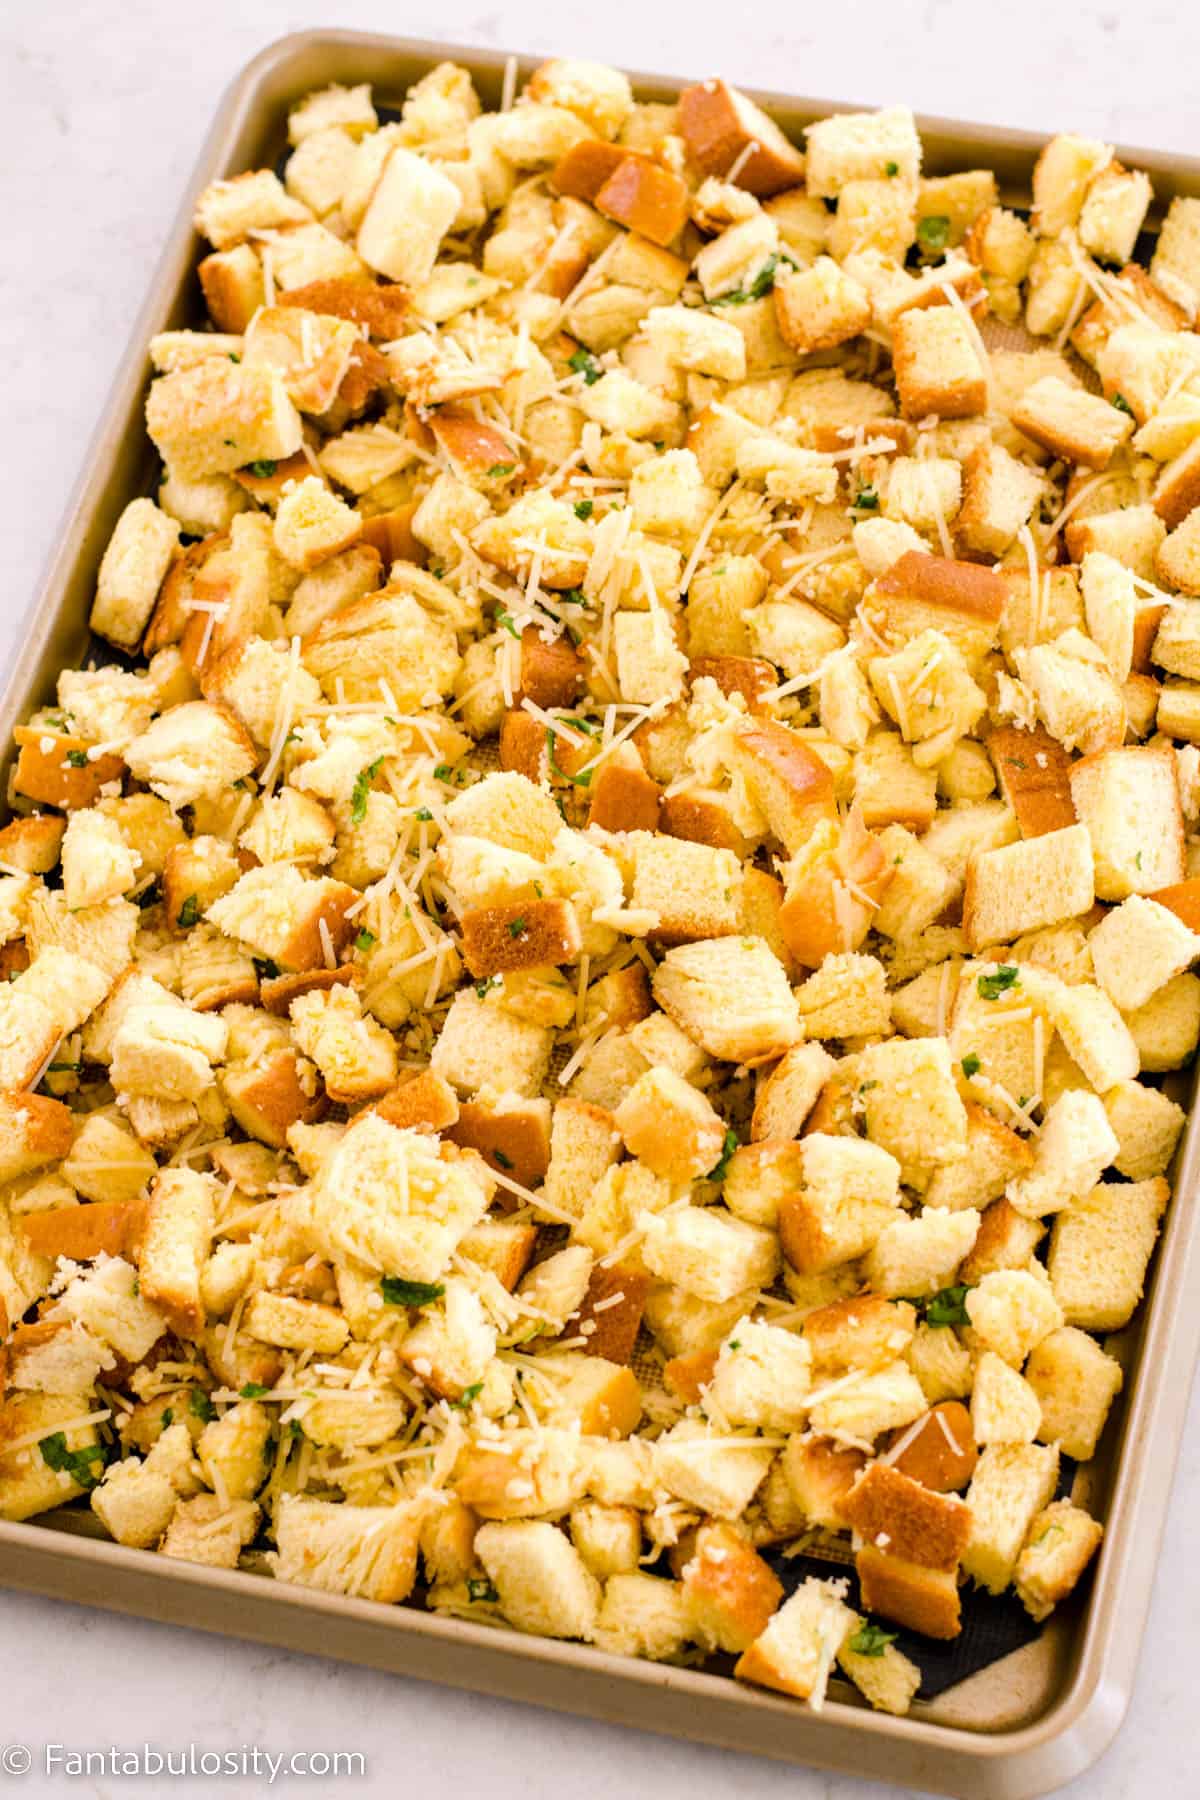
    Storage

    This cowboy queso recipe makes a lot of dip, and if you have a lot of leftovers it stores well in the fridge for up to 3 days in an airtight container. Simply reheat your dip in the microwave in 40 second increments, stirring well between each heat.

    An overhead shot of a skillet filled with cowboy queso. Around it are scattered ingredients and a bowl of tortilla chips.
    Queso cheese dip.

    Top Tip

    The texture is super creamy, and when it’s fresh off the stove it might seem a little runny. Don’t panic! It will firm up as it cools a little.
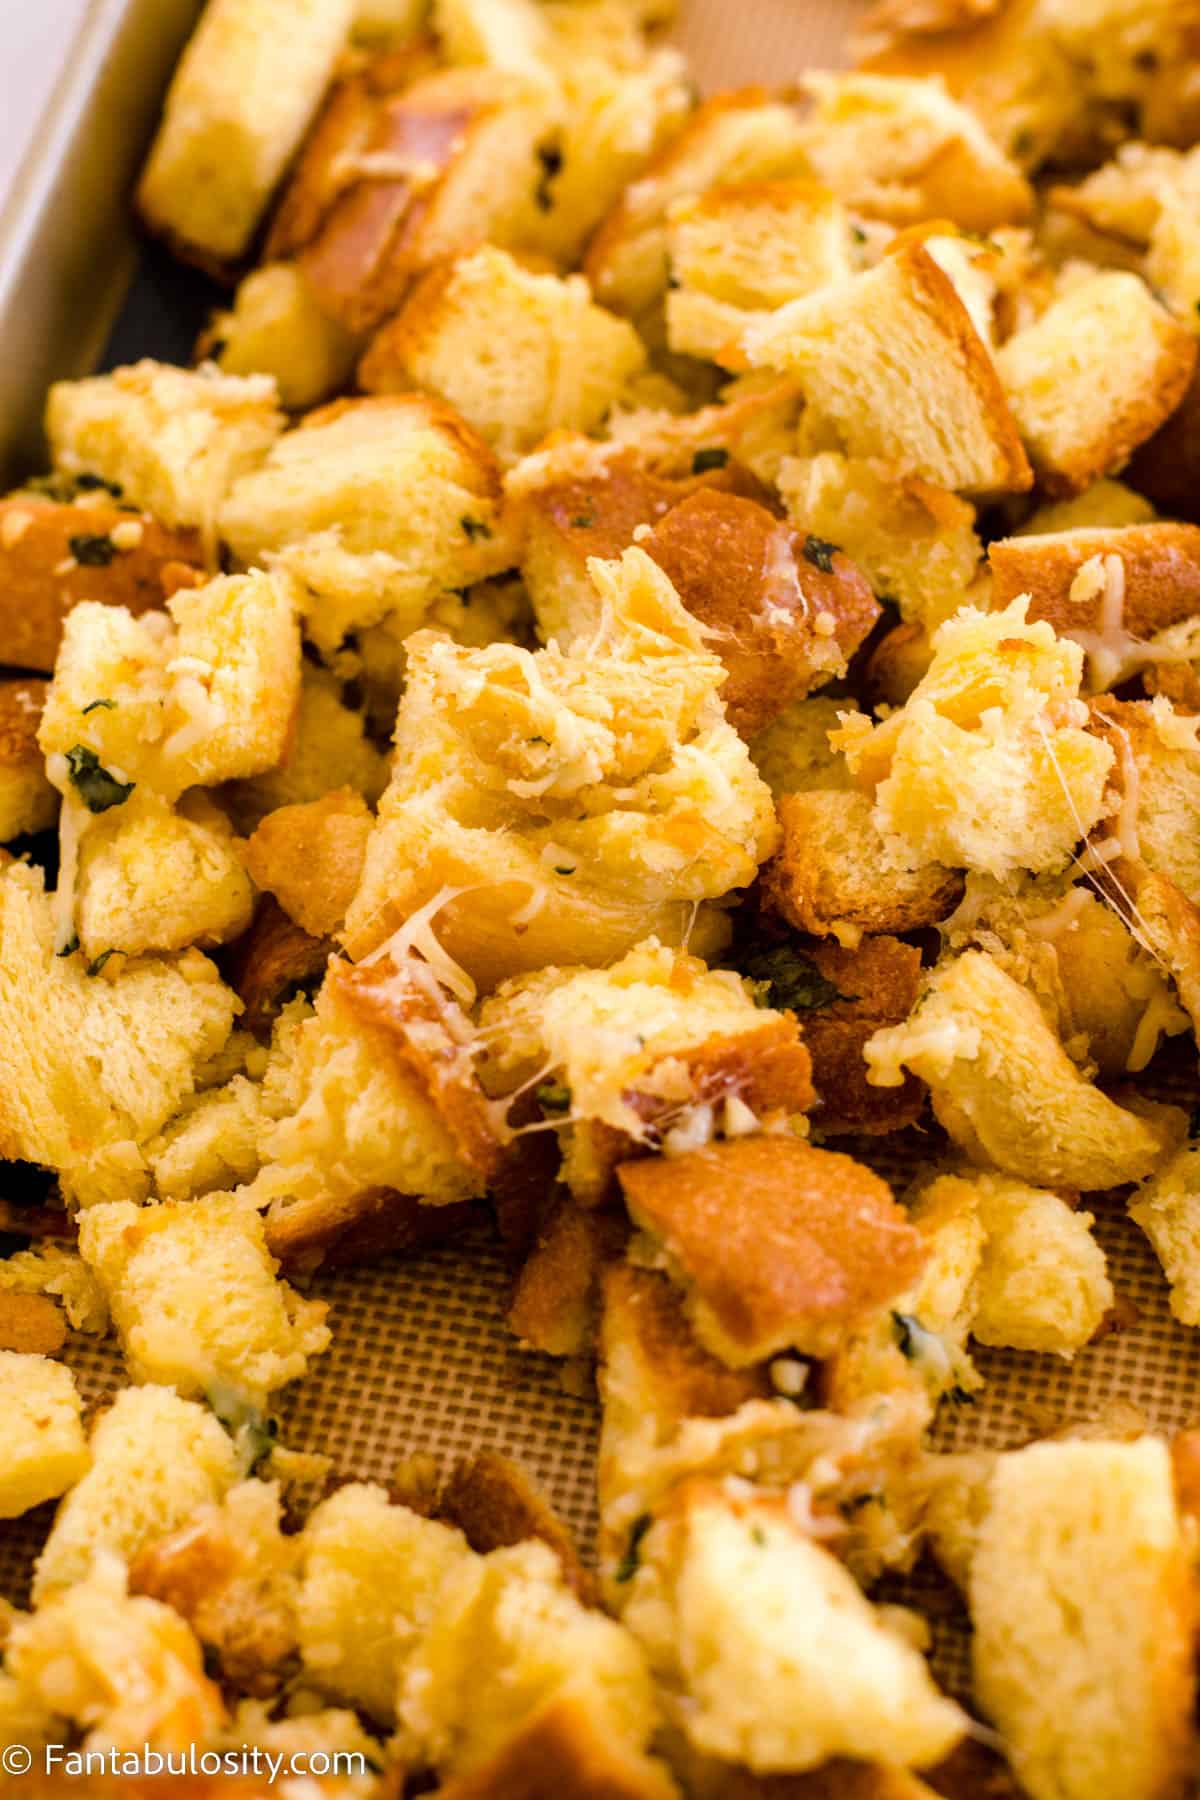
    FAQs

    Can I make cowboy queso without chorizo sausage?

    You can use ground beef instead of the chorizo sausage if desired, or skip it altogether. Either way, it will result in a delicious dip!

    Is cowboy queso dip really spicy?

    This is relatively mild. To add some heat you can add some cayenne pepper to taste to the dip when you add the corn and other mix-ins, or buy the "hot" Rotel tomatoes instead.

    What is “queso”?

    Queso in its simplest form is just melted cheese and chiles. Over the years queso has grown and there are now SO many recipes for unique recipes, but most still have melted cheese and chiles included.

    Did you make this? I’d be so grateful if you left a “star” rating below to let me know what you thought! Then, the next time you need a quick and easy recipe, come back to Fantabulosity to browse all of my easy recipes!

    Related Recipes

    This loaded cowboy queso recipe is similar to our smoked queso dip recipe (which is basically a beer cheese dip, by the way)! If you liked this one, you should definitely try it. And these BBQ white queso nachos are cheese and chips all in one.

    And if you’re looking for another easy, cheesy appetizer dip our cheese dip without Velveeta is another winner – trust me, you’ll want to eat it with a spoon, it’s that good! Our smoked queso dip and cheese dip without Velveeta are both cowboy favorites, too.

    Recipe

    A tortilla chip is being dipped into a big bowl of cowboy queso.
    Print Pin
    5 from 5 votes

    Cowboy Queso

    Cowboy Queso: This cowboy queso dip is loaded with cheese, sausage, beans and more and makes the perfect appetizer at a party or side dish for a southern inspired meal! Ready in less than 30 minuets, this dip is quick and easy and oh so satisfying. 
    Course Appetizer, Side Dish, Snack
    Cuisine American, Mexican
    Prep Time 10 minutes minutes
    Cook Time 15 minutes minutes
    Total Time 25 minutes minutes
    Servings 24 ⅓ cup servings
    Calories 147kcal
    Author Jessica Burgess

    Ingredients

    • ½ pound chorizo sausage casing removed
    • 8 ounces Velveeta cheese
    • 8 ounces shredded cheddar cheese I used a 3 cheese blend
    • 4 ounces cream cheese
    • 1 – 12 ounce can evaporated milk
    • 1 can rotel drained
    • 1 can black beans rinsed and drained
    • 1 can corn drained
    • 1 – 4 ounce can green chilies chopped
    • juice from one lime
    • chopped cilantro and diced avocado for garnish optional
    • tortilla chips for serving

    Instructions

    • In a large skillet over medium heat, add the sausage and cook, breaking up into small pieces.
    • Add the velveeta, shredded cheese, cream cheese, and evaporated milk and stir until all the cheese is completely melted.
    • Stir in the rotel, black beans, corn, and chopped green chilies and allow to cook 3-4 minutes, or until everything is heated through (you can reserve some black beans and corn for topping if desired).
    • Remove from heat, stir in the lime juice, then garnish with chopped cilantro, avocado, corn, and black beans if desired.
    • Serve warm with tortilla chips.

    Nutrition

    Serving: 0.33cup | Calories: 147kcal | Carbohydrates: 10g | Protein: 8g | Fat: 9g | Saturated Fat: 5g | Polyunsaturated Fat: 0.4g | Monounsaturated Fat: 2g | Cholesterol: 29mg | Sodium: 265mg | Potassium: 199mg | Fiber: 2g | Sugar: 4g | Vitamin A: 401IU | Vitamin C: 5mg | Calcium: 176mg | Iron: 1mg

    Jalapeno Artichoke Dip

    September 30, 2022

    A tortilla chip being dipped in a bowl of jalapeño artichoke dip.

    Jalapeno Artichoke Dip: This 6 ingredient creamy dip uses cream cheese, mayo, sour cream, parmesan, jalapeños, and artichokes to create a creamy baked dip that everyone will want the recipe for! It’s easy to make and ready in 30 minutes!

    A tortilla chip being dipped in a bowl of jalapeño artichoke dip.

    Why You’ll Love This Recipe

    Is there anything better than a scoop of warm, cheesy dip with a bit of a spice kick? This jalapeño artichoke dip will satisfy all of your cheesy, baked dip cravings, especially if you serve it alongside this queso dip and this crack corn dip recipe! (But make sure you also have this easy buffalo chicken dip recipe to make and serve at your parties too!)

    This is one of my favorite dip recipes (it’s right up there with my easy taco layer dip), and it’s so versatile. It can be the perfect appetizer for tailgating during football season or for serving at holiday parties!

    [feast_advanced_jump_to]

    Ingredients

    You only need 6 ingredients to make this warm, cheesy dip and you can easily find them all at your local grocery store (if they aren’t in your pantry/fridge already).

    • 8 ounces cream cheese
    • ½ cup mayonnaise
    • ½ cup sour cream
    • ¾ cup shredded parmesan cheese, divided
    • ¾ cup diced fresh jalapeños, divided (if you prefer a spicier dip, include some jalapeño seeds)
    • 14 ounce can artichoke hearts, chopped
    The ingredients for jalapeño artichoke dip on a counter with labels on the image.
    Ingredients

    See the printable recipe card below for quantities.

    Instructions

    1. Preheat oven to 375°F.
    2. Place cream cheese, mayonnaise, sour cream, 1⁄2 cup parmesan cheese, and 1⁄2 cup jalapeños in a medium mixing bowl. Mix until uniform.
    Mayo, sour cream, jalapeños,  and parmesan cheese in a mixing bowl.
    Mix together.
    1. Add chopped artichokes and mix again.
    Artichokes being added to the mixing bowl of jalapeño artichoke dip.
    Add artichoke hearts.
    Jalapeno artichoke dip being stirred together in a mixing bowl.
    Mix together well.
    1. Transfer mixture to a 9×9-inch baking dish.
    Jalapeno artichoke dip spread into a 9x9 baking dish.
    Spread into a 9×9 baking dish.
    1. Sprinkle remaining jalapenos and cheese on top.
    Parmesan cheese and jalapeños sprinkled on top of a 9x9 dish of jalapeño artichoke dip.
    Sprinkle jalapeños and parmesan on top.
    1. Bake for 18-20 minutes or until top is golden brown and bubbly. Serve as is or scoop into a serving dish. Enjoy!
    Baked jalapeño artichoke dip in a 9x9 dish.
    Bake for 18-20 mins!

    Substitutions & Variations

    If you need to make a change to this recipe, here are a few we would suggest…

    • Less Spice – if you can’t handle spice at all, you can completely omit the jalapeños. You could sprinkle a bit of paprika on the finished dip to give it a bit more flavor, instead.
    • Mayo/Sour Cream – if you are out of one, you can make the dip with 1 cup of either (1 cup of mayonnaise or 1 cup of sour cream). It will change the finished product a bit, but it will still create a delicious dip.
    • Artichoke – instead of artichoke hearts, you could use chopped spinach to turn this into a cheesy jalapeño spinach dip.
    • More Cheese – you could mix in ½ cup of shredded cheese (cheddar cheese, mozzarella cheese, havarti cheese, pepper jack cheese) and then sprinkle some extra shredded cheese on the top if you want a super cheesy dip!

    Jalapeno Artichoke Dip: This 6 ingredient creamy dip uses cream cheese, mayo, sour cream, parmesan, jalapeños and artichokes to create a creamy baked dip that everyone will want the recipe for! It’s easy to make and ready in 30 minutes!

    A tortilla chip being dipped in a bowl of jalapeño artichoke dip.
    Jalapeno Artichoke Dip

    Why you’ll love this recipe

    Is there anything better than a scoop of warm, cheesy dip with a bit of a spice kick? This jalapeño artichoke dip will satisfy all of your cheesy, baked dip cravings! It’s kind of like a hot, baked version of Trader Joes jalapeño artichoke dip.

    This is one of those dips that disappear super quickly when you take it to a party. It’s super easy to make, only required 6 ingredients, and it’s always a hit! What’s not to love?

    [feast_advanced_jump_to]

    Ingredients

    You only need 6 ingredients to make this artichoke jalapeno dip and you can easily find them all at your local grocery store (if they aren’t in your pantry/fridge already).

    • 8 ounces cream cheese
    • ½ cup mayonnaise
    • ½ cup sour cream
    • ¾ cup shredded parmesan cheese, divided
    • ¾ cup diced fresh jalapeños, divided (if you prefer a spicier dip, include some jalapeño seeds)
    • 14 ounce can artichoke hearts, chopped
    The ingredients for jalapeño artichoke dip on a counter with labels on the image.
    Ingredients

    See the printable recipe card below for quantities.

    Instructions

    1. The first thing you need to do is preheat oven to 375°F.
    2. Place cream cheese, mayonnaise, sour cream, 1⁄2 cup parmesan cheese, and 1⁄2 cup jalapeños in a medium mixing bowl. Mix until uniform.
    Mayo, sour cream, jalapeños,  and parmesan cheese in a mixing bowl.
    Mix together.
    1. Add chopped artichokes and mix again.
    Artichokes being added to the mixing bowl of jalapeño artichoke dip.
    Add artichoke hearts.
    Jalapeno artichoke dip being stirred together in a mixing bowl.
    Mix together well.
    1. Transfer mixture to a 9×9-inch casserole dish.
    Jalapeno artichoke dip spread into a 9x9 baking dish.
    Spread into a 9×9 baking dish.
    1. Sprinkle remaining jalapenos and cheese on top.
    Parmesan cheese and jalapeños sprinkled on top of a 9x9 dish of jalapeño artichoke dip.
    Sprinkle jalapeños and parmesan on top.
    1. Bake for 18-20 minutes or until top is golden brown and bubbly. Serve as is or scoop the whole thing into a serving dish. Enjoy!
    Baked jalapeño artichoke dip in a 9x9 dish.
    Bake for 18-20 mins!

    Substitutions & Variations

    If you need to make a change to this recipe, here are a few we would suggest…

    • Less Spice – if you can’t handle spice at all, you can completely omit the jalapeños. You could sprinkle a bit of paprika on the finished dip to give it a hint of spice, instead.
    • More Spice – if you like really spicy dip, you could add a few of the seeds from the jalapeños into the dip and top it with a few red pepper flakes!
    • Mayo/Sour Cream – if you are out of one, you can make the dip with 1 cup of either (1 cup of mayonnaise or 1 cup of sour cream). It will change the finished product a bit, but it will still create a delicious dip. You could also replace the sour cream with greek yogurt.
    • Artichoke – instead of artichoke hearts, you could use chopped spinach to turn this into a cheesy jalapeño spinach dip.
    • Jalapeno Peppers – instead of jalapeños, you can stir in ½ cup chopped spinach to turn this into a hot spinach artichoke dip. This would be delicious topped with some chopped green onions.
    • Green Chilis – if you don’t have jalapeño peppers, you could use green chilies.
    • More Cheese – you could mix in ½ cup of shredded cheese (cheddar cheese, mozzarella cheese, havarti cheese, pepper jack cheese, Monterey Jack cheese) and then sprinkle some extra shredded cheese on the top if you want a super cheesy dip!
    • Garlic Powder – if you like garlic, you could stir ½ teaspoon of garlic powder into the cream cheese mixture.
    Jalapeno artichoke dip being scooped out of the baking dish with a spoon.
    Jalapeno artichoke dip.

    What do you eat jalapeño artichoke dip with?

    Dip is one of my favorite appetizers because you can serve it with so many yummy things for dipping! Here’s a list of some of our favorite dippers for this jalapeño artichoke dip recipe:

    • tortilla chips
    • ripple potato chips
    • fresh cut veggies (red bell peppers are especially yummy)
    • crackers (ritz crackers, wheat thins, any kind of cracker will do)
    • French bread (try making this easy Italian white bread to serve with it)
    • pita chips
    Jalapeno artichoke dip in a bowl with a bowl of tortilla chips in the background.
    Serve them with tortilla chips.

    Storage

    Store any leftover jalapeño artichoke dip in an airtight container in the fridge for up to 3 days.

    Note: This dip should only be out of the refrigerator for about two-three hours. After that, any remaining dip should be put back in the refrigerator for food safety.

    A bowl of jalapeño artichoke dip.
    Hot dips are always a hit!

    A few more delicious dips you can try…

    Hot Dips:

    Elote Dip

    Smoked Queso

    Pretzel Cheese Dip

    Cold Dips:

    Everything But the Bagel Dip

    Loaded Cream Cheese Dip

    Jalapeno Ranch Dip

    Expert tips and FAQs

    Can you freeze jalapeño artichoke dip?

    We haven’t tried it, but I do think that this dip would freeze pretty well! I would mix up the dip and freeze it before baking, then when you are ready to eat it simply let it thaw out and then bake for 18-20 mins like the recipe says.

    Is artichoke jalapeño dip gluten free?

    Yes! The ingredients in this quick and easy dip are naturally gluten free.

    What do you eat jalapeño artichoke dip with?

    You can eat it with anything (including a spoon, we won’t judge), but a few of our favourite things to serve it with are fresh veggies, chips (tortilla chips or potato chips), and crackers.

    A tortilla chip dipped in jalapeño artichoke dip.
    Grab your favorite dippers & enjoy!

    Did you make this? I’d be so grateful if you left a “star” rating below to let me know what you thought! Then, the next time you need a quick and easy recipe, come back to Fantabulosity to browse all of my easy recipes!

    Related Recipes

    If you liked this creamy jalapeno artichoke dip and you’re looking for more appetizer dips, you absolutely must try our cheesy reuben dip recipe and our buffalo bacon blue cheese dip! They are both super easy but insanely satisfying party dip that are perfect to serve to a crowd.

    Recipe

    A tortilla chip being dipped in a bowl of jalapeño artichoke dip.
    Print Pin
    5 from 7 votes

    Jalapeno Artichoke Dip

    Jalapeno Artichoke Dip: This 6 ingredient dip uses cream cheese, mayo, sour cream, parmesan, jalapeños and artichokes to create a creamy baked dip that everyone will want the recipe for! It's easy to make and ready in 30 minutes!
    Course Appetizer, Side Dish
    Cuisine American
    Prep Time 10 minutes minutes
    Cook Time 20 minutes minutes
    Total Time 30 minutes minutes
    Servings 12 servings
    Calories 187kcal
    Author Jessica Burgess

    Ingredients

    • 8 ounces cream cheese
    • ½ cup mayonnaise
    • ½ cup sour cream
    • ¾ cup shredded parmesan cheese divided
    • ¾ cup diced fresh jalapeños divided (if you prefer a spicier dip, include some jalapeño seeds)
    • 14 ounce can artichoke hearts chopped

    Instructions

    • Preheat oven to 375°F.
    • Place cream cheese, mayonnaise, sour cream, 1⁄2 cup parmesan cheese, and 1⁄2 cup jalapeños in a medium mixing bowl. Mix until uniform.
    • Add chopped artichokes and mix again.
    • Transfer mixture to a 9×9-inch baking dish.
    • Sprinkle remaining jalapenos and cheese on top.
    • Bake for 18-20 minutes or until top is golden brown and bubbly. Serve as is or scoop into a serving dish. Enjoy!

    Notes

    STORAGE: Store any leftover jalapeño artichoke dip in an airtight container in the fridge for up to 3 days.
    Note: This dip should only be out of the refrigerator for about two-three hours. After that, any remaining dip should be put back in the refrigerator for food safety.
    FREEZING: We haven’t tried it, but I do think that this dip would freeze pretty well! I would mix up the dip and freeze it before baking, then when you are ready to eat it simply let it thaw out and then bake for 18-20 mins like the recipe says.
     

    Nutrition

    Serving: 1serving | Calories: 187kcal | Carbohydrates: 5g | Protein: 5g | Fat: 17g | Saturated Fat: 7g | Polyunsaturated Fat: 5g | Monounsaturated Fat: 4g | Trans Fat: 0.02g | Cholesterol: 33mg | Sodium: 237mg | Potassium: 141mg | Fiber: 1g | Sugar: 1g | Vitamin A: 480IU | Vitamin C: 9mg | Calcium: 110mg | Iron: 0.3mg

    Biscoff Truffles

    September 28, 2022

    Close up photo of a stack of Biscoff Truffles with the center truffle missing a bite

    Biscoff Truffles: These decadent two-bite truffles have a creamy cookie center dipped in Biscoff white chocolate. The drizzle of dark chocolate and a sprinkle of cookie crumbs make these no-bake treats a totally blissful bite!

    White chocolate dipped Biscoff truffles are stacked on a white marble surface in the center of the photo with a jar of Biscoff spread visible in the background

    Oh, friends! I am a big fan of Biscoff cookies. After having this Biscoff Cheesecake and this Biscoff Pie, I knew that we needed more Biscoff recipes around here. So feast your eyes on these perfect little no-bake Biscoff truffles.

    Why You’ll Love These Easy Truffles

    No. Bake. Biscoff. Truffles. Those are pretty much all my favorite words in one easy recipe!

    Once you taste these truffles, you will double (or triple) this recipe to wow your party guests this holiday season. A cellophane bag of these no-bake Biscoff truffles make a great gift for teachers, coworkers, and friends!

    If you’re a Biscoff fan, you’ll also love these easy Biscoff cupcakes too!

    [feast_advanced_jump_to]

    Ingredients

    What do you need for this Lotus Biscoff Truffles recipe? While they may sound fancy, you should be able to find all 5 simple ingredients at most grocery stores!

    The ingredients to make no bake Biscoff Truffles are displayed on a white marble background
    Ingredients
    • 20 Biscoff cookies (If you have extras, you may want to make this Biscoff pie crust recipe for a pie!)
    • ½ cup cream cheese, softened
    • 7 ounces white chocolate
    • 2 tablespoons Biscoff spread
    • 1 ½ ounces semi-sweet chocolate chips

    See the printable recipe card below for step-by-step instructions, nutrition information, and detailed notes.

    Instructions for our Biscoff Truffle Recipe

    Here are the step-by-step instructions and photos to help you make a successful batch of these no-bake treats:

    1. Line a baking sheet with parchment paper, wax paper or a silicone mat and set aside.
    2. Place Biscoff cookies in the bowl of a food processor and pulse them until they are fine crumbs. Remove and reserve 1 tablespoon of the Biscoff crumbs to garnish the truffles with later.
    3. Add the softened cream cheese to the cookie crumbs and process until they are well combined.
    Biscoff cookies have been placed in the bowl of a food processor for processing into crumbs
    Add Biscoff cookies
    Biscoff crumbs and a block of softened cream cheese are in the bowl of a food processor
    Combine with cream cheese
    1. Use a small cookie scoop to scoop the mixture. With damp hands, roll the mixture into small balls and place them on the lined baking tray.
    2. Now, in a microwave-safe bowl, melt the white chocolate and cookie butter spread. Stir the chocolate and microwave it again in 15 or 30-second intervals until the mixture is smooth and creamy.
    Pieces of white chocolate and Biscoff spread are in a white bowl centered on a white marble background
    A white bowl of light caramel colored melted white chocolate is being stirred and is centered on a white marbled background
    1. Dip the truffles in the melted white chocolate and allow the excess to drip back into the bowl. Place the truffles back on the lined baking sheet.
    A rounded ball of Biscoff cookie truffle mixture is being dipped in a bowl of melted Biscoff white chocolate
    A large white plate is centered and holds 12 white chocolate dipped Biscoff truffles
    1. In a small microwave-safe bowl, heat the semi-sweet chocolate in short intervals until it is melted and smooth.
    2. Drizzle the semi-sweet chocolate over the dipped truffles and sprinkle each truffle with a pinch of the reserved Biscoff biscuit crumbs.
    A large white plate is centered and holds 12 white chocolate dipped Biscoff truffles that have been drizzled with dark chocolate and topped with Biscoff crumbs
    1. Place the truffles in the refrigerator to set for at least 2 hours before serving.

    Sit down with a cup of coffee, a truffle, or two, and enjoy!

    Close up photo of a white plate holding white chocolate dipped Biscoff truffles

    Substitutions

    We are sharing a few substitutes below that may fit your lifestyle. Believe me when I say, you need this Biscoff truffle recipe in your life!

    • We used good quality white chocolate for dipping. However, you can use vanilla candy melts, chocolate coating, white chocolate chips, almond bark or white candy coating to dip the truffles in.
    • Full-fat cream cheese creates a rich creamy center in these delicious Biscoff truffles. If you prefer, use reduced-fat or low-fat cream cheese.
    • The Biscoff spread in the white chocolate gives it an extra boost of Biscoff flavor and warm caramel color, but you can omit it if you’d like.
    • Since the Biscoff cookies are vegan, if you use non-dairy substitutes for the chocolate and cream cheese, you can make vegan Biscoff truffles.

    Variations

    They say, variety is the spice of life. So here are a few ways to spice up these truffles.

    • Speaking of spice, to boost the spice flavors in the cookies, add a sprinkle of cinnamon to the white chocolate. Or add ½ teaspoon of cinnamon into the cream cheese and Biscoff cookie crumb filling before mixing it.
    • You can turn these easy Biscoff truffles into truffle pops! Just insert a lollipop stick into each truffle before it sets up.
    • If semi-sweet chocolate chips aren’t your thing, use any remaining Biscoff white chocolate or make a chocolate ganache to drizzle over these Biscoff cookie balls.
    White chocolate dipped Biscoff truffles are scattered on a white marble surface and one truffle in the center is missing a bite

    FAQs

    What is the flavor of Biscoff?

    If you have never had Biscoff cookies, are you in for a treat! I would describe the flavor as a buttery cookie with a little caramel, warm spices and brown sugar.

    What type of cookie is a Biscoff?

    You may hear them called Biscoff biscuits, but these cookies are not soft! Rather, they are thin, flat crispy cookies and I think they are pretty perfect for dunking in milk or that afternoon cup of coffee.

    Are Biscoff cookies “speculoos”?

    Yes! In fact, I’ve heard the following terms used to refer to Biscoff cookies: Lotus Biscoff cookies (Lotus Bakeries is the company that makes these cookies), speculoos cookies, and Biscoff biscuits. The Biscoff spread may also be called Biscoff butter, Lotus Biscoff spread, cookie butter or speculoos butter.

    How to Store Biscoff Truffles

    If you use dairy cream cheese, the best way to store the Biscoff truffles is in an airtight container in the refrigerator for up to 4 days.

    The good news is that these truffles are a great candidate for freezing! Keep them in an airtight container or sealed freezer bag in the freezer for up to two months.

    A small white bowl is piled full of white chocolate dipped Biscoff truffles and a jar of Biscoff spread is visible in the background

    Related Recipes

    If you love making no-bake truffles, we’ve got a frosted animal cookie truffle recipe for Easter and an amazing Cake Batter Candy Truffles recipe that will blow your mind!

    Did you make this? I’d be so grateful if you left a “star” rating below to let me know what you thought! Then, the next time you need a quick and easy recipe, come back to Fantabulosity to browse all of my easy recipes!

    Recipe

    Close up photo of a stack of Biscoff Truffles with the center truffle missing a bite
    Print Pin
    5 from 4 votes

    Biscoff Truffles

    Biscoff Truffles: These decadent two-bite truffles have a creamy cookie center dipped in Biscoff white chocolate. A drizzle of dark chocolate and sprinkle of cookie crumbs make these a must-make no-bake treat.
    Course Dessert
    Cuisine American
    Prep Time 15 minutes minutes
    Cook Time 5 minutes minutes
    Chilling Time 2 hours hours
    Total Time 2 hours hours 20 minutes minutes
    Servings 12 truffles
    Calories 221kcal
    Author Jessica Burgess

    Ingredients

    • 20 Biscoff cookies
    • ½ cup cream cheese softened
    • 7 ounces white chocolate
    • 2 tablespoons Biscoff spread
    • 1 ½ ounces semi-sweet chocolate melted

    Instructions

    • Line a baking sheet with parchment paper, wax paper or a silicone mat and set aside.
    • Place the Biscoff cookies in the bowl of a food processor and pulse them until they are fine crumbs. Remove and reserve 1 tablespoon of the Biscoff crumbs to garnish the truffles with later.
    • Add the softened cream cheese to the cookie crumbs and process until well combined.
    • Use a small cookie scoop to scoop the mixture. With damp hands, roll the mixture into truffles and place them on the lined baking tray.
    • In a microwave safe bowl, melt the white chocolate and cookie butter spread. Stir the chocolate and microwave it again in 15 or 30 second intervals until the mixture is smooth and creamy.
    • Dip the truffles in the melted white chocolate and allow the excess to drip back into the bowl. Place the truffles back on lined tray.
    • In a microwave safe bowl, heat the semi-sweet chocolate chips in short intervals until it is melted and smooth.
    • Drizzle the semi-sweet chocolate over the dipped truffles and sprinkle with the reserved Biscoff biscuit crumbs.
    • Place the truffles in the refrigerator to set for at least 2 hours before serving.

    Notes

    • If you don’t have a food processor, place the Biscoff cookies in a large ziploc bag  and use a rolling pin to roll/crush the cookies into crumbs. Then, mix the softened cream cheese and cookie crumbs in large bowl until well combined.
    • Store the finished truffles in an airtight in refrigerator or up to 4 days or in the freezer for up to 2 months.

    Nutrition

    Serving: 1truffle | Calories: 221kcal | Carbohydrates: 13g | Protein: 2g | Fat: 11g | Saturated Fat: 6g | Polyunsaturated Fat: 0.3g | Monounsaturated Fat: 3g | Trans Fat: 0.003g | Cholesterol: 13mg | Sodium: 45mg | Potassium: 80mg | Fiber: 0.3g | Sugar: 12g | Vitamin A: 134IU | Vitamin C: 0.1mg | Calcium: 44mg | Iron: 0.3mg

    Breakfast Pigs in a Blanket

    September 27, 2022

    Hand holding breakfast pigs in a blanket

    Breakfast Pigs in a Blanket: This 2 ingredient recipe is so simple and the whole family will love the breakfast version of pigs in a blanket!

    Love the finger-food breakfast recipe idea? Then you’ll also love these breakfast egg rolls that are made with bacon, eggs, and cheese.

    hand holding breakfast pigs in a blanket over bowl of gravy

    If you’re a fan of pigs in a blanket or biscuits and gravy but not a fan of making a huge breakfast, this is ideal for a quick “on-the-go” recipe. Or, you may also like this biscuits and gravy casserole for a fun twist on the classic!

    Why you’ll love these:

    Two ingredients. Two! That’s all it takes to make this easy breakfast recipe!

    Just like regular pigs in a blanket made with hot dogs, these breakfast pigs in a blanket with crescent rolls are pretty much a roll and bake dish!

    If you need something to add to a breakfast or brunch menu, you know pigs in a blanket are always a huge hit, so you’ll probably want to double or triple this recipe!

    These make ahead breakfast pigs in a blanket can be tucked in a lunch box for a “breakfast for lunch” option or reheated in the morning to get breakfast on the table quickly!

    Ingredients

    With two super simple ingredients, this quick breakfast version of pigs in a blanket recipe couldn’t be easier!

    • One 8-count tube of crescent rolls
    • 8 breakfast sausage links, cooked
    • 1 cup white gravy recipe (optional but delicious!)

    See the printable recipe card below for the ingredient list, detailed recipe, nutrition facts and recipe notes.

    Instructions

    1. First, preheat your oven to 375 degrees F and prepare a baking sheet with nonstick cooking spray, parchment paper or a silicone baking mat.
    2. While cooking the sausage links, unroll the crescent rolls, and break the triangles apart along the seams.
    crescent rolls unfolded on to cookie sheet
    Unroll crescent rolls
    1. Placing one cooked sausage link on the wide end of one unrolled crescent roll triangle and roll it up from the wide end to the tip.
    roll cooked sausage up in crescent roll
    Roll up in crescent roll
    sausage link rolled up in crescent roll
    Sausage rolled up
    1. Arrange the sausage/crescent rolls on a prepared baking sheet with a couple of inches between the rolls.
    sausage links inside of crescent rolls on cookie sheet
    Roll remaining links
    1. Bake these breakfast pigs in a blanket for 11-13 minutes, or until golden brown.
    Breakfast pigs in a blanket on cooling rack
    Baked and ready!

    Don’t those little guys look scrumptious? That soft golden brown crescent roll dough wrapped around a savory breakfast sausage is a pretty delicious way to wake up any day of the week!

    breakfast pigs in a blanket piled on plate
    Breakfast Pigs in a Blanket

    Substitutions & Variations

    • Now, if you’re more of a “homemade,” type, rather than a “fabulously fast” type, then feel free to make your own homemade gravy to serve with this! I typically do, but when time is short and I’m looking for quick and easy, I’ll use the packet of white gravy mix.
    • Serve these up with my chorizo gravy recipe or this jalapeno chorizo gravy for an extra special treat!
    • I chose to buy uncooked sausage links and pan fry them. However, you can make breakfast even easier and purchase the pre-cooked sausage links. You can also use the veggie sausage links that you can find in the freezer section or turkey/chicken breakfast sausage links.
    • Sprinkle these guys with everything bagel seasoning before you bake them to add flavor and texture.
    hand holding pigs in a blanket, dipping in to white gravy
    Dip in gravy!

    FAQs

    • What should I serve with pigs in a blanket?
      • Fresh fruit is a great option. We like fresh blueberries or this Honey Lime Fruit Salad.
      • Mini cinnamon rolls or mini pancakes are a sweet addition to a breakfast spread.
      • Additional breakfast sausages (link sausages or sausage patties), ham or bacon are never a bad idea. Try our air fryer bacon recipe!
      • Gravy (of course!), maple syrup, warmed fruit jam and honey are delicious to dip these breakfast bites in.
    • Can pigs in a blanket be prepared the night before? Yes. You can bake them them and reheat them when you are ready for breakfast. We recommend heating them in the oven at 350 degrees F until they are warmed through. You can reheat them in the microwave, but the crescent roll dough may not stay crispy.
    • Do you put egg wash on pigs in a blanket? We didn’t, but you certainly can! It will give these pigs in a blanket a shiny, deeper golden color. Simply whisk an egg in a small bowl until the egg white and egg yolk are well combined and use a pastry brush to brush the egg mixture over the crescent roll dough.
    breakfast pigs in a blanket dipped in white gravy
    Dipping made easy!

    Storage

    Keep these breakfast pigs in a blanket in an airtight container in the refrigerator for up to 3 days.

    Bite taken out of crescent rolls with sausage
    Take a bite!

    More Easy Breakfast Ideas

    We have a big variety of breakfast recipes that we’ve shared over the years. Here are a few fan favorites that we think you’ll like!

    • Easy Peach Turnovers
    • Cinnamon French Toast Sticks
    • Brioche French Toast
    • Sausage Breakfast Casserole

    Did you make this? I’d be so grateful if you left a “star” rating below to let me know what you thought! Then, the next time you need a quick and easy recipe, come back to Fantabulosity to browse all of my easy recipes!

    Recipe

    Hand holding breakfast pigs in a blanket
    Print Pin
    5 from 1 vote

    Breakfast Pigs in a Blanket

    Breakfast Pigs in a Blanket are made with just 2 ingredients! They are a quick and delicious on the go breakfast option and a brunch crowd pleaser!
    Course Appetizer
    Cuisine American
    Prep Time 15 minutes minutes
    Cook Time 13 minutes minutes
    Total Time 28 minutes minutes
    Servings 8 servings
    Calories 172kcal
    Author Jessica Burgess

    Ingredients

    • 1 tube crescent rolls 8 count
    • 8 breakfast sausage links cooked
    • 1 cup gravy, if desired we love this jalapeno sausage gravy

    Instructions

    • First, preheat your oven to 375 degrees F and prepare a baking sheet with nonstick cooking spray, parchment paper or a silicone baking mat.
    • While cooking the breakfast sausage links, unroll the crescent rolls, and break the triangles apart along the seams.
    • Place one cooked sausage link on the wide end of one unrolled crescent roll triangle and roll it up from the wide end to the tip.
    • Arrange the sausage/crescent rolls on a prepared baking sheet with a couple of inches between each roll.
    • Bake for 11-13 minutes, or until golden brown.
    • Serve alongside white gravy for dipping, if desired

    Video

    Notes

    • You can use veggie link sausages, turkey breakfast sausage or chicken breakfast sausage for this recipe.
    • For a twist, sprinkle these with everything bagel seasoning before baking to add flavor and texture.
    • Store these breakfast pigs in a blanket in an airtight container in the refrigerator for up to 3 days.

    Nutrition

    Serving: 1serving | Calories: 172kcal | Carbohydrates: 12g | Protein: 4g | Fat: 11g | Saturated Fat: 4g | Cholesterol: 16mg | Sodium: 484mg | Potassium: 49mg | Sugar: 3g | Vitamin A: 15IU | Vitamin C: 0.2mg | Calcium: 2mg | Iron: 0.6mg

    Pinwheel Christmas Tree Appetizer

    September 26, 2022

    Savory pinwheel slices are arranged to look like a Christmas tree on a wooden serving board

    Pinwheel Christmas Tree Appetizer: Tortilla pinwheels filled with a festive savory cream cheese filling are shaped like a Christmas tree in this no-bake appetizer that is perfect for holiday parties and Christmas Eve nibbling!

    Slices of a rolled tortilla pinwheel are arranged to look like a Christmas tree, cherry tomatoes are placed to look like ornaments and there are decorative holiday picks for serving

    It’s time to ring in the holiday season with parties, entertaining, and time with family and friends! That means you’ll need “go to” Christmas appetizer recipes like the one I’m sharing with you today, and this BEST bruschetta, air fried pigs in a blanket, and bacon-wrapped dates.

    Or, if you want another Christmas tree idea, even this Christmas Tree Charcuterie Board!

    P.S. If you haven’t made these Spicy Ranch Crackers, you are definitely going to want to! It’s one of my favorite appetizers.

    Why You’ll Love This Recipe

    This red and green appetizer has Christmas written all over it! Green tortillas, red peppers, green olives, bright red cherry tomatoes and vibrant green herbs definitely bring in the festive colors of Christmas! It’s a fun twist on our pinwheel sandwiches recipe, in Christmas form!

    The Christmas tree shape is easy to create and really adds a ton of Christmas charm to any appetizer spread.

    It’s a no bake appetizer recipe! No oven and no cooking time means this appetizer can be whipped up in no time before that holiday party.

    Can I make pinwheels the day before? The answer is yes! Pinwheels are the perfect appetizers to be prepped ahead of time. I actually think the cream cheese filling tastes even more flavorful with a little time to sit.

    [feast_advanced_jump_to]

    Ingredients

    With simple ingredients and no baking or cooking required, I think this is the perfect Christmas appetizer for every holiday party.

    Bowls of ingredients like olives, pimientos, cream cheese and spices sit alongside tortillas on a white marble background
    Pinwheel ingredients
    • 2 blocks (16 oz.) cream cheese, softened and brought to room temperature
    • 1 teaspoon garlic powder
    • 1 teaspoon onion powder
    • 1 teaspoon lemon juice
    • ¼ cup green olives, sliced
    • ¼ cup black olives, sliced
    • ¼ red peppers, finely chopped
    • 1 teaspoon fresh dill, minced
    • 4 large tortillas – 2 plain and 2 green tortillas (spinach)
    • Fresh rosemary for garnish
    • Cherry tomatoes for garnish
    • Decorative holiday picks for serving (optional)

    See the printable recipe card below for detailed instructions, nutrition information and detailed notes.

    Instructions

    Here are step-by-step instructions -with pictures! – so you can easily make this holiday appetizer at home!

    1. First, chop the red pepper into small pieces and slice the olives, if necessary.
    2. Now, in a large mixing bowl, add the cream cheese, garlic powder, onion powder and lemon juice. Blend with hand mixer until the cream cheese mixture is smooth with no lumps.
    A glass bowl contains blocks of cream cheese and seasonings to be mixed together with the nearby hand mixer
    A savory whipped cream cheese mixture is shown in a glass bowl next to a hand mixer
    1. Once combined, use a spatula or spoon to fold in the fresh dill, olives and chopped peppers.
    2. Next, place a tortilla on a flat working surface (like your countertop or a large baking sheet) and using an offset spatula, spread about ½ cup of the cream cheese mixture onto the tortilla. Spread the mixture just to the edge of the tortilla.
    Olives, pimientos and fresh dill have been added to a glass mixing bowl containing a savory whipped cream cheese mixture
    A savory olive cream cheese mixture has been spread on a spinach tortilla
    1. Roll up the tortilla and wrap it tightly with plastic wrap. Repeat for all 4 tortillas. Chill them in the freezer for 30 minutes, then cut each rolled tortilla into eight ¾-inch slices.
    A spinach tortilla spread with a savory olive cream cheese mixture has been rolled up tightly and wrapped in plastic wrap
    Slices of a rolled tortilla pinwheel are shown on a wooden cutting board
    1. Arrange the pinwheel slices into the shape of a tree on your favorite festive serving platter, plate or wooden board. Garnish the tree with sprigs of fresh rosemary, cherry tomato “ornaments” and decorative holiday picks for serving.
    Slices of a rolled tortilla pinwheel are arranged to look like a Christmas tree, cherry tomatoes are placed to look like ornaments and there are decorative holiday picks for serving

    Substitutions

    What are pinwheel snacks made of? Typically, pinwheels are made by spreading a soft cheese based filling on a tortilla, rolling it up and cutting it into the classic pinwheel slices. It’s like your favorite cheese ball spread on a soft tortilla!

    Here are a few ways to adjust this basic recipe to your personal preferences:

    • We love the creaminess and richness of full fat cream cheese, but you can use light cream cheese or fat free cream cheese if you prefer.
    • You can easily make this festive appetizer gluten-free by using gluten-free tortillas.
    • Instead of the red bell peppers, you can use diced green peppers or drained pimentos to keep the festive red and green colors in the cream cheese mixture.

    Variations

    We love it when you make the easy recipes here at Fantabulosity! If you want to get creative, we’re sharing a few of our favorite ways to do just that:

    • Add your favorite savory flavors to the cream cheese mixture. Crispy chopped bacon, green onions, shredded sharp cheddar or Parmesan cheese, chopped and drained artichoke hearts and toasted chopped pecans are great ways to add different flavors to this pinwheel appetizer.
    • Use all green tortillas. We used a mix of regular flour tortillas and green spinach tortillas, but this Christmas tree appetizer would look great using all green pinwheels.
    • Make festive garnishes. Use a small cookie cutter (either a star or a small ornament) to cut decorative shapes out of thick sliced cheese. Place a large star shaped garnish at the top of the tree. Fresh herbs like springs of dill, thyme and rosemary add a pop of color to your serving platter.
    A wooden serving board holds a Pinwheel Christmas tree appetizer

    Storage

    Store any leftover pinwheels in an airtight container in the refrigerator for up to 5 days.

    Slices of rolled tortilla pinwheels are served on two white plates, you can see the cream cheese filling studded with olives and pimientos

    Top Tip

    This holiday appetizer idea is the perfect start to a Christmas charcuterie board! Surround this pinwheel tree with bowls of nuts, dried fruit, honey and fruit spread, cranberry sauce, marinated olives, crackers, sliced salami, hummus, and veggies.

    Did you make this? I’d be so grateful if you left a “star” rating below to let me know what you thought! Then, the next time you need a quick and easy recipe, come back to Fantabulosity to browse all of my easy recipes!

    Recipe

    Savory pinwheel slices are arranged to look like a Christmas tree on a wooden serving board
    Print Pin
    5 from 9 votes

    Pinwheel Christmas Tree Appetizer

    Pinwheel Christmas Tree Appetizer: Tortilla pinwheels filled with a festive, savory cream cheese filling are shaped like a Christmas tree in this no-bake appetizer that is perfect for holiday parties and Christmas Eve nibbling!
    Course Appetizer, Snack
    Cuisine American
    Diet Vegetarian
    Prep Time 10 minutes minutes
    Chilling Time 30 minutes minutes
    Total Time 40 minutes minutes
    Servings 32 pinwheels
    Calories 65kcal
    Author Jessica Burgess

    Ingredients

    • 16 oz cream cheese (2 blocks) room temperature
    • 1 teaspoon garlic powder
    • 1 teaspoon onion powder
    • 1 teaspoon lemon juice
    • ¼ cup green olives sliced
    • ¼ cup black olives sliced
    • ¼ cup red peppers finely chopped
    • 1 teaspoon fresh dill minced
    • 4 large tortillas 2 plain and 2 green (spinach)
    • fresh rosemary for garnish
    • cherry tomatoes for garnish
    • Decorative holiday picks optional for serving

    Instructions

    • First, chop the peppers and slice the olives if necessary.
    • Now, in a large bowl, add the cream cheese, garlic powder, onion powder and lemon juice. Blend with a hand mixer until the cream cheese mixture is smooth with no lumps.
    • Once combined, use a spatular or spoon to fold in the fresh dill, green and black olives and the red peppers.
    • Next, place a tortilla on a flat surface and using an offset spatula, spread about ½ cup of the cream cheese mixture onto the tortilla. Spread the mixture just to the edge of the tortilla.
    • Roll up the tortilla and wrap it tightly with plastic wrap. Repeat for all 4 tortillas. Chill them in the freezer for 30 minutes and cut each rolled tortilla into ¾-inch slices.
    • Arrange the pinwheel slices into the shape of a Christmas tree on your favorite festive platter or wooden serving board. Garnish the tree with springs of fresh rosemary, cherry tomato "ornaments" and decorative holiday picks for serving.

    Notes

    • You can make the Christmas Tree Pinwheels ahead of time! Placed the finished rolled tortillas in the refrigerator and slice them just before plating and serving.
    • To make these pinwheels gluten free, chose gluten-free tortillas from your local grocery store.
    • You can use your favorite kind of olives (kalamata, garlic or blue cheese stuffed olives, marinated olives) in place of the traditional green and black olives.
    • Similarly, you can use drained jarred pimientos to replace the red peppers we used.
    • Store any leftover pinwheels in an airtight container in the refrigerator for up to 5 days.

    Nutrition

    Serving: 1pinwheel | Calories: 65kcal | Carbohydrates: 3g | Protein: 1g | Fat: 6g | Saturated Fat: 3g | Polyunsaturated Fat: 0.3g | Monounsaturated Fat: 2g | Cholesterol: 14mg | Sodium: 105mg | Potassium: 29mg | Fiber: 0.2g | Sugar: 1g | Vitamin A: 235IU | Vitamin C: 2mg | Calcium: 21mg | Iron: 0.2mg

    Biscuit and Gravy Casserole

    September 24, 2022

    A close up of a slice of biscuit and gravy casserole.

    Biscuit and Gravy Casserole: This biscuit and gravy breakfast casserole is the perfect recipe for a Sunday brunch or holiday morning! This easy recipe uses fluffy biscuits, pork sausage, eggs, cheddar cheese, and a few other ingredients to create an easy breakfast everyone will enjoy.

    This recipe is a fun spin on traditional biscuits and my white gravy recipe, and turning them in to a casserole recipe!

    A piece of biscuit and gravy casserole sitting on a plate.

    Why You’ll Love This Recipe

    This sausage biscuits and gravy casserole has all of the flavor and comfort of old-fashioned biscuits and gravy, but in an easy casserole form. This is the perfect recipe to make for a crowd for a weekend brunch or for breakfast over the holidays.

    [feast_advanced_jump_to]

    What goes well with sausage gravy and biscuit casserole?

    This breakfast biscuit casserole is delicious all on its own, but if you want to make something to go with it here are a few suggestions:

    • scrambled eggs
    • fried eggs
    • air fryer hashbrowns patties
    • air fryer bacon (try making it in the air fryer – it’s so easy and the bacon gets nice and crispy)
    • honey lime fruit salad

    Can this biscuit and gravy casserole recipe be used as an overnight casserole?

    We haven’t tried this, but I bet you could! If you made the casserole and then covered it with plastic wrap and refrigerated it, you should be able to bake it the next morning! If you do give this a try, be sure to let us know how it worked in the comments below.

    This breakfast casserole would be the perfect thing to prep ahead and bake on Christmas morning!

    Ingredients

    The ingredients in this biscuits and gravy casserole recipe are all ones you can easily find at your local grocery store. Nothing fancy or complicated here, just good old-fashioned biscuits and gravy in casserole form!

    • 1- 16.3 ounce can Pillsbury Grands original flaky layers biscuits
    • 16 ounces pork sausage (I used Jimmy Deans, but 1 pound of any sausage will work)
    • 6 eggs
    • ¼ cup milk
    • 1 ½ cups shredded cheddar cheese
    • 4 tablespoons butter
    • 4 tablespoons all-purpose flour
    • 3 ½ cups half and half cream
    • ½ teaspoon salt (plus more to your liking)
    • ¼ teaspoon black pepper (plus more to your liking)
    Biscuit and gravy casserole ingredients set on a counter with labels on the image.
    Ingredients

    See the printable recipe card further down in this post for exact quantities and step-by-step instructions.

    Instructions

    1. Preheat the oven to 350°. Coat the 13×9 casserole dish with a nonstick spray.
    2. In a large skillet, break up the sausage into fine pieces. Cook until browned.
    Cooked ground sausage in a large skillet.
    Cook sausage.
    1. While the sausage is cooking, prepare your biscuit. Quarter each slice and spread them out in a casserole dish. This will be your bottom layer.
    Biscuits on a cutting board being cut into pieces.
    Cut up biscuits.
    1. Scoop the sausage out of the pan with a skimmer spoon and spread it evenly on top of the biscuit. DO NOT DRAIN THE FAT.
    A 9x13 casserole dish with biscuit pieces and cooked sausage in it.
    Spread sausage over biscuits.
    1. In the same skillet with the remaining fat, melt the butter and mix the flour in to make a roux until it becomes paste-like. Add in the half and half, salt, and pepper. Mix thoroughly until the roux dissolves. Over medium heat, stir occasionally until your homemade sausage gravy thickens. Season with salt and pepper to taste.
    A skillet with melted butter and flour in it (a roux).
    Cook butter and flour to a roux.
    A large skillet with milk in it.
    Add cream & seasonings.
    1. In the meantime, in a small bowl, combine eggs and milk. Whisk until mixed in. Then pour the egg batter evenly on top of the biscuits and sausage.
    2. Cover the sausage, biscuit, and egg layer with the shredded cheddar cheese.
    A 9x13 casserole dish with biscuits, sausage, cheese, and egg mixture in it.
    Pour egg over.
    A 9x13 casserole with biscuits and sausage in it and cheddar cheese on top.
    Cover with cheese.
    1. Pour the gravy mix evenly on top of the cheese.
    The 9x13 pan of biscuit and gravy casserole, ready to be baked.
    Pour gravy over.
    1. Bake for 45-55 minutes. Remove the baking dish from the oven and let cool for a few minutes. Serve & enjoy!
    A baked 9x13 pan of biscuit and gravy casserole.
    Bake 45-55 mins.

    Substitutions & Variations

    If you’re missing some of the ingredients in this recipe (or someone in your family doesn’t like them), don’t stress! You can swap them out and make this casserole your own.

    Here are a few suggestions…

    • Half and Half – instead of half and half, you can use milk. I chose to use half and half because it creates a thicker, creamier gravy but any milk or cream will do!
    • Milk – if you want a thicker, creamier gravy you can use whole milk. If you like a thinner gravy, you can use 2% or 1% milk (I wouldn’t recommend skim milk, but if that’s all you’ve got on hand it will do).
    • Biscuits – if you can’t find the Pillsbury Grands biscuits you can definitely use the original ones. You’ll just need to double up on the regular biscuits as they are quite a bit smaller than the grands.
    • Sausage – if your family doesn’t like the spice of Jimmy Deans sausage, you can absolutely use mild sausage in this recipe (or even a honey garlic breakfast sausage or other mild flavor). Any ground breakfast sausage will work, or even an Italian sausage!
    • Cheese – you can swap out the cheddar cheese for any cheese you’d like to create a fun twist on this easy recipe!
    A forkful of biscuit and gravy casserole being held above a piece of it on a plate.

    Storage

    Any leftover breakfast biscuit and gravy casserole can be stored in the fridge in an airtight container or covered tightly with plastic wrap for up to 3 days.

    A slice of biscuit and gravy casserole being scooped out of the 9x13 pan.
    Biscuit gravy casserole

    Top Tip

    Don’t discard the fat after you cook the sausage! By keeping the fat and using it as part of the roux you make for the gravy, you add a ton of extra flavor to this homemade gravy.

    (But yes, if you really don’t want to use the fat you can drain it and make you roux with the butter called for in the recipe. You’ll be missing out though!)

    What is a roux?

    Roux is flour and fat cooked together and used to thicken sauces. Roux is typically made from equal parts of flour and fat by weight.

    Can I do cornstarch instead of flour to thicken white gravy?

    Absolutely. Do 1⁄2 cup of water and 1⁄2 tablespoon of cornstarch to start until desired thickness is reached. (Ratio is 1 tablespoon of cornstarch per 1 cup of liquid).

    Can I add more gravy to this biscuits and gravy casserole?

    I recommend you don't change the number of ingredients for the gravy. The biscuit rises during baking so if you add more, the gravy will spill over. You can make extra separately and pour it over your casserole when you are serving it, instead.

    Related Recipes

    An easy breakfast casserole is a quick and easy way to make a delicious breakfast that will feed a crowd! If you’re looking for more quick and easy breakfast ideas, you should definitely check out our easy breakfast sliders breakfast sausage casserole and our cinnamon roll casserole!

    Did you make this? I’d be so grateful if you left a “star” rating below to let me know what you thought! Then, the next time you need a quick and easy recipe, come back to Fantabulosity to browse all of my easy recipes!

    Recipe

    A close up of a slice of biscuit and gravy casserole.
    Print Pin
    5 from 5 votes

    Biscuit and Gravy Casserole

    Biscuit and Gravy Casserole: This biscuit and gravy breakfast casserole is the perfect recipe for a Sunday brunch or holiday morning! This easy recipe uses fluffy biscuits, pork sausage, eggs, cheddar cheese, and a few other ingredients to create an easy breakfast everyone will enjoy. 
    Course Breakfast, Main Course
    Cuisine American
    Prep Time 20 minutes minutes
    Cook Time 55 minutes minutes
    Total Time 1 hour hour 15 minutes minutes
    Servings 8 servings
    Calories 514kcal
    Author Jessica Burgess

    Ingredients

    • 1- 16.3 ounce can Pillsbury Grands original flaky layers biscuits
    • 16 ounces pork sausage I used Jimmy Deans, but 1 pound of any sausage will work
    • 6 eggs
    • ¼ cup milk
    • 1 ½ cups shredded cheddar cheese
    • 4 tablespoons butter
    • 4 tablespoons flour
    • 3 ½ cups half and half cream
    • ½ teaspoon salt (plus more to your liking)
    • ¼ teaspoon black pepper (plus more to your liking)

    Instructions

    • Preheat the oven to 350°. Coat the 13×9 casserole dish with a nonstick spray.
    • In a large skillet, break up the sausage into fine pieces. Cook until browned.
    • While sausage is cooking, prepare your biscuit. Quarter each slice and spread them out in a casserole dish.
    • Scoop the sausage out of the pan with a skimmer spoon and spread them evenly on top of the biscuit. DO NOT DRAIN THE FAT.
    • In the same skillet with the remaining fat, melt the butter and mix the flour in to make a roux until it becomes paste-like. Add in the half and half, salt, and pepper. Mix thoroughly until the roux dissolves. Turn down the heat to medium-high. Stir occasionally until it thickens. Season with salt and pepper to taste.
    • In the meantime, in a small bowl, combine eggs and milk. Whisk until mixed in. Then pour the egg batter evenly on top of the biscuit & sausage layer.
    • Cover the sausage, biscuit, and egg layer with the shredded cheddar cheese.
    • Pour the gravy mix evenly on top of the cheese.
    • Bake for 45-55 minutes.

    Video

    Notes

    TOP TIP: Don’t discard the fat after you cook the sausage! By keeping the fat and using it as part of the roux you make for the gravy, you add a ton of extra flavor.
    (But yes, if you really don’t want to use the fat you can drain it and make you roux with the butter called for in the recipe. You’ll be missing out though!)
     
    STORAGE: Any leftover breakfast biscuit and gravy casserole can be store in the fridge in an airtight container for up to 3 days. 

    Nutrition

    Serving: 1serving | Calories: 514kcal | Carbohydrates: 9g | Protein: 22g | Fat: 44g | Saturated Fat: 21g | Polyunsaturated Fat: 4g | Monounsaturated Fat: 15g | Trans Fat: 0.4g | Cholesterol: 238mg | Sodium: 804mg | Potassium: 360mg | Fiber: 0.1g | Sugar: 5g | Vitamin A: 996IU | Vitamin C: 1mg | Calcium: 299mg | Iron: 1mg

    Cornflake Wreaths

    September 22, 2022

    Bright green cornflake cookies dotted with bright red cinnamon candies fill a parchment lined baking sheet

    Cornflake Wreaths: Classic no bake Christmas cookies with crunchy cornflakes coated in green marshmallows, decorated with red hot candies and cute little holly sprinkles!

    Christmas time is a season for family movie nights, parties and fun food, so you have definitely come to the right place for your holiday entertaining!

    This photo is a birds eye view of two white plates and a baking sheet that hold festive green cornflake wreath cookies
    Cornflake Christmsas wreaths

    Why You’ll Love This Recipe

    During the busy holiday season, no bake Christmas cookies are a lifesaver.

    If you need a sweet treat to fill those holiday Christmas cookie trays, and Christmas dessert charcuteries, or take to your holiday party and cookie exchanges, these festive wreaths are quick to make with just a handful of ingredients. (Just like our other cornflake cookies!)

    Does anyone else remember these cute traditional Christmas cookies from their childhood? Cornflake wreath cookies remind me of family traditions and happy holiday memories. I let my boys help shape the cookies and add the red cinnamon candies for holly berries.

    [feast_advanced_jump_to]

    Ingredients

    Your local grocery store should have most, if not all of the ingredients for these wreath cookies. (If you can’t find the holly leaf sprinkles near you, you can buy these holly leaf and holly berry sprinkles!)

    The ingredients to make cornflake wreath cookies are displayed in bowls on a white marble countertop
    Ingredients
    • ½ cup unsalted butter
    • ½ teaspoon pure vanilla extract
    • ¼ teaspoon almond extract
    • 1 teaspoon green food coloring
    • 4 cups of mini marshmallows
    • 4 cups of cornflakes
    • ¼ cup cinnamon red hot candies
    • 2 tablespoons holly leaf sprinkles

    See the printable recipe card below for ingredients, full instructions and recipe notes.

    Instructions

    These cornflake wreath cookies are made with the same method used to make rice krispie treats. For this recipe, melt butter, add gooey marshmallows, food coloring and cornflake cereal. Then, just stir, shape and set!

    1. First, it’s best to line two baking sheets with parchment paper, wax paper, or silicone mats and set them aside.
    2. In a large saucepan, melt ½ cup of unsalted butter over medium heat. Once the butter has melted, add the vanilla and almond extracts as well as the green food coloring.
    A large pot with melted butter is centered in the photo with several ingredients for cornflake cookies scattered on a marble countertop
    Melt butter
    Green food coloring has been added to melted butter in a large pot in preparation to make cornflake wreath cookies
    Add extracts & food coloring
    1. Stir to combine, turn to low heat, and then add 4 cups of mini marshmallows to the butter mixture. Stir gently until the marshmallows have melted, and then remove the pan from the heat.
    2. Next, slowly add 4 cups of cornflakes cereal into the marshmallow mixture. Try not to crush the cornflakes when stirring, and coat evenly with the green marshmallow mixture.
    Mini marshmallows, melted butter and green food coloring have been melted and stirred together in a large pot in the center of the photo
    Stir in marshmallows
    Green marshmallow coated cornflakes have been stirred in a large pot and will be shaped into no bake cornflake wreath cookies
    Add cornflakes & stir to coat
    1. Using a large cookie scoop, (to create a cookie that’s about a couple of inches wide, or so) create a mound of the cornflake mixture on the parchment paper. Use your fingers to press out the center and round the edges to make a wreath shape.

      Pro tip: Spray the cookie scoop and your clean hands with nonstick cooking spray to prevent the cornflakes from sticking so much.
    2. Add several red cinnamon candies around the wreath. Finally, add a few of the holly leaf sprinkles. Repeat making wreaths, until the mixture is gone.
    Green marshmallow coated cornflakes have been shaped into wreath shapes on a parchment lined baking sheet
    Form wreaths
    Red hot cinnamon candies and decorate holly leaf sprinkles have been added to green marshmallow coated cornflake wreath cookies
    Add candies & sprinkles
    1. Allow the cornflake cookies to sit at room temperature for about 10 minutes to set.
    A white spatula holds a green cornflake wreath cookie above a baking sheet holding another batch of the festive holiday cookies

    Substitutions & Variations

    We are big fans of “use what you love” around here. So, here are a few ways to include some of your favorite things to make these cornflake cookies!

    Close up photo of three cornflake wreath cookies on a speckled white plate with a few red hot candies scattered on the plate
    • You can use Frosted Flakes, Rice Krispies or your favorite cereal instead of cornflakes for the base of these cornflake Christmas wreaths.
    • If you only have large marshmallows on hand, those will work too. We find that mini marshmallows are easier to measure and melt quicker.
    • While we love the combination of vanilla and almond extracts, you can omit the almond extract and just add more vanilla extract.
    • If you don’t like cinnamon, use red M&Ms minis, red sprinkles or other red candies for the holly berries. (Or just grab the sprinkles, where the berries and leaves are already together, that I mentioned above!) Then, if you have leftover candies after picking the “reds” out, make this Christmas dessert mix!
    • Add your favorite brightly colored holiday sprinkles. I don’t think anyone will mind extra sprinkles!

    Storage

    You can store these cornflake Christmas wreath cookies in an airtight container at room temperature for up to three days.

    More Christmas Recipes

    Aren’t these the cutest Christmas wreath cookies EVER? If you want more, easy, no bake holiday recipes, try our Christmas Tree Cake Dip, Butterfinger Puppy Chow or Forest Cupcakes (they start with store-bought cupcakes) that we love making during the holidays!

    Although not necessarily Christmas cookies… these haystack cookies are amazing for a cookie platter during the holiday season!

    Did you make this? I’d be so grateful if you left a “star” rating below to let me know what you thought! Then, the next time you need a quick and easy recipe, come back to Fantabulosity to browse all of my easy recipes!

    Recipe

    Bright green cornflake cookies dotted with bright red cinnamon candies fill a parchment lined baking sheet
    Print Pin
    4.60 from 5 votes

    Cornflake Wreaths

    Cornflake Wreaths: Classic no bake Christmas cookies with crunchy cornflakes coated in green marshmallow and decorated with red hot candies and cute little holly sprinkles!
    Course Dessert
    Cuisine American
    Prep Time 15 minutes minutes
    Cook Time 5 minutes minutes
    Total Time 20 minutes minutes
    Servings 18 cookies
    Calories 117kcal
    Author Jessica Burgess

    Ingredients

    • ½ cup unsalted butter
    • ½ teaspoon pure vanilla extract
    • ¼ teaspoon almond extract
    • 1 teaspoon green food coloring
    • 4 cups mini marshmallows
    • 4 cups corn flakes
    • ¼ cup red hot candies
    • 2 tablespoons holly leaf sprinkles

    Instructions

    • Start by lining two baking sheets with parchment paper and set aside.
    • In a large saucepan, melt ½ cup of unsalted butter over medium heat. Once the butter has melted, add the vanilla and almond extracts as well as the green food coloring.
      Stir to combine, turn to low heat, and then add 4 cups of mini marshmallows to the butter mixture. Stir gently until the marshmallows have melted, and then remove the pan from the heat.
    • Next, slowly add 4 cups of cornflakes cereal into the marshmallow mixture. Try not to crush the cornflakes when stirring, and coat evenly with the green marshmallow mixture.
    • Using a large cookie scoop, (to create a cookie that's about a couple of inches wide, or so) create a mound of the cornflake mixture on the parchment paper. Use your fingers to press out the center and round the edges to make a wreath shape. Pro tip: Spritz the cookie scoop and your clean hands with nonstick cooking spray to prevent the cornflakes from sticking so much.
    • Add several red cinnamon candies around the wreath. Finally, add a few of the holly leaf sprinkles. Repeat making wreaths, until the mixture is gone.
    • Allow the cornflake cookies to sit at room temperature for about 10 minutes to set. Remove them from the parchment paper, serve at room temperature and enjoy!

    Notes

    Tips:
    • Spray a small amount of nonstick cooking spray on the cookie scoop and on your hands to help reduce the flakes from sticking.
    • Depending on the size of your cookies, this recipe should yield 12-18 cornflake wreaths.
    Storage:
    You can store these cornflake Christmas wreath cookies in an airtight container at room temperature for up to three days.

    Nutrition

    Serving: 1cookie | Calories: 117kcal | Carbohydrates: 18g | Protein: 1g | Fat: 5g | Saturated Fat: 3g | Polyunsaturated Fat: 0.2g | Monounsaturated Fat: 1g | Trans Fat: 0.2g | Cholesterol: 14mg | Sodium: 55mg | Potassium: 13mg | Fiber: 0.2g | Sugar: 10g | Vitamin A: 269IU | Vitamin C: 1mg | Calcium: 2mg | Iron: 2mg

    Candy Corn Rice Krispie Treats

    September 20, 2022

    Close up photo of layered Candy corn rice krispie treats topped with candy corn

    Candy Corn Rice Krispie Treats: Three candy corn colored layers of rice krispie treats with candy corn for a fun, no bake Halloween dessert!

    It’s Halloween season and we are pulling out all of the stops! We can help you stock your Halloween party dessert table with Pumpkin Patch Brownies, Nutter Butter Mummies, Dirt Cupcakes with Gummy Worms, and these colorfully striped candy corn krispie treats!

    Close up of the a candy corn rice krispie treat, showing the yellow, orange and white layers of the treat

    Why You’ll Love This Recipe

    Honestly, who wouldn’t love a tray of these fun striped no bake Halloween rice krispie treats? But it is a hard toss-up between these and these mummy rice krispie treats!

    Candy corn lovers, this one is for you! The addition of candy corn inside of the treats and on top of them are sure to make your whole family smile – much like this Candy Corn Cake recipe.

    Crispy treats are a crowd pleaser; have you seen our perfect marshmallow treats recipe? They always disappear from the dessert table so that must mean they are perfect for Halloween season. These carrot cake rice krispie treats are a fun, orange treat for Halloween too.

    This recipe can easily be doubled to make a 9×13 pan!

    [feast_advanced_jump_to]

    Ingredients

    A quick trip to the grocery store is all it takes since the simple ingredients for these crispy treats are easy to find.

    Bowls of the ingredients to make layered Candy Corn rice krispie treats, a stick of butter and food coloring are displayed on a white marbled background
    Ingredients
    • 6 tablespoons of butter, divided into three portions of 2 tablespoons each
    • 6 cups of mini marshmallows, divided into three portions of 2 cups each
    • 6 cups of rice krispies cereal, divided into three portions of 2 cups each
    • ¼ cup of candy corn for the orange layer
    • ½ cup of candy corn for the decoration
    • Orange gel food coloring
    • Yellow gel food coloring

    See the printable recipe card below for the ingredient list, the full recipe and nutrition information.

    Substitutions & Variations

    We love to share ways that you can customize this recipe and make these Halloween treats for your family.

    • For a fun twist, use Frosted Rice Krispies instead of the classic crispy rice cereal for a little added sweetness.
    • No marshmallows? No problem. I’ve used marshmallow creme in rice krispie treats too.
    • Want to know one of my favorite little tricks? I have added a little vanilla extract to the marshmallow mixture for additional flavor.
    • Or, frost the top of the krispie treats with your favorite vanilla frosting and then add the candy corn decoration.
    • Speaking of decoration, get creative with the toppings! You can drizzle on melted orange and yellow candy melts. Sprinkle on candy corn marshmallows, mini candy corn or Autumn mix for a festive appearance.
    • Want to make these treats the hit of your Halloween parties? Sandwich Halloween sprinkles, white chocolate chips, extra marshmallows or more candy corn in between the layers of this deliciously sweet Halloween treat.
    • Finally, you can use a cookie cutter or a knife to cut these candy corn rice krispies treats into candy corn shapes. Your little goblins will gobble up these tasty treats up in no time!

    Instructions

    Don’t let those striped layers fool you. These candy corn treats couldn’t be easier to make! You need one 8×8 pan, a saucepan, a spoon and a handful of ingredients that can be found at your local grocery store.

    Make Candy Corn Krispie Treats

    First, line an 8×8 pan with parchment paper greased with butter or non-stick spray.

    Start with the bottom yellow layer

    1. Melt 2 tablespoons of butter in a medium saucepan and then add 2 cups of mini marshmallows, on low to medium heat. Next, stir until they’re melted and smooth.
    2. Remove the saucepan from heat and add then about ¼ teaspoon of yellow gel food coloring to the marshmallows. Keep stirring until the marshmallow mixture is evenly colored.
    3. Next, fold in 2 cups of rice krispies cereal until the cereal is evenly coated in the marshmallow mixture. Then, using a clean hand or a greased spatula, press the yellow mixture into the bottom of the prepared 8×8 pan.
    A pot of melted marshmallows and butter is being stirred with a wooden spoon to incorporate yellow food coloring
    Stir in yellow food coloring
    An 8x8 cake pan is filled with a layer of yellow rice kripie treats for candy corn rice krispie treats
    Add yellow layer to pan

    For the middle orange layer

    1. In a medium-sized saucepan, melt 2 tablespoons of butter and 2 cups of mini marshmallows on low to medium heat. Stir until melted and smooth, just like the first layer.
    2. Remove the pan from the heat and add ¼ cup candy corn. Stir until the candy corn melts. Add orange gel food coloring if you want this layer to have a darker orange color. Then, you can stop stirring when the marshmallow mixture is evenly mixed and evenly colored.
    A sauce pan in centered and it contains a melted marshmallow mixture and candy corn. This is the beginning of the orange layer of candy corn rice krispie treats
    Stir in candy corn
    1. Next, fold in 2 cups of rice krispies cereal until the cereal is evenly coated. Press the orange cereal mixture on top of the yellow layer, evenly.
    Orange food coloring is stirred into a pan that contains melted butter and marshmallows for a layer of candy corn rice krispie treats
    Add orange food coloring
    A layer of orange tinted rice krispie treat mixture has been pressed into a parchment paper lined 8x8 baking dish for candy corn rice krispie treats
    Press orange layer in pan

    To make the top white layer

    1. Melt 2 tablespoons of butter and 2 cups of mini marshmallows in a saucepan, on low to medium heat, just like before. Stir until melted and smooth.
    2. Then, remove the pan from the heat and fold in the last two cups of rice krispies cereal. You will want to keep stirring until the cereal is evenly coated. Press the white mixture on top of the orange layer.
    A bowl of rice krispie cereal is ready to be added to a pot of melted marshmallow and butter for the white layer of candy corn rice krispie treats
    A layer of regular rice krispie treat mixture is layered on top of an orange rice krispie layer for candy corn rice krispie treats
    1. Finally, press the candy corn into the white layer of the rice krispies treats for decoration. Allow the rice krispie treats to cool completely (about 30 minutes), and then cut, and serve!
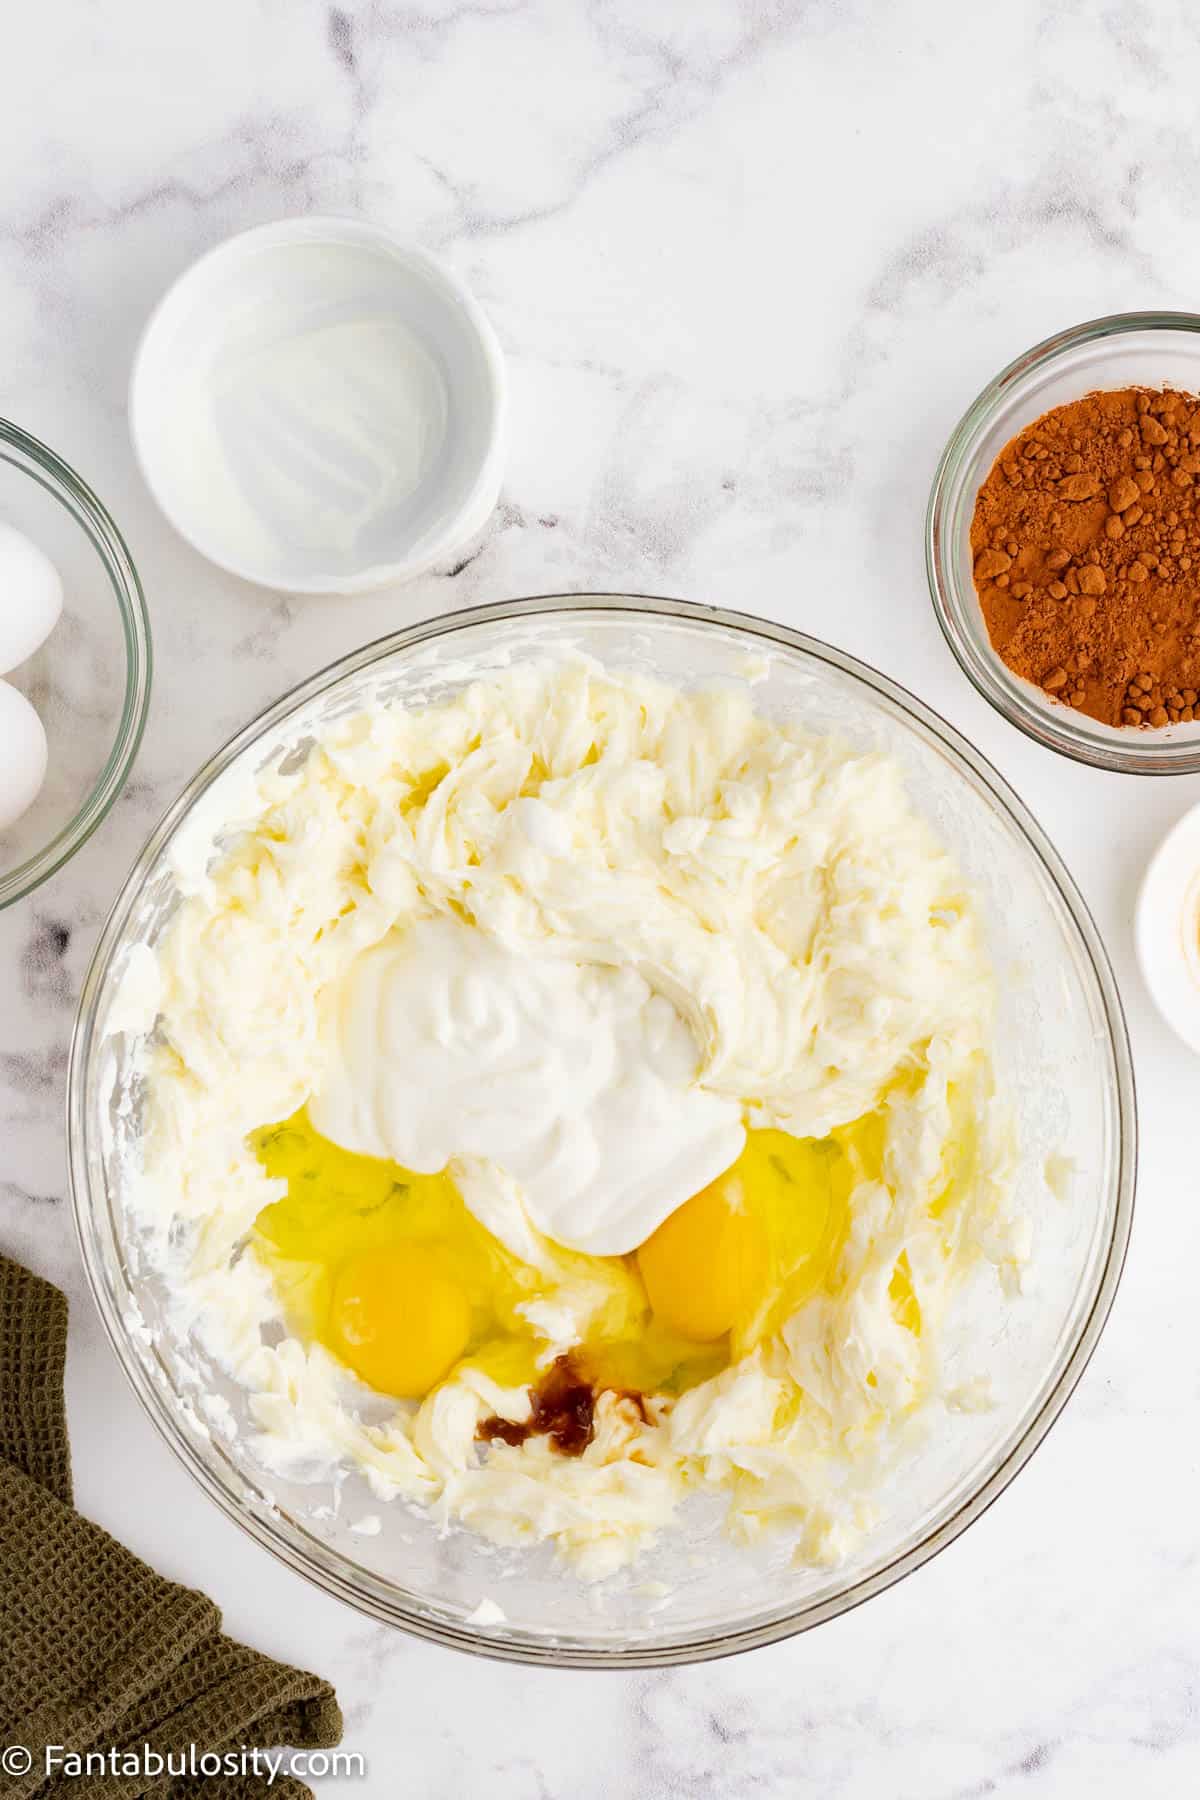
    An 8x8 pan of candy corn rice krispie treats topped with candy corn is centered in the picture with a bowl of candy corn in the upper right corner
    Adorable Halloween snack
    A stack of candy corn rice krispie treats are served on a white plate and garnished with additional candy corn
    Cute candy corn desserts!

    Storage

    To keep your Halloween rice krispie treats fresh, store them in an airtight container. Separate the cut treats with parchment paper or wax paper to prevent them from sticking together. Keep them at room temperature for 2-3 days, in the refrigerator for up to a week or pop them in the freezer for up to six weeks. If you have leftovers, that is!

    Squares of candy corn rice krispie treats are resting on parchment paper and surrounded by scattered candy corn

    More Halloween Treat Ideas

    If you need other ideas for Halloween, then you’ll also really love this Monster Munch, and these Mummy Oreos!

    Or, if you need a classic, this rice krispie treat recipe is always a good choice!

    Did you make this? I’d be so grateful if you left a “star” rating below to let me know what you thought! Then, the next time you need a quick and easy recipe, come back to Fantabulosity to browse all of my easy recipes!

    Recipe

    Close up photo of layered Candy corn rice krispie treats topped with candy corn
    Print Pin
    5 from 4 votes

    Candy Corn Rice Krispie Treats

    These candy corn rice krispie treats are three candy corn colored layers that are topped with candy corn for a fun, no bake Halloween dessert!
    Course Dessert, Snack
    Cuisine American
    Prep Time 5 minutes minutes
    Cook Time 15 minutes minutes
    Cooling Time 30 minutes minutes
    Total Time 50 minutes minutes
    Servings 9 bars
    Calories 297kcal
    Author Jessica Burgess

    Ingredients

    • 6 tablespoon butter divided into three portions of 2 tablespoons each
    • 6 cups mini marshmallows divided into three portions of 2 cups each
    • 6 cups Rice Krispies divided into three portions of 2 cups each
    • ¼ cup candy corn for the orange layer
    • ½ cup candy corn for decoration
    • orange food coloring
    • yellow food coloring

    Instructions

    • Before starting, line an 8×8 pan with parchment paper greased with butter or non-stick spray.

    To make the bottom yellow layer

    • Melt 2 tablespoons of butter and 2 cups of mini marshmallows in a medium sized saucepan, on low to medium heat. Stir until melted and smooth.
    • Remove the saucepan from the heat and add about ¼ teaspoon of yellow gel food coloring. Mix until the marshmallow mixture is evenly colored.
    • Fold in 2 cups of rice krispies cereal until the cereal is evenly coated. Press the yellow mixture into the bottom of the prepared 8×8 pan.

    For the middle orange layer

    • In a medium sized saucepan, melt 2 tablespoons of butter and 2 cups of mini marshmallows on low to medium heat, like in the first batch. Stir until melted and smooth.
    • Remove the saucepan from heat and add ¼ cup candy corn. Stir this until the candy corn has melted. Add orange gel food coloring if you want this layer to have a darker orange color. Mix together until the marshmallow mixture is evenly colored.
    • Next, fold in 2 cups of rice krispies cereal until the cereal is evenly coated. Press the orange mixture on top of the yellow layer, making sure to evenly cover the yellow layer.

    To make the top white layer

    • In a medium sized saucepan, melt 2 tablespoons of butter and 2 cups of mini marshmallows over low to medium heat, as you did in the first two batches. Stir until melted and smooth.
    • Remove the pan from the heat and fold in 2 cups of rice krispies cereal until the cereal is evenly coated. Press the white mixture on top of the orange layer.
    • Press some candy corn into the white layer of the rice krispie treats for decoration.
    • Allow the krispie treats to cool completely (about 30 minutes), cut and serve.

    Notes

    How to Store:
    To keep your Halloween rice krispie treats fresh, store them in an airtight container. Separate the cut treats with parchment paper or wax paper to prevent them from sticking together. Keep them at room temperature for 2-3 days, in the refrigerator for up to a week or pop them in the freezer for up to six weeks. If you have leftovers, that is!

    Nutrition

    Serving: 1bar | Calories: 297kcal | Carbohydrates: 56g | Protein: 2g | Fat: 8g | Saturated Fat: 5g | Polyunsaturated Fat: 0.4g | Monounsaturated Fat: 2g | Trans Fat: 0.3g | Cholesterol: 20mg | Sodium: 224mg | Potassium: 27mg | Fiber: 0.1g | Sugar: 33g | Vitamin A: 1475IU | Vitamin C: 12mg | Calcium: 4mg | Iron: 6mg

    Taco Chicken Casserole

    September 18, 2022

    Taco Chicken Casserole on a plate.

    Taco Chicken Casserole: Shredded chicken, Rotel, black beans, rice, corn, cheese, tomatoes, and a few other fresh, flavorful ingredients make this easy chicken taco bake a must try!

    This Taco Chicken Casserole is quick and easy to make, making it the perfect easy weeknight meal. (Well, and this chicken tater tot casserole too.)

    A wood spoon scooping taco chicken casserole out of the casserole dish. You can see that the cheese is melted and stringy.

    Don’t have any shredded chicken on hand? Follow my foolproof method to make easy shredded chicken in the slow cooker. Or you can grab a rotisserie chicken and shred that if you’re in a hurry! Don’t throw away the bones and skin though! Save it and make this delicious rotisserie chicken broth to use in other recipes!

    Want more tomato-cheese goodness? Rotel Pasta gives you a hit of spice with the same taco-type flavors.

    Why You’ll Love This Recipe

    Can I tell you a secret? I LOVE a good taco. Ok, that’s not actually much of a secret because I think I’ve said that a few times on here before and we have just a few different taco-inspired recipes (like a taco soup…and a taco pasta recipe…). Anything taco-related is a hit at our dinner table.

    I especially love when you take all the flavors and fixings of a taco and put it in an easy-to-make (and easy-to-eat – my tacos always fall apart all over my plate anyhow) format like this easy chicken taco casserole!

    And as an added bonus, this recipe is a great way to use up any leftover slow cooker shredded chicken you might have in the fridge, if you’re not going to make this crispy chicken tacos recipe.

    Tip: I find the best way to meal prep is to make a big batch of protein early in the week and use it for multiple recipes in these ground beef dinners throughout the week (like how I sometimes make ground beef for tacos early in the week and then use it in creative ways over the next few days – I have a whole post about what to do with leftover taco meat!). 

    [feast_advanced_jump_to]

    Ingredients

    There are quite a few ingredients in this recipe, but none of them are hard to find or fancy. You can grab all of these from your local grocery store, but most of them are probably kicking around in your fridge or pantry already!

    • 2 cups slow cooked shredded chicken, cooked
    • 1 – 10 ounce can Rotel
    • 1 cup black beans, cooked
    • 1 cup white rice, cooked
    • ½ cup sweet corn, cooked
    • 1 package taco seasoning (We love using this container of taco seasoning or this chicken taco seasoning recipe.)
    • 2 cups colby jack cheese, shredded
    • 2 avocados, chopped
    • 1 large tomato, diced
    • 1 cup tortilla chips, broken into large crumbles
    • ¼ cup black olives, sliced
    • cilantro, diced (for garnish)
    • sour cream, as a topping if desired
    • taco sauce, as a topping if desired

    The ingredients in this recipe are similar to this hot taco dip recipe!

    The ingredients for taco chicken casserole on a counter with labels on the image.

    There’s a printable recipe card farther down in this post with quantities and step-by-step instructions.

    Instructions

    1. Preheat your oven to 375 degrees.
    2. In a large bowl combine the 2 cups of chicken, Rotel, black beans, rice, corn, and taco seasoning.
    Combine first 6 ingredients in a mixing bowl.
    Mix the first 6 ingredients together.
    1. Add combined ingredients to a 9×13 casserole dish.
    The mixed ingredients spread evenly into a 9x13 baking dish.
    Spread into a 9×13 pan.
    1. Evenly spread the Colby jack cheese over the chicken mixture in your casserole dish.
    Colby Jack cheese spread evenly over the 9x13 pan of ingredients.
    Cover with cheese.
    1. Bake the casserole for 30 minutes or until the cheese is melted and bubbly.
    The baked casserole with the cheese on top looking melted.
    Bake 30 mins, till cheese bubbles.
    1. Remove the casserole from the oven and top with largely crumbled tortilla chips, avocado, tomato, and black olives.
    The 9x13 tray of garnished chicken taco casserole sitting next to a plate and cutlery.
    Add toppings & enjoy!
    1. Garnish with cilantro and serve with taco sauce and/or sour cream if you prefer, and serve warm.

    Substitutions & Variations

    Much like tacos themselves, this casserole can be customized in SO many ways!

    • Cheese – instead of colby jack, try experimenting with a sharp cheddar, mozzarella, pepper jack, or your other favorite cheese. You could even stir an extra ½ cup of cheese into the casserole and then top it with the remaining cheese for a super cheesy taco chicken casserole with rice.
    • Switch Toppings – the sky is the limit here. Top the casserole with your favorite taco fixings. Green chiles, this easy pico de Gallo, bell peppers, homemade guacamole, green onions, Rotel Salsa, a few scoops of sour cream…get creative!
    • Vegetarian – the chicken in this recipe could be replaced with your favorite lentil to make this dish vegetarian.
    • Switch Proteins – instead of shredded chicken, you could also make this recipe with ground beef.
    • Rice – we used white rice for this recipe, but you can make it with brown rice, Mexican rice, or even another cooked grain like quinoa or buckwheat.
    • Sauce – if you like enchiladas, you could swap out the taco seasoning and instead add a can of green enchilada sauce to this recipe, making it more of a chicken enchilada casserole.
    • Gluten Free – if you use corn tortillas, this recipe should be gluten free! For those with serious allergies, we still recommend reading the labels of the ingredients you are using to be safe.
    taco casserole serving on wooden server

    Storage

    This Taco Chicken Casserole should be stored in an airtight container in the refrigerator for up to 5 days. This casserole tastes great the next day, but the tortilla chips on top may get a bit soggy. You can always pull them off and add some fresh ones before reheating!

    It can also be made and frozen for up to 3 months, but we would recommend freezing it without the toppings (tortilla chips, tomatoes, avocados, black olives, and cilantro). You can add those when you are ready to eat it. 

    How do I reheat a frozen casserole?

    When you are ready to eat your frozen chicken taco casserole, you have two options:

    1. Let it thaw in the refrigerator and bake it as stated in the recipe.
    2. Bake it from frozen. If baking from frozen, you will need to decrease the baking temp to 350° and bake it for about an hour. It’s finished when the cheese is melted and bubbling.

    Either way, when it is finished cooking you can top it with tortilla chips, tomatoes, avocados, black olives, and cilantro and enjoy!

    Chicken taco casserole serving on white plate

    If you’re trying to make something low carb, you should definitely check this Keto Taco Casserole that looks delicious!

    Expert Tips and FAQs

    Can you freeze casseroles with rice in them?

    Absolutely! Rice freezes and reheats well, so it’s not a problem to freeze a casserole with rice in it.

    Can you make your own taco seasoning?

    You sure can. Taco seasoning is just a mixture of spices. If you’re making your own, we would recommend trying:
    1 tablespoon chili powder
    1 teaspoon cumin
    1 teaspoon paprika
    ½ teaspoon onion powder
    ½ teaspoon garlic powder
    ½ teaspoon of salt (to your preference)
    ¼ teaspoon oregano
    and a pinch of red pepper flakes (if you like spice, add more)

    A package of taco seasoning mix usually has about 2 tablespoons in it, so once you’ve combined your spices together well you can use 2 tablespoons in this easy chicken taco bake recipe and save the rest in an airtight container for later!

    What to Serve With This Taco Chicken Casserole

    Whether you’re looking for a side dish that can go with this casserole or a sweet treat for enjoying after, I think you’ll really love these!

    Side Dishes: This easy elote dip and my homemade guacamole are easy recipes to prepare and so delicious served with a taco recipe! Or, for a heartier side, consider this fried tacos recipe!

    Dessert: Mexican Conchas is a sweet bread that is absolutely lovely to serve after this taco casserole!

    More Easy Casserole Recipes

    If you’re making a meal plan and you’re looking for more easy casserole recipes like this one, we have a bunch! You love this walking taco casserole recipe if you love this one, and this taquito chicken casserole, along with these:

    Cheeseburger Casserole

    Southern Broccoli Casserole

    Chicken Pot Pie Casserole

    Green Bean Casserole (this one is a fan favorite)

    Did you make this? I’d be so grateful if you left a “star” rating below to let me know what you thought! Then, the next time you need a quick and easy recipe, come back to Fantabulosity to browse all of my easy recipes!

    Related Recipes

    Did you enjoy this taco chicken casserole recipe? Then you’re in luck because we have a few more recipes we just know you’re going to love like this Doritos Casserole, these crockpot enchiladas, these Chicken Street Tacos (I kid you not, these chicken tacos are so good), and our Easy Taco Layer Dip recipe (this one disappears at a party)!

    But go ahead and round out your chicken casserole plans with this Stove Top Stuffing Chicken Casserole.

    Recipe

    Taco Chicken Casserole on a plate.
    Print Pin
    5 from 4 votes

    Taco Chicken Casserole

    Taco Chicken Casserole: Shredded chicken, Rotel, black beans, rice, corn, cheese, tomatoes, and a few other fresh, flavorful ingredients make this easy chicken taco bake a must try!
    Course Main Course
    Cuisine American, Mexican
    Prep Time 10 minutes minutes
    Cook Time 30 minutes minutes
    Total Time 40 minutes minutes
    Servings 6 (1 cup) servings
    Calories 546kcal
    Author Jessica Burgess

    Ingredients

    • 2 cups shredded chicken cooked
    • 1 – 10 ounce can Rotel
    • 1 cup black beans cooked
    • 1 cup white rice cooked
    • ½ cup sweet corn cooked
    • 1 package taco seasoning
    • 2 cups colby jack cheese shredded
    • 2 avocados chopped
    • 1 large tomato diced
    • 1 cup tortilla chips broken into large crumbles
    • ¼ cup black olives sliced
    • cilantro diced, for garnish

    Instructions

    • Preheat your oven to 375 degrees.
    • In a large bowl combine shredded chicken, rotel, black beans, rice, corn, and taco seasoning.
    • Add combined ingredients to a 9×13 casserole dish.
    • Evenly spread the colby jack cheese over the chicken mixture in your casserole dish.
    • Bake the casserole for 30 minutes or until the cheese is melted and bubbly.
    • Remove the casserole from the oven and top with largely crumbled tortilla chips, avocado, tomato, and black olives.
    • Garnish with cilantro and serve warm.

    Nutrition

    Serving: 1serving | Calories: 546kcal | Carbohydrates: 56g | Protein: 18g | Fat: 29g | Saturated Fat: 11g | Polyunsaturated Fat: 4g | Monounsaturated Fat: 12g | Trans Fat: 0.01g | Cholesterol: 42mg | Sodium: 895mg | Potassium: 628mg | Fiber: 10g | Sugar: 3g | Vitamin A: 1360IU | Vitamin C: 13mg | Calcium: 352mg | Iron: 2mg

    Banana Chocolate Chip Cookies

    September 16, 2022

    A plate of banana chocolate chip cookies.

    Banana Chocolate Chip Cookies: Wondering what to do with those overripe bananas? Mashed bananas added to a chocolate chip cookie recipe create a delicious new treat – banana chocolate chip cookies!

    Psst…if all you have is green bananas on hand, check out this post on how to ripen bananas faster!

    A plate of banana chocolate chip cookies with a glass of milk and bunch of bananas at the top of the image.

    Why You’ll Love This Recipe

    I love a good chocolate chip cookie. Whether it’s a classic chocolate chip cookie, a big fat chewy chocolate chip cookie, a peanut butter chocolate chip cookie, a chocolate chip cookie pie, or a cookie that tastes like banana bread in cookie form, like this one (maybe we should have called these banana bread chocolate chip cookies)!

    Because of the natural sweetness of bananas, you don’t have to add as much sugar as some chocolate chip cookie recipes call for, which is a bonus.

    And the one thing that most all chocolate chip cookies have in common is that they are quick, easy, and don’t require any fancy ingredients. This recipe checks all the boxes, and it’s delicious, too! Plus it’s a great way to use up all of your over-ripe bananas (or those brown bananas tucked away in the freezer).

    [feast_advanced_jump_to]

    Ingredients

    With some simple ingredients, most of which I bet you already have in the cupboard, you can whip up these banana cookies in no time!

    • ½ cup mashed ripe banana (about 2 medium bananas)
    • ½ cup brown sugar
    • ½ cup unsalted butter softened
    • ½ cup white sugar
    • 1 teaspoon vanilla
    • 1 large egg
    • 1 ½ cup all purpose flour
    • 2 cups quick oats (or old fashioned oats for a more chunky cookie)
    • 1 teaspoon baking soda
    • 1 teaspoon baking powder
    • ½ teaspoon salt
    • ½ – ¾ cup semisweet chocolate chips (½ is usually enough, but if you want to intensify the chocolate flavor add ¾ cup)
    Banana Chocolate Chip Cookies with ingredients listed.

    Check out the printable recipe card for exact quantities and step-by-step instructions for these banana oatmeal chocolate chip cookies.

    Instructions

    1. Preheat oven to 350 F.
    2. In a large bowl combine butter and sugars. Beat on low with an electric hand mixer or stand mixer until smooth and creamy. 
    3. Add egg, vanilla extract, and mashed banana. Mix on low until combined. Set aside.
    A bowl with liquid ingredients mixed together in it.
    Combine butter & sugar, add egg & vanilla.
    1. In a separate large bowl, combine sifted flour and baking soda, baking powder, salt, and oats. Whisk to combine.
    Dry ingredients mixed together in a bowl.
    Mix together the dry ingredients.
    1. Add the flour mixture to wet ingredients gradually. Add ½ or 1 cup at a time, beat on low until combined, and then continue with the next batch. Mix until ingredients are almost combined. 
    Banana chocolate chip cookie dough in a glass mixing bowl (without the chocolate chips).
    Combine dry and wet ingredients.
    1. Fold in chocolate chips.
    Banana chocolate chip cookie dough in a glass bowl.
    Fold in the chocolate chips.
    1. Scoop 2 tablespoonfuls of dough and roll into balls. 
    2. Arrange the cookie balls on the prepared baking sheet lined with parchment paper at least 2 inches apart. Don't press down! 
    Balls of banana chocolate chip cookie dough on a parchment lined baking sheet.
    Place balls of cookie dough on cookie sheet.
    1. Bake for 11-13 minutes (the time varies due to different ovens) until the cookies are starting to turn golden brown and they look set. The cookies will have a quite soft center inside. Once they cool down they will set well and the texture inside remains soft, lots of banana flavor and buttery. 
    Baked banana chocolate chip cookies on a parchment lined baking sheet.
    Bake for 11-13 mins.
    1. Let the baked cookies cool on the baking sheet for 5-10 minutes and then transfer to a wire rack to cool completely.

    Substitutions

    If you need to swap something out, here’s where we’d start…

    • Gluten Free – substitute the all purpose flour for your favorite gluten free flour blend to make these chewy banana oatmeal cookies gluten free
    • Dairy Free – replace the butter in this recipe for a dairy free alternative and make sure you choose semisweet chocolate chips that say “dairy free” on them to make these banana treats dairy free

    Variations

    The options for customizing your chocolate chip cookies are ENDLESS. Here are a few of our favourites…

    • Add nuts! If you like a bit of crunch in your cookies, add in some of your favorite chopped nuts. 
    • Switch up the chocolate. Instead of using semi-sweet chocolate chips, try a mixture of white chocolate chips, milk chocolate chips, and semisweet chocolate chips (totaling the same amount called for in the recipe). 
    • Add some cinnamon. If you want these cookies to taste a bit like a banana muffin, try adding a teaspoon of cinnamon!
    • Change the cookie. Sugar cookies with chocolate chips are such a fun twist when it comes to a chocolate chip cookie.

    Or, if you love bananas, you may want to try these peanut butter banana cookies or this banana pudding poke cake.

    Storage

    Store your mashed bananas chocolate chips cookies in an airtight container and they should keep for up to a week on the counter. 

    You could also freeze them! After your cookies have cooled completely, place them in a freezer-safe, airtight container or ziplock freezer bag and freeze for up to a month. When you are ready to eat them, just thaw them and reheat them in the oven (they taste very good when warm).

    Top Tip

    I would recommend not substituting sugars in this recipe. You can make these cookies only with white sugar; they will still taste good, but there will definitely be a difference. Both sugars should be used to get the very best buttery and soft cookie.

    Can I replace the brown sugar in this recipe with white sugar?

    Can I make these cookies ahead of time and freeze them?

    Yes, these cookies will freeze very well! When you are ready to eat them, just thaw them and reheat them in the oven (they taste very good when warm). These cookies should keep in an airtight, freezer-safe container for up to a month.

    What if I like raisins in my oatmeal chocolate chip cookies instead of chocolate chips?

    Not to worry, these cookies would taste great either way! This banana chocolate chip cookies oatmeal recipe could absolutely be modified to use raisins instead. Simply replace the chocolate chips with ½ – ¾ cup of raisins and enjoy!

    Did you make this? I’d be so grateful if you left a “star” rating below to let me know what you thought! Then, the next time you need a quick and easy recipe, come back to Fantabulosity to browse all of my easy recipes!

    Related Recipes

    If you liked these banana chocolate chip cookies, then you totally have to try these banana chocolate brownies, and some of our other banana recipes like our banana bread pudding and the BEST banana bread you’ll ever make (with a secret ingredient that makes it SO moist).

    Recipe

    A plate of banana chocolate chip cookies.
    Print Pin
    5 from 6 votes

    Banana Chocolate Chip Cookies

    Banana Chocolate Chip Cookies: Mashed bananas added to a chocolate chip cookie recipe create a delicious new cookie recipe!
    Course Dessert
    Cuisine American
    Prep Time 20 minutes minutes
    Cook Time 13 minutes minutes
    Total Time 33 minutes minutes
    Servings 16 cookies
    Calories 225kcal
    Author Jessica Burgess

    Ingredients

    • ½ cup mashed ripe banana (about 2 medium bananas)
    • ½ cup brown sugar
    • ½ cup unsalted butter softened
    • ½ cup white sugar
    • 1 teaspoon vanilla
    • 1 large egg
    • 1 ½ cup all purpose flour
    • 2 cups quick oats (or old fashioned oats for a more chunky cookie)
    • 1 teaspoon baking soda
    • 1 teaspoon baking powder
    • ½ teaspoon salt
    • ½ – ¾ cup semisweet chocolate chips (½ is usually enough, but if you want to intensify the chocolate flavor add ¾ cup)

    Instructions

    • Preheat oven to 350 F.
    • In a large bowl combine butter and sugars. Beat on low with an electric hand mixer or stand mixer until smooth and creamy.
    • Add egg, vanilla, and mashed banana. Mix on low until combined. Set aside.
    • In a separate large bowl, combine sifted flour and baking soda, baking powder, salt, and oats. Whisk to combine.
    • Add flour mixture to wet ingredients gradually. Add ½ or 1 cup at a time, beat on low until combined, and then continue with the next batch. Mix until ingredients are almost combined. 
    • Fold in chocolate chips.
    • Scoop 2 tablespoonfuls of dough and roll into balls. 
    • Arrange the cookie balls on a baking sheet lined with parchment paper at least 2 inches apart. Don't press down! 
    • Bake for 11-13 minutes (the time varies due to different ovens) until the cookies are starting to turn golden brown and they look set. The cookies will have a quite soft center inside. Once they cool down they will set well and the texture inside remains soft, lots of banana flavor and buttery. 
    • Let cool on the baking sheet for 5-10 minutes and then transfer to a wire rack to cool completely.

    Notes

    • I would recommend not substituting sugars in this recipe. You can make these cookies only with white sugar; they will still taste good, but there will definitely be a difference. Both sugars should be used to get the very best buttery and soft cookie.
     
    STORAGE: Store your mashed bananas chocolate chips cookies in an airtight container and they should keep for up to a week on the counter. 
    You could also freeze them! After your cookies have cooled completely, place them in a freezer safe, airtight container or ziplock freezer bag and freeze for up to a month. When you are ready to eat them, just thaw them and reheat them in the oven (they taste very good when warm).

    Nutrition

    Serving: 1cookie | Calories: 225kcal | Carbohydrates: 33g | Protein: 3g | Fat: 9g | Saturated Fat: 5g | Polyunsaturated Fat: 1g | Monounsaturated Fat: 2g | Trans Fat: 0.2g | Cholesterol: 27mg | Sodium: 150mg | Potassium: 146mg | Fiber: 2g | Sugar: 16g | Vitamin A: 201IU | Vitamin C: 1mg | Calcium: 30mg | Iron: 2mg

    Iced Caramel Latte

    September 15, 2022

    iced caramel lattes with straw

    Iced Caramel Latte: This homemade recipe uses basic ingredients making it a light, refreshing easy drink that you can make in minutes!

    Quick Overview: Just a few simple ingredients such as coffee, milk, caramel sauce, vanilla, and ice, and you have one of your favorite coffee shop drinks.

    iced caramel lattes in clear glasses with blue straw

    Why You’ll Love This Iced Latte Recipe

    Although a delicious latte can look hard to make, and something that you should get at a local coffee shop, this easy recipe can be made at home at a fraction of the price. (Just like this Dirty Chai Latte recipe that’s a must!)

    Bonus: You can add all of the extra whipped cream and caramel that you want!

    [feast_advanced_jump_to]

    Ingredients

    This coffeehouse copycat caramel latte has a few simple ingredients as seen below. If you can stir and pour, this indulgent caramel coffee is just minutes away.

    The ingredients to make Iced Caramel Lattes are displayed in various sizes of bowls on a white marble background
    Ingredients
    • 1 cup of strong coffee, chilled
    • ¾ cup cold milk
    • ¼ cup granulated sugar
    • ⅓ caramel sauce, warmed
    • 1 teaspoon of vanilla extract
    • 3 cups of ice
    • Optional toppings: whipped cream, additional caramel sauce

    See the recipe card down toward the bottom of this post for quantities and instructions all in one place!

    How to Make an Iced Latte

    1. In a pitcher or large glass mixing cup, stir together the strong brewed coffee, caramel, milk, sugar, and vanilla.
    A small bowl of warmed caramel is being poured into strong coffee
    Pour caramel sauce
    Milk is being poured into coffee
    Add milk
    1. Fill two tall glasses with 1 ½ cups of ice and split the coffee mixture between the glasses.
    2. Top each latte with whipped cream.
    Coffee with caramel and cream is being poured into a tall glass full of ice
    Pour over ice
    Two glasses of iced caramel latte have been topped with whipped cream
    Top with whipped cream
    1. Drizzle extra caramel sauce over the whipped cream and enjoy.
    Caramel from a spoon is being drizzle over the top of a glass of iced coffee topped with whipped cream
    Caramel drizzle

    How to Serve

    You can serve this drink in any glass that you prefer but it’s really fun to serve them in plastic, see-through iced coffee cups!

    Substitutions

    Don’t worry if you don’t have the exact ingredients in your kitchen. We’ve got a few suggestions so that you can have this

    • Use milk alternatives – There are no fancy ingredients this, so it is easy to substitute a non-dairy milk of your choice like oat milk, soy milk, coconut milk or almond milk.
    • Make homemade caramel sauce – Caramel lattes can be made with your favorite caramel sauce from the grocery store or a homemade caramel sauce.
    • Use what you have on hand – I love the creaminess that whole milk adds to iced coffee, but feel free to use half and half, heavy cream or a caramel coffee creamer if that is what you have in your fridge.

    Variations

    Put on your barista cap and turn your kitchen into your local coffee shop. Here are a few fun variations on a classic ice caramel latte. I’ll take a caramel macchiato!

    • Add an extra shot of espresso to really jump start your day.
    • Make a simple syrup to use in your iced latte instead of granulated sugar.
    • Whip up a kid friendly version. For a coffee-free version of this Starbucks copycat, just omit the coffee and replace it with more milk. But definitely don’t skip the whipped cream and caramel drizzle!
    • Heat it up! In the hot summer months, this iced version is on repeat. However, you can make a hot caramel latte with the same creamy taste and caramel flavor. Simply use hot coffee and skip the ice.
    Close up photo of a glass of iced caramel latte, topped with whipped cream and caramel with a teal and white striped straw
    Iced caramel coffee

    FAQs

    We’re answering your burning questions about making this coffeehouse drink at home!

    • What are iced lattes made of? Typically, an iced latte is made with espresso, milk and an optional sweetener.
    • What is the ratio of an iced latte? It is generally made with ⅓ coffee and ⅔ milk, but you can adjust that to your personal taste.
    • What is the difference between iced coffee and a latte? Iced coffee is made with brewed coffee and a latte is made with espresso.
    • Do you need to steam milk for an iced latte? No! While steamed milk is normally used in a hot latte, cold milk is preferred for the iced version.
    Close up photo of a two glasses of iced caramel latte, topped with whipped cream and caramel with a teal and white striped straw
    Iced coffee recipe

    Storage

    You can double or triple this recipe and keep it in the fridge for up to a week.

    I find that the easiest way to freeze any leftover iced caramel latte is in ice cube trays. Then, store the frozen cubes in a freezer bag or airtight container until you are ready for another coffee drink.

    Top Tip

    Use the frozen cubes of caramel latte to add to your iced coffee to prevent it from getting diluted. You can also blend the frozen coffee cubes with cold brew coffee, milk, and a little extra caramel sauce for a slushy, caramel coffee treat!

    Related Recipes

    If you love coffee shop drinks like this one, then you’ll also love this tutorial on how to make iced coffee, this peppermint latte recipe, and this whipped coffee recipe!

    Or if you’re a caramel fan, this no-bake caramel pie recipe is delicious too.

    Did you make this? I’d be so grateful if you left a “star” rating below to let me know what you thought! Then, the next time you need a quick and easy recipe, come back to Fantabulosity to browse all of my easy recipes!

    Recipe

    iced caramel lattes with straw
    Print Pin
    5 from 4 votes

    Iced Caramel Latte

    Make an Iced Caramel Latte at home in minutes with a few simple pantry ingredients! You will love this indulgent coffeehouse copycat drink!
    Course Drinks
    Cuisine American
    Prep Time 5 minutes minutes
    Total Time 5 minutes minutes
    Servings 2 lattes
    Calories 239kcal
    Author Jessica Burgess

    Ingredients

    • 1 cup strong coffee chilled
    • ¾ cup milk
    • ¼ cup granulated sugar
    • ⅓ cup caramel sauce warmed
    • 1 teaspoon pure vanilla extract
    • 3 cups ice

    Toppings

    • whipped cream
    • caramel sauce

    Instructions

    • In a pitcher or large glass mixing cup, stir together the coffee, caramel, milk, sugar and vanilla.
    • Fill two tall glasses with 1 ½ cups of ice and split the coffee mixture between the glasses.
    • Top each latte with whipped cream.
    • Drizzle extra caramel sauce over the whipped cream and enjoy!

    Notes

    • Strong coffee, as defined in this recipe, has been brewed by using 2 tablespoons of ground coffee to 2 cups of water. 
    • To help the caramel sauce mix into the coffee, heat it briefly in the microwave for 15-20 seconds.
    • This caramel latte can be made using your favorite dairy or non-dairy milk (almond milk, soy milk, oat milk, cashew milk, etc.).

    Nutrition

    Serving: 8oz | Calories: 239kcal | Carbohydrates: 51g | Protein: 4g | Fat: 3g | Saturated Fat: 2g | Polyunsaturated Fat: 0.1g | Monounsaturated Fat: 1g | Cholesterol: 11mg | Sodium: 184mg | Potassium: 224mg | Sugar: 51g | Vitamin A: 182IU | Vitamin C: 0.2mg | Calcium: 144mg | Iron: 0.03mg

    Candy Corn Cake

    September 14, 2022

    Close up photo of a frosted tri-colored piece of cake with candy corn on it

    Candy Corn Cake: A tri-colored cake is soaked in sweetened condensed milk, topped with a fluffy cream cheese frosting and covered in colorful candy corn. This is pretty much the Halloween cake of your dreams!

    When it comes to Halloween cake ideas, we think this is one of the cutest candy corn recipe ideas! If you haven’t taken a look at all of our Halloween food ideas and Halloween party ideas, take a peek. I think these candy corn rice krispie treats, Mummy Rice Krispie Treats and Pumpkin Patch Brownies are a pretty great place to start!

    A cut piece of candy corn topped cake is centered, showing the tri-colored layers inside the cake
    Candy Corn Cake

    Why you’ll love this recipe

    This sweet treat has candy corn colors from top to bottom! The cake is striped thanks to white, yellow and orange layers of batter. And we have absolutely covered the top of the cake with candy corn!

    Since this is baked in a 9×13 pan, you can serve generous pieces of cake or scale back the size of the pieces you cut as an easy way to feed a crowd at a Halloween party.

    If you have never made a poke cake, the sweetened condensed milk soaks into the baked cake while the cake chills, which results in such a soft, tender cake! Our Pumpkin Poke Cake is one of our favorite seasonal poke cake recipes.

    [feast_advanced_jump_to]

    Ingredients

    We love candy corn around here. It may be my favorite Halloween candy, so it was only natural that there is a candy corn cake recipe around here.

    The ingredients to make this poke cake are easily found at your local grocery stores, which makes it easy to stock up and put this cake recipe on repeat!

    The ingredients for a candy corn poke cake are displayed on a white marble background
    Ingredients

    Ingredients for the candy corn cake:

    • 1 box of white cake mix + the ingredients required on the back of the box
    • Orange gel food coloring
    • Yellow gel food coloring
    • One 14 oz. can of sweetened condensed milk
    • 1 cup of candy corn (more if desired)

    What you’ll need to make the cream cheese topping:

    • 8 oz. cream cheese, softened
    • 1 cup of powdered sugar
    • 1 tablespoon of vanilla extract
    • 2 cups of heavy cream

    Scroll down for a printable recipe card with the full recipe, ingredients, directions and detailed notes.

    Instructions

    Believe it or not, this candy corn cake is simple to make and we’ve included step-by-step photos and instructions.

    1. Prepare a 9×13 baking dish with non-stick cooking spray.
    2. Mix the cake mix according to the package directions and divide the cake batter into 3 separate bowls. There should be about 1 ½ cups of batter in each bowl.
    3. Leave one bowl of batter as is. Add yellow food coloring to one bowl until you have a bright lemon yellow color. Add orange gel food coloring to the last bowl until you reach a rich orange color. Really, you can just add one drop of food coloring at a time until you get the right color.
    4. Now, pour the yellow batter evenly across the bottom of the prepared baking dish. Place it in the freezer on a level surface for about 20 minutes to allow this layer to set up.
    Three white bowls filled with white, yellow and orange colored cake batter are displayed on a white marble background
    A 9x13 baking dish is filled with a layer of yellow cake batter for Candy Corn Cake
    1. Remove the dish from the freezer and spread the orange batter across the yellow layer and smooth it out evenly. Return the dish to the freezer for another 20 minutes.
    2. Next, spread the final layer of white batter on top of the orange layer and spread it evenly.
    A 9x13 baking dish is filled with a layer of orange cake batter for Candy Corn Cake
    A 9x13 baking dish is filled with a layer of white cake batter for Candy Corn Cake
    1. Allow the cake batter to come to room temperature while you preheat the oven to 350 degrees F.
    2. Bake the cake according to the package directions and allow the cake to cool slightly.
    3. Next, use a chopstick, a drinking straw or the end of a wooden spoon handle to poke holes evenly across the top of the cake.
    4. Now, pour the can of sweetened condensed milk over the top of the cake and into all of the holes.
    A 9x13 baking dish contains a baked cake with holes poked in the cake for a Candy Corn poke cake
    A hand holds a can of sweetened condensed milk that is being poured on a baked cake for a poke cake
    1. Cover the cake with foil or plastic wrap and place it in the refrigerator for at least 8 hours or overnight.
    2. Now, it’s time to make the cream cheese topping which includes fresh whipped cream. Place a mixing bowl in the freezer for about 15 minutes to help the whipped cream whip up easily.
    3. In a separate mixing bowl, cream together the cream cheese, powdered sugar and vanilla extract until it is smooth.
    4. Remove the chilled bowl from the freezer, add the cream and using a hand mixer or with the whisk attachment in a stand mixer, mix on medium speed for 1-2 minutes. Then, increase the speed to high speed and continue whipping the cream until stiff peaks form.
    Cream cheese, vanilla and powdered sugar were combined into a smooth mixture in a glass bowl on a white marbled background
    Fluffy whipped cream in the metal bowl of a stand mixture
    1. Add the cream cheese mixture to the whipped cream and mix it on medium speed for another 1-2 minutes and it is well combined.
    2. Spread the gloriously fluffy white frosting over the chilled cake and top it with candy corn. Cut and serve chilled.
    A yellow and white striped towel is spread on a marbled background with plates of cut Candy Corn cake and a 9x13 baking dish with rest of the cake
    Candy Corn Poke Cake

    My favorite thing is that you can see the white layer, orange layer and yellow layer in each slice of this festive cake!

    Substitutions

    Here are a few ways you can change this recipe to suit your family or the ingredients you have on hand.

    • We used a box cake mix, but you can whip up your favorite from scratch classic vanilla cake recipe.
    • Similarly, we made a homemade cream cheese topping. You can use your favorite store bought frosting to frost this cake.
    • Instead of sweetened condensed milk, you can mix up a box of orange or lemon jello. Pour the liquid jello over the top of cake to add a little fruity flavor. Chill the cake and frost as per the recipe.

    Variations

    We love sharing a variety of ways to make candy corn treats. Here are a few suggestions:

    • This recipe lends itself well to being made into a bundt cake. Spread the three layers of batter in a bundt pan. You may need to adjust the baking time, so bake according to the instructions on the back of the cake mix.
    • And you know we love a festive cupcake recipe! Divide the three colored batters into two cupcake tins lined with cupcake papers for candy corn cupcakes!
    • If you love the flavor of candy corn, you can add candy corn flavoring oil/extract to the batter. You can find it online or if you’re lucky, in the baking aisle of your local craft stores.
    • Finally, we never say no to sprinkles! You can top this candy corn with your favorite seasonal sprinkles, jimmies or nonpareils.
    A piece of Candy Corn topped cake and a 9x13 baking dish with the rest of the cake rest on a yellow and white striped towel

    Storage

    Store this cake covered in the refrigerator for up to 3-4 days. Since the topping contains fresh whipped cream (which can liquify when thawed), we don’t recommend storing it in the freezer.

    Did you make this? I’d be so grateful if you left a “star” rating below to let me know what you thought! Then, the next time you need a quick and easy recipe, come back to Fantabulosity to browse all of my easy recipes!

    Recipe

    Close up photo of a frosted tri-colored piece of cake with candy corn on it
    Print Pin
    5 from 2 votes

    Candy Corn Cake

    A tri-colored cake is soaked in sweetened condensed milk, topped with a fluffy cream cheese frosting and covered in colorful candy corn for the Halloween cake of your dreams!
    Course Dessert
    Cuisine American
    Prep Time 1 hour hour
    Cook Time 30 minutes minutes
    Chilling Time 8 hours hours
    Total Time 9 hours hours 30 minutes minutes
    Servings 12 slices
    Calories 563kcal
    Author Jessica Burgess

    Ingredients

    Ingredients for the candy corn cake

    • 1 box white cake mix plus the required ingredients from the back of the box
    • orange gel food coloring
    • yellow gel food coloring
    • 14 oz sweetened condensed milk
    • 1 cup candy corn more if desired

    For the cream cheese topping

    • 8 oz cream cheese softened
    • 1 cup powdered sugar
    • 1 tablespoon pure vanilla extract
    • 2 cups heavy whipping cream

    Instructions

    To make the candy corn cake

    • Prepare a 9×13 baking pan with non-stick cooking spray.
    • Mix the cake mix according to the package directions and divide the cake batter into 3 bowls. There should be about 1 ½ cups of batter in each bowl.
    • Leave one bowl of batter as is. Add yellow food coloring to one bowl until you have a bright lemon yellow color. Add orange gel food coloring to the last bowl until you reach a rich orange color.
    • Now, pour the yellow batter evenly across the bottom of the prepared baking dish. Place it in the freezer on a level surface for about 20 minutes to allow this layer to set up.
    • Remove the dish from the freezer and spread the orange batter across the yellow layer and smooth it out evenly. Return the dish to the freezer for another 20 minutes.
    • Next, spread the final layer of white batter on top of the orange layer and spread it evenly.
    • Allow the cake batter to come to room temperature while you preheat the oven to 350 degrees F.
    • Bake the cake according to the package directions and allow the cake to cool slightly.
    • Next, use a chopstick, a drinking straw or the end of a wood spoon handle to poke holes evenly across the cake.
    • Now, pour the can of sweetened condensed milk over the top of the cake and into all of the holes.
    • Cover the cake and place it in the refrigerator for at least 8 hours or overnight.

    For the cream cheese topping

    • Place a mixing bowl in the freezer for about 15 minutes – this helps the whipping cream whip easily.
    • In a separate mixing bowl, cream together the cream cheese, powdered sugar and vanilla extract until it is smooth.
    • Remove the chilled bowl from the freezer, add the whipping cream and mix it on medium speed for 1-2 minutes. Then, increase the speed to high and continue whipping until stiff peaks form.
    • Add the cream cheese mixture to the whipped cream and mix it on medium speed for another 1-2 minutes and it is well combined.
    • Spread the topping over the chilled cake and top it with candy corn. Cut and serve chilled.

    Notes

    • If you prefer, use your favorite from scratch classic vanilla cake recipe instead of a boxed cake mix.
    • For a fruity cake, mix up a small box of orange or lemon jello and pour the liquid jello over the cake instead of the sweetened condensed milk. Chill and frost the cake as directed.
    • While we made a homemade cream cheese topping, you can use your favorite purchased frosting to frost this cake.
    • This recipe can be made in a bundt cake pan or into cupcakes, too! Adjust the baking time accordingly.
    • Store this cake covered in the refrigerator for 3-4 days. We don’t recommended freezing this cake since the fresh whipped cream in the frosting can liquify/separate during the thawing process.

    Nutrition

    Serving: 1slice | Calories: 563kcal | Carbohydrates: 78g | Protein: 7g | Fat: 25g | Saturated Fat: 16g | Polyunsaturated Fat: 1g | Monounsaturated Fat: 6g | Trans Fat: 0.2g | Cholesterol: 75mg | Sodium: 450mg | Potassium: 214mg | Fiber: 0.5g | Sugar: 60g | Vitamin A: 925IU | Vitamin C: 1mg | Calcium: 233mg | Iron: 1mg

    Halloween Pretzels

    September 13, 2022

    Pretzel rods decorated for Halloween are dislayed on a black marbled background

    Halloween Pretzels: Salty pretzel rods are dipped in sweet, creamy chocolate and decorated to look like ghosts, mummies and spider webs! Get out those Halloween sprinkles and let’s make chocolate Halloween pretzels!

    With Halloween just around the corner, we have been sharing Halloween ideas to make your holiday fun and festive! We think Dirt Cupcakes with Gummy Worms, Nutter Butters Mummies and Halloween Snack Mix are perfect for any Halloween bash!

    Assorted chocolate dipped pretzel rods decorated in several ways for Halloween are scattered on a black background
    Halloween Pretzel Treats

    Why you’ll love this recipe

    Combine salty pretzels with sweet melted chocolate and you have a delicious, salty sweet Halloween snack! This should please all of the snack lovers in your household!

    This is another super simple no-bake recipe. If you can dip, drizzle and sprinkle, then you can make this Halloween dessert!

    If you need a sweet little Halloween gift or party favor, just pop these in cellophane pretzel treat bags and tie it closed with a ribbon. Done and done!

    [feast_advanced_jump_to]

    Ingredients for this easy Halloween recipe

    Hit the your local grocery store or craft store and pick up the ingredients to make adorable Halloween pretzels!

    Pretzel rods, a bowl of chocolate chips, candy eyes and Halloween sprinkles are displayed on a white background
    Ingredients
    • 24 pretzel rods
    • 6 ounces of white chocolate chips
    • 6 ounces of semi-sweet chocolate chips
    • Halloween sprinkles, jimmies or nonpareils
    • 1 package candy eyes

    See the printable recipe card below for quantities, full instructions and notes.

    Instructions

    1. Line two baking sheets with parchment paper, wax paper or silicone mats.
    2. Now, melt white chocolte and semi-sweet chocolate in two separate bowls in the microwave in 30-second intervals. Stir between each heating until the chocolate is smooth and creamy.
    A bowl of melted white chocolate is in the center with a spoon being pulled from the chocolate. Halloween sprinkles and pretzel rods can be seen in the background.
    Smooth melted chocolate
    1. Once the chocolate is smooth, transfer it into two medium/tall thin glasses to dip the pretzel rods in.

    Let’s make ghost pretzels

    1. Dip a pretzel rod in the white chocolate, covering about ¾ of the pretzel. Let the chocolate drip off and transfer the pretzel to the lined baking sheet.
    A hand holding a prezel rod is dipping it in a tall thin glass filled with melted white chocolate. A glass of melted dark chocolate, candy eyes and pretzel rods are also in the photo
    A hand is pulling a pretzel rod from a tall thin glass full of melted white chocolate, allow the excess chocolate to drip off
    1. Next, place the sheet in the refrigerator or freezer so the chocolate sets. This should take about 15 minutes.
    2. Use a disposable piping bag fitted with a small tip to pipe on dark chocolate eyes and a rounded mouth.

    To make Halloween sprinkle pretzels

    1. First, dip pretzel rods in semi-sweet chocolate, covering about ¾ of the pretzel. Let the extra chocolate drip off and move the pretzel to the lined baking sheet. Cover with Halloween sprinkles, jimmies or nonpareils.
    2. Place the sheet in the refrigerator or freezer for about 15 minutes so the chocolate sets.

    Make spider web pretzels

    1. Dip a pretzel rod in melted semi-sweet chocolate until ¾ of the pretzel is covered. Allow excess chocolate to drip off and transfer to the lined baking sheet. Refrigerate to set, about 15 minutes.
    2. Next, use a disposable piping bag fitted with a small tip to drizzle melted white chocolate to look like a spider web. Return to the refrigerator or freezer to set.
    3. Finally, to make the spiders, pipe a large dot of semi-sweet chocolate on a pretzel rod. Use a toothpick to drag a small amount of chocolate out to make 8 legs. (See photo below.)
    Close up photo of a hand holding a toothpick, creating a tiny spider out of dark chocolate on a chocolate covered prezel rod
    Spider web pretzels

    For the mummy pretzels

    1. Fill a disposable piping bag fitted with a small tip with melted white chocolate. Drizzle the chocolate back and forth over ¾ of the pretzel rod to resemble mummy wrappings.
    2. Then, add two candy eyeballs towards the top of the pretzel rod. Refrigerate for about 15 minutes to allow the chocolate to set.

    Mummies, ghosts and spiders, oh my!

    4 types of Halloween chocolate dips pretzel rods are lined up on a parchment lined baking sheet
    Fun Halloween treats

    Substitutions

    Here are few ways to use the ingredients that you have on hand or can find in your area!

    • Use candy melts, candy coatings or almond bark instead of the chocolate chips.
    • If you can’t find pretzel rods or want smaller versions of these chocolate-dipped Halloween pretzels, use regular pretzel twists or mini pretzel rods.
    • For a totally sweet version, use filled cookie sticks like Pirouette cookies instead of pretzels.

    Variations

    Here are a few fun ways to make even more Halloween pretzel sticks!

    • Witch fingers – Use green candy melts to dip the prezel rods. Add a slice almond to the end of each pretzel rod for a fingernail.
    • Werewolves – Dip each pretzel rod in melted milk chocolate, add two eyes and lots of chocolate jimmies for werewolf ‘fur’.
    • Frankenstein Pretzels – Dip each pretzel in green candy melts, drizzle dark chocolate for hair at the top of each pretzel, add two candy eye balls and mini chocolate chips on the sides of the pretzel rods for his ‘bolts’
    • Monster Pretzels – Use orange, blue or purple candy melts to dip the pretzel rods in. Add one large candy eye ball or multiple small candy eyes balls to make each little monster.
    • Candy corn pretzels – Dip the pretzel rods in white chocolate. Drizzle stripes of yellow and orange melted chocolate to make the candy corn colors.
    Assorted chocolate dipped pretzel rods decorated in several ways for Halloween are scattered on a black background
    Chocolate pretzels

    Storage

    The best way to store these Halloween pretzel rods is in an airtight container at room temperature for up 2-3 weeks. You can freeze them for up to 6 months. If you store these in the freezer, the condensation may cause the candy eyes to smudge so thaw/handle them carefully to prevent the eyes from smudging or running.

    Halloween decorated chocolate covered pretzel rods have been placed vertically in a mug. Additional decorated pretzel rods lay around the mug on a moody dark background
    Halloween Pretzel Rods

    Related Recipes

    If you love fun Halloween treats like these, then you’ll also love these candy corn treats, this candy corn cake, these mummy rice krispy treats and mummy oreos!

    Did you make this? I’d be so grateful if you left a “star” rating below to let me know what you thought! Then, the next time you need a quick and easy recipe, come back to Fantabulosity to browse all of my easy recipes!

    Recipe

    Pretzel rods decorated for Halloween are dislayed on a black marbled background
    Print Pin
    5 from 6 votes

    Halloween Pretzels

    Easy to make Halloween Pretzels start with pretzel rods dipped in chocolate and then decorated to look like ghosts, mummies and spider webs!
    Course Dessert, Snack
    Cuisine American
    Prep Time 10 minutes minutes
    Decorating & Chill Time 35 minutes minutes
    Total Time 45 minutes minutes
    Servings 24 pretzels
    Calories 83kcal
    Author Jessica Burgess

    Ingredients

    • 24 pretzel rods
    • 6 oz White chocolate chips melted
    • 6 oz semi-sweet chocolate chips melted
    • Halloween sprinkles
    • 1 package candy eyes

    Instructions

    • Line two large baking sheets with parchment paper, wax paper or silicone mats.
    • Melt white chocolate and semi-sweet chocolate in two separate bowls in the microwave in 30 second intervals. Stir well between each heating until the chocolate is smooth and creamy.
    • Transfer the chocolate into 2 medium-tall thin glasses to dip the prezel rods in.

    Let's make ghost pretzels

    • Dip a pretzel rod in the white chocolate, covering about ¾ of the pretzel. Let the excess chocolate drip off and transfer the pretzel to the lined baking sheet.
    • Place the sheet in the refrigerator or freezer so the chocolate sets. This should take about 15 minutes.
    • Use a disposable piping bag fitted with a small tip to pipe on dark chocolate eyes and a rounded mouth.

    To make Halloween sprinkle pretzels

    • Dip pretzel rods in semi-sweet chocolate, covering about ¾ off the pretzel. Let extra chocolate drip off and move the pretzel to the lined baking sheet. Cover with Halloween sprinkles, jimmies or nonpareils.
    • Place the sheet in the refrigerator or freezer so the chocolate sets. This should take about 15 minutes.

    Make spider web pretzels

    • Dip a pretzel rod in melted semi-sweet chocolate until ¾ of the pretzel is covered. Allow excess chocolate to drip off and transfer to the lined baking sheet. Refrigerate to set, about 15 minutes.
    • Use a disposable piping bag fitted with a small tip to drizzle melted white chocolate to look like a spider web. Return to the refrigerator or freezer to set.
    • Finally, to make the spiders, pipe a large dot of semi-sweet chocolate on the pretzel rod. Use a toothpick to drag out a small amount of the chocolate to make 8 legs.

    For the mummy pretzels

    • Fill a disposable piping bag fitted with a small tip with melted white chocolate. Drizzle the chocolate back and forth over ¾ of the preztel rod to resemble mummy wrappings.
    • Add two candy eyeballs towards the top of the pretzel rod. Refrigerate for about 15 minutes to allow the chocolate to set.

    Notes

    • If you don’t have disposable piping bags and tips, use a small ziploc bag and snip off a corner to pipe the melted chocolate.
    • Instead of using melted chocolate for the mummy eyes and spiders, you can use food decorating gel or purchased decorator icing.
    • Use regular pretzel twists or mini pretzel rods for smaller versions of these Halloween dipped pretzels.

    Nutrition

    Serving: 1pretzel rod | Calories: 83kcal | Carbohydrates: 9g | Protein: 1g | Fat: 5g | Saturated Fat: 3g | Polyunsaturated Fat: 0.2g | Monounsaturated Fat: 1g | Trans Fat: 0.01g | Cholesterol: 2mg | Sodium: 19mg | Potassium: 63mg | Fiber: 1g | Sugar: 7g | Vitamin A: 6IU | Vitamin C: 0.1mg | Calcium: 19mg | Iron: 1mg

    Pumpkin Deviled Eggs

    September 12, 2022

    A round white plate is filled with halved hard boiled eggs with orange yolk filling piped to look like a pumpkin

    Pumpkin Deviled Eggs: Traditional deviled eggs get a festive makeover with a creamy, flavorful filling piped to look like pumpkins.

    Don’t worry, there is no pumpkin spice in each cute little pumpkin – just hard-boiled eggs and a few pantry ingredients. This adorable appetizer will be the star of all of your Fall celebrations!

    Pumpkin Deviled Eggs are displayed on a wooden cutting board
    Halloween Deviled Eggs

    Why you’ll love this recipe

    Deviled eggs are ALWAYS popular at get togethers and these pumpkin themed deviled eggs are an easy appetizer for this holiday season.

    The hard boiled eggs can be made in your Instant Pot or you can see my favorite tutorial for how to boil hard boiled eggs!

    These pumpkin eggs can be prepped and even assembled a day in advance. So this make ahead recipe can be whipped up the day before your Halloween party or as a Thanksgiving appetizer. We have lots of Halloween food ideas if you are looking for inspiration!

    [feast_advanced_jump_to]

    Ingredients for Pumpkin Deviled Eggs

    I’m pretty sure you have all of these ingredients in your kitchen, so these deviled eggs are ready in about 15 minutes!

    The ingredients to make Pumpkin Deviled Eggs are displayed on a white marble background
    Ingredients
    • 8 hard boiled eggs
    • ¼ cup mayonnaise
    • 1 tablespoon chopped green onions
    • 1-2 teaspoons dijon mustard
    • ⅛ teaspoon salt
    • ¼ teaspoon paprika
    • red food coloring
    • yellow food coloring
    • fresh chives

    See the printable recipe card below for quantities and the easy steps to make this appetizer recipe.

    Instructions

    1. Peel the hard boiled eggs and cut them in half lengthwise. Scoop out the yolks and place them in a bowl. Set egg whites aside.
    A wooden cutting board displays halved hard boiled eggs, some with the yolks removed
    Halve the boiled eggs
    A white bowl is filled with the yolks removed from hard boiled eggs in preparation to make Pumpkin Deviled Eggs
    Remove yolks
    1. In another small bowl, combine mayonnaise, onions, dijon mustard, paprika and salt. Stir in 2 drops of red food coloring and 1 drop of yellow food coloring.
    2. Add the mayonnaise mixture to the egg yolks. Mix well until the yolk mixture is smooth, creamy and a consistent orange color.
    Flavorful deviled egg filling is mixed in a white bowl surrounded by ingredients and a decorative orange napkin
    Add food coloring
    Bright orange deviled egg filling is displayed in a bowl in preparation to make Pumpkin Deviled Eggs
    Orange egg filling
    1. Place the yolk mixture into a disposable piping bag fitted with a large star tip. Pipe the filling into the hollow of the egg halves. Add a chive to the top of each egg for the pumpkin stem.
    A wooden cutting board displays halved hard boiled eggs, some with piped yolk filling, are in various stages of assembly of Pumpkin Deviled Eggs
    Pumpkin eggs
    1. Place the pumpkin deviled eggs on a serving platter and enjoy!
    A close up of halved hard boiled eggs filled with orange yolk filling and snipped chives inserted as stems to look like pumpkins
    Pumpkin Deviled Eggs

    Substitutions & Variations

    I know that there are different yolks for different folks, so here are a few suggestions for way to adjust this recipe for your particular preferences.

    • Omit the onions – I think the onions give the filling a nice little crunch, but if your family prefers, you can leave the onions out.
    • Use regular mustard – Dijon mustard can be replaced with regular yellow mustard in this hard boiled egg recipe.
    • Add bacon – If you haven’t had bacon in a deviled egg, you might be missing out!
    • Herbs – feel free to add a tablespoon or two of chopped fresh herbs to the filling. Dill, parsley or even cilanto can add a fresh pop to the filling.
    • Spice it up! – Replace the regular paprika with smoked paprika for a little heat in the yolk mixture filling.
    • Jack-o-lanterns – If you want to transform our pumpkin deviled eggs into a spooky treat, add small bits of black olives as eyes, nose and a mouth for jack-o-lantern deviled eggs.

    Storage

    You can store the prepared eggs in an airtight container in the refrigerator for up to 4 days.

    We do not recommend freezing the pumpkin deviled eggs.

    Hard boiled eggs halves filled to look like pumpkins are sitting on a white marble background
    Halloween deviled eggs recipe

    Top tip

    Since the filling already has mayonnaise and seasonings, leftover deviled eggs (if there is such a thing!) can be chopped for a quick egg salad!

    Related Recipes

    If you’re a fan of deviled eggs but love mixing things up, then you’ll also want to try these deviled eggs with candied bacon! And I have to tell you… when you have leftover or extra hard boiled eggs, consider making this egg salad recipe that’s really popular!

    Did you make this? I’d be so grateful if you left a “star” rating below to let me know what you thought! Then, the next time you need a quick and easy recipe, come back to Fantabulosity to browse all of my easy recipes!

    Recipe

    A round white plate is filled with halved hard boiled eggs with orange yolk filling piped to look like a pumpkin
    Print Pin
    5 from 7 votes

    Pumpkin Deviled Eggs

    Pumpkin Deviled Eggs: Traditional deviled eggs get a festive makeover with a creamy, flavorful filling piped to look like pumpkins.
    Course Appetizer
    Cuisine American
    Prep Time 15 minutes minutes
    Total Time 15 minutes minutes
    Servings 16 eggs
    Calories 63kcal
    Author Jessica Burgess

    Ingredients

    • 8 hard boiled eggs
    • ¼ cup mayonnaise
    • 1 tablespoon chopped green onions
    • 1-2 teaspoon dijon mustard
    • ⅛ teaspoon salt
    • ¼ teaspoon paprika
    • red food coloring
    • yellow food coloring
    • fresh chives

    Instructions

    • Peel the hard boiled eggs and cut them in half lengthwise. Scoop out the yolks and put them in a bowl. Set egg whites aside.
    • In another small bowl, combine mayonnaise, onions, dijon mustard and spices. Stir in 2 drops of red food coloring and 1 drop of yellow food coloring.
    • Add the mayonnaise mixture to the egg yolks. Mix well until the yolk mixture is smooth, creamy and a consistent orange color.
    • Place the yolk mixture into a disposable piping bag fitted with a large star tip.
    • Pipe the filling into the hollow of the egg halves. Add a chive to the top of the egg for the pumpkin stem.
    • Place the eggs on a serving platter and enjoy!

    Video

    Notes

    • I used gel food coloring for this recipe but you can use liquid food coloring as well, just make sure it is food safe.
    • If you don’t have a piping bag, you can transfer the egg yolk mixture into a ziploc bag, squeeze the air out and seal the bag. Using scissors, cut off a corner of the bag and squeeze the mixture into the eggs to make the pumpkin design.
    • You can definitely make these deviled eggs ahead of time. Boil the eggs, prepare the yolk mixture and store them in the refrigerator. When you are ready to make the eggs, allow the yolk to soften up a bit, pipe the filling, add the chives and serve.

    Nutrition

    Serving: 1egg | Calories: 63kcal | Carbohydrates: 0.4g | Protein: 3g | Fat: 5g | Saturated Fat: 1g | Polyunsaturated Fat: 2g | Monounsaturated Fat: 2g | Trans Fat: 0.01g | Cholesterol: 95mg | Sodium: 75mg | Potassium: 34mg | Fiber: 0.03g | Sugar: 0.3g | Vitamin A: 152IU | Vitamin C: 0.1mg | Calcium: 13mg | Iron: 0.3mg

    Mummy Oreos

    September 11, 2022

    A black plate in the center of the photo is filled with Mummy Oreos

    Mummy Oreos: Oreo cookies are dipped in creamy white chocolate and decorated with candy eyes and white chocolate bandages for fun Halloween treats!

    Spooky season is upon us and we have been sharing tons of Halloween food ideas: Nutter Butter Mummies, Mummy Rice Krispie Treats and Pumpkin Patch Brownies. And now, the cutest Halloween Oreos are making their debut!

    A black plate is filled with Oreos decorated to look like mummies. Around the plate, there are a scattering of candy eyes and several more Mummy Oreos
    Mummy Oreos

    Why you’ll want to make these mummy cookies for Halloween

    There are only 3 ingredients and a few simple steps. This is one easy Halloween recipe!

    Since this is a no bake dessert (we LOVE no bake recipes), these fun Halloween treats can be made and enjoyed in about 15 minutes!

    These simple treats can be made by kids of all ages at a class party, play date or homeschool co-op.

    [feast_advanced_jump_to]

    Ingredients

    What do you need to make mummy cookies for Halloween? Three simple ingredients!

    The ingredients used to make chocolate dipped Mummy Oreos are displayed on a white background
    • 15 Oreo sandwich cookies
    • 2 cups white chocolate candy melts
    • 1 package candy eyeballs

    See the printable recipe card below for the full recipe, detailed instructions and additional notes.

    Instructions

    1. Line a baking sheet with parchment paper or wax paper and set aside.
    2. Place the white chocoalte in the microwave and heat according to the package instructions. Stir and continue heating in 15 second intervals until the chocolate is smooth and melted.
    3. Place an Oreo cookie on a fork and dip it into the chocolate, covering the entire cookie. Lift the cookie from the chocolate and allow the excess white chocolate to drip off. Wipe the extra chocolate off the back of the cookie using the edge of the bowl.
    An Oreo cookie is resting on the tines of a fork waiting to be dipped in a small bowl of melted white chocolate
    Oreo cookie
    An Oreo cookie that has been dipped in chocolate is poised over a bowl of melted white chocolate
    Dip in white chocolate
    1. Place the dipped Oreos onto the cookie sheet and add two candy eyes to each cookie. Continue until all Oreos are dipped and have eyes.
    A metal baking sheet lined in parchment paper holds chocolate dipped Oreos with candy eyes
    Add candy eyes
    1. Microwave any remaining melted chocolate (add more chocolate melts if necessary) until it is smooth. Pour the melted chocolate into a disposable piping bag and twist the top closed.
    2. Use scissors to snip off of the tip of the piping bag so the chocolate is piped in a thin line for the mummy bandages.
    3. Pipe lines of chocolate in multiple directions across the top of the cookies, avoiding the eyes.
    A baking sheet lined in parchment paper holds Oreo cookies that have been dipped in white chocolate and are decorated to look like mummies
    Drizzle white chocolate
    1. Place the cookies in the refrigerator for 5-10 minutes to allow the chocolate to set. Remove the excess chocolate from around the cookies, place on a plate and serve.
    A close up photo of Oreo cookies dipped in white chocolate and decorated to look like mummies
    Oreo mummy cookies

    Substitutions

    We’ve got a few ways that you can adjust this recipe to fit what you have on hand!

    • Oreos – Use your favorite flavor of Oreos, Golden Oreos or even double stuff Oreos.
    • Candy eyes – If you can’t find candy eyes, you can use mini chocolate chips, round candy sprinkles or even piped black icing.
    • White chocolate – We used white candy melts, but you can use white almond bark or any other white/vanilla candy coating for these white chocolate Oreo mummies.

    Variations

    If you want to get creative, try these fun variations.

    • Make Oreo mummy pops – Before dipping the Oreos, insert a popsicle stick or lollipop stick into the center of the cookie. Then, dip the cookie, add the eyes and drizzle the mummy wrapping. These mummy Oreo pops would make cute Halloween party favors for your Halloween parties.
    • Create Oreo ghosts – If you don’t add the white chocolate drizzle, you’ve got Oreo ghosts!
    • More Halloween Oreos – Change the color of the candy wafers/candy melts to make different Halloween Oreos. Green candy melts can become witches or Frankenstein. Orange candy melts can transform Oreos into jack-o-lanterns. Milk chocolate melts and brown sprinkles are perfect to make Oreo werewolves.

    Storage

    Store any leftover Oreo mummy cookies in a zip-top bag or airtight container in the refrigerator or freezer. Store in the fridge for 1-2 weeks and up to one month in the freezer. Thaw frozen cookies in the refrigerator before eating.

    A photo of white chocolate dipped Oreos decorated to look like mummies
    Mummy Oreo cookies

    Related Recipes

    If you loved these mummies, then you’ll also love these mummy rice krispie treats and the quick dessert ideas in this Halloween party!

    Did you make this? I’d be so grateful if you left a “star” rating below to let me know what you thought! Then, the next time you need a quick and easy recipe, come back to Fantabulosity to browse all of my easy recipes!

    Recipe

    A black plate in the center of the photo is filled with Mummy Oreos
    Print Pin
    5 from 1 vote

    Mummy Oreos

    Mummy Oreos: Oreo cookies are dipped in creamy white chocolate and decorated with candy eyes and white chocolate bandages for a sweet and spooky treat!
    Course Dessert
    Cuisine American
    Prep Time 10 minutes minutes
    Setting Time 5 minutes minutes
    Total Time 15 minutes minutes
    Servings 15 cookies
    Calories 185kcal
    Author Jessica Burgess

    Ingredients

    • 15 Oreo cookies
    • 2 cups white chocolate melts
    • 1 package candy eyes

    Instructions

    • Line a baking sheet with parchment paper or wax paper and set aside.
    • Place the white chocolate in the microwave and heat according to package instructions. Stir and continue heating in 15 second intervals until chocolate is smooth and melted.
    • Place an Oreo cookie on a fork and dip into the chocolate, covering the entire cookie. Lift the cookie from the chocolate and allow the excess white chocolate to drip off. Wipe the extra chocolate off of the back of the cookie using the edge of the bowl.
    • Place the dipped Oreo onto the cookie sheet and add two candy eyes. Continue until all Oreos are dipped and have eyes.
    • Microwave any remaining melted chocolate (add more chocolate melts if necessary) until it is smooth. Pour the melted chocolate into a disposable piping bag and twist the top closed.
    • Use scissors to snip off the tip of the piping bag so the chocolate is piped in a thin line for the mummy bandages.
    • Pipe lines of chocolate in multiple directions across the top of the cookie, avoiding the eyes.
    • Place the cookies in the refrigerator for 5-10 minutes to allow the chocolate to set. Remove the excess chocolate from around the cookies, place on a plate and serve.

    Notes

    • This recipe is for 15 mummy Oreos, but if you want to use all of the cookies in the package, you will need to purchase more white chocolate melts and candy eyes.
    • The black pupils on the candy eyes smudge easily, so I prefer to handle them with tweezers or tongs.
    • If you don’t have a piping bag, you can use a ziploc bag or even a spoon to drizzle the mummy bandages.
    • If you can’t find the candy eyes at the grocery store, try your local Walmart, the baking aisle of the craft store or Amazon. 

    Nutrition

    Serving: 1cookie | Calories: 185kcal | Carbohydrates: 23g | Protein: 2g | Fat: 10g | Saturated Fat: 5g | Polyunsaturated Fat: 1g | Monounsaturated Fat: 3g | Trans Fat: 0.01g | Cholesterol: 5mg | Sodium: 68mg | Potassium: 97mg | Fiber: 0.4g | Sugar: 19g | Vitamin A: 7IU | Vitamin C: 0.1mg | Calcium: 50mg | Iron: 2mg

    Dirt Cupcakes

    September 10, 2022

    A plate full of Dirt Cupcakes with gummy worms is centered and surrounded by plastic spiders, Oreo crumbs and a glass of milk

    Dirt Cupcakes: Each rich chocolate fudge cupcake is topped with fluffy homemade chocolate buttercream, Oreo dirt, and a wiggly gummy worm for a whimsical dessert that is fun for kids of all ages!

    This is our take on a classic worms in dirt dessert but in cupcake form. You may remember seeing the Oreo crumbs on our Pumpkin Patch Brownies. I think a few gummy worms in that dirt would be pretty darn cute, too!

    Frosted chocolate cupcakes are topped with Oreo crumbs and gummy worms, surrounded by plastic spiders, gummy worms and Oreo crumbs
    Dirt Cupcakes with Gummy Works

    Why you’ll love this recipe for dirt cake cupcakes

    Who doesn’t love a cute cupcake? Cupcakes with gummy worms are perfect for a garden party, bug themed birthday or a Halloween party. And boy, have we got lots of Halloween food ideas for your parties. I even think these cupcakes are a fun dessert for an Earth Day celebration!

    You can make this easy recipe with ingredients from your local grocery store: a chocolate cake mix, chocolate frosting, Oreo cookies and gummy worms. I love recipes with simple ingredients and easy directions.

    [feast_advanced_jump_to]

    Ingredients

    Here is what you will need to make gummy worm dirt cupcakes:

    The ingredients for Dirt Cupcakes with gummy worms are displayed on a white background
    Ingredients

    To make the cupcakes

    • One box of chocolate fudge cake mix + the ingredients required on the box

    For the chocolate cream cheese frosting

    • ½ cup milk chocolate chips, melted
    • 8 oz. (one block) of cream cheese, softened
    • ½ cup (1 stick) of butter, softened
    • 1 teaspoon pure vanilla extract
    • 2 cups powdered sugar
    • ½ cup cocoa powder

    For the Oreo dirt

    • 15 Oreo cookies, crushed into crumbs

    Cupcake toppings

    • 24 Gummy worms
    • Plastic spider rings, optional

    See the recipe card for quantities, full instructions and notes.

    Frosted chocolate cupcakes are topped with Oreo crumbs and gummy worms, surrounded by plastic spiders, gummy worms and Oreo crumbs
    Worms & Dirt Cupcakes

    How to Make Gummy Worm Dirt Cupcakes

    Bake the cupcakes

    1. Preheat the oven according to the directions on the chocolate cake mix. Line two cupcake pans/muffins tins with cupcakes papers and set aside.
    2. In a large bowl, prepare the cake mix according to package instructions.
    3. Spoon the cupcake batter into the liners, filling them about ⅔ full. Bake as per the instructions on the box and allow the cupcakes to cool completely.
    A 12 cup muffin tin is filled with chocolate cupcake batter ready to be baked
    Cupcake batter
    12 baked chocolate cupcakes are cooling on a rectangle shaped wire cooling rack
    Let cupcakes cool

    Make the chocolate cream cheese frosting

    1. Melt the chocolate chips in a microwave safe bowl for 30 seconds and stir. Continuing microwaving the chocolate in 15 second intervals until it is melted and smooth.
    2. In a large mixing bowl using a stand mixer or a handheld mixer, cream the butter and cream cheese together until smooth and fluffy. Add the melted chocolate and mix well. Add the powdered sugar gradually until it is combined. Mix in the cocoa powder. Add the vanilla extract and mix one more time. Set frosting aside.
    A hand is holding a bowl of powdered sugar ready to be added to a bowl of chocolate cream cheese frosting
    Add powdered sugar
    A metal bowl of fluffy, whipped chocolate cream cheese frosting is centered on a white background
    Chocolate cream cheese buttercream

    For the Oreo dirt crumbs

    1. Place the Oreo cookies into a food processor and pulse them until they are crumbs. Set aside.
    Oreo cookies are in the food processor ready to be made into Oreo crumbs or Oreo dirt
    Add Oreo cookies
    A bowl full of fine Oreo cookie crumbs is centered on a white background
    Oreo cookie dirt

    Let’s decorate the cupcake

    1. Frost each cupcake with the chocolate buttercream. You can spread the frosting with an offset spatula or use a piping bag fitted with a 1M tip (the large open star) to pipe the frosting onto the top of the cupcakes.
    2. Dip the cupcake into the bowl of Oreo dirt or sprinkle a few spoonfuls of Oreo dirt on top of the frosting. Place a gummy worm in the center of each cupcake.
    3. For a spooky twist, add a plastic spider ring to the top of the cupcakes. Or, you can poke the gummy worms into the frosting so they look like they are wiggling out.
    Chocolate cupcakes are displayed on a wire cooling rack. Half of them are frosting with chocolate frosting and half of them are topped with Oreo crumbs
    12 chocolate cupcakes with chocolate frosting and Oreo crumbs are displayed on a wire cooling rack
    A close up photo of 12 chocolate cupcake that have been frosted with chocolate and topped with Oreo crumbs and gummy worms are sitting on a wire cooling rack
    Gummy worm cupcakes

    Substitutions

    Feel free to use any of the suggested substitutions below if you need to know how to make gummy worm cupcakes fit for your family and lifestyle.

    • Homemade chocolate cake – We love the time saving step of using a cake mix, but if you have a favorite chocolate cake or cupcake recipe, you can use that instead.
    • Store-bought frosting – While the homemade frosting in this recipe is amazing, you can absolutely use your favorite purchased frosting if you are in a time crunch.
    • Cookie crumbs – Substitute your favorite chocolate cookies or for the crumbs

    Variations

    There are so many ways to switch up elements in this recipe for Oreo dirt cupcakes to fit your family!

    • Gummy worms – Use your favorite brand or type of gummy worms. Classic gummy worms or even sour worms will work. You can even use gummy bugs and add chocolate rocks.
    • Oreo flavors – You can get creative and use different flavors of Oreos for the Oreo dirt. We prefer the dark chocolate cookies, but you can use the golden Oreos if that is what you can find.
    • Frosting flavors – Try making classic chocolate buttercream, caramel buttercream or even Oreo buttercream to top these cupcakes.
    • Add a pudding center – If you really want to up the chocolate factor of these cupcakes, hollow out a small piece of each cupcake center (keep the piece of cake!) and spoon in a tablespoon of chocolate pudding. Replace the piece of cake and continue frosting and topping the cupcakes.
    • Make dino dig cupcakes – If you aren’t into wiggly worms, this cupcake base with Oreo dirt could easily become dinosaur themed. Just add a dinosaur cupcake topper or chocolate dinosaurs to the top of each cupcake. Around Halloween, you may even be able to find candy bones to add to the dinosaur dig cupcakes.

    Storage

    We recommend storing any leftover dirt worm cupcakes in an airtight container at room temperature. If you prefer, you can store the cupcakes in the refrigerator, but they could dry out.

    The Oreo crumbs will soften after cupcake assembly but they will still taste delicious!

    A hand is holding a chocolate frosted cupcake topped with Oreo crumbs and a colorful gummy worm

    Related Recipes

    Love cupcake recipes? Then we think you’ll also love these Oreo cupcakes and caramel cupcakes!

    Or, if you’re looking for Halloween treats, then you’re really going to love these mummy cookies, Halloween snack mix, and mummy rice krispy treats!

    Did you make this? I’d be so grateful if you left a “star” rating below to let me know what you thought! Then, the next time you need a quick and easy recipe, come back to Fantabulosity to browse all of my easy recipes!

    Recipe

    A plate full of Dirt Cupcakes with gummy worms is centered and surrounded by plastic spiders, Oreo crumbs and a glass of milk
    Print Pin
    5 from 4 votes

    Dirt Cupcakes

    Dirt Cupcakes: Chocolate fudge cupcakes are topped with fluffy homemade chocolate buttercream, Oreo dirt and a wiggly gummy worm for a whimsical dessert that is fun for kids of all ages!
    Course Dessert
    Cuisine American
    Prep Time 15 minutes minutes
    Cook Time 15 minutes minutes
    Total Time 30 minutes minutes
    Servings 24 cupcakes
    Calories 268kcal
    Author Jessica Burgess

    Ingredients

    To Make the cupcakes

    • 1 box chocolate fudge cake mix plus ingredients required on the package

    For the chocolate cream cheese frosting

    • ½ cup milk chocolate chips melted
    • 8 oz cream cheese softened
    • ½ cup butter softened
    • 1 teaspoon pure vanilla extract
    • 2 cups powdered sugar
    • ½ cup cocoa powder

    For the Oreo dirt

    • 15 Oreo cookies crushed into crumbs

    Toppings

    • 24 gummy worms
    • plastic spider rings optional

    Instructions

    Bake the Cupcakes

    • Preheat the oven according to the directions on the chocolate cake mix. Line two cupcake/muffin pans with cupcake papers and set aside.
    • In a large bowl, prepare the cake mix according to package instructions.
    • Spoon the cupake batter into the liners, filling them about ⅔ full. Bake as per the instructions on the box and allow cupcakes to cool completely.

    Make the Chocolate Cream Cheese Frosting

    • Melt the chocolate chips in a microwave safe bowl for 30 seconds and stir. Continue microwaving in 15 seconds intervals just until the chocoalte is melted and smooth.
    • In a large mixing bowl using a stand mixer or a handheld mixer, cream the butter and cream cheese together until smooth and fluffy. Add the melted chocolate and mix well. Add the powdered sugar gradually until it is combined. Mix in the cocoa powder. Add the vanilla extract and mix one more time. Set frosting aside.

    For the Oreo crumbs

    • Place the Oreo cookies into a food processor and pulse them until they are crumbs. Set aside.

    To Decorate the cupcakes

    • Frost each cupcake with the chocolate butter cream. You can spread the frosting with an offset spatula or use a piping bag fitted with a 1M tip (the large open star) to pipe the frosting onto the top of the cupcake.
    • Dip the cupcake into the bowl of Oreo dirt or sprinkle a few spoonfuls of Oreo dirt on top of the frosting and place a gummy worm in the center of each cupcake.
    • For a spooky twist, add a plastic spider ring to the top of the cupcakes. Or, you can poke the gummy worms into the frosting so they look like they are wiggling out.

    Video

    Notes

    • If you prefer, use your favorite chocolate cake recipe instead of a boxed mix.
    • You can also use a tub of store-bought chocolate frosting instead of making homemade chocolate buttercream. Tip: Whip the purchased frosting with a hand mixer to make it light and fluffy.
    • Use your favorite candy for the dirt and worms cupcakes – classic gummy worms or sour worms, gummy bugs/spiders and candy rocks are all fun options.

    Nutrition

    Serving: 1cupcake | Calories: 268kcal | Carbohydrates: 39g | Protein: 3g | Fat: 12g | Saturated Fat: 6g | Polyunsaturated Fat: 1g | Monounsaturated Fat: 4g | Trans Fat: 0.2g | Cholesterol: 20mg | Sodium: 243mg | Potassium: 118mg | Fiber: 1g | Sugar: 26g | Vitamin A: 246IU | Calcium: 41mg | Iron: 2mg

    Mummy Rice Krispie Treats

    September 9, 2022

    A plate full of Mummy Rice Krispie Treats is centered in the photo and a glass of milk, a decorate black and white towel and another krispie treat surround the plate

    Mummy Rice Krispie Treats: Classic rice krispie treats are covered in white chocolate, then decorated to look like mummies and spider webs! These easy Halloween treats have just 4 ingredients and can be made in minutes!

    If you are looking for a Halloween dessert this time of year, you have come to the right place. If these fun treats don’t say Happy Halloween, I don’t know what will! (You’re also really going to love these Mummy Oreo Cookies!)

    A plate full of Mummy Rice Krispie Treats is displayed with a glass of milk and another krispie treat is in the foreground beside a decorative black and white towel
    Mummy Rice Krispies Treats

    Why you’ll love this recipe

    This is a no bake Halloween dessert so it is quick and easy!

    You don’t need any special tools or fancy ingredients. Everything can be found at your grocery store or the baking aisle of your local Walmart.

    This is the perfect easy recipe to let the kids help with! Little hands can unwrap the krispy treats, place the candy eyes, stir the white candy melts and of course, taste test.

    Festive, easy Halloween desserts like our Nutter Butters Mummies and these super simple mummy treats are perfect for your next Halloween party.

    [feast_advanced_jump_to]

    Ingredients

    You only need four ingredients to make a batch of cute mummy rice krispie treats!

    The ingredients to make Mummy Rice Krispie Treats are displayed on a marble background
    Ingredients
    • 24 rice krispie treats bars
    • Two 10 oz. bags of white chocolate melting wafers
    • One or two packages of candy eyes
    • 8 oz. black decorating icing bag with removable tips (with coupler and #3 decorating tip)

    See the recipe card below for quantities, full instructions and helpful notes.

    Instructions

    1. Line several baking sheets with parchment paper. Unwrap the krispie treats and place them a few inches apart on the baking sheets.
    2. Melt half of the candy melts (one bag or 10 oz.) in a microwave-safe bowl according to the package directions. Be careful not to overheat the chocolate or it will dry out and clump.
    3. Spread about one tablespoon of melted white chocolate on the top of each of the krispie treats with the back of a spoon or an offset spatula. Add two candy eyeballs before the chocolate sets. If you are decorating some of the treats with spider webs, leave several of the coated krispie treats with no eyes.
    Nine unwrapped rice krispie treats are arranged on a parchment lined baking sheet
    Line tray
    Spread chocolate
    1. To make the mummy wrap or bandages, start by melting the remaining white chocolate in the microwave. Pour it into a disposable piping bag and twist it closed at the top.
    2. Using scissors, snip a tiny corner of the piping bag so the chocolate pipes out in thin lines.
    3. Squeeze the filled piping bag gently and drizzle the melted chocolate in different directions over the coated treats, avoiding the eyes. Set the tray(s) aside to allow the bandages to set up.
    A hand is holding a piping bag of white chocolate over a pan of chocolate covered rice krispie treats with candy eyes
    Drizzle chocolate
    1. To pipe the spider webs, first remove the tip that was included with the black decorating icing. Replace it with a coupler (a piece to connect the piping tip) and a #3 decorating tip.
    2. Using the picture below as a guide, pipe spider webs on the coated rice krispie treats. You may want to practice first on an extra piece of parchment or wax paper.
    Add decorating tip
    Chocolate covered Rice krispie treats are decorated with black piped spider webs and laid on a parchment lined baking sheet
    Pipe spider webs
    1. Allow the spider web krispie treats to set up for about 15 minutes.
    2. Remove any extra white chocolate drizzle from the sides of the mummies and put both the mummies and spider web treats on a plate. Enjoy!
    Rice krispie treats decorated to look like mummies and spider webs are displayed on a marble surface accented by a black and white towel
    Easy Halloween Rice Krispie Treats

    Substitutions & Variations

    Since this is such an easy Halloween recipe and you may want to make it again and again, we’ve included a few different ways to make our Halloween rice krispie treats. You can find all of our Halloween food ideas here!

    Instead of store bought rice krispie treats, you can easily make a batch of homemade rice krispies treats with rice cereal, mini marshmallows and butter. If you’re feeling really festive, try one of our flavored krispie treats – caramel krispie treats, chocolate krispie treats or even Oreo krispie treats!

    While we made mummies and spider web rice krispie treats, get creative with the color of the chocolate melts and the decorations. You can make frankenstein rice krispie treats using green candy melts or ghost krispie treats if you don’t add the mummy bandages.

    If you can’t find the candy googly eyes, you can use the black icing or mini chocolate chips.

    Insert a popsicle stick or lollipop stick into the bottom of the krispie treats and make rice krispie treat pops! They would make adorable classroom treats, favors for a Halloween party or a fun activity for school parties.

    Storage

    We recommend storing these spooky rice krispie treats at room temperature in an airtight container. For the best results, enjoy these within 1-2 days.

    A plate full of Mummy Rice Krispie Treats is displayed with a glass of milk
    Halloween dessert idea

    Did you make this? I’d be so grateful if you left a “star” rating below to let me know what you thought! Then, the next time you need a quick and easy recipe, come back to Fantabulosity to browse all of my easy recipes!

    Recipe

    A plate full of Mummy Rice Krispie Treats is centered in the photo and a glass of milk, a decorate black and white towel and another krispie treat surround the plate
    Print Pin
    5 from 3 votes

    Mummy Rice Krispie Treats

    For these Mummy Rice Krispie Treats, classic rice krispie treats are covered in white chocolate, then decorated to look like mummies and spider webs! These easy Halloween treats have just 4 ingredients and can be made in minutes!
    Course Dessert
    Cuisine American
    Prep Time 10 minutes minutes
    Setting Time 30 minutes minutes
    Total Time 40 minutes minutes
    Servings 24 krispie treats
    Calories 257kcal
    Author Jessica Burgess

    Ingredients

    • 24 rice krispie treats bars
    • 20 oz white chocolate melting wafers
    • 1-2 packages candy eyes
    • 8 oz. black icing

    Instructions

    • Line several baking sheets with parchment paper. Unwrap the krispie treats and place them a few inches apart on the baking sheets.
    • Melt half of the candy melts (one bag / 10 oz.) in a microwave-safe bowl according to the package directions.
    • Spread about one tablespoon of melted white chocolate on the top of each of the krispie treats with the back of a spoon or an offset spatula. Add two candy eyeballs before the chocolate sets. If you are decorating some of the treats with spider webs, leave several fo the coated krispie treats with no eyes.
    • To make the mummy wrap or bandages, start by melting the remaining white chocolate in the microwave. Pour it into a disposable piping bag and twist it closed at the top.
    • Using scissors, snip a tiny corner of the piping bag so the chocolate pipes out in thin lines.
    • Squeeze the piping bag gently and drizzle the melted chocolate in different directions over the coated treats, avoiding the eyes. Set the tray(s) aside to allow the bandages to set up.
    • To pipe the spider webs, first remove the tip that was included with the black decorating icing. Replace it with a coupler (a piece to connect the piping tip) and a #3 decorating tip.
    • Using the picture in the post as a guide, pipe spider webs on the coated rice krispie treats. You may want to practice first on an extra piece of parchment or wax paper.
    • Allow the spider web krispie treats to set up for about 15 minutes.
    • Remove any extra white chocolate drizzle from the sides of the mummies and put both the mummies and spice web treats on a plate to serve. Enjoy!

    Notes

    • The white chocolate sets quickly, so you may need to microwave it in 15 to 30-second intervals to keep it melted.
    • The black dots on the candy eyes smear easily, so I prefer to handle them with tongs or tweezers.
    • If you don’t have piping bags, you can pour the white chocolate into a ziplock bag and snip of one of the corners. Or, use a small spoon to drizzle a small amount of chocolate across the chocolate coated rice krispie treats.

    Nutrition

    Serving: 1bar | Calories: 257kcal | Carbohydrates: 20g | Protein: 1g | Fat: 9g | Saturated Fat: 5g | Polyunsaturated Fat: 1g | Monounsaturated Fat: 3g | Cholesterol: 5mg | Sodium: 39mg | Potassium: 71mg | Fiber: 0.05g | Sugar: 20g | Vitamin A: 7IU | Vitamin C: 0.1mg | Calcium: 47mg | Iron: 0.1mg

    Nutter Butter Mummies

    September 8, 2022

    Nutter Butter Mummies Cookies are displayed on a black plate on a decorative white & black cloth in the center of the photo

    Nutter Butter Mummies: Crunchy peanut butter cookies dipped in white chocolate get an adorable Halloween makeover with candy eyes and white chocolate bandages! These no bake mummy cookies will be a monstrous hit at all of your Halloween parties!

    Nutter Butter mummies cookies on black plate
    Nutter Butter Mummies

    Why You’ll Love These Halloween Cookies

    There are only three ingredients that you can grab on your next trip to the grocery store.

    Since this is a no bake recipe, your family will have a batch of Halloween treats in no time!

    We love recipes that the kids can help with. These adorable Nutter Butter mummy cookies have minimal ingredients and simple steps, a lot like these Oreo mummies. Kids will love to get in the kitchen. My mummy rice krispy treats, and Halloween snack mix are a few more Halloween food ideas that your family will love to make!

    [feast_advanced_jump_to]

    Ingredients for Mummy Nutter Butters

    With just three ingredients that can be found at your local grocery store, you can have little Nutter Butter mummies ready by snack time!

    The ingredients for Nutter Butter Mummies - white chocolate melts, Nutter Butter cookies and candy eyes - are laid out on a white surface
    Ingredients
    • One family-size package of Nutter Butter cookies
    • One package of candy eyeballs
    • Two 10 oz. bags of white candy melts

    See the printable recipe card below for quantities and step-by-step instructions.

    Instructions

    1. Line several baking trays with parchment paper, wax paper or a silicone mat and set aside.
    2. Place the white chocolate melts in a microwave-safe bowl and heat according to package directions. Continue to microwave until the melted white chocolate is smooth and creamy.
    A small white bowl is full of melted white chocolate melts. This will be used to dip Nutter Butter cookies into to make Nutter Butter Mummies
    Melt white chocolate
    1. Dip the Nutter Butters one at a time into the melted chocolate, dipping about ¾ of each cookie. Remove the excess chocolate from the back of the cookies and place the dipped cookies on the baking sheet. Leave a few inches of space between each cookie.
    2. Add the candy eyes before the chocolate sets. Repeat until all cookies are dipped and have eyes.
    A hand is dipping a Nutter Butter in white chocolate as the first step in making Nutter Butter Mummies
    Dip cookies
    A hand is placing a candy eye on a chocolate dipped Nutter Butter Mummies cookie
    Add candy eyes
    1. Microwave the remaining chocolate in the bowl and add more chocolate melts as necessary. Fill a disposable piping bag with the chocolate and twist the bag slightly to close.

      Snip the tiniest bit off of the tip of the bag and squeeze gently to make sure the chocolate flows out in a small piped line. This will be used to make the mummy wrap or mummy bandages so you don’t want to cut off too much of the tip of the bag or the bandages will be too thick.
    A hand is holding a piping bag that is filled with melted white chocolate
    Piping bag
    1. Holding the piping bag firmly, gently pipe small lines of white chocolate in multiple directions across each coated cookie, avoiding the eyes.
    A tray of Nutter Butter Mummies cookies are displayed and a hand is drizzling melted white chocolate on the cookies for the mummy bandages
    Pipe or drizzle
    1. Place the cookies in the refrigerator for 5-10 minutes to allow them to set/harden.
    2. Once set, remove the cookies from the fridge and carefully snap off the excess candy-coating pieces from around each cookie. Place cookies on a plate and serve!
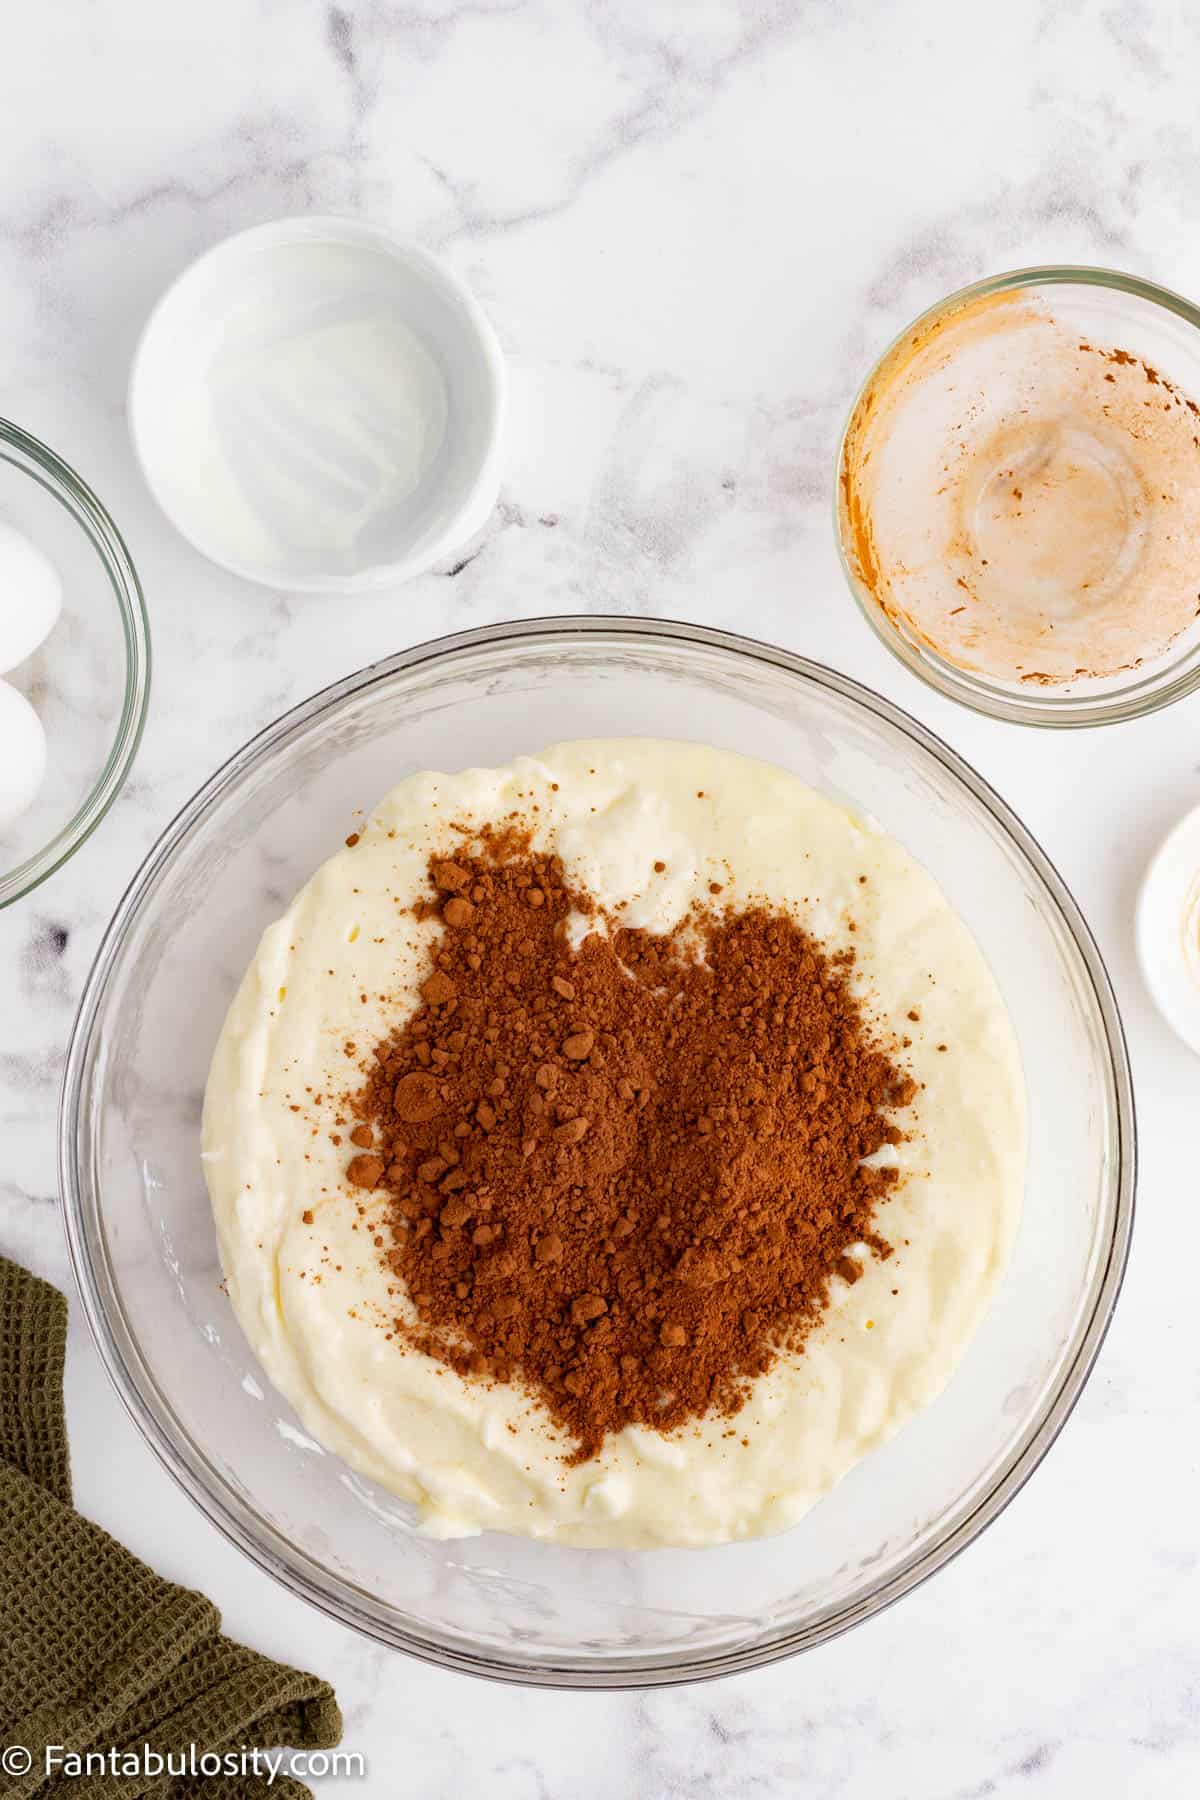
    A hand holds a single Nutter Butter mummy cookie with a plate of cookies and a glass of milk in the background
    Chocolate covered Nutter Butters

    Substitutions

    Here are a few easy substitutions to fit the ingredients and tools you have on hand.

    • Cookies – If you can’t find the Nutter Butters or need an option without peanut butter, we like using Pepperidge Farm Milano cookies since they are the same general shape and size
    • White chocolate – You can also use a package of white almond bark or melt white chocolate chips over a double boiler instead of the white candy melts.
    • Candy eyes – I found the candy eyes at my local Walmart but you can also purchase them online or try the food crafting section of the craft store. If you can’t find them, you can also use mini chocolate chips for eyes.

    Variations

    • Ghosts – If you don’t pipe the mummy bandages, you can add a chocolate chip mouth for a batch of little Nutter Butter ghosts.
    • Make mummy cookie pops – Insert a lollipop stick or popsicle stick into the cookie filling of each mummy to make a cookie pop. Slip each cookie pop into a cellophane bag and tie with a festive ribbon to make easy favors for your Halloween party!

    How to Store Mummy Nutter Butter Cookies

    These cookies can be stored in an airtight container in the refrigerator for 1-2 weeks or in the freezer for up to a month. Thaw the frozen cookies in the fridge before eating.

    While you can store these cookies in the refrigerator/freezer, the black dots on the candy eyes may smudge or smear due to the condensation in the cool environment. So, we really like to enjoy these the day they are made.

    A black plate in the center of the photo is filled with Nutter Butter Mummies cookies and a glass of milk is waiting in the background
    Mummy Nutters Butters

    I have a feeling you’ll also love these chocolate-covered Halloween pretzels too!

    Did you make this? I’d be so grateful if you left a “star” rating below to let me know what you thought! Then, the next time you need a quick and easy recipe, come back to Fantabulosity to browse all of my easy recipes!

    Recipe

    Nutter Butter Mummies Cookies are displayed on a black plate on a decorative white & black cloth in the center of the photo
    Print Pin
    5 from 1 vote

    Nutter Butter Mummies

    Nutter Butter Mummies are simply cookies dipped in white chocolate that get an adorable Halloween make over with candy eyes and white chocolate bandages! These no bake mummy cookies will be a monstrous hit at your Halloween parties!
    Course Dessert
    Cuisine American
    Prep Time 10 minutes minutes
    Setting Time 5 minutes minutes
    Total Time 15 minutes minutes
    Servings 30 cookies
    Calories 167kcal
    Author Jessica Burgess

    Ingredients

    • 30 Nutter Butter cookies from a family size package
    • 20 ounces white chocolate candy melts
    • 1 package candy eyes

    Instructions

    • Line several baking trays with parchment paper, wax paper or a silicone mat and set aside.
    • Place the white chocolate melts in a microwave safe bowl and heat according to package directions. Continue to microwave until the melted white chocolate is smooth and creamy.
    • Dip the Nutter Butter cookies one at a time into the melted chocolate, dipping about ¾ of each cookie. Remove the excess chocolate from the back of the cookies and place the dipped cookies on the baking sheet.
    • Add the candy eyes before the chocolate sets. Repeat until all cookies are dipped and have eyes.
    • Microwave the remaining chocolate in the bowl and add more chocolate melts as necessary. Fill a disposable piping bag with the chocolate and twist the bag slightly to close. Snip the tiniest bit off of the tip of the bag and squeeze gently to make sure the chocolate flows out in a small piped line.
    • Holding the piping bag firmly, gently pipe small lines of white chocolate in multiple directions across each coated cookie, avoiding the eyes.
    • Place the cookies in the refrigerator for 5-10 minutes to allow them to set/harden.
    • Once set, remove the cookies from the refrigerator and carefully snap off the excess candy coating pieces from around each cookie. Place cookies on plate and serve!
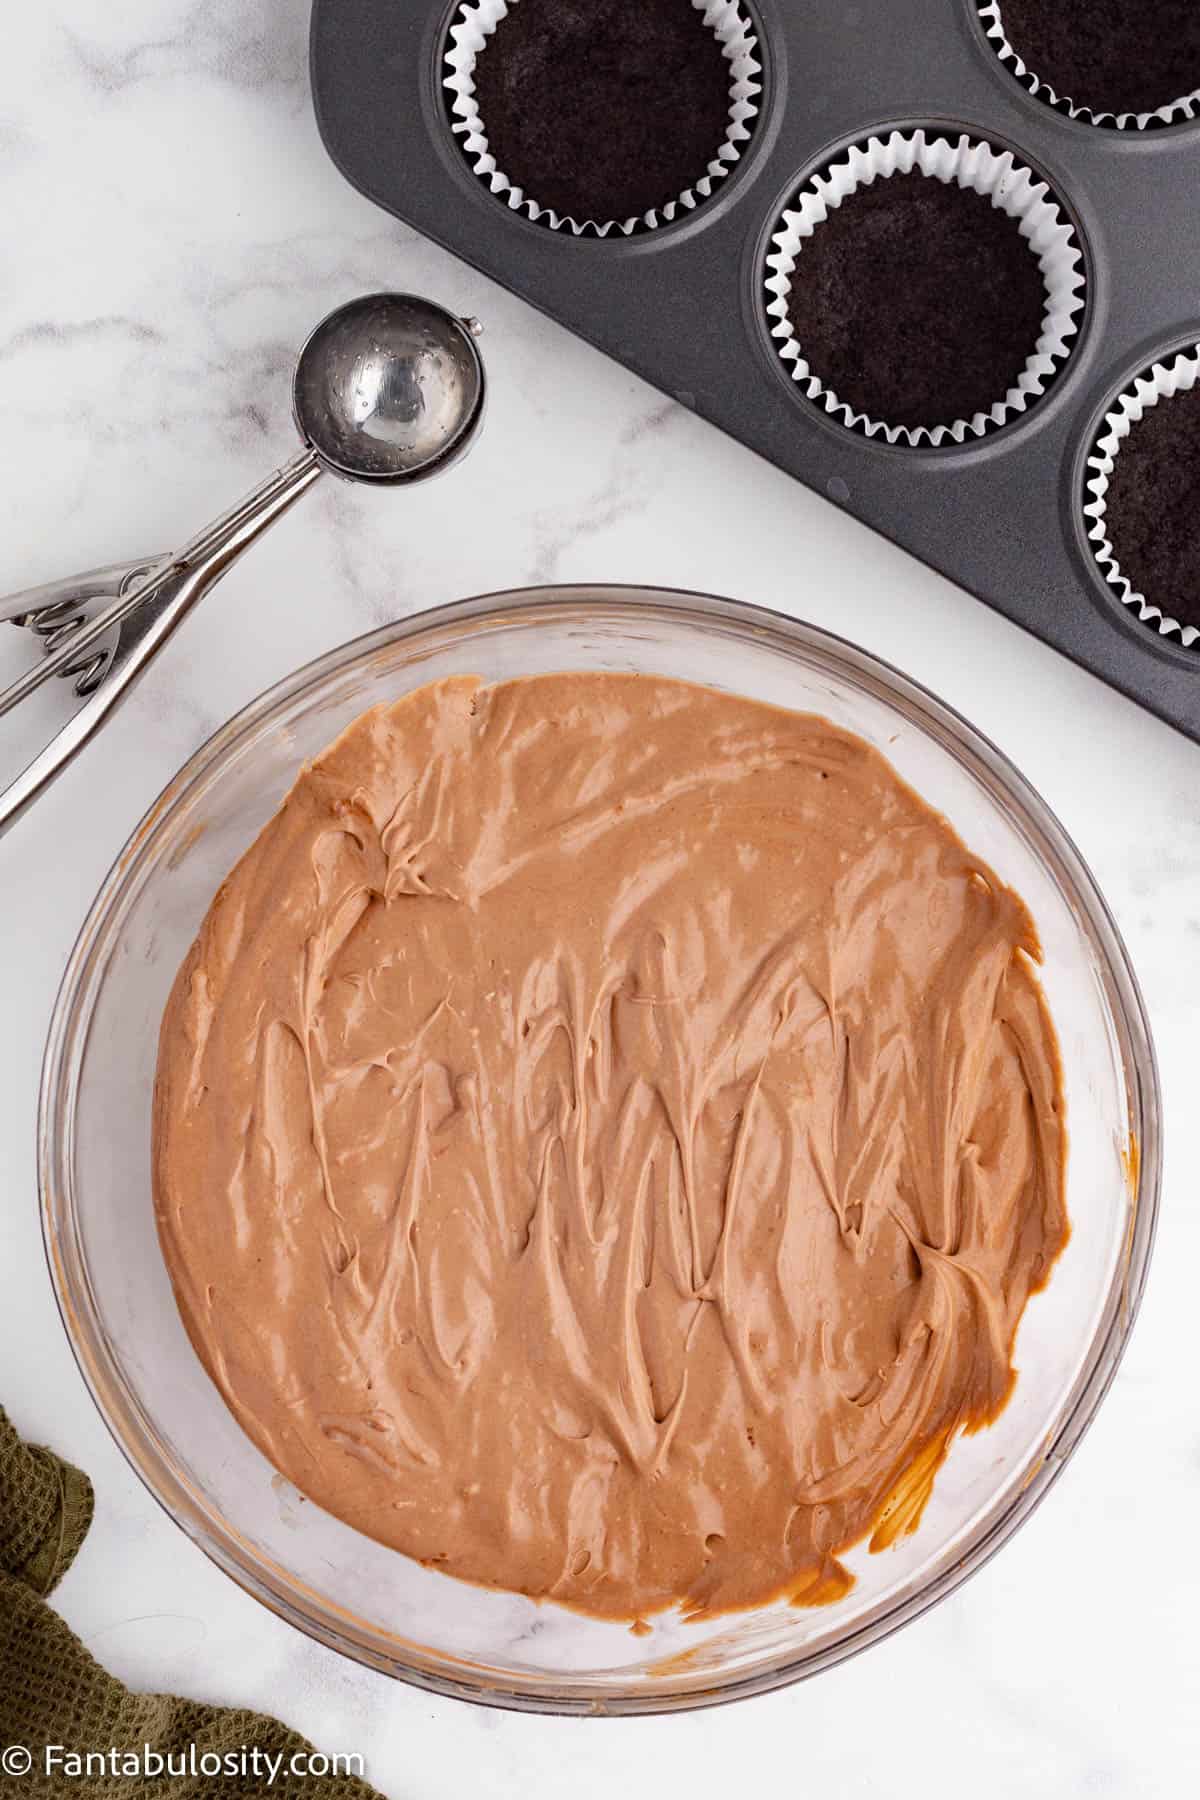
    Notes

    • The white chocolate sets quickly, so you may need to microwave it in 15 second intervals to keep it melted.
    • I was able to make about 30 cookies with one package of candy eyes.
    • The black dots on the candy eyes smear easily, so I prefer to handle them with tongs or tweezers.
    • While you can store these cookies in the refrigerator/freezer, the black dots on the candy eyes may smudge or smear due to the condensation in the cool environment. So, we really like to enjoy these the day they are made.
    • If you don’t have piping bags, you can pour the white chocolate into a ziploc bag and snip of one of the corners. Or, use a small spoon to drizzle a small amount of chocolate across the dipped cookies.

    Nutrition

    Serving: 1cookie | Calories: 167kcal | Carbohydrates: 21g | Protein: 1g | Fat: 9g | Saturated Fat: 4g | Polyunsaturated Fat: 1g | Monounsaturated Fat: 3g | Cholesterol: 4mg | Sodium: 67mg | Potassium: 54mg | Fiber: 0.04g | Sugar: 15g | Vitamin A: 6IU | Vitamin C: 0.1mg | Calcium: 38mg | Iron: 0.05mg

    Cream Cheese Pasta

    September 7, 2022

    Cream Cheese Pasta being scooped up and held above the plate.

    Cream Cheese Pasta: This linguine covered in cream cheese pasta sauce is the perfect recipe for a busy weeknight dinner idea! It’s ready in 20 minutes, only calls for 7 simple ingredients, tastes like Alfredo sauce (but with less fuss), and the whole family will love it!

    Cream cheese pasta on a plate being scooped up with a fork.

    We love pasta recipes around here (shocking, I know), but cream cheese pasta recipes like this one might just be our new favorite pasta dish when it comes to main courses, much like this creamy lemon chicken pasta.

    When the weather starts to cool off, I start to crave cream cheese recipes. Whether it’s a simple cheese ball served with crackers, a loaded cream cheese dip, or a pasta recipe with a cream cheese sauce like this one!
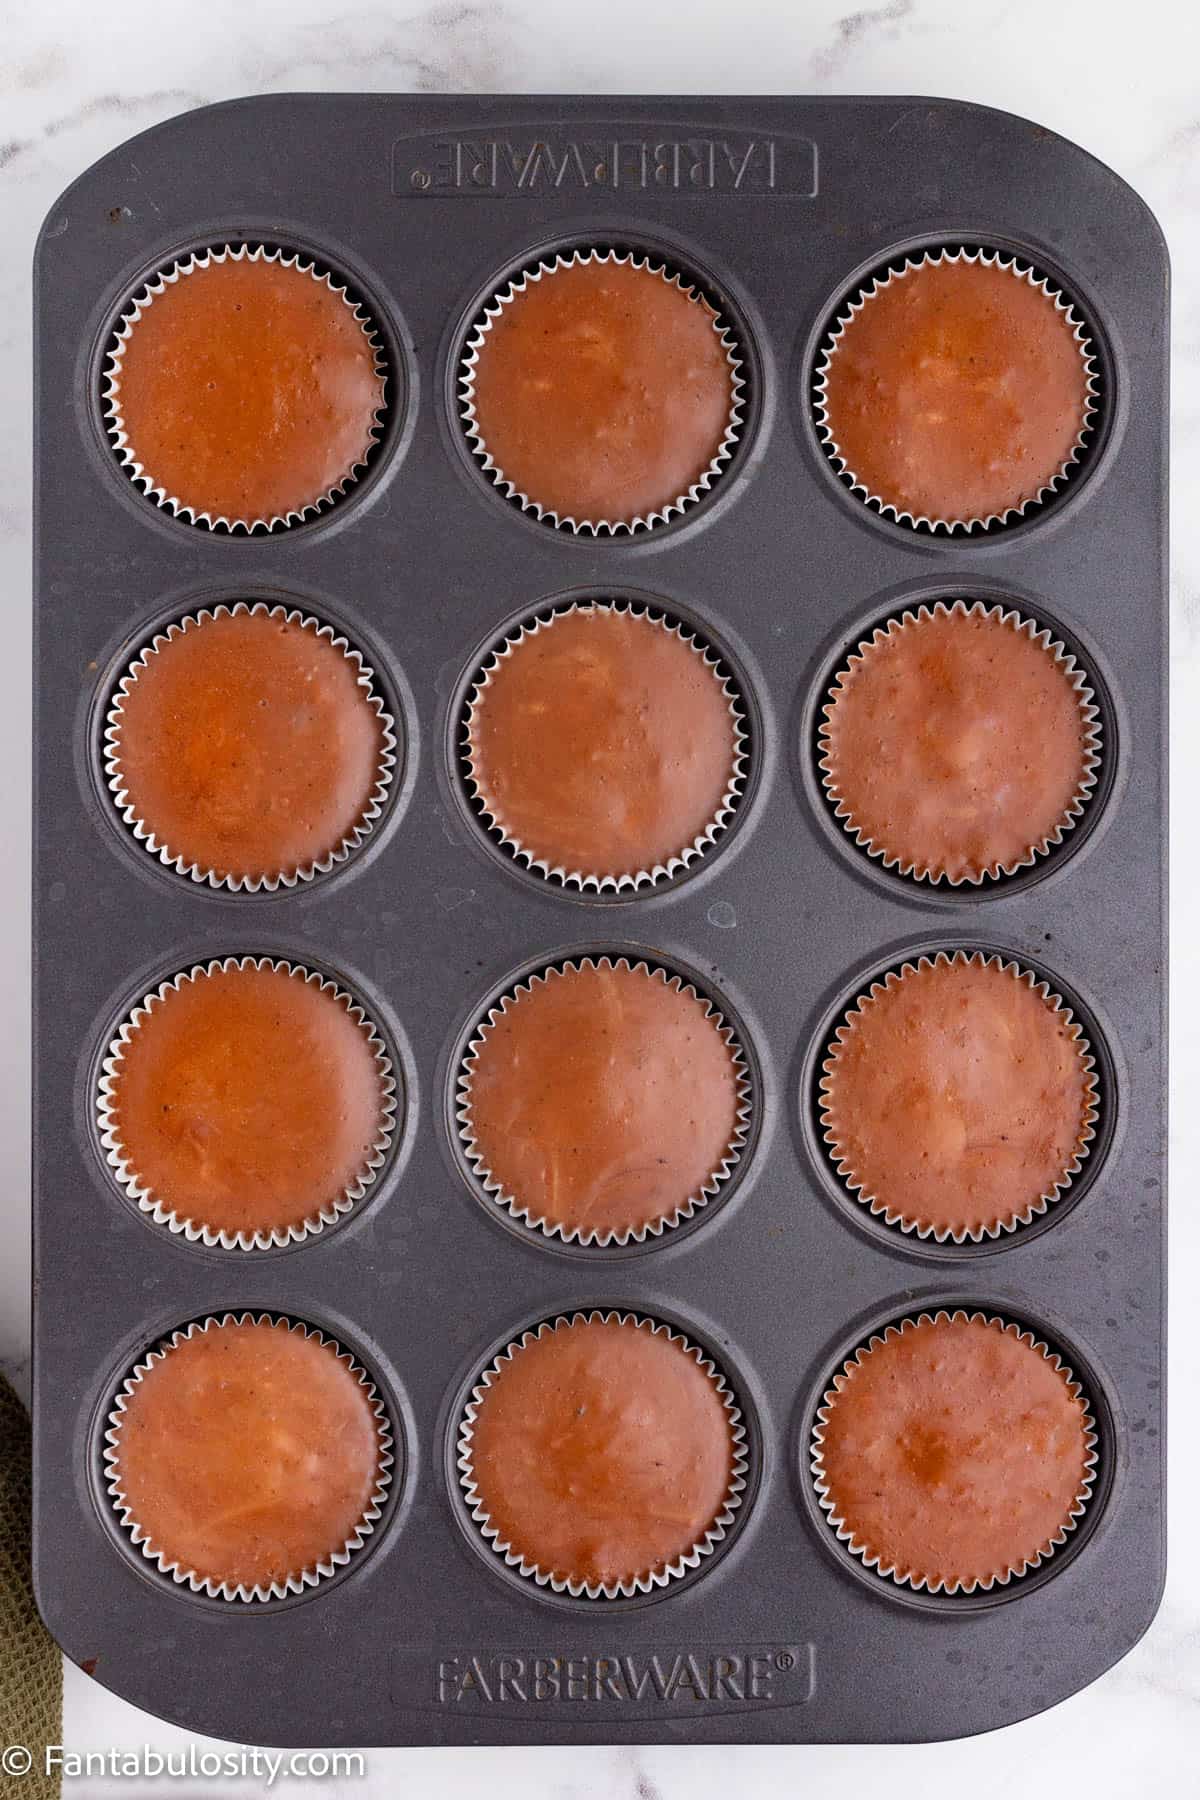
    [feast_advanced_jump_to]

    Why This Recipe Works:

    1. Quick and Easy: It’s so quick and easy to make.
    2. Simple Ingredients: The ingredients are easy and simple, and picky eaters love it!
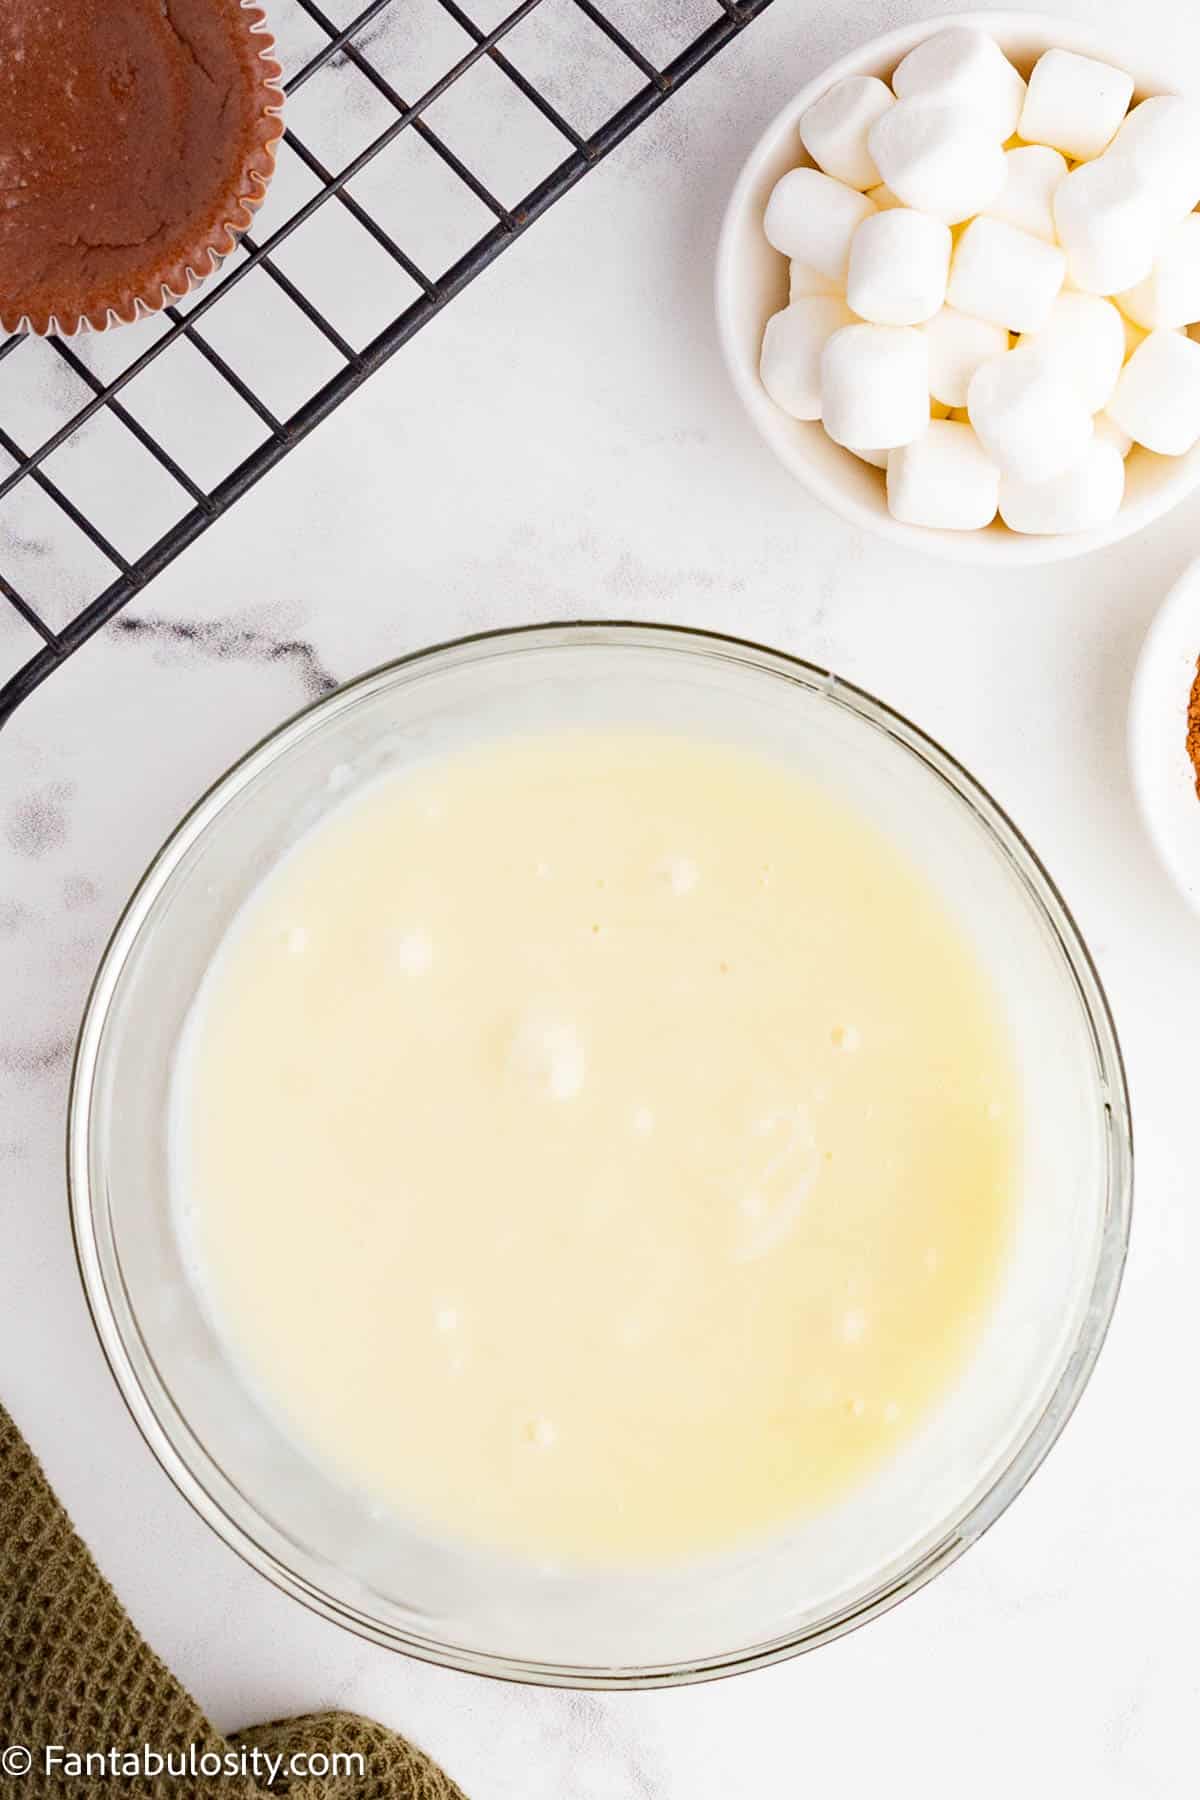
    3. Add Protein: You can add items like grilled shrimp, steak bites, chicken bites, or vegetables like roasted broccoli to this dish!

    Ingredients

    I've highlighted a couple of ingredients with some relevant notes. Aside from this, the ingredients needed are pretty basic.

    The ingredients for cream cheese pasta laid out on a counter with labels on the image.
    • Pasta: the linguine noodles in this are the perfect width, for a hearty dish, that wraps around the creamy sauce.
    • Butter: We use salted butter for this recipe, and it gives the cream cheese sauce the richness you’re looking for.
    • Cream Cheese: We like to use the Philadelphia cream cheese, block style, but any will work.

    Substitutions

    If you need to swap out an ingredient, here are a few of our suggestions!

    • Linguine – if you don’t have linguine on hand, you can use whatever pasta you like! Using another long noodle like spaghetti or spaghettini will give you the most similar finished dish, but you could use a shell noodle, rotini noodle, bowtie pasta, or other short pasta too! We even use egg noodles in our chicken and noodles recipe, and that has a great texture!
    • Gluten Free – use your favorite gluten-free pasta instead of wheat noodles to make this yummy pasta recipe gluten free.
    • Garlic Pepper Seasoning – if you don’t have garlic pepper seasoning on hand, you can make your own by mixing together 8 teaspoons of garlic powder and 4 ½ teaspoons of black pepper. You can keep the rest on hand for future recipes and use 1 tablespoon of it in this recipe!

    Variations

    Pasta recipes are so fun because they are super easy to customize! Here are a few fun ideas we have for variations on this easy cream cheese pasta recipe.

    • Spicy – the cayenne pepper in this recipe is optional, but if you want some heat add the cayenne and consider adding a pinch of chili flakes as well.
    • Parmesan Cheese – although this recipe makes the cream cheese pasta sauce without parmesan, cheese lovers know that you can add parmesan to any pasta dish and it only gets better. Feel free to add ½ cup parmesan cheese into the sauce to your liking, and garnish the pasta with more parmesan!
    • Add Your Favorite Protein – To make this pasta dish a bit more hearty, you can add your favorite cooked meat into it! Try mixing in cooked chicken breast, Italian sausage, chopped bacon, or shrimp.
    • More Flavor – If you want to add a bit of extra flavor to this recipe, you can swap out ½ of the pasta water for my homemade chicken broth. You could also add some chopped fresh garlic and a pinch of onion powder to really up the flavor!
    • Add Tomatoes-If you’re a fan of tomatoes, you can stir in some chopped cherry tomatoes or even sun-dried tomatoes!

    Instructions for Making This Easy Pasta Dish

    There are just a few steps to make this spaghetti sauce with cream cheese.

    *Be sure to see the recipe card below for the full ingredients list & instructions!*

    Boiled linguine noodles in a pot with butter, cream cheese, and parsley placed around the pot.
    Linguine noodles, butter, and cream cheese in a pot.

    STEP 1: Boil the Noodles. Boil the linguine pasta al dente, as directed on the box (about 10 minutes) reserving 1 cup of the starchy pasta water (Image 1).

    STEP 2: Combine. In a large saute pan or pot, add the hot-cooked pasta, butter, and cream cheese. Cover and let stand for 2 minutes to let the butter and cream cheese soften (Image 2).

    Seasonings, butter, and cream cheese in the pot with the linguine. There is a measuring cup of pasta water poised to be poured into the pot.
    Cream cheese pasta in a pot being stirred together.

    STEP 3: Season. Remove the cover and add the garlic pepper seasoning, Italian seasoning, cayenne pepper, and ½ of the hot pasta water. Stir to combine (Image 3).

    TIP: If the pasta is still too thick for your liking add more pasta water a little at a time until smooth and creamy.

    STEP 4. Garnish & Serve. Add the chopped fresh parsley and serve immediately. Optionally, you can choose to top your creamy pasta sauce with freshly grated parmesan cheese and more parsley (Image 4). Enjoy!

    Cream cheese pasta in a pot with fresh chopped parsley sprinkled on it.
    Garnish & enjoy!

    Top Tip

    • How to Avoid Overcooking the Pasta Noodles: When cooking pasta in general, it’s important not to overcook it or it will become mushy. A great tip is to stop the cooking process when it comes to al dente. You can remove the pasta from the hot water, drain and rinse cool/warm water over it to stop the process. When the time to serve, simply run hot water over the pasta again in the colander, to warm it back up!

    Expert Tips and FAQs

    Which cheese should be used for pasta?

    You can use any type of cheese for pasta! Some of the popular favorites are parmesan, mozzarella, cheddar, etc. However, keep in mind how you’re using the cheese. If it’s for melting, some cheese will melt better than others.

    Can you melt cream cheese?

    100% you can! Cream cheese melts into a delicious, creamy smooth consistency making it the perfect base for dips and sauces.

    Can I use cream cheese instead of heavy cream for pasta?

    Absolutely! If you are looking to thicken up any pasta dish, you can replace the heavy cream called for with cream cheese.

    What thickens pasta sauce?

    Depending on the type of sauce, the answer will be different. If it’s a tomato based sauce, you can thicken it by simmering it on a low heat for a long period of time (letting some of the liquid evaporate). If it’s a cream based sauce, you can add some flour and water into the sauce and boil it to thicken it, or you can add some extra cheese to the sauce!

    Additional Mix-in Ideas

    This pasta is delicious all by itself but you can add some shrimp, chicken, crab meat (similar to this crab pasta bake recipe) or any protein you wish!

    What to Serve with this Delicious Pasta Recipe

    Of course you could eat this linguine with its cheesy sauce and call it a day, but we’re big believers in side dishes to round out a meal. Here are a few ideas for things you could serve with this pasta recipe.

    • air fryer garlic bread (and if you want to get really fancy, you could make your own Italian white bread to use – it’s easier than you think)
    • a simple green salad like this one (because we could all use a few more leafy greens in our day)
    • this easy focaccia bread recipe
    • or a delicious salad that’s a bit different, like this old fashioned pea salad

    Storage

    Store any leftover cream cheese pasta in an airtight container in the refrigerator for up to 3 days. When you are ready to reheat the pasta, add a little extra butter and warm it in the microwave (the sauce becomes thicker when it cools, so the extra butter will help thin it out again). It may be fun to try making this cream cheese pasta as a fried spaghetti recipe too!

    Cream cheese pasta sauce won’t freeze well, so we wouldn’t recommend freezing this pasta dish.

    Bite of cream cheese pasta on fork
    Enjoy a bite!

    Did you make this? I’d be so grateful if you left a “star” rating below to let me know what you thought! Then, the next time you need a quick and easy recipe, come back to Fantabulosity to browse all of my easy recipes!

    More Pasta Recipes

    Did your family like this cream cheese pasta recipe? If they did, you’re in luck because we have a lot of easy pasta recipes just like this one on the blog. Next time you’re meal planning, consider adding one of our other creamy pasta recipes like our Instant Pot buffalo chicken pasta, this easy baked feta pasta, or this fan favorite beef stroganoff recipe!

    Or, choose from these easy dinner recipes that are some of our favorites:

    • Bowl of ham and beans with spoon, and cornbread sitting on side of bowl.
      Ham and Beans Recipe
    • Poppy Seed Chicken Casserole serving on a plate, next to green beans.
      Poppy Seed Chicken Casserole
    • Smothered pork chop with mushroom gravy on top of rice in a plate.
      Smothered Pork Chops in Creamy Mushroom Gravy
    • Church supper recipes collage.
      Church Supper Recipes

    Recipe

    Cream Cheese Pasta being scooped up and held above the plate.
    Print Pin
    5 from 11 votes

    Cream Cheese Pasta

    Cream Cheese Pasta: This linguine covered in cream cheese pasta sauce is the perfect recipe for a busy weeknight dinner! It's ready in 20 minutes, & only calls for 7 simple ingredients
    Course Main Course, Side Dish
    Cuisine American
    Diet Vegetarian
    Prep Time 5 minutes minutes
    Cook Time 15 minutes minutes
    Total Time 20 minutes minutes
    Servings 6 servings
    Calories 516kcal
    Author Jessica Burgess

    Ingredients

    • 16 ounces linguine uncooked
    • 2 tablespoons salted butter
    • 12 ounces cream cheese room temperature
    • 1 tablespoon garlic pepper seasoning
    • 1 tablespoon Italian seasoning
    • ½ cup parmesan cheese optional
    • ¼ teaspoon cayenne pepper optional
    • 3 tablespoons fresh parsley chopped

    Instructions

    • Boil the linguine pasta al dente, as directed on the box (about 10 minutes) reserving 1 cup of the starchy pasta water.
    • In a large saute pan or pot add the hot cooked pasta, butter, and cream cheese. Cover and let stand for 2 minutes to let the butter and cream cheese soften.
    • Remove the cover and add the garlic pepper seasoning, Italian seasoning, cayenne pepper, ½ of the hot pasta water and parmesan cheese (if using). Stir to combine, if the pasta is still too thick for your liking add more pasta water a little at a time until smooth and creamy.
    • Add the chopped fresh parsley and serve immediately. Optionally, you can choose to top your pasta with freshly grated parmesan cheese and more parsley. Enjoy!

    Notes

    Top Tip:
    How to Avoid Overcooking the Pasta Noodles: When cooking pasta in general, it’s important not to overcook it or it will become mushy. See the blog post for our favorite tip on how to help prevent this!
    Storage of Leftovers:
    Store any leftover cream cheese pasta in an airtight container in the refrigerator for up to 3 days. When you are ready to reheat the pasta, add a little extra butter and warm it in the microwave (the sauce becomes thicker when it cools, so the extra butter will help thin it out again).

    Nutrition

    Serving: 1serving | Calories: 516kcal | Carbohydrates: 60g | Protein: 14g | Fat: 24g | Saturated Fat: 14g | Polyunsaturated Fat: 1g | Monounsaturated Fat: 6g | Trans Fat: 0.2g | Cholesterol: 67mg | Sodium: 214mg | Potassium: 268mg | Fiber: 3g | Sugar: 4g | Vitamin A: 1095IU | Vitamin C: 3mg | Calcium: 88mg | Iron: 1mg

    Ghost Craft for Kids

    September 5, 2022

    cotton ball ghosts craft

    Ghost Craft for Kids: Such a fun project for the kids at Halloween. Just a few items, that you probably even have on hand, for craft time success!

    two ghost craft projects on table
    Ghost Craft for Halloween

    When Halloween rolls around in our house, a craft is a MUST and this Ghost Halloween Craft is one of our favorites! It’s easy to make, and uses items that we usually have in our craft bin anyway!

    Materials Needed:

    • White Cardstock, Small Posterboard, or White Construction Paper (Card Stock is thicker, so I chose this so it would hold up better}
    • Black Construction Paper
    • Scissors
    • Cotton Balls (amount depends on size of ghost you cut out. We used 35-40)
    • Googley Eyes
    • Glue (we use glue sticks to keep it less messy)

    Just for fun, you’ll also love snacking on this Monster Mix or these Halloween pretzel sticks, while you’re crafting!

    Instructions:

    1. Start by using white cardstock, and cut a “bell” shape (or upside down “U”) and feel free to add a scalloped edge to the bottom, to give the ghost a “flowy” look.
    Ghost template on white cardstock
    Ghost template
    1. Next, cut out the ghost shape with scissors.
    Cutting ghost template out of paper
    Cut out ghost
    1. Then, using black construction paper, cut out a small round or oval shape, to create the mouth of the ghost. Glue on to ghost where the mouth should go.
    Scissors cutting out mouth, from black construction paper
    Cut out mouth
    1. Using adhesive craft eyes, stick the eyes on to the ghost. (Or, if not adhesive eyes, glue the eyes on.)
    Attaching eyes to ghost paper
    Add eyes to ghost
    Both eyes on ghost
    Both eyes added
    1. Next, using glue (we use a glue stick but you can use Elmer’s glue if desired) spread glue on the white parts of the ghost.
    Stick glue spread on ghost
    Use a glue stick
    1. Begin sticking cotton balls on to glue, pressing down to secure each ball.
    Hand sticking cotton balls on to ghost
    Stick cotton balls on to ghost
    1. Cover the entire ghost with as many cotton balls as it takes, making sure the eyes and mouth still show.
    ghost craft being held up by kid hands
    Ghost Craft Idea
    cotton ball ghost craft being held by kiddo hand
    Kids Ghost Craft

    Then it’s done! Hang it up on the refrigerator, in their bedroom or out on a display for all the trick-or-treaters to see!

    Hint: Save it for next year as a little keepsake, and you can display it for Halloween again!

    Related Halloween Ideas

    I also think you’ll love this pumpkin patch dessert that we love making this time of year!

    Recipe

    Yield: 1 ghost

    Ghost Craft

    cotton ball ghosts craft
    5.0 Stars (1 Review)

    Ghost Craft for Kids: Such a fun project for the kids at Halloween. Just a few items, that you probably even have on hand, for craft time success!

    Active Time 15 minutes
    Total Time 15 minutes
    Difficulty Easy

    Materials

    • white card stock (or mini poster board)
    • black construction paper
    • cotton balls
    • glue stick (or Elmer's Glue)
    • googly eyes

    Tools

    • scissors

    Instructions

      1. Start by using white cardstock, or mini white poster board, and cut out a "bell" shape or an upside-down "U" shape. Feel free to scallop the bottom if desired, or keep it straight across.
      2. Next, cut out that shape with the scissors.
      3. Then, using black construction paper, cut out a round or oval shape, for the ghost's mouth. Glue on.
      4. Using adhesive googly eyes, stick two on the ghost. Or, if they're not adhesive, glue them on.
      5. Next, using glue, spread glue on to the whites of the ghost, around the eyes and mouth.
      6. Begin sticking cotton balls to glue, pressing down to secure each cotton ball.
      7. Cover the entire ghost with cotton balls.
      8. Allow to dry!
    © Jessica

    A flashback to when my toddler made this for the first time and I had to help him. Now, he did it all on his own!

    Halloween Ghost Craft for Kids-5
    Toddler Halloween Craft, Ghost Halloween Craft for Kids

    How to Make Iced Coffee

    September 4, 2022

    iced coffee and cold brew

    How to Make Iced Coffee: Skip the busy lines at your favorite coffee shop, save money, and make a delicious iced coffee recipe at home!

    tall glass filled with iced coffee and ice cubes

    This recipe teaches you how to make iced coffee in minutes, and you can customize it to your desired taste, sweetness, strength and temperature! If you want to add more flavor to your coffee, you may want to try this iced caramel latte recipe or this dirty chai recipe too!

    The best part… once you have your extract, you can make your iced coffee faster than you could, placing your drive-through order!

    Or make this espresso martini later for fun!

    Friends, I am THRILLED to have Charlotte from Pretty Mindful Mama Life with us today, sharing how she makes her favorite iced coffee recipe…

    How to Make Iced Coffee

    As a busy mom of 4 very active boys, it is no secret that I am FUELED BY COFFEE! I love it in any form!

    Latte, cappuccino, americano…once that aroma hits me I’m ready to start my day! When it’s hot, my go-to is definitely an iced coffee which is a treat in a glass.

    I usually enjoy my coffee with no sugar but iced coffee is really elevated with a little bit of sweetness.

    Side note: Jessica LOVES her Ninja Coffee Bar if you’re in the market for a new coffee machine!

    Make Your Cold Brew

    The only part of this process that takes a bit of time is creating your cold brew coffee extract.

    It’s not difficult but requires you to wait patiently for your coffee to brew in cold water in the fridge overnight.

    The great news is, once you’ve made a batch of your cold brew you can use it all week for your favorite coffee drinks hot or cold.

    Wanting something faster? You may LOVE the Ninja Coffee Bar that Jessica uses since it has an iced brew setting! Or, brew your coffee like normal and let it sit overnight!

    Learn more about the machine HERE or just head over and buy the Ninja Coffee Maker HERE!

    French Press or No French Press…

    A french press is not required for the cold brew process but I find it super handy and convenient for this task and love the flavor it gives the iced coffee.

    If you don’t have a french press, never fear…all you need is a container to pour your water and coffee in. You would then need a coffee filter or cheesecloth to strain the grinds.

    Step 1: Add Water

    Pour 4 cups of cold filtered water into your french press (or container of choice, a mason jar works great!)

    Step 2: Ground Coffee Beans

    Add ½ cup of course ground coffee beans of your choice to the water. I use a medium – dark roast, organic.

    Give it a gentle stir just to moisten the grounds and your coffee is ready to be transformed into a delicious cold brew.

    You will have to cover it with plastic wrap and allow it to brew for about 12-18 hrs in the fridge.

    When you wake up, you will be ready to use your coffee extract!

    Cold Brew Coffee Extract

    After the brewing process, if you are using a french press, simply press your grounds slowly and decant your coffee extract into a mason jar. (If you are not using a french press, use a wet coffee filter or cheesecloth to strain the grounds and then decant).

    Coffee Extract for the Week…

    Now that you have made your coffee extract you can store it in the fridge and use it for the rest of the week!

    TIP: If you would like to drink it hot, just pour a third of a cup into your coffee cup and fill with boiling water.

    Then add your favorite mix-ins! Coffee that’s ready for the week? Yes Please!

    Making the Iced Coffee

    Step 1: Add Ice

    Fill your serving glass with ice!

    Step 2: Fill with Cold Brew

    Fill a ⅓ to ½ the cup with your cold brew!

    Step 3: Add Milk + Sweetener

    Fill the remainder of the cup with your favorite milk and sweetener.

    I like a mix of half and half with 2 tablespoons of condensed milk! SO GOOD!

    You could use 2% milk, almond milk, coconut milk whatever you like. Whatever you do, DO NOT use regular sugar to sweeten. It will not dissolve.

    Sweeteners for Iced Coffee

    You can go unsweetened if that’s your jam too.

    But if you want to sweeten with something other than the condensed milk you can use a sugar syrup (or simple syrup) that you can purchase or easily make yourself.

    How to Make Your Own Simple Syrup

    Boil equal parts of sugar and water. I like to do 1 of cup sugar and 1 cup of water and once cooled I store it in a pretty bottle in my coffee station!

    You can even flavor your sugar syrup with different coffee flavor extracts.

    I like adding a whole scraped vanilla bean, or you can also use coconut sugar for your syrup.

    Honey or real maple syrup can also work as a sweetener.

    Before you know it you’ll be a master barista creating your own signature drinks!

    Step 4: Enjoy Iced Coffee at Home

    Enjoy!

    It’s THAT easy! Who would have thought? This recipe will be sure to quench your coffee thirst on a hot day or give you a much needed afternoon boost when energy is low.

    It will also save you a ton of money and time and most importantly you can have your drink the way YOU want it! Don’t even get me started on how you could take these over the top when you are entertaining!

    You could add whipped cream and garnish with a sprinkle of cinnamon or grated dark chocolate or a drizzle of salted caramel or dulce de leche!

    How Do YOU Make Iced Coffee?

    Let us know how you enjoy this super easy and delicious iced coffee and what your favorite mix-ins and toppings are! Drop a note in the comments so we can hear your wonderful ideas too!

    Recipe

    tall clear glass of iced coffee
    Print Pin
    5 from 3 votes

    How to Make Iced Coffee

    How to Make Iced Coffee: Skip the busy lines at your favorite coffee shop, save money, and make a delicious iced coffee recipe at home!
    Course Drinks
    Cuisine American
    Prep Time 5 minutes minutes
    Total Time 5 minutes minutes
    Servings 5 coffees
    Calories 33kcal
    Author Jessica Burgess

    Ingredients

    • 4 cups Cold Filtered Water
    • ½ cup Coarse Ground Coffee I use medium dark roast.
    • ¼ cup milk of choice I use half & half.
    • 2 tablespoon sweetened condensed milk You may use liquid sweetener of your choice.
    • Ice

    Instructions

    To make Cold Brew Coffee Extract:

    • Pour 4 cups of water into a french press or container of your choice.
    • Add coffee and gently stir to moisten grounds.
    • Cover with plastic wrap and refrigerate for 12-18 hours.
    • Once the coffee has brewed, press grounds with french press or strain with a wet coffee filter or cheesecloth. Pour strained cold brew into a mason jar. Cold Brew can be stored for up to two weeks in the refrigerator.

    To make Iced Coffee:

    • Fill a glass tumbler with ice.
    • Fill ⅓ to ½ the tumbler with cold brew.
    • Mix ¼ cup milk of choice with sweetener of choice and pour over cold brew. 
    • Stir and enjoy!

    Nutrition

    Serving: 1coffee | Calories: 33kcal | Carbohydrates: 5g | Protein: 1g | Fat: 1g | Saturated Fat: 1g | Polyunsaturated Fat: 0.04g | Monounsaturated Fat: 0.3g | Cholesterol: 4mg | Sodium: 24mg | Potassium: 48mg | Sugar: 5g | Vitamin A: 41IU | Vitamin C: 0.2mg | Calcium: 43mg | Iron: 0.02mg

    Looking for More Drink Recipes?

    If you love easy, and you love making your own drinks, then you’ll ADORE the super popular and super easy drink recipes here on the blog, already waiting for you!

    Pumpkin Poke Cake

    September 3, 2022

    Slice of pumpkin poke cake on plate with fork

    Pumpkin Poke Cake Recipe: With only 4 ingredients, this may just be your new favorite easy pumpkin dessert! It uses a cake mix, pudding mix, milk, and pumpkin puree!

    Quick Overview: You’ll bake this cake recipe for 25 minutes and then chill for 2 hours! Simple, easy, sweet, and perfect for fall! Next, you’ll want to try these pumpkin cheesecake bites, so you can really capture the taste of fall!

    Pumpkin Poke Cake on Plate with bite on fork

    Why You’ll Love this Recipe:

    During pumpkin season, pumpkin spice poke cake or, if you choose, to add caramel, this pumpkin caramel poke cake, will be one of your new favorite pumpkin desserts! (Well, besides these pumpkin cheesecake bars and this pumpkin pie with graham cracker crust, of course!)

    You will want to make this easy poke cake recipe a few hours in advance, as it has a 2 hour chill time but it’s going to be WORTH IT! (Since this has a chill time, you might as well make this no bake peanut butter pie while you’re at, so it can be chilling too!)

    Although this pumpkin pie poke cake calls for a spice cake mix, you can easily use a white cake mix or yellow cake mix, and choose which pudding mix you prefer, making this a totally customizable dessert! (See more about this below!) And if you’re looking for a poke cake with a more tropical flavor, this coconut poke cake fits the bill.

    [feast_advanced_jump_to]

    Ingredients

    Like our lemon poke cake, you won’t need a lot of ingredients to make this dessert, so go ahead, grab your favorite flavors from the grocery store, and get ready to make this dessert on repeat during the time of year where you crave fall flavors!

    pumpkin poke cake recipe ingredients
    Ingredients for pumpkin poke cake
    • 15.25 ounce Spice Cake mix (or yellow cake mix or white cake mix if you prefer – it may just lack the “spice” of fall flavors, so you may want to add a little pumpkin pie spice.)
    • 15 ounce can of pumpkin puree
    • 2 – 3.4 ounce instant pudding mix (Use can choose to use 2 cheesecake flavor puddings or combine 1 white chocolate pudding with 1 vanilla pudding!)
    • 4 cups of milk (for the standard pudding box directions)

    Instructions

    1. First, preheat your oven to 350 degrees. 
    pumpkin puree in bowl with cake mix
    Cake Mix and pumpkin puree
    1. Next, in a large bowl, mix together the cake mix and pumpkin puree until fully mixed. 
    Pumpkin puree and cake mix, mixed together
    Pumpkin puree and spiced cake mix in bowl, mixed together
    1. Pour the cake batter in to a greased 8×10, 9×9 square or 9×13 baking dish and spread evenly.
      (This recipe was made in an 8×10 size baking dish so if you do use a bigger cake pan, the bake time may vary if a larger. So be sure to watch the cake, as a bigger baking dish will make the batter more thin, and cook faster.
    Pour cake mix and pumpkin in to baking dish
    Pour cake mix batter in to baking dish
    1. Then, bake for 25 – 30 minutes, or until a knife inserted in to the center, comes out clean.
    Baking dish filled with pumpkin cake batter
    Cake batter in baking dish ready for baking

    Poke and Fill

    1. As soon as the cake is removed from the oven, grab a wooden spoon that has a narrow end, and poke holes, about 1 inch apart, over the entire top of the cake.
    holes poked in to baked cake
    Once baked, poke holes in top of cake with wood spoon handle
    1. In a small bowl, mix the instant pudding according to the package directions.
    Pudding mixture - in mixing bowl
    Prepare instant pudding
    1. Next, scrape the sides of the bowl with a spatula, and pour the pudding over the top of the cake, slowly, allowing the mixture to settle into the holes. 
    Pour pudding over the top of warm cake
    Pour instant pudding mix over cake and in to holes
    1. Next, refrigerate the cake for at least 2 hours before serving.
    After cake has chilled, remove from refrigerator
    Chill cake in refrigerator for 2 hours

    Finally, decorate with sprinkles, cinnamon, or white chocolate chips if preferred! See our list of ideas below!

    Sliced pumpkin poke cake on plate
    Serve chilled

    Or, if desired, you can drizzle with Torani Pumpkin Pie syrup, caramel syrup or chocolate syrup!

    Drizzle caramel sauce on cake
    If desired, drizzle with caramel sauce or favorite toppings

    How to Serve Pumpkin Poke Cake

    Surprisingly, this cake is delicious, served cold! But it can also be served at room temperature if desired.

    Slice of pumpkin poke cake with bite on fork
    Pumpkin Caramel Drizzle Cake

    Substitutions

    If you don’t have spice cake mix on hand, you can use different flavors of cake mix. Such as white cake mix, or yellow cake mix. However, when using a different cake mix flavor, it can lack the fall flavors of cinnamon, pumpkin pie spice, etc. So it may not give the exact flavor of this exact recipe but I’m sure it would still be delicious!

    Topping Ideas

    If you’d like to top the top layer of this cake, you can add:

    • nuts (pecans, walnuts)
    • mini chocolate chips
    • chopped candies
    • syrups
    • cinnamon
    • sprinkles
    • toffee bits
    • brown sugar
    • ice cream toppings (like caramel sundae sauce)
    • whipped topping (or Cool Whip)

    Storage

    If you have leftover pumpkin cake, store it in an airtight container in the refrigerator for 4-5 days, to stay moist. If desired, you can also freeze the cake, in an airtight container, for up to 1 month.

    More Pumpkin Desserts and Cake Recipes

    Poke cake recipes are so easy! If you love easy dessert recipes, then I know you’ll also love this pumpkin fluff, pumpkin cream cheese bread, and this ugly duckling cake!

    Did you make this? I’d be so grateful if you left a “star” rating below to let me know what you thought! Then, the next time you need a quick and easy recipe, come back to Fantabulosity to browse all of my easy recipes!

    Recipe

    Slice of pumpkin poke cake on plate with fork
    Print Pin
    5 from 8 votes

    Pumpkin Poke Cake

    Pumpkin Poke Cake Recipe: With only 4 ingredients, this may just be your new favorite easy pumkin dessert! You'll need: a cake mix, pudding mix, milk and pumpkin puree!
    Course Dessert
    Cuisine American
    Prep Time 8 minutes minutes
    Cook Time 25 minutes minutes
    Chill Time 2 hours hours
    Total Time 2 hours hours 33 minutes minutes
    Servings 12 servings
    Calories 281kcal
    Author Jessica Burgess

    Ingredients

    • 15.25 ounces boxed spice cake mix 1 box
    • 15 ounce can of pumpkin puree not pumpkin pie filling
    • 2 boxes instant pudding mix (2 Cheesecakes or 1 vanilla and 1 white chocolate) 3.4 ounces each
    • 4 cups milk to make standard pudding directions
    • optional toppings (caramel drizzle, chocolate chips, etc.)

    Instructions

    • Preheat the oven to 350 degrees. 
    • Using a spoon, mix together the cake mix and pumpkin puree in a mixing bowl, until fully combined. 
    • Spread the batter evenly in to a greased 8×10, 9×9 square or 9×13 baking pan. (This recipe was made in an 8×10 size baking dish so bake time may vary if larger, wider pan is used.) 
    • Bake for 25 – 30 minutes, or until a knife or toothpick inserted in to the center, comes out clean.
    • As soon as the cake is removed from the oven, poke holes, that are about 1 inch apart, with the skinny, with the end of a wooden spoon, over the entire surface of the cake.
    • Prepare the instant pudding, using the 4 cups of milk, according to package directions.
    • Pour the pudding liquid over the surface of the cake, slowly, allowing the mixture to settle into the holes. 
    • Place the baking dish/cake in the refrigerator, for at least 2 hours before serving.
    • Decorate with sprinkles, cinnamon, Torani Pumpkin Pie sauce or white chocolate chips if desired. (See blog post for more ideas!)

    Video

    Notes

    I haven’t tested this in an 8×8 pan yet, although I do believe it would fit. However all of the frosting/topping may struggle to fit in your pan. 

    Nutrition

    Serving: 1slice | Calories: 281kcal | Carbohydrates: 48g | Protein: 5g | Fat: 8g | Saturated Fat: 3g | Polyunsaturated Fat: 1g | Monounsaturated Fat: 3g | Cholesterol: 8mg | Sodium: 496mg | Potassium: 303mg | Fiber: 2g | Sugar: 34g | Vitamin A: 5648IU | Vitamin C: 2mg | Calcium: 135mg | Iron: 2mg
    • « Go to Previous Page
    • Page 1
    • Interim pages omitted …
    • Page 13
    • Page 14
    • Page 15
    • Page 16
    • Page 17
    • Interim pages omitted …
    • Page 26
    • Go to Next Page »

    Primary Sidebar

    Jessica Burgess standing in kitchen holding a hummingbird cake.

    Hi, I'm Jessica! - Owner and Creator of the blog and brand, Fantabulosity.

    I’m here to help you make easy comfort food and nostalgic recipes, using simple ingredients, that everyone will love.

    More about me →

    Potluck Recipes

    • A slice of strawberry jello cake, topped with a strawberry slice, sitting on a round plate.
      Strawberry Jello Cake (Easy, Moist Strawberry Cake)
    • Crack green beans on wooden spoon.
      Crack Green Beans
    • Old fashioned potluck cake recipes collage.
      Old-Fashioned Cakes That Still Show Up at Every Potluck
    • Collage of potluck desserts.
      Easy Potluck Desserts (Simple Recipes That Always Get Asked For)
    • Cold Pasta Salad Recipes Collage.
      Cold Pasta Salad Recipes
    • Chicken Casserole recipes image collage.
      20 Chicken Casserole Recipes

    Popular Recipes

    • bread pudding in baking dish
      Bread Pudding Recipe: Easy Old Fashioned Recipe (With Video!)
    • Burger baked in the oven, steamed in aluminum foil, and placed on white plate.
      Burgers in the Oven
    • two tuna salad sandwiches stacked on top of each other
      The BEST Tuna Salad Recipe
    • Sliced banana bread on white platter
      Best Banana Bread
    • Strawberry brownies on white marble cutting board.
      Strawberry Brownies Recipe
    • Cheeseburger Sliders made with Hawaiian Rolls, stacked on top of one another.
      Cheeseburger Sliders

    Footer

    ↑ back to top

    Featured In

    About

    • About Jessica
    • Contact
    • Collaborate
    • Dinner System

    Easy Recipes

    • All Recipes
    • Vintage Recipes
    • Dinner Recipes
    • Desserts

    How to Cook

    • Oven-Baked
    • Stove-Top
    • No Bake
    • Cooking Basics

    Privacy Policy |Accessibility Copyright © 2026 Fantabulosity | Terms & Conditions | FTC
    All recipes, photos, and content are copyrighted and may not be reproduced, republished, or distributed without written permission.

    Rate This Recipe

    Your vote:


    A rating is required
    A name is required
    An email is required