• Skip to primary navigation
  • Skip to main content
  • Skip to primary sidebar

Fantabulosity logo

  • All Recipes
  • Vintage Recipes
  • Holiday
  • Dinner Theme System
  • About
  • Navigation Menu: Social Icons

    • Facebook
    • Instagram
    • Pinterest
    • TikTok
    • YouTube
menu icon
go to homepage
  • Recipes
  • Desserts
  • Dinners
  • Cookbook
  • Holidays
  • Gatherings
  • About Jessica
    • Facebook
    • Instagram
    • Pinterest
    • TikTok
    • YouTube
  • search icon
    Homepage link
    • Recipes
    • Desserts
    • Dinners
    • Cookbook
    • Holidays
    • Gatherings
    • About Jessica
    • Facebook
    • Instagram
    • Pinterest
    • TikTok
    • YouTube
  • ×
    Home » Recipes

    Creamy Lemon Chicken Pasta

    Creamy Lemon Chicken Pasta

    August 24, 2022

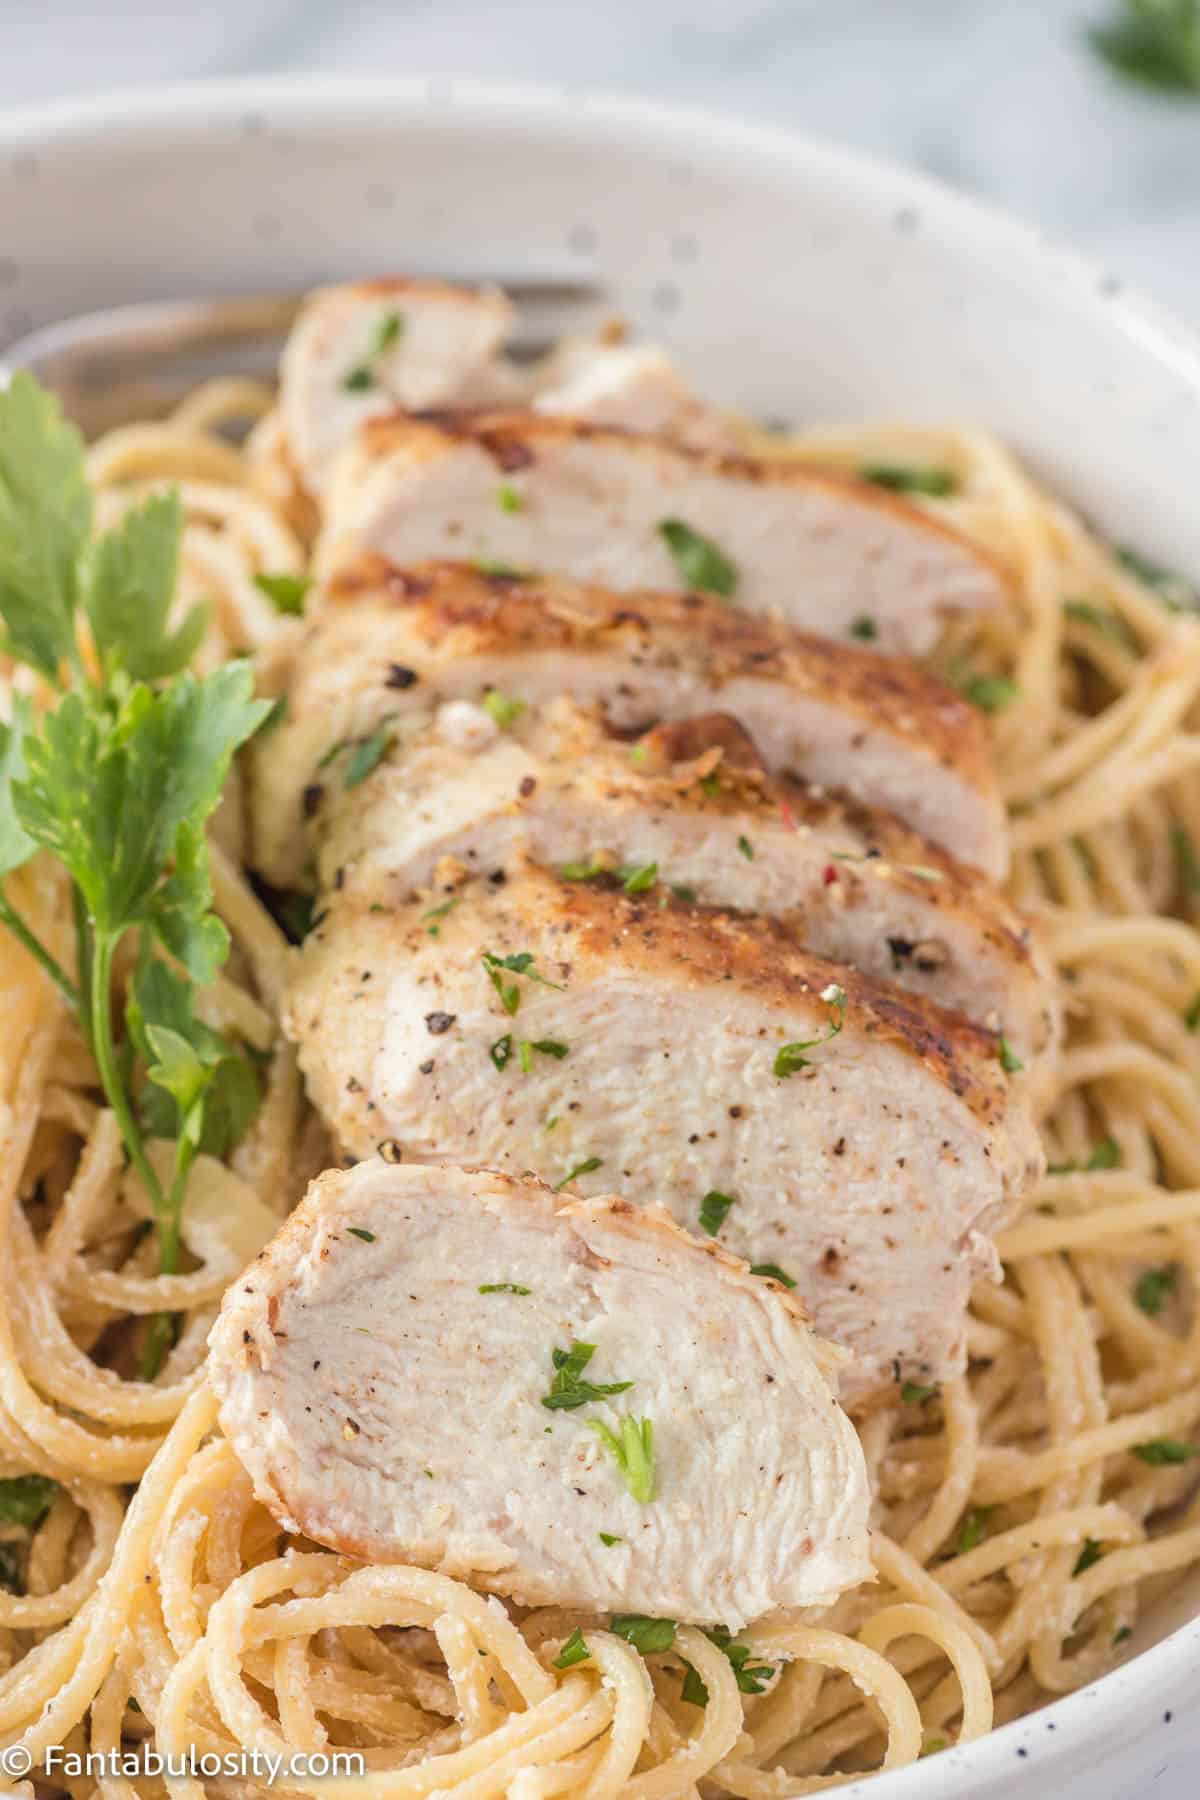
    Close up photo of Creamy Lemon Chicken Pasta and a fork in a white speckled serving bowl garnished with lemon slices and fresh parsley

    Creamy Lemon Chicken Pasta: Perfectly al dente pasta is drenched in a rich creamy lemon sauce and topped with flavorful chicken for a simple but hearty pasta dish!
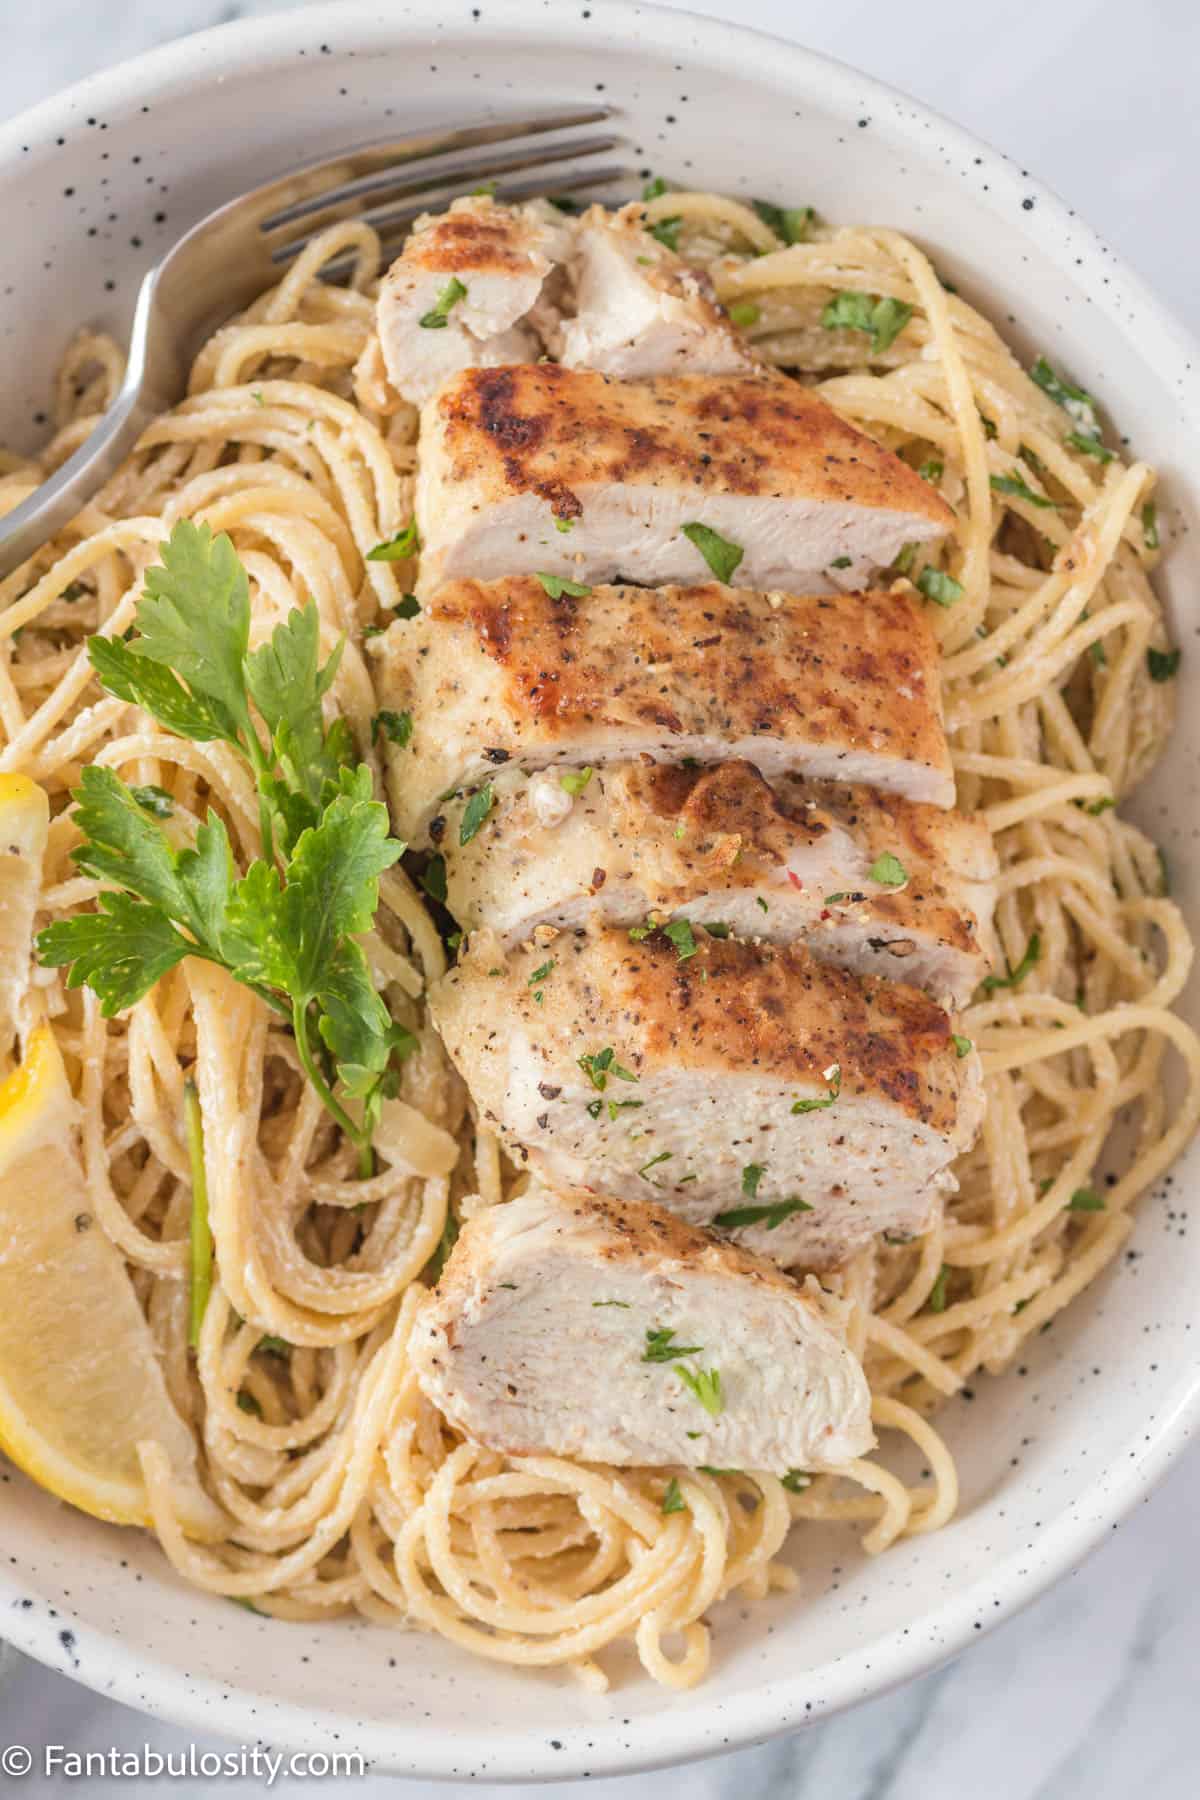
    Creamy Lemon Chicken Pasta in white bowl

    It should not come as a surprise that we are big pasta people around here. From comforting Chicken Bacon Ranch Pasta to this TikTok famous Baked Feta Pasta Recipe, if there is pasta, we are in! (You’ve got to check out what kind of pasta I use instead of noodles in the BEST Chicken Noodle Soup.)

    Whether it is a busy weeknight or a special occasion, this lemon chicken pasta will wow your entire family when they dig into the bright lemon flavor, tender, seasoned chicken, and noodles coated in a silky Parmesan cream sauce.

    Rotate this recipe on the menu along with this cream cheese pasta and this creamy caesar chicken recipe, and you’ll have a couple of pasta recipes that everyone will love! Then to keep the lemon flavor going, make this lemon pie recipe for dessert.

    Why You’ll Love This Recipe

    • Simple ingredients – a few staples from your pantry and fridge and fresh produce are all you need to whip up a big pan of creamy pasta (similar to our cream cheese pasta!)
    • Big lemon flavor – the lemon pasta sauce gets citrus flavor from both fresh lemon juice and lemon zest. If you have leftover lemons, these lemon blondies will be a great dessert choice after.
    • Easily vegetarian – we topped our creamy lemon pasta with chicken, but you can use mushrooms, tofu or roasted veggies.
    [feast_advanced_jump_to]

    Ingredients

    Get the full recipe card with instructions below!

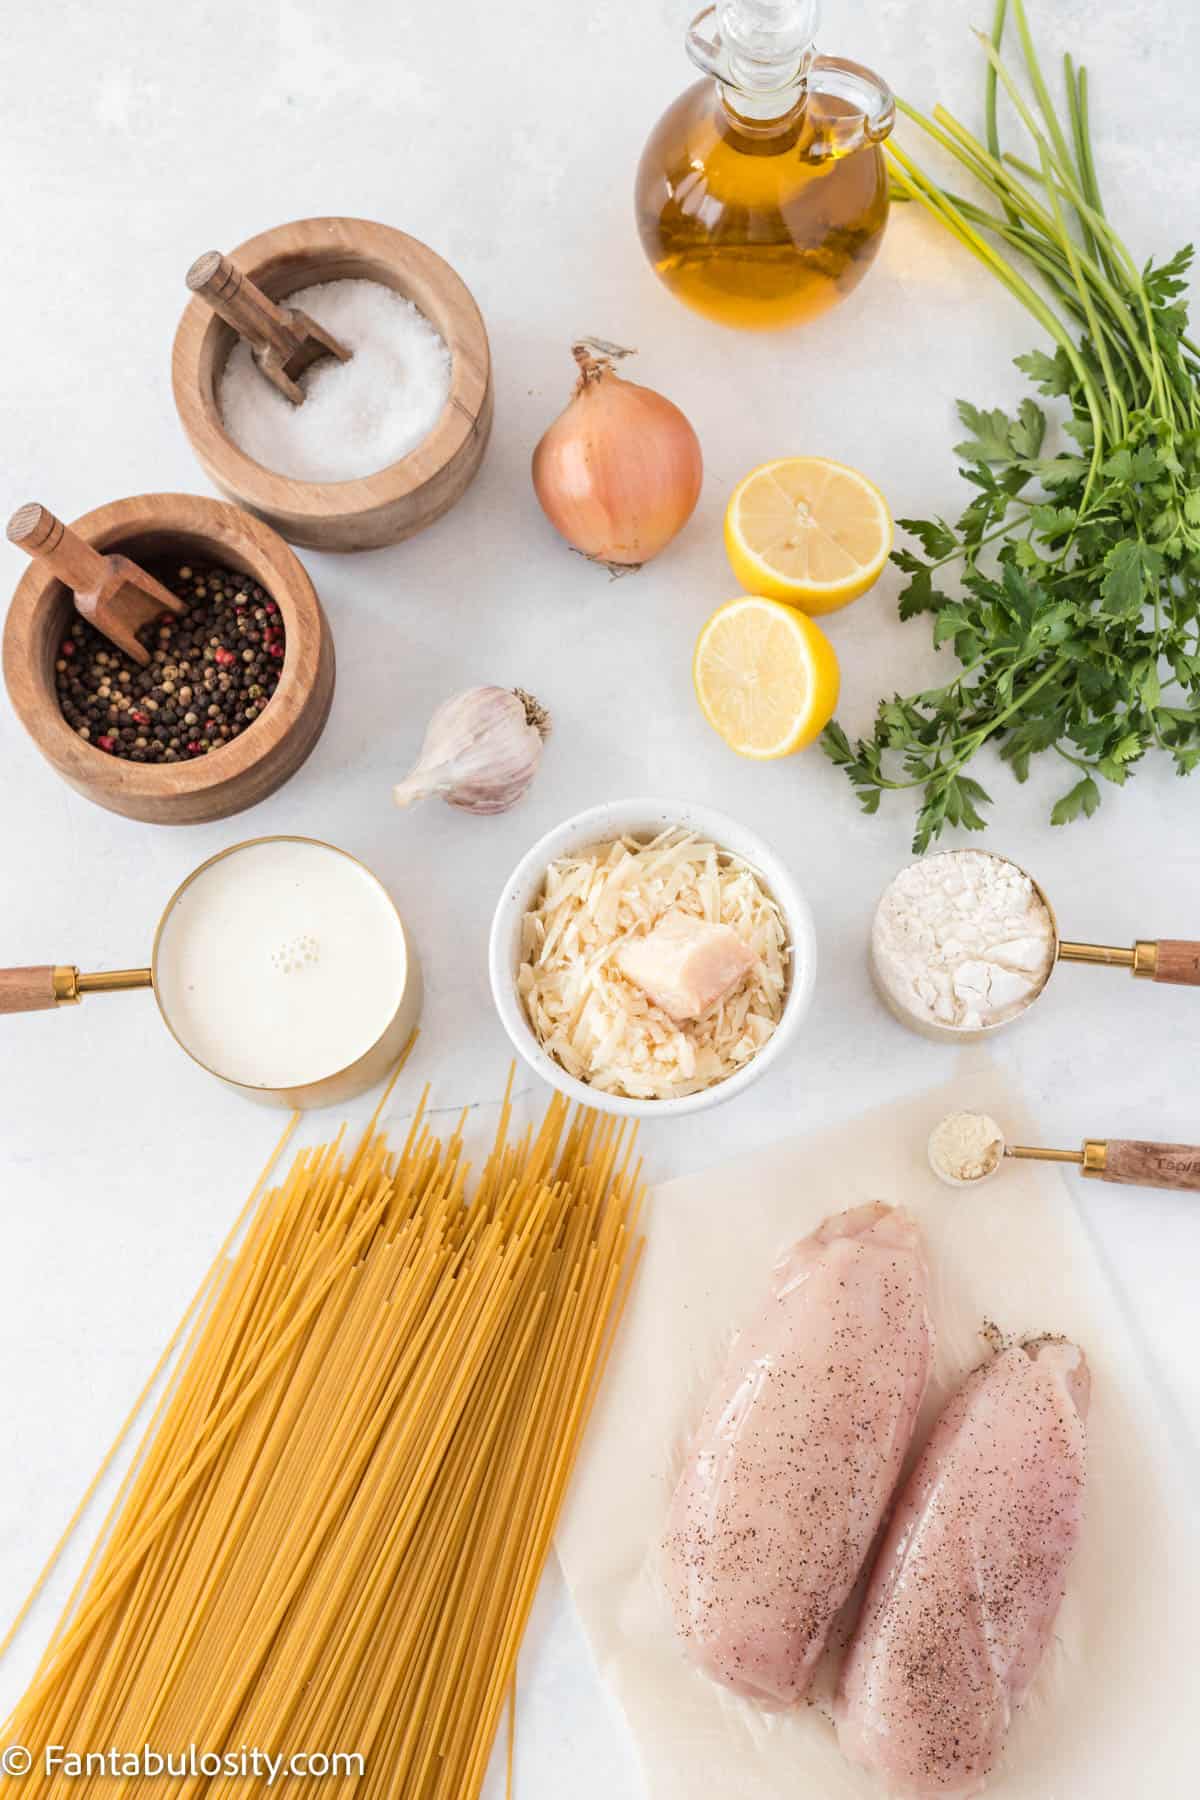
    • 3 tablespoons of olive oil, divided
    • 2 boneless, skinless chicken breasts
    • ¼ cup all purpose flour
    • 1 teaspoon garlic powder
    • 1 small onion, finely chopped
    • 1 clove of garlic, finely chopped
    • Zest of 1 lemon
    • Juice of 1 lemon
    • 1 cup heavy cream
    • ½ cup grated Parmesan cheese
    • 12 – 13 oz. of spaghetti (about ¾ of a standard 16 oz. box)
    • 3 tablespoons parsley, chopped
    • Salt and pepper to taste
    All of the fresh ingredients for Creamy Lemon Chicken Pasta are artfully arranged on a white marble counter top

    Instructions

    1. Cook the pasta in a large pot of water as directed on the packaging.
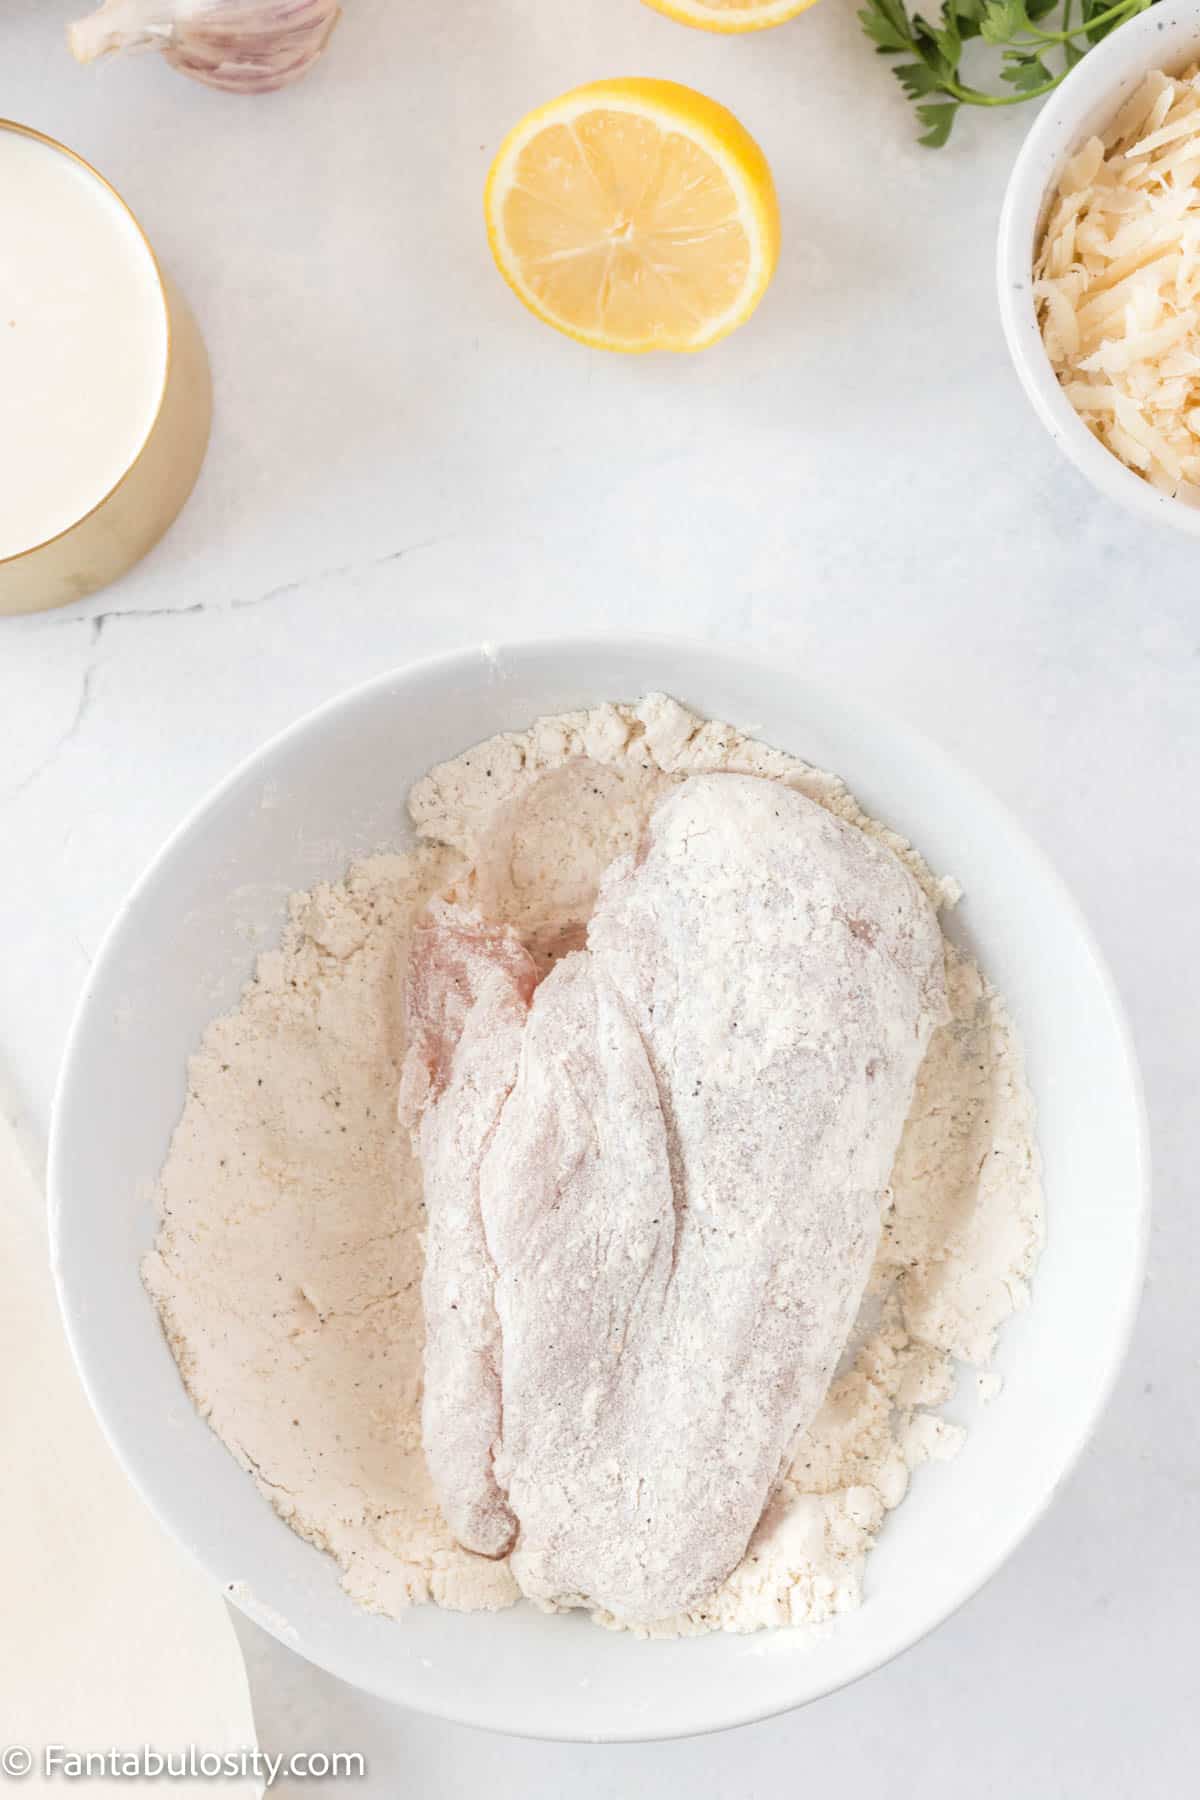
    2. In a small bowl, add flour and garlic powder and stir together.
    3. Place each chicken breast in the flour mixture and press on all sides to cover it.
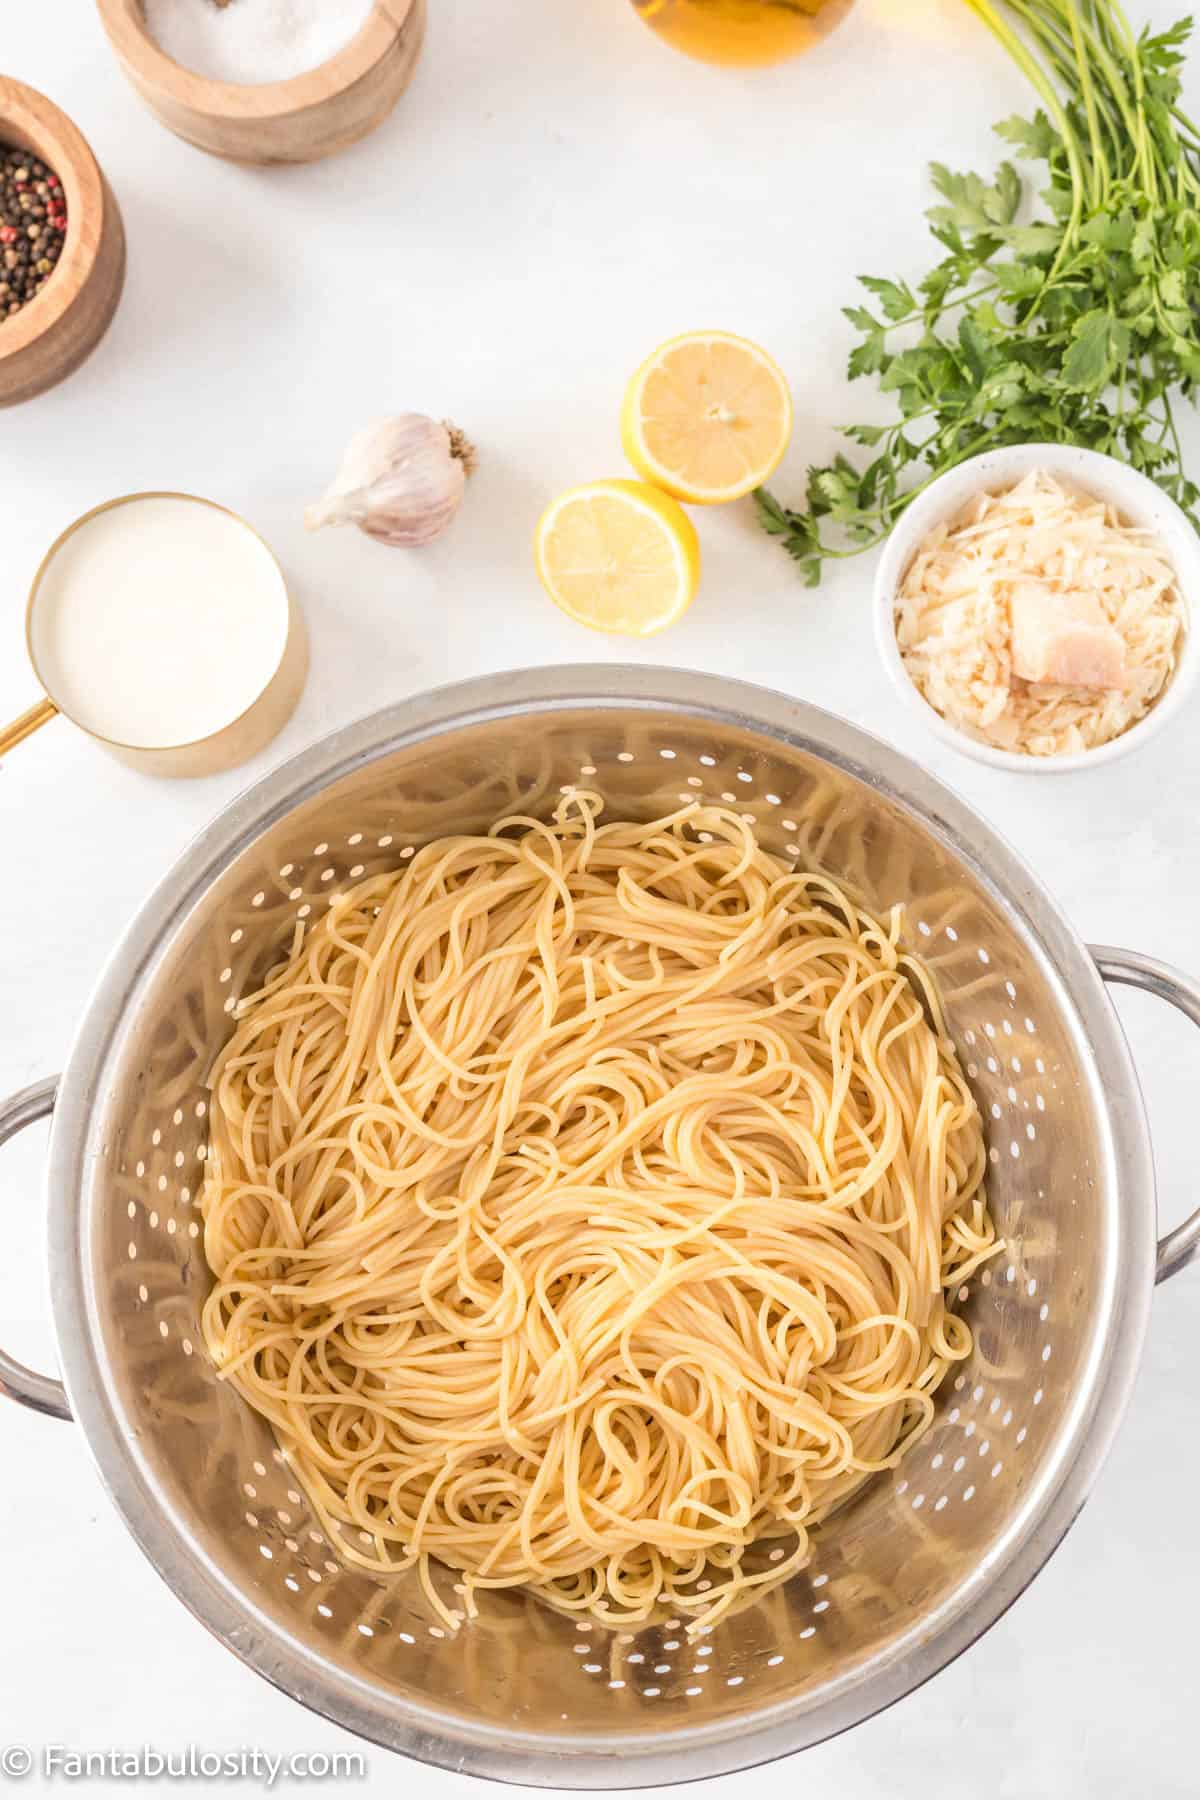
    Cooked spaghetti noodles for Creamy Lemon Chicken Pasta are sitting in a colander surrounded by lemons, garlic, parsley and Parmesan cheese
    Cook pasta
    Photo of a flour coated chicken breast ready to saute for Creamy Lemon Chicken Pasta
    Coat & season chicken
    1. In a large deep skillet over medium high heat, add 2 tablespoon of olive oil. Heat oil and add the chicken breasts. Cook for 5 minutes on each side or until the chicken is thoroughly cooked. Remove from the skillet and set aside.
    2. In the same skillet (leave all of those flavorful brown bits!), add the rest of the olive oil (1 tbsp), add the onion and garlic and cook until softened.
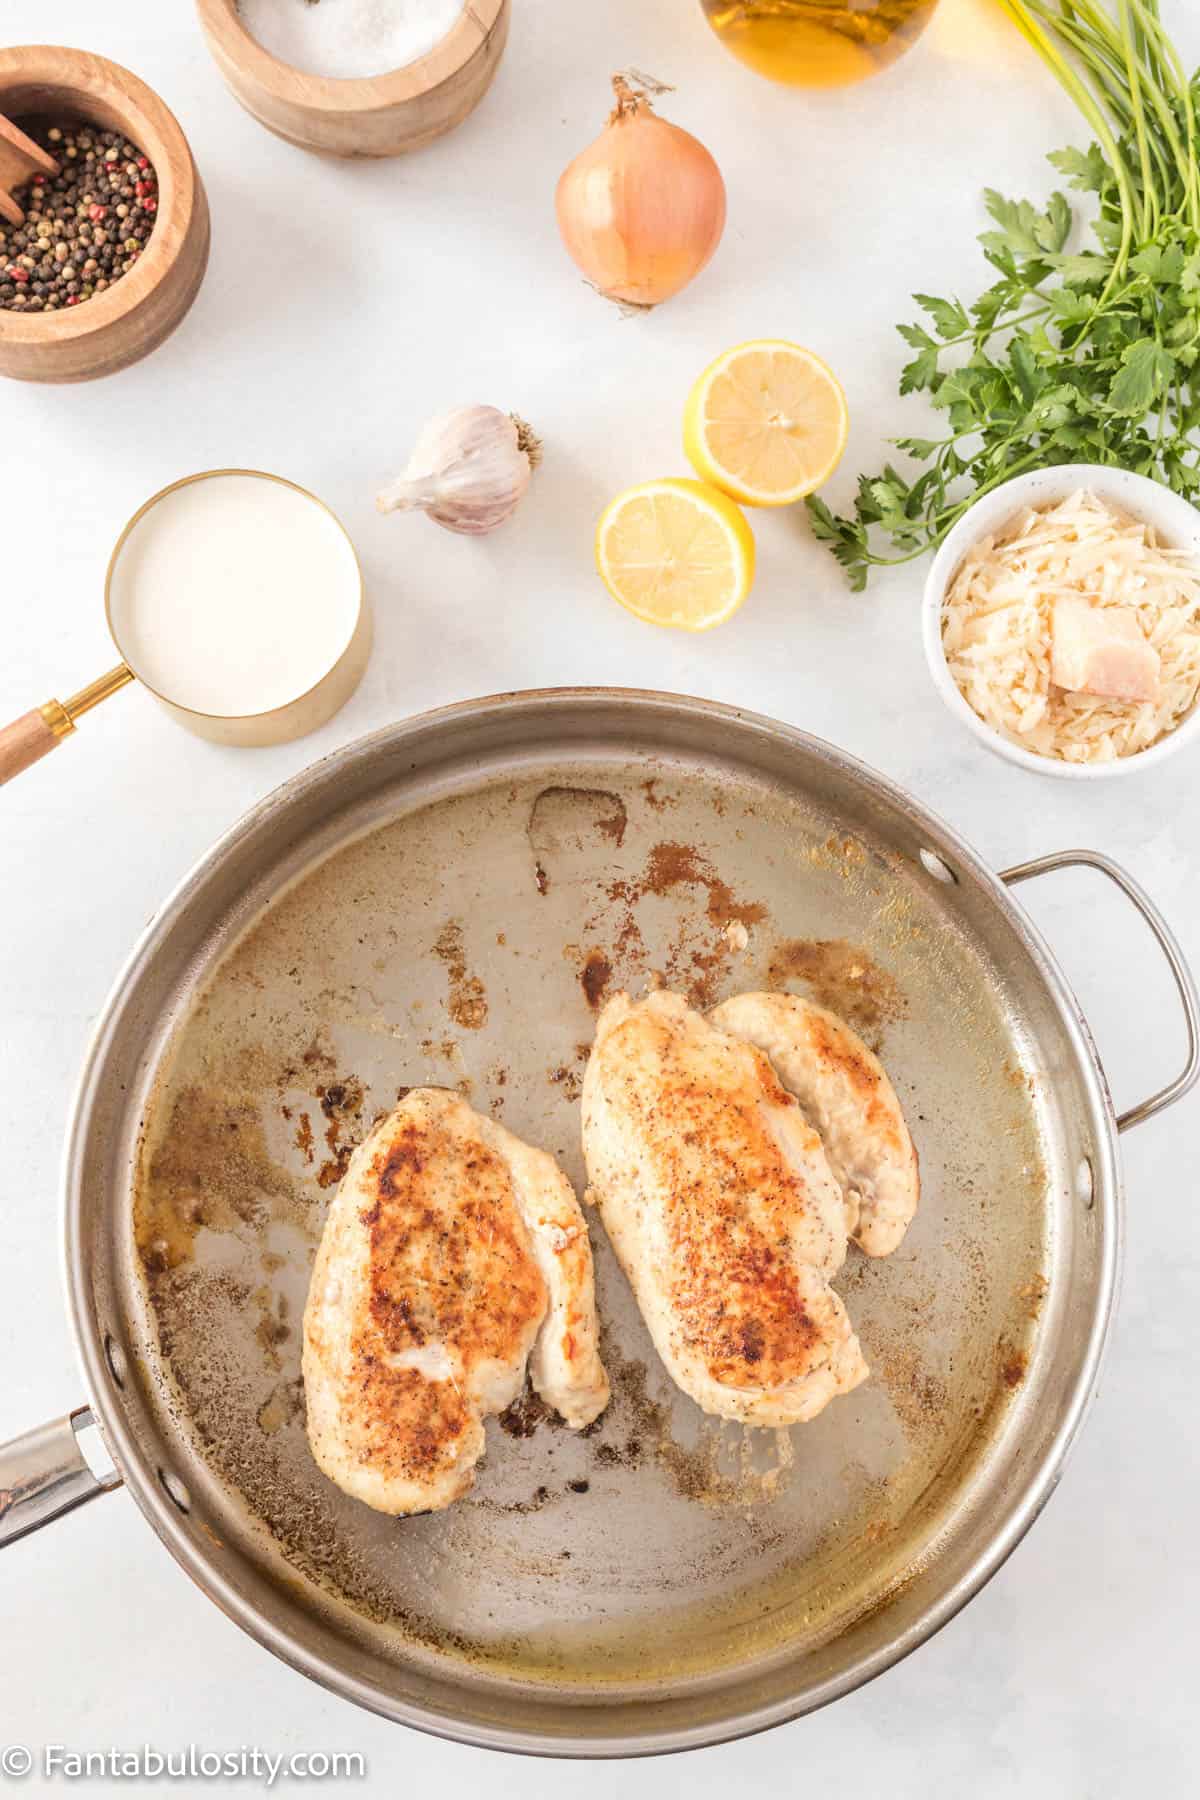
    Browned chicken breasts are displayed in a skillet surrounded by lemons, parsley, Parmesan cheese and garlic
    Brown chicken breasts
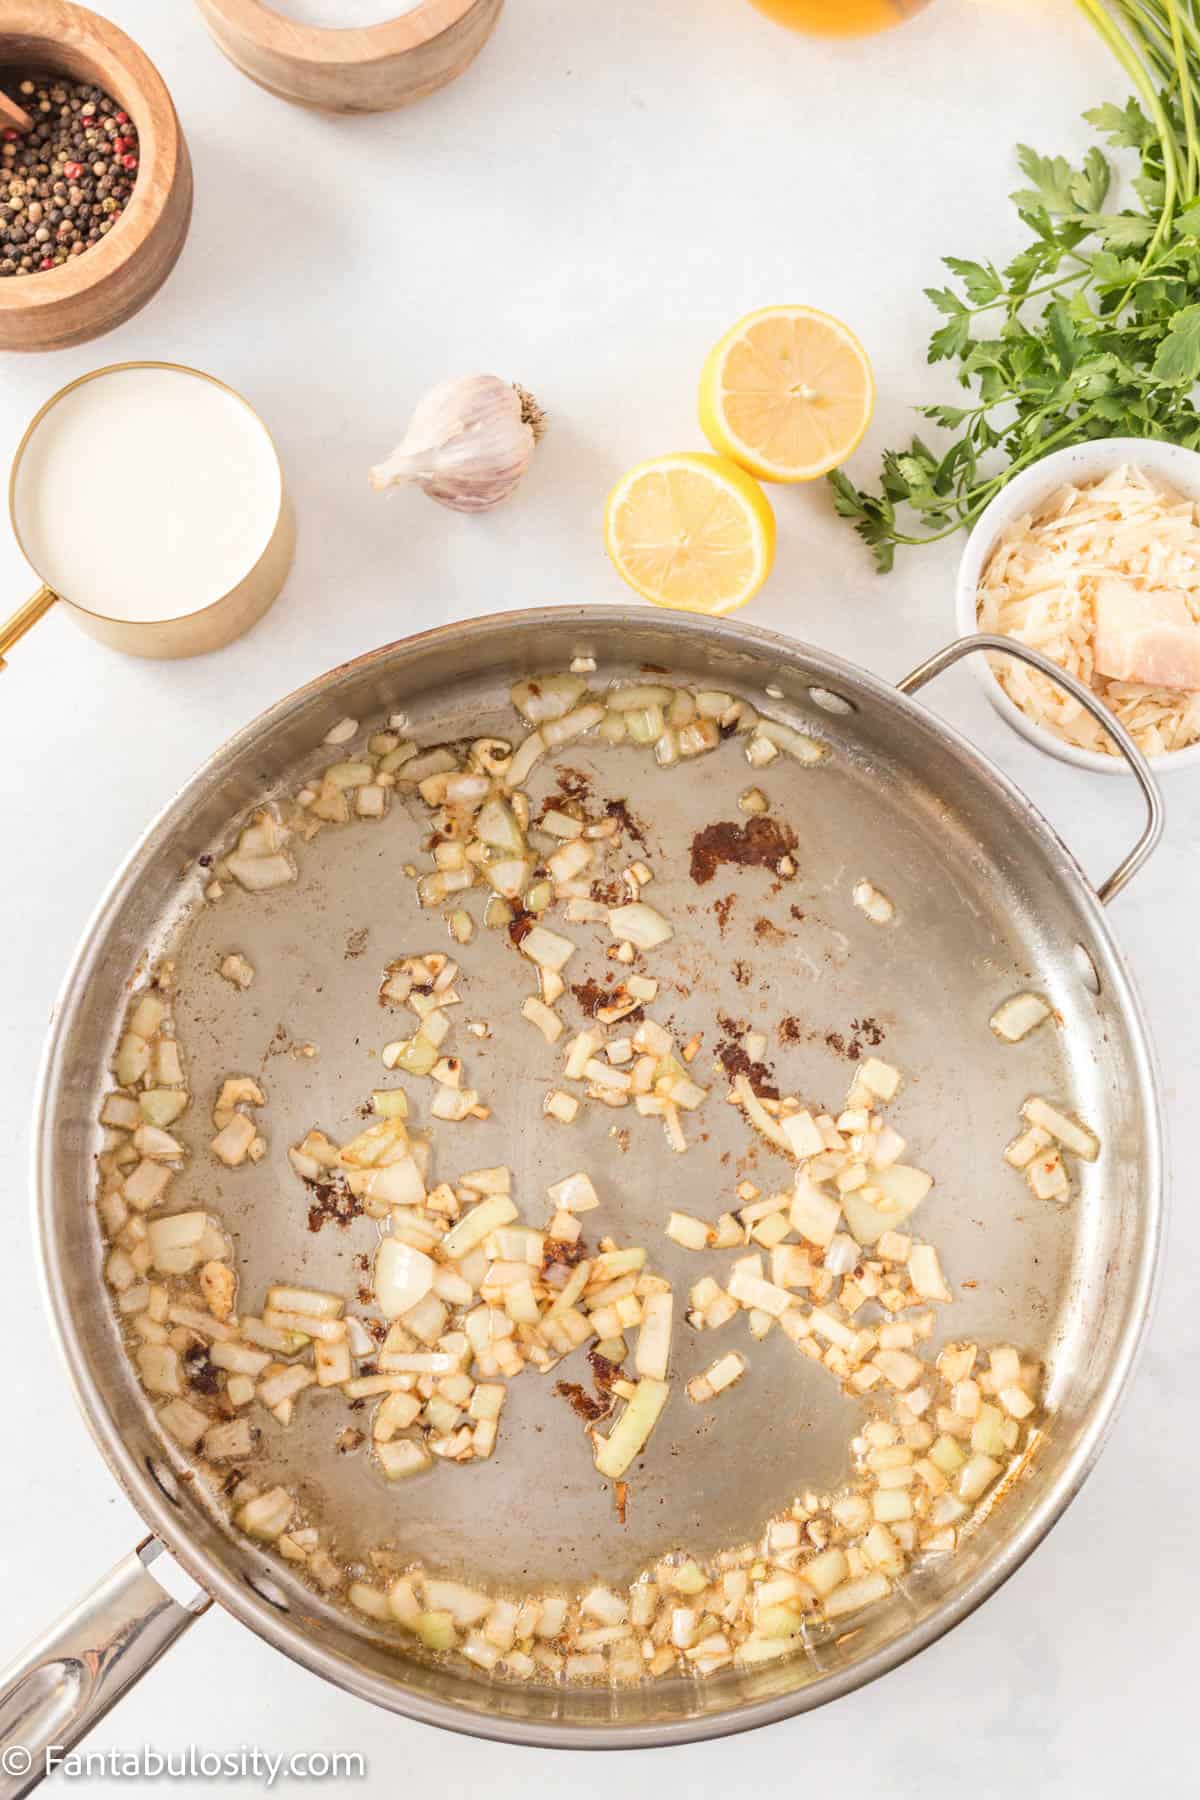
    A pan is centered with onions and garlic sauteeing in olive oil for Creamy Lemon Chicken Pasta
    Cook onion and garlic
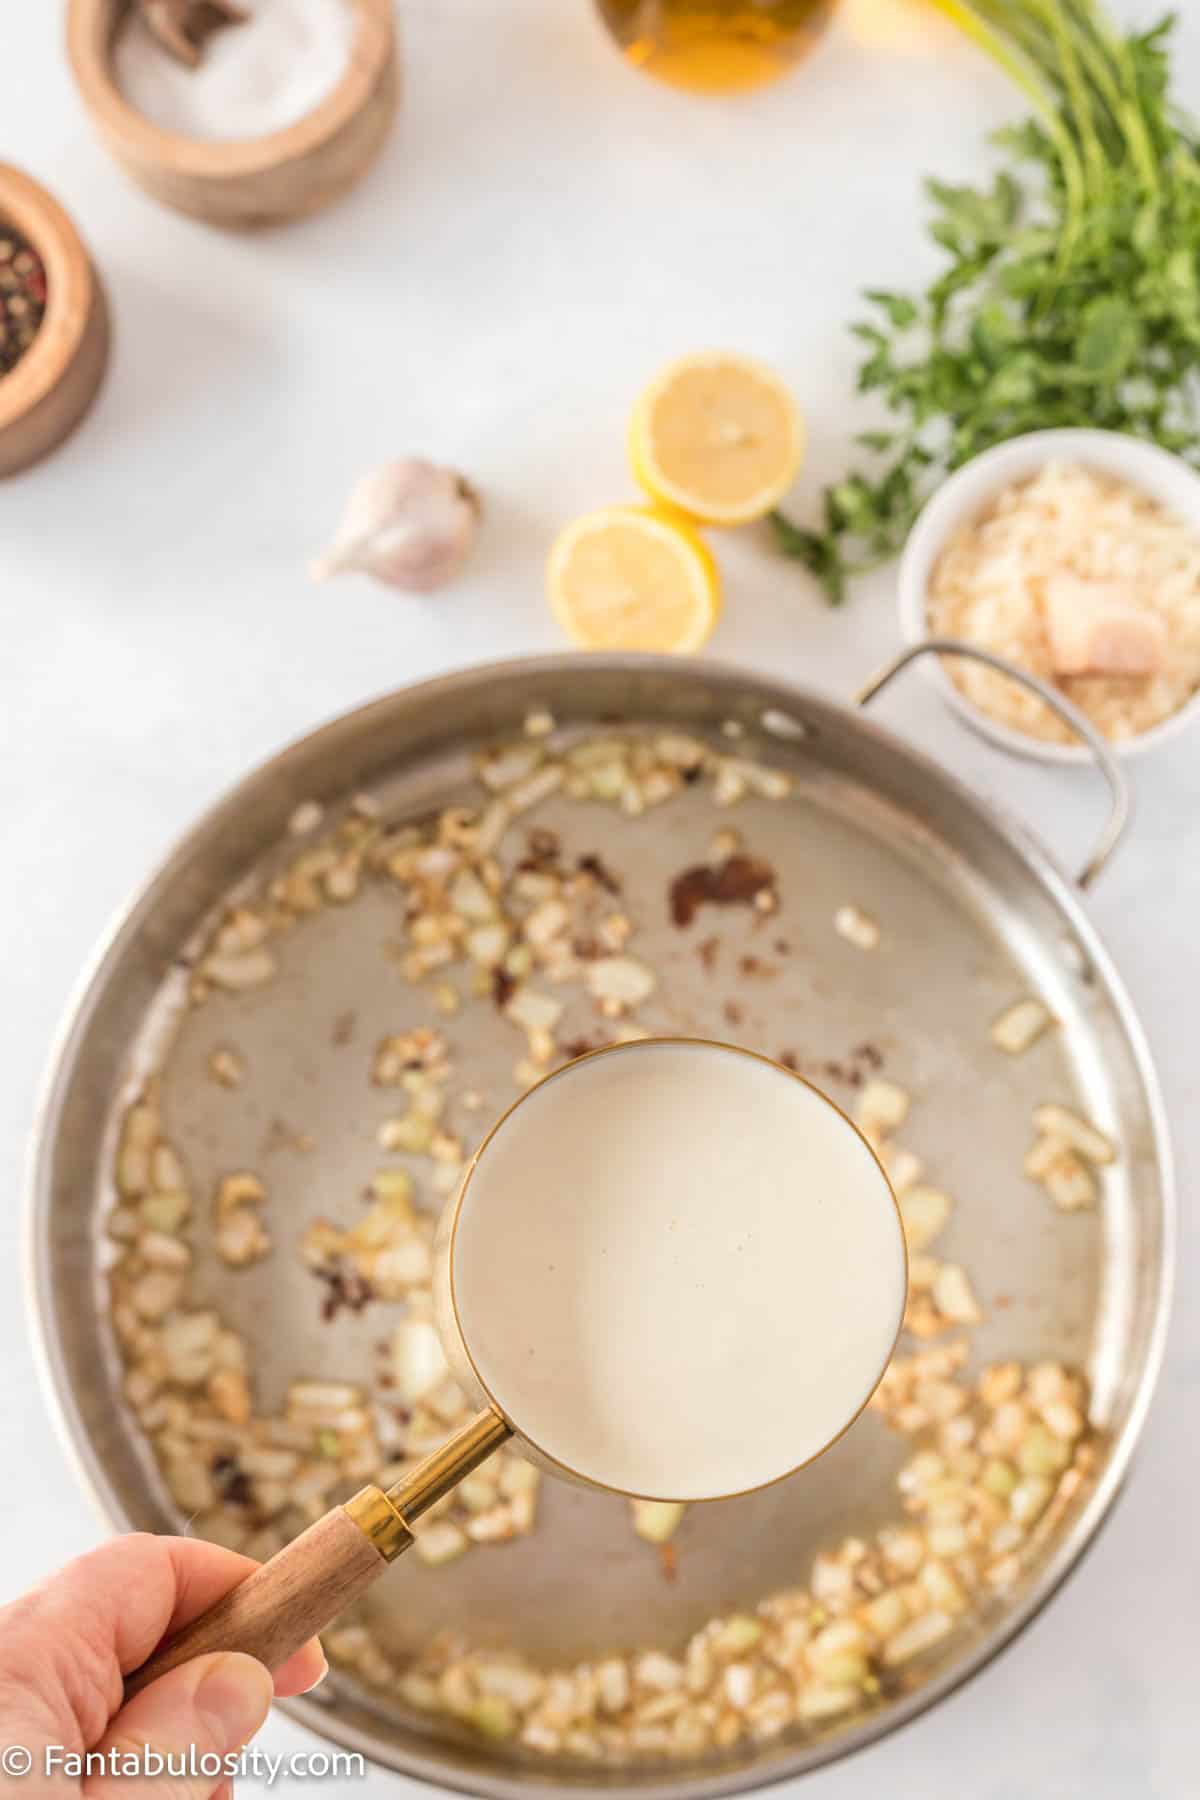
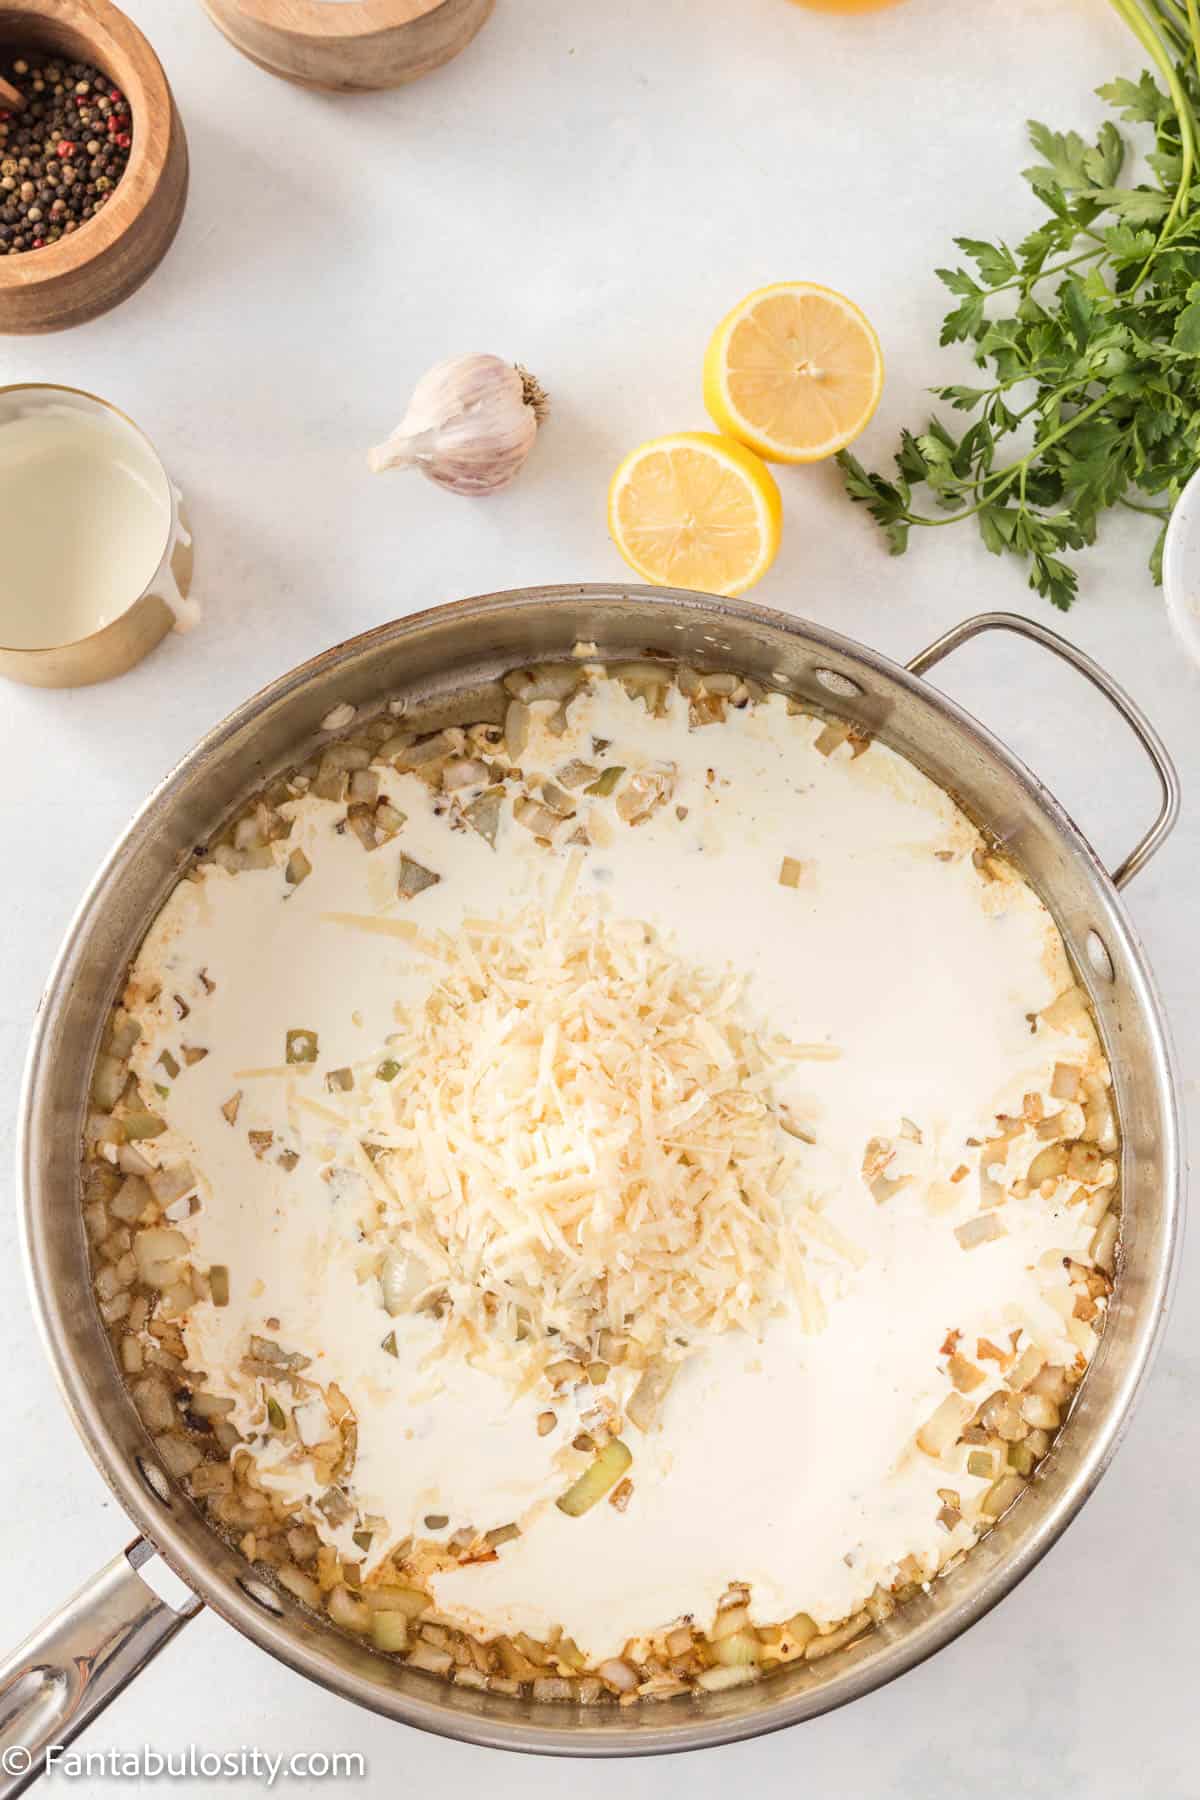
    1. Reduce heat to medium-low and add the heavy cream, Parmesan cheese, lemon zest, and lemon juice; stir until all the ingredients are well combined.
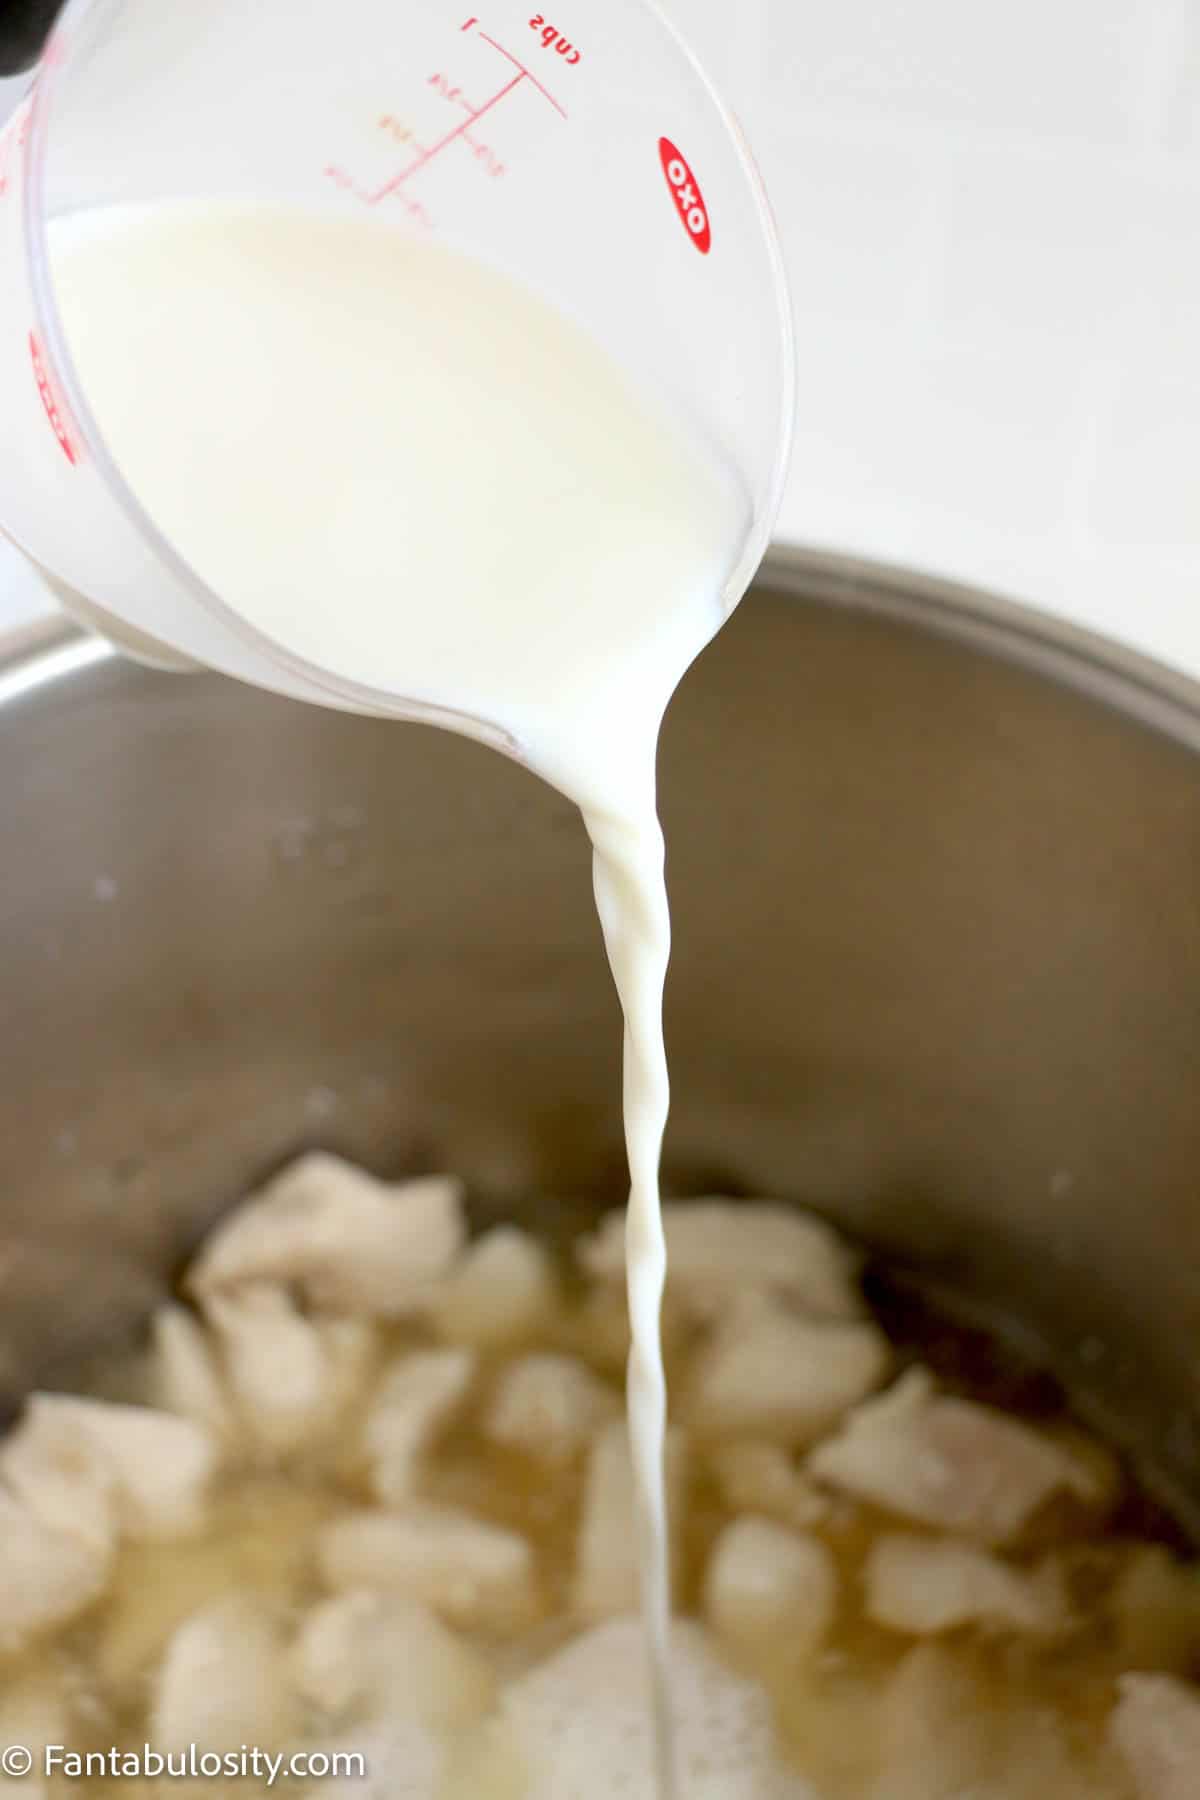
    A pan with sauteed onion and garlic is in the background while a measuring cup of heavy cream is waiting to be poured in the pan for Creamy Lemon Chicken Pasta
    Add heavy cream
    A pan is centered with cooked onions, garlic, heavy cream and shredded Parmesan cheese - this is the beginning of the sauce for Creamy Lemon Chicken Pasta
    Add Parmesan, lemon zest and juice
    1. Add the cooked pasta, and stir until the pasta is covered with the creamy sauce. Remove from heat.
    2. Adjust the seasoning to taste.
    3. Serve and top with sliced chicken breast. Garnish with fresh parsley.
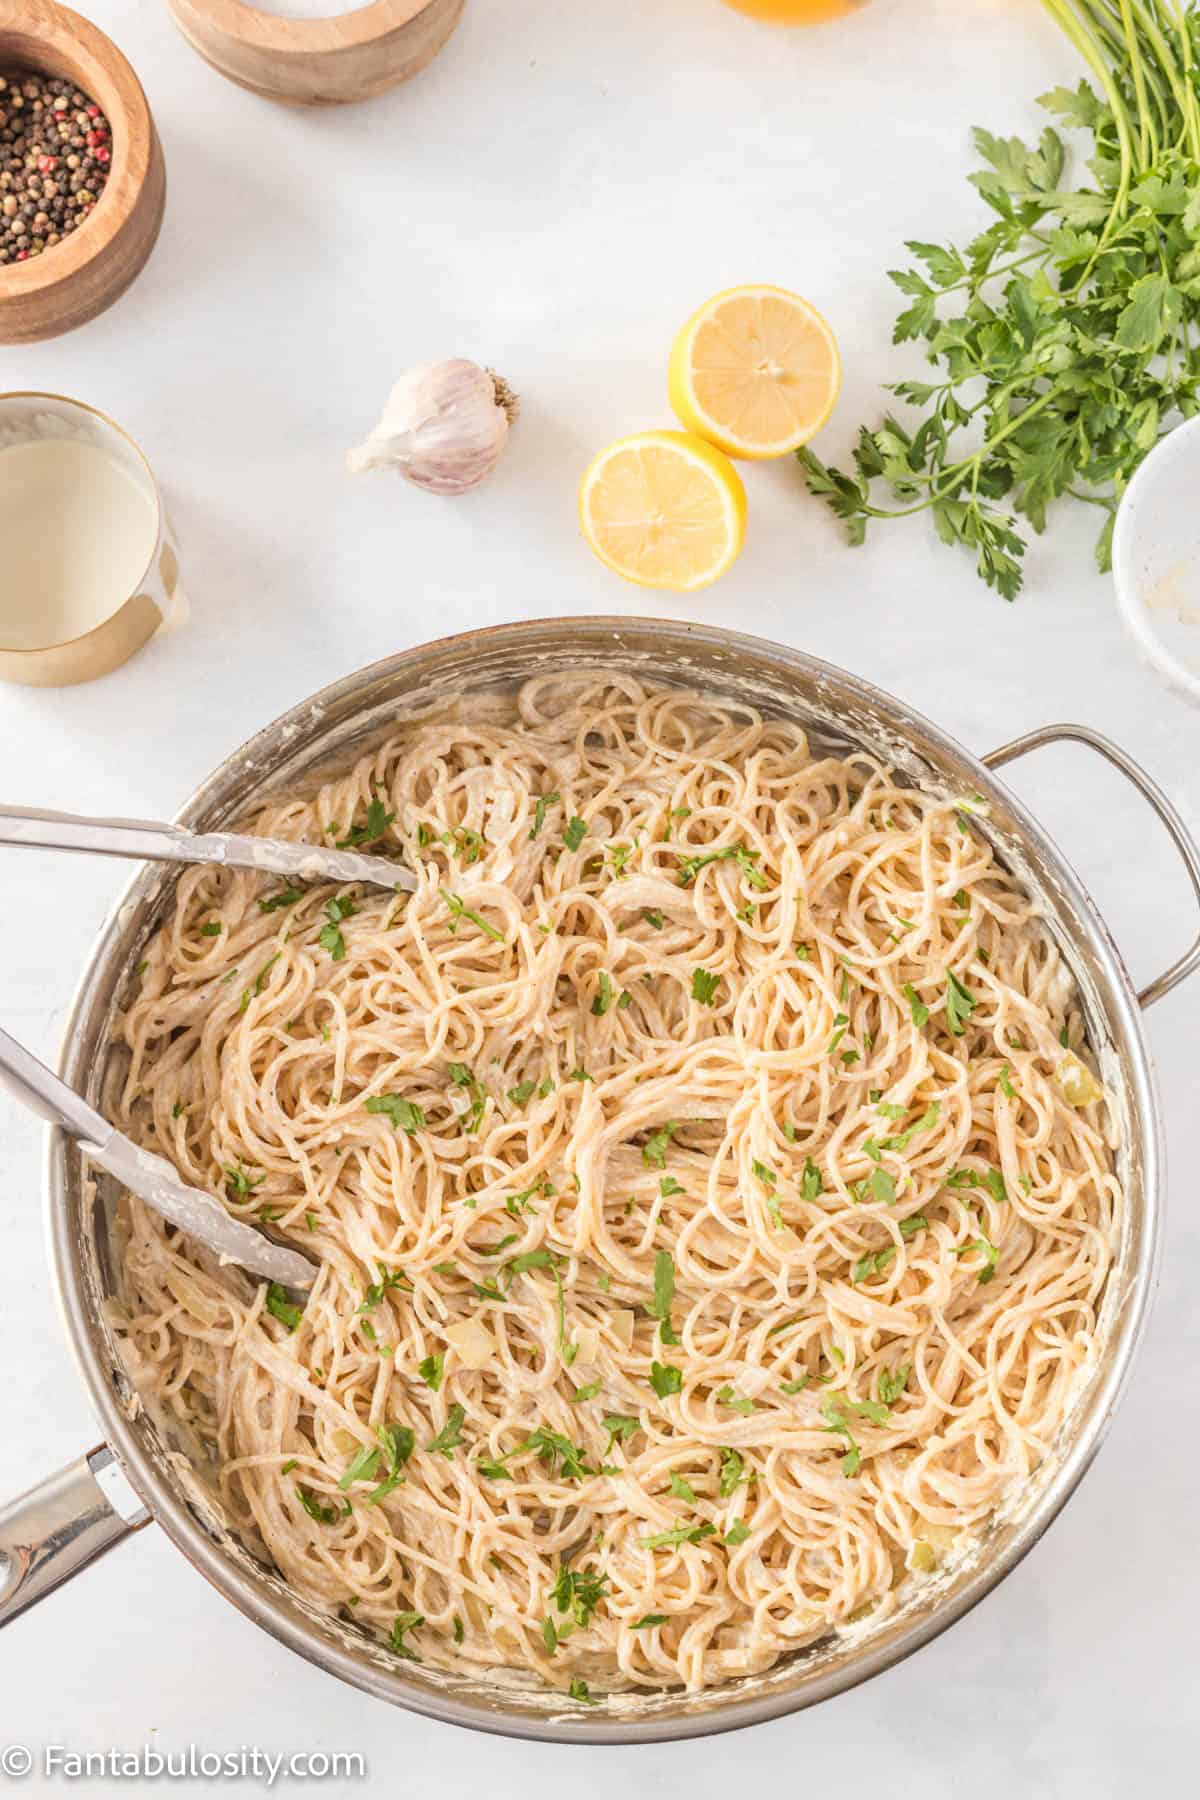
    Cooked spaghetti noodles for Creamy Lemon Chicken Pasta have been stirred into the creamy sauce and then topped with parsley
    Stir in pasta
    Close up of cooked spaghetti noodles coated with creamy lemon Parmesan sauce and topped with a sliced chicken breast and fresh parsley
    Top with chicken

    Substitutions and Variations

    One of our favorite things about this creamy lemon chicken pasta recipe (and most pasta dishes) is how flexible it is! Here are a few ways that you can adjust this recipe to fit your family or what you might have on hand.

    • Chicken – We used chicken breasts for this recipe, but you can use dark meat like chicken thighs if you prefer. If you are in a time crunch, you can also use shredded rotisserie chicken.
    • Pasta – While we used spaghetti noodles, any long pasta (fettucini, linguini or angel hair pasta) will work. Gluten-free pasta is also an option.
    • Add ins – Feel free to stir in sweet peas or cooked broccoli florets for some added veggies. Add a tablespoon or two of cream cheese to the sauce to make it even more creamy.
    • Toppings – Sprinkle bite sized pieces of chopped crispy bacon on top, add fresh basil or fresh parsley or for a little heat, sprinkle with red pepper flakes.
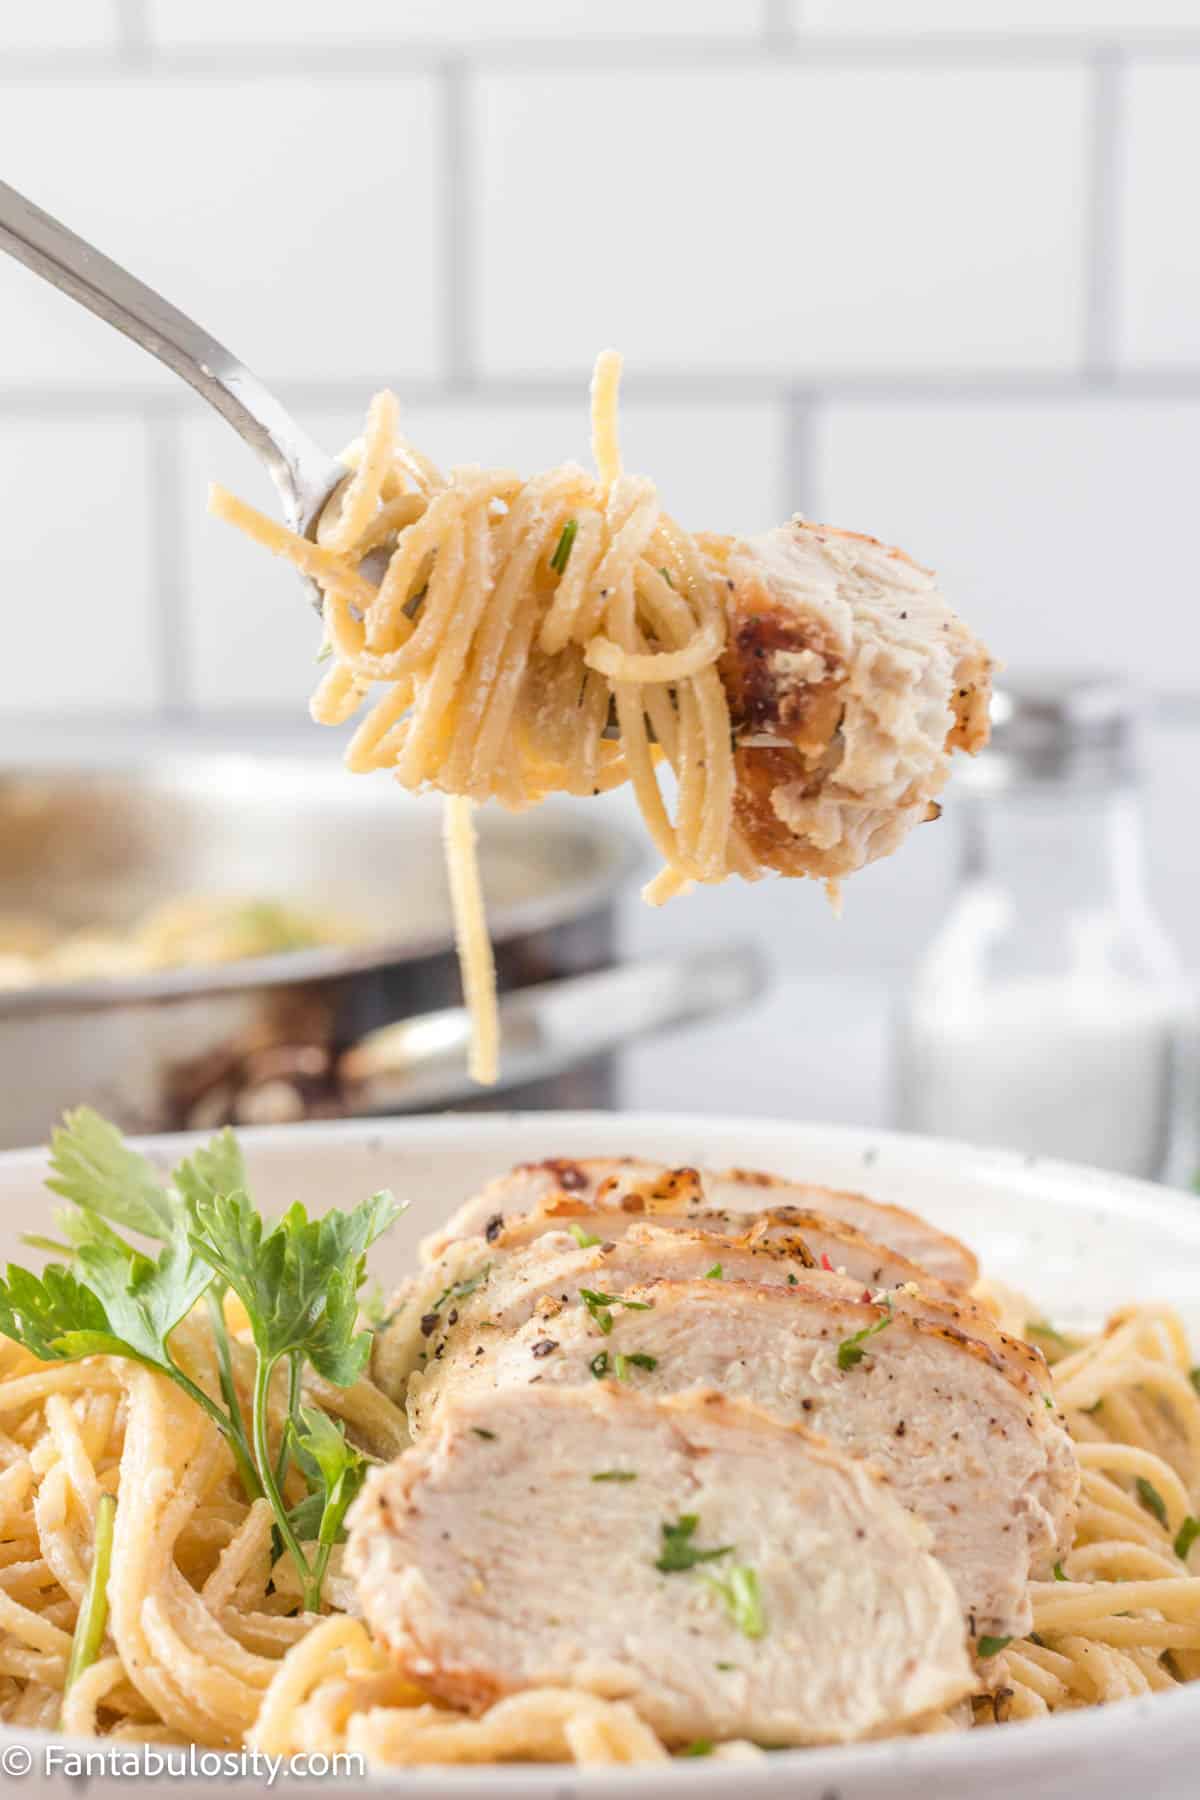
    Creamy lemon pasta on fork

    Storage

    Store this lemon pasta with chicken in an air-tight container in the refrigerator for up to 4 days. Since this dish is made with dairy, freezing it is not recommended.

    FAQs

    • What does adding lemon to chicken do? Lemon not only adds flavor to the chicken but it can also tenderize the chicken. However, I don’t recommend marinating chicken for longer than about 12 hours as it can make the chicken rubbery or tough.
    • Can I make this recipe ahead of time? Yes! When you are going to reheat the pasta, stir in about ¼ cup of water or chicken stock (or broth) to keep the sauce creamy.

    Related Recipes

    If you loved this pasta recipe, then you’ll also love this pasta dish with corn and tomatoes, this leftover spaghetti recipe, easy beef stroganoff recipe, as well as this bbq chicken pasta!

    Did you make this? I’d be so grateful if you left a “star” rating below to let me know what you thought! Then, the next time you need a quick and easy recipe, come back to Fantabulosity to browse all of my easy recipes!

    Recipe

    Close up photo of Creamy Lemon Chicken Pasta and a fork in a white speckled serving bowl garnished with lemon slices and fresh parsley
    Print Pin
    5 from 5 votes

    Creamy Lemon Chicken Pasta

    Creamy Lemon Chicken Pasta: Perfectly al dente pasta is drenched in a rich creamy lemon sauce and topped with flavorful chicken for a simple but hearty pasta dish!
    Course Main Course
    Cuisine American
    Prep Time 15 minutes minutes
    Cook Time 20 minutes minutes
    Total Time 35 minutes minutes
    Servings 4
    Calories 817kcal
    Author Jessica Burgess

    Ingredients

    • 3 tablespoon olive oil divided
    • 2 boneless skinless, chicken breasts
    • ¼ cup all purpose flour
    • 1 teaspoon garlic powder
    • 1 small onion finely chopped
    • 1 clove garlic finely chopped
    • zest of one lemon
    • juice of one lemon
    • 1 cup heavy cream
    • ½ cup grated parmesan cheese
    • 12 oz spaghetti noodles
    • 3 tablespoon chopped fresh parsley
    • Salt & Pepper to taste

    Instructions

    • Cook the pasta in a large pot of water as directed on the packaging.
    • In a small bowl, add flour and garlic powder and stir together.
    • Place each chicken breast in the flour mixture and press on all side to cover it.
    • In a large deep skillet over medium high heat, add 2 tablespoon of olive oil. Heat olive oil and add the chicken breasts to the skillet. Cook for 5 minutes on each side or until thoroughly cooked. Remove from the skillet and set aside.
    • In the same skillet (leave all of those flavorful brown bits!), add the rest of the olive oil (1 tablespoon), add the onion and garlic and cook until softened.
    • Reduce the heat to medium-low and add the heavy cream, Parmesan cheese, lemon zest and lemon juice. Stir until the ingredients are well combined.
    • Add the cooked pasta, and stir until the pasta is covered in sauce. Remove from heat.
    • Adjust the seasoning to taste.
    • Serve and top with sliced chicken breast. Garnish with fresh parsley.
    Nutrition

    Serving: 1g | Calories: 817kcal | Carbohydrates: 77g | Protein: 43g | Fat: 40g | Saturated Fat: 18g | Polyunsaturated Fat: 3g | Monounsaturated Fat: 15g | Trans Fat: 0.01g | Cholesterol: 150mg | Sodium: 376mg | Potassium: 758mg | Fiber: 1g | Sugar: 3g | Vitamin A: 1270IU | Vitamin C: 8mg | Calcium: 203mg | Iron: 4mg

    Pumpkin Streusel Muffins

    August 23, 2022

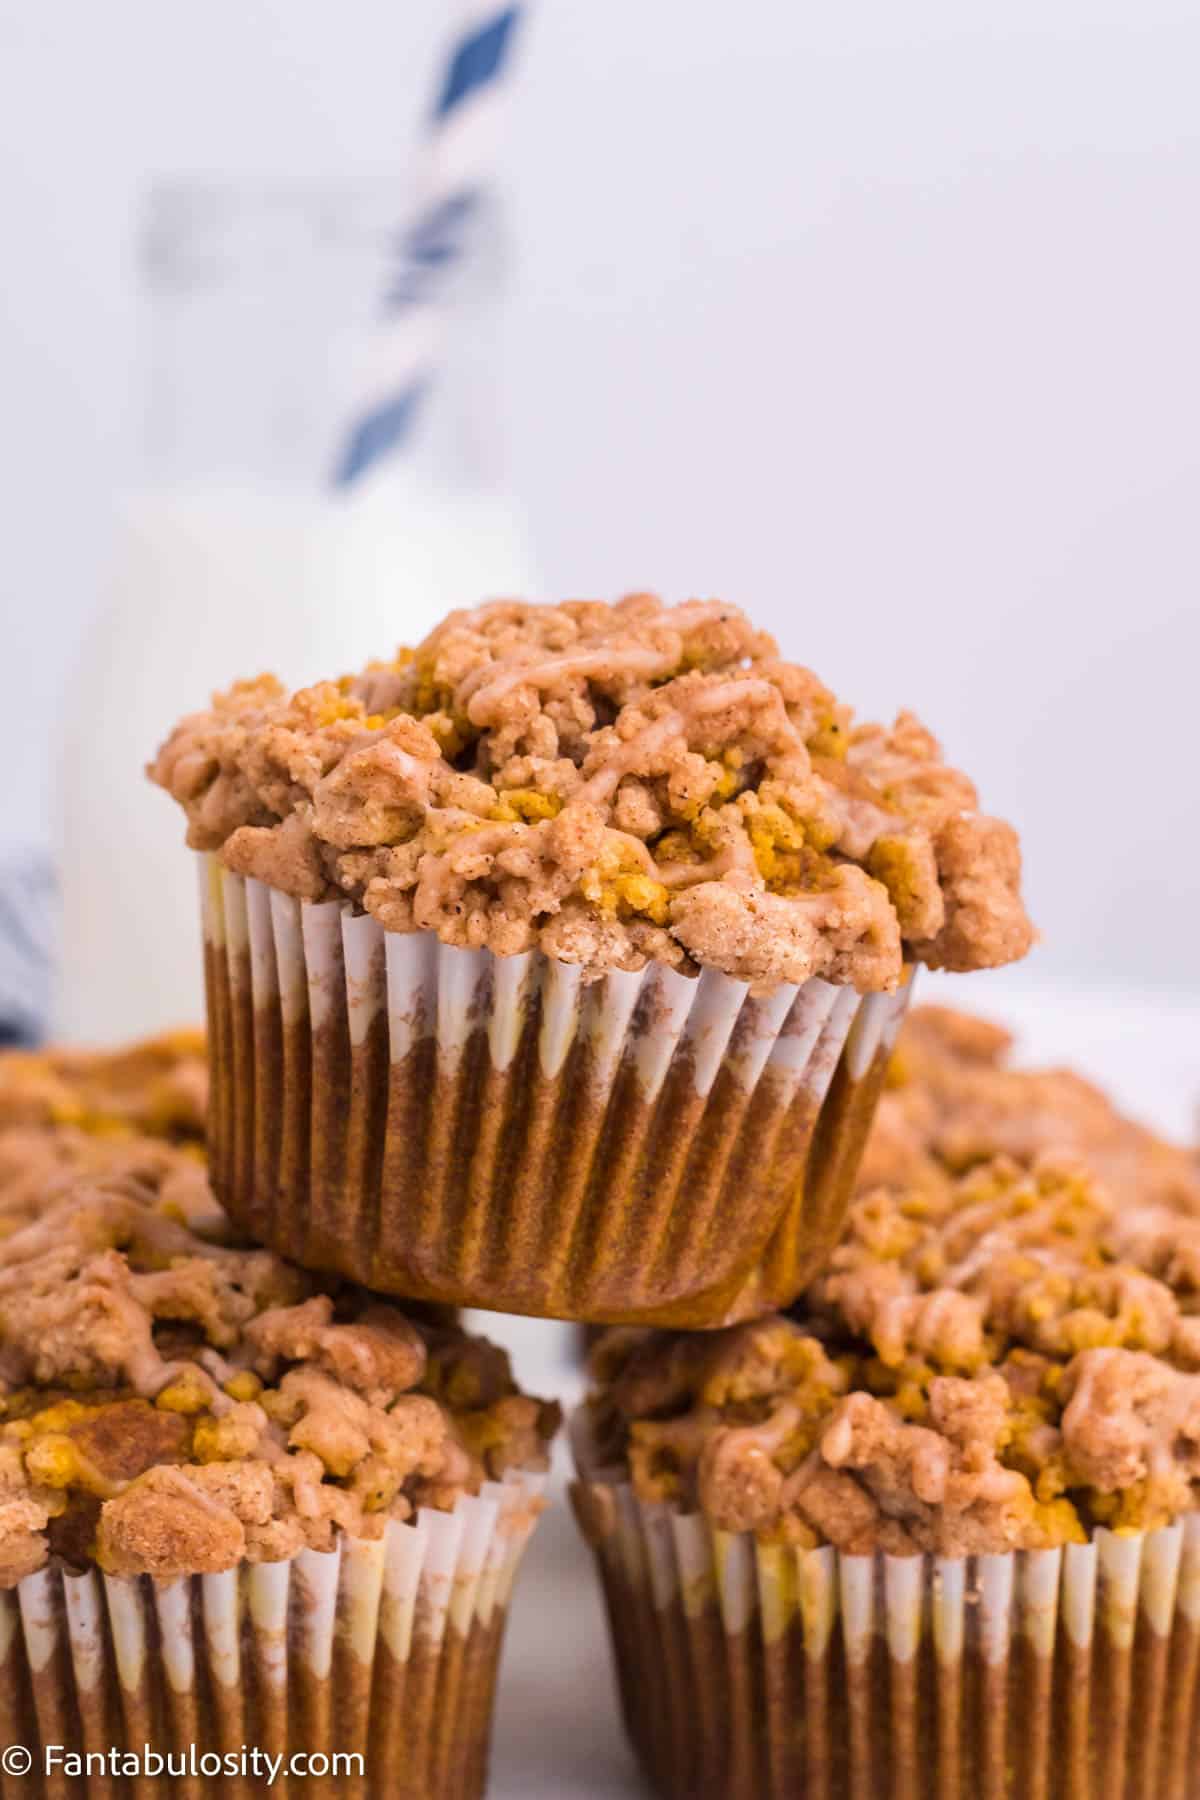
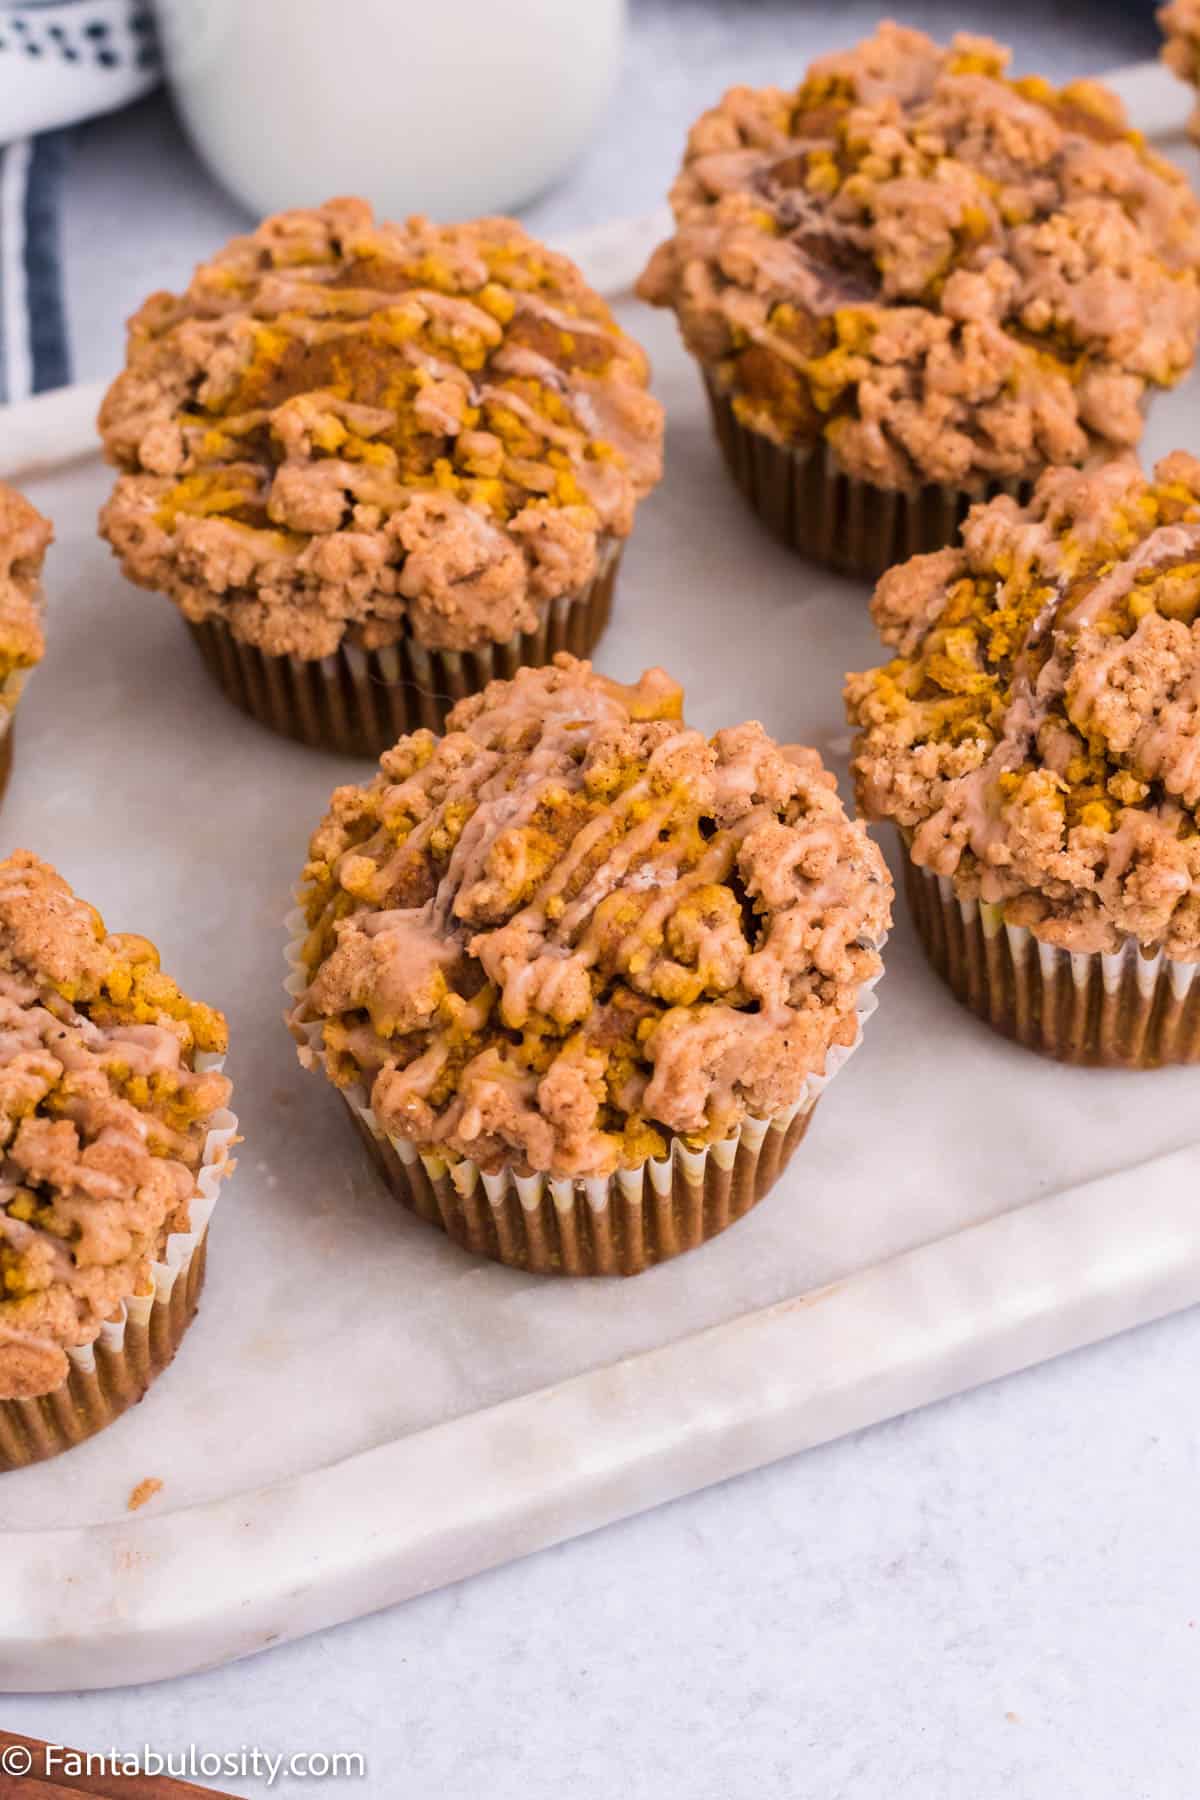
    Close up of pumpkin streusel muffins stacked on top of one another

    Pumpkin Streusel Muffins: Delicious pumpkin muffins with an incredible streusel topping that sits on top of the muffins, all made with simple ingredients!

    Baking through pumpkin season? Here’s the rest of my Halloween and fall recipes.

    Streusel makes everything better. Looking for more pumpkin recipes for fall? Start here.

    This post was originally written as a recipe using Stevia in the Raw but was updated in 2022 with a new, fresh recipe, without the Stevia product. You may still choose to use Stevia as a substitute for the baking sugar but please remember to follow the guidelines on the package for how to use in place of regular sugar.

    Close up of stacked pumpkin streusel muffins

    Why You’ll Love This Recipe

    • Muffins are always an amazing choice for a breakfast recipe that can be on-the-go or served as a sweet treat on something such as a coffee bar area!
    • When Fall rolls around, there’s nothing better than pumpkin flavors in some of our favorite easy recipes, and this recipe is perfect for a cool Fall morning, along with a cup of coffee!
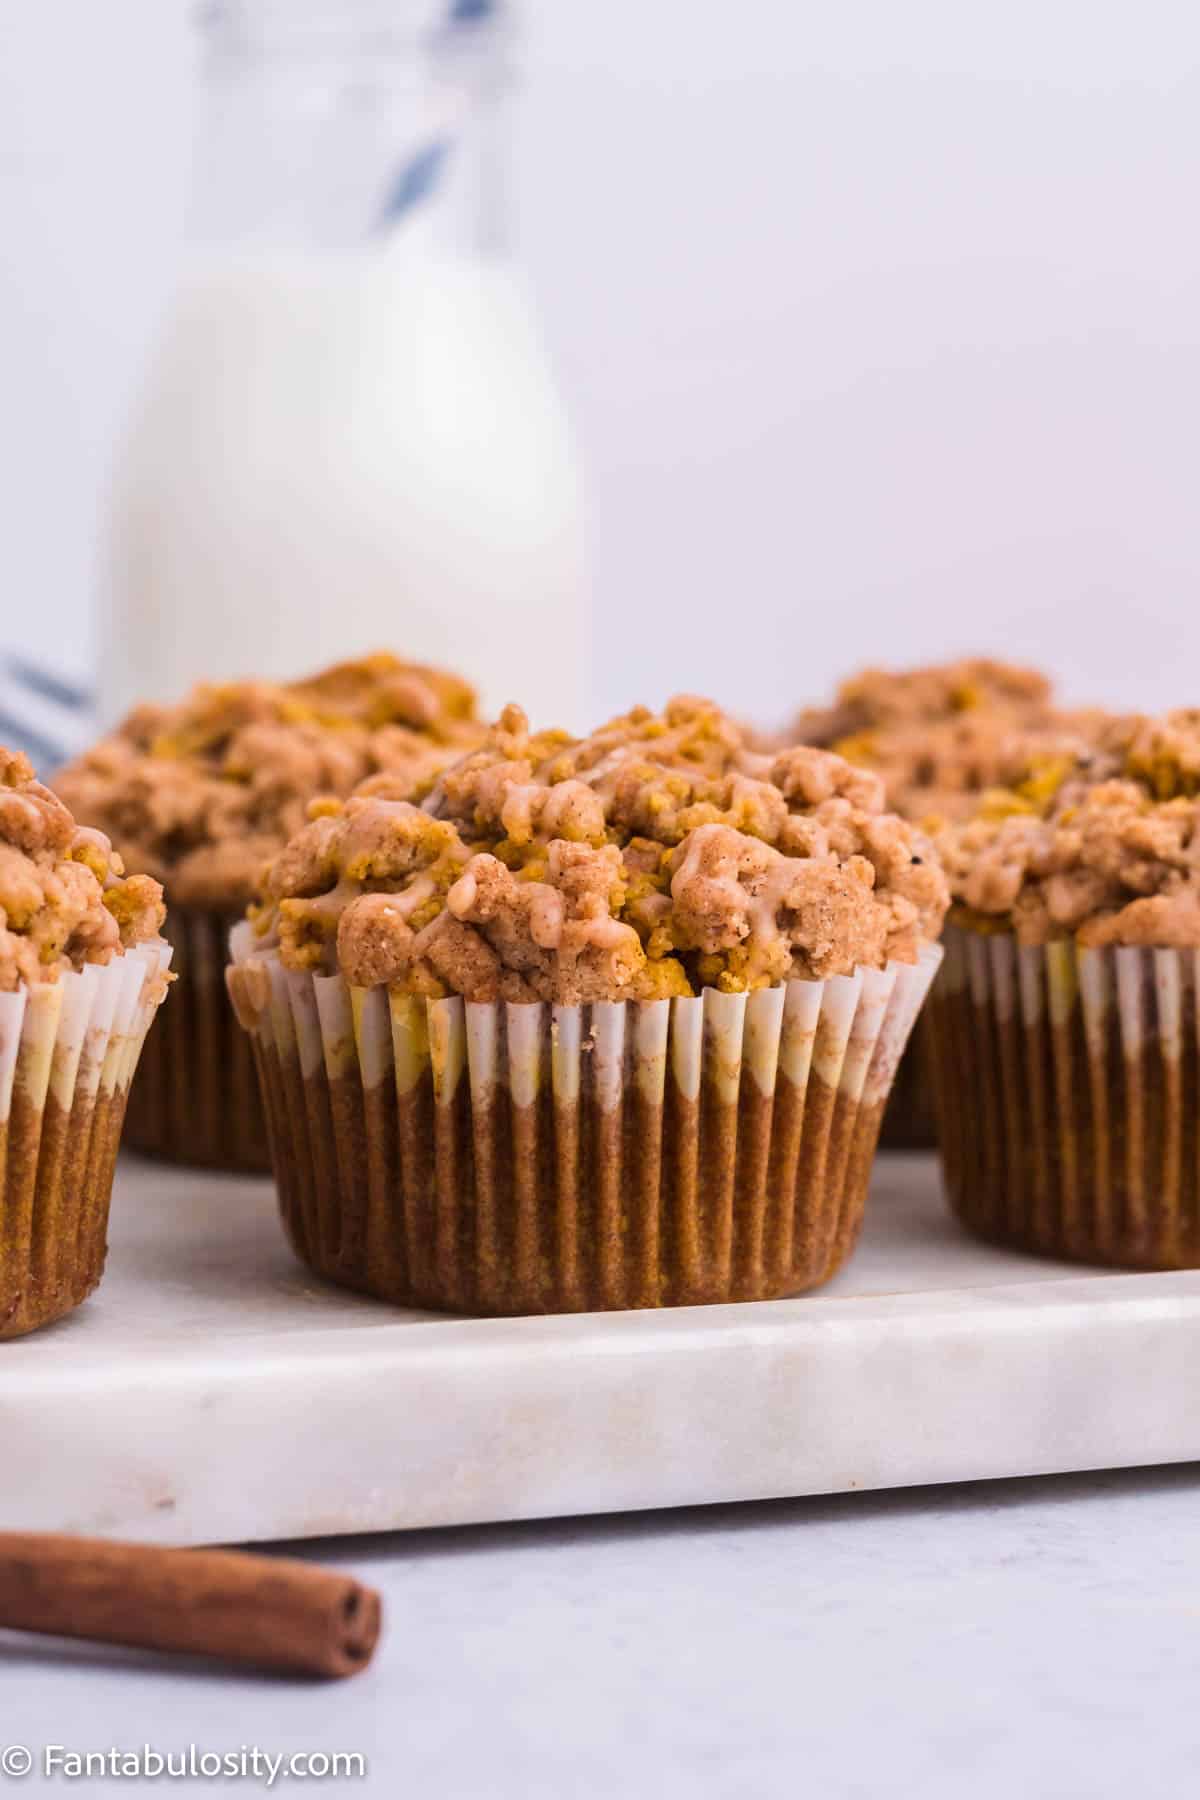
    • They’re super moist muffins, packed with pumpkin and spices. Topped with a streusel for the perfect amount of crunch and finished off with a drizzle of cinnamon glaze. But I think you’ll also love our easy pumpkin bread, especially if you’re a cream cheese lover!
    • If you were a fan of our cheesecake pumpkin bars, our pumpkin cheesecake bites, and our no-bake pumpkin pie, then you’ll also love this similar recipe!

    Ingredients

    When you see the list of ingredients below for these pumpkin crumb muffins, don’t worry about the amount! Many of them are the same ingredient but we just use them in the muffins, streusel and icing!

    Muffins

    • 1¾ cup All-purpose flour
    • 1 teaspoon Baking soda
    • 2 teaspoon Ground cinnamon
    • 1 teaspoon Pumpkin pie spice
    • ½ teaspoon Salt
    • ½ cup Vegetable oil
    • ¼ cup Milk
    • 2 large Eggs
    • 1½ teaspoon Vanilla extract
    • ½ teaspoon Rum extract
    • ½ cup Granulated sugar (white sugar)
    • ½ cup Light brown sugar
    • 1½ cup Pumpkin puree 

    Streusel topping

    • ¾ cup All-purpose flour
    • ¼ cup Granulated sugar
    • ¼ cup Light brown sugar
    • 1 teaspoon Pumpkin pie spice
    • ½ teaspoon Ground cinnamon
    • 6 tablespoon Melted butter, unsalted

    Icing

    • ½ cup Powdered sugar
    • ½ teaspoon Ground cinnamon
    • 2 teaspoon Milk
    Pumpkin streusel muffins on white counter
    Pumpkin Muffins

    Instructions

    Much like the simple ingredients, the instructions are simple too! Here’s how to make this pumpkin streusel muffins recipe:

    For Muffins

    1. Preheat oven to 425 degrees Fahrenheit.
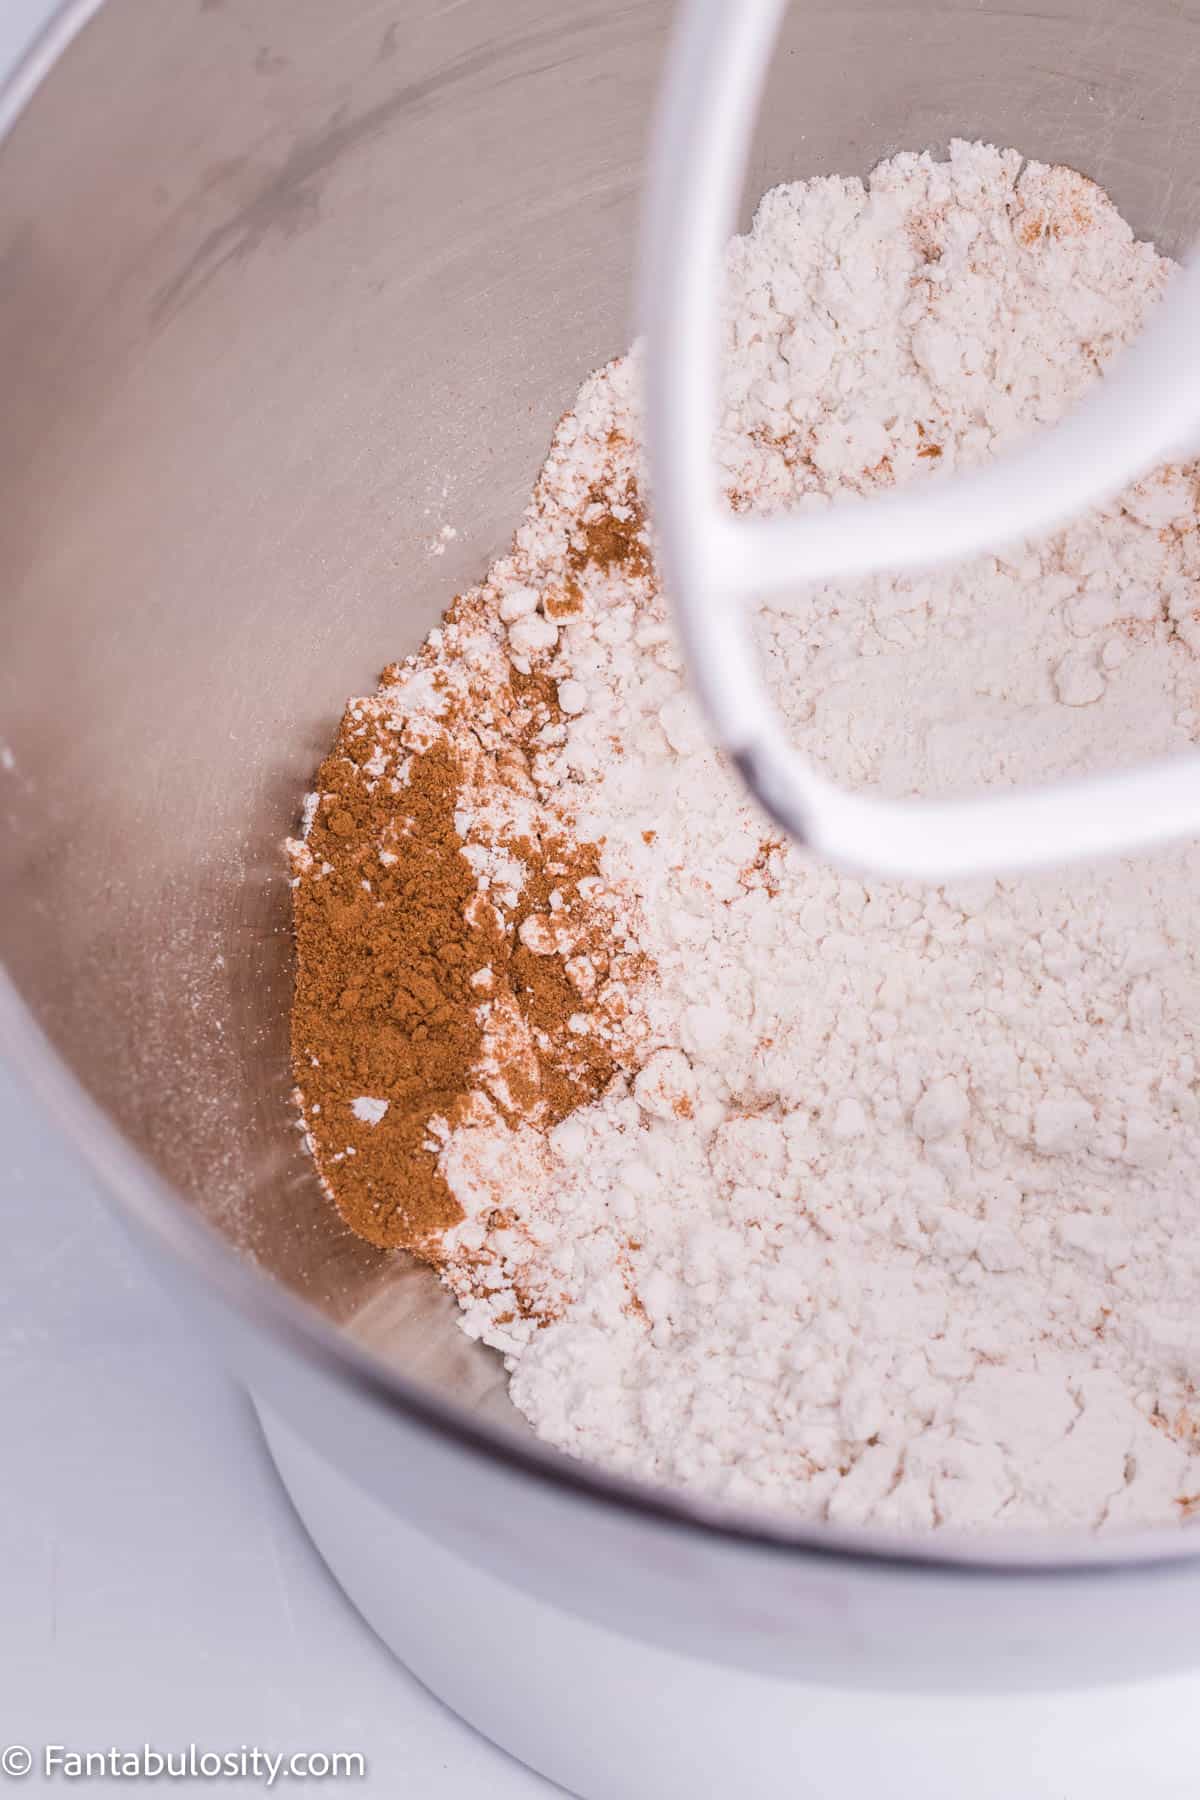
    2. To begin the muffins, add in the flour, baking soda, cinnamon, pumpkin pie spice, and salt into a large bowl.
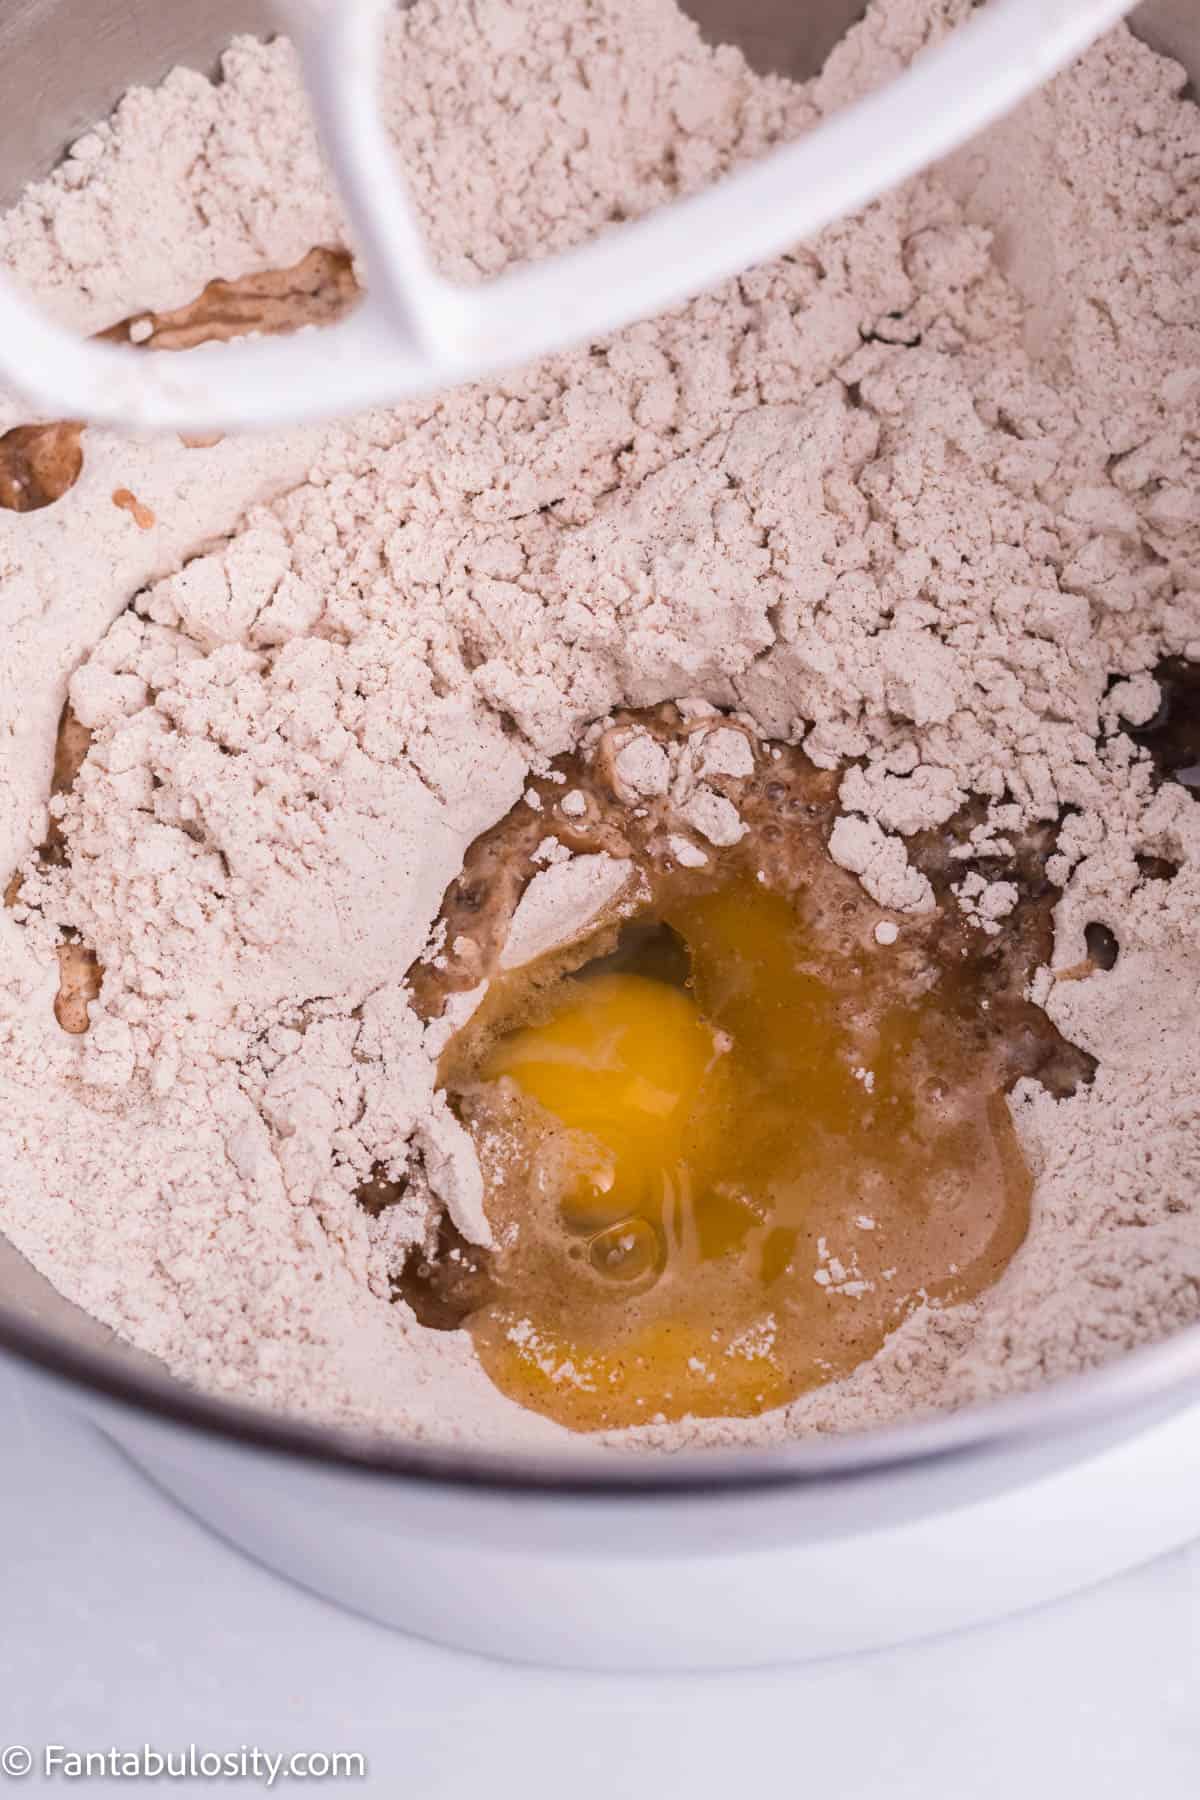
    3. Whisk and add in the vegetable oil, milk, eggs, and extracts.
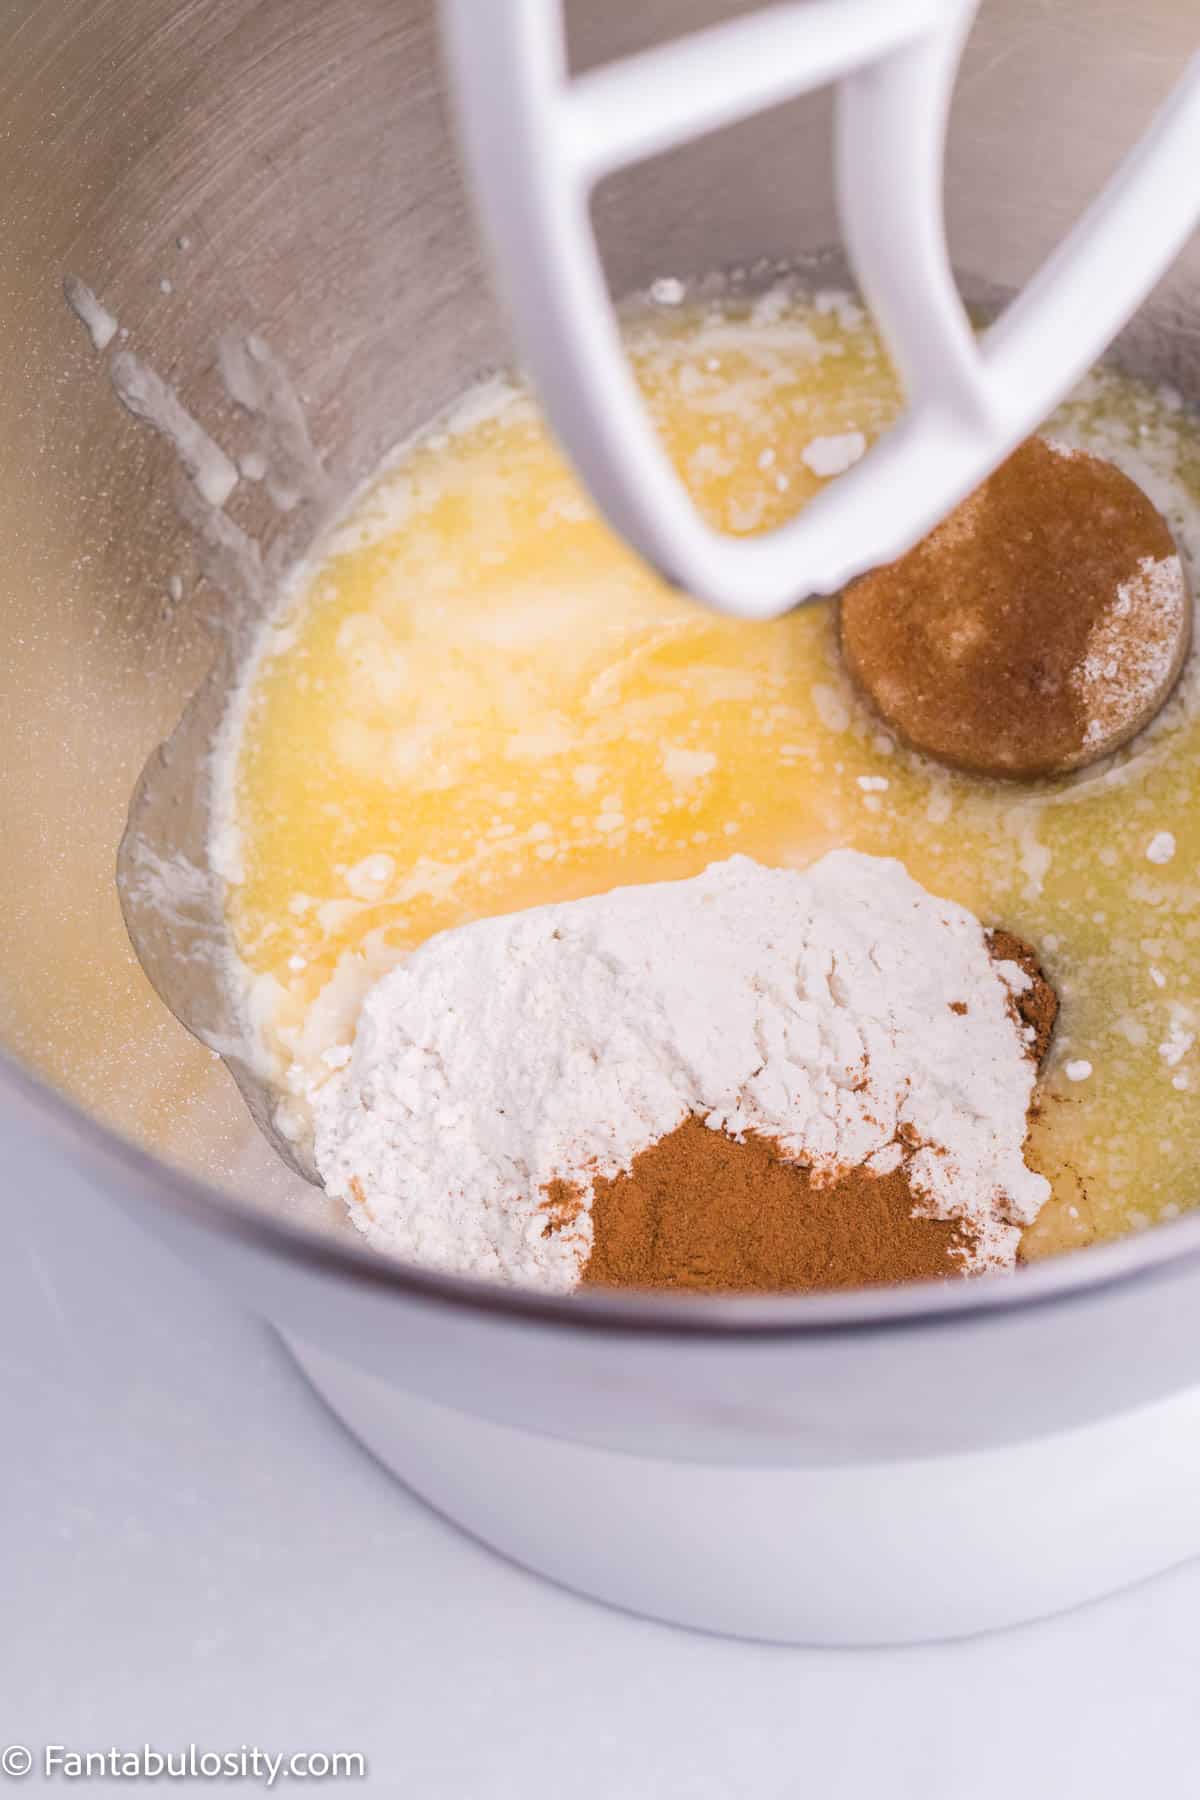
    sugar and cinnamon in mixing bowl
    Dry Ingredients
    Egg added to dry mixture
    Add wet ingredients
    1. Mix until well combined.
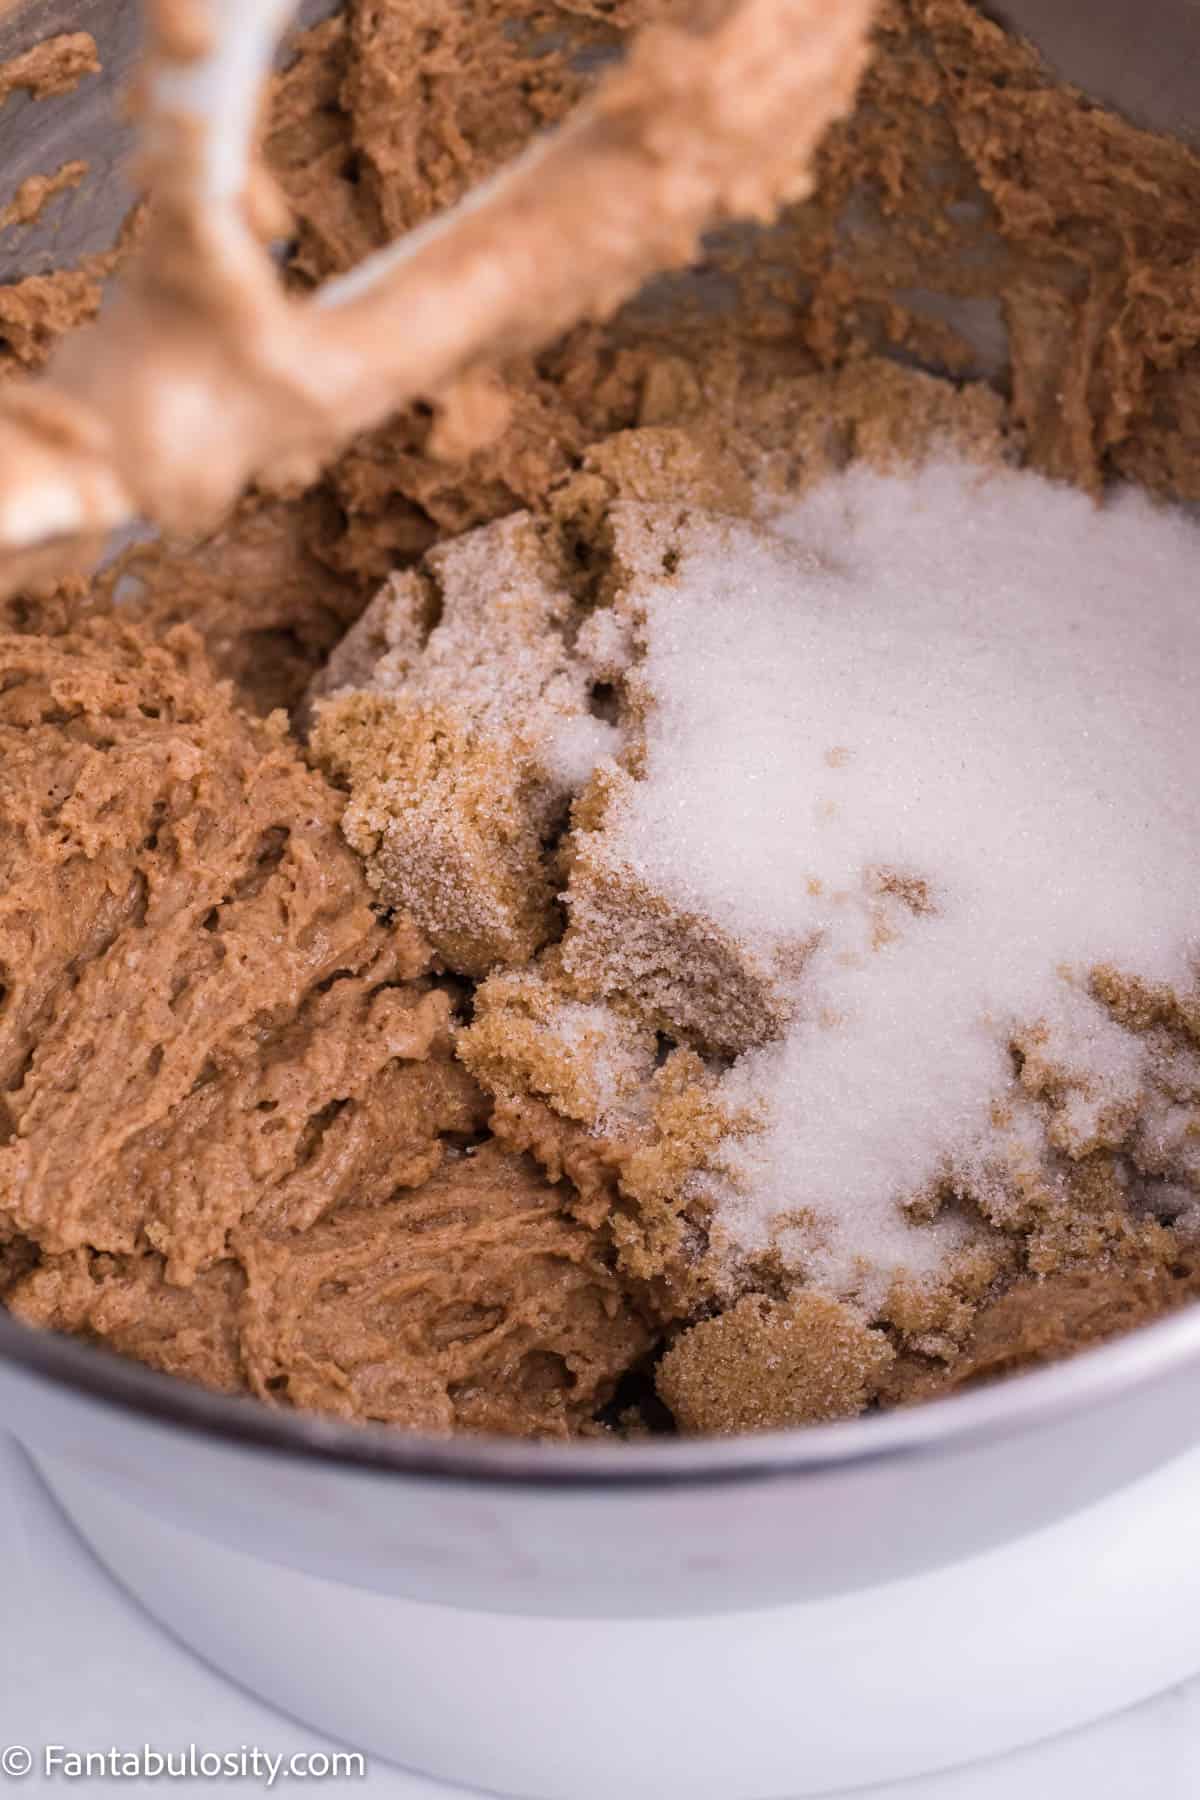
    2. Add in the sugars and mix.
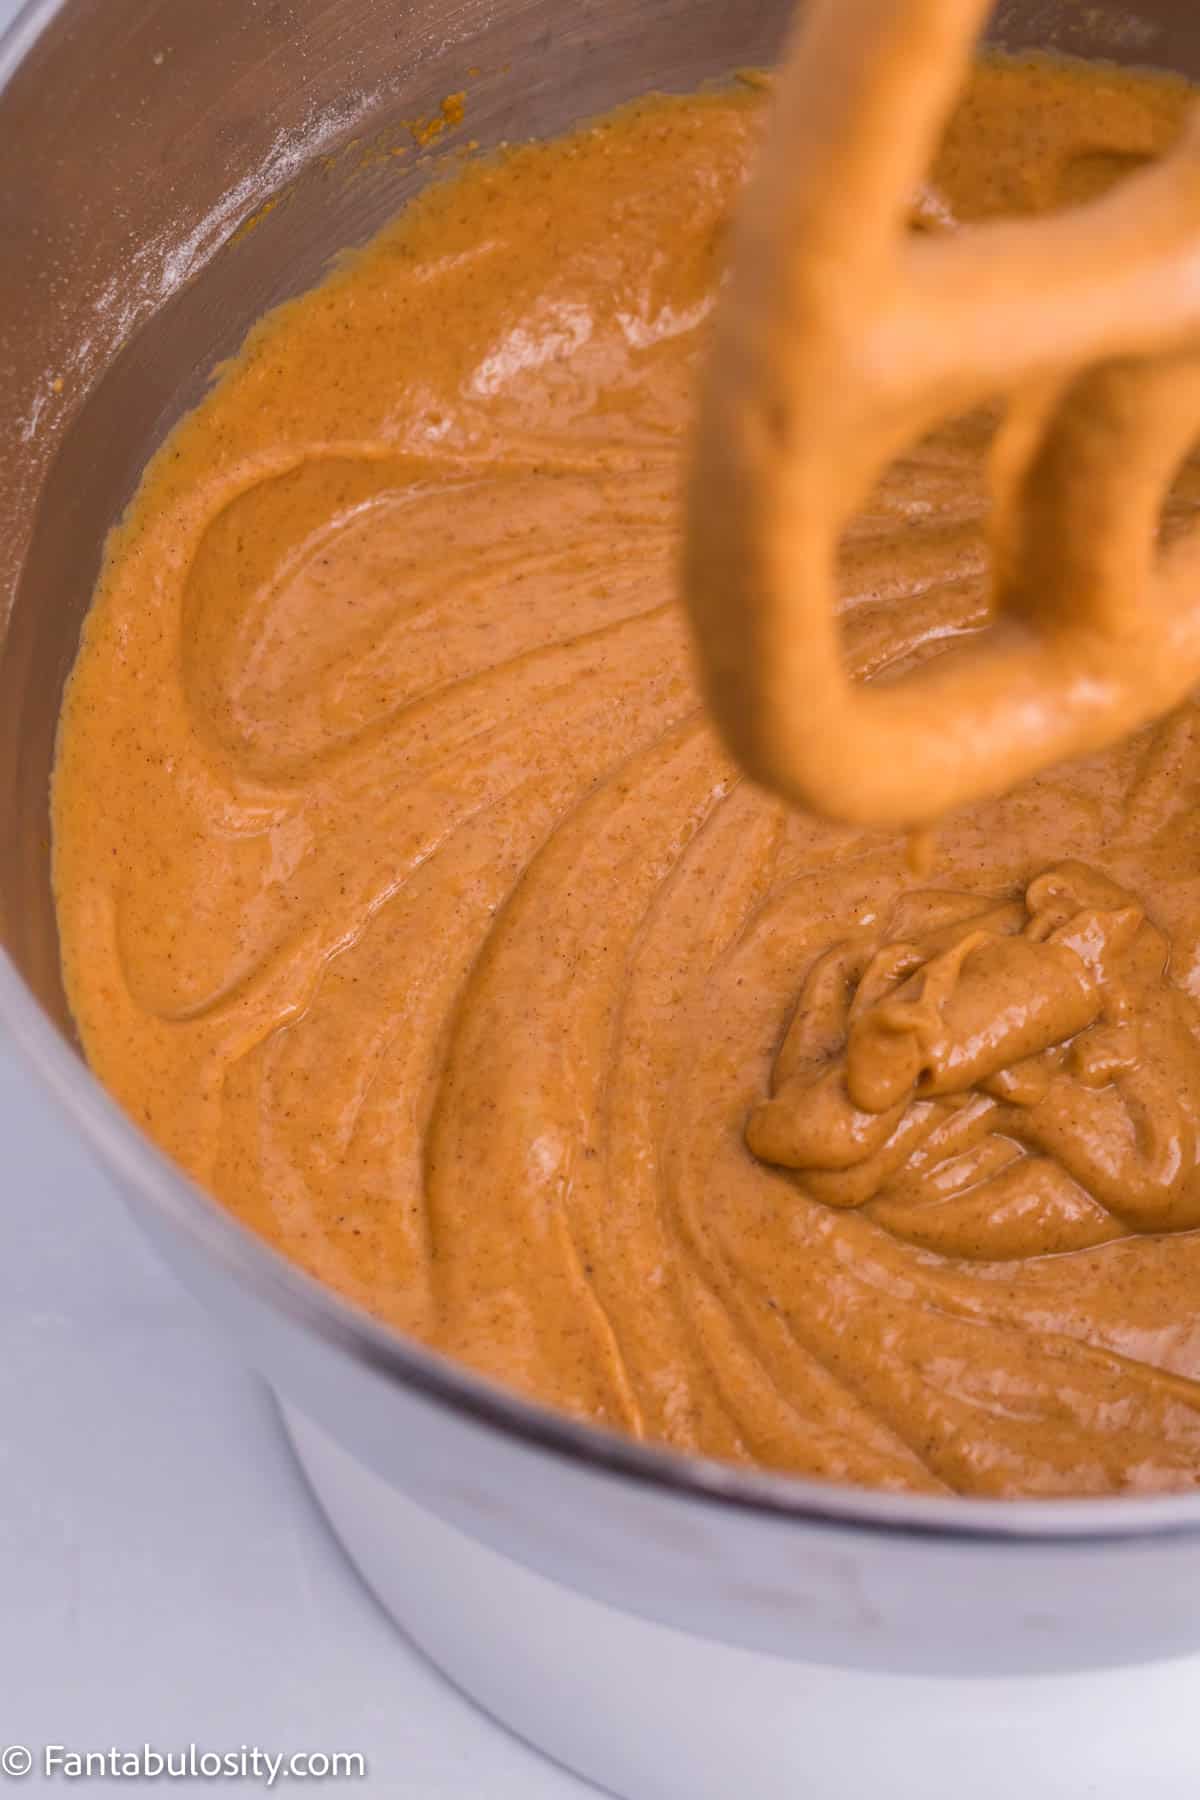
    3. Lastly, add in the pumpkin puree and mix until the batter is streak free. 
    Sugars added in to pumpkin mix
    Add sugars
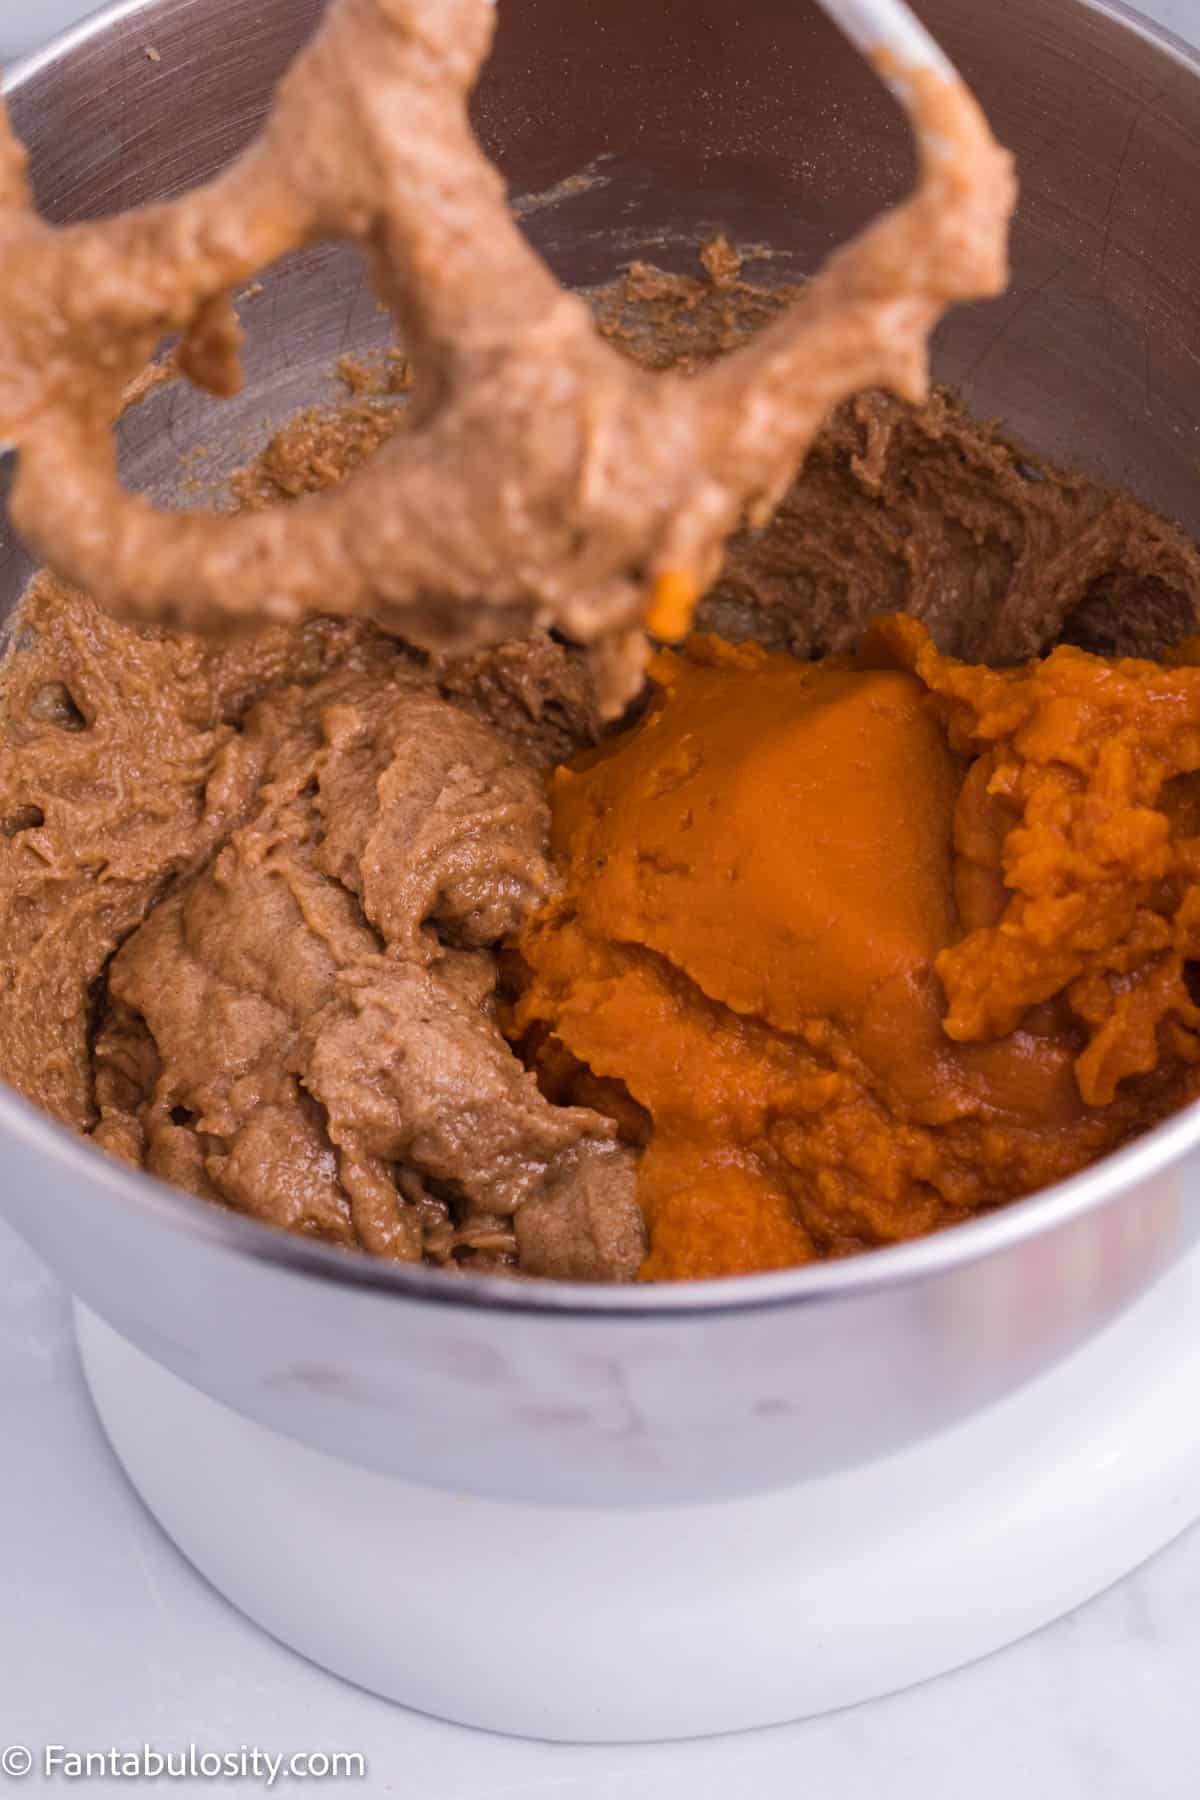
    pumpkin puree added to mixture
    Add pumpkin
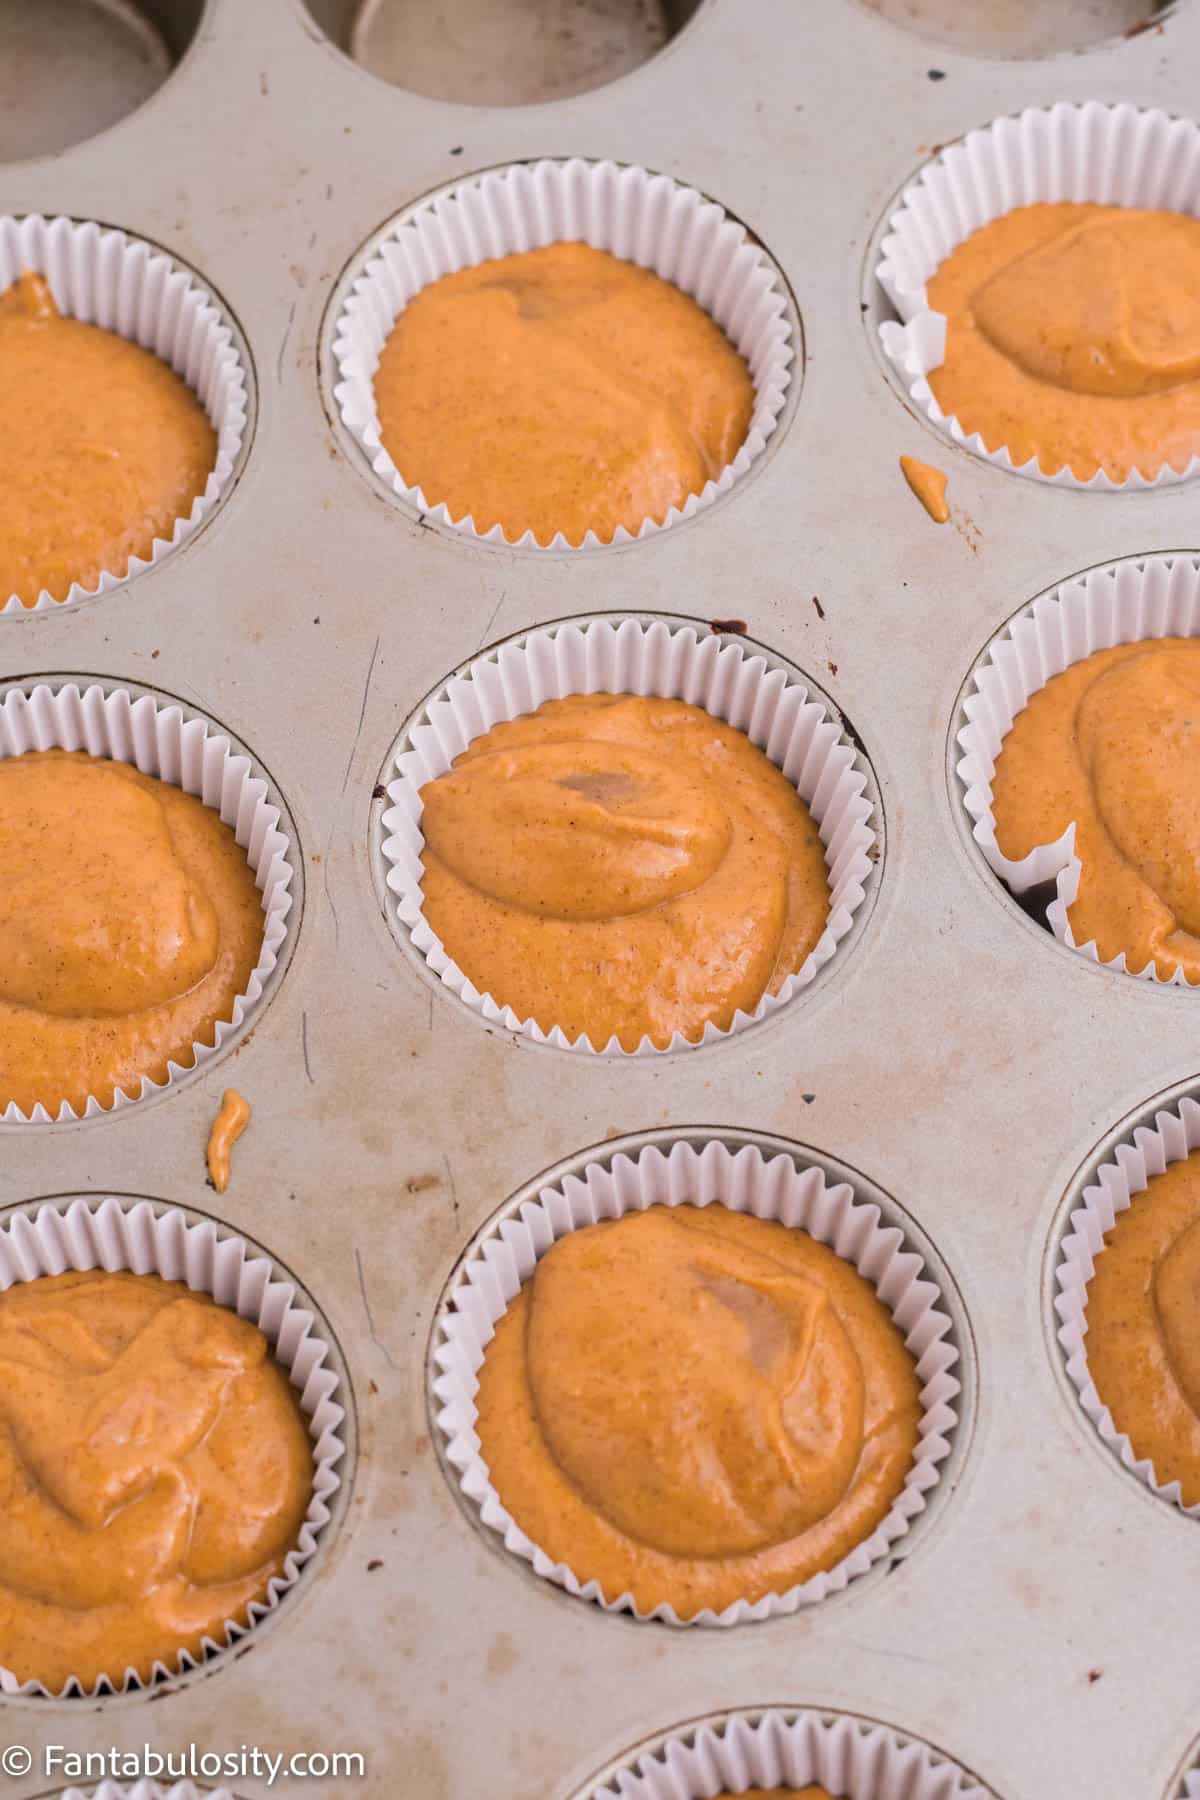
    1. In a muffin pan lined with paper liners, pour the batter in to the muffin cups until the liner is ¾ of the way full.
    2. Set aside and begin preparing the topping.
    Pumpkin muffin batter in mixing bowl
    Mix
    Muffin batter in muffin tins and liners
    Pour in liners

    Streusel Topping

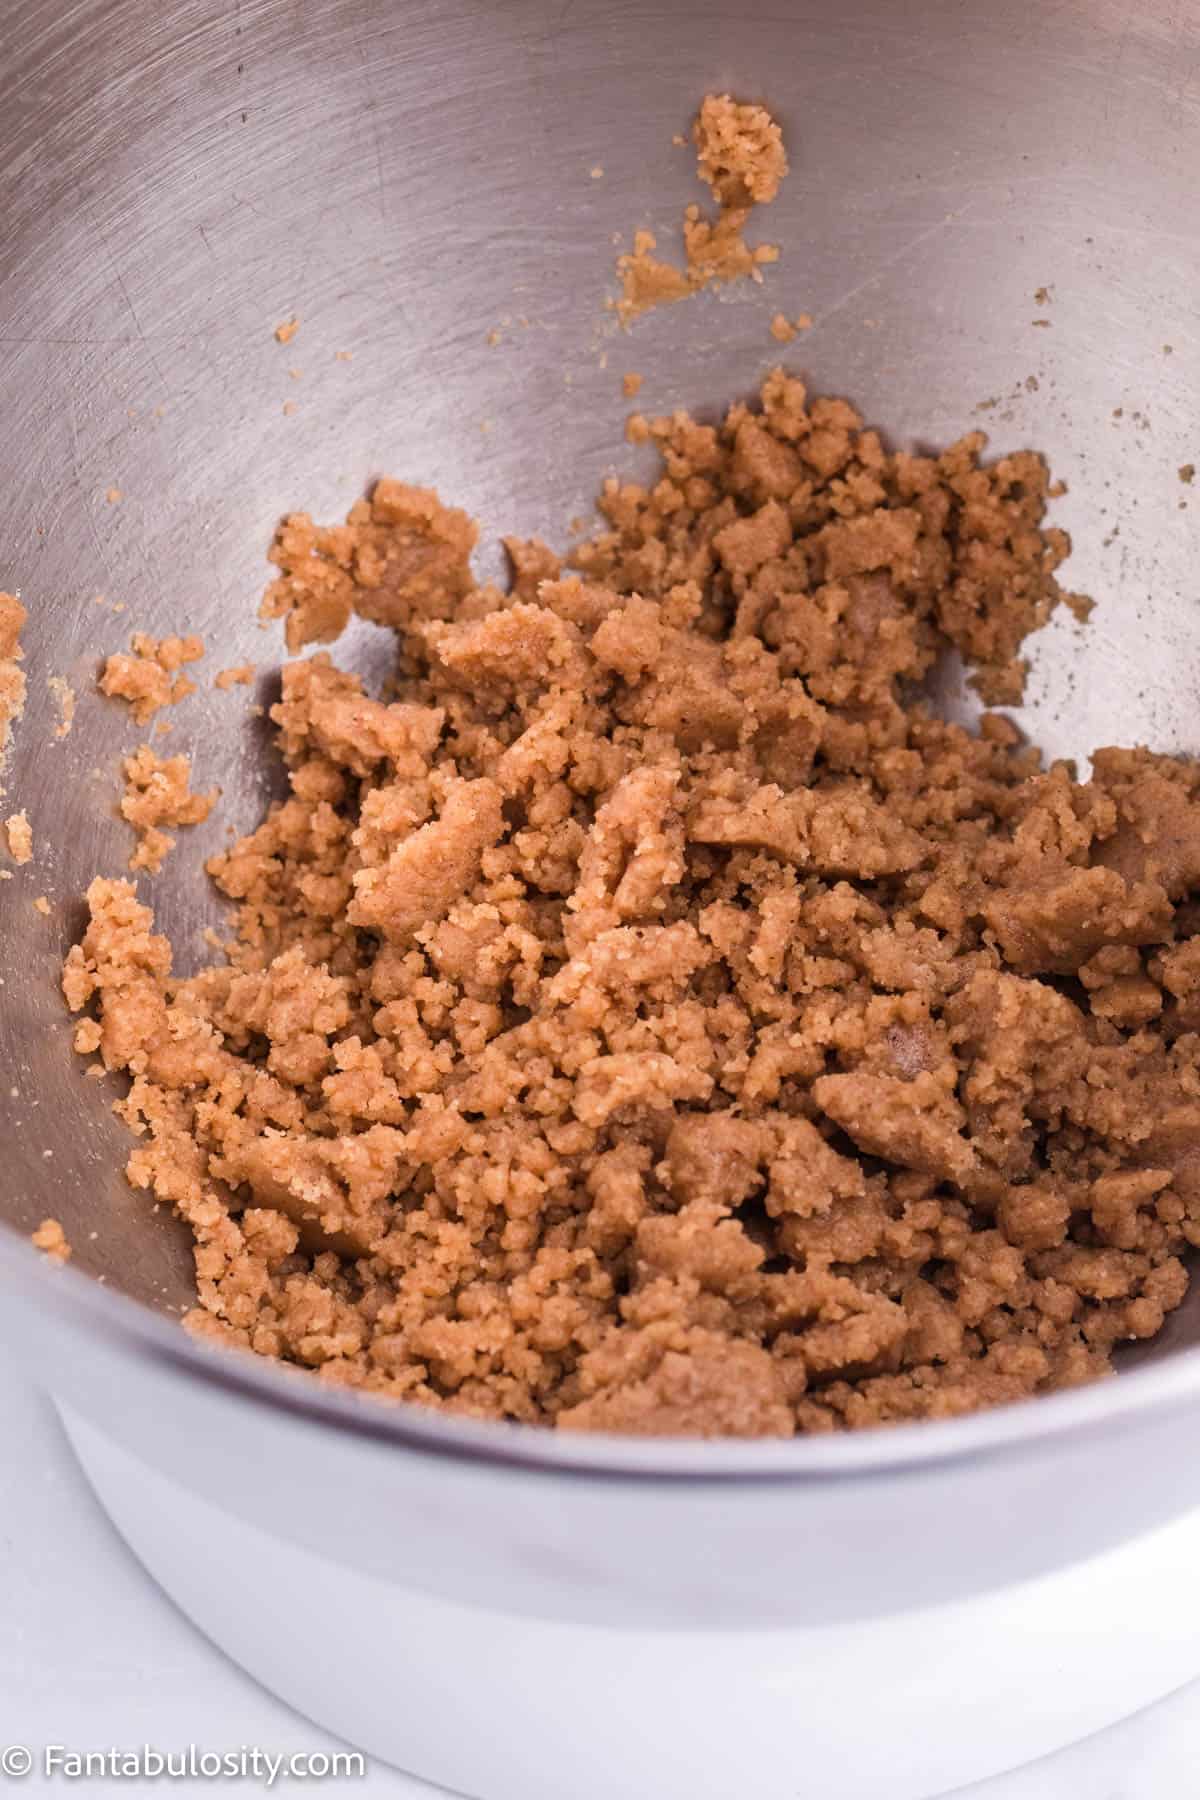
    1. In a small bowl, (or clean out the same mixing bowl) add in all the ingredients and mix until a coarse crumble has formed. 
    Wet ingredients in dry ingredients in mixing bowl for streusel topping
    Streusel Ingredients
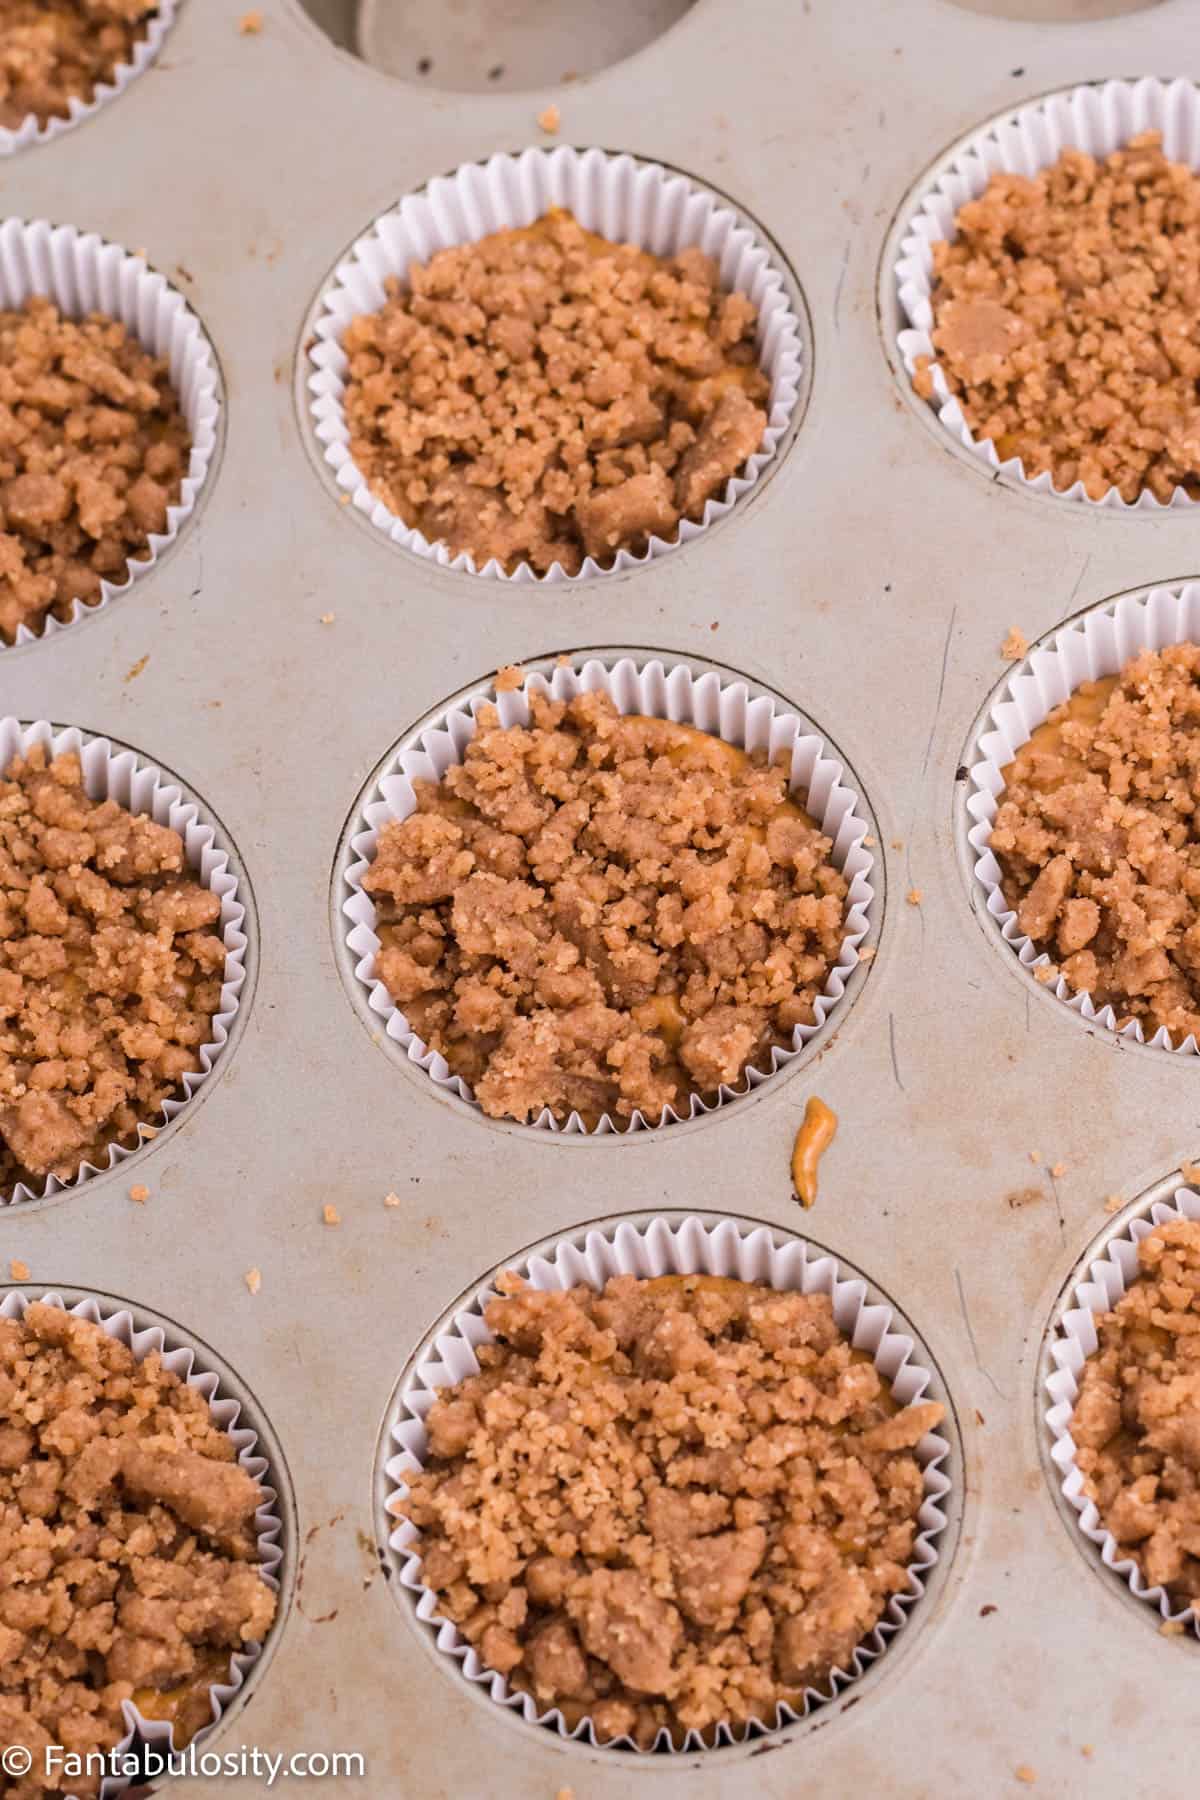
    1. Place 1-2 Tbsp. of the streusel on top of each of the batter filled liners for a little added pumpkin flavor and texture.
    2. Lightly tap the streusel into the batter. 
    streusel topping in metal mixing bowl
    Streusel mixture
    Streusel added to top of muffin batter in muffin tin
    Add streusel

    Bake Time

    1. Bake for 5 minutes, then without opening the oven, reduce the heat to 350 degrees and bake for an additional 16-17 minutes or until a toothpick placed in the center comes out clean. 
    2. Remove from the oven and allow to cool for 3-5 minutes.
    Pumpkin muffins on white counter
    Pumpkin Muffins with Glaze

    Cinnamon Glaze

    1. Prepare the icing by placing the sugar, cinnamon, and milk into a bowl.
    2. Whisk until the icing is clump free and smooth.
    3. Pour the icing into a piping bag and cut a tiny hole at the end of the bag.
    4. Drizzle the icing over each muffin. 
    5. Serve and enjoy. 

    Storage

    If you have leftover muffins, store in an airtight container, or securely wrap in plastic wrap, for up to 4 days at room temperature. (You can also place them in the refrigerator to keep even more fresh.)

    Substitutions and Variations

    You don’t have to include the glaze on these muffins but it’s highly recommend as it adds the best texture combined with the streusel topping!

    Top Tips

    • Be sure you use pure pumpkin puree and not pumpkin pie filling! Pumpkin puree is plain pumpkin, where pumpkin pie filling has spices and other ingredients in it!
    • Use an ice cream scoop to pour muffin batter in to liners to make it easier!

    Related Recipes

    If you love muffin recipes like this one, then I think you’ll also love these strawberry chocolate chip muffins and these buttermilk blueberry muffins!

    Or, if you’re looking for muffins for breakfast, definitely check out these healthy breakfast muffins.

    Did you make this? I’d be so grateful if you left a “star” rating below to let me know what you thought! Then, the next time you need a quick and easy recipe, come back to Fantabulosity to browse all of my easy recipes!

    Recipe

    Close up of pumpkin streusel muffins stacked on top of one another
    Print Pin
    5 from 8 votes

    Pumpkin Streusel Muffins

    Pumpkin Streusel Muffins: Delicious pumpkin muffins with an incredible streusel topping that sits on top of the muffins, all made with simple ingredients!
    Course Breakfast
    Cuisine American
    Prep Time 20 minutes minutes
    Cook Time 22 minutes minutes
    Total Time 42 minutes minutes
    Servings 16 muffins
    Calories 296kcal
    Author Jessica Burgess

    Ingredients

    Muffins

    • 1 ¾ cups all-purpose flour
    • 1 teaspoon baking soda
    • 2 teaspoons ground cinnamon
    • 1 teaspoon pumpkin pie spice
    • ½ teaspoon salt
    • ½ cup vegetable oil
    • ¼ cup milk
    • 2 large eggs
    • 1 ½ teaspoons vanilla extract
    • ½ teaspoon rum extract
    • ½ cup granulated sugar
    • ½ cup light brown sugar
    • 1 ½ cup pumpkin puree 

    Streusel

    • ¾ cup all purpose flour
    • ¼ cup granulated sugar
    • ¼ cup light brown sugar
    • 1 teaspoon pumpkin pie spice
    • ½ teaspoon ground cinnamon
    • 6 Tablespoons unsalted butter melted

    Glaze

    • ½ cup powdered sugar
    • ½ teaspoon ground cinnamon
    • 2 teaspoons milk

    Instructions

    • Preheat oven to 425 degrees Fahrenheit.

    Muffins

    • To begin the muffins, add in the flour, baking soda, cinnamon, pumpkin pie spice, and salt into a large mixing bowl.
    • Whisk and add in the vegetable oil, milk, eggs, and extracts. Mix until well combined.
    • Add in the sugars and mix.
    • Lastly, add in the pumpkin puree and mix until the batter is streak free. 
    • In a muffin pan lined with liners, pour the batter until the liner is ¾ of the way full.Set aside and begin preparing the streusel topping.

    Streusel

    • In a mixing bowl, add in all the ingredients and mix until a coarse crumble has formed. 
    • Place 1-2 Tbsp. of the streusel on top of each of the batter filled liners. Lightly tap the streusel into the batter. 
    • Bake for 5 minutes, then without opening the oven, reduce the heat to 350 degrees and bake for an additional 16-17 minutes or until a toothpick placed in the center comes out clean.
    • Remove from the oven and allow to cool for 3-5 minutes.

    Icing

    • Prepare the icing by placing the sugar, cinnamon, and milk into a bowl.Whisk until the icing is clump free and smooth.
    • Pour the icing into a piping bag and cut a tiny hole at the end of the bag.Drizzle the icing over each muffin. Serve and enjoy. 

    Nutrition

    Serving: 1muffin | Calories: 296kcal | Carbohydrates: 42g | Protein: 3g | Fat: 13g | Saturated Fat: 4g | Polyunsaturated Fat: 5g | Monounsaturated Fat: 3g | Trans Fat: 0.2g | Cholesterol: 35mg | Sodium: 170mg | Potassium: 105mg | Fiber: 1g | Sugar: 25g | Vitamin A: 3749IU | Vitamin C: 1mg | Calcium: 34mg | Iron: 2mg

    How to Make a Peanut Butter and Jelly Sandwich

    August 22, 2022

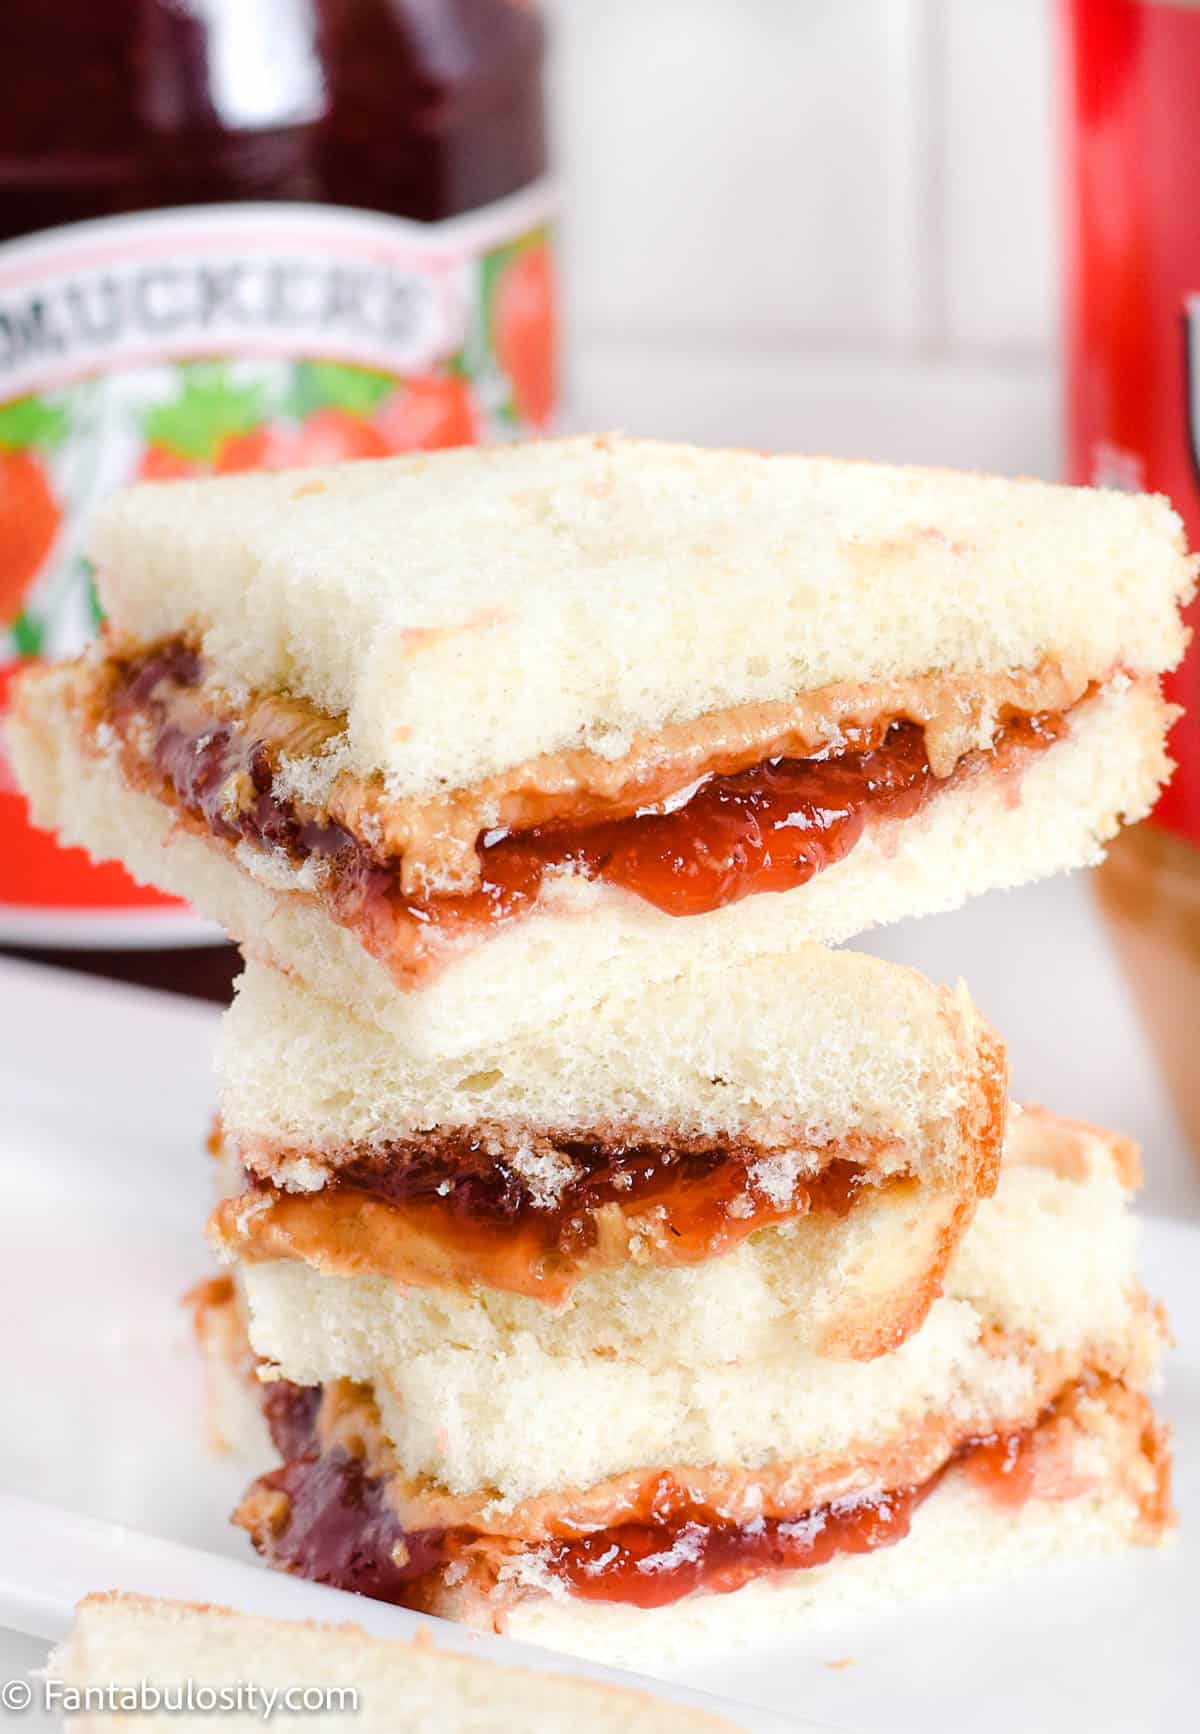
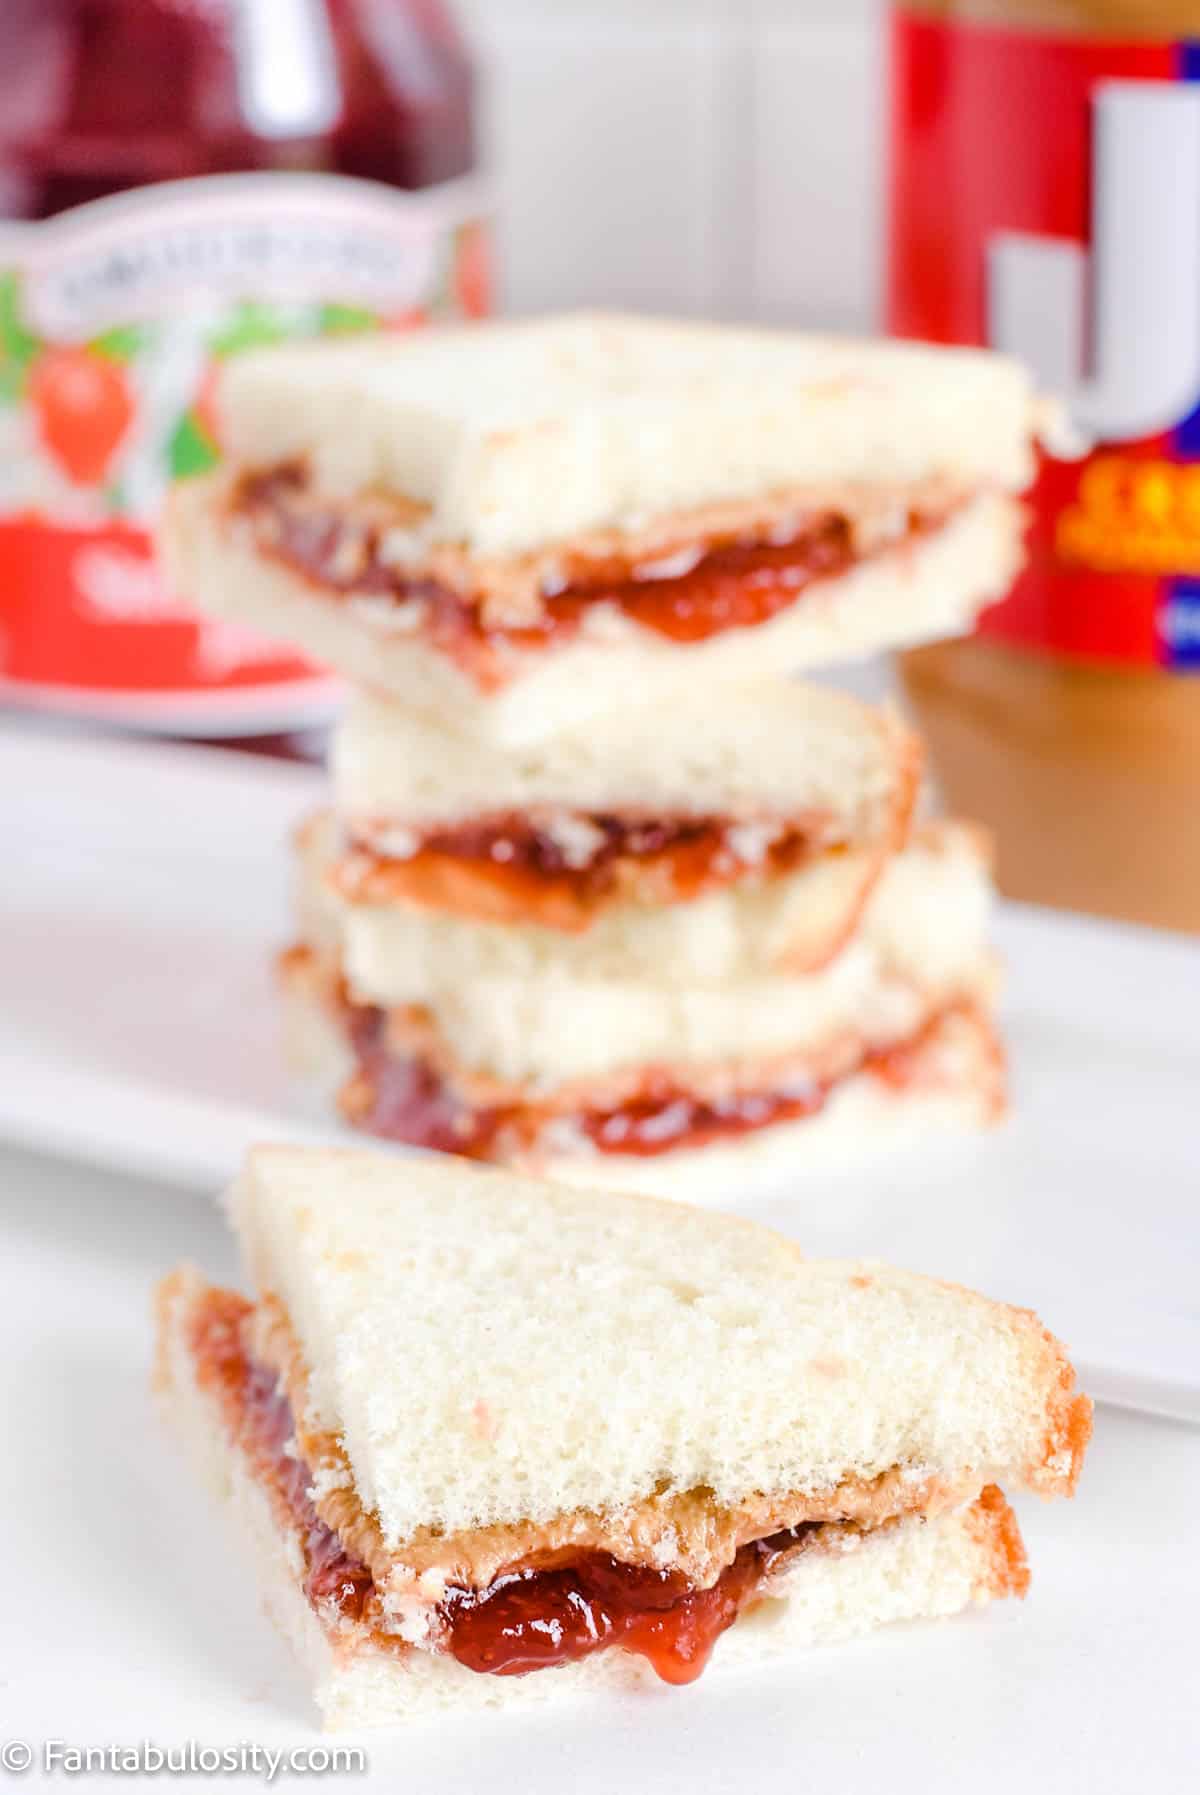
    Close up of peanut butter and jelly sandwich

    This is a sponsored conversation written by me on behalf of The J.M. Smucker Company. The opinions and text are all mine. #PBLove Originally posted in 2017. Updated in 2022.

    How to Make a Peanut Butter and Jelly Sandwich: Did you know that there’s a certain way to make a pb&j even better? It’s true. Keep reading!

    peanut butter and jelly sandwiches stacked on top of one another
    Peanut Butter and Jelly Sandwiches

    Do you know that 2400 people search google a month, asking:

    How do you make a peanut butter and jelly sandwich?

    It’s true! But I love it because even though there are many tricks and different ways to make one, I’m sharing my favorite way with you today. So keep reading because you may find one of my favorite tricks is your new favorite!

    However, if you’re wanting the best way to make a peanut butter and jelly, you’ll love this fried pb&j and may never go back.

    What is the correct way to make a peanut butter and jelly?

    My mind was blown the other day when I stumbled upon a post on Facebook of someone arguing with another person when asked,

    “What is the correct way to make a peanut butter and jelly sandwich?”

    …and I promise you, there were hundreds… HUNDREDS of comments on this thread of people backing one another up, arguing with who was right, wrong and why.

    But I’ll tell you… I DID learn something from that thread and even though there’s a part of me that wishes I had that 15 minutes of my life back, I kind of feel like I owe it to those who taught me something that day.

    TWO of the Most Popular Ways to Make a Peanut Butter and Jelly Sandwich:

    1. Apply peanut butter to both sides first and then jelly on top of both peanut buttered sides – Why? Because that way it keeps the jelly from soaking through the bread, especially if you’re making a PB&J for someone to take with them for the day, and they can’t eat it until later. (School, work, field trip, etc.) Ok ok… so that’s something I didn’t know until I spent 15 minutes of my one life here on Earth, reading these Facebook comments.
    2. Apply peanut butter to one side and jelly to the other – Why? Because the jelly sticks MUCH better to the sandwich creation, whereas when you put peanut butter on both sides, sometimes it’s hard to get the jelly to stick inside of the sandwich and it can seep out.

    So from above, there is no wrong or right way… unless you discuss it in a Facebook group and then someone will surely tell you you’re wrong. However, here’s my favorite tip for making a peanut butter and jelly the best:

    Should you use a spoon or knife to spread peanut butter?

    A spoon? Hear me out…

    Our assignment in college was to prepare a speech on giving a tutorial for the class. I remember one speech - and one speech only - from that day, and it wasn't mine. A fellow classmate stood up and said,

    "Today I'm going to teach you how to make a peanut butter and jelly sandwich."

    We all chuckled because we didn’t know how he was going to make an entire speech on this topic. But to my surprise, my classmate taught me something that day. I was making a peanut butter and jelly ALL wrong.

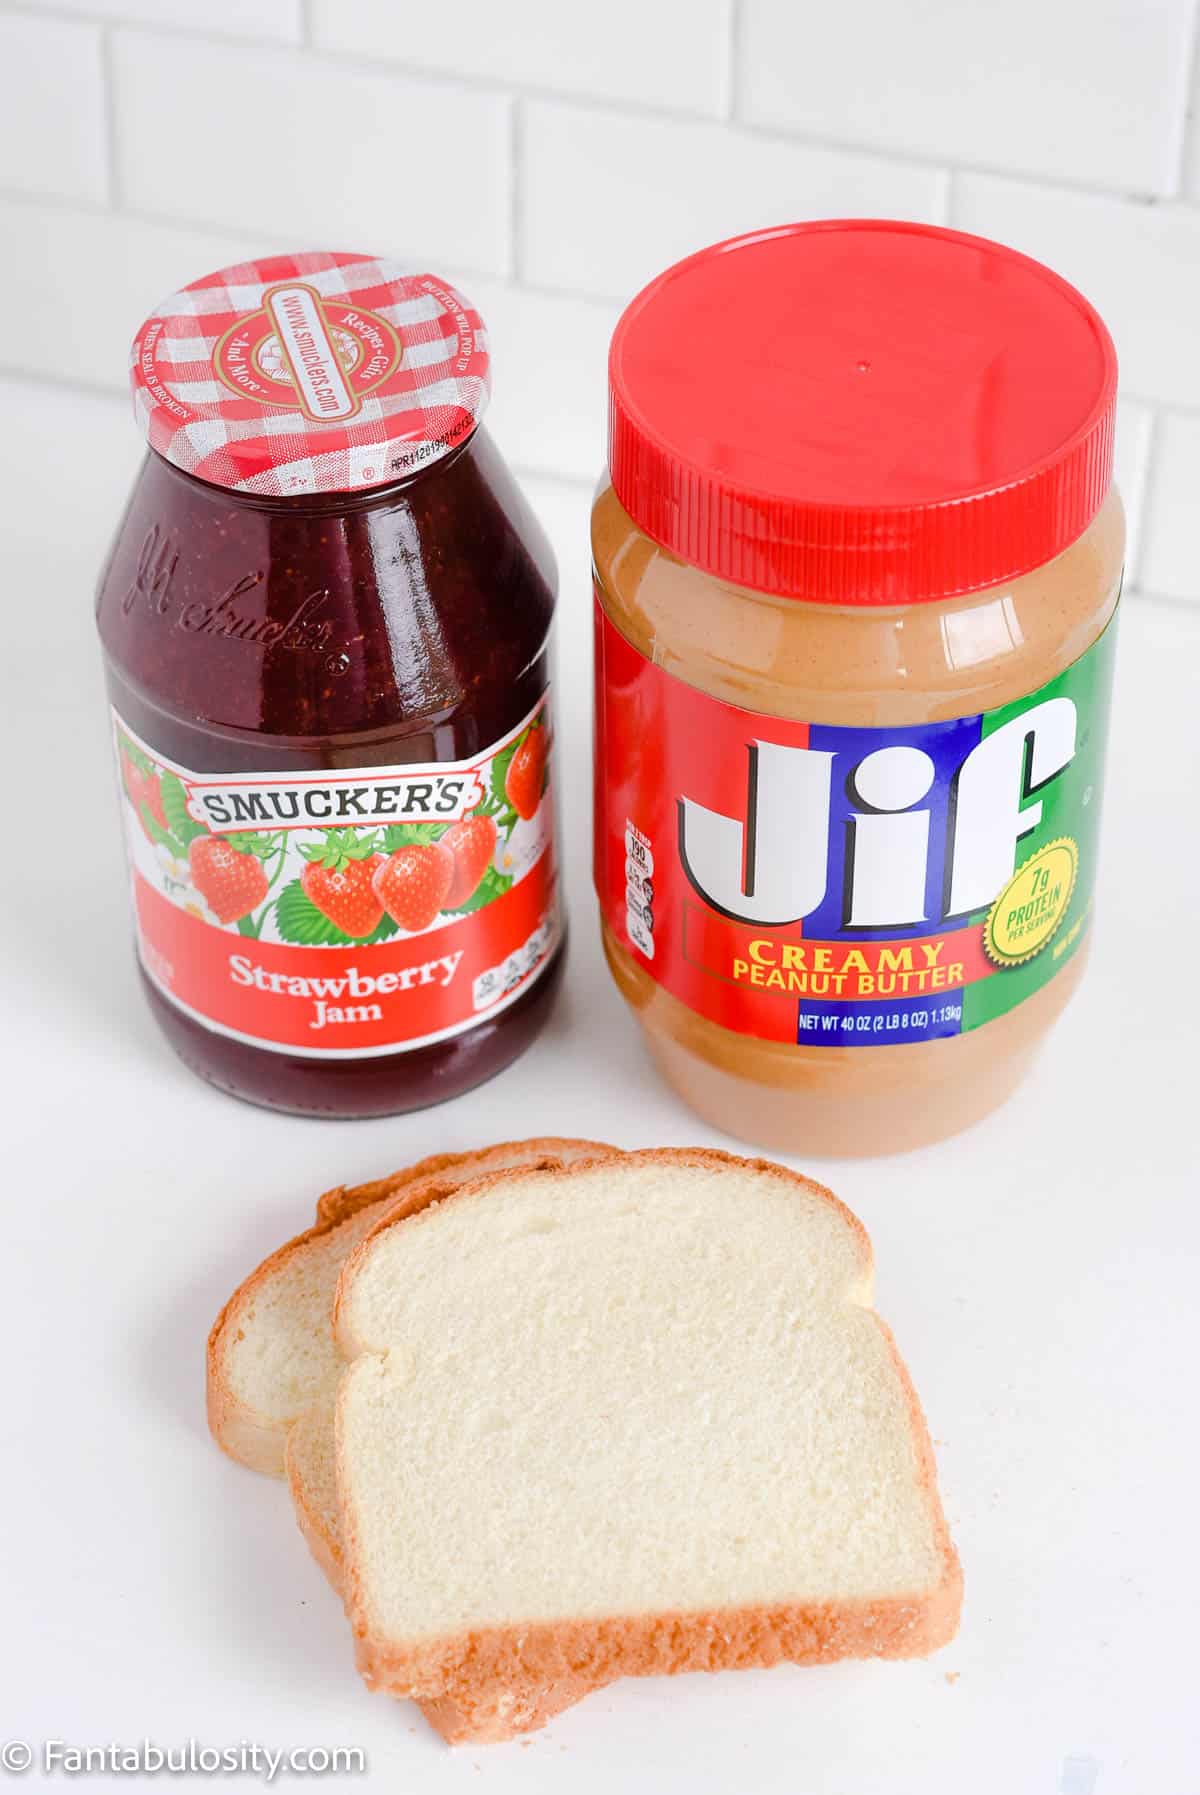
    Ingredients:

    You only need three ingredients to make a classic peanut butter and jelly.

    • peanut butter (Crunchy or creamy)
    • jelly (Your favorite flavor. We prefer strawberry or grape.)
    • bread (White, wheat, or your favorite type of bread.)
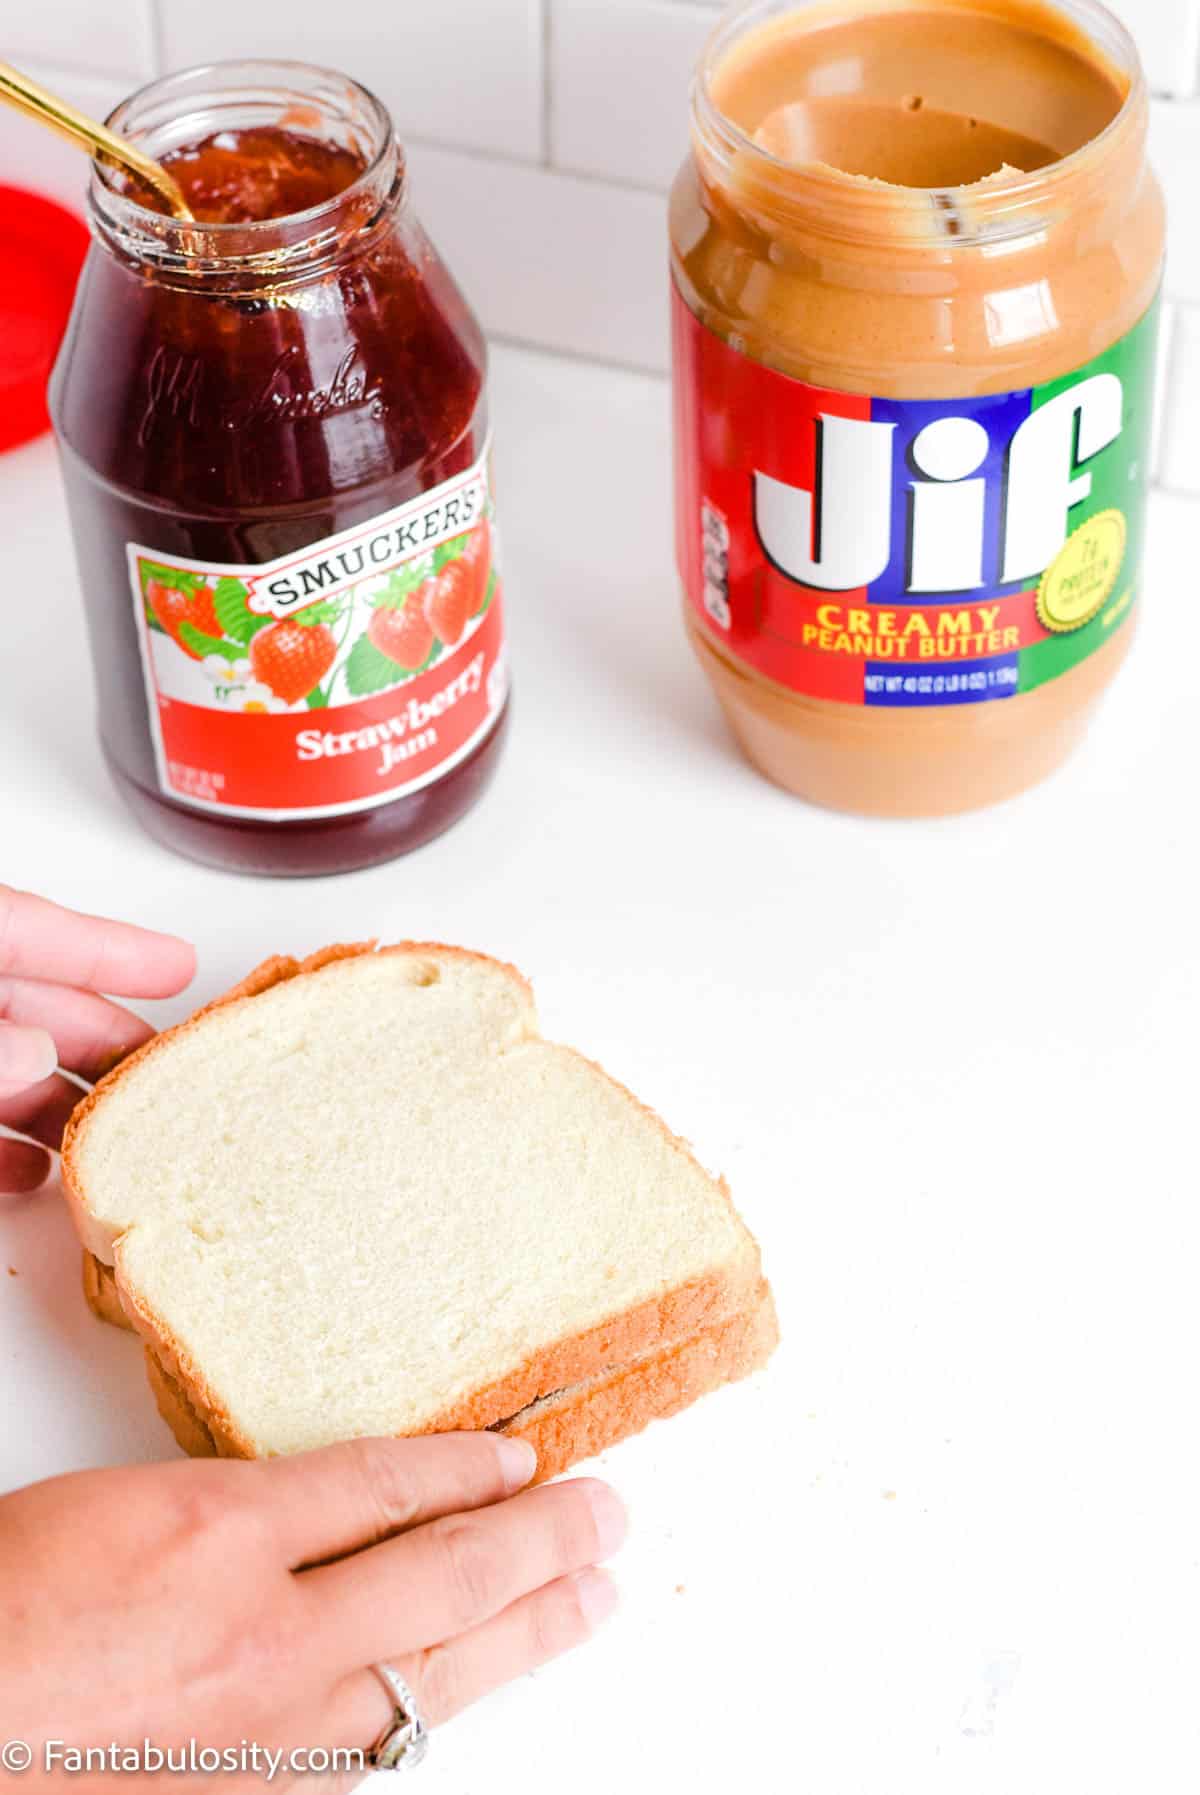
    ingredients on table for peanut butter and jelly

    How do you make a peanut butter and jelly sandwich better?

    I'll show you below what I learned that day, and how it changed my peanut butter and jelly sandwich-making life.

    If only I would have known back then that in 15 years I'd have little boys at home who want a PB&J every single day for lunch, I'd probably give that guy a big hug.

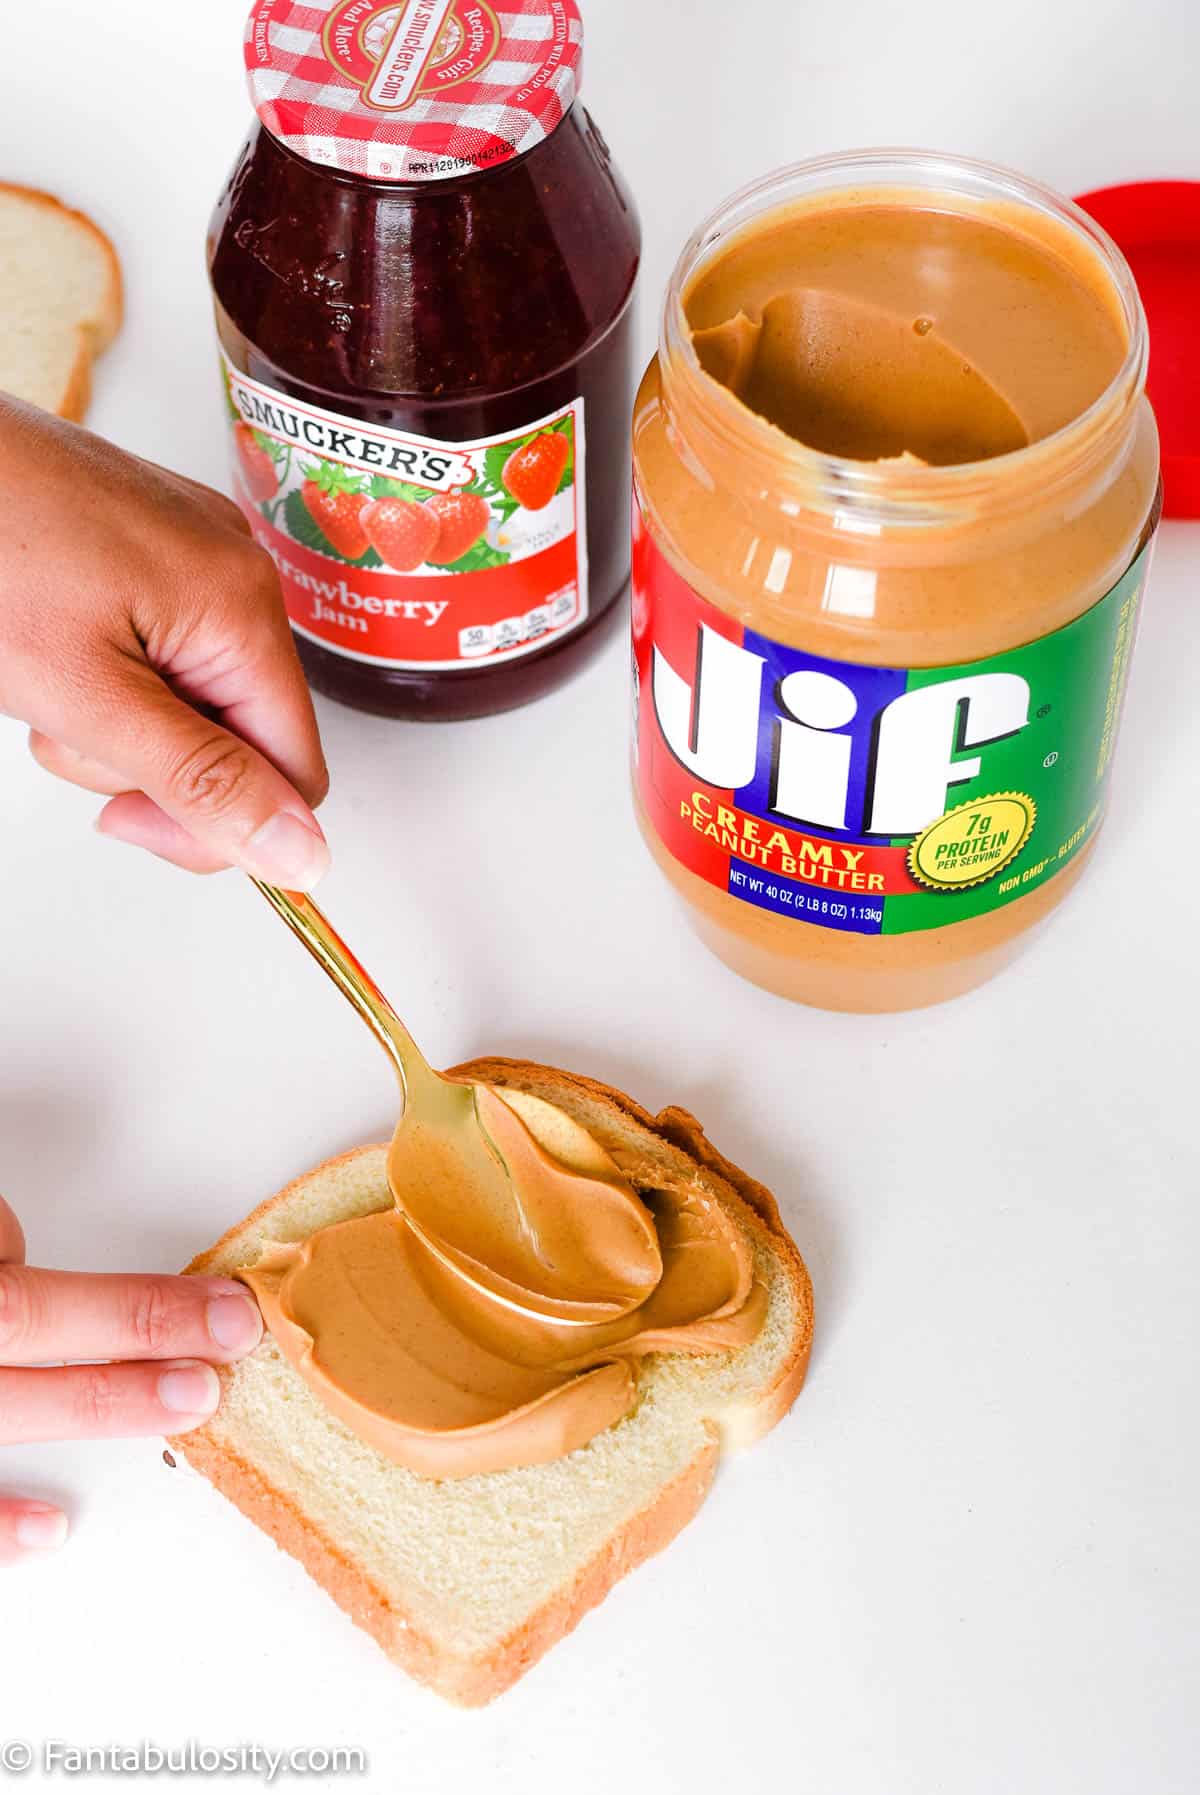
    hand spreading peanut butter on bread with spoon

    1. Use a Spoon:

    So many people that I know use a butter knife to spread their peanut butter and jelly, and it rips their bread and gets so messy.

    1. A spoon scoops the peanut butter and jelly out easier than a knife.
    2. Using the back of the spoon, spread the peanut butter and jelly onto each piece of bread.

    I promise, if you’re still using a butter knife to make your pb&j’s, use a spoon next time to see if it works better for you. It’s just one of those little life hacks that is so simple, but incredibly helpful!

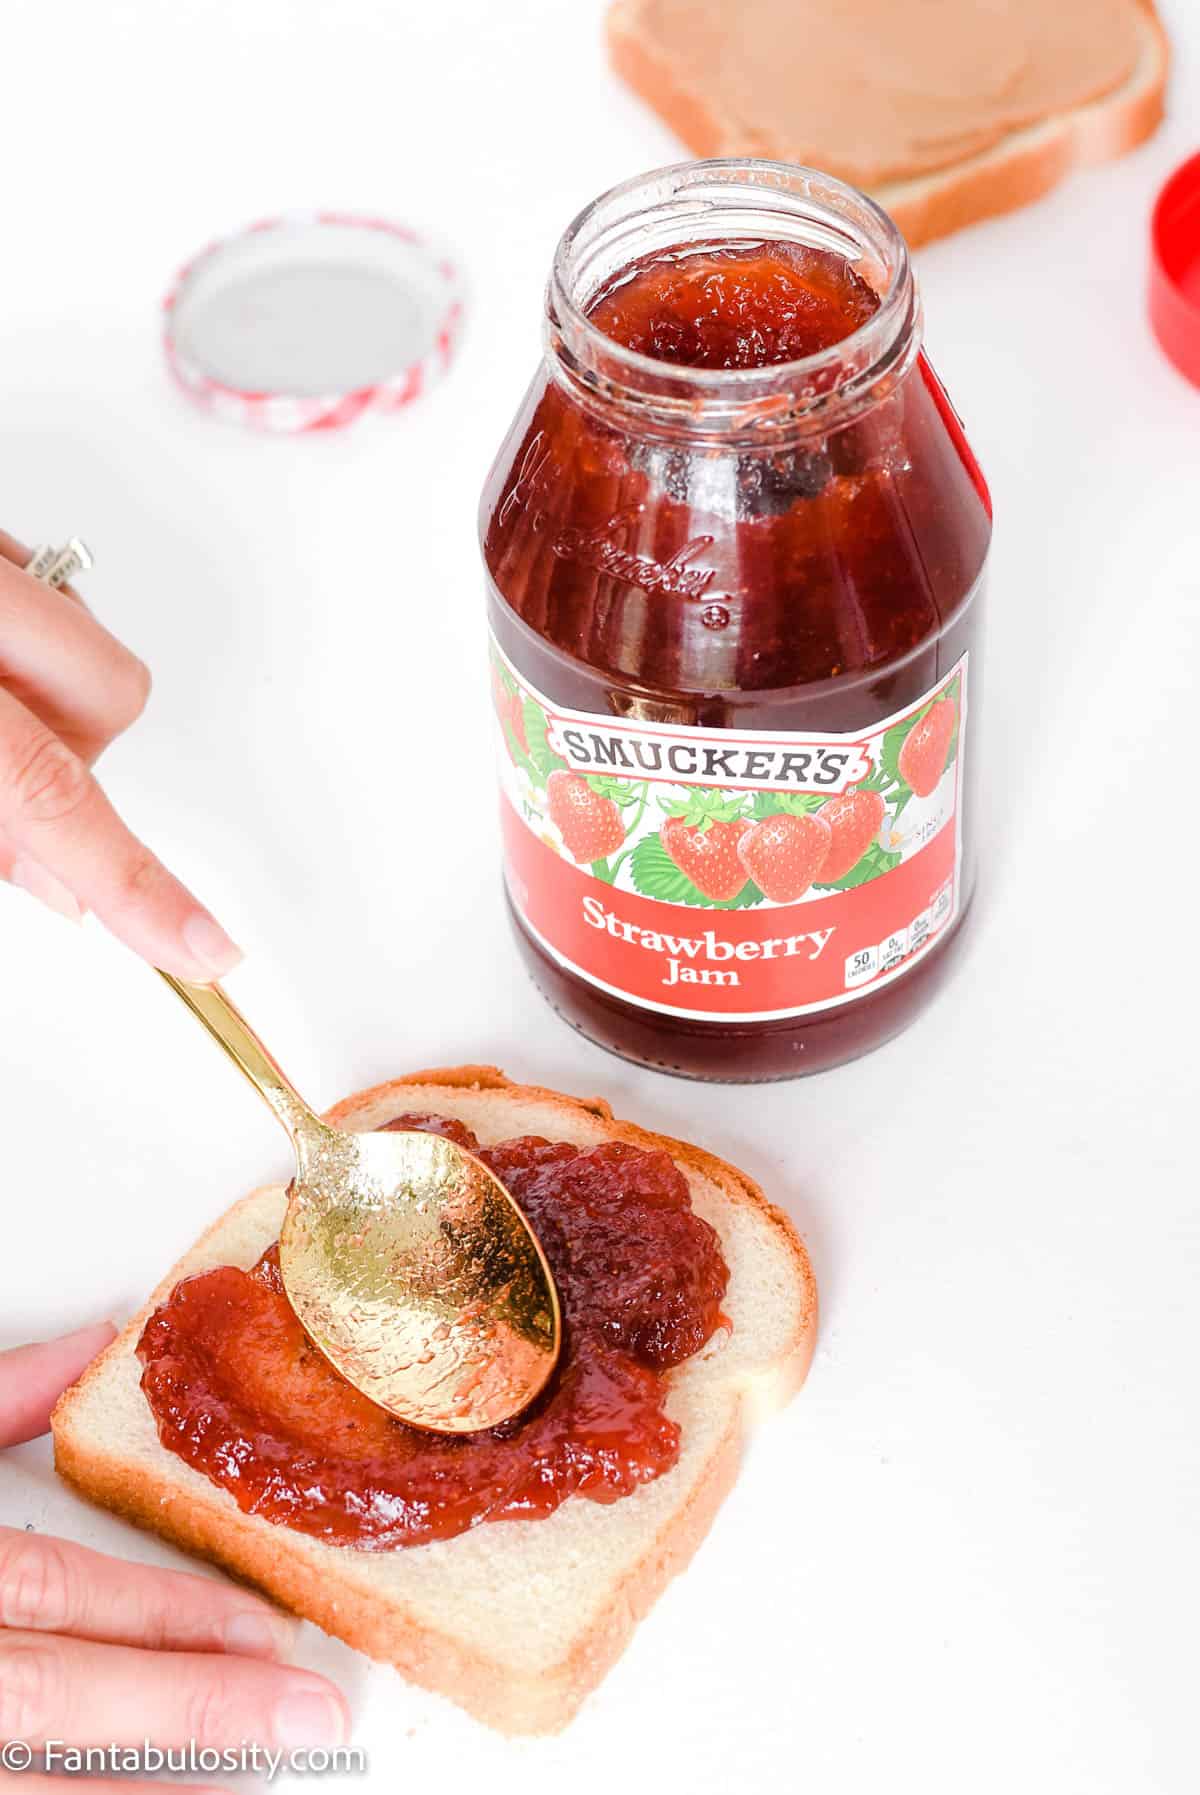
    hand using spoon to spread jelly on bread

    Place the two pieces of bread together, making sure the peanut butter and jelly are touching.

    peanut butter and jelly sandwich on counter

    2. Criss-Cross Cuts:

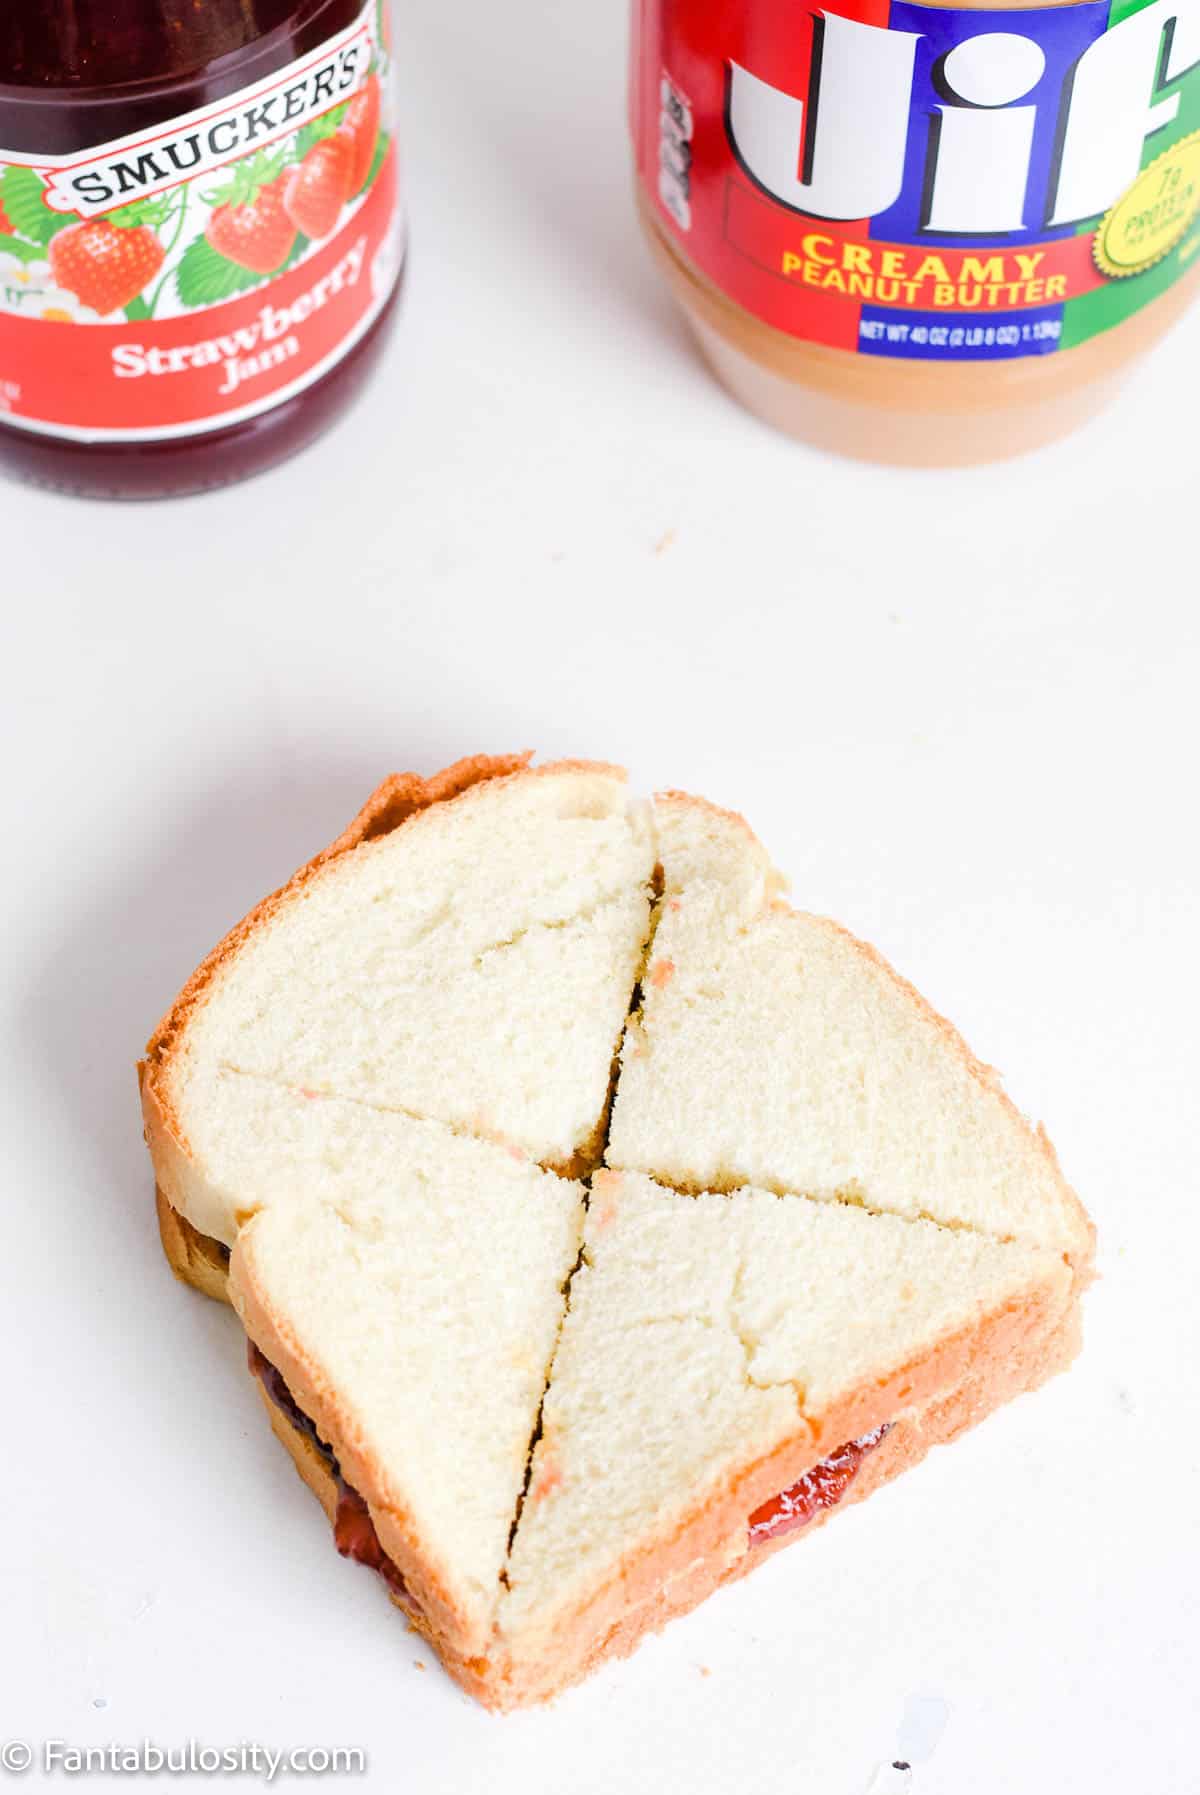
    With a house full of little boys, I’ve learned that cutting their sandwiches diagonal both ways helps keep the mess down. Their little hands hold on to the small triangles MUCH easier than a whole sandwich, or even half of a sandwich.

    If you choose to cut this way:

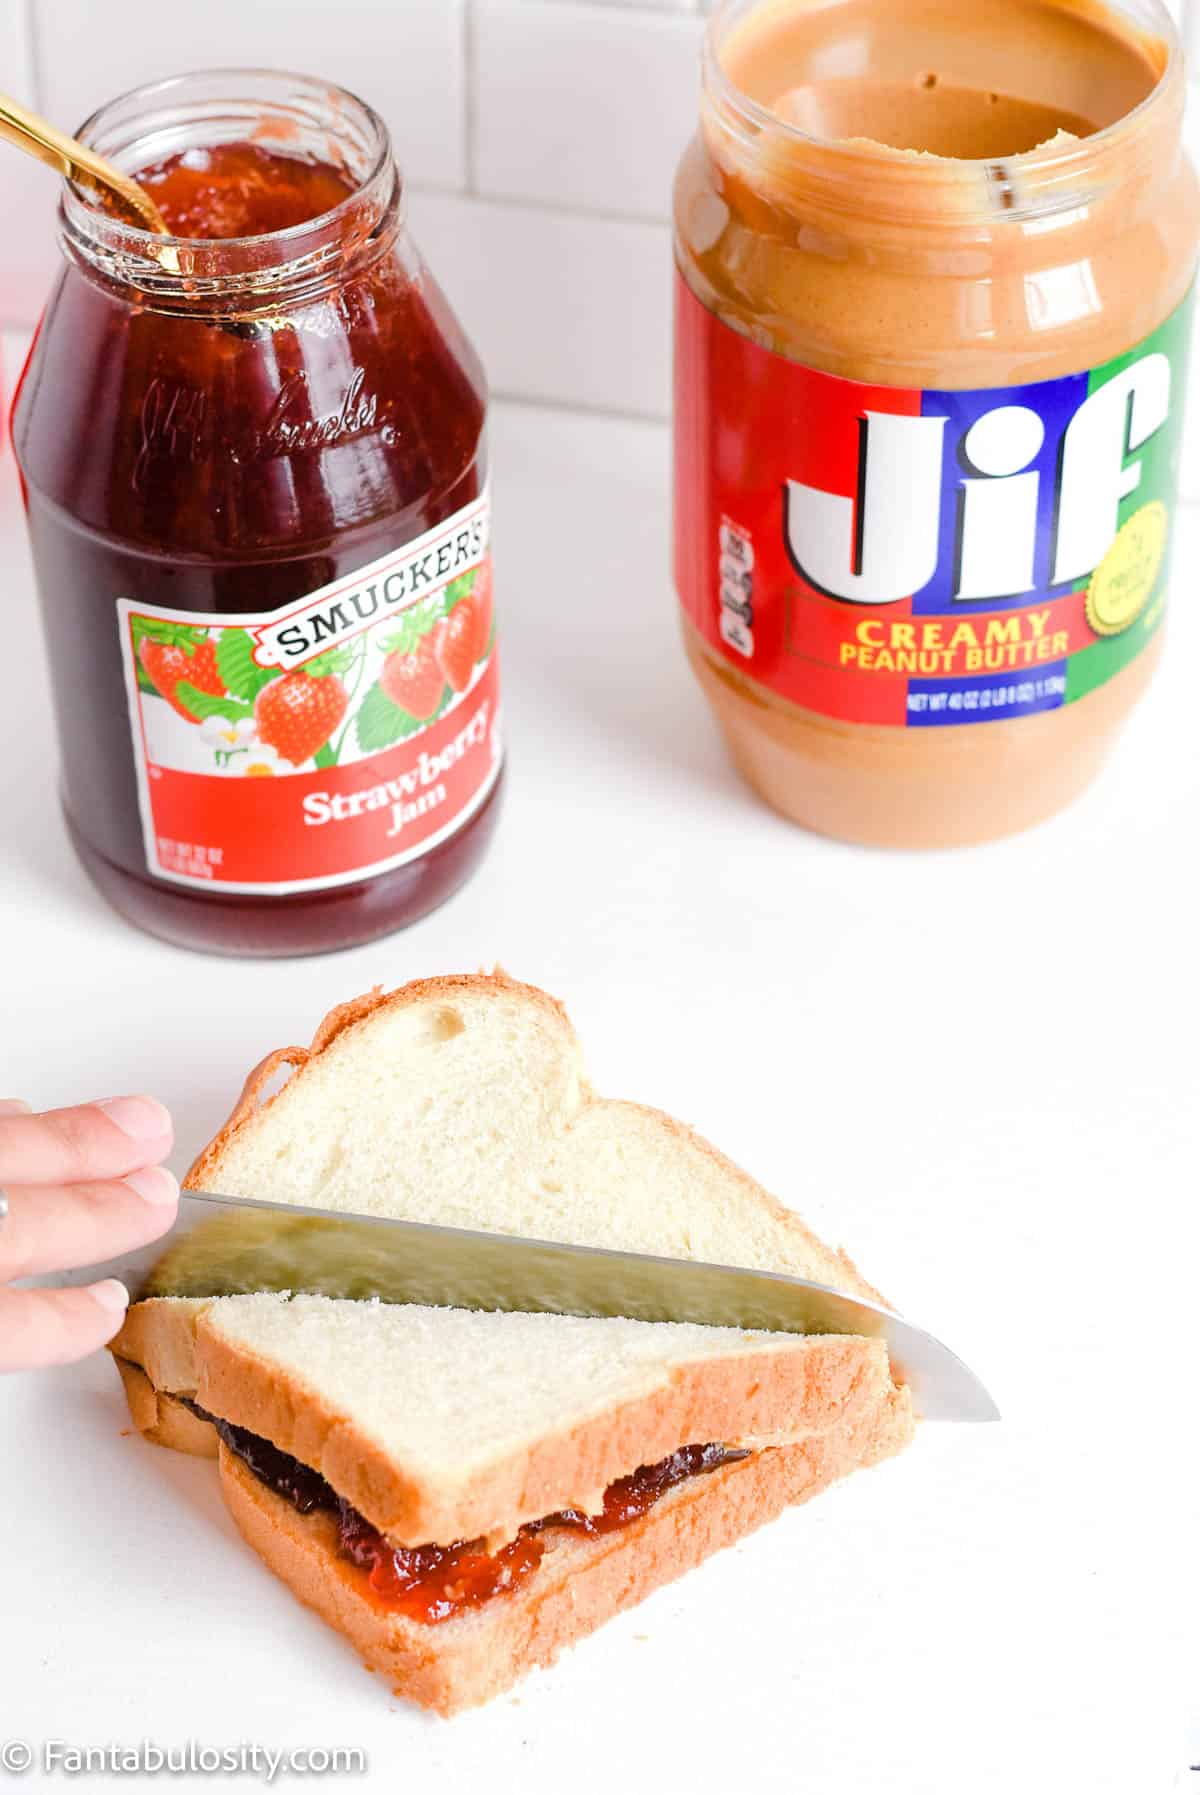
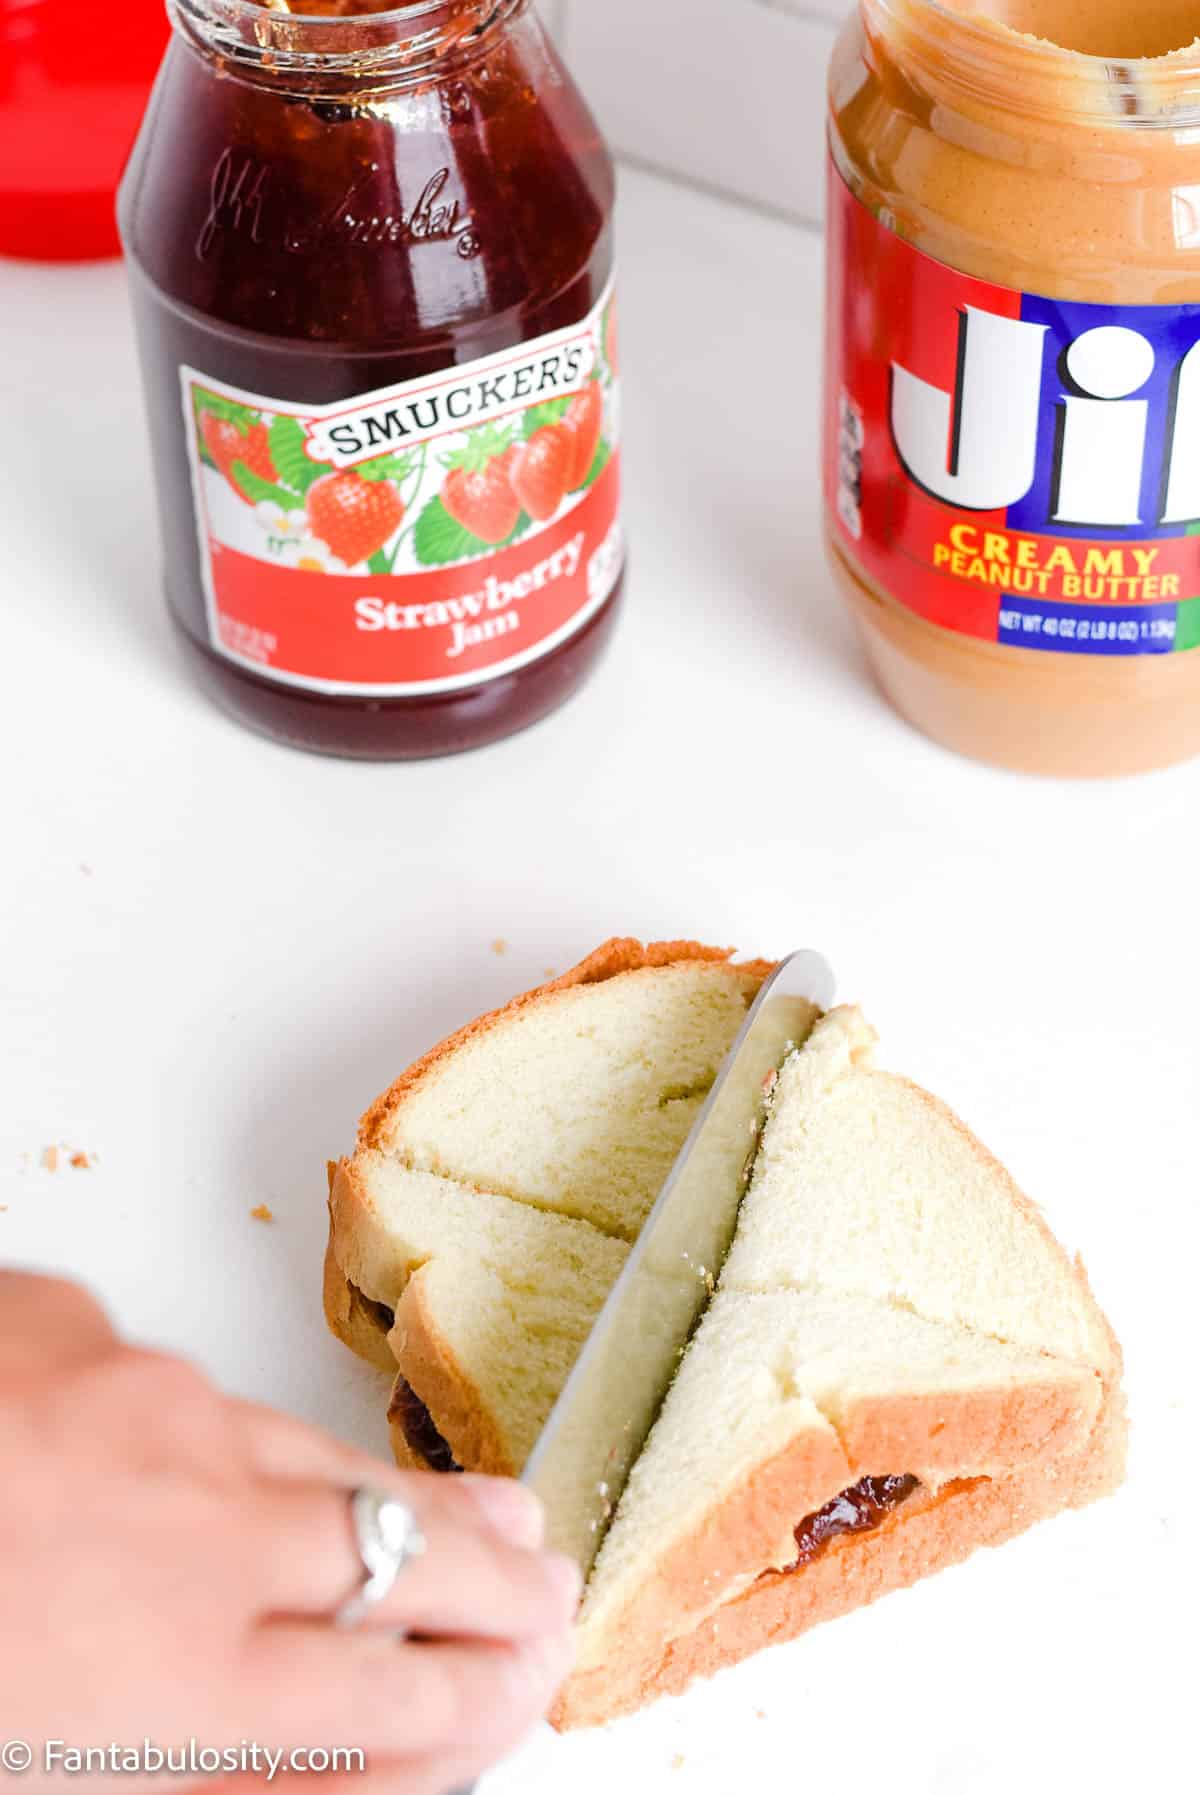
    1. Cut from corner to corner, in a diagonal way, twice.
    Knife cutting one corner in the sandwich
    Cut one diagonal
    Hand cutting the other corner of the sandwich
    Cut the other corner
    Sandwich cut in to 4 triangles

    What to Use Instead of Peanut Butter for PB&J

    If you can’t have peanut butter, you may love this almond butter recipe!

    You can also use something such as Nutella or even omit the peanut butter completely or even the jelly!

    Stacked small triangles of peanut butter and jelly sandwiches

    What is Your Favorite Way to Make a PB&J?

    When we had a big family gathering a few weeks ago, and I was thinking about this blog post… I asked everyone in the room how they make and prefer their pb&j. It was hilarious how different everyone prefers a simple pb&j.

    • The crust cut off
    • Mix together peanut butter & jelly and then apply to the bread
    • Eat whole, cut diagonally or cut down the middle
    • Fried (That’s my husband’s favorite way, and I’ve shared how to make a fried peanut butter and jelly sandwich!)
    • Peanut butter with syrup or honey instead of jelly

    If you’re making a PB&J for a school lunch, you’ll love these “school lunch love notes”.

    Related Recipes

    Love quick sandwiches? Then you’ll also love this egg salad sandwich, this hot ham and cheese and this tuna salad! They’re some of our favorite lunch recipes to date!

    Did you make this? I’d be so grateful if you left a “star” rating below to let me know what you thought! Then, the next time you need a quick and easy recipe, come back to Fantabulosity to browse all of my easy recipes!

    Recipe

    Close up of peanut butter and jelly sandwich
    Print Pin
    5 from 7 votes

    How to Make a Peanut Butter and Jelly Sandwich

    How to Make a Peanut Butter and Jelly Sandwich: Did you know that there's a certain way to make a pb&j even better? It's true. Keep reading!
    Course Breakfast, Main Course, Side Dish, Snack
    Cuisine American
    Prep Time 5 minutes minutes
    Total Time 5 minutes minutes
    Servings 1 sandwich
    Calories 305kcal
    Author Jessica Burgess

    Ingredients

    • 2 slices bread white, wheat or favorite type of bread
    • 1 tablespoon peanut butter creamy or crunchy
    • 1 tablespoon jelly or jam – any flavor

    Instructions

    • Using a spoon, scoop about a tablespoon of peanut butter and simply spread on one slice of bread. After the majority of the peanut butter is on the bread, turn the spoon over, and using the back of the spoon, spread the peanut butter to the corners. (Using a knife for this can cut the bread and tear it.)
    • Using a different spoon (or clean the first one) scoop about a tablespoon of jelly or jam, and pour on to the other slice of bread, and spread to the edges using the back of the spoon, as you did with the peanut butter.
    • Place the peanut butter bread and the jelly bread together, so the peanut butter and jelly are touching. Enjoy!
    • If desired, cut in to half or cut in to 4 small triangular shapes.

    Nutrition

    Serving: 1sandwich | Calories: 305kcal | Carbohydrates: 44g | Protein: 10g | Fat: 11g | Saturated Fat: 2g | Polyunsaturated Fat: 3g | Monounsaturated Fat: 4g | Trans Fat: 0.02g | Sodium: 340mg | Potassium: 185mg | Fiber: 3g | Sugar: 15g | Vitamin A: 1IU | Vitamin C: 2mg | Calcium: 82mg | Iron: 2mg

    Old Fashioned Pea Salad

    August 20, 2022

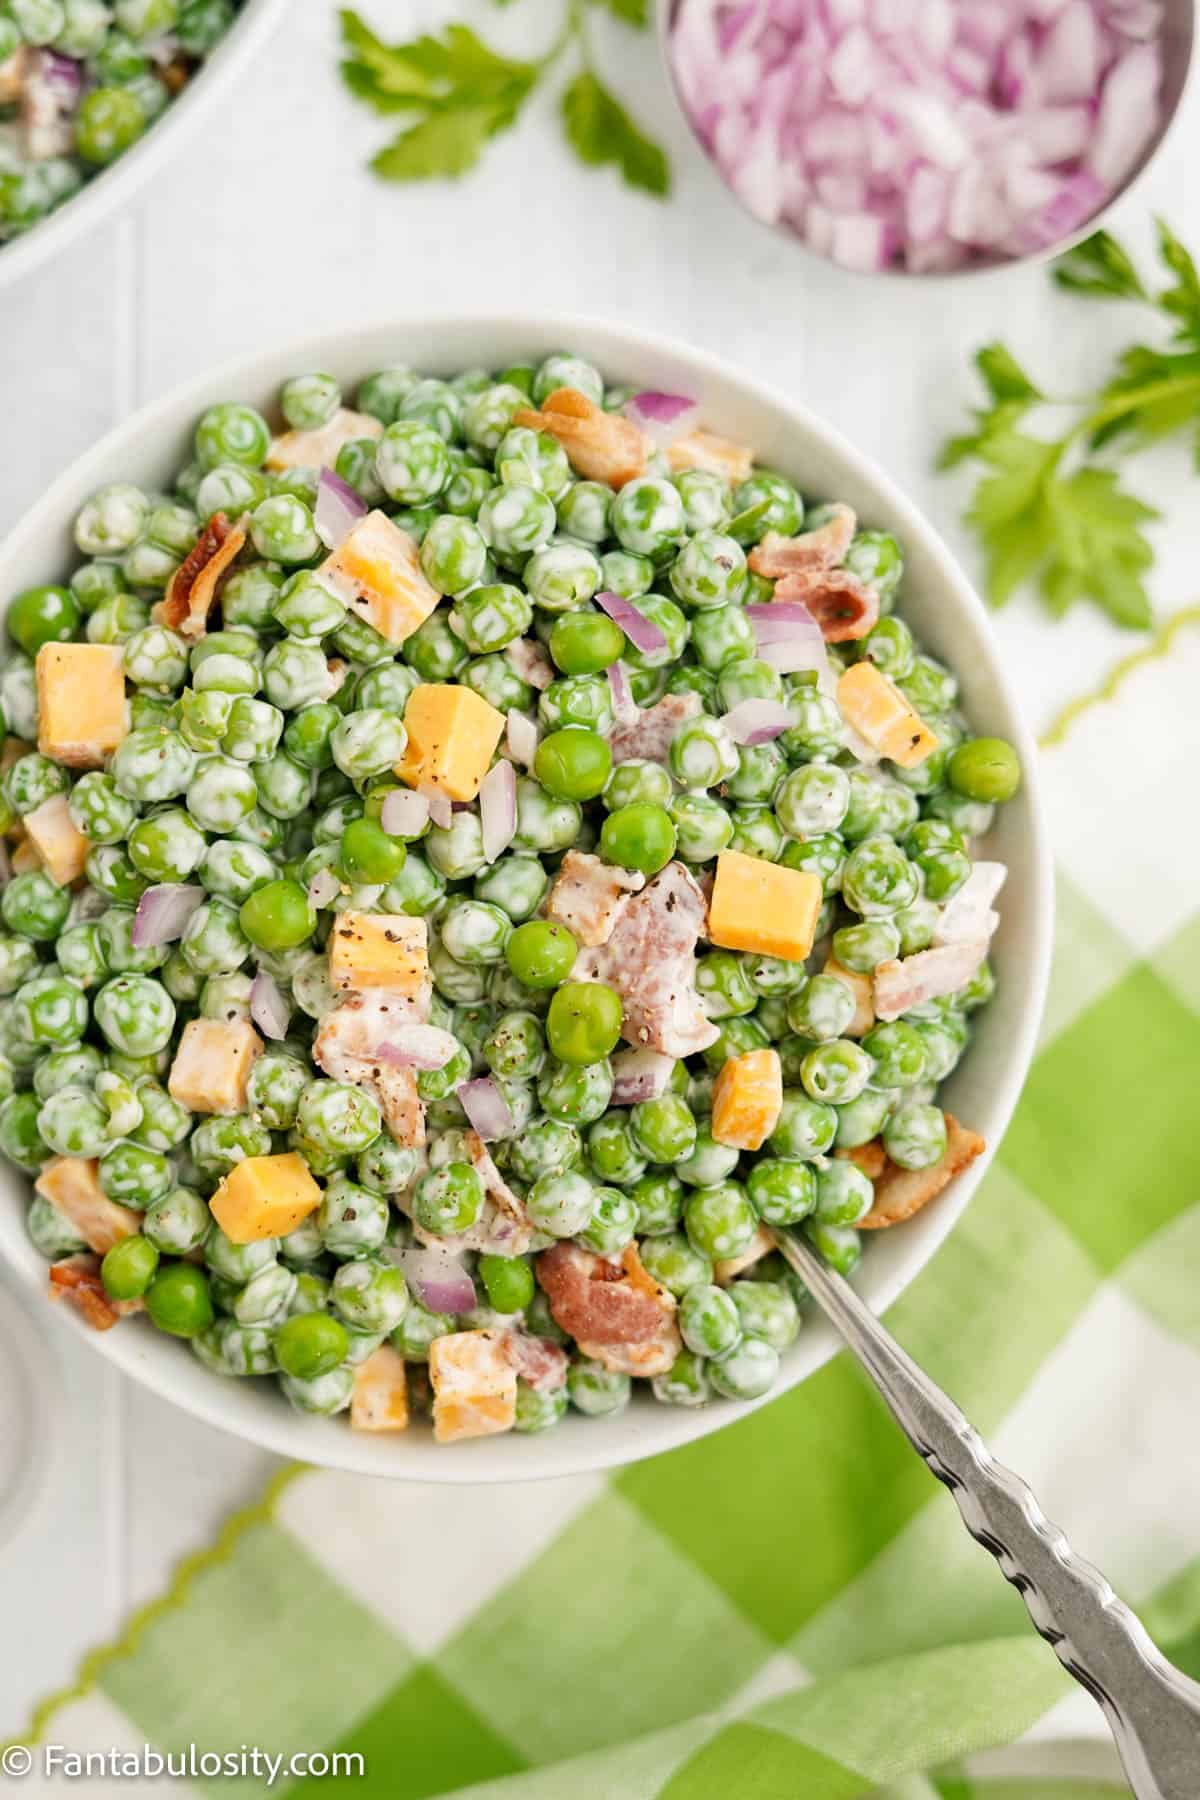
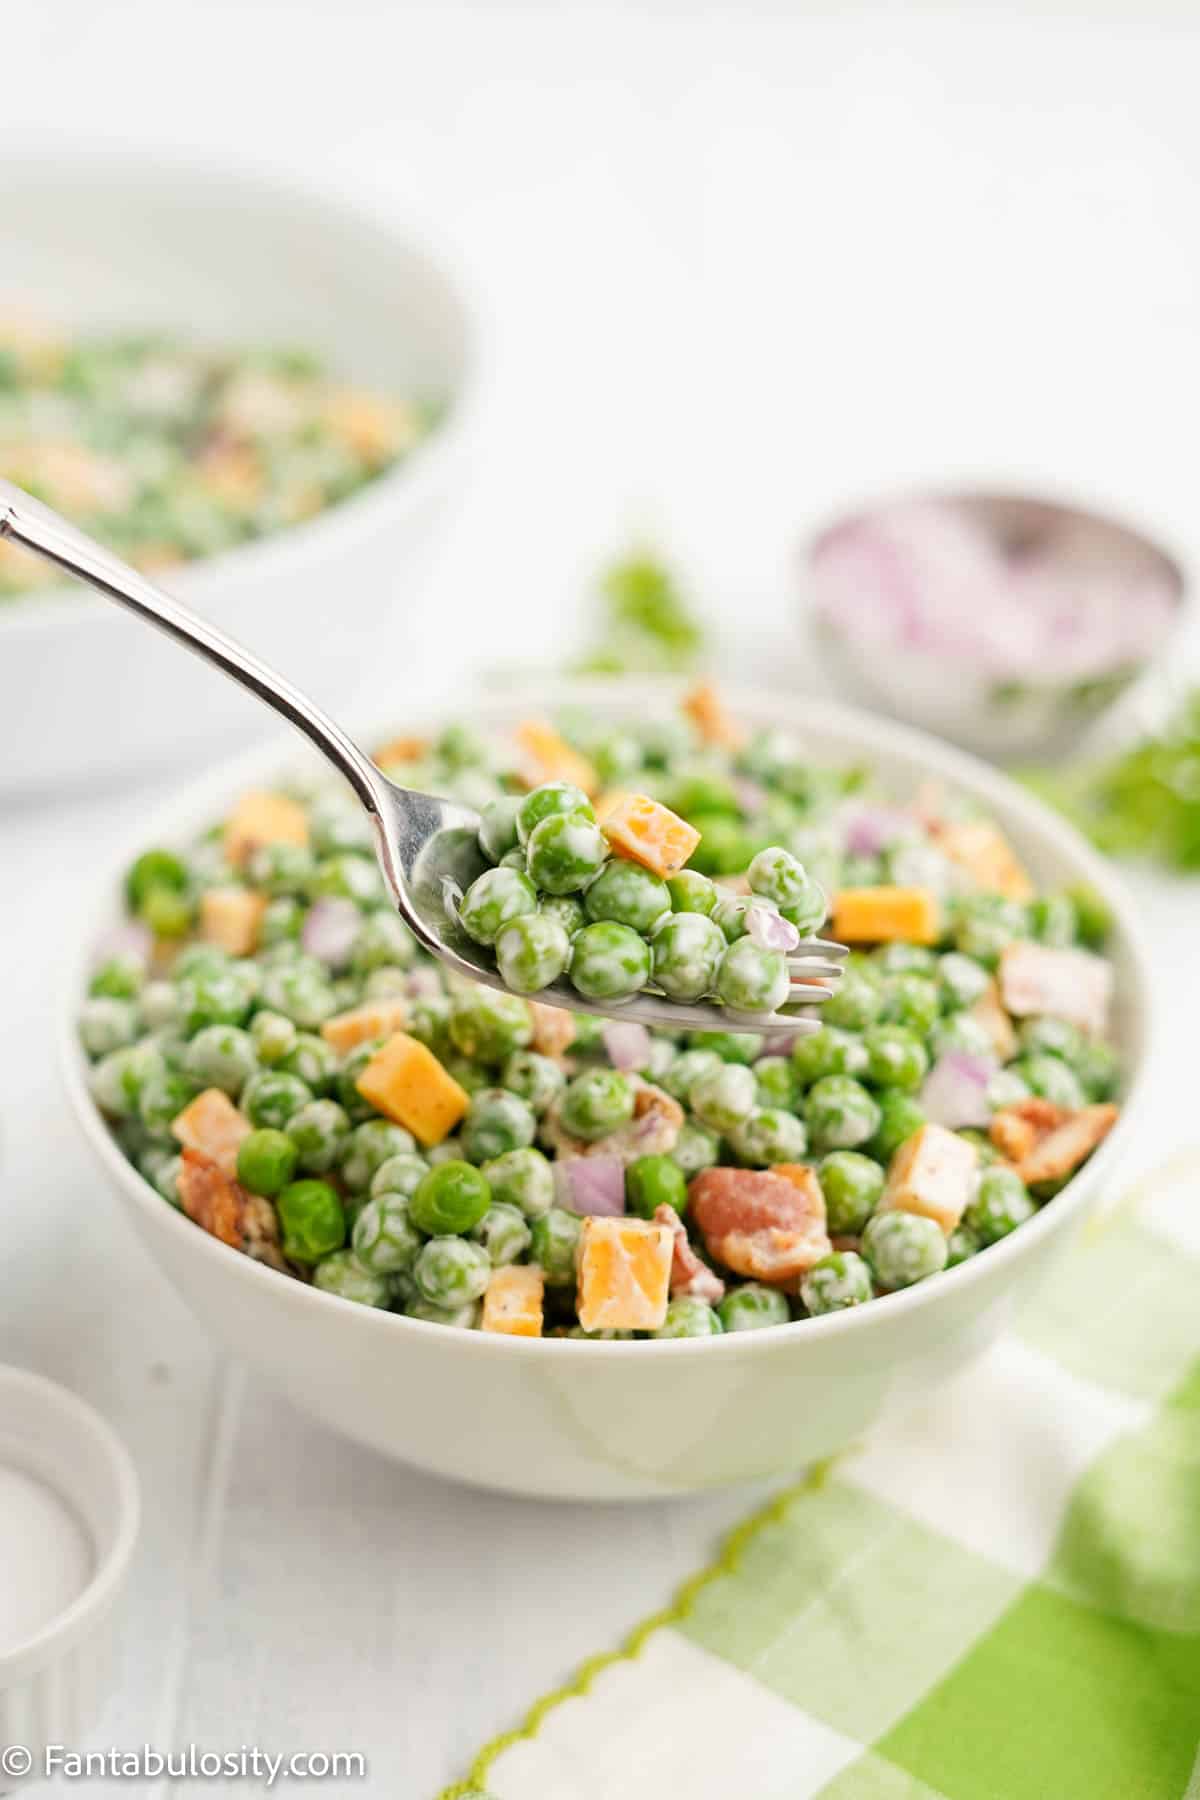
    Close up image of old fashioned pea salad in a bowl.

    Old Fashioned Pea Salad: This simple pea salad (often known as an English pea salad) is light, fresh, and the perfect side dish! Peas, crispy bacon, sharp cheddar cheese, and onion are topped with creamy mayo and sour cream dressing to create this classic salad recipe.

    Mix it a day ahead and let the flavors settle in. It’s one of my 40+ Thanksgiving side dishes.

    pea salad in white bowl with spoon sticking out

    More old-fashioned favorites? Fry up some Old-Fashioned Salmon Patties for a tasty lunch or make a good old tuna noodle casserole for supper.

    Why You’ll Love This Recipe

    Easy cold salads like this easy red skin potato salad and crab salad recipe, have stood the test of time for a good reason – they are so simple to make!

    This easy pea salad recipe makes one seriously delicious salad; the peas add a slight crunch, the creamy dressing make the salad very light and fresh, the bacon and cheese make it hearty and filling. It’s perfect for your next potluck, summer barbecue, baby showers, or as a simple side dish for your next dinner party.

    Most pea salad recipes have some bacon and cheese in them, but you’ll find that this recipe has a generous dose of both…because we like bacon and cheese around here.

    But the best part of green pea salads? You can make them however you want! This salad is super easy to adapt to fit your lifestyle and diet – just one of the many reasons we love it. See the substitutions and variations section for a few ideas I had.

    Safety Tip

    If you are bringing this old-fashioned pea salad to a potluck, serve in a temp-controlled container due to the dairy-based dressing (i.e. set your salad bowl in another bowl that has some ice in the bottom to help keep the salad chilled).

    [feast_advanced_jump_to]

    Ingredients

    The ingredients for this green pea salad are as simple as can be. You probably have most of these on hand already!

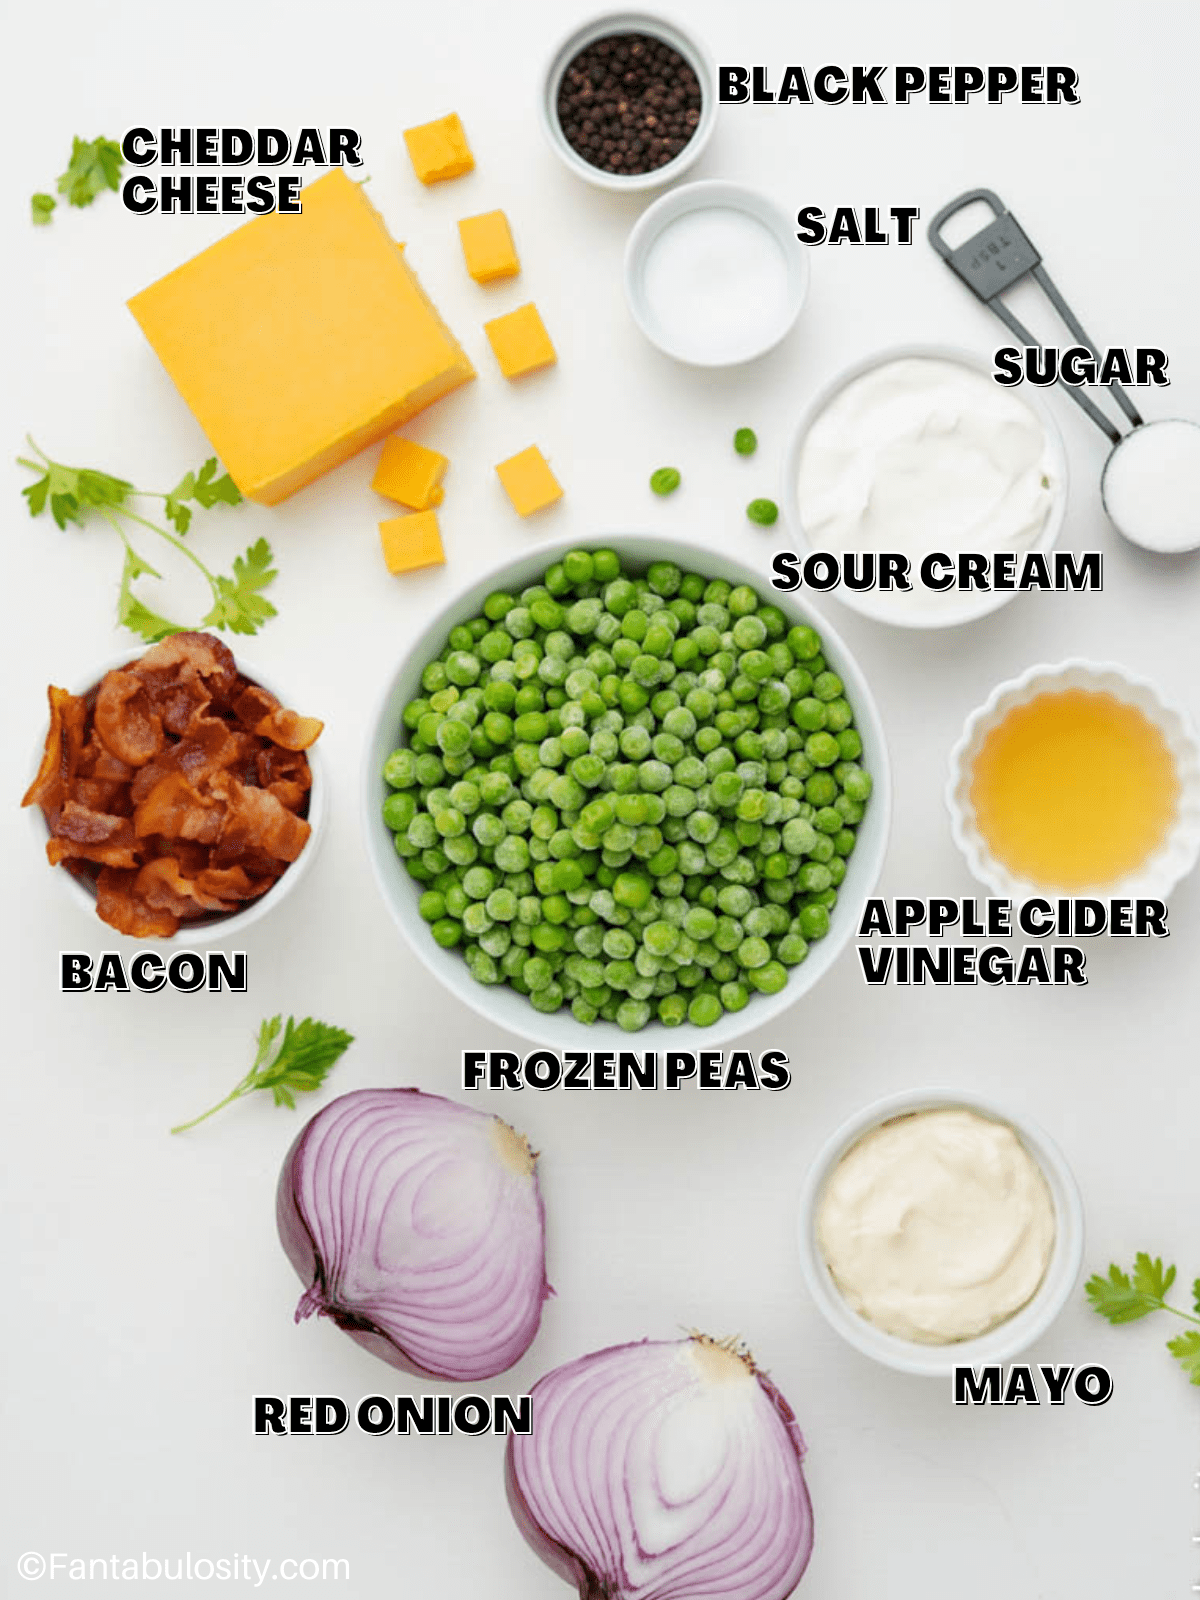
    Ingredients for pea salad laid out with labels on the image.
    • ¼ cup mayonnaise
    • ¼ cup sour cream
    • 1 tablespoon apple cider vinegar
    • 1 tablespoon sugar
    • ½ teaspoon salt
    • ¼ teaspoon ground black pepper
    • 2 – 10 ounce bags frozen peas (about 4-6 cups) – thawed halfway
    • 1 cup cooked bacon, chopped
    • 1 cup cheddar cheese, cubed
    • ½ cup red onion, finely chopped
    • Optional: fresh parsley for garnish

    See the printable recipe card below for a list of the ingredients and step-by-step instructions!

    Instructions for this easy pea salad recipe

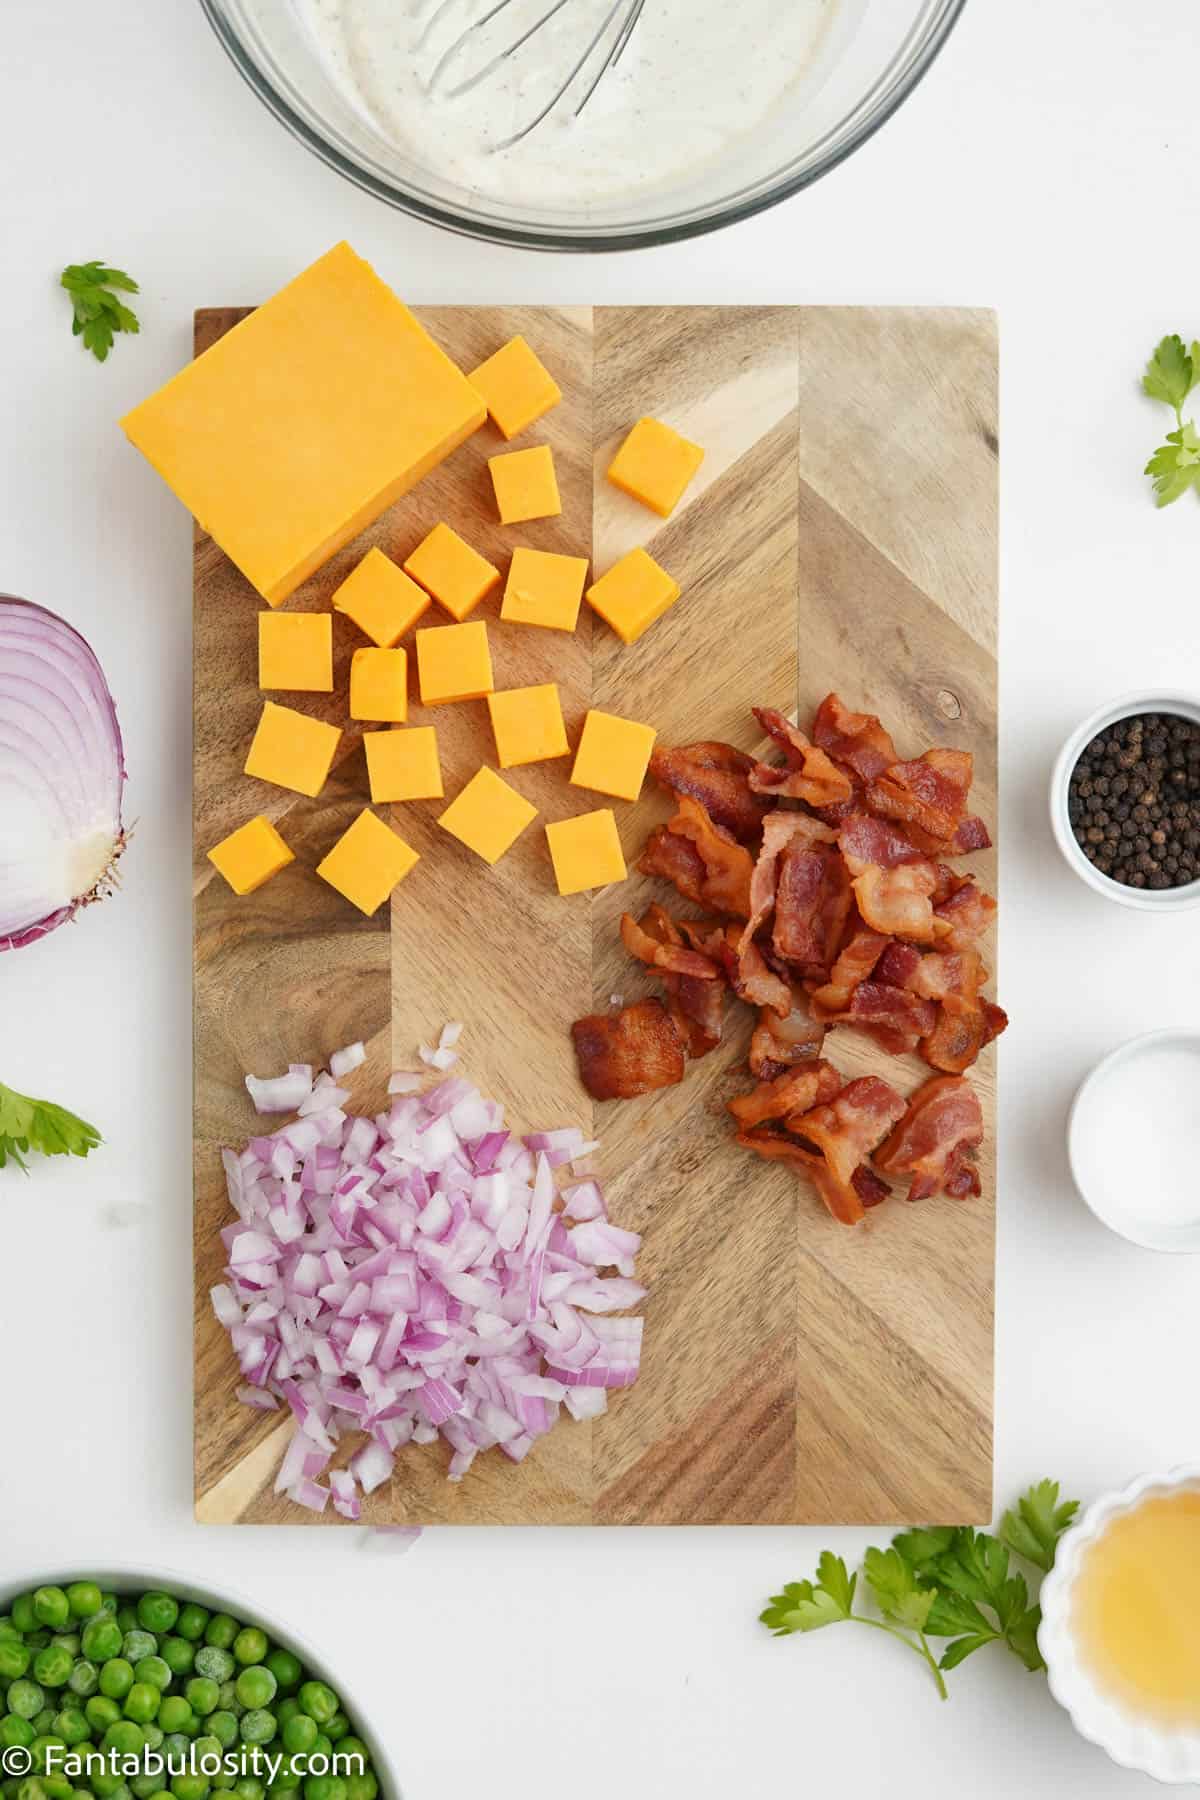
    ** To thaw peas, I like to set them out in a small bowl while I am cooking the bacon and prepping the cheese and onion. Prep time for these steps takes about 15 minutes and that is usually enough time for the peas to be "halfway thawed".

    Chopped bacon, chopped onion, and cubed cheddar cheese on a cutting board.
    Let peas thaw while you prep ingredients.
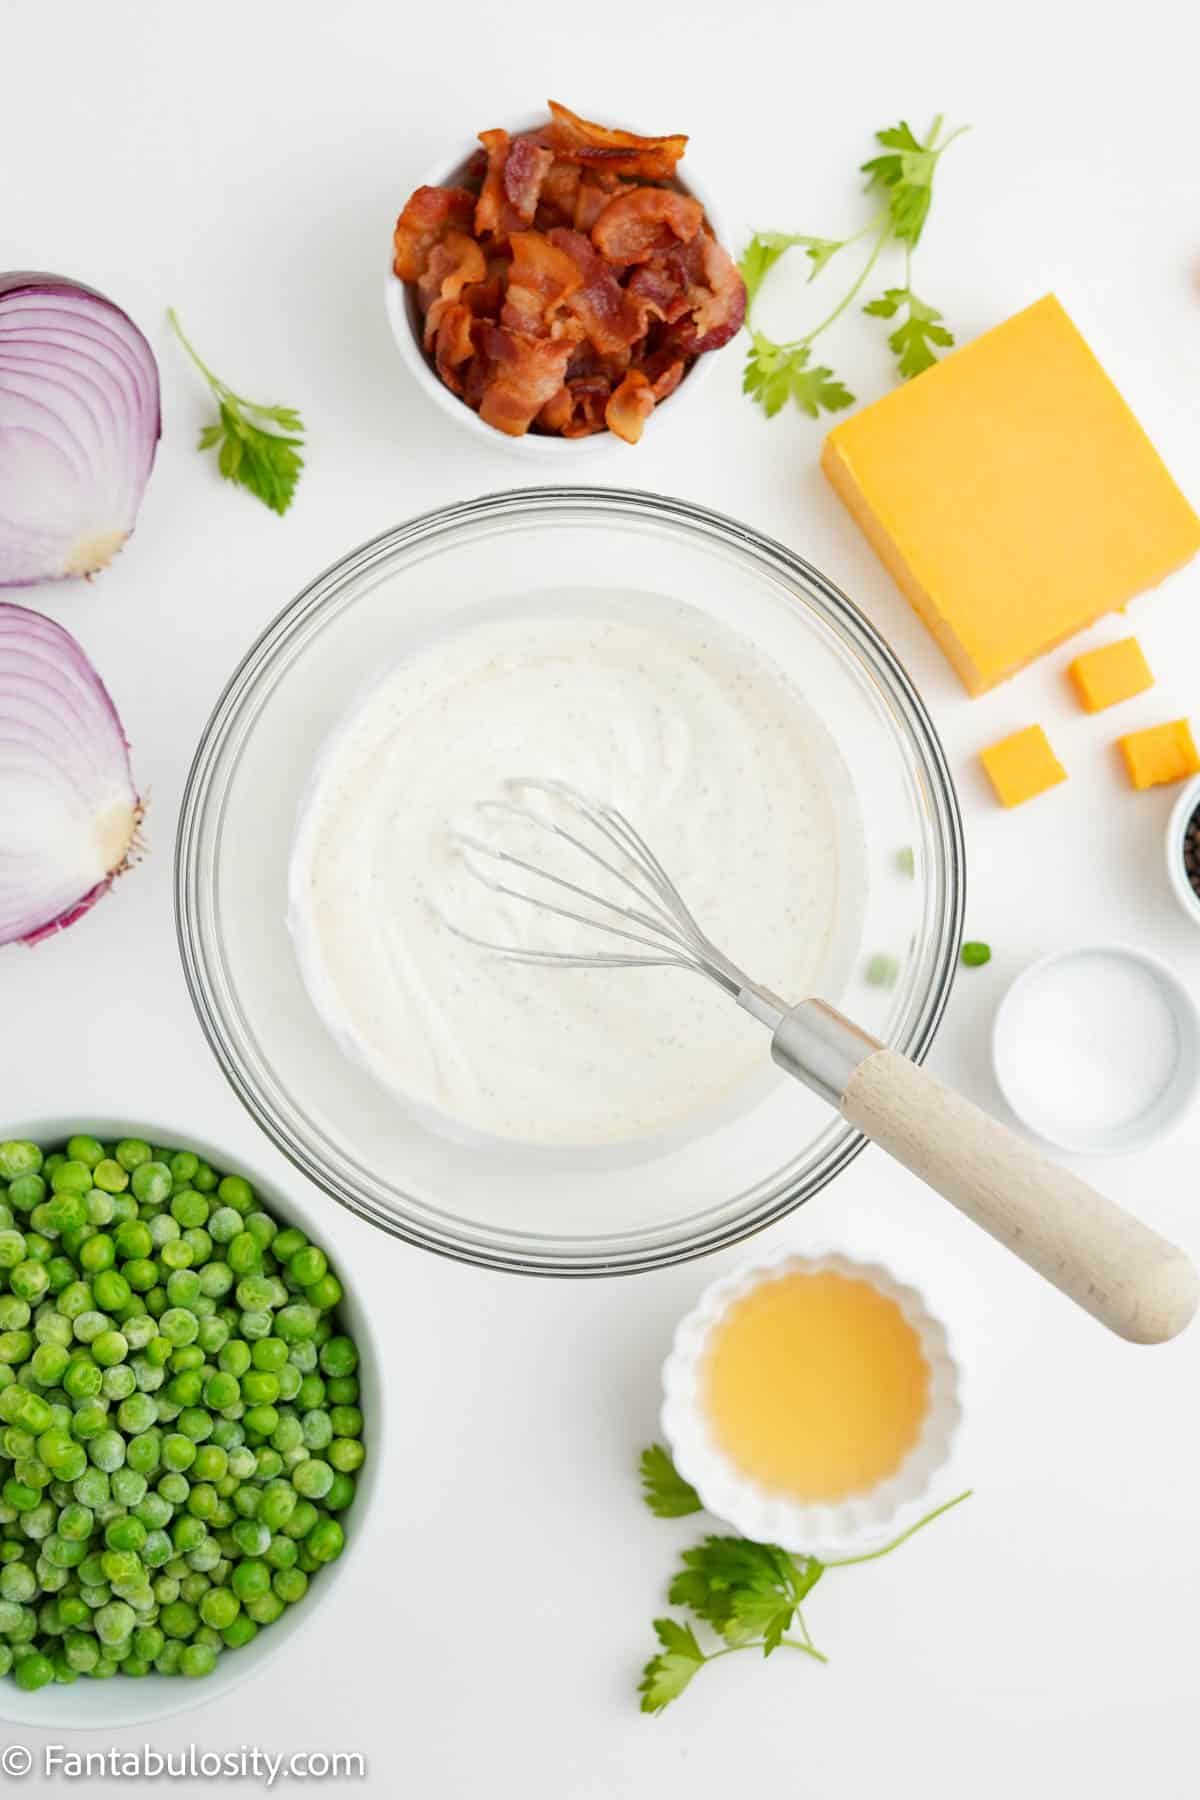
    1. In a large mixing bowl, whisk together the mayonnaise, sour cream, apple cider vinegar, sugar, salt and pepper until well combined. 
    Mayo and sour cream being whisked together in a bowl.
    Whisk together may and sour cream.
    1. Add the green peas, cheese, and red onion and toss in the prepared dressing until well combined. 
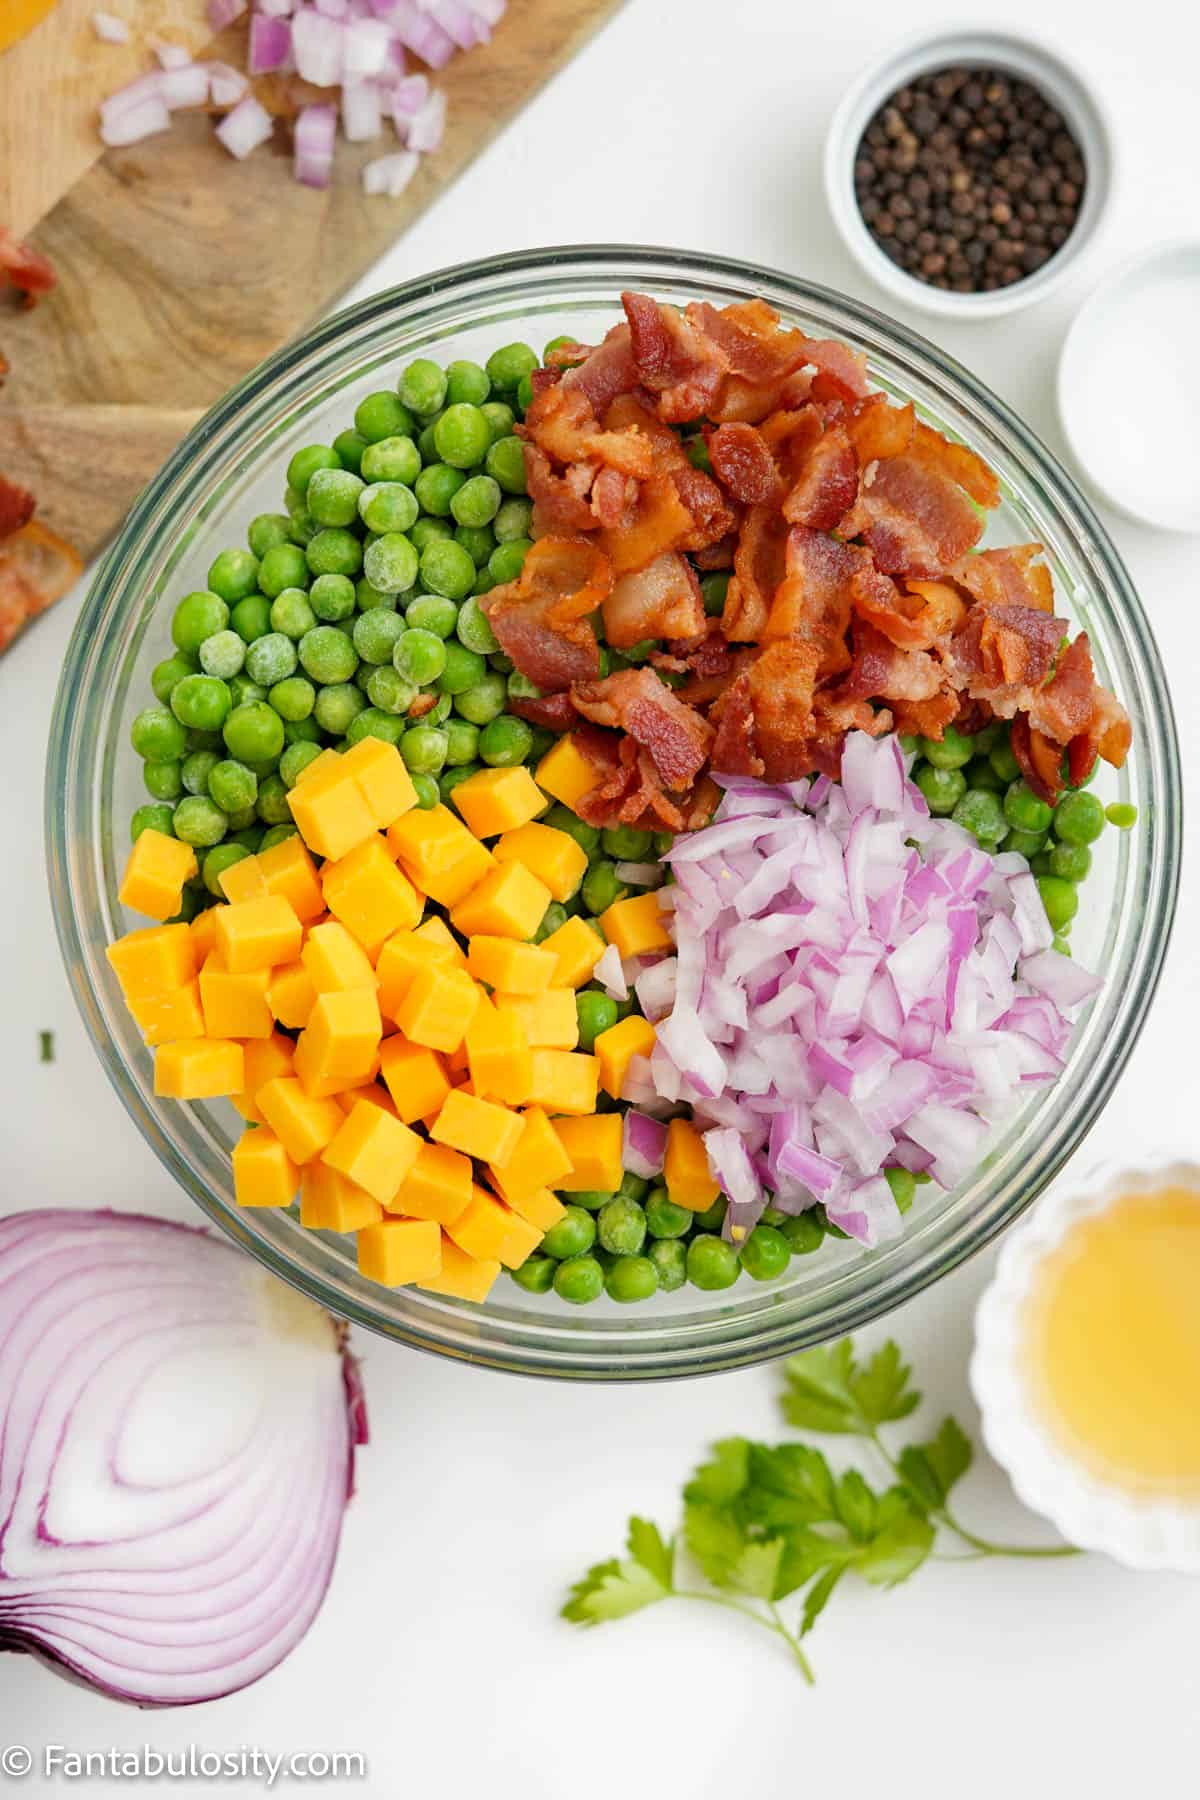
    Peas, bacon, onion, and cheese in a bowl.
    Add the rest of the ingredients and mix.
    1. Top with chopped fresh parsley (if desired) and serve salad chilled. You can serve this right away, but if you have a chance to let it chill in the fridge for a couple of hours the flavor will be even better.
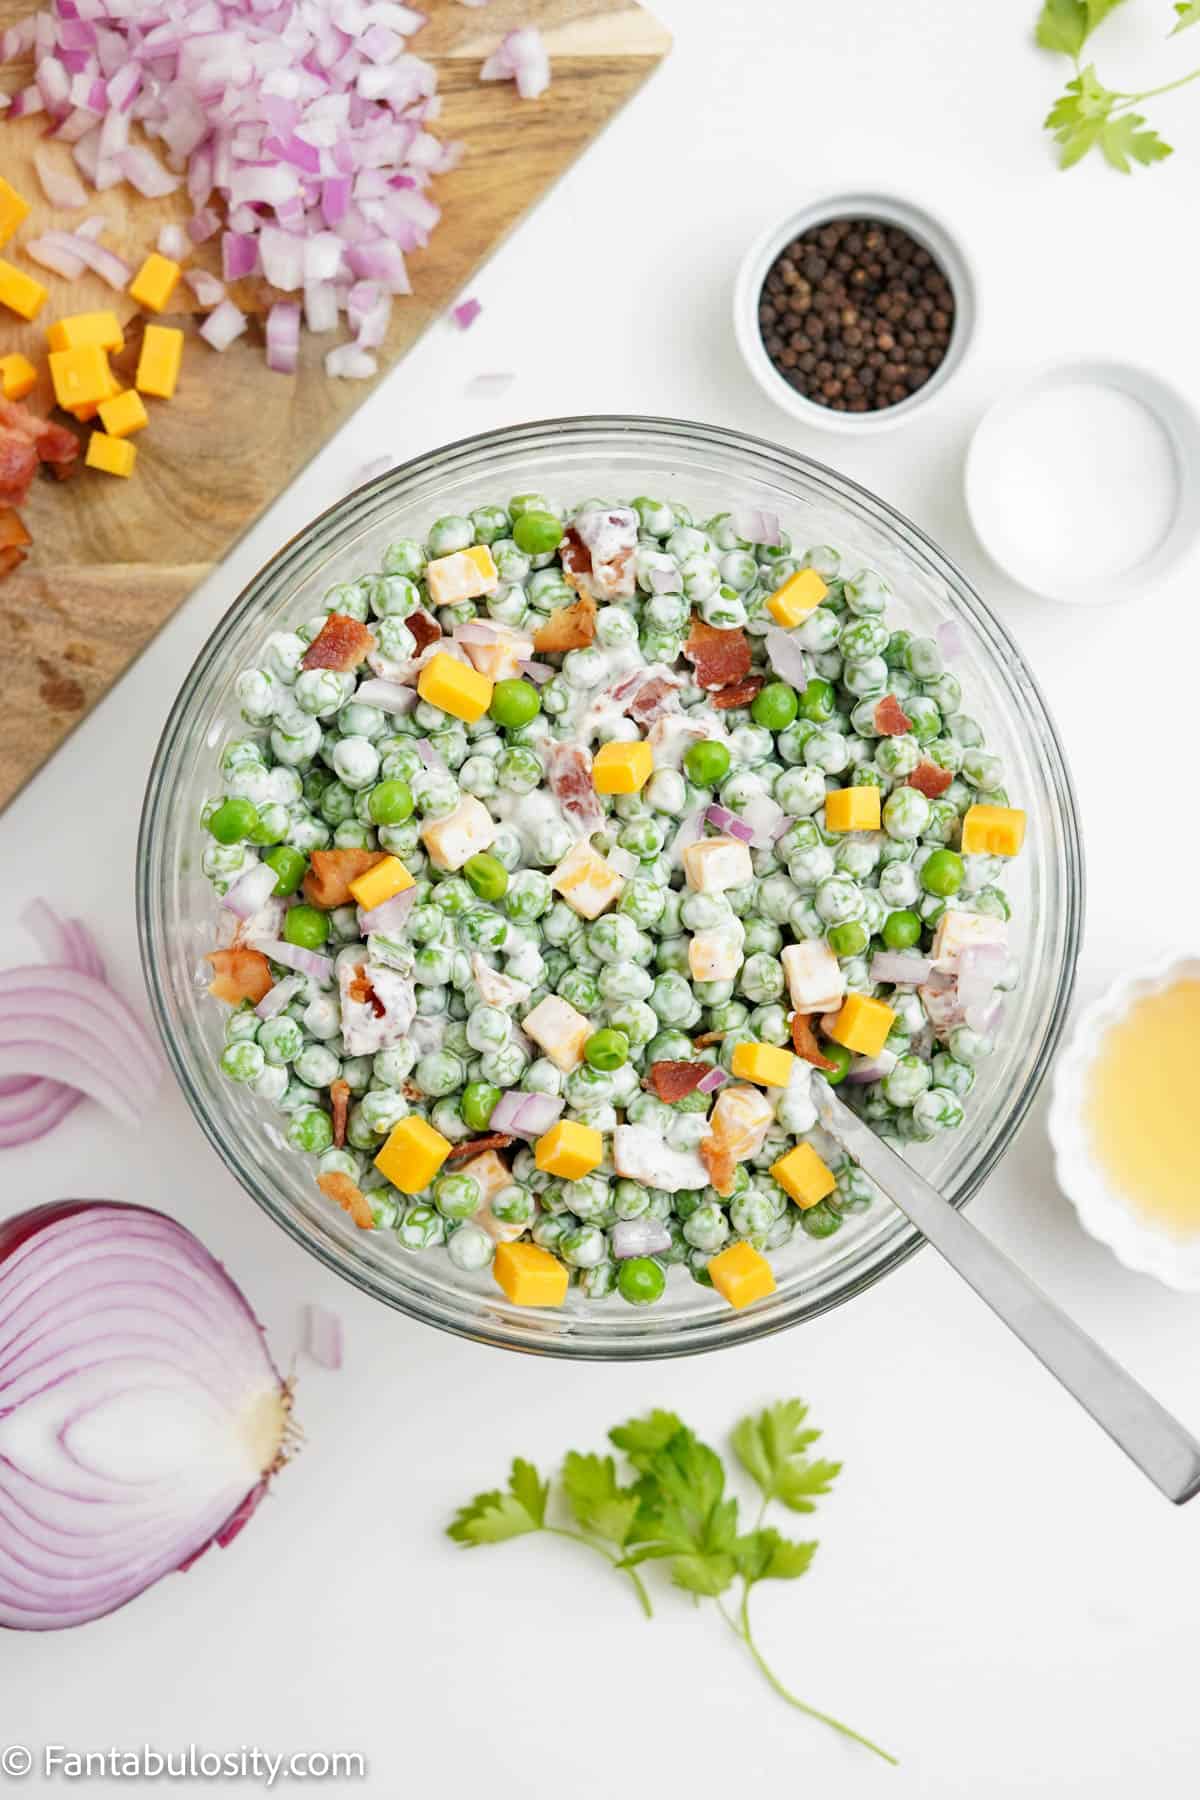
    Pea salad being mixed together in a bowl.

    Substitutions & Variations

    Cold salads like this are so fun to make because they are SO easy to adapt and play around with. You can get creative with this salad and make it your own! Here are a few substitution + variation ideas I had:

    • Make this cold pea salad dairy-free by substituting the mayo, sour cream and cheese with your favorite dairy alternative. 
    • Swap out the bacon for leftover ham for a fun twist (a great way to use up leftovers, too). 
    • Instead of red onion, you can use chopped green onions in this recipe. Green onion has a bit of a milder flavor, so this is perfect if you don’t want a super strong onion flavor in your salad.
    • Omit meat completely to make it vegetarian. 
    • Try some fun add-ins like: hard boiled eggs, fresh herbs, chopped green bell pepper, a pinch of paprika or cayenne for some spice.
    • You can use fresh peas for this. Just steam them and cool them in the fridge, first. DO NOT use canned peas for this recipe. They are too soft and your salad will become a mushy bowl of goo.
    Old fashioned pea salad in a bowl.
    Customize this cold salad to your liking!

    Storage

    You can make this simple peas salad recipe ahead of time, which is super convenient. Just cover it in plastic wrap and store it in the fridge to serve later that day or even the next day.

    Store any leftover creamy pea salad for up to 3 days in an airtight container in the fridge. Do not freeze.

    Expert Tips and FAQs

    Do you put eggs in pea salad?

    You sure can! That’s one of the best things about pea salad; it’s totally flexible. Adding chopped hard boiled eggs to this salad is a fun way to up the protein a bit.

    Are frozen peas already cooked?

    Frozen peas are flash-steamed before they are frozen, so really all you need to do is warm them up. For this recipe, we let them thaw at room temperature (but not all the way, only about half) so that the peas don’t get mushy while you are mixing the salad.

    What goes well with pea salad?

    This classic pea salad is great to pair with bbq foods for a summer backyard get together, but it’s also well suited as a hearty side dish for a comfort food meal in the cooler months. Try serving this as a side dish with this Instant Pot lemon and herb chicken for a quick and delicious dinner!

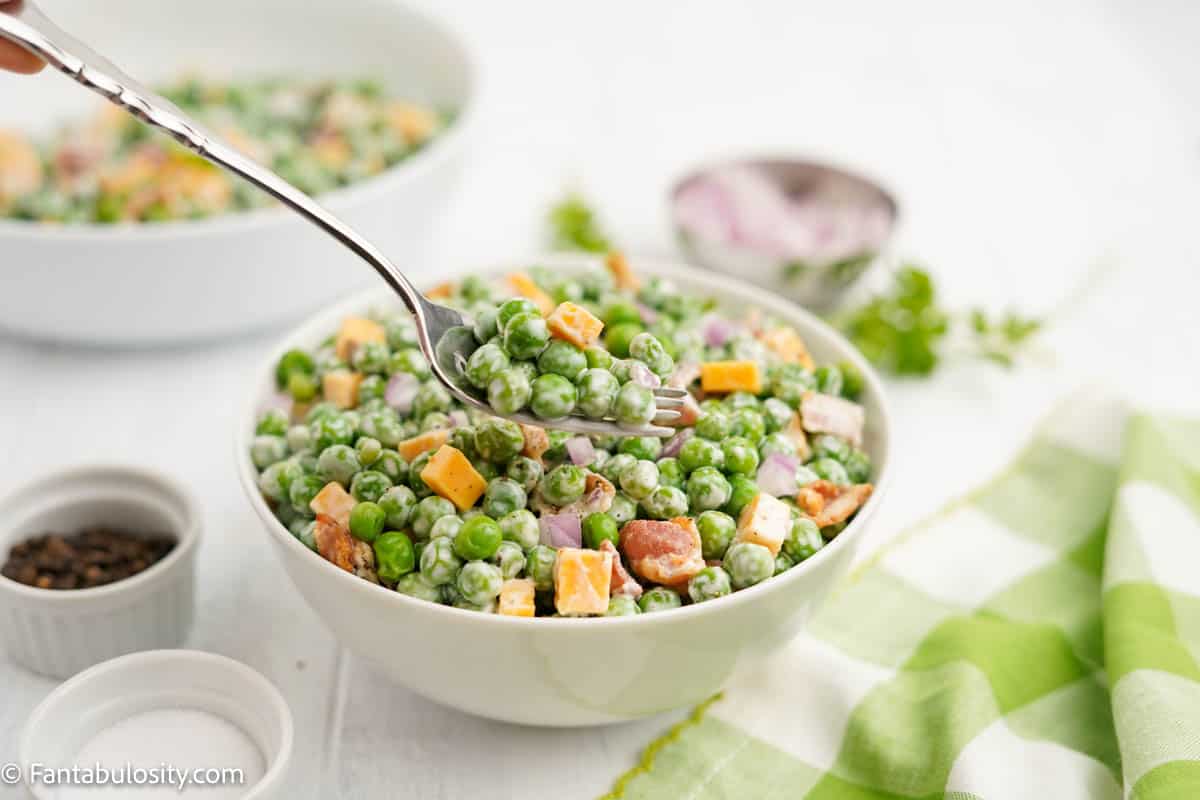
    Pea salad in a bowl with a spoon dipping into it.
    Pea salad – yum!

    Did you make this? I’d be so grateful if you left a “star” rating below to let me know what you thought! Then, the next time you need a quick and easy recipe, come back to Fantabulosity to browse all of my easy recipes!

    Related Recipes

    If you loved this old fashioned pea salad and you’re looking for more classic recipes, then I bet you’ll love this easy broccoli salad (it has raisins and bacon in it, need I say more? ).

    Then, use any leftover peas in the easy chicken pot pie recipe!

    Recipe

    Close up image of old fashioned pea salad in a bowl.
    Print Pin
    5 from 4 votes

    Old Fashioned Pea Salad

    Old Fashioned Pea Salad: This simple pea salad (often known as an English pea salad) is light, fresh, and the perfect side dish! Peas, crispy bacon, sharp cheddar cheese, and onion are topped with a creamy mayo and sour cream dressing to create this classic salad. 
    Course Salad, Side Dish
    Cuisine American
    Prep Time 15 minutes minutes
    Total Time 15 minutes minutes
    Servings 12 servings
    Calories 169kcal
    Author Jessica Burgess

    Ingredients

    • ¼ cup mayonnaise
    • ¼ cup sour cream
    • 1 tablespoon apple cider vinegar
    • 1 tablespoon sugar
    • ½ teaspoon salt
    • ¼ teaspoon ground black pepper
    • 2 – 10 ounce bags frozen peas (about 4-6 cups) – thawed halfway
    • 1 cup cooked bacon chopped
    • 1 cup cheddar cheese cubed
    • ½ cup red onion finely chopped
    • Optional: fresh parsley for garnish

    Instructions

    • ** To thaw peas, I like to set them out while I am cooking the bacon and prepping the cheese and onion. Prep time for these steps takes about 15 minutes and that is usually enough time for the peas to be "halfway thawed".
    • In a large bowl, whisk together the mayonnaise, sour cream, apple cider vinegar, sugar, salt and pepper until well combined. 
    • Add the green peas, cheese and red onion and toss in the prepared dressing until well combined. 
    • Top with chopped fresh parsley if desired and serve salad chilled. You can serve this right away, but if you have a chance to let it chill in the fridge for a couple of hours the flavor will be even better. 

    Notes

    STORAGE: Store any leftover pea salad for up to 3 days in an airtight container in the fridge. Do not freeze.
     
    SAFETY: If you are bringing this recipe to a potluck, serve in a temp controlled container due to the dairy based dressing (i.e. set your salad bowl in another bowl that has some ice in the bottom to help keep the salad chilled). 

    Nutrition

    Calories: 169kcal | Carbohydrates: 2g | Protein: 5g | Fat: 15g | Saturated Fat: 5g | Polyunsaturated Fat: 4g | Monounsaturated Fat: 5g | Trans Fat: 0.03g | Cholesterol: 27mg | Sodium: 320mg | Potassium: 65mg | Fiber: 0.1g | Sugar: 2g | Vitamin A: 136IU | Vitamin C: 1mg | Calcium: 75mg | Iron: 0.1mg

    Glazed Carrots

    August 19, 2022

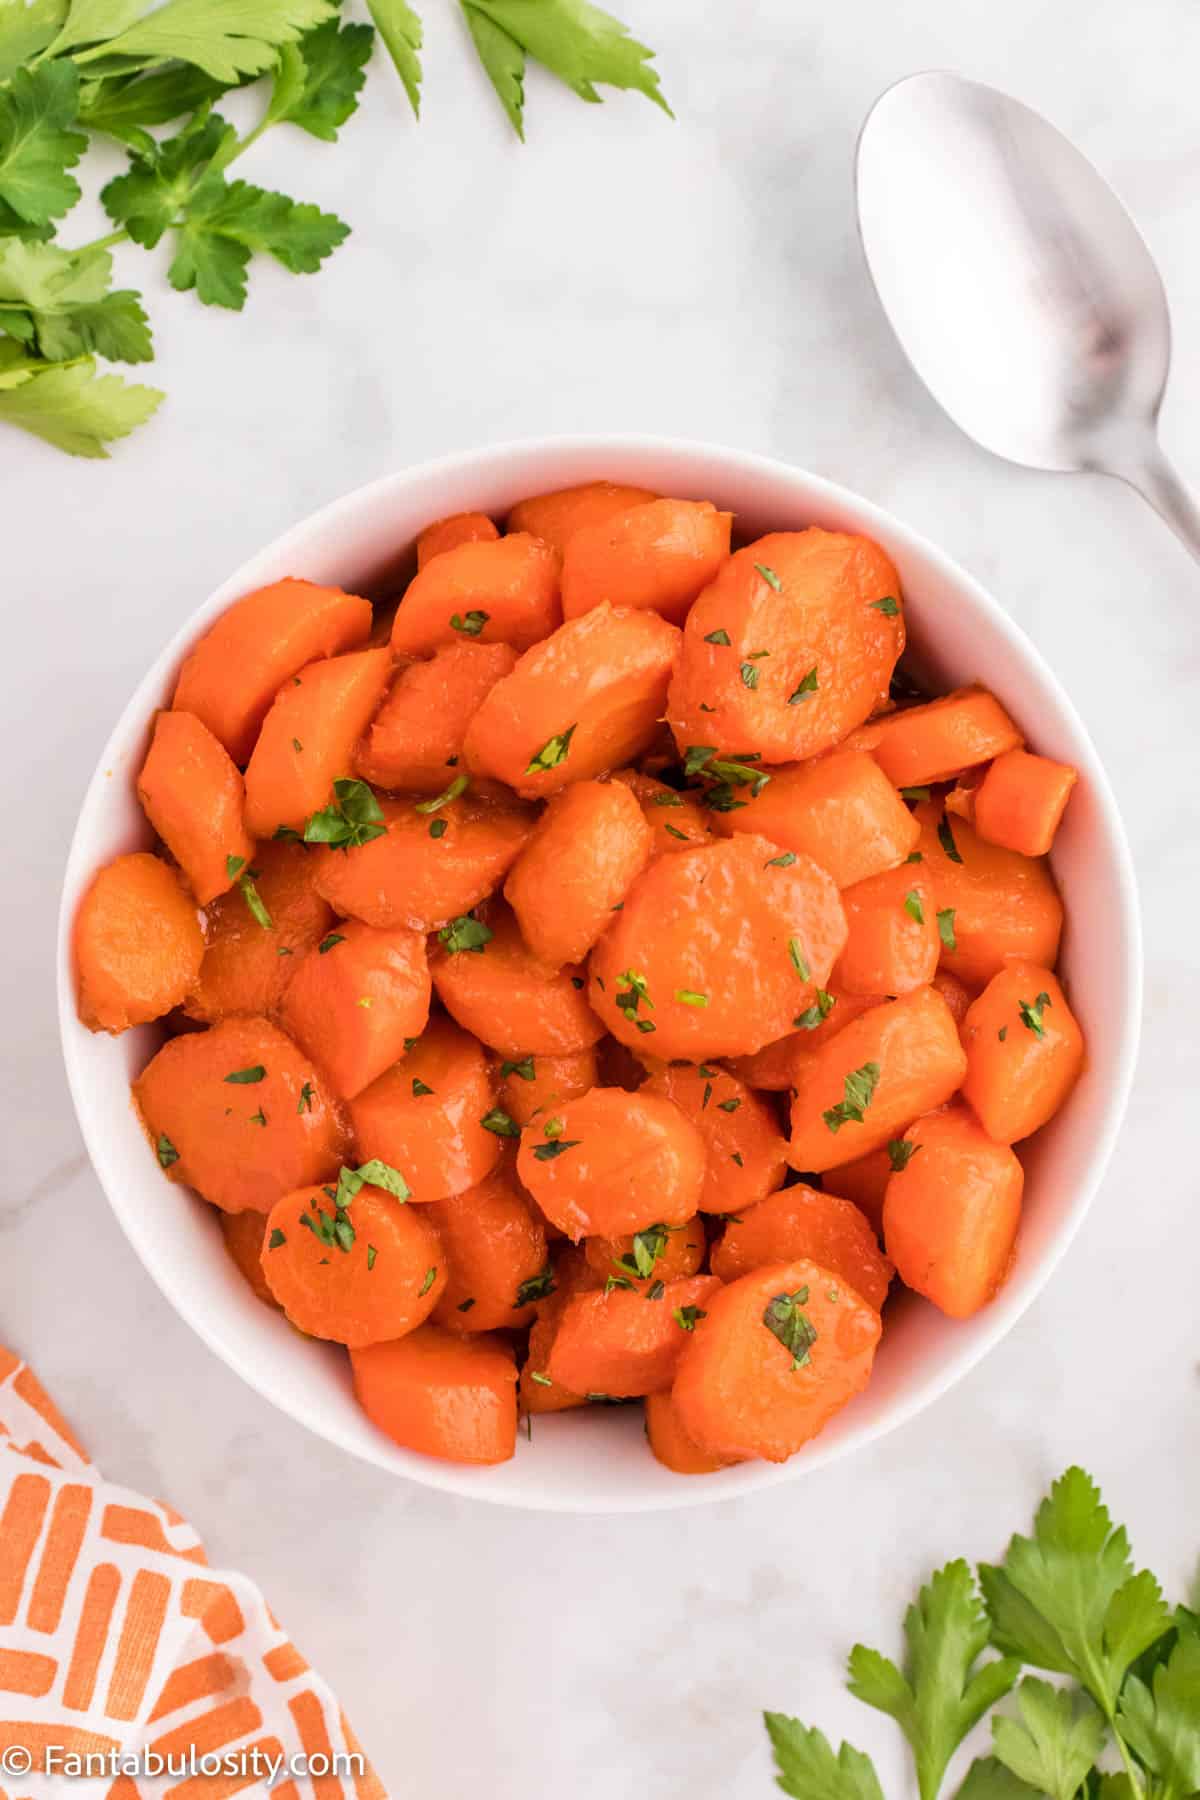
    Close up of cooked carrots covered in a butter brown sugar glaze and garnished with fresh parsley

    Glazed Carrots: Tender carrots simmered in a butter and brown sugar glaze, for one of our favorite side dishes for a holiday meal or an easy weeknight dinner.

    Want a vegetable nobody argues about on Thanksgiving? These made my Thanksgiving sides list.

    Whether you call them glazed carrots or candied carrots, this great recipe will turn fresh carrots into a sweet and savory side dish that pairs well with ham, steak, chicken, turkey, and meatloaf.

    Cooked Candied Carrots are shown in a white serving bowl with a spoon in the upper right hand corner and an orange patterned napkin in the bottom left corner

    Why You’ll Love These Glazed Carrots

    • Simple ingredients: There are just five ingredients needed to make this easy candied carrot recipe
    • Quick side dish: You can have these stovetop candied carrots on the table in just about 20 minutes
    • Veggies: the sweet glaze on our candied carrots make them a delicious way to encourage your picky eaters to eat more veggies
    [feast_advanced_jump_to]

    Ingredients

    Get the full recipe card with instructions below!

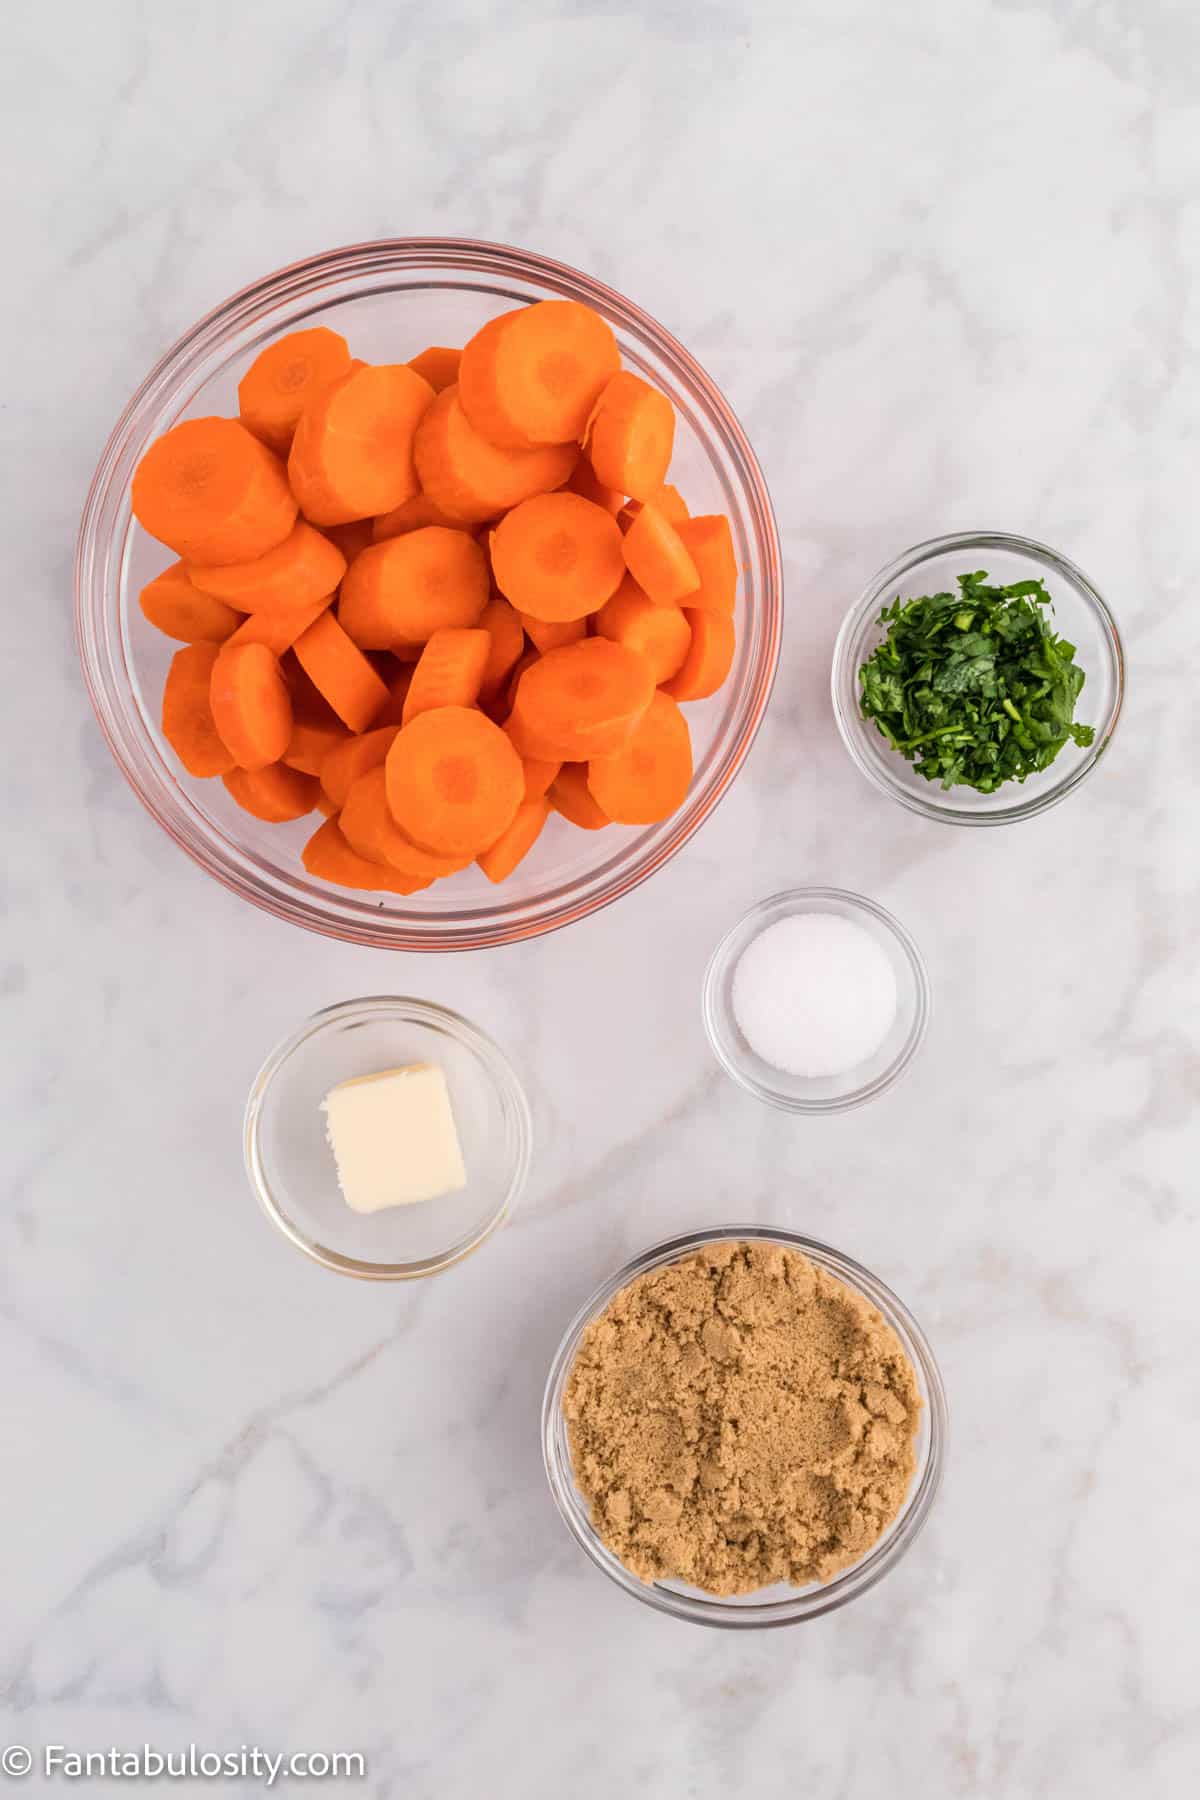
    • 1 ½ lbs whole carrots
    • 1 ½ tablespoons unsalted butter
    • ½ cup packed light brown sugar
    • 2 teaspoons salt, divided
    • Parsley (optional for garnish)
    Photo of bowls containing the ingredients for Candied Carrots - carrots, parsley, butter, salt and brown sugar

    Instructions

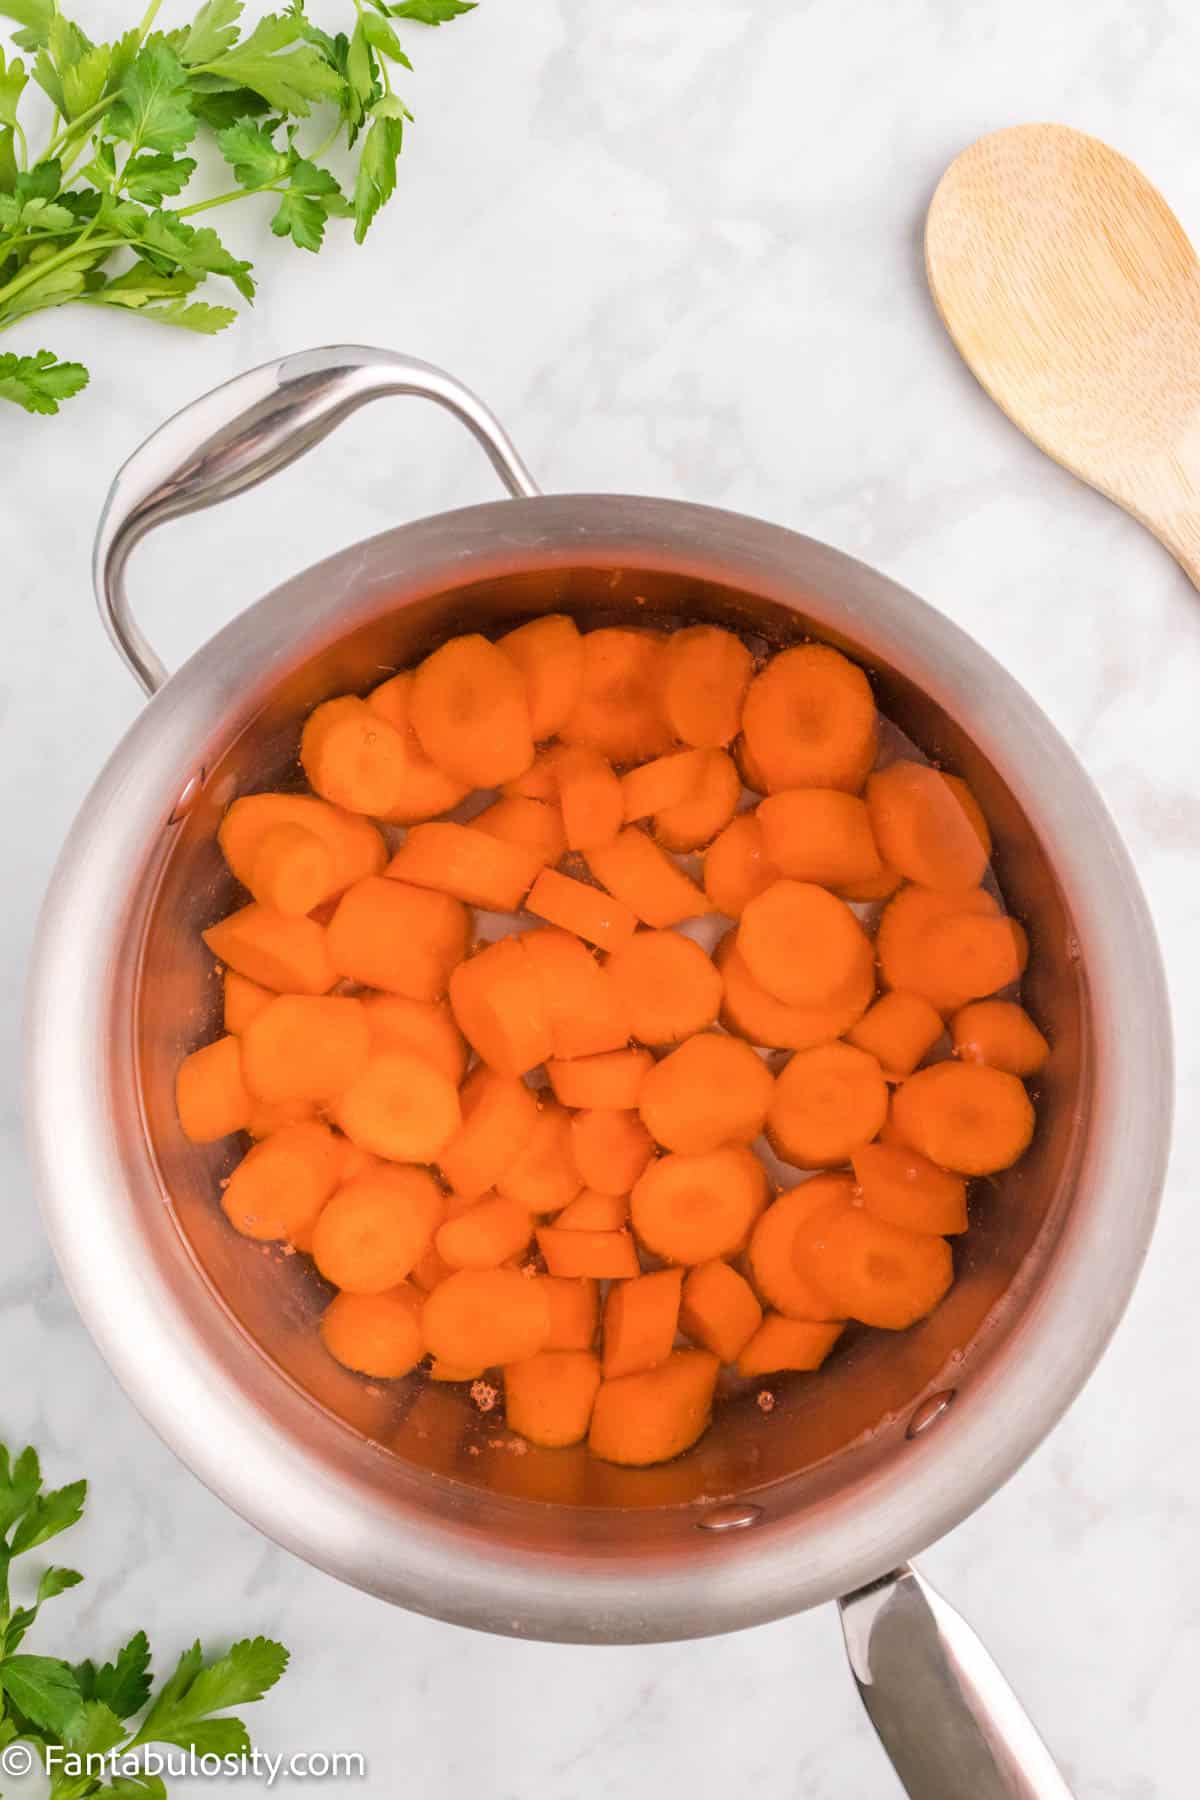
    1. Place peeled, cut carrots in a medium saucepan with 1 ½ teaspoons of salt. Cover the carrots completely with cold water at least 1 inch above the carrots.
    2. Bring the carrots to a boil and then lower the temperature to a simmer. Cook for about 10-20 minutes or until carrots are tender.
    3. Drain carrots and return them to the saucepan.
    Cut carrot coins are submerged in water in a medium sized saucepan getting ready to boil
    Cook carrots
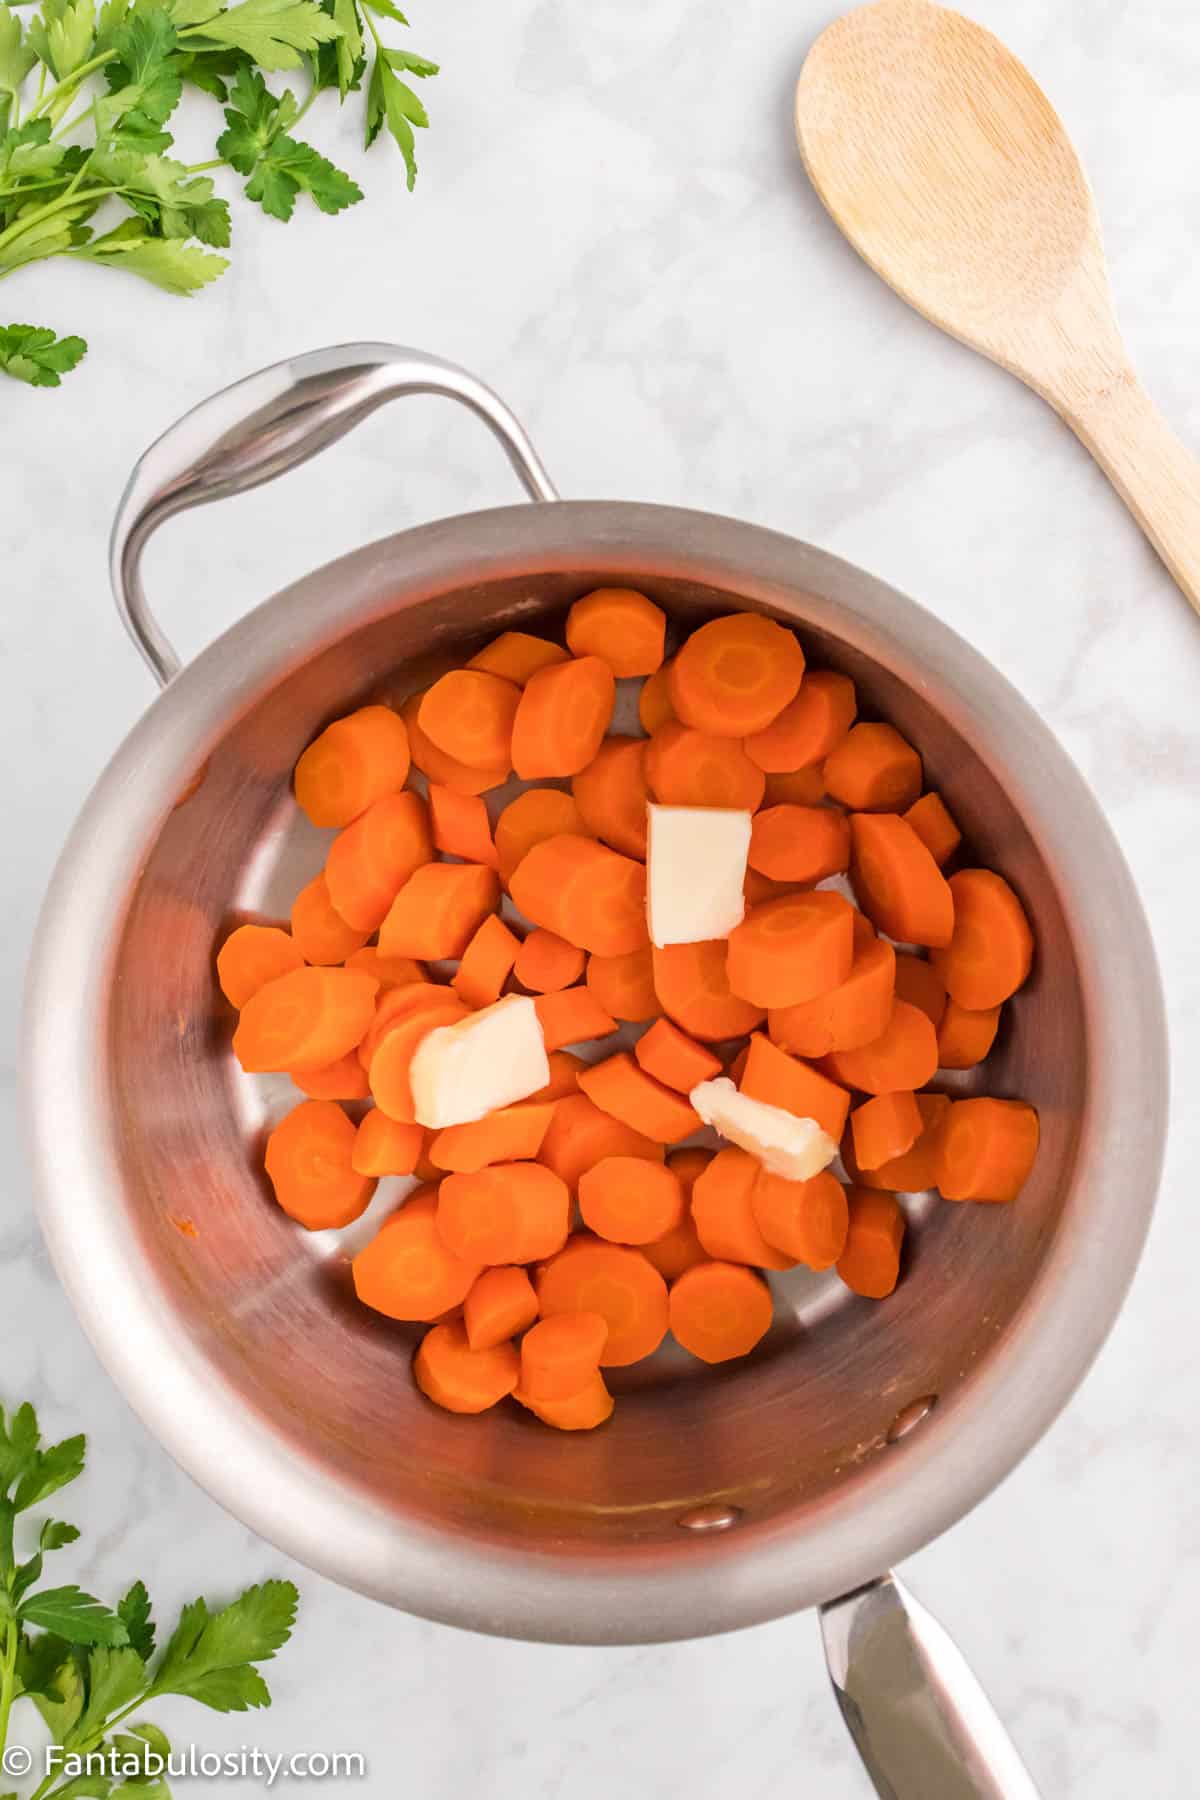
    1. Turn the heat to medium and add the butter to the pan. Once the butter is almost melted, add the brown sugar to the pan.
    Cooked carrots and several pats of butter are shown in a medium sized saucepan ready to heat to make Candied Carrots
    Add butter
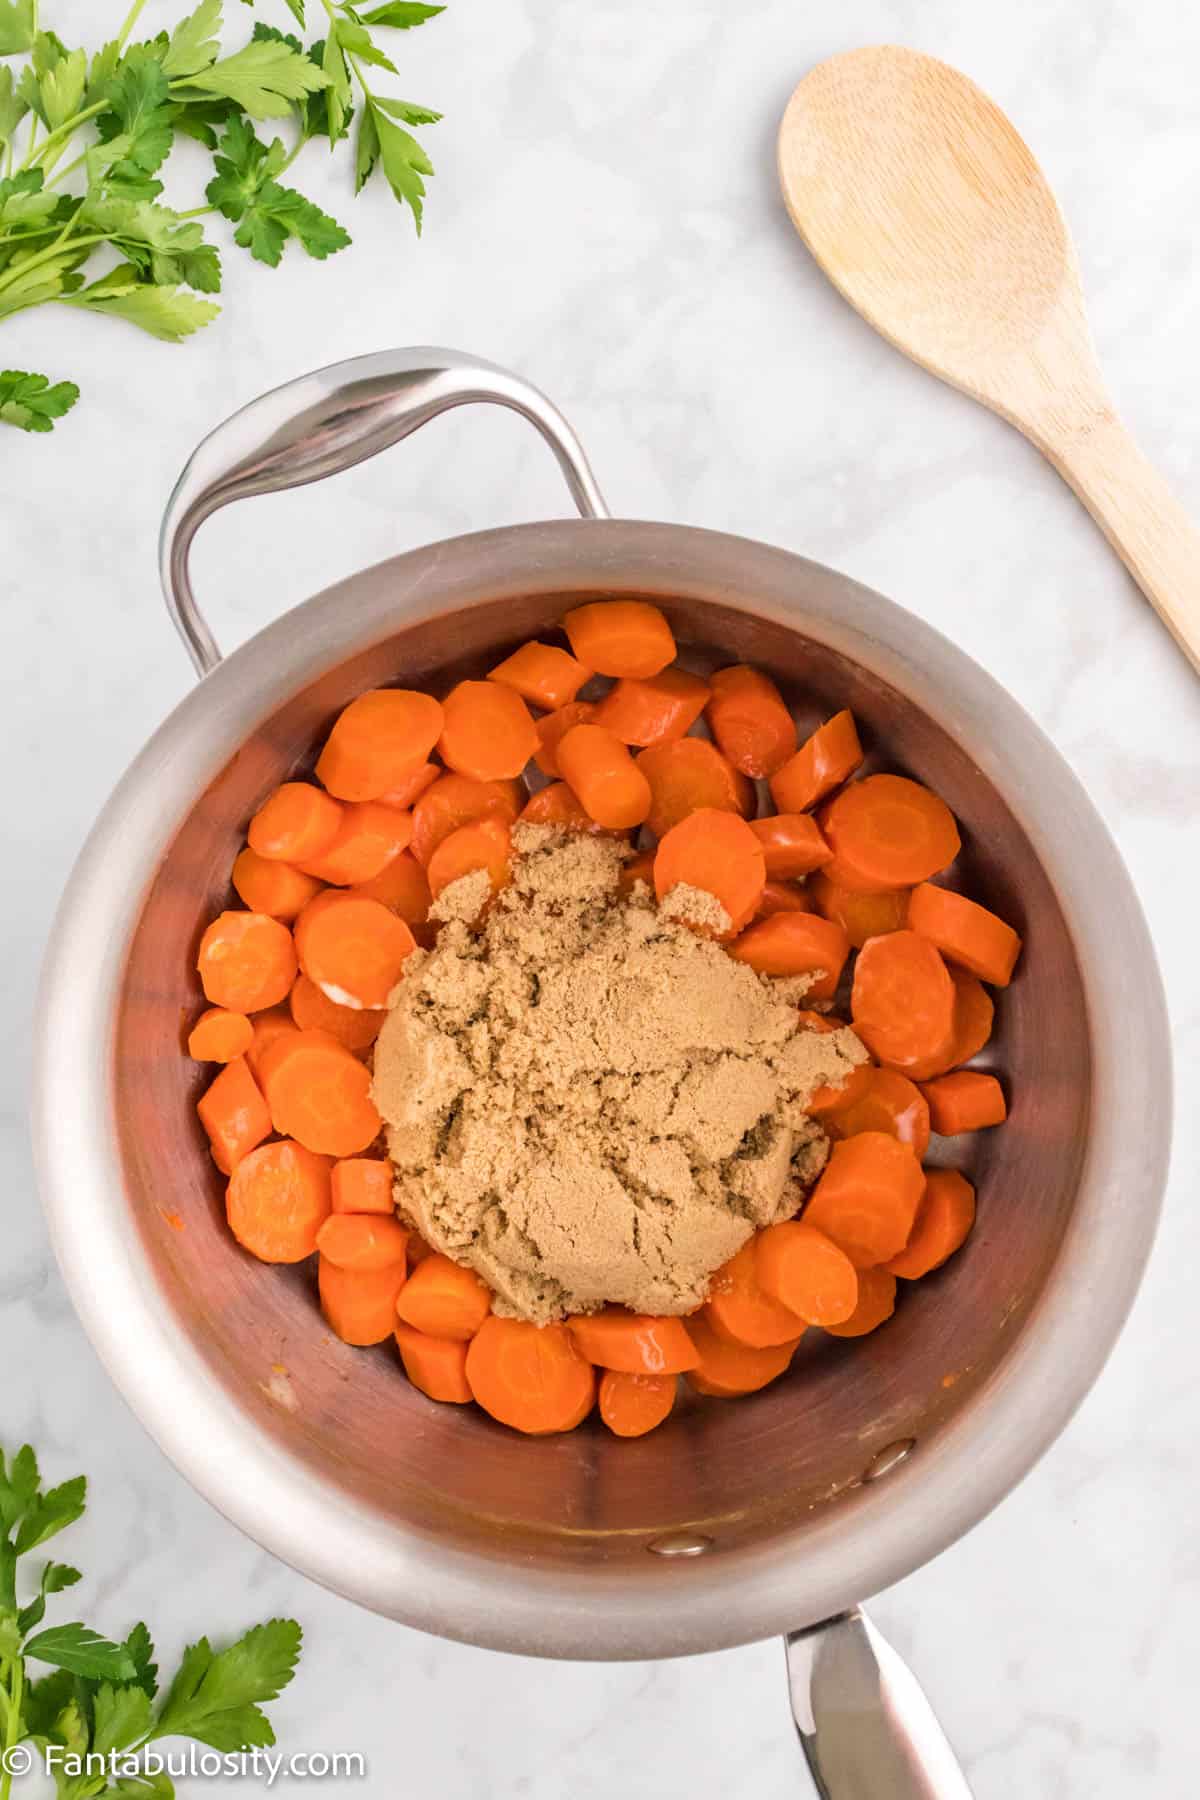
    Cooked carrots and brown sugar are shown in a medium sized saucepan ready to heat to make Candied Carrots
    Add brown sugar
    1. Continue to cook over medium heat until the brown sugar is melted and starts to thicken (about 5 minutes). Remove the pan from the heat and mix in the remaining ½ teaspoon of salt and stir. Garnish with parsley (optional).
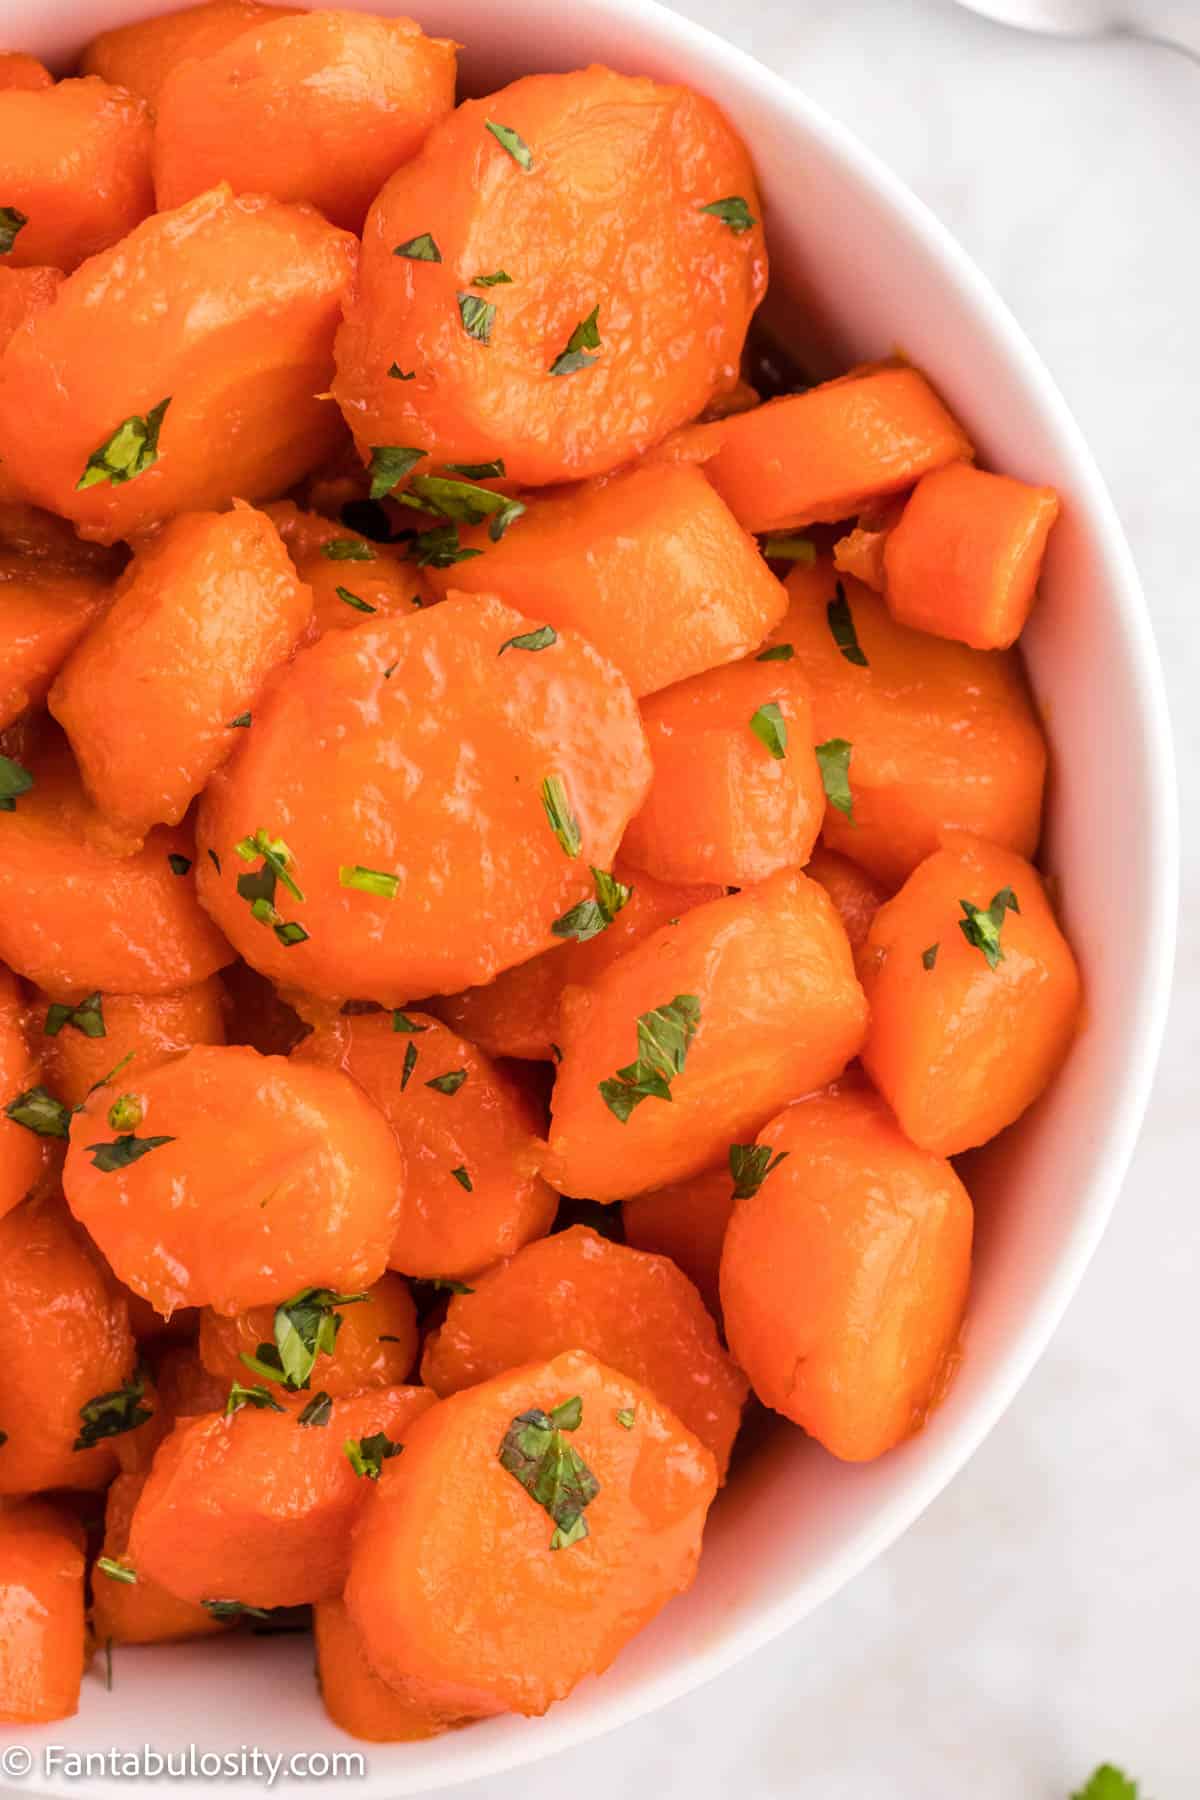
    Close up up cooked candied carrots topped with bright green parsley in a white serving bowl

    With their bright orange color and a simple glaze of just butter and brown sugar, this vegetable side dish is one of those classic recipes that your family will request over and over!

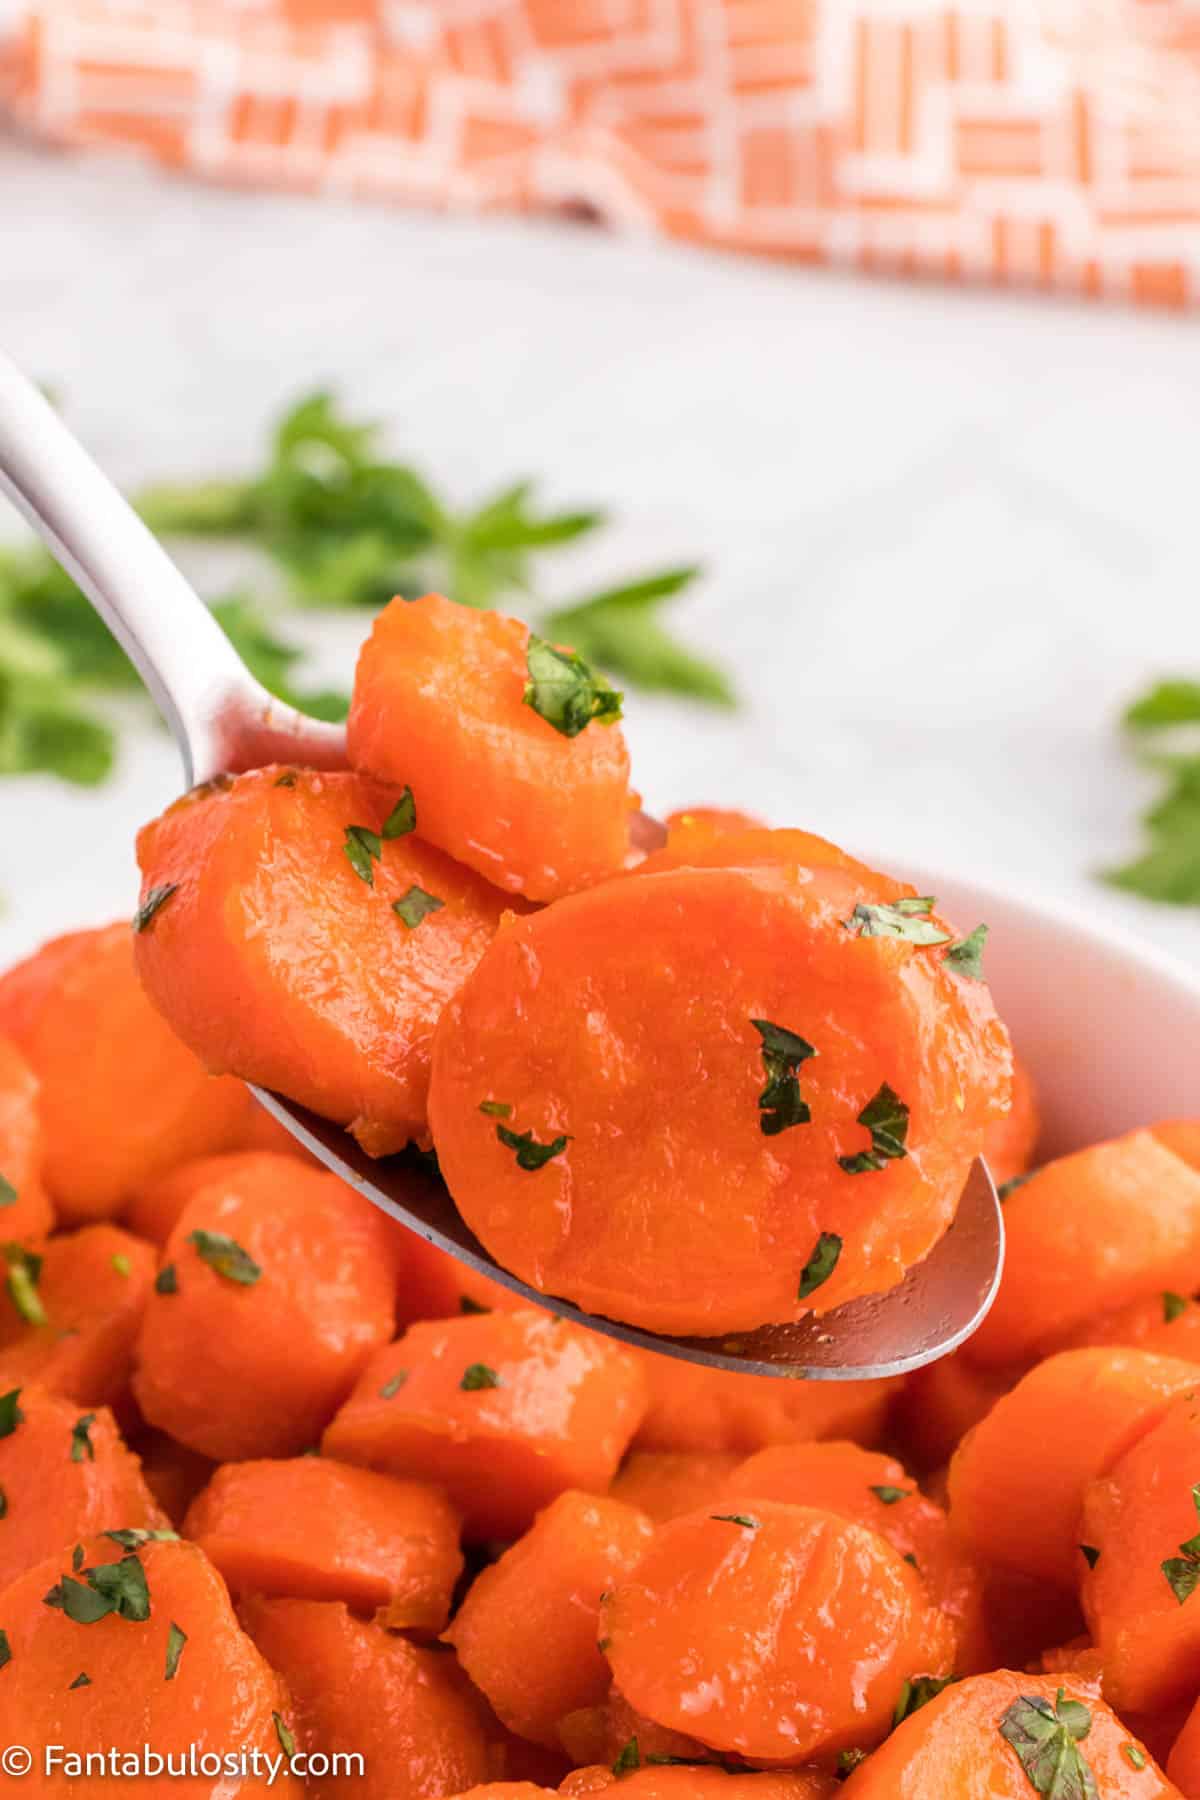
    A spoon filled with cooked carrots is displayed in front of a bowl of cooked Candied Carrots
    Candied Carrots

    Substitutions and Variations

    Easy candied carrots are one of the most simple side dishes to make and I’ve got a few ways to adjust this recipe to your personal preference.

    • Carrots – instead of carrots, you can use this same cooking method for sweet potatoes
    • Sweet Flavors – use an equal amount of maple syrup, honey, dark brown sugar, agave syrup or coconut sugar if you don’t have brown sugar on hand. Carrots have a natural sweetness, so if you want to make this recipe with less sugar, reduce the brown sugar to 2 tablespoons.
    • Orange – add a splash of orange juice before you add the brown sugar or stir in orange peel or zest for a fresh citrus boost
    • Spices – Sprinkle the carrots with black pepper to taste or add ½ to 1 teaspoon of your favorites spices like cinnamon, allspice or pumpkin pie spice

    FAQs

    • What type of carrots can I use? You can use regular carrots, baby carrots or even colorful rainbow carrots. I use fresh carrots for air fryer carrots too.
    • What are glazed carrots made of? Very simply, candied glazed carrots are made of cooked carrots simmered in a butter and brown sugar glaze
    • Are glazed carrots healthy? Carrots are naturally low in calories and packed with vitamins A, C, and K, calcium, iron, potassium and fiber. We’ve used less than 2 tablespoons of butter in this recipe and while there is brown sugar in the glaze, you can reduce the amount you use or use an alternate sweetener to fit the way you eat.
    • Can glazed carrots be made a day ahead? Yes! If you plan to make these candied carrots ahead of time, reduce the cooking time for a few minutes since they will have additional cook time when you reheat them. To reheat leftover glazed carrots, return them to the sauce pan to simmer until warm.

    Storage

    Store any leftover carrots with the brown sugar glaze in an airtight container in the refrigerator for 2-3 days.

    More Simple Side Dishes

    If you like this candied carrots recipe, then I bet you’ll love our Carrot Salad. If you haven’t tried it yet, this is the absolute BEST Side Salad Recipe and you can’t go wrong with Garlic Roasted Broccoli!

    Did you make this? I’d be so grateful if you left a “star” rating below to let me know what you thought! Then, the next time you need a quick and easy recipe, come back to Fantabulosity to browse all of my easy recipes!

    Recipe

    Close up of cooked carrots covered in a butter brown sugar glaze and garnished with fresh parsley
    Print Pin
    5 from 5 votes

    Glazed Carrots

    Candied Carrots: Tender carrots are simmered in a butter, brown sugar glaze in the perfect side dish for a holiday meal or weeknight dinner!
    Course Side Dish
    Cuisine American
    Prep Time 5 minutes minutes
    Cook Time 20 minutes minutes
    Total Time 25 minutes minutes
    Servings 6
    Calories 141kcal
    Author Jessica Burgess

    Ingredients

    • 1 ½ lbs carrots peeled, sliced and cut on the bias into ½ inch pieces
    • 2 teaspoon salt divided
    • 1 ½ tablespoon unsalted butter
    • ½ cup light brown sugar
    • parsley chopped for garnish (optional)

    Instructions

    • Place the peeled, cut carrots in a medium saucepan with 1 ½ teaspoons of salt. Cover the carrots completely with cold water at least 1 inch above the carrots.
    • Bring the carrots to a boil and then lower the temperature to a simmer. Cook for about 10-20 minutes or until carrots are tender.
    • Drain the carrots and return them to the saucepan.
    • Turn the heat to medium and add the butter to the pan. Once the butter is almost melted, add the brown sugar to the pan.
    • Continue to cook over medium heat until the brown sugar is melted and starts to thicken (about 5 minutes). Remove the pan from the heat and mix in the remaining ½ teaspoon of salt and stir. Garnish with parsley (optional).

    Notes

    • When cutting carrots on the bias, make diagonal cuts with your knife and cut ½ inch pieces. Another option is to use baby carrots.
    • Cooking times may vary depending on the size of the pieces of carrots and how soft or firm you like them.
    • If you prefer sweeter glazed carrots, omit the last ½ teaspoon of salt.

    Nutrition

    Serving: 1serving | Calories: 141kcal | Carbohydrates: 29g | Protein: 1g | Fat: 3g | Saturated Fat: 2g | Polyunsaturated Fat: 0.2g | Monounsaturated Fat: 1g | Trans Fat: 0.1g | Cholesterol: 8mg | Sodium: 881mg | Potassium: 388mg | Fiber: 3g | Sugar: 23g | Vitamin A: 19032IU | Vitamin C: 7mg | Calcium: 54mg | Iron: 0.5mg

    Peanut Butter Yogurt Dip

    August 18, 2022

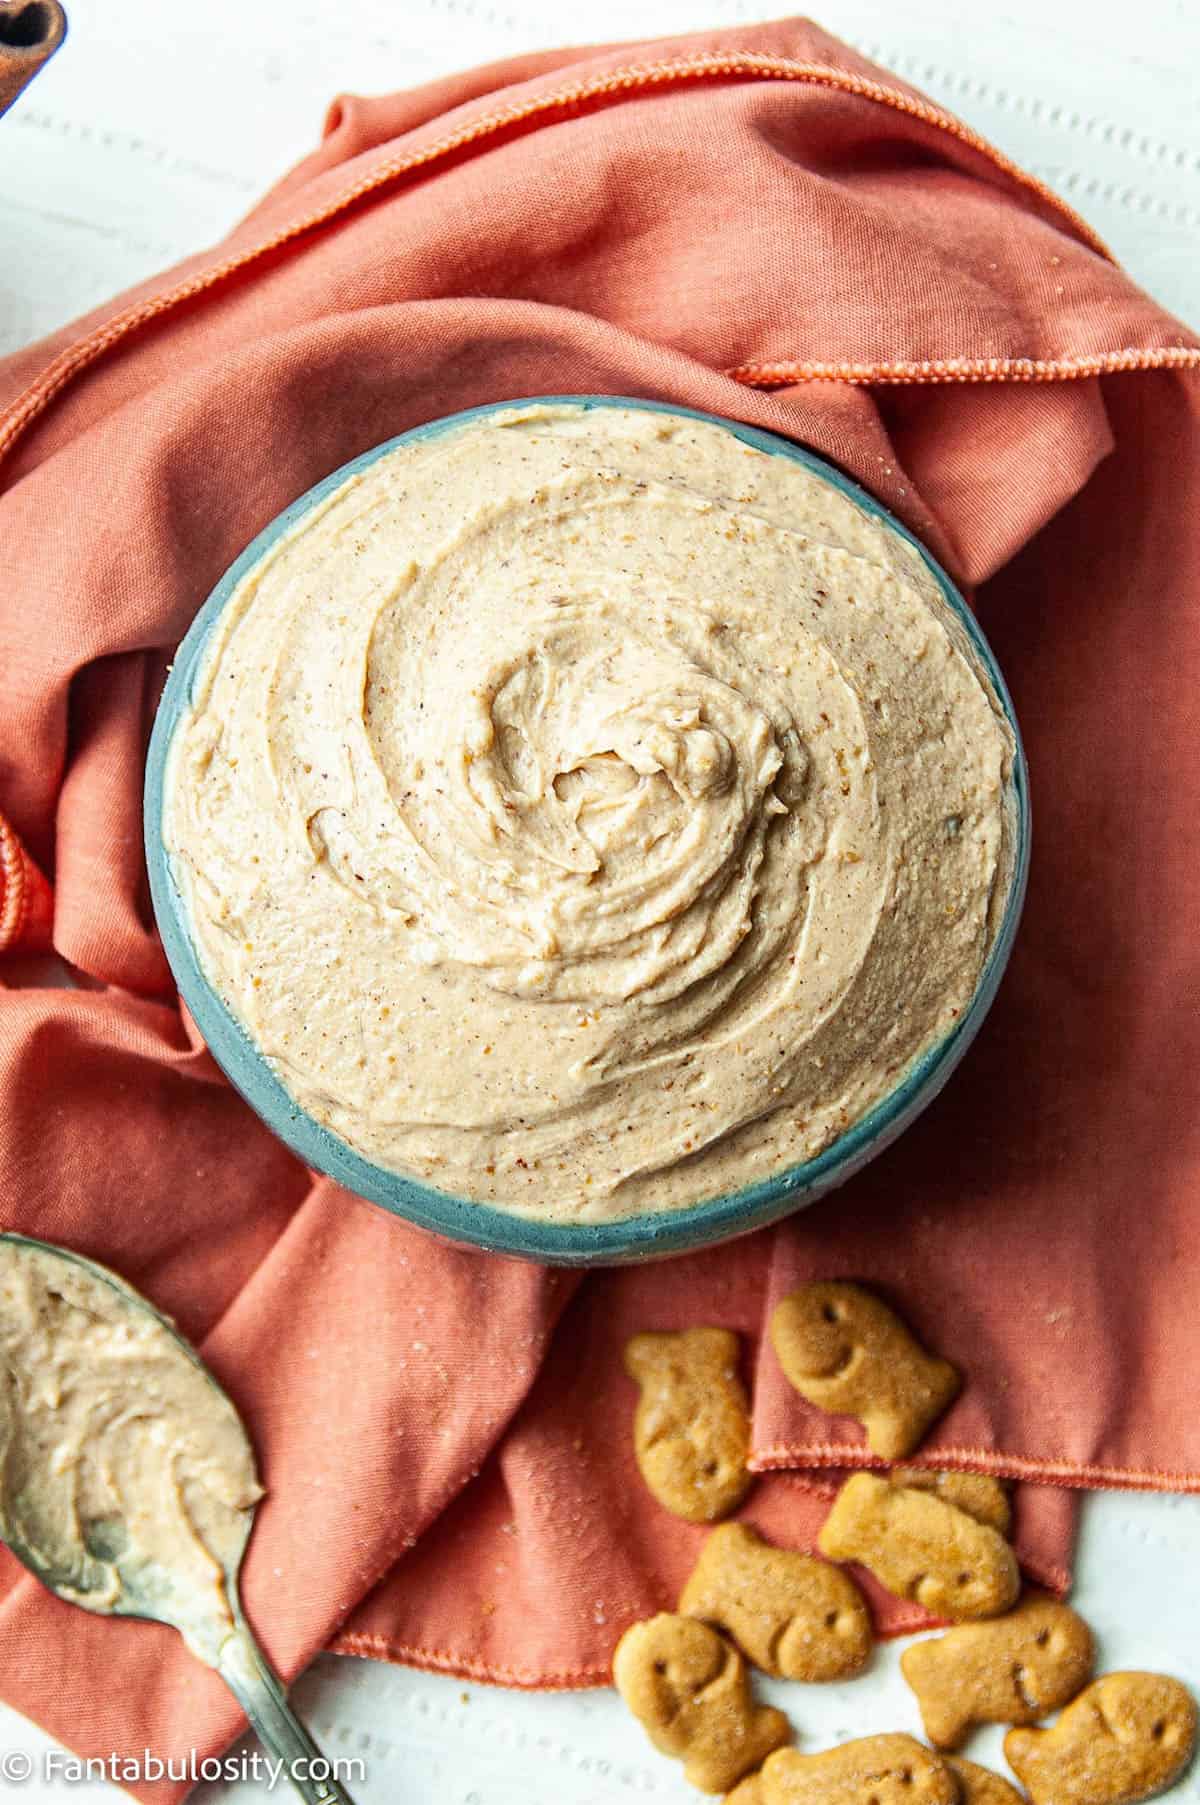
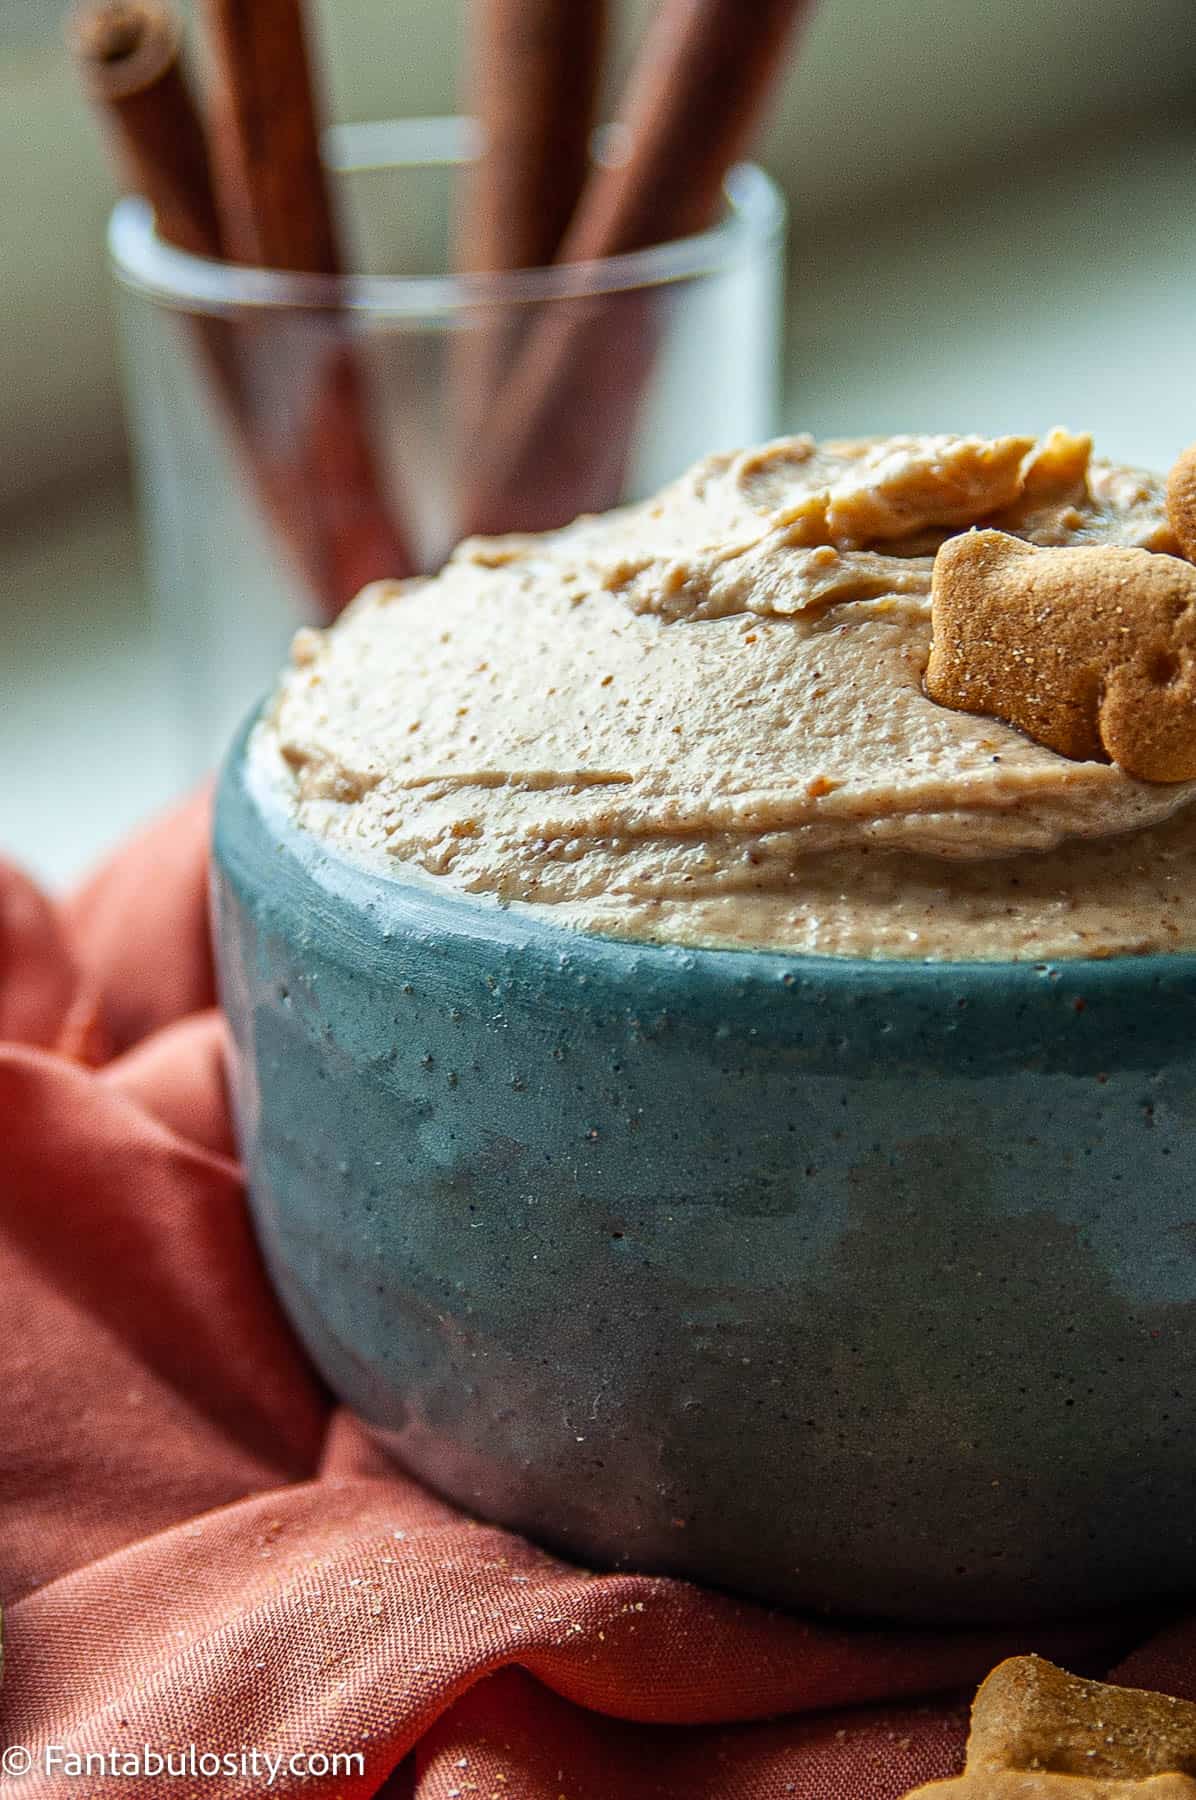
    Close up of Peanut Butter Yogurt Dip in a bowl

    Peanut Butter Yogurt Dip: A sweet dessert dip made with peanut butter, Greek yogurt, honey, and cinnamon that is perfect for dipping fresh fruit, graham crackers, or pretzels.

    If you love peanut butter recipes, (like our peanut butter fudge) the recipe for this peanut butter Greek yogurt dip has just six ingredients and stirs together in five minutes, so it is a quick healthy snack and a sweet addition to any fruit board, and paired alongside this other yogurt fruit dip recipe.

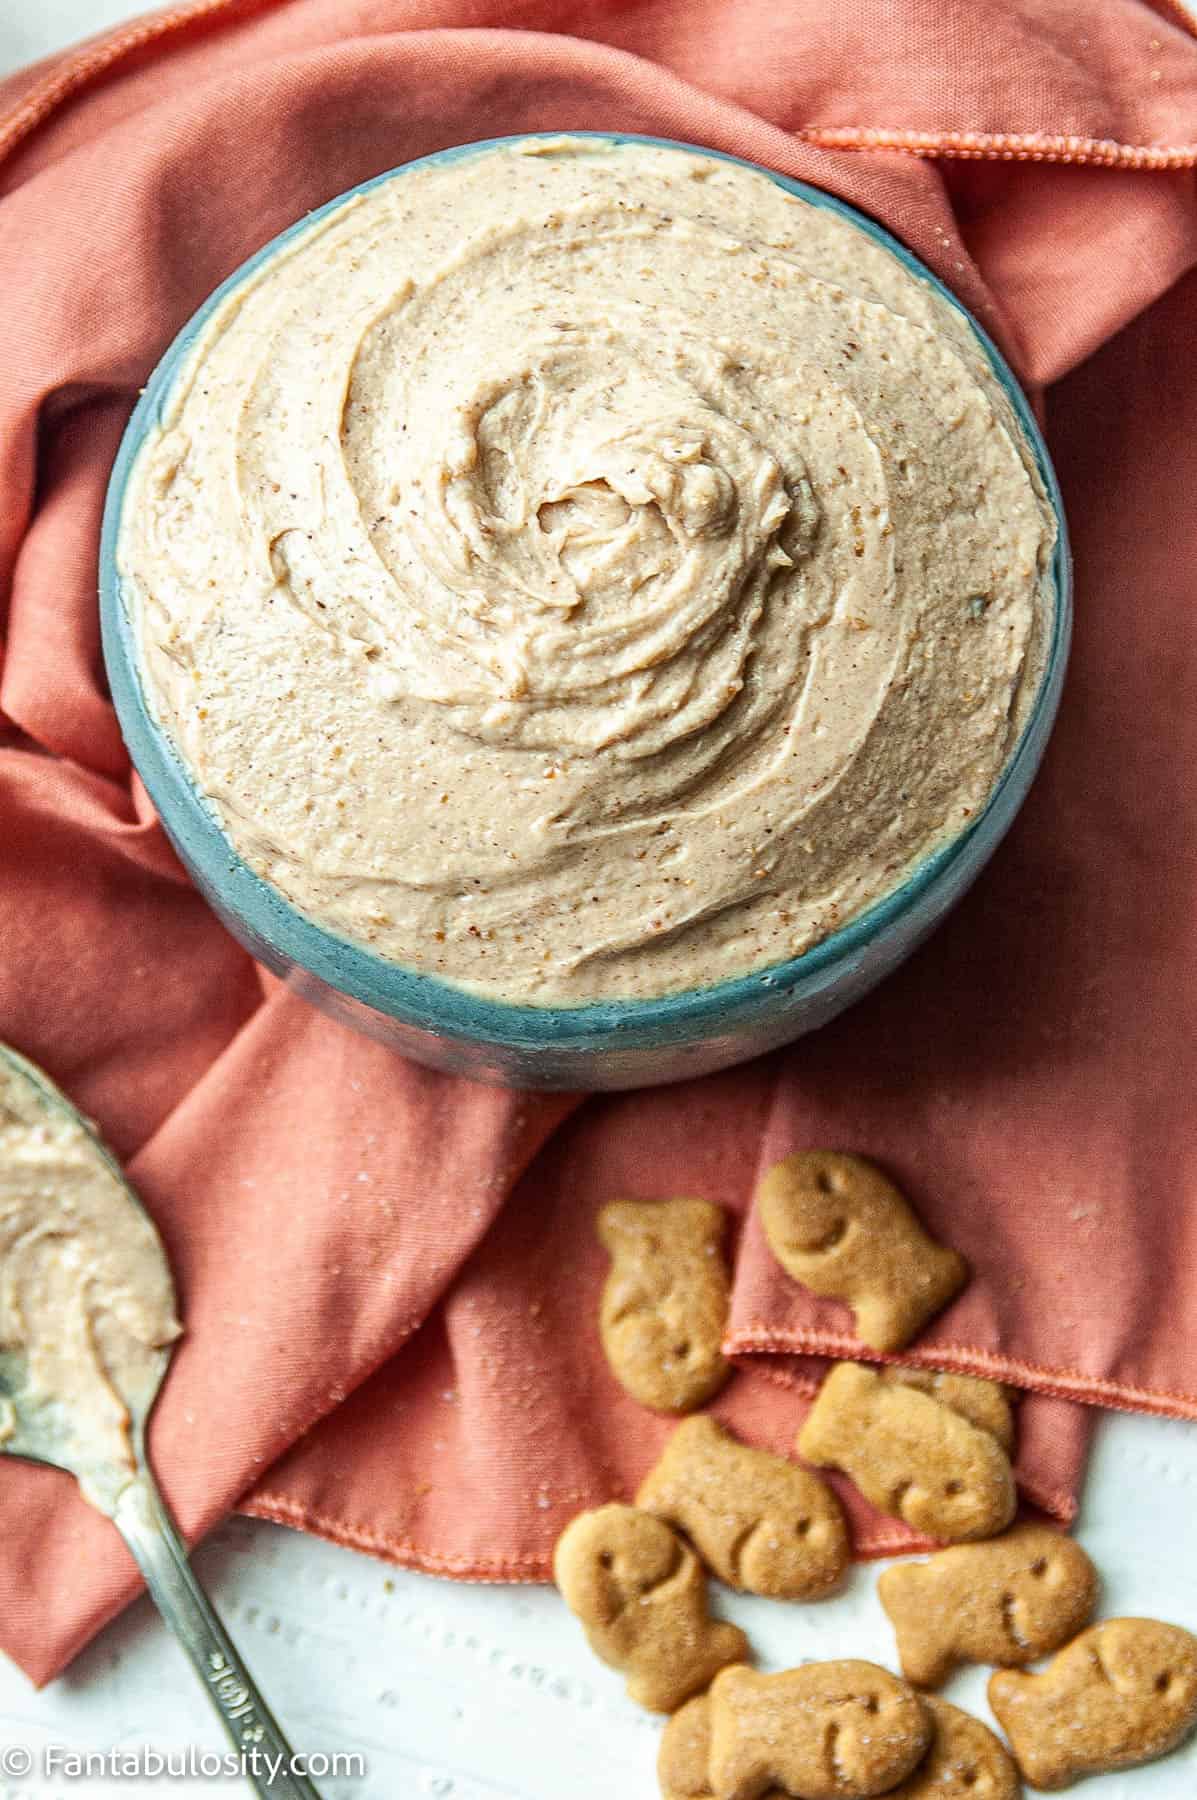
    Creamy peanut butter yogurt dip is shown in the center of the photo on an orange background. There is a spoon on the left and graham crackers for dipping on the right.
    Peanut Butter Dip

    Why You’ll Love This Recipe

    Whether it is classic easy peanut butter cookies or an old fashioned peanut butter pie, we love easy recipes for peanut butter! This peanut butter dip will satisfy your sweet tooth and quickly become a family favorite.

    • Simple Ingredients: With just 6 ingredients from your pantry and fridge, this dip can be made whenever the craving hits
    • Family Friendly: This is such an easy recipe that the kids can help measure the ingredients, mix the yogurt dip together, prepare different kinds of fruit and serve it, too.
    • Protein Packed: With protein from both the Greek yogurt and peanut butter, this is a great snack that is filling and any leftovers can be frozen to add to your smoothies.
    • Summer Treat: Summer snacks can be so nice to have on hand, that you can just grab and go. This dip is something that can be enjoyed quickly and is a healthier option than some dips!
    [feast_advanced_jump_to]

    Ingredients

    Get the full recipe card with instructions below!

    • 1 cup greek yogurt
    • ¾ cup peanut butter
    • ¼ cup honey
    • 1 teaspoon ground cinnamon
    • 1 teaspoon vanilla extract
    • Pinch of salt
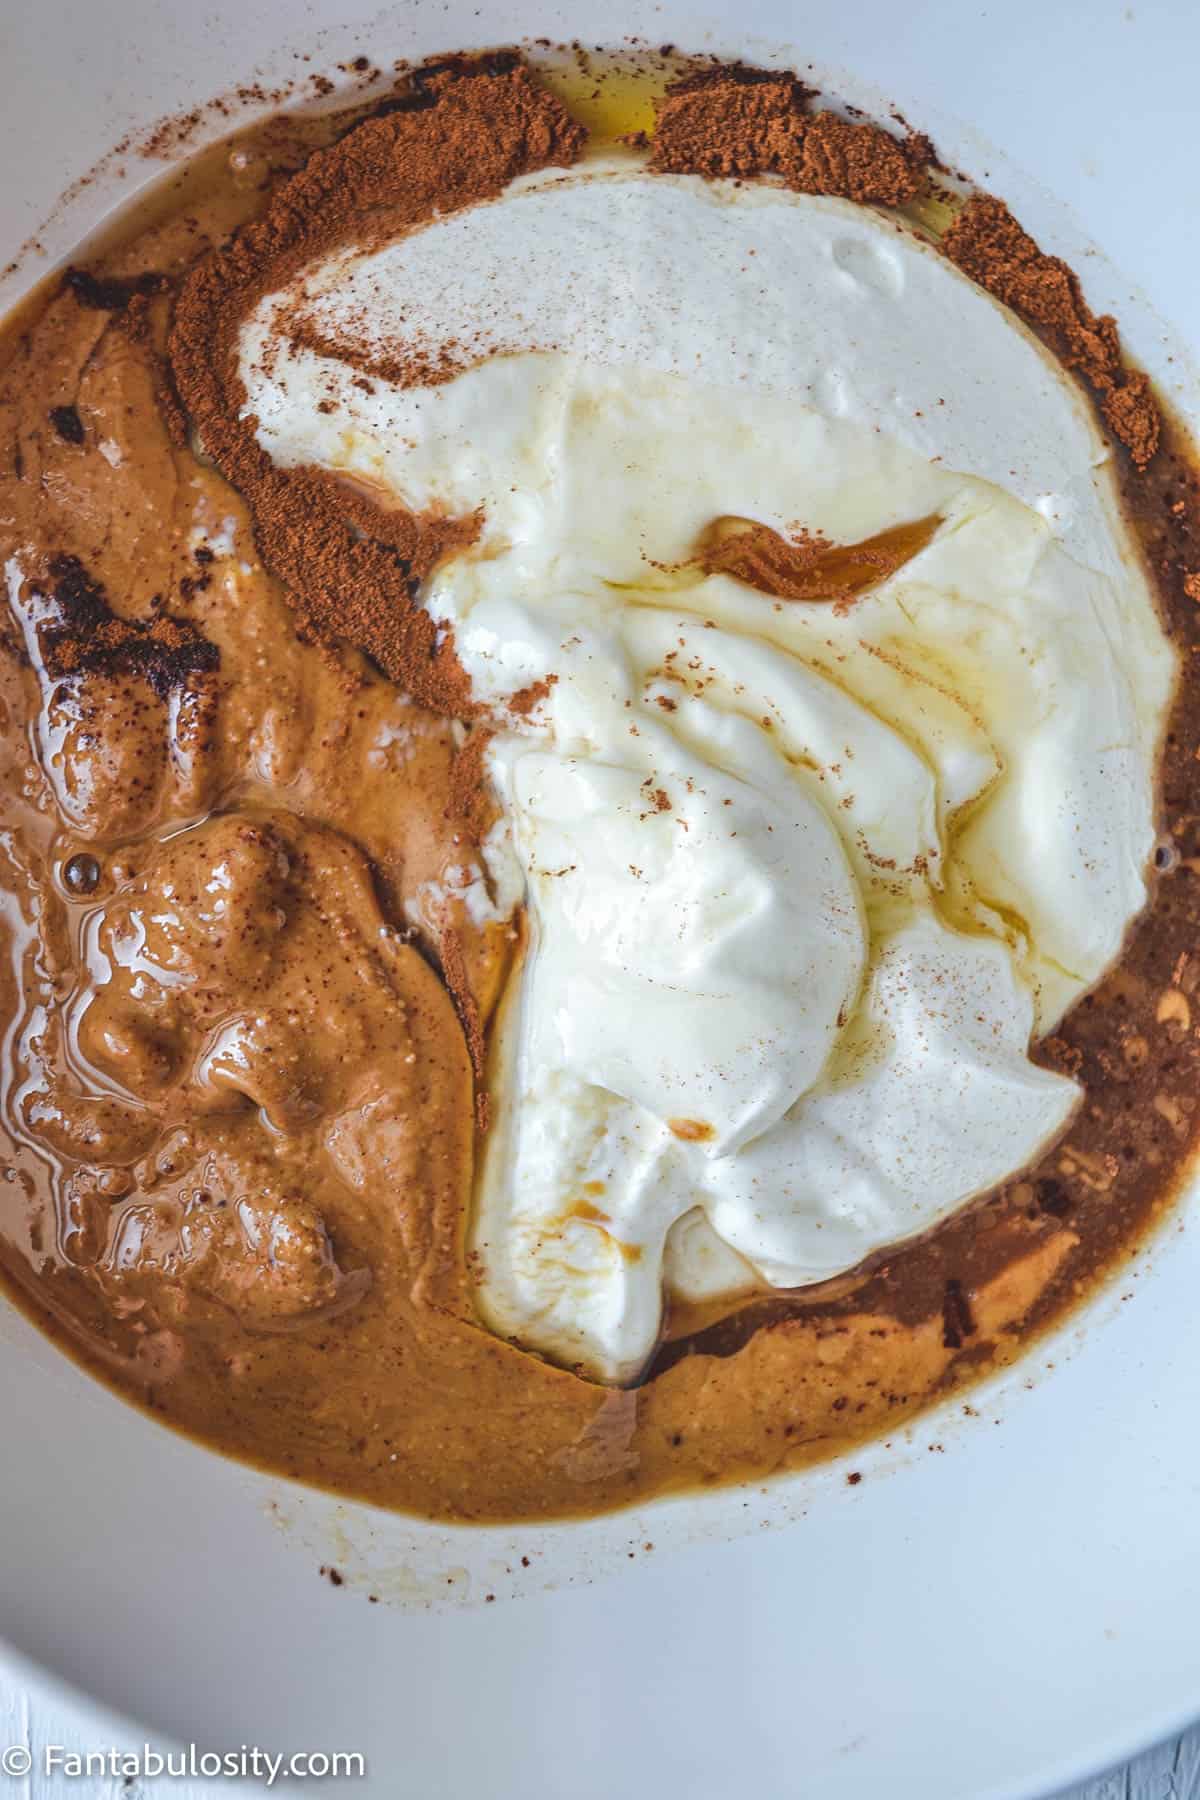
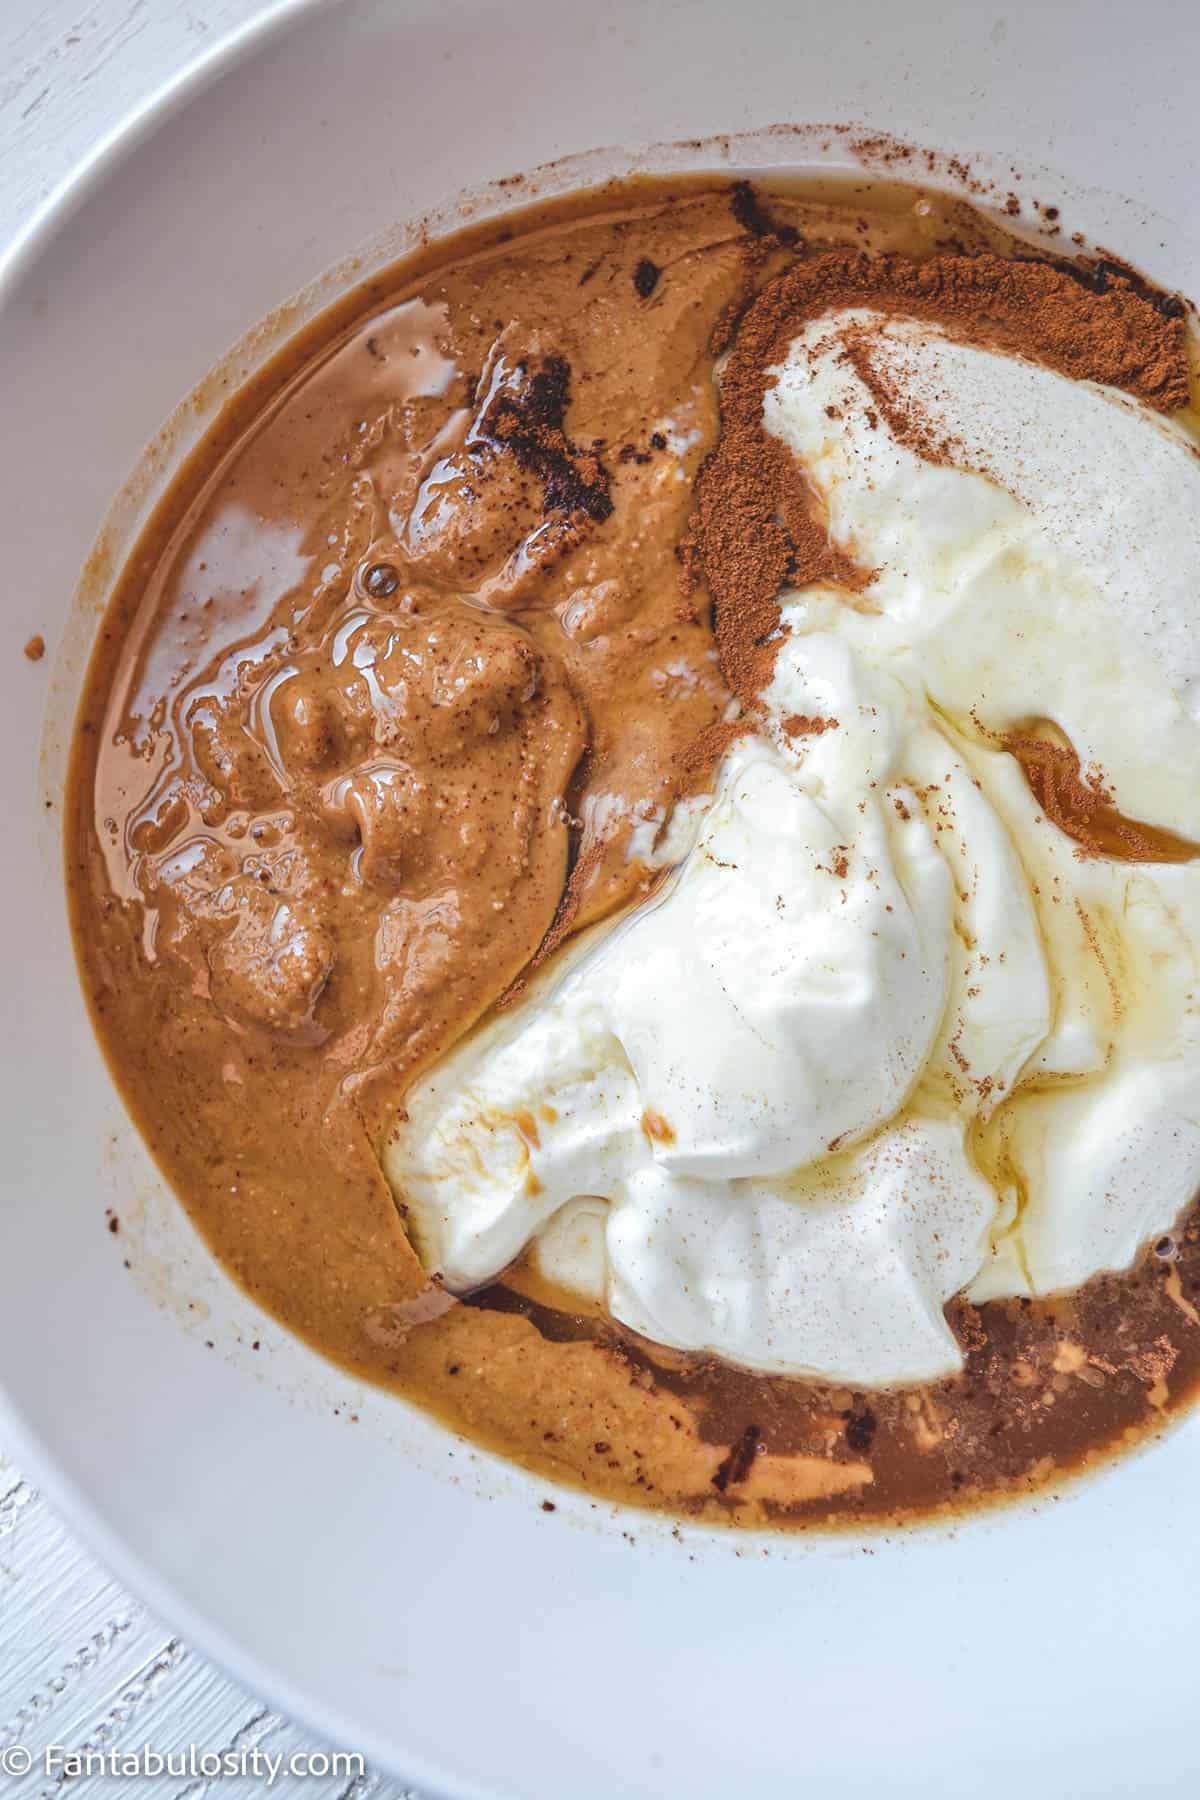
    Peanut butter dip ingredients in bowl ready for mixing
    Ingredients

    Instructions

    1. Place all ingredients in a medium sized mixing bowl.
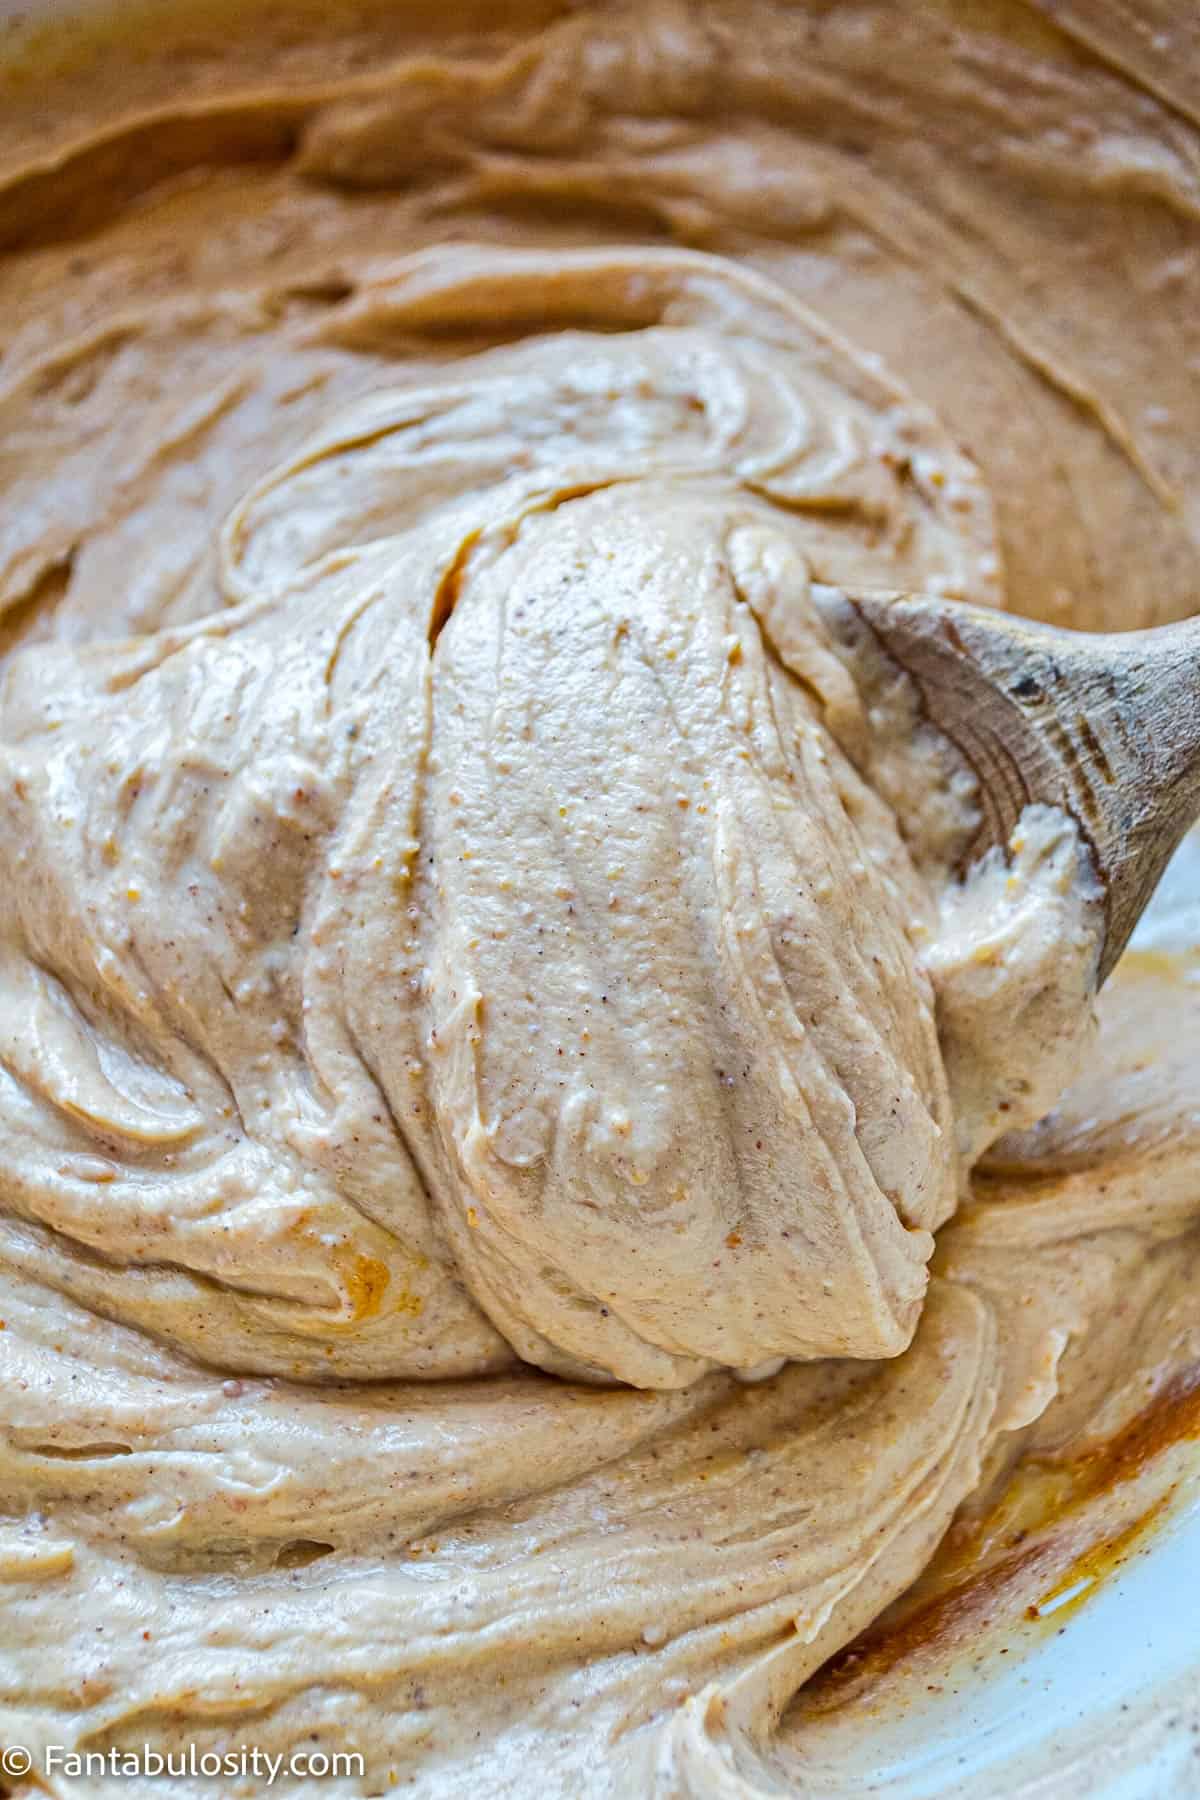
    2. Use a whisk, silicone spatula, or wooden spoon to gently fold the ingredients together until combined.
    Ingredients for Peanut Butter Yogurt Dip are waiting to be mixed in a white bowl.
    Ingredients
    A wooden spoon is stirring together peanut butter, yogurt, honey, cinnamon and vanilla extract to make Peanut Butter Yogurt Dip
    Mix well
    1. Spoon into a serving bowl and serve with apple slices, graham crackers, or pretzels. Or, create individual servings and transfer to these chocolate dipped waffle cone bowls.
    Close up photo of creamy Peanut Butter Yogurt Dip in a blue serving bowl with graham crackers for dipping
    Peanut Butter Greek Yogurt Dip

    Substitutions and Variations

    • Alternatives to Peanut Butter – If you prefer, use your favorite nut butter like almond butter, cashew butter or sun butter
    • Yogurt – While I used plain Greek yogurt for this version, you could also use vanilla Greek yogurt, honey Green yogurt or even regular yogurt
    • Sweetener – If you don’t have honey on hand, try using maple syrup to sweeten this Greek yogurt peanut butter dip
    • Add Chocolate – Stir in a tablespoon of cocoa powder for chocolate peanut butter dip or fold in 2 tablespoons of mini chocolate chips for a chocolate fruit dip
    • Switch Up Your Dippers – For a fun twist, why not try dipping chocolate or cinnamon graham crackers, strawberry halves, banana chips or cinnamon sugar pita chips in this peanut butter and yogurt dip?
    Peanut Butter Yogurt Dip is displayed in a serving bowl with a spoon to the left and graham crackers on the right
    Dip, baby, dip!

    Yogurt dip FAQ’s

    • What kind of peanut butter can I use? I used natural peanut butter in this recipe for yogurt fruit dip, but you can use chunky peanut butter or creamy peanut butter for a slightly different texture.
    • Can you mix peanut butter and yogurt? Absolutely! The peanut butter and yogurt will combine with the other ingredients and you will end up with a bowl full of irresistible peanut butter yogurt cinnamon dip.

    Storage

    Store this Greek yogurt peanut butter dip in an airtight container in the refrigerator for up to 5 days.

    Top tip

    Freeze any leftover peanut butter yogurt fruit dip in ice cube trays as a protein packed addition to your smoothies!

    What to serve with peanut butter dip

    You can serve so many things with this no bake dip but here are some of our favorites:

    • fresh fruit (apple slices, strawberries)
    • graham crackers
    • pretzels
    • Teddy Grahams (or even these fun chocolate-covered Teddy Grahams.)
    • cookies
    • sweet breads

    More dessert and fruit dip recipes

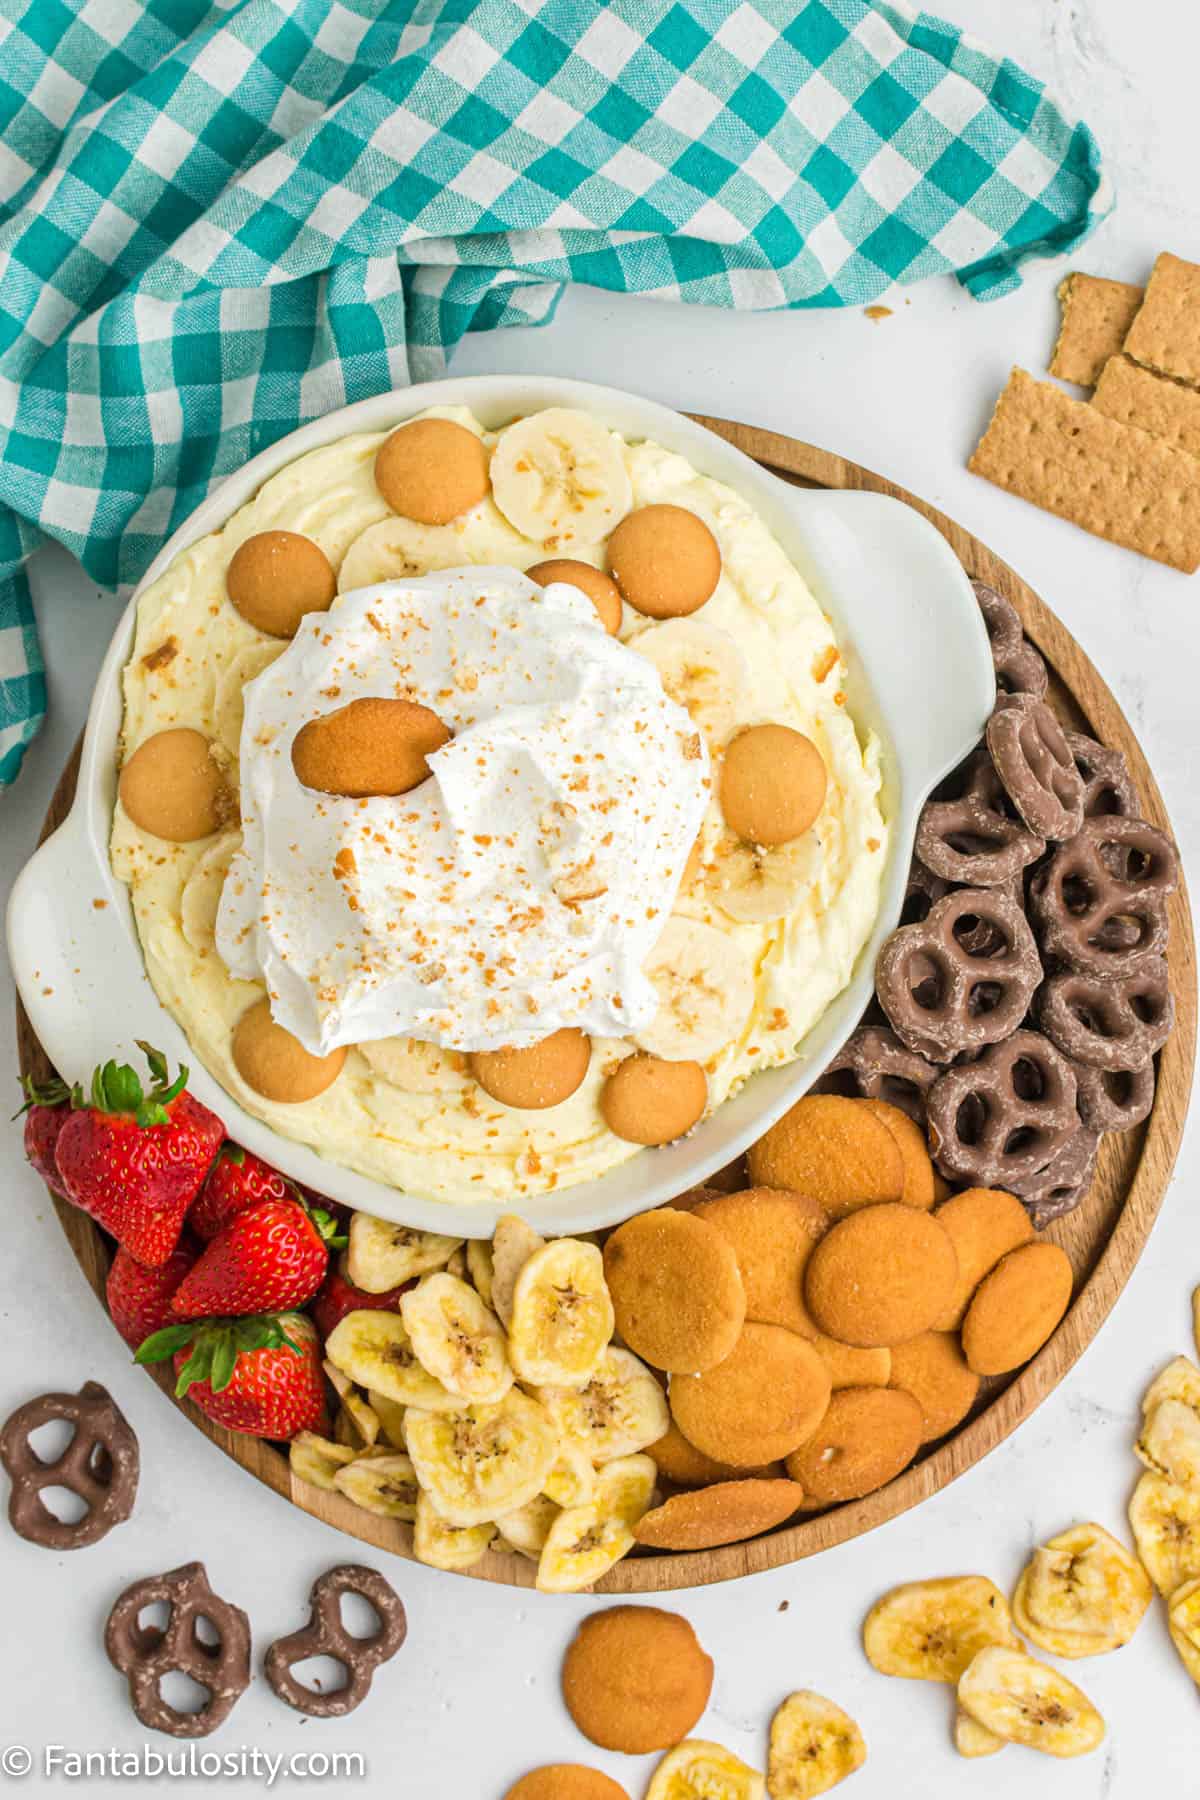
    This Oreo Dip is perfect for the cookies and cream lovers. Pudding fans will go wild for our creamy dreamy Banana Pudding Dip. Then no fruit tray or platter is complete without this Fruit Dip with Marshmallow Fluff!

    Did you make this? I’d be so grateful if you left a “star” rating below to let me know what you thought! Then, the next time you need a quick and easy recipe, come back to Fantabulosity to browse all of my easy recipes!

    Recipe

    Close up of Peanut Butter Yogurt Dip in a bowl
    Print Pin
    5 from 4 votes

    Peanut Butter Yogurt Dip

    Peanut Butter Yogurt Dip: A sweet dessert dip made with peanut butter, Greek yogurt, honey and cinnamon that is perfect for dipping fresh fruit, graham crackers or pretzels.
    Course Dessert
    Cuisine American
    Prep Time 5 minutes minutes
    Total Time 5 minutes minutes
    Servings 4
    Calories 388kcal
    Author Jessica Burgess

    Ingredients

    • 1 cup Greek yogurt
    • ¾ cup peanut butter
    • ¼ cup honey
    • 1 teaspoon vanilla extract
    • 1 teaspoon ground cinnamon
    • 1 pinch salt

    Instructions

    • Place all ingredients in a medium sized mixing bowl.
    • Use a whisk, silicone spatula or wooden spoon to gently fold the ingredients together until combined.
    • Spoon into a serving bowl and serve with fresh fruit, graham crackers and pretzels.

    Notes

    • You can use natural peanut butter, creamy peanut butter, crunchy peanut butter or even your favorite nut butter in this recipe.
    • Plain Greek yogurt, vanilla Greek yogurt or honey Greek yogurt can be used for this peanut butter yogurt cinnamon dip.

    Nutrition

    Calories: 388kcal | Carbohydrates: 31g | Protein: 16g | Fat: 25g | Saturated Fat: 5g | Polyunsaturated Fat: 6g | Monounsaturated Fat: 12g | Trans Fat: 0.003g | Cholesterol: 3mg | Sodium: 236mg | Potassium: 358mg | Fiber: 3g | Sugar: 24g | Vitamin A: 3IU | Vitamin C: 0.1mg | Calcium: 86mg | Iron: 1mg

    Slow Cooker Apple Cinnamon Oatmeal

    August 17, 2022

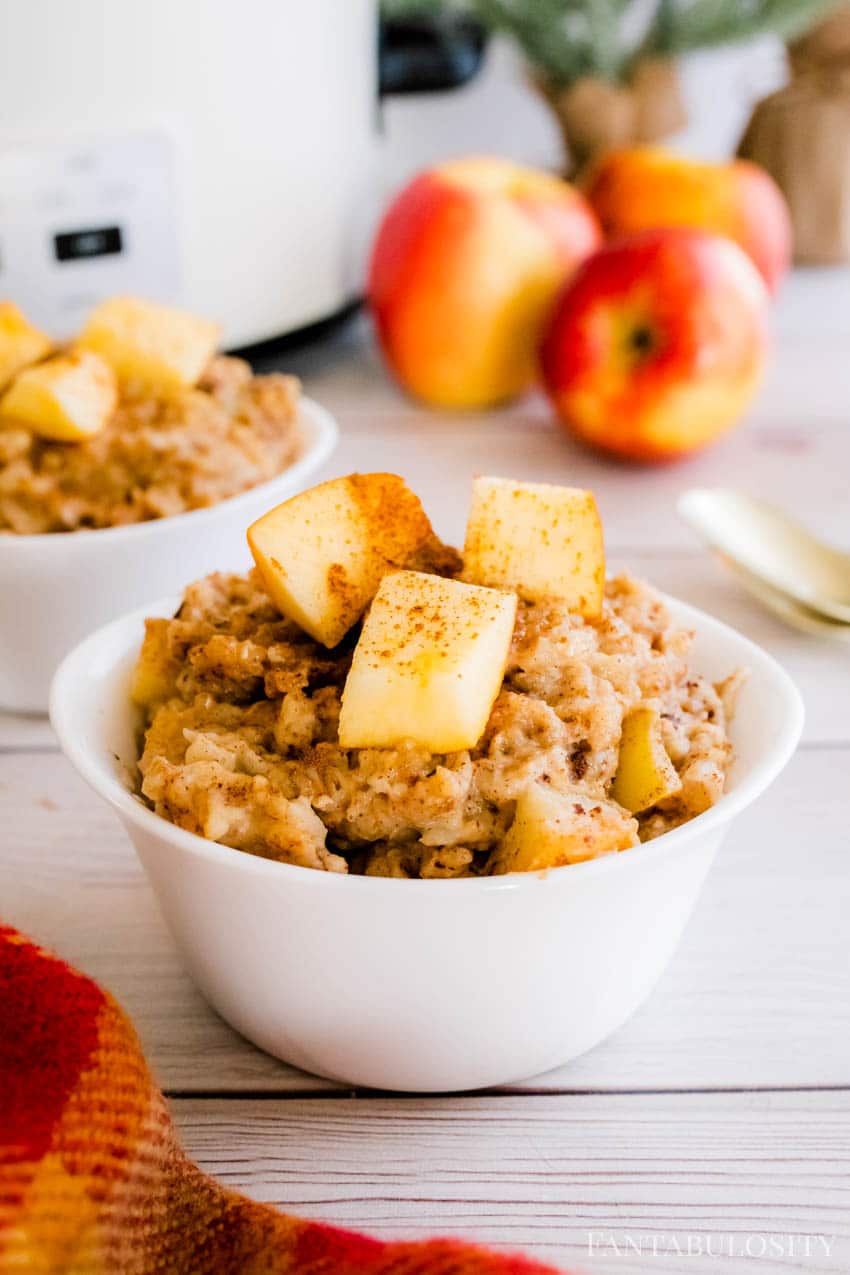
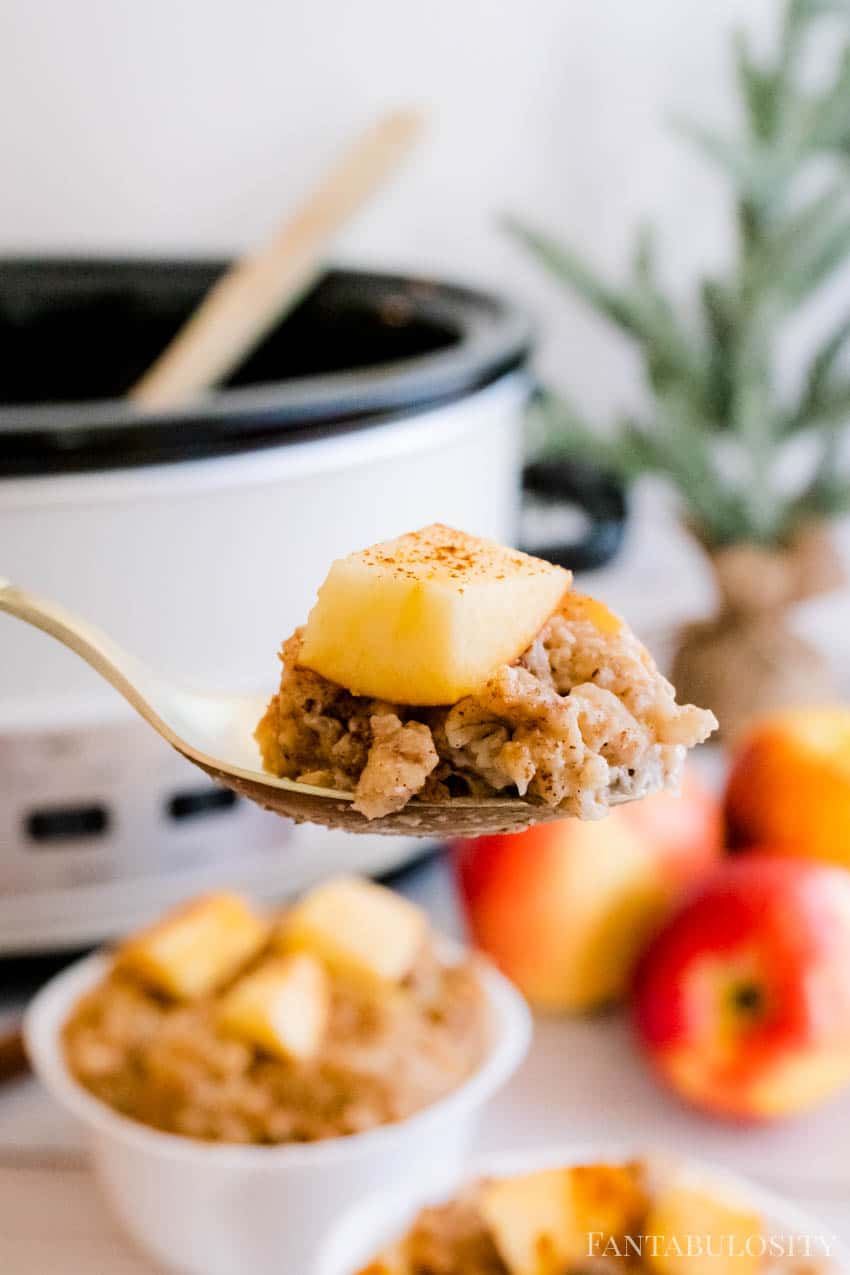
    apple cinnamon oatmeal in a small white bowl with apple pieces on top

    Slow Cooker Apple Cinnamon Oatmeal: An easy breakfast recipe that’s perfect for a crowd or for a comforting breakfast!

    With a prep time of only 5 minutes, this oatmeal recipe is made with little effort and ready to cook for 4 hours, and is deliciously warm and comforting, making it one of our favorite breakfasts and one of our favorite slow cooker recipes.

    Slow Cooker Apple Cinnamon Oatmeal

    Why you’ll love this recipe

    I’m not sure if there’s anything better than smelling the sweet, comforting smell of “fall spice” cooking in the kitchen. The smell of a fresh baked apple pie in the fall is something that makes me feel all warm and cozy inside… (especially when this cinnamon coffee cake is baking) but now this crockpot apple cinnamon oatmeal is right there with it!

    And whether or not you’re looking for a warm and healthy breakfast idea to feed a crowd or if you’re looking for (one of our favorites) a recipe to have “breakfast” for “dinner” you’re going to LOVE this incredibly easy slow cooker oatmeal recipe.

    If you have an air fryer, consider making cinnamon rolls (canned or homemade or this cinnamon roll casserole to serve alongside this oatmeal for the ultimate cinnamon treat!

    Apples aren’t just for breakfast. I’ve figured out a way to make baked beans a really fun side dish by adding in apple pie filling.

    Apple Oatmeal with Fall Ingredients

    I’ll never forget the first time I decided to make a big batch of oatmeal for our family and some guests that were staying with us.

    I wanted to kick plain ole oatmeal up a notch, so I looked around my kitchen and saw a few apples sitting on my counter, and I knew right then and there that it had to be oatmeal with apples.

    Combine the apples with fall spices like cinnamon, pumpkin pie spice, nutmeg, brown sugar, and even some maple extract… with fresh apples, and you have a slow cooker apple cinnamon oatmeal recipe with the heavenly aromas, that will give you all the fall feels.

    Crockpot Oatmeal

    Although slow cooker oatmeal is wonderful for an easy weekend breakfast with family, busy mornings… and it doubles as the perfect breakfast dish if you’re hosting or need a dish to take to brunch!

    Think: A delicious recipe for potlucks, Thanksgiving and Christmas morning celebrations, office parties, and more!

    What kind of oats to use for slow cooker oatmeal?

    For this recipe you’ll use old-fashioned rolled oats.

    Can you use quick oats or instant oats?

    I wouldn’t use quick oats due to the fact that they’re thinner and will cook fast.

    How to Cook Oatmeal in the Crock-Pot

    For the printable recipe, you can see the recipe card toward the bottom of this post!

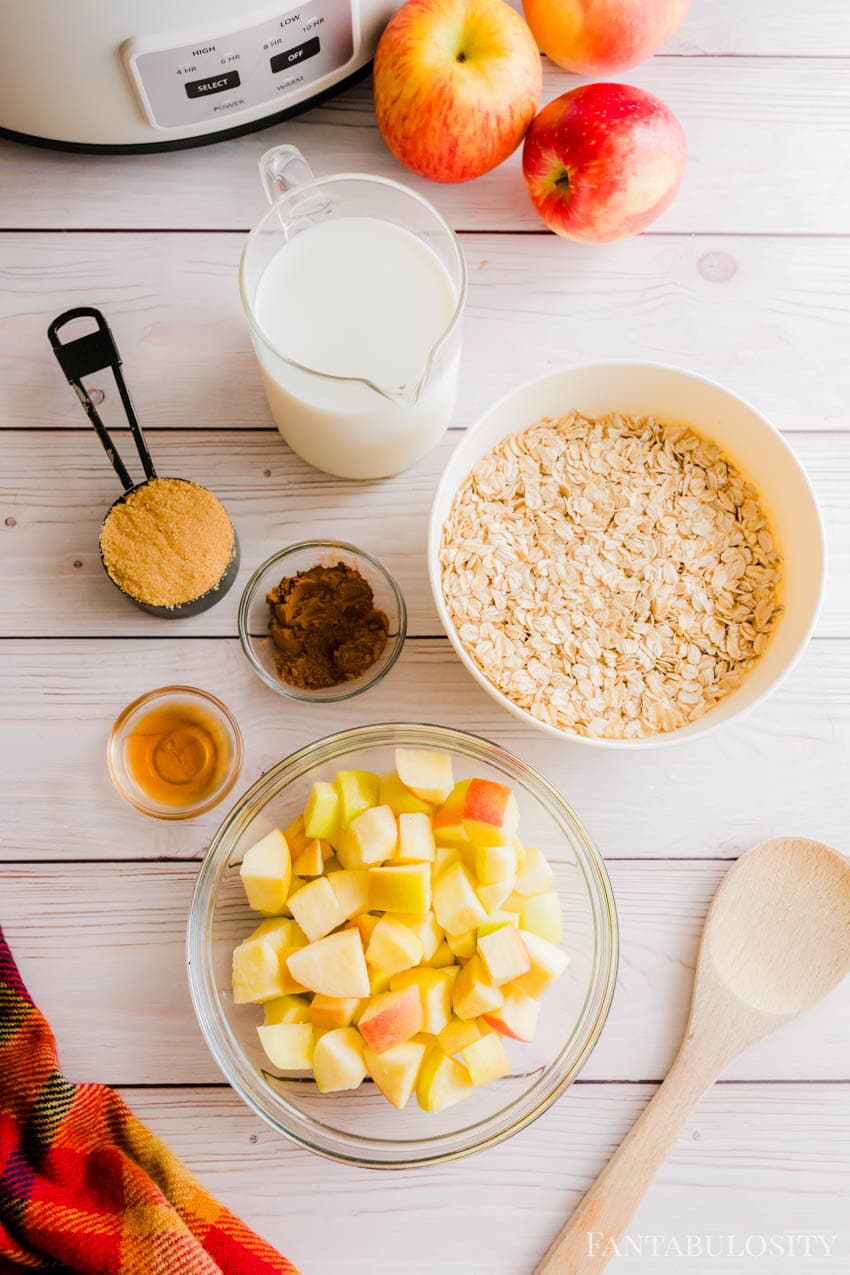
    Ingredients for Slow Cooker Apple Cinnamon Oatmeal

    • 3 large apples (diced) – the kind of apple is up to you but we prefer red apples over green apples
    • 2 cups old-fashioned rolled oats or steel-cut oats
    • 4 cups milk
    • 2 teaspoon maple extract
    • ⅓ cup brown sugar
    • 1 teaspoon pumpkin pie spice
    • 2 teaspoon ground cinnamon
    • 1 teaspoon ground nutmeg
    Ingredients for slow cooker apple cinnamon oatmeal
    1. First, coat your slow cooker with cooking spray to prevent the oatmeal from sticking.
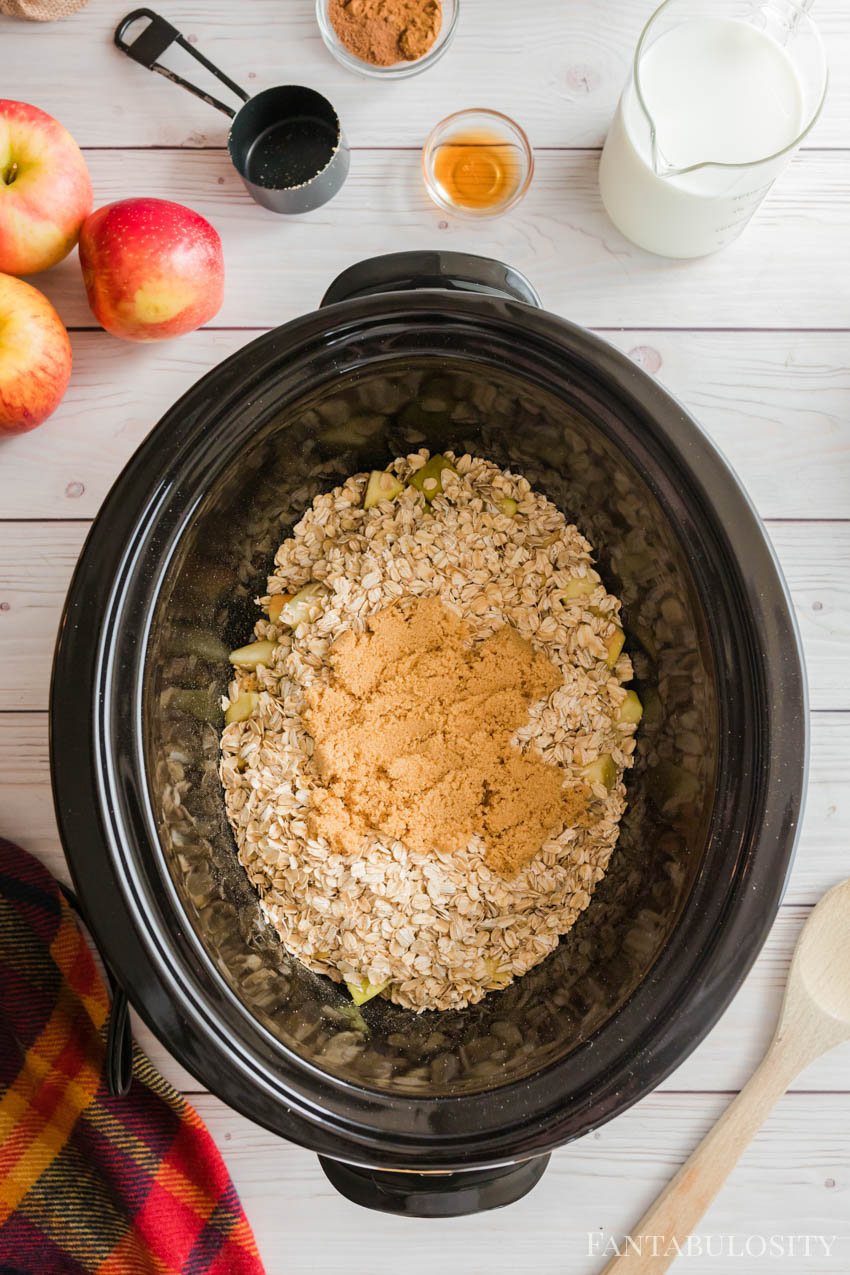
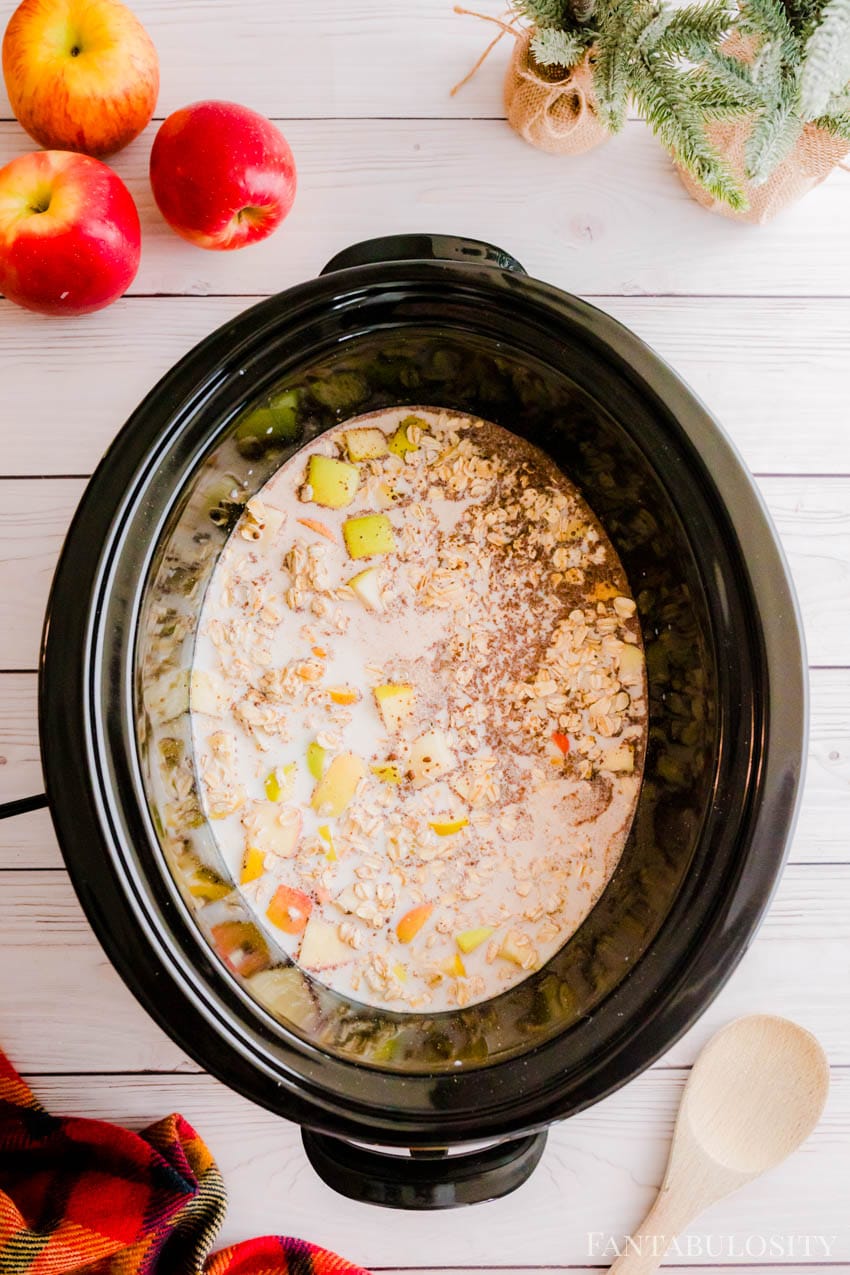
    2. Next, in your slow cooker, place your apples on the bottom and then pour your rolled oats on top in an even layer, followed by your brown sugar.
    Oats, apples, and brown sugar in crockpot
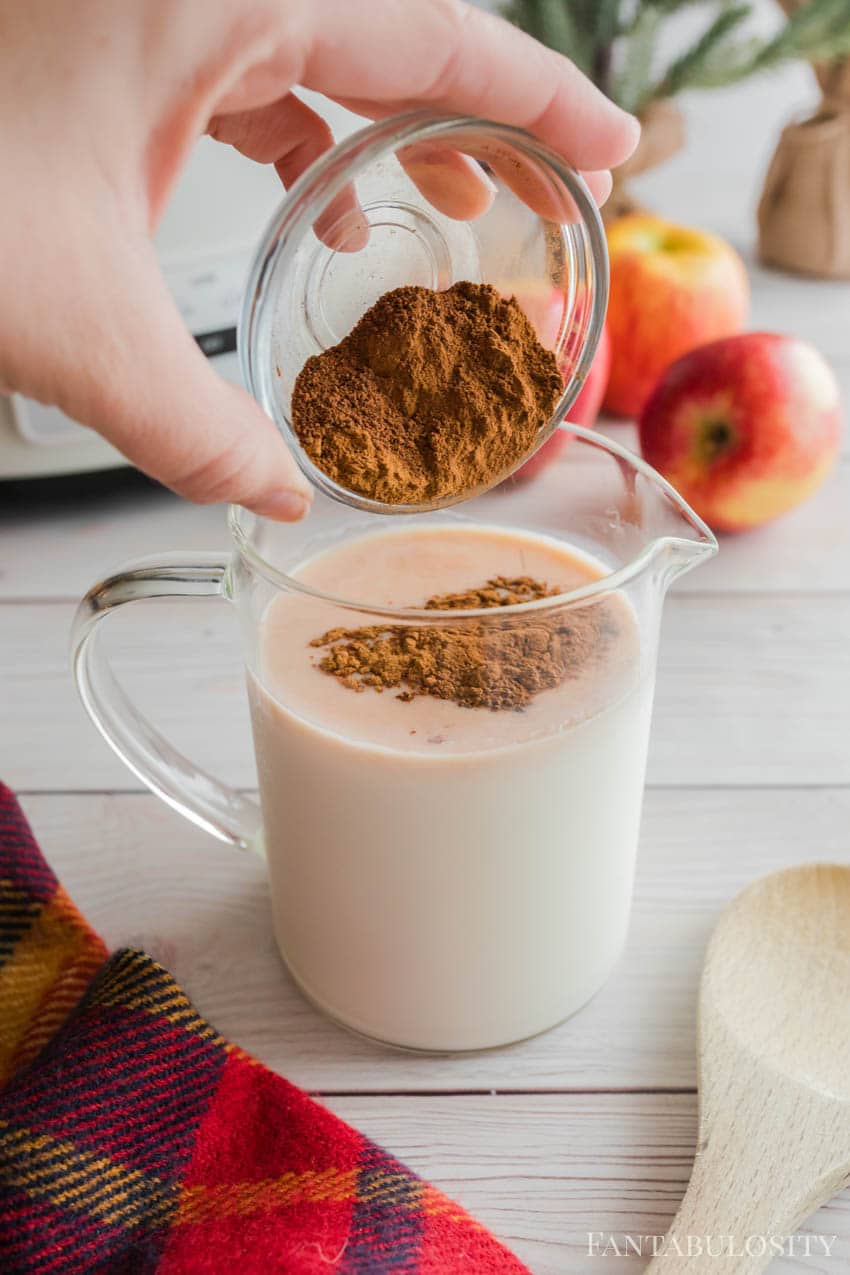
    1. In your four cups of milk, mix in your maple extract and spices.
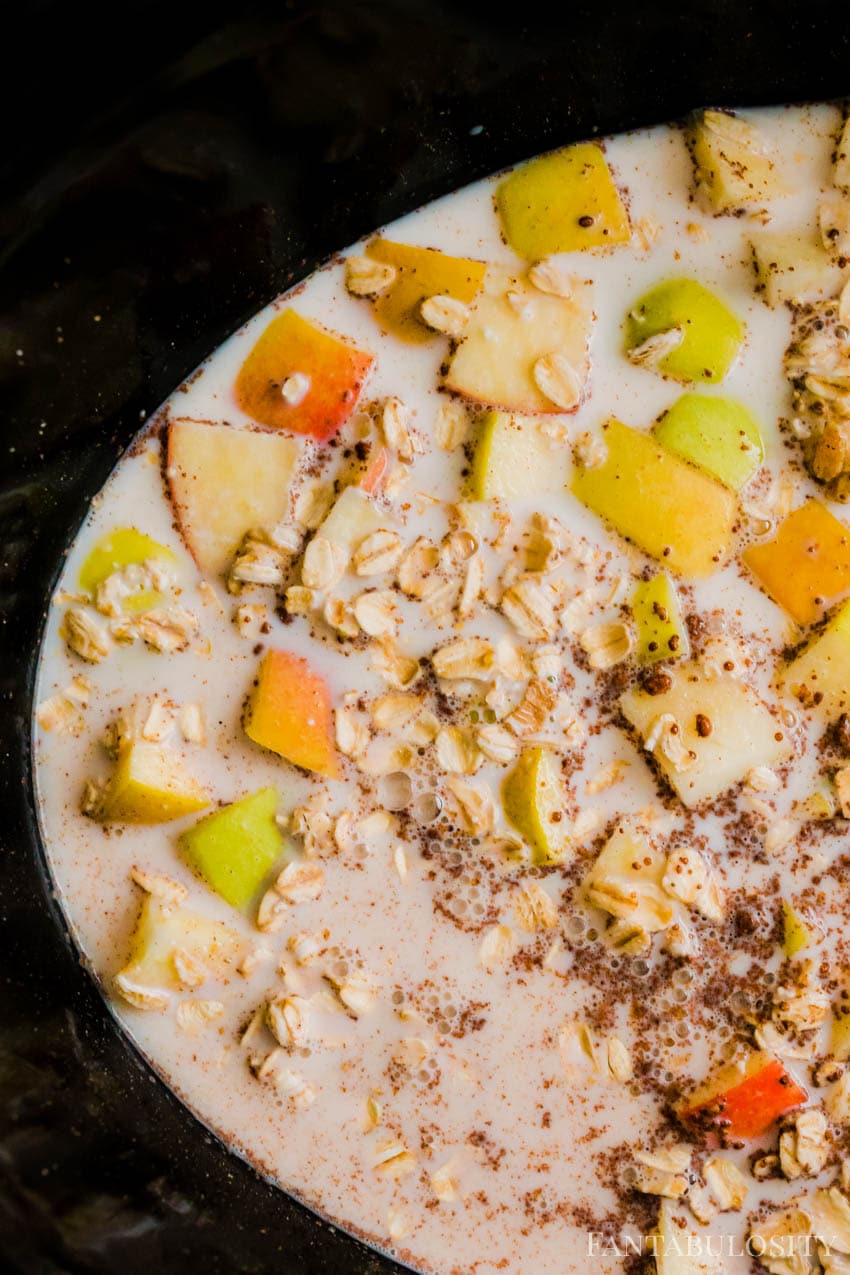
    milk and spices for slow cooker oatmeal
    1. Stir until mixed thoroughly and then pour evenly over your ingredients that are already in your slow cooker.
    Pour milk and spice mixture in slow cooker
    1. Place the lid on your slow cooker and set it to cook on high for 4 hours.
    Cover and cook on low for oatmeal
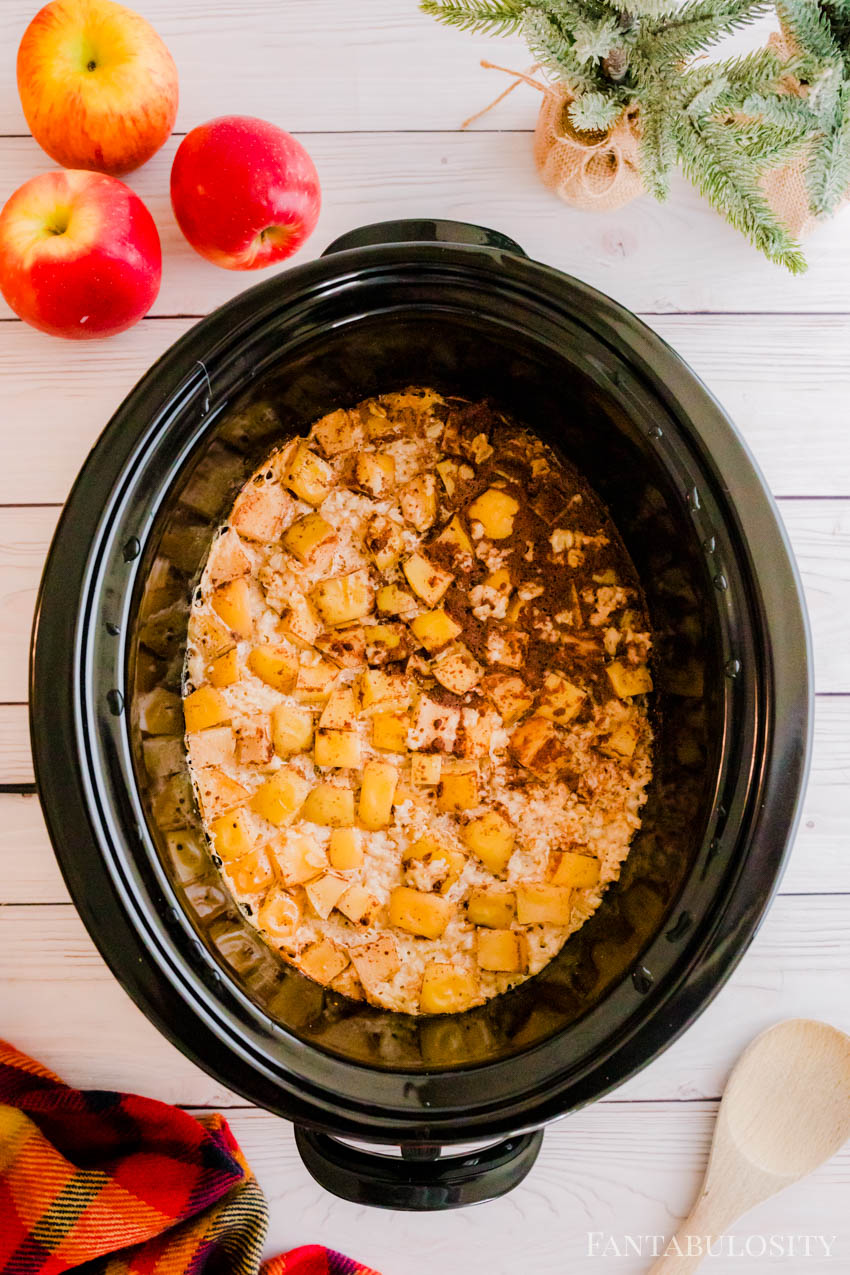
    1. Once it is finished cooking, give it a good stir and then enjoy!
    Cooked apple cinnamon oatmeal

    Substitutions and Variations

    What if you’re missing some of the spices? Although this recipe will be SUPERB with all of the ingredients it calls for, still give it a chance if you’re lacking the maple extract, pumpkin pie spice, and/or nutmeg. It will still be delicious even with some or even just the brown sugar and cinnamon!

    Love some extra sweetness? Add a drizzle of maple syrup on top!

    Milk: If you prefer to use a different type of milk, something such as unsweetened almond milk will work too!

    Quick Tip

    If you need to keep the crock pot oatmeal warm, you can keep it on the warm setting. But do know that sometimes this can thicken the oatmeal and make it less creamy. So you can add a splash of milk to thin it out, as it sits, if desired.

    Storage

    If you have leftover oatmeal, allow it to cool and store in an airtight container, and place it in the fridge for 3-4 days.

    Simply reheat the portion you need, the next day for a quick breakfast, in the microwave or place back in the slow cooker and add a little milk to thin it out as desired.

    More breakfast recipes you’ll love

    If you love easy breakfast recipes as much as I do, then you’ll love these:

    • Sausage Breakfast Casserole
    • Cinnamon Roll Casserole
    • The BEST Homemade Pancakes
    • French Toast Bake
    • Brioche French Toast
    Slow Cooker Apple Cinnamon Oatmeal

    Did you make this? I’d be so grateful if you left a “star” rating below to let me know what you thought! Then, the next time you need a quick and easy recipe, come back to Fantabulosity to browse all of my easy recipes!

    Recipe

    apple cinnamon oatmeal in a small white bowl with apple pieces on top
    Print Pin
    4.94 from 15 votes

    Slow Cooker Apple Cinnamon Oatmeal

    Slow Cooker Apple Cinnamon Oatmeal: An easy breakfast recipe that's perfect for a crowd or for a weekend family breakfast!
    Course Breakfast
    Cuisine American
    Prep Time 5 minutes minutes
    Cook Time 4 hours hours
    Total Time 4 hours hours 5 minutes minutes
    Servings 6 servings
    Calories 311kcal
    Author Jessica Burgess

    Equipment

    • slow cooker

    Ingredients

    • 3 large apples diced
    • 2 cups old-fashioned rolled oats
    • 4 cups milk
    • 2 teaspoon maple extract
    • ⅓ cup brown sugar
    • 1 teaspoon pumpkin pie spice
    • 2 teaspoon ground cinnamon
    • 1 teaspoon ground nutmeg

    Instructions

    • Coat your slow in cooking spray to prevent the oatmeal from sticking
    • In your slow cooker, place your apples on the bottom and then pour the rolled oats on top in an even layer, followed by brown sugar.
    • In your four cups of milk, mix in your maple extract and spices. Stir until mixed thoroughly and then pour evenly over your ingredients that are already in your slow cooker.
    • Place the lid on your slow cooker and set it to cook on high for 4 hours.
    • Once it is finished cooking, give it a good stir and enjoy!

    Notes

    What if you’re missing some of the spices? Although this recipe will be SUPERB with all of the ingredients it calls for, still give it a shot if you’re lacking the maple extract, pumpkin pie spice, and/or nutmeg. It will still be delicious even with some or even just the brown sugar and cinnamon!

    Nutrition

    Serving: 1serving | Calories: 311kcal | Carbohydrates: 54g | Protein: 9g | Fat: 7g | Saturated Fat: 3g | Cholesterol: 16mg | Sodium: 76mg | Potassium: 448mg | Fiber: 6g | Sugar: 32g | Vitamin A: 324IU | Vitamin C: 5mg | Calcium: 224mg | Iron: 2mg

    Chocolate Belgian Waffles Recipe

    August 16, 2022

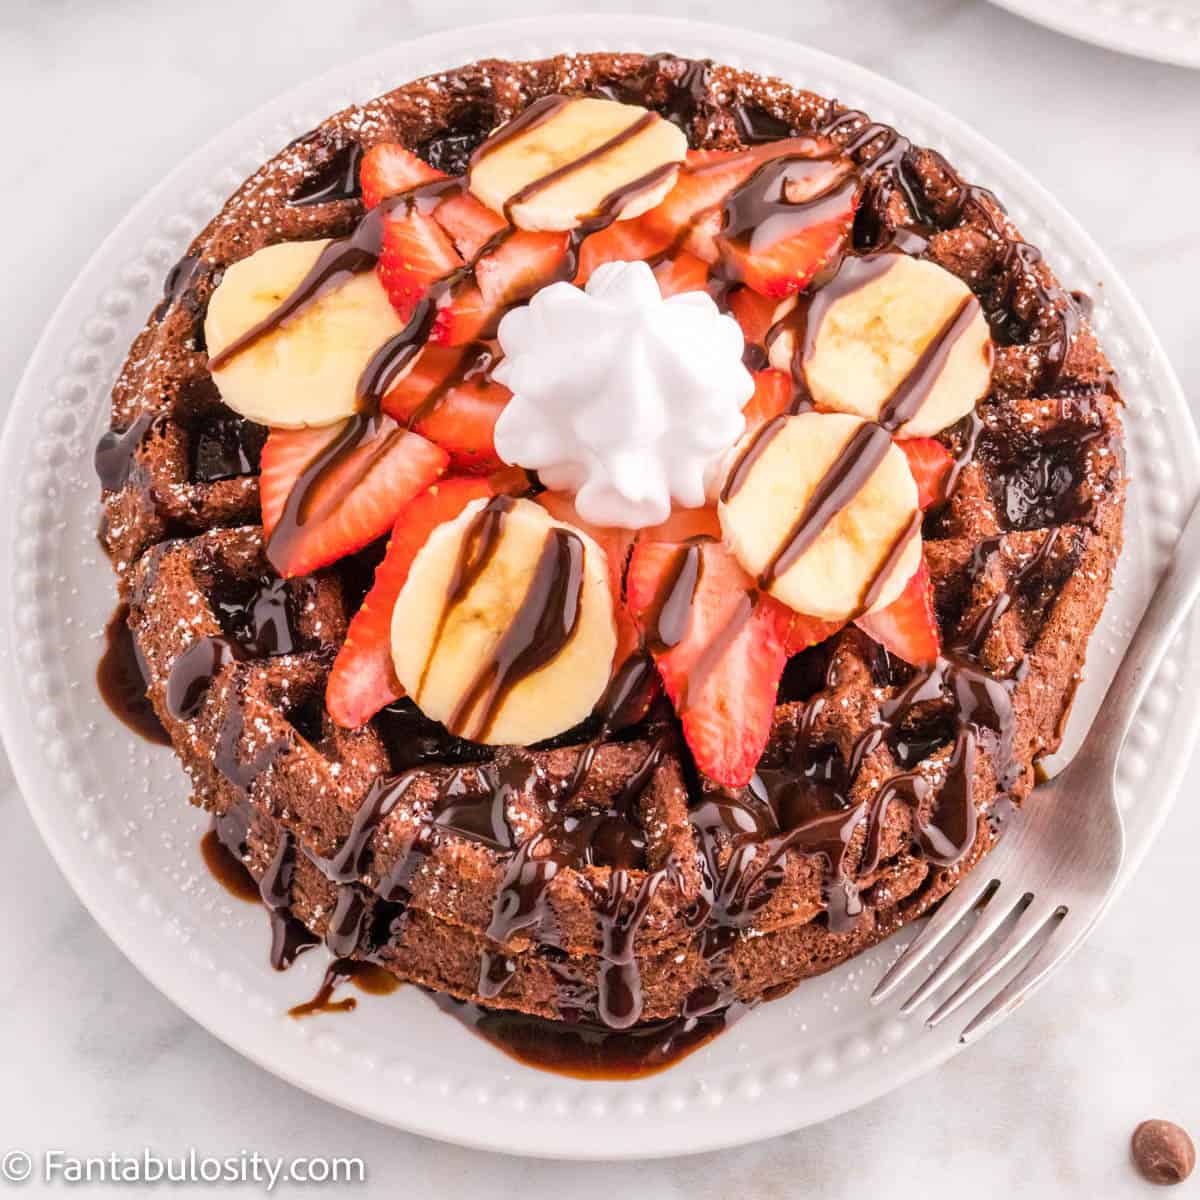
    Chocolate Belgian Waffles on a plate topped with fruit, chocolate syrup and whipped cream

    Chocolate Belgian Waffles: One of the best waffle recipes for fluffy chocolate waffles that you can top with maple syrup, fresh fruit, a drizzle of chocolate syrup and more!

    Quick Overview: In under 20 minutes, you’ll have decadent chocolate waffles and a delicious breakfast recipe, made with simple ingredients, that any chocolate lover will adore. Make them for your weekend breakfast or add them to your waffle charcuterie board.

    Chocolate waffles with chocolate syrup and fruit on white plate
    Chocolate Belgian Waffles

    Why you’ll love this recipe

    Simple Ingredients: Just like our Blueberry Waffles, this waffle recipe uses basic pantry staples that you can keep on hand to make Belgian chocolate waffles on a lazy Sunday morning or for a big weekend breakfast! Speaking of simple… these cake mix rainbow waffles are super easy!

    Easy to Personalize: Whether you top these homemade waffles with classic maple syrup or with our favorite toppings like fresh berries, whipped cream and chocolate chips, this recipe makes fluffy waffles that everyone in your family will enjoy.

    [feast_advanced_jump_to]

    Ingredients

    Get the full recipe card with instructions below!

    • Biscuit baking mix
    • Sugar
    • Cocoa powder
    • Eggs
    • Vegetable oil
    • Water
    • Vanilla extract
    • Chocolate chips
    ingredients
    Ingredients

    Instructions

    1. Heat waffle maker.
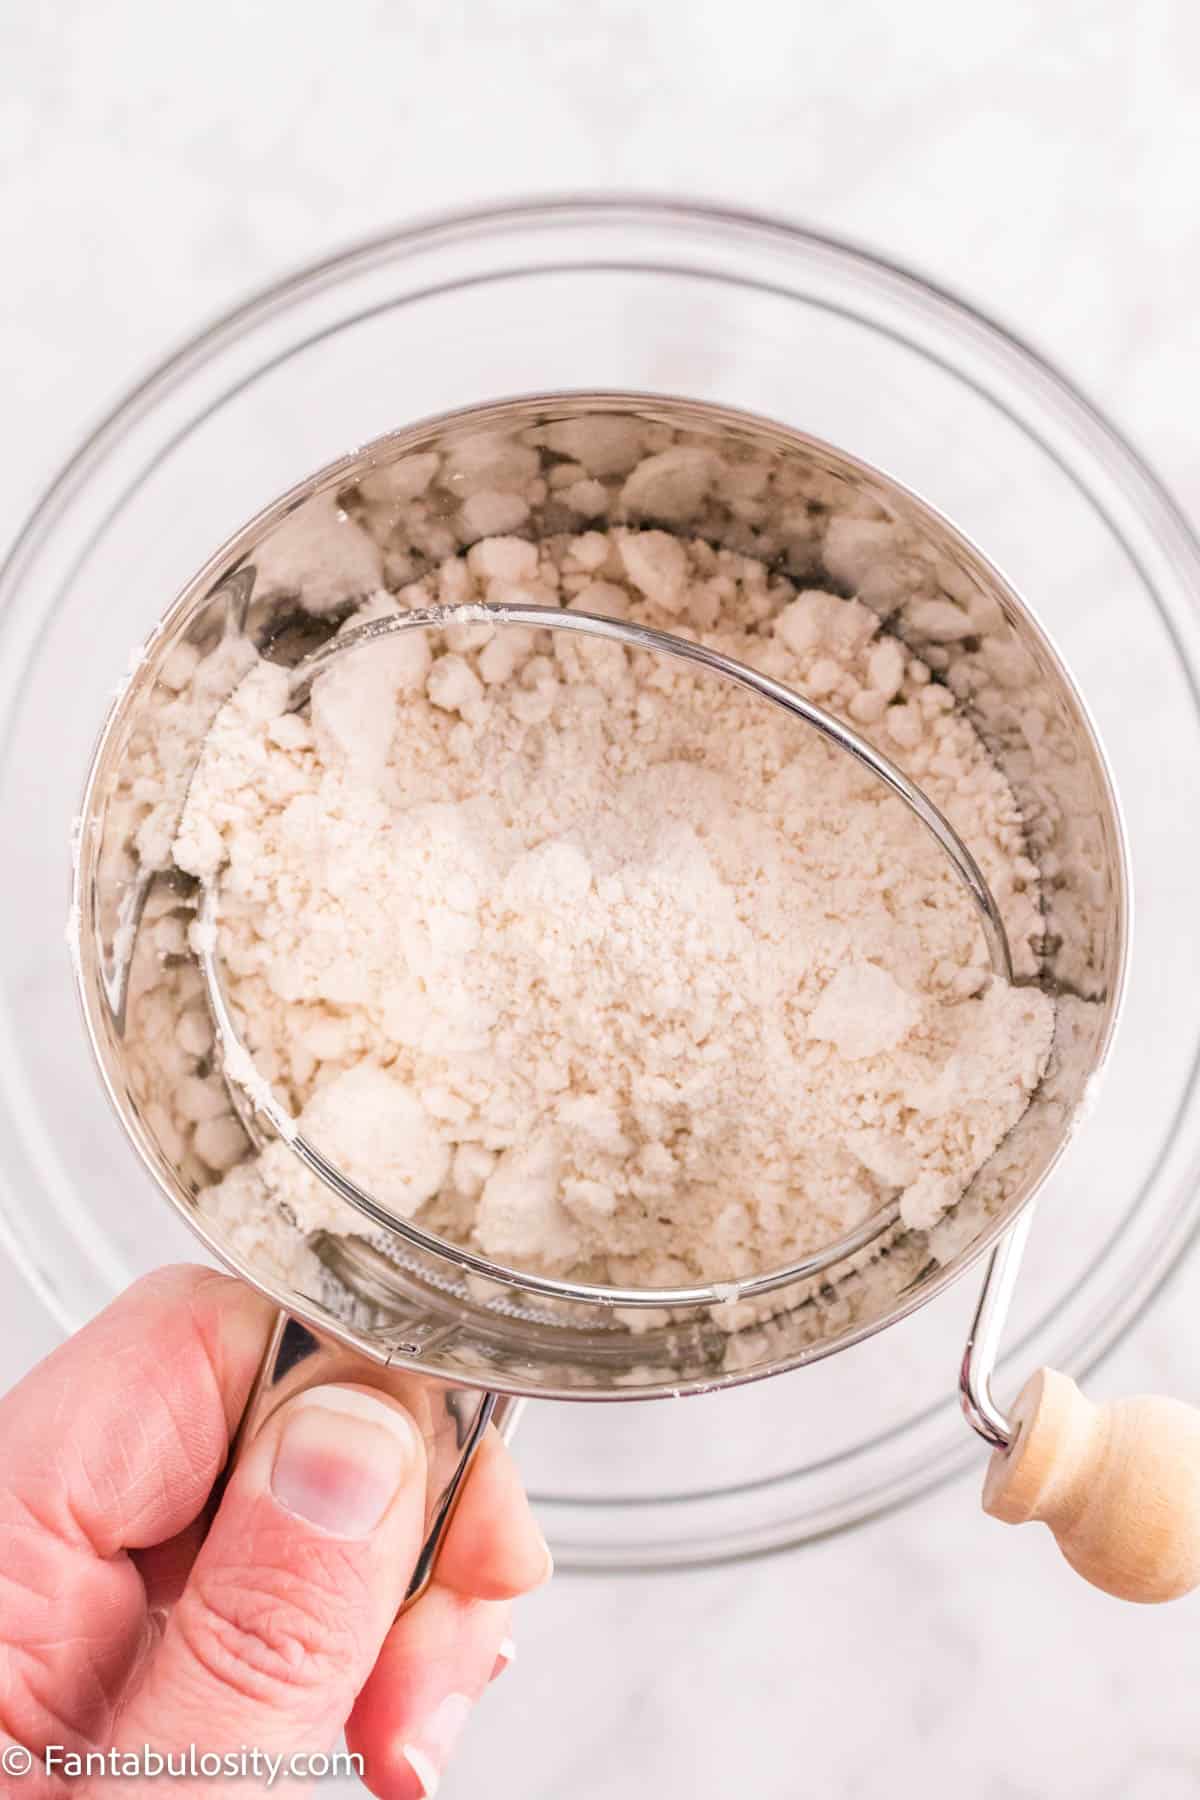
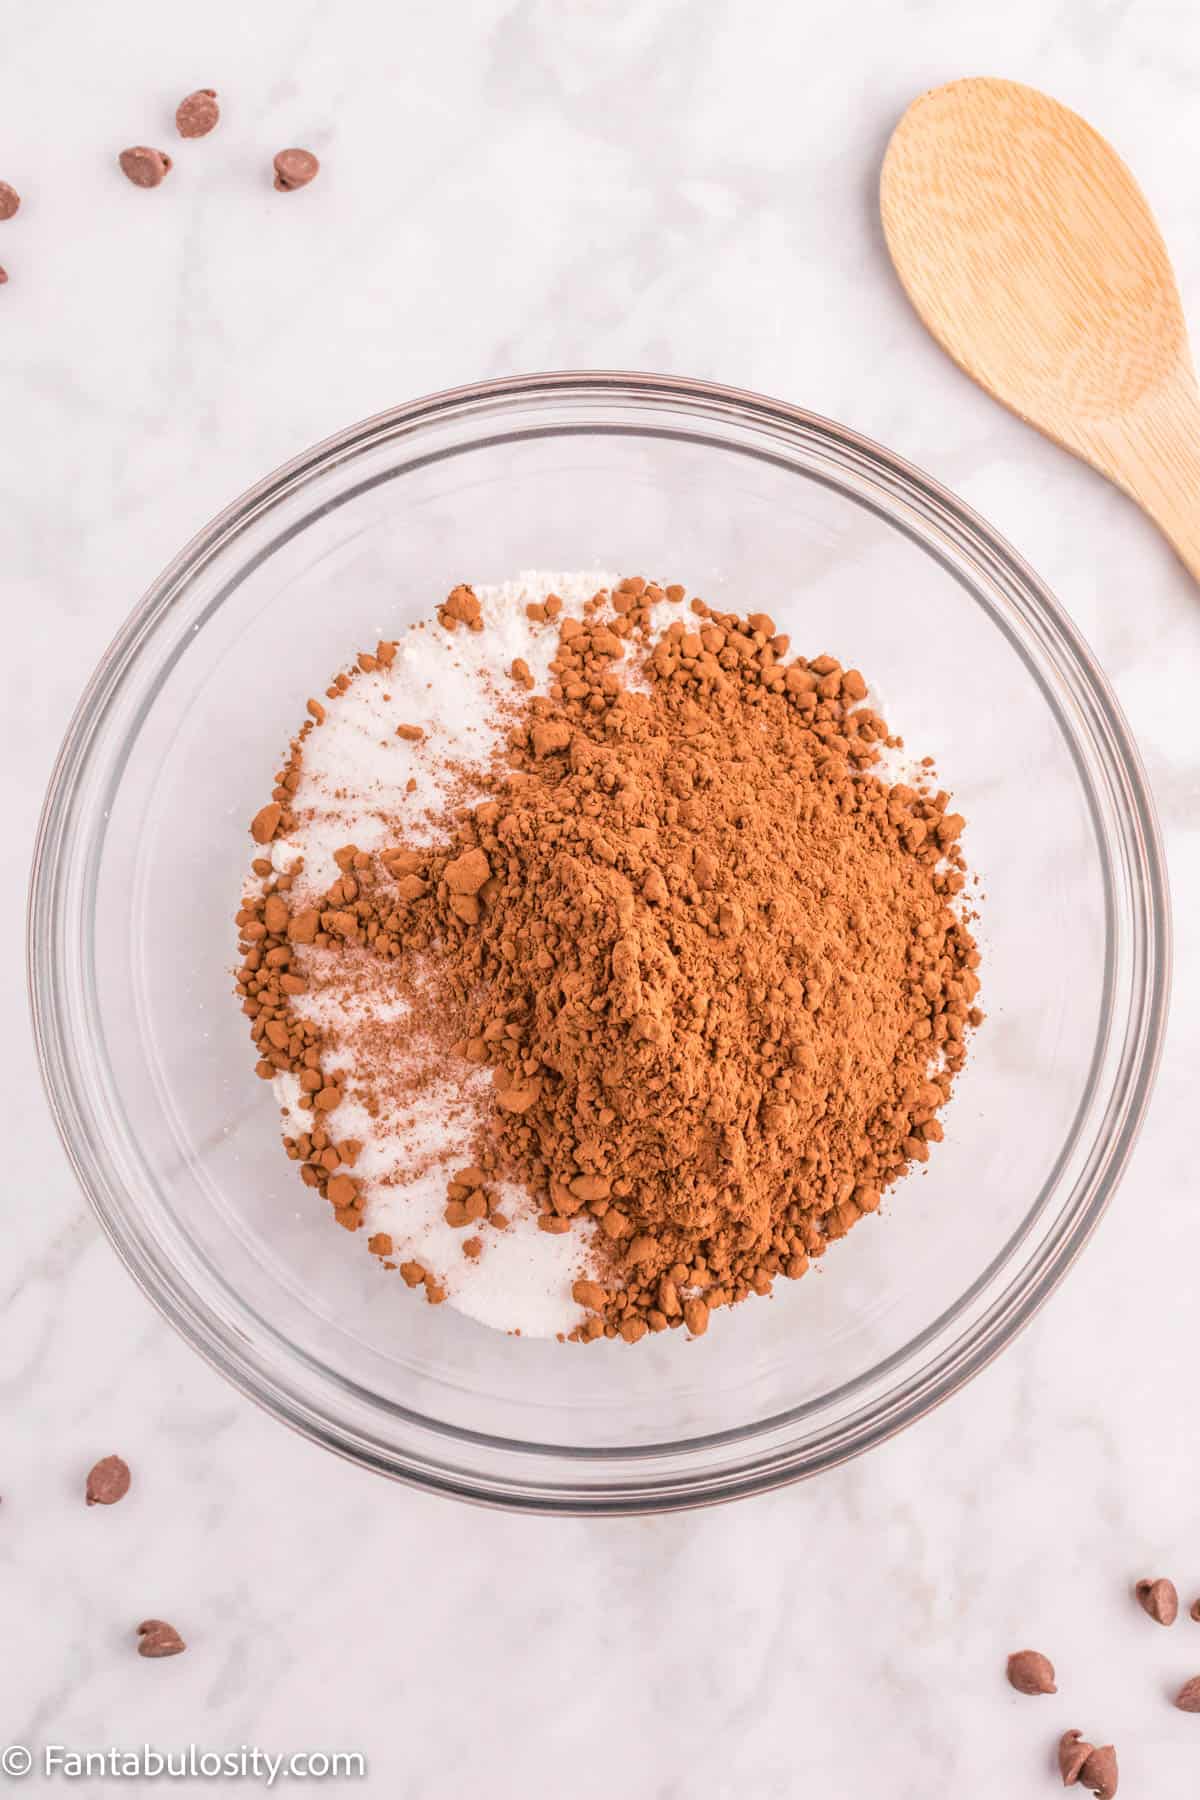
    2. Into a large bowl, sift the biscuit mix to get rid of any lumps. Stir in sugar and cocoa powder.
    waffle mix in glass bowl
    Sift the biscuit mix
    dry ingredients in glass bowl
    Sugar & cocoa powder
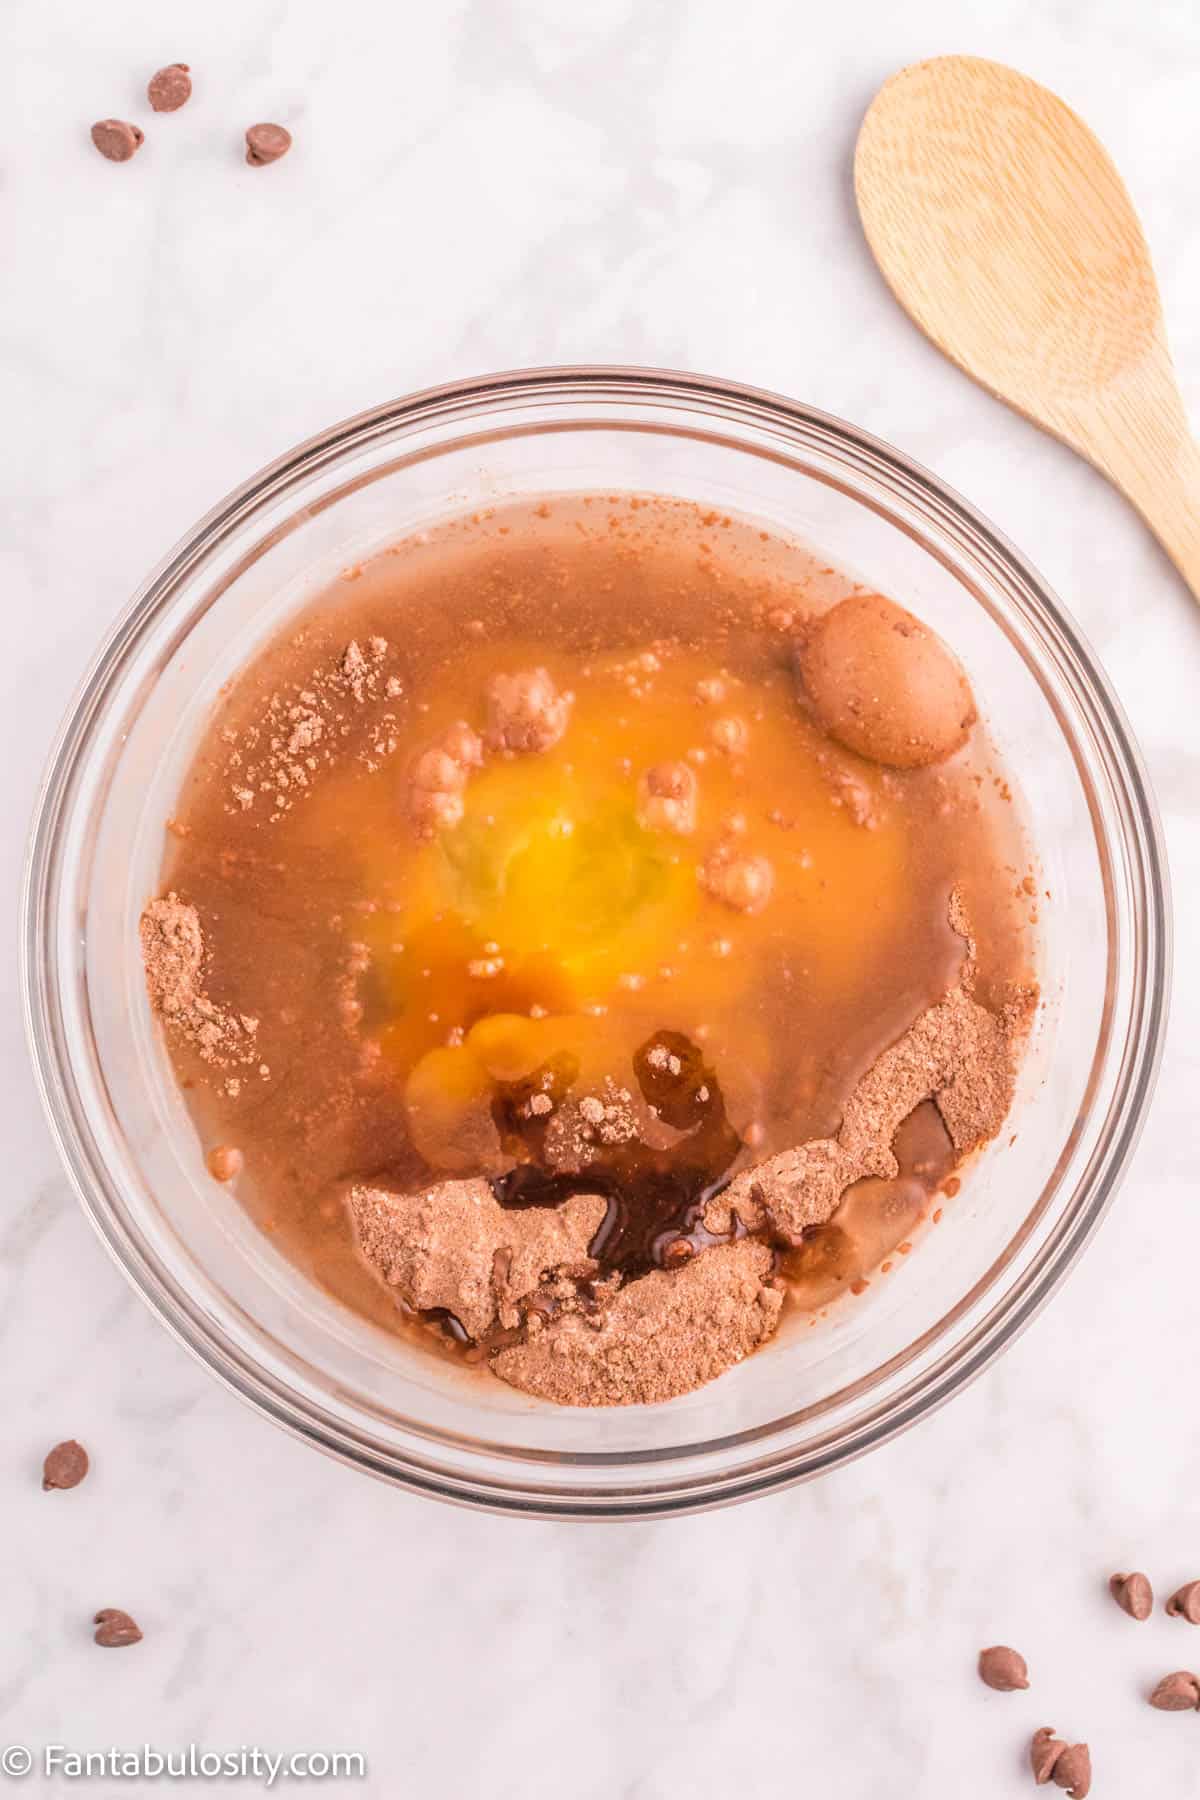
    1. Add the eggs, oil, water and vanilla extract to the dry ingredients; mix well.
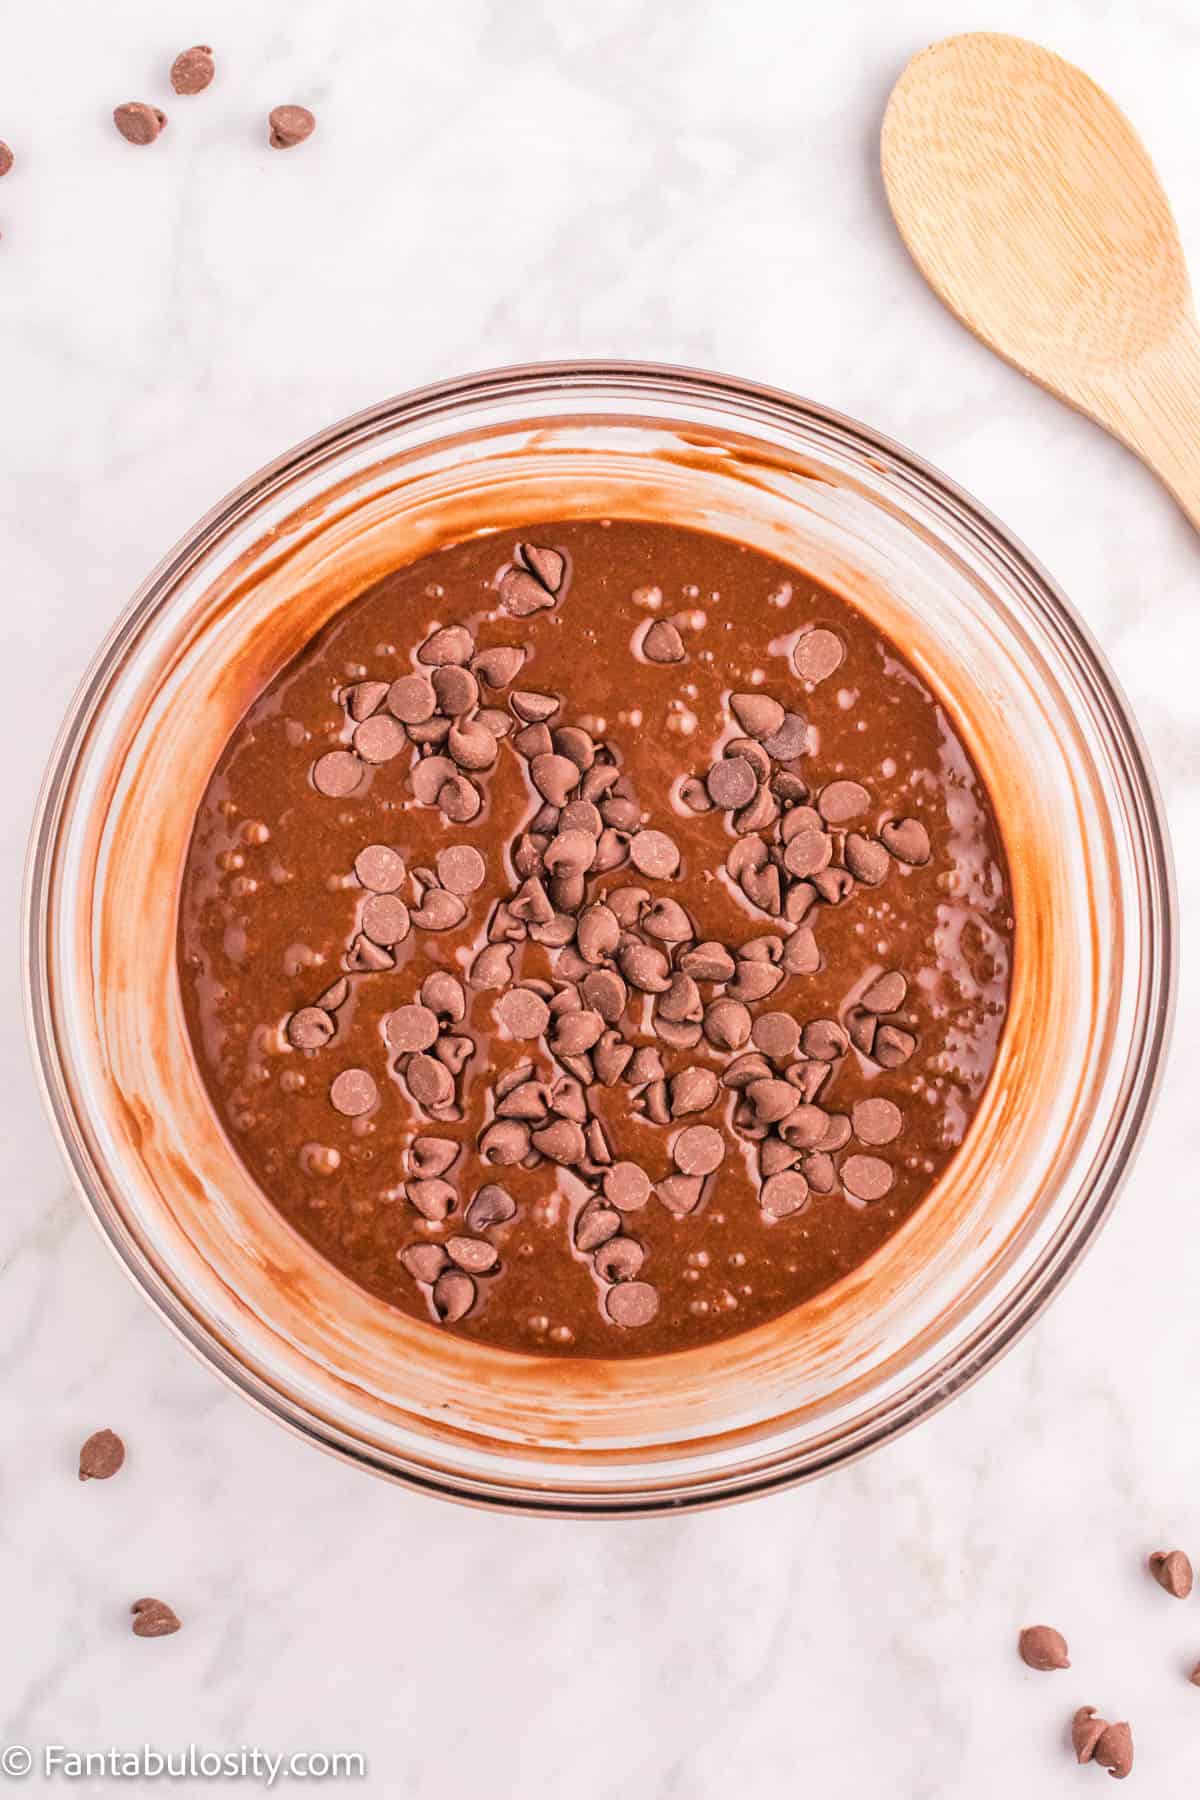
    2. Stir in chocolate chips.
    eggs, and waffle ingredients in glass bowl
    Add eggs, oil, water & vanilla
    Waffle batter with chocolate chips
    Mix well & add chocolate chips
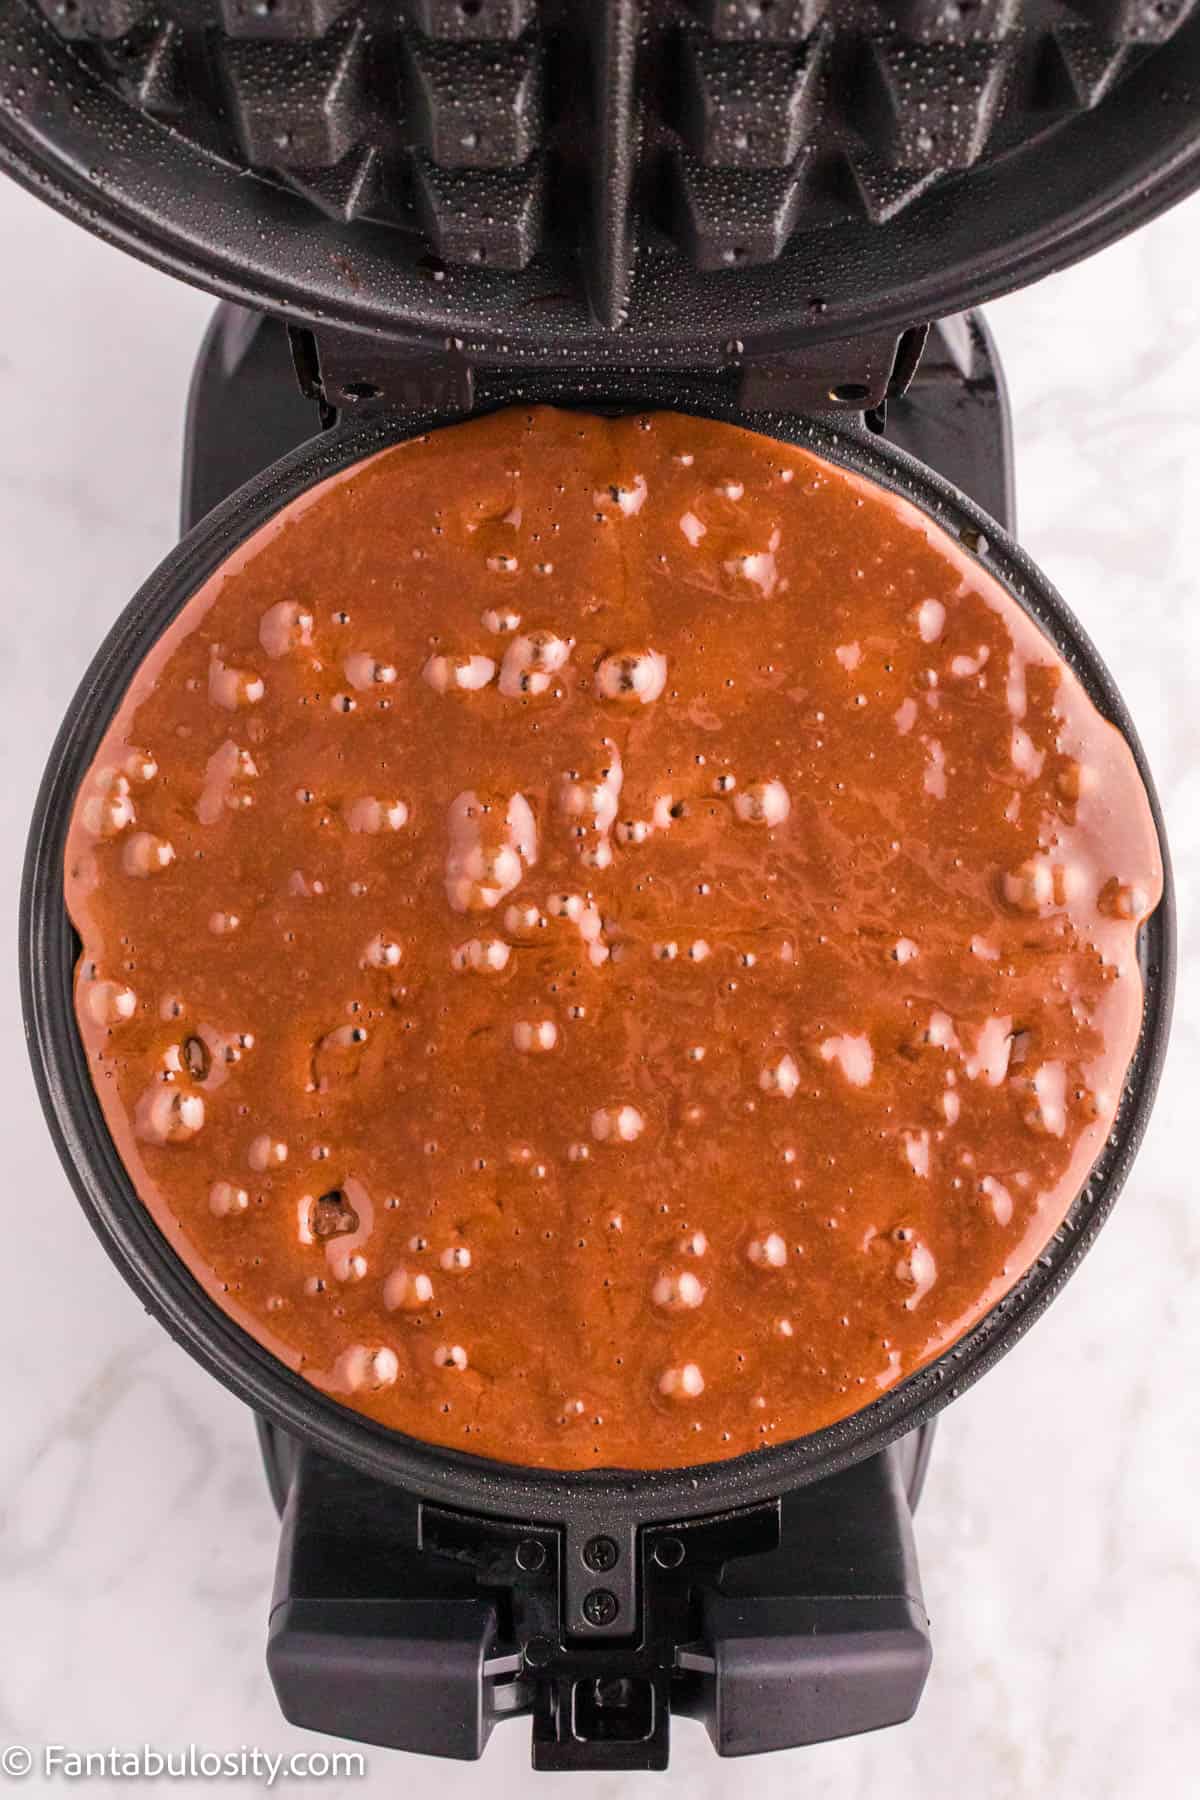
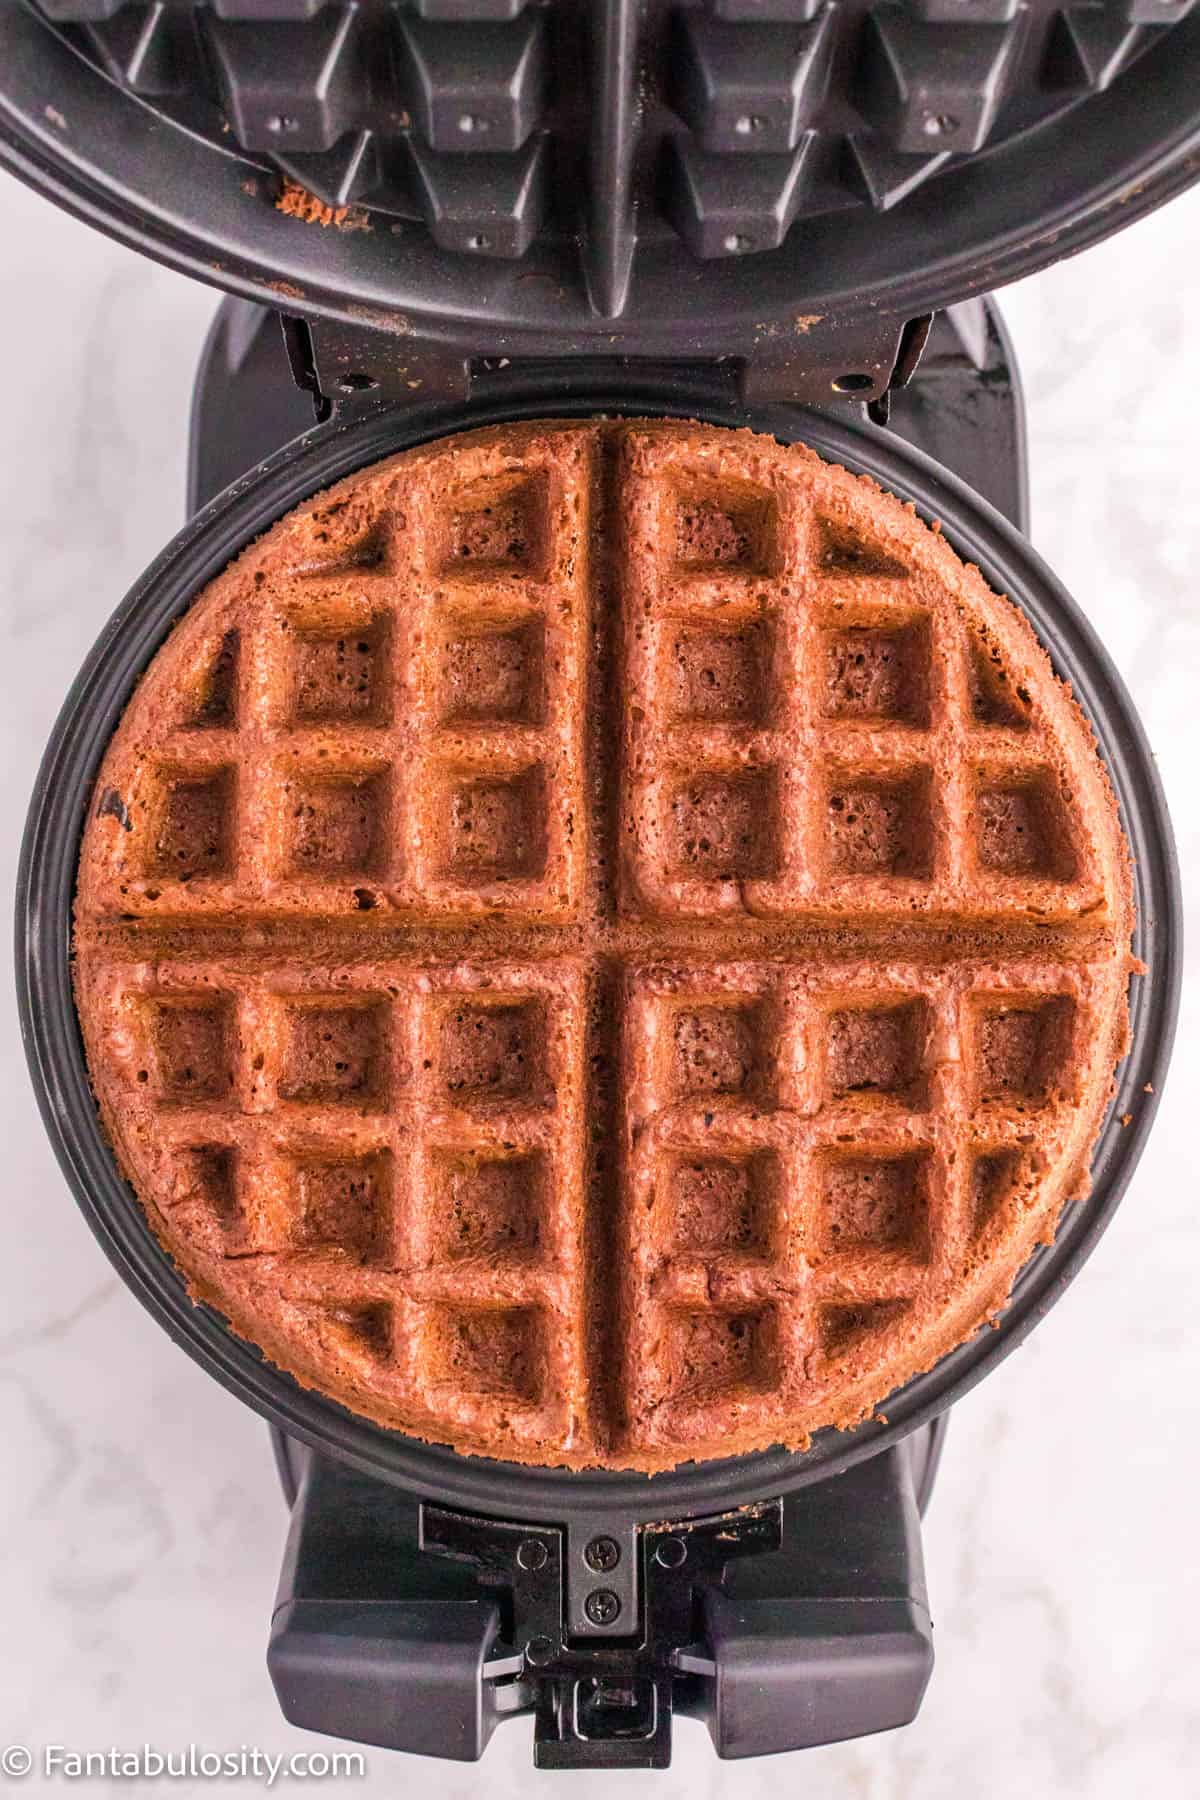
    1. Spray hot waffle iron with cooking spray. Pour batter into the waffle maker until the bottom plate is just barely covered completely (about ¾ cup). Cook for about 2 minutes or until firm.
    2. Carefully remove waffle and serve with toppings if desired.
    Raw waffle batter in waffle maker
    Add waffle batter to waffle maker
    Chocolate waffles in waffle maker
    Cook until firm

    Hint: Be sure to spray the waffle iron very well before each batch of waffles.

    Topping Ideas

    And now for my favorite part of this chocolate Belgian waffle recipe: the toppings!! Just look at those glossy sliced bananas, juicy red strawberries, the dusting of powdered sugar and warm chocolate syrup!

    Chocolate waffles on white plate with strawberries and bananas
    Easy Chocolate Waffles

    What is the difference between a waffle and a Belgian waffle?

    Belgian waffles are usually thicker than regular waffles! They tend to be soft, fluffy and make a wonderful presentation for breakfast.

    Variations

    While this chocolate waffle recipe is practically perfect already, here are a few ways to complement their rich chocolate flavor:

    • Add different flavored chips – Add dark chocolate chips, mini chocolate chips, white chocolate chips, cinnamon chips or even peanut butter chips to the waffle batter
    • Make a waffle sandwich – sandwich bacon (try my quick Air Fryer Bacon) or sausage patties between two chocolately waffles or be really bold and make a Waffle Burger!
    • Turn up the toppings – Top these waffles with pats of melted butter, toffee chips, raspberry jam, dollops of peanut butter, hot fudge, chocolate sauce, Nutella, your favorite frosting, shredded coconut, toasted nuts, or cinnamon sugar.
    close up of chocolate waffles with chocolate sauce, strawberries, bananas and whipped cream
    Chocolate Waffles

    Equipment

    Do you have to use a Belgian waffle maker? No! You can use a regular waffle iron or a mini waffle maker, too. Every waffle maker cooks a little differently, so while my waffles were done is about 2 minutes, watch yours carefully and remove the waffles when they are firm and fully cooked.

    Storage

    Leftover waffles (if there are any!) should be cooled and then stored in an airtight container or storage bag in the refrigerator for up to 3 days.

    To freeze extra waffles, lay them in a single layer on a sheet pan and freeze for about 2 hours. Separate the frozen waffles with parchment or wax paper and store in a freezer bag for up to several months.

    More Breakfast Recipes You’ll Love

    If you love delicious breakfast recipes, then you’ll also love these french toast sticks, these pancakes from scratch, and these mini waffle breakfast sandwiches.

    Did you make this? I’d be so grateful if you left a “star” rating below to let me know what you thought! Then, the next time you need a quick and easy recipe, come back to Fantabulosity to browse all of my easy recipes!

    Recipe

    Chocolate Belgian Waffles on a plate topped with fruit, chocolate syrup and whipped cream
    Print Pin
    5 from 4 votes

    Chocolate Belgian Waffles

    Chocolate Belgian Waffles: One of the best waffle recipes for fluffy chocolate waffles that you can top with maple syrup, fresh fruit, a drizzle of chocolate syrup and more!
    Course Breakfast
    Cuisine American
    Prep Time 10 minutes minutes
    Cook Time 8 minutes minutes
    Total Time 18 minutes minutes
    Servings 4 waffles
    Calories 616kcal
    Author Jessica Burgess

    Equipment

    • 1 waffle maker

    Ingredients

    • 1 ½ cups biscuit baking mix (I used Bisquick)
    • 1 cup granulated sugar
    • ½ cup cocoa powder
    • ¾ cup water
    • 2 eggs lightly beaten
    • 2 tablespoon vegetable oil
    • ½ teaspoon vanilla extract
    • ½ cup chocolate chips
    • Assorted toppings (powdered sugar, maple syrup, chocolate syrup, strawberries, raspberries, banana slices, whipped cream, ice cream, additional chocolate chips, etc.)

    Instructions

    • Heat waffle maker.
    • Into a large bowl, sift the biscuit mix to get rid of any lumps. Stir in sugar and cocoa powder. Add in water, eggs, oil, and vanilla; mix well. Stir in the chocolate chips until well combined.
    • Spray hot waffle iron with cooking spray. Pour batter into the waffle maker until the bottom plate is just barely covered completely (about ¾ cup but amount may vary depending on the size of your waffle maker). Cook for about 2 minutes or until firm.
    • Carefully remove waffle and serve with toppings if desired.

    Notes

    • Chocolate chips are optional but they really amp up the rich chocolate flavor of these waffles.
    • You can use a Belgian waffle maker, standard waffle maker or even a mini waffle maker for this recipe.
    • Each waffle maker cooks a little differently, so while my waffles took about 2 minutes to cook, watch your waffles and remove them when they are firm and fully cooked.
    • Use non-stick cooking spray and spray the waffle maker well before each batch of waffles.

    Nutrition

    Serving: 1waffle | Calories: 616kcal | Carbohydrates: 100g | Protein: 10g | Fat: 23g | Saturated Fat: 8g | Polyunsaturated Fat: 5g | Monounsaturated Fat: 7g | Trans Fat: 0.1g | Cholesterol: 86mg | Sodium: 626mg | Potassium: 269mg | Fiber: 6g | Sugar: 70g | Vitamin A: 171IU | Vitamin C: 0.3mg | Calcium: 135mg | Iron: 3mg

    Easy Slow Cooker Shredded Chicken

    August 6, 2022

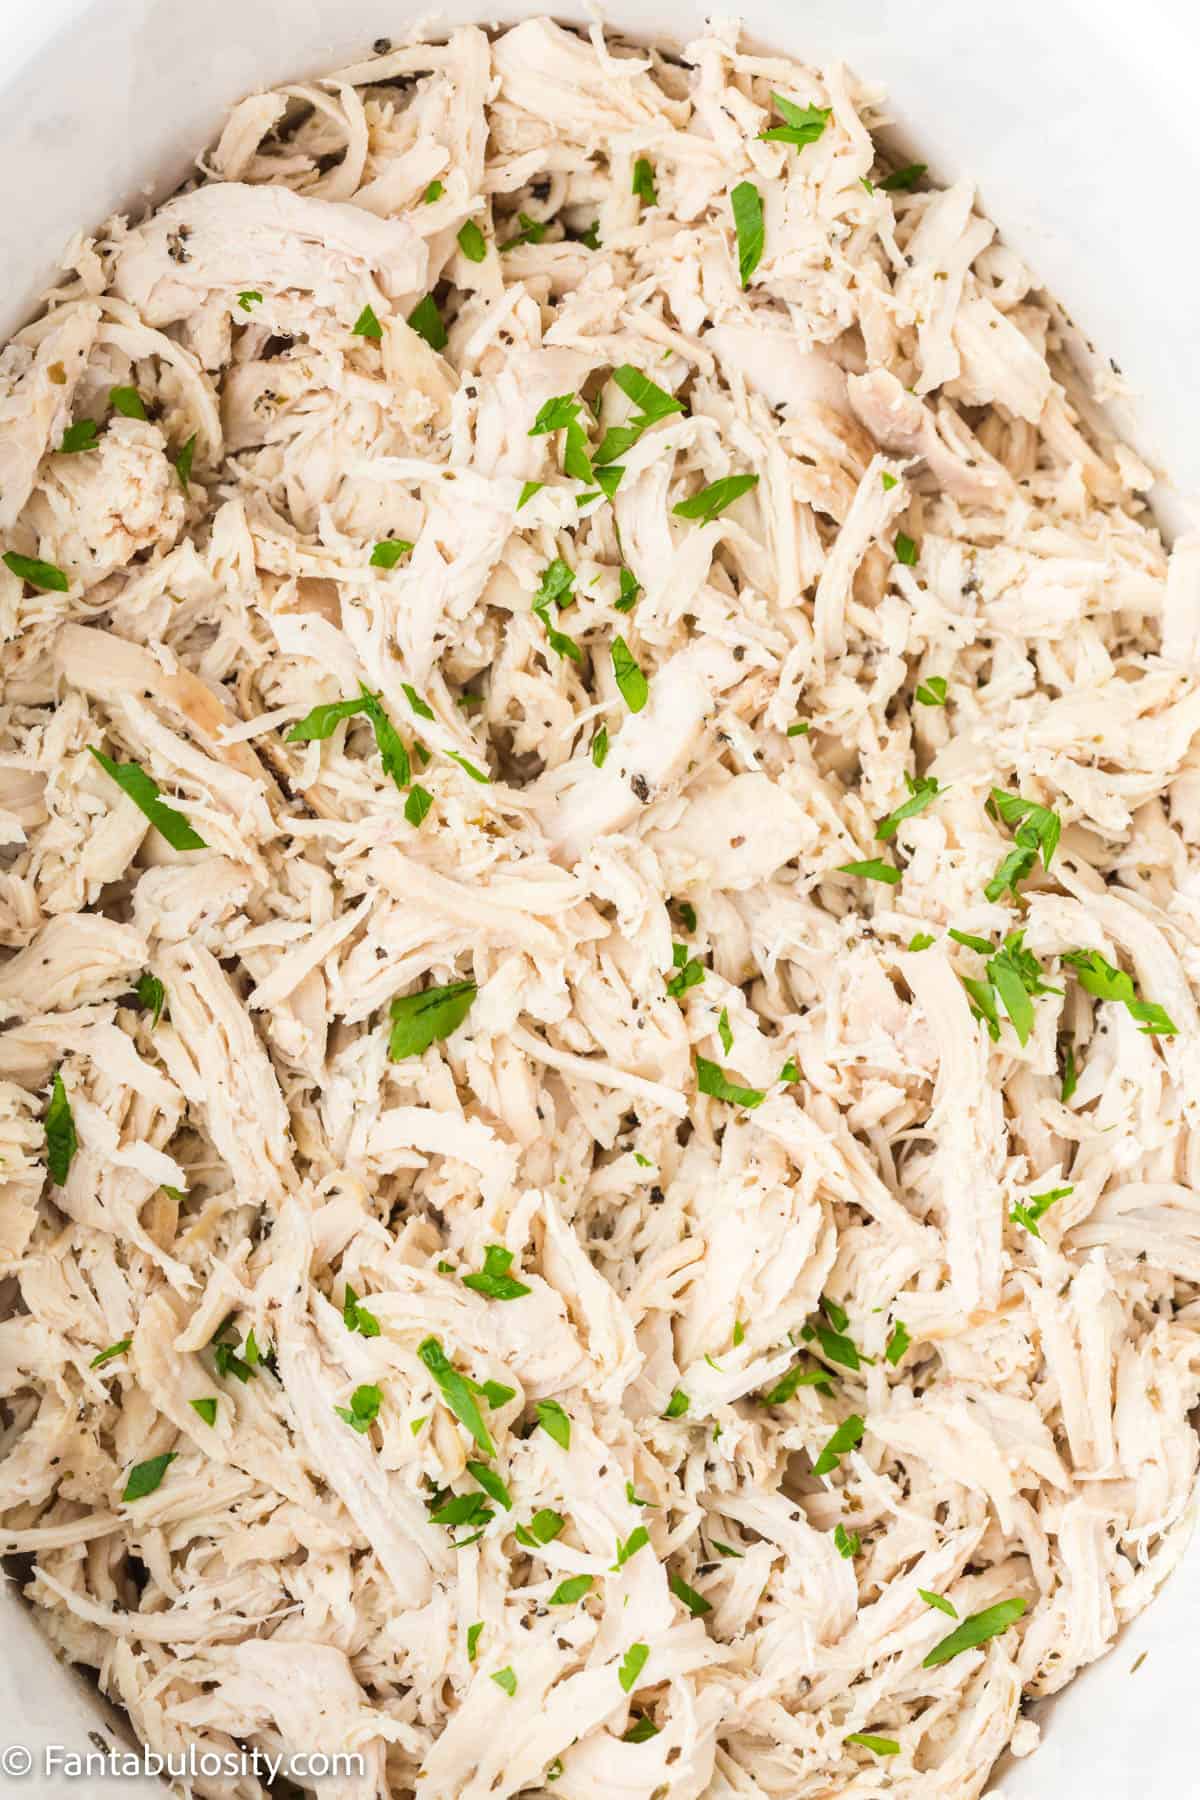
    cooked shredded chicken in slow cooker

    Slow Cooker Shredded Chicken: This easy recipe, using boneless skinless chicken breasts, is the best way to cook chicken for all of your favorite chicken dishes.

    Want to turn chicken into a slow cooker dinner? Browse these crockpot chicken recipes for creamy pasta, enchiladas, sandwiches, and more. For other main dishes, see my slow cooker dinner recipes.

    We absolutely love slow cooker recipes around here, and when you can make a batch of crock pot chicken for dishes like this taco chicken casserole, chicken street tacos, taco salad, or other delicious recipes, it makes things so much easier!

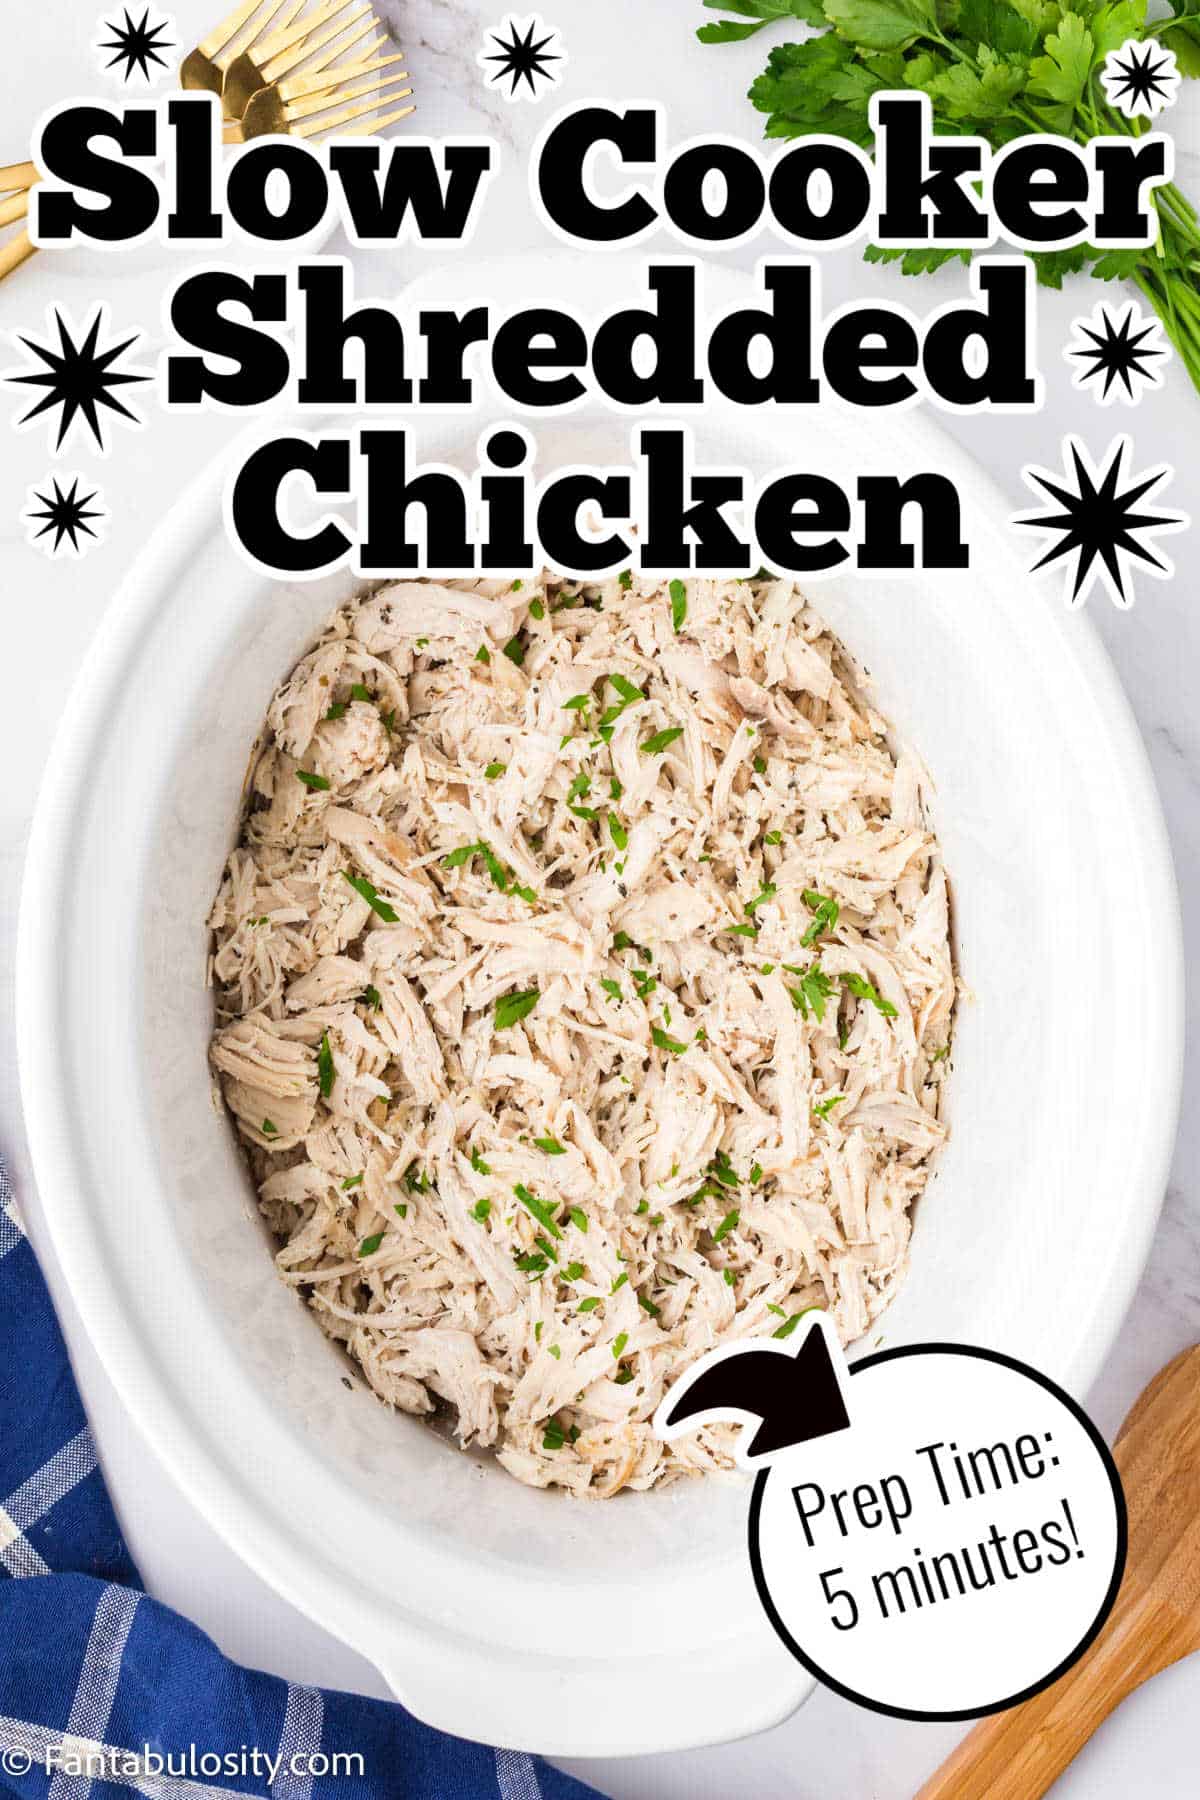
    Shredded Chicken in Slow Cooker with text on image

    Why You’ll Love This Recipe

    Easy: This easy slow cooker recipe for shredded chicken, may just become your new favorite way to cook a large batch of chicken. With only a 5-minute prep time, this chicken is ready for cooking in just a short time.

    Easy Meal Prep: Imagine the possibilities of what you can do with this crockpot shredded chicken when it has cooked! With little effort, and a 4 hour cook time on “high” or 6-8 hours on “low” you’ll have a protein for busy weeknights, or to even place in freezer bags for small batches later for your favorite weeknight meals. (Or even a quicker version of these crock pot chicken enchiladas.)

    [feast_advanced_jump_to]

    Ingredients

    • 3.5 pounds of raw chicken breasts, deboned and skinless
    • ¼ cup butter
    • 2 cups chicken broth
    • 3 tablespoons Italian seasoning
    • 1 tablespoon garlic powder
    • 1 teaspoon salt
    • 1 teaspoon pepper
    • parsley to taste for garnish
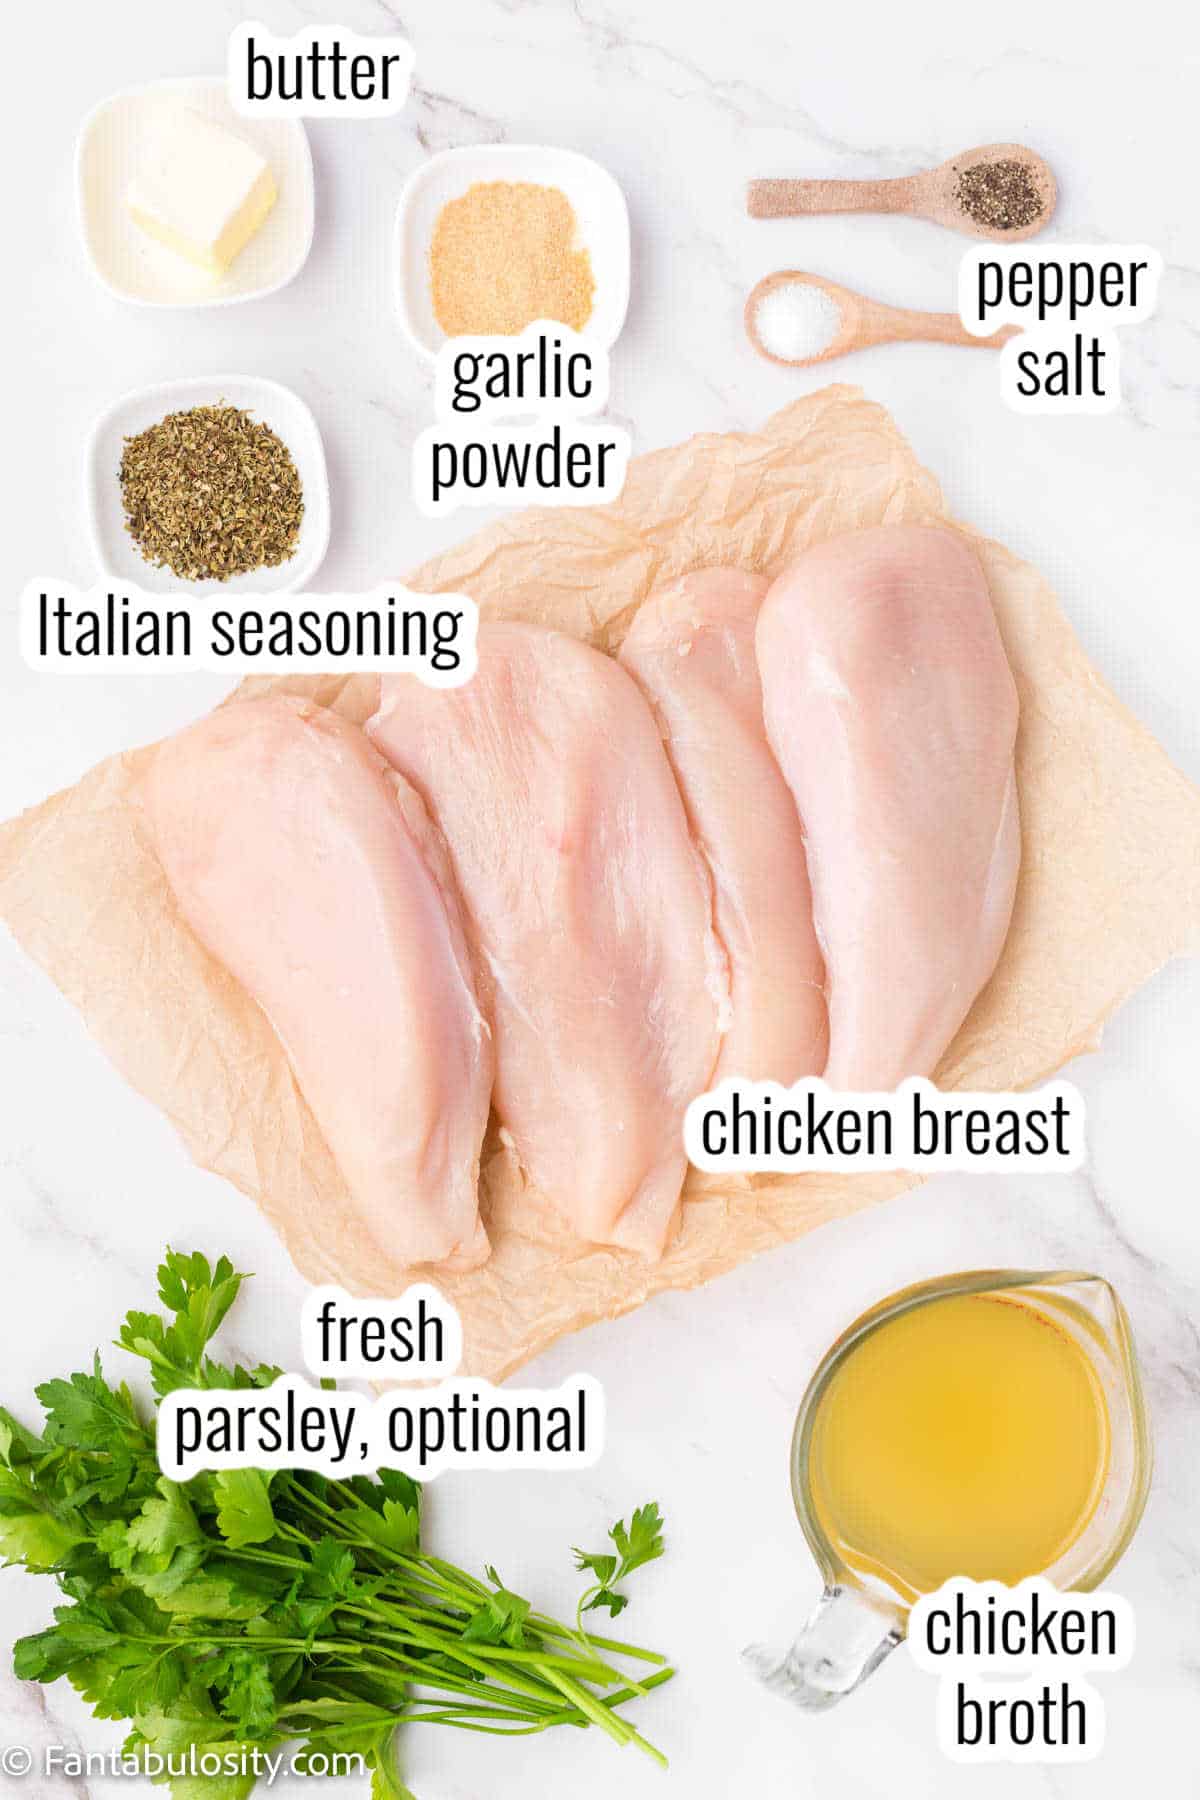
    ingredients out on table for shredded chicken - with ingredient labels in text

    Make sure to check out the full recipe card toward the bottom of this post, where you can see everything in one place!

    Instructions

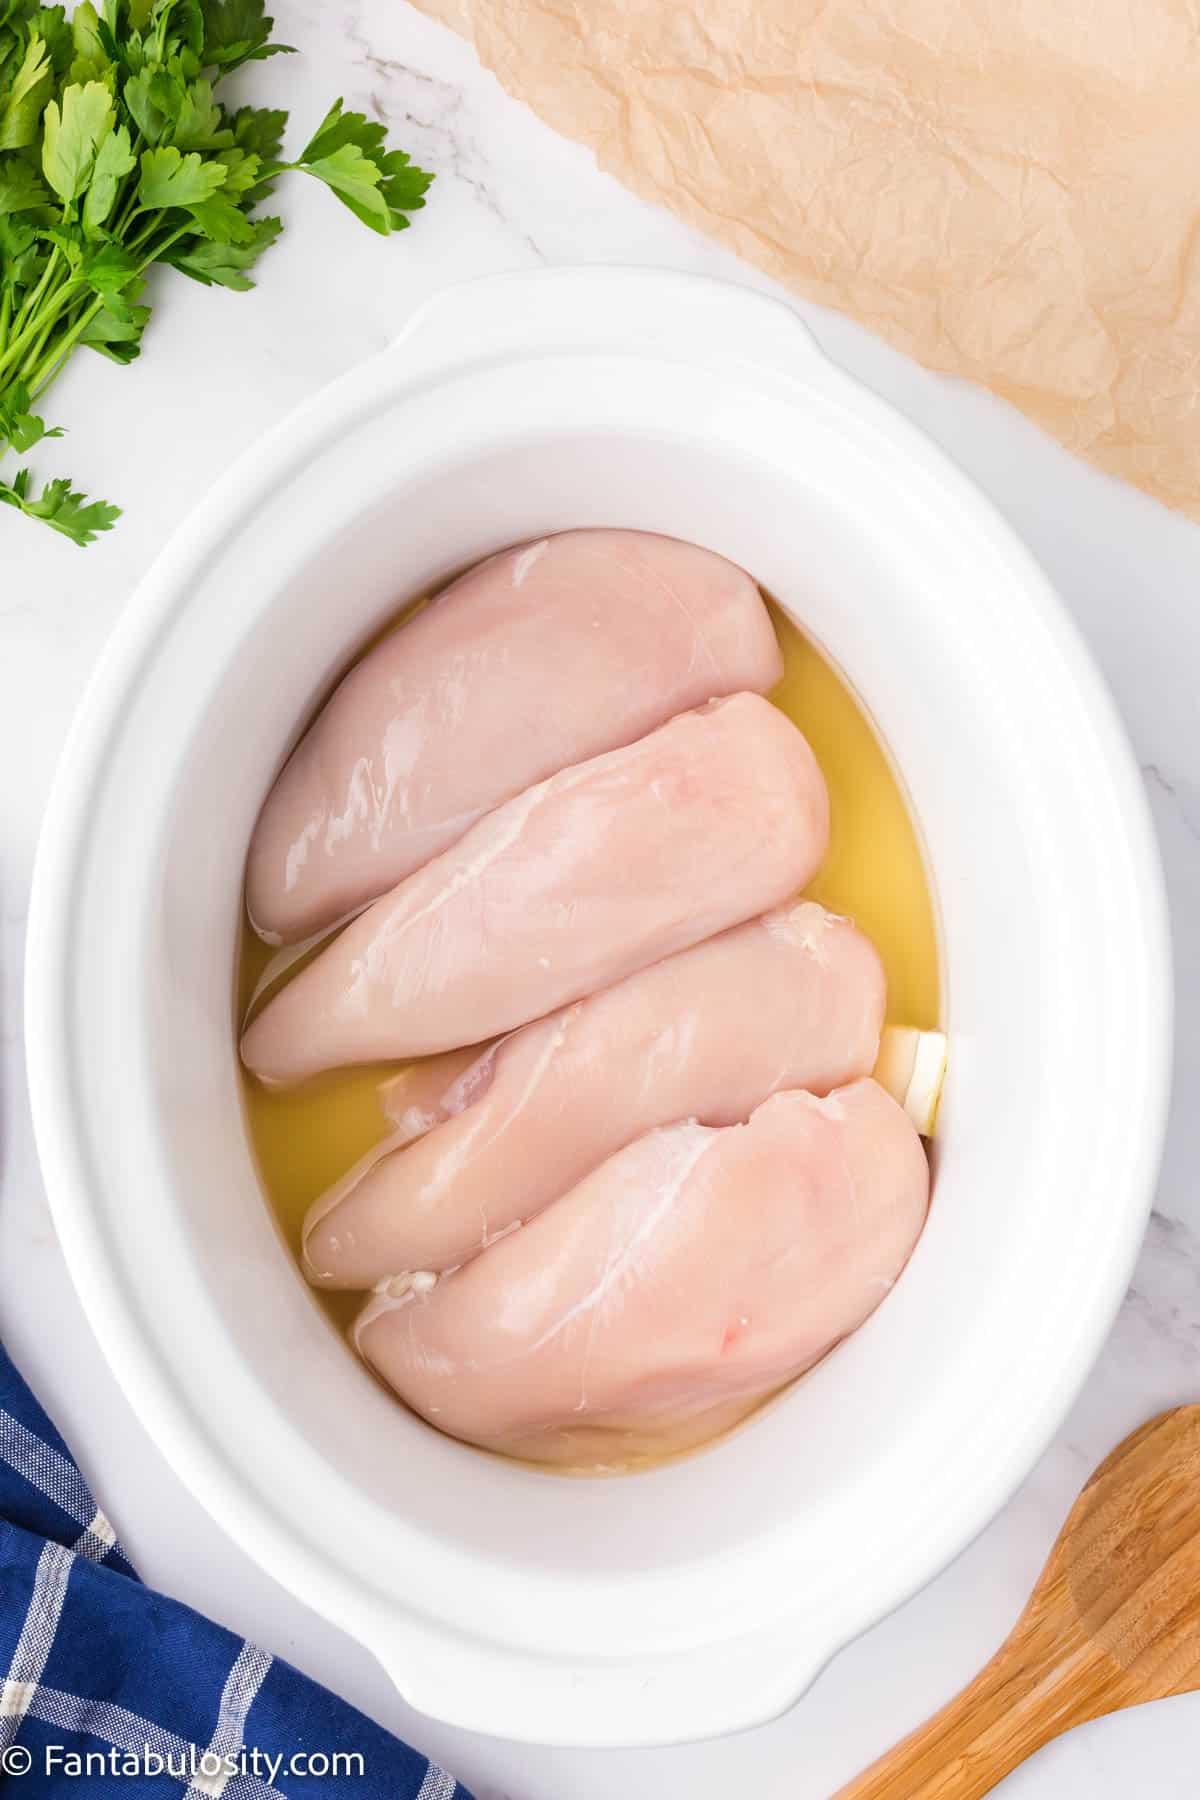
    1. Pour chicken broth into a 4-6 quart crockpot along with butter.
    2. Place chicken breasts in a single layer, into the bottom of the cooker, over the butter.
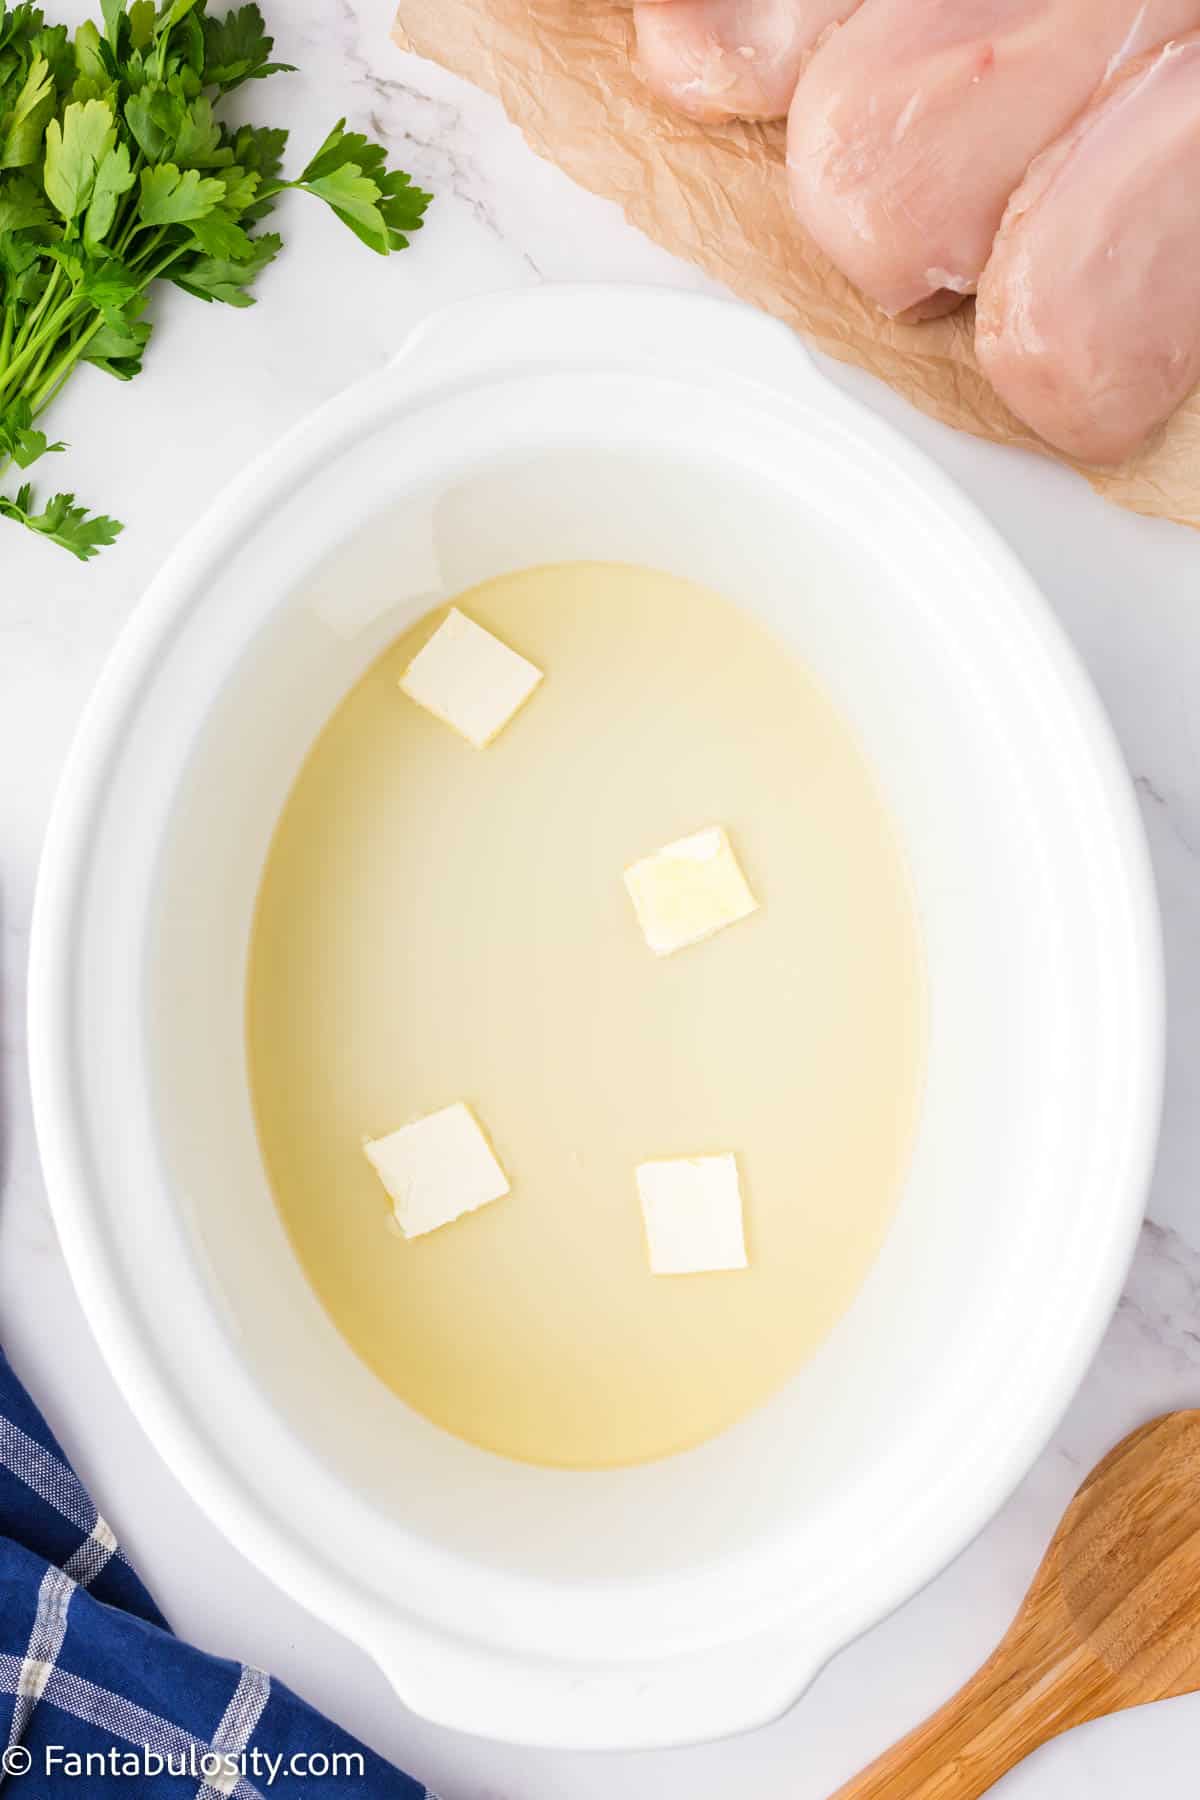
    broth and butter melting in slow cooker
    Broth & Butter
    Uncooked chicken breasts in slow cooker
    Add chicken breasts
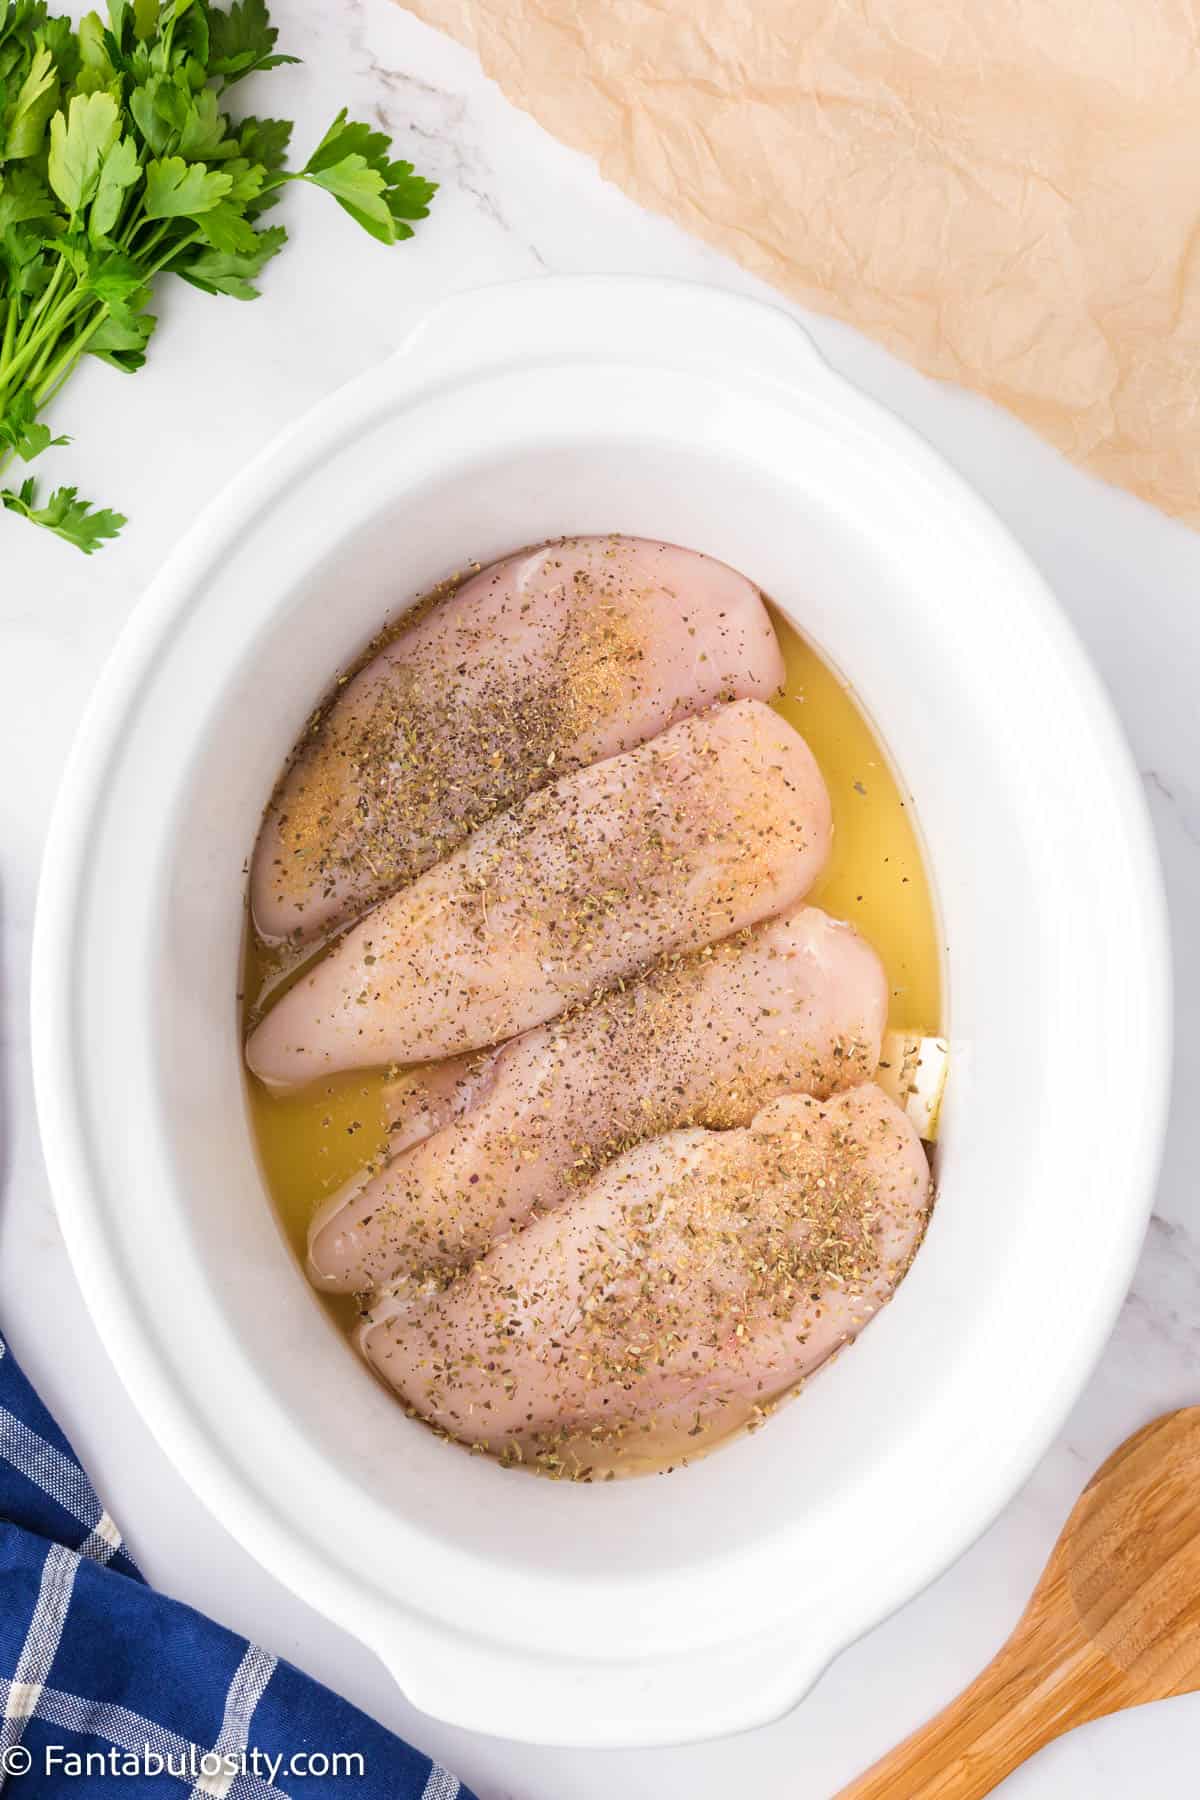
    1. Evenly sprinkle Italian seasoning, garlic powder, salt, and pepper over the chicken breasts.
    seasoning on chicken
    1. Cook on high for 4 hours or low for 6-8 hours. Check to make sure the internal temperature of the chicken is 165 degrees before removing it from the crock pot.
    2. Once cooked, remove all except 1 inch of broth from the crock pot.
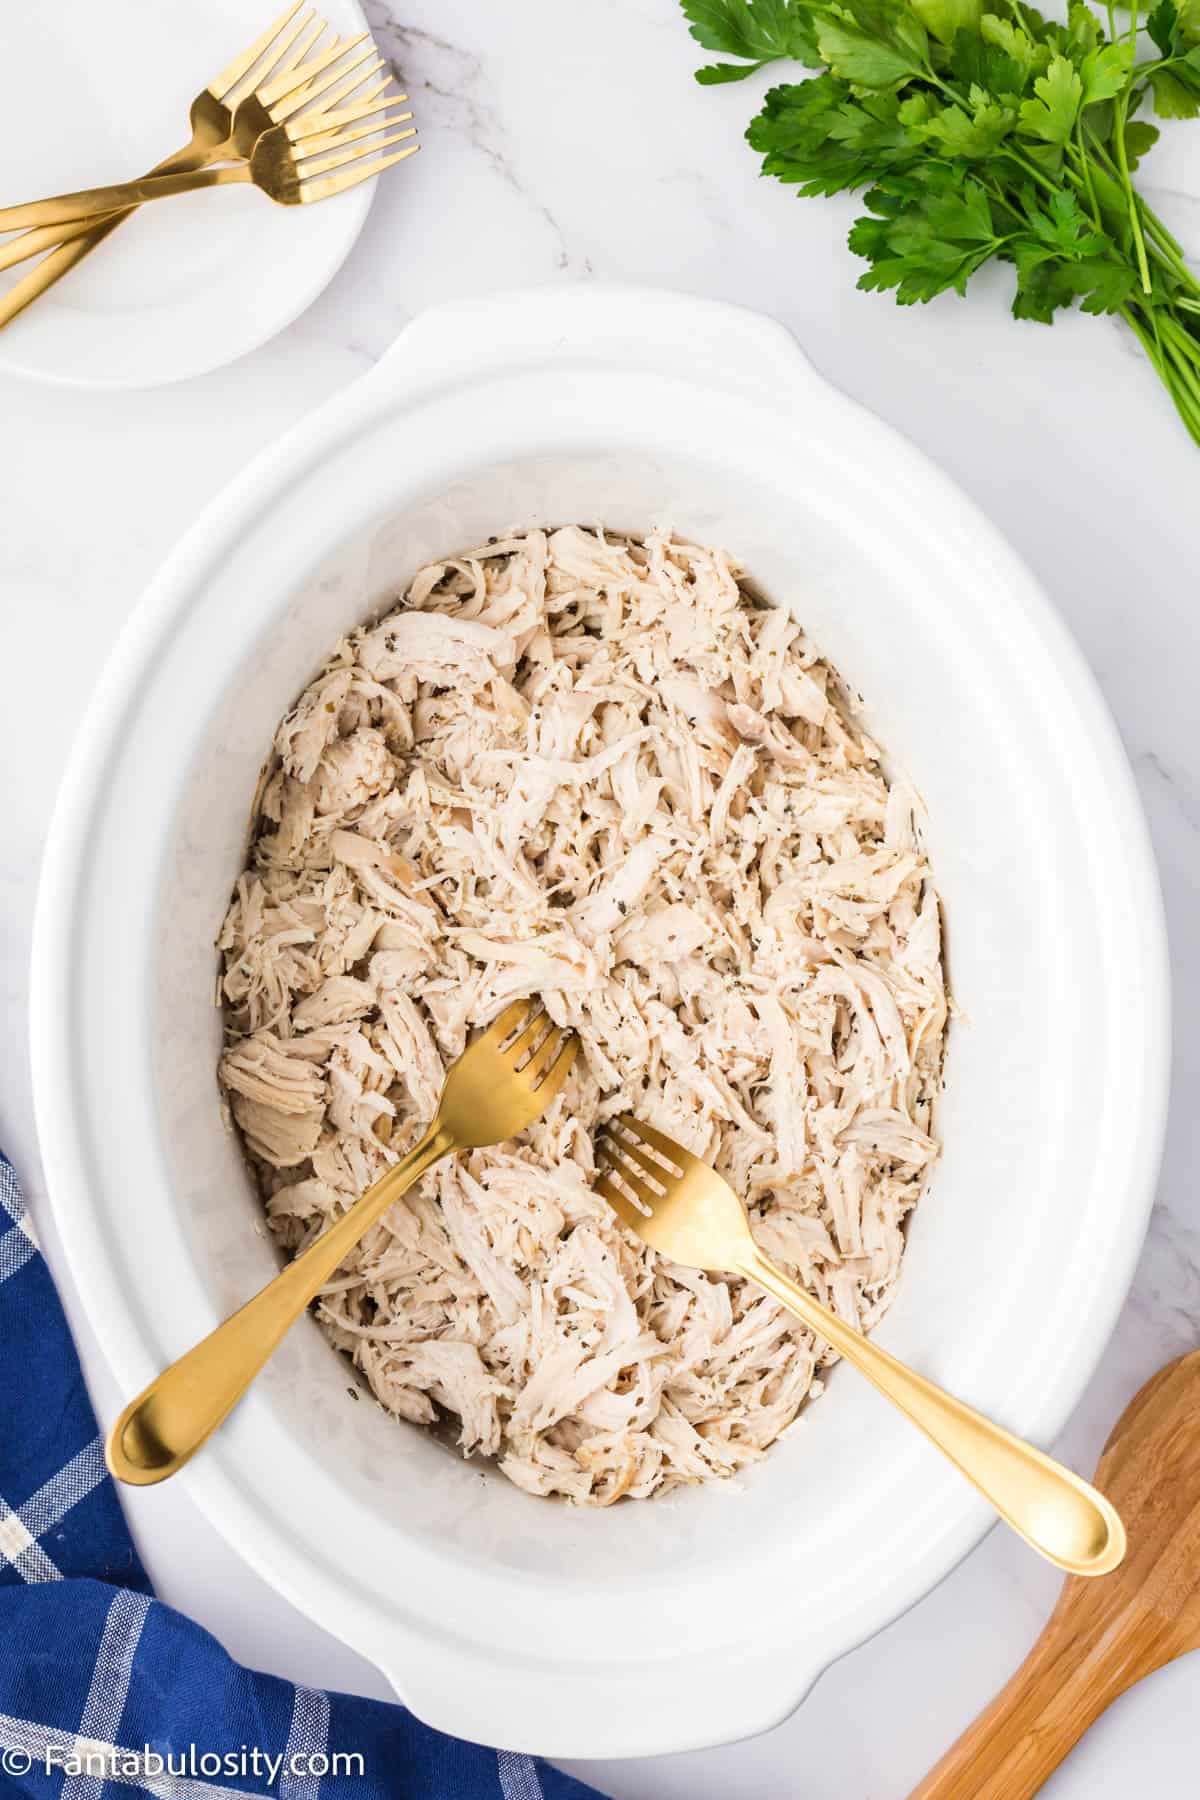
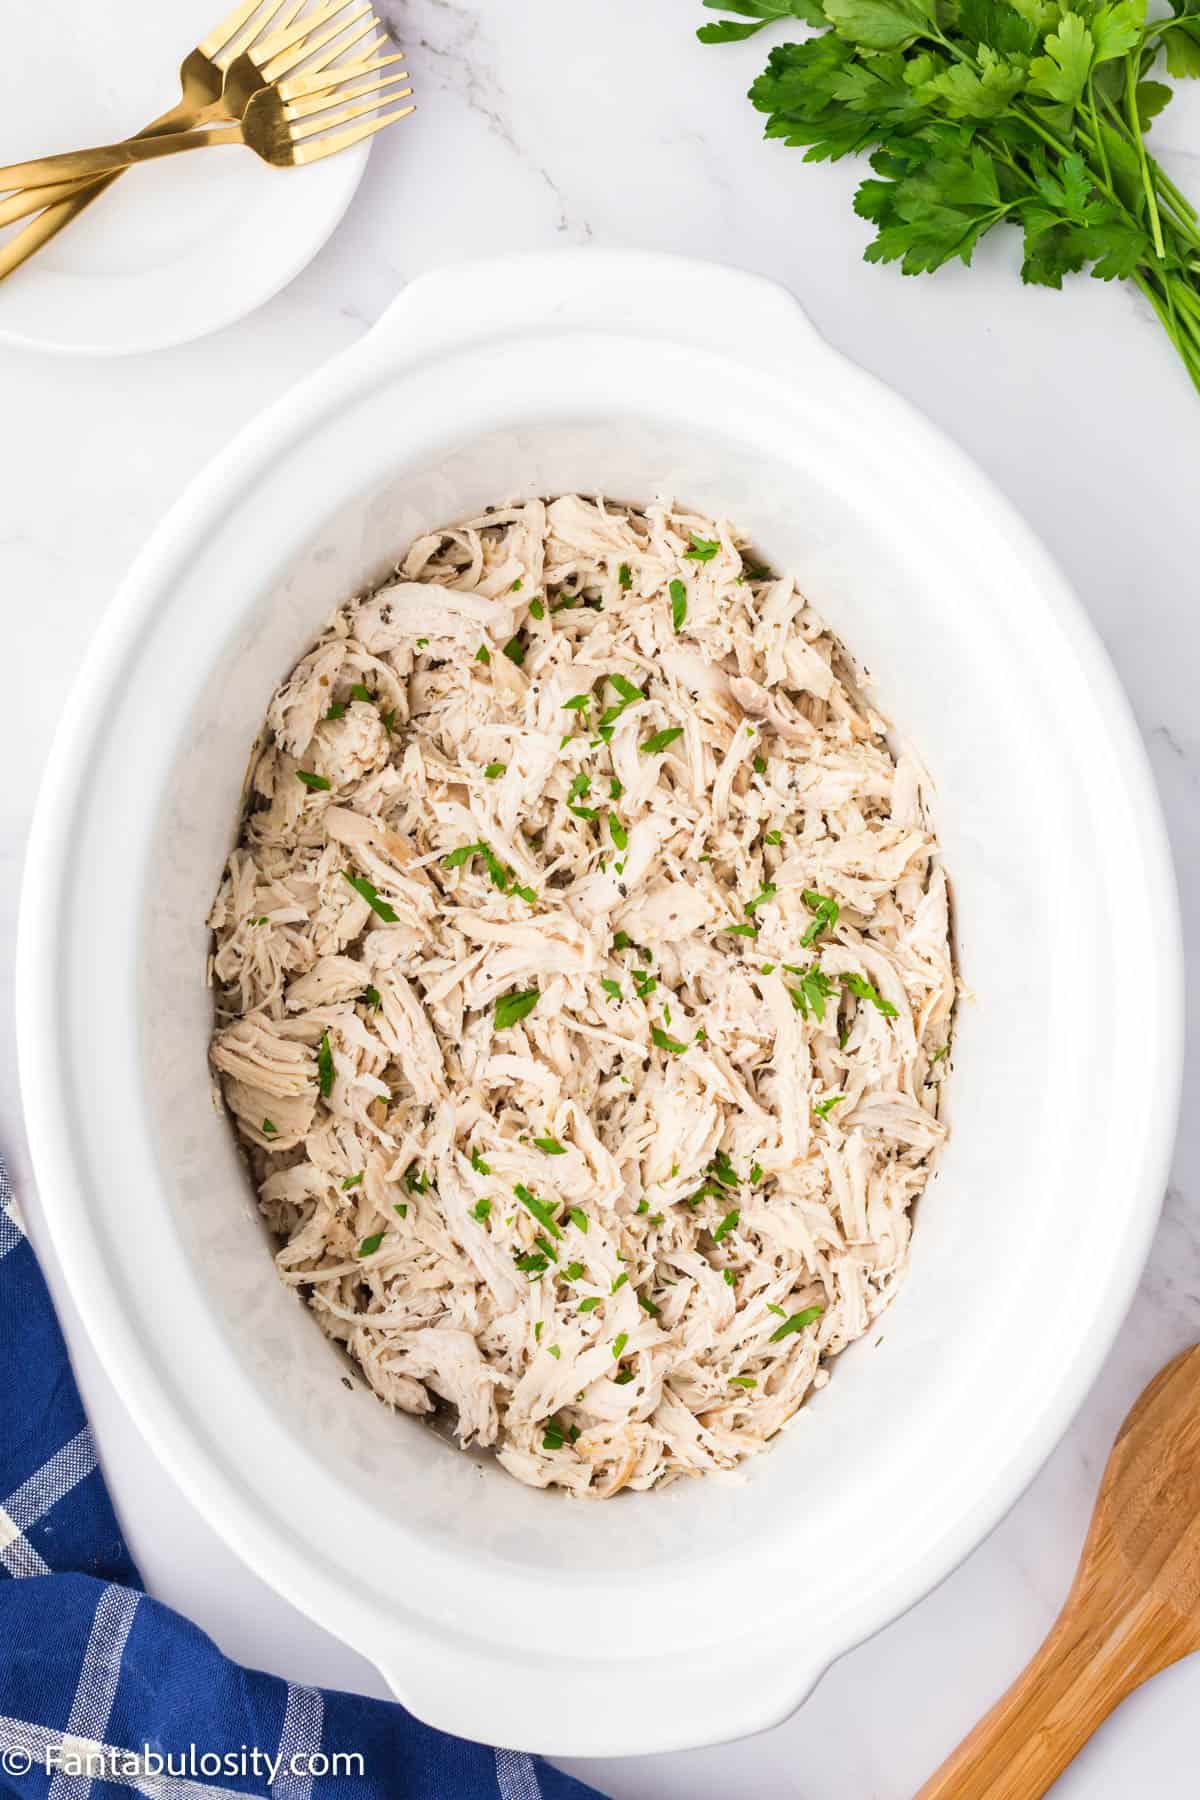
    3. Using 2 forks, shred the chicken and top with chopped parsley.
    cooked, shredded chicken in slow cooker
    Shred cooked chicken
    shredded cooked chicken in slow cooker
    Slow Cooker Shredded Chicken
    1. Serve warm in chicken recipes, on sandwiches, or by itself.
    cooked shredded chicken in slow cooker

    Equipment

    Any basic slow cooker should work just fine for this! We actually have an Instant Pot though, and we use this for a lot of our slow cooker recipes, like when we made our Instant Pot pulled pork! The cooking time may be different, as we don’t have a “high” and “low” on our Instant Pot for the slow cooker function so it’s best to check and make sure the middle of the chicken breast with a meat thermometer, to make sure the internal temp as reached 165 degrees.

    Electric Mixer vs. Two Forks: Some find that using an electric mixer or stand mixer with the paddle attachment to shred the chicken, is an easier way. However, using two forks is an option that works well and is something everyone usually has on hand.

    Substitutions

    • Type of chicken: The chicken breasts can be substituted with boneless chicken thighs (skinless) if you prefer! Yes, buying a rotisserie chicken in the grocery store can be an easy way to add chicken in to some dishes but this is a great way to get easy shredded chicken, and save money!
    • Garlic: Minced garlic or chopped garlic can be used instead of garlic powder if that’s all you have on hand or prefer a stronger garlic flavor.
    • Seasoning: If you don’t have Italian seasoning or aren’t a fan of that flavor, you can use taco seasoning, seasoning salt, or something similar! You can also leave the seasoning out completely if you feel like it will mess with the flavor of the dishes you plan to make with it!
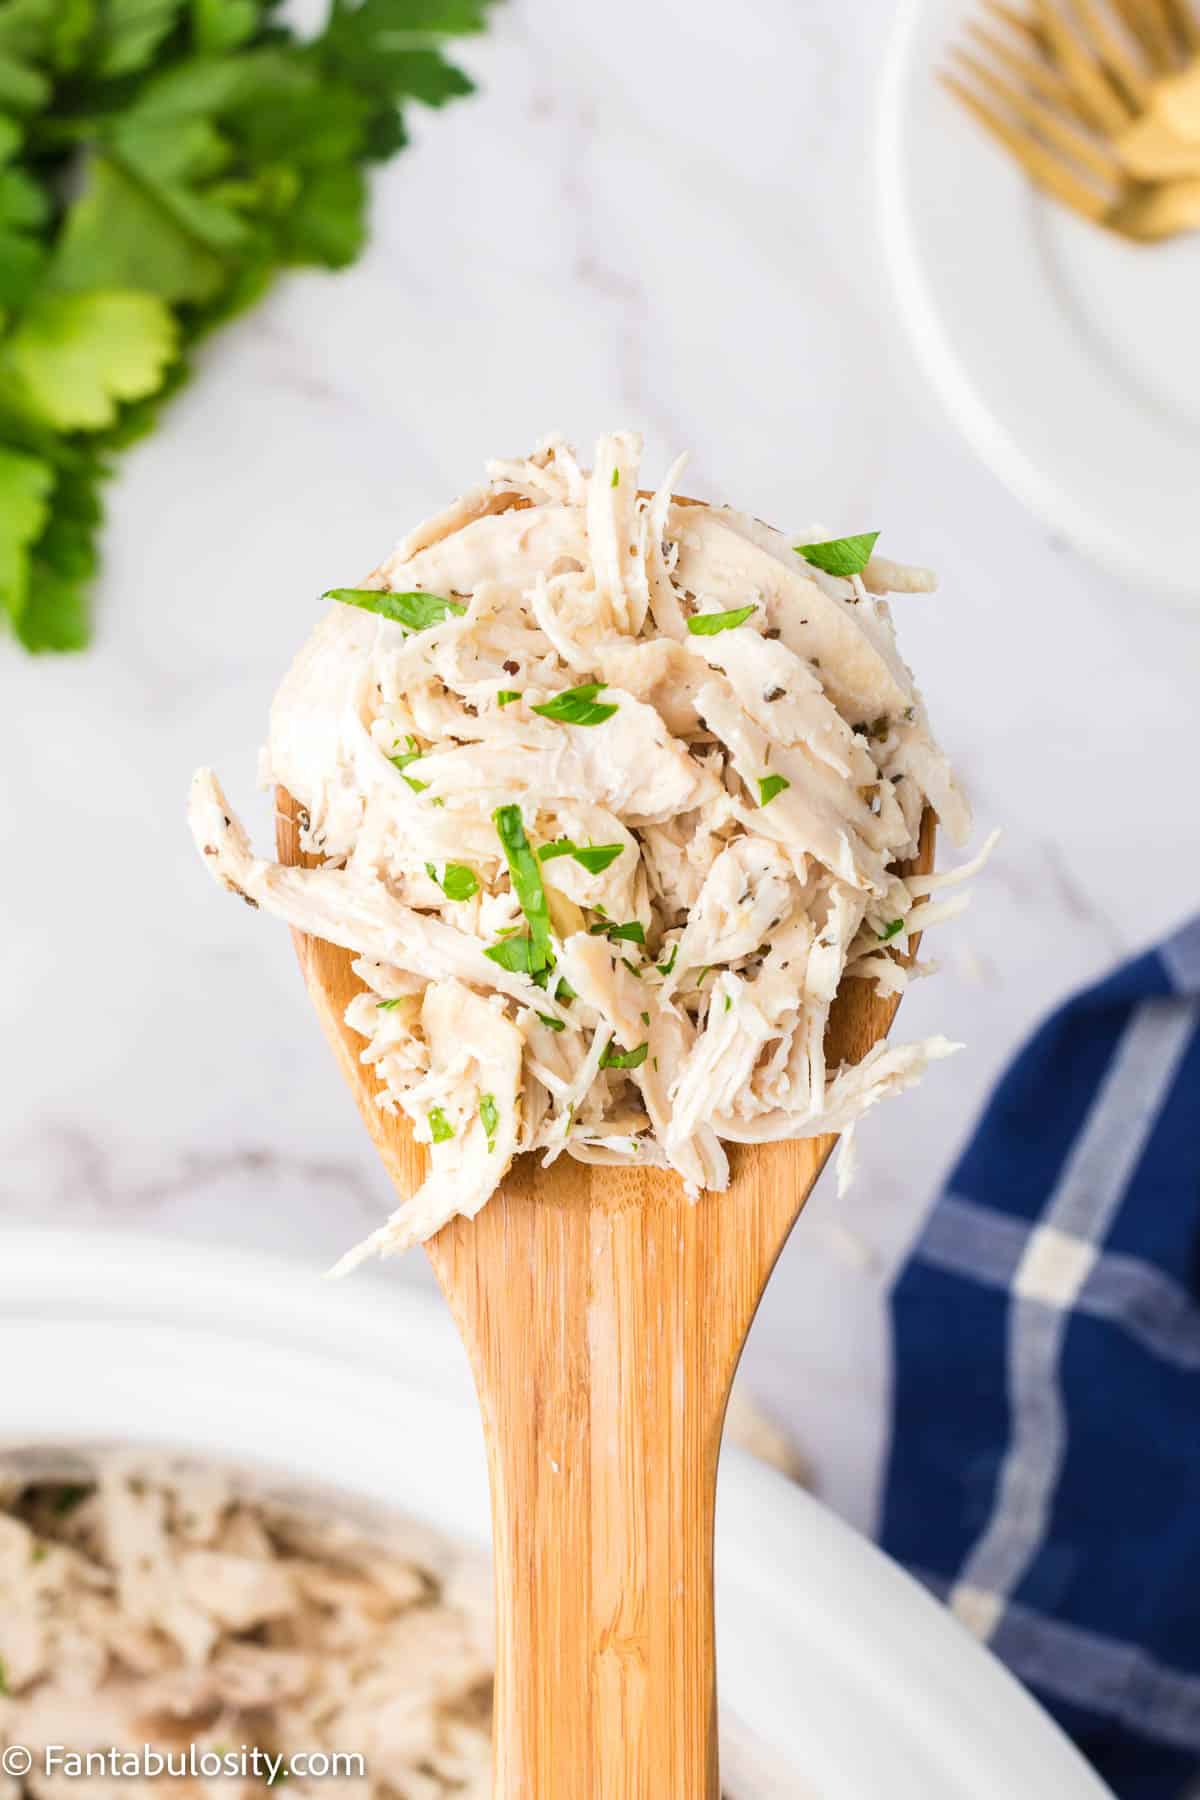
    Cooked shredded chicken on wooden spoon

    Storage

    This crock pot shredded chicken should be stored in an air-tight container in the refrigerator for up to 5 days, or in a freezer for up to 6 months.

    Pro Tip

    Double or triple this recipe, to make large batches of cooked chicken to freeze for later!

    FAQs

    Should I eat cooked shredded chicken warm or cold?

    As long as it’s fully cooked, you can eat shredded chicken warm or cold! Warm in tacos, soups, casseroles, or even cold in salads like chicken salad or a lettuce salad!

    Can you freeze shredded chicken?

    Yes, you can make this slow cooker shredded chicken ahead of time and freeze it in an airtight container or freezer bag for up to 6 months. Make
    sure to thaw completely in the refrigerator before reheating or serving.

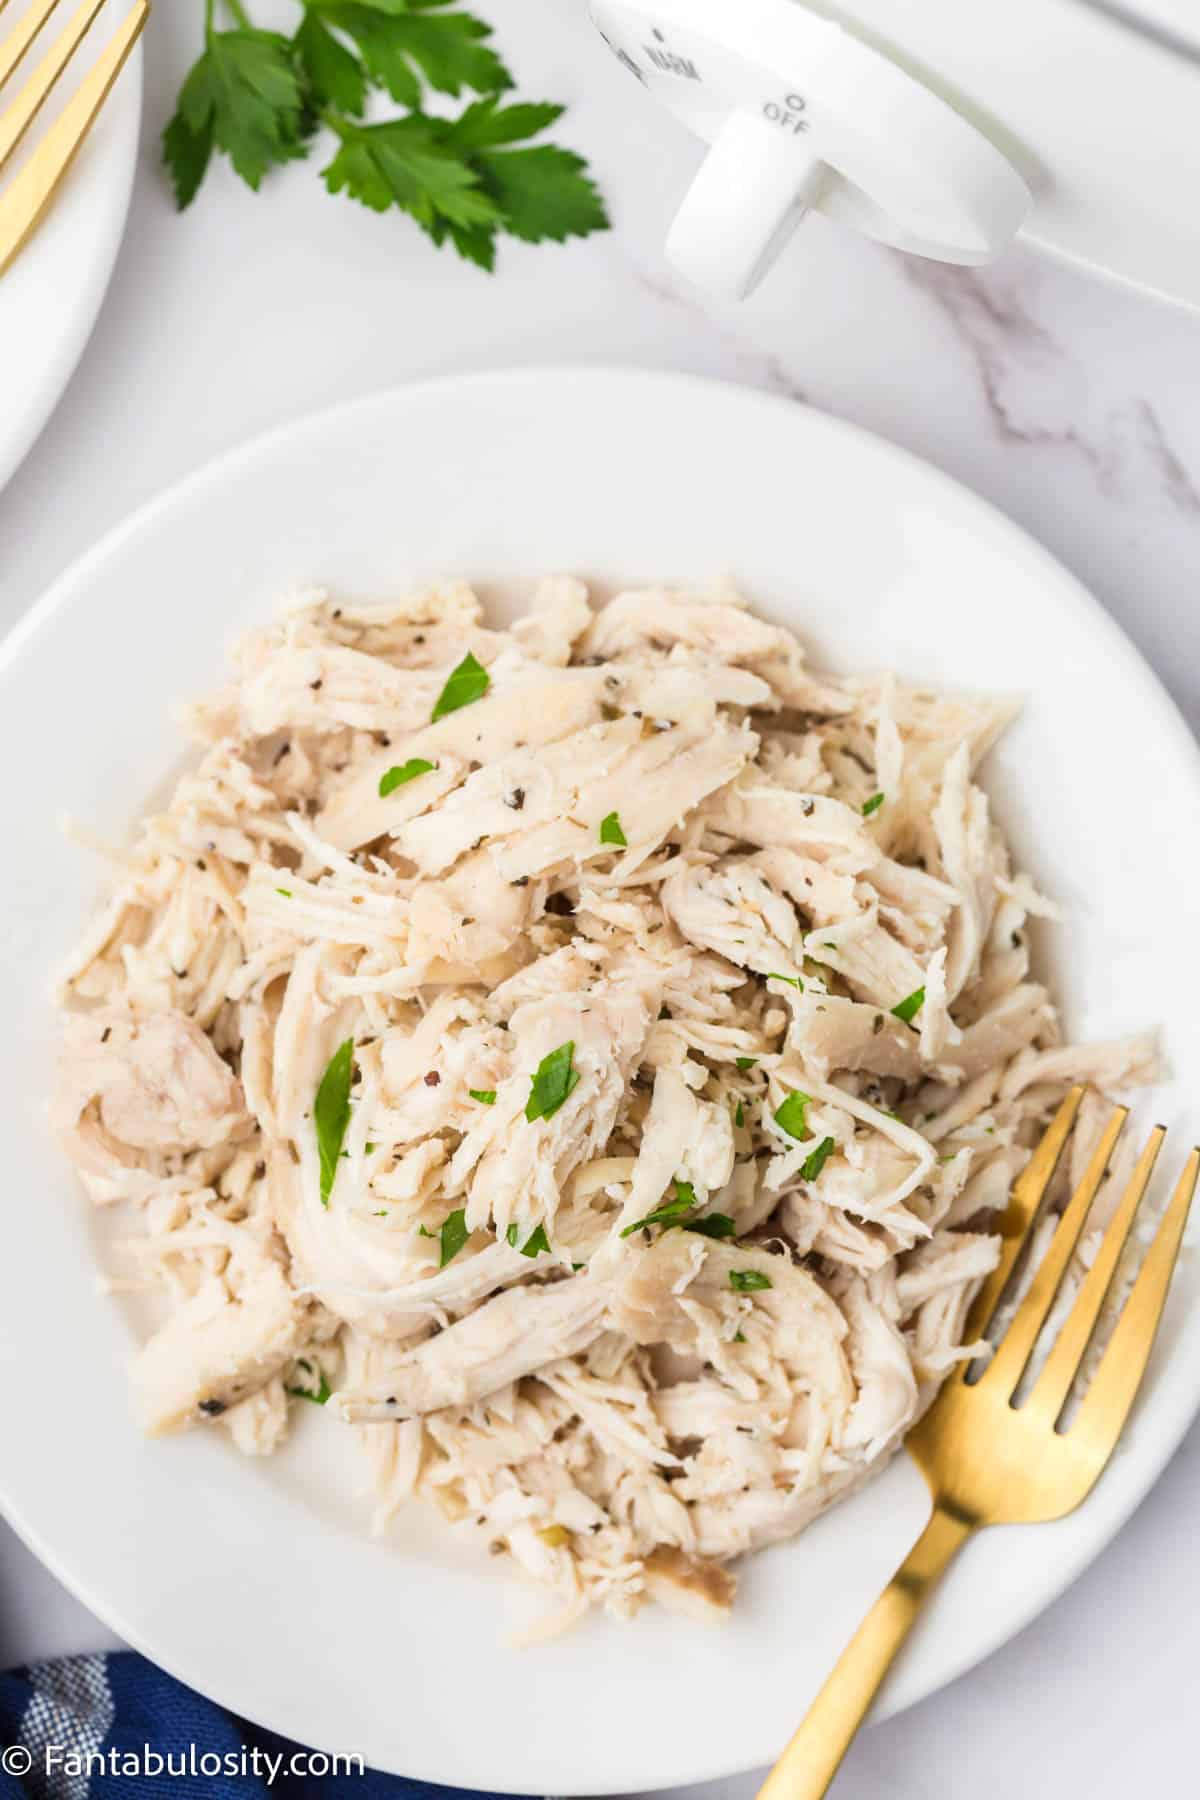
    Cooked shredded chicken on white plate

    How to Use Shredded Chicken

    Now that you’ve made the shredded chicken, here are some easy recipes that it will be perfect for:

    • Chicken and noodles in a white bowl with fork holding a bite.
      Chicken and Noodles Recipe
    • Chicken Pot Pie Casserole in white baking dish
      Chicken Pot Pie Casserole
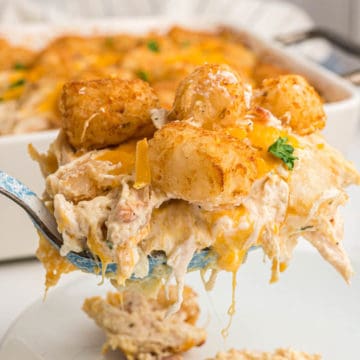
    • Close up photo of a spoonful of a creamy chicken and cheese casserole topped with crispy browned tater tots
      Chicken Tater Tot Casserole
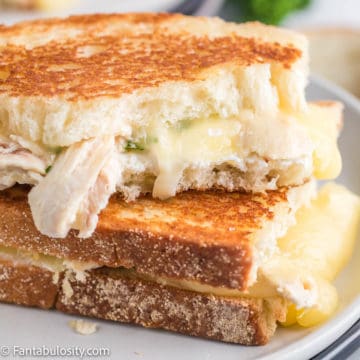
    • Chicken Grilled Cheese Sandwich
      Chicken Grilled Cheese

    If you love chicken dishes like this one, you’ll definitely want to check out this crack chicken that’s so good!

    Or if you love a “kick” to your chicken recipes, this jalapeno crock pot chicken is an easy one to make!

    Related Recipes

    If you love easy slow cooker recipes, such as this one, then you’ll also love this shredded slow cooker pulled pork and these slow cooker bbq meatballs! Or if you’re even thinking of taco recipes, these shredded beef tacos are made in the slow cooker.

    Did you make this? I’d be so grateful if you left a “star” rating below to let me know what you thought! Then, the next time you need a quick and easy recipe, come back to Fantabulosity to browse all of my easy recipes!

    Recipe

    cooked shredded chicken in slow cooker
    Print Pin
    5 from 3 votes

    Easy Slow Cooker Shredded Chicken Recipe

    Slow Cooker Shredded Chicken: This easy recipe, using boneless skinless chicken breasts, is the best way to cook chicken for all of your favorite chicken dishes.
    Course Appetizer, Main Course, Side Dish
    Cuisine American
    Diet Low Fat
    Prep Time 5 minutes minutes
    Cook Time 4 hours hours
    Total Time 4 hours hours 5 minutes minutes
    Servings 6 cups
    Calories 539kcal
    Author Jessica Burgess

    Equipment

    • slow cooker – such as a crock pot

    Ingredients

    • 3.5 pounds raw chicken breasts boneless, skinless
    • ¼ cup butter
    • 2 cups chicken broth
    • 3 Tablespoons Italian seasoning
    • 1 Tablespoon garlic powder
    • 1 teaspoon salt
    • 1 teaspoon pepper
    • parsley to taste optional

    Instructions

    • Pour chicken broth into a 4-6 quart crockpot along with butter.
    • Place chicken breasts into the crock pot over the butter.
    • Evenly sprinkle the Italian seasoning, garlic powder, salt, and pepper over the chicken breasts.
    • Cook on high for 4 hours or low for 6-8 hours. Check to make sure the internal temperature of the chicken is 165 degrees before removing it from the crock pot.
    • Once cooked, remove all except for about 1 inch of broth from the slow cooker.
    • Using 2 forks, shred the chicken and top with chopped parsley.
    • Serve warm in chicken recipes, on sandwiches, or by itself.

    Notes

    Storage: This crock pot shredded chicken should be stored in an air-tight container in the refrigerator for up to 5 days, or in a freezer for up to 6 months.
    Can you freeze this chicken? Yes, you can make this slow cooker shredded chicken ahead of time and freeze it in an airtight container or freezer bag for up to 6 months. Make sure to thaw completely in the refrigerator before reheating or serving.
    Substitute: The chicken breasts can be substituted with boneless skinless chicken thighs if you prefer!

    Nutrition

    Serving: 0.25cup | Calories: 539kcal | Carbohydrates: 3g | Protein: 56g | Fat: 32g | Saturated Fat: 12g | Polyunsaturated Fat: 6g | Monounsaturated Fat: 12g | Trans Fat: 1g | Cholesterol: 191mg | Sodium: 907mg | Potassium: 650mg | Fiber: 1g | Sugar: 0.5g | Vitamin A: 502IU | Vitamin C: 0.1mg | Calcium: 77mg | Iron: 3mg

    French Onion Beef Casserole

    August 2, 2022

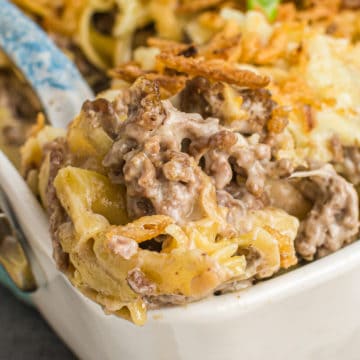
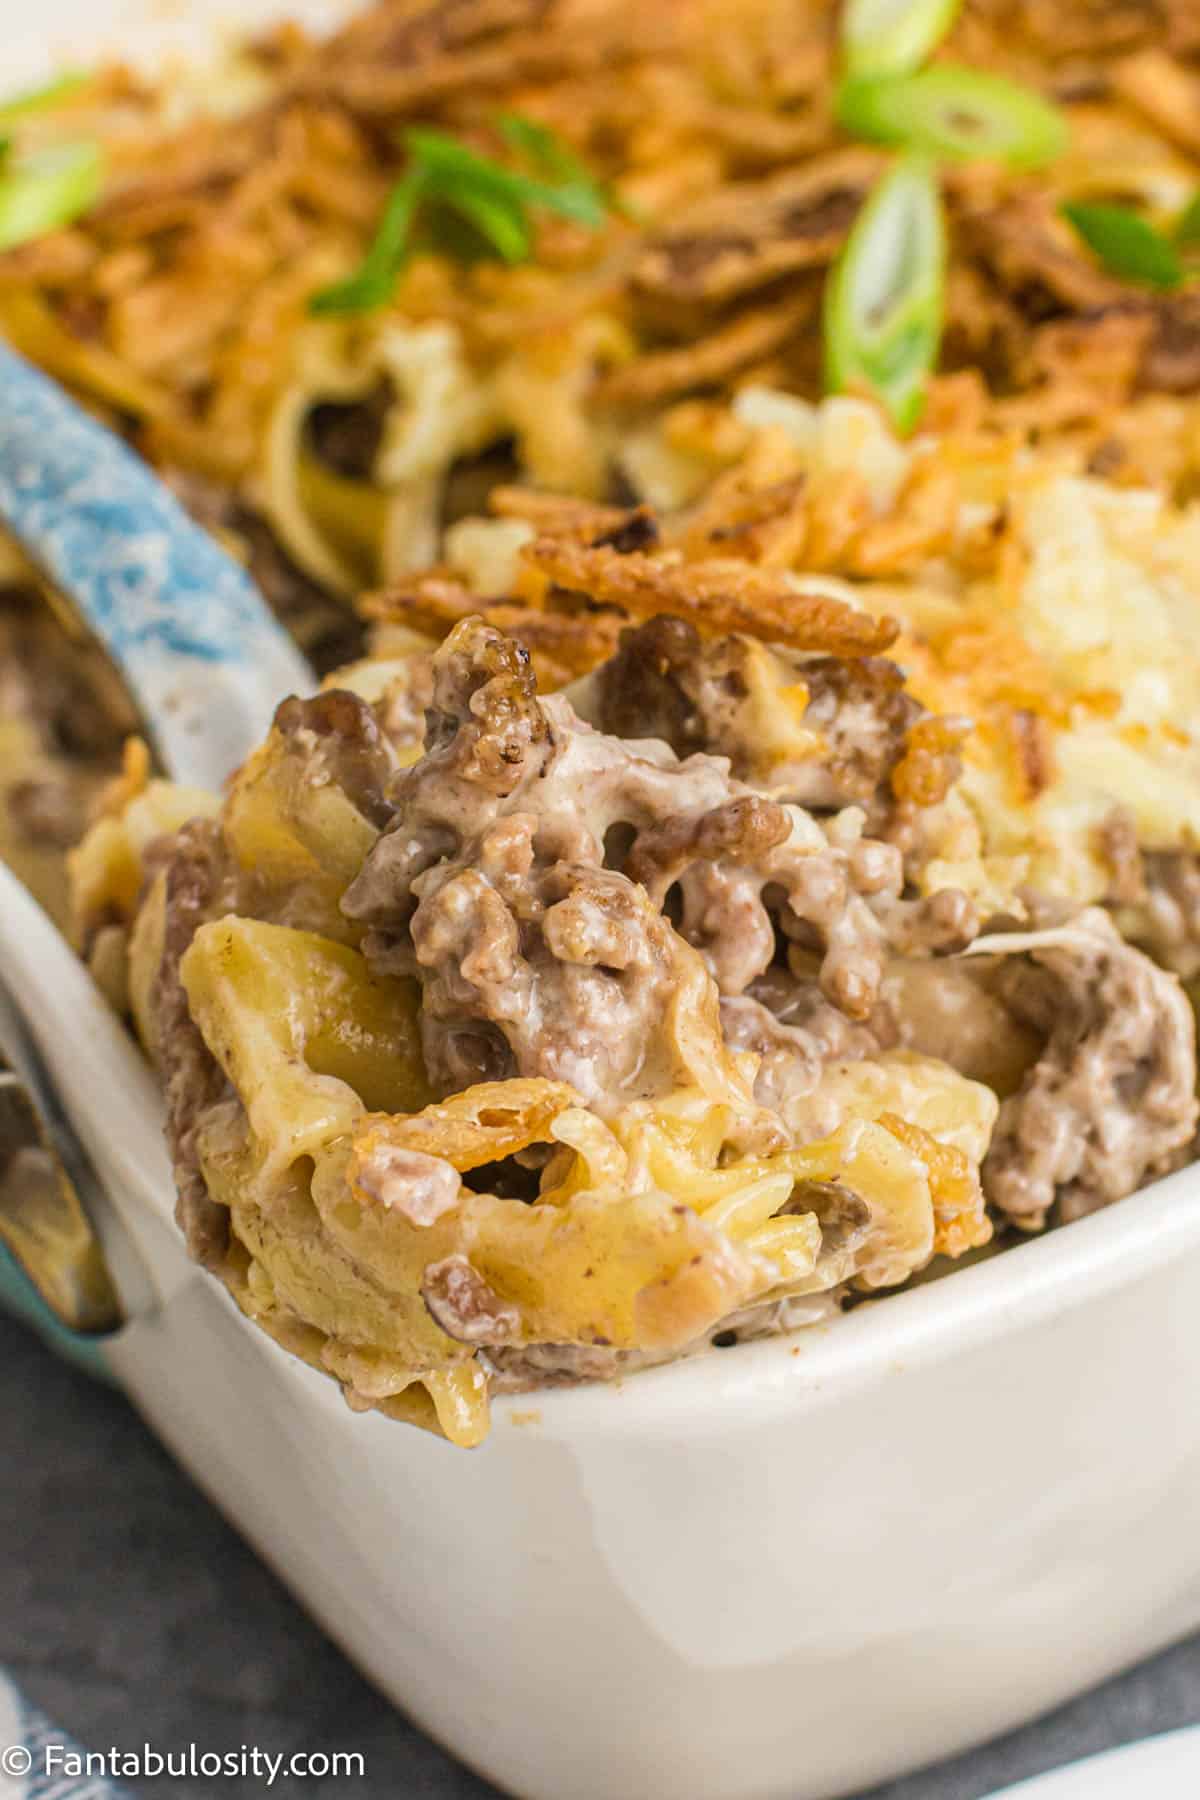
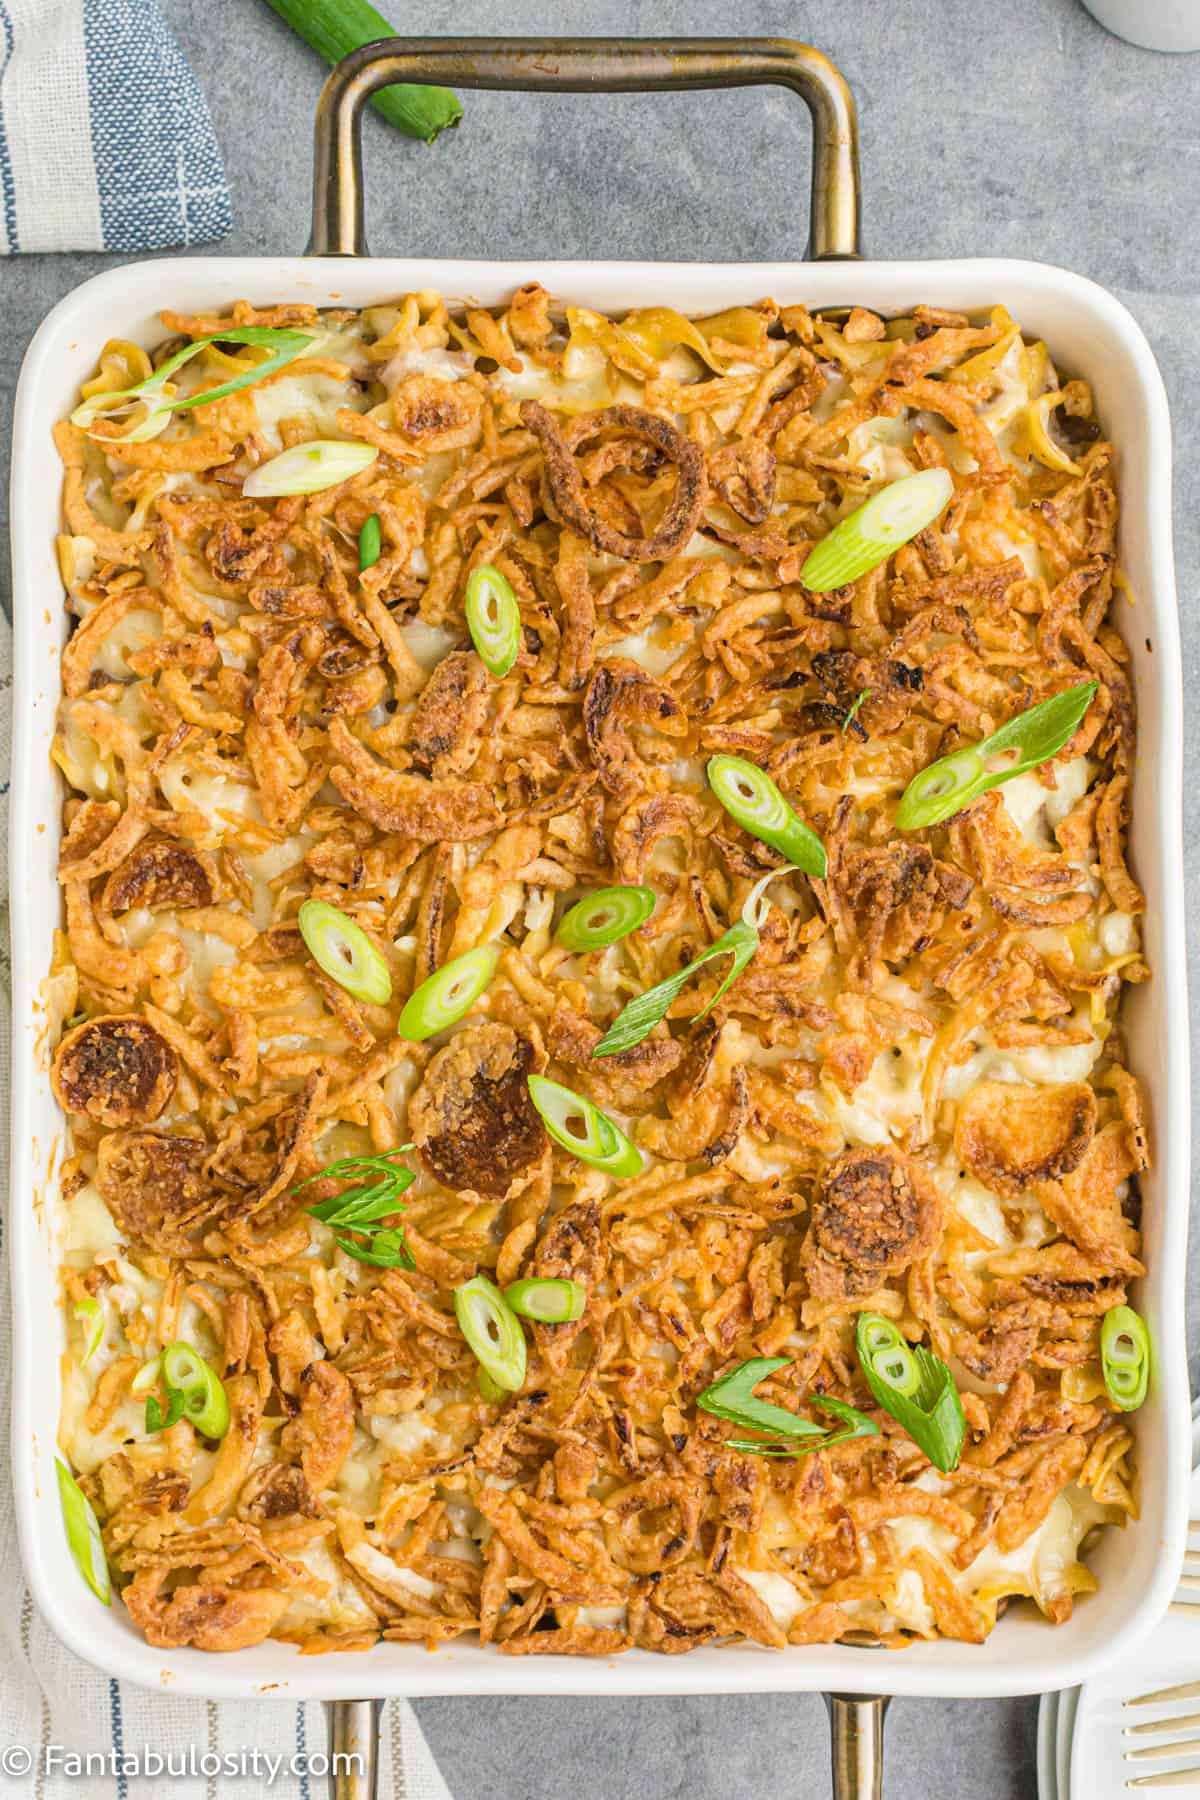
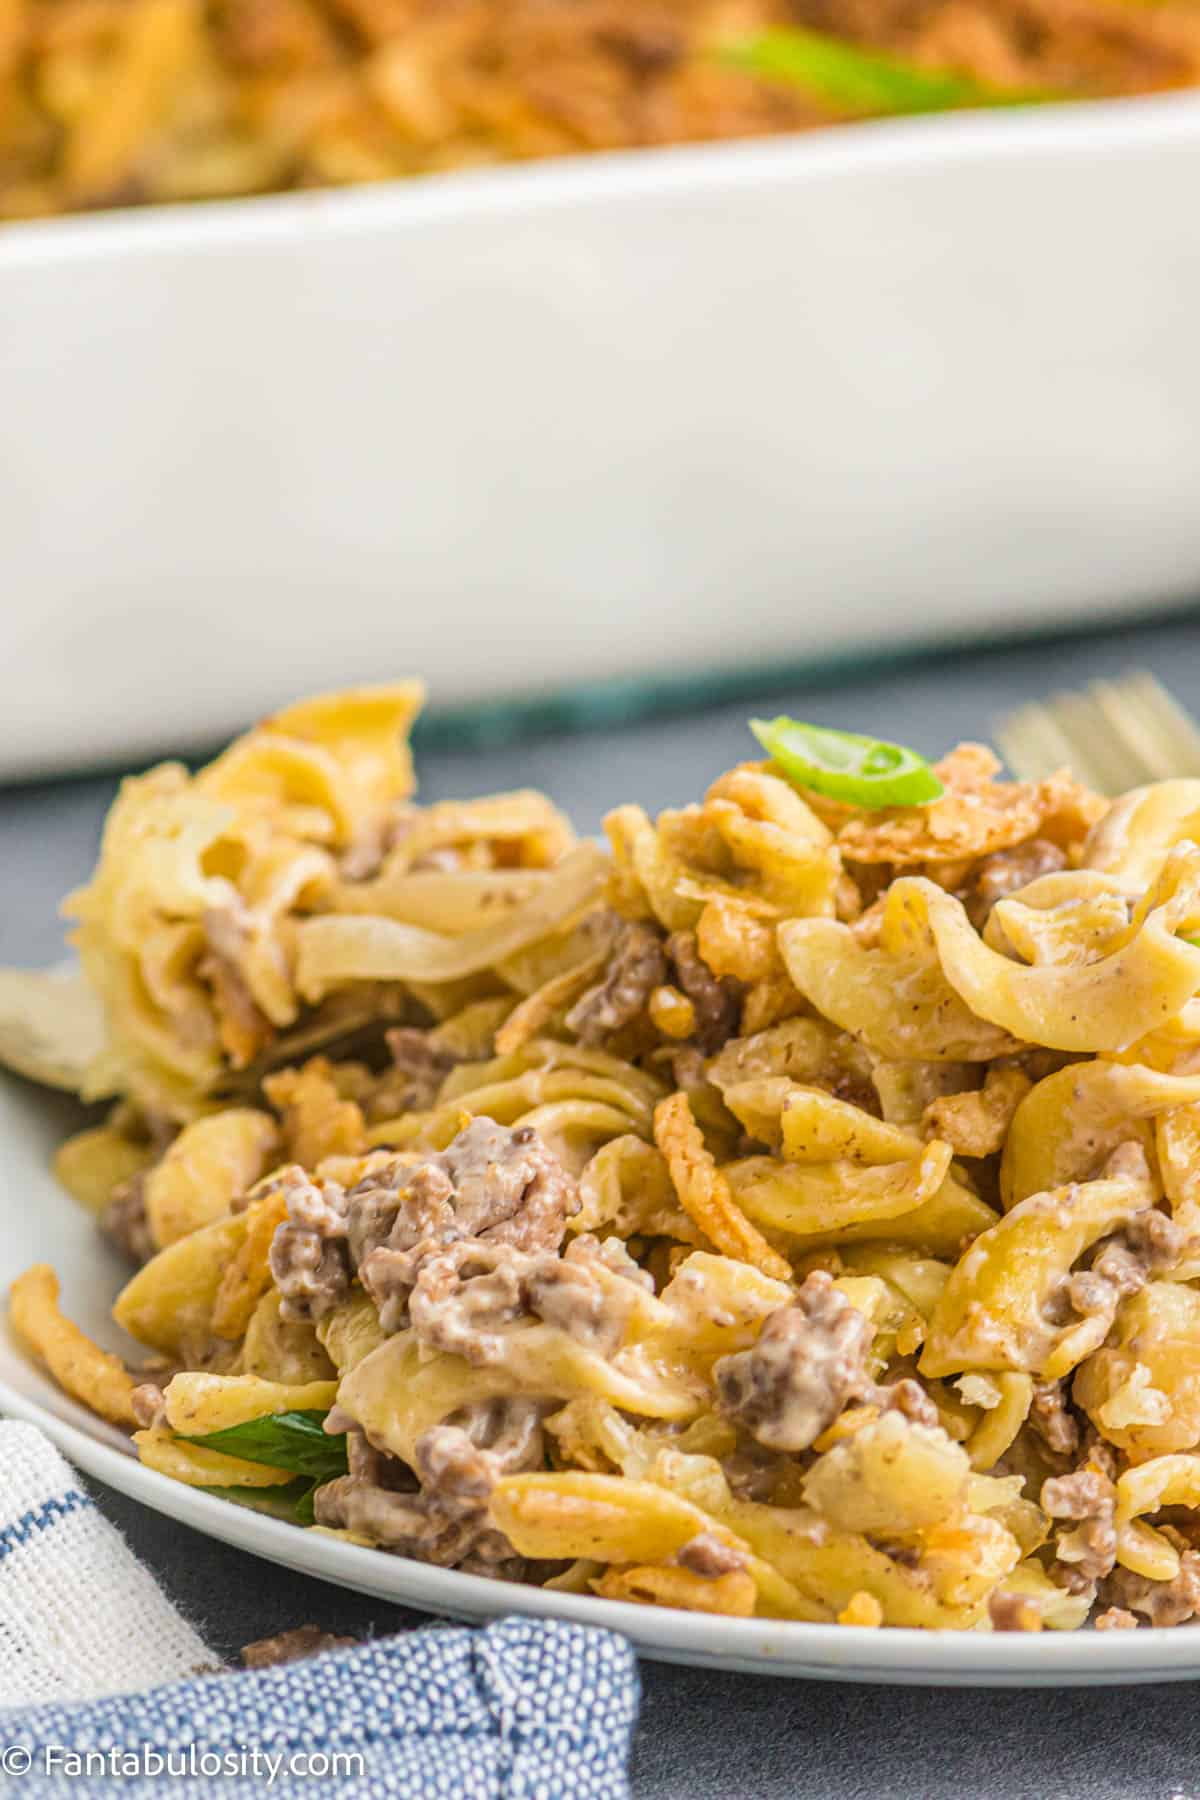
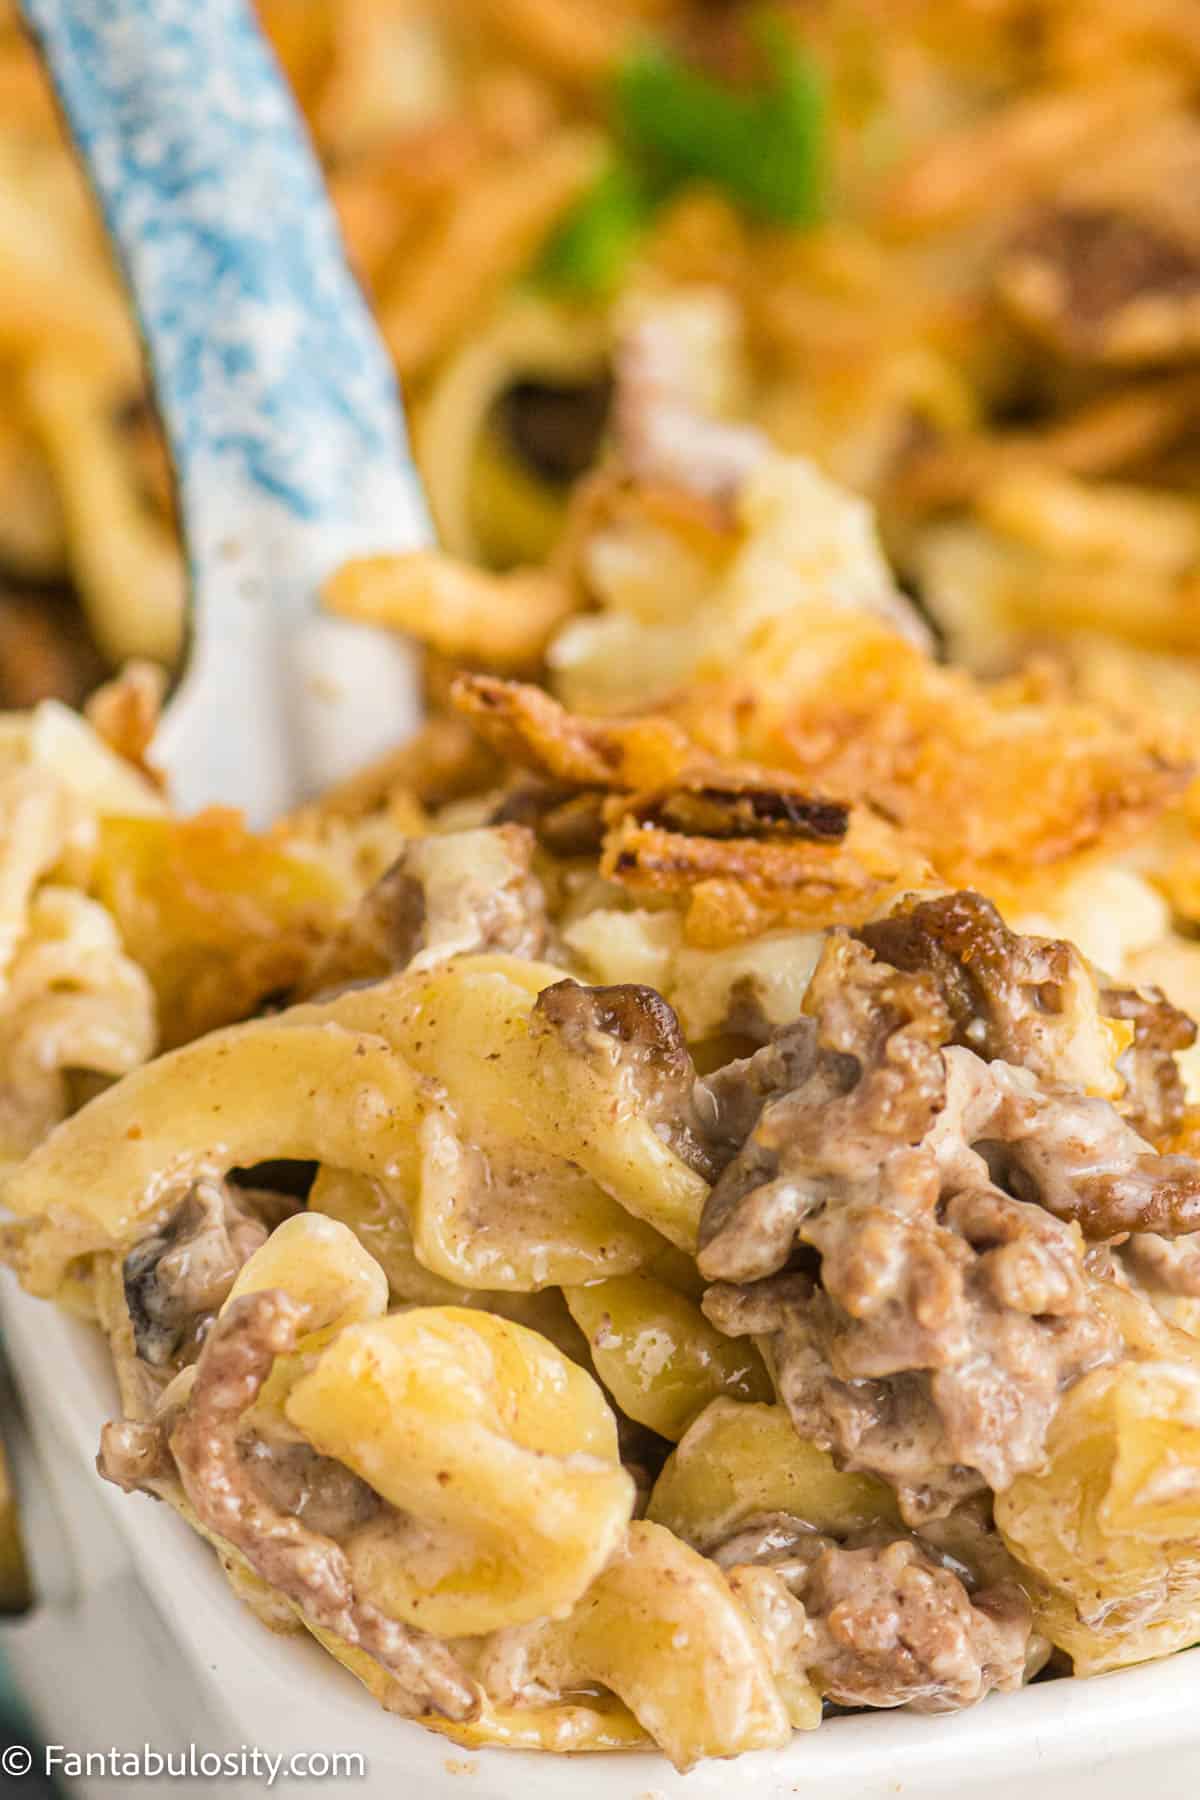
    french onion beef casserole scooped up out of white dish

    French Onion Beef Casserole: This beef casserole recipe is comfort food at its finest! Made with ingredients such as egg noodles, onion soup mix, swiss cheese, and more, it’s a crowd and family favorite!

    Quick Overview: With the prep only taking 10 minutes, you’ll have this easy casserole dish ready for the oven and dinner table in no time! Rotate this casserole with this similar hamburger hashbrown casserole recipe.

    french onion beef casserole in dish with spoon lifting up serving size

    Why You’ll Love This Recipe

    • Feeding a crowd or a family: Casserole recipes are one of those easy recipes that’s great for feeding a crowd or for meal planning for a busy weeknight!
    • Make ahead: Assemble this casserole ahead of time, and bake it when you’re ready.
    • Simple ingredients: This is one of those recipes that you can keep most of the ingredients on hand for, when you need something for dinner at the last minute.
    What Makes Something “French Onion”

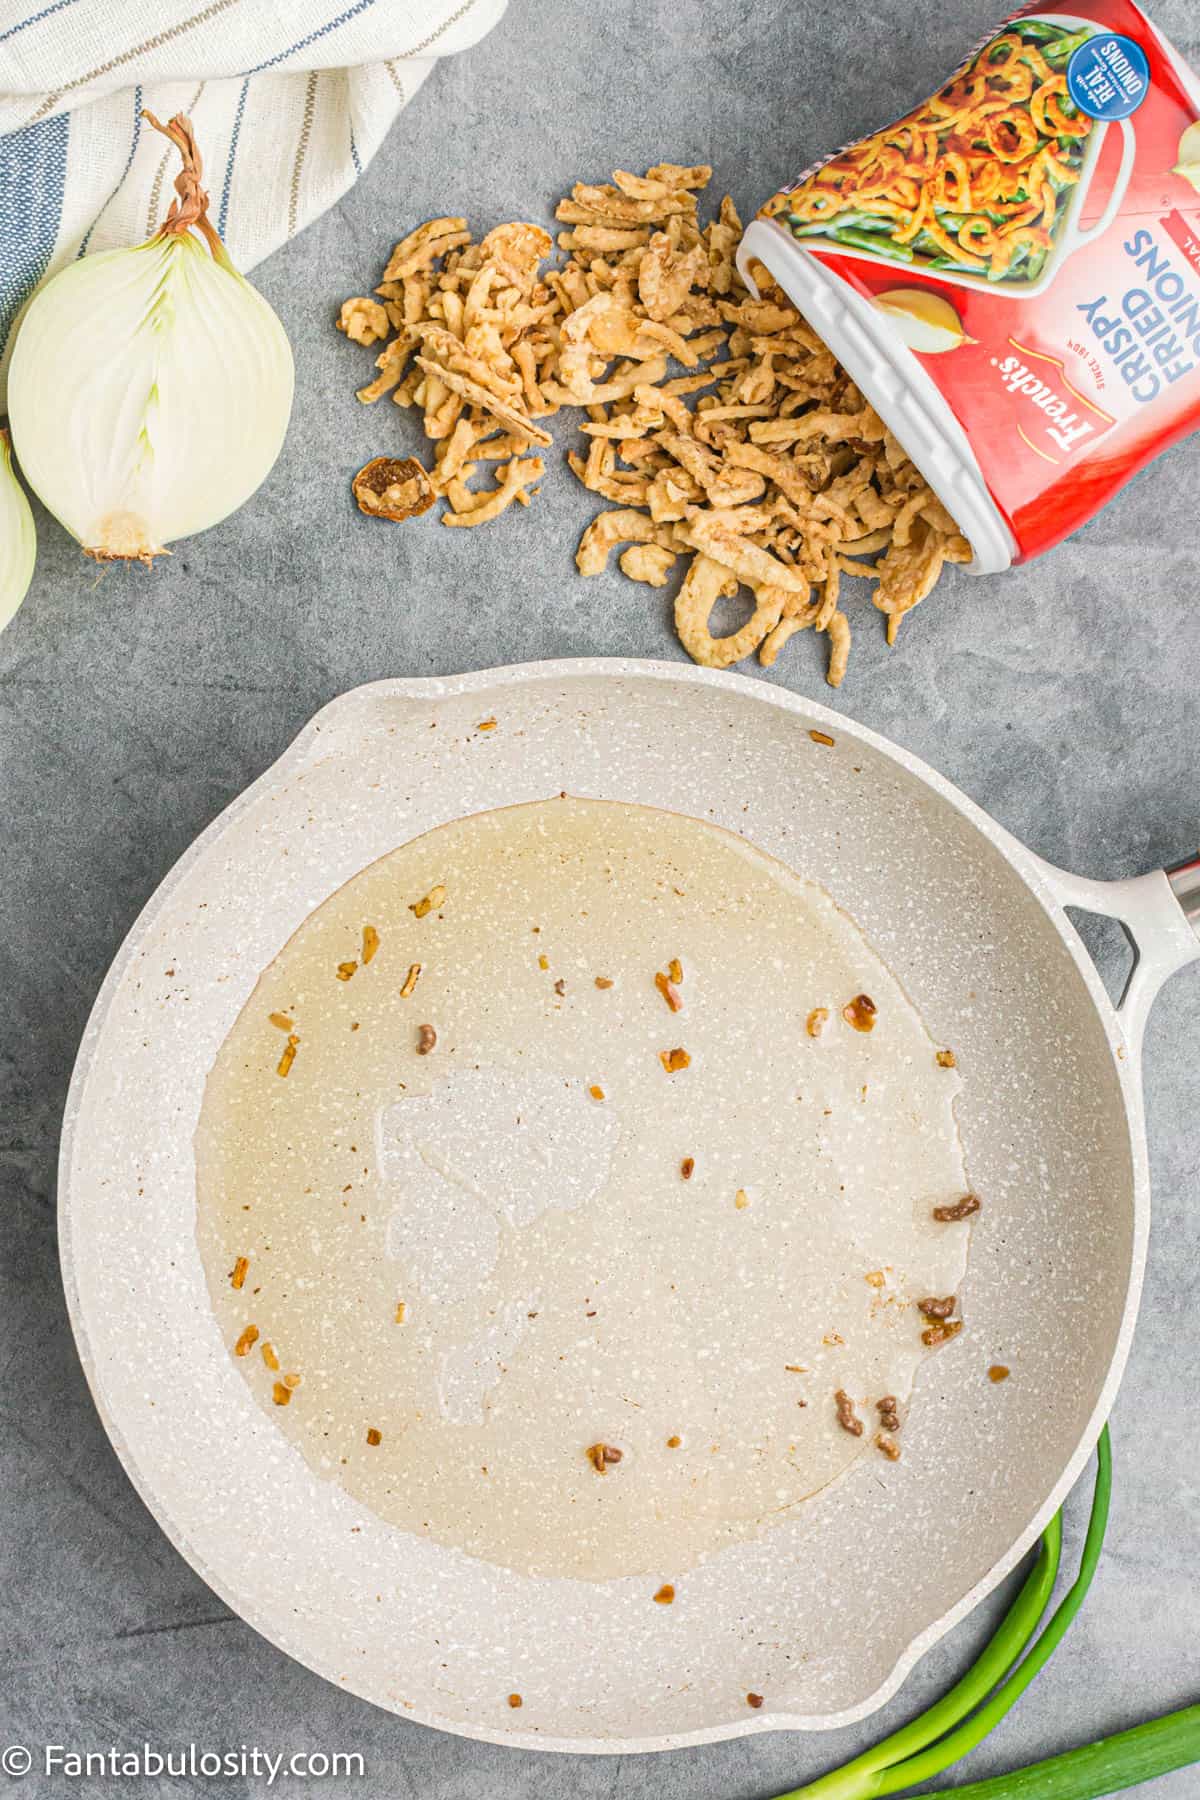
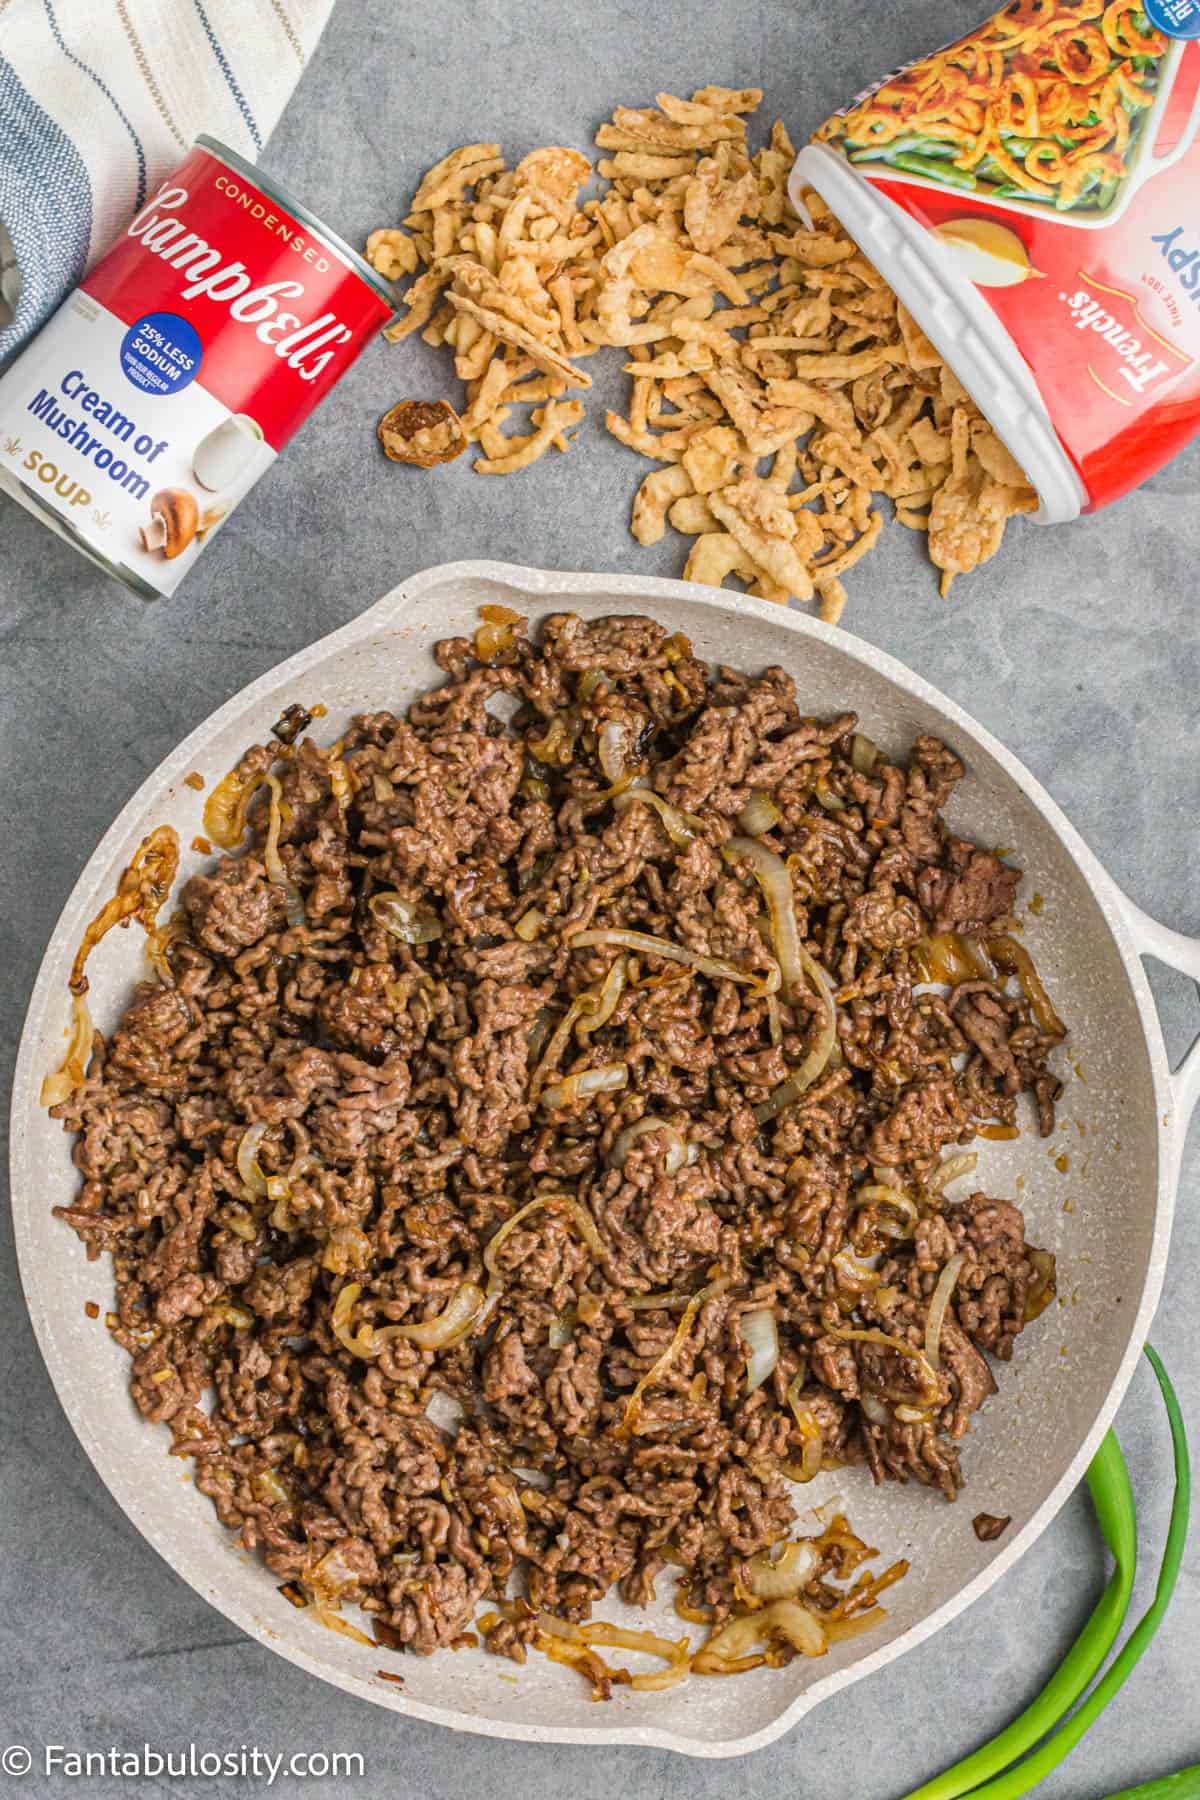
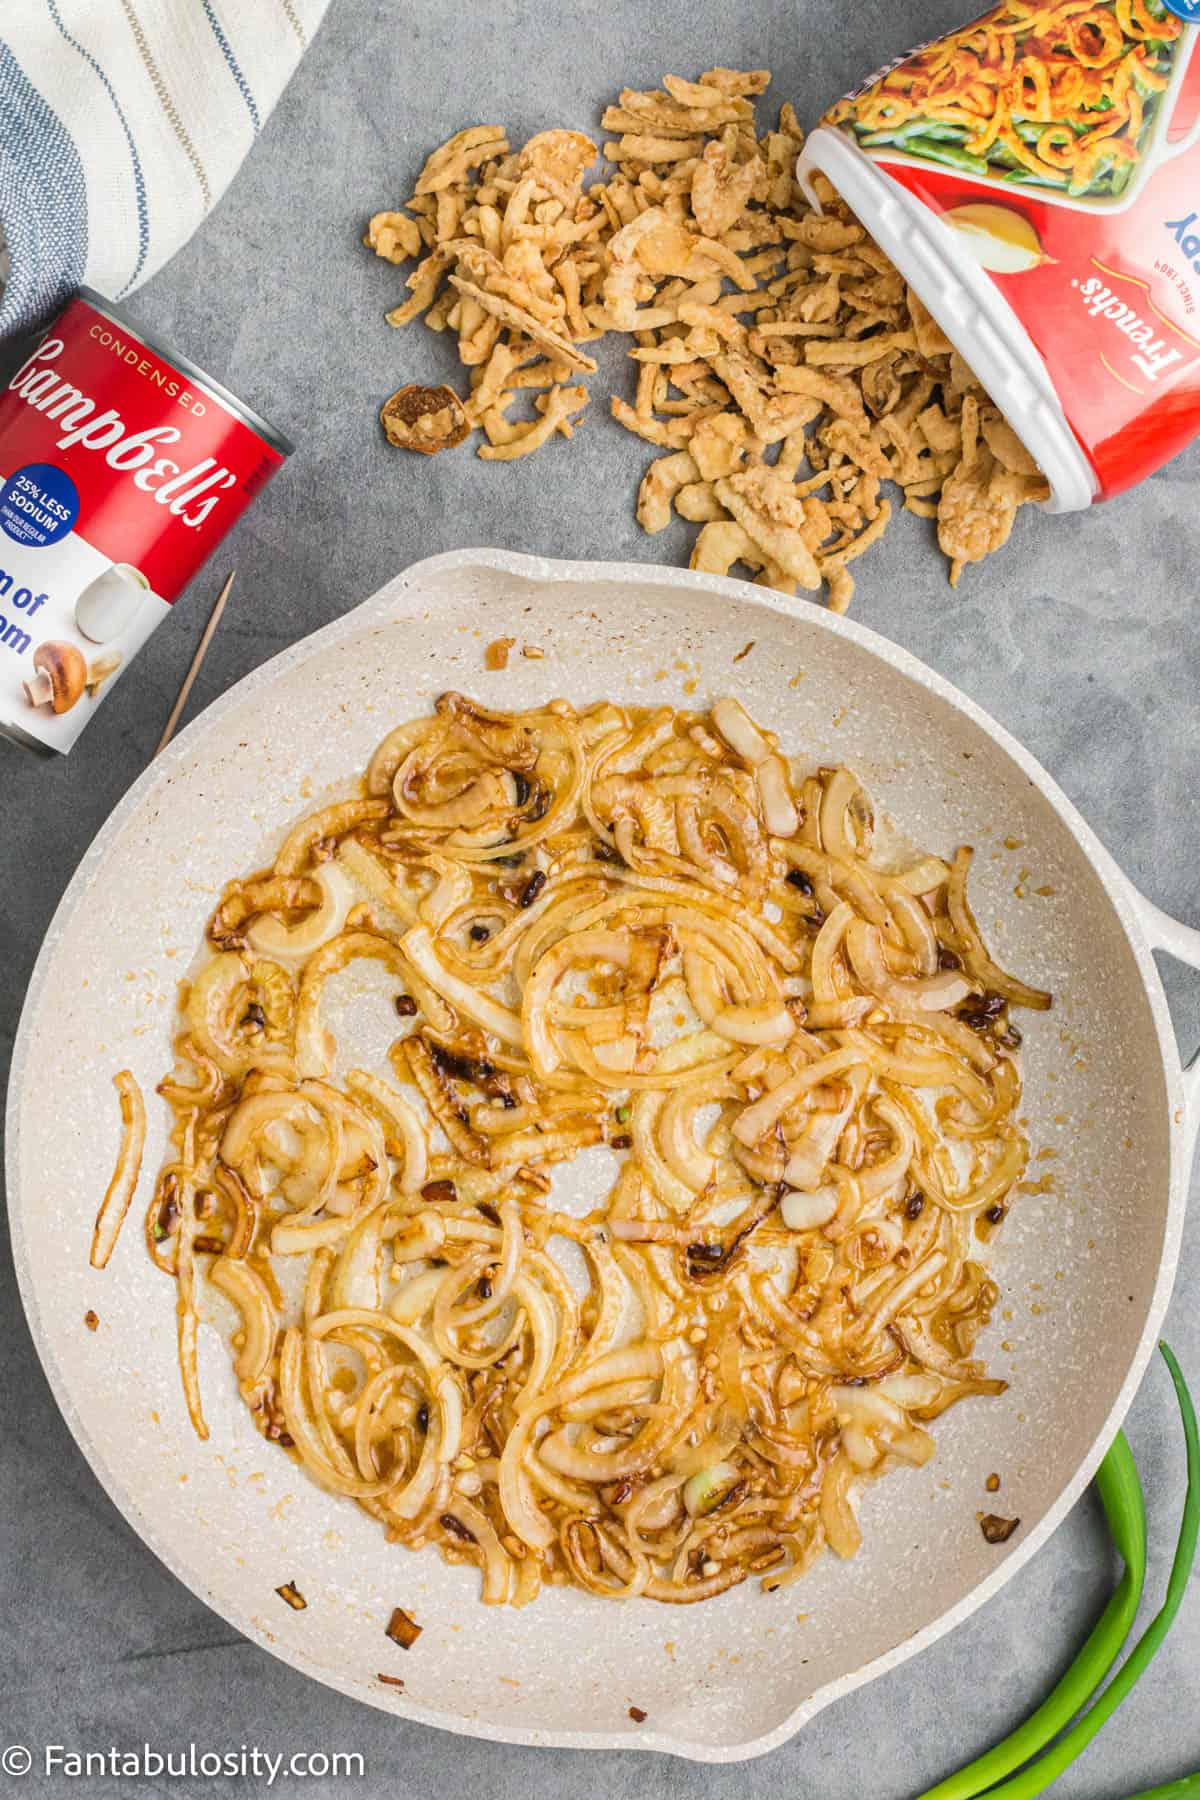
    Carmelized onions are typically found in “French onion” recipes (think: French onion dip and French onion soup) and are usually combined with a meat stock, such as beef broth. For this recipe, the caramelized onions are cooked in beef fat, giving it an incredible base!

    [feast_advanced_jump_to]

    Ingredients

    This great dish uses simple ingredients, that you’ll mostly be able to keep on hand for those times you dinner an easy dinner idea! (Then this tater tot casserole of course, as well!)

    What you’ll need:

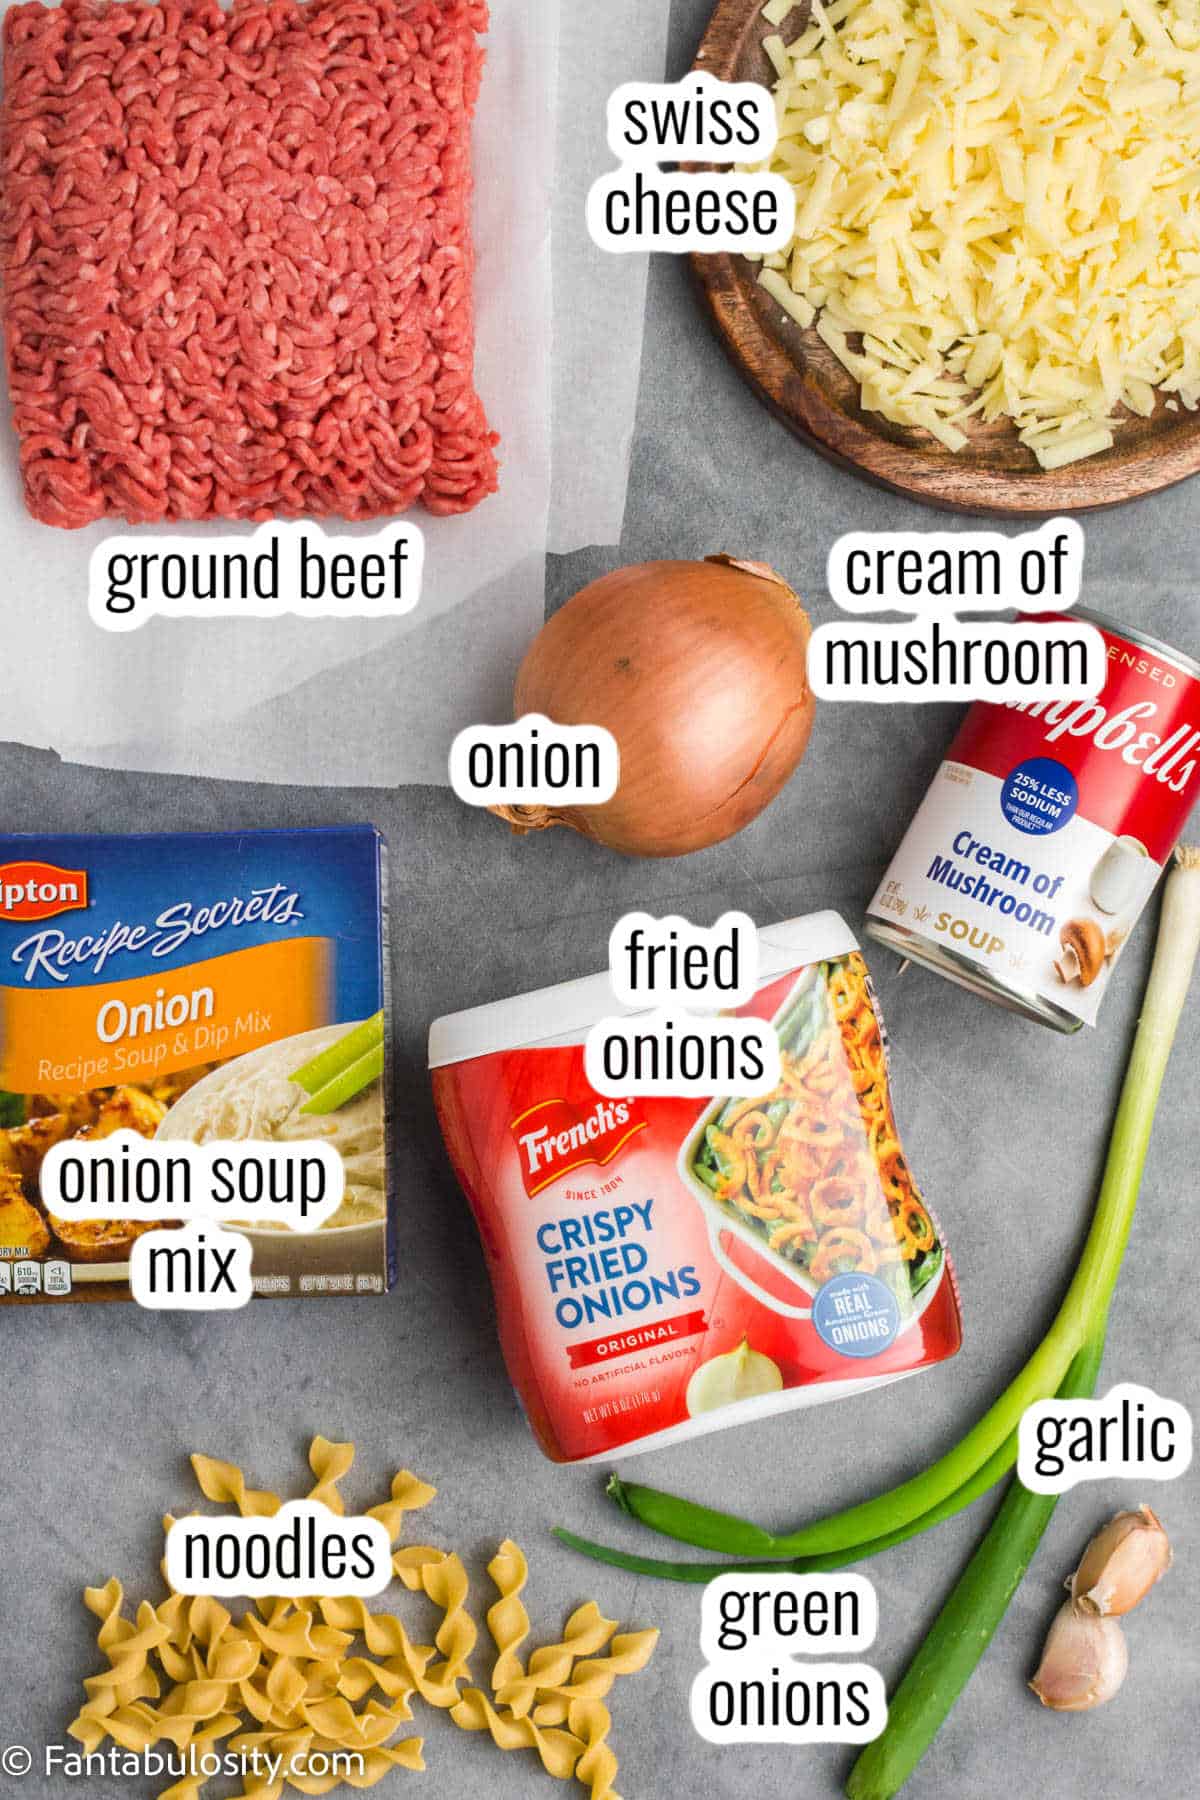
    • 1.5 lbs Ground beef – not super lean ground beef, as you’ll want the drippings to saute the onions (But if you have lean ground beef, you may want to make one of these other ground beef dinner recipes.)
    • 1 – 1oz Bag Lipton onion soup/dip mix – you can also use the generic version
    • 1 Medium sized onion, sliced – we prefer yellow onion but white will be ok too.
    • 2 Cloves garlic, minced – or you can use garlic that has already been minced
    • 2 10.5oz Cans condensed cream of mushroom soup – don’t make the soup with this, you’ll just add it to the recipe from the can
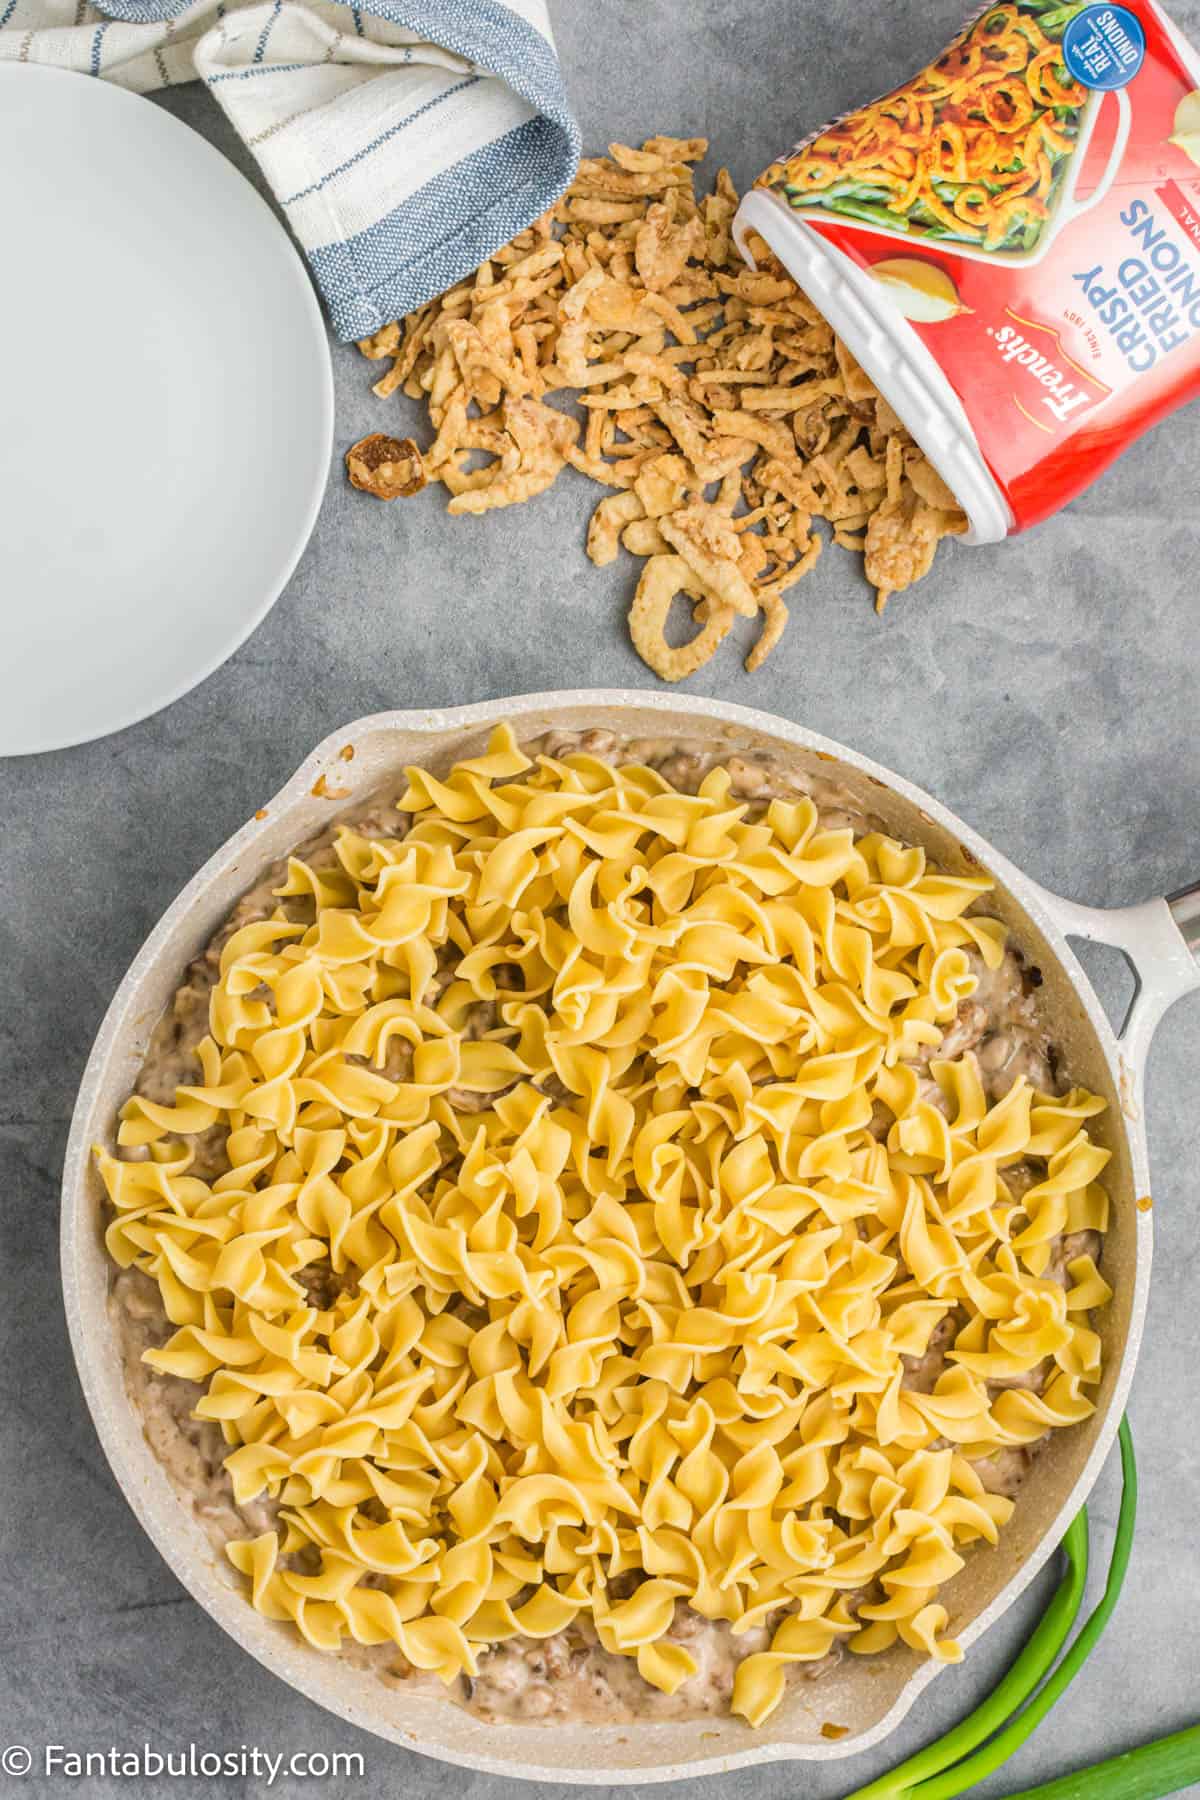
    • 10oz egg noodles, cooked according to instructions on bag – Cooked al dente
    • 8 oz. Swiss cheese, shredded – You can shred your own or can use pre-shredded, although we prefer shredding our own so it’s creamier.
    • 1.5 Cups French’s crispy fried onions – you can use the generic instead! But the crunch of the fried onions on top is amazing! So much so, that we put it on our tuna casserole recipe too!
    • Green onions for garnish, sliced (optional) – this adds wonderful color to the dish, and flavor
    ingredients on table for french onion beef casserole
    Ingredients

    See the recipe card toward the bottom of this post for the ingredients and instructions all in one place!

    Instructions

    1. Preheat the oven to 350 degrees Fahrenheit.
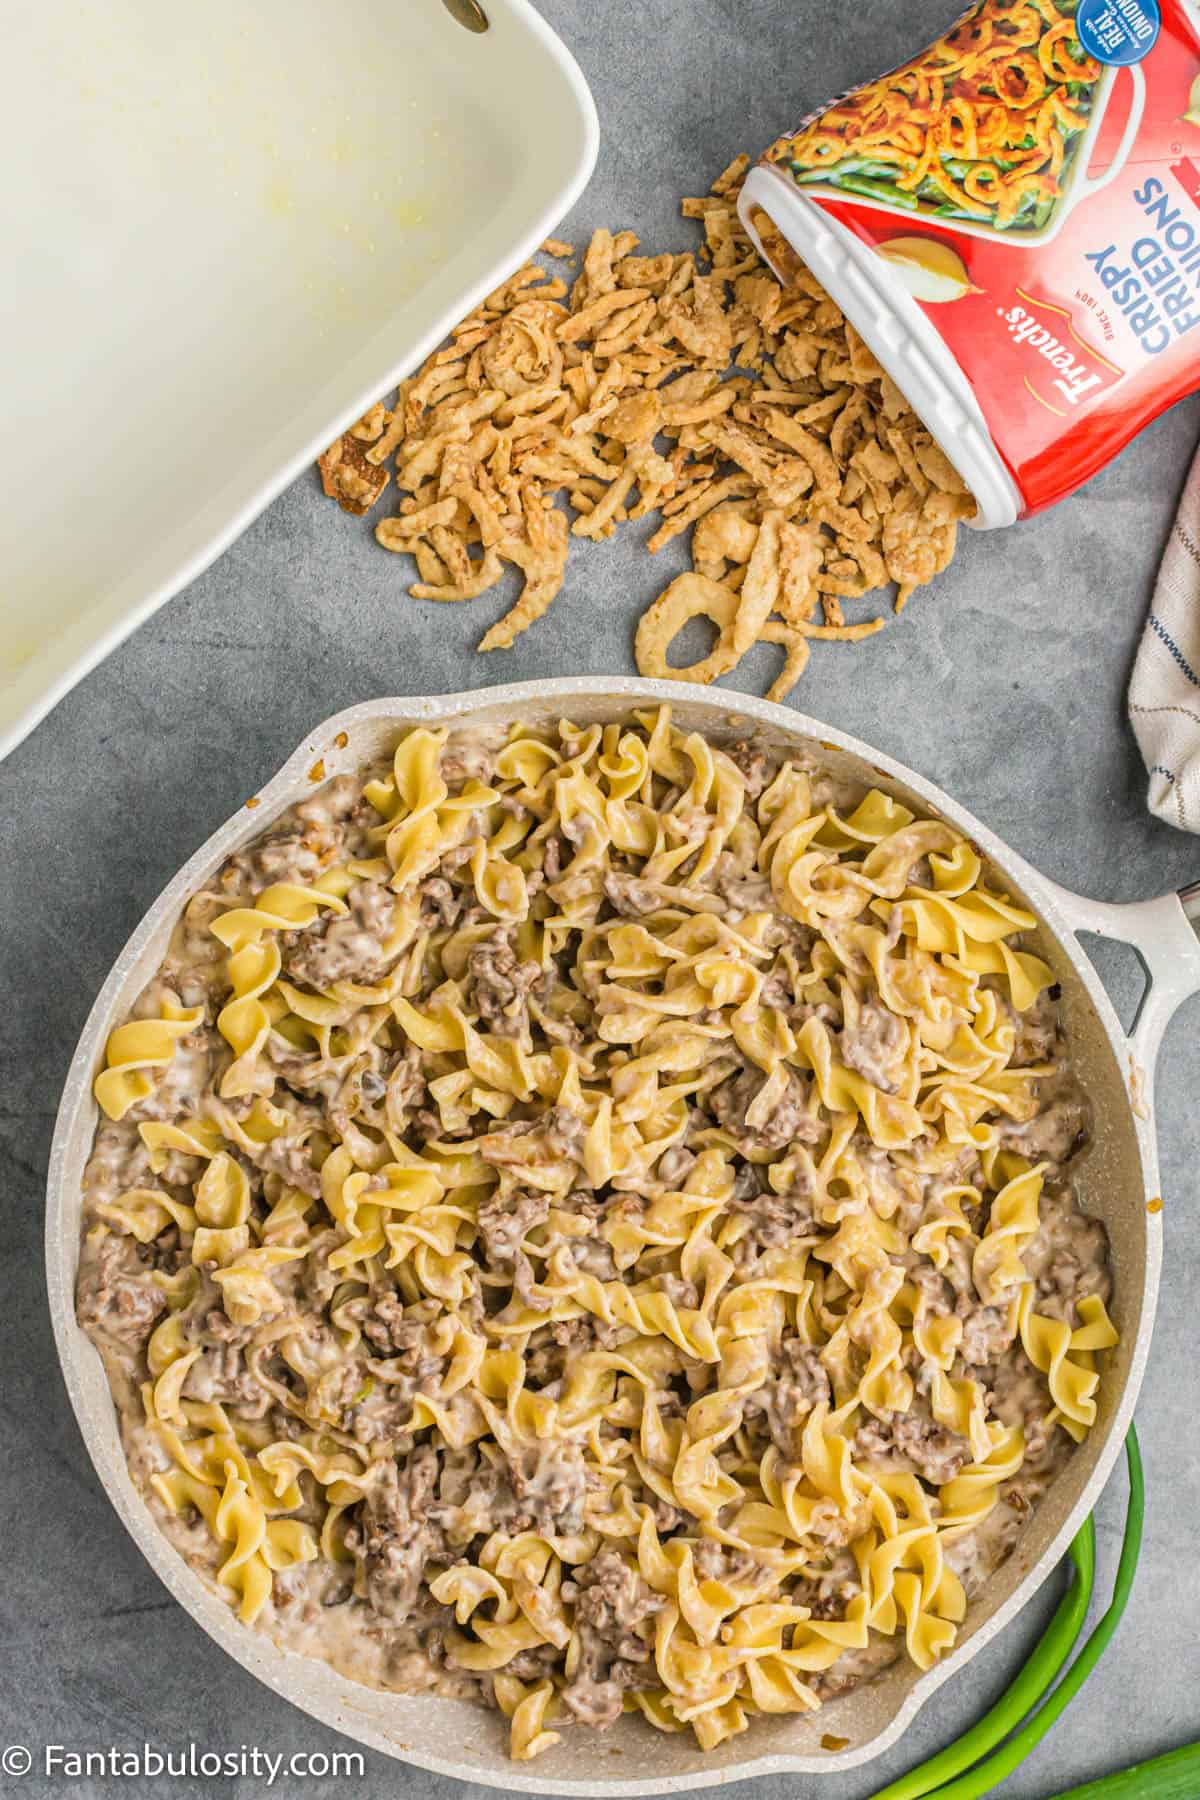
    2. Prepare a baking dish by spraying with nonstick cooking spray.
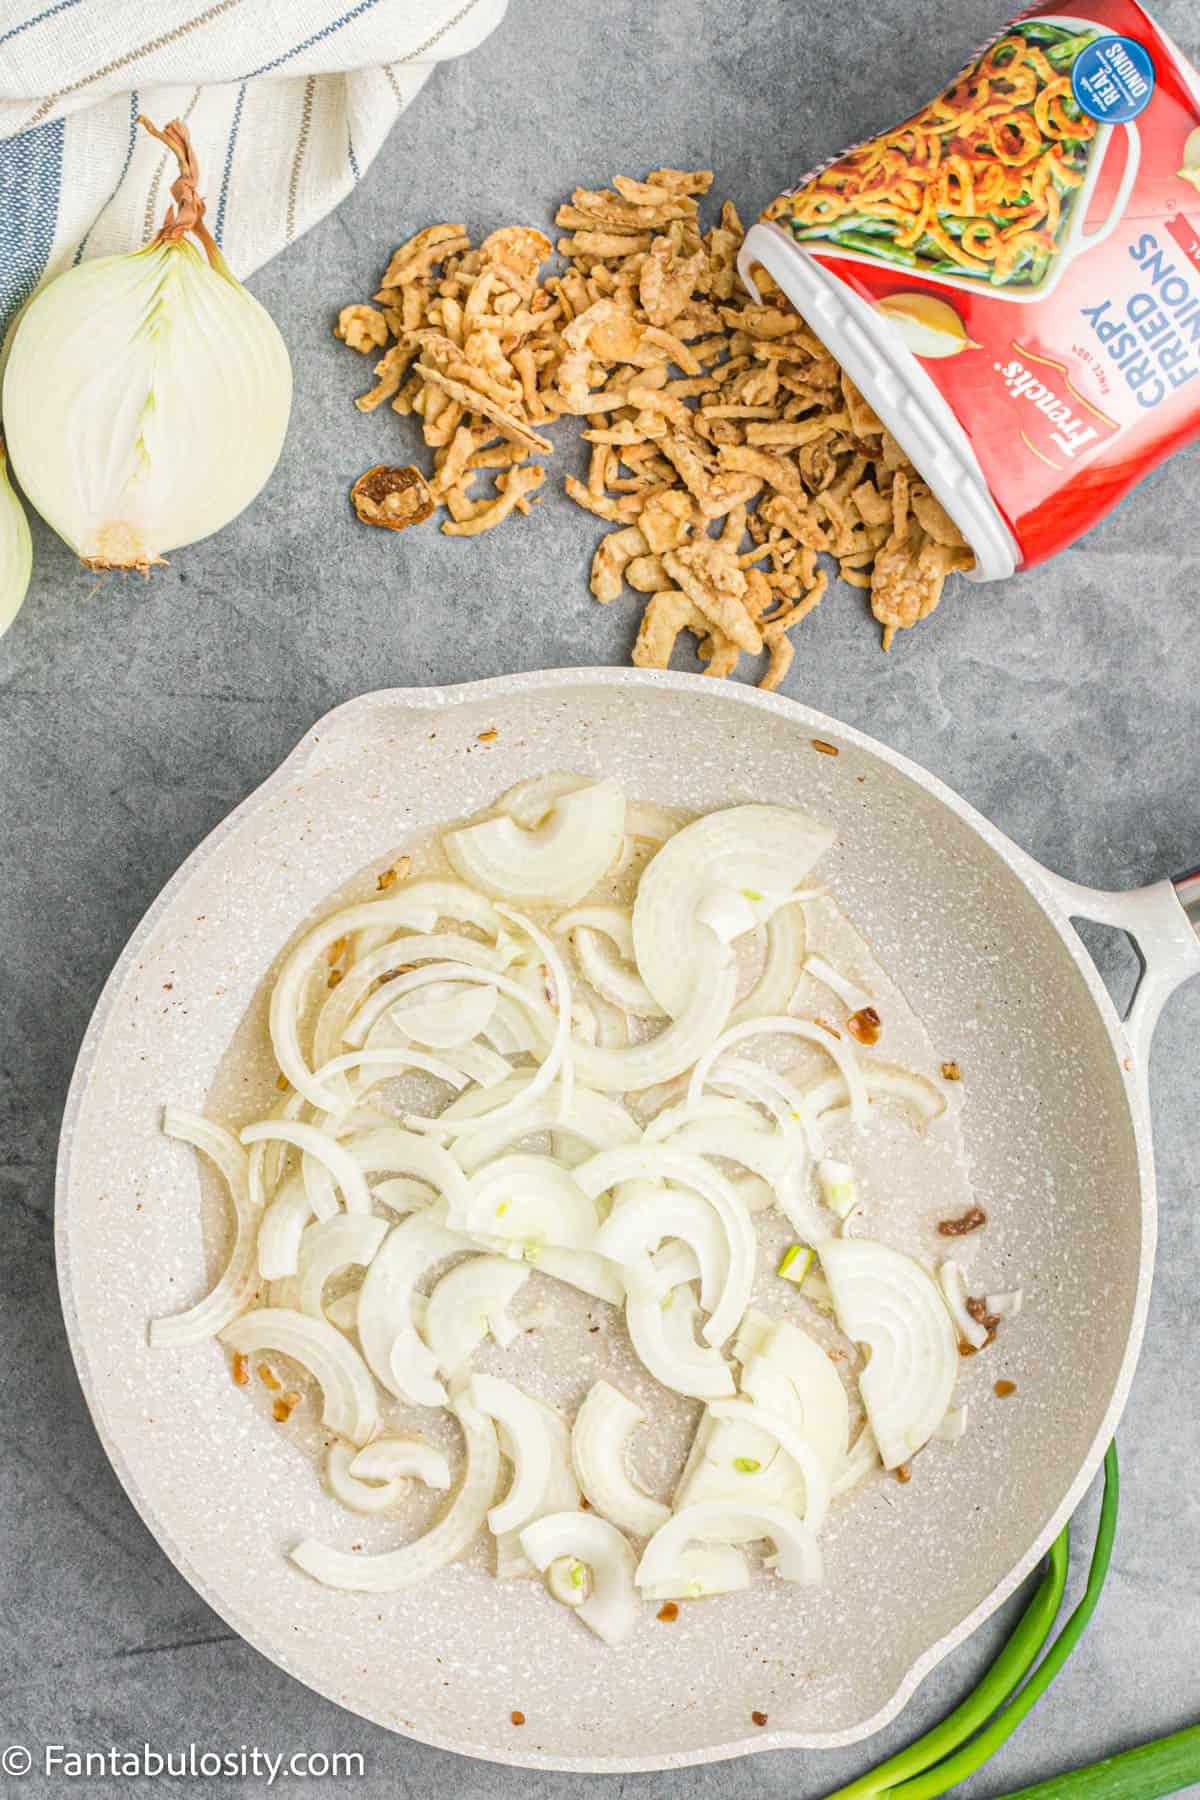
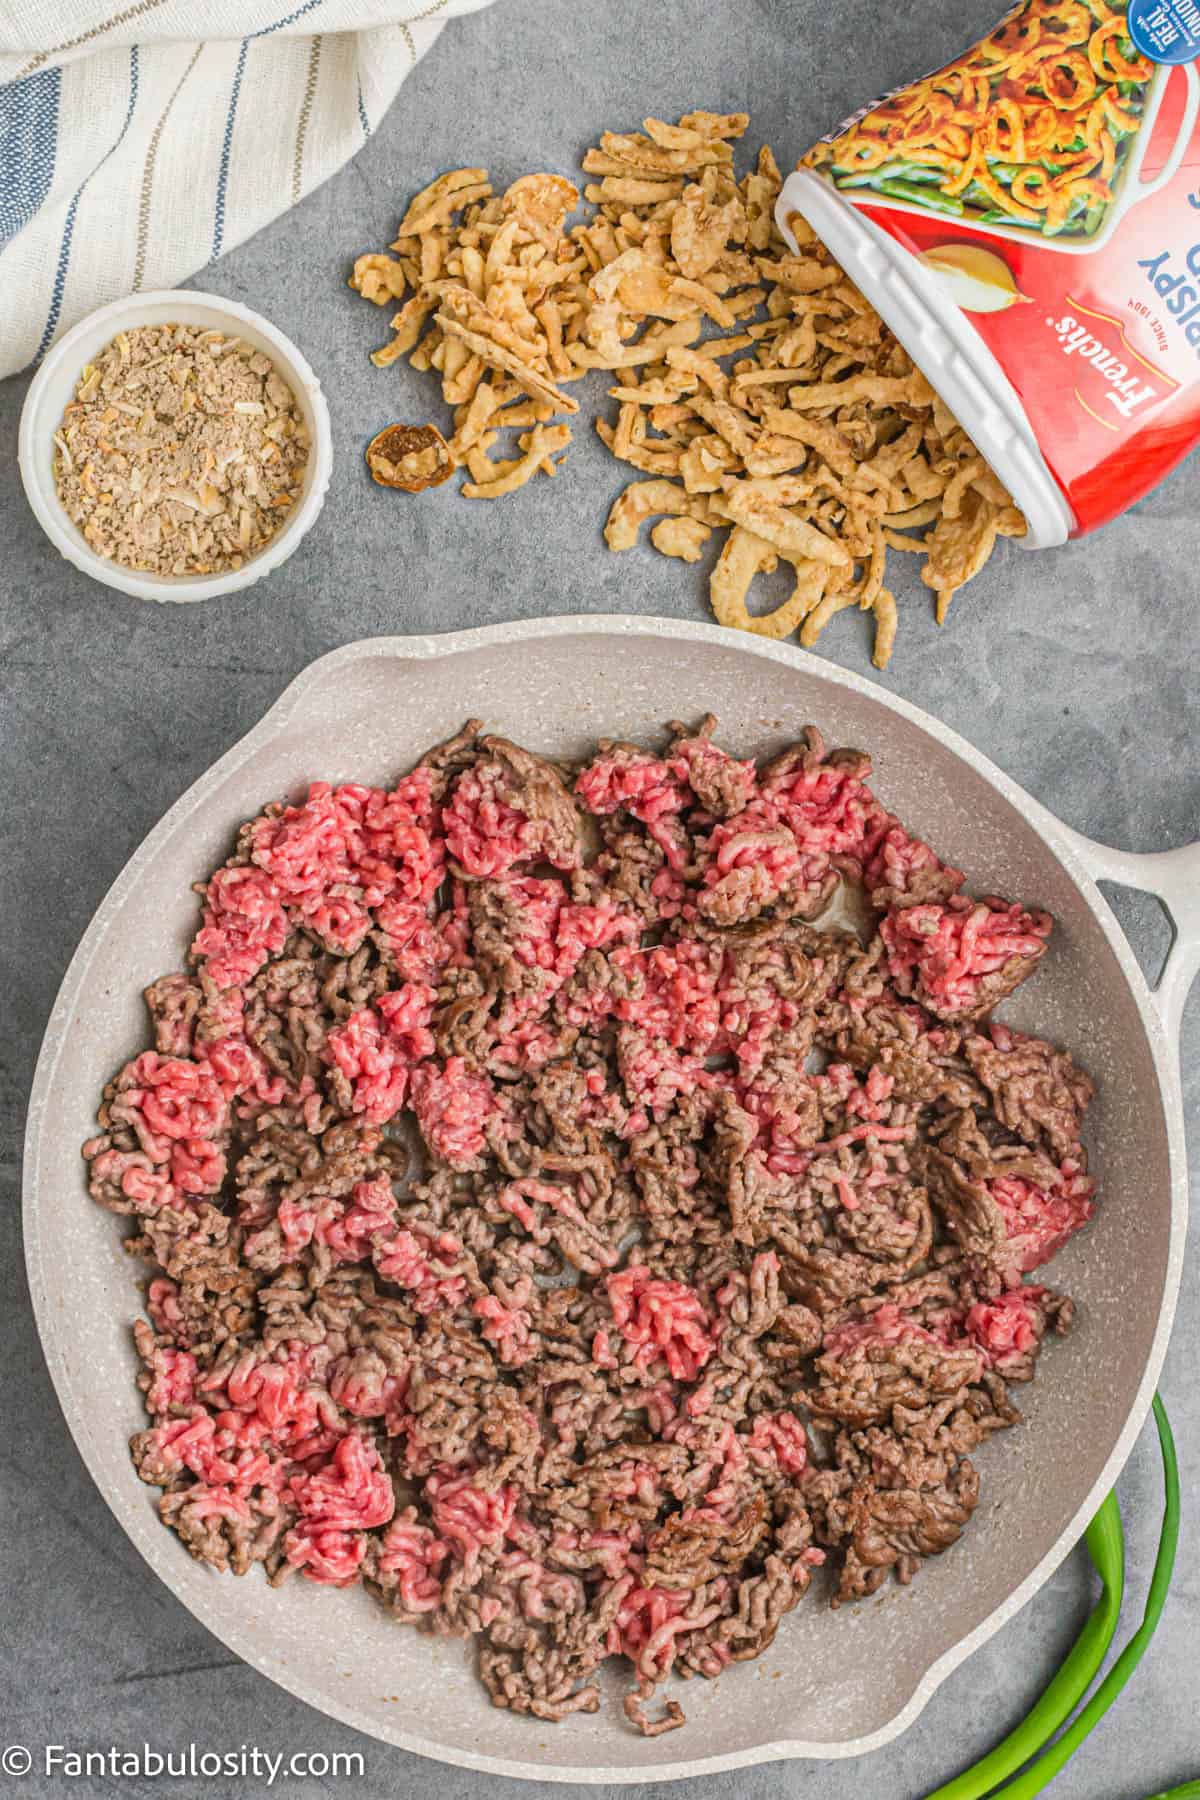
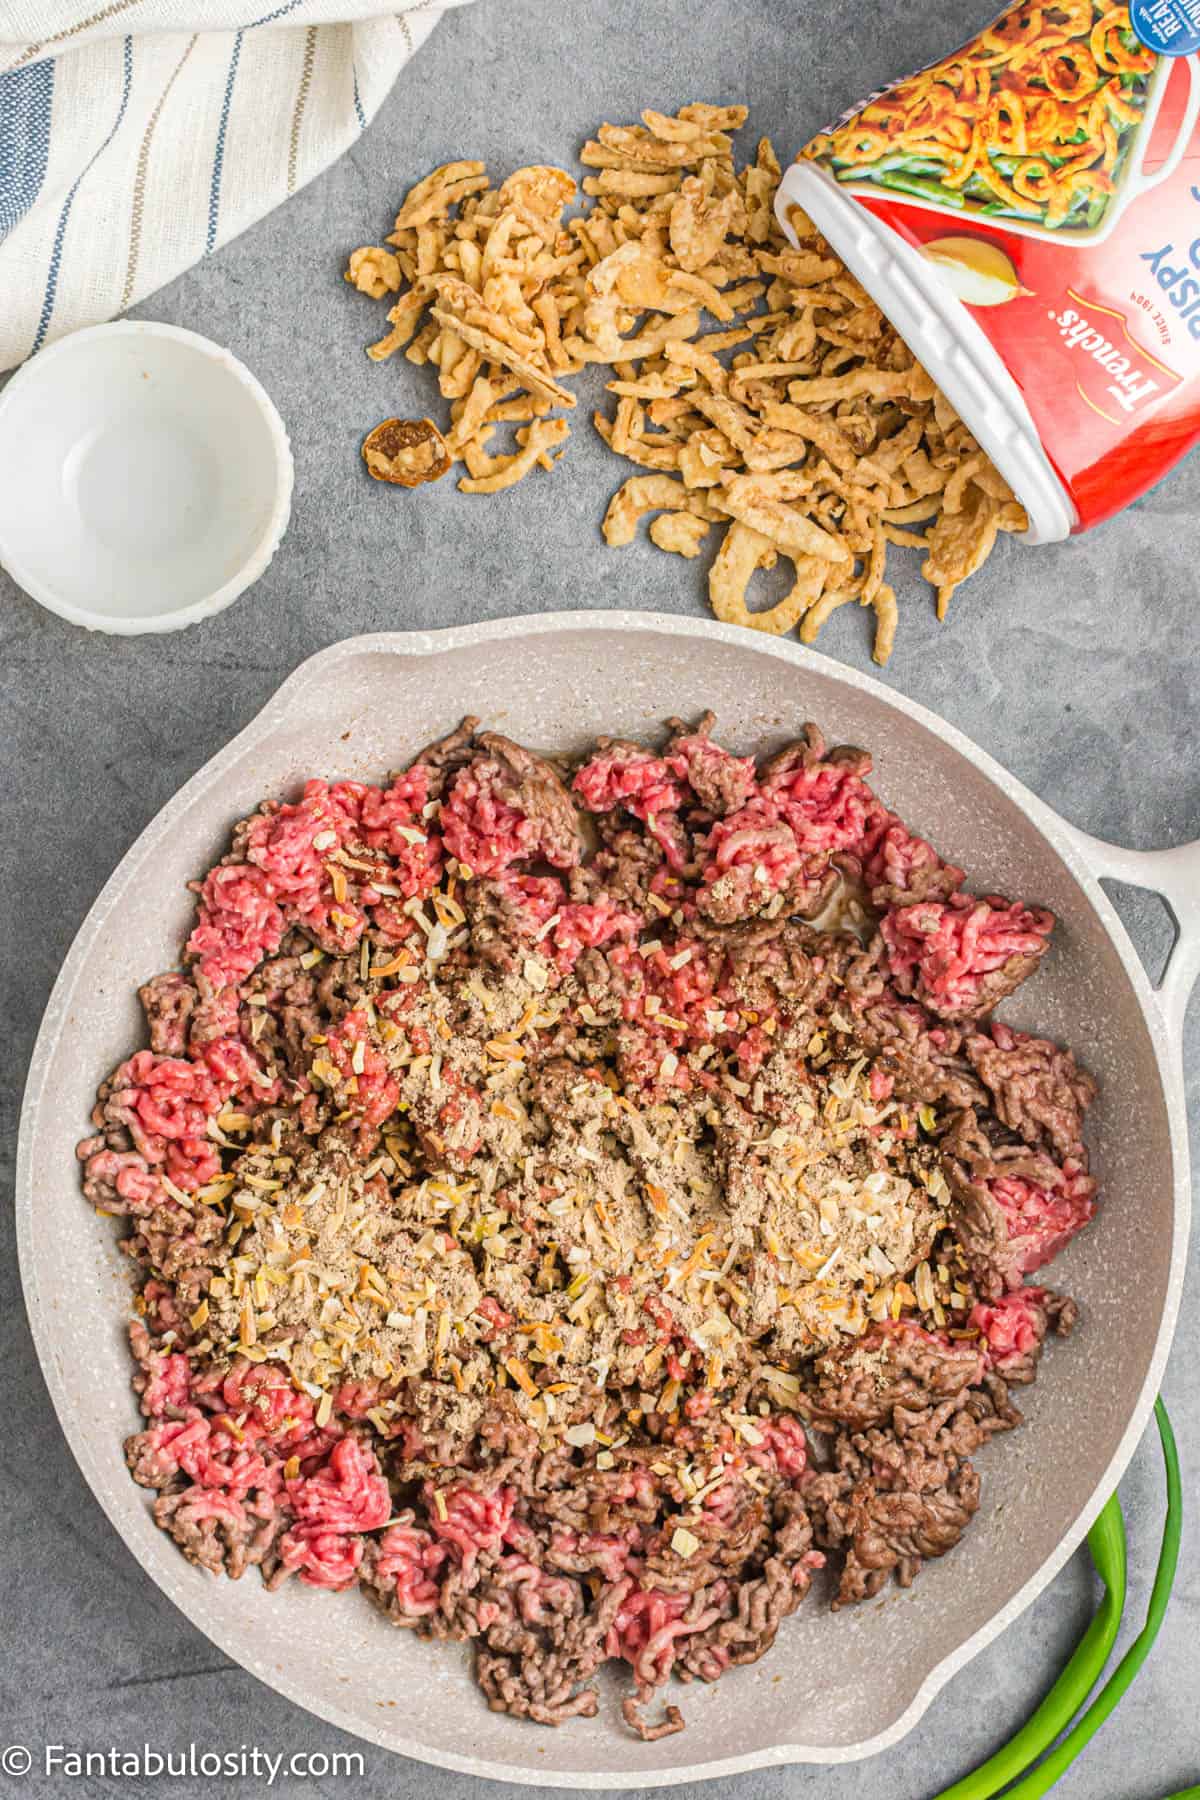
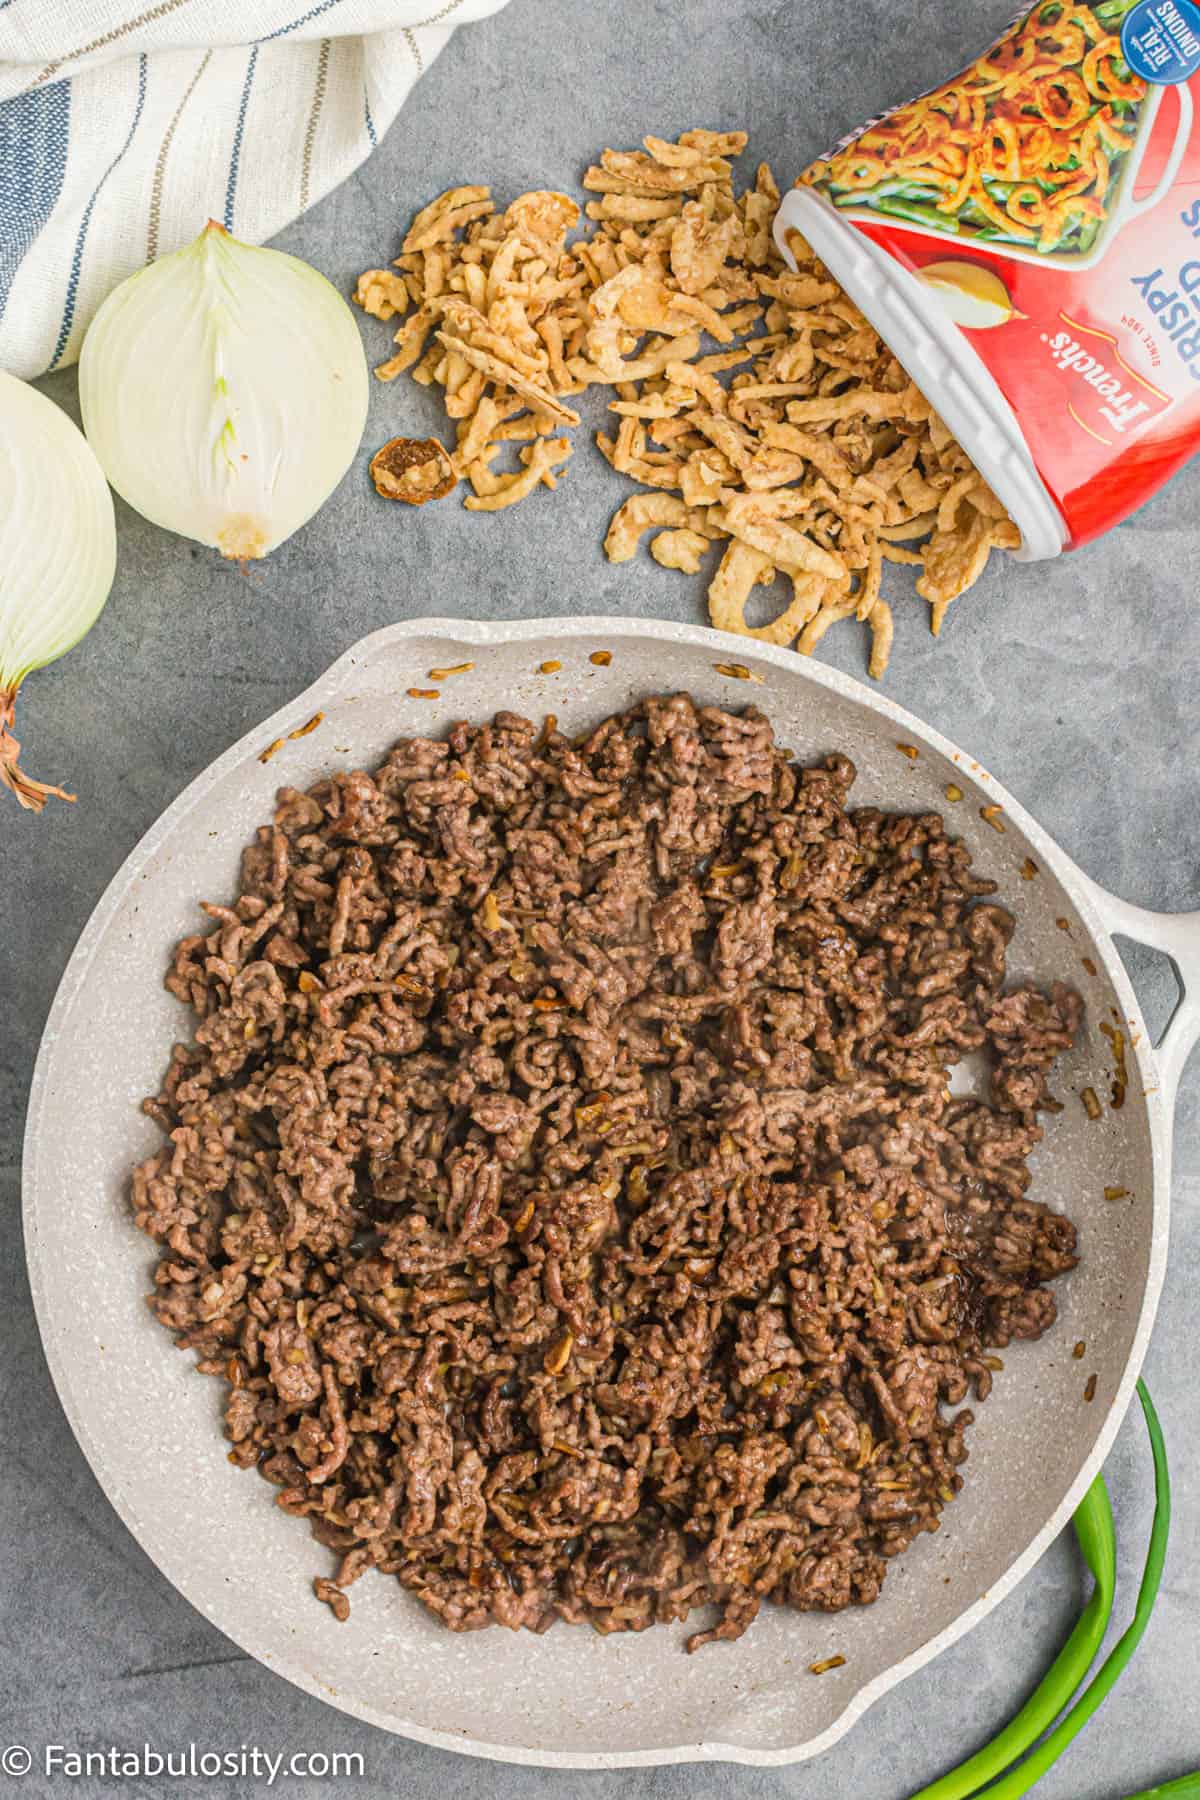
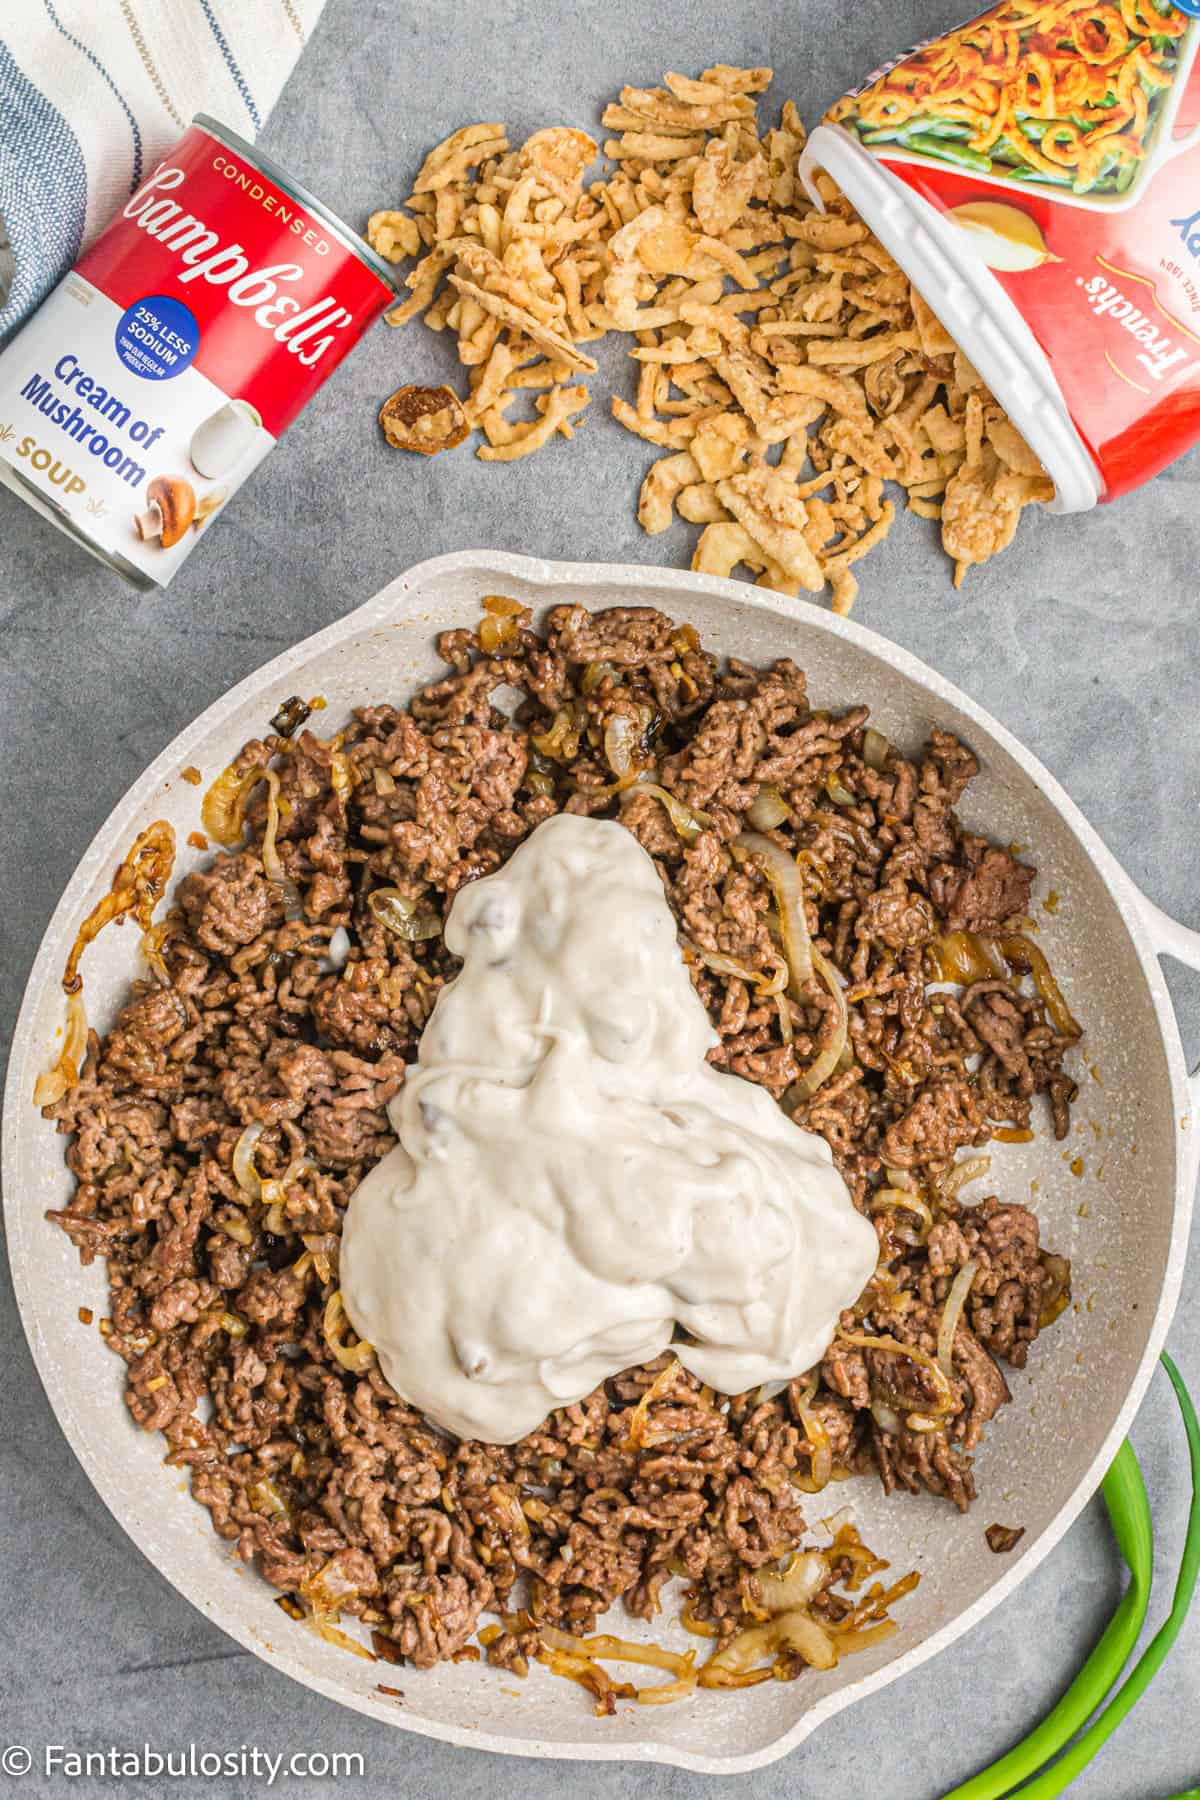
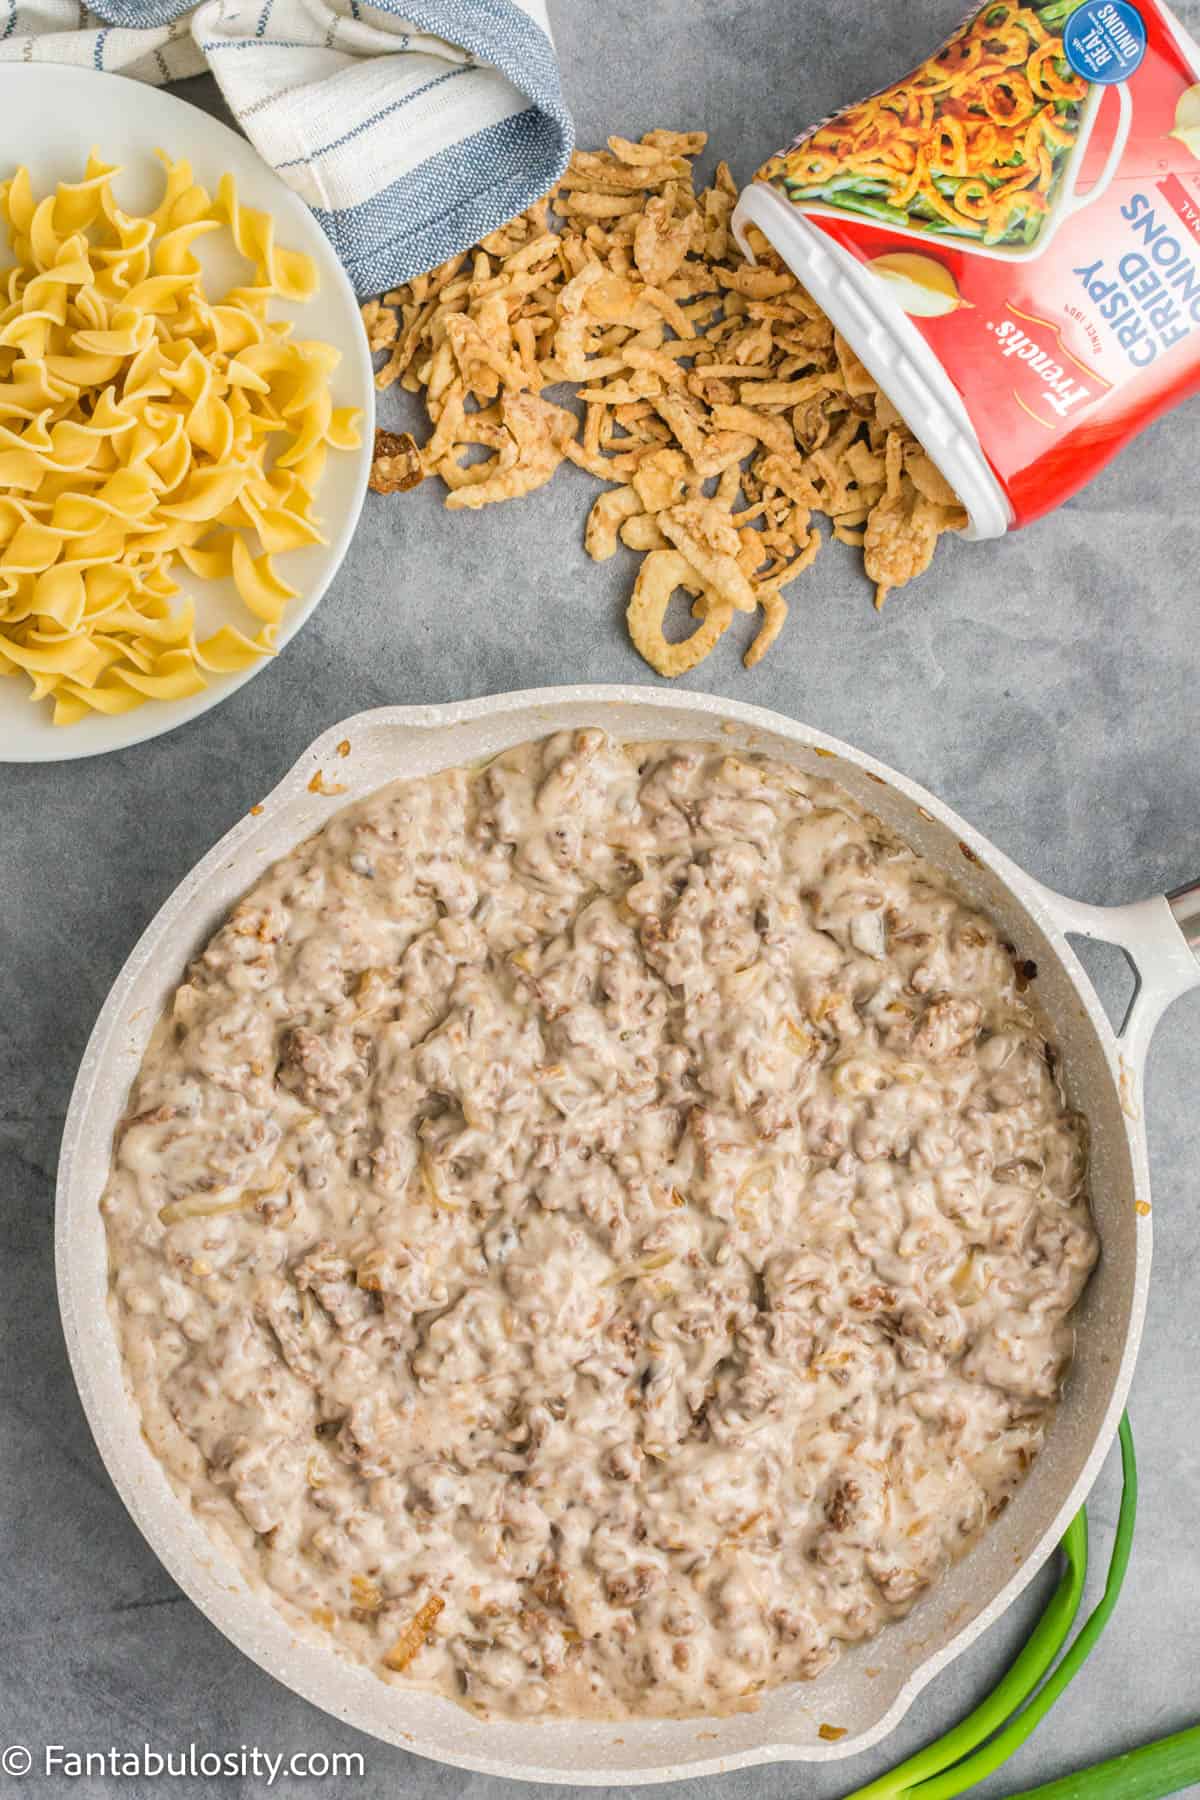
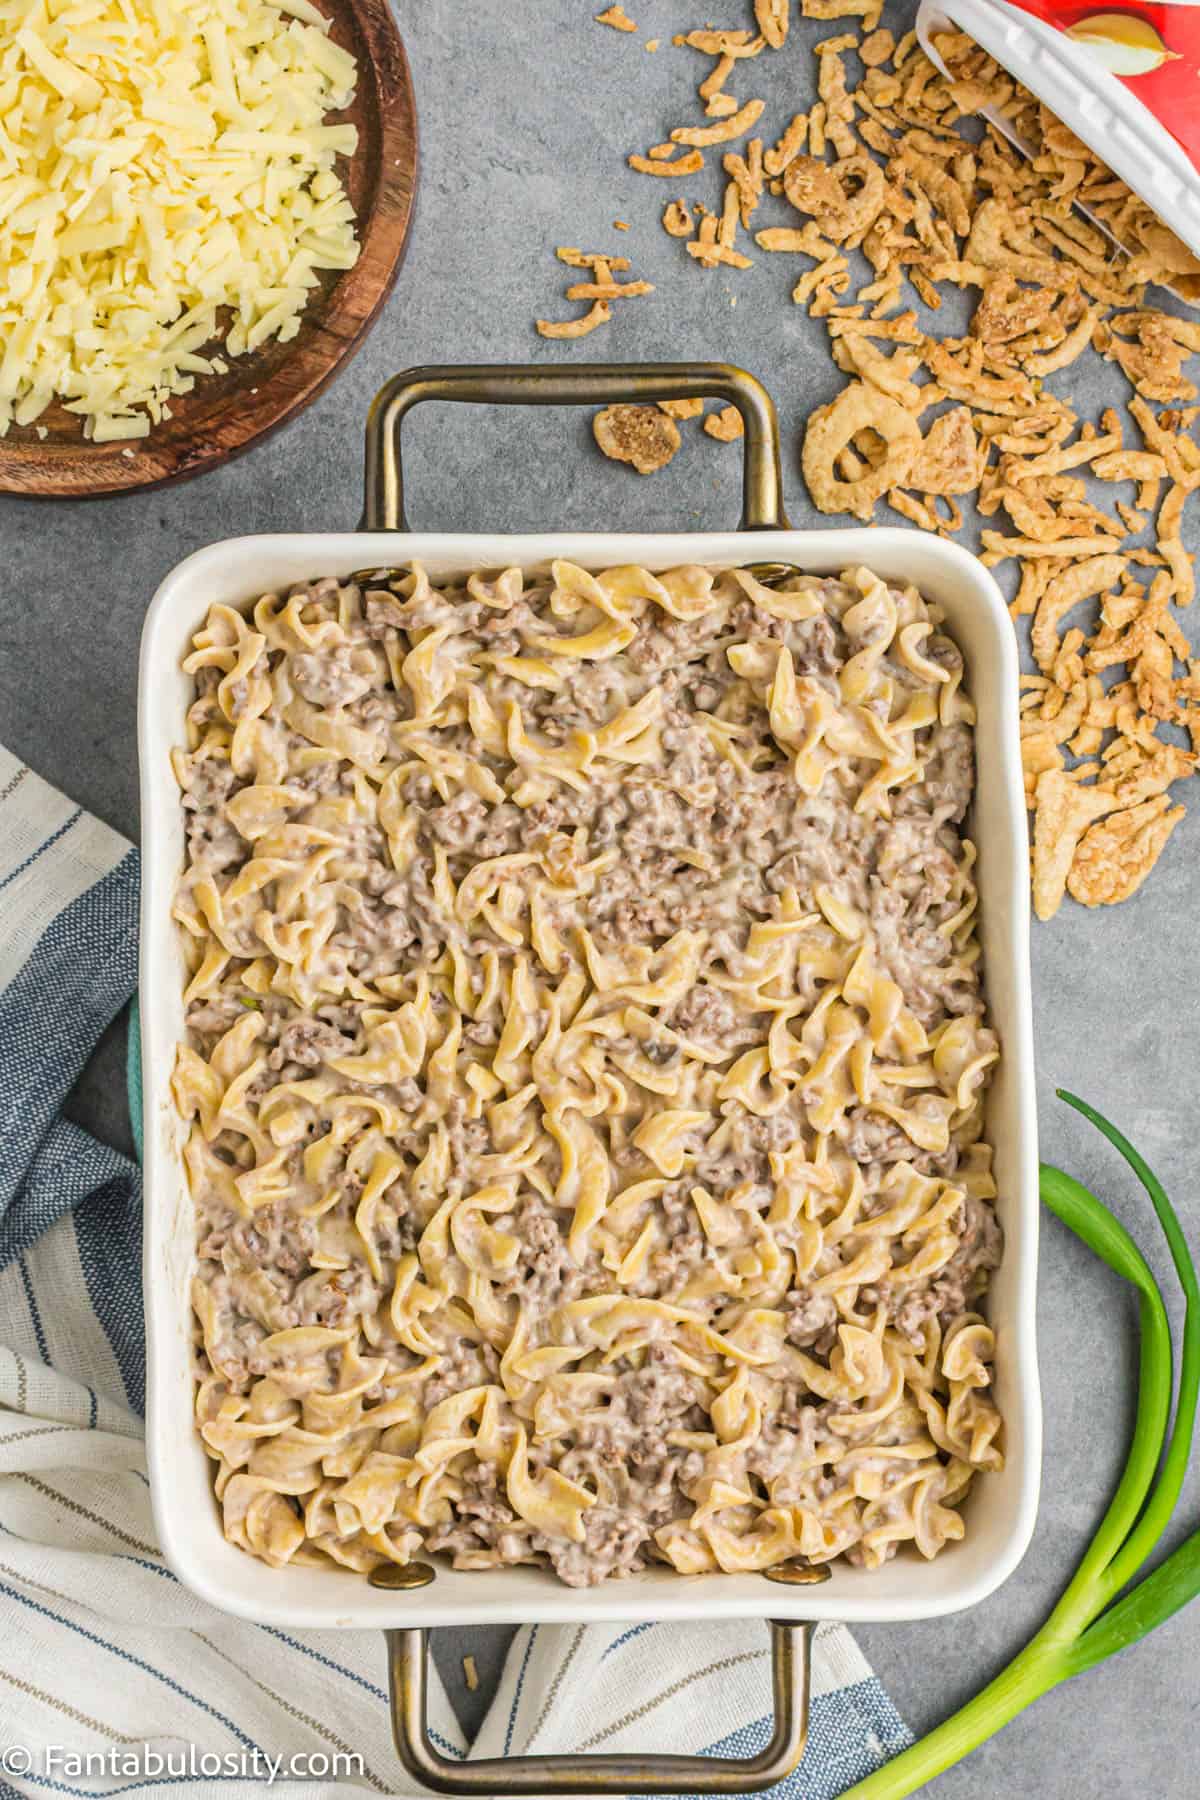
    3. In a nonstick skillet, brown the ground beef on medium-high heat until no longer pink. Add the Lipton soup mix halfway through cooking, about 5 minutes. (Make sure your noodles have been cooked, according to package directions too. If not, this is a great time to go ahead and do that as well.)
    ground beef in skillet
    Add ground beef
    onion soup mix added to ground beef
    Add onion soup mix
    1. Using a slotted spoon, remove the ground beef to a paper towel-lined plate, leaving the fat in the pan to cook the onions.
    cooked beef in skillet
    Cooked ground beef
    Ground beef removed, and fat drippings left in skillet
    Remove beef, leave fat
    1. In the same skillet add the sliced onions and cook until caramelized and golden brown, about 5-8 minutes.
    onions added to skillet
    Cook onion in fat
    cooked onions in skillet
    Cooked onions
    1. When the onions are caramelized add the garlic and cooked ground beef. Add the 2 cans of mushroom soup and bring to a simmer.
    ground beef added back in to skillet
    Add ground beef & garlic
    Canned soup added
    Add soup
    1. Remove from the heat and fold in the cooked egg noodles, in to the ground beef mixture.
    soup mixed in to beef mixture
    Stir
    Noodles added in to beef
    Add noodles
    1. Add the beef mixture to the prepared baking dish and spread evenly.
    noodles and ground beef stirred
    Mix together
    Beef mixture poured in to baking dish
    Pour in baking dish
    1. Top with the shredded Swiss cheese and the crispy fried onions.
    Casserole topped with cheese
    Top with cheese
    French fried onions on top of casserole
    Add fried onions
    1. Cover completely with foil and bake for 20 minutes.
    2. Remove the foil and bake for another 5 minutes.
    3. Remove from the oven and let stand for 2 minutes.
    4. Garnish with sliced scallions, if desired, and serve.
    Baked french onion beef casserole
    Baked!

    Substitutions

    • Soup: We think cream of mushroom is best for this casserole recipe but if you only have something else that’s similar, on hand, you can try cream of celery, cream of chicken, etc.
    • Noodles: Egg noodles give this casserole dish incredible texture but feel free to use a different noodle such as rotini, elbow macaroni, penne or even bowtie. If you have extra egg noodles in the pantry, you may also want to consider making chicken and noodles later in the week!
    • Meat: This recipe is for ground beef but if you would like to try ground sausage, turkey, or even ground chicken, this should be just fine too!
    • Cheese: We love the flavors of swiss cheese on this, however if you want to use a different kind of shredded cheese, such as mozzarella cheese, gruyere cheese, or even cheddar cheese, I’m sure that would be delicious as well.
    Serving of french onion beef casserole on plate
    French Onion Casserole

    Storage

    To store the casserole put any leftovers in an airtight container, or cover with plastic wrap once it has fully cooled, and refrigerate for up to 3 days.

    Can you freeze french onion beef casserole?

    You can. For best results, assemble the casserole until it’s time to add the fried onions on the top. Wrap tightly and prepare for the freezer, and then it can be stored for up to 2 months.

    When ready to bake, remove from freezer, place in refrigerator and allow to thaw, top with fried onions and then bake as instructed in the recipe card.

    To Reheat the Casserole:

    If reheating an entire casserole, cover the dish loosely with foil and bake in a 350° F oven until warmed through (about 20 minutes). If only reheating smaller portions, this can be reheated on a microwaves safe plate, in the microwave, for 1-2 minutes.

    Serving of french onion beef casserole being lifted out of baking dish
    Creamy casserole

    What to Serve with French Onion Ground Beef Casserole

    Casseroles are one of the easiest dinner recipes, so we definitely want to keep the side dish recipes easy too, right? Our favorite recipes to serve with this casserole are an easy caesar salad or even a can of green beans! (Make sure you see how to make canned green beans taste better!)

    Related Recipes

    If you thought this was a good casserole, and you love casserole recipes, then you’ll also want to make sure to check out this cheeseburger casserole, Doritos chicken casserole, taco casserole, and this ham casserole which are reader favorites!

    Did you make this? I’d be so grateful if you left a “star” rating below to let me know what you thought! Then, the next time you need a quick and easy recipe, come back to Fantabulosity to browse all of my easy recipes!

    Recipe

    french onion beef casserole scooped up out of white dish
    Print Pin
    4.34 from 6 votes

    French Onion Beef Casserole

    French Onion Beef Casserole: This beef casserole recipe is comfort food at its finest! Made with ingredients such as egg noodles, onion soup mix, swiss cheese and more, it's a crowd and family favorite!
    Course Main Course
    Cuisine American
    Prep Time 10 minutes minutes
    Cook Time 35 minutes minutes
    Total Time 45 minutes minutes
    Servings 8 servings
    Calories 546kcal
    Author Jessica Burgess

    Ingredients

    • 1 ½ pounds ground beef
    • 1 ounce bag onion soup mix
    • 1 medium onion sliced
    • 2 cloves garlic minced
    • 2 10.5 ounce cans of condensed cream of mushroom soup
    • 10 ounces egg noodles cooked, according to instructions on bag
    • 8 ounces swiss cheese shredded
    • 1 ½ cups crispy french fried onions
    • green onions for garnish, optional

    Instructions

    • Preheat the oven to 350 degrees Fahrenheit. Prepare a baking dish by spraying with nonstick cooking spray.
    • In a nonstick skillet, brown the ground beef on medium high heat until no longer pink. Add the Lipton soup mix half way through cooking, about 5 minutes.
    • Using a slotted spoon, remove the ground beef to a paper towel lined plate, leaving the fat in the pan to cook the onions. In the same skillet add the sliced onions and cook untilcaramelized, about 5-8 minutes.
    • When the onions are caramelized add the garlic and cooked ground beef. Add the 2 cans of mushroom soup and bring to a simmer. Remove from the heat and fold in the cooked egg noodles.
    • Add the beef mixture to the prepared baking dish and spread evenly. Top with the shredded Swiss cheese and the crispy fried onions.
    • Cover completely with foil and bake for 20 minutes. Remove the foil and bake for another 5 minutes. Remove from the oven and let stand for 2 minutes. Garnish with sliced scallions and serve.

    Notes

    Storage
    To store the casserole put any leftovers in an airtight container, or cover with plastic wrap once it has fully cooled, and refrigerate for up to 3 days.
    Can you freeze french onion beef casserole?
    You can. For best results, assemble the casserole until it’s time to add the fried onions on the top. Wrap tightly and prepare for the freezer, and then it can be stored for up to 2 months.
    When ready to bake, remove from freezer, place in refrigerator and allow to thaw, top with fried onions and then bake as instructed in the recipe card.
    To Reheat the Casserole:
    If reheating an entire casserole, cover the dish loosely with foil and bake in a 350° F oven until warmed through (about 20 minutes). If only reheating smaller portions, this can be reheated on a microwaves safe plate, in the microwave, for 1-2 minutes.

    Nutrition

    Serving: 1serving | Calories: 546kcal | Carbohydrates: 34g | Protein: 28g | Fat: 33g | Saturated Fat: 14g | Polyunsaturated Fat: 1g | Monounsaturated Fat: 10g | Trans Fat: 1g | Cholesterol: 117mg | Sodium: 491mg | Potassium: 385mg | Fiber: 2g | Sugar: 1g | Vitamin A: 258IU | Vitamin C: 1mg | Calcium: 290mg | Iron: 2mg

    Instant Pot Parmesan Risotto

    July 27, 2022

    Instant Pot parmesan risotto in a bowl.

    Instant Pot Parmesan Risotto: This pressure cooker risotto is the perfect side dish for a busy weeknight meal, but it’s fancy enough to serve for a dinner party if you want to! Risotto doesn’t have to be difficult; this one is ready in under 30 minutes and is so easy to make!

    Instant Pot parmesan risotto in a bowl.
    Cheesy Instant Pot risotto

    Why You’ll Love This Recipe

    Risotto is such a classy dish, but traditional risotto often gets a bad reputation for being difficult to make properly. This Instant Pot risotto is a one pot, quick and easy version of risotto that requires minimal effort and will make you wonder why you ever did it any other way!

    In just a few simple steps, and using simple ingredients, you can have a fluffy risotto with a creamy texture that’s ready to serve alongside your weeknight meals or your fancy dinner party main course!

    If you love cooking with a pressure cooker, make sure to check out our other Instant Pot recipes too!

    [feast_advanced_jump_to]

    Ingredients for Instant Pot Risotto Recipe

    You will be able to find everything you need to make this creamy rice dish in most grocery stores!

    Instant Pot parmesan risotto ingredients with labels on the image.
    Ingredients
    • 2 tablespoons olive oil (or any vegetable oil)
    • ⅓ cup chopped onion (I used white, but red or sweet onion works as well)
    • 1 clove garlic, crushed
    • 1 cup Arborio rice
    • ½ teaspoon salt
    • ¼ teaspoon pepper
    • 1 teaspoon garlic powder
    • 2 cups chicken broth
    • 2 tablespoons salted butter (can use unsalted if you like)
    • ¾ cup fresh parmesan cheese, grated

    See the printable recipe card below for a full ingredient list and step-by-step instructions for making this easy instant pot risotto!

    Instructions

    The Instant Pot is by far the easiest way to make risotto! Let me show you how…

    1. Set the Instant Pot to the saute function and add oil, onions, and crushed garlic clove. Using a spatula mix and cook until the onions are softened.
    A measuring cup of chopped onions held above an Instant Pot.
    Saute garlic and onion.
    1. Add the rice and cook for 2-3 minutes. The rice will start to look transparent; you need to constantly stir so it does not burn or toast.
    A cup of arborio rice held above an instant pot.
    Add the rice.
    1. Mix in the spices: salt, pepper, garlic powder. Mix well to coat.
    Spices in a bowl.
    Add spices.
    1. Add the chicken stock and mix well, making sure nothing is stuck to the bottom of the pot.
    Rice, chicken broth, and spices in the Instant Pot.
    Add chicken broth.
    1. Turn off the Sauté mode. Place the lid on the Instant Pot and set the Instant Pot on high pressure for 6 minutes cooking time. Make sure the valve is sealed.
    2. Once cooked, do a quick release. Once the pressure is out, open the lid.
    3. With a fork, fluff up/stir the risotto. Add in the butter and the cheese.  
    A square of butter sitting on top of the cooked rice in the Instant Pot.
    Add butter.
    Parmesan cheese sprinkled on top of the cooked rice in the Instant Pot.
    Add parmesan.
    1. Using your fork, mix until butter and cheese is melted, and risotto is creamy. Serve and enjoy your perfect risotto!
    Instant Pot parmesan risotto in a bowl.
    Serve & enjoy!

    Substitutions & Variations

    • When looking for fresh Parmigiano, you will see Grana Padano. You can use Grana Padano as well, it’s also made in Italy. Compared to Parmigiano (made in the region of Parma with strict rules of aging and storage) the Grana Padano is made only a few miles west in the region next to Parma. It’s a hard cheese, milky, but without the strong taste of the Parmigiano. Both cheeses can be interchangeable 
    • You can serve the risotto with more cheese or fresh herbs on top.
    • You could if you want on step 4 add ¼ cup of dry white wine (sweet wine will caramelize and give a weird taste to the Risotto). Keep your IP on Sauté mode, add the wine and mix until the wine has evaporated. Then add the Chicken broth and proceed to cooking. 
    • You can use vegetable stock instead of chicken broth/stock in this recipe.
    • You can also add some bacon bits when sautéing the onions for some extra flavor
    • Wanting to make this risotto a main dish? Try adding some cooked shrimp or cooked, shredded chicken to your parmesan risotto and serving it as a main course!
    • Add a handful of sliced mushrooms to the Instant Pot and saute along with the onions and garlic to turn this into a mushroom risotto!

    Equipment

    We used an Instant Pot for this recipe, but you could make it with other brands of pressure cookers as well.

    Storage

    Risotto is best when served immediately. I would not keep the Instant pot on warm as it will overcook the Risotto and become mushy.

    You can store your leftover Instant Pot risotto in an airtight container in the refrigerator for up to 4 days. When warming up the leftovers, I like to place a wet paper towel on top of my portion, in the microwave at 50% power for 1 minutes, mixing at 30 seconds.

    Spoonful of Risotto
    Spoonful of Risotto

    Expert Tips and FAQs

    How do you make risotto in a pressure cooker?

    It’s so simple to make risotto in the pressure cooker. First you saute your aromatic ingredients (garlic and onion), add the rice and cook for a few minutes, and then you add the liquid and cook just like you would any other rice! One pot, super simple, and ready in under 30 minutes.

    What can I substitute for Parmesan cheese in risotto?

    You can use any cheese in place of the parmesan cheese, but a sharp, hard cheese will give you the most similar taste. Pecorino, gruyere, Swiss would all be quite similar but a sharp cheddar cheese or mozzarella cheese would also be delicious!

    Can I make risotto without white wine?

    Absolutely! This recipe doesn’t call for any wine, but it will still create delicious, fluffy risotto. If you do want to use wine, you could if you want on step 4 add ¼ cup of dry white wine (sweet wine will caramelize and give a weird taste to the Risotto). Keep your IP on Sauté mode, add the wine and mix until the wine has evaporated. Then add the Chicken broth and proceed to cooking. 

    Can I use a different type of rice?

    You sure can, but we would recommend sticking with a short grain rice. Short grain rice has higher amylopectin levels in it than long grain rice, which is what helps make the risotto creamy. You could use a long-grain rice if you like, but the resulting risotto may not be quite as creamy.

    Did you make this? I’d be so grateful if you left a “star” rating below to let me know what you thought! Then, the next time you need a quick and easy recipe, come back to Fantabulosity to browse all of my easy recipes!

    Related Recipes

    Looking for more easy Instant Pot recipes like this easy risotto recipe? Try our Instant Pot buffalo chicken pasta! This is another quick and easy one pot meal that is sure to be a hit!

    Or, if you love using your Instant Pot, then I think you’ll also love seeing how to make Instant Pot White Rice.

    Recipe

    Instant Pot parmesan risotto in a bowl.
    Print Pin
    5 from 5 votes

    Instant Pot Parmesan Risotto

    Instant Pot Parmesan Risotto: This pressure cooker risotto is the perfect side dish for a busy weeknight meal, but it's fancy enough to serve for a dinner party if you want to! Risotto doesn't have to be difficult; this one is ready in under 30 minutes and is so easy to make!
    Course Side Dish
    Cuisine American
    Prep Time 15 minutes minutes
    Cook Time 6 minutes minutes
    Total Time 21 minutes minutes
    Servings 4 servings
    Calories 262kcal
    Author Jessica Burgess

    Equipment

    • Instant Pot (Pressure Cooker) or similar

    Ingredients

    • 2 tablespoons olive oil or any vegetable oil
    • ⅓ cup chopped onion I used white, but red or sweet onion works as well
    • 1 clove garlic crushed
    • 1 cup Arborio rice
    • ½ teaspoon salt
    • ¼ teaspoon pepper
    • 1 teaspoon garlic powder
    • 2 cups chicken broth
    • 2 tablespoons salted butter can use unsalted if you like
    • ¾ cup parmesan cheese fresh grated

    Instructions

    • Set the Instant Pot to sauté and add oil, onions, and crushed garlic clove. Using a spatula mix and cook until the onions are softened.
    • Add the rice and cook for 2-3 minutes. The rice will start to look transparent; you need to constantly stir so it does not burn or toast.
    • Mix in the spices: salt, pepper, garlic powder. Mix well to coat.
    • Add the chicken broth and mix well, making sure nothing is stuck to the bottom or side of the pan.
    • Turn off the Sauté mode. Place the lid on the Instant Pot and set the Instant Pot on high pressure for 6 minutes. Make sure the valve is sealed.
    • Once cooked, do a quick release. Once the pressure is out, open the lid.
    • With a fork, fluff up/stir the risotto. Add in the butter and the cheese.  
    • Using your fork, mix until butter and cheese is melted, and risotto is creamy. Serve and enjoy!

    Notes

    STORAGE: Risotto is best when served immediately. I would not keep the Instant pot on warm as it will overcook the Risotto and become mushy. 
    You can store your leftover Instant Pot risotto in an airtight container in the refrigerator for up to 4 days. When warming up the leftovers, I like to place a wet paper towel on top of my portion, in the microwave at 50% power for 1 minutes, mixing at 30 seconds

    Nutrition

    Serving: 1serving | Calories: 262kcal | Carbohydrates: 17g | Protein: 9g | Fat: 18g | Saturated Fat: 8g | Polyunsaturated Fat: 1g | Monounsaturated Fat: 8g | Trans Fat: 0.2g | Cholesterol: 30mg | Sodium: 1073mg | Potassium: 85mg | Fiber: 0.3g | Sugar: 1g | Vitamin A: 325IU | Vitamin C: 1mg | Calcium: 235mg | Iron: 1mg

    Deviled Eggs with Candied Bacon

    July 25, 2022

    Deviled Eggs with Candied Bacon

    Deviled Eggs with Candied Bacon: Not your grandma’s deviled eggs! These are filled with incredible ingredients such as liquid smoke, dijon mustard, and even a little smoked paprika for the best deviled eggs!

    These keep everyone out of the kitchen while you finish the holiday meal. See my Thanksgiving side dishes roundup.

    Quick Overview: It’s an easy recipe, that packs a punch of flavor! Make your hard-boiled eggs your favorite way (we prefer to make hard boiled eggs in the Instant Pot) and use the simple ingredients to make up the filling! It will be an easy appetizer recipe that you’ll want to take to any party!

    Close up of deviled eggs with candied bacon
    Deviled Eggs with Candied Bacon

    Why you’ll love these

    • Classic deviled eggs are delicious but when you can kick things up a notch with a few simple ingredients, you’ll have friends and family asking for the recipe!
    • The flavors of the liquid smoke, the twist of the mustard and the crunch of the sweet and salty bacon, creates a combination that’s hard to resist!
    [feast_advanced_jump_to]

    Ingredients

    Candied Bacon

    • 3 slices of bacon
    • 1-2 tablespoons of maple syrup
    • 1 tablespoon brown sugar

    Eggs

    • 12 eggs
    • ½ cup mayo
    • 2 tablespoon of djion mustard
    • ⅛ teaspoon liquid smoke
    • pinch of seasoned salt
    • pinch of smoked paprika
    ingredients for deviled eggs with candied bacon on counter
    Ingredients

    Instructions:

    1. First, make hard boiled eggs. The process of how you do that is totally up to you. If you have one, you may like to cook the eggs in the Instant Pot. If you don’t, another easy way is to make boil them on the stove top.

      How to cook the eggs on the stove-top: Place eggs in a sauce pan and cover with water, just enough to make sure there are about 2 inches of water above the eggs.

      Turn the burner to “high” and bring the water to a rolling boil and then shut off the burner and allow it to sit for about 10-12 minutes.

    After the time is up, drain the water and place eggs in an ice bath. (Meaning, allow eggs to sit in cold water and ice.) Allow the eggs to sit in the cold for at least 5 minutes. (This stops the cooking process and I find it helps the shells peel off easier.)

    Drain, and carefully peel the shells off of the cold eggs. (Believe it or not, this may be the hardest part of the whole recipe, and it’s not even that bad!)

    You’ll want them to peel as clean and even as possible, not to mess up the “whites” of the eggs.

    Cooked eggs in ice bath
    Chill cooked eggs in ice bath
    1. While the eggs cook, you can cook the bacon:

      You can also cook the bacon how you prefer, whether that’s in the microwave, in the oven, or how I do it, in the air fryer.

      Before cooking the bacon, place the uncooked bacon on the cooking surface (air fryer basket, plate, baking sheet, etc.) and drizzle maple syrup on top of each slice. Then, sprinkle brown sugar on top. If you have a silicone brush, or BBQ brush, gently spread the sugar and syrup evenly on top of the bacon.

    For air fryer bacon cook times and instructions, you’ll find this method for cooking bacon in the air fryer, handy!

    Brushing brown sugar and syrup on bacon
    Brush on syrup
    Sprinkle on brown sugar
    Sprinkle sugar
    1. Slice eggs in half: Using a knife, starting at the most narrow end of the egg, begin slicing the egg in half.
    2. Grab a small bowl, and carefully remove the yellow yolks and place the yolks in the bowl and set the empty whites of the egg, aside, in a single layer, on a plate/platter that you plan to serve or store the deviled eggs when finished.
    Eggs sliced in half on cutting board
    Slice eggs in half
    eggs having yolk removed
    Remove yolks from eggs
    1. Add mayo to yellow yolk and stire with a fork to really mash the yolks down, trying to remove any large clumps.
    mayo on top of egg yolks in glass bowl
    Add mayo to yolk
    egg yolk and mayo mixed in bowl
    Stir to combine
    1. Add in the dijion mustard, salt, and liquid smoke.
    2. Stir until evenly combined.
    mustard being added to yolk
    Add other ingredients
    seasoning added to yolk
    Stir to combine
    1. Optional: You can get a wet paper towel and gently wipe the egg whites if they’re messy, but this is optional.
    2. Place yolk mixture in to a plastic, ziptop bag (or piping bag). (See image below – using a tall drinking glass, place the plastic bag down inside of the glass, and pull the opening to stretch out around the rim. This holds the bag open for easy pouring of the yolk.

      Then, cut the bottom corner of the bag, to create an easy way to fill the egg whites with the yolk mixture. This acts as a piping bag or you can use an actual piping bag if desired.
    yolk in bag, in glass
    Pour yolk in bag
    cutting corner of bag
    Cut corner of bag
    1. Fill egg whites with egg mixture.
    Pouring yolk in egg whites
    Squeeze in to eggs
    yolk filled egg whites
    All filled!
    1. Take the cooked bacon and cut it to about 1-in pieces. Then put it on the top of the deviled eggs.
    candied bacon on plate
    Cut bacon
    Small bacon pieces on top of eggs
    Add bacon
    1. Sprinkle with a bit of smoked paprika, if desired. Serve! (Or keep refrigerated until ready to serve.)
    Deviled eggs sprinkled with paprika
    Sprinkle paprika

    NOTE: I had 4 egg white halves left over (2 eggs) because I like to REALLY fill up my eggs. But you can put less to make the yolk stretch.

    Substitutions

    If there’s something in this recipe that you’re not fond of, it should be ok to switch it out for something similar! For instance:

    • Liquid Smoke: If you don’t have any or don’t really like the flavor of liquid smoke, you can omit it but it is HIGHLY recommended!
    • Bacon: You don’t have to “candy” the bacon but it adds a delicious sweet and salty contrast! Also, instead of the slice of bacon on top of the egg, you can make a minced bacon and add it right in to the yolk.
    • Mustard: You can use regular yellow mustard if you prefer. The dijon gives it a slight, sweeter spin which is really fun!

    Variations

    We prefer this recipe, just the way it is. However, if you want to add some things to experiment, you definitely can! Some ideas we’ve had are:

    • hot sauce
    • hot honey
    • green onions
    • garlic powder
    • pickle juice
    • vinegar
    • jalapeno slices and juice
    • pinch of cayenne
    • worcestershire sauce
    Close up of deviled eggs with bacon pieces
    Deviled eggs with bacon

    Storage

    If you have leftover deviled eggs, refrigerate for up to 3 days. You can place them in an airtight container or cover with plastic wrap.

    Top tips

    To keep the cutting of the eggs “clean” (meaning, egg yolks not building up on the egg whites as you cut them) keep a wet paper towel nearby and wipe the knife after each egg cut for a clean cut.

    To fill the plastic bag with ease, place the plastic baggie in a clean drinking glass, as shown above. This pries the bag open for easy yolk pouring.

    If making these in advance, which is absolutely fine, we’ve found that when deviled eggs sit in the refrigerator for more than a day, they can lose some of the flavor. (As far as “salt” flavors. So you may want to sprinkle a little more seasoning salt on to the eggs just before serving, if needed.)

    How do you keep deviled eggs from sliding on a plate?

    Sometimes the egg whites and slip around on a slick plate. So you can either use a deviled egg container that’s specifically made for deviled eggs, or you can try lining your platter with parchment paper to help keep the eggs from slipping. Or, try placing a wire rack on your platter and see if that holds the egg halves in place.

    What makes a deviled egg deviled?

    They’re called deviled eggs because the filling consists of spices and a tangy ingredient.

    What to serve with deviled eggs

    Usually served as an appetizer, especially at the holidays such as Easter Sunday, deviled eggs can also be a side dish for any meal, any time of year.

    Serve alongside a hearty main course such as oven baked turkey, or along other holiday side dish favorites such as this green bean casserole and corn casserole!

    Recipe

    Deviled Eggs with Candied Bacon
    Print Pin
    5 from 6 votes

    Deviled Eggs with Candied Bacon

    Deviled Eggs with Candied Bacon: These are filled with incredible ingredients such as liquid smoke, dijon mustard, and even a little smoked paprika for the best deviled eggs!
    Course Appetizer, Side Dish, Snack
    Cuisine American
    Prep Time 10 minutes minutes
    Cook Time 10 minutes minutes
    Total Time 20 minutes minutes
    Servings 24 egg halves
    Calories 82kcal
    Author Jessica Burgess

    Ingredients

    Eggs

    • 12 eggs
    • ½ cup mayonnaise
    • 2 tablespoons dijon mustard
    • ⅛ teaspoon liquid smoke
    • 1 pinch seasoned salt
    • 1 pinch smoked paprika

    Candied Bacon

    • 3 slices bacon
    • 2 tablespoons maple syrup
    • 1 tablespoon brown sugar

    Instructions

    Cooking the Hard Boiled Eggs

    • First, make hard boiled eggs. The process of how you do that is totally up to you. If you have one, you may like to cook the eggs in the Instant Pot. If you don't, another easy way is to make boil them on the stove top.
      How to cook the eggs on the stove-top: Place eggs in a sauce pan and cover with water, just enough to make sure there are about 2 inches of water above the eggs.Turn the burner to "high" and bring the water to a rolling boil and then shut off the burner and allow it to sit for about 10-12 minutes.
    • After eggs have cooked, drain the water and place eggs in an ice bath. (Meaning, allow eggs to sit in cold water and ice.) Allow the eggs to sit in the cold for at least 5 minutes.
      Drain, and carefully peel the shells off of the eggs. You'll want them to peel as clean and even as possible, not to mess up the "whites" of the eggs.

    Cooking Bacon

    • While the eggs cook, you can cook the bacon: You can also cook the bacon how you prefer, whether that's in the microwave, in the oven, or how I do it, in the air fryer.
    • Before cooking the bacon, place the uncooked bacon on the cooking surface (air fryer basket, plate, baking sheet, etc.) and drizzle maple syrup on top of each slice. Then, sprinkle brown sugar on top. If you have a silicone brush, or BBQ brush, gently spread the sugar and syrup evenly across each slice.

    Assembling Deviled Eggs

    • Slice eggs in half: Using a knife, starting at the most narrow end of the egg, begin slicing the egg in half. Grab a small bowl, and carefully remove the yellow yolks and place the yolks in the bowl and set the empty whites of the egg, aside, on a plate/platter that you plan to serve or store the deviled eggs when finished.
    • Add mayo to yellow yolk and stire with a fork to really mash the yolks down, trying to remove any large clumps.
    • Add in the dijion mustard, salt, and liquid smoke. Stir until evenly combined.
    • Optional: You can get a wet paper towel and gently wipe the egg whites if they're messy, but this is optional.
    • Place yolk mixture in to a plastic, ziptop bag (or piping bag). (See image in post.) Then, cut the bottom corner of the bag, to create an easy way to fill the egg whites with the yolk mixture. This acts as a piping bag or you can use an actual piping bag if desired.
    • Fill egg white cavities with yolk mixture.
    • Take the cooked bacon and cut it to about 1-in pieces. Top each egg half with a piece of candied bacon.
    • Sprinkle with a bit of smoked paprika, if desired. Serve! (Or keep refrigerated until ready to serve.)

    Notes

    If you have leftover deviled eggs, refrigerate for up to 3 days. You can place them in an airtight container or cover with plastic wrap.
     
    See blog post for more tips to make the best deviled eggs!

    Nutrition

    Serving: 1egg | Calories: 82kcal | Carbohydrates: 2g | Protein: 3g | Fat: 7g | Saturated Fat: 2g | Polyunsaturated Fat: 3g | Monounsaturated Fat: 2g | Trans Fat: 0.02g | Cholesterol: 86mg | Sodium: 95mg | Potassium: 44mg | Fiber: 0.1g | Sugar: 2g | Vitamin A: 144IU | Vitamin C: 0.01mg | Calcium: 16mg | Iron: 0.4mg

    Chilis Southwestern Egg Rolls Copycat & Sauce

    July 24, 2022

    Chilis Southwestern Egg Rolls Copycat

    Chilis Southwestern Egg Rolls Copycat: An easy recipe that is super popular at a favorite restaurant, along with the delicious dipping sauce that’s a must!

    Quick Overview: These southwestern eggrolls, use simple ingredients, ready in about 30 minutes. After wrapping, they’ll be fried in oil for only 2 minutes!

    Chilis southwest rolls copycat and dipping sauce
    Chilis Southwest Rolls Copycat

    Why you’ll love this recipe

    If you’ve ever had the egg rolls at Chili’s restaurants, then you know how delicious they are. But I have to say, that the creamy avocado ranch sauce that comes with it, makes them even better! In this recipe, you’ll find out how to make BOTH! It’s one of our favorite copycat recipes to date!

    Ingredients

    • Oil for deep frying (vegetable oil or canola oil)
    • Wrappers – either tortillas or eggroll wrappers

    Filling:

    • 1 ½ c cooked chicken breast, shredded
    • 1 teaspoon cumin
    • 1 teaspoon garlic powder
    • 1 teaspoon onion powder
    • 1 teaspoon paprika
    • 1 teaspoon chili powder
    • ½ teaspoon salt
    • 2 c pepper jack cheese
    • 1 c spinach
    • ½ c canned corn, drained
    • ½ c black beans, drained
    • ⅓ c diced red pepper
    • 2 teaspoon lime juice
    Ingredients on table for chili's egg rolls
    Ingredients

    Avocado Ranch:

    • ½ c mashed avocado
    • ½ c ranch
    • 3 Tbs fresh chopped cilantro
    • 2 ½ Tbs sour cream
    • 1 teaspoon lime juice
    • ½ teaspoon salt
    • ¼ teaspoon garlic powder
    • ¼ teaspoon onion powder
    • ⅛ teaspoon black pepper
    Ingredients for avocado ranch
    Ingredients for Sauce

    Instructions:

    1. Preheat 3″ of oil to 375° in a large pot, on the stovetop.
    2. In a large mixing bowl combine the shredded chicken, cumin, garlic powder, onion powder, paprika, chili powder and salt. Once the chicken and spices are well mixed, add pepper jack cheese, spinach, corn, beans, red peppers and lime juice and mix to combine. Set aside.
    Filling ingredients in white bowl
    Filling ingredients
    Mixed ingredients for filling
    Mixed ingredients
    1. Next, place the tortillas on a microwave safe plate and microwave for 30 seconds to make them more pliable.
    Tortillas on wooden cutting board
    Warm tortillas
    Mixture on center of tortilla
    Place mixture on tortilla
    1. Place ¼ cup of the filling onto the center of a tortilla. Fold the outward sides towards the middle, then roll up. 
    Hand folding tortilla
    Fold together
    Hands folding tortilla for egg roll
    Fold again
    1. Brush the top edge with water to seal. 
    Brushing edges to make tortilla stick
    Brush to stick
    1. After all tortillas are rolled, let them sit for 1 minute before frying to allow the water to stick the edges together. 
    Egg rolls on counter ready for frying
    Ready for frying
    Fried egg rolls on counter
    Fried Egg Rolls
    1. Place 4 rolls into the preheated oil and fry for 1 minute, then flip and fry for 1 minute, until golden.  Once cooked, carefully remove the rolls from the oil and place on a paper towel lined plate. Repeat the frying process with the remaining rolls. 
    Chili's Copycat Egg Rolls on cutting board
    Chili’s Egg Rolls Copycat

    Easy Avocado Ranch Sauce

    1. In a mixing bowl, combine the avocado, ranch, cilantro, sour cream, lime juice, salt, garlic powder, onion powder, and pepper.
    2. Mix until well combined and smooth.  Serve alongside the fried eggrolls. 
    ingredients in small bowl for dipping sauce
    Ingredients for sauce
    Avocado ranch dipping sauce
    Avocado Ranch Sauce
    Open egg rolls with ranch sauce
    Enjoy!

    Storage

    If you happen to have leftovers of these egg rolls, they can be stored in an airtight container in the fridge for up to 3 days. You can reheat the egg rolls in the microwave or in the air fryer if you have one!

    Substitutions

    • Dipping sauce: If you’re not a fan of avocado ranch, you may prefer this jalapeno ranch dipping sauce!
    • Cooked shredded chicken – If you’d like to use something other than chicken, you can use cooked beef, tofu, or cooked shredded turkey instead. However keep in mind that this could change the flavor.  
    • Cheese – If you want to use something other than pepper jack cheese, you can. Do note that this could change the flavor a bit. Some ideas for different cheese are, jalapeno jack cheese, monterey jack cheese)
    • Additional ingredients: If you’d like to also add other items to this recipe, you may want to consider: jalapeno peppers, cayenne pepper, green onion, green chiles, white or yellow onion, hot sauce
    • Dip: If you’re not a fan of the dipping sauce that goes with this recipe, you may want to consider dipping them in something like this Texas queso!
    Open egg rolls
    Chili’s Egg Rolls Copycat

    Expert Tips

    • You can insert a toothpick into the filled roll before placing it in the oil to keep the roll closed while frying. 
    • For a smoother, creamier texture, you can use an immersion blender to blend the avocado ranch!

    Related Recipes

    If you loved these chilis southwest egg rolls, and love easy appetizer recipes, then you’ll also love this elote dip, chicken empanadas, and this easy guacamole dip!

    Recipe

    Chilis Southwestern Egg Rolls Copycat
    Print Pin
    5 from 7 votes

    Chili’s Southwestern Egg Rolls Copycat

    Chilis Southwestern Egg Rolls Copycat: An easy recipe that is super popular at a favorite restaurant, along with the delicious dipping sauce that's a must!
    Course Appetizer
    Cuisine American
    Prep Time 30 minutes minutes
    Cook Time 2 minutes minutes
    Total Time 32 minutes minutes
    Servings 12 egg rolls
    Calories 239kcal
    Author Jessica Burgess

    Ingredients

    • Oil for Frying

    Wrappers

    • 12 Taco size – flour tortillas or egg roll wrappers 

    Filling

    • 1 ½ cups cooked shredded chicken
    • 1 teaspoon cumin
    • 1 teaspoon garlic powder
    • 1 teaspoon onion powder
    • 1 teaspoon paprika
    • 1 teaspoon chili powder
    • ½ teaspoon salt
    • 2 cups pepper jack cheese
    • 1 cup fresh spinach
    • ½ cup canned corn drained
    • ½ cup black beans rinsed and drained
    • ⅓ cup diced red bell pepper
    • 2 teaspoons lime juice

    Avocado Ranch Dipping Sauce

    • ½ cup mashed avocado
    • ½ cup ranch
    • 3 Tablespoons fresh cilantro chopped
    • 2 ½ Tablespoons sour cream
    • 1 teaspoon lime juice
    • ½ teaspoon salt
    • ¼ teaspoon garlic powder
    • ¼ teaspoon onion powder
    • ⅛ teaspoon black pepper

    Instructions

    • Preheat 3" of oil to 375° in a large pot, on the stovetop.

    Egg Roll Filling

    • In a large mixing bowl combine the shredded chicken, cumin, garlic powder, onion powder, paprika, chili powder and salt. Once the chicken and spices are well mixed, add pepper jack cheese, spinach, corn, beans, red peppers and lime juice and mix to combine. Set aside.
    • Next, place the tortillas on a microwave safe plate and microwave for 30 seconds to make them more pliable.

    Assembly

    • Place ¼ cup of the filling onto the center of a tortilla. Fold the outward sides towards the middle, then roll up.  Brush the top edge with water to seal. 
    • After all tortillas are rolled, let them sit for 1 minute before frying to allow the water to stick the edges together. 

    Frying

    • Place 4 rolls into the preheated oil and fry for 1 minute, then flip and fry for 1 minute, until golden.  Once cooked, carefully remove the rolls from the oil and place on a paper towel lined plate. Repeat the frying process with the remaining rolls. 

    Avocado Ranch Dipping Sauce

    • In a mixing bowl, combine the avocado, ranch, cilantro, sour cream, lime juice, salt, garlic powder, onion powder and pepper. M
    • Mix until well combined and smooth.  Serve alongside the fried eggrolls. 

    Nutrition

    Serving: 1egg roll | Calories: 239kcal | Carbohydrates: 20g | Protein: 8g | Fat: 14g | Saturated Fat: 6g | Polyunsaturated Fat: 4g | Monounsaturated Fat: 4g | Cholesterol: 21mg | Sodium: 635mg | Potassium: 166mg | Fiber: 2g | Sugar: 2g | Vitamin A: 679IU | Vitamin C: 7mg | Calcium: 199mg | Iron: 2mg

    Hot Ham and Cheese Sandwiches

    July 23, 2022

    Hot ham and cheese sandwich on white plate

    Hot Ham and Cheese Sandwiches: Hamburger buns, slices of cheese, and your favorite ham, toasted in the oven to create an easy lunch or dinner idea!

    Quick Overview: A hot and ready sandwich recipe that’s ready to eat in 5 minutes! Customize with your favorites, add more options (like in these Italian sliders) or make as suggested!

    Hot ham and cheese sandwich on white plate next to pasta salad
    Hot Ham and Cheese Sandwiches

    Why you’ll love these:

    • Easy: They’re a quick and easy lunch idea that’s warm and comforting or even a main course! Sandwich dinners like this are classic old-fashioned comfort food meals.
    • Make Ahead: Like with cooking burgers in the oven, they’re something that can be made ahead of time, and wrap in aluminum foil to keep warm for a bit!
    • Flexible: Make these sandwiches with your favorites! Whether that’s the type of bun used, cheese, or using your favorite condiments… your hot ham and cheese sandwich will be exactly how you want it!
    [feast_advanced_jump_to]

    Ingredients

    • 7-8 sandwich sliced, thin, ham slices (We use Oscar Mayer’s 9-ounce package to make three sandwiches. However you can use honey ham, black forest ham, etc. Or… try bologna, like we did with our fried bologna sandwiches!)
    • 3 slices of your favorite sliced cheese (We use yellow and white American cheese.)
    • 3 hamburger buns (Regular buns, brioche, or your favorite buns.)
    ingredients on table for hot ham and cheese sandwich
    Ingredients

    Instructions

    1. Preheat oven to 350 degrees.
    2. On a cookie sheet, lined with parchment paper (optional), place buns, insides facing up.
    3. Layer 7-8 slice of ham (or more/less depending on preference) on bottom buns.
    4. Place cookie sheet in oven and bake ham on buns for 2-3 minutes.
    ham on bun, on cookie sheet
    Ham on bun
    1. Open oven door, and place a slice of cheese on the ham, and bake for an additional minute.
    Slice of cheese melted on ham and bun
    Melted hot ham and cheese
    1. Remove from oven and top with your favorite condiments or serve!
    Hot ham and cheese on white plate next to pasta salad
    Hot ham and cheese sandwich

    Condiment Ideas

    We absolutely LOVE having these hot ham and cheese sandwiches just as they are but if you love condiments, here are some great ideas:

    • yellow mustard
    • mayonnaise
    • honey mustard
    • Dijon mustard (we use this in our ham salad sandwiches too!)
    • aoili
    • ranch (or maybe even a drizzle of this jalapeno ranch dressing)

    Substitutions

    1. Lunch meat: You can definitely substitute different meats for the ham, such as turkey, roast beef, etc.
    2. Cheese: We used American cheese for these hot ham sandwiches but you may choose different types of cheeses to use, such as Colby jack, pepper jack cheese, mozzarella cheese, swiss cheese and other types, depending on your favorites!
    3. Buns: Brioche buns are a delicious alternative to regular hamburger buns. However you can use gluten free buns, homemade buns, or even something completely different such as something fun like a jalapeno cheddar bagel!

    Variations

    If you’d like to take things up a notch, here are different variations you may want to try as well:

    • Up-level your buns: If you’d like to make these with sweet Hawaiian rolls or even the Hawaiian hamburger buns, you absolutely can!
      We did this with our cheeseburger sliders and they were a HIT!
      You may also want to create a butter mixture, using melted butter, Worcestershire sauce, poppy seeds, or sesame seeds for an extra kick of flavor on those buns! Simply melt a couple of tablespoons of butter in a small bowl, use a splash of Worcestershire sauce, and seeds, if you prefer, and brush on the bun tops before baking.
    • More Topping Ideas: If you don’t want to stop at condiments, you can top your layers of ham with items such as caramelized onions, lettuce, banana peppers, red onions, and more!

    Storage

    If you have left over ham and cheese sandwiches, you can store them in an airtight container, and place them in the refrigerator.

    For reheating, you can try using the microwave, or place in the oven to reheat. Or, if you have an air fryer, you may find that you like that for reheating as well.

    But all in all, it’s best to not assemble and not bake until right before consuming.

    Top tip

    Feeding a group? Assemble as many of these sandwiches as you need, wrap each one in aluminum foil, and keep on warm until ready to eat! (Usually a maximum of 2 hours.) You can place them in the oven on “warm” or you can even place them in a slow cooker and keep them warm, for traveling!)

    Related Recipes

    If you loved this easy sandwich recipe, you’ll also love this chicken grilled cheese, Caprese sandwich, and this bacon egg and cheese sandwich!

    Or, if you love a fun spin on classics, this fried peanut butter and jelly sandwich will be a hit!

    Did you make this? I’d be so grateful if you left a “star” rating below to let me know what you thought! Then, the next time you need a quick and easy recipe, come back to Fantabulosity to browse all of my easy recipes!

    Recipe

    Hot ham and cheese sandwich on white plate
    Print Pin
    5 from 11 votes

    Hot Ham and Cheese Sandwiches

    Hot Ham and Cheese Sandwiches: Hamburger buns, slices of cheese, and your favorite ham, toasted in the oven to create an easy lunch or dinner idea!
    Course Main Course, Side Dish
    Cuisine American
    Prep Time 1 minute minute
    Cook Time 4 minutes minutes
    Total Time 5 minutes minutes
    Servings 3 sandwiches
    Calories 441kcal
    Author Jessica Burgess

    Equipment

    • oven

    Ingredients

    • 9 ounces ham We used a 9 ounce package of Oscar Mayer but any will do
    • 3 slices cheese American, colby, pepperjack, or your favorite
    • 3 hamburger buns or brioche, hawaiian buns, or your favorite
    • Your favorite condiments

    Instructions

    • Preheat oven to 350 degrees.
    • On a cookie sheet, lined with parchment paper (optional), place buns, insides facing up. Layer 7-8 slice of ham (or more/less depending on preference) on bottom buns.
    • Place cookie sheet in oven and bake ham on buns for 2-3 minutes.
    • Open oven door, and place a slice of cheese on the ham, and bake for an additional minute.
    • Remove from oven and top with your favorite condiments or serve!

    Notes

    Flexible: You can add more ham slices and cheese to each sandwich if you want a really big helping! Just make sure to get enough for what you need! The amount listed here is a great amount but regular size helping.
    Tip: Wrap each warm sandwich in aluminum foil to keep for a couple of hours, if feeding a crowd. See post for more tips!

    Nutrition

    Serving: 1sandwich | Calories: 441kcal | Carbohydrates: 22g | Protein: 29g | Fat: 25g | Saturated Fat: 11g | Polyunsaturated Fat: 3g | Monounsaturated Fat: 9g | Cholesterol: 81mg | Sodium: 1405mg | Potassium: 317mg | Fiber: 1g | Sugar: 3g | Vitamin A: 281IU | Vitamin C: 1mg | Calcium: 266mg | Iron: 2mg

    Instant Pot Buffalo Chicken Pasta

    July 20, 2022

    Instant Pot Buffalo Chicken Pasta: This is the ultimate comfort food – ready in under 20 minutes and full of delicious cheese, this creamy one pot meal is an easy weeknight meal that’ll wow your taste buds!

    Quick Overview: To make this cheesy pasta in the Instant Pot, warm up your olive oil in the Instant Pot on sauté mode and cook your chicken breast pieces. (Or make slow cooker chicken in advance!)
    Layer in the rest of the ingredients in the order mentioned, cook on high pressure 5 minutes. Quick release, stir in the cheddar cheese, top with blue cheese crumbles and green onions, and enjoy!

    A bowl of instant pot buffalo chicken pasta.

    Why You’ll Love This Recipe

    There’s nothing quite like a creamy, cheesy bowl of pasta to warm you up from the inside out, am I right? My favorite pasta dishes have real cream and cheese (like this cream cheese pasta recipe and this crockpot chicken pasta recipe) and all that yummy goodness (even better if they have a bit of a slight kick of spice)!  BUT, I don’t want to spend hours making it. 

    Am I asking for too much? Maybe. Does this recipe deliver all I’m looking for and more? YES! (This is exactly why I love cooking pasta in the Instant Pot.) This one pot buffalo chicken pasta dish is creamy, cheesy, uses real ingredients, AND is so quick and easy to make. That’s a yes, for me. 

    [feast_advanced_jump_to]

    Ingredients

    With one pot and a few simple ingredients easily find next time you’re at the grocery store, you can quickly make this delicious Instant Pot pasta recipe the whole family will love!

    Instant Pot Buffalo Chicken Pasta
    • 2 tablespoons olive oil
    • 1 pound boneless, skinless chicken breasts (cut into bite-sized pieces)
    • 1 ½ cups chicken broth
    • 1 cup milk
    • ⅓ cup buffalo sauce
    • 8 ounces rotini pasta (uncooked)
    • 4 ounces cream cheese
    • 1 ½ cups shredded cheddar cheese
    • blue cheese crumbles (optional)
    • chopped green onion (optional)

    Substitutions

    If you need to make some substitutions in this Instant Pot buffalo chicken mac and cheese, here are a few suggestions!

    • Gluten Free – There are some great gluten free pasta alternatives out there now! If you need, you can swap the rotini for your favorite gluten free style of pasta and it should work just as well. 
    • Olive Oil – You can use your favorite oil in place of olive oil if you like. Canola, coconut, grapeseed…any of those would work (although coconut will alter the flavor of the finished dish a tiny bit). 
    • Milk – You can substitute cream for the milk if you’d like your sauce to be a bit thicker.

    Variations

    Pasta dishes are so fun because there are so many ways you can change them up! Here are a few of my favorite ideas for variations on this Instant Pot Buffalo Chicken Pasta dish.

    • Swap Cheese – Instead of using 4 ounces of cream cheese, try 4 ounces of feta! The sharp taste of feta will add some zing to the recipe!
    • More Spicy – Like in my buffalo chicken dip, you can add a splash of your favorite hot sauce (like Frank’s red hot sauce) along with the buffalo sauce to really kick up the heat. You can even throw in a few sliced jalapeño peppers if you want! 
    • Less Spicy – Buffalo might just be my favorite flavor, but I know it’s not for everyone. If everything in this recipe sounds great to you other than the buffalo sauce, you can omit it! Instead, try adding some Italian seasonings (garlic powder, onion powder, oregano, basil). You can choose to still top the pasta with blue cheese crumbles or you could switch to parmesan cheese in keeping with the Italian theme! You could also swap out the cheddar cheese for mozzarella cheese – yum!

    See the printable recipe card below for quantities and step-by-step instructions on how to make this easy Instant Pot pasta dish!

    Instructions

    Wondering how to make this easy buffalo chicken pasta recipe? Let me show you!

    1. Add olive oil to the insert of your Instant Pot. 
    2. Plug in your Instant Pot and set it to sauté mode. 
    3. Once the Instant Pot is hot, add the chicken and sauté until cooked through. 
    Raw chicken breast pieces in an Instant Pot.
    Cook your chicken pieces.
    1. In this order, add the chicken broth, milk, buffalo sauce, pasta and cream cheese. DO NOT STIR.
    Pouring chicken broth into the Instant Pot with cooked chicken breast pieces in it.
    Add chicken broth.
    Pouring milk into the Instant Pot with cooked chicken breast pieces in it.
    Add milk.
    Pouring buffalo sauce into the Instant Pot with cooked chicken breast pieces in it.
    Add buffalo sauce.
    Uncooked pasta in the Instant Pot with the other ingredients.
    Add pasta.
    Cream cheese added on top of the other ingredients.
    Add pasta. DO NOT STIR.
    1. Place the lid on the Instant Pot, close the pressure valve. Set your Instant Pot to manual for 5 minutes with the pressure on high.
    An Instant Pot showing 5 minutes cook time on it.
    Set your Instant Pot to 5 minutes (manual). 
    1. When the 5 minute cook time has finished, do a quick release (carefully open the pressure valve and let the pressure release). 
    2. When the pressure is fully released, take the lid off and stir the ingredients together.
    Cooked buffalo chicken pasta being stirred up.
    Stir everything together. 
    1. Add the shredded cheese and stir until it is melted and combined with the other ingredients.
    Cooked buffalo chicken pasta with shredded cheddar cheese on top.
    Add shredded cheese. 
    1. Serve your pasta with blue cheese crumbles and chopped green onions on top of the pasta (or a drizzle or ranch dressing if you like), and enjoy!
    Instant Pot buffalo chicken pasta with blue cheese crumbles and green onion on top.
    Serve with blue cheese crumbles and green onions. 
    buffalo chicken pasta in blue bowl
    Buffalo Chicken Pasta

    Equipment

    We used an Instant Pot for this recipe, but you could make it with other brands of electric pressure cooker as well. Always be sure to check meat to ensure it is cooked to the minimum internal temperature of 165 F, regardless of which cooker you use.

    Storage

    Your Buffalo Chicken Pasta should keep for 2-3 days in the fridge as long as it is in an airtight container. 

    I haven’t tried freezing this yet, but I think it would work. Put your Buffalo Chicken Pasta in an airtight, freezer-safe container and it should keep for up to a month!

    Expert Tips and FAQs

    Can I use pre-cooked chicken for this recipe? 

    Absolutely! This is a great way to use leftover chicken. If you have pre-shredded chicken or leftover rotisserie chicken, simply cook the step of cooking the chicken and go straight to layering your ingredients in the warm Instant Pot (starting with the chicken). 

    Can I make this on the stove instead of in the Instant Pot?

    You sure can, but the cooking time will be longer (that’s the beauty of the Instant Pot, it makes everything faster). To modify this for stove top, cook your chicken pieces in oil in a medium pot. Add in the ingredients just like the recipe states, cover and cook until your noodles are soft (follow the cook times on the package). You may need to stir the noodles a few times while cooking on the stove to keep them from sticking to the bottom of the pot. When the noodles are done cooking, add the cheddar cheese and stir until everything is melted and well combined. 

    buffalo pasta in blue dish

    More Buffalo Chicken Recipes

    If you like the flavor of buffalo sauce and you enjoy easy pasta dishes, then you absolutely have to try this buffalo chicken lasagna next! It’s one of those dishes people will rave about when you serve it to them (and it’s surprisingly easy to put together). Go check it out!

    Looking for more easy meals? Try this easy buffalo chicken soup recipe and these buffalo chicken sliders! And if it’s easy instant pot recipes you’re looking for, I have tons over on the blog. Check them out!

    Did you make this? I’d be so grateful if you left a “star” rating below to let me know what you thought! Then, the next time you need a quick and easy recipe, come back to Fantabulosity to browse all of my easy recipes!

    Recipe

    Print Pin
    5 from 3 votes

    Instant Pot Buffalo Chicken Pasta

    Instant Pot Buffalo Chicken Pasta: This is the ultimate comfort food – ready in under 20 minutes and full of delicious cheese, this creamy one pot meal is an easy weeknight meal that'll wow your taste buds! 
    Course Main Course
    Cuisine American
    Prep Time 10 minutes minutes
    Cook Time 5 minutes minutes
    Pressure Release 1 minute minute
    Total Time 16 minutes minutes
    Servings 6 servings
    Calories 477kcal
    Author Jessica Burgess

    Equipment

    • 1 instant pot or similar pressure cooker

    Ingredients

    • 2 tablespoons olive oil
    • 1 pound boneless, skinless chicken breasts cut into bite-sized pieces
    • 1 ½ cups chicken broth
    • 1 cup milk
    • ⅓ cup buffalo sauce
    • 8 ounces rotini pasta uncooked
    • 4 ounces cream cheese
    • 1 ½ cups shredded cheddar cheese
    • blue cheese crumbles optional
    • chopped green onion optional

    Instructions

    • Add olive oil to the insert of your Instant Pot.
    • Plug in your Instant Pot and set it to sauté mode.
    • Once the Instant Pot is hot, add the chicken and sauté until cooked through.
    • In this order, add the chicken broth, milk, buffalo sauce, pasta and cream cheese. DO NOT STIR.
    • Place the lid on the Instant Pot, close the pressure valve. Set your Instant Pot to manual for 5 minutes with the pressure on high.
    • When the 5 minute cook time has finished, do a quick release (carefully open the pressure valve and let the pressure release).
    • When the pressure is fully released, take the lid off and stir the ingredients together.
    • Add the shredded cheese and stir until it is melted and combined with the other ingredients.
    • Serve your pasta with blue cheese crumbles and chopped green onions on top of the pasta (or a drizzle or ranch dressing if you like), and enjoy!

    Notes

    NOTES: Your Buffalo Chicken Pasta should keep for 2-3 days in the fridge as long as it is in an airtight container. 
    I haven’t tried freezing this yet, but I think it would work. Put your Buffalo Chicken Pasta in an airtight, freezer-safe container and it should keep for up to a month!

    Nutrition

    Serving: 1serving | Calories: 477kcal | Carbohydrates: 32g | Protein: 30g | Fat: 25g | Saturated Fat: 11g | Polyunsaturated Fat: 2g | Monounsaturated Fat: 8g | Trans Fat: 0.01g | Cholesterol: 102mg | Sodium: 976mg | Potassium: 482mg | Fiber: 1g | Sugar: 4g | Vitamin A: 627IU | Vitamin C: 1mg | Calcium: 282mg | Iron: 1mg

    Bacon Egg and Cheese Sandwich

    July 20, 2022

    Bacon Egg and Cheese

    Bacon Egg and Cheese Sandwich: This easy breakfast sandwich is made with brioche, over easy egg, cheese and crispy bacon! It definitely makes your breakfast something to brag about!

    Next, you’ll want to make these egg rolls for breakfast because they’re such a fun twist! If mini food is more your style, I’ve also got Breakfast Sliders with the same flavor profile.

    Bacon Egg and Cheese Sandwich Sliced Open

    Why you’ll love this!

    • This sandwich is a delicious breakfast sandwich but it can also be served all day long or even a late night snack!
    • It’s incredibly easy, uses simple ingredients, and can be changed up to reflect your favorite flavors and textures.
    • If you loved our Hawaiian Rolls Breakfast Sliders and our fried egg and bologna sandwich, then you’re going to love the flavors of this one too!

    Ingredients

    First, I really recommend using thick cut bacon for this recipe. I use thick cut, because I’m a texture gal, and when I can really taste the thick cut of bacon in a bite… my bacon love language is on high-alert.

    • bacon
    • sliced cheese (we used white American cheese)
    • egg
    • bun (We used brioche but you can use a hamburger bun, Hawaiian bun, etc.)
    Bacon in the package - Oscar Mayer
    Thick Cut Bacon

    Then, you’ll want an egg, a slice of cheese and a bun for each sandwich you want to make!

    Egg, brioche and cheese
    Ingredients

    Instructions

    Step 1: Cook the Bacon

    Cook the bacon. (I’m a “crunchy” bacon kind of gal, but I have friends and family members that prefer it’s not cooked as long. So however you prefer your bacon, feel free to cook it as long as you like! Just make sure it is fully cooked!) Set aside, and keep warm. You can even cook bacon in the air fryer if you have one!

    Cooked bacon slices on papertowel
    Cooked Bacon

    Step 2: Over Easy Egg

    If you’ve noticed “over-easy” eggs on sandwiches all over the menus in your favorite restaurants lately, then you know that eggs aren’t just for breakfast anymore. I think it takes sandwiches to a whole new level.

    So gently cook your over-easy eggs, being careful not to bust the egg yolk. (You’ll want to bust that yolk when cutting the sandwich in half, right before serving!)

    Egg in pan
    Over easy egg

    Step 3: Assemble!

    Slice your brioche bun in half, and layer on a slice of cheese, and then top with two slices of bacon. (I sliced each bacon piece in half, so the bacon pieces would sit better on the sandwich.)

    Cheese and bacon on bun
    Layer cheese and bacon

    Then, carefully top with your over-easy egg, and the top of the brioche bun.

    Over easy egg on bacon
    Add egg

    Serve!

    Sometimes, I don’t get so lucky to “pop” the egg yolk when I slice it, but nevertheless, the combination of the crunch of the bacon with the other ingredients is DYNAMITE!

    If you won’t be serving the breakfast sandwiches right away, you can wrap them in aluminum foil for easy transportation or to keep warm!

    Bacon egg and cheese sandwich
    Bacon egg and cheese

    Substitutions

    Feel free to experiment and substitute items for this sandwich. Such as:

    • Cheese: The type of cheese is up to you! Here are some of our favorites: swiss, provolone, pepper jack, gouda
    • Meat: Turkey Bacon, sausage, ham, turkey (or skip the meat and just do cheese and egg sandwiches)
    • Bun: Hamburger bun, Hawaiian bun, slider, buttermilk biscuit, kaiser roll, bagel
    • Eggs: If you’re not a fan of runny eggs, you can easily cook a fried egg and top with the fluffy egg instead

    Topping Ideas

    Want to kick things up a notch with some extra fun flavors? Here are some ideas of what you can top this sandwich with:

    • Mayo
    • Hot Sauce
    • Hollandaise

    Other Bacon Sandwich Ideas

    If you’re looking for other fun bacon sandwich recipes ideas, here are a few ideas you can play around with!

    • Bacon, lettuce, tomato, over-easy egg
    • Bacon, avocado, tomato
    • Bacon, chicken, ranch dressing
    • Bacon grilled cheese

    Then for some added extra fun, combine some of those sandwich ideas to make a whole new sandwich!

    More Recipes?

    If you loved this sandwich recipe, then you’ll also want to make sure you get your hands on this hot ham and cheese sandwich recipe, too! Or, if you’re having this sandwich for breakfast, then you’ll also love to see this biscuits and gravy casserole recipe that you can make soon!

    Did you make this? I’d be so grateful if you left a “star” rating below to let me know what you thought! Then, the next time you need a quick and easy recipe, come back to Fantabulosity to browse all of my easy recipes!

    Recipe

    Bacon Egg and Cheese
    Print Pin
    4.50 from 2 votes

    Bacon Egg and Cheese Sandwich

    Bacon Egg and Cheese Sandwich: This easy breakfast sandwich is made with brioche, over easy egg, cheese and crispy bacon!
    Course Breakfast, Main Course
    Cuisine American
    Prep Time 5 minutes minutes
    Cook Time 10 minutes minutes
    Total Time 15 minutes minutes
    Servings 1 sandwich
    Calories 821kcal
    Author Jessica Burgess

    Ingredients

    • 2 slices bacon
    • 1 tablespoon butter
    • 1 egg
    • 1 slice cheese American, swiss or your favorite
    • 1 brioche bun Or hamburger bun

    Instructions

    • Cook bacon. You can place bacon slices on a plate lined with a paper towel, and cook in the microwave for 4 minutes or until bacon is crispy.
    • While bacon in microwaving, you can cook your over easy egg in a skillet on the stove. Melt butter in skillet over medium heat. Carefully crack egg over skillet, being careful not to bust the yolk.
    • Cook egg for about 2 minutes, and carefully flip egg over, using a spatula and cook for another minute or so. You'll want the egg white fully cooked but the yolk still be runny inside.
    • Build the sandwich: Place slice of cheese on bottom bun, layer cooked bacon and top with over easy egg. Place top bun on top, and serve!

    Video

    Notes

    Feel free to change up the cheese flavor, bun type and more, to create the perfect sandwich! 
    This recipe makes one sandwich but simply increase amounts to make as many sandwiches that you need. 

    Nutrition

    Serving: 1sandwich | Calories: 821kcal | Carbohydrates: 40g | Protein: 27g | Fat: 62g | Saturated Fat: 31g | Polyunsaturated Fat: 4g | Monounsaturated Fat: 14g | Trans Fat: 1g | Cholesterol: 394mg | Sodium: 1011mg | Potassium: 173mg | Sugar: 0.3g | Vitamin A: 1604IU | Calcium: 276mg | Iron: 2mg

    Key Lime Pie Cookies – Crumbl Copycat

    July 15, 2022

    A key lime pie cookie.

    Key Lime Pie Cookies – Crumbl Copycat: If you like key lime pie and cookies, you’re going to LOVE this easy recipe! These copycat Crumbl key lime pie cookies are a pie in cookie form and are sure to become a family favorite!

    A key lime pie cookie with a bite out of it.
    Key Lime Pie Cookie – Crumbl Copycat

    Why you’ll love this recipe

    This key lime cookie recipe might be a bit more involved than your typical drop cookies, but I promise they are sooo worth it! These soft cookies are perfectly chewy, and the tart key lime filling on the top is out of this world! If you like key lime pie or key lime cheesecake, you’re going to LOVE these.

    These would be the best cookies to take to a dinner party because they look super impressive and they taste delicious. But the best part? They are actually super simple to make!

    What are Crumbl cookies?

    Crumbl is a cookie company that was started by two cousins with a passion for baking and creativity. What started out with one store is now a chain serving much of North America!

    Crumbl’s cookie journey began with their infamous milk chocolate chip cookies, but now they develop unique and delicious cookies inspired by popular flavors, foods, desserts of all kinds – from pies to cakes to candies and more. 

    [feast_advanced_jump_to]

    Ingredients

    You might need to run to the grocery store to grab a few ingredients for this key lime pie cookies recipe, but you should be able to find everything you need to your local grocery store (and trust me, it’s worth it)!

    Key lime pie cookies ingredients on a counter with labels on the image.
    Ingredients for key lime pie cookies.

    Cookies

    • 1 cup unsalted butter, softened
    • 1 cup brown sugar, packed
    • ¾ cup granulated sugar
    • 2 eggs
    • 1 teaspoon vanilla
    • 2 ⅔ cups all purpose flour
    • 2 cups graham crackers, crushed
    • 1 teaspoon baking powder
    • ½ teaspoon baking soda
    • ½ teaspoon salt
    Key lime pie cookie filling ingredients on a counter with labels on the image.

    Filling

    • 8 ounces cream cheese, softened at room temperature
    • ½ cup sweetened condensed milk
    • ⅓ cup (key) lime juice
    • whipped cream, sliced (key) lime wedges, additional crushed graham cracker crumbs for topping (optional)

    See the printable recipe card below for quantities and detailed instructions on how to make these key lime cookies!

    How to Make Key Lime Pie Cookies

    1. Preheat the oven to 350 degrees. Line a large baking sheet with parchment paper and set aside.
    2. In a large mixing bowl or the bowl of a stand mixer, cream together the butter, brown sugar, and granulated sugar.
    Creamed brown and white sugar and butter in a bowl.
    Cream butter and sugars.
    1. Add the eggs and vanilla and mix until well incorporated.
    2. In a separate medium bowl, add the flour, crushed graham cracker crumbs, baking powder, baking soda, and salt. Mix well with a whisk.
    Graham crumbs, flour, and other dry ingredients in a mixing bowl.
    Combine dry ingredients.
    1. Add the flour mixture to the wet ingredients and mix well with a wooden spoon or stand mixer until the dough forms into clumps.
    Wet and dry ingredients mixed together in a bowl.
    1. Take a golf ball sized amount of dough and roll it in your hands. Place it on the prepared baking sheet and flatten it slightly. Do not crowd the cookies, as they will spread and get very large!
    2. Using the rounded back of a tablespoon or a small cup sprayed in nonstick spray, make little indentations into the dough to form a shallow bowl.
    Key lime pie cookie dough balls on a cookie sheet, slightly flattened to create a shallow bowl in each cookie dough.
    Create a bowl in each dough ball.
    1. Place the baking sheet in the oven and bake for 11-13 minutes. 
    2. When the cookies are done, you will need to reshape the shallow bowls on the tops of the cookies with the back of a tablespoon again. Once the shallow bowls have been made, move the cookies to a cooling rack with a large spatula so they can cool.
    Key lime pie cookies after being baked and reshaping the shallow bowls on top of them with a spoon.
    Reshape the bowls after the cookies finish baking.

    How to Make Key Lime Pie Cookie Filling

    1. In a medium bowl or the bowl of a stand mixer, combine the cream cheese, sweetened condensed milk, and key lime juice until smooth and creamy. 
    Cream cheese, sweetened condensed milk and lime juice mixed until smooth in a bowl.
    Combine until smooth.
    1. When the cookies have completely cooled, fill the shallow bowls on the tops with the cream cheese mixture and place in the refrigerator to allow centers to “set” until ready to serve.
    Key lime pie cookies with the filling added, sitting on a wire rack.
    1. Top the cookies with a dollop of whipped cream, additional crushed graham cracker crumbs, and a slice of (key) lime. Serve and enjoy!
    Key lime pie cookies, fully garnished, sitting on a wire cooling rack.

    Substitutions

    Need to make a swap? I’ve got a few ideas!

    • Butter – instead of butter, you could use margarine and the end result would be similar.
    • Brown Sugar – you can use white granulated sugar instead of brown sugar in the cookies if you need to, but the cookie will likely spread a bit more and will not be quite as soft (will be a bit more crispy around the edges).
    • Gluten Free – I haven’t tested this, but it should be possible to swap the flour for your favorite 1:1 gluten free blend and the graham cracker crumbs for a gluten free version and still get a delicious cookie!

    Variations

    Are you the creative type who always wants to put their own spin on a recipe? I can relate! Here are a few ideas I had for how to change this one up a bit…

    • Lemon Meringue Cookies – you could easily switch the lime juice for lemon juice, top these cookies with a bit of meringue and then torch or broil it for that classic golden brown lemon meringue pie look. How delicious would that be?!
    • Chocolate Key Lime Pie Cookies – if you swap the crushed graham cracker crumbs for Oreo crumbs, you would get a delicious chocolate twist on this pie inspired cookie! It would be similar to making a key lime pie with a chocolate crust instead of a graham cracker crust.
    • Lime Explosion – if you really love lime, you can add 1-2 tablespoons of fresh lime zest to the cookie filling before you add it to the top of the cookies. This will add an extra pop of lime flavor!

    If you get creative with this recipe, be sure to let me know in the comments. I love trying new versions of my recipes!

    Key lime pie cookies on a wire rack with a bowl of graham crackers and a bowl of key limes next to them.
    Key lime pie cookies.

    Storage

    Your key lime sugar cookies should keep for 2-3 days in an airtight container in the fridge (because the key lime filling has cream cheese in it, these should not be left out of the fridge for more than 2 hours).

    I haven’t tried freezing these cookies, so I’m unsure how they would turn out. The texture of cream cheese often changes after being frozen, so it’s likely that the cream cheese mixture would not freeze/thaw well. I do think you could freeze the cookies separately (in a freezer safe container for up to a month) and then add the filling to the cookies when you are ready to serve them. If you do try it, let me know in the comments below!

    Expert Tips and FAQs

    I really like lime; can I pump up the lime flavor in this recipe somehow?

    If you want even more key lime flavor, you can add about 1-2 teaspoons of key lime zest to the cream cheese mixture before you top the cookies!

    Can you substitute regular limes for key limes?

    Yes! In most recipes, regular limes can be used in place of key limes. While key limes are touted as being more acidic and more “tangy” than your average grocery store lime, you can absolutely replace the juice in this recipe with regular lime juice.

    What flavors go well with key lime?

    Lime is a bright, tropical flavor and it goes well with flavors like coconut, blueberry, and raspberry! Try serving these decadent cookies on a tray with some fresh berries and slices of dried coconut for the ultimate dessert!

    Related Recipes

    If you enjoyed this decadent Crumbl key lime pie cookie, you should definitely check out the sugar cookie sandwiches on the blog! They are similarly simple to make but impressive to look at!

    And if you like the look of cookies with delicious filling on top, you have to try these Twix cookies – these are perfect for cookie exchanges, bake sales, or any other time you need to wow people with a tasty and impressive looking snack.

    Recipe

    A key lime pie cookie.
    Print Pin
    4.91 from 10 votes

    Key Lime Pie Cookies – Crumbl Copycat

    Key Lime Pie Cookies – Crumbl Copycat: If you like key lime pie and cookies, you're going to LOVE this easy recipe! These copycat Crumbl key lime pie cookies are a pie in cookie form and are sure to become a family favorite!
    **Note: these cookies are on the large side to mimic the ones that Crumbl makes.
    Course Dessert, Snack
    Cuisine American
    Prep Time 20 minutes minutes
    Cook Time 13 minutes minutes
    Chill Time 2 hours hours
    Total Time 2 hours hours 33 minutes minutes
    Servings 20 cookies
    Calories 321kcal
    Author Jessica Burgess

    Ingredients

    Cookies

    • 1 cup unsalted butter softened
    • 1 cup brown sugar packed
    • ¾ cup granulated sugar
    • 2 eggs
    • 1 teaspoon vanilla
    • 2 ⅔ cups all purpose flour
    • 2 cups graham cracker crumbs crushed
    • 1 teaspoon baking powder
    • ½ teaspoon baking soda
    • ½ teaspoon salt

    Filling

    • 8 ounces cream cheese softened at room temperature
    • ½ cup sweetened condensed milk
    • ⅓ cup (key) lime juice
    • whipped cream, sliced (key) lime wedges, additional crushed graham cracker crumbs for topping (optional)

    Instructions

    Cookie

    • Preheat the oven to 350 degrees. Line a large baking sheet with parchment paper and set aside.
    • In a large bowl or the bowl of a stand mixer, cream together the butter, brown sugar, and granulated sugar.
    • Add the eggs and vanilla and mix until well incorporated.
    • In a separate medium bowl, add the flour, crushed graham cracker crumbs, baking powder, baking soda, and salt. Mix well with a whisk.
    • Add the flour mixture to the wet ingredients and mix well with a wooden spoon or stand m mixer until the dough forms into clumps.
    • Take a golf ball sized amount of dough and roll it in your hands. Place it on the prepared baking sheet and flatten it slightly. Do not crowd the cookies, as they will spread and get very large!
    • Using the rounded back of a tablespoon or a small cup sprayed in nonstick spray, make little indentations into the dough to form a shallow bowl.
    • Place the baking sheet in the oven and bake for 11-13 minutes. 
    • When the cookies are done, you will need to reshape the shallow bowls on the tops of the cookies with the back of a tablespoon again. Once the shallow bowls have been made, move the cookies to a cooling rack with a large spatula so they can cool.

    Filling

    • In a medium bowl or the bowl of a stand mixer, combine the cream cheese, sweetened condensed milk, and key lime juice until smooth and creamy. 
    • When the cookies have completely cooled, fill the shallow bowls on the tops with the cream cheese mixture. 
    • Preferred: Refrigerate to allow centers to "set" before serving.
    • Top the cookies with a dollop of whipped cream, additional crushed graham cracker crumbs, and a slice of (key) lime. Serve and enjoy!

    Notes

    STORAGE: These cookies should keep for 2-3 days in an airtight container in the fridge.
    I haven’t tried freezing these cookies, so I’m unsure how they would turn out. The texture of cream cheese often changes after being frozen, so it’s likely that the cream cheese mixture would not freeze/thaw well. I do think you could freeze the cookies separately (in a freezer safe container for up to a month) and then add the filling to the cookies when you are ready to serve them. If you do try it, let me know in the comments below!

    Nutrition

    Serving: 1cookie | Calories: 321kcal | Carbohydrates: 43g | Protein: 4g | Fat: 15g | Saturated Fat: 9g | Polyunsaturated Fat: 1g | Monounsaturated Fat: 4g | Trans Fat: 0.4g | Cholesterol: 55mg | Sodium: 197mg | Potassium: 125mg | Fiber: 1g | Sugar: 25g | Vitamin A: 482IU | Vitamin C: 1mg | Calcium: 66mg | Iron: 1mg

    Hot Dog Bar Toppings and Ideas for Your Next Party

    July 10, 2022

    hot dog toppings

    This post has been sponsored by Kraft Foods. All thoughts and opinions are my own. It’s hot dog bar toppings and ideas for your next party!

    Hot Dog Bar Ideas and Toppings Suggestions for a party

    Words cannot express how badly I have wanted to style a party at my parent’s farm, and last week… that dream came true, styling this hot dog bar!

    Food bars are one of my favorites to style for a party, so I knew this was a MUST.

    Hot Dog Bar Ideas

    Now ANY hot dog bar, should start out with gathering your favorite toppings and basics.

    Hot Dog Bar Basics

    For my hot dog bar, I used Oscar Mayer Wieners (the perfect amount for a small group of friends), buns, chips, and a big variety of different toppings for guests to choose from. (Seen below.)

    Grilling hot dogs for hot dog bar

    Tip: Let guests cook their own dogs on the grill nearby, so they can customize their hot dog even more! (Some may like them cooked longer than others.) Or you can even add some other types of hot dogs like these mini corn dogs or make wiener winks on the grill.

    Hot Dog Bar Baskets for individual servings

    Boxed Kits

    For a little fun, I created a “boxed” style plate for each guest. Each one included a bun, a carton of chips and a fabric napkin. I love the idea of guests being able to grab-&-go, and head right over to the toppings area to make their own creations!

    However, using small baskets, boats, or paper plates is perfectly fine too!

    Individual Baskets for Hot Dog Bar

    Drinks – Keeping it Simple

    Since I had the girls on my mind, when styling this chic hot dog bar, I knew lemon water would be PERFECT. It’s simple, thirst quenching for a warm day, and pretty to-boot!

    Tip: Fill with a lot of ice, so the water stays chilled and you don’t have to worry about adding ice to the individual cups.

    Water with Lemon for outdoor party in drink dispenser

    Comfort Food for the Gals

    I don’t know about you, but there’s a REASON I have the friends that I do. We know a good comfort-food dish when we see one.

    So styling this party with my gal pals in mind, it was with NO hesitation that I’d encourage a “mac & cheese bacon dog.” (You’ll see a bit of that goodness below.)

    I included a bowl of mac & cheese on the table, for an easy side dish if guests aren’t in to using it as a topping.

    Mac and Cheese - perfect as a side or hot dog topping

    Hot Dog Bar Toppings

    Alright, let’s get down to the hot dog bar toppings, shall we? I had so much fun creating my own hot dog creation, and I already can’t wait to do this again sometime so I can try something new next time!

    To keep things simple, I found the cutest little mason jars, that were the perfect size for the toppings. They came in a 12 pk., and I was able to fill them ahead of time, and top with the lids until it was time to serve!

    Hot Dog Bar Topping Ideas

    Using mini clothespins I attached little strips of paper to each jar.

    Hot Dog Bar Toppings in mason jars

    I wish I had thought to put this hot dog sauce on the hot dog bar too because it would be the perfect topping paired with some of these others!

    Hot Dog Bar Toppings in small mini glass jars

    Topping Ideas:

    • Ketchup
    • Mustard
    • Dill Relish
    • Barbecue Sauce
    • Bacon – See how to bake bacon in the oven!
    • Mac & Cheese
    • Lettuce
    • Sliced Jalapenos
    • Sauerkraut
    • Chili
    • Tomato
    • Red Onion
    • Cheese Dip
    Hot Dogs in their little boxes, ready for the guests

    Mac & Cheese Bacon Dog

    Now for real, who WOULDN’T love the combo of cheese and bacon on a hot dog? I know most of my friends would… and I sure did!

    Hot dog with mac and cheese with crumbled bacon

    Now I’ll go ahead and say that this may be one of my favorite party set-ups so far. (Although I do tend to say that with each one.)

    Hot Dog Bar Toppings Ideas for outdoor party

    Building Your Own Hot Dog Bar

    So remember if you’re styling and hosting your own hot dog bar, start with the basics, and have fun with the topping selections!

    This was by far one of the easiest parties I’ve styled, and would be super easy to recreate again!

    Kraft, Oscar Mayer, and Heinz products for a hot dog bar party

    Recipe

    hot dog toppings
    Print Pin
    5 from 3 votes

    Hot Dog Bar Ideas & Toppings

    Hot Dog Bar Toppings and Ideas for Your Next Party: Indoor or outdoor, this is an easy party food to serve that allows guests to make their hot dogs their own way! Who WOULDN'T love to play around with the different flavors!
    Course Main Course
    Cuisine American
    Prep Time 30 minutes minutes
    Total Time 30 minutes minutes
    Servings 10 people
    Calories 237kcal
    Author Jessica Burgess

    Ingredients

    • Cooked Hot Dogs
    • Hot Dog Buns
    • Mustard
    • Relish
    • Barbecue Sauce
    • Bacon
    • Lettuce
    • Onions Red, White or Green
    • Sliced Jalapenos
    • Sauerkraut
    • Chili
    • Tomatoes
    • Bell Peppers
    • Mac & Cheese
    • Cheese Sauce

    Instructions

    • Place cooked hot dogs

    Nutrition

    Serving: 1hot dog | Calories: 237kcal | Carbohydrates: 30g | Protein: 9g | Fat: 9g | Saturated Fat: 3g | Polyunsaturated Fat: 2g | Monounsaturated Fat: 4g | Trans Fat: 0.001g | Cholesterol: 21mg | Sodium: 548mg | Potassium: 129mg | Fiber: 1g | Sugar: 3g | Vitamin A: 38IU | Vitamin C: 3mg | Calcium: 74mg | Iron: 3mg

    I can’t wait to hear about your very own hot dog bar, and as always… let me know what questions you have, below!

    Fruit Board

    July 9, 2022

    fruit board with crackers and dip

    Fruit Board: A great way to serve your favorite fruits at your next party! Make the fruit platter as shown or use your favorite fruits and crackers.

    Quick Overview: Below is a step-by-step tutorial on how to make a fruit charcuterie board with your favorite fruits and your favorite board!

    fruit board on white platter

    Why you’d want to make a fruit board

    A fruit board is an easy way to serve hungry kids, to serve as a perfect appetizer for a large crowd for your next party, special occasions, or for something like baby showers, or just a fun way to eat your favorite fruits. It’s also a great idea when you need something quick and easy, especially when you serve it with this 3-ingredient fruit dip with marshmallow cream or this Cool Whip Fruit Dip!

    [feast_advanced_jump_to]

    Ingredients

    What’s fun about this fruit platter, is that you can put whatever items that want to put on it!

    Since we pair it so often with fruit dip, fruit is usually the main focus but we also love serving it with other items, such as crackers, cookies, and more!

    Fruit and crackers in small bowls on counter
    Ingredients

    Here are some ideas of our favorite items to include:

    • Strawberries
    • Blueberries
    • Kiwi
    • Green Apples
    • Cantaloupe
    • Pineapple
    • Ritz Crackers
    • Toll House Crackers
    • Vanilla Wafers

    Instructions

    You can arrange your fruit board any way you like, especially if your board or platter is a different shape than the one seen here.

    However if you want to make it just like this one, here’s how it’s styled:

    1. Place the bowl in the middle where the widest section is. This can be the star of the show. Fill it with your favorite fruit dip – ours being this marshmallow dip!
    2. Place the three crackers on the opposite sides of each other. One in the middle on top and the bottom across from each other. 
    bowl of dip in white platter
    Place a dip in center
    crackers added to white platter
    Add crackers
    1. Place strawberries, apples, and blueberries next to crackers. Make sure you leave enough space for the rest of the fruits. 
    2. Then fill in the rest of the empty spaces with kiwi, cantaloupe, and pineapple.
    fruit added to white board
    Add fruit

    Substitutions

    Feel free to substitute your favorite fruits and or crackers to create beautiful boards. This is simply a tutorial to give you an idea of how you can style a fruit tray at home!

    If you don’t want a totally fresh fruit charcuterie board, you can even use things like dried fruits as well, for a simple fruit charcuterie board.

    Variations

    If you really would like to balance all that sweetness out, you can definitely add either salami and/or pepperoni as well for meats. Or, make a cheese board with the fruit and assemble a variety of cheeses like soft cheese (like goat cheese), hard cheese, or your favorites to make a fruit and cheese board!

    For me, I do love the variety that a cheese platter with fruits and meats, provides too. Or even adding a little dark chocolate with the variety of fruits is a great contrast.

    close up of blueberries, crackers and dip
    Left side
    close up of vanilla wafers, kiwi, strawberries
    Right side

    Platters

    You can use any large serving trays, platters, or boards that you choose! (Really, just about any large serving trays that you may have on hand, would probably be a good choice.)

    If you’d prefer a platter like the one that we used here, you can use this similar oval platter! Then, using something like these white ramekins, are such a great way to serve dips!

    We even love using a good charcuterie board, such as this charcuterie board that comes with the cutest pullout drawer for utensils! Perfect for a dinner party when serving guests an appetizer or a dessert charcuterie board, and you want it to look extra special!

    But using any round boards, rectangular boards, etc. is perfectly fine too!

    Storage

    If you have leftover items on your fruit board, store any fruit in an airtight container. If you have leftover crackers, you can place those back in the original packaging or in plastic ziptop bags. It’s best not to store the items together, as the juices from the fruit could leak to the crackers and make them soggy.

    Pro tip

    When serving, it’s a good idea to try and get the best fruit of the season for ripe fruit and juicy fruit! However, if it’s a time of year when your favorite fruits may not be the best and may have a bit of a “sour” to them… the marshmallow fruit dip recipe that we recommend can help offset the taste if seasonal fruits aren’t available near you or at your grocery stores.

    Also, boards come in all different sizes and a variety of shapes, so the amount of fruit/crackers that you need, will depend on the size of the board that you’ll use.

    Related Ideas

    If you loved the idea of this fruit board, then you may also love this tutorial on how to make a cheese board and this beautiful breakfast charcuterie board!

    Did you make this? I’d be so grateful if you left a “star” rating below to let me know what you thought! Then, the next time you need a quick and easy recipe, come back to Fantabulosity to browse all of my easy recipes!

    Recipe

    fruit board with crackers and dip
    Print Pin
    5 from 5 votes

    How to Make a Fruit Board

    Fruit Board: A great way to serve your favorite fruits at your next party! Make the fruit platter as shown or use your favorite fruits and crackers.
    Course Appetizer, Breakfast, Dessert, Side Dish, Snack
    Cuisine American
    Diet Vegan
    Prep Time 15 minutes minutes
    Total Time 15 minutes minutes
    Servings 10 people
    Calories 44kcal
    Author Jessica Burgess

    Ingredients

    Fruit

    • strawberries
    • blueberries
    • kiwi
    • green apples
    • cantaloupe
    • pineapple

    Crackers

    • round butter crackers Such as Ritz
    • tollhouse crackers
    • vanilla wafers

    Fruit Dip

    • We love the fruit dip with marshmallow fluff recipe in the instructions below!

    Instructions

    • Place the bowl in the middle where the widest section is. Fill it with your favorite fruit dip recipe!
    • Place the three crackers on the opposite sides of each other. One in the middle on top and the bottom across from each other. 
    • Place strawberries, apples, and blueberries next to crackers. Make sure you leave enough space for the rest of the fruits. 
    • Then fill in the rest of the empty spaces with kiwi, cantaloupe, and pineapple.

    Notes

    See blog post above for other ideas and items to assemble on your fruit platter!

    Nutrition

    Serving: 1serving | Calories: 44kcal | Carbohydrates: 11g | Protein: 1g | Fat: 0.2g | Saturated Fat: 0.02g | Polyunsaturated Fat: 0.1g | Monounsaturated Fat: 0.02g | Sodium: 6mg | Potassium: 125mg | Fiber: 2g | Sugar: 8g | Vitamin A: 583IU | Vitamin C: 33mg | Calcium: 14mg | Iron: 0.3mg

    No Bake Chocolate Peanut Butter Bars

    July 8, 2022

    A stack of no bake chocolate peanut butter bars.

    No Bake Chocolate Peanut Butter Bars: If you’re craving a chocolate peanut butter dessert and want something quick and easy – these no bake chocolate peanut butter bars are it! This no bake dessert uses simple ingredients and is a quick and easy recipe to make.

    A stack of no bake chocolate peanut butter bars.

    This recipe is one of my go-to desserts for a potluck, especially when you need something dependable.

    Recipe Notes

    I absolutely adore Reese’s peanut butter cups! Peanut butter and chocolate are the best combination in my opinion (my fellow peanut butter lovers know what I’m talking about). Sometimes I get a craving for them but it’s not convenient to run out and get one, and that’s where this recipe comes in.

    If you’re looking for something to satisfy that peanut butter and chocolate craving, this chocolate peanut butter bars recipe will absolutely do the trick. It’s made with simple ingredients that you can keep on hand, so you can make it in a pinch! Trust me, the hardest part of this recipe is not eating it all by yourself.

    [feast_advanced_jump_to]

    Ingredients

    These easy peanut butter bars are comfort food, pure and simple. They are made with simple ingredients that I bet you already have on hand, much like the peanut butter fudge with sweetened condensed milk that we love to make!)

    The ingredients for no bake chocolate peanut butter bars with labels on them.
    Ingredients
    • 1 cup salted butter
    • 1 ½ teaspoon vanilla extract
    • 1 ¼ cups peanut butter, divided
    • 2 cups powdered sugar
    • 1 cup graham crackers, crushed
    • 2 cups semi-sweet chocolate chips

    See the printable recipe card below for quantities and step-by-step instructions.

    Instructions

    1. In a small saucepan, combine the butter, vanilla, and 1 cup peanut butter on medium-low heat until the butter is completely melted, and the mixture is homogenous.
    Peanut butter, butter, and vanilla in a saucepan.
    Melt butter, peanut butter, and vanilla in saucepan.
    1. Remove the pot from the heat and gently whisk the powdered sugar and graham cracker crumbs into the peanut butter mixture.

    Note: To crush your graham crackers, you can use a food processor or simply place them in a ziplock bag and roll over them with a rolling pin until they are more crumb than cookie.

    Graham crumbs and powdered sugar added into the saucepan.
    Whisk in graham crumbs & powdered sugar.
    1. Pour the mixture into an 8×8 baking dish and melt the chocolate chips with the remaining peanut butter in a microwave-safe bowl in the microwave.
    Chocolate chips and peanut butter in a microwave safe bowl.
    Melt chocolate & peanut butter.
    1. Pour the chocolate layer on top of the peanut butter layer and place the dish in the fridge for 2 hours.
    An 8x8 square pan with chocolate peanut butter bars in it.
    Pour chocolate over first layer & chill.
    1. Cut the bars into squares, serve, and enjoy! Enjoy your chocolate peanut butter slice with a glass of cold milk or hot coffee – either way, it’ll be delicious!
    A chocolate peanut butter square on a spatula being held above the 8x8 pan of squares.
    Cut into squares & enjoy!

    Substitutions

    If you need to make a few changes to these no-bake chocolate peanut butter bars, here are my suggestions!

    • Peanut Butter – you can use either creamy peanut butter or crunchy peanut butter in this recipe. I like to use smooth peanut butter, but using crunchy doesn’t have a major effect on the outcome of this recipe. I would not recommend using natural peanut butter for this recipe, though, as it does result in a different texture (natural PB is much softer).
    • Chocolate Chips – you can switch out the semi-sweet chocolate chips for milk chocolate chips or dark chocolate depending on how much sweetness you want to add to the recipe.
    • Vegan – if you want to make this sweet treat vegan friendly, simply use your favorite vegan butter alternative and be sure to select a brand of semi-sweet chocolate chips that are vegan certified.
    • Gluten Free – all you’ll need to do to make this recipe gluten free is to swap the graham crackers for a gluten free graham cracker or graham crumbs!
    • Graham Crackers – instead of graham crackers (crushed), you could choose to use digestive biscuits. These will result in a similar flavor and texture.

    Variations

    This old fashioned peanut butter bars recipe is a fantastic base to play around with! You can add so many fun things to turn this into your own unique creation.

    • Festive – add sprinkles and candies to the top of your bars that match the holiday (red and green for Christmas, pink for Valentine’s Day, green clover sprinkles for St. Patrick’s Day…).
    • Chopped Nuts – sprinkle some chopped peanuts or your favourite nut onto the top of the bars before the chocolate sets for a pretty and delicious garnish!
    • Make it Oreo – instead of crushed graham crackers, use Oreo crumbs or crushed Oreo cookies!
    • Extra Peanut Butter – if you are a super peanut butter lover, you can replace the chocolate chips with peanut butter chips for no-bake peanut butter bars!

    Storage

    These chocolate peanut butter squares will last for 4 days in the fridge if stored in an airtight container.

    You can also freeze these! You can individually wrap the bars in plastic wrap and put them in a freezer safe container or simply place the bars right into a freezer safe container. They should keep for a month or more this way.

    Expert Tips and FAQs

    Can I make these look more like a Reese’s Peanut Butter Cup?

    Yes! If you want these to look more like Reese Peanut Butter cups, you can make them in a muffin cup. Line 12 muffin cups with paper liners. Pour your peanut butter & graham cracker mixture evenly into the 12 muffin cups. Pour your melted chocolate and peanut butter into the 12 muffin cups; chill your entire muffin tray for 2 hours. Enjoy!

    Should I serve these room temperature or chilled?

    These bars are great served chilled or at room temperature. They are a little softer at room temperature, making them easier to eat with a fork. When you serve them chilled, they are more of a finger food.

    Did you make this? I’d be so grateful if you left a “star” rating below to let me know what you thought! Then, the next time you need a quick and easy recipe, come back to Fantabulosity to browse all of my easy recipes!

    Related Recipes

    Looking for other easy, no bake desserts? Try our no bake cherry cheesecake (this one is a huge hit anytime I make it) and these classic no bake cookies (maybe you called them haystacks as a kid?). Or if peanut butter is your favorite, this peanut butter sheet cake recipe with peanut butter icing is full of flavor.

    Recipe

    A stack of no bake chocolate peanut butter bars.
    Print Pin
    5 from 5 votes

    No Bake Chocolate Peanut Butter Bars

    No Bake Chocolate Peanut Butter Bars: If you're craving a chocolate peanut butter dessert and want something quick and easy – these no bake chocolate peanut butter bars are it! This no bake dessert uses simple ingredients and is a quick and easy recipe to make. 
    Course Dessert, Snack
    Cuisine American
    Prep Time 10 minutes minutes
    Chill Time 2 hours hours
    Total Time 2 hours hours 10 minutes minutes
    Servings 9 servings
    Calories 881kcal
    Author Jessica Burgess

    Ingredients

    • 1 cup salted butter
    • 1 ½ teaspoon vanilla extract
    • 1 ¼ cups peanut butter divided
    • 2 cups powdered sugar
    • 1 cup graham crackers crushed
    • 2 cups semi-sweet chocolate chips

    Instructions

    • In a small saucepan, combine the butter, vanilla, and 1 cup of the peanut butter on medium-low heat until the butter is completely melted, and the mixture is homogenous.
    • Remove the pot from the heat and gently whisk in the powdered sugar and crushed graham crackers.
    • Pour the mixture into an 8×8 baking dish and melt the chocolate chips with the remaining peanut butter in the microwave.
    • Pour the chocolate mixture over the peanut butter layer and place the dish in the fridge for 2 hours.
    • Cut the bars into squares, serve, and enjoy!

    Notes

    STORAGE: These bars will last for 4 days in the fridge if stored in an airtight container. 
    You can also freeze these! You can individually wrap the bars in plastic wrap and put them in a freezer safe container or simply place the bars right into a freezer safe container. They should keep for a month or more this way. 
     
    NOTE: To crush your graham crackers, you can use a food processor or simply place them in a ziplock bag and roll over them with a rolling pin until they are more crumb than cookie.

    Nutrition

    Serving: 1serving | Calories: 881kcal | Carbohydrates: 71g | Protein: 11g | Fat: 63g | Saturated Fat: 27g | Polyunsaturated Fat: 10g | Monounsaturated Fat: 22g | Trans Fat: 1g | Cholesterol: 57mg | Sodium: 478mg | Potassium: 471mg | Fiber: 5g | Sugar: 53g | Vitamin A: 650IU | Calcium: 58mg | Iron: 4mg

    Fruit Dip with Marshmallow Fluff

    July 2, 2022

    Fruit dip with marshmallow fluff in a white bowl

    Fruit Dip with Marshmallow Fluff: An easy fruit dip recipe that’s perfect for fruit platters for dipping your favorite fruit or even graham crackers in!

    Quick Overview: Only 3 simple ingredients, a total time of only 10 minutes to prep, and then serve!

    Fruit dip with marshmallow fluff in a white bowl

    Why you’ll love this fruit dip

    This marshmallow fluff fruit dip only uses THREE ingredients, and it’s a no bake recipe that only takes 10 minutes! How could you not love that kind of “cooking” in the kitchen? However, if you’re looking for two dips to make, this Cool Whip Fruit Dip recipe uses similar ingredients but it adds a touch of strawberry flavor.

    You’ll absolutely love serving this fluffy marshmallow cream cheese fruit dip on a fruit tray or fruit board, with your favorite type of fruit! It is the best fruit dip for that!

    When we shared this oreo dip, booty dip, and banana pudding dip, I just knew you’d also love this creamy dip because they’re all some of the best dips (dessert-wise) in my opinion!

    It’s a wonderful dip to serve at your next party, such as birthday parties, baby showers, or a holiday meal. It’s also wonderful to make for a special treat or a great snack if you’re looking for easy after school snacks!

    [feast_advanced_jump_to]

    Ingredients

    A 3 ingredient fruit dip! That’s all it takes! Plus, they’re ingredients that you probably already have on hand (or could easily get at any grocery store) and could keep on hand for those last minute desserts or snacks!

    • 6 Tablespoons of marshmallow fluff
    • 1 8 ounce package of softened cream cheese
    • 6 Tablespoons of powdered sugar

    See the full, printable, recipe card below for ingredients and instructions, all in one place!

    ingredients on counter for fruit dip
    Ingredients

    Instructions

    1. Grab a large bowl, or at least one that’s big enough for the 3 ingredients, that gives you room to mix with a hand mixer.
    2. Place all three items in to mixing bowl, and mix together until evenly combined.
    ingredients in bowl for fruit dip
    All ingredients in bowl
    ingredients mixed together in bowl
    Mixed ingredients
    1. If desired, pour in to a serving dish and serve right away at room temperature, or chill in the refrigerator for later!
    fruit dip in white bowl
    Enjoy or chill!

    For fun, if entertaining, you can place a few pieces of fresh fruit on top, to give it some pizzaz!

    Berries on top of fruit dip in bowl
    Top with berries for fun!

    What fruit is good for dipping?

    Feel free to dip any of your favorite fresh fruits in this! Some of our favorite fruits to dip in this easy fruit dip recipe, are:

    • strawberries
    • apple slices (red apples or green apples)
    • blueberries
    • pineapple
    • cantaloupe
    • honeydew
    • grapes
    • kiwi
    • peaches
    • papaya
    • mangoes
    Strawberry dipping in to fruit dip
    Enjoy your dip!

    Crackers for dipping

    Even though it’s called a “fruit dip” this dip is absolutely lovely with other items, especially crackers. Here are some of our favorites:

    • graham crackers
    • Ritz crackers
    • animal crackers
    • Teddy Grahams
    • vanilla wafers
    Cracker dipped in fruit dip
    Can also dip crackers!

    Other items for dipping:

    We also love dipping items such as:

    • cookies
    • pound cake
    • pretzels
    fruit and cracker with dip on plate
    Marshmallow Fruit Dip

    Variations and Substitutions

    If you’d love to mix things up or are missing an ingredient and need to replace it with something else, here are some ideas that can help:

    • vanilla extract
    • lemon juice
    • Cool Whip
    • orange juice concentrate
    • chocolate chips
    • peanut butter

    Storage

    If you have leftover fruit tip, store in an airtight container, in the refrigerator for up to 7 days.

    Expert Tips

    Make this dip in advance to cut down on things you have to make for a party or to just make available as an easy grab-and-go snack!

    Serve this as an appetizer, dessert or a snack for after school!

    Related Recipes

    If you love fruity snacks and desserts as much as we do, then you’ll also love these cheesecake stuffed strawberries, creamy fruit salad, or even this pumpkin fluff dip!

    Did you make this? I’d be so grateful if you left a “star” rating below to let me know what you thought! Then, the next time you need a quick and easy recipe, come back to Fantabulosity to browse all of my easy recipes!

    Recipe

    Fruit dip with marshmallow fluff in a white bowl
    Print Pin
    5 from 11 votes

    Fruit Dip with Marshmallow Fluff

    Fruit Dip with Marshmallow Fluff: An easy fruit dip recipe that's perfect for fruit platters for dipping your favorite fruit or even graham crackers in!
    Course Appetizer, Dessert, Snack
    Cuisine American
    Prep Time 10 minutes minutes
    Total Time 10 minutes minutes
    Servings 6 servings
    Calories 213kcal
    Author Jessica Burgess

    Ingredients

    • 8 ounces cream cheese softened
    • 6 Tablespoons powdered sugar
    • 6 Tablespoons marshmallow fluff

    Instructions

    • In a bowl, combine the cream cheese, marshmallow fluff, and the powdered sugar with a hand mixer, on medium speed until it is fully mixed together.
    • Pour in to serving dish, if desired!
    • Serve right away or chill until ready for serving!

    Nutrition

    Serving: 1serving | Calories: 213kcal | Carbohydrates: 17g | Protein: 2g | Fat: 15g | Saturated Fat: 8g | Polyunsaturated Fat: 2g | Monounsaturated Fat: 4g | Cholesterol: 38mg | Sodium: 146mg | Potassium: 55mg | Sugar: 14g | Vitamin A: 508IU | Calcium: 37mg | Iron: 0.1mg

    Tuna Pasta Salad

    June 30, 2022

    Tuna pasta salad in white bowl

    Tuna Pasta Salad: A creamy, easy recipe using simple, everyday ingredients like mayo, and a few spices, that can be made in only 20 minutes!

    Pasta salad rounds out a slider bar nicely. Here are more side dishes for sliders.

    A delicious side dish to serve for any weeknight main course or to even have for a quick, fulfilling lunch!

    Tuna pasta salad in white bowl

    If you love recipes like this one, then you’ll also love all of our easy delicious pasta salad recipes!

    What You’ll Love About This Pasta Salad

    Our shrimp macaroni salad has been visited by you all, SO many times, so I knew that since you loved it as much as I did, then you’d also love what we call the best tuna pasta salad recipe!

    • This creamy tuna pasta salad is the perfect side dish for a summer bbq or to simply have for an easy lunch or on a busy weeknight as a main course, too!
    • If you keep most of the ingredients on hand in the pantry (canned tuna, pasta, vinegar, spices, etc.) you sure won’t need much else, to whip this up in a flash!
    [feast_advanced_jump_to]

    Ingredients

    10 simple ingredients are all it takes to make this dish! (Even less if you don’t want to use celery or green onion… as they’re optional but they add so much flavor and texture! So I HIGHLY recommend them.)

    ingredients on table for tuna pasta salad

    What you’ll need:

    • 5 ounce can of tuna fish, drained
    • 1 cup uncooked rotini
    • ½ cup mayonnaise
    • 2 teaspoons plain vinegar
    • ½ teaspoon seasoned salt
    • ½ teaspoon black pepper
    • ½ teaspoon white sugar
    • ½ teaspoon garlic powder
    • ¼ cup chopped green onions
    • ¼ cup chopped celery

    See the printable recipe card toward the end of this post for ingredients and instructions all in one place.

    Instructions

    1. Boil rotini in water, according to package directions. Drain the cooked pasta and rinse with cold water to cool it down. Place in a large bowl (big enough for all ingredients, and room to stir), or in the bowl that you plan to serve the tuna pasta salad in. Set aside.
    Cooked rotini in white bowl
    Cooked Rotini
    1. In a small mixing bowl, add mayo and vinegar.
    mayo in white bowl
    Mix mayonnaise…
    vinegar pouring in to dish
    Add vinegar…
    1. Next, pour in garlic powder, sugar, seasoned salt, and black pepper.
    sugar and garlic powder pouring in to dish
    Add sugar & garlic powder
    black pepper and salt pouring in to dish
    Add salt & pepper
    1. Stir to combine mayo and vinegar mixture with spices.
    seasonings and mayo in white dish
    Seasonings and mayo
    seasonings mixed with mayo in dish
    Seasonings mixed
    1. Pour mayonnaise mixture over pasta.
    mayo mixture poured on top of pasta
    Pour mayo on pasta
    1. Add tuna, celery, and green onion.
    Add tuna on to pasta salad
    Add tuna
    celery and green onion added to tuna pasta
    Add green onion & celery
    1. Stir until fully combined and mixed together.
    Pasta mixed with mayo and vegetables
    Stir to combine

    Serve this cold tuna pasta salad right away or chill for later!

    tuna pasta salad in white serving bowl with red napkin underneath

    Substitutions

    If you find that you’re out of some of the items that this recipe calls for, it’s ok to switch some things up! Here are some things you can consider:

    • Canned tuna: I prefer the canned tuna that’s in water but you can use the tuna in oil if that’s what you have on hand.
    • Pasta: I love the texture of the rotini pasta for this salad but it’s absolutely ok to substitute an other type of pasta, such as elbow pasta, shell pasta, bowtie pasta, etc. I would just recommend a short, smaller pasta, over a longer pasta. You can also use a whole wheat pasta if you prefer.
    • Seasoned Salt: If you’re not a fan of this, you can use regular table salt if you prefer.
    • Vinegar: Don’t have white vinegar on hand? You may want to try a little lemon juice instead, to get that zing!
    • Mayo: I prefer mayo over Miracle Whip or greek yogurt but you can definitely experiment with these if that’s all that you have on hand.
    Tuna pasta salad on lettuce as a salad

    Variations

    Eating this tuna pasta salad just the way it is, is my favorite. However, a runner-up to eating it alone, is eating it on a bed of lettuce as a main dish! The crunch of the lettuce leaves with the softness of the pasta and tuna is absolutely incredible, and gives such delicious flavors!

    Love kicking things up a notch? Have fun with added flavors, such as hot sauce for a kick!

    Other ingredients you may want to consider adding in this easy tuna macaroni salad if you like to mix things up, are:

    • red onion
    • orange bell peppers, yellow bell peppers, green bell pepper or red bell peppers
    • other fresh herbs (such as fresh dill)
    • cherry tomatoes, sliced in half
    • lemon zest
    • fresh peas
    • english cucumber
    tuna pasta salad in white bowl

    Storage

    If you have leftover tuna pasta salad, store it in an airtight container for up to 3 days. You can also cover the dish that it’s in, with plastic wrap to keep for later.

    Top Tip

    You can make this in advance if you’re planning on making it for an event or taking it to a potluck. Making it a day in advance or the morning of would be a good idea! Just stir the pasta salad right before serving!

    Related Recipes

    If you love these kinds of recipes, then you’ll also want to check out this tuna salad recipe, crab salad, and this zesty pasta salad!

    Or if you’re looking for a warmer dish that utilizes canned tuna, you’ll love this tuna casserole recipe.

    Did you make this? I’d be so grateful if you left a “star” rating below to let me know what you thought! Then, the next time you need a quick and easy recipe, come back to Fantabulosity to browse all of my easy recipes!

    This tuna pasta salad is delicious served with my classic cheeseburger sliders for a simple, family-friendly dinner.

    Recipe

    Tuna pasta salad in white bowl
    Print Pin
    5 from 9 votes

    Tuna Pasta Salad

    Tuna Pasta Salad: An easy recipe using simple, everyday ingredients like mayo, and a few spices, that can be made in only 20 minutes!
    Course Main Course, Salad, Side Dish
    Cuisine American
    Prep Time 10 minutes minutes
    Cook Time 10 minutes minutes
    Total Time 20 minutes minutes
    Servings 6 servings
    Calories 190kcal
    Author Jessica Burgess

    Ingredients

    • 5 ounces canned tuna in water (drained)
    • 1 cup uncooked rotini
    • ½ cup mayonnaise
    • 2 teaspoons plain distilled vinegar
    • ½ teaspoon seasoned salt
    • ½ teaspoon black pepper
    • ½ teaspoon white granulated sugar
    • ½ teaspoon garlic powder
    • ¼ cup chopped green onion
    • ¼ cup chopped celery

    Instructions

    • Boil rotini in water, according to package directions. Drain, and rinse with cold water to cool it down. Place in mixing bowl, or in the bowl that you plan to serve the tuna pasta salad in. Set aside.
    • In a small mixing bowl, add mayo and vinegar.
    • Next, pour in garlic powder, sugar, seasoned salt, and black pepper.
    • Stir to combine mayo and vinegar mixture with spices.
    • Pour mayonnaise mixture over pasta.
    • Add tuna, celery, and green onion.
    • Stir until fully combined and mixed together. Serve!

    Nutrition

    Serving: 1serving | Calories: 190kcal | Carbohydrates: 9g | Protein: 6g | Fat: 14g | Saturated Fat: 2g | Polyunsaturated Fat: 8g | Monounsaturated Fat: 3g | Trans Fat: 0.03g | Cholesterol: 16mg | Sodium: 369mg | Potassium: 95mg | Fiber: 1g | Sugar: 1g | Vitamin A: 87IU | Vitamin C: 1mg | Calcium: 14mg | Iron: 1mg

    Everything But The Bagel Dip

    June 28, 2022

    A bowl of everything but the bagel dip with vegetables and crackers around it.

    Everything But The Bagel Dip: This delicious dip uses simple ingredients to give you all the flavor of an everything bagel in convenient dip form. You only need 5 minutes and 4 simple ingredients, and the recipe only has 3 steps – it doesn’t get easier than that!

    It’s an easy appetizer recipe that you’ll want to keep the ingredients on hand for, for those last-minute cravings or entertaining needs!

    A bowl of everything but the bagel dip with vegetables and crackers around it.
    Everything But The Bagel Dip.

    Why You’ll Love This Everything But the Bagel Dip

    • If you like everything bagels, you’re going to love this dip! It has all the bagel flavors of an everything bagel with cream cheese, but you get to dip all of your favorite things in it! (I’d even make it and put it on a bagel bar if hosting, when I’m making this homemade bagels recipe!)
    • Whether you’re a veggies and dip kind of person, a crackers and dip person (or maybe even a dip a slice of cheese in dip kind of person…I won’t tell), this dip is sure to hit the spot. (Of course, alongside our other favorite savory dip, this easy blue cheese dip!)
    • It’s a great snack idea for summer! Super easy to make and nice and cool to serve at a bbq.
    [feast_advanced_jump_to]

    Ingredients

    You only need 4 simple ingredients to make this dip – that’s it, just 4 things you can find in your grocery store!

    The ingredients for everything but the bagel dip laid out on a counter with labels on the image.
    • 1 – 8 ounce cream cheese block, softened
    • ⅔ cup sour cream
    • 3 tablespoons Everything But The Bagel seasoning
    • chopped fresh scallions (for topping)

    See the printable recipe card below for exact ingredients and the entire recipe.

    Instructions

    1. In a large bowl or the bowl of a stand mixer, mix together the cream cheese and sour cream.
    Cream cheese and sour cream blended together in a mixing bowl.
    Mix cream cheese and sour cream.
    1. Fold in the everything but the bagel seasoning with a rubber spatula.
    Cream cheese and sour cream in a bowl with everything but the bagel seasoning on top.
    Fold in seasoning.
    1. Transfer to a serving bowl if you like, top with chopped scallions and serve chilled with your favorite crackers or veggies!
    Everything but the bagel dip in a bowl with chopped scallions on top.
    Add chopped scallions.

    What to Eat with Everything but the Bagel Dip

    The best thing about dip is that you can eat it with whatever you want! Here are a few of my favorite ideas for how to eat this everything but the bagel seasoning dip:

    • Spread it on a bagel – I know it sounds extra, but try spreading this everything but the bagel dip on your favorite toasted bagel! It’s delicious.
    • With veggies – If you have picky veggie eaters in your house, serve up a big plate of chopped fresh vegetables with this flavorful dip and watch it all disappear! This is a great way to get your kids to eat more veggies. Serve this dip with celery sticks, carrot sticks or baby carrots, julienned cucumbers, or whatever other veggies your family likes!
    • As a dipping sauce – Whether you’re making chicken wings or French fries, the tangy flavors of this dip make it a good choice as a dipping sauce.
    • On avocado toast – Spread this dip onto some whole grain toast and top it with sliced avocado and an egg if you like. This might become your favorite breakfast – it’s so good! You’ll also love my guacamole recipe for your next party spread!

    If you want to serve this easy dip recipe as an appetizer, here are some of our favorite dippers to serve with it:

    • pita chips
    • tortilla chips
    • potato chips
    • fresh vegetables
    • pretzels
    • bagel chips (you can buy these at the grocery store!)

    Substitutions & Variations

    This everything bagel dip recipe is pretty great on its own, but if you need to make some changes I have a few suggestions for you!

    • Scallions – you can use chopped green onions instead of scallions.
    • Dairy Free – you can most likely find dairy free cream cheese and sour cream alternatives in your grocery store!
    • Higher Protein – if you want to up the protein in this recipe, you can replace the sour cream with plain greek yogurt!
    • Cream Cheese – you can use full-fat cream cheese or low-fat cream cheese, whatever suits your dietary needs. Personally, I like full-fat cream cheese because it’s very rich and creamy but low-fat cream cheese will work well, too.
    • Copycat Everything But The Bagel Seasoning – If you can’t find everything but the bagel seasoning, you can make your own! Combine 2 tablespoons poppy seeds, 1 tablespoon white sesame seeds, 1 tablespoon black sesame seeds, 1 tablespoon + 1 teaspoon dried minced garlic, 1 tablespoon + 1 teaspoon dried minced onion, 2 teaspoons flaked sea salt or coarse salt. Once you’ve made up your everything bagel seasoning mix, use 3 tablespoons of it for this recipe!

    Storage

    Store your leftover everything bagel dip in an airtight container in the fridge for 2-3 days.

    Freezing cream cheese can alter the texture a bit, so freezing isn’t recommended. If you don’t mind if the texture changes, you can definitely freeze this dip in a freezer safe, airtight container or bag for up to three months.

    Expert Tips and FAQs

    Can I make my own everything but the bagel seasoning?

    If you can’t find everything but the bagel seasoning, you can make your own bagel seasoning blend! Combine 2 tablespoons poppy seeds, 1 tablespoon white sesame seeds, 1 tablespoon black sesame seeds, 1 tablespoon + 1 teaspoon dried minced garlic, 1 tablespoon + 1 teaspoon dried minced onion, 2 teaspoons flaked sea salt or coarse salt. Once you’ve made up your everything bagel seasoning mix, use 3 tablespoons of it for this recipe!

    Can I make this dip ahead of time?

    Yes! If you make this dip ahead of time and let it sit in the fridge the flavors will get a bit stronger, which will be delicious!

    Related Recipes

    Love dip recipes? Then you’re really going to love this easy elote dip, Reuben dip, and homemade cheese dip recipe! Or if you’re a fan of using beers in dip, this beer pretzel dip is easy to make and has amazing flavor!

    If you’re looking for more great options to serve on game day or at your next party, check out our loaded cream cheese dip! Cream cheese, jalapenos, ranch seasoning, cheese and bacon…need I say more? Or, keep the bagel theme going and whip up these easy pizza bagels!

    Did you make this? I’d be so grateful if you left a “star” rating below to let me know what you thought! Then, the next time you need a quick and easy recipe, come back to Fantabulosity to browse all of my easy recipes!

    Recipe

    A bowl of everything but the bagel dip with vegetables and crackers around it.
    Print Pin
    5 from 5 votes

    Everything But The Bagel Dip

    Everything But The Bagel Dip: This delicious dip uses simple ingredients to give you all the flavor of an everything bagel in convenient dip form. You only need 5 minutes and 4 simple ingredients, and the recipe only has 3 steps – it doesn't get easier than that!
    Course Appetizer, Snack
    Cuisine American
    Prep Time 5 minutes minutes
    Total Time 5 minutes minutes
    Servings 8 servings
    Calories 39kcal
    Author Jessica Burgess

    Ingredients

    • 1 – 8 ounce cream cheese block softened
    • ⅔ cup sour cream
    • 3 tablespoons Everything But The Bagel seasoning
    • chopped fresh scallions for topping

    Instructions

    • In a large bowl or the bowl of a stand mixer, mix together the cream cheese and sour cream.
    • Fold in the everything but the bagel seasoning with a rubber spatula.
    • Transfer to a serving bowl if you like, top with chopped scallions and serve chilled with your favorite crackers or veggies!

    Notes

    STORAGE: Store your leftover everything but the bagel dip in an airtight container in the fridge for 2-3 days.
    Freezing cream cheese can alter the texture a bit, so freezing isn’t recommended. If you don’t mind if the texture changes, you can definitely freeze this dip in a freezer safe, airtight container or bag for up to three months. 

    Nutrition

    Serving: 1serving | Calories: 39kcal | Carbohydrates: 1g | Protein: 1g | Fat: 4g | Saturated Fat: 2g | Polyunsaturated Fat: 0.2g | Monounsaturated Fat: 1g | Cholesterol: 11mg | Sodium: 303mg | Potassium: 28mg | Fiber: 0.04g | Sugar: 1g | Vitamin A: 134IU | Vitamin C: 0.5mg | Calcium: 21mg | Iron: 0.04mg

    Oreo Dip

    June 27, 2022

    A bowl of Oreo dip with an Oreo in it and crumbled Oreos on top.

    Oreo Dip: This dip is so quick and easy to make! All you need are 10 minutes and five simple ingredients to whip up this creamy, Oreo fluff dip (or Oreo cheesecake dip) that’s sure to be a crowd-pleaser.

    It’s an easy no-bake dessert recipe that you’ll want to keep handy for those last-minute needs! (Just like our super popular Oreo Dessert and Oreo Mousse that everyone seems to love too and our Oreo Rice Krispie Treats!)

    Someone holding an Oreo dipped in Oreo dip.

    If you love Oreos as much as we do, then you’ll also love these Oreo cupcakes and these Oreo Brookies!

    Why You’ll Love This Oreo Dip Recipe

    Is it just me, or is the creamy filling inside an Oreo basically the best part? As a kid, I think most of us licked that filling out before we ate the cookies…right?

    This dessert dip has all the cream flavor and fluffy goodness of Oreo cookie filling, and it has crushed Oreos right in it (Oreo lover, rejoice)!

    It’s everything you want from something called “Oreo dip” and more. Trust me, if you make this easy recipe for a party or just as a summer snack recipe. You’ll definitely have guests asking you for the recipe (and they’ll be shocked to learn how simple it was to make).

    [feast_advanced_jump_to]

    Ingredients

    You only need 5 simple ingredients to make this easy Oreo dip!

    Ingredients for Oreo dip set out on a counter with labels on the image.
    Ingredients
    • 8 ounce cream cheese, softened
    • 1 cup powdered sugar
    • 2 teaspoons vanilla extract
    • 1 – 8 ounce tub of whipped topping (like Cool Whip)
    • 18 Oreo cookies (set aside 1 or 2 for topping)

    See the printable recipe card below for the full recipe.

    Instructions

    Making this easy Oreo dip recipe is a breeze. Follow along and I’ll show you how, step-by-step.

    1. In a large bowl, add the softened cream cheese, powdered sugar, and vanilla extract.
    2. Beat with an electric hand mixer until well incorporated, about 1-2 minutes. 
    Cream cheese, powdered sugar and vanilla creamed together in a bowl.
    Cream together first 3 ingredients.
    1. Fold the whipped topping into the cream cheese mixture.
    Whipped topping in a bowl with the cream cheese, powdered sugar, and vanilla.
    Fold in whipped topping.
    1. Place 16 or 17 Oreo cookies into a plastic bag and crush them into small pieces (you can also do this with a food processor if you have one). 
    Oreo cookies in a bag being crushed up, with a bowl of Oreos beside it.
    Crush Oreo cookies.
    1. Add the crushed Oreos into the bowl and gently fold them into the whipped topping mixture.
    Crushed Oreos folded into the dip mixture.
    Fold Oreos into dip mixture.
    1. When ready to serve, crush the remaining 1-2 Oreos on top of the dip. 
    Oreo dip.
    Crumble oreos on top.
    1. Serve this creamy Oreo dip snack with additional cookies, graham crackers, fresh strawberries, pretzels, etc. This would make a delicious sweet snack for your little ones after school, a tasty dessert, or a fun road trip treat (how sweet would this look packed into a bento box alongside some fruit)!
    Oreo dip with graham crackers, strawberries and cookies around it.
    Serve with your favorite dippers!

    What to Serve With Oreo Dip?

    There’s really no wrong answer to this question, but a few of my favorite things to serve alongside this creamy dip are:

    • graham crackers
    • pretzels
    • fresh fruit like strawberries or apple slices
    • oreos (and then use the extras to make these Oreo Pancakes tomorrow morning!)
    • vanilla wafers
    • shortbread cookies

    Get creative! You can serve this party dip with any sort of dippable treat you like!

    Substitutions

    Need to make a substitution? Here are my suggestions…

    • Gluten Free – Check your local grocery store for a gluten free “chocolate sandwich cookie” to use in this recipe in place of the Oreos (or, if you’re lucky, you might be able to find gluten free brand name Oreos in your local store)! Even if you need to use gluten free cookies, you’ll still end up with a delicious dip!
    • Dairy Free – It’s getting easier and easier to find dairy free alternatives in grocery stores. Most grocery stores will have a dairy free version of cream cheese in the natural aisle (like Daiya brand or Trader Joe’s). There are also some whipped toppings that are dairy free! So Delicious makes a dairy free whipped coconut topping that would work for this recipe.
    • Whipped Topping Alternative – If you don’t have access to whipped topping but you have a cup of heavy whipping cream, you can make your own! This blog post tells you how to use whipping cream, sour cream, and powdered sugar to make a whipped topping substitution.

    Variations

    This yummy Oreo dip with cream cheese is delicious exactly as it is, but it’s also a great base and could be customized in so many ways! Next time you make this, try…

    • Mix Ins – Fold in some themed sprinkles or candies (think, M&M’s like we use in this dessert cheese ball) to make this dip special for a holiday! Pink heart sprinkles for Valentine’s Day, green sprinkles for St. Patrick’s Day, red and green for Christmas, you get the idea.
    • Add Chocolate Chips – Add a little crunch to your dip and some extra chocolate flavor, fold in a handful of chocolate chips!
    • Brownie Bits -Chop up some one bite brownies (or homemade brownies) and fold them into the batter to take this dip to the next level of chocolate goodness.
    • Oreos – You can use classic Oreo cookies for this recipe, or you can change things up and try different kinds of Oreo cookies! Golden Oreos, lemon Oreos, birthday cake Oreos, mint Oreos, chocolate marshmallow Oreos…any one of these would be delicious!
    no bake oreo dip in white bowl with dippers around
    No Bake Oreo Dip

    Storage

    Store your leftover Oreo cookie dip in an airtight container in the fridge for 2-3 days. This dip can be served chilled or at room temperature, it’s personal preference.

    Freezing cream cheese can alter the texture a bit, so freezing isn’t recommended. If you don’t mind if the texture changes, you can definitely freeze this dip in a freezer safe, airtight container or bag for up to three months.

    Expert Tips and FAQs

    Can I make this dip ahead of time?

    Absolutely! I would recommend not folding the crushed Oreos in until right before you want to serve it, though. It is nice to have a bit of crunchy cookie in the dip, and if you let it sit for too long the Oreos will get a bit softer. That being said, it will still be delicious even if you make the whole thing ahead of time and store it in the fridge!

    What can I use instead of whipped topping?

    If you don’t have access to whipped topping but you have a cup of heavy whipping cream, you can make your own! This blog post tells you how to use whipping cream, sour cream, and powdered sugar to make a whipped topping substitution.

    Did you make this? I’d be so grateful if you left a “star” rating below to let me know what you thought! Then, the next time you need a quick and easy recipe, come back to Fantabulosity to browse all of my easy recipes!

    Related Recipes

    Are you looking for more sweet dips? We have a few on the blog that make a delicious dessert or sweet snack, like this viral TikTok booty dip, fruit dip with marshmallow cream or this banana pudding dip!

    Or if you’re looking for one of our favorite dips to serve at Christmas, you’re going to love this Little Debbie Christmas Tree Snack Cake Dip!

    If you’re in the mood for savory dips, we’ve got those too! This elote dip is sooo good (it’s got all the flavor of the iconic Mexican street corn but in convenient dip form) and this easy taco layer dip is one that people beg me to bring to gatherings.

    Recipe

    A bowl of Oreo dip with an Oreo in it and crumbled Oreos on top.
    Print Pin
    5 from 7 votes

    Oreo Dip

    Oreo Dip: This dip is so quick and easy to make! All you need are 10 minutes and five simple ingredients to whip up this creamy, fluffy Oreo dip that's sure to be a crowd pleaser.
    Course Dessert, Snack
    Cuisine American
    Prep Time 10 minutes minutes
    Total Time 10 minutes minutes
    Servings 10 servings
    Calories 277kcal
    Author Jessica Burgess

    Ingredients

    • 8 ounce cream cheese softened
    • 1 cup powdered sugar
    • 2 teaspoons vanilla extract
    • 1 – 8 ounce tub of whipped topping
    • 18 Oreo cookies set aside 1 or 2 for topping

    Instructions

    • In a large bowl, add the softened cream cheese, powdered sugar, and vanilla extract.
    • Beat with an electric hand mixer until well incorporated, about 1-2 minutes. 
    • Fold in the whipped topping.
    • Place 16 or 17 Oreo cookies into a plastic bag and crush them into small pieces. 
    • Add the crushed Oreos into the bowl and gently fold them into the whipped topping mixture.
    • When ready to serve, crush the remaining 1-2 Oreos on top of the dip. 
    • Serve with additional cookies, graham crackers, fresh strawberries, pretzels, etc. 

    Video

    Notes

    NOTES: 
    • This dip is best served chilled or at room temperature.
    • Make sure the cream cheese is softened! If you are working directly with "cold/stiff" cream cheese, this may cause tiny little lumps of unblended cream cheese in your dip.
     
    STORAGE: Store your Oreo dip in an airtight container in the fridge for 3-4 days. This dip can be served chilled or at room temperature – it’s personal preference. 
    Freezing cream cheese can alter the texture a bit, so freezing isn’t recommended. If you don’t mind if the texture changes, you can definitely freeze this dip in a freezer safe, airtight container or bag for up to three months. 

    Nutrition

    Serving: 1serving | Calories: 277kcal | Carbohydrates: 32g | Protein: 3g | Fat: 16g | Saturated Fat: 6g | Polyunsaturated Fat: 3g | Monounsaturated Fat: 5g | Trans Fat: 0.01g | Cholesterol: 23mg | Sodium: 197mg | Potassium: 89mg | Fiber: 1g | Sugar: 24g | Vitamin A: 305IU | Calcium: 27mg | Iron: 3mg

    Purple Mattress | Personal Review in 2025

    June 26, 2022

    Mom and son playing on purple mattress

    This blog post was sponsored by Purple and all opinions are my own.

    Mom and son playing on purple mattress

    To say that my husband and I were ready for a new mattress is an understatement.

    We had been shopping around and looking at all kinds of different mattresses, ever since we moved in to our furnished home here in Montana. Now, don’t get me wrong… we were so grateful the home already had a bed for us to sleep in when we moved in but we just weren’t grooving with the mattress that was here.

    Our old mattress was a queen size, and being married to someone who doesn’t consider himself to have the body type of a small person… it was a tight squeeze. Add that with “uncomfortable” and it was a combination for a rough night’s sleep.

    So when I had the opportunity to try out the California King, Purple Hybrid Premier mattress, that I had been hearing so many positive reviews about when reading mattress reviews online, I knew we had to get it in to our bedroom, quickly!

    Purple Mattress Review

    From the moment our new Purple mattress arrived (yes! It was delivered right to our house!) I was totally impressed. It arrived, “rolled-up” in a long “tube-like” bag (almost like a large duffel bag), where we could unpack it and unroll it right where we wanted it.

    Now, I say “right where we wanted it” because our mattress arrived before the new bed frame that we ordered. So since we couldn’t wait, we unrolled that baby, right there on the floor, and slept on it for the next few nights!

    That first night was a DREAM! We had more space to stretch out and the comfort we experienced was unlike any other.

    I felt like I was “floating” and my husband actually slept ALL night, which hadn’t happened since moving in.

    When the bed came in a few days later, we were able to easily remove the mattress from the floor and place it on the bed frame! (No box springs needed!)

    California King Hybrid Purple Mattress Review

    Specifications:

    I tend to OVER research things when looking for something online or when needing to buy something that will play a large part in our lives.

    So when researching the Purple mattress, I found these specifications and info about the unique materials, VERY helpful:

    • Purple mattresses have Optimal Temperature: There are 1,800 air channels built into the temperature-neutral grid and breathable foams used in the vase, you'll stay comfortable all night. This was VERY important for my husband as he’s a “hot-sleeper” so making sure we didn’t get a mattress that would make him even hotter, was a priority.
    • The Instant Response is so nice: The hyper-elastic gel Grid immediately flexes to give great support and springs back into place as you readjust and move overnight. I love this because when (and if) I roll around (which I’ve been known to sleep in one position all night on this mattress now), I feel like I’m gently cradled “in-place” when I adjust positions.
    • With the Pressure Reduction feature, the soft, cushioning, smart comfort Grid cradles points like your hips and shoulders, with layers of foam providing extra padding.
    • With the signature Purple Grid, the thicker the gel grid, the less pressure you'll feel. The Hybrid Premier that we received (and that you see in this review) is perfect for sleepers who crave even more of that dreamy "floating" effect – like ME!
    • The mattress has a “StretchMax” Cover which boasts even more stretch, and the soft top material allows you to feel the full benefits of the Purple Grid, while ultra-breathable woven side panels encourage airflow. It’s the perfect complement to the Grid's 1,800+ air channels. Now, even though we have sheets on the bed, that soft cover feels amazing to the touch.
    • With the Purple hybrid mattress that we have, you have the option to get the 3'' or 4'' Purple Grid, which is made from temperature-neutral, hyper-elastic gel, this graded layer is engineered to flex directly under pressure points while still supporting the rest of your body.
    • In regard to “support,” it has responsive support coils which are individually wrapped stainless steel coils that pair with the Grid to offer dynamic pressure relief and support. And what I absolutely love about this, is that each coil is wrapped in premium noise-reducing fabric. The LAST thing I want is a mattress that is “noisy” while my husband or I turn in the middle of the night and it does a great job of being quiet!
    • The Purple Mattress has a signature 2″ gel Grid, that pairs with dual-layered comfort foam to give you just the right mix of support and flex.
    • Dual Comfort Layer Foam: A soft, cushioning layer and a firm, supportive layer create an ideal combination. Both foams are high in density to offer a durable, long-lasting base – which makes me feel really good, hoping it lasts us a long time!
    Purple Mattress in Bedroom - Review

    Best Sheets for Purple Mattress

    Picking out a new mattress that works for YOU is important. But I feel like picking out sheets to go ON that mattress is just as important.

    We knew we wanted TIGHT sheets because we don’t like sheets that pull up around the corners, or get baggy throughout the night if tossing and turning.

    Purple Sheets Review - sheets on bed

    So it was a no-brainer to put Purple sheets on our new mattress and oooooh my goodness. I’ve never felt anything like them. Almost like a VERY soft, breathable t-shirt, (you know, the good tees that feel soft on your skin but not too hot) these sheets are unlike any others I’ve ever slept on.

    I’m so thankful I chose to put these on because it only amplified the sleeping experience.

    California King Purple Mattress Review

    Closer Look

    If you’ve been hanging around Fantabulosity for some time now, then you know that I don’t recommend something without truly loving it.

    Well, this is no exception.

    If you’ve been shopping or needing a new mattress, PLEASE consider buying a Purple. I’ve slept on, and have tried many mattresses over the years and this is by far my favorite.

    It’s incredibly cozy, provides enough support that I need without pressure, and helps me get a FULL night’s sleep. Finally.

    Does the sleeping position matter?

    • As a side sleeper, and someone who loves to hug the edge, I find that it has great edge support and is a good option! Now, since I’m one of the side sleepers, I had heard that the Purple Hybrid Premier was a good choice, and although I’ve never tried the original Purple mattress, I have to agree that the Hybrid was a fantastic choice for me!
    • I also find it’s great for back sleepers (my husband) and stomach sleepers (both of us at times).

    What about body heat at night?

    Another important trait that we love is that it’s ideal for hot sleepers, due to the 1800 air channels and side panels so it can “breathe”.

    How does it feel?

    It has a responsive feel, is a comfortable mattress, and is a good option for different types of sleepers! Honestly, I truly feel like it’s one of the best mattresses I’ve ever slept on.

    Now, going to bed at night is not only a daily routine, it’s an experience.

    Banana Pudding Dip

    June 26, 2022

    banana pudding dip on serving tray with crackers and fresh fruit

    Banana Pudding Dip: An easy creamy dip that can be served with vanilla wafers, graham crackers, and fresh fruit as a no bake dessert recipe that’s a sweet treat everyone will love!

    Quick Overview: Prep this recipe in only 10 minutes and chill for 30 minutes! Then it’s ready to enjoy!

    Banana Pudding Dip in bowl with dippers surrounding it on a tray

    Why You Should Make This Banana Dip!

    No bake recipes are one of our favorite things to make here. Why? Because they’re so easy to make and are usually so quick to put together.

    Love banana cream pie? This dip is an easier way to snack and enjoy the flavors, similar to the best banana pudding recipe out there!

    Simple Ingredients: This banana cream pie dip (you could also call it), is made with only a few ingredients (kind of like this 3-ingredient fruit dip) and they’re all ingredients that you should be able to find at your local grocery store! So it’s an easy banana pudding dip that you’ll want to make over and over again.

    Crowd-Pleaser: When you’re asked to bring a dessert to a party, this amazing dessert dip will leave everyone begging for the recipe and you’ll be the hero of the night. If you have time to bake something, you may want to try this banana pudding poke cake recipe too.

    [feast_advanced_jump_to]

    Ingredients

    5 ingredients! Yes, that’s all you need to make this dip! (Plus the items you want to serve with it for dipping!)

    labeled ingredients for banana pudding dip on table
    Ingredients
    • 3.4 ounce banana cream pudding mix
    • 1 ½ cups milk
    • 8oz cream cheese, softened
    • 1 cup whipped topping, cool whip
    • 1 banana, sliced
    • Graham crackers, vanilla wafers, strawberries, chocolate-covered pretzels, banana chips for dipping

    Make sure to scroll down to see the full, printable recipe card with ingredients and instructions all in one place!

    Instructions

    1. In a small mixing bowl, whisk together the banana cream pudding mix and the milk. Set aside.
    pudding mix and milk in glass bowl
    Mix pudding and milk
    Pudding and milk mixed in bowl
    Pudding mixed
    1. In a medium sized mixing bowl using an electric hand mixer, whip the cream cheese until light and fluffy.
    cream cheese in white mixing bowl
    Mix cream cheese
    cream cheese mixed in bowl
    Mixed cream cheese
    1. Add the pudding mixture in to the cream cheese mixture and mix in medium speed until fully incorporated with no lumps.
    pudding added to cream cheese in mixing bowl
    Add pudding
    pudding mixed with cream cheese
    Mixed pudding and cream cheese
    1. Using a rubber spatula, fold in the 1 cup of whipped topping. Cover and refrigerate for at least 30 minutes or until ready to use.
    Cool whip added to mixture in bowl
    Add Cool Whip
    Cool Whip mixed in to pudding
    Mix Cool Whip in
    1. Remove from refrigerator and top with the sliced fresh bananas, more whipped cream, and crushed vanilla wafers if desired.
    Banana pudding dip poured in to serving dish
    Top with banana slices
    Vanilla wafers placed on dip
    Add vanilla wafers

    What to serve with banana pudding dip?

    Enjoy this dip by dipping with items such as:

    • vanilla wafers
    • graham crackers
    • fresh fruit
    • cookies
    • and more!

    How to serve:

    You can serve it right in the bowl that you mixed it in, or pour in a fun serving dish!

    For another serving option, you can layer the dip with banana slices, nilla wafers, and whipped topping for a trifle dish!

    Dip topped with Cool Whip
    Top with Cool Whip

    Substitutions

    Not a fan of banana pudding? You can substitute banana pudding for french vanilla pudding (like we used in this carrot poke cake) or even try an instant chocolate pudding for a chocolate pudding dip!

    Close up of banana pudding dip
    Serve!

    Variations

    Making this for fun, at home for say, a family game night? Experiment by adding other fun toppings on top of the dip, such as:

    • chocolate or caramel drizzle
    • crushed Oreos
    • sprinkle of cinnamon on top
    • strawberry ice cream topping
    • chopped nuts
    • toasted coconut
    Banana pudding dipped with chocolate pretzel
    Dip with snacks!

    Storage

    To store this dip recipe, wrap with plastic wrap or store in an airtight container for up to 5 days.

    Top tip

    This banana dip can easily be doubled to serve more people-it will go quickly!

    More No Bake Dip Recipes

    There are other great recipes here on Fantabulosity when you’re looking for a sweet treat, such as this booty dip and this pumpkin fluff!

    Related Recipes

    Oh friend… if you love the idea of this banana pudding dip, then you’re also going to love these other banana recipes that we’ve shared with you. This banana bread pudding is a combo between our popular banana bread recipe and bread pudding recipe!

    You’ll also love this banana cream pie, these banana pudding brownies, and these banana peanut butter brownies!

    Did you make this? I’d be so grateful if you left a “star” rating below to let me know what you thought! Then, the next time you need a quick and easy recipe, come back to Fantabulosity to browse all of my easy recipes!

    Recipe

    banana pudding dip on serving tray with crackers and fresh fruit
    Print Pin
    5 from 8 votes

    Banana Pudding Dip

    Banana Pudding Dip: An easy creamy dip that can be served with vanilla wafers, graham crackers, and fresh fruit as a no bake dessert recipe that's a sweet treat everyone will love!
    Course Dessert
    Cuisine American
    Prep Time 10 minutes minutes
    Chill Time 30 minutes minutes
    Total Time 40 minutes minutes
    Servings 8 servings
    Calories 205kcal
    Author Jessica Burgess

    Ingredients

    • 3.4 ounce box of banana cream pudding mix
    • 1 ½ cups milk
    • 8 ounces cream cheese softened
    • 1 cup whipped topping such as Cool Whip
    • 1 banana sliced

    Dippers

    • graham crackers
    • vanilla wafers
    • strawberries
    • chocolate covered pretzels
    • banana chips

    Instructions

    • In a small mixing bowl, whisk together the banana cream pudding mix and the milk. Set aside.
    • In a medium sized mixing bowl using an electric hand mixer, whip the cream cheese until light and fluffy.
    • Add the pudding mixture and mix in medium speed until fully incorporated with no lumps.
    • Using a rubber spatula, fold in the 1 cup of whipped topping. Cover and refrigerate for at least 30 minutes or until ready to use.
    • Top with the sliced bananas, more whipped topping and crushed vanilla wafers if desired!
    • Serve with dippers such as cookies, crackers, fresh fruit, etc. See post for more ideas and variations!

    Notes

    Storage of Leftovers
    To store, wrap with plastic wrap or store in an airtight container for up to 5 days.
    Making for a crowd?
    This recipe can easily be doubled to serve more people!
    Alternate way of serving:
    For another serving option, you can layer the dip with banana slices, vanilla wafers, and whipped topping for a trifle dish.
    See post for more ideas and tips!

    Nutrition

    Serving: 1serving | Calories: 205kcal | Carbohydrates: 20g | Protein: 4g | Fat: 13g | Saturated Fat: 8g | Polyunsaturated Fat: 1g | Monounsaturated Fat: 3g | Cholesterol: 34mg | Sodium: 294mg | Potassium: 170mg | Fiber: 0.4g | Sugar: 17g | Vitamin A: 471IU | Vitamin C: 1mg | Calcium: 92mg | Iron: 0.1mg

    Cheesecake Stuffed Strawberries

    June 25, 2022

    Close-up of strawberry, cut open half way from bottom, with cheesecake filling

    Cheesecake Stuffed Strawberries: This easy, no bake recipe, is perfect for summer! The cheesecake filling is made with only a few simple ingredients such as cream cheese, powdered sugar, heavy cream, vanilla extract, and graham cracker crumbs!

    Quick Overview: In only 20 minutes, these will be ready for a one-hour chill time! Then serve!

    strawberries on cutting board, that are filled with cheesecake filling

    Why You’ll Love This Recipe

    No bake: With spring and summer traditionally being “strawberry season” this strawberries recipe, using fresh strawberries is the perfect fit for the time of year. Plus, with the warmer months, and it being a no bake treat, it’s such a crowd-pleaser on a hot day! (Think, a baby shower, bridal showers, Mother’s Day, family gatherings, etc.)

    But don’t get me wrong. Making these for Valentine’s Day is just as much of a treat as they are any other time of year too, like our pink chocolate covered strawberries!

    Easy Dessert: With little effort, you can have these juicy strawberries filled with creamy cheesecake filling, and ready for eating!

    Cheesecake filling: Talk about a creamy filling! This cream cheese filling comes together in no time and has that flavor of creamy cheesecake in the center of the strawberries that will make you swoon!

    [feast_advanced_jump_to]

    Ingredients

    Only 6 ingredients are necessary for this recipe, and you may even have most of them on hand already or can easily find them at your local grocery store!

    ingredients on table with food labels
    • 2 pounds of fresh strawberries, washed
    • 8 ounce package cream cheese, softened to room temperature
    • ½ cup powdered sugar
    • 1 tablespoon heavy whipping cream
    • 1 teaspoon vanilla extract
    • ¼ cup graham cracker crumbs

    Make sure to see the full printable, recipe card below with the ingredients and instructions all in one place!

    Instructions

    1. Slice off the green stems of the strawberries so that they sit flat with the "stem" side, facing down.
    2. On the other end of the strawberry (narrow end) cut an “X” from the tip through part of the base, but make sure not slice all the way through or your strawberries will fall apart. Repeat with the remaining strawberries and set aside.
    strawberries sliced and cut for filling
    Slice and cut
    1. In a large mixing bowl, beat the cream cheese with an electric mixer until smooth.
    2. Add the powdered sugar, cream and vanilla to the cream cheese and beat until well combined.
    cream cheese beaten in glass bowl with mixer
    Beat the cream cheese
    vanilla, cream and sugar in cream cheese bowl
    Add cream, sugar & vanilla
    1. Once mixed together, fill a pastry bag with a tip, or plastic ziptop bag (such as a Ziploc bag) with the end cut off. (Get a piping bag and tip set here!)
    Mixed cream cheese mixture in glass bowl
    Cheesecake filling
    1. Pipe the cream cheese filling into the center or each sliced strawberry, filling it up all the way.
    Piped strawberries with cream filling on cutting board
    Piped strawberries with filling
    1. Sprinkle each strawberry with a bit of graham cracker crumbs.
    graham cracker crumbs sprinkled on top of strawberries
    Sprinkle graham cracker crumbs
    1. Chill in the refrigerator for one hour or until ready to serve. Enjoy!
    graham cracker crumbs sprinkled on top of strawberries
    Enjoy!

    Substitutions & Variations

    If you want to experiment with different toppings for these stuffed strawberries, here are some ideas that we have for you that you can try:

    Topping Suggestions

    • Crushed Oreos
    • Crushed peanuts (or other nuts like pistacios, pecans, etc.)
    • Chocolate syrup drizzle
    • Caramel drizzle
    • Mini chocolate chips
    • Cinnamon graham crackers instead of honey
    Close up of cheesecake stuffed strawberries
    Cheesecake Strawberries

    Storage

    If you happen to have any leftovers, you can store them in the refrigerator for 2-3 days in an airtight container.

    Expert Tips

    What can I do with lots of strawberries?

    Making cheesecake stuffed strawberries is a great way to use them up! However there are other desserts you can make with strawberries, such as strawberry crumble, strawberry cheesecake cookies, or even cover them with chocolate!

    How do you core a strawberry for stuffing?

    Instead of coring the strawberries, we’ve found it’s better to cut an “X” from the tip (narrow end) through part of the base! However, do not slice all the way through or your strawberries will fall apart. 

    Related Recipes

    Love strawberry desserts? Then you’ll really love some of our favorite desserts, such as these strawberry brownies, strawberry shortcake cookies, and these berry trifles! Or, for another no-bake recipe, this strawberry cream cheese icebox cake is a great option!

    Or, if you love cheesecake, then you’re going to absolutely adore this San Sebastian Cheesecake!

    Did you make this? I’d be so grateful if you left a “star” rating below to let me know what you thought! Then, the next time you need a quick and easy recipe, come back to Fantabulosity to browse all of my easy recipes!

    Recipe

    Close-up of strawberry, cut open half way from bottom, with cheesecake filling
    Print Pin
    5 from 7 votes

    Easy Cheesecake Stuffed Strawberries

    Cheesecake Stuffed Strawberries: This easy, no bake dessert only takes a few simple ingredients such as strawberries, cream cheese, powdered sugar, graham cracker crumbs, vanilla extract, and heavy cream!
    Course Appetizer, Dessert, Snack
    Cuisine American
    Prep Time 20 minutes minutes
    Chill Time 1 hour hour
    Total Time 1 hour hour 20 minutes minutes
    Servings 20 strawberries
    Calories 85kcal
    Author Jessica Burgess

    Ingredients

    • 2 pounds fresh strawberries washed
    • 8 ounces cream cheese softened to room temperature
    • ½ cup powdered sugar
    • 1 tablespoon heavy whipping cream
    • 1 teaspoon vanilla extract
    • ¼ cup graham cracker crumbs

    Instructions

    • Slice off the green stems of the strawberries so that they sit flat with the "stem" side, facing down.
    • On the other end of the strawberry (narrow end) cut an "X" from the tip through part of the base, but make sure not to slice all the way through or your strawberries will fall apart. Repeat with the remaining strawberries and set aside.
    • In a large mixing bowl, beat the cream cheese with an electric mixer until smooth.
    • Add the powdered sugar, cream and vanilla to the cream cheese and beat until well combined.
    • Once mixed together, fill a pastry bag or plastic, ziptop bag with the end cut off.
    • Pipe the cream cheese filling into the center or each sliced strawberry, filling it up all the way.
    • Sprinkle each strawberry with a bit of graham cracker crumbs.
    • Chill in the refrigerator for one hour or until ready to serve. Enjoy!

    Notes

    Storage: 
    If you happen to have leftover strawberries, you can store them in an airtight container for 2-3 days.

    Nutrition

    Serving: 1strawberry | Calories: 85kcal | Carbohydrates: 9g | Protein: 1g | Fat: 5g | Saturated Fat: 3g | Polyunsaturated Fat: 1g | Monounsaturated Fat: 1g | Cholesterol: 12mg | Sodium: 54mg | Potassium: 89mg | Fiber: 1g | Sugar: 6g | Vitamin A: 169IU | Vitamin C: 27mg | Calcium: 20mg | Iron: 0.3mg

    Air Fryer Baby Potatoes

    June 20, 2022

    Air fryer baby potatoes.

    Air Fryer Baby Potatoes: This baby potato recipe is quick and easy – all you need are mini potatoes, olive oil, and some spices to create these mouthwatering potatoes! This air fryer recipe is an alternative to stovetop fried potatoes, that’s the perfect side dish for a busy weeknight but fancy enough for those special occasions, too!

    Short on oven space in November? These earned a spot in my 40+ Thanksgiving side dishes roundup.

    Air fryer baby potatoes.

    Why You’ll Love This Recipe

    Is it just me, or do small potatoes taste better than full size ones? I don’t know what it is, but crispy baby potatoes are my favorite!

    These potatoes are so quick and easy to make, they have a delicious rosemary flavor, the skin gets just the perfect amount of crispness from the air fryer, and you don’t have to heat up your house by turning on the oven to make them!

    This easy recipe is going to be one you’ll want to add to your meal plan, for sure!

    [feast_advanced_jump_to]

    Ingredients

    These delicious little potatoes are made with simple ingredients, as most of the best dishes are! You can find fresh rosemary and baby potatoes at your local grocery store, and the rest of the ingredients you probably have in your cupboard right now.

    Ingredients for baby potatoes in the air fryer with labels on the image.
    Ingredients
    • 1.5 pounds mini gold potatoes
    • 1 tablespoon olive oil
    • 1 tablespoon fresh rosemary finely chopped
    • 1 teaspoon garlic powder
    • ½ teaspoon flakey sea salt
    • ½ teaspoon ground black pepper

    You can find all of the ingredients and instructions on the printable recipe card below.

    Instructions

    It’s so easy to make these mini potatoes in the air fryer!

    1. Preheat the air fryer to 400°F while you are preparing the potatoes. 
    2. Cut your baby gold potatoes in half and place in a large bowl. Drizzle potatoes with olive oil then sprinkle with chopped rosemary, garlic powder, salt and pepper. Toss the potatoes to evenly coat with oil and seasonings.
    Baby potatoes on a cutting board. Some are cut in half, some are whole.
    Cut potatoes in half.
    A teaspoon of spice being held high above a bowl of cut baby potatoes.
    Drizzle with oil, add spices.
    1. Place your cut baby potatoes in air fryer basket in a single layer. Cook for 15 minutes turning once halfway through cooking. 
    An air fryer basket with raw baby potatoes that are covered in oil and spices in it.
    Cook in air fryer in single layer.
    1. Enjoy these air fry baby potatoes immediately with your favourite dipping sauces or a dollop of sour cream!
    Air fryer baby potatoes in a bowl.
    Enjoy!

    Substitutions

    Do you need to change something up in this recipe? Here are some of my suggestions…

    • Olive Oil – I use olive oil because of its high smoke point and mild flavor, but you can definitely replace it with your favorite oil and the end result will still be delicious.
    • Rosemary – Fresh rosemary can be substituted for 1 teaspoon of dried rosemary.
    • Mini Potatoes – if you don’t have mini potatoes, you can cut larger potatoes into 6-8 pieces (depending on how large the potato is) and you should be able to keep the cook times the same.
    • Potato Type – if you don’t have gold mini potatoes (or baby potatoes, small potatoes, fingerling potatoes…whatever you call them), you could also use mini red potatoes. New potatoes from the garden would also be delicious! All of these potatoes have thin skins and would crisp up nicely (I would NOT recommend using a russet potato for this, its skin is too thick).

    Variations

    This recipe is very simple, but that’s part of its charm. Like most simple recipes, you can get creative and make this one recipe so many different ways! Try the variations below and make your air fryer mini potatoes your own way.

    • Spicy Tex Mex – omit the rosemary and garlic powder and instead add 2 teaspoons of taco seasoning. If you like things spicy, you can add chili flakes or hot sauce to your liking as well!
    • Cheesy – after you’ve coated your potatoes with olive oil, add ¼ cup of parmesan cheese to the potatoes along with your spices for a delicious cheesy variation on these air fryer roasted baby potatoes!
    • Spice Swap – you can change out the rosemary and garlic in this recipe for your favorite seasonings! Try using Italian seasoning, cajun seasoning, onion powder, fresh parsley, etc.

    Can I use whole baby potatoes?

    If you want to make air fryer whole baby potatoes, you will simply need to adjust the cooking time. When you cut the mini potatoes in half they cook a bit faster. For a whole baby potato, I would let them cook for 20 minutes (turning them half way through) and then check for doneness. The potatoes are done when you can easily pierce them with a fork.

    Storage

    Store any leftover air fryer baby potatoes in an airtight container in the fridge for 3-4 days. When you are ready to eat them, reheating them in the air fryer for a few minutes will warm them up and make them crispy again!

    Top tip

    What temp should you air fry potatoes?

    I find that potatoes cook best at 400°F in the air fryer. If you cook them at a lower temperature they will still cook through (although it will take longer), but they won’t get nice and crispy on the outside.

    Why are my potatoes not crispy in the air fryer?

    If your potatoes don’t have a nice crispy skin after cooking in the air fryer, the most likely cause is crowding. If your potatoes are too squished, the air can’t get around all sides of the potato and it won’t be able to cook to that nice crispy brown you are looking for. Make sure that you don’t pack your air fryer basket too full – it’s better to do two batches and have nice crispy potatoes!

    Do you need to boil potatoes before putting them in air fryer?

    Not at all! You can simply pop your raw potatoes (with their oil and spices) right in the air fryer basket and cook them!

    Did you make this? I’d be so grateful if you left a “star” rating below to let me know what you thought! Then, the next time you need a quick and easy recipe, come back to Fantabulosity to browse all of my easy recipes!

    Related Recipes

    If you liked this easy air fryer recipe, I think you’d also like these easy air fryer breakfast potatoes (because who doesn’t love crispy breakfast potatoes without the restaurant wait?!) and these frozen sweet potatoes French fries in the air fryer (ready in just 10 minutes)!

    Or if love potato recipes, and you have a slow cooker, you’ll love these crock pot cheesy potatoes!

    Recipe

    Air fryer baby potatoes.
    Print Pin
    5 from 2 votes

    Air Fryer Baby Potatoes

    Air Fryer Baby Potatoes: This baby potato recipe is quick and easy – all you need are mini potatoes, olive oil, and some spices to create these mouthwatering potatoes! This is the perfect side dish for a busy weeknight but fancy enough for those special occasions, too! 
    Course Side Dish
    Cuisine American
    Prep Time 5 minutes minutes
    Cook Time 15 minutes minutes
    Total Time 20 minutes minutes
    Servings 6 side servings
    Calories 110kcal
    Author Jessica Burgess

    Ingredients

    • 1.5 pounds mini gold potatoes
    • 1 tablespoon olive oil
    • 1 tablespoon fresh rosemary finely chopped
    • 1 teaspoon garlic powder
    • ½ teaspoon flakey sea salt
    • ½ teaspoon ground black pepper

    Instructions

    • Preheat the air fryer to 400°F while you are preparing the potatoes.
    • Cut potatoes in half and place in a large bowl. Drizzle potatoes with olive oil then sprinkle with chopped rosemary, garlic powder, salt and pepper. Toss the potatoes to evenly coat with oil and seasonings.
    • Add potatoes to the air fryer basket in a single layer. Cook for 15 minutes turning once halfway through cooking. 
    • Enjoy these air fry baby potatoes immediately with your favourite dipping sauces or a dollop of sour cream! 

    Notes

    NOTES: 1 teaspoon of dried rosemary can be substituted for the fresh rosemary.
     
    STORAGE: Store any leftover air fryer baby potatoes in an airtight container in the fridge for 3-4 days. When you are ready to eat them, reheating them in the air fryer for a few minutes will warm them up and make them crispy again!

    Nutrition

    Serving: 1serving | Calories: 110kcal | Carbohydrates: 20g | Protein: 2g | Fat: 2g | Saturated Fat: 0.4g | Polyunsaturated Fat: 0.3g | Monounsaturated Fat: 2g | Sodium: 201mg | Potassium: 488mg | Fiber: 3g | Sugar: 1g | Vitamin A: 13IU | Vitamin C: 22mg | Calcium: 16mg | Iron: 1mg

    Elote Dip

    June 18, 2022

    Elote corn dip in a bowl with lime wedges.

    Elote Dip: In just 15 minutes, you can have this warm, cheesy Mexican street corn dip on the table! This is the best dip – it’s quick & easy and will be your new go-to appetizer! Similar to this crack corn dip, it’s full of corn, a creamy base, and delicious flavors.

    Elote corn dip in a bowl with lime wedges and someone dipping a corn chip into it.
    Elote dip

    Why you’ll love this recipe

    I love food with a good spice kick, but not everyone feels the same way. If you are looking for a Mexican themed dish that won’t melt sensitive tastebuds, this elote dip recipe is it! This dip is full of flavor without any spicy heat (and it’s also delicious – this is a seriously elite corn dip)!

    It’s also gluten-free, vegetarian, and can be made with canned or frozen corn so it’s easy to whip up on short notice. This is one of those dips you’ll be making for every party you go to and the guests will be begging you for the recipe.

    [feast_advanced_jump_to]

    Ingredients

    Good food doesn’t have to be difficult to be delicious, and this is a prime example. This Mexican elote dip recipe is made with fairly simple ingredients you can find at most grocery stores! If you can’t find cotija cheese at your grocery store, see our substitutions section for ideas on what else you can use.

    Ingredients for elite dip with labels on the image.
    Ingredients
    • 2 – 15 ounce cans whole kernel corn, drained
    • 2 tablespoons butter
    • ⅓ cup cotija cheese
    • 4 tablespoons mayonnaise
    • 4 tablespoons sour cream
    • 2 tablespoons fresh parsley, chopped
    • 1 lime juiced
    • 1 teaspoon chili powder
    • ½ teaspoon garlic powder

    See the printable recipe card below for ingredients and step-by-step instructions.

    Instructions

    This easy elote dip is a breeze to make. In just 5 simple steps you’ll have a delicious Mexican street corn dip that your guests will rave about!

    1. In a large skillet with a heavy bottom (like a cast iron skillet) set over medium heat, melt the butter and add in the corn.
    2. Cook for 10 minutes, stirring often, or until the corn kernels have started to char on some pieces. 
    Corn in a skillet.
    Cook corn.
    1. Remove from the heat and transfer the corn to a medium bowl. Allow it to cool for a few minutes before adding the remaining ingredients. 
    All ingredients for elote dip in a bowl.
    Add remaining ingredients.
    1. Mix mayonnaise, roasted corn and the rest of the ingredients together until everything is well combined. Season with salt and pepper to taste. 
    Elote dip stirred together in a mixing bowl.
    1. Scoop this into your favorite serving bowl and enjoy with warm corn chips! This warm elote dip makes a great side dish for a summer bbq and would be perfect to serve for a cinco de mayo celebration!
    Someone dipping a tortilla chip into a bowl of elote dip with a lime in it.
    Enjoy!

    Substitutions

    Need to make a swap? Here are my suggestions…

    • Corn – if you don’t have cans of corn, you can use frozen corn or corn cut straight off the cob for this recipe!
    • Cotija – this might be tough to find if you don’t have a lot of Mexican inspired ingredients at your local grocery stores. The best replacement for cotija is queso fresco, but you could also use feta cheese for this recipe – the flavor will be a bit different, but it will still be delicious!
    • Mayo/Sour Cream – only have one or the other? While using both creates the best flavor, you can opt to use one or the other for the full amount (8 tablespoons) and you will still end up with a delicious, creamy dip. You could even replace the sour cream with greek yogurt if you like.
    • Lime Juice – I’m a big fan of lime juice, but you could absolutely use lemon juice in this recipe instead.
    • Parsley – I know cilantro is a bit of a not a fan or love it type thing, but if you are one of those people who loves it then be sure to add it! Chop up some fresh cilantro and use it in place of the parsley in this recipe for a more authentic flavor.

    Variations

    Looking to have some fun and get creative? I have suggestions for that, too!

    • Spicy – add some chopped jalapeños and a splash of your favorite hot sauce into this dip if you’re a spice lover like me! You could also add some pepper jack cheese in addition to the cotija to add some kick in cheese form as well!
    • Add Protein – if you’re looking to turn this dip into more of a main dish and add some protein, you could add some taco meat or pulled chicken!
    • Add Onion – dice up some red onion and mix it into your elote recipe for some added flavor.

    Storage

    Store your elote dip in an airtight container in the fridge for up to 3 days. 

    Expert tips and FAQs

    What is an elote made of?

    Elote isa Mexican dish that is made by grilling corn cobs and then slathering them with mayonnaise. Typically it is seasoned with chili powder, lime juice and then sprinkled with cotija cheese and cilantro.


    What does elote style mean?

    When a recipe says it is “elote style”, it simply means that it has been modelled after the elote corn that is sold by street vendors at Mexican markets and festivals. This delicious recipe incorporates all the flavors of Mexican street corn, but in an easy dip form!

    Did you make this? I’d be so grateful if you left a “star” rating below to let me know what you thought! Then, the next time you need a quick and easy recipe, come back to Fantabulosity to browse all of my easy recipes!

    Related Recipes

    If you’re looking for more easy recipes for an amazing dip, you have to check out this smoked queso recipe (smoked sausage, beer, and cheese…need I say more?) and this easy taco layer dip recipe (a huge hit at every party I go to).

    Recipe

    Elote corn dip in a bowl with lime wedges.
    Print Pin
    5 from 5 votes

    Elote Dip

    Elote Dip: In just 15 minutes, you can have this warm, cheesy Mexican street corn dip on the table! This is the best dip – it's quick & easy and will be your new go-to appetizer!
    Course Appetizer
    Cuisine American
    Diet Vegetarian
    Prep Time 5 minutes minutes
    Cook Time 10 minutes minutes
    Total Time 15 minutes minutes
    Servings 6 servings
    Calories 141kcal
    Author Jessica Burgess

    Ingredients

    • 2 – 15 ounce cans whole kernel corn drained
    • 2 tablespoons butter
    • ⅓ cup cotija cheese
    • 4 tablespoons mayonnaise
    • 4 tablespoons sour cream
    • 2 tablespoons fresh parsley chopped
    • 1 lime juiced
    • 1 teaspoon chili powder
    • ½ teaspoon garlic powder

    Instructions

    • In a medium sized heavy-bottomed skillet set over medium heat, melt the butter and add in the corn.
    • Cook for 10 minutes, stirring often, or until the corn has started to char on some pieces. 
    • Remove from the heat and transfer the corn to a large mixing bowl. Allow it to cool for a few minutes before adding the remaining ingredients. 
    • Add in the rest of the ingredients and stir together well. Season with salt and pepper to taste. 
    • Enjoy with warm tortilla chips!

    Notes

    STORAGE: Store your elote dip in an airtight container in the fridge for up to 3 days. 
    NOTES: If corn is in season, fresh corn cut from the cob is even more delicious than canned!

    Nutrition

    Serving: 1serving | Calories: 141kcal | Carbohydrates: 2g | Protein: 2g | Fat: 14g | Saturated Fat: 5g | Polyunsaturated Fat: 4g | Monounsaturated Fat: 3g | Trans Fat: 0.2g | Cholesterol: 26mg | Sodium: 194mg | Potassium: 47mg | Fiber: 0.5g | Sugar: 1g | Vitamin A: 424IU | Vitamin C: 5mg | Calcium: 58mg | Iron: 0.3mg

    Air Fryer Pigs in a Blanket

    June 15, 2022

    A bowl full of air fryer pigs in a blanket.

    Air Fryer Pigs in a Blanket: This classic appetizer is made even easier by making it in the air fryer. All you need are crescent rolls and hot dogs to make this quick & easy recipe that’s perfect for game day (or any day)!

    A bowl of air fryer pigs in a blanket.

    How about a breakfast version? Try these breakfast pigs in a blanket too!

    Why You’ll Love This Easy Pigs in a Blanket Recipe

    Sometimes you just need an easy recipe that is guaranteed to be delicious, you know what I mean? These air fryer pigs in a blanket make amazing appetizers or snacks because they only require two ingredients and they are so quick and easy to make (so you know they’ll be perfect every time)!

    These also make me feel nostalgic - pigs in a blanket were a fun thing my family would make as appetizers when I was a kid, so it’s extra fun to share them with my kids now! My kids think these delicious bite sized pigs in a blanket are the cutest little things, so they love these just as much as these air fryer french bread pizzas!

    [feast_advanced_jump_to]

    Ingredients

    This simple recipe is the easiest one EVER! You only need two ingredients - seriously, two!

    You will also need an air fryer (like a Ninja Foodi or similar - see our top air fryers for my reviews & top picks).

    Ingredients for air fryer pigs in a blanket with labels on the image.
    Ingredients
    • 1 tube crescent rolls
    • 8 hot dogs

    That’s it! Read on to see how easy it is to make these crescent dogs or skip straight to the printable recipe card below…

    How do you make pigs in a blanket in air fryer?

    The ingredients are simple, and so are the steps to make these air fryer crescent dogs (or pigs in a blanket - call them whatever you like, I just call them delicious).

    1. Prepare hotdogs by cutting them in half.
    2. Roll half the crescent dough out so you can see 4 triangles. Slowly work seams together so you have one piece of dough.
    Unrolled crescent dough from a can on a cutting board.
    Work dough seams together so you have one big sheet.
    1. Using a pizza cutter, cut dough into 8 strips. Repeat this with the other half of the dough. You will have a total of 16 strips.
    2. Wrap each strip around each half hot dog.
    Hot dogs, cut in half and wrapped in a strip of crescent dough.
    Wrap strip around hot dog.
    1. Place pigs in a blanket in a greased air fryer basket so they are about an inch apart in a single layer. Depending on the size of your air fryer, you may have to cook in a couple batches.
    8 pigs in a blanket in the basket of an air fryer, unbaked.
    Place wrapped dogs in air fryer basket.
    1. Air fryer at 350°F for 4 minutes, then flip. Continue air frying for 4 more minutes or until crescent dough is golden.
    8 pigs in a blanket in the basket of an air fryer, baked.
    Air fry 4 mins each side.
    1. Serve your pigs in a blanket with your favorite dipping sauces! This is the perfect appetizer for a game day party, a birthday party, or really any day!
    Someone dipping a pig in a blanket into ketchup that is in a tiny stainless steel bowl.
    Serve with dipping sauces!

    Air Fryer Pigs in a Blanket Temperature

    I’ve found that 350° is the best temperature to cook these pigs in a blanket at. You can turn the heat up a bit if you are in a hurry and decrease the cooking time by a minute, but make sure you watch them so they don’t get too brown!

    Air Fryer Pigs in a Blanket Time

    When you are cooking them at 350°, you’ll need to cook them for 4 mins on each side. If you are turning the temperature up you’ll have to keep an eye on them, but I think you would want to decrease the cook time by a minute on each side.

    You want to cook them until the crescent roll dough is nice and golden brown and the hot dog looks a bit sweaty.

    A pig in a blanket in the foreground with a bowl of ketchup in the background.

    Substitutions & Variations

    Need to swap out one of these two ingredients? Want to mix things up a little bit? Here are my suggestions!

    • Hot dogs – instead of hot dogs cut in half, you could make these easy air fryer pigs with cocktail sausages! Save the hot dogs for this delicious buffalo hot dog recipe!) Cocktail sausages can also be called cocktail weenies, little smokies, mini hotdogs, lil’ smokies, mini sausages, mini dog…no matter what they are called, they are the same. They are made so they can be eaten in one or two little bites, so they are perfect for this recipe.
    • Crescent dough – if you don’t have access to canned crescent dough, you could also make these with puff pastry dough (either the flakey puff pastry you find in the freezer section of the grocery store of even a homemade version).

    What to Dip your Air Fryer Pigs in a Blanket In

    The best way to create variations on this recipe is to mix up the dipping sauce! Here are some of my favorite sauces to use…

    • bbq sauce
    • ketchup
    • honey mustard
    • mustard
    • cheese sauce (try this pretzel cheese dip, it would be perfect)
    • jalapeño ranch dip

    Storage

    Store your air fryer pigs in a blanket in an airtight container in the fridge for 3-5 days. When you’re ready to eat them, you can reheat them in the microwave or in the air fryer if you’d like them to be a bit crispy again!

    Expert Tips and FAQs

    Can I make these pigs in a blanket ahead of time?

    Yes! You can wrap the hot dogs (or cocktail sausages) in the dough ahead of time and then freeze them. When you are ready to cook the frozen pigs, you’ll just need to increase the cook time by a minute or so on each side. Flip them after 5 minutes and cook for another 5, then see if they are golden brown. If not, cook for another minute or so.

    What if I don’t have an air fryer? Can I make these in the oven?

    Yes, you certainly can. There are plenty of recipes you can find online for oven-baked pigs in a blanket, and it seems most of those recommend baking them at 375° for 10-14 minutes.

    Did you make this? I’d be so grateful if you left a “star” rating below to let me know what you thought! Then, the next time you need a quick and easy recipe, come back to Fantabulosity to browse all of my easy recipes!

    Looking for more air fryer appetizers?

    We have quite a few air fryer recipes here on the blog, so if you’re looking for more quick and easy air fryer appetizer recipes be sure to check it out! Our fried shrimp with cocktail sauce is a delicious, easy appetizer recipe, and so are our air fryer eggplant fries.

    Recipe

    A bowl full of air fryer pigs in a blanket.
    Print Pin
    5 from 4 votes

    Air Fryer Pigs in a Blanket

    Air Fryer Pigs in a Blanket: This classic recipe is made even easier by making it in the air fryer. All you need are crescent rolls and hot dogs to make this quick & easy appetizer that's perfect for game day (or any day)!
    Course Appetizer, Snack
    Cuisine American
    Prep Time 10 minutes minutes
    Cook Time 8 minutes minutes
    Total Time 18 minutes minutes
    Servings 16 pigs in a blanket
    Calories 105kcal
    Author Jessica Burgess

    Equipment

    • air fryer

    Ingredients

    • 1 tube crescent rolls
    • 8 hot dogs

    Instructions

    • Prepare hotdogs by cutting them in half.
    • Roll half the crescent dough out so you can see 4 triangles. Slowly work seams together so you have one piece of dough.
    • Using a pizza cutter, cut dough into 8 strips. Repeat this with the other half of the dough. You will have a total of 16 strips.
    • Wrap each strip around each half hot dog.
    • Place pigs in a blanket in a greased air fryer basket so they are about an inch apart. Depending on the size of your air fryer, you may have to cook in a couple batches.
    • Air fryer at 350°F for 4 minutes, then flip. Continue air frying for 4 more minutes or until crescent dough is golden.
    • Serve your pigs in a blanket with your favorite dipping sauces!

    Nutrition

    Serving: 1pig in a blanket | Calories: 105kcal | Carbohydrates: 10g | Protein: 3g | Fat: 6g | Saturated Fat: 2g | Polyunsaturated Fat: 1g | Monounsaturated Fat: 2g | Cholesterol: 10mg | Sodium: 265mg | Potassium: 33mg | Sugar: 1g | Vitamin C: 0.02mg | Calcium: 5mg | Iron: 1mg

    Cherry Coca-Cola Slow Cooker Pulled Pork

    June 14, 2022

    Slow Cooker Pulled Pork shredded with bbq sauce

    Slow Cooker Pulled Pork: This recipe is an easy slow cooker recipe for pork shoulder that can be made with simple ingredients and has an amazing flavor because it’s cooked in Cherry Coca-Cola! Similar to our Instant Pot Pulled Pork, this comes out so tender and flavorful.

    Hungry for more? See all my slow cooker dinners.

    pile of slow cooker pulled pork with bbq sauce drizzle

    Quick Overview: Cook on “high” for 5-6 hours, or on “low” for 8-10 hours and serves 8-10 (½ lb. per person)! Serve on a bun, alone, or as pork sliders, as bbq nachos, salad, or stuffed in a baked potato like we did with this shrimp stuffed potato! Want a bit fancier of a meal? Cook a roasted pork tenderloin in the slow cooker next time.

    Why You’ll Love This Recipe

    Cherry Coke: I’m sure you’ve heard of cooking pork shoulder (or pork butt) in Coca-Cola but the flavor of Cherry Cola, takes it to a whole other level!

    Set it and Forget it: Who doesn’t love a recipe that you can put in a slow cooker on busy days, turn it on and let it cook until it’s done? (Kind of like making a batch of this slow cooker shredded chicken or these slow cooker beef tacos.) Slow cooker recipes are hard to beat, especially this great recipe!

    Easy: This is such an easy recipe! With just a few minutes of prep (about 10 minutes) you can have this cut of pork ready for the crock pot in no time for some slow cooker bbq!

    [feast_advanced_jump_to]

    Ingredients

    Would you believe it only takes a few ingredients to make this pulled pork flavorful? It’s true! You may even have most of these ingredients on hand already!

    Make sure to check out the full recipe card below that lists the ingredients and full instructions for you, all in one spot!

    • 1 4-5 pound boneless pork shoulder (we think this is the best cut of meat to use)
    • 1 tablespoon smoked paprika 
    • 1 tablespoon onion powder 
    • 1 tablespoon garlic powder 
    • 1 tablespoon salt 
    • 1 teaspoon black pepper 
    • 2 teaspoons liquid smoke 
    • ¼ cup brown sugar 
    • 12 ounces cherry cola 
    • 1 cup BBQ sauce (Sweet Baby Ray or homemade bbq sauce)
    ingredients for slow cooker pulled pork on white counter
    Ingredients

    How to Make Slow Cooker Pulled Pork

    1. Mix together the smoked paprika, onion powder, garlic powder, salt, pepper, liquid smoke and brown sugar.
    2. Then, put the pork shoulder in the slow cooker and rub all sides with the rub, trying to cover it the best you can.
    raw pork shoulder in crockpot
    Place pork in slow cooker
    Pork shoulder coated with barbecue sauce
    Pour barbecue sauce on to meat
    1. Next, pour the BBQ sauce over the meat (you can use a brush if that’s easier, to cover with sauce. Then, pour the soda over the pork.
    2. Put the lid on the crock pot and cook on low for 8-10 hours or 5-6 hours on high.
    Pouring cherry coke over pork shoulder
    Pour cherry cola over pork
    Cooked pork shoulder in slow cooker
    1. The meat is cooked and ready to eat when the meat is tender enough to pull apart, easily, with two forks.
    Pulled pork shredded on cutting board

    If desired, you can save some of the meat drippings and juices, and pour over the shredded pork, or cook the pulled pork in the sauce till thick.

    Pro tip: For best results, if you won’t be serving right away, make sure to turn the slow cooker to the warm setting, so not to overcook and make it mushy.

    Pulled pork in white bowl with tongs

    Do you need liquid in the slow cooker for pulled pork?

    Yes. That’s what will make it moist and juicy! By using something like Cherry Coke (like in this recipe) it’s the liquid that it needs and gives it a delicious flavor!

    Substitutions

    If you don’t have Cherry Coke, that’s ok! You can use regular Coca-Cola, Dr. Pepper, or even a sugar free version of these!

    Or, if soda isn’t something you’re interested in, you can use something such as chicken broth for the cooking liquid. (You can even make my easy chicken broth recipe.) However, it may lack some of the flavor that you’ll get by cooking it with cola. So you may want to also add items such as:

    • Worcestershire sauce
    • apple cider vinegar (only a little or it could overpower!)
    • red onion or yellow onion
    • mustard powder
    • soy sauce
    • tomato paste
    Pulled pork in bowl with bbq sauce drizzled on top

    How to Eat Pulled Pork

    • This pulled pork recipe is delicious serve alone as a main course, eating it with a fork, paired with some of your favorite barbecue side dishes, such as this Amish potato salad, a side salad, or even this bacon ranch pasta salad! Pour a little extra bbq sauce on top!
    • Serve a portion on your favorite kind of bun: hamburger, slider buns (like we did with our cheeseburger sliders) kaiser, brioche, wheat, etc. for pulled pork sandwiches!
    • Top tortilla chips with some smoked queso and this pulled pork for some ultimate nachos!

    What to Serve with Pulled Pork

    We absolutely love serving pasta salads or this red-skinned potato salad recipe with pulled pork but this KFC Coleslaw recipe is incredible too. Or, a classic side is a delicious cornbread muffin as well.

    Or, if you haven’t tried hearty baked beans yet, you’re definitely going to want to try those too!

    Tongs holding portion of pulled pork above tray of pork

    Storage

    If you happen to have leftover pulled pork, you can store it in an airtight container, in the refrigerator for up to 5 days. Simply reheat by placing the portion in the microwave or place it all in a slow cooker again and reheat on low until heated through!

    Hamburger bun next to try of pulled pork
    Serve on buns or alone!

    Expert Tips

    Can you freeze pulled pork?

    Absolutely! It can be frozen for up to 3 months! We like to place any leftovers in food saver bags, and freeze that way. When we’re ready to enjoy, we remove from the freezer and either thaw out in the refrigerator or place the plastic-sealed bag in a warm water bath and then reheat.

    Do you cook pulled pork fat side up or down?

    Make sure the fat side is on the top while cooking in the slow cooker. This acts as a natural baster and will keep the meat delicious and moist, making it the best pulled pork!

    Can I use the Instant Pot for this pulled pork?

    Yes! I use the slow cooker function on my pressure cooker to cook this bbq pulled pork recipe! Make sure to check out our other easy Instant Pot recipes too!

    Related Recipes

    If you loved this recipe, then I have a feeling you’ll also love the idea of this pulled pork mac and cheese.

    The next time you’re at the grocery store, and want to stock up on pork, we know you’ll love this super popular pork steak recipe that has been pinned on Pinterest thousands of times! We also think you’ll love this slow cooker pork steak, roasted pork tenderloin and these baked pork chops!

    Or, if you love slow cooker recipes, this Crock Pot Cube Steak recipe is a set-it-and-forget-it recipe is a family favorite!

    Recipe

    Slow Cooker Pulled Pork shredded with bbq sauce
    Print Pin
    5 from 9 votes

    Cherry Cola Slow Cooker Pulled Pork

    Slow Cooker Pulled Pork: This recipe for pork shoulder is an easy slow cooker recipe that can be made with simple ingredients and has an amazing flavor because it's cooked in Cherry Coca Cola!
    Course Main Course
    Cuisine American
    Prep Time 10 minutes minutes
    Cook Time 5 hours hours
    Total Time 5 hours hours 10 minutes minutes
    Servings 8 servings
    Calories 317kcal
    Author Jessica Burgess

    Equipment

    • slow cooker

    Ingredients

    • 4 pounds pork shoulder 4-5 pounds will work!
    • 1 tablespoon onion powder
    • 1 tablespoon garlic powder
    • 1 tablespoon smoked paprika
    • 1 tablespoon salt
    • 1 teaspoon black pepper
    • 2 teaspoons liquid smoke
    • ¼ cup brown sugar
    • 1 cup barbecue sauce We LOVE Sweet Baby Rays
    • 12 ounces cherry cola Such as Cherry Coke

    Instructions

    • Mix together the smoked paprika, onion powder, garlic powder, salt, pepper, liquid smoke and brown sugar.
    • Then, put the pork shoulder in the slow cooker and rub all sides with the rub, trying to cover it the best you can.
    • Next, pour the BBQ sauce over the meat (you can use a brush if that's easier, to cover with sauce.
    • Then, pour the soda over the pork. Put the lid on the crock pot and cook on low for 8-10 hours or 5-6 hours on high.
    • The meat is cooked and ready to eat when the meat is tender enough to pull apart, easily, with two forks.
    • If desired, you can save some of the meat drippings and juices, and pour over the meat, or cook the pulled pork in the sauce till thick.

    Notes

    How to make pulled pork moist?
    Make sure the fat side is on the top while cooking in the slow cooker. This acts as a natural baster and will keep the meat delicious and moist!
    How to freeze pulled pork: Pulled pork can be frozen up to 3 months! We like to place any leftovers in food saver bags, and freeze that way. When we’re ready to enjoy, we remove from the freezer and either thaw out in the refrigerator or place the plastic-sealed bag in a warm water bath and then reheat.

    Nutrition

    Serving: 0.5pounds | Calories: 317kcal | Carbohydrates: 27g | Protein: 28g | Fat: 10g | Saturated Fat: 3g | Polyunsaturated Fat: 1g | Monounsaturated Fat: 5g | Cholesterol: 93mg | Sodium: 1354mg | Potassium: 609mg | Fiber: 1g | Sugar: 23g | Vitamin A: 521IU | Vitamin C: 2mg | Calcium: 46mg | Iron: 2mg

    Buttermilk Blueberry Muffins

    June 14, 2022

    A buttermilk blueberry muffin cut in half with butter on one half.

    Buttermilk Blueberry Muffins: These fluffy, moist buttermilk muffins are made from scratch and with lots of blueberries, making them the perfect snack or breakfast menu addition! This is also the perfect recipe for blueberry season!

    Quick Overview: Cream butter & sugars, add wet ingredients, then dry. Stir in blueberries, divide into 12 muffin tins and bake for 30-35 mins at 375°!

    8 buttermilk blueberry muffins in a muffin pan.

    Why You’ll Love this Blueberry Muffin Recipe with Buttermilk

    I think everyone should have a good blueberry muffin recipe in their recipe box, and this might just be the best blueberry muffins recipe ever! Using buttermilk helps make these muffins soft without making them too crumbly, the fresh blueberries give the muffin a delicious blueberry flavor, and the sprinkle of sugar on top is just the sweet finish these muffins need!

    These muffins are super simple to make and don’t require any fancy ingredients, so you can whip these up anytime you are looking for a delicious, juicy blueberry filled treat! This lemon blueberry loaf is also bursting with plump blueberries and comes together quickly and easily.

    What Makes Muffins Light and Fluffy?

    There are a few key things you can do to achieve light and fluffy muffins. The first is make sure your eggs and oil are at room temperature before combining with the other ingredients.

    When at room temperature, it allows the batter to trap air and expand while baking. In addition to that, baking powder allows baked goods rise in the oven. When your muffins expand and rise in the oven, they come out light and fluffy!

    [feast_advanced_jump_to]

    Ingredients for Blueberry Buttermilk Muffins

    This recipe uses simple ingredients and you may even have most of them on hand already!

    Ingredients for buttermilk blueberry muffins with labels on the image.
    • ½ cup unsalted butter softened
    • ¾ cups white granulated sugar `
    • ½ cup brown sugar
    • 2 large eggs
    • 1 teaspoon vanilla extract
    • 2 cups all purpose flour
    • ½ teaspoon salt
    • 2 teaspoons baking powder
    • ½ cup buttermilk
    • 2 cups blueberries washed, drained, and picked over (Have more? Whip up this blueberry skillet cobbler recipe too!)
    • 3 teaspoons coarse sugar like this sugar or turbinado sugar, optional

    See the printable recipe card below for a full list of ingredients and step-by-step instructions.

    What does buttermilk do to muffins?

    Buttermilk is a wonderful addition to a lot of baked goods. It adds flavor without adding extra fat, and the acidity helps to tenderize the gluten from the flour (which makes your muffin more tender). The acidity also helps your baked goods to rise. It’s a win-win all around!

    Instructions

    1. Heat oven to 375°.
    2. Cream the butter and ¾ cup white sugar and ½ cup brown sugar in a large bowl or the bowl of a stand mixer.
    Butter, brown sugar and white sugar in a mixing bowl.
    Cream together butter and sugars.
    1. Add the eggs, beating well, then add vanilla and mix in.
    Creamed butter and sugar in a mixing bowl with eggs on top.
    Add eggs.
    Creamed butter, sugar, and egg mixture in a bowl with someone pouring vanilla extract into the bowl.
    Add vanilla.
    1. In a separate bowl, sift together the flour, salt, and baking powder (or put them all in the bowl and stir them with a whisk). 
    Dry ingredients in a mixing bowl.
    Sift dry ingredients.
    1. Add flour mixture to the creamed mixture alternately with the ½ cup buttermilk.
    Buttermilk being added to the creamed sugar mixture.
    Alternate adding buttermilk and four mixture.
    1. Using a fork, crush ½ cup blueberries and then mix them into the batter.
    2. Pour the remaining whole berries in mixture and gently stir to mix in.
    Fresh blueberries being mixed into the muffin batter.
    Add crushed and whole blueberries.
    1. Line a 12 cup standard muffin tin with paper liners or an 8-cup jumbo muffin tin, and fill the prepared muffin cups with batter. For standard muffins, we fill the batter ¾ full. For jumbo muffins, we like to fill the entire muffin tin, to allow bigger “muffin tops”.

    To make it easier to fill the muffin cups, pour batter into a zip top bag. Seal and cut a small (but big enough a blueberry can fit through) hole in the corner of the bag. Now, you can “pipe” the batter in to each muffin liner. You could also use an ice cream scoop to scoop the batter into the muffin liners.

    12 muffin liners in a muffin pan.
    Line a muffin tin with 8 or 12 liners.
    Muffin liners in a muffin tin with batter in them.
    Fill with batter.
    1. Sprinkle the tops of the muffins with the 3 teaspoons of sugar and bake at 375 degrees for about 30-35 minutes.
    2. Remove the muffins from the tin and allow them to cool for at least 30 minutes. Enjoy a fresh-baked muffin with a cold glass of milk or a fresh cup of coffee! Or, take it to the next level and whip up a batch of flavored butter to spread on top!
    Baked buttermilk blueberry muffins in a muffin tin.
    Bake 30-35 mins.

    Substitutions

    Need to make a substitution? We’ve got you covered!

    • Fresh blueberries – if you don’t have fresh blueberries, frozen berries will work just as well! You can stir them in right from frozen, no thawing required.
    • Buttermilk substitute -if you don’t have buttermilk, you can make your own buttermilk! Simply stir ½ tablespoon of vinegar or lemon juice into your ½ cup of milk and let it sit for 5 mins so it can curdle slightly.
    • Butter – if you’d like to use salted butter instead of unsalted, simply decrease the salt in the recipe to ¼ teaspoon salt. You can also use margarine in place of butter.

    Variations

    Even though these buttermilk blueberry muffins are fantastic just as they are, we totally understand that sometimes you have the urge to play around with a recipe and make it your own. Here are a few suggestions you can try if you are feeling creative!

    • Add more fruit – If you want to add more than just fresh blueberries, you can add cherries, strawberries, and/or raspberries to this recipe. If you do choose to add extra fruit, make sure it's chopped and then fold it in with the blueberries. This is a great way to use up any fruit that may be aging quickly!
    • Get nutty – if you’re like me and you love nuts in baking, stir in some chopped walnuts or pecans when you stir in the blueberries.

    Storage

    For the best results, store these delicious muffins uncovered for 2-3 days. If you store them in an airtight container, the muffins can become a little soggy after a day or two. 

    Expert Tips and FAQs

    How can I make my muffins lighter and fluffy?

    There are a few key things you can do to achieve light and fluffy muffins. The first is make sure your eggs and oil are at room temperature before combining with the other ingredients. When at room temperature, it allows the batter to trap air and expand while baking. In addition to that, baking powder allows baked goods rise in the oven. When your muffins expand and rise in the oven, they come out light and fluffy!

    If I don’t have buttermilk, what can I use?

    If you don’t have buttermilk like the recipe calls for, you can make your own buttermilk! Simply stir ½ tablespoon of vinegar or lemon juice into your ½ cup of milk and let it sit for 5 mins so it can curdle slightly.

    Can I use frozen blueberries instead of fresh in this recipe?

    If you don’t have fresh blueberries, frozen will work just as well! You can stir them in right from frozen, no thawing required.

    Related Recipes

    If you love all things blueberry, then you’ll also love these blueberry granola bars or these:

    • Blueberry waffles on a plate, drenched in syrup.
      Blueberry Waffles Recipe
    • Blueberry Pancakes
      Easy Blueberry Pancakes
    • Blueberry turnovers with a powdered sugar and milk glaze.
      Blueberry Turnovers Recipe
    • Strawberry chocolate muffins on cooling rack.
      Strawberry Chocolate Muffins

    Did you make this? I’d be so grateful if you left a “star” rating below to let me know what you thought! Then, the next time you need a quick and easy recipe, come back to Fantabulosity to browse all of my easy recipes!

    Recipe

    A buttermilk blueberry muffin cut in half with butter on one half.
    Print Pin
    5 from 7 votes

    Buttermilk Blueberry Muffins

    Buttermilk Blueberry Muffins: These fluffy, moist buttermilk muffins are made from scratch and are full of fresh blueberries, making them the perfect snack or brunch menu addition! 
    Course Breakfast, Snack
    Cuisine American
    Prep Time 15 minutes minutes
    Cook Time 35 minutes minutes
    Total Time 50 minutes minutes
    Servings 12 muffins
    Calories 248kcal
    Author Jessica Burgess

    Ingredients

    • ½ cup unsalted butter softened
    • ¾ cups white granulated sugar `
    • ½ cup brown sugar
    • 2 large eggs
    • 1 teaspoon vanilla extract
    • 2 cups flour
    • ½ teaspoon salt
    • 2 teaspoons baking powder
    • ½ cup buttermilk
    • 2 cups blueberries washed, drained, and picked over
    • 3 teaspoons coarse sugar like this one

    Instructions

    • Heat oven to 375°.
    • Cream the butter and ¾ cup white sugar and ½ cup brown sugar.
    • Add the eggs, beating well, then add vanilla and mix in.
    • Sift together the flour, salt, and baking powder (or put them all in a bowl and stir them with a whisk).
    • Add flour mixture to the creamed mixture alternately with the buttermilk.
    • Using a fork, crush ½ cup blueberries and then mix them into the batter.
    • Pour the remaining whole berries in mixture and gently stir to mix in.
    • Line a 12 cup standard muffin tin with cupcake liners or an 8-cup jumbo muffin tin, and fill with batter. (See notes below for an easy way to pour batter in to liners.)
      For standard muffins, we fill the batter ¾ full. For jumbo muffins, we like to fill the entire muffin tin, to allow a bigger "muffin top".
    • Sprinkle the 3 teaspoons sugar on top of each of the muffins and bake at 375 degrees for about 30-35 minutes.
    • Remove the muffins from the tin and allow them to cool for at least 30 minutes.

    Video

    Notes

    STORAGE: For the best results, store these muffins uncovered for 2-3 days. If you store them in an airtight container, the muffins can become a little soggy after a day or two. 
    NOTES: To make it easier to fill the muffin cups, pour batter into a zip top bag. Seal and cut a small (but big enough a blueberry can fit through) hole in the corner of the bag. Now, you can “pipe” the batter in to each muffin liner. You could also use an ice cream scoop to scoop the batter into the muffin liners. 

    Nutrition

    Serving: 1muffin | Calories: 248kcal | Carbohydrates: 42g | Protein: 3g | Fat: 8g | Saturated Fat: 5g | Polyunsaturated Fat: 0.4g | Monounsaturated Fat: 2g | Trans Fat: 0.3g | Cholesterol: 21mg | Sodium: 112mg | Potassium: 137mg | Fiber: 1g | Sugar: 24g | Vitamin A: 266IU | Vitamin C: 2mg | Calcium: 55mg | Iron: 1mg

    Zesty Italian Pasta Salad Recipe

    June 1, 2022

    ingredients in bowl for zesty Italian pasta salad

    Zesty Italian Pasta Salad: This super easy recipe is made using any type of pasta you prefer, a few other simple ingredients, and Zesty Italian dressing!

    You know we love salad recipes around here right? Well this one is at the top of our favorites list for sure! And if you’re an overall fan of pasta salads then you’ll especially love this shrimp pasta salad!

    Post originally published in 2017 – Updated in June of 2022!

    If you need a little something to go along with this pasta salad, these Hot Italian Sliders would pair amazingly with this!

    Pasta Salad Recipe – Cold, Italian Style and SO Easy

    I’m sharing how to make pasta salad, the super easy and delicious way!

    It not only looks gorgeous as a side dish with all of the pops of color, but it is packed with TONS of flavor.

    Plus, in “slightly homemade” and Fantabulosity fashion, this side dish recipe is quick and oh so easy to whip up for a weeknight meal. Another quick and easy option is this cowboy pasta salad that also comes together quickly and easily.

    Cold Pasta Salad

    A nice cold, flavorful pasta salad is a side dish that is PERFECT for a summer bbq. (Like I served at our Backyard BBQ Party!) But I must admit, no matter what time of year it is, it’s quite delicious any time of year, paired with some of main course, and one of my favorite steak sides!

    Plus, with it being a cold pasta salad recipe, that means NO cooking, and very little prep! One of my favorite recipe combinations!

    Italian Pasta Salad

    When I started experimenting with this pasta salad, I was craving an Italian pasta salad. The thought of mixing together herbs with oils and vinegar crossed my mind, but then that sounded WAY too time consuming and fancy for this momma. So when I eyed the Zesty Italian salad dressing in my pantry, I knew it was exactly what this Italian pasta salad needed!

    Then, the addition of the cute little pepperoni and mozzarella helped tie in the Italian theme as well.

    But the combo of flavors with the red pepper, banana peppers, cherry tomatoes, and spinach rounding off the rest of it, is just what this cold pasta salad needed!

    Tip for Pasta Salad Recipes:

    When I’m making pasta salads, or ANY salad that has tomatoes in it (like one of my favorites: My Tomato Mozzarella and Avocado Salad), PLEASE don’t make this ahead of time and chill it. Now, if it makes life so much easier to… then that’s ok, go ahead. But the refrigeration of the tomatoes causes them to lose SO much flavor. But not only that, the pasta will soak up the dressing and it begins to lose that punch of flavor too.

    What about left overs?  Well save them… I do. But if you have any extra Italian dressing laying around to add more to your left overs, that helps a ton!

    Mason Jar Pasta Salad

    I couldn’t help but to also show you how I assemble the pasta salad in to a jar, when I’m making it to-go, to deliver to family and friends, or when you need an easy picnic food idea. The presentation of the rainbow layer of colors is my all-time favorite.

    Here’s the step by step layering I do when making this Italian Pasta Salad for a care package!

    Finish off the jar with a cute little ribbon and all they have to do is dump it out in to a bowl, stir and serve to their family!

    4 image collage of pasta salad in jar
    Steps 1-4
    4 image collage of zesty italian pasta salad recipe
    Steps 5-8
    2 image collage of pasta salad in mason jar
    9-10

    Love Easy Side Dishes?

    If you love easy side dishes, then you’ll LOVE the others here on the blog. Check out more easy side dishes and pin all of those that you love to your Pinterest board for when you need them!

    Recipe

    ingredients in bowl for zesty Italian pasta salad
    Print Pin
    4.73 from 18 votes

    Zesty Italian Pasta Salad

    Zesty Italian Pasta Salad: This super easy recipe is made using any type of pasta you prefer, a few other simple ingredients, and Zesty Italian dressing!
    Course Side Dish
    Cuisine Italian
    Prep Time 10 minutes minutes
    Cook Time 8 minutes minutes
    Total Time 13 minutes minutes
    Servings 5 servings
    Calories 871kcal
    Author Jessica Burgess

    Ingredients

    • 1 lb bowtie pasta
    • 1 16-ounce bottle zesty Italian dressing
    • 5 ounces cherry tomatoes sliced
    • 1 cup sliced banana peppers
    • 5 ounces mini pepperoni’s
    • 8 ounces of mozzerella pearls
    • 2 cups chopped spinach
    • 1 cup finely diced red onion

    Instructions

    • Cook bowtie pasta according to package directions.
    • Drain pasta and rinse in cold water until pasta is fully cooled.
    • Mix the past together with all of the remaining ingredients.
    • Serve!

    Nutrition

    Serving: 1cup | Calories: 871kcal | Carbohydrates: 86g | Protein: 30g | Fat: 44g | Saturated Fat: 13g | Cholesterol: 65mg | Sodium: 1763mg | Potassium: 635mg | Fiber: 4g | Sugar: 15g | Vitamin A: 1690IU | Vitamin C: 33.3mg | Calcium: 293mg | Iron: 2.8mg

    Beautiful Walk-in Pantry Organization Ideas

    May 31, 2022

    walk in pantry organization ideas

    Walk-in Pantry Organization Ideas: Tips for making a beautiful and organized pantry for easy access to your dry goods and pantry items.

    See links below to all of the items I used to organize this pantry!

    white pantry shelves with organized items
    Walk-in Pantry Organization Tips

    Keeping the pantry organized in our busy home is a great way to stay on top of meal planning and be able to keep track of the food items that we have on hand, especially when it’s time for a trip to the grocery store!


    When planning out the system for this pantry makeover in our home, I wanted to keep things affordable, yet stylish at the same time. It’s also a very real space in our home, with little kids, so using products like lazy susans, clear containers, and baskets makes these easily accessible, especially with deep shelves, was super important.

    You will also love these other organization ideas!

    [feast_advanced_jump_to]

    What can I use to organize my pantry?

    When it comes to pantry storage, there are specific tips that I have that work for the pantries I’ve organized over the years:

    (See the full “how-to” card below to print and use as a guide for your own pantry organization!)

    • Lazy Susans: These can be really helpful for reaching items in the back of the shelf, especially with deep shelving.
    • Clear Containers: Using these or clear bins for certain products is a great idea, so you can see in without having to open or pull out the container.
    • Glass Jars: They provide such a classy look and also allow you to see in!
    • Labels: I used pre-printed labels for most of the products and I absolutely love this set! You can also use a label maker or chalkboard labels!
    • Spice Racks: Placing spices, canned goods, and other small jars/bottle-type items are KEY for deep shelves. This way items aren’t hidden and you can utilize height!
    • Baskets and Crates: You can use various sizes and types but they work fantastic for keeping similar items all in one place!
    • Can Risers: Sometimes you can use the same riser for canned goods and spices! Just be sure to check your measurements, and make sure the spice rack is big enough to hold a large canned good.
    Wide angle view of white pantry organization
    Walk In Pantry Ideas

    Walk-in Pantry Shelving

    Since we have a white pantry, the walk-in pantry shelving is made of wooden shelves that are painted white wood, on white walls. We’ve had wire shelves in the past but wire shelving allows items to fall through and smaller items may have a hard time balancing on the wires.

    So if you’re building or doing a pantry makeover, I highly recommend using wooden shelves if possible. (Although if you have wire shelves, the baskets and crates come in even handier.) You can also use a shelf liner though if you have struggled with items falling through the wire shelving.

    small appliances and white plates in pantry
    Small appliances & Dishes

    Deep Pantry Organization

    How do you organize a walk in pantry with deep shelves?

    The items I used for this walk-in pantry work lovely for deep shelves. The baskets and crates can pull out, so you can not only reach items in the back easily but so you can carry them to your kitchen if you’re baking and cooking something and want to use a few things at the same time!

    I also make sure to only put larger containers towards the back, make sure they’re full of items that I don’t have to use often, and that they’re not super heavy. (I don’t want to have to pull out a really heavy item from far back.)

    Organized pantry shelves
    Organized Pantry Shelving

    Dry Foods and Goods

    Mostly everything, when it comes to food in a pantry, is considered “dry foods” but depending on the dry good, and how it’s packaged, varies on how to store and organize it.

    Expert Tip:

    If you purchase dry goods that come in small, individual packages, such as:

    • hot chocolate
    • oatmeal
    • granola bars

    Those look best, unboxed and stored in their own basket or crate. (As long as the individual item is labeled. If not labeled, (such as cake mixes) I leave those in the box, if you can’t see what the item is. If it’s something such as “saltines” you can leave those in the box, or store the sleeves. Whatever you prefer!)

    Packaged mixes in white baskets
    Packaged & Boxed Goods

    What you see in the photo above:

    • Bread Box (bottom right) – this has tortillas in it currently because I simply needed to make a trip to the grocery store!
    • White Baskets – These are PERFECT for small packaged items such as oatmeal, cake mixes, etc. You can see through the baskets to see what’s inside of them but they hold items really well!
    small clear containers with labels
    Clear containers

    What you see in the photo above:

    • Small clear containers with white lids: These are smaller but hold items such as chocolate chips, dried fruit, candy, and nuts, PERFECTLY!
    • Labels: This is an amazing set of sticker labels for just about anything you’d store in your pantry!
    Flour and pasta organization ideas
    Flour, Sugar and Pasta

    What you see in the photo above:

    • Jars with Wooden Lids: I found mine at Ikea and Amazon. The spaghetti and small jars with animal and mini Ritz crackers can be found on Amazon. The larger glass jars (pancake mix and bread flour canisters) were found at Ikea but similar can be found here!
    • Flour and Sugar Canisters: I found the flour canister and the sugar canister at Target!
    • Smaller glass bowls with wooden lids: the smaller bowls (that are holding the cocoa powder, chia seeds, corn starch, and flax seeds) were from Ikea but similar can be found here! (They’re 22 oz. and the glass canisters I used are 20 oz.)
    • Basket for plastic wear: I LOVE putting our disposable forks, spoons, and knives in this basket! It makes them so accessible and looks better than the boxes/bags that they come in!

    Snacks and Paper Goods

    Wooden Crates on Shelves
    Wood Crates

    In the photo above:

    • Large Wooden Crates (On the bottom): I used the large crates to store paper goods such as paper towels, paper plates/bowls, and solo and coffee cups.
    • Open Crate (Bottom Left): I used the same crate here as I did for the “bread box” above, to store cookies in!
    • Small Wooden Crates (Top left): These are the perfect size to hold snack bars, fruit snacks, and more! Something to keep in mind when organizing snacks in a pantry is that keeping HEALTHY snacks on a low shelf, with easy access, can come in handy so the kids aren’t always asking for a snack.
    • Small wire basket (top right): This basket holds hot chocolate mixes wonderfully! I made sure to keep this in a “drink” section of the pantry.
    • Clear, tall container with white lid: This is a taller version of the clear containers I used above for baking chips and dried fruit. I stored tea bags in this container.
    • Small glass rectangular container with wood lid: Sometimes we have drink mix packets (Liquid Iv’s powdered mix, etc.) that we store in here. I found this at Ikea but you can find a similar set of them, here!
    Pantry shelves with organized canned goods and spices
    Spices and Canned Goods

    Spices, Canned Goods, and Cereal

    • Large Wooden Crates (on the top shelf): I use these to store items that we don’t need very often and that need to stay in their boxes/bags. (Such as candy, popcorn kernels, popcorn fixings, saltines, etc.) I chose solid crates for these items so you can’t see in.
      There really isn’t a need to see inside them, since we don’t use the items very often, and they usually look messy inside
    • Wooden Can and Spice Jar Risers: I absolutely LOVE these. They do make wire risers (a lot like pantry wire shelving) but I loved the wood look, so they’d match the crates and baskets.
    • Spice Jars and Labels: Use code: FANTAB10 to get 10% off your own! The second I saw these, I knew I had to have them. Not only are they beautiful but I loved buying them from the place that I did because they create custom labels for you! (Sometimes when you buy a set, you only get so many labels and they may not have a specific spice that you need!) If you need help deciding which spices to put in your pantry, you’ll love where I share the top 20 spices to have in your kitchen!
    • Baking Soda Container: I love OXO products but wasn’t too fond of the prices so I limited what items I used. I like to keep my baking soda and brown sugar (see next) fresh as can be so I was willing to spend a bit more for these.
    • Brown Sugar Container: Like the baking soda above, brown sugar is something I wanted to keep fresh with an air-tight seal. I also use this brown sugar keeper to keep things fresh!
    • Cereal Containers: These are AMAZING! They not only look so much nicer than cereal boxes but the seals on these are tight and keep our cereal fresh. (I bought extras because sometimes we have more cereal than some and I also use them to store marshmallows!)
    • Chip Crate (Bottom right corner): Same as the bread box used above, this is a crate that’s shaped in a way that it can hold items that won’t roll out but that’s open in the front so it’s easy to reach in and grab what you need! (We put this on a low shelf because our kiddos like chips!)
    • Large Baskets (not pictured in this photo but they are visible in the first image in this article): I needed something to store overflow products in. Meaning, if I have a little flour leftover, or an extra jar of peanut butter, I store them in the “overflow” bins.
      TIP: These really help keep clutter down on the shelves, and I always know to check the basket when I run out of the item on the shelves. When I pull the extra out of the basket, I know to add it to my grocery list.
    Sprinkles and spice mixes on shelves
    Baking goods & spices mixes

    What you see in the photo above:

    • Lazy Susan: I have two of these, one in each corner on the same shelf. On one lazy susan I stored condiments such as BBQ sauce, dressing, etc. On the other (in the photo above) I stored sweet condiments such as peanut butter and syrup.
    • Wood Riser: Just like I used for canned goods and spices, this riser comes in handy for items such sprinkles, honey, canned frosting.
    • Small Crate: Same as above, for the snacks, we use the small crate to hold our keto supplies.
    • Woven Rectangular Basket: I used this same basket above for the plastic utensils. In this space, I used it to hold sauce and seasoning packets.
    Baskets of oil and produce
    Oil and produce

    Oil and Produce

    On the floor, underneath my small appliances, I like to keep oils and produce on the bottom so it’s cool and dark.

    • White Mesh Basket: This is what I use to store my vegetable oil, large jugs of olive oil, etc.
    • White Metal Basket: When I have potatoes, I usually store them in the basket you see but all I had was one lonely onion when I took this photo. This basket works great for produce that needs to stay in a dark, cool area.

    Dishes and Cookware

    white dishes on shelves
    White dishes

    White Dishware: I didn’t use anything to store the dishes in, simply because they’re too big and they look pretty when they’re stacked an organized way!

    small appliances on white shelf
    Small appliances
    Instant Pot and air fryer on shelf
    Instant Pot and Air Fryer

    Small Appliances (above): All along the bottom shelf (hidden behind the door, when opened) I store all of my small appliances. They’re handier this way than storing in a deep cabinet and when the door is open, you can’t see them anyway so it works out!

    Cookie cutters and cloth napkins on shelf
    Cookie cutters and cloth napkins

    What you see in the photo above:

    • White Linen Basket: I use this basket on the left to hold my cookie cutters simply because I loved the look of it. But you could also use a woven basket.
    • White Wire Basket: I use this basket on the right, to store fabric napkins and they fit perfectly!
    apron hanging on door
    Aprons

    Apron Organization

    I LOVE a good apron. So I like to keep them handy for when I’m cooking, so hanging them on the back of the door with a Command Hook, works for me! You could also use the back of the pantry door if you’re low on pantry space, for more storage if you have a small pantry, and use a door rack. (Or even a shoe organizer to hold spices, if you have very little cabinet space!)

    How to Organize a Pantry

    Here are my tips for getting started, for walk-in pantry organization ideas, or any type of pantry, really!

    1. Start by making a list of “categories” that your pantry will have. For instance, will you have a “baking” section? Or what about a “cereal” or “chips” section? Making a brain dump of all the items you’d like to store in your pantry is a great place to start!
    2. Next, measure your shelves. Go ahead and take a photo of the pantry too, so if you’re out and about shopping and you see some amazing containers, you’ll be able to refer back to the photo to see if it would work in that space. Carry a mini tape measure in your purse so you can measure something at the store if need be. This little gadget also comes in SO handy when shopping for home furnishings.

      Extra tip: Love organizing as much as me? Jot down the measurements in your Trello account so you can easily access them while you’re out. Or, upload a photo of your pantry to an app on your photo and with text, add the measurements of the shelves and spaces, right on the photo, in the space.
    3. Draw it out! If you’re a sketcher (don’t worry, you don’t have to make it look pretty) draw some lines on the paper, resembling your pantry, and write in where you think each category should go.
    sketched drawing of pantry organization
    Sketch it!
    1. Start buying products! I’ve linked to all of the items I’ve used (under each photo above) but I’ve also linked to them all in one spot to make things easy for you:

      Shop the items I bought from Amazon!
      Shop the items I bought from Target!


      I also know that sometimes things are unavailable or not going to work for your pantry. So don’t feel like you can’t get one thing at a time, here and there. It’s a work-in-progress, and even though I’ve shared my “final” pantry reveal with you, I’m sure I’ll continue to add and change things as time goes on.

    Common Questions & FAQs

    How do I arrange my walk in pantry?

    It’s key to keep similar items in categories, similar to the way grocery stores have items organized. Baking supplies, canned goods, snacks, etc. are typically all in the same aisle so the same organization can take place in your pantry!

    How can I keep my kitchen pantry organized?

    The best way to keep your pantry organized once it’s all in place, is to remember (and encourage family members to remember) that everything has a “home” inside of the pantry. Nothing should be left out of crates, baskets, off risers, etc.

    How to Keep Track of Expiration Dates on Unpackaged Items

    If you remove food/products from its original packaging to have a more organized pantry, a trick to use is to either cut the expiration date out of the packaging and tape it to the underside of the kid or the container. (Or, use a piece of clear tape and write the date on the tape.) You can also use a dry erase marker on clear glass/plastic containers.

    If you need to declutter and organize your life, make sure to also check out my free, 5-day decluttering challenge!

    Recipe

    How to Organize a Walk-in Pantry

    walk in pantry organization ideas
    5.0 Stars (2 Reviews)

    Walk-in Pantry Organization Ideas: Tips for making a beautiful and organized pantry for easy access to your dry goods and pantry items.

    You can find the links to all of the items I used to organize my pantry, in the instructions of this card or in the body of the article.

    Active Time 1 hour
    Total Time 1 hour
    Difficulty Easy

    Materials

    • Lazy Susans
    • Clear Containers or Clear bins
    • Glass Jars
    • Labels
    • Spice Racks
    • Baskets
    • Crates
    • Can Risers

    Instructions

    1. Start by making a list of "categories" that your pantry will have. For instance, will you have a "baking" section? Or what about a "cereal" or "chips" section? Making a brain dump of all the items you'd like to store in your pantry is a great place to start!
    2. Next, measure your shelves. Go ahead and take a photo of the pantry too, so if you're out and about shopping and you see some amazing containers, you'll be able to refer back to the photo to see if it would work in that space. Carry a mini tape measure in your purse so you can measure something at the store if need be. This little gadget also comes in SO handy when shopping for home furnishings.Extra tip: Love organizing as much as me? Jot down the measurements in your Trello account so you can easily access them while you're out. Or, upload a photo of your pantry to an app on your photo and with text, add the measurements of the shelves and spaces, right on the photo, in the space.
    3. Draw it out! If you're a sketcher (don't worry, you don't have to make it look pretty) draw some lines on the paper, resembling your pantry, and write in where you think each category should go.
    4. Start buying products! I've linked to all of the items I've used (under each photo above) but I've also linked to them all in one spot to make things easy for you:
      Shop the items I bought from Amazon!
      Shop the items I bought from Target!
    © Jessica

    Funfetti Cake Mix Cookies

    May 27, 2022

    A plate of funfetti cake mix cookies.

    Funfetti Cake Mix Cookies: These brightly colored funfetti cake mix cookies are so quick and easy to make! A box of funfetti cake mix, oil, eggs, sprinkles, vanilla, and 30 minutes are all you need to create these delicious cookies!

    Quick Overview: 5 minutes of prep time, 20 minutes of chill time, 8-10 minutes of cook time.

    A stack of funfetti cake mix cookies.

    Cake mix cookies are the absolute best because not only are they delicious, they are also incredibly quick and easy to whip up! They are also made with ingredients that you can easily keep on hand, so they are the perfect recipe to whip up for last-minute guests. We’ve even made peanut butter cookies with a cake mix!

    These funfetti cake mix cookies would make the perfect spring or summer cookies because they are so fun and brightly colored! They would also be adorable at birthday parties, baby showers, Mother’s Day brunch, or even for Valentine’s Day!

    [feast_advanced_jump_to]

    Why You’ll Love This Easy Cookie Recipe

    Quick: You can whip these cookies up in just 30 minutes!

    Easy: Because these are made with a cake mix, they are the absolute easiest thing to make…seriously! One bowl, five ingredients, stir it all together and roll it into balls. It doesn’t get much easier than that.

    Delicious: These cookies aren’t only quick & easy, but they are also super tasty! They are soft and chewy and everything you want from a cookie. If you have a bit of a sweet tooth, this easy recipe is for you!

    Perfect for Little Bakers

    This funfetti cookie recipe is the perfect one to make with your little bakers because it’s super simple to make! They’ll love stirring together the batter, rolling out the dough, and adding all those rainbow sprinkles! Making these alongside other fun cookies like these rocky road cookies that also use a cake mix, would be so fun for them too!

    Ingredients for Funfetti cake cookies

    You only need 5 simple ingredients for these cookies, and you probably have most (if not all) of them in your house right now! If you don’t, you can find all of these at your local grocery store.

    Ingredients for confetti cake mix cookies with labels on the image.
    Ingredients

    You can find the complete list of ingredients and directions can be found in the recipe card below.

    • 1 box funfetti cake mix
    • ⅓ cup canola oil
    • 2 eggs
    • ¼ cup + 2 tablespoons colored sprinkles, divided
    • 1 teaspoon vanilla

    How to make these easy funfetti cake mix cookies

    1. Preheat the oven to 350 degrees. Place a piece of parchment paper on a baking sheet and set aside. 
    2. In a large bowl, add the funfetti cake mix, canola oil, eggs, 2 tablespoons colored sprinkles, and vanilla. Stir with a rubber spatula until well combined, about 1-2 minutes.
    3. Cover the bowl in plastic wrap and chill in the refrigerator for 20 minutes.
    Funfetti cake mix cookie dough.
    Combine ingredients, refrigerate 20 mins.
    1. Remove the bowl from the refrigerator and scoop the cake batter cookie dough into 1- to 1 ½-inch balls. Place the dough balls on the prepared baking sheet and lightly press down to "flatten" the tops a little bit. 
    2. With the remaining ¼ cup of sprinkles, add them to the slightly flattened tops of the cookies.
    Uncooked balls of funfetti cake mix cookies on a parchment lined baking sheet.
    Scoop dough, add sprinkles.
    1. Place the cookie sheet in the oven and bake for 8-10 minutes. For the perfect cookies, do not overbake.
    2. Remove the baking tray from the oven and let the cookies cool completely on a cooling rack before serving. Warning: cake mix cookies usually have a soft texture, so be careful when transferring them to the cooling rack!
    Baked funfetti cake mix cookies on a parchment lined baking sheet.
    Bake 8-10 mins.
    Funfetti cake mix cookies cooling on a wire rack.
    Cool on a wire rack.

    I’m a huge fan of cake mix cookies because they are the easiest cookies to make!

    If you enjoyed these easy cake mix cookies, you should try our other easy cake mix cookie recipes! Check out the brownie mix cookies and red velvet cake mix cookies on the blog.

    I’m a firm believer that you should always have a box of cake mix on hand. Not only can you use it as the box directs, you can also use it for recipes like the cake mix cookies we mentioned above and for other quick, easy, and delicious dessert recipes! Our pineapple sunshine cake, caramel apple dump cake, and lemon cake mix brownies are easy recipes also made using dry cake mix!

    Substitutions & Variations

    Want to mix things up or need something switched out? Here are some of our favorite suggestions for switching up these colorful cookies.

    • Canola Oil – instead of canola oil, you can use vegetable oil, your favorite oil, or even melted butter.
    • Eggs – instead of eggs, you could use a “cornstarch egg” as a binding agent. Check out this tutorial for more info.
    • Cake Mix – they won’t be funfetti cake mix cookies anymore, but you could absolutely replace the funfetti cake mix with your favourite flavor and create a whole new cookie.
    • Holidays – if you are making these cookies for a specific occasion or holiday, you can add sprinkles that match the theme! Green sprinkles on top for St. Patrick’s Day, red and green for Christmas, red and white for Valentine’s Day…

    Storage

    Store your confetti cake mix cookies in an airtight container at room temperature for 4-5 days.

    You can also freeze these chewy funfetti cookies in an airtight, freezer safe container for up to a month!

    Expert Tips and FAQs

    Is Funfetti cake mix the same as white cake mix?

    Funfetti is a white cake mix with sprinkles added in! You can use a funfetti cake mix or a white cake mix and add extra sprinkles to make these easy funfetti cookies!

    Is confetti and Funfetti the same thing?

    Funfetti is technically a trademark of Pillsbury, so yes a funfetti cake mix and confetti cake mix are just the same thing by different names. We used the terms funfetti cookies and confetti cookies interchangeably in this recipe because they are essentially the same thing. Some other brands have their own name for white cake with sprinkles (like Betty Crocker rainbow bit cake mix), but any cake mix with colourful sprinkles will do.

    Can I add more sprinkles to Funfetti cake mix?

    Absolutely! You can add extra sprinkles to the batter to your preference.

    🍪 More Cookie Recipes

    If you love cookie recipes, you’ll also love these Key Lime Pie Crumbl Copycat cookies!

    Did you make this? I’d be so grateful if you left a “star” rating below to let me know what you thought! Then, the next time you need a quick and easy recipe, come back to Fantabulosity to browse all of my easy recipes!

    Recipe

    A plate of funfetti cake mix cookies.
    Print Pin
    5 from 11 votes

    Funfetti Cake Mix Cookies

    Funfetti Cake Mix Cookies: These brightly coloured funfetti cake mix cookies are so quick and easy to make! A box of funfetti cake mix, oil, eggs, sprinkles, vanilla and 30 minutes are all you need to create these delicious cookies!
    Course Dessert, Snack
    Cuisine American
    Prep Time 5 minutes minutes
    Cook Time 10 minutes minutes
    Chill Time 20 minutes minutes
    Total Time 35 minutes minutes
    Servings 22 cookies
    Calories 115kcal
    Author Jessica Burgess

    Ingredients

    • 1 box funfetti cake mix
    • ⅓ cup canola oil
    • 2 eggs
    • ¼ cup + 2 tablespoons colored sprinkles divided
    • 1 teaspoon vanilla

    Instructions

    • Preheat the oven to 350 degrees. Place a piece of parchment paper on a baking sheet and set aside. 
    • In a large bowl, add the funfetti cake mix, canola oil, eggs, 2 tablespoons colored sprinkles, and vanilla. Stir with a rubber spatula until well combined, about 1-2 minutes.
    • Cover the bowl in plastic wrap and chill in the refrigerator for 20 minutes.
    • Remove the bowl from the refrigerator and scoop the cookie dough into 1- to 1 ½-inch balls. Place the balls on the prepared baking sheet and lightly press down to "flatten" the tops a little bit. 
    • With the remaining ¼ cup of rainbow sprinkles, add them to the slightly flattened tops of the cookies.
    • Place the baking tray in the oven and bake for 8-10 minutes. For the perfect cookies, do not overbake.
    • Remove the baking tray from the oven and let the cookies cool completely on a wire rack before serving. Warning: cake mix cookies usually have a soft texture, so be careful when transferring them to the cooling rack!

    Notes

    STORAGE: Store your confetti cake mix cookies in an airtight container at room temperature for 4-5 days. You can also freeze these chewy funfetti cookies in an airtight, freezer safe container for up to a month!

    Nutrition

    Serving: 1cookie | Calories: 115kcal | Carbohydrates: 16g | Protein: 1g | Fat: 5g | Saturated Fat: 1g | Polyunsaturated Fat: 1g | Monounsaturated Fat: 2g | Trans Fat: 1g | Cholesterol: 15mg | Sodium: 132mg | Potassium: 6mg | Fiber: 1g | Sugar: 10g | Vitamin A: 22IU | Calcium: 10mg | Iron: 1mg

    4th of July Rice Krispie Treats

    May 24, 2022

    A 4th of July Rice Krispie star with layers fo red, white and blue Rice Krispie treat!

    4th of July Rice Krispie Treats: This patriotic dessert is easy to make, super delicious, and tons of fun to serve at your Fourth of July get-together (or anytime)! Our American Flag Pizza Dessert is another fun recipe to make for the holiday too!

    A stack of Rice Krispie treats shaped like stars that clearly show three layers - red, white, and blue.

    I love a good Rice Krispie treat, but I love it even more when it’s themed to the occasion. This red, white, and blue dessert is the perfect treat to serve for the Fourth of July, along with these 4th of July cupcakes of course!

    Rice Krispie treats are an easy, no bake dessert to make and they are so fun to customize. This easy Fourth of July dessert combines three layers of this tasty, nostalgic rice treat and then cuts it into a star for an extra wow factor.

    Serve them at your backyard barbecue, your lunch picnic, or any old time! Your party guests are sure to love these Fourth of July Rice Krispie Treats, especially if this 4th of July Puppy Chow is sitting next to them too!

    [feast_advanced_jump_to]

    Why You’ll Love This Recipe

    Fun & Festive: This red, white, and blue dessert is patriotic and the perfect dessert to serve at your Fourth of July barbecue or get together. See our substitutions & variations section for ideas of other holidays you could make this for!

    Quick & Easy: Although this recipe takes a little bit of time because it has three layers, it’s still a quick and easy dessert to put together.

    No Bake: You won’t have to heat up the oven and the house to make this yummy no bake dessert. And if you’re making it for the Fourth of July, which is pretty dang warm in some parts of the country, that’s a big plus!

    Delicious: I think most of us have had a Rice Krispie treat before, and for good reason. They are delicious!

    What is the Fourth of July?

    Here in the USA, July 4th is Independence Day. This is a federal holiday commemorating the Declaration of Independence of the United States, which was ratified by the Second Continental Congress on July 4, 1776.

    For patriotic holidays like July 4th, it’s common for Americans to celebrate with friends and family. Often these celebrations involve food that is themed after our nation’s flag (which is red, white, and blue and has both stars and stripes on it) as a show of patriotic pride.

    How do you make 4th of July rice crispy treats?

    You only need 5 simple ingredients (that you probably have in your pantry) to make this super fun treat!

    Ingredients for 4th of July Rice Krispie treats laid out on a counter with labels on each.

    Ingredients

    • ¾ cup butter divided
    • 15 cups mini marshmallows
    • 12 cups of Rice Krispies, divided (or any crispy rice cereal)
    • 1½ teaspoons clear vanilla extract divided
    • red & blue food coloring (8-9 red drops, 6 blue)

    You can find a complete list of ingredients and directions in the recipe card below.

    Instructions

    1. Line a 9×13-inch pan with parchment paper. Spray lightly with nonstick cooking spray.     
    2. In a large pot, start to melt ¼ cup butter over medium-low heat. Once melted, add 5 cups of marshmallows to the butter, stirring often. Once the marshmallows are almost melted, turn the heat to low. 
    A 9x13 pan on a counter.
    Prepare the 9×13.
    Marshmallows in a large pot with melted butter.
    Melt butter, add marshmallows
    1. Add ½ teaspoon of vanilla and the red food coloring, a few drops at a time, and mix well. If needed, continue to add food coloring until desired color. Remove from heat. 
    2. Mix in 4 cups of the Rice Krispie cereal. Stir until the cereal is well coated. 

    Note: The marshmallow cools down quickly, so be prepared to mix in the cereal immediately after removing from the heat, then quickly add them to the pan before cooling down too much and getting very sticky. 

    Melted marshmallows and butter with red food colouring added in.
    Add food coloring.
    Rice Krispies on top of the red melted marshmallow mixture.
    Stir in rice cereal.
    1. Pour into the parchment-lined pan. Spread evenly while pressing down firmly, and smooth the top using the back of a buttered spoon. 
    2. Repeat the same process, leaving this second batch white. Pour the white batch on top of the red layer. Press down and smooth evenly.
    Red Rice Krispie treats being pressed into the 9x13.
    Spread in pan.
    A white layer of Rice Krispies on top of the red layer in the 9x13 pan.
    Repeat with white layer.
    1. Repeat the process one last time with the blue food coloring. Place the blue Rice Krispie Treats on top of the white layer. Press firmly and smooth out the top layer. Allow to cool completely at room temperature (will take about an hour). 
    2. Remove the treats from the pan, using a knife to cut around the edges if needed. Peel off the parchment paper and place on a cutting board. 
    Repeat with blue layer; cool.
    Remove from pan.
    1. Cut the red, white, and blue Rice Krispy treats into star shapes using a cookie cutter. If the cutter isn't deep enough to completely reach the bottom of the pan, create an indentation with the cutter to use as a stencil, and then cut it out completely using a knife. Be sure to spray your cookie cutter and/or knife with cooking spray so the Rice Krispie doesn’t stick to them.
    2. Serve & enjoy!
    A star shaped cookie cutter about to press into the Rice Krispie treat.
    Cut into stars.
    Several red, white, and blue star shaped Rice Krispie treats sitting on a counter.
    Serve and enjoy!

    Looking for more no bake desserts? Try this no bake cherry cheesecake or this 4th of July Dip! In fact, if you used a mixture of cherry pie filling and blueberry pie filling this could become another easy Fourth of July dessert!

    And since you’re looking for no bake recipes, why not whip up a batch of our amazing no bake cookies to have on hand? They’re a family favorite!

    Looking for more Fourth of July recipes and decorating ideas? Check out the Fourth of July section on the blog for red donuts, a red, white and blue themed dip bar, and more!

    Substitutions & Variations

    Missing an ingredient? Looking for other ways to enjoy these American Rice Krispie Treats? Try these suggestions…

    • Butter – I love the flavor of butter, but you can use margarine in this recipe if you need.
    • Marshmallows – Store brand marshmallows and old, dried out marshmallows don’t work as well for this recipe. Make sure you use good quality marshmallows, and pick up a fresh bag for the best results!
    • Other Holidays/Occasions – The colored layers can be changed for any holiday or occasion. Make these for Christmas (red & green), St. Patrick's Day (green), Valentine's Day (red & pink), etc. 
    • Add Sprinkles or Mix-Ins – Before your top layer cools, quickly press some sprinkles or other fun mix-ins into it for a fun decoration! You could also stir sprinkles/mix-ins into the marshmallow cereal mixture before you press it into the pan. For this recipe, you could use red, white, and blue sprinkles or red, white, and blue m&m. If you are making it for another holiday/occasion, use things that fit with that theme!

    Storage

    Store your star rice Rice Krispie treats in an airtight container on the counter for 2-3 days, or in the fridge for 4-5 days.

    You could also put these in an airtight, freezer-safe container and freeze them for up to a month. Rice Krispie treats keep well in the freezer.

    Expert Tips and FAQs

    Do you have to refrigerate rice krispie treats?

    No, it’s not necessary to refrigerate Rice Krispie Treats. If you need them to cool down faster you can chill them for a short while while they are setting, but otherwise, they can be stored at room temperature.

    How to keep rice krispies treats fresh?

    The absolute best way to keep these fresh is to make sure they are stored in an airtight container! If you are concerned about it, you can individually wrap each star in plastic wrap before placing them in an airtight container and this should ensure that they stay nice and soft/fresh until you are ready to eat them.

    What if I don’t have a star-shaped cookie cutter?

    If you don’t, don’t worry at all! This dessert will look just as great cut into squares, and you’ll still be able to see all three layers and colors that way.

    You could also make yourself a star-shaped template out of paper and cut around that with a knife to make your star-shaped treats.

    How do you make Rice Krispie treats more sticky and gooey?

    If you like your Rice Krispie treats a bit more on the gooey side (where they pull apart super easily and are more sticky to eat), simply add an additional cup of marshmallows to each of the batches you are making (the red, the plain, and the blue).  

    Can I make these in the microwave?

    Technically, yes you can. In a large, microwave-safe bowl melt the butter in 30-second increments. Once melted, add your marshmallows and continue to heat in 30-second increments (stirring often). When your butter and marshmallows are melted completely, stir in the vanilla and food coloring and quickly stir in the cereal. From there the recipe continues as it is written.

    Did you make this? I’d be so grateful if you left a “star” rating below to let me know what you thought! Then, the next time you need a quick and easy recipe, come back to Fantabulosity to browse all of my easy recipes!

    Recipe

    A 4th of July Rice Krispie star with layers fo red, white and blue Rice Krispie treat!
    Print Pin
    5 from 4 votes

    4th of July Rice Krispie Treats

    4th of July Rice Krispie Treats: This patriotic dessert is easy to make, super delicious, and tons of fun to serve at your Fourth of July get together (or anytime)!
    Course Dessert, Snack
    Cuisine American
    Prep Time 25 minutes minutes
    Cook Time 15 minutes minutes
    COOL TIME 1 hour hour
    Total Time 1 hour hour 40 minutes minutes
    Servings 8 stars
    Calories 279kcal
    Author Jessica Burgess

    Equipment

    • 3-inch star cookie cutter

    Ingredients

    • ¾ cup butter divided
    • 15 cups mini marshmallows
    • 12 cups crispy rice cereal divided (I used Rice Krispies)
    • 1½ teaspoons clear vanilla extract divided
    • red & blue food coloring (8-9 red drops, 6 blue)

    Instructions

    • Line a 9×13-inch pan with parchment paper. Spray lightly with nonstick cooking spray.     
    • In a large pot, start to melt ¼ cup butter over medium-low heat. Once melted, add 5 cups of the mini marshmallows to the butter, stirring often. Once the marshmallows are almost melted, turn the heat to low.
    • Add ½ teaspoon of vanilla and the red food coloring, a few drops at a time, and mix well. If needed, continue to add food coloring until desired color. Remove from heat.
    • Mix in 4 cups of the cereal. Stir until the cereal is well coated.
    • Pour into the parchment lined pan. Spread evenly while pressing down firmly, and smooth the top using the back of a buttered spoon. 
    • Repeat the same process, leaving this second batch white. Pour the white batch on top of the red layer. Press down and smooth evenly.
    • Repeat the process one last time with the blue food coloring. Place on top of the white layer. Press firmly and smooth out the top layer. Allow to cool completely at room temperature (will take about an hour). 
    • Remove the treats from the pan, using a knife to cut around the edges if needed. Peel off the parchment paper and place on a cutting board. 
    • Cut the treats into star shapes using a cookie cutter. If the cutter isn't deep enough to completely reach the bottom of the pan, create an indentation with the cutter to use as a stencil, and then cut it out completely using a knife. Be sure to spray your cookie cutter and/or knife with cooking spray so the Rice Krispie doesn't stick to them. 
    • Serve & enjoy!

    Notes

    NOTE: The marshmallow cools down quickly, so be prepared to mix in the cereal immediately after removing from the heat, then quickly add them to the pan before cooling down too much and getting very sticky. 
     
    STORAGE: Store your patriotic homemade Rice Krispie treats in an airtight container on the counter for 2-3 days, or in the fridge for 4-5 days. 
    You could also put these in an airtight, freezer safe container and freeze them for up to a month. Rice Krispie treats keep well in the freezer. 

    Nutrition

    Serving: 1star | Calories: 279kcal | Carbohydrates: 50g | Protein: 2g | Fat: 9g | Saturated Fat: 6g | Polyunsaturated Fat: 1g | Monounsaturated Fat: 2g | Trans Fat: 1g | Cholesterol: 23mg | Sodium: 107mg | Potassium: 21mg | Fiber: 1g | Sugar: 27g | Vitamin A: 266IU | Calcium: 5mg | Iron: 1mg

    Air Fryer Zucchini No Breading

    May 24, 2022

    sliced air fryer zucchini in white bowl

    Air Fryer Zucchini: An easy (and low carb) recipe without breading that is the perfect side dish to serve with dinner! Cut in to chips or fries & done in as little as 10 minutes!

    sliced, cooked air fryer zucchini in white bowl
    Air Fryer Zucchini

    Why You’ll Love This Recipe

    We have this air fried zucchini at LEAST 3 times a week and my family has NOT grown tired of this recipe yet! I’d say that’s a “win” since it’s one of the healthiest side dishes we’ve ever had here on Fantabulosity.

    When it comes to air fryer recipes, this one may just take the cake. It’s easy, it’s healthy and it’s so delicious that our guests will stop mid-bite and ask what we did to make this zucchini so delicious!

    More Air Fryer Recipes You’ll Love:

    • Air Fryer Bacon
    • Hamburgers in the Air Fryer
    • Air Fryer Chicken Legs

    So without further ado… let’s get in to the details of how to make this zucchini so you can make it too!

    Ingredients

    ingredients for air fryer zucchini
    Ingredients

    If you’re a vegan, no fear… leave the parmesan cheese out, and simply only use the remainder of the ingredients to whip up this simple and delish veggie.

    What you’ll need:

    • Zucchini (I use two medium zucchini) for our family of four, but depending on the exact size of the “summer squash” — yep, it’s also a squash, a “medium” size can sometimes serve 5-6.)
    • 2 tablespoon olive oil
    • ¼ teaspoon garlic salt (Or more, if you’re the salty type — Woah…I simply mean “taste bud” wise friend, not personality-wise.)
    • A dash of black pepper, or to taste
    • ½ cup (or more if you’re the cheese-lover type) of shredded parmesan cheese

    NOTE: Am I flexible with the measurements of the ingredients? Yep. Why? Because this recipe is VERY forgiving and customizable to what you prefer. The good thing for you? When you’ve added in the oil, garlic salt, and pepper, give the zucchini a taste to see how the flavor is! Eating raw zucchini is a-ok!

    Zucchini in the Air Fryer, No Breading…

    Yep, you heard me. No breading needed/used here and you’re still going to love it, especially if you use the shredded parmesan cheese that can give this recipe a slight “toast” flavor to bring in what you may miss if you’re a diehard, breaded zucchini lover.

    How to Make Zucchini in the Air Fryer

    Ready to see just how easy this recipe is? Let’s get with it.

    Slice the Zucchini

    My family prefers for the zucchini to be sliced about a ¼ in. thick — again, very forgiving, so feel free to do thicker/thinner as you prefer. Just know that the cook time may need to adjust a bit.

    sliced zucchini on white cutting board
    Slice zucchini

    Slice the Zucchini Again

    If you want to make it just like yours truly, slice those circles in half again. Is this a “must”? Nope… we just prefer to have it cut like this.

    sliced zucchini in halves on white cutting board
    Slice again

    Oil and Season

    If you love the idea of a quick and clean kitchen, grab a Ziploc bag and pourr the zucchini inside.

    Add in the olive oil, garlic salt and pepper.

    Shake until all zucchini has been coated with the oil/seasoning mixture.

    sliced zucchini in plastic ziptop bag
    Place in bag

    If you prefer to mix in a bowl to save a bag, you can do so! OR, get really snazzy and just place the zucchini, oil, and seasonings right in the air fryer basket and stir inside until evenly coated! (You just don’t want most of your oil to drip down through the basket holes.)

    seasoned zucchini in bag
    Season zucchini

    How long to air fry the zuccini

    If you prefer to preheat your air fryer, go for it! I’m too impatient so I just like to cook it with the idea in mind that it may take the food I’m cooking a little longer than a recipe calls for.

    So with that said, I cook my zucchini at 400° for about 10 minutes and this leaves me with a semi-crunchy zucchini. My husband prefers a softer texture so sometimes I’ll leave it in a few minutes longer.

    NOTE: Keep in mind that the cook time may vary, depending on the power level of your air fryer. (Some air fryers can cook much differently than one another.) But the good thing with zucchini is that you can open up the air fryer and check it occasionally if you prefer. It won’t ruin the taste but may just let the heat escape and take a little longer.
    Experiment with your air fryer, zucchini texture preference and you’ll have it nailed down in no-time!

    Seasoned zucchini in air fryer
    Place in air fryer

    Add the Parmesan (If Desired)

    If you’re not looking for a vegan recipe, then sprinkle with parmesan cheese after the 10 minutes and cook for an additional 2-3 minutes to toast the cheese! So so good!

    parmesan cheese on top of zucchini
    Add parmesan

    Serve

    Serve right away with your favorite side dish or if you’re a rebel like me, eat it as a stand-alone dish whenever you’re cooking for one!

    Extra Cheese? Yes Please.

    If you feel ever so frisky, top with any extra or remaining shredded parmesan cheese just before serving for a pop of goodness.

    air fried zucchini slices in white bowl
    Ready to eat!

    What to Serve Zucchini With?

    If you know you want to make this zucchini as a side dish but are unsure of what main dish to serve alongside it… here are our favorites: this oven baked steak, roasted pork tenderloin and these salt & pepper chicken bites!

    If you find that you have a lot of zucchini on hand, you may want to try freezing it for later. This is a great tutorial on how to freeze zucchini!

    Did you make this? I’d be so grateful if you left a “star” rating below to let me know what you thought! Then, the next time you need a quick and easy recipe, come back to Fantabulosity to browse all of my easy recipes!

    If you love to make zucchini many different ways, then you’ll also love these baked zucchini fries!

    Or, if you have a sweet tooth, then you’ll want to try this chocolate zucchini cake!

    Recipe

    sliced air fryer zucchini in white bowl
    Print Pin
    5 from 3 votes

    Air Fryer Zucchini

    Air Fryer Zucchini: An easy (and low carb) recipe that is the perfect side dish to serve with dinner! Cut in to chips or fries & done in as little as 10 minutes!
    Course Side Dish
    Cuisine American
    Prep Time 5 minutes minutes
    Cook Time 13 minutes minutes
    Total Time 18 minutes minutes
    Servings 4 people
    Calories 128kcal
    Author Jessica Burgess

    Equipment

    • air fryer

    Ingredients

    • 2 medium zucchini
    • 2 tablespoon olive oil
    • ¼ teaspoon garlic salt or to taste
    • ⅛ teaspoon pepper or to taste
    • ½ cup shredded parmesan cheese optional

    Instructions

    • Slice zucchini in to ¼ in. slices (see notes if you prefer a different cut) and then slice in half again.
    • Place cut zucchini in to a ziptop bag or bowl and pour in olive oil, garlic salt and pepper.
    • Shake the bag until all of the zucchini is evenly coated.
    • Pour zucchini in to air fryer basket.
    • Cook zucchini at 400° for 10 minutes (see notes to ensure the zucchini reaches the "doneness" you prefer).
    • If you prefer to add shredded parmean cheese, this is the time to sprinkle on the cheese and cook for an additional 3-4 minutes to melt /toast the cheese!

    Video

    Notes

    NOTE:
    We prefer to slice the zucchini in to ¼ inch circles (give/take) and then slice in half again. If you prefer to cut the zucchini in to “fries” that’s perfectly fine too!
    Keep in mind that the cook time may vary, depending on the power level of your air fryer. (Some air fryers can cook much differently than one another.) But the good thing with zucchini is that you can open up the air fryer and check it occasionally if you prefer. It won’t ruin the taste but may just let the heat escape and take a little longer.
    Experiment with your air fryer, zucchini texture preference and you’ll have it nailed down in no-time!

    Nutrition

    Serving: 1cup | Calories: 128kcal | Carbohydrates: 3g | Protein: 6g | Fat: 11g | Saturated Fat: 3g | Cholesterol: 9mg | Sodium: 354mg | Potassium: 267mg | Fiber: 1g | Sugar: 3g | Vitamin A: 294IU | Vitamin C: 18mg | Calcium: 164mg | Iron: 1mg

    Easy Butterscotch Brownies

    May 23, 2022

    A stack of easy butterscotch brownies.

    Easy Butterscotch Brownies: These old-fashioned butterscotch brownies are chewy, fudgy, and surprisingly quick to make!

    If potlucks are on your calendar, you'll find plenty of easy potluck desserts here.

    stacked butterscotch brownies

    Quick Overview: 15 mins prep, only 30 minutes of cook time and you’ll have a delicious twist on a blondie ready for your whole family to enjoy!

    Why You’ll Love This Recipe

    This chewy butterscotch brownies recipe is one of those ones you can whip up on short notice and wow your guests with. It’s made with simple ingredients you can keep on hand at all times, and it only takes 15 minutes to get into the oven. (If you have a little more time, you’ll also love these ultimate banana pudding brownies or these incredible peanut butter brownies!)

    They have all the fudgy, chewy goodness of a brownie, the unique light coloring of a blondie, and delicious butterscotch flavor with the addition of butterscotch chips! With just the right amount of sweetness, these are sure to satisfy your sweet tooth and be a hit with the whole family!

    [feast_advanced_jump_to]

    Ingredients

    You don’t need anything fancy for this easy butterscotch brownie recipe – some butter, sugar, eggs, flour, butterscotch chips, and a couple of other pantry staples come together to create a delicious treat!

    Ingredients for easy butterscotch brownies laid out on a counter with labels added to the photo.
    Ingredients
    • 1 cup of unsalted butter, melted
    • 1 cup brown sugar (dark brown sugar or light brown sugar)
    • ½ cup white sugar
    • 2 eggs, beaten
    • 1 ½ teaspoons vanilla extract
    • 2 ¼ cups all-purpose flour
    • ½ teaspoon baking soda
    • ½ teaspoon salt
    • ¾ cup butterscotch chips

    See the recipe card below for full instructions and ingredients all in one convenient place!

    Instructions

    These brownies with butterscotch chips are super easy to make. Keep reading for step-by-step instructions!

    1. Heat oven to 350 degrees. Grease a 9×13 pan (or an 8×8 pan if you want thicket brownies) with nonstick cooking spray or line it with parchment paper.
    2. Blend together melted butter, brown sugar, and white sugar in a large mixing bowl or the bowl of a stand mixer. Whisk in eggs and vanilla.
    Brown sugar, white sugar, and butter creamed together in a bowl.
    1. In a separate bowl, mix together flour, baking soda, and salt.
    2. Using a wooden spoon (or the paddle of a stand mixer on low), combine flour and sugar mixtures together in the large bowl until batter forms. Batter will be thick.
    Mix flour, baking soda, salt in a bowl.
    Combine dry ingredients in a separate bowl.
    Add flour mixture to sugar mixture and combine.
    Combine sugar mixture & flour mixture.
    1. Using a rubber spatula, fold in butterscotch chips. Spread batter into the prepared baking dish.
    2. Bake at 350 degrees for 25-30 minutes or until a toothpick inserted in the center comes out clean.

    (If you’re using an 8×8 square pan, bake for an additional 10-15 minutes.)

    Fold in butterscotch chips.
    Fold in butterscotch chips.
    Spread brownie batter into prepared 9x13 pan.
    Bake at 350°.
    1. Transfer your 9×13 to a wire rack and cool for 10-15 minutes. Cut into 24 squares and serve. These would be delicious with a scoop of vanilla ice cream and a cup of coffee!
    A spatula removing a square of baked butterscotch brownie from a 9x13 tray.
    Cool, cut & serve!

    More brownie recipes: If you’re looking for more fun twists on a classic brownie, check out our peanut butter banana brownies, these super quick & easy lemon cake mix brownies, or these delicious & pretty strawberry brownies! Or if traditional chocolate brownies are more your style, you’ll love these chocolate brownies with cream cheese frosting.

    More butterscotch recipes: If you’re craving more butterscotch, give these hello dollies bars and this butterscotch cinnamon pie recipe a try!

    Substitutions & Variations

    Want to mix things up or need something switched out? Here are some of our favorite suggestions for this easy butterscotch brownie recipe.

    • Sugars – a blend of brown and white sugar will result in the best brownies, but that being said if you are in a pinch you can definitely use one or the other exclusively.
    • Eggs -if you don’t have eggs, or can’t eat eggs, you could use a flax egg in this recipe.
    • Butterscotch Chips – although we love this recipe just the way it is, with the butterscotch chips in it, you could technically replace the butterscotch chips with and kind you like! You could try peanut butter chips, chocolate chips, white chocolate chips - the options are endless!
    • Butter – if you want to use salted butter, decrease the salt in this recipe to ¼ teaspoon.
    Butterscotch brownies on a plate with a tray of brownies and a glass of milk in the background.
    Butterscotch Brownies

    Storage

    Store any leftover butterscotch brownies at room temperature for 3-4 days in an airtight container, or for 7-10 days in an airtight container in the fridge.

    You can also store these for up to 4 months in a freezer, as long as they are in an airtight, freezer-safe container.

    Expert Tips and FAQs

    Do butterscotch chips taste good in a brownie?

    Absolutely! It’s a great alternative to chocolate chips and gives that old-fashioned flavor that’s a nice twist from a milk chocolate chip.

    What’s the difference between butterscotch brownies and butterscotch blondies?

    Typically, a brownie is a baked good that has chocolate or chocolate flavoring in it (cocoa powder, chocolate, white chocolate). A blondie is a baked good that has no chocolate in it (aside from maybe some chocolate chips sprinkled in).

    By that definition, these would technically be butterscotch blondies…but we still think of them as butterscotch brownies. If you are looking for blondie recipes, check out our Lucky Charms Blondies.

    More Brownie Recipes

    If you love brownie recipes, you’ll love how easy it is to make these red velvet brownies, or one of these favorites:

    • Strawberry brownies on white marble cutting board.
      Strawberry Brownies Recipe
    • Lemon Brownies Recipe with cake mix
      Lemon Cake Mix Brownies
    • Brownie mix cookies stacked on top of one another
      Brownie Mix Cookies
    • Oreo Brookies
      Oreo Brookies

    Did you make this? I’d be so grateful if you left a “star” rating below to let me know what you thought! Then, the next time you need a quick and easy recipe, come back to Fantabulosity to browse all of my easy recipes!

    Recipe

    A stack of easy butterscotch brownies.
    Print Pin
    5 from 9 votes

    Easy Butterscotch Brownies

    Easy Butterscotch Brownies: These old fashioned butterscotch brownies are chewy, fudgey, and surprisingly quick to make! 15 mins prep, 30 mins cook time and you'll have a delicious twist on a blondie ready for your whole family to enjoy!
    Course Dessert, Snack
    Cuisine American
    Prep Time 15 minutes minutes
    Cook Time 30 minutes minutes
    Total Time 45 minutes minutes
    Servings 24 servings
    Calories 189kcal
    Author Jessica Burgess

    Ingredients

    • 1 cup unsalted butter melted
    • 1 cup brown sugar
    • ½ cup white sugar
    • 2 large eggs beaten
    • 1 ½ teaspoons vanilla extract
    • 2 ¼ cups all-purpose flour
    • ½ teaspoon baking soda
    • ½ teaspoon salt
    • ¾ cup butterscotch chips

    Instructions

    • Heat oven to 350 degrees. Grease a 9×13 pan (or an 8×8 pan if you want thicket brownies) with nonstick cooking spray or line it with parchment paper.
    • Blend together butter, brown sugar and white sugar in a large bowl or the bowl of a stand mixer. Whisk in eggs and vanilla.
    • In a separate bowl, mix together flour, baking soda and salt.
    • Using a wooden spoon (or the paddle of a stand mixer on low), mix together sugar and flour mixtures until batter forms. Batter will be thick.
    • Using a rubber spatula, fold in butterscotch chips. Spread batter into the prepared baking pan.
    • Bake at 350 degrees for 25-30 minutes or until a toothpick inserted in the center comes out clean.
      (If you're using an 8×8 pan, bake for an additional 10-15 minutes.)
    • Transfer your 9×13 to a wire cooling rack and cool for 10-15 minutes. Cut into 24 squares and serve.

    Nutrition

    Serving: 1serving | Calories: 189kcal | Carbohydrates: 27g | Protein: 2g | Fat: 8g | Saturated Fat: 5g | Polyunsaturated Fat: 1g | Monounsaturated Fat: 2g | Trans Fat: 1g | Cholesterol: 36mg | Sodium: 102mg | Potassium: 33mg | Fiber: 1g | Sugar: 17g | Vitamin A: 264IU | Calcium: 14mg | Iron: 1mg

    Peanut Butter Banana Brownies

    May 18, 2022

    A plate of peanut butter banana brownies.

    Peanut Butter Banana Brownies: Move over regular brownies, these peanut butter banana brownies are the ones you’ve been waiting for! It only takes 15 minutes to get these in the oven, and pantry staples you probably have on hand right now!

    Brownie recipes can be so fun and these red velvet brownies and strawberry brownies are even made with cake mixes to make them easier!

    A plate of peanut butter banana brownies.

    Why You’ll Love This Recipe

    I’m a self-professed peanut butter lover as well as a chocolate lover, so these brownies were an easy yes for me! The addition of the banana is just a bonus!

    If you are looking for a quick, easy brownie recipe that uses ingredients you will likely always have on hand, these cocoa powder brownies are the ones for you! (As well as these cornflake brownies.)

    They are full of flavor, moist and soft, fudgy and chewy. These would be perfect for an after school snack, for dipping in a chocolate fondue, or as a dessert with a scoop of ice cream beside them.

    [feast_advanced_jump_to]

    Ingredients

    Sometimes we run out of chocolate chips in my house (probably because my kids think they are the best snack food), so fudgy brownies that can be made with just cocoa powder are a must for me! This easy brownie recipe uses ingredients that you probably have right now but could easily get at a grocery store if you don’t!

    Peanut butter banana brownie ingredients with labels.
    Ingredients
    • Butter: This makes the brownie fudgy and moist!
    • Baking Powder: This is the leavening agent that helps your brownie rise a bit.
    • Ripe Bananas: Adding ripe bananas will give it a light banana flavor and also make your brownie moist!
    • White All Purpose Flour: Of course we need some flour to help hold this all together. We used white all purpose flour for this recipe, but you could use whole wheat flour if you prefer (or see our substitutions for gluten-free alternatives).
    • Sugar: Just the right amount of sugar helps make this brownie sweet but not too sweet.
    • Eggs: Eggs are important for so many reasons! Most brownies don’t have a ton of flour in them, so eggs act as a binding agent to hold the brownie together. They also help give your brownie that fudgy texture.
    • Cocoa Powder: Since we aren’t using any chocolate in this brownie recipe, the cocoa powder is what gives it its chocolatey flavor!
    • Peanut Butter: Add in some creamy peanut butter for a delicious peanut butter flavor.

    You can find a complete list of ingredients and directions in the recipe card below.

    Instructions

    These brownies are super quick and easy to make – all you need is one bowl and 15 minutes of your time, and you’ll have delicious brownies in the oven making your house smell amazing.

    Peanut butter banana brownie ingredients in bowls on the counter.
    A few ingredients
    Butter and sugar in a bowl.
    Cream butter & sugar
    1. Gather your ingredients, heat oven to 350 degrees, and coat a 9×13 inch baking pan in nonstick cooking spray.
    2. In a large bowl or the bowl of a stand mixer, cream together the sugar and butter until creamy and well combined.
    Eggs and banana added to the butter and sugar mixture in the bowl.
    Add banana
    Flour and cocoa powder on top of the butter, sugar, egg, banana mixture in a bowl.
    Add cocoa
    1. Mash bananas. Whisk the eggs and mashed bananas into the creamed butter mixture until the mixture is smooth.
    2. Add the ½ cup cocoa powder (use a good quality cocoa powder for the best results), flour, and baking powder. Whisk the dry ingredients into the wet ingredients until no clumps of flour remain.
    Peanut butter on top of the brownie batter in a bowl.
    Add peanut butter
    Brownie batter spread into a prepared 9x13 pan.
    Fold in the peanut butter
    1. Fold in the ½ cup peanut butter with a rubber spatula until it is evenly distributed throughout the brownie batter. I found that creamy peanut butter worked better than crunchy peanut butter; however, you can always sprinkle chopped peanuts over the batter before baking if you want a crunchy experience!
    2. You can add a few dollops of peanut butter to the top of the batter and use a butter knife to swirl it in for a pretty peanut butter swirl on top! Pour the brownie mixture into the pan and bake for 50-55 minutes or until a toothpick can be cleanly removed from the center of the pan.
    One brownie square being held on a spatula above the full 9x13 pan of brownies.
    Cut and serve!
    A stack of brownies with a plate of brownies and bunch of bananas in the background.
    Delicious peanut butter banana brownies
    1. Let cool on a cooling rack, then slice into squares and enjoy! These brownies can either be served immediately or served cold, they’re great either way!

    Serving Suggestion: Serve these peanut butter chocolate banana brownies cold alongside a cup of coffee, warm with a scoop of ice cream or with a glass of cold milk!

    Substitutions

    • Peanut Butter – creamy works best, but you could use natural peanut butter, other natural nut butters or even a crunchy peanut butter if you prefer.
    • Gluten-Free – you can easily make these brownies gluten-free by replacing the 1 cup of white flour for a 1:1 ration gluten-free flour blend! You could also try using 1 cup almond flour instead of white flour (we haven’t tested this substitution – let us know if you try it)!
    • Dairy-Free – replace the butter in this recipe with a dairy-free alternative (or even coconut oil) so that even those on a dairy-free diet can enjoy them!
    • Eggs – if you can’t have eggs, you can try using flax eggs instead. You might notice a slight flax flavor in the brownies, but they will work as a binding agent just as well as an egg for this recipe.
    • Vegan – if you use the dairy-free substitution and the egg substitution above, you can turn these into vegan peanut butter banana brownies!
    • Sugar – you can use brown sugar instead of white sugar for this recipe. It will change the texture of the finished product, but it will work in a pinch!

    Variations

    The best part of a brownie recipe is that it’s a great base to get creative with! Here are a few fun ideas for you to try…

    • Holiday Festive – mix in some sprinkles and sprinkle some on top of the batter before baking to make your brownies festive! Try red and pink sprinkles for Valentine’s Day, green and tiny 4 leaf clover sprinkles for St. Patrick’s Day, red and green for Christmas, little pumpkin sprinkles for Halloween. Get creative!
    • S’mores Brownies – sprinkle some mini marshmallows and a little bit of chopped graham crackers on top of the banana brownie batter before baking to make these into s’mores themed peanut butter banana brownies!
    • Extra Chocolate – if you have a major sweet tooth, stir some chocolate chunks (or we even used a chocolate pudding mix in brownies, before) into the brownie batter before baking! Your brownies will be gooey and delicious!

    Storage

    You can store your banana peanut butter brownies on the counter or in the fridge, as long as it’s in an airtight container. On the counter they should last 3-5 days, in the fridge they should last at least a week.

    You can also store these in an airtight, freezer safe container in the freezer for up to 2 months. Perfect for when you want a quick snack (and if you haven’t tried eating a frozen brownie before, you really should).

    Expert Tips and FAQs

    Do I have to use ripe bananas?

    It is important to use ripe bananas to get the best banana flavor. An unripe banana really won’t taste the same. If you only have fresh bananas and need to ripen some quickly, check out this blog post on how to ripen a banana faster!

    Can you use bananas in brownies?

    Why yes, yes you can! This brownie recipe is the perfect way to use up all those overripe bananas you have kicking around!

    Related Recipes

    More brownie recipes: If you’re in the mood for another twist on the classic brownies recipe, go check out our lemon cake mix brownies or our strawberry brownies recipe! We have so many great recipes on the blog for brownies!

    More chocolate recipes: In the mood for something super chocolatey? You have to try this hot fudge cake! This is one of our favorite recipes when it comes to chocolate cake.

    Need to use up some overripe bananas?: I have the best banana bread recipe (with a secret ingredient) as well as an amazing banana bread pudding recipe you should try! Or, this banana pudding poke cake has a lot of banana flavor.

    Did you make this? I’d be so grateful if you left a “star” rating below to let me know what you thought! Then, the next time you need a quick and easy recipe, come back to Fantabulosity to browse all of my easy recipes!

    Recipe

    A plate of peanut butter banana brownies.
    Print Pin
    5 from 5 votes

    Peanut Butter Banana Brownies

    Peanut Butter Banana Brownies: Move over regular brownies, these peanut butter banana brownies are the ones you've been waiting for! It only takes 15 minutes to get these in the oven, and pantry staples you probably have on hand right now!
    Course Dessert, Snack
    Cuisine American
    Prep Time 15 minutes minutes
    Cook Time 55 minutes minutes
    Total Time 1 hour hour 10 minutes minutes
    Servings 12 brownies
    Calories 390kcal
    Author Jessica Burgess

    Ingredients

    • 1 cup salted butter softened at room temperature
    • 2 cups white granulated sugar
    • 4 large eggs
    • 2 ripe bananas mashed
    • ½ cup cocoa powder
    • 1 cup white all-purpose flour (whole wheat also works)
    • 1 teaspoon baking powder
    • ½ cup creamy peanut butter

    Instructions

    • Heat oven to 350 degrees and coat a 9×13 inch baking pan in nonstick cooking spray.
    • In a large mixing bowl or the bowl of a stand mixer, cream together the sugar and butter until creamy and well combined.
    • Mash bananas. Whisk the eggs and mashed bananas into the creamed butter mixture until the mixture is smooth.
    • Add the cocoa powder, flour, and baking powder. Whisk the dry ingredients into the wet ingredients until no clumps of flour remain.
    • Fold in the peanut butter with a rubber spatula until it is evenly distributed throughout the brownie batter.
    • Pour the batter into the pan and bake the brownies for 50-55 minutes or until a toothpick can be cleanly removed from the center of the pan.
    • Let cool, then slice into squares and enjoy!

    Nutrition

    Serving: 1brownie | Calories: 390kcal | Carbohydrates: 44g | Protein: 6g | Fat: 23g | Saturated Fat: 11g | Polyunsaturated Fat: 2g | Monounsaturated Fat: 7g | Trans Fat: 1g | Cholesterol: 103mg | Sodium: 192mg | Potassium: 134mg | Fiber: 1g | Sugar: 35g | Vitamin A: 563IU | Vitamin C: 1mg | Calcium: 35mg | Iron: 1mg

    Nacho Bar Ideas

    May 18, 2022

    nacho bar ideas

    Nacho Bar Ideas: An easy “serve yourself,” style of food bar for a party or event. Topping ideas, and my favorite way to serve the cheese!

    As a party planner at heart, I decided to style an easy nacho bar since food bars are my favorite!

    Table with nacho bar toppings in bowls and on plates

    We invited a few of our closest friends over on a Friday night, with a Facebook invite saying,

    It’s Nacho Birthday, it’s his!

    We then told them to plan on coming over to our house after school & work that Friday evening, for a nacho bar & some brew. (Juice boxes for the kiddos.)

    Nacho toppings on table, easily for guests to grab and go

    You’ll Also Love:

    • Taco Bar Toppings Ideas
    • Leftovers? Make these BBQ White Queso Nachos

    Everyone LOVED the nacho bar idea! They were able to make their own… just the way they wanted it, and it was the perfect way to vedge out, on a Friday evening.

    The idea started, when I saw a sign out front of the party rental store in my home town that said,

    “NOW CARRYING A NACHO CHEESE MACHINE.”

    I just about rear-ended someone, because of my excitement. I literally planned this party days later. 😉

    Nacho Bar Ideas

    Nacho cheese machine

    How to Make a Nacho Bar

    I literally bought almost everything already pre-made and pre-cut. It was by choice to make the guacamole and pico de gallo. But a nacho bar is PERFECT for a last minute party idea because it was literally all ready in no time.

    My easy guacamole recipe is a HUGE hit on Pinterest, and my top most-visited recipe post every year if you want to snag it too:

    Guacamole Dip in white bowl

    Type of Cheese for Nacho Bar

    In the recipe card below, you’ll find instructions for making your own cheese for the nacho bar, or you can make our Rotel Dip with Ground Beef!

    However, you can also look in to a nacho cheese machine rental, or you can usually also find the large cans of nacho cheese at grocery stores!

    White dishes full of salsa, sour cream, green onions

    Chips for a Nacho Bar

    Feel free to use your favorite tortilla chips (corn or flour)! Or, add a variety of chips, such as nacho cheese chips (like I use in this easy Doritos nachos recipe, lime chips, or even something fun like black bean chips!

    It’s fun to pour chips in to a basket, to serve them that way, instead of leaving them in the bags.

    But if you don’t have a basket, they’ll also go great in a large bowl!

    Chips in white basket

    Toppings for a Nacho Bar

    A nacho bar isn’t complete without salsal (try my rotel salsa), sour cream, and green onions.

    White bowls filled with salsa, sour cream, green onions

    (I had this wooden “plank,” left over from my son’s Nautical Birthday party,” and I thought it would work perfectly to add a little boost or height to the table.)

    Shredded lettuce, black olives & Pico de Gallo…

    Brown tray full of lettuce, black olives, pico

    refried beans, fajita chicken, & jalapeños…

    Refried beans, chicken and jalapenos on white plates

    oh…. and guac. Guacamole. My weakness.

    Guacamole on white plate

    Mmmmm, & Chili. I do love a mean chili-cheese-nacho.

    Chili in bowl

    What to serve nachos in?

    I found the cutest “boats,” & wooden utensils for the nachos, and they worked perfectly! No dishes to wash! (Well… besides the platters and small bowls on the table.)

    Food boats
    Wooden utensils in white cups

    The best part? People were coming and going all night, and they were able to snack as they pleased. This will definitely be happening in our house again.

    Nacho toppings in white dishes

    Nacho Toppings Ideas:

    • Salsa
    • Sour Cream
    • Green Onions
    • Lettuce
    • Black Olives
    • Pico De Gallo
    • Refried Beans
    • Chicken Breast
    • Jalapeños
    • Guacamole
    • Chili

    …of course don’t forget your chips & cheese.

    If you’re able to rent a cheese machine, do it! The kids (AND ADULTS) loved the heck out of that thing. I’ll admit… I had “cheese,” with EVERYTHING the entire weekend, that I had this glorious invention, rented.

    More recipes to serve, if desired:

    If you’re looking to serve a few main dishes along with this, you may like the idea of these Crock Pot Enchiladas because they’re easy and can be in a slow cooker!

    Nacho Bar for Birthday Party

    Since you’re probably thinking of doing a nacho bar because it’s easy, then I wanted to make sure you saw my easy birthday cake that I did for my son. (In case you’re doing a nacho bar for a birthday party too!)

    For my parties, I usually hire out for the cake, cake pops, or cupcakes. But this year, since a big “to-do,” wasn’t taking place, (and only our closest friends would “see,” the cake), I thought I’d give it a whirl.

    Birthday Cake with little balloons!

    Now… I can make a cake. That’s not the problem. It’s the DECORATING the cake. 

    Birthday Cake with little balloons!

      There’s a cake on Pinterest, that had itty bitty balloons sticking out of it, and I thought… I can do that! I just grabbed wooden skewers, small balloons, and super glued them to the skewers, and stuck ’em in. It worked, right?!

    Party Favors and Games

    I couldn’t send our guests out the door empty-handed. While my normal “stroll,” through the Target dollar bin, I came across playing cards & play dough, and thought they’d be the perfect little items to throw into goodie bags and to keep the kiddos busy on the car ride home.

    Easy Party Favors - Playing cards & Playdough

    I placed a rolling cart that I have from World Market, by the front door, and stuffed the goody bags in it… with a sign that said, “Take 1.” It worked out perfectly, and there wasn’t ONE favor left, by the end of the night. 

    Easy Party Favors - Playing cards & Playdough in wooden rolling cart

    If you’re looking for birthday game ideas for your nacho bar party, these 40th birthday party games are fun to keep in mind!

    So there it is! It was my “It’s Nacho Birthday, It’s His,” nacho bar party!

    P.S. My little guy LOVED his cake… & the nachos. He’s a “cruncher,” like his momma and loves anything salty and sweet. Ok, ok… he’s like his momma because he’ll eat anything.

    More Food Bar Ideas!

    If you love hosting food bars like I do, then you’ll also love these 51+ Food Bar Ideas too!

    Or, see some of our favorites, below:

    • Taco bar on table with salsa, chicken, and toppings in bowls.
      Taco Party and Taco Bar Ideas
    • hot dog toppings
      Hot Dog Bar Toppings and Ideas for Your Next Party
    • Burger Bar Ideas for an outdoor party
      Burger Bar Ideas for Your Next Party
    • Cereal Bar Ideas: Brunch shower, bridal shower, mother's day, baby shower breakfast party
      Cereal Bar Ideas for a Fun and Easy Party Setup

    Other Party Ideas by Fantabulosity

    • I can SO do this!!! Coffee Bar Party: "You've Warmed My Heart," theme! LOVE what she did as a random act of kindness with her guests! DIY Coffee bar ideas galore, and SO easy! fantabulosity.com
      Coffee Bar Ideas for a Party (What to Serve + Easy Setup Guide)
    • nacho bar ideas
      Nacho Bar Ideas
    • Ice Cream Party Ideas: Pastel Colors, ice cream cookies, cones with sprinkles,
      Ice Cream Party Ideas (Simple Decorations, Treats & Birthday Ideas)
    • Favorite Things Party Ideas
      Bloom Theme Party Ideas for a Girls Night or Shower

    Recipe

    nacho bar ideas
    Print Pin
    5 from 3 votes

    Nacho Bar Toppings & Ideas

    Nacho bars are SO fun and easy to serve for a crowd! Keep the toppings easy and use these tricks to make a spread worth inviting others to enjoy!
    Course Appetizer
    Cuisine American, Mexican
    Prep Time 10 minutes minutes
    Cook Time 15 minutes minutes
    Total Time 25 minutes minutes
    Servings 16 people
    Calories 108kcal
    Author Jessica Burgess

    Ingredients

    If making your own cheese

    • processed cheese
    • 10 ounces diced tomatoes and green chilies Such as Rotel

    Topping Ideas

    • salsa
    • sour cream
    • green onions
    • lettuce
    • black olives
    • pico de gallo
    • refried beans
    • cooked chicken pieces
    • jalapenos
    • guacamole
    • chili
    • chips

    Instructions

    Melting the Cheese

    • If making your own nacho cheese: Slice the processed cheese (Velveeta) and place into a microwavable bowl.
    • Pour in the can of diced tomatoes and green chilies. (Undrained)
    • Microwave for 2-3 minutes. Stirm and then cook again in 1-2 minute increments until melted.
    • To keep warm for nacho bar, place melted cheese in a slow cooker or in a food warmer.

    Assemble Nachos

    • In small dishes or plates, start by placing tortilla chips down first. Pour cheese on top and top with favorite toppings!

    Nutrition

    Serving: 1serving | Calories: 108kcal | Carbohydrates: 2g | Protein: 5g | Fat: 9g | Saturated Fat: 5g | Polyunsaturated Fat: 1g | Monounsaturated Fat: 2g | Trans Fat: 1g | Cholesterol: 28mg | Sodium: 475mg | Potassium: 71mg | Fiber: 1g | Sugar: 1g | Vitamin A: 289IU | Vitamin C: 2mg | Calcium: 302mg | Iron: 1mg
    • « Go to Previous Page
    • Page 1
    • Interim pages omitted …
    • Page 15
    • Page 16
    • Page 17
    • Page 18
    • Page 19
    • Interim pages omitted …
    • Page 27
    • Go to Next Page »

    Primary Sidebar

    Jessica Burgess standing in kitchen holding a hummingbird cake.

    Hi, I'm Jessica! - Owner and Creator of the blog and brand, Fantabulosity.

    I’m here to help you make easy comfort food and nostalgic recipes, using simple ingredients, that everyone will love.

    More about me →

    Recipe Collections

    • Crockpot recipe collage
      26 Easy Crockpot Dinners (Slow Cooker Recipes for Busy Weeknights)
    • Church supper recipes collage.
      Church Supper Recipes
    • Fall Dessert Recipes collage, showing pumpkin, apple and pecan desserts.
      Easy Fall Desserts (34 Cozy Recipes for the Whole Season)
    • Collage of Thanksgiving side dishes.
      40+ Thanksgiving Side Dishes (Easy Recipes for a Crowd)
    • Old fashioned potluck cake recipes collage.
      Old-Fashioned Cakes That Still Show Up at Every Potluck
    • Collage of potluck desserts.
      Easy Potluck Desserts (Simple Recipes That Always Get Asked For)

    Popular Recipes

    • bread pudding in baking dish
      Bread Pudding Recipe: Easy Old Fashioned Recipe (With Video!)
    • Burger baked in the oven, steamed in aluminum foil, and placed on white plate.
      Burgers in the Oven
    • two tuna salad sandwiches stacked on top of each other
      The BEST Tuna Salad Recipe
    • doritos chicken casserole on plate
      Doritos Chicken Casserole
    • Strawberry brownies on white marble cutting board.
      Strawberry Brownies Recipe
    • Cheeseburger Sliders made with Hawaiian Rolls, stacked on top of one another.
      Cheeseburger Sliders

    Footer

    ↑ back to top

    Featured in Parade, TODAY, House Beautiful, First for Women, The Pioneer Woman, BuzzFeed, Martha.com, Country Living, Woman’s World, and Access Hollywood.

    About

    • About Jessica
    • Contact
    • Collaborate
    • A Month of Dinners

    Easy Recipes

    • All Recipes
    • Vintage Recipes
    • Dinner Recipes
    • Desserts

    Popular Recipes

    • Cake Recipes
    • Bread Pudding
    • Chicken Spaghetti
    • 3-Ingredient Biscuits

    Privacy Policy |Accessibility Copyright © 2026 Fantabulosity | Terms & Conditions | FTC
    All recipes, photos, and content are copyrighted and may not be reproduced, republished, or distributed without written permission.

    Rate This Recipe

    Your vote:


    A rating is required
    A name is required
    An email is required