
• Skip to primary navigation
  • Skip to main content
  • Skip to primary sidebar

Fantabulosity logo

  • All Recipes
  • Vintage Recipes
  • Holiday
  • Dinner Theme System
  • About
  • Navigation Menu: Social Icons

    • Facebook
    • Instagram
    • Pinterest
    • TikTok
    • YouTube
menu icon
go to homepage
  • Recipes
  • Desserts
  • Dinners
  • Cookbook
  • Holidays
  • Gatherings
  • About Jessica
    • Facebook
    • Instagram
    • Pinterest
    • TikTok
    • YouTube
  • search icon
    Homepage link
    • Recipes
    • Desserts
    • Dinners
    • Cookbook
    • Holidays
    • Gatherings
    • About Jessica
    • Facebook
    • Instagram
    • Pinterest
    • TikTok
    • YouTube
  • ×
    Home » Recipes

    Easy Homemade Buttermilk Biscuits

    Easy Homemade Buttermilk Biscuits

    January 14, 2023

    A basket of homemade biscuits lined with a tea towel.

    These Easy Homemade Biscuits with buttermilk use simple ingredients to create flaky biscuits that can be served as an easy side dish with your favorite soup recipes and chilis!

    For the people who’d rather have biscuits than rolls on Thanksgiving. See my full Thanksgiving sides list.

    If you’re looking for a quick and easy biscuit recipe, my three-ingredient biscuits are a house favorite.

    A basket of homemade biscuits with plates of biscuits next to it and a pitcher of milk in the top left corner.
    Homemade biscuits…yum!

    There’s just something about a buttery, flakey biscuit fresh out of the oven that makes me swoon. Freshly baked breadstuffs are the surest way into anyone’s heart, in my opinion.

    I also love that biscuits are so quick and easy to make – I may not have time to make fresh bread with our soup for dinner (yeast breads like this Italian White Bread need time to rise), but I always have enough time to make some biscuits!

    🤍 Why You’ll Love This Recipe

    • Versatile: Whether you serve them with sausages and white gravy for breakfast, with jam as a snack, or as a side dish for dinner this easy homemade biscuits recipe is always a hit!
    • Simple: You probably have all the ingredients you need to make biscuits in your fridge and pantry.
    • Quick: You can have these biscuits ready to eat in less than 30 minutes.
    [feast_advanced_jump_to]

    🧾 What Goes Into This Recipe

    You’ll only need a handful of basic ingredients (which you probably have in your fridge and pantry already), to make this easy biscuit recipe!

    • Cold Butter & Margarine: You want to make sure that your butter and margarine are as cold as can be when you incorporate them into your biscuits to create the flakiest biscuits possible! Nice cold butter/margarine will hold its shape in the dough. Then when it bakes it will melt and release steam, resulting in a nice pocket of air and a flakey texture!
    • Buttermilk: We use buttermilk instead of plain milk or cream in this recipe for a few reasons. First, the acidity of buttermilk works with the leaveners in the recipe to create a fluffier biscuit. Second, the slight tang of buttermilk adds a delicious flavor!

    * Make sure to see the full recipe card below with the exact quantities of ingredients listed and step-by-step instructions to make these delicious biscuits! *

    📖 Substitutions

    These fluffy, flaky homemade biscuits are so good warm out of the oven (and just as good at room temperature or reheated the next day). If you were excited to make this recipe but realized you are missing something, maybe these substitutions can help!

    • Buttermilk – Did you know that you can make a buttermilk substitute with items you likely have on hand? You can! Add ¾ of a tablespoon of white vinegar to a measuring cup and then fill the cup with regular milk until it reaches the ¾ cup mark that is needed for this recipe. Let it sit for 5 minutes (you’ll notice that the milk starts to curdle a bit – this is what you want to see). Now you can use it in the recipe in place of buttermilk!
    • Honey: If you don’t have honey, you can use 1 tablespoon of white sugar in this biscuit recipe.
    • Butter/Margarine: If you are out of one or the other of these, you can make this easy biscuits recipe with just one (all butter or all margarine). Butter adds more flavor to your biscuit and creates a flakier end product, but margarine helps to make your biscuits soft. I’ve also used avocado oil as a substitute for margarine in a pinch!

    🔃 Variations

    We love making these flaky buttermilk biscuits just as they are, but here are a few variations you can try if you’re looking to get creative…

    • Garlic & Cheddar: Garlic and cheddar cheese is a delicious combination, especially when you add it to a biscuit! Try adding ½ a teaspoon of garlic and ½ cup of shredded cheddar cheese to these biscuits to create a delicious garlic cheddar biscuit.
    • Bacon & Chive: Adding bacon and chives (or green onions) creates a savory biscuit that’s perfect to serve with soups or chilis! You can use chopped bacon or bacon bits, and chopped chives or chopped green onions. Add to your taste preference!
    • Sweet: If you prefer a sweeter biscuit, you can add an extra tablespoon of honey or sugar to your biscuit dough. Sweet biscuits would be delicious to serve with some tea or coffee!

    🧑‍🍳 How to Make These Easy Homemade Biscuits

    This easy homemade biscuit recipe isn’t complicated, there are just a few simple steps.

    • combine your dry ingredients together
    • cut in your fat (in this case, butter and margarine)
    • add the liquid ingredients.

    Since these are rolled biscuits, we’ll need to roll the dough out and cut our biscuits from it as well.

    If you are looking for easy biscuits to make that skip this step, you can try something like our Bisquick Cheddar Biscuits which are drop biscuits. (You scoop the dough out and drop it onto the baking sheet – no rolling required).

    Step 1: Preheat your oven to 390 degrees. Place parchment paper over your cookie sheet and set aside. 

    Salt being poured from a small bowl into a large glass mixing bowl that already contains flour and baking powder.
    Step 2
    Dry ingredients being whisked together inside a large glass mixing bowl.
    cont’d – step 2

    Step 2: In a large mixing bowl, combine all of your dry ingredients (all purpose flour, baking powder, baking soda, salt) and whisk together.

    A stick of butter on top of dry ingredients in a large glass mixing bowl. There is a hand in the photo that is coating the butter with the flour mixture.
    Coat
    A stick of butter being grated onto dry ingredients in a large glass mixing bowl.
    Grate
    A crumbly mixture inside a glass mixing bowl.
    Mix

    Step 3: Grab your cold butter (do NOT use room temperature butter) and coat it with your flour mixture to make it easier to grate. Then use your cheese grater to grate it into your large bowl. Once all the butter has been grated, mix a bit until combined.

    TIP: Make sure your butter is very cold. If you want, you can even pop it into the freezer for 15 – 20 mins before grating. This can also make it a bit easier to grate without smushing. Cold butter is the secret key to making perfect biscuits!

    Margarine being added to a large glass mixing bowl with dry ingredients in it. The margarine is being added by a pair of hands using two spoons to scrape the margarine off into the bowl.
    Add margarine
    A hand that is mixing what appears to be dry ingredients with bits of butter in a large glass mixing bowl.
    Mix with hands

    Step 4: Add in the margarine and mix until combined using your fingertips.

    TIP: Be sure not to overmix. If you mix the dough too much, it will overdevelop the gluten, and it can result in biscuits that are tough or unpleasantly chewy.

    Dry ingredients in a large glass mixing bowl with a well created in the middle. A pitcher is pouring milk into the well.
    Add milk
    There is a glass mixing bowl with dry ingredients along the outside edges of the bowl to create a well and milk in the centre of the well. A hand is pouring honey into the milk from a small dish held above the bowl.
    Add honey
    A hand mixing biscuit dough in a large glass mixing bowl.
    Mix with hands

    Step 5: Make a well in the middle of your mixture and add in the milk and honey. Mix with your hands until you form a dough. Once again, try not to overmix. 

    Cutting the Biscuits

    A ball of biscuit dough is being flattened on a counter with a long wooden rolling pin.

    Step 6: Place your dough onto your lightly floured work surface. Extend it using a rolling pin until your dough is about 1 inch thick. If you want thicker biscuits, you can make them 1 ½ inches. Just keep in mind you will probably have fewer biscuits from your dough. 

    Biscuit dough has been rolled out onto a counter and there is a circular cookie cutter pressed into the dough.

    Step 7: Using your round biscuit cutter (I used 2 ½ inch in diameter) cut as many biscuits as possible. Once they are cut out, place them on your baking trays. 

    TIP: If you don’t have a biscuit cutter, you can use a cup! Simply dip the mouth of your cup into some flour and use it as a cookie cutter. If you find that the dough gets stuck in the cup, give it a gentle whack on the side and the dough should pop out.

    Step 8: Gather what is left of the dough, and repeat this last step until you have finished all of your dough. 

    6 round, raw biscuits on a parchment lined baking sheet.
    A hand is holding a pastry brush and brushing the top of a raw biscuit circle that is on a parchment lined baking sheet.

    Step 9: Once you are done, place biscuits on your cookie sheets. Whisk your egg and then with a pastry brush, brush some egg on the tops of the biscuits. (This will help your biscuits to reach a nice golden brown when they are done). Alternatively, you could use melted butter if you want the tops to be a bit softer and less brown.

    Step 10: Place the trays in the oven and bake for 12 – 15 minutes until well risen and the top is golden. 

    Once your biscuits are golden brown, remove them from the oven and let them cool on a wire rack until they are cool enough to handle. Serve and enjoy! Top them with a flavored butter, and try serving them alongside this oven-baked pot roast!

    Cooked, from scratch, buttermilk biscuits in pan on top of towel.

    ❓Recipe FAQs

    How do I store my biscuits?

    Any leftover biscuits can be kept at room temperature for 1-2 days as long as they are stored in an airtight container.

    Can I freeze my easy homemade biscuits?

    Yes! You can freeze your biscuits raw or baked!

    For raw biscuits, place them in a single layer on a freezer-safe tray and let them sit in the freezer until they are frozen through. Remove them from the tray, place them in an airtight, freezer-safe bag, and store them in the freezer for up to a month. When you want to bake them, you can either let them thaw on the baking tray before baking according to this recipe or simply add a few extra minutes to the baking time.

    For baked biscuits, let them completely cool on a wire rack. Once they are cool, place the biscuits in an airtight, freezer-safe bag and store in the freezer for up to a month (if you want to be extra sure they stay fresh, you can wrap each biscuit in plastic wrap before putting in the freezer bag). When you want to eat them, simply let them thaw at room temperature. You can also warm them up in the oven at 390° if you want a warm biscuit!

    What is the secret to light fluffy biscuits?

    Cold fat! The secret to making sure your biscuits are nice and fluffy is to make extra sure that your butter/margarine is cold. If it is soft it will become incorporated into the dough instead of remaining in little chunks. We want those little chunks in the dough because when they melt during baking they give off steam and help create lots of flaky layers. Yum!

    Did you make this? I’d be so grateful if you left a “star” rating below to let me know what you thought! Then, the next time you need a quick and easy recipe, come back to Fantabulosity to browse all of my easy recipes!

    🥯 More Biscuit Recipes

    If you’re making biscuits, give this Chorizo Gravy or this Jalapeno Sausage Gravy a try! If you’re looking for other delicious biscuit recipes, try these…

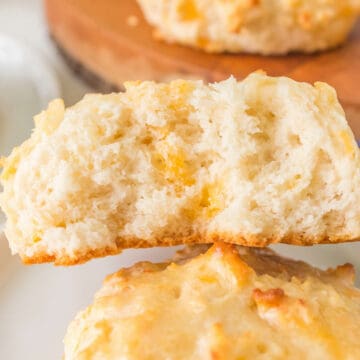
    • A Bisquick cheddar biscuit, broken in half so you can see the fluffy texture inside.
      Bisquick Cheddar Biscuits
    • Cooked, air fried frozen biscuits on white plate, with one biscuit with butter on top.
      Frozen Biscuits in the Air Fryer
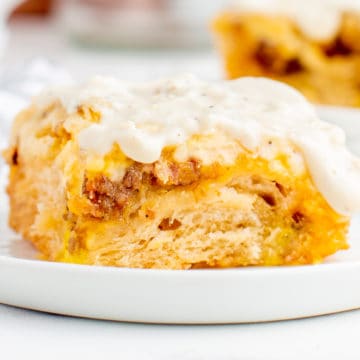
    • A close up of a slice of biscuit and gravy casserole.
      Biscuit and Gravy Casserole
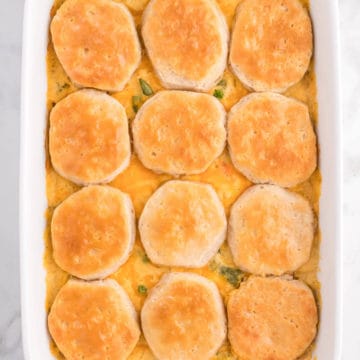
    • Chicken Pot Pie Casserole in white baking dish
      Chicken Pot Pie Casserole

    Recipe

    A basket of homemade biscuits lined with a tea towel.
    Print Pin
    5 from 3 votes

    Easy Homemade Biscuits

    These Easy Homemade Biscuits with buttermilk use simple ingredients to create flaky biscuits that can be served as a snack or as an easy side dish with your favorite soups and chilis!
    Course Breakfast, Side Dish, Snack
    Cuisine American
    Prep Time 10 minutes minutes
    Cook Time 15 minutes minutes
    Total Time 25 minutes minutes
    Servings 10 biscuits
    Calories 234kcal
    Author Jessica Burgess

    Ingredients

    • 2 ⅓ cups all purpose flour
    • 1 Tablespoon baking powder
    • ½ teaspoon baking soda
    • ½ teaspoon kosher salt
    • 8 Tablespoons cold butter + extra melted butter for brushing on after baking (optional)
    • 2 ½ Tablespoons cold margarine (for best results) or butter or oil, if needed
    • ¾ cup buttermilk
    • 1 Tablespoon honey
    • 1 small egg

    Instructions

    • Preheat your oven to 390 degrees. Place parchment paper over your cookie sheet and set aside. 
    • In a large bowl, combine all of your dry ingredients and whisk together.
    • Grab your cold butter and coat it with your flour mixture to make it easier to grate, and then with a grater, grate it into the bowl. Once all the butter has been grated, mix a bit until combined.
    • Add in the margarine and mix until combined using your fingertips.
    • Make a well in the middle of your mixture and add in the buttermilk and honey. Mix with your hands until you form a dough. Once again, try not to overmix. 
    • Add some flour onto your work surface and place your dough on top. Extend it using a rolling pin until your dough is about 1 inch thick. If you want thicker biscuits, you can make them 1 ½ inches, just keep in mind you will probably have fewer biscuits from your dough. 
    • Using your pastry cutter (I used 2 ½ inch in diameter) cut as many biscuits as possible. Once they are cut out, place them on your baking trays. 
    • Gather what is left of the dough, and repeat this last step until you have finished all of your dough. 
    • Once you are done, place biscuits on your cookie sheets. Whisk your egg and then with a pastry brush, brush some egg on top of the biscuit (this will help your biscuits to reach a nice golden brown when they are done). 
    • Place the trays in the oven and bake for 12 - 15 minutes until well risen and the top is golden. 
    • Once your biscuits are golden brown, remove them from the oven, and brush melted butter on tops if desired, and let them cool on a wire rack until they are cool enough to handle. Serve and enjoy!
    Video

    Notes

    To Store: Your easy homemade biscuits can be kept at room temperature for 1-2 days as long as they are stored in an airtight container.
    TIP #1: Make sure your butter is very cold. If you want, you can even pop it into the freezer for 15 – 20 mins before grating. This can also make it a bit easier to grate without smushing.
    TIP #2: Be sure not to overmix. If you mix the dough too much, it will overdevelop the gluten and can result in biscuits that are tough or unpleasantly chewy (you know the kind).
    TIP #3: If you don’t have a biscuit cutter, you can use a cup! Simply dip the mouth of your cup into some flour and use it as a cookie cutter. If you find that the biscuit dough gets stuck in the cup, just give it a bit of a whack on the side and the dough should pop out.

    Nutrition

    Serving: 1biscuit | Calories: 234kcal | Carbohydrates: 25g | Protein: 4g | Fat: 13g | Saturated Fat: 7g | Polyunsaturated Fat: 1g | Monounsaturated Fat: 4g | Trans Fat: 0.4g | Cholesterol: 40mg | Sodium: 301mg | Potassium: 187mg | Fiber: 1g | Sugar: 3g | Vitamin A: 450IU | Vitamin C: 0.02mg | Calcium: 83mg | Iron: 2mg

    Chicken and Noodles Recipe

    January 13, 2023

    Chicken and noodles in a white bowl with fork holding a bite.

    This Chicken and Noodles Recipe is made using only a few simple ingredients such as cream of chicken soup, chicken, chicken broth, herbs and spices, and it’s ready in just 25 minutes!

    Comfort food like this belongs in the rotation with my other church cookbook classics.

    Chicken and noodles in white bowl, next to large serving.

    This recipe ranks right up there in “chicken and noodle” recipe favorites, with the homemade chicken noodle soup and this easy chicken and dumplings recipe that I make.

    Old-fashioned chicken and noodles is more of a pasta dish with a creamy sauce, instead of a soup recipe. I remember having this growing up at home, and even in the school cafeteria, served with these hot rolls.

    [feast_advanced_jump_to]

    Why This Recipe Works

    • Simple ingredients: It doesn’t get much easier than this recipe, since it uses ingredients that you probably already have on hand, or that you can easily pick up at almost any grocery store.
    • Crowd-Pleaser: If you’re looking for an easy dinner idea for a crowd, this can easily be doubled or tripled to feed a group.
    • Kid-Friendly: Have picky eaters? I haven’t found a kid yet that turns this dish away!

    Ingredients Needed

    I’ve highlighted a couple of ingredients with some relevant notes. Aside from this, the ingredients needed are pretty basic.

    • Chicken – The type of chicken you can use in this recipe, is up to you! Chicken breast, pulled chicken from a boiled chicken, rotisserie chicken (then you can boil the rotisserie chicken carcass), chicken thighs, or even leftover chicken. As long as it’s cooked shredded chicken, it will work!
    • Chicken Broth – I tend to use homemade chicken broth for this recipe because after I boil a whole chicken, and use the meat for this dish, I have the broth too. (Storebought chicken broth is totally fine too, and I do use that sometimes.)
    • Garlic – I use the jarred, minced garlic but you can definitely chop your own garlic cloves if you prefer or even use garlic powder if that’s all you have on hand. (You just won’t saute the garlic powder… but rather add it in with the salt and pepper.)

    Substitutions

    If needed, substitutions can be made, and here a few that may come in handy:

    • Chicken – if you find that you have leftover turkey from Thanksgiving or any holiday dinner, this works wonderfully in this dish, instead of chicken.
    • Noodles – store-bought egg noodles are the classic choice for this recipe. However, you can use a different type of noodle, like making homemade egg noodles or some type of homemade noodles if you prefer. Or, using elbow macaroni, bow-tie pasta, or even fettuccini noodles could be a substitute if needed.

    Variations

    Although we love this recipe just the way it is, there are some ways you can add some variety to it; such as:

    • Vegetable Chicken and Noodles – Adding frozen mixed vegetables in with the broth, allowing them to cook through, is a great way to add vegetables to your dish.
    • Condensed Soup Flavor – Although I haven’t tried this yet, you may be curious about using cream of celery or cream of mushroom soup instead of cream of chicken. I don’t see why this wouldn’t turn out ok but it may have more of a beef stroganoff with cream of mushroom flavor, than the flavor of the chicken.

    Step-by-Step

    I’ve shared the process of this recipe and you’ll be able to see just how easy it is to throw this classic comfort food dish together, that the whole family will love.

    This recipe is broken into 3 components:

    • saute the onion and garlic
    • add liquid to build base
    • finish with tender chicken and noodles

    *Be sure to see the recipe card below for the full ingredients list & instructions!*

    The beautiful thing about this dish is that it’s a one-pot dish, so make sure you start with a large pot or large dutch oven to fit all of the ingredients, including the four cups of chicken stock.

    Melted butter and onion in stock pot.
    Image 1
    Minced garlic added to butter and onion in stock pot.
    Image 2

    STEP 1. Saute onion in butter. Melt butter over medium heat and then add onion and cook for 5 minutes. (Image 1).

    STEP 2. Saute garlic. Next, add the garlic and stir to combine. (Image 2).

    Cream of chicken soup added to stock pot.
    Image 3
    Broth added to soup in stock pot.
    Image 4

    STEP 3. Add liquid. Pour in condensed soups (Image 3) and broth (Image 4), and then turn up the heat to medium high heat.

    Tip: The broth is what will cook the noodles so there’s no need to pre-cook the egg noodles before adding to the pot.

    Uncooked egg noodles added to broth mixture.
    Image 5
    Egg noodles mixed in to broth and soup mixture.
    Image 6

    STEP 4. Add noodles. When soups/broth starts to boil, add in the in dry egg noodles (Image 5). Turn the heat down to medium low heat, stir and cook the noodles for about 10 minutes or until al dente (Image 6).

    Chicken added to broth mixture.
    Image 7
    Spices add to broth and noodle mixture.
    Image 8

    STEP 5. Add meat and spices. Next, pour in the chicken (Image 7), salt and pepper (Image 8) and then stir to combine.

    Noodles mixed with broth, and condensed soup mixture.
    Image 9
    Spoon lifting chicken and noodles out of stock pot.
    Image 10

    STEP 6. Simmer. Cook for an additional couple of minutes to allow chicken to heat through (Images 9 & 10).

    Recipe Pro Tips

    • Garnish. If desired, sprinkle some fresh parsley on top for a garnish.
    • Meal Planning Recipe. This is an amazing recipe to keep on hand for meal planning dinner and a last-minute meal. Whether that’s keeping frozen chicken in the freezer, and the rest of the ingredients in the pantry, it can be tossed together for those last-minute meals, especially on busy weeknights.

    Recipe FAQs

    What goes well with chicken and noodles?

    A simple piece of buttered bread, or buttermilk biscuit goes wonderful with chicken noodles. Or, a simple salad or these candied carrots are great too!

    How do I thicken chicken and noodles?

    This recipe is thickened by adding the condensed soup. However, if too much broth is added, you can thicken it by mixing a small amount of a mixture of flour and water (about 2 Tablespoons of each) and add it to the dish, and cook on low until it thickens.

    Can you freeze chicken and noodles?

    Yes! Allow it to fully cool and then store in an airtight, freezer container for up to 3 months. To thaw, remove from the freezer and place in the refrigerator so it thaws. Then, pour the chicken and noodles in a stock pot on the stove top, and gently warm it back up, on a “low” burner.

    Chicken and noodles in a big white bowl.

    Storage

    Simply store any leftovers in an airtight container (once it has cooled) for 3-5 days.

    More Easy Dinner Recipes

    If you love quick and easy dinner ideas, I think you’ll also love:

    • Crispy fried steak fingers piled on a plate beside white gravy.
      Steak Fingers
    • Four chicken dishes around a pale label reading 8 Easy Crockpot Chicken Recipes.
      8 Easy Crockpot Chicken Recipes for Cozy Dinners
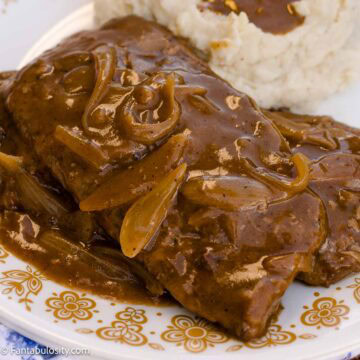
    • Smothered cube steak topped with onion gravy beside mashed potatoes.
      Smothered Cube Steak with Onion Gravy (Skillet Recipe)
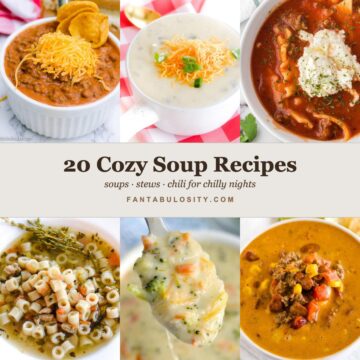
    • Collage of six cozy soups, stews, and chili recipes.
      20 Cozy Soup Recipes for Fall (Easy Soups, Stews & Chili)

    Did you make this? I’d be so grateful if you left a “star” rating below to let me know what you thought! Then, the next time you need a quick and easy recipe, come back to Fantabulosity to browse all of my easy recipes!

    Recipe

    Chicken and noodles in a white bowl with fork holding a bite.
    Print Pin
    4.24 from 26 votes

    Chicken and Noodles Recipe

    This Chicken and Noodles Recipe is made using only a few simple ingredients such as cream of chicken soup, chicken, chicken broth, herbs and spices, and it's ready in just 25 minutes!
    Course Main Course
    Cuisine American
    Cook Time 25 minutes minutes
    Total Time 25 minutes minutes
    Servings 6 servings
    Calories 365kcal
    Author Jessica Burgess

    Ingredients

    • ¼ cup butter
    • ½ cup chopped white or yellow onion or a medium sized onion
    • 1 Tablespoon minced garlic
    • 4 cups chicken broth
    • 2 cans 10.5 oz cream of chicken soup
    • 3 cups uncooked egg noodles
    • 2 cups cooked, shredded chicken
    • ½ teaspoon salt
    • ¼ teaspoon black pepper

    Instructions

    • Melt butter over medium heat and then add onion and cook for 5 minutes.
    • Next, add the garlic and stir to combine.
    • Add in both soups and broth, and then turn up the heat to medium high heat.
    • When it starts to boil, add in the in egg noodles. Turn the heat down to medium low heat and cook the noodles for about 10 minutes.
    • Add in the chicken, salt and pepper and then stir to combine.
    • Cook for an additional couple of minutes to allow chicken to heat through.

    Notes

    Tip: The broth is what will cook the noodles so there’s no need to pre-cook the egg noodles before adding to the pot.
    Storage: Simply store any leftovers in an airtight container (once it has cooled) for 3-5 days.
    Freezing Instructions: Allow it to fully cool and then store in an airtight, freezer container for up to 3 months. To thaw, remove from the freezer and place in the refrigerator so it thaws. Then, pour the chicken and noodles in a stock pot on the stovetop, and gently warm it back up, on a “low” burner.

    Nutrition

    Serving: 1serving | Calories: 365kcal | Carbohydrates: 30g | Protein: 19g | Fat: 19g | Saturated Fat: 8g | Polyunsaturated Fat: 3g | Monounsaturated Fat: 6g | Trans Fat: 0.3g | Cholesterol: 90mg | Sodium: 1589mg | Potassium: 244mg | Fiber: 1g | Sugar: 2g | Vitamin A: 461IU | Vitamin C: 2mg | Calcium: 44mg | Iron: 2mg

    Lasagna Soup

    January 13, 2023

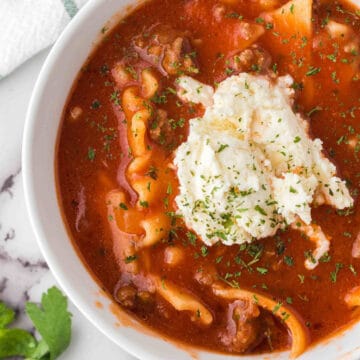
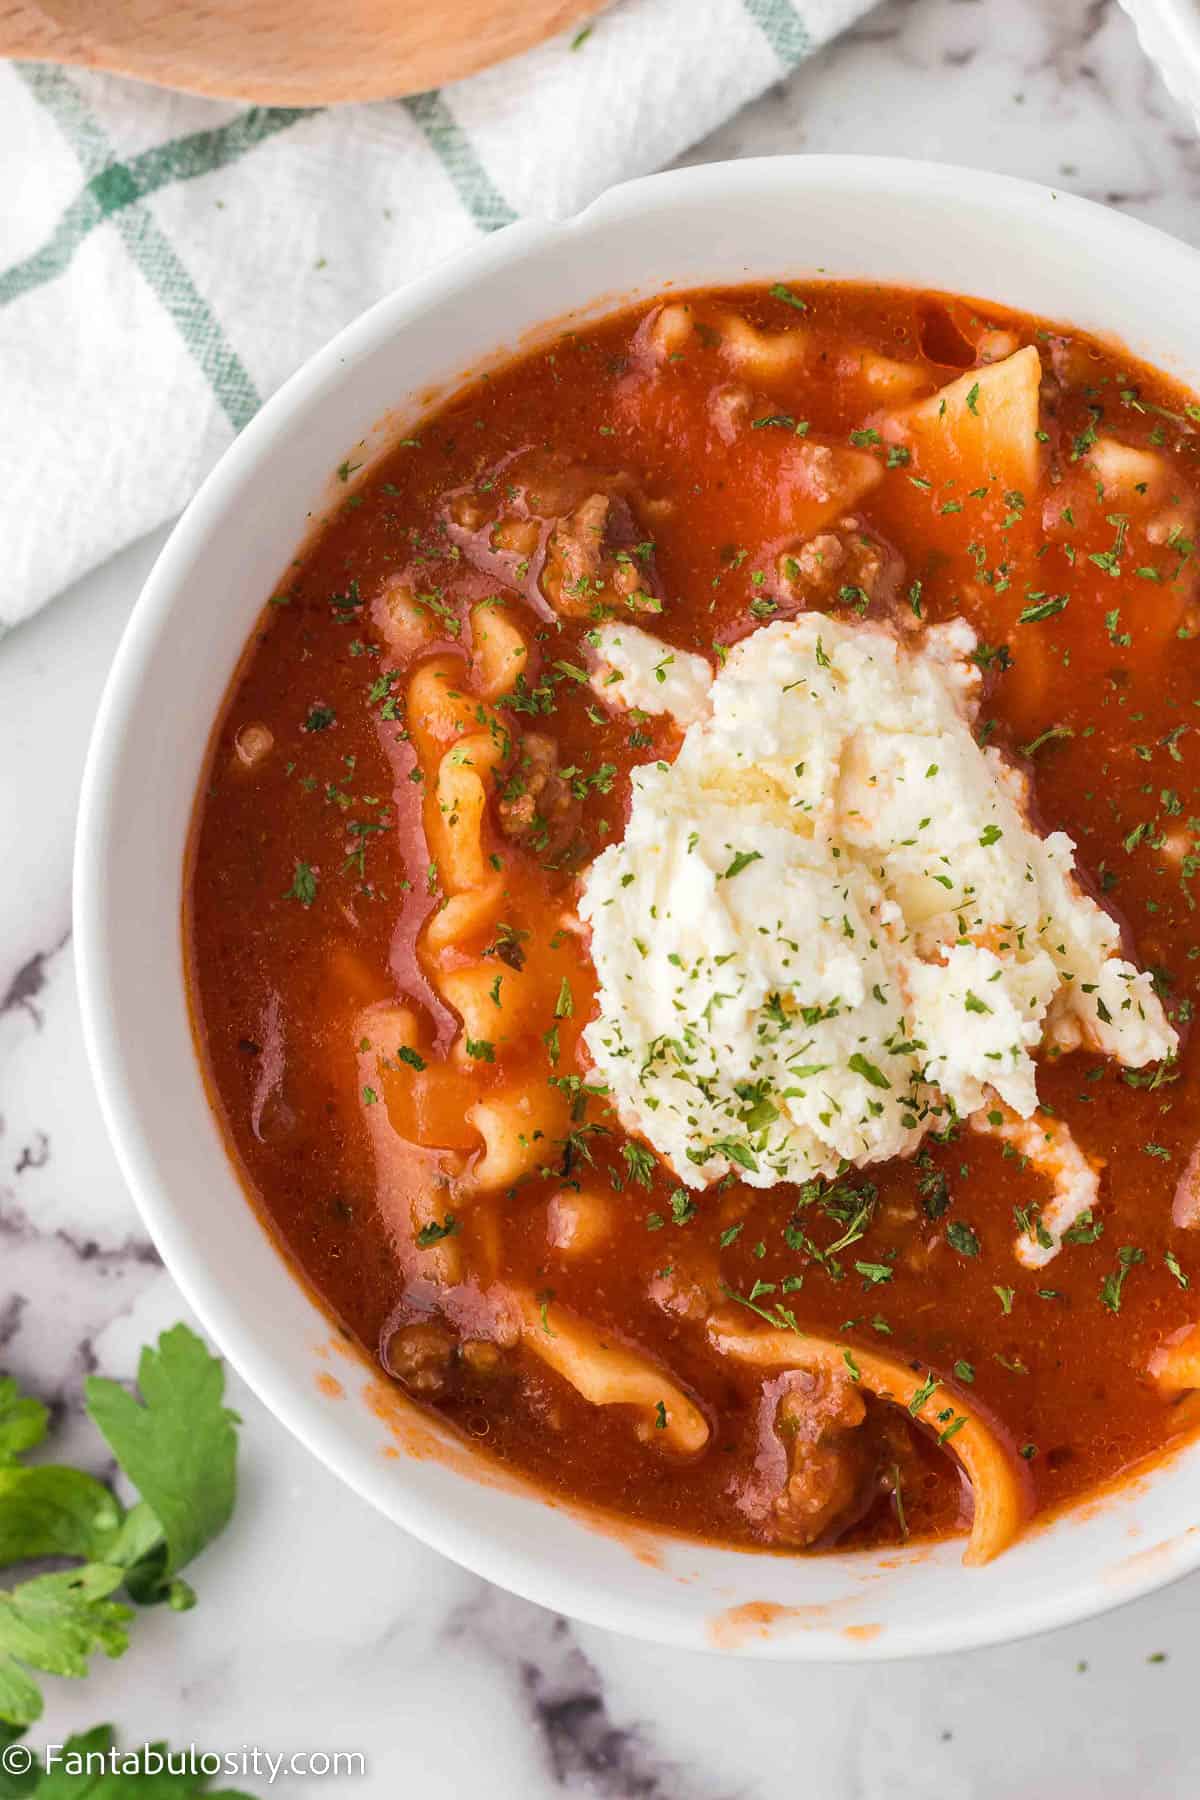
    Lasagna soup in white bowl with dollop of ricotta cheese on top.

    Lasagna Soup: Loaded with ground beef, Italian sausage, noodles, cheeses, and seasonings, this easy soup recipe is ready in about an hour, making it the perfect warm, dinner recipe!

    Want more comfort in a bowl? See all my easy soup recipes.

    Love Italian sausage in soup? I also use it in this Sausage Tortellini Soup recipe too.

    Lasagna soup in white bowl with ricotta on top.

    Cooler months, call for some of the best soup recipes! This buffalo chicken soup, this taco soup recipe, and this white chicken chili recipe are on repeat this time of year.

    But now, this lasagna soup is right in the middle of them on the rotation, and it’s especially delicious served alongside a crusty piece of bread baked in the oven.

    [feast_advanced_jump_to]

    Why This Recipe Works

    • Pasta Lovers: Everyone’s favorite pasta in soup form, this makes lasagna lovers giddy when they can have a different version of the Italian dish.
    • Freezable Soup: If you love meal planning and making freezer meals, this recipe is a great option! See the “storage” section below for tips on how to freeze this great soup for best results.
    • Flexible Substance: This soup has more of a broth substance, the way it is written, however, if you want a thicker soup, add 5 more lasagna noodles (broken up) to thicken it up a bit.

    Ingredients Needed

    I’ve highlighted a couple of ingredients with some relevant notes below. Aside from this, the ingredients needed are pretty basic.

    Ingredients for lasagna soup on marble counter.
    • Cheeses, optional – The cheeses do not have to be in the soup but if you’re able to have cheese, I highly recommend it. It’s more of a “topping” really that elevates the soup. However, the soup is delicious even without the ricotta, mozzarella, and parmesan that are blended in at the end. You can save your ricotta for this Alfredo chicken lasagna recipe if you decide to opt-out in the soup.
    • Broth – Some brands of broth purchased from the store, or even chicken broth made at home, can have higher levels of salt in them so keep this in mind when you’re adding salt later on in the recipe. Salt may not be as necessary or perhaps you’ll need more.
    • Herbs – We use dried herbs for this recipe, just because they’re staples in our spice cabinet but you can absolutely use fresh if you prefer, especially fresh basil!

    Substitutions

    If you’re short on some of the ingredients, feel free to switch some things out. Here are a few substitutions that may come in handy:

    • Tomato Sauce – Instead of using store-bought tomato sauce, you can buy 2-24oz cans of whole tomatoes and add all of your herbs and blend it all in a food processor or blender until smooth. Then add your tomato sauce to your pot and cook as per the instructions.
    • Spices and Herbs – If you’d prefer to use Italian seasoning instead of a combination of the spices we’ve listed, that should absolutely be ok. Something else that may be fun to try too, is the Italian dressing seasoning package that we use in a lot of other recipes such as our Venison spaghetti sauce.
    • Meat – This recipe calls for ground beef and ground pork sausage, however, ground turkey and your favorite ground sausage flavor will work great too. You can use ground beef in some of these ground beef dinner ideas!
    • Ricotta – If you’d rather use cottage cheese instead of ricotta, that’s absolutely ok. The two are often interchangeable in traditional lasagna recipes.
    • Pasta – Craving this soup but out of lasagna noodles? No problem! Switch out elbow macaroni, large fettuccine noodles, or even spaghetti noodles.

      (TIP: I’d break the spaghetti or fettuccini noodles down into smaller pieces like you’d do the lasagna noodles, for bitesize pieces. It may also require more noodles than what is called for in this recipe since they’re smaller.)

    Variations

    Making this recipe in the slow cooker or Instant Pot can be an option as well.

    • Slow Cooker Lasagna Soup – Fully cook the ground beef and sausage, drain and then add to the crock pot (or slow cooker). Next, add in the broth, tomato sauce, onion, spices, and herbs. Cook on low for 6-8 hours or high for 3-4 hours. Then, add the broken pieces of lasagna noodles and cook on high for 30 minutes. Top with ricotta mixture as the recipe states.
    • Instant Pot Lasagna Soup – Turn the “saute” function on, and cook the meat until brown, then drain, and set aside in a different bowl. Add the olive oil and chopped onion and saute for about 5 minutes. Then add broth (scraping the bottom of the pot to loosen any stuck-on pieces), tomato sauce, spices, and herbs, and stir. Add cooked meat and broken lasagna noodles, and stir. Attach the lid, turn the nozzle to “seal” and pressure cook on “high” for 3 minutes. Quick release. Top with ricotta, parmesan, and mozzarella mixture as the recipe states.

    How to Make Lazy Lasagna Soup

    We call this lazy lasagna because there’s no layering, spreading, or any careful structuring that traditional lasagna calls for.

    *Be sure to see the recipe card below for the full ingredients list & instructions!*

    This soup is broken into 3 components:

    • cooking the meat
    • mixing liquids, noodles, spices, and herbs
    • topping with cheese mixture

    TIP: After your meat is cooked in step 2, you’ll want to set it aside for a few minutes in a plate or bowl, so it may be good to have something to put the cooked meat in while you prep the liquid and spices.

    Ground beef and ground sausage in a bowl.
    Image 1
    Cooked meat in a bowl.
    Image 2

    STEP 1. Add ground beef and sausage to the stockpot (Image 1). Our favorite tool for breaking up cooked meat is this meat chopper.

    TIP: Cooking the onions – If you prefer, you can cook the onions with the meat, so they saute with the meat for more of a flavor blend, and softer onions.

    STEP 2. Brown until fully cooked. Cook the meat until it is fully browned, then drain and set aside. (Image 2).

    Spices and sauces added to pot.
    Image 3
    Broken lasagna noodles added to pot.
    Image 4

    STEP 3. Build the soup. In the same stockpot that the meat was cooked in, add olive oil, chopped onion (cook for a minute or two if not cooked with the meat in step 1), and then tomato sauce, chicken broth, spices, herbs, and cooked meat (Image 3).

    STEP 4. Add pasta. Bring mixture to a boil and then add broken pasta noodles. Cook until al dente (about 8-10 minutes) or until it reaches the desired texture and then remove from heat (Image 4).

    TIP: Time Saver. Mix the cheese topping (below) while the pasta is cooking in the soup, in step 4, to save time.

    Ricotta and cheeses in mixing bowl.
    Image 5
    Mixed ricotta and cheeses in clear glass bowl.
    Image 6

    Step 5. Gather the 3 kinds of cheese. Place ricotta, mozzarella, and parmesan cheese in a small bowl (Image 5).

    Step 6. Combine cheese mixture. Mix together until it’s evenly combined (Image 6).

    Lasagna soup in stock pot, without ricotta.
    Image 7
    Close up of lasagna soup on ladle.
    Image 8

    Step 7. Serve and/or top with cheese. Ladle out servings in to individual bowls and either serve as is (Image 7 & 8), or top with the cheese mixture and stir to blend (Image 9 & 10 below), and enjoy!

    Lasagna soup in white bowls, ready for eating.
    Image 9
    Lasagna soup in white bowl with ricotta mixed in.
    Image 10

    Recipe Pro Tips

    • Make-Ahead. Like lasagna, this soup may taste better the next day!
    • Double the recipe. If you love meal planning, you can double this recipe and eat leftovers later in the week, or freeze the extra for later (being mindful of the freezing instructions below)!
    • Spice it up. Love spicy dishes? Use spicy sausage and/or red pepper flakes to the recipe for a kick!

    Recipe FAQs

    Can you boil oven-ready lasagna for soup?

    Yes! It may not take as long to cook, as the regular noodles will, to come to al dente.

    What else can you use lasagna noodles for?

    If you have extra noodles, you can use them for a different kind of soup, like chicken noodle or vegetable soup. Or, you can use them for roll-ups that contain a cheese filling and marianara sauce on top.

    How long is lasagna soup good for?

    It will keep in the refrigerator for up to 5 days.

    What to Serve with this Delicious Lasagna Soup

    If you’re looking to round out your meal by serving something to go with this soup, we recommend this side salad recipe and these Italian sliders!

    Storage

    • Storing leftovers – Allow soup to fully cool and then store in an airtight container, in the refrigerator for up to 5 days.
    • Freezing – If you want to make this soup ahead of time and freeze it, make the soup through step 4, and stop right before adding in your pasta. Dish the soup, once cooled a little bit, into freezer-safe containers and freeze. When you are ready to make, put the frozen soup into a pot and bring to a boil, then continue with step 4, adding in the pasta.

    More Favorite Soup Recipes You’ll Love

    If you love an easy bowl of soup like this one, then you’ll also love these:

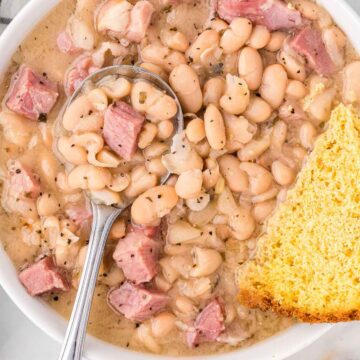
    • Bowl of ham and beans with spoon, and cornbread sitting on side of bowl.
      Ham and Beans Recipe
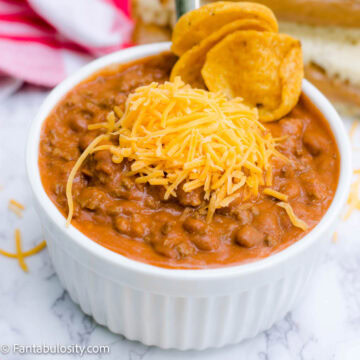
    • Homemade chili in small bowl with Fritos and cheese on top.
      Simple Chili Recipe
    • Southern chicken and dumplings in bowl.
      Chicken and Dumplings
    • Homemade Chicken Broth

    Did you make this? I’d be so grateful if you left a “star” rating below to let me know what you thought! Then, the next time you need a quick and easy recipe, come back to Fantabulosity to browse all of my easy recipes!

    Recipe

    Lasagna soup in white bowl with dollop of ricotta cheese on top.
    Print Pin
    5 from 8 votes

    Easy Lasagna Soup

    Lasagna Soup: Loaded with ground beef, Italian sausage, noodles, cheeses, and seasonings, this easy soup recipe is ready in about an hour, making it the perfect warm, dinner recipe!
    Course Main Course, Soup
    Cuisine American, Italian
    Prep Time 10 minutes minutes
    Cook Time 40 minutes minutes
    Total Time 50 minutes minutes
    Servings 7 servings
    Calories 706kcal
    Author Jessica Burgess

    Ingredients

    • 1 pound ground beef
    • ½ pound ground Italian sausage
    • 7 cups chicken stock
    • 10 lasagna noodles broken in to little pieces
    • ½ white onion diced
    • 2 teaspoons garlic powder
    • 1 Tablespoons olive oil
    • 2 – 24 ounce cans of tomato sauce
    • 1 teaspoon dried parsley
    • ½ teaspoon dried oregano
    • 1 teaspoon dried basil
    • salt to taste
    • black pepper to taste

    Cheese Mixture

    • ½ cup grated parmesan cheese
    • 1 cup shredded mozzarella
    • 15 ounces ricotta cheese

    Instructions

    • In a large pot on medium-high heat, cook the ground beef and ground Italian sausage until mostly cooked and lightly browned. Drain grease and remove meat from the pot.
    • Add your onion, olive oil, garlic powder, tomato sauce, chicken stock, oregano, parsley, and basil to your pot, and add your meat back into your soup. Add salt and pepper to taste.
    • Bring to a boil then add your broken lasagna noodles. Cook until al dente or to the texture you desire. Remove from the heat.

    Cheese Mixture

    • In a small bowl, mix together your ricotta, parmesan, and mozzarella cheese until combined.

    Serve

    • Pour your soup into bowls to serve, and add a dollop of your cheese mixture and basil to top and garnish.

    Notes

    Tip #1: This soup has more of a broth substance, the way it is written, however, if you want a thicker soup, add 5 more lasagna noodles (broken up) to thicken it up a bit.
    Tip #2: Cooking the onions – If you prefer, you can cook the onions with the meat, so they saute with the meat for more of a flavor blend, and softer onions.
    Storage and Freezing:
    • Storing leftovers – Allow soup to fully cool and then store in an airtight container, in the refrigerator for up to 5 days.
    • Freezing – If you want to make this soup ahead of time and freeze it, make the soup through step 4, and stop right before adding in your pasta.

    Nutrition

    Serving: 1serving | Calories: 706kcal | Carbohydrates: 43g | Protein: 40g | Fat: 41g | Saturated Fat: 17g | Polyunsaturated Fat: 3g | Monounsaturated Fat: 16g | Trans Fat: 1g | Cholesterol: 126mg | Sodium: 874mg | Potassium: 714mg | Fiber: 2g | Sugar: 6g | Vitamin A: 477IU | Vitamin C: 1mg | Calcium: 308mg | Iron: 3mg

    Frozen Waffles in the Air Fryer

    January 12, 2023

    Stack of cooked frozen waffles in air fryer.

    Frozen Waffles in Air Fryer: Simply place the number of waffles that will fit in the air fryer basket, in a single layer and cook! Toasty, and ready in minutes!

    Cooked, frozen waffles on a white plate, in front of an air fryer.

    When it comes to breakfast recipes, the easier the better, in our house! With easy recipes, comes one of our favorite small appliances… the air fryer! (We’ve fallen in love with our Bella Air Fryer!)

    Since getting the air fryer, we’ve made tons of easy air fryer recipes but breakfast is even easier since we can make easy air fryer breakfast recipes such as this air fryer bacon in minutes, breakfast potatoes in the air fryer, and even air fryer biscuits from frozen!

    Now, we even love making air fryer waffles in only 5 minutes! But, if you love something that you actually mix together and make for your air fryer, you should try this apple fritters in the air fryer recipe!

    [feast_advanced_jump_to]

    Why This Method Works

    • Cooking Time: The air fryer is quick to heat up, so it takes just 5 minutes for the frozen waffles to cook. Perfect for an easy breakfast on a busy morning or even a lazy Sunday morning.
    • Crispy edges and soft centers: I know frozen waffles don’t have as much of a fluffy center as homemade waffles but the air fryer gives the classic waffles a crisp edge and still leaves them with a soft center.

    Ingredients Needed

    You only need the frozen waffles for this method! (Well, and your favorite toppings. Make sure to see the list of pancake toppings that are similar to what you could put on your waffles.)

    Frozen waffles stacked on a white plate with the box in the background.
    • Waffles – No matter the brand or flavor of waffles that you’re using, the cook method should still be the same. Regardless of the brand, we feel the air fryer is the best way to cook frozen waffles!

    Substitutions

    Curious about different types of waffles and even items similar to waffles, such as pancakes?

    • Thawed/Bakery Waffles – We’ve purchased storebought waffles from the bakery in the past, and we also love tossing those in the air fryer too. Since they’re not frozen, it doesn’t take as long to cook but they come out delicious as well!
    • Gluten Free Waffles – If you eat gluten-free, we have purchased many gluten-free waffles in the past, that also cook wonderfully in the air fryer!
    • Pancakes – You may also find that you want to try frozen pancakes in the air fryer too! I don’t see why you couldn’t follow the same, similar cook method and time. Just be cautious that pancakes me be thinner than waffles, so it may not take as long to cook.

    How to Cook Waffles in the Air Fryer

    It doesn’t get much easier than this! In just a few minutes, you have a hot breakfast that’s ready for eating.

    *Be sure to see the recipe card below for the full ingredients list & instructions!*

    Cooked frozen waffles in the air fryer basket.

    The air fryers I’ve had, have stated not to use cooking spray in the air fryer baskets. (As you can see in the one I’m using here, it has been loved… a LOT… and the nonstick surface is starting to fade.)

    So if your air fryer basket has a nonstick coating, you shouldn’t need to spray it. Or, you may enjoy using air fryer basket liners or parchment paper too.

    STEP 1. Place waffles in a single layer. Place your waffles in the air fryer basket, in a single layer, making sure they don’t overlap so they cook evenly. (Image above).

    Tip: Make sure to either pull the basket open at the end of the cook time, or leave a crack to allow the heat to escape so the waffles don’t continue cooking, causing the waffles to be overdone.

    STEP 2. Cook at 350° degrees f. Turn the temperature to 350 degrees and cook for 5 minutes, or until golden brown (Image below).

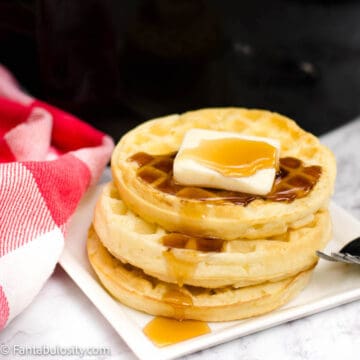
    Stack of cooked waffles on a white plate with a slice of butter on top.

    Equipment

    The air fryer seen in this recipe is my Chefman 6.5L air fryer.

    Recipe Pro Tips

    • No need to flip the air fryer waffles. We didn’t find a need to flip the waffles halfway through, as they cooked perfectly. However if you find that your air fryer doesn’t cook evenly on the top and bottom without flipping, you can flip halfway.
    • Difference in Air Fryers. Oven-style air fryers, toaster oven styles, and other models may cook differently, at different temperatures, than in a basket-style air fryer. So for best results, watch carefully to prevent overcooking.

    Recipe FAQs

    Can you cook Eggo waffles in the air fryer?

    Absolutely! Any brand of frozen waffles should cook just fine in the air fryer.

    How long do you cook an Eggo waffle in the air fryer?

    Place waffles in a single layer in the air fryer basket and cook at 350° for 5 minutes or until golden brown.

    How to reheat waffles in the air fryer

    If the waffles are cooked, and simply need to be reheated, 2-3 minutes should be enough time if cooked at 350°, just enough to warm up and crispy up the waffles. (Different air fryer models can vary, so it’s important to check early the first time making them.)

    Waffle Topping Ideas

    If you need a few topping ideas for your air-fried waffles, here are some of the favorite waffle toppings that we love to add on:

    • delicious maple syrup
    • whipped cream
    • peanut butter (or nut butters)
    • fresh fruit (such as fresh berries, peaches)
    • apple butter
    • chocolate chips
    • chocolate syrup (kind of like with our chocolate waffles)
    • ice cream (topped on that warm waffle, it’s so good!)

    Can you store leftover frozen waffles?

    Absolutely! Simply store the leftover waffles in an airtight container in the refrigerator for 3-5 days. Or, feel free to refreeze the waffles if needed.

    Refreezing Tip: If refreezing, place cooked waffles in a single layer on a cookie sheet and place the sheet in the freezer so the waffles freeze individually, without sticking to one another. After a couple of hours, place the frozen waffles in a freezer container or freezer bag, where the waffles are separate with parchment, freezer, or wax paper for easier disbursement later.

    More Waffle Recipes You’ll Love

    If you love waffles, I think you’re really going to love our other favorite recipes:

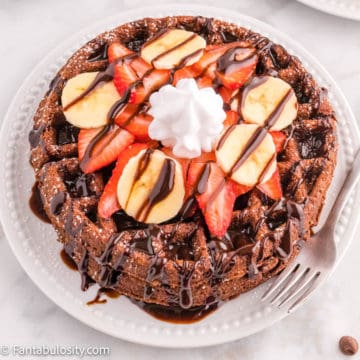
    • Chocolate Belgian Waffles on a plate topped with fruit, chocolate syrup and whipped cream
      Chocolate Belgian Waffles Recipe
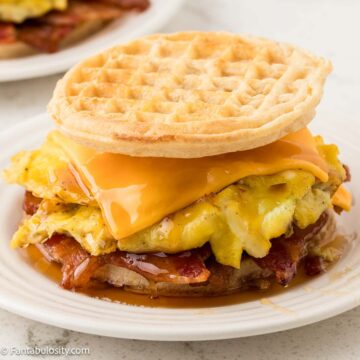
    • Waffle breakfast sandwich on plate.
      Waffle Breakfast Sandwiches
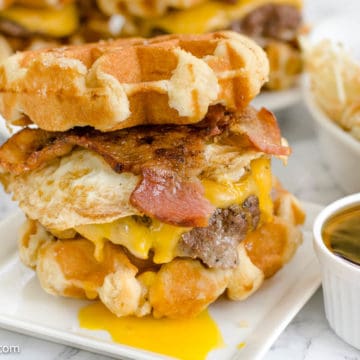
    • Waffle Burger on white plate with small bowl of syrup
      Waffle Burger
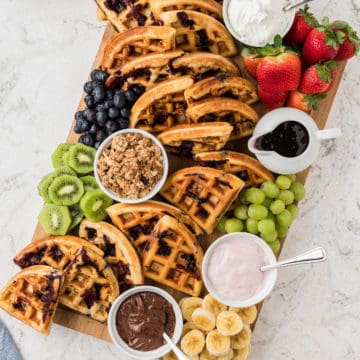
    • A breakfast waffle charcuterie board.
      Breakfast Waffle Charcuterie Board

    Did you make this? I’d be so grateful if you left a “star” rating below to let me know what you thought! Then, the next time you need a quick and easy recipe, come back to Fantabulosity to browse all of my easy recipes!

    Recipe

    Stack of cooked frozen waffles in air fryer.
    Print Pin
    5 from 5 votes

    Frozen Waffles in Air Fryer

    Frozen Waffles in Air Fryer: Simply place the number of waffles that will fit in the air fryer basket, in a single layer and cook! Toasty, and ready in minutes!
    Course Breakfast
    Cuisine American
    Diet Vegetarian
    Cook Time 5 minutes minutes
    Total Time 5 minutes minutes
    Servings 3 waffles
    Calories 97kcal
    Author Jessica Burgess

    Equipment

    • air fryer

    Ingredients

    • 3 Frozen waffles or as many you can fit in your air fryer, in a single layer
    • syrup if desired
    • butter if desired

    Instructions

    • Simply place the waffles, in a single later in the air fryer basket.
    • Turn the temperature of the air fryer to 350 degrees f and set the timer for 5 minutes. No need to flip, as both sides should cook.

    Video

    Notes

    TIPS:
    No need to flip the air fryer waffles. We didn’t find a need to flip the waffles halfway through, as they cooked perfectly. However if you find that your air fryer doesn’t cook evenly on the top and bottom without flipping, you can flip halfway.
    Difference in Air Fryers. Oven-style air fryers, toaster oven styles, and other models may cook differently, at different temperatures, than in a basket-style air fryer. So for best results, watch carefully to prevent overcooking.

    Nutrition

    Serving: 1waffle | Calories: 97kcal | Carbohydrates: 14g | Protein: 2g | Fat: 4g | Saturated Fat: 1g | Polyunsaturated Fat: 2g | Monounsaturated Fat: 1g | Trans Fat: 0.1g | Cholesterol: 9mg | Sodium: 205mg | Potassium: 30mg | Fiber: 0.4g | Sugar: 1g | Vitamin A: 532IU | Calcium: 81mg | Iron: 2mg

    Frozen Biscuits in the Air Fryer

    January 11, 2023

    Cooked, air fried frozen biscuits on white plate, with one biscuit with butter on top.

    Frozen Biscuits in Air Fryer: Using packaged biscuits like frozen Pillsbury Grands biscuits, place them in the air fryer basket and they’re ready in 15 minutes, and ready to sit under this white gravy.

    Then if the oven is free, try making a batch of sausage patties in the oven to serve on these biscuits for a delicious breakfast sandwich.

    Stack of biscuits that were cooked in the air fryer.

    Whether you’re needing biscuits to serve alongside this jalapeno gravy, to spread raspberry jam on, to even make a version of this easy breakfast sandwich like this bacon, egg, and cheese, they work for many breakfast recipes! Or, serve them alongside a soup like this clam chowder recipe, as an easy side dish, and one of the easiest bread options.

    [feast_advanced_jump_to]

    ⭐️ Why This Method Works

    • It only takes 15 minutes of cook time: I’ve found this to be much faster (in less time) than using the oven to cook frozen biscuits, like many of our air fryer recipes!
    • No oven needed: Is the oven busy? Don’t want to heat up the house with the big oven? Just pop these in the air fryer to keep from heating up the kitchen. Like our apple fritters in the air fryer, we love using the air fryer for recipes that are often made in the oven.
    • Soft center, golden outside: What I love about this method is that you still get the fluffy biscuits with the warm center and the golden brown outside.

    🧾 Ingredients Needed

    Ingredients? You only need the biscuits! Well, perhaps your favorite toppings could be something to consider too.

    Pillsbury Grands Biscuits in bag on counter
    • Biscuits – you definitely don’t have to use Pillsbury Grands Biscuits, and as a matter of fact, my mom tells me that she buys the Great Value brand over any others because they’re so delicious compared to others.

    📖 Substitutions and Variations

    Without much you can change about cooking frozen biscuits, here are some thoughts that you may consider:

    • Refrigerated Biscuits – if you have refrigerated, canned biscuits that aren’t frozen, I recommend cooking them at a 330-degree temperature for about 5 minutes. (Depending on the size of the biscuits – so check after about 3-4 minutes in case they’re smaller and your air fryer cooks faster than some.)
    • Cinnamon Rolls – similar to biscuits, if you also have cinnamon rolls to cook in the air fryer, this is the best way to cook air fryer cinnamon rolls!

    🍞 How to Cook Air Fryer Frozen Biscuits

    Just a few simple steps and you’ll have cooked biscuits ready for meal time!

    For best results, keep in mind that all air fryers, depending on the brand and type of air fryer, can vary in air fryer temperatures.

    Some also line their air fryer baskets with air fryer liners but I prefer to place the biscuits right on the basket, without non-stick spray.

    *Be sure to see the recipe card below for the full instructions!*

    Frozen biscuits in air fryer basket, in a single layer.
    Step 1

    STEP 1. Add frozen biscuits. Place frozen biscuits in a single layer, in to the air fryer basket, making sure the sides of the biscuits are touching. (Image 1).

    Tip: I do not use a non-stick spray in the air fryer baskets, as this can make the nonstick coating on the basket wear off. Your air fryer model may recommend using cooking spray, parchment paper, or a liner.

    STEP 2. Cook the biscuits. Cook the biscuits at 350 degrees f, for 10 minutes.

    STEP 3. Flip the biscuits. Flip, and cook for an additional 5 minutes or until the tops are golden brown and the centers are cooked.

    Stack of biscuits with one biscuit in the front, sliced with butter.

    🍳 Equipment

    For this process, I used a Chefman, 6.5 L basket style air fryer but other models, brands, and types, such as oven style air fryers, can be used. Be cautious of temperatures, and times, as different air fryers can vary.

    💭 Recipe Pro Tips

    • Make ahead. If making a big meal, these biscuits can be made first, and then you can make other air fryer items like this air fryer bacon and these air fryer hashbrown patties, or air fryer breakfast potatoes!
    • Preheating. Like most of our air fryer recipes and cooking methods, we typically cook without preheating. However, if you’d rather preheat, you absolutely can but it’s important to remember that the cooking time may not be as long, since it will cook at a higher temperature from the start.
    Stack of cooked biscuits, with one biscuit sliced with butter and jam spread on it.

    📋 Recipe FAQs

    Can you put Pillsbury biscuits in an air fryer?

    Absolutely! You can cook frozen biscuits or even canned refrigerated biscuits.

    How long do you put biscuits in the air fryer?

    If they’re frozen, a total of 15 minutes at 350 degrees is recommended. If refrigerated biscuits, cooking at 330 degrees for about 5 minutes (depending on the size of the biscuits) is recommended.

    How do you store leftover biscuits?

    Cooked biscuits can be stored at room temperature for 1-2 days, in an airtight container or plastic bag. After 2 days, store them in the refrigerator to help them last longer.

    🧑🏻‍🍳 More Biscuit Recipes You’ll Love

    If you love easy biscuit recipes, you’ll love these popular favorites:

    • A close up of a slice of biscuit and gravy casserole.
      Biscuit and Gravy Casserole
    • A Bisquick cheddar biscuit, broken in half so you can see the fluffy texture inside.
      Bisquick Cheddar Biscuits
    • Chicken Pot Pie Casserole in white baking dish
      Chicken Pot Pie Casserole
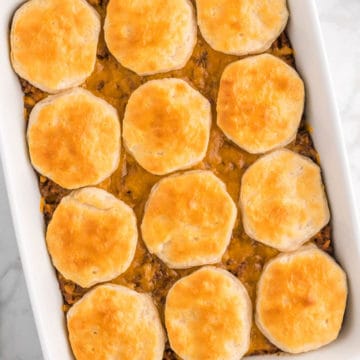
    • Cheeseburger Casserole
      Cheeseburger Casserole

    Did you make this? I’d be so grateful if you left a “star” rating below to let me know what you thought! Then, the next time you need a quick and easy recipe, come back to Fantabulosity to browse all of my easy recipes!

    Recipe

    Cooked, air fried frozen biscuits on white plate, with one biscuit with butter on top.
    Print Pin
    5 from 6 votes

    Frozen Biscuits in Air Fryer

    Frozen Biscuits in Air Fryer: Using packaged biscuits like frozen Pillsbury Grands biscuits, place them in the air fryer basket and they're ready in 15 minutes!
    Course Breakfast, Side Dish
    Cuisine American
    Diet Vegetarian
    Cook Time 15 minutes minutes
    Total Time 15 minutes minutes
    Servings 12 biscuits
    Calories 99kcal
    Author Jessica Burgess

    Equipment

    • air fryer – I used a 6.5 L basket air fryer

    Ingredients

    • 12 Frozen biscuits I used Pillsbury Grands but you can use any brand – and can cook as many as will fit, without overlapping

    Instructions

    • Add frozen biscuits. Place frozen biscuits in a single layer, in to the air fryer basket, making sure the sides of the biscuits are touching.
    • Cook the biscuits. Cook the biscuits at 350 degrees, for 10 minutes.
    • Flip the biscuits. Flip, and cook for an additional 5 minutes or until the tops are golden brown and the centers are cooked.

    Video

    Notes

    Tip #1: I do not use a non-stick spray in the air fryer baskets, as this can make the nonstick coating on the basket wear off. Your air fryer model may recommend using spray or a liner.
    Tip #2: Make ahead. If making a big meal, these biscuits can be made first, and then you can make other air fryer items.
    Tip #3: Preheating. Like most of our air fryer recipes and cooking methods, we typically cook without preheating. However, if you’d rather preheat, you absolutely can but remember that the cooking time may not be as long.

    Nutrition

    Serving: 1biscuit | Calories: 99kcal | Carbohydrates: 13g | Protein: 2g | Fat: 4g | Saturated Fat: 1g | Polyunsaturated Fat: 2g | Monounsaturated Fat: 2g | Cholesterol: 0.3mg | Sodium: 254mg | Potassium: 60mg | Fiber: 0.3g | Sugar: 1g | Vitamin A: 1IU | Calcium: 13mg | Iron: 1mg

    St. Patrick’s Day Charcuterie Board

    January 10, 2023

    St. Patrick's Day Charcuterie Dessert Board

    St. Patrick’s Day Charcuterie Board: A dessert board of green foods and candy or your favorite snacks, arranged in a fun way, for entertaining! It’s one of our favorite fun charcuterie boards to date!

    St. Patrick's Day Charcuterie Board, full of candy, on white marble.

    We’ve really been getting in to St. Patrick’s Day treats around here because it’s an easy way to celebrate the holiday and making everything “green” is a lot of fun. This leprechaun bait was especially fun to put together, in case you’re looking for multiple desserts to make!

    Your St. Patrick’s Day charcuterie boards can easily be made on a smaller scale too if you’re not wanting something so big or with so many different items. But it is so fun, having all the fun colors together, isn’t it? Kind of similar to the Easter charcuterie board and the Christmas dessert board that I put together.

    [feast_advanced_jump_to]

    Why You’ll Love Making This

    • Perfect for entertaining: Charcuterie boards are perfect when hosting or feeding a crowd. It’s an easy way for guests to snack and grab their favorites
    • Variety: Oftentimes, when it comes to dessert ideas, it only allows one type of cookie, cake, or even dip. But with a snack board, this gives a variety of flavors and treats!
    • Favorite Candy: There’s something special about seeing different types of candy, arranged on a board, instead of having them placed in individual bowls.

    Ideas of What You Can Use

    Your charcuterie board doesn’t have to look just like this one or use the exact same items! Feel free to mix things up, change things out and use your own favorites.

    Labeled items for St. Patrick's Day charcuterie dessert board.

    Different Types of Textures You Can Use:

    • Candies – A fun mixture of sweet and sour, gummy candy and hard candy, and so much more! For this board, rainbow colors and green are a safe bet!
    • Baked Goods – Whether it’s storebought or homemade cupcakes and homemade cookies, the baked goods had a wonderful alternative to candy, yet it’s still a sweet offering. If you’re up for it, these mint chocolate cupcakes would be the perfect addition to the charcuterie board, along with these rainbow waffles!
    • Dried Goods – Cereal, crackers, popcorn, dried fruit chips, they’re all great, crunchy options to add to a snack board.
    • Fruit and Veggies – Although you won’t see any of this on this board, we’ve used many fruits and vegetables on charcuterie boards and they offer a great alternative to candy and baked goods. See our fruit board and our breakfast charcuterie for ideas on green fruits that you can use!

    * Make sure to see the full recipe card below with the exact items listed that are seen on this charcuterie board, and the steps to make your own board! *

    Steps to Make This Charcuterie Board

    There’s really no wrong or right way to make this St. Patrick’s Day snack board. However, there are certain steps you can take to categorize items and make sure the board looks symmetrical.

    Start by gathering your treats and grabbing your favorite large wooden board or platter. We love using this wooden board for any kind of charcuterie and these small bowls would look great on a board too but any small bowls will work! You may also love these party toothpicks that work great for the marshmallow kebobs!

    Start with the Bowls

    TIP: You can use different sizes of bowls to elevate items to mix up the flow, and add more/less of items in the bigger/smaller bowls.

    Small bowls on wooden platter with snacks in them.
    Image 1
    Different bowls are added to charcuterie board.
    Image 2

    Step 1: In the center of the board, place 3 small bowls at a diagonal. Fill the bowls with the milk chocolate gold coins (for a fun pot of gold look!) and Lucky Charms cereal. (Image 1) (Or, you could also add these no-bake Lucky Charms treats to the board instead!

    Step 2: Next, place a bowl of Mini Reese Cups and a bowl of Rolo's, diagonal from each other on opposite corners of the board. (Image 2)

    Candy and cupcakes added to charcuterie board.
    Image 3
    Golden Oreo cookies added to board.
    Image 4

    Step 3: Fill the board with Skittles and your green cupcakes, creating a design. (Image 3)

    Step 4: Add your rainbow Airhead Extremes and Golden Oreos to create a flow and fill in the board. (Image 4)

    Make marshmallow skewers to accent charcuterie board.
    Image 5
    Finished St. Patrick's Day Charcuterie Board.
    Image 6

    Step 5: Make some small marshmallow skewers with the party toothpicks, green marshmallows, and shamrocks from Lucky Charms marshmallows.

    Step 6: Add the tiny marshmallow skewers and a few scattered gold coins as a special touch to finish up your St. Patrick's Day Charcuterie Board!

    Pro Tips

    • Feel free to get creative and use your favorite green and rainbow treats to make this colorful St. Patrick’s Day dessert charcuterie board your design!
    • Store-bought treats make this charcuterie board fun and easy, but feel free to add homemade treats!
    Gold coins, candy, cupcakes and more on a charcuterie board.

    Recipe FAQs

    Can I make the charcuterie board the night before?

    Depending on the items you use, you could either make some of the board the night before or all of the board. Be cautious of styling items on the board that could become stale with too much time sitting out. Items such as marshmallows, cupcakes, some cookies, etc. However, candies should be just fine.

    How to store leftover charcuterie items

    Store any leftover treats from this St. Patrick’s Day charcuterie board, in separate airtight containers.

    How big does a charcuterie board need to be?

    This will depend on how many guests you have, and how many snacks you want on the board. Top Tip: Remember that small amounts of each item can go on the board, and you can gradually add more as the event goes on. It doesn’t all have to be on the board at the start.

    More St. Patrick’s Day Recipes

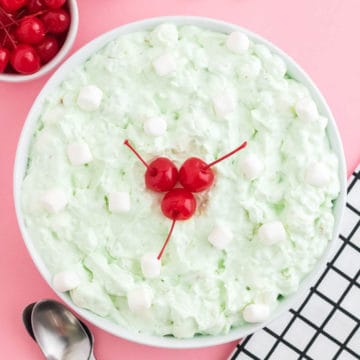
    • Pistachio Salad in white bowl on pink background
      Pistachio Salad
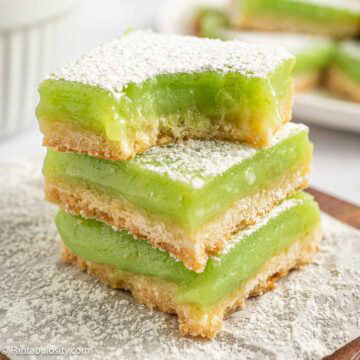
    • Lime bars in square shape, stacked on cutting board covered with parchment paper.
      Lime Bars
    • Leprechaun Bait in round bowl, sitting on yellow napkin.
      Leprechaun Bait
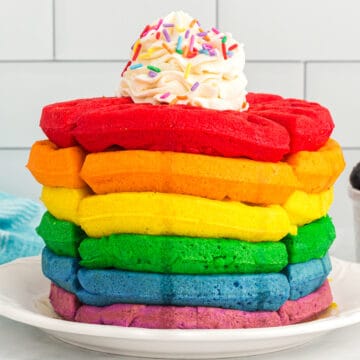
    • Rainbow waffles stacked on a white plate, with whipped cream on top.
      Rainbow Waffles

    Did you make this? I’d be so grateful if you left a “star” rating below to let me know what you thought! Then, the next time you need a quick and easy recipe, come back to Fantabulosity to browse all of my easy recipes!

    Recipe

    St. Patrick's Day Charcuterie Dessert Board
    Print Pin
    5 from 1 vote

    St. Patrick’s Day Charcuterie Board

    St. Patrick's Day Charcuterie Board: A dessert board of green foods and candy or your favorite snacks, arranged in a fun way, for entertaining!
    Course Appetizer, Dessert, Snack
    Cuisine American
    Prep Time 15 minutes minutes
    Cook Time 0 minutes minutes
    Total Time 15 minutes minutes
    Servings 15 people
    Calories 411kcal
    Author Jessica Burgess

    Equipment

    • 1 Charcuterie Board
    • 4 Small Bowls
    • Party Toothpicks

    Ingredients

    Candy

    • 25 Milk chocolate gold coins
    • 1 bag Mini Reese's Peanut Butter Cups
    • 1 bag Rolo Candies
    • 1 bag Skittles
    • 1 bag Rainbox Airheads Xtremes

    Baked Goods

    • 6 Green cupcakes Store-bought works great!
    • 10 Green jumbo marshmallows
    • 20 Lucky Charms marshmallows You can buy Star Marshmallows Here!
    • 15 Golden Oreos
    • 1 cup Lucky Charms Cereal

    Instructions

    • Start by gathering your treats and grabbing your favorite large wooden board or platter.
    • In the center of the board, place 3 small bowls on a diagonal. Fill the bowls with the milk chocolate gold coins and Lucky charms cereal.
    • Next, place a bowl of mini Reese cups and a bowl of Rolo's diagonal from each other on opposite corners of the board.
    • Fill the board with skittles and your store-bought green cupcakes, creating a design.
    • Add your rainbow Airhead Extremes and golden Oreos to create a flow and fill in the board.
    • Make some small marshmallow skewers with the party toothpicks, green marshmallows, and shamrocks from Lucky charms marshmallows.
    • Add the tiny marshmallow skewers and a few scattered gold coins as a special touch to finish up your St. Patrick's Day Charcuterie Board!

    Notes

    Making ahead of time: You can either make some of the board the night before or all of the board but be cautious of styling items on the board that could become stale with too much time sitting out.
    Storage: Store any leftover items in airtight containers.
    Tip 1: You can use different sizes of bowls to elevate items to mix up the flow, and add more/less of items in the bigger/smaller bowls.
    Tip 2: Feel free to get creative and use your favorite green and rainbow treats, either store-bought or homemade, to make this board your design!

    Nutrition

    Serving: 1serving | Calories: 411kcal | Carbohydrates: 60g | Protein: 4g | Fat: 21g | Saturated Fat: 10g | Polyunsaturated Fat: 2g | Monounsaturated Fat: 7g | Cholesterol: 0.4mg | Sodium: 137mg | Potassium: 169mg | Fiber: 3g | Sugar: 44g | Vitamin A: 77IU | Vitamin C: 1mg | Calcium: 48mg | Iron: 2mg

    Valentine’s Day Heart Sugar Cookies

    January 6, 2023

    Heart shaped cookies for Valentine's Day

    Valentine’s Day Cookie Decorating: Easy heart-shaped cookies for Valentine’s Day – perfect for the beginner.

    You’ve followed along on my cookie decorating journey, from my first attempt at decorating sugar cookies. You’ve been so encouraging, and I so appreciate it. I’m just a regular gal who wanted to decorate some cookies, knowing I’d probably never be as good as the professionals out there.

    But with my admittance of not being the best at this… I’m hoping you can find the courage to decorate your own cookies too!

    Valentine's Day Cookie Decorating for Beginners fantabulosity.com

    It’s possible that I’m going backwards, in my cookie decorating skills. I’m not going to lie. I watched SweetAmbs on Facebook lately, and when she posted her Valentine’s Day Heart Cookies, I thought,

    Oh I can SO do that.

    I even had people share the video on Fantabulosity’s Facebook page, saying,

    Jessica! Look! You should try these next!

    For heaven’s sake… others even had faith in me.

    But just so you can see… not all of my cookies turned out great. So practice is still necessary for me. HOWEVER…

    PINTEREST FAIL: Valentine's Day Cookies Decorating Fail fantabulosity.com

    Although they’re FAR from perfect, I did have some luck with the way most of them turned out. So… that told me that heart-shaped cookies, with a few simple designs, would be a good Valentine’s Day Cookie idea, for a beginner.

    Free Valentine's Day Printable - I Heart You-5

    Don’t look too close, or you’ll potentially find more “Pinterest fails,” and let me just bask in the “accomplishment,” for a moment. 🙂

    Notes about what you’ll need:

    • Sugar Cookies: I know that you may have your own favorite sugar cookie recipe, or you may even buy sugar cookies already in the shape of hearts. But I still want to share that the sugar cookie recipe I use for these and all of my sugar cookie decorating adventures, is this easy sugar cookie recipe. I also used that sugar cookie recipe, leaving them round sugar cookies with Nutella on top!
    • Royal Icing: When I decorate, I love buying the royal icing that I can just add water to, and then whatever colors I’m looking for, to keep things super easy. This is my favorite royal icing mix. However, you can use your favorite recipe if you have one!
    • Food Coloring: When it comes to coloring the royal icing, I like to use gel food coloring.
    Heart shaped sugar cookies decorated for Valentine's Day
    Valentine’s Day Cookies

    I’ll never be as good at SweetAmbs, but she sure is fun to follow to get ideas from.

    Valentine Heart Cookie Decorating Video

    Here’s a quick video on how I decorated these heart cookies with royal icing! I hope it’s helpful and if you have any questions, please don’t hesitate to drop a comment below!

    Plus, see the recipe card below with more details and how-to!

    Now, if you’re still a little intimidated at decorating cookies with royal icing, you may want to consider using fondant for your cookies, like we used in these ice cream sugar cookies!

    More Valentine’s Day Ideas

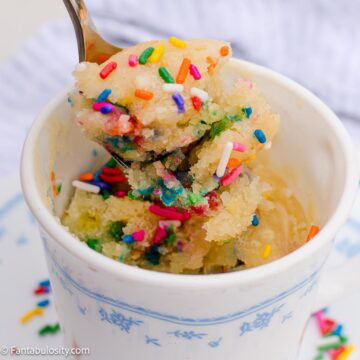
    • Vanilla mug cake in vintage coffee mug.
      The BEST Vanilla Mug Cake Recipe
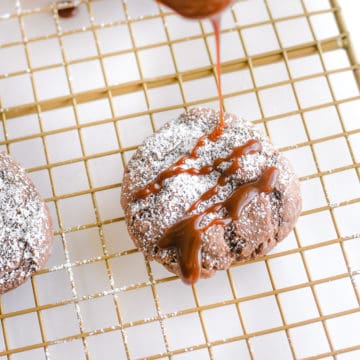
    • caramel drizzling on chocolate gooey butter cookie
      Chocolate Gooey Butter Cookies
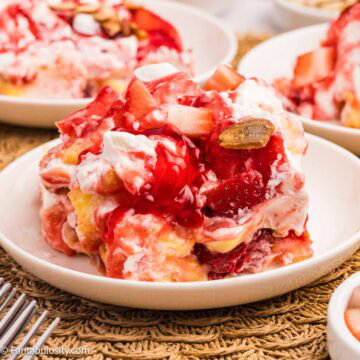
    • A slice of strawberry heaven cake dessert on a plate.
      Strawberry Heaven
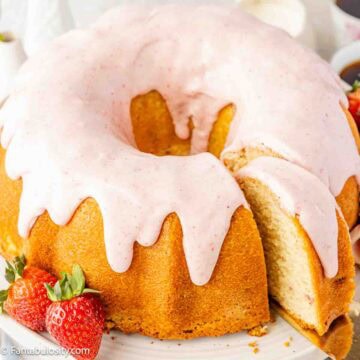
    • Strawberry Pound Cake on cake stand.
      Strawberry Pound Cake with Strawberry Glaze Icing

    Recipe

    Heart shaped cookies for Valentine's Day
    Print Pin
    5 from 1 vote

    How to Decorate Heart Sugar Cookies

    Valentine's Day Cookie Decorating: Easy heart-shaped cookies for Valentine's Day – perfect for the beginner.
    Course Dessert
    Cuisine American
    Prep Time 30 minutes minutes
    Total Time 30 minutes minutes
    Servings 24 cookies
    Calories 51kcal
    Author Jessica Burgess

    Equipment

    • Heart Shaped Cookie Cutters We like these heart cookie cutters
    • Scriber Needle Or toothpick will work too. Here's my favorite scriber tool.
    • Piping Tip .1 or .15 or similar (Small is best for fine detail decorating.)
    • 3 Piping Bags

    Ingredients

    • 24 Heart Shaped Sugar Cookies This is my favorite sugar cookie recipe! Or your favorite recipe, or storebought cookies
    • Royal Icing This is my favorite royal icing mix.
    • (Pink, Red, White) Gel Food Coloring

    Instructions

    • If making your own heart-shaped sugar cookies or buying storebought cookies, you'll need 24. cookies This sugar cookie recipe makes 24 cookies and is delicious! (Make sure to allow the cookies to fully cool before decorating.)

    Decorating the Heart Cookies

    • To get the red and pink royal icing, you'll need to separate the white royal icing in to 3 separate small bowls. Using red food coloring, add a drop to one bowl of royal icing and stir to combine. If not as red as you'd like, add one drop, until the icing reaches the desired color.
      Repeat in another bowl for the pink icing. Leave the third bowl white.
    • Decide which style of cookie you'll be decorating first.
    • Preferably, have three different piping bags with a .1 piping tip or .15 tip. (You may have to switch them out if you only have one – so doing as many cookies with each color, one at a time, may be helpful.)
    • Fill each piping bag, making one red, one pink, and one white piping bag.
    • Begin decorating cookies as shown in the video, outlining the heart first, then filling the centers and decorating with desired design.
    • Allow cookies to "dry" making sure they're sitting out in a single layer, before storing.

    Video

    Nutrition

    Serving: 1cookie | Calories: 51kcal | Carbohydrates: 6g | Protein: 1g | Fat: 3g | Saturated Fat: 1g | Polyunsaturated Fat: 1g | Monounsaturated Fat: 1g | Sodium: 35mg | Potassium: 9mg | Fiber: 0.1g | Sugar: 2g | Vitamin A: 9IU | Calcium: 1mg | Iron: 0.3mg

    Bisquick Cheddar Biscuits

    January 5, 2023

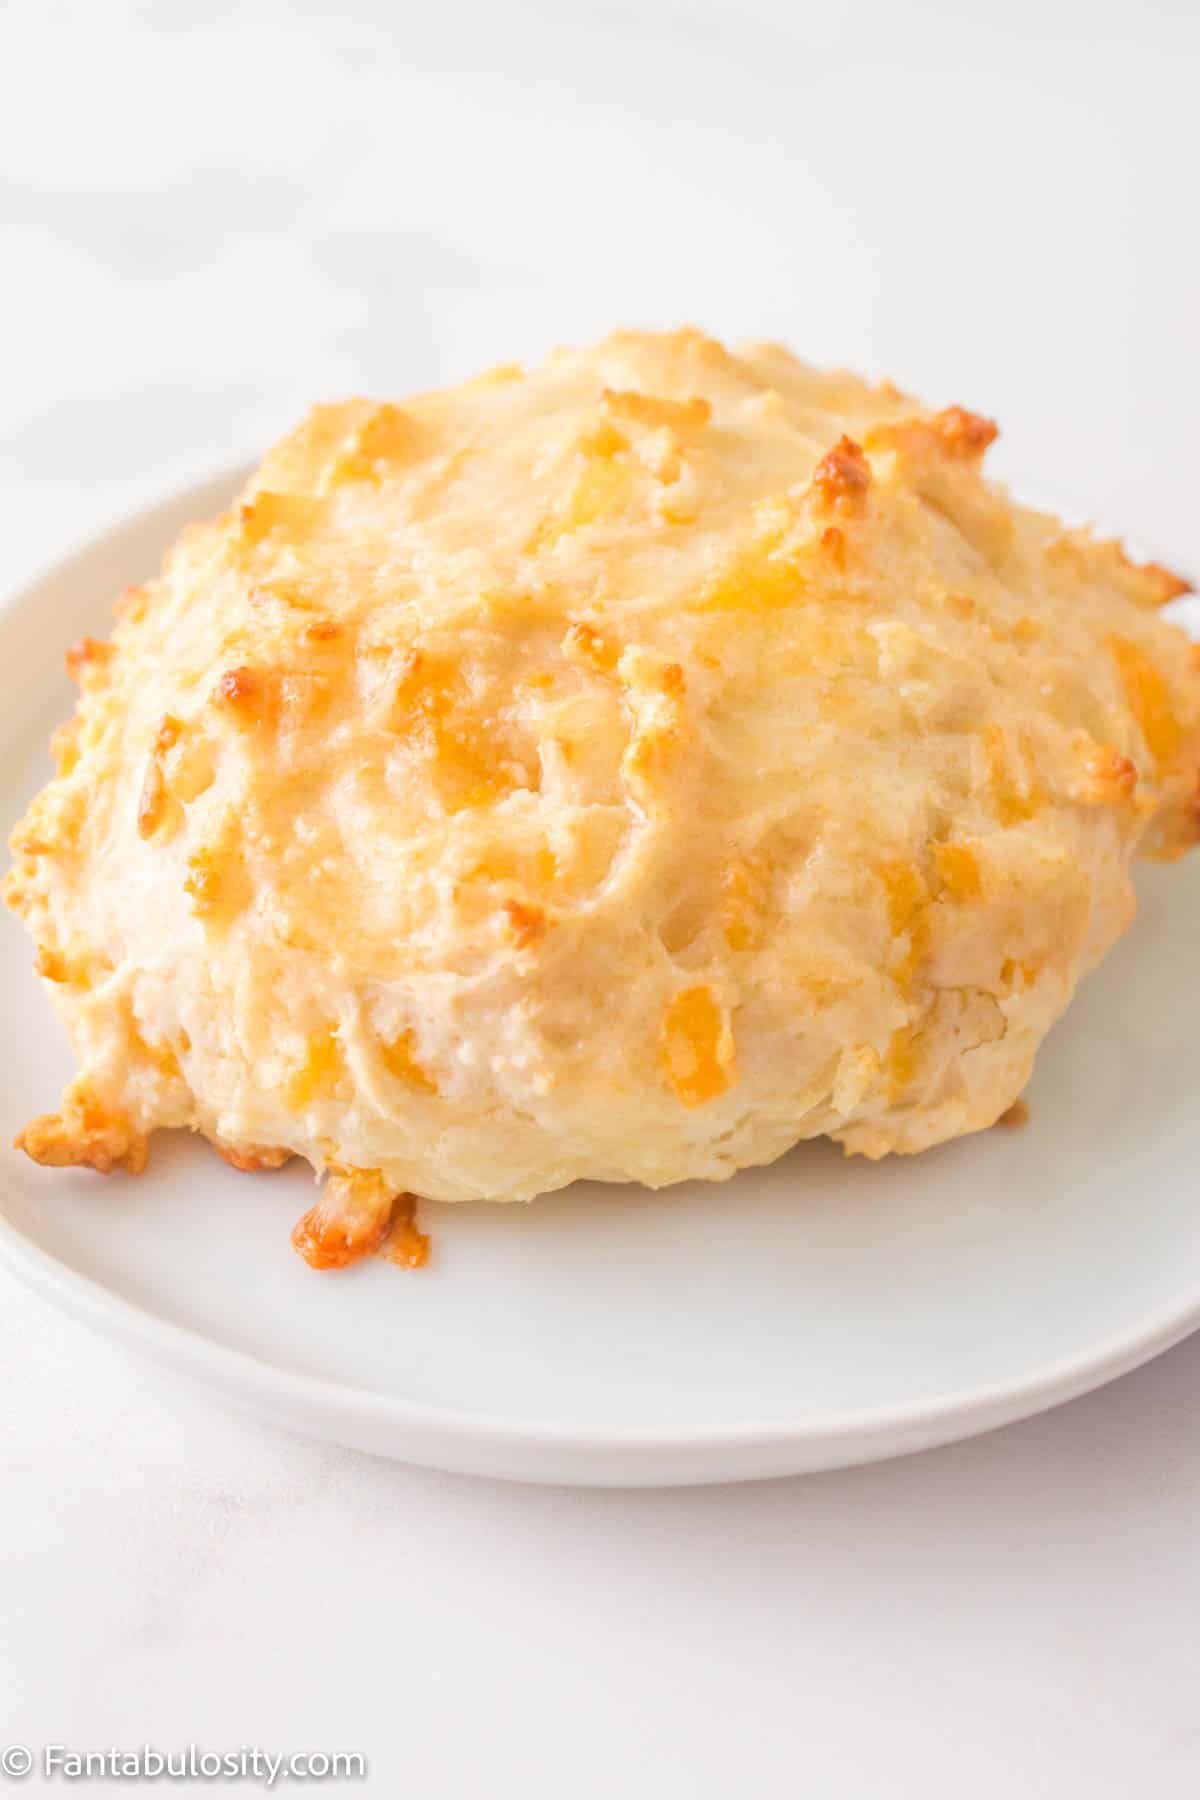
    A Bisquick cheddar biscuit, broken in half so you can see the fluffy texture inside.

    Bisquick Cheddar Biscuits: These golden brown biscuits are cheesy and are the perfect side for a simple chili recipe and soup recipes. Made with 6 simple ingredients and ready in just over 20 minutes!

    A Bisquick cheddar biscuit on a plate.

    Why You’ll Love This Recipe

    You can’t go wrong with this easy cheddar biscuit recipe served as an easy side dish on a cool day. They pair amazingly well with items like baked bratwursts or this popular fried shrimp recipe!

    The biscuits have a similar flavor to the copycat Red Lobster Cheddar Bay biscuits, so if you love those, I think you’ll love these too!

    [feast_advanced_jump_to]

    What to Serve with These Garlic Cheddar Drop Biscuits?

    On a chilly day, these biscuits also make the perfect easy side dish for chili or soup. Here are some of our favorite recipes to serve alongside some warm biscuits!

    CHILIS

    Easy Chili Recipe

    White Chicken Chili with Cream Cheese

    Vegetarian Chili

    Venison Chili (Stove Top or Slow Cooker)

    SOUPS

    Instant Pot Broccoli Cheddar Soup

    Buffalo Chicken Soup Recipe

    Taco Soup Recipe

    Easy Lobster Bisque Recipe

    Ingredients

    You only need 6 simple ingredients to whip up these Bisquick cheddar garlic drop biscuits (and because they’re drop biscuits, you don’t even have to dirty the counter)!

    • Bisquick mix
    • Milk cheddar cheese
    • Mozzarella cheese
    • Milk
    • Garlic powder
    • Butter
    ingredients on table for cheddar biscuits

    See the printable recipe card below for exact quantities and step-by-step instructions!

    Substitutions

    If you need to swap something out, here are a few suggestions we have…

    • Bisquick – if you don’t have access to Bisquick, you can use any other baking mix (like Jiffy mix, Krusteaz, etc.)
    • Gluten Free – if you need to make gluten free biscuits, you can use a gluten free baking mix like Bob’s Red Mill!
    • Cheese – I find that blocks of cheese shredded at home work better than the pre-shredded bags (the cheese in those bags is usually coated to keep it from sticking, which keeps it from melting as nicely). You can use either type of cheese, though. You can also swap out the cheddar and mozzarella for whatever cheese you have on hand! Mix and match with 1, 2, or more cheeses to make up the 1 cup total needed.

    Variations

    Biscuits are so easy to change up to create your own version! Here are a few ideas we had for how you could change this recipe…

    • Spicy – add some chopped jalapenos and swap the cheddar cheese for tex mex to create spicy jalapeno cheddar biscuits!
    • Onion – add some chopped green onion and ½ teaspoon of onion powder into your biscuit mix to create a cheddar and onion biscuit!
    • Bacon – adding bacon basically makes everything better…right? Cook up some bacon and chop it (or use bacon bits) and mix it into your batter for cheddar bacon biscuits that would be perfect for serving at brunch!
    • Air Fryer – If you have an air fryer, we cooked frozen biscuits in the air fryer so I’d imagine that these could be cooked in the air fryer too!

    Instructions

    1. Preheat the oven to 425 F.
    2. Place a silicone mat or sheet of parchment paper on a baking sheet and set it aside.
    3. In a large mixing bowl combine Bisquick mix (2 ½ cups), ½ cup cheddar cheese, ½ cup mozzarella cheese, and ½ teaspoon garlic powder.
    Bisquick mix, shredded cheddar cheese, and shredded mozarella cheese in a glass bowl.
    Add Bisquick and cheese to bowl.
    A small dish of garlic powder being held above a mixing bowl.
    Add garlic and mix.
    1. Mix in the ¾ cup milk.
    Bisquick cheddar biscuit dough in a glass bowl.
    Mix in the milk.
    1. Take two tablespoons or soup spoons and drop the batter on the baking sheet (scoop the batter with one spoon, then scrape it onto the baking sheet with the other). Leave 1-inch around each biscuit. They will not spread like cookies, but you want the heat to go around for more even cooking.
    A tablespoon with bisquick cheddar biscuit mix on it.
    Scoop biscuit dough.
    An unbaked cheddar biscuit sitting on a silicone mat on a baking sheet.
    Drop onto lined baking sheet.
    1. Bake for 12-14 minutes in the oven or until a toothpick comes out clean. They will be slightly golden brown on top. While the biscuits are baking, melt butter and set aside.
    A baking sheet with a silicone mat on it and baked cheddar biscuits on the silicone mat.
    Bake till golden brown.
    1. Leave the biscuits on the cookie sheet and with a pastry brush, brush the melted butter mixture onto each one.
    A pastry brush brushing melted butter onto a baked cheddar biscuit.
    Brush with melted butter.
    1. Transfer the biscuits to a cooling rack and let them cool enough that you can handle them.
    2. Serve and enjoy!
    A Bisquick cheddar biscuit broken in half so you can see the inside.

    Storage

    Store any leftover biscuits in a cool, dry area in an airtight container for 3 days.

    These biscuits would freeze well. Simply place the cooled biscuits in a tightly sealed, freezer-safe container and freeze them for up to a month. When you are ready to eat them, simply let them thaw at room temperature (or put them in the oven at 425° until they are warmed through).

    Top Tip

    When mixing the ingredients, you will have a thick, wet dough. I don't use a hand mixer for 2 reasons: the dough is too thick and sticky to work well with a hand mixer, and if I mix by hand I know I won't overmix it (giving your biscuit that nice, fluffy texture).

    FAQs

    Why are my Bisquick biscuits so crumbly?

    There are two likely reasons for crumbly Bisquick biscuits – the first is that you used cream instead of milk (since cream is thicker, it affects the moisture content of the biscuit). The second reason could be that you didn’t add enough milk. You don’t want your biscuit batter to be runny, but it definitely needs to come together as a smooth, stirrable batter. If it’s crumbly, try adding more milk 1 teaspoon at a time until you reach the right consistency.

    What’s the difference between a drop biscuit and a regular biscuit?

    Good question! Drop biscuits are just like they sound – they are dropped onto a baking sheet. The batter for a drop biscuit is closer to pancake batter.

    “Regular” biscuits (or rolled biscuits) are made with a dough that is more like pie dough. It is rolled out and then cut into a shape that is placed onto a baking sheet.

    Are these like Red Lobster cheddar bay biscuits?

    They are similar! The garlic, cheesy biscuit made with Bisquick is similar to copycat Red Lobster biscuits.

    Did you make this? I’d be so grateful if you left a “star” rating below to let me know what you thought! Then, the next time you need a quick and easy recipe, come back to Fantabulosity to browse all of my easy recipes!

    Related Recipes

    Looking for other recipes that include delicious biscuits? This Biscuit and Gravy Casserole is perfect for dinner or for a weekend brunch, and both this Cheeseburger Casserole and this Chicken Pot Pie Casserole are topped with biscuits and make the perfect comfort food dinner for a busy weeknight!

    Or if you love cheesy bread, this cheesy pull-apart bread is a must-make!

    Recipe

    A Bisquick cheddar biscuit, broken in half so you can see the fluffy texture inside.
    Print Pin
    5 from 5 votes

    Bisquick Cheddar Biscuits

    Bisquick Cheddar Biscuits: These buttery garlic brown biscuits are the perfect side for chilis and soup. Made with 6 simple ingredients and ready in just over 20 minutes!
    Course Appetizer, Side Dish, Snack
    Cuisine American
    Diet Vegetarian
    Prep Time 10 minutes minutes
    Cook Time 12 minutes minutes
    Total Time 22 minutes minutes
    Servings 8 biscuits
    Calories 250kcal
    Author Jessica Burgess

    Ingredients

    • 2 ½ cups Bisquick Pancake & Baking Mix
    • ½ cup mild cheddar cheese shredded
    • ½ cup mozzarella cheese shredded
    • ½ teaspoon garlic powder
    • ¾ cup milk
    • 2 tablespoons butter melted
    • garlic salt Sprinkle after applying butter if desired.

    Instructions

    • Preheat the oven to 425 F.
    • Place a silicone mat or sheet of parchment paper on a baking sheet and set it aside.
    • In a large mixing bowl combine 2 ½ cups Bisquick mix, the 1 cup of shredded cheeses, and ½ teaspoon garlic powder.
    • Mix in the ¾ cup milk.
    • Take two tablespoons or soup spoons and drop the batter on the baking sheet (scoop batter with one spoon, then scrape it onto the baking sheet with the other). Leave 1-inch around each biscuit. They will not spread like cookies, but you want the heat to go around for more even cooking.
    • Bake for 12-14 minutes in the oven or until a toothpick comes out clean. They will be slightly golden brown on top.
    • Leave the biscuits on the cookie sheet and with a pastry brush, brush the melted butter onto each one.
    • Transfer the biscuits to a cooling rack and let them cool enough that you can handle them.
    • Serve and enjoy!

    Video

    Notes

    TIP: When mixing the ingredients, you will have a thick, wet dough. I don't use a hand mixer for 2 reasons: the dough is too thick and sticky to work well with a hand mixer, and if I mix by hand I know I won't overmix it (giving your biscuit that nice, fluffy texture). 

    Nutrition

    Serving: 1biscuit | Calories: 250kcal | Carbohydrates: 25g | Protein: 7g | Fat: 13g | Saturated Fat: 6g | Polyunsaturated Fat: 1g | Monounsaturated Fat: 5g | Trans Fat: 0.1g | Cholesterol: 24mg | Sodium: 600mg | Potassium: 109mg | Fiber: 1g | Sugar: 6g | Vitamin A: 244IU | Vitamin C: 0.1mg | Calcium: 182mg | Iron: 1mg

    15 Bean Soup

    January 4, 2023

    A close up photo of a bowl of 15 bean soup.

    15 Bean Soup: This easy 15 bean soup mix recipe is the perfect weeknight dinner idea. Make it on the stovetop or in the slow cooker and serve it with cornbread for a comfort food dinner everyone will enjoy!

    Love an old-fashioned pot of soup? Here are more cozy soups and stews.

    A bowl of 15 bean soup on a counter with a red napkin next to it and some cornbread on a plate behind it.

    Soup recipes are the kind of dishes that can be made ahead of time and that are perfect for the cooler months. This bean soup recipe is no different!

    We love rotating this easy chili recipe and this white chicken chili recipe through the winter months too, and it makes dinner time a breeze!

    Why You’ll Love this Recipe

    This 15 bean soup recipe is the perfect way to use up leftover ham, ham hocks, and ham bones (waste not, want not) like we use in our ham and beans soup! It’s full of flavor, nutritious, and delicious making it the perfect meal to serve after the holidays when everyone needs a bit of a break from all the sweets and rich foods.

    You can make this as an easy stove top recipe, or in the slow cooker, the best of both worlds!

    [feast_advanced_jump_to]

    Ingredient Notes

    This soup is made with ingredients you likely have on hand already! This is perfect to make with leftover ham, so it’s the perfect soup to have with holiday leftovers.

    • Chicken Broth – using reduced-sodium chicken broth is preferred, as the seasoning packet that comes with the beans can be salty. Or you can make your own homemade chicken broth and cut back on the salt.
    • Ham – You don’t have to use leftover ham but it’s a great way to use it up. You can of course by ham to use in this recipe too! If you have a lot of leftover ham though, you may also want to make this ham casserole that’s perfect for it!

    Substitutions

    Soup recipes are very forgiving and have plenty of room for substitutions, and this one is no exception. Here are a few suggestions…

    • Meat – leftover ham bone, leftover ham, ham steak, chicken (especially this crockpot shredded chicken), and andouille sausage all work well in this recipe.
    • Thyme – if you don’t have fresh thyme, you can use 1 teaspoon of dried thyme instead.
    • Vegetarian – if you’d prefer to, you can omit the ham altogether and use vegetable broth instead of chicken to make this soup vegetarian-friendly.
    • Veggies – carrots and celery are delicious in this recipe because they don’t become soggy, but you can easily swap them for your favorite veggies!
    • Spice – if you like things spicy, try using a spicy andouille sausage instead of ham and adding a dash of cayenne pepper and red chili flakes!
    • Toppings – you can choose to top your 15 bean soup with chopped cilantro, crushed tortilla chips and a dollop of sour cream, shredded cheddar cheese, or whatever tasty toppings sound good to you!

    Instructions

    The ingredients for 15 bean soup on a counter with labels on the image.
    Ingredients.

    See the printable recipe card farther down in this blog post for quantities and step-by-step instructions.

    Instructions

    1. Remove the cajun seasoning packet from the Hurst’s HamBeens package and set it aside. Add the beans to a large bowl, and cover with water. Let soak for at least 8 hours or overnight.
    2. When you're ready to make the soup, drain the beans and set aside until ready to use.
    3. Heat a heavy bottom pot over medium-high heat. Once hot, add the 2 tablespoons of olive oil.
    4. Saute the 1 diced white/yellow onion, 3 diced carrots, and 3 diced celery stalks for 6-8 minutes, or until the vegetables begin to soften. Add the 4 cloves minced garlic and cook for an additional minute, or until fragrant.
    Diced vegetables and olive oil in a heavy sauce pan.
    Saute veggies till soft.
    1. Add the 6 cups chicken broth, 1.5 – 2 cups of leftover ham, 1 teaspoon black pepper, drained beans, 4 fresh thyme sprigs, 2 dry bay leaves, 2 tablespoons soy sauce, cajun seasoning packet, and 14.5 ounce can of diced tomatoes. Stir to combine and bring the soup to a boil.
    Chicken broth being poured into a pot with 15 bean soup ingredients in it.
    Add ham, liquid, and spice and bring to boil.
    1. Reduce the heat to simmer. Cover and cook for 1 ½ hours, or until the beans are soft.
    15 bean soup in a heavy sauce pan.
    Simmer till beans soften.
    1. Remove and discard the bay leaves and thyme sprigs from the soup.
    2. Serve with cornbread, this Italian bread recipe, or this easy focaccia bread.
    A bowl of 15 bean soup with cornbread in the background.
    Serve & enjoy!

    What to serve with this soup

    Looking for a delicious side to serve alongside this soup? These garlic drop biscuits are full of flavor and go really well with this recipe!

    A close up image of a bowl of 15 bean soup.
    Top with cilantro or parsley!

    Crock pot / Slow Cooker Instructions

    Soak the bean mix overnight per the instruction above. Once you're ready to make the soup, add all of the ingredients to your crockpot. Cook on low for 8-10 hours or on high for 6 hours. You’ll also love these other easy slow cooker recipes too!

    Storage

    Store any leftover 15 bean soup in an airtight container in the fridge for 3 days.

    This soup freezes beautifully. Once the soup is at room temperature, pour it into a freezer-safe container and store it in the freezer for up to 3 months. Once you're ready to eat it, let the soup thaw in the fridge overnight and heat in a saucepan on the stove or in a bowl in the microwave until hot. 

    Top tip

    If you find that your ham is very salty, omit the soy sauce to prevent your soup from becoming too salty!

    FAQ

    What are the beans in the 15-bean package?

    According to the Hurst Beans website, the package contains 15 of these bean varieties: northern beans, pinto beans, large lima beans, yelloweye beans, garbanzo beans, baby lima beans, green split peas, kidney beans, cranberry beans, small white beans, pink beans, small red beans, yellow split peas, lentils, navy beans, white kidney beans, and black beans.

    Why do I need to soak the beans?

    It's optional, but it will speed up the cooking time and break down some of the complex sugars in the beans. If you decide to make this in the crockpot instead of on the stove, you can skip the soaking process and add the dry beans right into the crock pot as they'll cook for 8 hours in there.

    Can I freeze 15 bean soup?

    This soup freezes beautifully. Once the soup is at room temperature, pour it into a freezer-safe container and store it in the freezer for up to 3 months. Once you're ready to eat it, let the soup thaw in the fridge overnight and heat in a saucepan on the stove or in a bowl in the microwave until hot. 

    Did you make this? I’d be so grateful if you left a “star” rating below to let me know what you thought! Then, the next time you need a quick and easy recipe, come back to Fantabulosity to browse all of my easy recipes!

    Related Recipes

    If you want to skip the overnight soak, try these no-soak black eyed peas with bacon. They start with dried peas and simmer on the stove until creamy.

    If you’re looking for other delicious comfort food soups, you have to try this Cowboy Stew, this Buffalo Chicken Soup Recipe (it’s ready in under 30 minutes and it’s always a hit) and this Instant Pot Broccoli Cheddar Soup recipe that’s a copycat of Panera Bread’s famous soup!

    Or, if hearty dishes are your go-to, you’ll also love this dutch oven stew recipe.

    Recipe

    A close up photo of a bowl of 15 bean soup.
    Print Pin
    5 from 4 votes

    15 Bean Soup

    15 Bean Soup: This easy 15 bean soup mix recipe is the perfect weeknight dinner. Make it on the stovetop or in the slow cooker and serve it with cornbread for a comfort food dinner everyone will enjoy!
    Course Main Course, Soup
    Cuisine American, Mexican
    Prep Time 8 hours hours 15 minutes minutes
    Cook Time 1 hour hour 30 minutes minutes
    Total Time 9 hours hours 45 minutes minutes
    Servings 8 servings
    Calories 447kcal
    Author Jessica Burgess

    Ingredients

    • 1 package Hurst HamBeens Cajun 15 Bean Soup Blend + cajun seasoning packet
    • 2 tablespoons olive oil
    • 1 white or yellow onion diced
    • 3 carrots peeled and diced/sliced
    • 3 celery stalks diced
    • 4 cloves garlic minced
    • 6 cups reduced-sodium chicken broth
    • 1 ½ – 2 cups leftover ham cubed or shredded
    • 1 teaspoon freshly cracked black pepper
    • 4 fresh thyme sprigs
    • 2 dried bay leaves
    • 2 tablespoons soy sauce
    • 1 – 14.5 ounce can diced tomatoes

    Instructions

    • Remove the cajun seasoning packet from the HamBeens package and set it aside. Add the beans to a large bowl, and cover with water. Let soak for at least 8 hours or overnight.
    • When you're ready to make the soup, drain the beans and set aside until ready to use.
    • Heat a heavy bottom pot over medium-high heat. Once hot, add the 2 tablespoons of olive oil.
    • Saute the 1 diced white/yellow onion, 3 diced carrots, and 3 diced celery stalks for 6-8 minutes, or until the vegetables begin to soften. Add the 4 cloves minced garlic and cook for an additional minute, or until fragrant.
    • Add the 6 cups chicken broth, 1.5 – 2 cups of leftover ham, 1 teaspoon black pepper, drained beans, 4 fresh thyme sprigs, 2 dry bay leaves, 2 tablespoons soy sauce, cajun seasoning packet, and 14.5 ounce can of diced tomatoes. Stir to combine and bring the soup to a boil.
    • Reduce the heat to simmer. Cover and cook for 1 ½ hours, or until the beans are soft.
    • Remove and discard the bay leaves and thyme sprigs from the soup.
    • Serve with cornbread or crusty bread and butter.

    Notes

    Crockpot/Slow Cooker Instructions: Soak the beans overnight per the instruction above. Once you're ready to make the soup, add all of the ingredients to your crockpot. Cook on low for 8-10 hours or on high for 6 hours.
    Storage: Store any leftover 15 bean soup in an airtight container in the fridge for 3 days.
    This soup freezes beautifully. Once the soup is at room temperature, pour it into a freezer-safe container and store it in the freezer for up to 3 months. Once you’re ready to eat it, let the soup thaw in the fridge overnight and heat in a saucepan on the stove or in a bowl in the microwave until hot. 

    Nutrition

    Serving: 1serving | Calories: 447kcal | Carbohydrates: 49g | Protein: 31g | Fat: 14g | Saturated Fat: 4g | Polyunsaturated Fat: 2g | Monounsaturated Fat: 7g | Cholesterol: 38mg | Sodium: 1933mg | Potassium: 339mg | Fiber: 15g | Sugar: 6g | Vitamin A: 3830IU | Vitamin C: 3mg | Calcium: 26mg | Iron: 1mg

    Easy Simmer Pot Recipe

    December 20, 2022

    Simmer pot with apples, oranges, cloves, rosemary and more!

    Easy Simmer Pot Recipe on the Stovetop: A great way to make a home smell fabulous, in a more natural way, especially during the colder time of year.

    Simmer pot with apples, oranges, cinnamon sticks, cloves and more!
    [feast_advanced_jump_to]

    What is a simmer pot?

    A simmer pot is a small sauce pan or large pot that is filled with water, fruits, herbs and fragrances such as extracts or even essential oils, that is heated on “low” on the stovetop, and creates a homemade potpourri in your home.

    Making one of these can help make your house a cozy home.

    Why make a simmer pot?

    Making a simmering pot of fragrant items is one of our favorite things to do during the winter months and the holiday season to fill up even an entire house with seasonal scents and for an easy DIY Christmas idea. When entertaining, it can be a great way to make your house smell wonderful when guests arrive.

    If you’re looking to add different scent combos to your own home, without using a scented candle, air fresheners or something using artificial scents, a stovetop potpourri may be the answer.

    They’re also perfect for gift-giving ideas, especially if you’re already buying the items to make a DIY Sangria Kit.

    Woman slicing an apple in the kitchen
    Slice apples

    Ingredients you’ll need

    Ingredients on counter for simmer pot
    Ingredients

    Ingredient Notes

    • anise extract: I prefer using star anise for a simmer pot but I have a really hard time finding it where I live, so I usually opt for the extract and it works wonderfully.
    • oranges/lemon/apple: You can use any type of these fruits, such as different types of apples, oranges, etc. This is also a great way to use up fruit that may be getting too ripe or leftover peels such as orange peels if you used the pulp for something else.
    • cloves: The whole cloves help give this pot of spices a beautiful look, next to all of the bright colors.

    Substitutions

    If you’re short-handed or if you can only find certain, similar items, you can try:

    • Fruit: pears, fresh cranberries, lemon peel, and pomegranates are great alternatives or additions to this simmer pot recipe.
    • Extract: extracts can be a great option for simmer pots if you don’t have fresh ingredients on hand. Additional extracts you may want to try are vanilla extract, peppermint extract, etc. Just remember that a few drops can go a long way.
    • Herbs: I used fresh rosemary for this scented water recipe but you could also use items such as mint, lavendar, bay leaves, rose petals, etc.

    Step by Step Photos

    Although you can make this in any order you want to, I usually start with filling the pot with water first, then add the fruits and finally add extract and spices.

    1. Fill your pot with fresh water, making sure the water level will be shallow enough that when adding the other items to the pot, it won’t overflo but deep enough to cover the items you plan to use. So you can actually add a little water and always add more, or even wait to add the water until the end. (The amount can vary but with this small saucepan, I used 4 cups of water.)
    Sliced apples on cutting
    Slice apples
    Orange slices on cutting board
    Slice Oranges
    1. Next, start slicing the fruit you plan to use. Slicing it a certain way is up to you, as this won’t make a difference with the aroma of course but it can look so pretty (which, I think is the best part) when it’s cut like it is shown in the photos below.
    2. Add the orange slices, and other fresh fruits and then add the rosemary sprigs.
    Sliced lemons on cutting board
    Sliced lemons
    Fruit, rosemary and water in glass pot
    Fill pot
    1. Next, add the cloves and cinnamon sticks, just pouring/placing them where you think they’d look great.
    Cloves added to glass pot with other items
    Add cloves
    Cinnamon sticks added to glass pot with other items
    Add cinnamon sticks
    1. This next step is where star anise would look beautiful added to this simmering pot recipe too but as I mentioned before, it can be hard to find so I used anise extract instead.
    Hands opening anise extract

    I absolutely love what adding anise extract does to the water, and how it sizzles in the pot of water.

    Simmer pot with apples, oranges, cinnamon sticks, cloves and more!
    Finished Simmer Pot
    1. When you have everything in the sauce pan, it’s time to place the pot on the stovetop burner and turn the burner on low, to allow it to simmer. I usually leave it uncovered but if you have a lid that has a vent, you may choose to put the lid on for more gentle scent.

      This can simmer for a couple of hours or as long as you want to, and as long as it keeps putting out a scent.
    Hands holding simmer pot
    Time to simmer

    Equipment

    You can use a small sauce pan or a large pot, or whatever you love using on the stovetop. I love using this clear glass pot so we see the beautiful colors as well.

    What to do with a simmer pot when it’s done

    If only using the simmering pot for a short amount of time, drain the water, allow it to cool, and then store contents in the refrigerator, and then reheat it with fresh water again, when you’re ready to add more scents to your home.

    Simmer pot FAQ’s

    Can you drink the simmer pot?

    This depends on what you put in it and how much of certain ingredients you put in it. For instance this simmer pot recipe may not be too tasty but if you use apple juice, or apple cider instead of water, it may be more delicious. (However I’d reduce the extract as it may overpower for the taste.)

    How long do you do a simmer pot for?

    Typically, heating a simmer pot for a couple of hours is a good amount of time for filling the house with the scent.

    Can you do a simmer pot with a gas stove?

    You can but it can be a little hard to lower the heat enough for a simmer. You also want to cautious that if you turn the gas low enough, that the flame may go out and that can be dangerous.

    Can you use a slow cooker for a simmer pot?

    You can! If there’s a warm setting, this should heat the different ingredients well too!

    More Ideas You’ll Love

    Did you make this? I’d be so grateful if you left a “star” rating below to let me know what you thought! Then, the next time you need a quick and easy recipe, come back to Fantabulosity to browse all of my easy recipes!

    Recipe

    Simmer pot with apples, oranges, cloves, rosemary and more!
    Print Pin
    5 from 1 vote

    Easy Simmer Pot Recipe (Simmering Potpourri)

    Easy Simmer Pot Recipe on the Stovetop: A great way to make a home smell fabulous, in a more natural way, especially during the colder time of year.
    Prep Time 5 minutes minutes
    Cook Time 30 minutes minutes
    Total Time 35 minutes minutes
    Servings 4 cups
    Calories 55kcal
    Author Jessica Burgess

    Ingredients

    • 4 cups water
    • 3 cinnamon sticks
    • 2 sprigs fresh rosemary
    • 1 apple
    • 1 orange
    • 1 lemon
    • 1 Tablespoon whole cloves
    • 1 teaspoon anise extract

    Instructions

    • Add 4 cups of water to a sauce pan or stock pot.
    • Slice fruit in to thin slices and place in water, along with rosemary sprigs, cloves, cinnamon sticks and anise extract.
    • Place on burner and simmer on "low" for at least 30 minutes or as long as you desire the scent to fill your home, or until the scents start to fade.

    Notes

    What to do with a simmer pot when it’s done:
    If only using the simmering pot for a short amount of time, drain the water, allow it to cool, and then store contents in the refrigerator, and then reheat it with fresh water again, when you’re ready to add more scents to your home.

    Nutrition

    Serving: 1simmer pot | Calories: 55kcal | Carbohydrates: 15g | Protein: 1g | Fat: 0.3g | Saturated Fat: 0.1g | Polyunsaturated Fat: 0.1g | Monounsaturated Fat: 0.03g | Trans Fat: 0.003g | Sodium: 15mg | Potassium: 165mg | Fiber: 4g | Sugar: 9g | Vitamin A: 115IU | Vitamin C: 34mg | Calcium: 61mg | Iron: 1mg

    Peach Mango Pie

    December 11, 2022

    A slice of peach mango pie on a white plate topped with a scoop of vanilla ice cream.

    Peach Mango Pie: Grab your favorite pie crust, some frozen peaches and mangos, and a few other ingredients, and whip up this delicious, easy dessert in no time. With just 15 minutes of prep time, this peach mango pie recipe may be one of the easiest pie recipes ever!

    A slice of peach mango pie on a white plate, topped with a scoop of vanilla ice cream.

    Why You’ll Love This Recipe

    There’s nothing quite like a fresh baked fruit pie, but who has the time?

    Guess what? You do!

    This peach mango pie uses frozen fruit to make the fruit filling and pre-made pie crusts to make it super quick and easy to create a fresh, homemade pie! Of course you can use your favorite homemade pie crust recipe if you’d prefer (we have an amazing flaky pastry, buttery pie crust recipe on the blog if you need one).

    With just 15 minutes of prep time, this pie is the perfect dessert for a dinner party or a Sunday evening family dinner. Whip it up and pop it in the oven and you’ll have a fresh baked pie in a little over an hour!

    [feast_advanced_jump_to]

    Should Mango Peach Pie be Eaten Warm or Cold?

    This peach mango pie is best served warm or at room temperature, however, it can be enjoyed cold as well. Make sure to completely cool the pie after baking and then reheat it if you wish for it to be served at a warmer temperature. Letting the pie cool will allow it to set nicely.

    What Texture Should the Peach Mango Pie be?

    This peach mango pie should be firm after cooling. You want to make sure to add the pie filling to the pie crust after it's been dusted with flour and make sure that you are leaving any excess fruit juices in the bowl when transferring the pie filling to the pie crust. Not doing these two steps can cause a soggy pie.

    You should also make sure the thawed peaches and mangos are well drained, the thawing process will leave behind liquid that can cause a soggy pie.

    Ingredients

    This pie recipe calls for simple ingredients you can keep in the pantry or fridge so you’re ready to make it whenever your pie craving hits!

    • 16 ounces frozen peaches thawed and drained well
    • 16 ounces frozen mango thawed and drained well
    • ¾ cup granulated sugar
    • ¼ cup dark brown sugar
    • ½ tablespoon ground cinnamon
    • 1 teaspoon ground nutmeg
    • 2 tablespoons cornstarch
    • 1 tablespoon lemon juice
    • 2 teaspoons vanilla extract
    • 1 tablespoon water
    • 2 raw pie crusts store-bought or homemade
    • ¼ cup all-purpose flour
    • 1 tablespoon sanding sugar
    Ingredients for peach mango pie laid out on a counter with labels on the image.
    Peach mango pie ingredients.

    See the printable recipe card below for quantities and step-by-step instructions.

    Substitutions

    This pie recipe is simple, and it’s also very versatile! Here are a few suggested substitutions…

    • Dark Brown Sugar – instead, you can use light brown sugar.
    • Nutmeg – this can be replaced with ground cloves or pumpkin pie spice.
    • Lemon Juice – you can also use lime juice if you prefer/that’s what you have.
    • Vanilla Extract – you can use almond extract instead. It will create a different flavor profile, but the end result will still be delicious!
    • Egg Wash – if you prefer, you can brush your pie crust with melted butter instead!
    • Sanding Sugar – if you don’t have access to sanding sugar, you can use coarse granulated sugar instead. The two are very similar.
    • Omit – based on your taste preference, you can also choose to omit the cinnamon, nutmeg, and/or vanilla extract entirely.
    • Canned Peaches – If you only have canned peaches on hand, save those for this peach cobbler with canned peaches recipe. You won’t regret it!

    Instructions

    1. Preheat your oven to 375 degrees F and spray a 9-inch pie dish with non-stick cooking spray.
    2. Flour both sides of 2 pie crusts using the ¼ cup of flour. Line the bottom of your pie pan with one of the pie crusts. With the other pie crust, place a few slits evenly in the center for the pie to vent and set aside.
    A piece of pie dough rolled out on a cutting board with flour sprinkled over it.
    Flour both crusts.
    A pie plate with a floured pie crust pressed into it.
    Place one crust in the pie pan.
    1. In a large bowl, combine your 16 ounces peaches, 16 ounces mango, ¾ cup sugar, ¼ cup brown sugar, ½ tablespoon cinnamon, 1 teaspoon nutmeg, 2 tablespoons cornstarch, 1 tablespoon lemon juice, and 2 teaspoons vanilla extract until well mixed.
    The ingredients for peach mango pie filling in a bowl, ready to be mixed.
    Combine filling ingredients.
    1. Scoop the peach and mango filling mixture into your pie pan with bottom crust, leaving any excess liquid behind in the bowl.
    2. Place the second pie crust with the slits on the top of your pie. It's easiest to do this by rolling the crust up onto a rolling pin and then rolling the pie crust back out across the top of the pie.
    A top pie crust being placed onto a peach mango pie.
    Add top crust.
    1. Tuck the top pie crust under the edges of the bottom pie crust and pinch together. You can also create a ruffle pattern while pinching or use a fork to gently seal the edges if you wish.
    A pie with a top crust, the edges pinched together in a ruffle design.
    Seal the edges as you like.
    1. In a small bowl, lightly whisk together 1 tablespoon water and 1 egg to create an egg wash for the top of your pie. Brush a thin layer of egg wash over the top of the pie and then sprinkle the 1 tablespoon of sanding sugar evenly over the entire top.
    A bowl of egg wash being held above an unbaked pie.
    Make egg wash.
    A pie with a top crust being brushed with a pastry brush.
    Brush pie crust & sprinkle with sanding sugar.
    1. Bake the pie in your preheated oven for 1 hour, or until the pie filling is bubbly and the pie crust is golden. If your pie crust edges start to brown before the top of the pie, you can loosely cover just the edges of the pie with aluminum foil or a pie shield until the last 20 minutes of bake time. 
    A fully baked peach mango pie sitting on a counter with a nice golden brown crust.
    Bake till bubbly and golden brown.
    1. Cool the pie completely before cutting and serving. Serve topped with whipped cream or a scoop of vanilla ice cream!
    A baked peach mango pie with one slice missing from it.
    Cool, slice & serve!

    Variations

    If peaches or mangoes aren’t really your thing, you can change up this pie with your own fruit combo! If you decide to use fresh fruit instead of frozen for any of these, you'll need to prepare them for the pie by coating them with sugar and lemon juice and allowing them to macerate (soften) in your refrigerator for up to 90 minutes. 

    You can also use canned fruit instead of frozen, just make sure you drain as much liquid as you can before using them. 

    Here are a few fruit combos we think would be delicious…

    • Kiwi and Mango
    • Raspberry and Peach
    • Strawberry and Kiwi
    • Cherry and Peach

    …the options are endless! If you do try another combo of fruit other than peach and mango, be sure to leave us a comment below and tell us how it turned out!

    A slice of peach mango pie with vanilla ice cream on top. A fork is taking a piece from the pie piece.
    Serve this a la mode!

    Equipment

    To make this simple pie recipe you’ll need the following tools:

    • 9 inch pie pan (2 inches deep)
    • Non-stick cooking spray
    • Large bowl
    • Small bowl
    • Small whisk
    • Stirring spoon
    • Small knife
    • Aluminum foil or a pie shield 

    Storage

    This peach and mango pie can be stored at room temperature, covered, for up to 2 days. You can refrigerate this pie in an airtight container for up to 4 days, or you can freeze this pie in a freezer-safe airtight container for up to 6 months.

    Top Tip

    You can make this peach mango pie ahead of time and freeze it for up to 6 months in a freezer-safe and airtight container! Makes sure to completely cool the pie before placing it into the freezer container and freezing it (otherwise condensation will form and can cause a soggy pie).

    To reheat your frozen peach mango pie, thaw it in the refrigerator overnight and reheat (bake) in a 350°F oven till heated through. The crust will need to be shielded to prevent over-browning.

    FAQs

    What is peach mango pie made of?

    This pie is filled with peaches and mangos, just as the name suggests! All you need to make the filling is fresh or frozen peaches and mango pieces, sugar, and some spices.

    How long does a peach mango pie last in the fridge?

    You can refrigerate this pie in an airtight container for up to 4 days.

    Can you reheat Peach Mango Pie?

    Absolutely! The best way to reheat your pie to keep it from getting soggy is to place it on a parchment-lined baking sheet and put it in a preheated 350 degrees oven for about 15 minutes. If it’s not warm enough, put it back in the oven in 5-minute increments until it is.

    Can peach pie sit out overnight?

    Yes! This peach mango pie can be stored at room temperature, covered, for up to 2 days.

    Can I use fresh fruit instead of frozen?

    If you have some ripe mangoes and ripe peaches on hand (perhaps it’s peach season right now) and want to use those instead, you’re in luck.

    Yes, you can use fresh mangoes and fresh peaches instead of frozen for this recipe. If you do, you'll need to prepare the peaches and mango for the pie by coating them with sugar and lemon juice and allowing them to macerate (soften) in your refrigerator for up to 90 minutes. 

    Using fresh peaches? Here’s a great tutorial on how to cut a peach that can come in handy!

    Did you make this? I’d be so grateful if you left a “star” rating below to let me know what you thought! Then, the next time you need a quick and easy recipe, come back to Fantabulosity to browse all of my easy recipes!

    More Pie and Peach Recipes

    If you’re looking for more easy and delicious pie recipes, you definitely have to try this easy Banana Cream Pie recipe (people will be wowed by your awesome pie skills with this one) and this trusty classic, Chocolate Cream Chess Pie! Or see some of these favorite peach recipes!

    • slice of peach cobbler on white plate
      Easy Peach Cobbler with Canned Peaches
    • Peach cobbler that was made with cake mix in a white baking pan.
      Peach Cobbler with Cake Mix
    • Peach turnover with drizzle on plate.
      Easy Peach Turnovers
    • Bisquick Peach Cobbler serving on a. plate, with ice cream on top.
      Bisquick Peach Cobbler

    Recipe

    A slice of peach mango pie on a white plate topped with a scoop of vanilla ice cream.
    Print Pin
    5 from 4 votes

    Peach Mango Pie

    Peach Mango Pie: Using frozen peaches and mangos, and a few other simple ingredients, this easy dessert only has 15 minutes of prep time.
    Course Dessert, Snack
    Cuisine American
    Prep Time 15 minutes minutes
    Cook Time 1 hour hour
    Total Time 1 hour hour 15 minutes minutes
    Servings 8 slices
    Calories 185kcal
    Author Jessica Burgess

    Ingredients

    • 16 ounces frozen peaches thawed and drained well
    • 16 ounces frozen mango thawed and drained well
    • ¾ cup granulated sugar
    • ¼ cup dark brown sugar
    • ½ tablespoon ground cinnamon
    • 1 teaspoon ground nutmeg
    • 2 tablespoons cornstarch
    • 1 tablespoon lemon juice
    • 2 teaspoons vanilla extract
    • 1 tablespoon water
    • 2 raw pie crusts store bought or homemade
    • ¼ cup all-purpose flour
    • 1 tablespoon sanding sugar

    Instructions

    • Preheat your oven to 375 degrees F and spray a 9-inch pie pan with non-stick cooking spray.
    • Flour both sides of 2 pie crusts using the ¼ cup of flour. Line the bottom of your pie pan with one of the pie crusts. With the other pie crust, place a few slits evenly in the centre for the pie to vent and set aside.
    • In a large bowl, combine your 16 ounces peaches, 16 ounces mango, ¾ cup sugar, ¼ cup brown sugar, ½ tablespoon cinnamon, 1 teaspoon nutmeg, 2 tablespoons cornstarch, 1 tablespoon lemon juice, and 2 teaspoons vanilla extract until well mixed.
    • Scoop the peach mango mixture into your pie pan with bottom crust, leaving any excess liquid behind in the bowl.
    • Place the second pie crust with the slits on the top of your pie. It's easiest to do this by rolling the crust up onto a rolling pin and then rolling the pie crust back out across the top of the pie.
    • Tuck the top pie crust under the edges of the bottom pie crust and pinch together. You can also create a ruffle pattern while pinching or use a fork to gently seal the edges if you wish.
    • In a small bowl, lightly whisk together 1 tablespoon water and 1 egg to create an egg wash for the top of your pie. Brush a thin layer of egg wash over the top of the pie and then sprinkle the 1 tablespoon of sanding sugar evenly over the entire top.
    • Bake the pie in your preheated oven for 1 hour, or until the pie filling is bubbly and the pie crust is golden. If your pie crust edges start to brown before the top of the pie, you can loosely cover just the edges of the pie with aluminum foil or a pie shield until the last 20 minutes of bake time. 
    • Cool the pie completely before cutting and serving. Serve topped with whipped cream or a scoop of vanilla ice cream!

    Notes

    STORAGE: This peach mango pie can be stored at room temperature, covered, for up to 2 days. You can refrigerate this pie in an airtight container for up to 4 days, or you can freeze this pie in a freezer-safe airtight container for up to 6 months.

    Nutrition

    Serving: 1slice | Calories: 185kcal | Carbohydrates: 45g | Protein: 1g | Fat: 1g | Saturated Fat: 0.2g | Polyunsaturated Fat: 0.1g | Monounsaturated Fat: 0.2g | Sodium: 12mg | Potassium: 185mg | Fiber: 2g | Sugar: 38g | Vitamin A: 800IU | Vitamin C: 24mg | Calcium: 21mg | Iron: 1mg

    Cornflake Candy Cookies

    December 6, 2022

    Close up of cornflake candy cookies

    Cornflake Candy Cookies: A no bake cornflake cookies recipe that uses simple ingredients, like creamy peanut butter, light corn syrup, sugar, vanilla extract, and of course cornflakes!

    Quick Overview: About 10 minutes to cook on the stovetop, and 20 minutes to cool… this no bake dessert is ready to eat in about 30 minutes!

    Cornflake Cookies on white parchment paper

    A good no bake cookie recipe (like these chocolate oatmeal no bake cookies) is one of our favorite cookie recipes to make around here, and this old-fashioned cornflake candy is one of them!

    This no-bake treat is perfect for a quick weeknight dessert or even wonderful to make during Christmas because you can make them to go on a cookie platter with other types of cookies (like these easy cake mix peanut butter cookies) during the holiday season.

    If you’re looking for cookies to make for Christmas, then you’re also going to love these No-Bake Cornflake Wreath Cookies since they use cornflakes too. Then you’ll adore these Snowball Cookies as they’re a traditional Christmas favorite.

    [feast_advanced_jump_to]

    Why you’ll love these

    If you’re looking for an easy cornflake cookies, that the whole family will love, this is it!

    This easy dessert is snackable, delicious treat, that will hit the sweet spot in minutes. No heating up the kitchen with the oven, and it even uses ingredients that you probably already have on hand!

    Ingredients

    5 ingredients! That’s all you need to make this no bake recipe.

    Ingredients on table for cornflake cookies
    Ingredients
    • 1 cup granulated sugar
    • 1 cup light corn syrup
    • 1 cup creamy peanut butter
    • 1 teaspoon vanilla extract
    • 6 cups of corn flakes

    Continue reading for step-by-step instructions for making this recipe or see the printable recipe card at the bottom of the post!

    Instructions

    1. First, get a large cookie sheet (two, if your cookie sheet is small) and cover in parchment paper. (Wax paper will work too if needed. If using aluminum foil, spray with non-stick spray.)
    2. Pour the sugar, corn syrup, and peanut butter in a large saucepan. (One that is big enough to hold the 6 cups of cornflakes eventually.)
    3. While constantly stirring, cook the sugar mixture over medium-high heat until the sugar dissolves and it starts to boil.
    Corn syrup, sugar, peanut butter in stock pot
    Syrup, sugar & peanut butter
    Melted peanut butter and syrup
    Melted together
    1. When the mixture comes to a boil, remove it from the heat and add in the vanilla extract. Stir until combined. Then, pour in the corn flakes, and stir until the cornflakes are all covered in the mixture.
    Vanilla pouring in to peanut butter
    Add vanilla
    Cornflakes pouring in to peanut butter
    Add cornflakes
    1. Use a spoon or large cookie scoop, and scoop some of the mixture and drop cookies (candy) onto parchment, quickly, or the candy will harden and become hard to scoop.
    Mixed cornflakes with peanut butter syrup mixture
    Mix together
    Scoop of cornflake candy over baking sheet
    Scoop cornflake mixture

    If you find that the candy isn’t sticking together well after scooped on to the parchment paper, allow the candy to cool for about a minute, or until it’s cool enough to touch with your clean hands, and gently form the scoops in to tight, balls.

    Scooping the cookie candy on to the baking sheet
    Place on sheet
    Baking sheet of cornflake candy pieces
    Fill Cookie Sheet
    1. Then, allow them to fully cool to room temperature on the parchment paper for about 20 to 30 minutes. Enjoy!

    Variations

    If you’d prefer chocolate peanut butter cornflake cookies, you can try adding chocolate chips to the peanut butter mixture, to slowly melt in to the mix.

    Cornflake Candy on Baking Sheet
    Cornflake Cookie Candy

    Equipment

    You’ll need a large sauce pan, cookie sheet (but you can do without, as long as you have parchement paper, wax paper, or greased aluminum foil) wooden spoon for stirring, and a cookie scoop or spoon for scooping cookies on to surface.

    Storage

    Store the cookies in an airtight container and enjoy them within 5 days.

    Close up of cornflake candy
    Enjoy!

    FAQ

    Can you freeze cornflake candy?

    Yes! These sweet treats freeze wonderfully, for up to 3 months. Simply store in a freezer container.

    Is cornflake candy the same as no bake cornflake cookies?

    Yes! We’ve heard these called many different things: Such as a cornflake cookie recipe, peanut butter no bake cookies, peanut butter cornflake candy, and much more!

    More Cookie Recipes

    If you love this recipe, then you’ll also love the other cookie recipes on the blog:

    • Grandma Ann's chocolate chip cookies piled on a white plate with a gold floral pattern.
      Grandma Ann's Chocolate Chip Cookies
    • Hostess Cupcake cookies stacked on top of one another and a bite taken out.
      Hostess Cupcake Cookies
    • Stacked snickerdoodle cookies on a vintage plate.
      Mom’s Snickerdoodle Cookies
    • Cookies with cherries, dates and walnuts, stacked on vintage plate.
      Grandma’s Christmas Cookies

    Did you make this? I’d be so grateful if you left a “star” rating below to let me know what you thought! Then, the next time you need a quick and easy recipe, come back to Fantabulosity to browse all of my easy recipes!

    Recipe

    Close up of cornflake candy cookies
    Print Pin
    5 from 4 votes

    Cornflake Candy Cookies

    Cornflake Candy Cookies: A no bake cornflake cookies recipe that uses simple ingredients, like creamy peanut butter, light corn syrup, sugar, vanilla extract, and of course cornflakes!
    Course Dessert
    Cuisine American
    Prep Time 5 minutes minutes
    Cook Time 5 minutes minutes
    Cooling 20 minutes minutes
    Total Time 30 minutes minutes
    Servings 36 cookies
    Calories 108kcal
    Author Jessica Burgess

    Equipment

    • 1 Saucepan
    • 1 Large Cookie Sheet
    • Cookie Scoop Or spoon
    • Wooden Spoon for mixing

    Ingredients

    • 1 cup granulated sugar
    • 1 cup light corn syrup
    • 1 cup creamy peanut butter
    • 1 teaspoon vanilla extract
    • 6 cups corn flakes

    Instructions

    • First, get a large cookie sheet (possibly two, if the candy won't all fit on one) and cover in parchment paper. (Wax paper will work too if needed. If using aluminum foil, spray with non-stick spray.)
    • Pour the sugar, corn syrup, and peanut butter in a large sauce pan. (One that is big enough to hold the 6 cups of cornflakes eventually.)
    • While constantly stirring, cook the sugar, syrup, and peanut butter over medium high heat until it starts to boil.
      When the mixture comes to a boil, remove it from the heat and add in the vanilla extract. Stir until combined. Then, pour in the corn flakes, and stir until the cornflakes are all covered in the mixture.
    • Use a spoon or cookie scoop, and scoop some of the mixture and drop cookies (candy) onto parchment, quickly, or the candy will harden and become hard to scoop.
    • If you find that the candy isn't sticking together well after scooped on to the parchment paper, allow the candy to cool for about a minute, or until it's cool enough to touch with your clean hands, and gently form the scoops in to tight, balls.
    • Then, allow them to full cool on the parchment paper for about 20 to 30 minutes. Enjoy!

    Notes

    You can freeze this cornflake candy if you want to make them in advance, or save leftovers. They freeze wonderfully, for up to 3 months. Simply store in a freezer container.

    Nutrition

    Serving: 1candy | Calories: 108kcal | Carbohydrates: 18g | Protein: 2g | Fat: 4g | Saturated Fat: 1g | Polyunsaturated Fat: 1g | Monounsaturated Fat: 2g | Sodium: 71mg | Potassium: 49mg | Fiber: 0.5g | Sugar: 14g | Vitamin A: 83IU | Vitamin C: 1mg | Calcium: 5mg | Iron: 1mg

    Christmas Dessert Charcuterie Board

    December 4, 2022

    Christmas Dessert Charcuterie Board

    Christmas Dessert Charcuterie Board: A dessert platter for the holiday season that’s full of sweet treats, and is a great way to serve smaller items and so much fun to have a variety of sweets. A Christmas charcuterie board is one of our favorite unique charcuterie boards to make.

    Make sure to see below which items I used, with suggestions on other favorite treats, so you can make your own!

    Christmas Dessert Charcuterie Board

    When Christmas rolls around, the season is full of snacking and entertaining and a Christmas charcuterie board can be a fun way to let guests snack all day!

    If you’re hosting or attending a large group gathering, or a Christmas movie night party, you may also want to consider styling a savory charcuterie board like this Christmas Tree Charcuterie!

    [feast_advanced_jump_to]

    Why You’ll Love This Board:

    • This sweet charcuterie board is flexible, and you can use any or all of the items that I used for mine.
    • This holiday dessert charcuterie board is also kid and adult friendly, so it’s sure to be a crowd-pleaser!
    • Although it’s not specifically a themed dessert charcuterie board, based around a certain subject, the theme is more of a red and pink theme, with Christmas goodies!

    Ingredients

    Although your charcuterie board can look a lot different than this one, easily, simply by using something else that you prefer or if you’re not able to find something that I used, I wanted to share what I did use, in case you find it helpful.

    • Candy canes
    • Chocolate covered pretzels
    • Pirouette
    • Snowman marshmallows
    • Christmas M&M’s
    • Stroopwafels (waffle-looking cookies)
    • Cinnamon gummy bears
    • Mini vanilla wafers
    • Marshmallows (snowflake shape and pink peppermint flavor)
    • Little Debbie Christmas Tree Cakes
    • Soft peppermint candies
    • Peppermint popcorn
    • Peppermint Hershey Kisses
    • Peanut butter sandwich crackers
    • Mini chocolate chip cookies
    • Mini pink and red Starbursts
    • Reese’s Christmas Trees
    • Mini Fudge Stripe Cookies
    • Ghirardelli chocolate snowmen
    • Chocolate bells
    • Candy Sour Strips

    Also see the recipe card below for more tips!

    Instructions

    The beautiful thing about a charcuterie board is that you really can’t mess one up. Items can overlap, sit next to something that you’d normally never eat together, and so much more.

    But I’d love to share some of my favorite tips that I follow when styling any charcuterie board!

    Wooden charcuterie board that's empty
    Wooden Charcuterie
    Cookies, marshmallows pretzels on the edges of the charcuterie
    Start in the middle – then edges
    1. First, grab the board, platter, or dish that you’d like to use. If you’re wanting to buy the large wooden board that I used here, this is where you can get this charcuterie board.
    2. Next, what I love to do is put the larger items on the board first. If serving a dip (like this Christmas Tree Cake Dip) I like to put that in the center of the board and then place items around it. However, with this board, I didn’t have a dip but I used the Christmas Tree Cakes as the center of attention.
    3. Then, I start putting other big items (large marshmallows, chocolate-covered pretzels, and candy canes) in the corners. (Mainly because the big items can overlap and hang over the edge of the board to allow more room for smaller items on the board.
    Some items on charcuterie board
    Add little piles
    Complete Christmas Dessert Board
    Fill the gaps
    1. Then, I start picking out the smaller items (but not the smallest… you’ll see why in the next step.) and start placing them from the outside of the board, and work my way in toward the center.
    2. Finally, I take the smallest items, like M&M’s, and fill in the gaps or empty spaces where I can see the board. I also love using the candy sour strips to wiggle in between some of the items for separation, and for an extra color pop!
    Pretzel rods on corner of charcuterie board
    Pretzels & Candy Canes

    That’s it! It’s really that easy. As you can see, I pile things up, and take it as I go. See below for more specific tips on what to avoid when making a charcuterie board.

    Peppermint marshmallows and star marshmallows
    Marshmallows

    Substitutions

    If there’s something on this board that you don’t like, or can’t find, it’s easy to substitute out your favorite snacks or candy! Here are some other ideas you may like to try:

    • Peanut M&M’s
    • Regular popcorn, this caramel corn recipe, or your favorite popcorn
    • Oreo cookies (for this color scheme, Golden Oreos would look better)
    • Strawberries (or red/pink fresh fruit)
    • Apple slices (make sure to soak them in lemon juice a bit first to keep them from turning brown)
    • Sugar cookies or your favorite Christmas cookies
    • Graham crackers
    • Homemade cookies or other store-bought cookies work great too!
    • Rice krispie treats
    • Gingerbread Cookies
    • Snowball cookies
    • Mini cupcakes
    Candies and cookies on board
    Candies & Cookies

    Equipment

    You can use so many different items for the “board,” such as a cutting board, a large platter or even something that’s not normally used as serveware. This charcuterie board on Instagram was made by covering a large board with parchment paper, and it worked great!

    Peppermint popcorn and candy cane kisses
    Popcorn and Kisses

    Storage

    If you happen to have leftover items, store them in their original containers (I usually save them and hide them in the pantry in case I need them again) or in plastic bags or in Tupperware.

    Reese's trees on charcuterie board
    Reese’s Trees

    Top tips

    After making quite a few charcuterie boards, I’ve learned a few things that I always try to avoid:

    • Have guests that are allergic to certain things? It is important to keep that in mind, as different foods are touching.
    • If you use something that’s runny, sticky, wet, etc. it’s best to serve that in small bowls, or it will make items soggy and messy.
    • Don’t feel like you have to use the entire package of an item. For instance, if you’re using a box of cookies, you don’t have to use the entire box all at once. Keep any extras nearby, and if you’d like, you can replenish the board as the night goes on!
    • It’s ok to “repeat” the same item on the board. Like in this board, I had pretzel sticks on two corners, on opposite sides of the board.
    • Even though there isn’t a “right” way to make a board, I DO try to alternate different colors and have a variety of textures. For example, I try to arrange the same colors on opposite sides of the board, to help even out the look of the board.
    Little Debbie Christmas Trees on the charcuterie board
    Little Debbie Christmas Trees

    FAQ

    What kind of chocolate goes on a charcuterie board?

    You can use any kind of chocolate that you like! Milk chocolate, dark chocolate, white chocolate, flavored chocolates, and more! You can also use small chocolate candies or even a small chocolate fondue pot.

    How do you make a candy charcuterie board?

    Different sizes, colors, and flavors of candy are perfect for a board! You can do a color scheme or mix up all the colors and do a rainbow of your favorite colors. Ideally, creating “sections” of different candies is preferred, instead of just mixing it all together.

    Is a charcuterie board an appetizer or dessert?

    It depends on what you want it to be! A traditional charcuterie board, or an appetizer charcuterie board is typically more of a savory board, full of meats and cheeses, dips, and crackers. A dessert board tends to have candy, sweet crackers, sweet dips and more.

    Sour gummy tape on charcuterie board
    Sour Candy Strips

    However you style your board, I’m sure it will be a perfect Christmas dessert board!

    More Christmas Ideas

    If you love Christmas or are looking for more entertaining ideas, you’ll also love these:

    • Close-up of the cranberry, cream cheese, and crumbly pretzel layers in a slice of cranberry pretzel salad.
      Cranberry Pretzel Salad
    • Penuche fudge squares with pecans on a wooden board.
      Old-Fashioned Penuche Fudge
    • A slice of burnt sugar cake on a round, vintage plate.
      Burnt Sugar Cake
    • A slice of chocolate peanut butter dump cake on a round plate.
      Chocolate Peanut Butter Dump Cake

    Did you make this? I’d be so grateful if you left a “star” rating below to let me know what you thought! Then, the next time you need a quick and easy recipe, come back to Fantabulosity to browse all of my easy recipes!

    Recipe

    Christmas Dessert Charcuterie Board
    Print Pin
    5 from 1 vote

    Christmas Dessert Charcuterie Board

    Christmas Dessert Charcuterie Board: A dessert platter for the holiday season that's full of sweet treats, and is a great way to serve smaller items and so much fun to have a variety of sweets.
    Course Dessert
    Cuisine American
    Prep Time 15 minutes minutes
    Total Time 15 minutes minutes
    Servings 15 people
    Calories 971kcal
    Author Jessica Burgess

    Ingredients

    • 2 Candy Canes
    • 4 Chocolate Covered Pretzel Sticks
    • 4 Pirouettes
    • 4 Snowman Marshmallows
    • 1 cup Christmas M&M's
    • 4 Stroopwafels
    • 1 cup Cinnamon Bears
    • 2 cup Mini Vanilla Wafers
    • 2 cups Peppermint Marshmallows
    • 5 Snowflake Marshmallows
    • 2 Little Debbie Christmas Tree Cakes
    • 1 cup Soft Peppermint Candies
    • 2 cups Peppermint Popcorn
    • 1 cup Peppermint Hershey Kisses
    • 2 cups Mini Peanut Butter Sandwich Crackers
    • 2 cups Mini Chocolate Chip Cookies
    • 1 cup Mini Pink & Red Starbursts
    • 5 Reese's Christmas Trees
    • 4 Ghirardelli Chocolate Snowmen
    • 2 cups Mini Fudge Stripes Cookies
    • 7 Chocolate Bells
    • 3 Candy Sour Strips

    Instructions

    • First, grab the board, platter, or dish that you'd like to use. If you're wanting to buy the large wooden board that I used here, this is where you can get this charcuterie board.
    • Next, what I love to do is put the bigger items on the board first. If serving a dip (like this Christmas Tree Cake Dip) I like to put that in the center of the board and then place items around it. However, with this board, I didn't have a dip but I used the Christmas Tree Cakes as the center of attention.
    • Then, I start putting other big items (large marshmallows, chocolate-covered pretzels, and candy canes) in the corners. (Mainly because the big items can overlap and hang over the edge of the board to allow more room for smaller items on the board.
    • Then, I start picking out the smaller items (but not the smallest… you'll see why in the next step.) and start placing them from the outside of the board, and work my way in toward the center.
    • Finally, I take the smallest items, like M&M's, and fill in the gaps where I can see the board.

    Notes

    Storage:
    If you happen to have leftover items, store them in their original containers (I usually save them and hide them in the pantry in case I need them again) or in plastic bags or in Tupperware.
     

    Nutrition

    Serving: 0.25cup | Calories: 971kcal | Carbohydrates: 148g | Protein: 10g | Fat: 40g | Saturated Fat: 18g | Polyunsaturated Fat: 8g | Monounsaturated Fat: 9g | Trans Fat: 0.3g | Cholesterol: 9mg | Sodium: 458mg | Potassium: 202mg | Fiber: 4g | Sugar: 89g | Vitamin A: 72IU | Vitamin C: 9mg | Calcium: 81mg | Iron: 3mg

    Christmas Chex Mix

    December 2, 2022

    Christmas Chex Mix in white bowl

    Christmas Chex Mix: A cereal mixture, covered in melted chocolate with delicious chocolate candies. It’s a great snack that’s perfect for the holiday season and is a crowd-pleaser!

    Quick Overview: Ready to eat in only 17 minutes, this Christmas Chex mix recipe only requires the microwave and a few ingredients!

    Christmas Chex Mix in white bowl
    Christmas Chex Mix

    When you need a Christmas recipe for a snack or a dessert, you’ve found a Christmas snack mix that everyone will love!

    This easy recipe goes wonderfully with other holiday snacks like this Christmas tree cake dip, this Christmas dessert cheese ball, and this Christmas Tree Charcuterie Board.

    [feast_advanced_jump_to]

    Why you’ll love this mix

    • Serve this sweet Chex mix recipe on game night or a holiday party for guests to munch on while they mingle!
    • This is so fun to package it up and give it as Christmas gifts! Place some of it in small plastic treat bags, tie it with a ribbon and even use a cute tag!
    • It’s like a Christmas puppy chow that has the added bonus of candy, making it the perfect combination.

    Ingredients

    Although you can easily trade ingredients out, or use some of your other favorites, this holiday Chex mix recipe is incredible, made with the following ingredients…

    Ingredients for Christmas Chex Mix
    Ingredients
    • 3 cups Rice Chex or Corn Chex cereal
    • 1 cup of Peanut butter puff cereal (we used Reese’s Puffs cereal)
    • 1 cup Christmas M&M’s (you could also use peanut M&M’s)
    • 1 cup mini Reese’s cups (we used the unwrapped, shareable bag)
    • 1-½ cups white chocolate chips
    • ½ cup powdered sugar

    See the recipe card below for the full recipe, where you can see the ingredients and instructions all in one spot.

    Instructions

    The steps in this recipe are super easy, and you’ll be snacking in no time!

    1. First, thinking ahead, grab a large baking sheet and cover it completely with parchment paper.
    2. Next, melt the chocolate baking chips in a large microwave-safe bowl (large enough that the cereal will fit in it after the chocolate is melted) following the package directions for melting. (Most will be to melt on half-power for 2 minutes, stirring in 30-second intervals. Do NOT overcook.)
    White chocolate chips
    Melt chocolate chips
    Melted white chocolate chips in glass bowl
    Melted
    1. Once the chocolate is completely melted, pour your dry cereal in to the bowl of white chocolate and carefully stir to mix, trying to make sure all of the cereal becomes covered, and trying not to break the cereal in to pieces.
    2. Next, pour the powdered sugar on top of the chocolate-covered cereal and stir to combine.
    Melted white chocolate poured over chex cereal
    Pour & stir over cereal
    Powdered sugar poured on to cereal and chocolate
    Add powdered sugar & mix
    1. Pour the cereal on to the prepared baking sheet and spread out, and allow the chocolate to cool and harden. (About 10 minutes.)
    Cereal and powdered sugar mixed
    Stir to combine
    Chocolate covered cereal poured out on to baking sheet
    Pour on to sheet
    1. When the chocolate has cooled to room temperature, pour the candy on top of the cereal mixture and then stir to combine.
    Candy added to chocolate cereal mixture
    Add candy
    Cereal and candy combined on baking sheet
    Stir to combine
    1. If desired, transfer the mix to a large serving bowl, or place in multiple small bowls when entertaining, and place them around the room. (Or, serve on a Christmas dessert charcuterie!)
    Christmas Chex Mix in white bowl ready for eating
    Christmas Snack Mix

    Substitutions

    Not able to have some of the items in this recipe? No problem. Run out of something? Not a problem either! Here are some ideas of what you can use instead:

    • Mini Snickers
    • White chocolate-covered pretzels, pretzel sticks or pretzel twists
    • Cheerios
    • Peanuts
    • Milk Chocolate (instead of white chocolate)
    • Mini chocolate chips
    • Mini marshmallows
    • Red Hot candies
    • Holiday sprinkles (just make sure you add these while the chocolate is still hot, so they’ll stick to the cereal when cooled.)

    Storage

    If there are leftovers, store the holiday mix in an airtight container and enjoy for up to 5 days!

    Top tip

    Make this in advance and store it until needed! It’s one less thing you’ll need to make the day of the event!

    Related Recipes

    If you love easy snackable recipes like this one, then you’ll also love the following recipes:

    • Lemon Puppy Chow in white bowl.
      Lemon Puppy Chow
    • white chocolate covered pecans in gray bowl
      Chocolate Covered Pecans
    • A bowl of Oreo dip with an Oreo in it and crumbled Oreos on top.
      Oreo Dip
    • A sweet cheeseball that has bee rolled in colorful M&M's is centered with pretzels and sugar wafer cookies waiting for dipping
      Chocolate Chip Cheese Ball with M&M’s

    Recipe

    Christmas Chex Mix in white bowl
    Print Pin
    5 from 4 votes

    Christmas Chex Mix

    Christmas Chex Mix: A cereal mixture, covered in melted chocolate with delicious chocolate candies. It's a great snack that's perfect for the holiday season and is a crowd pleaser!
    Course Dessert, Snack
    Cuisine American
    Prep Time 5 minutes minutes
    Cook Time 2 minutes minutes
    Cooling Time 10 minutes minutes
    Total Time 17 minutes minutes
    Servings 12 servings
    Calories 386kcal
    Author Jessica Burgess

    Ingredients

    • 3 cups Rice Chex or Corn Chex cereal
    • 1 cup Peanut butter puff cereal We used Reese's Puffs cereal
    • 1 cup Christmas M&M's
    • 1 cup mini Reese's cups
    • 1½ cups white chocolate chips
    • ½ cup Powdered Sugar

    Instructions

    • First, thinking ahead, grab a large baking sheet and cover it completely with parchment paper.
    • Next, melt the chocolate baking chips in a large microwave-safe bowl (large enough that the cereal will fit in it after the chocolate is melted) following the package directions for melting. (Most will be to melt on half-power for 2 minutes, stirring in 30-second intervals. Do NOT overcook.)
    • Once the chocolate is completely melted, pour your dry cereal in to the bowl of white chocolate and carefully stir to mix, trying to make sure all of the cereal becomes covered, and trying not to break the cereal in to pieces.
    • Next, pour the powdered sugar on top of the chocolate-covered cereal and stir to combine.
    • Pour the cereal on to the prepared baking sheet and spread out, and allow the chocolate to cool and harden. (About 10 minutes.)
    • When the chocolate has cooled to room temperature, pour the candy on top of the cereal mixture and then stir to combine.
    • If desired, transfer the mix to a large serving bowl!

    Notes

    Top Tip:
    Make this in advance and store it until needed! It’s one less thing you’ll need to make the day of the event!
    Storage:
    If there are leftovers, store the holiday mix in an airtight container and enjoy for up to 5 days!
     

    Nutrition

    Serving: 1serving | Calories: 386kcal | Carbohydrates: 51g | Protein: 5g | Fat: 19g | Saturated Fat: 9g | Polyunsaturated Fat: 2g | Monounsaturated Fat: 5g | Trans Fat: 0.03g | Cholesterol: 9mg | Sodium: 188mg | Potassium: 166mg | Fiber: 2g | Sugar: 42g | Vitamin A: 239IU | Vitamin C: 2mg | Calcium: 119mg | Iron: 3mg

    Candy Cane Pie

    December 1, 2022

    Slice of candy cane pie on white plate

    Candy Cane Pie: A no bake Christmas dessert that’s incredible during the holiday season, made of an Oreo crust, heavy cream, peppermint extract, vanilla extract, homemade whipped cream, crushed candy canes, cream cheese, powdered sugar, and food coloring!

    Quick Overview: This peppermint pie recipe only takes 15 minutes to make, then chill for 2 hours or even overnight.

    Slice of candy cane pie on white plate

    When Christmas rolls around, it’s so fun to make peppermint-flavored sweets, Christmas cookies, traditional desserts, and fun desserts, like this Christmas Tree Cake Dip. Now, this candy cane pie recipe is a new favorite, and since it’s a “no-bake” recipe, (one of our favorite things around here!) it makes it even better!

    [feast_advanced_jump_to]

    Why this Pie is a the Perfect Holiday Dessert

    • It starts with the chocolate pie crust, that mixes things up for your holiday pie, compared to traditional pies.
    • Then, the cream cheese mixture that is full of peppermint flavor, which is also a beautiful red color… makes this the perfect dessert for Christmas.
    • With it being no-bake, it’s an easy dessert, that uses simple ingredients.

    Ingredients

    As you can tell, this recipe uses just a few ingredients that you can pick up at almost any major grocery store.

    ingredients for candy cane pie
    Ingredients

    What You’ll Need:

    See the recipe card below that gives the list of ingredients and steps, in a printable recipe card.

    • 2 cups of heavy cream (divided: 1 cup for pie and 1 cup for topping)
    • 1-½ cups of powdered sugar (for pie)+ 2 Tablespoons of powdered sugar (for topping)
    • 2 teaspoons vanilla extract
    • 1 teaspoon peppermint extract
    • 10 drops of red food coloring
    • 5-6 candy canes (or about ¼ cup + 1 Tablespoon) (divided: about 4 candy canes for filling + 2 for topping)
    • 2-8oz. packages of cream cheese, softened
    • Oreo cookie crust (a store-bought crust or any chocolate crumb crust recipe)

    Instructions

    This easy pie only has a few steps, and then it just needs to sit in the refrigerator and chill!

    1. First, in a large mixing bowl (a bowl of a Kitchenaid mixer and whisk attachment, or similar electric mixer works great for this!) whip 1 cup of heavy cream until stiff peaks form, and then set the bowl aside.
    Heavy cream in mixing bowl
    Whip heavy cream
    1. In a different mixing bowl, about medium-sized, add the softened cream cheese and powdered sugar. Mix (I used a hand mixer for this) together the two ingredients until they’re evenly combined.
    Cream cheese and powdered sugar in glass bowl
    Cream Cheese & Powdered Sugar
    Cream cheese and powdered sugar mixed together
    Mixed
    1. Add in 10 drops of red food coloring, vanilla and peppermint extract, and mix with mixer, until color has evenly blended in with the cream cheese mixture.
    Red food coloring drops in cream cheese mixture, in glass bowl
    Red Food Coloring
    Red mixed in with cream cheese and sugar
    Mixed
    1. Place 4 candy canes (or about ¼ cup of peppermint candies) in to a small plastic bag, and seal and crush the candies until fine crumbs. (I used a rolling pin for this.)

      NOTE: You’ll need 1-2 more, crushed candy canes for the topping so you can either crush those now, and save for later or crush them later on.
    Candy canes in plastic zip top bags
    Candy Canes
    Candy canes that are crushed in a plastic zip-top bag
    Crushed Candy Canes
    1. Pour crushed peppermint candy in to red mixture, and stir to combine.
    Crushed candy canes poured in to pie filling
    Add candy canes
    1. Next, pour red cream cheese mixture in to the whipped heavy cream that you set aside earlier. Mix until evenly combined, and then pour in the cookie crust.
    Cream cheese mixture poured in to heavy cream
    Add red mixture to heavy cream
    Red pie mixture poured in to Oreo cookie crust
    Pour pie mixture in crust
    1. In either a different mixing bowl, or clean your previous mixing bowl (I cleaned and used my Kitchenaid mixer bowl again) whip the 1 cup of heavy cream and 2 Tablespoons of powdered sugar until stiff peaks form. This will be used to top the pie with.
    Heavy cream and powdered sugar in mixing bowl
    Heavy cream & powdered sugar
    Homemade whipped cream in white mixing bowl
    Homemade Whipped Cream
    1. Spread the homemade whipped cream over the top of the pie, covering the entire candy cane pie.
    2. Sprinkle more crushed peppermints over the top of the pie. (This was about 1-2 crushed peppermints for me, and was about 1 Tablespoon or so of crushed candies.)
    Homemade whipped cream on top of candy cane pie
    Top with Whipped Cream
    Crushed candy canes sprinkled on pie
    Sprinkle Candy Canes
    1. Place the plastic cover that came with the store-bought crust, on top of the pie. (Or, if you made your own crust, simply cover it with something that won’t mash the whipped cream topping.)
    2. Place the pie in the refrigerator for at least 2 hours, or even overnight to allow the pie to set.
    Pie covered with plastic lid
    Cover and refrigerate
    1. Remove pie from refrigerator, just before serving, slice, and serve! Place the pie back in to the refrigerator when you’re not serving.
    Candy cane pie with a slice cut out

    Substitutions

    If you’d prefer to make some changes to this pie, here are some helpful tips:

    • Crust – You don’t have to use an Oreo crust but it’s our favorite. You may also want to try a sugar cookie crust or a graham cracker crust.
    • Whipped Topping – You can use Cool Whip for the topping, if you prefer but I’ve found that the homemade whipped topping (the heavy cream and powdered sugar) has an incredible, creamy flavor that’s hard to beat.
    • Peppermint – we use candy canes for this recipe but you can use peppermint candies.
    Slice of peppermint pie on white plate, next to rest of pie.
    Serve!

    Top Tip

    If making for the holidays, make in advance so it’s one less thing that you have to worry about on the day of!

    Fork holding a bite of candy cane pie

    Storage

    Store the pie in the refrigerator at all times, unless serving. The pie should be good for 3-5 days or you can even freeze the pie for up to 3 months. (Make sure you allow time for thawing in the refrigerator before serving.)

    More No-Bake Pie Recipes

    If you love easy pie recipes, than you’re also going to love these favorites:

    • No bake peanut butter pie
      No Bake Peanut Butter Pie
    • No bake chocolate pie slice on wood spatula
      Chocolate Cream Cheese Pie
    • A slice of cherry cheesecake on a plate, next to full cheesecake.
      No Bake Cherry Cheesecake
    • A slice of banana cream pie.
      Easy Banana Cream Pie Recipe

    Did you make this? I’d be so grateful if you left a “star” rating below to let me know what you thought! Then, the next time you need a quick and easy recipe, come back to Fantabulosity to browse all of my easy recipes!

    Recipe

    Slice of candy cane pie on white plate
    Print Pin
    5 from 6 votes

    Candy Cane Pie

    Candy Cane Pie: A no bake Christmas dessert that's incredible during the holiday season, made of an Oreo crust, and a smooth and cool, creamy filling.
    Course Dessert
    Cuisine American
    Prep Time 15 minutes minutes
    Chill Time 2 hours hours
    Total Time 2 hours hours 15 minutes minutes
    Servings 8 slices
    Calories 501kcal
    Author Jessica Burgess

    Ingredients

    For Pie (see duplicate ingredients in topping!)

    • 1 cup heavy cream
    • 1 ½ cups powdered sugar
    • 2 teaspoons vanilla extract
    • 1 teaspoon peppermint extract
    • 10 drops red food coloring
    • 16 ounces cream cheese Softened (2 – 8oz. packages)
    • 4 candy canes (or about ¼ cup crushed peppermints)
    • 1 Oreo Pie Crust

    Topping

    • 1 cup heavy cream
    • 2 Tablespoons powdered sugar
    • 1 candy cane (or about 1 Tablespoon crushed peppermints)

    Instructions

    • First, in a large mixing bowl (a bowl of a Kitchenaid mixer or similar works great for this!) whip 1 cup of heavy cream until stiff peaks form, and then set the bowl aside.
    • In a different mixing bowl, about medium-sized, add the softened cream cheese and powdered sugar. Mix (I used a hand mixer for this) together the two ingredients until they're evenly combined.
    • Add in 10 drops of red food coloring, vanilla and peppermint extract, and mix with mixer, until color has evenly blended in with the cream cheese mixture.
    • Place 4 candy canes (or about ¼ cup of peppermint candies) in to a small plastic bag, and seal and crush the candies until fine crumbs. (I used a rolling pin for this.)
    • Pour crushed peppermint candy in to red mixture, and stir to combine.
    • Next, pour red cream cheese mixture in to the whipped heavy cream that you set aside earlier. Mix until evenly combined, and then pour in the cookie crust.
    • In either a different mixing bowl, or clean your previous mixing bowl (I cleaned and used my Kitchenaid mixer bowl again) whip the 1 cup of heavy cream and 2 Tablespoons of powdered sugar until stiff peaks form. This will be used to top the pie with.
    • Spread the homemade whipped cream over the top of the pie, covering the entire candy cane pie.
    • Sprinkle more crushed peppermints over the top of the pie. (This was about 1-2 crushed peppermints for me, and was about 1 Tablespoon or so of crushed candies.)
    • Place the plastic cover that came with the store-bought crust, on top of the pie. (Or, if you made your own crust, simply cover it with something that won't mash the whipped cream topping.)
    • Place the pie in the refrigerator for at least 2 hours, or even overnight to allow the pie to set.
    • Remove pie from refrigerator, just before serving, slice, and serve! Place the pie back in to the refrigerator when you're not serving.

    Video

    Notes

    Storage:
    Store the pie in the refrigerator at all times, unless serving. The pie should be good for 3-5 days or you can even freeze the pie for up to 3 months. (Make sure you allow time for thawing in the refrigerator before serving.)
    Make in Advance:
    If making this for a party or holiday meal, feel free to make this in advance, so it’s one less thing you need to make on the day of.

    Nutrition

    Serving: 1slice | Calories: 501kcal | Carbohydrates: 30g | Protein: 5g | Fat: 41g | Saturated Fat: 25g | Polyunsaturated Fat: 2g | Monounsaturated Fat: 10g | Trans Fat: 0.01g | Cholesterol: 125mg | Sodium: 195mg | Potassium: 134mg | Fiber: 0.003g | Sugar: 28g | Vitamin A: 1636IU | Vitamin C: 0.4mg | Calcium: 95mg | Iron: 0.1mg

    Crock Pot Goulash

    November 19, 2022

    Close up photo of a bowl brimming with noodles, vegetables and ground beef in a rich red tomato based sauce

    Crock Pot Goulash: This old-fashioned comfort food crock pot meal is made with simple ingredients and packed with flavor from chunky vegetables, hearty beef, and warm spices simmered in a rich, tomato-based sauce.

    Old-fashioned comfort food is what the slow cooker does best. Browse more slow cooker dinner recipes while you’re here.

    Pastas are the ultimate comfort food. So along with this one, we love having our hamburger mac and cheese and this quick beef stroganoff recipe.

    A spoon is tucked into a white bowl filled to the brim with goulash packed with vegetables, beef and noodles

    When the temperatures drop and the sweaters come out, I love serving steaming hot bowls of recipes like this goulash recipe, and this chicken noodle soup, comforting clam chowder, and classic chili.

    I especially love throwing ingredients in my slow cooker and coming back a few hours later for a delicious main course, ready to dish out to my family and friends. Now, I think I’ve found the best slow cooker goulash recipe and I am so excited to share it with you!

    Why You’ll Love This Recipe

    With minimal prep and simple, familiar ingredients, this super easy crock pot goulash recipe will be a staple in cooler months. Goulash is an old-fashioned recipe that provides the comfort that you’re looking for! (Speaking of old-fashioned recipes, have you ever had macaroni and tomatoes? It’s a classic southern favorite.)

    If you’re not used to having peppers in your goulash, you can leave them out! But… they do add a great flavor!

    Goulash is comfort food with a capital C. This comfort food classic is a cross between chili mac a little of this sausage pasta bake, and vegetable soup and it is rich, hearty, and delicious!

    Our beef goulash recipe makes 10 generous servings, so this hearty meal is a great option for a large family, a potluck or to serve on game day!

    [feast_advanced_jump_to]

    Ingredients

    Goulash is one of our all-time ultimate comfort foods. It is made with simple, budget-friendly ingredients that you can find in any grocery store.

    Labeled ingredients on counter for crock pot goulash.
    Ingredients for goulash

    Substitutions & Variations

    This easy slow cooker recipe is very flexible and can be adjusted to fit your family’s tastes or dietary preferences. Here are some simple substitutions and suggestions for this easy goulash recipe:

    • Meat: This old-fashioned goulash recipe in the crock pot calls for ground beef, but you can easily substitute lean ground beef, ground chicken (like we used in our chicken bolognese recipe), or ground turkey. Or if you have more ground beef on hand, you can make some of these dinner ideas with ground beef.
    • Spices: To vary the flavor in this goulash, you can use smoked paprika, Hungarian paprika, chili powder, caraway seed, or bay leaves. (Remove the bay leaves before serving.)
    • Broth: If you don’t have beef broth on hand, my homemade chicken broth or vegetable broth will work in a pinch.
    • Sauces: Instead of Worcestershire sauce, you can substitute soy sauce or liquid aminos. Any of the sauces add richness and depth of flavor to the goulash.
    • Add toppings! Serve this easy crockpot goulash with a big dollop of sour cream, a variety of shredded cheese (cheddar cheese, mozzarella cheese or Parmesan cheese), fresh parsley or even crunchy French fried onions.

    *Be sure to see the recipe card below for the full ingredients list & instructions!*

    Instructions

    With just 4 easy steps, you will have a delicious meal with minimal effort that delivers big on flavor!

    1. In the insert of a 6-8 quart crock pot, combine one 28 oz. can crushed tomatoes, 1 cup chunky tomato pasta sauce, 2 tablespoons of Worcestershire sauce, 2 tablespoons of minced garlic, 1 tablespoon paprika, 3 tablespoons Italian seasoning, ½ cup shredded cheddar cheese, ¼ cup grated Parmesan cheese and ½ tablespoon of red pepper flakes and stir until well mixed.
    A white crock pot insert has tomato sauce, cheese, spices and garlic waiting to be stirred together while bowls of vegetables and ground beef are in the background
    Add sauce ingredients
    1. Now, add 2 ½ pounds of cooked and drained ground beef, 1 large chopped onion, 1 diced large green pepper, 1 diced large red pepper, and stir well.
    Cooked ground beef and chopped peppers and onions have been added to a crock pot insert filled with a glossy red tomato based sauce
    Add beef and vegetables
    1. Next, stir in 3 cups of beef broth.
    Beef broth is waiting to be added to a crock pot full of beef, vegetables, spices and cheeses in a rich tomato based sauce
    Stir in beef broth
    1. Cook on low for 5 hours or on high for 3 hours. 30 minutes prior to serving, add 2 cups of uncooked elbow macaroni noodles.
    Cooked elbow macaroni noodles have been added to a big pot of crock pot goulash
    Add macaroni noodles

    Once the noodles are tender, serve the goulash warm and enjoy!

    A black ladle is serving a big spoonful of luscious crock pot goulash
    Old fashioned goulash

    My mouth is watering! I can’t wait to dig into another bowl of this perfect comfort food.

    Putting this on repeat with this easy lasagna soup recipe is what our winter dinner menu consists of.

    A close up photo of a rich red tomato based sauce with ground beef, vegetables and macaroni noodles
    Crock pot American goulash

    FAQs

    What gives goulash its flavor?

    Most goulash recipes get the recognizable flavor from bell peppers, beef, a tomato based sauce and spices like caraway, cumin and paprika.

    What is traditional goulash made of?

    The key ingredients in traditional goulash are ground beef, peppers and onions, spices and macaroni noodles in a seasoned tomato sauce.

    What side dishes go with goulash?

    Steamed rice or cooked egg noodles are staple side dishes for goulash. Fresh baked Italian white bread or this focaccia bread recipe are great for dipping in the saucy goulash. Hungarian goulash, as you may hear this dish called, is often served with cooked cabbage or a cucumber salad. I like to serve this American style goulash (or American chop suey) with a fresh side salad, too.

    Storage

    Leftovers from this goulash recipe in the slow cooker can be stored in an airtight container in the refrigerator for up to 5 days.

    You can freeze slow cooker goulash for up to 5 months in an airtight, freezer safe container. We recommend freezing the goulash without the noodles. Thaw the leftover goulash in the refrigerator, reheat it on the stove or in your crock pot, add the cooked noodles and serve.

    Two bowls of goulash sit alongside a crock pot full of the same rich, hearty soup brimming with beef, vegetables and noodles

    More Slow Cooker Meals

    Busy weeknights and jam-packed weekends call for easy slow-cooker meals, am I right? Here are a few of our very favorite crock pot dinners:

    • Slow Cooker Chicken Drumsticks
    • BBQ Pork Steaks in the Slow Cooker
    • Venison Chili
    • Slow Cooker Pulled Pork

    Did you make this? I’d be so grateful if you left a “star” rating below to let me know what you thought! Then, the next time you need a quick and easy recipe, come back to Fantabulosity to browse all of my easy recipes!

    Recipe

    Close up photo of a bowl brimming with noodles, vegetables and ground beef in a rich red tomato based sauce
    Print Pin
    5 from 5 votes

    Crock Pot Goulash

    Crock Pot Goulash: This comfort food crock pot meal is made with simple ingredients and packed with flavor from chunky vegetables, hearty beef and warm spices simmered in a rich, tomato based sauce.
    Course Main Course
    Cuisine European
    Prep Time 10 minutes minutes
    Cook Time 5 hours hours
    Total Time 5 hours hours 10 minutes minutes
    Servings 10 2 cup servings
    Calories 465kcal
    Author Jessica Burgess

    Equipment

    • slow cooker

    Ingredients

    • 1 28 oz can crushed tomatoes
    • 1 cup chunky tomato pasta sauce
    • 2 tablespoon Worcestershire sauce
    • 2 tablespoon minced garlic
    • 1 tablespoon paprika
    • 3 tablespoon Italian seasoning
    • ½ cup shredded cheddar cheese
    • ¼ cup grated Parmesan cheese
    • ½ tablespoon red pepper flakes
    • 2 ½ lbs ground beef browned and drained
    • 1 onion diced
    • 1 tomato diced
    • 1 green bell pepper diced
    • 1 red bell pepper diced
    • 3 cups beef broth
    • 2 cups elbow macaroni noodles uncooked

    Instructions

    • In the insert of a 6-8 quart crock pot, combine one 28 oz. can crushed tomatoes, 1 cup chunky tomato pasta sauce, 2 tablespoons of Worcestershire sauce, 2 tablespoons of minced garlic, 1 tablespoon paprika, 3 tablespoons Italian seasoning, ½ cup shredded cheddar cheese, ¼ cup grated Parmesan cheese and ½ tablespoon of red pepper flakes and stir until well mixed.
    • Now, add 2 ½ pounds of ground beef that has been browned and drained, 1 diced large sweet onion, 1 diced large tomato, 1 diced green bell pepper and 1 diced red pepper and stir well.
    • Next, add 3 cups of beef broth and stir well.
    • Cook on low for 5 hours or high for 3 hours. 30 minutes prior to serving, add 2 cups of uncooked elbow macaroni noodles. Once the noodles are tender, serve the goulash warm and enjoy!

    Notes

    • If you’re not used to have peppers in your goulash, you can leave those out but they provide amazing flavor!
    • We recommend using lean ground beef for this recipe, but you can also use ground chicken or ground turkey.
    • You can precook the noodles and add them right before serving this old fashioned goulash.
    • Crock pot goulash can be stored in an airtight container in the refrigerator for up to 5 days.
    • You can freeze the goulash for up to 5 months. We recommend freezing the goulash without the noodles and add them after thawing. Thaw the goulash in the refrigerator before reheating and serving.
    • To reheat the goulash, you can return it to the crock pot and heat on low for an hour. You can also microwave it in a microwave-safe container. Another option is to heat the goulash on the stove top in a large pan over medium heat. 

    Nutrition

    Serving: 2cups | Calories: 465kcal | Carbohydrates: 28g | Protein: 29g | Fat: 26g | Saturated Fat: 10g | Polyunsaturated Fat: 1g | Monounsaturated Fat: 11g | Trans Fat: 1g | Cholesterol: 88mg | Sodium: 355mg | Potassium: 618mg | Fiber: 3g | Sugar: 4g | Vitamin A: 1195IU | Vitamin C: 30mg | Calcium: 131mg | Iron: 4mg

    Crock Pot Chicken Enchiladas

    November 17, 2022

    A plate holds a serving of crock pot chicken enchiladas that has been topped with sour cream and chives

    Crock Pot Chicken Enchiladas: With all of your favorite chicken enchilada ingredients simmered in a crock pot and topped with cheddar cheese, this easy slow cooker enchilada recipe will be a family favorite in no time!

    Mexican night got a whole lot easier. For more ways to cook chicken in your slow cooker, browse these easy crockpot chicken recipes. You’ll also find beef, pork, and more in the whole crockpot dinner collection.

    A slow cooker insert holds a chicken enchilada mixture with a layer of melty cheddar cheese and one serving has been removed

    Chicken in the Crock Pot is not only easy to make but making different variations of chicken can keep things from getting boring! This Crock Pot Jalapeno Chicken and this garlic parmesan chicken pasta, are others that you’ll want to try!

    Our family loves the flavors of Mexican food. Enchiladas, street tacos, and beef and cheese burritos make a regular appearance on our dinner menu. We’ve turned them into a creamy chicken chili, a tasty chicken casserole, a layered taco appetizer dip, taco pinwheels, and even taco soup! And now, I’m sharing a twist on classic baked enchiladas that you can make in your slow cooker!

    Why You’ll Love This Recipe

    Slow cooker enchiladas are an easy weeknight main course. You can pop the ingredients in the slow cooker on low for most of the day and have a delicious meal ready to eat in about 30 minutes.

    Sometimes, the thought of filling and rolling a big pan of enchiladas is a little overwhelming. This recipe for slow cooker chicken enchiladas simplifies that process. There is no rolling, no mess and I don’t even have to turn the oven on!

    The familiar flavors of cumin, chiles, chili powder, garlic and onion are a crowd-pleaser so this is a great recipe to make for potlucks, family dinners, and taco Tuesday!

    [feast_advanced_jump_to]

    Ingredients

    You can grab all of the ingredients for this crockpot chicken enchilada casserole at your local grocery store and they are easy to keep stocked in your fridge, freezer, and pantry.

    Corn tortillas, chicken breasts, enchilada sauce, corn, black beans, green chiles, onions, cheese and a lime are displayed on a white marble background
    Enchilada ingredients
    • 4 large boneless, skinless chicken breasts (1 ½ – 2 lbs)
    • One 28 ounce can of red enchilada sauce
    • One 15 ounce can of black beans, drained and rinsed
    • One 4 ounce can of mild green chiles
    • ½ onion, diced
    • 1 teaspoon garlic powder
    • One 15 ounce can of corn, drained
    • 10 corn tortillas, cut into strips
    • 1 lime, juiced
    • 2 cups shredded cheddar cheese

    See the printable recipe card below for ingredients, nutrition information, and detailed recipe notes.

    Instructions

    This slow cooker recipe is very simple (much like this Slow Cooker Orange Chicken recipe) but we’ve made sure to include step-by-step instructions with photos below to ensure that your crockpot chicken enchiladas are a success!

    1. First, spray a 6-quart slow cooker insert with non-stick cooking spray.
    2. Place 4 large skinless, boneless chicken breasts (about 1 ½ – 2 lbs) in the slow cooker insert.
    3. Then, in a large bowl, combine 28 oz. of enchilada sauce, one 15 oz. can of black beans (drained and rinsed), one 4 oz. can of mild green chiles, ½ of an onion (diced) and 1 teaspoon of garlic powder.
    4. Now, pour the enchilada sauce mixture over the raw chicken in the slow cooker. Place the lid on the slow cooker and cook for 6-8 hours on low or for 3-4 hours on high. Use a meat thermometer to check that the chicken has reached an internal temperature of 165 degrees E.
    A mixing bowl holds a mixture of enchilada sauce, corn, onions, black beans and green chiles ready to be added to a slow cooker
    Enchilada sauce & beans
    A white slow cooker insert holds chicken breasts that have been covered with a mixture of beans, corn, onions, chiles and enchilada sauce
    Pour over chicken
    1. Once the chicken is fully cooked, remove it from the crockpot. Shred the chicken and return it to the crock pot.
    2. Add the 15 oz. can of corn (drained), the tortilla strips, and the juice of one lime to the chicken mixture in the crock pot. Stir to mix well.
    Bowls hold shredded chicken, corn, shredded cheese and lime juice and a plate of corn tortillas are also displayed on a white marble background
    Shred chicken
    A slow cooker insert holds a chicken enchilada mixture and strips of corn tortillas
    Add corn & tortillas
    1. Now, sprinkle the 2 cups of shredded cheddar cheese over the top of the mixture in the crock pot. Replace the lid of the crock pot and cook for an additional 30 minutes on high or until the cheese is melted.
    A slow cooker insert holds a mixture of chicken enchilada filling that has been covered with a layer of shredded cheddar cheese
    Add cheese
    A slow cooker insert holds a crock pot chicken enchilada mixture topped with a layer of melty cheddar cheese
    Continue cooking
    1. Serve the crock pot enchiladas hot with optional toppings: lime wedges, sour cream, chopped chives, fresh cilantro, diced onions, green onions, black olives, homemade salsa, avocado slices and guacamole.
    A white plate holds a serving of cheesy chicken enchiladas while another plate, limes and a board with additional shredded cheese are visible in the background

    Substitutions & Variations

    Slow cooker recipes are generally pretty forgiving and flexible. Here are a few ways you can adjust the ingredients in these crock pot chicken enchiladas.

    • Try pork instead of chicken – You can use an equal amount (amount 2 lbs.) of boneless pork tenderloin or boneless pork shoulder in place of the chicken.
    • Try a different cut of chicken – Like dark meat? You can use boneless chicken thighs as well.
    • Increase the heat – If you prefer spicier enchiladas, you can use hot green chilies, a Mexican-style can of corn and serve with jalapeños.
    • Add taco seasoning – If you want to add even more spice, sprinkle a packet of chicken taco seasoning over the chicken breasts before adding the enchilada sauce mixture to the crock pot.
    • Use homemade enchilada sauce – While a can of enchilada sauce is easy, if you love your recipe for homemade enchilada sauce, you can absolutely use it for crock pot enchiladas.
    A white plate holds a serving of crock pot chicken enchiladas while another plate and a wooden board holding shredded cheese are in the background

    FAQs

    What’s typically in an enchilada?

    Enchiladas can be made with many different fillings, but traditionally, an enchilada is filled with meat (chicken, beef, or pork), cheese, sauce, and vegetables/beans.

    Can I use frozen chicken breasts in this recipe?

    We do not recommend using frozen chicken breasts in this recipe as the chicken would be at a low temperature for too long.

    What kind of cheese is traditionally used for enchiladas?

    The most popular options are cheddar cheese, Monterey jack cheese or a Mexican blend of cheese. I’ve even seen enchiladas made with cheese dips like this smoked queso, so feel free to use your favorite cheese. We love to sprinkle a little cotija cheese or queso fresco on the top of our enchiladas, too.

    Storage

    Store the leftover slow cooker enchiladas in an airtight container in the refrigerator for up to 3 days.

    A close up photo of a serving of crock pot chicken enchiladas garnished with sour cream and fresh chives

    More Slow Cooker Entree Recipes

    The convenience of a dinner made in the slow cooker is a game changer for busy families. This Crock Pot Cube Steak is one of our favorites but here are a few of our other favorites ways to make mealtime easier (and delicious!):

    • Slow Cooker Goulash
    • BBQ Pork Steaks in the Slow Cooker
    • Slow Cooker Chicken Drumsticks
    • Cherry Cola Slow Cooker Pulled Pork
    • Slow Cooker BBQ Meatballs

    Did you make this? I’d be so grateful if you left a “star” rating below to let me know what you thought! Then, the next time you need a quick and easy recipe, come back to Fantabulosity to browse all of my easy recipes!

    Recipe

    A plate holds a serving of crock pot chicken enchiladas that has been topped with sour cream and chives
    Print Pin
    5 from 3 votes

    Crock Pot Chicken Enchiladas

    Crock Pot Chicken Enchiladas: With all of your favorite chicken enchilada ingredients simmered in a crock pot and topped with cheddar cheese, this easy slow cooker enchilada recipe will be a family favorite in no time!
    Course Main Course
    Cuisine Mexican
    Prep Time 15 minutes minutes
    Cook Time 8 hours hours
    Total Time 8 hours hours 15 minutes minutes
    Servings 8 servings
    Calories 387kcal
    Author Jessica Burgess

    Ingredients

    • 4 large boneless, skinless chicken breasts 1 ½ – 2 lbs
    • 28 ounces red enchilada sauce
    • 15 ounces can black beans drained and rinsed
    • 4 ounces can mild green chiles
    • ½ onion diced
    • 1 teaspoon garlic powder
    • 15 ounce can corn drained
    • 10 corn tortillas cut into strips
    • 1 lime juiced
    • 2 cups shredded cheddar cheese

    Instructions

    • First, spray a 6 quart slow cooker insert with non-stick cooking spary.
    • Place 4 large chicken breasts (1 ½ – 2 lbs) in the slow cooker.
    • Then, in a large bowl, combine 28 ounces of enchilada sauce, one 15 ounce can of black beans, one 4 ounce can of mild green chiles, ½ of an onion (diced) and 1 teaspoon of garlic powder.
    • Now, pour the enchilada sauce mixture over the raw chicken in the slow cooker. Place the lid on the slow cooker and cook on low for 6-8 hours or on high for 3-4 hours. Use a meat thermometer to check that the chicken has reached an internal temperature of 165 degrees F.
    • Once the chicken is fully cooked, remove it from the crock pot. Shred the chicken and return it to the sauce in the crockpot.
    • Add the 15 ounce can of corn, the 10 corn tortillas that have been cut into strips and the juice of one lime to the chicken mixture in the crock pot. Stir to mix well.
    • Now, sprinkle 2 cups of shredded cheddar cheese over the top of the chicken mixture in the crock pot. Replace the lid of the crockpot and cook for an additional 30 minutes on high or until the cheese is melted.
    • Serve with optional toppings: sour cream, chopped chives, chopped cilantro, salsa, diced onions, avocado slices and guacamole.

    Notes

    • We don’t recommend using flour tortillas in this recipe as they tend to get very soggy. So, we find that yellow or white corn tortillas work best.
    • Refrigerate leftover crock pot enchiladas in an airtight container for up to 3 days. 

    Nutrition

    Serving: 1serving | Calories: 387kcal | Carbohydrates: 42g | Protein: 27g | Fat: 13g | Saturated Fat: 6g | Polyunsaturated Fat: 1g | Monounsaturated Fat: 3g | Trans Fat: 0.01g | Cholesterol: 64mg | Sodium: 1473mg | Potassium: 556mg | Fiber: 8g | Sugar: 7g | Vitamin A: 987IU | Vitamin C: 13mg | Calcium: 258mg | Iron: 3mg

    Pecan Snowball Cookies

    November 16, 2022

    Close up photo of buttery snowballs cookies coated in powdered sugar piled on a white cake stand

    Pecan Snowball Cookies: These tender, buttery pecan snowball cookies, rolled in powdered sugar, are a Christmas time favorite made with just 5 ingredients!

    Buttery and pecan-heavy, these belong on any cool-weather cookie tray. Here are more cozy fall dessert recipes to bake alongside them.

    Powdered sugar coated pecan snowball cookies are piled on a white cake stand
    Easy snowball cookie recipe

    Get that glass of milk ready, because it is cookie season! Around Christmas time, my cookie jar and holiday cookie tray are never empty. Whether I’ve made no bake cornflake wreath cookies or a batch of cut out sugar cookies to decorate with our boys, cookies and Christmas go hand in hand. I know I can’t go wrong with classic snowball cookies!

    Why you’ll love this recipe

    If this is your first time making snowball cookies, you will absolutely adore these melt in your mouth cookies. Each tasty little snowball has a sweet powdered sugar coating and a crumbly, buttery cookie center. Yep, I’m pretty sure these are the best ever snowball cookies!

    With just 5 simple ingredients, this is an easy snowball cookie recipe. It is pretty much a mix, roll and bake kind of recipe and you know easy recipes are my favorite!

    If you need a snow day activity, let the kids help! They can roll the cookies into balls before baking and then roll the cooled cookies in powdered sugar.

    These cookies are so festive and perfect for the holiday season! With their sweet powdered sugar coating, pecan snowball cookies really do look like little snowballs piled up on your Christmas cookie tray.

    [feast_advanced_jump_to]

    Ingredients

    With a quick trip to your grocery store or even just a visit to your kitchen, you can make buttery snowball cookies with just 5 basic ingredients!

    Flour, butter, vanilla, pecan halves and powdered sugar are in various sized bowls on a white marble background
    Ingredients for classic snowball cookies
    • 2 sticks (1 cup) salted butter, softened
    • 2 ⅓ cups powdered sugar, divided
    • 1 ¾ cups all purpose flour
    • 1 ¼ cups pecan halves, finely chopped
    • 2 teaspoons vanilla extract

    See the printable recipe card below for ingredients, nutrition information and detailed recipe notes.

    Instructions

    If this your first time making snowball cookies, then you have come to the right place. We have step-by-step instructions with photos below to make baking these pecan snowballs a breeze!

    1. First, use a food processor or hand held chopper to chop 1 ¼ cups of pecan halves into finely ground pieces.
    2. Next, in a small bowl, combine 1 ¾ cups of all purpose flour with the ground pecans and set aside.
    3. Now, in a medium bowl, cream 2 sticks of softened, salted butter with ⅓ cup of powdered sugar using a hand mixer until the mixture is fluffy and light yellow. Add 2 teaspoons of vanilla extract to the butter mixture and cream to combine.
    All purpose flour and finely ground pecans have been mixed together with a wooden spoon in a large white mixing bowl
    Combine flour and ground pecans
    Two sticks of butter, vanilla extract and powdered sugar have been mixed with a hand mixer in a large mixing bowl until they are fluffy and light yellow
    Cream butter, powdered sugar & vanilla
    1. Add the flour and nut mixture to the creamed butter and use a wooden spoon to mix the dough by hand until it is combined. Cover the bowl with plastic wrap and chill the dough for 20 minutes.
    2. Now, preheat the oven to 350 degrees F and line 2 or 3 cookie sheets with parchment paper.
    3. Using a cookie scoop to portion the dough, roll each scoop of dough into a ball.
    A soft pecan shortbread cookie dough is in a large white mixing bowl covered with plastic wrap, ready to chill in the refrigerator
    Chill the cookie dough
    A hand is holding a ball of cookie dough that has been scooped with a cookie scoop from a bowl of dough in the background
    Scoop & roll
    1. Place the dough balls on the prepared baking sheets and bake them for about 10 minutes or just until they are lightly browned on the bottom. The cookies will be light in color, so watch them carefully so they are not overbaked. All the cookies to cool for about 2 minutes.
    2. Finally, place the remaining 2 cups of powdered sugar in a shallow bowl and rolls the cookies in the powdered sugar. Place them on a cooling rack to cool completely. Once the cookies have cooled, roll them in powdered sugar a second time and enjoy!
    A metal baking sheet lined with parchment paper holds balls of pecan cookie dough
    Bake snowball cookies
    A hand holding a pecan snowball cookie is rolling it in powdered sugar while a wire rack in the background holds additional cookies that are in various stages of coating
    Roll twice in powdered sugar

    Aren’t these sweet little snowballs pretty? I think they are just gorgeous to pile on a cake stand or cookie tray.

    A close of photo of powdered sugar coated snowball cookies piled on a decorative white cake stand
    Pecan shortbread snowball cookies

    Substitutions

    If you are looking for a few alternatives to the ingredients or methods we used in this snowball cookies recipe, see our suggestions below.

    • Nuts – We made pecan cookies, but you can use walnuts or almonds instead.
    • Extract – Another common way to adjust the flavor of this cookie recipe is to replace half of the vanilla extract with almond extract.
    • Butter – While we used salted butter for this recipe, you can use unsalted butter as well. Just add ½ teaspoon of salt to the dough to help balance the sweetness and enhance the flavor of the cookies.
    • Cookie scoop – Finally, if you don’t have a cookie scoop, you can use a tablespoon to measure the dough. That way, the cookies are uniform in size for even baking.

    Just look at those melt in your mouth pecan snowballs!

    A photo of powdered sugar coated pecan snowball cookies, one with a bite gone, resting on white parchment paper
    Buttery Pecan Snowball cookies

    FAQs

    What are snowball cookies made of?

    Snowball cookies have just 5 ingredients: nuts, flour, butter, vanilla and powdered sugar.

    What are different names for these snowball cookies?

    You may have heard them called Mexican wedding cookies, Mexican wedding cake cookies, pecan sandies, Italian wedding cookies or Russian tea cakes. While they may have different names, they are all very similar recipes for cookies made with a simple nut based cookie dough and powdered sugar coating.

    Why did my snowball cookies flatten?

    The most common reason that snowball cookies might flatten is that the ingredients were too warm and the dough didn’t chill long enough. Chilling the dough ensures that the cookies keep their snowball shape while baking.

    Can snowball cookie dough be frozen?

    Yes! Simply roll the dough into balls and place them in the freezer until the cookie dough is frozen. Place the frozen balls in an airtight container or freezer bag in the freezer for up to 3 months. When you are ready to bake the cookies, allow them to thaw in the refrigerator and follow the rest of the recipe.

    Storage

    Store these pecan snowball cookies in an airtight container at room temperature for up to a week.

    To freeze pecan snowball cookies, bake them and allow them to cool completely. Do not roll them in powdered sugar. Place the baked cookies in an airtight container or freezer bag in the freezer for up to 3 months. When you are ready to enjoy them, thaw them in the refrigerator and then roll the cookies twice in powdered sugar.

    Pecan snowball cookies have been piled on a white cake stand and several additional cookies, one with a bite gone, are sitting on a piece of white parchment paper
    Traditional snowball cookie

    More cookies for Santa

    ‘Tis the season for holiday baking and you can’t go wrong with these Christmas cookie recipes! You will stay firmly on Santa’s nice list with classic gingerbread cookies, adorable Rudolph reindeer cookies, gooey red velvet cookies or decadent chocolate cherry cookies!

    Did you make this? I’d be so grateful if you left a “star” rating below to let me know what you thought! Then, the next time you need a quick and easy recipe, come back to Fantabulosity to browse all of my easy recipes!

    Recipe

    Close up photo of buttery snowballs cookies coated in powdered sugar piled on a white cake stand
    Print Pin
    5 from 4 votes

    Pecan Snowball Cookies

    Pecan Snowball Cookies: These tender, two bite buttery pecan snowball cookies, rolled in powdered sugar, are a Christmas time favorite made with just 5 ingredients!
    Course Dessert
    Cuisine American
    Prep Time 5 minutes minutes
    Cook Time 10 minutes minutes
    Chilling Time 20 minutes minutes
    Total Time 35 minutes minutes
    Servings 36 cookies
    Calories 122kcal
    Author Jessica Burgess

    Ingredients

    • 2 sticks salted butter softened
    • 2 ⅓ cups powdered sugar divided
    • 1 ¾ cups all purpose flour
    • 1 ¼ cups pecan halves finely chopped
    • 2 teaspoon pure vanilla extract

    Instructions

    • First, use a food processor or hand held chopper to chop 1 ¼ cups of pecan halves into finely ground pieces.
    • Next, in a small bowl, combine 1 ¾ cups flour with the ground pecans and set aside.
    • Now, in a medium mixing bowl, cream 2 sticks of softened, salted butter and ⅓ cup of powdered sugar with a hand mixer. Beat for 2 minutes until the mixture is fluffy and light yellow. Add 2 teaspoons of vanilla extract to the butter mixture and cream to combine.
    • Add the flour and nut mixture to the creamed butter and use a wooden spoon to mix the dough by hand until it is combined. Cover the bowl with plastic wrap and chill the dough for 20 minutes.
    • Now, preheat the oven to 350 degrees F and prepare a cookie sheet with parchment paper.
    • Using a cookie scoop, roll each scoop of dough into a ball.
    • Place the dough balls on the prepared baking sheet and bake them for about 10 minutes or just until lightly browned on the bottom. The cookies will be light in color so watch them carefully so they are not overbaked. Allow the cookies to cool for about 2 minutes.
    • Finally, place the remaining 2 cups of powdered sugar in a shallow bowl and roll the cookies in the powdered sugar. Place them on a cooling rack to cool completely. Once the cookies have cooled, roll them a second time in the powdered sugar and enjoy!

    Notes

    • You can substitute almonds or walnuts for the pecans in this recipe.
    • If you are using almonds, you can substitute almond extract for half of the vanilla extract.
    • If you don’t have a cookie scoop, roll about 1 tablespoon of cookie dough into 1-inch balls and place them on the baking sheet.
    • If you have unsalted butter on hand, you can use it and add ½ teaspoon of salt.
    • If the dough seems a bit dry and does not roll into balls, add ½ tablespoon of water until the dough holds together.
    • Store these pecan snowball cookies in an airtight container at room temperature for up to one week.
    • To freeze the dough, scoop the cookie dough onto a baking sheet and place the sheet in the freezer until the dough is frozen. Place the dough balls in an airtight container or freezer bag in the freezer for up to 3 months. Allow them to thaw in the refrigerator and then follow the remainder of the recipe.
    • To freeze the already baked cookies, allow the cookies to cool but do not roll them in powdered sugar. Place them in an airtight container or freezer bag in the freezer for up to 3 months. Allow them to thaw in the refrigerator and then roll the cookies in powdered sugar twice.

    Nutrition

    Serving: 1cookie | Calories: 122kcal | Carbohydrates: 13g | Protein: 1g | Fat: 8g | Saturated Fat: 3g | Polyunsaturated Fat: 1g | Monounsaturated Fat: 3g | Trans Fat: 0.2g | Cholesterol: 13mg | Sodium: 41mg | Potassium: 23mg | Fiber: 0.5g | Sugar: 8g | Vitamin A: 159IU | Vitamin C: 0.04mg | Calcium: 5mg | Iron: 0.4mg

    12 Chicken Casserole Recipes (Easy Weeknight Dinners)

    November 15, 2022

    Chicken Casserole recipes image collage.

    Casseroles are what I fall back on when the week gets away from me. One dish, one oven, and enough left over that nobody has to cook tomorrow either.

    Every one of these is built from things you can find at any grocery store. Canned soup, rotisserie chicken, a bag of shredded cheese. Nothing here needs a special trip.

    If you have never made the poppy seed one, start there. It has been showing up at church suppers for fifty years for a reason.

    Creamy and Classic

    Poppy seed chicken casserole on a dinner plate, with green beans.

    Buttery cracker topping over a creamy chicken filling. The one everybody asks about.

    Make poppy seed chicken casserole when you need something that always disappears.

    Old fashioned chicken and rice casserole being scooped out of baking dish.

    Chicken and rice baked together until the rice soaks up every bit of the sauce.

    Try this old fashioned chicken and rice casserole on a night when you want supper to feel like Sunday.

    A chicken and stuffing slow cooker chicken breast on a spatula.

    A box of stuffing on top, so the whole thing tastes like Thanksgiving on a Tuesday.

    Bake Stove Top stuffing chicken casserole and skip making a side dish entirely.

    Chicken Pot Pie Casserole in white baking dish

    All the chicken pot pie filling you love, spread into a 9×13 so it feeds more people.

    Serve up chicken pot pie casserole when a crust feels like more work than you have in you.

    Crunchy on Top

    Spatula lifting Frito chicken casserole out of baking dish.

    Corn chips baked right on top so they stay crisp against the creamy filling.

    Set out Frito chicken casserole and watch the pan empty.

    Dorito Chicken Casserole on white plate

    Crushed Doritos, cheese, and chicken. The kids will ask for it by name.

    Bake a pan of Doritos chicken casserole on a night when nobody can agree on dinner.

    chicken tater tot casserole serving on spoon

    Tater tots on top, browned and salty, over a creamy chicken base.

    Pull chicken tater tot casserole out of the oven and let the tots do the talking.

    Pasta Bakes

    Cooked chicken spaghetti in plate, with fork digging a bite out.

    Creamy, cheesy, with a little kick from the Rotel. A potluck staple.

    Bring chicken spaghetti with Rotel to the next gathering and plan on going home with an empty dish.

    Chicken Alfredo Lasagna in baking dish, being lifted out.

    Layers of noodles, chicken, and alfredo sauce instead of red.

    Make chicken alfredo lasagna when you want lasagna without the tomato.

    Buffalo Chicken Lasagna

    Buffalo chicken layered into lasagna, tangy and rich at the same time.

    Try buffalo chicken lasagna if your family fights over the wings every time.

    Tex-Mex Casseroles

    taco casserole serving on wooden server

    Everything you want on a taco, baked into one dish.

    Scoop out taco chicken casserole on taco night when you would rather not stand at the stove.

    A slow cooker insert holds a chicken enchilada mixture with a layer of melty cheddar cheese and one serving has been removed

    The slow cooker does the work and you come home to enchiladas.

    Start crock pot chicken enchiladas in the morning and dinner is handled.

    One Dish, Supper Done

    Casseroles earn their keep on the busy nights. Most of these can be put together in the afternoon, covered, and slid into the oven whenever everybody finally gets home.

    Pick two or three that sound good, keep the ingredients on hand, and you will always have something to fall back on.

    More Roundups

    • 26 Easy Crockpot Dinners
    • Slider Recipes for Dinner and Parties
    • Old-Fashioned Dinner Recipes
    • Easy Potluck Desserts

    Crock Pot Cheesy Hashbrowns

    November 12, 2022

    Close up photo of a white plate holding diced hashbrown potatoes covered in melted cheddar cheese

    Crock Pot Cheesy Hashbrowns: Tender potatoes and a seasoned cheese sauce are cooked low and slow in the crock pot, then topped with more cheese and broiled until they are bubbly and golden brown!

    Freeing up the oven on Thanksgiving? That’s exactly why these made my roundup of easy Thanksgiving side dishes.

    Cheesy potatoes go with just about any main dish. Take a look at the rest of my crockpot dinners.

    A white plate holds a serving of cheesy hashbrowns while another plate and the baking dish of potatoes are visible in the background
    Crock pot cheesy potatoes

    With the holidays right around the corner, I am always looking for new side dishes to serve alongside our Instant Pot turkey, smoked Cornish hens, and roasted pork tenderloin. I can’t go wrong with potatoes and cheese cooked until ooey, gooey, and gloriously delicious!

    Why you’ll love this recipe

    Are you planning a big holiday dinner? Slow cooker recipes to the rescue! With oven space at a premium, this recipe for cheesy hashbrowns in the crock pot allows you to save the oven space for the other side dishes on your menu.

    Speaking of a big family dinner or potluck, this is the perfect side dish to feed a crowd. Whether you serve cheesy hashbrowns as a side dish with a main course or add it to your brunch menu, I can almost guarantee you won’t have leftovers. Much like this cheesy hashbrown and hamburger casserole.

    Cheesy hashbrowns are the ultimate comfort food. Have you ever heard them called funeral potatoes? Or, maybe you’ve heard of party potatoes too, and these are similar for sure.

    [feast_advanced_jump_to]

    Ingredients

    This cheesy potatoes recipe is made with simple ingredients that can be found at your local grocery store.

    Diced hashbrown potatoes, shredded cheddar cheese and several other bowls of ingredients are displayed on a white marble background
    Ingredients for cheesy hashbrowns
    • Two 26 oz. bags of diced frozen hashbrowns
    • One 10.5 oz. can of condensed cheddar cheese soup
    • 1 cup sour cream
    • ¼ cup unsalted melted butter
    • 2 tablespoons of Italian seasoning
    • 1 teaspoon garlic powder
    • ½ teaspoon salt
    • ½ teaspoon black pepper
    • 5 cups shredded cheddar cheese, divided
    • 1 tablespoon fresh parsley, chopped (optional for garnish)

    See the printable recipe card below for ingredients, nutrition information and detailed recipe notes.

    Instructions

    When I say this is an easy slow cooker recipe, I mean it. Once you combine the potatoes and cheese mixture in your crock pot, you can set it and forget it until the last few minutes under the broiler. Here are the step-by-step instructions with photos.

    1. First, place the two 26 oz. bags of frozen diced hash brown potatoes into the insert of a 6 quart crock pot.
    2. Then, in a large mixing bowl, combine the 10.5 oz can of condensed cheddar cheese soup, 1 cup of sour cream, ¼ cup unsalted butter (melted), 2 tablespoons of Italian seasoning, 1 teaspoon of garlic powder, ½ teaspoon of salt and ½ teaspoon of black pepper.
    3. Now, add the shredded cheddar cheese to the wet mixture. (Set the remaining 1 cup of shredded cheddar cheese aside.)
    4. Add the wet mixture into the frozen hash browns and stir it to coat the hashbrowns completely. If you do not have room to stir the potatoes and cheese mixture in the crock pot, transfer it to an extra large bowl to mix it. Then, return the coated hashbrowns to the crock pot.
    A glass bowl holds a mixture of cream of chicken soup, shredded cheese, sour cream, Italian seasoning and butter to be mixed with potatoes
    Make the cheese mixture
    An oval slow cooker insert is shown with frozen diced hashbrown potatoes that have been mixed with a creamy cheese mixture
    Put coated potatoes in the crock pot
    1. Place the lid on the crock pot and cook the hashbrowns for 5 to 6 hours on the low setting until the hashbrowns have softened, the cheese has melted and the edges of the hashbrown mixtures are starting to brown.

    Optional but highly recommended!

    1. Next, preheat your oven to broil.
    2. Prepare a 9×13 baking dish with non-stick spray. Transfer the contents of the crockpot into the baking dish.
    An oval slow cooker insert is shown with diced potatoes that have been cooked for several hours and are cheesy and golden brown
    Cook on low for 5-6 hours
    Diced hashbrown potatoes have been transferred to a 9x13 baking dish and are waiting to be topped with shredded cheddar cheese
    Transfer to a baking dish
    1. Then, sprinkle the remaining cup of shredded cheddar cheese over the top of the cheesy hashbrowns.
    2. Place the baking dish in the oven for 1-2 minutes or until the top layer of the cheese begins to bubble and brown. Watch this carefully so the cheese doesn’t burn.
    3. Finally, sprinkle fresh chopped parsley over the top of the hashbrowns before serving.
    A white 9x13 baking dish holds seasoned diced hashbrown potatoes that have been topped with shredded cheddar cheese
    Sprinkle with cheddar cheese
    A 9x13 white baking dish holds baked cheesy hashbrown potatoes that have been sprinkled with fresh parsley
    Broil until cheese is melted and golden

    Oh, man, just look at that pan full of cheesy goodness! The classic combination of ooey gooey cheddar cheese and tender potatoes is one my entire family loves. I bet yours will, too.

    A close up photo of a white baking dish holding golden baked hashbrown potatoes covered in melted cheddar cheese and sprinkled with fresh parsley
    Slow cooker cheesy hashbrowns

    Substitutions & Variations

    This easy slow cooker recipe is easy to make and even easier to adjust to your personal preferences or dietary needs.

    • Use your favorite cheese – Parmesan, Monterey Jack or pepper jack cheeses are delicious to try.
    • Add veggies – Diced yellow onions, bell peppers or small broccoli florets are easy additions to this crockpot hashbrown casserole recipe.
    • Add meat – To make this dish a little heartier, add cooked bacon, diced ham or cooked ground beef to the potato cheese mixture.
    • Switch spices – Omit the Italian seasoning in exchange for a more traditional blend of onion powder and garlic powder.
    • Swap soups – If you can’t find the cheddar cheese soup or prefer a different flavor, try cream of chicken soup.
    • Try toppings – To really take these potatoes to the next level, serve them with a variety of toppings. We like crumbled bacon, French fried onions, sour cream and salsa.
    A white plate holds a serving of cheesy hashbrowns while another plate and the baking dish of potatoes are visible in the background
    Crockpot Cheesy Potatoes

    FAQs

    Can you substitute fresh potatoes for frozen hashbrowns?

    You can but it does require a little more work. Peel and dice potatoes into bite-sized pieces (about 6-7 cups). Place the potatoes in a large bowl, cover them with water for about 30 minutes and let the soak. Drain and dry the diced fresh potatoes before adding them to your crock pot.

    Can I use frozen shredded hashbrowns?

    For this recipe, we do not recommend using the shredded frozen hashbrowns as they don’t stand up to the amount of cooking time in the crock pot and they get soggy.

    What can you put on top of cheesy hashbrowns?

    Well, extra cheese of course! You can also add chopped cooked slices of bacon, crushed cornflakes for some crunch, or even french fried onions!

    Can cheesy hashbrowns be frozen?

    They sure can! This is actually a really great make-ahead freezer meal as this cheesy side dish can be stored in an airtight, freezer-safe container for up to 2 months in the freezer. Allow the frozen potatoes to thaw in the refrigerator before reheating in the microwave or oven.

    What goes with cheesy hashbrowns?

    I love to search a rich ooey gooey cheesy dish with veggies or a salad. (That cancels out some of the calories, right?) I would suggest roasted broccoli, roasted brussels sprouts, candied carrots or the BEST little side salad ever.

    Storage

    Store any leftover cheesy hash browns in an airtight container in the refrigerator or up to 3 days or in the freezer for up to 2 months. Allow the frozen potatoes to thaw in the fridge before reheating them in the oven or microwave.

    A white 9x13 baking dish holds seasoned diced hashbrown potatoes topped with melted cheddar cheese
    Best crock pot hashbrown casserole

    More popular potato dishes

    If you are on the hunt for some of the most delicious side dish recipes to add to your menu, then you just scored! Here is a list of some popular potato recipes:

    • Instant Pot Mashed Potatoes – This is another dish that will save you oven space and you’ll have mashed potatoes in just 25 minutes.
    • Air Fryer Baby Potatoes – These baby potatoes are seasoned and crispy and done in 20 minutes.
    • Amish Potato Salad – If you have never this dish before, you will love this slightly sweeter potato salad with a creamy dressing.
    • Baked Potato Wedges – Classic crowd pleasers, these potato wedges are tossed in ranch seasoning before being baked to perfection.

    Did you make this? I’d be so grateful if you left a “star” rating below to let me know what you thought! Then, the next time you need a quick and easy recipe, come back to Fantabulosity to browse all of my easy recipes!

    Recipe

    Close up photo of a white plate holding diced hashbrown potatoes covered in melted cheddar cheese
    Print Pin
    5 from 6 votes

    Crock Pot Cheesy Hashbrowns

    Crock Pot Cheesy Hashbrowns: Tender potatoes are cooked low in a slow cooker, then topped with more cheese and broiled until they are ooey, gooey and golden brown!
    Course Breakfast, Side Dish
    Cuisine American
    Prep Time 15 minutes minutes
    Cook Time 5 hours hours
    Total Time 5 hours hours 15 minutes minutes
    Servings 15 servings
    Calories 311kcal
    Author Jessica Burgess

    Ingredients

    • 2 – 26 oz bags of diced frozen hashbrowns
    • 1 – 10.5 can condensed cheddar cheese soup
    • 1 cup sour cream
    • ¼ cup unsalted butter melted
    • 2 tablespoon Italian seasoning
    • 1 teaspoon garlic powder
    • ½ teaspoon salt
    • ½ teaspoon black pepper
    • 5 cups shredded cheddar cheese divided
    • 1 tablespoon fresh parsley chopped (optional for garnish)

    Instructions

    • First, place the two 26 oz. bags of frozen diced hash browns into the insert of a 6 quart crock pot.
    • Then, in a large mixing bowl, combine the 10.5 oz can of condensed cheddar cheese soup, 1 cup sour cream, ¼ cup melted, unsalted butter, 2 tablespoons of Italian seasoning, 1 teaspoon of garlic powder, ½ teaspoon of salt and ½ teaspoon of black pepper.
    • Now, add 4 cups of shredded cheddar cheese to the wet mixture. (Set the remaining 1 cup of cheddar cheese aside if you want to sprinkle on top at the end.)
    • Add the wet mixture into the frozen hashbrowns and stir it together to coat the hashbrowns completely. If you do not have room in the crock pot to stir the cheese mixture into the hashbrowns, transfer the hashbrowns into an extra large bowl, stir to coat them completely and transfer the coated hashbrowns back into the crock pot.
    • Place the lid on the crock pot and cook the hashbrowns on low for 5 to 6 hours until the hashbrowns have softened, the cheese is melting and the edges of the hashbrown mixture are starting to brown. (We don't recommend cooking the hashbrowns on the high setting as the cheese mixture will get grainy.)

    Optional, but highly recommended:

    • Preheat your oven to broil.
    • Prepare a 9×13 baking dish with nonstick cooking spray. Transfer the contents of the crockpot into the baking dish.
    • Then, sprinkle the remaining 1 cup of shredded cheddar cheese over the top of the cheesy hashbrowns.
    • Place the baking dish in the oven for 1-2 minutes or until the top layer of cheese melts and begins to bubble and brown. Watch this carefully so the cheese doesn't burn.
    • Finally, sprinkle fresh chopped parsley over the top of the hashbrowns before serving.

    Notes

    • For this recipe, we recommend using diced frozen hashbrowns. The shredded frozen hashbrowns will get soggy and not hold up in the crock pot.
    • We find that shredding a block of cheddar cheese with a cheese grater works best for this recipe. Pre-package shredded cheese often has a coating on it that prevents it from melting as well. 
    • Store the leftover crock pot cheesy hashbrown in an airtight container in the refrigerator for up to 3 days. You can also freeze leftovers in a freezer safe, airtight container for up to 2 months. Allow the frozen hashbrowns to thaw in the refrigerator and then heat them in the oven or microwave.

    Nutrition

    Serving: 1serving | Calories: 311kcal | Carbohydrates: 22g | Protein: 12g | Fat: 20g | Saturated Fat: 11g | Polyunsaturated Fat: 1g | Monounsaturated Fat: 4g | Trans Fat: 0.1g | Cholesterol: 56mg | Sodium: 457mg | Potassium: 434mg | Fiber: 2g | Sugar: 1g | Vitamin A: 683IU | Vitamin C: 9mg | Calcium: 311mg | Iron: 1mg

    Oreo Pizza Recipe

    November 10, 2022

    A close up of a slice of dessert pizza with a cookie crust, cream cheese icing and chopped Oreo cookies

    Oreo Pizza Recipe: With a chocolate chip cookie crust, a layer of rich cream cheese frosting and crumbled Oreo cookies, this dessert pizza recipe is as easy as it is decadently delicious!

    A delicate white plate holds a slice of Oreo dessert pizza and a fork while the rest of the pizza and several Oreo cookies are visible in the background
    Oreo Pizza recipe

    Ya’ll, when a dessert recipe calls for chocolate chip cookie dough, cream cheese and Oreo cookies? You know it is going to be good! I’ve decided that if it is an Oreo dessert recipe, I am in. Have you seen this Oreo dip? Divine. These Oreo Cupcakes with Oreo buttercream? Heavenly. And don’t get me started on Oreo Brookies. They are totally craveable and utterly addictive, just like this no bake Oreo Mousse.

    Why you’ll love this recipe

    This cookie pizza recipe is for cookie lovers! With a golden chocolate chip cookie crust and Oreo crumble sprinkled on top, get that big ol’ glass of milk ready!

    Our Oreo pizza recipe is the perfect sweet treat to make with the kiddos in the kitchen. Little hands can press the cookie dough into the pan, spread the frosting and sprinkle on the Oreo cookies.

    Once you make the Oreo version, you can try different cookie crusts and different toppings for lots of different dessert pizzas.

    [feast_advanced_jump_to]

    Ingredients

    Nope. There is no pizza dough in this sweet pizza recipe. But don’t worry, you can find all of the ingredients at your local grocery store!

    The ingredients used to make an Oreo pizza are laid out on a white marble background
    Dessert pizza ingredients
    • 16 oz. of refrigerated cookie dough (I used Pillsbury Chocolate chunk cookie dough)
    • ¼ cup butter (half of a stick), softened
    • 4 oz. cream cheese, softened
    • ¼ cup powdered sugar
    • 1 teaspoon vanilla extract
    • pinch of salt
    • 1 ½ cups of chopped Oreo cookies (about 12 Oreo cookies)

    See the printable recipe card below for ingredients, nutrition information and detailed recipe notes.

    Instructions

    With our step-by-step photos and easy to follow instructions, you’ll be able to satisfy your sweet tooth with this tasty treat in no time!

    1. First, preheat the oven to 350 degrees F. Prepare a 12 inch round baking sheet or pizza pan with non-stick cooking spray.
    2. Press 16 oz. of chocolate chip cookie dough into an even circle into the pan. Bake for 12-15 minutes or until a toothpick inserted in the center of the cookie comes out clean. Allow the cookie base to cool completely.
    3. Next, in a medium or large bowl, use a hand mixer to cream together ¼ cup softened butter and 4 oz. of softened cream cheese until it is light and fluffy.
    Chocolate chip cookie dough has been pressed into a 12 inch round tart pan and several other recipe ingredients are staged around it
    Press the dough into the pan
    Butter and cream cheese have been mixed together with a hand mixer to create a light yellow fluffy mixture
    Cream butter and cream cheese
    1. Then, add ¼ cup powdered sugar, 1 teaspoon of vanilla extract and a pinch of salt to the cream cheese mixture. Mix it on low speed and then increase the speed to medium and beat the frosting until it combined and smooth.
    2. Now, chop 12 Oreo cookies into small pieces and set them aside. *Are you wondering how to crush Oreo cookies? You can use a knife to chop them into larger pieces or put them in a zip top bag and smash them gently with a rolling pin or wooden mallet for smaller pieces/crumbs.
    Powdered sugar and vanilla extract has been added to a glass bowl that contains a mixture of cream cheese and butter
    Add powdered sugar and vanilla
    Oreo cookies have been chopped into small pieces on a wooden board
    Chop the Oreo® cookies
    1. When the cookie crust is cool, use an offset spatula to spread the cream cheese frosting in an even layer on the cookie. Leave a 1 inch border unfrosted to give the dessert more of a pizza look.
    2. Then, sprinkle the chopped Oreo cookies on top of the cream cheese frosting. Chill the Oreo pizza for 10 minutes in the refrigerator.
    A hand holding an offset spatula is spreading cream cheese frosting on a 12 inch round chocolate chip cookie base
    Spread the frosting
    Pieces of chopped Oreo cookies have been sprinkled on half of a chocolate chip cookie base spread with cream cheese frosting
    Sprinkle the Oreo crumble
    1. Finally, use a sharp knife or a pizza wheel to slice the dessert pizza into 8 large slices or 16 smaller slices.
    A round Oreo dessert pizza is in center of the photo while plates and forks and a pizza wheel wait nearby to serve it with
    Pizza cookie

    Wouldn’t this dessert pizza be fun to serve at a pizza themed party? Or at a Milk and Cookies Party? Really, this is pretty delicious served anytime. Just look at that glorious slice of cookie crust, frosting and Oreos!

    A metal spatula holds a slice of Oreo pizza above the dessert
    Easy Dessert: Oreo Pizza

    Substitutions & Variations

    I know you’ll love this Oreo pizza recipe, but here are few creative suggestions for this sweet treat!

    • I love the ease of pre-made refrigerated cookie dough in this recipe. However, you can absolutely make a batch of your family’s favorite homemade chocolate chip cookie dough for the cookie crust.
    • Do you eat gluten-free? You can use a gluten-free cookie mix, full fat cream cheese and gluten free Oreos to make the Oreo pizza gluten free friendly.
    • Go to town on the toppings! Along with the Oreos, you can top this dessert pizza with chopped fruit like berries and bananas, caramel sauce, hot fudge, white chocolate or dark chocolate chips and sprinkles
    • With such an easy recipe, you can change the types of cookie crust and frosting for great flavor combos. Try a sugar cookie crust with strawberry frosting. Or a peanut butter cookie crust with chocolate frosting. A double chocolate cookie crust with coconut pecan frosting would make an awesome German chocolate version of this dessert pizza.
    A close up picture of a dessert pizza made with a chocolate chip cookie crust, cream cheese frosting and cut up Oreo cookies
    Oreo Cookie Dessert Pizza

    Storage

    Store any uneaten Oreo pizza wrapped in plastic wrap in the refrigerator for up to 5-7 days. While the Oreo cookie pieces will soften, it will still taste delicious.

    A slice of Oreo pizza rests on a pretty white plate and the rest of the pizza, a few Oreo cookies and forks are visible in the background
    Dessert pizza with Oreos

    More Outstanding Oreo Recipes

    If you are like me and just can’t resist Oreo cookies, bookmark or pin these Oreo recipes right now!

    • Start the day off right with these Oreo pancakes, and win over your entire family with the sweet treat!
    • The BEST no bake Oreo dessert has a layer of Oreo cookie crust, chocolate pudding and fluffy whipped topping.
    • Oreo Rice Krispie Treats combine two of my favorite classic desserts.
    • Our Cookies and Cream Cinnamon Rolls have Oreos in the dough, tucked into the rolls and sprinkled over the cream cheese frosting!
    • Go ahead and get to sippin’ this creamy Cookies and Cream Milkshake – you won’t regret it!

    Did you make this? I’d be so grateful if you left a “star” rating below to let me know what you thought! Then, the next time you need a quick and easy recipe, come back to Fantabulosity to browse all of my easy recipes!

    Recipe

    A close up of a slice of dessert pizza with a cookie crust, cream cheese icing and chopped Oreo cookies
    Print Pin
    5 from 3 votes

    Oreo Pizza Recipe

    Oreo Pizza Recipe: With a chocolate chip cookie crust, a layer of rich cream cheese frosting and crumbled Oreo cookies, this dessert pizza recipe is as easy as it is decadently delicious!
    Course Dessert
    Cuisine American
    Prep Time 10 minutes minutes
    Cook Time 15 minutes minutes
    Cooling Time 40 minutes minutes
    Total Time 1 hour hour 5 minutes minutes
    Servings 16 slices
    Calories 224kcal
    Author Jessica Burgess

    Ingredients

    • 16 oz. refrigerated cookie dough
    • ¼ cup butter half a stick, room temperature
    • 4 oz. cream cheese softened
    • ¼ cup powdered sugar
    • 1 teaspoon vanilla extract
    • pinch salt
    • 12 Oreo cookies chopped

    Instructions

    • First, preheat the oven to 350 degrees F.
    • Press the cookie dough into a even circle on a 12 inch round baking sheet or pizza pan. Bake for 12-15 minutes or until a toothpick inserted in the center of the cookie comes out clean. Allow the cookie base to cool completely.
    • Next, in a medium mixing bowl, use a hand mixer to cream together ¼ cup softened butter and 4 oz. of softened cream cheese until it is light and fluffy.
    • Then, add ¼ cup powdered sugar, 1 teaspoon of vanilla extract and a pinch of salt to the cream cheese mixture. Mix it on low speed and then increase the speed to medium and beat the frosting until it is combined and smooth.
    • Now, chop the 12 Oreo cookies into small pieces and set them aside.
    • When the cookie base is cool, use an offset spatula to spread the cream cheese frosting in an even layer on the cookie. Leave a 1 inch border unfrosted to give the dessert more of a pizza look.
    • Then, sprinkle the chopped Oreo cookies on top of the cream cheese frosting. Chill the Oreo pizza for 10 minutes in the refrigerator.
    • Finally, use a sharp knife or a pizza cutter to slice the dessert pizza into 8 large slices or 16 smaller slices.

    Notes

    • You can substitute your favorite homemade cookie dough for the pizza base and you may need to adjust the baking time.
    • If you want to prep this recipe ahead of time, you can bake and cool the cookie and make the cream cheese frosting a few days in advance. Bring both the cookie base and frosting to room temperature to assemble the Oreo pizza.
    • Store any uneaten Oreo pizza wrapped in saran wrap in the refrigerator for up to 5-7 days. The Oreo cookie pieces will soften, however it will still taste delicious!

    Nutrition

    Serving: 1slice | Calories: 224kcal | Carbohydrates: 26g | Protein: 2g | Fat: 13g | Saturated Fat: 5g | Polyunsaturated Fat: 1g | Monounsaturated Fat: 5g | Trans Fat: 0.1g | Cholesterol: 18mg | Sodium: 163mg | Potassium: 73mg | Fiber: 1g | Sugar: 16g | Vitamin A: 194IU | Calcium: 12mg | Iron: 2mg

    Venison Spaghetti

    November 9, 2022

    Close up of venison spaghetti in

    Venison Spaghetti: A great way to use ground venison, and is delicious for a Sunday supper or a quick weeknight dinner.

    Quick Overview: Ready in about 20 minutes, this venison spaghetti sauce, poured over spaghetti noodles, may just become your new favorite meal! Then, if you have leftover spaghetti, make sure to make this fried spaghetti!

    Venison Spaghetti in White Bowl

    Why You’ll Love This Recipe

    This venison meat sauce uses just a few, common ingredients that you may even have in your pantry already; tomato sauce and Italian seasoning (the salad dressing mix that comes in packets!) and dried diced onion, that’s even optional! It’s amazing how simple this recipe is but it can quickly become your new favorite sauce (or version of chicken bolognese sauce) for any kind of spaghetti recipe.

    Serve these Instant Pot Frozen Meatballs (that use the same sauce recipe) over this spaghetti and you’ll have an incredibly hearty dish!

    Almost every kind of pasta recipe is considered comfort food in our house, and this venison bolognese is no exception. When we’re craving hearty pasta dishes we either make this favorite pasta or will make something similar like this chili mac or this stroganoff recipe to use the ground deer meat that we have in our freezer. Have chicken? This chicken spaghetti recipe using Rotel is a must-make.

    [feast_advanced_jump_to]

    Ingredients

    Dinner recipes with simple ingredients are our favorite around here, so as you can see, it doesn’t take much to make this delicious recipe!

    Ingredients on white marble counter for venison spaghetti
    Ingredients
    • 1 pound of ground venison: a very lean wild game that works great in pasta dishes. (Ground venison is also amazing to use for deer burgers.)
    • 1 pound of uncooked spaghetti: I usually just grab a handful of uncooked spaghetti, enough to where my fingertips touch and this is approximately the same amount.
    • 2 – 15 ounce cans of tomato sauce: any brand will do and it’s great to stock up on this for spaghetti recipes, chili recipes and much more!
    • 2 – .6 ounce packages of Italian Dressing Seasoning: I only had one Zesty Italian and one regular on hand but you can use either kind, or both of the same kind!
    • 1 Tablespoon dried chopped onion: This is optional but can add more great flavor.

    Continue reading for step-by-step instructions for making this easy venison spaghetti or see the recipe card at the bottom of the post!

    How to Make Deer Spaghetti

    1. Brown venison and chopped onion in a large skillet over medium-high heat, and to save time, also boil water in a large pot for the spaghetti noodles.
    2. When the water comes to a rolling boil, add spaghetti noodles and cook for 8-12 minutes until al dente, or however long the package directions say to.
    ground venison and onion in white cast iron
    Brown venison & onion
    Spaghetti Noodles in Pot with Water
    Cook Noodles
    1. To save more time, while venison and noodles are cooking, mix together the tomato sauce and packages of Italian seasoning in a small bowl.
    2. When the ground meat has fully cooked (no more pink, and for about 5 minutes), it’s time to add the pasta sauce.
    tomato sauce in bowl with Italian dressing seasoning
    Make Sauce
    Browned ground venison in white cast iron
    Cooked venison
    1. Pour the (what is now) marinara sauce, in to the cooked meat and turn heat down to medium heat, and let cook/simmer for 1-2 minutes or until heated through.
    Ground venison with marinara in dish
    Mix sauce and venison
    1. When the pasta has finished cooking, drain the pasta in a colander.
    2. Once fully drained, you can place cooked pasta in a serving bowl.
    Cooked spaghetti in strainer
    Drain Spaghetti
    Cooked spaghetti in white bowl
    Cooked Spaghetti
    1. If serving right away, you can pour the homemade spaghetti sauce on top of pasta.
    Deer Spaghetti in white bowl
    Deer Spaghetti

    If desired, sprinkle parmesan cheese on top or even fresh herbs!

    Sprinkled shredded parmesan cheese on spaghetti
    Sprinkle with parmesan

    Substitutions

    • Wild Game – Although this recipe uses ground venison, you can also use ground elk, ground beef, or ground pork, (or combine them like we did in the lasagna soup recipe) or even combine venison with different meats.
    • Onion – if you’d prefer to use raw onion, you absolutely can. Either white or yellow onion will be great, and you can use up to half of the fresh onion. Saute with the ground venison.
    • Tomato Sauce – if you prefer a really thick sauce, you can substitute one can of tomato sauce with one can of tomato paste.
    Close up of deer spaghetti in bowl
    Enjoy!

    How to Store

    If you have leftover spaghetti, we have the most delicious leftover spaghetti recipe coming to the blog very soon! It’s called fried spaghetti, and it’s incredible, so stay tuned!

    However, to store any leftover spaghetti, store it in an airtight container and enjoy it within 3-5 days.

    Bowl of deer spaghetti in white bowl next to garden salad
    Serve with Salad!

    Top Tip

    I learned this tip from my mom, and it has come in so handy over the years. If you’re not ready to serve the spaghetti noodles right away after they’ve finished cooking, leave them in the colander and run cold water over them to stop the cooking process.

    But when you’re ready to serve the spaghetti, run hot water over the noodles, to warm them back up, allow the water to fully drain, and then serve!

    FAQs

    Is ground venison deer meat?

    It is! But venison is also referred to as any meat that’s considered in the “deer” family. So this could include elk as well.

    Is ground venison good?

    It is. It’s considered a leaner meat so it works great in recipes such as spaghetti, lasagna, chili, etc, where it can crumble easy and doesn’t have to hold it’s shape. Although if used for recipes such as burgers, it’s best to mix it with a fattier meat, such as sausage.

    Is venison and ground beef the same?

    It’s not but can be commonly interchanged in recipes. Using ground venison in recipes that generally use ground beef is very common. Venison however, tends to have more of an “earthy” flavor, or some even say “gamey” flavor.

    Is deer meat healthier than hamburger?

    The fact that it tends to be more lean than hamburger, can make this a healthier option, fat-wise.

    What to Serve with Venison Spaghetti

    You can serve any side dish that you’d normally serve with pasta or even ground beef spaghetti. However, we love serving air fryer garlic bread and a side salad with this recipe!

    Related Recipes

    We usually have a deep freezer full of venison in our house, so you’ll find other venison recipes here as well that are reader favorites, such as deer steak, fried deer meat, and venison chili!

    Did you make this? I’d be so grateful if you left a “star” rating below to let me know what you thought! Then, the next time you need a quick and easy recipe, come back to Fantabulosity to browse all of my easy recipes!

    Recipe

    Close up of venison spaghetti in
    Print Pin
    5 from 5 votes

    Venison Spaghetti

    Venison Spaghetti: A great way to use ground venison, and is delicious for a Sunday supper or a quick weeknight dinner.
    Course Main Course
    Cuisine American, Italian
    Prep Time 5 minutes minutes
    Cook Time 15 minutes minutes
    Total Time 20 minutes minutes
    Servings 4 servings
    Calories 578kcal
    Author Jessica Burgess

    Ingredients

    • 1 pound ground venison
    • 1 pound spaghetti noodles uncooked
    • 2 – 15 ounce cans of tomato sauce
    • 2 .6 ounce packets of Italian Dressing Seasoning Mix
    • 1 Tablespoon dried diced onion

    Instructions

    • Brown one pound of venison and 1 Tablespoon of dried, chopped onion in a large skillet over medium-high heat, and to save time, also boil water in a large pot for the spaghetti noodles.
    • When the water comes to a rolling boil, add 1 pound of spaghetti noodles and cook for 8-12 minutes until al dente, or however long the package directions say to.
    • To save more time, while venison and noodles are cooking, mix together the 2 cans of tomato sauce and 2 packages of Italian seasoning in a small bowl.
    • When the ground meat has full cooked (no more pink, and for about 5 minutes), it's time to add the pasta sauce.
    • Pour the (what is now) marinara sauce, in to the cooked meat and turn heat down to medium heat, and let cook/simmer for 1-2 minutes or until heated through.
    • When the pasta has finished cooking, drain the pasta in a colander.
    • Once fully drained, you can place cooked pasta in a serving bowl.
    • If serving right away, you can pour the homemade spaghetti sauce on top of pasta. Top with shredded parmesan cheese if desired!

    Notes

    Top Tip for Making Ahead:
    I learned this tip from my mom, and it has come in so handy over the years. If you’re not ready to serve the spaghetti noodles right away after they’ve finished cooking, leave them in the colander and run cold water over them to stop the cooking process.
    But when you’re ready to serve the spaghetti, run hot water over the noodles, to warm them back up, allow the water to fully drain, and then serve!

    Nutrition

    Serving: 1.5cup | Calories: 578kcal | Carbohydrates: 86g | Protein: 41g | Fat: 10g | Saturated Fat: 4g | Polyunsaturated Fat: 1g | Monounsaturated Fat: 2g | Cholesterol: 91mg | Sodium: 149mg | Potassium: 640mg | Fiber: 0.1g | Sugar: 0.5g | Vitamin A: 2IU | Vitamin C: 1mg | Calcium: 61mg | Iron: 7mg

    Sheet Pan Pancakes

    November 8, 2022

    A close up photo of a stack of cinnamon swirled pancake squares that were baked on a sheet pan

    These Sheet Pan Pancakes are made with a cinnamon roll swirl that makes breakfast something worth getting out of bed for. Made with a pancake mix, these pancakes are ready in 30 minutes!

    A fork rest on a plate stacked with squares of cinnamon swirl pancakes while a small pitcher of frosting and the pan of pancakes are in the background

    Forget flipping pancakes in a skillet or on a griddle! My fluffy sheet pan pancakes with a rich, brown sugar cinnamon swirl, are baked in the oven in just 20 minutes and served with homemade cream cheese icing!

    Have you seen all of the breakfast recipes here at Fantabulosity? What I love, is that I have so many pancake recipes on the blog, that even if you have to use almond milk to make pancakes or want to make something fun with cookies, this Oreo pancakes recipe is a must-make, or any of the other special pancakes here on the blog.

    We also think that breakfast can be the easiest meal of the day. With recipes like this simple cinnamon roll casserole, this baked French toast, and this easy cinnamon coffee cake, today’s recipe for sheet pan pancakes will fit right in!

    Why You’ll Love This Recipe

    Making pancakes on a sheet pan is my new go-to pancake-making method: no skillets, no hot griddle, no flipping, and no hassle! This is good food made easy.

    The whole family can eat breakfast together! No more waiting as individual pancakes are made one by one in a pan. Since the pancakes are baked in the oven, I love that we can all sit down to warm pancakes at the same time.

    Sheet pan pancakes are an easy way to feed a crowd. Two pans of pancakes yields 20 servings in about 20 minutes, so you easily double this recipe for a sleepover, a big family brunch or your holiday morning breakfast.

    [feast_advanced_jump_to]

    Ingredients

    There are no unusual or gourmet ingredients used in this pancakes recipe. In fact, most of the ingredients are baking basics and you probably already keep the dry ingredients stocked in your pantry and the wet ingredients in your fridge.

    The ingredients for pancake batter, a cinnamon sugar swirl and cream cheese icing are all displayed on a white marble background

    See the printable recipe card below for a list of all of the ingredients and the amounts. I’ve provided a few notes about some of the key ingredients:

    For the pancakes:

    • pancake mix – original flavor
    • milk – whole is preferred but your favorite type should work ok too.
    • butter – you can use salted or unsalted but make sure it’s softened

    Variations

    Here are a few ways to adjust the recipe for your preferences if you need a few ideas:

    • Pancake mix – Sheet pan pancakes from a mix (like Bisquick mix) are a great way to get breakfast on the table quick. However, you can also use your favorite homemade pancake batter to make these pancakes.
    • Milk – While we used whole milk in our sheet pan pancakes, you can use almond milk (or any nut milk), oat milk, or coconut milk in this homemade breakfast recipe.
    • Favorite Mix-Ins – You can sprinkle chocolate chips, frozen blueberries or even toasted pecans or walnuts into the batter before baking.
    • Toppings – I have a fabulous list of over 95 pancake toppings, but here are a variety of toppings to try the next time you make these sheet pan pancakes:
      • Any type of fruit – Sliced banana, fresh berries, sliced peaches and crushed pineapple are some of our favorites.
      • Fruit compote
      • Shredded coconut
      • Granola
      • Whipped cream – cinnamon whipped cream would be SO good to add to cinnamon swirl pancakes
      • Honey
      • Warmed jam
      • Caramel sauce
      • Peanut butter
      • Hot fudge
      • Ice cream – if you really want a treat or to serve these pancakes as a dessert, add a scoop of rich vanilla ice cream

    Instructions

    Once you see how easy it is to make a homemade breakfast of warm, cinnamon pancakes on a sheet pan, you may never make pancakes any other way. Here are the step-by-step instructions with photos:

    1. First, preheat the oven to 350 degrees F and line a half-sheet pan with parchment paper greased with butter.
    2. Next, in a large mixing bowl, whisk 2 cups of pancake mix, 1 cup of milk and 2 large eggs together until the batter is smooth. A few small lumps is okay, but you don’t want any large clumps of unmixed pancake mix in your fluffy batter.
    3. Then, pour the batter into the prepared pan and spread it in an even layer across the pan.
    Mix pancake batter
    Pancake batter has been poured into a prepared sheet pan for sheet pan pancakes
    Pour batter in prepared baking sheet
    1. In a microwave-safe bowl, melt 8 tablespoons of butter. Add 1 cup of brown sugar and 2 tablespoons of ground cinnamon and stir until combined.
    2. Now, using a spoon, drop dollops of the brown sugar mixture on top of the batter in the pan.
    A sheet pan of pancake batter waits for a brown sugar butter cinnamon sauce to be swirled in for sheet pan pancakes
    Mix up cinnamon swirl
    Dollops of a rich brown sugar cinnamon butter mixture have been dropped into pancake batter
    Dollop cinnamon swirl on the batter
    1. Take a butter knife and gently drag it through the brown sugar dollops to create a swirl pattern in the pancake batter.
    2. Place the baking sheet in the center of the oven and bake for 15-20 minutes. Use a toothpick to test for doneness. (Insert a toothpick into the center of the pancake. If there is no wet batter on the toothpick and it comes out clean, the pancakes are baked.)
    3. While the pancakes are baking, make the cream cheese icing. First, beat 4 oz. of softened cream cheese and 1 teaspoon of vanilla in a medium-sized bowl until it is smooth. Then, add ⅔ cup of powdered sugar and mix it until it is thoroughly combined.
    Dollops of a cinnamon brown sugar mixture have been swirled into pancake batter on a large sheet pan
    Swirl the cinnamon mixture in the batter
    A small white bowl of smooth cream cheese icing is being stirred with a fork
    Make cream cheese icing

    Yummy pancakes are about 20 minutes away. Just bake and serve!

    A pan of sheet pan pancakes is being served with butter, syrup and cream cheese icing

    To serve this giant pancake, cut it into squares and serve them with butter, homemade cream cheese icing, and warm maple syrup to drizzle. The cream cheese icing paired with these cinnamon swirl pancakes reminds me of a cinnamon roll and it is beyond delicious!

    A metal spatula holds a baked square of sheet pan pancakes above a the full pan of the cinnamon swirled breakfast

    Storage

    Store any leftover pancakes in an airtight container in the refrigerator for 3-5 days. Reheat them in the microwave.

    Can you freeze sheet pan pancakes? You sure can! Allow the sheet of pancakes to cool completely and cut it into squares. Separate the squares of pancakes with parchment paper. Store the pancakes in a freezer bag in the freezer for up to a month.

    A close up photo of the inside of a stack of soft, fluffy cinnamon swirled sheet pan pancakes

    More Homemade Pancake Recipes

    While we love the convenience of pancake mix in this recipe, our recipe for Fluffy Homemade Pancakes from Scratch is perfect for a leisurely weekend morning. Feeling fruity? Easy Blueberry Pancakes are right up your alley. If you love the warm comforting flavors of Fall, we think you’ll flip for our Pumpkin White Chocolate Pancakes.

    Did you make this? I’d be so grateful if you left a “star” rating below to let me know what you thought! Then, the next time you need a quick and easy recipe, come back to Fantabulosity to browse all of my easy recipes!

    Recipe

    A close up photo of a stack of cinnamon swirled pancake squares that were baked on a sheet pan
    Print Pin
    5 from 6 votes

    Sheet Pan Pancakes – Cinnamon Swirl

    Sheet Pan Pancakes with a rich, brown sugar cinnamon swirl, are baked in the oven in 20 minutes and served with homemade cream cheese icing!
    Course Breakfast
    Cuisine American
    Prep Time 10 minutes minutes
    Cook Time 20 minutes minutes
    Total Time 30 minutes minutes
    Servings 10 pancake squares
    Calories 325kcal
    Author Jessica Burgess

    Ingredients

    To Make Cinnamon Swirl Sheet Pan Pancakes

    • 2 cups pancake mix
    • 1 cup milk
    • 2 large eggs
    • 8 tablespoons butter softened
    • 1 cup brown sugar
    • 2 tablespoons ground cinnamon

    For the Cream Cheese Icing

    • 4 ounces cream cheese softened
    • ⅔ cup powdered Sugar
    • 1 teaspoon vanilla extract

    Instructions

    For the cinnamon swirl sheet pan pancakes

    • First, preheat the oven to 350 degrees F and prepare a half sheet baking pan with parchment paper greased with butter.
    • Next, in a large bowl, whisk 2 cups of pancake mix, 1 cup of milk and 2 large eggs together until smooth.
    • Then, pour the batter into the prepared sheet pan and spread it evenly across the pan.
    • In a microwave safe bowl, melt 8 tablespoons of butter. Add 1 cup of brown sugar and 2 tablespoons of cinnamon and stir until combined.
    • Now, using a spoon, drop dollops of the brown sugar mixture onto the pancake batter in the pan. Take a butter knife and gently drag it through the brown sugar to create a swirl pattern in the pancake batter.
    • Place the baking sheet in the center of the oven and bake for 15-20 minutes. Use a toothpick to test for doneness. (If there is no wet batter on the toothpick and it comes out clean, the sheet pan pancakes are baked.)

    To Make the Cream Cheese Icing

    • First, beat 4 oz. of softened cream cheese and 1 teaspoon of vanilla extract in a medium sized bowl until it is smooth. Add ⅔ cup of powdered sugar and mix it until it is thoroughly combined.
    • Serve the warm cinnamon swirl pancakes with cream cheese icing, butter and maple syrup.

    Notes

    • A half sheet pan is about 18″ x 13″ x 1″. If you use a 9×13 baking dish, only use half of the batter and make two batches of oven baked pancakes.
    • You can prepare the parchment lined baking sheet with non-stick cooking spray but I find that using butter to grease the parchment adds a little more flavor.
    • Store any leftover pancakes in an airtight container in the refrigerator for 3-5 days. Reheat in the microwave.

    Nutrition

    Serving: 1square | Calories: 325kcal | Carbohydrates: 40g | Protein: 5g | Fat: 17g | Saturated Fat: 9g | Polyunsaturated Fat: 1g | Monounsaturated Fat: 4g | Trans Fat: 0.4g | Cholesterol: 94mg | Sodium: 269mg | Potassium: 157mg | Fiber: 1g | Sugar: 31g | Vitamin A: 595IU | Vitamin C: 0.2mg | Calcium: 140mg | Iron: 1mg

    Top 20 Spices Every Kitchen Needs

    November 7, 2022

    spices in glass jars on wooden shelf

    Top 20 Spices Every Kitchen Needs: Essential spices every home cook should have in their kitchen or walk-in pantry. Perfect for a beginner cook, a new homeowner, or someone looking to get organized!

    Spices in small glass jars with labels on wooden riser
    Top 20 Spices Every Kitchen and Pantry Should Have

    With all of the different spices in the grocery store these days, it can be overwhelming to know where to start if you’re stocking your kitchen for the first time.

    Spice rubs, spice blends, stand-alone spices… so many options. However, this list of basic pantry staples is a great place to start.

    Must have spices in the pantry

    If you’re a gourmet chef, you’ll probably already know or even have these spices on hand. However, if you’re like me, someone who is busy, and just wants simple and easy recipes to make for her family but loves flavor… then this list is for you!

    They’re affordable, the most used spices in my kitchen, and versatile spices (meaning, they can go in so many different types of dishes) that you’ll want to put on your grocery list today!

    [feast_advanced_jump_to]

    What basic spices should every kitchen have?

    You’ll want a range of spices for savory dishes and sweet dishes as a great addition to your kitchen for everyday cooking. Adding a little bit flavor with spices and dried herbs in to a variety of dishes will help give a lot of flavor to dishes such as main dishes, Italian dishes, vegetable dishes, Indian dishes, meat dishes, poultry dishes, and much more!

    Get this printable spices list down below to use as a guide!

    1. Basil (although we sure prefer fresh basil in our recipes)
    2. Bay Leaves
    3. Black Pepper (or black peppercorns in a pepper grinder)
    4. Chili Powder (or cayenne pepper)
    5. Cloves
    6. Cinnamon
    7. Cumin Powder
    8. Garlic Powder (and/or Garlic Salt)
    9. Greek Seasoning
    10. Lemon pepper
    11. Nutmeg
    12. Onion Powder (and/or Dried Chopped Onion)
    13. Oregano
    14. Paprika (smoked or even regular sweet paprika)
    15. Parsley
    16. Red Pepper Flakes
    17. Rosemary
    18. Salt (table salt, kosher salt, sea salt flakes)
    19. Seasoned Salt
    20. Thyme
    Spices in small glass jars on wooden shelf
    Different Types of Spices

    Organizing Spices

    Depending on the space that you have, or plan to use for your spices, this can look different for each space.

    However, one thing I’ve found that works for me, no matter what my space looks like, is that I absolutely adore putting all of my store-bought spices in to clear jars with labels. I also put them in alphabetical order so when it comes time to find the spice I’m looking for, it’s as easy as pie. (Or, pumpkin pie spice.)

    Clear Glass Spice Jars

    If you’d like to use the same jars that I used to organize my walk-in pantry, you can get them at my favorite online store but make sure to use code: FANTAB10 to get 10% off your own! Here are the Spice Jars and Labels that I use!

    Wooden Can and Spice Jar Risers: I absolutely LOVE these for organizing my spices to create a spice rack!

    Rows of spices in glass jars on pantry shelf
    Best Spices

    FAQs

    Should spices go in pantry?

    A pantry is a great place to store spices because it’s usually a dry space, out of direct sunlight. However, if you don’t have a pantry space, a spice cabinet or drawer will be great too, as long as it’s a dark place. Or, you can utilize the back of the door with an over-the-door organizer if needed.

    How long are spices good for?

    Usually, 6 months is the lifespan for dried spices. But this doesn’t mean that you can’t use them past 6 months, it just may mean that spices aren’t as flavorful. A good way to test them is to smell them and if you no longer smell anything, it’s probably time to toss and replace them.

    When should you add spices when cooking?

    If you put them in early, in the cooking process, they can lose flavor. So it’s best to add them in about halfway or toward the end to really let the flavor shine!

    Feel free to add other spices or your favorites to your spice collection if they’re not on this list! This is just a great starting point for your spice shelf!

    💡 More Planning and Organizing Tips

    You’ll also love this cheat sheet to keep in your kitchen for questions come up like “How many ounces in a gallon,” and more!

    Recipe

    spices in glass jars on wooden shelf
    Print Pin
    5 from 1 vote

    Top 20 Spices Every Kitchen Needs

    What basic spices should every kitchen have? Get this printable spices list to use as a guide!
    Prep Time 0 minutes minutes
    Cook Time 0 minutes minutes
    0 minutes minutes
    Servings 20 spices
    Author Jessica Burgess

    Ingredients

    • Basil
    • Bay Leaves
    • Black Pepper
    • Chili Powder
    • Cloves
    • Cinnamon
    • Cumin
    • Garlic Powder (and/or Garlic Salt)
    • Greek Seasoning
    • Lemon Pepper
    • Nutmeg
    • Onion Powder (and/or Chopped Dried Onion)
    • Oregano
    • Paprika
    • Parsley
    • Red Pepper Flakes
    • Rosemary
    • Salt
    • Seasoned Salt
    • Thyme

    Instructions

    • Arrange spices in alphabetical order to keep things streamlined!

    Notes

    Feel free to add other spices or your favorites if they’re not on this list! This is just a great starting point for your spice shelf!

    Nutrition

    Serving: 1teaspoon

    How to Blind Bake a Pie Crust

    November 6, 2022

    A blind baked pie crust without any filling in it.

    How to Blind Bake a Pie Crust:  A lot of pie recipes call for “blind baking” the pie crust. Blind baking sounds confusing, but it’s a lot simpler than it seems!

    A blind-baked crust is the start of this old-fashioned strawberry pie, filled with fresh berries and a homemade glaze.

    A blind baked pie crust on a counter with a rolling pin and some pie dough, rolled out, on a wood cutting board at the top of the image.

    Take your DIY to the next level and make your own butter before baking! I love using my Buttery Pie Crust recipe whether I need one crust or two, and then after learning to blind bake use it to make Banana Cream Pie.

    What is “blind baking” and how do you blind bake pastry crust?

    Blind baking is a culinary term that refers to pre-baking a tart crust or pie crust before any filling is added. This will keep your pie from having a soggy bottom crust.

    The process of blind baking involves putting a bottom crust into a pie plate, creating vent holes, weighing the dough down, and then baking it. It’s really quite simple, but we’re going to walk you through it step-by-step in this post.

    How long do you blind bake for a pie?

    This will depend on the recipe (it will tell you how long to blind bake a pie crust for that specific filling), but as a general rule it’s 20 mins with the weights in and 5 mins without the weights.

    [feast_advanced_jump_to]

    Ingredients

    You can use your favorite homemade pie crust recipe or store-bought dough to create a pie that calls for blind baking (we like this butter pie crust recipe, it makes a flaky pie crust that works for any filling).

    Whip up a batch of your favorite dough, or grab one at the store, and let’s get started.

    Pie dough rolled out on a lightly floured wood cutting board.
    Make pie dough or buy a pie crust.

    Equipment

    You will need a 9-inch pie plate (glass or metal will work best for blind baking) and something to weigh down your bottom crust.

    In this recipe we show you how to use sugar as a pie weight, but you can also use:

    • ceramic pie weights like these pie weights
    • steel pie weight chain like this pie weight chain
    • dry beans or uncooked rice / dry rice (we would recommend saving these and using them as your pie weights again – the dried beans and rice aren’t good for cooking once they’ve been baked)

    Instructions

    1. Make pie dough using this pie crust recipe, or if you are using a store-bought pie crust, you can skip to step 6. 
    2. Preheat your oven to 425 degrees and lightly grease a glass or metal 9-inch pie pan. Thick Ceramic pie pans tend to distribute heat unevenly and may not work for blind baking this pie crust.
    3. Remove the larger disk of your homemade pie dough from your refrigerator and let it sit for 5 minutes or long enough for it to become workable but still cold. Sprinkle a flat workspace with flour as well as your rolling pin.
    4. Starting in the center of the dough disk, roll the dough outward in all directions from the center to the edge until you have a ⅛-inch thick round pie crust.
    Pie dough rolled out on a lightly floured wood cutting board.
    Roll out your bottom crust.
    1. Place the pie crust over your pie dish using your rolling pin by rolling the pie crust over the rolling pin and allowing it to carry the weight of the pie crust, and then rolling it gently across your pie pan. This will help avoid any stretching or cracks. 
    Pie dough being rolled from a wood cutting board onto a wooden rolling pin.
    Roll dough onto pin.
    Pie dough half draped on a rolling pin being unrolled over a glass pie plate.
    Roll dough out onto pie tin.
    1. (For the store-bought crust, start here.) Gently press the pie crust down into the pie pan, fitting into the crease all the way around. Trim excess pie dough from around the pan with a small sharp knife and with the tines of a fork, poke holes around the bottom of the pie crust.

      These little holes allow venting and prevent air pockets from bubbling up. Place a piece of parchment paper over the bottom of the crust and fill with sugar, using the parchment paper as a barrier between the sugar and pie crust.
    A neatly trimmed pie crust pressed into a pie plate. The edges are trimmed.
    Press crust into pan & trim.
    An unbaked pie crust covered with parchment paper and filled with sugar.
    Line with parchment, fill with sugar.

    Tip: Wondering what to do with the sugar after baking? The yummy toasted sugar can be used in sugar cookies and quick breads for a nice toasty flavor!

    1. Bake in preheated oven for 20 minutes, remove the sugar and parchment paper, and continue baking for 5 minutes or until the bottom of the pie crust is just starting to brown. Cool the blind-baked crust before adding any pie filling.

    **Keep in mind that baking time and oven temperature can vary from oven to oven.

    A blind baked pie crust without any filling in it.
    Bake till golden brown, then cool.

    Should I brush my pie crust with butter or egg?

    This depends on what kind of crust you are looking to create. If you want a nice golden brown crust, brush the top with an egg wash right before baking.

    If you want a deep, golden color and intense shine then an egg yolk wash is best! Mix one yolk with 2 teaspoons of water and brush it all over the top crust of your pie, then bake as directed.

    Brushing your pie crust with butter will add a bit of extra flavor, but it doesn’t do as much for creating a crisp golden crust as other washes will. Flavor counts, though, so brush away!

    Top Tip

    If you don’t want to use pie weights, it is possible to blind bake pie crust without weights. You can take a slightly smaller pie plate and set it on top of the crust. This will work the same and prevent the crust from bubbling up.

    We wouldn’t recommend baking it without anything on top of the crust as it will result in very large bubbles that will make it hard for you to fill the pie later.

    FAQs

    What temperature should I blind bake a pie crust?

    It’s best to blind bake a pie crust at a high temperature – we like to blind bake ours at 425° F.

    How do you blind bake a store bought pie crust?

    Blind baking a store bought pie crust is very similar to baking a homemade pie crust. You will need to prick the base of the bottom crust to allow for venting, fill the crust with weights of your choice, and bake for 20 mins at 425°. Remove the weights, bake another 5 minutes and then let the crust cool before you fill it!

    How to par bake a pie crust?

    Par baking crusts means partially baking them, whereas to blind bake pastry crust means to completely bake it. How long to bake pie crust depends on the type of filling you’ll be adding.

    Typically a recipe will ask you to blind bake the crust if the filling is not going to be baked, and to par bake a crust if the filling will need to be baked (to prevent over baking the bottom crust). Recipes like pumpkin pie and custard pies usually call for a partially baked crust (par baking).

    Did you make this? I’d be so grateful if you left a “star” rating below to let me know what you thought! Then, the next time you need a quick and easy recipe, come back to Fantabulosity to browse all of my easy recipes!

    Related Recipes

    Now that you know how to blind bake a pie you can get to the fun part…making the pie! This easy Banana Cream Pie Recipe would be a great place to start. Or if you’ve made a pie crust and have extras, keep this easy pie crust cookies recipe in mind.

    And if you’re looking for some easy, no-bake pies you should definitely check out this Chocolate Cream Pie and our No Bake Peanut Butter Pie. This butterscotch cinnamon pie recipe is absolutely delicious and so easy to make for the summer or for the holidays.

    Recipe

    A blind baked pie crust without any filling in it.
    Print Pin
    5 from 3 votes

    How to Blind Bake a Pie Crust

    How to Blind Bake a Pie Crust: A lot of pie recipes call for "blind baking" the pie crust. Blind baking sounds confusing, but it's a lot simpler than it seems!
    Course Dessert
    Cuisine American
    Cook Time 25 minutes minutes
    Total Time 25 minutes minutes
    Servings 1 pie crust
    Calories 777kcal
    Author Jessica Burgess

    Equipment

    • pie weights or dry beans/rice

    Ingredients

    • 1 recipe pie dough or store bought pie crust
    • 1 lb granulated sugar if not using pie weights

    Instructions

    • Make pie dough using this pie crust recipe. Or, if you are using a store bought pie crust, you can skip to step 6.
    • Preheat your oven to 425 degrees and lightly grease a glass or metal 9-inch pie pan. Thick Ceramic pie pans tend to distribute heat unevenly and may not work for blind baking this pie crust.
    • Remove the larger disk of your homemade pie dough from your refrigerator and let it sit for 5 minutes or long enough for it to become workable but still cold. Sprinkle a flat workspace with flour as well as your rolling pin.
    • Starting in the center of the dough disk, roll the dough outward in all directions from the center to the edge until you have a ⅛-inch thick round pie crust.
    • Place the pie crust over your pie pan using your rolling pin by rolling the pie crust over the rolling pin and allowing it to carry the weight of the pie crust, and then rolling it gently across your pie pan. This will help avoid any stretching or cracks. 
    • (For store-bought pie crust, start here)
      Gently press the pie crust down into the pie pan, fitting into the crease all the way around. Trim excess pie dough from around the pan with a small sharp knife and with a fork, make small holes around the bottom of the pie crust to allow venting and prevent the pie crust from bubbling up. Place parchment paper over the pie crust and fill with sugar, using the parchment paper as a barrier between the sugar and pie crust.
    • Bake in preheated oven for 20 minutes, remove the sugar and parchment paper, and continue baking for 5 minutes or until the bottom of the pie crust is just starting to brown. Cool the pie crust before adding any pie filling.

    Notes

    NOTES: If you don’t want to use pie weights, it is possible to blind bake pie crust without weights. You can take a slightly smaller pie plate and set it on top of the crust. This will work the same and prevent the crust from bubbling up. 
    We wouldn’t recommend baking it without anything on top of the crust as it will result in very large bubbles that will make it hard for you to fill the pie later. 

    Nutrition

    Serving: 1crust | Calories: 777kcal | Carbohydrates: 83g | Protein: 10g | Fat: 44g | Saturated Fat: 14g | Polyunsaturated Fat: 5g | Monounsaturated Fat: 21g | Sodium: 695mg | Potassium: 165mg | Fiber: 4g | Vitamin A: 2IU | Calcium: 32mg | Iron: 4mg

    Buttery Pie Crust Recipe

    November 6, 2022

    An unbaked pie with a top crust. The pie has a design carved in the top to allow steam to escape.

    Buttery Pie Crust Recipe: This easy pie crust recipe can be used to make any pie recipe (a single crust pie or a double crust pie). With only 6 ingredients, this flaky pie crust is super simple to make and ready for a pie or this savory easy chicken pot pie recipe.

    This is the crust used in this fresh strawberry pie. It’s blind baked, then filled with berries in a homemade glaze.

    A picture of a baked pie with a nice, golden brown crust.

    Why You’ll Love This Recipe

    If you’re looking for the best pie crust recipe, this is it! This recipe uses butter to create a flaky, golden pie crust that’s perfect for all your favorite pies! (Especially this egg custard!)

    The best part is, you can use this for all your homemade pies – sweet pies (like fruit pies such as this peach and mango pie recipe) and savory pie (think chicken pot pie)! You can even see how to make cookies with a pie crust.

    Common Pie Questions

    What is the secret to a good pie crust? The questions below should help you uncover all the tips and tricks that can be used to make a pie crust that’s perfect for your tastes!

    Is pie crust better made with butter or shortening?

    If you’re asking yourself this question, you’re not alone! A lot of people have a strong preference for one or the other.

    In my experience, butter makes for a sturdier, flakier crust with a nicer flavor, but shortening makes for a more tender crust that holds its shape better.

    What does butter do in a pie crust?

    Butter adds flavor to a pie crust (and who doesn’t want that?), but it also helps make the layers light and fluffy. Since butter has a high water content, that water evaporates as you bake and incorporates air into the crust!

    Should I brush my pie crust with butter or egg?

    This depends on what kind of crust you are looking to create. If you want a nice golden brown crust, brush the top with an egg wash right before baking.

    If you want a deep, golden color and intense shine then an egg yolk wash is best! Mix one yolk with 2 teaspoons of water and brush it all over the top crust of your pie, then bake as directed.

    Brushing your pie crust with butter will add a bit of extra flavor, but it doesn’t do as much for creating a crisp golden crust as other washes will. Flavor counts, though, so brush away!

    My favorite apple pie crust recipe calls for brushing the crust with milk and then sprinkling it lightly with granulated sugar. There’s really no wrong answer, so feel free to experiment until you find what you like best.

    [feast_advanced_jump_to]

    Ingredients

    Making this homemade pie crust recipe doesn’t require anything fancy – just a few simple ingredients that you likely have on hand at all times!

    Ingredients needed to make a buttery pie crust laid out on a counter with labels on the image.
    Ingredients
    • flour
    • granulated sugar
    • salt
    • butter
    • water
    • egg

    See the printable recipe card below for exact quantities and step-by-step instructions.

    Instructions

    To Make the Pie Dough

    1. In a food processor, combine 2 ½ cups flour, 1 tablespoon sugar, and ½ teaspoon salt until well blended.
    Flour, sugar, and salt in a food processor
    Put flour, sugar, and salt in food processor.
    1. Add half of your butter (½ cup) to the food processor and blend with the flour mixture. Add the second half (other ½ cup) of the butter and blend again. The mixture should be a powdery sand texture.

      The butter should be very cold, if your room is warm you'll need to place it back into the refrigerator between adding it to the food processor. Room-temperature butter will melt too quickly and the result will be pie crust that isn’t as flaky.
    Butter cubes on top of flour mixture in a food processor.
    Add ½ the butter.
    Top shot of food processor after butter has been blended with flour.
    Add the other ½ butter and blend.
    1. Add 2 tablespoons of ice cold water into your food processor and blend between each set. Repeat this until the texture of the mixture is a rough crumble and when you pinch it, it holds together.

      When this happens, you know you’ve added enough water. This usually takes about 6 tablespoons depending on the type of butter you use. You need the water to remain very cold, add ice cubes to your cup of water if needed.
    Top shot of a food processor with a flour and butter mixture in it.
    Add water till dough comes together.
    1. Pour your pie crust dough mixture onto a flat surface and divide it into 2 halves, one half being slightly larger than the other.
    Crumbly pie crust dough poured out onto a wood cutting board.
    Pour dough out.
    1. Form the dough into 2 round disks by squeezing it together and kneading it lightly. Do not overwork the dough or it will become very solid and tough to work with.
    Two discs of dough on a wood cutting board.
    Shape into disks.
    1. Wrap your 2 dough disks tightly in plastic wrap making sure that no air is touching the dough. Refrigerate for at least 1 hour. The dough can remain in the refrigerator for up to 48 hours if needed.
    Two discs of dough covered in plastic and resting on a wood cutting board.
    Wrap & refrigerate.
    1. Preheat your oven to 425 degrees and lightly grease a glass or metal 9-inch pie pan. Thick Ceramic pie pans tend to distribute heat unevenly and may not work for blind baking this pie crust.
    2. Remove the larger disk of pie dough from your refrigerator and let it sit for 5 minutes or long enough for it to become workable but still cold. Sprinkle a flat workspace with flour as well as your rolling pin.
    3. Starting in the center of the dough disk, roll the dough outward in all directions from the center to the edge until you have a ⅛-inch thick round pie crust.
    Pie dough rolled out on a lightly floured wood cutting board.
    Roll out your crust.
    1. Place the pie crust over your pie pan using your rolling pin by rolling the pie crust over the rolling pin and allowing it to carry the weight of the pie crust, and then rolling it gently across your pie pan. This will help avoid any stretching or cracks. 
    Pie dough being rolled from a wood cutting board onto a wooden rolling pin.
    Roll dough onto rolling pin.
    Pie dough half draped on a rolling pin being unrolled over a glass pie plate.
    Unroll dough on pie plate.
    1. Gently press the pie crust down into the pie pan, fitting into the crease all the way around. Trim excess pie dough from around the pan with a small sharp knife and with a fork, make small holes around the bottom of the pie crust to allow venting and prevent the pie crust from bubbling up. 
    A neatly trimmed pie crust pressed into a pie plate. The edges are trimmed.
    Press into pie tin, trim edge.

    Blind Baking

    If your recipe calls for blind baking, preheat your oven to 425°. Roll out your bottom crust dough, line it with parchment paper, and weigh it down (with the weight of your choice). Bake for 20-25 mins, then cool before filling.

    (See how to blind bake a pie too!)

    For Top Crust

    Note: Exact time and temperature will depend on filling instructions for each individual pie.

    1. Fill bottom of the crust with desired pie filling and preheat your oven by the pie filling instructions.
    2. Remove the smaller disk of pie dough from your refrigerator and let it sit for 5 minutes or long enough for it to become workable but still cold. Sprinkle a flat workspace with flour as well as your rolling pin.
    3. Starting in the center of the dough disk, roll the dough outward in all directions from the center to the edge until you have a ⅛-inch thick round pie crust.
    4. Place the pie crust over your pie pan using your rolling pin by rolling the pie crust over the rolling pin and allowing it to carry the weight of the pie crust, and then rolling it gently across your pie pan. Vent your pie crust by making slits in the top of the pie, all the way around with a small sharp knife. 
    A top crust being rolled over an apple pie using a wooden rolling pin.
    Add top crust.
    1. Trim the excess pie dough from around your pie pan and create a seal around the edge of your pie by rippling and pinching the pie dough between your index finger, thumb, and middle finger.
    2. In a small bowl, whisk together egg and 1 tablespoon of water. Brush this egg-wash mixture over your pie crust in a thin layer.
    A small bowl of butter or egg white being held over an unbaked pie.
    Whisk egg & water.
    A pastry brush brushing an unbaked pie.
    Brush over pie crust.
    1. Bake your pie by the filling instructions or until the pie crust is golden brown. If the edges are browning too quickly, wrap them in aluminum foil or a pie saver. 
    A baked pie with a design cut into the top for venting.
    Bake till golden brown!

    NOTE: This recipe makes enough dough for a double pie crust recipe. If you only need a bottom crust, you can wrap the other half of the dough in plastic wrap and refrigerate it for a week or put that wrapped dough ball in an airtight, freezer-safe container or bag and freeze it for up to 2 months. When you’re ready to use it, simply thaw it on the counter and continue on with the recipe. 

    Substitutions

    If you need to make your pie crust suit your dietary needs, there are a few changes you can make!

    • Dairy-Free – use your favorite dairy-free butter alternative to make this pie crust dairy free!
    • Gluten-Free – use your favorite gluten-free flour blend instead of all-purpose flour to make this pie crust gluten-free! We recommend using a blend that contains xantham gum for the best results.
    • Egg Free – if you need to omit the egg in this recipe, you can replace it with a cornstarch egg (2 tablespoons of cornstarch blended into 3 tablespoons of cold water will replace one egg).

    Equipment

    You will need the following supplies: 

    • 9-inch pie plate (metal or glass)
    • Parchment paper
    • small knife
    • food processor (if you don’t have a food processor, you can “cut in” the butter with a pastry cutter, aka a pastry blender)
    • rolling pin
    • small bowl
    • plastic wrap
    A slice of baked pie on a white plate.
    Enjoy!

    Storage

    This pie crust can be stored in your refrigerator in airtight plastic wrap for up to 48 hours before baking.

    After baking the crust can remain fresh in your refrigerator in an airtight container for up to 5 days and frozen for up to 4 months. The blind-baked crust can also be frozen before adding any filling.

    To freeze a pie crust (baked or raw), be sure to make it in a freezer-safe pie dish and then wrap the pie crust (cooled, if you’ve blind-baked it) in plastic wrap and then tin foil before freezing.

    Top Tip

    Make sure your water and butter are both very cold. The longer it takes your butter to melt in the oven, the lighter and flakier your crust will be!

    FAQs

    What is blind baking?

    Blind baking a crust means you are baking the bottom of a pie crust so that a soft pie filling doesn't create a soggy layer. You would usually blind-bake a pie crust if you are using a filling that doesn't need to be baked, such as fruit filling, pudding filling, or pre-made fillings (although some recipes with cooked filling will ask you to partially or par bake the bottom crust).

    What type of pie pan should I use?

    You should use a 9-inch pie pan that is made of glass or metal. A ceramic pie pan can be used if not blind baking your pie. The ceramic tend to heat unevenly during the blind baking process. 

    What texture should the dough be?

    When adding water to your dough, it should be a smooth texture without cracks. If you have a lot of cracks in your dough you'll want to slowly add a tablespoon of water at a time until it is smooth and easy to work with. Do not overwork the pie dough, this can make it tough and too thick. 

    My pie dough is tough and thick, what did I do wrong?

    Some things that will cause a pie dough to become thick and tough are:

    – Adding too much flour to your workspace. Only add enough flour to avoid the dough sticking to your surface. 

    – Melted or soft butter. You want your butter to remain as cold as possible throughout the entire process. You can even put your butter in a freezer for 10 minutes before using it if you are working in a warm room.

    – Not rolling the dough thin enough. You want to make sure the dough is nice and thin, about ⅛ inch thick all the way around.

    Did you make this? I’d be so grateful if you left a “star” rating below to let me know what you thought! Then, the next time you need a quick and easy recipe, come back to Fantabulosity to browse all of my easy recipes!

    Related Recipes

    Now that you know how to make a butter pie crust recipe, you can use it to make some delicious pies like this easy banana cream pie or this classic pecan pie! Or this butterscotch cinnamon pie recipe.

    Recipe

    An unbaked pie with a top crust. The pie has a design carved in the top to allow steam to escape.
    Print Pin
    5 from 4 votes

    Buttery Pie Crust Recipe

    Buttery Pie Crust Recipe: This easy pie crust recipe can be used to make any pie recipe (a single crust pie or a double crust pie). With only 6 ingredients, this flaky pie crust is super simple to make!
    Course Dessert
    Cuisine American
    Prep Time 15 minutes minutes
    Cook Time 25 minutes minutes
    Total Time 40 minutes minutes
    Servings 2 (9 inch) pie crusts
    Calories 1437kcal
    Author Jessica Burgess

    Equipment

    • 9" pie pan

    Ingredients

    • 2 ½ cups flour + more for flouring work surface
    • 1 tablespoon granulated sugar + 2 lbs if blind baking
    • ½ teaspon salt
    • 1 cup very cold butter diced into ½-inch cubes
    • ½ cup ice cold water divided
    • 1 egg

    Instructions

    To Make Pie Dough

    • In a food processor, combine 2 ½ cups flour, 1 tablespoon sugar, and ½ teaspoon salt until well blended.
    • Add half of your butter (½ cup) to the food processor and blend with the flour mixture. Add the second half (other ½ cup) of the butter and blend again. The mixture should be a powdery sand texture.
      The butter should be very cold, if your room is warm you'll need to place it back into the refrigerator between adding it to the food processor.
    • Add 2 tablespoons of water into your food processor and blend between each set. Repeat this until the texture of the mixture is a rough crumble and when you pinch it, it holds together. This usually takes about 6 tablespoons depending on the type of butter you use. You need the water to remain very cold, add ice cubes to your cup of water if needed.
    • Pour your pie crust dough mixture onto a flat surface and divide it into 2 halves, one half being slightly larger than the other.
    • Form the dough into 2 round disks by squeezing it together and kneading it lightly. Do not overwork the dough or it will become very solid and tough to work with.
    • Wrap your 2 dough disks tightly in plastic wrap making sure that no air is touching the dough. Refrigerate for at least 1 hour. The dough can remain in the refrigerator for up to 48 hours if needed.
    • Preheat your oven to 425 degrees and lightly grease a glass or metal 9-inch pie pan. Thick Ceramic pie pans tend to distribute heat unevenly and may not work for blind baking this pie crust.
    • Remove the larger disk of pie dough from your refrigerator and let it sit for 5 minutes or long enough for it to become workable but still cold. Sprinkle a flat workspace with flour as well as your rolling pin.
    • Starting in the center of the dough disk, roll the dough outward in all directions from the center to the edge until you have a ⅛-inch thick round pie crust.
    • Place the pie crust over your pie pan using your rolling pin by rolling the pie crust over the rolling pin and allowing it to carry the weight of the pie crust, and then rolling it gently across your pie pan. This will help avoid any stretching or cracks. 
    • Gently press the pie crust down into the pie pan, fitting into the crease all the way around. Trim excess pie dough from around the pan with a small sharp knife and with a fork, make small holes around the bottom of the pie crust to allow venting and prevent the pie crust from bubbling up. 

    Blind Baking

    • If your recipe calls for blind baking, preheat your oven to 425°. Roll out your bottom crust dough, line it with parchment paper and weigh it down (with the weight of your choice). Bake for 20-25 mins, then cool before filling. 
      (We wrote an entire blog post dedicated to blind baking pies, so if you need a few more details be sure to head over there and check it out.)

    For Top Crust Note: Exact time and temperature will depend on filling instructions for each individual pie.

    • Fill your bottom pie crust with desired pie filling and preheat your oven by the pie filling instructions.
    • Remove the smaller disk of pie dough from your refrigerator and let it sit for 5 minutes or long enough for it to become workable but still cold. Sprinkle a flat workspace with flour as well as your rolling pin.
    • Starting in the center of the dough disk, roll the dough outward in all directions from the center to the edge until you have a ⅛-inch thick round pie crust.
    • Place the pie crust over your pie pan using your rolling pin by rolling the pie crust over the rolling pin and allowing it to carry the weight of the pie crust, and then rolling it gently across your pie pan. Vent your pie crust by making slits in the top of the pie, all the way around with a small sharp knife. 
    • Trim the excess pie dough from around your pie pan and create a seal around the edge of your pie by rippling and pinching the pie dough between your index finger, thumb, and middle finger.
    • In a small bowl, whisk together egg and 1 tablespoon of water. Brush this egg-wash mixture over your pie crust in a thin layer.
    • Bake your pie by the filling instructions or until the pie crust is golden brown. If the edges are browning too quickly, wrap them in aluminum foil or a pie saver. 

    Notes

    This recipe makes enough dough for a double pie crust recipe. If you only need a bottom crust, you can wrap the other half of the dough in plastic wrap and refrigerate it for a week or put that wrapped dough ball in an airtight, freezer-safe container or bag and freeze it for up to 2 months. When you’re ready to use it, simply thaw it on the counter and continue on with the recipe. 

    Nutrition

    Serving: 1crust | Calories: 1437kcal | Carbohydrates: 125g | Protein: 20g | Fat: 96g | Saturated Fat: 59g | Polyunsaturated Fat: 5g | Monounsaturated Fat: 25g | Trans Fat: 4g | Cholesterol: 326mg | Sodium: 864mg | Potassium: 225mg | Fiber: 4g | Sugar: 7g | Vitamin A: 2955IU | Calcium: 65mg | Iron: 8mg

    What to Pack for Mexico – Free Printable Checklist

    November 5, 2022

    What to Pack for Mexico – Free Checklist that you can print and check off items while you pack, that’s perfect for an all inclusive resort vacation.

    Whether it’s your first time going to Mexico or you’re not sure what to pack for, you’ll find this list of things and essential items really helpful!

    El Dorado Resort in Mexico
    El Dorado Resort in Mexico

    Post and printable checklist originally published in 2016.

    What should I pack for Mexico?

    If you’re traveling to Puerto Vallarta, Cancun, Playa del Carmen, Cabo San Lucas or any of the beach towns soon, this is the ultimate Mexico packing list of items that I always pack, and recommend that you do too.

    Then, make sure to also get my tips for a Mexico Vacation, where I go in to more detail about what to expect when vacationing there.

    Over there, you’ll find the answers to questions like:

    • Why an ink pen is important to take?
    • Why you should pack a bathing suit in your carry-on.

    …and so much more. I can’t WAIT to jot all of my thoughts and advice on the subject. It may just take me back to vacation.

    What should you not forget to take to Mexico?

    Your passport! That’s the one thing I always check my bag for, about 5 times before we even get to the airport. You can usually get anything else you may need at the store!

    What items do I need to travel to Mexico

    Your passport (a must!) and credit cards are highly recommended.

    Mexico Resort Entrance
    Mexico Resort

    Packing Checklist For Mexico Vacation

    When you’ve been dreaming of this beach destination, the last thing you want to do is get there, realizing you’ve forgotten something really important! So make sure to consider some or all of these things when packing:

    Travel Documents:

    • Passport
    • Drivers License
    • Travel Documents (boarding passes, transportation confirmation, phone numbers, addresses, travel insurance papers, etc.)

    Travel Accessories:

    • Cash, Credit Cards, Debit Card (Dollar bills for tips! We like to take about $100 with us for tipping,$50 in ones and the rest in $5, $10, and $ ’20s.)
    • Books/Magazines
    • Wifi downloaded movies, etc. for the long flight
    • Laptop/ipad/cell phone
    • Headphones
    • Chargers
    • Ink Pen (to fill out forms on the plane)

    Personal Items:

    • Makeup
    • Toothbrush/Toothpaste
    • Mouthwash
    • Floss
    • Body Wash
    • Contacts/Glasses
    • Contact Solution
    • Face Wash
    • Lotion
    • Anti-Bacterial Cream (Never know when you may get a scrape and want to doctor it!)
    • Blow Dryer (Check to see if your hotel room has one, to save room in your luggage!)
    • Straightener
    • Curling Wand/Iron
    • Brush/Comb
    • Hair Oil/Protectant
    • Hair Clips/Ties
    • Hair Spray
    • Mousse
    • Shampoo/Conditioner
    • Pain Reliever

    Clothes:

    • Pajamas
    • Workout Clothes
    • Tennis Shoes
    • Socks
    • Dress Shoes (High Heels)
    • Tops and Shorts for Day Outings (Casual Clothing)
    • Dresses/Dress Clothes
    • Jewelry
    • Purses
    • Light Jacket

    Outdoor Essentials

    • Swimming Suits
    • Flip Flops
    • Sun Hat
    • Sunglasses
    • Bug Spray
    • Sunblock
    • Aloe Vera

    Other Items for Your Travel Bag

    I included the most important things above and usually don’t pack the following items, and they’re not on the packing list but I wanted to provide them in case you see something you don’t want to forget, that may be a good idea :

    • beach bag
    • rain jacket (depending on the time of year, especially if you’re visiting during a rainy season)
    • dry bag (if you plan to explore the area and hike
    • water bottle
    • first aid kit
    • lip balm
    • travel umbrella
    • comfortable shoes (if you plan on doing outdoor activities and walking a lot)

    Feel free to print off this free packing list to check things off as you go!

    Download Packing List Here!
    Free Mexico packing list download.

    I’m assuming you’re here because you’re going on vacation to Mexico soon. I so hope you have a great time. But before you go, check out my posts, to give you a better idea of what the All-Inclusive Resorts look like:

    • See our El Dorado Casitas Royale Resort Vacation
    • Take a look at how I surprised my husband for his 30th birthday at Excellence Resort

    If you’re heading to the beach, here’s a list of beach picnic snack ideas that may be helpful too!

    Christmas Tree Charcuterie Board

    November 1, 2022

    A rectangular white platter holds charcuterie in the shape of a Christmas tree

    Christmas Tree Charcuterie Board: It doesn’t get more festive than your favorite meats, cheese, fruit, vegetables and nuts displayed in a Christmas tree shape. This holiday charcuterie board is the perfect appetizer for all of your Christmas parties, or holiday movie nights!

    Nuts, fruits, meats and cheeses have been arranged in the shape of a Christmas tree on a white rectangular serving platter

    I don’t know about you, but for our family, the holiday season means our calendar fills up with holiday gatherings, Christmas parties, our big family dinner, a brunch or two and the occasional cocktail party. That means I need to have some go-to appetizer recipes and Christmas dessert trays ready to go for all these events. And I think this Christmas tree meat and cheese tray is the perfect appetizer!

    Why You’ll Love This Idea

    Charcuterie boards are a no-brainer for entertaining! I don’t see the charcuterie craze ending anytime soon, especially with all of these fun charcuterie boards. Everyone makes a stop to grab a plate of their favorite meat, cheese and fruit.

    You can make this Christmas tree cheese board as simple or gourmet as you want by changing the ingredients that you use. If you omit the meat, this charcuterie tree can easily be vegetarian.

    This easy festive cheese board can be prepped a few hours before your event so you can spend time right before the party making the punch and putting out the finishing touches.

    Our simple appetizer is a festive way to add tons of holiday cheer to any table with the recognizable Christmas tree shape and adorable star topper!

    [feast_advanced_jump_to]

    Ingredients

    This simple recipe starts with your favorite ingredients displayed on a pretty platter or wood board. You can grab basic staples from your grocery store or local gourmet store.

    Bowls fruit, cheese and nuts and a wooden board holding different types of meat are displayed
    Holiday snack board ingredients
    • 12-15 mini pretzel sticks
    • 4-5 sprigs of fresh rosemary
    • 8 oz. yellow cheddar cheese
    • 4 oz. prosciutto
    • 1 cup fresh raspberries
    • 4 oz. mozzarella cheese pearls
    • ⅔ cup Kalamata olives
    • 4 oz. salami slices
    • 4 oz. white cheddar cheese
    • 1 cup green grapes
    • ½ cup pecan halves
    • 1 slice Havarti cheese

    See the printable recipe card below for ingredients, nutrition information and detailed recipe notes. We have lots of Christmas tree charcuterie board ideas below, too!

    Instructions

    Here are the step-by-step instructions with photos to walk you through putting together a festive charcuterie board!

    Prep your ingredients:

    1. Drain the mozzarella pearls on a paper towel lined plate.
    2. Cut the cheddar cheeses into ½ – ¾ inch cubes and set aside.
    3. Use a 2-3 inch star cookie cutter to cut a star shape from the slice of Havarti cheese.
    4. Then, tear the prosciutto into smaller pieces and set aside.
    5. Remove the stems from the green grapes and wash and dry them if necessary.

    Assemble Charcuterie Tree

    1. Now, at the bottom of a large rectangular platter or oval serving platter, group the pretzel sticks together vertically to form the Christmas tree trunk.
    2. Then, lay 2-3 sprigs of fresh rosemary horizontally directly above the pretzel sticks to create the bottom edge of the Christmas tree.
    A large rectangular white platter has pretzel sticks together forming the trunk of a Christmas tree charcuterie board
    Pretzel stick trunk
    Sprigs of rosemary have been laid in a horizontal line, forming the bottom edge of the Christmas tree shaped charcuterie
    Add rosemary sprigs
    1. Add a slightly shorter row of yellow cheddar cheese cubes above the rosemary. As you build the Christmas tree charcuterie board, each row will get a little shorter, creating the triangular tree shape.
    2. Next, arrange the prosciutto pieces in a row on top of the yellow cheese cubes.
    A row of cheddar cheese cubes have been added to continue creating the shape of a Christmas tree on a rectangular white platter
    Add a row of cheddar cubes
    A row of prosciutto has been added to continue creating the shape of a Christmas tree on a rectangular white platter
    Place prosciutto in the next row
    1. Now, place a row of fresh raspberries above the prosciutto.
    2. Next, add a row of drained mozzarella pearls.
    A row of bright red raspberries have been added to continue creating the shape of a Christmas tree on a rectangular white platter
    Add raspberries
    A row of small fresh mozzarella cheese balls have been added to continue creating the shape of a Christmas tree on a rectangular white platter
    Layer mozzarella pearls
    1. Now, add a row of Kalamata olives.
    2. Now, fold the salami slices in half and in half again. Add the folded salami in a layer above the olives. They’re folded in a certain way to give a ruffled look. If you have leftover salami, you may want to practice making salami roses for a charcuterie board too.
    A row of pitted black kalamata olives have been added to continue creating the shape of a Christmas tree on a rectangular white platter
    Next, add Kalamata olives
    A row of folded salami slices have been added to continue creating the shape of a Christmas tree on a rectangular white platter
    A row of salami is next
    1. Now, add a row of white cheddar cheese cubes.
    2. Arrange the grapes in a row above the white cheese cubes.
    A row of white cheddar cheese cubes have been added to continue creating the shape of a Christmas tree on a rectangular white platter
    Add white cheese cubes
    A row of green grapes has been added to continue creating the shape of a Christmas tree on a rectangular white platter
    Grapes are in the next row
    1. Now, use the pecan halves to form the top of the tree, angling them into a triangle.
    2. Place the cheese star at the top of the Christmas tree shape.
    Pecan halves have been added to form the pointed top of a Christmas tree on a rectangular white platter
    Shape pecan halves
    A star shaped piece of havarti cheese has been added to the top of the Christmas tree shaped charcuterie
    Add a cheese star
    1. Finally, tuck small sprigs of fresh rosemary in and around the tree to create the look of greenery. You can also use fresh dill or parsley.
    Additional sprigs of fresh rosemary have been tucked into the fruit, nuts, meats and cheese of a Christmas tree shaped platter of charcuterie
    Easy Christmas charcuterie board

    Grab some tongs and cheese knives and serve your Christmas tree snack board immediately with an assortment of dips, jams, honey, bread and crackers.

    A white rectangular serving platter holds meats, cheese, nuts and fruit that has been arranged in the shape of a Christmas tree
    Festive charcuterie board

    Variations

    This charcuterie Christmas tree recipe is SO flexible. You can use different meats, your favorite cheeses, nuts, fruits and vegetables to make the rows. Here are some different ingredients to build your tree shaped charcuterie:

    • Cubed ham
    • Sliced turkey rolled up and sliced
    • Summer sausage or kielbasa cut into cubes
    • Peppered salami
    • Baby carrots
    • Pepperjack cheese cubes
    • Swiss cheese cubes
    • Cauliflower florets
    • Blue cheese crumbles
    • Grape tomatoes
    • Red grapes
    • Strawberries
    • Green olives
    • Broccoli florets
    • Black olives
    • Blackberries
    • Blueberries
    • Chocolate covered blueberries or cherries
    • Dark chocolate morsels/chips
    • Cinnamon glazed pecan halves
    • Rosemary roasted mixed nuts
    • Roasted walnuts
    • Dried fruit like apricots, golden raisins, cherries or cranberries
    • Sprinkle pomegranate seeds to look like seasonal berries
    Close up photo of meat, cheese, fruit and nuts that has been arranged in the shape of a Christmas tree with a star shaped piece of cheese at the top

    Christmas Tree Charcuterie Board FAQs

    What’s typically on a charcuterie board?

    A savory charcuterie board is normally put together with various meats, cheeses, nuts, olives, pickles, spreads or dips and served with different kinds of crackers, chips, crisps and breads.

    You can also make a dessert charcuterie board with various types of cookies, candies, sweets, chocolate, cupcakes, fruit and sweet dips and spreads.

    What can I use as a charcuterie board instead of wood?

    Get creative! Large platters, food safe chargers, glass cutting boards and even a baking sheet lined with parchment or wax paper can be used to make a charcuterie board.

    What is a charcuterie tree?

    Simply put, a charcuterie tree is a variety of meat, cheese, nuts, olives, fruit and vegetables placed on a large platter or board in the shape of a Christmas tree!

    What is the base of a charcuterie tree?

    We use pretzel sticks as the base of our charcuterie tree (the tree trunk), but you could also use a piece of pumpernickel bread, brown crackers or large pretzel rods to make the trunk of the tree.

    Storage

    Store the individual ingredients separately in airtight containers in the refrigerator for up to three days.

    Close up photo of meat, cheese, fruit and nuts that has been arranged in the shape of a Christmas tree with a star shaped piece of cheese at the top

    More Christmas Appetizers

    If you are looking for another adorable Christmas tree shaped appetizer, how about our Pinwheel Christmas Tree Appetizer? If you need a few sweet treats to nibble on before dinner or between red martini cocktails, this Christmas Tree Cake Dip or this Christmas Chocolate Chip Cheese Ball are crowd pleasers.

    Did you make this? I’d be so grateful if you left a “star” rating below to let me know what you thought! Then, the next time you need a quick and easy recipe, come back to Fantabulosity to browse all of my easy recipes!

    Recipe

    A rectangular white platter holds charcuterie in the shape of a Christmas tree
    Print Pin
    5 from 4 votes

    Christmas Tree Charcuterie Board

    A Christmas Tree Charcuterie Board is a simple and festive holiday appetizer for all of your seasonal parties and get togethers!
    Course Appetizer
    Cuisine American
    Prep Time 20 minutes minutes
    Total Time 20 minutes minutes
    Servings 8 people
    Calories 428kcal
    Author Jessica Burgess

    Ingredients

    • 12-15 pretzel sticks
    • 4-5 sprigs fresh rosemary
    • 8 ounces yellow cheddar cheese
    • 4 ounces prosciutto
    • 1 cup raspberries
    • 4 ounces mozzarella pearls
    • ⅔ cup Kalamata olives
    • 4 ounces salami slices
    • 4 ounces white cheddar cheese
    • 1 cup green grapes
    • ½ cup pecan halves
    • 1 slice Havarti cheese

    Instructions

    Prep Your Ingredients

    • Drain the mozzarella balls on a paper towel lined plate.
      Cut the cheddar cheeses into ½-¾ inch cubes and set aside.
      Use a 2-3 inch star cookie cutter to cut a star shape from the slice of havarti cheese.
      Then, tear the prosciutto into smaller pieces and set it aside.
      Remove the stems from grapes and wash and dry them if necessary.

    Assemble Charcuterie Tree

    • Now, on a large rectangular or oval serving platter, group the pretzel sticks together vertically in a pile to create the trunk of the Christmas tree.
    • Then, lay 2-3 sprigs of fresh rosemary horizontally to create the bottom edge of the Christmas tree.
    • Add a slightly smaller row of yellow cheddar cheese cubes above the rosemary. As you build the Christmas tree charcuterie board, each row will get a little shorter, creating the triangular tree shape.
    • Next, arrange the prosciutto pieces in a row on top of the yellow cheddar cheese cubes.
    • Now, place a row of raspberries above the prosciutto.
    • Place the drained mozzarella pearls in a row above the prosciutto.
    • Then, add a row of Kalamata olives.
    • Now, fold the salami slices in half and in half again. Add the folded salami in a row above the olives.
    • Add a row of white cheddar cheese cubes.
    • Arrange the grapes in a row above the white cheese cubes.
    • Now, use the pecan halves to form the top of the tree, angling them into a triangle.
    • Place the cheese star at the top of the Christmas tree shape.
    • Finally, tuck small sprigs of fresh rosemary in and around the tree to add the look of greenery.
    • Serve the Christmas tree charcuterie board immediately with dips, jam, honey, bread and crackers.

    Notes

    • The number of ingredients and quantity of ingredients may vary depending on the size of your platter. Keep additional ingredients stored in the fridge and replenish them as necessary.
    • This recipe is very flexible, so you can substitute your favorite cheeses, fruit, vegetables and olives when building the Christmas tree shape.
    • If you make the board in advance, wrap it tightly in plastic wrap and keep it in the refrigerator. Add the pretzel sticks just before serving.
    • We don’t recommend leaving the board out at room temperature for more than two hours.
    • To store, disassemble the tree and store individual ingredients separately in the refrigerator.

    Nutrition

    Serving: 1serving | Calories: 428kcal | Carbohydrates: 9g | Protein: 20g | Fat: 35g | Saturated Fat: 15g | Polyunsaturated Fat: 4g | Monounsaturated Fat: 13g | Trans Fat: 0.1g | Cholesterol: 77mg | Sodium: 993mg | Potassium: 218mg | Fiber: 2g | Sugar: 4g | Vitamin A: 621IU | Vitamin C: 5mg | Calcium: 412mg | Iron: 1mg

    Chocolate Covered Pecans

    October 31, 2022

    white chocolate covered pecans in gray bowl

    Chocolate-Covered Pecans: A white chocolate pecans recipe that is a delicious treat and also makes a great gift! The pecans are seasoned with sweet spices and coated in chocolate! Nuts and white chocolate just seem to go together so well, and that’s why we also think you’ll love this white chocolate crock pot candy, too!

    white chocolate pecans in gray bowl
    White Chocolate Covered Pecans

    Whether you are looking for a sweet snack or a dessert idea, these can be a perfect solution. They’re also a simple treat to make and package up and give as an easy gift idea during the holiday season!

    Ingredients:

    Complete list of ingredients and amounts can be found in the recipe card below, along with step-by-step instructions.

    • 1 pound pecan halves
    • 1 egg white
    • 1 teaspoon vanilla extract
    • ½ cup sugar
    • 1 teaspoon cinnamon
    • 1 teaspoon salt
    • 1 bar Ghirardelli white chocolate
    spiced pecans on white plate
    Spiced pecans

    Instructions

    1. Beat egg white and vanilla in a large bowl.
    2. Mix dry ingredients in a separate bowl.
    3. Coat pecans first in egg mixture, and then stir them into spice mixture.
    4. Spread in greased shallow pan or baking sheet and bake at 200 degrees for 40 minutes to 1 hours, stirring every 10 minutes.
    5. Melt white chocolate in a microwave-safe bowl, in the microwave at 50% for 30 seconds. Repeat until chocolate is melted.
    6. Dump the pecans into the melted chocolate, and using a slotted spoon, lay out on a cookie sheet (covered with parchment paper for easy clean-up!), or cooling rack that will allow the excess chocolate drip to drop.
    7. When chocolate hardens, enjoy this great snack!
    Pecans covered in white chocolate on cooling rack
    White Chocolate Pecans

    Substitutions and Variations

    • Chocolate – If you prefer different flavors of chocolate, such as milk chocolate or dark chocolate, you can absolutely use that instead! Just follow the recipe as stated, simply switching out any flavor of delicious chocolate.
    • Sprinkles – to make these specifically for a holiday, you can add some sprinkles to match the occasion! Right after coating with chocolate, before it hardens, sprinkle your favorite color of sprinkles on to the pecans.
    • Plain pecans – you can skip seasoning the pecans if you’d like, and simply just cover them in melted white chocolate but the flavor of the pecans paired with the chocolate, is amazing!

    How to Store

    If you have leftover pecans after making them, or if you make them in advance, store them in an airtight container once they have cooled off and fully hardened, for best results.

    Gift Giving

    If you plan to make these and give as gifts, some of our favorite food containers to package these up in are these kraft treat bags with windows!

    Related Recipes

    If you love these, then you’ll also love these hot chocolate muddy buddies, this Texas trash, and this homemade caramel corn! And, if you want something that the kids will love, these chocolate covered teddy bear graham crackers are just perfect.

    Did you make this? I’d be so grateful if you left a “star” rating below to let me know what you thought! Then, the next time you need a quick and easy recipe, come back to Fantabulosity to browse all of my easy recipes!

    Recipe

    white chocolate covered pecans in gray bowl
    Print Pin
    4.50 from 4 votes

    White Chocolate Pecans

    Chocolate-Covered Pecans: A white chocolate pecan recipe that is a delicious treat and also makes a great gift! The pecans are seasoned with sweet spices and coated in chocolate!
    Course Dessert, Snack
    Cuisine American
    Prep Time 10 minutes minutes
    Cook Time 40 minutes minutes
    Total Time 50 minutes minutes
    Servings 16 servings
    Calories 250kcal
    Author Jessica Burgess

    Ingredients

    • 1 pound pecan halves
    • 1 egg white
    • 1 teaspoon vanilla extract
    • ½ cup sugar
    • 1 teaspoon cinnamon
    • 1 teaspoon salt
    • 1 bar Ghirardelli white chocolate

    Instructions

    • Beat egg white and vanilla in a large bowl.
    • Mix dry ingredients in a separate bowl.
    • Coat pecans first in egg mixture, and then stir them into spice mixture.
    • Spread in in a greased shallow pan and bake at 200 degrees for 40 minutes to 1 hours, stirring every 10 minutes.
    • Melt white chocolate in the microwave at 50% for 30 seconds. Repeat until chocolate is melted.
    • Dump the pecans into the melted white chocolate, lift out using a slotted spoon to allow excess chocolate to drip back in to the bowl, and lay the pecans out in a single layer, on a cookie sheet, covered with wax paper, or cooling rack that will allow any access chocolate to drip off.
    • When chocolate hardens, enjoy!

    Nutrition

    Serving: 1serving | Calories: 250kcal | Carbohydrates: 13g | Protein: 3g | Fat: 22g | Saturated Fat: 2g | Cholesterol: 1mg | Sodium: 153mg | Potassium: 134mg | Fiber: 2g | Sugar: 10g | Vitamin A: 15IU | Vitamin C: 0.3mg | Calcium: 32mg | Iron: 0.7mg

    Turkey Cranberry Sliders

    October 30, 2022

    A metal spatula holds a cranberry and turkey slider above a pan of the same slider sandwiches

    Turkey Cranberry Sliders: Take Thanksgiving leftovers from boring to brilliant! Tuck turkey, creamy Brie cheese, and tangy cranberry sauce into soft Hawaiian rolls, brush them with a savory poppy seed butter, and bake them until toasty and golden!

    Thanksgiving leftovers work in more than one slider. See the rest of my slider recipes.

    A metal spatula holds a cranberry and turkey slider above a pan of the same slider sandwiches

    Slider recipes are a favorite around here because they’re easy, perfect for entertaining and bite-size appetites. If you’re looking to try multiple slider recipes, these salmon sliders are not only delicious but they’re a great protein twist. Or these roast beef sliders are easy to make and so full of flavor too!

    Let’s talk turkey! Whether you made a whole bird or cooked a turkey breast in the Instant Pot or turkey breast in the air fryer, odds are, you will have leftover turkey.

    Are you someone who cooks a larger roasted turkey and makes extra sides just so there are leftovers for the next couple of days? Me too! And boy, do I have one of the best leftover turkey recipes for you today!!

    You can also extend cranberry season by stirring some dried cranberries into fresh scones.

    Why You’ll Love This Recipe

    Let’s say it again: holiday leftovers! These baked mini turkey sandwiches are my new favorite way to repurpose leftovers (even that leftover cranberry sauce) into a whole new meal! (Or if you have leftover chicken, you can make chicken sliders too!)

    Turkey sliders are the perfect quick meal to refuel after Black Friday shopping. Just pop them in the oven while you are reheating all those Thanksgiving side dishes.

    You can channel your favorite Thanksgiving flavors any time of the year with this recipe. So, go ahead and make these Hawaiian roll turkey sliders whenever the mood strikes!

    [feast_advanced_jump_to]

    Ingredients

    Even if you are low on leftovers, a quick trip to the grocery store will produce all of the simple ingredients needed for this slider recipe.

    Small bowls hold various ingredients and rolls, turkey, cheese, cranberry sauce and fresh thyme are all laid out on a white marble background
    Ingredients
    • 12 King’s Hawaiian rolls – Savory Butter variety
    • ¾ lb. sliced turkey
    • 1 cup whole cranberry sauce
    • 3 tablespoons unsalted butter
    • 3 tablespoons Dijon mustard
    • ¾ teaspoon poppy seeds
    • ¼ teaspoon salt
    • fresh thyme, optional for garnish

    See the printable recipe card below for ingredients, nutrition information and detailed recipe notes.

    How to Make Turkey Cranberry Sliders

    We just a few minutes of prep and our easy-to-follow instructions with step-by-step pictures, you will have a pan full of the best turkey cranberry sliders ready to eat in no time!

    1. First, preheat the oven to 350 degrees F and prepare the bottom of an 8×11 or 9×13 baking dish with nonstick cooking spray.
    2. Next, using a bread knife or serrated knife, slice the Hawaiian rolls in half horizontally, taking care not to slice the bottom buns too thin.
    3. Then, place the bottom buns into the greased baking dish.
    12 Hawaiian rolls have been sliced horizontally in preparation to assemble Thanksgiving slider sandwiches
    Cut rolls in half
    The bottom buns of 12 slider rolls have been placed in a 9x13 glass baking dish in preparation to assemble slider sandwiches
    Place in dish
    1. Add the sliced turkey on top of the buns in an even layer.
    2. Next, spread the cranberry sauce over the turkey.
    Sliced turkey has been layered on top of the bottoms of slider buns to begin assembling turkey cranberry slider sandwiches
    Top with turkey
    A layer of vibrant red cranberry sauce has been added on top of sliced turkey to build a pan of slider sandwiches
    Add cranberries
    1. Top the cranberry sauce with the slices of Brie.
    2. Then, place the tops of the buns over the cheese.
    A layer of brie cheese has been added to the slider sandwiches in a 9x13 glass baking dish
    Add cheese
    The top buns of 12 sliders have been replaced and the small sandwiches are waiting to be brushed with a flavorful butter sauce before baking
    Add top buns
    1. In a small microwave-safe bowl, combine the butter, mustard, poppy seeds, and salt. Microwave until fully melted and stir to combine.
    2. Now, use a silicone or pastry brush to spread the butter mixture evenly over the tops of the buns, making sure to scrape any poppy seeds from the bottom of the bowl.
    A small white bowl holds melted butter and a fork is placed in the butter to stir it as other ingredients are added
    Butter
    A glass baking dish holds 12 assembled turkey cranberry slider sandwiches
    Brush on
    1. Cover the baking pan with aluminum foil and bake for 15 minutes. Then, remove the foil and bake uncovered for an additional 5 minutes.
    2. Finally, cut the sliders into individual sandwiches, garnish with fresh thyme and serve out of the oven.
    A glass baking dish holds 12 slider sandwiches that have been baked to golden brown and brushed with a savory butter sauce
    Thanksgiving sliders

    Oh my word! The tender turkey, that melty Brie, the gorgeous bright red cranberry sauce and the baked butter topping have me wishing it was Thanksgiving every day!

    A turkey cranberry slider sandwich rests on a white plate with a pan of the same small sandwiches in the background
    Baked turkey cranberry sliders

    Variations

    Everyone’s Thanksgiving table and pantry may look a little different, so here are a few ways to adapt this recipe to your favorite flavors and preferences!

    • Rolls – We use the savory butter variety for these Hawaiian roll turkey sliders, but you can use the original sweet Hawaiian rolls for a slightly sweeter slider.
    • Turkey – This is the perfect recipe to use that leftover Thanksgiving turkey! But deli turkey slices will work in a pinch if you have already nibbled all of that turkey away.
    • Cheese – While we used Brie cheese, use your favorite cheese for these turkey and cheese sliders. Havarti cheese, provolone cheese, sliced Swiss cheese or any mild melting cheese will be delicious.
    • Mustard – You can use yellow mustard, spicy brown mustard or stone ground mustard for a little different flavor.
    • Flavor the butter – Speaking of flavor, you can add onion powder, garlic powder or minced garlic to the butter. A dash or two of Worcestershire sauce adds a little tang and depth to the savory butter sauce as well. If you like a sweeter glaze, mix a tablespoon of brown sugar into the butter mixture.
    • Stuffing – I love the idea of adding a little leftover stuffing on top of the cranberry sauce to add one more layer of Thanksgiving flavor to these sliders!
    • Toppings – For a little extra wow factor, sprinkle the tops of the sandwiches with more poppy seeds, sesame seeds or everything bagel seasoning before popping them into the oven.
    Two small white plates hold a slider sandwich with a pan of the same sliders in the background
    Cranberry turkey sliders

    FAQs

    What is a Thanksgiving leftover sandwich called?

    You may hear a sandwich made with Thanksgiving leftovers called a Gobbler or The Pilgrim.

    How long can you eat leftover Thanksgiving turkey?

    We recommend eating or freezing Thanksgiving leftovers in 3 or 4 days, so keep Monday on your radar to eat or share all of that great food! These Thanksgiving sliders are perfect for eating it up in time!

    Storage

    These delicious turkey cranberry sliders are really best when eaten fresh and toasty from the oven. While you can store leftover sliders in the refrigerator for up to 3 days, we find the bottom buns do soften and can get a little soggy.

    We don’t recommend freezing the leftover sliders, but once you taste them, I really don’t think you’ll have to worry about leftovers.

    Two small white plates hold a slider sandwich with a pan of the same sliders in the background

    More Slider Recipes

    We are huge fans of sliders around here, and are constantly trying to find a way to make new ones!

    Reader favorites are these sloppy joe slider sandwiches, these cheeseburger sliders in the oven, hot Italian sliders (or smoked Italian sliders), and these breakfast sliders!

    More Recipes for Thanksgiving Dinner

    From appetizers to desserts, we have your Thanksgiving dinner menu covered!

    • Pumpkin Deviled Eggs – don’t worry, these deviled eggs just look like pumpkins!
    • Our Pumpkin Fluff Dip is a little sweet treat to tide everyone over until dinner is ready.
    • This really is the BEST green bean casserole – you can’t go wrong with bacon and cheese, right?!
    • Our corn casserole and Southern broccoli casserole are family favorites for Thanksgiving, too.
    • Pass on the pumpkin pie and make these Pumpkin Cheesecake Bars or Pumpkin Patch Brownies instead!

    Did you make this? I’d be so grateful if you left a “star” rating below to let me know what you thought! Then, the next time you need a quick and easy recipe, come back to Fantabulosity to browse all of my easy recipes!

    Recipe

    A metal spatula holds a cranberry and turkey slider above a pan of the same slider sandwiches
    Print Pin
    5 from 3 votes

    Turkey Cranberry Sliders

    Turkey Cranberry Sliders: Soft Hawaiian rolls are stuffed with Thanksgiving favorites like turkey, cranberry sauce and Brie cheese before being brushed with poppy seed butter and baked to golden perfection!
    Course Main Course
    Cuisine American
    Prep Time 10 minutes minutes
    Cook Time 20 minutes minutes
    Total Time 30 minutes minutes
    Servings 12 sliders
    Calories 248kcal
    Author Jessica Burgess

    Ingredients

    • 12 Hawaiian Rolls
    • ¾ lb sliced turkey
    • 1 cup whole cranberry sauce
    • 8 oz. Brie cheese sliced
    • 3 tablespoon unsalted butter
    • 3 tablespoon dijon mustard
    • ¾ teaspoon poppy seeds
    • ¼ teaspoon salt
    • fresh thyme optional for garnish

    Instructions

    • First, preheat the oven to 350 degrees F and prepare the bottom of an 8×11 or 9×13 baking dish with nonstick cooking spray.
    • Next, using a bread knife or serrated knife, slice the Hawaiian rolls in half horizontally, taking care not to cut the bottom buns too thin.
    • Then, place the bottom buns into the greased baking dish.
    • Add the sliced turkey on top of the buns in an even layer.
    • Next, spread the cranberry sauce over the turkey.
    • Top the cranberry sauce with the slices of brie.
    • Then, place the tops of the buns over the brie.
    • In a small microwave safe bowl, combine the butter, mustard, poppy seeds and salt. Microwave until fully melted and stir to combine.
    • Now, use a brush to spread the butter mixture evenly over the top of the buns, making sure to scrape the poppy seeds out of the bottom of the bowl.
    • Cover the pan with foil and bake for 15 minutes. Then, remove the foil and bake uncovered for an additional 5 minutes.
    • Finally, cut the sliders into individual sandwiches, garnish with fresh thyme and serve hot out of the oven.

    Notes

    • This recipe can easily be doubled or tripled to feed a crowd.
    • You can use yellow, dijon or stone ground mustard for the butter mixture.
    • If you like garlic, you can add a little garlic powder or minced garlic to the butter as well.
    • These are best eaten fresh and do not reheat well. If you store the leftovers, refrigerate them for up to 3 days. (The bottom buns may soften or get a bit soggy.)

    Nutrition

    Serving: 1slider | Calories: 248kcal | Carbohydrates: 25g | Protein: 12g | Fat: 11g | Saturated Fat: 6g | Polyunsaturated Fat: 1g | Monounsaturated Fat: 3g | Trans Fat: 0.1g | Cholesterol: 50mg | Sodium: 549mg | Potassium: 148mg | Fiber: 0.5g | Sugar: 12g | Vitamin A: 212IU | Vitamin C: 0.3mg | Calcium: 45mg | Iron: 0.4mg

    Fried Bologna and Egg Sandwich

    October 28, 2022

    Fried Bologna and Egg Sandwich

    Fried Bologna and Egg Sandwich: A couple of bologna slices, an egg, a couple of slices of bread, and a pat of butter, and you’re set for a delicious breakfast recipe!

    It’s fun to mix things up for breakfast, like with these breakfast egg rolls, how they use bacon, eggs, and cheese, inside of the wrappers.

    Fried Bologna and Egg Sandwich, cut in half, sitting on white plate

    Whether you’re looking for more affordable breakfast ideas, or just quick and easy breakfast recipes, this bologna and egg sandwich is one of the best sandwiches!

    The heartiness of egg and bologna sandwiches will hold you over until lunchtime, making this a perfect option for before school or work.

    Rotate this sandwich with others like our Hawaiian breakfast sandwich, this bacon, egg, and cheese sandwich, and these breakfast sliders, and you’ll never tire of the same thing!

    Why you’ll love this recipe:

    • It’s quick – It can be made and ready to eat in minutes, only dirtying one dish!
    • On-the-go – Make it, wrap it in aluminum foil or a paper towel, and send it with the kids, or your spouse, or take it yourself to eat on the way to work or school!
    • Protein-packed – Much better than filling your stomach with a ton of sweets and carbs to start your day, this sandwich has protein to help start your day right!
    [feast_advanced_jump_to]

    Ingredients for these bologna sandwiches

    Here’s what you need to make this easy and delicious bologna and egg sandwich. (With the addition of butter for cooking!)

    Ingredients for a fried bologna and egg sandwich

    Complete list of ingredients and amounts can be found in the recipe card below.

    • Bologna: grab your favorite kind from the store but if you’d like our recommendation, we love the thick slices of bologna. You can even get your own sliced bologna from the deli department at your local grocery store!
    • Egg: Large eggs are what we opt for but you can use any size eggs. We also fry the egg, flat; yolks and all but you can do a sunny side up egg to allow the yolk to spread on the sandwich like we did with our waffle burger!
    • Sliced bread: There’s nothing better than classic white bread for this sandwich. However you can use whole wheat bread, brioche buns, sourdough bread, or your favorite type of bread.
    • Butter: You may not need/want to use butter if you have a nonstick pan. However, we prefer using butter to cook our eggs in, and to toast our bread with. So this is optional. (See substitutions below.)

    How to make a proper fried bologna sandwich

    Nothing fancy here… but definitely a childhood favorite that’s simple and easy to make!

    1. Melt Butter (if desired): In a large skillet (or at least one big enough to cook about 2 slices of bologna at the same time if possible) melt about a tablespoon of butter over medium heat.
    2. Cook Egg: Next, crack the egg in to the skillet and bust the yolk if necessary. Cook for about 1 minute and then flip to cook the other side for an additional minute, or at least until the yolk and whites of the egg are fully cooked. Set aside.
    Cracked egg in skillet
    Crack egg in to buttered skillet
    Egg that has been flipped in skillet
    Flip egg
    1. Cook Bologna: Remove the red ring (if this is on your bologna) from the bologna and place both slices in the same frying pan. Cook bologna for about a minute on each side until it has that golden brown, glistening look! Set aside the cooked bologna slice with the cooked egg.

      Not Toasted: Place egg and bologna on two pieces of white bread and enjoy if you prefer the sandwich not to be toasted.
    2. If you Prefer a Toasted Sandwich: Place another tablespoon of butter in the hot skillet and melt. Then add a slice of bread and cook for about one minute until golden brown. Place bologna and egg on top, and then add the second slice of bread and flip the sandwich, like you would a grilled cheese.
    2 slices of bologna in frying pan
    Fry both sides of bologna
    Slice of bread with bologna and egg on top in skillet
    Toast bread with bologna and egg

    Top Tip:

    Enjoy warm! Serve immediately, or wrap in aluminum foil or a paper towel to stay warm until ready to eat, when you’re on the go!

    Fried bologna and egg sandwich on white plate

    Substitutions

    • Type of Bread: You can use your favorite type of bread for this recipe but we love white sandwich bread.
    • Different Meats: Feel free to switch out the type of lunch meat if you’d like, or even add other meats in with the bologna, such as ham, turkey, chicken (like in our chicken grilled cheese) spam, and more!
    Fried bologna and egg sandwich cut in half on white plate

    Variations

    • Add Cheese Slices: Some will also love a slice of cheese on their sandwich. For instance, a slice of cheese like American cheese would be good. Or even another melty cheese such as provolone or swiss would be incredible as well!
    • Toppings: If you’d like to add toppings to your sandwich, you may want to consider black pepper and salt, cream cheese, tomato slices, onion slices, dijon mustard, or even something like hot sauce for a kick!
    Fried bologna and egg sandwich on white plate

    Storing Tips

    This recipe makes one sandwich so the odds of you having leftovers is rare. However, if you’re wanting to make a few sandwiches in advance, so they can be easy to grab and go in the morning, you can assemble the sandwich, allow it to fully cool, and then wrap in aluminum foil or a plastic bag and store in the refrigerator until later.

    To reheat: We love reheating foods like this in our air fryer! However you can also reheat the sandwich gently, by adding it to a warm skillet to let it slowly warm back up. (Or the microwave can be a quick option but be careful warming bread up in the microwave, as it can get hard it cooked too long.)

    Hand holding fried bologna and egg sandwich

    What to Eat with This Simple Sandwich:

    It’s delicious by itself but if you’re looking to round out breakfast or even lunch, this pairs so nicely with so many other things.

    • Fresh Fruit: If you’d like to make this honey lime fruit salad ahead of time, it’s a great thing to keep on hand for another fast option in the morning. Or, this fruit platter to snack on, if entertaining is super easy to put together!
    • Fries/Chips: If you’re making this protein-packed sandwich, something like seasoned potato wedges, air fried breakfast potatoes, air fryer sweet potato fries, or even chips go great with a sandwich like this, even for lunch!

    More Sandwich Recipes You’ll Love:

    • Fried peanut butter and jelly sandwich, sliced on white plate.
      Fried Peanut Butter and Jelly Sandwich
    • Hot ham and cheese sandwich on white plate
      Hot Ham and Cheese Sandwiches
    • Peanut butter and syrup sandwich sliced in half, stacked on top of each other.
      Peanut Butter and Syrup Sandwich
    • Close up of peanut butter and jelly sandwich
      How to Make a Peanut Butter and Jelly Sandwich

    FAQ’s

    Is fried bologna a southern thing?

    It is! Although enjoyed all over, it’s commonly a sandwich you’ll find in the south.

    What does fried bologna taste like?

    Bologna is similar to hot dogs or even spam. It’s a saltier lunch meat that is processed.

    What condiments do you put on a bologna sandwich?

    Common condiments that you may put on a bologna sandwich are ketchup, mayonnaise, and mustard.

    Did you make this? I’d be so grateful if you left a “star” rating below to let me know what you thought! Then, the next time you need a quick and easy recipe, come back to Fantabulosity to browse all of my easy recipes!

    Recipe

    Fried Bologna and Egg Sandwich
    Print Pin
    5 from 5 votes

    Fried Bologna and Egg Sandwich

    Fried Bologna and Egg Sandwich: A couple of bologna slices, an egg, a couple of slices of bread, and a pat of butter, and you're set for a delicious breakfast recipe!
    Course Breakfast, Main Course, Side Dish
    Cuisine American
    Prep Time 2 minutes minutes
    Cook Time 8 minutes minutes
    Total Time 10 minutes minutes
    Servings 1 sandwich
    Calories 571kcal
    Author Jessica Burgess

    Ingredients

    • 2 slices white bread
    • 1 egg
    • 2 slices bologna
    • 2 Tablespoons butter, for cooking

    Instructions

    • Melt a tablespoon of butter in a large skillet, over medium heat.
    • Crack egg in to skillet and bust egg yolk if necessary. Cook for one minute, flip and cook the other side of the egg for another minute, or until egg whites and yolk are fully cooked. Set egg aside.
    • Place both slices of bologna in hot skillet, and cook on each side for one minute, or until the bologna is heated through. Set aside with egg.
    • Melt the additional tablespoon of butter in the same skillet and add a slice of bread. Place egg and bologna on top of bread and place remaining slice of bread on top. Flip the sandwich after about one minute and toast the other slice of bread. Enjoy!

    Notes

    • Enjoy warm! Serve immediately, or wrap in aluminum foil or a paper towel to stay warm until ready to eat, when you’re on-the-go!
    • Add Cheese Slices: Some will also love a slice of cheese on their sandwich. For instance, a slice of cheese like American cheese would be good. Or even another melty cheese such as provolone or swiss would be incredible as well!
    • Toppings: If you’d like to add toppings to your sandwich, you may want to consider black pepper and salt, cream cheese, tomato slices, onion slices, dijon mustard, or even something like hot sauce for a kick!

    Nutrition

    Serving: 1sandwich | Calories: 571kcal | Carbohydrates: 28g | Protein: 19g | Fat: 42g | Saturated Fat: 21g | Polyunsaturated Fat: 3g | Monounsaturated Fat: 14g | Trans Fat: 1g | Cholesterol: 257mg | Sodium: 1019mg | Potassium: 302mg | Fiber: 1g | Sugar: 5g | Vitamin A: 985IU | Vitamin C: 0.5mg | Calcium: 184mg | Iron: 3mg

    Christmas Popcorn Balls with Free Gift Tag Printable

    October 27, 2022

    A popcorn ball that has been rolled in red and green sprinkles has been placed in a cellophane bag that is tied closed with red ribbon.

    Christmas Popcorn Balls with Free Gift Tag Printable: A classic childhood favorite, these marshmallow popcorn balls get all dressed up for holiday gift giving with a free gift tag printable!

    A Christmas popcorn ball has been wrapped in a cellophane bag that is tied closed with a red ribbon and a festive holiday gift tag

    We love popcorn around here! If you follow my social media, you may have seen that our boys have become young entrepreneurs selling popcorn and lemonade in our neighborhood and at our local farmers market.

    So, it’s no surprise that this homemade popcorn in the microwave (that can easily become a delicious popcorn treat, much like this caramel corn recipe) is near and dear to my heart.

    Needless to say, Christmas Popcorn Balls with Free Gift Tag Printable is my favorite way to give one of our favorite holiday treats to our friends and family at Christmas.

    Why You’ll Love This Recipe

    There are only 5 ingredients use to make our homemade popcorn balls! Easy recipes like this one are perfect for this busy time of year.

    Just like these nostalgic cornflake wreaths, this recipe for old-fashioned popcorn balls takes me back to childhood. Anyone else remember these traditional popcorn balls from your family’s kitchen?

    There is no light corn syrup in our recipe and you don’t need a candy thermometer. We use basic pantry ingredients and the same process used to make rice crispy treats. It doesn’t get much easier than that!

    Christmas treats, like these Christmas popcorn balls, are perfect for gift-giving during the holiday season. You can make a batch for a holiday party, for your service workers or to treat your favorite people! (Make them along with this Candy Cane Pie to really get in the spirit!)

    [feast_advanced_jump_to]

    Ingredients

    When a recipe starts with key ingredients that are easily found in my kitchen and pantry, I know I can whip it up at a moment’s notice. This recipe for popcorn balls in one to keep handy for any holiday or event.

    Bowls of popcorn, mini marshmallows, butter, sprinkles and vanilla extract and wrapping supplies are displayed on a white marble background
    Ingredients
    • 3 tablespoons of unsalted butter
    • 8 cups of popped popcorn
    • 10 oz. mini marshmallows
    • 1 teaspoon vanilla extract
    • ¼ cup Christmas colored sprinkles (optional: additional sprinkles for garnish)

    To wrap Christmas Popcorn Balls with free gift tag printable:

    • 6 striped paper straws cut in half
    • 12 cellophane bags
    • Ribbon
    • 12 Printed “Popping By to Say Happy Holidays” gift tags (or, here is the PDF version of the gift tag)

    See the printable recipe card below for ingredients, nutrition information and detailed recipe notes.

    Instructions

    If you have made rice krispie treats, then you will have no trouble following this Christmas popcorn balls recipe. We’ve got step-by-step instructions with pictures below so you can easily follow along and make these sweet and salty treats!

    1. First, if necessary, prepare the popcorn. We love to make homemade popcorn in the microwave. Place the popped popcorn in a large mixing bowl. Sort through it and remove any unpopped kernels and set the popcorn aside.
    2. Next, in a large pot over medium heat, melt the butter and marshmallows together, stirring constantly until the mixture is smooth and the butter and marshmallows are completely incorporated.
    A white dutch oven holds mini marshmallows and a pat of butter
    Marshmallows and butter
    A white dutch oven holds ooey gooey melted marshmallow
    Melt the butter and marshmallows until smooth
    1. Remove the pot from the heat and stir the vanilla extract into the marshmallow mixture.
    2. Then, pour the melted marshmallow mixture over the bowl of popcorn and let it sit for a few minutes to allow the butter/marshmallow coating to cool slightly.
    Vanilla extract has been added to a white dutch oven full of ooey gooey melted marshmallow
    Remove from heat and add vanilla
    Melted marshmallow has been poured over a bowl full of popped popcorn
    Pour over popcorn
    1. Then, using a spatula or clean hands, stir or mix the popcorn until the marshmallow mixture is evenly coated over the popcorn. *IMPORTANT: Be careful not to mix the popcorn mixture with your hands right after you’ve added the marshmallow mixture or you can risk being burned by the hot butter/marshmallow.
    2. Now, add the Christmas sprinkles to the popcorn and mix them in.
    3. Finally, with clean hands, form the popcorn mixture into 12 balls and place them onto a sheet of parchment paper.
    Two hands are mixing together a bowl of popped popcorn and melted marshmallow
    Mix popcorn
    6 round marshmallow popcorn balls have been placed on a piece of parchment paper
    Form popcorn into balls

    While it is optional, I love to roll the popcorn in extra sprinkles for easy Christmas popcorn balls. Who doesn’t love sprinkles?

    6 marshmallow popcorn balls have been sprinkled with red and green jimmies
    Add extra sprinkles
    A close up of a marshmallow popcorn ball that has been rolled in red and green Christmas sprinkles
    Christmas popcorn balls

    To package Christmas Popcorn Balls with a Free Gift Tag Printable

    1. First, insert a cut straw half into the center of each popcorn ball and let them cool fully.
    2. Then, place a popcorn ball pop in each cellophane bag. Punch a hole in each gift tag and be sure to fill out the “to and from”.
    A red and white paper straw has been cut in half and inserted into the center of a sprinkle covered marshmallow popcorn ball
    Insert a straw into each popcorn ball
    Gift tags that read "Popping By to say Happy Holidays" are displayed on a white marble background surrounded with colorful Christmas colored sprinkles
    Free printable gift tags
    1. Finally, tie each bag closed with a ribbon and gift tag.
    Close up photo of a marshmallow popcorn ball that has been wrapped in a cellophane gift tag that is tied closed with a red ribbon and festive holiday gift tag
    Christmas Popcorn Balls

    A tray of these Christmas popcorn balls all wrapped up would make a wonderful favor for guests to take home after a holiday party. I am a big fan of a little snack for the drive home!

    Or, I used popcorn on this Dessert Christmas Charcuterie and these popcorn balls would look amazing on a board too!

    Variations

    Here are a few more ways to make and decorate these Christmas popcorn balls:

    • We made these popcorn balls using a stove top method, but you can use a microwave-safe bowl to melt butter and the marshmallows. Either way, please be careful when handling the hot marshmallow mixture.
    • For some added festive flair, set the popcorn balls into Christmas cupcake liners before tucking them into the cellophane bags. A cupcake paper adds a little more color and provides a flat bottom when placed in the bag.
    • Melt white chocolate chips and drizzle white chocolate over the popcorn balls and add more sprinkles for a different way to decorate these holiday treats.
    • For a seasonal twist, add red or green food coloring to the marshmallow mixture for tinted popcorn balls.

    How to Store Christmas Popcorn Balls

    Store any leftover popcorn balls in an airtight container at room temperature for 5-7 days. The popcorn will soften but the popcorn balls will still taste delicious.

    We don’t really recommend freezing these holiday popcorn balls. Honestly, they are so yummy that you won’t need to worry about leftovers!

    A marshmallow popcorn ball has been placed in a cellophane bag that is tied closed with a red ribbon and a festive holiday gift tag
    Easy Popcorn Balls

    Easy Christmas Recipes

    Christmas Popcorn Balls with Free Gift Tag Printable are an easy, no-bake Christmas dessert. Here are a few more of our favorite easy Christmas recipes:

    • This Christmas Tree Cake Dip is a sweet dessert dip made with Little Debbie Christmas Tree Cakes and is a big time crowd pleaser!
    • Our Cornflake Wreaths start with cornflakes and an ooey gooey marshmallow mixture just like these popcorn balls. You’ll love decorating the cute little wreath cookies, or for a similar cookie, this cornflake candy will be a breeze to make!
    • A Christmas Chocolate Chip Cheeseball will make your holiday dessert table fun, festive and delicious!
    • This Sweet Christmas Chex Mix recipe is perfect for snacking on during the holidays, and it’s easy to make!

    Did you make this? I’d be so grateful if you left a “star” rating below to let me know what you thought! Then, the next time you need a quick and easy recipe, come back to Fantabulosity to browse all of my easy recipes!

    Recipe

    A popcorn ball that has been rolled in red and green sprinkles has been placed in a cellophane bag that is tied closed with red ribbon.
    Print Pin
    5 from 6 votes

    Christmas Popcorn Balls with Free Gift Tag Printable

    Christmas Popcorn Balls with Free Gift Tag Printable: A classic childhood favorite, these marshmallow popcorn balls get all dressed up for holiday gift giving with a free gift tag printable!
    Course Dessert
    Cuisine American
    Prep Time 10 minutes minutes
    Cook Time 5 minutes minutes
    Total Time 15 minutes minutes
    Servings 12 popcorn balls
    Calories 143kcal
    Author Jessica Burgess

    Ingredients

    • 3 tablespoons unsalted butter
    • 8 cups popped popcorn
    • 10 ounces mini marshmallows
    • 1 teaspoon vanilla extract
    • ¼ cup Christmas colored sprinkles optional: extra sprinkles for garnish

    To wrap the popcorn balls for gifting

    • 6 striped paper straws, cut in half
    • 12 cellophane bags
    • ribbon
    • 12 printed gift tags You can download the gift tags here!

    Instructions

    • First, if necessary, prepare the popcorn and set it aside in a large mixing bowl. Make sure to remove any unpopped kernels.
    • Next, in a large pot over medium heat, melt the butter and marshmallows together, stirring constantly.
    • Remove the pot from the heat and stir the vanilla extract into the marshmallow mixture.
    • Pour the melted marshmallow mixture over the bowl of popcorn and let the popcorn sit for a few minutes to allow the butter/marshmallow coating to cool slightly.
    • Then, using a rubber spatula or clean hands, stir/mix the popcorn so that the marshmallow mixture is evenly coated over the popcorn. *SEE NOTES*
    • Now, stir in the sprinkles and mix them in.
    • Finally, with clean hands, form the popcorn into 12 balls and place them onto a sheet of parchment paper. While it is optional, I like to roll the popcorn balls in extra sprinkles.

    To package the popcorn balls for gifts

    • Insert a cut straw half into the center of each popcorn ball and allow them to cool fully.
    • Place a popcorn ball pop in each bag.
    • Punch a hole in each gift tag and fill out the "to and from". Tie each bag closed with a ribbon and a gift tag.

    Notes

    • IMPORTANT: Be careful not to mix the popcorn mixture with your hands right after you’ve added the marshmallow mixture or you can risk being burned by the hot butter/marshmallow.
    • You can use any type of popcorn for this recipe: stovetop popcorn, bagged microwaved popcorn, homemade microwave popcorn or pre-popped from the grocery store deli. If you use pre-buttered popcorn, the popcorn balls with have a slightly saltier flavor.
    • Store any leftover Christmas popcorn balls in an airtight, sealed container for up to 5-7 days. The popcorn may soften but the popcorn balls will still taste delicious.

    Nutrition

    Serving: 1popcorn ball | Calories: 143kcal | Carbohydrates: 28g | Protein: 1g | Fat: 3g | Saturated Fat: 2g | Polyunsaturated Fat: 0.3g | Monounsaturated Fat: 1g | Trans Fat: 0.1g | Cholesterol: 8mg | Sodium: 20mg | Potassium: 26mg | Fiber: 1g | Sugar: 17g | Vitamin A: 102IU | Calcium: 2mg | Iron: 0.3mg

    Bacon Wrapped Asparagus

    October 26, 2022

    Bacon Wrapped Asparagus

    Bacon Wrapped Asparagus: The perfect easy side dish for weeknight dinners or an elegant side dish for a special occasion!

    These do double duty as a side and an appetizer, which is why they’re in my Thanksgiving sides roundup.

    This easy recipe for asparagus and bacon is right up there on our list of salty bacon and maple syrup favorites (it might even be tied with our baked brie with maple syrup and bacon recipe)!

    Bacon Wrapped Asparagus

    Why You’ll Love This Recipe

    I’m a big fan of asparagus (those deep green stalks are packed full of vitamins A, C and K), but it’s not exactly a family favorite.

    That’s where this savory side dish comes in- I think my family would eat just about anything if you wrapped it in a piece of bacon (and I don’t blame them)!

    Wrapping tender asparagus stalks in pieces of bacon is a delicious way to add some variety to the vegetables hitting the dinner table!

    Who knows, this tasty side dish might even end up becoming a family favorite and show up in one of your repeat spring dinner meals!

    [feast_advanced_jump_to]

    Ingredients

    Asparagus season runs from February to June, with the peak season hitting around April. That means that spring is the perfect time to be making ALL the asparagus appetizers because you’ll have access to the best asparagus out there.

    [Not to worry though- even during the “off” season you should still be able to find asparagus bundles in your local grocery stores.]

    This easy appetizer only requires 5 ingredients and is sure to be a hit all year round!

    • 1 pound fresh asparagus spears
    • 6 strips bacon
    • 2 tablespoons maple syrup
    • 2 teaspoons soy sauce
    • ½ teaspoon ground black pepper
    Ingredients for Bacon Wrapped Asparagus

    How to Make Baked Bacon Wrapped Asparagus

    1. Preheat the oven to 400 degrees F. and line your baking sheet with parchment paper (optional: if you don’t have parchment paper you can brush your baking sheet with olive oil to keep bacon from sticking).
    2. Wash your asparagus stalks & lightly dry them. Break off the ends, or cut 1" off the bottom (you do this to remove the woody ends of the asparagus). Divide asparagus into groups of 4-6. The number of spears you have will just depend on how big the individual spears of asparagus are.
    Asparagus bunches wrapped with raw bacon on cookie sheet
    Wrap asparagus with bacon
    1. Wrap one slice of bacon around 4-6 asparagus stalks, folding the end of the bacon wrap under the asparagus. Place bundles on the prepared baking sheet and repeat with the remaining asparagus and bacon slices. 
    Bacon wrapped asparagus being drizzled with sauce
    Drizzle sauce over asparagus
    1. Mix the maple syrup, soy sauce, & black pepper in a small bowl, and warm up for 15-20 seconds in the microwave. This will make it easier to stir together. 
    2. Remove your sauce mixture from the microwave and stir together. Drizzle the sauce mixture over your bacon-wrapped bundle of asparagus.
    Bacon wrapped asparagus bunches on cookie sheet
    Bacon wrapped asparagus ready for baking
    1. Place your baking sheet of bacon asparagus into the preheated oven and bake for 25 minutes. 
    Cooked bacon wrapped asparagus
    Baked bacon wrapped asparagus
    1. Lastly, set your oven to broil and broil your bacon and asparagus for 3 minutes (be sure to watch closely so your food doesn’t burn). This will help to create a nice, crispy bacon strip. 
    2. Remove from the oven, being careful not to burn yourself on the bacon grease, serve and enjoy!

    Substitutions

    We hope you can find an easy way to make this delicious side dish work for your lifestyle and dietary needs. Here are a few suggestions for how to adapt this baked asparagus recipe…

    • Bacon – if you don’t eat pork, try using turkey or chicken bacon as an easy bacon replacement! Simply replace the 6 slices bacon called for in the recipe with turkey or chicken bacon and prepare the recipe as directed (you may need to add a minute or two to the broiling step to ensure your turkey or chicken bacon crisps up).
    • Gluten-free – regular soy sauce is not gluten-free, but don’t worry! If you follow a strictly gluten free lifestyle, look for a gluten-free soy sauce that uses rice instead of wheat (you should be able to find it in most grocery stores).

    Note: this is a great side dish for those looking to follow a low carb diet!

    Variations for Bacon Wrapped Asparagus

    This asparagus dish would be super easy to experiment with; try these simple variations to create an entirely new flavor profile!

    • Sweet – coat your bacon wrapped asparagus with brown sugar before baking to create a sweet, caramelized sugar coating
    • Savoury – replace the sauce mixture in this recipe with a balsamic glaze
    • Kid friendly – coat your bacon wrapped asparagus with parmesan cheese before baking to add a cheesy flavor your kids are sure to enjoy
    • Spicy – try adding a few red pepper flakes to your sauce mixture before drizzling it on your bacon wrapped asparagus to take it to the next level!

    I think my favorite way to eat these would be with a few red pepper flakes added into the maple syrup sauce- sweet and spicy!

    Storage

    Store your bacon wrapped asparagus in an airtight container in the fridge once cooled and they will stay fresh for 4-5 days. To reheat them, place them back on a parchment lined baking sheet and cook in a 400 F oven until warmed through.

    Psst…bacon wrapped asparagus is a great option for a snack the next day!

    These ingredients don’t stand up well to freezing.

    Bacon wrapped asparagus bunches on white plate on counter

    Expert Tips and FAQs

    How long to bake asparagus in the oven?

    Asparagus cooks in about 10 minutes in the oven when the stalks are laid out in a single layer. In this recipe, we are bundling 4-6 asparagus stalks together and wrapping them in bacon (bacon cooks a bit more slowly than asparagus) which is why the cook time called for is 25 minutes with additional broil time at the end!

    Can I cook bacon wrapped asparagus on the grill?

    We haven’t tried it, but yes I think you could! Brush your grill/bbq with oil to keep them from sticking, place your asparagus bundles right on the grill and close the lid. Grill them for 5-8 minutes per side until the bacon slices look crispy and the asparagus is tender.

    Related Recipes

    If you liked this bacon-wrapped asparagus recipe, you’ll also like this air fryer bacon, these bacon-wrapped blue cheese dates, and this air fryer asparagus!

    Also, asparagus pairs nicely with a red meat main course like an oven-baked ribeye steak or grilled venison steak!

    Recipe

    Bacon Wrapped Asparagus
    Print Pin
    5 from 5 votes

    Bacon Wrapped Asparagus

    Bacon Wrapped Asparagus: The perfect easy side dish for weeknight dinners or an elegant side dish for a special occasion!
    Course Appetizer, Snack
    Cuisine American
    Prep Time 10 minutes minutes
    Cook Time 30 minutes minutes
    Total Time 40 minutes minutes
    Servings 6 servings
    Calories 126kcal
    Author Jessica Burgess

    Ingredients

    • 1 pound fresh asparagus spears
    • 6 strips bacon
    • 2 tablespoons maple syrup
    • 2 teaspoons soy sauce
    • ½ teaspoon ground black pepper

    Instructions

    • Preheat the oven to 400 degrees f. and line your baking sheet with parchment paper (optional: if you don't have parchment paper you can brush your baking sheet with olive oil to keep bacon from sticking.
    • Wash your asparagus stalks & lightly dry them. Break off the ends, or cut 1" off the bottom (you do this to remove the woody ends of the asparagus). Divide asparagus into groups of 4-6. The number of spears you have will just depend on how big the individual spears of asparagus are.
    • Wrap one slice of bacon around 4-6 asparagus stalks, folding the end of the bacon wrap under the asparagus. Place bundles on the prepared baking sheet and repeat with the remaining asparagus and bacon slices.
    • Mix the maple syrup, soy sauce, & black pepper in a small bowl, and warm up for 15-20 seconds in the microwave. This will make it easier to stir together. 
    • Remove your sauce mixture from the microwave and stir together. Drizzle the sauce mixture over your bacon wrapped bundle of asparagus.
    • Place your baking sheet of bacon asparagus into the preheated oven and bake for 25 minutes. 
    • Lastly, set your oven to broil and broil your bacon and asparagus for 3 minutes (be sure to watch closely so your food doesn't burn). This will help to create a nice, crispy bacon strip.
    • Remove from the oven, being careful not to burn yourself on the bacon grease, serve and enjoy!

    Notes

    STORAGE: Store your bacon wrapped asparagus in an airtight container in the fridge once cooled and they will stay fresh for 4-5 days. To reheat them, place them back on a parchment lined baking sheet and cook in a 400 F oven until warmed through.
    These ingredients don’t stand up well to freezing.
    SUBSTITUTIONS:
    • Bacon – if you don’t eat pork, try using turkey or chicken bacon as an easy bacon replacement! Simply replace the 6 slices bacon called for in the recipe with turkey or chicken bacon and prepare the recipe as directed (you may need to add a minute or two to the broiling step to ensure your turkey or chicken bacon crisps up).
    • Gluten-free – regular soy sauce is not gluten-free, but don’t worry! If you follow a strictly gluten free lifestyle, look for a gluten-free soy sauce that uses rice instead of wheat (you should be able to find it in most grocery stores).
    NOTE: this is a great side dish for those looking to follow a low carb diet!

    Nutrition

    Serving: 1serving | Calories: 126kcal | Carbohydrates: 8g | Protein: 5g | Fat: 9g | Saturated Fat: 3g | Polyunsaturated Fat: 1g | Monounsaturated Fat: 4g | Trans Fat: 1g | Cholesterol: 15mg | Sodium: 260mg | Potassium: 218mg | Fiber: 2g | Sugar: 5g | Vitamin A: 581IU | Vitamin C: 4mg | Calcium: 28mg | Iron: 2mg

    Peppermint Cupcakes

    October 25, 2022

    Peppermint cupcakes on baking rack

    Peppermint Cupcakes: A white cake mix that uses simple ingredients to make the cupcakes better than a boxed mix, with peppermint extract added for the perfect touch of flavor! Then, if desired, a homemade buttercream frosting with peppermint candies on top!

    Peppermint cupcakes on baking sheet
    Peppermint Cupcakes

    When one of our favorite chocolate cakes with peppermint went over so well, I knew it was time to add something like this to our easy dessert recipes. But this time, I wanted it to be a batch of cupcakes since so many seem to love our cupcake recipes too!

    Why you’ll love these:

    • They use a cake mix! But…I do a few things to it, to make them better than a cake mix cupcake recipe! I also love using a cake mix for this other holiday, eggnog tres leches cake.
    • The vanilla cupcake has a hint of peppermint flavor (like in our chocolate mint cupcakes) that gives an almost “cooling” feel when you bite in to it. They’re perfect any time of year but especially around the holiday season, or for holiday parties!
    • With the peppermint cupcake topped with this homemade buttercream and crushed peppermint candies, it’s a flavor combination that can’t be beat!
    • They’re perfect when entertaining for Christmas! The peppermint flavor, individual little cakes… it just makes perfect sense! (If you love peppermint, you’ll also want to try this candy cane pie recipe!)

    Ingredients:

    This recipe uses simple ingredients, that you can find at almost any grocery store!

    Cupcake Ingredients

    • 16.25-ounce white cake mix
    • ½ cup melted butter
    • 3 egg whites
    • 1 cup water
    • 1 teaspoon of peppermint extract

    Buttercream Frosting Ingredients

    • ½ Cup Vegetable Shortening½
    •  Cup Unsalted Butter (1 stick softened)
    • 4 Cups Powdered Sugar (sifted)
    • 2 Tablespoons Milk (or heavy cream)
    • 1 teaspoon vanilla extract
    • Pinch of salt
    • About 20 peppermint candies
    Ingredients for peppermint cupcakes
    Ingredients

    Substitutions and Variations

    • Peppermint Extract: We do not put peppermint extract in to the buttercream, as we think the peppermint in the cupcakes and the crushed peppermint candies on top of the cupcake, are the perfect amount of flavor. However, feel free to add a small drop (it’s very powerful!) to the buttercream for a strong peppermint flavor to make a peppermint frosting. You may even want to try our mint buttercream recipe for these!
    • Cupcake Flavor: You can use a yellow cake mix, or even chocolate to make chocolate peppermint cupcakes if you prefer. If using something other than a white cake mix, you can use the egg yolks too, instead of just the egg whites.
    • Melted butter vs. Oil for Cupcakes: If you don’t have butter for the cupcakes, you can use vegetable oil.
    • Peppermint Candies: Feel free to use crushed candy canes, or even mini candy canes for a special Christmas idea!

    Instructions

    First, you’ll want to make the cupcakes. Then, while the cupcakes are cooling, it’s a great time to make the buttercream frosting.

    TIP: If you plan to make this buttercream frosting recipe, go ahead and get the stick of butter out, so it can be softening while you’re baking the cupcakes.

    How to make the cupcakes:

    1. Preheat oven to 350 degrees and line muffin tin with cupcake liners.
    2. In a large bowl, pour in cake mix, melted butter, egg whites, water, and peppermint extract.
    3. Mix on medium speed for 2 minutes. (If using a Kitchenaid mixer, use the paddle attachment if you have it. (I only had my whisk attachment, so I used that. Using this makes the cupcakes airier too.)
    cake mix and butter in white mixing bowl
    Make cupcakes
    Cupcake batter in mixing bowl
    Cupcake Batter
    1. Pour about 3 tablespoons of cupcake batter in to each cupcake liner, in the muffin cups. (Or ⅔ full.) I use a cookie scoop for this to make it easier.
    cupcake batter in cupcake pan
    Pour batter in liners
    1. Bake the cupcakes for 12 minutes or until the tops of the cupcakes bounce back when your finger gently touches them. If it leaves an indention, the cupcakes need to bake longer.

      Remove from the cupcake pan and place cupcakes on a wire rack to cool to room temperature.
    baked cupcakes on cooling rack with oven mit behind them
    Baked peppermint cupcakes

    How to make the buttercream frosting:

    1. In a large mixing bowl, mix together the stick of softened butter and shortening until light and fluffy. You may need to use a rubber spatula to scrape down the sides a couple of times to make sure the ingredients blend evenly. (Make sure to turn the mixer off before scraping.)
    2. Next, start adding the powdered sugar, making sure the mixer is on low speed, for about 1 cup at a time, mixing together completely before adding the next cup of sugar. Do this until all of the powdered sugar has been mixed in.
    butter and crisco in mixing bowl
    Butter & Crisco
    Powdered sugar pouring in to mixing bowl
    Add powdered sugar
    1. Add in vanilla extract, and mix in completely.
    2. Then, pour in the milk and mix on medium-high speed until the buttercream looks fully combined and fluffy.
    vanilla pouring in to mixing bowl
    Add vanilla
    Milk pouring in to mixing bowl
    Add milk
    1. Optional: Although optional, I do recommend adding a pinch of salt and mixing it in to the buttercream.
    hand pinching salt for buttercream
    Add salt
    Buttercream frosting in piping bag
    Buttercream in piping bag
    1. If you have a piping bag, it’s time to place the buttercream in to a large piping bag, and begin piping the frosting on to the cupcakes. You can spread the frosting on to the cupcakes instead, if that’s what you prefer!
    Buttercream piping on to cupcake
    Add buttercream
    Peppermint candies on top of cupcakes
    Add peppermints
    1. Unwrap peppermint candies and place them in to a small plastic, sealable bag, and crush them until fine.
    Peppermint candies in plastic bag
    Crush peppermints
    1. Sprinkle the crushed peppermint candies on top of the buttercream, on the cupcakes.
    Peppermint cupcakes on baking rack
    Finished Peppermint Cupcakes

    Storage

    If you have leftover cupcakes, leaving them out will result in the cupcakes and buttercream getting hard. It’s best to place them in a single layer in an airtight container, and place in the refrigerator (since it has milk in the buttercream).

    Peppermint cupcake sliced in half
    Airy peppermint cupcakes

    Related Recipes

    If you’re a fan of peppermint recipes, you’re going to love this peppermint latte recipe and these chocolate-dipped waffle bowls that are rimmed in peppermints, which are perfect to serve desserts in!

    Or, for an easy Christmas no-bake dessert recipe, you’re going to love this Christmas Tree Cake Dip!

    Did you make this? I’d be so grateful if you left a “star” rating below to let me know what you thought! Then, the next time you need a quick and easy recipe, come back to Fantabulosity to browse all of my easy recipes!

    Recipe

    Peppermint cupcakes on baking rack
    Print Pin
    5 from 5 votes

    Peppermint Cupcakes

    Peppermint Cupcakes: A vanilla cake mix that uses simple ingredients to make the cupcakes better than a boxed mix, with peppermint extract added for the perfect touch of flavor! Then, if desired, a homemade buttercream frosting with peppermint candies on top!
    Course Dessert
    Cuisine American
    Prep Time 20 minutes minutes
    Cook Time 12 minutes minutes
    Total Time 32 minutes minutes
    Servings 24 cupcakes
    Calories 275kcal
    Author Jessica Burgess

    Ingredients

    Peppermint Cupcake Ingredients

    • 16.25 ounce box white cake mix
    • ½ cup melted butter
    • 3 egg whites
    • 1 cup water
    • 1 teaspoon peppermint extract

    Buttercream Ingredients

    • ½ cup vegetable shortening
    • ½ cup unsalted butter softened
    • 4 cups powdered sugar sifted
    • 2 Tablespoons milk or heavy cream
    • 1 teaspoon vanilla extract
    • pinch of salt optional
    • 20 peppermint candies

    Instructions

    How to Make the Peppermint Cupcakes

    • Preheat oven to 350 degrees and line the cupcake pan (or muffin tin) with cupcake liners.
    • In a large mixing bowl, pour in the cake mix, melted butter, egg whites, water, and peppermint extract, and mix on medium speed for 2 minutes.
    • Pour about 3 tablespoons of cupcake batter in to each cupcake liner. (Or ⅔ full.)
    • Bake the cupcakes for 12 minutes or until the tops of the cupcakes bounce back when your finger gently touches them. If it leaves an indention, the cupcakes need to bake longer.
      Remove from the cupcake pan and place cupcakes on a wire rack to cool.

    How to Make the Buttercream Frosting

    • In a large mixing bowl, mix together the stick of softened butter and shortening until light and fluffy. You may need to use a rubber spatula to scrape down the sides a couple of times to make sure the ingredients blend evenly.
    • Next, start adding the powdered sugar, about 1 cup at a time, mixing together completely before adding the next cup of sugar. Do this until all of the powdered sugar has been mixed in.
    • Add in vanilla extract, and mix in completely. Then, pour in the milk and mix in until buttercream looks fully combined and fluffy.
    • Optional: Although optional, I do recommend adding a pinch of salt and mixing it in to the buttercream.
    • If you have a piping bag, it's time to place the buttercream in to the piping bag, and begin piping the frosting on to the cupcakes. You can spread the frosting on to the cupcakes instead, if that's what you prefer!
    • Unwrap peppermint candies and place them in to a small plastic, sealable bag, and crush them until fine.
    • Sprinkle the crushed peppermint candies on top of the buttercream, on the cupcakes. Serve!

    Nutrition

    Serving: 1cupcake | Calories: 275kcal | Carbohydrates: 40g | Protein: 1g | Fat: 13g | Saturated Fat: 6g | Polyunsaturated Fat: 2g | Monounsaturated Fat: 4g | Trans Fat: 1g | Cholesterol: 20mg | Sodium: 172mg | Potassium: 23mg | Fiber: 0.2g | Sugar: 31g | Vitamin A: 238IU | Calcium: 47mg | Iron: 0.4mg

    Chocolate Chip Cheese Ball with M&M’s

    October 24, 2022

    A sweet cheeseball that has bee rolled in colorful M&M's is centered with pretzels and sugar wafer cookies waiting for dipping

    Chocolate Chip Cheese Ball with M&M’s: The inside of this easy, no bake dessert cheese ball tastes like peanut butter chocolate chip cookie dough and the outside is covered in colorful M&M’s!

    A sweet dessert cheese ball covered in colorful M&Ms is surrounded by pretzel twists and vanilla sugar wafer cookies

    Why You’ll Love This Recipe

    Oh my word! This no bake chocolate chip cream cheese dessert is pretty much a mash-up of some of my favorite things: cheesecake, peanut butter chocolate chip cookies and M&Ms!

    This may be shaped like a ball, but it has the same wonderful dippability as those sweet dessert dips (such as this fruit dip with marshmallow fluff) that everyone loves! So if you love chocolate chip dip or cheesecake dip, then this dessert is going to be your favorite sweet treat!

    This sweet dessert cheese ball can be prepped the day before your event. So, this is a time-saving, no fail recipe for those special occasions like a birthday party, baby shower or holiday party.

    [feast_advanced_jump_to]

    Ingredients

    With simple ingredients that can be found at your local grocery store (and most likely, your pantry!) this chocolate chip cheeseball recipe is a must make!

    A block of cream cheese, a stick of butter and bowls of chocolate chips, peanut butter, powdered sugar are displayed on a white marble background
    The sweet ingredients
    • 8 oz. cream cheese, softened at room temperature
    • 1 stick (½ cup) unsalted butter, softened at room temperature
    • ⅓ cup brown sugar
    • ⅓ cup creamy peanut butter
    • ½ teaspoon pure vanilla extract
    • 1 cup powdered sugar
    • ¾ cup semi-sweet chocolate chips
    • 1 cup M&M’s for coating

    See the printable recipe card below for ingredients, instructions, nutrition information and detailed recipe notes.

    Instructions

    If you’ve made a savory cheese ball, then you’ll be right at home making a sweet dessert version. If you’ve never made a cheese ball before, the step-by-step instructions with pictures below will make you a pro in no time.

    1. First, in a large mixing bowl, cream the cream cheese and powdered sugar with a hand mixer until they are well combined.
    A glass mixing bowl holds a block of cream cheese and powdered sugar
    Cream cheese & powdered sugar
    A hand mixer is creaming together cream cheese and powdered sugar in a glass mixing bowl
    Mix well
    1. Add butter, vanilla, and brown sugar and mix again.
    2. Then, add peanut butter and chocolate chips to the cream cheese mixture and mix until well combined.
    A stick of butter, vanilla extract and brown sugar have been added to a mixing bowl with a cream cheese mixture and a hand mixer is poised to mix it all together
    Add butter, vanilla and sugar
    Peanut butter and chocolate chips have been added to a fluffy sweet cream cheese mixture in a glass mixing bowl and a hand mixer is waiting to mix it all together
    Add peanut butter and chocolate chips
    1. Now, lay a large piece of plastic wrap or wax paper on your counter or a flat work surface. Using a rubber spatula, gather the cream cheese mixture from the bowl and form it into a ball using your hands. (This may get messy but continue to work it until it makes a solid shape.)
    A glass mixing bowl holds a fluffy caramel colored mixture of cream cheese, peanut butter, chocolate chips, brown sugar, vanilla and powdered sugar
    creamy cookie dough mixture
    A sweet cream cheese mixture made with peanut butter and chocolate chips is formed into a ball
    shape into a ball
    1. Next, wash your hands and wrap the dessert cheese ball tightly in plastic wrap.
    2. Chill the wrapped ball for 1 hour in the refrigerator.
    3. Just before serving, spread the M&M’s on a plate or in a shallow dish. Unwrap the dessert cheese ball and roll it in the M&M’s to cover the surface. You can manually press M&M’s into any spots that still need to be covered.
    Sweet dessert cheese ball mixture has been formed into a ball and wrapped in plastic wrap
    wrap tightly & chill
    A chilled dessert cheese ball is resting on a white plate of colorful M&Ms
    roll in M&Ms
    1. Finally, place the dessert cheese ball in the center of a serving tray and add your favorite cookies, crackers, pretzels or fruit for dipping.
    Birdseye photo of a dessert cheese ball covered in colorful M&Ms plated with pretzels and vanilla sugar wafer cookies
    Easy cheese ball recipe

    Substitutions & Variations

    This is such an easy dessert cheeseball recipe that you’ll make it again and again. Here are a few ways to adjust the recipe for your preferences and get creative!

    • We used full-fat cream cheese, but you can use lower fat cream cheese to save a few calories.
    • You can use crunchy peanut butter instead of the creamy peanut butter we used for this sweet cheese ball.
    • Switch up the chips! Instead of regular semi-sweet chocolate chips, you can add the same amount of mini chocolate chips, white chocolate chips, peanut butter chips or butterscotch chips.
    • For additional texture and flavor, add ⅓ cup-½ cup of chopped pecans, chopped honey roasted peanuts, graham cracker crumbs (trust me!) or toffee bits to the cream cheese mixture.
    • We served this easy dessert with pretzels and sugar wafer cookies. Try serving it with different dippers like vanilla wafers, graham crackers, chocolate graham crackers, chocolate chip cookies, Ritz crackers, Teddy grahams, apple slices or strawberry halves.
    • To make this a no bake Christmas dessert, use seasonal red and green colored M&M’s! For Halloween, look for spooky orange and black M&M’s. Pastel Easter or Spring M&M’s are perfect for springtime sweet cheese balls. You can even order special colors of M&M’s online to match the colors or theme of any event you are hosting.
    • Try rolling this dessert cheese ball in mini M&M’s, dark chocolate M&Ms, the caramel flavored M&M’s or even peanut butter M&M’s.
    • Finally, you can roll the cream cheese mixture into mini sweet cheese balls for a bite-sized version of this sweet treat. If you are making mini dessert cheese balls, then we would recommend using miniature chocolate chips in the filling and mini M&M’s for the coating.
    A hand is holding a pretzel twist that has been dipped into a sweet cream cheese peanut butter chocolate chip mixture
    Dessert cheese ball

    What to Serve with this Dessert Ball

    So many things can go great with a dessert cheeseball like this. Here are our favorites:

    • graham crackers
    • Teddy Graham’s (especially these Chocolate covered Teddy Grahams)
    • cookies
    • apples
    • vanilla wafers
    • Biscoff cookies (and then use the rest to make these delicious Biscoff truffles.)

    Storage

    Wrap any leftover chocolate chip dessert cheese ball in plastic wrap and then aluminum foil and refrigerate for up to 1 week. The colors from the M&M’s may run a bit from the condensation, but it will still taste delicious.

    If you want to freeze this M&M cheese ball, I recommend wrapping the uncoated dessert ball in plastic wrap, then aluminum foil, and popping it in the freezer for up to 4 weeks. To serve, thaw overnight in the refrigerator and then roll it in the M&M’s.

    A close up photo of a dessert cheese ball covered in colorful M&Ms and served with pretzels and cookies for dipping
    Sweet cream cheese dessert

    Related Recipes

    Chocolate chip lovers, this no bake dessert dip called Booty Dip will definitely satisfy that sweet tooth! And for my cheesecake fans, our Cheesecake Stuffed Strawberries are the no bake treats for you! Don’t worry peanut butter people, this no bake Peanut Butter Pie will knock your peanut butter loving socks off!

    Did you make this? I’d be so grateful if you left a “star” rating below to let me know what you thought! Then, the next time you need a quick and easy recipe, come back to Fantabulosity to browse all of my easy recipes!

    Recipe

    A sweet cheeseball that has bee rolled in colorful M&M's is centered with pretzels and sugar wafer cookies waiting for dipping
    Print Pin
    5 from 3 votes

    Chocolate Chip Cheese Ball with M&M’s

    Chocolate Chip Cheese Ball with M&M's: The inside of this easy, no bake dessert cheese ball tastes like peanut butter chocolate chip cookie dough and the outside is covered in colorful M&M's!
    Course Dessert
    Cuisine American
    Prep Time 10 minutes minutes
    Chilling Time 1 hour hour
    Total Time 1 hour hour 10 minutes minutes
    Servings 12 servings
    Calories 304kcal
    Author Jessica Burgess

    Ingredients

    • 8 ounces cream cheese softened at room temperture
    • 8 tablespoons unsalted butter softened at room temperture
    • ⅓ cup brown sugar
    • ⅓ cup creamy peanut butter
    • ½ teaspoon pure vanilla extract
    • 1 cup powdered sugar
    • ¾ cup semi-sweet chocolate chips
    • 1 cup M&Ms for coating

    Instructions

    • First, in a large bowl using a hand mixer, combine cream cheese and powdered sugar. Mix until well combined.
    • Add butter, vanilla and brown sugar and mix again.
    • Then, add the peanut butter and chocolate chips to the cream mixture and mix until well combined.
    • Now, lay a length of plastic wrap on your counter or a flat work surface. Using a rubber spatula, gather the cream cheese mixture from the bowl and form it into a ball using your hands. (This may get messy but continue to work it until it makes a solid shape.)
    • Next, wash your hands and wrap the dessert cheese ball tightly in plastic wrap.
    • Chill the wrapped ball for 1 hour in the refrigerator.
    • Just before serving, spread the M&M's on a plate or in a shallow dish. Unwrap the dessert cheese ball and roll it through the M&M's to cover the surface. You can manually press M&M's into any spots that still need covered.
    • Finally, place the dessert cheese ball in the center of a serving tray and add your favorite cookies, crackers, pretzels or fruit for dipping.

    Video

    Notes

    • You can make this ahead of time and chill this treat overnight. Before rolling it in the M&M’s, let the cheese ball sit for about 10 minutes before unwrapping it.
    • To store any leftovers, wrap the cheesecake ball in plastic wrap, then aluminum foil. Store it in the refrigerator for up to a week.
    • If you want to freeze this M&M cheese ball, I recommend wrapping the uncoated dessert ball in plastic wrap, then aluminum foil and popping it in the freezer for up to 4 weeks. To serve, thaw overnight in the refrigerator and then roll it in the M&M’s.

    Nutrition

    Serving: 1serving | Calories: 304kcal | Carbohydrates: 25g | Protein: 4g | Fat: 22g | Saturated Fat: 12g | Polyunsaturated Fat: 2g | Monounsaturated Fat: 7g | Trans Fat: 0.3g | Cholesterol: 40mg | Sodium: 94mg | Potassium: 140mg | Fiber: 1g | Sugar: 21g | Vitamin A: 495IU | Calcium: 36mg | Iron: 1mg

    Delicious Swedish Meatballs

    October 23, 2022

    Close up photo of a white plate full of cooked egg noodles topped with meatballs in a creamy sauce

    Delicious Swedish Meatballs: Tender homemade beef meatballs are tossed in a luscious cream sauce that can be served over noodles, rice or mashed potatoes in this classic comfort food recipe!

    A white plate holds cooked egg noodles topped with baked meatballs in a creamy sauce

    When I am planning main course for our family, meatballs are the star of some of my favorite recipes. These Easy Meatballs Stuffed Bell Peppers are one of our favorites for a quick week night meal. Our saucy Slow Cooker BBQ Meatballs make a great meatball sub on a toasted roll or by themselves. Now, I’m so excited to share this easy Swedish meatball recipe with you!

    Why You’ll Love this Recipe for Swedish Meatballs

    This is quick and cozy comfort food in under an hour! Who needs IKEA meatballs when you can make them at home?

    You only need one bowl, one baking dish and one skillet to make this recipe. Less dishes mean more time spent with your friends and family!

    If you need to feed a crowd, you can easily double or triple this recipe for Swedish meatballs.

    Serve them over mashed potatoes, egg noodles or rice for even more deliciousness, like we did with this chicken and gravy recipe!

    [feast_advanced_jump_to]

    Ingredients

    Recipes with simple ingredients are my favorite! All of the ingredients for this meatball recipe can be found at your local grocery store.

    Ground beef, an egg, bowls of spices and milk are displayed on a white marble background

    For the traditional Swedish meatballs:

    • ½ lb. ground beef
    • 1 large egg
    • 3 tablespoons of milk
    • ¼ cup plain bread crumbs
    • 1 tablespoon onion flakes
    • ½ tablespoon dried parsley
    • ¼ teaspoon black pepper
    • ⅛ teaspoon ground nutmeg
    Milk, butter, flour and bowls of spices are displayed on a white marble background

    For the Swedish meatball sauce:

    • 3 tablespoons salted butter
    • 3 tablespoons flour
    • 3 teaspoons beef bouillon powder (or 3 beef bouillon cubes)
    • ¼ teaspoon black pepper
    • 3 cups milk

    See the printable recipe card below for recipe instructions, nutrition information and detailed recipe notes.

    Instructions

    Is this is your first time making homemade meatballs, it is easier than you think. (Now, we love a good frozen meatball recipe too but when you have time to make homemade like these… it’s hard to beat.)

    We’ve got step-by-step instructions with photos so you can make these Swedish meatballs at home!

    To make the meatballs:

    1. First, preheat your oven to 400 degrees F. Prepare a 9×13 baking dish with non-stick cooking spray.
    2. In a large bowl, use your hands or a spoon to mix together the beef, egg, milk, bread crumbs, onion flakes, dried parsley, black pepper and nutmeg until it is well combined.
    3. Next, use a spoon or a cookie scoop to shape the mixture into small (1-inch) meatballs. This recipe makes between 20 and 22 meatballs.
    4. Now, place the uncooked meatballs in the prepared baking dish and bake for about 20 minutes or until the center of the meatballs is no longer pink. You can also brown the meatballs in a large skillet with a tablespoon of olive oil until cooked through. If you cook the meatballs in a skillet, make sure to rotate the meatballs so they brown on all side and stay relatively round. Once cooked, set the meatballs aside and keep them warm.
    A glass mixing bowl holds ground beef, bread crumbs, an egg and spices to mix to make meatballs
    Combine meatball ingredients
    A cookie scoop in the foreground holds a scoop of meatball mix and a tray full of shaped meatballs is shown in the background
    Shape meatballs

    For the cream sauce:

    1. In a large skillet with sides, melt the butter over medium-high heat. Remove the pan from the heat and add the flour, bouillon powder and black pepper to the melted butter. Whisk until well combined. Add the milk slowly, whisking into a sauce that is well blended and smooth.
    2. Return the pan to medium heat and cook, stirring constantly, until the cream sauce starts to boil. Boil for about 1 minute and continue stirring. Remove the pan from the heat.
    A large black skillet has melted butter, flour and nutmeg
    Melt butter and add flour and bouillon
    A whisk is poised above a large black skillet that holds the beginning of a cream sauce
    Whisk in milk slowly until smooth
    1. Next, add the cooked meatballs to the pan of sauce. Stir to help completely coat the meatballs with the sauce.
    Cooked meatballs have been added to a large black skillet full of a rich creamy sauce
    Place cooked meatballs in the sauce
    Cooked meatballs have been coated in thick creamy sauce and are simmering in a large black skillet
    Creamy Swedish meatballs
    1. Finally spoon the Swedish meatballs and sauce over hot egg noodles, rice or mashed potatoes.

    Just look at that luscious, creamy sauce! The butter makes it shiny and smooth and the beef bouillon adds a depth of flavor that really complements the flavorful meatballs. You may never make meatballs any other way again!

    A wooden spoons holds two meatballs and a rich cream sauce above a pan containing the sauce and more meatballs

    Variations

    Our recipe is a classic Swedish meatballs and creamy gravy sauce recipe. But, that doesn’t mean that you can’t switch it up to meet your family’s dietary needs or preferences. Or, if you just want to try something new, we’ve got some creative additions to the sauce that you may love!

    • While we used ground beef for these juicy meatballs, you can use a mixture of ground beef + ground pork, ground pork, ground chicken or ground turkey.
    • If you use ground pork, chicken or turkey for the meatball mixture, you can use chicken bouillon powder instead of beef.
    • For a thinner sauce, use broth (beef broth or chicken broth (it can even be my homemade chicken broth recipe) depending on the ground meat you use) for some of the milk.
    • For an even creamier sauce, use heavy cream in place of some of the milk.
    • To amp up the flavor of the sauce, add a dash or two of Worcestershire sauce, a teaspoon of Dijon mustard or a dollop of sour cream.
    Swedish meatballs and sauce top cooked egg noodles on a white plate

    Swedish Meatballs FAQs

    How are Swedish meatballs different from regular meatballs?

    While Swedish meatballs are made with similar ingredients to regular meatballs (ground meat, eggs and bread crumbs), Swedish meatballs are typically smaller and have warm spices like nutmeg and allspice added.

    What is Swedish meatball sauce made of?

    The sauce is made with a base of melted butter and flour, seasoned with pepper and beef bouillon (or sometimes broth) and thickened with milk to a rich, creamy consistency.

    What goes good with Swedish meatballs?

    Traditionally, Swedish meatballs are served over buttered noodles or Instant Pot mashed potatoes. Lingonberry jam or cranberry sauce are a great accompaniment to provide some tartness to cut the rich sauce. You can also serve vegetables alongside the Swedish meatballs like green beans, roasted broccoli or fresh pickled cucumbers.

    Storage

    Store any leftover meatballs and sauce in an airtight container in the refrigerator for up to three days.

    A close up photo of a white place holding cooked egg noodles and tender Swedish meatballs and cream sauce

    Top Tips

    Using a small cookie scoop results in evenly sized, perfect meatballs for this recipe.

    For easy clean up while make these delicious Swedish meatballs, wear gloves while mixing up the meat and line the baking dish with aluminum foil.

    More Comfort Food Classics

    Chicken and Dumplings made in the Instant Pot are the heart of warm and cozy comfort food, and so are these chicken and noodles! Our Creamy Beef Stroganoff Recipe is old-fashioned comfort food ready in just 30 minutes, like these Old-Fashioned Salisbury Steaks!

    Did you make this? I’d be so grateful if you left a “star” rating below to let me know what you thought! Then, the next time you need a quick and easy recipe, come back to Fantabulosity to browse all of my easy recipes!

    Recipe

    Close up photo of a white plate full of cooked egg noodles topped with meatballs in a creamy sauce
    Print Pin
    5 from 3 votes

    Easy Swedish Meatballs

    Easy Swedish Meatballs: Tender homemade beef meatballs are tossed in a luscious cream sauce that can be served over noodles, rice or mashed potatoes in this classic comfort food recipe!
    Course Main Course
    Cuisine European
    Prep Time 15 minutes minutes
    Bake/Cook Time 30 minutes minutes
    Total Time 45 minutes minutes
    Servings 4 servings
    Calories 410kcal
    Author Jessica Burgess

    Ingredients

    For the meatballs

    • ½ pound ground beef
    • 1 large egg
    • 3 tablespoons milk
    • ¼ cup plain breadcrumbs
    • 1 tablespoon onion flakes
    • ½ tablespoon dried parsley
    • ¼ teaspoon black pepper
    • ⅛ teaspoon ground nutmeg

    Ingredients for the sauce

    • 3 tablespoons salted butter
    • 3 tablespoons flour
    • 3 teaspoons beef bouillon powder or 3 beef bouillon cubes
    • ¼ teaspoon black pepper
    • 3 cups milk

    Instructions

    To make the meatballs

    • Preheat your oven to 400 degrees F. Prepare a 9×13 baking dish with non-stick cooking spray.
    • Using your hands or a spoon, mix together the beef, egg, milk, bread crumbs, onion flakes, dried parsley, black pepper and nutmeg until well combined.
    • Next, use a spoon or cookie scoop to shape the mixture into small (1 inch) meatballs. This recipe makes about 20-22 meatballs.
    • Now, place the meatballs in the prepared baking dish and bake for about 20 minutes or until the center of the meatballs is no longer pink. You can also brown the meatballs in a skillet with a tablespoon of oil until cooked through. If you cook them in a skillet, make sure to rotate the meatballs so they brown on all sides and stay relatively round. Set the meatballs aside and keep them warm.

    How to make the cream sauce

    • In a large saucepan or skillet with sides, melt the butter over medium high heat. Remove the pan from the heat and add the flour, bouillon powder and black pepper. Whisk until well combined. Add the milk slowly, whisking into a sauce that is well blended and smooth.
    • Return the pan to medium heat and cook, stirring constantly, until the cream sauce starts to boil. Boil for 1 minute and continue stirring. Remove the pan from the heat.
    • Next, add the cooked meatballs to the pan of sauce. Stir to help completely coat the meatballs with the sauce.
    • Finally, spoon the Swedish meatballs and sauce over hot egg noodles, rice or mashed potatoes.

    Notes

    • We recommend making 1 inch meatballs because that size cooks through in the center without becoming too brown on the outside.
    • For the best results, eat this dish while the sauce is hot because it thickens quickly and may form a skin over the top as it cools.
    • Store any leftover meatballs and sauce in an airtight container in the refrigerator for up to three days.

    Nutrition

    Serving: 5meatballs | Calories: 410kcal | Carbohydrates: 20g | Protein: 20g | Fat: 28g | Saturated Fat: 14g | Polyunsaturated Fat: 1g | Monounsaturated Fat: 9g | Trans Fat: 1g | Cholesterol: 133mg | Sodium: 638mg | Potassium: 521mg | Fiber: 1g | Sugar: 11g | Vitamin A: 651IU | Vitamin C: 1mg | Calcium: 280mg | Iron: 2mg

    Brioche Croutons

    October 22, 2022

    close up of brioche croutons

    Brioche Croutons: The absolute BEST croutons because of the brioche bread, garlic, butter, parmesan cheese and fresh basil! Simple ingredients, and ready in only 20 minutes!

    Brioche croutons with parmesan cheese on cookie sheet

    Are homemade croutons better than storebought?

    Oh yes. 100% yes. Now this is coming from a gal who can sit and eat an entire bag of storebought croutons like a bag of potato chips.

    But when you have homemade croutons on your favorite salad recipes and soup recipes, you’ll understand my love for the homemade, seasoned, little cubes of bread.

    Why You’ll Love Brioche Croutons

    I love regular croutons (as in, croutons made out of regular bread instead of brioche) and have had some of the most delicious croutons at restaurants… but there’s just something about this brioche croutons recipe that’s hard to beat.

    The brioche bread already has such a buttery and a tad “sweet” taste, that drives so much flavor! Combine those flavors with the added savory ingredients in this homemade croutons recipe, and you’ll love it as much as I do!

    [feast_advanced_jump_to]

    Ingredients

    This recipe uses simple ingredients, or has easy subsitutions (see those below) so you can make these croutons in minutes, and have them ready for your classic caesar salad in no time!

    ingredients for brioche croutons
    • 1 loaf brioche bread (1 pound)
    • ½ cup butter (salted or unsalted – just be mindful of any added salt)
    • ¼ cup minced garlic
    • ½ cup shredded parmesan cheese
    • 1 teaspoon garlic powder
    • 8 leaves fresh basil, chopped
    • sprinkle of salt, if desired

    See the printable recipe card toward the bottom of this post for ingredients and instructions all in one place!

    Instructions

    Making homemade croutons is incredibly easy! Here’s how to make them:

    1. Prehat oven to 350 degrees.
    2. Begin by cutting your brioche bread in to about 1 inch cubes. (Don’t worry if it’s not exact. Also, if you prefer smaller croutons, you can cut them smaller!)
    3. Place the bread cubes in a large bowl. (Make sure the bowl is large enough for stirring later.)
    4. Next, add shredded parmesan cheese, garlic powder, and fresh basil to bread. Stir to combine.
    Brioche bread cut in to cubes on cutting board
    Cut in to cubes
    brioche cubes, cheese, basil and seasonings in white bowl
    Add cheese, seasonings and basil
    1. Add butter and minced garlic to a microwave safe dish and microwave for 2 minutes or until butter has melted. Stir and pour over bread.
    butter and garlic in measuring cup
    Make garlic butter
    garlic butter pouring in to bread cubes
    Pour butter over bread
    1. With a rubber spatula, carefully stir to coat bread with buttery mixture and other ingredients until it looks like most of the bread as been coated.
    2. Next, pour buttered and seasoned bread in a single layer, on to a baking sheet pan that’s lined with parchment paper or a silicone mat.
    buttered and seasoned bread cubes in white bowl
    Stir to combine
    Bread cubes on baking sheet
    Spread on baking sheet
    1. Bake in a 350 degree oven for 20-25 minutes, flipping the croutons, half way through. (We did 20 minutes for the croutons that you see here. However if you prefer a crispier crouton, you may want to check on them at 20 minutes and cook for an additional 5 minutes or until they reach the desired crispiness that you prefer. Be careful not to burn!)
    Baked croutons on baking sheet
    Baked croutons
    1. If desired, sprinkle a little salt on after baking. (I use kosher salt or flaked sea salt but you can also use table salt.) Then serve warm or allow to cool before serving on a cold dish like a salad!

    This makes about 8 cups of croutons!

    brioche croutons on salad
    Serve on salad or soup

    Substitutions

    • Basil – If you don’t have fresh basil, it’s ok to use about 1 tablespoon of dried basil.
    • Garlic – if you don’t have minced garlic, you can use chopped garlic or a little more garlic powder.
    • Bread – this recipe is specifically for brioche croutons, meaning you’ll use brioche bread. However you can also follow this same recipe for a different type of bread.
    • Seasonings – there is so much flavor with the garlic butter and basil but you can also use other seasonings if you’d like. Such as, black pepper, Italian seasoning, etc.

    Variations

    I’ve made this recipe two different ways, and wanted to include a variation that you may prefer as well.

    Extra Buttery Croutons

    If you don’t mind a croutons that’s not crispy, and love a big buttery flavor, then you may want to try the other way that I make these!

    • Keep the ingredients the ingredients and instructions the same, except for the butter! Melt 2-3 cups of butter instead of ½ a cup. This will make the bread soak up way more butter and may prevent the croutons from becoming super crispy but talk about FLAVOR!
    Brioche croutons on green salad with yellow napkin
    Homemade Croutons

    How to Store Croutons

    Store the croutons, after they have fully cooled, in an airtight container or ziptop bag at room temperature for up to 5 days. If you line the bag or container with a paper towel, it can help trap the moisture to prevent the croutons from getting soggy.

    You can also store them in the refrigerator for 6-7 days, or even in the freezer for up to 4-6 weeks! (Freezer Tip: flash freeze croutons on the baking sheet and then transfer to a plastic freezer bag or container and place back in the freezer so the don’t stick to one another.)

    NOTE: They do soften after being stored so if you plan to use leftovers, you may want to toss them back in the oven to crisp up or even in an air fryer for a quick refresh if you want them super crispy.

    FAQ’s and Expert Tips

    If the croutons are not as crispy as you prefer, you can allow them to sit out for a few hours/overnight and they will become more stale (crispy), or simply allow them to sit out for a few hours to harden.

    Recipes to go with Croutons

    I have a feeling you may already have an idea of what you want to put croutons. However, if you need some ideas, we love croutons on this side salad, this buffalo chicken soup, this clam chowder recipe, and on this chili recipe!

    Recipe

    close up of brioche croutons
    Print Pin
    5 from 8 votes

    Brioche Croutons

    Brioche Croutons: The absolute BEST croutons because of the brioche bread, garlic, butter, parmesan cheese and fresh basil! Simple ingredients, and ready in only 20 minutes!
    Course Appetizer, Side Dish
    Cuisine American
    Prep Time 5 minutes minutes
    Cook Time 20 minutes minutes
    Total Time 25 minutes minutes
    Servings 8 cups
    Calories 377kcal
    Author Jessica Burgess

    Ingredients

    • 1 pound brioche bread
    • ½ cup butter salted or unsalted
    • ¼ cup minced garlic
    • ½ cup shredded parmesan cheese
    • 1 teaspoon garlic powder
    • 8 leaves fresh basil chopped
    • salt if desired

    Instructions

    • Prehat oven to 350 degrees.
    • Begin by cutting your brioche bread in to about 1 inch cubes, and place the bread cubes in a large bowl.
    • Next, add shredded parmesan cheese, garlic powder, and fresh basil to bread. Stir to combine.
    • Add butter and minced garlic to a microwave safe dish and microwave for 2 minutes or until butter has melted. Stir and pour over bread.
    • With a rubber spatula, carefully stir to coat bread with buttery mixture and other ingredients until it looks like most of the bread as been coated.
    • Next, pour the buttered and seasoned bread on to a baking sheet that's lined with parchment paper or a silicone mat.
    • Bake in a 350 degree oven for 20-25 minutes or until they've reached the golden brown color that you prefer. Flip the croutons, half way through the cooking process.
    • If desired, sprinkle a little salt on the croutons after baking. Serve warm or allow to cool before serving.

    Notes

    If the croutons are not as crispy as you prefer, you can allow them to sit out for a few hours/overnight and they will become staler (crispy), or simply allow them to sit out for a few hours to harden.

    Nutrition

    Serving: 1cup | Calories: 377kcal | Carbohydrates: 28g | Protein: 9g | Fat: 26g | Saturated Fat: 16g | Polyunsaturated Fat: 0.5g | Monounsaturated Fat: 3g | Trans Fat: 0.5g | Cholesterol: 132mg | Sodium: 451mg | Potassium: 32mg | Fiber: 0.1g | Sugar: 0.1g | Vitamin A: 916IU | Vitamin C: 1mg | Calcium: 119mg | Iron: 1mg

    Hawaiian Roll Breakfast Sliders

    October 21, 2022

    A close up photo of a stack of breakfast slider sandwiches

    Hawaiian Roll Breakfast Sliders: Everyone’s favorite Hawaiian rolls are stuffed with sausage, bacon, eggs, and cheese brushed with a butter maple glaze and then baked until warm and toasty! Breakfast may never be the same again!

    Then, after breakfast, make these cheeseburger sliders or these salmon sliders for a hearty dinner. Or these roast beef sliders are amazing for a party appetizer or an easy lunch recipe.

    Breakfast slider sandwiches are stacked on a plate making it easy to see sausage, bacon, eggs and cheese on toasted Hawaiian rolls

    Breakfast recipes are a pretty big deal around here, and we think you’re also going to love making this Biscuit and Gravy Casserole and the breakfast egg rolls after these sliders but we also have something for every breakfast lover.

    Hawaiian rolls work for breakfast and dinner both. See the full list of slider recipes.

    Why You’ll Love This Recipe

    Hawaiian roll breakfast sliders with sausage, fluffy eggs, bacon and cheese tucked into a sweet roll are a delicious way to take breakfast on the go.

    These make-ahead breakfast sliders can also be frozen and reheated to make breakfast on those busy mornings a breeze.

    The sweet and savory flavors of these breakfast sandwiches make them a perfect addition to a breakfast buffet or brunch party, especially paired with something like these cheesy hashbrowns. And I’m pretty sure that you will be the MVP when you show up with these tailgate breakfast sliders.

    [feast_advanced_jump_to]

    Ingredients

    Our Hawaiian roll breakfast sliders are made with basic breakfast ingredients, so there is nothing fancy or intimidating about this breakfast sliders recipe.

    Hawaiian rolls, cooked bacon and sausage, scrambled eggs and shredded cheese are displayed on a white marble background

    We’ve included some notes about the ingredients below that you may find helpful! See the printable recipe card below for ingredients, nutrition information, and detailed recipe notes.

    • 12 King’s Hawaiian rolls – we used the smaller rolls, not the larger slider buns.
    • 12 breakfast sausage patties, cooked (It’s easy to cook sausage patties in the oven since you’ll have to preheat the oven anyway!)
    • 12 eggs, scrambled
    • 6 strips of bacon, cooked (It’s fast to cook bacon in the air fryer or cook bacon in the oven too!)
    • 2 cups of shredded Colby jack cheese – pre-shredded or shred your own!
    • ¼ cup melted butter – salted or unsalted works!

    Instructions

    When I say a recipe is simple, I mean it. We’ve got pictures and step-by-step instructions below to walk you through preparing this delicious breakfast recipe.

    1. First, preheat your oven to 350 degrees F and spray an 8×10-inch baking dish with non-stick cooking spray.
    2. Using a bread knife (or a serrated knife), slice the soft Hawaiian rolls horizontally while keeping the tops and bottoms of the rolls connected together.
    12 Hawaiian rolls have been cut horizontally and are resting on a wooden cutting board.
    1. Place the bottom of the rolls in the baking dish.
    The bottom halves of 12 Hawaiian rolls have been placed in a 9x13 inch baking dish to begin the assembly of breakfast slider sandwiches.
    1. Next, place the breakfast sausage patties over the rolls in a single, even layer.
    Cooked breakfast sausage patties have been layered on the bottom halves of Hawaiian rolls to start building breakfast sliders.
    1. Now, top the sausage patties with the scrambled eggs and sprinkle the eggs with salt and pepper.
    Cooked, crumbled bacon has been added to the breakfast slider sandwiches that are being assembled in a glass baking dish.
    1. Next, crumble the bacon and sprinkle it evenly over the eggs.
    2. Top the eggs and crispy bacon crumbles with an even layer of shredded Colby jack cheese.
    A layer of shredded cheese has been added to the breakfast slider sandwiches being assembled in a glass baking dish.
    1. Place the tops of the Hawaiian dinner rolls on top of the cheese.
    2. Now, combine the melted butter and maple syrup in a small bowl. Liberally brush the butter and syrup mixture over the tops of the rolls.
    A silicone brush is brushing melted butter over the tops of 12 breakfast sliders in a glass baking dish.
    1. Finally, bake the sliders uncovered for 15-20 minutes or until the tops of the rolls are golden brown and crispy.
    A glass baking dish is filled with breakfast sliders with toasted buns

    Cut the individual sliders apart and serve them warm. You are going to love the sweet maple butter glaze and the savory meat, melty cheese, and eggs inside a tender, toasted Hawaiian roll. I mean, what’s NOT to love about these Hawaiian roll breakfast sliders?!

    A single breakfast slider sandwich is balanced on a wooden serving spoon

    Variations

    Burger sliders are always a crowd favorite at any backyard get-together, right? There IS just something about your favorite things tucked in a soft Hawaiian roll. So, it’s time to give the people what they want and make this breakfast version!

    Here are a few ways to adjust our basic recipe to fit your family:

    • Buns – You can use regular slider buns instead of Hawaiian rolls if you’d like. But once you’ve had the sweet roll paired with a salty protein (like in this cheeseburger sliders and this cheesy sloppy joe sliders recipe) it’s hard to use anything else!
    • Breakfast meat – We used pork sausage patties and bacon for these sweet and savory breakfast sliders. Feel free to use turkey sausage, slices of deli ham, ham slices, fried chicken (similar to our crispy chicken sliders) browned and crumbled breakfast sausage (the ground pork sausage in the tube) or Canadian bacon. Or, make something similar to our fried bologna and egg sandwich, by using bologna!
    • Cheese – Our family loves Colby Jack cheese for this recipe, but try shredding provolone, Swiss, cheddar cheese, American, Monterey Jack or even pepperjack cheese. (Pre-shredded cheese actually has an added non-stick coating that prevents it from sticking together, so it doesn’t melt as well. Trust me on this one!)
    • Butter glaze – The maple syrup butter glaze is probably my favorite thing to brush on the tops of the rolls. However, you can make the butter sauce more savory if you use Dijon mustard, Worcestershire sauce, everything bagel seasoning or poppy seeds instead of the maple syrup.
    A white plate in the center of the photo holds a breakfast sandwich made with a Hawaiian roll. Additional plates and sandwiches are seen in the background.

    FAQs

    What can I use in the glaze for breakfast sliders if I don’t have any maple syrup?

    You can substitute brown sugar, honey or agave syrup for the maple syrup in the butter glaze.

    What can I use instead of non-stick spray for baking?

    You can line the baking dish with parchment paper for another non-stick option, like butter or oil.

    I added salt and pepper when I scrambled the eggs. Should I still add the salt and pepper in the recipe?

    No. If you add seasoning when you scramble eggs, omit the salt and pepper listed in the recipe. Otherwise, you may have really salty sliders.

    Can breakfast sliders be eaten warm or cold?

    These sliders can be eaten warm or cold, but they are at their best when they are hot and toasty right from the oven!

    What should I serve with breakfast sliders?

    I don’t think anyone will turn down bacon cooked in the air fryer or air fryer crispy breakfast potatoes. Fresh fruit is a great side for breakfast slider. We think this Honey Lime Fruit Salad, Apple Salad or an easy-to-assemble Fruit Board are perfect for breakfast or brunch!

    Storage

    Store any leftover Hawaiian roll breakfast sliders in an airtight container in the refrigerator for up to 3 days.

    To freeze, wrap individual sliders in plastic wrap, then aluminum foil, and place them in a freezer bag or freezer-safe container for up to 4 months. Thaw them in the refrigerator before reheating and serving the sliders.

    Related Recipes

    If you are looking for breakfast sandwich recipes, you have hit the jackpot!

    • A classic Bacon Egg and Cheese Sandwich is always a great choice.
    • Our Hawaiian Breakfast Sandwich with a fruity twist may surprise you.
    • Mini Waffle Breakfast Sandwiches are bite sized, but they are big on flavor.
    • If you are craving a hearty, sweet and savory breakfast sandwich, try our Waffle Burger or Donut Burger!

    Did you make this? I’d be so grateful if you left a “star” rating below to let me know what you thought! Then, the next time you need a quick and easy recipe, come back to Fantabulosity to browse all of my easy recipes!

    Recipe

    A close up photo of a stack of breakfast slider sandwiches
    Print Pin
    5 from 7 votes

    Hawaiian Roll Breakfast Sliders

    Hawaiian Roll Breakfast Sliders: Everyone's favorite Hawaiian rolls are stuffed with sausage, bacon, eggs and cheese and brushed with a butter maple glaze and then baked until warm and toasty!
    Course Breakfast
    Cuisine American
    Prep Time 10 minutes minutes
    Cook Time 20 minutes minutes
    Total Time 30 minutes minutes
    Servings 12 sliders
    Calories 457kcal
    Author Jessica Burgess

    Ingredients

    • 12 Hawaiian Rolls
    • 12 breakfast sausage patties cooked
    • 12 eggs scrambled
    • ½ teaspoon salt
    • 1 teaspoon black pepper
    • 6 slices cooked bacon
    • 2 cups colby jack cheese shredded
    • ¼ cup melted butter
    • 2 tablespoon maple syrup

    Instructions

    • First, preheat your oven to 350 degrees F and spray an 8×10 casserole dish with non-stick cooking spray.
    • Using a bread knife, slice the Hawaiian rolls horizontally while keeping the tops and bottoms connected to each other.
    • Place the roll bottoms in the casserole dish.
    • Next, place the breakfast sausage patties over the rolls in a single even layer.
    • Now, top the sausage patties with the scrambled eggs and sprinkle the eggs with salt and pepper.
    • Next, crumble the bacon and sprinkle it evenly over the scrambled eggs.
    • Top the eggs with an even layer of shredded Colby jack cheese.
    • Place the roll tops on top of the cheese.
    • Now, combine the melted butter and maple syrup. Liberally brush the butter and syrup mixture over the tops of the rolls.
    • Finally, bake the sliders uncovered for 20 minutes or until the tops of the rolls are golden brown and crispy. Cut the sliders apart and serve warm.

    Notes

    • Store any leftover sliders in an airtight container in the refrigerator for up to 4 days.
    • You can wrap and freeze individual breakfast sliders in an airtight, freezer safe container or freezer bag for up to 3 months. Thaw them completely in the refrigerator before reheating and serving the sliders.  

    Nutrition

    Serving: 1slider | Calories: 457kcal | Carbohydrates: 18g | Protein: 22g | Fat: 33g | Saturated Fat: 14g | Polyunsaturated Fat: 3g | Monounsaturated Fat: 12g | Trans Fat: 0.3g | Cholesterol: 242mg | Sodium: 750mg | Potassium: 227mg | Fiber: 0.04g | Sugar: 6g | Vitamin A: 611IU | Vitamin C: 0.3mg | Calcium: 185mg | Iron: 1mg

    Toddler Lunch Ideas

    October 21, 2022

    Toddler foods in ice cube tray

    Toddler Lunch Ideas: If you’re on a mission to find an easy toddler lunch idea, you’ll not only find a list of ideas but a list of great recipes, too!

    toddler lunch idea in ice cube tray

    What you see in the photo above, in the ice cube tray:

    • Avocado
    • Chicken
    • Nuts
    • Carrots
    • Raisins
    • Animal Crackers
    • Apple Slices, or favorite fruit
      More Ideas that Would Fit in the Tray:
    • Pita Bread
    • Bell Peppers
    • Black Beans
    • Sweet Potatoes
    • Whole Grain Crackers
    • Carrot Sticks
    • Tortilla Chips
    • Snap Peas
    • Cheese slices or cubes

    I have had a picky eater in the world! Trust me, I could TOTALLY put him in a contest for the pickiest eater, and win… hands down. His favorite diet consisted of PB&J’s, grilled cheeses, green beans, and carrots. Repeat.

    After a recent medical scare with him, it was time to change my son’s eating habits.
    So I’m sharing quick lunch ideas that rotate through our house, for normal toddler lunches, in hopes it helps you get through the toddler lunch “funk,” that you may be in. You may also find some snack ideas if you’re traveling on a road trip with your toddler!

    I’m also going to share some of the best recipes from of my blogging friends in case you’re looking to add more ideas to your rotation!

    Tips for Toddler Lunches

    • Ice Cube Trays: It’s kind of like a more organized way to create a small charcuterie board or a lunch bento box. I don’t know about you but when I arrange small amounts of different varieties of food on a platter, my kids seem to eat more of it! But with little ice cube trays, it’s easier to keep things separated for little hands, and we really think it’s a good idea.
    • Fun Shapes: Use fun-shaped cookie cutters to cut out fun shapes of foods to make eating veggies fun! For instance, cut a cucumber in half, the long way, and use a narrow cookie cutter (for example, a “train”) and the cucumber may be eaten more than normal!
    • Hidden Veggies: Using a blender, food processor, or juicer to mash up or minimize the vegetables or new foods your toddler may not like, is a great way to sneak them in to their favorite foods!
    • Dips for vegetables or crackers: Sometimes adding a simple dip can encourage young toddlers to try more; such as ranch dressing, almond butter or seed butter, cottage cheese, cheese dip, and greek yogurt.

    Toddler Meal Idea List

     I’ve also provided a free printable of toddler lunch ideas, in case you’d like to print this. Keep it handy for those days when your brain is fried and you don’t feel like getting creative in the kitchen. Plus… take a look at it, before you make your grocery shopping list, and add the items you need to get.

    Download the List HERE!
    Toddlerlunchpreview

    DISCLAIMER: Keep in mind that some of the food items that I mention, may not tickle your fancy. I get that. Before my son was diagnosed with epilepsy, and we took him to a nutritionist, I would have turned my nose up at some of these items as well. For instance… “hot dogs,” “lunch meat,” “chicken nuggets,” etc. But my little 4 year old, chosen vegetarian, was really lacking in the protein department, so I’ve since then, tried incorporating some meats in to his lunches. I just try to only buy the hot dogs and lunch meat without nitrates, artificial flavorings, etc., to do the best that I can with healthy toddler lunch ideas.

    Eeeek! Look how sweet he is! This is the first time he used the new plate. He ate every bit of his goodies, without a fight. (But he couldn’t take his eyes off of his favorite show on tv, long enough for me to get a photo.) 🙂

    Toddler holding ice cube tray
    Toddler Favorite!

    Toddler Lunch Recipes

    See some of our favorite lunch ideas for toddlers, from some of my favorite blogging friends that are a great option for lunches:

    How to Make a Peanut Butter and Jelly Sandwich
    How to Make a Peanut Butter and Jelly Sandwich: Did you know that there's a certain way to make a pb&j even better? It's true. Keep reading!
    Peanut Butter and Jelly Recipe
    Close up of peanut butter and jelly sandwich
    Cream Cheese Pasta
    Cream Cheese Pasta: This linguine covered in cream cheese pasta sauce is the perfect recipe for a busy weeknight dinner! It's ready in 20 minutes, & only calls for 7 simple ingredients
    Cream Cheese Pasta Recipe
    Cream Cheese Pasta being scooped up and held above the plate.
    Mozzarella Wrap with Tomato and Basil
    You can also make a cheese quesadilla with just cheese and tortillas.
    Mozzarella Wrap
    easy caprese wrap recipe
    Pizza Monkey Bread
    This pepperoni pizza monkey bread is a delicious blend of bread, parmesan cheese, marinara sauce, pepperoni, mozzarella cheese and italian seasoning, baked in a bundt pan creating a delicious appetizer recipe!
    Pizza Monkey Bread Recipe
    pizza monkey bread
    Fried Peanut Butter and Jelly Sandwich
    A fried peanut butter and jelly sandwich is your classic pb&j, cooked on the stovetop with butter, giving it a crispy outside with a warm and gooey inside.
    Fried Peanut Butter and Jelly
    Fried peanut butter and jelly sandwich, sliced on white plate.
    Hot Ham and Cheese Sandwiches
    Hot Ham and Cheese Sandwiches: Hamburger buns, slices of cheese, and your favorite ham, toasted in the oven to create an easy lunch or dinner idea!
    Hot Ham and Cheese Recipe
    Hot ham and cheese sandwich on white plate
    Fresh Fruit Salad
    Honey Lime Fruit Salad: A refreshing fresh fruit salad that's always a hit! Serve this fruit salad as a healthy dessert or as a sweet side dish for any occasion!
    Honey Lime Fruit Salad
    Honey Lime Fruit Salad
    Hard-Boiled Eggs
    Instant Pot Hard Boiled Eggs: So quick, easy and it made the shells peel off so easily, with the 5, 5 & 5 method!
    Instant Pot Hard Boiled Eggs Tutorial
    sliced hard boiled eggs on plate
    Pizza Bagels
    These pizza bagels are the perfect quick dinner recipe and are great for the pickiest eaters! Pizza night made easy with this recipe.
    Easy Pizza Bagels Recipe
    Bagel pizza topped with pepperonis on baking sheet.
    Fried Bologna and Egg Sandwich
    Fried Bologna and Egg Sandwich: A couple of bologna slices, an egg, a couple of slices of bread, and a pat of butter, and you're set for a delicious breakfast recipe!
    Fried Bologna Sandwich Recipe
    Fried Bologna and Egg Sandwich
    Peanut Butter and Syrup Sandwich
    This peanut butter and syrup sandwich recipe is the perfect side dish for chili or your favorite soup or a great, sweet lunch idea!
    Peanut Butter and Syrup Recipe
    Peanut butter and syrup sandwich sliced in half, stacked on top of each other.
    Homemade Spaghetti O's (Allergy-Free, Gluten-Free, Vegan)
    These homemade spaghetti O's are allergy-free, gluten-free, and vegan! A super easy lunch or dinner that's kid-friendly and mom-approved!
    Check out this recipe
    Ham and Pea Pasta
    This Ham and Pea Pasta is a delicious change from the traditional mac and cheese. Filled with bits of ham and frozen peas and can be ready in just 20 minutes!
    Check out this recipe
    Veggie Muffins
    These veggie muffins taste sweet and chocolaty but they're loaded with hidden vegetables. They're an easy way to sneak some extra nutrients into a picky toddler's lunch.
    Check out this recipe

    Slow Cooker Chicken Drumsticks

    October 20, 2022

    Eight cooked chicken drum sticks are swimming in a sauce in a black crock pot

    Slow Cooker Chicken Drumsticks: Budget-friendly chicken drumsticks are cooked low and slow in a savory sauce until they fall off the bone tender!

    Drumsticks are one of the cheapest cuts at the store. More budget-friendly crockpot dinners here.

    If you love chicken in the slow cooker, this Crock Pot Jalapeno Chicken and this crockpot chicken pasta, need to be next on your list! You can also compare cooking times and serving ideas in my crockpot chicken recipe collection.

    A white plate in the center of the photo holds two chicken drumsticks and mashed potatoes while a crockpot is off to the left and a platter of chicken is visible in the right corner

    As I’m sure you know, slow cooker recipes are my jam! These Slow Cooker BBQ Meatballs are perfect for a party appetizer or game day spread. And don’t get me started on these super tender BBQ Pork Steaks in the Slow Cooker! Now, I’m super excited to add this recipe for crock pot chicken legs to our dinner rotation.

    Why You’ll Love This Recipe

    Since these crock pot chicken drumsticks are made with just 5 ingredients and 5 minutes of prep time, you can definitely add this to your easy family recipes file, along with these slow cooker chicken enchiladas.

    Chicken drumsticks are a budget-friendly cut of chicken, so this easy crock pot recipe is an inexpensive way to feed the whole family! I don’t know a more kid-friendly dinner recipe than slow cooker drumsticks.

    If you are looking for a healthy chicken drumstick slow cooker recipe, you’ll be happy to hear that our recipe has no butter or olive oil.

    [feast_advanced_jump_to]

    Ingredients

    This chicken drumsticks recipe only has 5 simple ingredients. And, you probably have every one of them in your kitchen right now! If not, your local grocery store should have everything you need to make these crockpot chicken legs.

    A wooden cutting board holds a bulb of garlic, bowls of sauces and 6 raw chicken drumsticks
    • 3 pounds of chicken drumsticks (about 6-8 drumsticks depending on the size)
    • ½ cup honey
    • ½ cup soy sauce
    • ½ cup ketchup
    • 1 teaspoon garlic, minced
    • Optional: sesame seeds, sliced green onion or parsley for garnish

    See the printable recipe card below for ingredients, nutrition information and detailed instructions.

    Instructions

    I am a firm believer in crock pot recipes for busy weeknight dinners. If you want a “set it and forget it” meal, then this slow cooker chicken recipe definitely fits the bill. Here are the instructions and step-by-step photos for our crockpot drumsticks.

    1. First, prepare the slow cooker with nonstick spray and place the chicken legs in a single layer inside of the slow cooker insert.
    2. In a small bowl, whisk the honey, soy sauce, ketchup, and garlic together.
    10 raw chicken drumsticks are tucked into a black crockpot
    raw chicken
    A whisk is resting in a glass mixing bowl that holds a dark brown sauce with bits of garlic
    sauce
    1. Next, pour the sauce over the chicken and toss the drumsticks in the sauce to evenly coat them.
    A dark reddish brown sauce is being poured over raw chicken drumsticks in a crockpot
    pour sauce
    Raw chicken drumsticks have been tossed in a deep reddish brown sauce and are sitting in a crockpot waiting to be cooked
    ready for cooking
    1. Cook the chicken drumsticks for 3-4 hours on high or 5-6 hours on low in your slow cooker.
    2. Finally, remove the chicken from the slow cooker and serve.
    A black crockpot holds cooked chicken drumsticks swimming in a dark reddish brown sauce

    Now, I don’t mind classic crockpot chicken drumsticks with BBQ sauce. But this sauce… a definite must to make. The honey is a natural sweetener, the soy sauce brings a depth and richness, the garlic adds a savory zing and the ketchup adds a tang that brings it all together.

    Finish Off in the Oven (Optional)

    If you’d love for them to have more of a crispy skin, something you can do is place them in the oven a baking sheet and cook on “broil” for just a couple of minutes to crisp them up! (See below)

    Cooked chicken drumsticks on baking sheet

    Variations & Substitutions

    We love sharing ways to adjust our recipes to fit the ingredients you have on hand and providing creative alternatives and suggestions to fit your family’s preferences.

    • Type of Chicken: You can use bone-in chicken thighs, chicken wings or chicken breasts for this recipe, too. Adjust the cooking time based on the cut of chicken you use and check it periodically. I use chicken tenderloins in this Orange Chicken Crockpot recipe, too.
    • Soy Sauce: If you prefer, use low-sodium soy sauce or liquid aminos in place of the soy sauce in this recipe.
    • Honey: While we used honey, you could substitute maple syrup or brown sugar in the sauce to add sweetness.
    • Seasonings: This 4-ingredient sauce is delicious as is, but you can also season this chicken with your favorite spices to add additional flavor. Try garlic powder, black pepper, onion powder, a spice rub or even a little chili powder for some heat.
    • Garnish: To serve, you can garnish the slow cooker chicken legs with sesame seeds, sliced green onions or fresh parsley.
    • Cook method: Even though this is a slow cooker chicken legs recipe, you can also boil chicken legs if you need a simple way to make the legs!
    Cooked drumsticks are displayed on a white serving tray surrounded by a bowl of mashed potatoes, a stack of plates and several forks

    FAQs

    Is it safe to cook raw chicken on low in a slow cooker?

    Absolutely! The temperatures in a slow cooker (both the low and high settings) are safe to cook chicken according to the USDA.

    Is it better to slow cook chicken on low or high?

    This really depends on how much time you have before you need to serve your meal. Either setting is safe as long as the chicken reaches 165 degrees F.

    How long does it take for drumsticks to fully cook?

    I know I’ve said it before, but it depends. The length of time will vary with the size of your drumsticks. Check the doneness periodically with a meat thermometer to ensure that they are fully cooked.

    What can I serve with slow cooker chicken drumsticks?

    You can serve this with traditional side dishes like Instant Pot mashed potatoes or white or brown rice. Cauliflower rice or homemade fried rice also goes well with these juicy chicken drumsticks. We also suggest rounding out the meal with our favorite side salad, roasted broccoli or these candied carrots.

    A close up photo of cooked chicken drumsticks on a white serving platter

    Storage

    Leftover slow cooker chicken drumsticks can be stored in an airtight container in the refrigerator for up to 4 days.

    To freeze leftover chicken, remove the chicken from the bone and store it in freezer bags with the air removed for up to 2 months.

    A white plate holding two chicken drumsticks and a serving of mashed potatoes is surrounded by a serving platter of chicken and another plate of food
    Crock pot chicken drumsticks recipe

    Top Tip for Food Safety

    Use a meat thermometer inserted into the thickest part of the drumstick and make sure the internal temperature reaches 165 degrees F to ensure that the chicken is fully cooked. Cooking time will depend on the size of your chicken drumsticks, so check them periodically for the best results.

    More Slow Cooker Dinner Recipes

    Our easy Slow Cooker Shredded Chicken is a star for meal prep. You can use it for tacos, nachos or pulled chicken sandwiches. This Slow Cooker Pulled Pork is made with cherry cola – it is savory and sweet and SO delicious! We even make Venison Chili in the slow cooker for those chilly Fall and winter nights.

    Did you make this? I’d be so grateful if you left a “star” rating below to let me know what you thought! Then, the next time you need a quick and easy recipe, come back to Fantabulosity to browse all of my easy recipes!

    Recipe

    Eight cooked chicken drum sticks are swimming in a sauce in a black crock pot
    Print Pin
    5 from 10 votes

    Slow Cooker Chicken Drumsticks

    Slow Cooker Chicken Drumsticks: Budget friendly chicken drumsticks are cooked low and slow in a savory sauce until they are fall-off-the-bone tender!
    Course Main Course
    Cuisine American
    Prep Time 5 minutes minutes
    Cook Time 4 hours hours
    Total Time 4 hours hours 5 minutes minutes
    Servings 8 drumsticks
    Calories 338kcal
    Author Jessica Burgess

    Equipment

    • slow cooker

    Ingredients

    • 3 lbs chicken drumsticks
    • ½ cup honey
    • ½ cup soy sauce
    • ½ cup ketchup
    • 1 teaspoon garlic minced

    Instructions

    • First, prepare the slow cooker with non-stick cooking spray and place the chicken legs inside of the slow cooker insert.
    • In a small bowl, whisk the honey, soy sauce, ketchup and garlic together.
    • Next, pour the sauce over the chicken and toss evenly to coat.
    • Cook the chicken drumsticks on high for 3-4 hours or low for 5-6 hours.
    • Finally, remove the chicken from the slow cooker and serve.

    Optional

    • If you'd like to crisp up the chicken drumsticks, you can place them on a baking sheet and place in the oven that's set to "broil" for just a couple of minutes!

    Notes

    • You can use bone in thighs or chicken breasts if you prefer.
    • Leftover slow cooker chicken drumsticks can be stored in an airtight container in the refrigerator for up to 4 days.
    • To freeze, remove the chicken from the bone and store it in freezer bags with the air removed for up to 2 months.

    Nutrition

    Serving: 1drumstick | Calories: 338kcal | Carbohydrates: 23g | Protein: 23g | Fat: 17g | Saturated Fat: 5g | Polyunsaturated Fat: 4g | Monounsaturated Fat: 7g | Trans Fat: 0.1g | Cholesterol: 87mg | Sodium: 1028mg | Potassium: 304mg | Fiber: 0.2g | Sugar: 21g | Vitamin A: 239IU | Vitamin C: 3mg | Calcium: 20mg | Iron: 2mg
    • « Go to Previous Page
    • Page 1
    • Interim pages omitted …
    • Page 13
    • Page 14
    • Page 15
    • Page 16
    • Page 17
    • Interim pages omitted …
    • Page 27
    • Go to Next Page »

    Primary Sidebar

    Jessica Burgess standing in kitchen holding a hummingbird cake.

    Hi, I'm Jessica! - Owner and Creator of the blog and brand, Fantabulosity.

    I’m here to help you make easy comfort food and nostalgic recipes, using simple ingredients, that everyone will love.

    More about me →

    Recipe Collections

    • Crockpot recipe collage
      26 Easy Crockpot Dinners (Slow Cooker Recipes for Busy Weeknights)
    • Church supper recipes collage.
      Church Supper Recipes
    • Fall Dessert Recipes collage, showing pumpkin, apple and pecan desserts.
      Easy Fall Desserts (34 Cozy Recipes for the Whole Season)
    • Collage of Thanksgiving side dishes.
      40+ Thanksgiving Side Dishes (Easy Recipes for a Crowd)
    • Old fashioned potluck cake recipes collage.
      Old-Fashioned Cakes That Still Show Up at Every Potluck
    • Collage of potluck desserts.
      Easy Potluck Desserts (Simple Recipes That Always Get Asked For)

    Popular Recipes

    • bread pudding in baking dish
      Bread Pudding Recipe: Easy Old Fashioned Recipe (With Video!)
    • Burger baked in the oven, steamed in aluminum foil, and placed on white plate.
      Burgers in the Oven
    • two tuna salad sandwiches stacked on top of each other
      The BEST Tuna Salad Recipe
    • doritos chicken casserole on plate
      Doritos Chicken Casserole
    • Strawberry brownies on white marble cutting board.
      Strawberry Brownies Recipe
    • Cheeseburger Sliders made with Hawaiian Rolls, stacked on top of one another.
      Cheeseburger Sliders

    Footer

    ↑ back to top

    Featured in Parade, TODAY, House Beautiful, First for Women, The Pioneer Woman, BuzzFeed, Martha.com, Country Living, Woman’s World, and Access Hollywood.

    About

    • About Jessica
    • Contact
    • Collaborate
    • A Month of Dinners

    Easy Recipes

    • All Recipes
    • Vintage Recipes
    • Dinner Recipes
    • Desserts

    Popular Recipes

    • Cake Recipes
    • Bread Pudding
    • Chicken Spaghetti
    • 3-Ingredient Biscuits

    Privacy Policy |Accessibility Copyright © 2026 Fantabulosity | Terms & Conditions | FTC
    All recipes, photos, and content are copyrighted and may not be reproduced, republished, or distributed without written permission.

    Rate This Recipe

    Your vote:


    A rating is required
    A name is required
    An email is required