• Skip to primary navigation
  • Skip to main content
  • Skip to primary sidebar

Fantabulosity logo

  • All Recipes
  • Vintage Recipes
  • Holiday
  • Dinner Theme System
  • About
  • Navigation Menu: Social Icons

    • Facebook
    • Instagram
    • Pinterest
    • TikTok
    • YouTube
menu icon
go to homepage
  • Recipes
  • Desserts
  • Dinners
  • Gatherings
  • Holidays
  • About Jessica
    • Facebook
    • Instagram
    • Pinterest
    • TikTok
    • YouTube
  • search icon
    Homepage link
    • Recipes
    • Desserts
    • Dinners
    • Gatherings
    • Holidays
    • About Jessica
    • Facebook
    • Instagram
    • Pinterest
    • TikTok
    • YouTube
  • ×
    Home » Recipes

    The Lodge at Whitefish Lake, Montana

    The Lodge at Whitefish Lake, Montana

    April 13, 2023

    Winter in Whitefish Montana - Lodge at Whitefish.

    Looking for a weekend getaway in Montana for our family, we decided The Lodge at Whitefish Lake would be our destination. If you’ve been thinking about a quick trip, here’s why you’ll want to stay here!

    View from condo of frozen lake at The Lodge at Whitefish.
    Frozen Lake View from Condo

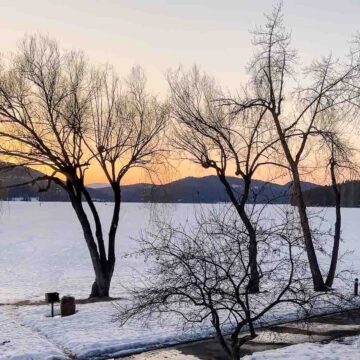
    As you can probably tell from the photos, we chose to visit The Lodge at Whitefish in the winter (March, actually… but it was still “winter” there).

    I highly recommend this time of year if you have a little cabin fever and need to get the kids out of the house.

    See more Fantabulosity travel ideas!

    Of course, the pool isn’t open but the hot tubs are, they have s’mores at night, and of course there are snow activities that some families may even enjoy doing. (We’re not one of those families… so you won’t be seeing any skiing adventures or snowshoeing trips here. Now cocktails… and food? We’re your family.)

    Video Highlight of our Weekend Trip to The Lodge at Whitefish

    I’ve compiled a reel on Instagram if you want to see even more details of our trip but make sure you see more details below with images, tips, and more about a weekend getaway for your family in Whitefish.

    View this post on Instagram

    A post shared by Fantabulosity.com (@fantabulosity_blog)

    Whitefish Montana Weekend Trip

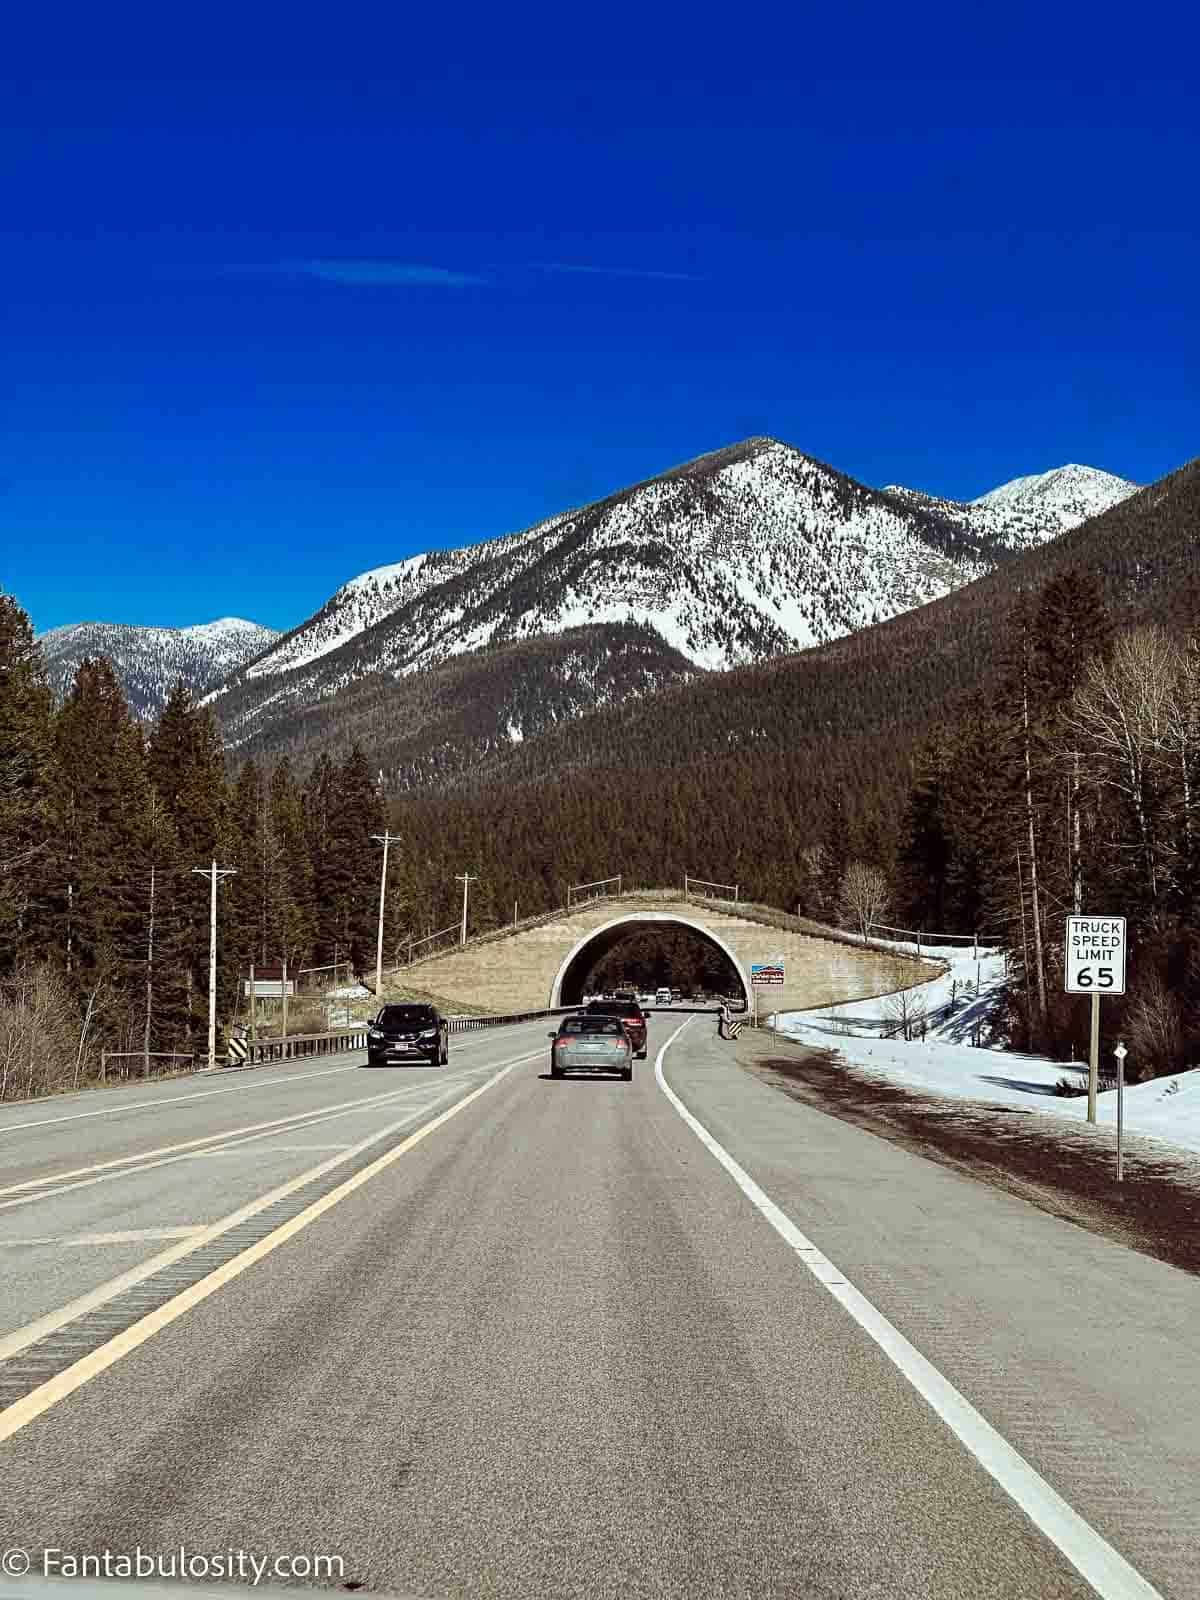
    If you’re not from Montana, or rather, from Whitefish, then you may just be taken away by the beautiful views on the way TO Whitefish. We were lucky enough to drive through Polson, and around Flathead Lake on our route, and it was STUNNING.

    But that wasn’t all… there were beautiful spots (like the one below) made up of mountains, beautiful (clean!) roads, and as my kids love to see… “tunnels!”

    Driving to Whitefish montana, with a view of the road and mountains.

    The Lodge at Whitefish Lake

    When we arrived at the lodge, check-in was a breeze, and not to mention, beautiful with a welcoming outdoor fireplace. (See that in the highlight reel.)

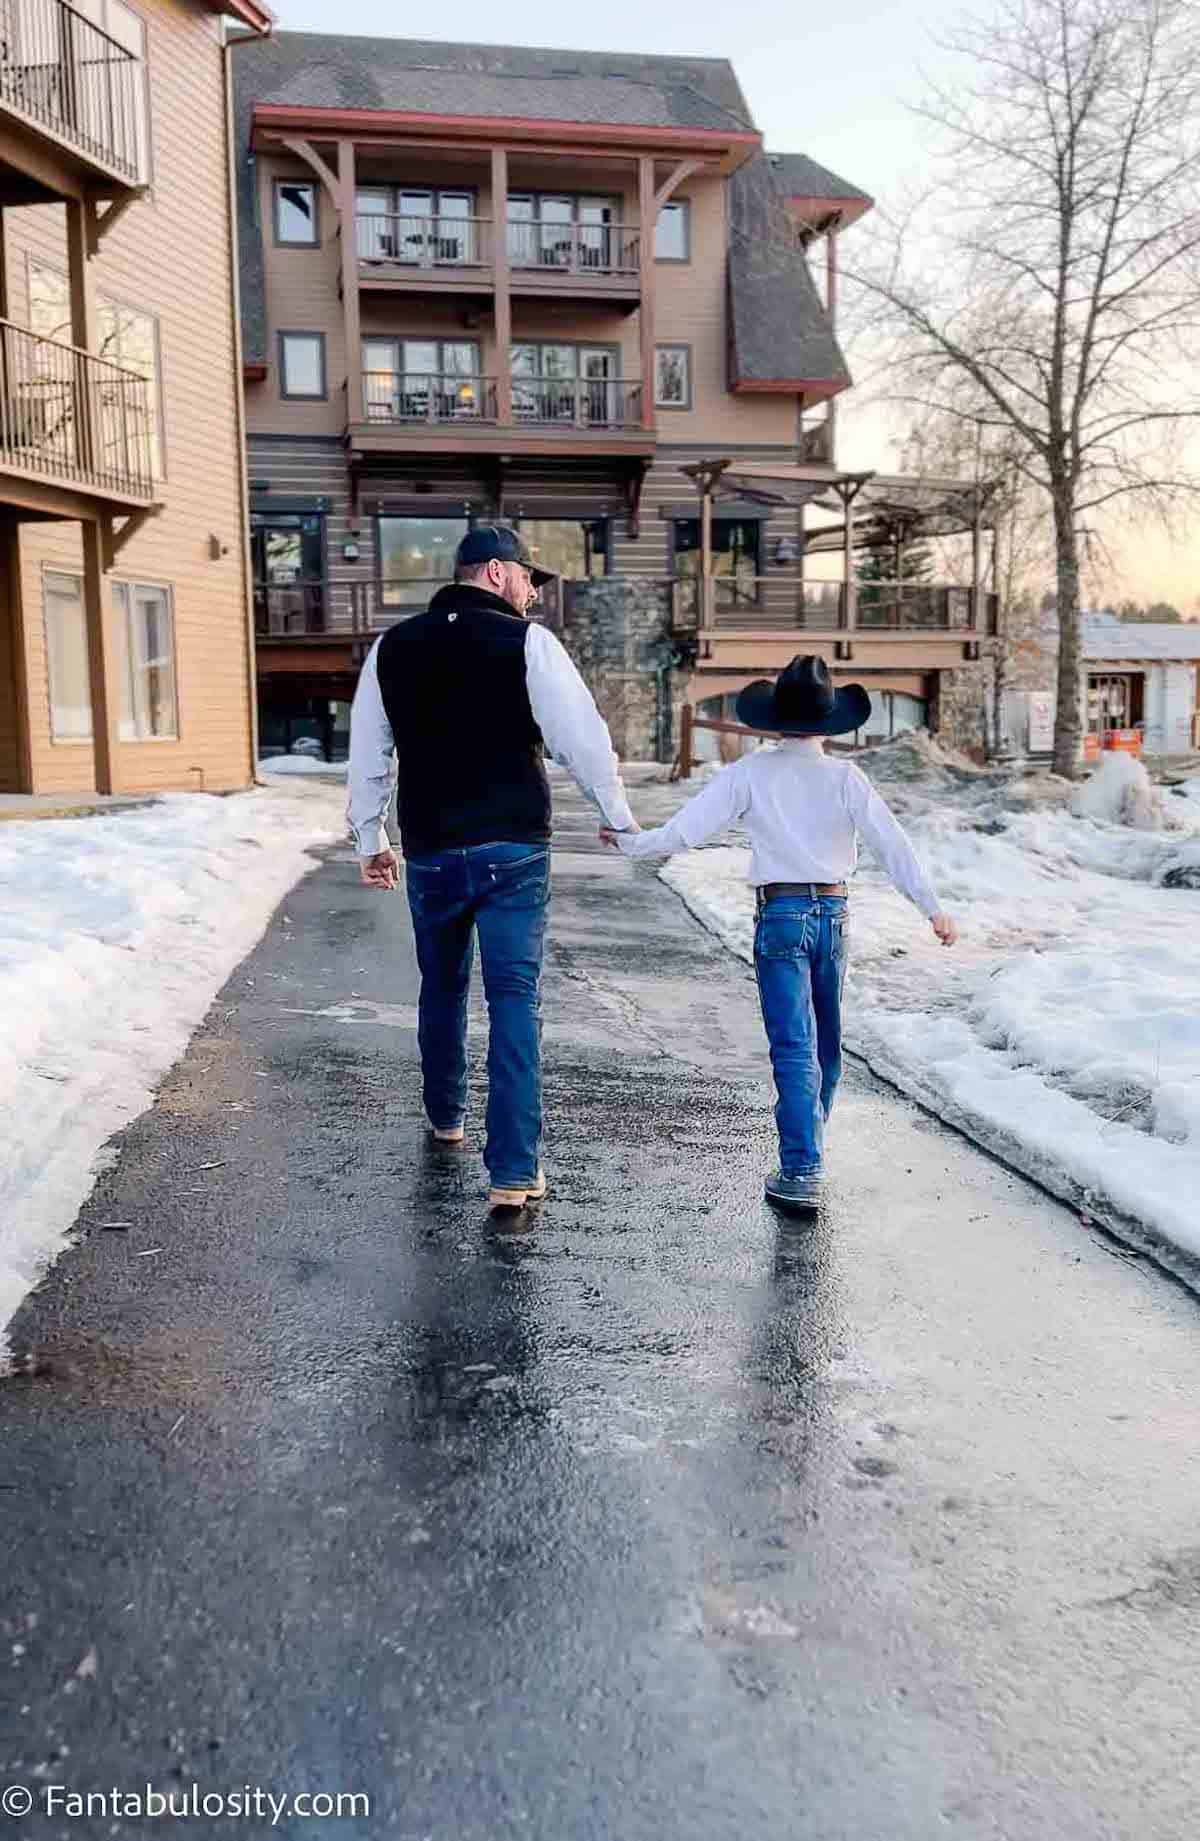
    When we called to book a room, we explained that we wanted a separate area for the kids to sleep in, so my husband and I could have our own room. (This is always a priority for us, so we can have our alone time.)

    2 Bedroom Condo

    We opted for the two-bedroom condo, so we’d have our own room, and the boys could share a bedroom.

    After all the years of traveling, we actually prefer this type of hotel-style, condo accommodation, over Airbnb travel.

    The condo had a living area, dining area, and full kitchen, which made it nice so we could cook an easy breakfast and quick lunches/meals in the condo when we didn’t feel like going out.

    Besides… when you have two growing boys, it’s important to always have food around, and having a refrigerator made this easier to keep healthy snacks on hand.

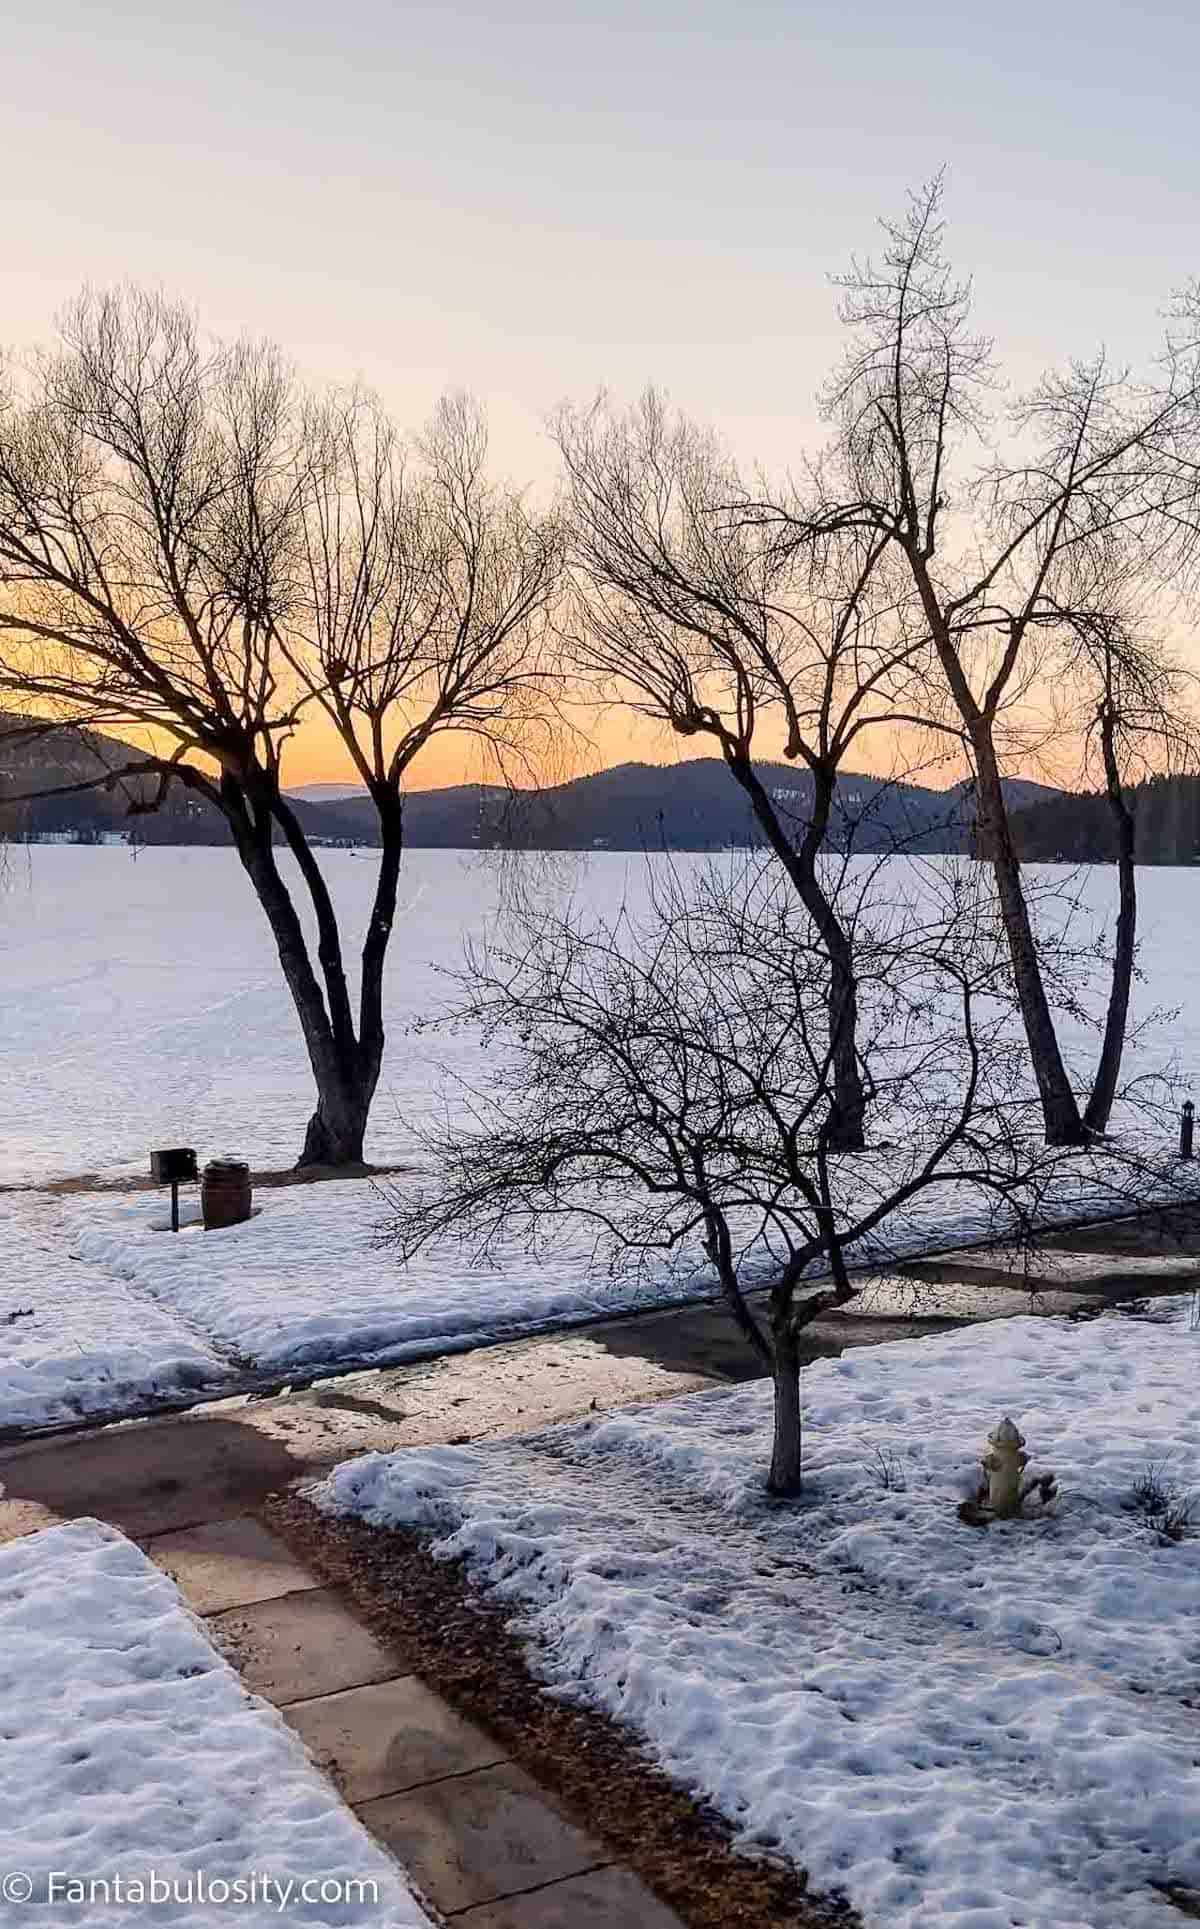
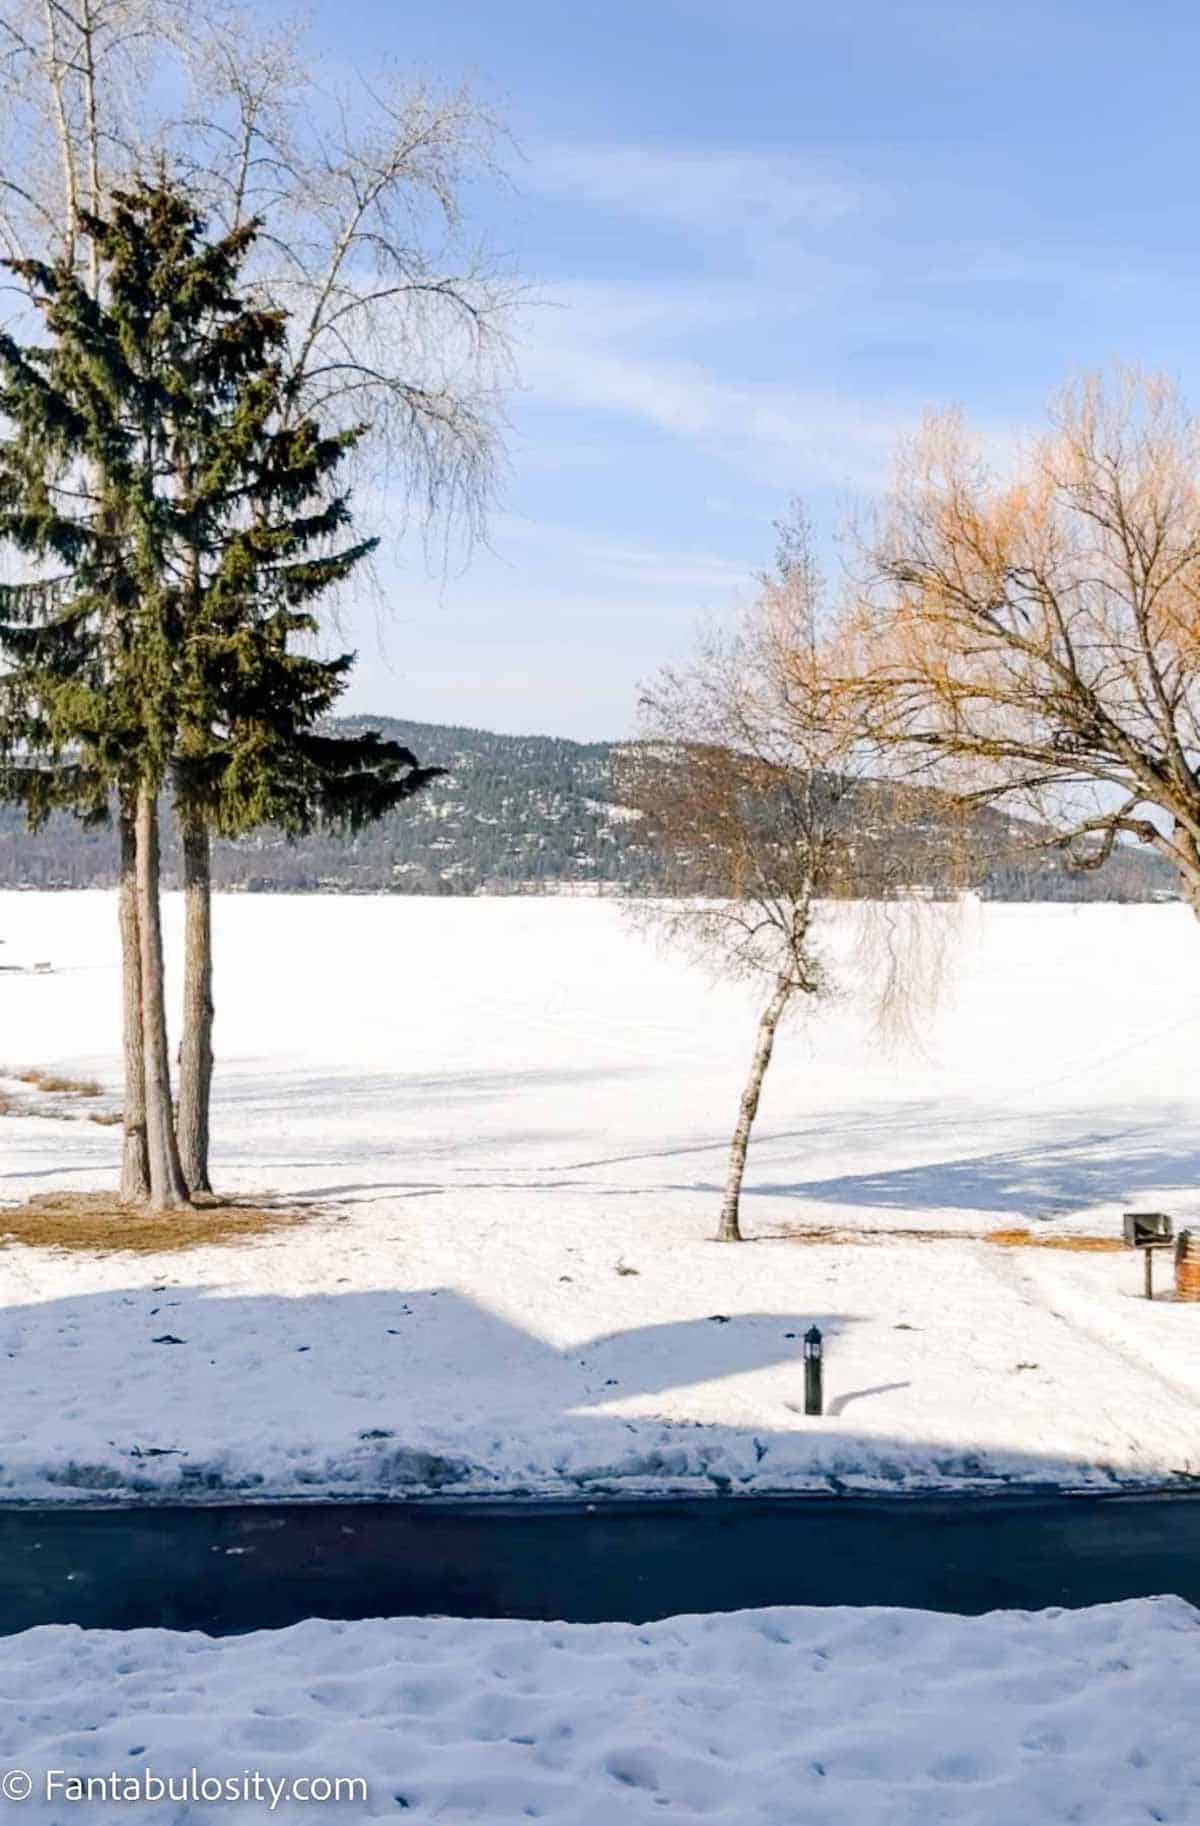
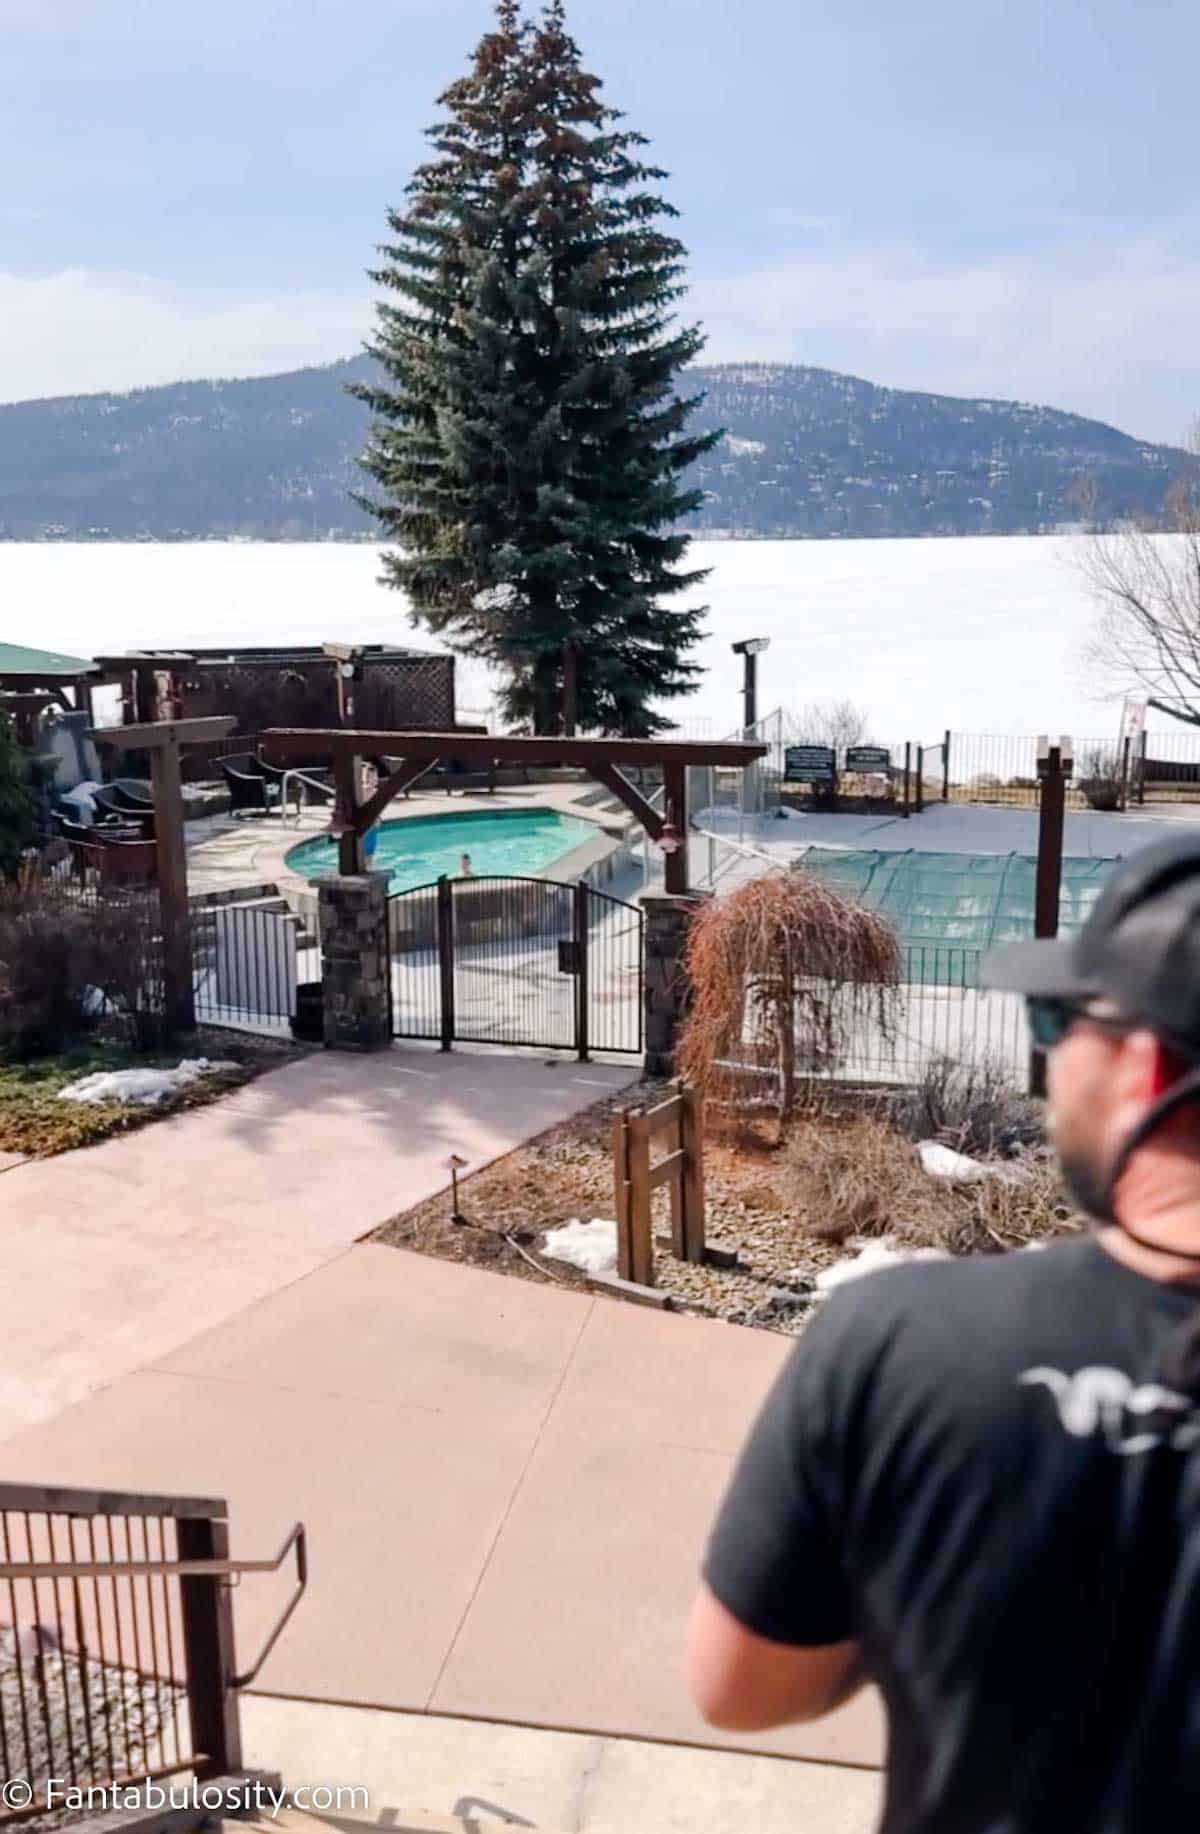
    The view from our condo was beautiful, even in the winter. The frozen lake, fluffy white snow, and even a train in the far distance (that you couldn’t hear) that looked beautiful passing by through the mountains.

    View of frozen lake at Lodge of Whitefish Condo.

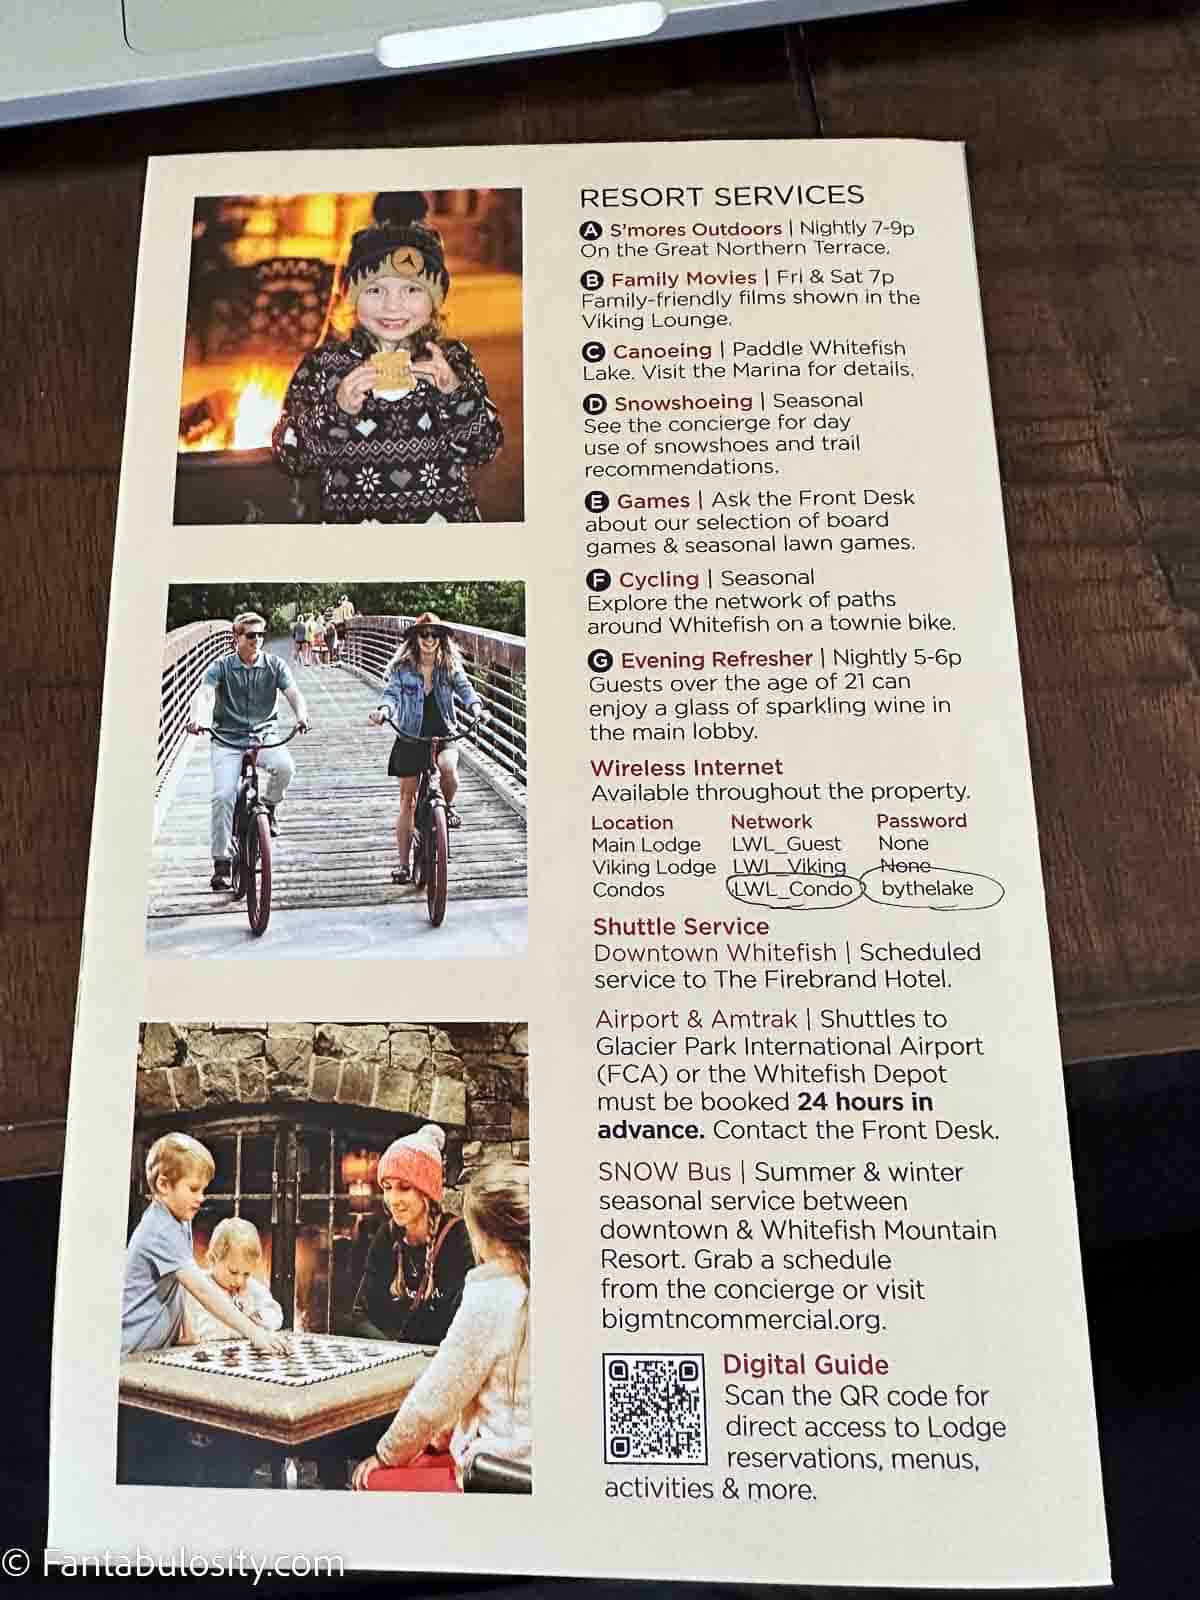
    Whitefish Lodge Resort Services and Events

    To be honest, we were only there for a couple of days, so we didn’t get to take advantage of nearly half of the amazing amenities and services that The Lodge at Whitefish offers, even in the winter!

    Below you can see the winter resort services booklet that they gave us, and I so wish we would have been able to take part in the S’mores Outdoors, and family movie night for sure.

    Events calendar at Lodge at Whitefish Lake

    The Boat Club at The Lodge at Whitefish Lake

    The first night we were there, we arrived around 7:00 so we immediately went to dinner, and couldn’t wait to dine at the Boat Club. The menu looked incredible and the reviews were wonderful.

    We walked over to the restaurant from our room (super easy walk) and the boys had pizza off of their kid’s menu. My husband had a steak, and I had a small Caesar salad and we munched on their charcuterie board as an appetizer.

    Our waitress was a lovely lady, and she even surprised us with a fun (free) cocktail sample at the beginning of dinner. (My kind of lady!)

    Man and son walking at The Lodge at Whitefish.

    Hot Tub at Whitefish Lodge

    The next day, the boys were begging to go to the hot tub. We had a few to choose from; one inside with waterfalls and one outside, overlooking the frozen lake and mountains.

    As you can see, we chose the one outside but I’m not going to lie… the boys were begging to head to the one with waterfalls afterward but we ran out of time.

    Hot tub and lake view at The Lodge at Whitefish.
    Book at The Lodge at Whitefish Lake

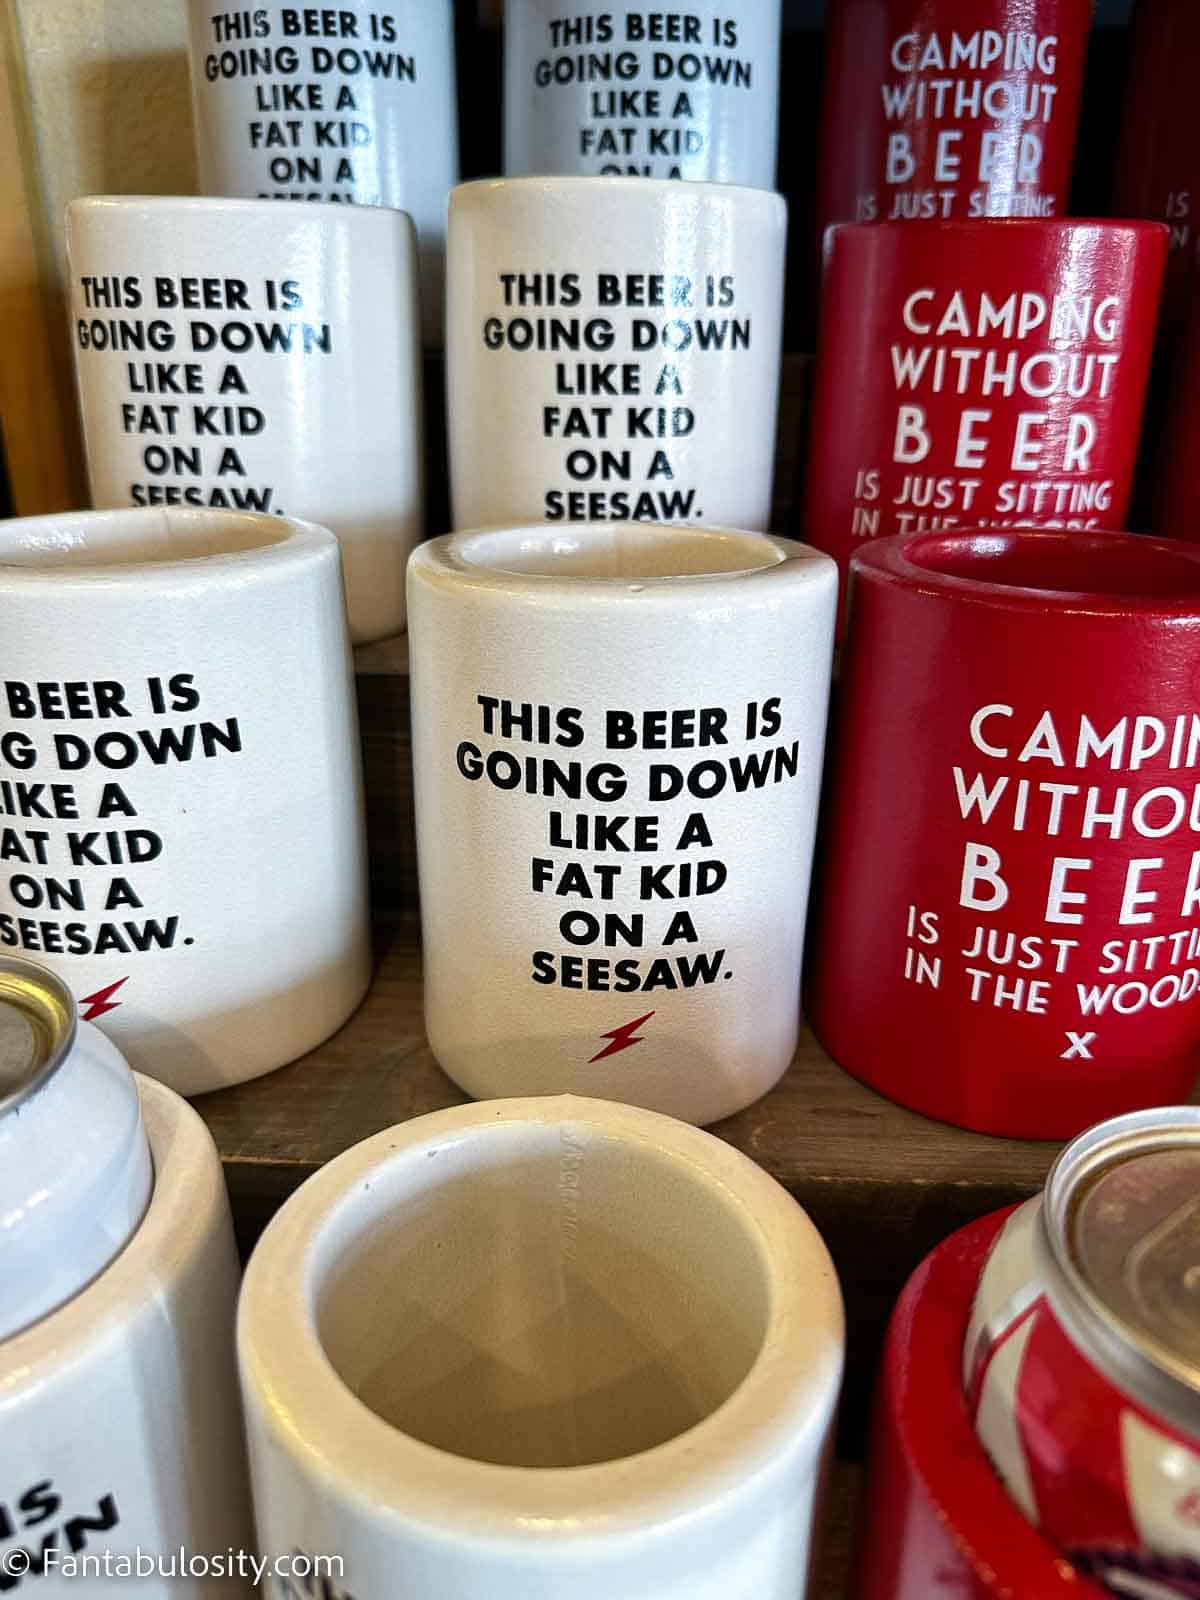
    Downtown Whitefish Shops

    Later in the day, we headed to downtown Whitefish to check out the shops and we were not disappointed. The mountain views, cute stores, and local goods were plentiful.

    Downtown Whitefish.

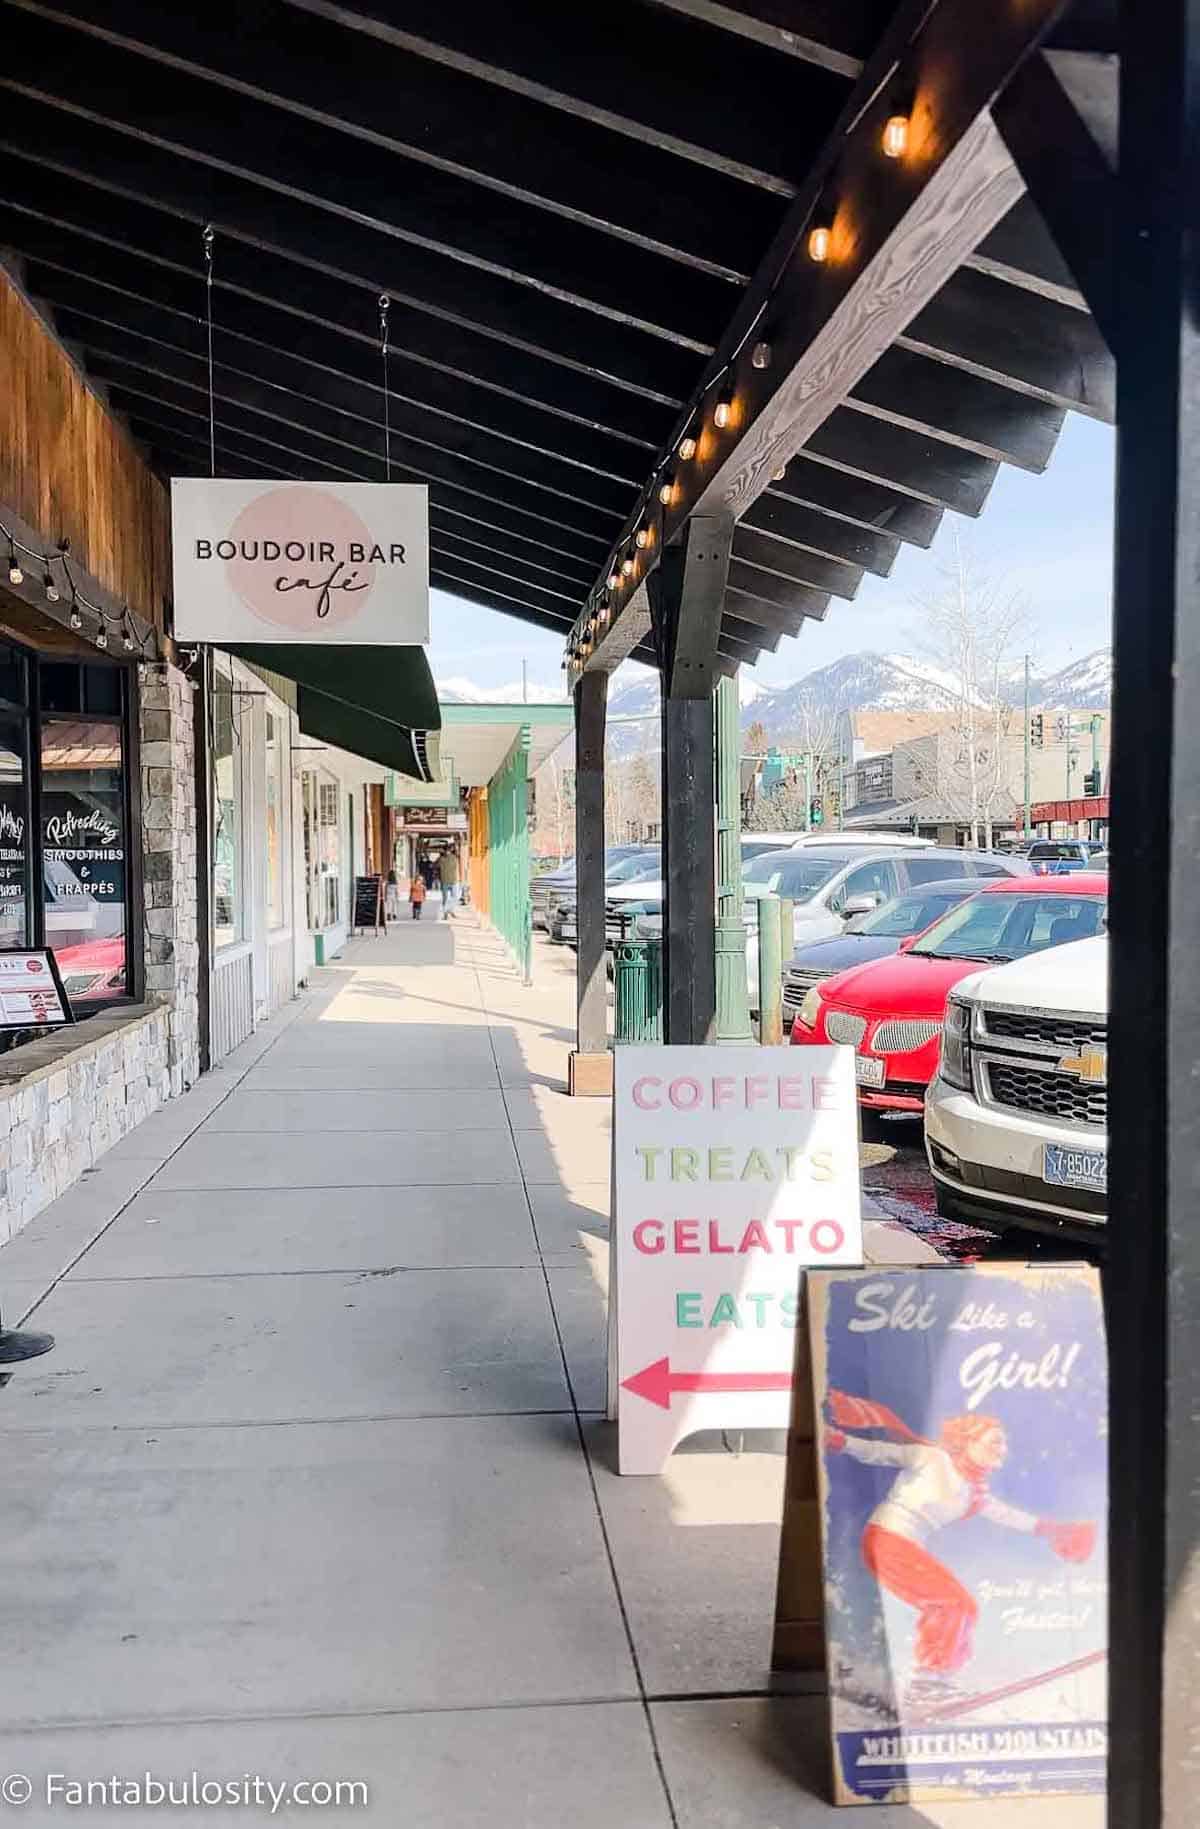
    The shops were plentiful, everyone was friendly, and we even saw some of the cutest dogs, shopping along with their owners along the way, and we were able to love on them for a few minutes.

    Downtown Whitefish Family Photo

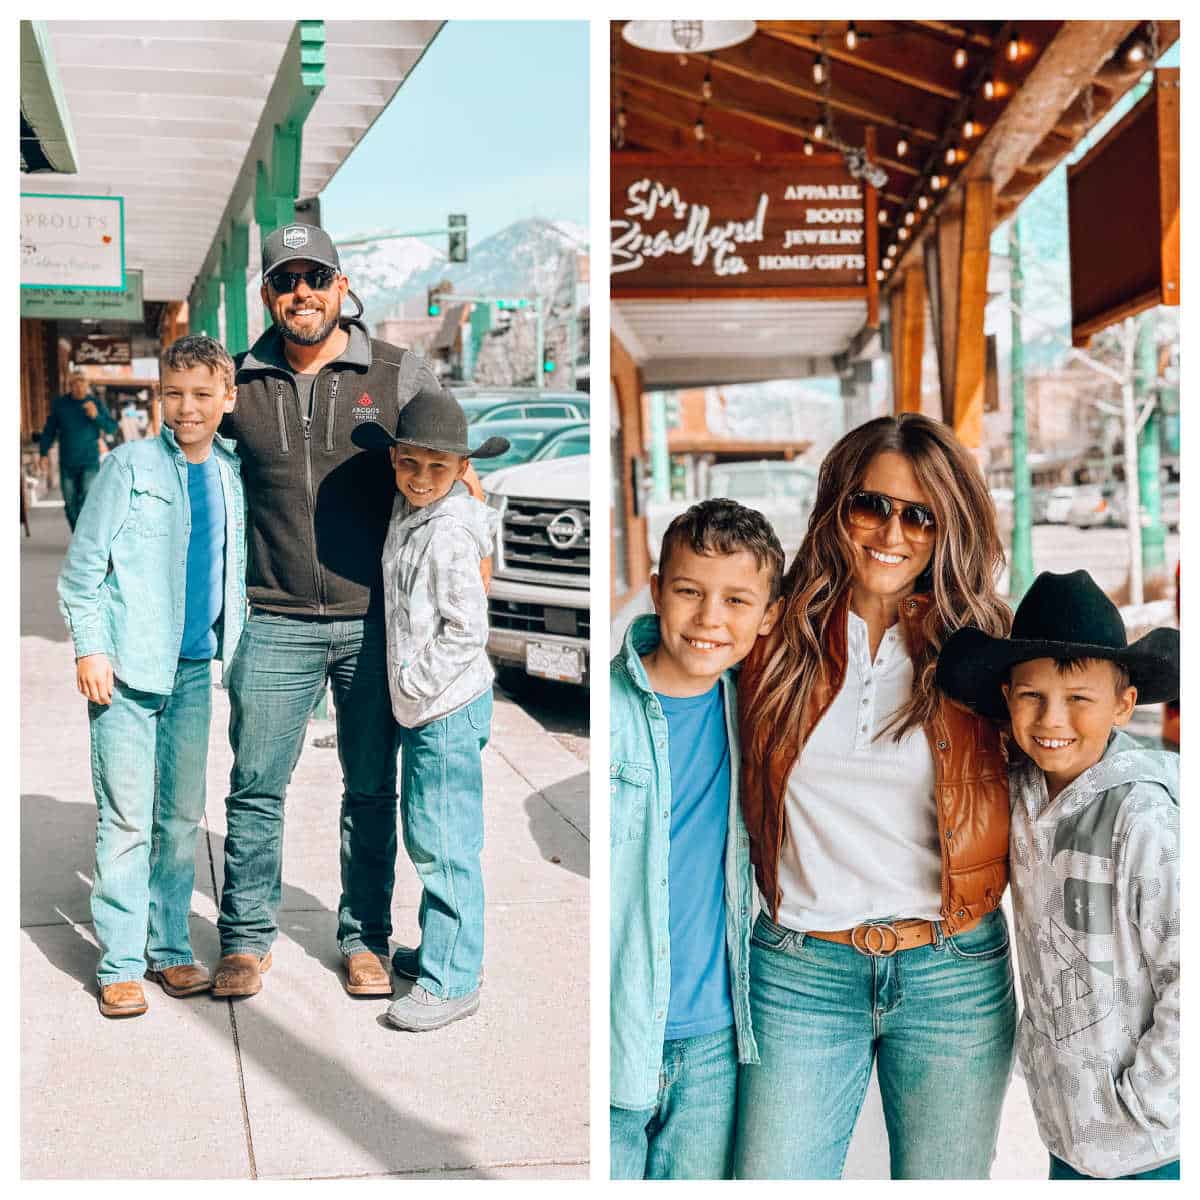
    We love cruising the shops in little towns like this to see all the things that we don’t need but want.

    Some gift items at the shops in Whitefish.

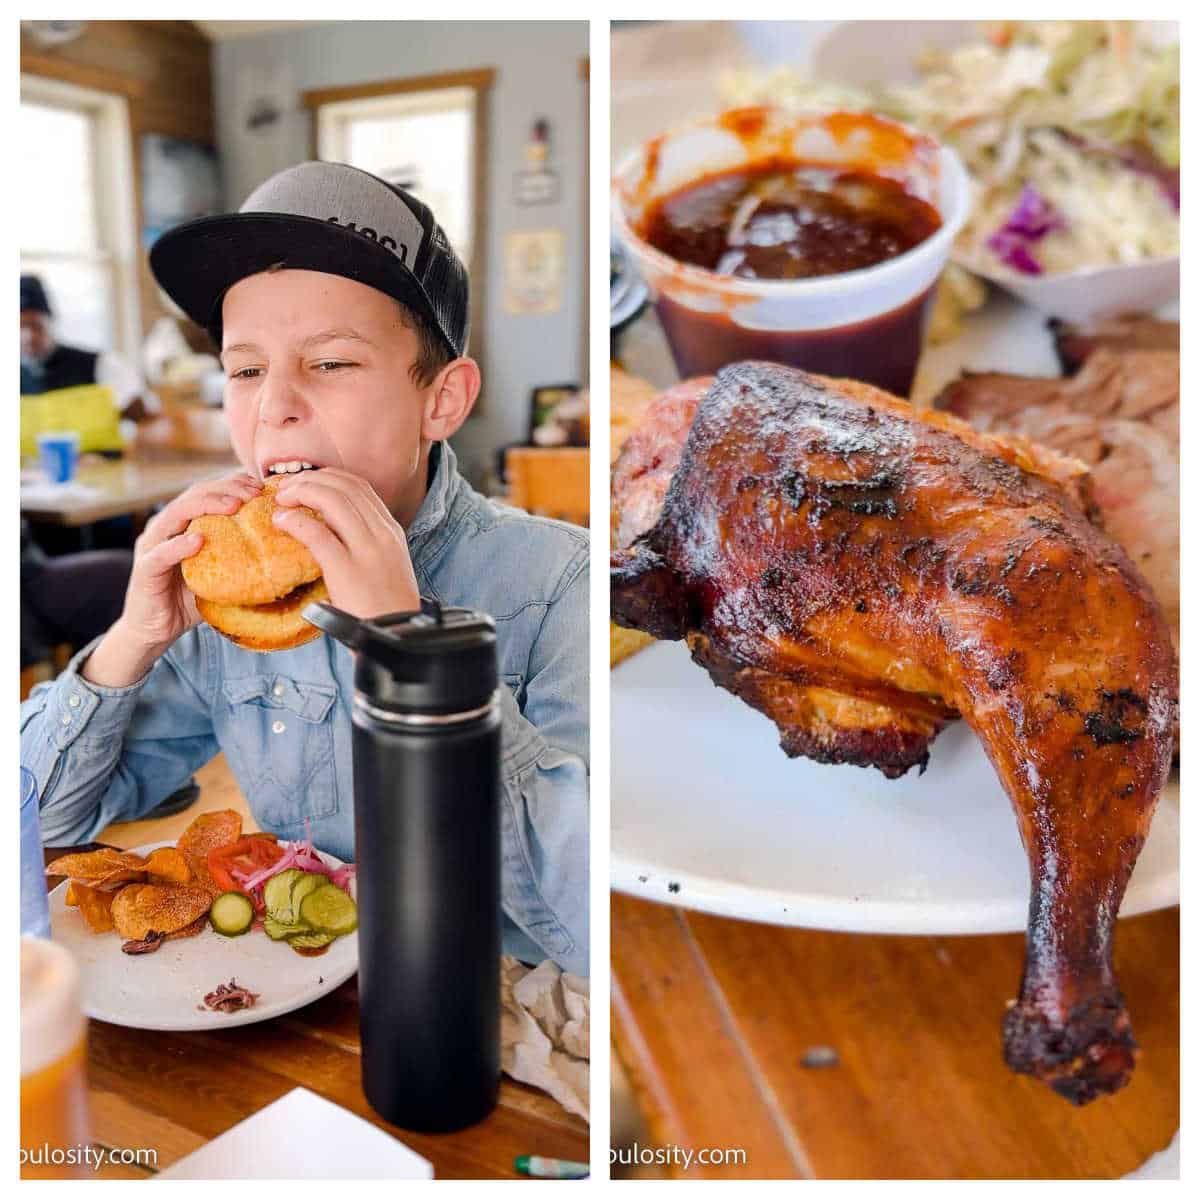
    Restaurants in Whitefish

    After visiting Whitefish quite a few times now, we’ve eaten some GREAT food. Our favorites are:

    • Craggy Range – Bar food, and Jessica, the bartender is my FAVORITE.
    • Latitude 48 Bistro – Pricey, but they have great martinis, great food, and a fun atmosphere in the basement.
    • The Boat House – This is in the Lodge at Whitefish Lake, and is a higher end atmosphere. We’ve had Thanksgiving dinner here and it was a pretty penny but it was delicious. We’ve also had dinner and drinks here often, and are always pleased.
    • The Palace – This is a bar, and they had $4 burgers that were incredible! Love supporting places like this that have good food, affordably.
    • Jalisco Cantina – Mexican food, that has wonderful cocktails and tacos!
    Boy eating bbq at Piggyback BBQ in Whitefish.

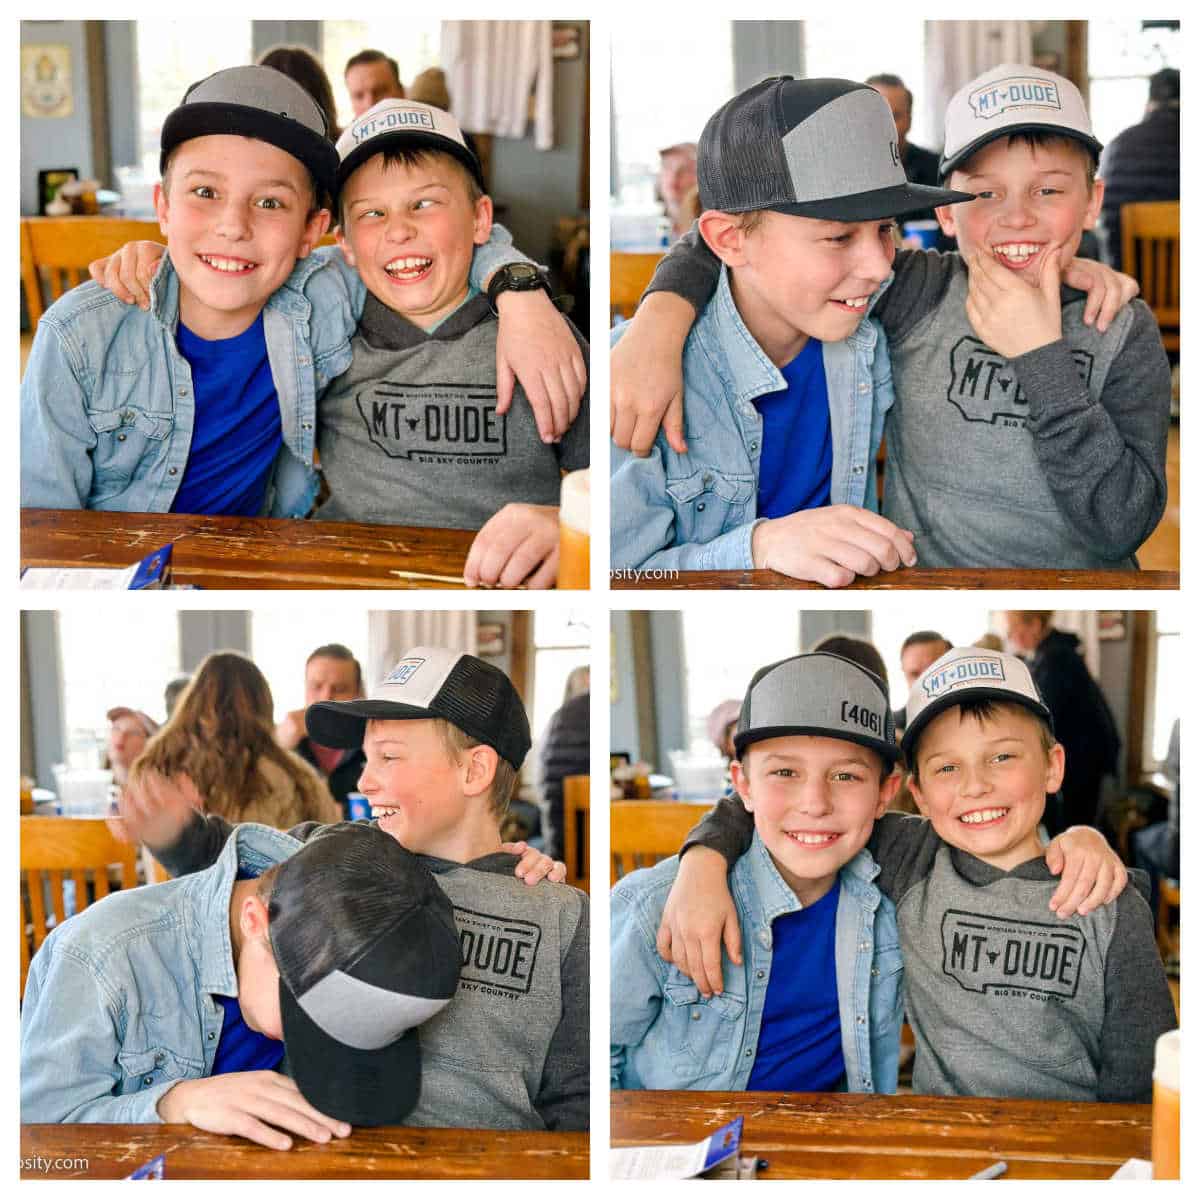
    While waiting for our lunch, we have to keep ourselves entertained… and the boys are usually really good at that. It’s either this or play UNO and Old Maid while we wait for food to help pass the time. (I recommend keeping cards in your purse so you can play while you wait.)

    Boys smiling at the camera, laughing, in a 4 image collage.

    Wrapping Up our Weekend Trip to Whitefish Montana

    It was a quick trip to Whitefish, and we definitely didn’t get to do everything that we wanted to do, so we’ll be going back. Will we stay at The Lodge at Whitefish again? I don’t know. Would we? YES. Will we try something else so we can share it with you? We just may. Stay tuned for more travel ideas in Montana. We can’t stay home, and we know you’ll love visiting the places we do too.

    Book at The Lodge at Whitefish Lake
    What is there to do at Lodge at Whitefish Lake?

    Depending on the time of year, there are many things you can do at Lodge at Whitefish Lake. In the winter, there are snow sports, hot tubs, S’mores Outdoors, family movie nights, dining, and more! In the summer, the lake is great for water sports, and the pool and outdoor areas are full of activities. If you’re looking for relaxation, the spa is also an amazing amenity.

    How much does it cost to stay at Lodge at Whitefish Lake?

    This depends on a few things: the time of year, the type of room you reserve, and who you book it through. We found it to be more affordable during the winter months, than in the summer months.

    Is parking available at Lodge at Whitefish Lake?

    Yes! Valet parking was offered upon arrival but self-parking, near the condos, was available as well.

    What are some of the property amenities at Lodge at Whitefish Lake?

    Free wifi, a restaurant that serves breakfast, lunch, and dinner, hot tubs and pools, a bar area, live music, free wine tastings, a spa, and family-friendly activities.

    Pork Steaks in the Oven

    April 10, 2023

    Baked BBQ Pork Steaks on white plate

    These baked BBQ pork steaks in the oven are so easy and just like our slow cooker pork steaks, this is one that can be made with little effort, showing you how to bake!

    Baked bbq pork steaks on white plate.

    Why You’ll Love These Baked Pork Steaks

    If you have pork steaks or pork shoulders (or blade steaks) sitting in your freezer or refrigerator, then you may have happened upon here while trying to find one of the BEST pork steak recipes you can find, for an easy dinner recipe.

    Some pork recipes are grilled, some cooked in a cast iron pan with gravy drippings, some in a slow cooker, like this slow cooker bbq pulled pork, and more! But baking is by far our favorite way to have bbq pork steaks, with no marinade required!

    When I shared how to cook steak in the oven, and how easy it is to get a melt-in-your-mouth steak with that process, I knew you’d love seeing how to bake all different kinds of steaks.

    I think you’re in the right place and that you’re going to love how easy and how delicious this pork steak recipe is. Serve them with these Dr. Pepper Baked Beans and your dinner will be incredible.

    If you also saw my slow cooker bbq pork steaks recipe, then you may already know that cooking them slowly, over a longer period of time makes the pork steak meat literally fall off of the bone.

    But when you need something a bit quicker, baking pork steaks in the oven is an alternative that definitely won’t disappoint you and will also leave you with tender pork steaks.

    The day that I made these to take photos for the blog, I only made two steaks, as it was just the right amount for what we needed that day…however I’ve created the recipe in the recipe card below to reflect 4 pork steaks, as that would be more common for a family of 4.

    What is a Pork Steak?

    Pork steaks are a section of a hog that’s cut from the shoulder, and /or butt. Some grocery stores or butcher shops have pork steaks ready for you. However, if you are not able to find them, you can ask them to cut pork shoulder or pork butt in to steaks for grilling.

    Recipes like this are perfect examples of classic old-fashioned dinner ideas.

    Uncooked pork steaks sitting on packaging.

    What is the Difference Between Pork Chops and Pork Steaks?

    Since pork steaks come from the shoulder and or butt area of a hog, the pork chops are cut from the loin section. Pork chops like these Baked Pork Chops, tend to be lean than pork steaks and can sometimes be more “dry” than pork steaks, where pork steaks tend to have more fat around the meat to help make them juicy. Now, if you have pork chops instead, this fried pork chops recipe is easy to make and frying them can add so much flavor!

    Ingredients for Pork Steaks in the Oven

    All you’ll need for these delicious, tender porks steaks are:

    • Pork Steaks – As many as you’ll need to serve.
    • Salt – This is optional, and remember that your barbeque sauce could have salt in it.
    • Pepper – This is also optional, and it’s important to keep in mind how spicy the bbq sauce is that you’re using.
    • BBQ Sauce – your favorite kind will do! We love using Sweet Baby Rays.

    How to Cook Pork Steak

    Now of course you don’t have to cook pork steaks with bbq sauce, but for us, it’s really hard to cook them/eat them any other way.

    Feel free to have fun creating sauces and using different spices for your pork steaks, but if you’re wanting to bake your steaks in the oven, then this is a great reference to find out how long to cook them.

    You can find the full recipe card with an ingredient list and instructions at the bottom of this post.

    Start by preheating your oven to 400º and then cover your pork steaks with salt and pepper (if desired).

    PRO TIP: You can even pound your pork steaks with a meat tenderizer before seasoning them if you want to make sure they’re super tender.

    4 image collage of baked pork steaks.
    1. Next, line a baking pan (large enough to fit the number of steaks you’re cooking, so they don’t overlap) with aluminum foil for easy cleaning, and then drizzle a layer of barbeque sauce on the aluminum foil where you’ll place each steak.
    2. Place your steaks down on the foil and sauce.
    3. Then, cover steaks with the remaining bbq sauce.

    How Long Should You Cook Pork Steaks in the Oven?

    1. Bake the pork steaks uncovered for 50-60 minutes, (on the middle rack) or until the internal temperature of the steaks reaches 145 degrees.

    NOTE: Oven temperatures can vary, and some have reported that they prefer baking at 350 for 50-60 minutes, or checking the internal temp after 30 minutes to avoid over-cooking. I’ve even used different ovens and have found myself, cooking them for shorter/longer times, so it’s best to check to see what works best for yours.

    Cut bbq pork steaks with a piece on a fork.

    Expert Tips:

    • Flexible: You can cook one pork steak up to as many as you want/need, as long as they fit in the baking pan you plan to use, and if you have enough bbq sauce to cover them. You can even pop some hot dogs in the oven for the kids, since you bake those at the same temperature. (Just not as long!)
    • Dinner Meal Plan: Cook more than you need, and serve the leftovers, sliced, on bbq nachos, on a side salad to make it an entree, or as a sandwich!

    Recipe FAQs

    What temperature do you cook pork steaks?

    Bake pork steaks at 400° for 50-60 minutes.

    Should pork steaks rest before serving?

    Although it’s not a must, it is a great idea to allow it to rest for a few minutes before serving to all of the juices to set in before slicing.

    What should the internal temperature be of cooked pork steaks?

    The internal temperature of cooked pork steaks should reach at least 145°F before eating.

    How to Store

    Refrigerate: If you have leftover pork steaks, it’s best to allow them to cool and then place in an airtight container, in the refrigerator for 3-4 days.

    Freeze: You can freeze leftover pork steaks in a freezer-safe container for up to 3-4 months.

    Thaw: Thaw the pork steaks in the refrigerator overnight.

    Reheat: Sometimes reheating cooked pork steaks can make them dry. So if reheating in the oven, place the pork steaks in a baking pan (with raised sides) and pour about ¼ cup of broth in the bottom, to help add moisture to the steaks while reheating.

    What Side Dishes to Serve with Pork Steaks

    Side dishes that go with bbq pulled pork are often delicious with pork steaks too! This KFC coleslaw is a staple side dish for pork recipes but I also LOVE Pasta Salads!

    This creamy corn casserole recipe, Amish Potato Salad or this old-fashioned potato salad (or this cauliflower potato salad for low-carb eaters), and this Cornbread Salad.

    But, adding some ground beef to baked beans lately has been a winner too!

    Meal Planning for the Week?

    Since the oven is hot, consider making burgers in the oven too, so you can eat on them all week! Just re-heat and serve! Or, making these cube steaks in the slow cooker is so easy!

    More Pork Recipes

    We love having pork steaks and pork chops around here. They’re so easy and actually pretty affordable. Here are our favorite pork recipes that you don’t want to miss…

    • BBQ Baked Boneless Pork Chops
    • Sweet & Smokey Grilled Pork Chops
    • Baked Pork Chops & Veggies in the Oven
    • Ribs on the Grill: Chipotle Apple Butter Ribs

    Recipe

    BBQ pork steaks cooked in the oven, that are on a white plate.
    Print Pin
    4.64 from 406 votes

    BBQ Pork Steaks in the Oven

    These BBQ pork steaks in the oven are so easy. Season, sauce and bake at 400° F. for delicious, tender and juicy pork steaks.
    Course Main Course
    Cuisine American
    Prep Time 10 minutes minutes
    Cook Time 50 minutes minutes
    Total Time 1 hour hour
    Servings 4 steaks
    Calories 208kcal
    Author Jessica Burgess

    Equipment

    • Large Baking Sheet rimmed

    Ingredients

    • 4 pork steaks or pork shoulders
    • salt to taste
    • pepper to taste
    • 16 ounce bottle of barbecue sauce I use Sweet Baby Rays

    Instructions

    • Prep: Preheat oven to 400 degrees
    • Season: Rub salt and pepper on both sides of each pork steak if desired
      4 pork steaks or pork shoulders, salt, pepper
    • Cover Pan: Line a baking pan (large enough to fit the number of steaks you're cooking, so they don't overlap) with aluminum foil.
    • Sauce the Pan: Drizzle half a bottle of barbeque sauce on the aluminum foil where you'll place each steak.
      16 ounce bottle of barbecue sauce
    • Sauce the Steaks: Place your steaks down on the foil and sauce, and then cover steaks with remaining bbq sauce.
    • Bake: Bake the pork steaks at 400 degrees, uncovered for 50-60 minutes, (on the middle rack) or until the internal temperature of the steaks reaches 145 degrees.
      NOTE: Oven temperatures can vary, and some have reported that they prefer baking at 350 for 50-60 minutes, or checking the internal temp after 30 minutes to avoid over-baking.

    Video

    Notes

    Storage of Leftovers:
    Refrigerate: If you have leftover pork steaks, it’s best to allow them to cool and then place in an airtight container, in the refrigerator for 3-4 days.
    Freeze: If you’d like to freeze leftovers, allow them to fully cool, and store in a freezer-safe container for 3-4 months.
    Thaw: Thaw the pork steaks in the refrigerator overnight.
    Reheat: Sometimes reheating cooked pork steaks can make them dry. So if reheating in the oven, place the pork steaks in a baking pan (with raised sides) and pour about ¼ cup of broth in the bottom, to help add moisture to the steaks while reheating.

    Nutrition

    Serving: 1steak | Calories: 208kcal | Protein: 28g | Fat: 9g | Saturated Fat: 3g | Cholesterol: 89mg | Sodium: 66mg | Potassium: 499mg | Calcium: 9mg | Iron: 0.7mg

    The BEST Tuna Salad Recipe

    April 9, 2023

    two tuna salad sandwiches stacked on top of one another

    This tuna salad recipe will become your new favorite! It’s not your boring, everyday tuna salad. The ingredients in this are mind-blowing and will change your tuna salad life. Just read the comments! It’s not just me saying that!

    Quick Overview: In only 10 minutes, this easy recipe will become what you consider, the best tuna salad recipe! It ranks right up there with the BEST Chicken Salad Recipe and this Avocado BLT.

    Tuna sandwiches, stacked on top of one another

    Why You’ll Love This Recipe

    During the summer months, tuna salad sandwiches are one of my favorite summer recipes to make for a lunch recipe. (But you can have it for main course too! Especially after being outside all day on a hot day!) It’s a great sandwich to rotate between ham salad sandwiches and egg salad sandwiches!

    Plus, they’re easy, and don’t require heating up the kitchen!

    You can also use the tuna salad to top a bed of lettuce with, eat with crackers and so much more!

    Which Type of Tuna is Best?

    It’s so nice to be able to keep a can of tuna in the pantry for those last minute meals, like this tuna pasta salad recipe and this tuna casserole, and for this tuna recipe, you can use whatever kind of tuna you prefer: albacore, tuna with olive oil, etc.

    However, I think the best kind of tuna is white tuna in water, in case you find that helpful! (See “substitutions” and FAQs below if you decide to use something other than what I used!)

    [feast_advanced_jump_to]

    Ingredients for this Tuna Salad Recipe

    I’ve had and have made tuna salad sandwiches many different ways over the years but I keep coming back to the classic tuna salad that uses simple ingredients, and that’s what I want to share with you today!

    ingredients for tuna salad on table

    See the recipe card below for full ingredients and instructions.

    • Canned tuna: For this recipe we choose solid white albacore tuna in water and flaked it after draining. You may use other canned tuna if you have a preference.
    • Real mayonnaise: Mayo is used as a binder for the ingredients to come together in perfect harmony. There are many options for mayo. For this recipe we prefer to use real mayonnaise. Elevate this recipe by using mayo made with olive oil!
    • Sweet pickle relish: You may substitute dill relish or even chop your own favorite pickles!
    • Red onion: Depth and savory flavor profile.
    • Celery: Celery brings a fresh crunch to this elevated dish.
    • Fresh lemon juice and flat-leaf parsley: Both of these ingredients elevate this dish and bring a freshness to the recipe.
    • Dried chives and garlic powder: Chives elevate and enhance the flavor profile of this delicious salad.
    • Kosher salt and ground black pepper: Salt and pepper are perfect companions for tuna!

    Substitutions

    1. If you choose canned tuna packed in oil, you may want to reduce the mayonnaise to ¼ cup.
    2. You may use a number of mayonnaise options including mayo alternatives, such as Miracle Whip, plant based mayo, avocado oil mayo, plain Greek yogurt, etc.
    3. You may use dill relish or your own minced sweet pickles or dill pickles instead of sweet relish if you prefer less sweetness.
    4. If you are averse to red onion, try substituting green onion, diced apples or grapes!
    5. Lime juice instead of lemon juice. (I haven’t tried this but I’m sure it would have great flavor!)

    Variations

    • Make a tuna melt: Simply make the tuna salad as stated, and then make it like a grilled cheese sandwich!
    • Tuna Lettuce Wrap: Serve this recipe on a bed of lettuce or in one giant romaine lettuce leaf as a wrap!
    • Additional Mix-in ideas: Looking to kick things up a notch? Here are some extra ingredients I’ve added to tuna salad before, that you may want to try: hot sauce, curry powder (like the flavors in our curry egg salad), garlic clove – chopped, (or garlic powder) a teaspoon of dijon mustard (or so), red bell pepper, or fresh dill!

    How to Make This Tuna Salad Recipe

    In only 10 minutes you’ll have delicious tuna salad ready for bread, a croissant or even eat with crackers!

    drained tuna placed in glass bowl
    Pour drained tuna in glass bowl
    mayo, onion, celery and relish added to bowl
    Add mayo, onion, relish, celery & lemon juice
    1. Drain the water from the tuna and place in a medium mixing bowl.
    2. Next, add ⅓ cup real mayonnaise, ¼ cup sweet pickle relish, 2 tablespoons red onion, minced, 1 stalk celery, minced, and 1 tablespoon of lemon juice to the mixing bowl of tuna.
    herbs & seasonings added to bowl
    Add herbs & seasonings
    tuna mixed with ingredients in bowl
    Stir to combine
    1. Then add 1 tablespoon flat-leaf parsley, 1 teaspoon dried chives, 1 teaspoon garlic powder, ¼ teaspoon kosher salt, and ½ teaspoon ground black pepper.
    2. Combine together using a rubber spatula or spoon. Be sure all of the ingredients are well blended.
    tuna salad on lettuce leaf, on top of bread slice

    Hint: To elevate and add heat to this delicious recipe, add 1 small minced jalapeno!

    close up of tuna salad on bread

    Recipe FAQs

    When it comes to tuna and even tuna salad, there may be some questions that you have. Here are answers to the most common questions:

    What mixes well with canned tuna?

    Canned tuna mixes so well with so many things. Mayo, mashed avocado, lettuce salad, pasta, breadcrumbs, eggs, and so much more. Some of these items mixed in with tuna, make amazing dishes such as tuna salad, tuna casseroles, avocado toast, and even tuna patties.

    What can I add to canned tuna to make it better?

    Fresh herbs, seasonings, spices, creamy bases, and veggies for a crunch, are always good options to add to canned tuna to make it better! Using tuna as a protein like you would other proteins like salmon and chicken can be a great idea.

    Why does restaurant tuna salad taste better?

    If you find that your tuna at home doesn’t taste as good as it does when eating at a cafe, diner, or restaurant, it’s possibly because the tuna salad was made earlier, and it has allowed the flavors to combine and settle together in the refrigerator. Try making your tuna salad in advance, and then not only will the flavors have time to blend, but it will be a quick meal idea too!

    What can I use in tuna instead of mayo?

    Greek yogurt, plain yogurt or Miracle Whip can be a substitute for mayo in tuna, if desired. If looking for a vegan option though, a vegan mayo can be used. Mashed avocado can also be a great substitute for a creamy base.

    Should I rinse canned tuna before using?

    No need to rinse canned tuna before using it. It’s safe to eat right out of the can unless it’s in oil, and then you may want to rinse it.

    Is tuna in oil better than water for tuna salad?

    This is a personal preference and it could also depend on how you’re serving or using the canned tuna. Tuna in oil can add a slightly different flavor and more calories. Tuna in water could reduce the calories and help capture the true tuna flavor.
    The texture of tuna with oil is something to think about, compared to water as well. As far as blending canned tuna with other ingredients, oily tuna can blend well with the other creamy ingredients too.

    Tuna salad sandwich with crackers on plate

    What to Serve with Tuna Salad

    Tuna Sandwich: You can enjoy the tuna salad on only slices of bread, or you can top the tuna salad sandwich with: crisp lettuce, bacon (you can even do bacon cooked in the air fryer or turkey bacon), a slice of onion, avocado halves (or slices), a drizzle of balsamic vinegar, fresh veggies or more fresh herbs, or even top with potato chips for an extra “crunch!”

    Tuna Salad: This is delicious when served with crackers or even your favorite chips. (You could even use sliced peppers or sliced cucumbers to dip if going low-carb.) It’s also delicious when served on top of a leafy green salad.

    Storage

    You may store this tuna salad in the refrigerator using an airtight container, for up to 5 days!

    Due to the fact that there is mayonnaise in this recipe, refrigerate after 2 hours for food safety reasons.

    Top Tip

    If you choose a solid white canned tuna, you may need to flake the meat after you drain the water.

    Related Recipes

    If you loved this classic recipe, then you’ll also love this egg salad recipe, this chicken grilled cheese, and this fried peanut butter and jelly!

    Recipe

    two tuna salad sandwiches stacked on top of one another
    Print Pin
    5 from 92 votes

    The BEST Tuna Salad Recipe

    This tuna salad recipe is the best and will become your new favorite! Red onion, sweet pickle relish, celery, and a few simple spices will combine for INCREDIBLE flavor!
    Course Main Course, Salad, Side Dish
    Cuisine American
    Prep Time 10 minutes minutes
    Cook Time 0 minutes minutes
    Total Time 10 minutes minutes
    Servings 4 sandwiches
    Calories 266kcal
    Author Jessica Burgess

    Ingredients

    • 12 ounces can tuna, drained
    • ⅓ cup real mayonnaise see substitutions in post
    • ¼ cup sweet pickle relish see substitutions in post
    • 2 Tablespoons red onion, minced
    • 1 stalk celery, minced
    • 1 Tablespoon lemon juice
    • 1 Tablespoon flat-leaf parsley
    • 1 teaspoon dried chives if desired
    • ½ teaspoon garlic powder
    • ¼ teaspoon kosher salt
    • ½ teaspoon ground black pepper

    Instructions

    • Drain the water from the tuna and place in a medium mixing bowl.
    • Next, add ⅓ cup real mayonnaise, ¼ cup sweet pickle relish, 2 tablespoons red onion, minced, 1 stalk celery, minced, and 1 tablespoon of lemon juice to the mixing bowl of tuna.
    • Then add 1 tablespoon flat-leaf parsley, 1 teaspoon dried chives, 1 teaspoon garlic powder, ¼ teaspoon kosher salt, and ½ teaspoon ground black pepper and combine together using a rubber spatula. Be sure all of the ingredients are well blended.
    • Serve on your favorite bread or a bed of lettuce with crackers. Enjoy!

    Video

    Notes

    TIP: If you choose a solid white canned tuna, you may need to flake the meat after you drain the water.
    Storage: Store this tuna salad in the refrigerator using an airtight container, for up to 5 days. Especially since there is mayonnaise in this recipe, refrigerate after 2 hours for food safety reasons.

    Nutrition

    Serving: 1sandwich | Calories: 266kcal | Carbohydrates: 8g | Protein: 21g | Fat: 17g | Saturated Fat: 3g | Polyunsaturated Fat: 9g | Monounsaturated Fat: 4g | Trans Fat: 1g | Cholesterol: 44mg | Sodium: 719mg | Potassium: 296mg | Fiber: 1g | Sugar: 5g | Vitamin A: 1188IU | Vitamin C: 12mg | Calcium: 32mg | Iron: 1mg

    Fried Peanut Butter and Jelly Sandwich

    April 4, 2023

    Fried peanut butter and jelly sandwich, sliced on white plate.

    This Fried Peanut Butter and Jelly Sandwich takes your classic pb&j recipe to the next level. The outside is golden brown, and inside the two slices of bread is gooey peanut butter combined with warm jelly.

    Made like a grilled cheese sandwich (and our chicken grilled cheese) it’s cooked on the stovetop over medium-low heat, to get the crispy bread. It’s the perfect easy lunch idea or even a warm breakfast recipe.

    Fried peanut butter and jelly sandwich on a white plate.
    [feast_advanced_jump_to]

    We all love the pb&j from childhood, and now, with this method, you can still have the famous sandwich but with a twist, with a delicious, buttery coating.

    Why You’ll Love this Recipe

    • Crispy & Creamy: The texture of this sandwich is completely different than simply spreading peanut butter and jelly on two pieces of bread. The golden, crispy, outside texture combines perfectly with the inside, creamy texture.
    • Restaurant Style: If you ever watch shows that feature fun and different recipes, this fried peanut butter & jelly feels like something you’d find at a “must-visit” diner.
    • Ready in minutes: With a regular pb&j only taking a few minutes, don’t be intimidated by the extra step of frying or grilling! It will only take a few minutes to cook the sandwich on both sides.
    Sliced friend peanut butter and jelly sandwich on white plate, surrounded by milk jars and strawberries.

    Fried PB&J Ingredients & Variations

    The beautiful thing about this sandwich is that you can use your favorite ingredients that you love using to make a peanut butter and jelly, and then add one more ingredient (butter).

    Ingredients for fried peanut butter and jelly sandwich.
    • Bread – There are so many options for bread. Brioche, sliced white bread, wheat, or your favorite sandwich bread.
    • Peanut Butter – Crunchy or creamy, or even a substitute like Nutella or your favorite nut butter will work too.
    • Jelly – Strawberry or grape jelly work, or you can even use your favorite flavor of jam.
    • Butter – Using spreadable butter is recommended so it slides across the bread easier. Or, if you have stick butter, melt it gently to make it smooth to spread easier. Salted butter is a great option because it adds that hint of salt with all of the sweetness.

    How to Make a Fried Peanut Butter and Jelly Sandwich

    *Be sure to see the recipe card below for the full ingredients list & instructions!*

    Steps 1-4 image collage of how to make a friend peanut butter and jelly.
    1. Add Peanut Butter – Spread peanut butter on one side, of one slice of bread.
    2. Spread Jelly – Then, spread jelly on one side, of the other slice of bread.
    3. Butter the Bread – Place the coated sides of the bread together, so they form a classic pb&j. Next, coat the outside of both sides of the sandwich, with butter and place on a skillet, and cook over medium-high heat for 3-4 minutes or until the side facing down, is a golden brown.
    4. Toast the Bread – Flip once golden, and cook the other side for 3-4 minutes, or until golden brown. Serve!
    Fried, whole, peanut butter and jelly sandwich on white plate.

    Tip: Sprinkle with a little powdered sugar if desired for an extra sweet treat.

    Sliced fried peanut butter and jelly sandwich on white plate.

    Recipe Pro Tips

    • Multiple Sandwiches – If making multiple sandwiches, make as many sandwiches as you need, up until the point of adding them to a skillet. Using a griddle (a much larger cooking surface) place all of the assembled sandwiches on the griddle at the same time, in a single layer, to cook them at the same time. This way, you’re not making one at a time, which can be time-consuming.
    • Fun Additions. Love bananas on your peanut butter sandwich? Slice bananas to place on the peanut butter, or add other fun items like marshmallow fluff or honey or syrup like in our peanut butter and syrup sandwich, bacon, or even sprinkles!

    Recipe FAQs

    Should peanut butter and jelly sandwiches be toasted?

    They don’t have to be but they’re delicious when toasted. But frying them in a pan is ideal, rather than using a toaster because the jelly and peanut butter can melt out.

    What is the best bread for PB&J?

    We think sliced white bread is the best for pb&j but brioche is a delicious option too.

    Do you use smooth or crunchy peanut butter in PBJ?

    This is a personal preference, however, crunch peanut butter can make the sandwich “unbalanced” so the bread can slip around more, due to the nuts.

    Is jam or jelly better for PB&J?

    Either one works but jam will slide on more smooth, as jelly can be a little “bumpy” causing the bread to slide around a little more.

    More Sandwich Recipes

    If you love classic sandwiches and fun recipes to make for lunch, you’ll love these reader favorites too:

    • Fried Bologna and Egg Sandwich
      Fried Bologna and Egg Sandwich
    • two tuna salad sandwiches stacked on top of one another
      The BEST Tuna Salad Recipe
    • Hot ham and cheese sandwich on white plate
      Hot Ham and Cheese Sandwiches
    • egg salad on croissant
      The BEST Egg Salad Recipe

    Recipe

    Fried peanut butter and jelly sandwich, sliced on white plate.
    Print Pin
    5 from 7 votes

    Fried Peanut Butter and Jelly Sandwich

    A fried peanut butter and jelly sandwich is your classic pb&j, cooked on the stovetop with butter, giving it a crispy outside with a warm and gooey inside.
    Course Main Course, Snack
    Cuisine American
    Prep Time 5 minutes minutes
    Cook Time 5 minutes minutes
    Total Time 10 minutes minutes
    Servings 1 sandwich
    Calories 326kcal
    Author Jessica Burgess

    Ingredients

    • 2 slices bread Your favorite sliced sandwich bread
    • 1 ½ Tablespoon peanut butter smooth or crunchy
    • 1 ½ Tablespoon jelly or jam
    • 1 Tablespoon butter

    Instructions

    • Add Peanut Butter – Spread peanut butter on one side, of one slice of bread.
    • Spread Jelly – Then, spread jelly on one side, of the other slice of bread.
    • Butter the Bread – Place the coated sides of the bread together, so they form a classic pb&j. Next, coat the outside of both sides of the sandwich, with butter and place on a skillet, and cook over medium-high heat for 3-4 minutes or until the side facing down, is a golden brown.
    • Toast the Bread – Flip once golden, and cook the other side for 3-4 minutes, or until golden brown. Serve!

    Notes

    Multiple Sandwiches – If making multiple sandwiches, make as many sandwiches as you need, up until the point of adding them to a skillet. Using a griddle (a much larger cooking surface) place all of the assembled sandwiches on the griddle at the same time, in a single layer, to cook them at the same time. This way, you’re not making one at a time, which can be time-consuming.
     

    Nutrition

    Serving: 1sandwich | Calories: 326kcal | Carbohydrates: 36g | Protein: 7g | Fat: 17g | Saturated Fat: 8g | Cholesterol: 30mg | Sodium: 430mg | Potassium: 153mg | Fiber: 2g | Sugar: 8g | Vitamin A: 350IU | Vitamin C: 0.9mg | Calcium: 77mg | Iron: 2mg

    Hamburger Hashbrown Casserole

    April 3, 2023

    Hamburger hashbrown casserole in baking dish with ladle resting in it.

    This hamburger hashbrown casserole recipe is full of creamy and cheesy goodness and has so much flavor with the seasonings and the peppers and onions. It’s a casserole recipe that’s amazing as a main dish recipe that the whole family will love, or even as a hearty side dish recipe that’s great for the holidays or potlucks!

    Hamburger hashbrown casserole in baking dish with spoon resting in it.

    There’s something so comforting about seeing a hashbrown casserole on the dinner table. It’s usually full of cheese, shredded hashbrowns, or diced potatoes, and finished with a creamy soup and seasonings.

    Ground beef dinners like this are classic old-fashioned comfort food recipes.

    This easy meal is no different. But what makes this recipe better than others, is that it has the flavors of the peppers and onions, for that perfect hint of pepper flavor on top of all of the other amazing flavors going on.

    Now, if you’re looking for a dish that doesn’t have meat, these crock pot cheesy potatoes may be for you! Or, this sausage casserole in the slow cooker with kielbasa is a similar dish, that uses a different type of meat.

    [feast_advanced_jump_to]

    Ingredients Needed

    Labeled ingredients on counter for hamburger hashbrown casserole.
    • 2 pounds ground beef
    • 2 teaspoons cooking oil
    • 1 teaspoon black pepper, divided
    • 2 teaspoons salt, divided
    • 1 teaspoon garlic powder
    • 2 cups frozen seasoning blend
    • 2 – 10.5 ounce cans cream of mushroom soup
    • 12 ounce can evaporated milk
    • 30 ounce package frozen hashbrown potatoes – if you have cubed hash browns, you’ll also love this party potatoes recipe.
    • 4 Tablespoons butter, melted
    • 2 cups cheddar cheese, shredded (divided)
    • 1 cup mozzarella cheese, shredded 

    Substitutions

    This recipe can be flexible if you prefer certain flavors, types of meat or you simply only have specific items on hand. Here are some suggestions that you may find helpful:

    • Cheese – we love using cheddar and mozzarella for this recipe but feel free to use your favorite types of melty cheese instead. Or, you could also try using canned cheddar cheese soup or
    • Meat – you can use ground chicken, ground sausage, or your favorite ground meat substitute, instead of this ground beef casserole, if you prefer. (In case you want to use it for these other ground beef dinner ideas.)
    • Soup – Cream of chicken soup instead of cream of mushroom soup would also be a great soup to use if you’d rather have that.
    • Potatoes – although we highly recommend using frozen shredded hashbrowns, you could also use frozen diced potatoes instead.

    How to Make Hamburger Hashbrown Casserole

    *Be sure to see the recipe card below for the full ingredients list & instructions!*

    Before Beginning: Heat oven to 375 degrees, grease a 9 x 13 inch casserole dish, and remove hashbrowns from the freezer so they can thaw while you’re prepping other things.

    Steps 1-4 on how to make hashbrown hamburger casserole.
    1. Place oil and ground beef in a medium to large skillet. Brown ground beef over medium heat until the beef is just done and is not pink, about 5 minutes. Make sure to break beef into small pieces while cooking.
    2. Once the ground beef is done cooking, drain the meat and return to the skillet.
    3. Stir in 1 ½ teaspoons salt, ½ teaspoon black pepper, garlic, and seasoning blend.
    4. Cook for an additional 5 minutes stirring frequently to make sure seasonings are evenly distributed.
    Steps 5-8 of making hashbrown hamburger casserole.
    1. Then stir in half (1 cup) of the cheddar cheese, and stir to mix in.
    1. In a medium bowl combine the cans of mushroom soup with the evaporated milk. Mix together until smooth. You can do this with a mixer but a fork also works well. 
    1. Spread the ground beef mixture into the bottom of the greased 9 x 13 inch pan.
    2. Pour the soup mixture over the beef mixture in the pan. Spread out the soup mixture with a spoon or spatula to make sure it covers the beef evenly.
    Steps 9-12 of how to make hamburger hash brown casserole.
    1. In a small bowl, mix the remaining salt (½ teaspoon) and pepper (½ teaspoon) with the melted butter.
    1. Pour over the partially thawed hash browns that are in a large mixing bowl. Toss to coat the hash browns in the butter mixture.

    Pro Tip: If you have excess water, discard this, instead of mixing it with the melted butter and seasonings.

    1. Evenly spread the buttered hash browns onto the soup mixture.
    1. Bake in the preheated oven for 45 minutes to 1 hour or until the edges are bubbly and light golden brown and the center is hot. Then, after baking for one hour, sprinkle the cheddar and mozzarella cheese on top of the casserole and bake for an additional 5 minutes until the cheese is melted.
    Baked hamburger hashbrown casserole in glass baking dish.

    Allow to Rest: Let the hashbrown hamburger casserole rest for 5 minutes before serving.

    Ladle holding hamburger hashbrown casserole above the baking dish.

    Recipe Pro Tips

    • For a smaller batch: This recipe can easily be halved and baked in an 8 ½ X 4 ½ in (6 cup) loaf pan. Cook for 40 minutes at 375 before adding cheese when doing this. 
    • Make ahead: This dish is easy to make the day before. To do this layer the beef, soup, and potatoes then cover and refrigerate. When ready to cook the next day, cover the pan with foil and bake at 375 degrees for 45 minutes. Then remove the foil and bake for 15 minutes until bubbly and cooked through. Then add cheese and bake for an additional 5 minutes to melt the cheese. 

    Recipe FAQs

    Do I have to thaw frozen hash browns for casserole?

    It’s best for them to thaw before baking hashbrowns in a casserole. If you pull them out of the freezer right when starting this recipe, they’ll thaw while making the ground beef and prepping the layers.

    Why is my hash brown casserole soggy?

    If it’s soggy it could be because the hashbrowns were not thawed, and the water from the hashbrowns has caused the casserole to be wet.

    Do you cook meat before putting it in a casserole?

    Yes! Cooking the ground beef before adding it to the baking in the dish is important.

    Hamburger hashbrown casserole serving on white dinner plate.

    Storage

    Allow the casserole to cool to room temperature and then refrigerate any leftovers of the hamburger hash brown casserole in an airtight container, or cover with plastic wrap, for up to 3 days. To reheat, microwave in a microwave-safe dish.  

    Fork holding a bite of hamburger hashbrown casserole.

    What to Serve with this Casserole

    So many things can go great with this delicious casserole. A green salad recipe or even something like this roasted garlic broccoli is delicious with it! Or, if you want to keep things really simple, see how to make canned green beans taste better!

    Similar Recipes

    If you love simple recipes like this one, you’ll also love these reader favorites that are similar with ground beef or potatoes:

    • beef stroganoff in black skillet
      Easy Beef Stroganoff Recipe
    • french onion beef casserole scooped up out of white dish
      French Onion Beef Casserole
    • Dutch oven beef stew in white pot.
      Dutch Oven Beef Stew
    • Fiesta Ranch potato wedges on plate next to a small bowl of ranch dressing.
      Fiesta Ranch Baked Potato Wedges

    Did you make this? I’d be so grateful if you left a “star” rating below to let me know what you thought! Then, the next time you need a quick and easy recipe, come back to Fantabulosity to browse all of my easy recipes!

    Recipe

    Hamburger hashbrown casserole in baking dish with ladle resting in it.
    Print Pin
    5 from 13 votes

    Hamburger Hashbrown Casserole

    Hamburger hashbrown casserole is a delicious and hearty main dish or side dish recipe that uses simple ingredients but has so much flavor. Perfect for an easy dinner or a potluck!
    Course Main Course
    Cuisine American
    Prep Time 15 minutes minutes
    Cook Time 45 minutes minutes
    Total Time 1 hour hour
    Servings 8 servings
    Calories 680kcal
    Author Jessica Burgess

    Ingredients

    • 2 pounds ground beef
    • 2 teaspoons cooking oil
    • 1 teaspoon black pepper divided
    • 2 teaspoons salt divided
    • 1 teaspoon garlic powder
    • 2 cups frozen veggie seasoning blend Frozen vegetable mixture of onions, red pepper, green pepper, celery, and parsley, or similar.
    • 2 – 10.5 ounce cans cream of mushroom soup
    • 12 ounce can evaporated milk
    • 30 ounces frozen shredded hashbrowns
    • 4 Tablespoons butter melted
    • 2 cups shredded cheddar cheese divided
    • 1 cup shredded mozzarella

    Instructions

    • Heat oven to 375 degrees, grease a 9 x 13 inch pan, and remove hash browns from the freezer so they can thaw while you're prepping the rest.
    • Place oil and ground beef in a medium to large skillet. Cook ground beef over medium heat until the beef is just done and is not pink, about 5 minutes. Make sure to break beef into small pieces while cooking.
    • Once done drain meat and return to the skillet.
    • Stir in 1 ½ teaspoons salt, ½ teaspoon black pepper, garlic, and seasoning blend. Cook for an additional 5 minutes stirring frequently to make sure seasonings are evenly distributed. Then stir in half (1 cup) of the cheddar cheese.
    • Spread beef mixture into the bottom of the greased 9 x 13 inch pan.
    • In a medium bowl combine the cans of mushroom soup with the evaporated milk. Mix together until smooth. You can do this with a mixer but a fork also works well. 
    • In a large bowl mix the remaining salt (½ teaspoon) and pepper (½ teaspoon) with the melted butter and pour over the partially thawed hash browns. Toss to coat the hash browns in the butter mixture.
    • Pour the soup mixture over the beef mixture in the pan. Spread out the soup mixture with a spoon or spatula to make sure it covers the beef evenly.
    • Evenly spread the buttered hash browns onto the soup mixture.
    • Bake for 45 minutes to 1 hour or until the edges are bubbly and light brown and the center is hot.
    • Once done cooking sprinkle cheddar and mozzarella cheeses on top and bake for an additional 5 minutes until cheese is melted.
    • Let the casserole rest for 5 minutes before serving.

    Nutrition

    Serving: 1serving | Calories: 680kcal | Carbohydrates: 31g | Protein: 36g | Fat: 46g | Saturated Fat: 22g | Polyunsaturated Fat: 2g | Monounsaturated Fat: 16g | Trans Fat: 2g | Cholesterol: 147mg | Sodium: 1067mg | Potassium: 877mg | Fiber: 3g | Sugar: 5g | Vitamin A: 2966IU | Vitamin C: 14mg | Calcium: 427mg | Iron: 4mg

    Cowboy Stew

    April 1, 2023

    Cowboy stew in white dutch oven.

    Cowboy Stew: A hearty soup made of ground beef, kielbasa, bacon, and hearty vegetables, is the perfect soup recipe to feed a crowd or to serve on a cold day. Serve this stew with cheesy biscuits or one of these salads for a crowd, and you’ll have a delicious, rounded-out meal!

    Cowboy stew in white dutch oven on the counter.

    What you’ll love about cowboy stew is that it’s not as thick as say, hearty stew recipes such as this beef stew recipe. It’s lighter but yet hearty enough to fill up those bellies for a busy day dinner or a comforting dish for Sunday dinner.

    If you’re looking for more dishes for the hungry cowboys in your life (or just those who love cowboy favorites) you’ll also love these cowboy burgers and this cowboy queso.

    [feast_advanced_jump_to]

    Ingredients Needed

    Labeled ingredients for cowboy stew on counter.

    You’ll need the following simple ingredients:

    • 6 slices bacon, chopped
    • 1 pound ground beef (See more of our other ground beef dinners.)
    • 1 (12 ounce) package kielbasa sausage, sliced into rounds
    • 1 medium onion, diced
    • 3 garlic cloves, minced
    • 2 teaspoons Chili powder – Adjust spices to your taste, for more heat add additional chili powder. 
    • 1 teaspoon smoked paprika
    • 1 teaspoon salt
    • ½ teaspoon black pepper
    • 14.5 ounce can Fire Roasted tomatoes
    • 15 ounce can Great North beans or other white beans, drained and rinsed
    • 4 ounce can chopped green chilies, with liquid
    • 32 oz carton of beef stock (4 cups)
    • 1 cup frozen corn
    • 1 cup frozen peas
    • 3 medium Yukon Gold potatoes (approximately 1 ½ cups), diced – if you have a large back of potatoes you may also want to make this loaded potato soup.
    • Garnishes:  fresh parsley, shredded Monterey jack cheese, sour cream

    Substitutions & Variations

    • Ground Beef: You can use different kinds of meat, such as ground turkey, ground venison, ground elk, ground chicken, or your favorite ground meat, instead of ground beef. Or, you could also try ground Italian sausage in soup.
    • Beans: You can use other white beans, such as pinto beans instead of great white northern beans.
    • Potatoes: If you’d like to use red potatoes instead of Yukon gold, you can! However, we do not recommend using Russet potatoes as they tend to get too soft in stews.
    • Additions: If you’d like to add other times to this cowboy soup, you absolutely can. Some add cumin (which you could add about 1 teaspoon if you love that cumin flavor.) You may want to add items such as black beans, hot sauce for that extra kick, red kidney beans, chili beans, and more!

    Equipment

    • A Dutch oven or large stock pot is needed for this easy cowboy stew recipe.

    How to Make Cowboy Stew

    *Be sure to see the recipe card below for the full ingredients list & instructions!*

    Bacon cooking in white dutch oven.
    Image 1
    Kielbasa cut up and sautéing in white dutch oven.
    Image 2
    1. In a dutch oven or large pot cook bacon until crisp.  Using a slotted spoon remove bacon and place on paper towel lined plate to drain.
    2. Add sliced kielbasa to pan with bacon drippings and cook over medium-high heat until browned.  Using a slotted spoon remove the kielbasa and place it on a plate with bacon.  
    Cooked ground beef in dutch oven.
    Image 3
    Sausage, ground beef and bacon in white dutch oven.
    Image 4
    1. Add ground beef, onion and garlic to pan and cook over medium heat, breaking up the beef with a spoon or spatula and cook until brown and no longer pink.  Drain excess grease.
    2. Return bacon and kielbasa to the pot and add chili powder, smoked paprika, salt, and pepper to the ground beef mixture.  Stir for one to two minutes until combined.
    Beans, tomatoes, and meat in white dutch oven.
    Image 5
    Items mixed together with beef stock in dutch oven.
    Image 6
    1. Next, add fire roasted tomatoes, drained beans, canned green chilies, and beef broth to pan.  Stir to combine. Bring to a boil then lower eat and simmer.
    Potatoes added to cowboy stew in dutch oven.
    Image 7
    Frozen corn and peas added to cowboy stew in dutch oven.
    Image 8
    1. Once the beef mixture is at a steady simmer, add potatoes and continue simmering for 20 minutes until the potatoes are soft and cooked through. 
    2. Add frozen corn and peas and simmer for an additional 5 minutes until cooked through.  
    Dutch oven full of cowboy stew.

    How to Serve Cowboy Stew

    If desired, garnish with chopped fresh parsley, crushed tortilla strips, cheese, or sour cream.

    One serving of cowboy stew in white bowl, sitting on wooden pot holder.

    Recipe Pro Tips

    • Make ahead. As with so many soup recipes, like our chili recipe or even taco soup recipe, sometimes soups can be even better the next day because the flavors have had more time to blend together. This cowboy stew recipe is no different.
    • Freeze a batch. Soups are one of those dishes that are amazing to make and freezer for a quick meal later. Freezing cowboy stew is a great option for future meal planning or a way to store leftovers. See the tips below for freezing tips.

    Recipe FAQs

    What is cowboy stew made of?

    Cowboy stew is made of bacon, ground beef, and kielbasa for a hearty base. It then usually had vegetables, mixed in with a tomato broth and spices.

    Where did cowboy stew originate?

    Cowboy stew came from Texas! Although this Texas cowboy stew recipe could also be a cowboy soup, it’s called cowboy stew because you combine all of the ingredients in to a stew.

    Is cowboy stew the same as beef stew?

    Cowboy stew had thinner consistency, where beef stew tends to have a thicker consistency.

    Storage

    Refrigerate: Store any leftovers in an airtight container in the refrigerator for 3-4 days.

    Freeze: To freeze any leftovers, once cooled, pour cowboy stew in to freezer-safe container and freeze for up to 3 months.

    Thaw: When ready to enjoy the frozen stew, place in the refrigerator to thaw. Or, place stew in a stockpot (if you can get it out of the container) and turn on low, and cook until heated through.

    What to Serve with Cowboy Soup

    Cheddar biscuits are delicious, served with this soup. You’d also love having something fun like Texas Toast pizzas as a side with this hearty dish!

    Or, if you love sliders, try serving these sloppy joe sliders with it, as we haven’t met a cowboy yet that doesn’t love them!

    More Soup Recipes

    If you love soup recipes like this old-fashioned cowboy stew, you’ll also love these:

    • Homemade chili in small bowl with Fritos and cheese on top.
      Simple Chili Recipe
    • Southern chicken and dumplings in bowl.
      Chicken and Dumplings
    • Homemade Chicken Broth
    • Loaded Potato Soup in small crock, next to fabric napkin.
      Loaded Baked Potato Soup Recipe

    Did you make this? I’d be so grateful if you left a “star” rating below to let me know what you thought! Then, the next time you need a quick and easy recipe, come back to Fantabulosity to browse all of my easy recipes!

    Recipe

    Cowboy stew in white dutch oven.
    Print Pin
    5 from 3 votes

    Cowboy Stew

    This cowboy stew recipe is made with hearty meats such as ground beef, kielbasa and bacon, potatoes and vegetables. It's easy, and so delicious for a comforting lunch or dinner.
    Course Soup
    Cuisine American
    Prep Time 20 minutes minutes
    Cook Time 25 minutes minutes
    Total Time 45 minutes minutes
    Servings 8 servings
    Calories 536kcal
    Author Jessica Burgess

    Equipment

    • Dutch Oven or large stock pot

    Ingredients

    • 6 slices uncooked bacon chopped
    • 1 pound ground beef
    • 12 ounces kielbasa sausage sliced into rounds
    • 1 medium onion diced
    • 3 cloves garlic minced
    • 2 teaspoons chili powder
    • 1 teaspoon smoked paprika
    • 1 teaspoon salt
    • ½ teaspoon pepper
    • 14.5 ounces can fire roasted tomatoes
    • 15 ounces canned great northern beans or other white beans drained and rinsed
    • 4 ounces canned chopped green chilies, with liquid
    • 32 ounces beef stock or 4 cups
    • 1 cup frozen corn
    • 1 cup frozen peas
    • 3 medium Yukon Gold potatoes (approximately 1 ½ cups), diced
    • Optional Garnishes:  fresh parsley, shredded monterey jack cheese, tortilla chips, sour cream

    Instructions

    • In a dutch oven or large pot cook bacon until crisp.  Using a slotted spoon remove bacon and place on paper towel lined plate to drain.
    • Add sliced kielbasa to pan with bacon drippings and cook over medium heat until browned.  Using a slotted spoon remove kielbasa and place on plate with bacon.
    • Add ground beef, onion and garlic to pan and cook over medium heat, breaking up the beef with a spoon or spatula and cook until brown and no longer pink.  Drain excess grease.
    • Return bacon and kielbasa to the pot and add chili powder, smoked paprika, salt and pepper to the ground beef mixture.  Stir for one to two minutes until combined.
    • Next, add fire roasted tomatoes, drained beans, canned green chilies, and beef broth to pan.  Stir to combine. Bring to a boil then lower eat and simmer.
    • Once beef mixture is at a steady simmer, add potatoes and continue simmering for 20 minutes until potatoes are soft and cooked through. 
    • Add frozen corn and peas and simmer for an additional 5 minutes until cooked through.  
    • Optional:  Garnish with chopped fresh parsley, cheese, or sour cream

    Nutrition

    Serving: 1serving | Calories: 536kcal | Carbohydrates: 37g | Protein: 28g | Fat: 31g | Saturated Fat: 11g | Polyunsaturated Fat: 3g | Monounsaturated Fat: 14g | Trans Fat: 1g | Cholesterol: 81mg | Sodium: 1178mg | Potassium: 1098mg | Fiber: 7g | Sugar: 4g | Vitamin A: 625IU | Vitamin C: 26mg | Calcium: 90mg | Iron: 4mg

    Ugly Duckling Cake

    April 1, 2023

    Slice of ugly duckling cake on white plates.

    This ugly duckling cake recipe is a rich buttery fruit cocktail cake that starts with a yellow cake mix… But nobody will ever know it’s that easy!

    Recipes like this are exactly why old-fashioned cake recipes are still so popular today.

    ugly duckling cake

    When I’m in charge of a dessert recipe for parties, I almost always consider a cake recipe.

    Cakes are so easy and always crowd-pleasers. My personal favorites are creamy lemon bundt cake, ding dong cake, this easy carrot cake, and gooey butter cake!

    Why You’ll Love This Recipe:

    • Not only is this ugly duckling cake delicious, but it’s the perfect party dessert because it’s a conversation starter! Who doesn’t want to take about a cake that’s called an “ugly duckling cake!?”
    • Fruit cocktail cake (aka ugly duckling cake), is a classic southern dessert that does not disappoint. It’s a refreshing cake which makes it perfect for summer or hot weather!
    • You guys know me, I’m all about amazing food without the difficulty! This cake recipe is just that. You’ll only need basic ingredients and minimal baking skills to get the perfect fruit cocktail cake. It’s also very similar to this vintage Granny Cake.

    Why is it Called an “Ugly Duckling Cake?”

    You know, I’m not 100% sure… but I assumed it was because it wasn’t necessarily a beautiful cake on the outside but the inside was absolutely beautiful. (In looks and in taste!)

    Plus, the outside of the cake has coconut flakes that could resemble a duck? That’s all just a guess but I’ll go with it! How about you?

    The inside of the cake also has a nice little red surprise from the cherries in the fruit cocktail and the kids find that so fun!

    fruit cocktail cake with coconut

    Ingredients for Duckling Cake

    • One box yellow cake mix
    • 1 – 16 ounce can of fruit cocktail undrained
    • 2 ½ cups of coconut (flaked and divided)
    • two eggs
    • ½ cup brown sugar
    • ½ cup butter
    • ½ cup of granulated/white sugar
    • ½ cup of evaporated milk

    Step-by-Step Directions

    1. Heat oven to 325 degrees f.
    2. Grease 9 x 13″ baking dish and set aside.
    3. In large mixing bowl, combine cake mix with can of fruit cocktail, one cup of coconut, and eggs (Image 1).
    4. Beat with an electric mixer at medium speed for two minutes.
    5. Pour into prepared cake pan and then sprinkle with brown sugar (Image 2).
    Ugly duckling cake steps 1 and 2.
    1. Bake for 45 minutes or until cake springs back when touched.
    2. In a small saucepan bring butter, sugar, and evaporated milk to a boil (Image 3).
    3. Boil for two minutes stirring constantly remove from heat and stir in remaining coconut. Spread over hot cakes (Image 4). Served warm or cool!
    Steps to make ugly duckling cake.

    Expert Tips and FAQs

    How do I store yellow duckling cake?

    You can store yellow duckling cake in an airtight container on the counter at room temperature for a couple of days. Storing in the refrigerator may change the texture of the cake.

    Can I freeze fruit cocktail coconut cake?

    Yes! You can freeze this cake for up to 6 months. For the best flavor and texture, you’re going to want to make sure that the cake is completely thawed before serving.

    Can I use white cake mix?

    No, white cake mix and yellow cake mix have different flavors and textures. Yellow cake mix will work much better for this recipe. There’s more about the differences on white vs yellow cake mix in this post!

    What’s the difference between yellow and white cake mix?

    Yellow cakes are made with egg yolks or whole eggs while white cake mixes are made with egg whites. In addition to that, yellow cake mix uses whole-wheat pastry flour while white cake mix uses all-purpose flour. These differences add body, flavor, and a more dense texture to the yellow cake mix.

    ugly duckling cake with cake mix

    What to Top an Ugly Duckling Cake with

    There are so many yummy options for the top of the cake if you wish to do so! Here are great ideas to consider:

    • cherries
    • cool whip
    • vanilla ice cream
    • extra coconut flakes
    • pecans
    • almond slivers

    They’d all taste amazing on top of the warm cake! Feel free to branch out from these options as well.

    fruit cocktail cake with coconut

    More Easy Dessert Recipes You’ll Love

    If you love easy desserts like this one, especially if you love coconut, then you’ll also love these magic cookie bars! Or, if the fruit desserts are your favorite, then you’ll also love our pineapple cake!

    Recipe

    Slice of ugly duckling cake on white plates.
    Print Pin
    5 from 17 votes

    Ugly Duckling Cake

    This Ugly Duckling Cake is a rich and buttery fruit cocktail cake made with a yellow cake mix and coconut to create a flavorful, moist dessert!
    Course Dessert
    Cuisine American
    Prep Time 15 minutes minutes
    Cook Time 45 minutes minutes
    Total Time 1 hour hour
    Servings 12 slices
    Calories 457kcal
    Author Jessica Burgess

    Ingredients

    • 1 Box Yellow cake mix
    • 16 ounce fruit cocktail undrained 1 can
    • 2 ½ cups flaked coconut divided
    • 2 eggs
    • ½ cup brown sugar
    • ½ cup granulated sugar
    • ½ cup butter
    • ½ cup evaporated milk

    Instructions

    • Preheat the oven to 325 degrees f
    • Grease 9 x 13" pan and set aside.
    • In large mixing bowl, combine cake mix with can of fruit cocktail, one cup coconut, and eggs.
    • Beat with an electric mixer at medium speed for two minutes.
    • Pour into prepared cake pan and then sprinkle with brown sugar (Image 2).
    • Bake for 45 minutes or until cake springs back when touched.
    • In a small sauce pan bring butter, sugar, and evaporated milk to a boil.
    • Boil for two minutes stirring constantly remove from heat and stir in remaining coconut.
    • Spread over hot cake. Served warm or cool!

    Video

    Notes

    How do I store yellow duckling cake? 
    You can store yellow duckling cake in an airtight container on the counter at room temperature for a couple of days. Storing in the refrigerator may change the texture of the cake.
    Can I use white cake mix? 
    No, white cake mix and yellow cake mix have different flavors and textures. Yellow cake mix will work much better for this recipe. There’s more about the differences on white vs yellow cake mix in this post!

    Nutrition

    Serving: 1slice | Calories: 457kcal | Carbohydrates: 64g | Protein: 5g | Fat: 22g | Saturated Fat: 16g | Polyunsaturated Fat: 1g | Monounsaturated Fat: 3g | Trans Fat: 0.4g | Cholesterol: 51mg | Sodium: 408mg | Potassium: 207mg | Fiber: 4g | Sugar: 44g | Vitamin A: 380IU | Vitamin C: 1mg | Calcium: 140mg | Iron: 2mg

    Rotisserie Chicken Stock

    March 30, 2023

    Rotisserie Chicken Stock in mason jar.

    Rotisserie Chicken Stock: A great way to use a leftover carcass from a rotisserie chicken, to get the most out of it! Combine the leftover rotisserie chicken carcass with water, vegetables or vegetable scraps, and herbs to create a homemade stock that’s full of so much flavor.

    Rotisserie chicken stock in mason jar, surrounded by other jars.

    It’s delicious in soup recipes like this homemade chicken soup, and even hearty recipes like chicken and noodles. Or, store it for later when you need it for an easy dinner recipe!

    There are different ways you can make homemade chicken broth, and the great thing about it is that it’s really flexible with the types of chicken, fresh vegetables, and herbs that you can use.

    For instance, we also use raw chicken when we make this whole chicken bone broth recipe. You could also use leftover bones from a cooked chicken (or even something like these smoked cornish hens or from a bone-in chicken thighs recipe.) But using a rotisserie chicken that you pick up from the grocery store, is a great way to utilize the leftovers after using the meat.

    [feast_advanced_jump_to]

    What does rotisserie broth taste like?

    The combination of chicken bones, vegetables, and herbs gives the stock a savory and slightly sweet flavor, with hints of garlic, bay leaves, and black pepper. The fresh thyme and parsley add a layer of herbaceousness to the broth, while the long simmering time helps to extract all of the flavors from the ingredients.

    Rotisserie Broth Ingredients

    Labeled ingredients on white counter, for rotisserie chicken stock.
    • 1 leftover rotisserie chicken carcass
    • 2 onions, roughly chopped and unpeeled
    • 2-3 carrots, roughly chopped and unpeeled
    • 2-3 stalks of celery, roughly chopped
    • 3-4 sprigs fresh thyme OR 2 teaspoons dried thyme
    • 4 garlic cloves, smashed and unpeeled
    • 2 bay leaves
    • ¼ cup fresh parsley leaves, roughly chopped
    • 1 teaspoon whole black peppercorns OR ½ teaspoon ground black pepper
    • 2 teaspoons Italian seasoning
    • 1 teaspoon salt, plus more to taste
    • 3 quarts water (12 cups of water), or fill up to the top of your pot

    Substitutions

    • Carrots: If you don’t have carrots, you can try using parsnips, turnips, or celery roots to add a similar earthy sweetness.
    • Celery stalks: Fennel or bok choy are a great substitute for a similar flavor and texture to celery.
    • Thyme: If you don’t have fresh, you can use dried thyme.
    • Garlic cloves: If you don’t have fresh garlic cloves, garlic powder, minced garlic, or roasted garlic can be used in this recipe.
    • Bay leaves: Try using dried thyme or dried oregano if you don’t have bay leaves on hand, to add a similar flavor.
    • Black peppercorns or ground black pepper: White peppercorns or red pepper flakes can be used in place of black peppercorns or ground black pepper to add a different heat and flavor.
    • Italian seasoning: You can substitute Italian seasoning with dried basil or dried rosemary for a similar flavor.
    • Fresh parsley leaves: You can use dried parsley instead or for a slightly different flavor, you can use fresh oregano.

    Equipment

    1. Large stockpot
    2. Fine mesh strainer or cheesecloth
    3. Ladle
    4. Airtight containers for storage (e.g. mason jars, plastic containers)
    5. Cutting board

    How to Make Leftover Rotisserie Chicken Stock

    *Be sure to see the recipe card below for the full ingredients list & instructions!*

    1. First, remove all the meat from the rotisserie chicken carcass, and set it aside for another use, such as this easy chicken pot pie casserole, a chicken caesar pasta salad or this chicken grilled cheese!

      Break the carcass into several pieces so it will fit in your pot, optional.
    Fresh herbs and vegetables in stock pot for chicken broth.
    Image 1
    Water added to vegetables, chicken and herbs for Rotisserie chicken stock.
    Image 2
    1. In a large stock pot, combine the chicken carcass pieces, onions, carrots, celery, garlic, bay leaves, black peppercorns, Italian seasoning, parsley, thyme, and salt.
    2. Then, fill the pot with water until the ingredients are completely covered. (This could be around 3 quarts of water, but this can vary depending on the size of your pot.)
    Cooked rotisserie chicken stock in stock pot.
    Image 3
    Drain vegetables and herbs from broth.
    Image 4
    1. Bring the water in the pot to a boil over high heat on the stove top, then reduce the heat to low and cover. Let this chicken stock simmer for at least 4 hours, or until the liquid has reduced by half and the vegetables are very soft.

    Tip: Note that the total time will vary slightly depending on how long you let the stock simmer on the stove. The longer it simmers, the more concentrated and flavorful it will become. After cooking, the stock will need to be strained and cooled, which will add additional time to the process.

    1. Once the rotisserie chicken stock has finished cooking, use a slotted spoon to remove the solids from the pot.
    2. Next, strain the liquid through a fine-mesh strainer to remove any remaining solids. Then, discard the solids.
    3. Now, taste the stock and add salt as needed to bring out the flavor, if desired. You may choose not to add more salt, so you can add salt to the recipe later, that you plan to use the stock for.
    Rotisserie chicken stock in glass pitcher.
    1. If not using the rotisserie chicken bone broth right away, let the stock cool to room temperature, and then transfer it to airtight containers and store in the refrigerator. See the tips below for freezing for later, to use in your favorite recipes.
    Close up of homemade rotisserie chicken stock.

    Recipe Pro Tips

    • Amount it makes: As a general rule, you can expect to yield about 8-12 cups of stock from a recipe like this, depending on the size of your pot and the concentration of the stock. If you cook the stock longer, you will be left with a more concentrated stock, but it will produce less liquid.
    • Flexible. This recipe is very flexible, so feel free to add other vegetables or herbs to the pot to suit your tastes. Some great options to consider might include mushrooms, rosemary, or sage. You could also add some crushed red pepper flakes for a spicy kick.
    Pouring homemade Rotisserie chicken stock in to mason jar.

    Recipe FAQs

    Can you use rotisserie chicken bones for stock?

    Yes! There’s so much flavor that can come from a rotisserie chicken, especially if it was cooked with seasonings. But the delicious broth that can come from any leftover skin left and the bones themselves, is fantastic.

    Can I use this stock in place of water in other recipes, such as soups or stews?

    This is a great stock to use in place of water in other recipes! However, keep in mind that if the recipe calls for salt, the broth will already have a saltiness to it, unlike water.

    Is chicken stock the same as chicken broth?

    They’re very similar but stock is usually created when using bones, and broth is usually made using the meat. However they are often used interchangeably.

    Spoonful of homemade rotisserie chicken stock being lifted out of mason jar.

    Storage

    • To store: To store leftover rotisserie chicken stock, it is best to let it cool to room temperature before transferring it to airtight containers. Some even pour stock in ice cube trays, so they can pop out small servings as needed.
    • Refrigerate: The stock can be stored in the refrigerator for up to 5 days, and to keep on hand to make recipes like my tortellini soup recipe.
    • To freeze: It can be stored in the freezer, in a freezer-safe container or freezer bag, for up to 3 months. it is recommended to leave enough headspace in the container to allow for expansion as the liquid freezes.
    • To thaw: When ready to use, simply thaw the stock in the refrigerator overnight and reheat it on the stove until hot and simmering.
    Mason jar full of rotisserie chicken stock.

    Recipes for Stock

    Looking for ways to use your new rotisserie chicken stock, other than a chicken noodle soup? We think you’ll love these ways to use chicken broth:

    • Chicken and gravy on top of mashed potatoes on white plates
      Chicken and Gravy Recipe
    • buffalo chicken soup in white bowl with green onions and chips
      Buffalo Chicken Soup Recipe
    • Instant Pot Chicken and Potatoes
      Instant Pot Chicken and Potatoes
    • White chicken chili in white bowl
      White Chicken Chili with Cream Cheese

    Did you make this? I’d be so grateful if you left a “star” rating below to let me know what you thought! Then, the next time you need a quick and easy recipe, come back to Fantabulosity to browse all of my easy recipes!

    Recipe

    Rotisserie Chicken Stock in mason jar.
    Print Pin
    5 from 10 votes

    Rotisserie Chicken Stock

    Make rotisserie chicken stock out of your bones instead of tossing them, using fresh vegetables and herbs, that you can use in soups and other recipes.
    Course Soup
    Cuisine American
    Prep Time 10 minutes minutes
    Cook Time 4 hours hours
    Total Time 4 hours hours 10 minutes minutes
    Servings 9 cups
    Calories 179kcal
    Author Jessica Burgess

    Equipment

    • Large stockpot
    • Fine mesh strainer
    • Ladle
    • Airtight containers for storage (e.g. mason jars, plastic containers)
    • Cutting board

    Ingredients

    • 1 rotisserie chicken carcass
    • 2 onions roughly chopped and unpeeled
    • 2-3 carrots roughly chopped and unpeeled
    • 2-3 celery stalks roughly chopped
    • 3-4 sprigs fresh thyme OR 2 teaspoons dried thyme
    • 4 cloves garlic smashed and unpeeled
    • 2 bay leaves
    • ¼ cup fresh parsley leaves roughly chopped
    • 1 teaspoon whole black peppercorns OR ½ teaspoon ground black pepper
    • 2 teaspoon Italian seasoning
    • 1 teaspoon salt plus more to taste
    • 3 quarts water (12 cups), or fill up to the top of your pot

    Instructions

    • First, remove all the meat from the rotisserie chicken carcass, and set it aside for another use. Break the carcass into several pieces so it will fit in your pot, optional.
    • In a large stock pot, combine the chicken carcass pieces, onions, carrots, celery, garlic, bay leaves, black peppercorns, Italian seasoning, parsley, thyme, and salt.
    • Then, fill the pot with water until the ingredients are completely covered. (This could be around 3 quarts of water, but this can vary depending on the size of your pot.)
    • Bring the water in the pot to a boil over high heat, then reduce the heat to low and cover. Let this chicken stock simmer for at least 4 hours, or until the liquid has reduced by half and the vegetables are very soft.
    • Once the rotisserie chicken stock has finished cooking, use a slotted spoon to remove the solids from the pot.
    • Next, strain the liquid through a fine-mesh strainer to remove any remaining solids. Then, discard the solids.
    • Now, taste the stock and add salt as needed to bring out the flavor, if desired. You may choose not to add more salt, so you can add salt to the recipe later, that you plan to use the stock for.
    • If not using right away, let the stock cool to room temperature, and then transfer it to airtight containers and store in the refrigerator. See the tips below for freezing.

    Notes

    Tip: The total time can vary depending on how long you let the stock simmer on the stove. 
    Amount it makes: As a general rule, you can expect to yield about 8-12 cups of stock from a recipe like this, depending on the size of your pot and the concentration of the stock. If you cook the stock longer, you will be left with a more concentrated stock, but it will produce less liquid.
    How to Store: There are refrigeration and freezer options for storing this broth. See post in the “Storage” section for more details.

    Nutrition

    Serving: 1cup | Calories: 179kcal | Carbohydrates: 5g | Protein: 32g | Fat: 4g | Saturated Fat: 1g | Polyunsaturated Fat: 1g | Monounsaturated Fat: 2g | Trans Fat: 0.04g | Cholesterol: 95mg | Sodium: 650mg | Potassium: 426mg | Fiber: 1g | Sugar: 2g | Vitamin A: 2456IU | Vitamin C: 6mg | Calcium: 51mg | Iron: 1mg

    20 Non-Candy Easter Basket Ideas

    March 28, 2023

    Easter graphic with text on image for Easter basket non candy ideas.

    Easter is one of the top holidays for kids, hands down. Egg hunting, baskets, and candy. So much candy. But honestly, there can be a bit too much candy.

    When filling a basket, it can be hard to find non-sugary options. Which is where this list of 20 non-candy Easter basket ideas comes in to save the day.

    Easter graphic with text on image for Easter basket non candy ideas.
    Non-Candy Easter Basket Ideas

    Make sure you check out our other Easter ideas here, to fill your holiday with fun things to try!

    Non-Candy Easter Basket Ideas for Toddlers

    Toddlers don't need too much sugar regardless, holiday or not. While a little candy every once in a while won't necessarily hurt a toddler, it's still better to stay away from it whenever possible. These non-candy Easter basket ideas for toddlers offer multiple basket fillers for little ones.

    Peekaboo Learning Farm 

    This bright, colorful toy will please kids who are learning how to grab and manipulate objects. The Peekaboo Learning Farm contains a series of colored barns that hide rubber farm animals inside. These make great Easter basket ideas. Toddlers will love opening them and finding out what animals are there to be found.

    Biscuit’s Pet & Play Easter: A Touch & Feel Book 

    Little kids love books, even if they can't really read just yet. But they love being read to, and it helps them develop language skills as well. The

    Biscuit’s Pet & Play Easter is a great book for toddlers who can touch the different textures and surfaces. Plus, Biscuit the pup is a classic children's character, and this is a perfect introduction to that little dog.

    Nesting Easter Eggs Toy 

    Toddlers love to stack things, and to put things into other things. This 

    Nesting Easter Eggs Toy allows them to do both to their heart's content. The cute, colorful plastic eggs have little faces on them that toddlers will be drawn to.

    6 Pack Wooden Percussion Musical Shake Eggs 

    To toddlers, toys are great, but toys that make noise are even better. Toddlers love to shake things around anyway, but any toy that gives them feedback is sure to be a hit. These Wooden Percussion Musical Shake Eggs are perfect. The bright, colorful eggs are on theme for Easter, and the fact that they are shakers mean toddlers won't be able to put them down.

    Lil’ Nibbles Textured Silicone Teether 

    Bunnies love carrots, historically. Now your toddler can love carrots as well, or at least the Lil’ Nibbles Textured Silicone Teether. This carrot-shaped teether will appeal to little ones pushing out teeth, and the bright colors and soft texture mean they will latch on to this teether happily.

    Educational Wooden Carrot Toys 

    This Wooden Carrot Toys Shape Size Sorting Matching Puzzle lets toddlers put carrots into holes all the live-long day. Plus, as they do it more and more, they will start to learn that certain carrots go into certain holes, which makes it a learning experience as well.

    Non-Candy Easter Egg Fillers

    Those plastic Easter eggs are an Easter mainstay, and always need to be filled. Candy is the easiest option, but since we're trying to avoid candy, something else will need to fill the void. What follows are a number of great non-candy fillers for those plastic eggs.

    60 PCS Fun Erasers 

    Here we have a whole collection of cute little Mini Novelty Tiny Take-Apart Puzzle Erasers for kids to play with. They can collect them, take them apart and put them together, even erase things with them, if they feel so inclined.

    Easter Slap Bracelets  

    Another thing kids love are little bracelets. The more brightly colored, the better. This Easter Slap Bracelets and Rubber Wristbands pack comes with a good assortment of rubber bracelets and slap bracelets, so there is sure to be something to please each of them.

    Mini Pop Keychain Fidget Toys 

    Kids love pop keychains. Basically reusable bubble wrap, these keychains are made of durable rubber. The Mini Pop Keychain Fidget Toys come in a variety of bright colors and fun shapes, so kids will be happy collecting and trading them.

    DIY Flower Garden Building Block 

    These DIY Flower Garden Building Block sets are high quality and come with a really nice assortment of flowers that can be put together by the kids. This bouquet of building block flowers will be so much fun once it's all put together.

    Easter Temporary Tattoos  

    Kids always love temporary tattoos, and they make perfect non-candy Easter egg stuffers, too. These cute little Easter tattoos are sure to please kids who will end the holiday with more than one piece of artwork on their arms. In terms of non-candy Easter ideas, you can't go wrong with tattoos.

    Non-Candy Easter Gifts

    Let's face it, a lot of gifts that go into Easter baskets aren't of the highest quality. Especially those pre-packed ones at grocery stores. But that doesn't have to be the case by any means. The following are all good quality toys or gifts that are on theme with the holiday, but that kids won't just toss out as soon as they are done pretending that they really like it.

    White Rabbit Animal Toy Building Set 

    The Lego Easter bunny is a great model for the Easter holiday. It's very cute, and kids will love building it. Plus, it can be converted to a couple of other models as well. Legos are perfect Easter gifts.

    Light Up Bunny Easter Bubble Wand 

    A bubble wand is a no-brainer, really. Kids love bubbles, and they will definitely love this Light Up Bunny Easter Bubble Wand. It lights up and shoots bubbles, and that's all they really need. When looking for good Amazon Easter gifts, a light-up bubble wand is a great way to go.

    Easter Bunny Go Fish Card Game  

    A fun game is always a welcome change, and Go Fish is a classic. This Easter Bunny Go Fish Card Game will give them something to do after the egg hunt and Easter lunch have ended.

    Easter Egg Toss 

    Another fun game for kids to play comes with this Easter Egg Toss.They can toss it back and forth, but they have to be gentle, and avoid breaking the egg.

    4 Pack Easter Wooden Puzzles 

    This one is perfect for the younger egg hunters out there. The 4 Pack Easter Wooden Puzzles for Kids are nice, quality wood puzzles with fun Easter scenes on them that little ones can put together.

    Non-Candy Easter Basket Ideas for Tweens and Teens

    Teens and Tweens aren't going to be happy with just some temporary tattoos, however. It usually takes a bit more to please them. Luckily, this list has several different options for a variety of non-candy Easter basket stuffers for tweens as well as teens.

    Burt’s Bees Easter Basket Stuffers  

    Tweens and teens love flavored lip balms, and tend to like Burt's Bees products as well. The Burt’s Bees Easter Basket Stuffers Spring Surprise Set scratches both of those itches with a couple nice Easter basket ideas for teens.

    LED Neck Reading Light 

    Staying up reading is something a lot of kids this age will do. If they are going to do it anyway, might as well do it right. The LED Neck Reading Light will help them read without straining their eyes, and it's rechargeable. Creative Easter baskets sporting a gift like this will go over very well.

    Emojinks Emoji Card Game 

    Kids love emojis. They just seem drawn to them. This Emojinks Emoji Card Game gives them something to play with their friends while comparing basket hauls after the egg hunt. A good card game is one of the most unique Easter gifts.

    Anti Blue Light Glasses

    These adorable blue light glasses are perfect for tweens and teens. They’re stylish, and affordable and we haven’t met a gal yet who wouldn’t love these! (Make sure you also check out some of the cutest accessories that SheIn has, that make perfect Easter basket gifts.)

    More Easter Ideas

    So there are plenty of options for people who want to keep the sugar levels down on Easter Sunday, regardless of the ages of the kids involved. While some candy is just fine, it's great to have options that aren't sugared up to keep everybody just a little bit calmer.

    For more Easter ideas, you’ll love these reader favorites:

    • A slice of strawberry heaven cake dessert on a plate.
      Strawberry Heaven
    • Strawberry Pound Cake on cake stand.
      Strawberry Pound Cake with Strawberry Glaze Icing
    • A slice of strawberry cheesecake poke cake on a round plate.
      Strawberry Cheesecake Poke Cake
    • A slice of burnt sugar cake on a round, vintage plate.
      Burnt Sugar Cake

    Old Fashioned Tuna Casserole

    March 27, 2023

    Old Fashioned Tuna Casserole on white plate.

    Old Fashioned Tuna Casserole: A delicious dish of a tuna mixture with cream of mushroom soup, cheese, and a few other simple ingredients baked in a baking dish. Casserole recipes are perfect for an easy dinner, for a potluck or to take in a meal care package for someone.

    Old fashioned tuna casserole on a white plate.

    Tuna is so versatile and can be used in so many dishes, warm or cold. We’ve used it in a tuna pasta salad, and in this tuna salad recipe, and they’ve both been extremely popular recipes, so I knew you’d love this old-fashioned tuna noodle casserole too.

    [feast_advanced_jump_to]

    Ingredients for Tuna Casserole

    Labeled ingredients for old fashioned tuna casserole.

    You’ll need the following for this old-fashioned tuna casserole:

    • 12 Ounces Wide Egg Noodles, Cooked Al Dente 
    • 2 – 5oz Cans Tuna (For a lighter tuna flavor use canned Albacore Tuna.)
    • 4 Tablespoons Butter, Melted
    • 2 Tablespoons Pimento Peppers (optional)
    • 1 Teaspoon Onion Powder
    • ½ Teaspoon Salt
    • ½ Teaspoon Pepper
    • 2 – 15.5oz Cans Cream of Mushroom
    • 1 Cup Sour Cream
    • 1 Cup Frozen Peas and Carrots
    • 1 Cup Cheddar Cheese
    • ½ Cup Milk
    • 1 Cup French Fried Onions

    Substitutions & Variations

    • French Fried Onions – you could use potato chips, buttered crackers (such as Ritz crackers), bread crumbs, or a combination of the three!
    • Vegetables – you can leave these out, or use one of the two, and could even use canned instead of frozen or fresh peas as I use in this easy homemade chicken pot pie.
    • Noodles – You don’t have to use egg noodles. You can use elbow noodles (like we used in this old-fashioned macaroni and tomatoes recipe) penne pasta, or your favorite type. Just make sure to cook them to al dente, or if cooked until soft, they’ll become mushy after baking in the oven.
    • Soup – if you only have cream of celery soup or cream of chicken soup, you could try using one of those instead.
    • Additional Ingredients – you could also try adding garlic powder, parmesan cheese, or your favorite spices and toppings.

    How to Make Tuna Casserole

    *Be sure to see the recipe card below for the full ingredients list & instructions!*

    1. Preheat the oven to 425 degrees and spray a 9 x 13 casserole dish with cooking spray.
    Tuna with other ingredients in glass mixing bowl.
    Image 1
    Mixed ingredients in glass mixing bowl.
    Image 2
    1. In a large mixing bowl stir together tuna, melted butter, pimento peppers, onion powder, salt, and pepper. 
    Cheese, vegetables, soup and other ingredients in glass mixing bowl.
    Image 3
    Mixed soup with vegetables and cheeses, in glass mixing bowl.
    Image 4
    1. Then add the cans of soup, sour cream, peas and carrots, cheese, and milk to the bowl. Mix well.
    Noodles added in to soup and vegetable mixture in glass mixing bowl.
    Image 5
    Egg noodles mixed in to soup and vegetable mixture in glass mixing bowl.
    Image 6
    1. Finally add the cooked noodles to the bowl and fold into the mixture. 

    Tip: Make sure the cooked noodles are cooked until al dente. If cooked too much, they’ll be mushy after baking in the oven.

    Tuna casserole mixture in baking dish.
    Image 7
    French fried onions sprinkled on top of tuna casserole in baking dish.
    Image 8
    1. Spread the mixture evenly in the casserole dish.
    2. Sprinkle fried onions over the top.
    3. Bake in the preheated oven for 15-20 minutes until warm all the way through and golden brown.
    Baked tuna casserole in baking dish.

    Recipe Pro Tips

    • Freezer Meal Plan. Make two batches or make in advance, and freeze for later for an easy dinner. This would fit perfectly in some of the dinner themes in my dinner theme system!
    • Bake in the middle of the oven. It’s best to bake on an oven rack in the middle of the oven so the top does not burn before heated through. If you noticed the french fried onions cooking too quick, without the casserole heated through, cover the dish with aluminum foil.
    Spoon rested in baking dish where tuna casserole was baked.

    Recipe FAQs

    Why is my tuna casserole so dry?

    It could be because the noodles sat too long and soaked up milk before baking, or perhaps the dish was too big and it allowed the liquid to cook out, instead of cook in to the casserole.

    How long does tuna casserole last in the fridge?

    It’s best to enjoy tuna casserole within 3-4 days from making.

    Does tuna casserole have to be refrigerated?

    It does! Once fully cooled, store covered, in the refrigerator.

    Spoonful of tuna casserole holding up above baking dish.

    Storage

    Refrigerator: Refrigerate leftover tuna casserole when it has come to room temperature, in an airtight container or covered in plastic wrap for 3-4 days. 

    To Freeze: You can freeze the casserole before or after cooking. When freezing, wrap the pan in two layers of aluminum foil and freeze for up to 6 months.

    To Thaw: Fully thaw the casserole in the refrigerator overnight, then bake as directed. 

    Plate of old fashioned tuna casserole.

    What to Serve with Tuna Casserole

    If you’re looking for a side dish to serve with this classic tuna casserole and family favorite, these are highly recommended:

    • A basket of homemade biscuits lined with a tea towel.
      Easy Homemade Buttermilk Biscuits
    • side salad on white plate drizzled with ranch
      The BEST Side Salad Recipe
    • Close up image of old fashioned pea salad in a bowl.
      Old Fashioned Pea Salad
    • A Bisquick cheddar biscuit, broken in half so you can see the fluffy texture inside.
      Bisquick Cheddar Biscuits

    Did you make this? I’d be so grateful if you left a “star” rating below to let me know what you thought! Then, the next time you need a quick and easy recipe, come back to Fantabulosity to browse all of my easy recipes!

    Recipe

    Old Fashioned Tuna Casserole on white plate.
    Print Pin
    4.88 from 8 votes

    Old Fashioned Tuna Casserole

    This old fashioned tuna casserole is easy to make, is a hearty and classic comfort food, and is a recipe that's perfect for dinner, a potluck or as a meal to make for a family in need.
    Course Main Course
    Cuisine American
    Prep Time 10 minutes minutes
    Cook Time 15 minutes minutes
    Total Time 25 minutes minutes
    Servings 6 servings
    Calories 524kcal
    Author Jessica Burgess

    Ingredients

    • 12 ounces wide egg noodles cooked, al dente
    • 2 – 5 ounce cans of tuna
    • 4 tablespoons butter melted
    • 2 tablespoons pimento peppers optional
    • 1 teaspoon onion powder
    • ½ teaspoon salt
    • ½ teaspoon black pepper
    • 2 – 15.5 ounce cans cream of mushroom soup
    • 1 cup sour cream
    • 1 cup frozen peas and carrots
    • ½ cup milk
    • 1 cup cheddar cheese
    • 1 cup french fried onions

    Instructions

    • Preheat the oven to 425 degrees and spray a 9 x 13 casserole dish with cooking spray.
    • In a large mixing bowl stir together tuna, butter, pimento peppers, onion powder, salt, and pepper.
    • Then add the cans of soup, sour cream, peas and carrots, cheese, and milk to the bowl. Mix well.
    • Finally add the cooked noodles to the bowl and fold into the mixture. 
    • Spread the mixture evenly in the casserole dish.
    • Sprinkle fried onions over the top.
    • Bake for 15-20 minutes until warm all the way through.

    Notes

    Bake in the middle of the oven. It’s best to bake on an oven rack in the middle of the oven so the top does not burn before heated through. If you noticed the french fried onions cooking too quick, without the casserole heated through, cover the dish with aluminum foil.
    To Store:
    Refrigerator: Refrigerate leftovers in an airtight container for 3-4 days. 
    To Freeze: You can freeze the casserole before or after cooking. When freezing, wrap the pan in two layers of aluminum foil and freeze for up to 6 months.
    To Thaw: Fully thaw the casserole in the refrigerator overnight, then bake as directed.

    Nutrition

    Serving: 1serving | Calories: 524kcal | Carbohydrates: 51g | Protein: 15g | Fat: 29g | Saturated Fat: 15g | Polyunsaturated Fat: 2g | Monounsaturated Fat: 6g | Trans Fat: 0.3g | Cholesterol: 112mg | Sodium: 509mg | Potassium: 295mg | Fiber: 3g | Sugar: 4g | Vitamin A: 3079IU | Vitamin C: 8mg | Calcium: 228mg | Iron: 2mg

    Biscoff Cupcakes

    March 25, 2023

    Close up photo of a light tan cupcake cut in half with Biscoff spread in the center and a fluffy buttercream swirl on top of the cupcake

    These delicious, from-scratch, Biscoff cupcakes combine a fluffy cupcake with Biscoff cookie flavor.

    Biscoff biscuits and the Lotus Biscoff spread, all mixed in with the easy cupcake batter and Biscoff buttercream frosting, will leave everyone asking for this easy cupcake recipe!

    A frosted cupcake has been drizzled with melted cookie butter and topped with a Biscoff cookie

    Speculoos cookies (or Biscoff cookies) are becoming increasingly popular and a household name. We’ve even made tons of Biscoff recipes using the Biscoff flavor, such as these Biscoff truffles and this Biscoff fudge.

    We’ve even made a Biscoff cheesecake and a No Bake Biscoff pie, that uses a Biscoff crust. So you can say we’re getting pretty comfortable with using this delicious cookie around here and can totally relate to other Biscoff lovers out there.

    [feast_advanced_jump_to]

    Biscoff Cupcake Ingredients

    Labeled ingredients for Biscoff Cupcakes and Biscoff Buttercream

    You’ll need the following to make this Biscoff cupcake recipe:

    Cupcakes:

    • ¾ cup unsalted butter, softened
    • ¾ cup soft brown sugar
    • 3 eggs
    • 1 cup all-purpose flour
    • 1 ¼ teaspoons baking powder

    Cupcake Filling:

    • 12 teaspoons Biscoff spread

    Biscoff Buttercream:

    • ¾ cup unsalted butter, softened
    • 2 cups powdered sugar
    • 1 cup Biscoff spread
    • 2 Tablespoons boiling water

    To decorate:

    • 4 Tablespoons Biscoff spread
    • 12 Biscoff cookies

    Pro Tip: We used soft brown sugar to add a touch of caramel flavor to the cupcakes since this is a great accompaniment to the caramelized/cookie butter flavor of the Biscoff itself.

    Substitutions

    Sugar: If you don’t have soft brown sugar, you can substitute white sugar.

    Equipment

    • Mixer: You can use a hand-held electric mixer to make the cupcake batter or a stand mixer fitted with the paddle attachment.
    • Corer: To core the cupcakes you can use a cupcake corer, sharp pairing knife or we have found an upturned piping nozzle to be the perfect size and sharp enough to remove the cupcake middle cleanly.

    How to Make these Biscoff Cupcakes

    1. Preheat the oven to 350°F. and line a 12-cup cupcake pan with cupcake liners.
    2. Add the butter and brown sugar to a mixing bowl and mix together on high speed until it’s fluffy.
    3. Add the eggs to the bowl and beat on a high speed until light and expanded.
    4. Combine the flour and baking powder and add it to the bowl, and then mix on a low speed until combined.
    A bowl holding creamed butter and sugar has had 3 eggs added to it and a hand mixer is nearby prepared to mix them in
    Flour and baking soda have been added to a mixing bowl with cupcake batter in it
    1. Divide the batter evenly between the 12 cupcake liners.
    A cupcake tin has 12 white cupcake papers waiting to be filled with cupcake batter
    A hand holding a cookie scoop is adding cupcake batter to the last of 12 cupcake liners in a cupcake tin
    1. Place the cupcake pan in the center of the preheated oven and bake for 18 minutes or until the cupcakes have risen and are a pale golden brown. Set aside to cool on a wire rack.

    Pro Tip: When properly baked, the cupcakes will have risen to the top of the cupcake liners, be a pale golden brown, and will spring back when gently touched with a finger.

    Butter and powdered sugar have been creamed together in the mixing bowl of a stand mixer
    Powdered sugar have been added to a bowl of creamed butter for buttercream frosting
    1. Briefly heat the 12 teaspoons of Biscoff spread in the microwave – just until it's a little runnier than usual, so it will be easier to fill the cupcakes with.
    2. Core the center from the cooled cupcakes and add a teaspoon of Biscoff spread to each hole.

    Pro Tip: We didn't replace the piece of cupcake we cut away as it can make the cupcake look a little lopsided. You can if you want to (or eat them!!).

    A hand is using a metal piping tip to remove the center of 12 baked cupcakes in preparation to fill them with cookie butter
    A hand is shown filling a cupcake with melted cookie butter spread

    How to Make the Biscoff Buttercream

    1. Add the softened butter to the bowl of a stand mixer fitted with the paddle attachment or to another type of bowl, to mix with hand mixer and beaters. Beat on a medium speed for 2-3 minutes until creamy. Then add the powdered sugar, half a cup at a time. Once all the powdered sugar has been added, beat on medium speed for a further 2 minutes.
    2. Next, add the Biscoff spread to the mixing bowl, increase the speed to medium-high and beat for 5 minutes.
    3. Add the boiling water and beat on a low speed, this will change the buttercream to a smoother consistency.

    Pro Tip: Adding boiling water to the Biscoff buttercream helps smooth it out so that it almost looks the texture of a Swiss meringue buttercream. However if you find the buttercream is too thin you can add the powdered sugar a tablespoon at a time. If it's too thick, add extra boiling water a teaspoon at a time to reach the consistency that you need.

    Biscoff spread has been added to a bowl with creamed butter and sugar in it
    The bowl of a stand mixer holds very light brown fluffy buttercream frosting
    1. Next, transfer the buttercream to a piping bag that’s fitted with a star nozzle. Pipe buttercream swirls on top of each cupcake.

    Pro Tip: A Wilton 1M piping nozzle was used to frost these Lotus Biscoff cupcakes.

    1. Warm the remaining Biscoff spread in the microwave for a few seconds or until it is pourable. Drizzle the warm Biscoff spread over the top of the cupcakes then add Biscoff cookies on top of each cupcake.
    A single cupcake is shown on a white plate and a piping bag of frosting is visible piping frosting onto the cupcake
    A spoon with melted cookie butter is drizzling the Biscoff spread over a frosted cupcake

    How to Serve

    Crush and sprinkle Biscoff cookie crumbs on top or add them whole as decoration (or a bit of both!) on top of the buttercream.

    These delicious Biscoff cupcakes would be amazing on a dessert table with these caramel cupcakes, or served with this iced caramel latte for the ultimate sweet pairing.

    A close up photo of a buttercream frosted cupcake that has been drizzled with melted cookie butter

    Storage

    In the refrigerator: You can store these cupcakes in an airtight container in the refrigerator for up to 3 days.

    In the freezer: Unfrosted Biscoff cupcakes can be frozen for up to 1 month, if stored properly in a freezer-safe container.

    A hand is placing a Biscoff cookie on a frosted cupcake that has been drizzled with Biscoff spread

    Delicious cupcakes like these won’t hang around long. They’re fun to make for a weekend treat or for even a birthday party, or to serve at a beautiful get-together for a girls’ get-together!

    A frosted cupcake topped with buttercream, a drizzle of Biscoff spread and a Biscoff cookie is centered with additional cupcakes visible in the background

    FAQs

    What can I replace Biscoff spread with?

    If you can’t find Biscoff spread or butter but you still want to make these with the cookies, you could fill the cupcakes with peanut butter or maybe even a caramel filling.

    What flavor is Biscoff?

    It resembles a caramel flavor, but yet it’s still unique enough that it has its own distinct flavor.

    What kind of frosting is good on Biscoff Cupcakes?

    We think the Biscoff buttercream is perfect for this recipe. However, you could also use a chocolate buttercream frosting recipe or vanilla frosting.

    A frosted cupcake has been cut in half, revealing a center stuffed with Biscoff spread

    More Dessert Recipes

    • Old fashioned potluck cake recipes collage.
      Old-Fashioned Cakes That Still Show Up at Every Potluck
    • A slice of coconut poke cake on a spatula.
      Coconut Poke Cake Recipe
    • A slice of chocolate peanut butter dump cake on a round plate.
      Chocolate Peanut Butter Dump Cake
    • Strawberry Cream Cheese Dump Cake serving on a round plate.
      Strawberry Cream Cheese Dump Cake

    Did you make this? I’d be so grateful if you left a “star” rating below to let me know what you thought! Then, the next time you need a quick and easy recipe, come back to Fantabulosity to browse all of my easy recipes!

    Recipe

    Close up photo of a light tan cupcake cut in half with Biscoff spread in the center and a fluffy buttercream swirl on top of the cupcake
    Print Pin
    5 from 5 votes

    Biscoff Cupcakes

    These Biscoff Cupcakes with Biscoff buttercream from scratch are easy to make and are full of the speculoos cookie flavor.
    Course Dessert
    Cuisine American
    Prep Time 15 minutes minutes
    Cook Time 18 minutes minutes
    Total Time 33 minutes minutes
    Servings 12 cupcakes
    Calories 602kcal
    Author Jessica Burgess

    Ingredients

    For the cupcakes

    • ¾ cup unsalted butter softened
    • ¾ cup brown sugar
    • 3 large eggs
    • 1 cup all purpose flour
    • 1 ¼ teaspoons baking powder

    Biscoff Filling

    • 12 teaspoons Biscoff spread

    For the Biscoff buttercream

    • ¾ cup unsalted butter softened
    • 2 cups powdered sugar
    • 1 cup Biscoff spread
    • 2 tablespoons boiling water

    To decorate the cupcakes

    • 4 tablespoons Biscoff spread
    • 12 Biscoff cookies

    Instructions

    For the Biscoff cupcakes

    • Preheat the oven to 350 degrees F. Line a 12-cup cakecake pan with cupcake liners.
    • Add ¾ cup unsalted butter and ¾ cup brown sugar to a large mixing bowl. Use a hand mixer or a stand mixer on high speed to beat them together until fluffy.
    • Add 3 large eggs to the bowl and beat on high speed until light and fluffy.
    • In a smaller bowl, combine 1 cup flour and 1 ¼ teaspoon baking powder. Add it to the creamed mixture and beat it on low speed until the dry ingredients are just combined.
    • Divide the cupcake batter evenly between the cupcake liners.
    • Bake in the center of a preheated oven for 18 minutes or until the cupcakes have risen and are a pale golden brown.
      Set the cupcakes aside to cool completely.

    Cupcake Filling

    • Gently warm the Biscoff spread in the microwave by brieflyl heating it just until it's a little runnier than usual.
    • Core the center of each cupcake and then add a teaspoon of the Biscoff spread in to each hole. (See notes below about center pieces of cupcakes.)

    Frosting the Cupcake

    • Add the softened butter to the bowl and beat on a medium speed for 2-3 minutes until creamy.
      Then add the powdered sugar, half a cup at a time. Once all the powdered sugar has been added, beat on medium speed for a further 2 minutes.
    • Next, add the Biscoff spread to the mixing bowl, increase the speed to medium-high and beat for 5 more minutes.
    • Add the boiling water and beat on a low speed, this will change the buttercream to a smoother consistency.
    • Next, transfer the buttercream to a piping bag that's fitted with a star nozzle. Pipe buttercream swirls on top of each cupcake.
    • Warm the remaining Biscoff spread in the microwave for a few seconds or until it is pourable so you can drizzle the warm Biscoff spread over the top of the cupcakes then add Biscoff cookies on top of each cupcake.

    Notes

    Tips:
    • Bake to perfection: When properly baked, the cupcakes will have risen to the top of the cupcake liners, be a pale golden brown, and will spring back when gently touched with a finger.
    • Middle of cupcake: We didn't replace the piece of cupcake we cut away as it can make the cupcake look a little lopsided. You can if you want to (or eat them!!).
    • Piping tip: A Wilton 1M piping nozzle was used to frost these Lotus Biscoff cupcakes.
    Storage: 
    Store any leftover cupcakes in an airtight container in the refrigerator and enjoy within 3 days.

    Nutrition

    Serving: 1cupcake | Calories: 602kcal | Carbohydrates: 57g | Protein: 5g | Fat: 36g | Saturated Fat: 18g | Polyunsaturated Fat: 1g | Monounsaturated Fat: 6g | Trans Fat: 1g | Cholesterol: 102mg | Sodium: 24mg | Potassium: 94mg | Fiber: 0.3g | Sugar: 43g | Vitamin A: 768IU | Calcium: 44mg | Iron: 1mg

    Dutch Oven Beef Stew

    March 23, 2023

    Dutch oven beef stew in white pot.

    This Dutch oven beef stew recipe is made with potatoes, vegetables, stew meat and made without wine! It’s cooked on the stove but then transferred to the oven for a couple of hours to allow the flavors to blend and cook together perfectly.

    Close up of beef stew in a dutch oven.

    Like our Dutch oven pot roast, we recommend you use a chuck roast for the most tender meat, like we also use in this easy slow cooker pulled beef recipe!

    Beef stew is an old-fashioned recipe that’s usually made of large chunks of beef with vegetables, usually thicker than most soup recipes, and is a total comfort food. If you’re looking for a thinner soup, this Cowboy Stew may be more of what you’re looking for!

    It’s the ideal Sunday dinner, along with this Instant Pot Roast and this Tri-Tip Roast recipe.

    [feast_advanced_jump_to]

    Why This Recipe Works

    This easy Dutch oven beef stew uses simple ingredients, that create an amazing, hearty flavor that the whole family will love.

    The tender beef pieces cook in the beef stock, seasonings, and veggies, all come together to give a great texture and rich flavor.

    Ingredients Needed

    I’ve highlighted a couple of ingredients with some relevant notes. Aside from this, the ingredients needed are pretty basic.

    • Meat – The best cut of beef to use for stew is boneless chuck roast because it is well-marbled with fat. This will help ensure you have tender meat in your Dutch oven stew. TIP: Make sure any large hard pieces of fat and silver skin are removed before searing. 
    • Onion – Using a yellow onion for this recipe is our favorite because it provides a sweeter onion flavor and pairs best with beef recipes.
    • Potatoes – We recommend using Yukon Gold potatoes for this recipe so they hold their shape and don’t get mushy like russet potatoes can. If you have russet potatoes, you could make this loaded potato soup with them.
    Labeled ingredients on white countertop.

    Substitutions

    Sometimes substitutions are necessary because of ingredients that are unavailable or needed for dietary restrictions. Here are some suggestions that can help when making Dutch oven beef stew:

    • Meat – Rump roasts and bottom rounds are also good options if you don’t have a chuck roast.
    • Potatoes – If you don’t have Yukon Gold potatoes, you can use red potatoes.
    • Tomatoes – We like using canned diced tomatoes but you can use fresh if you prefer.
    • Peas – Keeping frozen peas on hand is handy for our favorite recipes (like our pea salad) but you can use canned. (Do note: that canned peas won’t need the 5-10 minutes to cook as frozen will.)

    Equipment

    We like using a large Dutch oven for this recipe so it can go from stove-top to baking in the oven.

    How to Make Dutch Oven Beef Stew

    To help the variety of ingredients cook properly, we do it in stages. The steps consist of:

    • searing the meat
    • cooking the base
    • combining ingredients to bake
    • adding in remaining, quick-cook items

    *Be sure to see the recipe card below for the full ingredients list & instructions!*

    STEP 1. Preheat. Begin by preheating your oven to 350° F.

    STEP 2. Prep meat. Pat the beef dry with a paper towel and season generously with salt and pepper.

    Stew meat in a dutch oven.
    Image 1
    Onions sautéing in dutch oven.
    Image 2

    STEP 3. Brown meat. Heat 1 tablespoon of olive oil in a large Dutch oven over medium-high heat. Brown the pieces of meat in a single layer, in batches (not to overcrowd) searing for around 1-2 minutes per side. Add more oil as needed between batches. Set the beef aside (Image 1).

    Tip: Do not overcrowd the pan with beef pieces as this will cause the meat to steam, not sear.

    STEP 4. Cook onions. Reduce the heat to medium and add another 1 tablespoon of olive oil to the Dutch oven. Saute the diced onions for 5 minutes or until soft and starting to turn golden. Add the garlic and cook for another 1 minute or until fragrant (Image 2).

    Onions cooking in dutch oven with flour.
    Image 3
    Tomato paste added in to dutch oven with sliced onions.
    Image 4

    STEP 5. Add flour. Next, add an additional 1 tablespoon of olive oil and allow it to heat through for about 30 seconds. Sprinkle the flour over the cooked onion and garlic, and then cook for about 1 minute, stirring constantly (Image 3).

    STEP 6. Add tomato paste & broth. Then, add the tomato paste and cook for about 1 minute, stirring constantly. While stirring, slowly pour in the beef stock, and make sure the flour is mixed in and not lumpy (Image 4).

    Broth, tomatoes, stew meat and more added to dutch oven.
    Image 5
    Potatoes and carrots added to dutch oven for beef stew.
    Image 6

    STEP 7. Seasonings. Next, add the diced tomatoes, Worcestershire sauce, seared beef (that you set aside earlier) thyme, oregano, and bay leaves to the pot and bring to a simmer (Image 5).

    STEP 8. Time for oven. Cover the pot and transfer to the oven. Cook for 1 hour.

    STEP 9. Carrots & Potatoes. Add the potatoes and carrots to the pot and stir. Cover the pot and return to the oven for an additional 1 hour (Image 6).

    Frozen peas added to dutch oven full of beef stew.
    Image 7
    Dutch oven beef stew in white pot, simmering.
    Image 8

    STEP 10. Add peas. Remove the Dutch oven from the oven and remove the bay leaves. Now, add the frozen peas, stir, and cover the pot (Image 7).

    STEP 11. Simmer. Allow the beef stew to sit for 5-10 minutes to allow the peas to heat through before serving. Season with salt and pepper as needed (Image 8).

    Spoonful of beef stew being lifted up out of dutch oven.

    Recipe Pro Tips

    • Do not skip browning the beef. I know it may be tempting but searing the meat helps to seal moisture in the beef resulting in tender beef. The brown bits on the bottom of the pot also add depth of flavor to the stew. 
    • Better the next day? As with other hearty soup recipes like this one, you may find that you even enjoy this Dutch oven beef stew the next day because it sits and the flavors blend together even more. See the tips below for storing.

    Recipe FAQs

    What is the secret to tender beef stew?

    Using the right type of beef and cooking it long enough, is the key to tender beef stew.

    Is it better to cook stew meat on the stove or in the oven?

    Cooking stew meat in the oven allows the meat to slowly cook and tenderize. However, searing the meat on the stovetop gives a flavor that you can’t get from solely baking it.

    How do you thicken stew in a Dutch oven?

    The flour that’s cooked in with the onions, and then combined with beef stock, will be the key to thickening this Dutch oven stew. However, if you need to thicken your stew even more, mix together a roux, by combining 1 tablespoon of flour with 1 tablespoon of melted butter. Add a few tablespoons of beef stew liquid in to roux, stir until there are no lumps, and then stir into beef stew. Simmer and it should thicken. Repeat if necessary.

    White bowl of a serving of dutch oven beef stew.

    Storage

    Refrigerate leftovers: If you have leftover Dutch oven beef stew, allow it cool and then store it in an airtight container for up to 4 days.

    How to freeze: allow the beef stew to cool completely before adding to an freezer container or freezer bag. You can then freeze it up to three months.

    Reheat: Allow the stew to defrost in the refrigerator before reheating, and then you can re-warm it in the Dutch oven on low-medium heat until heated through. (The time will differ, depending on the amount you’re reheating.)

    More Soup Recipes You’ll Love

    Although beef stew isn’t really a soup recipe, we think you’ll also love these soup recipes that are similar:

    • Lobster bisque in small bowl with crackers on a plate underneath.
      Easy Lobster Bisque Recipe
    • Soup ladle with a creamy sausage and tortellini soup inside of it.
      Sausage Tortellini Soup
    • Creamy taco soup serving in white bowl.
      Creamy Taco Soup
    • Cowboy stew in white dutch oven.
      Cowboy Stew

    Did you make this? I’d be so grateful if you left a “star” rating below to let me know what you thought! Then, the next time you need a quick and easy recipe, come back to Fantabulosity to browse all of my easy recipes!

    Recipe

    Dutch oven beef stew in white pot.
    Print Pin
    5 from 5 votes

    Dutch Oven Beef Stew

    Dutch Oven Beef Stew: This hearty beef stew is cooked in a dutch oven, starting on the stovetop and then placed in the oven for a couple of hours to achieve the tender pieces of beef, delicious vegetables and amazing flavors.
    Course Main Course, Soup
    Cuisine American
    Prep Time 10 minutes minutes
    Cook Time 2 hours hours
    Total Time 2 hours hours 10 minutes minutes
    Servings 6 servings
    Calories 495kcal
    Author Jessica Burgess

    Equipment

    • Dutch Oven or large, oven-safe stock pot

    Ingredients

    • 2½ pounds stew meat (beef) cut into 1½ inch chunks
    • 3½-4 tablespoons olive oil
    • 2 medium yellow onions quartered and sliced
    • 5 cloves garlic minced
    • ¼ cup all-purpose flour
    • 1 tablespoon tomato paste
    • 3 cups beef broth
    • 14.5 ounce can diced tomatoes
    • 3 tablespoons worcestershire sauce
    • 1 teaspoon dried thyme
    • ½ teaspoon dried oregano
    • 2 bay leaves
    • 4 medium carrots cut into 1-inch chunks
    • 1 pound Yukon Gold potatoes cut into 1-inch cubes (3-4 potatoes)
    • 1 cup frozen peas
    • Salt and pepper to season

    Instructions

    • STEP 1. Preheat. Begin by preheating your oven to 350° F. 
    • STEP 2. Prep meat. Pat the beef dry with a paper towel and season generously with salt and pepper.
    • STEP 3. Brown meat. Heat 1 tablespoon of olive oil in a large dutch oven over medium-high heat. Brown the pieces of meat in a single layer, in batches (not to overcrowd) searing for around 1-2 minutes per side. Add more oil as needed between batches. Set the beef aside (Image 1).
    • STEP 4. Cook onions. Reduce the heat to medium and add another 1 tablespoon of olive oil to the dutch oven. Saute the diced onions for 5 minutes or until soft and starting to turn golden. Add the garlic and cook for another 1 minute or until fragrant (Image 2). 
    • STEP 5. Add flour. Next, add an additional 1 tablespoon of olive oil and allow it to heat through for about 30 seconds. Sprinkle the flour over the cooked onion and garlic, and then cook for about 1 minute, stirring constantly (Image 3).
    • STEP 6. Add tomato paste & broth. Then, add the tomato paste and cook for about 1 minute, stirring constantly. While stirring, slowly pour in the beef stock, and make sure the flour is mixed in and not lumpy (Image 4).
    • STEP 7. Seasonings. Next, add the diced tomatoes, Worcestershire sauce, seared beef (that you set aside earlier) thyme, oregano, and bay leaves to the pot and bring to a simmer (Image 5).
    • STEP 8. Time for oven. Cover the pot and transfer to the oven. Cook for 1 hour.
    • STEP 9. Carrots & Potatoes. Add the potatoes and carrots to the pot and stir. Cover the pot and return to the oven for an additional 1 hour (Image 6).
    • STEP 10. Add peas. Remove the dutch oven from the oven and remove the bay leaves. Now, add the frozen peas, stir, and cover the pot (Image 7).
    • STEP 11. Simmer. Allow the beef stew to sit for 5-10 minutes to allow the peas to heat through before serving. Season with salt and pepper as needed (Image 8).

    Video

    Notes

    Tips:
    • Make sure any large hard pieces of fat and silver skin are removed before searing. 
    • When searing meat, make sure it’s in a single layer and you do not crowd the meat, or it will steam instead of sear.
    Storage:
    Refrigerate leftovers: If you have leftover stew, allow it cool and then store it in an airtight container for up to 4 days.
    How to freeze: allow the beef stew to cool completely before adding to a freezer container or freezer bag. You can then freeze it for up to three months.
    Reheat: Allow the stew to defrost in the refrigerator before reheating, and then you can re-warm it in the dutch oven on low-medium heat until heated through. (The time will differ, depending on the amount you’re reheating.)

    Nutrition

    Serving: 1serving | Calories: 495kcal | Carbohydrates: 31g | Protein: 51g | Fat: 18g | Saturated Fat: 4g | Polyunsaturated Fat: 1g | Monounsaturated Fat: 10g | Cholesterol: 117mg | Sodium: 318mg | Potassium: 1320mg | Fiber: 5g | Sugar: 7g | Vitamin A: 7040IU | Vitamin C: 32mg | Calcium: 94mg | Iron: 6mg

    No Bake Chocolate Pie

    March 17, 2023

    Slice of no bake chocolate pie on white plate.

    See how easy it is to make this no bake chocolate pie, with just a few ingredients, that you may even have on hand. This chocolate pudding pie is one of our favorite pie recipes, and it’s a smooth, creamy, chilled dessert that is perfect for the summer months or enjoyed as a holiday dessert recipe.

    A slice of no bake chocolate pie on spatula, holding above the pie.

    This dessert recipe is one of the many, easy no bake recipes and even no bake desserts, that we have come up with for you, (similar to our Chocolate Turtle Pie) and it just may be the perfect dessert for what you need.

    What makes this no-bake chocolate pie recipe better than the rest? The layers. If you look closely, you can see:

    • an Oreo crust
    • then a darker chocolate pudding layer
    • a lighter chocolate layer (chocolate pudding and whipped cream mixture)
    • then finely, a creamy Cool Whip layer.

    The chocolate no-bake layers are similar to this no-bake Oreo dessert recipe that has become so popular, and this Oreo mousse. But sometimes the old-fashioned feel that comes from a creamy pie, is the best choice for family gatherings or to pair alongside a hot cup of coffee on a rainy day; just like this chocolate cream cheese pie and no bake peanut butter pie that we make too!

    [feast_advanced_jump_to]

    Ingredients Needed

    To make this no-bake chocolate pudding pie, you’ll need simple ingredients like: chocolate pudding mix, cold milk, Cool Whip (whipped topping), chocolate pie crust (or an Oreo cookie crust, made out of crushed Oreo cookies and melted butter), and a chocolate bar.

    Labeled ingredients for no bake chocolate pie

    Substitutions

    Sometimes it’s fun to switch things up if you’re feeling creative, or perhaps you’ll need to change some ingredients out to use what you have on hand. Either way, here are some ideas to help get you started:

    • Crust – A simple storebought graham cracker crust will work for this recipe too, or you can make this Biscoff pie crust for a twist on flavor that will pair perfectly with the chocolate filling.
    • Pudding Mix – White chocolate pudding mix or any flavor of pudding mix, really, would also make a delicious pie filling, just make sure it’s instant pudding mix. (We use cook-and-serve pudding mix in this possum pie if that’s what you have on hand though!)
    • Whipped Topping – We use Cool Whip for a lot of recipes here because it’s a great shortcut and saves time, like when we used it in this pumpkin pie with graham cracker crust, recipe. However, if you prefer a homemade whipped topping as we used in our no-bake candy cane pie, using heavy whipping cream and sugar, then you can use that as well!

    Step-by-Step Instructions

    This may be the easiest pie you’ve ever made because, with only 5 ingredients, it’s simply a matter of mixing and pouring, and allowing the pie to “set” in the refrigerator.

    *Be sure to see the recipe card below for the full ingredients list & instructions!*

    Pudding mix and milk in white mixing bowl.
    Image 1
    Pudding mix and milk mixed together in a white mixing bowl, with a whisk inside.
    Image 2
    1. Mix pudding. Combine the chocolate pudding and milk in a large bowl and whisk until the pudding thickens (Images 1 & 2).
    Chocolate pie filling inside of chocolate pie crust.
    Image 3
    Cool Whip being mixed in to remaining chocolate pie filling.
    Image 4
    1. Fill pie crust. Spread half of the chocolate pudding over the bottom of the pie crust and set aside (Image 3).
    2. Make creamy chocolate layer. Add half of the whipped topping to the remaining pudding and fold to combine (Image 4).
    Chocolate and whipped cream mixture in white mixing bowl.
    Image 5
    Chocolate and whipped cream mixture on top of pie.
    Image 6
    1. Add cream and chocolate layer. Spread the mixture over the pudding in the pie crust (Image 6).
    Cool Whip topping on top of chocolate pie.
    Image 7
    Chocolate shavings on top of no bake chocolate pie.
    Image 8
    1. Add whipped cream layer & chill. Top the pie with the remaining whipped topping. Refrigerate for at least four hours (Image 7).
    2. Sprinkle on chocolate. Garnish with chocolate shavings on the top of your pie if desired before slicing and serving (Image 8). You could also top with chocolate chips, flaked coconut, or your favorite sprinkles.
    Slice of chocolate pie on white plate, next to pie plate.

    Recipe Pro Tips

    • Use instant pudding: Make sure you use instant pudding and not the cook-and-serve kind.
    • Type of milk: Whole milk is recommended in this recipe as it will result in a thicker, creamier filling. If you use 1 or 2% milk, the filling will not be as thick. 
    • How to make chocolate shavings: To make the chocolate shavings run a vegetable peeler along the long side of a chocolate bar. You can also use chocolate chips for the topping if that’s easier or you prefer those. Putting chocolate chips in this chocolate chip cookie pie is a favorite, too.

    Recipe FAQs

    Even if you’ve been cooking for years, sometimes there are some questions you may have about making a no-bake pie. Here are some of the most popular questions that are asked about a chocolate pudding pie:

    How do you store a chocolate pie?

    Store a no-bake chocolate pie or any leftovers in the refrigerator, covered with plastic wrap or aluminum foil, or in an airtight container for up to 3 days.

    How do you make pudding thicker for pie filling?

    You can use heavy cream instead of milk for this recipe, to achieve an even thicker pie filling.

    How long should a no-bake chocolate pie set?

    It’s best to allow at least 4 hours for a no-bake chocolate pie to set.

    Why is my chocolate pudding pie runny?

    It’s possible that the chocolate pie hasn’t set long enough or that thinner milk was used instead of whole milk.

    Bite taken out of slice of no bake chocolate pie.

    More Chocolate Dessert Recipes

    If you love no-bake desserts like this one, then these other easy recipes will be perfect to satisfy that chocolate craving.

    • Slice of Oreo Nutella Cheesecake on spatula.
      Oreo Nutella Cheesecake
    • Slice of no bake Oreo cheesecake on a plate with a Hugs Kiss, candy bar and Oreo cookie.
      Oreo Cheesecake
    • Fried Chocolate Pies stacked on a plate.
      Fried Chocolate Pies
    • No bake cookies on aluminum foil.
      The BEST No Bake Cookies Recipe

    Did you make this? I’d be so grateful if you left a “star” rating below to let me know what you thought! Then, the next time you need a quick and easy recipe, come back to Fantabulosity to browse all of my easy recipes!

    If smooth, chocolate desserts are your favorite, you’ll also love this homemade chocolate pudding!

    Recipe

    Slice of no bake chocolate pie on white plate.
    Print Pin
    5 from 7 votes

    No Bake Chocolate Pie

    See how easy it is to make this no bake chocolate pie recipe using only 5 ingredients! This creamy, smooth pie only takes 10 minutes to make and then chills for a few hours.
    Course Dessert
    Cuisine American
    Diet Vegetarian
    Prep Time 10 minutes minutes
    Chill Time 4 hours hours
    Total Time 4 hours hours 10 minutes minutes
    Servings 10 slices
    Calories 146kcal
    Author Jessica Burgess

    Ingredients

    • 1 chocolate pie crust 9-inch
    • 2 packages instant chocolate pudding mix 3.9 ounce each
    • 2½ cups cold milk
    • 8 ounce container of whipped topping, thawed
    • Chocolate bar for shavings (optional for garnish)

    Instructions

    • Combine the chocolate pudding and milk in a large bowl and whisk until the pudding thickens. 
    • Spread half of the chocolate pudding over the bottom of the pie crust and set aside.
    • Add half of the whipped topping to the remaining pudding and fold to combine. Spread the mixture over the pudding in the pie crust.
    • Top the pie with the remaining whipped topping. Refrigerate for at least four hours. 
    • Garnish with chocolate shavings if desired before slicing and serving.

    Video

    Notes

    Tips for making this the best chocolate pie:
      • Use instant pudding: Make sure you use instant pudding and not the cook-and-serve kind.
      • Type of milk: Whole milk is recommended in this recipe as it will result in a thicker, creamier filling. If you use 1 or 2% milk, the filling will not be as thick. 
      • How to make chocolate shavings: To make the chocolate shavings run a vegetable peeler along the long side of a chocolate bar. 
    To Store Leftovers: You’ll want to store any leftovers in the refrigerator for up to 3 days.
    An even thicker pie: If desired, you can try using heavy cream instead of milk for this recipe, to achieve an even thicker pie filling.
    My pie is runny. If your pie is runny, then it’s possible that the chocolate pie hasn’t set long enough, or that skim or 2% milk was used instead of whole milk.

    Nutrition

    Serving: 1slice | Calories: 146kcal | Carbohydrates: 26g | Protein: 3g | Fat: 3g | Saturated Fat: 2g | Polyunsaturated Fat: 0.2g | Monounsaturated Fat: 1g | Trans Fat: 0.01g | Cholesterol: 11mg | Sodium: 324mg | Potassium: 163mg | Fiber: 1g | Sugar: 20g | Vitamin A: 139IU | Calcium: 102mg | Iron: 0.3mg

    Venison Burgers

    March 16, 2023

    Venison burger on white plate, sitting next to french fries.

    Venison Burgers: Baked in the oven, these juicy venison burgers are combined with ground sausage, and a few spices and there’s a special trick at the end like we use in our baked burgers, that makes these deer burgers the best!

    Stack of venison burgers with cheese.

    Burger recipes are probably our favorite thing to make when it comes to dinner recipes. They’re easy to make, and once we developed and figured out how to use aluminum foil to “steam and toast” the buns, it was a game-changer for our burgers.

    So when it came to wanting to make venison burgers, we knew we’d keep that trick the same but there were a few things we needed to do differently than our other burgers since deer meat tends to be pretty lean.

    Now, if you love burger recipes in general, you’ll definitely want to check out our cowboy burger, stovetop burgers, and these cheeseburger sliders. Or if venison recipes are your thing, you’ll really love this fried deer meat recipe that has become so popular!

    [feast_advanced_jump_to]

    Why This Recipe Works

    • Juicy! If you cook venison burgers and only use venison, the burgers can come out pretty dry. So we like to add ground sausage (it’s optional) to this recipe to create the juiciest burgers.
    • Not gamey: Have a freezer full of venison but not a fan of the gamey taste? With this recipe, the pork fat flavor can help reduce the gamey flavor you may normally taste in venison burgers. If you have more venison, you may also love this deer chili recipe and this super popular deer steak recipe.
    • Flexible: Even though this deer burger recipe calls for a pound of ground sausage to go with the meat, you don’t have to use that much. You can reduce the sausage to half a pound, and still get the juicy result… but without the strong sausage flavor.

    Ingredients Needed

    I’ve highlighted a couple of ingredients with some relevant notes. Aside from this, the ingredients needed are pretty basic.

    Ingredients for venison burgers on white counter, that are labeled.
    • Ground Sausage – We used a pound of ground sausage in this recipe but that results in a strong sausage flavor. So if you prefer to use less, you absolutely can. I’d recommend using only ½ pound sausage instead. However, we like using the entire pound of sausage, to spread out the number of burgers that we can make, and we actually like the sausage flavor to help make the burgers less “gamey” tasting.
    • Worcestershire sauce – If you can get it, we highly recommend Lea & Perrines for this recipe. We used to buy whatever brand was the most affordable but when I had Lea & Perrines for the first time, I decided I’d never buy a different brand. (It’s a world of difference in flavor.)
    • Crackers and the egg – the purpose of these two ingredients is to help hold the venison together in the shape of a patty. Deer meat is so lean that the burgers can be dry and crumbly if you don’t add something to help keep it together.

    Substitutions

    Sometimes substitutions are necessary because of ingredients that are unavailable or needed for dietary restrictions. Here are some suggestions that can help:

    • Ground Sausage – if you don’t want to use ground pork sausage, you could substitute it with ground beef, ground turkey or even ground chicken. If you don’t want to use any other type of meat to mix with the venison, that’s ok too but just know that it could result in a “dry” burger. The addition of the other meat is to help the burgers be juicier.
    • Crackers – we used buttery-round crackers (such as Ritz) but you could also use saltines if you’d like. Crush these so they’ll be in small pieces and mix in to the meat mixture well.

    How to Make Venison Burgers

    You’ll first combine the meat with spices and binders. We feel this results in the best and most flavorful burgers.

    *Be sure to see the recipe card below for the full ingredients list & instructions!*

    STEP 1. Preheat and Prep. Preheat your oven to 375° F. and get out a baking dish that will be big enough for all of the (6 or 8) burger patties, and place them in a single layer, without overlapping.

    Ground venison and sausages with crackers, eggs in glass bowl.
    Image 1
    Hand pouring worcestershire sauce in to ground venison mixture, in to glass bowl.
    Image 2

    STEP 2. Mix meat with binders. In a large bowl, add the ground venison meat, the ground sausage, the egg, and the crushed crackers (Image 1).

    STEP 3. Add sauce. Next, pour in the Worcestershire sauce (Image 2).

    Spices are being poured in to ground meat mixture in glass bowl.
    Image 3
    Hand mixing ground deer and spices in bowl.
    Image 4

    STEP 4. Add spices. Next, pour in the paprika, garlic powder, onion powder, and pepper (Image 3).

    STEP 5. Mix. Using your hands or a large spoon, mix together the meat with all of the binders and the spices until evenly combined (Image 4).

    Ground venison, sausage and spices mixed together in bowl.
    Image 5
    Ground venison burger patties in baking dish.
    Image 6

    STEP 6. Make burgers. Patty out 6-8 burgers (depending on how thin/thick you want your burgers — just note they may not need to bake as long if on the thin side) and place them in the baking dish in a single layer (Image 6).

    Hand sprinkling salt on top of burgers that are in a white baking dish.
    Image 7
    Seasoned venison burgers in baking dish.
    Image 8

    STEP 7. Sprinkle with salt. If desired, sprinkle each burger patty with salt (Image 7).

    Baked venison burger patties in white baking dish.

    STEP 8. Bake the burgers, uncovered, in the oven for 25 minutes or until juices are running clear (Image above) or until the internal temp reaches 165° since it has sausage in it.

    Tip: After baking, leave the oven on if you want to do the following steps.

    The Trick…

    Cooked deer burgers on buns, on top of aluminum foil.
    Image 9
    Slices of American cheese on top of burger patties.
    Image 10

    STEP 9. Wrap and steam. Although this step is optional, it is highly recommended. For each burger that you plan to eat, tear aluminum foil squares for each one. (Make sure each square is large enough to wrap a burger on a bun, completely.)

    STEP 10. Top with bun & cheese. If desired, top each burger patty with a slice of cheese and place the burgers on buns (Images 9 & 10).

    Venison burgers being wrapped up in aluminum foil.
    Image 11
    Venison burgers wrapped in aluminum foil, in baking dish, ready for oven.
    Image 12

    STEP 11. Wrap in foil. Wrap each assembled burger that’s on a hamburger bun with cheese, in a piece of aluminum foil and place in another baking dish or cookie sheet (or even back on the oven rack) for about 2-3 minutes (Images 11 & 12).

    Don’t forget to turn the oven off!

    Baked venison burgers ready for eating.

    Enjoy! Or top with your favorite toppings! (Tip: sometimes the bun and cheese can stick together after this trick — but you can put toppings on the bottom bun if so, or add your toppings before toasting.)

    Recipe Pro Tips

    • Chill meat. If you find that your raw meat is on the warmer side, or not very cold, and it’s not easy to work with, it may be best to refrigerate and chill the meat after mixing with crackers and egg (and other ingredients) for about 15 minutes, so it will form in to patties better and hold their shape.
    • ½ pound of sausage. Use only ½ pound of sausage to reduce the “sausage” flavor, if desired, if you want more of a gamey flavor. (But you can keep the ingredient amounts on everything else the same.)
    Bite taken out of deer burger.

    Recipe FAQs

    What to mix with venison to make burger?

    You can mix other types of meat with venison to make hamburgers if you want. If you don’t, the venison burgers can be dry unless you had a fattier meat with it. This could be sausage, ground beef, etc.

    Is deer meat good for hamburgers?

    Absolutely. If you’re not a fan of deer meat flavors, you can add sausage to the venison, to help camouflage the wild game flavor.

    What is the best binder for venison burger?

    Crackers and egg are a great binder for burgers, as these tend to hold the lean meat together. However, if your raw meat is still struggling to hold together, you can chill the meat for about 15 minutes to have it form better.

    Storage

    If you have leftover burgers (without the buns), store them in an airtight container or wrap in plastic wrap for 3-5 days.

    If you pre-made the burgers and the buns with the “trick” mentioned above, it may be harder to reheat the burgers but it’s not impossible. It would be best to place the assembled burgers in at 375° oven, wrapped in aluminum foil, for about 8-10 minutes or until heated through.

    Venison burgers on white plate next to french fries.

    More Burger Recipes

    If you love burgers as much as we do, you’re also going to love these:

    • Air Fryer Burgers
    • A juicy Lucy burger cut in half so we can see the cheese inside and stacked one half on top of the other.
      Juicy Lucy Burgers
    • Smoked burger on a white plate, topped with pickles, cheese and tomato.
      Smoked Burger Recipe
    • These were SO juicy and easy! Love what she uses. The BEST Cheeseburger recipe!
      Electric Skillet Hamburgers

    Did you make this? I’d be so grateful if you left a “star” rating below to let me know what you thought! Then, the next time you need a quick and easy recipe, come back to Fantabulosity to browse all of my easy recipes!

    Recipe

    Venison burger on white plate, sitting next to french fries.
    Print Pin
    5 from 4 votes

    Venison Burgers

    Venison Burgers: Baked in the oven, these juicy venison burgers are combined with ground sausage, and a few spices and there's a special trick at the end that makes these deer burgers the best!
    Course Main Course
    Cuisine American
    Prep Time 5 minutes minutes
    Cook Time 25 minutes minutes
    Total Time 30 minutes minutes
    Servings 6 burgers
    Calories 504kcal
    Author Jessica Burgess

    Ingredients

    • 1 pound ground venison
    • 1 pound ground sausage or ½ pound if less sausage flavor desired
    • 1 egg
    • 5 buttery round crackers such as Ritz
    • 1 Tablespoon garlic powder
    • 1 Tablespoon onion powder
    • 1 teaspoon paprika
    • ½ teaspooon salt
    • 1 teaspoon pepper
    • 1 Tablespoon worcestershire sauce
    • sliced cheese if desired
    • hamburger buns

    Instructions

    • Preheat oven to 375° F.
    • In a large bowl, combine ground venison, sausage, and the rest of the ingredients except salt, buns and cheese, until evenly combined.
    • For meat mixture in to burger 6-8 burger patties (Note: Thicker may result in longer cooking time.) and place in single layer on a baking dish.
    • Bake in the oven at 375° F for 25 minutes or until internal temp reaches 165° since it has sausage in it.
    • If desired, place a piece of cheese on each burger and place back in to the oven to allow the cheese to melt, unless toasting and steaming buns in next step.

    To Toast and Steam Buns with Aluminum Foil, if desired.

    • Assemble the burgers by place a burger patty on a bun, and top with a slice of cheese.
    • Create squares of aluminum foil that are big enough to wrap each assembled burger.
    • Wrap each burger in a piece of aluminum foil and place the foil wrapped burgers in a baking dish or on the oven rack, and allow to cook for an additional 2-3 minutes until the buns are nice and steamed/toasted. Serve!

    Notes

    If meat is falling apart: You can chill the meat after mixing with crackers and egg (and other ingredients) for about 15 minutes, so it will form in to patties better and hold their shape.
    If you don’t want a strong sausage flavor: Instead of a pound of sausage, you can use ½ pound to reduce the “sausage” flavor, if desired.

    Nutrition

    Serving: 1burger | Calories: 504kcal | Carbohydrates: 26g | Protein: 34g | Fat: 28g | Saturated Fat: 10g | Polyunsaturated Fat: 4g | Monounsaturated Fat: 11g | Trans Fat: 0.2g | Cholesterol: 142mg | Sodium: 853mg | Potassium: 565mg | Fiber: 1g | Sugar: 4g | Vitamin A: 265IU | Vitamin C: 2mg | Calcium: 96mg | Iron: 5mg

    Blue Cheese Dip

    March 15, 2023

    Blue cheese dip in small white bowl, with hand holding chip.

    Blue Cheese Dip: Made of simple ingredients like sour cream, mayo, green onions, spices, lemon juice, and of course, blue cheese crumbles. This no bake recipe is delicious to serve with fresh vegetables, your favorite crackers, or even as a thick blue cheese dressing on top of a side salad.

    Blue Cheese Dip in white bowl, surrounded by vegetables.

    I’m just going to say it, this will be your all-time favorite blue cheese dip recipe. Yes, this buffalo blue cheese dip is good too but this one takes the cake.

    It’s delicious served as an appetizer with your favorite crackers, vegetables, or whatever you love serving with savory dips like this one; such as these air-fried chicken wings. You may also want to serve this delicious crack corn dip too!

    [feast_advanced_jump_to]

    Ingredients Needed

    I’ve highlighted a couple of ingredients with some relevant notes. Aside from this, the ingredients needed are pretty basic.

    Labeled ingredients on white counter for blue cheese dip.
    • Blue Cheese – You can use blue cheese crumbles but I love to use the block cheese and crumble it myself but either will do! If you have extra, consider these blue cheese burgers to up your burger game too!
    • Mayo – The brand of mayo that you use is up to you but I absolutely love either Kraft mayo or Hellman’s mayo for this dip.
    • Buttermilk – If you only have regular milk on hand, it’s ok to use that instead but we prefer buttermilk for that extra tang.

    How to Make Blue Cheese Dip

    It’s really simple to make this dip, and it only involves placing all of the ingredients in a bowl, mixing until combined, and chilling! See below!

    *Be sure to see the recipe card below for the full ingredients list & instructions!*

    Ingredients for blue cheese dip in clear glass bowl.
    Image 1
    Ingredients for blue cheese dip mixed together in glass bowl.
    Image 2

    STEP 1. Place all ingredients in bowl. Combine all ingredients in a bowl, and stir until evenly combined (Images 1 & 2).

    STEP 2. Chill.  Cover the bowl and place in the refrigerator and chill for at least 2 hours and then serve!

    Tip: This dip can be enjoyed after just a couple of hours but it’s even better when it sits in the refrigerator at least overnight, or for a day to really allow the flavors to combine.

    Blue cheese dip in white bowl, on platter that's surrounded by vegetables and crackers.

    Recipe FAQs

    What is blue cheese dip made of?

    The base is made of sour cream, mayo, lemon juice, buttermilk, spices and of course, blue cheese crumbles.

    How long does blue cheese dip last?

    Blue cheese dip is good for at least 4-5 days, if stored properly in the refrigerator.

    What do you eat blue cheese with?

    Celery and carrots are very popular dippers for blue cheese dip. However, crackers, summer sausage, and other vegetables are delicious when served with blue cheese.

    Hand holding chip with dip on the end of it, holding above a platter of dip and vegetables.

    If you’re a dip fan, and even a cheesy fan… you’ll definitely want to dip your pretzels in to this beer cheese pretzel dip.

    Or if you need dip recipes for dipping French fries, your favorite protein, or to drizzle on your favorite fish, this Chipotle aioli recipe is a must-try too.

    More Blue Cheese Recipes

    If you love blue cheese, you’ll love seeing how we used blue cheese in these recipes:

    • Buffalo Chicken Lasagna
      Buffalo Chicken Lasagna
    • Bacon Wrapped Dates with Blue Cheese
      Bacon Wrapped Dates with Blue Cheese
    • Blue cheese burger on pretzel bun, with lettuce leaf, sitting next to french fries on plate.
      Blue Cheese Burgers
    • Instant Pot Buffalo Chicken Pasta

    Did you make this? I’d be so grateful if you left a “star” rating below to let me know what you thought! Then, the next time you need a quick and easy recipe, come back to Fantabulosity to browse all of my easy recipes!

    Recipe

    Blue cheese dip in small white bowl, with hand holding chip.
    Print Pin
    5 from 3 votes

    Blue Cheese Dip

    Blue Cheese Dip: Made of simple ingredients like sour cream, mayo, green onions, spices, lemon juice, and of course, blue cheese crumbles. This no bake recipe is delicious to serve with fresh vegetables, your favorite crackers, or even as a thick blue cheese dressing on top of a side salad.
    Course Appetizer, Snack
    Cuisine American
    Diet Vegetarian
    Prep Time 5 minutes minutes
    Inactive Time 2 hours hours
    Total Time 5 minutes minutes
    Servings 8 servings
    Calories 300kcal
    Author Jessica Burgess

    Ingredients

    • 1 cup mayo
    • 1 cup sour cream
    • 1 Tablespoon buttermilk Or you can use regular milk
    • 4 ounces blue cheese crumbles
    • 1 Tablespoon lemon juice
    • ½ teaspoon garlic powder
    • 1 Tablespoon chopped green onion
    • 1 teaspoon chopped chives
    • ¼ teaspoon salt
    • ¼ teaspoon pepper

    Instructions

    • Pour all of the ingredients in to a small or medium mixing bowl and stir to combine.
    • Cover the bowl with a lid or plastic wrap, and place in the refrigerator and chill for a few hours at least, or even overnight.

    Notes

    Storage: Blue cheese dip is good for at least 4-5 days, if stored properly in the refrigerator.
    What to dip in blue cheese: Celery, carrots, crackers, summer sausage, and other vegetables are great to serve with this dip.

    Nutrition

    Serving: 0.25cups | Calories: 300kcal | Carbohydrates: 2g | Protein: 4g | Fat: 31g | Saturated Fat: 9g | Polyunsaturated Fat: 13g | Monounsaturated Fat: 7g | Trans Fat: 0.1g | Cholesterol: 40mg | Sodium: 425mg | Potassium: 88mg | Fiber: 0.1g | Sugar: 1g | Vitamin A: 322IU | Vitamin C: 1mg | Calcium: 110mg | Iron: 0.2mg

    Biscoff Pie Crust

    March 14, 2023

    Biscoff pie crust in white pie plate.

    Biscoff Pie Crust: A delicious and easy pie crust recipe that’s made of Biscoff cookies and butter, and then baked for a few minutes to set. (Or, simply freeze until set.)

    It’s perfect for your favorite pie recipes, as an alternative to a graham cracker crust or a baked buttery pie crust, especially like this Biscoff pie!

    Biscoff pie crust in white pie plate.

    This Biscoff crust idea stemmed from wanting to make a Biscoff pie recipe because of a Biscoff craving, and since we already have a Biscoff cheesecake recipe, Biscoff truffles, Biscoff cupcakes, and Biscoff fudge, we wanted something a little different.

    But when I thought about using a regular graham cracker crust (although it would be good) it just wouldn’t be as good as a crust made of Biscoff, so I got to work and this recipe was born. (Save those graham cracker crusts for this no bake pumpkin pie recipe!)

    Now, this crust would be delicious with another kind of pie, such as this chocolate cream cheese pie, this peanut butter pie, and this banana cream pie.

    [feast_advanced_jump_to]

    Why This Recipe Works

    • Only 2 ingredients: Yes, you read that right! It only takes 2 ingredients to make this Biscoff cookie crust.
    • Easy to make: When you think of homemade recipes, they can sound hard and complicated. However, this crust is made by making Biscoff cookie crumbs out of Biscoff cookies, combining them with butter, pressing into a pie plate, and baking.
    • Works with many pies: This Biscoff crust recipe will work well with so many different recipes for your favorite pie fillings or even as a cheesecake crust for recipes that call for a cheesecake filling, like this cherry cheesecake or this coconut cheesecake.

    Ingredients Needed

    Only two simple ingredients are required for this recipe, and you probably even have one of them on hand!

    Biscoff cookies and butter in white pie plate.
    • Butter – I chose to use salted butter for this recipe because the small addition of salt, combined with a cookie that makes a sweet crust, makes a delicious combination.
    • Biscoff Cookies – You may have heard these called different things, such as Biscoff biscuits, or Speculoos cookies, and no matter what they’re called, they’re super delicious.

    Substitutions

    Sometimes substitutions are necessary because of ingredients that are unavailable or needed for dietary restrictions. Here are some suggestions that can help:

    • Cookies – can’t find the Biscoff cookies at the grocery store but still need an easy pie crust? You can try switching out the Biscoff for graham crackers, Oreo cookies, etc.
    • Butter – if you only have unsalted butter, that’s ok to use too! I would just add a small pinch of salt (don’t have to) for that “zip” that it can give in combination with the sweetness of the crumb crust.

    Equipment

    If you don’t have a food processor, you can still make this crust recipe. It just may take some elbow grease to make the cookies in to fine crumbs. If you’re not using a food processor, place the cookies in a plastic ziptop bag (like a Ziploc bag), seal it well, and mash the cookies with a rolling pin or something that can crush the cookies in to very small, fine, pieces.

    How to Make a Biscoff Pie Crust

    It’s really easy to make this pie crust but I’ll show you the step-by-step to make it even easier!

    There are 3 steps to this pie crust recipe:

    • crushing the cookies
    • mixing the crumbs with butter
    • baking in the pie pan to set (Or freeze if you prefer a no-bake recipe. See more below.)

    *Be sure to see the recipe card below for the full ingredients list & instructions!*

    Preheat to an oven temperature of 350° F.

    Biscoff cookies in food processor.
    Image 1
    Biscoff cookies crushed in to fine crumbs in food processor.
    Image 2

    STEP 1. Crush cookies. Place the Biscoff cookies in a food processor, and crush until the cookies are finely crushed (Images 1 and 2).

    Tip: If you don’t have a food processor, you can crush the cookies in to fine crumbs with a zip top bag and rolling pin.

    Melted butter poured in to Biscoff cookie crumbs.
    Image 3
    Buttery Biscoff crumbs in pie plate.
    Image 4

    STEP 2. Add melted butter. Next, in a small bowl, combine cookie crumbs and melted butter and give it a good mix until the crumbs are evenly mixed with butter (Image 3).

    STEP 3. Press in pie plate. Pour buttery crumb mixture in to a pie plate (mine was an 8 inch pie plate), press down (you can even use the bottom of a measuring cup) and make sure the bottom is covered and spread evenly with crumbs (Image 4).

    NOTE: The crumbs can press up on to the sides of the pan, a little bit if needed, to make the bottom an even thickness.

    Pressed Biscoff crumbs in white pie plate.
    Image 5

    STEP 4. Bake. Place pie dish in preheated oven and bake at 350° for 9-10 minutes, or until the crust looks like it has turned a slight, light, brown, and has hardened. (You don’t want it to burn so if it looks like it’s getting too dark, remove from the oven.)

    Refrigerated Biscoff pie crust in white pie plate.

    Recipe Pro Tips

    • Freeze instead of bake. If you don’t want to bake the pie crust, you can opt to freeze it instead. Instead of preheating the oven, place the pie crust in the freezer for at least 30 minutes to “set”.
    • Allow to cool. If making a no-bake pie recipe with this crust, make sure you allow the crust to cool to room temperature before you fill it with pie filling. You can place the pie plate on wire rack to help it cool off faster.

    Recipe FAQs

    Can you substitute Biscoff cookies for graham crackers?

    Absolutely! If you need a graham cracker crust but need to substitute them, you can use Biscoff cookies to make the pie crust, with this easy recipe!

    Are Biscoff like graham crackers?

    They do taste a bit different than graham crackers and can often be used in similar ways as a graham cracker.

    What flavor is Biscoff?

    Biscoff is a unique flavor that actually has a slight caramel flavor.

    Storage

    If you’re making a Biscoff pie crust in advance, you can store it covered with plastic wrap in the refrigerator for 3-4 days or you can even freeze it (if stored in freezer-safe containers) for up to 3 months.

    More Dessert Recipes

    If you love easy desserts, you’re also going to love these reader favorites:

    • A slice of cherry yum on a round plate.
      Cherry Yum Yum
    • A square slice of sock it to me cake on a spatula.
      Sock it to Me Cake
    • A slice of cloud cake, topped with strawberries, sitting on round plate.
      Cloud Cake Recipe
    • Condensed milk brownies on parchment paper with middle brownie turned up on it's side.
      Condensed Milk Brownies

    Did you make this? I’d be so grateful if you left a “star” rating below to let me know what you thought! Then, the next time you need a quick and easy recipe, come back to Fantabulosity to browse all of my easy recipes!

    Recipe

    Biscoff pie crust in white pie plate.
    Print Pin
    5 from 5 votes

    Biscoff Pie Crust

    This Biscoff pie crust is made using only 2 ingredients, Biscoff cookies and butter, and can be baked to set, or frozen. Perfect for many different pie or cheesecake recipes.
    Course Dessert
    Cuisine American
    Diet Vegetarian
    Prep Time 10 minutes minutes
    Cook Time 10 minutes minutes
    Total Time 20 minutes minutes
    Servings 1 crust
    Calories 1885kcal
    Author Jessica Burgess

    Equipment

    • Food Processor
    • Pie plate

    Ingredients

    • 8.8 ounce package of Biscoff cookies
    • 6 Tablespoons melted butter

    Instructions

    • Preheat the oven to 350° F.
    • Add entire package of Biscoff cookies to the bowl of a food processor and crush until they are crushed in to fine crumbs.
    • Pour crumbs in to small bowl and mix with melted butter until evenly combined.
    • Place buttery crumbs in to a pie plate (8 or 9 inch) and press down until they're in an even layer, covering the bottom of the pie plate, and slightly pressed up on to the sides of the plate.
    • Bake the pie crust at 350° F for 9-10 minutes or until the crust becomes a light brown, and it looks as if the pie crust is set.
    • Remove from oven and let cool before filling with pie filling.

    Notes

    TIP: You can freeze instead of bake if preferred: If you don’t want to bake the pie crust, you can opt to freeze it instead. Instead of preheating the oven, place the pie crust in the freezer for at least 30 minutes to “set”.
     

    Nutrition

    Serving: 1crust | Calories: 1885kcal | Carbohydrates: 159g | Protein: 14g | Fat: 133g | Saturated Fat: 63g | Polyunsaturated Fat: 23g | Monounsaturated Fat: 34g | Trans Fat: 3g | Cholesterol: 181mg | Sodium: 1421mg | Potassium: 240mg | Fiber: 3g | Sugar: 54g | Vitamin A: 2314IU | Calcium: 53mg | Iron: 7mg

    Instant Pot Frozen Meatballs

    March 13, 2023

    Instant Pot frozen meatballs in white bowl, with fresh parsley sprinkled on top.

    Instant Pot Frozen Meatballs: A quick and easy way (Only takes 4 minutes!) to make the most delicious Italian meatballs. Serve them on your favorite homemade bolognese recipe or simply have them as an easy meal!

    White bowl full of cooked Instant Pot frozen meatballs.

    When we make Italian dishes with a red sauce, we usually try to use a quick, favorite marinara sauce using tomato sauce and Italian seasoning (the dressing mix). It is so easy and one of our favorite flavors.

    We use it in our venison spaghetti (then of course it’s a given that it’s used in our fried spaghetti recipe) but you can use any of your favorite jar of sauce for these meatballs instead, if you prefer. But it’s our favorite pasta sauce for this Instant Pot meatball recipe.

    [feast_advanced_jump_to]

    Why This Recipe Works

    • Quick: Using the Instant Pot, makes this one of the quickest, and easy Instant Pot recipes, with 4 minutes of cook time.
    • Busy Weeknights: They’re quick for a busy weeknight or any night of the week! The kids love them by themselves for a one-pot meal, or you can make meatball subs, stuff meatballs in bell peppers, or quickly cook your favorite noodle, and an easy dinner is served!
    • Frozen Meatballs: Since the meatballs are frozen, they’re great to keep in the freezer for those last-minute meal ideas or as an appetizer like these slow cooker BBQ meatballs!

    Ingredients Needed

    I’ve highlighted a couple of ingredients with some relevant notes. Aside from this, the ingredients needed are pretty basic.

    Ingredients for Instant Pot frozen meatballs, all sitting on counter in front of Instant Pot.
    • Meatballs – Since we’re using a spaghetti sauce to coat these meatballs in, we chose to use frozen Italian-style meatballs.
    • Italian seasoning – The seasoning we use for the sauce, is the Italian dressing seasoning packet. You can usually find this at your local grocery store but it’s different than Italian seasoning in the spice aisle. You want the packet that you can make the salad dressing out of – although you’ll just be using the seasoning.
    • Water – ½ cup of water is added to create a liquid substance for the pressure cooking, to help prevent getting a burn notice, so don’t skip this ingredient.

    Substitutions

    Sometimes substitutions are necessary because of ingredients that are unavailable or needed for dietary restrictions. Here are some suggestions that can help:

    • Meatballs – I know you may love homemade meatballs more than frozen, and that’s absolutely ok! If you make your own meatballs (like we do with our easy Swedish meatballs) and freeze them for later, this should also work just fine! Fresh meatballs, however, may cook a bit differently since frozen meatballs tend to be fully cooked and only frozen… so that’s important to keep in mind. You may also choose to make turkey meatballs, ground beef meatballs, or even a different flavor of meatballs, and that’s just fine too.
    • Water – if you’d rather use a broth, such as my homemade chicken broth or beef broth instead of water, you absolutely can! Keep in mind, that if you use a regular broth, instead of low-sodium broth, this could make the meatballs very salty, with the salt that’s already in the Italian seasoning packet.
    • Pasta sauce – we think using the recipe we use for the sauce in the recipe card below is better than most sauces, but you can use your favorite brand or recipe. Just make sure you’re using enough, especially if you plan to serve any excess sauce over pasta.

    Equipment

    We make this Instant Pot meatballs recipe, using an electric pressure cooker or what you may call an “Instant Pot.” But any brand will do, to make these pressure cooker meatballs. (Do note, that different brands can vary for cooking time.)

    Some may use a steamer basket for easy removal of the cooked meatballs from the bottom of the pot, but I don’t feel there’s a need for this. However, it won’t hurt anything if you do decide to use this.

    How to Make Frozen Instant Pot Meatballs

    Cooking these meatballs at high pressure means that they only have to cook for 4 minutes. It’s a great way to serve juicy meatballs as, or as part of a delicious dinner.

    *Be sure to see the recipe card below for the full ingredients list & instructions!*

    STEP 1. Make sauce. In a medium-sized bowl, mix together the 2 cans of tomato sauce and 2 packets of Italian dressing seasoning mixes until combined.

    Uncooked frozen meatballs in Instant Pot.
    Image 1
    Tomato sauce and seasonings mixed, and poured on top of frozen meatballs, inside of Instant Pot.
    Image 2

    Tip: If making the meatballs to serve over pasta, now is a good time to start boiling your pasta, so it can be cooking while the meatballs are pressuring.

    STEP 2. Water and meatballs. Pour ½ cup water and frozen meatballs in to the Instant Pot metal insert (Image 1).

    STEP 3. Add sauce. Next, pour the seasoned tomato sauce in, over the meatballs (Image 2).

    Marinara sauce mixed in with frozen meatballs, inside of Instant Pot.
    Image 3
    Cooked frozen meatballs that are cooked in spaghetti sauce, inside of Instant Pot.
    Image 4

    STEP 4. Stir and Secure. Stir to combine the sauce and meatballs. Secure the lid on the Instant Pot, turn the steam valve to “seal” and set the timer for 4 minutes (Image 3).

    STEP 5. Remove lid. When the timer ends, quick-release the steam valve and when the float valve goes down, remove the lid (Image 4).

    Cooked, Instant Pot meatballs in ladle, holding above the Instant Pot.

    STEP 6. Serve! Finally, serve and enjoy. If desired, sprinkle on grated parmesan cheese, fresh basil, and/or fresh parsley.

    Recipe Pro Tips

    • Make ahead. Even though these cook quickly, you can also make a big batch to eat on for a few days, or even freeze again for a quick spaghetti and meatballs recipe when you need something hearty and fast.
    • Stock up on ingredients. Since all of the ingredients can be stored for quite a while, this is a great recipe to stock up on so you can make them when you’re not sure what to have for a main dish!
    Cooked, Instant Pot meatballs that are in a small white bowl.

    Recipe FAQs

    How long does it take to make frozen meatballs?

    When cooking meatballs in the Instant Pot, it only takes 4 minutes to cook. Then, you’ll quick-release and allow the float valve to go down before removing the lid. (This could take a few extra minutes.)

    How do you store leftover Instant Pot meatballs?

    Allow the meatballs to cool off, and then place them in an airtight container and in the refrigerator for 3-4 days.

    Can you freeze leftover meatballs?

    Absolutely. The best way to freeze cooked meatballs is to let them cool completely, and then place them in a single layer, without touching, either on a cookie sheet or in an airtight container. When they’ve become frozen, you can place them together in a freezer bag or freezer container to store easier. (Freezing them separately at first, keeps them from sticking together when freezing.)

    Cooked meatballs from Instant Pot, sitting in white bowl with fresh parsley on top.

    More Italian Recipes

    If you love easy Italian recipes like this one, then you’ll also love these:

    • Lasagna soup in white bowl with dollop of ricotta cheese on top.
      Lasagna Soup
    • Italian sliders on Hawaiian buns
      Italian Sliders (Easy Party Sandwiches)
    • ingredients in bowl for zesty Italian pasta salad
      Zesty Italian Pasta Salad Recipe
    • Texas Toast Pizza on baking sheet
      Texas Toast Pizzas

    Did you make this? I’d be so grateful if you left a “star” rating below to let me know what you thought! Then, the next time you need a quick and easy recipe, come back to Fantabulosity to browse all of my easy recipes!

    Recipe

    Instant Pot frozen meatballs in white bowl, with fresh parsley sprinkled on top.
    Print Pin
    5 from 6 votes

    Instant Pot Frozen Meatballs

    Instant Pot Frozen Meatballs – in only 4 minutes, your Italian meatballs will be ready to serve over your favorite pasta or to eat alone! This 2-step marinara sauce recipe is better than any store-bought sauce too!
    Course Appetizer, Main Course, Side Dish
    Cuisine Italian
    Prep Time 6 minutes minutes
    Cook Time 4 minutes minutes
    Total Time 10 minutes minutes
    Servings 11 servings
    Calories 236kcal
    Author Jessica Burgess

    Equipment

    • Pressure Cooker such as an Instant Pot

    Ingredients

    • ½ cup water
    • 32 ounce bag of frozen Italian meatballs
    • 30 ounces tomato sauce 2 – 15 ounce cans
    • 2 – .7 ounce packets Italian dressing seasoning mix
    • grated parmesan cheese and fresh parsley if desired

    Instructions

    • In a medium-sized bowl, mix together the 2 cans of tomato sauce and 2 packets of Italian dressing seasoning mixes until combined.
    • Pour ½ cup water and frozen meatballs in to the Instant Pot metal insert.
    • Next, pour the seasoned tomato sauce in, over the meatballs and stir to combine.
    • Secure the lid on the Instant Pot, turn the steam valve to "seal" and set the timer for 4 minutes.
    • When the timer ends, quick-release the steam valve and when the float valve goes down, remove the lid.
    • Serve the meatballs! If desired, sprinkle on grated parmesan cheese and fresh parsley.

    Notes

    How to Store Leftover Meatballs: Allow the meatballs to cool off, and then place them in an airtight container and in the refrigerator for 3-4 days.
    Can you freeze frozen cooked meatballs? Sure! The best way to freeze cooked meatballs is to let them cool completely, and then place them in a single layer, without touching, either on a cookie sheet or in an airtight container. When they’ve become frozen, you can place them together in a freezer bag or freezer container to store easier. (Freezing them separately at first, keeps them from sticking together when freezing.)

    Nutrition

    Serving: 6meatballs | Calories: 236kcal | Carbohydrates: 4g | Protein: 15g | Fat: 18g | Saturated Fat: 7g | Polyunsaturated Fat: 2g | Monounsaturated Fat: 8g | Cholesterol: 59mg | Sodium: 432mg | Potassium: 466mg | Fiber: 1g | Sugar: 3g | Vitamin A: 341IU | Vitamin C: 6mg | Calcium: 23mg | Iron: 1mg

    Ham and Beans Recipe

    March 9, 2023

    Bowl of ham and beans with spoon, and cornbread sitting on side of bowl.

    Ham and Beans: An old-fashioned and flavorful ham and bean soup recipe that’s made of canned great northern beans, ham, spices, and chicken broth!

    With only a 7-minute prep time and 45-minute cooking time, this easy recipe is a vintage soup recipe you’ll want to add to your meal plan for dinner or a weekend comfort meal.

    Ham and beans in a white bowl with side of cornbread dipped in.

    Sometimes a warm, and easy bowl of soup is what sounds good on a cold day. This 15 bean soup is one that we love to have on the rotation along with this ham and beans recipe. They’re both so easy to make but the 15-bean soup has more of a cajun flair while this ham and beans recipe has a gentle warm flavor that the whole family will love.

    But if you’re looking for multiple soup recipes, perhaps for a food bar or to serve at a pot-luck, you may also love our hearty soups, like this Cowboy Stew recipe, our taco soup recipe, easy chili recipe, and this easy lasagna soup recipe!

    [feast_advanced_jump_to]

    Why This Recipe Works

    • Large Batch Cooking: Although this recipe serves 6, it’s a great recipe that’s enjoyed the next day so it’s a great way to cook once and have a meal for days if you’re only cooking for a small amount or you can easily double or triple for a huge batch!
    • Great way to use leftover ham: This recipe calls for a hearty ham that you can buy at the grocery store but it’s also a great use of leftover ham bone, ham shanks, ham hocks, leftover holiday ham (like leftover Easter ham) or whatever you think is the best ham!
    • Old Fashioned Recipe: It’s a recipe that has been around for many years and is a delicious soup that you would normally find in a large soup pot served with cornbread muffins at Grandma’s table, next to this easy chicken pot pie recipe! Pork dinners like this have long been part of old-fashioned comfort cooking.

    Ingredients Needed

    I’ve highlighted a couple of ingredients with some relevant notes but all are simple ingredients.

    Labeled ingredients on counter for ham and beans
    • Broth – We use my homemade chicken broth for this recipe although you can also use low-sodium broth.
    • Beans – Using canned beans instead of dried beans is a faster way to make ham and beans since the beans have already been cooked
    • Ham – Using pre-diced ham saves time but leftover ham (like we did for this ham casserole) works great as well. Dicing a ham steak or thickly sliced deli meat is also a great choice.

    Substitutions

    Sometimes substitutions are necessary because of ingredients that are unavailable or needed for dietary restrictions. Here are some suggestions that can help:

    • Beans – you can use navy beans, dried beans with a quick soaking of beans method, cannellini beans, or pinto beans. If using dried beans, soak the beans overnight and drain. Simmer with broth, meat, and seasonings for 2-3 hours. 
    • Ham – ham shanks, smoked ham hock, any extra ham you may have on hand or just an easy ham that you love to cook with.
    • Broth – You can use vegetable broth or even homemade chicken broth.

    Equipment

    We cooked this ham and beans recipe on the stove top in a dutch oven but you may also want to try making it in the crock pot or an electric pressure cooker.

    How to Make Ham and Beans

    There aren’t many steps to this recipe since it’s a quick, dump-and-go soup!

    *Be sure to see the recipe card below for the full ingredients list & instructions!*

    Beans, ham, and ham hock added to stock pot, with broth and spices sitting around pot.
    Image 1
    Broth and spices added to stock pot with ham and beans.
    Image 2

    STEP 1. Beans and Ham. Place beans, ham, and ham hock to a large pot or dutch oven. (Image 1).

    STEP 2. Broth and Spices. Next, add broth and spices and stir to combine (Image 2).

    Ham hock and bay leaves removed from pot
    Image 3
    Ham hock on cutting board with bay leaves sitting beside the board.
    Image 4

    STEP 3. Boil. Bring to a boil for 5-10 min* stirring frequently.

    Tip: *For creamier beans, boil for 10 minutes and stir often. If less creamy beans are desired boil for a shorter amount of time and stir less often.

    STEP 4. Reduce heat to a simmer. Simmer for 30-35 min stirring occasionally (Image 3).

    STEP 5. Remove. Once done remove bay leaves and ham hock (Image 4).

    Ham pieces from ham hock, added back in to the stock pot.
    Image 5
    Simmering ham and beans in stock pot.
    Image 6

    STEP 6. Remove meat. Remove as much meat as possible from the ham hock and return the meat to the pot (Image 5). 

    STEP 7. Stir & Serve. Stir once more and serve with cornbread and a dash of black pepper if desired (Image 6).

    Ladle full of cooked ham and beans in stock pot.

    Recipe Pro Tips

    • Side dishes for ham and beans. It’s common to serve ham and beans with cornbread but you could also serve it with rice, air fryer garlic bread, or French bread.
    • More veggies. Adding thinly sliced carrots in the last 10 minutes of cooking is something you can do if you’re looking to add more color or vegetables to your recipe.
    Bowl of ham and beans with spoon inside, and a piece of cornbread on side of bowl.

    Recipe FAQs

    Should I use ham hocks for ham shanks for ham and beans?

    You can use either. Ham hocks tend to have less meat on them than ham shanks, however, they both work well.

    What kind of beans do you put in ham and beans?

    There are many different kinds of beans you can put in your ham and beans. The most popular types are great northern beans, navy beans, pinto, or cannellini beans.

    How do you thicken ham and beans?

    Cooking your beans longer, and stirring the beans often, can make a creamier, thicker, ham and beans. Or, you can also combine a mixture of flour and water or broth (about 3 Tablespoons of flour and 1 cup of liquid) and pour in to the pot, and allow to simmer until thickened.

    Storage

    Refrigerate any leftovers in an airtight container for up to 5 days. Reheat on the stove or in the microwave. You can also freeze ham and beans in an airtight container for up to 3 months. Let them thaw in the refrigerator overnight before warming. 

    More Comfort Food

    If you love comforting meals like this, you might enjoy browsing these old-fashioned dinner recipes too.

    • Close up photo of a bowl brimming with noodles, vegetables and ground beef in a rich red tomato based sauce
      Crock Pot Goulash
    • Chicken and gravy on top of mashed potatoes on white plates
      Chicken and Gravy Recipe
    • french onion beef casserole scooped up out of white dish
      French Onion Beef Casserole
    • Dutch oven pot roast, with potatoes, carrots and rosemary on top.
      Dutch Oven Pot Roast

    Did you make this? I’d be so grateful if you left a “star” rating below to let me know what you thought! Then, the next time you need a quick and easy recipe, come back to Fantabulosity to browse all of my easy recipes!

    Recipe

    Bowl of ham and beans with spoon, and cornbread sitting on side of bowl.
    Print Pin
    4.82 from 11 votes

    Ham and Beans Recipe

    Ham and Beans: A flavorful ham and bean soup recipe that's made of canned great northern beans, ham, spices, and chicken broth! With only a 7-minute prep time and 45-minute cooking time, this easy recipe is a soup recipe you'll want to add to your meal plan for dinner or a weekend comfort meal.
    Course Main Course
    Cuisine American
    Prep Time 7 minutes minutes
    Cook Time 45 minutes minutes
    Total Time 52 minutes minutes
    Servings 6 servings
    Calories 554kcal
    Author Jessica Burgess

    Ingredients

    • 5 – 15 ounce cans great northern beans 3 drained and 2 undrained
    • 4 cups chicken broth
    • 2 cups diced ham
    • 2 Tablespoons dried minced onions
    • 2 bay leaves
    • 1 smoked ham hock
    • 1 teaspoon dried basil
    • ¼ teaspoon salt
    • ¼ teaspoon black pepper
    • ¼ teaspoon cayenne pepper

    Instructions

    • Place all ingredients into a large pot or dutch oven.
    • Bring to a boil for 5-10 min* stirring frequently.
    • Reduce heat to a simmer. Simmer for 30-35 min stirring occasionally.
    • Once done remove bay leaves and ham hock.
    • Remove as much meat as possible from the ham hock and return the meat to the pot. 
    • Stir once more and serve with sweet cornbread and a dash of black pepper if desired. 

    Video

    Notes

    * For creamier beans, boil for 10 minutes and stir often. If less creamy beans are desired boil for a shorter amount of time and stir less often.
    To Store: Refrigerate any leftovers in an airtight container for up to 5 days.
    To Freeze: You can also freeze ham and beans in an airtight container for up to 3 months. Let them thaw in the refrigerator overnight before warming. 

    Nutrition

    Serving: 1serving | Calories: 554kcal | Carbohydrates: 77g | Protein: 42g | Fat: 10g | Saturated Fat: 3g | Polyunsaturated Fat: 1g | Monounsaturated Fat: 3g | Cholesterol: 54mg | Sodium: 1259mg | Potassium: 1410mg | Fiber: 18g | Sugar: 2g | Vitamin A: 42IU | Vitamin C: 6mg | Calcium: 209mg | Iron: 7mg

    Cornflake Brownies

    March 7, 2023

    A cornflake brownie propped up around other brownies.

    Cornflake Brownies: Fudgy brownies made with a brownie mix, that’s topped with a delicious cornflake topping that’s made of Corn Flakes, caramels, and evaporated milk. They’re a deliciously soft and chewy brownie recipe that’s perfect for a sweet craving.

    We love putting twists on brownie recipes, and if you do too, then we think you’re going to love these red velvet brownies!

    Stack of cornflake brownies.

    If you love brownie recipes as much as we do, then you’re going to love the twist that we put on a lot of these! We’ve made strawberry brownies, banana pudding brownies, lemon brownies, and even butterscotch brownies!

    But I have to say, these caramel cornflake brownies rank right up there at the top of the best chocolate brownies for sure, and even on of our top favorite dessert recipes.

    [feast_advanced_jump_to]

    Why This Recipe Works

    • Chewy, Crunchy, and Soft: The texture of the crunchy cornflakes, combined with the chewy caramel and the soft brownie base, is a texture that’s hard to beat.
    • Simple Recipe: Since this recipe uses a brownie mix, it makes this an easy recipe that uses just a few simple ingredients to make a decadent dessert. If you don’t want to use a brownie mix, you may prefer this homemade brownie recipe.
    • Bake and Chill: Once you bake the brownies from the boxed mix directions, you’ll only need to chill the rest. So you can make this recipe ahead of time and allow it to sit in the refrigerator until you’re ready to serve!

    Ingredients Needed

    I’ve highlighted a couple of ingredients with some relevant notes. Aside from this, the ingredients needed are pretty basic.

    Ingredients for corn flake brownies on kitchen counter.
    • Brownie Mix – I chose to use the Betty Crocker Supreme Original brownie mix but you can use your favorite mix. Do note that you’ll need to gather the ingredients that your box mix calls for as well, such as eggs, oil, water, etc.
    • Caramels – Using caramel candies is best for this recipe, instead of the caramel baking bits that you may see in the grocery store.
    • Cornflakes – You’ll want to use regular cornflakes instead of frosted cornflakes (although you can use them but it may be a lot sweeter and the recipe is sweet as it is).

    Substitutions

    Sometimes substitutions are necessary because of ingredients that are unavailable or needed for dietary restrictions. Here are some suggestions that can help:

    • Cereal – if you don’t have cornflakes on hand for this recipe, you should be able to use other cereal such as Cheerios.
    • Brownies – you can absolutely make brownies from scratch instead of using a box mix if you prefer. Or, you can try a dark chocolate brownie mix instead of a milk chocolate mix for a different type of sweet combo.

    How to Make Cornflake Brownies

    Make sure you allow enough time for the caramel cornflake topping to chill and thicken before serving.

    These cornflake brownies are broken into 3 components:

    • making the brownies
    • making the caramel topping
    • chill brownies and caramel topping

    *Be sure to see the recipe card below for the full ingredients list & instructions!*

    Make the Brownies

    STEP 1. Preheat and Prep. Begin by preheating the oven to the temperature your brownie mix or recipe recommends, (mine was 350°) and line an 8×8 or 9×9 baking dish or square pan with parchment paper.

    I lined my baking dish with parchment paper (cut the corners) and sprayed the baking dish with cooking spray before adding the paper.

    Brownie mix with egg, oil and water.
    Image 1
    Brownie mix, mixed together in glass bowl.
    Image 2

    STEP 2. Make brownie batter. Make your brownie mix batter according to the package directions (Images 1 & 2).

    My brownie mix required one egg, 3 tablespoons of water, and ⅓ cup oil.

    Mine baking pan was a 9×9 so I did 28 minutes.

    Brownie batter in 8x8 baking dish, sitting on white kitchen counter.
    Image 3
    Baked brownies in white 8x8 baking dish, sitting on cooling rack.
    Image 4

    STEP 3. Bake brownies. Pour the brownie mix in to prepared pan (Image 3).

    STEP 4. Bake. Next, bake the brownies according to the brownie mix’s directions, remove them from the oven, and allow them to cool on a wire rack (Image 4).

    Tip: This is why I specifically love using parchment paper to line the baking dish with. To speed up the cooling process of the freshly baked brownies, I can easily lift up the parchment paper, lifting the brownies out, allowing them to sit on the cooling rack to cool faster than resting in the baking dish. This saves time and prevents putting super hot brownies in the refrigerator.

    Caramel candies in glass bowl with evaporated milk.
    Image 5
    Melted caramel candies in glass bowl.
    Image 6

    Make the Caramel Cornflake Topping

    While the brownies are cooling on a wire rack make the cornflake topping.

    STEP 5. Add caramels and milk to bowl. Add evaporated milk and caramels to a microwave-safe bowl that will be big enough to add in the 4 cups of cornflakes in a bit (Image 5).

    STEP 6. Melt. In 30-second intervals, melt the caramels and milk together in the microwave and stir after each 30-second interval. (This took a total of about 5 times for me.)

    Corn Flakes poured in to melted caramel in glass bowl.
    Image 7
    Corn Flakes stirred and mixed in with melted caramel candies.
    Image 8

    STEP 7. Add cereal. Add cornflakes to the caramel and stir to combine (Images 7 & 8).

    Caramel cornflake mixture poured on top of baked brownies in baking dish.
    Image 9
    Caramel cornflakes spread out evenly on top of baked brownies.
    Image 10

    Then place the brownies back in the baking dish (if you removed them).

    STEP 8. Top brownies. Pour the cornflake topping on top of the brownies, and spread evenly to create a cornflake layer (Images 9 & 10).

    Chilled caramel corn flakes on top of baked brownies, sitting on parchment paper.

    STEP 9. Chill. Place in refrigerator and allow to cool for 2-3 hours, or until topping has hardened (Image above).

    Cornflake brownies cut in to squares, and the middle on sticking up to see the brownie and the topping.

    STEP 10. Slice. Slice and serve the caramel cornflake crunch brownies. I sliced mine in to 9 squares (Image above).

    Recipe Pro Tips

    • Leftover evaporated milk. Since this recipe doesn’t use a full can, we use any leftovers as coffee creamer.
    • Smaller pieces. The brownies are very sweet and rich. You can cut them into smaller sizes to stretch out the servings and it will be plenty for a serving.
    Hand holding a square corn flake brownie.

    Recipe FAQs

    How do you store cornflake brownies?

    To keep the caramel crunch topping thick, store the brownies covered, in an airtight container, in the refrigerator for best results, instead of room temperature, for 3-4 days.

    Can you make cornflake brownies ahead of time?

    Absolutely. Actually, since the brownies need time to chill so the topping with harden, making them ahead of time is ideal. However, I would recommend still making them the night before or the morning of.

    Can I make these brownies from scratch instead?

    Of course! This recipe is very forgiving so making the brownies from scratch, even if it makes more than what this recipe calls for, should be ok. It may just change the ratio of the thickness of the topping compared to the brownie layer. These Instant Pot Brownies are made from scratch, which would also be fun to try.

    More Cereal Recipes You’ll Love

    Love using cereal in recipes? We do too. Here are some of our other favorites:

    • Lucky Charms Treats stacked on top of one another, sitting on white counter.
      Lucky Charms Treats
    • Close up of cornflake candy cookies
      Cornflake Candy Cookies
    • lucky charms pancakes
      Lucky Charms Pancakes
    • Rice krispie treats on wooden board.
      The BEST Rice Krispie Treats

    Did you make this? I’d be so grateful if you left a “star” rating below to let me know what you thought! Then, the next time you need a quick and easy recipe, come back to Fantabulosity to browse all of my easy recipes!

    Recipe

    A cornflake brownie propped up around other brownies.
    Print Pin
    5 from 10 votes

    Cornflake Brownies

    Cornflake Brownies: Fudgy brownies made with a brownie mix, that's topped with a delicious cornflake topping that's made of Corn Flakes, caramels, and evaporated milk. They're a deliciously soft and chewy brownie recipe that's perfect for a sweet craving.
    Course Dessert
    Cuisine American
    Prep Time 2 minutes minutes
    Cook Time 28 minutes minutes
    Chill Time 2 hours hours
    Total Time 2 hours hours 30 minutes minutes
    Servings 9 brownies
    Calories 331kcal
    Author Jessica Burgess

    Ingredients

    • 16 ounce boxed brownie mix or your favorite brownie recipe
    • ingredients needed according to your brownie mix directions Mine used an egg, oil and water.

    Cornflake Topping

    • ⅓ cup evaporated milk
    • 2 cups caramels
    • 4 cups Corn flakes

    Instructions

    • Preheat oven to the temperature that's instructed on your brownie mix or favorite brownie recipe. I preheated my oven to 350° F.
    • Line a 9×9 baking dish with parchment paper. See blog post for tips.
    • Make brownie mix according to package direcctions, and bake.
    • Remove brownies from the oven once they're baked, and allow them to cool while making caramel cornflake topping.

    Caramel Cornflake Topping

    • Add caramels and milk to bowl. Add evaporated milk and caramels to a microwave-safe bowl that will be big enough to add in the 4 cups of cornflakes in a bit.
    • Melt. In 30-second intervals, melt the caramels and milk together in the microwave and stir after each 30-second interval. (This took a total of about 5 times for me.)
    • Add cereal. Add cornflakes to the caramel and stir to combine
    • Top brownies. Pour the cornflake topping on top of the brownies, and spread evenly.

    Chill

    • Chill. Place in refrigerator and allow to cool for 2-3 hours, or until topping has hardened.
    • Slice in to 9 squares (Or smaller if you prefer more, smaller, servings.)

    Notes

    Smaller pieces. The brownies are very sweet and rich. You can cut them into smaller sizes to stretch out the servings and it will be plenty for a serving.
    How to store: Store leftovers in an airtight container in the refrigerator for 3-4 days.

    Nutrition

    Serving: 1brownie | Calories: 331kcal | Carbohydrates: 52g | Protein: 4g | Fat: 13g | Saturated Fat: 2g | Polyunsaturated Fat: 4g | Monounsaturated Fat: 6g | Trans Fat: 0.03g | Cholesterol: 6mg | Sodium: 230mg | Potassium: 162mg | Fiber: 0.4g | Sugar: 37g | Vitamin A: 267IU | Vitamin C: 3mg | Calcium: 98mg | Iron: 4mg

    Crispy Chicken Tacos

    February 27, 2023

    Crispy chicken tacos baked on baking sheet.

    Crispy Chicken Tacos: Crunchy tacos, baked on a baking sheet, using chicken, shredded cheddar cheese, lime juice, and chicken taco seasoning to make the most delicious crunchy chicken tacos. It’s a 30-minute or less dinner that you’ll want to add to your meal plan rotation!

    Love crispy tacos? If so, you’ll also want to make sure to try these fried tacos soon too!

    Baked crispy chicken tacos on baking sheet.

    We love a good taco recipe on taco night and these easy crispy chicken tacos are by far one of our favorites. These chicken street tacos and fish finger tacos are other easy recipes that your whole family will love too! Or, if you’re looking for healthier recipes, these 21-Day Fix chicken tacos are a great option, or you can even make a taco salad with Catalina dressing to get in some greens.

    [feast_advanced_jump_to]

    Why This Recipe Works

    • A nice change from beef: Ground beef tacos are delicious but switching things up by using chicken, is a wonderful change every once in a while. You can use any ground beef for this walking taco casserole this week!
    • They’re baked: When the chicken and cheese are baked in to the crispy shells, it creates an amazing warm combo of flavors!
    • Ready in about 15 minutes: With just a few minutes to prep the chicken taco meat, fill the shells, and then bake… these tacos are ready for toppings in about 15 minutes; perfect for weeknight dinners.

    Ingredients Needed

    • Cooked Shredded Chicken – We love boiling boneless, skinless chicken thighs to use for a lot of different chicken recipes but especially this one. You can cook your own slow cooker shredded chicken ahead of time, or even use a rotisserie chicken from the grocery store (then you can even use the bones to make a rotisserie chicken broth), cooked chicken breasts, or your favorite type of chicken.

    TIP: Cook extra chicken so you can also make these chicken fajita wraps and these Chicken Chipotle Melts, soon!

    Boiled chicken thighs on a white plate.
    Shredded boiled chicken thighs
    • Lime Juice – you don’t have to put this in the recipe but it’s absolutely encouraged. It adds the perfect hint of tang for a delicious Mexican dish.
    • Taco Seasoning – you can use a packet of store-bought taco seasoning but we absolutely love using 3 Tablespoons of this homemade chicken taco seasoning recipe.
    • Avocado Oil – to help the seasoning cling to the chicken, oil is recommended.
    Ingredients for crispy chicken baked tacos
    • Shredded Cheddar – we love using the Mexican-style blend cheeses for this recipe.
    • Crunchy Taco Shells – the store-bought shells are perfect for this recipe, however, you’re more than welcome to bake your own corn tortillas.
    • Taco Toppings – top your tacos with your favorite toppings, such as lettuce, Rotel Salsa, salsa verde, corn salsa, more cheese, sour cream, black olives, black beans, jalapeno ranch dressing, chunky guacamole, green chiles, fresh cilantro, hot sauce.

    Substitutions

    Sometimes substitutions are necessary because of ingredients that are unavailable or needed for dietary restrictions. Here are some suggestions that can help:

    • Cheese – you can use shredded cheddar, monterey jack, pepper jack, or your favorite melty cheese.
    • Meat – you can use ground chicken, ground beef, venison, seafood, or your favorite type of meat that you have on hand! Or, these shredded beef tacos in the slow cooker are a great option too!
    • Oil – you can use olive oil instead of avocado oil if you prefer.

    Equipment

    A rimmed sheet pan lined with parchment paper is ideal for baking in the oven but you could use a baking dish if needed. You can also use a small toaster oven as well.

    How to Make Crispy Chicken Tacos

    Making this chicken taco recipe is so easy, with just a few steps!

    *Be sure to see the recipe card below for the full ingredients list & instructions!*

    If you already have the pre-cooked chicken, preheat your oven to 325°F. If you still need to cook your chicken, do this prior to preheating and prepping the tacos.

    STEP 1. Prep Baking Sheet. Line a large, rimmed baking sheet with parchment paper, that’s large enough to fit 10 tacos.

    Shredded Chicken with taco seasoning, lime juice and oil in bowl.
    Image 1
    Cooked shredded chicken in bowl with taco seasoning, lime juice and oil.
    Image 2

    STEP 2. Make seasoned chicken. Coat the cooked chicken with oil, lime juice, and taco seasoning (Image 1). Stir until combined and seasoning is mixed in with the chicken, as evenly as possible (Image 2).

    Crispy taco shells on baking sheet, filled with chicken and cheese.
    Image 3
    Baked crispy chicken tacos on baking sheet.
    Image 4

    STEP 3. Fill tacos. Fill the taco shells with about ¼ cup of the chicken mixture, and sprinkle about a Tablespoon of shredded cheese on top of the chicken filling. Arrange tacos on a baking sheet in a single layer. (Image 3).

    Tip: Propping the tacos up on one another, making the first row lean against the rim on the baking sheet can help start the propping-up process. Propping them up will help the cheese and chicken mixture stay inside of the shells while baking.

    STEP 4. Bake. Place the baking sheet in the oven and bake at 325° for about 6-7 minutes or until the cheese is melted and the shells are golden brown (Image 4).

    Crispy chicken tacos on baking sheet, that are topped with lettuce, salsa and sour cream.

    STEP 5. Enjoy. Enjoy the tacos as they are, or top them with your favorite toppings!

    Recipe Pro Tips

    • Add toppings as you go. In case there are leftovers, it’s best to top the tacos with your favorite toppings when you’re going to eat them. This is better for reheating or to help prevent the tacos from getting too soggy from wet ingredients.
    • Serve at a party. Serving baked tacos at a party is a great way to feed a crowd! Bake them in advance, serve them at a taco bar or fiesta party, and let your guests top them with their favorite toppings!

    Recipe FAQs

    How do you make crispy tacos?

    Baking crunchy taco shells in the oven will give you a crispy taco, and is our favorite way to make them.

    How do you keep crunchy tacos crispy?

    If you have leftover crunchy tacos, sometimes they can become soft when chilled from the moisture. Reheat crunchy tacos in the air fryer to get them crispy again.

    What do you serve with chicken tacos?

    Popular sides to serve with chicken tacos are this pico de Gallo recipe, cowboy queso, rotel dip, hot taco dip, cold taco dip, Spanish rice, and this elote dip recipe.

    Storage

    If you have leftover baked chicken tacos, store them in an airtight container or a sealable, plastic bag, and place in the refrigerator for 3-4 days.

    More Recipes You’ll Love

    If you love easy Mexican recipes like this one, then you’ll also love these:

    • A plate holds a serving of crock pot chicken enchiladas that has been topped with sour cream and chives
      Crock Pot Chicken Enchiladas
    • Creamy taco soup serving in white bowl.
      Creamy Taco Soup
    • Close-up of pinwheel sandwiches stacked on top of one another.
      Pinwheel Sandwiches
    • Taco Chicken Casserole on a plate.
      Taco Chicken Casserole

    Did you make this? I’d be so grateful if you left a “star” rating below to let me know what you thought! Then, the next time you need a quick and easy recipe, come back to Fantabulosity to browse all of my easy recipes!

    Recipe

    Crispy chicken tacos baked on baking sheet.
    Print Pin
    5 from 4 votes

    Crispy Chicken Tacos

    Crispy Chicken Tacos: Crunchy tacos, baked on a baking sheet, using chicken, shredded cheddar cheese, lime juice, and chicken taco seasoning to make the most delicious crunchy chicken tacos!
    Course Appetizer, Main Course
    Cuisine Mexican
    Prep Time 8 minutes minutes
    Cook Time 7 minutes minutes
    Total Time 15 minutes minutes
    Servings 10 tacos
    Calories 195kcal
    Author Jessica Burgess

    Ingredients

    • 10 crunchy taco shells
    • 2½ cups cooked, shredded chicken
    • 6 ounces shredded Mexican-style cheese Or about ½ -1 cup shredded cheese
    • 1 packet taco seasoning Or 3 Tablespoons of this homemade chicken taco seasoning.
    • 1 teaspoon lime juice
    • 2 Tablespoons avocado oil
    • Your favorite toppings

    Instructions

    • Preheat oven to 325°F, and line a rimmed baking sheet with parchment paper.
    • Combine cooked, shredded chicken with taco seasoning, lime juice and oil. Stir until combined and chicken is coated with seasoning mixture.
    • Begin filling crunchy taco shells with about ¼ cup of chicken mixture, and then top with about 1 Tablespoon of shredded cheese.
    • Line baking sheet with tacos, in a single layer.
    • Bake at 325°F for 6-7 minutes or until cheese is melted and shells are a deep golden brown.
    • Top with your favorite toppings if desired, and enjoy!

    Notes

    Tip: Propping the tacos up on one another, making the first row lean against the rim on the baking sheet can help start the propping-up process. Propping them up will help the cheese and chicken mixture stay inside of the shells while baking.
    Storage: If you have leftover baked chicken tacos, store them in an airtight container or a sealable, plastic bag, and place in the refrigerator for 3-4 days. 

    Nutrition

    Serving: 1taco | Calories: 195kcal | Carbohydrates: 10g | Protein: 14g | Fat: 11g | Saturated Fat: 4g | Polyunsaturated Fat: 2g | Monounsaturated Fat: 5g | Trans Fat: 0.03g | Cholesterol: 37mg | Sodium: 480mg | Potassium: 124mg | Fiber: 1g | Sugar: 1g | Vitamin A: 445IU | Vitamin C: 2mg | Calcium: 212mg | Iron: 1mg

    Chicken Taco Seasoning

    February 26, 2023

    Homemade Chicken Taco Seasoning in small white bowl.

    Chicken Taco Seasoning: Make your own seasoning that helps you know what’s in it, unlike the store-bought packets. This homemade chicken taco seasoning makes the best chicken taco around, especially baked crispy chicken tacos!

    Chicken taco seasoning in small white bowl.

    Our favorite way to season taco recipes is with this homemade taco seasoning mix. Some of our favorite recipes to use this spice mix in, are this taco chicken casserole and these chicken street tacos.

    [feast_advanced_jump_to]

    Why This Recipe Works

    • Clean ingredients: This seasoning blend is made using ingredients that you probably already have in your spice cabinet (or can easily get at the grocery store) and you don’t have to worry about ingredients in it that you can commonly find in a packet of taco seasoning; such as corn syrup solids, food dye, and corn maltodextrin.
    • Make a big batch: Even though this recipe makes one small batch, the best part is that you can make a double batch, triple, or larger batch of this spice blend and store it in a container such as a mason jar, and use it as needed or when meal prepping other dinners like this Catalina Taco Salad, and is ready for you on busy weeknights.
    • Use it in other recipes too! Even though this is a chicken taco seasoning that you may think you can only use in a chicken recipe, you can absolutely use it in a ground turkey or ground beef recipe too! We love it in this hot taco dip, this taco soup recipe, this taco pasta, taco pinwheels, and this taco layer dip. Or, have fun with it in these shredded beef tacos!

    This recipe makes about 3 Tablespoons of chicken taco seasoning and will be ready to go in your ground chicken tacos, turkey tacos, shredded chicken, or your favorite Mexican dishes!

    Ingredients Needed

    Just a few basic ingredients are all it takes to make this easy homemade taco mix!

    *Be sure to see the recipe card below for the full ingredients list & instructions!*

    Labeled ingredients for chicken taco seasoning.

    Substitutions

    If you’re shorthanded on some of the spices and ingredients, you may want to substitute some of the items. Here are tips that can help:

    • Garlic Powder – if you’re short on garlic powder, you could use garlic salt instead but reduce the amount of salt that the recipe calls for.
    • Smoked Paprika – if you have regular paprika instead of smoked paprika, that should be just fine.
    • Oregano – coriander can be substituted for oregano if desired.
    Spice jars on counter, that are used to make chicken taco seasoning.

    Buy the spice jars I use, and love! Use code: FANTAB10 for 10% off.

    How to Make Chicken Taco Seasoning

    It’s super easy to make this homemade seasoning blend!

    I suggest making a large batch so you can store it and have it on hand when you need to make a quick taco recipe.

    Seasonings in glass bowl, ready to be mixed for homemade taco seasoning.
    Image 1
    Mixed seasonings for homemade chicken taco seasoning.
    Image 2

    STEP 1. Mix. Add all of the ingredients/seasonings to a small glass bowl (Image 1) and stir until combined (Image 2).

    STEP 2. Use or store. If using right away, using the full batch (about 3 Tablespoons) is delicious with about a pound of meat.

    Tip: Add to your meat as you normally would or mix with ⅓ cup of tomato sauce for an enhanced tomato-based flavor.

    Feel free to use less/more based on your taste preference. We use all 3 Tablespoons for one pound of meat.

    Recipe Pro Tips

    • Flexible. If you prefer stronger garlic, saltiness, or spicier seasoning, this recipe is flexible and you can add more or less of the ingredients to suit your taste, or you can even use it as the seasoning for these chicken fajita wraps.
    • Gift Giving. If you love making DIY or homemade gifts, this seasoning is a great give to package up in to these small cute jars!

    Recipe FAQs

    What is the difference between taco seasoning and chicken taco seasoning?

    There’s not much of a difference between the two, and both seasonings can be used for beef and chicken.

    Do you cook meat before adding taco seasoning?

    Yes. Fully cook the meat you’re making, and then coat it with the taco seasoning.

    How do you store chicken taco seasoning?

    Store homemade taco seasoning in an airtight container and make sure it’s in a cool, dark place, such as a pantry or a cabinet.

    More Recipes You’ll Love

    If you love finding ways to skip store-bought recipes and make your own homemade recipes, you’ll also love these:

    • Jalapeno Ranch Dip in small crock.
      Jalapeno Ranch Dip (Or Dressing!) Recipe
    • Cheese dip in sauce pan, with soft pretzels surrounding it.
      Pretzel Cheese Dip
    • Chipotle Aioli in small bowl, with a polenta fry dipping in to it.
      Chipotle Aioli Recipe
    • Buffalo Blue Cheese Bacon Dip- Easy dip recipe for a party, or to serve alongside french fries, chips, or a steak!
      Buffalo Blue Cheese Dip

    Did you make this? I’d be so grateful if you left a “star” rating below to let me know what you thought! Then, the next time you need a quick and easy recipe, come back to Fantabulosity to browse all of my easy recipes!

    Recipe

    Homemade Chicken Taco Seasoning in small white bowl.
    Print Pin
    5 from 1 vote

    Chicken Taco Seasoning

    Chicken Taco Seasoning: Make your own seasoning that helps you know what's in it, unlike the store-bought packets. This homemade chicken taco seasoning makes the best chicken taco around!
    Course Main Course
    Cuisine Mexican
    Prep Time 5 minutes minutes
    Total Time 5 minutes minutes
    Servings 3 Tablespoons
    Calories 63kcal
    Author Jessica Burgess

    Ingredients

    • 1 Tablespoon ground cumin
    • 1 Tablespoon chili powder
    • ¼ teaspoon black pepper
    • ¼ teaspoon red pepper flakes
    • ½ teaspoon oregano
    • ¼ teaspoon salt (plus more to taste)
    • ½ teaspoon smoked paprika
    • 1 teaspoon garlic powder

    Instructions

    • Mix all of the ingredients together in a small bowl, until evenly blended as possible.
    • Use as you would in your favorite taco recipe or store in an airtight container in a cool dark place.
      This makes 3 Tablespoons of your own taco seasoning. Use this for 1 pound of meat. (You can use 2 Tablespoons if desired but we like a stronger taco flavor in our dishes!)
    • **You may find that you want to add ⅓ cup of water to help the meat absorb the seasoning more. Or, instead of water, you can use ⅓ cup tomato sauce to get an extra tomato flavor.

    Notes

    Tip: Add to your meat as you normally would or mix with ⅓ cup of tomato sauce for an enhanced tomato-based flavor.
    Flexible. If you prefer stronger garlic, saltiness, or spicier seasoning, this recipe is flexible and you can add more or less of the ingredients to suit your taste.

    Nutrition

    Serving: 3tablespoons | Calories: 63kcal | Carbohydrates: 11g | Protein: 3g | Fat: 3g | Saturated Fat: 0.4g | Polyunsaturated Fat: 1g | Monounsaturated Fat: 1g | Sodium: 734mg | Potassium: 351mg | Fiber: 5g | Sugar: 1g | Vitamin A: 3109IU | Vitamin C: 1mg | Calcium: 107mg | Iron: 6mg

    The BEST Rice Krispie Treats

    February 25, 2023

    Rice krispie treats on wooden board.

    What makes these rice krispie treats the best? Adding a bit of milk to the marshmallows makes them creamy and helps make them become a gooey treat that’s hard to beat!

    Rice krispie treats on wooden cutting board.

    Even though we absolutely love these chocolate rice krispie treats, these cookies and cream rice krispie treats, and of course… these caramel rice krispie treats, sometimes there’s nothing better than classic homemade rice krispie treats.

    [feast_advanced_jump_to]

    Why This Recipe Works

    • It’s a classic! You’ll commonly find this favorite dessert at family gatherings, holidays, summer BBQs, and many more events. It’s something that guests see on the table and they trust it! So why not be the one to bring the best rice krispie treat recipe there is?
    • No bake: When you need something to travel or you simply don’t want to have to worry about keeping a dessert cold or warm, this is a great option! It’s great for camping, boating, and many more trips!
    • Bakery style: Have you ever been to a bakery where the delicious treats are large, thick, and look so appealing? If made using the tips below, you can have your own bakery-style treats too!

    Ingredients Needed

    I’ve highlighted a couple of ingredients with some relevant notes. Aside from this, the ingredients needed are pretty basic.

    Ingredients for rice krispie treats on a white counter.
    • Butter – We use unsalted for this recipe but you can use salted if you prefer. Sometimes the slight saltiness combined with the sweetness is the perfect touch.
    • Milk – You can use whole milk or 2% for this recipe, or even see the substitution ideas below for a twist.
    • Marshmallows – Did you know you can make rice krispie treats with marshmallow fluff too? That may be something you want to try next time!

    Substitutions

    Sometimes switching things out can be fun, or a necessity if you’re short on items. Here are some ideas of what can be substituted if you’d like:

    • Cereal – It’s easy to switch the types of cereal out if needed. Some ideas that we’ve tried or these Fruity Pebbles treats and these Lucky Charms treats. However, you can also try Cheerios, Golden Grahams, and more.
    • Milk – if you’re short on milk, check to see if you have a can of sweetened condensed milk on hand for a substitute.

    How to Make this Classic Dessert

    *Be sure to see the recipe card below for the full ingredients list & instructions!*

    Prepare a 9X13 inch baking dish with cooking spray and set aside.

    Melted butter in stock pot for rice krispie treats.
    Image 1
    Milk and vanilla added to butter in stock pot for rice krispie treats.
    Image 2

    STEP 1. Butter. In a large saucepan over low heat, melt the butter (Image 1).

    STEP 2. Marshmallow mixture. Then add the milk and vanilla extract (Image 2).

    Marshmallows added to stock pot with butter, milk and vanilla.
    Image 3
    Melted marshmallows being lifted up on wooden spoon.
    Image 4

    STEP 3. Marshmallow mixture. Next, add the mini marshmallows to the butter mixture (Image 3).

    Step 4. Melt. Stirring constantly, melt marshmallows over low heat until they are fully melted. This may take around 5 minutes. Remove the pan from the heat (Image 4).

    Rice krispies add to melted marshmallows in stock pot.
    IMage 5
    Wooden spoon stirring marshmallows and rice krispies.
    Image 6

    STEP 5. Add cereal. Next, stir in the rice krispie cereal until it’s fully mixed in (Images 5 & 6).

    Rice krispie marshmallow treats poured in to baking pan.
    Image 7

    STEP 6. Press in pan. Pour the mixture into the prepared pan, gently pressing the mixture down.

    Tip: Don’t press too hard, as this can make the treats hard. (See more tips below.)

    Rice krispie treat square on white background.

    STEP 7. Cool and cut. Let it cool and stiffen, and then cut into squares and enjoy!

    Recipe Pro Tips

    • Nonstick Pressing. Use the back of a spoon, the bottom of a smooth juice glass, or even your fingers, that’s greased with cooking spray will make it even easier and less sticky when pressing.
    • Thinner treats. If preferred, you can place the treats in a half sheet pan and this will result in a thinner rice krispie bar.

    Recipe FAQs

    Can I make Rice Krispie Treats the night before?

    You can, even though they’re best enjoyed the day of. Just make sure to store them properly to ensure freshness.

    What is the best way to cut Rice Krispie Treats?

    Once cooled, you can dump the large rectangle of treats on to a cutting board and then cut them evenly. However, you can also cut them right in the pan if needed.

    Do you freeze or bake rice crispy treats?

    Neither. However, you can freeze rice krispie treats if needed.

    Storage

    Store any leftover rice krispie treats in an airtight container or plastic bag. Make sure it is sealed the best way possible, to help the treats stay soft and fresh for as long as possible.

    Wrap properly in freezer paper and in a freezer bag or freezer container for up to 1-2 months. Remove from freezer and allow to call at room temperature and then enjoy.

    More No-Bake Recipes

    If you love no-bake recipes, then you’ll love these other treats that can be made with no oven or cooking involved, especially these fun carrot cake rice krispie treats.

    • Curry chicken salad with grapes in a white bowl.
      Curry Chicken Salad
    • A slice of caramel cream pie on a round plate, with a fork lying next to it.
      Caramel Cream Pie
    • squares of peanut butter fudge on white plate
      Peanut Butter Fudge with Condensed Milk
    • A slice of pumpkin lush on round plate.
      Pumpkin Lush

    Did you make this? I’d be so grateful if you left a “star” rating below to let me know what you thought! Then, the next time you need a quick and easy recipe, come back to Fantabulosity to browse all of my easy recipes!

    Recipe

    Rice krispie treats on wooden board.
    Print Pin
    5 from 4 votes

    The BEST Rice Krispie Treats

    This rice krispie treats recipe is made with milk, making the marshmallows more creamy and the treats gooey and soft!
    Course Dessert
    Cuisine American
    Prep Time 10 minutes minutes
    Cook Time 5 minutes minutes
    Cooling time 1 hour hour
    Total Time 15 minutes minutes
    Servings 16 squares
    Calories 198kcal
    Author Jessica Burgess

    Ingredients

    • ½ cup butter
    • 2 Tablespoons milk
    • 1 Tablespoon vanilla extract
    • 10 cups mini marshmallows
    • 10 cups puffed rice cereal

    Instructions

    • Prepare a 9X13 inch baking dish with cooking spray and set aside.
    • In a large saucepan over low heat, melt the butter. Then add the milk,vanilla extract and the mini marshmallows.
      Stirring constantly, melt marshmallows over low heat until they are fully melted. This may take around 5 minutes. Remove the pan from the heat.
    • Next, stir in the rice krispie cereal until it's fully mixed in.
    • Pour the mixture into the prepared pan, gently pressing the mixture down. (Don't press too hard, as this can make the treats hard.)
    • Let it cool and stiffen, an then cut into squares and enjoy!

    Video

    Notes

    These result in soft, thick treats! You can use a larger pan if you prefer treats that are thinner.
    Tip: 
    Grease whatever you use to gently press the treats in, with cooking spray to prevent sticking.
    How to store leftovers:
    Store any leftover rice krispie treats in an airtight container or plastic bag. Make sure it is sealed the best way possible, to help the treats stay soft and fresh for as long as possible.
    Wrap properly in freezer paper and in a freezer bag or freezer container for up to 1-2 months. Remove from freezer and allow to call at room temperature and then enjoy.

    Nutrition

    Serving: 1serving | Calories: 198kcal | Carbohydrates: 36g | Protein: 2g | Fat: 6g | Saturated Fat: 4g | Polyunsaturated Fat: 0.3g | Monounsaturated Fat: 2g | Trans Fat: 0.2g | Cholesterol: 15mg | Sodium: 72mg | Potassium: 21mg | Fiber: 0.2g | Sugar: 18g | Vitamin A: 180IU | Calcium: 6mg | Iron: 0.4mg

    Hot Taco Dip

    February 24, 2023

    Spoonful of hot taco dip in dish.

    Hot Taco Dip Recipe: Made of layers of delicious taco meat, creamy cheeses, beans, and salsa and topped with a lime and onion topping, this warm taco dip is baked and makes a deliciously easy appetizer recipe. It’s delicious served alongside other Mexican dishes, especially this walking taco casserole!

    Hot taco dip in a pie plate with a spoon dishing out a serving.

    When hosting a party or looking for a dip to make for any occasion, a taco dip is always an excellent choice, whether it’s this warm taco dip or this cold taco dip.

    But if taco recipes, in general, are your favorite, like they are ours, you’ll also love this taco chicken casserole, this taco soup, and this taco pasta!

    [feast_advanced_jump_to]

    Why This Recipe Works

    This is the best taco dip recipe! Here’s why:

    • Taco flavors: Who doesn’t love tacos? When you can have tacos in dip form, it gets even better!
    • Make-ahead recipe: You can assemble this up to two days ahead of time if needed. To do this, layer the dip but do not add the topping. Store the layered dip in the fridge until you are getting ready to cook.  Let it sit out at room temp for about 20-30 minutes before baking and add 10 minutes to the cooking time. Place foil on over the top for the first 10 minutes of cooking then remove for the last 25 minutes to keep the cheese from burning. 
    • Ready in only 45 minutes: Assemble, bake, and enjoy in about 45 minutes! Perfect for a last-minute dip idea when entertaining.

    Ingredients Needed

    I’ve highlighted a couple of ingredients with some relevant notes. Aside from this, the ingredients needed are pretty basic.

    Ingredients for hot taco dip on white counter.
    • Cheeses – This recipe uses shredded cheeses and if you have time and the ability to shred the block cheeses yourself, that can make the dip even creamier. However, using pre-shredded cheese is just fine to use.
    • Taco meat – we give directions on how to make the taco meat but if you have leftovers from tacos the night before, it’s a great way to use leftover taco meat!
    • Refried beans – we use black refried beans for this recipe but feel free to use your favorite.
    • Salsa – we use thick and chunky salsa for this recipe to reduce the amount of liquid in the dip, which could make it soupy.
    • Taco Seasoning – we love using homemade taco seasoning but you can use a package of storebought for this recipe.

    Substitutions

    If there are some items in this recipe that you’re not fond of, or that you may be out of, here are some suggestions that may help:

    • Cheeses – we feel like cheddar and Monterey Jack cheeses are the best for this dip but other cheeses such as a Mexican cheese blend or pepper jack cheese could also be wonderful!
    • Meat – we love using ground beef for this recipe but you could also use ground turkey, sausage, or your favorite meat substitute. See more of our ground beef dinner ideas!

    Make it Spicy

    If you love adding spice, you can use some or all of these ingredients: hot taco seasoning, unseeded jalapenos, pickled jalapenos, hot sauce, chili powder, or hot salsa.

    Equipment

    We used a pie dish for this cheesy beef taco dip but if you need to bake it in something different, you can try using a 13×9 casserole dish or a 9×9 square baking dish, being careful not to overfill the dish, where it could bubble-over. (To be safe, you can place the dish on a rimmed baking sheet in the oven, to catch any overflow.)

    How to Make Hot Taco Dip

    This is an easy taco dip recipe, and takes just a few steps!

    This taco dip is broken into 4 components:

    • cooking taco meat
    • assemble the layers
    • bake
    • top with toppings

    *Be sure to see the recipe card below for the full ingredients list & instructions!*

    Heat oven to 350 degrees and spray a 9.5 inch deep dish pie plate with cooking spray.

    Raw ground beef in skillet.
    Image 1
    Cooked ground beef in skillet.
    Image 2

    STEP 1. Brown ground beef. Brown meat over medium heat in a large skillet, making sure to break up into small pieces while cooking. When done, and no pink remains, drain and rinse fat from beef then return it to the pan (Images 1 & 2).

    Taco seasoning in skillet on top of cooked ground beef.
    Image 3
    Cooked ground beef with taco seasoning mixed in, in skillet.
    Image 4

    STEP 2. Make taco meat. Add taco seasoning and stir until fully incorporated (Images 3 & 4).

    Tip: Do not add water like the taco seasoning packaging may call for. This will make it soupy. However, if you prefer a juicier dip, you can add a bit of water.

    Cream cheese and sour cream in glass bowl.
    Image 5
    Cream cheese and sour cream mixed together in glass bowl.
    Image 6

    STEP 3. Make creamy mixture. In a medium mixing bowl stir together cream cheese and sour cream. Stir until very few clumps remain or use a mixer (Images 5 & 6).

    Refried beans layer in baking dish.
    Image 7
    Cream cheese and sour cream mixture spread over refried beans in pie plate.
    Image 8

    How to Layer Hot Taco Dip

    STEP 4. Beans and Creamy Layer. Evenly spread refried beans in the bottom of the dish (Image 7) and then spread the cream cheese mixture on top of the beans (Image 8).

    Salsa layer on top of cream cheese mixture in pie plate.
    Image 9
    Ground beef taco mixture on top of salsa layer.
    Image 10

    STEP 5. Salsa and beef. Spread the salsa on top of the cream cheese mixture (Image 9) then spread the ground beef over the salsa (Image 10).

    Shredded cheddar cheese on top of taco meat.
    Image 11
    Shredded monterey jack cheese on top of cheddar cheese on taco dip.
    Image 12

    STEP 6. Cheese. Finally sprinkle the cheeses on top of the meat (Images 11 & 12).

    STEP 7. Bake. Bake for 25 minutes until warm and bubbly. 

    Onion, cilantro, tomatoes in a glass bowl, ready for mixing.
    Image 13
    Mixed tomatoes, onions and herbs for topping on taco dip.
    Image 14

    STEP 8. Making toppings – if desired. While the dip is baking, mix all the topping ingredients (lime juice, red onion, cilantro, jalapeno, tomatoes) together in a small bowl (Images 13 & 14).

    Baked taco dip in baking dish, ready for toppings.
    Image 15
    Onions, tomatoes, cilantro on top of hot taco dip in baking dish.
    Image 16

    STEP 9. Add toppings. After baking let dip cool for 5 minutes before adding the topping (if doing so) and serve with your favorite corn chips (Images 15 & 16).

    Hot taco dip being lifted out of baking dish with a chip.

    Recipe Pro Tips

    • Additional topping ideas. If you’re looking to add more toppings to this cheesy taco dip, you may want to try black olives, pickled jalapenos, taco sauce, avocados, corn, Mexican cheeses, black beans, chopped green onions, shredded lettuce, etc. 
    • What to serve with this hot dip: Tortilla chips, corn chips (such as Fritos), fresh vegetables, pita chips, and more!

    What to Serve this Taco Dip with:

    This warm taco dip would be delicious to serve with these Tostadas.

    Or, these crispy chicken tacos or these fried tacos would be amazing along with it!

    Recipe FAQs

    What is taco dip made of?

    Most taco dips are made of a taco seasoned ground beef, with a creamy layer of cream cheese and sour cream, and then topped with your favorite taco toppings.

    Why does my taco dip get runny?

    It could be because the ground beef wasn’t drained enough, water was added when making taco meat or the salsa was more watery.

    How do you store taco dip?

    Store any leftovers in an airtight container, or cover with plastic wrap, once it has cooled off, for 2-3 days in the refrigerator.

    More Dip Recipes You’ll Love

    If you love dips as much as we do, then you’ll also love these other dip recipes:

    • A tortilla chip being dipped in a bowl of jalapeño artichoke dip.
      Jalapeno Artichoke Dip
    • Rotel dip with meat, in white bowl, that has a chip dipping in to it.
      Rotel Dip
    • Reuben dip being scooped out of baking dish with metal spoon.
      Reuben Dip Recipe
    • A tortilla chip is being dipped into a big bowl of cowboy queso.
      Cowboy Queso

    Did you make this? I’d be so grateful if you left a “star” rating below to let me know what you thought! Then, the next time you need a quick and easy recipe, come back to Fantabulosity to browse all of my easy recipes!

    Recipe

    Spoonful of hot taco dip in dish.
    Print Pin
    5 from 8 votes

    Hot Taco Dip

    Hot Taco Dip Recipe: Made of layers of delicous taco meat, creamy cheeses, beans, salsa and topped with a lime and onion topping, this warm taco dip is baked and makes a delicious easy appetizer recipe.
    Course Appetizer, Side Dish
    Cuisine Mexican
    Prep Time 15 minutes minutes
    Cook Time 25 minutes minutes
    Total Time 40 minutes minutes
    Servings 6 cups
    Calories 648kcal
    Author Jessica Burgess

    Equipment

    • 9.5 inch, deep dish pie plate

    Ingredients

    • 1 pound ground beef
    • ¼ cup taco seasoning or 1 Packet
    • 1 cup black refried beans
    • ½ cup sour cream
    • 8 ounces cream cheese softened to room temperature
    • 1¼ cup thick and chunky salsa
    • 1½ cup monterey jack cheese shredded
    • 1½ cup cheddar cheese shredded

    Optional Toppings

    • 2 teaspooons lime juice 
    • 2 Tablespoons red onion diced
    • 2 Tablespoons fresh cilantro chopped
    • 2 Tablespoons jalapeno seeded and diced
    • 3 Tablespoons tomato diced

    Instructions

    • Heat oven to 350 degrees and spray a 9.5 inch deep dish pie plate with cooking spray.
    • Brown meat over medium heat, making sure to break up into small pieces while cooking. When done, and no pink remains, drain and rinse fat from beef then return it to the pan. Add taco seasoning and stir until fully incorporated. 
    • In a medium mixing bowl stir together cream cheese and sour cream. Stir until very few clumps remain or use a mixer.

    To Layer Hot Taco Dip

    • Evenly spread refried beans in the bottom of the dish, next spread the cream cheese mixture on top of the beans, spread the salsa on top of the cream cheese mixture, then spread meat over the salsa, and finally sprinkle cheese on top of the meat.

    Bake Dip

    •  Bake for 25 minutes until warm and bubbly.
    •  While the dip is baking, mix all the topping ingredients together in a small bowl.
    • After baking let dip cool for 5 minutes before adding the topping (if doing so) and serve with your favorite corn chips. 

    Video

    Notes

    Leftovers: Store any leftovers in an airtight container, or cover with plastic wrap, once it has cooled off, for 2-3 days in the refrigerator.
    More topping ideas: black olives, pickled jalapenos, taco sauce, avocados, corn, Mexican cheeses, black beans, chopped green onions and shredded lettuce.
    What to serve with this dip: tortilla chips, corn chips, fresh veggies, pita chips and more.

    Nutrition

    Serving: 0.5cup | Calories: 648kcal | Carbohydrates: 18g | Protein: 32g | Fat: 50g | Saturated Fat: 26g | Polyunsaturated Fat: 2g | Monounsaturated Fat: 15g | Trans Fat: 1g | Cholesterol: 157mg | Sodium: 1911mg | Potassium: 498mg | Fiber: 5g | Sugar: 8g | Vitamin A: 2470IU | Vitamin C: 13mg | Calcium: 511mg | Iron: 3mg

    Oreo Mousse

    February 22, 2023

    Oreo mousse in a clear glass single serving container.

    Oreo Mousse: A delicious no bake dessert made with Oreo cookies, heavy whipping cream, and a few other simple ingredients to make a creamy mousse. This can also be made in individual serving cups or in a large bowl, and it only takes 15 minutes to make, and chills for 3 hours before serving!

    Oreo mousse in small clear glass.

    No bake Oreo desserts recipes are some of our favorite dessert recipes around here. This Oreo pudding dessert is a reader favorite and this Oreo dip is amazing to serve with your favorite crackers or other cookies for an easy dessert recipe.

    This 5 ingredient Oreo mousse recipe is a delicious dessert that comes together with simple ingredients, and is the perfect dessert to serve at a summer dinner party or for the holidays or any Oreo lover.

    [feast_advanced_jump_to]

    Why This Recipe Works

    • It uses a few ingredients: With only 5 ingredients, this decadent Oreo recipe uses items that you may even have on hand.
    • Make-ahead recipe: Did you know that you can make this recipe in advance if you want to? Since it needs to chill for at least 3 hours anyway, it’s great to make hours before serving so you can focus on other things.
    • Oreo recipes: Oreos are so popular and if you’re a fan of our Oreo Pizza, this Oreo No-Bake Cheesecake, this Oreo Cheesecake, and these Oreo Rice Krispie Treats, then you’re also going to love this one!

    Ingredients Needed

    I’ve highlighted a couple of ingredients with some relevant notes. Aside from this, the ingredients needed are pretty basic.

    Ingredients for Oreo mousse on white counter.
    • Baking Chocolate – we used semisweet chocolate (chips or baking bar chopped)
    • Heavy Cream – Make sure you use heavy cream, and not milk, as the texture won’t be the same.

    Substitutions

    Sometimes substitutions are necessary because of ingredients that are unavailable or needed for dietary restrictions. Here are some suggestions that can help:

    • Oreos – although we haven’t tried it, we don’t see a reason why you couldn’t use Golden Oreos for this recipe instead, or even other types of cookies.
    • Chocolate – you can use milk chocolate chips as well but the mousse will be sweeter overall. Or, you can use a mix of chocolate chips if you wish; such as half semi sweet and half milk chocolate. This is a great way to use any partial bags you may have.

    Equipment

    We love making small individual cups (we used 6.8 ounce cups) of mousse but you can absolutely make one bowl of this recipe and dish it out in to servings, as needed.

    How to Make Oreo Mousse

    First, it’s best to make space for the finished mousse cups in your refrigerator, so once you’ve made the mousse, you can place it in to chill right away.

    *Be sure to see the recipe card below for the full ingredients list & instructions!*

    How to Make the Chocolate

    STEP 1. Heat cream. Heat ½ Cup of Heavy Cream in the microwave for 40-45 seconds.

    Heavy cream poured over chocolate pieces in glass mixing bowl.
    Image 2
    Melted chocolate and heavy cream in glass bowl.
    Image 3

    STEP 2. Make chocolate. Pour Heated cream over chocolate (Image 2). Let the chocolate and cream sit for 3 minutes before stirring. Once stirred if the chocolate is not melted and smooth, microwave for 15 additional seconds and stir again. Continue to do this until melted. Once smooth, and melted, sit aside to cool (Image 3).

    Oreo cookies in food processor.
    Image 4
    Crushed Oreo cookies in food processor.
    Image 5

    Crushing the Cookies

    STEP 3. Make Oreo crumbs. In a food processor finely blend 12 cookies in to fine crumbs. Reserve 1 Tablespoon of crumbs for garnish if desired (Images 4 & 5).

    If you have extra, you’ll love sprinkling crushed Oreo crumbs on top of these dirt cupcakes!

    Oreo cookies in small, sealable bag, to be crushed.
    Image 6
    Oreos broken in to small pieces, in a small glass bowl.
    Image 7

    STEP 4. Crush cookies. Next place 8 cookies into a ziplock bag and roughly crush into pieces (Images 6 & 7).

    Sugar, vanilla and cream in a large mixing bowl.
    Image 8
    Whipped and mixed cream, sugar and vanilla in glass mixing bowl.
    Image 9

    How to Make the Mousse

    STEP 5. Cream ingredients. Add the remaining cream, powdered sugar, and vanilla to a large mixing bowl and beat until stiff soft peaks form (Images 8 & 9).

    Crushed Oreos added to cream and sugar mixture.
    Image 10
    Crushed Oreos mixed in with cream, sugar and vanilla mixture.
    Image 11

    STEP 6. Add cookies. Add cookie crumbs into cream mixture and stir until combined. Then remove 1 ½ cups of the cookies and cream mixture to set aside to use as the cream layer when assembling the mousse.

    Melted chocolate poured in to remaining Oreo mousse mixture.
    Image 12
    Melted chocolate mixed in with mousse mixture.
    Image 13

    STEP 7. Add melted chocolate. Pour the cooled chocolate from step 2, into the remaining cookie and cream mixture and carefully stir the chocolate into the mixture until fully incorporated.

    Layering the Mousse

    Tip: For a cleaner look you can pipe the mixtures into the desert cups. 

    First layer of Oreo chocolate mousse in dish.
    Image 14
    Broken Oreo pieces on top of chocolate mousse
    Image 15

    STEP 8. First layer. Fill a small bowl about ⅔ full with chocolate mixture, sprinkle roughly crushed Oreo cookie pieces – about one cookie worth (Images 14 & 15).

    Oreo mousse on top of chocolate mousse in glass container.
    Image 16
    Crushed Oreo on top of mousse, with Oreos placed around dish.
    Image 17

    STEP 9. Layer 2. Spoon the reserved cookie and cream mixture on top of crushed cookies, if desired sprinkle with reserved cookie crumbs, and top with a whole cookie (Images 16 & 17).

    STEP 10. Refrigerate. Refrigerate desserts for at least 3 hours before serving, to allow mousse to set.

    A bit of Oreo mousse on a spoon.

    Recipe Pro Tips

    • Cover with plastic wrap. When chilling in the refrigerator, if you cover with plastic wrap, it will help prevent odors from other foods from seeping in to the mousse.
    • Top with whipped cream. Although it’s not necessary, you could add whipped cream to the top of the mousse, especially if your containers are bigger and you need to fill more space in each cup/dish.

    Recipe FAQs

    What is Oreo mousse made of?

    A mixture of chocolate, heavy cream, vanilla extract, powdered sugar and Oreo cookies make up this easy Oreo mousse.

    What is the difference between pudding and mousse?

    Pudding tends to be more dense than mousse and either is cooked or it uses ingredients for thickening, while mousse is more airy.

    Why is it called mousse?

    Mousse originated in France and means “foam” which is a similar texture to mousse.

    Storage

    To store leftovers, refrigerate in an airtight container or cover with plastic wrap, for about 3-4 days.

    More No Bake Dessert Recipes

    If you love no bake simple desserts as much as we do, then you’ll also love these favorites:

    • Smores Cheesecake - No Bake Recipe
      No-Bake S’Mores Cheesecake Recipe
    • Edible cookie dough in glass jar.
      Edible Cookie Dough Recipe
    • A bowl of booty dip surrounded by crackers and with two graham crackers in the dip.
      Booty Dip
    • No bake chocolate pie slice on wood spatula
      Chocolate Cream Cheese Pie

    Have extra Oreos left? Make this Oreo Pancakes Recipe tomorrow morning for breakfast!

    Did you make this? I’d be so grateful if you left a “star” rating below to let me know what you thought! Then, the next time you need a quick and easy recipe, come back to Fantabulosity to browse all of my easy recipes!

    Recipe

    Oreo mousse in a clear glass single serving container.
    Print Pin
    5 from 5 votes

    Oreo Mousse

    Oreo Mousse: A delicious no bake dessert made with Oreo cookies, heavy whipping cream, and a few other simple ingredients to make a creamy mousse that can also be made in individual serving cups or in a large bowl, and it only takes 15 minutes to make, and chills for 3 hours before serving!
    Course Dessert
    Cuisine American
    Diet Vegetarian
    Prep Time 15 minutes minutes
    Chill Time 3 hours hours
    Total Time 3 hours hours 15 minutes minutes
    Servings 8 servings
    Calories 617kcal
    Author Jessica Burgess

    Ingredients

    • 5 ounces semi sweet baking chocolate chips or baking bar chopped
    • 3 cups heavy cream divided
    • 28 chocolate sandwich cookies (I used original Oreos)
    • ¼ cup powdered sugar
    • 1 teaspoon vanilla extract

    Instructions

    Prepare

    • Make space for finished mousse cups in your refrigerator.

    Melt Chocolate

    • Heat ½ cup of heavy cream in the microwave for 40-45 seconds.
      Then pour the heated cream over chocolate. Let the chocolate and cream sit for 3 minutes before stirring.
      Once stirred, if the chocolate is not melted and smooth, microwave for 15 additional seconds and stir again. Continue to do this until melted. Once smooth, and melted, sit aside to cool.

    Prepare Cookies

    • In a food processor finely blend 12 cookies. Reserve 1 Tablespoon of crumbs for garnish if desired.
      Next, place 8 cookies into a ziplock bag and roughly crush into pieces.

    Making the Mousse

    • Add the remaining cream, powdered sugar, and vanilla to a large mixing bowl and beat until stiff peaks form. Fold cookie crumbs into cream mixture. Then remove 1 ½ cups of the cookie and cream mixture to use as the cream layer.
    • Pour the cooled chocolate into the remaining cookie and cream mixture. Carefully fold chocolate into the mixture until fully incorporated.

    To Layer Dessert

    • Fill a small dessert cup about ⅔ full with chocolate mixture, sprinkle some roughly crushed cookies on top (about one cookie worth), then spoon the reserved cookie and cream mixture on top of crushed cookies, if desired sprinkle with reserved cookie crumbs, and top with a whole cookie. Repeat in the remaining cups.
    • Refrigerate desserts for at least 3 hours before serving, to allow mousse to set.

    Notes

    Tip: For a cleaner look you can pipe the mixtures into the desert cups. 
    Serving: You can serve this in a large bowl or individual serving bowls like we did.
    Storage: To store leftovers, refrigerate in an airtight container for about 3 days.

    Nutrition

    Serving: 1serving | Calories: 617kcal | Carbohydrates: 45g | Protein: 6g | Fat: 47g | Saturated Fat: 27g | Polyunsaturated Fat: 3g | Monounsaturated Fat: 14g | Trans Fat: 0.04g | Cholesterol: 102mg | Sodium: 189mg | Potassium: 284mg | Fiber: 3g | Sugar: 30g | Vitamin A: 1322IU | Vitamin C: 1mg | Calcium: 79mg | Iron: 6mg

    Red Velvet Cupcakes with Creamy Chocolate Chip Frosting

    February 18, 2023

    Red velvet cupcake with chocolate chip frosting.

    Red Velvet Cupcakes with a Creamy Chocolate Chip Frosting: Using a red velvet cake mix to make the cupcakes, this recipe is elevated by making this chocolate chip frosting to go on top! (Feel free to make your own red velvet cupcakes from scratch instead!)

    Red Velvet Cupcakes with chocolate chip frosting, on cake stand.

    If you’re a fan of red velvet desserts, then you’ll also love these red velvet donuts and these red velvet cake mix cookies!

    But honestly, the fact that these red velvet cupcakes are topped with a creamy, chocolate chip dip, as a frosting… is absolutley incredible and it may just become your new favorite cupcake recipe.

    [feast_advanced_jump_to]

    Why This Recipe Works

    • The frosting: I mean, a red velvet cupcake topped with any frosting, is going to be delicious. But the second that we topped these with this chocolate chip dip as a frosting, was the day our cupcake game changed.
    • Cake mix: Even though we used a cake mix for this recipe, you can absolutely use your own favorite red velvet cupcake recipe from scratch. However, if you choose to use a cake mix too, you can see what we did with our peppermint cupcakes to elevate the cake mix cupcakes!

    How to Make these Cupcakes

    *Be sure to see the recipe card below for the full ingredients list & instructions!*

    If making the cupcakes for an event, make sure you allow enough time for the cupcakes to cool, before topping with the chocolate chip frosting.

    TIP: Now is a good time to set out the cream cheese and butter, so it can have time to soften while you’re making the cupcakes.

    Red velvet cupcakes on cooling rack.

    STEP 1. Make cupcakes according to package directions, and allow to cool while making frosting.

    Cream cheese and butter in glass bowl.
    Cream cheese and butter mixed together in glass bowl.

    STEP 2. Cream. Mix together the butter and cream cheese in a medium-sized bowl.

    Sugars and vanilla added to glass bowl.
    Sugars and vanilla mixed in with cream cheese and butter.

    STEP 3. Add flavorings. Add in the vanilla and sugars and mix until combined.

    Chocolate Chip Frosting in glass bowl.

    STEP 4. Add chips. Stir in chocolate chips until blended.

    Red velvet cupcakes with chocolate chip frosting, on cooling rack.

    STEP 5. Frost cupcakes. Once cupcakes have cooled, top cupcakes with about 2 tablespoons of the chocolate chip frosting (or however much you want – just make sure to leave enough to cover all the cupcakes) and enjoy!

    Red velvet cupcakes with chocolate chip frosting, sitting on a white plate.

    If not enjoying right away, chill the cupcakes in the refrigerator to make sure frosting stays in tact.

    Red velvet cupcake with chocolate chip frosting, with a bite taken out of it, sitting on a white plate.

    Storage

    Store any leftover cupcakes in the refrigerator, due to the cream cheese in the frosting. Cupcakes do tend to dry out faster when stored in the refrigerator so if making ahead of time, it’s best not to make them a few days in advance.

    TIP: If you prefer more of a cookie dough flavor for the frosting, you may want to try this edible cookie dough recipe!

    More Easy Desserts

    If you love easy desserts like we do, then you’ll also love these other easy recipes:

    • Crock Pot rice pudding in small bowl.
      Crock Pot Rice Pudding
    • A slice of strawberry jello cake, topped with a strawberry slice, sitting on a round plate.
      Strawberry Jello Cake
    • A slice of caramel cake with caramel frosting on a spatula.
      Caramel Sheet Cake with Caramel Frosting
    • A slice of Milky Way sheet cake on top of a round plate.
      Milky Way Cake

    Recipe

    Red velvet cupcake with chocolate chip frosting.
    Print Pin
    5 from 6 votes

    Red Velvet Cupcakes with a Creamy Chocolate Chip Frosting

    Red velvet cupcakes topped with a creamy chocolate chip frosting that's delicous and easy to make!
    Course Dessert
    Cuisine American
    Prep Time 15 minutes minutes
    Cook Time 15 minutes minutes
    Total Time 30 minutes minutes
    Servings 24 cupcakes
    Calories 109kcal
    Author Jessica Burgess

    Ingredients

    Cupcakes

    • Red Velvet Cake Mix
    • The ingredients needed according to your cake mix directions

    Chocolate Chip Frosting

    • 8 ounces cream cheese softened
    • 1 stick butter softened
    • ¾ powdered sugar
    • 2 Tablespoons brown sugar
    • 1 teaspoon vanilla extract
    • 1 cup mini chocolate chips

    Instructions

    Cupcakes

    • Make cupcakes according to package directions, and allow to cool while making frosting.

    Chocolate Chip Frosting

    • Mix together the butter and cream cheese in a medium-sized bowl.
    • Add in the vanilla and sugars and mix until combined. Stir in chocolate chips until blended.
    • Once cupcakes have cooled, top cupcakes with about 2 tablespoons of the chocolate chip frosting (or however much you want – just make sure to leave enough to cover all the cupcakes) and enjoy!
    • Chill cupcakes in the refrigerator to make sure frosting stays in tact.

    Notes

    You may have leftover chocolate chip frosting with this recipe. If you do, you can enjoy the leftovers with graham crackers or your favorite cookies, as a dip!

    Nutrition

    Serving: 1cupcake | Calories: 109kcal | Carbohydrates: 7g | Protein: 1g | Fat: 9g | Saturated Fat: 5g | Polyunsaturated Fat: 0.3g | Monounsaturated Fat: 2g | Trans Fat: 0.2g | Cholesterol: 21mg | Sodium: 65mg | Potassium: 15mg | Fiber: 0.2g | Sugar: 6g | Vitamin A: 261IU | Vitamin C: 0.05mg | Calcium: 20mg | Iron: 0.1mg

    Fried Spaghetti

    February 13, 2023

    A fork holding a bite of fried spaghetti.

    Fried Spaghetti: An easy and delicious way to cook and use up leftover spaghetti! This recipe uses simple ingredients, and is ready in only about 10 minutes! Serve it alongside this air fryer garlic toast, and you have an easy dinner or lunch meal ready in minutes!

    Fried spaghetti on a white plate with a side of Texas toast.

    Our venison spaghetti is by far one of our favorite spaghetti recipes because of the marinara sauce that we make to go with it. (But don’t worry, you can use that recipe using ground beef, ground turkey, or chicken like we use in our chicken bolognese if you want to, too.)

    But no matter what spaghetti recipe is your favorite, it should be a delicious leftover spaghetti recipe!

    [feast_advanced_jump_to]

    What is Fried Spaghetti?

    Fried pasta doesn’t mean coating the noodles in batter and frying it in oil. It simply means cooking the cooked spaghetti noodles (or leftover pasta) over higher heat in a frying pan, giving the pasta’s ends a chewier and crispier texture. Those crispy bits give such an incredible texture to this dish.

    Why This Recipe Works

    • Easy recipe: With just a few steps and a few ingredients, this recipe is simple to make and is ready in just a few minutes!
    • Using leftovers: This is a great way to use any leftover spaghetti (or maybe even this sausage pasta bake) the next day. Sometimes simply reheating regular spaghetti in the microwave can be soggy and flavorless. But making fried spaghetti gives it a whole new life, and you’re able to enjoy it in a different way!
    • Comfort food meal: Pasta dishes in general are a comfort-food favorite. This cheesy fried spaghetti is no exception and is one of our favorite comfort food recipes that the entire family loves.

    Ingredients Needed

    I’ve highlighted a couple of ingredients with some relevant notes. Aside from this, the ingredients needed are pretty basic.

    Ingredients for fried spaghetti on white counter.
    • Leftover Spaghetti – the amount of leftover spaghetti can vary per household and meal of course. However, the flexibility of this recipe is ideal because you can adjust the ingredients based on the amount you have. For this recipe, and the measurements listed in the recipe card below, are based on 4 cups of cooked leftover spaghetti noodles.
    • Cheeses – if you have more or less spaghetti to use, you can lower/increase the amount of cheese based on that… but the beauty of this recipe is that you can’t really have too much cheese. We also love shredding our own mozzarella cheese as it melts better than pre-shredded.
    • Butter – feel free to use salt or unsalted butter for this recipe. A couple of tablespoons of butter will work for a varied amount of leftover spaghetti.

    Substitutions

    Sometimes items can be substituted for various reasons. Here are some suggestions that may help:

    • Garlic – we like using minced garlic but you can use garlic powder or chopped garlic cloves if that’s what you prefer.
    • Butter – if you prefer to use a little olive oil instead of butter, that should work just fine.
    • Cheese – we use mozzarella cheese and parmesan cheese for this recipe but feel free to use other types, such as cheddar cheese, a sharp hard cheese, Italian blend and more.
    • Spices – since the spaghetti was already seasoned before making, we didn’t add any additional seasonings (besides garlic). However, you can use other spices and seasonings such as
    • Herbs and Extra Ingredients – you may want to add additional items to enhance the flavor if your spaghetti wasn’t flavorful to begin with. Some suggestions are Italian seasoning, green onions, fresh parsley, black pepper, fresh basil leaves, and red pepper flakes.

    Equipment

    I love using my cast-iron skillet for this, to really get that “sear” but you can use a nonstick skillet if you prefer. Do note, it may not give as much of that “char” that you see in my recipe.

    How to Make This

    If you’ll be shredding your own cheese, I recommend doing this before starting the cooking process.

    Or, if you’re loving the idea of adding meatballs, make these frozen meatballs in the Instant Pot before cooking your fried spaghetti.

    *Be sure to see the recipe card below for the full ingredients list & instructions!*

    Butter melting in cast iron pan.
    Image 1
    Leftover spaghetti in cast iron pan on top of melted butter.
    Image 2

    STEP 1. Melt butter. Over medium heat, melt butter (and minced garlic if using instead of garlic powder – garlic powder can wait until step 2) in large frying pan (Image 1). Cook until butter has melted.

    Some of the mozzarella and parmesan cheese sprinkled on top of leftover spaghetti in cast iron.
    Image 3
    Spaghetti mixed in with cheeses and fried in cast iron pan.
    Image 4

    STEP 2. Fry spaghetti. Add leftover spaghetti (Image 2) a half cup of the shredded mozzarella, half of the parmesan cheese, and garlic powder (unless you used minced garlic instead, in step 1) to the melted butter. Cook on medium-high heat for 8-10 minutes, stirring occasionally (Images 3 and 4).

    Tip: One of the best things about fried spaghetti, is the seared cheese and portions of spaghetti noodles that become crisp while cooked over the high heat. So allowing it to sit and sear for a minute or two, can really develop that “fried” flavor.

    The rest of the mozzarella and parmesan cheese sprinkled on top of spaghetti.
    Image 5
    Melted cheese on top of fried spaghetti.
    Image 6

    STEP 3. Pour the remaining cheese on top and cover, cooking for an additional couple of minutes to melt the cheese, and then serve (Images 5 & 6).

    Fried spaghetti on white plate next to garlic Texas toast.

    Recipe Pro Tips

    • If you need to make it with fresh spaghetti instead. Although we only make this with leftover spaghetti, you should be able to use fresh spaghetti instead. Just make your favorite spaghetti recipe beforehand and cook as directed in this recipe. I’d be curious about making fried spaghetti with with this Rotel Chicken Spaghetti too.
    • Make a double batch. If you love meal planning, you can make an extra batch of spaghetti and freeze it, and save it for when you want to make fried spaghetti later. See more ideas like this in my Dinner Theme System!
    A fork holding a bite of fried spaghetti, over a plate of it, next to a piece of garlic toast.

    Recipe FAQs

    What happens if you fry spaghetti noodles?

    It gives the noodles a crispy, chewy edge texture that’s different than boiled spaghetti.

    Do you boil pasta before frying it?

    Yes, the pasta needs to be cooked (boiled) before frying it.

    Do I need to add more marinara sauce to fried spaghetti?

    We don’t feel like it’s necessary to add more marinara and the liquid from the sauce could actually prevent the spaghetti from frying nicely. It’s better if the leftover spaghetti actually soaks up most of the liquid for the best results.

    Storage

    If you have leftover fried spaghetti, simply store it in an airtight container for up to 3 days. (DO NOTE: It’s best to enjoy the fried spaghetti within 3-4 days of the original cook date of the spaghetti, not necessarily 3-4 days of when the fried spaghetti was made.)

    More Pasta Recipes

    If you love easy pasta recipes, you’re also going to love these that are reader favorites:

    • Close up photo of Creamy Lemon Chicken Pasta and a fork in a white speckled serving bowl garnished with lemon slices and fresh parsley
      Creamy Lemon Chicken Pasta
    • Cream Cheese Pasta being scooped up and held above the plate.
      Cream Cheese Pasta
    • Pasta with corn and tomato sauce is the PERFECT summer pasta recipe!
      Pasta with Corn and Tomatoes
    • beef stroganoff in black skillet
      Easy Beef Stroganoff Recipe

    Did you make this? I’d be so grateful if you left a “star” rating below to let me know what you thought! Then, the next time you need a quick and easy recipe, come back to Fantabulosity to browse all of my easy recipes!

    Recipe

    A fork holding a bite of fried spaghetti.
    Print Pin
    5 from 4 votes

    Fried Spaghetti

    Fried Spaghetti: An easy and delicious way to cook leftover spaghetti! Simple ingredients, and it's ready in about 10 minutes!
    Course Main Course
    Cuisine American, Italian
    Prep Time 0 minutes minutes
    Cook Time 10 minutes minutes
    Total Time 10 minutes minutes
    Servings 4 cups
    Calories 1062kcal
    Author Jessica Burgess

    Ingredients

    • 2 tablespoons butter
    • 1 teaspoon garlic or garlic powder
    • 4 cups leftover spaghetti cooked
    • 1 cup shredded mozzarella divided
    • ½ cup parmesan cheese divided

    Instructions

    • Add butter (and garlic if using minced garlic — garlic powder can wait until step 2) to a frying pan or skillet, and cook over medium heat in a frying pan until butter has melted.
    • Add leftover spaghetti, a half cup of the shredded mozzarella and half of the parmesan to the melted butter and garlic powder (if using).
      Cook on high heat for 8-10 minutes, stirring often.
    • Pour the remaining cheese on top and cover, cooking an additional couple of minutes to melt the cheese, and then serve!

    Video

    Nutrition

    Serving: 1cup | Calories: 1062kcal | Carbohydrates: 178g | Protein: 42g | Fat: 19g | Saturated Fat: 10g | Polyunsaturated Fat: 2g | Monounsaturated Fat: 5g | Trans Fat: 0.2g | Cholesterol: 46mg | Sodium: 435mg | Potassium: 565mg | Fiber: 8g | Sugar: 7g | Vitamin A: 462IU | Vitamin C: 0.2mg | Calcium: 342mg | Iron: 3mg

    Frozen Garlic Bread in Air Fryer

    February 11, 2023

    Frozen garlic bread that's cooked, sitting on white plate.

    Frozen Garlic Bread in Air Fryer: Such an easy way to make this easy side dish, that comes out with crisp edges and a soft center. Made in less time than the oven (because it doesn’t require pre-heating a large oven) and is our personal preference for making garlic toast!

    Cooked frozen garlic bread, sitting on white plate in front of an air fryer.

    Cooking frozen foods in the air fryer has become so popular in our house and for so many! It’s sometimes faster than convection ovens and it doesn’t require preheating a large oven, keeping the heat down in the kitchen.

    So if you’re thinking of making more air fryer recipes and frozen foods in the air fryer too, then how we cook frozen biscuits in the air fryer and even frozen waffles in the air fryer, may be helpful for you!

    [feast_advanced_jump_to]

    Why This Method Works

    • Crisp Edges and Soft Centers: There’s something special about the air fryer cooking method that gives garlic toast the texture we love.
    • Cook from Frozen: Even from frozen, you can cook air fryer texas toast or garlic toast in the air fryer without preheating, and it’s ready to eat in minutes!

    What You’ll Need

    All you’ll need is the frozen garlic bread, straight from the packaging, to make this! How many you’ll need will depend on how many you want to cook and how many will fit in the air fryer tray.

    Frozen garlic toast in box, sitting on counter in front of the air fryer.

    Substitutions

    There are many different brands and types of garlic bread that you can find at the grocery store, so it can vary but here are the most common types:

    • Cheesy Garlic Bread – We love the 5 cheeses garlic toast and since it’s frozen it cooks nicely in the air fryer. Sometimes when making a homemade garlic bread recipe, the air fryer can blow the cheese off of the garlic bread slices.
    • Garlic Toast without Cheese – even though we used garlic cheese toast for this, you will cook toast without cheese at the same time, at the same temperature.
    • Texas Toast – we used frozen Texas toast garlic bread this for this how-to example and you may have this in many different flavors and types but ultimately it has the same cooking method. We also love using Texas toast to make this Texas Toast Pizza!
    • Garlic Bread – You may also have garlic bread in loaf form, that’s sliced and that should have the same method of cooking as well.

    How to Make Air Fryer Frozen Garlic Bread

    *Be sure to see the printable recipe card below.

    Frozen garlic bread in air fryer basket.
    Image 1
    Cooked garlic bread in air fryer basket.
    Image 2

    STEP 1. Place in basket. Place frozen pieces of garlic toast in a single layer, in the air fryer basket, without overlapping them (Image 1).

    STEP 2. Cook. Turn the temperature to 400° F and set the timer for 6 minutes or until golden brown, and air fry garlic bread. (NOTE: Some air fryers cook differently than others and I’ve had them range anywhere from 6 minutes to 10 minutes of cooking time so it may be good to check halfway for best results.)

    Cooked and toasted garlic bread that was made in the air fryer, sitting on white plate.

    Pro Tip

    No need to flip. Since the air fryer works by cycling hot air around inside, there’s no need to flip the garlic bread.

    Storage

    If you have leftover garlic bread allow it to cool and then store in a plastic bag or airtight container and place it at room temperature unless it’s cheesy bread. The best way to store that is in the refrigerator.

    What to Serve Garlic Bread With:

    You can serve garlic bread with so many different things like your favorite pasta dinner such as our favorite Chicken Bolognese, and especially something like tomato soup. Or, it’s the perfect side dish for easy recipes like this Lasagna Soup, this Chicken and Noodles recipe, and this Cream Cheese Pasta.

    Recipe FAQs

    How long do you cook frozen garlic bread?

    There are a few different ways that you can cook frozen garlic bread; in the oven, in a toaster oven, and in the air fryer!

    How long does garlic bread take in air fryer?

    The time can vary for different air fryers and we’ve found that some can cook at 400° for only 6 minutes, up to 10 minutes, so it’s best to check halfway through to see which is the best cook time for your air fryer.

    Can you reheat garlic bread in air fryer?

    Absolutely. Since it won’t be frozen, it won’t take as long to cook so start with a 2-3 minutes and keep an eye on it.

    More Bread Recipes

    If you love serving bread with pasta dishes or just love having bread on hand for a quick snack, you’ll also love these popular bread recipes:

    • Stack of homemade hush puppies on white plate, with one split open to show the inside.
      Hush Puppies
    • Sweet cornbread muffins stacked on a plate.
      Sweet Cornbread Recipe
    • Wooden spoon holding a serving of old-fashioned cornbread dressing.
      Old-Fashioned Cornbread Dressing
    • how to make Traditional Italian White Bread
      Easy Italian White Bread

    Did you make this? I’d be so grateful if you left a “star” rating below to let me know what you thought! Then, the next time you need a quick and easy recipe, come back to Fantabulosity to browse all of my easy recipes!

    Recipe

    Frozen garlic bread that's cooked, sitting on white plate.
    Print Pin
    5 from 2 votes

    Frozen Garlic Bread in Air Fryer

    Frozen Garlic Bread in Air Fryer: Such an easy way to make this easy side dish, that comes out with crisp edges and a soft center, and only takes about 6 minutes!
    Course Side Dish
    Cuisine American, Italian
    Diet Vegetarian
    Prep Time 0 minutes minutes
    Cook Time 6 minutes minutes
    Total Time 6 minutes minutes
    Servings 5 toasts
    Calories 140kcal
    Author Jessica Burgess

    Equipment

    • air fryer

    Ingredients

    • 5 frozen garlic bread or toast We used cheese garlic toast

    Instructions

    • Place frozen pieces of garlic toast in air fryer basket, without overlapping them. (They can be touching if needed.)
    • Turn temperature to 400° F and set the timer for 6 minutes or until golden brown. (NOTE: Some air fryers cook differently than others and I've had them range anywhere from 6 minutes to 10 minutes of cooktime so it may be good to check halfway.)

    Notes

    How to Store Leftover Garlic Bread: If you have leftover garlic bread, allow it to cool and then store in a plastic bag or airtight container and place in the refrigerator so it lasts longer. 

    Nutrition

    Serving: 1toast | Calories: 140kcal | Carbohydrates: 17g | Protein: 3g | Fat: 7g | Saturated Fat: 2g | Sodium: 210mg | Fiber: 1g | Sugar: 2g | Iron: 6mg

    How to Cook Italian Sausages in the Oven

    February 10, 2023

    Baked Italian sausages in baking dish.

    How to Cook Italian Sausages in the Oven: Cooking Italian sausages or dinner links in the oven is so easy and only takes about 15 minutes! Serve your baked Italian sausages on a bun or with your favorite toppings.

    Oven cooked sausages in baking pan with parchment paper.

    They’re an easy way to make a main dish dinner idea that the whole family will love! Thinking of breakfast sausage instead? I’ve shared how to cook breakfast sausage in the oven too!

    There are many different ways you can cook these larger sausages like these but we feel that baking sausages are the best way when needing something quick, and easy. We also love this method for how to cook sausage patties in the oven, although the oven temperature is a bit different.

    We love having them alone, or even cooking them in the oven to serve in other dishes, such as pasta or even something like this sausage casserole in the slow cooker.

    [feast_advanced_jump_to]

    What makes bratwurst different than sausage?

    All sausages are not bratwursts but bratwursts are a type of sausage. Italian sausages (like what we used here) have different flavoring than say, a bratwurst. But the two can often be interchanged easily for the cooking process.

    For instance, we show how to cook brats in the oven and the method is similar to baking Italian sausages. They can also be cooked in a frying pan with onions for another easy method.

    We’ve also made bratwursts in the air fryer, and we feel that the cooking process would be the same for dinner sausages, as well.

    Why This Method Works

    We feel that cooking sausage in the oven is one of the easiest methods, for these reasons:

    • Set it and ALMOST, forget it: Simply place the sausages in the baking pan, and place them in the oven when pre-heated, only having to flip halfway through the cooking process.
    • Batch cooking: It’s easy to bake a large number of sausages in the oven to eat for a few days, making meal planning easy!
    • Perfect for a rainy day: If it’s cold or raining outside, cooking the sausages inside, in the oven, can be a great way to still enjoy them.

    Types of Sausages

    If you’ve found your way here to see how to cook the sausages you have on hand, some may differ in cook time and internal temperature recommendations.

    Uncooked Italian sausages in packaging, on white counter.

    Here are some suggestions based on what you may have:

    • Italian Sausage – We tend to buy mild but there are also hot and sweet Italian sausage flavors available.
    • Chicken Sausage (make note of internal temperature difference) – If cooking chicken sausage or turkey sausage, this can be baked in the oven as well but the internal temperature should reach 165° before eating.
    • Smoked Sausage – Sometimes referred to as smoked polish sausage, this type of sausage is typically purchased fully cooked, and simply needs to be heated and served, being careful not to dry it out. (Some add a layer of shallow water to the pan if cooking in the oven.)

    How Long to Bake Italian Sausages in the Oven

    You may hear or see different temperatures and cook times for sausages. This is because some may prefer cooking the sausage at a higher temperature to achieve a crispier skin on the outside. (If doing this, make sure the internal temperature reaches 160° before eating.)

    Cooking at a lower temperature may prevent the outside from getting too crisp, too quickly.

    What temperature to cook Italian sausages in the oven

    Our recommendation: Cook the sausages at 425° for 12-15 minutes, making sure to turn the sausages over, at about the 6-7 minute mark. Ovens can vary so it’s best to check the internal temperature of the sausages, making sure it has reached 160°.

    *Be sure to see the recipe card below for the instructions all in one place.

    Preheat your oven to 425° F.

    Uncooked sausages in baking dish on top of parchment paper.
    Image 1
    Cooked Italian sausages in baking dish on white counter.
    Image 2

    STEP 1. Place sausages in dish. Line a baking tray or dish with parchment paper and place the sausages on top, making sure they have space between each one. (Image 1). You can use aluminum foil if you prefer but I would splash a little olive oil on it if so, so the sausages do not stick.

    STEP 2. Bake the sausages. Place the baking dish in to the preheated oven and cook uncovered for 12-15 minutes (flipping the sausages with tongs, have way through the cooking time) or until brown and until the internal temperature, checked with a meat thermometer, has reached 160° F.

    Tip: Set the timer for about 6 minutes, so you remember to flip the sausages over.

    Cooked Italian sausage in bun, in a white dish next to potato chips.

    Equipment

    You’ll only need a baking dish or a rimmed baking sheet for this process. (Rimmed so the juices, if any, do not leak out during the baking process.)

    How to Serve Sausages

    There are many different ways that you can serve dinner sausages like Italian sausage, and we’ve given some of our favorite ways below.

    Close up of cooked sausage in hot dog bun with mustard on top.
    • Plain sausages – You can serve sausages just by themselves. Simply slice the baked sausage and enjoy for an easy meal.
    • On a bun – Using a hot dog bun or brat/sausage bun, it’s easy to enjoy a gameday favorite!
    • Favorite toppings – So many topping options for sausages but popular topping choices are mustard, stone ground mustard, caramelized onions, sauteed peppers, sauerkraut, ketchup, relish, marinara sauce, and more!
    • In sausage recipes – Diced sausage is great in a sheet pan dinner, pasta dishes and soups (like this 15-bean soup!). It would be delicious used in a dish like this Cabbage and Kielbasa, this Cajun Pasta, or even in this quick Alfredo Sausage Pasta.

    Pro Tips

    • Making extra. If you find sausages on sale, it’s a great idea to stock up on them, and either freeze them before cooking in the oven, or you can cook them and freeze them for easier meal prep later. However, cooked sausages tend to last longer in the freezer, than raw sausages.
    • Crisping up the skin. If for some reason the outside skin of your sausages haven’t browned as much as you’d like but the internal temperature has reached 160° if pork, and 165° if chicken, you can turn the oven to “broil” and allow the sausages to broil for 1-2 minutes to crisp up.
    Bite taken out of Italian sausage that was cooked in the oven.

    Cooking the oven-cooked sausage this way makes the most delicious juices on the inside, similar to when I bake hot dogs in the oven!

    Recipe FAQs

    How long should you cook Italian sausages in the oven?

    You should cook pork sausages in the oven at 425° F for 12-15 minutes or until the internal temperature, checked with a meat thermometer, reaches 160 degrees F. (If chicken sausage or turkey sausage, make sure the internal temperature has reached 165°F.)

    Do you bake Italian sausage covered or uncovered?

    Cooking the sausages uncovered allows the skin to develop a nice “crispy” outside, so it’s best to cook them uncovered.

    How do you store leftover sausages?

    First, all the cooked sausages to cool, and then store in an airtight container and store in the refrigerator for 3-5 days. If freezing, store in a freezer-safe container or freezer bag for 1-2 months.

    More Oven-Baked Recipes

    If you love using your oven to make more easy dinners or recipes, here are some of our reader’s favorites:

    • bread pudding in baking dish
      Bread Pudding Recipe: Easy Old Fashioned Recipe (With Video!)
    • Burger baked in the oven, steamed in aluminum foil, and placed on white plate.
      Burgers in the Oven
    • Strawberry brownies on white marble cutting board.
      Strawberry Brownies Recipe
    • slice of peach cobbler on white plate
      Peach Cobbler with Canned Peaches

    Did you make this? I’d be so grateful if you left a “star” rating below to let me know what you thought! Then, the next time you need a quick and easy recipe, come back to Fantabulosity to browse all of my easy recipes!

    Recipe

    Baked Italian sausages in baking dish.
    Print Pin
    5 from 6 votes

    How to Cook Italian Sausages in the Oven

    This method for baked Italian sausages is quick and it gives the skin a crispy bite with the center being juicy! Perfect for an easy dinner idea!
    Course Main Course
    Cuisine American
    Prep Time 1 minute minute
    Cook Time 14 minutes minutes
    Total Time 15 minutes minutes
    Servings 5 sausages
    Calories 388kcal
    Author Jessica Burgess

    Ingredients

    • Italian sausages or similar dinner sausage links
    • hot dog buns if desired
    • Toppings such as: sauted onions, mustard, dijon, bbq sauce, saurkraut, etc.

    Instructions

    • Preheat oven to 425°.
    • Line a baking dish (large enough to fit the sausages without crowding them) with parchment paper. (This is for easy clean-up but not required.)
    • Place sausages in preheated oven and cook for 12-15 minutes at 425° or until the internal temperature reaches 160°, flipping the sausages halfway through the baking process. Serve!

    Notes

    Tip for Crisping up the skin. If for some reason the outside skin of your sausages haven’t browned at the end of the cook time or when the internal temperature of the sausage reaches 160°, you can turn the oven on the “broil” setting and allow the sausages to broil for 1-2 minutes.
    If cooking chicken or turkey sausages, make note that the internal temperature of the poultry sausages needs to reach 165°F.

    Nutrition

    Serving: 1sausage | Calories: 388kcal | Carbohydrates: 1g | Protein: 16g | Fat: 35g | Saturated Fat: 13g | Polyunsaturated Fat: 5g | Monounsaturated Fat: 16g | Cholesterol: 85mg | Sodium: 819mg | Potassium: 283mg | Vitamin C: 2mg | Calcium: 20mg | Iron: 1mg

    Rainbow Waffles

    February 9, 2023

    Rainbow waffles stacked on a white plate, with whipped cream on top.

    Rainbow Waffles: Fun, colored cake batter, poured in to a waffle iron, make beautiful Belgian waffles that are a fun way to enjoy rainbow food for birthday parties or a Sunday brunch. They’d especially look amazing on this breakfast charcuterie board.

    Rainbow waffles on white plate, with section cut out.

    If you’re looking for a St. Patrick’s Day breakfast idea or just love the idea of making colorful waffles for a breakfast idea, you’re going to love these!

    You’re also going to love making these Lucky Charms Pancakes, a magically delicious way to start your day, and our other delicious waffle recipes like these chocolate waffles, and these delicious blueberry waffles!

    [feast_advanced_jump_to]

    ⭐️ Why This Recipe Works

    • It uses a few ingredients: Since this recipe uses a cake mix, you’ll only need just a few other ingredients to make this rainbow waffle recipe.
    • Coloring: Although we suggest below how to get these vibrant colors with a certain food coloring, and do one color per waffle, you can easily change up the colors you choose! (From pastels to only using 2 colors, etc.)
    • Ready in only 25 minutes: These colorful rainbow waffles only take 25 minutes to make! So even though they look fancy, they sure don’t take a lot of time or a lot of work!

    🧾 Ingredients Needed

    I’ve highlighted a couple of ingredients with some relevant notes. Aside from this, the ingredients needed are pretty basic.

    Ingredients for rainbow waffles on white countertop.
    • Cake Mix – any white cake mix brand should do! (The most common size is 15.25 ounces.)
    • **Coloring – For these vibrant colors, we used the brand Chefmaster Liqua-gel in the colors: super red, neon brite orange, lemon yellow, leaf green, neon brite blue, and neon brite purple.

    📖 Substitutions

    Cake Mix – even though we haven’t tried this substitute for this recipe, you may be able to use pancake mix to make rainbow pancakes (make sure to check and see what changes need to be made for ingredients) or even your favorite waffle mix. However, do note that using a waffle mix or pancake mix, can alter the coloring of the waffles since they can turn golden brown when cooked.

    👩🏻‍🍳 How to Make Rainbow Waffles

    You’ll begin by making the whole batch of waffle batter but then will be separating the batter into small individual bowls, to make different colors for the waffles.

    *Be sure to see the recipe card below for the full ingredients list & instructions!*

    Pancake batter in clear glass bowl.
    Image 1

    STEP 1. Make waffle batter. In a large mixing bowl, beat together cake mix, water, vegetable oil, and eggs. Beat on high for 2 minutes scraping down the sides of the bowl with a spatula as needed (Image 1).

    Pancake batter poured in to small, individual bowls.
    Image 2
    Food coloring added to waffle batter, in small clear glass bowls.
    Image 3

    STEP 2. Divide batter. Separate the waffle batter evenly into 6 separate bowls (Image 2).

    STEP 3. Color the batter. Color one bowl of batter red, one orange, one yellow, one green, one blue, and one purple. Stir each bowl well to blend food coloring into the batters (Image 3).

    Blue waffle batter in waffle iron.
    Image 4
    Cooked blue waffle in waffle maker.
    Image 5

    STEP 4. Preheat the waffle iron to a low heat setting. 

    STEP 5. Spray. Once fully heated, spray the waffle iron with non-stick cooking spray. 

    STEP 6. Make waffles. Depending on the size of your waffle maker, each color of batter should make one waffle.

    (Usually around ¾ cup but irons can differ so make sure to just cover the bottom of the waffle iron.)

    Pour one colored batter in to the hot waffle iron, and close waffle maker.

    Be careful not to add too much batter to the waffle iron though, or the waffle iron will overflow (Image 4).

    Your waffle maker should have an indicator on it to let you know when the waffle is done baking but usually takes about 2-3 minutes per waffle (Image 5).

    Carefully remove the waffle from the waffle iron. 

    Stack of rainbow waffles on white plate.

    STEP 7. Repeat steps 5 & 6 for the rest of the batters. 

    STEP 8. Serve warm, and top with whipped cream, syrup, and rainbow sprinkles if desired.

    🍳 Equipment Needed

    • measuring cups and spoons of various sizes
    • mixing bowls of various sizes
    • electric mixer
    • spatula
    • non-stick cooking spray
    • waffle iron
    Colored waffles arranged on a white plate.

    💭 Recipe Pro Tip

    Cut in to a rainbow shape. To make fun little rainbows out of the waffles, cut them in half to form a half circle. Spray a dollop of whipped cream on the ends to look like an actual rainbow!

    Rainbow waffles stacked on white plate with whipped cream on top.

    📋 Recipe FAQs

    How do you store rainbow waffles?

    It’s best to store any leftover waffles in the refrigerator.

    Can I freeze these rainbow waffles?

    Yes, if sealed properly in a sealed food-safe container or bag, these can be frozen for up to 2 months. Make sure the waffles cool completely before storing in the fridge or freezer (to prevent condensation inside the container which would lead to soggy leftovers).

    Can I reheat these waffles in the toaster?

    No, these are softer waffles than the freezer style of waffles, so they'll fall apart in a standard toaster. They're best reheated in the microwave.

    Rainbow waffles arranged in a circle on a white plate.

    🧇 More Waffle Recipes

    If you love waffles as much as we do, here are other waffle-related recipes we think you’ll love:

    • Waffle breakfast sandwich on plate.
      Waffle Breakfast Sandwiches
    • Stack of cooked frozen waffles in air fryer.
      Frozen Waffles in the Air Fryer
    • Waffle Burger on white plate with small bowl of syrup
      Waffle Burger
    • Regular waffle cone bowls are way more fun when they are dipped in chocolate and peppermint chips! Chocolate Dipped Waffle Cone Bowls are such a fun way to serve ice cream, pudding or any sweet treat!
      Chocolate Dipped Waffle Cone Bowls

    Did you make this? I’d be so grateful if you left a “star” rating below to let me know what you thought! Then, the next time you need a quick and easy recipe, come back to Fantabulosity to browse all of my easy recipes!

    Recipe

    Rainbow waffles stacked on a white plate, with whipped cream on top.
    Print Pin
    5 from 4 votes

    Rainbow Waffles

    Rainbow Waffles: Fun, colored cake batter, poured in to a waffle iron, make beautiful Belgian waffles that are a fun way to enjoy rainbow food for birthday parties or a Sunday brunch.
    Course Breakfast
    Cuisine American
    Diet Vegetarian
    Prep Time 10 minutes minutes
    Cook Time 15 minutes minutes
    Total Time 25 minutes minutes
    Servings 6 waffles
    Calories 462kcal
    Author Jessica Burgess

    Equipment

    • waffle maker

    Ingredients

    • 1 box white cake mix
    • 1 cup water
    • ⅓ cup oil
    • 3 eggs
    • gel food coloring: red, orange, yellow, green, blue, purple For these vibrant colors, we used the brand Chefmaster Liqua-gel in the colors: super red, neon brite orange, lemon yellow, leaf green, neon brite blue and neon brite purple.

    Instructions

    • In a large mixing bowl, beat together cake mix, water, vegetable oil and eggs. Beat on high for 2 minutes scraping down sides of bowl with a spatula as needed. 
    • Separate batter evenly into 6 bowls. This works out to be about 153 grams of batter per bowl. 
    • Color batters. Color one bowl of batter red, one orange, one yellow, one green, one blue and one purple. Stir each bowl well to blend food coloring into batters. 
    • Preheat waffle iron to a low heat setting. 
    • Once fully heated, spray waffle iron with non-stick cooking spray. 
    • Depending on the size of your waffle maker, each color of batter should make one waffle. (Usually around ¾ cup but irons can differ so make sure to just cover the bottom of the waffle iron.)
      Pour one colored batter in to the hot waffle iron, and close waffle maker. Be careful not to add too much batter to the waffle iron or the waffle iron will overflow. Your waffle maker should have an indicator on it to let you know when the waffle is done baking (takes about 2-3 minutes per waffle).
    • Carefully remove the waffle from the waffle iron. 

    Notes

    TIP: Cut in to a rainbow shape. To make fun little rainbows out of the waffles, cut them in half to form a half circle. Spray a dollop of whipped cream on the ends to look like an actual rainbow!
    STORAGE: Store any leftover waffles in the refrigerator, or freeze in a freezer-safe container for up to 2 months.

    Nutrition

    Serving: 1waffle | Calories: 462kcal | Carbohydrates: 70g | Protein: 6g | Fat: 18g | Saturated Fat: 3g | Polyunsaturated Fat: 4g | Monounsaturated Fat: 9g | Trans Fat: 0.4g | Cholesterol: 82mg | Sodium: 630mg | Potassium: 84mg | Fiber: 1g | Sugar: 36g | Vitamin A: 119IU | Calcium: 202mg | Iron: 2mg

    Mint Chocolate Brownies

    February 7, 2023

    Stack of mint chocolate brownies with green background.

    Mint Chocolate Brownies: Layers of mint between rich dark chocolate ganache and fudgy brownies. Perfect for St. Patrick’s Day, as a Christmas dessert, or any time of year!

    If you're bringing dessert to a gathering, you'll find more easy options in my potluck dessert ideas.

    Stack of mint chocolate brownies on green background.

    Brownie recipes are the perfect option for hosting parties, holidays or even to enjoy on the weekends for a sweet treat.

    Mint chocolate lovers are especially going to LOVE this recipe! Not only does it use a brownie mix (that we spiff up using simple ingredients) but these fudgy chocolate brownies have a delicious frosting layer of mint, and then they have a top layer that’s a melted chocolate ganache.

    If you love all things mint flavored, make sure that these chocolate mint cupcakes and this mint buttercream are on your list too!

    [feast_advanced_jump_to]

    ⭐️ Why This Recipe Works

    • Flavors: Mint and chocolate together are the perfect combinations for tons of flavor!
    • Make-ahead: Since these are chilled, you can make them ahead of time, especially if you’re day is full of other cooking and baking. Chill until ready to serve.
    • Texture: The fudgy brownie base, combined with a fluffy filling, and a soft, smooth topping, gives so many different textures that everyone will love when taking a bite!

    🧾 Ingredients Needed

    I’ve highlighted a couple of ingredients with some relevant notes. Aside from this, the ingredients needed are pretty basic.

    Ingredients for crab pasta bake on white counter.
    • Butter – we used unsalted butter for this ganache, as we prefer that when combined with chocolates.
    • Green Food Coloring – Gel paste coloring is recommended over traditional liquid food coloring.
    • Heavy Cream – You may notice that “heavy cream” is listed in the ingredients, twice. This is because we add some to the brownie mix and to the ganache.

    📖 Substitutions

    Sometimes substitutions are necessary because of ingredients that are unavailable or needed for dietary restrictions. Here are some suggestions that can help:

    • Chocolate Chips – This recipe calls for semisweet chocolate chips but if you prefer a milk chocolate ganache, that’s ok to substitute too. We used them these brownies with cream cheese frosting too.
    • Box Mix – If you have a recipe for homemade brownies that you love, you can use that recipe instead of a box mix. Just make sure to allow it to chill after baking so it’s chilled enough for the mint frosting. (Similar to our brownie recipe made with cornflakes.)

    🥘 Equipment

    • 9×9" baking pan
    • Offset spatula (You should be able to get by with a butter knife, or a rubber spatula would work well too.)

    Missing something? You can make this Instant Pot brownies recipe if you have a pressure cooker.

    👩🏻‍🍳 How to Make Mint Chocolate Brownies

    Don’t let the layers fool you! This is an easy recipe, especially since it starts out by making a boxed brownie mix!

    This mint brownie recipe is broken into 3 components:

    • baking the brownies
    • making/topping with the mint layer of frosting/filling
    • making/topping with the chocolate ganache

    *Be sure to see the recipe card below for the full ingredients list & instructions!*

    How to Make the Brownies

    STEP 1. Preheat oven to 350° F. and line the bottom and sides of a 9×9-inch baking pan with parchment to extend over the sides. (We like to cut small slits in the corners of the paper to help it fit nicely.)

    Brownie mix in bowl with heavy cream, oil and egg, mixed together.
    Image 1
    Brownie batter poured in parchment paper-lined pan.
    Image 2

    STEP 2. Mix brownies together. Next, in a large mixing bowl mix the brownie mix, oil, ⅓ cup of heavy cream, and egg (Image 1).

    STEP 3. Pour batter in pan. Then, pour the brownie batter into the prepared baking pan (Image 2) and bake for 20-25 minutes or until a toothpick inserted, comes out clean. Then allow the brownies to cool on a wire rack for 10 minutes and then lift the brownies out of the pan and place them on a baking sheet.

    STEP 4. Chill. Place the baking sheet in the refrigerator and chill the brownies for 20 minutes while you make the mint filling.

    Tip: It's important to let the brownies completely cool before adding the peppermint and chocolate layers. This is important so they stay solid and don't ooze out. However, if you want to speed up chill time, you can put the brownies in the freezer, and this will reduce chilling time by more than half.

    How to Make the Peppermint Filling

    White baking chips mixed with heavy cream.
    Image 3
    Melted white chocolate chips with heavy cream, in clear glass bowl.
    Image 4

    STEP 5. Melt chocolate and cream. In a microwave-safe bowl (we use glass) combine the white chocolate chips with the 6 tablespoons of heavy cream (Image 3) and heat for 1 minute, or until the chocolate is 85% melted, stir, and let it sit. (Keep in mind that the mixture will continue to melt, so give it another stir until the mixture is smooth in texture).

    Cream cheese mixed in glass bowl.
    Image 5
    Green mint filling for brownies.
    Image 6

    STEP 6. Continue with filling. In a medium-sized bowl beat the cream cheese with an electric mixer on medium-high spped until smooth and creamy, which is about 2 minutes (Image 5). Then, add the melted white chocolate, salt, peppermint extract, and food coloring to the cream cheese, and beat for 1 minute, increasing speed to high for an additional minute, or until light and fluffy (Image 6).

    Mint frosting poured on to center of chocolate brownies.
    Image 7
    Mint green filling spread on top of brownies.
    Image 8

    STEP 7. Top with mint filling. Frost the chilled brownie layer with the mint icing and place the brownies back in the refrigerator for 1 hour (Images 7 & 8).

    How to Make the Chocolate Ganache Topping

    Chocolate chips and butter in glass bowl.
    Image 9
    Melted chocolate chips in glass bowl, ready for spreading on top of mint filling.
    Image 10

    STEP 9. Mix butter and chocolate. Combine butter and semi-sweet chocolate chips in a microwave-safe bowl (Image 9) and heat for 30 seconds, stir, and continue heating in 15-30 second intervals until the chocolate has a smooth and pourable consistency (Image 10).

    Melted chocolate ganache, poured on top of mint brownies.
    Image 11
    Chocolate ganache spread evenly on top of mint filling, on top of brownies.
    Image 12

    STEP 10. Top with ganache. Pour the chocolate ganache over the peppermint layer (Image 11) smoothing it out with an offset spatula (Image 12).

    STEP 11. Chill. Return the baking sheet to the refrigerator and chill the brownies for 3 hours, to allow the chocolate layer to properly set.

    Tip: Before cutting, you can let the brownies sit on the counter for 5-10 minutes to allow the chocolate topping to soften slightly, as this will make them easier to cut, so the chocolate layer doesn't break or come off the peppermint layer. To ensure clean cuts in your brownie layers, clean and dry your knife before making each cut

    Mint chocolate brownies cut in to squares on baking pan.

    STEP 12. Cut into pieces. Cut into 12 equal-sized servings and keep in the refrigerator until ready to eat.

    Stack of mint chocolate brownies on green background.

    💭 Recipe Pro Tips

    • Darker green. If you want your green frosting to be darker, you can use 2 drops of gel paste instead of one.
    • Even cut squares. This multi-wheeled cutter takes the guesswork out of trying to get equal-sized servings.
    • Andes Mints. If you love those mint chips or candies, you can add some of the top of the brownies.

    📋 Recipe FAQs

    What makes a brownie fudgier?

    The fat content added to brownies can help make them fudgier. More flour can make brownies more cake-like.

    What type of mint is used in mint chocolate?

    Peppermint extract is typically used in mint chocolate recipes, however, spearmint extract may work just fine too!

    What is the secret to moist brownies?

    Using heavy cream in brownie mix, instead of water, can help make brownies moister.

    Chocolate mint brownie on white plate with bite taken out of it.

    ❄️ Storage

    How to store mint brownies: Brownies will keep for up to 1 week in the refrigerator in an airtight container.

    Freezer Instructions: This recipe freezes well. Simply cut into individual serving sizes and then wrap each piece in plastic wrap (or Press n Seal is our favorite for freezing) and place in a freezer bag and freeze. When you are ready to eat, let them thaw out on the counter for a few hours beforehand. 

    Bite of mint chocolate brownie on a fork.

    🍰 More Dessert Recipes

    If you love easy desserts, then you’ll love these red velvet brownies but you’re also going to love these reader favorites:

    • A slice of Texas sheet cake topped with walnuts, sitting on a wooden spatula, next to the rest of the pan.
      Texas Sheet Cake
    • Stack of sad cake pieces on a plate.
      Sad Cake
    • A slice of preacher cake on a wooden spatula, resting above the rest of the cake.
      Preacher Cake
    • Cherry chocolate dump cake being spooned out of baking dish.
      Cherry Chocolate Dump Cake

    Recipe

    Stack of mint chocolate brownies with green background.
    Print Pin
    5 from 4 votes

    Mint Chocolate Brownies

    Mint Chocolate Brownies: Layers of mint between rich dark chocolate ganache and fudgy brownies. Perfect for St. Patrick's Day, as a Christmas dessert, or any time of year!
    Course Dessert
    Cuisine American
    Prep Time 25 minutes minutes
    Cook Time 25 minutes minutes
    Chill Time 4 hours hours 30 minutes minutes
    Total Time 5 hours hours 20 minutes minutes
    Servings 12 servings
    Calories 734kcal
    Author Jessica Burgess

    Ingredients

    Brownie Base

    • 1 box brownie mix (We used Ghiradelli)
    • 1 large egg
    • ⅓ cup vegetable oil
    • ⅓ cup heavy cream

    Peppermint Filling

    • 11 ounces white chocolate chips (312g)
    • 6 Tablespoons heavy cream
    • 8 ounces cream cheese, room temperature (226g)
    • 1 pinch salt
    • ¾ teaspoon peppermint extract
    • 1 drop gel paste food coloring (We used 'leaf green')

    Chocolate Ganache

    • 12 ounces package of semi-sweet chocolate chips (340g) Make sure to use high quality chocolate
    • ½ cup unsalted butter (1 stick)

    Instructions

    How to Make Brownies

    • Preheat oven to 350° F. and line the bottom and sides of a 9×9-inch baking pan with parchment to extend over the sides. (We like to cut small slits in the corners of the paper to help it fit nicely.)
    • Next, in a large mixing bowl mix the brownie mix, oil, ⅓ cup of heavy cream, and egg.
    • Pour the brownie batter into the prepared baking pan and bake for 20-25 minutes or until a toothpick inserted, comes out clean. Then allow the brownies to cool on a wire rack for 10 minutes and then lift the brownies out of the pan and place them on a baking sheet.
    • Place the baking sheet in the refrigerator and chill the brownies for 20 minutes while you make the mint filling.

    How to Make the Mint Filling

    • In a microwave-safe bowl (we use glass) combine the white chocolate chips with the 6 tablespoons of heavy cream and heat for 1 minute, or until the chocolate is 85% melted, stir, and let it sit. (Keep in mind that the mixture will continue to melt, so give it another stir until the mixture is smooth in texture).
    • In a medium-sized bowl beat the cream cheese on medium/high speed using a handheld mixer until smooth and creamy, which is about 2 minutes. Then, add the melted white chocolate, salt, peppermint extract, and food coloring to the cream cheese, and beat for 1 minute, increasing speed to high for an additional minute, or until light and fluffy.
    • Frost the chilled brownies with the mint icing and place the brownies back in the refrigerator for 1 hour.

    Chocolate Ganache

    • Combine the butter and semi-sweet chocolate chips in a microwave-safe bowl (we use glass) and heat for 30 seconds. Stir and continue heating it in 15-30 second intervals until the chocolate has a smooth and pourable consistency.
    • Next, pour the chocolate ganache over the peppermint layer, smoothing it out with an offset spatula.
    • Return the baking sheet of brownies to the refrigerator and chill the brownies for 3 hours, to allow the chocolate layer to set properly.
    • Cut the brownies into 12 equal-sized square servings and keep them in the refrigerator until they're ready to eat.

    Notes

    IMPORTANT: Let the brownies completely cool before adding the peppermint and chocolate layers.
    TIP: Before cutting, you can let the brownies sit on the counter for 5-10 minutes to allow the chocolate topping to soften slightly, as this will make them easier to cut, so the chocolate layer doesn’t break or come off the peppermint layer. 
    STORAGE: Store the brownies in an airtight container in the refrigerator. 

    Nutrition

    Serving: 1brownie (1/12 pan) | Calories: 734kcal | Carbohydrates: 65g | Protein: 7g | Fat: 50g | Saturated Fat: 25g | Polyunsaturated Fat: 5g | Monounsaturated Fat: 15g | Trans Fat: 0.4g | Cholesterol: 78mg | Sodium: 224mg | Potassium: 282mg | Fiber: 2g | Sugar: 48g | Vitamin A: 742IU | Vitamin C: 0.2mg | Calcium: 102mg | Iron: 3mg

    Bunny Butt Cookies

    February 6, 2023

    Bunny Butt Cookies on white counter top.

    Bunny Butt Cookies: Adorable cake mix cookies, decorated to look like bunny butts with mini marshmallows as the bunny tail and large marshmallows to look like bunny paws. These adorable Easter cookies are easy to make with ingredients you can get from the grocery store.

    Bunny Butt cookies on a white countertop.

    These Easter bunny butt cookies are just one of the cutest treats that we have here for Easter ideas. So if you’re looking for more treats like this Bunny Bait, these Easter Oreo cookies, and these Easter Egg Truffles to add to your charcuterie board for Easter, you’re in the right place!

    [feast_advanced_jump_to]

    Why This Recipe Works

    • Cake Mix Cookies: If you love a good cookie recipe that uses a cake mix to make things easier, these cute bunny butt cookies are made with a white cake mix or a vanilla cake mix! (Like these funfetti cookies and these strawberry shortcake cookies!)
    • Gift Giving: These are so fun for gift-giving for Easter! Package them up in cute cookie boxes, wrap the boxes with pastel ribbon, and you’re set!
    • An Easy Easter Cookie: Sometimes it’s fun to make something cute for the holidays, especially when they’re easy recipes! These easy bunny cookies start off easy with the cake mix and finish easily with simple decorations, that are perfect to make on a crafty morning!

    Ingredients Needed

    I’ve highlighted a couple of ingredients with some relevant notes. Aside from this, the ingredients needed are pretty basic.

    Labeled ingredients on counter for bunny butt cookies.
    • Butter – we used unsalted butter for this cookie recipe.
    • Milk – we prefer using whole milk when baking our recipes but if you have 2% or skim, that should be just fine too.
    • Cake Mix – it’s best to use a white cake mix or vanilla cake mix, so you get the whiter color with the cookies.

    Substitutions

    Sometimes it’s necessary to substitute ingredients that you can’t find or that you can’t use in a recipe. Here are some suggestions that may help:

    • Cookies – If you don’t want to use a cake mix to make the cookie base, you can use this sugar cookie recipe and use a large circle cookie cutter, or store-bought sugar cookie dough to make bunny butt sugar cookies. However, you want the cookies to be around 3 inches in diameter, and make sure they’re circle-shaped sugar cookies. 
    • Coconut – If you don’t want to use coconut, simply leave it off or use white sprinkles or sanding sugar instead.
    • Candy Melts – Although we haven’t tried using jelly beans for this particular recipe, you can try using jelly beans for the pads on the feet, like we used in our bunny-in-the-hole donuts! Or, you may try using pink icing or adding pink food color to royal icing or the frosting, to pipe on the pads of the feet.

    How to Make Bunny Butt Cookies

    These adorable bunny butt cookies are easy to make with just a few steps!

    These cookies are broken into 3 components:

    • making the cake mix cookies
    • making the frosting
    • decorating the cookies

    *Be sure to see the recipe card below for the full ingredients list & instructions!*

    STEP 1. Preheat. Heat the oven to 350 degrees F., line two cookie sheets with parchment paper, and set them aside.

    Cake mix, egg and oil in a  glass bowl that needs to be mixed for cookie dough.
    Image 1
    Cake mix, mixed together with egg and oil in glass bowl.
    Image 2

    STEP 2. Make cookie dough. In a medium-sized mixing bowl, add the eggs, cake mix, and oil (Image 1). Then, mix it all together until combined (Image 2). You can use a hand mixer, standing mixer or even mix by hand.

    Raw cookie dough on baking sheet for bunny cookies.
    Image 3
    Baked cake mix cookies, cooling on cooling rack.
    Image 4

    STEP 3. Scoop cookie dough. Drop the cookie dough onto the parchment-lined cookie sheets using a medium scoop, making sure to leave at least 2 inches between the cookie dough scoops (Image 3).

    STEP 4. Bake. Bake the cookies for 8-10 minutes or until the edges start to turn a golden brown.

    STEP 5. Cool Cookies. Allow the cookies to cool on the cookie sheets for 5 minutes before transferring them to a wire rack to finish cooling (Image 4).

    How to Make the Frosting

    Butter whipped with mixer in glass bowl.
    Image 5
    Powdered sugar, vanilla, salt and milk added in and mixed together to make frosting.
    Image 6

    STEP 6. Beat butter. In a medium bowl, beat the butter with a hand mixer or stand mixer until it’s light and fluffy (Image 5).

    STEP 7. Make the fluffy frosting. Add the powdered sugar, vanilla, salt, and 1 tablespoon of milk to the whipped butter, and beat until well combined. Then, add more milk, about ½ tablespoon at a time, until the frosting reaches a consistency where it can easily be spread, but the white frosting still holds its shape (Image 6).

    Assembly of Bunny Butt Cookies

    Now it’s time for the fun part! It’s time to decorate the top of the cookies.

    STEP 8. Reserve some frosting. Set aside 2-3 tablespoons of the frosting. This will be used to stick the feet and tail to the cookies after they have been dipped in the coconut.

    STEP 9. Prep the marshmallow feet. Cut the large marshmallows in half, crosswise, to create the bunny feet, and then set them aside.

    Tip: This is a great time to pour coconut in to a shallow dish, that will be big enough for dipping each cookie in, in step 11 below.

    Frosted cookies on wire rack.
    Image 7
    Cookies on wire rack with shredded coconut on top.
    Image 8

    STEP 10. Frost cookies. When the cookies have completely cooled, frost them with a layer of frosting (Image 7).

    STEP 11. Dip in coconut. Dip the frosted side of the cookies in the coconut to create the bunny fur (Image 8).

    Mini marshmallows on top of shredded coconut, on top of cookies.
    Image 9
    Large marshmallows as "feet" on the bunny butt cookies.
    Image 10

    STEP 12. Secure the tail. Spread a small of frosting on the bottom of the mini marshmallow, and stick it into the center of each cookie to create the tail. Repeat with the rest of the cookies (Image 9).

    STEP 13. Place bunny feet. Place a small amount of frosting on the cut side of the larger marshmallows and stick them side by side on the bottom of the cookie to create the feet (Image 10).

    Bunny Butt Cookies on counter.

    STEP 14. Finish the feet with candy melts. Melt the candy melts according to the package directions and pour in to a small piping bag. Pipe an oval shape in the middle of the marshmallow feet to create the pad of the feet. Pipe three small dots below each oval to create the toes (Image above).

    Allow the frosting to set before serving the cookies. 

    Bunny Butt Cookie leaned up against Easter basket that has eggs in it.

    Recipe Pro Tips

    • Frosting the cookies. The easiest way to frost the cookies is with a small offset spatula or butter knife (a knife with no serrations). 
    • No piping bag? No problem. If you do not have a piping bag available, you can use a sandwich-size Ziploc bag with a small cut in the corner.

    Recipe FAQs

    How do I store bunny butt cookies?

    If you have leftover bunny butt cookies, store them in a single layer in an airtight container at room temperature for up to three days.

    How early in advance can I make bunny butt cookies?

    You can make these a couple of days in advance if you have to but they’ll be fresher if you make them the day of or just the day before.

    More Easter Recipes You’ll Love

    If you love making Easter treats and easy desserts, here are some other Easter ideas for you:

    • Dr. Pepper baked beans in a cast iron and wooden spoon spooning out a serving.
      Dr. Pepper Baked Beans
    • A collage of side dishes for sliders.
      Best Sides for Sliders (Easy Recipes Your Family Will Love)
    • Bagel French Toast casserole in the crock pot.
      Crock Pot Bagel French Toast Casserole
    • Mac and Cheese with Ham in bowl.
      Mac and Cheese with Ham

    Did you make this? I’d be so grateful if you left a “star” rating below to let me know what you thought! Then, the next time you need a quick and easy recipe, come back to Fantabulosity to browse all of my easy recipes!

    Recipe

    Bunny Butt Cookies
    Print Pin
    5 from 4 votes

    Bunny Butt Cookies

    Bunny Butt Cookies: Adorable cake mix cookies, decorated to look like bunny butts with mini marshmallows as the bunny tail and large marshmallows to look like bunny paws.
    Course Dessert
    Cuisine American
    Prep Time 20 minutes minutes
    Cook Time 8 minutes minutes
    Total Time 28 minutes minutes
    Servings 16 cookies
    Calories 436kcal
    Author Jessica Burgess

    Ingredients

    Cookies

    • 1 15.25 ounce box vanilla or white cake mix
    • 2 large eggs
    • ½ cup vegetable oil

    Frosting

    • ¾ cup unsalted butter room temperature – 1 ½ sticks
    • 2 ½ cups powdered sugar
    • 1½ teaspoons vanilla extract
    • 1 pinch salt
    • 2-4 Tablespoons milk

    Decorations

    • ⅔ cups shredded sweetened coconut
    • 16 regular marshmallows for feet
    • 16 mini marshmallows for tails
    • ¼ cup light pink candy melts

    Instructions

    Bake the Cookies

    • Preheat. Preheat the oven to 350 degrees F., line two cookie sheets with parchment paper, and set them aside.
    • Make cookie dough. In a medium-sized mixing bowl, add the eggs, cake mix, and oil. Then, mix it all together until combined.
    • Scoop cookie dough. Drop the cookie dough onto the parchment-lined cookie sheets using a medium scoop, making sure to leave at least 2 inches between the cookie dough scoops.
    • Bake. Bake the cookies for 8-10 minutes or until the edges start to turn a golden brown.
    • Cool Cookies. Allow the cookies to cool on the cookie sheets for 5 minutes before transferring them to a wire rack to finish cooling.

    How to Make the Frosting

    • Beat butter. In a medium bowl, beat the butter with a hand mixer or stand mixer until it's light and fluffy.
    • Make the fluffy frosting. Add the powdered sugar, vanilla, salt, and 1 tablespoon of milk to the whipped butter, and beat until well combined. Then, add more milk, about ½ tablespoon at a time, until the frosting reaches a consistency where it can easily be spread, but still holds its shape.

    Assembly of the Bunny Butt Cookies

    • Reserve some frosting. Set aside 2-3 tablespoons of the frosting. This will be used to stick the feet and tail to the cookies after they have been dipped in the coconut.
    • Prep the marshmallow feet. Cut the large marshmallows in half, crosswise, to create the bunny feet, and then set them aside.
    • Frost cookies. When the cookies have completely cooled, frost them with a layer of frosting.
    • Dip in coconut. Dip the frosted side of the cookies in the coconut to create the bunny fur.
    • Secure the tail. Spread a small of frosting on the bottom of the mini marshmallow, and stick it into the center of a coconut-covered cookie to create the tail. Repeat with the rest of the cookies.
    • Secure the feet. Place a small amount of frosting on the cut side of the larger marshmallows and stick them side by side on the bottom of the cookie to create the feet.
    • Finish the feet with candy melts. Melt the candy melts according to the package directions and pour in to a small piping bag. Pipe an oval shape in the middle of the marshmallow feet to create the pad of the feet. Pipe three small dots below each oval to create the toes.
      Allow the frosting to set before serving the cookies. 

    Notes

    TIPS: 
    • When frosting the cookies, the easiest way to frost the cookies is with a small offset spatula or butter knife (a knife with no serrations). 
    • No piping bag is required! If you do not have a piping bag available, you can use a sandwich-size Ziploc bag with a small cut in the corner.

    Nutrition

    Serving: 1cookie | Calories: 436kcal | Carbohydrates: 67g | Protein: 2g | Fat: 19g | Saturated Fat: 9g | Polyunsaturated Fat: 4g | Monounsaturated Fat: 4g | Trans Fat: 0.4g | Cholesterol: 46mg | Sodium: 63mg | Potassium: 39mg | Fiber: 1g | Sugar: 53g | Vitamin A: 303IU | Vitamin C: 0.1mg | Calcium: 11mg | Iron: 0.4mg

    Crab Pasta Bake

    February 5, 2023

    Crab pasta bake being lifted out of baking dish with tongs.

    Crab Pasta Bake: This delicious combination of pasta, Alfredo, cheeses, and crab, create a delicious casserole that’s easy enough for a quick dinner idea!

    The Old Bay Seasoning adds the perfect Cajun kick, and the comforting Alfredo flavors are a great combination with the spices. (You’ll also love this Blackened Chicken Alfredo if you love a good “kick” in flavor.)

    Crab casserole being lifted out of baking dish.

    We absolutely love using imitation crab meat at home because of its flavor and because of how easy it is to add to dishes. We used it in this crab salad recipe, this Copycat Subway Crab Sandwich, and even in this crab bisque!

    Although you can use real crab in this crab pasta bake, imitation crab can be more affordable and easier to find. So feel free to use either lump crab meat or imitation for this hearty casserole.

    [feast_advanced_jump_to]

    Why This Recipe Works

    • Quick Recipe: With the easy ingredients this recipe uses, they come together quickly and before you know it, you can put it in the oven for baking and then it’s ready to serve!
    • Double Recipe for Freezer Meals: If you love meal prepping, you can make a double batch of this, and freeze the second casserole if desired.

    Ingredients Needed

    I’ve highlighted a couple of ingredients with some relevant notes. Aside from this, the ingredients needed are pretty basic.

    Ingredients on table for baked crab pasta recipe
    • Cajun Seasoning – We use Old Bay Seasoning for this crab pasta bake but feel free to use your favorite brand of cajun or creole seasonings. Then if you’re looking for a way to use that extra Old Bay Seasoning, try this air fryer shrimp!
    • Mozzarella – We love shredding our own mozzarella because it creates a more creamy texture. Store-bought, pre-shredded mozzarella cheese usually has a powdery substance on it that can make the cheese not as creamy.
    • Butter – You can use salted or unsalted butter. However, keep in mind when adding additional salt to the recipe if you used salted butter or unsalted.

    Substitutions

    Sometimes substitutions are necessary because of ingredients that are unavailable or needed for dietary restrictions. Here are some suggestions that can help:

    • Pasta – Although we use penne pasta for this, you can use your favorite shape of pasta for this recipe! Angel hair pasta, bowtie pasta, pasta shells, are just a few examples of what may be delicious in this recipe too!
    • Crab – fresh crab is of course a tastier option, however, it can be expensive and hard to find. So keeping imitation crab on hand can be a great substitute.
    • Cheese – This recipe uses 2 different kinds of cheese for topping: mozzarella and shredded parmesan. If you prefer to use a different cheese for the mozzarella and shredded parmesan for the topping, you can! Swiss cheese, Monterey jack cheese, white cheddar cheese, and mild cheddar, are great choices to use if needed.

    Variations

    Want to make this crab casserole recipe but looking to change some things up? Go for it! Here are some suggestions:

    • Seafood – if you want to make this recipe but are not a fan of crab, you can make a similar seafood pasta bake using shrimp, salmon, scallops, or other types of fish! We love shrimp recipes, so if you do too, make sure you see this reader favorite, fried shrimp and this shrimp baked potato!
    • Seasoning – Cajun seasonings can be switched out for Italian seasonings if it’s too spicy for you, and it will become more of an Italian pasta dish.

    How to Make this Crab Pasta Bake

    This delicious recipe is broken into 3 components:

    • cooking the pasta
    • making the creamy sauce
    • baking the casserole dish

    While your pasta is boiling, gather the rest of the ingredients for easy prep later!

    *Be sure to see the recipe card below for the full ingredients list & instructions!*

    STEP 1. Preheat your oven to 350 degrees.

    Cook Pasta

    Pasta in pot of water.
    Image 1
    Cooked pasta in colander
    Image 2

    STEP 1. Cook pasta. You’ll begin by cooking your pasta, and depending on the type of pasta you’re using, could depend on how long it takes for it to come to al dente. Follow the package directions for cooking (Image 1) usually about 10 minutes of cook time, then drain, rinse, and set aside (Image 2).

    Tip: Cook pasta until it is JUST al dente. You don’t want overcooked pasta. Then, rinse pasta in cool water to stop the cooking process. Make sure to drain well so the water does not make your baked casserole watery.

    Make Alfredo Sauce

    Cream, butter and cream cheese in stock pot.
    Image 3
    Seasonings added to cream mixture.
    Image 4

    STEP 2. Make Alfredo. In a medium saucepan, add butter, heavy cream, and cream cheese, and cook over medium heat, stirring frequently, until the butter and cream cheese have melted (Image 3). Or you can choose to make my homemade Alfredo sauce recipe.

    STEP 3. Add seasonings. When melted, add in the Old Bay Seasoning, minced garlic, salt and pepper (Image 4). Stir to combine.

    Grated parmesan added to cream mixture in stock pot.
    Image 5
    Alfredo poured over cooked pasta.
    Image 6

    STEP 4. Add grated parmesan. Whisk in grated parmesan cheese in to the cream mixture, turn heat to low, and whisk and cook over low heat to simmer for 2-3 more minutes (Image 5).

    STEP 5. Pour creamy sauce on pasta. Pour the Alfredo sauce over the pasta and stir to combine (Image 6).

    Crab added to alfredo pasta mixture.
    Image 7
    Crab mixed in to alfredo pasta in stock pot.
    Image 8

    STEP 6. Add crab. Next, pour the crab meat over pasta (breaking larger pieces in to the smaller pieces if needed) and stir to combine (Images 7 & 8).

    Assemble Pasta Bake Casserole

    Half of the pasta and crab mixture poured in to baking dish.
    Image 9
    Shredded mozzarella poured on top of crab alfredo pasta.
    Image 10

    STEP 7. Assemble Layers. Pour half of the creamy Alfredo mixture in to a 9×13 ovenproof dish or casserole dish (Image 9).

    STEP 8. Top with half of mozzarella. Sprinkle with half of the mozzarella cheese, spreading it evenly over the top of the pasta in the dish (Image 10).

    More alfredo crab pasta poured on top of mozzarella.
    Image 11
    Mozzarella and shredded parmesan spread out on top of the crab casserole.
    Image 12

    STEP 9. Add remaining pasta. Layer remaining pasta on top of the mozzarella cheese in the baking dish (Image 11).

    STEP 10. Add remaining cheese. Sprinkle on remaining mozzarella cheese and shredded parmesan cheese, spreading it evenly over the casserole (Image 12).

    Baked crab alfredo casserole in baking dish.
    Image 13
    Fresh parsley sprinkled on top of crab Alfredo bake.
    Image 14

    STEP 11. Bake. Place the casserole in the oven and bake for 20-30 minutes until heated through and the cheese is a light golden brown on top (Image 13).

    STEP 12. Optional. If desired, sprinkle chopped fresh parsley on top for color (Image 14).

    Crab pasta bake being pulled up out of dish with tongs.

    Recipe Pro Tips

    • More Mix-in Ideas: This crab pasta bake recipe is delicious as suggested, however if you’re looking to add more items to this recipe, you may want to try green onions, green pepper, red bell pepper, bread crumbs or crushed Ritz crackers to sprinkle on top before baking.

    Recipe FAQs

    Why is my pasta bake so dry?

    Sometimes baking a pasta casserole uncovered can result in a dry casserole. If this is the case, you can cover the casserole with aluminum foil for the first 20 minutes and then remove foil to allow the cheese to become golden brown.
    Or, if you have leftover pasta and it is reheated and it comes out dry, it could be because the pasta has absorbed some of the sauce. You can add a little heavy cream to moisten it back up if desired.

    Should you rinse pasta after boiling?

    We rinse our pasta after boiling to stop the cooking process. For this recipe, I do recommend rinsing with cool water, as the pasta will heat back up in the oven.

    Why is my pasta bake watery?

    This could be because your pasta wasn’t drained as much as it should have been.

    Storage

    Refrigerator: If you have leftovers of this crab pasta bake, allow the pasta to cool, and then place in the refrigerator in an airtight container, or cover with plastic wrap, for up to three days.

    Freezing: If you want to freeze leftovers, or you have made a double batch, you can freeze the baked pasta. Simply make sure it’s in a freezer safe dish, and freeze up to 3 months.

    Meal Prep: If you’re making a second batch, you can freeze the pasta before baking. When ready to eat, thaw in refrigerator overnight and then bake according to recipe directions.

    Thaw: Thaw in the refrigerator overnight and pop back in the oven at 350 degrees to warm through. (You may want to cover it with aluminum foil so the top does not burn before heating through.)

    More Casserole Recipes You’ll Love

    A baked pasta is a dinner that can be so comforting. This baked ravioli pasta is another great dish for an easy, comforting dinner. Or, if you love easy casserole recipes like this crab pasta bake, we think you’re really going to love these too:

    • Close up photo of a spoonful of a creamy chicken and cheese casserole topped with crispy browned tater tots
      Chicken Tater Tot Casserole
    • french onion beef casserole scooped up out of white dish
      French Onion Beef Casserole
    • doritos chicken casserole on plate
      Doritos Chicken Casserole
    • Chicken Pot Pie Casserole in white baking dish
      Chicken Pot Pie Casserole

    Did you make this? I’d be so grateful if you left a “star” rating below to let me know what you thought! Then, the next time you need a quick and easy recipe, come back to Fantabulosity to browse all of my easy recipes!

    Recipe

    Crab pasta bake being lifted out of baking dish with tongs.
    Print Pin
    5 from 20 votes

    Crab Pasta Bake

    Crab Pasta Bake: This delicious combination of pasta, Alfredo, cheeses, and crab, create a delicious casserole that's easy enough for a quick dinner idea!
    Course Main Course
    Cuisine American, Italian
    Prep Time 20 minutes minutes
    Cook Time 30 minutes minutes
    Total Time 50 minutes minutes
    Servings 6 people
    Calories 1016kcal
    Author Jessica Burgess

    Ingredients

    • 14 ounces imitation crab meat
    • 16 ounces penne pasta + water for boiling
    • 1 pint heavy cream
    • ½ cup butter 1 stick
    • 4 ounces cream cheese half of a block
    • 1 teaspooon Old Bay Seasoning
    • 1 teaspoon minced garlic
    • ¼ teaspoon salt
    • ¼ teaspoon black pepper
    • 1 cup grated parmesan
    • 2 cups mozzarella shredded
    • ¼ cup shredded parmesan

    Instructions

    • Preheat oven to 350 degrees.

    Boil Pasta

    • Cook pasta. You'll begin by cooking your pasta, and depending on the type of pasta you're using, could depend on how long it takes for it to come to al dente (usually about 10 minutes.) Follow the package directions for cooking, then drain, rinse, and set aside.

    Make Alfredo Sauce

    • Melt. In a medium saucepan, add butter, heavy cream, and cream cheese, and cook over medium heat, stirring frequently, until the butter and cream cheese have melted.
    • Add seasonings. When melted, add in the Old Bay Seasoning, minced garlic, salt and pepper. Stir to combine.
    • Add grated parmesan. Whisk in grated parmesan cheese in to the cream mixture, turn heat to low, and whisk and cook over low heat to simmer for 2-3 more minutes.
    • Pour creamy sauce on pasta. Pour the Alfredo sauce over the pasta and stir to combine.
    • Add crab. Next, pour the crab meat over pasta (breaking larger pieces in to the smaller pieces if needed) and stir to combine.

    Layer the Casserole

    • Assemble Layers. Pour half of the creamy Alfredo mixture in to a 9×13 ovenproof dish or casserole dish.
    • Top with half of mozzarella. Sprinkle with half of the mozzarella cheese, spreading it evenly over the top of the pasta in the dish.
    • Add remaining pasta. Layer remaining pasta on top of the mozzarella cheese in the baking dish.
    • Add remaining cheese. Sprinkle on remaining mozzarella cheese and shredded parmesan cheese, spreading it evenly over the casserole.

    Bake the Casserole

    • Bake. Place the casserole in the oven and bake for 20-30 minutes until heated through and the cheese is a light golden brown on top.
    • Optional. If desired, sprinkle chopped fresh parsley on top for color.

    Notes

    Tips:
    Make sure to cook the pasta until it is JUST al dente. You don’t want overcooked pasta.
    Rinse the pasta in cool water to stop the cooking process.
    Make sure to drain the pasta well so the water does not make your baked casserole watery.

    Nutrition

    Serving: 1serving | Calories: 1016kcal | Carbohydrates: 75g | Protein: 32g | Fat: 66g | Saturated Fat: 40g | Polyunsaturated Fat: 3g | Monounsaturated Fat: 17g | Trans Fat: 1g | Cholesterol: 203mg | Sodium: 1268mg | Potassium: 340mg | Fiber: 3g | Sugar: 8g | Vitamin A: 2320IU | Vitamin C: 1mg | Calcium: 479mg | Iron: 1mg

    No Bake Mini Cheesecakes

    January 31, 2023

    No bake mini cheesecakes on counter, with cherry pie filling on top.

    No Bake Mini Cheesecakes: A shortcut method to make delicious little cheesecakes, where you can use your favorite toppings and pie fillings, with an optional cheesecake filling from scratch.

    Post originally published in 2016, updated in 2023.

    No Bake Mini Cheesecakes on counter, with cherry pie filling on top.

    When it comes to no bake recipes, these little individual cheesecakes are the perfect dessert for something quick after dinner or classy enough if you’re hosting a party, especially during the summer months! (But if you’re hosting a party, this walking dessert is a great idea too!)

    Now, if you’d prefer to make a whole, no-bake cheesecake, make sure you check out our Oreo Nutella Cheescake, this No Bake S’mores Cheesecake and this Oreo Cheesecake, too!

    [feast_advanced_jump_to]

    Why This Recipe Works

    • No skills required: If choosing the pre-made filling and storebought mini graham cracker crusts, it’s really just a matter of putting the ingredients together! (However, even making the cheesecake filling from scratch, STILL makes this an easy recipe that beginners can be comfortable with.)
    • Make-ahead: If hosting, or just wanting to make a dessert ahead of time, this is a quick dessert idea that can be made in advance and stored in the refrigerator until ready to enjoy!
    • Ready in only 5 minutes: If you’re using the pre-made filling, and using the storebought mini graham cracker crusts, this is ready to eat within just a few minutes!

    Ingredients Needed

    There are a couple of options to make mini cheesecakes, and I’ll be sharing how to make these with the simplest way (pre-made ingredients) and you’ll also see how to make the cheesecake filling from scratch if desired, too.

    Ingredients For Shortcut Mini Cheesecakes

    Ingredients for no bake mini cheesecakes.
    • A Tub of No-Bake Cheesecake Filling – If you can find this in the refrigerator aisle of your grocery store, it’s a great shortcut for cheesecake recipes. Sometimes it can be hard to find but when you do, it’s lovely. It’s made by “Philadelphia” and I haven’t seen it offered by anyone else – but there may be generic brands that are just as good.
    • Mini Graham Cracker Crusts – Sometimes you can find these in the baking aisle in the grocery store.
    • Canned Pie Filling – What I love about this is that you can mix and match your favorite flavors. Apple, cherry, blueberry… pick your favorite or offer a variety!

    From Scratch Cheesecake Filling

    If you prefer to make your cheesecake filling from scratch, or you can’t find the pre-made cheesecake filling at the store, you’ll just need a few ingredients to whip this up, and don’t worry… it’s still super easy to make!

    • 8-ounce package of cream cheese, softened
    • 14-ounce can of sweetened condensed milk
    • ⅓ cup lime juice
    • 1 teaspoon vanilla extract

    How to Make No-Bake Cheesecake Filling from Scratch

    To see how to make this cheesecake filling from scratch, see the full instructions in our No Bake Cherry Cheesecake recipe.

    Then, simply use the filling to fill your mini graham cracker crusts.
    NOTE: Make sure to allow time for the cheesecake filling to “set” in the crusts, in the refrigerator for 2-3 hours. (No need to allow time for chilling if using pre-made cheesecake filling.)

    Substitutions

    Sometimes substitutions are necessary because of ingredients that are unavailable or needed for dietary restrictions. Here are some suggestions that can help:

    • Graham Cracker Crusts – if you want to make your own mini graham cracker crusts, you can make them using a muffin pan and cupcake liners.
      – Preheat oven to 350 degrees (unless freezing crusts to set instead).
      – Line a 12-cavity muffin pan with cupcake liners.
      – Simply mix ¾ cups graham cracker crumbs, ¼ cup melted butter and 2 tablespoons of granulated sugar together in a bowl. Pour about 1 tablespoon of crumb mixture in to each cupcake liner.
      – Bake for 5-10 minutes or place in the freezer for 10 minutes. Fill with cheesecake filling as instructed. This makes 12 graham muffin-size cracker crusts.
    • Pie Filling- you can use whatever flavor of pie filling you prefer, or top your cheesecake with different toppings. (See topping suggestions below.)

    Topping Suggestions

    If you’d like to use different toppings for your cheesecakes, here are some of our favorite topping suggestions that may be helpful:

    • Pie Filling – canned cherry, blueberry, strawberry or apple.
    • Fresh Fruits – peaches, blueberries, strawberries, raspberries.
    • Syrups – chocolate syrup, caramel, strawberry.
    • Candies and Sweets – chocolate chips, nuts, crushed candy bars, crushed cookies.
    • Whipped Cream – Cool Whip or homemade whipped cream on top can be a great option too.

    How to Make These Mini No Bake Cheesecakes

    If using the shortcut method, this no bake dessert only consists of two steps:

    • filling the graham cracker crusts with cheesecake filling
    • topping with your favorite toppings (if desired).

    I suggest making these ahead of time if serving a large meal. That way they’re done, can be chilled and can be pulled out of the refrigerator and served when ready.

    *Be sure to see the recipe card below for the full ingredients list & instructions!*

    Gather your ingredients, and if using homemade, from-scratch ingredients as mentioned above, prepare those at this point, then proceed with step one.

    Ingredients open and ready to make no bake mini cheesecakes.
    Image 1
    Cheesecake filling poured in to mini graham cracker crusts.
    Image 2

    STEP 1. Unwrap crusts, open cheesecake, and toppings. Begin filling graham cracker crusts with about ¼ cup of cheesecake filling, or desired amount. (Image 1).

    TIP: Create a cavity, by pressing down in the center of the cheesecake filling with a spoon, to allow the pie filling, or your desired topping to sink in to, to prevent overflowing (Image 2).

    Cheesecake filling poured in to mini graham cracker crusts.
    Image 3
    Cherry pie filling being poured by a spoon on to no bake cheesecake filling.
    Image 4

    STEP 2. Top with Topping. Once all graham cracker crusts are filled (6 of them, or the amount you’re making) start spooning on the pie filling. In this case, we used cherry pie filling, straight from the can but you can use whatever you prefer!

    STEP 3. Chill or Serve. If enjoying right now, they’re ready to eat! If serving later, store the cheesecakes in the refrigerator until ready to serve.

    No bake mini pies on counter.

    TIP: If storing in the refrigerator for later, place the cheesecakes in a large container or on a rimmed baking sheet for easier storage. You can cover them with a lid or with plastic wrap to prevent refrigerator flavors from absorbing as much.

    No bake mini cheesecakes on counter.

    Recipe Pro Tips

    • Up-Level Pre-Made Ingredients: Don’t be ashamed for using shortcuts to make a delicious dessert. However, if you want to dress up this easy dessert, using different pie fillings on different cheesecakes, top with whipped cream, and sprinkle with fancy toppings such as chocolate curls.

    Recipe FAQs

    Which is better no-bake cheesecake or baked?

    It depends on which texture you prefer. They’re both delicious, however a baked cheesecake tends to have a more dense texture, where a no-bake cheesecake has a fluffy, airy, texture.

    Why is my No Bake Cheesecake not firm?

    No-bake cheesecake filling is more fluffy and airy than a baked cheesecake, so if a firm, no-bake cheesecake is desired, it’s best to allow 6-8 hours, overnight for the cheesecake to chill, to make sure it reaches a firmer texture. However, since it’s a no-bake recipe, it won’t achieve the firmness a baked cheesecake will.

    Does no-bake cheesecake taste like cheesecake?

    It definitely has the flavor of the cheesecake you’re used to, although the texture could be slightly different.

    Storage

    Store any leftover or made-ahead cheesecakes in the refrigerator for up to 5 days. If using storebought cheesecake filling, it’s best not to freeze, as it doesn’t hold up well from freezing.

    More Cheesecake Recipes You’ll Love

    If you love cheesecakes, baked and no-bake, we think you’ll love these reader favorites:

    • Close-up of strawberry, cut open half way from bottom, with cheesecake filling
      Cheesecake Stuffed Strawberries
    • Slice of Biscoff Cheesecake on white plates
      Biscoff Cheesecake
    • A slice of coconut cheesecake on a wood board.
      Coconut Cheesecake
    • Strawberry Crunch Cheesecake
      Strawberry Crunch Cheesecake

    Did you make this? I’d be so grateful if you left a “star” rating below to let me know what you thought! Then, the next time you need a quick and easy recipe, come back to Fantabulosity to browse all of my easy recipes!

    Recipe

    No bake mini cheesecakes on counter, with cherry pie filling on top.
    Print Pin
    5 from 4 votes

    No Bake Mini Cheesecakes

    No Bake Mini Cheesecakes: A shortcut method to make delicious little cheesecakes, where you can use your favorite toppings and pie fillings, with an optional cheesecake filling from scratch.
    Course Dessert
    Cuisine American
    Diet Vegetarian
    Prep Time 5 minutes minutes
    Cook Time 0 minutes minutes
    Total Time 5 minutes minutes
    Servings 6 cheesecakes
    Calories 241kcal
    Author Jessica Burgess

    Ingredients

    • 6 mini graham cracker crusts or see post for mini graham cracker crust recipe
    • Storebought no bake cheesecake filling or use this no bake cheesecake filling recipe
    • 1 can pie filling we used cherry

    Instructions

    • Fill mini graham cracker crusts with about ¼ cup of cheesecake filling, creating a cavity in the center with a spoon.
    • Top with a spoonfull of your favorite flavor of pie filling, or your favorite toppings. (See post for more topping ideas.)
    • Serve and enjoy or chill in the refrigerator until ready to serve.

    Notes

    To Make Your Own Graham Cracker Crusts:
    – Preheat oven to 350 degrees (unless freezing crusts to set instead).
    – Line a 12-cavity muffin pan with cupcake liners.
    – Simply mix ¾ cups melted butter, ¼ cup melted butter and 2 tablespoons of granulated sugar together in a bowl. Pour about 1 tablespoon of crumb mixture in to each cupcake liner.
    – Bake for 5-10 minutes or place in the freezer for 10 minutes. Fill with cheesecake filling as instructed.

    Nutrition

    Serving: 1cheesecake | Calories: 241kcal | Carbohydrates: 44g | Protein: 2g | Fat: 7g | Saturated Fat: 1g | Polyunsaturated Fat: 0.5g | Monounsaturated Fat: 5g | Sodium: 180mg | Potassium: 76mg | Fiber: 2g | Sugar: 19g | Vitamin A: 24IU | Vitamin C: 2mg | Calcium: 12mg | Iron: 1mg

    Rotel Dip

    January 30, 2023

    Rotel dip with meat, in white bowl, that has a chip dipping in to it.

    Rotel Dip: An easy dip recipe with simple ingredients, cooked on the stovetop, that’s a hearty appetizer recipe or snack idea that’s perfect for game day or a party!
    This Rotel dip recipe is ready in about 10 minutes, and it uses Velveeta, Rotel diced tomatoes and green chiles, and cooked ground beef or sausage. Serve it alongside this Rotel Salsa and these crockpot little smokies when you’re having a party and your guests will love it!

    Rotel dip in white bowl, with chip dipping in to it.

    This delicious dip is always going to be a hit at parties because you can serve it alongside tortilla chips, or bagel chips, and vegetables and you can add other ingredients to put a fun spin on it. This cowboy queso recipe is a great example of taking Velveeta cheese dip, and adding more ingredients, like black beans, to it to take it to a whole other level! Or if you have a smoker, making smoked queso may be a fun way to make a cheesy dip for a party!

    This pretzel cheese dip is a similar easy recipe, that uses cheddar cheese and a few other ingredients, instead of Velveeta. But using processed cheese like Velveeta makes this Rotel dip smooth and some even prefer the flavor.

    [feast_advanced_jump_to]

    Why This Recipe Works

    • This Rotel dip uses 3 ingredients: 3 ingredients… that’s it! (Or 2 if you want to omit the meat!)
    • Quick recipe: When cooked on the stove top, it only takes about 10 minutes (Plus some if you still need to brown ground beef.)
    • Thicker dip: Adding the ground beef makes this dip a bit thicker (like our warm taco dip) and is a nice change from the regular queso dip.

    Ingredients Needed

    I’ve highlighted a couple of ingredients with some relevant notes. Aside from this, the ingredients needed are pretty basic.

    Ingredients in pan for Rotel dip. Velveeta, hamburger, Rotel.
    • Velveeta – There are multiple sizes of the block melty cheese but for this recipe, we recommend the 16-ounce block, although you can double or even reduce the size of this recipe if needed.
    • Can of Rotel – You don’t have to use the actual brand of “Rotel” but it is recommended to use the canned green chiles and diced tomatoes so you can take advantage of the juices that come in the can.

    Substitutions

    There can be substitutions for this recipe in case you’re out of something or need to change something for dietary needs.

    • Ground Beef – You can absolutely use something different for the meat if desired; such as ground turkey, ground sausage, or your favorite meat substitute. (Just remember to drain excess grease before mixing with the cubed Velveeta and Rotel and see our list of other ground beef recipes.)
    • Rotel – Can of diced tomatoes and can of green chiles. If you only have a can of each of these items, you can add both of them instead, trying to measure out about 10 ounces of the two, combined.

    Variations

    Want to add some things to your Rotel dip? Here are some ways to mix things up:

    • Seasonings – although we don’t add seasonings to this recipe, you can add some things to spice it up if desired. Such as; taco seasoning, chili powder, and hot sauce. You may also love adding chopped green onions to the top of this easy Rotel dip too.
    • Milk – Sometimes cheesy Rotel dip can be too thick, so if you prefer to add something like milk or heavy cream, you absolutely can.

    How to Make Rotel Dip

    It’s very easy to make this Rotel cheese dip, and you’ll find it’s one of the easiest dips you can make just for fun or for the big game because it’s an absolute crowd pleaser.

    *Be sure to see the recipe card below for the full recipe below!*

    Velveeta cut in to one inch cubes, on wrapper.

    STEP 1. Slice Velveeta cheese in to small, 1-inch cubes. (Image above).

    Tip: If your ground beef isn’t cooked yet, make sure you do this ahead of time, and drain the excess fat first!

    STEP 2. Combine ingredients. In a sauce pan or enameled cast iron pan, add cooked ground beef, Velveeta cubes, and a can of Rotel (undrained).

    Rotel dip being scooped out of pan, ready for eating.

    STEP 3. Over low-medium heat, stirring occasionally, melt the Velveeta, Rotel, and ground beef together until the cheese has fully melted (about 10 minutes).

    STEP 4. Turn to low and let simmer if needed, until ready to serve!

    Rotel dip in a white bowl, next to a bowl of tortilla chips.

    Equipment

    You’ll need a large skillet, enameled cast iron or a saucepan to cook this Rotel dip on the stove top.

    However, you can also cook this in a crock pot, or even keep it on a warm setting for 2-3 hours too!

    Rotel Dip in the Slow Cooker

    To make this dip in the slow cooker, simply add cooked ground beef to the slow cooker, layer cubed Velveeta on top, and then the can of Rotel. Turn the slow cooker to “low” and cook for 2 hours, stirring occasionally.

    Recipe Pro Tips

    • Fresh cilantro. Serve chopped fresh cilantro on the side of this Rotel dip. If serving this at a party, some may not like the flavor of the fresh herb, so it’s good to let the guests top their own if desired.
    • Don’t cook it too hot, too fast. If the cheese is cooked too high, or too fast, it can burn the cheese. A slow melt is best, and stirring often is key.
    Tortilla chip scooping Velveeta Rotel dip out of bowl.

    Recipe FAQs

    What is Rotel dip made of?

    It’s made of three ingredients (sometimes two), Velveeta cheese, Rotel (diced tomatoes and green chiles), and ground beef or ground sausage. Sometimes Rotel can be made without meat if desired.

    What can I substitute for Velveeta in Rotel dip?

    Although we haven’t tested it for this recipe, swiss is a soft cheese that is sometimes used as a substitute for Velveeta.

    Why is my Rotel dip so thick?

    Sometimes when Rotel dip cools down, it can become thick. You can add milk to thin it out to remain a creamy cheese dip.

    Storage, Freeze, Thaw, Reheat

    How to Store: If you have leftover Rotel, store it in an airtight container in the refrigerator.

    Freeze: You can freeze Rotel dip, in a freezer-safe container for up to 3 months.

    Thaw: To thaw, place the frozen Rotel in the refrigerator overnight, so it gently thaws.

    Reheat: If reheating from being refrigerated, you can reheat it by using the microwave, by stovetop, or even in a slow cooker. You may want to add a ¼ cup of milk or so if it’s too thick even after reheating.

    More Dip Recipes You’ll Love

    If you love dip recipes or if you’re looking for more dips to serve at a party, here are some of our reader’s top favorites:

    • A tortilla chip being dipped in a bowl of jalapeño artichoke dip.
      Jalapeno Artichoke Dip
    • Close up of chip dipping in to buffalo chicken dip.
      Buffalo Chicken Dip
    • taco layer dip recipe
      Easy Taco Layer Dip Recipe
    • Reuben dip being scooped out of baking dish with metal spoon.
      Reuben Dip Recipe

    Did you make this? I’d be so grateful if you left a “star” rating below to let me know what you thought! Then, the next time you need a quick and easy recipe, come back to Fantabulosity to browse all of my easy recipes!

    Recipe

    Rotel dip with meat, in white bowl, that has a chip dipping in to it.
    Print Pin
    5 from 9 votes

    Rotel Dip

    This Rotel dip is made using only 3 ingredients and is ready in about 10 minutes. Perfect as an appetizer to serve alongside chips, vegetables and more!
    Course Appetizer, Side Dish, Snack
    Cuisine American, Mexican
    Prep Time 1 minute minute
    Cook Time 10 minutes minutes
    Total Time 11 minutes minutes
    Servings 12 servings
    Calories 176kcal
    Author Jessica Burgess

    Ingredients

    • 16 ounces Velveeta or similar processed cheese
    • 10 ounces Rotel or can of diced tomatoes and green chiles, undrained
    • 1 pound cooked ground beef, drained or cooked ground sausage, drained

    Instructions

    • Slice Velveeta cheese in to small, 1-inch cubes.
    • In a sauce pan or enameled cast iron pan, add cooked ground beef, Velveeta cubes and the can of Rotel (undrained).
    • Over low-medium heat, stirring occassionally, melt the Velveeta, Rotel and ground beef together until cheese has fully melted.
    • Turn to low and let simmer if needed, until ready to serve!

    Notes

    How to Store: If you have leftover Rotel dip, store it in an airtight container in the refrigerator.
    Freeze: You can freeze Rotel dip, in a freezer-safe container for up to 3 months.
    Thaw: To thaw, place the frozen Rotel dip in the refrigerator overnight, so it gently thaws.
    Reheat: If reheating from being refrigerated, you can reheat it by using the microwave, by stovetop, or even in a slow cooker. You may want to add a ¼ cup of milk or so if it’s too thick even after reheating.
    How to Cook Rotel Dip in the Slow Cooker:
    To make this dip in the slow cooker, simply add cooked ground beef to the slow cooker, layer cubed Velveeta on top, and then the can of Rotel. Turn the slow cooker to “low” and cook for 2 hours, stirring occasionally.

    Nutrition

    Serving: 1serving | Calories: 176kcal | Carbohydrates: 5g | Protein: 17g | Fat: 9g | Saturated Fat: 5g | Polyunsaturated Fat: 0.2g | Monounsaturated Fat: 2g | Trans Fat: 0.4g | Cholesterol: 48mg | Sodium: 632mg | Potassium: 307mg | Fiber: 0.2g | Sugar: 4g | Vitamin A: 399IU | Vitamin C: 2mg | Calcium: 232mg | Iron: 1mg

    Panko Crusted Cod

    January 29, 2023

    Panko Crusted Cod on spatula, above a plate of food.

    Panko Crusted Cod: An easy recipe, where pieces of cod are topped with a panko mixture, lemon juice, and seasonings, that the whole family will love! Much like our baked chicken cutlets, this cod is breaded and cooked in the oven to perfection.

    Piece of panko crusted cod on white plate, with fork stick in the top of it.

    Dinner just got a whole lot easier. We love making fish recipes to switch things up from beef and chicken recipes. This air fryer tilapia is another mild white fish recipe that we love making but when we’re looking for a “crunch” factor, this baked cod with panko is a great choice. (It’s especially delicious when used in fish finger tacos!)

    We’ve used panko crumbs on these air fryer buffalo chicken tenders and this panko chicken also, and to say that it’s delicious, is an understatement!

    [feast_advanced_jump_to]

    Why This Recipe Works

    • Quick recipe: In just about 20 minutes, this panko-crusted cod recipe will be ready!
    • Use frozen or fresh cod: Although fresh fish is ideal, it’s likely that frozen cod may be what you’re using, and that’s ok! (See tips below to insure your frozen fish fillets have the best results.)

    Ingredients Needed

    I’ve highlighted a couple of ingredients with some relevant notes. Aside from this, the ingredients needed are pretty basic for this baked breaded cod.

    Labeled ingredients for panko crusted cod.
    • Cod – You can use fresh or frozen. If using frozen fish, press as much water out of the filets as possible once thawed. I like to place the filets in a pan then using paper towels press on the fish, flipping to press on each side. Doing this keeps your crumb topping from getting soggy, by reducing the amount of water that cooks out into the pan.
    • Butter – You can use salted or unsalted butter for this recipe. If using salted, keep this in mind when adding salt to your panko seasonings.
    • Lemon juice – Fresh lemons (and even a little lemon zest) are so delicious for this recipe. I’d grab a few extra lemons to garnish with or serve with if desired.

    Substitutions

    If needing to switch things out for various reasons, here are some suggestions that may be helpful for this baked pod with panko and parmesan:

    • Cod – if you don’t have enough cod, or are curious about trying other mild white fish, you can try tilapia, halibut, and grouper too.
    • Butter – although we haven’t tried using oil instead of butter in this recipe, it’s an option that can be considered. Olive oil or avocado oil would be good options.
    • Mrs. Dash – If you don’t have this seasoning or want to trade it out for something different, you may want to try garlic powder and Old Bay seasoning instead.

    How to Make this Panko-Crusted Cod Recipe

    This dish is easily made into a tasty salt-free dish! To do this, omit the salt when seasoning the fish and use an additional tablespoon of lemon juice. 

    *Be sure to see the recipe card below for the full ingredients list & instructions!*

    Grease a 9 x13 baking dish or sheet pan and preheat the oven to 425 degrees.

    Uncooked cod filets sitting on cloth, next to lemon.
    Image 1
    Cod filets seasoned with salt and pepper.
    Image 2

    STEP 1. Season fish. Coat fish with lemon juice then sprinkle salt and pepper over filets. Place Cod filets into a greased baking pan. (Images 1 & 2).

    Tip: if using frozen filets be sure to press as much water as possible out of the filets before seasoning.

    Panko and seasonings in clear glass bowl to season cod.
    Image 3
    Panko and seasonings mixed together in clear glass bowl.
    Image 4

    STEP 2. Make panko seasoning. In a small bowl mix cayenne pepper, Mrs. Dash, parmesan cheese, and Panko crumbs together (Image 3). Pour in melted butter; mix well to coat the crumbs (Image 4).

    Panko crumbs with fresh parsley added to bowl.
    Image 5
    Panko and seasonings in glass bowl with fresh parsley mixed in.
    Image 6

    STEP 3. Add fresh parsley. Then stir in fresh parsley to mix in with the panko breadcrumb mixture (Images 5 & 6).

    Raw cod filets in baking dish with panko and seasonings being added on top.
    Image 7
    Panko coated cod filets in baking dish.
    Image 8

    STEP 4. Top with panko bread crumbs. Spoon crumb mixture evenly onto the top of the fish filets. Press crumbs into fish (Images 7 & 8).

    STEP 5. Bake. Place the pan into the oven and bake for 12-14 minutes until the fish flakes and is opaque throughout, and has reached an internal temperature of 145° F.

    Baked cod filets with panko crusted seasoning.

    Serve with fresh lemons and garnish with additional parsley if desired. 

    Recipe Pro Tips

    • Salt-free option. This dish is easily made into a tasty salt-free dish! To do this, omit the salt when seasoning the fish and use an additional tablespoon of lemon juice. 
    Panko crusted cod on spatula.

    Recipe FAQs

    Does cod need to be marinated?

    Without a marinade or seasonings, cod can be bland. With this panko crusted cod recipe, the seasonings help give it flavor, without the need to marinate.

    Do you flip cod when baking?

    No, this cod does not need to be flipped while baking.

    Should you rinse cod before cooking?

    No, it is not recommended to wash cod or meats before cooking.

    Storage

    This dish does not freeze well and tastes best when eaten fresh. If you have leftovers, store them in the refrigerator in an airtight container for up to 2 days.

    What to Serve with Crispy Baked Cod Recipe

    There are a lot of delicious sides that go with this baked fish but here are a few ideas that are popular with it:

    • french fries
    • rice pilaf
    • green vegetables (like this garlic roasted broccoli)
    • white bread (like this Italian bread recipe)
    • tartar sauce is a favorite condiment for dipping too!

    More Seafood Recipes You’ll Love

    If you love fish and seafood recipes, you’ll also love these reader favorites:

    • fried shrimp on plate next to sauce
      The BEST Fried Shrimp
    • Mussels cooked in white wine and garlic sauce, stacked on plate, next to toasts.
      Mussels in White Wine Sauce
    • grilled shrimp in white bowl
      Grilled Shrimp Recipe and Marinade
    • air fryer salmon patties
      Air Fryer Salmon Patties

    Did you make this? I’d be so grateful if you left a “star” rating below to let me know what you thought! Then, the next time you need a quick and easy recipe, come back to Fantabulosity to browse all of my easy recipes!

    Recipe

    Panko Crusted Cod on spatula, above a plate of food.
    Print Pin
    5 from 5 votes

    Panko Crusted Cod

    Panko Crusted Cod: An easy recipe, where pieces of cod are topped with a panko mixture, lemon juice and seasonings, that the whole family will love!
    Course Main Course
    Cuisine American
    Diet Low Fat
    Prep Time 7 minutes minutes
    Cook Time 14 minutes minutes
    Total Time 21 minutes minutes
    Servings 4 filets
    Calories 177kcal
    Author Jessica Burgess

    Ingredients

    • 1 pound cod filets 4 pieces
    • 1 tablespoon fresh lemon juice
    • ½ teaspoon salt
    • ½ teaspoon black pepper
    • ⅛ teaspoon cayenne pepper
    • 2 teaspoons Mrs. Dash Table Blend
    • 1 Tablespoon grated parmesan cheese
    • ⅓ cup plain panko crumbs
    • 2 Tablespoon butter melted
    • 2 Tablespoon fresh parsley finely chopped

    Instructions

    • Grease a 9 x13 baking dish or sheet pan and preheat the oven to 425 degrees.
    • Coat fish with lemon juice then sprinkle salt and pepper over filets. Place Cod filets into a greased baking pan. (Note: if using frozen filets be sure to press as much water as possible out of the filets before seasoning.)
    • In a small bowl mix cayenne pepper, Mrs. Dash, parmesan cheese, and Panko crumbs together. Pour in melted butter; mix well to coat the crumbs. Then stir in fresh parsley.
    • Spoon crumb mixture evenly onto the top of the fish filets. Press crumbs into fish.
    • Place the pan into the oven and bake for 12-14 minutes until the fish is flakey and opaque throughout.
    • Serve with fresh lemons and garnish with additional parsley if desired.

    Notes

    Tip: if using frozen filets be sure to press as much water as possible out of the filets before seasoning.

    Nutrition

    Serving: 1piece | Calories: 177kcal | Carbohydrates: 6g | Protein: 22g | Fat: 7g | Saturated Fat: 4g | Polyunsaturated Fat: 1g | Monounsaturated Fat: 2g | Trans Fat: 0.2g | Cholesterol: 65mg | Sodium: 457mg | Potassium: 533mg | Fiber: 1g | Sugar: 1g | Vitamin A: 469IU | Vitamin C: 5mg | Calcium: 84mg | Iron: 2mg

    Lucky Charms Treats

    January 28, 2023

    Lucky Charms Treats stacked on top of one another, sitting on white counter.

    Lucky Charms Treats: Delicious cereal bars made with a favorite cereal, that are made in the microwave and ready in about 10 minutes!

    Lucky Charms Treats stacked on top of one another, one white counter.

    These cereal treats, a fun twist on your favorite rice krispie treats, are ready in minutes, and are perfect for a quick snack or an easy no bake dessert idea!

    We absolutely love a fun treat like this, using a box of Lucky Charms, like in our Lucky Charms Blondies and these Lucky Charms Pancakes. They’re all a fun St. Patrick’s Day treat that can be made to celebrate the holiday, too! If you love using cereal to make treats, you should also try making this puppy chow with Butterfingers.

    [feast_advanced_jump_to]

    Why This Recipe Works

    • 3 ingredients: That’s all it takes to make these easy treats!
    • Thick and gooey Lucky Charms treats: Making these in square pans (we used a 9×9) makes these Lucky Charms bars thick and delicious when using fresh, gooey marshmallows.

    Ingredients Needed

    I’ve highlighted a couple of ingredients with some relevant notes. Aside from this, the ingredients needed are pretty basic.

    Labeled ingredients for Lucky Charms Treats
    • Butter – We use salted butter for this recipe. However, if you’re using unsalted butter, add a pinch of salt to the marshmallow mixture before adding the cereal.   
    • Marshmallows – You’ll want to use a 10-ounce bag of marshmallows (regular or mini size). This is equivalent to about 40 big marshmallows and 6 cups of mini marshmallows.

    Tip: Set aside some extra marshmallows from the cereal and press them into the top of the treats before they set.

    Substitutions

    Sometimes substitutions are necessary. Here are some suggestions that may help:

    • Lucky Charms – Using an off-brand Lucky Charms is absolutely ok. You may also find different cereals that will work great too, such as Reeses Peanut Butter Puffs, and Cocoa Pebbles, and we’ve even made Fruity Pebbles treats!
    • Vanilla – we like to add vanilla extract to a lot of our rice krispie treat recipes, such as these caramel rice krispie treats so feel free to add a teaspoon of vanilla extract too if you’d like. However, Lucky Charms tend to have a sweeter, vanilla taste to them already so we omitted this.

    Step-by-Step Instructions

    For the best results use a fresh bag of marshmallows and cereal. If either of these ingredients is stale you will end up with stale-tasting treats.

    *Be sure to see the recipe card below for the full ingredients list & instructions!*

    It’s really simple to make these Lucky Charms marshmallow treats! Here’s how:

    STEP 1. Line a 9×9 inch baking pan (or 13×9 for thinner treats) with parchment paper and set aside.

    Large marshmallows in clear glass bowl.
    Image 1
    Melted marshmallows in large glass bowl.
    Image 2

    STEP 2. Next, place the marshmallows and butter in a large microwave-safe bowl (Image 1).
    Microwave on high for 60 seconds and then stir well and then microwave for another 30 seconds.Stir until smooth and the marshmallow and butter are well combined. If needed, microwave for an additional 30 seconds until the marshmallows are melted (Image 2).

    Lucky Charms poured in to melted marshmallows, in large glass bowl.
    Image 3
    Lucky Charms and melted marshmallows poured in to baking dish.
    Image 4

    STEP 3. Add the cereal and mix until the cereal is evenly coated with marshmallow and butter mixture (Image 3).

    STEP 4. Turn the coated cereal mixture into the prepared pan gently pressing it into an even layer (Image 4).

    Tips:

    • Be gentle with pressing the treats in the pan, using a light hand. Pressing too much or too hard may result in tough Lucky Charm treats.
    • To prevent stickiness. You can spray your spoon and hands with non-stick spray to help prevent the melted marshmallows from sticking when mixing and pressing the treats into the pan.
    Lucky Charms treats sliced in to squares on counter.

    STEP 5. Allow the crispy treats to set at room temperature for at least an hour before cutting (Image above.)

    Enjoy the treats by themselves or put them on a fun charcuterie board like on this St. Patrick’s Day charcuterie board!

    Recipe Pro Tips

    Make sure you also see the other tips above, for these homemade Lucky Charms treats!

    • Extra gooey marshmallow treats. If you’d like, you can set aside some marshmallows from the cereal and press them into the top of the treats before they set.
    • Fresh Marshmallows. For the best results use a fresh bag of marshmallows and cereal. If either of these ingredients is stale you will end up with stale-tasting treats.
    Lucky Charms treats stacked on top of one another, on white counter.

    Recipe FAQs

    How do you store Lucky Charms treats?

    It’s best to store any leftover treats in an airtight container at room temperature for up to three days. These treats tend to get stale faster than traditional rice krispies treats, so you may even want to wrap them in plastic wrap to help them stay fresh, longer.

    What else can I add to Lucky Charms treats?

    Although these are delicious the way they are made, it could be fun to add sprinkles or drizzle melted green candy melts for St. Patrick’s Day.

    More Marshmallow Treats

    If you love marshmallow treats like this one, we think you’re also going to love these:

    • Three chocolate rice krispie treats stacked on top of each other.
      Chocolate Rice Krispie Treats
    • Oreo rice krispy treats stacked on top of one another.
      Oreo Rice Krispie Treats
    • marshmallow popcorn balls on white background
      Marshmallow Popcorn Balls
    • Marshmallow cookies stacked with sprinkles.
      Marshmallow Cookies with Sprinkles

    Did you make this? I’d be so grateful if you left a “star” rating below to let me know what you thought! Then, the next time you need a quick and easy recipe, come back to Fantabulosity to browse all of my easy recipes!

    Recipe

    Lucky Charms Treats stacked on top of one another, sitting on white counter.
    Print Pin
    5 from 4 votes

    Lucky Charms Treats Recipe

    Lucky Charms Treats: Delicious cereal bars made with a favorite cereal, that are made in the microwave and ready in about 10 minutes!
    Course Dessert, Snack
    Cuisine American
    Diet Vegetarian
    Prep Time 10 minutes minutes
    Cook Time 2 minutes minutes
    Total Time 12 minutes minutes
    Servings 16 treats
    Calories 133kcal
    Author Jessica Burgess

    Ingredients

    • 10 ounces marshmallows
    • 4 Tablespoons salted butter
    • 6 cups Lucky Charms cereal

    Instructions

    • Line a 9×9 inch baking pan (or 13×9 for thinner treats) with parchment paper and set aside.
    • Then, place the marshmallows and butter in a large microwave-safe bowl. Microwave on high for 60 seconds and then stir well and then microwave for another 30 seconds.
      Stir until smooth and the marshmallow and butter are well combined. If needed, microwave for an additional 30 seconds until marshmallows are melted.
    • Add the cereal and mix until the cereal is evenly coated with marshmallow and butter mixture. 
    • Turn the coated cereal into the prepared pan gently (see tips in post) pressing it into an even layer.
    • Allow the treats to set at room temperature for at least an hour before cutting. 

    Notes

    TIPS:
    • Fresh Marshmallows. For the best results use a fresh bag of marshmallows and cereal. If either of these ingredients is stale you will end up with stale-tasting treats.
    • To prevent stickiness. You can spray your spoon and hands with non-stick spray to help prevent the melted marshmallows from sticking when mixing and pressing the treats into the pan.
    • Be gentle with pressing the treats in the pan, using a light hand. Pressing too much or too hard may result in tough Lucky Charm treats.
    • Extra gooey marshmallow treats. If you’d like, you can set aside some marshmallows from the cereal and press them into the top of the treats before they set.
    STORAGE:
    Store any leftover treats in an airtight container at room temperature for up to three days. Keep in mind that these treats tend to get stale faster than traditional rice krispies treats. 

    Nutrition

    Serving: 1treat | Calories: 133kcal | Carbohydrates: 25g | Protein: 1g | Fat: 4g | Saturated Fat: 2g | Polyunsaturated Fat: 0.3g | Monounsaturated Fat: 1g | Trans Fat: 0.1g | Cholesterol: 8mg | Sodium: 124mg | Potassium: 32mg | Fiber: 1g | Sugar: 15g | Vitamin A: 469IU | Vitamin C: 4mg | Calcium: 60mg | Iron: 3mg

    Mint Buttercream

    January 27, 2023

    Mint buttercream swirled in to small white dish.

    Mint Buttercream Frosting: With only 5 ingredients, this mint frosting recipe is delicious on chocolate cake, and especially on these mint chocolate cupcakes! Or, you could even spread it on these mini chocolate cakes for a twist!

    Mint buttercream in small whit bowl.

    Whether it’s for St. Patrick’s Day or you just love mint-flavored desserts, this buttercream will be absolutely delicious on your favorite baked goods. (It’s similar to the filling that we put in the mint chocolate brownies that are so delicious too!)

    We’ve been known to put strawberry buttercream between sugar cookies, making cookie sandwiches, which would be a delicious way to use a little bit of this mint frosting recipe, in between 2 of these brownie mix cookies.

    [feast_advanced_jump_to]

    Why This Recipe Works

    • It uses a few ingredients: Using only butter, powdered sugar, mint extract, milk, and green food coloring, you may have these ingredients on hand and will be topping your favorite dessert with this peppermint buttercream in no time!
    • Type of Mint: Although we use peppermint extract for this recipe, if you prefer spearmint flavor, you can absolutely use spearmint extract instead.
    • Ready in minutes: Making your own buttercream is easy and is ready in just a few minutes, so you can skip the store-bought frosting!

    Ingredients Needed

    I’ve highlighted a couple of ingredients with some relevant notes. Aside from this, the ingredients needed are pretty basic.

    Labeled ingredients on counter.
    • Butter – We use salted butter for this recipe but you can use unsalted butter if you prefer. Make sure to use 2 sticks of softened butter, since one stick is typically ½ cup. (Check your butter to make sure a stick equals ½ cup.)
    • Food Coloring – For a more vibrant green color, add extra food coloring. It is important to note that gel food coloring will give you a better color than liquid food coloring. 

    Substitutions

    If you’ve found that you’re out of some of the ingredients or need to substitute something, here are some suggestions that you may find helpful:

    • Butter – if you don’t have butter, you can try using margarine instead, although we haven’t tested that yet for this recipe. Do know that the results may come out different when using something other than good quality butter.
    • Food Coloring – if you don’t have the gel on hand and need to use liquid food coloring, it’s ok! We prefer the gel for best results but the liquid is ok in a pinch.
    • Milk – we like using whole milk but we’ve also used heavy cream for our buttercream and that turns out wonderful too!

    Step-by-Step Instructions

    In just a few simple steps, this creamy mint buttercream frosting will be ready for your sheet cake, cake layers, or your favorite chocolate cupcake recipe.

    I suggest making this when you’re waiting for your baked goods to cool off.

    *Be sure to see the recipe card below for the full ingredients list & instructions!*

    Butter creamed in glass bowl.
    Image 1
    Powdered sugar in glass bowl with butter.
    Image 2

    STEP 1. Beat butter. In a large bowl, use an electric mixer to cream the softened butter until it is smooth and creamy. Ensure that there are no large clumps of butter remaining (Image 1).

    STEP 2. Add powdered sugar. Add the powdered sugar and mix again until completely mixed and crumbly (Image 2).

    Green gel food coloring added to butter and sugar, in glass bowl.
    Image 3
    Mixed butter, sugar and green food coloring in glass bowl.
    Image 4

    STEP 3. Mix in the remaining ingredients. Use the hand mixer to whisk in the milk, peppermint extract, and food coloring. Mix the buttercream for about 2 minutes, or until smooth and creamy (Images 3 & 4).

    Tip: If the frosting is still crumbly after 2 minutes, add another ½ tablespoon of milk and mix again to achieve the perfect consistency.

    STEP 4. Ready to use. Frost your dessert with the delicious frosting or store the frosting in the refrigerator, covered with plastic wrap, until you are ready to use it. Enjoy!

    Mint buttercream in a white bowl.

    Recipe Pro Tips

    • Allow to fully cool. When using this frosting, you want to make sure that whatever you use it on has cooled completely. Because there is so much butter in the frosting, it will become runny quickly if it is put on something hot or warm.
    • Quality Butter. The key to delicious buttercream frosting is to use good quality butter.
    • Amount needed. How much frosting you’ll need, will depend on what you’re using the frosting for. This recipe makes about 3 cups.

    Recipe FAQs

    How do you store mint buttercream frosting?

    If you have leftover frosting or you want to make ahead, you can store this frosting for up to 2 weeks in the fridge as long as it is in an airtight container or tightly covered with plastic wrap. After that it will begin to harden significantly. 

    What is the difference between frosting and buttercream?

    Frosting and buttercream can differ because of the ingredients. For instance, some frosting is made with cream cheese. Buttercream is mostly made of butter.

    Cake and Cupcake Recipes You’ll Love

    We love this buttercream on homemade chocolate cupcakes but we’ve also hand picked some of our favorite cake and cupcake recipes that you’ll love to serve this mint buttercream on:

    • A slice of Milky Way sheet cake on top of a round plate.
      Milky Way Cake
    • Easy Marble Cake Recipe
      Homemade Marble Cake
    • Oreo Cupcakes with Oreo Buttercream Frosting
      Oreo Cupcakes and Oreo Buttercream Frosting
    • Peppermint cupcakes on baking rack
      Peppermint Cupcakes

    Did you make this? I’d be so grateful if you left a “star” rating below to let me know what you thought! Then, the next time you need a quick and easy recipe, come back to Fantabulosity to browse all of my easy recipes!

    Recipe

    Mint buttercream swirled in to small white dish.
    Print Pin
    5 from 4 votes

    Mint Buttercream

    Mint buttercream frosting is made using only 5 ingredients, and that's butter, powdered sugar, milk, green food coloring and peppermint extract, and it's ready in minutes!
    Course Dessert
    Cuisine American
    Diet Vegetarian
    Prep Time 10 minutes minutes
    Total Time 10 minutes minutes
    Servings 3 cups
    Calories 1020kcal
    Author Jessica Burgess

    Ingredients

    • 1 cup salted butter
    • 3 cups powdered sugar
    • 2 teaspoons peppermint extract
    • 1 Tablespoon whole milk Plus more if needed to achieve desired consistency.
    • 1 teaspoon green food coloring gel

    Instructions

    • In a large mixing bowl, use an electric hand mixer to cream the butter until it i smooth and creamy. Ensure that there are no large clumps of butter remaining. 
    • Add the powdered sugar and mix again until homogenous and crumbly. 
    • Use the hand mixer to whisk in the milk, peppermint extract, and food coloring. Mix the buttercream for about 2 minutes, or until smooth and creamy. 
    • If the frosting is still crumbly after 2 minutes, add another ½ tablespoon of milk and mix again.

    Nutrition

    Serving: 2tablespoon | Calories: 1020kcal | Carbohydrates: 120g | Protein: 1g | Fat: 62g | Saturated Fat: 39g | Polyunsaturated Fat: 2g | Monounsaturated Fat: 16g | Trans Fat: 2g | Cholesterol: 163mg | Sodium: 491mg | Potassium: 32mg | Sugar: 118g | Vitamin A: 1899IU | Calcium: 26mg | Iron: 0.1mg

    Mint Chocolate Cupcakes

    January 26, 2023

    3 mint chocolate cupcakes stacked on top of one another.

    Mint Chocolate Cupcakes: These cupcakes, made from scratch, are full of chocolate flavor and topped with a beautiful green, cream cheese frosting if you desire.

    Mint chocolate cupcakes with mint cream cheese frosting on top with mini chocolate chips.

    Minty, chocolatey cupcakes are perfect for any time of year but they’re especially delicious around Christmas and St. Patrick’s Day.

    With this chocolate cupcake recipe, we’ve provided a simple green, cream cheese frosting that you can top your cupcakes with, or you can use a mint buttercream frosting recipe, chocolate buttercream, or you can even choose your favorite frosting recipe.

    Make sure to browse our other cupcake recipes too, so you can have one for every occasion! If you like chocolate cupcakes, you’ll especially love these Dirt Cupcakes and these Oreo Cupcakes, too!

    [feast_advanced_jump_to]

    ⭐️ Why This Recipe Works

    • Minty Flavor: The surprising, light flavor of mint in a cupcake, combined with creamy, smooth, vanilla frosting is such a wonderful combo. We even added peppermint to our peppermint cupcakes and they were a hit!
    • Frosting Options: Although we provide quick cream cheese frosting instructions, this chocolate mint cupcake pairs wonderfully with many frosting options!

    🧾 Ingredients for Chocolate Mint Cupcakes

    I’ve highlighted a couple of ingredients with some relevant notes. Aside from this, the ingredients needed are pretty basic.

    Labeled ingredients for mint chocolate cupcakes.
    • Butter – We use salted butter for this recipe. Making sure your butter is softened helps it to cream with the sugar much better.
    • Milk – Whole milk provides the cupcakes with the moisture they need to be soft and spongey.
    • Flour – all-purpose flour is recommended for this recipe.

    🧁 Ingredients for Cream Cheese Frosting

    We like to keep the frosting a simple vanilla flavor; however, you can also add some peppermint extract for some extra mint flavor. If so, I’d recommend adding 1 teaspoon of mint extract, tasting to see if it’s strong enough, and then adding more if desired. Here are some notes about some of the frosting ingredients, that may help:

    • Cream cheese – you’ll want to use the block style of cream cheese for this
    • Green gel food coloring – The gel food coloring gives the frosting a more vibrant green color than liquid food coloring.

    📖 Substitutions

    Looking to mix things up? Here are some suggestions that you may find helpful:

    • Food Coloring – you can use red food coloring instead of green if you’re looking for cupcakes for the holidays!
    • Toppings – we sprinkled mini chocolate chips on top of the homemade chocolate cupcakes (like we did with this cookie dough frosting) but you can switch these out with nuts, shredded coconut, Andes mints, Thin Mint cookies, candies, and more!
    • Mint Extract – if you prefer a spearmint flavor, you can use spearmint extract instead of peppermint extract.

    👩🏻‍🍳 How to Make the Mint Cupcakes

    The process for the moist chocolate cupcakes is simple, even though they’re made from scratch.

    *Be sure to see the recipe card below for the full ingredients list & instructions!*

    STEP 1. Preheat your oven to 350 degrees Fahrenheit.

    Butter and sugar in glass bowl with other ingredients sitting around it.
    Image 1
    Eggs added to sugar and butter mixture in glass bowl.
    Image 2

    STEP 2. Cream butter and sugar. In a large bowl, on low speed, use an electric mixer to cream your butter and granulated sugar together until smooth (Image 1).

    STEP 3. Whisk in the eggs, peppermint extract, and milk until the mixture is homogenous and the egg yolks are fully beaten (Image 2).

    Cocoa added to glass bowl with butter and sugar mixture.
    Image 3
    Mint chocolate cupcake batter in muffin pans.
    Image 4

    STEP 4. Gently whisk the cocoa powder, flour, and baking powder into the wet ingredients (cupcake batter) until fully incorporated (Image 3).

    STEP 5. Divide the batter among 12 cupcake liners in a muffin tin. Bake your cupcakes for 20 minutes or until a toothpick inserted in to the center of a cupcake comes out clean (Image 4). Remember that your baking time can differ for different ovens so checking with a toothpick is helpful!

    STEP 6. While the cupcakes are in the oven, prepare the frosting by whisking together the cream cheese, powdered sugar, food coloring, and vanilla in a large bowl until it is smooth and creamy. Scrap the bottom and the sides of the bowl to make sure no clumps of cream cheese are stuck.

    Baked mint chocolate cupcakes in muffin tin.

    STEP 7. Allow the cupcakes to fully cool (on a wire rack preferably) and then frost the cupcakes, sprinkle with mini chocolate chips if desired, serve, and enjoy!

    💭 Recipe Pro Tips

    For your favorite cupcake recipes, it’s best to remember these tips:

    • Allow to fully cool. Making sure that you allow the tender chocolate cupcakes to completely cool before frosting is key or the frosting won’t turn out the way that it should.
    • Butter. Make sure the butter is softened or at room temperature to make sure that it blends together with the sugar much easier.
    Mint chocolate cupcake with cream cheese frosting.

    📋 Recipe FAQs

    How do you store mint chocolate cupcakes?

    These cupcakes are best stored in the fridge covered with plastic wrap for up to 4 days since they’re topped with the cream cheese frosting. If not topped with a frosting that’s perishable, they can be stored on the counter at room temperature for 1-2 days, and then refrigerated.

    What is the secret to moist cupcakes?

    Do not overmix the batter. If you do, this causes air bubbles to go away and the cupcakes can become dense. When mixing, just mix until the ingredients are combined but then stop.

    🍰 More Dessert Recipes You’ll Love

    If you love easy dessert recipes, you’re going to love what we’ve been baking and cooking up lately, especially these mint chocolate brownies and mini chocolate cakes.

    • Crack cake sheet cake, sliced in pan.
      Crack Cake
    • Collage of potluck desserts.
      Easy Potluck Desserts for a Crowd
    • Image collage of dump cake recipes.
      Best Dump Cake Recipes (Easy, Crowd-Pleasers)
    • A single serving of Oreo dump cake on a plate, that's topped with a scoop of vanilla ice cream.
      Oreo Dump Cake

    Did you make this? I’d be so grateful if you left a “star” rating below to let me know what you thought! Then, the next time you need a quick and easy recipe, come back to Fantabulosity to browse all of my easy recipes!

    Recipe

    3 mint chocolate cupcakes stacked on top of one another.
    Print Pin
    5 from 4 votes

    Mint Chocolate Cupcakes

    Mint Chocolate Cupcakes: These cupcakes made from scratch or full of chocolate flavor and topped with a beautiful green, cream cheese frosting.
    Course Dessert
    Cuisine American
    Prep Time 15 minutes minutes
    Cook Time 20 minutes minutes
    Total Time 35 minutes minutes
    Servings 12 cupcakes
    Calories 417kcal
    Author Jessica Burgess

    Equipment

    • muffin tin or cupcake pan

    Ingredients

    • ¾ cup salted butter softened
    • ¾ cup granulated sugar
    • 2 large eggs
    • 2 teaspoons peppermint extract
    • ⅓ cup whole milk
    • ½ cup unsweetened cocoa powder
    • 1½ cup all purpose flour
    • 1 teaspoon baking powders

    Cream Cheese Frosting

    • 8 ounces cream cheese block style – softened
    • 3 cups powdered sugar
    • 1 teaspoon green gel food coloring
    • 1 teaspoon vanilla extract
    • mini chocolate chips as a garnish, if desired

    Instructions

    • Preheat your oven to 350 degrees Fahrenheit.
    • Use an electric hand mixer to cream your butter and granulated sugar together until smooth.
    • Whisk in the eggs, peppermint extract, and milk until the mixture is fully mixed together and the eggs yolks are fully beaten.
    • Gently whisk the cocoa powder, flour, and baking powder into the cupcake batter, just until fully incorporated. DO not overmix.
    • Divide the batter among 12 cupcake liners in a muffin tin. Bake your cupcakes for 20 minutes.
    • While the cupcakes are in the oven, prepare the frosting by whisking together the cream cheese, powdered sugar, food coloring, and vanilla in a large bowl until it is smooth and creamy. Scrap the bottom of the bowl to make sure no clumps of cream cheese are stuck.
    • Allow the cupcakes to fully cool (on a wire rack preferably) and then frost the cupcakes, serve, and enjoy!

    Notes

    TIPS:
    • Allow to fully cool. Making sure that you allow the chocolate cupcakes to completely cool before frosting is key or the frosting won’t turn out the way that it should.
    • Butter. Make sure the butter is softened or at room temperature to make sure that it blends together with the sugar much easier.

    Nutrition

    Serving: 1cupcake | Calories: 417kcal | Carbohydrates: 58g | Protein: 5g | Fat: 20g | Saturated Fat: 12g | Polyunsaturated Fat: 1g | Monounsaturated Fat: 5g | Trans Fat: 0.5g | Cholesterol: 81mg | Sodium: 202mg | Potassium: 124mg | Fiber: 2g | Sugar: 43g | Vitamin A: 664IU | Calcium: 62mg | Iron: 1mg

    Easter Oreos

    January 23, 2023

    Easter Oreos - chicks, bunny, Easter eggs, on white plates.

    Easter Oreos: Oreo cookies covered in different colors of melted chocolate, and decorated as the cutest bunnies, chicks, and Easter eggs! These Easter Oreos are a close match with these Bunny Butt Cookies, and we think the two of them on a cookie platter would be absolutely adorable!

    Easter Oreos that are decorated like eggs, bunnies and chicks, sitting on white plate.

    Easter is one of the prettiest holidays of the year. (Or at least I think so!) The spring colors, with bright touches, and adorable treats that can make an appearance, like these cookies and other fun desserts like these Easter egg truffles, these mini egg cookies, and this bunny bait!

    Whether you’re looking for cute Easter desserts for Easter baskets or to include on an Easter charcuterie board for an Easter celebration, these chocolate-covered Oreos are going to be the perfect treat! (If you’re looking to cut down on the Easter sweets, you’ll love this list of ideas for non-candy Easter basket ideas!)

    [feast_advanced_jump_to]

    ⭐️ Why This Recipe Works

    • Fun for Kids: Kids will love helping with this recipe, and sprinkling on the sugars and festive sprinkles can be a fun task for them!
    • Pre-made ingredients: Don’t feel like baking? Covering Oreos or cookies with chocolate is an easy treat that doesn’t take long!
    • Gift Giving: If you love making treats for Easter, for neighbors, kiddos or friends/family, these will be adored by so many!

    🧾 Ingredients Needed

    I’ve highlighted a couple of ingredients with some relevant notes. Aside from this, the ingredients needed are pretty basic.

    Labeled ingredients on kitchen counter for Easter Oreos - chics and bunny rabbits.
    • Oil-Based Candy Color – Use only oil-based candy coloring for chocolate. Gel color or food coloring may be uneven and leave streaks. Here is oil-based color that you can use!
    • Sprinkles – If you need sprinkles like you see in the images here, you can get the following with the provided links:
      – heart sprinkles for bunny nose
      – black nonpareils for eyes, orange jimmies for the chick feet, and orange circular sprinkles for the chick nose. If in stock, these Halloween sprinkles are perfect because they have everything you need. However, if they’re out of stock, you can buy them separately: get the sprinkles for eyes and chick feet, and orange circles for chick nose (and use the other colors for other spring desserts like Easter Bark!)
      – For sprinkles for the Easter egg cookies, these spring sprinkles are a perfect fit!

    📖 Substitutions

    Sometimes you may find that you need to substitute some items for a recipe, or that you want to change some things out. Here are some suggestions that you may find helpful if you need to change anything:

    • Belgian Chocolate – Substitute colored candy melts for the Belgian chocolate if you wish. You may even be able to use white almond bark or white chocolate chips too if you’re comfortable with those, although we did not test those with this recipe.
    • Cookies – You can also use Golden Oreos instead of original Oreos too if you like those better!

    👩🏻‍🍳 How to Make these Easter Oreos

    There are 3 different kinds of decorated Easter cookies you can make:

    • Bunny rabbit Oreo cookies
    • Baby chicks made out of Oreos
    • Easter egg Oreo cookies

    *Be sure to see the recipe card below for the full ingredients list & instructions!*

    This recipe can be easily doubled or tripled to make any many as you’d like! We also give tips along the way to make these Easter cookies a success.

    🐰 How to Make Bunny Oreos

    STEP 1. Melt 1⁄2 cup white chocolate in a small deep microwave-safe bowl in 20-second increments and stir until smooth.

    STEP 2. Mix in the white candy color until the desired shade is reached.

    Tip: Overheating the chocolate. Do not overheat your chocolate. The 20-second increments are perfect for safely heating in the microwave.

    Fork dipping Oreo in to melted white chocolate.
    Image 1
    White chocolate coated Oreo, that's being held by a fork, up above a bowl of chocolate.
    Image 2

    STEP 3. Dip an Oreo cookie, using a fork, until it is covered, and allow the excess drip back into the bowl. Place the dipped Oreo on a wax paper-lined plate or cookie sheet (Images 1 & 2).

    Eyes and nose on face of bunny rabbit Oreo.
    Image 3
    White chocolate ears for Oreo bunny rabbit, on parchment paper.
    Image 4

    STEP 4. While the chocolate is still wet, add 2 small, black sprinkles for the eyes and a pink heart sprinkle for the nose (Image 3).

    Pink added to ears for bunny rabbit Oreos for Easter.
    Image 5
    Finished bunny rabbit ears and faces on Oreo for Easter.
    Image 6

    STEP 5. Place a tablespoon of the melted white chocolate into a piping bag and pipe 2 ears and 2 bunny paws on the wax paper (Image 4). Sprinkle them with pink sanding sugar. Place the plate in the freezer for 10 minutes to set (Image 5).

    STEP 6. Once set, remove the ears and feet from the wax paper and attach them to the bunny Oreo, using small dollops of melted chocolate (Image 6).

    Allow to set until ears and feet are secure.

    Bunny rabbit Oreo for Easter, sitting next to Easter chick.

    🐥 How to Make Easter Chicks Cookie

    STEP 1. Melt 1⁄2 cup white chocolate in a small deep microwave-safe bowl, in 20-second increments, and stir until smooth.

    STEP 2. Mix in yellow candy color until the desired shade is reached.

    Fork holding Oreo up above yellow melted chocolate.
    Image 7
    Yellow chocolate dipped Oreo, on a fork, up above a bowl of chocolate.
    Image 8

    STEP 3. Dip an Oreo cookie into the yellow melted chocolate, using a fork, until it is covered, and allow the excess to drip back into the bowl. Place the dipped Oreo on a wax paper-lined plate (Images 7 & 8).

    Oreo decorated like a chick for Easter, sitting on a plate, surrounded by bunny and egg Oreos.

    STEP 4. While the chocolate is still wet add 2 black nonpareil sprinkles for the eyes and an orange round sprinkle for the nose (Image above).

    STEP 5. Next, carefully add 3 orange Jimmie sprinkles to form each of the chick’s feet (Image above).

    Allow to set until chocolate has hardened.

    🥚 How to Make Easter Egg Cookies

    STEP 1. In 2 small deep microwave-safe bowls, melt 1⁄2 cup (each) of white chocolate in 20-second increments and stir until smooth.

    STEP 2. Mix in the pink color in one bowl and the blue in the other until the desired shade is reached.

    Oreos coated in pink and blue chocolate.
    Image 9
    Easter egg decorated Oreos.
    Image 10

    STEP 3. Using a fork dip an Oreo cookie until it is covered in the pink chocolate and allow the excess to drip back into the bowl. Place the dipped Oreo on a wax paper-lined plate. Continue with another Oreo and the blue chocolate. (You will have 2 Oreos of each color.)

    Place the plate in the freezer for 10 minutes to set (Image 9).

    STEP 4. Place a tablespoon of the melted pink chocolate into a piping bag. Once the Oreos are set, pipe a zig-zag pattern and cover it with sprinkles while it is still wet.

    Then pipe a line across, cover in sprinkles and then repeat the zig-zag pattern at the bottom of the Oreo to complete the design and then cover in sprinkles.

    Repeat with the remaining Oreos, remembering to garnish the piping with sprinkles while the chocolate is still wet.

    Allow to set until the chocolate has hardened.

    Oreos on a plate, decorated to look like Easter eggs, chicks, and bunny rabbits.

    💭 Recipe Pro Tips

    • Using Tweezers. When decorating cookies you can use tweezers to add the sprinkles. Be sure not to clamp the sprinkles too hard or they can easily break.
    • Fragile for Gifting. The Bunny ears can be very delicate, so if you are packaging these chocolate Oreos for gifting in a gift box, be sure that they are fully set and packed in a single layer to avoid smudging. If one breaks, you can "glue" them back together with more melted chocolate and cover the seam with more sanding sugar. Chill in the refrigerator for a few moments to set.

    📋 Recipe FAQs

    Can you leave chocolate-covered Oreos out overnight?

    Yes! As long as they’re made as instructed, and no cream cheese or other perishable ingredients have been added.

    How to Store Easter Chocolate-Covered Oreos

    Store Oreos at room temperature in an airtight container for up to 2 weeks.

    What kind of cookies can you cover in chocolate?

    Oreos, Golden Oreos, and even Ritz cracker peanut butter sandwiches are delicious when covered in milk chocolate.

    🐣 More Easter Recipes

    If you love Easter ideas and Easter treats, then you’ll also love these delicious recipes and favorites:

    • Crockpot baked beans cooked with a wooden spoon resting inside.
      Crockpot Baked Beans
    • Cherry pineapple dump cake serving on a plate, and topped with a scoop of vanilla ice cream.
      Cherry Pineapple Dump Cake
    • A slice of chocolate Tres Leches cake on a plate, with a fork holding a bite.
      Chocolate Tres Leches Cake (3 Milks)
    • A slice of supper cake, being removed from rest of cake.
      Supper Cake

    Did you make this? I’d be so grateful if you left a “star” rating below to let me know what you thought! Then, the next time you need a quick and easy recipe, come back to Fantabulosity to browse all of my easy recipes!

    Recipe

    Easter Oreos - chicks, bunny, Easter eggs, on white plates.
    Print Pin
    5 from 5 votes

    Easter Oreos

    Easter Oreos: Oreo cookies covered in different colors of melted chocolate, and decorated as the cutest bunnies, chicks, and Easter eggs!
    Course Dessert, Snack
    Cuisine American
    Diet Vegetarian
    Prep Time 30 minutes minutes
    Cooling Time 10 minutes minutes
    Total Time 40 minutes minutes
    Servings 8 Oreos
    Calories 234kcal
    Author Jessica Burgess

    Ingredients

    • 8 Oreos or chocolate sandwich cookies
    • Oil-based candy color for coloring chocolate (white, yellow, pink, and light blue)
    • ½ cup melted Belgian white chocolate, colored white. (Bunny Oreo)
    • ½ cup melted Belgian white chocolate, colored yellow. (Chick Oreo)
    • ½ cup melted Belgian white chocolate, colored pink. (Easter Egg Oreo)
    • ½ cup melted Belgian white chocolate, colored blue. (Easter Egg Oreo)
    • assorted sprinkles
    • pink sanding sugar

    Instructions

    Easter Bunny Tutorial

    • Melt 1⁄2 cup white chocolate in a small deep microwave-safe bowl in 20-second increments and stir until smooth.
    • Mix in the white candy color until the desired shade is reached.
    • Dip an Oreo cookie, using a fork, until it is covered and allow the excess to drip back into the bowl. Place the dipped Oreo on a wax paper-lined plate or cookie sheet.
    • While the chocolate is still wet, add 2 small, black sprinkles for the eyes and a pink heart sprinkle for the nose.
    • Place a tablespoon of the melted white chocolate into a piping bag and pipe 2 ears and 2 bunny paws on the wax paper. Sprinkle them with pink sanding sugar. Place the plate in the freezer for 10 minutes to set.
    • Once set, remove the ears and feet from the wax paper and attach them to the bunny Oreo, using small dollops of melted chocolate.
    • Allow to set.

    Easter Chick Tutorial

    • Melt 1⁄2 cup white chocolate in a small deep microwave-safe bowl, in 20-second increments and stir until smooth.
    • Mix in yellow candy color until the desired shade is reached.
    • Dip an Oreo cookie in to the yellow melted chocolate, using a fork, until it is covered and allow the excess to drip back into the bowl. Place the dipped Oreo on a wax paper-lined plate.
    • While the chocolate is still wet add 2 black nonpareil sprinkles for the eyes and an orange round sprinkle for the nose.
    • Next, carefully add 3 orange Jimmie sprinkles to form each of the chick's feet.
    • Allow to set.

    Easter Egg Tutorial

    • In 2 small deep microwave-safe bowls, melt 1⁄2 cup (each) of white chocolate in 20-second increments and stir until smooth.
    • Mix in the pink candy color in one bowl and the blue in the other until the desired shade is reached.
    • Using a fork dip an Oreo cookie until it is covered in the pink chocolate and allow the excess to drip back into the bowl. Place the dipped Oreo on a wax paper-lined plate. Continue with another Oreo and the blue chocolate. ( You will have 2 Oreos of each color.) Place the plate in the freezer for 10 minutes to set.
    • Place a tablespoon of the melted pink chocolate into a piping bag. Once the Oreos are set, pipe a zig-zag pattern and cover it with sprinkles while it is still wet.
      Then pipe a line across, and cover in sprinkles and then repeat the zig-zag pattern at the bottom of the Oreo to complete the design and then cover in sprinkles.
      Repeat with the remaining Oreos, remembering to garnish the piping with sprinkles while the chocolate is still wet.
    • Allow to set.

    Notes

    Tips:
    • Overheating the chocolate. Do not overheat your chocolate. The 20-second increments are perfect for safely heating in the microwave.
    • Using Tweezers. When decorating cookies you can use tweezers to add the sprinkles. Be sure not to clamp the sprinkles too hard or they can easily break.
    How to Store Easter Oreos:
    Once the chocolate has “set” the Oreos can be stored in an airtight container at room temperature for up to 2 weeks. 

    Nutrition

    Serving: 1oreo | Calories: 234kcal | Carbohydrates: 28g | Protein: 3g | Fat: 13g | Saturated Fat: 7g | Polyunsaturated Fat: 1g | Monounsaturated Fat: 4g | Trans Fat: 0.01g | Cholesterol: 7mg | Sodium: 76mg | Potassium: 122mg | Fiber: 0.4g | Sugar: 24g | Vitamin A: 10IU | Vitamin C: 0.2mg | Calcium: 68mg | Iron: 2mg

    Dutch Oven Pot Roast

    January 22, 2023

    Dutch oven pot roast, with potatoes, carrots and rosemary on top.

    This savory, comforting Dutch Oven Pot Roast is the perfect weeknight dinner. It tastes like you spent hours in the kitchen, but you only spent 15 minutes of active cooking time.

    Chuck roast in dutch oven, with potatoes and carrots.

    Paired with carrots, potatoes, and a rich sauce, this tasty, fork-tender roast is going to be something the whole family will love. Similar to our dutch oven beef stew, this hearty recipe is perfect for Sunday dinner.

    Pot roast has been a Sunday dinner staple for years, and when dinner can sit in the dutch oven and cook for 3 hours, along with the veggies, it’s a great recipe to set it and forget it. This hearty dish is exactly the kind of meal you’ll find in traditional old-fashioned dinner recipes.

    This tender dutch oven pot roast is also a comfort food dish to keep on hand for those days when a hot, home-cooked meal is desired; much like our Instant Pot Pot Roast, this Tri-Tip Roast and Gravy recipe and this Creamy Chicken and Gravy recipe.

    [feast_advanced_jump_to]

    Why This Recipe Works

    • One pot meal: With this being a dutch oven pot roast recipe, it starts in the dutch oven and ends in the dutch oven. Not a lot of dishes to wash, with this classic recipe!
    • Simple ingredients: Considering this is a main dish and side dish recipe in one, it does use a good list of ingredients but the good thing is, they’re all simple ingredients, which you may even have on hand or can find at your local grocery store!
    • Fall-apart tender: Talk about a quick and easy dinner idea! This dutch oven pot roast recipe, from start to finish, only takes half an hour.

    Ingredients Needed

    I’ve highlighted a couple of ingredients with some relevant notes. Aside from this, the ingredients needed are pretty basic.

    Ingredients for dutch oven pot roast.
    • Chuck roast - Consider size when picking a roast. At 350 F a roast will need about 1 hour per pound to cook. Anything larger than 3 lbs. may need additional broth and seasonings, and will likely need more than 3 hours in the oven. Another thing that can affect the cooking time is the presence of a bone in your roast. A bone-in roast can be used, but if you are not familiar with dealing with bone-in cuts of meat, then boneless chuck roasts are the way to go. Other varieties of roasts that work well using this type of cooking method include bottom chuck roasts, round roasts, or anything labeled pot roast, just be sure to keep size in mind.
    • Olive oil - Any neutral-flavored cooking oil will work. Enough fat comes from the meat during the cooking process, so the oil in this recipe is really only used to sear the meat.
    • Yellow onion - I like yellow onions because they tend to be sweeter and less overpowering. You could use a white onion in a pinch, but I do not recommend using a red onion as they can be too sharp in flavor.
    • Carrots - If using organic carrots, note that they can be smaller so you may need 4-5 small carrots for this recipe.
    • Yellow baby potatoes - Also called Dutch babies or baby Yukon potatoes, are starchy and slightly sweet. Really any type of potato can be used in pot roast recipes. Any other variety of baby potatoes will work nicely. If using whole potatoes with tougher skin like russet potatoes, I recommend peeling the skin before dicing. 
    • Beef broth - Don't discount the power of broth! I do not recommend using water in place of beef broth in this recipe. Vegetable or even my homemade chicken broth recipe can be used if that is what you have on hand, but beef broth will be the best choice. Try a really richly-flavored beef 'drinking bone broth' to add more flavor to the sauce, but keep in mind that these tend to be saltier than traditional broth.
    • Herbs - I love the use of fresh thyme and rosemary in pot roasts. It adds a bit of freshness to a mostly meat and root vegetable meal.

    Substitutions

    • Garlic powder - Fresh garlic is a great way to add flavor to this roast in lieu of garlic powder. Peel and mince 4 garlic cloves and toss them in along with the vegetables. 
    • Carrots – You could replace the carrots with a peeled and diced sweet potato or yam for something a little different. 
    • Worcestershire sauce - Sometimes Worcestershire sauce can contain funky ingredients. If you do not generally have Worcestershire sauce in your home or have dietary restrictions, coconut aminos may be used to replace the Worcestershire sauce in a 1:1 ratio. The flavor will be very slightly different, but it will still add a nice umami element to the sauce. 
    • Balsamic vinegar - If you don't have balsamic vinegar on hand but have an open bottle of red wine, a small splash of red wine will work nicely with these flavors. 
    • Ground celery seed - Fresh celery can add the same flavor to the roast as ground celery seed. If using celery as a substitute, thinly slice 1-2 stalks and add it in with the rest of the vegetables. 
    • Herbs – You can absolutely add 1 teaspoon of dried thyme and 1 teaspoon of dried rosemary to the broth mixture in place of the fresh herbs if this is what you're working with. Fresh oregano is also another tasty herb that I like to dice and toss in sometimes. 

    Variations

    Curious about how to cook this dutch oven pot roast with a different method? Here are some suggestions that you may find helpful:

    • Slow Cooker – A Dutch oven is very similar to a slow cooker, except that the Dutch oven requires a conventional oven whereas the slow cooker is stand-alone. This recipe can be done in a slow cooker without much alteration. You will want to season and sear the meat over medium heat in a skillet. Prepare the ingredients as described in the recipe card adding them to the crock of a slow cooker. You will cook this roast for 8-10 hours on low heat or 4-6 on high. If you do not want your veggies to get too soft, you can wait about 2 hours before adding them, ensuring that they are covered with broth once they are added.
    • For an Instant Pot, you will follow the same instructions but the cooking time will be about 75 minutes (or 25 minutes per pound) on the high or "meat" setting. The veggies can get mushy in a pressure cooker, so it would not be a bad idea to add them halfway through the cooking process if using your Instant Pot.

    How to Make this Chuck Roast in the Oven

    This oven-baked chuck roast recipe is broken into 3 components:

    • searing the roast
    • creating the sauce
    • roasting in the oven

    *Be sure to see the recipe card below for the full ingredients list & instructions!*

    You’ll start by seasoning the roast and searing it. Then, it will sit and cook in the juices until ready to serve!

    STEP 1. Prep Chuck Roast. Pull the roast from the fridge and allow it to come to room temperature by placing it on the counter for at least 30 minutes before cooking. 

    Tip: Cooking Evenly: Pulling the meat from the fridge 30-60 minutes before cooking and allowing it to come to room temperature helps to ensure that it will cook evenly and not be overdone on the outside and underdone in the center.

    STEP 2. Preheat the oven to 350 F.

    STEP 3. While the roast is coming to room temperature, begin preparing the vegetables. Peel and cut the carrots into about 1-inch pieces. Halve the onion and then peel and quarter the halves, breaking the layers apart with your hands.

    Wash the baby potatoes and halve them or you can leave them whole. Halving them takes more time but allows them to absorb more flavor from the sauce. Set all veggies aside.

    Chuck roast with seasonings on top of it.
    Image 1
    Chuck roast in dutch oven, searing in hot oil.
    Image 2

    STEP 4. Pat the meat dry using a paper towel and season with salt, pepper, and garlic powder (Image 1).

    STEP 5. In a large Dutch oven (I used a 7 Qt), heat 2 tbsp. of olive oil over medium heat. Once the oil is hot place the seasoned roast in the pot and begin to sear each side, about 3-4 minutes per side (Image 2).

    Seasonings and sauces added to dutch oven.
    Image 3
    Chuck roast added back in to dutch oven with spices and sauces.
    Image 4

    STEP 6. Once the roast has a nice sear on both sides, remove it from the Dutch oven and set it to the side. Deglaze the bottom of the pot using the broth and a wooden spatula to scrape up any brown bits. Add in the tomato paste, Worcestershire sauce, balsamic vinegar, and ground celery seed, and mix together until there are no clumps (Image 3). Place the meat back in the Dutch oven with the broth and surround it with the prepared vegetables (Images 4 & 5).

    Vegetables added to roast in the dutch oven.
    Image 5
    Dutch oven filled with chuck roast, carrots, potatoes and fresh rosemary.
    Image 6

    STEP 7. Top the roast with fresh rosemary and thyme (Image 6). Place the lid on the Dutch oven and place it in the oven for about 2.5-3 hours (1 hour per pound of meat), or until the meat becomes fork-tender. Periodically, spoon some of the liquid from the Dutch over the roast to ensure that it stays moist.

    STEP 8. Remove from the oven, and remove the sprigs of rosemary and thyme from the pot. Run your fingers along the thyme to release the leaves from the woody stem. 

    Cooked chuck roast in dutch oven with vegetables, spices and herbs.

    STEP 9. Allow the roast to rest. Once cool enough to handle, slice the roast against the grain or use two forks to pull the meat apart. Serve with the veggies and the sauce that has developed in the Dutch oven.

    How to Make Pot Roast Gravy

    Thicken the sauce: To thicken the sauce in the Dutch oven to make a flavorful gravy, simply dissolve a teaspoon of starch (like potato starch or cornstarch) in 2 Tablespoons of hot water in a small bowl.

    Remove all the veggies and meat from the Dutch oven and scoop out 1-2 cups of the cooking liquid. Combine the hot cooking liquid with the starch slurry and stir in to the rest of the juices in the dutch oven, until well incorporated.

    After several minutes it should thicken into a beautiful gravy. If you want it even thicker, you can add an additional teaspoon. of starch using the same process.

    Beef and gravy recipes are like PB&J’s. This easy Salisbury steak recipe with mushroom gravy is another old-fashioned favorite to combine the two favorites.

    Equipment

    • Knife
    • Cutting board
    • Wooden Spatula
    • Dutch oven

    What can I use instead of a dutch oven?

    A Dutch oven is a versatile kitchen tool and is a worthwhile investment; however, not every home has one. If you want to make this recipe in the oven but do not have a Dutch oven, consider other large oven-safe vessels that have properly fitting lids.

    Some options include an oven-friendly stock pot, a large ceramic casserole dish with a glass lid, or a deep oven-safe skillet. Ensure that whatever you choose is large enough not only to hold the roast but the veggies and broth as well. I would not try anything smaller than 5 Qt for this dutch oven pot roast.

    Recipe Pro Tips

    • Basting for Moisture: Spooning the cooking liquid over the roast periodically during the cooking process can help keep the meat from drying out. This is especially important if your roast is very tall and is not mostly submerged by the broth, or if you are using a large but shallow Dutch oven.
    • Tougher Cuts of Meat: If you have a lower-grade cut of meat or are using grass-fed meat (which can be tougher than conventional), cutting the meat into smaller chunks can help expose more surface area to the cooking liquid. This can aid in making the meat more tender.
    • Texture of Veggies: For this cooking time (2.5-3 hours) your vegetables should not be mushy, but if you prefer your veggies to have a little more structure consider adding them later in the cooking process. Adding them after the roast has cooked for about an hour should give them enough time to become tender without becoming overly soft.
    • Save the liquid: Even if you don't make gravy, do not discard the cooking liquid. Serve and store the meat with this cooking liquid to help keep it moist and flavorful. If your meat gets overcooked, a hearty drizzle of this cooking liquid can be a tasty way to salvage it. There is so much flavor in there!
    Serving of dutch oven post roast, potatoes and carrots on white plate.

    Recipe FAQs

    What is a beef chuck roast?

    A beef chuck roast comes from the shoulder of a cow. This section of meat tends to be tough because it is filled with fibrous connective tissue that develops due to being a heavily exercised muscle group. This connective tissue, if broken down properly, can lend a delicious flavor to the meat.

    Chuck roast is often ground to make ground beef because it is naturally about an 80:20 ratio of muscle to fat. It is commonly used for pot roast, stews, or in other slow cooking methods that allow the connective tissue time to break down, leaving tender, flavorful meat. Other names for chuck roast include beef chuck arm, beef arm roast, 7-bone roast, shoulder steak roast, chuck shoulder, and shoulder pot roast.

    Can I use a bone-in chuck roast?

    Absolutely. A bone-in chuck roast, often called a 7-bone chuck roast, can be used in this recipe. Personally, I like to remove the bone before cooking to help ensure that the roast cooks evenly. The bone is usually easily accessible and fairly small so it is simple to remove. Some people prefer to leave the bone on the roast for extra flavor.

    If the bone is left on, keep in mind that the cooking time may vary slightly depending on the size of the bone. If the bone is particularly large, the portion of meat nearest to the bone may not cook as quickly as the rest of the meat. To get the best of both worlds, you may choose to separate the bone from the roast but add the bone to the Dutch oven to get the flavor and nutrition from the bone.

    What can I do to make my roast as tender as possible?

    Make sure you are cooking your roast long enough! A tough roast is most commonly caused by undercooking. A roast is not like a steak, in terms of determining if it is done properly. Even a well-done roast may still be undercooked because the chewy cartilage may not have broken down all the way.

    A higher quality grade of meat will ensure there is more intermuscular marbling and help to keep the meat tender and moist. Prime-grade meat has the most marbling and is, therefore, the most tender. With pot roasts, most people are looking for a large cut of meat with an inexpensive price tag, so prime may not be an option. If you are using a select-grade cut of meat, consider cutting the meat into smaller chunks so that there is more surface area exposed to the cooking liquid. Another thing that can help with tougher cuts of meat is physically tenderizing with a meat mallet before cooking. 

    How can I prevent my roast from becoming dry?

    Apart from the grade of meat, there are other things you can do to help ensure your meat is not too dry. The first thing is to prevent over-cooking. It can be a delicate balance between cooking the meat enough so that the cartilage breaks down and not cooking it too much so that the meat does not become dry.

    For smaller roasts always check the meat around the two-hour mark. Another way to help combat dryness is to ensure there is enough cooking liquid throughout the entire cooking process. Your liquid should not cook off in this recipe, but periodically, spooning some of the cooking liquid over the top of the meat can be helpful. This technique is especially important if your roast is not fully submerged in liquid.

    Storage

    Storage of this dish is easy. Store any leftovers (meat and vegetables) in an airtight container. Top it with any gravy or excess cooking liquid you may have from the Dutch oven. Consume leftovers within 4 days after the roast is prepared. (You may even consider using leftover roast to serve on top of nachos as we did with these bbq queso nachos!)

    Can you freeze an oven-baked chuck roast? Yes. You may choose freeze for longer storage, however, the veggies will not hold up well if frozen, so it is best to freeze only the meat along with the cooking liquid. Store in an airtight container in the freezer for 1-2 months.

    More Easy Dinner Recipes

    If you love easy dinners like this one, we think you’re also going to love:

    • A sliced, boneless pork chop that was baked in the oven, sitting on a plate.
      How to Cook Pork Chops in the Oven (Bone-In & Boneless Guide)
    • A wooden spoon dishing out a serving of meatball casserole in a 9x13 baking dish.
      Meatball Casserole
    • Old-Fashioned Dinner Recipes collage.
      19 Old-Fashioned Dinner Recipes (Classic Comfort Food Favorites)
    • bratwursts on bun with toppings
      How to Cook Brats in the Oven

    Did you make this? I’d be so grateful if you left a “star” rating below to let me know what you thought! Then, the next time you need a quick and easy recipe, come back to Fantabulosity to browse all of my easy recipes!

    Recipe

    Dutch oven pot roast, with potatoes, carrots and rosemary on top.
    Print Pin
    5 from 7 votes

    Dutch Oven Pot Roast

    This Dutch Oven Pot Roast with carrots, potatoes and a rich sauce, is the perfect weeknight dinner, and tastes like you spent hours in the kitchen, but you only spent 15 minutes of active cooking time.
    Course Main Course
    Cuisine American
    Prep Time 15 minutes minutes
    Cook Time 3 hours hours
    Total Time 3 hours hours 15 minutes minutes
    Servings 6 servings
    Calories 486kcal
    Author Jessica Burgess

    Equipment

    • Dutch Oven

    Ingredients

    • 2.5-3 pound boneless chuck roast
    • 2 teaspoon kosher salt
    • 1 teaspoon black pepper
    • 1 teaspoon garlic powder
    • 2 Tablespoons olive oil
    • 1 yellow onion
    • 3 large carrots
    • 1 pound yellow baby potatoes
    • 2 cups beef broth
    • 2 Tablespoons tomato paste
    • 2 Tablespoons Worcestershire sauce
    • 1 Tablespoon balsamic vinegar
    • ½ teaspoon ground celery seed
    • 2 sprigs fresh rosemary
    • 5 sprigs fresh thyme

    Instructions

    • Allow roast to sit: Pull the roast from the fridge and allow it to come to room temperature by placing it on the counter for at least 30 minutes before cooking. 
    • Preheat the oven to 350 F.
    • Prep Veggies: While the roast is coming to room temperature, begin preparing the vegetables. Peel and cut the carrots into about 1-inch pieces. Halve the onion and then peel and quarter the halves, breaking the layers apart with your hands. Wash the baby potatoes and halve them or you can leave them whole. Halving them takes more time but allows them to absorb more flavor from the sauce. Set all veggies aside.
    • Season the roast: Pat the meat dry using a paper towel and season with salt, pepper, and garlic powder.
    • Sear roast: In a large Dutch oven (I used a 7 Qt), heat 2 tbsp. of olive oil over medium heat. Once the oil is hot place the seasoned roast in the pot and begin to sear each side, about 3-4 minutes per side.
    • Create broth: Once the roast has a nice sear on both sides, remove it from the Dutch oven and set it to the side. Deglaze the bottom of the pot using the broth and a wooden spatula. Add in the tomato paste, Worcestershire sauce, balsamic vinegar, and ground celery seed, and mix together until there are no clumps. Place the meat back in the Dutch oven with the broth and surround it with the prepared vegetables.
    • Bake the roast: Top the roast with fresh rosemary and thyme. Place the lid on the Dutch oven and place it in the oven for about 2.5-3 hours (1 hour per pound of meat), or until the meat becomes fork-tender. Periodically, spoon some of the liquid from the Dutch over the roast to ensure that it stays moist.
    • Remove from the oven, and remove the sprigs of rosemary and thyme from the pot. Run your fingers along the thyme to release the leaves from the woody stem. 

    Notes

    Tips:
      • Basting for Moisture: Spooning the cooking liquid over the roast periodically during the cooking process can help keep the meat from drying out. 
    •  
      • Texture of Veggies: For this cooking time (2.5-3 hours) your vegetables should not be mushy, but if you prefer your veggies to have a little more structure consider adding them later in the cooking process. 
      • Save the liquid: Even if you don't make gravy, do not discard the cooking liquid. Serve and store the meat with this cooking liquid to help keep it moist and flavorful. 
    See blog post for more details about tips and notes to help make this recipe a success!

    Nutrition

    Serving: 1serving | Calories: 486kcal | Carbohydrates: 21g | Protein: 42g | Fat: 27g | Saturated Fat: 10g | Polyunsaturated Fat: 2g | Monounsaturated Fat: 14g | Trans Fat: 1g | Cholesterol: 130mg | Sodium: 1102mg | Potassium: 1191mg | Fiber: 3g | Sugar: 4g | Vitamin A: 5250IU | Vitamin C: 21mg | Calcium: 73mg | Iron: 5mg
    • « Go to Previous Page
    • Page 1
    • Interim pages omitted …
    • Page 10
    • Page 11
    • Page 12
    • Page 13
    • Page 14
    • Interim pages omitted …
    • Page 25
    • Go to Next Page »

    Primary Sidebar

    Jessica Burgess of Fantabulosity, slicing an avocado.

    Hi, I'm Jessica! - Owner and Creator of the blog and brand, Fantabulosity.

    I’m here to help you make easy comfort food and nostalgic recipes, using simple ingredients, that everyone will love.

    More about me →

    Easter Recipes

    • A slice of chocolate chip cookie pie on a plate with a fork.
      Chocolate Chip Cookie Pie
    • 9x13 baking dish with party potatoes inside, and a wooden serving spoon, spooning it out.
      Party Potatoes
    • German Chocolate Sheet Cake in baking dish.
      German Chocolate Sheet Cake
    • Yeast rolls in baking pan.
      Yeast Rolls Recipe
    • A slice of Amish applesauce cake on plate with fork.
      Amish Applesauce Cake
    • A slice of applesauce crumb cake on spatula, being held above pan.
      Applesauce Crumb Cake

    Popular Recipes

    • bread pudding in baking dish
      Bread Pudding Recipe: Easy Old Fashioned Recipe (With Video!)
    • Burger baked in the oven, steamed in aluminum foil, and placed on white plate.
      Burgers in the Oven
    • two tuna salad sandwiches stacked on top of one another
      The BEST Tuna Salad Recipe
    • Sliced banana bread on white platter
      Best Banana Bread
    • Strawberry brownies on white marble cutting board.
      Strawberry Brownies Recipe
    • Cheeseburger Sliders
      Cheeseburger Sliders with Hawaiian Rolls

    Footer

    ↑ back to top

    Featured In

    About

    • About Jessica
    • Contact
    • Collaborate
    • Dinner System

    Easy Recipes

    • All Recipes
    • Vintage Recipes
    • Dinner Recipes
    • Desserts

    How to Cook

    • Oven-Baked
    • Stove-Top
    • No Bake
    • Cooking Basics

    Privacy Policy |Accessibility Copyright © 2026 Fantabulosity | Terms & Conditions | FTC
    All recipes, photos, and content are copyrighted and may not be reproduced, republished, or distributed without written permission.

    Rate This Recipe

    Your vote:


    A rating is required
    A name is required
    An email is required