• Skip to primary navigation
  • Skip to main content
  • Skip to primary sidebar

Fantabulosity logo

  • All Recipes
  • Vintage Recipes
  • Holiday
  • Dinner Theme System
  • About
  • Navigation Menu: Social Icons

    • Facebook
    • Instagram
    • Pinterest
menu icon
go to homepage
subscribe
search icon
Homepage link
  • All Recipes
  • Theme Night Dinner System
  • Dinner
  • Desserts
  • Holidays
  • Contact
  • About Jessica
    • Facebook
    • Instagram
    • Pinterest
    • Twitter
  • ×
    Home » Recipes

    Candied Yams Recipe

    Candied Yams Recipe

    November 3, 2024

    Candied yams in pot.

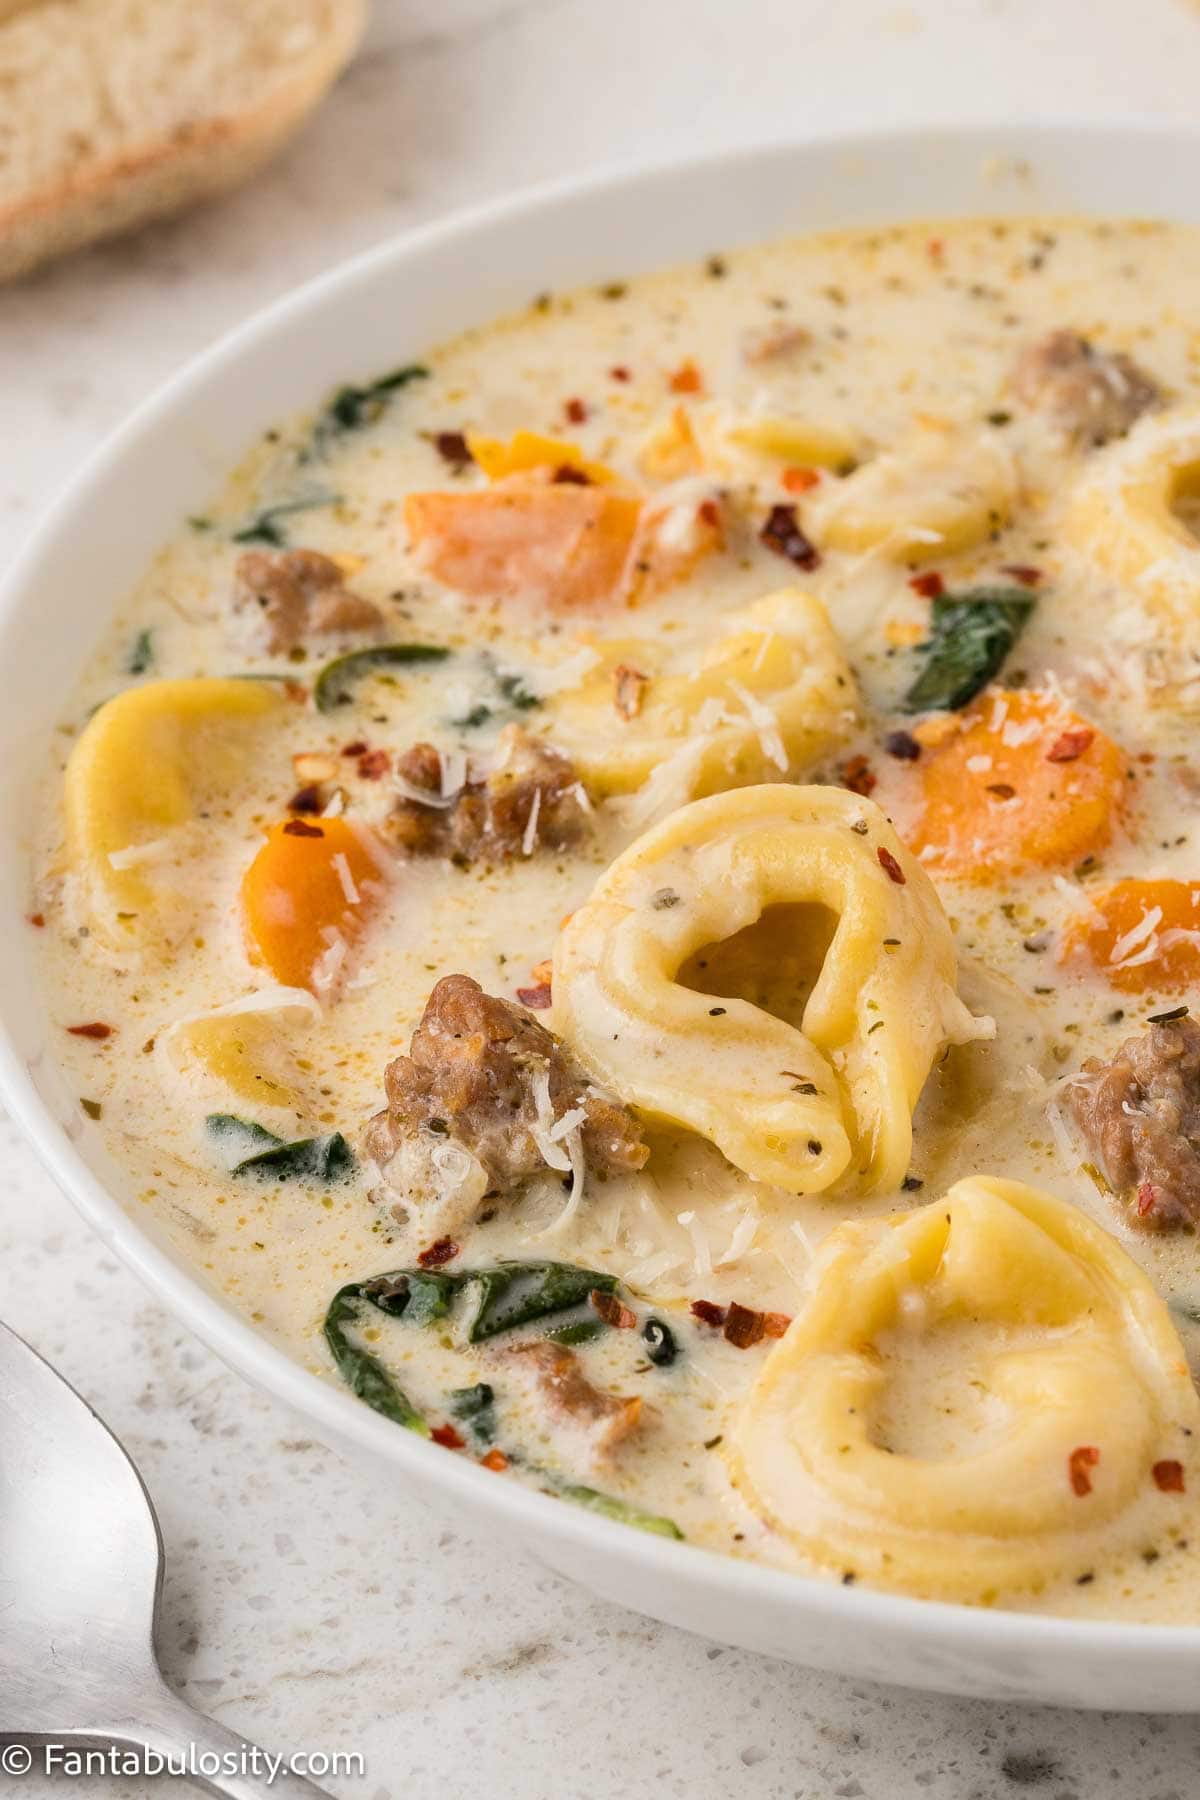
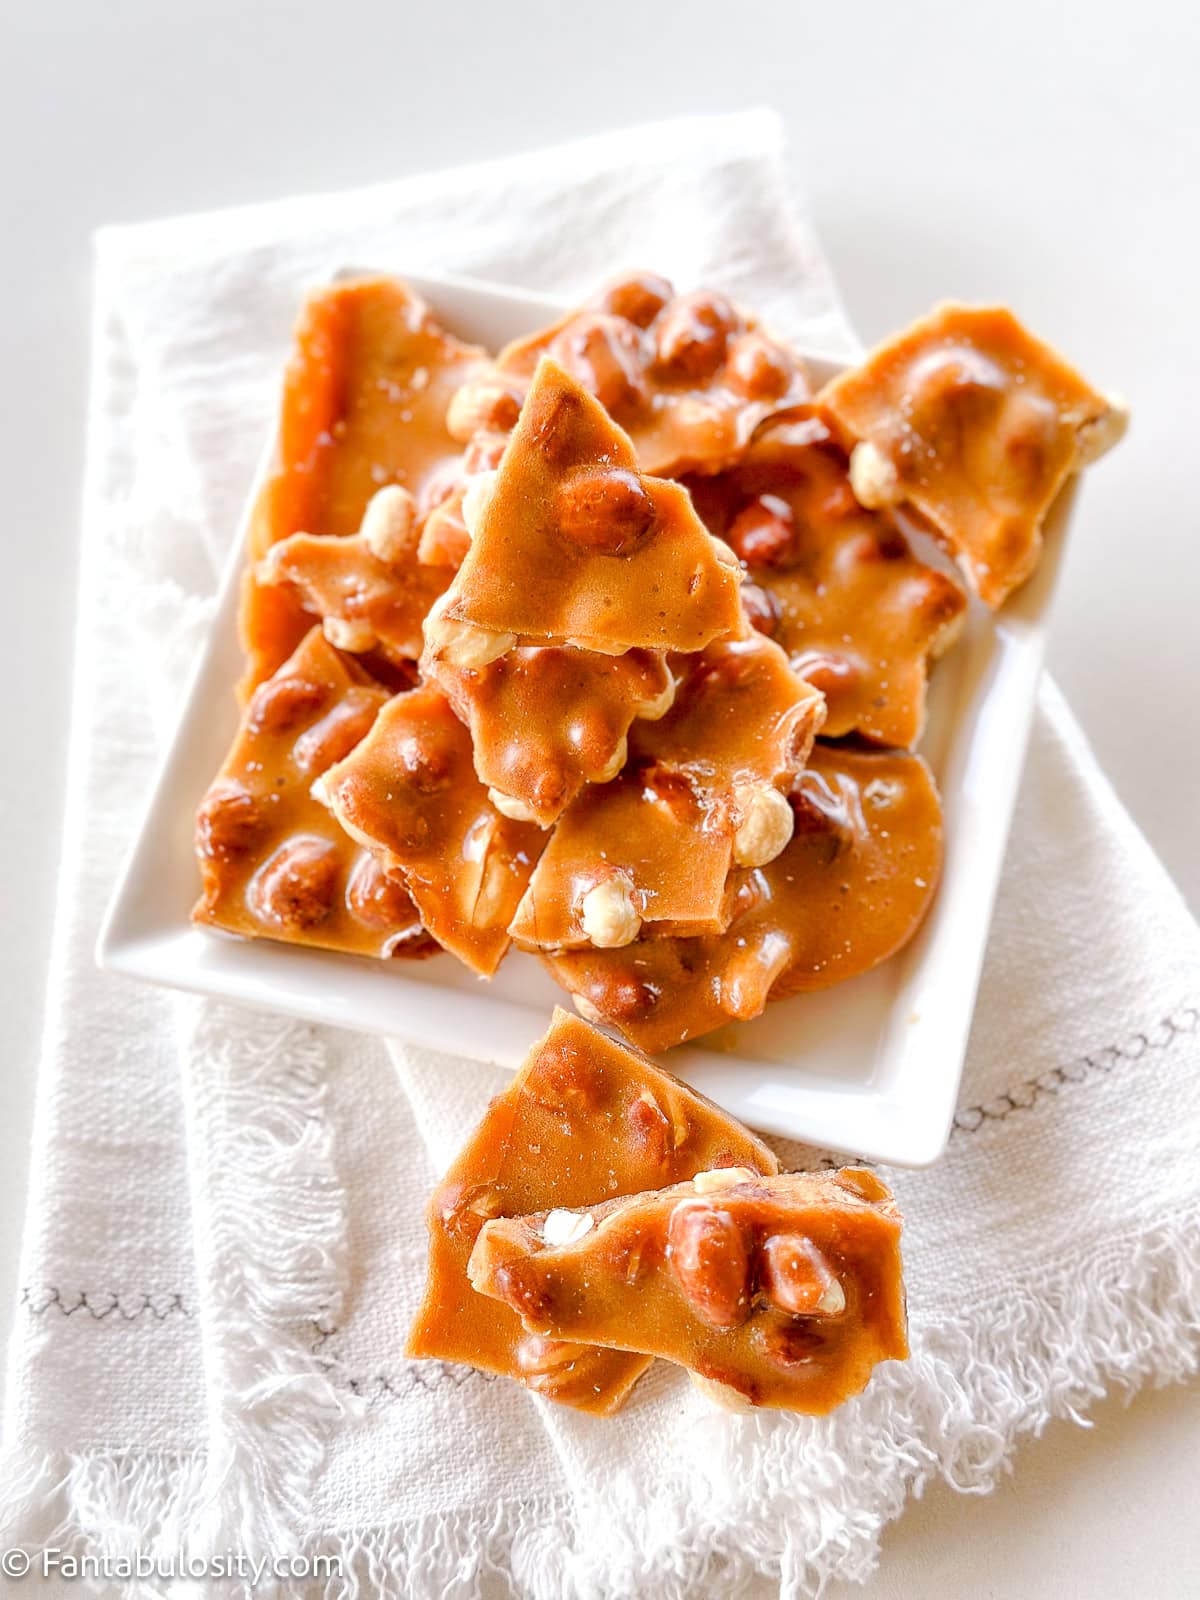
    This Candied Yams recipe is made on the stovetop, using sweet potatoes (since they can be easier to find) and a few simple ingredients, including a secret ingredient that makes these the best recipe!

    Candied yams in pot, cooked and ready to eat.

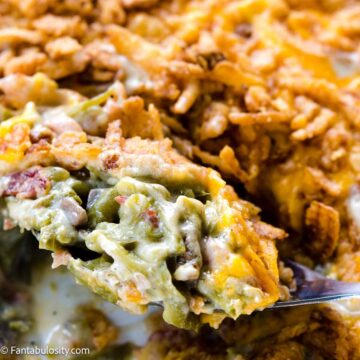
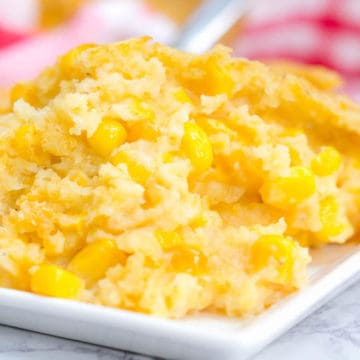
    Thanksgiving recipes like this green bean casserole with cheese and bacon, and this easy corn casserole, are just two that I make every year, now along with these candied yams. They’re comforting, and bring in the fall flavors so much!

    [feast_advanced_jump_to]

    Are yams and sweet potatoes the same thing?

    Yes and no. Yams are technically different than sweet potatoes, however the two are often used interchangeably in the United States.

    So why use sweet potatoes and how are they different?

    • It can be difficult to find yams in the grocery store, so sweet potatoes have become a common “yam” replacement in recipes today.
    • Sweet potatoes are a bit sweeter than yams as well.
    • Sweet potatoes are also creamier when cooked, than yams tend to be, which is why I prefer using sweet potatoes for candied yams and this sweet potato casserole recipe.

    Why You’ll Love These Candied Yams

    • Simple ingredients: The ingredients for this recipe can be easy to find in most grocery stores, and you don’t need a lot.
    • Stovetop recipe: During the holidays, oven space can be hard to come by, so this recipe is made on the stovetop freeing up oven space for other recipes like this southern broccoli casserole.
    • Prep time: With only a few minutes of prep, the majority of the time it takes to make this recipe is spent simmering on the stove so you can work on something else.
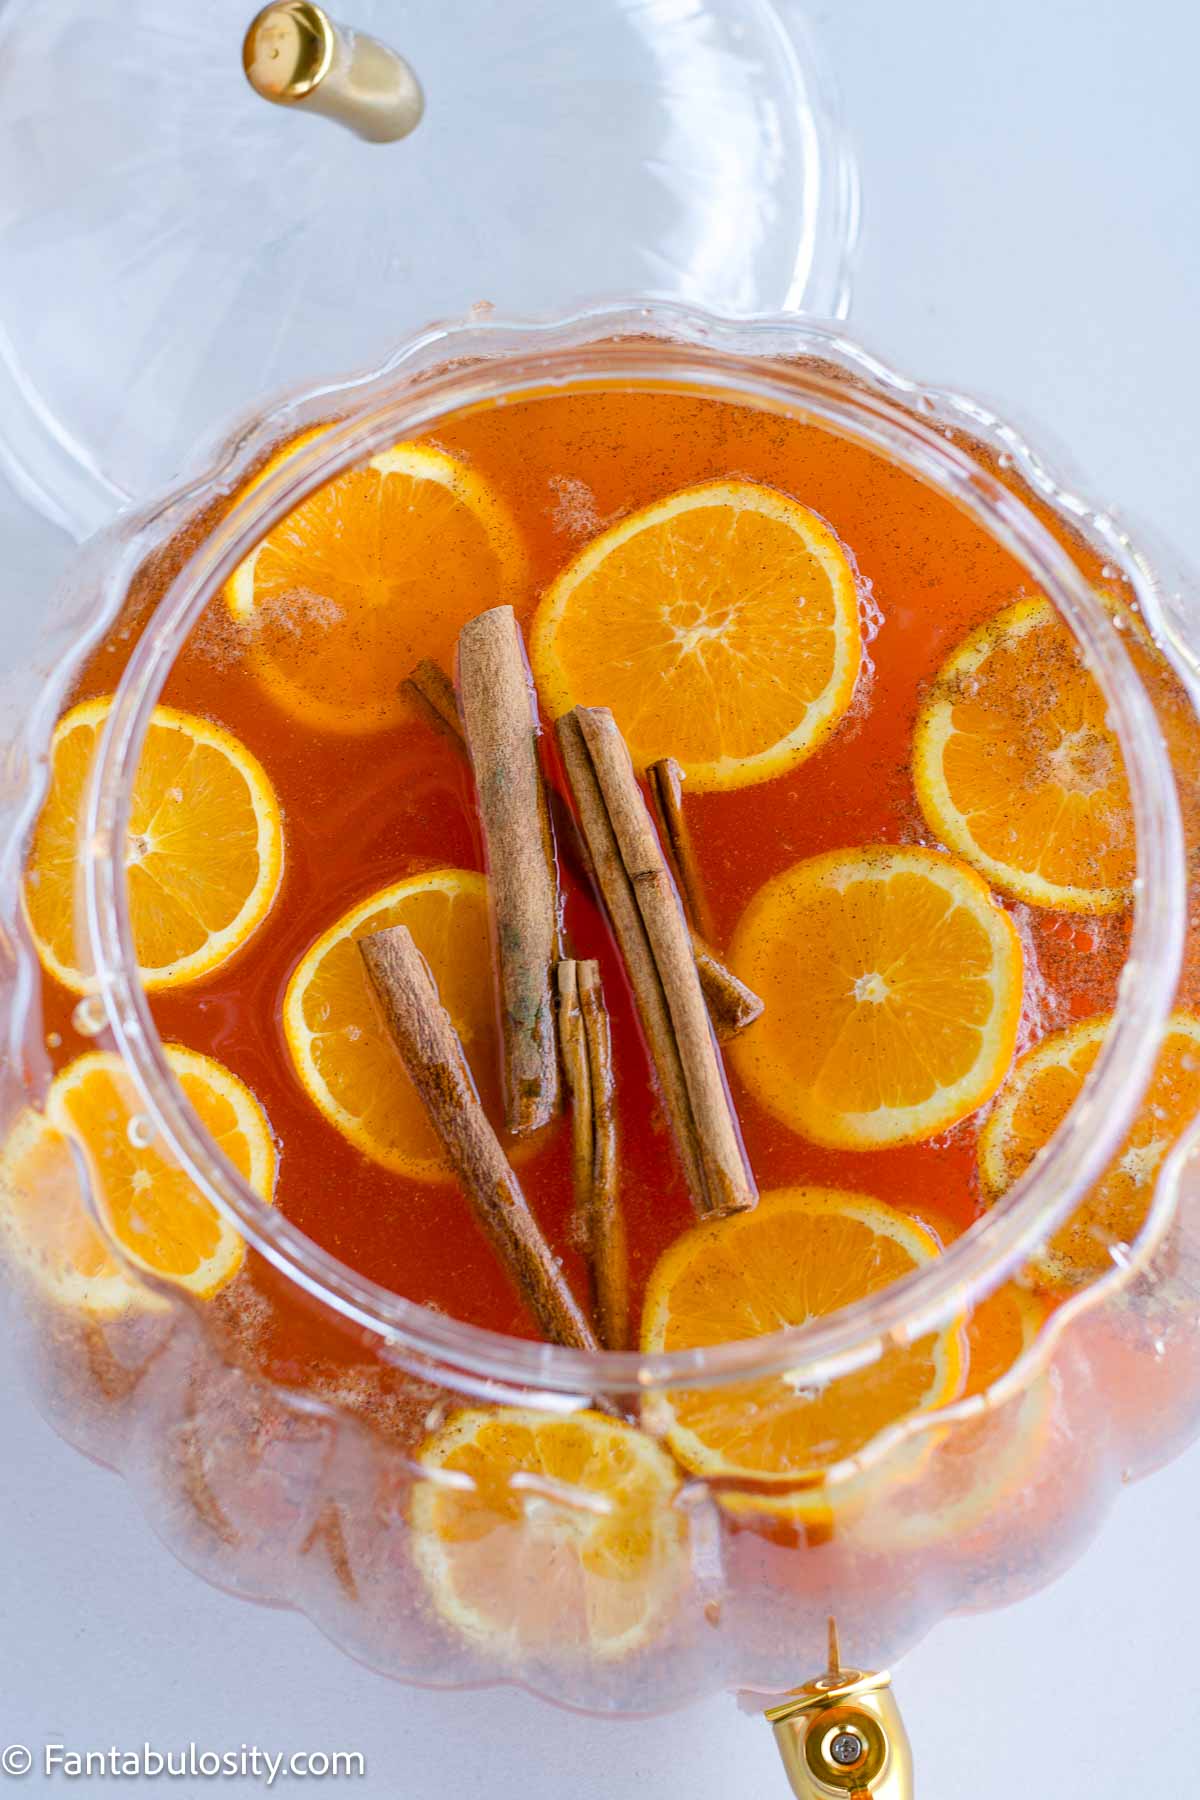
    • Touch of citrus: I think what makes this recipe stand out from the others is the citrus flavor, combined with the warm spices of fall. The flavors work incredible together and it’s almost an unexpected compliment when someone takes that first bite.
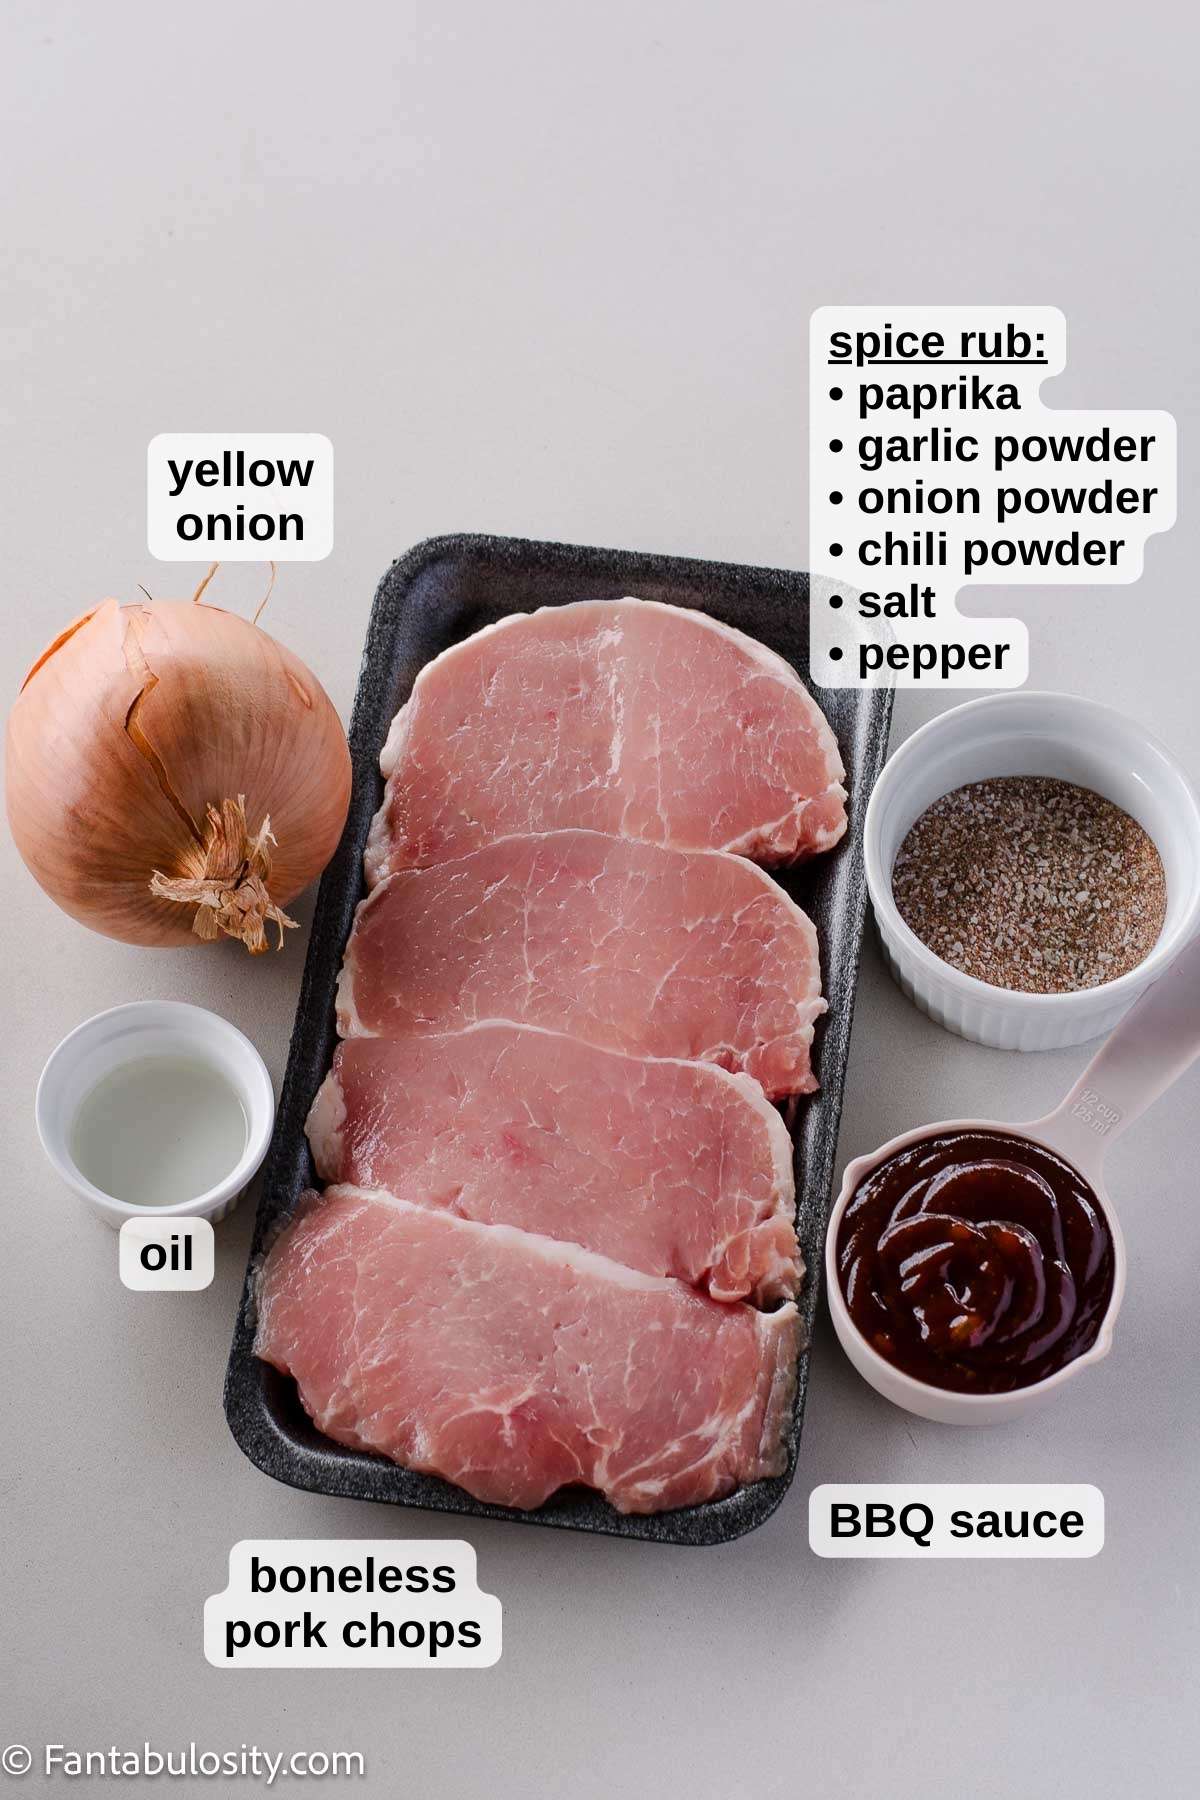
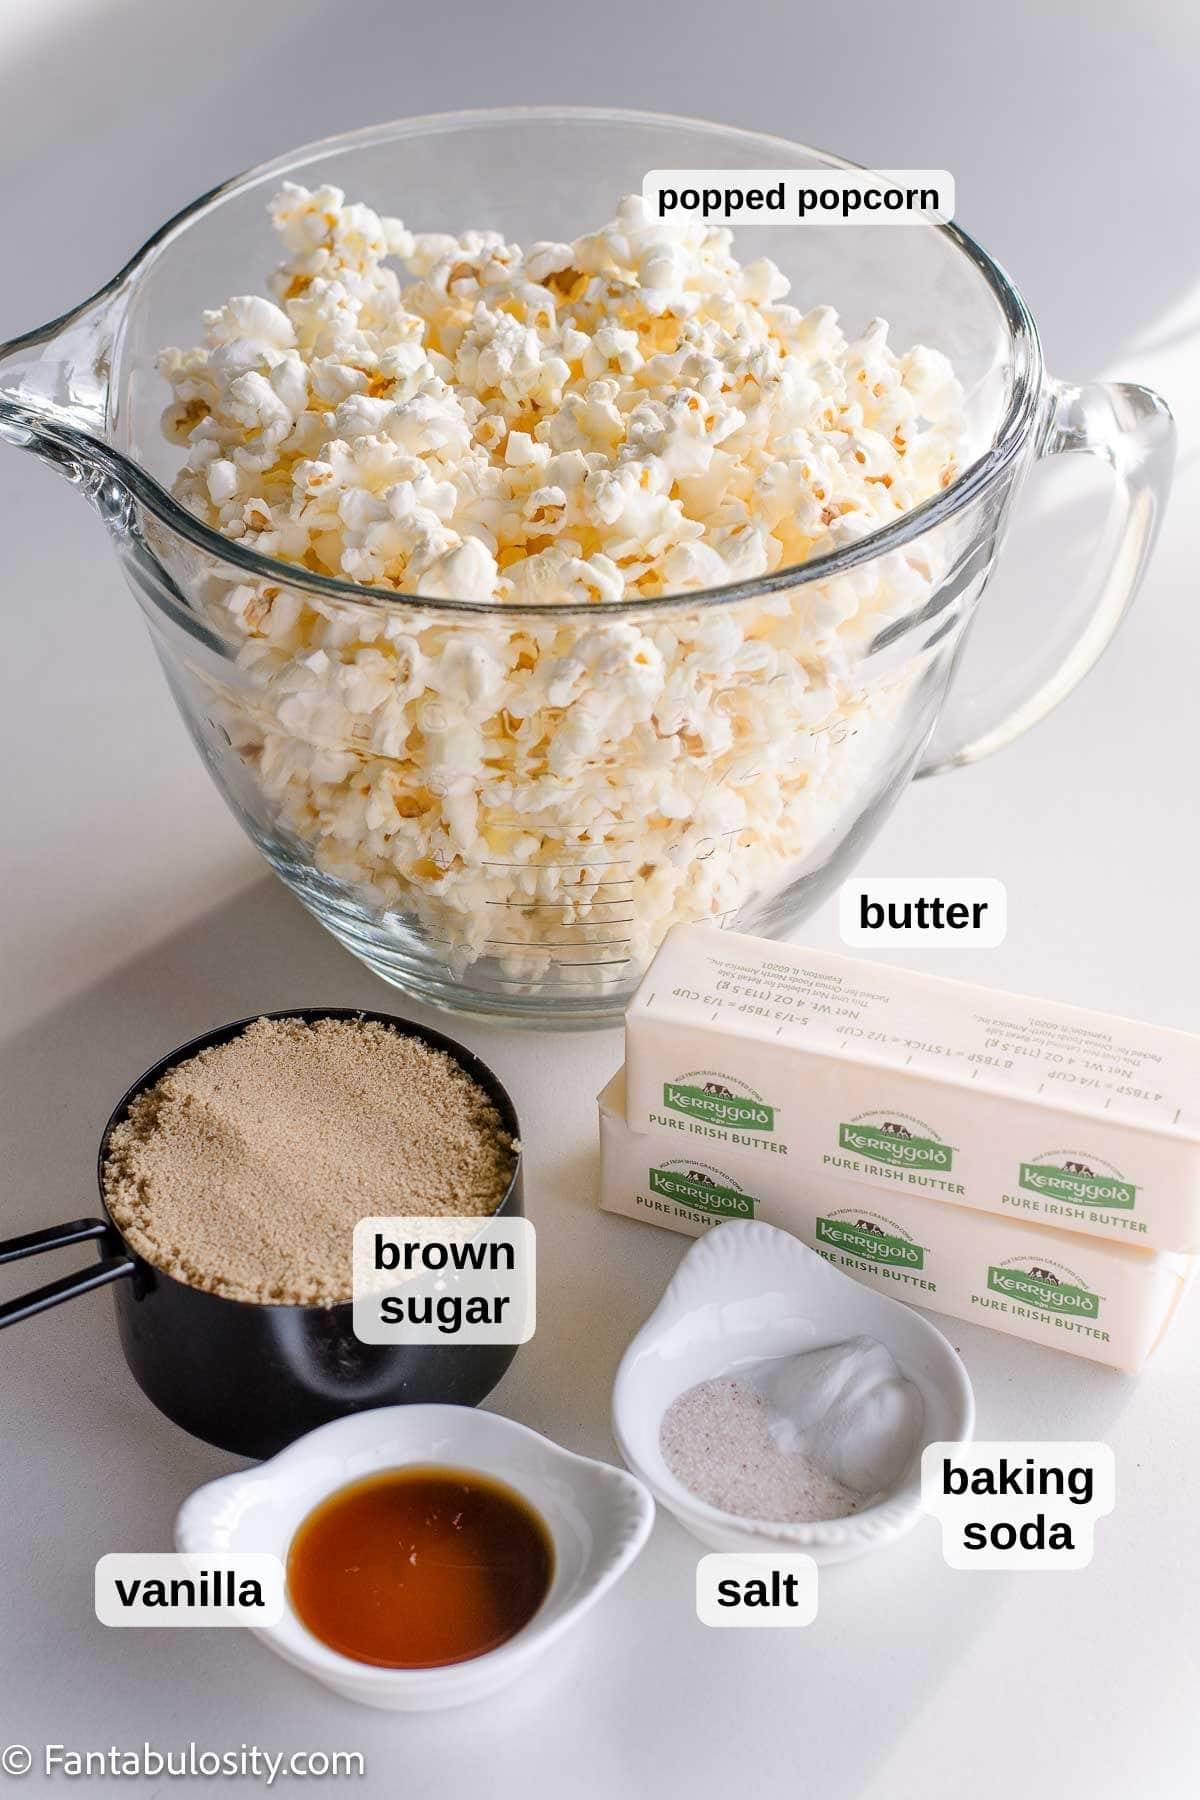
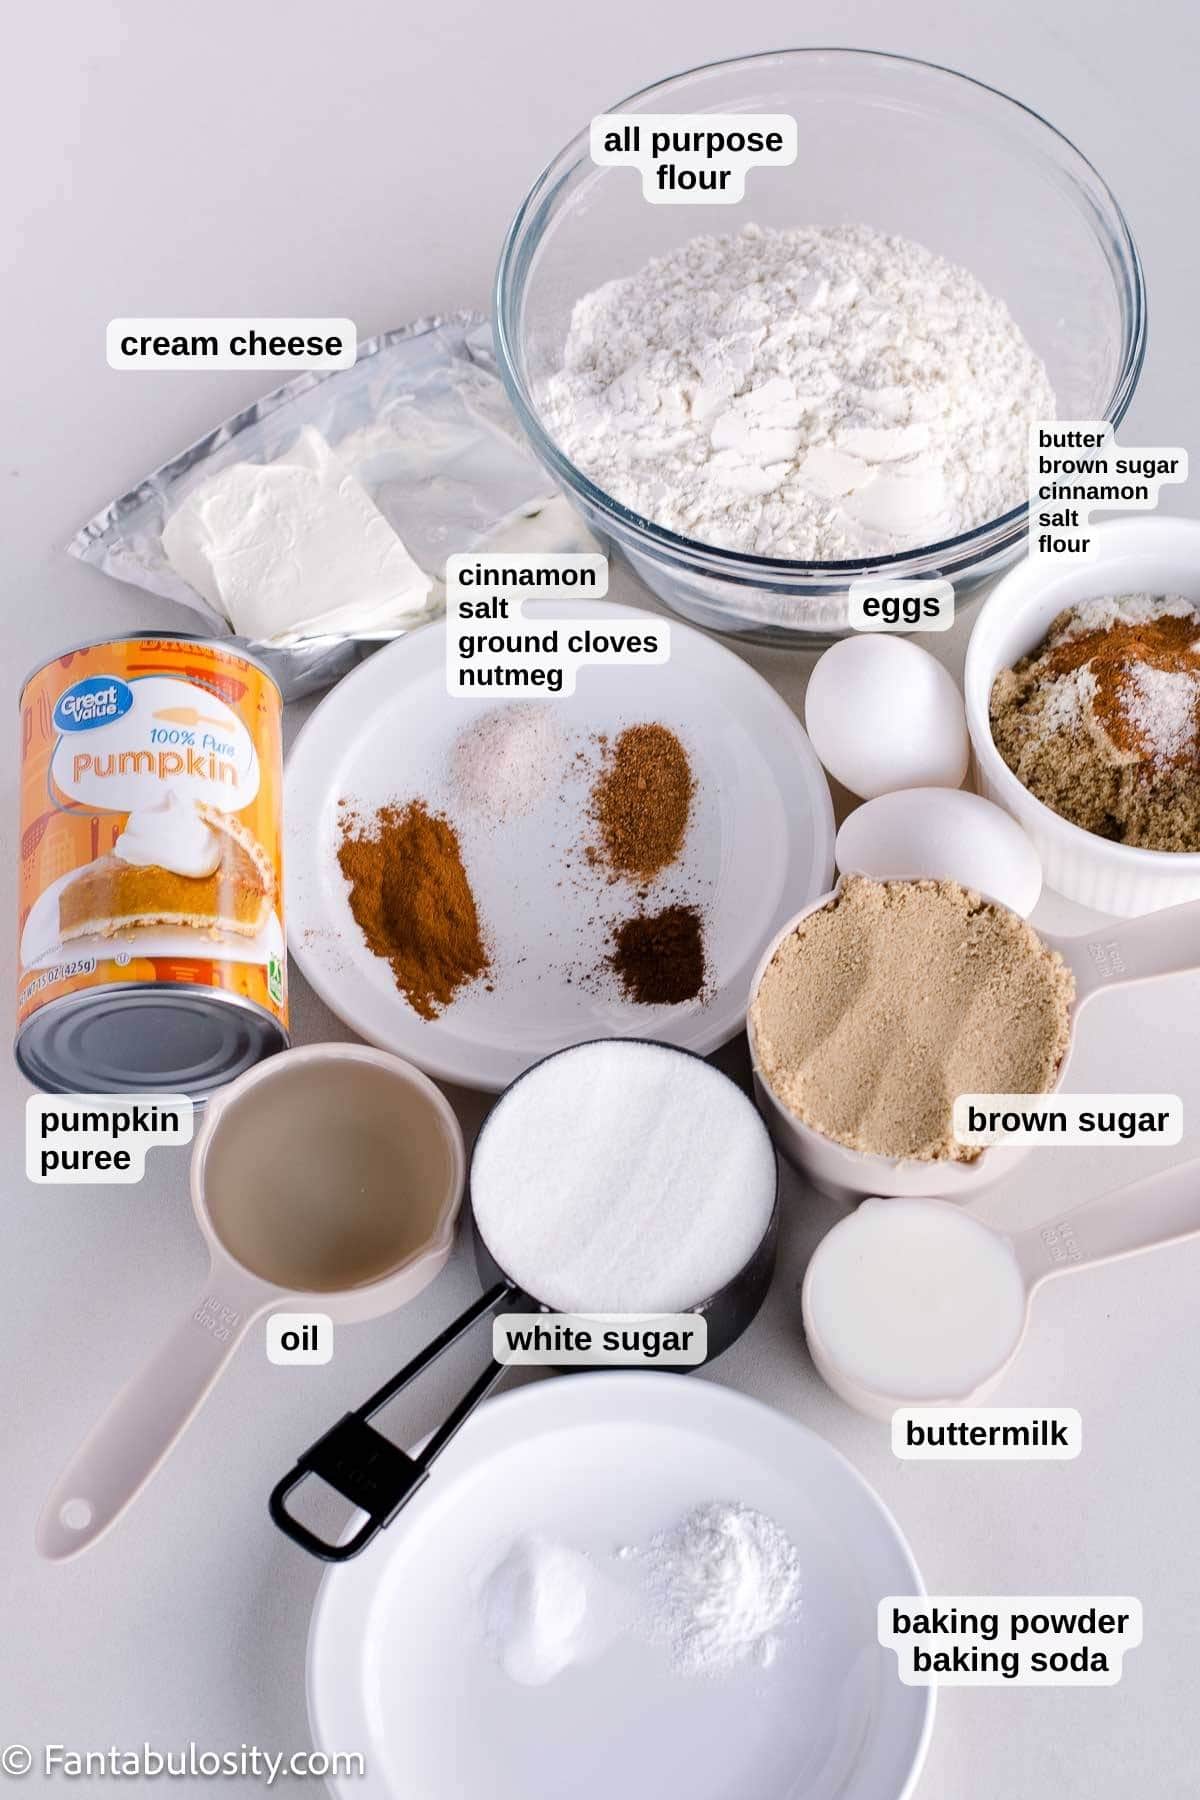
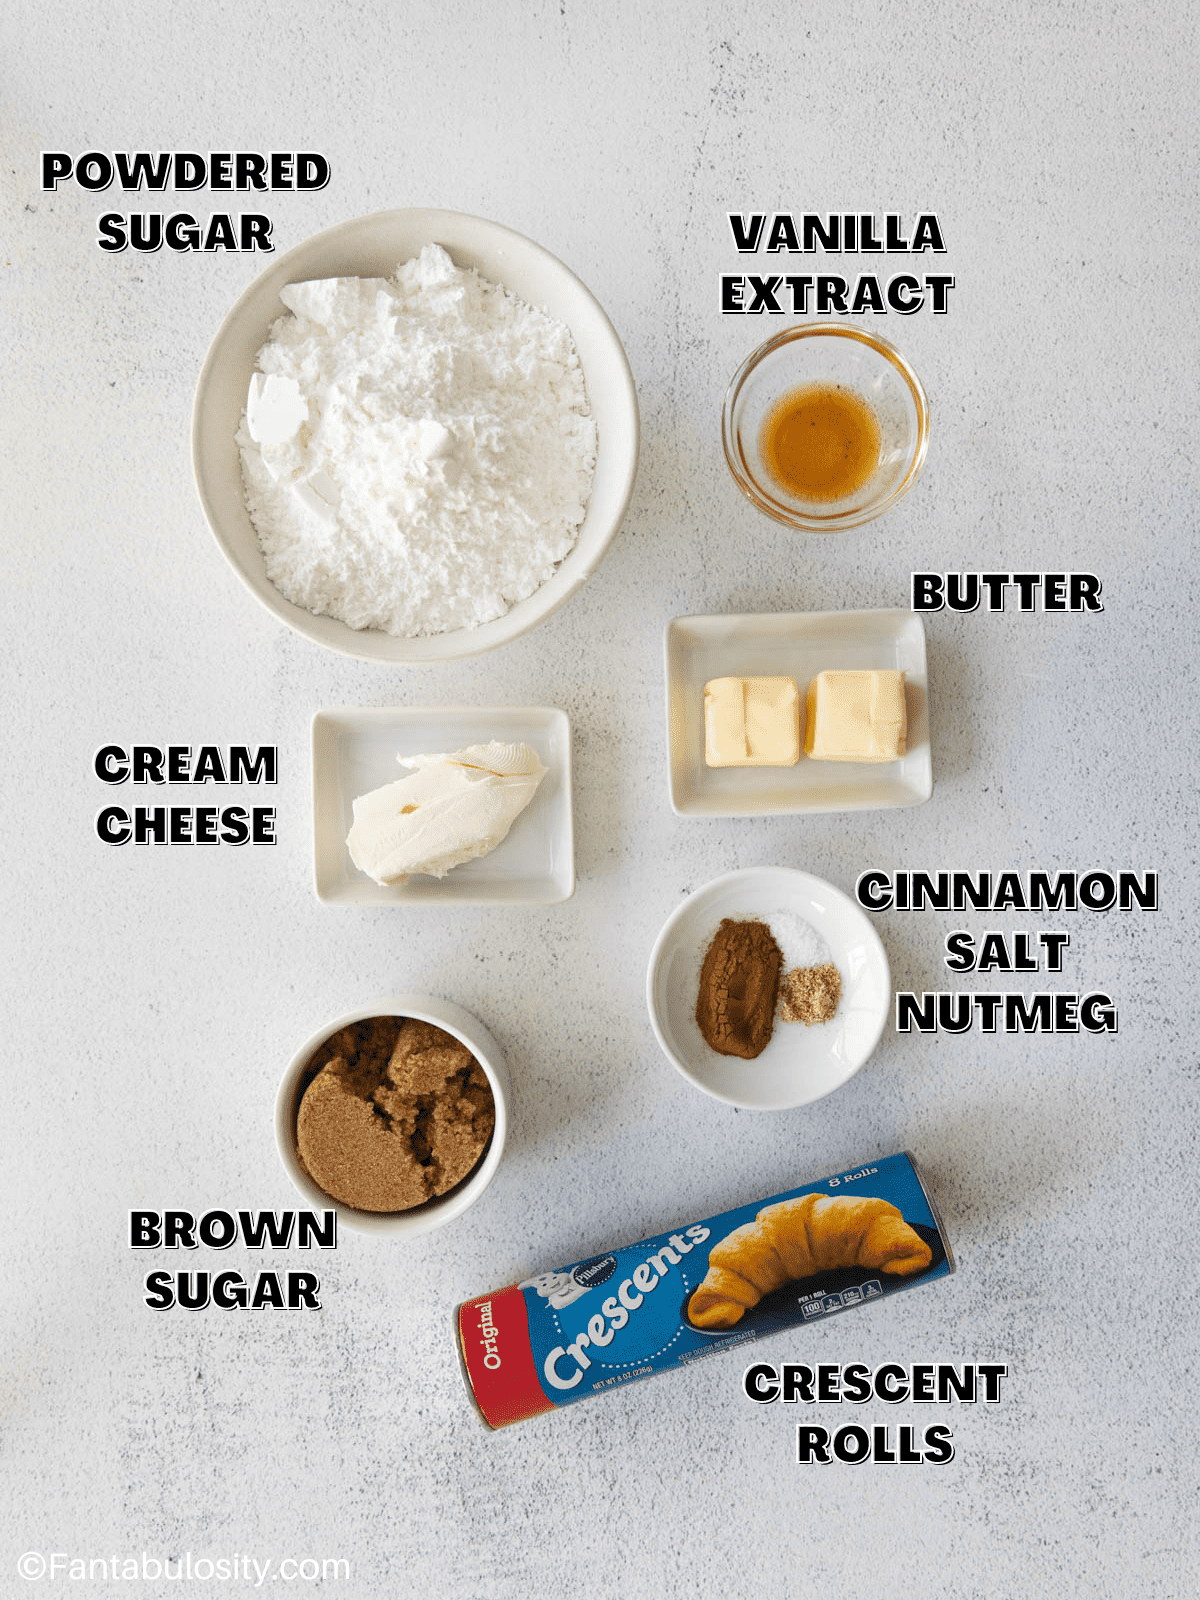
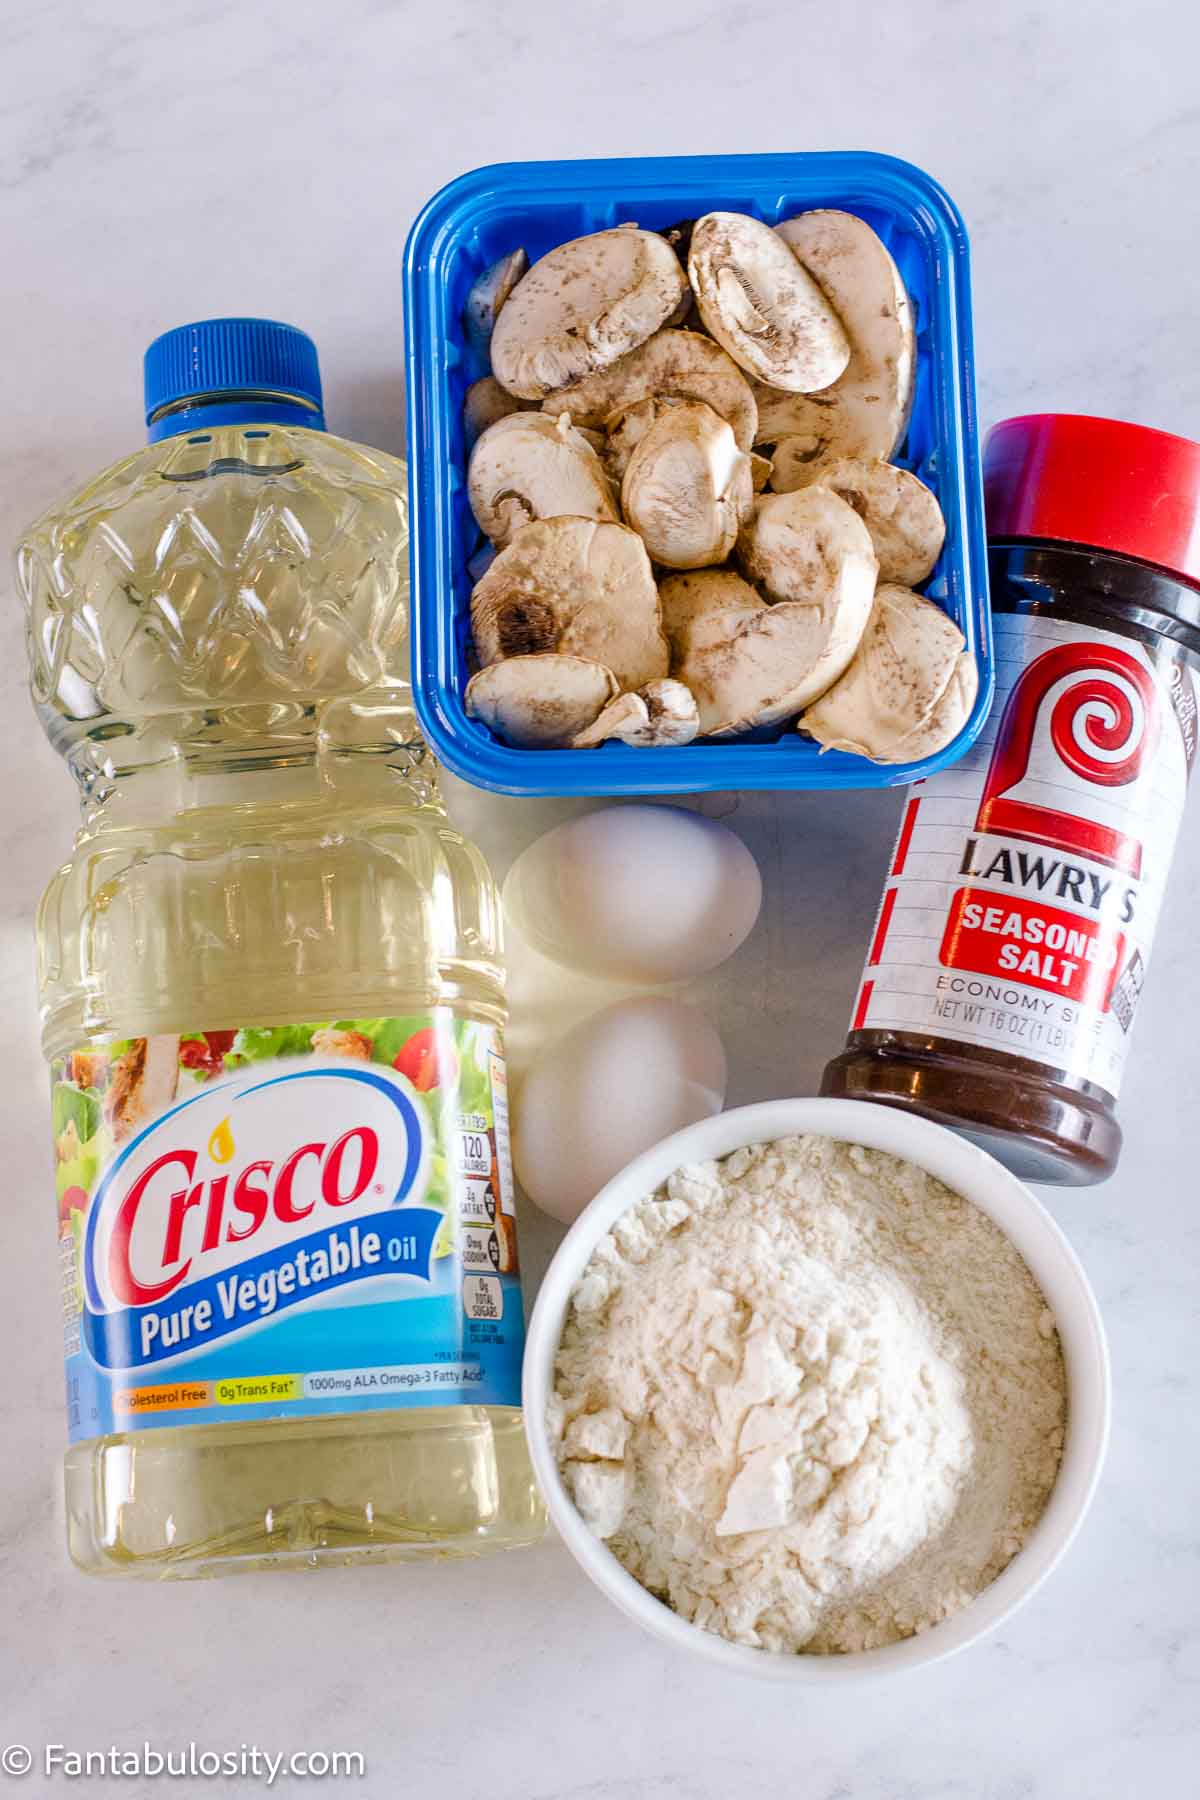
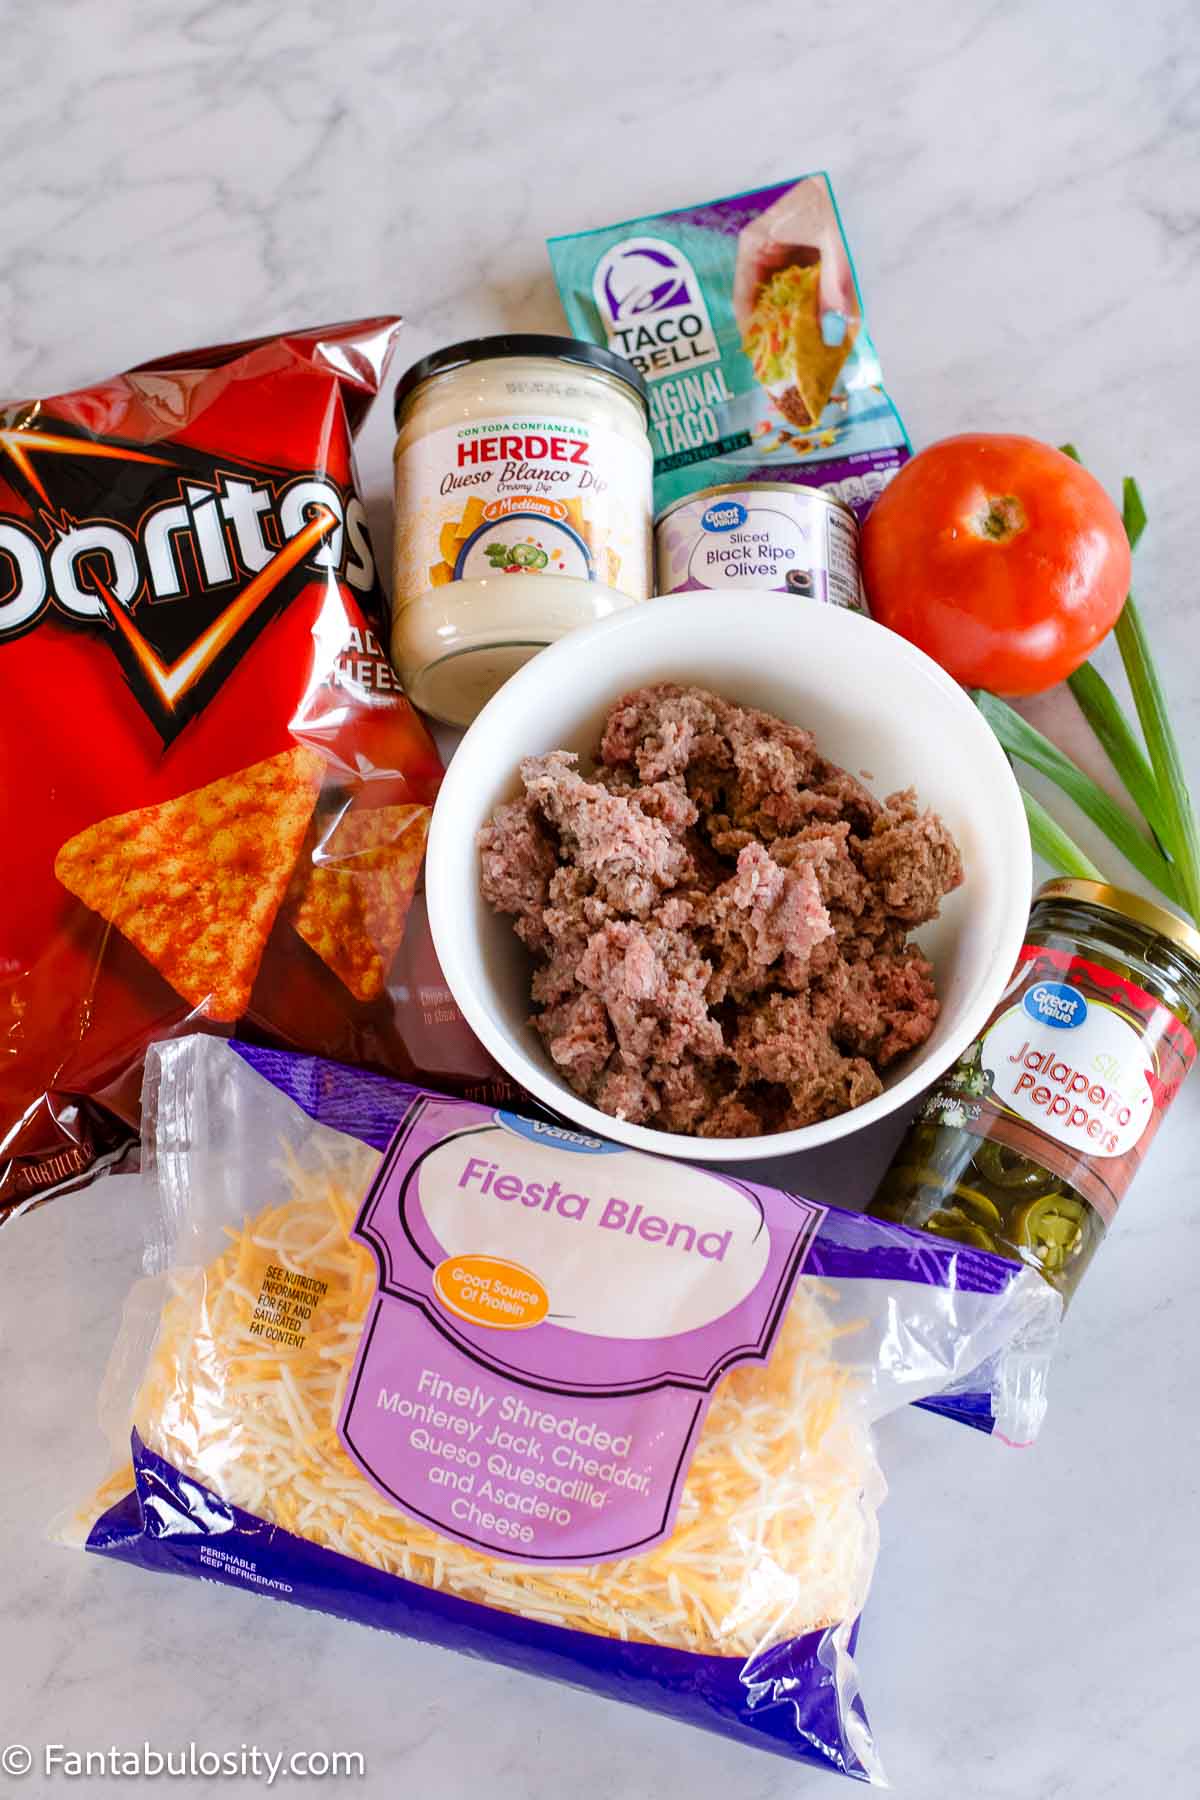
    Ingredients

    I’ve provided a few notes below on key ingredients but make sure to see the recipe card below for the full list of ingredients and instructions all in one place.

    Ingredients for candied yams on counter.
    • Sweet potatoes: I’ve listed that 2 pounds of potatoes are required but it doesn’t have to be exact. The amount of potatoes can depend as well, as potatoes vary in size. If you have yams instead, the same amount is recommended, however, make sure to see the “Should I peel sweet potatoes” section below.
    • Brown sugar: I prefer using dark brown sugar for this recipe but if you only have light brown sugar, that’s perfectly find to use too.
    • Butter: I usually only have salted butter on hand, but unsalted butter will work for this too. Make sure to “brown” the butter in this, instead of just melt it. The browned butter adds an enhanced flavor to this dish that’s hard to beat.
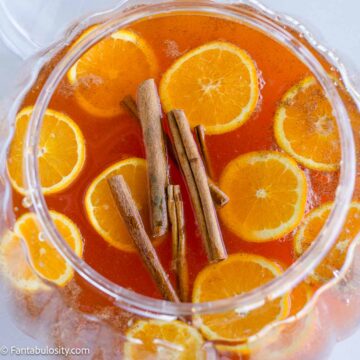
    • Oranges: This is the secret ingredient that makes this recipe stand out! No oranges on hand? You can use ¼ cup of store-bought orange juice and about a teaspoon of grated orange peel if that’s all you have but fresh does something so beautiful to this dish, so it’s highly recommended.

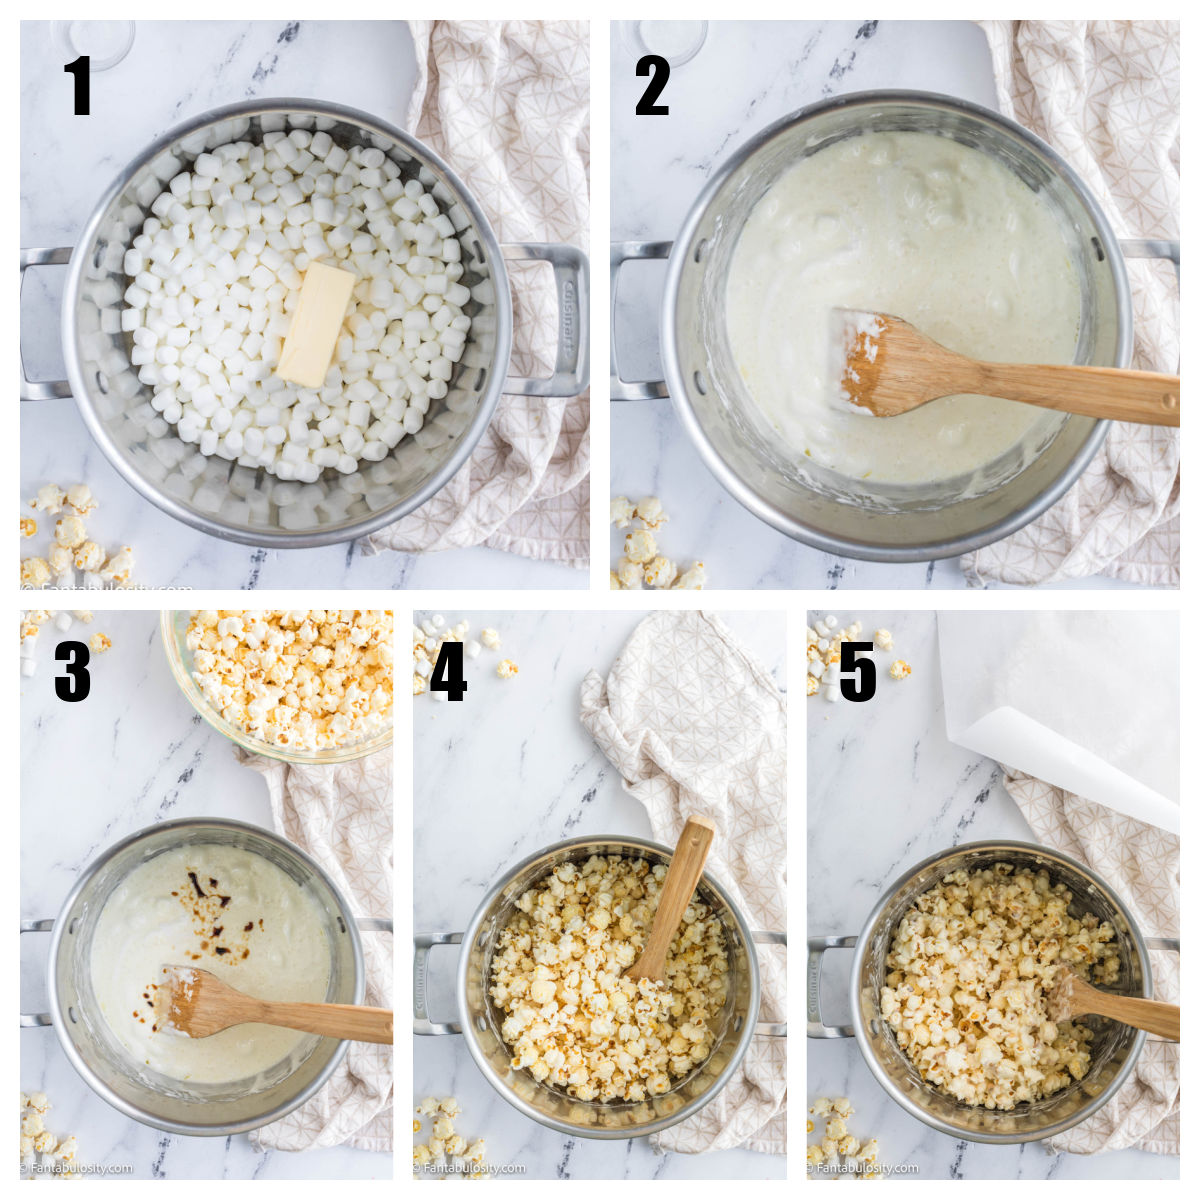
    How to Make Candied Yams

    To see the full instructions, you can jump on down to the recipe card, or you can see the extra details and notes I’ve provided here that you may find helpful.

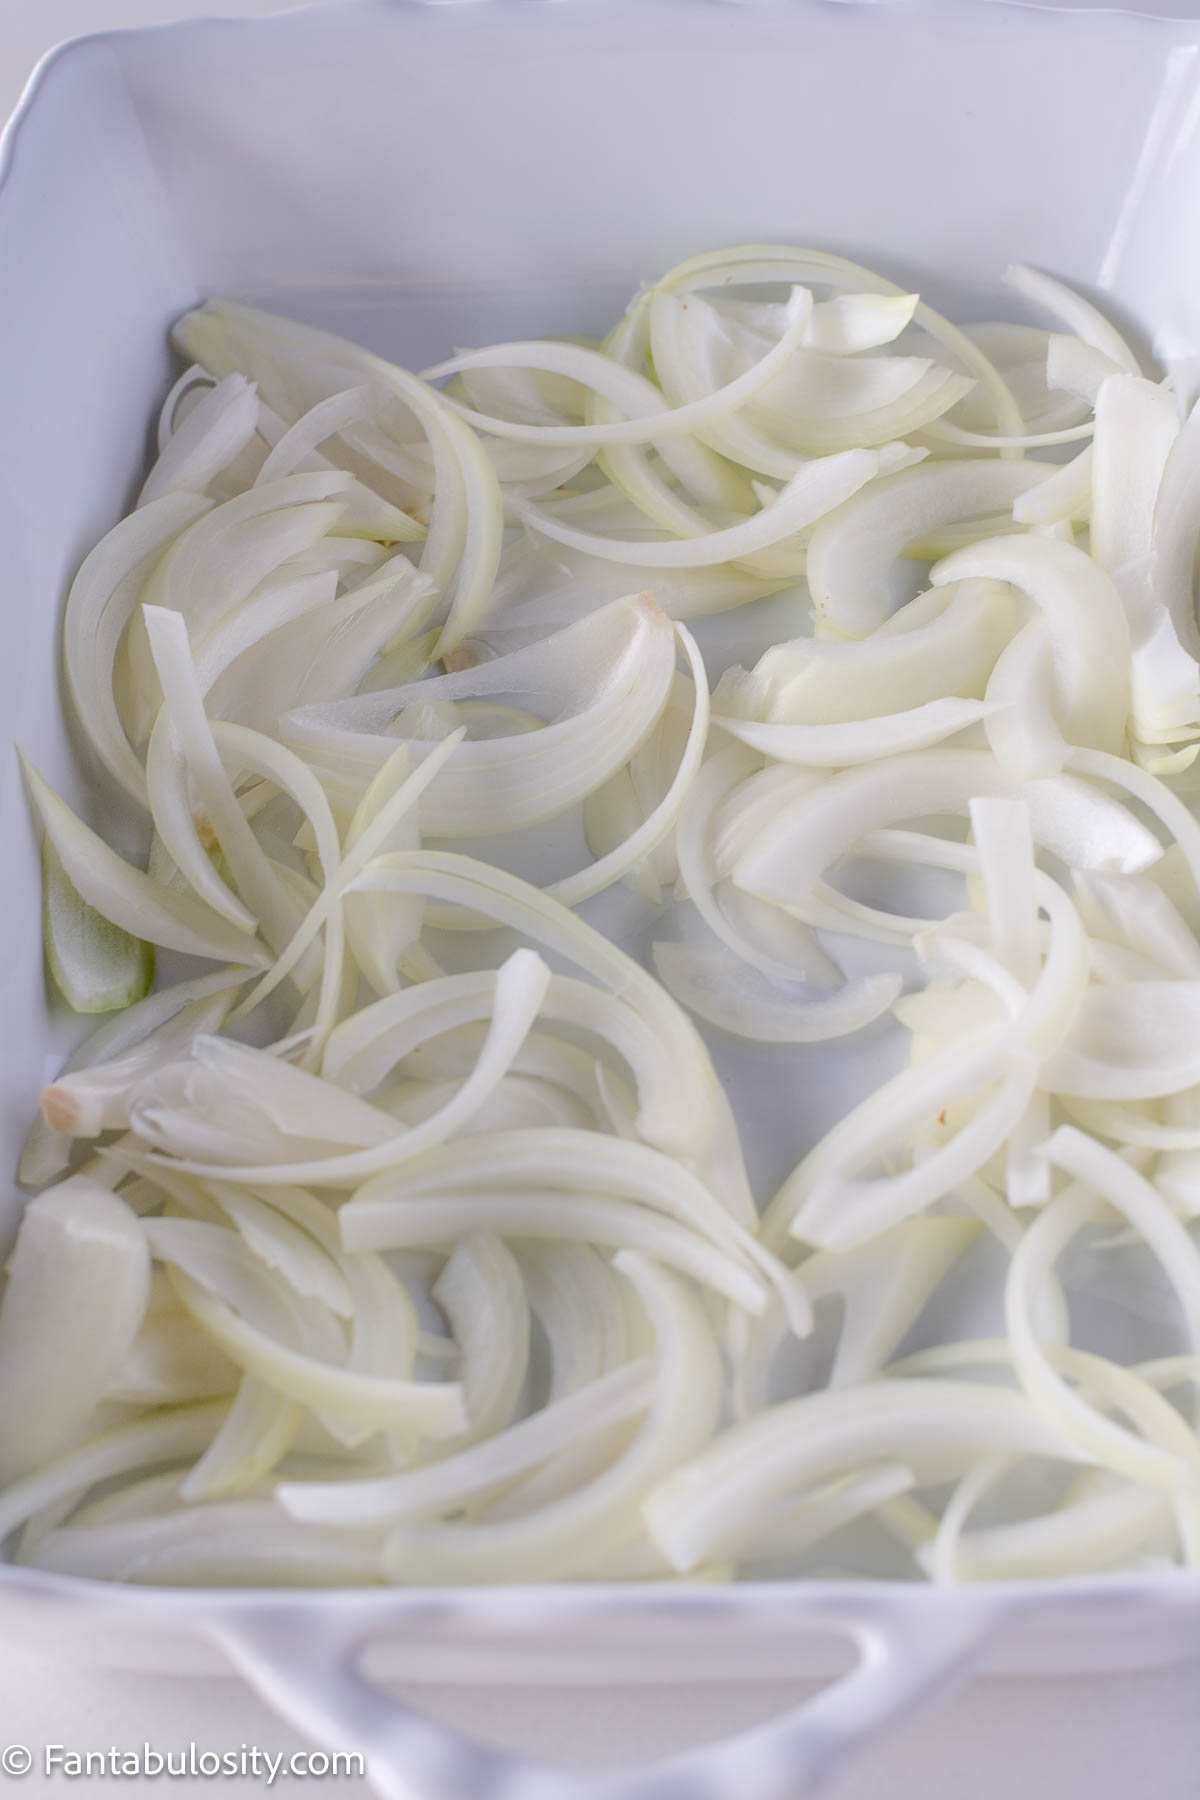
    • First, wash and slice the sweet potatoes in to ½ inch thick, rounds. (You can peel your potatoes first, if you prefer but it’s not required.)
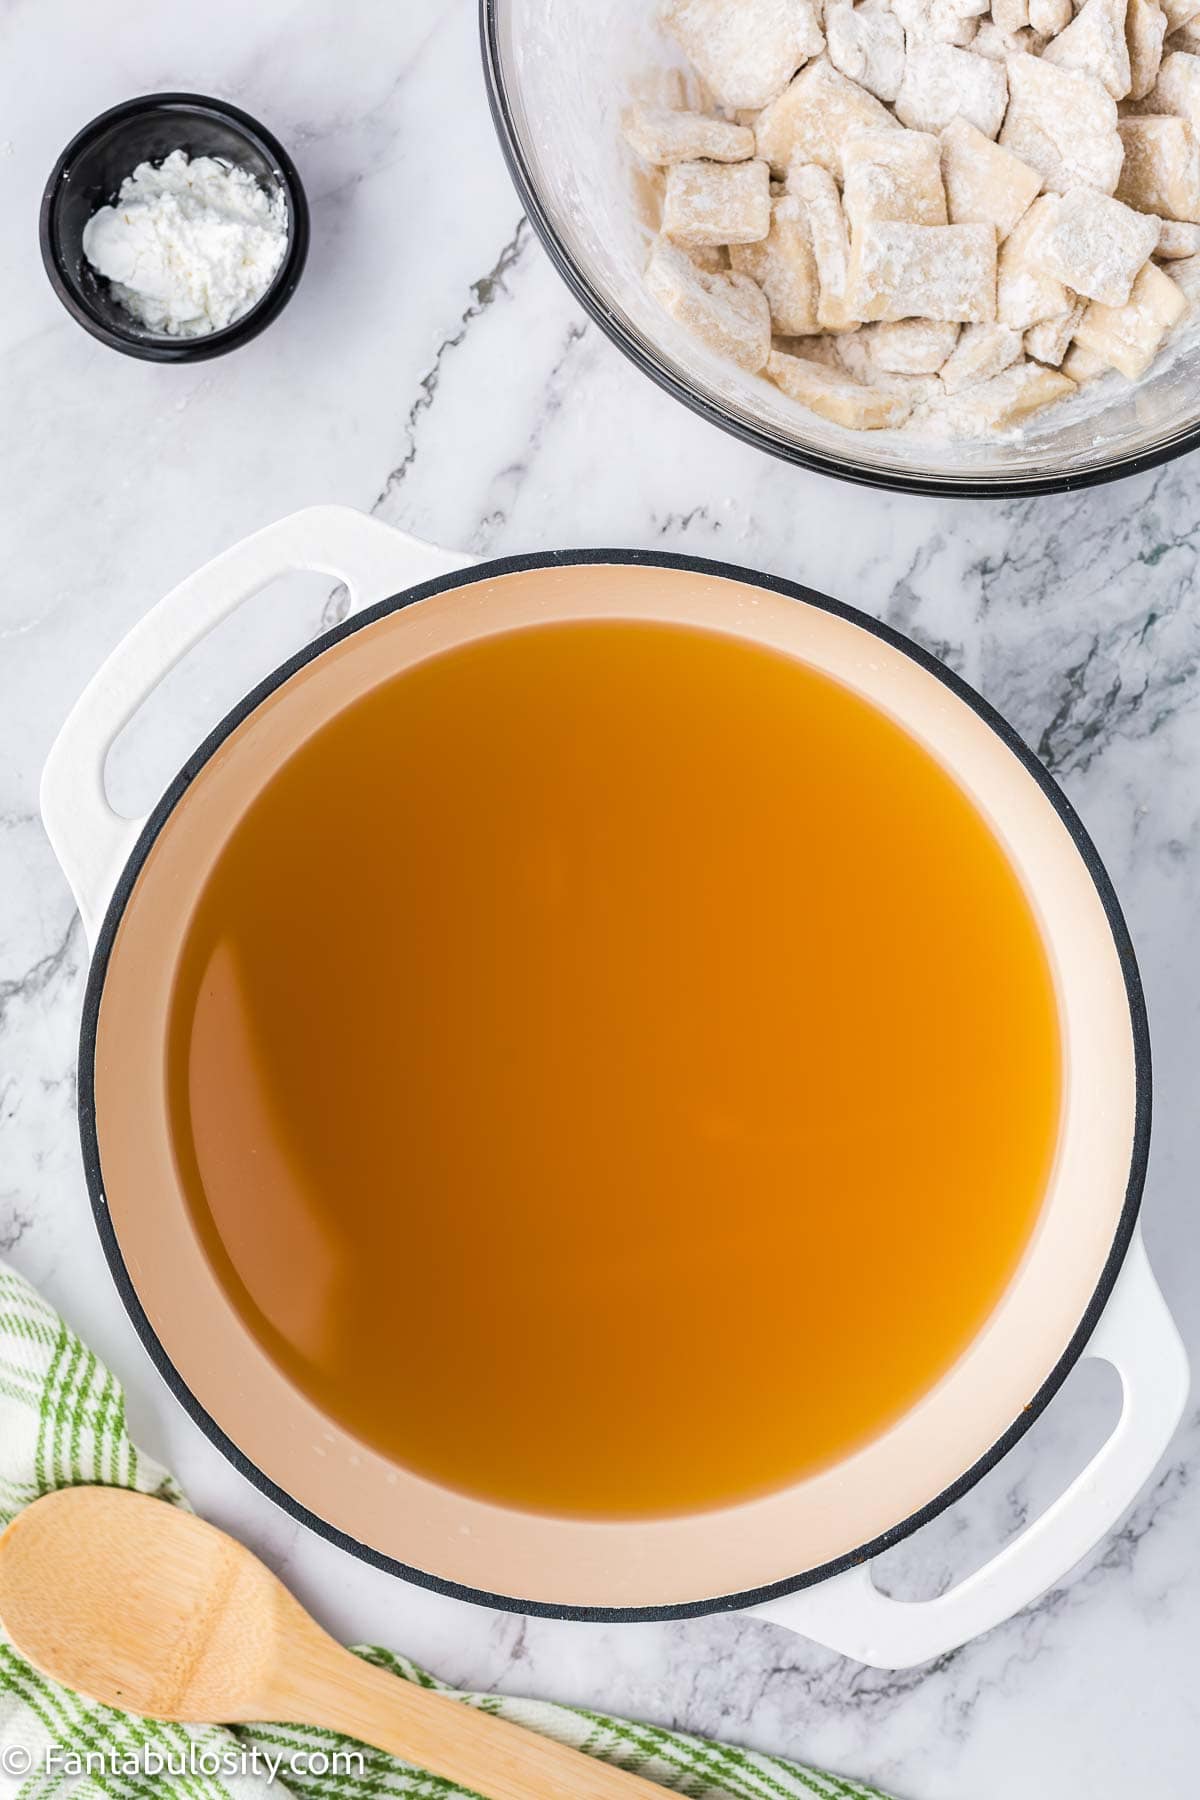
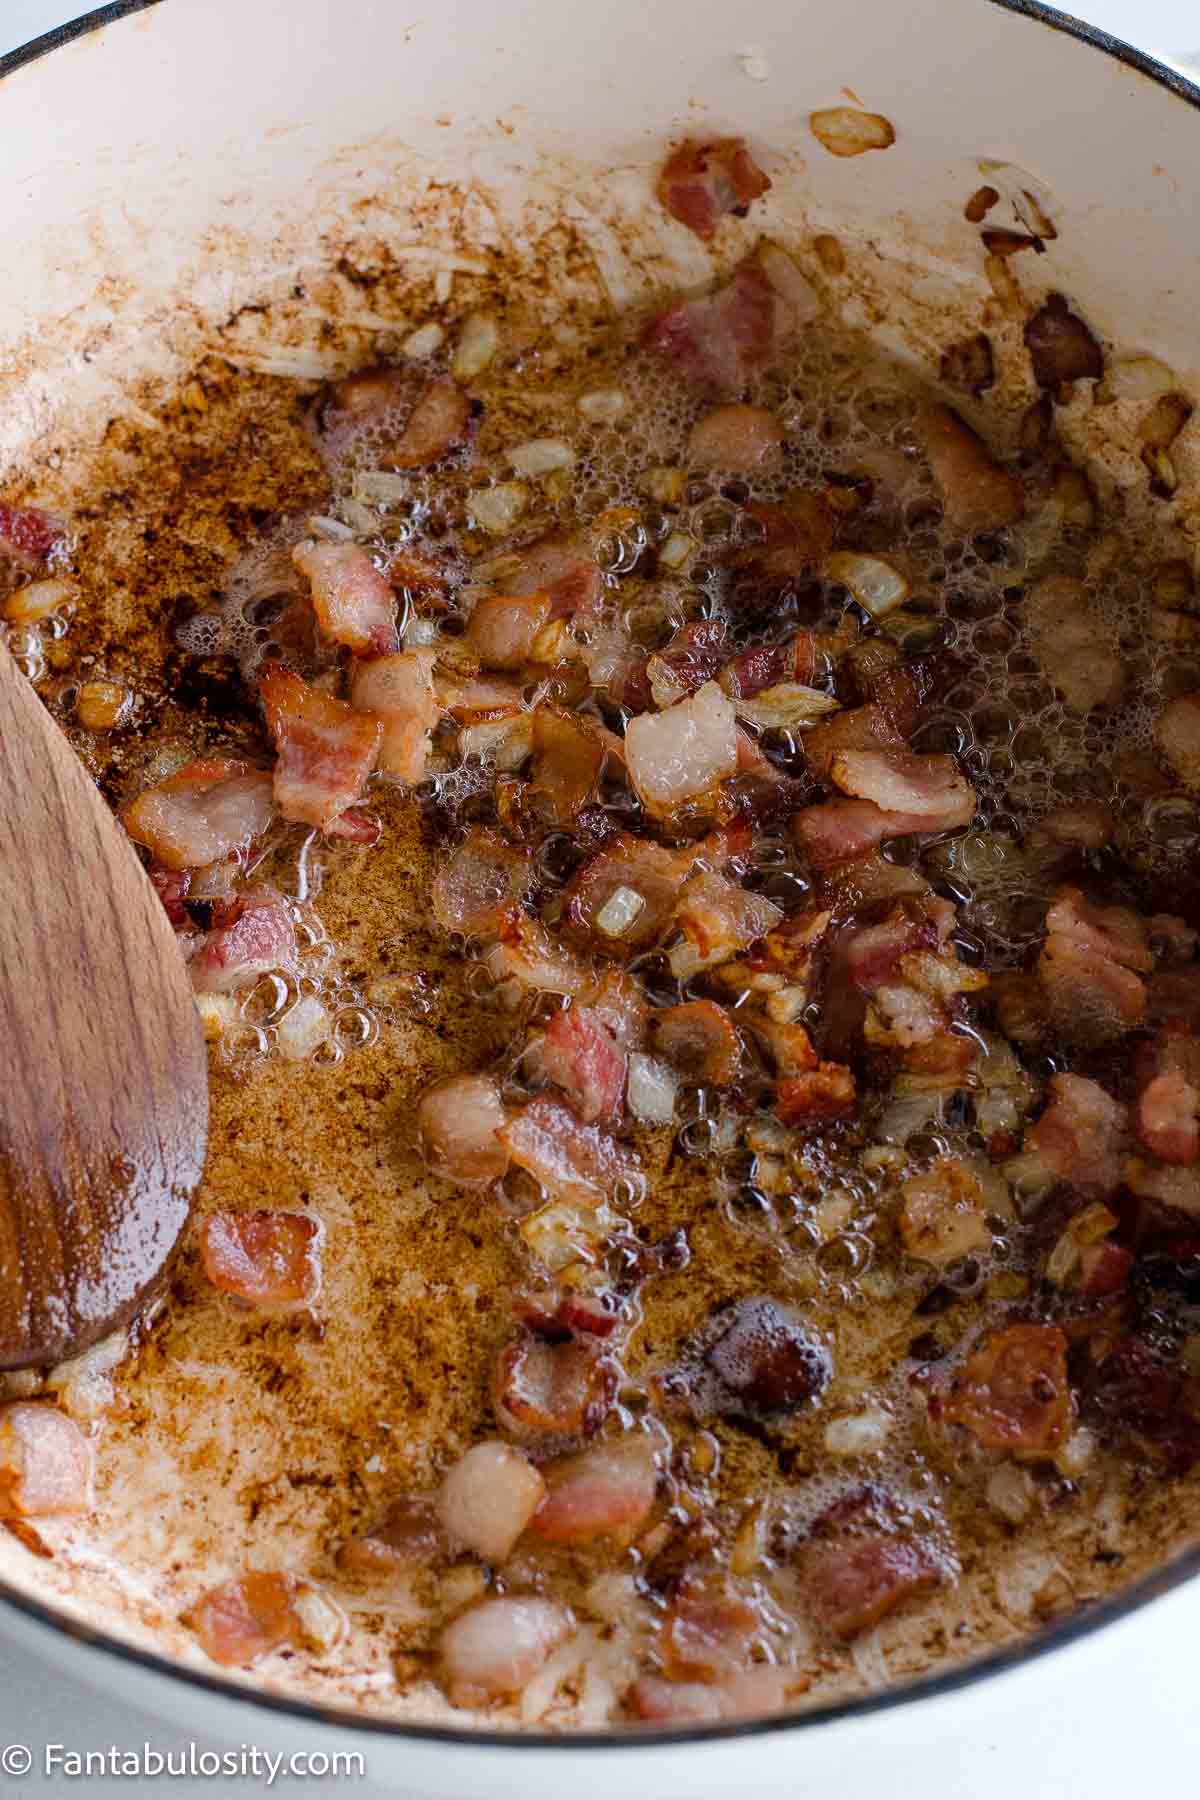
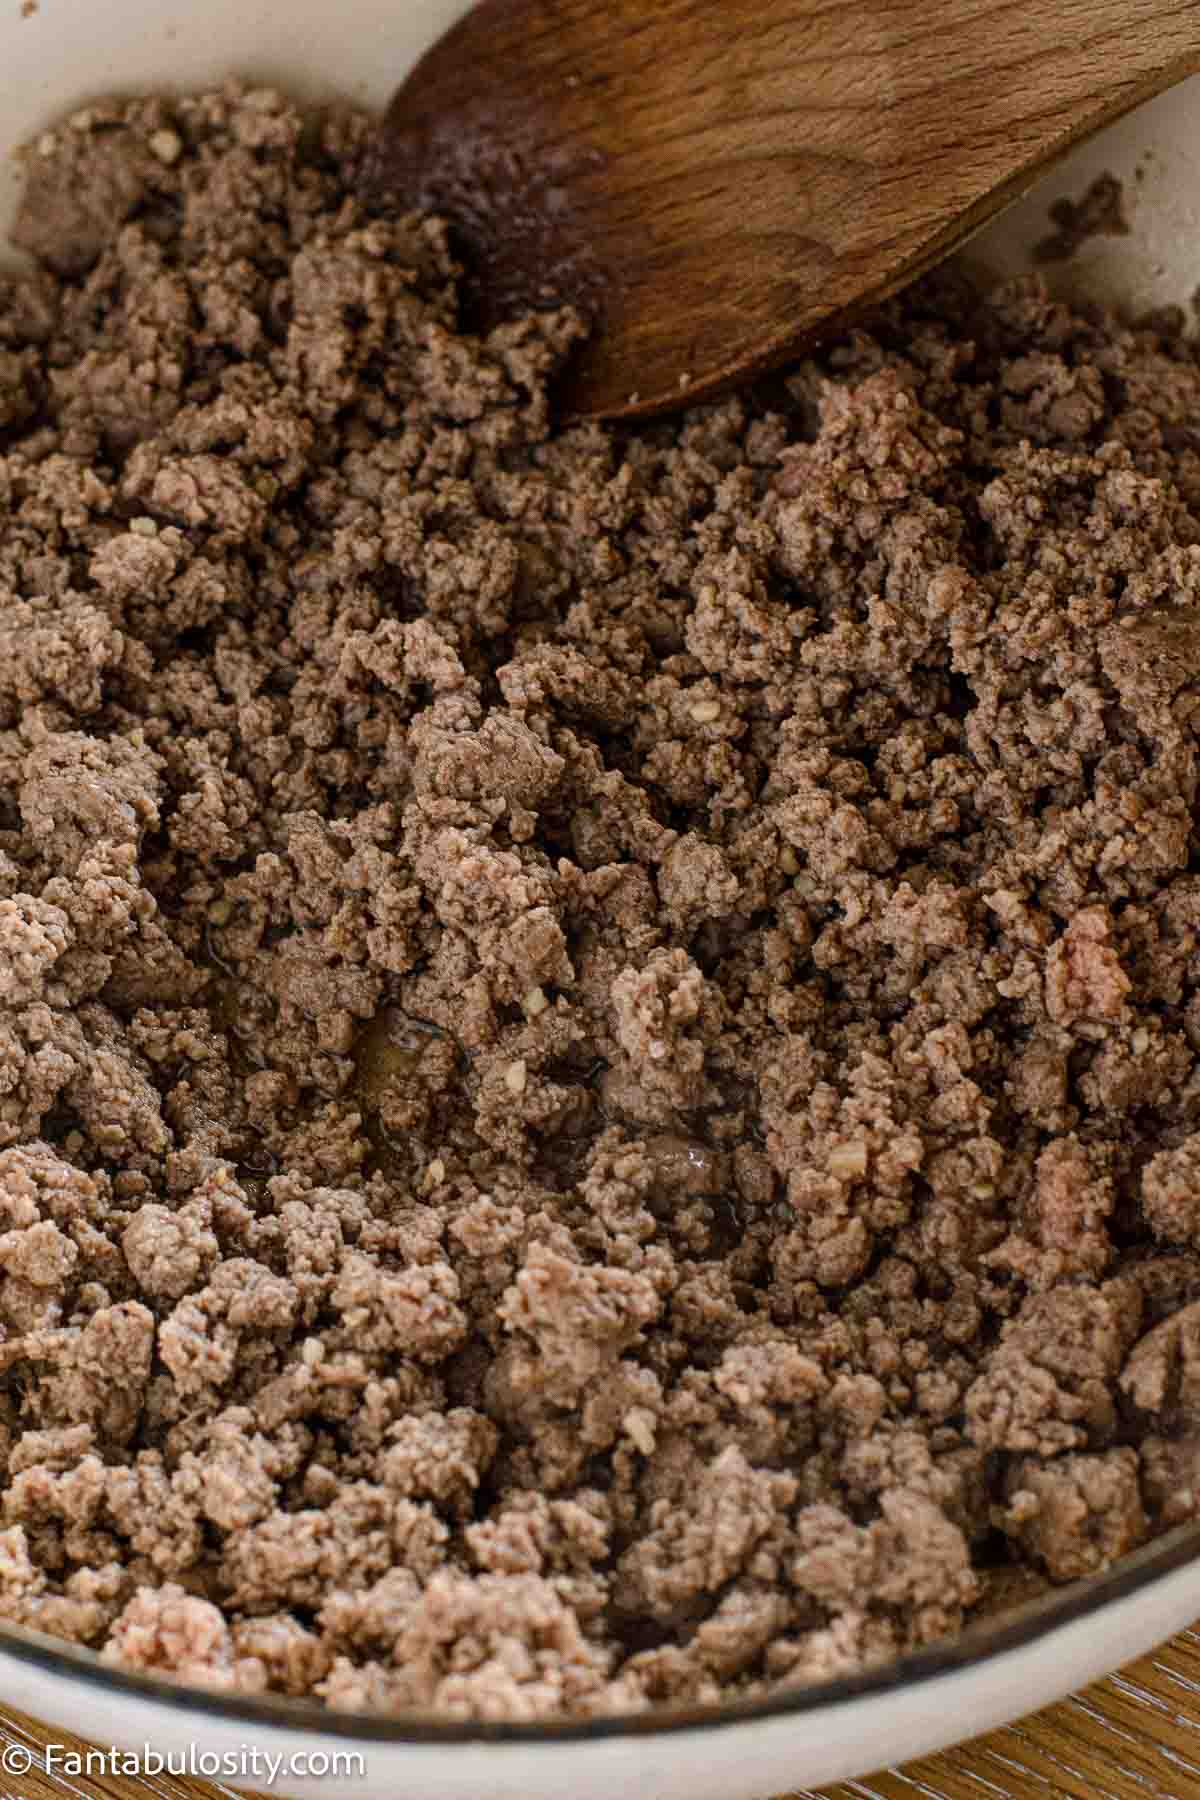
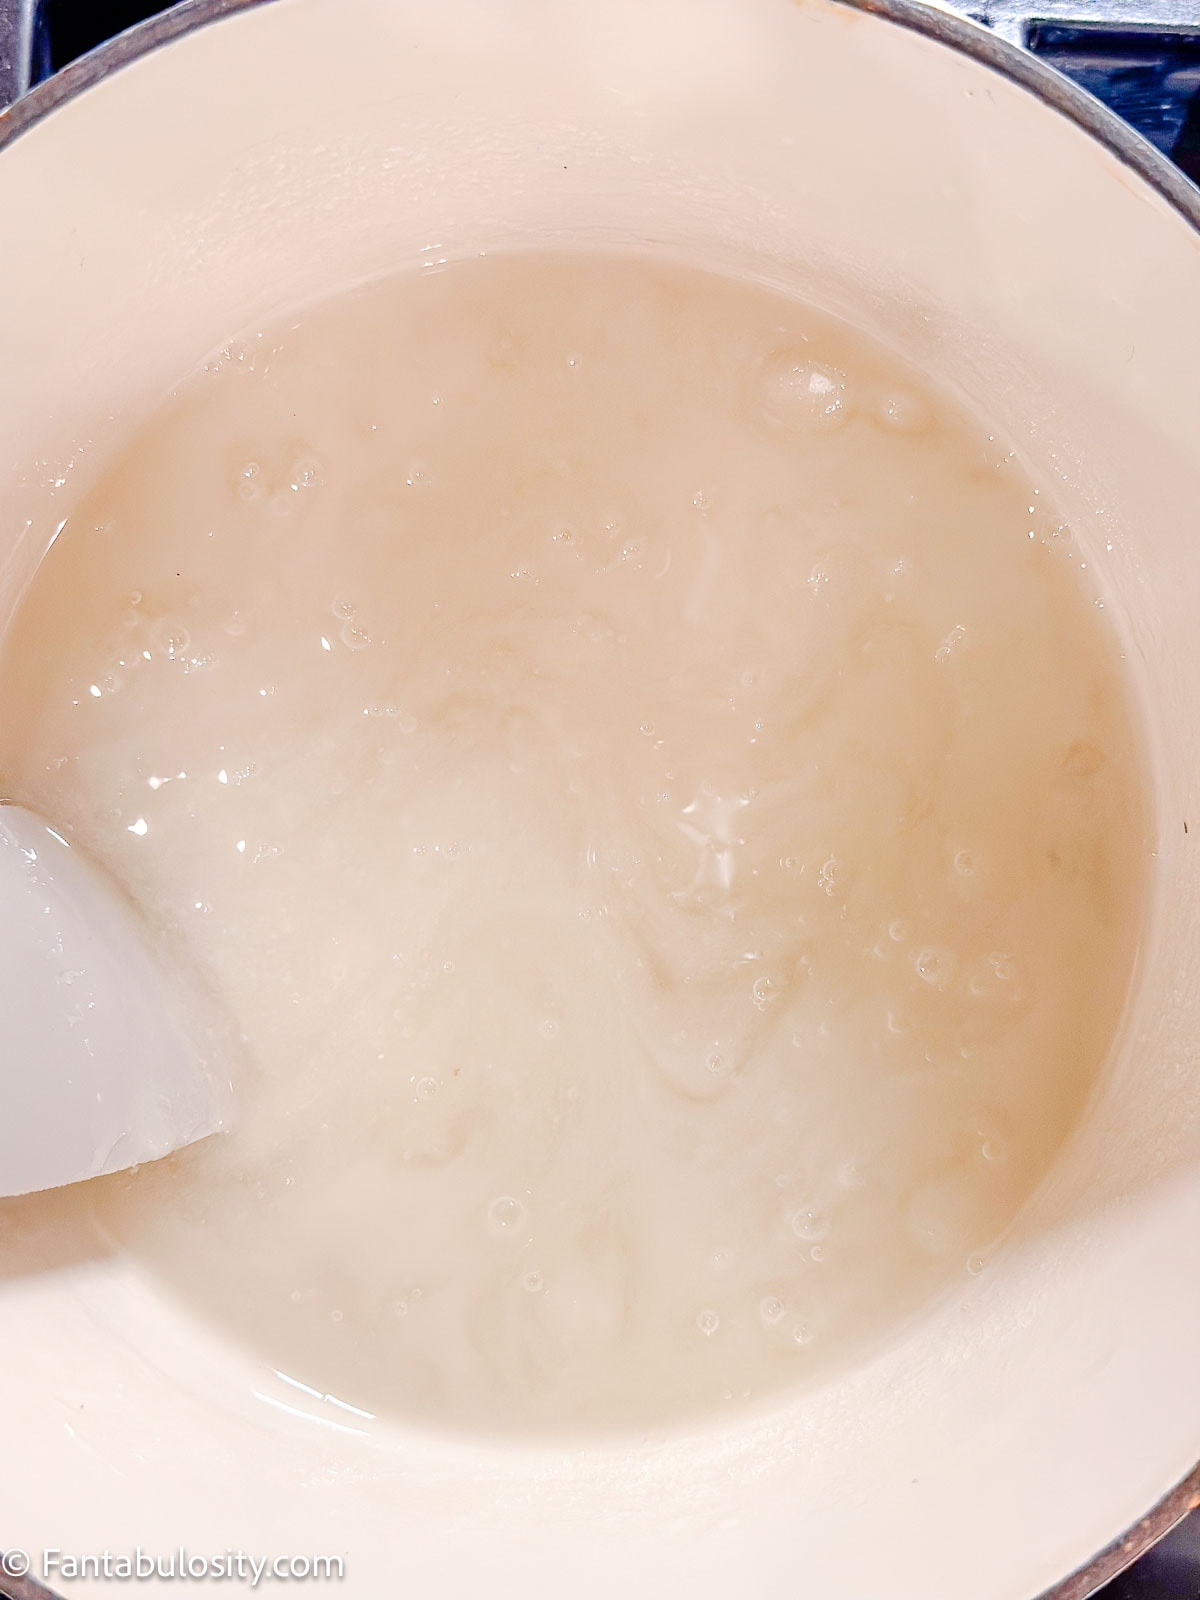
    • Next, place butter in a sauce pan or deep skillet, that’s big enough to hold all of the potatoes eventually.
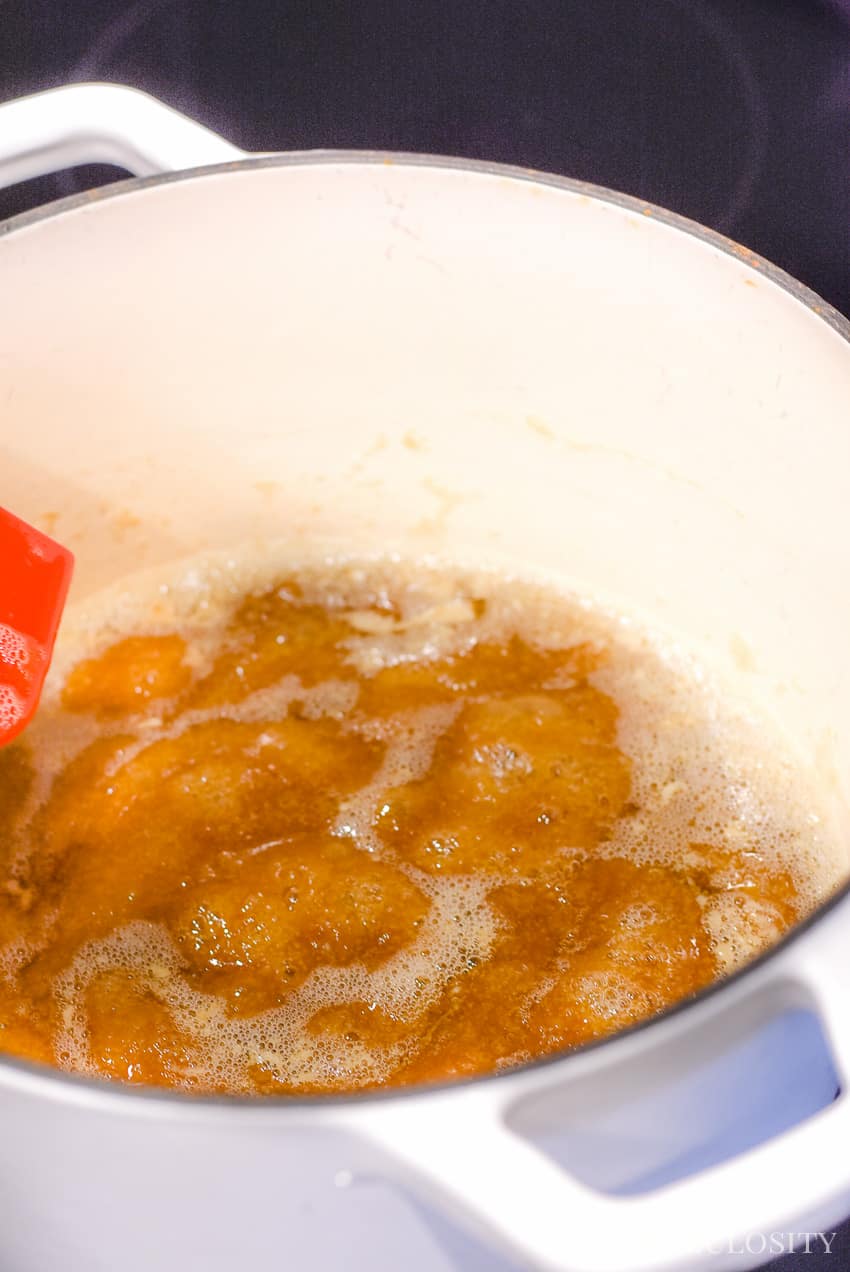
    • Turn to medium-high heat to brown the butter.

    Tip: Browning the butter means to cook the butter long enough that it starts to turn a golden brown. This gives the dish a whole different flavor, than just melting the butter.

    Sugar, butter and spices mixed together in pot.
    Sliced yams covered in sauce.
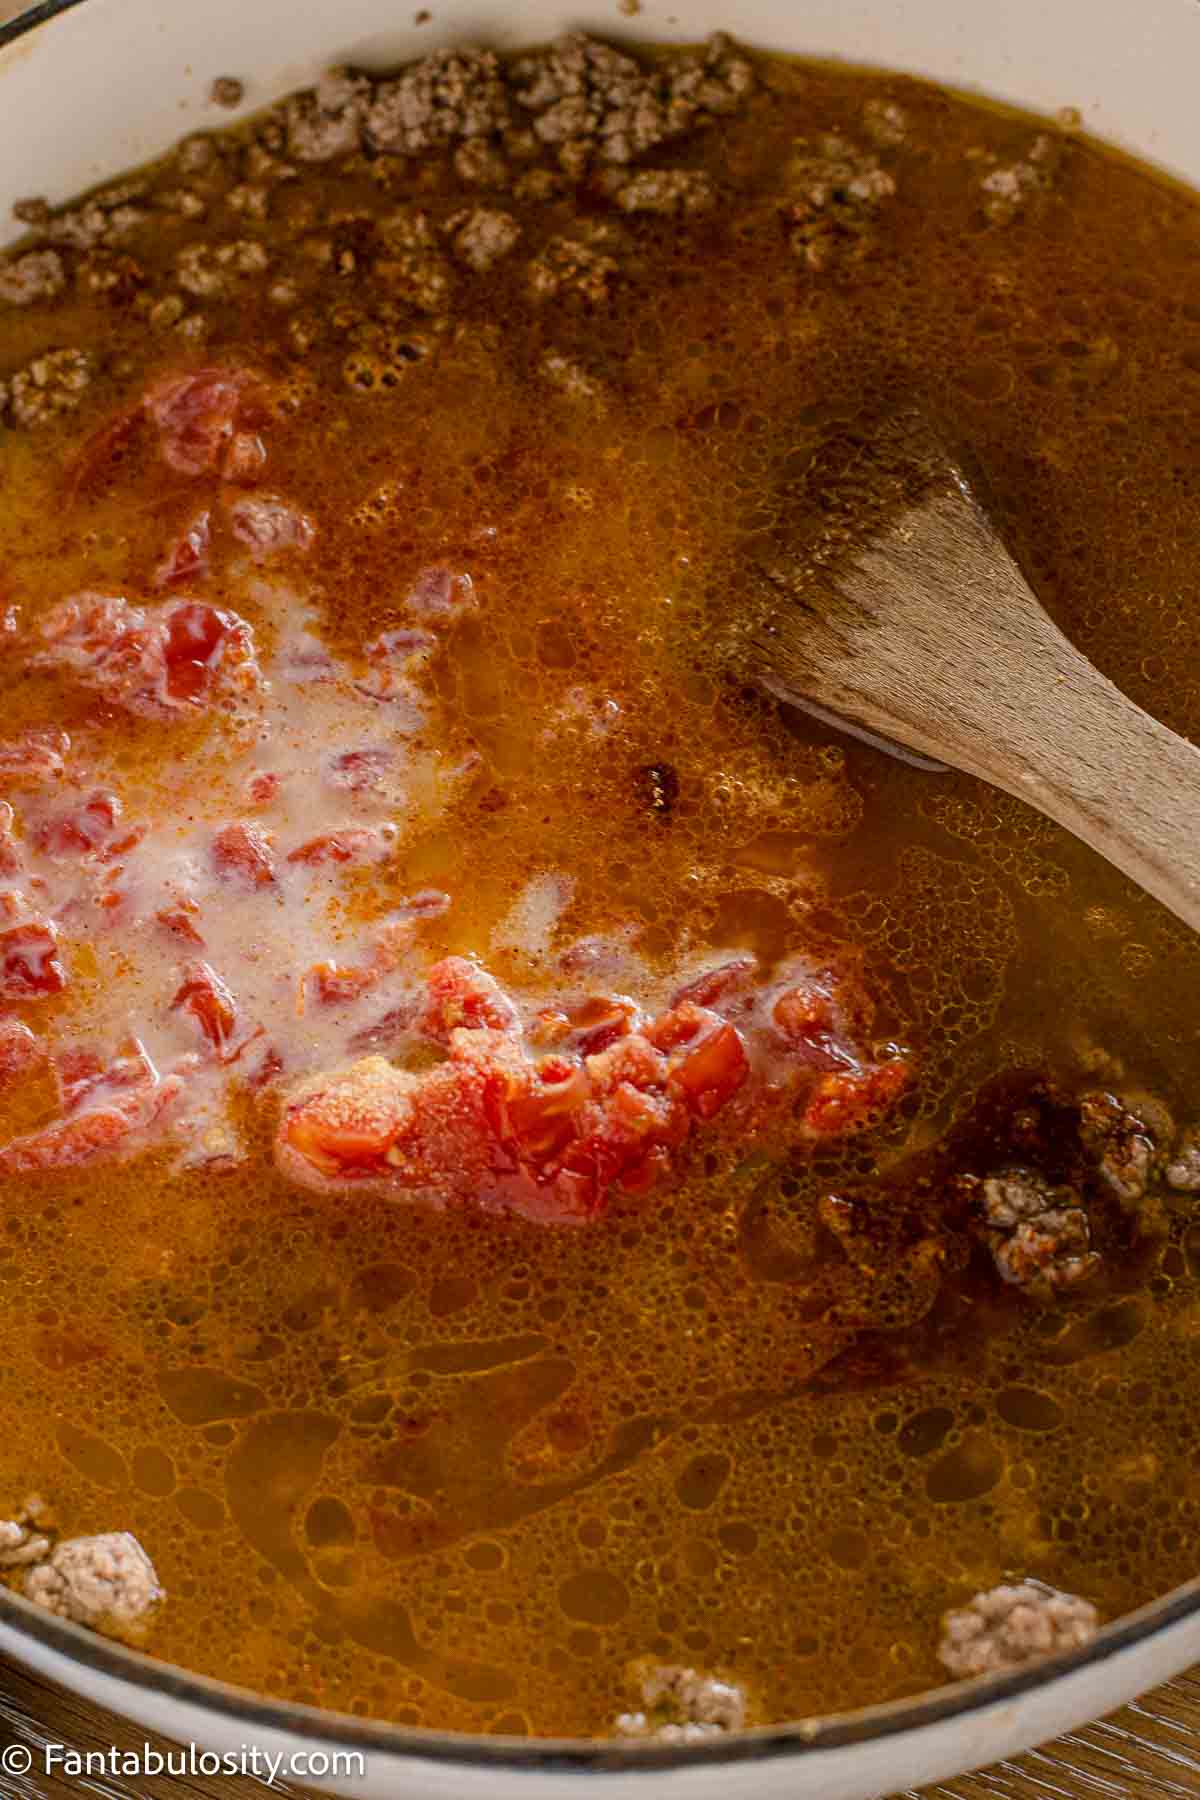
    • While the butter is browning, you can zest your orange. Then, slice the orange in half because you’ll be squeezing the juice from the orange.
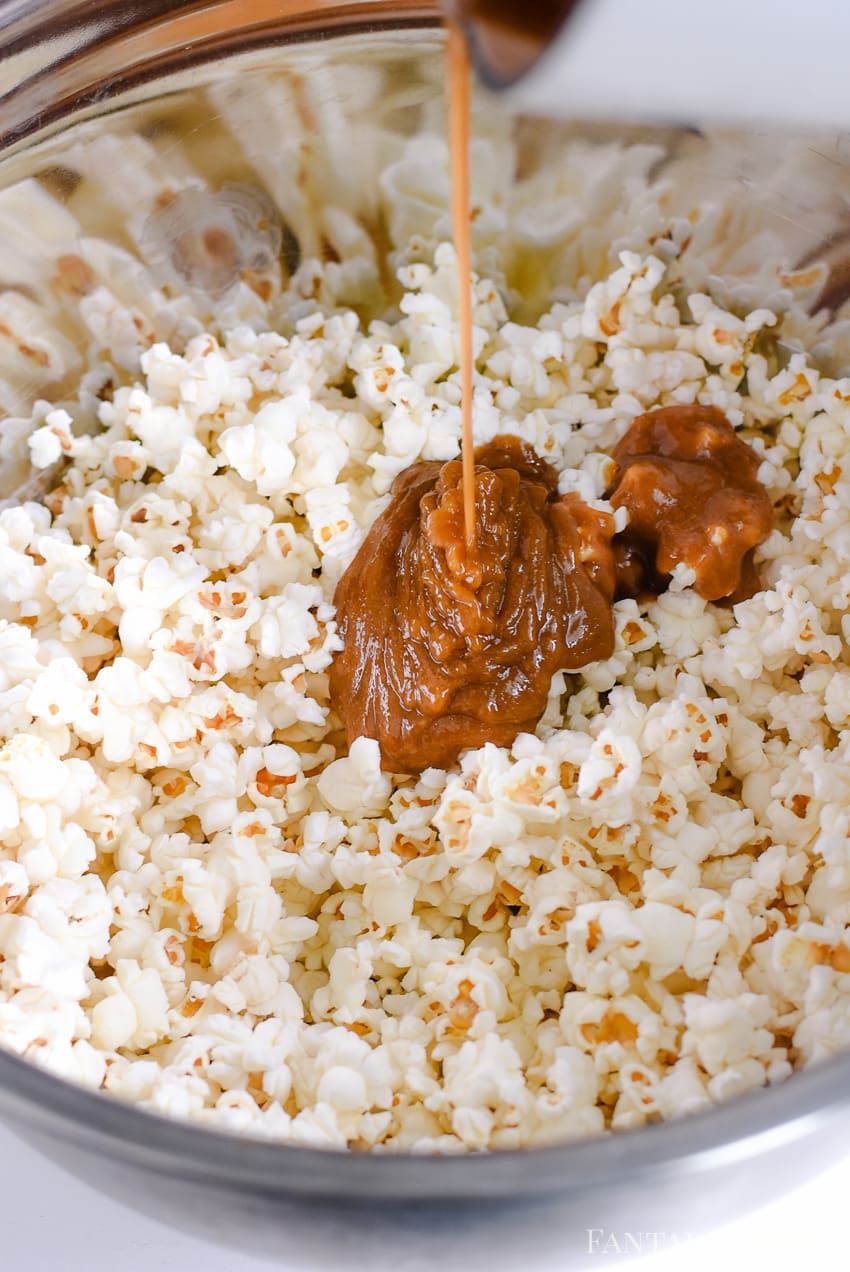
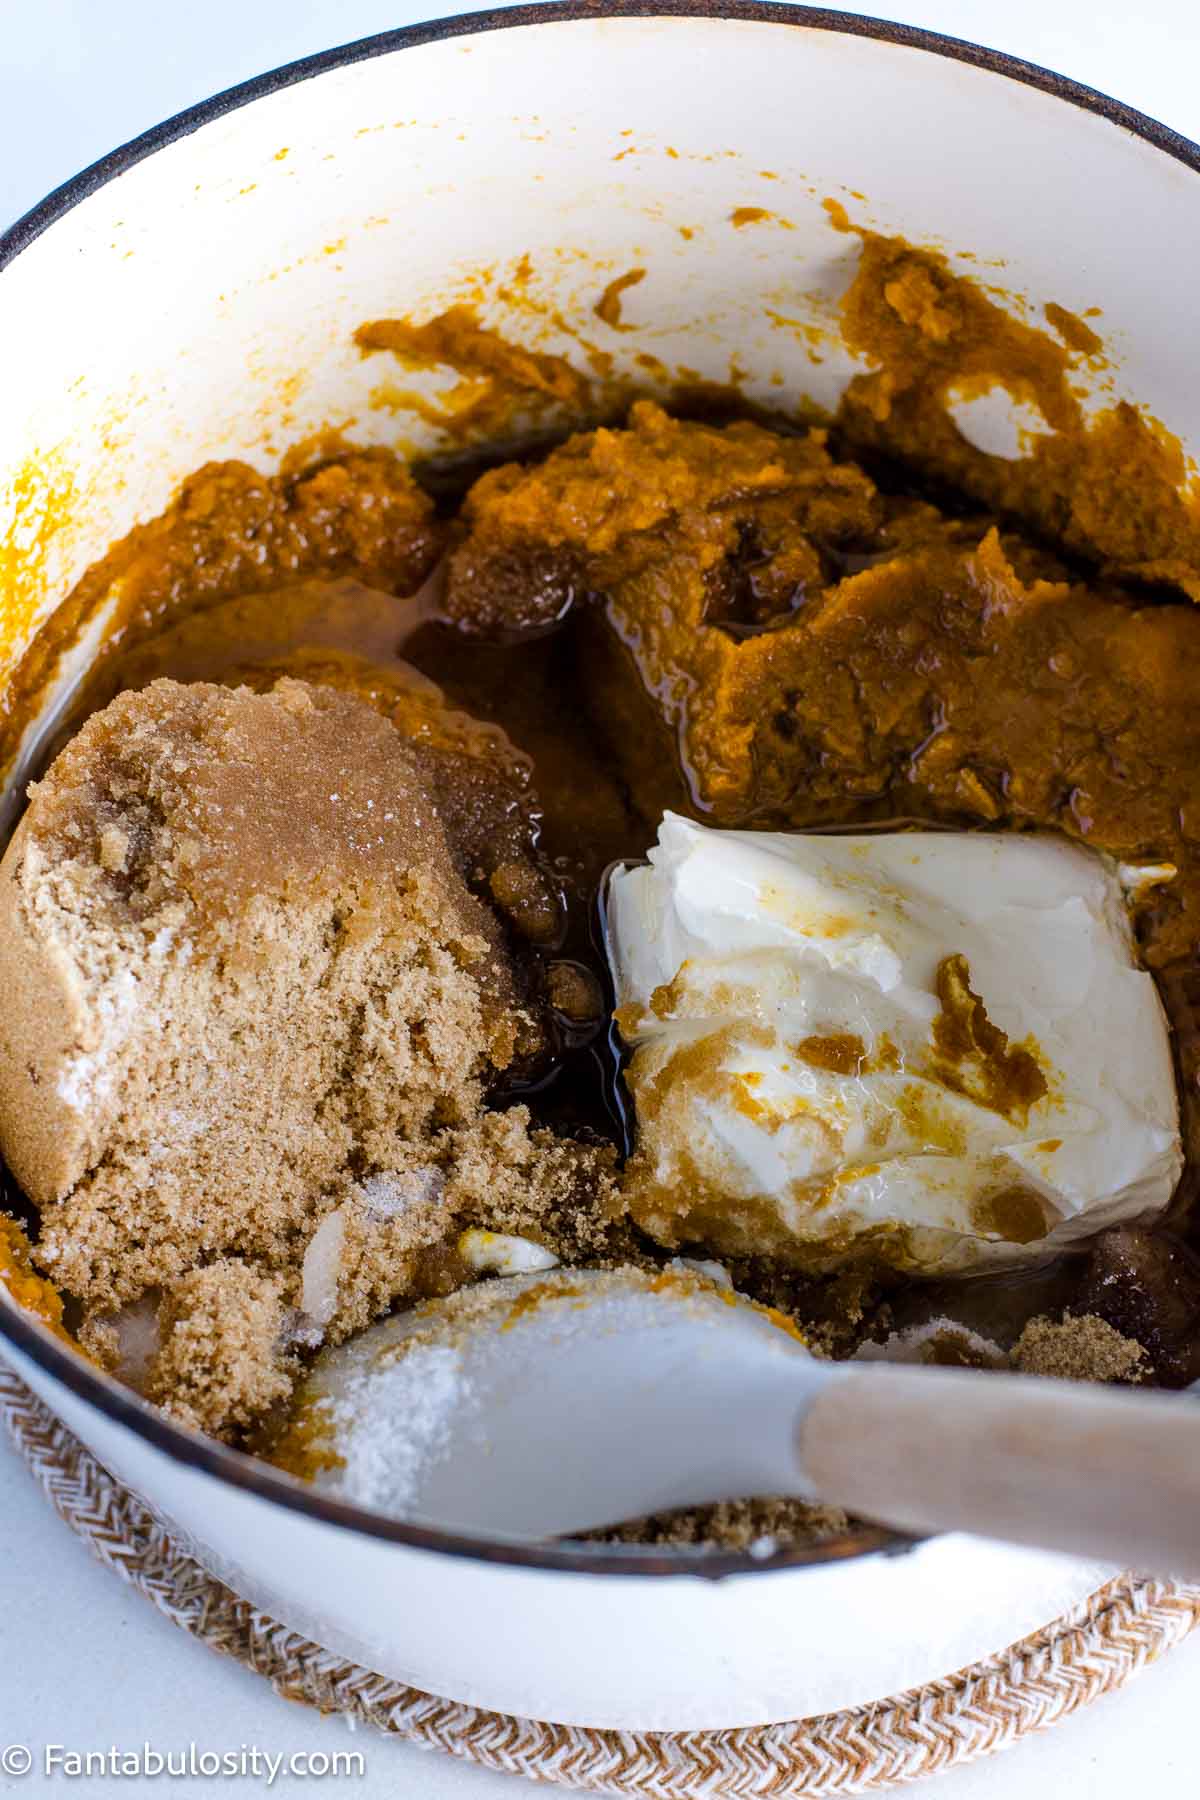
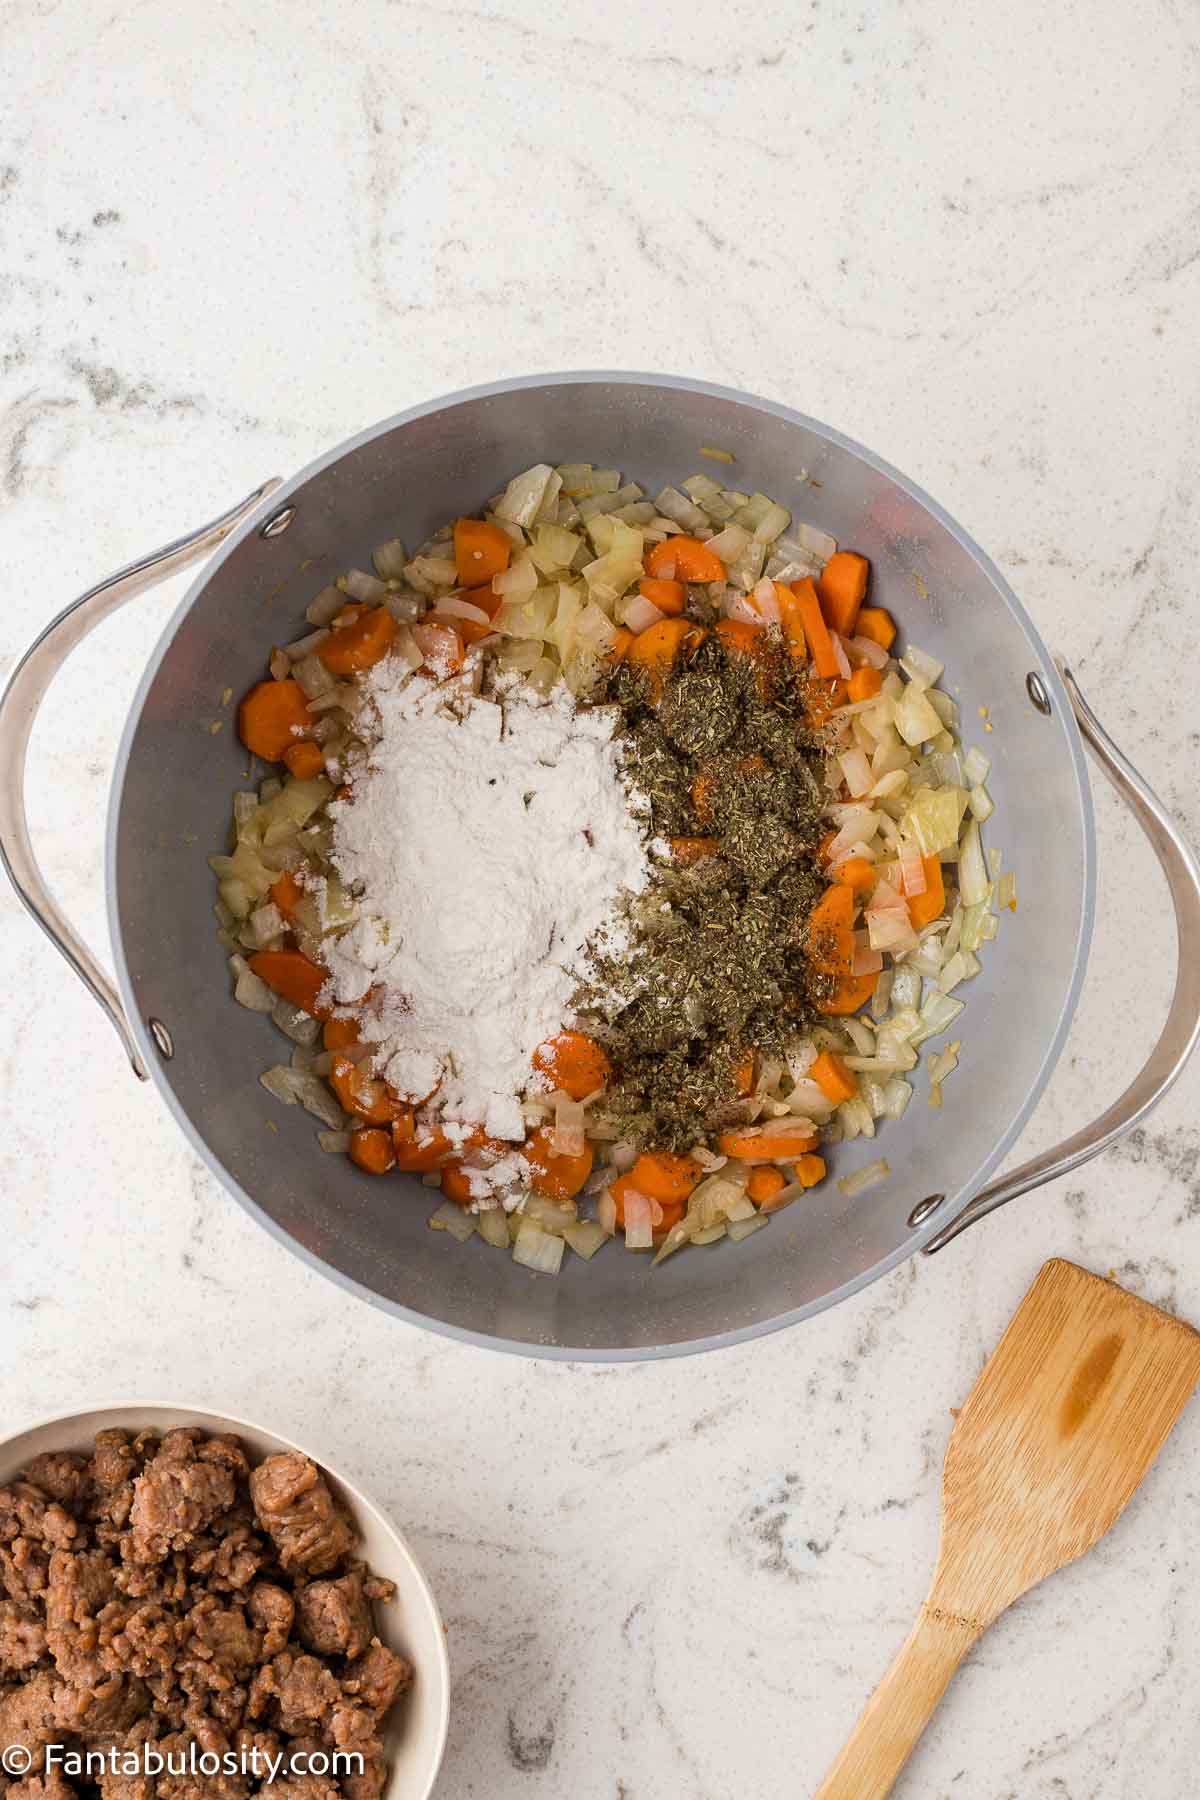
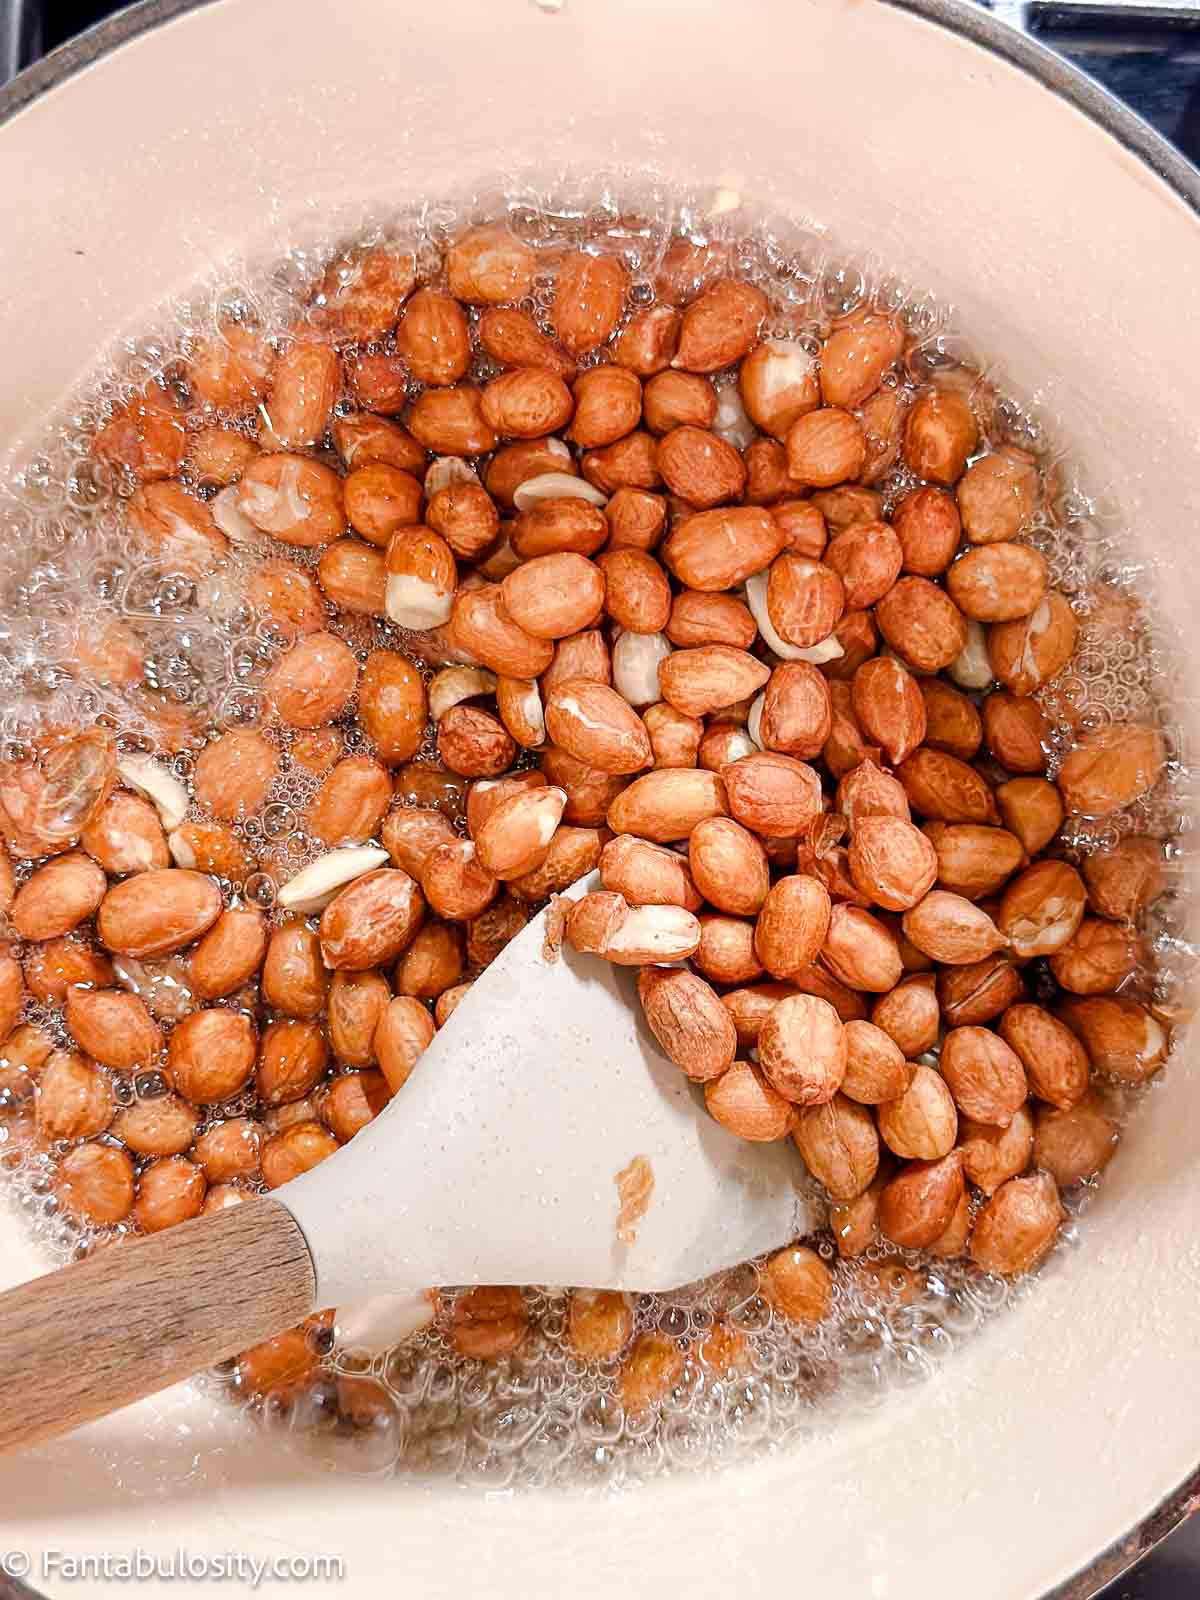
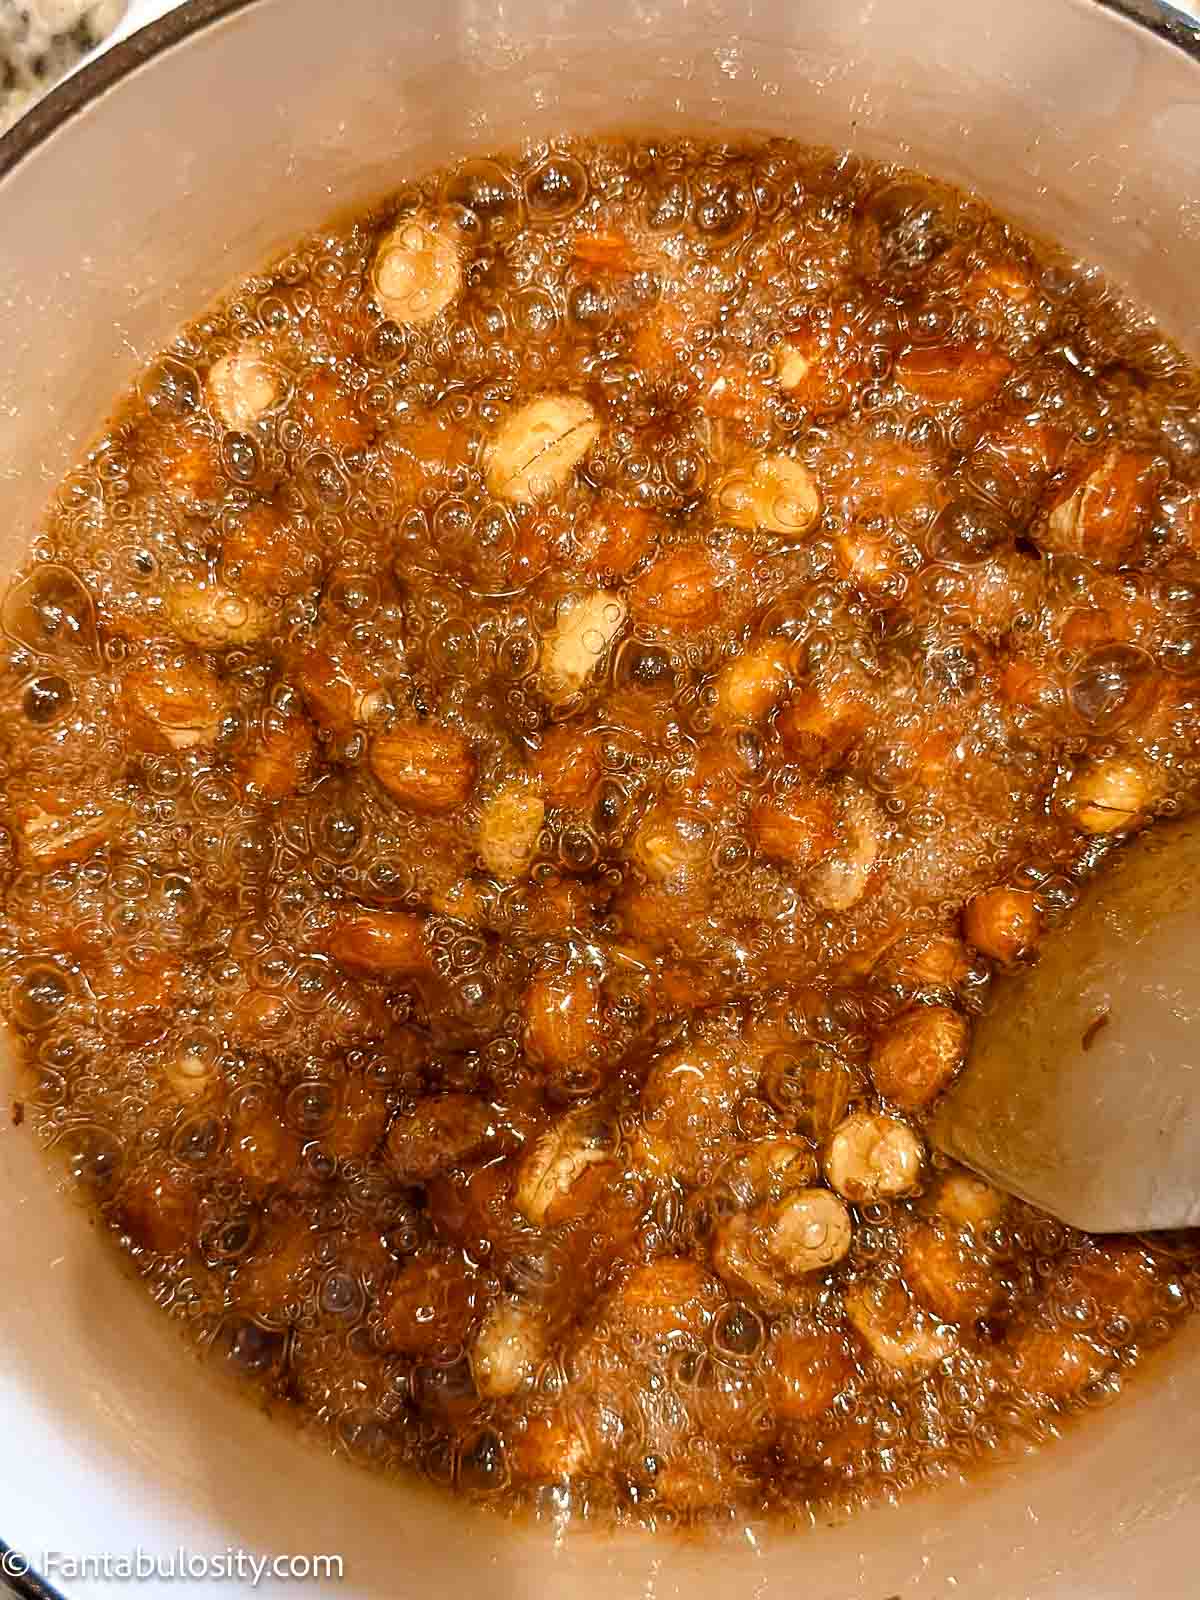
    • When the butter has melted, add in the remaining ingredients, except the sweet potato slices. Bring the mixture to a boil, and then add in the sweet potatoes, and stir to coat them in the sugar-citrus mixture.
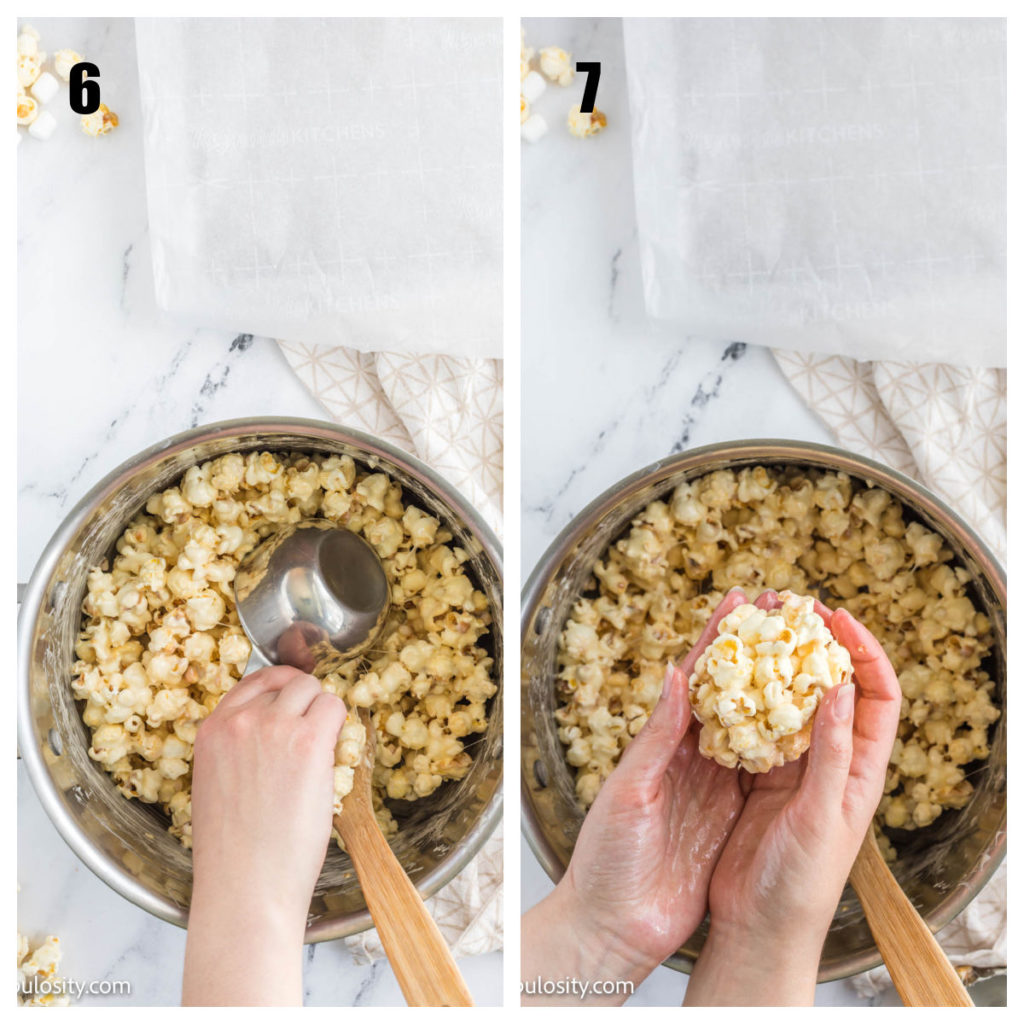
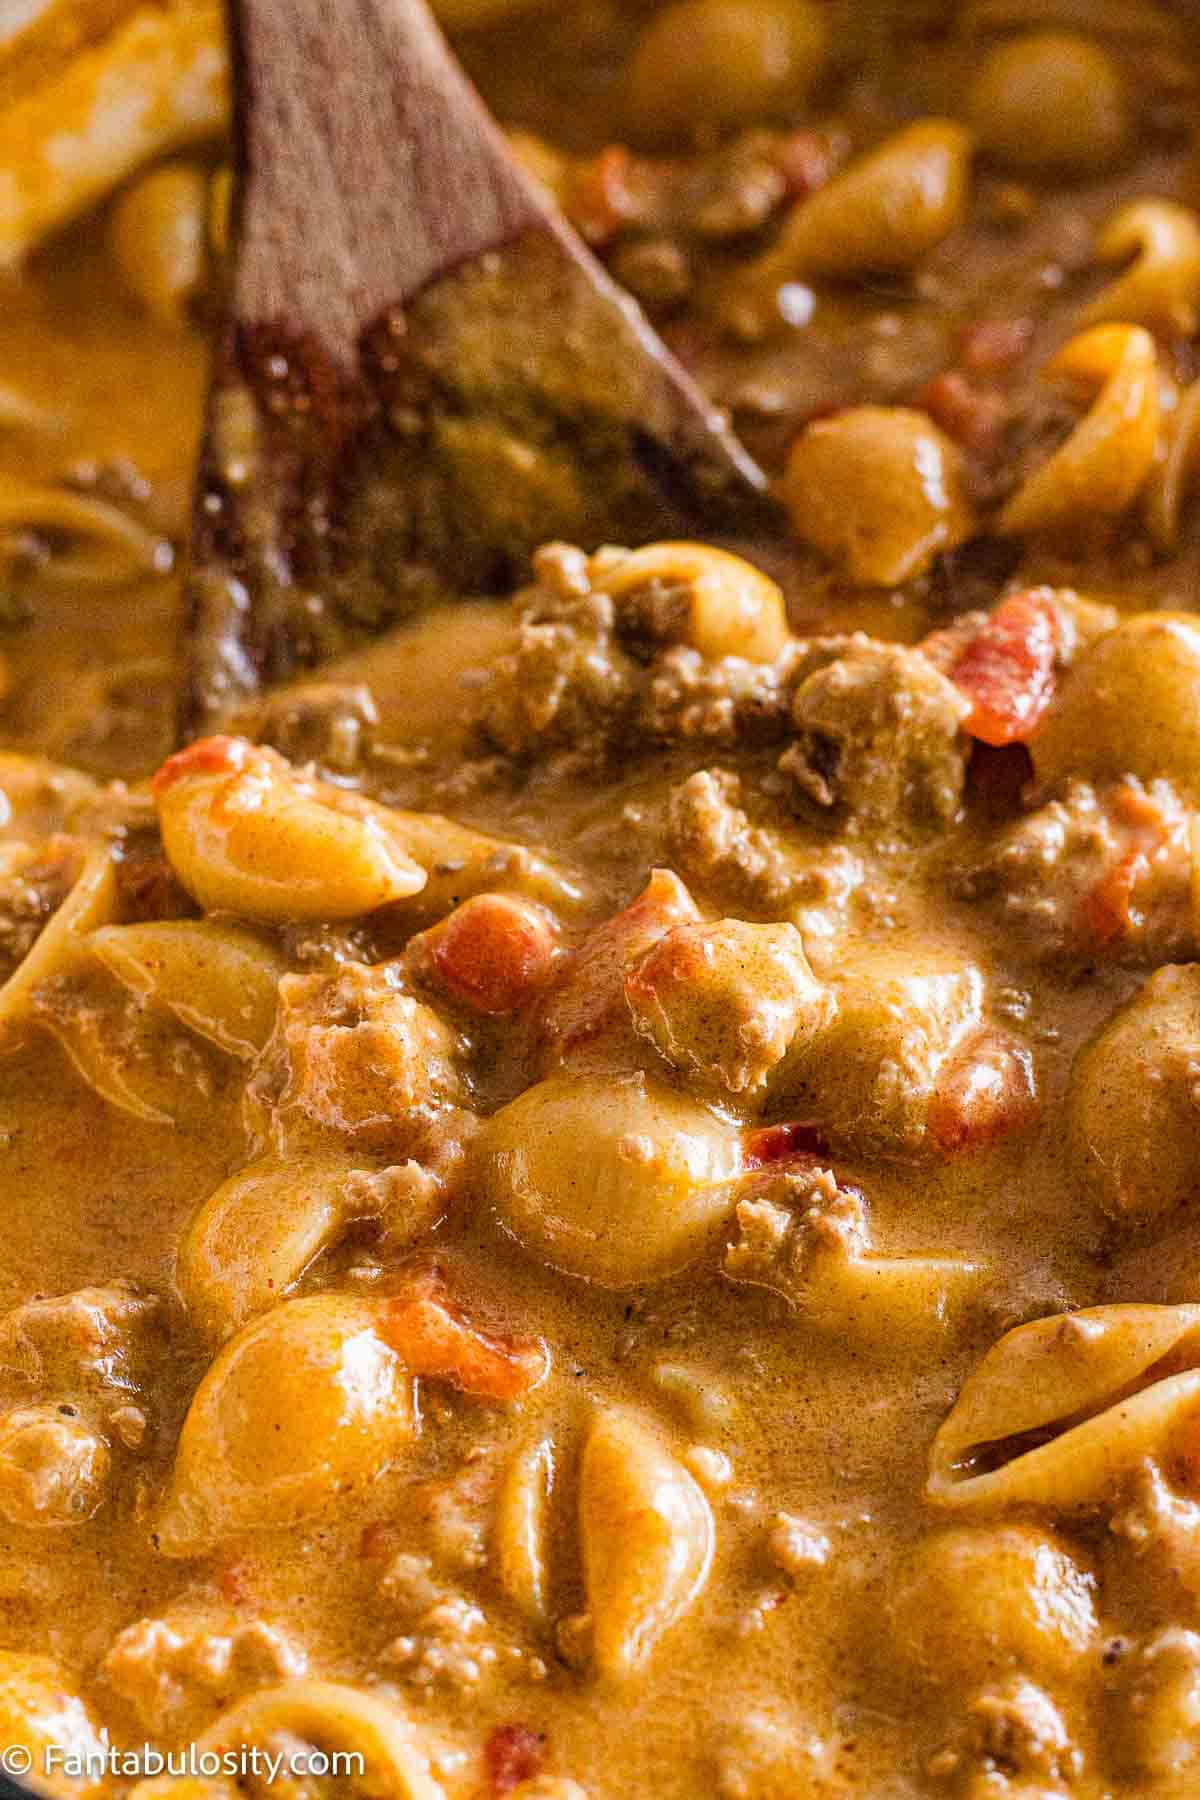
    • Turn to “low” and cover the pan, and allow it to simmer for about an hour or until the sweet potatoes are tender enough when poked with a fork.
    Candied yams cooked in stock pot.

    Recipe Tips

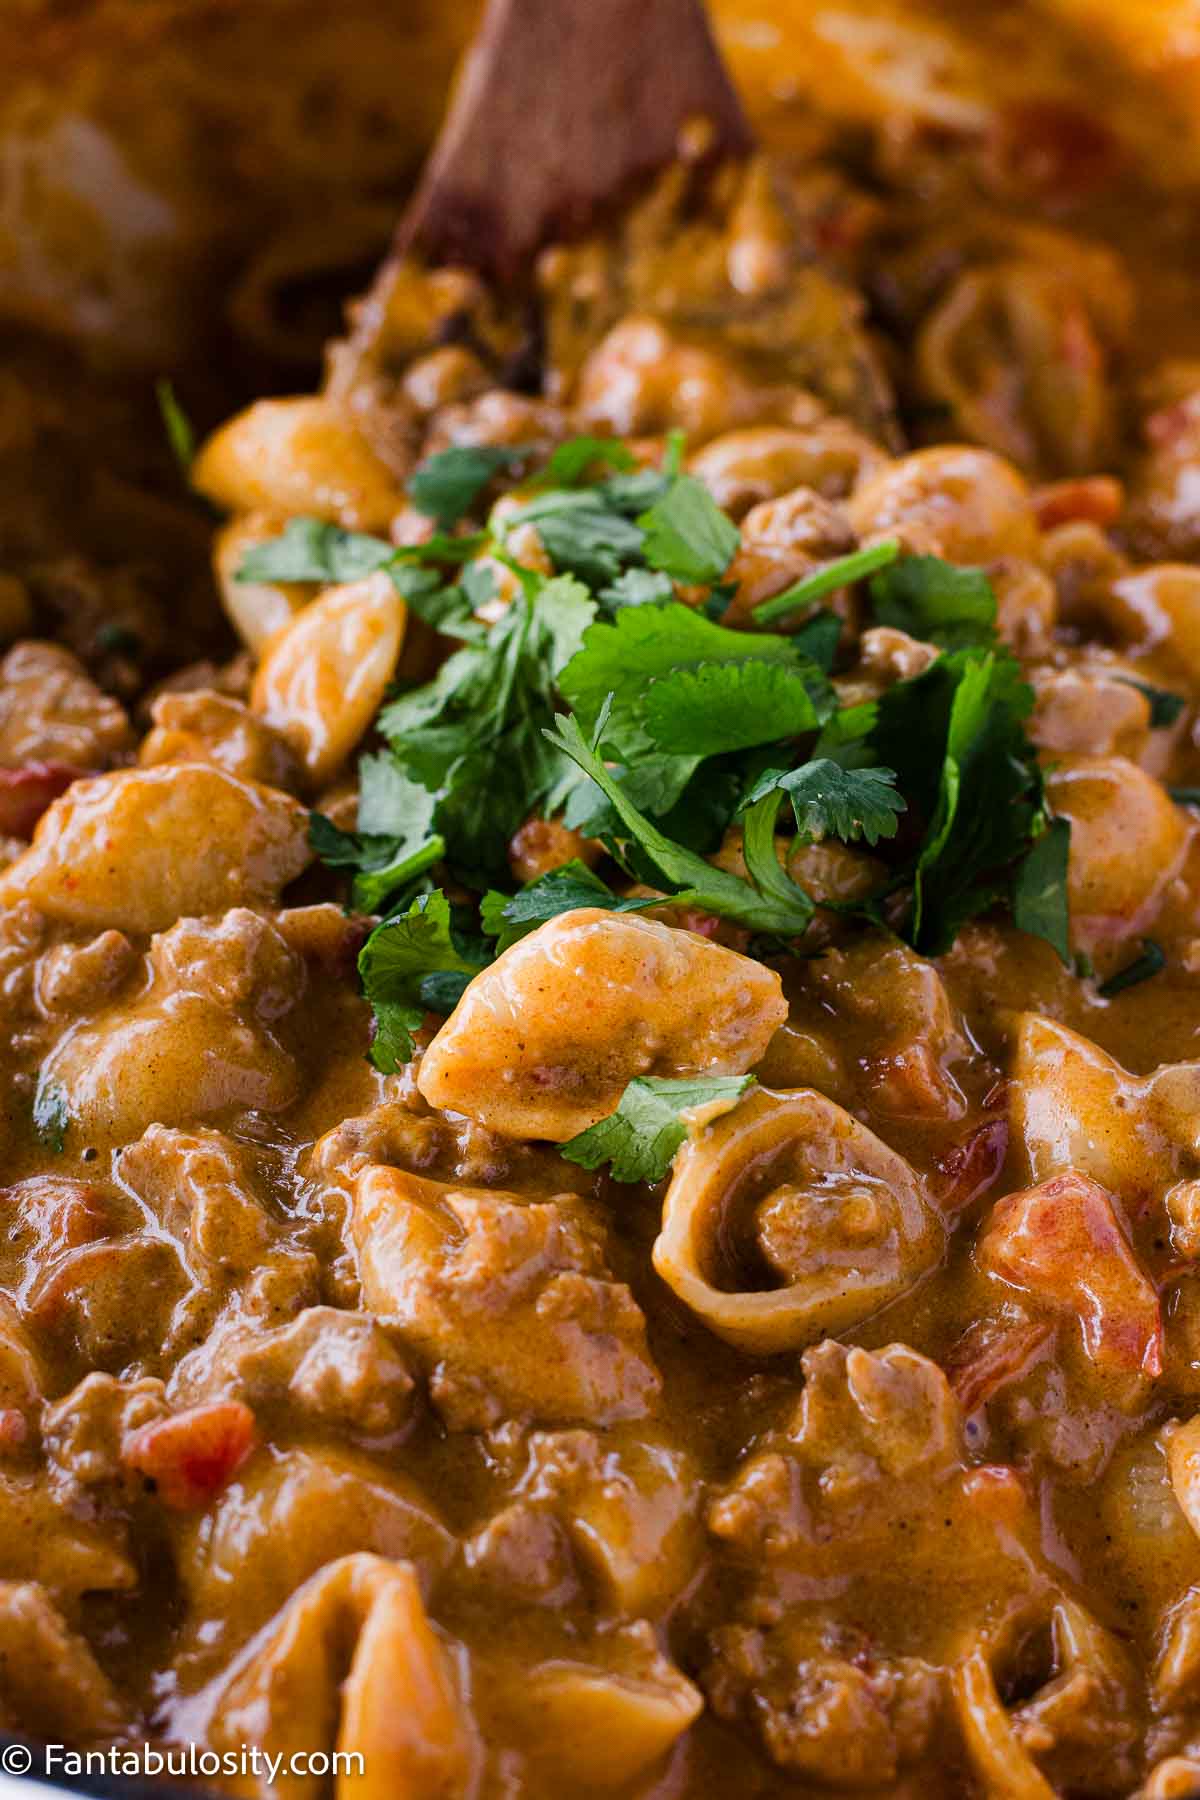
    • Cook time: You can cook the potatoes too long, in a way that the potatoes can fall apart easily. It’s ok if they do, as they’ll still taste great but they may be harder to serve. So checking the potatoes, or even carefully stirring them once during the simmer can be great so you can check for tenderness along the way.
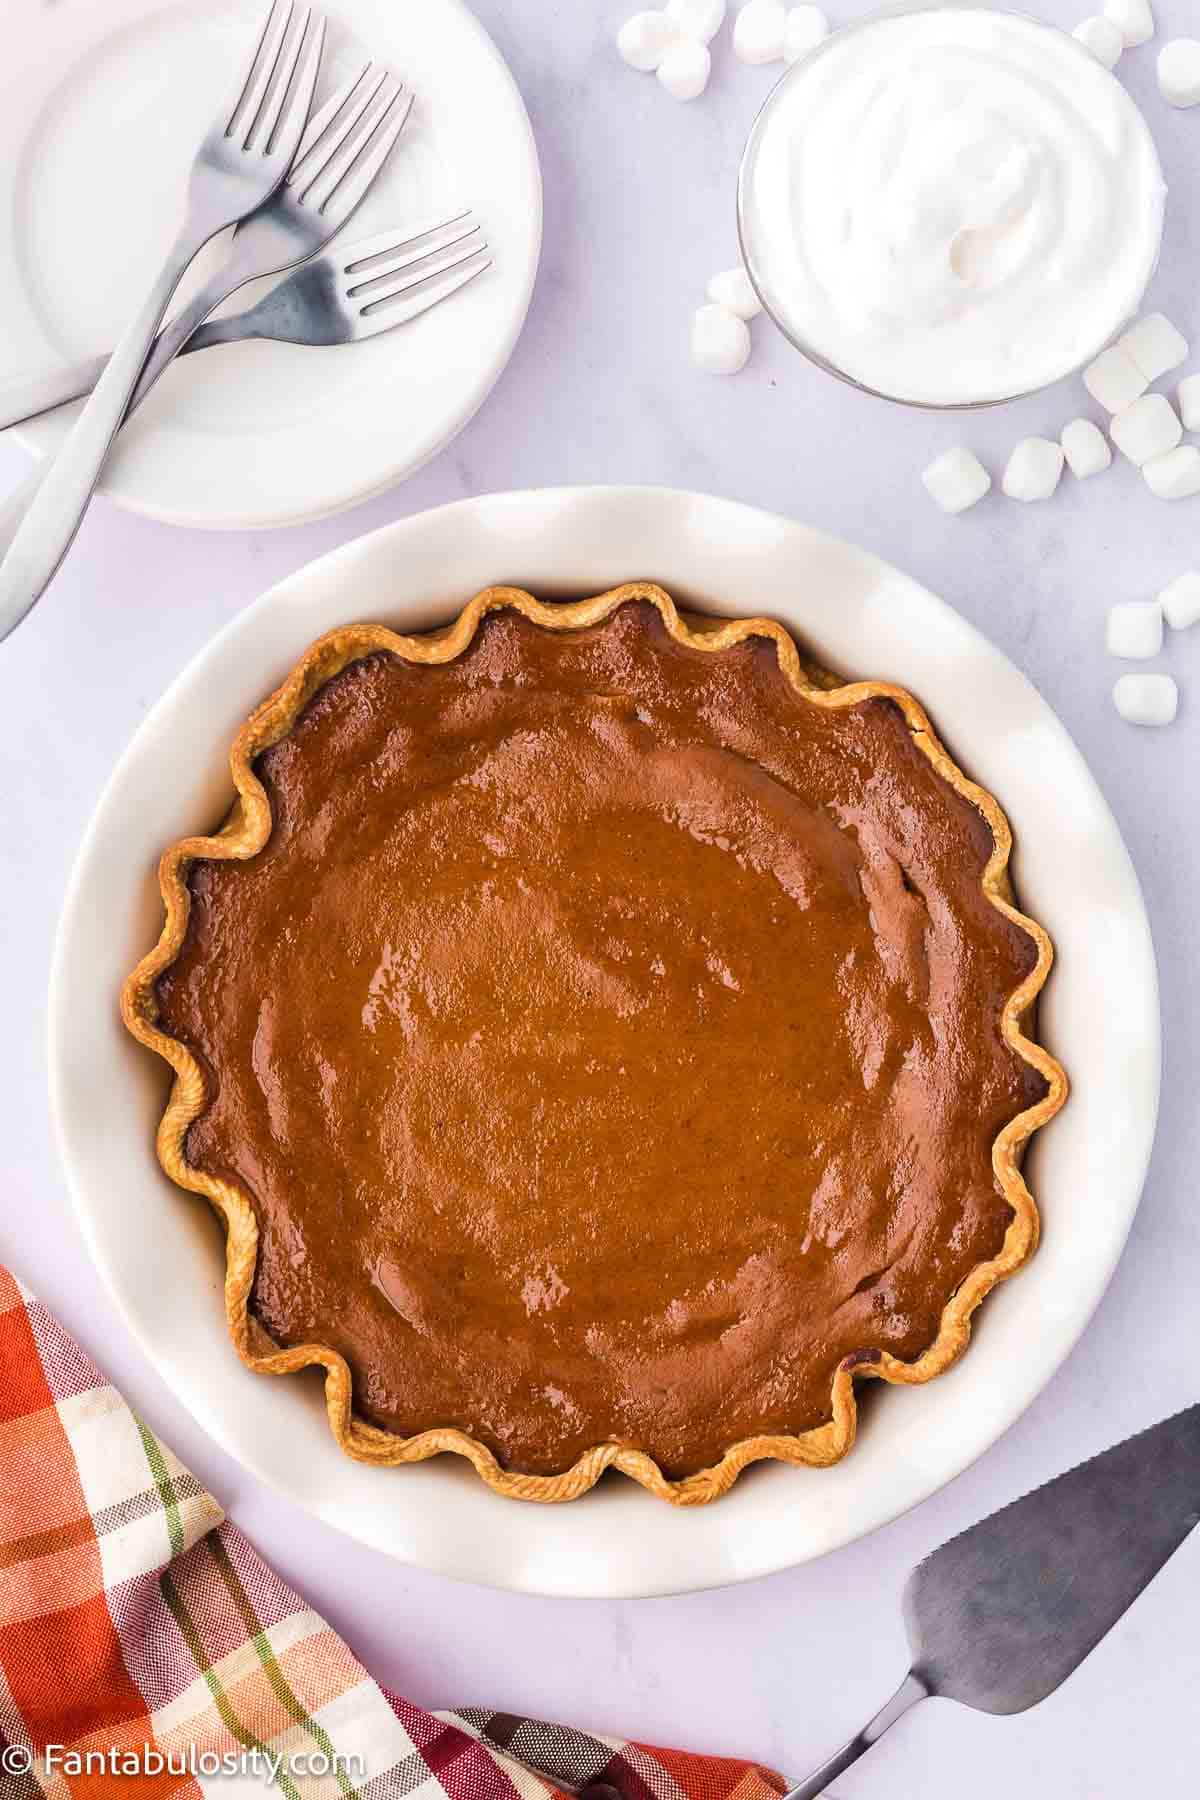
    • Keep warm: These keep warm really well, if they’re done before everything else. Simply pop them in the oven on warm, and serve when ready.
    Should I peel sweet potatoes?

    You can but you don’t have to. Actually, some prefer eating the peel for texture and/or other reasons.

    How do you keep candied yams from being runny?

    If you prefer a thicker glaze for your candied yams, you can add a small mixture of cornstarch and water (a teaspoon of each or so) to the glaze and it will thicken up.

    Recipe

    Candied yams in pot.
    Print Pin
    5 from 1 vote

    Candied Yams Recipe

    This stove-top candied yams recipe, actually uses sweet potatoes and a few other simple ingredients with a secret ingredient that makes this holiday side dish the best!
    Course Side Dish
    Cuisine American
    Prep Time 10 minutes minutes
    Cook Time 1 hour hour
    Total Time 1 hour hour 10 minutes minutes
    Servings 4 servings
    Calories 724kcal
    Author Jessica Burgess

    Ingredients

    • 2 pounds sweet potatoes
    • ½ cup butter 1 stick
    • 2 tablespoons vanilla extract
    • 2 teaspoons pumpkin pie spice
    • ¼ teaspoon salt
    • ½ cup brown sugar packed
    • 1 cup white granulated sugar
    • 1 large orange, the zest and juices only or two small oranges

    Instructions

    • Slice potatoes in to round slices that about half an inch thick. (You may want to peel your potatoes before slicing if you don't prefer the skins.)
    • Add butter to a saucepan or pot, that will be large enough to fit all of the potatoes in eventually. Cook the butter over medium-high heat until the butter has turned a golden brown.
    • While the butter is cooking, you can zest your orange. Using a zester or cheese grater, zest the skins of your oranges and set aside. Slice the orange in half.
    • Add orange zest to the butter, and squeeze the orange over the butter, getting all of the juice out that you can. (Watch for seeds!)
      Add the remaining ingredients except the sliced sweet potatoes and stir, and bring to a boil.
    • Add sliced sweet potatoes, lower heat to a simmer/low, and cover the pot and allow the potatoes to cook for about an hour, or utnil they're tender when pierced with a fork.

    Video

    Nutrition

    Serving: 1serving | Calories: 724kcal | Carbohydrates: 126g | Protein: 4g | Fat: 23g | Saturated Fat: 15g | Polyunsaturated Fat: 1g | Monounsaturated Fat: 6g | Trans Fat: 1g | Cholesterol: 61mg | Sodium: 462mg | Potassium: 855mg | Fiber: 7g | Sugar: 88g | Vitamin A: 32917IU | Vitamin C: 13mg | Calcium: 107mg | Iron: 2mg

    Ding Dong Cake

    November 1, 2024

    This Ding Dong cake is a rich chocolate cake with a creamy filling! If you’re a fan of Hostess cupcakes or Ding Dong cakes then you’ll definitely love this moist chocolate cake recipe!

    Quick Overview: Using a cake mix, canned frosting, and cool whip, to keep things easy, this great recipe can look difficult but is an easy one with a few little tricks! It’s one of our most popular cake recipes to date!

    Ding dong cake slice on a white plate
    [feast_advanced_jump_to]

    The next time you need a birthday cake or a last-minute dessert for a party, this can be your next go-to cake recipe! Now, if you need a smaller cake, this mini chocolate cake recipe may be a good choice too. Or, a cake made without eggs… this depression cake is a winner!

    It’s a crowd favorite, has a homemade Ding Dong feel, and resembles the Hostess Ding Dong snack cakes that so many love!

    If you’re wanting an easy ding-dong cake recipe using cake mix and Cool Whip… this is the one for you!

    Not only does it speed things up in the kitchen using these two ingredients, but the cake is also made with simple ingredients that you may already have on hand!

    Ding Dong Cake - cut in to with milk in the background

    How to Make Ding Dong Cake

    For this recipe, you’ll need the ingredients list (you can find the full printable recipe card below) but you’ll also need a few items to keep this cake super simple! But don’t worry… I’ve got you covered with tips and tricks along the way so make sure to keep reading!

    Ingredients Needed:

    • One box of Devil’s Food cake mix (and the following 3 items below to make the cake unless your cake mix calls for different ingredients)
    • 1 – ¼ cups water (only if your cake mix calls for it)
    • ½ cup vegetable oil (only if your cake mix calls for it)
    • 3 eggs (only if your cake mix calls for it)
    • 8 oz. cream cheese, softened
    • 3 cups of powdered sugar
    • ½ cup stick butter, softened
    •  8 ounces of Cool Whip
    • 16 ounce container of milk chocolate icing (Or two containers if you want to ice the entire cake)
    ingredients for ding dong cake

    How to Make Ding Dong Cake

    You can find all of the ingredients and instructions in the printable recipe card below but I also love sharing more details and tips throughout this post, in case you find it helpful. Keep reading to see how to make this delicious cream-filled cake.

    Preheat Oven to 350 Degrees

    Before you begin mixing all of the ingredients together, go ahead and preheat your oven to 350° so it’s hot and ready when your cake batter is in the pans, ready for baking.

    Two 9-inch Round Cake Pans

    Next, grease two round, 9-inch cake pans with cooking spray and set them aside. This way when your cake batter is ready, you can pour it right in!

    Bake Devil’s Food Cake

    Using a cake mix, make the cake according to package directions. This usually includes the ingredients 1-¼ cups water + ½ cup vegetable oil + 3 eggs, but double-check your boxed directions.

    If you love tricks to make cakes more moist, you can mix in extra ingredients such as a box of instant pudding mix to do so, or follow your favorite tricks for making cake mixes better!

    Divide batter between the two cake pans and bake cake according to package directions. Remove cakes from pan and place on a cooling rack to cool.

    Cream Cheese Cool Whip Cake Filling

    While the cake is baking, you can go ahead with this step:

    The part of this cake that takes it to the next level is the creamy filling! Here’s how to make the cream filling:

    In a mixing bowl, combine the softened cream cheese, powdered sugar, and softened butter.

    cream cheese and butter in mixing bowl for ding dong cake

    Once that has been mixed, fold in (which means to use a silicone spatula or spoon to gently stir in) the Cool Whip until evenly mixed. Set aside.

    fold in whipped cream in to butter and cream cheese

    How to Cut Cake in Half

    When the cake has cooled, you can safely cut the cakes in half to create multiple layers for the cream cheese filling. We LOVE layered cakes around here because they’re so pretty! You’ll also love this layered cherry chip cake!

    How to cut the cake in half: Using unwaxed dental floss, hold the floss in both hands, creating a tight, straight piece of floss. Place straight floss on the farthest side of the cake from you, in the middle of the side. Carefully pull the floss toward you, creating an even split, which will turn one cake in to two thinner cakes.

    Or… if you want it to be even more accurate, you can follow these steps for split layers:

    1. Measure the thickness of the cake layer and divide the number in half.
    2. At the halfway point, stick a toothpick part way in to the sides, to mark that height. (Picture looking down over the cake and it looks like a sun with the toothpicks inserted in to the sides.)
    3. Continue measuring and adding in toothpicks around the cake (I used 4 toothpicks).
    4. Then, using a long piece of dental floss, place the floss on top of the toothpicks circling the whole cake and bring the ends to the front.
    5. Cross them over and gently pull until the cake is split.
    6. It will cut your cake exactly in half in a straight line!

    Repeat on the other cake, leaving you with FOUR layers of cake.

    How to Apply Cream Filling on Cake Layers

    The key to spreading the whipped cream filling on the cake layers is to make sure you don’t spread the filling all of the way to the edge of the cakes. If you do, the weight of the stacked cakes can make the cream filling push out too much, causing it to overlap the edges of the cake.

    Divide the fluffy cream filling in to three equal amounts. (This doesn’t have to be perfect, just eyeballing the amounts should suffice.)

    Starting with one of the layers, place a third of the cream filling in the center. Carefully spread the filling evenly across the top, making sure to not put it right on the edges.

    Ding dong cake with cream filling in between layers

    Stack another layer of cake on top of the cream filling you just spread on.

    Carefully spread out the second portion of cream filling across the 2nd layer of cake.

    Repeat this process on the chocolate cake layers until you place the 4th layer of cake on top.

    Picture of Ding dong cake assembled

    How to Frost the Cake

    To make the cake just like you see in the photos, you only need to frost the top of the cake with a can of chocolate frosting. We do this so you can see the beautiful filling on the sides of the cake.

    However, if you prefer frosting the entire cake and like lots of chocolate frosting, and let the cream filling be a surprise when sliced, you can! It may take a little more than one container of frosting so be prepared to use at least some of a second container!

    Frosted ding dong cake layers

    What to Serve with Cake

    If you’re looking for different toppings or items to serve with this ding dong cake, these are some of our favorites:

    • vanilla ice cream
    • nuts (peanut, walnuts, pralines)
    • caramel drizzle
    • sliced fruit such as strawberries, raspberries or cherries
    • extra whipped cream
    • chocolate chips
    • toffee pieces
    • glass of cold milk
    • chocolate ganache (poured over the top of the cake)
    • substitute cream filling with marshmallow filling
    Slice of ding dong cake

    More Chocolate Dessert Recipes

    If you’re a fan of chocolate like I am, then you’re really going to love this brownie pudding cake, The BEST Oreo Dessert, No Bake Chocolate Oatmeal Cookies, and these Cast Iron Brownies! Or see these recent favorites:

    • Slice of Pina Colada sheet cake on a plate.
      Pina Colada Cake
    • Slice of pink lemonade cake, with pink and white striped straw sticking out the top.
      Pink Lemonade Cake
    • Slice of peaches and cream cake on plate with fresh peaches on top.
      Peaches and Cream Cake
    • A serving of banana dump cake in a small ramekin with caramel sauce and sliced bananas.
      Banana Dump Cake

    Recipe

    Print Pin
    5 from 10 votes

    Ding Dong Cake

    This ding dong cake is a rich chocolate cake with a creamy filling! If you're a fan of Hostess cupcakes or Ding Dong cakes then you'll definitely love this chocolate cake recipe!
    Course Dessert
    Cuisine American
    Prep Time 30 minutes minutes
    Cook Time 30 minutes minutes
    Cooling Time 2 hours hours
    Total Time 3 hours hours
    Servings 15 servings
    Calories 623kcal
    Author Jessica Burgess

    Ingredients

    • 1 box Betty Crocker devil's food cake mix If you use another brand of cake mix, the water, vegetable oil and eggs listed below, may differ. Follow your cake mix instructions instead and leave out the water, vegetable oil and eggs below, as those are recommended for Betty Crocker cake mix.
    • 1 ¼ cups water If using Betty Crocker cake mix (may differ for other cake mix brands)
    • ½ cup vegetable oil If using Betty Crocker cake mix (may differ for other cake mix brands)
    • 3 eggs If using Betty Crocker cake mix (may differ for other cake mix brands)
    • 8 oz. cream cheese softened
    • 3 cups powdered sugar
    • ½ cup stick of butter softened
    • 8 ounces Cool Whip
    • 16 ounce container of milk chocolate frosting or 2 containers if you want to frost the entire cake, instead of just the top

    Instructions

    • Preheat oven to 350 degrees
    • Grease two 9-inch cake pans and set aside
    • Using a devil's food cake mix, make the cake according to package directions. This usually includes the ingredients 1-¼ cups water + ½ cup vegetable oil + 3 eggs, but double-check your boxed directions. If your box mix calls for different ingredients, you can omit the water, vegetable oil and eggs that are included in the ingredients list.
    • Bake cake according to package directions.
    • While cake is baking, mix the cream cheese, butter and powdered sugar in a bowl.
    • Fold in the Cool Whip until evenly mixed.
    • When cake has finished baking, place on cooling rack to cool.
    • When cake has cooled completely, begin splitthing the cakes in half, in to thinner layers. See notes for tips.
    • Divide cream filling in to 3 equal portions. (You can do this right inside of the bowl, and it doesn't have to be perfect.)
    • Take one portion of cream filling and spread on top of one of the cake layers, being careful not to spread to the edges as the weight of the stacked cakes would press down and squeeze the filling over the edges if so.
    • Once evenly spread on the first layer, place another layer of cake on top and spread the 2nd portion of cream filling across that layer.
    • Repeat these steps until the last cake layer is placed on top.
    • Once cake has been completely assembled, frost the top of the cake with the amount of milk chocolate frosting desired. If you prefer to frost the entire cake, instead of only the top, you may need the whole container and part of a 2nd container.

    Nutrition

    Serving: 1slice | Calories: 623kcal | Carbohydrates: 75g | Protein: 3g | Fat: 36g | Saturated Fat: 17g | Polyunsaturated Fat: 6g | Monounsaturated Fat: 11g | Trans Fat: 1g | Cholesterol: 35mg | Sodium: 491mg | Potassium: 209mg | Fiber: 1g | Sugar: 60g | Vitamin A: 420IU | Calcium: 81mg | Iron: 2mg

    Baked Portobello Mushrooms

    October 31, 2024

    Stuffed portobello mushrooms

    Baked Portobello Mushrooms: Stuffed with cheeses and a blend of spices like Italian seasoning, garlic, onion powder, salt & pepper, this recipe is easy and the BEST!

    When I say this is the BEST baked portobello mushrooms I’ve ever had, I’m not just saying that because the recipe is here on this blog. I’m saying that because they really are the best I’ve had and my husband agrees.

    Baked Portobello Mushrooms

    The first time I bought portobellos, I only knew that I wanted to do SOMETHING with them, even if it was to just slice and fry them in flour and oil, similar to how to fry sliced mushrooms.

    But I’m always up for trying something new and the idea of stuffing mushrooms with different cheeses sounded so good, and I’m glad I made a note of how to make them, so I could share them with you.

    [feast_advanced_jump_to]

    Ingredients

    You can find the full list of ingredients and measurements in the recipe card toward the bottom of this post. Here are a few notes about some of the key ingredients:

    • portobello mushrooms (Remove the stems and gills and wipe the mushrooms clean with a wet paper towel.)
    • olive oil – you can use avocado or coconut oil as well
    • cream cheese – make sure this is softened.
    • shredded asiago – the asiago adds so much flavor to these mushrooms.
    • minced garlic – you can use garlic powder if that’s all you have
    • onion powder
    • parmesan cheese, fresh parsley, asiago optional garnishes

    How to Make Baked Portobello Mushrooms

    First things first, I show 4 portobello mushrooms for this recipe, but honestly, the filling could be enough to fill more mushrooms if desired.

    For the full recipe ingredients and instructions, you’ll find the free printable recipe card at the bottom of this post. However, I’d love to walk you through the step-by-step process with images so you can grab more helpful tips along the way.

    How to Clean Portobello Mushrooms

    First you’ll want to clean your mushrooms:

    • Remove the gills/stems from the inside of the portobello mushrooms. An easy way to do this is to use a spoon to scrape out the gills (the little black lines inside the rim of the mushroom). Discard the stems/gills.
    • With a wet paper towel, gently wipe down the mushrooms. (Soaking the mushrooms in water is not a good idea, as they’ll absorb the water.)
    Portobello Mushrooms

    Oil the Mushrooms

    • Mix olive oil, salt and pepper together in a small bowl.
    Oil salt and pepper
    • Using a basting brush, brush the inside and outside of the portobellos with the oil and spice mixture.
    Coat mushrooms with oil and spices

    How Long to Pre-Bake Mushrooms

    • Bake the mushrooms on a baking sheet at 425°F for 10 minutes. (You can line the baking sheet with parchment paper if you prefer.)
    Bake mushrooms first and then stuff with cheese

    How to Make the Cream Cheese Mixture

    • In a small mixing bowl, mix together the cream cheese, shredded asiago, shredded cheddar, Italian seasoning, minced garlic, onion powder, kosher salt and a pinch of pepper. These simple ingredients add so much flavor!
    Baked portobello mushroom filling in white bowl.
    • Mix ingredients all together until evenly combined.
    Cheese filling for baked portobello mushrooms

    Stuff the Portobellos with Cheese

    Fill the mushrooms with the cream cheese mixture, with the desired amount.
    (This could mean that you have filling left over if you’re only cooking 4 mushrooms like I did… or if you like a lot of filling you can use all of it!)

    Stuff mushrooms with cheeses

    How Long to Bake Stuffed Portobello Mushrooms

    • Since you have “pre-baked” the mushrooms, you only need to bake the stuffed mushrooms for an additional 10 minutes or until the cheese filling is heated through.
    Bake the stuffed mushrooms

    What to Garnish Stuffed Portobello Mushrooms With:

    • If desired, feel free to garnish your stuffed mushrooms with grated parmesan, fresh parsley, or extra shredded asiago!
    Stuffed Portobello Mushrooms

    What to Serve This Portobello Mushrooms Recipe With:

    • We absolutely love eating this as a main dish.
    • Or, you can serve this as an appetizer or even as a side dish recipe alongside your favorite main course!
    Baked Portobello Mushrooms

    Storage Instructions

    Have leftover mushrooms? Allow them to cool and then place in an airtight container or cover with plastic wrap, and place in the refrigerator for 3-4 days.

    To reheat, you can place then back in the oven and reheat at 350°F until heated through, which will probably take about 8-10 minutes.

    If you Love This Recipe You’ll Love my Other Appetizer and Mushroom Recipes:

    • Cheese dip in sauce pan, with soft pretzels surrounding it.
      Pretzel Cheese Dip
    • Chicken salad with grapes and apples, sitting on bread.
      Chicken Salad with Grapes and Apples
    • The best guacamole in a small bowl with fresh cilantro on top.
      The BEST Guacamole Recipe
    • Mussels cooked in white wine and garlic sauce, stacked on plate, next to toasts.
      Mussels in White Wine Sauce

    Did You Make This?
    Snap a pic and hashtag it #Fantabulosity — I love to see your creations on Instagram and Facebook.

    Recipe

    Stuffed portobello mushrooms
    Print Pin
    5 from 37 votes

    Baked Portobello Mushrooms (Restaurant Quality!)

    Baked Portobello Mushrooms: Stuffed with cheeses and a blend of spices like Italian seasoning, garlic, onion powder, salt & pepper, this recipe is easy and the BEST!
    Course Appetizer
    Cuisine American
    Prep Time 5 minutes minutes
    Cook Time 10 minutes minutes
    Additional Cook Time 10 minutes minutes
    Total Time 25 minutes minutes
    Servings 4 mushrooms
    Calories 427kcal
    Author Jessica Burgess

    Ingredients

    • 4 portobello mushrooms stems and gills removed, and wiped clean
    • ⅓ cup olive oil
    • 1 teaspoon kosher salt + ½ teaspoon for filling
    • ¼ teaspoon black pepper + pinch of pepper for filling
    • 8 ounces cream cheese softened
    • ¼ cup shredded asiago
    • ¼ cup shredded cheddar
    • ½ teaspoon Italian seasoning
    • 1 teaspoon minced garlic
    • ½ teaspoon onion powder
    • parmesan cheese, fresh parsley, asiago optional garnishes

    Instructions

    • Preheat oven to 425°F. Remove stems and gills from portobello mushrooms. With a damp paper towel, wipe down the mushrooms gently to clean them
    • Mix olive oil, 1 teaspoon salt and ¼ teaspoon pepper together in a small bowl.
    • Brush inside and outside of mushrooms with olive oil mixture.
    • Bake mushrooms on a cookie sheet at 425°F for 10 minutes.
    • While mushrooms are baking, mix together cream cheese, shredded asiago, shredded cheddar cheese, and spices in a mixing bowl.
    • Remove mushrooms from oven and stuff with filling and bake another 10 minutes or until cheese is melted and heated through.
    • Garnish with grated parmesan, fresh parsley or extra asiago if desired!

    Notes

    Note: The amount of filling in this recipe may be more than what you prefer to fill the mushrooms with. Fill the desired amount in each mushroom and if you end up with extra filling, save it for later and stuff extra things you may have in the refrigerator like peppers or use it as a dip!

    Nutrition

    Serving: 1mushroom | Calories: 427kcal | Carbohydrates: 7g | Protein: 9g | Fat: 42g | Saturated Fat: 16g | Cholesterol: 74mg | Sodium: 1206mg | Potassium: 384mg | Fiber: 1g | Sugar: 4g | Vitamin A: 881IU | Vitamin C: 1mg | Calcium: 187mg | Iron: 1mg

    Crescent Roll Cinnamon Rolls

    October 30, 2024

    20 mini cinnamon rolls in a 9x13 baking dish, 7 of them with frosting on top.

    Crescent Roll Cinnamon Rolls: This easy recipe is perfect for when you are craving a cinnamon roll because they use crescent roll sheets) and they’re ready in under 30 minutes.

    We love cinnamon buns around here, and these cute little two-bite cinnamon rolls are right up there with our other favorite cinnamon roll recipes (our cookies and cream cinnamon rolls and our air fryer cinnamon rolls)!

    A pan of mini cinnamon rolls sitting on a tea towel on the counter with someone's hand about to pick the pan up.

    Why You’ll Love This Recipe

    Simple Ingredients: You don’t need anything fancy to make this, just a few simple ingredients you can find at any grocery store.

    Quick: These mini cinnamon rolls are ready to eat in less than 30 minutes! No long dough rise time is needed.

    Delicious: We bet you can’t eat just one of these warm, cinnamon-filled rolls. These have all the yummy flavors of homemade cinnamon rolls in a faster, bite-sized format!

    These quick, 25-minute cinnamon rolls using crescent rolls would be the perfect treat to make for a baby shower, brunch, or for the kids as an after-school snack (these are the perfect size for tiny fingers)! My kids adored these little baby cinnamon rolls.

    [feast_advanced_jump_to]

    Ingredients

    10 simple ingredients are all you need to make this quick and easy dessert, and chances are you have most of these in your pantry already!

    • 1 package of crescent rolls
    • 2 tablespoons butter melted
    • ⅓ cup light brown sugar
    • 1 teaspoon ground cinnamon
    • ¼ teaspoon ground nutmeg
    • ⅛ teaspoon kosher salt

    For the Frosting

    • 2 ounces cream cheese softened
    • 2 tablespoons butter softened
    • 1 teaspoon vanilla extract
    • 1 ½ cups powdered sugar
    The ingredients for mini cinnamon rolls laid out on a counter with labels on the image.

    See the printable recipe card below for quantities and step-by-step instructions.

    Instructions

    For the Crescent Roll Cinnamon Rolls

    1. Preheat your oven to 350F and grease a mini-muffin pan with nonstick baking spray. 
    2. Unroll the crescent roll dough onto a lightly floured surface (no need to use a rolling pin, simply unroll) and brush each one with melted butter.
    Unroll crescent dough & brush with butter.
    1. In a small bowl, combine the brown sugar, cinnamon, nutmeg, and salt. Sprinkle the cinnamon sugar mixture evenly over the crescent rolls. 
    Crescent dough on a cutting board with cinnamon and brown sugar spread over it.
    1. Roll the crescent rolls tightly from the long end into a log, pinch the seam together, and slice into ¾” thick rolls– you should have about 12 rolls per cinnamon roll log. 

    Fun Fact: Did you know you can use unflavoured dental floss to cut cinnamon rolls? You can! You simply slide a piece of floss under the dough and then bring it together to slice through. Check out this video on YouTube to watch it in action.

    Cinnamon roll dough rolled up.
    1. Place one roll into a well of the prepared mini muffin pan and repeat with the remaining rolls. 
    I mini cupcake pan with 24 spaces, each filled with an unbaked mini cinnamon roll.
    1. Bake for 8-10 minutes in your preheated oven, or until the rolls are set in the center and golden brown around the edges. 
    Baked mini cinnamon rolls in a mini cupcake tray.
    1. Serve the cinnamon rolls warm, topped with the icing (instruction below). Store any leftover rolls in an airtight container in the fridge for up to three days. 

    For the Frosting

    1. In a small bowl, combine the cream cheese, butter, and vanilla. 
    Frosting mixed together in a bowl.
    1. Next, add the powdered sugar and mix until the icing is smooth. Spread the icing over the warm cinnamon rolls and enjoy. 
    24 baked mini cinnamon rolls in a 9x13 baking dish with frosting on 7 of them.

    Substitutions & Variations

    These easy cinnamon rolls can be changed up in a few ways if you need to. This recipe is truly so wonderful!

    • Crescent Dough – although using the crescent dough is a great way to save time, you can easily replace it with your favorite dough recipe instead.
    • Brown Sugar – I love using light brown sugar for this recipe, but granulated sugar will definitely work, too!
    • Filling – obviously cinnamon, nutmeg, and sugar are the classic cinnamon roll fillings, but if you want to turn these into a different kind of roll you totally could! Try experimenting with Nutella, your favorite jam, or even pie filling!
    • Butter – you could use salted or unsalted butter for this recipe. If you use salted butter, you can omit the salt in the filling.

    Equipment

    I used a mini muffin tin for this recipe!

    Don’t have a mini muffin tin? You can use a regular-size muffin tin or even a 9×13 baking dish.

    Storage

    Store any leftover cinnamon rolls in an airtight container in the fridge for 3 days (if you choose not to ice your cinnamon rolls, they can remain at room temperature).

    I haven’t tried it, but these should freeze well so feel free to whip up a double batch and throw one in the freezer! The only thing that might not freeze well is the cream cheese icing, so I would recommend freezing them unfrosted. Simple wrap your cooked, cooled cinnamon rolls in plastic wrap, place them in an airtight and freezer-safe bag or container and freeze for up to a month!

    Top Tip

    If you want to make sure your cream cheese icing is nice and smooth, ensure your butter and cream cheese are softened at room temperature!

    FAQs

    Do I have to use butter in this recipe?

    You could replace the butter in this recipe with margarine or your favourite dairy-free butter alternative, but we find that butter does give it the best flavor.

    What is cinnamon roll filling made of?

    The filling for these cinnamon rolls is made of butter, brown sugar, cinnamon, nutmeg, and salt. Cinnamon is important in cinnamon rolls – obviously! Nutmeg adds a bit of earthiness to the rolls that pairs perfectly with cinnamon. And the salt helps balance out all of the sweetness in the recipe. The butter is used to help the filling stick to the dough!

    How long do mini cinnamon rolls last?

    In an airtight container, your cinnamon rolls should last 3-4 days. Typically you can store cinnamon rolls at room temperature, but because the frosting on these has cream cheese in it we would recommend storing them in the fridge.

    Did you make this? I’d be so grateful if you left a “star” rating below to let me know what you thought! Then, the next time you need a quick and easy recipe, come back to Fantabulosity to browse all of my easy recipes!

    Related Recipes

    If you enjoyed this easy treat, you might like some of our other bite-sized treats like our No-Bake Mini Party Pies and our adorable mini cakes!

    Recipe

    20 mini cinnamon rolls in a 9x13 baking dish, 7 of them with frosting on top.
    Print Pin
    5 from 7 votes

    Crescent Roll Cinnamon Rolls

    Crescent Roll Cinnamon Rolls: This easy recipe is perfect for when you are craving a cinnamon roll! They're quick to make (using crescent roll sheets), and they're even easier to eat!
    Course Breakfast, Dessert, Snack
    Cuisine American
    Prep Time 15 minutes minutes
    Cook Time 10 minutes minutes
    Total Time 25 minutes minutes
    Servings 24 bites
    Calories 100kcal
    Author Jessica Burgess

    Ingredients

    For the Cinnamon Rolls

    • 1 package crescent rolls
    • 2 Tablespoons butter melted
    • ⅓ cup light brown sugar
    • 1 teaspoon ground cinnamon
    • ¼ teaspoon ground nutmeg
    • ⅛ teaspoon kosher salt

    For the Frosting

    • 2 ounces cream cheese softened
    • 2 Tablespoons butter softened
    • 1 teaspoon vanilla extract
    • 1 ½ cups powdered sugar

    Instructions

    For the Cinnamon Rolls

    • Preheat your oven to 350F and grease a mini-muffin pan with nonstick baking spray. 
    • Unroll the crescent roll sheets onto a lightly floured surface and brush each one with melted butter. 
    • In a small bowl, combine the brown sugar, cinnamon, nutmeg, and salt. Sprinkle the mixture evenly over the crescent rolls. 
    • Roll the crescent rolls tightly into a log and slice into ¾” thick rolls– you should have about 12 rolls per log. 
    • Place one roll into a well of the prepared muffin pan and repeat with the remaining rolls. 
    • Bake for 8-10 minutes, or until the rolls are set in the center and golden brown around the edges. 
    • Serve the cinnamon rolls warm, topped with the icing (below). Store any leftover cupcakes in an airtight container in the fridge for up to two days. 

    For the Frosting

    • In a small bowl, combine the cream cheese, butter, and vanilla. 
    • Next, add the powdered sugar and mix until the icing is smooth. Spread the icing over the warm cinnamon rolls and enjoy. 

    Notes

    TIP: If you want to make sure your cream cheese icing is nice and smooth, ensure your butter and cream cheese are softened at room temperature!

    Nutrition

    Serving: 1bite | Calories: 100kcal | Carbohydrates: 14g | Protein: 1g | Fat: 5g | Saturated Fat: 3g | Polyunsaturated Fat: 1g | Monounsaturated Fat: 1g | Trans Fat: 0.1g | Cholesterol: 7mg | Sodium: 109mg | Potassium: 9mg | Fiber: 0.05g | Sugar: 11g | Vitamin A: 90IU | Vitamin C: 0.004mg | Calcium: 6mg | Iron: 0.2mg

    Fried Mushrooms – Easy Pan or Deep Fried Recipe

    October 29, 2024

    Fried mushrooms on plate next to a bowl of ranch dressing.

    Fried mushrooms are easy to make, and this recipe uses only a few simple ingredients! Using sliced mushrooms is key, as they’re easier to eat and tastier to dip!

    Whether you need a side dish or a quick appetizer recipe, whip these store-bought sliced mushrooms up and serve alongside your favorite dipping sauce, and maybe even these fried pickle slices, and they’ll both become your new favorite!

    Fried mushrooms with batter, next to ranch dip.
    Fried Mushrooms with Egg Breading

    Why You’ll Love This Easy Fried Mushrooms Recipe

    • Texture: I prefer using sliced mushrooms instead of button mushrooms for the texture and or the ease of eating! Using an egg in the batter provides a thicker breading and give the mushrooms a slight crunch.
    • Quick: Sliced mushrooms don’t take long to cook through, and there’s very little prep time, making this recipe great for a quick side dish or appetizer to snack on while waiting for dinner.
    • Ease: Fried sliced mushrooms are really easy and great for a beginner who may be looking to fry things for the first time too!
    [feast_advanced_jump_to]

    Deep Fried Mushrooms

    When it comes to deep frying mushrooms, I like to deep fry them in my cast iron with oil but you can also use a deep fryer if you prefer. The mushrooms will float, so flipping may be required.

    Can You Use Button Mushrooms?

    You can! But we personally don’t like button mushrooms because of the texture when you bite in to them. However feel free to follow this same recipe, knowing that the cook time may be a little longer, waiting for the centers to cook too.

    How to Wash Mushrooms

    Did you know you’re not supposed to soak mushrooms? They’ll absorb water, and you sure don’t want that for taste/frying.

    Just wipe or lightly rinse with cool water and pat dry. (Better yet, if you have time, wash them early and let air dry after you pat dry too… just so there is little chance of any water remaining on the mushrooms.)

    Ingredients for fried mushrooms on table.

    Ingredients

    • Seasoned salt
    • Flour
    • Eggs (if making the thicker breading – see images below)
    • Sliced Mushrooms
    • Oil

    That’s it. The seasoned salt was super tasty in the flour breading and made a big difference. But feel free to use a different seasoning.
    Some seasoning options to consider are:

    • lemon pepper
    • garlic pepper
    • french fry seasoning
    • greek seasoning

    How to Fry Mushrooms

    I’ll touch on a few key notes below on how to make fried mushrooms but you can also scroll down to the recipe card where you’ll find all of the details in one place.

    To make the fried mushrooms without egg, for a thin breading:

    Flour and seasoned salt in a plastic storage bag for battering mushrooms.
    Sliced mushrooms in bag with flour and seasoning.
    • Bring oil to a temperature of about 375° F or hot enough over medium-high heat, that when a little flour is sprinkled in, it sizzles.
    • You’ll start by combining the flour and seasoned salt in a bowl or zip-top bag.
    • Add in your clean mushrooms and shake or stir to coat with the flour-spice mixture.
    • Place them, one-by-one in the hot oil and cook for 2-3 minutes on each side or until golden brown.
    Easy fried mushrooms on a plate.
    Mushrooms with Thin Breading

    To make the fried mushrooms with egg, for a thicker breading, you’ll:

    • Bring oil to a temperature of about 375° F or hot enough over medium-high heat, that when a little flour is sprinkled in, it sizzles.
    • You’ll start by combining the flour and seasoned salt in a bowl or zip-top bag.
    • Next, whisk your eggs in a separate bowl.
    • Place your mushrooms in the egg, and then place in seasoned flower to coat. (I seal the bag and shake until mushrooms are coated.)
    • Place battered mushrooms in hot oil and allow them to fry on each side for about 2-3 minutes or until golden brown.
    • When fried mushrooms are finished, remove them from the oil with a slatted spatula and place them on a plate, platter, or baking sheet that is lined with paper towels (to soak up excess grease) and serve immediately.
    Fried mushroom being dipped in ranch dressing.
    Mushrooms Fried with Egg in Breading

    To Use Egg or Not Use Egg

    My pick is to use egg. My dad is the one who taught me how to make fried mushrooms and he prefers the mushrooms without the egg in the breading, so it results in a thinner coating.

    I suggest trying both so you can be the judge of what you prefer!

    Fried mushrooms made two ways.

    What to Serve with Fried Mushrooms

    Eating these mushrooms by themselves is great but they’d also be amazing alongside this jalapeno ranch or this chipotle sauce!

    FAQs

    What is the best way to fry mushrooms?

    Deep frying mushrooms in vegetable or canola oil, is a great way to fry them, to get that breading and crunch.

    What type of mushroom is good for frying?

    Sliced mushrooms are great for frying but you can also fry button mushrooms if you prefer that texture.

    How to know when fried mushrooms are done?

    When the mushrooms have turned slightly golden brown, they’re ready to remove from the oil on to a paper towel-lined plate, to soak up excess oil.

    Related Recipes

    If you love easy recipes like this one, you’ll also love these:

    • Stuffed portobello mushrooms
      Baked Portobello Mushrooms
    • Smoked stuffed mushrooms in a platter.
      Smoked Stuffed Mushrooms
    • fried shrimp on plate next to sauce
      The BEST Fried Shrimp
    • Air fryer eggplant fries dipped in marinara sauce.
      Air Fryer Eggplant Fries

    Recipe

    Fried mushrooms on plate next to a bowl of ranch dressing.
    Print Pin
    3.88 from 62 votes

    Fried Mushrooms Recipe

    This fried mushrooms recipe using sliced mushrooms is so easy with two options for breading thickness.
    Course Appetizer, Side Dish
    Cuisine American
    Prep Time 10 minutes minutes
    Cook Time 5 minutes minutes
    Total Time 10 minutes minutes
    Servings 4 servings
    Calories 160kcal
    Author Jessica Burgess

    Ingredients

    • 8 ounces sliced mushrooms cleaned
    • 1 cup flour
    • 2 Tablespoon seasoned salt
    • vegetable or canola oil enough to create an inch or more of oil in pan if pan frying, or enough for your deep fryer requirements.
    • 2 eggs leave out the eggs if you prefer a more thin, breading. See instructions below.

    Instructions

    • Heat oil in the pan over medium heat if pan frying. If deep frying, heat oil to about 375° F, or turn on medium heat and test with sprinkle of flour for sizzle. (See below.)
    • Combine flour and seasoned salt in large bowl or zip-top bag.

    For Thin Mushroom Breading

    • Pour mushrooms into flour/salt mixture and stir or shake to coat.
    • When oil is heated through (to test if oil is ready, sprinkle a pinch of flour in oil. If sizzles, it's ready.)

    For Thicker Mushroom Breading

    • Coat mushrooms in the eggs, then seasoned flour, and place the mushrooms in the heated oil, and fry for 2-3 minutes, (flipping if necessary) until they turn to a golden brown.
    • If deep frying, fry for 2-3 minutes or until golden brown.
    • Remove from oil and drain on a plate topped with paper towels to soak up excess oil.
    • Serve warm!

    Video

    Notes

    Wash your mushrooms but do not soak them! They’ll retain water and they will not cook appropriately.
    You can also sprinkle on additional seasonings after the mushrooms have been fried if you’re looking for more.

    Nutrition

    Serving: 1serving (¼ recipe) | Calories: 160kcal | Carbohydrates: 23g | Protein: 3g | Fat: 5g | Saturated Fat: 4g | Sodium: 1744mg | Potassium: 33mg | Calcium: 5mg | Iron: 1.5mg

    Taco Pasta Recipe

    October 28, 2024

    This Taco Pasta Recipe makes a great easy dinner idea and is a comfort food favorite! This is a recipe that can be made in under 30 minutes, uses simple ingredients, and has cheesy vibes that even the kids will love.

    Taco pasta in skillet with fresh cilantro on top.

    Pasta dishes for dinner are always a favorite in our house (especially this lasagna soup and this hamburger mac and cheese!) because they’re easy, filling, and comforting!

    This taco pasta recipe is one of my favorite meals to make when I am short on time and energy and I’m craving comfort food. I love rotating it with this chicken spaghetti recipe made with Rotel.

    [feast_advanced_jump_to]

    Ingredients

    Here’s what you’ll need to make this easy pasta recipe, and a few notes below about some of the key ingredients.

    Ingredients for taco pasta on a dining room table.
    • Ground beef: I don’t see why you couldn’t use ground sausage, or ground turkey instead of beef if desired.
    • Velveeta: You won’t need to use the entire 16 ounce block, only have. Save the remaining Velveeta to make a small batch of Rotel Dip.
    • Taco sauce: You could also substitute salsa for this if needed. It helps give the recipe more warmth.
    • Shredded cheese: I believe that shredding your own cheese for recipes like this one always tastes better. However that’s not something I always want to do when I’ve had a long day, so know that pre-shredded cheese is great to use for this one too.
    • Milk: I use 2% but that’s just because it’s what I usually have on hand. Feel free to use a different type if needed.

    Instructions

    Here are these steps on how to make this taco pasta dish but you can find the full, detailed steps below in the recipe card.

    Cooked ground beef in a skillet.
    Rotel, milk and seasonings added to taco pasta.
    • Brown the ground beef and mined garlic and drain if necessary.
    • Add in the beef broth, Rotel, milk, taco seasoning, and taco sauce, and bring that to a boil.
    Pasta shells added to taco mixture.
    Shredded cheese and Velveeta added to taco skillet recipe.
    • Add in the pasta, reduce to a simmer, and cover to let the noodles become tender, to al dente.
    • When the pasta becomes tender, add in the cubed Velveeta, and shredded cheese and stir to melt in. Remove from heat.
    Taco pasta ready to eat, in skillet with a wooden spoon.

    Feel free to add chopped cilantro to the top, right before serving for color and added, fresh, flavor.

    Taco pasta ready for serving, with fresh cilantro on top.

    Additional Topping Ideas if Desired:

    I have a big list of taco toppings if you’re looking for a lot of extra fun for your taco pasta but here are a few favorites:

    • crushed taco shells
    • chopped avocado
    • extra chopped tomato
    • extra grated cheese
    • corn
    • shredded lettuce
    • black olives

    If you’re a taco fan, be sure to also check out this taco soup recipe.

    Storage Instructions

    Leftovers: Allow any leftovers to cool completely, and then store in an airtight container in the refrigerator and enjoy within 3-4 days.

    Related Recipes

    If you love taco recipes, make sure you also try this walking taco casserole that’s delicious or these pasta favorites:

    • Chicken macaroni salad in a bowl.
      The BEST Chicken Macaroni Salad
    • Chicken Caesar Pasta Salad in big bowl, sitting on napkin.
      Chicken Caesar Pasta Salad Recipe
    • Shrimp Pasta Salad With Mayo
      Shrimp Macaroni Salad
    • Easy Alfredo Sauce in skillet, next to fresh herbs and parmesan cheese wedge.
      How to Make Alfredo Sauce

    Recipe

    Print Pin
    4 from 4 votes

    Taco Pasta Recipe

    This Taco Pasta Recipe is like if Rotel dip and tacos had a baby! This creamy kick of cheeses with taco seasoning is a favorite easy dinner.
    Course Main Course
    Cuisine American
    Prep Time 10 minutes minutes
    Cook Time 20 minutes minutes
    Total Time 30 minutes minutes
    Servings 6 cups
    Calories 474kcal
    Author Jessica Burgess

    Ingredients

    • 2 cups uncooked pasta shells ½ of a 1 pound box
    • 1 pound ground beef
    • 1 teaspoon minced garlic
    • 1 packet taco seasoning
    • 2 cups beef broth
    • 2 Tablespoons taco sauce
    • 1 cup milk
    • 10 ounces canned diced tomatoes with green chilies undrained
    • 8 ounces Velveeta cheese cut in to cubes
    • 1 cup shredded fiesta blend cheese

    Instructions

    • Cook the 1 pound of ground beef and minced garlic in a skillet over medium high heat, until meat is no longer pink. Drain grease if needed.
    • Add in taco seasoning, the 2 cups beef broth, 2 Tablespoons taco sauce, 1 cup milk, and 1 can of diced tomatoes with green chilies, and bring to a boil, stirring occassionally.
    • When boiling, reduce to a simmer, add the pasta, cover and stir occasionally and cook until the pasta is al dente.
    • When pasta is cooked, add in the shredded cheese and the Velveeta cheese. Stir until melted and remove from heat.
    • Serve with fresh cilantro on top (optional), and enjoy!

    Video

    Notes

    If you like a little spice, feel free to add a few splashes of hot sauce or use spicy taco sauce.

    Nutrition

    Serving: 1.5cups | Calories: 474kcal | Carbohydrates: 38g | Protein: 33g | Fat: 21g | Saturated Fat: 10g | Polyunsaturated Fat: 1g | Monounsaturated Fat: 6g | Trans Fat: 1g | Cholesterol: 84mg | Sodium: 1652mg | Potassium: 640mg | Fiber: 3g | Sugar: 9g | Vitamin A: 1227IU | Vitamin C: 8mg | Calcium: 520mg | Iron: 3mg

    Doritos Nachos

    October 27, 2024

    Doritos Nachos are as good as they sound. Doubt I’ll ever make nachos using plain tortilla chips again, and I’ll definitely be putting Doritos on the nacho bars I create!

    Ready in minutes, this appetizer recipe is fantastic for football season, fall weather, as a side dish for your favorite chili recipe, or just a fun easy dinner recipe like this Dorito Chicken Casserole recipe!

    Doritos nachos on baking sheet.

    Recipe Highlights

    • Ease: Easy to make, and great for beginners in the kitchen.
    • Versatile: You can use different chips, and different toppings, and make this your own creation.
    • Purpose: A great party food, late-night snack, or even a great dinner recipe that everyone can share around the table.

    There’s something about using white Queso on nachos, which is why I recommend using it on these BBQ nachos too! However, a great Rotel with ground beef will always have my heart as well.

    [feast_advanced_jump_to]

    Ingredients

    Feel free to be flexible with the ingredients and the ingredient amounts in this recipe. Here are some notes about some of the ingredients I’ve used but you can find the full list and instructions below in the recipe card.

    Ingredients for Doritos nachos.
    • Doritos: You don’t have to use the brand name and you can use any nacho cheese-flavored chip if you like. You can also use something like a ranch-flavored chip if you prefer.
    • Queso: I use a storebought queso but feel free to make your own.
    • Fiesta cheese: I like to use the finely shredded cheese for these and if you can’t find the fiesta cheese, you can use cheddar or something like Colby Jack.
    • Ground beef: I think ground sausage would also be incredible in this recipe. Cooked chicken or shrimp would also be delicious. Or, if you have leftover taco meat, it’s the perfect way to use it!
    • Taco seasoning: if you don’t have a packet of this on hand, this chicken taco seasoning works great.

    Note: You may not use the entire 1 pound of taco meat. Using the extra taco meat to make the Taco Salad with Catalina dressing or these fried tacos would be such a great idea.

    How to Make Doritos Nachos

    Taco seasoned ground beef in skillet.
    Doritos on a baking sheet that's lined with parchment paper.
    1. Start by cooking your ground beef, and draining the grease if needed. Add in the taco seasoning, and mix together with the cooked beef. (I actually don’t add in water, just to keep the ground beef really seasoned but you can add water according to the package directions if needed.)
    2. You can use a platter, or a cookie sheet lined with parchment paper like I did if you like, and spread out the bag of Doritos on to the sheet. (Spreading them out so cheese can get on as many chips as possible.)
    White Queso drizzled on top of Doritos.
    Taco seasoned ground beef on top of Queso and nacho cheese Doritos.
    • Next, warm your queso and pour it over the top of the chips.
    • Sprinkle on the desired amount of cooked taco meat. You can use the entire pound or must half, like I did.
    Black olives and shredded cheese on top of chips.
    Diced tomatoes, green onions and jalapenos on top of the Doritos nachos.
    • Then it’s time to add your favorite toppings:
      – shredded fiesta cheese
      – black olives
      – diced tomatoes
      – green onions
      – sliced pickled jalapenos
    Doritos nachos on a baking sheet with toppings.

    Serve the nachos immediately and enjoy!

    Hand holding Dorito nacho with jalapeno, tomato and black olive.

    Storing Instructions

    The unfortunate thing about making nachos like this is that if all haven’t been eaten, the chips can get soggy. However, if that’s your thing, refrigerate them within a couple of hours of sitting out and reheat in the oven.

    Are Doritos good for nachos?

    Yes! They add even more flavor to nachos and hold their crispiness for a while when covered with cheese.

    What flavor of Doritos for nachos?

    Almost any Doritos flavor is good for nachos but Nacho Cheese and Cool Ranch are great go-to’s. Although spicy flavors can be great as well.

    What is the secret to making good nachos?

    Make sure as many chips can get covered with cheese and toppings, as possible. Also make sure to have enough cheese to go with the amount of chips. Put the toppings on the side that may not be enjoyed by everyone

    Do you have to bake nachos?

    You don’t. I actually prefer not to bake them but you can if you want to warm the chips slightly. Just be careful not to burn them.

    Similar Recipes You’ll Love

    If you like easy recipes that make great party food or easy dinners, you’ll also love these:

    • Spoonful of hot taco dip in dish.
      Hot Taco Dip
    • Crispy chicken tacos baked on baking sheet.
      Crispy Chicken Tacos
    • A tortilla chip is being dipped into a big bowl of cowboy queso.
      Cowboy Queso
    • Stack of steak quesadillas.
      Steak Quesadilla

    Recipe

    Print Pin
    5 from 1 vote

    Doritos Nachos

    Doritos nachos are loaded with white queso, taco meat, and toppings like tomatoes, jalapenos, shredded cheddar, green onions and other great toppings!
    Course Appetizer, Lunch, Side Dish
    Cuisine Mexican
    Prep Time 15 minutes minutes
    Cook Time 10 minutes minutes
    Total Time 25 minutes minutes
    Servings 4 servings
    Calories 983kcal
    Author Jessica Burgess

    Ingredients

    • 9 ounces Nacho Cheese Doritos
    • 15 ounces white queso
    • 1 cup shredded fiesta cheese
    • 1 pound ground beef
    • 1 ounce packet taco seasoning
    • 2 green onions chopped
    • 1 tomato diced
    • ½ cup sliced pickled jalapenos
    • 2 ounces sliced black olives drained

    Instructions

    • Cook ground beef, drain and add taco seasoning. Mix to combine.
    • Pour Doritos out on to a baking sheet.
    • Warm queso and pour over Doritos.
    • Pour taco meat on top of queso.
    • Top with remaining ingredients, and serve right away!

    Video

    Notes

    Can you bake these nachos? You can. I prefer it this way but if you prefer warm chips, and more of a toasted taste, you can place them in the oven. Just be careful not to burn the chips.

    Nutrition

    Serving: 0.25g | Calories: 983kcal | Carbohydrates: 50g | Protein: 48g | Fat: 67g | Saturated Fat: 29g | Polyunsaturated Fat: 9g | Monounsaturated Fat: 17g | Trans Fat: 1g | Cholesterol: 160mg | Sodium: 2608mg | Potassium: 624mg | Fiber: 6g | Sugar: 5g | Vitamin A: 1342IU | Vitamin C: 22mg | Calcium: 305mg | Iron: 4mg

    Peanut Brittle

    October 26, 2024

    Broken pieces of peanut brittle.

    This easy peanut brittle recipe is a vintage classic that’s easy to make and so fun to bring along to holiday gatherings. In under an hour, this old-fashioned candy recipe is ready to package up as gifts or to put on a dessert table for snacking.

    Peanut Brittle on plate, broken in to pieces.

    Recipe Highlights

    Cooking Level: Great for beginners and easy.

    Texture: Crunchy and sticks to your teeth… just as it should!

    How to serve: As a holiday dessert, snack or even package up and give these treats as a gift.

    Peanut brittle has been around for ages! My grandma used to make it at Christmas time, and she’d put it in a little tin and sit it out on the dessert table next to this egg custard and pecan pie recipes that she also used to make.

    Now, I love making this peanut brittle recipe to package up and give to neighbors, and friends, and just something for my boys to snack on since I only make it about once a year.

    [feast_advanced_jump_to]

    Ingredients You’ll Need

    Here are a few notes on some of the ingredients you’ll need to make this homemade peanut brittle. Jump to the recipe card below to see the exact measurements.

    Jump to Recipe
    Labeled ingredients for easy peanut brittle recipe.
    • Peanuts: Raw peanuts are used in this recipe and I’ve always used raw but I’m sure you can use roasted peanuts as well. I just keep using raw because that’s what Grandma did.
    • Margarine: You can also use butter instead if you prefer but again, margarine is what she used, so I do too.
    • Vanilla: As in all of my recipes, I prefer using pure vanilla extract instead of imitation.

    Love peanuts? You’ll also love this peanut buster parfait recipe!

    How to Make Peanut Brittle

    Here are step-by-step images and notes on how to make homemade peanut brittle. For the full instructions, see the recipe card below.

    Begin by prepping a large, rimmed, baking sheet by spreading butter, margarine, or non-stick spray on it, so the peanut brittle doesn’t stick to the pan.

    Tip: You’ll want to prep the baking sheet first because you’ll want to quickly pour the peanut mixture on to the pan when it’s time. I used a 13.5 x 17 pan and kept a second, smaller pan on stand-by in case I had overage and didn’t want it as thick. So really it’s up to how thick you want your peanut brittle.

    Corn syrup, sugar and water in saucepan.
    Raw peanuts in sugar mixture.
    • Make the syrup: Bring the sugar, light corn syrup, and water to a boil.
    • Add peanuts: Pour in the raw peanuts and boil, stirring often, until syrup turns a light brown color, which is about 15 minutes.
    Cooked peanuts in saucepan and sugar mixture.
    Peanut brittle mixture in saucepan.
    • Cook and brown the syrup: When the syrup has turned a light brown color, remove the pot from the heat.
    • Mix in flavorings: Add in the margarine and stir. Then add in the baking soda and vanilla extract.
    Peanut brittle on cookie sheet.
    • Quickly pour the peanut brittle mixture on to the prepared baking sheet and spread it out so it’s even and flat.
    • Allow it to cool and then using your hands, break the brittle in to pieces.
    Hand holding easy peanut brittle.

    Storage Instructions

    Once the peanut brittle has cooled and has been broken in to pieces, it’s safe to store it in an airtight container or bag and kept at room temperature. If stored properly it should stay good for a month or two.

    What is peanut brittle made of?

    This vintage peanut brittle recipe is made of corn syrup, sugar, water, vanilla, peanuts, and baking soda.

    Is peanut brittle an American thing?

    It is. The story has it, that a woman accidentally used baking soda in her taffy and it turned to peanut brittle consistency.

    Can you use parchment paper when making peanut brittle?

    You can. Or you can also grease a baking dish or use a silpat mat.

    Tips for the Best Peanut Brittle

    • Prep: Make sure to prep your pans before starting the brittle recipe, so you’re not in a rush when it’s time to pour the peanut mixture out to cool.
    • Baking soda: Use fresh baking soda in any recipe, and in this one too.
    • Breaking: If you don’t want to use your hands to break up the brittle, you can use a mallet or meat tenderizer.

    More Holiday Desserts

    If you love holiday desserts and snacks like this one, you’ll also love these favorites:

    • Caramel Corn in black metal stand.
      Caramel Corn Recipe
    • A popcorn ball that has been rolled in red and green sprinkles has been placed in a cellophane bag that is tied closed with red ribbon.
      Christmas Popcorn Balls with Free Gift Tag Printable
    • No bake peanut butter pie
      No Bake Peanut Butter Pie
    • Close up photo of stacked squares of white chocolate fudge topped with red, green and white sprinkles
      Sugar Cookie Fudge

    Recipe

    Broken pieces of peanut brittle.
    Print Pin
    Be the first to rate!

    Peanut Brittle

    This old-fashioned peanut brittle recipe is easy to make with simple ingredients, ready in under and hour, and perfect for the holidays!
    Course Dessert, Snack
    Cuisine American
    Prep Time 5 minutes minutes
    Cook Time 25 minutes minutes
    Cooling Time 15 minutes minutes
    Total Time 45 minutes minutes
    Servings 30 servings
    Calories 146kcal
    Author Jessica Burgess

    Ingredients

    • 1 cup light corn syrup
    • 2 cups sugar
    • ½ cup water
    • 2 Tablespoons margarine
    • 2 cups raw peanuts
    • 2 teaspoons baking soda
    • 1 teaspoon vanilla

    Instructions

    • Prepare a large, rimmed, baking sheet (or two small, rimmed, baking sheets) by coating it with butter. (I used a large, 13.5-inch x 17-inch baking sheet with a smaller, baking sheet on stand by if I decided to keep my peanut brittle thin so I could pour the remaining amount in, in case I felt my brittle was thick enough.)
    • Boil the corn syrup, sugar and water in a saucepan until it reaches 230° F with a candy thermometer or until it *spins a thread.
    • Add peanuts and stir frequently for about 15 minutes or until syrup has turned a light brown.
    • Remove from the burner and add in the margarine, vanilla and baking soda. (The mixture will foam, and that's ok!)
    • Stir quickly, and then pour out on to prepared baking sheet(s) and spread out evenly. (It will start to harden and dry quickly, so it's best to work fast.)
    • Allow it to cool. When cool, it should be hardened, and you should be able to pick it up and start breaking in to pieces.

    Video

    Notes

    *A boiling a “thread” means when a candy mixture reaches a consistency that when a small amount of syrup is added to cold water, it forms a “thread” and it doesn’t break.

    Nutrition

    Serving: 4pieces | Calories: 146kcal | Carbohydrates: 24g | Protein: 3g | Fat: 6g | Saturated Fat: 1g | Polyunsaturated Fat: 2g | Monounsaturated Fat: 3g | Sodium: 91mg | Potassium: 73mg | Fiber: 1g | Sugar: 22g | Vitamin A: 33IU | Vitamin C: 0.002mg | Calcium: 12mg | Iron: 0.4mg

    Easy Pound Cake Recipe

    October 25, 2024

    Pound cake made in a bundt pan, with powdered sugar and blackberries on top.

    This easy pound cake recipe is made with a few everyday ingredients to make this classic, vintage dessert a favorite to serve during the holidays or for potlucks.

    Serve this cake alone as it is or top with the included glaze recipe, your favorite toppings, or choose from the list of ideas that I’ve given below! One of my favorites is drizzling on some homemade vanilla sauce that I also use on my bread pudding recipe.

    Pound cake

    Why You’ll Love This Cake Recipe

    Ease: We’re all about “easy recipes” around here, and when you use that phrase in front of a word like easy cake recipes, you know you’re in the right place.

    Flexible: With a classic cake like this one, it means that you can serve it alone or elevate it with your favorite toppings.

    Texture: Pound cake can be a “spongey” texture, and more dense than say, an angel food cake.

    Vintage recipe: I love the vintage classic recipes. You really can’t go wrong with grandma’s favorites. You’ll also love this vintage peanut brittle recipe and this egg custard recipe that my grandma shared with me.

    Easy Pound Cake

    Ingredients

    Here are a few notes about some of the ingredients you’ll need for this cake recipe. You can also jump to the recipe card below for a full list of ingredients.

    Jump to Recipe
    • Eggs and egg yolks: Plan on needing a total of 7 eggs for this recipe, although you’ll just be using 3 of them for the yolks. Use the leftover egg whites for this lemon meringue!
    • Cake flour: I recommend using cake flour in this recipe. However, I know that it may not be something that you always have on hand. So if you only have all-purpose flour, you can measure out two cups of flour and remove 4 tablespoons and put it back in your flour container. Replace the removed 4 tablespoons of flour with 4 tablespoons of cornstarch.

    Pound Cake Flavor + Topping Ideas

    What I love about a pound cake, is that you can flavor it or top it with just about anything to customize the flavor you’re looking for, or leave it plain and capture the buttery-sugary goodness.

    • glaze (like this recipe)
    • fresh fruit
    • crunchy items (like cookies, nuts, graham crackers, etc.)
    • icing
    • sugars

    How to Make Pound Cake

    You can find the full recipe card below, but I love to show the process in images as well in case you’re a visual person like me!

    …………………………….

    You’ll start by mixing together the butter and the sugar for about 3 minutes. (Why do almost all good dessert recipes start with butter & sugar?!?!)

    Then, add in the eggs, yolks, and vanilla and mix for about 5 minutes.

    How to make pound cake
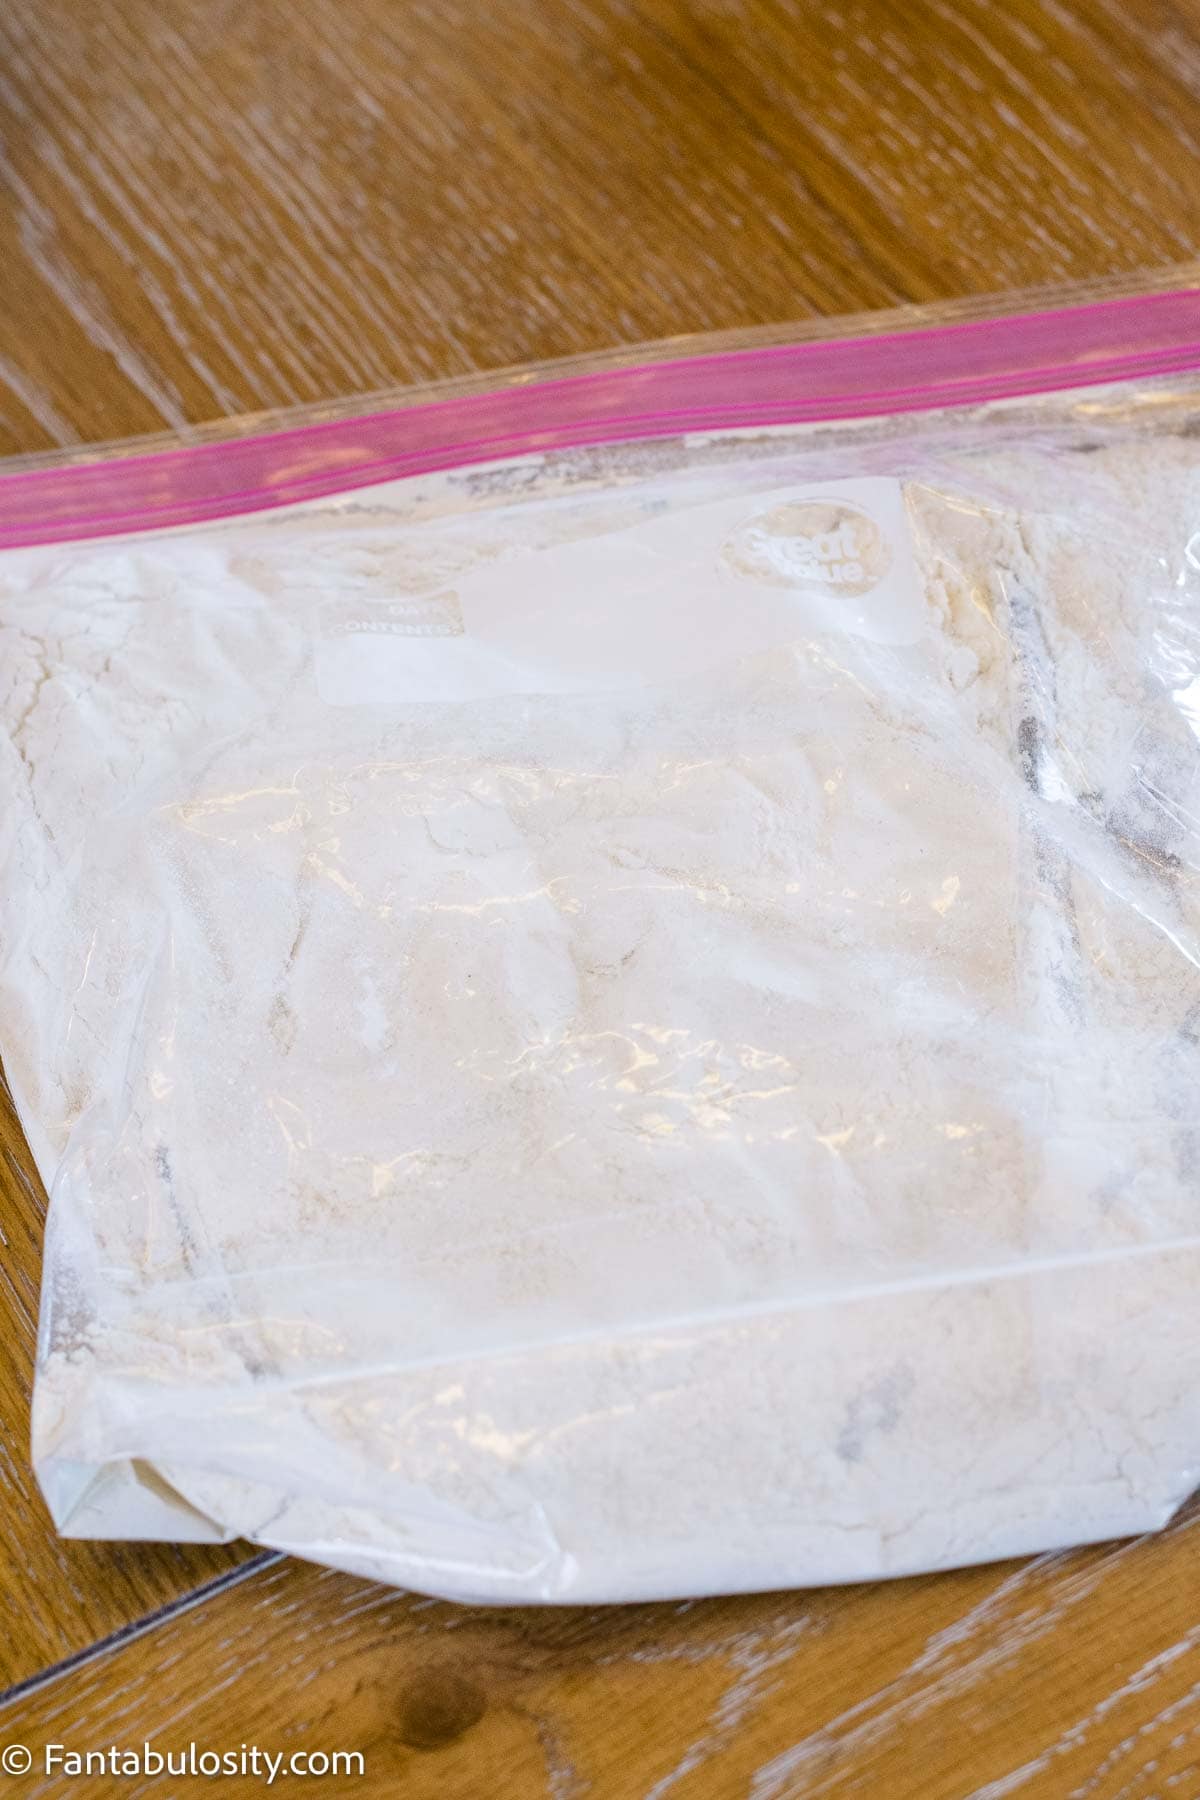
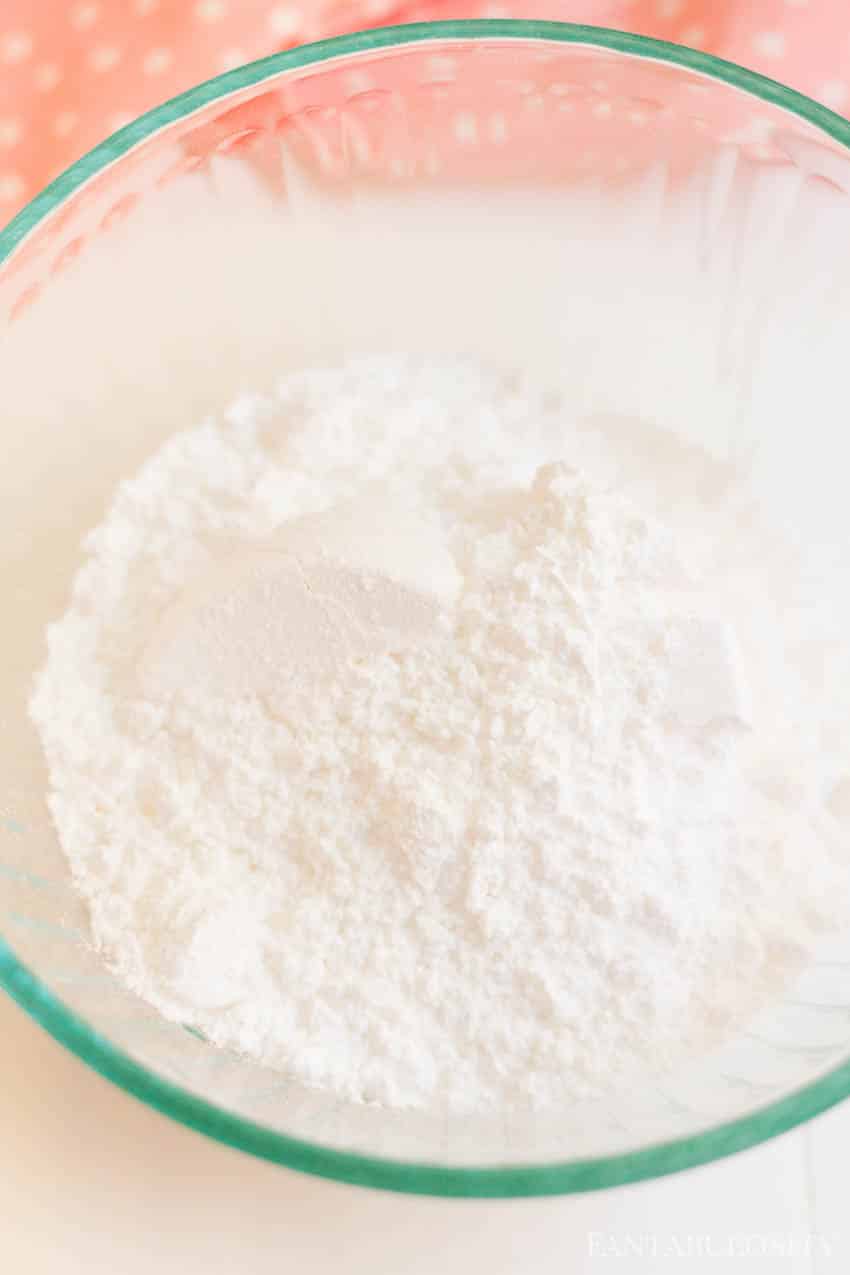
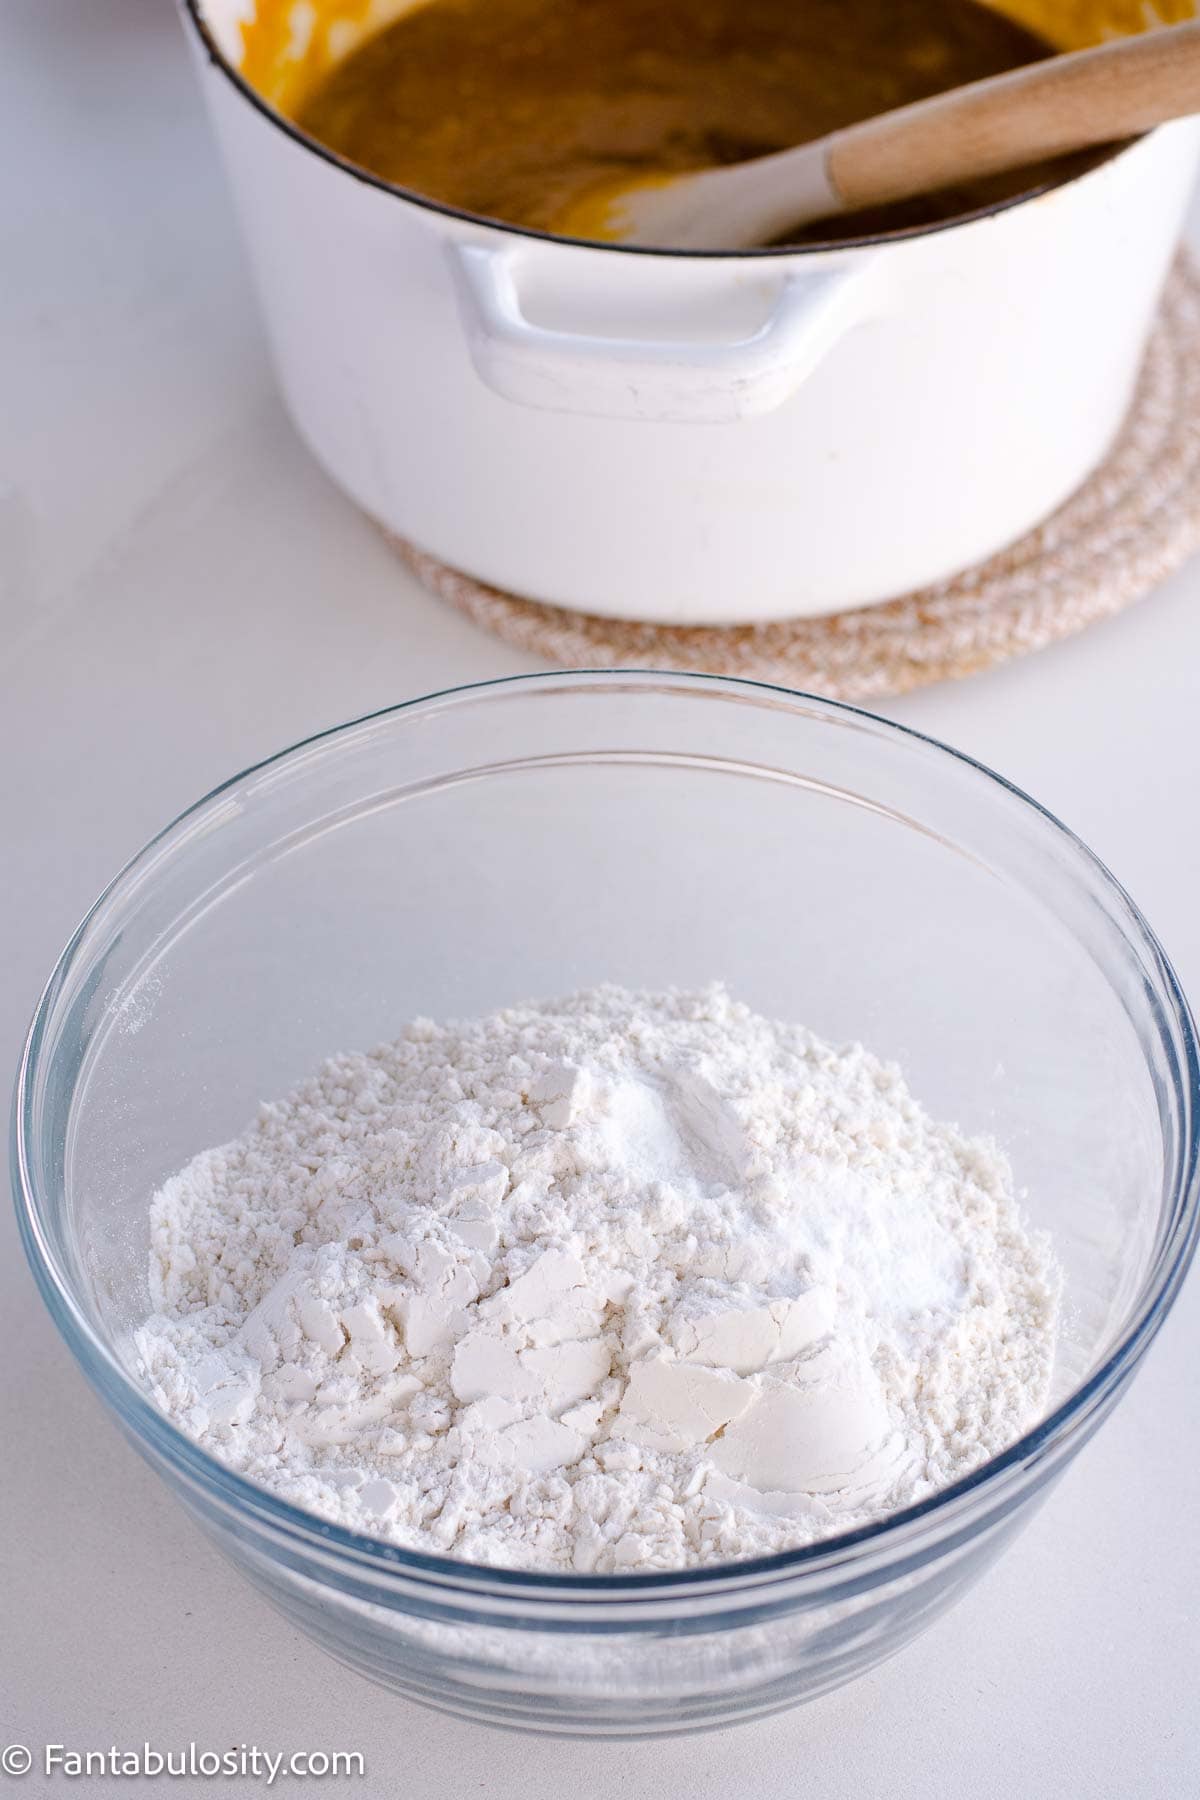
Next, in a separate bowl, sift together the flour, baking powder, and salt.

    The BEST Pound cake recipe
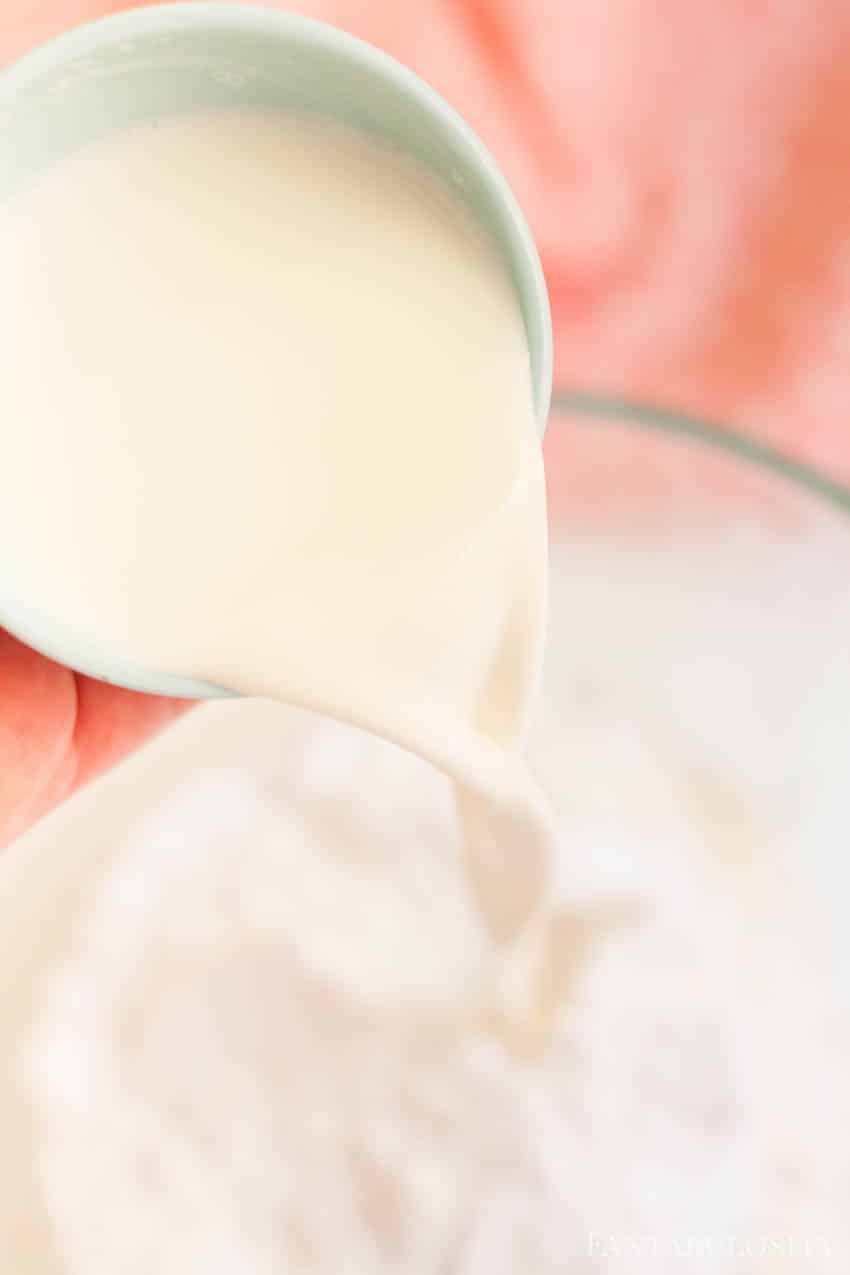
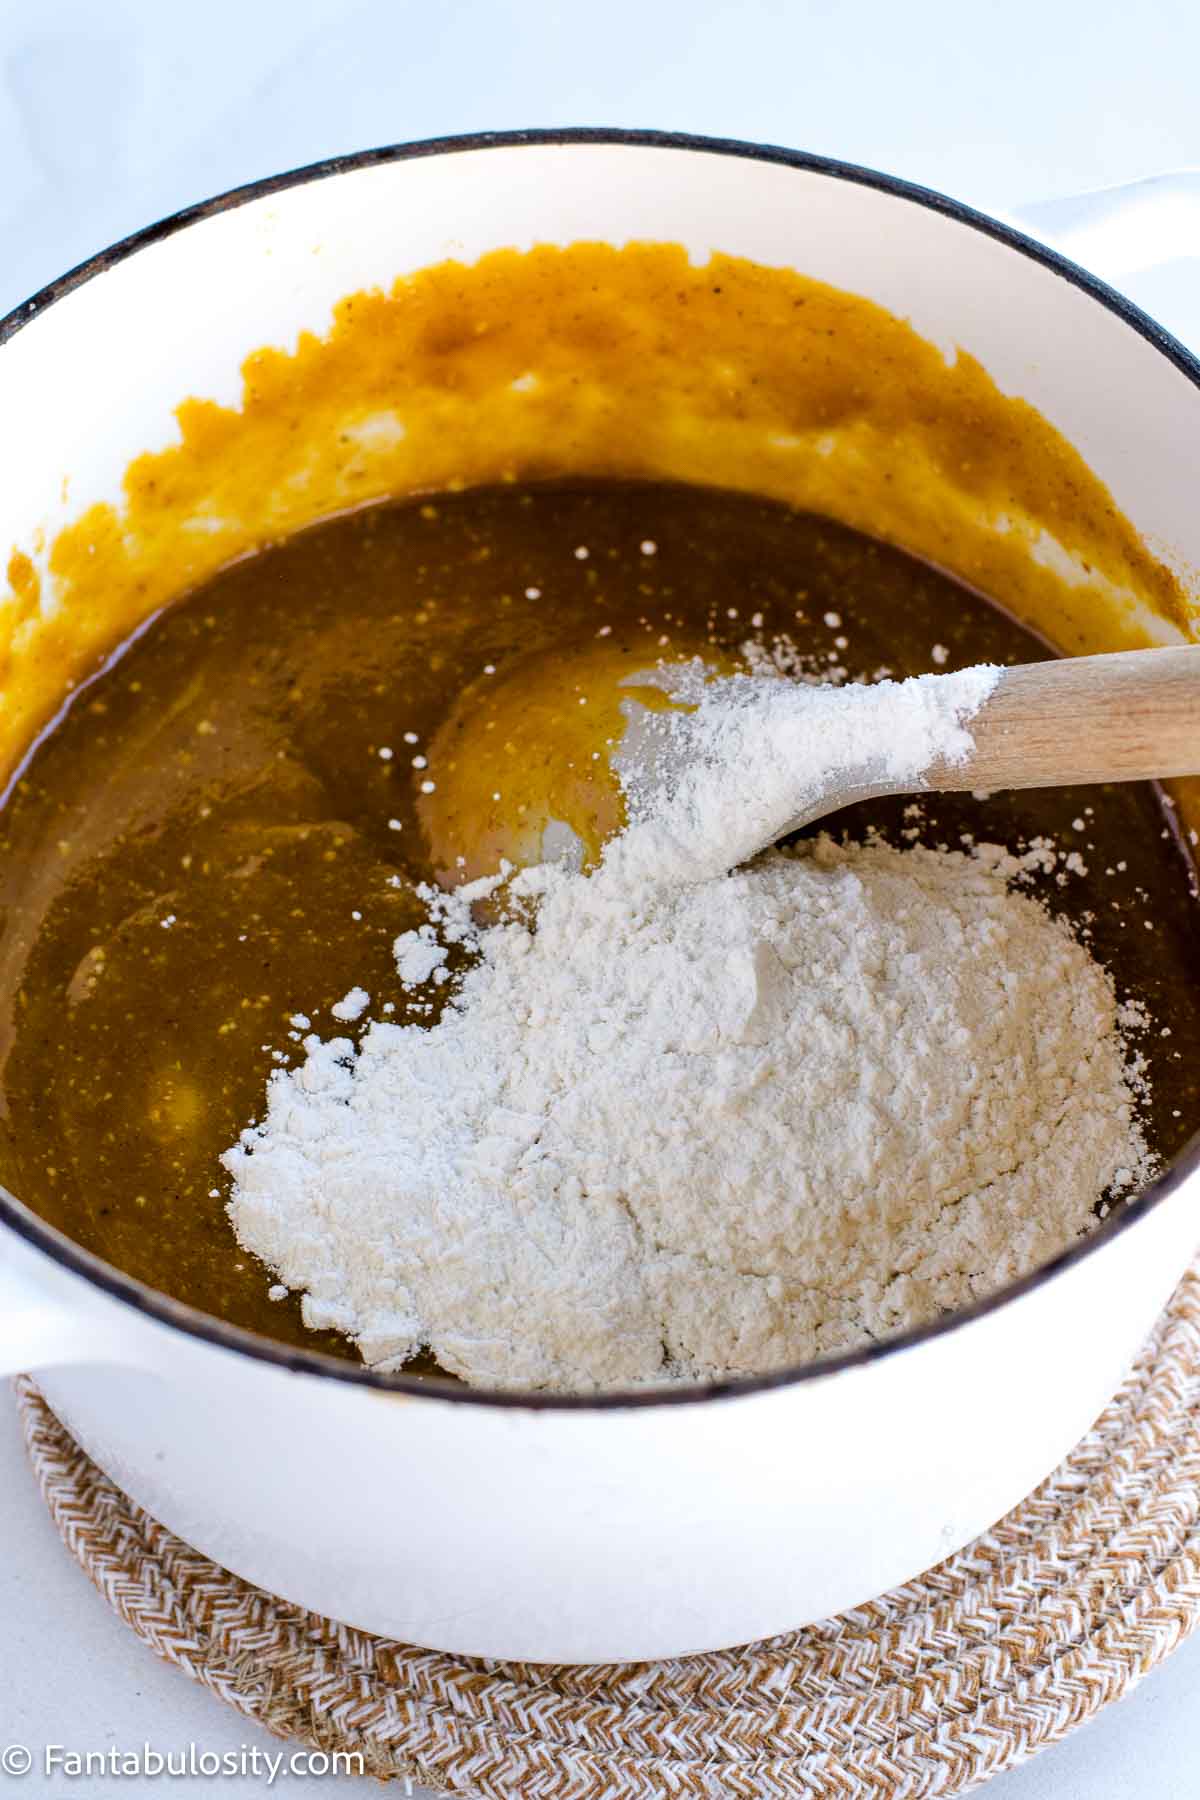
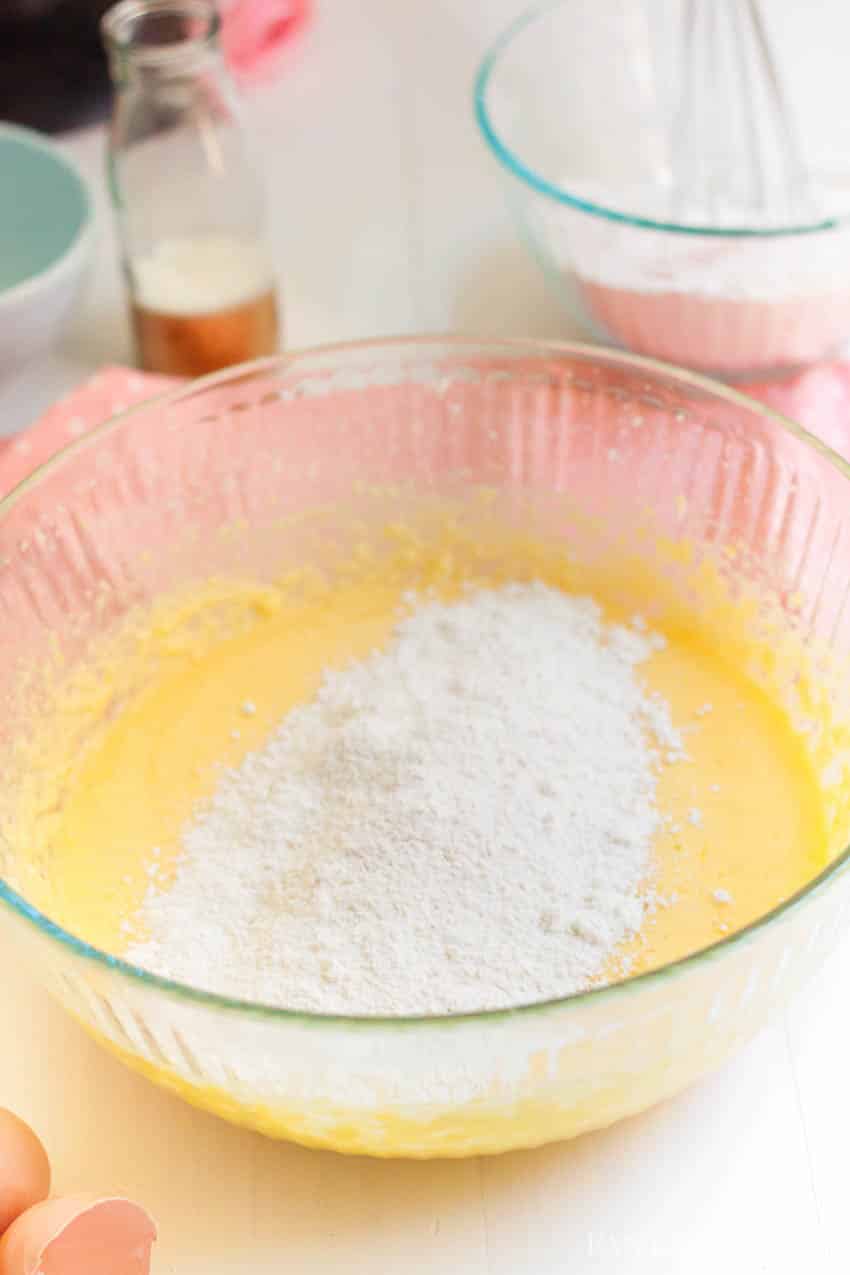
Reduce mixer speed to low, and add half of the flour mixture and half the milk to the butter/sugar mixture, and mix for 5 minutes.

    Recipe for pound cake
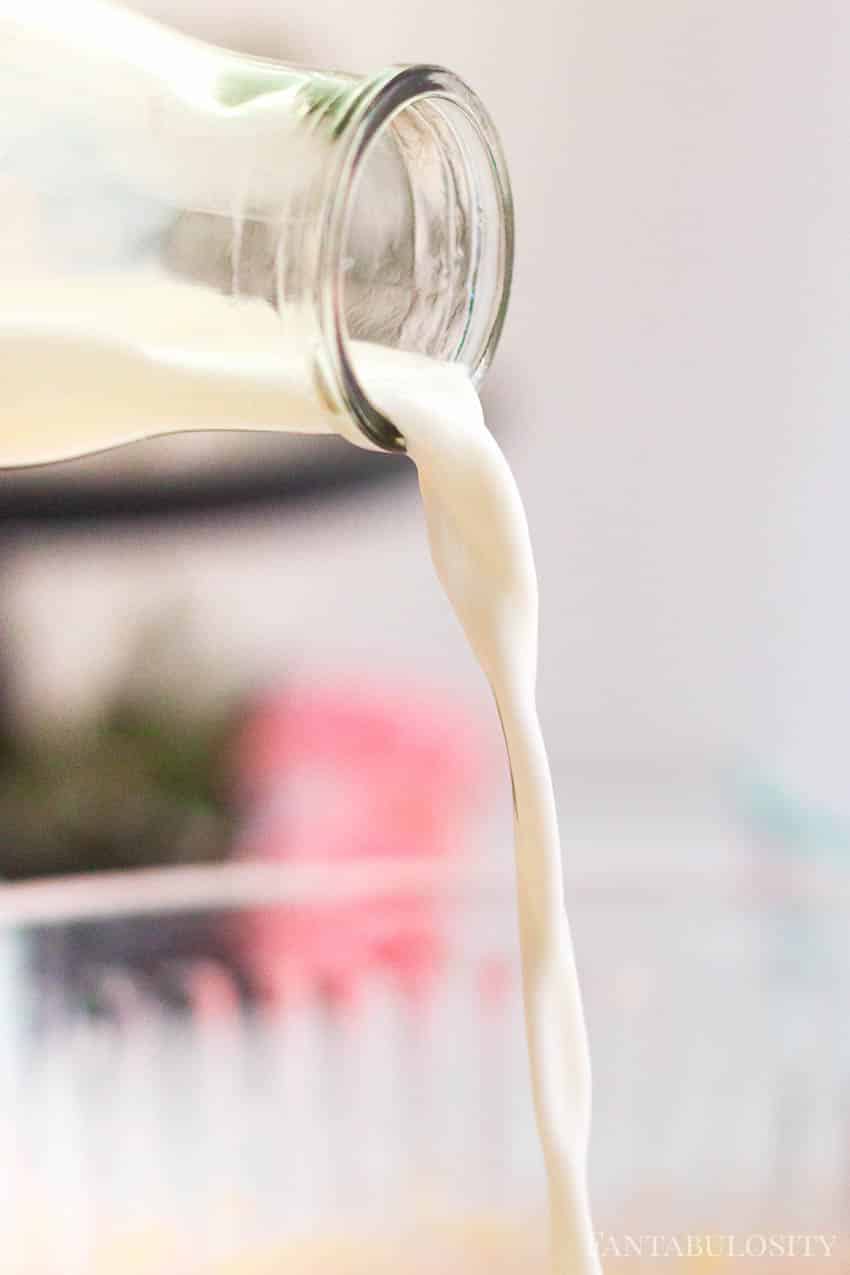
Add the second half of flour mixture and milk… and mix for 5 minutes.

    Recipe for easy pound cake

    Grease and flour your bundt pan (or pan of your choosing) pour in the batter, and smooth out any bubbles!

    What kind of pan for a pound cake - bundt cake
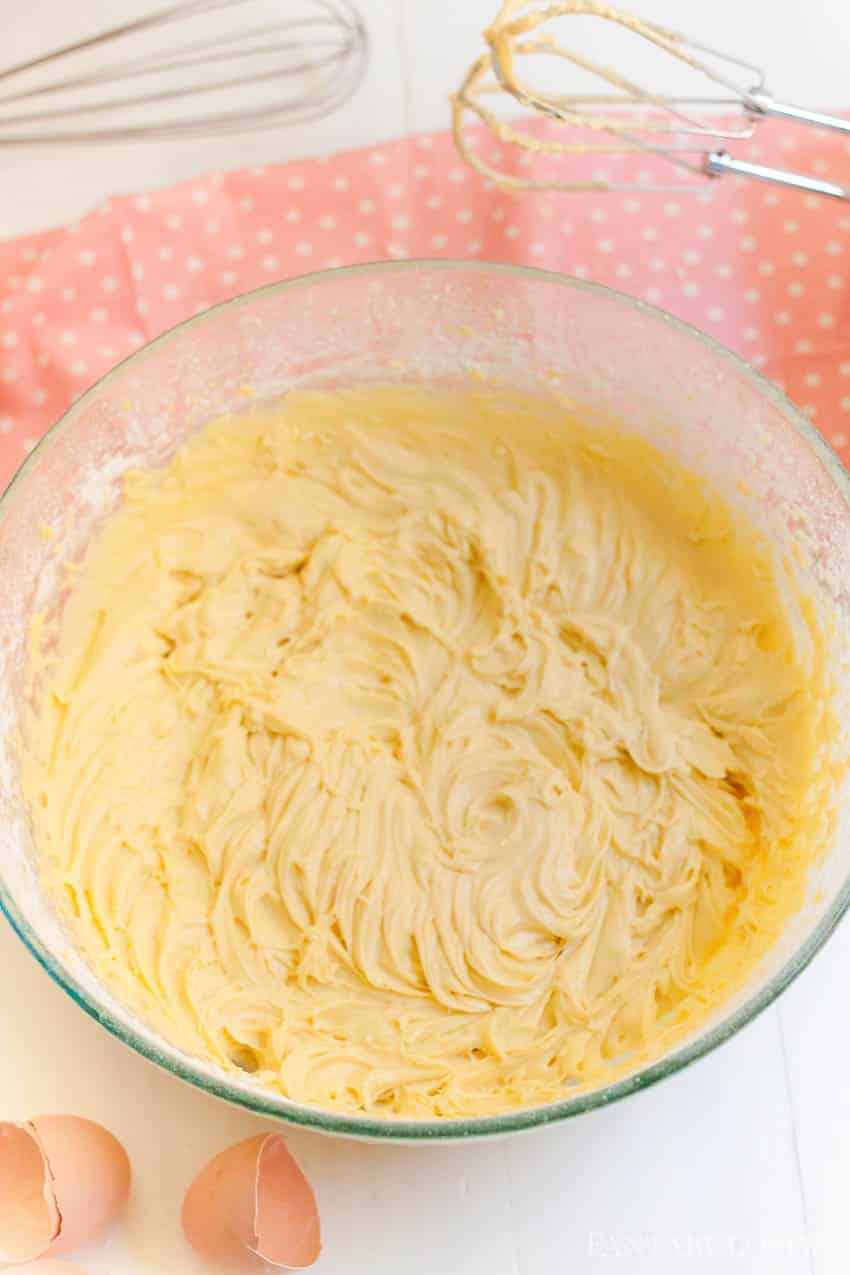
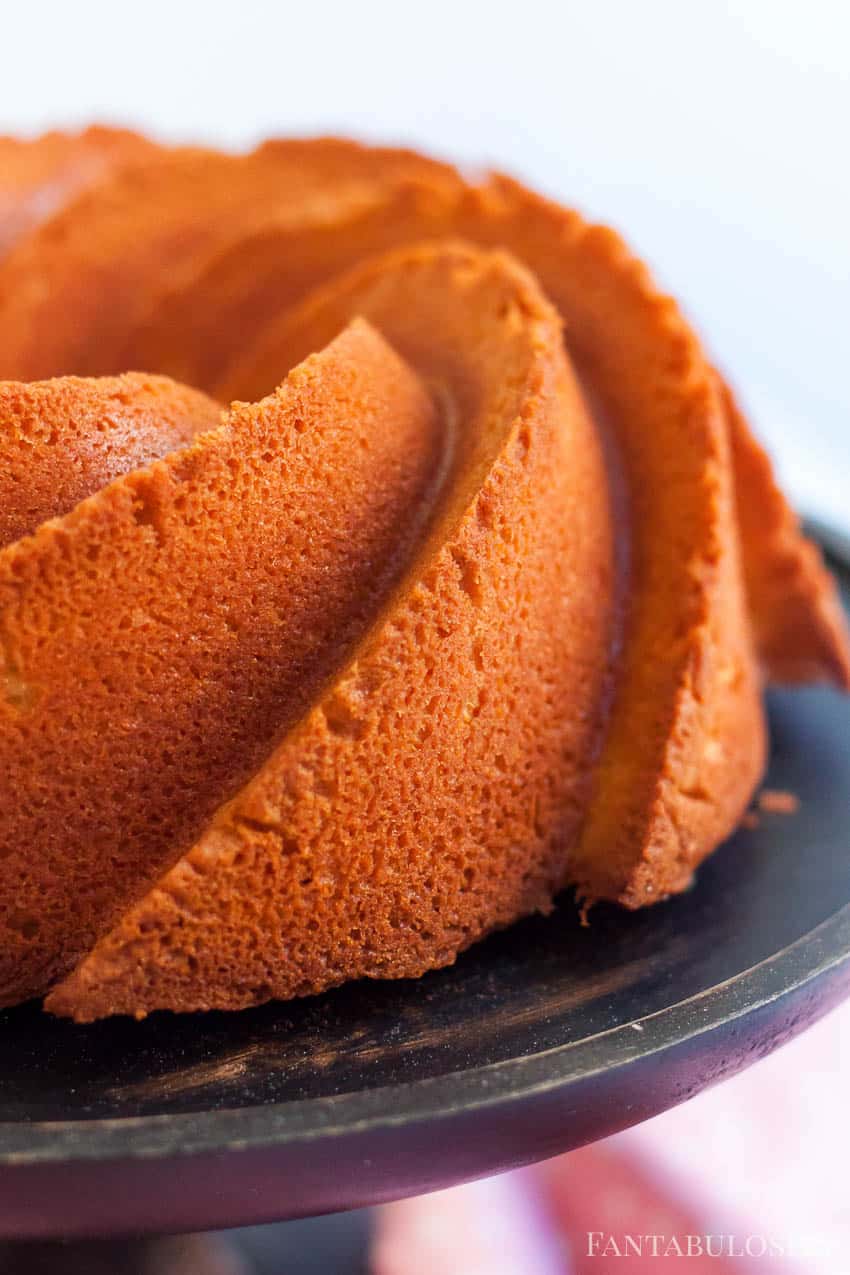
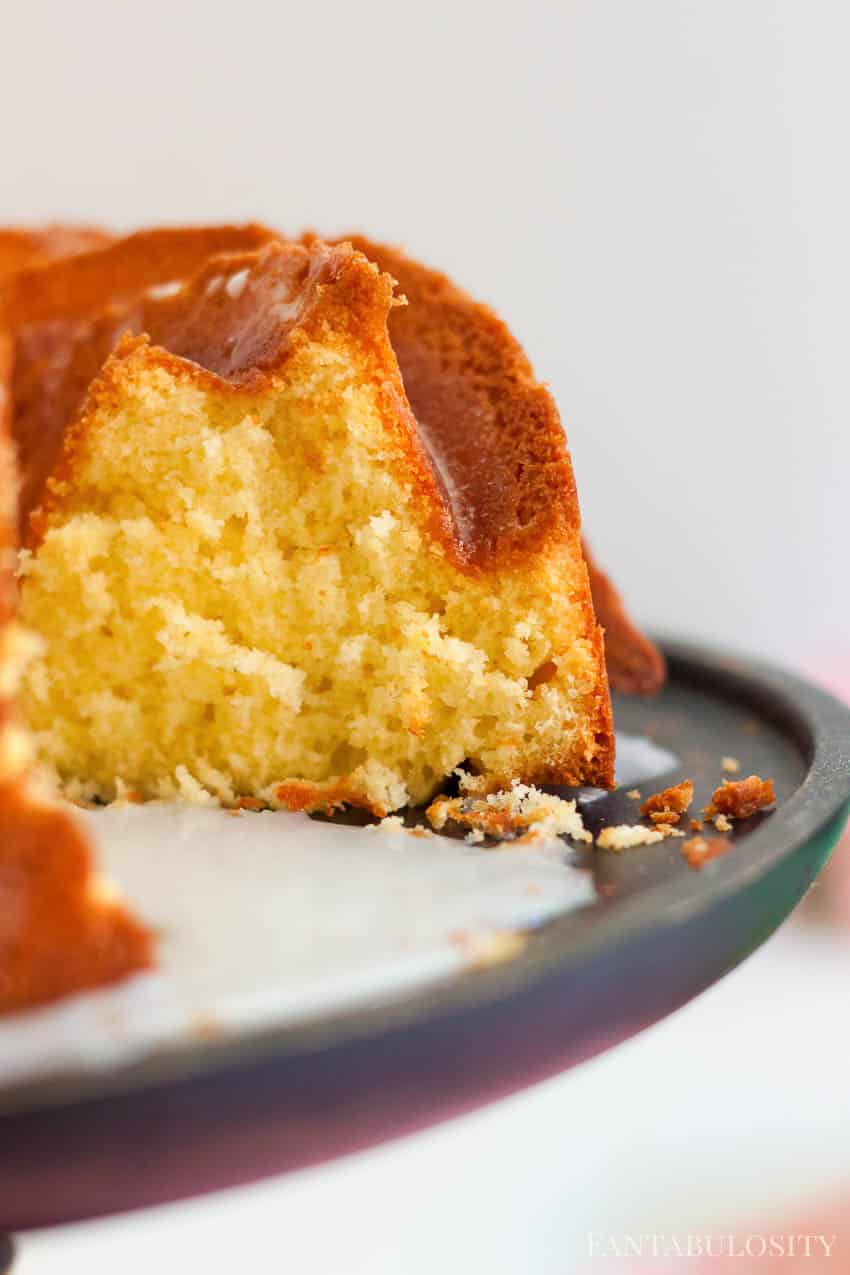
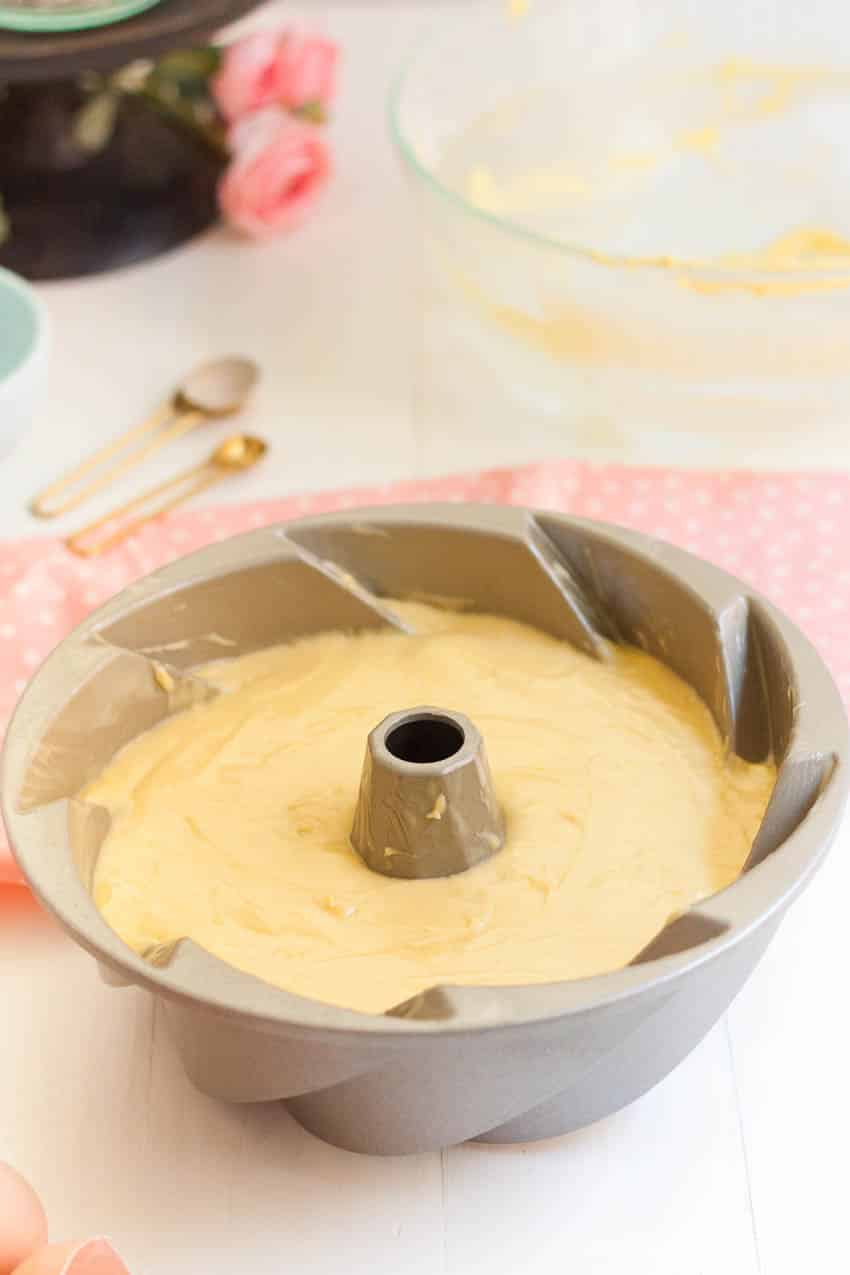
Place the pan in a cool oven and set the temperature to 350℉ and bake for 1 hour.

    The cake will be done when a toothpick inserted into the cake comes out clean!

    Allow 30 minutes for the cake to cool, and then remove from the pan (using a butter knife around the edges help) and turn upside down to finish cooling.

    You’ll want the cake fully cooled before drizzling the glaze.

    Pound Cake Glaze

    The glaze for your pound cake is really, really simple. Although the buttery goodness of a pound cake it plenty, the glaze adds a delicious touch and smooth, creamy, silky texture. 

    For the glaze, you’ll need:

    • 1 ¾ cup of confectioners sugar
    • 4 tablespoons of whole milk
    Glaze or Icing recipe for pound cake

    Simply add powdered sugar (confectioners sugar) to a bowl, and add 1 tablespoon of milk to the sugar at a time, stirring it in until smooth.

    glaze for pound cake recipe

    Drizzle over your cooled cake and serve! (If the cake is still hot, the glaze will melt in to the cake, which is still delicious but you won’t be able to see it as much.)

    Pretty Pound cake pan and recipe

    Doesn’t that look amazingly scrumptious? I’m not sure if there’s anything better than the classics. 

    Drizzle for pound cake

    More Easy Dessert Recipes

    If you love easy desserts, then you’re in the right place. You’ll LOVE these no matter if you’re just in the “sweets” mood, or if you need a dessert to take along to a potluck!

    • lemon bundt cake on wood stand
      Creamy Lemon Bundt Cake
    • A square of carrot walnut cake.
      Carrot Cake Poke Cake
    • A slice of coconut cheesecake on a wood board.
      Coconut Cheesecake
    • A piece of granny cake on a small plate.
      Granny Cake
    sprinkle powdered sugar on your pound cake if you prefer!

    Easily top your pound cake with fresh berries and extra powdered sugar for an added touch of flavor and cuteness!

    Recipe

    Pound cake made in a bundt pan, with powdered sugar and blackberries on top.
    Print Pin
    5 from 2 votes

    Easy Pound Cake Recipe

    Easy Pound Cake Recipe – This simple recipe made with eggs, butter, sugar, flour, and a few other everyday ingredients is the perfect staple dessert!
    Course Dessert
    Cuisine American
    Prep Time 20 minutes minutes
    Cook Time 1 hour hour
    Cool 30 minutes minutes
    Total Time 1 hour hour 20 minutes minutes
    Servings 12
    Calories 387kcal
    Author Jessica Burgess

    Ingredients

    • 4 eggs room temperature
    • 3 egg yolks room temperature
    • 2 sticks unsalted butter room temperature
    • 1 teaspoon vanilla extract
    • 4 Tablespoons whole milk
    • 2 cups cake flour
    • 1 teaspoon baking powder
    • ¼ teaspoon salt
    • 1 ¼ cup sugar

    Glaze

    • 1 ¾ cup confectioners sugar
    • 4 Tablespoons whole milk

    Instructions

    • Move oven rack to middle of the oven.
    • Mix butter and sugar in large bowl until creamed, about 3 minutes.
    • Add eggs, yolks, and vanilla, beat 5 minutes on medium.
    • Sift together flour, baking powder and salt.
    • Reduce mixer speed to low and add ½ of the flour mixture and half the milk. Mix 5 minutes.
    • Add second half of flour mixture and milk. Mix for 5 minutes.
    • Generously grease and flour bundt pan.
    • Pour batter into pan and tap to remove bubbles.
    • Place pan in cool oven, set temperature to 350℉ and bake 1 hour. Cake will be done when a toothpick inserted into the cake comes out clean.
    • Allow to cool 30 minutes before releasing the edges with a knife and turning the pan upside down to finish cooling. 

    Glaze

    • Add one tablespoon of milk at a time to confectioners sugar to achieve desired consistency. 
    • Drizzle over cake. Enjoy!

    Nutrition

    Serving: 1slice | Calories: 387kcal | Carbohydrates: 54g | Protein: 4g | Fat: 17g | Saturated Fat: 10g | Cholesterol: 96mg | Sodium: 77mg | Potassium: 100mg | Sugar: 38g | Vitamin A: 565IU | Calcium: 45mg | Iron: 0.5mg

    Marshmallow Popcorn Balls

    October 24, 2024

    marshmallow popcorn balls on white background

    Marshmallow Popcorn Balls: These simple and delicious popcorn balls come together in minutes for the perfect snack or sweet treat, using only simple ingredients that you may already have on hand!

    Quick Overview: In only 20 minutes, you’ll have these delicious popcorn balls ready for eating! Whether that’s for a Halloween treat or just for a quick dessert!

    These simple and delicious popcorn balls come together in minutes for the perfect snack or sweet treat.

    Let me start out by saying, I love to make any type of popcorn recipe.

    Plain, buttered, sweet, or savory I will take it all. So naturally, I was very excited for the opportunity to pull together a delicious and simple marshmallow popcorn ball recipe to share with you all.

    Love easy vintage snacks like this one? Try this old-fashioned peanut brittle next.

    [feast_advanced_jump_to]

    Hey Fantabulosity readers, it’s Meg again popping in from Meg’s Everyday Indulgence with another fun and delicious recipe to share with you all.

    Why You’ll Love This Recipe

    • They’re made without corn syrup! So if you want to do without that, you can use marshmallows that don’t have corn syrup!
    • Made with marshmallows and other ingredients that you probably already have on hand! (We love anything “marshmallow”, especially this marshmallow fruit dip!)
    • They’re fun to make with the kiddos.

    Popcorn Balls without Corn Syrup

    What I also love about this recipe, is that it doesn’t use corn syrup. Most marshmallows have corn syrup but if you get marshmallows such as Dandies All Natural Marshmallows, the ingredients do not list corn syrup.

    Ingredients

    Let’s start by discussing these Popcorn Balls’ ridiculously easy ingredient list.

    Ingredients You’ll Need:

    • Plain popped popcorn
    • Butter
    • Marshmallows
    • Kosher salt
    • Pure vanilla extract
    ingredients on the table for popcorn balls

    How to Make Marshmallow Popcorn Balls

    First, you need to pop your popcorn. I used my air popper to pop the popcorn and ended up needing about ½ cup of popcorn kernels.

    You can also pop your kernels on the stovetop or even use plain microwave popcorn.

    You’ll need 16 cups of popcorn for the recipe, and once the popcorn is popped, make sure to remove any unpopped kernels.

    This step may seem tedious but you don’t want to bite into a hard kernel while enjoying your popcorn ball.

    Set the popcorn aside.

    Marshmallows + Butter

    Next up, melt the butter and marshmallows in a large stockpot. Make sure it’s big enough to hold all your popcorn which you’ll be adding in a minute. (Image 1 below.)

    Once the butter and marshmallows are melted together, (Image 2 below) remove from the heat and stir in the salt and vanilla extract. (Image 3 below.)

    Stir in the popcorn. Keep stirring to ensure every piece is coated in marshmallowy goodness.

    Let it cool for a few minutes, until it’s a good temperature for you to handle with your hands. This next step is vital in your popcorn ball success.

    step by step collage of making marshmallow popcorn balls

    Shape into Popcorn Balls

    Spray your hands well with nonstick cooking spray. Otherwise, you will end up with a huge sticky mess on your hands.

    Measure out 1 cup of the mixture and roll into a ball. (Image 6 below.)

    how to shape marshmallow popcorn balls

    Place on parchment paper and keep moving until all your popcorn mixture has been used up. (See image below.)
    You will probably need to respray your hands a few times throughout the process.

    popcorn balls on parchment paper on baking sheet

    Variations

    You can simply serve your popcorn balls as they are or you can jazz them up in several different ways.

    The easiest way to fancy them up is to add a long, festive toothpick. I grabbed these cute picks at Hobby Lobby and they came in a pack with a variety of fun, bright colors.

    These simple and delicious popcorn balls come together in minutes for the perfect snack or sweet treat.

    Another cute option that would be a huge hit with adults and kids alike, sprinkles! After you’ve shaped your popcorn balls, roll them in sprinkles. You can make them festive for any holiday or event.

    My last fun idea to make these a little extra special involves food coloring. Mix in food coloring after melting the butter and marshmallows to make these popcorn balls any color you want.

    Can’t you see cute little pink or red popcorn balls wrapped in cellophane for a fun Valentine’s surprise?!

    marshmallow popcorn balls on table

    How long are popcorn balls good for?

    It can vary but if stored well, in an airtight container, they should be good for up to 5 days!

    So Many Reasons to Make Marshmallow Popcorn Balls

    There are so many reasons to make these popcorn balls. My kids were more than happy to be my little taste testers on this recipe for their after-school snack.

    They would also be a really fun and different option for a bake sale or potluck at school or church. I always love it when there is something besides the typical cookies or brownies to choose from.

    Make them festive, wrap them in cellophane, and add them to the kids’ Easter baskets for a delicious homemade addition.

    popcorn balls on white table cloth

    Want More Portable Treats?

    If you are looking for more delicious, portable sweets like these marshmallow popcorn balls, you have to try this cookie dough fudge, hot chocolate muddy buddies, caramel corn, and chocolate + peanut butter energy bites.

    Recipe

    marshmallow popcorn balls on white background
    Print Pin
    5 from 42 votes

    Easy Marshmallow Popcorn Balls

    These simple and delicious marshmallow popcorn balls come together in minutes for the perfect snack or sweet treat.
    Course Dessert, Snack
    Cuisine American
    Prep Time 10 minutes minutes
    Cook Time 10 minutes minutes
    Total Time 20 minutes minutes
    Servings 10 popcorn balls
    Calories 209kcal
    Author Jessica Burgess

    Ingredients

    • 16 cups popped popcorn (½ cup kernels) Here is how to pop popcorn!
    • 10 ounces mini marshmallows 6 cups
    • 5 Tablespoons unsalted butter
    • ¼ teaspoon kosher salt
    • ¾ teaspoon pure vanilla extract
    • Nonstick spray

    Instructions

    • Go through popcorn and remove any unpopped kernels. Set aside. Lay a rectangle of parchment on the counter.
    • Heat a large pot (big enough for the popcorn) over medium low heat. Add butter and marshmallows. Stir until melted.
    • Remove from heat and stir in kosher salt and vanilla extract.
    • Add popcorn to pot and stir until completely coated. Allow to cool for 3 minutes.
    • Spray hands well with nonstick spray. Measure out a cup of the popcorn mixture. Roll into a ball.
    • Set on prepared parchment. Repeat until you have used all the popcorn. Store in an airtight container.

    Nutrition

    Serving: 1ball | Calories: 209kcal | Carbohydrates: 37g | Protein: 3g | Fat: 7g | Saturated Fat: 4g | Polyunsaturated Fat: 1g | Monounsaturated Fat: 2g | Trans Fat: 0.2g | Cholesterol: 15mg | Sodium: 83mg | Potassium: 61mg | Fiber: 3g | Sugar: 17g | Vitamin A: 209IU | Calcium: 4mg | Iron: 1mg

    Baked BBQ Pork Chops in the Oven

    October 22, 2024

    BBQ Pork Chops in the Oven are super simple but full of flavor! It’s an easy dinner idea that goes with so many great side dishes, especially these baked beans with hamburger. The recipe is similar to how to cook pork steaks and the result is a juicy, delicious cut of meat.

    Hello again Fantabulosity readers. It’s Meg from Meg’s Everyday Indulgence again! I’m so pumped to share this recipe with you today. (Photos updated by Fantabulosity in 2024.)

    Baked bbq pork chops on a bed on sliced onions.

    I have a feeling a lot of you out there are always on the hunt for simple yet delicious dinners that you can get on the table in a flash. You know, the ones that don’t require a mountain of ingredients that you don’t have on hand. (Or at least the recipes that require little prep like this Coca-Cola BBQ Pulled Pork or bbq pork steak recipes.)

    Why You’ll Love These Baked Pork Chops

    If you love easy recipes that use simple ingredients, then you’ll love this one!

    You’ll find that these baked pork chops use staple ingredients, so much like these broiled pork chops and these creamy crock pot pork chops, and I’m betting you already have all or most of these on hand.

    • Pork Chops
    • Onions
    • Barbecue Sauce
    • Basic Spices (to create a delicious, flavorful rub)

    Also, since the pork chops are thinly cut and boneless, they cook very quickly, making them perfect for nights when you don’t have much time to get dinner on the table.

    Baking cuts of meat in the oven can result in a juicy, tender cut of meat, and these pork chops are no different.

    Ingredients

    Ingredients for baked bbq pork chops.

    Pork Chop Rub

    Before the boneless pork chops go into the oven to bake, a simple rub is sprinkled all over both sides.

    All the ingredients in the rub are pretty basic pantry staples. This includes salt, pepper, garlic powder, onion powder, chili powder, and paprika.

    Almost all of the spices are used in equal amounts (excluding the salt, and if you’re using table salt, you may want to use ½ teaspoon) so it’s super simple to mix up and makes a big impact on the flavor.

    The Secret to Good Pork Chops

    This boneless pork chop recipe has a little secret that adds so much flavor to this cut of pork. By slicing an onion and and layering it along the bottom of your baking dish, adds a lot of flavor to the pork chops.

    Baked pork chops on white plate, sitting next to cast iron skillet.

    How to Cook Baked Pork Chops

    First, as the chops sit on the onion slices and bake away, the onion flavor is imparted upon them. But no fear, it’s not a crazy oniony taste that will cause your kids to revolt but a nice, subtle flavor boost.

    Sliced onions in bottom of baking dish.
    Uncooked pork chops and onions in baking dish.

    The second plus is that once the chops are done cooking, the onions have softened and become seasoned with the rub, barbecue sauce, and pork juices, which makes for a great topping to your chops.

    Baked bbq pork chops on plate with sliced onions.

    TIP: You could easily double or triple the amounts and keep the extra in an airtight container to have it ready for next time.

    Barbecue Sauce for Pork Chops

    Now the great debate may be on. What kind of barbecue sauce do you like? Hot, sweet, smoky, all of the above?! I’m a sweet, Kansas City style barbecue sauce girl all the way. My husband grew up in KC and I grew up just a few hours away so it’s in our DNA to like the sweet saucy stuff.

    You obviously can use whatever kind of barbecue sauce you like best and they will all pair well with the rub.

    Expert Tip

    I chose to use somewhat thinly cut chops to keep this a quick cooking meal. I’m always on the lookout for quick, healthy and homemade dinner options for nights when we have dance, Cub Scouts or conferences so it’s nice to have another option to add to the arsenal.

    What to Serve with BBQ Pork Chops

    There’s nothing better than the staples when it comes to sides dishes that go with BBQ. This red skin potato salad is one of our favorite savory salad recipes but pasta salad recipes are always a good option too! Or, it’s hard to have pork without this KFC Copycat Coleslaw recipe!

    More Pork Chop and Pork Steak Recipes You’ll Love:

    If you love cuts of pork these are some other great easy recipes that you’ll want to try out for sure. Or, if you’re a fan of using the slow cooker, give these slow cooker bbq pork steaks a try! (Pork steaks are taken from the shoulder of a pig and are usually tougher than chops… but juicier.)

    • Close up of southern fried pork chops on white plate, with a pork gravy poured on top.
      Southern Fried Pork Chops
    • Baked Boneless Pork Chops Recipe
      Baked Pork Chops & Veggies – One Pan
    • Grilled pork chop on plate next to asparagus.
      Grilled Pork Chops Recipe
    • Baked BBQ Pork Steaks on white plate
      Pork Steaks in the Oven

    Did you make this? I’d be so grateful if you left a “star” rating below to let me know what you thought! Then, the next time you need a quick and easy recipe, come back to Fantabulosity to browse all of my easy recipes!

    Recipe

    Print Pin
    4.88 from 32 votes

    Baked BBQ Pork Chops

    Baked BBQ Pork Chops in the oven are a super easy dinner that's on the table in 30 minutes. Sweet, smoky, simple and delicious.
    Course Main Course
    Cuisine American
    Prep Time 5 minutes minutes
    Cook Time 25 minutes minutes
    Total Time 30 minutes minutes
    Servings 4 servings
    Calories 119kcal
    Author Jessica Burgess

    Ingredients

    • 1 large yellow onion, sliced into ¼-inch rings
    • 1 Tablespoon olive oil
    • 4 ¼-inch thick boneless pork chops
    • ½ cup barbecue sauce

    For the BBQ Rub:

    • 1 ½ Tablespoon kosher salt If using table salt, you may want to use less.
    • ½ teaspoon garlic powder
    • ½ teaspoon onion powder
    • ½ teaspoon chili powder
    • ½ teaspoon paprika
    • ½ teaspoon black pepper

    Instructions

    • Preheat oven to 400 degrees F. Layer onions in a large cast iron skillet or 9×3 baking dish. Drizzle with olive oil. Set aside.
    • In a small bowl, combine the kosher salt, garlic powder, onion powder, chili powder, paprika and pepper. 
    • Sprinkle both sides of the pork chops with the bbq rub. Place the seasoned chops on top of the onions. Bake for 15 minutes. 
    • Remove from the oven and brush both sides of the chops generously with barbecue sauce. Bake another 10 minutes or until the internal temperature reaches 145 F. Remove from oven and let rest for 3 minutes before slicing. Top with onions when serving.

    Video

    Notes

    This recipe is easy to double or triple if you need larger amounts.
    Make sure not to overlap the pork chops so they cook evenly.

    Nutrition

    Serving: 1g | Calories: 119kcal | Carbohydrates: 20g | Protein: 1g | Fat: 4g | Sodium: 2528mg | Potassium: 163mg | Fiber: 1g | Sugar: 13g | Vitamin A: 565IU | Vitamin C: 3mg | Calcium: 23mg | Iron: 0.6mg

    Caramel Corn Recipe

    October 20, 2024

    Caramel Corn in black metal stand.

    This homemade caramel corn recipe doesn’t require baking and uses just a few, easy ingredients! Plus, make your popcorn using my easy homemade popcorn recipe and you’re ready for the ultimate fall, snack!

    Caramel corn in black metal french fry stand.

    Each year when the temps lower to…oh… say 40 degrees or so, I start craving all the winter goodies. Like this Peppermint latte, peppermint cake, sugar cookies, and well… just about anything not good for me. Caramel corn is one of those winter staples that I begin craving instantly

    You may also love:

    • Hot Chocolate Muddy Buddies
    • Perfect Marshmallow Treats
    • Fried Cake Bites

    I remember making caramel corn as a kid with my parents, and I thought it was one of the coolest things ever.  Now, I can make caramel corn with my kids and make our own memories!

    Why You’ll Love This Easy Recipe

    No baking required! Yes really. I love how it doesn’t take hours to make this recipe and you can start eating it as soon as it cools off. (For real, make sure it cools off. I can’t tell you how many times I’ve burnt my tongue because I’m too impatient.)

    Ingredients

    Labeled ingredients for caramel corn recipe.

    With only using a few ingredients, you can make this super easy caramel corn at home too. Here are the everyday ingredients you’ll be using but make sure to see the recipe card below for the full list of ingredients and instructions all in one place.

    • Popped Popcorn – I prefer making my own with kernels so I don’t have to worry about the flavorings and extras that microwave popcorn tends to have.
    • Butter – Real butter is recommended here.
    • Light Brown Sugar – You can use dark brown sugar too!
    • Vanilla Extract – I prefer to use real vanilla, instead of imitation.
    • Baking Soda
    • Salt

    How to Make the Caramel Corn

    Making caramel corn on the stove top, no baking! It's so quick and easy!

    First you’ll brown your butter, then add the brown sugar and salt. Allow those items to boil and then add vanilla and baking soda! Mix to combine and then pour over the prepared popcorn.

    Pour caramel syrup over popcorn - homemade caramel corn recipe

    Pour the caramel covered popcorn on to a greased, or parchment paper lined baking sheet and allow it the caramel to harden and dry.

    Caramel Corn Recipe - easy

    Pro Tips

    • I like to stir the popcorn after about 10 minutes while it’s cooling to help dry it out faster.
    • This caramel corn recipe is great to give out as gifts during the holiday season. Package it up in cute packaging with a gift tag (like these Christmas popcorn balls) and it’s ready to go! Just make sure it has cooled off before packaging or it will get soggy.
    Hand holding a piece of homemade caramel corn.

    More Snack Recipes

    If you love easy snacks like this one, you’ll also love these new favorite snack recipes:

    • 4th of July cupcakes.
      4th of July Cupcakes – Red, White, and Blue Layers
    • Strawberry cake mix cookies on white plate.
      Strawberry Cake Mix Cookies
    • A mixed berry mini trifle.
      Mixed Berry Mini Trifles
    • Cake mix peanut butter cookies stacked.
      Cake Mix Peanut Butter Cookies

    Recipe

    Caramel Corn in black metal stand.
    Print Pin
    4.50 from 10 votes

    Caramel Corn Recipe

    It only takes a handful of ingredients to make this easy caramel corn recipe. No baking required for this quick snack recipe!
    Course Dessert, Snack
    Cuisine American
    Prep Time 10 minutes minutes
    Cook Time 10 minutes minutes
    Total Time 20 minutes minutes
    Servings 16 servings
    Calories 463kcal
    Author Jessica Burgess

    Ingredients

    • 8 cups Popped Popcorn
    • 1 cup butter
    • 1 cup light brown sugar
    • 2 teaspoon vanilla extract
    • ½ teaspoon baking soda
    • 1 teaspoon salt or to taste (We like to use kosher salt.)

    Instructions

    • Make plain popcorn by following this homemade popcorn recipe or using store bought, and place in large mixing bowl.
    • Melt butter in a saucepan over medium heat.
    • Add brown sugar and salt and stir until mixed.
    • Bring the butter and sugar mixture up to a boil, stirring consistently.
    • When it begins to boil, stop stirring and allow it to cook for 5 minutes, but after 4 minutes add vanilla and stir to mix.
    • Continue to boil for one more minute and then add the baking soda, stir until mixed in.
    • Grab the bowl of popcorn and drizzle the caramel sauce over the top. Using a spatula or wooden spoon, gently stir until all the popcorn is covered with the sauce.
    • Pour the popcorn out and spread out onto a flat surface to allow cooling. (i.e cookie sheet, wax paper, etc.)

    Video

    Notes

    Although not required, I like to stir the popcorn after about 10 minutes of cooling to help speed up the process and keep the popcorn crunchy.

    Nutrition

    Serving: 1serving (about ½ cup) | Calories: 463kcal | Carbohydrates: 74g | Protein: 9g | Fat: 15g | Saturated Fat: 8g | Cholesterol: 31mg | Sodium: 290mg | Potassium: 246mg | Fiber: 10g | Sugar: 14g | Vitamin A: 355IU | Calcium: 19mg | Iron: 2.6mg

    Hot Cocoa Dip

    October 17, 2024

    Hot cocoa dip made with marshmallow cream, whipped cream and cream cheese.

    Hot Cocoa Dip isn’t hot at all… it’s a no-bake dessert that only requires 4 ingredients: cream cheese, marshmallow fluff, Cool Whip, and hot chocolate mix. Serve it with your favorite cookies or graham crackers for a delicious and easy treat that’s creamy and sweet.

    Hot Cocoa Dip in bowl, with marshmallows and graham crackers.

    Who says desserts in the fall and winter must be baked in an oven? Not me! I love the flavors of this hot cocoa dip, all while it only takes a few minutes to whip up!

    Serve it on a Christmas dessert board, this s’mores dip in the fall, or just to have on a holiday table for snacking.

    Ingredients for Hot Cocoa Dip

    Here’s what you’ll need for this easy recipe, below. Make sure to check the recipe card below for the full list of ingredients and measurements with instructions.

    Ingredients to make hot cocoa dip on kitchen counter.

    Notes of Key Ingredients

    • Whipped Cream: You can use homemade whipped cream as a substitute for Cool Whip. Simply whip heavy cream with a bit of sugar until it forms stiff peaks. Use it in the same quantity as the Cool Whip in the recipe.
    • Marshmallow Fluff: If you don’t have marshmallow fluff, you can substitute it with an equal amount of mini marshmallows melted with a little butter. Melt them gently over low heat and allow them to cool slightly before mixing them with the cream cheese.

    How to Make This No Bake Dip

    Cream cheese, marshmallow fluff, Cool Whip and hot cocoa mix all in a mixing bowl.
    Hot cocoa dip in serving bowl, ready to top with marshmallows, chocolate chips or your favorites.

    First, mix together the cream cheese and marshmallow fluff, using a hand mixer or a wooden spoon.

    Then, mix in the hot chocolate mix until fully combined.

    Lastly, using a spatula, fold in (meaning to carefully and gradually) stir the whipped cream in to the dip so it remains fluffy.

    Pour in to a serving dish and serve with your favorite snacks. See ideas below.

    Hot cocoa dip with marshmallows and chocolate chips on top, with graham crackers.

    What to Serve with Hot Cocoa Dip

    You can serve so many different yummy items with this dip. Here are some of my favorites:

    • graham crackers
    • vanilla wafers
    • mini cookies
    • pretzels
    • animal crackers

    Extra Fun Ideas for this Dip:

    • Feel free to get creative with the toppings! Consider adding crushed peppermint candies, caramel drizzle, or chopped nuts to add different flavors and textures.
    • Additional flavors: Add a few drops of peppermint extract for a festive twist. Swirl in a couple of tablespoons of Nutella for an extra chocolaty flavor.

    How to Store this Dip

    • Leftovers: Store any leftover dip in an airtight container in the refrigerator for up to 5 days.
    • Freezing: Although the texture may change, you can freeze the dip for up to 1 month. Thaw in the refrigerator before serving and stir well.

    More Creamy Dessert Recipes

    • A bowl of Oreo dip with an Oreo in it and crumbled Oreos on top.
      Oreo Dip
    • A bowl of booty dip surrounded by crackers and with two graham crackers in the dip.
      Booty Dip
    • Cool Whip fruit dip with strawberry ham, in a white bowl.
      Cool Whip Fruit Dip
    • banana pudding dip on serving tray with crackers and fresh fruit
      Banana Pudding Dip

    Did you make this? I’d be so grateful if you left a “star” rating below to let me know what you thought! Then, the next time you need a quick and easy recipe, come back to Fantabulosity to browse all of my easy recipes!

    If you’re a hot chocolate fan, you’ll also love these DIY hot chocolate gifts!

    Recipe

    Hot cocoa dip made with marshmallow cream, whipped cream and cream cheese.
    Print Pin
    Be the first to rate!

    Hot Cocoa Dip

    This creamy, no-bake, hot cocoa dip is ready in 10 minutes, and uses cream cheese, marshmallow fluff, Cool Whip and hot chocolate mix.
    Course Dessert, Snack
    Cuisine American
    Prep Time 10 minutes minutes
    Total Time 10 minutes minutes
    Servings 8 servings
    Calories 170kcal
    Author Jessica Burgess

    Ingredients

    • 1 cup whipped cream cheese original
    • ¾ cup marshmallow fluff
    • 1 cup frozen whipped topping (Such as Cool Whip) thawed
    • ⅓ cup hot chocolate mix

    Instructions

    • In a large mixing bowl, blend the cream cheese and marshmallow fluff until smooth and well combined. (You can use a hand mixer or wooden spoon).
    • Add the hot chocolate mix powder to the cream cheese mixture. Mix until fully incorporated.
    • Gently fold in the thawed whipped topping using a spatula. Mix until the dip is smooth and fluffy.
    • Transfer the dip to a serving bowl. Garnish with mini marshmallows, chocolate chips and a dusting of cocoa powder if desired. Serve immediately or refrigerate until ready to serve. See "Notes" below for ideas on what to serve with this dip!

    Video

    Notes

    Garnish Ideas:
    • Mini marshmallows
    • Cocoa powder
    • Chocolate chips
    What to Serve with this Dip:
    • Graham crackers
    • Cookies
    • Vanilla wafers
    • Pretzels
    • Animal crackers

    Nutrition

    Serving: 1serving | Calories: 170kcal | Carbohydrates: 18g | Protein: 2g | Fat: 11g | Saturated Fat: 7g | Polyunsaturated Fat: 0.4g | Monounsaturated Fat: 3g | Trans Fat: 0.01g | Cholesterol: 30mg | Sodium: 138mg | Potassium: 48mg | Fiber: 0.2g | Sugar: 13g | Vitamin A: 398IU | Calcium: 43mg | Iron: 0.1mg

    Chicken Alfredo Lasagna

    October 11, 2024

    Chicken Alfredo Lasagna on round plate.

    This Chicken Alfredo Lasagna is made without spinach and uses a jar of sauce to keep things quick and easy. Ready in just a little over an hour, this recipe is a great dinner recipe that the whole family will love.

    Chicken Alfredo Lasagna in baking dish, being lifted out.

    Chicken Alfredo recipes are hearty and comforting, especially when combined with delicious cheeses and tender chicken pieces. Love those flavors together? Try this Alfredo garlic bread recipe alongside this dish.

    If you’re a spice lover, this Buffalo Chicken Lasagna is similar and is a fun twist on the classic. Or, for another lasagna favorite, this Lasagna Soup Recipe is a must-make during the cooler months.

    Chicken Alfredo Lasagna Highlights

    • The ingredients in this recipe are simple, everyday ingredients, which you can usually keep on hand when you need a dinner recipe in a pinch.
    • Creamy and comforting, this lasagna is a comfort food recipe that even the kids will love.
    [feast_advanced_jump_to]

    Key Ingredients

    Here’s what you’ll need to make this chicken lasagna.

    Ingredients for chicken alfredo lasagna on counter.

    Complete list of ingredients and amounts can be found in the recipe card below.

    • Lasagna Noodles: Use oven-ready lasagna noodles to skip the boiling step, or swap with gluten-free lasagna noodles if needed.
    • Ricotta Cheese: Cottage cheese can be used as a lower-fat option. 
    • Parmesan Cheese: Use freshly grated Parmesan for better texture and taste. You can also use Pecorino Romano for a similar flavor.
    • Egg: Adding an egg helps bind the ricotta mixture together, ensuring a firmer filling.
    • Garlic: You can substitute the granulated garlic with garlic powder or minced fresh garlic (though fresh garlic will provide a sharper taste).
    • Chicken: You can use rotisserie chicken for convenience (then use the bones to make this rotisserie chicken broth). Or, if you’d like to boil chicken for easy cooking, these boiled chicken breasts are a great option. You can substitute the cooked chicken with leftover Thanksgiving turkey.
    • Alfredo Sauce: I love using store-bought sauce to keep things quick and easy. However, you can make your own easy Alfredo Sauce if you prefer.
    • Mozzarella Cheese: Pre-shredded mozzarella can have anti-caking agents, so shredding your own cheese yields better melting. Provolone or Monterey Jack can be used for a different but mild, creamy melt.

    How to Make Chicken Alfredo Lasagna

    Complete instructions can be found in the recipe card below.

    1. Preheat the oven to 375°F. Lightly spray a 9 x 13-inch baking dish with cooking spray. Set aside. 
    Cooked lasagna noodles on sheet pan.
    Cook noodles and set aside.
    Ricotta cheese and seasonings in mixing bowl.
    Mix cheeses and seasonings.
    Ricotta cheese mixture spread on lasagna noodles in baking dish.
    Spread cheese mixture on to noodles.
    Chicken added and Alfredo sauce on top of noodles for lasagna.
    Spread chicken and Alfredo sauce on to cheese mixture.
    Shredded mozzarella cheese sprinkled on top.
    Sprinkle shredded mozzarella on top.
    Unbaked chicken Alfredo lasagna in baking dish.
    Repeat layers.
    Chicken Alfredo Lasagna baked in baking dish.

    Cover and bake lasagna in the oven for 30-35 minutes, and remove foil and bake for an additional 10-15 minutes.

    Slice of Chicken Alfredo Lasagna on round plate.

    Recipe FAQs

    Is Alfredo sauce the same as lasagna sauce?

    Typically, lasagna sauce is a red, tomato-based marinara sauce, but when making Alfredo lasagna, a white, creamy sauce is used.

    Is the top layer of lasagna sauce or noodles?

    Sauce and cheese are the top layers of lasagna. Typically the cheese is on the very top so it melts and toasts for a beautiful look.

    Do you bake lasagna covered or uncovered?

    Covering the lasagna for the majority of the bake time is recommended, and then uncovering towards the end is best for melting and toasting the top.

    Storage Tips

    • Refrigerator: Store leftover lasagna in an airtight container or cover the baking dish tightly with plastic wrap or foil. It will last for up to 3 – 4 days in the refrigerator.
    • Freezer: Lasagna can be frozen for up to 2 – 3 months. Wrap individual portions or the entire lasagna tightly in plastic wrap and then in aluminum foil, or use a freezer-safe container.
    • To Reheat: Thaw overnight in the refrigerator if frozen. Reheat in the oven at 350°F for 20 – 30 minutes or until heated through. For faster reheating, use a microwave, covering the lasagna to retain moisture.
    • Make-Ahead: You can assemble the lasagna a day in advance. Cover it tightly with plastic wrap or foil and store it in the refrigerator until ready to bake. You can also freeze it unbaked. Assemble the lasagna, then freeze it before baking. Wrap tightly in plastic wrap and foil. When ready to bake, thaw in the refrigerator overnight, then bake as directed, adding about 10 – 15 minutes to the baking time if it’s still slightly chilled.

    Related Recipes

    • Crab pasta bake being lifted out of baking dish with tongs.
      Crab Pasta Bake
    • scoop of chicken bacon ranch pasta
      Chicken Bacon Ranch Pasta
    • Close-up of chicken and broccoli pasta with creamy sauce.
      Chicken and Broccoli Pasta
    • Cream Cheese Pasta being scooped up and held above the plate.
      Cream Cheese Pasta

    Recipe

    Chicken Alfredo Lasagna on round plate.
    Print Pin
    5 from 1 vote

    Chicken Alfredo Lasagna

    This creamy chicken Alfredo lasagna turns a classic recipe in to a creamy, rich, dish that pasta lovers will adore.
    Course Dinner, Main Course
    Cuisine Italian
    Prep Time 15 minutes minutes
    Cook Time 50 minutes minutes
    Total Time 1 hour hour 5 minutes minutes
    Servings 9 servings
    Calories 703kcal
    Author Jessica Burgess

    Ingredients

    • 12 lasagna noodles
    • 2½ cups ricotta cheese
    • ¾ cup grated parmesan cheese divided (½ cup + ¼ cup)
    • 1 large egg
    • 2 teaspoons garlic powder
    • 2 teaspoons Italian seasoning
    • 1 teaspoon kosher salt
    • ½ teaspoon black pepper
    • 3 cups cooked chicken shredded
    • 30 ounces jarred Alfredo sauce or use this alfredo sauce recipe
    • 4 cups shredded mozzarella cheese divided (shred block cheese for best results)
    • 2 Tablespoons fresh parsley chopped, for garnish
    • red pepper flakes optional garnish

    Instructions

    • Preheat the oven to 375°F. Lightly spray a 9 x 13-inch baking dish with cooking spray. Set aside. 
    • Bring a salted pot of water to a boil. Cook the 12 lasagna noodles according to the package instructions. Drain and lay the noodles flat on a sheet pan, or lightly toss them in olive oil to prevent sticking.
    • Using a rubber spatula, combine 2½ cups ricotta cheese, ¾ cup grated parmesan cheese, 1 large egg, 2 teaspoons garlic powder, 2 teaspoons Italian seasoning, 1 teaspoon kosher salt, and ½ teaspoon black pepper in a medium mixing bowl.
    • Spread a thin layer of Alfredo sauce at the bottom of your prepared 9 x 13-inch dish.
      Place 3 lasagna noodles in a single layer on top of the sauce.
      Spread a layer of the ricotta mixture over the noodles (about 1 heaping cup).
      Top with a layer of shredded chicken (about 1 heaping cup).
      Then drizzle about ½ cup of Alfredo sauce over the chicken and spread evenly over the chicken.
      Sprinkle 1 cup of shredded mozzarella cheese over the sauce.
      Repeat this layering process twice (noodles, ricotta, chicken, Alfredo, mozzarella).
      There should now be three layers of filling.
    • On the final layer, place three more noodles over the final layer of filling.
      Pour the remaining Alfredo sauce on top of the noodles and sprinkle with the remaining ¼ cup of Parmesan cheese and the remaining cup of shredded mozzarella.
    • Cover with aluminum foil and bake for 30 – 35 minutes. Remove the foil and bake for an additional 10 – 15 minutes or until the cheese on top is golden and bubbly.
    • Garnish with extra fresh parsley and red pepper flakes (if desired). Let the lasagna rest for 10 minutes before slicing. 
    • Slice into 9 or 12 square pieces and serve. Enjoy!

    Notes

    • Ensure the Alfredo sauce is spread evenly on all layers, particularly the top, to prevent the noodles from drying out.
    • To keep noodles from sticking together, cook them al dente and coat lightly with olive oil after draining. Lay out the noodles flat on a sheet pan. Use a piece of parchment paper to separate them if you need to layer them. 

    Nutrition

    Serving: 1serving | Calories: 703kcal | Carbohydrates: 36g | Protein: 42g | Fat: 42g | Saturated Fat: 22g | Polyunsaturated Fat: 6g | Monounsaturated Fat: 12g | Trans Fat: 0.002g | Cholesterol: 199mg | Sodium: 1455mg | Potassium: 343mg | Fiber: 1g | Sugar: 3g | Vitamin A: 847IU | Vitamin C: 1mg | Calcium: 494mg | Iron: 2mg

    Apple Cider Punch

    September 29, 2024

    Fall punch in a drink dispenser with orange slices and cinnamon sticks.

    Apple Cider Punch is made with apple cider, orange soda, caramel syrup, pumpkin pie spices, and the optional oranges and cinnamon sticks. It’s ready in minutes and great for fall parties!

    Apple cider punch in a pumpkin drink dispenser.

    Serve this easy recipe at Halloween parties or Thanksgiving dinners, and watch it disappear quickly when everyone has that first sip. It has the flavors of autumn and is such a refreshing blend of flavors for any occasion.

    This Fruit Punch Recipe is always a winner during the holidays, and this Orange Sherbet Punch is a great summer option, or another orange punch option if you don’t mind ice cream punch during the cooler months.

    Autumn Punch Highlights

    • Flavors: This punch has warm flavors of smooth caramel, orange, and apple spice, that come together perfectly.
    • Ease: With just a few ingredients, and being able to pour everything right in together, makes this a great recipe for kids to help with, or even beginners in the kitchen.
    • Time: This punch is ready in just a few minutes, meaning you can whip this up right when the party starts (and is recommended).
    [feast_advanced_jump_to]

    Key Ingredients

    Have fun making this punch your way and with your favorite ingredients. However, the combination you see below is my favorite.

    Ingredients for apple cider punch.

    Complete list of ingredients and amounts can be found in the recipe card below.

    • Apple Cider: The apple cider I used was a Honeycrisp style so I feel it wasn’t as thick as some ciders but do believe other ciders will work lovely in this too. It just may make your punch darker if your cider is darker.
    • Pumpkin Pie Spice: If you have apple pie spice on hand instead, this is perfectly fine to use as well.
    • Caramel Syrup: You can use an ice cream caramel syrup instead although I’m not sure how it will mix with the cold beverages. I prefer using a flavored coffee-type syrup, like the Torani brand.
    • Orange Soda: You can use Fanta or Sunkist, whichever you prefer. Or, try ginger ale, or even another type of citrus soda.

    How to Make This Apple Cider Punch Recipe

    Apple cider, orange soda, caramel syrup, and pumpkin pie spice in drink dispenser.
    • In Advance (Optional): Chill apple cider and orange soda so it’s a cold punch when serving.
    • Slice oranges if using.
    • In drink dispenser or punch bowl, pour in the apple cider, caramel syrup, pumpkin pie spice, and orange soda and whisk for a couple of minutes, trying to dissolve the spices.
    • Lastly, place orange slices and cinnamon sticks in punch bowl and serve.
    Apple cider punch in pumpkin drink dispenser for the fall season.

    Fall Punch Tips

    • Garnish: Rim drinking glasses with a cinnamon and sugar mixture if desired. Or, place a cinnamon stick in each glass when serving.
    • Punch for a Crowd: This recipe makes about 1 gallon of punch, which makes about 16 glasses, so you can easily double or triple the recipe if needed.
    • Making in Advance: If you plan to make this punch ahead of time, it’s best to wait to pour/open the orange soda, to keep it fresh and bubbly when drinking.
    • Pumpkin Pie Spice: Using a whisk can help mix in the powdery spices but with it being a cool beverage, it’s harder for the spices to dissolve. Feel free to reduce the amount you use too.
    • Keeping it Cold: You can always add about 6 cups of ice if you’d like but as the ice melts it will water down the punch. So if you buy extra apple cider, you can free the cider in ice cube trays and add those to the punch, so as they melt, it’s not as watered down.

    Additional Variations

    • Fruits: Sliced apples (red or green), cranberries,and pears would look amazing in this punch too.
    • Herbs: Fresh rosemary and or thyme would look beautiful with the fall colors.

    Apple Cider Punch FAQs

    What is good to mix with apple cider?

    Citrus beverages mix wonderfully with warm-flavored beverages like apple cider.

    How to serve apple cider at a party?

    It’s a beautiful golden color for fall, so pouring it in to a drink dispenser looks great, especially when garnished with fruits in this punch recipe.

    Is apple cider just warmed up apple juice?

    It’s not. It has warm spices added to it like cloves, cinnamon and allspice, and has been heated.

    More Fall Recipes

    • Baked pumpkin bread on cutting board.
      Easy Pumpkin Bread Recipe
    • Pumpkin Fluff Cool Whip Dip
      Pumpkin Fluff Cool Whip Dip
    • Slice of sweet potato pie recipe on spatula.
      Sweet Potato Pie Recipe
    • A stack of desserts bars with a graham cracker crust and swirled pumpkin cheesecake filling are in the center of the photo
      Pumpkin Cheesecake Bars

    Recipe

    Fall punch in a drink dispenser with orange slices and cinnamon sticks.
    Print Pin
    Be the first to rate!

    Apple Cider Punch

    This apple cider punch recipe uses apple cider, orange soda, caramel syrup, pumpkin pie spice and a few other ingredients to create drink that's perfect for hosting!
    Course Drinks
    Cuisine American
    Prep Time 5 minutes minutes
    Total Time 5 minutes minutes
    Servings 16 glasses
    Calories 126kcal
    Author Jessica Burgess

    Ingredients

    • 64 ounces apple cider
    • 2 liters orange soda
    • ¼ cup caramel syrup
    • ⅛ teaspoon pumpkin pie spice
    • 3 oranges optional
    • 6 cinnamon sticks optional

    Instructions

    • Optional: Place apple cider and orange soda in the refrigerator, hours in advance so punch is cold when serving.
    • Slice oranges and set aside.
    • Pour 64 ounces apple cider, 2 liters orange soda, ¼ cup caramel syrup, ⅛ teaspoon pumpkin pie spice, in a drink dispenser or punch bowl. Stir or whisk to combine in the ingreidents, trying to make the spices dissolve more. (They may not dissolve easily since beverages are cold, and that's ok.)
    • Place the sliced, 3 oranges and 6 cinnamon sticksin punch and serve immediately!

    Notes

    Tips for the Perfect Punch
    • Wait to pour in the orange soda if not serving soon, to keep the soda from going flat too much in the punch. 
    • Freeze extra apple cider in advance, in ice cube trays, to add to punch to help keep it cool without watering the punch down.
    • Double or triple this recipe easily for a large batch when hosting a party.

    Nutrition

    Serving: 8ounces | Calories: 126kcal | Carbohydrates: 32g | Protein: 1g | Fat: 0.2g | Saturated Fat: 0.03g | Polyunsaturated Fat: 0.1g | Monounsaturated Fat: 0.02g | Sodium: 29mg | Potassium: 168mg | Fiber: 2g | Sugar: 28g | Vitamin A: 63IU | Vitamin C: 14mg | Calcium: 36mg | Iron: 0.3mg

    Easy Pumpkin Bread Recipe

    September 25, 2024

    Baked pumpkin bread on cutting board.

    This Easy Pumpkin Bread Recipe is the perfect way to welcome the fall season. This uses canned pumpkin puree, warm spices, and a few other simple ingredients, and this dessert bread is ready to enjoy in about an hour.

    Sliced pumpkin bread on wooden cutting board with a streusel on top.

    When the cooler weather hits, the pumpkin flavors start flowing. So it’s a toss-up between this bread, these pumpkin cream cheese bars, or this no-bake pumpkin pie.

    Gift Idea: This pumpkin bread recipe is one of my favorites to gift my neighbors when the season rolls around too. It’s a great way to bring the fall flavors in and spread the love. It’s hard to choose if this banana bread recipe, this chocolate bread loaf, or this pumpkin bread is their favorite.

    Pumpkin Bread Highlights

    • Texture: This bread is dense, soft, and sturdy enough to hold a piece in your hand while you take a bite.
    • Simple ingredients: No wild things to get for this dessert recipe. You may already have the items on hand to make this one, except the pumpkin puree. But you can grab a can of it to keep on hand for those last-minute fall dessert cravings.
    • Quick: A quick bread that’s ready in about an hour!
    [feast_advanced_jump_to]

    Key Ingredients

    Here’s what you’ll need to make this fall bread recipe:

    Complete list of ingredients and amounts can be found in the recipe card below.

    • Cream cheese: Since cream cheese usually comes in 8-ounce blocks, save the other 4 ounces to make this cream cheese frosting for brownies.
    • Oil: I like to use coconut oil for a lot of my baking and cooking. You can use vegetable oil if you prefer.
    • Brown Sugar: Light brown sugar is recommended for this recipe.
    • Streusel Topping Ingredients: Note that the streusel uses a lot of the same ingredients that are used in the bread. So when checking the ingredient measurements to see if you have all that you need, don’t forget the similar ingredients in the streusel.
    • Buttermilk: If you don’t have buttermilk, you can use regular milk (the same amount) and add a tablespoon of lemon juice to it, and allow it to sit and curdle a bit before adding to the pumpkin batter.
    • Eggs: I’ve made this recipe using 4 eggs in the past, and it causes the bread to be fluffier and lighter. I prefer using only 2 eggs, and it making a heavier, more dense bread. It’s up to you on how you prefer your bread.

    How to Make This Pumpkin Bread

    Canned pumpkin puree and spices in saucepan.
    1. Cook pumpkin puree, 1 teaspoon salt, ¼ teaspoon nutmeg & ⅛ cloves.
    Sugars, and cream cheese added to pumpkin mixture.
    2. Add sugars, oil, and cream cheese & cook until melted together.
    Eggs and buttermilk in small bowl.
    3. Mix eggs and buttermilk.
    Pouring eggs and buttermilk in to pumpkin mixture.
    4. Add buttermilk mixture to the pumpkin mixture.
    Flour, baking soda and baking powder mixed in small bowl.
    5. Mix flour, baking soda and baking powder together.
    Flour added in to pumpkin puree mixture for pumpkin bread.
    6. Add flour mixture to pumpkin mixture.
    Loaf pan lined with parchment paper.
    7. Grease or line loaf pans with parchment paper.
    Pumpkin bread batter poured in to loaf pan.
    8. Pour half of batter in each loaf pan.
    Pumpkin bread streusel ingredients in mixing bowl.
    9. Make streusel: Combine ingredients.
    Streusel ingredients poured on top of pumpkin bread batter.
    10. Sprinkle half of the streusel on top of each loaf pan.

    About the Streusel: The Streusel on top is kind of my favorite. There are times I’ll leave a streusel off of my recipes, just because I feel like it’s a whole other step that’s not really necessary. But with this one… I couldn’t believe how good it was. I start eating a piece, anticipating when I reach the top, to get to the streusel.

    Baked pumpkin bread in loaf pan.

    Bake the pumpkin bread at 350° degrees F for 45-50 minutes, or until a toothpick inserted in to the middle comes out clean.

    Baked loaf of pumpkin bread on parchment paper.

    Remove the bread from the oven. Carefully lift out parchment paper (if using) slice, and enjoy.

    For Mini Loaves:

    If making mini loaves of pumpkin bread, I found that it only took about 15 minutes for the mini loaves to be done, baking at 350 degrees. However, mini loaf pans can vary so it’s best to check with a toothpick after about 12 minutes to see if the bread is finished baking.

    Baked mini pumpkin bread loaves.
    Mini pumpkin cream cheese loaves.

    Pumpkin Bread FAQs

    What’s the difference between canned pumpkin and pumpkin puree?

    There is no difference. Canned pumpkin is the same as pumpkin puree. However, canned pumpkin pie mix is not the same as pumpkin puree. Pumpkin pie mix has spices mixed in with it already.

    How to store pumpkin bread?

    When the bread has cooled, it’s best to store it by wrapping in parchment paper or wax paper. You can also store it in an airtight container or in a zip-top storage bag but it could cause the bread to become gummy. No need to refrigerate. It’s best to enjoy within 2-3 days.

    How do you remove pumpkin bread from a loaf pan?

    For a no-fail way of removing pumpkin bread from a loaf pan, it starts before you even put the batter in the pan. Spray the loaf pan with nonstick cooking spray. Then place a piece of parchment paper inside of the loaf pan, with the corners cut with a slit, so it forms to the loaf pan easier. Then, once baked, simply lift out the bread loaf by pulling on the parchment paper corners.

    Related Recipes

    Love pumpkin flavors? Then you’ll also love these other pumpkin favorites:

    • Pumpkin Cheesecake Bites on wooden cutting board.
      Pumpkin Cheesecake Bites
    • Pumpkin Fluff Cool Whip Dip
      Pumpkin Fluff Cool Whip Dip
    • Slice of pumpkin poke cake on plate with fork
      Pumpkin Poke Cake
    • Close up of pumpkin streusel muffins stacked on top of one another
      Pumpkin Streusel Muffins

    Recipe

    Baked pumpkin bread on cutting board.
    Print Pin
    5 from 2 votes

    Easy Pumpkin Bread Recipe

    This moist pumpkin bread is the perfect fall recipe and is easy to make using canned pumpkin, and a few other simple ingredients.
    Course Dessert
    Cuisine American
    Prep Time 20 minutes minutes
    Cook Time 45 minutes minutes
    Total Time 1 hour hour 5 minutes minutes
    Servings 15 servings
    Calories 307kcal
    Author Jessica Burgess

    Equipment

    • 2 loaf pans or 2, 9-cavity mini loaf pans

    Ingredients

    • 15 ounce can pumpkin puree
    • 1½ teaspoon cinnamon
    • 1 teaspoon kosher salt
    • ¼ teaspoon ground nutmeg
    • ⅛ teaspoon ground cloves
    • 1 cup sugar
    • 1 cup light brown sugar
    • 4 ounce cream cheese
    • ½ cup oil I use coconut but you can use vegetable
    • ¼ cup buttermilk or milk with a few drops of lemon juice
    • 2 large eggs Use 3-4 eggs for a lighter, fluffier bread.
    • 2 cups all-purpose flour
    • ½ teaspoon baking powder
    • ½ teaspoon baking soda

    Streusel:

    • 5 Tablespoons light brown sugar
    • 1 Tablespoon all-purpose flour
    • 1 Tablespoon unsalted butter cold
    • 1 teaspoon cinnamon
    • ¼ teaspoon kosher salt

    Instructions

    • Preheat over to 350 degrees.
    • In a small saucepan, add the 15 ounce can pumpkin puree, 1½ teaspoon cinnamon, 1 teaspoon kosher salt, ¼ teaspoon ground nutmeg and ⅛ teaspoon ground cloves.
    • Cook over medium heat for 5-6 minutes, stirring occassionally.
    • Reduce heat to low-medium heat (to reduce bubbling & splashing).
    • Add in the 1 cup sugar, 1 cup light brown sugar, 4 ounce cream cheese, and ½ cup oil.
    • Cook until cream cheese is melted.
    • In a separate dish, combine the ¼ cup buttermilk and 2 large eggs.
    • Slowly add into the cream cheese mixture, and remove the saucepan from heat.
    • In a separate bowl, combine the 2 cups all-purpose flour, ½ teaspoon baking powder, ½ teaspoon baking soda, and fold into the wet mixture.
    • Line two 9×5 loaf pans with parchment paper or spray with nonstick spray (see notes below for tips) and pour half of the pumpkin batter, in to each pan.

    Streusel Topping

    • Combine the 5 Tablespoons light brown sugar, 1 Tablespoon all-purpose flour, 1 Tablespoon unsalted butter, 1 teaspoon cinnamon, and ¼ teaspoon kosher salt and mix until corporated. (I use a fork and my hands to mix togther the cold, hard butter with the spices the best that I can. Try to only have small pieces of butter left.)
    • Evenly distribute the streusel over the top of both loaf pans of batter.
    • Bake at 350 degrees F for 45-50 minutes or until a toothpick inserted in the middle, comes out clean.
      For mini loaf pans, bake at 350 degrees for 15-20 minutes or until a toothpick inserted in to the middle, comes out clean.

    Video

    Notes

    Tip for Prepping Loaf Pans: I like to spray my loaf pans with non-stick cooking spray and then line with parchment paper. The spray helps the paper stick to the sides. Also, cutting small slits in the corners of the parchment paper helps the paper fit better in to the pans.
    For mini loaf pans, only using non-stick cooking spray works just fine.

    Nutrition

    Serving: 11-inch slice | Calories: 307kcal | Carbohydrates: 48g | Protein: 4g | Fat: 12g | Saturated Fat: 3g | Polyunsaturated Fat: 2g | Monounsaturated Fat: 6g | Trans Fat: 0.1g | Cholesterol: 35mg | Sodium: 289mg | Potassium: 128mg | Fiber: 1g | Sugar: 33g | Vitamin A: 4581IU | Vitamin C: 1mg | Calcium: 53mg | Iron: 2mg

    Recipe originally shared in September 2016, updated in September 2024.

    Pulled Pork Sliders

    September 23, 2024

    Close up of a pulled pork slider on a Hawaiian bun.

    Pulled Pork Sliders on Hawaiian buns are the recipe that should be on every gameday table. Use my pulled pork recipe(s) or pre-made, store-bought pulled pork for this one.

    The yummy glaze and delicious sprinkled seasonings on top of the buttery buns, make this a recipe everyone will be begging for.

    Close-up of pulled pork sliders stacked on top of one another.

    Whether you’re hosting a party for the big game, or feeding a crowd, these will disappear once everyone finds out how delicious they are.

    These pork sliders also make a wonderful and easy dinner recipe that the whole family will love.

    Love slider recipes? Then you’ll also want to try these buffalo chicken sliders and these cheeseburger sliders that have become so popular.

    [feast_advanced_jump_to]

    Pulled Pork Slider Recipe Highlights

    • Comfort Food: The sweet, salty, hearty flavors in this soft, tender, and meaty recipe, give all the feels.
    • Quick Recipe: When using leftover or store-bought cooked pulled pork, this can speed up the recipe by a lot!

    Key Ingredients

    Here’s what you need to make these pulled pork sliders:

    Labeled ingredients for pulled pork sliders.

    Complete list of ingredients and amounts can be found in the recipe card below.

    • Pulled Pork – If you’d like to make your own pulled pork recipe for this, I’d suggest this slow cooker pulled pork recipe or this Instant Pot pulled pork recipe.
    • Hawaiian Buns – You can use different sliders if you prefer. These sweet rolls offer such an amazing contrast with the saltiness of the glaze and pulled pork.
    • BBQ Sauce – Using original sauce is recommended, instead of spicy or some other type, however, feel free to mix things up!
    • Red Pepper Flakes – If you don’t like any heat, you can leave this out of the glaze but it adds a great little kick to mix with the sweet and salty flavors.
    • Cheese – I love the flavor of provolone cheese on these sliders but you can use pepper jack, American, Colby jack, swiss, or your favorite.

    How to Make BBQ Pulled Pork Sliders

    Full instructions can be found in the recipe card below.

    Steps 1-4 of how to make pulled pork sliders.

    Preheat your oven to 350 degrees F.

    Next, mix together your pulled pork and barbecue sauce (unless your pulled pork already has bbq sauce on it).

    TIP: Warmed pulled pork is ideal, so it won’t take as long for the meat to heat through when baking. You can pop it in to the microwave to warm it before assembling the sliders.

    Slice Hawaiian buns in half, creating a top bun layer and a bottom bun layer.

    Place the bottom layer of buns on a baking sheet that’s lined with parchment paper. Spoon out all 4 cups of cooked pulled pork on to the bottom bun layer and then cover pork with the 9 slices of cheese.

    Steps 4-7 of how to make pulled pork sliders.

    Next, place top layer of buns on top of the cheese.

    In a small bowl, mix together ¼ cup melted butter, 1 teaspoon garlic powder, 1 teaspoon Dijon mustard and 1 teaspoon Worcestershire sauce to make glaze.

    Brush the glaze on top of the buns, saving half of it for after you’ve baked the sliders.

    Sprinkle 1 teaspoon of sesame seeds, 1 teaspoon grated parmesan cheese and ½ teaspoon crushed red pepper flakes across the top of the glazed buns.

    Place sliders in the preheated over and bake, covered with foil, for 20 minutes. (TIP: Remove the foil when there’s a minute left, and let it cook to toast the buns a bit.)

    Recipe Pro Tip

    • If your cheese hasn’t melted after the 20 minutes, it could be because the cheese is thick. Simply cover with foil again and bake an additional 3-4 minutes or until it has melted. Or, slice the sliders, and place back in to the oven, covered, so it melts the cheese more evenly. (If your pulled pork was cold, when assembling the sliders, this could also delay the warming process.)
    Baked pulled pork sliders on baking sheet and parchment paper.

    Brush the remaining glaze on top of the buns, then slice in to individual sliders and serve!

    Pulled pork sliders stacked on top of one another.

    📋 Recipe FAQs

    What kind of cheese goes with pulled pork?

    Provolone, cheddar, pepper jack, Monterey Jack, Colby Jack, Swiss, and American, are all great options for these sliders.

    What goes with a pulled pork slider?

    Creamy coleslaw, french fries, baked beans with ground beef, chips and dip, and red potato salad are amazing side dishes that go with pulled pork sliders.

    What is the best liquid to moisten pulled pork?

    If your pulled pork is dry, this could make for a dry slider. Try mixing a little bit of apple juice, beer or broth in to your pulled pork (about a teaspoon at at time) until it shows moisture. Just be cautious of adding too much, as it will make your slider soggy.

    Stacked bbq pulled pork sliders, sitting in front of a bowl of cole slaw.

    Storage

    For leftover sliders: allow them to cool and then cover with plastic wrap or aluminum foil, and refrigerate for up to 3-5 days.

    To reheat: you can place individual sliders in the microwave for about 30 seconds, or until heated through. Or, place multiple sliders in the oven and bake, covered (so the bread doesn’t get hard) at 350 degrees until heated through.

    Bite taken out of bbq pulled pork sliders on Hawaiian buns.

    More Slider Recipes You’ll Love

    If you love sliders as much as I do, you’ll also love these popular slider recipes:

    • Close up of pizza sliders on white plate.
      Pizza Sliders
    • Sloppy joe sliders with melted cheese on white marble cutting board
      Sloppy Joe Sliders
    • Italian sliders on Hawaiian buns
      Italian Sliders with Hawaiian Rolls
    • Turkey slider sitting on top of other turkey sliders with cheese.
      Turkey Sliders

    Did you make this? I’d be so grateful if you left a “star” rating below to let me know what you thought! Then, the next time you need a quick and easy recipe, come back to Fantabulosity to browse all of my easy recipes!

    Recipe

    Close up of a pulled pork slider on a Hawaiian bun.
    Print Pin
    5 from 2 votes

    Pulled Pork Sliders

    This easy pulled pork sliders recipe uses simple ingredients, a homemade pulled pork recipe or store-bought pulled pork, and is perfect for game day or an easy dinner.
    Course Appetizer, Dinner, Main Course, Side Dish
    Cuisine American
    Prep Time 5 minutes minutes
    Cook Time 20 minutes minutes
    Total Time 25 minutes minutes
    Servings 12 sliders
    Calories 364kcal
    Author Jessica Burgess

    Ingredients

    • 12 slider Hawaiian buns (don't cut them individually yet)
    • 4 cups cooked pulled pork Either store bought or use this pulled pork recipe.
    • 9 slices provolone cheese
    • 1 cup bbq sauce

    Glaze and Topping Ingredients

    • ¼ cup butter
    • 1 teaspoon garlic powder
    • 1 teaspoon Dijon mustard
    • 1 teaspoon Worcestershire sauce
    • 1 teaspoon sesame seeds
    • 1 teaspoon grated parmesan cheese
    • ½ teaspoon crushed red pepper flakes optional for a little heat

    Instructions

    • Preheat oven to 350 degrees F.
    • Slice Hawaiian buns in half, creating top and a bottom layers. (You will not cut the buns individually yet. It's much easier to assemble sliders and then cut in to sliders.) Place bottom layer of buns in a 9×13 baking dish.
    • In a mixing bowl, mix together 4 cups cooked pulled pork and 1 cup bbq sauce until combined. (Tip: microwave or warm the pulled pork so it warms faster in the oven.)
    • Spread pulled pork on top of bottom layer of Hawaiian buns, evenly.
    • Top pulled pork with slices of 9 slices provolone cheese and then place tops of Hawaiian buns on.
    • In a small mixing bowl, melt the ¼ cup butter, and add 1 teaspoon garlic powder, 1 teaspoon Dijon mustard, and 1 teaspoon Worcestershire sauce, and mix together until combined. Brush at least half of the glaze on top of Hawaiian buns.
    • Sprinkle 1 teaspoon sesame seeds, 1 teaspoon grated parmesan cheese, and ½ teaspoon crushed red pepper flakes on top of buttered buns.
    • Cover baking dish with aluminum foil and bake at 350 degrees for 20 minutes, uncovering with only 1 minute left to give the tops of the buns a golden finish.

    Notes

    If your cheese is not melted in the middle of your sliders after the 20 minutes, this could be due to the pulled pork being colder when baking, or that the cheese is thicker. Simply cover with aluminum foil and continue baking until heated through.

    Nutrition

    Serving: 3sliders | Calories: 364kcal | Carbohydrates: 39g | Protein: 17g | Fat: 16g | Saturated Fat: 8g | Polyunsaturated Fat: 0.3g | Monounsaturated Fat: 2g | Trans Fat: 0.2g | Cholesterol: 64mg | Sodium: 953mg | Potassium: 87mg | Fiber: 0.3g | Sugar: 24g | Vitamin A: 444IU | Vitamin C: 2mg | Calcium: 163mg | Iron: 1mg

    Blackberry Banana Bread

    September 23, 2024

    Blackberry banana bread on cooling rack.

    Blackberry Banana Bread – the perfect way to use up those blackberries and older bananas, or even to buy just for this recipe!

    OMG. Now THIS is the banana bread I'll be making. Blackberry Flax Banana Bread

    Remember my banana bread recipe that went viral on Pinterest? On average, we probably make this about once a month in our home. My kiddos eat about a banana-a-day, but somehow we always end up with bananas that are a little too brown to eat by themselves. (It may have something to do with buying too many, so I then have an excuse to make this banana bread.)

    If you have green bananas, here’s how to ripen bananas for recipes like this one!

    OMG. Now THIS is the banana bread I'll be making. Blackberry Flax Banana Bread

    Why You’ll Love This Blackberry Banana Bread

    There’s a secret ingredient (buttermilk) that makes this banana blackberry bread so moist and so different than other recipes out there.

    OMG. Now THIS is the banana bread I'll be making. Blackberry-Flax Banana Bread

    TIP: I did choose to put flax seed in this recipe but you don’t have to! It’s just an added ingredient that I like to sneak in for the kids.

    OMG. Now THIS is the banana bread I'll be making. Blackberry-Flax Banana Bread

    I so hope you love this recipe. I kid you not, when I tell you that it never lasts a day in our house So that whole thing I said about how it’s good for breakfast? Yeah, that’s a theory. We’ve never even made it to breakfast with this banana bread in the house.

    More Bread Recipes

    If you love fruit breads, then you’ll also love this pineapple bread recipe too!!

    • Texas Toast Pizza on baking sheet
      Texas Toast Pizzas
    • Sliced banana bread on white platter
      Best Banana Bread
    • Chicken Alfredo garlic bread slices.
      Chicken Alfredo Garlic Bread
    • Cookies and Cream Cinnamon Rolls
      Oreo Cinnamon Rolls

    Recipe

    Blackberry banana bread on cooling rack.
    Print Pin
    4 from 2 votes

    Blackberry Banana Bread

    This blackberry banana bread is SO easy to make and is perfect for breakfast. Try this easy recipe for a yummy breakfast on the go!
    Course Breakfast
    Cuisine American
    Prep Time 20 minutes minutes
    Cook Time 45 minutes minutes
    Total Time 1 hour hour 5 minutes minutes
    Servings 12 servings (2 loaves)
    Calories 334kcal
    Author Jessica Burgess

    Ingredients

    • ½ cup buttermilk or you can combine ½ c. milk with 2 tsp. lemon juice & set aside to curdle
    • ¾ cup butter softened (1 ½ sticks)
    • 1½ cup granulated sugar
    • 1½ cup very ripe bananas mashed, which is about 3 large bananas (Here's how to ripen bananas.)
    • ½ cup mashed blackberries
    • 2 eggs
    • 2 cup all-purpose flour
    • 1 teaspoon baking soda
    • 1 teaspoon salt
    • ¼ cup flaxseed Optional but not required.

    Instructions

    • Preheat your oven to 325 degrees F.
    • Cream the butter and the sugar.
    • Add in the mashed bananas & blackberries (I combine the two in a Ziploc bag and squeeze until mixed.)
    • Add in the eggs.
    • Mix all together until combined.
    • In a separate bowl. mix together the flour, baking soda, salt and flaxseed if using.
    • Add the flour mixture and the buttermilk alternately to the creamed mixture, and mix on low or by hand until combined.
    • If you’re adding chocolate chips/pecans, add to mixture and hand stir to combine
    • Pour into two greased pans, or mini loaf pans.
    • If baking in two regular loaf pans, bake at 325 for 40-45 minutes. If baking in mini loaf pans, bake at 325, and begin checking after 20 minutes with a toothpick to see if it comes out clean. (Because each mini loaf size is different, like mentioned above.)

    Nutrition

    Serving: 1slice (⅙ regular loaf) | Calories: 334kcal | Carbohydrates: 48g | Protein: 4g | Fat: 14g | Saturated Fat: 7g | Cholesterol: 58mg | Sodium: 409mg | Potassium: 178mg | Fiber: 2g | Sugar: 29g | Vitamin A: 430IU | Vitamin C: 2.5mg | Calcium: 32mg | Iron: 1.4mg

    Chicken and Dumplings

    September 17, 2024

    Southern chicken and dumplings in bowl.

    This easy homemade Chicken and Dumplings recipe hits the spot on cool days and is made from scratch, using simple ingredients.

    Ready in about an hour, this Southern classic recipe is ready for dinner, a Sunday lunch, or great to take to a potluck.

    Homemade chicken and dumplings in pot.

    Vintage soup recipes like this one, are delicious in the fall and winter months.

    The warm broth combined with the tender chicken and dense dumplings, seasoned with everyday spices like garlic and onion, make this recipe a go-to for when you need something warm on the table or to even make for someone under the weather.

    Love vintage classics like this one? These ham and beans and this easy chicken pot pie recipe are two recipes to keep on hand when you need comfort food.

    Chicken and dumplings soup in bowl with spoon.

    Chicken and Dumplings Highlights

    • Great for beginners: Don’t let these seem intimidating. This recipe is easy, and everyone will think you spent hours in the kitchen.
    • Everyday ingredients: The ingredients used are simple and may even be ingredients that you have on hand. For instance, do you have cooked shredded chicken in the freezer? Or even rotisserie chicken broth saved for this type of recipe?

    Key Ingredients

    Here’s what you need to make this old-fashioned chicken and dumplings recipe:

    Ingredients to make chicken and dumplings.

    Complete list of ingredients and amounts can be found in the recipe card below.

    • Boneless, skinless chicken breasts – If you want to save some time, you can use a rotisserie chicken. Remove the meat from the carcass and shred it. 
    • Olive oil – Coconut oil, vegetable oil, or really any neutral cooking oil will work here. 
    • Cold butter – Shortening will also do the trick if needed and salted or unsalted works as well.
    • Half and half – I have been known to use buttermilk instead. Whole milk will also work. 
    • Garlic – You can use 1-2 teaspoons of garlic powder instead. 
    • Chicken broth – you can make my homemade chicken broth if you don’t want to use storebought chicken broth.

    How to Make Chicken and Dumplings

    Full instructions can be found in the recipe card below.

    1. Prep. Preheat the oven to 400°F and grease a baking dish with cooking spray or butter. 

    Raw chicken breasts in baking dish.
    2. Season and cook chicken breasts.
    Shredded cooked chicken breasts in a baking dish.
    3. Shred cooked chicken.

    Other ways to cook chicken: Not a fan of baking the chicken breasts? You can try boiling chicken breasts but note that the spices will more than likely need to be added to the shredded chicken after it’s cooked so the spices carry over to the soup, instead of be left behind in the boiling water.

    Butter and flour in mixing bowl to make dumplings.
    4. Make dumpling dough.
    Flour dumplings cut on cutting board.
    5. Form the dumpling dough.
    Chicken broth in pot for dumplings.
    6. Heat chicken broth.
    From scratch dumplings in chicken broth.
    7. Boil the dumplings in chicken broth.
    Homemade chicken and dumplings in pot.
    8. Add cooked chicken to rest of ingredients in the pot.
    Homemade chicken and dumplings in stock pot.
    9. Mix together, and thicken if desired.
    Serving of easy homemade chicken and dumplings in bowl with spoon.

    Recipe Tips

    • Dutch oven size: An 8-quart Dutch oven was used here, but anything between 6 and 8 quarts will work.
    • Add veggies. Saute chopped celery and carrots along with the garlic. Peas would also be a great addition. This is now similar to my Instant Pot Chicken and Dumplings recipe.
    • Cook it all in a Dutch oven. Cook the chicken in a Dutch oven instead of in a baking dish. Remove the chicken, shred it, and set it aside. Then build the broth and boil the dumplings in the same Dutch oven. 

    Recipe FAQs

    What do you need to make southern chicken and dumplings?

    Flour, chicken broth, chicken breasts, baking powder, oil, butter, half and half, and a few everyday spices.

    What are one-pot chicken and dumplings?

    This recipe can be made in one pot as well. Simply cook the chicken in a dutch oven, then continue with the broth and dumplings, and then combine chicken, dumplings, and broth.

    What type of chicken to use for chicken and dumplings?

    Chicken breasts work fantastic but you can also use any type of leftover chicken, such as a rotisserie chicken or even boiled chicken thighs.

    Storing Tips

    • To store. Allow the chicken and dumplings to cool completely before sealing them in an airtight container. You can store them in the fridge for up to 4 days or in the freezer for up to 3 months. 
    • To reheat. Thaw the leftovers (if applicable) and then transfer them to a pot. Reheat over medium-low heat, stirring occasionally. You can also heat individual servings in the microwave in 30-second intervals until warm. 
    • To freeze. Here’s how to freeze the individual components.

      – For the dumplings: Arrange the dumplings in a single layer on a baking sheet lined with parchment paper and pop them in the freezer for a couple of hours to firm up. Load them into a freezer bag and freeze them for up to 3 months. 

      – For the chicken. Allow the shredded chicken to cool before sealing it in an airtight container and freezing it for up to 3 months. 

      – Reheating frozen chicken and dumplings: When you are ready to enjoy, allow the chicken to thaw and boil the dumplings in the flavorful broth just as you normally would. Just for a bit longer. Add the chicken to the mix and, voila! You’re done!

    What to Serve with Chicken and Dumplings

    This dish is great served alone but there’s also something so comforting about serving this with a side of bread, whether it’s homemade biscuits, cheesy pull-apart bread, or even this easy focaccia bread recipe.

    A side salad is also a great side dish for that cool, crisp, contrast.

    More Vintage Recipes

    • Baked chicken and rice casserole in baking dish.
      Old Fashioned Chicken and Rice Casserole
    • Close up of southern fried pork chops on white plate, with a pork gravy poured on top.
      Southern Fried Pork Chops
    • Crack green beans on wooden spoon.
      Crack Green Beans
    • Slice of lemon meringue pie on small plate, with slice of lemon laying beside it.
      Lemon Meringue Pie

    Recipe

    Southern chicken and dumplings in bowl.
    Print Pin
    5 from 1 vote

    Chicken and Dumplings

    This easy homemade chicken and dumplings recipe uses simple ingredients and it's the old-fashioned recipe that your family will love and ready in about an hour.
    Course Dinner, Main Course, Soup
    Cuisine American
    Prep Time 20 minutes minutes
    Cook Time 55 minutes minutes
    Total Time 1 hour hour 15 minutes minutes
    Servings 10 servings
    Calories 349kcal
    Author Jessica Burgess

    Ingredients

    • 2 pounds boneless, skinless chicken breasts
    • 2 Tablespoons olive oil
    • 1 Tablespoon minced garlic
    • ½ Tablespoon onion powder
    • 1 teaspoon salt
    • ½ teaspoon black pepper
    • 10 cups chicken broth
    • 3 cups all-purpose flour divided – plus more for rolling dough
    • ½ teaspoon baking powder
    • ¼ cup cold butter cubed
    • ¾ cup half and half
    • 1 Tablespoon cornstarch

    Instructions

    • Prep. Preheat the oven to 400°F and grease a baking dish with cooking spray or butter. 
    • Bake the chicken. Rub the 2 pounds boneless, skinless chicken breasts with 2 Tablespoons olive oil, 1 Tablespoon minced garlic, ½ Tablespoon onion powder, 1 teaspoon salt, and ½ teaspoon black pepper and arrange it in a single layer in the prepared baking dish. Bake for 25 minutes or until a meat thermometer inserted into the thickest part of the largest piece reads 165°F. 
    • Shred the chicken. Allow the chicken to rest for 5 minutes once cooked. Use two forks to shred the chicken. Set aside. 
    • Make the dumpling dough. In a large mixing bowl, whisk together 2 cups of flour and the ½ teaspoon baking powder. Work the ¼ cup cold butter into the flour mixture with a fork until crumbly (this can also be done in a food processor). Stir in the ¾ cup half and half Mix until the dough comes together into a cohesive ball. Don’t over-mix. 
    • Form dumplings. Place the dough on a lightly floured work surface and dust the dough with additional flour. Roll the dough into ¼ inch thick slab and cut it into 1-inch squares. In a large mixing bowl, toss the squares of dough with the remaining flour to coat.
    • Add the broth. Pour the 10 cups chicken broth in a large dutch oven or pot and heat on high.
    • Boil the dumplings. Bring the chicken broth to a rolling boil and reduce heat to medium high. Add the dumpling slices, one at a time, giving the contents of the pot a stir every few slices to keep the dumplings from sticking together. Boil for 15-20 minutes. 
    • Thicken (if necessary). If the broth isn’t thickening to your preferences (the flour coating on the dumplings should thicken it quite a bit), whisk together 1 Tablespoon cornstarch and 2 tablespoons of broth in a small mixing bowl and then whisk it into the rest of the broth. Continue to cook until thickened.
    • Put it all together. Gently stir the shredded chicken into the dumplings. 
    • Serve. Turn the heat off and ladle the chicken and dumplings into bowls. Enjoy!

    Notes

    Instructions for Making Ahead and Freezing Chicken and Dumplings:
    • Freezing Leftovers: Allow the chicken and dumplings to cool completely before sealing them in an airtight container. You can store them in the freezer for up to 3 months, in a freezer container.
    • Dumplings: Arrange the dumplings in a single layer on a baking sheet lined with parchment paper and pop them in the freezer for a couple of hours to firm up. Load them into a freezer bag and freeze them for up to 3 months. 
    • Chicken: Allow the shredded chicken to cool before sealing it in an airtight container and freezing it for up to 3 months. 

    Nutrition

    Serving: 1serving | Calories: 349kcal | Carbohydrates: 32g | Protein: 25g | Fat: 13g | Saturated Fat: 5g | Polyunsaturated Fat: 1g | Monounsaturated Fat: 5g | Trans Fat: 0.2g | Cholesterol: 81mg | Sodium: 1280mg | Potassium: 452mg | Fiber: 1g | Sugar: 2g | Vitamin A: 239IU | Vitamin C: 2mg | Calcium: 56mg | Iron: 2mg

    Sweet Potato Pie Recipe

    September 16, 2024

    Slice of sweet potato pie recipe on spatula.

    This Sweet Potato Pie Recipe with Marshmallow Whipped Cream uses fresh sweet potatoes, a refrigerated pie crust (or use my homemade pie crust recipe) and a few simple ingredients to make this delicious classic dessert that’s popular during the holiday season.

    Slice of sweet potato pie with marshmallow whipped cream.

    This homemade sweet potato pie is one to make for Thanksgiving dinner, and it will look amazing on your dessert table sitting next to this apple punch recipe.

    This creamy sweet potato pie filling has a mix between and sweet and savory flavor but topped with the sweet marshmallow whipped cream, it pairs perfectly for a sweet dessert. Sometimes adding a bit of savory or tangy flavor, like in this buttermilk pie recipe, can help complement the sweetness.

    Looking for more sweet potato recipes? This sweet potato crunch and sweet potato bread pudding are favorites around here too. Thanksgiving is full of sweet potato recipes, so don’t forget candied yams too!

    Overhead look of sweet potato pie in baking dish, with slices cut.

    Sweet Potato Pie Highlights

    • Easy to Make: This pie will be ready for serving in about an hour and a half, and is easy enough for a beginner in the kitchen.
    • Thanksgiving Dessert Idea: Although this can be made anytime of year, this is typically made around the Thanksgiving holiday.
    • Make Ahead and Freeze: This pie can be made ahead of time and even frozen to enjoy later. See the tips below for how to freeze a sweet potato pie.

    Key Ingredients

    Here’s what you need to make this sweet potato pie with the marshmallow whipped cream topping:

    Ingredients for homemade sweet potato pie recipe.

    Complete list of ingredients and amounts can be found in the recipe card below.

    • 9 inch deep dish pie crust – If you purchase the box of pie crusts and it has two crusts, use the other to make these pie crust cinnamon cookies. A graham cracker crust would be yummy too.
    • Salted butter – Unsalted would also work, just add an extra pinch of salt to your pie filling.
    • Dark brown sugar – If all you have is light brown sugar, you can use that.
    • Heavy cream – If you wanted to replace the cream in the whipped cream with something already made you could use Cool Whip.
    • Olive oil – Any oil would work here. You could use vegetable, coconut, etc.
    • Vanilla extract – Almond extract would also work, just make sure that you only use half the amount because almond extract is strong. Vanilla bean paste would also be delicious.
    • Cinnamon – You could replace the cinnamon, nutmeg, and clove for pumpkin pie spice. 

    How to Make Sweet Potato Pie

    Cubed sweet potatoes on baking sheet for roasting for pie.
    1. Roast the potatoes.
    Pie crust in baking dish with pie weights.
    2. Bake your pie crust.

    Here is where you can use a pre-made crust or you can make my buttery pie crust recipe and can follow my directions on how to blind-bake a crust if needed.

    You can also pour sugar on top of parchment paper, or use something else if you don’t have pie weights to hold the crust down while baking.

    Mashed sweet potatoes in glass bowl.
    3. Mash sweet potatoes.
    Brown sugar, eggs an other ingredients to make sweet potato pie.
    4. Flavor the sweet potato pie filling.
    Sweet potato pie filling inside of pie crust, ready for baking.
    5. Bake the pie filling.
    Homemade marshmallow whipped cream in mixing bowl.
    6. Make marshmallow whipped cream topping.
    Baked sweet potato pie in pie dish.

    Serve this delicious pie warm, or at room temperature, and by dolloping the marshmallow whipped cream on top of each slice. (Make sure it’s not too hot so the whipped cream doesn’t melt completely.)

    Recipe Tips

    • Homemade Whipped Cream Alternative: You can use a store-bought whipped cream like Cool Whip and fold in the marshmallow fluff to create a similar cream topping. However, make sure to defrost the Cool Whip in the refrigerator overnight or on the counter for at least an hour (until it’s completely defrosted). This will make folding in the marshmallow fluff easier.
    • Square Dish Instead of Round: You can use a 9×9 square dish. Something to keep in mind is that the corners can be overcooked easily though. So keep an eye out and if you start to see the edges get a little too brown you can cover them with foil and continue baking. This will ensure that your filling cooks, but your crust doesn’t burn. 
    • Boiling Potatoes Instead of Roasting: You can boil them but you’ll lose a lot of flavor in the cooking water.  Roasting the sweet potato allows the sugars in the sweet potato to caramelize and brings about a much deeper flavor than you would get if you boiled them. You could microwave or bake the potato instead if you don’t want to cube and roast it. Remember that if you’re looking to speed things up you can always cut the sweet potatoes into smaller cubes. The smaller the cubes, the faster they will cook. You could also cook your sweet potatoes the day before and keep them in the refrigerator until you’re ready to use them. 
    Slice of sweet potato pie with homemade marshmallow whipped cream.

    Storing Tips

    • Refrigerator – When you’re ready to store any leftover sweet potato pie, wrap it in plastic wrap and place in the refrigerator. It will last for 3-4 days refrigerated. To reheat, simply place individual slices onto a microwavable plate and warm on 50% power for 1 minute. To reheat in the oven, preheat your oven to 350°F and heat slices for 10-15 minutes or the whole pie for 25-30 minutes. 
    • Freezer – To make your sweet potato pie ahead of time and freeze it, allow the pie to cool completely on the counter. Once completely cooled, wrap your sweet potato pie in foil and place into a resealable bag. This will keep your pie from getting freezer burn.
    • To reheat – Defrost your pie overnight in the refrigerator and simply place individual slices onto a microwavable plate and warm on 50% power for 1 minute. You can also rewarm your pie as a whole or in individual slices. Preheat your oven to 350°F and heat slices for 10-15 minutes or the whole pie for 25-30 minutes. 

    Recipe FAQs

    What does sweet potato pie taste like?

    Sweet potato pie is the perfect balance between sweet and savory. It’s similar to pumpkin pie but leans slightly more savory. A hefty dollop of marshmallow whipped cream rounds out these traditional fall flavors and brings it all together. 

    Can I use canned sweet potatoes for sweet potato pie?

    I love a good, canned ingredient but for this recipe, I really don’t recommend using canned sweet potatoes. This option really throws off the texture of your pie and leaves you with a soggy and pretty messy situation.

    Should sweet potato pie be served warm or cold?

    This pie tastes great warm or room temperature. It’s a great option to set out on a dessert table for the holidays and let people serve themselves. Be sure that the pie is warm and not hot, or your whipped cream will melt and turn into a soupy mess. 

    More Thanksgiving Recipes You’ll Love

    • Scoop of the best green bean casserole.
      The BEST Green Bean Casserole with Bacon and Cheese
    • A round white plate is filled with halved hard boiled eggs with orange yolk filling piped to look like a pumpkin
      Pumpkin Deviled Eggs
    • Corn Casserole Recipe
      The BEST Corn Casserole
    • A stack of desserts bars with a graham cracker crust and swirled pumpkin cheesecake filling are in the center of the photo
      Pumpkin Cheesecake Bars

    Recipe

    Slice of sweet potato pie recipe on spatula.
    Print Pin
    Be the first to rate!

    Sweet Potato Pie with Marshmallow Whipped Cream

    This homemade sweet potato pie recipe uses fresh sweet potatoes, a pre-made pie crust (or homemade) and a few simple ingredients to make this popular holiday dessert.
    Course Dessert
    Cuisine American
    Prep Time 35 minutes minutes
    Cook Time 50 minutes minutes
    Total Time 1 hour hour 25 minutes minutes
    Servings 8 servings
    Calories 582kcal
    Author Jessica Burgess

    Equipment

    • 9 inch pie dish

    Ingredients

    • 2 pounds sweet potatoes peeled and cubed (½ inch cubes)
    • ½ teaspoon salt divided
    • 9-inch pie crust You can make this homemade pie crust recipe
    • ½ cup salted butter softened
    • ⅔ cup dark brown sugar packed
    • 1½ cups heavy cream divided
    • 2 large eggs
    • 2 Tablespoons olive oil or similar type, divided
    • 1½ teaspoon vanilla extract
    • 1 teaspoon cinnamon
    • ¼ teaspoon nutmeg
    • ¼ teaspoon ground cloves
    • ¼ cup marshmallow fluff

    Instructions

    • Roast your potatoes. Preheat the oven to 400°F. Line a baking sheet with parchment paper. Lay out the peeled and cubed 2 pounds sweet potatoes onto the pan and drizzle with 2 Tablespoons olive oil and ¼ teaspoon salt tossing to coat them well. Bake for 25 minutes or until soft. Keep an eye on them as they bake, some might get brown tips and those you want to toss before adding them to your pie. Set aside to cool for at least 10 minutes.
    • Prebake your pie crust. Prebake your 9-inch pie crust according to the recipe or package instructions. Use pie weights or pour sugar over parchment paper to weigh down the crust and make sure the pie keeps its shape. Set aside to let the pie crust cool slightly while making the filling.
    • Mash your sweet potatoes. In a large bowl (or the bowl of a stand mixer) using a hand mixer (or stand mixer fitted with a paddle attachment) add the roasted sweet potatoes and ½ cup salted butter and mash on medium speed. 
    • Flavor your sweet potatoes. Add in the remaining ¼ teaspoon salt, ⅔ cup dark brown sugar, ½ cup heavy cream, 2 large eggs, remaining olive oil, 1½ teaspoon vanilla extract, 1 teaspoon cinnamon, ¼ teaspoon nutmeg and ¼ teaspoon ground cloves and mix on low speed to start, increasing to medium speed for about 3 minutes or until well combined and silky smooth.
    • Bake. Pour your pie filling into the crust and bake uncovered for 50-60 minutes or until a toothpick inserted into the center comes out clean. Check the pie frequently and if the crust is browning too fast you can cover it with foil to prevent burning. While the pie bakes, whip your cream.
    • Whip the cream. Using a hand (or stand) mixer on medium speed, whip the remaining 1 cup heavy cream until stiff peaks form (about 3-4 minutes) and then mix in ¼ cup marshmallow fluff until combined. Don’t over whip your cream or you may end up making butter!
    • Serve. Slice and top your pie with whipped cream and serve.

    Notes

    • You can use Cool Whip instead of homemade whipped cream if you prefer.
    • I don’t recommend using canned sweet potatoes for this recipe. 

    Nutrition

    Serving: 1slice | Calories: 582kcal | Carbohydrates: 56g | Protein: 6g | Fat: 38g | Saturated Fat: 20g | Polyunsaturated Fat: 2g | Monounsaturated Fat: 13g | Trans Fat: 0.5g | Cholesterol: 127mg | Sodium: 421mg | Potassium: 493mg | Fiber: 4g | Sugar: 26g | Vitamin A: 17167IU | Vitamin C: 3mg | Calcium: 96mg | Iron: 2mg

    Chicken Chipotle Melts

    September 10, 2024

    Hand holding a chipotle chicken melt over a pan of others.

    These copycat Taco Bell Chipotle Chicken Melts, are cheesy, filled with shredded rotisserie chicken and a storebought Chipotle sauce, that’s all wrapped in a tortilla, making these a 4-ingredient recipe.

    These cheesy melts are baked and ready in only 15 minutes!

    Chicken chipotle melts in baking dish and hand holding one to see the inside.

    This chipotle chicken melt recipe is great for a school lunch recipe, an easy dinner or even a snack to take to the beach or for a picnic.

    Keep the ingredients on hand (you can even boil chicken breasts instead of using a rotisserie chicken) for last minute meals.

    Love last-minute easy meal ideas? Make sure to try these Salt & Pepper Chicken Bites and these Texas Toast Pizzas for those nights where you need something quick and can keep the ingredients on hand for.

    Chicken Chipotle Melts Highlights

    • Quick and Easy: Assembly takes just a few minutes and these copycat melts from the cravings value menu are baked in about 12 minutes for a cheesy treat.
    • Control the Spice: The more chipotle sauce that you add, the spicier these melts will get. So if you love a little spice, just a dab will do. If you prefer a lot of spice, add more. You can also sprinkle on a little taco seasoning to give it a little more flavor.
    • Family Friendly: These chicken melts are great for the kids and family members of all ages. (Some may prefer these without the chipotle sauce and that’s ok too! They become more like a rolled up chicken and cheese quesadilla by leaving the sauce off and that’s absolutely ok.)

    Key Ingredients

    Here’s what you need to make these copycat Taco Bell Chicken Chipotle Melts.

    Ingredients for Chicken Chipotle Melts.

    A complete list of ingredients and amounts can be found in the recipe card below.

    • Tortillas: You’ll want to use medium flour tortillas to make them as pictured. You can use different sizes and even different types of tortillas (such as corn) if you prefer but they will have a different taste and the portions may very if smaller or larger. You’ll just want to use soft tortillas for these, and if you only have hard shells, you can make these crispy chicken tacos instead.
    • Chicken: Don’t have a rotisserie chicken? No problem. Feel free to boil chicken thighs, boil chicken legs, or other types of cooked chicken that you may already have, or make crockpot shredded chicken. Taco Bell’s chicken has a smokey flavor so you can even smoke chicken tenders and chop those up for this recipe to get it even closer.
    • Cheese: You can use shredded colby jack or cheddar but I usually just use the feista blend that the store has.
    • Chipotle: If you can find the Taco Bell brand of Chipotle sauce, even better! If not, no worries. You can find a chipotle sauce at the store and it should still be delicious. Or, try making this chipotle sauce.

    How to Make Chicken Chipotle Melts

    Shredded chicken on flour tortilla for Chipotle melt.
    1. Lay a tortilla flat and place shredded chicken on bottom ⅓ of tortilla.
    Taco Bell Chipotle being added to chicken melt.
    2. Drizzle on about 1 tsp. of Chipotle sauce.
    Shredded cheese added to Chicken Chipotle Melt.
    3. Sprinkle about 2 Tbsp. of shredded cheese on top of chicken and sauce.

    TIP: You can adjust how much chicken, creamy sauce and cheese that you put in your melts. The measurements do not have to be exact, and you can do more than suggested. Just be cautious not to add too much sauce for spice and not too much filling, so the tortilla doesn’t roll up properly.

    Hand rolling tortilla for Chicken Chipotle Melt.
    4. Roll the bottom of the tortilla up just enough to cover chicken filling.
    Rolling up the tortilla in to a tube, to make a chipotle chicken melt.
    5. Tuck the tortilla under the filling (to try and secure it) and continue rolling all of the way.
    Chicken chipotle melts in baking dish.
    6. Place rolled tortillas in a greased baking dish, pressing up against one another to secure them from unrolling.

    How Long to Bake Chicken Melts: Place baking dish in an oven that’s preheated to 375 degrees, and bake for 12-15 minutes or until it looks like the cheese is melted.

    Recipe Tips

    • Additional Flavors: Love more flavor? No problem. Mix chicken taco seasoning in with your chicken or sprinkle it on the chicken when making each melt.
    • Assembly: When placing your chicken melts in the baking dish, place the tortillas with the flap side, down, so they stay rolled during the baking process.
    • Make them Extra: If you’re looking to add more to this recipe, feel free sprinkle more shredded cheese on top of the melts before baking. Or, pour cheese sauce on top and then bake, to make more of a cheesy enchilada type dish.

    Storing Tips

    • Leftovers: If you have leftover chicken chipotle melts, allow them to fully cool and then store them in an airtight container or plastic bag in the refrigerator.
    • Freezing: These make the perfect, make-ahead, freezer-meal. Assemble as instructed, and place in a freezer-safe dish or bag and freeze. Simply place in a baking dish and bake until heated through, or microwave. Freezing Tip: Wrap each chicken melt in Glad Press ‘n Seal (or similar), so they can easily be pulled out of the freezer without sticking to one another.

    What to Serve with Chicken Chipotle Melts

    This Rotel salsa recipe is not only another great recipe that you can keep ingredients on hand for but serving it with chips is a great side dish to serve with these chicken melts.

    These stuffed celery sticks are an easy vegetable to serve alongside these melts to get veggies in, or for a warmer side dish, this Elote dip recipe is easy to whip up and pairs with these wonderfully.

    Recipe FAQs

    Can I make chicken chipotle melts in the microwave?

    Yes. Since the ingredients are fully cooked and really only need warming up, these melts can be warmed up in the oven. They’ll have more of a “steamed” tortilla, rather than a toasted texture but that works too.

    What all comes in a Chicken Chipotle Melt?

    Chicken, cheese, and Chipotle sauce are wrapped up in a tortilla and warmed so the cheese melts together.

    Are copycat Taco Bell Chicken Chipotle Melts the same?

    They do taste a little differently than the chicken chipotle melts you get at the fast food change, only because the chicken can be difficult to get the exact same. So the idea of these is to get the same type of outcome, and they’re still a delicious recipe idea.

    More Recipes You’ll Love

    Love quick and easy chicken recipes like this one? You’ll also love this chicken grilled cheese sandwich recipe, and these crockpot chicken drumsticks.

    Recipe

    Hand holding a chipotle chicken melt over a pan of others.
    Print Pin
    Be the first to rate!

    Chicken Chipotle Melts

    Chicken Chipotle Melts are a Taco Bell copycat recipe that only uses 4 ingredients and they are ready in about 20 minutes.
    Course Dinner, Lunch, Main Course, Snack
    Cuisine Mexican
    Prep Time 5 minutes minutes
    Cook Time 15 minutes minutes
    Total Time 20 minutes minutes
    Servings 6 melts
    Calories 294kcal
    Author Jessica Burgess

    Ingredients

    • 6 medium flour tortillas
    • 3 cups shredded rotisserie chicken The breasts from a rotisserie chicken
    • 6 tablespoons creamy Chipotle sauce I use the Taco Bell brand
    • 1 cup shredded fiesta cheese Or shredded Colby or shredded cheddar

    Instructions

    • Grease an 8×8 baking dish with cooking spray or line with parchment paper, and preheat the oven to 375 degrees.
    • Take one of the 6 medium flour tortillas, and lay it flat. Divide the 3 cups shredded rotisserie chicken evenly between the 6 tortillas, and place it on the bottom third of each tortilla. (This is about ¼ cup of shredded chicken, or so. Feel free to add more/less.)
    • Next, drizzle about 1 Tablespoon of the 6 tablespoons creamy Chipotle sauce on top of the chicken on each tortilla.
    • Divide the 1 cup shredded fiesta cheese between each tortilla, sprinkling it on the chicken and sauce.
    • Fold the tortilla, about a third of the way up, just enough to cover the filling and tuck the tortilla under the chicken, and continue rolling the tortilla all of the way up.
    • Place the rolled tortillas in the prepared baking dish, with the flap side down so it stays secure in the baking dish. Place the melts, side-by-side, in the baking dish to also help secure them to help stay in place.

    Notes

    You may also want to sprinkle a little taco seasoning on to the chicken if you want a little more spice or flavor added to these. 

    Nutrition

    Serving: 3melts | Calories: 294kcal | Carbohydrates: 18g | Protein: 18g | Fat: 16g | Saturated Fat: 6g | Polyunsaturated Fat: 3g | Monounsaturated Fat: 6g | Trans Fat: 0.1g | Cholesterol: 60mg | Sodium: 575mg | Potassium: 216mg | Fiber: 1g | Sugar: 3g | Vitamin A: 304IU | Vitamin C: 3mg | Calcium: 176mg | Iron: 2mg

    Sausage Tortellini Soup

    September 9, 2024

    Soup ladle with a creamy sausage and tortellini soup inside of it.

    This Sausage Tortellini Soup is creamy and full of flavor and so cozy during the fall months.

    The crumbled Italian sausage and cheese tortellini pasta gives this soup a hearty texture.

    Soup ladle holding creamy sausage and tortellini soup.

    This soup recipe can be enjoyed any time of year but it’s especially delicious to have this warm soup in the fall and winter months. Pair it with a sandwich for “Soup and Sandwich Saturday” in your Dinner Theme System too!

    The heavy cream helps give this a creamy soup base, while the fresh spinach gives this soup a beautiful color and another type of texture in a bite. The everyday spices are simple yet add a seasoned touch to this soup.

    Want more soup recipes? If you like the idea of a hearty soup but want it a little bit differently, try my lasagna soup or cowboy stew recipes.

    Bowl of tortellini and sausage soup.

    Sausage and Tortellini Soup Highlights

    • Quick and Easy Homemade Soup – In under an hour, this creamy soup is ready for serving!
    • Chunky and Hearty – The texture in this soup is meaty, soft, and creamy, giving each bite something hearty, and making this soup so filling.
    • Flexible Ingredients – Love spicy? How about a thicker soup? You can add optional or more ingredients to increase the spice level or add more flour to make the soup thicker.

    Key Ingredients

    Here’s what you need to make this sausage and tortellini soup:

    Ingredients for sausage tortellini soup.

    Complete list of ingredients and amounts can be found in the recipe card below.

    • Cheese Tortellini: (Frozen or refrigerated) Adds heartiness and texture, making the soup more filling and providing bursts of cheesy flavor.
    • Italian Sausage: Provides a rich, savory flavor and meaty texture. The spices in the sausage enhance the overall taste of the soup. If you prefer spicier soups, you can opt for hot and spicy Italian sausage.
    • Spices: These are spices that you may already have on hand since they’re common pantry staples. You’ll need minced garlic, crushed red pepper flakes, salt, pepper, and Italian seasoning.
    • Chicken Broth: I love using my own rotisserie chicken broth or homemade chicken broth, however storebought is absolutely fine to use too.

    How to Make Sausage Tortellini Soup

    Raw Italian sausage in skillet.
    1. Cook sausage and set aside.
    Vegetables, flour, and spices in soup pot for tortellini soup.
    2. Cook vegetables and make a roux.
    Chicken broth added to soup pot for tortellini soup.
    3. Add chicken broth.
    Cooked Italian sausage added to soup pot.
    4. Add cooked sausage and simmer for 15-20 minutes.
    Heavy cream added to sausage and tortellini soup pot.
    5. Add heavy cream and tortellini.
    Fresh spinach added to sausage and tortellini soup.
    6. Add spinach and red pepper flakes.

    Recipe Tips:

    • Spicy Sausage: Use a high-quality Italian sausage for the best flavor. If you like a bit of heat, choose spicy Italian sausage. For a milder taste, opt for sweet or mild Italian sausage.
    • Thicker Soup: If you prefer a thicker soup, increase the amount of flour to 4 tablespoons or reduce the amount of chicken broth slightly.
    • Optional Tomato Paste: Tomato paste adds a rich, concentrated tomato flavor that can deepen the overall taste of the soup. It also adds a subtle sweetness and a hint of acidity, which can balance the richness of the cream and sausage. Add 2 tablespoons tomato paste to the soup and stir until fully incorporated in step 3.
    Creamy Sausage and Tortellini Soup with carrots and spinach.

    Storing Tips

    • Refrigerate: Allow the soup to cool to room temperature before storing. Use an airtight container(s) or heavy-duty freezer bags. You may want to divide the soup into smaller portions, making reheating only the amount you need easier.
      Be sure to label the containers with the storage date and contents. Store in the refrigerator if you plan to consume it within 3 – 4 days.
    • Freeze: Once you have transferred the soup to an airtight container, you can store the soup in the freezer for 2 – 3 months. 
    • Reheating: If refrigerated, reheat the soup on the stove over medium heat, stirring occasionally, until thoroughly heated.
      If your soup is frozen, move the container to the refrigerator and let it thaw overnight. On the stovetop, heat over low to medium heat, stirring occasionally.
      As the soup begins to thaw and loosen, you can increase the heat to medium and continue stirring until thoroughly heated. If the soup has thickened too much during storage, add a bit of Chicken broth or purified water to reach the desired consistency.

    What to Serve with Sausage Tortellini Soup

    This soup is full of so many hearty ingredients so it’s great alone but there are also some great side dishes that pair wonderfully with this soup.

    Cheesy pull-apart bread is fun to serve with this soup as you can pinch off small pieces and even dip it in to the soup.

    Add even more heartiness by adding these ham and cheese sliders with this soup for a fall meal that will leave everyone feeling full and happy!

    For dessert, these turtle cookies will conquer that sweet tooth from the salty and savory soup contrast that you’re looking for.

    Tortellini and sausage soup with spoon.

    Recipe FAQs

    What is sausage tortellini soup made of?

    Cheese tortellini, Italian sausage, carrots, fresh spinach, heavy cream, chicken broth, flour and a few spices.

    How to keep tortellini from getting mushy in soup?

    It’s best to add the soup last or towards the end of the cooking process. It will only need long enough to soften, and not overcook, as overcooking is what causes it to become mushy.

    Should pasta be cooked before adding to soup?

    Pasta can cook right in the soup, in the liquid. Just be cautious of the type of pasta and how long it needs to cook. Dried pasta, will take longer to cook, unlike a refrigerated tortellini pasta.

    Similar Hearty Recipes

    • Sausage pasta bake in white baking dish.
      Easy Sausage Pasta Bake
    • Baked ravioli being lifted out of baking dish.
      Baked Ravioli
    • Close up of pasta recipe with kielbasa on white plate.
      Kielbasa Pasta
    • Creamy taco soup serving in white bowl.
      Creamy Taco Soup

    Recipe

    Soup ladle with a creamy sausage and tortellini soup inside of it.
    Print Pin
    Be the first to rate!

    Sausage and Tortellini Soup

    This creamy Sausage Tortellini Soup is ready in under an hour, so flavorful using everyday spices and is hearty enough to feed the family a comforting dinner.
    Course Dinner, Lunch, Main Course, Soup
    Cuisine American, Italian
    Prep Time 15 minutes minutes
    Cook Time 40 minutes minutes
    Total Time 55 minutes minutes
    Servings 8 servings
    Calories 586kcal
    Author Jessica Burgess

    Ingredients

    • 1 Tablespoon olive oil
    • 16 ounces mild Italian sausage (or spicy, if you prefer)
    • 2 carrots peeled and diced
    • 1 large sweet onion finely chopped
    • 4 cloves garlic minced
    • 2 teaspoons Italian seasoning
    • 3 Tablespoons all-purpose flour
    • 6 cups chicken broth
    • 1½ cups heavy cream
    • 16 ounces cheese tortellini (frozen or refrigerated)
    • 2 cups fresh spinach roughly chopped
    • salt and pepper to taste
    • ½ teaspoon red pepper flakes optional for added spice

    Instructions

    • Heat 1 Tablespoon olive oil over medium heat in a large pot or Dutch oven. Add 16 ounces mild Italian sausage , breaking it up into small pieces with a spoon. Cook until browned and cooked through, about 5 – 7 minutes. Remove the sausage from the pot with a slotted spoon and set aside, leaving the rendered fat in the pot.
    • Add 2 carrots (diced) and 1 large sweet onion finely chopped, to the pot. Cook, stirring occasionally, until the vegetables are softened, about 5 minutes. Add 4 cloves garlic, minced and cook for another 1 – 2 minutes until fragrant. Stir in 2 teaspoons Italian seasoning and 3 Tablespoons all-purpose flour. Cook for 1 – 2 minutes to create a roux.
    • Slowly stir or whisk in 6 cups chicken broth, making sure to scrape up any browned bits from the bottom of the pot.
    • Return the cooked sausage to the pot. Bring the mixture to a boil, then reduce the heat and let it simmer for 15 – 20 minutes, allowing the flavors to meld together.
    • Stir in 1½ cups heavy cream and add 16 ounces cheese tortellini. Simmer until the tortellini float to the surface and are tender, about 3 – 6 minutes.
    • Add 2 cups fresh spinach and salt and pepper to taste. Cook for an additional 2 – 3 minutes until the spinach wilts. If using, add ½ teaspoon red pepper flakesfor a spicy kick.

    Video

    Notes

    • Type of sausage: Use a high-quality Italian sausage for the best flavor.
    • If you prefer a thicker soup: increase the amount of flour to 4 tablespoons or reduce the amount of chicken broth slightly.
    • Optional tomato paste: Tomato paste adds a rich, concentrated tomato flavor that can deepen the overall taste of the soup. Add 2 tablespoons tomato paste to the soup and stir until fully incorporated in step 3 if desired.

    Nutrition

    Serving: 1serving | Calories: 586kcal | Carbohydrates: 35g | Protein: 20g | Fat: 41g | Saturated Fat: 19g | Polyunsaturated Fat: 3g | Monounsaturated Fat: 14g | Cholesterol: 119mg | Sodium: 1349mg | Potassium: 375mg | Fiber: 3g | Sugar: 7g | Vitamin A: 3957IU | Vitamin C: 7mg | Calcium: 159mg | Iron: 3mg

    Butterscotch Cinnamon Pie

    September 6, 2024

    Slice of butterscotch cinnamon pie on white plate, next to gold fork.

    Butterscotch Cinnamon Pie is a rich, creamy, no-bake pie recipe that is great any time of year! It uses a refrigerated pie crust (or make this homemade pie crust) and cook the ingredients like milk, eggs, and brown sugar on the stove, and then chill the pie in the refrigerator! It’s easy as…well… pie!

    Butterscotch Cinnamon Pie slice on a plate next to a gold fork.

    A creamy pie, or custard-like pie, is always a holiday dessert favorite. However, with certain pies being chilled, they’re also a great dessert idea for the summertime. This egg custard, lemon meringue pie, and no-bake chocolate pie are other old-fashioned pies you should try too!

    What is a butterscotch pie made of? This vintage butterscotch pie recipe uses butterscotch chips, cinnamon, brown sugar, and thickening ingredients to give off flavors of caramel, and a smooth texture.

    [feast_advanced_jump_to]

    Ingredients

    Labeled ingredients for butterscotch cinnamon pie on kitchen counter.

    Here are some notes about some of the key ingredients:

    • Prepared raw pie crust – You could also make a homemade pie crust, or use a graham cracker crust would be divine as well. If you have the box of 2 refrigerated pie crusts, consider making these easy pie crust cookies with this other.
    • Dark brown sugar – Light brown sugar will also work. You will end up with a slightly more mild, less molasses-y flavor. 
    • Vanilla extract – You can use almond extract instead of (or in addition to) vanilla. Just note that almond extract is stronger than vanilla. So, you won’t need as much.  
    • Cool Whip – Homemade whipped cream would totally work here as well. 

    *Be sure to see the recipe card below for the full ingredients list & instructions!*

    Equipment Needed:

    Do a quick inventory of your kitchen and make sure you have the following ingredients. 

    • Pie pan (I like using glass or ceramic) 
    • Fork 
    • Parchment paper
    • Pie weights (sugar or uncooked rice will also work)
    • Heavy-bottomed saucepan 
    • Mixing bowl 
    • Whisk 
    • Measuring cups and spoons 

    For another vintage dessert recipe, you should also try this buttermilk pie.

    How to Make Butterscotch Cinnamon Pie

    Steps for how to make butterscotch cinnamon pie.

    Pre-bake the pie crust. Lay the pie crust in a pie pan, crimp the edges, and use a fork to poke holes in the bottom. Set a sheet of parchment paper on top of the crust and weigh it down with pie weights or sugar. Pre-bake (here’s how to blind bake a pie crust) the crust according to package instructions. Allow the pie crust to cool while you make the filling.  

    Pie Dish Size: I used a 10-inch, 40-ounce deep pie dish. You could also make this recipe in a standard depth pie dish, it will make 2 pies this way! Just grab 2 pie crusts.

    Make the filling base. In a medium non-stick saucepan, combine the brown sugar, cornstarch, salt, cinnamon, and milk. Bring the mixture to a light simmer over medium heat and then reduce the heat to low. Cook until thickened, about 7 minutes, stirring occasionally. 

    Temper in the egg yolks. In a small mixing bowl, very slowly whisk together the egg yolks and ¼ cup of the milk mixture. Slowly whisk the egg mixture into the bulk of the milk mixture. Cook, stirring consistently, for 3 minutes or until quite thick. The texture should be like thick pudding when ready.

    Final steps for making butterscotch cinnamon pie.

    Add some flavor. Remove the filling from the heat and stir in ¾ cup butterscotch chips along with the vanilla and butter. 

    Assemble and chill. Smooth the filling into the cooled pie crust and pop the pie in the fridge for at least 6 hours or until set. 

    Serve. Remove the pie from the fridge, top with the remaining butterscotch chips, and serve with the Cool Whip.

    Recipe FAQs

    Why is my butterscotch pie soft?

    Make sure when cooking the filling you keep stirring and simmering until it is a nice thick pudding texture to avoid a soft pie.

    Do you eat butterscotch pie warm or cold?

    Creamy butterscotch pie is best enjoyed chilled. So, keep it in the fridge until you are ready to serve.

    Can you freeze butterscotch pie?

    Absolutely. Prepare and bake as directed, allow it to cool, and then freeze for up to 3 months.

    Slice of butterscotch cinnamon pie on small plate with fork.

    Storage

    Once the filling has fully set and you’ve topped the pie with extra butterscotch chips, go ahead and wrap the whole thing (or what’s left of it) in a double layer of plastic wrap. You can also store individual slices in a single layer in an airtight container. Butterscotch cinnamon pie will stay good in the fridge for up to 4 days.

    To freeze: Follow the recipe from start to finish. Once it’s set, wrap the whole pie in a double layer of plastic wrap and store it in the freezer for up to 3 months. Allow the pie to thaw in the fridge before slicing and serving.  

    Thaw: If you choose to freeze this sweet masterpiece, allow it to thaw in the fridge before serving. 

    Related Recipes

    If you love this kind of dessert recipe with flavors of butterscotch, caramel, and cinnamon, then you’ll also love these desserts:

    • A stack of easy butterscotch brownies.
      Easy Butterscotch Brownies
    • hello dollies bars stacked on white plate
      7 Layer Bars
    • A cornflake brownie propped up around other brownies.
      Cornflake Brownies
    • Stack of cinnamon biscuits on white plate.
      Cinnamon Biscuits

    Did you make this? I’d be so grateful if you left a “star” rating below to let me know what you thought! Then, the next time you need a quick and easy recipe, come back to Fantabulosity to browse all of my easy recipes!

    Recipe

    Slice of butterscotch cinnamon pie on white plate, next to gold fork.
    Print Pin
    Be the first to rate!

    Butterscotch Cinnamon Pie

    Butterscotch Cinnamon Pie has flavors of caramel and cinnamon in this smooth pie that's perfect for Fall or any time of year, especially the holidays.
    Course Dessert
    Cuisine American
    Prep Time 10 minutes minutes
    Cook Time 30 minutes minutes
    Chill Time 6 hours hours
    Total Time 6 hours hours 40 minutes minutes
    Servings 10 servings
    Calories 332kcal
    Author Jessica Burgess

    Equipment

    • pie pan 10 inch, 40 ounce deep dish is what I used – (I like using glass or ceramic)
    • parchment paper
    • pie weights (sugar or uncooked rice will also work)
    • Heavy-bottomed saucepan
    • Mixing bowl
    • Whisk
    •  Measuring cups and spoons

    Ingredients

    • 1 prepared raw pie crust or make this buttery pie crust recipe
    • ¾ cup dark brown sugar
    • 2½ Tablespoons cornstarch
    • ½ teaspoon salt
    • 1½ Tablespoons cinnamon
    • 2½ cups whole milk
    • 6 egg yolks room temperature
    • 1 cup butterscotch chips divided
    • 2 teaspoons vanilla extract
    • ¼ cup unsalted butter
    • Cool Whip for topping

    Instructions

    • Pre-bake the pie crust. Lay the 1 prepared raw pie crust in a pie pan, crimp the edges, and use a fork to poke holes in the bottom. Set a sheet of parchment paper on top of the crust and weigh it down with pie weights or sugar.
      Pre-bake the crust according to package instructions. Allow the pie crust to cool while you make the filling.  
    • Make the filling base. In a medium non-stick saucepan, combine the ¾ cup dark brown sugar, 2½ Tablespoons cornstarch, ½ teaspoon salt 1½ Tablespoons cinnamon and 2½ cups whole milk. Bring the mixture to a light simmer over medium heat and then reduce the heat to low. Cook until thickened, about 7 minutes, stirring occasionally. 
    • Temper in the egg yolks. In a small mixing bowl, very slowly whisk together the 6 egg yolks, and ¼ cup of the milk mixture. Slowly whisk the egg mixture into the bulk of the milk mixture.
      Cook, stirring consistently, for 3 minutes or until quite thick. The texture should be like thick pudding when ready.
    • Add some flavor. Remove the filling from the heat and stir in ¾ cup of the butterscotch chips along with the 2 teaspoons vanilla extract and ¼ cup unsalted butter. 
    • Assemble and chill. Smooth the filling into the cooled pie crust and pop the pie in the fridge for at least 6 hours or until set.
    • Serve. Remove the pie from the fridge, top with the remaining butterscotch chips, and serve with Cool Whip.

    Notes

    • Pie too soft? Make sure when cooking the filling you keep stirring and simmering until it is a nice thick pudding texture to avoid a soft pie.
    • Can I make this ahead of time and freeze it? You can. Follow the recipe from start to finish. Once it’s set, wrap the whole pie in a double layer of plastic wrap and store it in the freezer for up to 3 months. Allow the pie to thaw in the fridge before slicing and serving.  
    • How to Store Butterscotch Pie? Store leftovers in the refrigerator for up to 4 days.

    Nutrition

    Serving: 1slice | Calories: 332kcal | Carbohydrates: 46g | Protein: 5g | Fat: 14g | Saturated Fat: 7g | Polyunsaturated Fat: 1g | Monounsaturated Fat: 5g | Trans Fat: 0.2g | Cholesterol: 138mg | Sodium: 322mg | Potassium: 150mg | Fiber: 1g | Sugar: 33g | Vitamin A: 417IU | Vitamin C: 0.05mg | Calcium: 120mg | Iron: 1mg

    Garlic Roasted Broccoli

    September 4, 2024

    Garlic roasted broccoli in square bowl, sitting on linen napkin.

    Garlic Roasted Broccoli is such a delicious way to enjoy the popular green vegetable. The garlic powder, olive oil, and kosher salt are all it takes to make this broccoli side dish in the oven, something the family will love.

    Garlic Roasted Broccoli

    Within 25 minutes, (including prep and cook time) this recipe is ready to serve alongside your favorite main dish like this cheesy chicken bake or this Ribeye steak in the oven.

    [feast_advanced_jump_to]

    How to Make Garlic Roasted Broccoli

    To start, just a small little bowl will do, and mix the oil and the seasonings together in it.

    Olive oil with spices

    For the broccoli, you can buy the already-cut, broccoli florets, or you can buy the stalks and cut it yourself.

    Just cut the broccoli stems off the big stalk, to create smaller broccoli pieces, easy for picking up with a fork and taking a bite. Place them in a plastic bag. (You can also put them in a bowl, and mix this way if you prefer.)

    Pour the seasoned oil over the broccoli, seal the bag, and shake to try and coat all of the broccoli.

    Broccoli in plastic bag to season

    To avoid dirty dishes, cover cookie sheet (or baking pan) with aluminum foil and spray it with a non-stick spray.

    Lay all of the broccoli out on to the foil, trying to make sure pieces don’t overlap. (This is so it will cook evenly.)

    Uncooked Broccoli

    How Long to Bake Broccoli

    Bake it at 425 degrees F, for 20 minutes (or longer if you like an even crispier broccoli — I sure do).

    Roasted broccoli in oven

    Enjoy this broccoli hot, right out of the oven. If you prefer, you can also sprinkle parmesan cheese over the broccoli or even a little black pepper, or include it in the seasoned oil before coating the broccoli.

    This was so easy, and GOOD! I don't even like broccoli that much! Healthy Side Dish Recipe

    Storage

    If you have leftovers, allow the baked broccoli to fully cool and then store in a container, in the refrigerator and enjoy within 4-5 days.

    Reheat: When reheating, you can warm the broccoli in the microwave or if you have an air fryer or even a toaster oven, this can help the broccoli remain a bit crispy, instead of soggy. You could also put it back in the oven but reheating at a lower temperature would be best so it doesn’t cook more and burn.

    Related Recipes

    If you love easy vegetables or are looking for more side dishes to serve with dinner, I think you’ll also love this asparagus wrapped in bacon!

    • Easy Broccoli Raisin Salad with Bacon
    • Roasted Brussel Sprouts with Bacon, Cranberries + Sweet Glaze
    • Air Fryer Butternut Squash

    Recipe

    Garlic roasted broccoli in square bowl, sitting on linen napkin.
    Print Pin
    4.57 from 32 votes

    Garlic Roasted Broccoli

    This garlic roasted broccoli side dish is the BEST way to eat broccoli. Pair this with chicken or steak, and a starch for a rounded out meal.
    Course Side Dish
    Cuisine American
    Prep Time 5 minutes minutes
    Cook Time 20 minutes minutes
    Total Time 25 minutes minutes
    Servings 3 servings
    Calories 131kcal
    Author Jessica Burgess

    Ingredients

    • 12 ounces broccoli florets About 1.5-2 cups
    • 2 Tablespoons olive oil
    • 3 teaspoons garlic powder
    • salt to taste; I used 2 teaspoons kosher salt
    • black pepper optional
    • parmesan cheese optional

    Instructions

    • Preheat oven to 425 degrees F
    • Place your broccoli in a gallon size ziptop bag
    • In a small bowl, combine oil, powder, and salt (pepper if using)
    • Pour liquid mixture over the top of the broccoli
    • Shake until broccoli is fully covered
    • Pour broccoli out on to a greased cookie sheet, covered in aluminum foil
    • Bake for 20 minutes
    • Remove from oven. Sprinkle with additional salt, parmesan cheese if desired.
    • Serve immediately.

    Notes

    It’s best to use fresh broccoli, and not frozen for this recipe. Frozen broccoli has a lot of moisture and can alter the bake time for this roasted broccoli.
    It’s best to enjoy this right after cooked, however leftovers can also be enjoyed at a later date.

    Nutrition

    Serving: 1serving (⅓ recipe without cheese) | Calories: 131kcal | Carbohydrates: 10g | Protein: 4g | Fat: 10g | Saturated Fat: 1g | Sodium: 39mg | Potassium: 394mg | Fiber: 3g | Sugar: 2g | Vitamin A: 705IU | Vitamin C: 101.1mg | Calcium: 53mg | Iron: 1mg

    Fruity Ice Cubes (Balls)

    September 1, 2024

    Fruity Ice Cubes in glass, showing fresh herbs and fruit inside of round ice cubes.

    Fruity ice cubes (or round ice balls) are so easy to make and are beautiful for any type of drink. This tutorial uses coconut water to make the pretty ice cubes, which can add a touch of flavor to your favorite drink. (You can use regular water, and I’ll give tips below on how to choose the type of water to freeze for clear ice.)

    Fruity Ice Cubes in different shapes of glasses.

    Jessica’s “How-To” Highlights

    • Appearance: Options are endless for how beautiful these ice cubes can look. If hosting a party, or serving one specific drink, it can be fun to customize the ice cubes to match and coordinate with specific colors.
    • Flavor: Using coconut water adds a touch more flavor to already fruity fun flavors the ice provides as it melts.
    • Ease: It’s as simple as adding fruit, water, and fresh herbs to your ice molds. Freeze, and they’re ready for your drink!

    Why Use Fruity Ice Cubes?

    • The bright colors of the fruits add such an amazing look to clear drinks or even colorful drinks, like this fruit punch recipe or this apple cider punch recipe.
    • Great way to save fruits and fresh herbs that may go bad before enjoying them.

    What You’ll Need

    • Ice mold of your choice. I used a round ice mold but you can use a cube, or different shapes.
    • Coconut water or distilled water
    • Fresh fruit (See fruit ideas below.)
    • Fresh herbs, if desired (See fresh herb ideas below.)

    How to Make Fruity Ice

    First, wash and slice your fruit in to small pieces so they will fit in the ice molds.

    Using your ice mold, fill each hole with fruit and fresh herbs. How much, will depend on the size of your molds.

    ** TIP: I like mixing up different fruits for each ice cube but you can use all of the same fruits in each cube if you like.

    Fruit and herb ice balls, in black round ice mold.

    Fill your ice molds with coconut water, water, or juice, and then freeze until ice has become solid. (Ice usually takes about 2 hours but can depend on the size of your ice, and type of mold. I usually make them the night before I want to use them, just in case.)

    Beautiful round ice cube with fresh rosemary, and fruit inside.

    Fruit Ideas for Ice Cubes:

    • strawberry
    • oranges
    • nectarines
    • blueberries
    • blackberries
    • raspberries
    • kiwi
    • watermelon
    • canteloupe
    • honeydew
    • lemon
    • lime
    Mint leaves, nectaries, inside of round ice cube.

    Fresh Herb Ideas for Ice Cubes:

    • mint
    • thyme
    • rosemary
    Drinks in different shaped glasses with different drinks, and fruit flavored ice.

    Drinks to Make with Ice Cubes Filled with Fruit

    • lemonade
    • ginger ale
    • soda
    • tea
    • juices (ruby red grapefruit, orange juice, etc.)

    Tips for the Best Flavored Ice Cubes

    • How to Make Clear Ice: If using coconut water, it will depend on which brand you use to get clear ice. Some coconut water is white, milk’ish looking. If using regular water, try to use distilled or very filtered water. I also have this ice cube tray that’s specifically to make very clear, cubed ice.
    • Use fresh fruit and herbs: Remove browned leaves, or and rotten spots on the fruit, as this will make for poor flavored ice.
    • Added flavors: Take things up a notch and add flavorings to your ice, such as flavored syrups or extracts.

    Recipe

    Fruity Ice Cubes in glass, showing fresh herbs and fruit inside of round ice cubes.
    Print Pin
    Be the first to rate!

    Fruity Ice Cubes

    Making these fruity ice cubes (ice balls) is easy, and they use coconut water which adds a fun flavor twist to any drink! Use fresh fruit and fresh herbs for any drink!
    Course Drinks
    Cuisine American
    Prep Time 5 minutes minutes
    Freeze Time 2 hours hours
    Total Time 2 hours hours 5 minutes minutes
    Servings 6 cubes
    Author Jessica Burgess

    Equipment

    • Ice Mold Shape and size can vary

    Ingredients

    • coconut water or distilled/filtered water
    • fresh fruit see post for fruit ideas
    • fresh herbs see post for fresh herb ideas

    Instructions

    • Wash, and dice fruit.
    • Place fruit pieces and pieces of herbs in ice mold and then fill with coconut water or water of choice.

    Notes

    • How to Make Clear Ice: If using coconut water, it will depend on which brand you use to get clear ice. Some coconut water is white, milk’ish looking. If using regular water, try to use distilled or very filtered water. I also have this ice cube tray that’s specifically to make very clear, cubed ice.
    • Use fresh fruit and herbs: Try not to use browned leaves, or rotten fruit, as this will make for poor ice.
    • Added flavors: Take things up a notch and add flavorings to your ice, such as flavored syrups or extracts.

    Nutrition

    Serving: 1cube

    Pumpkin Pancakes with Pancake Mix

    August 29, 2024

    Pumpkin White Chocolate Pancakes with a White Chocolate Maple Syrup: A breakfast recipe that’s perfect for cool fall days.

    Pancake recipes are my JAM, and if you’re looking for a basic, homemade pancake recipe, then you’ll also love these fluffy pancakes!

    Pumpkin White Chocolate Pancakes with a White Chocolate Maple Syrup Recipe fantabulosity.com

    There is something about the idea of the smell of pancakes that helps me roll out of bed in the morning.

    They’re easy to whip up, always requested by my little guys, and perfect to make in bulk to store for leftovers for a few days. Pancakes for the win!

    Pumpkin White Chocolate Pancake Recipe

    If you’ve made my 5-minute Butternut Squash pancakes, then you know that I LOVE experimenting by adding “not so normal” ingredients to the dessert-like breakfast dish. If I can sneak in a little healthy, you better count on it.

    But with the Fall season here, the taste and scent of “pumpkin,” is EVERYWHERE. This last weekend was no exception. Unlike with the butternut squash pancakes, I didn’t add in a can of pumpkin to these. I absolutely could have, but decided to splurge and get a little unhealthy with these beauties.

    Pumpkin spice, white chocolate chips, and maple syrup created a combo of something pretty amazing.

    If you love pumpkin flavors, you’ll also love this pumpkin pie with a graham cracker crust.

    Pumpkin White Chocolate Pancakes with a White Chocolate Maple Syrup Recipe fantabulosity.com

    Could you also add in some canned pureed pumpkin? You bet. It would probably actually make it a little more “pumpkin,” flavored. (I didn’t have any on hand, so I skipped it this round.)

    So pumpkin pie spice and white chocolate chips were the heroes of this pancake recipe. But I didn’t stop there.

    White Chocolate Maple Syrup

    We all know maple syrup is delicious as it stands. (At least I think so. Especially when my hand reaches for the “extra butter,” flavored syrup. Sinful, and unhealthy I know. But only on a whim. Promise.)

    To “wow” the kiddos at the breakfast table, I mixed in a bit of maple syrup and milk (to thin it out) to some melted white chocolate… creating a white chocolate maple syrup to drizzle over their Pumpkin White Chocolate Pancakes.

    Pumpkin White Chocolate Pancakes with a White Chocolate Maple Syrup Recipe fantabulosity.com

    Their eyes became wide open like silver dollars when I told them what the “new syrup,” was made of.

    Pumpkin White Chocolate Pancakes with a White Chocolate Maple Syrup Recipe fantabulosity.com

    For my pancakes, I use Krusteaz pancake mix, only because it’s the best one I’ve used. You only have to add water (for regular ole pancakes), and they make the biggest fluffiest pancakes around! I buy a HUGE bag at Costco to stock up for our ever-so-loving pancake hearts.

    For the white chocolate in this recipe, I used Ghirardelli white chocolate chips. You can use any brand that you wish.

    You could also add Oreo cookies like we did in our cookies and cream pancakes, and that would be delicious!

    Related Recipes

    Love pancakes too? Try these oven pancakes that are swirled with cinnamon! Or, if you love using almond milk at home, you will love trying these almond milk pancakes.

    If you love pancakes as much as I do, then you’ll want to get a hold of this list of over 95 pancake toppings to add to all sorts of pancakes!

    pumpkin-white-chocolate-pancakes-with-a-white-chocolate-maple-syrup-11

    Needless to say, the kids begged for these the next morning, but I had to be the bearer of bad news, and tell them that we only get to have this on special occasions. Chocolate syrup for breakfast every morning? Yeah I don’t think so. I’m the only one that gets to pour a ton of sugar in my “dish” of the day around here.

    I so hope you love these ANY time of the year. Not feeling the “pumpkin,” flavor right now? No problem. Replace it with cinnamon, apple pie spice, or anything else that your little heart desires.

    Recipe

    Print Pin
    5 from 1 vote

    Pumpkin Pancakes with White Chocolate Maple Syrup

    This pumpkin pancake recipe is the perfect fall breakfast treat! Drizzled in a white chocolate syrup, the whole family will love this!
    Course Breakfast
    Cuisine American
    Prep Time 10 minutes minutes
    Cook Time 15 minutes minutes
    Total Time 25 minutes minutes
    Servings 10 servings
    Calories 221kcal
    Author Jessica Burgess

    Ingredients

    Pancakes:

    • 2 cups pancake mix Or a homemade pancakes recipe works too!
    • 1-⅓ cup water
    • 1 Tablespoon pumpkin pie spice
    • ½ cup white chocolate chocolate chips
    • butter for greasing

    Syrup:

    • 1 cup white chocolate chocolate chips
    • 1 Tablespoon milk
    • 3 Tablespoons maple syrup

    Instructions

    Pancakes:

    • Preheat griddle to 350.
    • Gently mix pancake mix, water, and pumpkin pie spice together in mixing bowl, until evenly distributed. The batter will be lumpy.
    • Add in chocolate chips, and gently stir in.
    • Grease griddle with butter.
    • Begin pouring batter on to griddle into approx. 5 in circles (I use a measuring cup or ice cream scoop.)
    • When tops of pancakes begin to bubble, flip.
    • When pancakes are cooked through, remove from griddle. (Stacking the pancakes will help retain heat until time to eat.)

    Syrup:

    • Melt chips in microwave safe container at medium power for 1 to 1 ½ minutes, stir. If chips have not melted, continue heating in 15-second intervals until smooth.
    • Stir in milk and maple syrup.
    • Drizzle over pancakes and serve!

    Nutrition

    Serving: 1serving | Calories: 221kcal | Carbohydrates: 28g | Protein: 3g | Fat: 10g | Saturated Fat: 5g | Cholesterol: 24mg | Sodium: 157mg | Potassium: 146mg | Sugar: 19g | Vitamin A: 70IU | Vitamin C: 0.4mg | Calcium: 122mg | Iron: 0.5mg

    Italian Cucumber Salad

    August 28, 2024

    Italian cucumber salad with onions, tomatoes, Italian dressing and seasonings.

    This Italian cucumber salad recipe has only 7 ingredients and only a few minutes of prep time, then stored in the refrigerator for serving later! The best thing about this recipe? It uses store-bought Italian dressing to keep things fast and simple. Looking for a creamy version? This creamy cucumber salad is one to try too!

    Italian cucumber salad with onions, tomatoes, and Italian dressing, and seasoning.

    The most difficult thing about this recipe? Slicing the tomatoes, onion, and cucumbers, and that’s not difficult at all! It’s a great dish to make as a side dish for a quick summer dinner or even to take along to a BBQ on a hot summer day, alongside this carrot salad recipe too.

    Looking for more great recipes for a summer BBQ? Try this easy broccoli salad recipe, and this baked beans and hamburger recipe.

    Why You’ll Love This Recipe

    • Easy to make
    • Simple ingredients
    • Make ahead of time
    • Tons of flavor

    Ingredients for Italian Cucumber Salad

    Ingredients for Italian cucumber salad recipe.

    Here are key ingredients that make the best cucumber salad:

    • Cucumbers – find firm cucumbers with little “give” so you have that crunch. I used regular cucumbers for this recipe when making it for you but I also love using English cucumbers in this recipe.
    • Cherry tomatoes – you can use slicing tomatoes instead but I find that cherry tomatoes, sliced in half, add a less mushy texture, and are more firm and pair with the cucumbers nicely.
    • Onions – white or yellow, or red onions will work for this recipe.
    • Italian dressing – using your favorite brand will work just fine, and you can even use a zesty Italian to make a zesty cucumber salad if you prefer.

    How to Make Italian Cucumber Salad

    Steps to show how to make Italian cucumber salad recipe.
    • Slice all of your veggies and place them in a large mixing bowl.
    • Next, pour on the salad dressing, and then sprinkle on the seasonings.
    • Stir to combine and mix in well.
    Italian cucumber salad with dressing, mixed together.
    • Cover the bowl with plastic wrap, or a lid, and refrigerate for 2 hours (or longer if making ahead of time).

    TIP: Chilling the salad for a couple of hours allows the vegetables to absorb flavor and the dressing to give them more flavor.

    Italian cucumber salad in glass bowl, covered to be refrigerated.
    • Once the cucumber salad has chilled for a couple of hours, it’s ready to serve.
    Italian Cucumber Salad in bowl with spoon.

    Cucumber Salad Storage Instructions

    Keep this cucumber salad in the refrigerator when not actively serving. Enjoy within a couple of days to enjoy the freshness of the cucumbers and other vegetables if possible. Discard after 4-5 days if needed.

    More Summer Salad Recipes

    • Red Potato Salad
    • Avocado Tomato Mozzarella Salad
    • Macaroni Chicken Salad
    • Cornbread Salad
    • Carrot Salad
    • Pea Salad Recipe
    • KFC Coleslaw

    Recipe

    Italian cucumber salad with onions, tomatoes, Italian dressing and seasonings.
    Print Pin
    Be the first to rate!

    Italian Cucumber Salad

    Italian cucumber salad uses simple ingredients, such as Italian dressing, onions, cherry tomatoes and a few seasonings to make this a summer side dish to keep on hand!
    Course Salad
    Cuisine American, Italian
    Diet Vegetarian
    Prep Time 10 minutes minutes
    Chill Time 2 hours hours
    Total Time 2 hours hours 10 minutes minutes
    Servings 6 servings
    Calories 128kcal
    Author Jessica Burgess

    Ingredients

    • 2 large cucumbers
    • 1 medium onion sweet, red, white or yellow
    • 1 pint cherry tomatoes
    • 8 ounces Italian dressing half of a 16 ounce bottle
    • ½ teaspoon black pepper Or more if you prefer a stronger pepper flavor
    • 1 teaspoon garlic powder
    • 1 Tablespoon Italian seasoning

    Instructions

    • Wash and slice 2 large cucumbers (with peel) in to about ¼ inch thick slices.
    • Wash and slice 1 pint cherry tomatoes, in half. Slice 1 medium onion in to long, thin, slices/strips.
    • Place all sliced vegetables in large mixing bowl.
    • Pour 8 ounces Italian dressing on to the vegetables and then add ½ teaspoon black pepper, 1 teaspoon garlic powder, and 1 Tablespoon Italian seasoning. Stir to combine and evenly coat vegetables in dressing and seasonings.
    • Cover bowl with plastic wrap or lid and store in the refrigerator for at least 2 hours to allow the flavors to absorb in to the vegetables. Serve!

    Video

    Notes

    You can stir the cucumber salad once or twice during the two hours of chill time if you prefer but not required.
    Store in the refrigerator when not serving, and it’s best to enjoy it within the first couple of days.

    Nutrition

    Serving: 1serving | Calories: 128kcal | Carbohydrates: 13g | Protein: 2g | Fat: 8g | Saturated Fat: 1g | Polyunsaturated Fat: 4g | Monounsaturated Fat: 2g | Trans Fat: 0.02g | Sodium: 387mg | Potassium: 376mg | Fiber: 2g | Sugar: 8g | Vitamin A: 482IU | Vitamin C: 23mg | Calcium: 45mg | Iron: 1mg

    Crack Green Beans

    August 24, 2024

    Crack green beans on wooden spoon.

    These crack green beans are a vintage recipe that takes canned green beans to a whole new level. Flavors of bacon, brown sugar, onion, soy sauce, and a few other simple ingredients give this green bean recipe a taste that even non-green bean lovers will love. This is a recipe that makes canned green beans taste so much better!

    Cooked green beans with bacon, in skillet.

    Why are they called crack green beans?

    Well, if you’ve seen certain recipes called “crack” it’s typically because the recipes are so good, that they’re addicting. I’ll be the first to say, that these green beans are addicting for sure. I ate them right out of the pan and they didn’t even make it dinnertime. Even my non-green bean-loving kiddo was eating right out of the skillet too.

    Need some other vintage side dish recipes? You’ll also love this green bean casserole, or this macaroni and tomatoes recipe, this broccoli salad recipe, or this baked beans with ground beef recipe.

    Ingredients

    The ingredients for this recipe are simple, and I wanted to use ingredients that you could keep on hand for those last-minute side dish needs or even a dish to take to a family gathering, holiday dinner, or potluck.

    Ingredients sitting out, for crack green beans recipe.

    Here are some helpful notes about some of the ingredients you’ll need for this recipe:

    • Green Beans – I prefer to use cut green beans instead of french-style green beans but you can use those if you prefer. With fresh green beans, more cook time may be required so they’ll soften more.
    • Bacon – Using thick-cut bacon is my favorite for texture reasons but you can use any thickness that you prefer. You may also want to keep in mind the flavor of the bacon that you use. Lower sodium, or sweeter bacon like “maple” bacon, could alter the flavor some as well.
    • Soy Sauce – I used less-sodium soy sauce (as you can see in the photo above) and you don’t have to use this but it’s the only type I had on hand when making this recipe for you.
    • Worcestershire Sauce – As with any recipe that uses Worcestershire sauce, I always recommend Lea and Perrines as it just has a much better flavor than the generic brands tend to have.

    How to Make Crack Green Beans

    Begin by cooking the diced bacon and diced onion in a skillet over medium heat until the bacon is crispy.

    Bacon and onions sautéing in enameled cast iron pan.

    Next, add the two cans of drained green beans, and the remaining ingredients.

    Turn the burner to medium to low heat, and cook covered, for 20 minutes, stirring carefully, and once, halfway through. (At the 10 minute mark.)

    Green beans and brown sugar in enameled cast iron pan.

    Tip: You can cut back on the sugar, making it ¼ cup (instead of ½ cup) of brown sugar if you don’t want the green beans that sweet.

    Cooked crack green beans with bacon in enameled cast iron pan.

    How to Serve this Green Beans Recipe

    Serve this warm side dish alongside your favorite dinners like this country fried steak, these homemade chicken and dumplings, or these fried pork chops.

    If taking to a gathering or potluck, keep these beans warm in a slow cooker (on “warm” or “low”) or in a dish inside of a warmer if possible.

    More Bean Recipes: You’ll also love these bean recipes that are easy and they go great with so many dishes:

    • Instant Pot Green Beans and Potatoes in a white serving dish
      Instant Pot Green Beans and Potatoes
    • Close up of apple pie baked beans in skillet, with wooden spoon.
      Apple Pie Baked Beans
    • 3 bean salad recipe - cilantro lime, black beans, dark red kidney beans, pinto
      3 Bean Salad Recipe – Mexican Side Dish
    • A close up photo of a bowl of 15 bean soup.
      15 Bean Soup

    Recipe

    Crack green beans on wooden spoon.
    Print Pin
    5 from 2 votes

    Crack Green Beans Recipe

    Crack green beans are made on the stovetop, using brown sugar, soy sauce, bacon, onion and a few other ingredients and they're delicious.
    Course Side Dish
    Cuisine American
    Cook Time 30 minutes minutes
    Total Time 30 minutes minutes
    Servings 4 servings
    Calories 215kcal
    Author Jessica Burgess

    Ingredients

    • 2 cans green beans 14.5 each, drained
    • 4 pieces bacon diced in to small pieces
    • ⅓ cup light brown sugar
    • ½ teaspoon garlic powder
    • 1 teaspoon Worcestershire sauce
    • 2 teaspoons soy sauce
    • ½ cup yellow onion diced in to small pieces
    • ¼ teaspoon black pepper

    Instructions

    • Cook 4 pieces bacon and ½ cup yellow onion over medium heat, until bacon is crispy.
    • Add 2 cans green beans (drained) and ⅓ cup light brown sugar, ½ teaspoon garlic powder, 1 teaspoon Worcestershire sauce, 2 teaspoons soy sauce, and ¼ teaspoon black pepper.
    • Cook between med low heat, covered, for 20 minutes, stirring carefully and once, halfway through. (At 10 min.)

    Notes

    If you don’t prefer a sweeter taste, you can cut back on the sugar to ¼ cup brown sugar.

    Nutrition

    Serving: 1serving | Calories: 215kcal | Carbohydrates: 30g | Protein: 6g | Fat: 9g | Saturated Fat: 3g | Polyunsaturated Fat: 2g | Monounsaturated Fat: 4g | Trans Fat: 0.03g | Cholesterol: 15mg | Sodium: 347mg | Potassium: 398mg | Fiber: 4g | Sugar: 23g | Vitamin A: 914IU | Vitamin C: 18mg | Calcium: 72mg | Iron: 2mg

    Baked Ravioli

    August 15, 2024

    Baked ravioli being lifted out of baking dish.

    This Baked Ravioli recipe uses storebought fresh or frozen ravioli (pick your favorite flavor) and your favorite store-bought marinara sauce, along with a few other ingredients to create an easy, short-cut dinner in under an hour, making it one of the easiest pasta recipes for dinner!

    Baked Ravioli being lifted out of baking dish with a stainless serving spoon.

    Do you love casserole recipes as much as I do? It’s basically a one pot meal but baked in the oven! It’s perfect for busy nights because you are simply layering ingredients and popping them in a hot oven to do their thing. This recipe is like a combination of a delicious pasta dish and a casserole.

    This sausage pasta bake is similar in how it’s made but uses different flavors and types of pasta if you’d love to mix things up but still keep things simple at dinnertime.

    [feast_advanced_jump_to]

    Ingredients Needed

    I’ve highlighted a couple of ingredients below with some relevant notes. Aside from this, the ingredients needed are pretty basic.

    Labeled ingredients for baked cheese ravioli.
    • Ravioli – Use any brand of fresh (refrigerated) or frozen. But do not use any dried options on the regular pasta shelf, as these won’t cook through.
    • Marinara – Again, any brand or flavor will do!
    • Cheese – I highly recommend shredding your own Parmesan or finding the little cup in the deli section. Shredding mozzarella is a bit tricky, but it will melt SO much better! But pre-shredded is fine here; just don’t use the green can of Parmesan!
    • Herbs – A bit of chopped fresh parsley on top is a great finish touch.

    Substitutions

    • Ravioli – use any variety you’d like. Maybe you prefer sausage or spinach ravioli. You can even go gourmet with lobster ravioli!
    • Sauce – use your favorite pasta sauce, whether it’s a nice basic red sauce or one that has lots of fresh seasonings added!

    Variations

    Some like to add cooked ground beef or Italian sausage to the sauce layers. This is an easy way to increase the bulk of the meal! You would only need a half pound to give flavor. Just make sure to cook the meat before adding it to the ravioli before baking.

    Feel free to add some fresh spinach leaves in the layers as well!

    How to Make Easy Baked Ravioli

    *Be sure to see the recipe card below for the full ingredients list & instructions!*

    STEP 1. Preheat the oven to 375 degrees, F.

    STEP 2. Start layers. Add a thin layer of sauce to a greased baking dish.

    Tip: You don’t need a ton of sauce in each layer, it’s more important to ensure there is sauce on both top and bottom of all ravioli!

    STEP 3. Pasta and cheese. Add an even layer of ravioli over the sauce. Next up, add more sauce and then a third of the mozzarella cheese.

    STEP 4. Repeat. Repeat with sauce, ravioli, sauce, cheese – until you’ve used everything up and end with mozzarella.

    Steps 2-5 of how to make baked ravioli.

    STEP 5. Bake. Add a sprinkle of Parmesan over top, then cover the dish with aluminum foil and bake. Uncover for the final 5 minutes to brown the cheese.

    Recipe Pro Tips

    • Allow to fully cool. When saving leftovers, it’s always best to cool to room temperature before placing in the fridge. This will allow it to chill quickly and also not get a lot of condensation.
    • Fresh or frozen. All ravioli works here, whether it is in the refrigerated case or the freezer section of your store. Just check the package weights as they may differ between brands.
    A serving of baked ravioli on a white plate, with a fork.

    Recipe FAQs

    How do I store leftovers?

    Once cooled, store leftovers in an airtight container in the fridge for up to 3 days. Reheat in the microwave for a quick lunch. You can also freeze leftovers for up to 3 months.

    Do I have to boil ravioli?

    Great question! The ravioli should be already par-cooked, which is why it only takes a few quick minutes in boiling water. This means it is already soft enough to cook in the pasta sauce without any extra water so there’s no boiling involved! Simply assemble and bake.

    Bite of baked cheese ravioli on a fork.

    🍽 What to Serve with Baked Ravioli

    A house salad is the perfect veggie here as it’s nice and light compared to a heavy baked pasta dish. You can also drop some Texas toast in the air fryer.

    More Pasta Recipes You’ll Love

    • Baked Feta Pasta Recipe
      Baked Feta Pasta Recipe
    • Sausage pasta bake in white baking dish.
      Easy Sausage Pasta Bake
    • Easy instant pot pasta recipe
      Instant Pot Cajun Pasta
    • scoop of chicken bacon ranch pasta
      Chicken Bacon Ranch Pasta

    Did you make this? I’d be so grateful if you left a “star” rating below to let me know what you thought! Then, the next time you need a quick and easy recipe, come back to Fantabulosity to browse all of my easy recipes!

    Recipe

    Baked ravioli being lifted out of baking dish.
    Print Pin
    Be the first to rate!

    Baked Ravioli (Fresh or Frozen!)

    This baked ravioli recipe is like a hearty casserole, that's perfect for an easy dinner, potluck or to make for someone needing a meal. Storebought ravioli, jarred marinara sauce, and a few ingredients make a complete dish.
    Course Main Course
    Cuisine Italian
    Prep Time 10 minutes minutes
    Cook Time 40 minutes minutes
    Total Time 50 minutes minutes
    Servings 6 servings
    Calories 600kcal
    Author Jessica Burgess

    Ingredients

    • 25 ounces marinara sauce
    • 25 ounces frozen or fresh cheese ravioli
    • 3 cups shredded mozzarella cheese about 12 ounces
    • 3 Tablespoons shredded Parmesan cheese
    • Fresh chopped parsley for topping optional

    Instructions

    • Preheat the oven to 375°F and grab a 9×13-inch baking dish. Lightly spray the dish with cooking spray.
    • Cover the bottom of the dish with a thin layer of marinara sauce. Line up ravioli in a single layer on the sauce.
    • Next, layer 1 cup of sauce and 1 cup of shredded mozzarella over the ravioli. Repeat the layers twice more until you've used up the ravioli.
    • Add remaining marinara and mozzarella cheese as a final layer.
    • Evenly sprinkle the Parmesan cheese over the top of the casserole.
    • Using a sheet of foil, cover the dish tightly. Bake in the preheated oven for 25-30 minutes. 25 for fresh ravioli, and 30 if they are frozen.
    • Carefully remove the foil from the dish. Bake uncovered for 5-7 minutes longer, or until the cheese is bubbly and browning.
    • Remove from the oven and let rest for about 5 minutes. Add fresh parsley on top and serve.

    Notes

    • Try fresh basil on top in place of the parsley!
    • Use whatever flavor of ravioli you like here. Spinach or sausage filled would add lots of flavor.

    Nutrition

    Serving: 1serving | Calories: 600kcal | Carbohydrates: 56g | Protein: 32g | Fat: 27g | Saturated Fat: 12g | Polyunsaturated Fat: 1g | Monounsaturated Fat: 4g | Cholesterol: 110mg | Sodium: 1680mg | Potassium: 396mg | Fiber: 5g | Sugar: 7g | Vitamin A: 910IU | Vitamin C: 8mg | Calcium: 353mg | Iron: 14mg

    Broccoli Crunch Salad

    August 14, 2024

    Broccoli crunch salad in big serving bowl, with bacon, cranberries and almonds.

    Broccoli Crunch Salad is a combination of a creamy dressing made of mayonnaise and Greek yogurt with a touch of sugar for sweetness, all mixed with crunchy broccoli, red onions, bacon, sliced almonds, and a few other ingredients. It’s a side dish recipe that’s easy enough to serve with dinner or to take to a potluck meal.

    Broccoli crunch salad in bowl, sitting on fabric napkin on table.

    The crunch of the broccoli and bacon, combined with the chewiness of the cranberries and creaminess of the dressing will ignite your tastebuds and leave your friends and family begging you to bring this to the next gathering!

    If you’re new around here, then you may not know that I’m a big fan of salad recipes and especially love that this particular savory salad recipe helps switch things up from a typical lettuce salad. Looking for other non-lettuce salads? This cucumber salad with Italian dressing and this carrot salad is great too!

    Ingredients

    Ingredients on cutting board to make broccoli salad.
    • Broccoli: I’m all about time-savers in the kitchen and believe that shortcuts can be sanity savers too! So feel free to grab a bag of the pre-cut broccoli in the produce section at your local grocery store. Or, if using a stalk of broccoli, cut off the florets and use as directed in the recipe card below.
    • Red Onion: I don’t know if I’m alone here, but red onion is one of my absolute favorite veggies out there. Whether it’s on a simple cheeseburger recipe or chopped up in the world’s best guacamole… you can almost bet you’ll see me adding it into just about anything that will work. Well this salad is no exception and it’s the perfect flavor addition. Slice up one red onion, really thin and add it to the bowl of broccoli!
    • Bacon: Crispy bacon is key here! For more crunch, crispy bacon is so delicious in this salad.
    • Cranberries: Dried cranberries add a touch of sweetness and softness to this otherwise crunchy recipe.
    • Mayonnaise: I prefer to use Hellmans or Best Foods brands but any will do.
    • Almonds: For even more crunch, using almonds or your favorite type of nut is a great idea. You may also prefer to use sunflower seed kernels.

    How to Make Broccoli Crunch Salad

    How to make broccoli crunch salad.

    Tip: Feel free to make this broccoli salad ahead of time to save time in the kitchen later.

    Broccoli salad in small bowl, sitting next to large serving bowl of broccoli salad.

    Check out my other favorite make-ahead salads for a crowd!

    More Salads and Recipes You’ll Love:

    • 3 Bean Salad
    • Creamy Crunchy Cucumber Salad
    • Garlic Roasted Broccoli

    Recipe

    Broccoli crunch salad in big serving bowl, with bacon, cranberries and almonds.
    Print Pin
    5 from 2 votes

    Broccoli Crunch Salad

    Broccoli crunch salad uses bacon, goat cheese, cranberries, Greek yogurt, mayonnaise and a few other ingredients and it's a great make-ahead salad recipe!
    Course Side Dish
    Cuisine American
    Prep Time 15 minutes minutes
    Cook Time 10 minutes minutes
    Total Time 25 minutes minutes
    Servings 8 servings
    Calories 351kcal
    Author Jessica Burgess

    Ingredients

    Broccoli Salad

    • 5 cups broccoli florets pre-cut or cut from stems
    • 8 slices thick-sliced bacon cooked, chopped
    • ½ cup dried cranberries
    • ½ cup sliced almonds
    • ⅓ cup diced red onion sliced thin
    • ¼ cup crumbled goat cheese

    Broccoli Salad Dressing

    • ½ cup mayonnaise Hellmans or Best Foods is recommended
    • ½ cup plain Greek yogurt
    • ½ teaspoon granulated sugar

    Instructions

    Broccoli Salad Instructions

    • In a large mixing bowl, add 5 cups broccoli florets, 8 slices thick-sliced bacon, ½ cup dried cranberries, ½ cup sliced almonds, ⅓ cup diced red onion, and ¼ cup crumbled goat cheese.
    • In a small mixing bowl, combine the ½ cup mayonnaise, ½ cup plain Greek yogurt and the ½ teaspoon granulated sugar. Mix with a whisk to combine.

    Broccoli Salad Dressing Instructions

    • Pour dressing over broccoli mixture and stir to combine. It's ready to serve or you can place in the refrigerator until ready to serve.

    Notes

    You can leave the sugar out if you prefer.
    Store any leftovers in the refrigerator and enjoy within 4-5 days.

    Nutrition

    Serving: 1g | Calories: 351kcal | Carbohydrates: 13g | Protein: 10g | Fat: 29g | Saturated Fat: 8g | Polyunsaturated Fat: 9g | Monounsaturated Fat: 11g | Trans Fat: 0.1g | Cholesterol: 34mg | Sodium: 377mg | Potassium: 329mg | Fiber: 3g | Sugar: 8g | Vitamin A: 451IU | Vitamin C: 51mg | Calcium: 71mg | Iron: 1mg

    Avocado BLT

    August 11, 2024

    Avocado BLT sliced in half, stacked and sitting on cutting board.

    An avocado BLT takes the classic sandwich recipe to the next level. Plus, the simple seasonings I use and how I apply them, make every bite full of so much extra goodness and flavor. Bake bacon in the oven ahead of time, pop it in the microwave, or make air fryer bacon, and you can easily assemble this sandwich in minutes.

    Sliced avocado BLT sandwich on wooden cutting board, sitting next to lettuce and mayo.

    BLTs (bacon, lettuce, and tomato sandwiches) have been around for years. It wasn’t until recently that I decided to start adding avocados on BLTs and I’m so glad that I did because they had a creamy layer, and good fats.

    Have extra avocados? You’ll love this guacamole recipe, this chopped Caprese salad, or this summer side salad to serve alongside this sandwich too.

    Ingredients

    Make sure to see the recipe card below as well, to get all of the specifics of the ingredients and instructions!

    Ingredients for avocado BLT on wooden cutting board.

    Ingredient Tips:

    • Mayo: Using a great quality of mayonnaise is key for this. I suggest Hellman’s, or Best Foods brands.
    • Bread: I love using wheat (honey and nut bread) but you can use white bread or your favorite type of bread.
    • Bacon: This recipe calls for cooked bacon, so making it ahead of time, however you prefer can help save time when it comes time to eat. Thick bacon works best, and crispy bacon makes the sandwich easier to eat so you’re not pulling on the bacon when taking a bite.
    • Tomatoes: Do not refrigerate tomatoes. This causes them to lose flavor.
    • Seasonings: Sprinkling salt on ingredients such as tomatoes and avocados, can help even out the flavors. The garlic pepper adds a hint of spice and garlic to the already delicious mayo but it is optional.

    How to Make an Avocado BLT

    It’s really easy to make this version of the BLT and feel free to change up the layers and the ingredients but I’m showing how I make this sandwich, to get optimal flavor!

    Steps on how to make an avocado blt sandwich.
    • To toast or not to toast: Either toasted or not toasted will work, however, my favorite is not toasted, to appreciate the texture of the crispy bacon, soft tomato, crunchy lettuce and creamy mayo. Sometimes toasted bread can overpower the textures of the ingredients.
    • Start by spreading on mayo on bread and seasoning the mayo. The amount can depend on how much mayo you actually love on a sandwich but I do put mayo on both slices of bread, and this is usually about 2 Tablespoons total for the sandwich.
    • Next, slice half of an avocado thin. You can also choose to mash your avocado and spread this on your sandwich as well. Add the avocado on top of one slice of mayonnaise-topped bread. Sprinkle sliced avocados with salt.
    • Cut 6 pieces of thick bacon in half, and place all of them on top of the avocado.
    • Slice tomato in to 2 thin slices, and place on top of bacon. Sprinkle tomatoes with salt.
    Lettuce and mayo on bread with garlic pepper.
    • Next, place two pieces of leaf lettuce on top of bacon slices.
    • Place the other slice of garlic pepper and mayo-topped bread, on top of the lettuce.
    • Serve, or slice in half and serve.
    Avocado BLT on wooden cutting board.

    Recipe Tips:

    • Sandwich assembly: If your bacon cooks flat, your tomatoes and avocado and tomato slices are sliced thin, your sandwich should stay assembled well while eating, without falling apart. However, feel free to place toothpicks in to sandwich to help secure ingredients, if needed.
    • Too salty: Keep in mind that some garlic pepper contains salt and some bacon is saltier than others. So be cautious of adding too much salt.
    • Tomatoes: Pat dry the tomatoes after slicing to prevent juices from making the bread mushy.
    Half BLT stacked on top of one another.

    Additional Topping Options for a BLT

    • Cheese: American, pepper jack, swiss or provolone are delicious cheeses for this sandwich.
    • Onion: Sliced white or yellow onion would also be delicious on this sandwich.
    • Chips: Yes! Regular, original potato chips add a fun crunch to this sandwich.
    • Sauce: Not a fan of mayo? No problem. Using mustard, or an aioli could be a great alternative.

    Related Recipes

    If you’re a fan of BLTs, you’ll also love these similar recipes:

    • Salmond slider with garlic aioli, tomato and lettuce.
      Salmon Sliders
    • Chicken club sandwich in platter next to french fries.
      Chicken Club Sandwich
    • Chicken Caprese Sandwich on white plate.
      Chicken Caprese Sandwich

    Recipe

    Avocado BLT sliced in half, stacked and sitting on cutting board.
    Print Pin
    5 from 1 vote

    Avocado BLT

    The best avocado blt sandwich with mayonnaise, garlic pepper, avocado slices, lettuce and tomato on sliced bread. The salt and garlic pepper add so much flavor too!
    Course Dinner, Lunch, Side Dish
    Cuisine American
    Prep Time 5 minutes minutes
    Total Time 5 minutes minutes
    Servings 1 sandwich
    Calories 721kcal
    Author Jessica Burgess

    Ingredients

    • 6 slices cooked bacon oven method bacon is best
    • 2 slices sandwich bread
    • 2 Tablespoons mayonnaise
    • 2 pieces leaf lettuce
    • 2 slices tomato
    • ½ avocado sliced
    • ¼ teaspoon garlic pepper
    • ¼ teaspoon salt

    Instructions

    • Begin by spreading about 2 Tablespoons mayonnaise on 2 slices sandwich bread (About 1 Tablespoon on each.) Sprinkle ¼ teaspoon garlic pepper between both pieces of mayo topped bread.
    • Slice ½ avocado in to thin slices, and place on top of one piece of bread. Sprinkle with ½ of the ¼ teaspoon salt.
    • Next, slice 6 slices cooked bacon in half and place all pieces on top of avocado slices.
    • Thinly slice 2 slices tomato, and place them on top of bacon pieces, and sprinkle with the remaining ¼ teaspoon salt.
    • Place the 2 pieces leaf lettuce on top of the tomato, and top with other mayo and garlic pepper seasoned bread.
    • Slice and serve.

    Video

    Nutrition

    Serving: 1sandwich | Calories: 721kcal | Carbohydrates: 36g | Protein: 24g | Fat: 54g | Saturated Fat: 12g | Polyunsaturated Fat: 18g | Monounsaturated Fat: 22g | Trans Fat: 0.1g | Cholesterol: 59mg | Sodium: 2396mg | Potassium: 923mg | Fiber: 9g | Sugar: 5g | Vitamin A: 781IU | Vitamin C: 18mg | Calcium: 132mg | Iron: 3mg

    Smoked Cheeseburger Sliders

    August 8, 2024

    Smoked cheeseburger sliders stacked on top of others, made with Hawaiian buns.

    Smoked Cheeseburger Sliders take our sheet pan cheeseburger sliders to a different level by adding smoke flavor, with the smoker. All you’ll need is Hawaiian buns (and yes, we steam these like we do in our burgers in the oven recipe), ground beef, cheese, butter, and a few spices, and about an hour, then you’re ready to enjoy these as a party appetizer or easy dinner!

    Smoked cheeseburger sliders stacked on top of one another.

    Slider recipes have become a hit lately, so experimenting with different types of sliders is always fun because you never know which one will be your favorite.

    These roast beef sliders, pizza sliders, and fried chicken sliders are just a few of the sliders that have been drool-worthy in kitchens all over! Now, with the idea of smoking sliders, it’s so fun to take the slider ideas and add “smoke” flavor to them. I also made these Smoked Italian Sliders and they were gone within minutes. There’s something about that smoke flavor that changes the whole experience.

    Ingredients:

    It doesn’t take a lot to make these sliders but I recommend not skipping an ingredient for optimal flavor. I’ll give some notes below that you may find helpful about the ingredients needed!

    Ingredients for cheeseburger sliders sitting on table.
    • Ground beef: I use a lean beef for these, only because we get our beef from a local farm. You can use a fattier beef so just make sure that you “stretch” the beef accordingly when you patty it out in to the rectangle because as the fat cooks, it will shrink. Mine didn’t shrink as much, so it hung over the buns, and that was ok with us!
    • American cheese slices: Any cheese should work but I recommend getting cheese sliced in the deli – so good! Or, get thicker cheese for that extra gooey bite.
    • Butter: I just use salted or unsalted, whatever I have on hand. However garlic salt is mixed with the butter so if you’re not a fan of too salty, this will be something to keep in mind.
    • Hawaiian buns: Make sure you get the 12-pack, sweet buns. You can use the dinner rolls version if you don’t like sweet though.

    How to Make Smoked Cheeseburger Sliders:

    You can also scroll down to the recipe card for the ingredients and instructions as well. However, I’d love to walk you through the process so you can see a visual of how I make these.

    Raw ground beef on parchment paper.
    1. Preheat your smoker to 250 degrees.
    2. Next, in a large mixing bowl, use your hands to mix together the 2 pounds of ground beef with the seasoning salt and pepper, until it’s evenly combined.
    3. Then, on a piece of parchment paper, flatten out the 2 pounds of ground beef in to a rectangle shape that’s slightly larger than the rectangle of Hawaiian buns. (Keep in mind the shrinking that I mentioned above in the ingredient notes.) To be safe, making the rectangle about an inch wider than your Hawaiian buns will be a good size.

    TIP: You can also place the parchment paper on a baking sheet if desired, to make the transition of the ground beef to the smoker, easier.

    Raw ground beef rectangular shaped patty on the smoker.
    1. When the smoker is preheated, flip the ground beef patty, directly on to the smoker, and close the lid, and set the timer for one hour.
    2. When the hour is almost up, melt the butter and garlic salt in a small bowl and set aside. If you do it too early, the butter will harden again.
    3. This is also a great time to slice the Hawaiian buns in half (making a top layer and a bottom layer – do not slice each individual bun just yet). Once sliced, place the bottom bun later in the bottom of a 11×9 aluminum pan.
    Smoked ground beef for cheeseburger sliders.

    Note: The ground beef will have a pink “tent” to it because it’s smoked. If you want to check the temperature of your beef, insert a meat thermometer in to the center and remove when it has reached 160 degrees.

    1. Using a 2 large spatulas, carefully lift the ground beef patty and place it on to the bottom buns that are in the aluminum pan.
    American cheese on cheeseburger sliders in aluminum pan.
    1. Next, layer on your slices of American cheese, making sure to cover all of the ground beef. If your cheese slices aren’t very thick, you can do two layers of cheese if you prefer for extra gooeyness.
    2. Add top layer of buns on top of the cheese.
    3. Then, brush about half of the melted garlic butter on top of the buns. (Saving the remaining butter for later.)
    4. Cover the aluminum pan with aluminum foil and place the pan on the smoker for about 10 minutes to allow the cheese to melt and the buns to steam/toast.
    Smoked cheeseburger sliders in aluminum pan.
    1. Using your spatulas, you can remove the cheeseburger sliders from the aluminum pan and place the batch on a cutting board.
    2. Using a bread knife, slice the sliders, in to individual pieces, and serve!
    Smoked cheeseburger sliders sliced in to small pieces.

    What to Serve with Smoked Sliders

    When smoking food, it’s always fun to have foods like this easy potato salad recipe, or even more smoked recipes like these smoked mushrooms, as a side dish.

    Storing Leftovers

    Have leftovers? No problem. You can either reheat them in the oven (cover with aluminum foil) at 350 degrees until the burgers are heated through. (How long will depend on how many you have, if they’re spaced out, etc.)

    More Burger Recipes You’ll Love

    If you’re a fan of burgers, you’ll also love these favorites:

    • cowboy burger on bun
      The Greatest Cowboy Burgers
    • A juicy Lucy burger cut in half so we can see the cheese inside and stacked one half on top of the other.
      Juicy Lucy Burgers
    • Aloha burger on white plate.
      Aloha Burgers
    • Blue cheese burger on pretzel bun, with lettuce leaf, sitting next to french fries on plate.
      Blue Cheese Burgers

    Recipe

    Smoked cheeseburger sliders stacked on top of others, made with Hawaiian buns.
    Print Pin
    5 from 1 vote

    Smoked Cheeseburger Sliders

    These smoked cheeseburger sliders are made with simple ingredients but are filled with flavor. The garlic butter topping helps add even more flavor.
    Course Appetizer, Dinner, Main Course
    Cuisine American
    Prep Time 5 minutes minutes
    Cook Time 1 hour hour
    Total Time 1 hour hour 5 minutes minutes
    Servings 12 sliders
    Calories 327kcal
    Author Jessica Burgess

    Equipment

    • smoker
    • 11×9 Aluminum foil pan

    Ingredients

    • 12 Hawaiian buns
    • 2 pounds ground beef
    • 9 slices American cheese or more for thicker cheese layer
    • 1 teaspoon seasoned salt
    • ½ teaspoon black pepper
    • ½ teaspoon garlic salt
    • 2 Tablespoons butter

    Instructions

    • Preheat smoker to 250 degrees.
    • In a medium-sized bowl, mix together 2 pounds ground beef, ½ teaspoon black pepper, and 1 teaspoon seasoned salt, until evenly combined.
    • On a piece of parchment paper, flatten out the ground beef in to a rectangle shape, makign it slightly larger than the size of the size of the Hawaiian buns rectangle. (About an inch larger should be good.)
    • Transfer ground beef rectangle on to smoker grill. (Using your hand, or a spatula, you should be able to flip the patty on to the smoker and pull the parchment paper off.)
    • Smoke for one hour, or until the internal temperature of the ground beef reaches 160 degrees. (Meat will look pink due to the smoke.)
    • While meat is smoking, and toward the end of the hour, this is a good time to melt the 2 Tablespoons butter, and combine it with the ½ teaspoon garlic salt. It's also a good time to slice the Hawaiian buns in half, creating a bottom layer and a top layer of buns. (Do not cut individual buns right now.)
    • When the meat has finished smoking, place the bottom layer of 12 Hawaiian buns in an aluminum foil pan and place the smoked ground beef patty on top of the buns.
    • Top ground beef with 9 slices American cheese (or more) and top with top bun layer. Brush on half of the melted seasoned butter and cover the pan with aluminum foil.
    • Place the pan on the smoker and smoke for an additional 10 minutes or until the cheese has melted and the buns are nice and steamed/toasted.

    Video

    Nutrition

    Serving: 3sliders | Calories: 327kcal | Carbohydrates: 15g | Protein: 20g | Fat: 20g | Saturated Fat: 9g | Polyunsaturated Fat: 1g | Monounsaturated Fat: 7g | Trans Fat: 1g | Cholesterol: 82mg | Sodium: 703mg | Potassium: 246mg | Fiber: 0.02g | Sugar: 4g | Vitamin A: 208IU | Calcium: 177mg | Iron: 2mg

    Smoked Italian Sliders

    July 31, 2024

    Smoked Italian Sliders stacked on top of one another.

    These smoked Italian sliders take my baked Italian sliders recipe to a whole new level by cooking them in the smoker for a couple of hours! The smoked flavor, delicious seasoned butter on top of the Hawaiian buns, melty cheese, and different meats make these a great appetizer for parties or even an easy dinner.

    Smoked Italian sliders stacked on top of one another.

    Slider recipes are incredibly easy to make, and when using Hawaiian buns, they add a sweet flavor as a contrast to savory flavors of some of my favorite sliders. These cheeseburger sliders are the most popular slider recipe, these fish sliders are the most unique and these ham sliders are the most common, and they all use Hawaiian buns too.

    Most sliders are made in the oven but when I thought I’d try making sliders in the smoker, I was hoping they’d come out with a delicious smokey flavor, and they did! Plus, cooking the sliders this way, was a great way to cook dinner without having to babysit a dish. I also smoked cheeseburgers on Hawaiian buns!

    Ingredients for Smoked Italian Sliders

    I’ve given notes on a few of the key ingredients below, but you can see the recipe card below that lists all of the ingredients and instructions too!

    Ingredients for Italian sliders on table.
    • Hawaiian buns: If you do not like sweeter buns, you can use regular slider buns for this recipe.
    • Italian dressing seasoning: This is different than Italian seasoning that you find in the spice aisle. This is the seasoning packet that you’ll find in the dressing aisle at the grocery store. I’ve used Zesty Italian and have also used regular Italian dressing seasoning, so either will work.
    • Cheese: I prefer to use provolone for this recipe but mozzarella or white American cheese would also be delicious.
    • Banana peppers: Totally optional. Sometimes I will include these on Italian sliders but have found that I prefer them without. If using, simply top the meat with your desired amount of peppers, trying to make sure they don’t carry over a lot of liquid that could make the bread soggy.

    How to Make Smoked Italian Sliders

    1. First, preheat your smoker to 250 degrees F.
    2. Next, slice the Hawaiian rolls in half, creating a top bun and a bottom bun, making two separate pieces. (Do NOT cut each roll or bun in to individual buns. It will be much easier to keep the rolls intact, so you can easily create a bottom bun and a top bun.
    3. Place the bottom buns in an aluminum foil pan. Next, layer on the sliced provolone cheese, covering the bottom layer of buns. I did 12 slices of cheese, using 9 to cover the buns and 3 more pieces running diagonal through the middle, just to use the package of cheese and get more cheese in more bites. You can do more or less depending on your preference.
    4. After the cheese, add a layer of salami, then a layer of pepperoni and a layer of smoked ham. (It doesn’t have to be in this order.) If you prefer banana peppers on your sliders, this is where you’ll layer those on as well.
    5. Place the top buns on top of the meat. Mix together the melted butter and the Italian dressing seasoning and stir to combine. Brush the tops of the buns with half of the seasoned butter. (If desired, you can mix in crushed red pepper and grated parmesan in to the butter as well.)
    6. Cover the aluminum foil pan with aluminum foil, and place the pan in the preheated smoker, and smoke at 250 for 2 hours.
    Smoked Italian sliders in aluminum baking pan.
    1. After the two hours are up, remove pan from smoker and remove the aluminum foil. The cheese should all be melted, the meat heated through and the buns a beautiful seasoned brown. (The aluminum foil will protect the buns from toasting and drying out.) You can now top the buns with the remaining melted butter if desired.
    Smoked Italian slider on cutting board, sitting around others.

    Using a spatula (preferably two) slide the Italian sliders on to a cutting board so you can cut the sliders in to individual pieces.

    Serve while warm, or leave covered with foil to keep them warm longer before serving.

    Pro Tips

    • Careful Removing: The cheese could stick to the sides of the aluminum pan, or if the cheese melts and sticks to the bottom of the pan. So before removing the sliders to the cutting board to cut in to pieces, make sure to detach anything sticking to the pan, to help make sure that your bread does not break or pull apart.
    • More Flavor: Love a little kick to your sandwiches? Feel free to add some crushed red pepper. You can also add grated parmesan cheese to the butter mixture if you prefer.

    Related Recipes

    If you love slider recipes, you’ll also love these other fun flavors that readers love:

    • Stack of roast beef sliders.
      Roast Beef Sliders
    • Sloppy joe sliders with melted cheese on white marble cutting board
      Sloppy Joe Sliders
    • Corned beef sliders stacked on top of one another, sitting on a white plate.
      Corned Beef Sliders
    • Close up of pizza sliders on white plate.
      Pizza Sliders

    Recipe

    Smoked Italian Sliders stacked on top of one another.
    Print Pin
    Be the first to rate!

    Smoked Italian Sliders

    This smoked Italian sliders recipe is ready in 2 hours, made with ham, salami, pepperoni, provolone, and topped with an Italian seasoned butter glaze.
    Course Appetizer, Dinner, Lunch, Main Course, Side Dish
    Cuisine Italian
    Prep Time 5 minutes minutes
    Cook Time 2 hours hours
    Total Time 2 hours hours 5 minutes minutes
    Servings 12 sliders
    Calories 252kcal
    Author Jessica Burgess

    Equipment

    • 1 aluminum foil pan Disposable
    • smoker We have a Treager but any brand will work

    Ingredients

    • 12 count package of Hawaiian buns
    • 12 slices provolone cheese slices
    • 9 ounces smoked ham
    • 7 ounces salami slices
    • 5 ounces large pepperoni slices or small (Can also use more/less pepperoni if desired.)
    • 4 Tablespoons butter melted
    • 1 Tablespoon Italian dressing seasoning
    • sliced banana peppers optional
    • crushed red pepper optional
    • grated parmesan cheese optional

    Instructions

    • Preheat smoker to 250° F.
    • Using a sererated bread knife, slice the 12 count package of Hawaiian buns in half, creating a top bun later and a bottom bun later.
    • Place the bottom buns in a 11×9 aluminum pan.
    • Add layer of 12 slices provolone cheese slices on top of the bottom buns, making sure to cover the bread completely.
    • Next layer on the meats, (9 ounces smoked ham, 7 ounces salami slices, 5 ounces large pepperoni slices) one at a time, and the order doesn't matter, just try to make sure the meats are evenly layered if possible, so the top buns rest evenly on top. If desired, layer on sliced banana peppers.)
    • Add top layer of buns on to the top of meats.
    • Mix 4 Tablespoons butterwith 1 Tablespoon Italian dressing seasoning and brush half or ¾ of the mixture on top of the buns. (If desired, mix in crushed red pepper and grated parmesan cheese as well.)
    • Cover the pan with aluminum foil and place on smoker and cook for 2 hours.
    • Remove the pan from the smoker, remove the aluminum foil, and if desired, brush on remaining melted seasoned butter. (You may have to re-melt the butter.)
    • Remove sliders from the pan and place on to a cutting board or platter. Using a big spatula to remove the large rectangle is easiest. Using the serrated bread knife, slice the sliders in to individual pieces, where the lines are aleady formed. Serve!

    Notes

    Careful Removing: The cheese could stick to the pan in the smoking process. Before removing the sliders to the cutting board, make sure to detach anything sticking to the pan, to help make sure that your bread does not break or pull apart.

    Nutrition

    Serving: 3sliders | Calories: 252kcal | Carbohydrates: 2g | Protein: 15g | Fat: 21g | Saturated Fat: 10g | Polyunsaturated Fat: 2g | Monounsaturated Fat: 8g | Trans Fat: 0.3g | Cholesterol: 58mg | Sodium: 1025mg | Potassium: 179mg | Sugar: 0.3g | Vitamin A: 284IU | Calcium: 151mg | Iron: 1mg

    Instant Pot Brownies

    July 29, 2024

    Instant Pot brownie on white plate.

    These easy Instant Pot brownies are so gooey, have a great balance of rich cocoa flavor and vanilla, and make things easy without heating up the oven. In about an hour, these thick, delicious brownies are ready to enjoy, making it one of my favorite Instant Pot recipes to date.

    Instant Pot brownie on white plate.

    Whether for a late-night dessert or you’re looking to impress at a potluck, these brownies will be a hit!

    Want to try more variations of the classic chocolate brownies? You could start with these dessert recipes: Cornflake Brownies for a tasty and crunchy option or, for something different, try these Lemon Cake Mix Brownies.

    [feast_advanced_jump_to]

    Why You’ll Love This Recipe

    • Versatile dessert: This Instant Pot Brownies recipe is perfect for any occasion. From casual family dinners to elegant gatherings, these brownies can serve as a mouthwatering treat everyone can relish.
    • Steps are simple to follow: You don’t have to be a culinary expert to whip up this dessert. This fudgy brownie recipe is straightforward, making it suitable for novice cooks and baking enthusiasts alike.
    • Regulates sweetness: The beauty of homemade desserts is in the control you have over the ingredients. With this recipe, you can adjust the level of sweetness to your preferences and dietary needs.

    Are Instant Pot Brownies Different?

    Instant Pot Brownies take the classic oven-baked treat to a whole new level. They’ve got this irresistible texture and richness that’s hard to resist. 

    Thanks to the Instant Pot’s unique cooking environment, every inch of these rich fudgy brownies is perfectly sticky. And guess what? They’re even made in a deep-dish style, so you’re in for a thick, decadent dessert packed with chocolatey goodness. Just a small piece is enough to satisfy your sweet tooth, making them perfect for those who like to keep an eye on portion sizes. 

    Ingredients Needed

    I’ve highlighted a couple of ingredients with some relevant notes. Aside from this, the ingredients needed are pretty basic.

    Labeled ingredients for Instant Pot brownies.
    • Granulated Sugar – When measuring granulated sugar, ensure to level it off using the back of a knife for accurate measurements. Also, store it in an airtight container to prevent it from clumping due to moisture.
    • Cocoa Powder – For a deeper, richer flavor, opt for unsweetened cocoa powder. Also, sift it before use to get rid of any lumps, ensuring a smoother mix into your batter.
    • Chocolate Chips – Consider using a mix of milk and dark chocolate chips for a more complex chocolate flavor.

    Substitutions

    • Cocoa Powder – If you run out of cocoa powder, you can use the same amount of unsweetened baking chocolate by reducing the butter in the recipe accordingly. If the recipe calls for 3 tablespoons of cocoa powder, use one ounce of unsweetened chocolate and reduce the butter in the recipe by 1 tablespoon.
    • Vanilla Extract – In case you’re out of vanilla extract, you can use an equal amount of maple syrup or honey. Alternatively, almond extract can also be used, but only half as much as it has a stronger flavor.
    • Chocolate Chips – If you don’t have chocolate chips, you can chop up any bar of chocolate that you have on hand. If you’re looking to avoid chocolate, try using dried fruit, nuts, or seeds for a healthful twist. For a dairy-free or vegan option, opt for dairy-free chocolate chips.

    Variations

    • Nutty Brownies: Enhance the texture and flavor of the brownies by folding a handful of your favorite nuts into the batter. You can use chopped almonds, walnuts, or pecans for a delightful crunch.
    • Salted Caramel Brownies: Drizzle some salted caramel over the brownies just before they’re done. The sweet and salty combination will take your brownies to a whole new level.
    • Mocha Brownies: For a coffee-infused twist to your brownies, add two tablespoons of instant coffee or espresso powder to the batter.
    • Fruity Brownies: Consider adding some dried cherries, cranberries, or orange zest to the batter for a fruity twist.
    • Peppermint Brownies: Add a drop or two of peppermint extract to the brownie batter for a refreshing, minty flavor. This variation is particularly popular during the holiday season.
    • Vegan Brownies: Substitute the eggs in this recipe with a flax egg (1 tablespoon ground flaxseed + 3 tablespoons water per egg) and use dairy-free chocolate chips for a vegan-friendly version.

    Equipment

    I have read that using a 3-inch high trivet keeps the brownies a bit less sticky and dense; however, I used the one that came with the Instant Pot and enjoyed them!

    How to Make Instant Pot Brownies

    *Be sure to see the recipe card below for the full ingredients list & instructions!*

    STEP 1: Cream the butter and sugar. Melt butter and blend with sugar in a medium bowl until a smooth consistency is achieved. Add cocoa powder and stir. (Image 1).

    STEP 2: Add eggs. Add the eggs and vanilla extract into the mix. Ensure thorough mixing. (Image 2).

    Steps 1-4 of how to make Instant Pot brownies.

    STEP 3: Mix in flour and chocolate chips. Add flour and salt to the mixture. Stir until a blend is achieved. Fold chocolate chips in gently with a wooden spoon. (Image 3-4).

    STEP 4: Add mix to the pan. Pour batter into a 7” greased springform pan. Optionally, add more chocolate chips on top. Cover the pan tightly with tin foil. (Image 5).

    STEP 5: Prepare the Instant Pot. Pour a cup of water into the bottom of your Instant Pot, situate the pan on top of the trivet, and lower it into the Pot. (Image 6).

    STEP 6: Cook the brownies. Secure the lid of the Instant Pot, ensure the valve is set to sealing, and set the Pot to high-pressure cooking for 55 minutes of cook time. Permit for a 10-minute natural release for the remaining pressure. (Image 7).

    Steps 5-8 for making Instant Pot brownies.

    STEP 7: Check the brownies. Open the lid, and inspect the brownies. Ensure no jiggling is present, and check for a firm center. If not firm, re-cook for an extra 5 minutes on high pressure and allow for a natural release. (Image 8).

    STEP 8: Cool and serve. Allow the pan of brownies to cool completely before detaching the sides and cutting into square or wedge slices.

    Instant Pot brownies on white plates, sitting next to Instant Pot.

    Recipe Pro Tips

    • Check for doneness: For best results, use a toothpick to check if the brownies are fully cooked. Insert the toothpick into the center of the brownie. If it comes out clean or with a few crumbs clinging, the brownies are done.
    • Let the brownies cool: Be patient and allow the brownies to cool completely before cutting. This will make them easier to cut, and they’ll hold their shape better.
    • Grease the Pan Well: Make sure to thoroughly grease your prepared pan to prevent the brownies from sticking.
    • Use Quality Ingredients: For the best flavor, use high-quality chocolate and cocoa powder. The quality of your ingredients can make a big difference in the final product.
    • Perfect The Texture: For a fudgier texture, slightly undercook the brownies. If you prefer cake-like brownies, add an extra egg to the recipe.
    • Mixing Matters: Don’t overmix the batter once the flour is added. Overmixing can lead to tougher brownies. Mix just until you don’t see any flour.
    • Keep an Eye on the Instant Pot: Make sure the Instant Pot is sealed correctly before starting and check that the release valve is in the right position. This will ensure that steam doesn’t escape, which can affect the cooking time and texture of the brownies.
    Close up of Instant Pot brownies on white plate.

    Recipe FAQs

    Can I double this recipe?

    Yes, you can double this great recipe. Just be sure that you have a pan large enough to accommodate the increased quantity.

    I don’t have an Instant Pot. Can I make this recipe in the oven?

    Yes, you can make this recipe in the oven. The cooking time and temperature might need to be adjusted, though. You’ll likely need to bake the brownies at 350°F (180°C) for about 20-25 minutes but check them often to avoid overcooking.

    Can I substitute the sugar with a sugar substitute?

    Yes, you can substitute the sugar with a sugar substitute. However, the texture and taste might vary. It’s best to use a sugar substitute specifically designed for baking and follow the conversion instructions on the package.

    Is it necessary to use a springform pan?

    A spring form pan makes it easier to remove the brownies once they’re cooked, but it’s not strictly necessary. You can use any pan that fits in your Instant Pot, just make sure to line it with parchment paper for easier removal.

    What can I substitute for eggs in this recipe?

    If you’re looking for an egg substitute, you can use applesauce, mashed bananas, or flax eggs. However, the texture of the brownies might differ slightly.

    What to Serve with Instant Pot Brownies

    These delectable Instant Pot Brownies pair earnestly with a variety of accompaniments, offering a sweet finish to any meal.

    A warm brownie with a scoop of creamy vanilla ice cream or a dollop of whipped cream can create an irresistible combination, while fresh berries or a dusting of powdered sugar provide simpler, yet equally satisfying options. Or make it extra chocolatey by adding some chocolate sauce on top of the brownie.

    Storage

    These brownies can be stored at room temperature in an airtight container for up to 3 days. If you want to keep them longer, you can refrigerate them, where they’ll last for about a week. Before storing, ensure that the brownies have cooled completely to prevent condensation, which can make them soggy. 

    As for freezing, yes, you can freeze these brownies. After they’ve cooled, cut them into individual squares and wrap them tightly in plastic wrap. Then, put the wrapped brownies in a zip-top bag or an airtight container and freeze for up to 3 months. The next time you want a delicious brownie, thaw at room temperature or warm up in the oven or microwave.

    More Chocolate Recipes You’ll Love

    If you have some chocolate chips left, there are plenty of delicious recipes you can make with them! If you don’t want to turn on the oven, then this No Bake Chocolate Pie is perfect. Or you could go for a great combination of chocolate and banana in these Banana Chocolate Chip Cookies,

    • Hot fudge cake sitting on white plate, with a scoop of vanilla ice cream on top.
      Hot Fudge Cake
    • chocolate bread pudding in a baking dish
      Chocolate Bread Pudding
    • No bake cookies on aluminum foil.
      The BEST No Bake Cookies Recipe
    • Mini chocolate cake on small cake stand.
      Mini Chocolate Cake

    Did you make this? I’d be so grateful if you left a “star” rating below to let me know what you thought! Then, the next time you need a quick and easy recipe, come back to Fantabulosity to browse all of my easy recipes!

    Recipe

    Instant Pot brownie on white plate.
    Print Pin
    Be the first to rate!

    Instant Pot Brownies

    Instant Pot Brownies made from scratch are cooked in the Instant Pot, giving them a fudgy, gooey texture, and they're ready in about an hour!
    Course Dessert
    Cuisine American
    Prep Time 10 minutes minutes
    Cook Time 1 hour hour
    Total Time 1 hour hour 10 minutes minutes
    Servings 12 large pieces
    Calories 323kcal
    Author Jessica Burgess

    Equipment

    • 1  3-inch high trivet 

    Ingredients

    • ¾ cup butter melted
    • 1 ½ cups granulated sugar
    • ½ cup cocoa powder
    • 2 eggs
    • 1 Tablespoon vanilla extract
    • ¾ cup flour
    • ¼ teaspoon salt
    • 1 cup chocolate chips plus more for top if desired

    Instructions

    • Whisk together melted butter and sugar until smooth, then stir in the cocoa powder.
    • Add the eggs and vanilla extract and stir well
    • Stir in the flour and salt until just combined,
    • then gently fold in the chocolate chips
    • Transfer the batter to a greased 7” springform pan, add additional chocolate chips to top if desired, and cover tightly with tin foil
    • Place 1 cup of water in the bottom of instant pot, the place the brownies on a trivet and lower into the pot
    • Put on the lid, make sure valve is set to sealing and cook on high pressure for 55 minutes, and allow for a 10 minute natural release
    • Open lid and check brownies, there should be no jiggling and the center should be firm to the touch. If not cook for an additional 5 minutes on high pressure and allow for a natural release
    • Allow brownies to cool completely before removing the sides and slicing into squares or wedges

    Notes

    Brownies in the Instant Pot are different than typical oven-baked brownies. The entire pan is sticky and gooey like the very middle piece of traditional brownies!
    These brownies are deep dish, and super chocolatey you only need a very small piece to feel satisfied
    I have read that using a 3-inch high trivet keeps the brownies a bit less sticky and dense, however, I used the one that came with the pot and enjoyed them!

    Nutrition

    Serving: 1brownie | Calories: 323kcal | Carbohydrates: 43g | Protein: 3g | Fat: 16g | Saturated Fat: 10g | Polyunsaturated Fat: 1g | Monounsaturated Fat: 3g | Trans Fat: 0.5g | Cholesterol: 60mg | Sodium: 162mg | Potassium: 78mg | Fiber: 2g | Sugar: 35g | Vitamin A: 428IU | Vitamin C: 0.1mg | Calcium: 31mg | Iron: 1mg

    Fried Dill Pickle Chips

    July 28, 2024

    Fried pickles in basket, with a cup of ranch dressing.

    Fried Dill Pickle Chips: With simple ingredients and just a few minutes, you’ll have a delicious, tangy, and crunchy appetizer recipe that’s perfect dipped in this jalapeno ranch dip or chipotle aioli.

    Fried pickles in black basket with small bowl of ranch.

    Love deep-fried recipes? Then you’ll also want to try The BEST Fried Shrimp Recipe! Or these fried mushrooms.

    [feast_advanced_jump_to]

    Why You’ll Love This Recipe

    • It’s versatile: These zesty fried pickles can be enjoyed as a snack, a delicious appetizer, or unique side dish to your main course. They are sure to add a fun twist to your usual menu.
    • They’re a crowd pleaser: Great for gatherings! The unexpected, tangy flavor of the pickles combined with the satisfying crunch often leaves people reaching for more. Who knew pickles could be such a hit?
    • Fun to make: This is an enjoyable recipe to prepare. From the battering process to the sizzle of the fryer, cooking up these pickles feels almost as good as eating them.

    Ingredients Needed

    I’ve highlighted a couple of simple ingredients with some relevant notes. Aside from this, the ingredients needed are pretty basic.

    Labeled ingredients for fried pickles.
    • Dill pickle chips or dill pickle slices – For the best flavor, opt for pickles labeled as ‘Kosher.’ These pack a more potent dill flavor, which results in a tastier fried pickle. Also, drain them well before using them to prevent your batter from getting soggy.
    • All-Purpose Flour – When measuring flour, don’t scoop it out directly from the container. Use a spoon to fluff up the flour within the container. Then, spoon the flour into the measuring cup. Sweep off the excess flour with the back of a knife. This prevents the flour from compacting and giving you more than you need for the recipe.
    • Smoked Paprika – This spice brings a sweet, smoky flavor to the recipe, enhancing the overall taste. However, it’s pretty potent, so use it sparingly. You can use half the amount stated in the full recipe if you prefer a milder flavor.

    Substitutions

    • Whole Milk – If you’re out of whole milk, you can use almond or soy milk as a substitute. For every cup of whole milk, you can use a cup of either almond or soy milk.
    • All-Purpose Flour – For those who are gluten-free, you can use almond flour or coconut flour instead of all-purpose flour. It’s a one-to-one substitution. But remember that these options can slightly change the texture of your dish.
    • Garlic Powder – Fresh garlic is an excellent substitute for garlic powder. Approximately half a teaspoon of minced fresh garlic equals an eighth of a teaspoon of garlic powder.
    • Smoked Paprika – You can use regular paprika or chili powder if you don’t have smoked paprika. The flavor will slightly differ, but it’ll still add a nice kick to your dish.
    • Corn Starch – Need an alternative for corn starch? You can use arrowroot powder or potato starch. Use two tablespoons of either arrowroot or potato starch for every tablespoon of cornstarch.

    Variations

    This recipe is quite versatile and can be tweaked to suit your personal preferences. Here are some fun variations you can try:

    • Spicy Deep Fried Pickles: For a spicy kick, add a dash of cayenne pepper, cajun seasoning, or some hot sauce to the batter before frying. This will give your pickle recipe a fiery twist that spice lovers will adore.
    • Cheesy Deep-Fried Pickles: Enhance the richness of your deep-fried pickles by adding some grated parmesan or sharp cheddar to the batter. The cheese will melt during frying, producing a gooey, savory delight.
    • Herb-Infused Deep Fried Pickles: Add some finely chopped herbs such as rosemary or thyme into the batter for an aromatic variation. This will impart a subtle, earthy flavor to your deep-fried pickles.
    • Sweet and Tangy Deep Fried Pickles: Do you prefer a dance of sweet and tangy on your taste buds? Dip the fried pickles in a sauce made of honey and mustard. The sweet honey balances the tangy pickles for an irresistible combo!

    How to Make Deep Fried Pickles

    *Be sure to see the recipe card below for the full ingredients list & instructions!*

    STEP 1: Mix the eggs and milk. Beat milk and eggs together in a medium-sized bowl until well mixed. Soak the pickles in this mixture for five minutes. (Photo 1-2)

    STEP 2: Add the seasoning. Combine dry ingredients: flour, garlic powder, paprika, and cornstarch in a second bowl. (Photo 3)

    Steps 1-4 of how to make fried pickles.

    STEP 3: Prepare the pickles. Drain the pickle-milk mixture, then toss the pickles into the flour mixture until fully covered. (Photo 4)

    STEP 4: Heat the oil in a frying pan. Pour oil into a pan or pot until it’s about 2 inches deep, and heat it up.

    Fried pickle chips in skillet with oil.

    STEP 5: Fry the pickles in the hot oil. Carefully place your pickles into the heated oil, cooking each side for 2-3 minutes or until brown. Remove pickles with a slotted spoon and put them on top of paper towels on a baking sheet to absorb excess oil.

    Fried pickles in black basket.

    Recipe Pro Tips

    • For the best results, I like to use canola oil for frying, but you can also use vegetable oil or any other high-temperature frying oil.
    • For the crispiest fried pickle, it is important to ensure the pickles are entirely coated in the flour mixture before you fry them; otherwise, the coating may separate from the pickles.
    • You can store these pickles in an airtight container in the fridge for 2 days.
    • These pickles are good served with ranch, a garlic aioli sauce, or by themselves.
    • You can substitute the pickles for bread and butter pickles if you would like, but they will have a bit of a sweeter flavor.
    Fried pickle dipped in ranch dressing, with hand holding it.

    Recipe FAQs

    Can I air-fry the pickles instead of deep-frying?

    Yes, you can air-fry these pickles. Preheat your air fryer to 400°F. Arrange the battered pickles in a single layer in the basket, ensuring they don’t overlap. Cook for about 10 minutes until golden brown, flipping halfway. This method will give you a lighter, less oily version of the recipe. You can also try using a deep fryer.

    Can I use Panko bread crumbs instead of flour for the coating?

    Certainly! Panko bread crumbs will give the fried pickles a different texture. If you’re using breadcrumbs, add the seasonings directly to the egg-milk mixture so the flavor sticks to the pickles.

    What if I don’t have cornstarch?

    If you don’t have cornstarch, you can use more flour in its place. While cornstarch helps make the coating extra crispy, using only flour will yield delicious results.

    Can I use any type of pickle in this recipe?

    This recipe works best with kosher dill pickles due to their strong flavor and crunchy texture. However, you can experiment with different types of pickles based on your preference. Just remember that the flavor and texture of the fried pickles will vary depending on the kind of pickles used.

    How do I make sure my batter sticks to the pickles? 

    To ensure the batter sticks to the pickles, pat them dry after draining them. Excess liquid can prevent the batter from adhering properly. Also, pressing the flour mixture onto the pickles can help the batter stick better.

    What to Serve with Deep Fried Pickles

    Deep-fried pickles are excellent as a standalone snack, but they’re also super versatile when it comes to pairing with other dishes. Here are a few suggestions:

    • Burgers: The crispy, tangy flavor of the pickles can perfectly balance the rich, savory taste of a burger recipe.
    • BBQ Ribs: Deep-fried pickles pair wonderfully with this classic barbecue dish – a match made in heaven!
    • Grilled Cheese Sandwich: Add some crunch and excitement to a classic grilled cheese sandwich with a side of fried pickles. Or, this chicken grilled cheese sandwich.
    • Chicken Wings: Spice up a plate of chicken wings with the tangy contrast of these pickles.
    • Salads: Chop some fried pickles and sprinkle them on a salad recipe for a unique and tasty twist.
    • Sauces: Dip pickles in your favorite dipping sauce, from ranch dressing to chipotle mayo, or even a specialty sauce of your choice.

    Storage

    The best way to store leftover deep-fried pickles is to refrigerate them. Place them in an airtight container and refrigerate for up to 2 days. It’s important to note that the pickles may lose some of their crispiness when stored. 

    To reheat, warm them in the oven at 350°F for about 10 minutes or until heated through. 

    As for freezing, you can freeze the fried pickles for up to a month. Before transferring them to a freezer-safe bag or container, make sure they are cooled and dry. 

    When ready to eat, reheat the frozen pickles in the oven

    More Recipes You’ll Love

    If you are looking for more side dishes to pair up with meals alongside these dried pickles, why not try making some Easy Red Skin Potato Salad? Or, if you want to get your crock pot into action while you make these pickles, try making some Crock Pot Cheesy Hashbrowns.

    • Close up of old fashioned sausage gravy poured across biscuits, sitting on a white plate.
      Old Fashioned Sausage Gravy
    • Fiesta Ranch potato wedges on plate next to a small bowl of ranch dressing.
      Fiesta Ranch Baked Potato Wedges
    • A large white bowl holds a fluffy orange dessert salad that is sprinkled with mandarin orange slices and mini marshmallows
      Orange Fluff Salad
    • Candied bacon pieces on rectangular plate, showing syrup and brown sugar sprinkled on top.
      Smoked Candied Bacon

    Did you make this? I’d be so grateful if you left a “star” rating below to let me know what you thought! Then, the next time you need a quick and easy recipe, come back to Fantabulosity to browse all of my easy recipes!

    Recipe

    Fried pickles in basket, with a cup of ranch dressing.
    Print Pin
    Be the first to rate!

    Fried Dill Pickle Chips

    Frying pickle chips is easy, and they're the perfect appetizer recipe that's a restaurant favorite. Serve them with ranch or a chipotle aioli!
    Course Side Dish
    Cuisine American
    Prep Time 10 minutes minutes
    Cook Time 5 minutes minutes
    Total Time 15 minutes minutes
    Servings 24 servings
    Calories 56kcal
    Author Jessica Burgess

    Ingredients

    • 32 ounces can kosher dill chip pickles drained
    • 1 cup whole milk
    • 2 large eggs
    • 2 cups all-purpose flour
    • 2 teaspoon garlic powder
    • 1 teaspoon smoked paprika
    • 1 Tablespoon corn starch
    • Oil for frying

    Instructions

    • In a medium sized mixing bowl, whisk together the milk and eggs until homogenous. Dump the pickles into the milk mixture and allow them to sit for five minutes.
    • In a separate bowl, whisk together the flour, garlic powder, paprika, and corn starch.
    • Drain the milk mixture from the bowl with the pickles and add the flour mixture. Use your hands or a spoon to fold the pickles in the flour mixture until they are evenly coated.
    • Heat 2 inches of oil in a pan or pot.
    • Gently place the pickles in the oil and cook for 2-3 minutes per side, or until they begin to brown. Place the pickles on a plate lined with paper towels to soak up the excess oil.
    • Serve and enjoy!

    Notes

    • For the best results, I like to use canola oil for frying, but you can also use vegetable oil or any other high-temperature frying oil.
    • For the crispiest fried pickle, it is important to ensure the pickles are entirely coated in the flour mixture before you fry them; otherwise, the coating may separate from the pickles.
    • You can store these pickles in an airtight container in the fridge for 2 days.
    • These pickles are good served with ranch, a garlic aioli sauce, or by themselves.
    • You can substitute the pickles for bread and butter pickles if you would like, but they will have a bit of a sweeter flavor.
    • The paprika adds just a hint of spice to the pickles. You can omit this ingredient if you do not want any spice.

    Nutrition

    Serving: 1serving | Calories: 56kcal | Carbohydrates: 10g | Protein: 2g | Fat: 1g | Saturated Fat: 0.4g | Polyunsaturated Fat: 0.2g | Monounsaturated Fat: 0.2g | Trans Fat: 0.001g | Cholesterol: 15mg | Sodium: 315mg | Potassium: 79mg | Fiber: 1g | Sugar: 1g | Vitamin A: 147IU | Vitamin C: 1mg | Calcium: 37mg | Iron: 1mg

    Easy Bagel Recipe

    July 26, 2024

    Baked homemade bagels on wire cooling rack.

    Easy Bagel Recipe: Baking bread doesn’t have to be intimidating! Save the time and money of running to bagel shops on the weekend and make your own Easy Bagels at home!

    Homemade bagels on wire rack, cooling.

    When you’re looking for delicious recipes for breakfast, these fluffy pancakes and this brioche French toast are always a hit but now I’m excited to add these homemade bagels to the mix.

    Bread does take time to proof, but bagels only need one rise rather than two, making them the perfect brunch meal, especially on a bagel cart. You can easily add toppings to these, or serve them alongside baked bacon and eggs, or even make these bagel sandwiches, for the most amazing homemade meal.

    [feast_advanced_jump_to]

    Why You’ll Love This Recipe

    • It uses a few ingredients: With only 5 ingredients, this recipe uses items that you may even have on hand.
    • Make-ahead recipe: Bread freezes SO well! You’ll want to keep these on hand at all times.
    • Affordable: Running out for bagels can be expensive! Make your own at home to save some dough.

    Ingredients Needed

    I’ve highlighted a couple of ingredients below with some relevant notes. Aside from this, the ingredients needed are pretty basic.

    Labeled ingredients for homemade bagels, sitting on counter.
    • Flour – Regular all-purpose flour has the right protein levels for bagels.
    • Yeast – Instant and active dry act the same here. This recipe isn’t formulated for fresh or cake yeast.
    • Sugar – White granulated is used to feed the yeast as well as to achieve a crisp crust.

    Variations

    It’s so easy to add toppings so your bagels aren’t just plain!

    • After boiling, let excess water drip back into the pot. Then, place the top of your bagel onto a plate of seasoning (sesame seeds, poppy seeds, everything bagel seasoning…) and press gently. Then rest on the cooling rack to dry.

    How to Make Easy Homemade Bagels

    Bread can seem finicky, but it’s really just a few simple steps. We are going to mix, proof, shape, boil, and bake. When you think of each step individually, it’s not overwhelming!

    *Be sure to see the recipe card below for the full ingredients list & instructions!*

    Steps 1-4 of how to make homemade bagels.

    STEP 1. Proof the yeast. Add yeast to warm (not hot!) water and let it bloom or proof (soften) (Image 1).

    Tip: If you bake a lot of bread, you’ll know if your water temperature is right just by feel. But if you aren’t sure, pull out that instant-read thermometer and give it a check. Water should be about 100-110°F and no higher. Higher than that and you will kill your yeast and the bagels will be flat and impossible to enjoy.

    STEP 2. Make dough. Add salt and 1 cup of flour to the yeast (Image 2). Stir to incorporate and add more flour until a soft dough forms (Image 3).

    STEP 3. Knead. Once you can no longer use a spoon, place the dough on a lightly floured surface and continue to knead in more flour (Image 4).

    Steps 5-8 of how to make bagels at home.

    STEP 4. Proof. Add dough back to a clean, greased bowl and cover. Let rise until doubled in size (Images 5 & 6).

    Tip: Bread dough needs warmth, but not too much, in order for the yeast to multiply. Place the bowl on the counter over your dishwasher if it is running. Another option is to place it in the cold oven and turn on the inside light. Just make sure to remove it before turning on the oven!

    STEP 5. Shape. Punch down and divide the dough into 8 equal pieces (Image 7). Form into smooth balls and use your thumb to make a center hole (Image 8).

    Raw bagel on silver spoon, being dipped in to water.

    STEP 6. Boil. Add the bagels gently to a pot of boiling sugar water for 1 minute on each side. Remove to a rack for water to evaporate.

    STEP 7. Bake. Bake on a parchment lined sheet until golden.

    Boiled bagels on baking sheet.

    Recipe Pro Tips

    • Boil, then bake. This extra step is essential if you want your bagels to have the correct texture.
    • Check your yeast. You can use instant or active dry yeast here. This is a perfect recipe for testing if your yeast is still good because we proof it before adding to any other ingredients. No waste if your yeast isn’t good!
    Baked bagels on baking sheet.

    Recipe FAQs

    What does boiling bagels before baking do?

    Boiling create a “crust” on the bread before it even hits the oven. This actually hinders raising in the oven – which is good for bagels. Unlike a soft and fluffy white bread loaf, we want a dense, chewy interior. The crust prevents the bagels from rising, which aids in their signature chew.

    Is it better to boil or not boil bagels?

    If you want the classic bagel texture, both inside and out, then boiling is a must. This one-two punch of boiling before baking will give you a crust to truly bite into before getting to that dense, chewy interior that will hold up to any spread you like.

    What makes for a good bagel?

    The crispy outside and chewy inside! Making any type of bread from scratch allows you to enjoy it fresh from the oven. This is the best way to experience the perfect texture of each type of bread. Boiling then baking will make really good bagels!

    Can I boil bagels without honey?

    Yes! I used granulated sugar here, which takes the place of honey. This allows your bagels to be vegan to fit a majority of diets. Using sugar in your boiling water glazes the dough and gives bagels their classic outer texture.

    Baked bagel recipe on wire cooling rack.

    What to Serve with Homemade Bagels

    Bagels are great on their own, when topped with jam, peanut butter, cream cheese, anything you like! You can also use them as the base for an egg sandwich, hot ham and cheese, or a fantastic chicken caprese.

    Baked, stacked bagels on kitchen counter.

    Storage

    Store bagels in a plastic bag, either with a tie or a zip. Make sure they are cooled completely, all the way through, before placing in the bag. If they are warm at all they will create condensation and the bagels will turn soggy!

    For long term storage, place in a plastic bag with all air removed and freeze for up to 3 months. Thaw overnight before slicing and toasting.

    Baked bagel with cream cheese and jam spread on top, sitting on white plate.

    More Bread Recipes You’ll Love

    • Focaccia bread in a bowl.
      Focaccia Bread
    • how to make Traditional Italian White Bread
      Easy Italian White Bread
    • Sliced banana bread on white platter
      Best Banana Bread
    • Hand pulling a piece of cheesy pull apart bread off of loaf.
      Cheesy Pull Apart Bread

    Did you make this? I’d be so grateful if you left a “star” rating below to let me know what you thought! Then, the next time you need a quick and easy recipe, come back to Fantabulosity to browse all of my easy recipes!

    Recipe

    Baked homemade bagels on wire cooling rack.
    Print Pin
    5 from 1 vote

    Easy Bagel Recipe

    This easy bagel recipe will have you wanting homemade bagels all of the time, with the soft, fresh, flavor of the bakery at home.
    Course Breakfast
    Cuisine American
    Prep Time 2 hours hours 25 minutes minutes
    Cook Time 30 minutes minutes
    Total Time 2 hours hours 55 minutes minutes
    Servings 8 bagels
    Calories 226kcal
    Author Jessica Burgess

    Ingredients

    • 1 ¼ cup warm water 296 ml
    • 1 packet active dry yeast 2 ¼ teaspoons or 7 g
    • ¼ cup sugar divided, 50 g
    • 3 ½ cups flour 420 g
    • 2 teaspoons salt 4 g

    Instructions

    • In a large mixing bowl or the bowl of your stand mixer, add the warm water, yeast, and 2 tablespoon of sugar. Stir to combine and allow to sit for 5 minutes.
    • Once the yeast has softened, add 1 cup of flour and the salt. Using a whisk, spatula, wooden spoon, or the dough hook of your stand mixer, stir to combine.
    • Slowly incorporate the rest of the flour ½ cup at a time. In the beginning, you can add an additional cup of flour. Once you get to the point (if making by hand) of not being able to add more flour with a spatula or wooden spoon, transfer the dough to a lightly floured surface.
    • Begin kneading in more of the flour. You will want to knead the dough for about 8-10 minutes or until the dough is soft and pliable.
    • If you are using a stand mixer, knead the dough for 8-10 minutes using the dough hook the dough will easily release from the sides of the bowl.
    • Place the dough in a lightly greased bowl and cover it. Allow the dough to rise until it has doubled in size. This should take between 1 ½ to 2 hours. This will depend on the temperature of your kitchen.
    • Line a baking sheet with a piece of parchment paper and set aside.
    • Once the dough has doubled in size, turn the dough over onto a lightly floured surface.
    • Divide the dough into 8 even pieces.
    • Form the pieces of dough into balls and then, using your finger, puncture a hole in the middle creating a donut shape then place it on the prepared baking sheet. Repeat this process for all 8 pieces.
    • Cover and allow to rest for 10 minutes.
    • Bring a large pot of water with the remaining 2 tablespoon of sugar to a boil.
    • Line a cooling rack with a paper towel or kitchen towel and set aside.
    • Preheat the oven to 375°F.
    • Gently place 2-4 bagels (one at a time) into the pot of boiling water. Allow them to boil for 1 minute on each side.
    • Remove them from the water and place them on the prepared cooling rack. Once the excess water has dried or evaporated, return the bagel to the prepared baking sheet.
    • Repeat this process for all 8 bagels.
    • Place the bagels in the oven at 375°F and bake for 25 minutes or until golden brown.

    Notes

    • Using a large slotted spoon works really well when placing the bagel into the boiling water.

    Nutrition

    Serving: 1bagel | Calories: 226kcal | Carbohydrates: 48g | Protein: 6g | Fat: 1g | Saturated Fat: 0.1g | Polyunsaturated Fat: 0.2g | Monounsaturated Fat: 0.1g | Sodium: 585mg | Potassium: 67mg | Fiber: 2g | Sugar: 6g | Vitamin C: 0.003mg | Calcium: 10mg | Iron: 3mg

    Blueberry Skillet Cobbler

    July 25, 2024

    Serving of skillet blueberry cobbler on white plate, next to cast iron.

    Blueberry Skillet Cobbler: Best served warm, this easy blueberry cobbler recipe comes together in under one hour which means you are only one hour away from warm, crumbly blueberry goodness!

    Serving of blueberry cobbler on white plate, that was made in a skillet.

    Obsessed with cobbler recipes? Try this Classic Peach Cobbler, this cobbler made with a cake mix, and this Bisquick peach cobbler too! All of which are delicious, served with a big scoop of vanilla ice cream.

    [feast_advanced_jump_to]

    Why You’ll Love This Recipe

    • It uses a few ingredients: With only 7 ingredients, this recipe uses items you may have on hand.
    • Super simple: You can basically just throw this easy dessert recipe together! Any skill level can make it.
    • Easily customizable: This cast iron skillet blueberry cobbler recipe can easily be added to it for even more deliciousness!

    Ingredients Needed

    I’ve highlighted a couple of ingredients below with some relevant notes. Aside from this, the ingredients needed are pretty basic.

    Labeled ingredients for skillet blueberry cobbler.
    • Butter – I used unsalted for this recipe but you can use salted if you prefer. Just remember that you may want to reduce the amount of salt the recipe calls for if using salted butter.
    • Milk – Any regular cow’s milk will do for this recipe.
    • Blueberries – I used fresh berries for this recipe.

    Substitutions

    Sometimes substitutions are necessary because of ingredients that are unavailable or needed for dietary restrictions. Here are some suggestions that can help:

    • Flour – If you are not a fan of all-purpose flour, feel free to sub in your preferred kind, like gluten-free flour, instead.
    • Milk – Easily swap in your favorite dairy-free milk variety to match your dietary needs.
    • Blueberries – Frozen berries work just as well for this recipe! Keep in mind that they might be a bit squishier, though. You could also use a blueberry filling for this recipe instead of fresh or frozen blueberries.

    Variations

    While this recipe is perfectly good as is, there are a few variations you can put into the mix to make it your own.

    • Cook Method – This recipe can be made in a baking dish if you’d prefer. Follow the same instructions!
    • Fruits – Feel free to add your favorite fresh fruits to this recipe to change up the fruit filling flavor.
    • Nuts – Some chopped nuts would really uplevel this classic skillet blueberry cobbler.
    • Lemon Juice – You can add some lemon juice to the blueberries to give them a hint of citrus flavor.
    • Lemon Zest Topping – Go the extra mile and finish this dish off with a dusting of lemon zest on top.

    How to Make Old Fashioned Blueberry Cobbler in a Skillet

    This recipe is super simple; just how grandma liked it to be!

    This Skillet Blueberry Cobbler is broken into 3 components:

    • Making the batter + pouring it into the dish
    • Tossing on the blueberries
    • Baking to perfection

    I suggest making this easy recipe right before you intend to serve it for the best flavor profile.

    *Be sure to see the recipe card below for the full ingredients list & instructions!*

    Begin by preheating your oven to 350 degrees.

    Steps 1-4 of how to make blueberry skillet cobbler.

    STEP 1. Melt butter. Place the stick of butter in an oven-safe cast-iron skillet (we use a cast iron pan), and melt over low heat on the stovetop. Remove from the burner when melted. (Image 1).

    STEP 2. Mix batter. While butter is melting, mix together flour, sugar, milk, baking powder & salt in a separate medium bowl. It should end up being a roughly mixed cake-like batter. (Image 2).

    Tip: You do not have to make sure the “clumps” are gone. Mix just enough that the wet ingredients are incorporated with the dry.

    STEP 3. Pour into dish. Pour batter on top of the melted butter in the hot skillet. (Do not mix.) (Image 3).

    STEP 4. Add blueberries. Pour blueberries on top of the batter mixture. (Do not mix.) (Image 4).

    Skillet blueberry cobbler baked, sitting in cast iron.

    STEP 5. Bake cobbler. Bake for 35-40 minutes, until the top is almost golden brown.

    Close-up image of skillet blueberry cobbler.

    Recipe Pro Tips

    • Serve warm. This cobbler recipe is best served with some vanilla ice cream after baking.
    • Don’t overcook. Be careful of the time. Overcooking cobbler can lead to a really mushy fruit filling.
    A bite of skillet blueberry cobbler on spoon.

    Recipe FAQs

    Why is my cobbler mushy?

    A mushy cobbler can come from excess fruit juices or not allowing it to bake long enough. To fix it, try reducing the fruit juices or bake it a bit longer until the topping is crisp.

    Why is my cobbler spongey?

    A spongey cobbler can happen when the batter is too wet or overmixed. To avoid this, ensure the batter is just mixed until combined and not too runny before pouring it over your fruit filling.

    Does blueberry cobbler need to be refrigerated after baking?

    Yes, after baking, it’s a good idea to refrigerate your blueberry cobbler if you have leftovers (which will be a surprise). Refrigeration helps to keep it fresh and safe to eat for a longer period. Just cover it or transfer it to an airtight container before putting it in the fridge. Enjoy your delicious cobbler tomorrow if you must!

    Is cobbler supposed to be eaten hot or cold?

    Cobbler is typically enjoyed warm, as the heat brings out the flavors and makes the topping crisp. However, you can also enjoy it at room temperature or even chilled if you prefer a different texture.

    Can you overcook cobbler?

    Yes, you can overcook cobbler, which may result in a dry or overly browned topping. To avoid this, follow the recommended baking time in your recipe, and keep an eye on it to ensure it’s just right – golden and bubbling.

    What to Serve with Cast-Iron Blueberry Cobbler

    Cobbler is best served with a scoop of ice cream or homemade whipped cream.

    Storage

    If, and only IF you have any leftover blueberry cobbler, store it in an airtight container once it has cooled down, and enjoy within 4-5 days.

    More Blueberry Recipes You’ll Love

    Love the simplicity of a cobbler? I think you will adore these other easy recipes too!

    • A buttermilk blueberry muffin cut in half with butter on one half.
      Buttermilk Blueberry Muffins
    • Blueberry turnovers with a powdered sugar and milk glaze.
      Blueberry Turnovers Recipe
    • Blueberry waffles on a plate, drenched in syrup.
      Blueberry Waffles Recipe
    • Blueberry Pancakes
      Easy Blueberry Pancakes

    Did you make this? I’d be so grateful if you left a “star” rating below to let me know what you thought! Then, the next time you need a quick and easy recipe, come back to Fantabulosity to browse all of my easy recipes!

    Recipe

    Serving of skillet blueberry cobbler on white plate, next to cast iron.
    Print Pin
    5 from 1 vote

    Skillet Blueberry Cobbler

    This old fashioned blueberry cobbler comes together fast and easy thanks to it's few, simple ingredients. Become the star of the show at your next dinner party if you break out this recipe!
    Course Dessert
    Cuisine American
    Prep Time 10 minutes minutes
    Cook Time 35 minutes minutes
    Total Time 45 minutes minutes
    Servings 8 servings
    Calories 294kcal
    Author Jessica Burgess

    Ingredients

    • 8 Tablespoons unsalted butter stick of butter
    • 1 cup all-purpose flour
    • 1 cup sugar
    • 1 cup milk
    • 2 teaspoons baking powder
    • ½ teaspoon salt
    • 2 cups blueberries

    Instructions

    • Prep: Preheat oven to 350 degrees.
    • Melt butter: Place stick of butter in oven-safe skillet (we use a cast iron pan), and melt over low heat on the stove top. Remove from burner when melted.
    • Mix batter: While butter is melting, mix together flour, sugar, milk, baking powder & salt in a separate bowl. (You do not have to make sure the "clumps" are gone. Mix just enough that the wet ingredients are incorporated with the dry.)
    • Pour in to dish: Pour batter on top of the melted butter in the baking pan. (Do not mix.)
    • Add blueberries: Pour blueberries on top of batter mixture. (Do not mix.)
    • Bake cobbler: Bake for 35-40 minutes, until top is almost a golden brown.

    Nutrition

    Serving: 1serving | Calories: 294kcal | Carbohydrates: 44g | Protein: 3g | Fat: 13g | Saturated Fat: 8g | Polyunsaturated Fat: 1g | Monounsaturated Fat: 3g | Trans Fat: 0.5g | Cholesterol: 34mg | Sodium: 160mg | Potassium: 196mg | Fiber: 1g | Sugar: 30g | Vitamin A: 420IU | Vitamin C: 4mg | Calcium: 89mg | Iron: 1mg

    Slow Cooker Pulled Beef

    July 24, 2024

    Slow Cooker Pulled Beef sitting on square plate.

    This Slow Cooker Pulled Beef recipe uses simple ingredients to give this tender chuck roast amazing flavor, all while cooking in the Crock Pot. Serve on bread as a sandwich, on top of mashed potatoes, rice, or even as a stand-alone.

    Slow cooker pulled beef wit onions, sitting on serving platter.

    This tender pulled beef is slow cooked to perfection, on low for 8 hours, and acts as an amazing base for so many dishes like pasta, or to serve on sliders. Or, this pulled chuck roast is even delicious next to some of your favorite side dishes.

    I also love using chuck roast for these pulled beef tacos, in this Instant Pot Roast recipe, and this Dutch oven roast recipe.

    Ingredients for Crock Pot Pulled Beef

    The ingredients used in this recipe are simple, and they give the pulled beef a flavor that pairs perfectly with so many things!

    I’ve provided a few key notes on some of the ingredients below, but you can skip right to the recipe card below with all the ingredients and instructions listed in one place.

    Ingredients for slow cooker pulled beef on kitchen table.
    • Chuck Roast – I used a 5-pound roast for this recipe, so if your roast is smaller/larger, please note that the cook times and ingredient amounts can be adjusted if preferred. However, this recipe is very forgiving so feel free to keep things the same and watch as it cooks.
    • Garlic – I have also used garlic powder instead of minced garlic and either will work great but I prefer minced garlic for more garlic flavor. Also, 2 Tablespoons of garlic gives this recipe quite a bit of garlic flavor so feel free to cut back on that if you don’t like it to overpower.
    • Smoked Paprika – You can use regular paprika instead of smoked paprika if desired. The flavor won’t vary too much at all.

    How to Make Slow Cooker Pulled Beef

    It’s really easy to make pulled beef in the slow cooker! It consists of seasoning the meat, placing it in the Crock Pot, and allowing it to cook!

    Steps on how to make slow cooker pulled beef.
    1. Mix spices together (except garlic if using minced garlic, although garlic powder can be mixed in with the other spices if using that instead).
    2. Slice onions and place in the bottom of the slow cooker.
    3. Coat roast with spice mixture and place in slow cooker, and top with minced garlic (unless garlic powder was used instead).
    4. Pour broth over roast and onions, and place the lid of the slow cooker on top. Cook on low for 8 hours.
    Cooked slow cooker beef roast on square plate.
    1. Remove roast from the slow cooker, and place on a platter that’s large enough for the chuck roast to be shredded.
    Shredded slow cooked beef, with forks poked in.

    The roast is now ready to be enjoyed how you wish! If serving alone, pouring some of the juices on top of the shredded beef, as well as the onions, is my favorite way to keep the meat from drying out and adding more flavor.

    Pro Tips:

    • Tough Roast: If you find that your roast is tough when shredding, it may need to cook longer. It could just be a tough cut of meat that needs a little more time.
    • Gravy: In my Instant Pot tri-tip recipe, I made a gravy out of the drippings and this can be done with the drippings of this chuck roast too.
    • Garnish: If entertaining, sprinkling fresh parsley on top adds some great color to this dish!
    Cooked pulled beef with cooked onions and juices on platter.

    Storage

    To store leftover cooked pulled beef, allow it to cool and store it, preferably with some of the juice and onions to keep it from drying out, in an airtight container and enjoy within 4-5 days.

    Related Recipe

    Love easy recipes like this one? Here are some of my other favorites for easy dinners:

    • Dutch oven beef stew in white pot.
      Dutch Oven Beef Stew
    • Crock Pot cube steak on top of mashed potatoes, sitting on white plate.
      Crock Pot Cube Steak
    • Close up of slow cooker steak on a pile of mashed potatoes.
      Slow Cooker Steak
    • Slow Cooker Pulled Pork shredded with bbq sauce
      Cherry Coca-Cola Slow Cooker Pulled Pork

    Recipe

    Slow Cooker Pulled Beef sitting on square plate.
    Print Pin
    Be the first to rate!

    Slow Cooker Pulled Beef

    This slow cooker pulled beef recipe uses simple ingredients that create delicious flavor, while slow cooking for 8 hours! Serve alone or on bread as a sandwich, or on top of mashed potatoes.
    Course Dinner, Main Course
    Cuisine American
    Prep Time 5 minutes minutes
    Cook Time 8 hours hours
    Total Time 8 hours hours 5 minutes minutes
    Servings 5 servings
    Calories 842kcal
    Author Jessica Burgess

    Equipment

    • slow cooker

    Ingredients

    • 5 pound chuck roast
    • 1 ½ Tablespoons salt
    • 1 Tablespoon pepper
    • 2 Tablespoons minced garlic or garlic powder
    • 1 Tablespoon smoked paprika
    • 2 teaspoons dried rosemary
    • 2 teaspoons dried thyme
    • 1 cup beef broth
    • 1 white onion

    Instructions

    • In a small bowl, mix together the 1 ½ Tablespoons salt, 1 Tablespoon pepper, 1 Tablespoon smoked paprika, 2 teaspoons dried rosemary, 2 teaspoons dried thyme, and garlic powder if using that instead of minced garlic.
    • Cut 1 white onion in to small slices and place them in the bottom of the slow cooker. Rub seasoning mixture all over roast.
    • Place 5 pound chuck roast on top of sliced onions and top, spread 2 Tablespoons minced garlic on top of roast.
    • Pour 1 cup beef broth on top of roast and onions, place lid on slow cooker and cook on low for 8 hours.
    • Remove roast from slow cooker and shred beef with two forks while still warm.
      If desired, pour some of the juices and cooked onions on top of the shredded beef and then serve on bread as a sandwich, or on top of mashed potatoes if desired.

    Nutrition

    Serving: 1serving | Calories: 842kcal | Carbohydrates: 5g | Protein: 88g | Fat: 52g | Saturated Fat: 23g | Polyunsaturated Fat: 4g | Monounsaturated Fat: 27g | Trans Fat: 3g | Cholesterol: 313mg | Sodium: 2642mg | Potassium: 1629mg | Fiber: 1g | Sugar: 1g | Vitamin A: 772IU | Vitamin C: 3mg | Calcium: 109mg | Iron: 11mg

    How to Make Salami Roses

    July 23, 2024

    Salami rose on charcuterie board, sitting next to nuts, cheese and crackers.

    How to Make Salami Roses – this tutorial will show you the easiest way to make a salami rose with a shot glass or wine glass, perfect for a charcuterie board, or when entertaining with a meat and cheese tray.

    Salami Rose on a charcuterie board.

    Charcuterie boards are beautiful additions to any buffet or holiday table, and adding items such as salami roses to them send them over the top! I love making charcuterie boards as an appetizer idea for parties, holidays (like this Christmas charcuterie board) and just as a casual dinner with friends.

    Did you know it’s easy to make salami roses? It’s true! I’m going to show you below just how easy it is, and tips on how to make them “stick”, different types of meats to use besides salami, and how to make different sizes of them.

    What You’ll Need:

    Salami in packaging, next to a shot glass.

    All you’ll need to make these meat roses are:

    • slices of salami
    • shot glass (or wine glass)

    (It will depend on the size of the salami rose that you’re looking for. See more tips below.)

    How to Make a Salami Rose:

    With only a few steps, you’ll have salami roses in minutes. I’ll walk you through with photos but you can also see the recipe card below for the tutorial in clear, concise, steps.

    Step by step of how to make a salami rose.
    1. Take one slice of salami, and bend the middle of it, over the edge of the shot glass, pressing hard, trying to get it to stick in a downward form.
    2. Next, take a second slice of salami, and cover half of the first piece of salami, pressing down on both, trying to get them to stick in place.
    3. Repeat with more slices of salami, working your way around the edge of the shot glass.
    4. When you’ve worked all the way around, keep repeating the process of overlapping the previous piece, placing the slices on top of one other, making layers and layers of salami. (How many slices will depend on the width of your shot glass or wine glass, and how “thick” you want your rose.)
    Three salami roses on square plate.
    1. When you have as many layers of salami as desired (I usually do 3 layers or so) take the palm of your clean hand (or glove covered hand) and press down very hard. This is securing the salami pieces the best that you can, so they’ll “stick” together in the rose shape.)
    2. Turn the shot glass over on to where you want to place your salami rose, and slowly lift up on the shot glass. (TIP: You can press down on the shot glass after flipping to give the rose an extra “stick” to stay in place.)
    Salami rose on mini charcuterie board.

    Tips for Perfect Salami Roses

    • Temperature of Salami: You don’t want the salami to sit out too long of course but if you allow it to sit out for about 10 minutes before working with it, it won’t be as “stiff” when trying to mold.
    • Placement on Board: If placing your salami rose on a charcuterie board, plan ahead and think of what types of food you can “butt up” against the rose to help hold it in place.
    • Make Roses Ahead of Time: These can be made ahead of time, and stored in an airtight container in the refrigerator. Either store in containers where the sides of the container can help hold the salami rose in shape, or place something in the container that presses up against to the rose to help secure it. (i.e. paper towels, cheese, etc.)
    • Different Types of Meats: Salami slices are great to work with to make roses but I’ve also made pepperoni roses for charcuterie boards.
    • Wine Glasses, and Different Types of Glasses: Wine glasses can be used to make large salami roses, as well as champagne glasses, or any other, thin, round, edge that’s food save. Do note that the bigger the rim, the bigger your salami roses will be.

    Recipe

    Salami rose on charcuterie board, sitting next to nuts, cheese and crackers.
    Print Pin
    Be the first to rate!

    How to Make Salami Roses

    Making salami roses are easy using a shot glass, champagne glass or wine glass. In minutes you'll have a beautiful rose for a charcuterie board or meat and cheese tray.
    Course Appetizer
    Cuisine American
    Prep Time 5 minutes minutes
    Total Time 5 minutes minutes
    Servings 1 rose
    Calories 440kcal
    Author Jessica Burgess

    Ingredients

    • 12 slices salami

    Instructions

    • Begin by taking one slice of salami, and bending the middle of the salami over the edge of the shot glass.
    • Next, take a second piece of salami and place it on the middle of the first piece, overlapping half of the first peice of salami.
    • Repeat this process, going around the entire rim of the shot glass. When you've reached the first piece, continue on, place the salami on top of one another, making layers. For a shot glass, about 12 pieces, and/or three layers of salami usually gives a "full" rose look. Size of shot glass, wine glass or champagne glass can vary on amounts of salami needed.
    • When desired amount of salami slices are added, take your clean palm and press down on the rim, and the sides of the salami, trying to secure the peices to stick to one another.
    • Decide where to place your salami rose on your charcuterie board, and turn the shot glass over, pressing down again, and slowly pulling off the shot glass.
      See tips in blog post for ways to help make the rose even more secure for the best appearance.

    Video

    https://youtube
    .com/shorts/tNMTQYfNAOE

    Nutrition

    Serving: 1rose | Calories: 440kcal | Carbohydrates: 2g | Protein: 24g | Fat: 36g | Saturated Fat: 13g | Polyunsaturated Fat: 4g | Monounsaturated Fat: 17g | Cholesterol: 85mg | Sodium: 2441mg | Potassium: 408mg | Calcium: 14mg | Iron: 1mg

    Marry Me Chicken Pasta

    July 21, 2024

    Marry me chicken pasta in white bowl.

    Marry Me Chicken Pasta is a delicious blend of chicken, pasta, heavy cream, garlic, parmesan, sundried tomatoes, Italian seasoning, and a few other spices to create the creamiest comfort food in under an hour.

    Marry Me Chicken Pasta in white bowl.

    Pasta recipes are the ultimate comfort food; and when they’re easy recipes, it’s a win-win. This blackened chicken alfredo and this bacon ranch chicken pasta recipe are similar pastas, that you’ll want to add to your dinner rotation too.

    Looking for another pasta recipe that will impress? This easy chicken lasagna looks fancy but is easier than you may think!

    Ingredients for Marry Me Pasta

    Ingredients for Marry Me Chicken Pasta recipe.

    The ingredients for this recipe are simple and should be easy to find at your local grocery store. I’ve provided notes on a few key ingredients below but make sure to see the recipe card at the bottom of this post for the full list of ingredients and instructions.

    • Chicken – you can use chicken breasts or chicken thighs for this recipe. Chicken thighs are my favorite to use, since they’re so tender, and flavorful. If you have another package of chicken to use this week, definitely consider this chicken spaghetti with Rotel too!
    • Penne pasta – using a different type of pasta will work but I prefer using penne because it’s tube shape and ridges hold the creamy sauce well, ensuring each bite is flavorful.
    • Grated parmesan cheese – if you have the time, freshly grating your parmesan cheese is so great. It makes this dish so creamy, instead of using a storebought version that tends to have an anti-caking agent to prevent sticking, that doesn’t allow it to be as creamy in the dish. I recommend the same expert tip in my easy homemade Alfredo sauce recipe.
    • Basil – Fresh basil is very recommended. Fresh basil provides so much flavor compared to dried.
    • Chicken broth – Try my easy homemade chicken broth recipe.

    How to Make Marry Me Chicken Pasta

    Ready for this delicious pasta in under an hour? I’ll walk you through how to make this with photos and key notes but make sure to also check out the recipe card below that lists the ingredients and full instructions.

    How to make marry me chicken pasta.
    1. Cook your pasta, drain and set aside.
    2. Next, cook chicken pieces until done.
    3. Remove the chicken and in the same skillet, make the creamy sauce recipe.
    4. When finished with the sauce, add your chicken back in, and stir.
    1. Add the sundried tomatoes.
    2. Toss in your cooked pasta, and stir to combine.
    3. Next, add in spinach.
    4. Stir to combine all of the ingredients.
    Marry Me Chicken Pasta in white bowl, with fork stuck in to middle.

    Your Marry Me Chicken Pasta is ready to be enjoyed! If desired, top with fresh basil.

    Serve this alongside some garlic cheese pull-apart bread, this hearty Alfredo chicken garlic bread, or even the best side salad recipe!

    Related Recipes

    Love pasta recipes? Try this baked ravioli recipe next time, and I know you’ll also love these easy pastas too!

    • Chicken spaghetti in baking dish, being lifted out with serving spoon.
      Chicken Spaghetti with Rotel
    • Taco Pasta Recipe
    • Chicken Alfredo Lasagna on round plate.
      Chicken Alfredo Lasagna
    • Marry me chicken pasta in white bowl.
      Marry Me Chicken Pasta

    Recipe

    Marry me chicken pasta in white bowl.
    Print Pin
    Be the first to rate!

    Marry Me Chicken Pasta

    Marry Me Chicken Pasta is a creamy, comforting dish made of ingredients such as sundried tomatoes, heavy cream, Italian seasoning, parmesan cheese, a few other simple ingredients and is ready under an hour!
    Course Dinner, Main Course
    Cuisine Italian
    Prep Time 20 minutes minutes
    Cook Time 30 minutes minutes
    Total Time 50 minutes minutes
    Servings 4 servings
    Calories 973kcal
    Author Jessica Burgess

    Ingredients

    Chicken and Pasta

    • 16 ounces bonesless, skinless chicken more/less is fine too! Cut in to 1-inch pieces.
    • 12 ounces penne pasta uncooked
    • 1 teaspoon kosher salt
    • ½ teaspoon ground black pepper
    • 2 Tablespoons olive oil

    Marry Me Pasta Sauce

    • 2 Tablespoons unsalted butter
    • 4 cloves minced garlic
    • 3 Tablespoons all-purpose flour
    • 2 cups chicken broth
    • 1 cup heavy cream
    • 1 cup grated parmesan cheese
    • ½ teaspoon paprika
    • 1 teaspoon dried Italian seasoning
    • ½ cup sun-dried tomatoes drained and chopped
    • 1 cup baby spinach optional
    • Fresh basil for garnish if desired

    Instructions

    Prep Chicken and Pasta

    • Bring a large pot of salted water to a boil. Add 12 ounces penne pasta and cook according to the package instructions until al dente. Drain and set aside.
    • Season the 16 ounces bonesless, skinless chicken pieces with 1 teaspoon kosher salt and ½ teaspoon ground black pepper.
    • Heat 2 Tablespoons olive oil in a large skillet over medium-high heat. Add the chicken pieces and cook until golden brown and cooked through (about 7 – 9 minutes). Remove the chicken from the skillet and set aside.

    How to Make Marry Me Pasta Sauce

    • To make the sauce, add 2 Tablespoons unsalted butter to the same skillet and melt over medium heat. Add 4 cloves minced garlic and sauté until fragrant, for about 1 minute. Stir in 3 Tablespoons all-purpose flour and cook for another minute to form a roux. Gradually whisk in 2 cups chicken broth, ensuring no lumps remain. Add 1 cup heavy cream and bring to a gentle simmer. Stir in½ teaspoon paprika, 1 teaspoon dried Italian seasoning, and 1 cup grated parmesan cheesee until melted and the sauce is smooth.

    Combine Chicken, Pasta and Sauce

    • Add the cooked chicken back to the skillet.
    • Stir in ½ cup sun-dried tomatoes. Simmer for 5 minutes until the sauce thickens and coats the chicken.
    • Add the cooked penne pasta to the skillet and toss to coat with the sauce. Simmer for an additional 2 – 3 minutes to allow the flavors to meld together.
    • Finally, add 1 cup baby spinach (optional) and stir until slightly wilted.
    • Garnish with Fresh basil for garnish if desired, and serve.

    Nutrition

    Serving: 1serving | Calories: 973kcal | Carbohydrates: 83g | Protein: 38g | Fat: 55g | Saturated Fat: 26g | Polyunsaturated Fat: 5g | Monounsaturated Fat: 19g | Trans Fat: 0.3g | Cholesterol: 164mg | Sodium: 1552mg | Potassium: 1008mg | Fiber: 5g | Sugar: 10g | Vitamin A: 2333IU | Vitamin C: 10mg | Calcium: 332mg | Iron: 4mg
    • « Go to Previous Page
    • Page 1
    • Page 2
    • Page 3
    • Page 4
    • Page 5
    • Page 6
    • Interim pages omitted …
    • Page 23
    • Go to Next Page »

    Primary Sidebar

    Jessica Burgess of Fantabulosity, slicing an avocado.

    Hi, I'm Jessica! - Owner and Creator of the blog and brand, Fantabulosity.

    I’m here to teach you how to make quick and easy recipes, using simple ingredients, that your family will love.

    More about me →

    Summer Recipes

    • Close-up of pinwheel sandwiches stacked on top of one another.
      Pinwheel Sandwiches
    • Chicken macaroni salad in a bowl.
      The BEST Chicken Macaroni Salad
    • Chicken salad with grapes and apples, sitting on bread.
      Chicken Salad with Grapes and Apples
    • Serving of banana pudding on small plate.
      Quick & Easy Banana Pudding

    Popular Recipes

    • bread pudding in baking dish
      Bread Pudding Recipe: Easy Old Fashioned Recipe (With Video!)
    • Burger baked in the oven, steamed in aluminum foil, and placed on white plate.
      Burgers in the Oven
    • Oven Baked Steak with Butter and a side of potatoes
      How to Cook Steak in the Oven
    • Strawberry brownies on white marble cutting board.
      Strawberry Brownies Recipe
    • Cheeseburger Sliders
      Cheeseburger Sliders with Hawaiian Rolls
    • Baked BBQ Pork Steaks on white plate
      Pork Steaks in the Oven

    Footer

    ↑ back to top

    Featured In

    About

    • About Jessica
    • Contact
    • Collaborate
    • 5 Days of Delicious Dinners

    Easy Recipes

    • All Recipes
    • Dinner Recipes
    • Side Dishes
    • Desserts

    How to Cook

    • Oven-Baked
    • Stove-Top
    • No Bake
    • Slow Cooker

    Privacy Policy |Accessibility Copyright © 2025 Fantabulosity | Terms & Conditions | FTC

    Rate This Recipe

    Your vote:


    A rating is required
    A name is required
    An email is required