• Skip to primary navigation
  • Skip to main content
  • Skip to primary sidebar

Fantabulosity logo

  • All Recipes
  • Vintage Recipes
  • Holiday
  • Dinner Theme System
  • About
  • Navigation Menu: Social Icons

    • Facebook
    • Instagram
    • Pinterest
    • TikTok
    • YouTube
menu icon
go to homepage
  • Recipes
  • Desserts
  • Dinners
  • Cookbook
  • Holidays
  • Gatherings
  • About Jessica
    • Facebook
    • Instagram
    • Pinterest
    • TikTok
    • YouTube
  • search icon
    Homepage link
    • Recipes
    • Desserts
    • Dinners
    • Cookbook
    • Holidays
    • Gatherings
    • About Jessica
    • Facebook
    • Instagram
    • Pinterest
    • TikTok
    • YouTube
  • ×
    Home » Recipes

    Venison Chili – Stovetop or Slow Cooker Recipe

    Venison Chili – Stovetop or Slow Cooker Recipe

    February 27, 2021

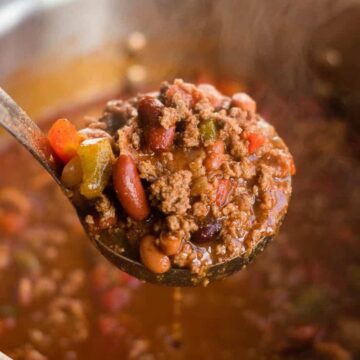
    Ladle of venison chili coming out of pot.

    This venison chili is one of the easiest ground deer meat recipes that you can make on the stove or in a slow cooker! The addition of the bacon helps give it a flavor that will leave you craving it on those cold winter days!

    Craving more warm bowls? Here are all my soups, stews, and chili.

    Deer meat and bacon make a chili worth bragging about. See our favorite slow cooker meals for more.
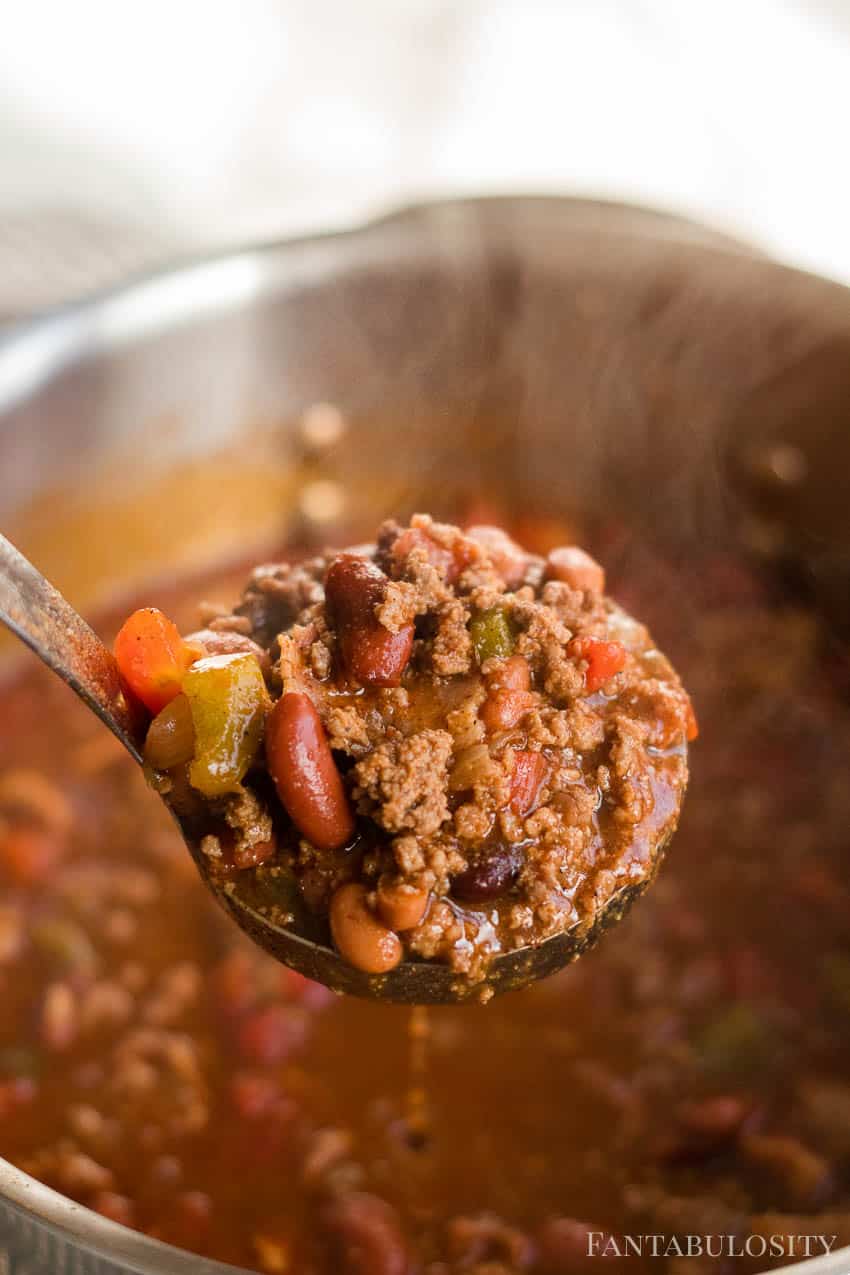
    Venison Chili

    We absolutely love deer meat recipes and are always looking for new ways to use it, since we live in Montana and my husband is a hunting guide. So if you have a freezer full of venison, adding deer chili to your menu plan is always a good idea! Or, put it on top of Frito’s and make a chili pie!

    [feast_advanced_jump_to]

    Why You’ll Love This Venison Chili

    I love using ground venison to make chili because it’s a great way to use up that deer that can’t be cut in to steaks.

    NOTE: If you’re someone who doesn’t really care for a gamey venison taste, using it in chili is a great way to use it up!

    Want Slow Cooker Venison Chili?

    Similar to our stovetop or slow cooker bean soup, this recipe process below will show you how to cook on the stovetop. However, if you’re planning on making this in the slow cooker… here is what we recommend:

    • Cook the bacon, venison, onions, peppers, and garlic together in a skillet over medium-high heat until the venison and bacon is cooked through.
    • Add it to the slow cooker with the rest of the ingredients.
    • Cook on high heat for about 5 hours or on low heat for about 8 hours. (Temperature settings on different slow cookers may vary. Check periodically for best results!)

    How to Make Deer Chili

    If you’re ready to get started on this venison chili, you can find the full stove-top recipe at the bottom of this post.
    However, I LOVE to show you process photos too in case you like to follow along visually like I do, when making a recipe I find online!
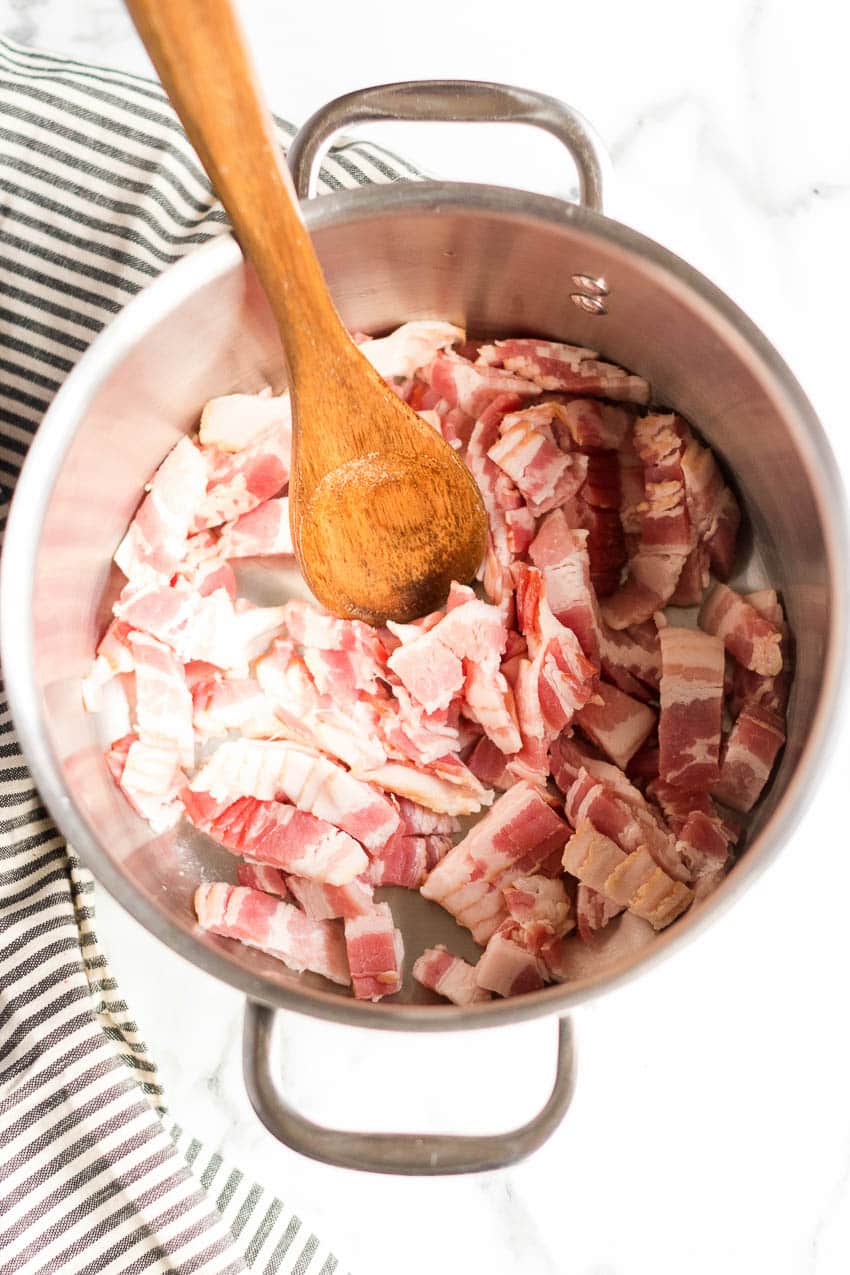
    Ground Venison Recipe - Deer Chili

    First, you’ll chop up your bacon and cook it over medium heat in a large pot for about 10 minutes until done. (Or longer if you prefer a crispier bacon in your chili.)
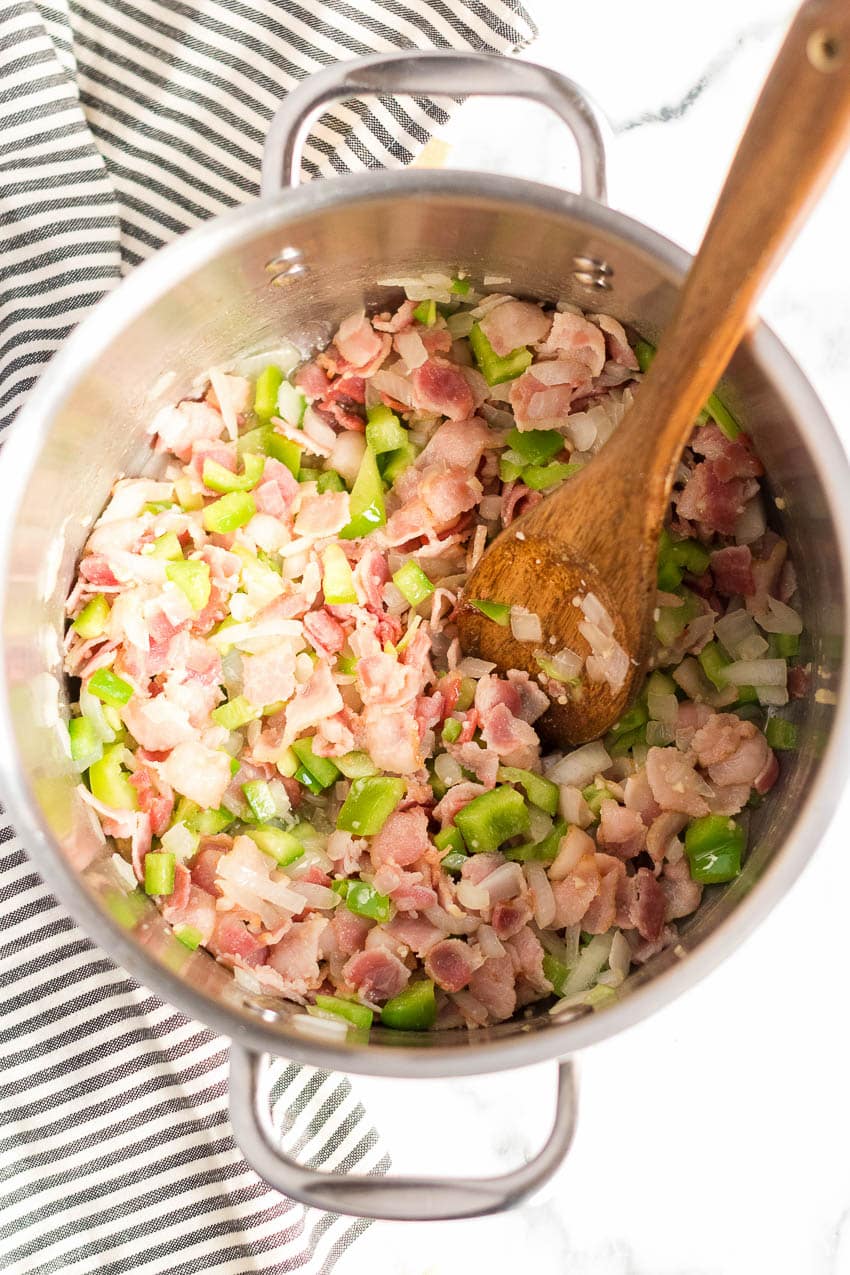
    Venison Chili Recipe

    Add your onion, garlic and bell peppers and cook for 5 minutes.

    Then, add the ground venison until venison is no longer pink.
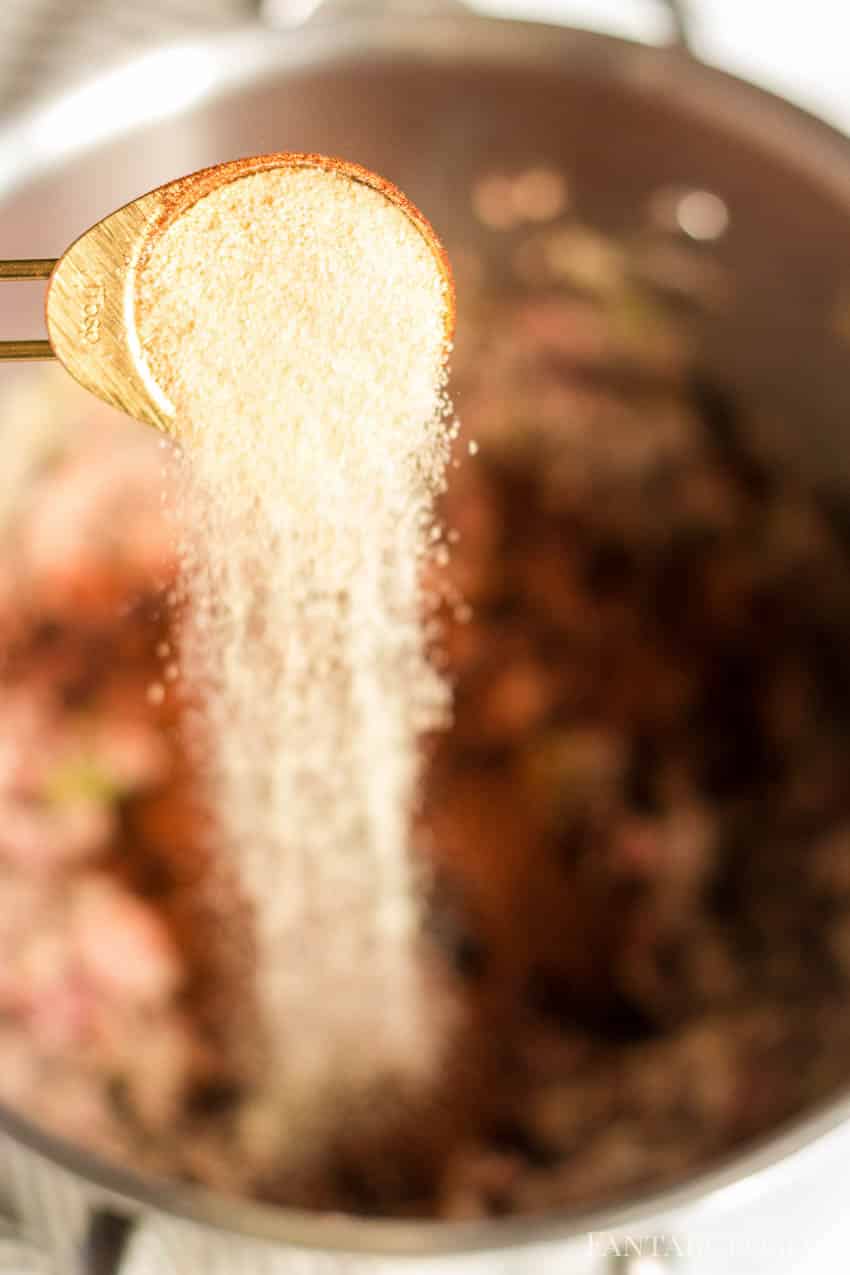
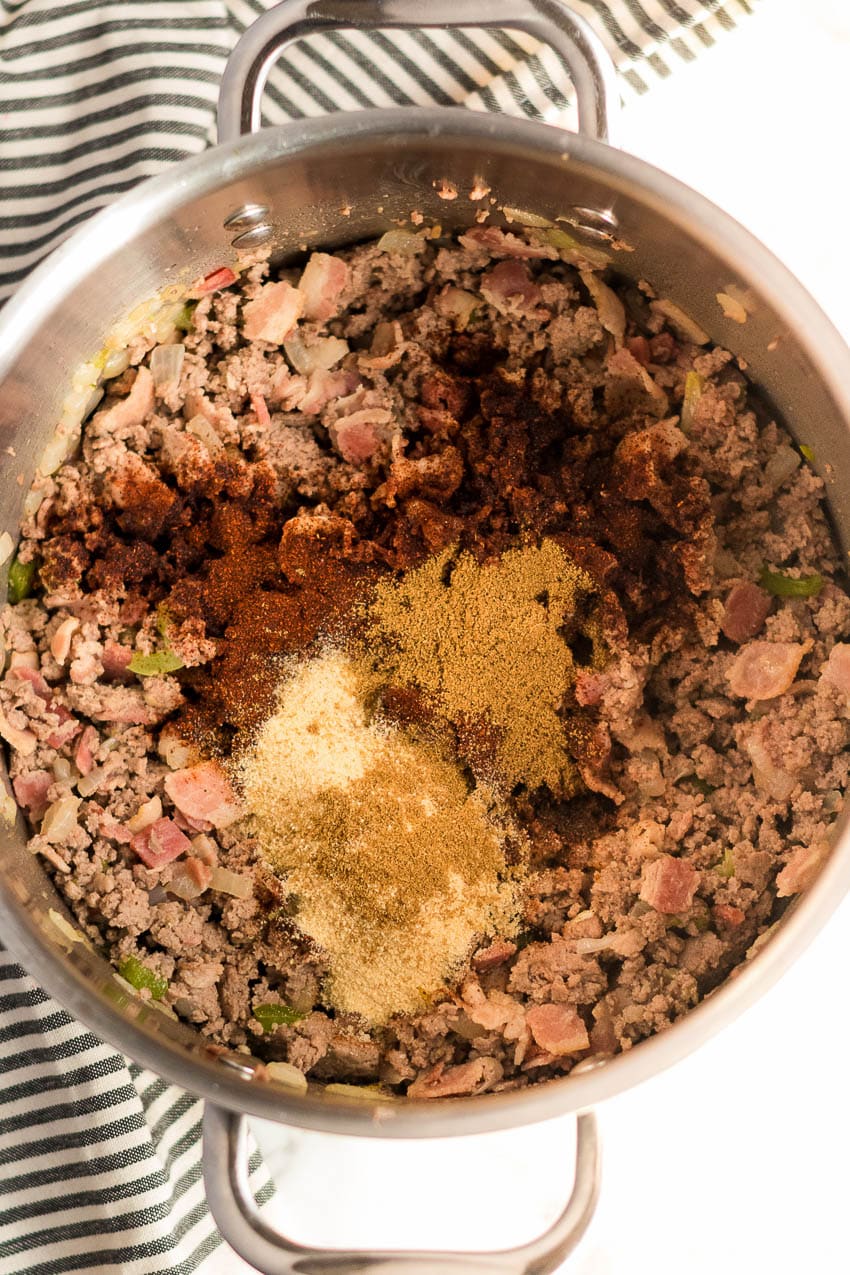
    Spices and ingredients for chili recipe

    Stir in the chili powder, cumin, onion powder and salt until the meat is evenly coated.
    Deer chili recipe

    Pour in the tomato sauce, diced tomatoes, chili beans, and kidney beans.
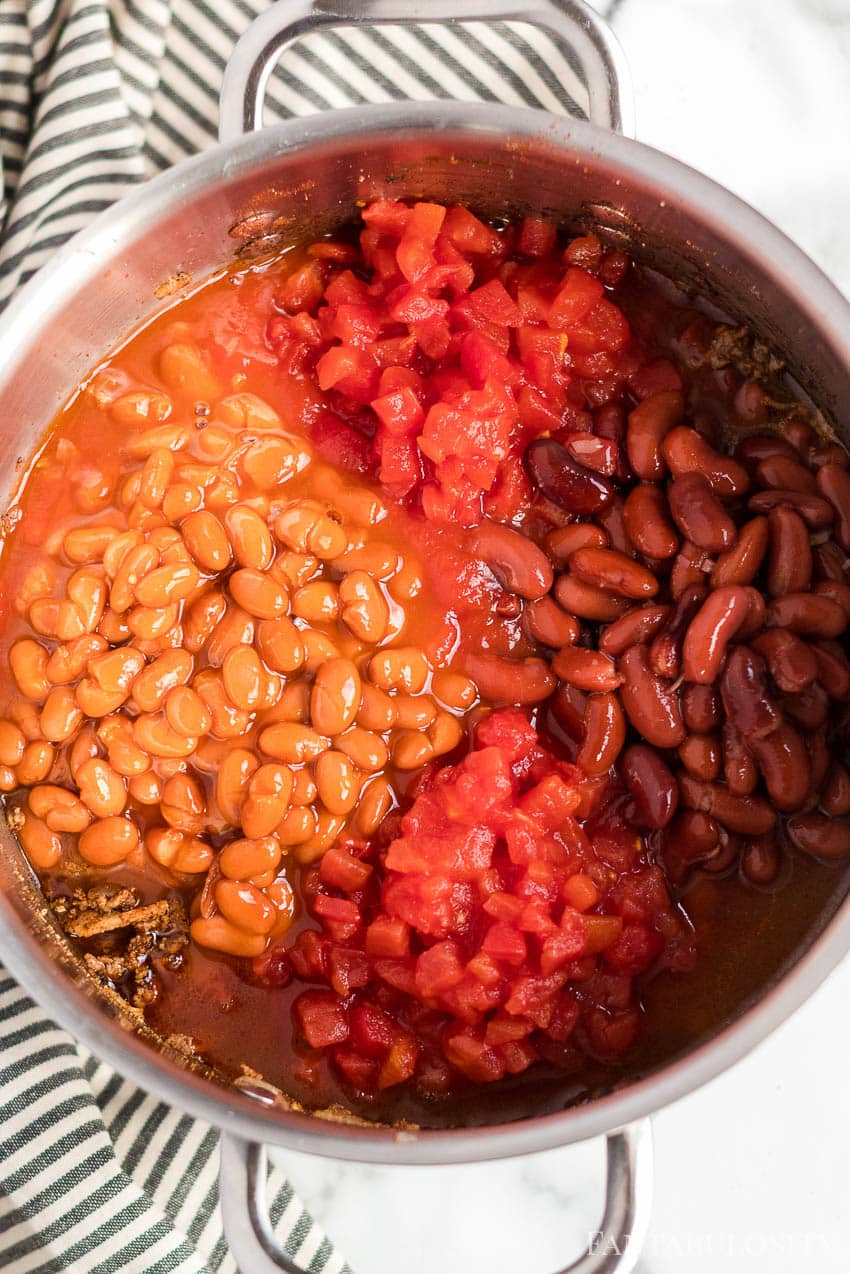
    Venison Recipes

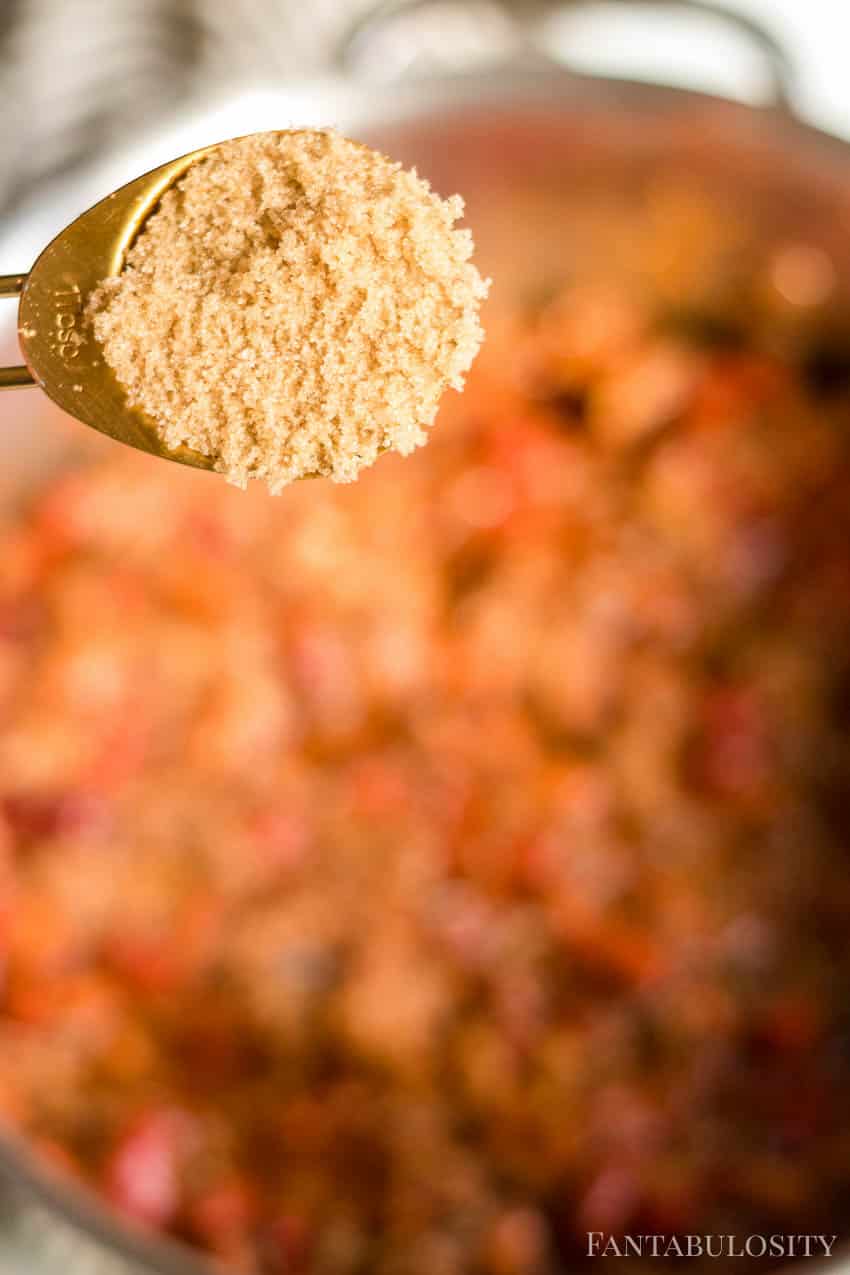
    Stir in the brown sugar…

    How to make deer chili

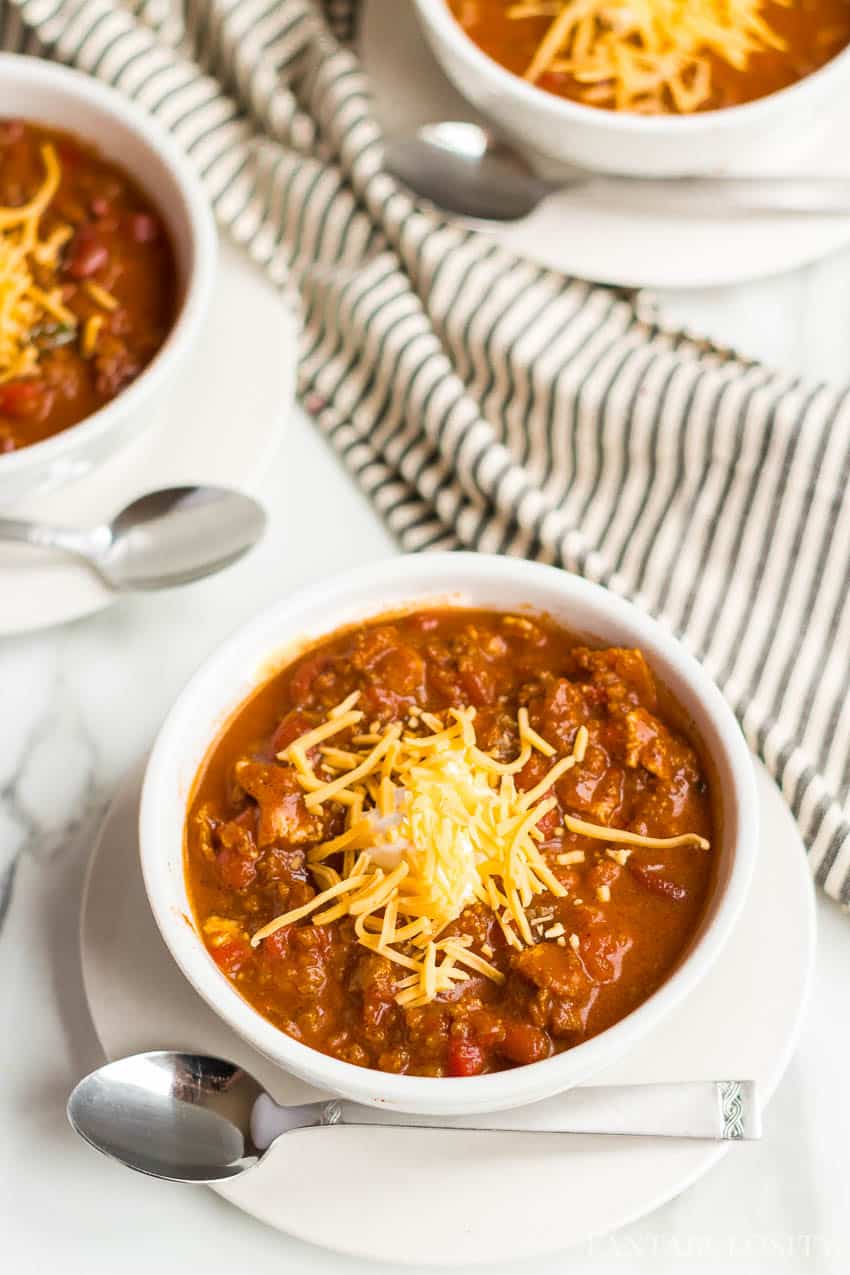
    Bring to a boil, reduce heat and let simmer for 15 minutes!

    Doesn’t this look amazing?!

    Venison Chili Tip

    If you’re using 100% ground venison, you’ll want to keep all of the bacon grease that cooks out. However, if you are using processed venison, drain the bacon grease because beef or pork may have been added to it during the process, giving it the fat that this recipe needs.

    Venison Chili Recipe

    Side Dishes for Venison Chili:

    If you’re looking for something to serve alongside this deer chili recipe, you love these:

    • Side Salad Recipe
    • Easy Focaccia Bread
    • Caprese Chicken Sandwich
    • or put it on top of these chili cheese corn dogs

    More Chili Recipes You’ll Love:

    • Easy Chili Recipe
    • Vegetarian Chili
    • Chili Mac
    • White Chicken Chili

    More Venison Recipes You’ll Love:

    • Deer Steak on the Stovetop
    • Fried Deer Meat
    • Grilled Deer Steak

    Recipe

    Ladle of venison chili coming out of pot.
    Print Pin
    4.84 from 18 votes

    Venison Chili

    This venison chili is one of the easiest ground deer meat recipes that you can make on the stove or in a slow cooker! The addition of the bacon helps give it a flavor that will leave you craving it on those cold winter days!
    Course Main Course
    Cuisine American
    Prep Time 5 minutes minutes
    Cook Time 20 minutes minutes
    Simmer 15 minutes minutes
    Total Time 40 minutes minutes
    Servings 8 servings
    Calories 514kcal
    Author Jessica Burgess

    Ingredients

    • 12 ounces thick sliced bacon
    • 2 pounds ground venison
    • 1 large yellow onion
    • 1 green bell pepper
    • 3 teaspoons minced garlic
    • 3 tablespoons chili powder
    • 1 ½ tablespoons cumin
    • 1 tablespoons onion powder
    • ½ tablespoons salt
    • 15 ounces can tomato sauce
    • 2 cans 14.5 oz. cans diced tomatoes or similar size
    • 15 ounces can hot chili beans or mild if you’re not in to “hot”
    • 15 ounces can kidney beans
    • 1 tablespoon brown sugar

    Instructions

    • Chop bacon into small pieces.
    • In a large pot, over medium heat, cook bacon about 10 minutes (you can cook it longer if you prefer a crispier bacon).
    • Add chopped onions, bell pepper, and garlic. 
    • Cook vegetable together with the bacon for 5 minutes. 
    • Add the ground venison and cook until the venison is no longer pink.
    •  Stir in the chili powder, cumin, onion powder and salt until the meat is evenly coated. 
    • Pour in the tomato sauce, diced tomatoes, chili beans, and kidney beans. 
    • Stir to combine. 
    • Stir in brown sugar.
    • Bring the chili to a boil and then reduce the heat and let it simmer for at least 15 minutes.

    Notes

    To Make Venison Chili in the Slow Cooker:
    • Cook the bacon, venison, onions, peppers, and garlic together in a skillet over medium-high heat until the venison and bacon is cooked through.
    • Add it to the slow cooker with the rest of the ingredients.
    • Cook on high heat for about 5 hours or on low heat for about 8 hours. (Temperature settings on different slow cookers may vary. Check periodically for best results!)
    TIP: If you’re using 100% ground venison, you’ll want to keep all of the bacon grease that cooks out. However, if you are using processed venison, drain the bacon grease because beef or pork may have been added to it during the process, giving it the fat that this recipe needs.
    Nutrition

    Serving: 2cups | Calories: 514kcal | Carbohydrates: 31g | Protein: 38g | Fat: 27g | Saturated Fat: 10g | Cholesterol: 119mg | Sodium: 1666mg | Potassium: 1350mg | Fiber: 9g | Sugar: 11g | Vitamin A: 1331IU | Vitamin C: 29mg | Calcium: 117mg | Iron: 8mg

    Pecan Pie Recipe

    October 13, 2023

    A slice of pecan pie on a white plate, with pecans sprinkled beside it.

    Our pecan pie recipe is not only easy to make but the extra addition of cinnamon gives the perfect flavor of fall or the touch of holiday spice. One of the most traditional pie recipes that we have, this will be perfect for your Thanksgiving table or your Christmas dinner.

    Pecan pie anchors our Thanksgiving table every year. Here are the other fall desserts for the holidays we count on.

    Paired with a store-bought pie crust to speed things up, or with our delicious, buttery pie crust recipe, this pecan pie will become your new favorite dessert!

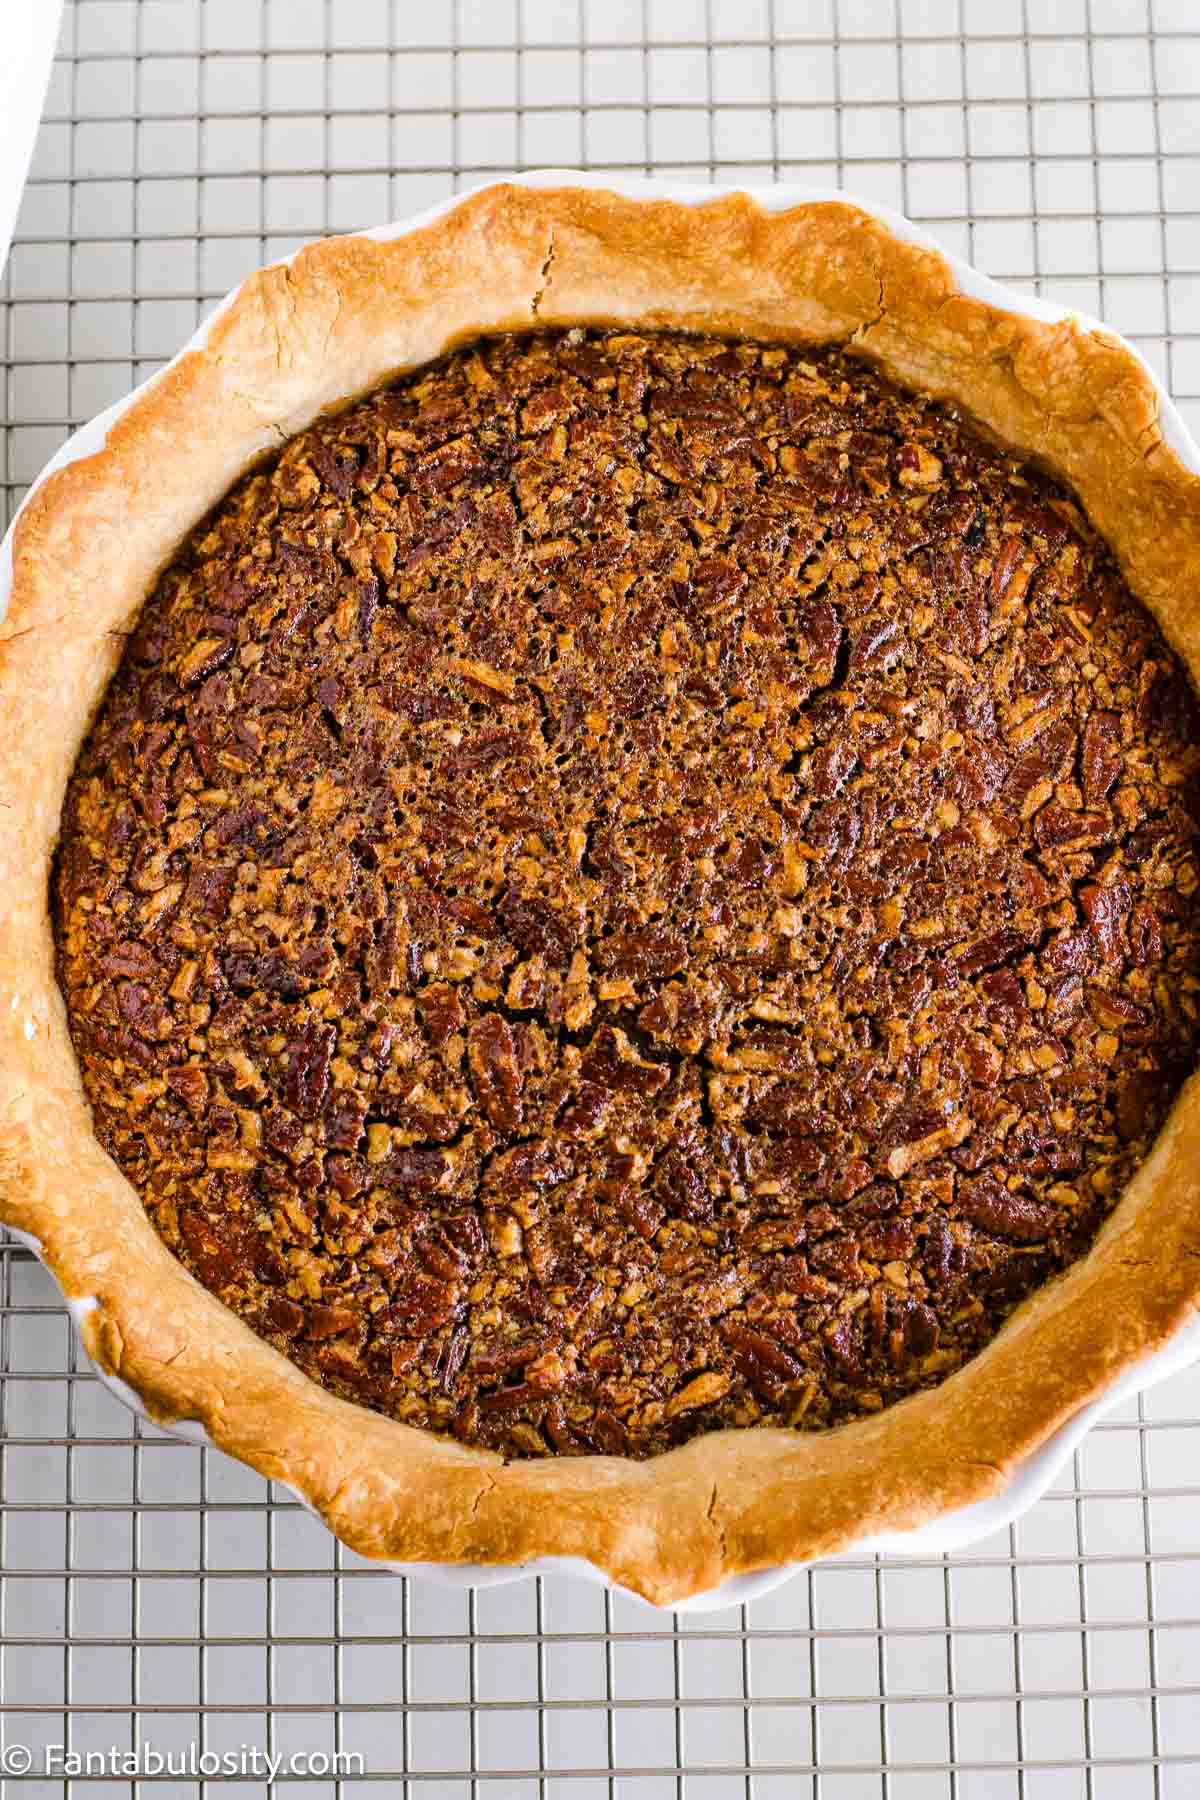
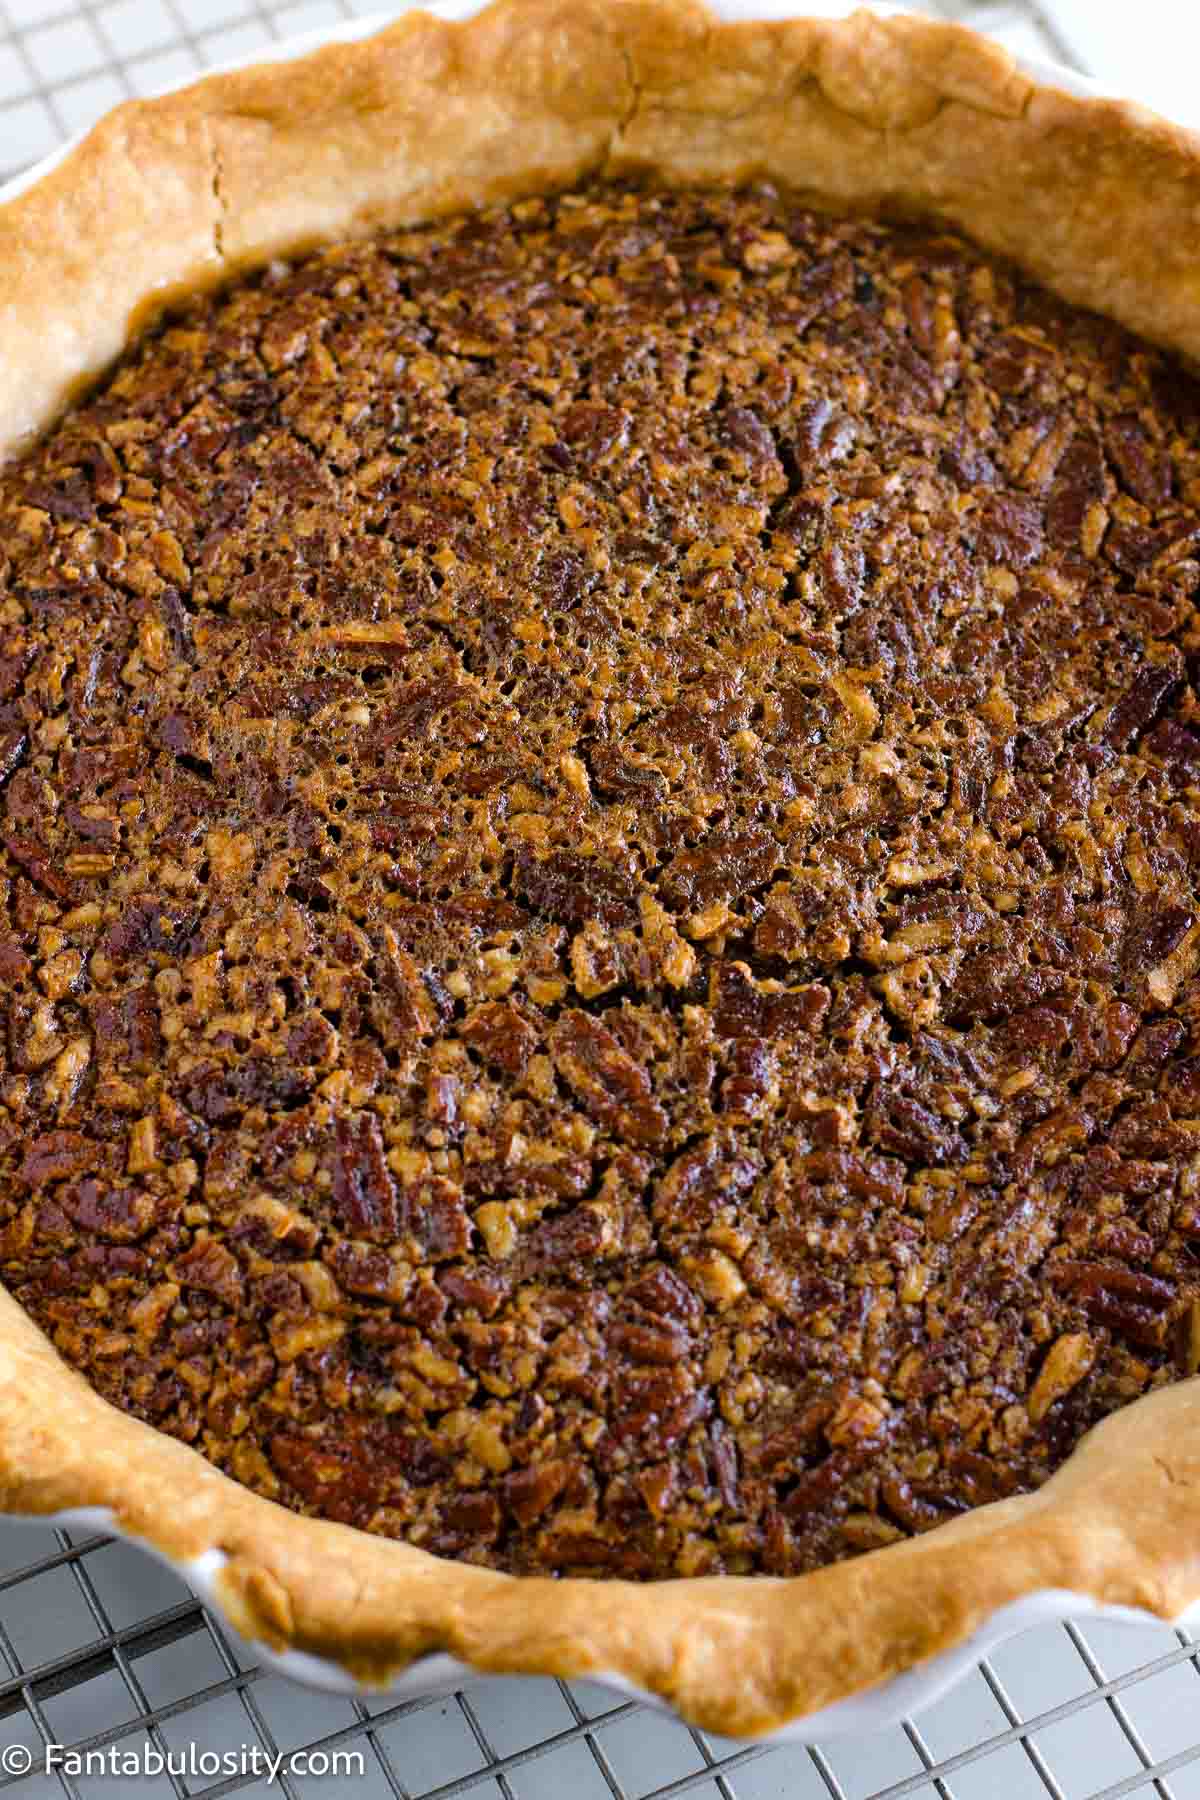
    Baked pecan pie sitting on cooling rack.

    During the holidays, you can more than likely count on finding this peanut butter pie and these 7 layer bars on the dessert table, next to pecan pie.

    But no matter what is sitting next to this pecan pie recipe, it will be a top favorite for your guests!

    Want the same flavor with a fraction of the work? Try the pecan pie dump cake instead.

    [feast_advanced_jump_to]

    Why You’ll Love This Recipe

    • The cinnamon touch: A lot of pecan pie recipes don’t use cinnamon and we love the touch it adds to this recipe! It gives it the perfect flavor of fall, or even taste of the holidays.
    • Make-ahead recipe: If making this for the holidays, make this ahead of time so you don’t have to worry about it on the day of.
    • Simple ingredients: A pecan pie recipe may sound intimidating but it’s not. This recipe is really easy to make but so full of flavor.

    Ingredients Needed

    The ingredients needed for this recipe are really simple and you may even have most of them on hand already!

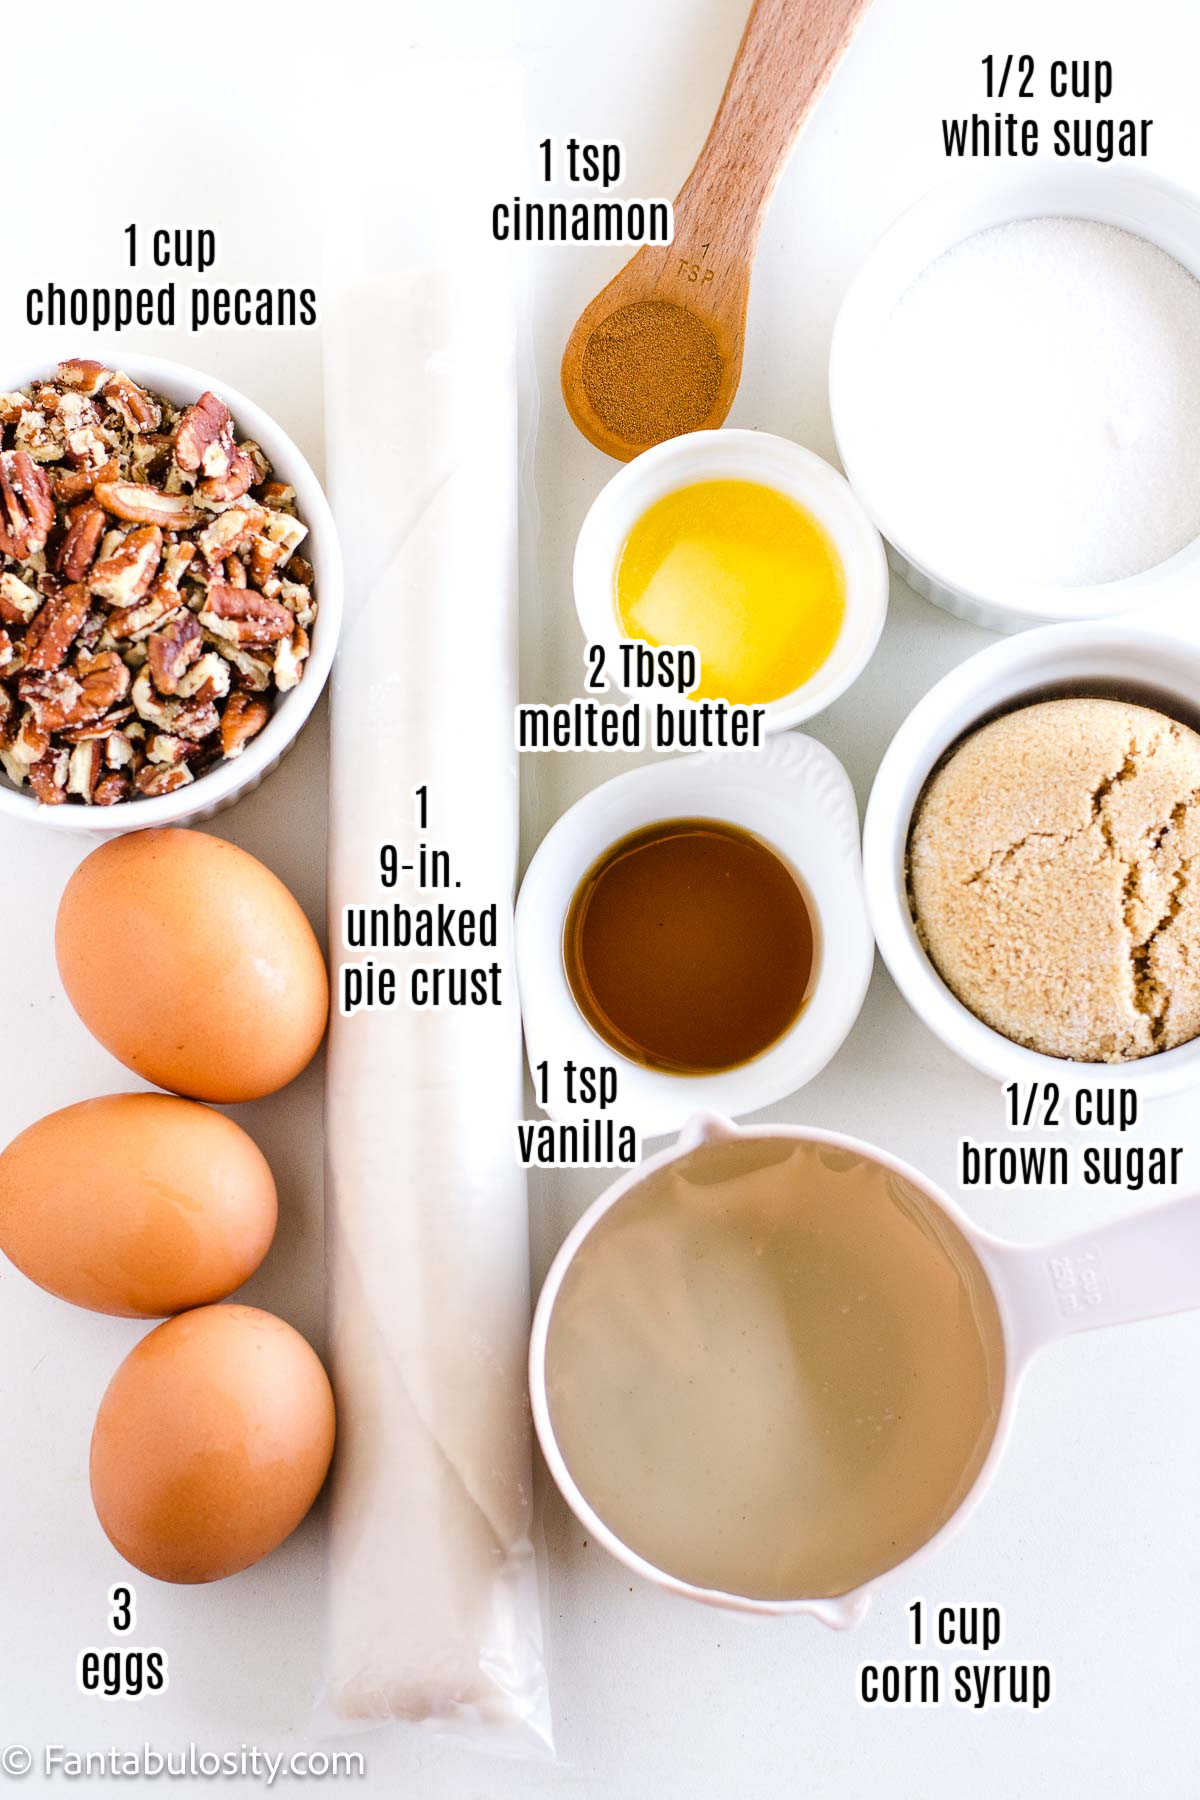
    Labeled ingredients for pecan pie recipe.

    Ingredient Notes and Substitutions:

    • Pie crust – To keep things really simple, you can use a store-bought pie crust, or if you prefer a homemade crust, this buttery crust recipe is always a great choice! If using store-bought crust, you can make these pie crust cookies with the second crust that comes in the package.
    • Corn syrup – We used light corn syrup in this recipe but feel free to use dark corn syrup if you prefer. It comes out delicious either way.
    • Sugars – we do white sugar and brown sugar for this recipe to give it a bit of a “twist” in flavor. However if you prefer to use just one cup of white sugar, instead of brown sugar, that works too.
    • Pecans – I usually buy the halved pecans so I can use some of them to sprinkle on the top for looks. So then I’ll chop them myself when putting them in to the pie. You can also leave them all halved, instead of chopping if you prefer.

    Equipment

    We use a 9-inch pie plate to make this recipe. This buttermilk pie recipe is another vintage dessert that you can make to serve during the holidays.

    How to Make Pecan Pie

    *Be sure to see the recipe card below for the full ingredients list & instructions!*

    First, preheat your oven to 350 degrees F. and remove pie crust from the refrigerator.

    TIP: Place a rimmed cookie sheet on the bottom shelf of the oven so it will catch any spillage that may take place during baking.

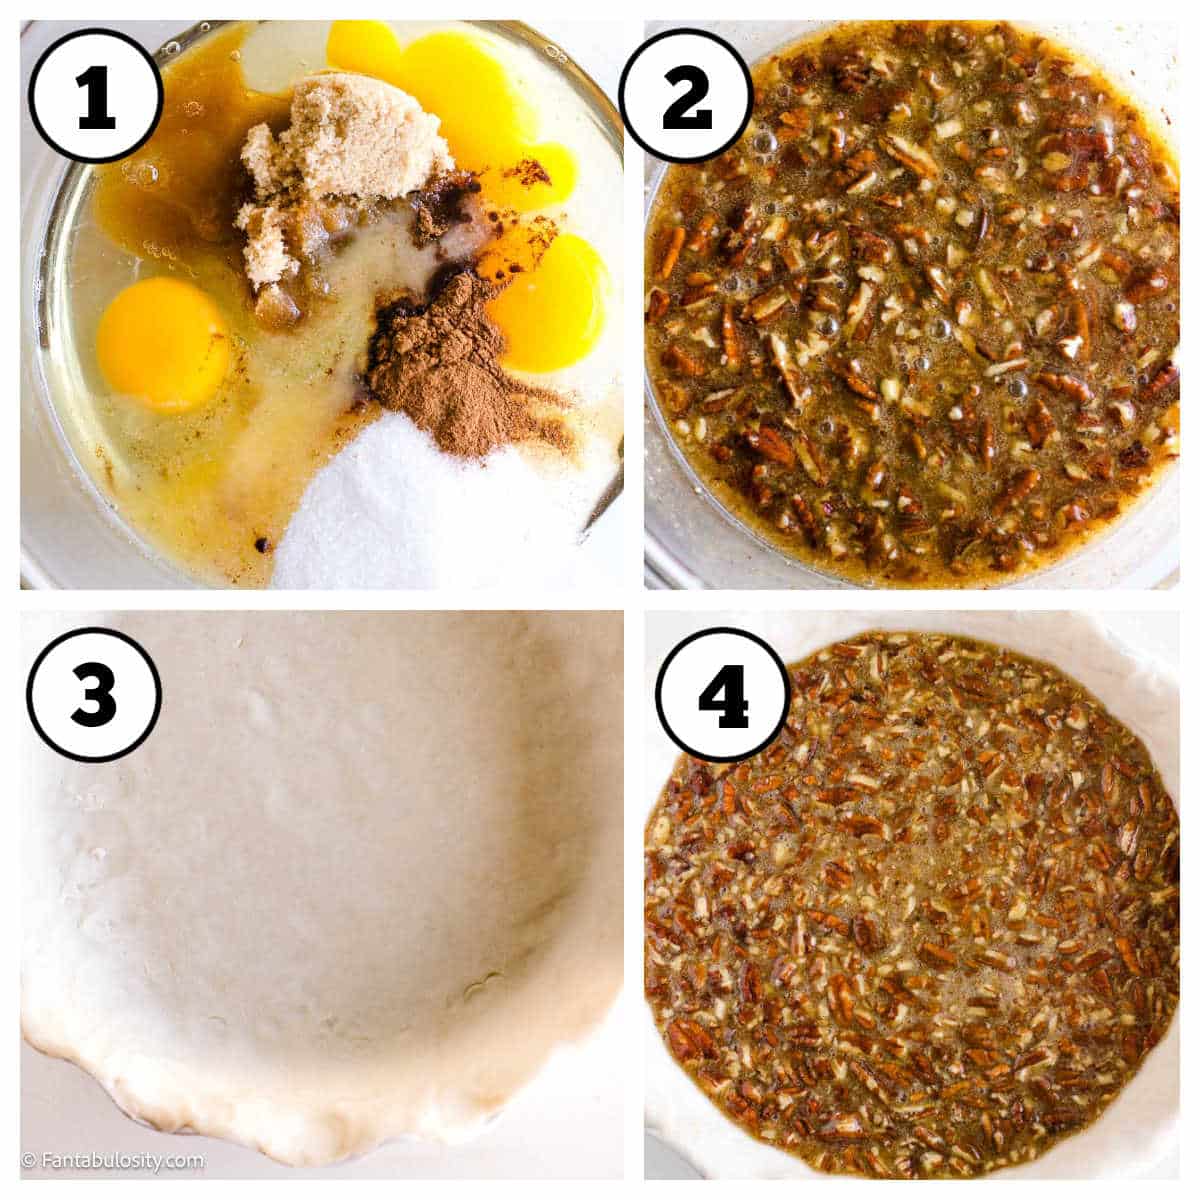
    Steps 1-4 of how to make pecan pie.

    STEP 1. Prep the batter. In a large mixing bowl, mix together the eggs, sugars, vanilla, cinnamon, corn syrup and butter until evenly combined.

    STEP 2. Add pecans. Next, add in the chopped pecans and stir to combine.

    Tip: You’ll want to stir this again just before pouring in to pie crust so the pecans are mixed together well with the batter.

    STEP 3. Pie crust. Unroll pie crust and place and gently press in to in a 9-inch pie plate, pinching the sides (optional) to form a “wall” for the pecan pie filling. Make sure the pie crust is evenly spread over the pie plate, for best results.

    STEP 4. Add filling. When pie crust is arranged in to pie plate, pour pecan pie filling in to the crust.

    Whole, baked pecan pie on a cooling rack.

    STEP 5. Bake. Gently move pecan pie to the oven, place on the rimmed baking sheet, and bake at 350 degrees for 60 minutes or until the middle springs back when lightly touched.

    STEP 6. Cool. All the pecan pie to cool for at least 2 hours before serving.

    Recipe Pro Tips

    • Allow to fully cool. Placing the baked pie on a cooling rack will help it cool faster and more evenly.
    • Altitude. The altitude can make this pie bake differently. You may find that it needs longer to to bake, so keeping an eye on it is best when making it for the first time so you’ll know for the future.
    • Prevent crust from burning. Sometimes the oven can cook the crust too fast, before the pie is done. If you notice the pie crust getting too brown, cover the crust edges with pieces of foil or use a pie shield.
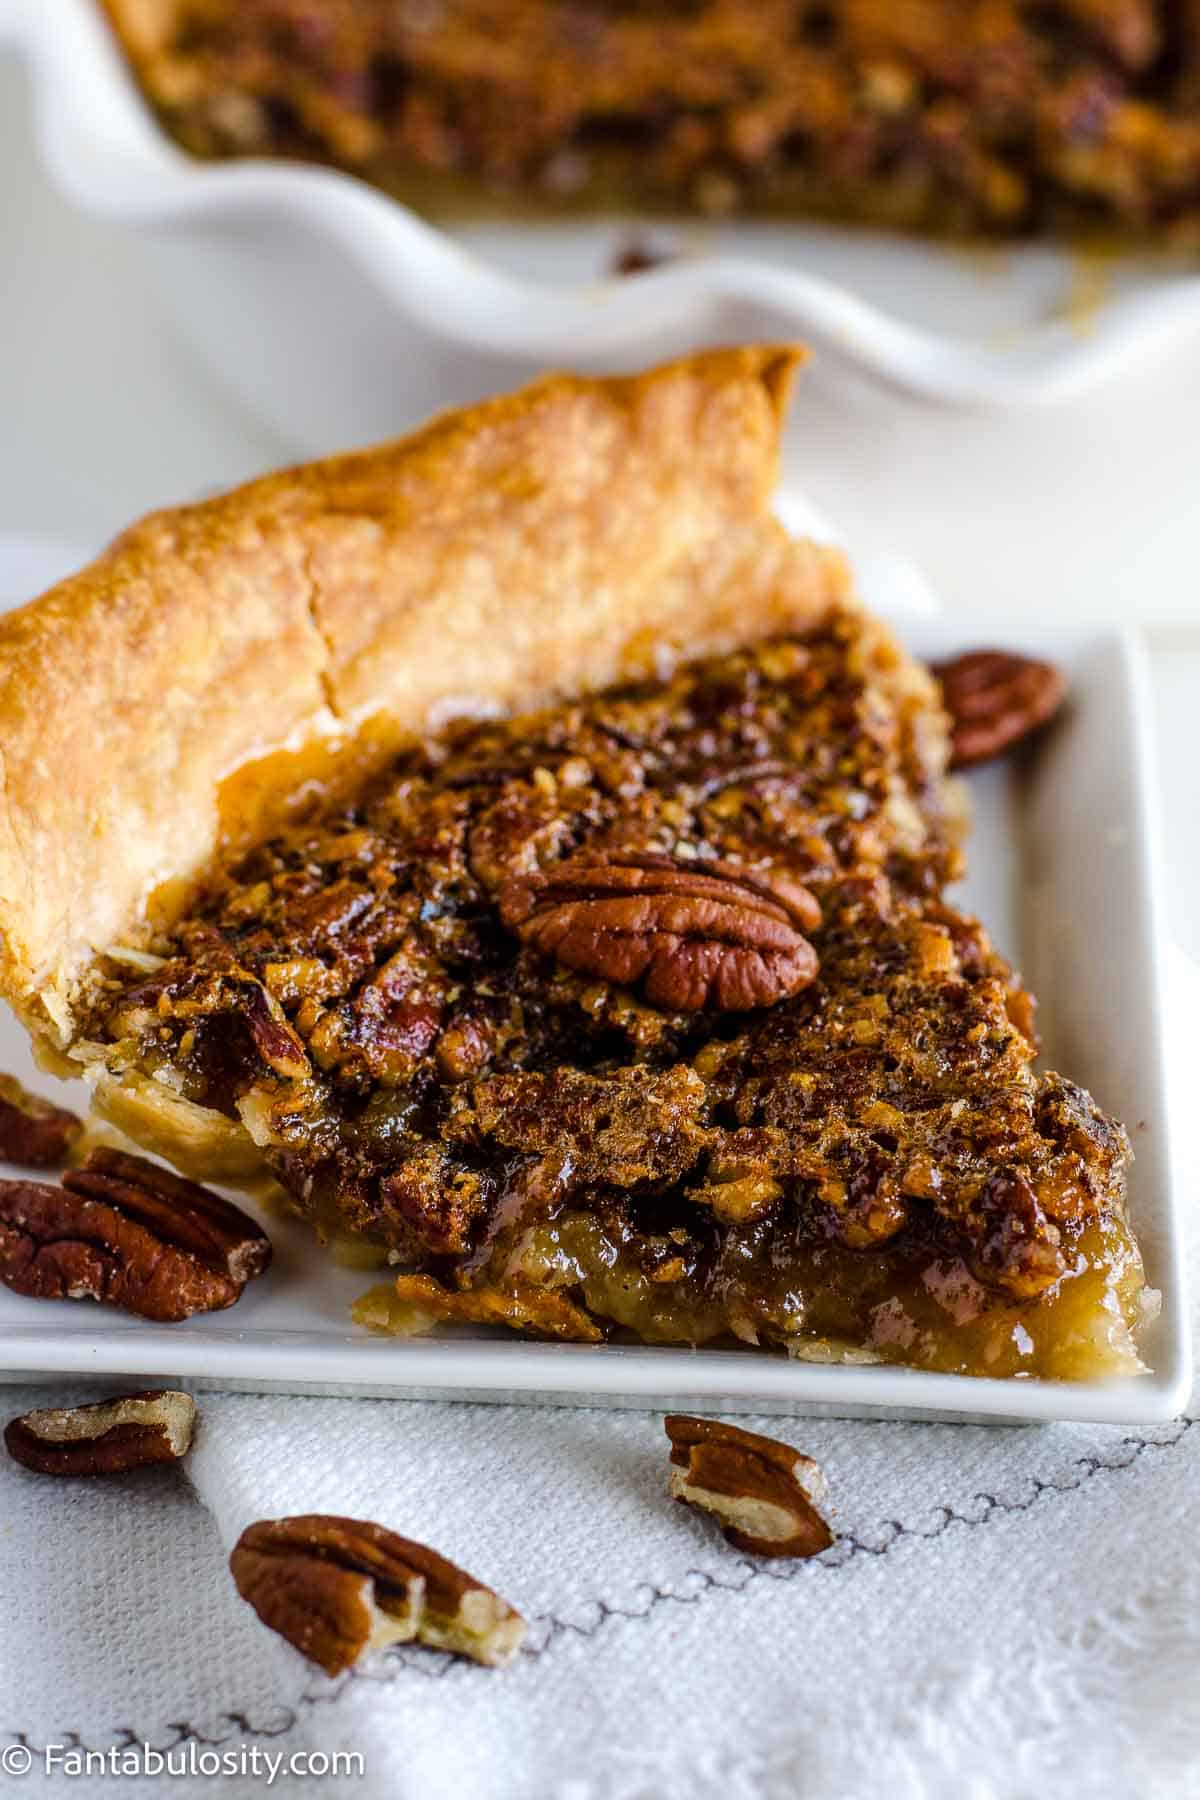
    Slice of pecan pie on a white plate.

    Recipe FAQs

    What is the filling made of in pecan pie?

    We use eggs, corn syrup, cinnamon, vanilla, butter, white sugar, brown sugar, and pecans.

    How do you make pecan pie crust not soggy?

    Although we don’t find that our crust gets soggy with this recipe, if you want to, you can whip an egg white and brush it on the crust before pouring the filling in.

    Can I use light corn syrup instead of dark for pecan pie?

    Absolutely! We’ve used dark and light corn syrup, interchangeably and it turns out great every time.

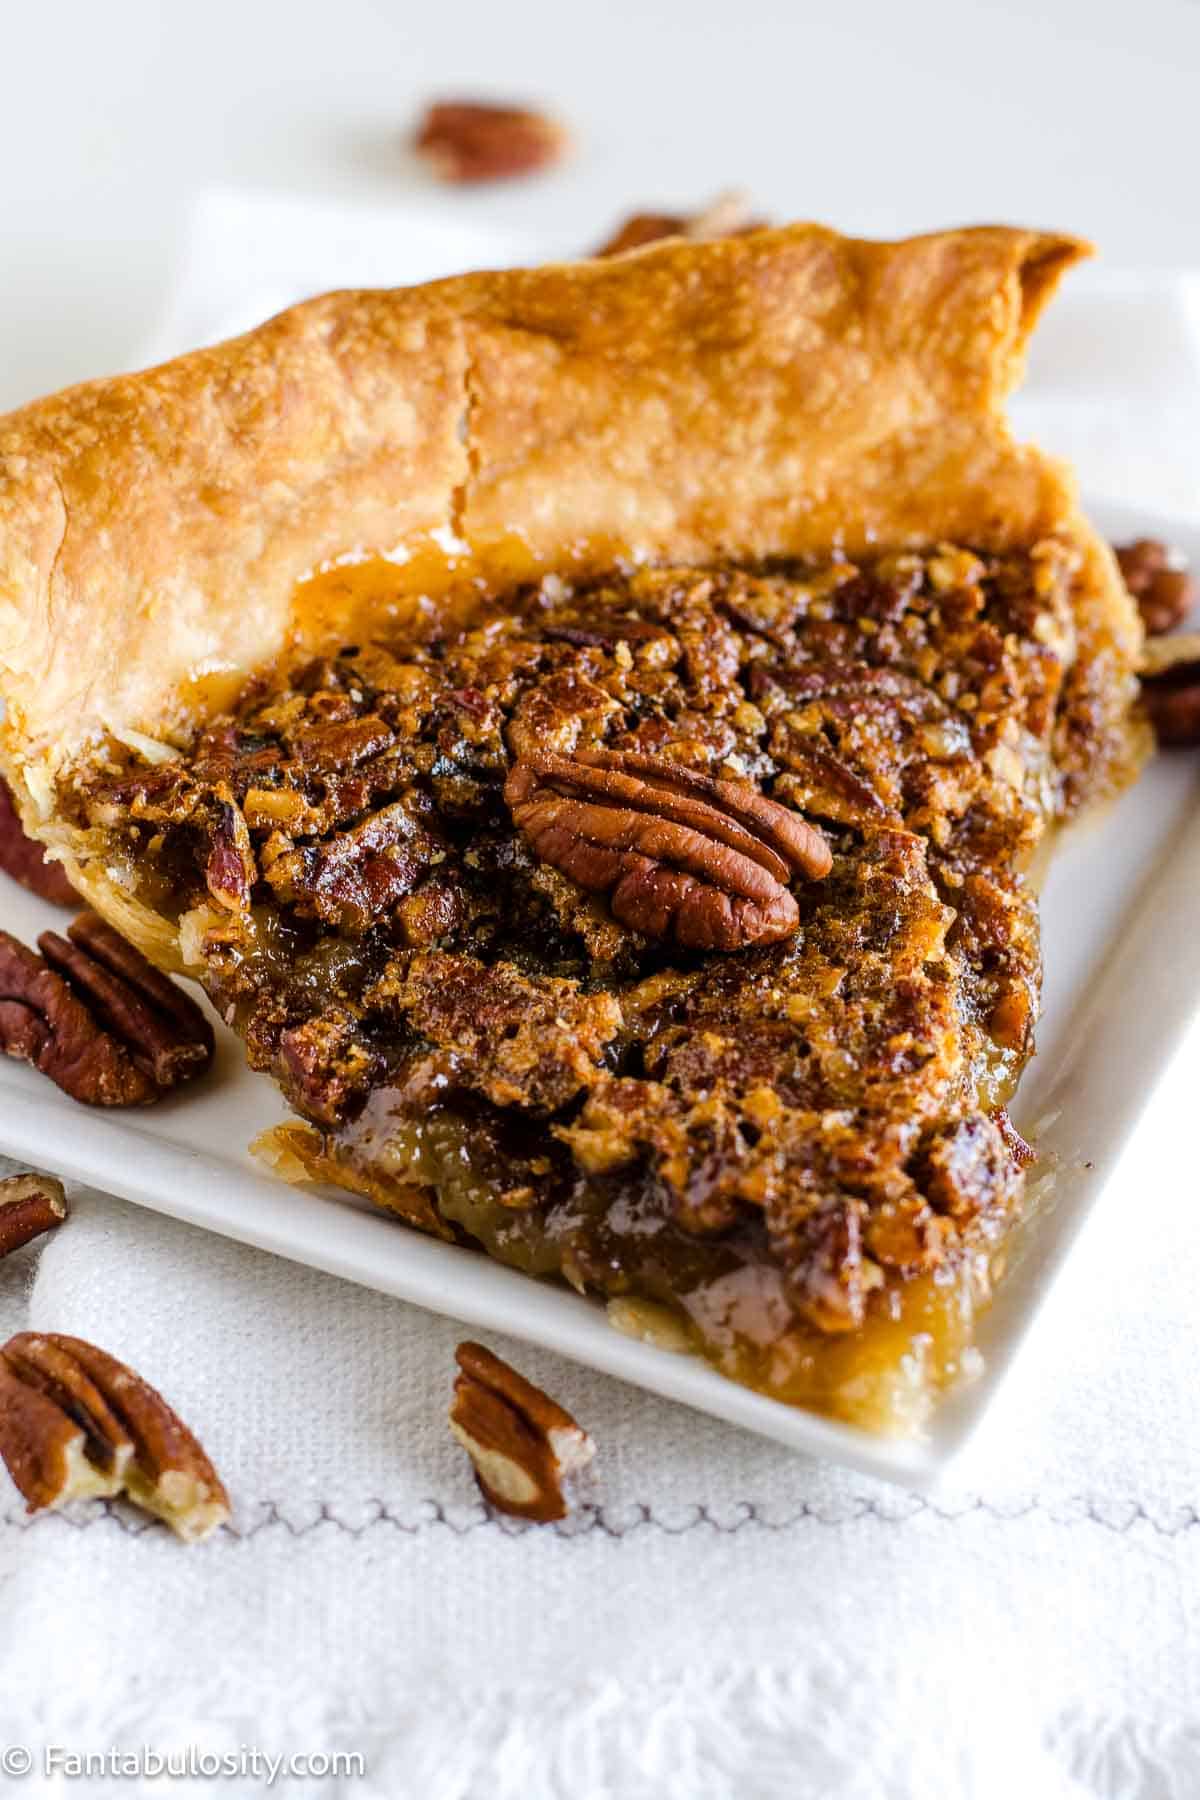
    Slice of pecan pie on a white plate.

    Storage

    After pecan pie has fully cooled, it’s best to store the pie in the refrigerator until ready to serve.

    More Holiday Recipes You’ll Love

    If you love making desserts for the holidays, you’ll also love these top favorites:

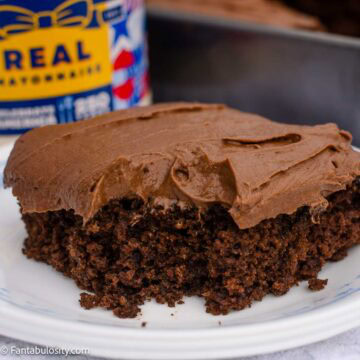
    • Close-up slice of chocolate mayonnaise cake with thick chocolate buttercream and a jar of mayonnaise behind it.
      Chocolate Mayonnaise Cake (Old-Fashioned Recipe)
    • Grandma Ann's chocolate chip cookies piled on a white plate with a gold floral pattern.
      Grandma Ann's Chocolate Chip Cookies
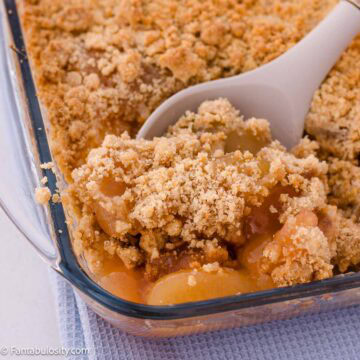
    • Apple crumble without oats with golden crumbs and apple filling on a serving spoon in a glass baking dish.
      Easy Apple Crumble Without Oats
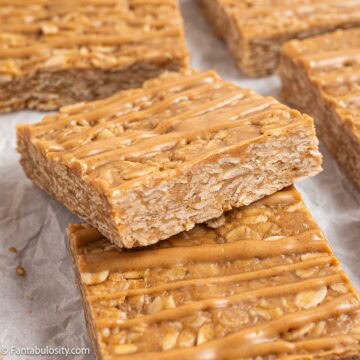
    • A close-up of peanut butter oatmeal bars with peanut butter drizzle.
      Peanut Butter Oatmeal Bars (3 Ingredients, No Bake)

    Did you make this? I’d be so grateful if you left a “star” rating below to let me know what you thought! Then, the next time you need a quick and easy recipe, come back to Fantabulosity to browse all of my easy recipes!

    Recipe

    A slice of pecan pie on a white plate, with pecans sprinkled beside it.
    Print Pin
    4.75 from 4 votes

    Pecan Pie Recipe

    This easy pecan pie recipe uses a touch of cinnamon to give it the perfect fall flavor or holiday spice that you're looking for!
    Course Dessert
    Cuisine American
    Prep Time 10 minutes minutes
    Cook Time 1 hour hour
    Total Time 1 hour hour 10 minutes minutes
    Servings 12 servings
    Calories 303kcal
    Author Jessica Burgess

    Ingredients

    • ½ cup white sugar
    • ½ cup brown sugar
    • 1 cup corn syrup light or dark
    • 2 Tablespoons melted butter
    • 1 teaspoon cinnamon
    • 1 teaspoon vanilla extract
    • 3 eggs
    • 1 cup pecans chopped (or halved)
    • 1 unbaked 9-inch pie crust or use this pie crust recipe

    Instructions

    • Preheat oven to 350F degrees. and place a rimmed baking sheet on the middle rack in the oven. Remove pie crust from refrigerator.
    • In a mixing bowl, mix together the sugars, eggs, corn syrup, vanilla, melted butter and cinnamon together until evenly mixed.
    • Add in the chopped pecans and stir to combine.
    • Unroll pie crust and place in baking dish, spreading it evenly to fit. Optional: pinch top sides of pie crust to create a "ruffle" for looks, and to help keep the pecan pie filling secure in the pie plate.
    • Stir the pecan pie filling one more time and pour in to pie plate.
    • Place pie plate on to the reheated baking sheet in the oven, and bake for 60 minutes or until the middle springs back when lightly touched.
    • Remove from oven, and allow to cool for at least 2 hours before serving.

    Notes

    If you find that the pie crust edges are turning brown too quickly, you can cover them with pieces of aluminum foil to prevent them from burning.
    Store: Refrigerate pie once it has fully cooled.

    Nutrition

    Serving: 1slice | Calories: 303kcal | Carbohydrates: 47g | Protein: 3g | Fat: 13g | Saturated Fat: 3g | Polyunsaturated Fat: 3g | Monounsaturated Fat: 6g | Trans Fat: 0.1g | Cholesterol: 46mg | Sodium: 109mg | Potassium: 77mg | Fiber: 1g | Sugar: 39g | Vitamin A: 123IU | Vitamin C: 0.1mg | Calcium: 28mg | Iron: 1mg

    The BEST Fried Shrimp

    March 25, 2025

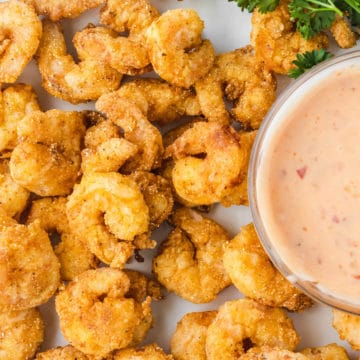
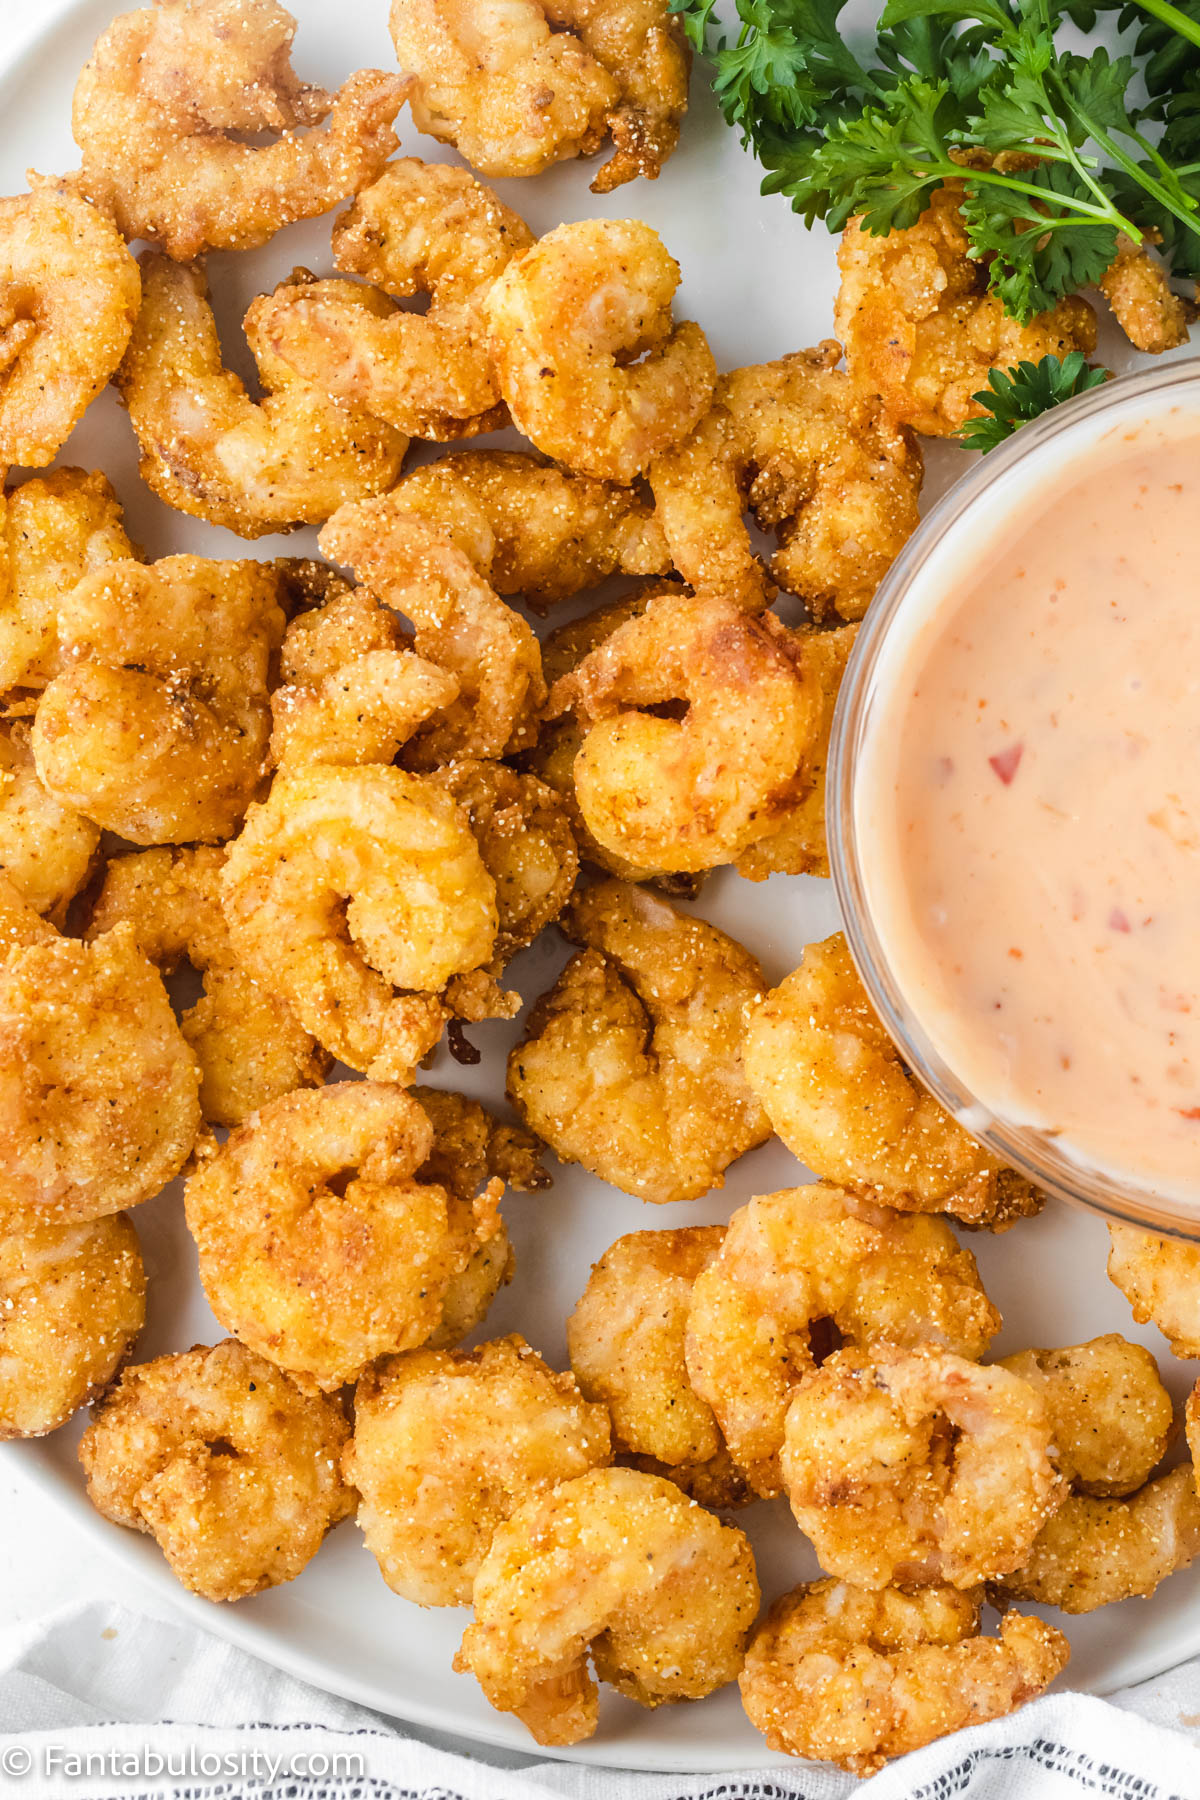
    fried shrimp on plate next to sauce

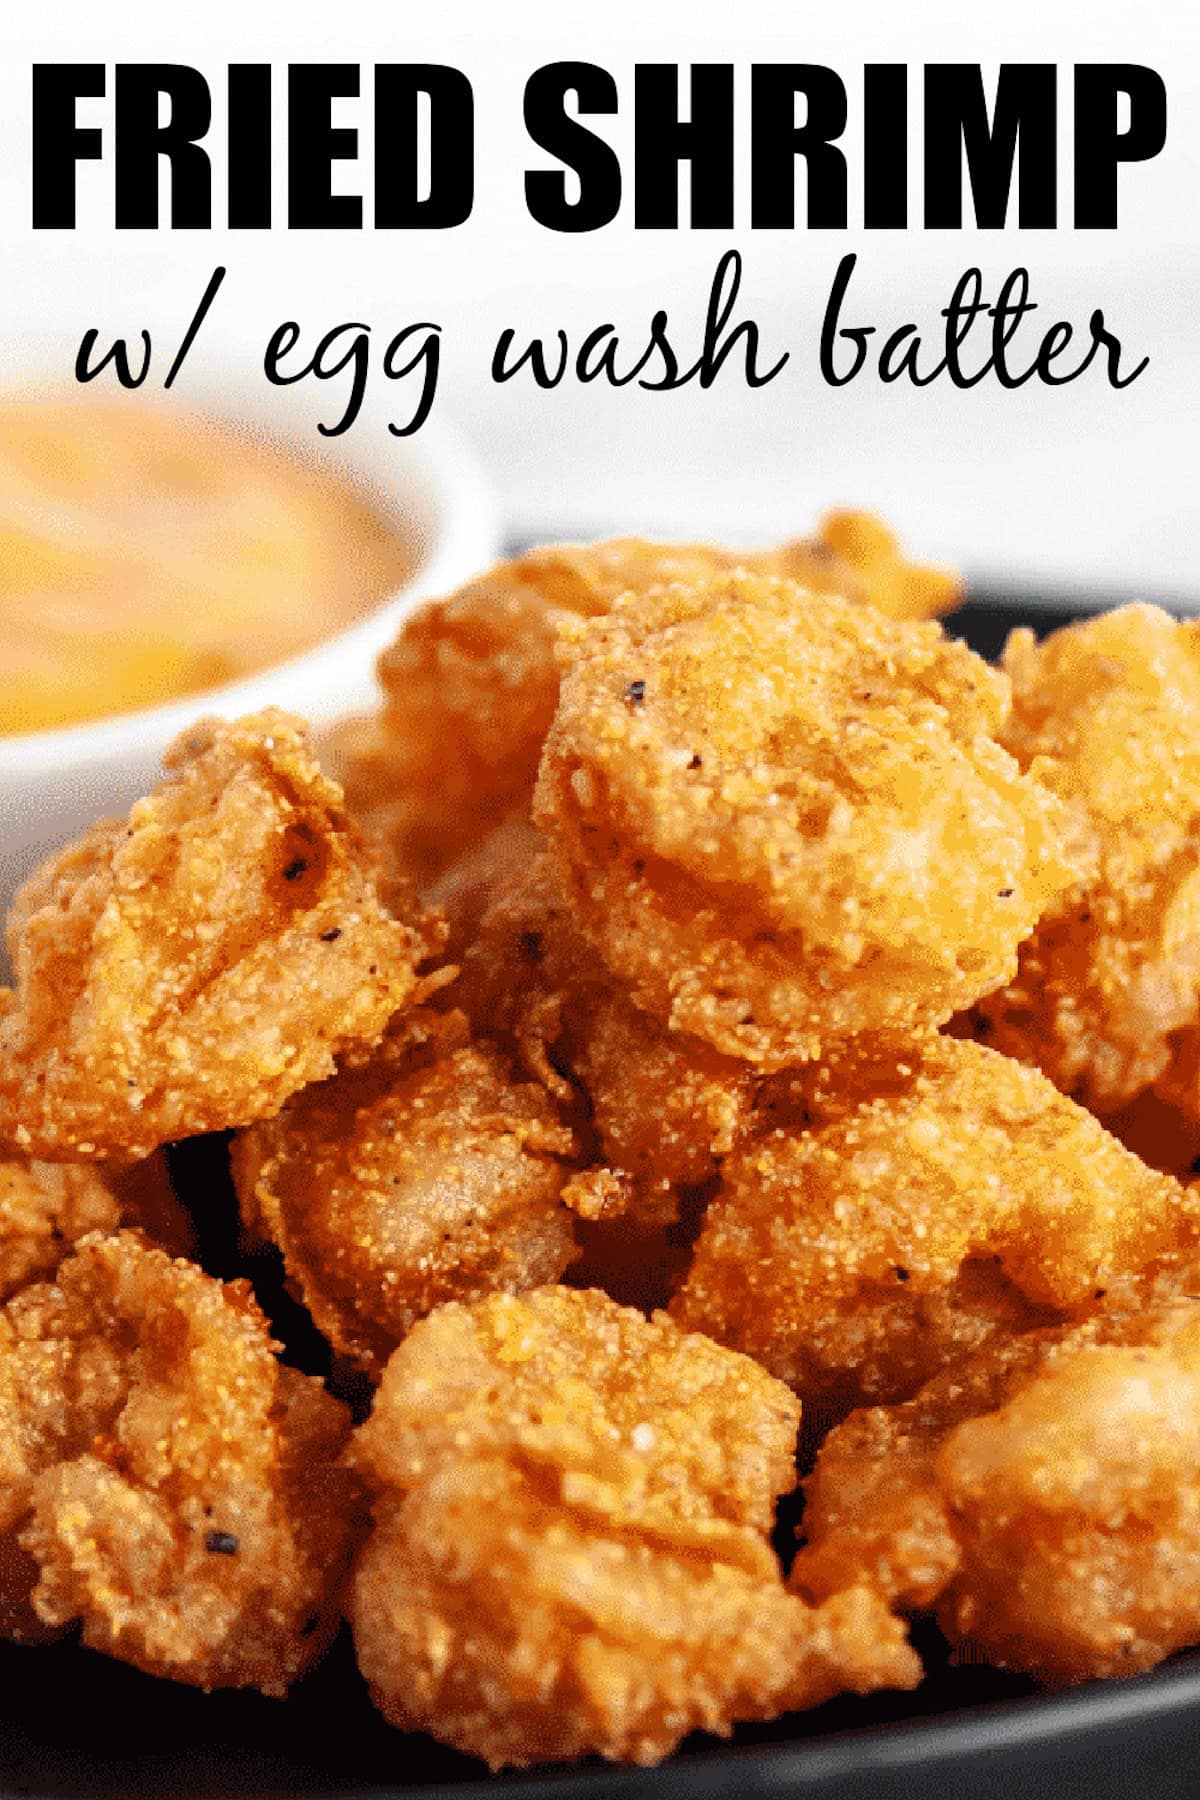
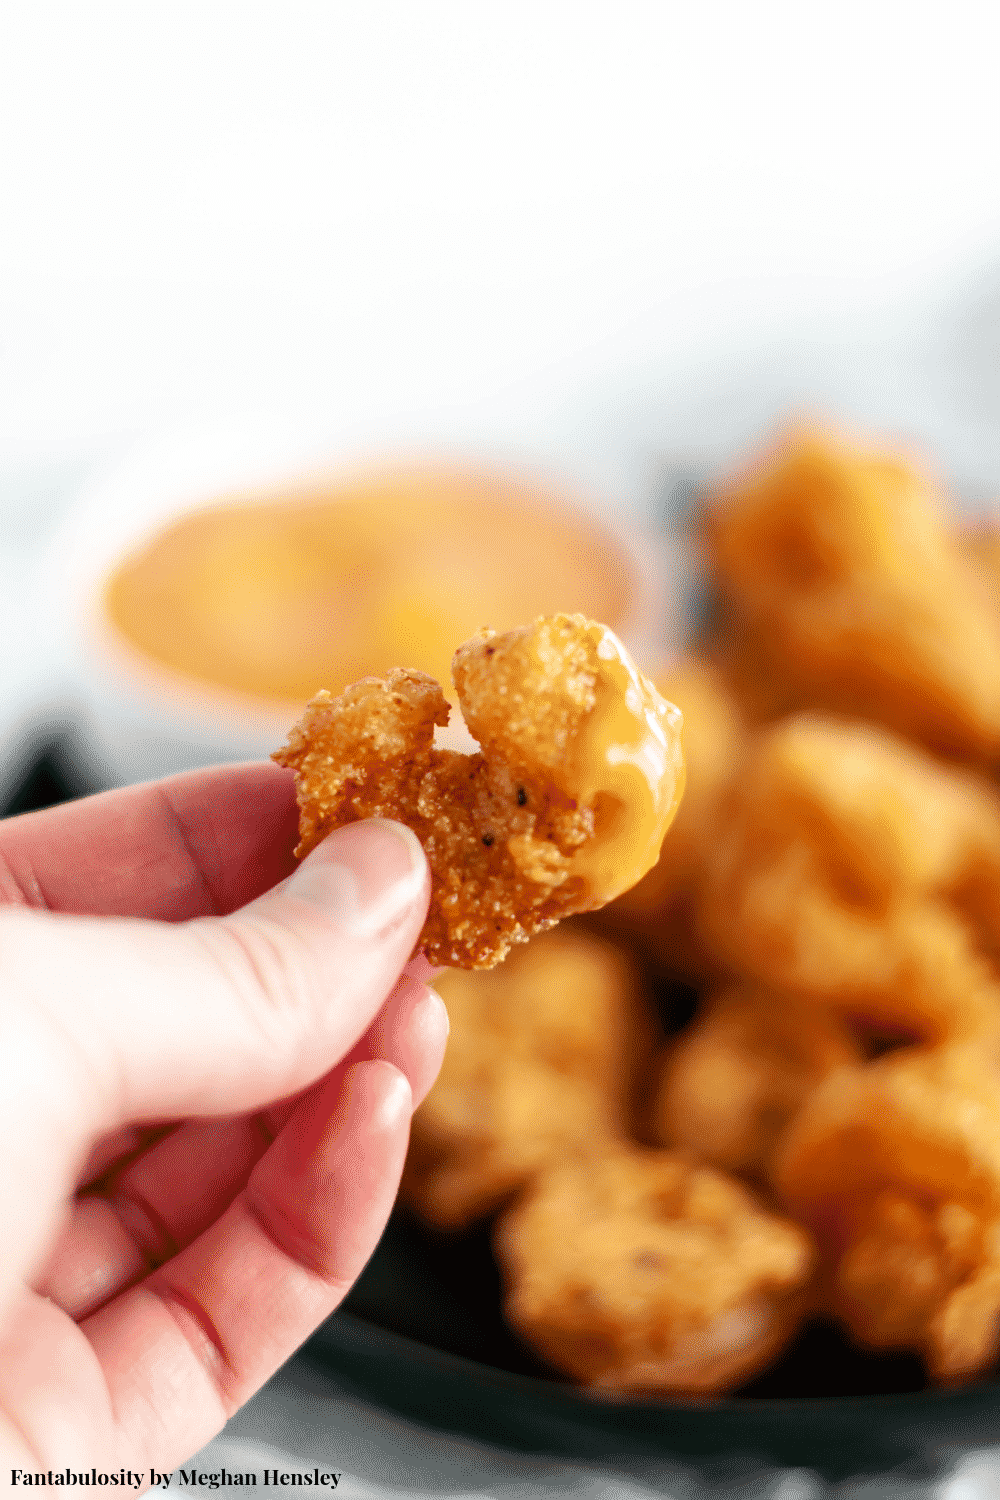
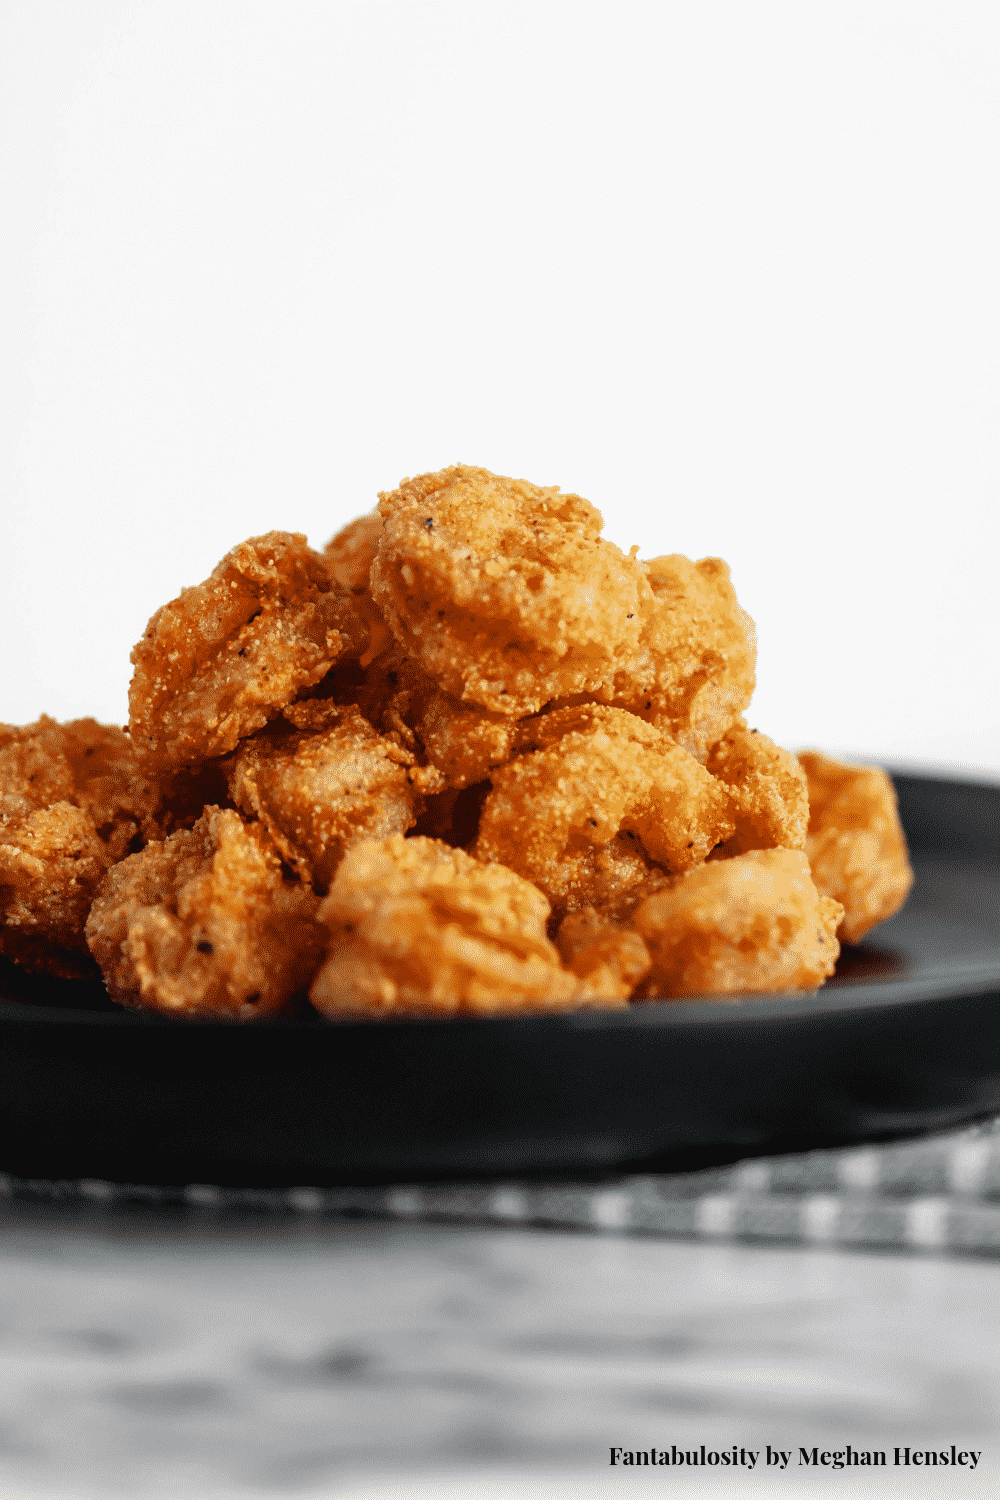
    Fried Shrimp is so much easier to make at home than you think. Just a few, simple pantry ingredients to create this fried shrimp batter using flour and cornmeal to make it crispy, and now you’ll know how to make pan-fried shrimp for easy dinners and it will become a true favorite!

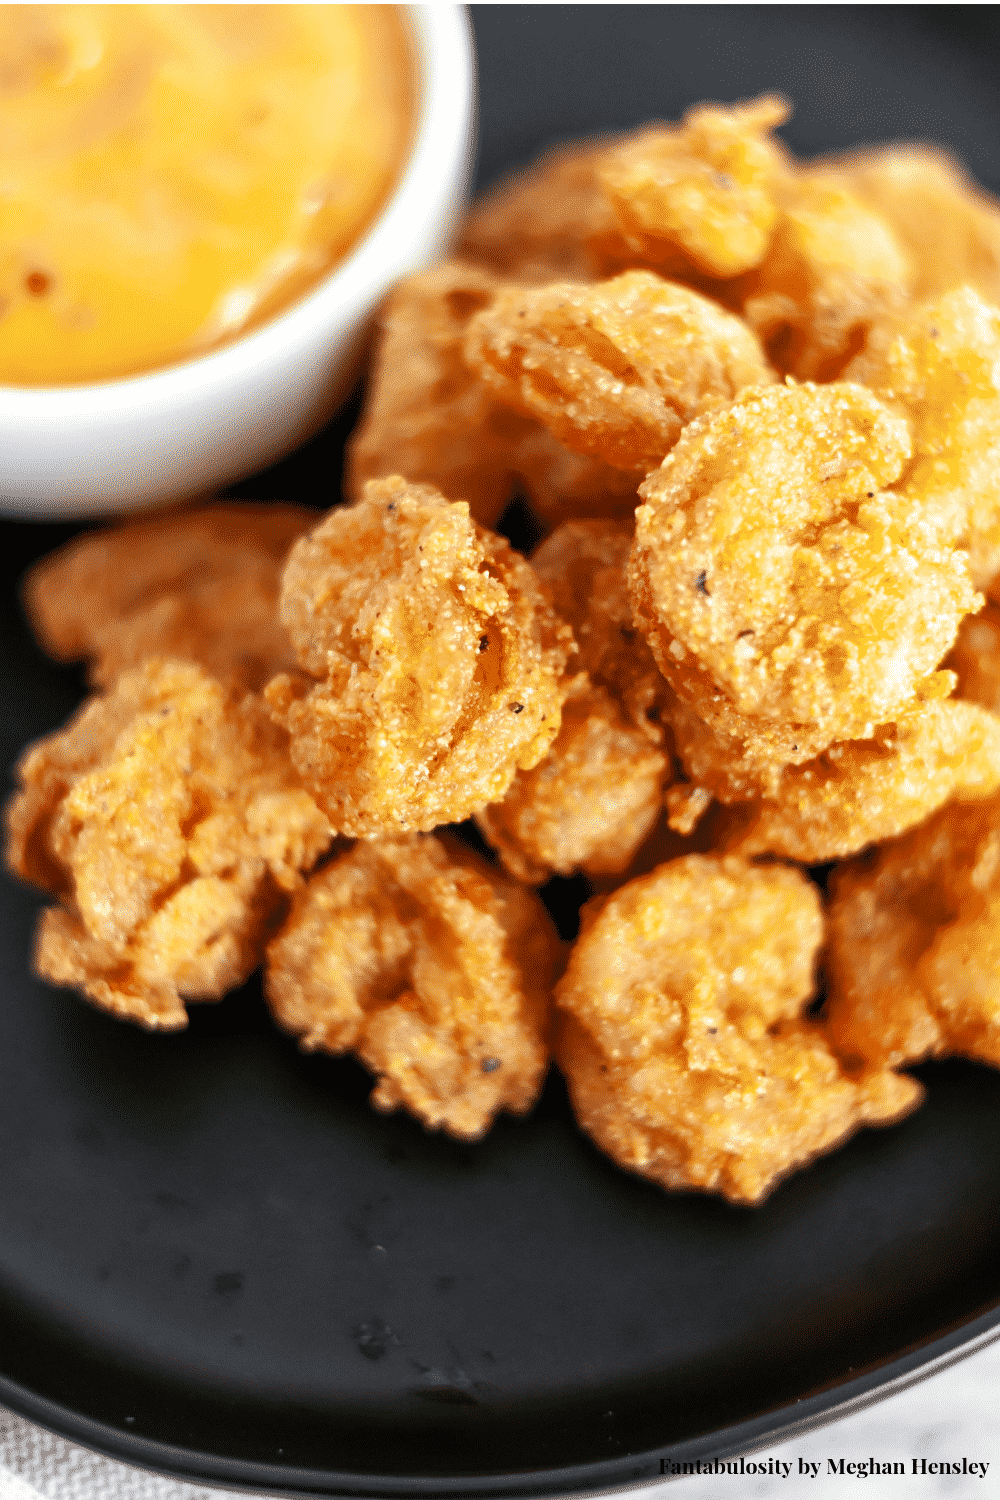
    Pan fried shrimp on a plate with sauce

    Roll up your sleeves, break out your pans and get to dredging. You’re less than 30 minutes away from crispy shrimp and old bay cocktail sauce or the dipping sauce recipe I share below, at home tonight or on “Fried Friday” in your Dinner Theme System.

    Serving tip: Serve this with steak! Not sure how to make steak? Here’s my favorite restaurant-quality steak recipe to use, How to Cook Steak or keep frying and make this deer meat recipe if you have venison in the freezer.

    Hey there! Meg here and I'm so excited to share another recipe with you all! I know how much you loved this grilled shrimp so this will be another seafood recipe to add to your cookbook!

    Why You’ll Love This Recipe

    I don't know about you but sometimes I find making fried foods at home kind of intimidating unless it’s air fryer shrimp.

    • Easy Breading: When frying, there's the whole dredging process and the sometimes messy, (tip below on how to make very little mess) frying of the food in hot oil. But I'm here to tell you, you will LOVE how easy this recipe is and it’s way better than the store-bought, frozen breaded shrimp, that’s for sure!
    • Restaurant quality fried shrimp at home in less than 20 minutes.
    • Batter Secret: Plus, using cornmeal and flour together in the batter, creates a crispy shrimp that’s hard not to love!
    Fried shrimp on plate next to dipping sauce.

    Fried Shrimp Cornmeal and Flour Batter

    The mixture of flour and cornmeal adds such a delicious crust to the shrimp. The cornmeal adds a crazy crunch and the flour adds its own wonderful touch for the crispiest fried shrimp!

    A good amount of onion powder, garlic powder, kosher salt, and a nice sprinkle of cayenne pepper in the batter also bring lots of flavor and interest.

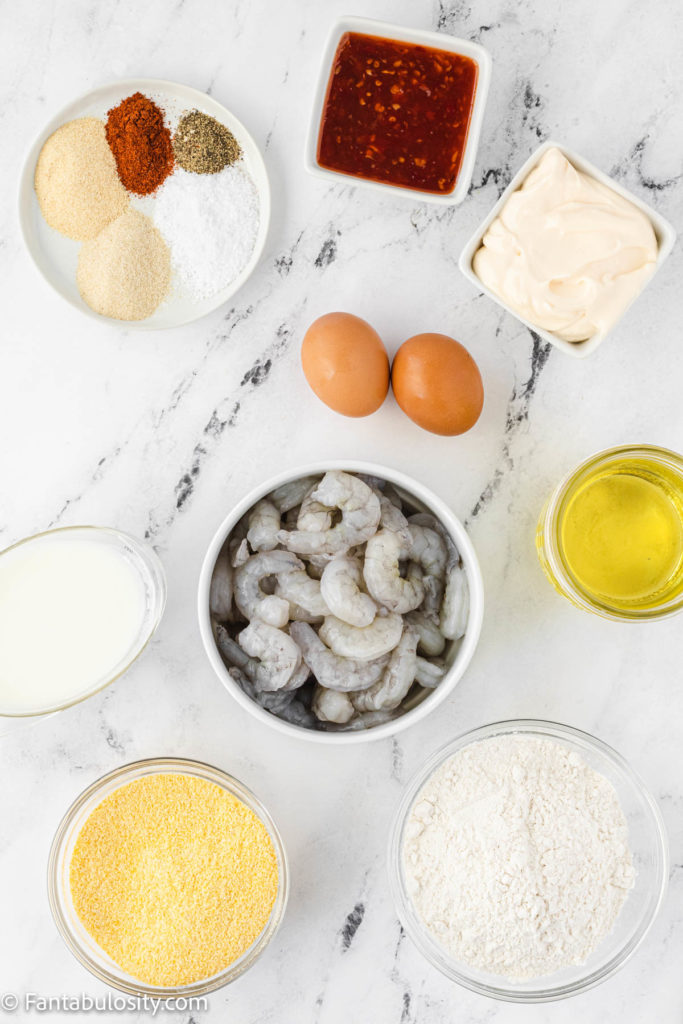
    Fried Shrimp Recipe Ingredients

    The ingredient list for this fried shrimp recipe is small and basic but it packs a punch! You’ll find that ingredients are similar to other fried recipes on the blog, so if you have pork chops handy, you’ll also love this fried pork chops recipe!

    *Be sure to see the recipe card below for the full ingredients list & instructions!*

    Fried Shrimp Ingredients on table

    Shrimp + Oil

    • Canola oil for frying (or vegetable oil)
    • 24 ounces large raw shrimp, peeled and deveined

    Egg Wash

    • 2 large eggs
    • 1 cup buttermilk (or milk)
    • ½ teaspoon kosher salt
    • ½ teaspoon black pepper

    Batter and Shrimp Seasoning Ingredients

    Keeping the seasoning simple is key for a crispy coating! Just a few favorite spices really give this shrimp, tons of flavor! You’ll be using these spices to mix with the flour and cornmeal!

    • 1 ½ cups all-purpose flour
    • 1 cup cornmeal
    • 2 teaspoon kosher salt
    • ½ teaspoon black pepper
    • 2 teaspoons garlic powder
    • 2 teaspoons onion powder
    • 1 teaspoon cayenne pepper

    Optional Dipping Sauce:

    This sauce recipe is optional but highly recommended.

    • ¾ cup mayo
    • ½ cup sweet chili sauce

    Similar to this sauce, this boom boom shrimp is coated in a delicious tangy sauce!

    Step by Step Directions:

    Before beginning: Heat oil in a large, heavy-bottomed skillet over medium heat. Line a large plate with a paper towel, set aside. Aim for an oil temperature of 350°F. If you don’t have a thermometer, drop a pinch of the breading in, and it should sizzle steadily right away.

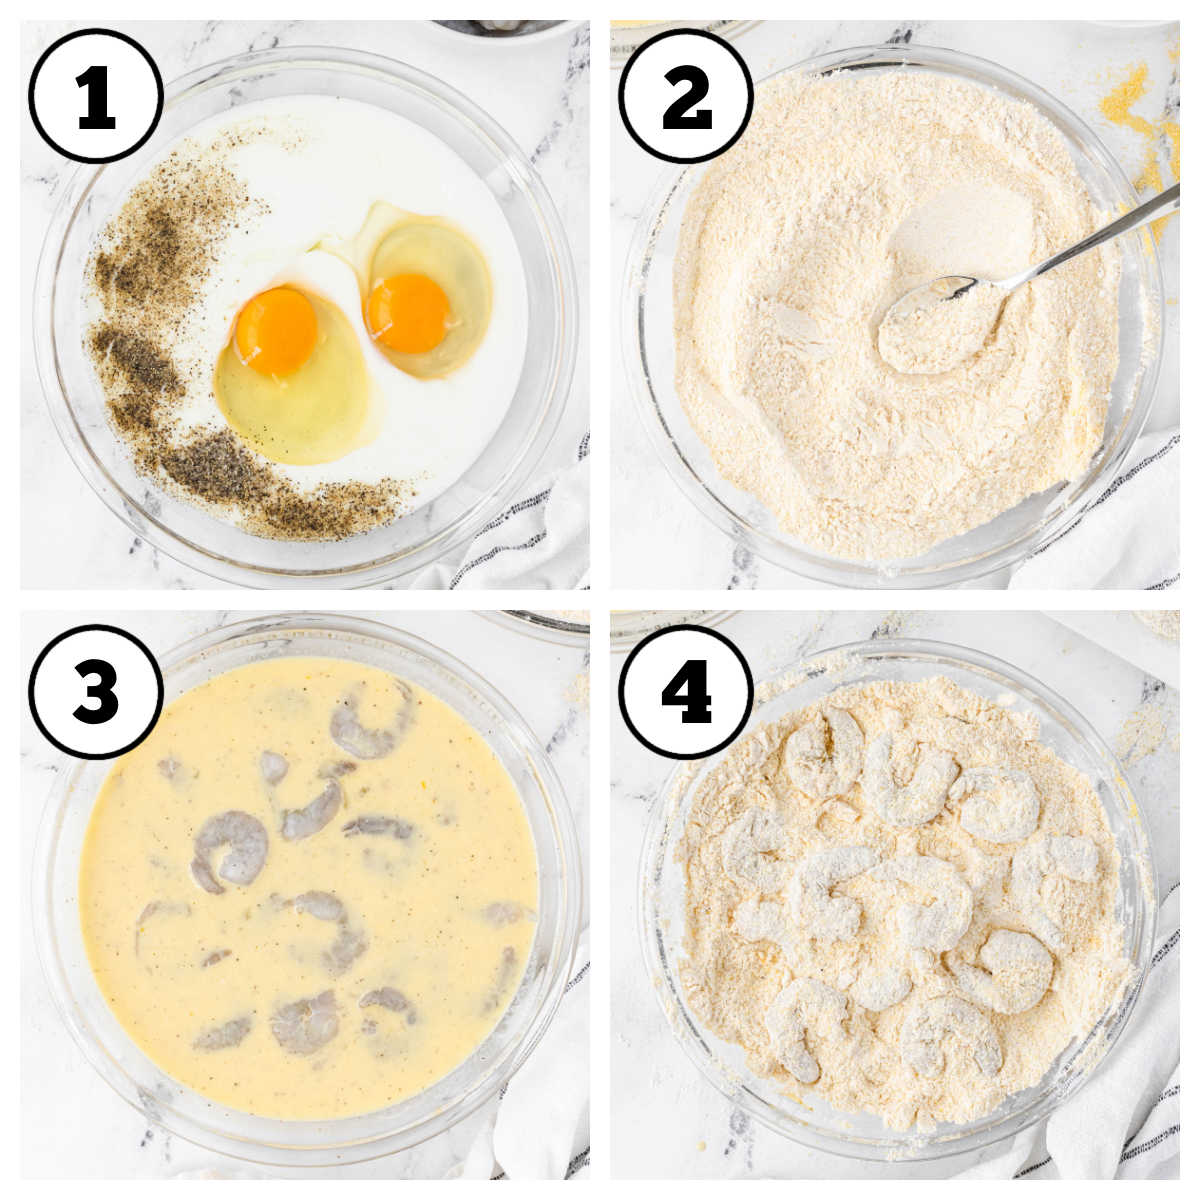
    Steps 1-4 of how to make fried shrimp.
    1. In a cake pan, pie plate, shallow dish or shallow bowl, whisk together eggs and buttermilk. Add ½ teaspoon of salt and pepper.  (Image below.)
    2. In another cake pan, mix together the flour, cornmeal, salt, pepper, garlic powder, onion powder, and cayenne pepper. 
    3. Add shrimp to the egg mixture and coat shrimp well.
    4. A few at a time, add the shrimp to the flour/cornmeal mixture and coat completely. (Place on a clean plate while you bread the remaining shrimp.)

    TIP: Allowing the shrimp to rest while breading the other shrimp, will help prevent the breading from falling off during frying.

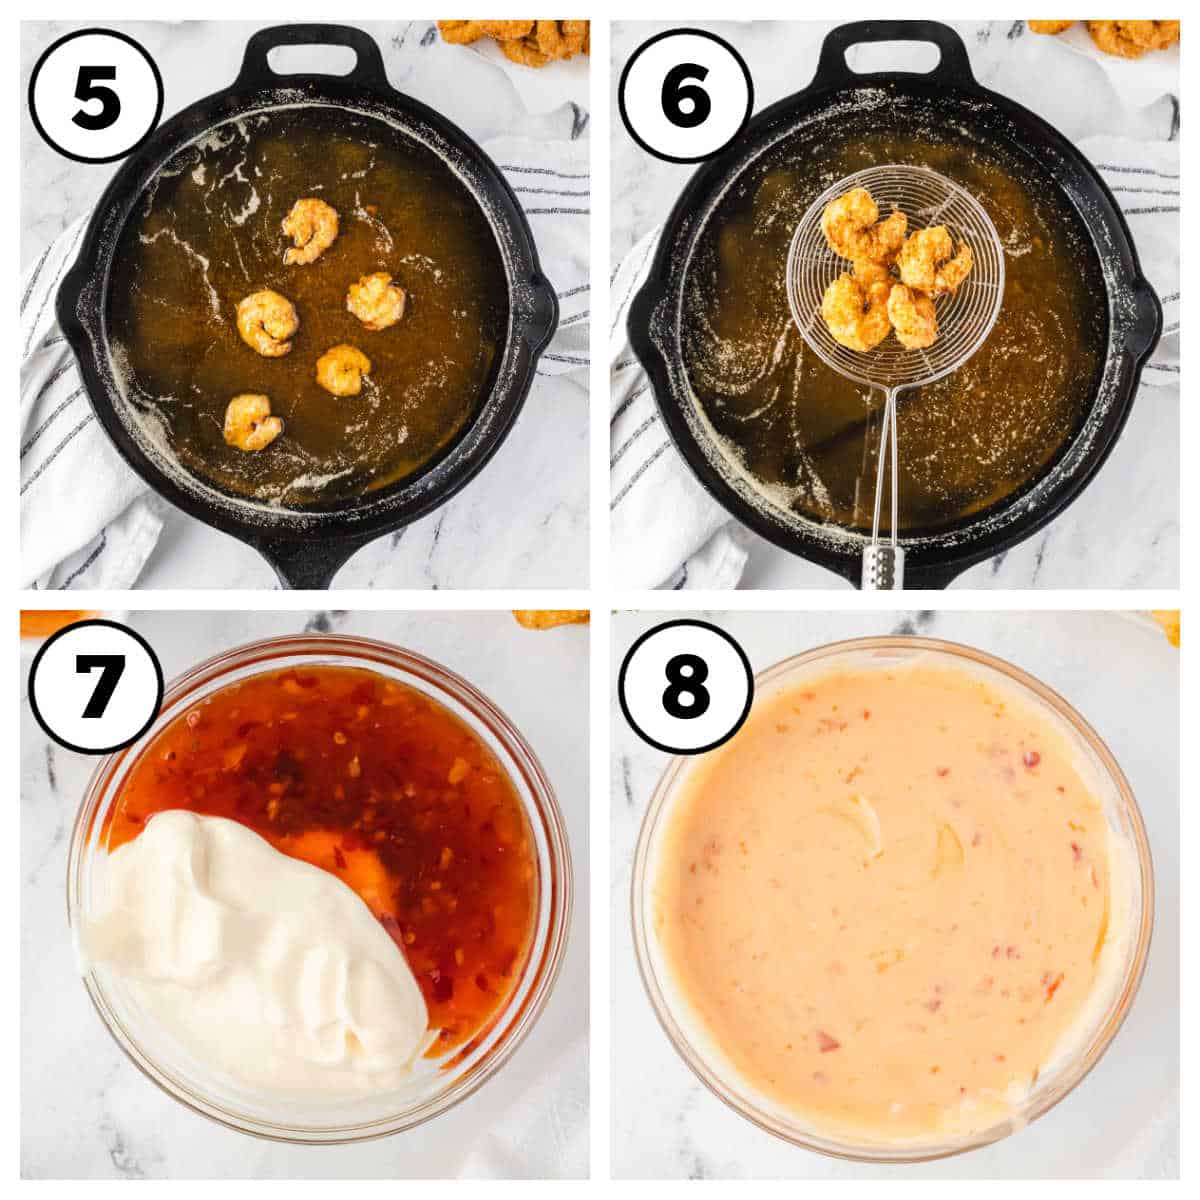
    Steps 5-8 on how to make fried shrimp.
    1. Add shrimp to skillet in a single layer, making sure not to overcrowd the pan. Let shrimp cook and fry for 3 minutes, until crispy and to a golden brown perfection.
    2. Remove shrimp from oil with a slotted spoon and drain on a prepared plate that has layers of paper towels to soak up any excess oil. Continue until all shrimp is fried. 

    Dipping Sauce Recipe for Shrimp

    Mayo and sweet chili sauce mix up to a creamy, spicy, slightly sweet sauce that really compliments the crispy, tender fried shrimp.

    1. Place the mayo and sweet chili sauce in a separate small bowl.
    2. Mix together the ingredients until evenly combined and serve with the cooked fried shrimp.
    Pan fried shrimp on a plate with sauce

    Recipe Pro Tips

    The Key to Less Mess: Ideally, set up two pie plates to create a breading station. You can use bowls if necessary but the wide, shallow shape of pie or cake pans makes the process much easier. One cake pan will have the liquid ingredients, in this case, an egg and buttermilk. The second pan will hold the dry ingredients, flour, cornmeal, and spices for a major flavor punch.

    Tips for How to Batter Shrimp

    This is by far the best shrimp batter, and after so many others have made this too and left reviews saying they think it’s delicious too… it’s safe to say it’s an easy recipe that you’ll want to cook shrimp in from here on out!

    Use one hand (I usually use my left since I move through the process left to right) to coat the shrimp in the egg mixture. Pick up the shrimp with the wet hand and place it in the dry mixture. Now use your other hand to gently coat the shrimp.

    Because you aren't going back and forth with both hands they aren't getting goopy and gross. One hand will have egg and one hand flour but not a big lumpy mess.

    It's not anything revolutionary but it makes a big difference in the mess level of battering and frying.

    Recipe FAQs

    How long do you fry shrimp for?

    Once battered, it only takes 3 minutes to fry the shrimp in oil.

    Do you have to soak shrimp in milk before frying?

    You can soak it but it’s not required. However, dipping shrimp in to milk (or buttermilk) instead of soaking, before frying is recommended. The buttermilk helps the batter stick to the shrimp and provides a thicker coating.

    How do you get breading to stick to shrimp?

    A buttermilk and egg will help the flour and cornmeal batter stick to the fried shrimp.

    How to fry shrimp

    Fried Shrimp Sauces

    If you don’t want to make the sauce recipe above, here are some other dipping options for your shrimp that you will love:

    • honey mustard
    • cocktail sauce
    • spicy ketchup
    • country white gravy
    • tartar sauce
    • hot sauce
    • remoulade sauce
    • ranch or even this jalapeno ranch

    Side Dishes to Serve with Southern Fried Shrimp

    Serve this southern shrimp recipe (or so we think it’s “southern”) with Amish potato salad or a side salad to round out your meal and enjoy. P.S. That side salad will give you LIFE.

    Or, serve popular side dishes such as:

    • fried mushrooms
    • hush puppies
    • since you’re frying shrimp, might as well make these fried pickles too!
    • seasoned potato wedges
    • french fries (or polenta fries or eggplant fries for healthier options)
    • roasted brussels sprouts
    • Instant Pot corn on the cob

    Or, if you want to serve it alone, you can easily add lemon wedges to the side and even a little chopped fresh parsley if you like!

    Easy Fried Shrimp Recipe and batter how-to!

    How to Store Leftover Shrimp

    To store any leftover shrimp, store it in an airtight container in the refrigerator for up to 3 days.

    How to Reheat Fried Shrimp

    When ready to reheat the fried shrimp, using the air fryer works amazingly well! Or, you can bake it in the oven or a toaster oven (around 400 degrees for a few minutes until heated through) to crisp it up a little.

    Using a microwave can leave the fried shrimp soggy but it’s definitely a way you can reheat if preferred.

    Classic, crispy fried shrimp is so much easier to make at home than you think. Just a few, simple pantry ingredients and you're on your way to fried perfection.

    More Recipes You’ll Love

    Want more yummy recipes? You’ll also love this shrimp baked potato, grilled shrimp marinade recipe. Or, if you love fried recipes, this southern country fried steak is a great southern staple.

    This fried rice recipe is perfect to create a fried shrimp rice recipe.
    Or serve up this fried shrimp recipe as an appetizer with some of our other favorite easy appetizer recipes that we have here on the blog.

    Originally published in 2019, then updated in November 2024 and in March 2025.

    Recipe

    fried shrimp on plate next to sauce
    Print Pin
    4.88 from 182 votes

    Fried Shrimp

    Classic, crispy fried shrimp is so much easier to make at home than you think. Just a few, simple pantry ingredients and you're on your way to fried perfection.
    Course Main Course
    Cuisine American
    Prep Time 15 minutes minutes
    Cook Time 6 minutes minutes
    Total Time 21 minutes minutes
    Servings 6 servings
    Calories 492kcal
    Author Jessica Burgess

    Ingredients

    • Canola oil for frying
    • 24 ounces large raw shrimp, peeled and deveined

    Egg Wash

    • 2 large eggs
    • 1 cup buttermilk (or milk)
    • ½ teaspoon kosher salt
    • ½ teaspoon black pepper

    Batter

    • 1 ½ cups all-purpose flour
    • 1 cup cornmeal
    • 2 teaspoon kosher salt
    • ½ teaspoon black pepper
    • 2 teaspoon garlic powder
    • 2 teaspoon onion powder
    • 1 teaspoon cayenne pepper

    Dipping Sauce:

    • ¾ cup mayo
    • ½ cup sweet chili sauce

    Instructions

    • Heat ½-inch of oil in a large, heavy-bottomed skillet over medium heat. Line a large plate with a paper towel, set aside.
    • In a cake pan or pie plate whisk together eggs and buttermilk. Add ½ teaspoon of salt and pepper. 
    • In another cake pan, mix together the flour, cornmeal, salt, pepper, garlic powder, onion powder, and cayenne pepper. 
    • Add shrimp to the egg mixture and coat well. A few at a time, add the shrimp to the flour and coat completely. Place on a clean plate while you bread the remaining shrimp. 
    • Add shrimp to skillet making sure not to overcrowd the pan. Fry for 3 minutes, until crispy and golden brown. Drain on prepared plate. Continue until all shrimp is fried. 

    Dipping Sauce

    • Mix mayo and sweet chili sauce in a bowl for dipping. 

    Notes

    Breading the shrimp with less mess:
    Set up your breading station using two pie plates. (Bowls can be used but the wide, shallow shape of pie or cake pans makes the process much easier.)
    One cake pan will have the liquid ingredients and the second pan will hold the dry ingredients, flour, cornmeal, and spices.
    Use one hand to coat the shrimp in the egg mixture. Pick up the shrimp with the wet hand and place it in the flour mixture. Now use your other hand to gently coat the shrimp. Because you aren’t going back and forth with both hands they aren’t getting goopy and gross. One hand will have egg and one hand flour but not a big lumpy mess.
    Aim for an oil temperature of 350°F. If you don’t have a thermometer, drop a pinch of the breading in, and it should sizzle steadily right away. 

    Nutrition

    Serving: 1g | Calories: 492kcal | Carbohydrates: 57g | Protein: 9g | Fat: 24g | Saturated Fat: 4g | Cholesterol: 82mg | Sodium: 1217mg | Potassium: 197mg | Fiber: 4g | Sugar: 11g | Vitamin A: 460IU | Vitamin C: 1mg | Calcium: 27mg | Iron: 2.9mg

    Disney World Tips – 10 Tips for a Better Vacation

    February 1, 2019

    Tips for Disney

    Disney World Tips – These 10 tips and tricks are so helpful for those who have never been to Disney or who are looking to make their next trip even better!

    With tons of world-class dining options, many fabulous resort choices, and countless entertainment possibilities, it can be overwhelming trying to plan your Disney vacation.

    I’ve invited Amy with The Travel Bug Company, who I call the “Disney Guru“, to share her favorite top 10 tips for those who have never been to Disney, and who are thinking about making it a family vacation soon!

    Tips for Disney

    Disney World Tips

    1. Use a stroller for young children

    A stroller can be brought from home or rented and delivered to your resort to be picked up once you arrive.

    On our last trip, we walked 10 miles on our first park day and I hadn't taken my own advice for my 5-year-old.
    That afternoon I rented a stroller from a company that I trust and picked it up the next morning on the way to the bus stop.

    It was such a GAME CHANGER. Less whining, extra storage space, and you know exactly where your young one is when navigating through security and crowded walking areas.

    2. Get a dining plan

    Disney World Dining Plan

    The dining plan is one of my favorite components of the Disney World experience, because, well… food.

    I think Disney has really upped its food game, and the meals and snacks we eat while there are pretty fabulous.

    The dining plan is offered as a perk of staying at a Disney resort and can offer a lot of value to your vacation, making it easy to enjoy many of their most popular dining options.

    There are several dining plans to pick from, and you can choose the plan that best fits your budget and vacation style.

    Most Popular Dining Plan?

    The most popular is the Disney Dining Plan, and it includes:

    •  1-table service meal
    • 1-quick service meal
    • and two snacks per person, per night of your stay.

    You also get a souvenir drink cup that has pixie dust and can be used at your resort for unlimited tea, coffee, and soda.

    The Disney Dining Plan may not sound like enough food, but trust me, I have two growing teenage boys and it was more food than they could eat in a day!

    3. Disposable ponchos

    Do you need ponchos for Disney

    I buy mine from Amazon in packs of 10 and keep one per person in my bag with me when we leave the resort.

    I recommend wearing one if you ride Splash Mountain in Magic Kingdom or Kali River Rapids in Animal Kingdom.

    They are also useful for afternoon showers when you want to get to the bus or hop to another ride.

    4. Memory Maker

    This is another of my favorites, and is a really fun way to make sure everybody gets in those photos, including Mom or Dad!

    There are Disney photographers sprinkled throughout the parks, especially near the iconic landmarks like Cinderella's Castle and the Epcot sphere.

    The photographer will be wearing a vest labeled “Photopass Photographer” and will be carrying a large camera, so you can't miss them.

    They will take your family's picture in your matching Mickey Mouse shirts and connect it to your reservation so you can save them when you get home. How cool is that!?

    There are videos from some of the rides that make for really fun viewing… like with your hair in the wind when you come around a bend on Seven Dwarfs Mine Train.

    Magic Shots are also offered in different locations, where an animation or overlay is added to your pic after it's taken. So so fun to have.

    5. Stay on site

    Staying on Disney property, in the "Disney Bubble," can add a lot of perks to your vacation. (For instance like I mentioned above, the dining plan is only available for resort guests.)

    Transportation to the parks and Disney Springs is complimentary, as well as Magical Express shuttle to and from the airport for Disney World guests.

    Fun story: On one of our bus rides from Hollywood Studios back to “Art of Animation” we had the most entertaining bus driver who quizzed us all with Disney trivia, making the bus ride feel quick and fun.

    You don't have to worry about parking or driving while you are there, and the resorts are known for theming, convenience and adding the benefit of being able to return to your room for a break on park day if your little ones need it. It ADDS to the whole vacation experience!

    6. No backpack in the parks

    A backpack in a theme park is very common, but we don't do it.

    I recommend a cross body bag or a fanny pack, or a small diaper bag that can be easily removed from the stroller basket when going through security and when parking the stroller.

    Backpacks can be tricky when getting into and out of rides, and I do not like having sweaty backs in the heat.

    In my cross body bag, I carry:

    • ponchos
    • sunglasses
    • travel-size sunscreen
    • ID and credit cards
    • phone
    • rechargeable phone battery
    • a couple of blister bandages
    • and a few other make-up/toiletry items.

    Every night I empty my bag and repack it for the next day.

    But here is an AMAZING resource for what to carry in your bag at Disney!

    7. Pin trading with cast members

    Almost every “Cast Member” (what Disney employees are called) will have character pins that they can trade with you for.

    We order a mixed bag from Amazon before our trip, divide them up at home, and trade in the parks.

    It's really fun to see what my kids keep and which ones they trade.

    We've used pin lanyards and wallet-type holders, with my favorite being a wallet that hangs on a lanyard.

    It's a good idea to discuss with your child that he or she needs to let you know if they would like to go trade pins with a Cast Member, as you could continue walking and not realize they are not there! (EEEk! Not that it's happened to us or anything.) Ha!

    Buy the character pins we get HERE!

    8. Pick up a Disney park times guide

    Disney's park entertainment options are subject to change, and this is a great way to keep track of what time they start and what is being offered that day.

    A few that come to mind are Animal Encounters in Animal Kingdom, Great Moments in History in Magic Kingdom or March of the First Order in Hollywood Studios.

    A times guide is available next to the maps as you enter the park.

    9. Wear ears or a Goofy hat

    Wearing something on your head is a really fun way to get into the Disney experience.

    Whether you order it ahead of time and coordinate all your outfits or get one headband and wear it the first day only, it's a lot of fun and makes for great photos. I usually wear mine to the airport on arrival and departure days, getting into the Disney spirit and relaxing into my vacation, and have a few I rotate during the week (yes, they match my outfits).

    The ears and hats are available online and throughout the parks, resorts and Disney Springs. Of course, Disney themed Christmas lights also go well with your favorite headgear…

    Disney clothes and headband

    10. Use a professional Disney travel planner

    Trying to plan your trip on your own, can be stressful. Using a Disney planner who knows ins and outs to get great deals, the best times for activities and so much more… can be so helpful with alleviating stress ahead of time and while you’re there, so you too can have fun too!

    Where do you find this Disney planner???

    I can’t WAIT to help you!

    I (Amy here) am a professional Disney travel planner with a goal to maximize your Disney experience with detailed daily plans, dining arrangements, ride reservations, and more!

    Together, we figure out the best fit for your family and I take care of all the details.

    Your vacation begins with me! You will get the benefit of a Disney expert and you won't have to do countless hours of research, discovery, and planning to have the best Disney vacation ever. (Ack!)

    Free Consultations

    YES! I offer free consultations.  So to learn more about my customized Disney travel services and how I can best meet your vacation needs, I’m just an email away.
    To schedule a time to chat, email me at

    [email protected]

     Have you ever visited Boca Grande Florida? See Jessica’s Boca Grande Florida vacation review to see if that’s somewhere you want to visit.

    Facebook:

    Or, I'm also on Facebook at Travel Bug Company if you’d like to visit me there!

    Want to See More Disney Photos?

    Head over to my Instagram at https://www.instagram.com/travel_bug_company

    I can’t wait to help plan your Disney vacation!

    Disney Planner - free consultations

    — Amy

    Thank you SO much Amy! As someone who’s never been to Disney, I have to say…you’ve already taught me so many helpful things!

    More Disney Tips?

    Friends, I’m dying to know what your favorite Disney tips are. Do you have any favorites? Let me know in the comments below! Thank you for sharing them with us!

    10 Disney World Tips and Tricks! These were SO helpful!

    Baked Turkey Burgers

    February 21, 2021

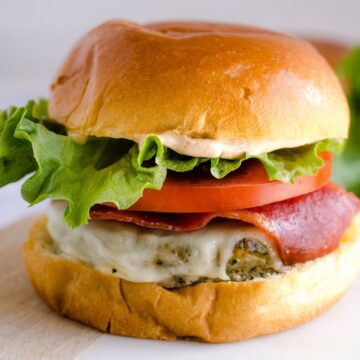
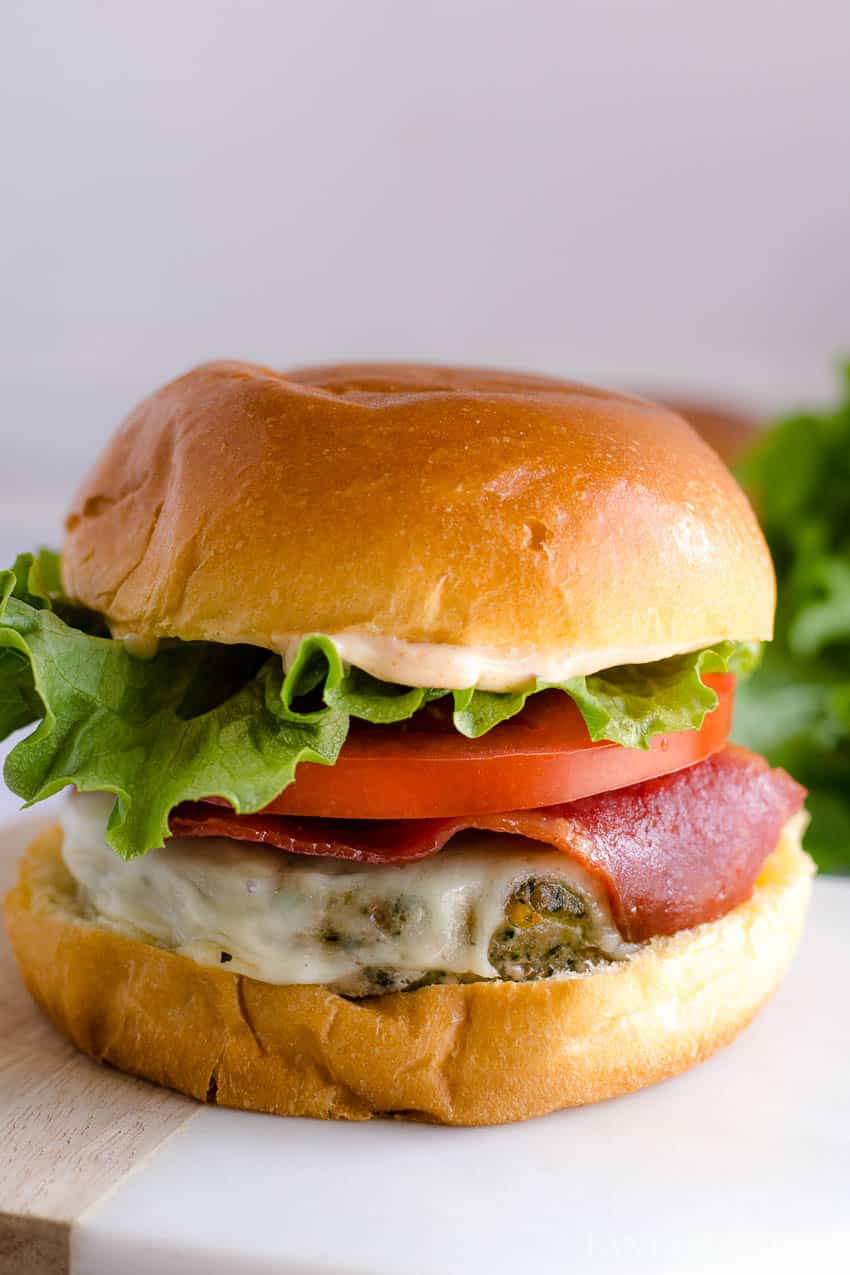
    Baked turkey burger on bun with lettuce, tomato, cheese and fiesta mayo.

    Baked Turkey Burgers – Cooking turkey burgers in the oven is EASY! It locks in juices and there’s less mess!

    Baked Turkey Burgers on bun with lettuce and tomato and turkey bacon

    Have a package of ground turkey for burgers? Consider making burger sliders, using ground turkey instead!

    Why You’ll Love These:

    This recipe is incredibly easy and I even give you a quick fun flavored mayo recipe to top it with! Or, if you own an air fryer, you may want to also consider trying these air fryer turkey burgers to see which recipe you prefer!

    You can find the full recipe card below with more details on how to whip up this “gourmet” tasting burger, that doesn’t require a gourmet chef at all!

    You’ll Also Love these Oven-Baked Hamburgers, these Air Fryer Burgers, Smoked Burgers, and these electric skillet burgers.

    Plain Ground Turkey or Pre-Pattied Seasoned

    Pre-Made Turkey Burgers

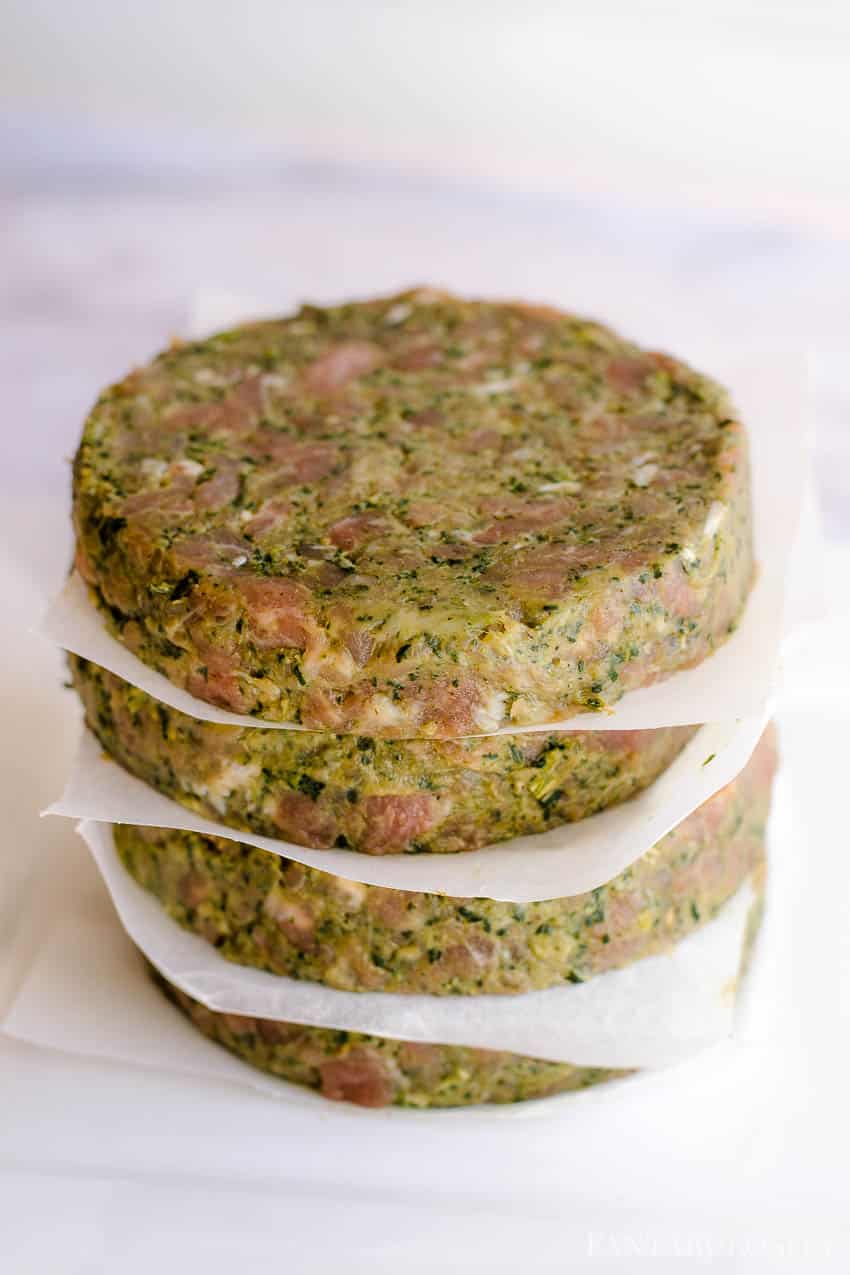
    For this turkey burger recipe, I wanted to keep things super simple, so I used a pre-pattied ground turkey burger that included spinach and kale.

    But you can absolutely use regular ground turkey for this! However, it’s a lot of fun to mix things up from time to time, just to add some different flavors to the mix!

    Making Your Own Patties: If you’re making your own turkey patties, you can add the seasoning right into the ground turkey before making your patties, but I find that waiting until after I patty them out, I can taste the flavors a LOT more. But whichever way you prefer to season them is just fine!

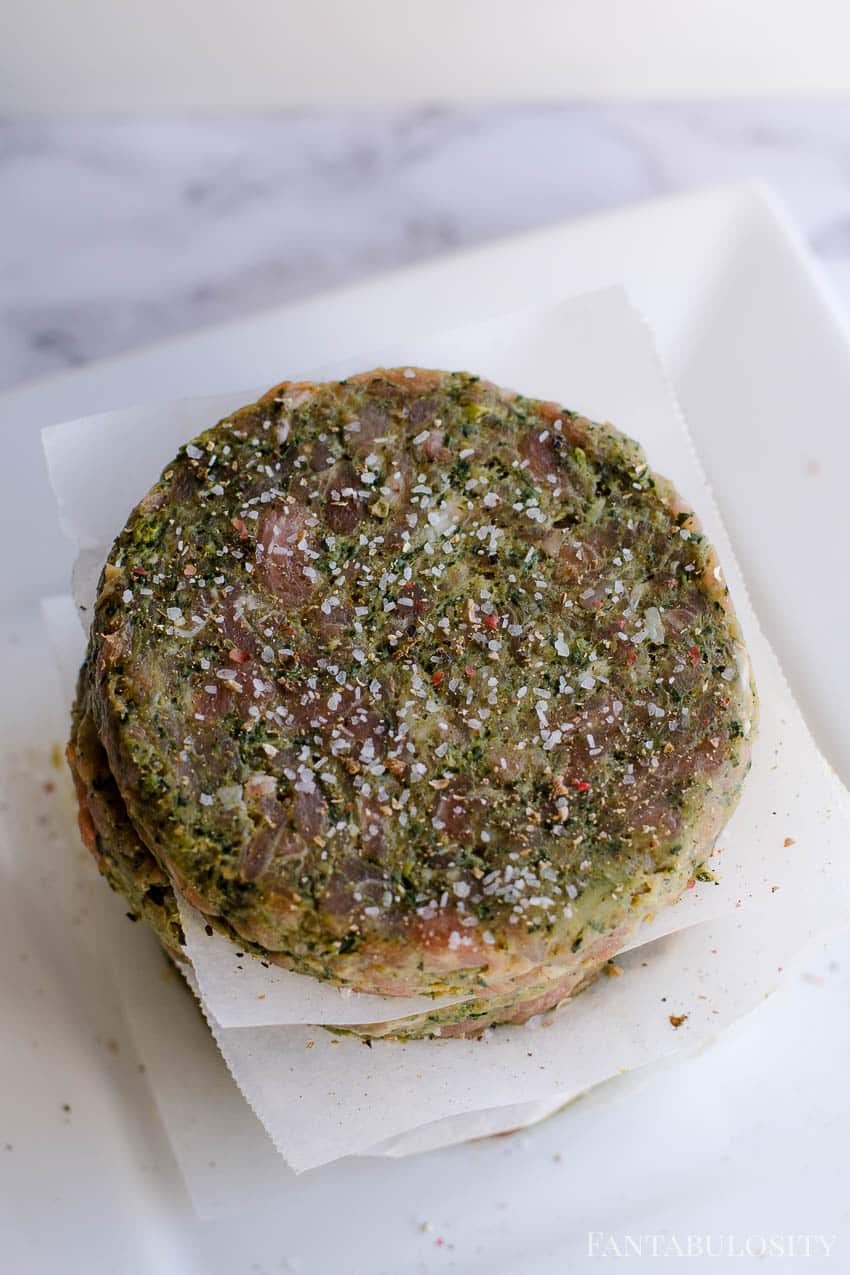
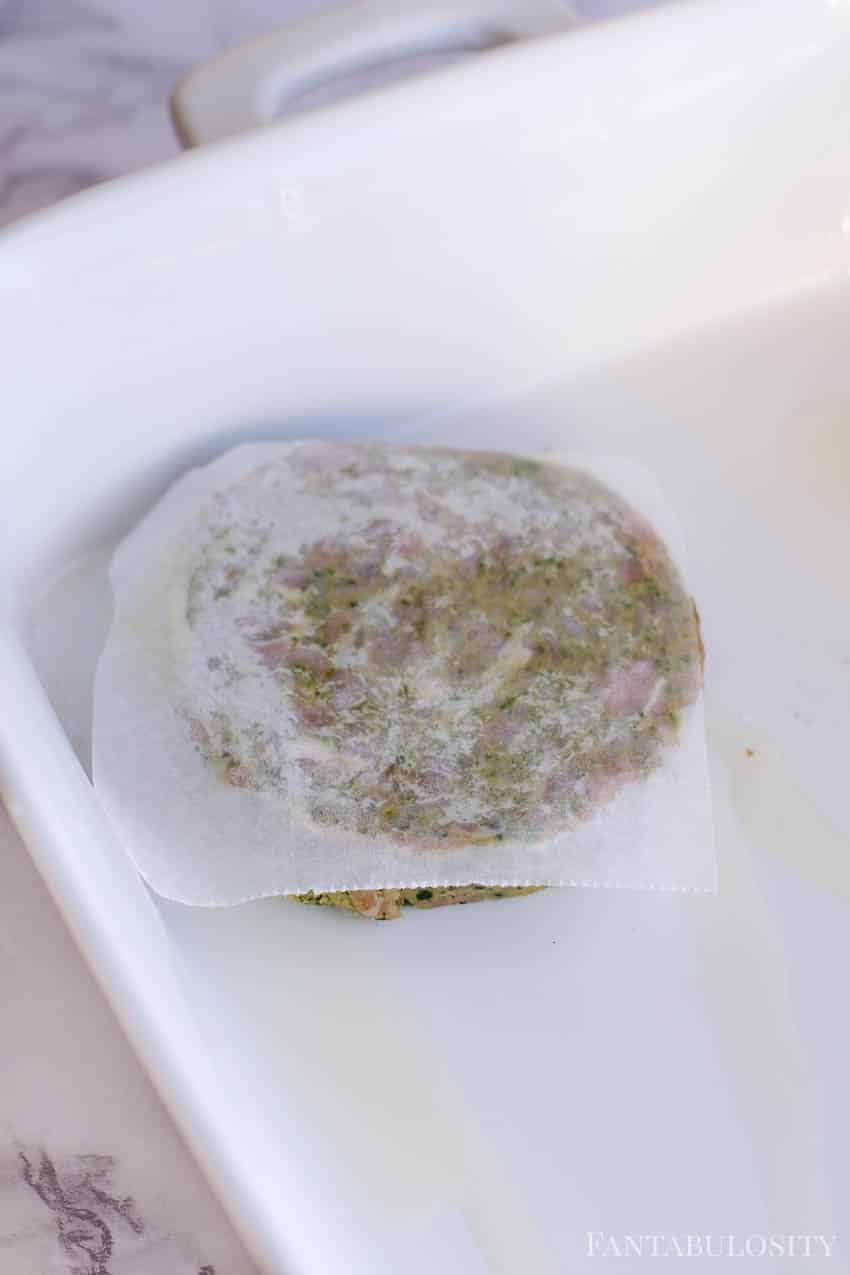
    Pre-Pattied Burgers: I love the turkey burgers (and any burgers really) that come with paper liners, because it makes separating the patties for easy seasoning and less mess. Here’s how I do it…

    Step by Step Directions

    For the turkey burgers, I wanted to allow the toppings and the fiesta mayo (recipe below) to season the burgers in a BIG way.

    So for seasoning, I kept it simple and just used salt and pepper! (My favorites… kosher salt and peppercorn medley.)

    If you’re using plain ground turkey, I feel that adding salt and pepper is a MUST. Some other additional seasonings I recommend for turkey burgers are:

    • garlic powder
    • garlic pepper
    • a mixture of basil, oregano, parsley
    • onion powder
    • cumin
    • red pepper flakes

    … there are many others you can experiment with, but just keep in mind what seasonings you’re using, so you don’t overpower the burger if you use a sauce like my fiesta mayo recipe below! 

    Grilled or Skillet Cooking

    You can absolutely cook your turkey burgers in a skillet or grill them. I prefer the oven-baked method to cut down on the mess in my kitchen, and when it’s too cold outside to grill. But feel free to cook them how you like!

    So let’s get to what I now call, the “BEST Turkey Burger Recipe“… the Turkey Club Burger. I’ll walk you through the recipe with photos in case you’re a visual person, but feel free to jump to the bottom of the post where I provided a recipe card that you can print and follow the directions in one spot!

    How to Make

    You’ll want to start by preheating your oven to 375 degrees and lining a baking dish with a drizzle of olive oil. (Approximately 1 tablespoon.)

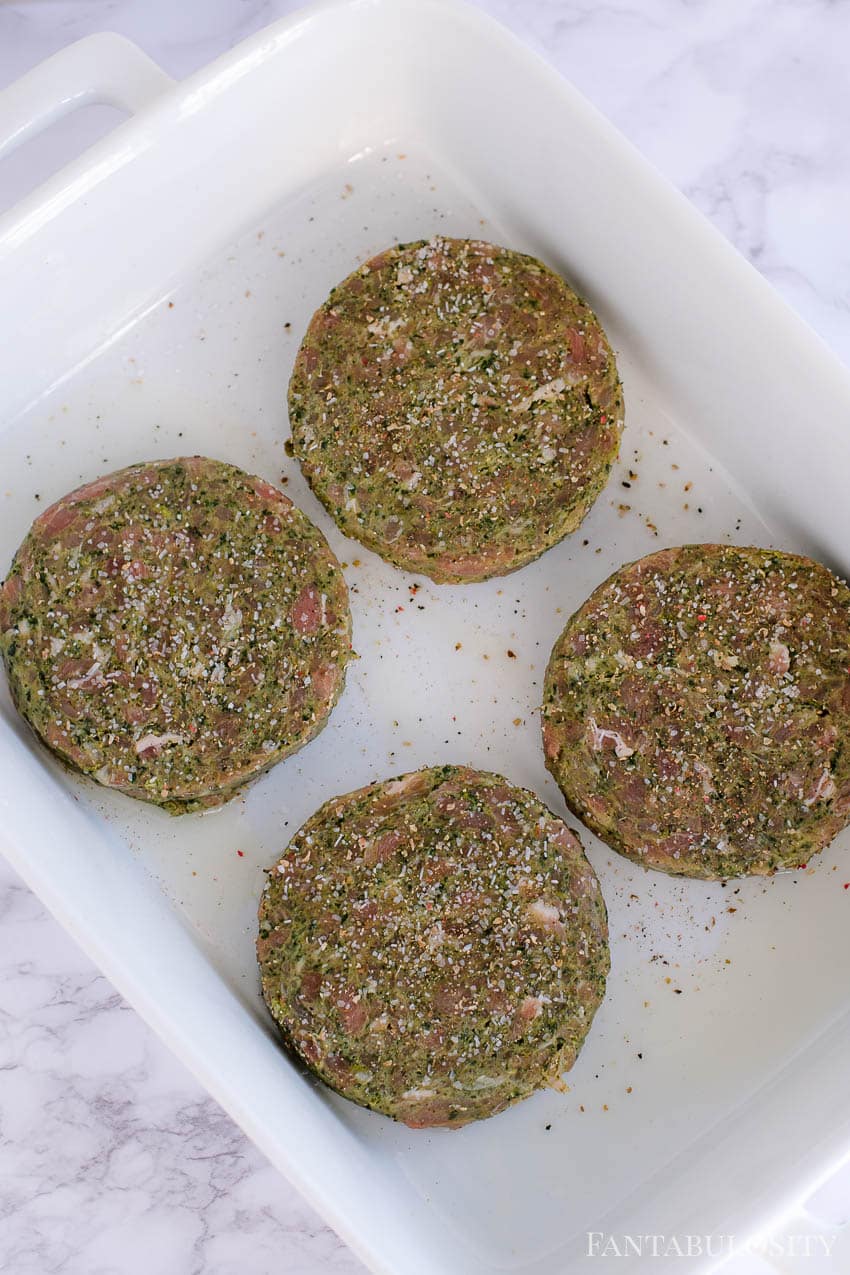
    Seasoned burgers stacked on paper liners

    Season the top of a burger with salt and pepper or desired seasonings (if you wish), grab the paper liner, and flip the burger over on to the baking dish. Peel the paper off and season the other side.

    Turkey burger placed facedown, using the paper liner for a clean release

    Work your way through the other patties in the same way.

    The paper helps keep my hands cleaner while handling raw meat!

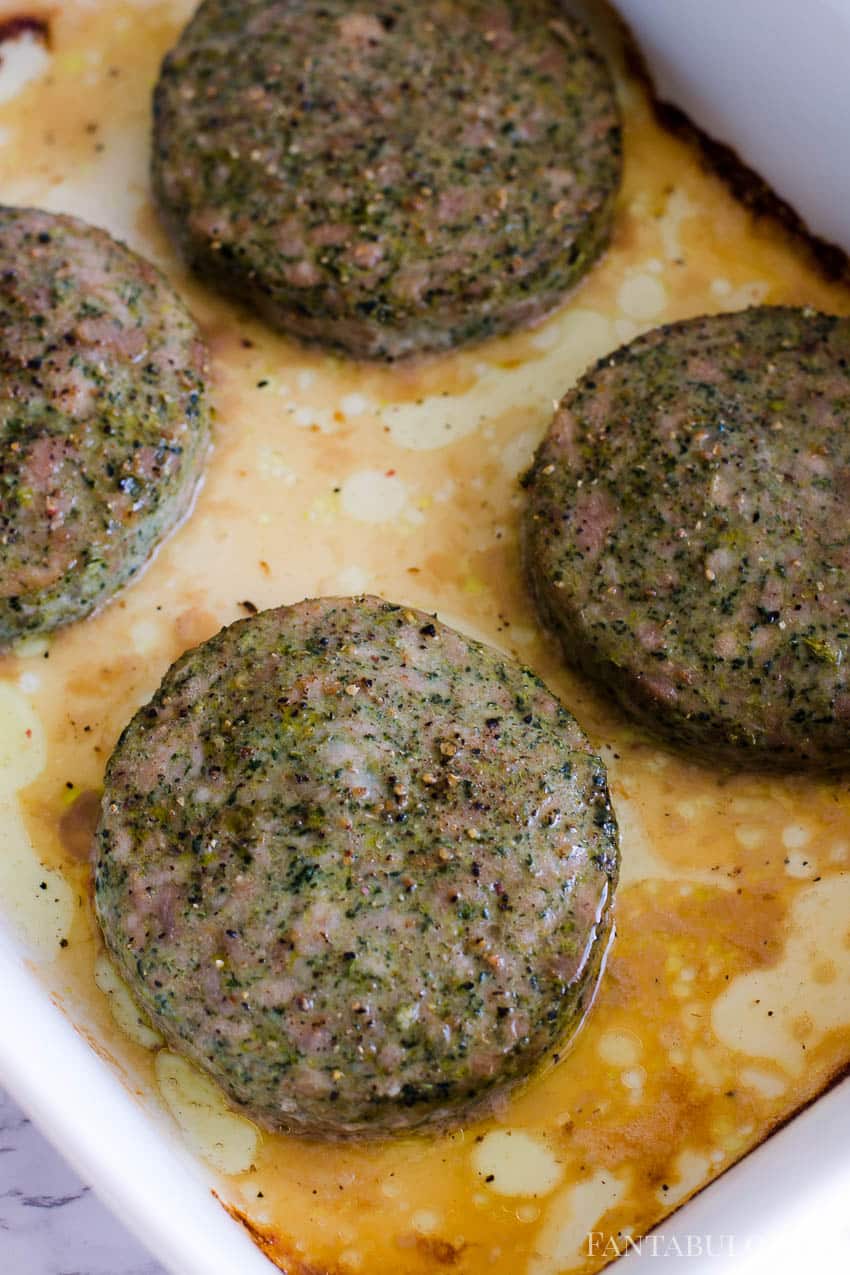
    Turkey burgers in white baking dish, seasoned and ready for the oven

    How Long to Cook Turkey Burgers in the Oven

    Pop the baking dish with turkey patties into the preheated 375° oven and bake for 30 minutes, until it reaches an internal temperature of 165 degrees. We do this a lot for our hamburger recipes, and even use this method for our ground venison burgers!

    How to Cook Turkey Bacon

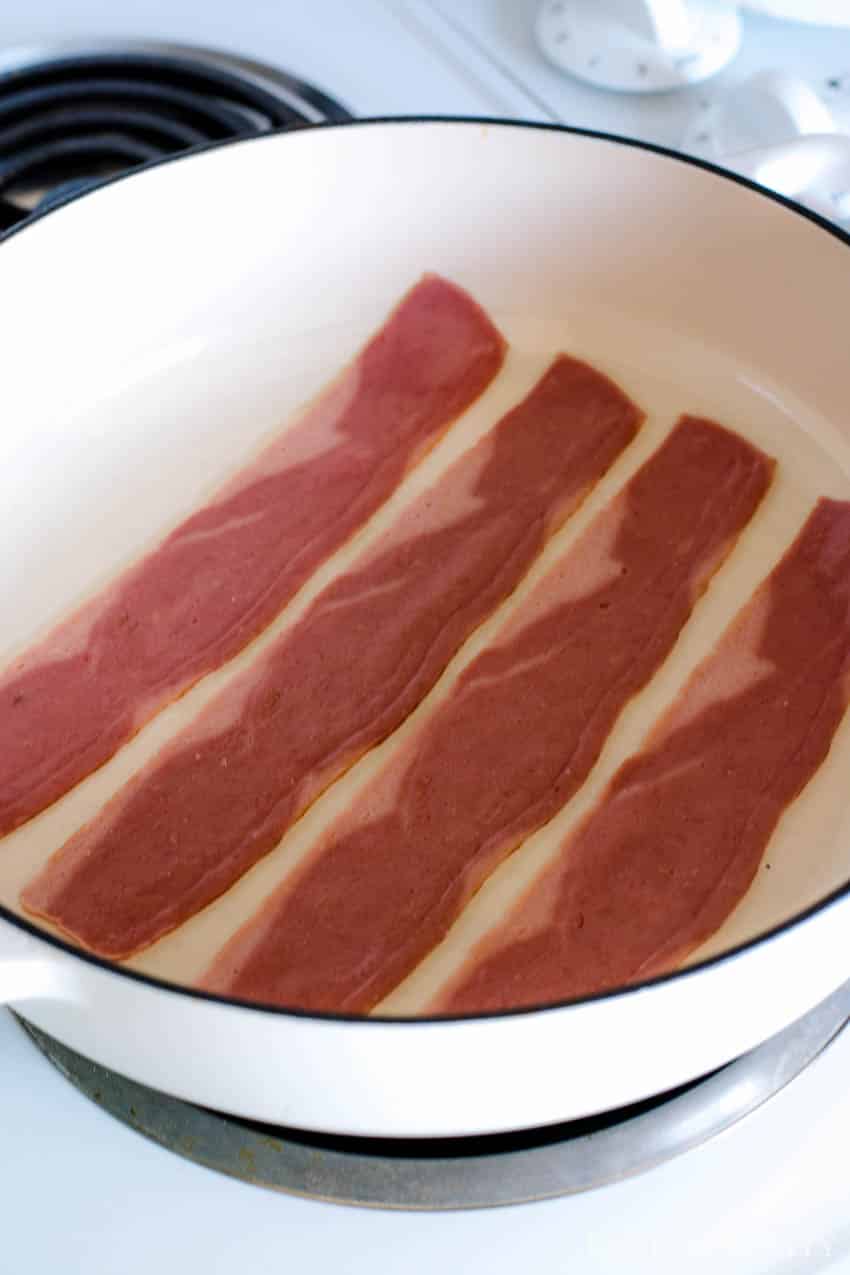
    One of my favorite ways to cook turkey bacon is in the skillet because of “how” I cook it.

    My boys prefer crispy bacon, and with turkey bacon tending to lay flat, I like to form it while it’s cooking to give it the texture that my boys are used to. You can also bake turkey bacon in the oven!

    turkey bacon in skillet

    How to Make Turkey Bacon Crispy

    If cooking in a pan, I start by spraying my skillet with cooking spray and then line the skillet with a few pieces of turkey bacon. Then, flipping the bacon often will help crisp it up.

    Fun trick for frying turkey bacon to make it look like regular bacon - manually curl up bacon

    However, while it’s cooking and I’m flipping, I’ll also “pinch” the bacon with my tongs so it will mimic the bacon texture they’re used to.

    We’re big texture people here if you haven’t guessed.

    Crispy turkey bacon

    After the bacon is finished cooking, and the turkey patties are still baking, this a great time to mix up your fiesta mayo, or any sauce like this chipotle aioli that you plan on serving on your turkey burger club!

    Fiesta Mayo - Hidden Valley Ranch Mix with mayo

    Fiesta Mayo Recipe

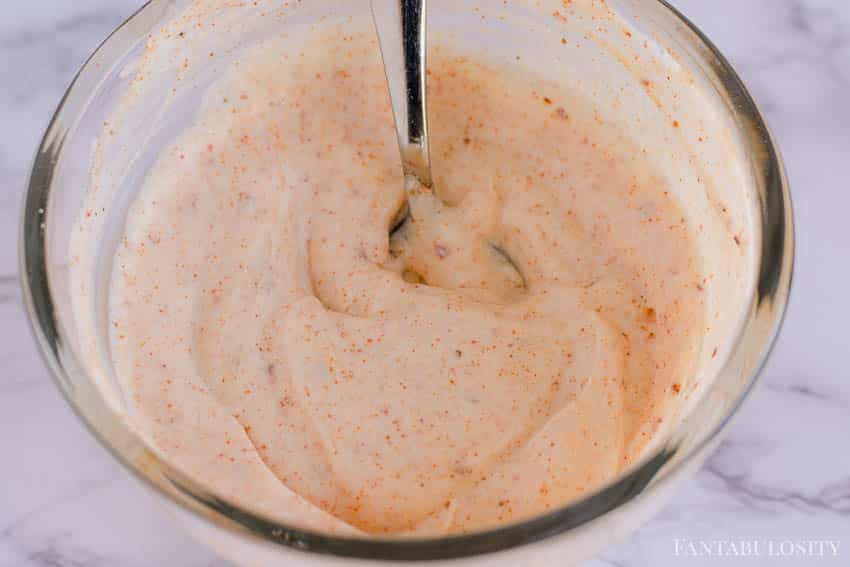
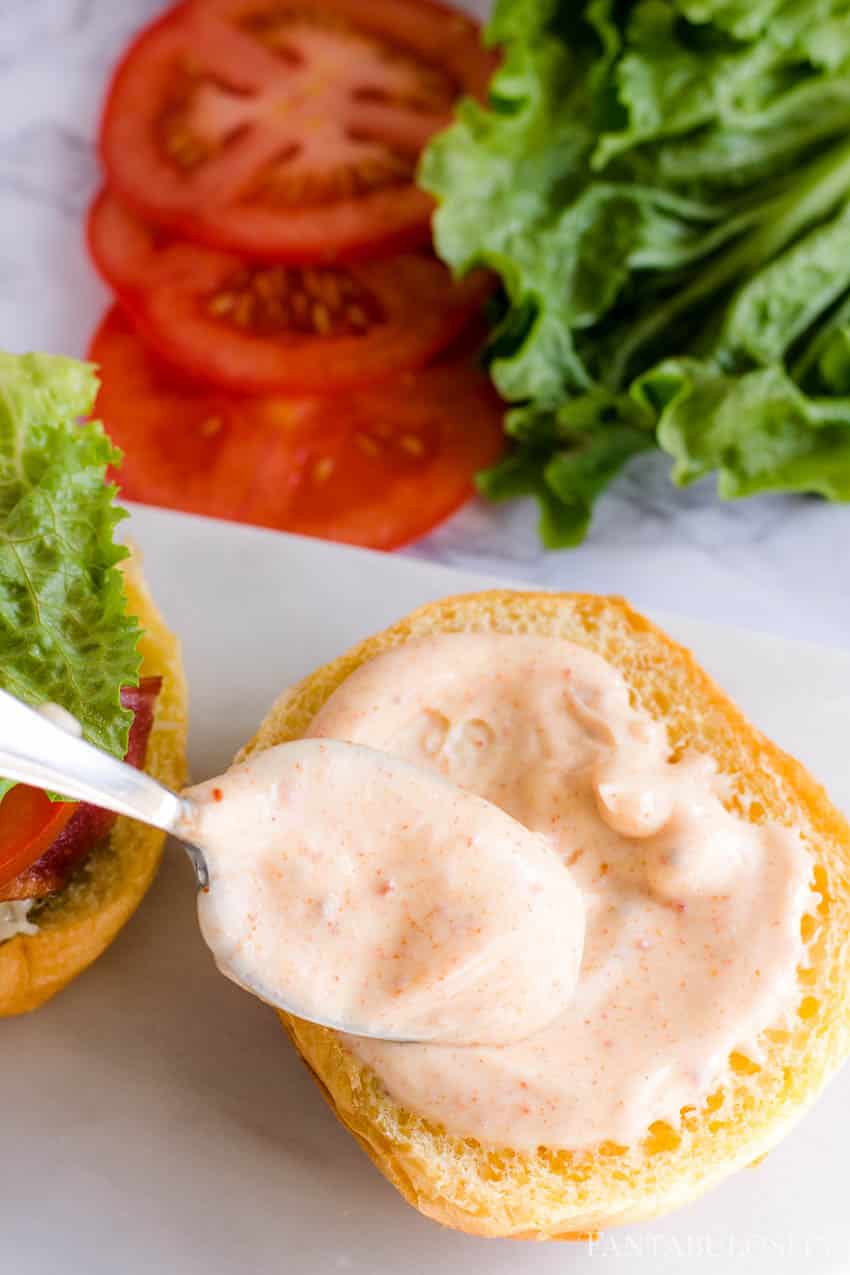
    Using a 12 ounce container of mayo and half a packet of Hidden Valley Fiesta Ranch Dips Mix (or similar dressing mix), mix the two together and you have a flavor of a mayo that will knock your socks off.
    (Note, this will create more than you need for this recipe, so feel free to make a smaller batch.)

    TIP: If you LOVE having a sauce like this on hand, feel free to use a 30 oz. container of mayo and a full packet of the dressing mix.

    Fiesta Mayo Recipe mixed together in small bowl

    Topping Ideas for Baked Turkey Burgers

    For this baked turkey club burger recipe, I’m using toppings like the bacon that you saw above, and the following extras:

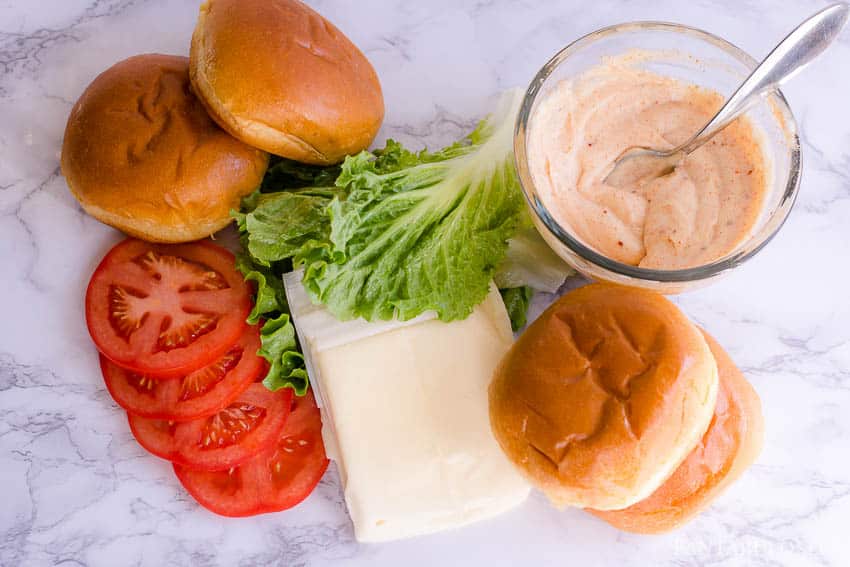
    • brick cheese
    • tomatoes
    • leaf lettuce
    • fiesta mayo
    • brioche buns
    Ingredients for baked turkey burger club

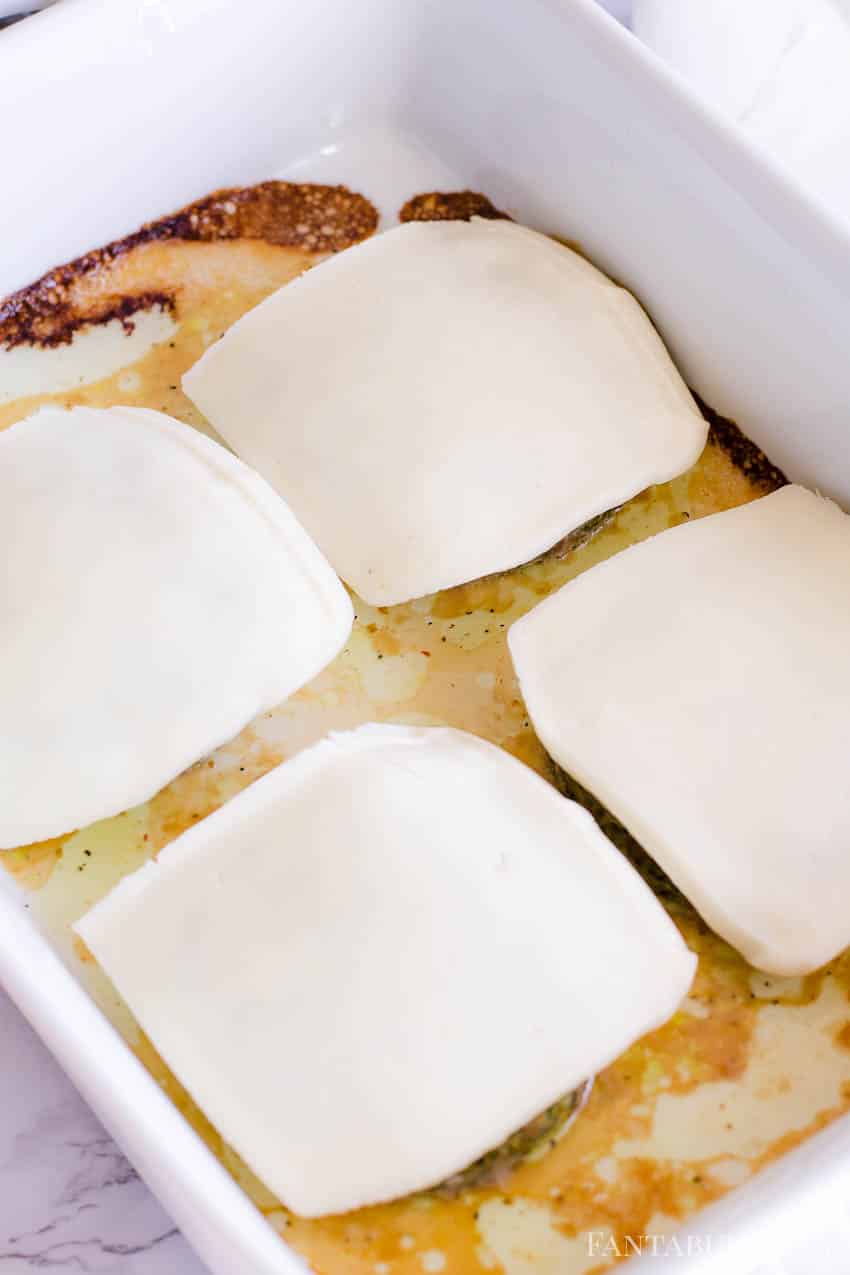
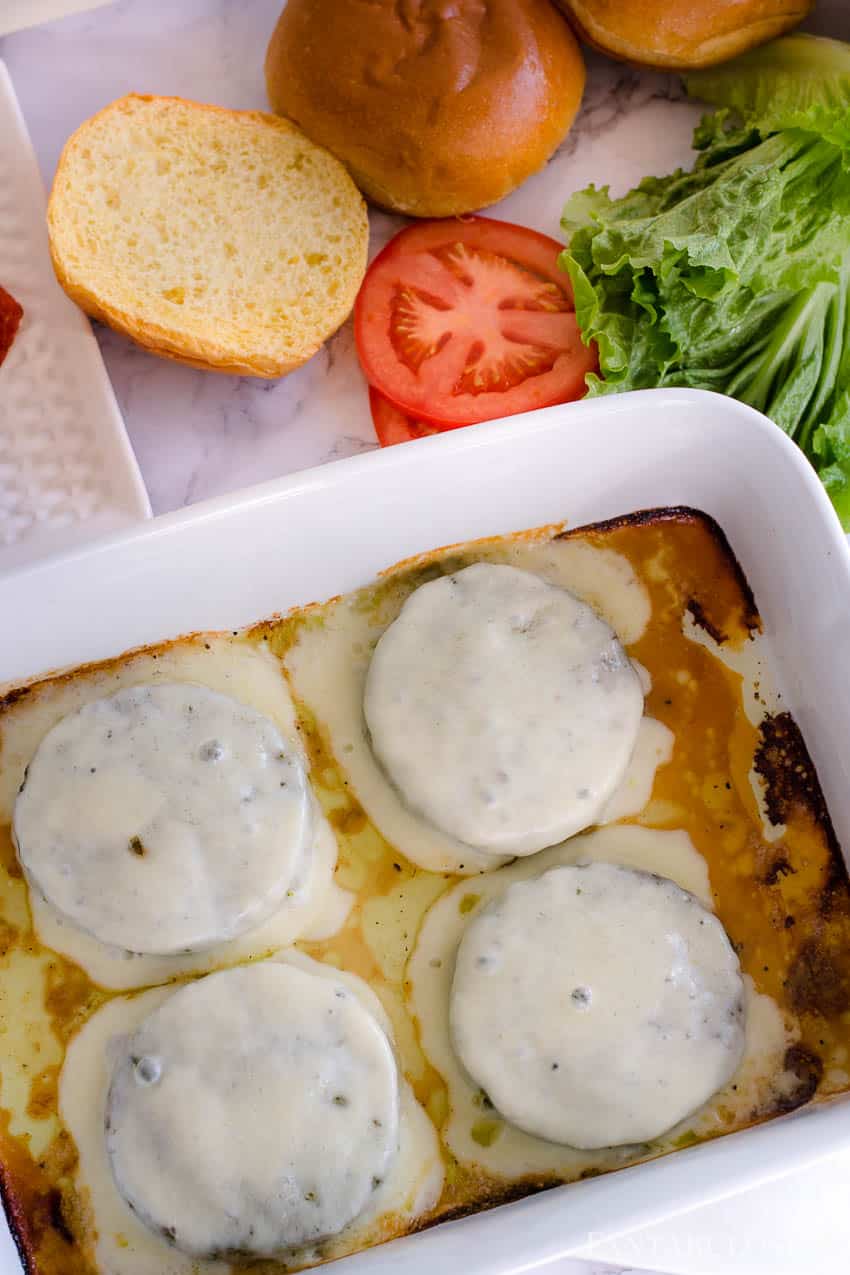
    Once the burgers have baked for 30 minutes, pull the burgers out of the oven and top each turkey burger with a slice of cheese, and place the baking dish back in the oven for just seconds to allow the cheese to melt.

    Cooked turkey burgers in white baking dish
    Sliced cheese on top of turkey burgers in baking dish

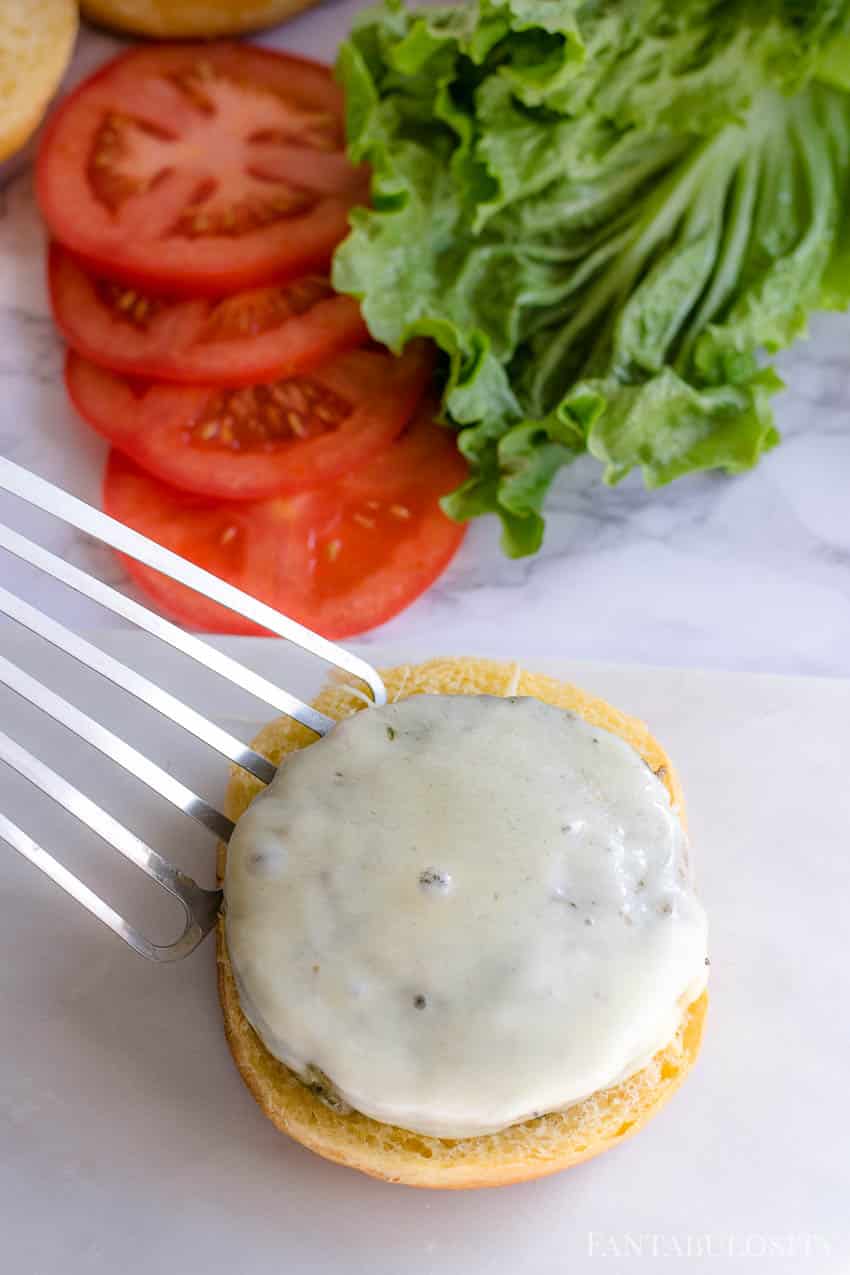
    Once the cheese has melted, remove your baking dish from the oven and top your burger with what you desire!

    Cheese melted on to burgers, ready to eat
    Placing cheese turkey burger on bun

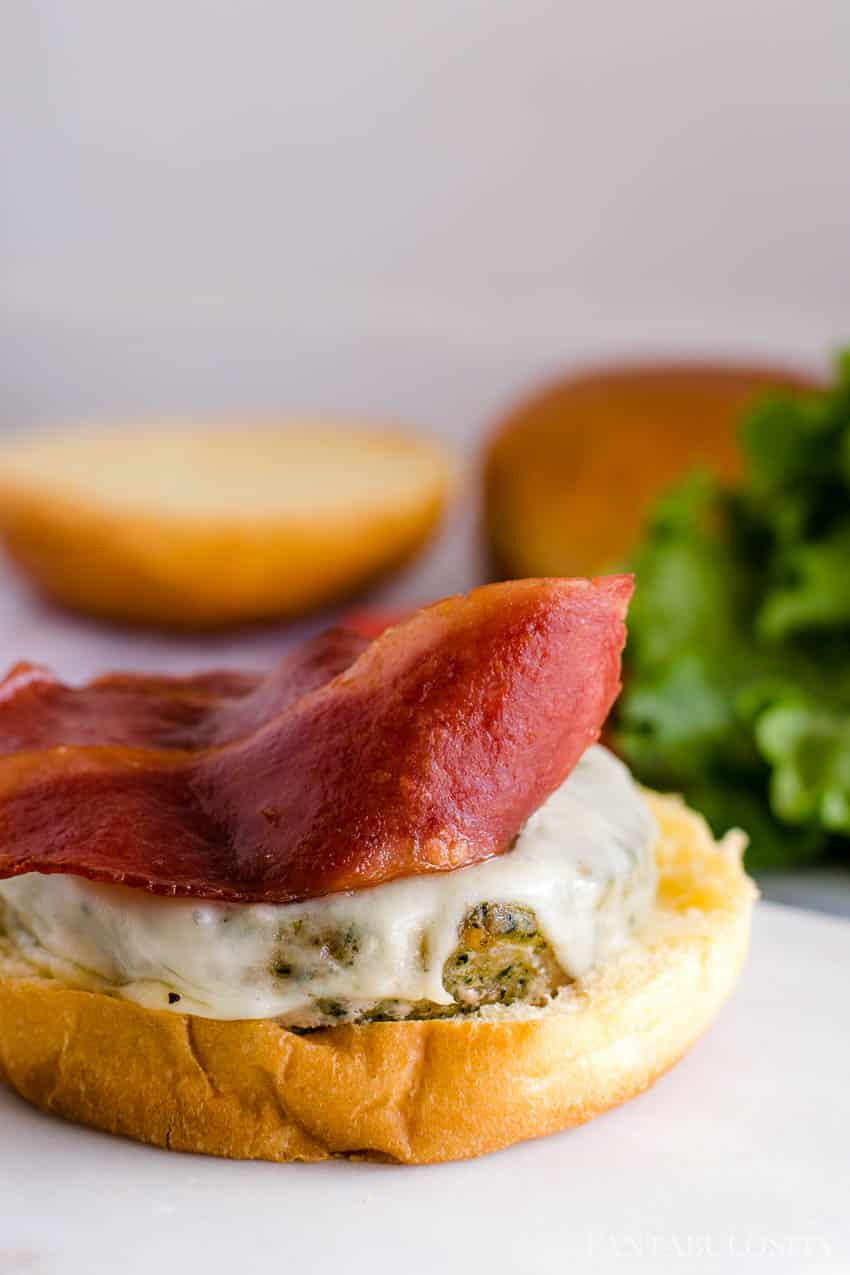
    Like, turkey bacon…

    Add turkey bacon to burger

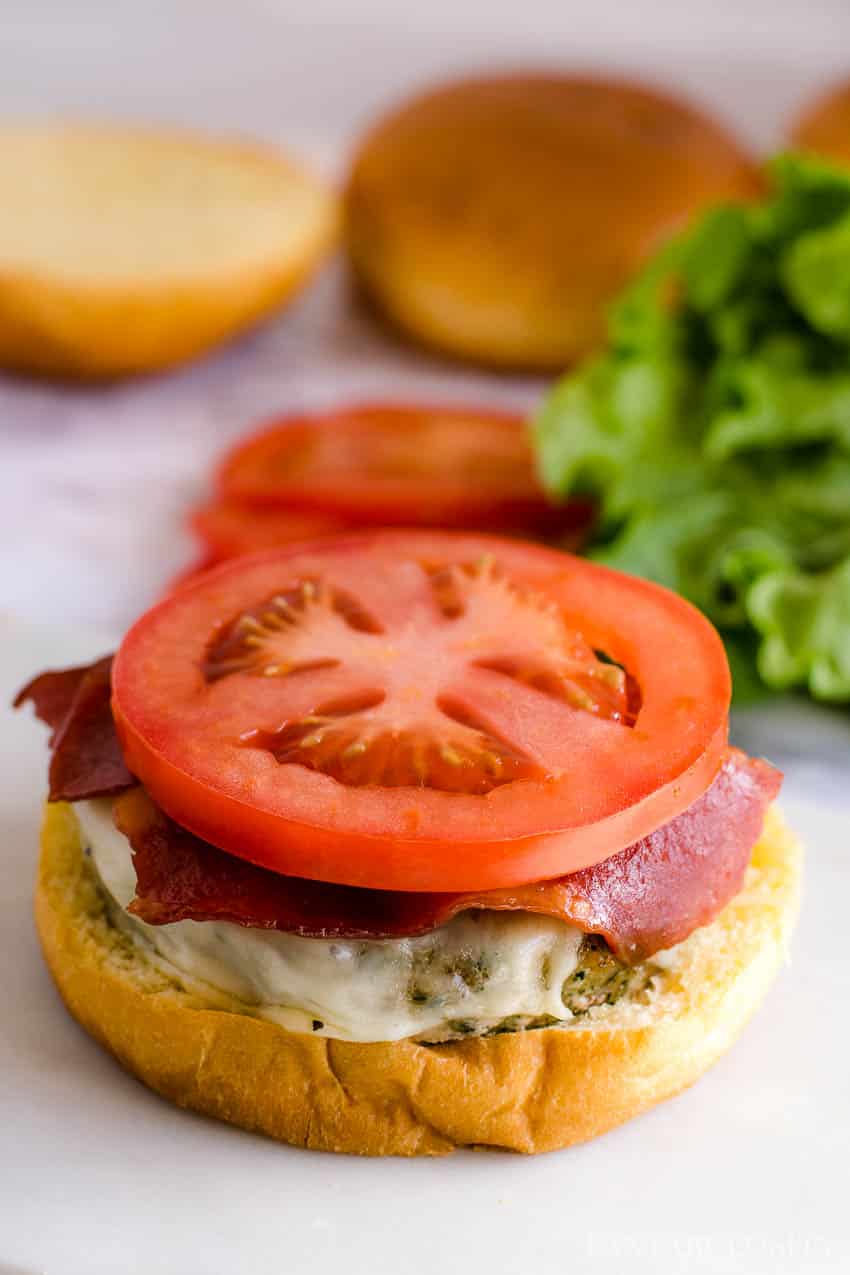
    tomato…

    Baked turkey club burger with bacon and tomato

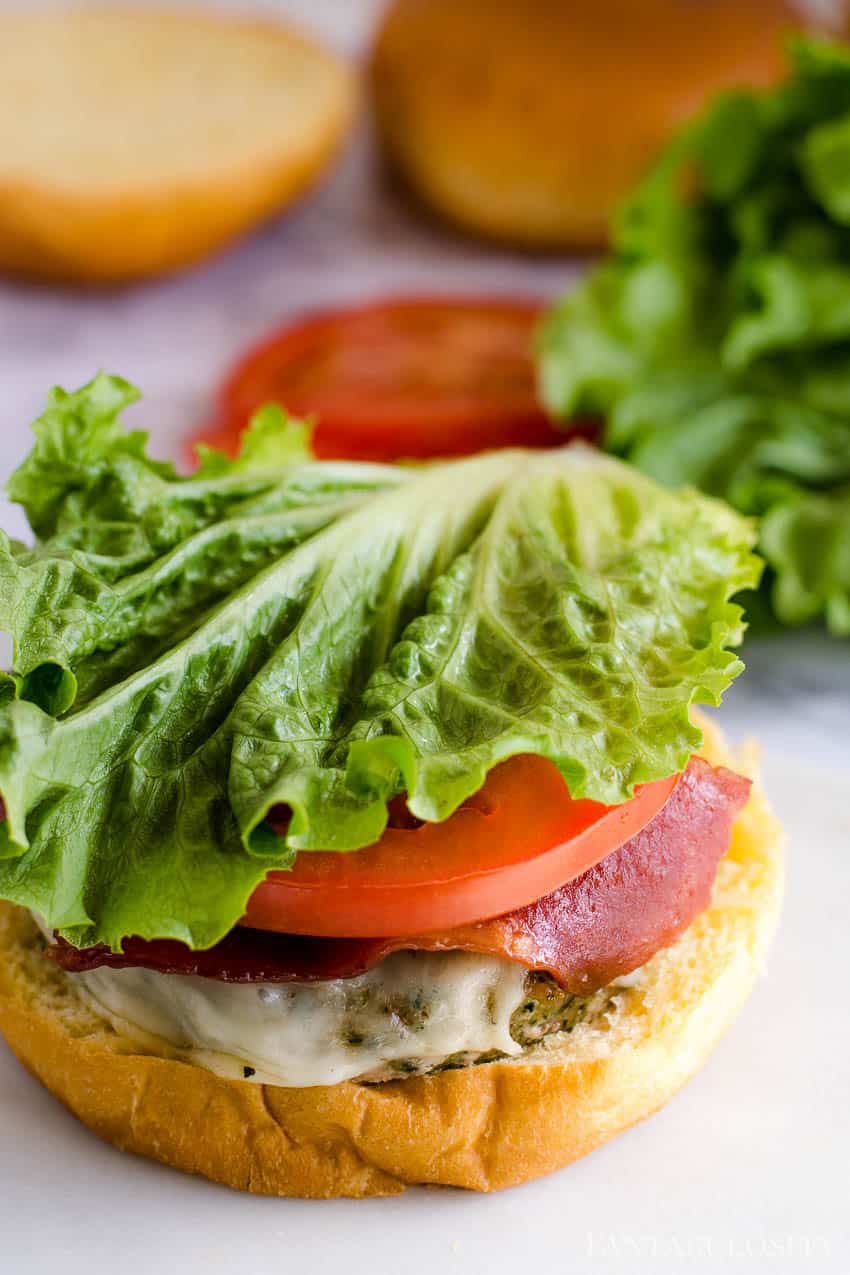
    leaf lettuce…

    Bacon lettuce and tomato turkey club burger

    fiesta mayo (or similar sauce)…

    Fiesta Mayo on a baked turkey burger

    then top with a brioche bun, and enjoy!

    Baked Turkey Burgers

    …and I mean it, I have a feeling that you WILL enjoy these as much as we did!

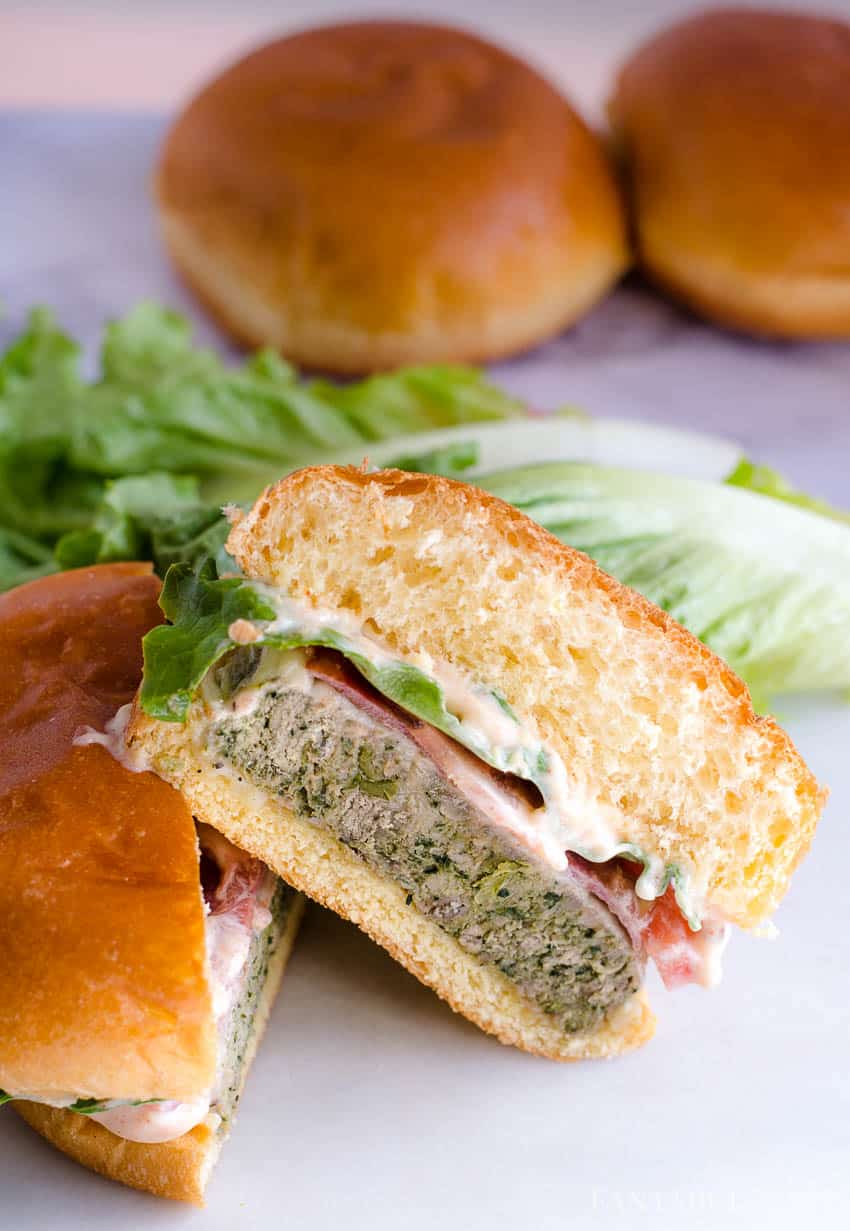
    Baked turkey burger - sliced in half!

    What to Serve with Turkey Burgers

    Side dishes for turkey burgers are similar to those that are great with ground beef burgers. Here are my favorite side dishes for turkey burgers:

    • side salad on white plate drizzled with ranch
      The BEST Side Salad Recipe
    • close up of bacon ranch pasta salad in gray bowl
      Easy Bacon Ranch Pasta Salad
    • Close up of red skin potato salad in white bowl, with wooden spoon.
      Easy Red Skin Potato Salad
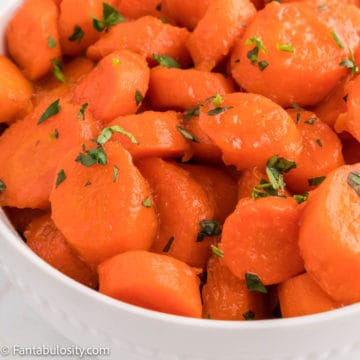
    • Close up of cooked carrots covered in a butter brown sugar glaze and garnished with fresh parsley
      Glazed Carrots

    Related Recipes

    If you loved making this recipe in the oven, then you’ll also love these hot ham and cheese sandwiches or these favorites:

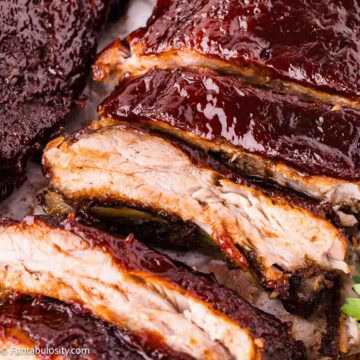
    • Sliced oven baked ribs on parchment showing tender meat under a dark BBQ glaze
      Oven Baked Ribs (Fall Off the Bone Baby Back Ribs)
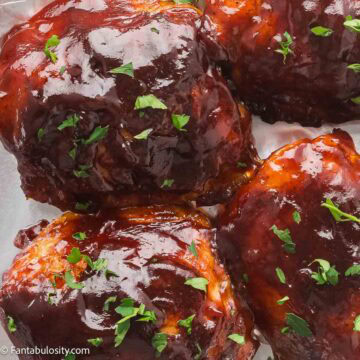
    • Baked BBQ chicken thighs with crispy skin and a sticky caramelized glaze, sprinkled with parsley.
      Baked BBQ Chicken Thighs with Crispy Skin
    • A slice of pumpkin cheesecake cake, on a round plate.
      Pumpkin Cheesecake Cake
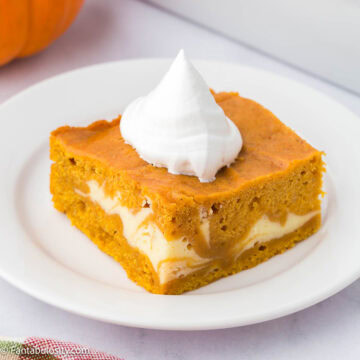
    • Pumpkin Dump Cake serving on round plate.
      Pumpkin Dump Cake

    Did You Make This?
    Snap a pic and hashtag it #Fantabulosity - I love to see your creations on Instagram and Facebook.

    Recipe

    Baked turkey burger on bun with lettuce, tomato, cheese and fiesta mayo.
    Print Pin
    4.93 from 26 votes

    Baked Turkey Burgers Recipe

    Baked Turkey Burgers – Cooking turkey burgers in the oven is EASY! It locks in juices and there's less mess!
    Course Main Course
    Cuisine American
    Prep Time 10 minutes minutes
    Cook Time 35 minutes minutes
    Total Time 45 minutes minutes
    Servings 4 people
    Calories 871kcal
    Author Jessica Burgess

    Ingredients

    • 4 Turkey Patties or 1 pound ground turkey, formed in to 4 patties plain or choice of flavored
    • salt to taste
    • pepper to taste
    • 4 slices cheese I used “brick cheese”
    • 4 brioche or hamburger buns
    • 4 slices tomato
    • 4 lettuce leaves
    • 4 slices bacon
    • 4 tablespoons fiesta mayo recipe in post, or choice of sauce

    Instructions

    • Begin by preheating your oven to 375 degrees.
    • Line a baking dish (big enough to fit 4 turkey patties without touching) with olive oil
    • Season both sides of turkey patties with salt and pepper if you wish, and place them in baking dish. Bake for 30 minutes.
    • White turkey patties are baking, fry your turkey bacon in a skillet. See above for tips for frying bacon!
    • This is also a good time to mix up your fiesta mayo (or other condiment/sauce you wish to make). 
    • When turkey burgers have reached 30 minutes, the internal temperature of each burger should be 165 degrees, before consuming.
    • If turkey burgers are to 165, place one slice of cheese on each burger and place back in the oven for seconds (or a few minutes) to allow the cheese to melt.
    • Remove burgers from oven and build turkey club by stacking on a brioche bun, bacon, lettuce, tomato and fiesta mayo! Enjoy!

    Notes

    You can use pre-pattied burgers or patty out your own! For 4 burgers, you’ll need at least 1 pound of ground turkey.
    Feel free to use pre-seasoned or regular turkey burgers for this recipe.

    Nutrition

    Serving: 4people | Calories: 871kcal | Carbohydrates: 41g | Protein: 49g | Fat: 54g | Saturated Fat: 22g | Cholesterol: 300mg | Sodium: 1108mg | Potassium: 193mg | Sugar: 1g | Vitamin A: 3135IU | Vitamin C: 8mg | Calcium: 288mg | Iron: 3.1mg

    Ham Casserole – Swiss Cheese + Noodle Bake

    February 12, 2019

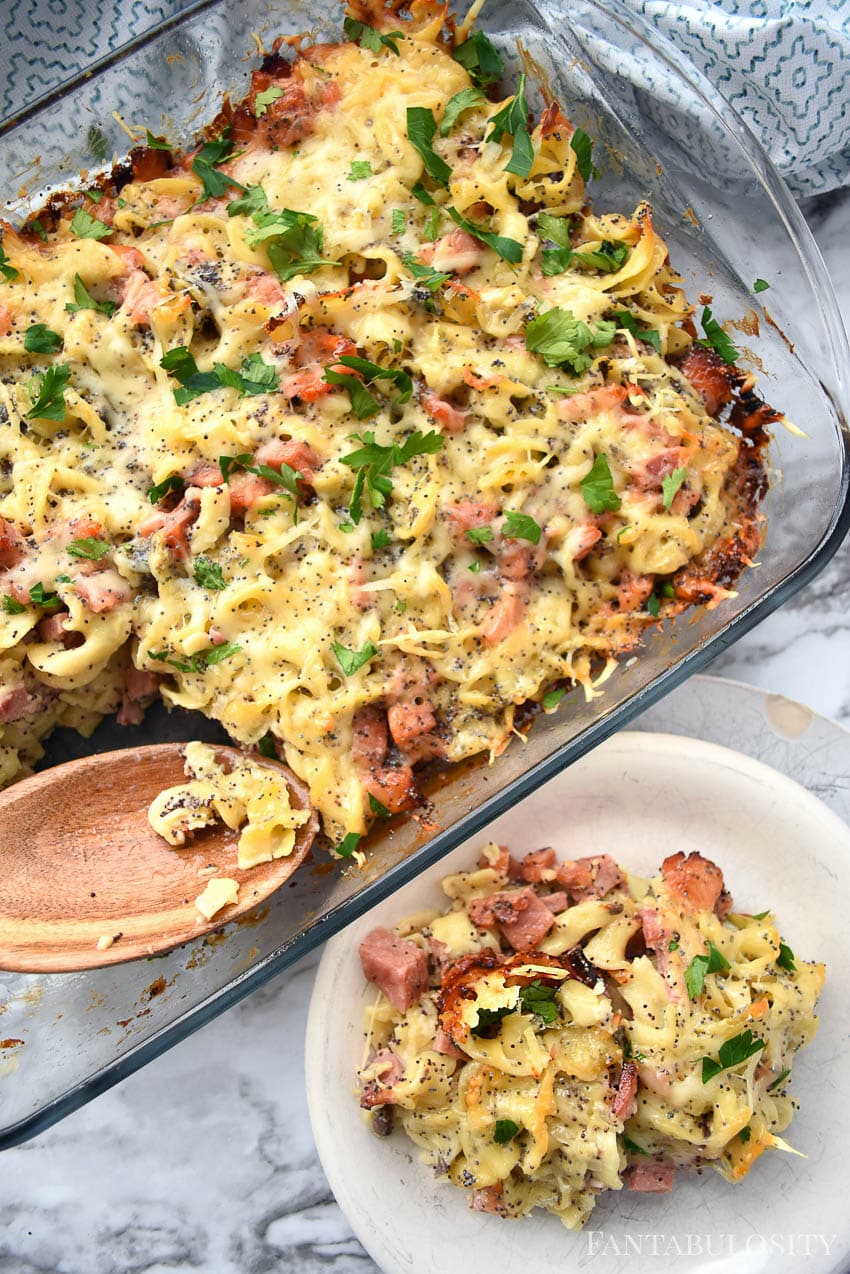
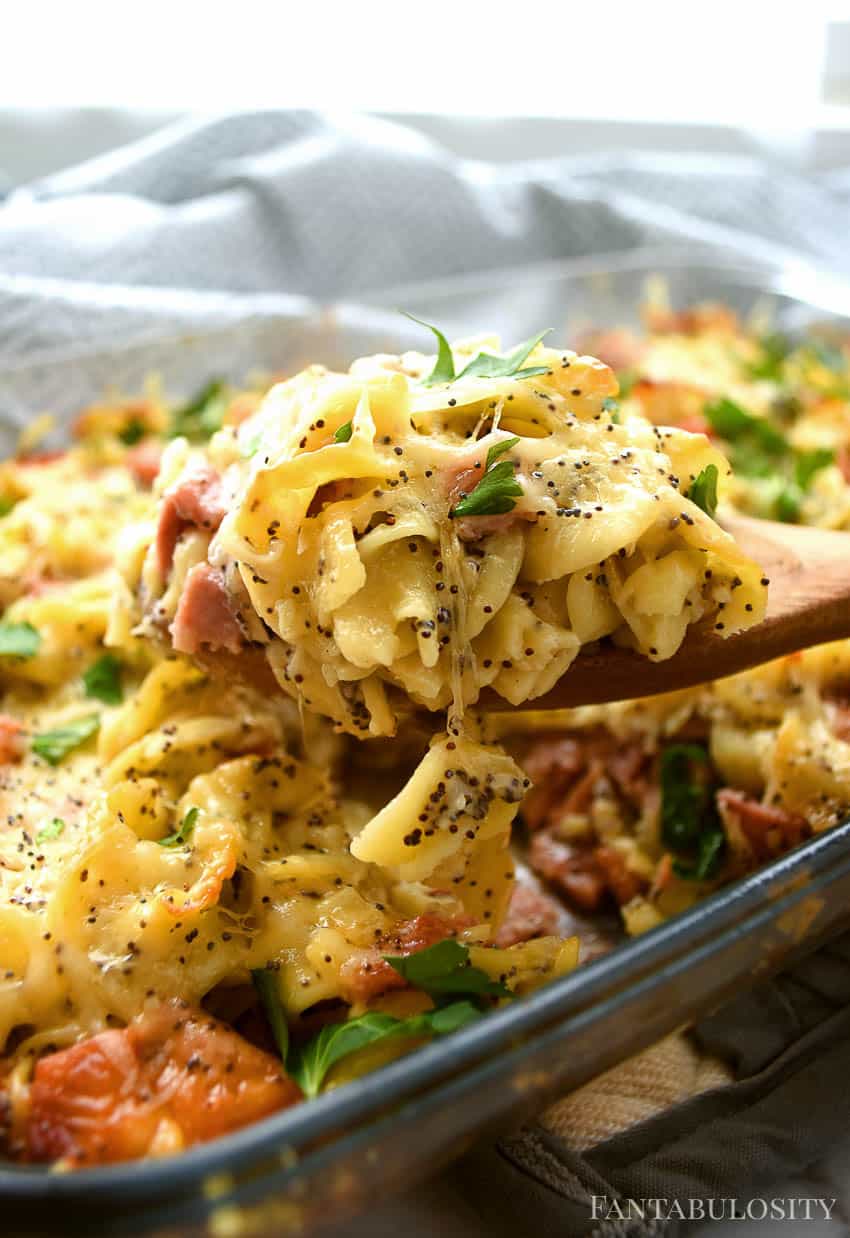
    Ham Casserole

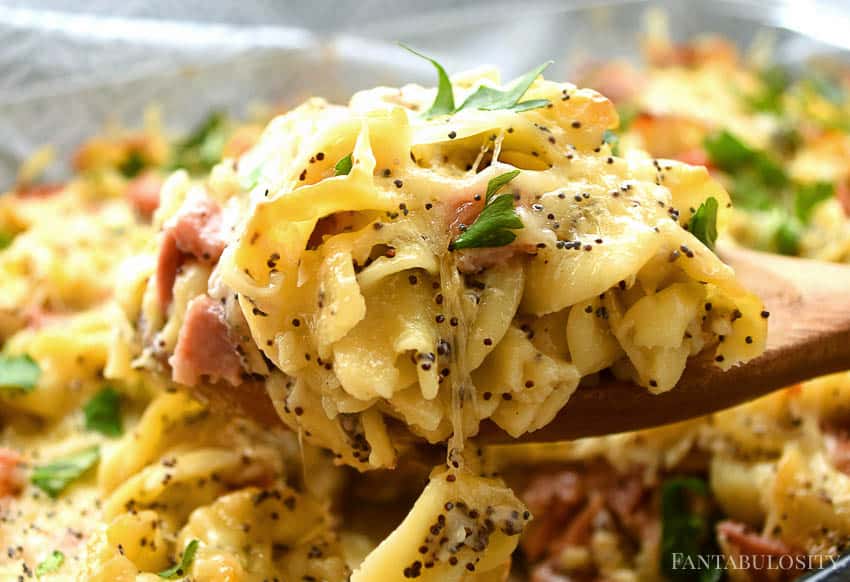
    Ham Casserole – This ham and swiss casserole recipe is all kinds of comfort food feels. Noodles, cream of mushroom soup, swiss cheese… it’s a ton of flavor in one dish! If you love the combination of ham and pasta, this mac and cheese with ham recipe has your name on it.

    This ham casserole dish reminds me of this french onion ground beef casserole, which we all love, but with ham!

    Casseroles are great dishes for potlucks, holidays, or any occasion where you need to easily feed a large number of people and want to show off your cooking skills. 

    Don’t miss the 20+ chicken casserole recipes we’ve gathered to load up your Pinterest boards with!

    Ham Casserole

    Ham Casserole

    Made with ham and cheese this ham casserole is the perfect recipe to make with your Easter leftovers or any time of year!

    For Easter, utilize the leftover ham and mix it with swiss cheese and cream of mushroom soup to make a delicious, family-loved recipe. (Or, if you have a lot of ham, make this ham and beans recipe too!)

    Or, if you like, you can even buy or make ham specifically for this recipe. It's so delicious that you don't need to make it only when you have leftovers, you'll want to make it all the time!

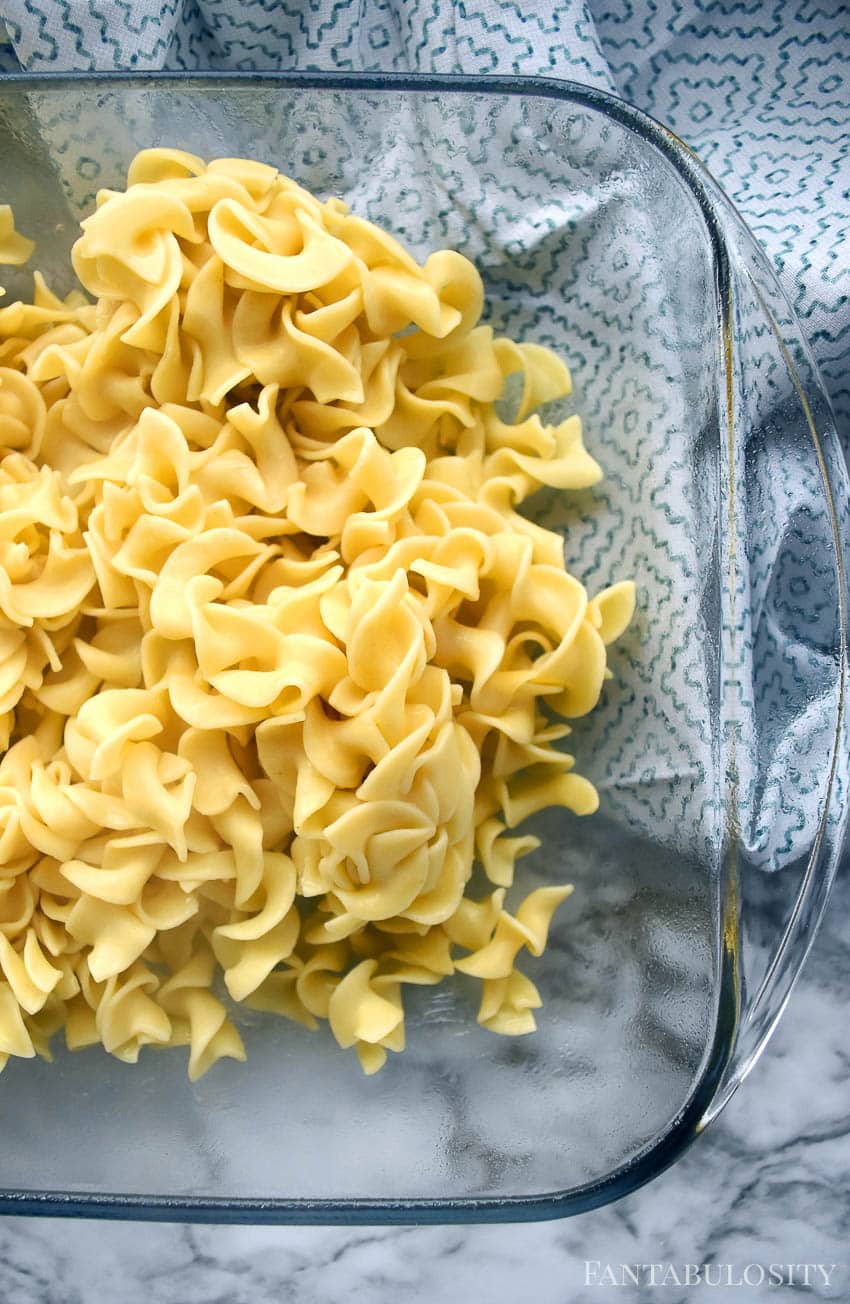
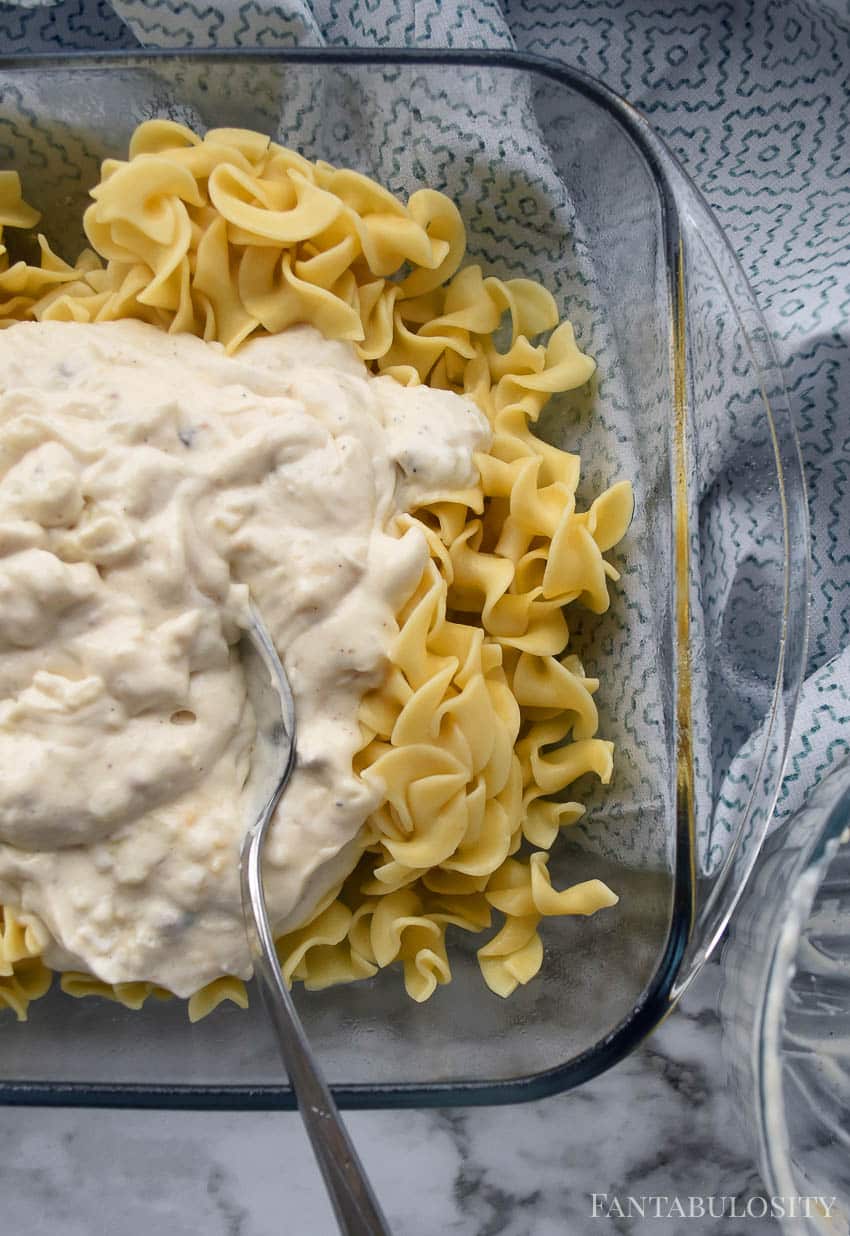
    Egg noodles for ham casserole

    What kind of noodles work best with ham and noodle casserole?

    There really isn't a noodle that works best with ham and noodle casserole – almost any noodle works! However, long pasta noodles like spaghetti or angel hair are not recommended since it is a casserole and long noodles make it more difficult to serve and eat.

    Egg noodles are a great option because they cook quickly, freeze well, and the swiss cheese latches onto them nicely. We also use these in this easy chicken and noodles recipe and this old-fashioned tuna casserole recipe too, and it freezes well too!

    How do I store leftover ham until I'm ready to use it in a casserole?

    • Ham should be tightly wrapped and not left at room temperature for more than two hours.
    • It should also be put in a refrigerator with a temperature of under 40 degrees, and should not be stored for more than four days.
    • If you're not using the ham within four days place in the freezer. (This is not ideal as it can affect the flavor of the meat, but sometimes situations require freezing.) It can be kept in a freezer for 1-2 months.

    Can I freeze ham casserole?

    Absolutely, you can freeze ham casserole! There are two ways you can freeze it – the dish prepared but uncooked, or the dish completely finished and cooked.

    To Freeze Uncooked Casserole

    If you are making the casserole for a special day it is a great recipe to make ahead of time and leave uncooked for the day of.

    However, it is recommended that you make it the night before and leave in the fridge, but you may need to freeze the casserole for a longer time before you make it. If this happens, be sure to take the casserole out of the freezer and put it into the fridge the night before.

    NOTE: It is not advised that you put a frozen casserole directly into a hot oven, as the swift change in temperature could cause the baking dish to crack.

    In fact, it is best if you can leave the dish out for 10 minutes before it is baked.

    Once the dish warms up simply bake it according to the recipe, adding a few minutes to account for the dish being cold.

    Bake Casserole Before Freezing

    If you bake the dish before you freeze it, make sure you let it warm up before you serve it again. It is also important in this case to let it thaw in the fridge overnight, set out for 10 minutes, and then bake.

    However, if the dish was already baked, it can be put it in the oven for 20-30 minutes, or until warm.

    Optional Ingredients for Ham Casserole

    If you’re looking to add-to or spice up your ham casserole, here are some ideas to add some variety to this recipe and make it your own!

    • Cheddar cheese (with or in place of swiss)
    • Mustard (or mustard seed)
    • Pickles (or relish)
    • Bacon
    • Jalapeno's
    • Sauerkraut (We use sauerkraut in these corned beef sliders so save some if you can!)
    • Corned beef
    • Broccoli

    How to Make Ham Casserole

    You can find the entire ingredients list and instructions in the recipe card at the bottom of this post, but if you’re a visual person like me, I’ve provided images and notes along the way in case it helps!

    This ham casserole is practically a dump and bake recipe, which is one of my FAVORITES! Less dishes, less mess, and less work!

    Ham Casserole Recipe

    Preheat your oven to 350º.

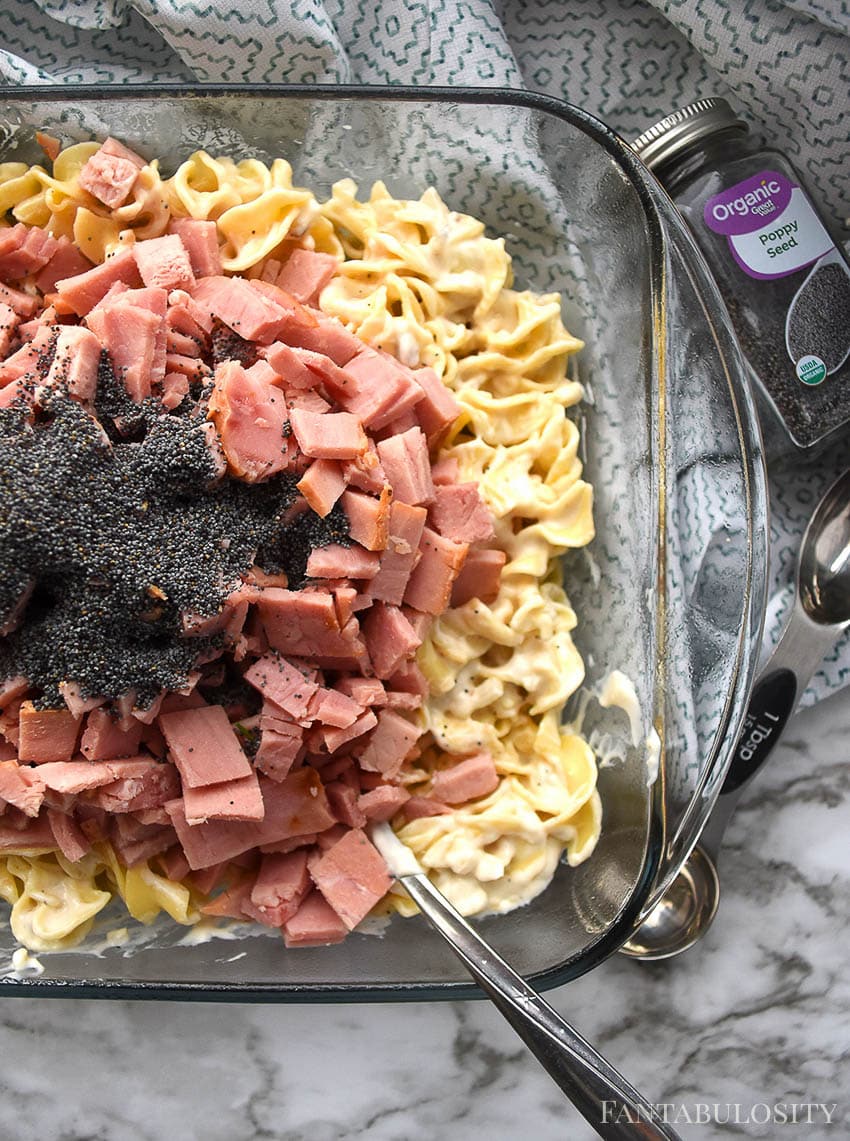
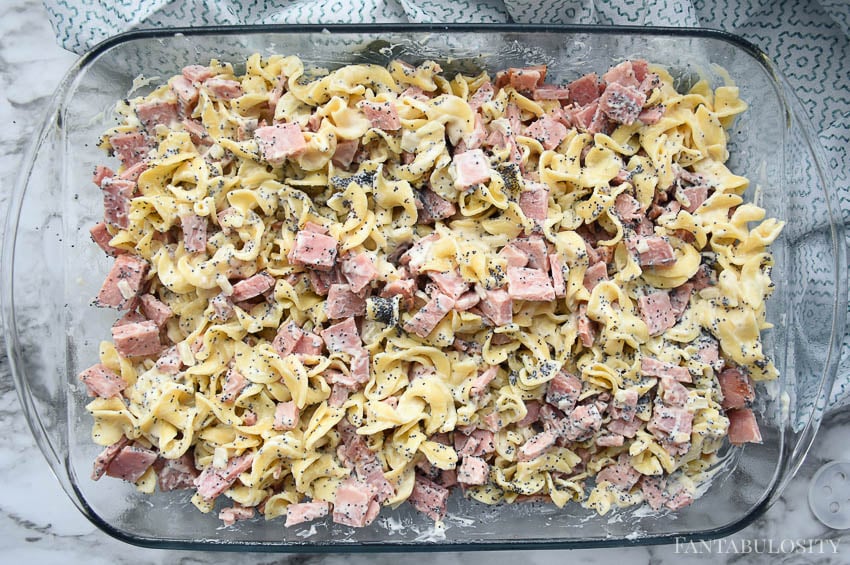
    Mix together all of the ingredients (except cheese) and dump into a greased baking dish. Or, mix it all up IN the baking dish to save on dish cleanup even more!

    Ham Casserole Recipe
    Ham Casserole Recipe

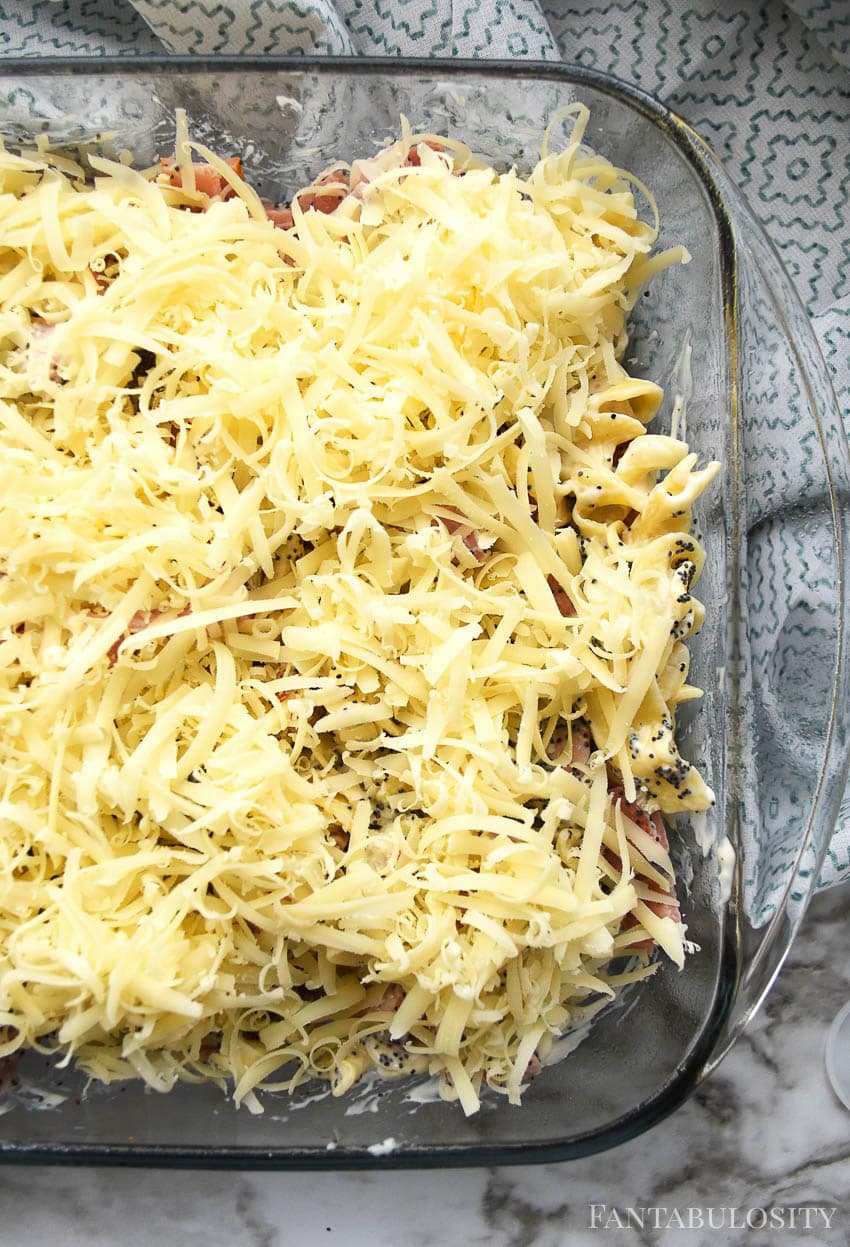
    Sprinkle on the cheese…

    Ham Casserole Recipe with Swiss Cheese

    …and bake covered for 45 minutes and then remove cover and bake for an additional 15 minutes.

    Ham Casserole Recipe
    YUUUUM!!! Easy Ham Casserole with noodles and swiss cheese!

    You’ll want to put this casserole on your menu rotation this week, we are sure it will become a family favorite!

    Recipe

    Ham Casserole
    Print Pin
    4.48 from 21 votes

    Ham Casserole – Swiss & Noodle Bake

    Ham Casserole – This Ham & Swiss Casserole Recipe is comfort food at its finest! Noodles, cream of mushroom soup, swiss cheese make this a quick & easy dish! 
    Course Main Course
    Cuisine American
    Prep Time 10 minutes minutes
    Cook Time 1 hour hour
    Servings 8 cups
    Calories 404kcal
    Author Jessica Burgess

    Ingredients

    • 8 oz. egg noodles pre-cooked according to package directions
    • 2 cups ham chopped in to bite sized pieces
    • 1 can cream of mushroom soup
    • ½ cup sour cream
    • ¼ cup half and half
    • 2 cloves garlic minced
    • ½ onion diced
    • 2 tablespoon butter melted
    • 3 tablespoon poppy seeds optional
    • ½ teaspoon pepper
    • 1 teaspoon salt
    • 2 cups swiss cheese shredded or grated

    Instructions

    • Preheat oven to 350º
    • Spray a 9 by 13 pan with cooking spray.
    • Mix all of the ingredients except the cheese in a large bowl.
    • Pour the mixture into the sprayed pan.
    • Top with the Swiss cheese and more poppy seeds, if desired.
    • Bake, covered, for 45 minutes.
    • Remove the cover and bake for another 15 minutes or until bubbly.

    Notes

    Please keep in mind that the nutritional information provided below is just a rough estimate and variations can occur depending on the specific ingredients used. 

    Nutrition

    Serving: 1cup | Calories: 404kcal | Carbohydrates: 26g | Protein: 21g | Fat: 23g | Saturated Fat: 11g | Cholesterol: 90mg | Sodium: 1075mg | Potassium: 301mg | Fiber: 1g | Sugar: 1g | Vitamin A: 445IU | Vitamin C: 0.9mg | Calcium: 302mg | Iron: 1.5mg

    We LOVE pasta comfort foods here in the midwest. Here are some of our favorites on the blog…

    • Cheeseburger Macaroni

    • Taco Pasta

    • Chicken and Noodles

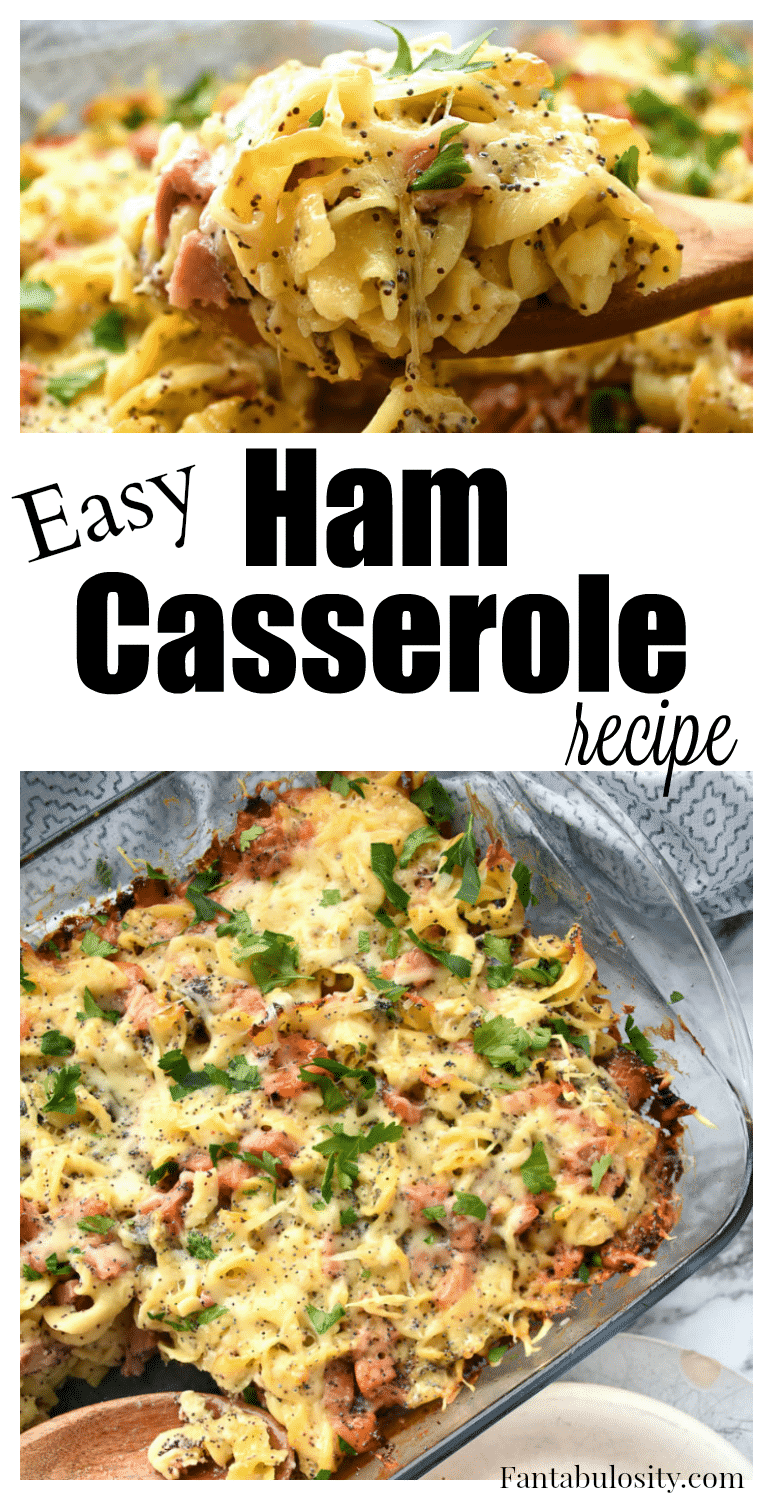
    Pin the image below to remember it for later!YUUUM! Comfort food! Easy ham casserole recipe

    Old-Fashioned Carrot Cake Recipe

    April 8, 2025

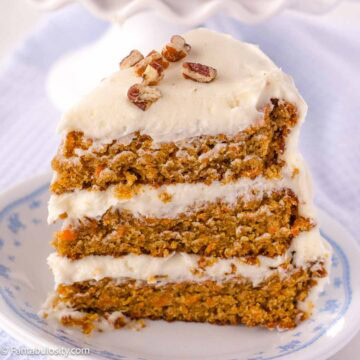
    A slice of old-fashioned carrot cake on round, vintage plate.

    Old-Fashioned Carrot Cake Recipe: A simple and moist recipe from scratch with a cream cheese buttercream frosting that will soon become a favorite!

    No matter what time of year it is, carrot cake can be the perfect cake, or serving this in the spring as an Easter recipe, along with this no-bake carrot cake treat.

    A slice of carrot cake with cream cheese icing on vintage plate.
    [feast_advanced_jump_to]

    As a fan of chocolate, it’s rare for me to like a dessert or a cake that doesn’t include chocolate in the ingredients list, like this Ding Dong Cake or Chocolate Peanut Butter Cake! But this carrot cake recipe from scratch is hard to beat, and it’s an old-fashioned cake recipe that should be in every recipe box.

    Carrot Cake from Scratch

    Now I love a boxed cake mix as much as the next gal, but when it comes to carrot cake, there’s something beyond amazing about it being made from scratch.

    If you have the time, (which may not be as much as you think you need) don’t give this recipe a second thought.

    Not looking for homemade? You’ll love this carrot walnut cake made with a spice cake mix!

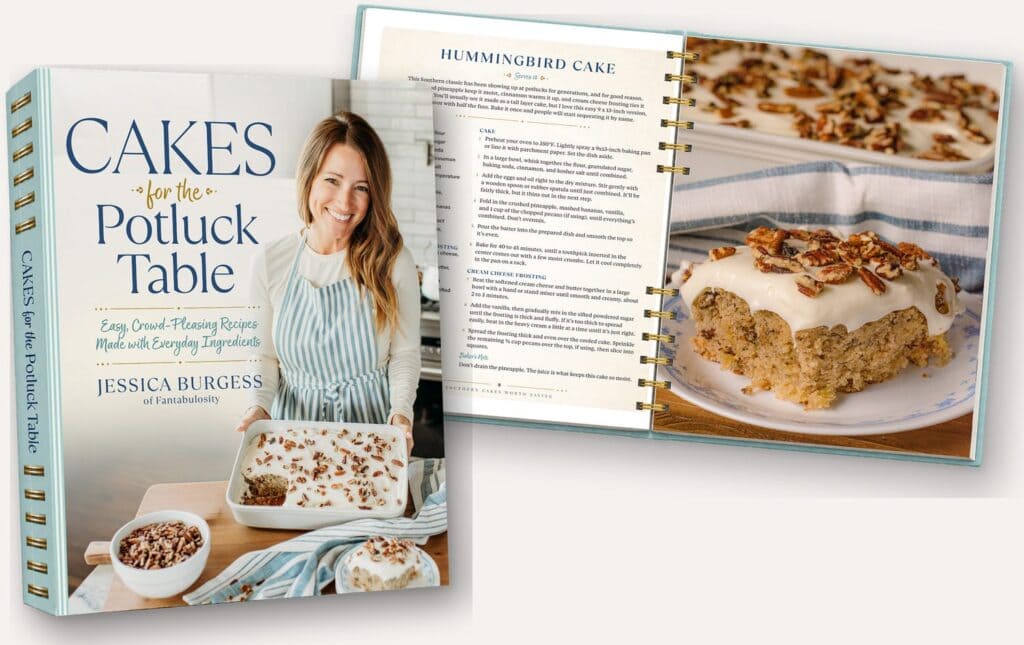
    Cakes for the Potluck Table cookbook by Jessica Burgess, cover and open recipe spread

    This cake is in my cookbook

    Cakes for the
    Potluck Table

    Sixty old-fashioned cakes, coming this spring. Six of the recipes are free right now.

    Send me the six cakes

    FAQs

    How do you store carrot cake?

    Store your 3-layer carrot cake in the refrigerator if you know you'll be eating it within a few days. I usually place it in a cake container or cover it loosely with plastic wrap. Since the frosting contains cream cheese, it's best kept cold. Before serving, I take it out and let it sit at room temperature for about 30 minutes so the frosting softens a bit, it tastes much better that way!

    If you need to store it longer, freeze it. You can freeze the whole cake or individual slices. Just wrap everything tightly in plastic wrap, then again in foil, or place it in an airtight container. It keeps well in the freezer for up to three months. When you’re ready to enjoy it, let it thaw in the fridge overnight and bring it to room temperature before serving.

    What makes a great carrot cake?

    A moist cake, with the right amount of sweetness, and the perfect amount of carrots, makes a great carrot cake recipe.

    Should carrots be grated or shredded for carrot cake?

    Finely grated or shredded is recommended, and the smaller, the better.

    Ingredients Needed (See recipe card below for the full recipe)

    Cake Ingredients:

    • All-purpose flour: This recipe uses AP flour as the base structure of the cake. All-purpose flour provides the right amount of gluten for a soft but sturdy cake. 
    • Baking powder: Helps the cake rise by creating air pockets in the batter. 
    • Baking soda: Reacts with the acid in the batter (like brown sugar) to give extra lift and tenderness. 
    • Ground cinnamon: The dominant warm spice that gives carrot cake its signature flavor. 
    • Nutmeg: Adds extra depth with a slightly sweet and nutty flavor profile.
    • Ground ginger: Brings a yummy warmth and slight spice to complement the carrots. 
    • Ground cloves: A small amount of ground clove goes a long way, adding richness and a little extra warmth. 
    • Vegetable oil: This recipe uses oil to moisten the cake without making it too heavy. Unlike butter, oil ensures a softer crumb. A neutral oil, like canola, works well too. You can use melted butter for more flavor, but expect a denser texture.
    • Brown sugar: Adds moisture and a deep caramel flavor due to the molasses content.
    • Grated carrots: The star ingredient! Carrots add a natural sweetness, moisture, and texture.

    Frosting Ingredients:

    • Cream cheese: The base of the frosting, giving it a creamy, slightly tangy flavor that balances the sweetness.
    • Unsalted butter: Adds richness, smoothness, and structure to the frosting. Substitute: Salted butter can be used, but reduce the added salt in the recipe.
    • Powdered sugar: Sweetens the frosting while keeping it smooth and creamy. 
    • Pure vanilla extract: Enhances the flavor and rounds out the sweetness.
    • Heavy cream: Helps loosen the frosting and make it extra smooth and spreadable. Whole milk or half-and-half can work, but heavy cream gives the best consistency for frosting.

    How to Make Carrot Cake

    Preheat your oven to 325°F. Prepare three 8-inch cake pans by lightly spraying each with cooking spray, then line the bottom of each pan with parchment paper.

    Process images, showing dry ingredients in one bowl, and wet ingredients in a different bowl.

    In a large mixing bowl, whisk together 3 cups all-purpose flour, 1 ½ cups packed brown sugar, 1 cup granulated sugar, 2 ½ teaspoons ground cinnamon, 1 teaspoon ground nutmeg, ¾ teaspoon ground ginger, ¼ teaspoon ground cloves, 2 teaspoons baking powder, 1 teaspoon baking soda, and ½ teaspoon table salt.

    In another mixing bowl, whisk together 4 large eggs, 1 ⅓ cup vegetable oil, and 2 ½ teaspoons pure vanilla extract until the wet ingredients are well combined.

    Two process images, with one showing carrots added to cake batter, and then the carrot cake batter poured in to round cake pan.


    Gradually mix the wet ingredients into the dry ingredients until just combined. Do not overmix. Gently fold in 3 cups of grated carrots with a spatula, ensuring they are blended into the batter.

    Two process images, with left one showing baked carrot cake, and right image showing frosting added to cake.


    Evenly divide the batter between the three prepared cake pans. Bake at 325°F for 30 – 35 minutes, or until a cake tester or toothpick inserted in the center comes out clean. Let cakes cool in the pans for 10 minutes, then turn them onto a wire rack to cool completely before frosting (about 50 minutes).

    How to Frost Carrot Cake

    1. To make the frosting, beat 12 ounces of cream cheese and 1 ½ cups (3 sticks) unsalted butter until smooth and fluffy. Ensure there are no lumps in the cream cheese butter mixture. Gradually mix in 4 cups powdered sugar, 1 cup at a time, followed by 2 teaspoons pure vanilla extract. Add 1 tablespoon of heavy cream and beat until light and creamy. If the frosting is too thick to spread, add another tablespoon of heavy cream until you reach your desired consistency.  
    2. Place one cake layer on a cake stand. Spread the frosting evenly over the top. Repeat with the second and third layers. Frost the top and sides of the cake evenly. Put the remaining frosting into a piping bag with a tip and pipe around the top edges of the cake if desired.
    3. If you prefer, gently press some chopped pecans around the bottom edge of the cake, then sprinkle a little more over the top for a fancy finish.
    Whole carrot cake on white cake stand.

    OPTIONAL: Place pecans in the cup of your hand and gently place the inside of your hand against the bottom of the cake, slowly turning the cake and carefully placing the nuts along the bottom! Or, sprinkle a few on top. TIP: You could even toast the pecans for a richer flavor.

    Feel free to use something other than pecans, to decorate your carrot cake. (Mini chocolate chips, toffee, etc.)

    Tips for the Best Carrot Cake Recipe

    • If you are using a box grater, use the fine side for softer, more evenly distributed carrots in the batter. Avoid store-bought pre-shredded carrots if possible as they're too dry and don't blend well into the cake.
    • Lightly pat dry the grated carrots with a paper towel if they seem too wet, but don't squeeze out all the moisture.
    • Use room temperature eggs - this ensures better emulsification and helps the cake rise evenly.
    • To ensure all three cake layers bake up evenly sized, use a kitchen scale to divide the carrot cake batter. First, place one of the empty pans on the scale and zero it out (this resets the weight to zero). Pour the batter into the pan until you reach the desired amount. Repeat with the other two pans. Make sure each one has the same weight. If one ends up with a little more, just use a spoon to shift a bit into the others until they're all about even. This extra step helps the layers bake at the same rate and keeps things even for stacking later. Or, if you don’t have a scale, I’ll also use a measuring cup and pour one cup in to each pan at a time, trying to get the same amount in each.
    • Overmixing the batter can cause too much gluten to develop, making the cake dense. Stir just until combined after adding the dry ingredients.
    • Baking at 325°F instead of 350°F prevents overbrowning and keeps the cake moist with a more even rise.
    • Let the cakes cool in the pan for 10 minutes before transferring them to a wire rack. Cooling too long in the pan can cause excess moisture buildup.
    • Chill the cake layers for at least 30 minutes before frosting for easier assembly and fewer crumbs.
    A slice of 3-layered carrot cake on vintage plate.

    More Easy Cake Recipes

    If you’re in a baking mood and want to add more cake recipes to your Pinterest boards, then you’ll want to check out reader favorites!

    • Mini Cakes
    • Peppermint Mocha Crunch Cake
    • Depression Cake
    • Lemon Poke Cake
    • Cherry Chip Cake
    • Marble Cake
    • Easy Pound Cake

    More Dessert Recipes

    We LOVE dessert around here, so you’ll want to make sure you snag your favorite easy dessert recipes before you head out! Browse our Easy Dessert Recipes!

    Previous, Old Carrot Cake Recipe – 2019 Version

    I've since updated this carrot cake recipe, due to the first carrot cake recipe having mixed reviews, with most saying the cake was sinking. However, if you had success with the cake, and prefer the old, I've provided the old cake recipe, here:

    Carrot Cake Recipe from Scratch - Easy and SO good!
    First version, older carrot cake recipe, created 2019.

    Ingredients for First Version of Carrot Cake Recipe

    • 1 cup sugar
    • 1 cup brown sugar
    • 2 teaspoons ground cinnamon
    • 2 cups flour
    • 2 teaspoons baking powder
    • 2 teaspoons baking soda
    • ½ teaspoon salt
    • 4 eggs
    • 1 ¼ cups vegetable oil
    • 2 teaspoons vanilla extract
    • 2 cups grated carrots

    Cream Cheese Frosting

    • 8 ounces cream cheese room temperature
    • 1 stick butter softened
    • 3 cups confectioners sugar
    • 1 teaspoon vanilla extract
    • 1 teaspoon heavy whipping cream

    Instructions for the First Version of the Carrot Cake Recipe

    • Preheat oven to 350 degrees F.
    • Prepare 3, 6" cake pans with nonstick spray and parchment paper if desired.
    • Combine all dry ingredients into a large mixing bowl or the bowl of a stand mixer.
    • Run through the ingredients with a whisk breaking up any large clumps.
    • Add in all of the wet ingredients and mix until combined.
    • Add in the carrots and mix until just combined.
    • Evenly distribute the batter between the three baking pans and bake for 30-35 minutes or until a toothpick inserted in the middle comes out clean.
    • Allow the cakes to cool for about 10 minutes in the pan. Then turn them out onto a wire rack to cool completely.
    • While the cakes are cooling, prepare your cream cheese buttercream by creaming together the cream cheese and butter until nice and smooth.
    • Slowly add one cup of confectioner’s sugar at a time until combined.
    • Add in vanilla and cream and mix on high for 3-4 minutes until the frosting is nice and fluffy.
    • Assemble the cake by placing one layer on a cake stand or plate and topping with about ½ cup of the frosting and leveling with a spatula.
    • Continue with all layers. Finally cover the entire cake with the frosting, and top with chopped pecans if desired. Enjoy! 

    First recipe, originally published: February 2019
    New recipe, republished:
    March 2026

    Did you make this? I’d be so grateful if you left a “star” rating below to let me know what you thought! Then, the next time you need a quick and easy recipe, come back to Fantabulosity to browse all of my easy recipes!

    Recipe

    A slice of old-fashioned carrot cake on round, vintage plate.
    Print Pin
    4.35 from 80 votes

    Old-Fashioned Carrot Cake Recipe

    Old-Fashioned Carrot Cake Recipe: A simple and moist recipe from scratch with a cream cheese buttercream frosting that will soon become a favorite!
    Course Dessert
    Cuisine American
    Prep Time 20 minutes minutes
    Cook Time 30 minutes minutes
    Total Time 50 minutes minutes
    Servings 8 slices
    Calories 1547kcal
    Author Jessica Burgess

    Equipment

    • 3 8-inch round cake pans
    • mixing bowls
    • measuring cups
    • measuring spoons
    • kitchen scale for dividing the batter equally
    • box grater or food processor
    • rubber spatula
    • Whisk
    • hand mixer or stand mixer
    • cooling racks
    • toothpicks or cake tester
    • cake leveler or serrated knife (to level layers, if needed)
    • offset spatula for frosting the cake

    Ingredients

    For the Cake:

    • 3 cups white all-purpose flour
    • 1½ cups light brown sugar packed
    • 1 cup granulated sugar
    • 2½ teaspoons ground cinnamon
    • 1 teaspoon ground nutmeg
    • ¾ teaspoon ground ginger
    • ¼ teaspoon ground cloves
    • 2 teaspoons baking powder
    • 1 teaspoon baking soda
    • ½ teaspoon table salt
    • 4 large eggs room temperature
    • 1⅓ cups vegetable oil
    • 2½ teaspoon pure vanilla extract
    • 3 cups carrots finely grated

    For the Cream Cheese Buttercream:

    • 12 ounces cream cheese 1½ blocks – room temperature
    • 1½ cups unsalted butter softened (3 sticks)
    • 4 cups powdered sugar
    • 2 teaspoons pure vanilla extract
    • 1 tablespoon heavy cream plus more, if needed

    For the Garnish

    • ½ cup pecans chopped (optional)

    Instructions

    • Preheat your oven to 325°F. Prepare three 8-inch cake pans by lightly spraying each with cooking spray, then line the bottom of each pan with parchment paper.
    • In a large mixing bowl, whisk together 3 cups all-purpose flour, 1 ½ cups packed brown sugar, 1 cup granulated sugar, 2 ½ teaspoons ground cinnamon, 1 teaspoon ground nutmeg, ¾ teaspoon ground ginger, ¼ teaspoon ground cloves, 2 teaspoons baking powder, 1 teaspoon baking soda, and ½ teaspoon table salt.
    • In another mixing bowl, whisk together 4 large eggs, 1 ⅓ cup vegetable oil, and 2 ½ teaspoons pure vanilla extract until the wet ingredients are well combined.
    • Gradually mix the wet ingredients into the dry ingredients until just combined. Do not overmix. Gently fold in 3 cups of grated carrots with a spatula, ensuring they are blended into the batter.
    • Evenly divide the batter between the three prepared cake pans. Bake at 325°F for 30 – 35 minutes, or until a cake tester or toothpick inserted in the center comes out clean. Let cakes cool in the pans for 10 minutes, then turn them onto a wire rack to cool completely before frosting (about 50 minutes).

    How to Make the Frosting

    • To make the frosting, beat 12 ounces of cream cheese and 1 ½ cups (3 sticks) unsalted butter until smooth and fluffy. Ensure there are no lumps in the cream cheese butter mixture. Gradually mix in 4 cups powdered sugar, 1 cup at a time, followed by 2 teaspoons pure vanilla extract. Add 1 tablespoon of heavy cream and beat until light and creamy. If the frosting is too thick to spread, add another tablespoon of heavy cream until you reach your desired consistency.
    • Place one cake layer on a cake stand. Spread the frosting evenly over the top. Repeat with the second and third layers. Frost the top and sides of the cake evenly. If desired, put the remaining frosting into a piping bag with a tip and pipe around the top edges of the cake.

    Garnish with Pecans, optional

    • If you prefer, gently press some chopped pecans around the bottom edge of the cake, then sprinkle a little more over the top for a fancy finish. Slice and ENJOY every bite!

    Video

    Notes

    I've updated this carrot cake recipe due to the first carrot cake recipe having mixed reviews, with most saying the cake was sinking. However, if you had success with the cake, and prefer the old, I've provided the old cake recipe just above the recipe card in the post. 

    Nutrition

    Serving: 1slice | Calories: 1547kcal | Carbohydrates: 170g | Protein: 12g | Fat: 94g | Saturated Fat: 38g | Polyunsaturated Fat: 25g | Monounsaturated Fat: 25g | Trans Fat: 2g | Cholesterol: 230mg | Sodium: 610mg | Potassium: 399mg | Fiber: 4g | Sugar: 128g | Vitamin A: 9823IU | Vitamin C: 3mg | Calcium: 195mg | Iron: 4mg

    Curry Chicken Salad

    February 12, 2026

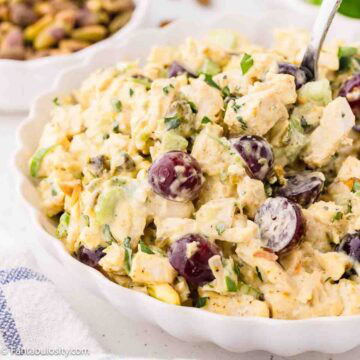
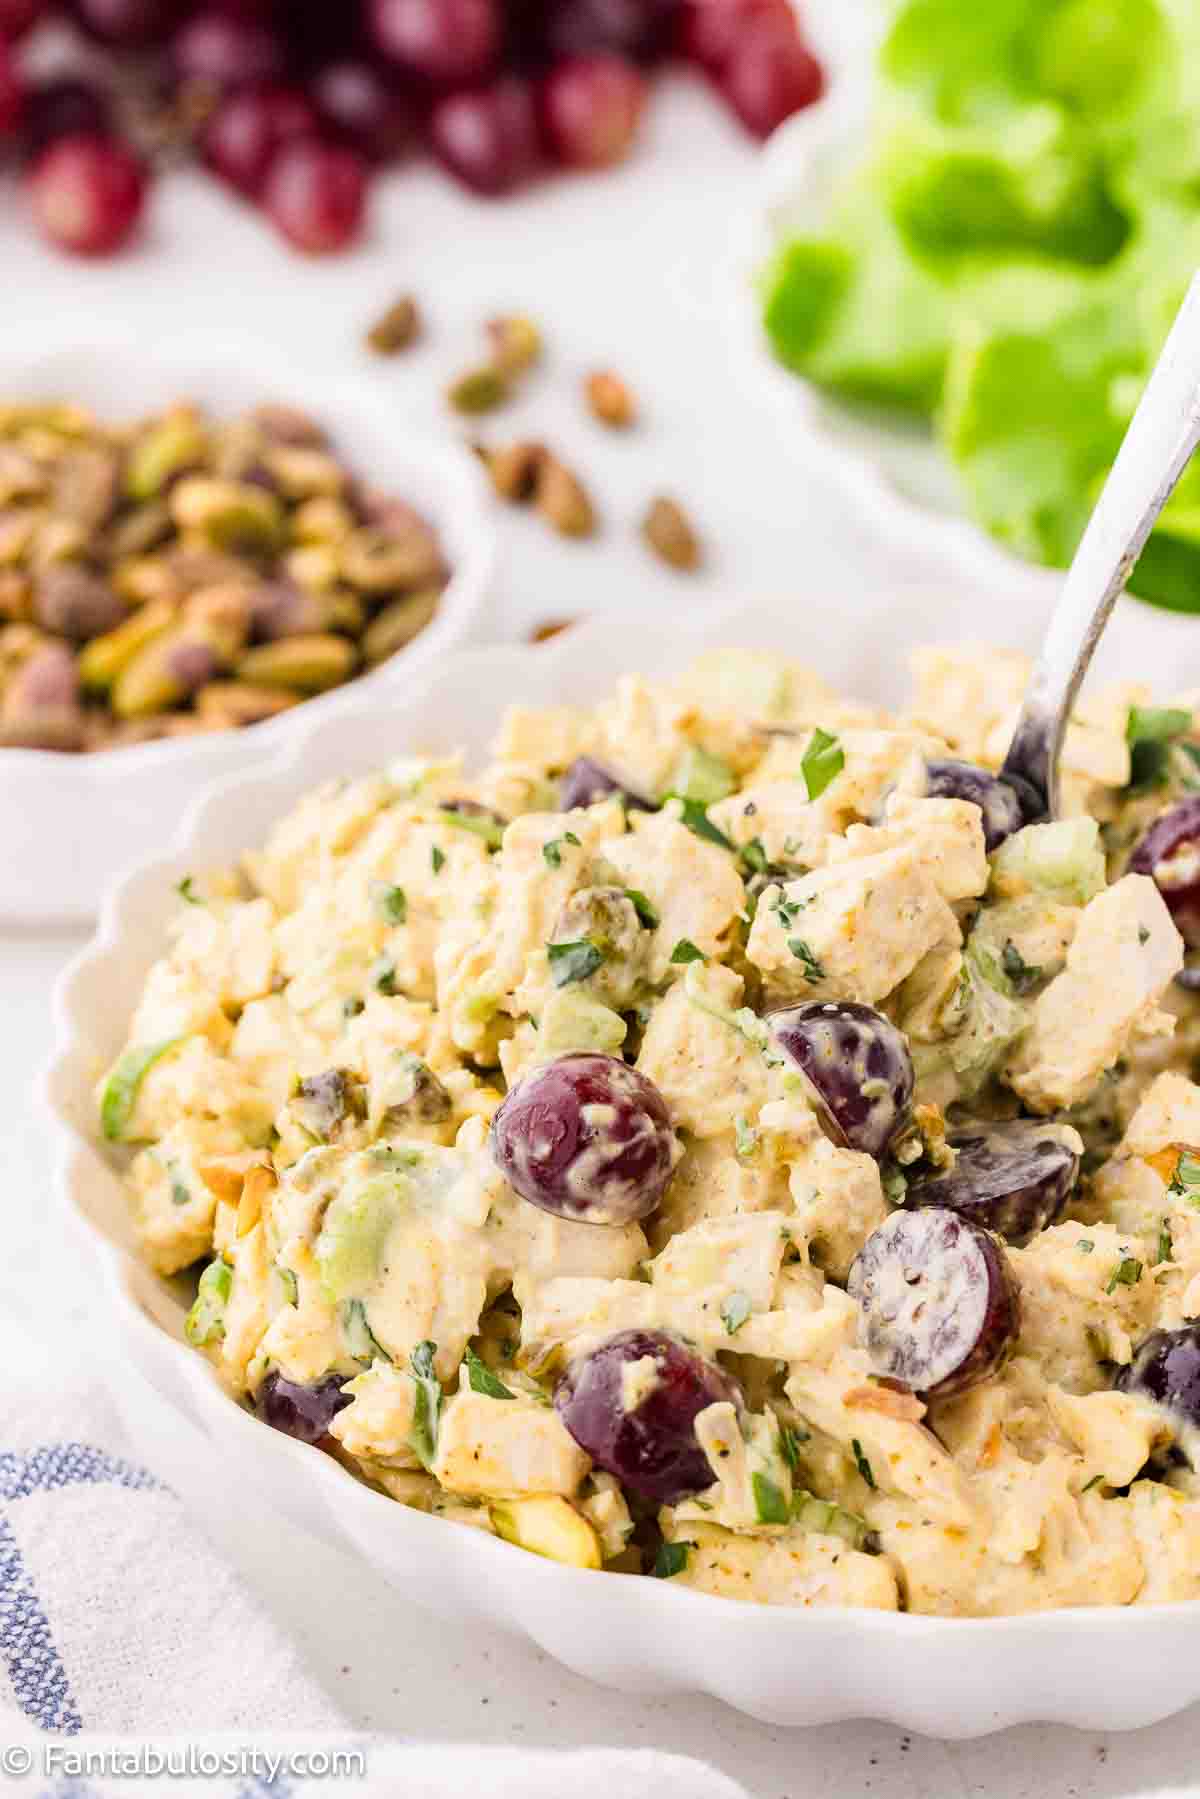
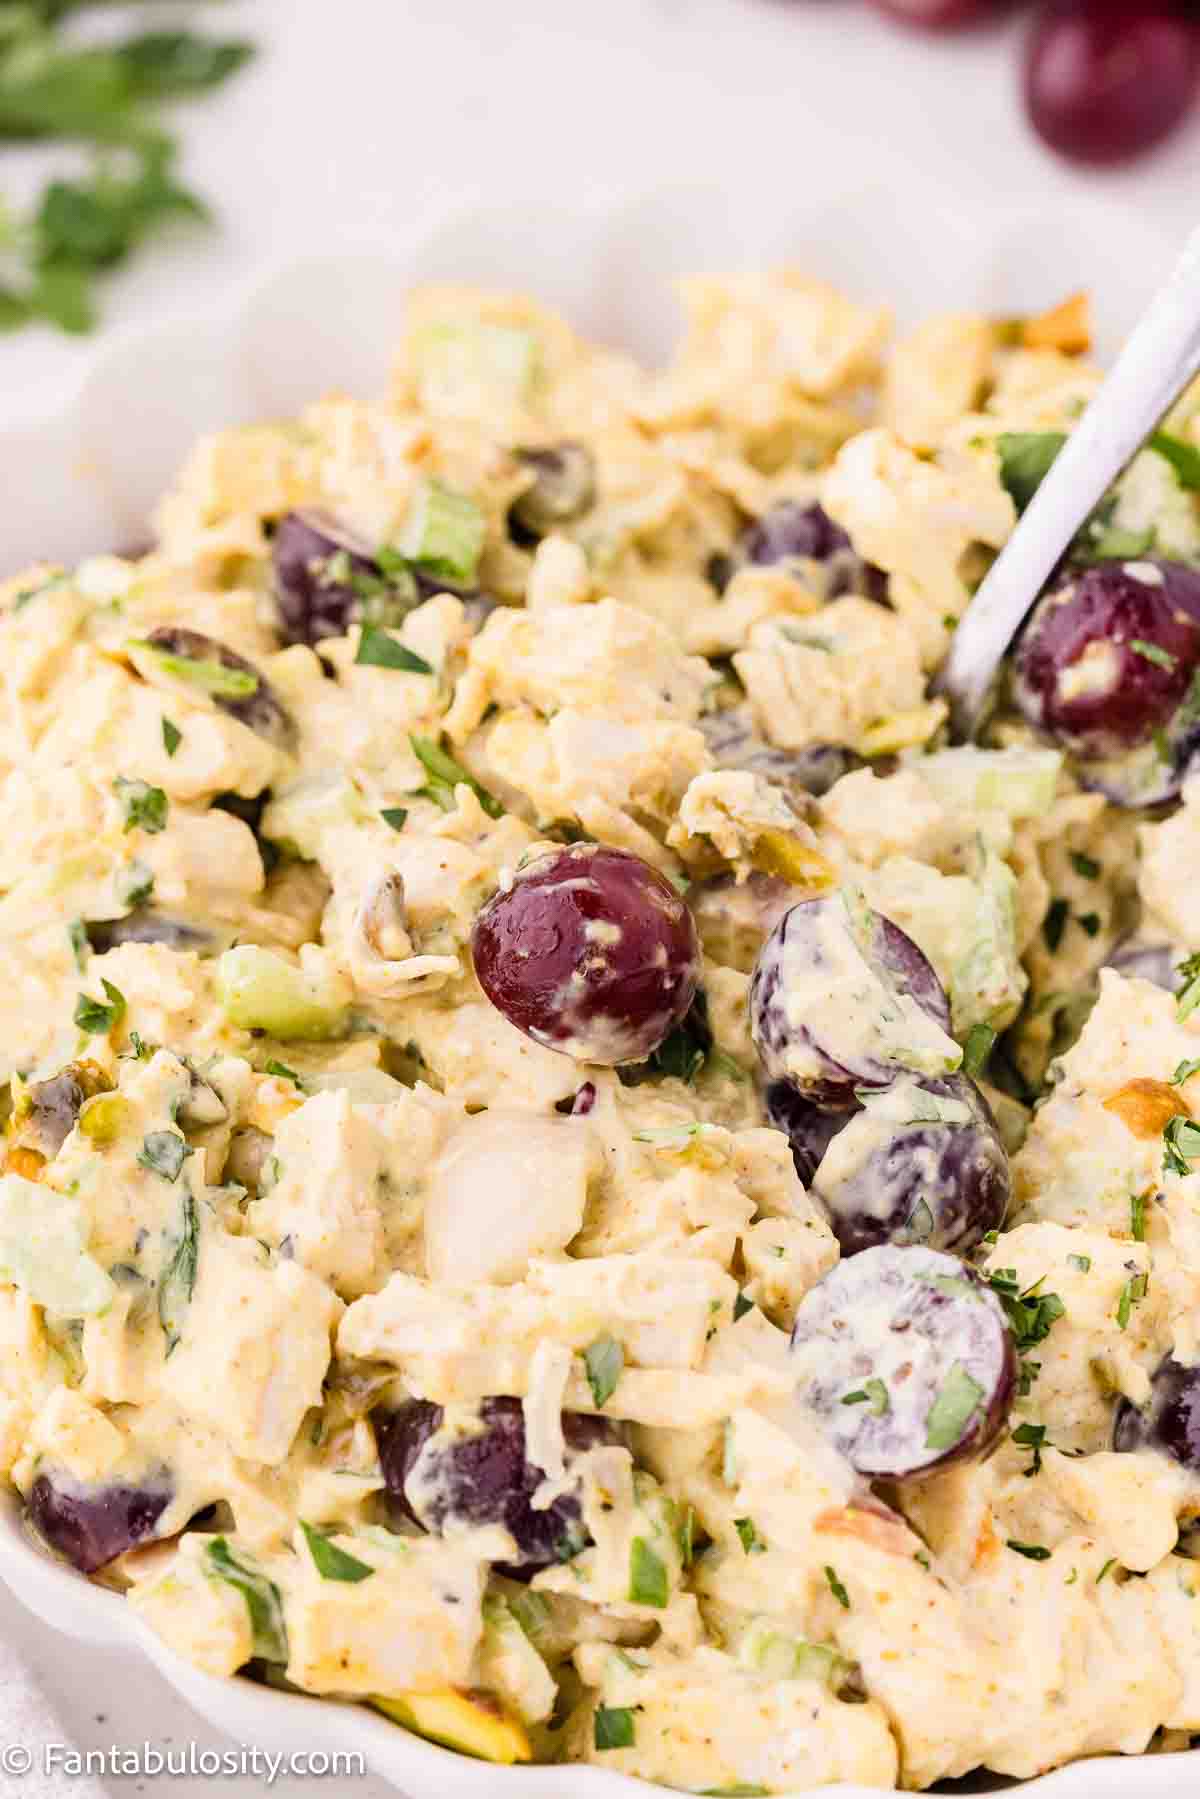
    Curry chicken salad with grapes in a white bowl.

    This Curry Chicken Salad with Grapes is creamy, sweet, savory, and packed with texture. It's an easy make-ahead lunch or light dinner that comes together in minutes and is one of my favorite salad recipes.

    A Sweet and Savory Chicken Salad That Feels a Little Fancy

    If you love classic chicken salad but want something with a little more personality, this is it. The curry powder adds warmth and depth, the grapes bring fresh sweetness, and the pistachios give just the right crunch. It's simple enough for weekday lunches but pretty enough for baby showers, brunches, or church potlucks.

    Curry chicken salad in bowl with spoon sticking out of it.

    It's one of those reliable recipes you can make ahead, chill, and know it's going to taste even better after it rests.

    FAQs

    Is this chicken salad spicy?

    No, it's mildly spiced rather than spicy. Curry powder adds warmth and flavor without heat. You can adjust the amount to suit your taste.

    Can I substitute the pistachios?

    Yes. Chopped almonds, cashews, pecans, or walnuts all work well. For a nut-free version, omit them or use roasted sunflower seeds.

    Can I use green grapes instead of red?

    Absolutely. Green grapes will give a slightly more tart flavor, while red grapes add more sweetness and color.

    How long does curry chicken salad last in the fridge?

    Store leftovers in an airtight container in the refrigerator for up to 2 days. Freezing is not recommended, as the texture will change.

    Ingredients

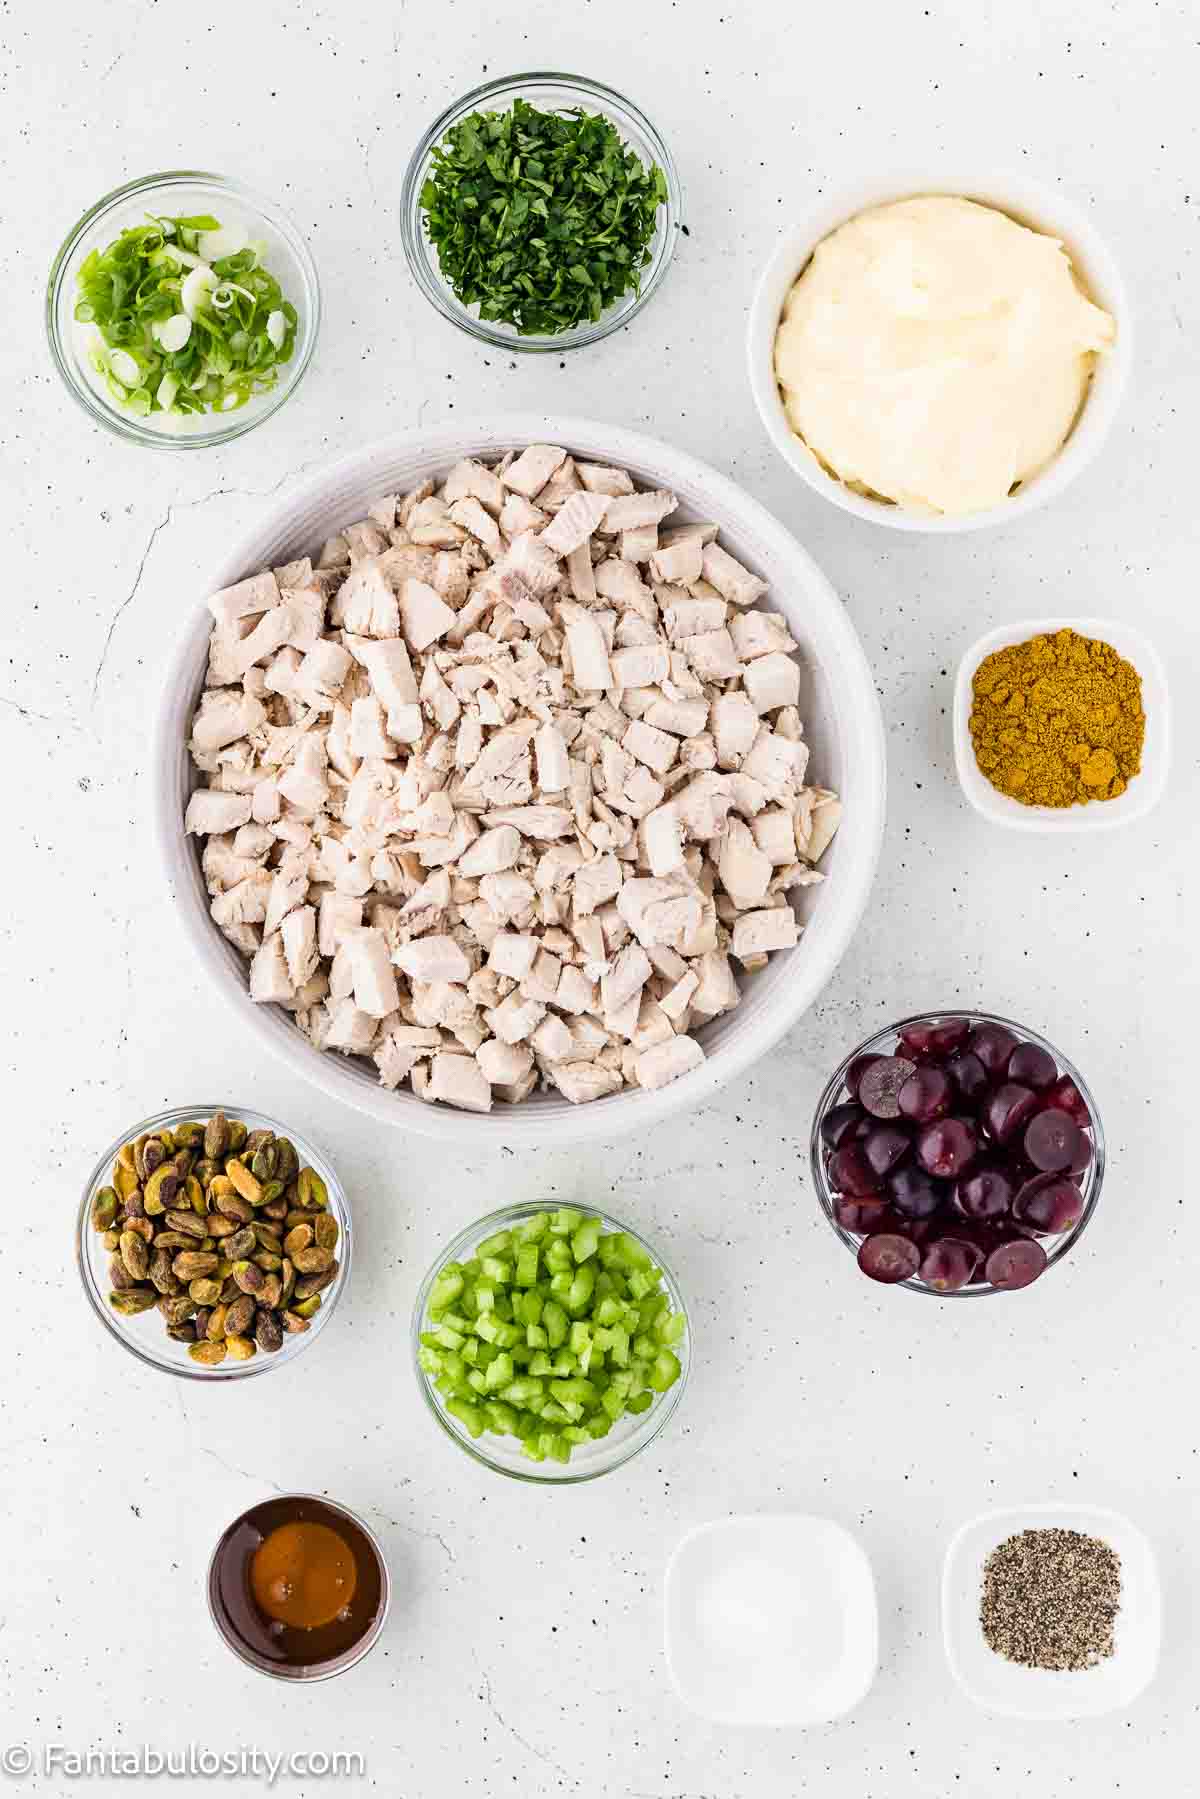
    • Cooked chicken - Shredded or chopped into bite-sized pieces. Rotisserie chicken works beautifully.
    • Red grapes - Sliced in half (or quartered if large) for even distribution.
    • Celery - Finely diced for a fresh, crisp texture.
    • Roasted salted pistachios - Roughly chopped for crunch and a subtle savory contrast.
    • Green onions - Thinly sliced for mild onion flavor.
    • Mayonnaise - Full-fat gives the creamiest texture and best flavor.
    • Fresh parsley - Adds freshness and a pop of color.
    • Honey - Balances the curry with a gentle sweetness.
    • Curry powder - Provides the signature warm, aromatic flavor.
    • Sea salt and black pepper - Enhance and balance all the flavors.
    Ingredients to make curry chicken salad on counter.

    Instructions

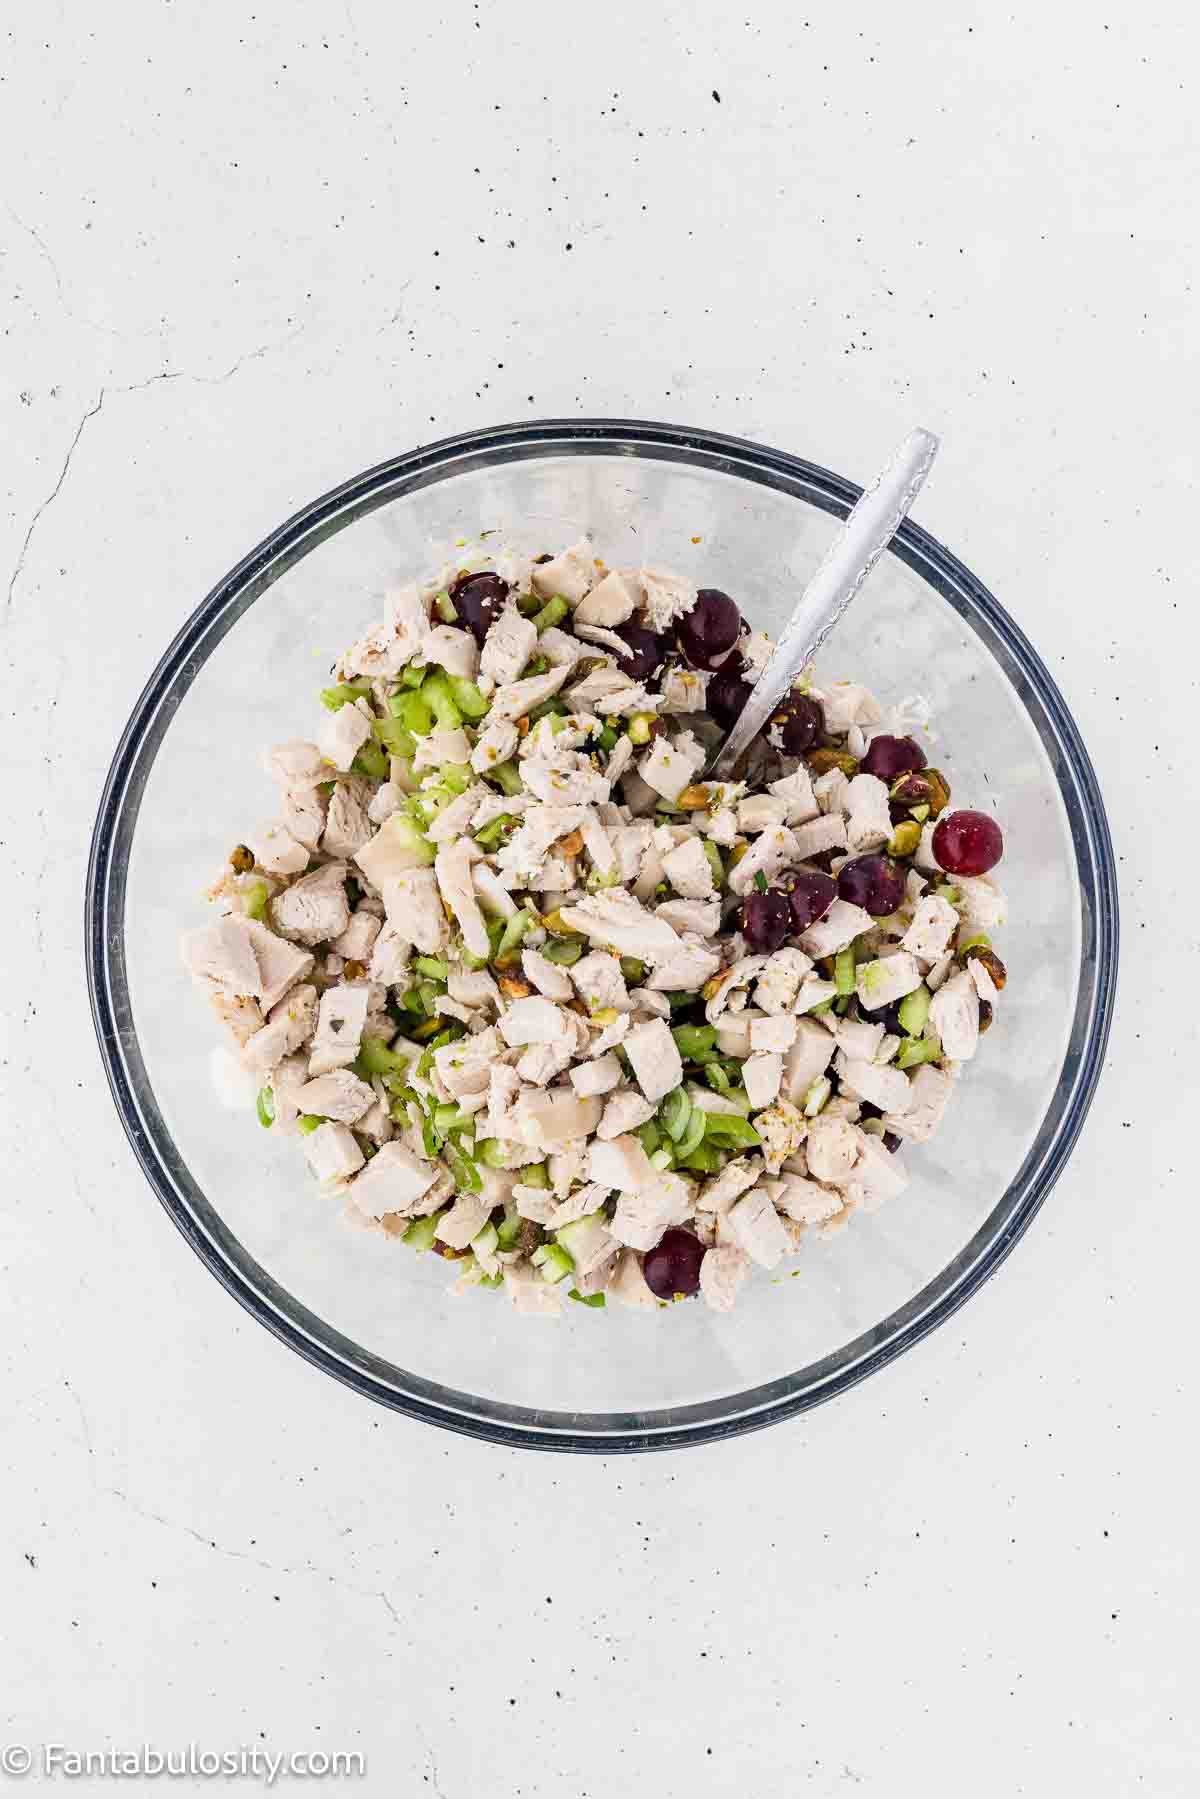
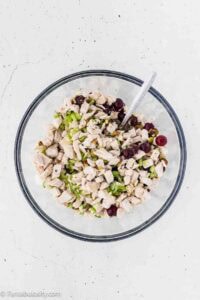
    • Add the chicken, grapes, celery, pistachios, and green onions to a large mixing bowl. Stir gently until evenly combined.
    Chicken, celery, grapes in mixing bowl.
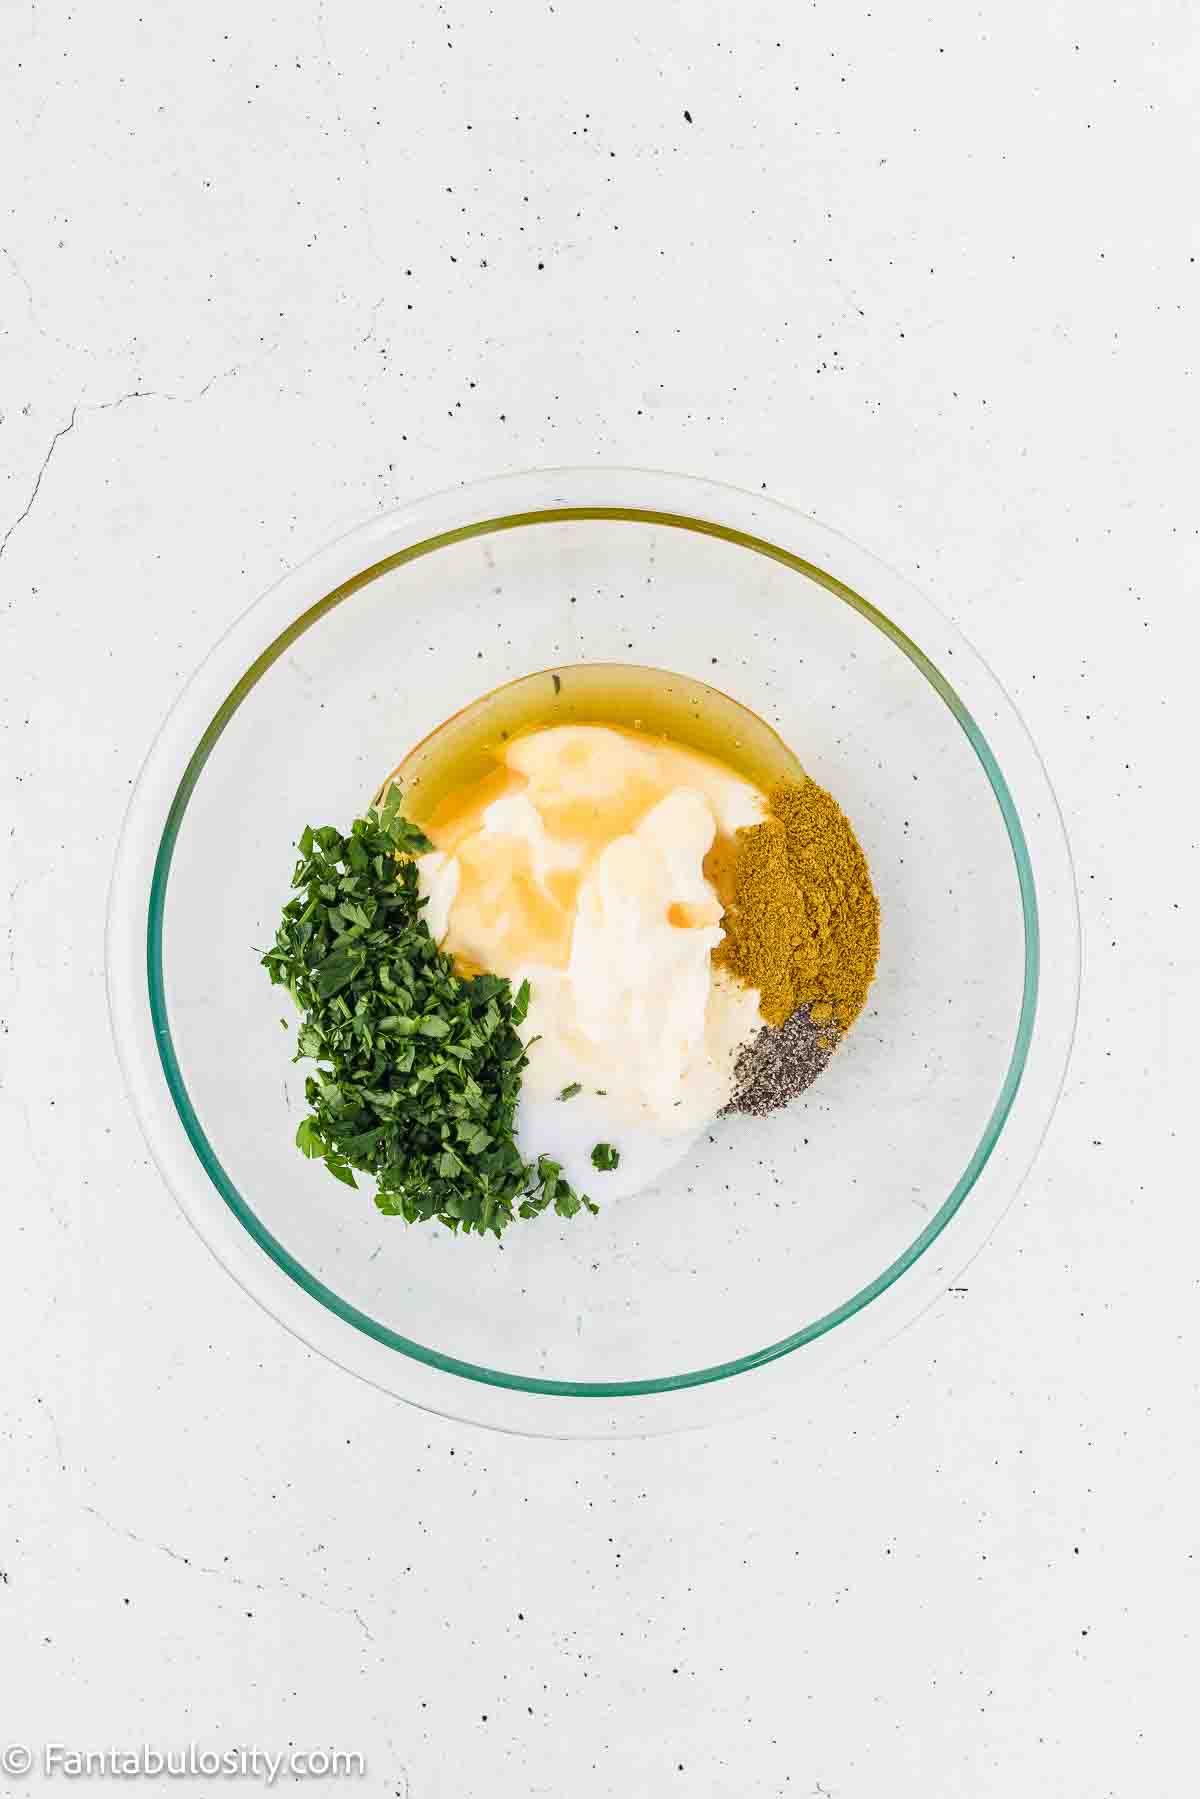
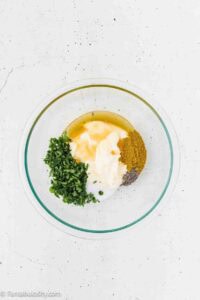
    • In a separate bowl, whisk together the mayonnaise, parsley, honey, curry powder, salt, and pepper until smooth and fully blended.
    Mayo, curry, honey and fresh parsley in clear mixing bowl.
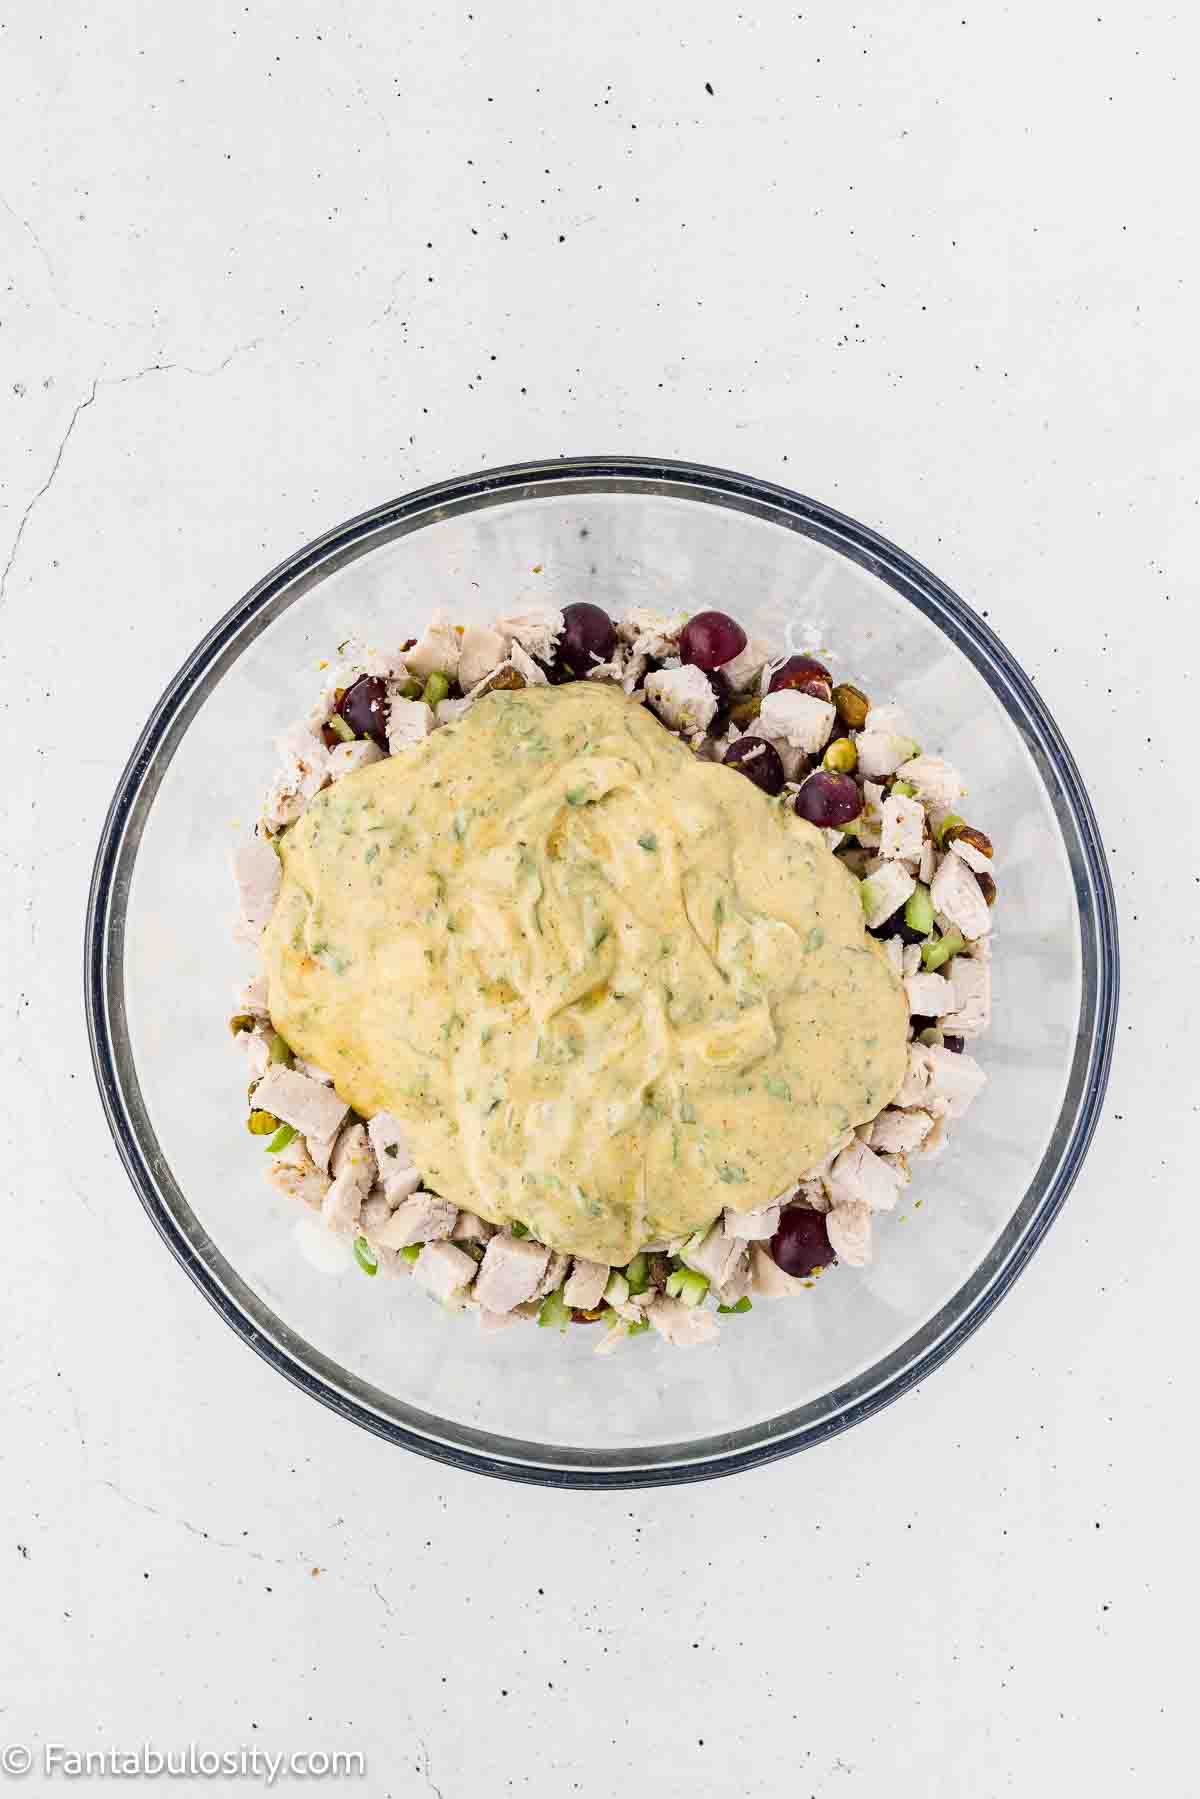
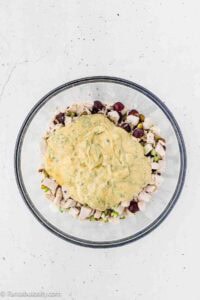
    • Pour the dressing over the chicken mixture and gently fold until everything is evenly coated.
    Dressing poured over chicken, grapes, parsley and celery in mixing bowl.
    • Cover and refrigerate for at least 30 minutes, preferably 1-2 hours, to allow the flavors to develop before serving.
    Curry chicken salad mixed together in mixing bowl.

    Tips for the Best Texture and Flavor

    • One whole rotisserie chicken typically yields about 4 cups of meat.
    • Two medium green onions will give you about ¼ cup sliced.
    • One medium celery stalk equals about ½ cup diced.
    • Dice everything small so you get balanced bites with a little of everything.
    • If the chicken seems dry, stir in an extra spoonful of mayonnaise before serving.
    • Taste and adjust salt after chilling, since flavors mellow in the refrigerator.

    Recipe Substitutions & Variations

    • Grapes: Use green grapes for a tarter flavor, or substitute dried cranberries or raisins for extra sweetness.
    • Celery: Swap for finely diced apple or cucumber for a similar crunch.
    • Pistachios: Try almonds, cashews, pecans, or walnuts. For nut-free, use sunflower seeds or omit.
    • Green Onions: Substitute minced red onion or shallot for a stronger flavor.
    • Mayonnaise: Replace with Greek yogurt for a lighter option. Stir well before serving.
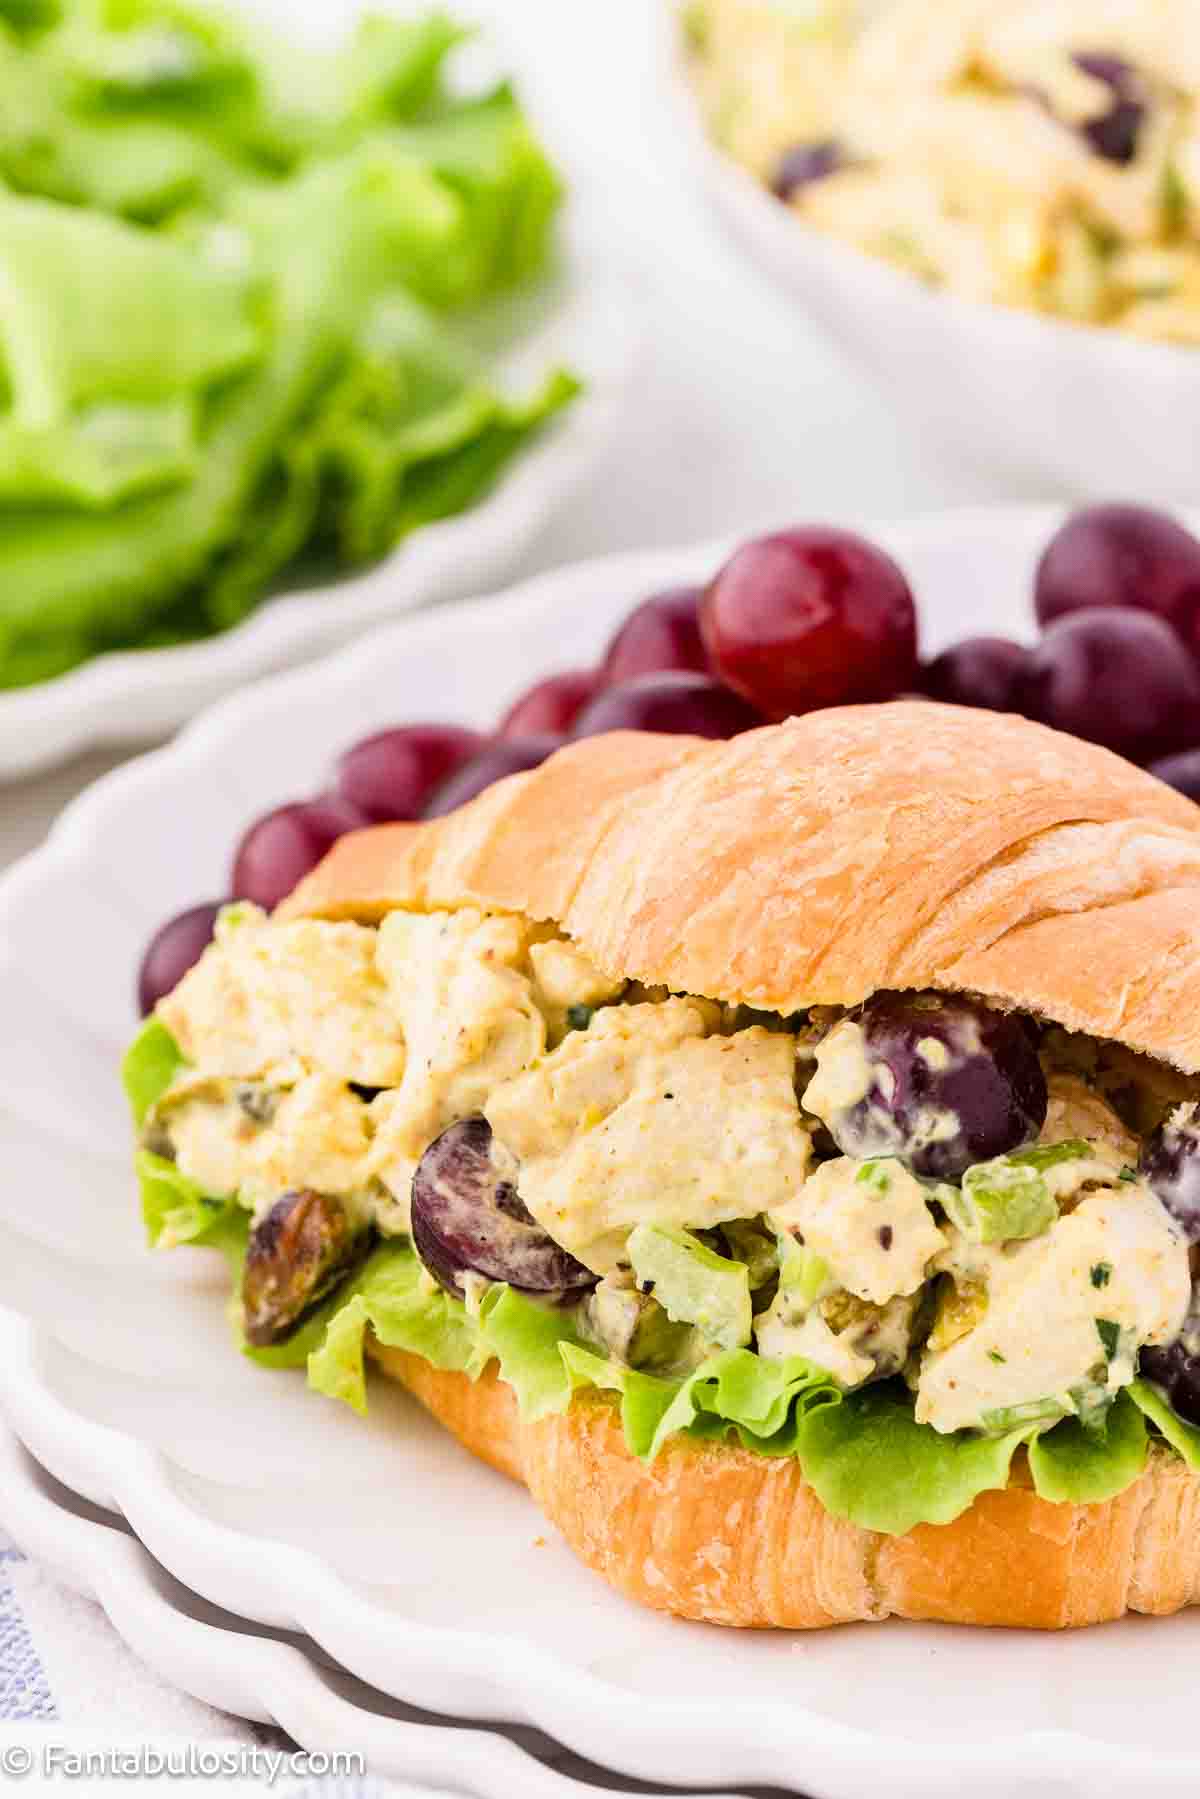
    Curry chicken salad on croissant bread.

    Serving Ideas

    • Spoon onto croissants for a bakery-style sandwich
    • Serve in lettuce cups for a lighter option
    • Add to a bed of mixed greens
    • Spread onto crackers for an easy appetizer
    • Tuck into mini rolls for showers and parties

    More Sandwich Recipes

    If you love having your chicken salad on bread as a sandwich, you’ll also love these favorites:

    • Sliders in a collage, for slider recipes.
      Slider Recipes: 19 Easy Ideas for Dinner, Parties & Game Day
    • Curry chicken salad with grapes in a white bowl.
      Curry Chicken Salad
    • Chicken salad with grapes and apples, sitting on bread.
      Harvest Chicken Salad
    • Crack Chicken Sandwich on wooden cutting board.
      Crack Chicken Sandwiches

    Recipe

    Curry chicken salad with grapes in a white bowl.
    Print Pin
    4.88 from 8 votes

    Curry Chicken Salad with Grapes

    This Curry Chicken Salad with Grapes is creamy, lightly sweet, and perfectly balanced with warm curry flavor and crunchy pistachios. It's an easy make-ahead favorite for lunches, brunches, and potlucks.
    Course Main Course
    Cuisine American
    Prep Time 5 minutes minutes
    Chill Time 30 minutes minutes
    Total Time 35 minutes minutes
    Servings 4 servings
    Calories 771kcal
    Author Jessica Burgess

    Ingredients

    • 4 cups cooked chicken shredded or chopped
    • 1 cup halved red grapes
    • ½ cup diced celery
    • ½ cup roasted salted pistachios chopped
    • ¼ cup green onions thinly sliced
    • 1 cup mayonnaise
    • ¼ cup chopped fresh parsley
    • 2 tablespoons honey
    • 1 tablespoon curry powder
    • 1 teaspoon sea salt
    • ¼ teaspoon black pepper

    Instructions

    • Add the chicken, celery, grapes, pistachios, and green onions to a large mixing bowl. Gently stir until the ingredients are evenly distributed.
      Chicken, celery and grapes added to mixing bowl.
    • In a separate bowl, whisk together the mayonnaise, parsley, honey, curry powder, salt, and pepper until smooth and fully combined.
      Mayo, curry, honey and fresh parsley in clear mixing bowl.
    • Pour the dressing over the chicken mixture and gently fold until everything is evenly coated. Refrigerate for 30 minutes before serving, preferably for 1-2 hours.

    Nutrition

    Serving: 1serving | Calories: 771kcal | Carbohydrates: 22g | Protein: 40g | Fat: 59g | Saturated Fat: 10g | Polyunsaturated Fat: 29g | Monounsaturated Fat: 17g | Trans Fat: 0.1g | Cholesterol: 129mg | Sodium: 1058mg | Potassium: 660mg | Fiber: 3g | Sugar: 16g | Vitamin A: 609IU | Vitamin C: 8mg | Calcium: 65mg | Iron: 3mg

    How to Make Iced Coffee

    September 4, 2022

    iced coffee and cold brew

    How to Make Iced Coffee: Skip the busy lines at your favorite coffee shop, save money, and make a delicious iced coffee recipe at home!

    tall glass filled with iced coffee and ice cubes

    This recipe teaches you how to make iced coffee in minutes, and you can customize it to your desired taste, sweetness, strength and temperature! If you want to add more flavor to your coffee, you may want to try this iced caramel latte recipe or this dirty chai recipe too!

    The best part… once you have your extract, you can make your iced coffee faster than you could, placing your drive-through order!

    Or make this espresso martini later for fun!

    Friends, I am THRILLED to have Charlotte from Pretty Mindful Mama Life with us today, sharing how she makes her favorite iced coffee recipe…

    How to Make Iced Coffee

    As a busy mom of 4 very active boys, it is no secret that I am FUELED BY COFFEE! I love it in any form!

    Latte, cappuccino, americano…once that aroma hits me I’m ready to start my day! When it’s hot, my go-to is definitely an iced coffee which is a treat in a glass.

    I usually enjoy my coffee with no sugar but iced coffee is really elevated with a little bit of sweetness.

    Side note: Jessica LOVES her Ninja Coffee Bar if you’re in the market for a new coffee machine!

    Make Your Cold Brew

    The only part of this process that takes a bit of time is creating your cold brew coffee extract.

    It’s not difficult but requires you to wait patiently for your coffee to brew in cold water in the fridge overnight.

    The great news is, once you’ve made a batch of your cold brew you can use it all week for your favorite coffee drinks hot or cold.

    Wanting something faster? You may LOVE the Ninja Coffee Bar that Jessica uses since it has an iced brew setting! Or, brew your coffee like normal and let it sit overnight!

    Learn more about the machine HERE or just head over and buy the Ninja Coffee Maker HERE!

    French Press or No French Press…

    A french press is not required for the cold brew process but I find it super handy and convenient for this task and love the flavor it gives the iced coffee.

    If you don’t have a french press, never fear…all you need is a container to pour your water and coffee in. You would then need a coffee filter or cheesecloth to strain the grinds.

    Step 1: Add Water

    Pour 4 cups of cold filtered water into your french press (or container of choice, a mason jar works great!)

    Step 2: Ground Coffee Beans

    Add ½ cup of course ground coffee beans of your choice to the water. I use a medium – dark roast, organic.

    Give it a gentle stir just to moisten the grounds and your coffee is ready to be transformed into a delicious cold brew.

    You will have to cover it with plastic wrap and allow it to brew for about 12-18 hrs in the fridge.

    When you wake up, you will be ready to use your coffee extract!

    Cold Brew Coffee Extract

    After the brewing process, if you are using a french press, simply press your grounds slowly and decant your coffee extract into a mason jar. (If you are not using a french press, use a wet coffee filter or cheesecloth to strain the grounds and then decant).

    Coffee Extract for the Week…

    Now that you have made your coffee extract you can store it in the fridge and use it for the rest of the week!

    TIP: If you would like to drink it hot, just pour a third of a cup into your coffee cup and fill with boiling water.

    Then add your favorite mix-ins! Coffee that’s ready for the week? Yes Please!

    Making the Iced Coffee

    Step 1: Add Ice

    Fill your serving glass with ice!

    Step 2: Fill with Cold Brew

    Fill a ⅓ to ½ the cup with your cold brew!

    Step 3: Add Milk + Sweetener

    Fill the remainder of the cup with your favorite milk and sweetener.

    I like a mix of half and half with 2 tablespoons of condensed milk! SO GOOD!

    You could use 2% milk, almond milk, coconut milk whatever you like. Whatever you do, DO NOT use regular sugar to sweeten. It will not dissolve.

    Sweeteners for Iced Coffee

    You can go unsweetened if that’s your jam too.

    But if you want to sweeten with something other than the condensed milk you can use a sugar syrup (or simple syrup) that you can purchase or easily make yourself.

    How to Make Your Own Simple Syrup

    Boil equal parts of sugar and water. I like to do 1 of cup sugar and 1 cup of water and once cooled I store it in a pretty bottle in my coffee station!

    You can even flavor your sugar syrup with different coffee flavor extracts.

    I like adding a whole scraped vanilla bean, or you can also use coconut sugar for your syrup.

    Honey or real maple syrup can also work as a sweetener.

    Before you know it you’ll be a master barista creating your own signature drinks!

    Step 4: Enjoy Iced Coffee at Home

    Enjoy!

    It’s THAT easy! Who would have thought? This recipe will be sure to quench your coffee thirst on a hot day or give you a much needed afternoon boost when energy is low.

    It will also save you a ton of money and time and most importantly you can have your drink the way YOU want it! Don’t even get me started on how you could take these over the top when you are entertaining!

    You could add whipped cream and garnish with a sprinkle of cinnamon or grated dark chocolate or a drizzle of salted caramel or dulce de leche!

    How Do YOU Make Iced Coffee?

    Let us know how you enjoy this super easy and delicious iced coffee and what your favorite mix-ins and toppings are! Drop a note in the comments so we can hear your wonderful ideas too!

    Recipe

    tall clear glass of iced coffee
    Print Pin
    5 from 3 votes

    How to Make Iced Coffee

    How to Make Iced Coffee: Skip the busy lines at your favorite coffee shop, save money, and make a delicious iced coffee recipe at home!
    Course Drinks
    Cuisine American
    Prep Time 5 minutes minutes
    Total Time 5 minutes minutes
    Servings 5 coffees
    Calories 33kcal
    Author Jessica Burgess

    Ingredients

    • 4 cups Cold Filtered Water
    • ½ cup Coarse Ground Coffee I use medium dark roast.
    • ¼ cup milk of choice I use half & half.
    • 2 tablespoon sweetened condensed milk You may use liquid sweetener of your choice.
    • Ice

    Instructions

    To make Cold Brew Coffee Extract:

    • Pour 4 cups of water into a french press or container of your choice.
    • Add coffee and gently stir to moisten grounds.
    • Cover with plastic wrap and refrigerate for 12-18 hours.
    • Once the coffee has brewed, press grounds with french press or strain with a wet coffee filter or cheesecloth. Pour strained cold brew into a mason jar. Cold Brew can be stored for up to two weeks in the refrigerator.

    To make Iced Coffee:

    • Fill a glass tumbler with ice.
    • Fill ⅓ to ½ the tumbler with cold brew.
    • Mix ¼ cup milk of choice with sweetener of choice and pour over cold brew. 
    • Stir and enjoy!

    Nutrition

    Serving: 1coffee | Calories: 33kcal | Carbohydrates: 5g | Protein: 1g | Fat: 1g | Saturated Fat: 1g | Polyunsaturated Fat: 0.04g | Monounsaturated Fat: 0.3g | Cholesterol: 4mg | Sodium: 24mg | Potassium: 48mg | Sugar: 5g | Vitamin A: 41IU | Vitamin C: 0.2mg | Calcium: 43mg | Iron: 0.02mg

    Looking for More Drink Recipes?

    If you love easy, and you love making your own drinks, then you’ll ADORE the super popular and super easy drink recipes here on the blog, already waiting for you!

    12 Chicken Casserole Recipes (Easy Weeknight Dinners)

    November 15, 2022

    Chicken Casserole recipes image collage.

    Casseroles are what I fall back on when the week gets away from me. One dish, one oven, and enough left over that nobody has to cook tomorrow either.

    Every one of these is built from things you can find at any grocery store. Canned soup, rotisserie chicken, a bag of shredded cheese. Nothing here needs a special trip.

    If you have never made the poppy seed one, start there. It has been showing up at church suppers for fifty years for a reason.

    Creamy and Classic

    Poppy seed chicken casserole on a dinner plate, with green beans.

    Buttery cracker topping over a creamy chicken filling. The one everybody asks about.

    Make poppy seed chicken casserole when you need something that always disappears.

    Old fashioned chicken and rice casserole being scooped out of baking dish.

    Chicken and rice baked together until the rice soaks up every bit of the sauce.

    Try this old fashioned chicken and rice casserole on a night when you want supper to feel like Sunday.

    A chicken and stuffing slow cooker chicken breast on a spatula.

    A box of stuffing on top, so the whole thing tastes like Thanksgiving on a Tuesday.

    Bake Stove Top stuffing chicken casserole and skip making a side dish entirely.

    Chicken Pot Pie Casserole in white baking dish

    All the chicken pot pie filling you love, spread into a 9×13 so it feeds more people.

    Serve up chicken pot pie casserole when a crust feels like more work than you have in you.

    Crunchy on Top

    Spatula lifting Frito chicken casserole out of baking dish.

    Corn chips baked right on top so they stay crisp against the creamy filling.

    Set out Frito chicken casserole and watch the pan empty.

    Dorito Chicken Casserole on white plate

    Crushed Doritos, cheese, and chicken. The kids will ask for it by name.

    Bake a pan of Doritos chicken casserole on a night when nobody can agree on dinner.

    chicken tater tot casserole serving on spoon

    Tater tots on top, browned and salty, over a creamy chicken base.

    Pull chicken tater tot casserole out of the oven and let the tots do the talking.

    Pasta Bakes

    Cooked chicken spaghetti in plate, with fork digging a bite out.

    Creamy, cheesy, with a little kick from the Rotel. A potluck staple.

    Bring chicken spaghetti with Rotel to the next gathering and plan on going home with an empty dish.

    Chicken Alfredo Lasagna in baking dish, being lifted out.

    Layers of noodles, chicken, and alfredo sauce instead of red.

    Make chicken alfredo lasagna when you want lasagna without the tomato.

    Buffalo Chicken Lasagna

    Buffalo chicken layered into lasagna, tangy and rich at the same time.

    Try buffalo chicken lasagna if your family fights over the wings every time.

    Tex-Mex Casseroles

    taco casserole serving on wooden server

    Everything you want on a taco, baked into one dish.

    Scoop out taco chicken casserole on taco night when you would rather not stand at the stove.

    A slow cooker insert holds a chicken enchilada mixture with a layer of melty cheddar cheese and one serving has been removed

    The slow cooker does the work and you come home to enchiladas.

    Start crock pot chicken enchiladas in the morning and dinner is handled.

    One Dish, Supper Done

    Casseroles earn their keep on the busy nights. Most of these can be put together in the afternoon, covered, and slid into the oven whenever everybody finally gets home.

    Pick two or three that sound good, keep the ingredients on hand, and you will always have something to fall back on.

    More Roundups

    • 26 Easy Crockpot Dinners
    • Slider Recipes for Dinner and Parties
    • Old-Fashioned Dinner Recipes
    • Easy Potluck Desserts

    25+ Polish Sausage Recipes

    June 5, 2019

    Image collage of polish sausage recipes.

    Polish Sausage Recipes – Using polish sausage is a quick and easy way to create a dinner in no-time for a busy weeknight. Here are our favorites!

    Polish Sausage Recipes

    Image collage showing polish sausage recipes.

    Polish sausage can be used in so many different kinds of recipes. It can be used to make simple dishes by throwing it over some rice and is great for easy meals like this Quick Alfredo Polish Sausage Pasta!

    Whether you're looking to create a comforting dish to get you through the cold winter months, or you're looking for a potluck recipe to bring to a party, polish sausage recipes are a great fit! They can work for any type of recipe in any season!

    Here you'll find polish sausage recipes that will make the most delicious dinner recipe regardless of who you are serving!

    25+ Polish Sausage Recipes

    Cabbage and polish sausage cooked in the Instant Pot.
    Kielbasa and Cabbage in the Instant Pot

    Easy Kielbasa and Cabbage

    This easy kielbasa and cabbage recipe made in the Instant Pot, can also be made on the stove-top. It uses very few ingredients but has tons of flavor!

    Polish sausage mac and cheese on plate.

    Instant Pot Cheesy Kielbasa Pasta by Eating in an Instant

    Let your instant pot make dinner in a flash. This dish is very cheesy; and it has plenty of polish sausage to satisfy your appetite after a long day at work.

    Polish sausage with cabbage in skillet.

    One Pot Cabbage and Kielbasa by Served From Scratch

    This easy and hearty dish only needs 1 dish to cook, and delivers delicious, wholesome results every time.  Make this with garden fresh cabbage for a fast, fuss free meal.

    Polish sausage with cajun rice.

    Cajun Sausage and Rice by I Heart Eating

    In the mood for something wonderfully spicy that won't break your grocery budget? This Cajun rice with polish sausage slices is just the thing to make for a hearty meal that can fill up a crowd.

    Brussels sprouts soup in dutch oven.

    Brussels Sprouts and Sausage Soup by Two Bit Tart

    This soup is unique and so flavorful. Use brussels sprouts and sausage slices with carrots for a cozy meal that satisfies with simple ingredients.

    Kielbasa and bean soup.

    Kielbasa and Bean Soup by Kitchen Verve

    This soup has such a hearty and healthy vibe. It is made with potatoes, sausage slices and white beans for a filling and cozy option. Pair with crusty bread for a great meal.

    Broccoli and polish sausage on a plate.

    Keto Broccoli and Polish Sausage by Two Sleevers

    Grab 3 wholesome ingredients and get dinner going! This low carb dish is packed with color and flavor. I know you will love this on busy weeknights.

    Polish sausage soup in pot, with bread on the side.

    Kale Kielbasa and Spinach Soup by From a Chef’s Kitchen

    Craving a creamy bowl of soup? This one has sausage, potatoes and plenty of healthy kale. I know you will want to grab a second bowl of this because it tastes awesome!

    Polish sausage pasta in bowl with peppers.

    Kielbasa and Pepper Pasta by Tasty Oven

    Pasta night gets a makeover with this dish! Sausage and peppers make this dish pop with great flavors for a unique and filling family meal idea.

    Polish sausage mac and cheese in skillet.

    Kielbasa Mac n Cheese by Chocolate Moosey

    This mac n cheese has plenty of polish sausage to make a great one pot meal. The whole family will love the smoky flavor this comfort food offers.

    Polish sausage with Queso on platter.

    Grilled Polish Sausage with Stout Queso by Erica's Recipes

    These beer grilled sausages have the BEST stout queso on top. You have to splurge for good buns if you make this because a dish with this much flavor deserves something epic to hold it together!

    Polish sausage coins on a plate with a toothpick.

    Air Fryer Polish Sausage Coins by Cook At Home Mom

    Pop these slices of polish sausage in the air fryer for such a tasty treat. Stick a toothpick in them for party food, or add them to something cheesy like mac n cheese, or au gratin potatoes maybe!

    Polish sausage green bean dish in a skillet.

    Sausage, Potato and Green Bean Skillet by Delicious by Design

    You can't go wrong with this wholesome and delicious dinner idea. It has green beans, potatoes and plenty of polish sausage. Everyone will enjoy this simple and satisfying meal idea.

    Polish sausage and beans in crockpot.

    Baked Beans with Sausage by The Cagle Diaries

    Pop these simple ingredients in the slow cooker to make one tasty and easy meal. This recipe is tangy, meaty and totally hearty!

    Kielbasa and lentils in soup.

    Lentil and Kielbasa Soup by 24 Bite

    Lentils make this healthy soup filling. Sausage slices make it even more delicious. Make a big pot of this easy soup for a great family meal.

    Polish sausage stir fry on plate.

    Polish Sausage Stir Fry by Like Mother Like Daughter

    This stir fry is very easy to make and it is affordable. Polish sausage makes an affordable and yummy source of protein for this veggie packed dinner.

    Polish sausage slices with cabbage in cast iron skillet.

    Sausage and Cabbage Skillet by The Forked Spoon

    You can get this filling and delicious dinner on the table in just 30 minutes. With plenty of cabbage, peppers and sausage, you know you are going to leave the dinner table very satisfied after serving this.

    Polish sausage and pasta on plates.

    Sausage with Creamy Mustard Pasta by Girl Gone Gourmet

    Pasta with creamy mustard sauce makes a great dinner that is a little different but so tasty. Sausage slices add a great smoky, meaty flavor.

    Polish sausage sandwiches on cutting board.

    Kielbasa Sandwiches by Craving Some Creativity 

    This recipe serves sausage philly cheese steak style. I know you are going to love polish sausages piled high with cheese, onions and peppers!

    A skillet of sauerkraut, apples and onions with sausage.

    Sausage and Sauerkraut with Apples and Onions by The Suburban Soapbox

    Get a great dinner on the table in no time with this recipe. Caramelized onions, apples and sauerkraut make for such a unique and tasty combination that is perfect for sausage.

    Gumbo soup in bowl.

    Paula Dean Gumbo by Simply Scrumptious Eats

    Paula Dean might have made this recipe famous, but you can make it unforgettable in your own kitchen. With shrimp, sausage and chicken, there is a lot to love in this filling meal!

    A plate with sausage bites topped with pastry stars.

    Star Spangled Kielbasa Bites by Aleka's Get Together

    These star spangled bites are perfect for a summer party. They are meaty, savory and so good. Everyone will want to nibble on these!

    Polish sausage recipe with beans in a pot.

    Butter Bean Sausage Stew by Deb's Daily Dish

    Butter beans and sausage, with onions and peppers makes the best stew! This hearty and healthy option is easy to make and is sure to hit the spot for dinner. Serve with cornbread for a complete meal.

    Polish sausage in a boil.

    Seafood Boil by Dinner at the Zoo

    Shrimp, sausage, clams and corn with lobster, potatoes and the best broth sounds like a dream right? This seafood boil is so easy to make you are going to want to grab the ingredients and get this meal underway!

    Black bean and sausage soup in dish.

    Black Bean and Sausage Soup by The Magical Slow Cooker

    This soup is a little spicy and so easy to make. If you love black beans, then this soup is going to find its way on your must-make list! It is cozy, filling and always tastes amazing!

    Kielbasa sausage wrapped in puff pastry.

    Kielbasa Puffs by I Heart Nap-time

    If you need a quick snack then these puffs are just the thing to make. They have meaty, smoky sausage and flaky crispy pastry dough. These are a great appetizer or party food that is virtually fuss-free.

    Easy Dinner Recipes

    If you loved these, then you’ll LOVE this main course too!

    Have a favorite polish sausage recipe? Share it right here in the comments!

    20 Eggplant Recipes

    July 6, 2019

    Image collage of eggplant recipes.

    20 eggplant recipes to add to your Pinterest boards and weekly dinner menu: Roasted, fried, Italian, grilled and so much more!

    Eggplant Recipes

    Eggplants are popular vegetables to use in recipes, possibly because they are easily one of the most versatile vegetables out there.

    Whether you are looking for a hearty main course or a simple snack or side dish, eggplants are a perfect choice! Plus, eggplant is so easy to incorporate into foods you already love!

    More Recipes You’ll Love:

    • Fettuccine with Corn & Tomatoes
    • Creamy Crunchy Cucumber Salad

    Easy Eggplant Recipes

    Many of these recipes are so simple to make, you'll wonder why you didn't try them sooner!

    Roasted, Fried, Italian, Grilled & MORE Eggplant Recipes

    Here you'll find eggplant recipes that make the perfect dinner or even a side dish for your next meal.

    Air Fryer Eggplant Fries by Fantabulosity

    Have you ever made fries with eggplant? This recipe is so easy and makes for the best eggplant fries right from the air fryer.

    Eggplant pancakes on plate.

    Eggplant Pancakes by The Top Meal

    Incorporate eggplant into breakfast with these unique and tasty pancakes. These savory cakes are going to be a favorite way to make things deliciously interesting at the first meal of the day.

    A plate of pasta with roasted eggplant mixed in.

    Eggplant Pasta by Green Bowl 2 Soul

    Roasted eggplant pairs perfectly with pasta and tomato sauce. This makes a great summertime dinner that is veggie packed for a filling meal.

    A plate of crispy tempura eggplant with chopsticks.

    Eggplant Tempura by A Mummy Too

    This recipe is so tasty that you can fake your family out. They would absolutely believe these crispy battered tempura eggplants came from a great restaurant.

    Baba ganoush in bowl next to cucumbers.

    Baba Ganoush by Pinch and Swirl

    This spread is smoky, creamy and oh so good. Bake your eggplant in the oven to speed the process up without sacrificing flavor.

    Baked Eggplant Gratin by Joy Filled Eats

    This easy side dish has the best garlic and basil sauce. It is creamy, easy to prepare and is vegan, so everyone can enjoy a scoop.

    Melanzane Parmigiana in baking dish.

    Melanzane Parmigiana by Emma Eats and Explores

    This dish feels as cozy as the best pasta dinner, but it doesn't have the noodles. I know you will love the three cheese blend this eggplant dish offers. It tastes perfect with the eggplant.

    Eggplant casserole in baking dish.

    Eggplant Rollatini by Vegan Huggs

    Make long thin slices of eggplant and tuck plenty of ricotta inside. This simple meal is vegan, and has the best smoky flavor for a dish that delights with every bite.

    Easy Cheesy Eggplant Casserole by Cook With Kushi

    If you have some eggplant, cheese and tomato sauce, you can whip up this delicious and easy dish. It works as a side or the main course on those nights you want a meatless meal.

    Eggplant Fries with Honey by The Foodolic

    Bring the flavor of a favorite tapas from Spain to the table with this simply delicious way to serve eggplant. Coarse salt, fresh eggplant and sweet honey make this such a yummy side or starter to share.

    Eggplant dish in bowl.

    Eggplant Masala  by Rosanna Etc

    Spinach, chickpeas, eggplant and masala spices make this dish completely delicious. You will want to serve this with yogurt on top to add a creaminess that sets this dish off.

    Eggplant Napoleon photo/recipe credit

    This dish is so easy to assemble, but it has so much fantastic flavor! Layers od eggplant slices, tomato sauce and cheese come together to make a perfect summer meal that won't weigh you down.

    Eggplant chip dipping in to sauce.

    Crispy Baked Eggplant by Spend with Pennies

    Bake this crispy eggplant for a delicious side. This will pair well with burgers, pasta or chicken for a fast and filling addition to dinner.

    Eggplant recipe in skillet.

    Mediterranean Eggplant Stew by Sour and Sweets

    This stew is loaded with tasty ingredients like eggplant, tomatoes, and onions to make a meal that is like a vacation for your taste buds. Get the flavors of the Mediterranean  on your dinner table!

    Eggplant pasta in baking pan.

    Pasta Alla Norma by Gypsy Plate

    This dish is a Sicilian classic for good reason; it is delicious! Make this pasta dish with buttery eggplant and tomato sauce for a meatless meal that is simple and so satisfying on a summer night.

    A serving of eggplant parmesan on a white plate with a fork.

    Baked Eggplant Parmesan by The Wooden Skillet

    Baked eggplant parm makes for such a wonderful summer meal. With crispy bread eggplant, tangy tomato sauce and creamy, melty cheese, what's not to love? Serve this dish with a salad and a glass of wine for the ultimate pairing.

    Eggplant recipe in casserole dish.

    Cheesy Baked Italian Sausage Casserole by Mae's Menu

    This Italian sausage baked casserole is loaded with cheese and is a highlight during eggplant season. The ricotta cheese layer makes this easy casserole feel extra indulgent.

    Aubergine Spaghetti by Where Is My Spoon

    Skip the red sauce, and go with this creamy garlic eggplant sauce. It is completely delicious and makes for such a great twist on pasta for dinner, using seasonal ingredients.

    Cubed eggplant with sauce on plate.

    Crispy Eggplant by I Heart Vegetables

    This crispy eggplant is sure to be a summer side you can't stop eating. Pair it with grilled meats, or simple summer sandwiches for a flavorful meal that uses in season produce.

    A platter of eggplant bruschetta with fresh tomatoes and garlic.

    Grilled Eggplant by The Wooden Skillet

    This grilled eggplant is loaded with seasonal goodies like fresh tomatoes and garlic drizzle with olive oil to make a bruschetta unlike any other! It is so good that you will want to make this every week as an appetizer.

    More Eggplant Recipes?

    Have a favorite eggplant recipe? Share it right here in the comments below! I’d love to add it to my list!

    20+ Make Ahead Salads for a Crowd

    April 17, 2023

    Collage of salad images with text overlay.

    20+ Make Ahead Salads for a Crowd: Whether you're whipping up an easy pasta salad, potato salad, or even just a standard lettuce side salad for your next get-together, salad recipes can be so easy to make ahead of time.

    There are so many delicious ways to make a salad that can feed a crowd.

    I’ve gathered some of the best make ahead salads for a crowd, so you have plenty to choose from when you need them!

    Make ahead salad collage of images with text overlay.

    Post originally published February 2019 – Updated April 2023

    Make Ahead Salads for a Crowd

    You’ll find that these make-ahead salads for a crowd are perfect for barbecue parties, cookouts, spring dinner recipe ideas, or any other fun parties where you need a dish. You can easily whip one of these up and you're ready to go!

    Or, if you like to make side dishes ahead of time or that easy to whip up in a pinch to go with dinner for your family, then you’ll find a fabulous amount of salad recipes to choose from here. (Salads are PERFECT as a side dish to accompany a ton of main dishes!)
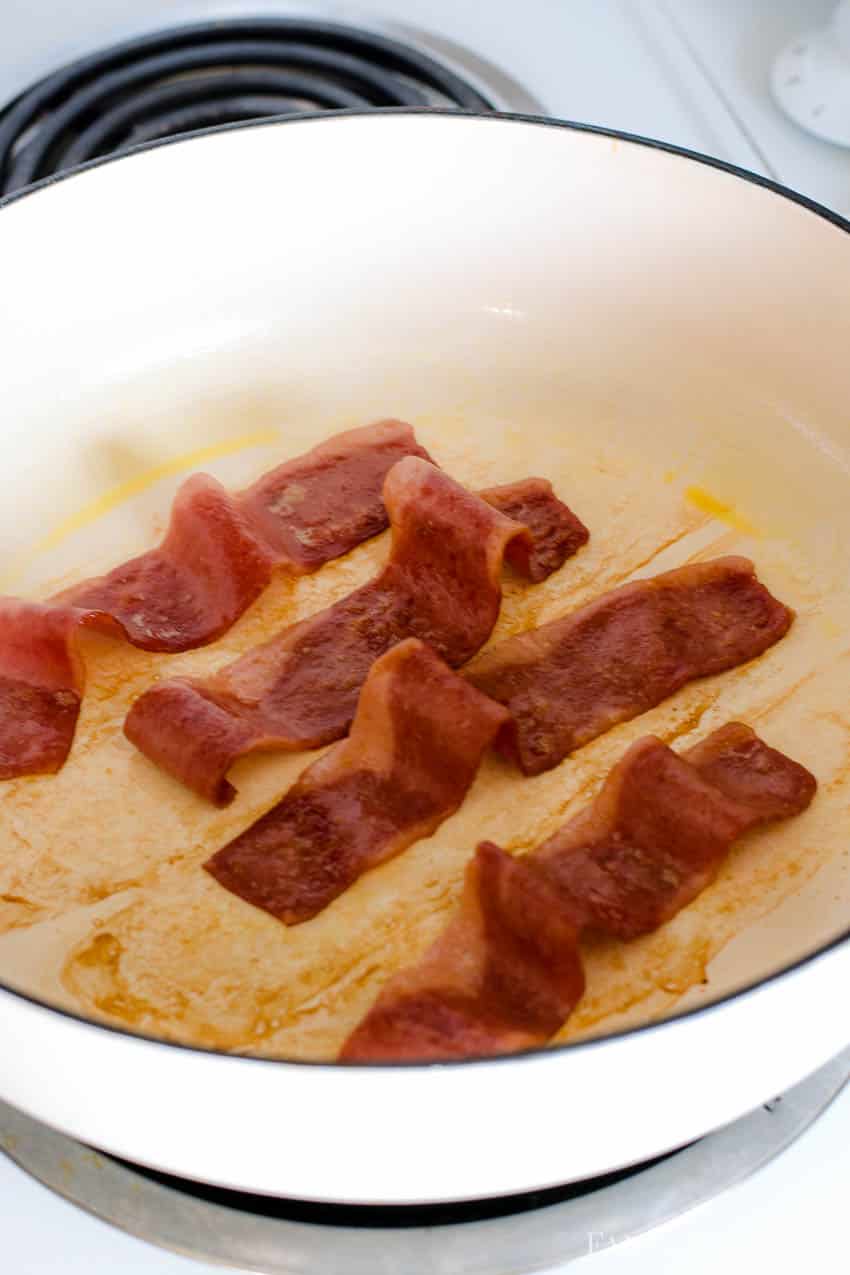
    20+ Salad Recipes for a Crowd

    Wooden spoon holding serving of red skin potato salad.

    Red Skin Potato Salad

    This delicious and easy potato salad recipe is a side dish staple at any barbecue. Easy to make and it can be made in advance, and transports well!

    Best Salad Recipe in White Plate with Red Napkin
    The BEST Salad Recipe

    The BEST Side Salad Recipe

    This side salad recipe has gone CRAZY on Pinterest with so many fans! We make this often ahead of time, to eat on all week or to take to a function. TIP: Make sure to store the toppings separately that could make your lettuce soggy. (i.e. bacon, cheese, etc.)

    EASY broccoli raisin salad recipe

    Broccoli Salad

    Loaded with both texture and flavor, this salad is a great way to change things up from a lettuce salad, and a great way to get in the greens.

    Apple Snicker Salad in white bowl
    Apple Snicker Salad

    Snickers Salad

    The crowd is going to LOVE this one as a dessert or to even have as a sweet side dish during the holidays. It’s one of our top favorite no bake dessert recipes, that we also consider a fun salad side dish.

    Carrot salad in a white bowl, next to blue napkin.

    Easy Carrot Salad Recipe

    Get in your extra veggies with this veggie salad that has carrots, and a lot of crunch!

    Thai salad in a wooden bowl.

    Thai Salad with Noodles

    A fantastic twist on a salad recipe that has texture and is full of flavor!

    Apple salad with yogurt in white bowl.

    Apple Salad

    This crispy and sweet salad is a great dessert salad that you can make ahead of time!

    Pistachio salad in bowl on black and white linen
    Pistachio Salad

    Pistachio Salad

    This may be more of a dessert salad but it’s a crowd-pleaser for sure, and a great addition to any holiday table.

    Chicken macaroni salad in brown wooden bowl.
    Chicken Macaroni Salad

    Chicken Macaroni Salad

    This pasta salad is so simple to make, and a great go-to for any party. The addition of chicken adds protein to make it a light, yet hearty dish.

    3 bean salad recipe - quick and easy and a great side dish idea

    Three Bean Salad

    A bean salad is a nice change from lettuce and pasta salads. It’s also perfect for cookouts or anywhere that you want to bring a healthier dish. 

    Chopped Asian Salad with mandarin oranges

    Asian Chopped Salad

    This is a light salad recipe that’s perfect to serve in the spring and summer and is so easy to make.

    This creamy cucumber crunch salad is a delicious side dish for potluck parties.

    Creamy Crunchy Cucumber Salad

    A fresh and light salad recipe for a hot summer day! Make it in advance, and pull it out of the refrigerator when it’s time to eat!

    This low carb cauliflower potato salad is a great low carb recipe! So easy and definitely a low carb vegetable for the keto diet!

    Cauliflower “potato” salad

    If you’re counting carbs or watching carbohydrates, this faux potato salad recipe is perfect for low-carb eaters!

    crab salad in white bowl with pink napkin underneath

    Crab Salad

    When it comes to make-ahead salad recipes, this crab salad is one that can be made in advance, and it only gets better with time!

    caesar chicken pasta salad recipe in a white bowl on a marble table

    Chicken Caesar Pasta Salad

    It may sound different to put some of these ingredients together but talk about a flavor combination that you’ll love! This chicken Caesar pasta salad is a favorite at functions. When making it ahead of time though, it’s best to prep everything and store the dressing and pasta in different containers. Then, combine all of it just before serving.

    Fruit salad with Cool Whip in gray bowl on counter.

    Fruit Salad with Cool Whip

    As seen on so many holiday tables, this dessert salad is one that can be made ahead of time, and is so easy to whip up!

    cornbread salad

    Cornbread Salad

    This savory Cornbread Salad is the perfect combination of sweet, crunchy, and savory to make the perfect salad for your next get-together with friends. 

    Italian Pasta Salad Recipe - This cold blend of ingredients is amazingly good! Love the bowtie pasta, and how easy it is!

    Cold Italian Pasta Salad

    An easy, cold salad that can be made in a pinch and that sits wonderfully and absorbs flavors. TIP: Take along extra dressing if it will be sitting a while, and drizzle with more dressing right before serving, in case the pasta soaks up the majority of the dressing.

    A close up photo of a large oblong white bowl holding a fluffy orange desserts salad sprinkled on top with mini marshmallows and mandarin orange slices

    Orange Fluff Salad

    Have you seen this delicious pile of fluff at family reunions and holidays? It’s a popular recipe that so many love, and is one of the best make-ahead salad recipes, due to how long it can sit.

    Tuna pasta salad in white bowl

    Tuna Pasta Salad

    A lovely combination of the creamy dressing, the tender pasta and the flavor of the tuna, all combe together to make a delicious pasta salad.

    Honey lime fruit salad in white bowl.

    Honey Lime Fruit Salad

    This fruit salad is a wonderful way to make prep a make-ahead salad for any event or for snacking on during the week.

    shrimp macaroni salad in bowl

    Shrimp Macaroni Salad

    Much like our tuna salad, this salad uses salad shrimp, and the combination of the seafood with the tender pasta is incredible.

    Cold bacon ranch pasta salad in individual servings.

    Bacon Ranch Pasta Salad

    The cubed cheese, cooked bacon and tender pasta, all drenched in a creamy dressing is a pasta salad that will be a hit at the next reunion.

    KFC Coleslaw in white bowl, sitting next to big bowl.

    KFC Copycat Coleslaw Recipe

    This easy coleslaw is such a great copycat recipe! So similar and it can be made at home in minutes!

    You won’t find only salad recipes around here…

    You’ll find TONS of easy recipes that can be made using everyday ingredients, that your family will love! Browse the easy recipes and pin your favorites!

    What are some of your favorite make-ahead salads for a crowd? Share them right here in the comments below!

    We love gathering recipes for you, depending on cuisine, ingredient, holiday, or season! See all of our amazing recipe collections!

    Sleepover Ideas for Boys (Fun Games, Food & Easy Slumber Party Ideas)

    February 10, 2019

    Slumber party ideas for boys

    But looking around at all of the slumber party ideas out there, a lot of these sleepover ideas can be used for boys or girls!

    Sleepover Ideas for Different Ages

    Plus, many of these slumber party ideas will work for boys or girls of any age. However, the most popular ages I’ve found for sleepovers are:

    • 9 year olds
    • 10 year olds
    • 11 year old
    • tweens

    What to Serve at a Sleepover (Easy + Kid-Friendly)

    • Popcorn bar, using this homemade popcorn recipe
    • Pizza (like this school pizza recipe) or these comforting sandwiches
    • Snack trays
    • Any of these summer snack ideas (even though they’re great all year long.)
    • Breakfast ideas: Fluffy pancakes, Diner-Style French Toast, or Breakfast Egg Rolls

    Fun Slumber Party Ideas

    The best part about this list of ideas is that you can reuse them over and over again no matter who will be sleeping over!

    So let’s get to them…

    If you have a basketball fan in the house, decorating for the slumber party may be easier than you think with these basketball party ideas.

    Basketball Party Ideas https://fantabulosity.com

    2. This homemade LEGO Homemade Jello Soap craft is perfect for boys to make at a sleepover. The Soccer Mom Blog

    4. This fun DIY Marshmallow toys makes it fun to play, and a fun snack to eat! Or So She Says

    5. No matter WHO the slumber party is for, I don’t know a kiddo who wouldn’t love a chocolate fountain to eat on all night! Serve up a ton of fun with these chocolate fountain food ideas!

    Chocolate Fountain Ideas

    6. Get your boys outside with this fun Nature Scavenger Hunt. The Joy of Boys

    7. If it's nice outside, have your boys have a Shaving Cream Battle. Fireflies and Mudpies

    8. This Super Hero Potion is perfect for pretend play, and will be a fun snack idea for your boys. What's Up Fanagans

    9. Make your own DIY Foam Swords for play battles or just as a fun activity to do. Or So She Says

    11. This fun and Easy Creeper Craft is great for boys who love Minecraft. Fireflies and Mudpies

    12. If you are looking for some fun Sleepover Games there are a few from this list that you won't want to miss! Wondermom Wannabe

    14. Have your kids watch a few Sleepover Movies on the big screen to keep them entertained. Mom Generations

    Smores trail mix for a camping party! Teddy Grahams, marshmallows and Hershey Bars! How fun is this! It's all so cute!!! Camping Sleepover Birthday Party Ideas! Pottery Barn Kids, fake fire, tents, sleeping bags, fire birthday cake, kaleidoscope, birthday banner.

    19. If you have older kids, they may love these Nerf Target Games that you can play inside or outside. Frugal Fun 4 Boys

    nerf birthday party ideas

    Spend the night creating with this fun Cardboard Pirate Ship activity! Pair this activity with the treasure hunt for even more fun! Red Ted Art

    More Slumber Party Ideas?

    What are some of your favorite slumber party ideas for boys? Share them right here in the comments below to help others looking for fun ideas! 

    More Party Ideas

    I absolutely love hosting, styling and throwing parties. See some of my favorites for more party ideas…

    • Favorite Things Party
    • Winter Onederland Birthday Party
    • Ice Cream Party

    Party Punch

    No matter what party, a birthday… baby shower… bridal shower… kids… adult…

    your guests are sure to love the BEST Punch Recipe on the planet!

    The BEST Punch Recipe for Any Party: made with Sprite (or lemon-lime soda), pineapple juice, kool-aid, sugar, and water! So easy, and the best ever!

    30th Birthday Ideas for Him (Food, Themes & Easy Party Ideas for Men)

    March 10, 2019

    30th birthday party ideas for men

    30th birthday party ideas: When he turns 30, it’s a milestone to celebrate! Here are the BEST themes and ideas for the big celebration!

    This list of 30th birthday party ideas for men is so helpful !

    30th Birthday Party Ideas

    Birthday parties are such a fun way to celebrate milestones in our lives. If you are looking for some great party ideas for that special man in your life, these 30th birthday party ideas for men are perfect!

    Need gift ideas? Head over to see our favorite 30th birthday gift ideas for him!

    Here you'll find 30th birthday party ideas for men that you can use for any special man in your life to throw the perfect party. 

    These ideas work great for friends, spouses, in-laws, or other family members you may be planning a party for.

    What to Serve at a 30th Birthday Party for Him

    If you're planning a party, the food is usually what guests remember most. These easy ideas work for everything from casual get-togethers to bigger celebrations.

    Crowd-Favorite Party Foods

    • Cheeseburger sliders or comfort food sandwiches
    • Crockpot BBQ Meatballs or appetizers that can stay warm
    • Dips and chips for easy snacking, such as Rotel Dip, Hot Taco Dip, and Pepperoni Pizza Dip

    Food Bar Ideas (Always a Hit)

    • Taco bar
    • Nacho bar
    • Burger bar
    • Hot dog bar

    Easy Desserts

    • Easy Cake Recipes
    • Brownies Recipes
    • Ice cream cake

    30th Birthday Party Themes & Decor Ideas

    Favorite Things Party: Who says a Favorite Things party has to be for women? I know a LOT of men who would love to receive their guests “favorite things”! Tell your guests if they wish to bring a gift, bring a $5 or $10 item that they consider one of their favorite things! The birthday boy may just end up of a collection of new favorite things of his own!

    This 30th Party in a Box is perfect for taking your party on the go or to celebrate with those from far away! The Sweetest Occasion

    These fun Confetti Balloons would be a fun way to decorate your space. Modge Podge Rocks

    If your special guy is a football fan, they are going to love these easy football party food ideas from right here at Fantabulosity!

    Looking for a great baseball themed party? Then you will love this Baseball themed 30th Party idea. The Sweetest Occasion

    Then we can’t forget about basketball party ideas!

    These Party Cups Dipped in Confetti are a fun way to dress up your cups for a party. Modge Podge Rocks

    30th Birthday Party Games

    Just as fun as our article on 40th birthday party games, these games will be some fun at the party!

    These fun Minute to Win it Party Games will keep your guests entertained for hours! Happiness is Homemade

    This fun Tic Tac Toe Beer Pong game is great for a family or adult party! Frugal Fun for Boys

    This Saran Wrap Party Game is a great game for adults or kids to play. Must Have Mom

    Don’t forget the simple and classic games like poker, darts, or even fun board games like:

    Cards Against Humanity 

    What Do You Meme?

    Apples to Apples

    Drinks

    A non-alcoholic option is my favorite party punch that we make at least once a year!

    These Homemade Bottled Cocktails are perfect for party favors or to serve to your guests. The Sweetest Occasion

    This Tropical Rum Punch would be great for a beach themed party or a summer party. The Soccer Mom Blog

    Beer Tasting: If the man of honor is a beer drinker, having a beer tasting may just be what he wants! Head to the liquor store and see if they offer a mix and match option for bottled and/or canned beer where you can get many different kinds of beer for your guests to try!

    Have a Favorite 30th Birthday Party Idea?

    What are your favorite party ideas for men? Share them right here in the comments below! I’d love to hear it!


    Amish Potato Salad

    December 1, 2018

    A bowl filled with a heaping serving of Amish Potato Salad.

    Amish Potato Salad – a potato salad recipe that can be made with or without an Instant Pot, and that uses simple ingredients, with a hint of sweetness, unlike our red-skin potato salad recipe. It’s one of many of our savory salad recipes that we recommend as a side dish for any barbeque.

    Amish Potato Salad - Instant Pot Recipe

    Amish Potato Salad

    We’re BIG fans of salad recipes around here and adding this Amish Potato salad recipe to the mix was a MUST!

    Speaking of what we’re fans of… then we can’t fail to mention that we’re also big fans of the Instant Pot.

    (See my Instant Pot review, and the Instant Pot recipes here on the blog that you’ll want to get your hands on too!)
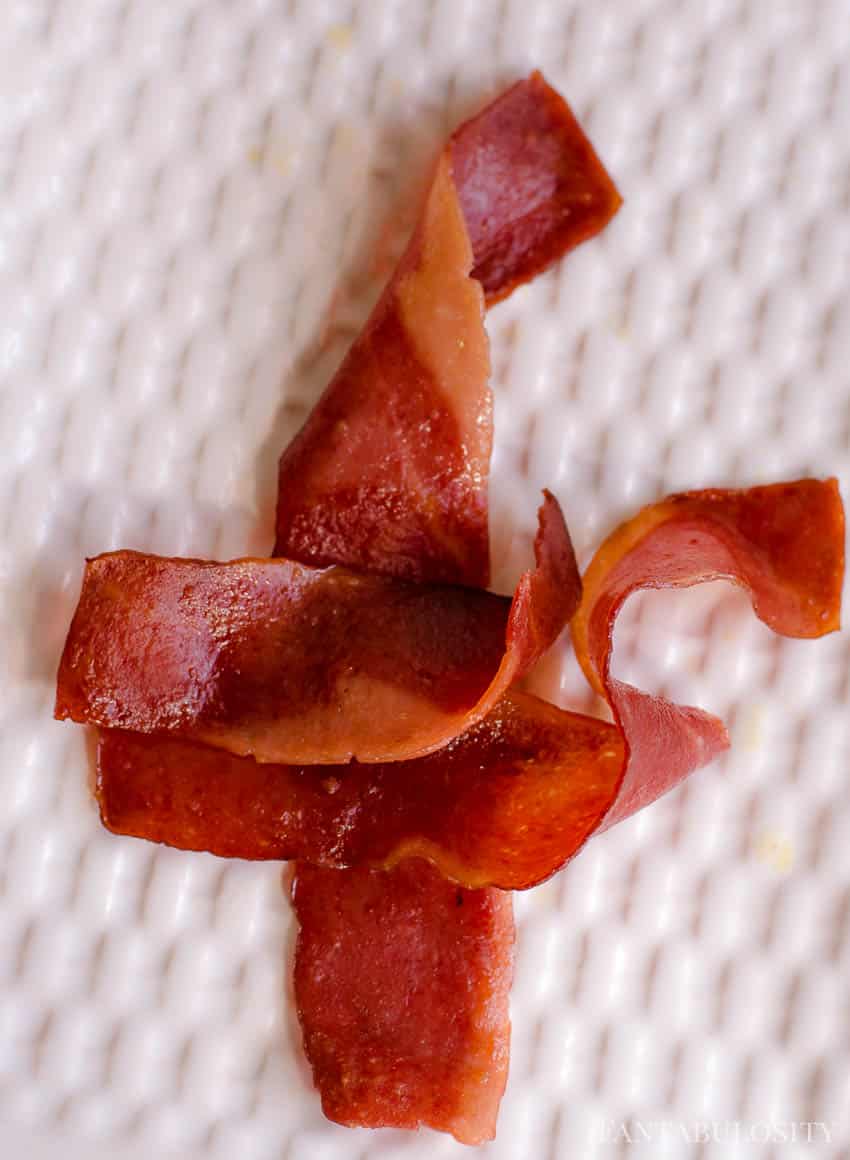
    So, creating an Amish potato salad recipe that you can make by using the Instant Pot just made sense, and is hopefully a quick and easy solution for making this very popular side dish! If you prefer to roast your potatoes instead, this potato salad with roasted potatoes lets the potatoes caramelize, adding a touch more flavor with every bite. 

    What’s the Difference in Amish Potato Salad and Regular Potato Salad?

    I had this question too. After reading an article online about this, I now know! Turns out, Amish potato salad tends to have a sweeter taste, than traditional potato salad. You can read more about that on RecipeLion: “Difference Between Amish & Regular Potato Salad“

    How to Make Amish Potato Salad

    Although we’re fans of using an Instant Pot for this recipe, it’s not a MUST. (Especially making eggs in the Instant Pot for this!)
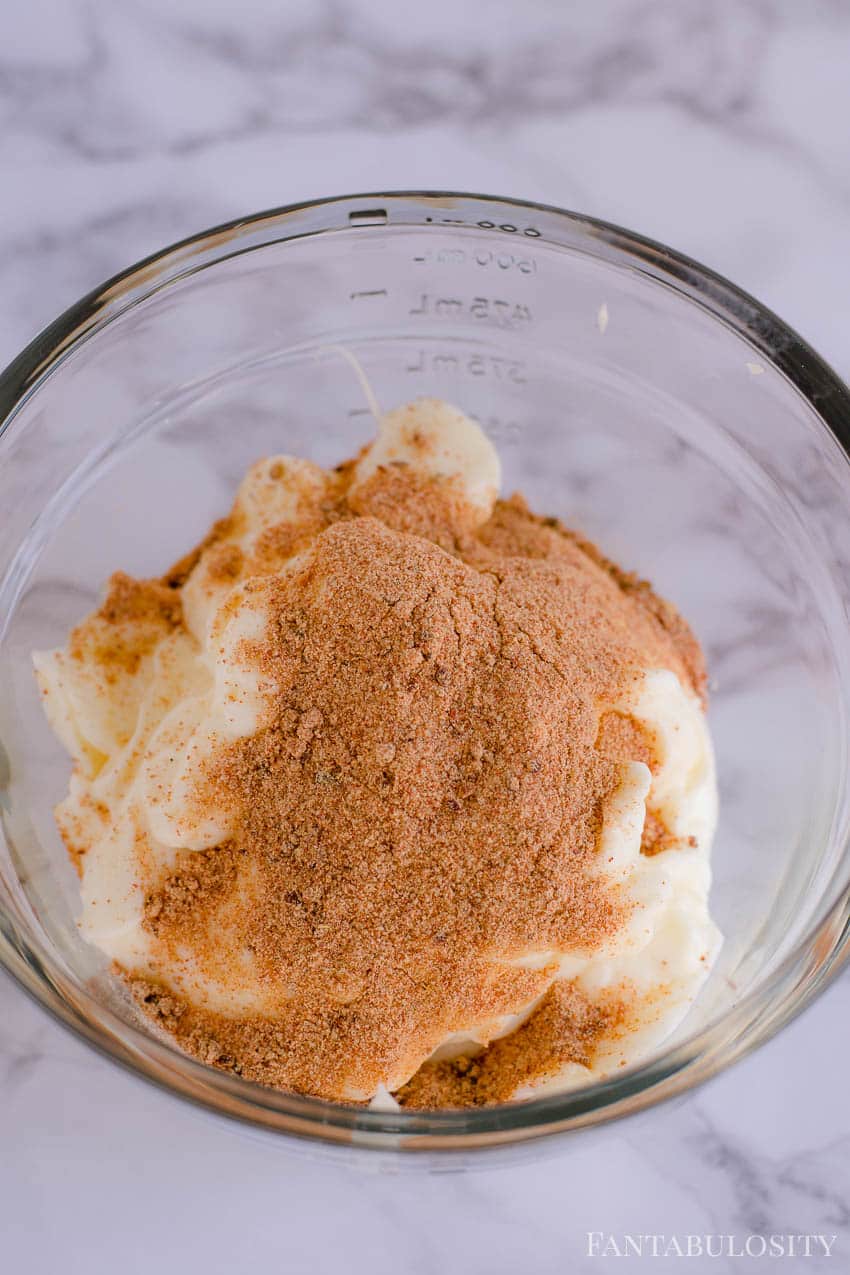
    Boiling your potatoes in a stock pot on the stove will work just as well, and can be made just as easy!

    You’ll find the full recipe at the end of this post, but I’d love to walk you through with photos in case you love the step-by-step tutorial too!

    Amish Potato Salad

    Cut the Red Potatoes

    Cut your potatoes into bite-sized pieces, and place into the Instant Pot.

    Chicken Broth for potato salad in instant pot

    Add in the Chicken Stock

    Pour in the chicken stock, secure the lid of the Instant Pot, close the steam vent, and set to manual high for 4 minutes. If you need chicken broth, you can make my easy chicken broth recipe.

    If Making Without the Instant Pot

    In a stock pot, bring water to a boil, add potatoes and reduce to a simmer. Cook for 8-12 minutes or until potatoes are tender. (Not mushy!) Drain and set aside.
    Amish Potato Salad

    While cooking, or once the potatoes are finished, chop the hard-boiled eggs, onion, celery, and red pepper into small pieces. Add to cooked potatoes.

    Instant Pot Amish Potato Salad
    Instant Pot Potato Salad

    Potato Salad “Dressing”

    In a medium bowl, combine mayonnaise, vinegar, sugar, mustard, sweet relish, milk, salt, and celery seed. Stir until thoroughly combined.

    Amish Potato Salad - Instant Pot Ingredients
    Use a whisk to mix potato salad mixture
    Instant Pot Potato Salad

    Add dressing mix to potatoes, carefully stir a few times while pouring, making sure to coat all of the potatoes.

    Amish Potato Salad in the Instant Pot

    Chill and Serve!

    Chill and store in the refrigerator until ready to serve.

    Amish Potato Salad
    Amish Potato Salad Recipe

    Easy Side Dish Recipe

    So in just a few minutes, you can have an easy side dish to serve your family on a busy weeknight, to make for a summer bbq, or even for a potluck at your next church event!

    Amish Potato Salad - Instant Pot Potato Salad Recipe

    Now that’s an easy Amish Potato Salad recipe, yes? We love easy recipes around here, not to mention salad recipes.

    More Salad Recipes

    If you’re a fan of salad recipes, here are a few more that we know you’ll love!

    • Close-up of the cranberry, cream cheese, and crumbly pretzel layers in a slice of cranberry pretzel salad.
      Cranberry Pretzel Salad
    • Roasted potato salad in serving bowl, topped with cheese, bacon and green onions.
      Roasted Potato Salad
    • Cowboy Pasta Salad in bowl with wooden spoon.
      Cowboy Pasta Salad
    • A bowl of wilted lettuce, that's leaf lettuce with bacon grease and salt.
      Wilted Lettuce

    Recipe

    A bowl filled with a heaping serving of Amish Potato Salad.
    Print Pin
    4.25 from 4 votes

    Amish Potato Salad

    Amish Potato Salad – In the Instant Pot: A potato salad recipe that can also be made without an Instant Pot and that’s a side dish full of flavor!
    Course Side Dish
    Cuisine American
    Prep Time 15 minutes minutes
    Cook Time 4 minutes minutes
    Total Time 19 minutes minutes
    Servings 10 servings
    Calories 419kcal
    Author Jessica Burgess

    Ingredients

    • 3 pounds red potatoes
    • 1 cup chicken stock
    • 6 hard boiled eggs
    • 1 cup celery sliced
    • ½ cup red onion diced
    • 1 ½ cup mayonnaise
    • 2 tablespoons distilled white vinegar
    • ¼ cup sugar
    • 3 tablespoons yellow mustard
    • 4 tablespoons sweet relish
    • ⅓ cup whole milk
    • ½ teaspoon salt
    • ½ teaspoon celery seed

    Instructions

    • Cut potatoes into bite-sized pieces. Add potatoes and chicken stock to the Instant Pot. Set to manual high for 4 minutes and close the steam vent.
    • Chop hard-boiled eggs, onion, celery, and red pepper into small pieces. Add to cooked potatoes.
    • In a medium bowl, combine mayonnaise, vinegar, sugar, mustard, sweet relish, milk, salt, and celery seed. Stir until thoroughly combined.
    • Add mix to potatoes, stir a few times while pouring.
    • Chill and store in the refrigerator until ready to serve. 

    Nutrition

    Serving: 0.5cup | Calories: 419kcal | Carbohydrates: 31g | Protein: 7g | Fat: 29g | Saturated Fat: 5g | Cholesterol: 127mg | Sodium: 537mg | Potassium: 743mg | Fiber: 2g | Sugar: 10g | Vitamin A: 320IU | Vitamin C: 12.6mg | Calcium: 51mg | Iron: 1.7mg

    Sausage and Egg Casserole

    October 14, 2022

    sausage and egg casserole being lifted out of baking dish

    Sausage and Egg Casserole: This easy recipe is filled with all your favorite breakfast ingredients: sausage, tater tots, eggs, cheese, and more! Perfect for Christmas morning or even busy mornings!

    You only need about 15 minutes to put this casserole together.

    Sausage and Egg Casserole being lifted out of baking dish

    Using similar ingredients, these breakfast egg rolls are a fun twist that you’ll also love!

    Meg here with another great recipe to share this month! We are big fans of breakfast recipes at my house and I hope you feel the same. (I also made this Instant Pot breakfast casserole too, in case you love Instant Pot recipes too!)
    Why You’ll Love This Breakfast Casserole

    I am all for breakfast food at any time of the day. How do you all feel about breakfast for dinner? We partake in it often at my house because it makes everyone happy and when that happens you just have to go with it.

    Breakfast casserole is definitely one of my go-to options when I need an easy, filling option for a great breakfast or dinner. Or sometimes I’ll even switch it out for this breakfast casserole with biscuits and gravy or this ham and cheese croissant bake, if we’re in the mood for something heavier!

    Let's talk about how easy this casserole is to make. It’s really similar to the easy quiche recipe that Jessica made but has a different spin on things with the hashbrowns, really tying in the breakfast flavor!

    The most work you put into the prep is cooking the sausage to brown, crispy perfection. And the great thing is you can prep all the remaining ingredients while the sausage is cooking.

    TIP: While this is baking, you could put frozen biscuits in the air fryer to serve them alongside this casserole.

    Ingredients for Breakfast Casserole

    This casserole is filled with simple ingredients, and it's just so good.

    Ingredients for sausage and egg casserole
    Ingredients
    • Breakfast sausage – we love using Jimmy Dean but any brand will do.
    • Tube crescent dough sheets – or crescent dough rolls with seams pressed together
    • Tater tots – frozen tater tots cut in half or hash browns
    • Shredded cheddar cheese – shredding block cheese can create a creamier casserole but pre-shredded is just fine.
    • Milk – 2% or whole preferably

    Make sure to check the recipe card below for the full list of ingredients and instructions.

    Substitutions and Variations

    Although this recipe is delicious just the way it is, here are some ideas you can try if you’d like to:

    • Sausage: I use ground sausage for this recipe but if you’re in a pinch and you only have sausage links, you can use those too! Just bake sausage links in the oven and chop them up!
    • Add-ins: You can add chopped bell peppers, mushrooms, fresh spinach, dry mustard or your favorite casserole additions!
    • Cheese: Feel free to change up the type of shredded cheese or even add more! Pepper jack cheese is a great way to add a small kick of flavor!

    Instructions

    Not only does this recipe use simple ingredients but it’s simple to put together, too! Here’s how:

    Crescent Dough

    First, a layer of flaky crescent dough. I mean, it can't be bad if it starts with bread. Am I right?!

    I love using the crescent sheets in the tube but if your store doesn't carry them, simply press together the seams of crescent rolls into the bottom of the baking dish.

    crescent rolls spread in to baking dish
    Crescent rolls
    Sausage in baking pan on top of crescent rolls
    Add sausage & tater tots

    Sausage

    Next up is of course breakfast sausage which adds lots of bulk to the casserole.

    When I tested the recipe, I tried it the first time with regular 'ole breakfast sausage and it was delicious. The second time I went with spicy and I loved it even more. I think maple would be crazy good too.

    So, the moral of this story is, use your favorite variety of sausage. All options are great choices.

    Cheese sprinkled on baking dish
    Add cheese

    Tater Tots

    I think my favorite addition to this casserole is the mini tater tots. First, because mini things are so dang cute and always seem to taste better.

    Second, because they add that yummy, starchy potato goodness. I like that there's bigger chunks of potato rather than the usual shredded hash brown option. Again, if you can't find the mini version at your store, regularly sized tater tots will work too.

    Eggs and Cheese

    And like any good breakfast casserole, there's a healthy amount of eggs and cheese to round it all out. Because it just can't be casserole without cheese.

    eggs in bowl before whisking
    Crack eggs
    Eggs whisked in bowl
    Whisked eggs

    My cooking mantra is all about taking simple, easy to find ingredients and turning them into something different and special and this casserole is the epitome of that stance.

    eggs poured over casserole
    Pour eggs over casserole

    Casserole for a Crowd

    This recipe makes a big, hearty 13×9 pan full of breakfast casserole so you can feed a decent sized crowd with this one.

    Now that the holidays are upon us, I love casseroles like this for holiday mornings because they'll keep your crew full until the big meal.

    Another big selling point is that it doesn't take much work to put together in the morning since the last thing you need on a holiday is more food prep.

    Baked Sausage and Egg Casserole
    Baked Casserole

    Can you make breakfast casserole ahead of time?

    You could cook the sausage and whisk up the eggs the night before so all you would have to do in the morning is a quick assembly.

    Whether you're having a big holiday breakfast, a simple weeknight meal or brunch with your friends, this Sausage Breakfast Casserole is a great main dish option.

    Serving of casserole being lifted out of dish with spatula

    How to Store Leftover Breakfast Casserole

    If you have leftover casserole, allow it to fully cool to room temperature and then cover with plastic wrap, aluminum foil or a lid or store in a smaller airtight container. Place in the refrigerator and enjoy for 3-5 days.

    Reheat it the next morning by place it back in the oven for a little bit (covered) or reheat small portions in the microwave!

    Bite of sausage and egg casserole on fork

    What to Serve with Breakfast Casserole

    If you’re looking for something to serve with this dish, we love having this fresh fruit salad with it, as well as something sweet, like these blueberry buttermilk muffins.

    More Breakfast Recipes You’ll Love

    A recipe, similar to this one, in sandwich form is this breakfast sliders recipe! You’ll also love this Avocado BLT, this French Toast Casserole and the super popular Cinnamon Roll Casserole!

    Try baking sausage patties in the oven too, for an easy breakfast side dish!

    Or, if you love using your slow cooker, especially for brunch recipes, you’ll love these crock pot cheesy potatoes!

    Did you make this? I’d be so grateful if you left a “star” rating below to let me know what you thought! Then, the next time you need a quick and easy recipe, come back to Fantabulosity to browse all of my easy recipes!

    Recipe

    sausage and egg casserole being lifted out of baking dish
    Print Pin
    5 from 8 votes

    Sausage and Egg Casserole

    Sausage and Egg Casserole: This easy recipe is filled with all your favorite breakfast ingredients: sausage, tater tots, eggs, cheese, and more! Perfect for Christmas morning or even busy mornings!
    Course Breakfast
    Cuisine American
    Prep Time 15 minutes minutes
    Cook Time 1 hour hour
    Total Time 1 hour hour 15 minutes minutes
    Servings 10 servings
    Calories 440kcal
    Author Jessica Burgess

    Ingredients

    • 1 pound breakfast sausage
    • 8 ounce tube crescent dough sheets (or crescent dough rolls with seams pressed together)
    • 2 cups mini tater tots (or regular tater tots cut in half)
    • 2 cups shredded cheddar cheese
    • 1 ½ cups milk (2% or whole preferably)
    • 9 large eggs
    • ½ teaspoon kosher salt
    • ¼ teaspoon pepper

    Instructions

    • Preheat oven to 350 degrees. Heat a large skillet over medium heat. Crumble the sausage into the hot skillet and cook until browned and crispy. Drain fat.
    • Meanwhile, spray a 13×9 baking dish with nonstick spray. Press crescent dough into the bottom of the prepared dish. Sprinkle tater tots and cooked sausage over the dough. Sprinkle with cheese.
    • In a large bowl, whisk together the eggs, milk, salt and pepper. Pour egg mixture over the sausage mixture. 
    • Cover with foil and bake for 30 minutes. Remove foil and bake another 25-30 minutes, until cooked through and slightly browned. 

    Nutrition

    Serving: 1serving | Calories: 440kcal | Carbohydrates: 18g | Protein: 20g | Fat: 32g | Saturated Fat: 13g | Polyunsaturated Fat: 5g | Monounsaturated Fat: 11g | Trans Fat: 0.1g | Cholesterol: 225mg | Sodium: 927mg | Potassium: 309mg | Fiber: 1g | Sugar: 4g | Vitamin A: 541IU | Vitamin C: 2mg | Calcium: 235mg | Iron: 2mg

    Apple Salad with Fruit

    August 27, 2018

    Apple salad with pudding.

    Apple Salad with Fruit: A quick dessert or side dish idea, full of fruit that easy to make for a potluck or to keep on hand for guests visiting.

    Whether you’re looking for an apple salad dessert like this one, or if you’re looking for a lettuce salad that contains apples… then you’re in luck! Scroll down to get this dessert-like apple salad recipe, or visit the 25 apple salad recipes that I gathered for you that includes everything from lettuce salads with apples, to more dessert style apple salad recipes!

    Then, if you’re feeling like a total salad fan right now, you’ll want to make sure that you visit the best salad recipes here on the blog, especially this honey lime fruit salad!

    Apple Salad - Creamy yogurt, pudding dressing

    Apple Salad

    I’m a sucker for a dessert that’s full of chocolate, and I typically bypass pies, ice creams and fruit salads at any gathering I attend, but I must say… I fell in love with this dessert idea.

    I’m also going to go out on a limb here and say that I’d even try to squeeze in this apple salad as a side dish idea.

    Yes, it has pudding in it… but the fruit, nuts, and yogurt are sometimes side items, right?

    Ok, we’ll call it a dessert, but just know that if you come over for a visit, you may find this on the table during dinner time, too.

    apple salad recipe - ingredients

    Apple Salad Ingredients

    You can find the full recipe and instructions at the end of this post, but I wanted to go into a little more detail about what you can use and substitute if you don’t have these on hand.

    For this recipe, it really is forgiving and can be made a lot of different ways. 

    Yogurt + Pudding

    For mine, I wanted to use vanilla yogurt AND vanilla pudding. You can use all yogurt or all pudding if you like, but if you have both on hand, mixing the two creates a crazy good flavor.

    Although I made my pudding from an instant pudding box, you can keep things super quick and easy and buy vanilla pudding already made!

    Nuts + Fruit

    Feel free to switch out the different nuts depending on your preference, but I used candied pecans and dried cranberries, because they come in a package together at Walmart, making it super easy.

    Then, I also used red grapes for a soft texture, and it was the perfect addition!

    Cut and core apples for apple salad

    Core + Cut Apples

    Of course you can cut your apples using a knife, but I absolutely love using an apple corer. It makes things that much faster, and less chances for seeds to end up in my apple salad.

    For this salad, I still use a knife to cut them in to cubes, but it still speeds up the process for sure!

    Cut and cube apples for apple salad
    apple salad - grapes, red and green apples
    Dried cranberries and candied nuts in an apple salad

    Once the apples, cranberries + nuts and grapes are in the bowl, it’s time to add in the yogurt and pudding.

    (You can mix up the pudding and yogurt first and add it in, or you can do what I did and add them in separately. It all mixes in well regardless.)

    apple salad - yogurt and pudding dressing
    apple salad recipe - yogurt and pudding dressing
    Mix together ingredients for apple salad

    Once it’s all mixed together, you can serve it immediately or store for later.

    I prefer to eat it immediately, but it’s good leftover too!

    Apple salad - creamy yogurt and pudding dressing

    I hope you enjoy this recipe! Make sure to check out the other easy salad recipes to add to your favorites!

    apple salad - dessert or side dish with a sweet creamy dressing

    Or, go all in and make dinner time super easy and grab my cookbook where I’ve created complete meal plans for you! Find more details about the Fabulously Fast Dinners cookbook!

    Recipe

    Apple salad with pudding.
    Print Pin
    4.77 from 26 votes

    Apple Salad – Creamy Yogurt + Pudding Dressing

    This Apple Salad with a Creamy Yogurt & Pudding Dressing is a quick dessert full of fruit that’s easy to make for a potluck or to keep on hand for guests visiting.
    Course Dessert
    Cuisine American
    Prep Time 10 minutes minutes
    Total Time 10 minutes minutes
    Servings 8 servings
    Calories 131kcal
    Author Jessica Burgess

    Ingredients

    • 5 apples, green/red
    • ½ cup dried cranberries and candied pecans
    • 1 cup red grapes
    • 1 cup vanilla yogurt
    • 1 cup vanilla pudding

    Instructions

    • Core and cut apples into small cubes
    • Slice grapes in half.
    • Place apples, cranberries, candied pecans and grapes in large bowl.
    • Add in yogurt and pudding.
    • Stir to combine
    • Serve when the dressing is equally distributed, and refrigerate any leftovers!

    Notes

    Please keep in mind that the nutritional information provided below is just a rough estimate and variations can occur depending on the specific ingredients used. 

    Nutrition

    Serving: 1serving (½ cup) | Calories: 131kcal | Carbohydrates: 32g | Protein: 1g | Cholesterol: 1mg | Sodium: 39mg | Potassium: 224mg | Fiber: 3g | Sugar: 26g | Vitamin A: 85IU | Vitamin C: 6.1mg | Calcium: 61mg | Iron: 0.3mg

    25 Apple Salad Recipes: Side Dishes, Desserts + More!

    May 31, 2023

    Collage of apple salad recipes with text overlay.

    Whether you’re looking for a side dish, dessert, or even salad recipes to use with apples, I think you’ll love these apple salad recipes that I’ve gathered for you!

    In the Fall, it’s easy to have a plentiful supply of apples, but the lovely part of recipes using apples is that apples can be found all year long to help keep your kitchen full of yummy recipes so these ideas should come in handy no matter when you’re finding them!

    Post originally published in August 2018, updated in May 2023.

    Collage of apple salad recipes with text overlay.

    Here you’ll find salads with apples, dessert dishes, and side dishes that are perfect for dinner or even to make for the potluck gathering that you’re attending soon!

    25 Apple Salad Recipes

    Cool Whip Fruit Salad  

    This fruity salad has the best cool and creamy dressing. Use cool whip and canned fruit with marshmallows. Add some fresh apples to give this salad a crispy texture that is delicious.

    Apple Raspberry Spring Mix

    Add berries and apples to  a simple spring mix for a fruity twist on a classic. You can make a meal of this or serve it on the side.

    Apple Salad with a Creamy Yogurt and Pudding Dressing

    The creamy yogurt and pudding dressing combined with the crunchiness of apples is a combo that’s hard to resist.

    Snickers Apple Salad

    This dessert salad has so much going for it! It has apples to make it a little healthier, but it has plenty of Snickers candy mixed in to keep it sweet and delicious!

    Pecan apple salad on plate next to fork and napkin.

    Harvest Chicken Salad

    Adding chicken and apples to a salad is one way to make for a fulfilling and healthy meal. This has a great combination of ingredients for unbeatable texture and flavor.

    Spinach Salad with Apple

    This apple salad has crunchy apples and nuts, and creamy cheese and healthy greens for a great meal.

    Arugula Apple Salad

    This simple salad is so satisfying! Make this with apples and arugula and be sure to add goat cheese and walnuts for texture and flavor.

    Shaved Brussels Sprouts Salad

    Shaved brussels sprouts and apples make such a good combination for a healthy salad. Serve this for lunch or dinner that hits the spot and doesn't weigh you down.

    grapes, apples, and walnuts atop greens

    Blue Cheese, Grape and Apple Salad

    Blue cheese, apples and grapes are such a good combination for a salad. Make this to enjoy for lunch, or serve it with grilled meat for dinner.

    Chicken Apple Salad

    Chicken and apples go together great in this easy and tasty salad. Make this for a fast and flavorful lunch you can pop in a picnic basket for a great summer meal.

    Fall Harvest Salad

    This salad has the best harvest flavors in every bite. With maple roasted squash, crispy apples, dried berries and a great dressing, this salad has a little something for everyone.

    Cucumber apple salad in bowl.

    Apple Cucumber Salad

    Make an apple salad with refreshing cucumbers for a unique and delicious flavor that pairs well with so many main meals.

    Classic Waldorf Salad

    Waldorf salad is a potluck staple. This recipe turns out perfectly every time for a crowd pleasing side or dessert option.

    Chopped apple salad.

    Apple Melon Pineapple Salad

    This fruity salad has all of the best flavors for a filling and refreshing healthy meal. This is great for a summer lunch to share with friends.

    Spinach Apple Salad

    Spinach and apples make for a delicious and easy combination for a healthy salad. You will love the crispy apples with walnuts and goat cheese.

    Apple salad in bowl with berries.

    Pomegranate and Brussels Sprouts Salad

    This salad starts with brussels sprouts sliced thin, and adds crunchy nuts, juicy pomegranate and crisp apples to make a really good salad with plenty of honey mustard dressing!

    Rainbow Broccoli Salad

    Bring the colors of the rainbow to the table with this crunchy and delicious salad. It has plenty of apples, broccoli, nuts, carrots and grapes to offer a medley of tasty flavors for your next potluck or party.

    Apple chicken walnut salad on lettuce leaves.

    Apple Walnut Chicken Salad

    Adding fruit and nuts is an easy way to make your chicken salad pop with great flavor. This will be a favorite fall lunch that is easy to meal prep ahead of time.

    Walnut apple salad on plate.

    Walnut Salad

    Walnuts are the star of this salad, but it has plenty of apples, greens and onions to give it texture, crunch and so much flavor!

    Simple Cabbage and Apple Salad

    Simple is always a good idea on a busy night. This recipe uses cabbage and apples to make a great side for grilled meats, or sandwiches.

    Green apple salad in bowl.

    Apple Gorgonzola Salad

    You can skip the trip to Buca di Beppo and get the iconic flavors of their apple gorgonzola salad at home with this easy to recreate dish.

    Apple salad with avocado - Harvest salad.

    Pomegranate and  Apple Harvest Salad

    Pecans, apples, avocado and pomegranate make this salad burst with fresh flavor in every bite.

    Cranberry Apple Salad

    Cranberries and apples come together to make a fresh and flavorful salad that you can serve all fall long for the best healthy lunches.

    Broccoli apple salad in bowl next to apples.

    Broccoli Apple Salad 

    Crispy apples, crunchy broccoli, and plenty of dressing come together in under 15 minutes to make a colorful and flavorful salad.

    Arugula and apple salad.

    Fall Panzanella Salad 

    This fresh salad has ample fall flavors in an easy to assemble form. You will want to pack this and take it along on a picnic with someone special on a pretty fall day.

    Apple salad in platter.

    Fall Harvest Salad

    Thinly sliced apples atop of leafy green lettuce with nuts, cheese and dressing make for a salad that captures the best flavors of the fall harvest in one easy to make salad.

    Love our Recipe Collections?

    If you love having themes for some of your favorite types of food, you’ll love these other recipe collections:

    • Collage of chicken and rice casserole, crock pot turkey breast, school pizza, and Milky Way cake, labeled Easy Weekly Meal Plan, Week 8.
      Easy Weekly Meal Plan #8: Five Dinners and Milky Way Cake
    • Collage of chicken pot pie, smothered cube steak, slow cooker ham, and Texas sheet cake, labeled Easy Weekly Meal Plan, Week 7.
      Easy Weekly Meal Plan #7: Five Dinners and Texas Sheet Cake
    • Four chicken dishes around a pale label reading 8 Easy Crockpot Chicken Recipes.
      8 Easy Crockpot Chicken Recipes for Cozy Dinners
    • Collage of poppy seed chicken casserole, salisbury steak, fried catfish, and apple dapple cake, labeled Easy Weekly Meal Plan, Week 6.
      Easy Weekly Meal Plan #6: Five Dinners and Apple Dapple Cake

    Best Friend Birthday Gifts

    February 25, 2019

    Gift ideas for best friends

    Best Friend Birthday Gifts: DIY gift basket ideas, favorite places to shop, and favorite birthday gift ideas for your best friend.

    I’m a sucker for good gift ideas, so when I have a friend that has a birthday coming up, and I’m on top of my game (or what at least feels like it) I LOVE creating the “perfect” gift for her, even if it’s just a small gesture like this cute boxed lunch idea.

    However, sometimes, life happens and I forget… life catches up with me and I’m stuck looking for a quick gift to buy online for her. 

     Best Friend Birthday Gifts

    But no matter what, it’s the thought that counts, and I truly believe that. Honestly, if she’s a true friend, you may not get her anything at all and she’ll still love you dearly.

    Gift Ideas for Her | To Make and/or To Buy

    Alright, so now that we’re ready to get to the cutest gift ideas for her, I’m going to show you my favorites and DIY gift ideas that I love to gift to my best friends when I have time and I’m feeling creative…

    Then, we’ll go over what you can buy online for those “oops” last minute moments, or if you just don’t feel like DIY’ing or crafting anything!

    To DIY…

    Spa at Home Gift Basket

    best friend birthday gifts - ideas, the places to shop and so many fun things to get her!

    Ok, first… can you EVER go wrong with a gift that’s full of things to help you feel like you’re at a spa?

    I don’t think so.

    However, she may struggle with finding the time to use these items if she’s a busy gal. But if that’s the case, one-up this gift and offer to babysit her kiddos so she can have a night off to use these goodies for her birthday!

    In this gift you’ll find things like:

    • body scrub
    • bath soak
    • pedicure file
    • eye mask
    • spa gloves
    • body brushes/scrubs
    • lotions, body wash, etc.

    Tip: Don’t just buy these items and throw them into a bag. Take what you can out of the packages and place them in a cute little $2 box from Hobby Lobby or Walmart and arrange them for an adorable presentation!

    See the full spa gift idea!

    Overnight Self Care Kit

    Overnight care for Mom - Gift idea

    With a similar take on the spa at home gift idea, this overnight self care kit can take things to a whole other level.

    Send her away for a night with her husband, or alone in a hotel where she can catch up on sleep and self care!

    Grab a make-up bag (a gift that keeps on giving and sometimes the same price as a stinking gift bag these days) and fill it with items she may love to use while staying overnight!

    Get all the details of my overnight self-care kit!

    DIY Sangria Kit

    Aw, how cool is this! DIY Gift Idea: Sangria for Friends, housewarming, for women, new neighbor, anyone! Who wouldn't love this!? They can even use the drink dispenser again and again!

    An INSANELY popular gift idea is my DIY Sangria Kit. When I whipped this up for my sister, I didn’t realize just how popular this gift would turn out to be on Pinterest!

    I’m a big fan (if you hadn’t guessed already) of using items that the recipient can reuse as a “gift bag” instead of spending a ton of money of a paper/plastic bag that they’ll just toss in the trash.

    This drink dispenser serves as a gift “basket” and it’s something she can reuse over and over again!

    Fill it with the ingredients to make a fun sangria and you two can whip up a batch and sip on it that evening!

    Get all of the details and my favorite places to buy the items to make this DIY Sangria gift idea HERE!

    Gift Basket for a Foodie

    Bread Basket Hostess Gift Idea: DIY and FREE Printable!! fantabulosity

    My friends know my love for food. So odds are, my friends love food too. So when a gift comes in food-form, you’re speaking my love language.

    Although I created this gift idea for a housewarming gift, it works perfectly for the food-lover or chef. Bread, cooking linens, fancy balsamic and olive oil and even a homemade spread!

    TIP: Using a wire basket allows the overall gift to look “bigger” and she can see all that’s she’s getting without having to dig in to it!

    Plus, a wire basket like this doubles as home decor! Again, a gift that keeps on giving. My favorite!

    Get all of the details for this gift basket for a foodie!

    Housewarming Gift + Drink Dispenser

    DIY House Warming Gift Ideas. Mason Jar Drink dispenser with all of those "always need," items when moving in! Awesome! https://fantabulosity.com

    Did your best friend just move in to a new house? We’ve moved more times than I can count, so having someone gift items that I may be running out of or forgetting to purchase every time a make a trip to the store… feels golden.

    Plus, filling a drink dispenser with the household items is a great way for the new home owner to later fill it with lemonade or her favorite cocktail to serve her guests when they come over to take a peek at the new place!

    See the items I put inside this housewarming gift for our new neighbors!

    Sunshine Gift Basket

    Sunshine Gift Ideas! Buckets, Box, Bags, anything woiuld work for this! Love it! https://fantabulosity.com

    To say this gift idea has gone viral online, is an understatement.

    So I feel it’s definitely note-worthy of a great gift idea for your best friend!

    Not to mention, this gift is SUPER fun to shop for, when you’re all eyes for anything yellow.

    You don’t realize how many yellow things there are in a store, until you start looking specifically for them!

    See what yellow items I included in my sunshine gift basket, to get ideas for your own!

    Take it Easy Gift Basket

    Gift basket idea for men or women

    What best friend wouldn’t love a cozy “take it easy” themed gift basket?

    A warm blanket, fuzzy slippers, a new coffee mug and maybe throw in a magazine for good measure.

    See how I assembled this “take it easy” gift basket idea, to get ideas for your own!

    Gift Basket Ideas for All Occasions

    DIY housewarming gift idea

    I believe that almost any gift can work for a birthday present.

    I have SO many more gift ideas here on the blog that you can browse through to get ideas for that special best friend in your life.

    Remember, think outside the box… what can they REALLY use… and how can you make it better when it comes to assembling it. (i.e. fun containers, baskets, etc.)

    Here are more gift ideas for all occasions to remember for later or to brainstorm more DIY ideas!

    Puzzle

    I know a puzzle sounds simple… but hear me out. My sister gifted me with a puzzle in the shape of Montana when we moved, and it was the sweetest thing. When she came to visit, we’d drink wine and put it together with family, and then we glued it and framed the puzzle to use as decor in our home.

    Favorite Gifts to Buy Best Friend

    So those moments we forgot, ran out of time, or just NOT in the mood to be creative with gift baskets??? I’ve got you covered. I’ve been there too.

    Since products are ever-evolving, selling out and changing, I’m sharing my favorite places to look FIRST when it comes to buying birthday gifts for my best friends.

    Target

    If you don’t like Target, I’m not sure we can be friends. Ok, totally kidding… but you can NEVER go wrong with picking up something in the “home” and/or “beauty” section at Target.

    • Fun kitchen utensils, dish towels, plates, coffee mug, cake stands
    • Bookshelf decor, wall hangings
    • Pillows, baskets, throw blankets
    • Notebooks, journals, planners
    • Face masks, makeup, makeup bags
    • Nail polish, pedicure sets, foot soaks
    • Hair masks, hair tools, hair accessories

    Then of course, don’t forget to hit up the dollar spot for something fun to garnish the gift with, like a fun notepad or car cell phone holder!

    Shop Target Home | Shop Target Beauty

    H&M

    Friend, if you’ve never shopped H&M’s “Home” section on their website… you are missing OUT.

    It’s not only a wonderful place to buy baskets to make gift baskets with, they have the most adorable items to gift someone.

    Blankets, baskets, home decor, pillows, and the list goes on. It’s affordable, trendy and something that your friend probably doesn’t already have 50 of because it’s like a hidden secret that so many don’t even know about!

    Shop H&M Home

    Chic Aprons

    Even if your best friend doesn’t cook that often, I can’t help but think that she’d LOVE one of these aprons. I myself, have way too many of these because they’re THAT cute.

    There’s something about putting on an adorable apron on when it’s time to make dinner. Kind of like how buying new workout clothes motivates you to workout?

    Get her one of these so she can feel great when it’s time to tackle the kitchen.

    Shop my FAVORITE Vintage Aprons

    Charming Charlie

    Charming Charlie has been my favorite place to get wallets, jewelry and purses for the last couple of years.

    But each time I go online, I see that they have the CUTEST gift ideas. (You know, the things that we don’t want to spend money on for ourselves, but the adorable things that we’d love to have!?)

    So if your best friend is a fashionista, snagging a bag, wallet or jewelry from Charming Charlie is a great place to do so! But they also have cute gifty items like pens, books, and perfume that would make perfect gifts!

    Shop Gift Ideas at Charming Charlie

    Other Gift Ideas for Your Best Friend

    In case you’re still at a loss of what to get your best friend, here are a few great ideas that I’ve loved gifting to my friends:

    • Homemade Food (cookies, cakes, brownies, jams, jellies, extracts)
    • A daily/monthly planner
    • Book
    • Magazine subscription
    • Online classes at Udemy (i.e. cooking, photography, sewing)
    • Gift certificate for a pedicure, manicure, massage at a local salon
    • Floral arrangement (Check to see if they offer a monthly/quarterly delivery service for a gift that keeps on giving.)
    • Suprise dinner with closest girlfriends
    • Wine subscription
    • House cleaning service (unless she could be easily offended, thinking you were saying her house was dirty. Eeeek.)
    • Drop off bagels and flavored cream cheeses from local coffee shop on her doorstep to start her birthday off with a bang!
    • DNA/Family history search

    I could go on and on with ideas, because I absolutely love brainstorming and thinking of new ways to gift someone I love and care about.

    So if you didn’t see something that will work for you and your best friend, let me know in the comments below! I’ll see if I can think of something for you!

    Love Birthday Ideas?

    Then you’ll LOVE how we celebrate birthdays and all sorts of occasions around here! Browse our party ideas!

    Pin the image below to remember it for later!

    Best Air Fryer: Reviews and Favorite Picks

    September 24, 2018

    Best air fryer reviews

    Best Air Fryer: The top 5 air fryers after researching customer reviews and specs of each one! Shop them today on Amazon and find out the favorite pick from Walmart!

    Best air fryer

    Fantabulosity participates in affiliate programs, which means we may receive commissions if you purchased an item via links on this page to retailer sites, at no extra cost to you! However, our recommendations do not reflect commisions. For more details, you can read our affiliate and earnings disclaimer!


    You know my love for my new kitchen gadget, the Instant Pot… so now I’m totally intrigued with what else I could add to my kitchen collection. My parent’s just purchased an air fryer, and after watching them use and LOVE theirs, it helped solidify that I may need one too.

    What is an Air Fryer?

    Well, according to Wikipedia,

    “An air fryer is a kitchen appliance that cooks by circulating hot air around the food using the convection mechanism. A mechanical fan circulates the hot air around the food at high speed, cooking the food and producing a crispy layer via the Maillard effect.”

    But if you ask my friends that have one, they’ll tell you something like,

    It’s crazy cool. It will fry the food without using oil and gives it an amazing flavor that baking doesn’t!

    Air Fryer Reviews

    But where do I begin? Researching, that’s where! So I’ve researched and compiled 5 air fryers that are great to choose from based on customer and Fantabulosity reader reviews!

    Best Air Fryer: Which One To Buy

    Listed in no particular order… and sharing my top pick at the bottom of this post!


    1. Simple Living 5.8qt Digital XL Air Fryer. 3 Piece Accessory Set & Recipe Book. 7 Cooking Settings (5.8Qt)

    The reviews on this one from Amazon really surprised me. At the time of this post, it has 332 reviews and has a star rating of 4.5 out of 5!

    Favorite Reviews:

    • Easy to use and clean
    • Food is crispy on the outside and juicy on the inside!

    Favorite Specs:

    • 7 presets
    • Extra large capacity (which I hear is super nice)

    2. Chefman 6.5 Liter/6.8 Quart Air Fryer 

    The XL capacity really caught my eye on this one, since I always feed a family of four and we like leftovers. 

    I was also pretty pleased with it when I used it since they sent me one to try out! See the video of the unboxing and how I made chicken wings below…

    Favorite Reviews:

    • This Chefman 6.5 Liter Air Fryer has twice the capacity of my largest air fryer…
    • Super easy to use

    Buy the Chefman 6.5L XL Air Fryer HERE!

    Don’t need an XL? You may love this one instead:

    Chefman 2.6 Liter/2.7 Quart Air Fryer with Adjustable Temperature Control

    Although smaller than the first one listed, this one caught my eye because of the price! Not sure you’ll use an air fryer? Start with a smaller (more affordable one) to see if you like it.

    Favorite Reviews:

    • Sleek design
    • Perfect for 2 (smaller basket)

    Favorite Specs:

    • Dishwasher safe parts
    • Nonstick and easy to clean

    3. Ninja Air Fryer AF100

    The Ninja Air Fryer has fantastic reviews, and if you’ve heard me go on and on about my Ninja Coffee Bar, then you already know how big of a fan I am about anything “Ninja”. You can buy this on Amazon, but I found it cheaper online at Walmart HERE!

    Favorite Reviews:

    • Roasts, dehydrates and reheats!
    • Attractive and lightweight

    Favorite Specs:

    • 4 qt. nonstick basket
    • Cooks up to 2 lbs. french fries
    Best air fryer - review

    4. Power Air Fryer XL 3.4 QT Black – Turbo Cyclonic Airfryer

    This reader favorite air fryer is what multiple Fantabulosity readers have and recommend, and sometimes there are no better reviews than those that you can trust!

    Favorite Reviews:

    • Can cook a whole chicken
    • Love the preset buttons!

    Favorite Specs:

    • Air Fry, Bake, Steam, Saute, Grill and Roast
    • 7 Preset Programs with easy one-touch digital controls.

    My Pick?

    I think I’m going to go with the Ninja Air Fryer AF100.

    I’m such a fan of the Ninja Coffee Bar and love that this one dehydrates because a dehydrator has been on my wishlist for a long time!

    I feel like getting this one will kill two birds with one stone!

    Plus, the price is mid-range of the others and I feel like I’m getting a good deal, yet not skimping on quality/size!

    Best air fryer - review

    BUY THIS ON WALMART.COM

    BUY THIS ON AMAZON

    If you only need an air fryer, I’d go with the Chefman 6.5L XL air fryer. But if you are looking for a combo, then the Ninja may be more your style!


    Do you have a favorite air fryer?

    I’d love to hear if you have an air fryer that I haven’t mentioned! Let us know in the comments below why you love it and why it’s your favorite!

    Pistachio Salad

    April 7, 2025

    Pistachio Salad in white bowl on pink background

    Pistachio Salad: A take on watergate salad and ambrosia dessert salad recipes that uses simple ingredients like fruit, pudding mix, and marshmallows and ready in minutes!

    Much like our fruit salad with Cool Whip and Orange Fluff, this fluffy dessert salad is made in minutes and ready to eat!

    Pistachio Salad in white bowl on pink background
    Pistachio Salad

    Recipe updated August 2022

    Why you’ll love this recipe

    I know how much you love salad recipes, whether that’s savory salads or dessert salads… and I knew this would be no different! But I knew you’d especially love this “green fluff” recipe because:

    • Easy: This is such a simple salad and great dessert! It only takes 5 minutes to prep. That’s it!
    • Simple Ingredients: With only 4 required ingredients, they can all easily be found at any grocery store and you can even keep them on hand for a last minute dessert idea! (Just freeze the Cool Whip to keep it fresh for longer!)
    • Perfect for feeding a crowd: If needing a salad recipe for a crowd, this pistachio salad recipe is a perfect fit. It’s a family favorite and crowd-pleaser and it can easily be doubled or tripled if needed! Think, a family reunion, work lunch, family gatherings, or even a fun dish for St. Patrick’s Day!

    Ingredients

    Get the full recipe card with instructions below!

    • 1 3-ounce package pistachio instant pudding
    • 1 20-ounce can crushed pineapple, not drained
    • 1 8-ounce tub whipped topping
    • 2 cups mini marshmallows
    • Maraschino cherries, chopped pecans, and/or additional miniature marshmallows for topping – all optional and amounts depend on preference
    ingredients on table for pistachio salad
    Ingredients

    Instructions

    1. In a large bowl, combine the pistachio instant pudding and the crushed pineapple. Mix well to let the pudding mix absorb into the juices from the pineapple.
    2. Fold in the Cool Whip and miniature marshmallows.
    pistachio pudding mix with pineapple in glass bowl
    Pineapple and Pudding
    whipped topping added to mixture in glass bowl
    Cool Whip & Marshmallows
    1. Pour into a serving bowl and refrigerate for at least 1 hour. 
    2. Just before serving, top the fluff with chopped pecans, additional miniature marshmallows, and maraschino cherries, if desired. Serve chilled. 
    Cherries on top of pistachio salad
    Add cherries!

    How to Serve

    You can eat and serve this pistachio salad as a side dish or dessert! It’s one of our favorite recipes for holiday tables, and we simply just eat it with a fork! Or, you can also use it as a dip for graham crackers! If serving it as dessert, I’ll sometimes portion it into these fun and delicious chocolate waffle cone bowls.

    Expert Tip

    If you’d like, you can also add chopped pecans into the fluff mixture. If you do want to add them, it’s best to start by adding about a ¼ cup of pecans and then increase the amount, up to ½ cup or so, or until it reaches your desired consistency!

    Pistachio salad in bowl on black and white linen
    Vintage Recipe

    Substitutions and Variations

    • Cottage Cheese: I know it may sound wild but some even add cottage cheese to recipes like this! It’s helps offset the sweet in this salad, and has an amazing texture. If you’d like to add it, you can mix in a 16 ounce container of small curd cottage cheese, just before you add the Cool Whip.
    • Pudding: Can’t find instant pistachio pudding mix? Consider a different instant pudding mix, although it won’t have that green color this one does and vanilla may be your best substitute, and then if you really want the “green” color, you can add a drop of green food coloring!
    • Nuts: If you don’t like pecans or don’t have any on hand, another great idea is to use crushed pistachio nuts! Very fitting for this jello salad!
    • Fruit: If you don’t have pineapple for this recipe, you may also want to consider using mandarin oranges! Just chop them up or crush them and use the same amount!
    • Watergate Salad and Ambrosia Salad: Sometimes you’ll hear this recipe called other things! (Or maybe you’ve even heard it called “pistachio pineapple delight.”) But we’ve always called it pistachio salad so that’s what we’re going to call it here, too!
    Bite of pistachio salad on spoon
    Take a bite!

    Storage

    If you happen to have leftovers, you can store it in the refrigerator in an airtight container, or cover with plastic wrap.

    Can you make pistachio fluff salad ahead of time?

    Yes! This needs to chill for at least an hour before serving anyway, so making this in advance is a great idea! Ideally, making it the night before is a great plan but just make sure not to add your toppings until right before serving. (The cherry juices could spread, etc. if added too soon.)

    More Easy Desserts

    If you love this pistachio pudding salad, and you love easy dessert recipes… then you’re DEFINITELY in the right place. Browse our easy dessert recipes to have a place to turn when you’re in the mood for something sweet, and quick!

    You’ll especially love this Snicker Apple Salad and this honey lime fruit salad!

    Or, if you’re a big fan of pistachio, then you’ll also love these pistachio cookies!

    Originally published: August 2019
    Updated and republished: April 2025

    Recipe

    Pistachio Salad in white bowl on pink background
    Print Pin
    5 from 10 votes

    Pistachio Salad

    Pistachio Salad: A take on watergate salad and ambrosia salad recipes that uses simple ingredients like fruit, pudding mix, and marshmallows and ready in minutes!
    Course Dessert
    Cuisine American
    Prep Time 5 minutes minutes
    Total Time 5 minutes minutes
    Servings 5 servings
    Calories 263kcal
    Author Jessica Burgess

    Ingredients

    • 3 ounces package pistachio instant pudding optional
    • 20 ounces can crushed pineapple not drained
    • 8 ounce container of Cool Whip
    • 2 cups miniature marshmallows
    • maraschino cherries optional
    • chopped pecans optional
    • miniature marshmallows optional

    Instructions

    • In a large bowl, combine the pistachio instant pudding and the crushed pineapple. Mix together well to let the pudding mix soak into the juices from the pineapple.
      3 ounces package pistachio instant pudding, 20 ounces can crushed pineapple
    • Fold in the Cool Whip and miniature marshmallows.
      8 ounce container of Cool Whip, 2 cups miniature marshmallows
    • Pour into a serving bowl and refrigerate for at least 1 hour. 
    • Just before serving, top the fluff with chopped pecans, additional miniature marshmallows and maraschino cherries, if desired. Serve chilled. 
      maraschino cherries, chopped pecans, miniature marshmallows

    Video

    Notes

    Tip:
    You can also add the chopped pecans in to the fluff mixture if you prefer. If you do want to, start at ¼ of a cup and increase up to ½ cup, or until your desired consistency. 

    Nutrition

    Serving: 0.5cup | Calories: 263kcal | Carbohydrates: 61g | Protein: 2g | Fat: 3g | Saturated Fat: 1g | Polyunsaturated Fat: 0.2g | Monounsaturated Fat: 1g | Cholesterol: 7mg | Sodium: 295mg | Potassium: 193mg | Fiber: 2g | Sugar: 51g | Vitamin A: 136IU | Vitamin C: 11mg | Calcium: 70mg | Iron: 0.4mg

    The BEST Egg Salad Recipe

    March 6, 2025

    egg salad on croissant

    The BEST Egg Salad Recipe: This classic egg salad uses simple ingredients such as mayo, relish, optional red onion, seasoned salt, and a little pepper!

    Similar to our ham salad recipe, this egg salad sandwich is easy to make and is ready for a great lunch idea in just a few minutes.

    Egg salad on croissant, on white plate

    We are REALLY into salad recipes around here, and can’t get enough of them. But all salads don’t have to be “lettuce” salads, right? It’s definitely one of my favorite savory salads, along with this chicken salad recipe!

    Why You’ll Love This Egg Salad Recipe

    • Affordable: This classic egg salad recipe uses only a few ingredients and affordable ingredients, at that!
    • Meal Plan: Whether you want to make a batch to eat on for a quick lunch for the week, or to just keep a batch in the refrigerator for everyone to snack on, this recipe is perfect for that! I like to make a large batch of hard-boiled eggs in my Instant Pot, to snack on, and I usually use 6 of these eggs to make this egg salad!
    • Protein: Eggs are a great source of protein! I love feeding this to my family so it holds them over for a while, between meals!

    Ingredients

    See the full ingredients amounts and directions toward the bottom of this post, in the recipe card! Here are a few notes about some of the key ingredients:

    • Hard-Boiled Eggs – Tips below to cook them if you’re not using already cooked eggs
    • Mayo – Hellman’s or Best Foods mayonnaise is recommended and I’ve found this gives this egg salad recipe the best flavor.
    • Relish – Dill or sweet pickle relish can be used for this recipe.
    • Red Onion – This is optional and gives the egg salad a little crunch. Chop the onion in to small pieces, so it doesn’t overpower the egg salad.
    • Seasoned Salt – Regular salt can be used instead but seasoned salt takes the flavor to the next level.
    labeled ingredients on counter for egg salad

    How Do You Make Egg Salad?

    I’ve always found everyone else’s opinions of how you make egg salad super interesting. But I consider this a classic egg salad recipe because it’s what my momma made and it’s the type of egg salad I’ve had from others, as well!

    1. Peel your hard boiled eggs. (If you need to cook your eggs first, see the different cooking methods below!)
    2. Discard the shells and chop up the eggs (egg whites and egg yolks) in to small pieces. (You can use a cheese grater if you like the pieces of the eggs smaller, but we prefer larger pieces.)
    Hard boiled eggs, some peeled some not
    Peel hard boiled eggs
    Chopped hard boiled eggs on cutting board
    Chopped eggs

    Tip: If you’re just now cooking your eggs, (meaning you’re not using eggs that have already been hard boiled ahead of time) we find that we prefer the egg fully cooled before making the egg salad.

    1. Place chopped hard-boiled eggs in a medium bowl.
    2. Next, add in mayo, relish, red onion, seasoned salt, and pepper.
    Chopped eggs in mixing bowl
    Place eggs in bowl
    Seasonings added to eggs
    Add seasonings
    1. Stir until evenly combined, and it’s ready to eat!
    mixed egg salad in glass bowl

    What Kind of Bread for an Egg Salad Sandwich?

    That’s up to you of course, but an at-home egg salad sandwich served on a croissant is my absolute favorite. It reminds me of a delicious sandwich I’d get at a cafe for lunch!

    However, those aren’t always handy so regular sandwich bread, lightly toasted, is my next favorite!

    Other bread like rye, wheat, or even on a pita, is super delicious too!

    1. If serving this egg salad recipe on bread, place a small amount (about a ¼ cup) on a sliced croissant (or other bread).
    2. Top with your favorite toppings (We used a lettuce and slices of bacon.)
    egg salad on croissant
    Spread on bread
    egg salad sandwich topped with bacon
    Add bacon (if desired)

    How to Make Hard Boiled Eggs

    There are different ways you can cook hard-boiled eggs, which is why I left that out of the recipe because it’s up to you how you decide to make them!

    Tip: Fresh eggs tend to be harder to peel, so if you have eggs that are older than others (but still good!), it’s best to use those!

    1. Pressure Cook: Now although it doesn’t quite matter how clean the eggs peel, since you’re chopping the eggs up anyway, I have to say that cooking eggs in the pressure cooker, is my all-time favorite way. The peels practically SLIDE off, leaving the whites of the eggs beautiful!
    2. Stove Top: Place eggs in sauce pan, and cover with about 1 inch of cold water. Leave pot uncovered (no lid). Bring water to a boil, and then reduce heat to a simmer and let simmer for about 7 minutes. Prepare an ice bath and place eggs in ice bath to cool. When they’ve cooled, they are ready to peel.
    3. Air Fryer: Place eggs in air fryer and turn the temperature to 250 degrees. Cook for 16-17 minutes (air fryer temperatures can vary). Place eggs in ice bath. Peel when cooled.
    egg salad sandwich recipe

    More Ways to Use Hard Boiled Eggs

    If you’re making hard boiled eggs for this egg salad recipe, then you might as well go ahead and make extra hard-boiled eggs to use for these other easy recipes, such as:

    • The BEST Side Salad Recipe
    • Cauliflower Potato Salad – Low Carb
    • Tuna Salad Recipe
    • Extra hard-boiled eggs for snacking
    Hand holding egg salad sandwich

    Variations

    If you’re looking for different ways to enjoy this simple egg salad recipe, other than on bread, as a sandwich, here are some other great ideas:

    • Do you have crackers in the pantry? Buttery crackers or herb-flavored crackers are delicious with this egg salad!
    • Looking for low carb? Try using celery to dip in the egg salad for a quick snack!
    egg salad on bed of lettuce next to crackers

    Additional Ingredient Suggestions

    Want to experiment with some extra flavors for your easy egg salad recipe?

    Here are some ideas to get you started…

    • avocado
    • hot sauce
    • pesto
    • dill pickles
    • cilantro
    • basil
    • other fresh herbs
    • candied pecans
    • celery
    • lemon juice
    • yellow mustard
    • cumin
    • green onions
    • dijon mustard

    Storage Instructions

    If you happen to have leftover egg salad, place in an airtight container, in the refrigerator for 3-5 days.

    Related Recipes

    If you love sandwich recipes like this one, then you’ll also love this curry chicken salad and this chicken grilled cheese sandwich!

    Recipe

    egg salad on croissant
    Print Pin
    5 from 8 votes

    Egg Salad

    The BEST Egg Salad Recipe: This classic egg salad uses simple ingredients such as mayo, relish, optional red onion, seasoned salt, and a little pepper!
    Course Main Course, Salad
    Cuisine American
    Prep Time 10 minutes minutes
    Cook Time 0 minutes minutes
    Total Time 10 minutes minutes
    Servings 4 sandwiches
    Calories 325kcal
    Author Jessica Burgess

    Ingredients

    • 6 hard boiled eggs
    • ½ cup mayo
    • ¼ cup relish dill or sweet
    • ¼ cup chopped red onion
    • 1 teaspoon seasoned salt
    • ½ teaspoon pepper

    Instructions

    • Peel your hard boiled eggs. (If you need to cook your eggs first, see in the notes, below, the different cooking methods.)
    • Discard the shells and chop up the eggs in to small pieces. (You can use a cheese grater if you like the pieces of the eggs smaller, but we prefer larger pieces.)
    • Add mayo, relish, onion, seasoned salt and pepper into the eggs, stir then until combined!
    • Serve about ¼ cup of egg salad on desired bread or dip with crackers!

    Notes

    How to Make Hard-Boiled Eggs
    There are different ways you can cook hard-boiled eggs, which is why I left that out of the recipe because it’s up to you how you decide to make them!
    1. Pressure Cook: Now although it doesn’t quite matter how clean the eggs peel, since you’re chopping the eggs up anyway, I have to say that cooking eggs in the pressure cooker, is my all-time favorite way. The peels practically SLIDE off, leaving the whites of the eggs beautiful!
    2. Stove Top: Place eggs in sauce pan, and cover with about 1 inch of water. Leave pot uncovered (no lid). Bring water to a boil, and then reduce heat to a simmer and let simmer for about 7 minutes. Prepare an ice bath and place eggs in ice bath to cool. When they’ve cooled, they are ready to peel.
    3. Air Fryer: Place eggs in air fryer and turn the temperature to 250 degrees. Cook for 16-17 minutes (air fryer temperatures can vary). Place eggs in ice bath. Peel when cooled.

    Nutrition

    Serving: 1serving (egg salad only) | Calories: 325kcal | Carbohydrates: 6g | Protein: 10g | Fat: 29g | Saturated Fat: 6g | Polyunsaturated Fat: 14g | Monounsaturated Fat: 8g | Trans Fat: 1g | Cholesterol: 292mg | Sodium: 1019mg | Potassium: 130mg | Fiber: 1g | Sugar: 1g | Vitamin A: 435IU | Vitamin C: 1mg | Calcium: 44mg | Iron: 1mg

    3 Bean Salad Recipe – Mexican Side Dish

    September 8, 2018

    3 bean salad recipe - cilantro lime, black beans, dark red kidney beans, pinto

    3 Bean Salad Recipe – Mexican Side Dish: An easy, no-cook, side dish recipe that can be made for a weeknight dinner, or for a potluck dinner at an event!

    Salad recipes are my favorite. They’re super easy to make, can be made ahead of time (for the most part) and are usually loved and wanted by all!

    3 bean salad recipe - cilantro lime, black beans, dark red kidney beans, pinto

    3 Bean Salad Recipe

    I’m not going to lie. When I’m at a potluck dinner, I typically reach right over the bean salads and head right for the potato dishes.

    But now that I’ve made my own 3 bean salad recipe and have realized just how delicious they can be, I’ll be giving them a fair chance at the next church picnic.

    Mexican Style Bean Salad

    If you’ve made my guacamole recipe,

    How to make guacamole - easy recipe with simple ingredients

    then you know my love for cilantro and all things that remind me of a trip to Mexico!

    Mexico Vacation, El Dorado Royale Resort Casitas Review https://fantabulosity.com

    But in any dish, combine cilantro AND red onion and you’re speaking my love language.

    The fresh cilantro, avocado lime dressing (store-bought, but you can make your own too) and the flavors of the beans, make this side salad dish a no-brainer for the next time you need something quick and tasty!

    How to Make 3 Bean Salad

    To start, open your cans of beans, drain, add to a colander, and rinse.

    Next, open and drain your corn, then add to the bowl of beans. (Or make this Mexican street corn to kick things up a notch!)

    3 bean salad recipe - beans to use

    If you haven’t diced your peppers and red onion yet, you’ll want to go ahead and do that now, and then add to the beans/corn.

    If you don’t have a chopper like this one, to quickly chop peppers and onions… you gotta give it a try. It’s a life changer when it comes to chopping in the kitchen.

    3 Bean Salad Recipe - Cilantro Lime

    3 Bean Salad Dressing

    The next part is quite possibly my favorite step because it’s so easy! I found a Sweet Cilantro Lime Vinaigrette Dressing from Sam’s Choice, at Walmart when I was ordering online with my grocery pickup app, planning to make this salad recipe.

    Now you know me, and how I prefer fabulously fast dishes, rather than making complete, from scratch meals… so buying a dressing instead of having to make it myself, was a no-brainer.

    HOWEVER, if you have trouble finding this dressing at the store, have fun with it and look to see if you can find something similar, like a lime-dressing.

    Or, you CAN make your own dressing too! I have put the ingredients for a 3 bean salad dressing recipe in the recipe card below too, that uses everyday ingredients. So again, don’t stress about finding this particular dressing.

    Sweet Cilantro Lime Dressing - sams choice from walmart
    Easy dressing idea for 3 bean salad recipe

    Once you’ve poured the desired amount of dressing on to your bean salad, toss until mixed, add a dash of salt, and top with fresh cilantro if you have some on hand!

    There’s just nothing better than fresh cilantro if you ask me. But I’m not one of those that think that it tastes like soap!

    It’s such a mystery to me, with how that works and we can all taste different things like that. (Sorry, squirrel moment.)

    3 bean salad recipe - quick and easy and a great side dish idea

    Isn’t that a gorgeous 3-bean salad? I just love the vibrant colors that it has, the texture of the crunch of the peppers and onions, and the ease of the dressing.

    Let us know in the comments below if you’re trying 3 bean salad for the first time, or if you’ve been a long time fan of it!

    Recipe

    3 bean salad recipe - cilantro lime, black beans, dark red kidney beans, pinto
    Print Pin
    4.80 from 29 votes

    3 Bean Salad Recipe – Mexican Style

    3 Bean Salad Recipe – Mexican Style: An easy, no-cook, side dish recipe that can be made for a weeknight dinner, or for a potluck dinner at an event!
    Course Side Dish
    Cuisine American
    Prep Time 10 minutes minutes
    Total Time 10 minutes minutes
    Servings 6 servings
    Calories 106kcal
    Author Jessica Burgess

    Ingredients

    • 1 15.5 oz can black beans rinsed
    • 1 15.5 oz can pinto beans rinsed
    • 1 15.5 oz can dark red kidney beans rinsed
    • 1 15.5 oz can corn drained
    • .5 red bell pepper diced
    • .5 orange bell pepper diced
    • .5 yellow bell pepper diced
    • .5 green bell pepper diced
    • .25 red onion diced
    • .5 cup Cilantro Lime Vinaigrette Dressing
    • salt to taste
    • fresh cilantro (if desired) chopped

    Instructions

    • Drain and rinse all beans and pour into medium size bowl
    • Drain corn and add to beans
    • Add in peppers, onions and dressing
    • If desired, sprinkle on fresh cilantro and salt to taste

    Notes

    If you’re unable to find the dressing that I used, you can make a 3 bean salad dressing with the following:
    ¼ c red wine vinegar, ¼ c olive oil, 2 T lime juice, 1 T lemon juice, 1 T salt, 1 clove crushed garlic/garlic powder, and a pinch of sugar for a sweet spin!
    Please keep in mind that the nutritional information provided below is just a rough estimate and variations can occur depending on the specific ingredients used. 

    Nutrition

    Serving: 1serving (about 1 cup) | Calories: 106kcal | Carbohydrates: 3g | Fat: 10g | Saturated Fat: 1g | Sodium: 1mg | Potassium: 86mg | Sugar: 1g | Vitamin A: 675IU | Vitamin C: 51.8mg | Iron: 0.2mg

    Hosting a Fiesta?

    This is an OLD Fiesta Housewarming party that I helped style for a friend, years… I mean YEARS ago, but you may still find some fun ideas for your fiesta!

    Fiesta Housewarming Party Ideas Margaritas in Mason Jars

    Don’t Forget to Pin This Recipe!!!

    You know how life gets. We see something online and say to ourselves,

    “Man that looks good. I should make that sometime.”

    Then we close out of the browser and never think about it again. Do yourself a favor and PIN this recipe to your Pinterest board, so the next time you’re looking for a pot luck side dish idea, you’ll have this one to turn to!

    Spring Mix Apple Raspberry Salad Recipe

    August 15, 2018

    Apple Raspberry Salad Recipe - Easy Side Dish Idea

    Spring Mix Apple Raspberry Salad Recipe – Serve as a spring dinner idea, take to a potluck or serve at a party. A few simple ingredients can add so much flavor to a salad.

    Whether you're looking for a side salad to incorporate apples with like this one, or if you're looking for an apple salad dessert… then you're in luck!

    Scroll down to get this apple salad recipe, and then visit the 25 apple salad recipes that I gathered for you that includes everything from more lettuce salads with apples, to dessert style apple salad recipes!

    Then if you’re on a salad kick, you’ll want to head over to get ALL of the best salad recipes that we have here on the blog!

    Apple Salad Recipe - Easy Side Dish Idea

    Spring Mix Apple Raspberry Salad

    Growing up, I was the “oddball” kiddo who loved when we went out to eat because that usually meant that I got to try a new salad from somewhere.

    Nothing has changed really, because I absolutely love trying new flavors when it comes to salads at restaurants, and even creating new salad recipes at home.

    More Apple Salad Recipes?

    In case you love all things apples and salads, then you have to take a look at 25 Apple Salad Recipes.

    Apple Salad Recipes You'll Want to Make

    Sweet + Crunchy

    One of my favorite ways to make a salad is to add something sweet and something crunchy! I mean, growing up, I was a head-lettuce, ranch dressing and bacon bit kind of gal. But as I’ve gotten older, I love having salads with a little twist from the norm and add things like fruit, nuts and sweet dressings.

    This spring mix apple raspberry salad is the perfect example of a side salad that is the total opposite of a basic garden salad.

    You’re going to absolutely love making this for dinner or taking it along with you to a potluck or dinner party because it’s GORGEOUS, yet takes very little time to put together.

    Pro Tip: Keep in mind it’s not really the amount of ingredients that “make” this salad, but rather the flavors combined that do. So feel free to adjust accordingly when it comes to the number of ingredients.

    Bulk or Individual Salad Servings

    You can make either type of servings with this salad. Make it in a large bowl for your family/guests to serve themselves, or go ahead and build individual servings in salad plates.

    No matter how you make it, you’ll still layer the ingredients and mix it all in the end anyway!

    For the sake of this post, I decided to stick with the bulk serving, but again, feel free to mix it up. (No pun intended. Ok, well, maybe.)

    Spring Mix

    As with most of my salads, feel free to use whatever lettuce tickles your fancy, but for this one, I’d recommend spring mix or even romaine lettuce like I use in my best side salad recipe.

    Mixed Greens for an apple salad - Perfect for fall apples

    Salad Ingredients

    Full recipe card also below for printing and easy viewing.

    For 4 servings, I use a 5 oz. bag of spring mix and place it in a serving bowl.

    I also buy the bag of dried cranberries and candied pecans to keep things super easy.

    cranberries and candied almonds

    Thin apple slices are my preference, but if you’re super short on time, feel free to use or even buy the packaged pre-sliced apples in the produce section.

    Grab a container of blue cheese crumbles (and plan on using the leftovers to make these Blue Cheese Burgers!

    Next, layer on all of the other toppings (except dressing at the moment), and drool over the cooked bacon (just me?) and get ready for delicious flavor combos.

    Bacon on an apple salad - easy side dish
    Apple Salad in bulk for dinner - side dish idea

    Right before serving, the salad can be topped with the raspberry vinaigrette dressing and toss, or you can make individual servings and then let each person choose their dressing or top with their desired amount.

    Individual Servings of an apple salad

    I just used the Great Value raspberry vinaigrette dressing from Walmart, but feel free to mix it up! I’m not going to lie, I think blue cheese dressing may be pretty tasty on this one.

    Raspberry Vinegerette Dressing on an apple salad
    Raspberry Vinaigrette on a salad with apples

    Recipe

    Apple Raspberry Salad Recipe - Easy Side Dish Idea
    Print Pin
    5 from 1 vote

    Apple Raspberry Salad Recipe

    Spring Mix Apple Raspberry Salad Recipe – Serve with dinner, take to a potluck or serve at a party! A few ingredients can add pizzazz to a side salad.
    Course Side Dish
    Cuisine American
    Prep Time 10 minutes minutes
    Total Time 10 minutes minutes
    Servings 4 servings
    Calories 310kcal
    Author Jessica Burgess

    Ingredients

    • 5 oz. spring mix lettuce
    • 3.5 oz. bag of dried cranberries & candied pecans
    • ¼ cup blue cheese crumbles
    • 1 apple sliced thin
    • 4 slices cooked, chopped bacon
    • ½ cup raspberry vinaigrette dressing or desired amount of preferred dressing

    Instructions

    • For bulk salad assembly, layer spring mix in serving bowl, and top with cranberries, pecans, blue cheese crumbles, apple slices, and cooked-chopped bacon.
      Apple Salad in bulk for dinner - side dish idea
    • Right before serving, toss with Vinaigrette dressing, or desired dressing.
    • Or, assemble salads into individual servings and divide the ½ cup of dressing to each salad accordingly. 
    • Store any leftover, undressed salad in an airtight container in the refrigerator.

    Nutrition

    Serving: 1salad (¼ recipe) | Calories: 310kcal | Carbohydrates: 24g | Protein: 6g | Fat: 21g | Saturated Fat: 5g | Cholesterol: 20mg | Sodium: 630mg | Potassium: 174mg | Fiber: 1g | Sugar: 19g | Vitamin A: 490IU | Vitamin C: 10.3mg | Calcium: 69mg | Iron: 0.7mg

    Love Salads?

    Me too. Here are my favorite salad recipes here on the blog…

    Best Side Salad Recipe

    The Best Side Salad Recipe

    Cold Italian Pasta Salad Recipe

    Pasta Salad Recipe - These easy Italian pasta salad recipe is SO good!

    Cauliflower Salad Recipe

    Cauliflower Potato Salad Recipe - An easy low carb recipe with vegetables!

    Cornbread Salad Recipe without Beans

    August 24, 2018

    Cornbread Salad Recipe

    This cornbread salad recipe is made without beans and has a BBQ Ranch flavor that is hard to beat! It’s an easy side dish recipe that’s perfect for a barbecue, dinner time with the family, or a potluck dinner!

    We’ve been on a salad recipes kick lately but my goodness they’re good, aren’t they? This red skin potato salad is another one of our favorites, that’s a go-to for summertime, too.

    Cornbread Salad Recipe

    Why you’ll love this recipe

    Alright, I get it. Cornbread salad? But for real, the first time I tried this, it was like the heavens parted, the birds were signing and I felt like twirling around like Snow White.

    Ok maybe that’s a little much, but just know that I mean business when I say how happy I am that I discovered another side dish I could make for dinner or to take to a potluck.

    Can you agree that it’s super tough to come up with a recipe OTHER than a side salad, green bean casserole, corn casserole, baked beans, and scalloped potatoes when someone says

    If you could just bring a side dish, that would be great.

    I used to panic at the thought of “Crap. What can I make and take with me that a gagillion other’s won’t be bringing?”

    Well, now I know! Boom! And you can too… you’ll want to make this. Not only does it have gorgeous, vibrant colors, but the flavor combination is DYNAMITE!

    It’s easy to make, uses simple ingredients and has beautiful colors!

    And now… I love this as much as I love panzanella, which is another side dish I LOVE seeing at potlucks that’s better than the side dishes you typically see!!

    What kind of cornbread do I use?

    For this recipe, I just grabbed a box of the Zatarain’s Jalapeno Cheddar Cornbread mix and made it according to the package directions.

    Heads Up: If you’re using the boxed mix that I used, make sure you have cheddar cheese, butter, milk and egg to make it! Or, you can sometimes find jalapeno cheddar cornbread already made at your local grocery store!

    Can I make it without beans?

    Yes! Actually, I prefer it without beans and love the texture that the other ingredients in this recipe provide.

    Ingredients

    It takes very little to make this easy salad recipe but it packs a BIG punch of flavor!

    You’ll need:

    • prepared jalapeno cheddar cornbread (I used Zatarain’s Cheddar Jalapeno Cornbread Mix in the box – but feel free to Jiffy or what you have on hand!)
    • cooked bacon
    • green pepper
    • cherry tomatoes
    • green onions
    • shredded cheddar cheese
    • bbq ranch dressing

    How to Make Cornbread Salad

    Jalapeno Cheddar Cornbread for Cornbread Salad

    In a large bowl, break up the cornbread and use a fork to break it all down into a crumble.

    Break up the cornbread for the salad

    Next, toss in the remaining ingredients (I save the dressing for last) and gently mix it all together until all of the dressing is evenly distributed.

    Chop up the ingredients for the cornbread salad
    Mix together veggies with the cornbread
    sprinkle cheese on to cornbread salad
    Cornbread Salad ingredients: How to make cornbread salad
    Combine ingredients in bowl for cornbread salad
    Add bbq ranch dressing to the cornbread salad
    Cornbread Salad Recipe

    Would you look at that? Aren’t the colors OUTSTANDING together!?

    I absolutely love carrying this dish into a potluck dinner or serving it as a side dish at dinnertime.

    How do you make cornbread salad

    I’m not going to lie… I will just eat THIS for a meal sometimes. I don’t need anything else to satisfy my tastebuds!

    Side dish: cornbread salad

    Tips for Making the Best Cornbread Salad:

    • The jalapeno cheddar cornbread is by far the best for this recipe but feel free to use Jiffy or whatever you may have on hand. If you want a jalapeno cheddar cornbread recipe, I have one included in my Fabulously Fast Dinners e-cookbook that you can get and save RIGHT NOW!
    • If you can’t find the bbq ranch dressing at the store, simply mix in a little of your favorite bbq sauce, in with your favorite ranch dressing, according to your taste!
    • I like to wait to mix everything together right before serving for the best results.
    • If you need more side dish recipes, then you’ll love these:
      – cauliflower “potato” salad
      – bacon ranch pasta salad
      – carrot salad

    Recipe

    Cornbread Salad Recipe
    Print Pin
    4.85 from 13 votes

    Cornbread Salad Recipe

    This cornbread salad recipe is made without beans and has a BBQ Ranch flavor that is hard to beat! It's an easy side dish recipe that's perfect for a barbecue, dinner time with the family or a potluck dinner!
    Course Side Dish
    Cuisine American
    Prep Time 10 minutes minutes
    Total Time 10 minutes minutes
    Servings 8 servings
    Calories 116kcal
    Author Jessica Burgess

    Ingredients

    • 1 box prepared jalapeno cheddar cornbread I used Zatarain’s Cheddar Jalapeno Cornbread Mix
    • 4 slices cooked bacon chopped
    • ½ green pepper chopped
    • ½ cup cherry tomatoes sliced
    • 4 green onions chopped
    • ½ cup shredded cheddar cheese
    • ¼ cup bbq ranch dressing

    Instructions

    • In a large bowl, break up the cornbread and use a fork to break it all down into a crumble.
    • Next, toss in the remaining ingredients (I save the dressing for last), and gently mix it all together until all of the dressing is evenly distributed.

    Notes

    If you can’t find the bbq ranch dressing at the store, simply mix in a little of your favorite bbq sauce, in with your favorite ranch dressing, according to your taste!
    • I like to wait to mix everything together right before serving for the best results.
    Please keep in mind that the nutritional information provided below is just a rough estimate and variations can occur depending on the specific ingredients used. 

    Nutrition

    Serving: 1serving (about ½ cup) | Calories: 116kcal | Carbohydrates: 1g | Protein: 3g | Fat: 10g | Saturated Fat: 3g | Cholesterol: 17mg | Sodium: 201mg | Potassium: 83mg | Vitamin A: 205IU | Vitamin C: 9.5mg | Calcium: 58mg | Iron: 0.3mg

    Cheeseburger Macaroni in the Instant Pot

    November 5, 2019

    Cheeseburger Macaroni in the Instant Pot

    Cheeseburger Macaroni in the Instant Pot: A homemade “hamburger helper” dinner ideas that can be quick for a family meal using items that you may even have on hand!

    Hey there quick meal idea lovers. I’m right there with you, hence the reason I finally took the plunge and bought the Instant Pot. Oh yes, this version of hamburger mac and cheese on the stovetop, can be made in a pressure cooker too!

    Cheeseburger Macaroni in the Instant Pot

    After staring at my pantry the other day, I decided I wanted to experiment a little bit with the Instant Pot, and now you’re looking at the result. After we realized how quick and easy it was, I knew I had to share it with you.

    I wasn’t sure if I’d ever like another “cheeseburger” dinner as much as we love the baked cheeseburgers but this dish is an amazing easy dinner idea when the comfort food craving calls! (We also think you’re going to love this cheeseburger subs recipe too, if you’re a cheeseburger fan.)

    Cheeseburger Macaroni in the Instant Pot

    Not only is there a ton of flexibility that you can have with this recipe, but the ease of throwing it all together was also my FAVORITE part.

    Cheeseburger Macaroni recipe in the Instant Pot

    Answering Your Cheeseburger Macaroni Questions:

    Can I use Velveeta instead of canned cheddar cheese soup?

    I haven’t tried this, but I don’t see why you couldn’t substitute it. I’d just make sure to use about 10 oz. of Velveeta (cut up into cubes, like we did in this Rotel Dip, and maybe add a little bit of milk — maybe ¼ cup??? – guessing here) since the canned cheese is a little more liquified than the block cheese. If you try this, let us know!

    How do you defrost ground beef in the Instant Pot?

    Want to use frozen beef? You totally can, because I do too! I typically either forget to thaw it out, or I decide at the last minute to make something with it. I made this using frozen ground beef, although provided directions for thawed beef too!
    But when I’m totally on my game and remember to thaw ground beef out naturally, you definitely find me making The BEST Cheeseburger recipe, where I use browned butter and basic ingredients/methods to make them the juiciest burgers I’ve ever had! So if you were on your game today, or just snagged some ground beef from the grocery store, you may want to make this cheeseburger recipe too!

    Instant Pot Hamburger Helper

    Now, I LOVE a good boxed, Hamburger Helper dinner from the grocery store. But what I REALLY love about this recipe is that it’s similar, super easy… (no, everything doesn’t come in a box) but the flavor of this dish is way more powerful!

    Other Instant Pot Recipes You’ll Love:

    • Kielbasa and Cabbage in the Instant Pot
    • Instant Pot Pot Roast – Even using a FROZEN roast!
    • Instant Pot Chicken and Dumplings
    • How to Cook Hard Boiled Eggs in the Instant Pot
    • Sweet Potatoes in the Instant Pot

    Easy Cheeseburger Macaroni Recipe…

    When sharing this recipe with you, I’m keeping in mind that a lot of you may desire a different level of seasonings and spices and I want to keep it as easy as possible.

    So expect this to be a very basic recipe that could use extra spices and flavors… or cheese. You can NEVER go wrong with adding more cheese!

    However, here are a few things I’d suggest doing additionally to really add flavor to it so it doesn’t come out bland.

    Items to Add to Cheeseburger Macaroni

    • Garlic Pepper (It’s my absolute favorite, to sprinkle on to the top of each serving, but not for my kids.)
    • Extra shredded cheese on top of each serving is a MUST in my book.
    • Add milk after cooking if you prefer it more creamy.
    • Salt and Pepper as desired, but remember… you can always add more, but you can’t take it out.
    • Sour Cream (Reader Suggested)
    • Hot Sauce – I haven’t tried this yet, but I could definitely go for this on my serving.
    • Can of diced tomatoes and green chilies! (Reader Suggested)
    • Bacon or bacon bits for super easy additions! (Reader Suggested)

    Left Over Cheeseburger Macaroni?

    If serving this leftover, you may want to add a little milk to it before reheating, just to recreate a creamy texture.

    Cheeseburger macaroni recipe in the instant pot

    I so hope you love this recipe. We ate on this for a couple of days and I’m already looking forward to making it again because it was so quick. It one of our favorite ground beef recipes that we turn to a lot.

    This recipe is not only a great family dinner idea to meal plan with, (get your meal planning printable in the home management binder) but it serves as the perfect dish to deliver to someone in a meal care package to eat on for a few days!
    Maybe just send along a little extra milk too, so they can add a bit to enhance the creaminess when reheated!

    If you’re into quick and easy recipes, then you’ll LOVE to blog the recipe archives here on the blog, OR make dinnertime insanely easy, and grab my “Fabulously Fast Dinners” cookbook where I’ve done all of the dinner time planning for you!

    More Comfort Food Recipes

    If you love comfort food, then you’re in the RIGHT place. Here we believe that food is love. So when you either want to show yourself some love, or make something comforting for someone you love, then browse our favorite easy-to-make recipes!

    But I’ve picked out some of our favorite comfort dishes here…

    This Cheeseburger Casserole has all the flavors of a cheeseburger but in a dish that’s perfect for a family weeknight meal, or even a care package!

    If you have extra elbow macaroni noodles, you can use them in this old-fashioned macaroni and tomatoes recipe!

    30-Minute Taco Pasta Recipe – This 30-minute Taco Pasta Recipe makes the perfect weeknight dinner! If you are a busy mom looking for a simple, quick, and healthy recipe that can be made in under 30 minutes, this taco pasta recipe is for you.

    Chili Mac Recipe – In less than 30 minutes, and a few simple ingredients, this chili mac using ground beef, beans, tomato sauce, chili powder, cumin, elbow macaroni, and cheese, will soon become a new favorite spin on a chili recipe! But similar to chili mac, this slow cooker goulash recipe is always a great choice!

    For even more cozy meal ideas, check out this collection of classic old-fashioned dinner recipes.

    Recipe

    Cheeseburger Macaroni in the Instant Pot
    Print Pin
    4.50 from 113 votes

    Cheeseburger Macaroni in the Instant Pot

    Cheeseburger Macaroni in the Instant Pot: A "hamburger helper" style dinner idea that can be quick for a family meal using items that you have or can keep on hand!
    Course Main Course
    Cuisine American
    Prep Time 5 minutes minutes
    Cook Time 10 minutes minutes
    Total Time 15 minutes minutes
    Servings 6 servings
    Calories 663kcal
    Author Jessica Burgess

    Ingredients

    • 1 lb lean ground beef drain after cooking if using a fatty beef
    • 16 oz elbow macaroni uncooked
    • 10.5 oz can of cheddar cheese soup
    • 3 cups broth chicken or vegetable (Recently updated from 2.5 cups to 3)
    • 3 cups shredded cheddar cheese
    • 2 teaspoon garlic powder
    • 2 teaspoon onion powder
    • salt and pepper as desired
    • garlic pepper seasoning optional

    Instructions

    • If ground beef is frozen, pour 1 cup water into the Instant Pot, put on the lid, make sure the valve is on “seal”, and select 25 minutes on “high” manual mode. Ground beef should be fully cooked before moving forward.
    • If starting with thawed ground beef, turn the “saute” setting on and cook the ground beef, garlic powder, and onion powder until beef is no longer pink.
    • Next add in broth, elbow macaroni, can of cheddar cheese soup and salt/pepper if desired.
    • Lock lid and close the valve to “seal” and cook for 4 minutes on manual “high” setting. The pressure cooker will take about 5 minutes to seal, 4 minutes to cook and then quick release the valve to let the pressure out.
    • Add in 2 cups of shredded cheddar and stir until melted.
    • Divide and sprinkle on remaining shredded cheddar on to each serving, for extra cheesy goodness! 
    • Tip: Get creative by sprinkling on seasonings like garlic pepper seasoning, hot sauce, and anything else that you love, to add more flavor!

    Notes

    This recipe is a basic cheeseburger macaroni recipe. You may want to add seasonings and other flavors to kick it up a notch with flavor. I wanted to keep it very basic for kids! If in doubt, add more cheese! You can never go wrong with more cheese! 

    Nutrition

    Serving: 1serving (about 1-½ cups) | Calories: 663kcal | Carbohydrates: 64g | Protein: 41g | Fat: 25g | Saturated Fat: 14g | Cholesterol: 108mg | Sodium: 1136mg | Potassium: 729mg | Fiber: 3g | Sugar: 4g | Vitamin A: 1015IU | Vitamin C: 0.2mg | Calcium: 449mg | Iron: 3.3mg

    Did You Make This?
    Snap a pic and hashtag it #Fantabulosity - I love to see your creations on Instagram and Facebook.

    41 Open When Letter Ideas and FREE Printables

    September 4, 2018

    Open when letters - ideas and free printable

    Open When Letters – Ideas for a boyfriend, best friend, husband, etc. or loved one, with a list of ideas of what to put in them and free printable cards!

    Open when letters - ideas and free printable

    I absolutely love creating printable cards, printable decor for home, and even creating birthday invitations, so these “Open When” Letters were right up my alley too!

    Open When Letters

    So what are open when letters? Well, if you are in a long-distance relationship, have a dear friend or relative far away, or if you find yourself away from your sweetheart longer than you'd like, creating a gift that allows you to speak to them when you are away is more than words can describe. I especially love the open when letters ideas as a birthday present for my husband.

    Even though it’s hard to top the year that I kept a secret from him for a YEAR and surprised him for his 30th birthday with a trip to Mexico with friends… this heartfelt gift just keeps on giving all year!

    See ALL of our gift ideas for the sweet person in your life! 

    Open When Letters can be a sweet way to send a heartfelt message to your loved one when it's hard to find the right words to say, and they’re just super fun anyway to create and give!

    How do Open When Letters Work?

    Open when letters work just like a regular handwritten card.

    However, the difference is that you give them instructions on the letter for when they are supposed to open them.

    They can be specific such as an anniversary or a set date, or broad such as “when we're having a fight”.

    You can be as creative as you want with these, and the more specific they are to your loved one, the better the experience will be.

    Free Printables and Envelope Ideas

    When I created my own, I wanted to make them so I could re-use the master copies for a friend, relative or even my husband again one day.

    Then, when I made them, I remembered that I can’t keep a good thing to myself, so I wanted to share 4 different free printables with you so you can make your own! You find where to save them below.

    Here’s how I made mine, and hopefully it will spark some ideas and help make your “open when” letter project a little easier!

    Open when letters - how to make

    How do you write open when letters?

    I simply grabbed size A2 envelopes from Walmart, and I had NO idea until I picked up my Walmart grocery pick-up that it was a box of envelopes AND cards! BONUS! I thought it was just the envelopes. Woot! (You can grab a2 envelopes and cards on Amazon HERE if you prefer shopping there!)

    However, for the letters that I’d be writing, I had already decided to use colorful paper that I already had on hand for the letters that I’ll put inside the envelopes, so I’ll save the blank cards for something else later.

    But to make things super easy, you can totally use the cards that come with the envelopes! 

    Cards for open when letters

    Once I had everything that I needed to get started on the open when letters, it was time to print off the printable cards.

    Blank “Open When” Cards

    When creating the master printable card, I ALMOST typed in the “when” on each card, until I realized that I may like to switch things up sometimes and that not everyone has the same relationship and things to say to one another as I do to my husband.

    So, I thought the blank space to write in exactly what you want it to say, would be the best bet.

    Plus, I think the handwritten “when” on each card has more of a personal touch, and how sweet is that, right?

    "Hey love" open when letters - free printables

    Free Printable Open When Letter Cards – Four Options

    I have included four different options in case you prefer one over the other.

    “Hey Love,” in Pink or in Black

    …for a boyfriend, husband, finance, etc.

    SAVE the Pink “HEY LOVE” CARDS HERE

    Pink Open When Card Printables

    Save the Black “HEY LOVE” Open When Printable Cards Here!

    Printable Open When Cards

    and

    “Hey You,”

    …for a friend, sibling, relatives, etc.

    Save the Pink “HEY YOU” Open When Printable CARDS HERE

    Printable Open When Cards in Pink

    Save the Black “HEY YOU” Open When Printable Cards HERE!

    Printable Open When Cards in Black

    This way, you can choose which of the above greetings works best for the person you’re sending them too!

    Note: I’ve included a list of ideas below of what you can fill in the blanks with.

    To Write:

    For the hand-written portion on the free cards, I’m a sucker for a good gold metallic sharpie, and I thought it looked adorable paired with the coral border and font on the card.

    (Perhaps I’m partial to these colors because of the colors I use in my logo here on the blog, but I digress.)

    Open when letter ideas - for boyfriend, husband or friend

    Cut.It.Out.

    (Insert the impression of Joey from Full House here. Just me? Ok, sorry.)

    Once the cards are cut out, they’re ready to glue on the front of each envelope!

    Blank "open when" letter printables - free
    Glue on the free open when download cards and put letters in the envelopes

    Glue on to the front of each envelope:

    I just grabbed a glue stick from my kid’s coloring cart and went to town. This worked amazingly well actually and I’d highly recommend it.

    I did hesitate using the glue sticks that we had, because they were purple, but I was excited to see that it dries clear, so that made a big difference!

    Open when free printable download
    Write the open when letters to put in the envelopes

    Write a little note for inside:

    Once the cards are glued (or taped is fine too) on to the outside of the envelopes, it’s time to start writing your sweet love notes to go inside.

    I kept mine short and sweet and sealed each letter into the coordinating envelope and it was ready to seal!

    Open when cards - free download and ideas
    Open when letters and ideas for boyfriend, husband, friend, sister, brother, military, etc.

    Seal for the perfect time!

    After you’ve inserted your little note into the envelope, it’s time to seal and it’s ready for them to open when needed!

    Box/Bag Them Up!

    Although you can give them to your loved one just like they are (or with a rubber band wrapped around all of them) I thought it would be a super cute touch to put them into a cute basket, box or bag.

    I even love the idea of putting them in a decorated shoebox, recipe card box, or narrow plastic container with a lid, (almost like a library card file) so they can sort through them easily when they’re looking for the right one!

    Here are a few fun ideas of what you can put the open when letters in. Just keep in mind you get a size that will work with the size of envelopes that you used!

    The Ground Rules for Open-When Letters

    Rules? Well that sounds pretty harsh, but let’s just say when you’re dealing with someone who wants to read them all RIGHT NOW, it may be best to give them some guidelines.

    When you first give them this Open When Letters set, you want to start by having an “open first” letter to get the ball rolling.

    This should include the "rules" of when to open the letters and how it works. You also want to make your letters in such a way that they won't open them all in one go. Try to space them out the best you can, and let life handle the rest!

    Open When Letters - Ideas for a boyfriend, husband, best friend

    Open When Letter Ideas and Topics:

    Here are a few ideas to help you get the ball rolling, and with the “fill in the blank” free printable open when cards that I’m giving you, you have the freedom to choose which cards work best for you and your loved one! 

    Feel free to fill in your own “open when’s” on the cards to really customize the experience!

    Open when…

    • You first get this
    • You are having a good day
    • You can't fall asleep
    • You need a good laugh
    • You are upset
    • You are feeling lonely
    • You feel really far away
    • You need a reminder of how much I love you
    • You are worried
    • You could use a pep talk
    • It's your birthday
    • It's our anniversary
    • You miss me
    • You are mad at me
    • You feel bad about yourself
    • You need a hug
    • You are sick
    • You feel like giving up
    • You've made a mistake
    • You want a surprise
    • We've said goodbye
    • I'm angry
    • You need to make a big decision
    • I'm driving you crazy
    • Someone passes away
    • You're missing home
    • It's my birthday
    • You're stressed out
    • You're bored
    • You want to talk to me
    • We haven't been able to talk in a while
    • You don't feel loved in a while
    • It's Christmas Eve
    • It's New Year's Eve
    • It's Valentine's Day
    • It's [insert favorite holiday]
    • You're feeling nostalgic
    • You've forgotten what I smell like
    • You're nervous
    • You're embarrassed
    • You're thinking about the future

    The Perfect Love Letter Ideas

    Open When Letters can be a thoughtful and sweet way to show your spouse that you love them. Instead of trying to come up with the right words on the spot, prepare these letters ahead of time so you can say the right thing at just the right time.

    Do you have a fun “open when” letter idea? I’d love to hear it below in the comments!

    50 + I Love You Because… Ideas and Thought Starters

    October 24, 2018

    I love you because ideas

    “I love you because” ideas and thought starters for greeting cards, for kids or for a husband or wife to say at the right time!

    I love you because ideas

    When creating the printables for the post “Open When Letters“, I realized how difficult it can be sometimes to say what we truly feel when we really want to say it.

    Especially if you’re a man or woman of a few words, trying to find the right thing to say can be difficult.

    But no one said you had to think of everything from scratch, right? There’s absolutely nothing wrong with looking online to help you get a jump start of saying “the right thing” to the one that you love.

    I Love You Because…

    So whether or not you’re looking for fun ways to say “I love you because” to say to your girlfriend, wife, husband, boyfriend, child or even a friend or another family member, here are some ideas to get you started.

    Feel free to use them as is, mix them up, and adjust to how they fit your relationship!

    “I Love You Because” Ideas for Husband, Wife, Boyfriend, Girlfriend:

    • you listen to me when I need to vent.
    • you’ve helped me discover who I really am and who I want to be.
    • there’s not a day that goes by that I feel unloved.
    • you’re such a hard worker.
    • you provide for our family.
    • you’re such a good dad/mom.
    • you let me be me.
    • you’re so stinking cute!
    • you bring out the best in me.
    • you help me around the house.
    • our kids look up to you.
    • we can laugh at and with each other.
    • we make such a good team.
    • of your smile.
    • you protect us.
    • of the funny things you say.
    • you keep our house in order.
    • you make amazing dinners.
    • your butt looks good in jeans.
    • you keep me on my toes.
    • you love Jesus first.
    • of the example you set for our children.

    “I Love You Because” Ideas for Child:

    • you have such a good heart.
    • you let me.
    • you’re such a good sister/brother.
    • you make me laugh.
    • playing nice with others is something you’re great at.
    • you help out at home.
    • you do your best.
    • God made you just the way you are.
    • you give the best hugs and kisses.
    • you’re eager to learn.
    • loving you is easy.
    • you melt my heart.
    • we both love ______.
    • we both love to play______.
    • you eat your veggies and healthy foods.
    • your snuggles are the best!

    “I Love You Because” Ideas for Friend/Family Member:

    • you’re always there for me.
    • we can vent together.
    • you don’t judge me.
    • we can pick up right where we left off.
    • you know too much! (Ha!)
    • you’ll watch my kids at the drop of a hat.
    • a midnight call is never too late.
    • our long drives always include the BEST songs.
    • you bake some mean cookies.
    • your cocktails always go down smooth.
    • you’re brutally honest about my outfit choices.
    • your advice is better than “Dear Abby’s”.
    • your marriage is something to look up to.
    • I’ve never met someone so passionate about _____.
    • your hugs are the absolute best.
    • we do the best karaoke duets together.
    • you stand up for me during the hard times.

    Is There Something Else?

    Is there something else that should be on the list? Of course there are gobs and gobs of things you could say to your loved one, but I hope these ideas give you the right words to say or at least some inspiration to get you started.

    Ways to Use “I Love You Because”

    Do you want to tell someone you love them, and why… but not sure how to do it?

    Here are a few fun ideas I thought of, in case you’re looking for ways to express why you love him or her.

    • Simply just tell them. Over the phone, through text, in person. Sometimes we don’t say it enough, or don’t dig deep in to the why, when in reality, giving a reason why can be something wonderful that he or she can hold on to for the rest of their life.
    • Hidden letters. Hide small notes around the house (underwear drawer, suitcase when he/she travels, lunchbox, cabinet, etc.)
    • Through a video. Create a video listing all of the reasons of why you love them. It’s something special that they can hang on to for forever, and see you while you’re saying it. Sometimes saying things on video is much easier than saying it in person.
    • In public. Want to go big or go home? Say a few reasons of why you love them in front of a large crowd, on tv, on the big screen at the theater or sporting event, to really make an impact on the person that loves to be in the spotlight. Is the person you love more recluse and private? Maybe going big and public isn’t something to do.

    Have another fun way to express “I love you because” ideas? I’d love to hear them. Drop them in the comments below!

    Good luck, have so much fun, and I can’t wait to hear how you’ve showered the person you love, with WHY you love them.

    Daily Planner – Free Printable

    September 11, 2018

    Daily Planner Printable - Free Download

    Daily Planner Free Printable – this cute and free day planner sheet is the BEST for staying organized during the day. Why? Because YOU helped create it!

    Daily Planner Printable - Free Download

    Daily Planner – Free Printable

    Have you ever searched for a cute, practical, organizing daily planner, only to come up short handed? Yeah, me too.

    I mean, don’t get me wrong, I have found planners that work for me, but I still feel like I’m wasting space and I’m still crossing things out to make it more of “my own” to help me stay on track for the day. I still felt like something was missing from the planner that I was using.

    I also made this monthly planner that has helped on a bigger scale!

    Is Something Missing From Your Daily Planner?

    Then you all said something that started to make me really wonder…

    “Jessica, PAH-LEESE create a planner that we can actually use!”

    I hear you, heard you, and am exploring the idea to see if it’s something that should be created.

    Gotta Start Somewhere!

    So when I sat down to dream up what the BEST daily planner sheet would and could include in a daily planner (and after asking all of you for your input too) I’m sharing the result (and free download) with you to use NOW! Because why wait until everything is perfect.

    That’s not real life, right? So, let’s see if we like this planner sheet… and if we do, it will validate that there needs to be more where that came from, yes? Yes.

    Daily Planner Printables Free Organizer - so cute and best for organization!

    But First…What do YOU Want a Planner to have?

    So although this daily planner sheet is ready for you to use, that doesn’t mean that it’s the final version. It also doesn’t mean that it’s the only sheet that could be in the planner.

    So what does this mean?

    I want to hear from YOU! What do YOU want the daily planning sheet to have? And what other types of planning sheets would you like to see in a planner?

    Daily Planner Printables Free Organizer - so cute and best for organization!

    Some suggestions have been:

    • Pre-dated Sheets or Undated for use all year long?
    • A physical planner
    • Digital download sheets to make your own
    • 5 x 8 or 8.5 x 11 size sheets/planner
    • Real life mom inspiration quotes, bible verses
    • Budget sheets
    • Meal planning sheets
    • Inside pocket
    • Stickers
    • To-do list for kids
    • Mom Hacks
    • Spiral-bound

    Let’s hear your suggestions! I’d love to incorporate all that I can, to make it even better!

    Or, feel free to let me know in the comments below, on Facebook or even send me an email at jessica(@)fantabulosity.com

    Get Your Free Daily Planner Printable:

    If you’d like to use this daily planner sheet now, go for it! I hope it helps you get more organized with your days, so you have more time to focus on the things that matter!

    Then, download, print, hole punch if you prefer… and store it in your favorite 3-ring binder!

    Download the Daily Planner Printable HERE!

    M&M’S® Candies Gift Idea

    December 9, 2018

    M&M Gift Idea for Christmas and Neighbors

    This post has been sponsored by Mars Wrigley Confectionery. All thoughts and opinions are my own.

    All year, and especially around the holidays, my boys absolutely LOVE to surprise others with gifts, whether that be if they see something in the store that a friend would love or if they make something at home.

    M&M'S® Pantry Jar at Sam's Club

    The M&M’s candies are the perfect colors, they’re a treat that my boys will LOVE to craft with, and they’re something that everyone will love.

    M&M’s Candies Gift Idea

    Knowing I should keep things simple, I came up with an idea that would be something they could help with and that the recipient would actually love and use.

    I grabbed the supplies we needed and told the boys all about it when I got home.

    When they saw the M&M’s Red & Green Milk Chocolate Pantry Jar, you should have SEEN their eyes light up. You better believe they were game for crafting and giving!

    M&M’S® Christmas Gift Tutorial

    So to “house” the M&M’s candies, I decided to use little plastic jars (that also serve as Christmas ornaments… how cute is that?!) and let the boys help me fill them.

    Mason jar ornament with m&ms

    They may have accidentally “dropped” a couple, just so they could say,

    “Ooops Mom. I better eat that one.”

    Uh huh, I know that trick. I do it myself. I suppose I taught them well.

    Fill jar with m&m's for treats

    Free Printable Christmas Treat Tags

    Now I’ll be honest… I did have thoughts of letting the boys color and create their own little gift tags to put on the jars but then quickly realized they’d tire of that after a couple. I decided it would be best to go ahead and make some so all they had to do was string them on the ribbon!

    Download Your Own Tags!

    I’m super glad I chose this route. Why? Because now I have a free printable to give you so you can make your own M&M’S gifts!

    After pondering on a fun saying for a little bit, I finally came up with (what I think) is a super cute one. It incorporates a lot of words that started with “m” to tie in the red and green M&M’S candies.

    “Merry Christmas from us to you! May it be Magical and full of Munching too!”

    To download your own treat tags, click on the image below!

    TIP: I used white cardstock for mine, so it was more of a sturdy type of paper since we were planning to do some “crafting” with them.

    String the Tags On

    Once I cut out the tags, the boys were able to hole punch them and string the ribbon through!

    I tied the ribbon on around the opening of the jar…

    Then, using the little red berries from the craft store, I cut little twigs off of each bunch, and the boys were able to stick a strand inside the tied ribbon!

    Get Creative with Decorating

    If you know me, you know that I can’t leave well enough alone and I tend to have to mix things up. Well, this craft wasn’t any different.

    I didn’t want all of the jars to look the same (I have no idea why, because they’re all super cute) so I changed some of them up a bit.

    I mean, we had enough M&M’S candies to make a lot of treats. So even though the boys had fun… momma had fun getting creative and decorating a LOT of jars, too!

    Christmas Tree Jar Tutorial

    For this little jar, I simply used the same tags and layered them over blank canvas tags so the printable would “POP.” I finished it off by tying a little winter Christmas tree around the lid, too!

    This may be my favorite one.

    Surprise! Hand Delivery!

    We ended up making quite a few of the little jars and hand delivered them to neighbors, friends, and family.

    My boys LOVE walking up, ringing someone’s doorbell with a smile and getting a big ole “thank you” after giving such a fun surprise.

    If it involves M&M’S candies, crafting, smiles and gifting… you better believe my boys are counting it as one of the “BEST DAYS EVER.”

    Pumpkin Streusel Muffins

    August 23, 2022

    A jumbo pumpkin muffin with streusel topping.

    Pumpkin Streusel Muffins: Delicious pumpkin muffins with an incredible streusel topping that sits on top of the muffins, all made with simple ingredients!

    Baking through pumpkin season? Here’s the rest of my Halloween and fall recipes.

    Streusel makes everything better. Looking for more pumpkin recipes for fall? Start here.

    Jumbo pumpkin muffin with streusel topping on vintage plate.

    Why You’ll Love This Recipe

    • Muffins are always an amazing choice for a breakfast recipe that can be on-the-go or served as a sweet treat on something such as a coffee bar area!
    • When Fall rolls around, there’s nothing better than pumpkin flavors in some of our favorite easy recipes, and this recipe is perfect for a cool Fall morning, along with a cup of coffee!
    • They’re super moist muffins, packed with pumpkin and spices. Topped with a streusel for the perfect amount of crunch and finished off with a drizzle of cinnamon glaze. But I think you’ll also love our easy pumpkin bread, especially if you’re a cream cheese lover!
    • If you were a fan of our cheesecake pumpkin bars, our pumpkin cheesecake bites, and our no-bake pumpkin pie, then you’ll also love this similar recipe!

    Ingredients

    When you see the list of ingredients below for these pumpkin crumb muffins, don’t worry about the amount! Many of them are the same ingredient but we just use them in the muffins, streusel and icing!

    Muffins

    • 1¾ cup All-purpose flour
    • 1 teaspoon Baking soda
    • 2 teaspoon Ground cinnamon
    • 1 teaspoon Pumpkin pie spice
    • ½ teaspoon Salt
    • ½ cup Vegetable oil
    • ¼ cup Milk
    • 2 large Eggs
    • 1½ teaspoon Vanilla extract
    • ½ teaspoon Rum extract
    • ½ cup Granulated sugar (white sugar)
    • ½ cup Light brown sugar
    • 1½ cup Pumpkin puree 

    Streusel topping

    • ¾ cup All-purpose flour
    • ¼ cup Granulated sugar
    • ¼ cup Light brown sugar
    • 1 teaspoon Pumpkin pie spice
    • ½ teaspoon Ground cinnamon
    • 6 tablespoon Melted butter, unsalted

    Icing

    • ½ cup Powdered sugar
    • ½ teaspoon Ground cinnamon
    • 2 teaspoon Milk
    Pumpkin streusel muffins on white counter
    Pumpkin Muffins

    Instructions

    Much like the simple ingredients, the instructions are simple too! Here’s how to make this pumpkin streusel muffins recipe:

    For Muffins

    1. Preheat oven to 425 degrees Fahrenheit.
    2. In a large bowl, whisk together the flour, baking soda, cinnamon, pumpkin pie spice, and salt.
    3. Add the vegetable oil, milk, eggs, and extracts.
    sugar and cinnamon in mixing bowl
    Dry Ingredients
    Egg added to dry mixture
    Add wet ingredients
    1. Use a hand mixer on low speed to mix just until combined.
    2. Add the sugars and mix just until combined.
    3. Lastly, add the pumpkin puree and mix just until the batter is streak free. 
    Sugars added in to pumpkin mix
    Add sugars
    pumpkin puree added to mixture
    Add pumpkin
    1. Grease a muffin pan or line it with paper liners, then fill the cups about ¾ full with batter.
    2. Set aside and begin preparing the topping.
    Pumpkin muffin batter in mixing bowl
    Mix
    Muffin batter in muffin tins and liners
    Fill muffin cups

    Streusel Topping

    1. In a small bowl (or clean out the same mixing bowl), combine all the streusel ingredients with a fork until a coarse crumble forms. 
    Wet ingredients in dry ingredients in mixing bowl for streusel topping
    Streusel Ingredients
    1. Place 1-2 Tbsp. of the streusel on top of each of the batter-filled muffin cups for a little added pumpkin flavor and texture.
    2. Lightly tap the streusel into the batter. 
    streusel topping in metal mixing bowl
    Streusel mixture
    Streusel added to top of muffin batter in muffin tin
    Add streusel

    Bake Time

    1. For standard muffins, bake at 425°F for 5 minutes, then without opening the oven, reduce the heat to 350°F and bake for an additional 16-17 minutes or until a toothpick placed in the center comes out clean. 
    2. Remove from the oven and allow to cool for 3-5 minutes.

    Jumbo Muffin Option

    Jumbo pumpkin muffin on vintage plate.

    This recipe makes 6 jumbo muffins. When I made them, I had a little batter left over, but not enough for another muffin. Grease a jumbo muffin pan or use liners, fill the cups about ¾ full with batter, and add the streusel topping.

    Bake at 425°F for 5 minutes, then without opening the oven, lower the temperature to 350°F and bake for 24 more minutes. That is 29 minutes total, which is when a toothpick came out clean in my batch. Start checking at 28 minutes total, inserting the toothpick through the streusel into the center of a muffin. If it has wet batter on it, continue baking and check again in 1-2 minutes.

    Cinnamon Glaze

    1. Prepare the icing by placing the sugar, cinnamon, and milk into a bowl.
    2. Whisk until the icing is clump free and smooth.
    3. Spoon the icing over each muffin.
    4. Serve and enjoy. 
    Pumpkin muffins on white counter
    Pumpkin Muffins with Glaze

    Storage

    If you have leftover muffins, store in an airtight container, or securely wrap in plastic wrap, for up to 4 days at room temperature. (You can also place them in the refrigerator to keep even more fresh.)

    Substitutions and Variations

    You don’t have to include the glaze on these muffins but it’s highly recommend as it adds the best texture combined with the streusel topping!

    Top Tips

    • Be sure you use pure pumpkin puree and not pumpkin pie filling! Pumpkin puree is plain pumpkin, where pumpkin pie filling has spices and other ingredients in it!
    • Use an ice cream scoop to portion the batter into the prepared muffin cups to make it easier!

    Related Recipes

    If you love muffin recipes like this one, then I think you’ll also love these strawberry chocolate chip muffins and these buttermilk blueberry muffins!

    Or, if you’re looking for muffins for breakfast, definitely check out these healthy breakfast muffins.

    Did you make this? I’d be so grateful if you left a “star” rating below to let me know what you thought! Then, the next time you need a quick and easy recipe, come back to Fantabulosity to browse all of my easy recipes!

    Recipe

    A jumbo pumpkin muffin with streusel topping.
    Print Pin
    5 from 8 votes

    Pumpkin Streusel Muffins

    Pumpkin Streusel Muffins: Delicious pumpkin muffins with an incredible streusel topping that sits on top of the muffins, all made with simple ingredients!
    Course Breakfast
    Cuisine American
    Prep Time 20 minutes minutes
    Cook Time 22 minutes minutes
    Total Time 42 minutes minutes
    Servings 16 muffins
    Calories 296kcal
    Author Jessica Burgess

    Ingredients

    Muffins

    • 1 ¾ cups all-purpose flour
    • 1 teaspoon baking soda
    • 2 teaspoons ground cinnamon
    • 1 teaspoon pumpkin pie spice
    • ½ teaspoon salt
    • ½ cup vegetable oil
    • ¼ cup milk
    • 2 large eggs
    • 1 ½ teaspoons vanilla extract
    • ½ teaspoon rum extract
    • ½ cup granulated sugar
    • ½ cup light brown sugar
    • 1 ½ cup pumpkin puree 

    Streusel

    • ¾ cup all purpose flour
    • ¼ cup granulated sugar
    • ¼ cup light brown sugar
    • 1 teaspoon pumpkin pie spice
    • ½ teaspoon ground cinnamon
    • 6 Tablespoons unsalted butter melted

    Glaze

    • ½ cup powdered sugar
    • ½ teaspoon ground cinnamon
    • 2 teaspoons milk

    Instructions

    • Preheat oven to 425 degrees Fahrenheit.

    Muffins

    • In a large mixing bowl, whisk together the flour, baking soda, cinnamon, pumpkin pie spice, and salt.
    • Add the vegetable oil, milk, eggs, and extracts. Use a hand mixer on low speed to mix just until combined.
    • Add the sugars and mix just until combined.
    • Lastly, add the pumpkin puree and mix just until the batter is streak free.
    • Grease a muffin pan or line it with paper liners, then fill the cups about ¾ full with batter. Set aside and begin preparing the streusel topping.

    Streusel

    • In a mixing bowl, combine all the streusel ingredients with a fork until a coarse crumble forms.
    • Place 1-2 Tbsp. of the streusel on top of the batter in each muffin cup. Lightly tap the streusel into the batter.
    • For standard muffins, bake at 425°F for 5 minutes, then without opening the oven, reduce the heat to 350°F and bake for an additional 16-17 minutes or until a toothpick placed in the center comes out clean. For the jumbo muffin yield and baking time, see the notes below.
    • Remove from the oven and allow to cool for 3-5 minutes.

    Icing

    • Prepare the icing by placing the sugar, cinnamon, and milk into a bowl.Whisk until the icing is clump free and smooth.
    • Spoon the icing over each muffin. Serve and enjoy.

    Notes

    Jumbo muffin option: This recipe makes 6 jumbo muffins. My batch had a little batter left over, but not enough for another muffin. Grease a jumbo muffin pan or use liners, fill the cups about ¾ full with batter, and add the streusel topping.
    Bake at 425°F for 5 minutes, then without opening the oven, reduce the temperature to 350°F and bake for 24 more minutes—29 minutes total. A toothpick came out clean at that point in my batch. Start checking at 28 minutes total, inserting a toothpick through the streusel into the center of a muffin. If it has wet batter on it, continue baking and check again in 1-2 minutes.
    The recipe card’s yield and cook time are for standard muffins. Nutrition is estimated per standard muffin, based on a yield of 16.

    Nutrition

    Serving: 1muffin | Calories: 296kcal | Carbohydrates: 42g | Protein: 3g | Fat: 13g | Saturated Fat: 4g | Polyunsaturated Fat: 5g | Monounsaturated Fat: 3g | Trans Fat: 0.2g | Cholesterol: 35mg | Sodium: 170mg | Potassium: 105mg | Fiber: 1g | Sugar: 25g | Vitamin A: 3749IU | Vitamin C: 1mg | Calcium: 34mg | Iron: 2mg

    The BEST Green Bean Casserole with Bacon and Cheese

    November 18, 2018

    Scoop of the best green bean casserole.

    The BEST Green Bean Casserole with Bacon and Cheese: One of the most popular green bean recipes, and such an easy side dish that shouldn’t just be for Thanksgiving!

    Putting together the holiday menu? This casserole is one of my go-to Thanksgiving sides.

    Green bean casserole being scooped out of dish.

    Not gonna lie, finding green bean recipes that I swoon over, are far and few between. (Unless I’m just going to open up a can of green beans… and then I have this extensive list of ways to make green beans taste better, in a pinch!)

    And I’m sure we’ve all had the infamous green bean casserole at a ladies’ lunch after a church gathering (along with this vintage green bean recipe) and even on our Thanksgiving tables… but I couldn’t resist sharing a recipe here when I made it to go with the Creole Roasted Turkey recipe for Thanksgiving.

    It’s a basic green bean casserole, but I couldn’t help but add extra cheese and bacon to this one to really “umph” the flavor a bit. And friends, I have to say… it really is the BEST green bean casserole I’ve ever had.

    How to Make the Best Green Bean Casserole

    If you’re here for the recipe, you’ll find that below, but I’ve also included photos of the process in case you’re more of a visual person and prefer to see image step by steps.

    French style green beans in mixing bowl.

    Preheat your oven to 350° so it’s ready when you are!

    French Green Bean Casserole

    Start by pouring your drained, canned French-style green beans into a large bowl.

    Soup and milk mixture in mixing bowl.

    In a separate bowl, combine the soup, milk, and pepper.

    Pour on top of the green beans and stir until completely coated.

    Milk mixture added to green beans.

    Add in the cooked chopped bacon and stir until mixed in.

    Chopped crispy bacon added to green beans.

    Next, add in half of the french fried onions and mix in too!

    Crispy French fried onions added to mixture.
    Crispy bacon and onions added to green bean casserole.

    Once mixed together, pour into a greased baking dish. I used a baking dish that was about an 8×8, but you can use a smaller/bigger dish if desired.

    Green bean casserole in baking dish before baking.

    Bake in the oven for 25 minutes. Remove and sprinkle on remaining french fried onions and cheese, until you’ve evenly covered the top.

    Add back into the 350 oven and bake for an additional 5-10 minutes or until the cheese is melted and a nice golden color!

    Baked green bean casserole in baking dish.

    Oh my goodness. Can we have a moment of silence for this golden warm casserole?

    Scoop of green bean casserole with cheese and bacon.

    Easy Green Bean Casserole

    Wasn’t that easy? I mean, I see why it’s a classic staple for family gatherings and pot luck… but this is going to start being a staple in my home for weeknight dinners too since it’s so easy!

    Serving of green bean casserole with cheese and bacon.

    Related Recipes

    If you love classics like this recipe you’ll also love these recipes:

    • Sweet potato crunch in white baking dish, with wooden spoon dipping out.
      Sweet Potato Crunch
    • Corn Casserole Recipe
      The BEST Corn Casserole
    • Southern broccoli casserole with cheese
      Southern Broccoli Casserole
    • Crack green beans on wooden spoon.
      Crack Green Beans

    Recipe

    Scoop of the best green bean casserole.
    Print Pin
    4.84 from 110 votes

    The BEST Green Bean Casserole with Cheese and Bacon

    The BEST Green Bean Casserole with Bacon and Cheese: One of the most popular green bean recipes, and such an easy side dish that shouldn't just be for Thanksgiving! 
    Course Side Dish
    Cuisine American
    Prep Time 5 minutes minutes
    Cook Time 30 minutes minutes
    Total Time 35 minutes minutes
    Servings 6
    Calories 243kcal
    Author Jessica Burgess

    Ingredients

    • 2 – 14.5 ounce cans of french style green beans drained
    • 10.5 ounce can of cream of mushroom soup
    • ¾ cup milk I used 2% but any will do!
    • pinch pepper or to taste
    • 1½ cups french fried onions divided – half will go in, half will sprinkle on top
    • 1 cup shredded cheddar cheese
    • 4 slices cooked bacon chopped
    • salt to taste (remember, bacon has salt!)

    Instructions

    • Preheat oven to 350 degrees
    • Start by pouring your drained, canned green beans into a large bowl.
    • In a separate bowl, combine the soup, milk, and pepper.
    • Pour on top of the green beans and stir until completely coated.
    • Add in the cooked chopped bacon and stir until mixed in.
    • Next, add in half of the french fried onions and mix in too!
    • Once mixed together, pour into a greased baking dish. (I used a baking dish that was about an 8×8, but you can use a smaller/bigger dish if desired.)
    • Bake in the oven for 25 minutes. Remove and sprinkle on remaining french fried onions and cheese, until you’ve evenly covered the top.
    • Add back into the 350 oven and bake for an additional 5-10 minutes or until the cheese is melted and a nice golden color!

    Video

    Notes

    You can use your favorite type of green beans if you don’t like the French style.
    Prep casserole in advance without the topping of French fried onions and cheese, and bake as directed.

    Nutrition

    Serving: 0.5cup | Calories: 243kcal | Carbohydrates: 7g | Protein: 7g | Fat: 19g | Saturated Fat: 9g | Cholesterol: 32mg | Sodium: 344mg | Potassium: 87mg | Sugar: 1g | Vitamin A: 240IU | Calcium: 170mg | Iron: 0.2mg

    Creole Turkey

    November 11, 2018

    How to bake a turkey

    This Creole Turkey recipe is part of a family recipe that gives an oven-roasted turkey a flavor that will leave guests asking YOU for the recipe for their own Thanksgiving turkey!

    Roast Turkey - How to Cook a Turkey in the oven

    I can’t wait to show you this family recipe that my husband’s aunt and uncle so kindly shared with us this year, to share with you!

    Although they deep fry a turkey with this recipe in mind, I wanted to provide an oven baked recipe to fit more of the traditional approach!

    Cajun Turkey

    Oven Roasted Turkey Recipe

    LOOK at the crispy crunchy skin on that turkey! To snag the full recipe, you can see everything that you need and even print out the recipe card at the very end of this post.

    However, I’d love to walk you through with photos too in case you love getting a detailed look at how to make this recipe for your own family!

    How to cook a turkey in the oven

    Fresh and Frozen Turkey Prep

    If you’ve grabbed a fresh turkey this year, then you won’t have to worry about thawing.

    However, if you need to thaw your turkey, keep in mind that you will need to allow about 24 hours for each 4 to 5 pounds of frozen turkey in the refrigerator. (If making this recipe I’m sharing below, pull the turkey out of the refrigerator and inject the marinade the night before baking if possible!)

    Once Thawed:

    • Cut off the plastic around the legs

    • Remove the neck, cut off the tail, and remove the giblet bag from the inside.

    How to prep a turkey

    PRO TIP: Allow turkey to become as close to room temperature before baking!

    Injected Marinade Tips

    Using ingredients like chicken broth (even my homemade chicken broth recipe), onion juice, garlic juice, liquid smoke, Worcestershire sauce, and lemon juice, from the Creole Roast Turkey recipe below…creates a flavor that packs the inside of the turkey with a flavor, making it a step you don’t want to skip!

    What is onion juice and garlic juice?

    I had the same question when we took the first peek at the recipe from our family. Those juices are sold by the bottle in some areas, but if you struggle to find them, you can do what I did…

    For the onion juice, I grabbed a juicer to extract the juices. (You may also be able to use the liquid that jarred onions rest in.)

    For the garlic, I simply bought a jar of minced garlic and used the liquid that the garlic rests in, inside of the jar.

    Whole turkey marinade recipe

    Once the marinade ingredients are mixed together, they’re ready to inject into your turkey!

    How to inject a turkey

    How to Inject a Turkey

    To inject your turkey, you’ll want to inject multiple areas with the marinade, especially through the breast, thighs, thick part of the wings, and legs.

    Then, if injecting the night before, place your turkey back in the refrigerator the rest of the night and pull out to allow enough time for the turkey to become room temperature before baking.

    Inject a turkey with a marinade overnight - marinade recipe

    PRO TIP: Preheat oven to 475, and while preheating, you can mix up your rub!

    Creole Rub

    This is where the creole flavor comes in, and really gives a kick to your turkey!

    Before baking, mix together the creole seasoning and mustard in a bowl.

    Oven roasted turkey rub recipe

    “Rub” It On…

    When evenly mixed, coat the outside of the turkey with ½ of rub, apply about a ¼ under the skin around the neck, and then use the remaining rub to coat the inside walls of the turkey.

    Crispy skin recipe for whole turkey

    Turkey Cook Time and Temperature

    Once the turkey is injected and has the rub applied, place your turkey into a turkey roaster with a roasting rack.

    Bake at 475 degrees for 30 minutes, then reduce the temperature to 350 and bake until the internal temperature of the turkey reaches 165 degrees. (This was about 3 hours for us, and for our bird. Yours can differ depending on size and oven temperature!)

    PRO TIP: Some turkeys come with a pop-up timer. But if you plan to use your own thermometer, make sure to insert the thermometer in the thickest part of the thigh, right where the thigh meets the breast, and push it in until you feel it slide into the thigh meat. (DON’T push it all the way into the bone.)

    How to bake a whole turkey in the oven

    Oven Roasted Turkey – Thanksgiving Table Worthy

    Now doesn’t that turkey look like something you’d be proud to put on your Thanksgiving table this year?

    Friends, if you’re intimidated by cooking a whole turkey this year, I encourage you to try this one.

    Or, if you’re planning a big meal, and need two turkeys, you can bake this one and also do a pellet grill smoked turkey.

    Thanksgiving turkey recipe

    My Favorite Thanksgiving Side Dish

    Are you looking for side dishes to go along with your Creole Roasted Turkey?

    For our Thanksgiving dinner, we ALWAYS have a salad, and when I’m assigned to bring a salad, you can almost bet that I’ll be bringing along the BEST Side Salad there is! It has a secret that makes it the best, and you’ll more than likely never go back to just dumping some lettuce in a bowl!

    Recipe

    How to bake a turkey in the oven
    Print Pin
    4.50 from 6 votes

    Creole Turkey Recipe

    This Creole Roasted Turkey recipe is part of a family recipe that gives an oven roasted turkey a flavor that will leave guests asking YOU for the recipe for their own Thanksgiving turkey!
    Course Main Course
    Cuisine American
    Prep Time 20 minutes minutes
    Cook Time 3 hours hours
    Resting Time 15 minutes minutes
    Total Time 3 hours hours 20 minutes minutes
    Servings 12 people
    Calories 317kcal
    Author Jessica Burgess

    Ingredients

    Turkey

    • 1 Whole Turkey 12-14 lbs

    Injected Marinade

    • 14.5 oz can chicken broth
    • 4 oz onion juice bottled or homemade
    • 2 tablespoon garlic juice
    • 2 tablespoon liquid smoke
    • 2 tablespoon Worcestershire sauce
    • juice from 1 lemon

    Rub

    • ⅓ cup creole seasoning
    • 4 tablespoon yellow mustard the condiment, not the dried spice

    Instructions

    • In medium-size bowl, mix together all ingredients for marinade.
    • Preferably the night before baking, inject completely thawed turkey with the marinade mixture and let sit overnight. 
    • When ready to bake, pre-heat oven to 475 degrees.
    • While pre-heating, mix together “rub” (mustard and creole seasoning) in a small bowl. 
    • Coat outside of turkey with ½ of rub, apply about a ¼ under the skin around the neck, and then use the remaining rub to coat the inside walls of the turkey.
    • Place turkey on rack and roasting pan and bake in 475 degree oven for 30 minutes, then reduce oven temperature to 325 degrees.
    •  Bake until internal temperature of turkey reaches the proper food and safety requirements of at least 165 degrees. (See notes in blog post for recommended thermometer placement to receive accurate temperature readings.)

    Notes

    Please keep in mind that the nutritional information provided below is just a rough estimate and variations can occur depending on the specific ingredients used. 

    Nutrition

    Serving: 1g | Calories: 317kcal | Carbohydrates: 2g | Protein: 47g | Fat: 12g | Saturated Fat: 3g | Cholesterol: 154mg | Sodium: 456mg | Potassium: 561mg | Vitamin A: 120IU | Vitamin C: 4.3mg | Calcium: 38mg | Iron: 2.2mg

    How to Cook Pork Chops in the Oven (Bone-In & Boneless Guide)

    March 18, 2026

    A sliced, boneless pork chop that was baked in the oven, sitting on a plate.

    Cooking pork chops in the oven is one of the easiest ways to get juicy, flavorful results every time. Whether you're using bone-in or boneless chops, this simple method works for busy weeknights or Sunday supper.

    Round out Sunday supper with my Sunday Best Mac and Cheese, a rich, creamy baked side with a golden cheese topping.

    The No-Stress Way to Make Juicy Pork Chops

    If you've ever pulled dry, tough pork chops out of the oven, you're not alone. Pork is lean, and it overcooks quickly. The good news is that once you understand temperature and timing, oven-baked pork chops become one of the most reliable dinners you can make.

    Baked boneless pork chop, sliced to show middle, sitting on a plate.

    After testing different temperatures, thicknesses, and cuts, this method consistently delivers tender pork chops with great flavor and no guesswork.

    Frequently Asked Questions

    What is the safe internal temperature for pork chops?

    Pork chops are safe to eat at 145°F, followed by a 3-minute rest. Use a meat thermometer inserted into the thickest part of the chop for accuracy.

    Should I bake pork chops covered or uncovered?

    Bake pork chops uncovered for better browning. If they are thick and you're worried about drying out, you can loosely tent with foil during the last few minutes.

    Why are my pork chops dry?

    Dry pork chops usually mean they were overcooked. Even a few extra minutes can make a difference. Always cook to temperature, not just time.

    Do bone-in and boneless pork chops cook differently?

    Yes. Bone-in pork chops typically take slightly longer to cook and often stay a bit juicier because the bone helps retain moisture.

    Can I cook pork chops from frozen?

    It's best to thaw them first for even cooking. Cooking from frozen can lead to dry outsides and undercooked centers.

    Pork chops in the oven cooking time chart at 400 degrees showing thickness and bake times.

    Bone-In vs. Boneless Pork Chops

    Both work beautifully in the oven, but here's what to expect:

    Bone-In Pork Chops

    • Slightly longer cook time
    • Often more flavorful
    • Tend to stay juicier

    Boneless Pork Chops

    • Cook faster
    • Easier to slice and serve
    • Great for quick weeknight meals

    Either option works with the timing guide below.

    What Temperature to Bake Pork Chops

    The oven temperature affects both texture and cook time.

    350°F - More gentle cooking, slightly longer time
    375°F - Balanced option for tenderness and browning
    400°F - My preferred temperature for juicy results with good color
    425°F - Faster cooking, better browning, watch carefully

    If you prefer high, direct heat from above for faster browning, you may also like broiled pork chops.

    For most 1-inch thick pork chops, 400°F gives the best combination of tenderness and flavor.

    How Long to Bake Pork Chops

    Cooking time depends on thickness and oven temperature.

    At 400°F:

    • ½-inch thick: 8-12 minutes
    • 1-inch thick: 15-20 minutes
    • 1½-inch thick: 20-25 minutes

    Always confirm with a thermometer. Remove from oven at 145°F and let rest 3-5 minutes before serving.

    Three baked boneless pork chops in a glass baking dish.

    Ingredients

    • Pork chops (bone-in or boneless) - The star of the dish. Choose evenly sized chops for even cooking.
    • Olive oil - Helps the seasoning stick and promotes browning.
    • Salt - Enhances natural flavor and helps retain moisture.
    • Black pepper - Adds simple, classic warmth.
    • Garlic powder - Provides savory depth without overpowering the pork.
    • Paprika - Adds mild smokiness and beautiful color.

    You can customize seasoning based on preference, but this simple blend works beautifully.

    Instructions

    1. Preheat your oven to 400°F.
    2. Pat pork chops dry with paper towels. This helps them brown instead of steam.
    3. Rub both sides lightly with olive oil.
    4. Season generously with salt, pepper, garlic powder, and paprika.
    5. Place pork chops on a baking sheet or in a baking dish, leaving space between each one.
    6. Bake according to thickness guidelines above.
    7. Remove from oven once internal temperature reaches 145°F.
    8. Rest for 3-5 minutes before serving.

    Flavor Variations

    Once you've mastered the basic oven method, try one of these reader-favorite versions:

    • BBQ Baked Boneless Pork Chops - Sweet, saucy, and perfect for weeknights.
    • Grilled Pork Chops - Bold flavor with a caramelized finish.
    • Crock Pot Pork Chops - A hands-off, slow cooker version for extra tenderness.
    • Southern Fried Pork Chops - Crispy and classic comfort food.

    This guide gives you the base method. From there, flavors are endless.

    Tips for Perfect Pork Chops

    • Use a thermometer. Guessing leads to dry pork.
    • Let chops come closer to room temperature before baking.
    • Rest after baking to keep juices inside.
    • Avoid overcrowding the pan.
    • Thicker chops stay juicier than very thin ones.

    Recipe

    A sliced, boneless pork chop that was baked in the oven, sitting on a plate.
    Print Pin
    4.34 from 3 votes

    Oven Baked Pork Chops (Bone-In & Boneless)

    This easy oven baked pork chop method works for both bone-in and boneless chops. Bake at 400°F until the internal temperature reaches 145°F for juicy, tender results every time.
    Course Main Course
    Cuisine American
    Prep Time 5 minutes minutes
    Cook Time 15 minutes minutes
    Total Time 20 minutes minutes
    Servings 4 servings
    Calories 241kcal
    Author Jessica Burgess

    Ingredients

    • 4 pork chops bone-in or boneless, about 1 inch thick
    • 1 tablespoon olive oil
    • 1 teaspoon salt
    • ½ teaspoon black pepper
    • ½ teaspoon garlic powder
    • ½ teaspoon paprika

    Instructions

    • Preheat your oven to 400°F.
    • Pat pork chops dry with paper towels. This helps them brown instead of steam.
    • Rub both sides lightly with olive oil.
    • Season generously with salt, pepper, garlic powder, and paprika.
    • Place pork chops on a baking sheet or in a baking dish, leaving space between each one.
    • Bake according to thickness guidelines above.
    • Remove from oven once internal temperature reaches 145°F.
    • Rest for 3-5 minutes before serving.

    Notes

    This seasoning amount works well for 4 standard pork chops. Adjust slightly if using very large or thick cuts.
    • Cooking time depends on thickness.
    At 400°F:
    • ½-inch thick: 8-12 minutes
    • 1-inch thick: 15-20 minutes
    • 1½-inch thick: 20-25 minutes
    • Bone-in chops may take slightly longer.
    • Always cook to 145°F internal temperature and rest 3-5 minutes.
    • See full post above for temperature chart and thickness guide.
     

    Nutrition

    Serving: 1pork chop | Calories: 241kcal | Carbohydrates: 1g | Protein: 29g | Fat: 13g | Saturated Fat: 4g | Polyunsaturated Fat: 2g | Monounsaturated Fat: 7g | Trans Fat: 0.1g | Cholesterol: 90mg | Sodium: 646mg | Potassium: 513mg | Fiber: 0.2g | Sugar: 0.04g | Vitamin A: 130IU | Vitamin C: 0.01mg | Calcium: 12mg | Iron: 1mg

    Baked BBQ Pork Chops in the Oven

    October 22, 2024

    BBQ Pork Chops in the Oven are super simple but full of flavor! It’s an easy dinner idea that goes with so many great side dishes, especially these baked beans with hamburger. The recipe is similar to how to cook pork steaks and the result is a juicy, delicious cut of meat.

    Hello again Fantabulosity readers. It's Meg from Meg's Everyday Indulgence again! I'm so pumped to share this recipe with you today. (Photos updated by Fantabulosity in 2024.)

    Baked bbq pork chops on a bed on sliced onions.

    I have a feeling a lot of you out there are always on the hunt for simple yet delicious dinners that you can get on the table in a flash. You know, the ones that don't require a mountain of ingredients that you don't have on hand. (Or at least the recipes that require little prep like this Coca-Cola BBQ Pulled Pork or bbq pork steak recipes.)

    Why You’ll Love These Baked Pork Chops

    If you love easy recipes that use simple ingredients, then you’ll love this one!

    You’ll find that these baked pork chops use staple ingredients, so much like these broiled pork chops and these creamy crock pot pork chops, and I'm betting you already have all or most of these on hand.

    • Pork Chops
    • Onions
    • Barbecue Sauce
    • Basic Spices (to create a delicious, flavorful rub)

    Also, since the pork chops are thinly cut and boneless, they cook very quickly, making them perfect for nights when you don't have much time to get dinner on the table.

    Baking cuts of meat in the oven can result in a juicy, tender cut of meat, and these pork chops are no different. For complete temperature and timing guidance, see our full guide on how to cook pork chops in the oven.

    Ingredients

    Ingredients for baked bbq pork chops.

    Pork Chop Rub

    Before the boneless pork chops go into the oven to bake, a simple rub is sprinkled all over both sides.

    All the ingredients in the rub are pretty basic pantry staples. This includes salt, pepper, garlic powder, onion powder, chili powder, and paprika.

    Almost all of the spices are used in equal amounts (excluding the salt, and if you’re using table salt, you may want to use ½ teaspoon) so it's super simple to mix up and makes a big impact on the flavor.

    The Secret to Good Pork Chops

    This boneless pork chop recipe has a little secret that adds so much flavor to this cut of pork. By slicing an onion and and layering it along the bottom of your baking dish, adds a lot of flavor to the pork chops.

    Baked pork chops on white plate, sitting next to cast iron skillet.

    How to Cook Baked Pork Chops

    First, as the chops sit on the onion slices and bake away, the onion flavor is imparted upon them. But no fear, it's not a crazy oniony taste that will cause your kids to revolt but a nice, subtle flavor boost.

    Sliced onions in bottom of baking dish.
    Uncooked pork chops and onions in baking dish.

    The second plus is that once the chops are done cooking, the onions have softened and become seasoned with the rub, barbecue sauce, and pork juices, which makes for a great topping to your chops.

    Baked bbq pork chops on plate with sliced onions.

    TIP: You could easily double or triple the amounts and keep the extra in an airtight container to have it ready for next time.

    Barbecue Sauce for Pork Chops

    Now the great debate may be on. What kind of barbecue sauce do you like? Hot, sweet, smoky, all of the above?! I'm a sweet, Kansas City style barbecue sauce girl all the way. My husband grew up in KC and I grew up just a few hours away so it's in our DNA to like the sweet saucy stuff.

    You obviously can use whatever kind of barbecue sauce you like best and they will all pair well with the rub.

    That same sauce is just as good on chicken. These BBQ chicken thighs in the oven use the same trick of baking first and saucing at the end.

    Expert Tip

    I chose to use somewhat thinly cut chops to keep this a quick cooking meal. I'm always on the lookout for quick, healthy and homemade dinner options for nights when we have dance, Cub Scouts or conferences so it's nice to have another option to add to the arsenal.

    What to Serve with BBQ Pork Chops

    There’s nothing better than the staples when it comes to sides dishes that go with BBQ. This red skin potato salad is one of our favorite savory salad recipes but pasta salad recipes are always a good option too! Or, it’s hard to have pork without this KFC Copycat Coleslaw recipe!

    More Pork Chop and Pork Steak Recipes You'll Love:

    If you love cuts of pork these are some other great easy recipes that you’ll want to try out for sure. Or, if you’re a fan of using the slow cooker, give these slow cooker bbq pork steaks a try! (Pork steaks are taken from the shoulder of a pig and are usually tougher than chops… but juicier.)

    • Close up of southern fried pork chops on white plate, with a pork gravy poured on top.
      Southern Fried Pork Chops
    • A sliced, boneless pork chop that was baked in the oven, sitting on a plate.
      How to Cook Pork Chops in the Oven (Bone-In & Boneless Guide)
    • Grilled pork chop on plate next to asparagus.
      Grilled Pork Chops Recipe
    • Baked BBQ Pork Steaks on white plate
      Pork Steaks in the Oven

    Did you make this? I’d be so grateful if you left a “star” rating below to let me know what you thought! Then, the next time you need a quick and easy recipe, come back to Fantabulosity to browse all of my easy recipes!

    Recipe

    Print Pin
    4.88 from 33 votes

    Baked BBQ Pork Chops

    Baked BBQ Pork Chops in the oven are a super easy dinner that's on the table in 30 minutes. Sweet, smoky, simple and delicious.
    Course Main Course
    Cuisine American
    Prep Time 5 minutes minutes
    Cook Time 25 minutes minutes
    Total Time 30 minutes minutes
    Servings 4 servings
    Calories 119kcal
    Author Jessica Burgess

    Ingredients

    • 1 large yellow onion, sliced into ¼-inch rings
    • 1 Tablespoon olive oil
    • 4 ¼-inch thick boneless pork chops
    • ½ cup barbecue sauce

    For the BBQ Rub:

    • 1 ½ Tablespoon kosher salt If using table salt, you may want to use less.
    • ½ teaspoon garlic powder
    • ½ teaspoon onion powder
    • ½ teaspoon chili powder
    • ½ teaspoon paprika
    • ½ teaspoon black pepper

    Instructions

    • Preheat oven to 400 degrees F. Layer onions in a large cast iron skillet or 9×3 baking dish. Drizzle with olive oil. Set aside.
    • In a small bowl, combine the kosher salt, garlic powder, onion powder, chili powder, paprika and pepper. 
    • Sprinkle both sides of the pork chops with the bbq rub. Place the seasoned chops on top of the onions. Bake for 15 minutes. 
    • Remove from the oven and brush both sides of the chops generously with barbecue sauce. Bake another 10 minutes or until the internal temperature reaches 145 F. Remove from oven and let rest for 3 minutes before slicing. Top with onions when serving.

    Video

    Notes

    This recipe is easy to double or triple if you need larger amounts.
    Make sure not to overlap the pork chops so they cook evenly.

    Nutrition

    Serving: 1g | Calories: 119kcal | Carbohydrates: 20g | Protein: 1g | Fat: 4g | Sodium: 2528mg | Potassium: 163mg | Fiber: 1g | Sugar: 13g | Vitamin A: 565IU | Vitamin C: 3mg | Calcium: 23mg | Iron: 0.6mg

    Pork Steaks in the Oven

    April 10, 2023

    Baked BBQ Pork Steaks on white plate

    Pork steaks are one of those cuts that used to scare me off, but the oven makes them easy. You season them, bake them until they hit 145°F, and brush on your barbecue sauce. That’s it. They come out tender every time, and you don’t have to babysit a grill to get there. If you love my slow cooker pork steaks, this is the same fork-tender result straight from the oven.

    Chicken gets the same treatment. These oven baked BBQ chicken thighs bake plain first and get their sauce in the last few minutes, so it never burns.

    Baked bbq pork steaks on white plate.

    Why You’ll Love These Baked Pork Steaks

    If you have pork steaks or pork shoulders (or blade steaks) sitting in your freezer or refrigerator, then you may have happened upon here while trying to find one of the BEST pork steak recipes you can find, for an easy dinner recipe.

    Some pork recipes are grilled, some cooked in a cast iron pan with gravy drippings, some in a slow cooker, like this slow cooker bbq pulled pork, and more! But baking is by far our favorite way to have bbq pork steaks, with no marinade required!

    When I shared how to cook steak in the oven, and how easy it is to get a melt-in-your-mouth steak with that process, I knew you’d love seeing how to bake all different kinds of steaks.

    I think you’re in the right place and that you’re going to love how easy and how delicious this pork steak recipe is. Serve them with these Dr. Pepper Baked Beans and your dinner will be incredible.

    If you also saw my slow cooker bbq pork steaks recipe, then you may already know that cooking them slowly, over a longer period of time makes the pork steak meat literally fall off of the bone.

    But when you need something a bit quicker, baking pork steaks in the oven is an alternative that definitely won’t disappoint you and will also leave you with tender pork steaks.

    The day that I made these to take photos for the blog, I only made two steaks, as it was just the right amount for what we needed that day…however I’ve created the recipe in the recipe card below to reflect 4 pork steaks, as that would be more common for a family of 4.

    What is a Pork Steak?

    Pork steaks are a section of a hog that’s cut from the shoulder, and /or butt. Some grocery stores or butcher shops have pork steaks ready for you. However, if you are not able to find them, you can ask them to cut pork shoulder or pork butt in to steaks for grilling.

    Recipes like this are perfect examples of classic old-fashioned dinner ideas.

    Uncooked pork steaks sitting on packaging.

    What is the Difference Between Pork Chops and Pork Steaks?

    Since pork steaks come from the shoulder and or butt area of a hog, the pork chops are cut from the loin section. Pork chops like these Baked Pork Chops, tend to be lean than pork steaks and can sometimes be more “dry” than pork steaks, where pork steaks tend to have more fat around the meat to help make them juicy. Now, if you have pork chops instead, this fried pork chops recipe is easy to make and frying them can add so much flavor!

    How to Keep Pork Steaks Tender and Not Tough

    Pork steaks come from the shoulder, so they’re marbled and forgiving, but they can turn tough if you rush them. Two things keep them tender. First, give them the full bake time so the fat and connective tissue soften. Pulling them early is what leaves them chewy. Second, cook to 145°F and then let them rest a few minutes before serving so the juices settle back in. Slice against the grain and they’ll practically fall apart.

    Ingredients for Pork Steaks in the Oven

    All you’ll need for these delicious, tender porks steaks are:

    • Pork Steaks – As many as you’ll need to serve.
    • Salt – This is optional, and remember that your barbeque sauce could have salt in it.
    • Pepper – This is also optional, and it’s important to keep in mind how spicy the bbq sauce is that you’re using.
    • BBQ Sauce – your favorite kind will do! We love using Sweet Baby Rays.

    How to Cook Pork Steak

    Now of course you don’t have to cook pork steaks with bbq sauce, but for us, it’s really hard to cook them/eat them any other way.

    Feel free to have fun creating sauces and using different spices for your pork steaks, but if you’re wanting to bake your steaks in the oven, then this is a great reference to find out how long to cook them.

    You can find the full recipe card with an ingredient list and instructions at the bottom of this post.

    Start by preheating your oven to 400º and then cover your pork steaks with salt and pepper (if desired).

    PRO TIP: You can even pound your pork steaks with a meat tenderizer before seasoning them if you want to make sure they’re super tender.

    4 image collage of baked pork steaks.
    1. Next, line a baking pan (large enough to fit the number of steaks you’re cooking, so they don’t overlap) with aluminum foil for easy cleaning, and then drizzle a layer of barbeque sauce on the aluminum foil where you’ll place each steak.
    2. Place your steaks down on the foil and sauce.
    3. Then, cover steaks with the remaining bbq sauce.

    How Long Should You Cook Pork Steaks in the Oven?

    1. Bake the pork steaks uncovered for 50-60 minutes, (on the middle rack) or until the internal temperature of the steaks reaches 145 degrees.

    NOTE: Oven temperatures can vary, and some have reported that they prefer baking at 350 for 50-60 minutes, or checking the internal temp after 30 minutes to avoid over-cooking. I’ve even used different ovens and have found myself, cooking them for shorter/longer times, so it’s best to check to see what works best for yours.

    Cut bbq pork steaks with a piece on a fork.

    Expert Tips:

    • Flexible: You can cook one pork steak up to as many as you want/need, as long as they fit in the baking pan you plan to use, and if you have enough bbq sauce to cover them. You can even pop some hot dogs in the oven for the kids, since you bake those at the same temperature. (Just not as long!)
    • Dinner Meal Plan: Cook more than you need, and serve the leftovers, sliced, on bbq nachos, on a side salad to make it an entree, or as a sandwich!

    Recipe FAQs

    What temperature do you cook pork steaks?

    Bake pork steaks at 400° for 50-60 minutes.

    Should pork steaks rest before serving?

    Although it’s not a must, it is a great idea to allow it to rest for a few minutes before serving to all of the juices to set in before slicing.

    What should the internal temperature be of cooked pork steaks?

    The internal temperature of cooked pork steaks should reach at least 145°F before eating.

    Why are my pork steaks tough?

    Usually they came out of the oven too soon. Pork steaks need time for the fat and connective tissue to break down. Let them reach 145°F, then rest before slicing. Cutting into them right away lets the juices run out and makes them dry.

    Can I use a different barbecue sauce?

    Absolutely. Sweet Baby Ray’s is our go-to for that sweet, sticky finish, but any barbecue sauce you love will work. A thicker sauce clings better and caramelizes nicely in the oven.

    Can you make baked pork steaks ahead of time?

    Yes. Bake them, cool them, and refrigerate. Reheat covered so they don’t dry out, adding a little extra sauce before they go back in. They’re great for meal prep or a make-ahead Sunday dinner.

    Can you freeze pork steaks?

    You can. Let them cool completely, then freeze in an airtight container [add your tested freeze time, commonly up to 2 to 3 months]. Thaw in the fridge overnight and reheat gently with a bit more sauce.

    How to Store

    Refrigerate: If you have leftover pork steaks, it’s best to allow them to cool and then place in an airtight container, in the refrigerator for 3-4 days.

    Freeze: You can freeze leftover pork steaks in a freezer-safe container for up to 3-4 months.

    Thaw: Thaw the pork steaks in the refrigerator overnight.

    Reheat: Sometimes reheating cooked pork steaks can make them dry. So if reheating in the oven, place the pork steaks in a baking pan (with raised sides) and pour about ¼ cup of broth in the bottom, to help add moisture to the steaks while reheating.

    What Side Dishes to Serve with Pork Steaks

    Side dishes that go with BBQ pulled pork are often delicious with pork steaks too! This KFC coleslaw is a staple side dish for pork recipes but I also LOVE Pasta Salads!

    This creamy corn casserole recipe, Amish Potato Salad or this old-fashioned potato salad (or this cauliflower potato salad for low-carb eaters), and this Cornbread Salad.

    But, adding some ground beef to baked beans lately has been a winner too!

    Meal Planning for the Week?

    Since the oven is hot, consider making burgers in the oven too, so you can eat on them all week! Just re-heat and serve! Or, making these cube steaks in the slow cooker is so easy!

    More Pork Recipes

    We love having pork steaks and pork chops around here. They’re so easy and actually pretty affordable. Here are our favorite pork recipes that you don’t want to miss…

    • BBQ Baked Boneless Pork Chops
    • Sweet & Smokey Grilled Pork Chops
    • Baked Pork Chops & Veggies in the Oven
    • Ribs on the Grill: Chipotle Apple Butter Ribs

    Recipe

    BBQ pork steaks cooked in the oven, that are on a white plate.
    Print Pin
    4.64 from 407 votes

    BBQ Pork Steaks in the Oven

    These BBQ pork steaks in the oven are so easy. Season, sauce and bake at 400° F. for delicious, tender and juicy pork steaks.
    Course Main Course
    Cuisine American
    Prep Time 10 minutes minutes
    Cook Time 50 minutes minutes
    Total Time 1 hour hour
    Servings 4 steaks
    Calories 208kcal
    Author Jessica Burgess

    Equipment

    • Large Baking Sheet rimmed

    Ingredients

    • 4 pork steaks or pork shoulders
    • salt to taste
    • pepper to taste
    • 16 ounce bottle of barbecue sauce I use Sweet Baby Rays

    Instructions

    • Prep: Preheat oven to 400 degrees
    • Season: Rub salt and pepper on both sides of each pork steak if desired
      4 pork steaks or pork shoulders, salt, pepper
    • Cover Pan: Line a baking pan (large enough to fit the number of steaks you're cooking, so they don't overlap) with aluminum foil.
    • Sauce the Pan: Drizzle half a bottle of barbeque sauce on the aluminum foil where you'll place each steak.
      16 ounce bottle of barbecue sauce
    • Sauce the Steaks: Place your steaks down on the foil and sauce, and then cover steaks with remaining bbq sauce.
    • Bake: Bake the pork steaks at 400 degrees, uncovered for 50-60 minutes, (on the middle rack) or until the internal temperature of the steaks reaches 145 degrees.
      NOTE: Oven temperatures can vary, and some have reported that they prefer baking at 350 for 50-60 minutes, or checking the internal temp after 30 minutes to avoid over-baking.

    Video

    Notes

    Storage of Leftovers:
    Refrigerate: If you have leftover pork steaks, it’s best to allow them to cool and then place in an airtight container, in the refrigerator for 3-4 days.
    Freeze: If you’d like to freeze leftovers, allow them to fully cool, and store in a freezer-safe container for 3-4 months.
    Thaw: Thaw the pork steaks in the refrigerator overnight.
    Reheat: Sometimes reheating cooked pork steaks can make them dry. So if reheating in the oven, place the pork steaks in a baking pan (with raised sides) and pour about ¼ cup of broth in the bottom, to help add moisture to the steaks while reheating.

    Nutrition

    Serving: 1steak | Calories: 208kcal | Protein: 28g | Fat: 9g | Saturated Fat: 3g | Cholesterol: 89mg | Sodium: 66mg | Potassium: 499mg | Calcium: 9mg | Iron: 0.7mg

    Cinnamon Roll Casserole

    December 22, 2024

    slice of cinnamon roll casserole on plate

    An easy Cinnamon Roll Casserole that’s perfect for breakfast, made of cinnamon roll pieces, butter, cinnamon, vanilla, heavy cream, syrup and eggs!

    cinnamon roll casserole on white plate

    If you love cinnamon, you’ll also love to see how we make cinnamon rolls in the air fryer, this cinnamon coffee cake recipe, and this vintage supper cake.

    Why You’ll Love this Recipe

    Oh heavens. Your Saturday morning is going to be complete with this easy breakfast recipe. But specifically, here’s why you’ll love this one:

    • This recipe is made using refrigerated cinnamon rolls! YES! We love shortcuts in the kitchen (like when we used crescent rolls for this biscuit and gravy casserole) and this recipe is no exception!
    • You can also make this recipe ahead of time and I give instructions and tips on how to do that below!
    slice of cinnamon roll casserole on white plate with baking dish in back

    Ingredient Notes

    By using canned cinnamon rolls, it really cuts down on the other simple ingredients for this recipe!

    labeled ingredients for cinnamon roll casserole, on counter
    • unsalted butter – You can use salted butter too, and it turns out just fine!
    • canned cinnamon rolls – We used Pillsbury cinnamon rolls but any brand/type will do, and either the original icing or cream cheese icing works great as well.

    To skip right to the recipe card where you can find the ingredients and instructions for this easy recipe, just scroll down to the bottom of this post and there you’ll find where you can print and gather all of the info that you need!

    Step by Step Directions

    1. First, preheat the oven to 375 degrees and lightly spray an 8×8 baking pan.
    2. Then start breaking the cinnamon rolls in to small pieces and place in to greased baking dish.
    small pieces of cinnamon rolls in dish
    Break cinnamon rolls in to pieces
    Melted butter pouring on top
    Pour melted butter on top
    1. In a medium bowl, beat together the eggs, heavy cream, cinnamon, and vanilla until combined well.
    heavy cream pouring in bowl with eggs
    Pour heavy cream in eggs
    Cinnamon pouring in to bowl
    Add cinnamon
    Vanilla pouring in to bowl
    Add vanilla
    Mixing ingredients together in bowl
    Mix ingredients together
    1. Pour egg mixture over the top of the cinnamon rolls in the dish.
    fully mixed batter in bowl
    Ready for pouring
    Pouring batter over cinnamon rolls
    Pour batter over rolls
    1. Drizzle the maple syrup all over the top.
    Pouring syrup over rolls
    Pour syrup over rolls
    1. Place in your preheated oven and bake for 20-30 minutes (see tips below for your desired baking time), until the top is golden brown, and let cool for a few minutes.
    baked cinnamon roll casserole
    Fresh from the oven
    1. Remove the metal lid from the icing container and microwave the icing for 5-10 seconds, until it's thin enough to drizzle. Then, pour the icing all over the top of the casserole!
    Pouring icing over cinnamon rolls
    Pour icing on top
    icing all over top of cinnamon rolls
    Icing on top

    How Long to Bake Cinnamon Roll Casserole

    If you see the photos below, the first image of the cinnamon roll casserole is baked for 20 minutes at 375°. This is a more gooey, soft, doughy center, that some prefer. For instance, if you love a gooey cinnamon roll… then you may prefer 20 minutes.

    The second image is the cinnamon roll casserole baked for 25-30 minutes, giving the casserole more of a “cooked” fluffy center that others may prefer.

    cinnamon roll casserole on spatula
    Baked for 20 minutes
    Cinnamon roll casserole on spatula
    Baked for 25-30 minutes
    1. When the casserole is baked to your desired level, sprinkle powdered sugar on top, if desired and enjoy!
    Powdered sugar on top of casserole
    Sprinkle powdered sugar

    Keep in mind, this delicious breakfast casserole is best served as a warm casserole, with a little extra syrup and powdered sugar.

    Cinnamon roll casserole bite on fork

    FAQs

    Can I double this cinnamon roll casserole recipe?

    Absolutely! Just double the ingredients and use an 8×11 baking pan or casserole dish. Cooking time should still be the same, but keep in mind how gooey you want the center. See notes in post for different bake time.

    What about a 9×13 pan? Although this pan size may be more common in your home, it may work ok but I haven’t tried this. I caution against it because there’s a lot of space left between the cinnamon roll pieces and this allows the egg/cream mixture to sit, and could be sections of a scrambled egg texture.

    Can I make cinnamon roll casserole in advance?

    This casserole can all be put together the night before, covered and stored in the refrigerator, and then baked the next morning. The baking temperature stays the same but since the casserole will be really cold from refrigeration, you may want to leave it to sit out on the counter for 30 minutes or so before baking may keep the baking time but not necessary.

    How do you store this sweet breakfast casserole?

    If you happen to have leftovers of this cinnamon roll breakfast bake, store in an airtight container or allow casserole to come to room temperature and place plastic wrap on top of baking dish and place in the refrigerator. For best results, enjoy the next morning or within 5 days.

    More Recipes You’ll Love

    Now although I’ve called this a cinnamon roll casserole, this could easily be called a cinnamon roll french toast casserole because of the eggs and maple syrup drizzle… so call it whatever you like, and whatever tickles your fancy!

    If you love this easy breakfast casserole recipe, then you’ll adore these other breakfast recipes, such as these pancakes in the oven, this French Toast Bake, and this Easy, Fluffy Pancake Recipe.

    Then of course, if you’d like to browse ALL of the easy breakfast recipes, especially mini cinnamon rolls, you’re sure to find more to add to your weekend favorites for the perfect breakfast or for even a holiday brunch!

    Did you make this? I’d be so grateful if you left a “star” rating below to let me know what you thought! Then, the next time you need a quick and easy recipe, come back to Fantabulosity to browse all of my easy recipes!

    Recipe

    slice of cinnamon roll casserole on plate
    Print Pin
    4.71 from 87 votes

    Cinnamon Roll Casserole

    An easy Cinnamon Roll Casserole that's perfect for breakfast, made of cinnamon roll pieces, butter, cinnamon, vanilla, heavy cream, syrup and eggs!
    Course Breakfast
    Cuisine American
    Prep Time 5 minutes minutes
    Cook Time 20 minutes minutes
    Total Time 25 minutes minutes
    Servings 6 servings
    Calories 382kcal
    Author Jessica Burgess

    Ingredients

    • 2 tablespoons unsalted butter
    • 12.4 ounces can Pillsbury Original Icing Cinnamon Rolls
    • 3 large eggs
    • ¼ cup heavy cream
    • 1 teaspoon ground cinnamon
    • 1 teaspoon vanilla extract
    • ½ cup maple syrup
    • powdered sugar if desired

    Instructions

    • Preheat oven to 375 degrees and lightly spray an 8×8 baking pan with non-stick cooking spray.
    • Break cinnamon rolls apart in to small pieces and place in greased baking dish.
    • Melt the butter and pour it on top of cinnamon rolls.
    • In a medium bowl, beat together the eggs, heavy cream, cinnamon and vanilla until well combined. Pour over the top of the cinnamon rolls in the dish. 
    • Drizzle the maple syrup all over the top. 
    • Bake for 20-25 minutes, until top is golden brown. Cool for a few minutes. (See notes in post for specific baking times for desired texture.)
    • Remove the metal lid from the icing container and microwave the icing for 5-10 seconds, until it's thin enough to drizzle. 
    • Pour the icing all over the top. Best served warm with a little extra syrup and powdered sugar. 

    Video

    Notes

    Making cinnamon roll casserole in advance:
    This casserole can all be put together the night before, covered and stored in the refrigerator, and then baked the next morning. The baking temperature stays the same but since the casserole will be really cold from refrigeration, you may want to leave it to sit out on the counter for 30 minutes or so before baking may keep the baking time but not necessary.

    Nutrition

    Serving: 1serving | Calories: 382kcal | Carbohydrates: 48g | Protein: 6g | Fat: 19g | Saturated Fat: 9g | Polyunsaturated Fat: 1g | Monounsaturated Fat: 3g | Trans Fat: 1g | Cholesterol: 114mg | Sodium: 462mg | Potassium: 108mg | Fiber: 1g | Sugar: 29g | Vitamin A: 398IU | Vitamin C: 1mg | Calcium: 54mg | Iron: 1mg

    Thai Salad Recipe with Noodles and Cabbage

    September 26, 2018

    Thai Salad with Noodles and Cabbage is packed full of flavor and texture.

    This Thai Salad Recipe with Rice Noodles and Cabbage is unlike any you've seen before. Soft rice noodles, crunchy cabbage, red bell peppers and more drenched in a deliciously rich peanut sauce.

    Hi friends! It's Meg again from Meg's Everyday Indulgence. I am so excited to be sharing another delicious and super flavorful recipe with you today, Thai Salad with rice noodles and cabbage. It’s just ONE of the many salad recipes here on Fantabulosity!

    Thai Salad Recipe

    Thai Salad with Noodles and Cabbage is packed with flavor and texture.

    Let's break down everything in this textural Thai salad:

    • Tender skinny rice noodles
    • Crunchy cabbage
    • Thinly sliced red bell peppers
    • Shredded carrots
    • Green onions
    • Cilantro
    • Dry roasted peanuts
    • Delicious and simple homemade peanut sauce

    Such an Easy Recipe!

    What's not to like, right?!

    I know the ingredient list may seem long but please don't let it scare you away. They are all common ingredients you can find in any decent sized grocery store. And you may already have them in your refrigerator and pantry.

    And it is super simple to throw together with just a few minutes of chopping vegetables and a quick buzz of the food processor or blender for the peanut sauce. All of which can be done while you are waiting for the water to boil for the rice noodles.

    And you can even take some shortcuts like I did by purchasing the cabbage and carrots already shredded. I'm always down for some store-bought help.

    Thai Salad with Noodles and Cabbage is packed full of flavor and texture.

    All About that Texture

    The textures in this salad are out of this world good. Like, so so good. I love lots of texture in my food and this salad is packed full of it.

    Shredded cabbage, shredded carrots, red bell peppers, and peanuts bring a major crunch factor while the noodles add something soft to the mix. Then, of course, there's the creamy peanut sauce that brings it all together.

    Thai Salad with Noodles and Cabbage is packed full of flavor and texture.

    Thai Salad Dressing – Peanut Sauce

    We need to talk about that peanut sauce next my friends. The base is honey roasted peanut butter and it's a total game changer. It's extra rich and nutty and the honey brings the perfect amount of sweetness to the sauce.

    I mean, you could use regular peanut butter and add in a drizzle of honey if you HAD to but the honey roasted version really does make a big difference. My favorite is fresh ground from Fresh Thyme so if you have one of them in your area RUN there now and get some. It's kind of life changing.

    There's a good amount of soy sauce in it which brings some extra depth and umami. Lime juice balances out the sweetness and the acidity helps balance out the richness of the other ingredients.

    It's so good you may want to drink it. Or dunk all the things in it.

    Add Meat – Chicken, Beef

    This is great as a side dish or if you wanted to turn it into a main dish, you could add some shredded or chopped meat like chicken (did somebody say Costco rotisserie chicken for a Thai Chicken Salad?) to bulk it up.

    Thai Salad with Noodles and Cabbage is packed full of flavor and texture.

    It would also be a really fun and different contribution to a potluck.

    No matter how you decide to enjoy it, I'm pretty sure the flavors and texture are going to blow your mind.

    Recipe

    Thai Salad with Noodles and Cabbage is packed full of flavor and texture.
    Print Pin
    5 from 4 votes

    Thai Salad Recipe with Noodles and Cabbage

    Thai Salad Recipe with Noodles and Cabbage is the perfect way to enjoy all those Thai flavors. Super simple to make and packed full of flavor and texture.
    Course Salad, Side Dish
    Cuisine Asian
    Prep Time 10 minutes minutes
    Cook Time 5 minutes minutes
    Total Time 15 minutes minutes
    Servings 4 servings
    Calories 389kcal
    Author Jessica Burgess

    Ingredients

    • 4 oz. thin rice noodles
    • 8.5 oz. shredded cabbage mix
    • ½ red bell pepper, thinly sliced
    • 2 green onions, white and green thinly sliced
    • ¼ cup shredded carrots
    • 2 Tbsp. torn cilantro
    • ¼ cup dry roasted peanuts

    For the Peanut Sauce:

    • ½ cup honey roasted peanut butter
    • 2 cloves garlic, peeled
    • ½ tsp. grated fresh ginger
    • 2 Tbsp. soy sauce
    • 2 Tbsp. lime juice
    • 1 Tbsp. rice vinegar
    • ½ tsp. sesame oil

    Instructions

    • Cook rice noodles according to package directions. Meanwhile, slice the vegetables for the salad. Toss together cabbage, bell pepper, green onions, carrots and cilantro in a large bowl. Set aside.
    • In a food processor or blender, combine the sauce ingredients. Blend until sauce is completely smooth. 
    • Once noodles are cooked, rinse well under cold water. Drain well and toss with the vegetables in the bowl. Pour about ¾ of the dressing over the salad and mix together until everything is coated. Add remaining dressing if desired and toss again. Sprinkle salad with cilantro and peanuts.

    Notes

    Please keep in mind that the nutritional information provided below is just a rough estimate and variations can occur depending on the specific ingredients used. 

    Nutrition

    Serving: 1serving (about ½ cup) | Calories: 389kcal | Carbohydrates: 39g | Protein: 13g | Fat: 21g | Saturated Fat: 4g | Sodium: 697mg | Potassium: 501mg | Fiber: 5g | Sugar: 6g | Vitamin A: 2420IU | Vitamin C: 47.4mg | Calcium: 63mg | Iron: 1.8mg

    What Do You Think?

    Did you try this recipe? We’d LOVE to hear about what you think. Give it a review and drop us a note to let us know!

    Looking for other easy side dish recipes? Then you’ll love our side dish archives. Give them a browse HERE!

    [simple-author-box]

    Oreo Cheesecake

    May 11, 2025

    Slice of no bake Oreo cheesecake on a plate with a Hugs Kiss, candy bar and Oreo cookie.

    This Oreo cheesecake recipe is a no-bake dessert that has an Oreo crust, and a creamy filling made of cream cheese, Oreo cookie cream filling, and Cool Whip.

    Slice of Oreo cheesecake on a plate, sitting in front of whole cheesecake.

    We are MAJOR Oreo fans in this house. I mean, so much so, that we’ve even had them for breakfast in Oreo pancakes, and when they come out with one of their new flavors, you MAY find us dancing in the store aisles and making an Oreo mug cake just to test them out. But the plain ole original Oreos will always have my heart.

    Anything cookies and cream or Oreo-flavored is going to win over my family, and this Oreo cheesecake recipe is no exception. We even used Oreos to make this Nutella cheesecake recipe and brookies with Oreos.

    Why You’ll Love This Recipe

    • No-Bake Recipe: No-bake desserts like this cheesecake, these Oreo rice Krispy treats, and this Oreo dessert recipe, are just some of our favorite no-bake desserts! “No-bake” usually means less time in the kitchen and fewer opportunities to mess something up. That’s a combination that I love.
    • Simple Ingredients: Only 8 ingredients are needed (and really, you could get away with only some of them if you leave off the candy garnishes) and you may already have the items in your refrigerator and pantry.
    • Make-Ahead: If hosting a party, cooking for a holiday, or just wanting to make an easy dessert in advance, this cheesecake is great to make ahead of time, since it needs to chill for at least 4 hours. This Oreo fudge is a hit around Christmas time though if you’re looking for a new fudge recipe to try.

    Love easy no-bake cheesecakes? This cherry cheesecake recipe is similar and even looks beautiful when served alongside this cookie cheesecake on the dessert table.

    Ingredients for Oreo Cheesecake

    • Oreos: Or your favorite brand of chocolate sandwich cookies. Personally, I think Oreos are the best, and use them in all of my chocolate cookie recipes, especially in this reader-favorite, Oreo Layered Dessert recipe. Buy extra Oreos so you can also make this Oreo pizza later.
    • Butter: Salted or unsalted will work for this recipe. I always seem to have salted butter on hand, and I love how the bit of salt has a tasty contrast with the sweetness of a dessert like this one.
    • Cream Cheese: Softened cream cheese is easier to work with in recipes like this one so allowing it to sit out an hour or so before starting, is a great idea.
    • Sugar: White granulated sugar is recommended for this recipe.
    • Whipped Cream: Feel free to make your own whipped cream but I love using Cool Whip to keep things easy in the kitchen.
    • Cookies and Cream Hershey Bars: These are optional, and are decorative (while also being delicious) on top of the finished cheesecake.
    • Cookies and Cream Hershey Kisses: Also optional, these are decorative and add a fun bite to the smooth cheesecake.
    • Vanilla Icing: Optional, drizzling vanilla frosting on top adds a fun look and another bite of chocolate. Buying pre-made icing in the piping bags is a great option for this.

    Substitutions

    Although an Oreo cookie crust is absolutely amazing, if you’d like to change some things up, you can try this pie crust recipe made of Biscoff cookies.

    How to Make Oreo Cheesecake

    You’ll find the full recipe card below, but I like to give photo instructions and little tidbits along the way too, in case you find that it helps you with the recipe.

    Two images with first photo showing the cheesecake filling and second image showing Oreo cookies in food processor.

    You’ll want to begin by grabbing a package and a half of the Oreos and separating the cookies and the cream centers.

    Making the Cheesecake Filling

    Place the cream centers of the cookies into a mixing bowl and the cookies into a food processor.

    Add your cream cheese and sugar into the mixing bowl and mix with a hand mixer until smooth.

    Next, add in your Cool Whip and the rest of your Oreos (broken up). Don’t forget to save about 6 of the Oreos though to use as the topping garnish!

    Mix well with a hand mixer until well blended and smooth. Set aside.

    Oreo Cookie Crust

    In a food processor, process the cookies until fine.

    Gradually add butter, until the cookies become slightly moist. (Wet sand consistency.)Then, mix well.

    Press the cookie mixture into the bottom of a greased cheesecake pan, and press down firmly.

    Pour cheesecake batter over the crust and smooth out evenly, and refrigerate for at least 3 hours.

    Two images, with left showing Oreo cookie crust and right showing Oreo cheesecake filling in pan.

    Toppings + Garnishes for Cheesecake

    Once the cheesecake has set, you can top your cheesecake and garnish with the Hershey Cookies and Cream Kisses, Cookies and Cream Hershey Bars, and remaining Oreo cookies!

    Or, top with your favorite fruit, like strawberries! But if you love strawberry cheesecake, then you’re really going to love this strawberry crunch cheesecake!

    Oreo cheesecake in pan, with toppings.

    Freeze the Oreo Cheesecake for One Hour

    Last, after decorating, you’ll want to pop it in the freezer for an hour to help it all set even more, and then serve and enjoy!

    Now if that doesn’t conquer your sweet tooth, I don’t know what would!

    No bake Oreo cheesecake on cake stand.

    How to Store Oreo Cheesecake

    Store the Oreo cheesecake in the freezer for best results, or if serving soon, store in the refrigerator to allow for easier slicing.

    Slice of Oreo cheesecake with a bite taken off, sitting on a plate.

    More Oreo Recipes:

    Love Oreo cookies as much as I do? Then you’ll also love these favorites:

    • Oreo Cupcakes with Oreo Buttercream Frosting
      Oreo Cupcakes and Oreo Buttercream Frosting
    • A bowl of Oreo dip with an Oreo in it and crumbled Oreos on top.
      Oreo Dip
    • Cookies and Cream Cinnamon Rolls
      Oreo Cinnamon Rolls
    • Oreo fudge, stacked on top of one another.
      Oreo Fudge

    Did you make this? I’d be so grateful if you left a “star” rating below to let me know what you thought! Then, the next time you need a quick and easy recipe, come back to Fantabulosity to browse all of my easy recipes!

    Originally published: 2018
    Updated and republished: May 2025

    Recipe

    Slice of no bake Oreo cheesecake on a plate with a Hugs Kiss, candy bar and Oreo cookie.
    Print Pin
    5 from 1 vote

    Oreo Cheesecake

    Oreo Cheesecake Recipe: A no bake cheesecake recipe on an Oreo crust that cookies and cream lovers will ADORE and that’s easy to make for a chocolate dessert recipe!
    Course Dessert
    Cuisine American
    Prep Time 15 minutes minutes
    Refrigeration/Freezing 4 hours hours
    Total Time 15 minutes minutes
    Servings 10 servings
    Calories 779kcal
    Author Jessica Burgess

    Ingredients

    • 2 13 ounce packages Oreos (Set 6 aside for topping)
    • 3-4 tablespoons butter melted
    • 16 ounces cream cheese
    • ⅔ cup sugar
    • 16 ounces whipped cream
    • 1 cookies and cream candy bars optional for garnish
    • Cookies and Cream Hershey Kisses optional for garnish

    Instructions

    • Start by separating a package and a half of Oreos. Placing the centers in a mixing bowl and the cookie into a food processor.
    • Add your cream cheese and sugar into the mixing bowl and mix with a hand mixer until smooth.
    • Next, add in your cool whip and the rest of your Oreos (broken up). Mix well with a hand mixer until well blended and smooth. Set aside.
    • In a food processor, process cookies until fine.
    • Gradually add butter, until cookies become slightly moist. (Wet sand consistency, unless you want a crumbly crust.) Mix well.
    • Press cookie mixture into the bottom of a greased cheesecake pan. Press firmly.
    • Pour cheesecake batter over crust and smooth out evenly.
    • Place in the fridge for 3 hours.
    • Once set, add frosting swirls to the top of cheesecake.
    • Then top with Oreos, Hershey kisses, and Hershey candy bars. However, you desire.
    • Place in the freezer for one hour.
    • Serve and enjoy!

    Video

    Nutrition

    Serving: 1slice (about 1/10 cake) | Calories: 779kcal | Carbohydrates: 85g | Protein: 9g | Fat: 47g | Saturated Fat: 23g | Cholesterol: 93mg | Sodium: 596mg | Potassium: 324mg | Fiber: 2g | Sugar: 55g | Vitamin A: 1025IU | Calcium: 111mg | Iron: 8.1mg
    • « Go to Previous Page
    • Page 1
    • Interim pages omitted …
    • Page 18
    • Page 19
    • Page 20
    • Page 21
    • Page 22
    • Interim pages omitted …
    • Page 27
    • Go to Next Page »

    Primary Sidebar

    Jessica Burgess standing in kitchen holding a hummingbird cake.

    Hi, I'm Jessica! - Owner and Creator of the blog and brand, Fantabulosity.

    I’m here to help you make easy comfort food and nostalgic recipes, using simple ingredients, that everyone will love.

    More about me →

    Recipe Collections

    • Crockpot recipe collage
      26 Easy Crockpot Dinners (Slow Cooker Recipes for Busy Weeknights)
    • Church supper recipes collage.
      Church Supper Recipes
    • Fall Dessert Recipes collage, showing pumpkin, apple and pecan desserts.
      Easy Fall Desserts (34 Cozy Recipes for the Whole Season)
    • Collage of Thanksgiving side dishes.
      40+ Thanksgiving Side Dishes (Easy Recipes for a Crowd)
    • Old fashioned potluck cake recipes collage.
      Old-Fashioned Cakes That Still Show Up at Every Potluck
    • Collage of potluck desserts.
      Easy Potluck Desserts (Simple Recipes That Always Get Asked For)

    Popular Recipes

    • bread pudding in baking dish
      Bread Pudding Recipe: Easy Old Fashioned Recipe (With Video!)
    • Burger baked in the oven, steamed in aluminum foil, and placed on white plate.
      Burgers in the Oven
    • two tuna salad sandwiches stacked on top of each other
      The BEST Tuna Salad Recipe
    • doritos chicken casserole on plate
      Doritos Chicken Casserole
    • Strawberry brownies on white marble cutting board.
      Strawberry Brownies Recipe
    • Cheeseburger Sliders made with Hawaiian Rolls, stacked on top of one another.
      Cheeseburger Sliders

    Footer

    ↑ back to top

    Featured in Parade, TODAY, House Beautiful, First for Women, The Pioneer Woman, BuzzFeed, Martha.com, Country Living, Woman’s World, and Access Hollywood.

    About

    • About Jessica
    • Contact
    • Collaborate
    • A Month of Dinners

    Easy Recipes

    • All Recipes
    • Vintage Recipes
    • Dinner Recipes
    • Desserts

    Popular Recipes

    • Cake Recipes
    • Bread Pudding
    • Chicken Spaghetti
    • 3-Ingredient Biscuits

    Privacy Policy |Accessibility Copyright © 2026 Fantabulosity | Terms & Conditions | FTC
    All recipes, photos, and content are copyrighted and may not be reproduced, republished, or distributed without written permission.

    Rate This Recipe

    Your vote:


    A rating is required
    A name is required
    An email is required