
• Skip to primary navigation
  • Skip to main content
  • Skip to primary sidebar

Fantabulosity logo

  • All Recipes
  • Vintage Recipes
  • Holiday
  • Dinner Theme System
  • About
  • Navigation Menu: Social Icons

    • Facebook
    • Instagram
    • Pinterest
    • TikTok
    • YouTube
menu icon
go to homepage
  • Recipes
  • Desserts
  • Dinners
  • Cookbook
  • Holidays
  • Gatherings
  • About Jessica
    • Facebook
    • Instagram
    • Pinterest
    • TikTok
    • YouTube
  • search icon
    Homepage link
    • Recipes
    • Desserts
    • Dinners
    • Cookbook
    • Holidays
    • Gatherings
    • About Jessica
    • Facebook
    • Instagram
    • Pinterest
    • TikTok
    • YouTube
  • ×
    Home » Recipes

    Sleepover Ideas for Boys (Fun Games, Food & Easy Slumber Party Ideas)

    Sleepover Ideas for Boys (Fun Games, Food & Easy Slumber Party Ideas)

    February 10, 2019

    Slumber party ideas for boys

    But looking around at all of the slumber party ideas out there, a lot of these sleepover ideas can be used for boys or girls!

    Sleepover Ideas for Different Ages

    Plus, many of these slumber party ideas will work for boys or girls of any age. However, the most popular ages I’ve found for sleepovers are:

    • 9 year olds
    • 10 year olds
    • 11 year old
    • tweens

    What to Serve at a Sleepover (Easy + Kid-Friendly)

    • Popcorn bar, using this homemade popcorn recipe
    • Pizza (like this school pizza recipe) or these comforting sandwiches
    • Snack trays
    • Any of these summer snack ideas (even though they’re great all year long.)
    • Breakfast ideas: Fluffy pancakes, Diner-Style French Toast, or Breakfast Egg Rolls

    Fun Slumber Party Ideas

    The best part about this list of ideas is that you can reuse them over and over again no matter who will be sleeping over!

    So let’s get to them…

    If you have a basketball fan in the house, decorating for the slumber party may be easier than you think with these basketball party ideas.

    Basketball Party Ideas https://fantabulosity.com

    2. This homemade LEGO Homemade Jello Soap craft is perfect for boys to make at a sleepover. The Soccer Mom Blog

    4. This fun DIY Marshmallow toys makes it fun to play, and a fun snack to eat! Or So She Says

    5. No matter WHO the slumber party is for, I don’t know a kiddo who wouldn’t love a chocolate fountain to eat on all night! Serve up a ton of fun with these chocolate fountain food ideas!
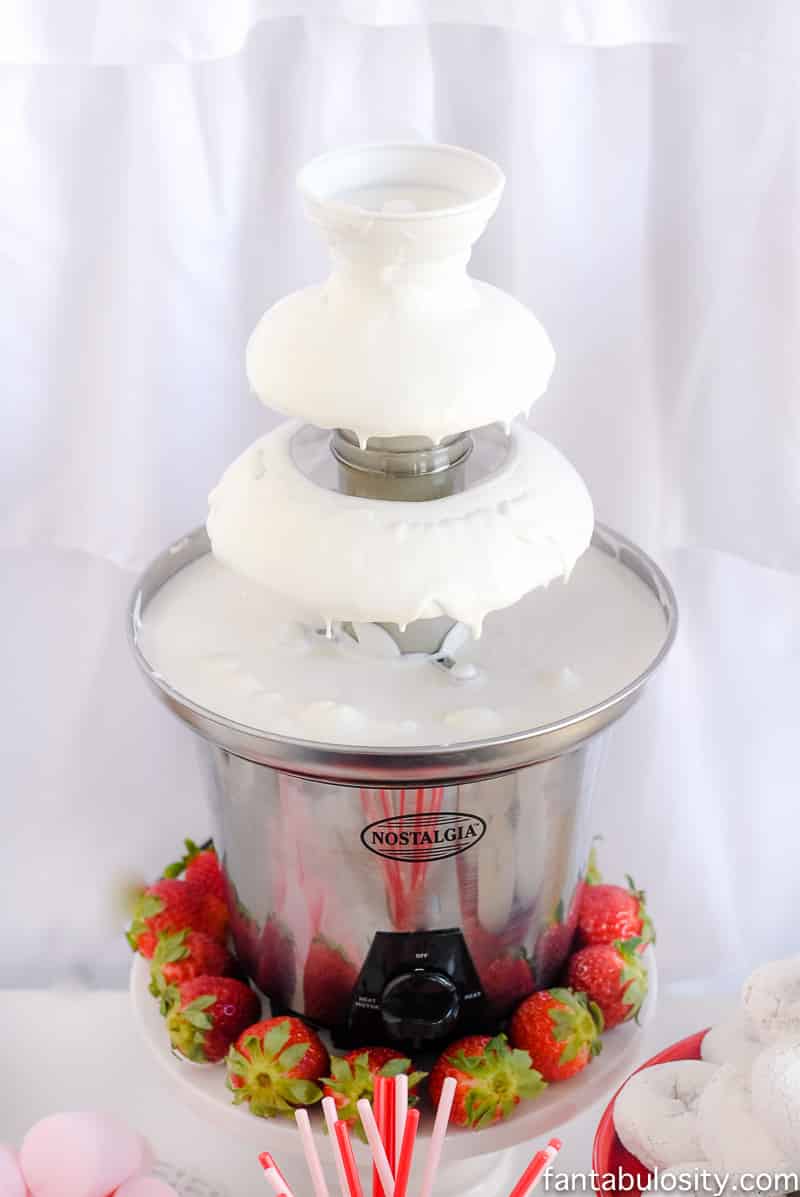
    Chocolate Fountain Ideas

    6. Get your boys outside with this fun Nature Scavenger Hunt. The Joy of Boys

    7. If it's nice outside, have your boys have a Shaving Cream Battle. Fireflies and Mudpies

    8. This Super Hero Potion is perfect for pretend play, and will be a fun snack idea for your boys. What's Up Fanagans

    9. Make your own DIY Foam Swords for play battles or just as a fun activity to do. Or So She Says

    11. This fun and Easy Creeper Craft is great for boys who love Minecraft. Fireflies and Mudpies

    12. If you are looking for some fun Sleepover Games there are a few from this list that you won't want to miss! Wondermom Wannabe

    14. Have your kids watch a few Sleepover Movies on the big screen to keep them entertained. Mom Generations
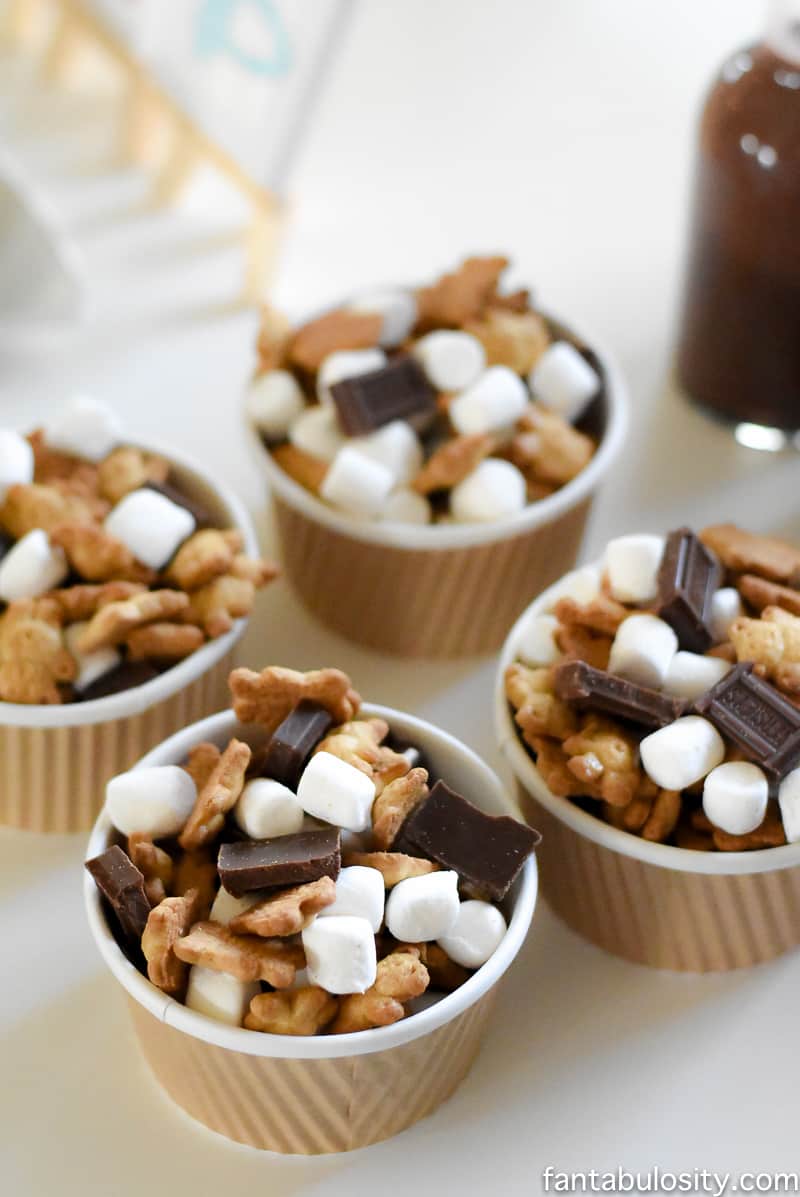
    Smores trail mix for a camping party! Teddy Grahams, marshmallows and Hershey Bars! How fun is this! It's all so cute!!! Camping Sleepover Birthday Party Ideas! Pottery Barn Kids, fake fire, tents, sleeping bags, fire birthday cake, kaleidoscope, birthday banner.

    19. If you have older kids, they may love these Nerf Target Games that you can play inside or outside. Frugal Fun 4 Boys

    nerf birthday party ideas

    Spend the night creating with this fun Cardboard Pirate Ship activity! Pair this activity with the treasure hunt for even more fun! Red Ted Art

    More Slumber Party Ideas?

    What are some of your favorite slumber party ideas for boys? Share them right here in the comments below to help others looking for fun ideas! 

    More Party Ideas

    I absolutely love hosting, styling and throwing parties. See some of my favorites for more party ideas…

    • Favorite Things Party
    • Winter Onederland Birthday Party
    • Ice Cream Party

    Party Punch

    No matter what party, a birthday… baby shower… bridal shower… kids… adult…

    your guests are sure to love the BEST Punch Recipe on the planet!
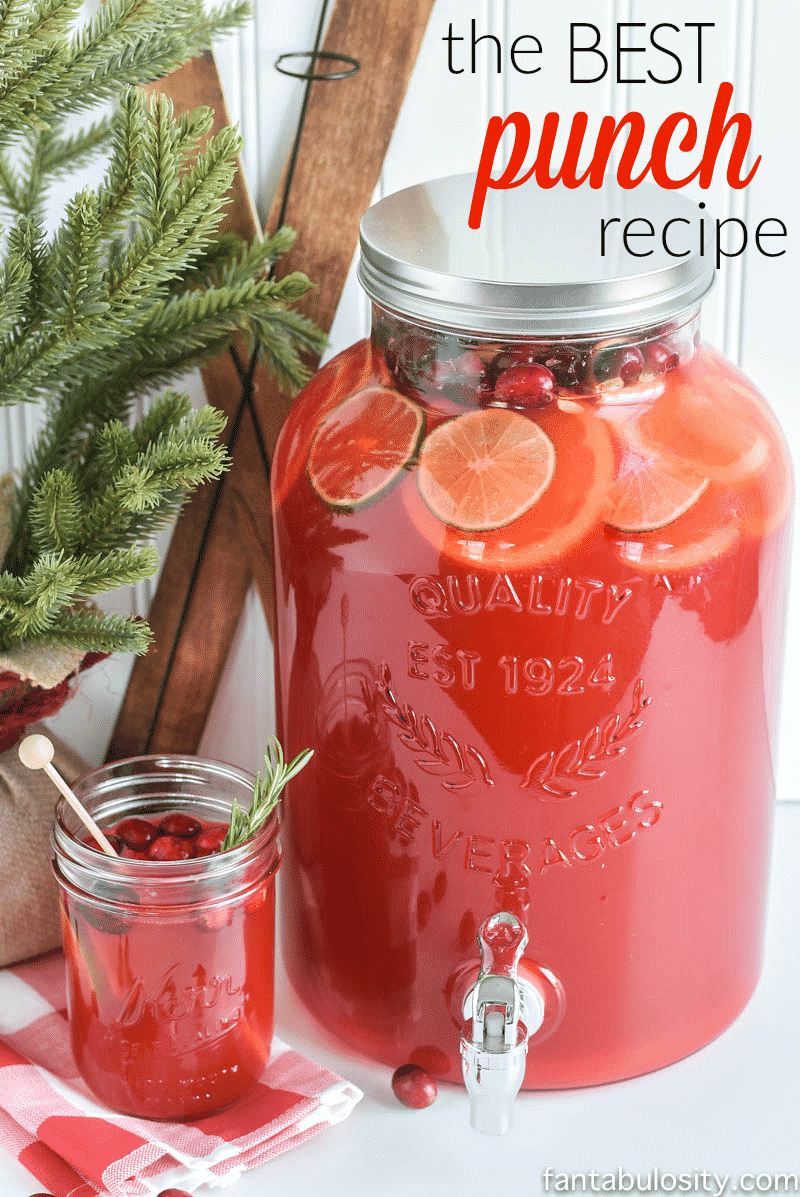
    The BEST Punch Recipe for Any Party: made with Sprite (or lemon-lime soda), pineapple juice, kool-aid, sugar, and water! So easy, and the best ever!

    Chicken Bites

    December 7, 2024

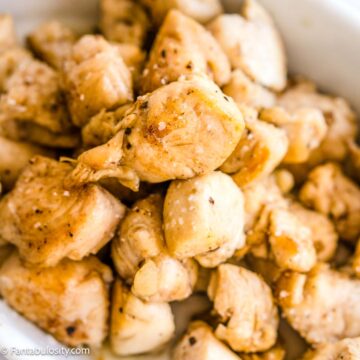
    Cooked chicken bites with salt, pepper and browned butter.

    Chicken Bites – Pieces of chicken breast tenderloins (or your favorite cut of chicken), cooked in browned butter and seasoned with salt and pepper, and cooked on the stove-top in just 8 minutes. It sounds simple, and it is, but full of so much flavor.

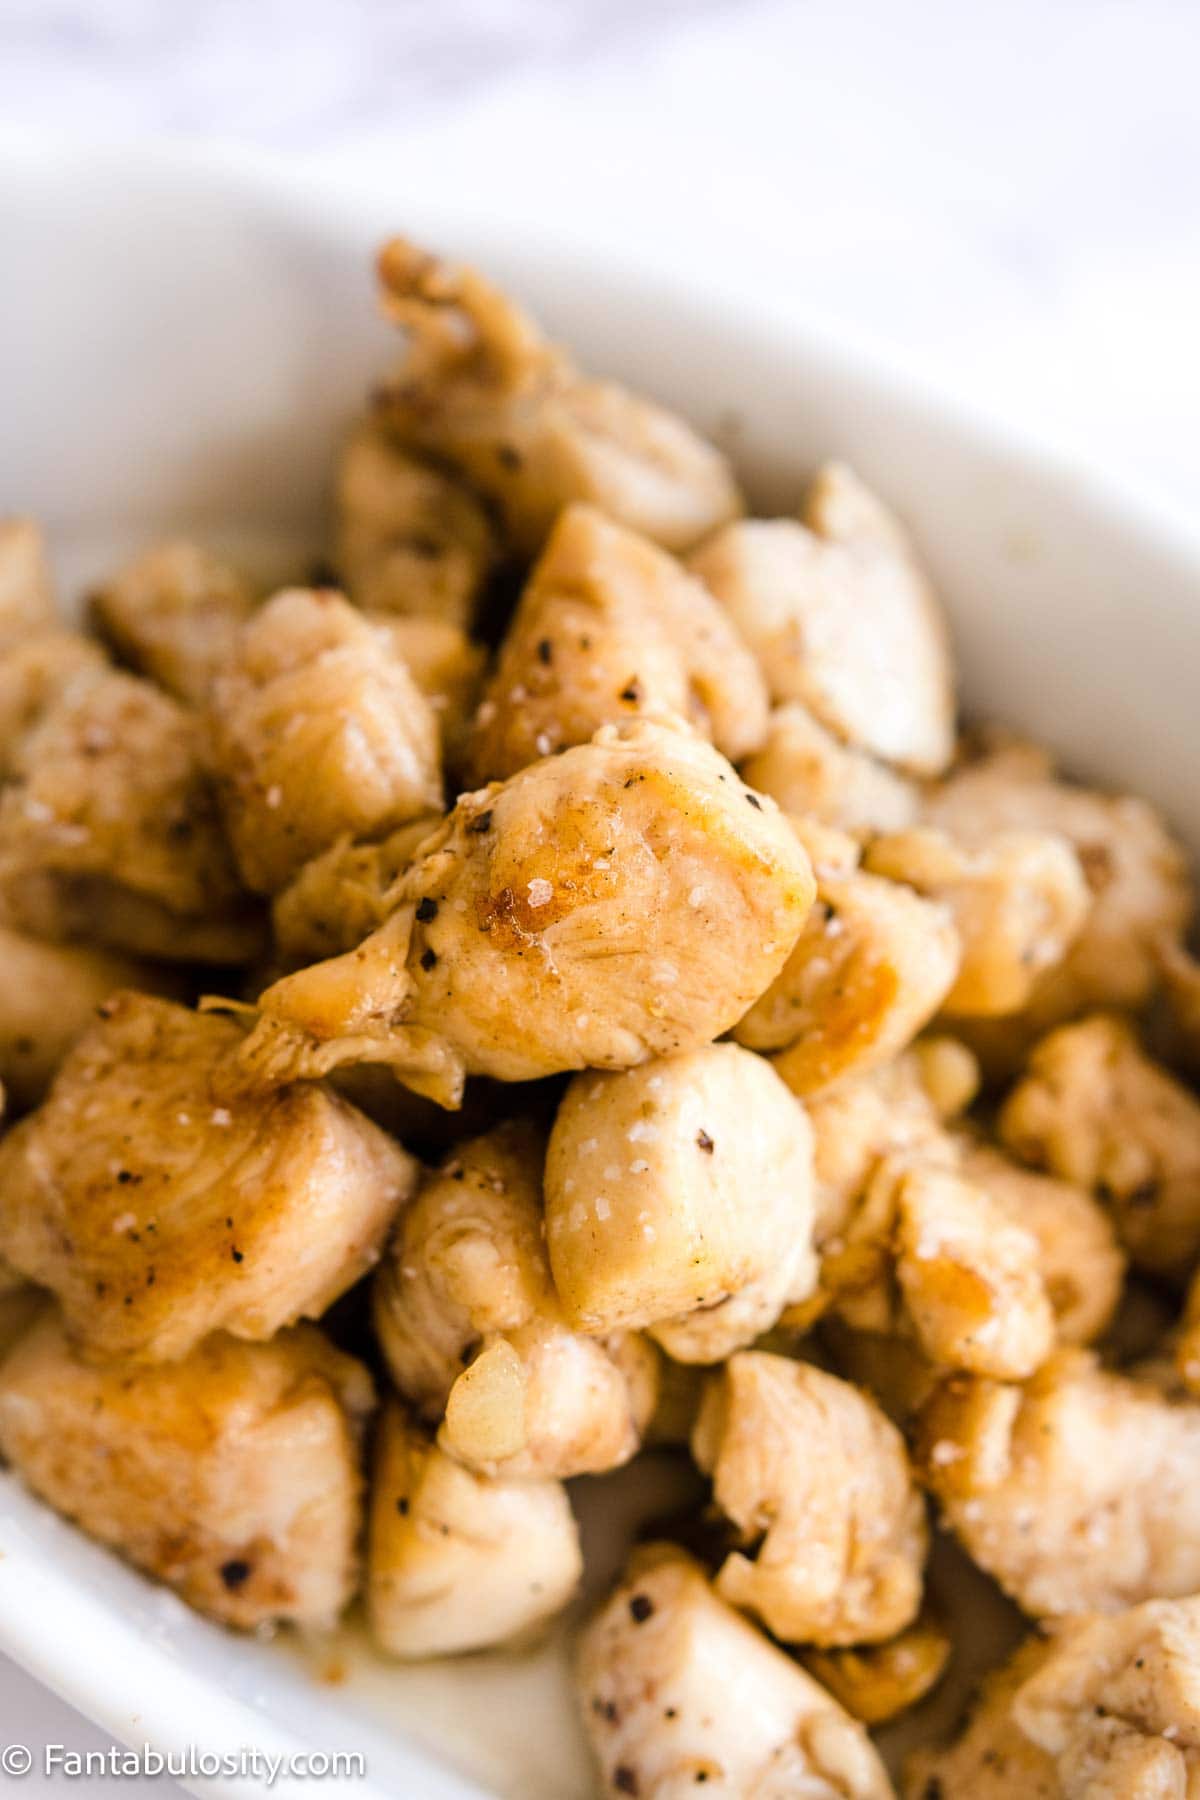
    Chicken bites in a dish, that were cooked with browned butter, salt and pepper.

    This chicken recipe is so versatile and we love rotating this for an easy dinner recipe, with these baked chicken drumsticks in the oven and these air fryer buffalo chicken tenders!

    Why Make These Easy Chicken Bites?

    I know, it looks like plain, cooked chicken, doesn’t it? But it’s not. It’s HOW it’s cooked that makes it the best.

    When I first experimented with cooking meat in browned butter for the BEST steak recipe on the planet… the way I cooked meat on the stovetop, changed forever.

    • Flavor – The browned butter creates a flavor that adds so much to the dish.
    • Ready in under 10 minutes – This chicken recipe is ready in under 10 minutes. Now that’s a dinner recipe that makes the “favorites” list.
    • Juicy chicken – Cooked on high, it sears the chicken and traps in the juices.

    Ingredients

    Chicken, salt, pepper, and butter. That’s it! Let me explain…

    • Butter – Feel free to use salted or unsalted butter for this recipe. But the key is to cook the butter in the skillet over high heat until it has turned brown. The butter develops a flavor that can’t be achieved from spices.
    • Salt and Pepper – Classics, yet a must. I prefer kosher salt and cracked peppercorns but regular ground black pepper works as well.
    • Chicken – Here I used chicken tenderloins but you can use chicken breast or chicken thighs. Chicken thighs tend to be juicer and they’re a dark meat. Chicken breasts are white meat, so they’ll have a slightly different flavor. We love both so it’s your preference but I recommend using boneless, skinless of either to keep things easy when cutting in to smaller, 1-inch pieces.

    How to Make Chicken Bites

    You can find the entire recipe and printable recipe card at the bottom of this post.

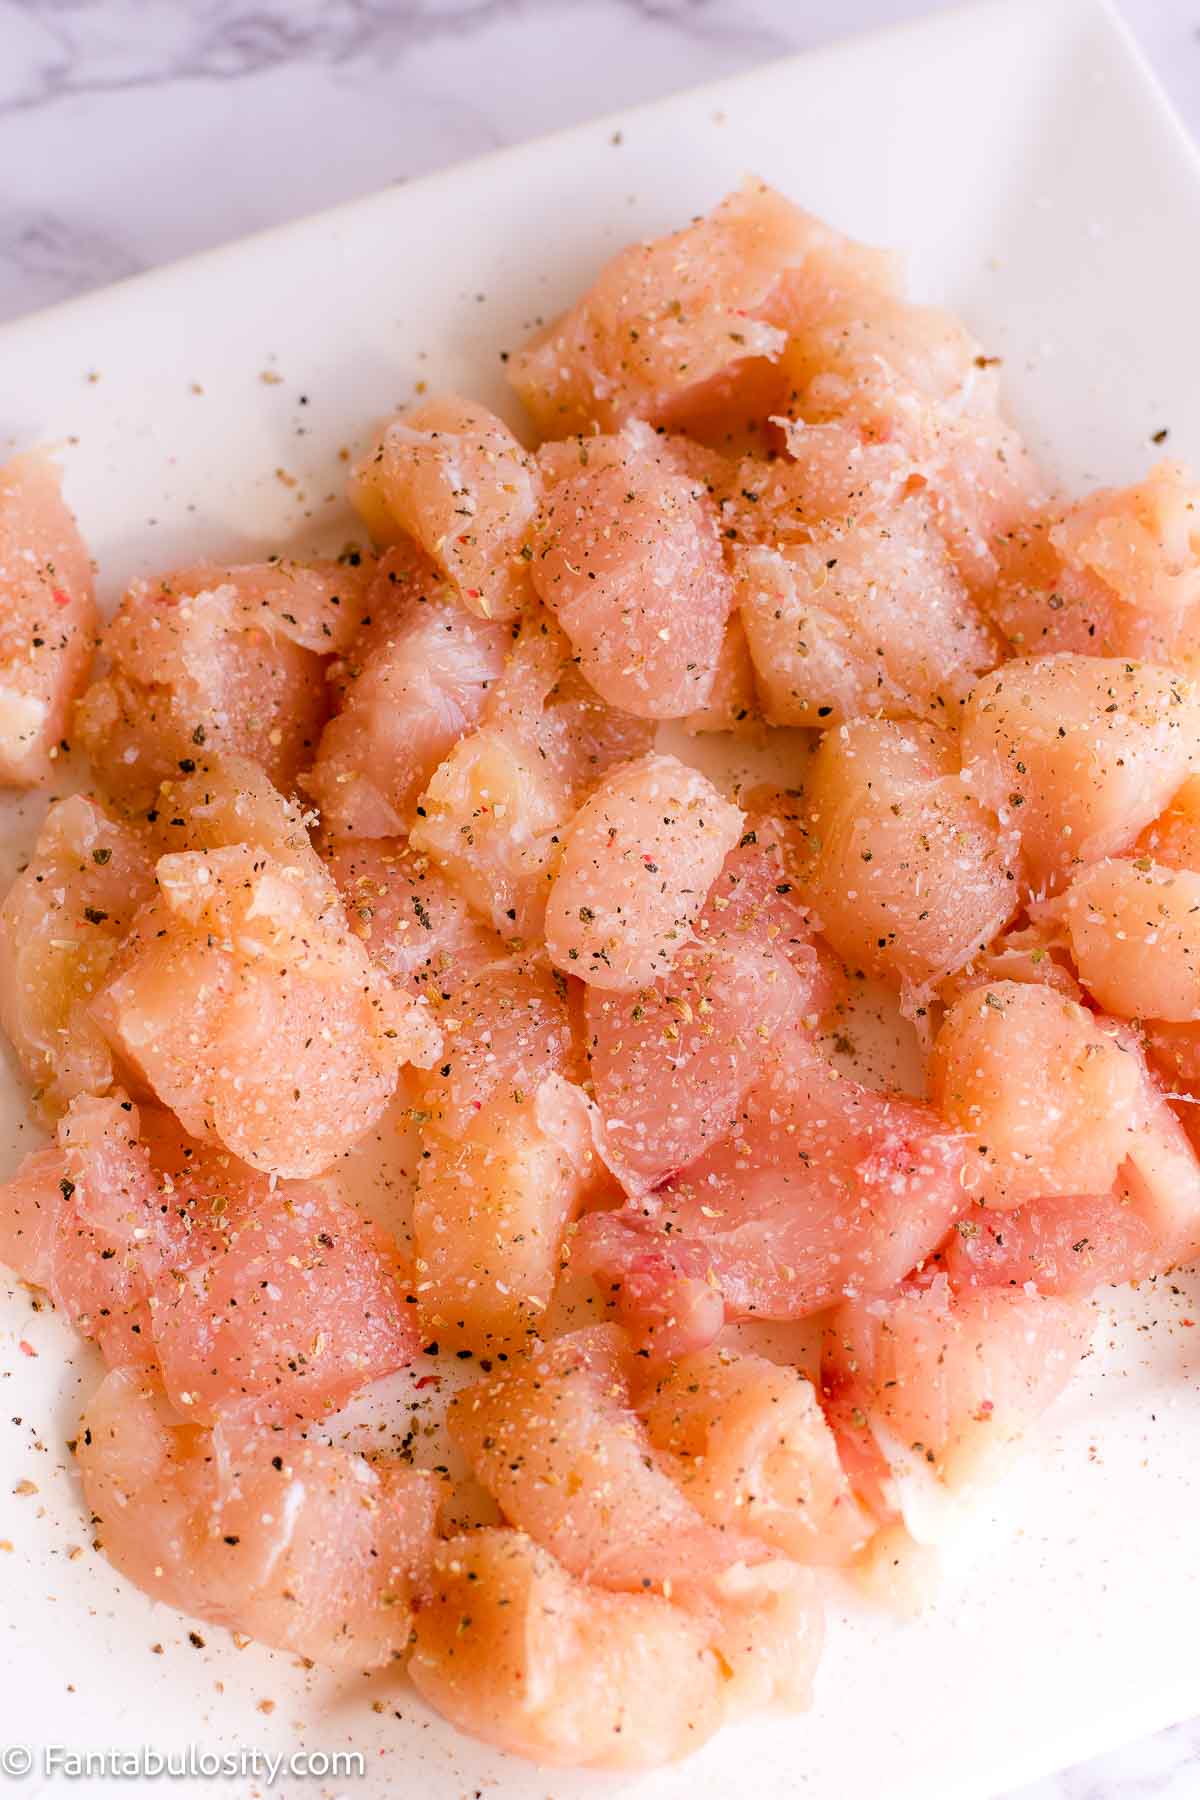
    Raw chicken pieces, seasoned with salt and pepper.
    1. Begin by cutting chicken in to approximately 1-inch pieces and sprinkle on the salt and pepper.
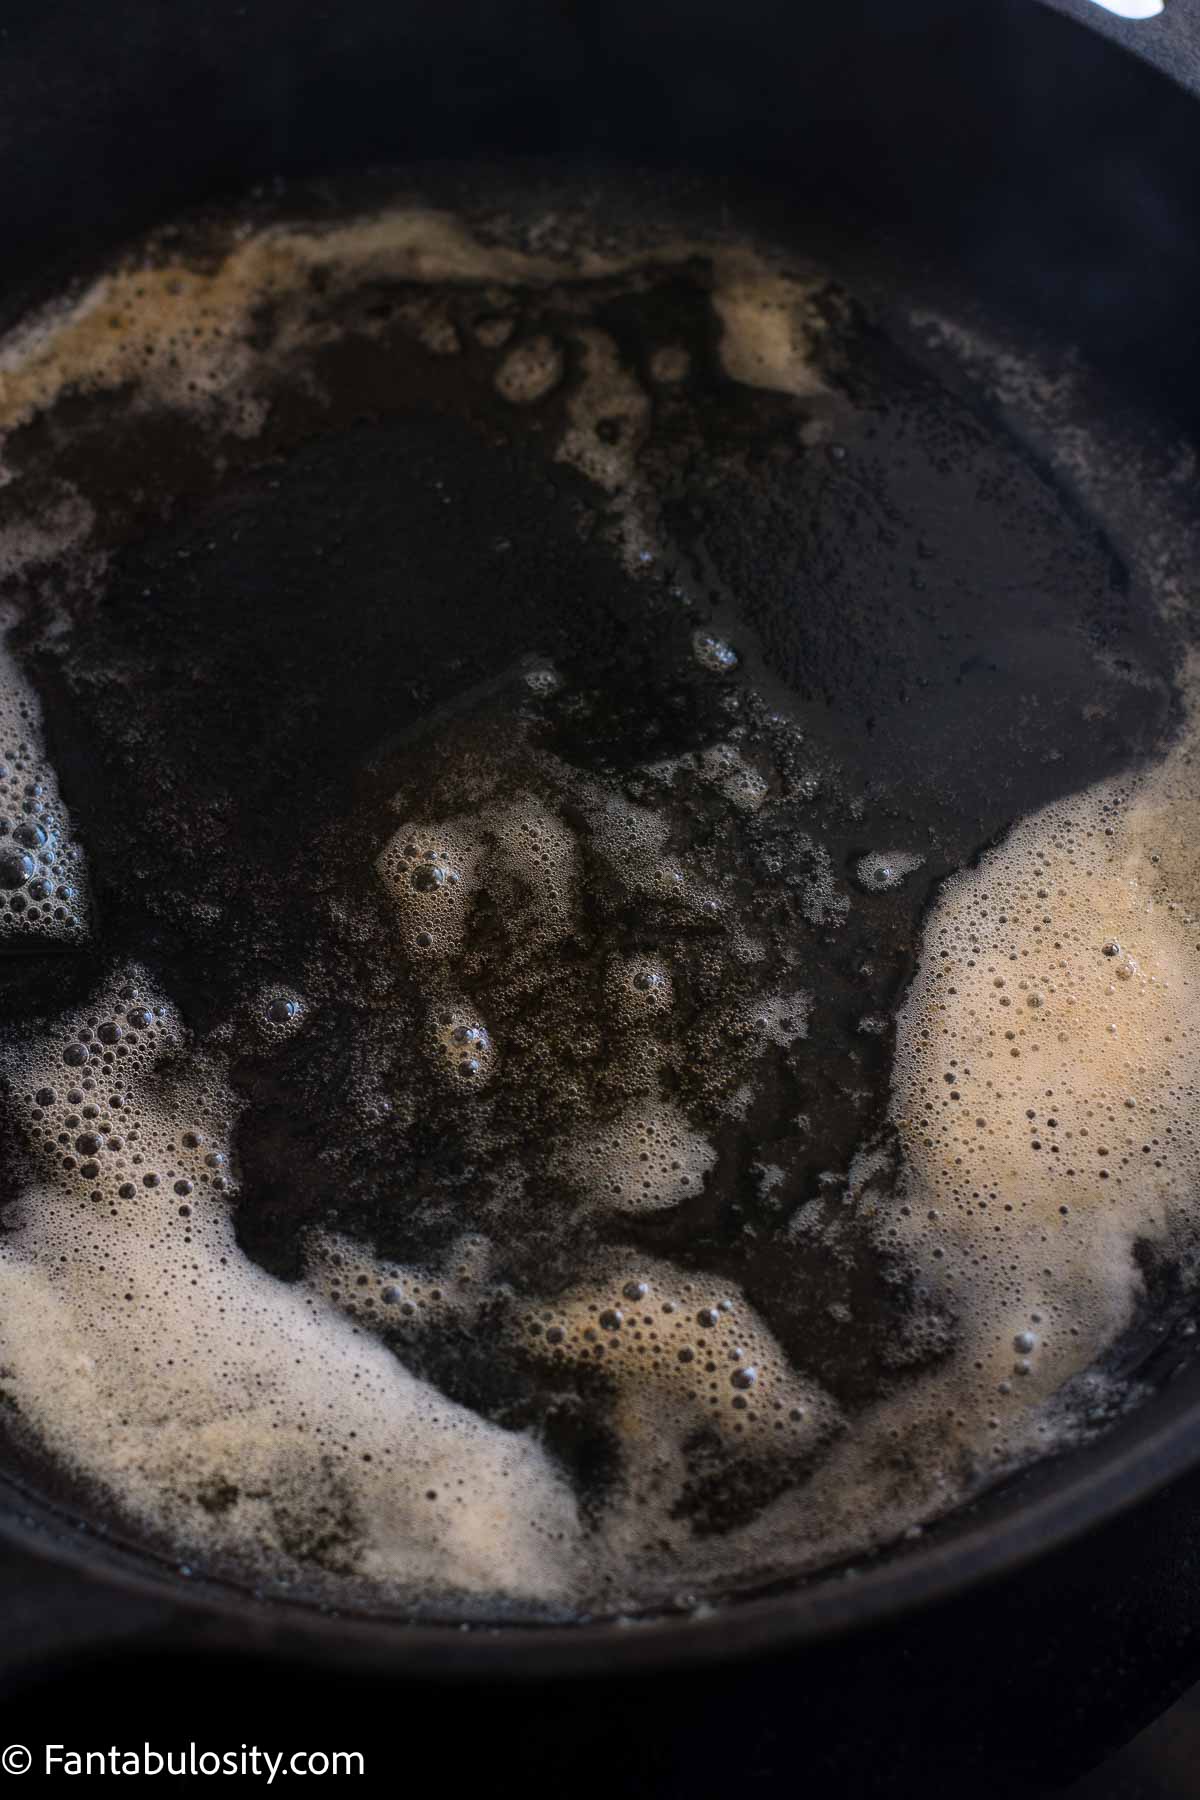
    Butter melted in skillet and browned.
    2. Place butter in skillet, and turn burner to medium-high heat, and allow it to melt, and cook until it turns brown.
    Raw chicken in cast iron pan, seasoned with salt and pepper.
    3. Add seasoned chicken pieces to hot skillet, spread them out, and allow it to sit, to sear. *See tip below.
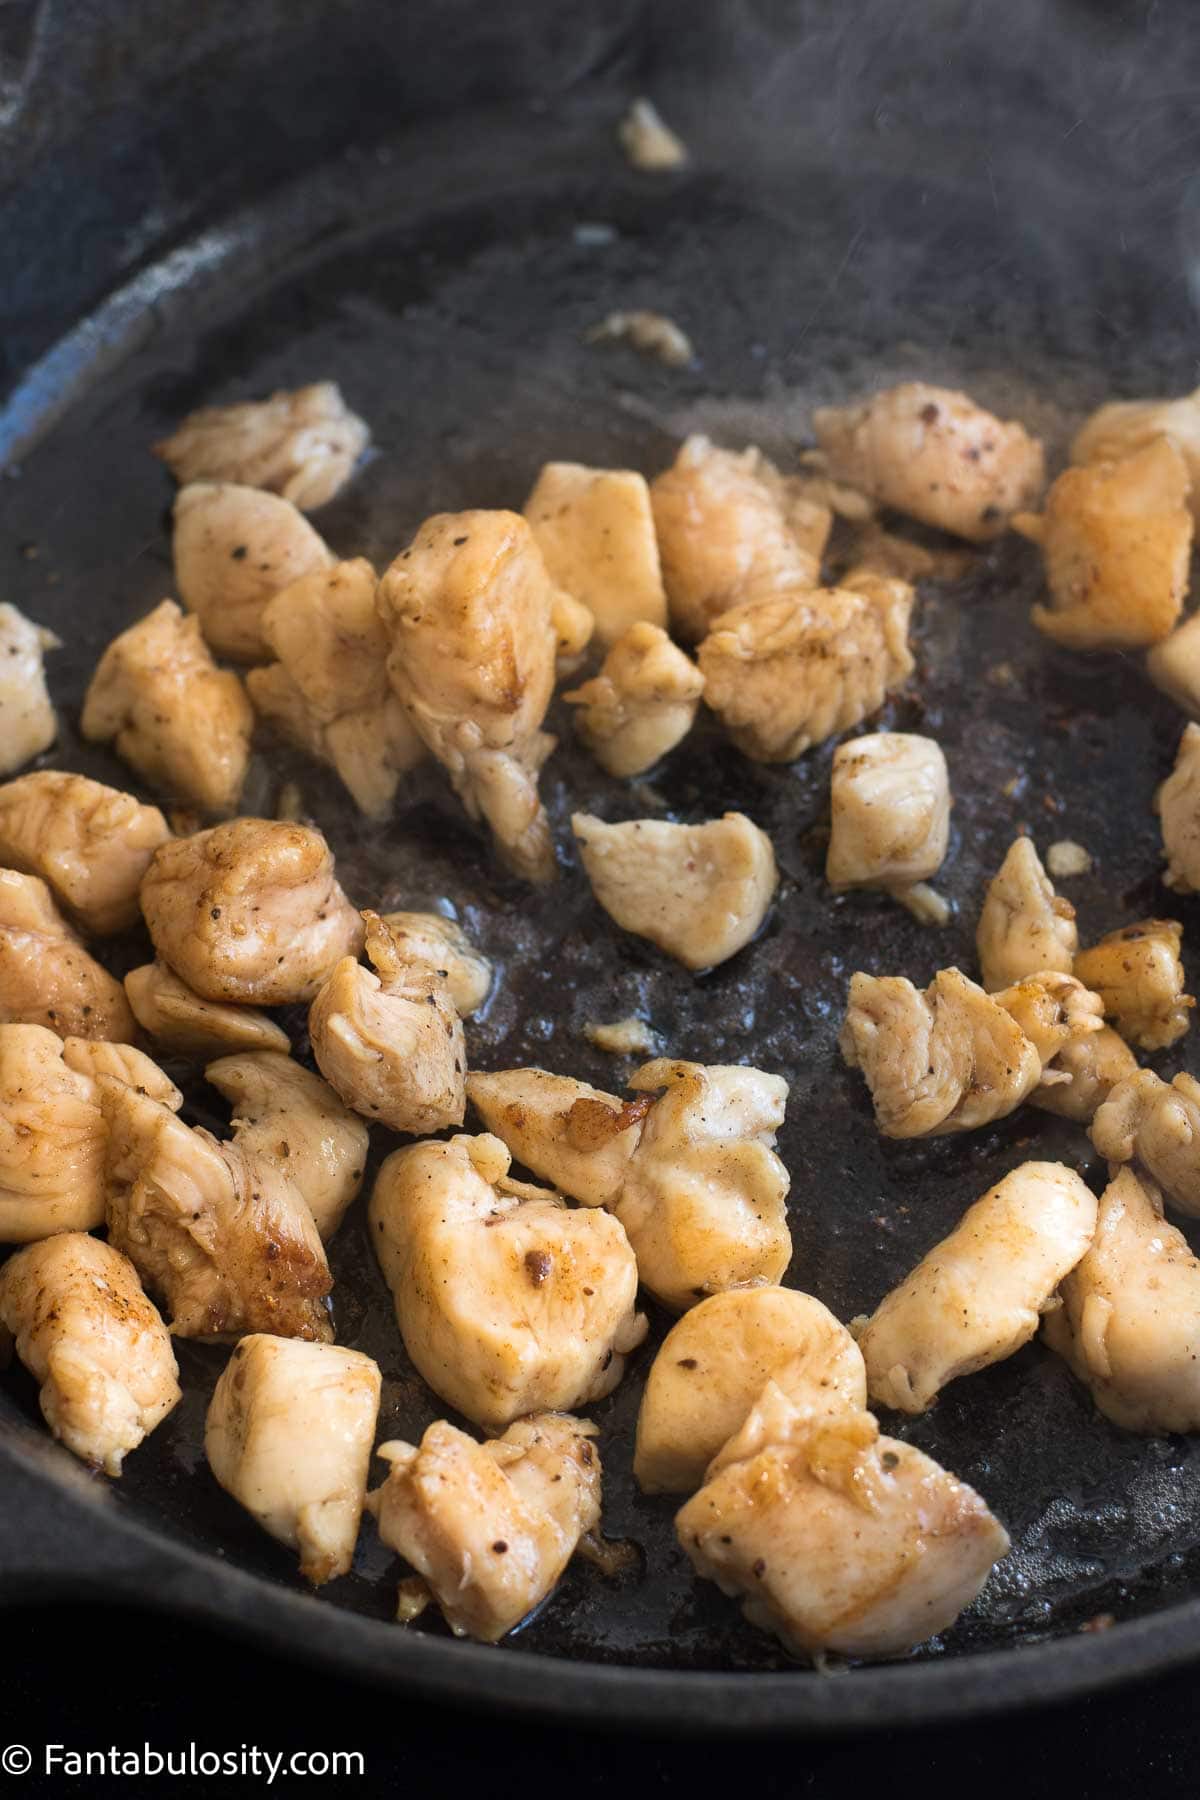
    Cooked chicken bites in cast iron skillet.
    4. When the bottom sides of the chicken start to turn golden brown (usually 1-2 minutes) flip the pieces of chicken to allow the other sides to cook.

    TIP: Constantly turning and flipping the chicken pieces will keep the chicken from searing so it’s best to let it sit once you’ve spread the chicken out. Try to make sure it’s an even layer of chicken and each piece is able to sear on the sillet. Constantly moving will cause the chicken to “steam” cook instead and it will lack flavor.

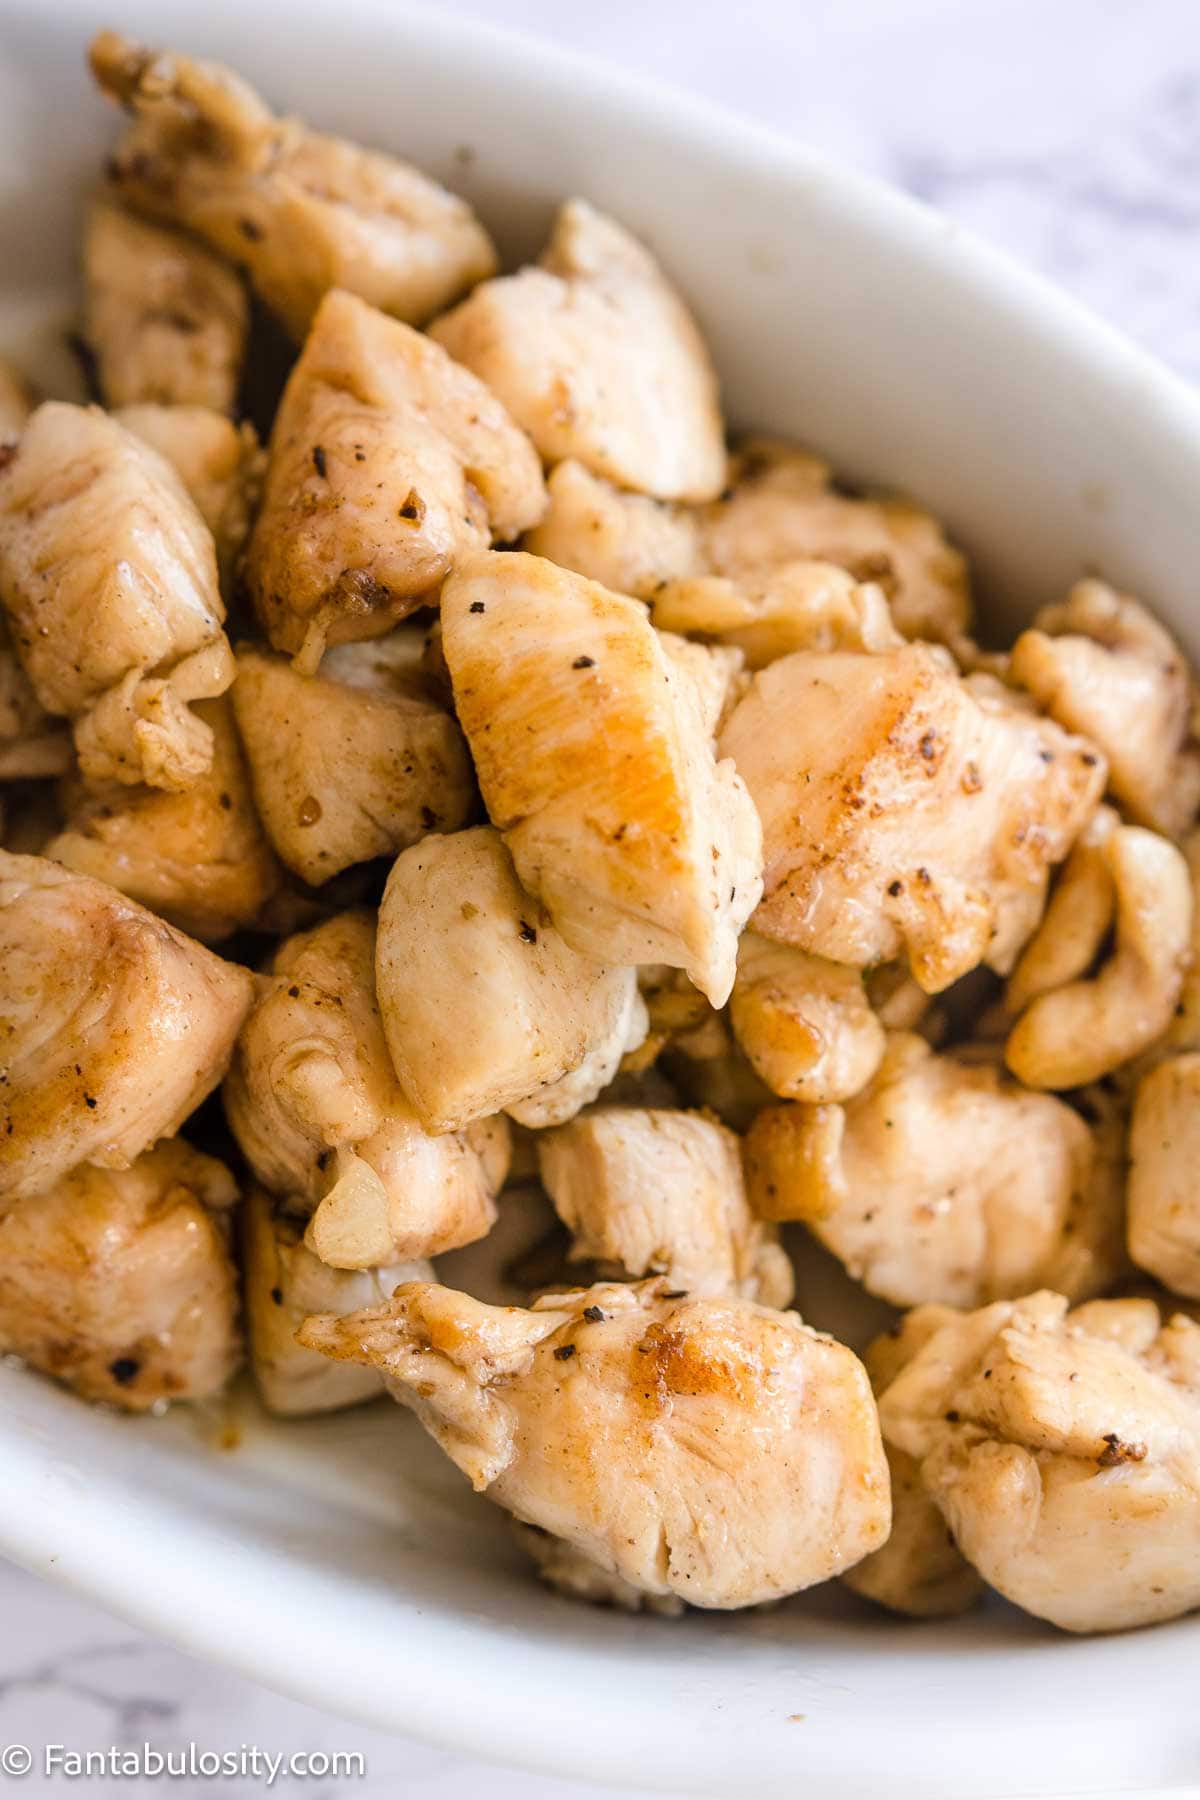
    Cooked chicken bites in a single serving dish.

    5. When the chicken is fully cooked, usually around 3-4 minutes (when the internal temperature reaches 165°F) quickly remove the chicken to a serving plate. If desired, sprinkle with a little salt and let the chicken rest for a minute before serving.

    Recipe Tips

    • Cast Iron Skillet: I prefer using a cast iron skillet when making this recipe. It sears the chicken so much better than my nonstick skillets, although a nonstick skillet can be used just fine.
    • Meal Planning: Doubling or tripling this recipe is a great idea to use it to make meals later in the week, such as these easy chicken street tacos or this pasta salad with chicken.
    • Chicken Cook-Time: The time it takes to cook could vary, and be different than what it takes for mine. Due to the size of the chicken pieces, the type of skillet, and the level of heat your stovetop is putting out.

    Optional Step

    When cooking with salt and pepper, a lot of times the salt and pepper can fall off of the food during the cooking process.

    So although I add salt and pepper to the chicken before cooking, I also love to sprinkle on a little more kosher salt while it’s resting. This makes a BIG difference.

    Just be careful not to put too much salt in and on your chicken. You can always add more, but it’s hard to take it away.

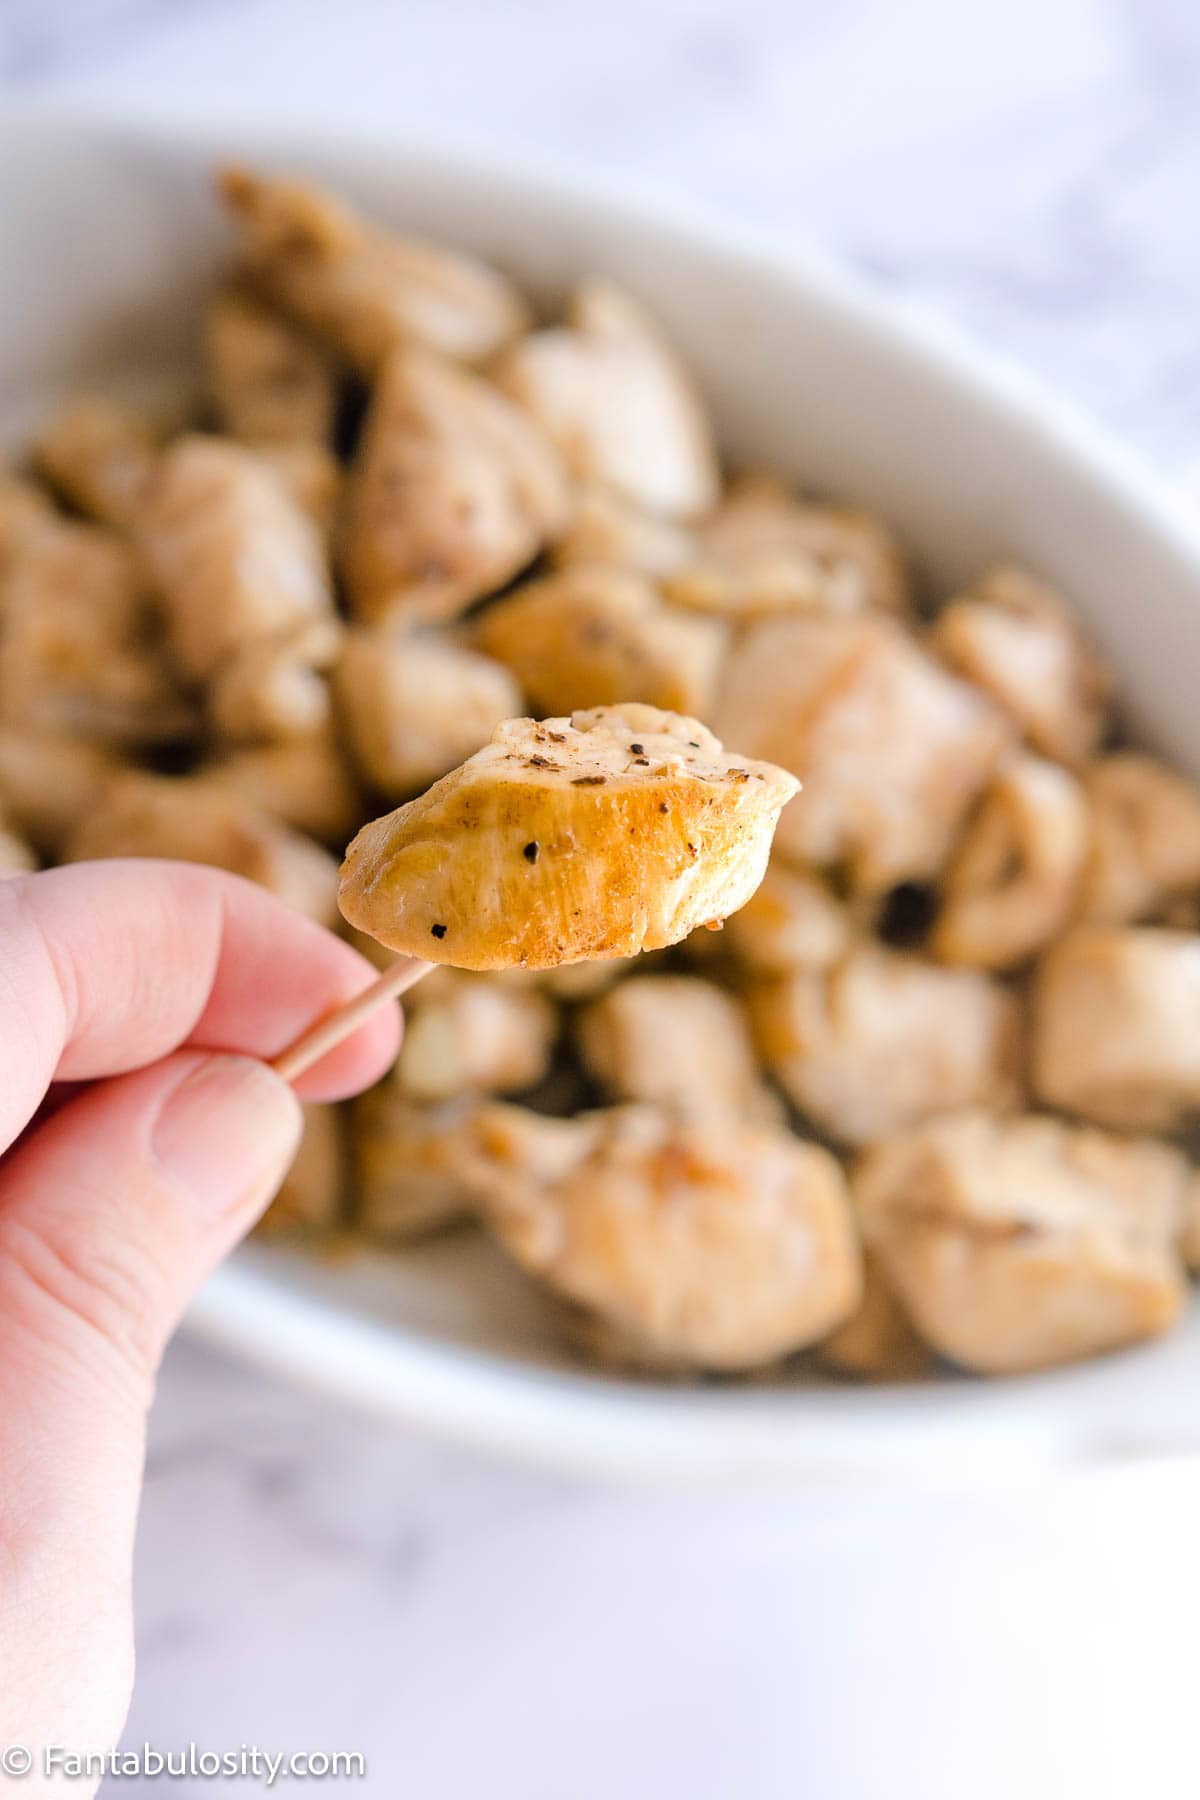
    Skillet chicken bites in dish and hand holding one piece on a toothpick.

    What to Serve with These Chicken Bites

    You can serve the chicken bites alone with toothpicks, or guests can dip them in their favorite dipping sauce like a homemade copycat Chick-fil-A sauce recipe, or this delicious teriyaki sauce recipe, kind of like I do with this teriyaki chicken and rice recipe.

    Side Dishes for Chicken Bites

    Serving easy-to-make sides is key, to keep dinner easy all around. Here are some of my favorite side dishes to go with this chicken, whether it’s to serve on the side, or to add the chicken to:

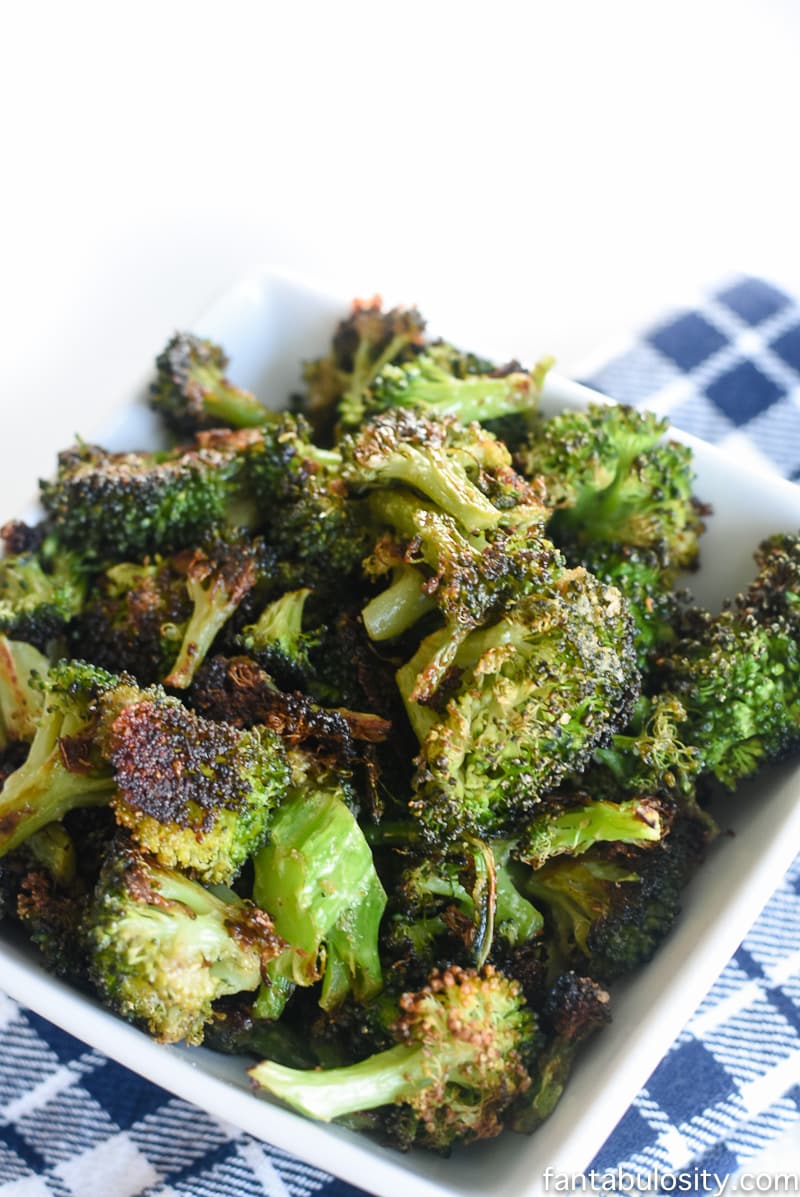
    • Garlic roasted broccoli in square bowl, sitting on linen napkin.
      Garlic Roasted Broccoli
    • Cream Cheese Pasta being scooped up and held above the plate.
      Cream Cheese Pasta
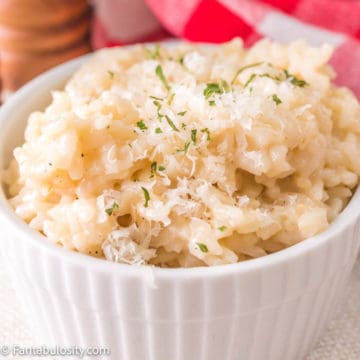
    • Instant Pot parmesan risotto in a bowl.
      Instant Pot Parmesan Risotto
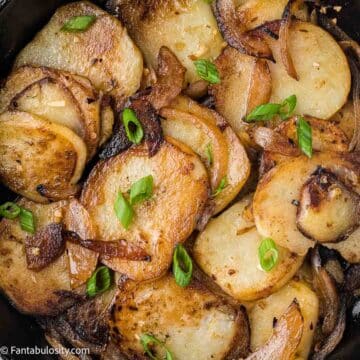
    • Fried potatoes and onions in cast iron skillet.
      Fried Potatoes and Onions

    If you love easy chicken recipes, then you’re also going to love this Sticky Chicken on a Stick!

    More Chicken Recipes You’ll LOVE:

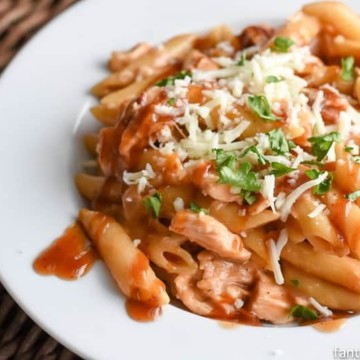
    • My husband said that I HAVE to make this again. It's so easy, so SURE! BBQ Chicken Pasta Recipe
      BBQ Chicken Pasta
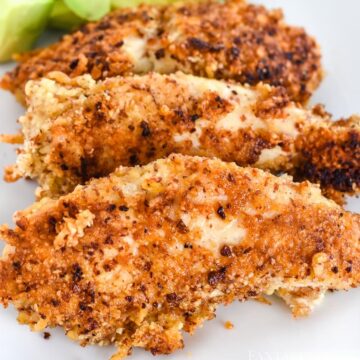
    • Almond meal chicken tenders recipe.
      Low Carb Parmesan Chicken Tenders
    • Chicken and noodles in a white bowl with fork holding a bite.
      Chicken and Noodles Recipe
    • Homemade Chicken Pot Pie in white pie dish, with a peek at the veggies and chicken.
      Easy Chicken Pot Pie Recipe

    Recipe

    Cooked chicken bites with salt, pepper and browned butter.
    Print Pin
    5 from 2 votes

    Chicken Bites

    Chicken Bites – Pieces of chicken cooked on the stove-top in browned butter, salt and pepper, and has ton of juicy flavor! Ready in 8 minutes, this is a quick dinner the family will love.
    Course Main Course
    Cuisine American
    Prep Time 5 minutes minutes
    Cook Time 3 minutes minutes
    Total Time 8 minutes minutes
    Servings 4 servings
    Calories 166kcal
    Author Jessica Burgess

    Ingredients

    • 1-1 ½ pounds chicken tendloins, breasts, or thighs (boneless, skinless and trimmed of any fat/skin)
    • 2 tablespoons salted butter
    • 1 teaspoon kosher salt or to taste, divided
    • ½ teaspoon black pepper or to taste

    Instructions

    • Cut chicken into small, bite-size pieces.
    • Season chicken with ½ teaspoon salt and ½ teaspoon black pepper, and toss to make sure it's evenly seasoned.
    • Melt butter in a pan over medium-high heat (I prefer cooking in a cast iron skillet) until it begins to turn a slight brown.
    • Place chicken pieces in hot butter/skillet and let cook for about one minute, until the undersides turn a beautiful golden brown. 
    • Flip the pieces over and continue cooking for another minute or two, until the inside is cooked. (Don't feel like you have to flip one at a time.)
    • Once chicken has cooked through, remove from skillet and place chicken in serving bowl/plate and sprinkle with remaining kosher salt. 
    • Let the chicken rest for a minute or two to allow the juices to really soak in!

    Notes

    *Type of Chicken: Feel free to use your favorite type of chicken. Chicken breasts, tenderloins or thighs work wonderful for this recipe.
    * Pepper: I prefer using black peppercorn instead of black ground pepper but either work great.
    * Chicken Cook-Time: The time it takes to cook could vary, and be different than what it takes for mine. Due to the size of the chicken pieces, the type of skillet, and the level of heat your stovetop is putting out.

    Nutrition

    Serving: 2tenderloins | Calories: 166kcal | Protein: 21g | Fat: 8g | Saturated Fat: 4g | Cholesterol: 79mg | Sodium: 748mg | Potassium: 370mg | Vitamin A: 205IU | Vitamin C: 1.2mg | Calcium: 5mg | Iron: 0.4mg

    Snicker Salad with Apples

    March 31, 2025

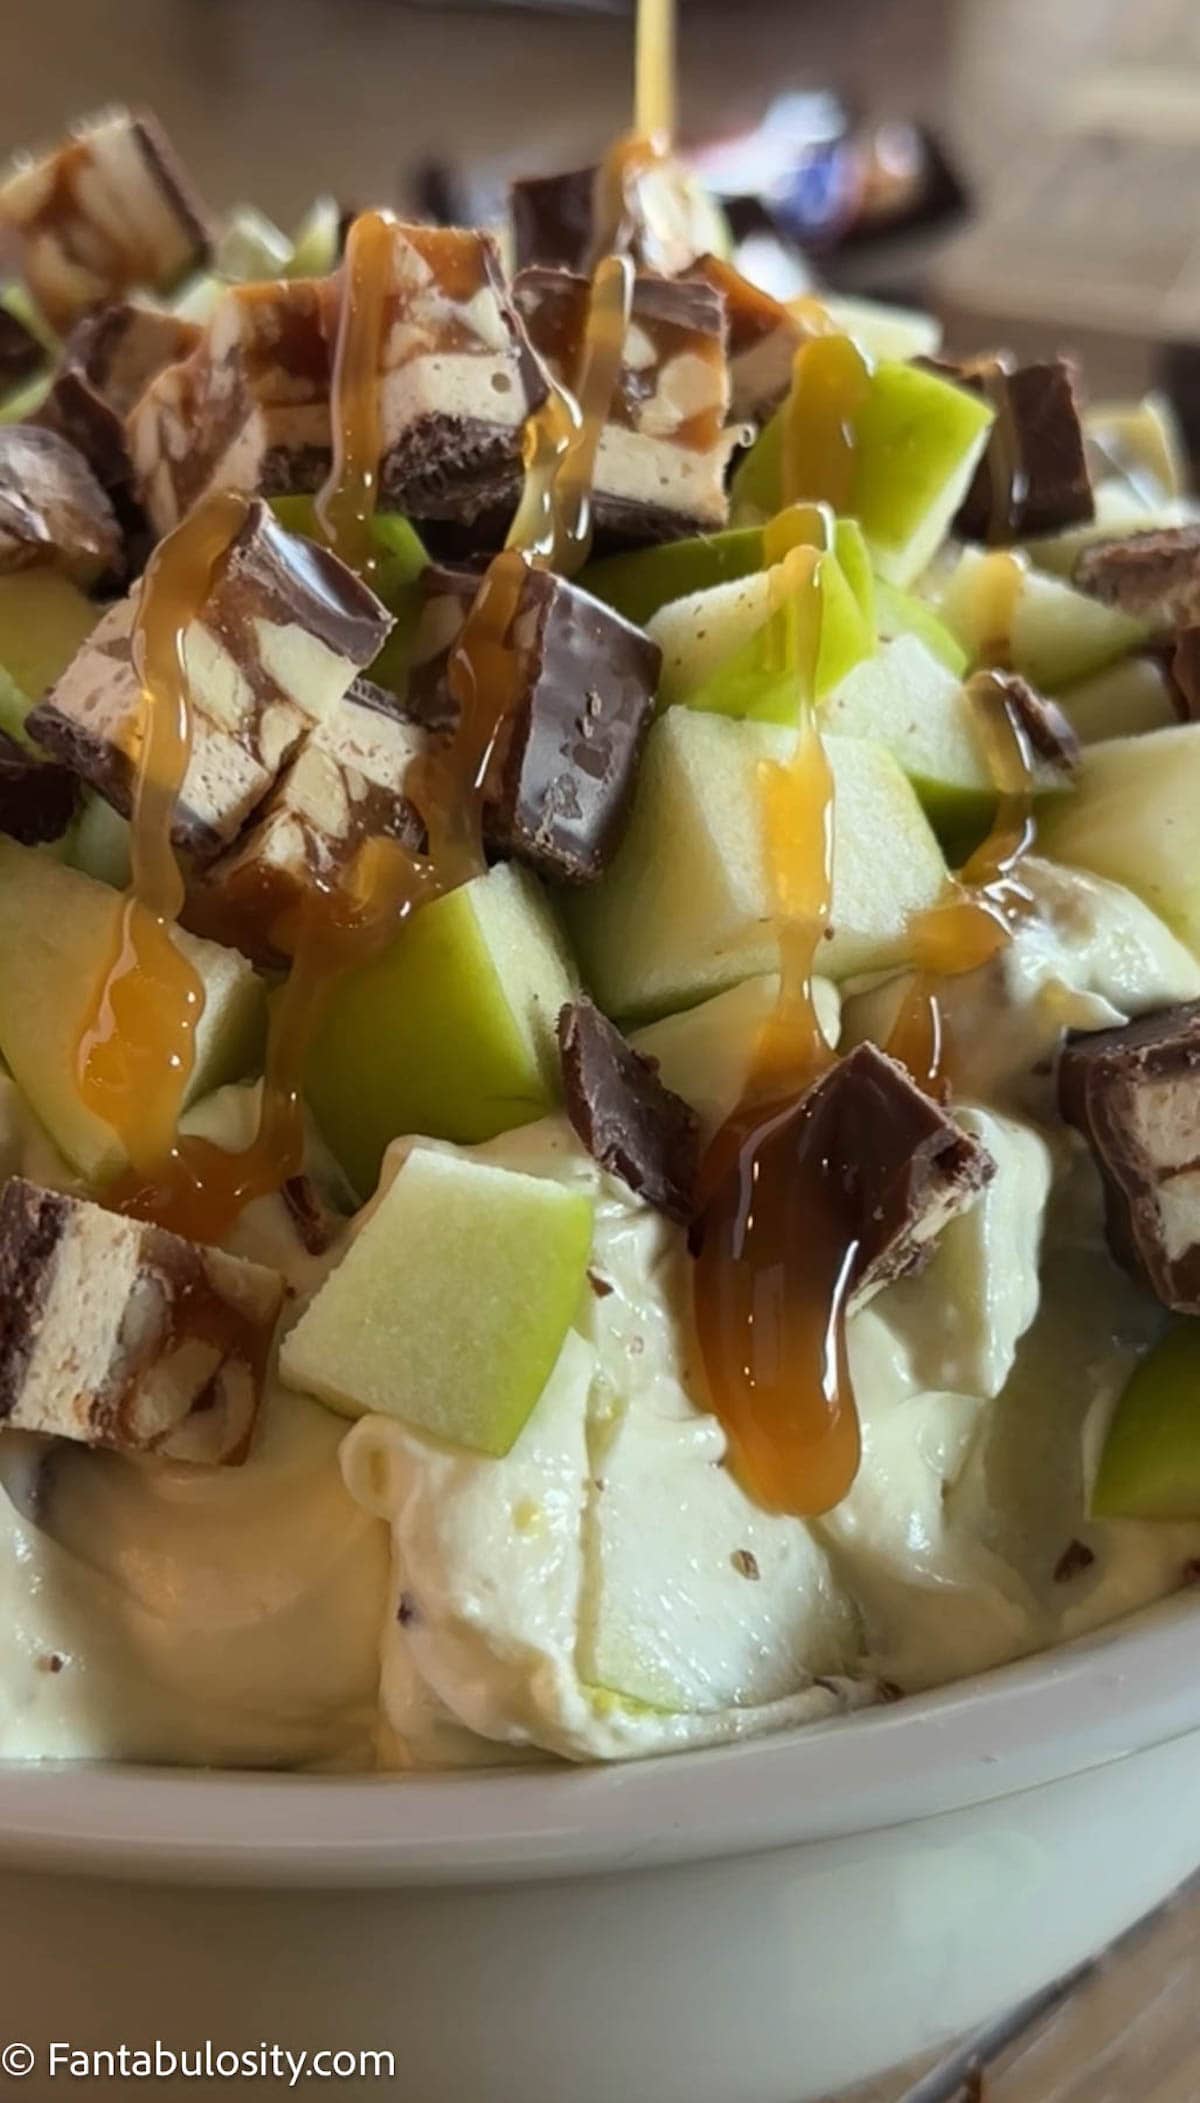
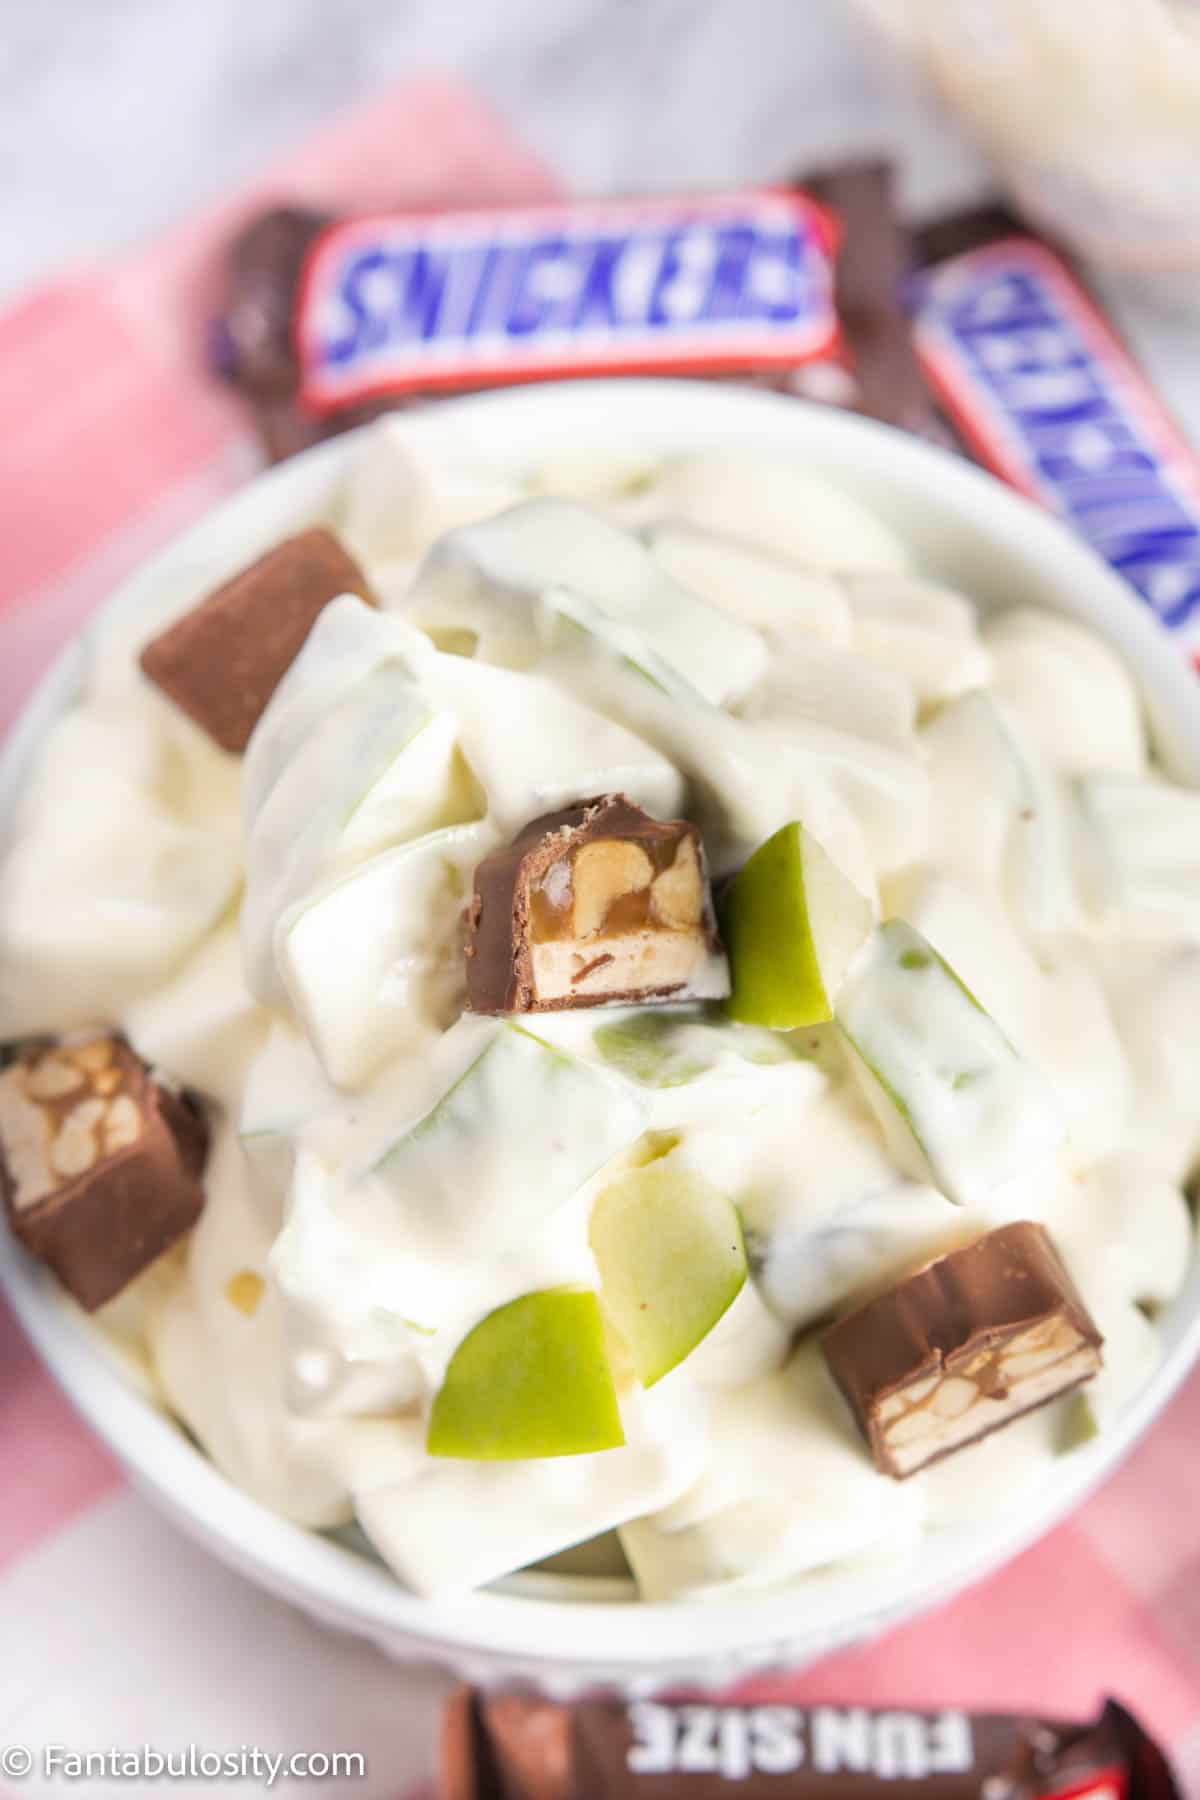
    Chopped green apples, and chopped Snickers candy bars on top of vanilla pudding with caramel drizzle.

    Snickers salad with apples (also called Snicker salad) is a classic Midwestern dessert salad made with tart apples, chopped Snickers candy bars, and a creamy pudding mixture. It's a quick, no-bake recipe that's perfect for potlucks, holidays, and family gatherings.

    If you want the bowl that empties first at Thanksgiving, this is it. See my full Thanksgiving sides list.

    This one is great alongside my easy pumpkin lush.

    It’s a potluck regular once apple season hits. You’ll find more like it in my easy fall desserts.

    Crisp, tart apples, sweet chunks of Snickers bars, and a simple, creamy sauce brings this salad together, making it one of our FAVORITE dessert salad recipes to date! (Well, this one and the Orange Fluff recipe!)

    Snicker Apple Salad in bowl, with caramel drizzle on top.

    Why You’ll Love This Recipe

    Hey friends! This is a super simple and crazy delicious side dish (or dessert recipe) that you're going to NEED at your next potluck.

    It’s Meg from Meg's Everyday Indulgence popping in again and I can’t wait to share this Snicker Salad Recipe with you!

    You may see this called Snickers salad, snickers salad, or candy bar apple salad, but they all refer to the same creamy, sweet dessert made with apples and Snickers.

    This midwestern classic dish consists of:

    • Granny Smith apples
    • chopped Snickers candy bars
    • and a creamy, pudding-based "dressing."

    It all comes together in a tart, sweet magical little dish that you can bet is on most holiday and potluck tables for family gatherings.

    I mean, when you can eat fruit and candy in the same bite AND call it salad, I think you're winning at life.


    I also think you’ll love this version of Watergate salad (or ambrosia salad) as well, especially if you love dessert salads!

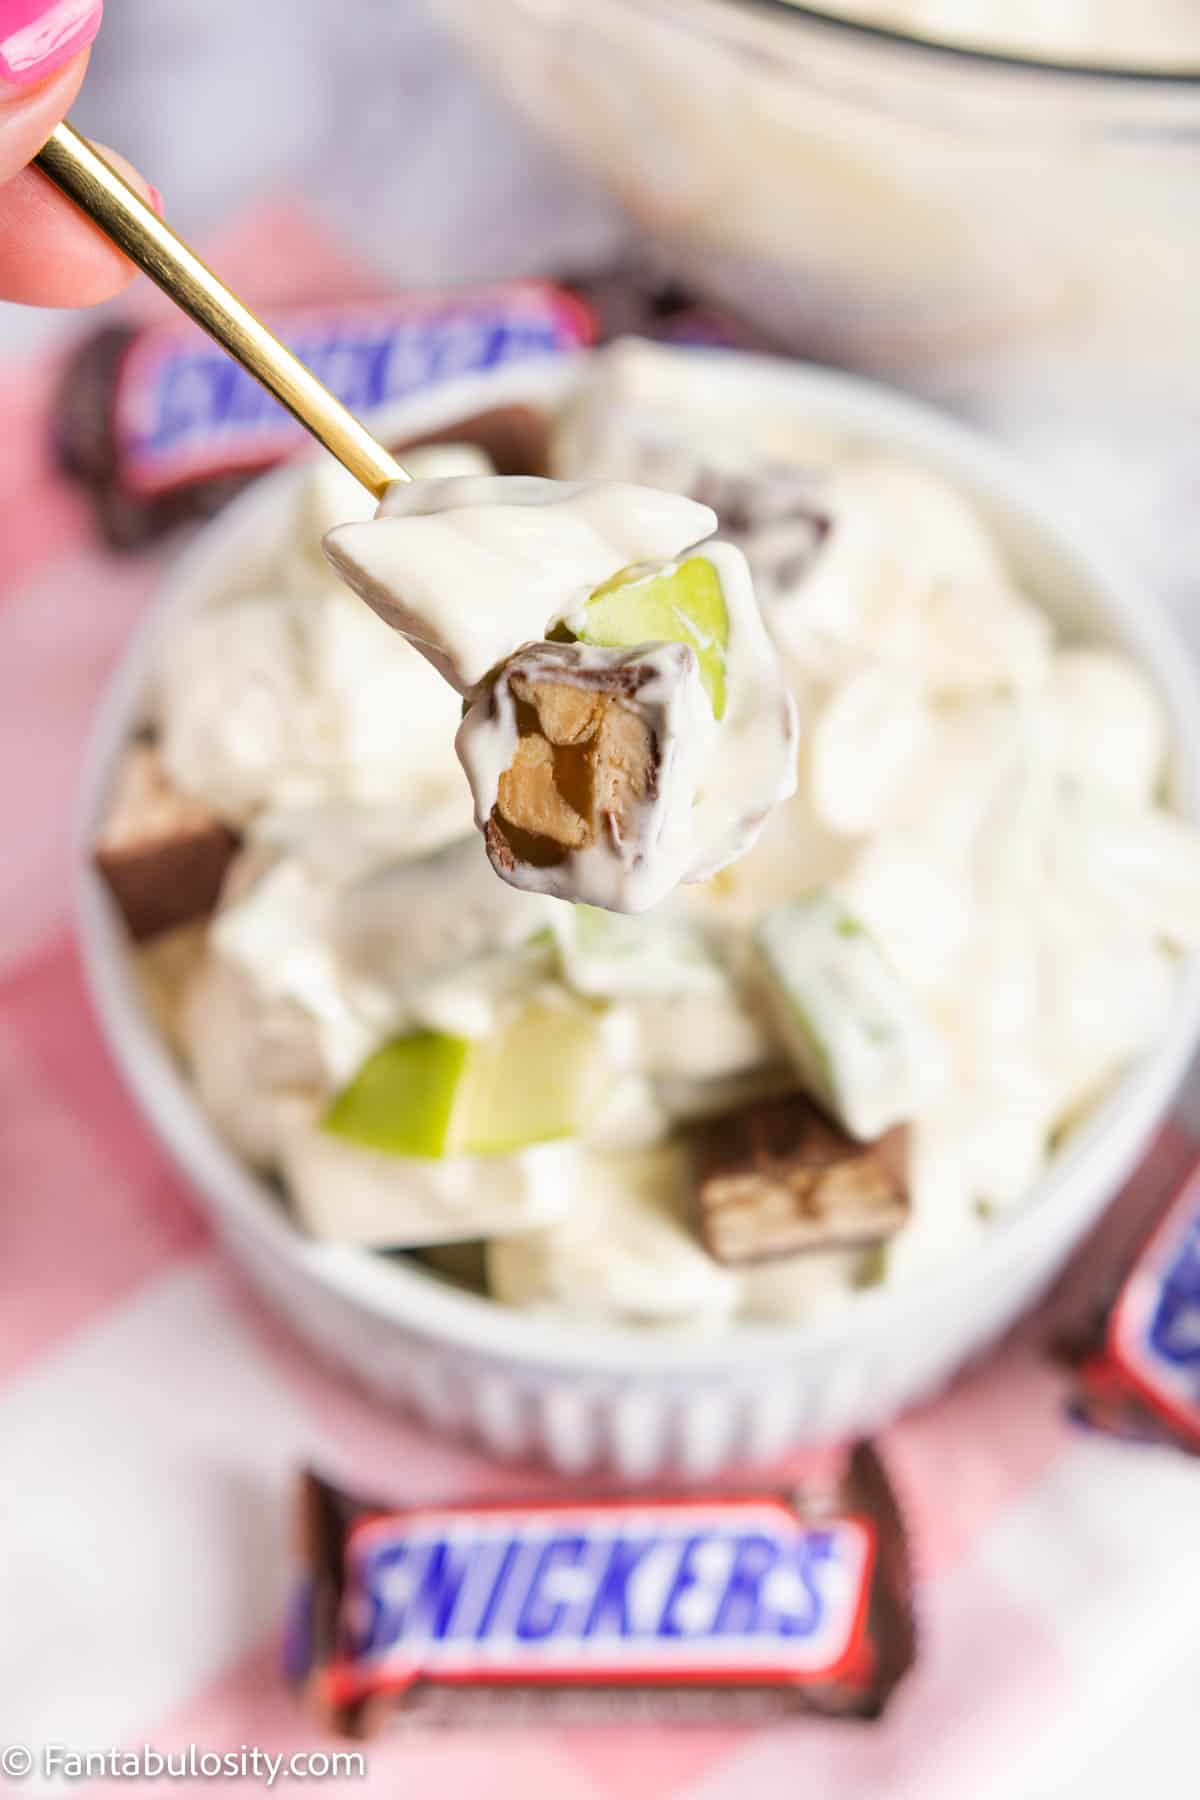
    Apple Snicker Salad bite on gold sppon

    Ingredients

    Would you believe it only takes a few ingredients to make this delicious recipe? It’s true. You’ll need:

    • Green apples – This uses about 3 large granny smith apples (5-6 small) and fresh apples are the best apples to use. The crunchy apples are such a delicious contrast to the chewy candy and the smooth pudding.
    • Snickers – this uses about 6 full-size or 12 of the fun-size Snickers.
    • Vanilla pudding mix – Make sure it’s the 3.4 oz. box of instant pudding mix.
    • Milk – Whole, 2%, or skim will work for this recipe.
    • Cool Whip – make sure your Cool Whip is thawed or it will be hard to mix in.
    • Caramel – optional, but so good!

    How to Make This Snicker Salad Recipe

    Get ready for an easy dessert recipe (or sweet side dish) because it really doesn’t get much easier than this!

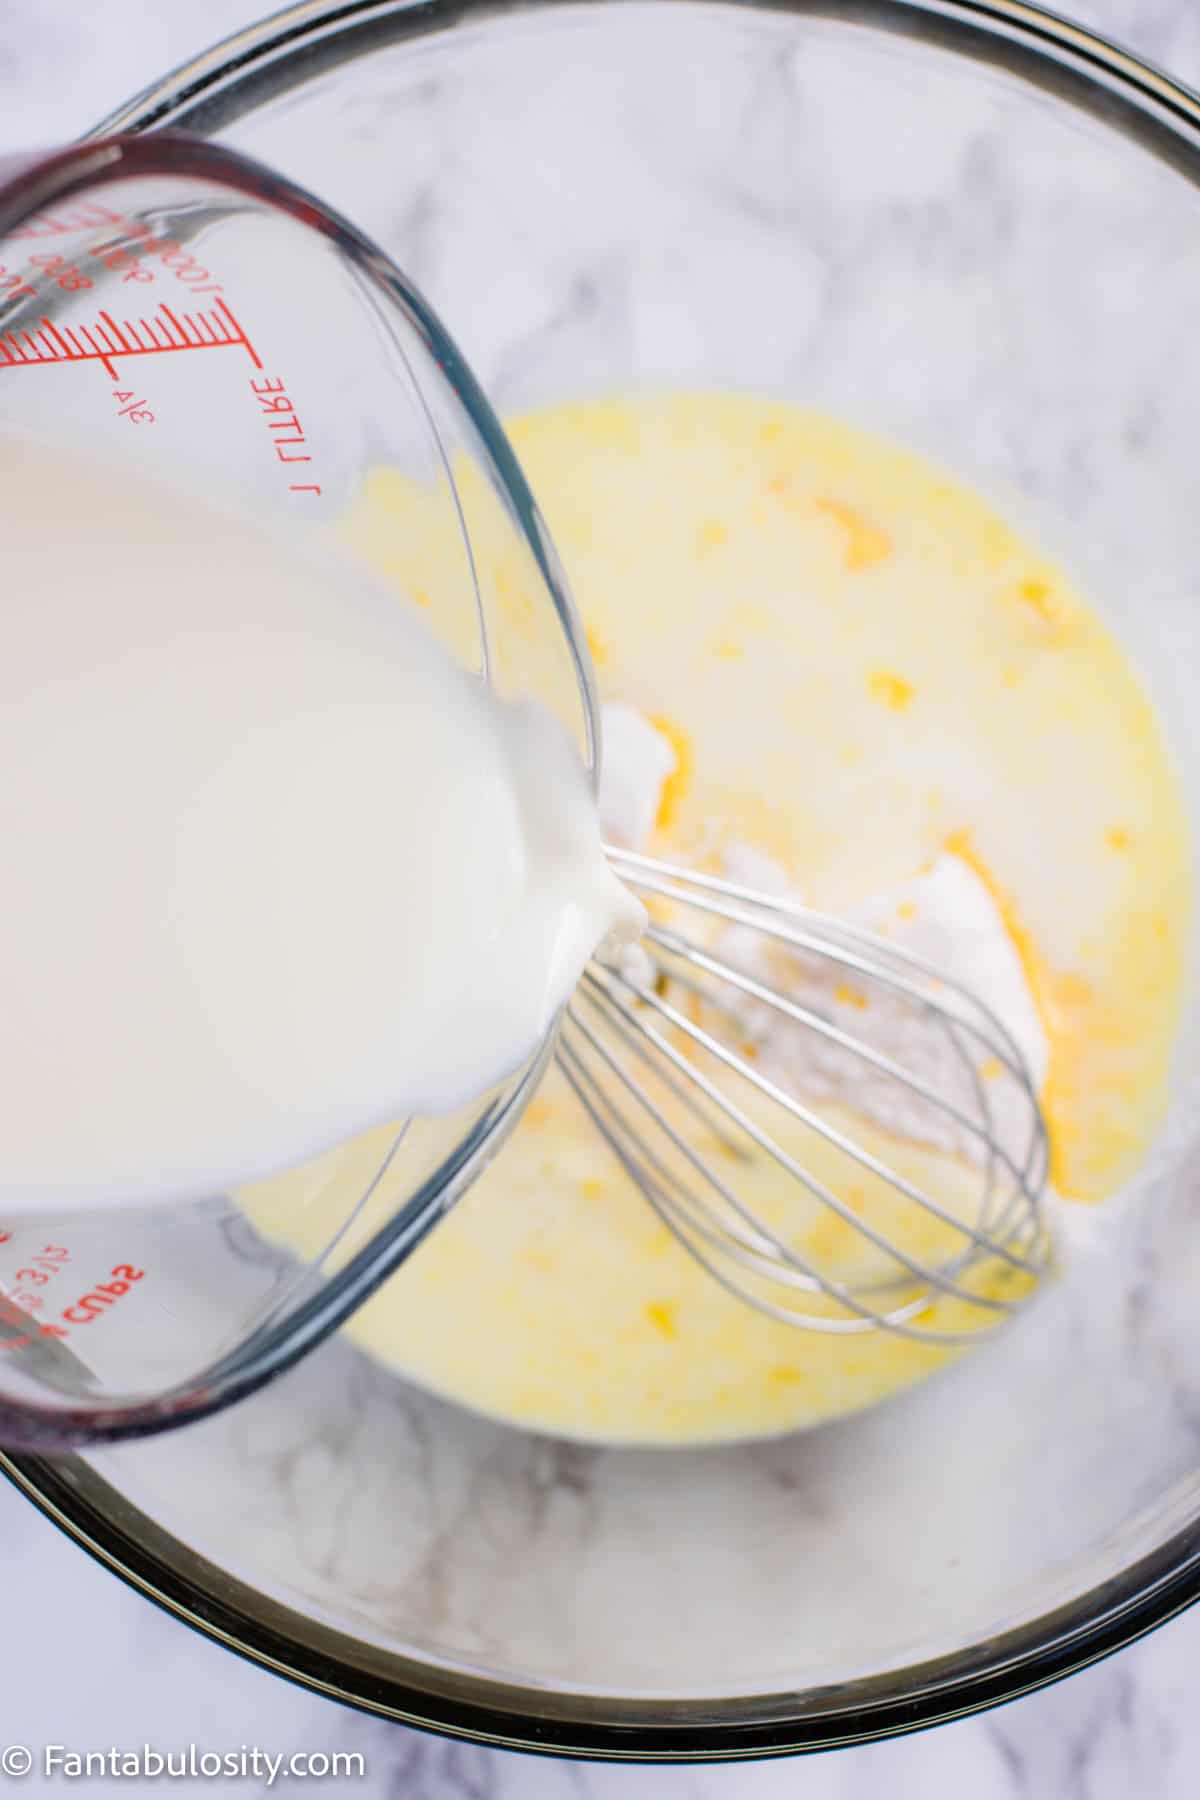
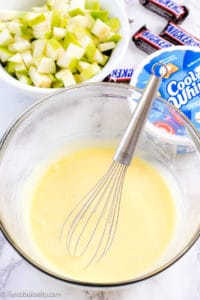
    1. First, pour the instant vanilla pudding mix in to large bowl and add milk.
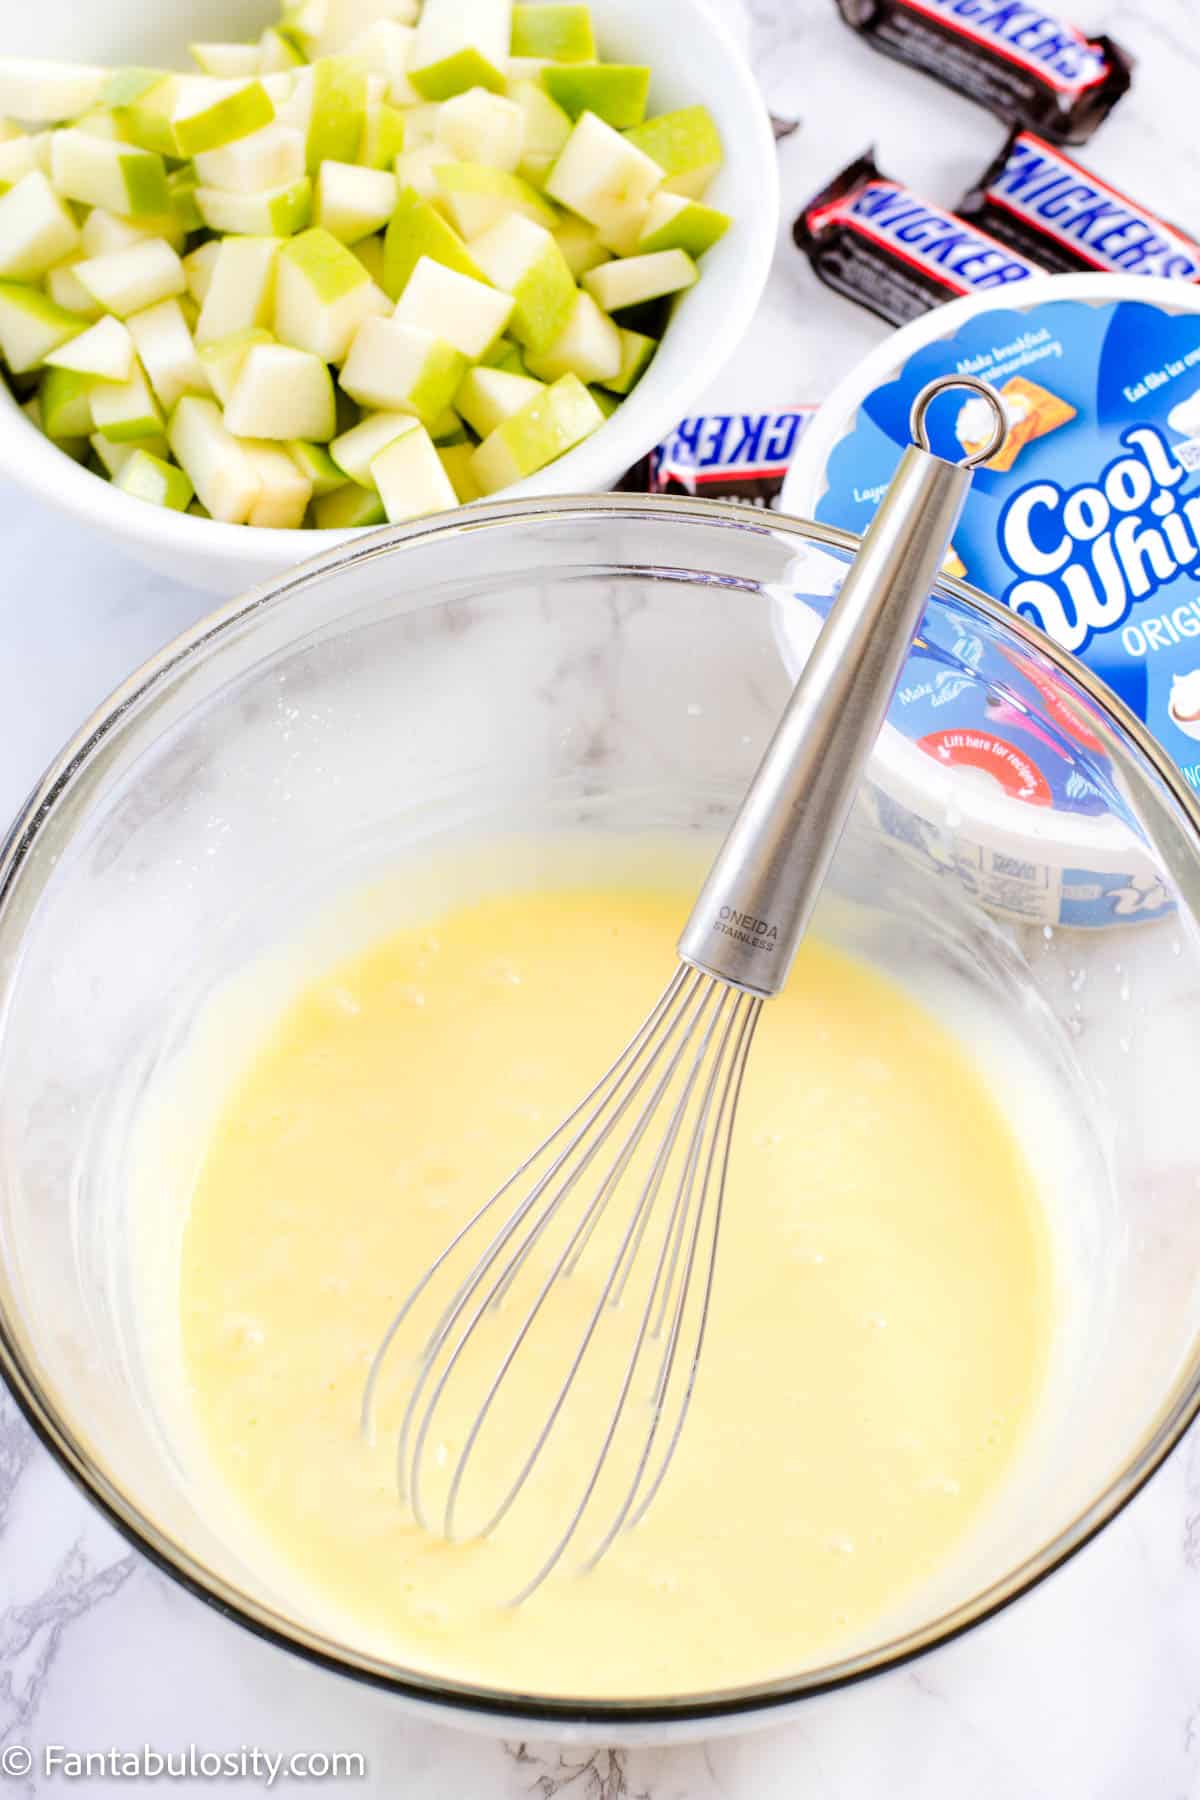
    2. Whisk together until pudding has become a thick mixture.
    pudding mix and milk in bowl
    Make vanilla pudding
    thick vanilla pudding in bowl
    Thick vanilla pudding
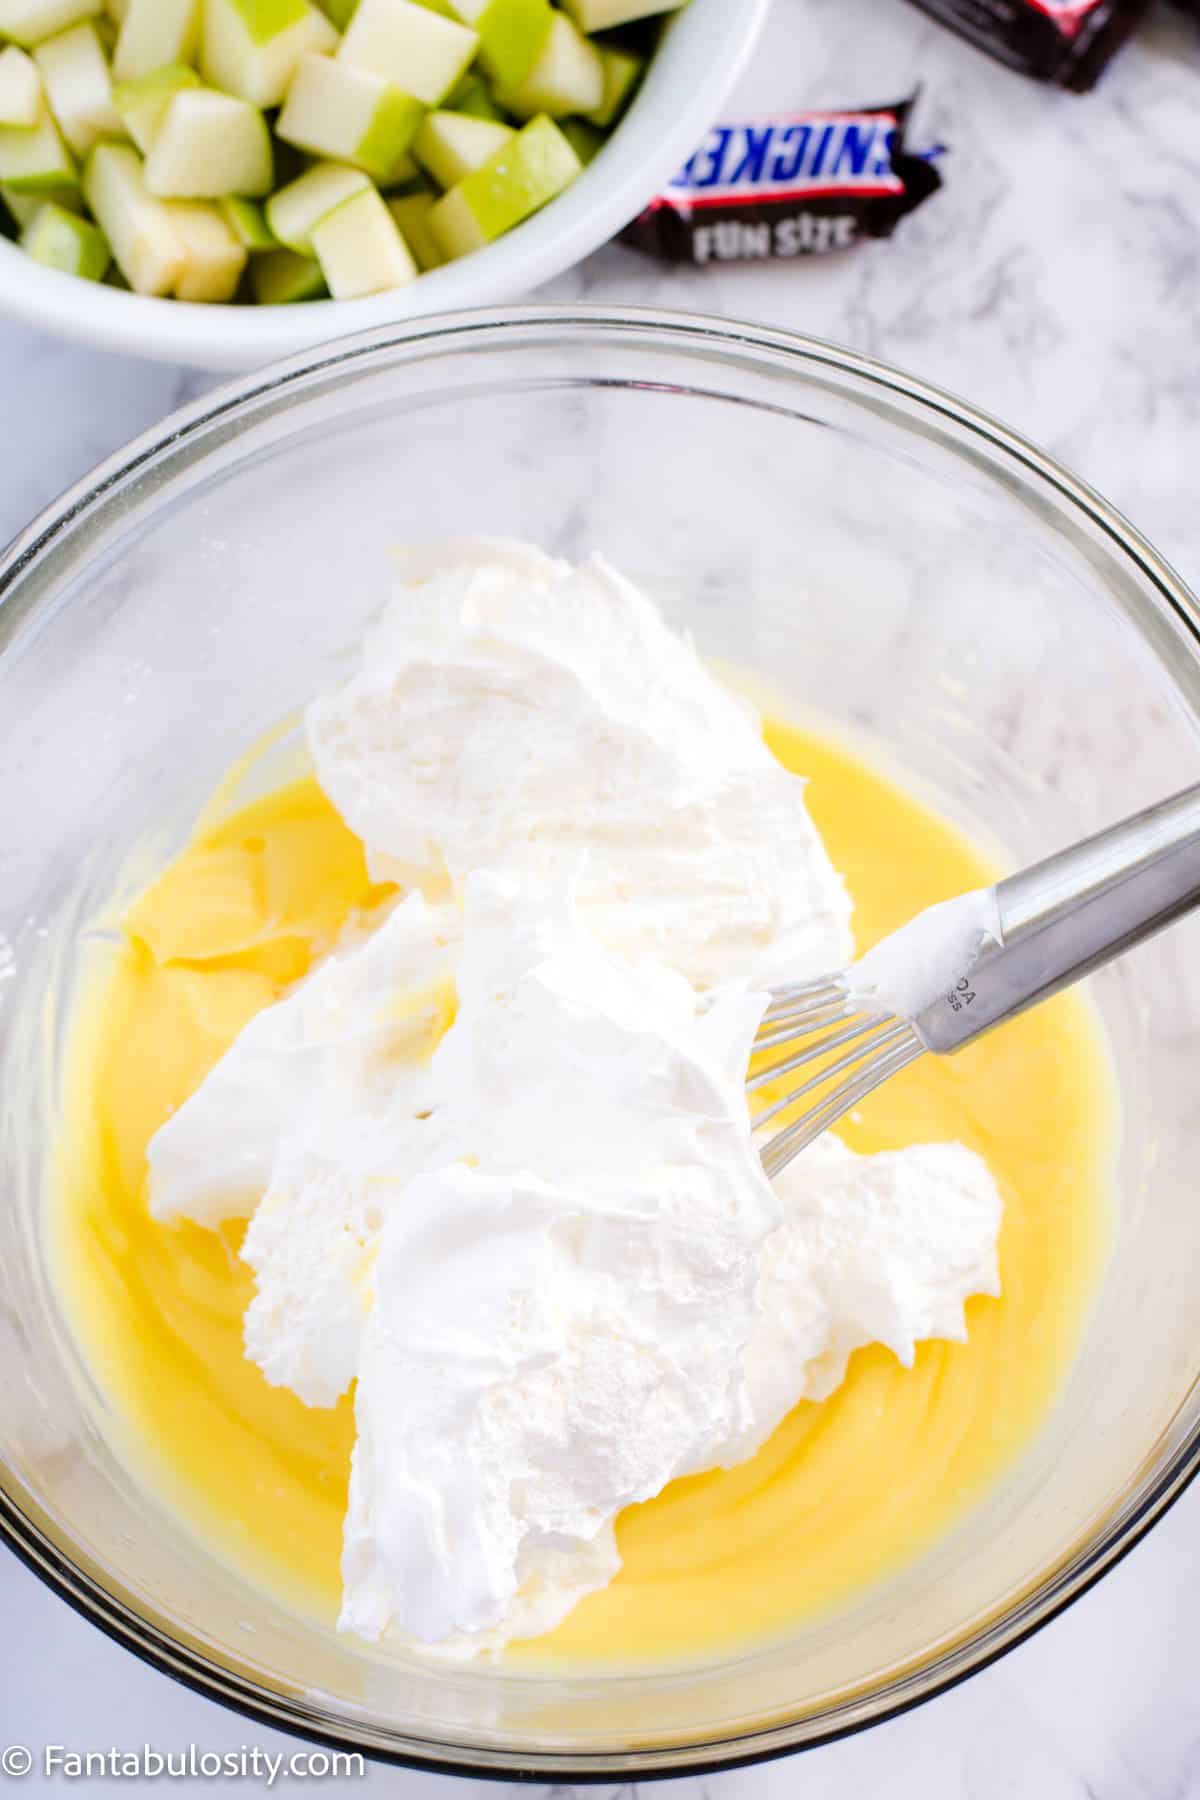
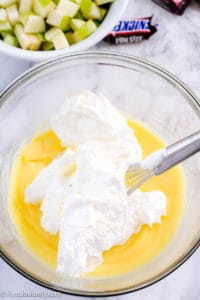
    1. Next, fold in whipped topping (Cool Whip) and mix until fully mixed in.
    cool whip in pudding in bowl
    Add in Cool Whip
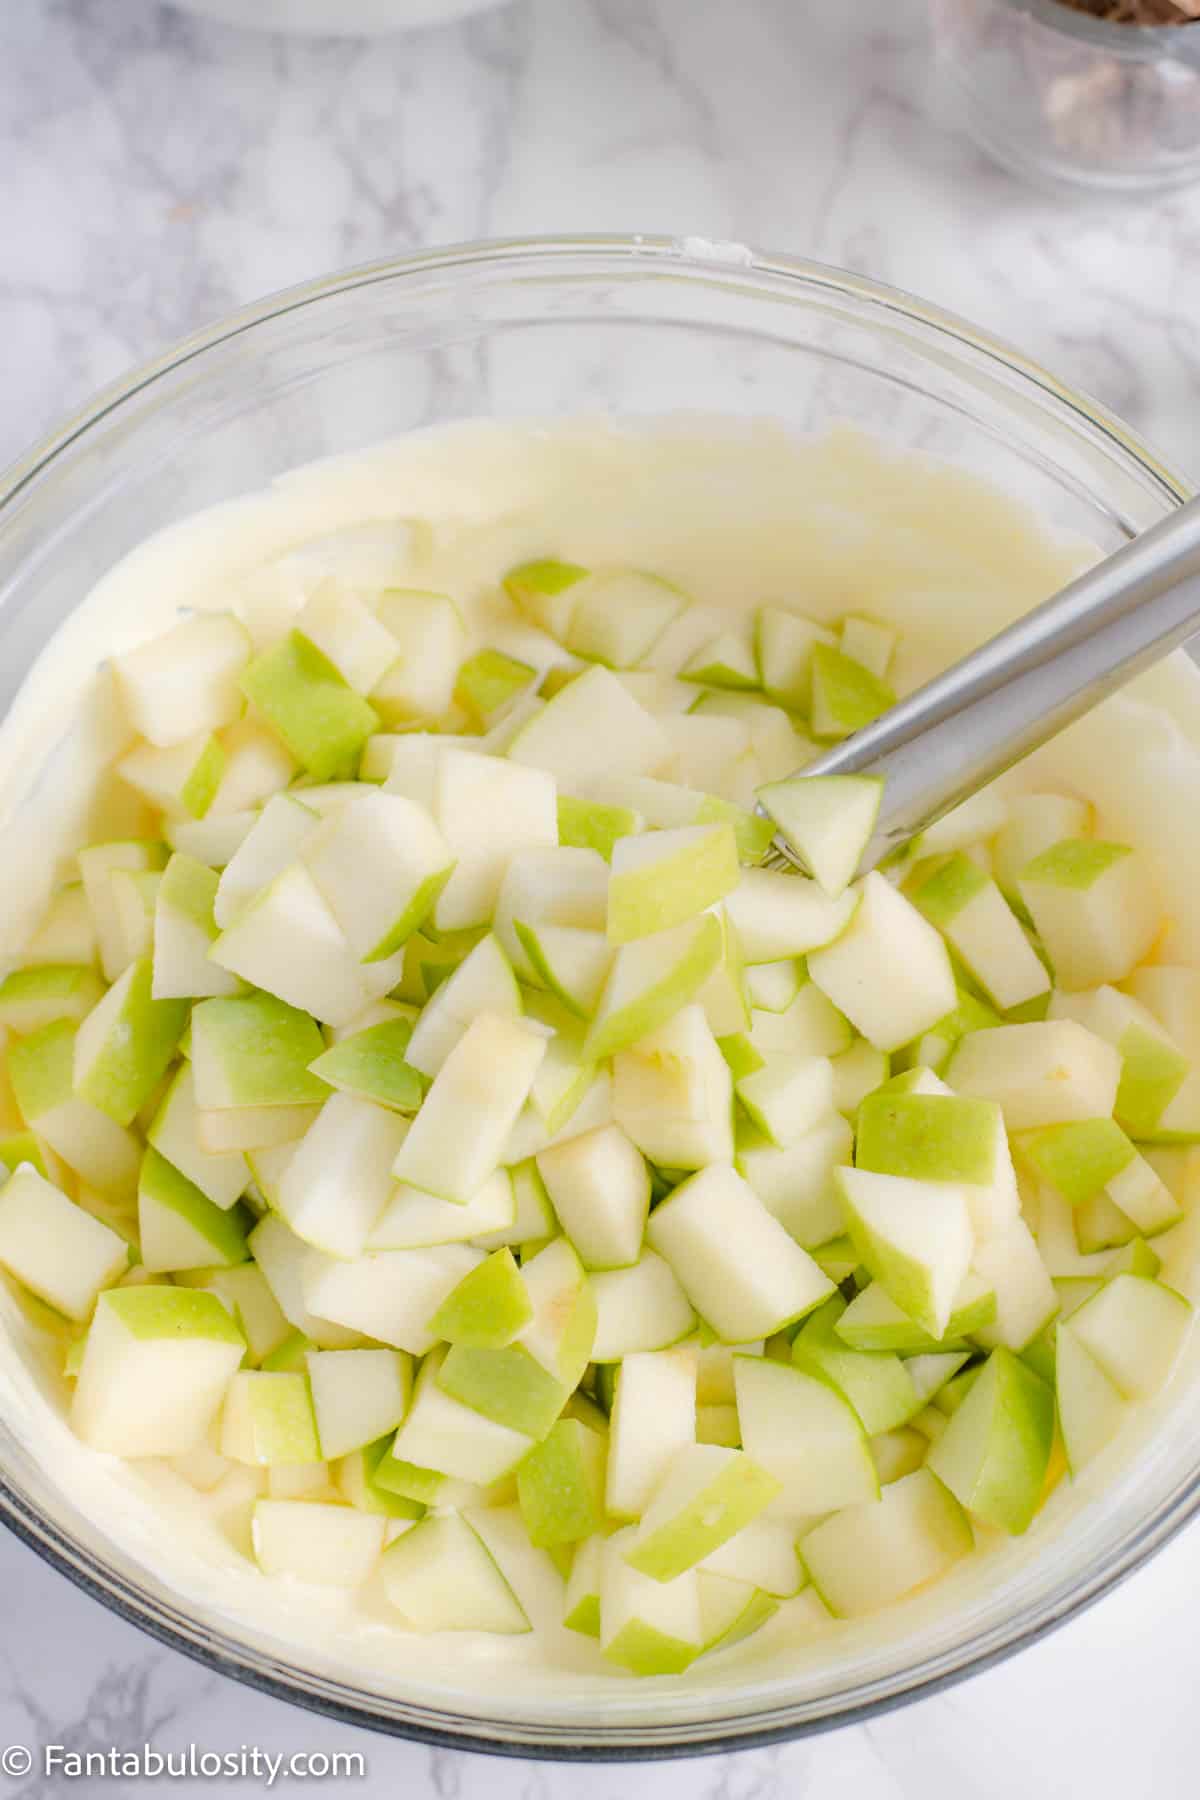
    1. Pour in the chopped apples.
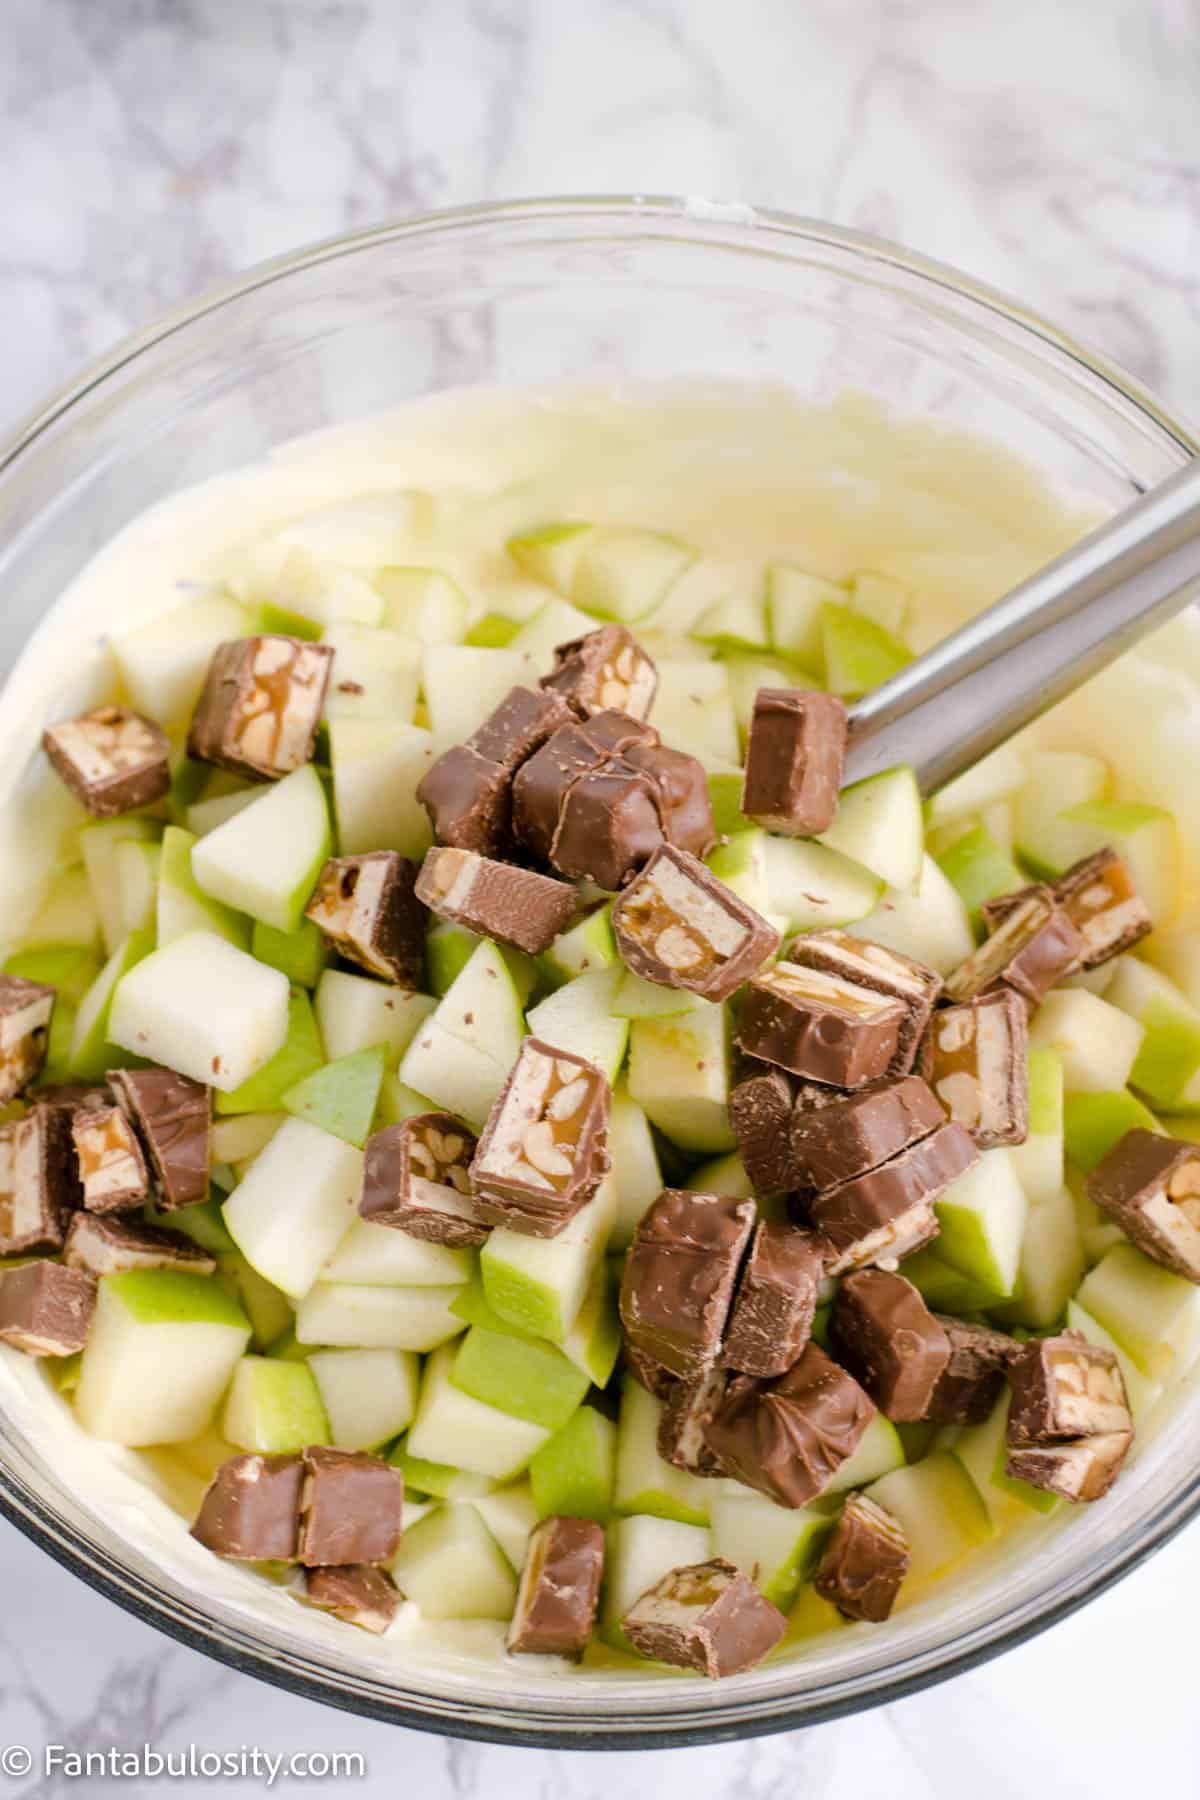
    2. Then pour in the chopped Snickers.
    Diced green apples in pudding mix
    Add in apples
    Add in snickers to pudding
    Add Snickers
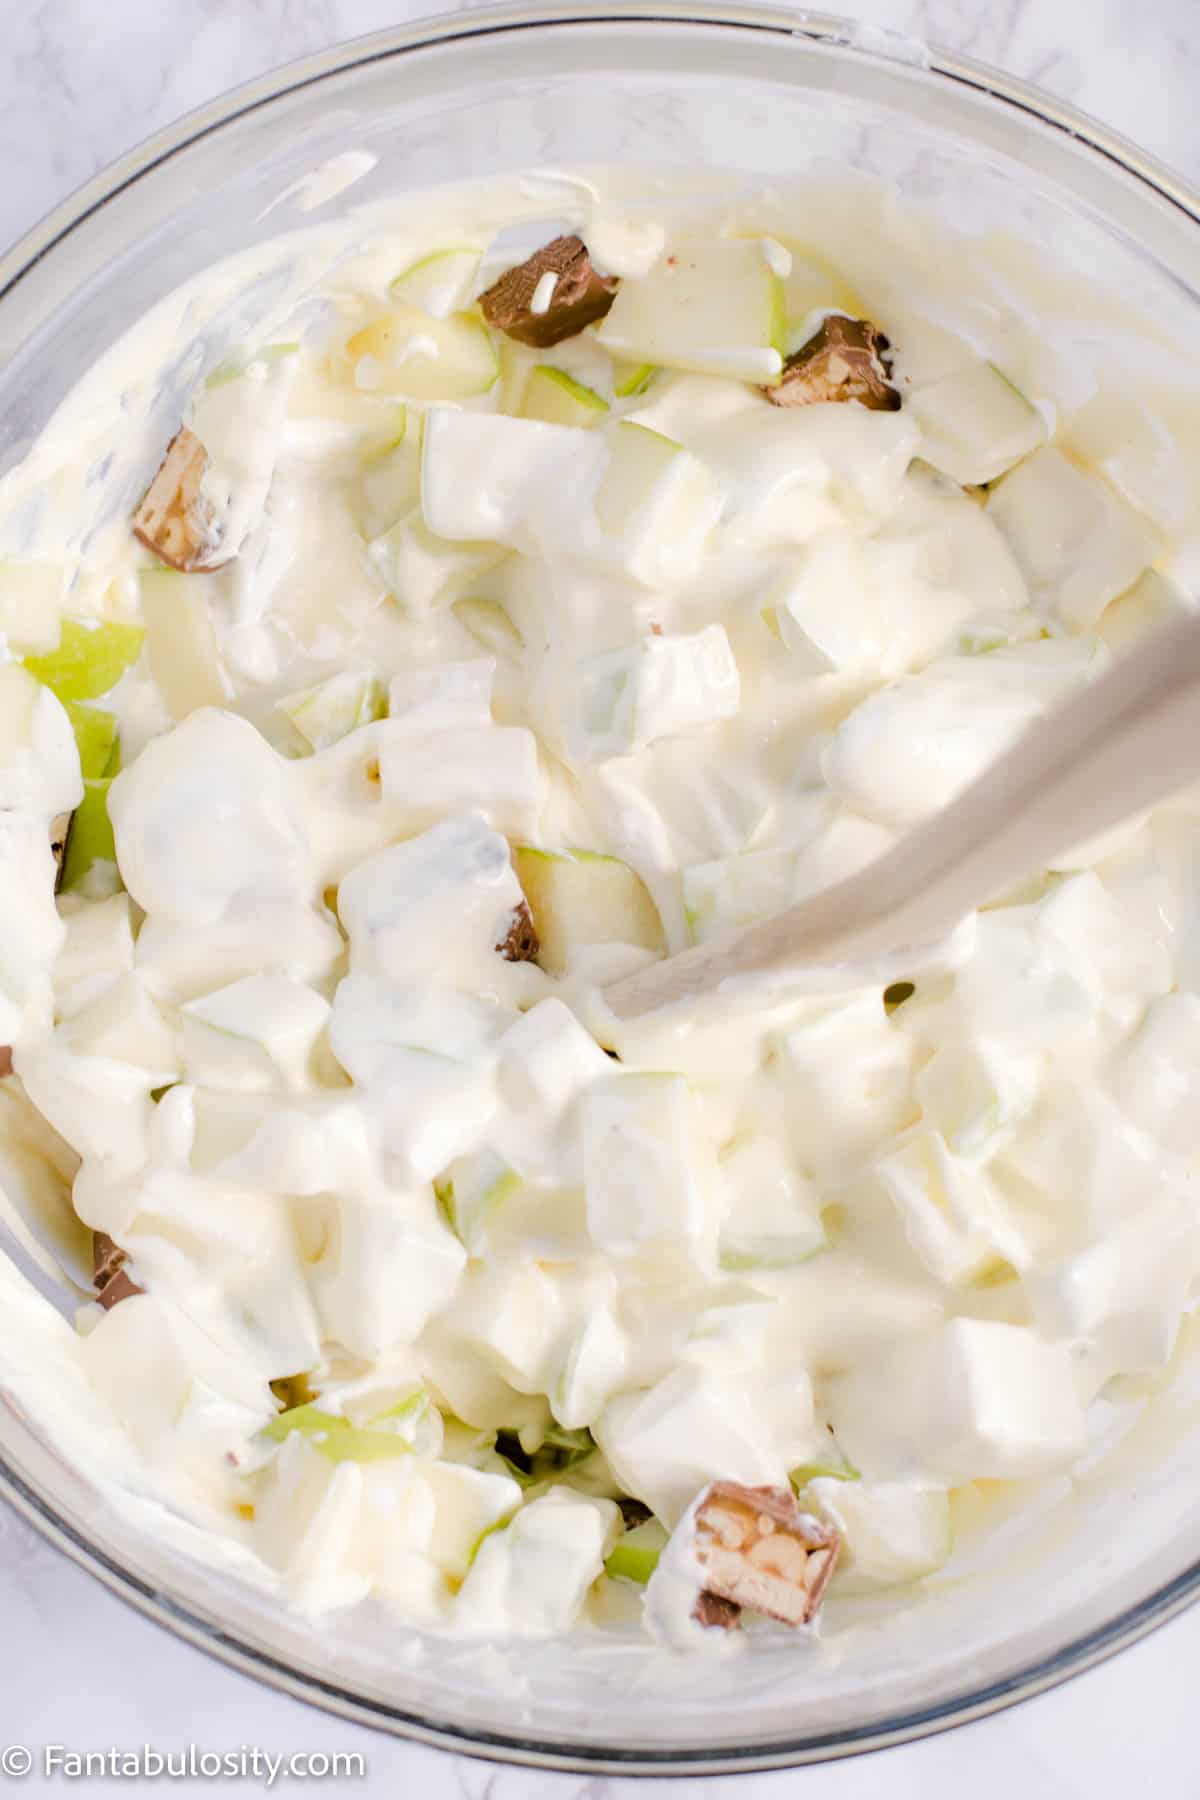
    1. Stir until evenly mixed and enjoy right away or save for later! (See storing tips below!)
    All ingredients mixed together
    Mix it all together

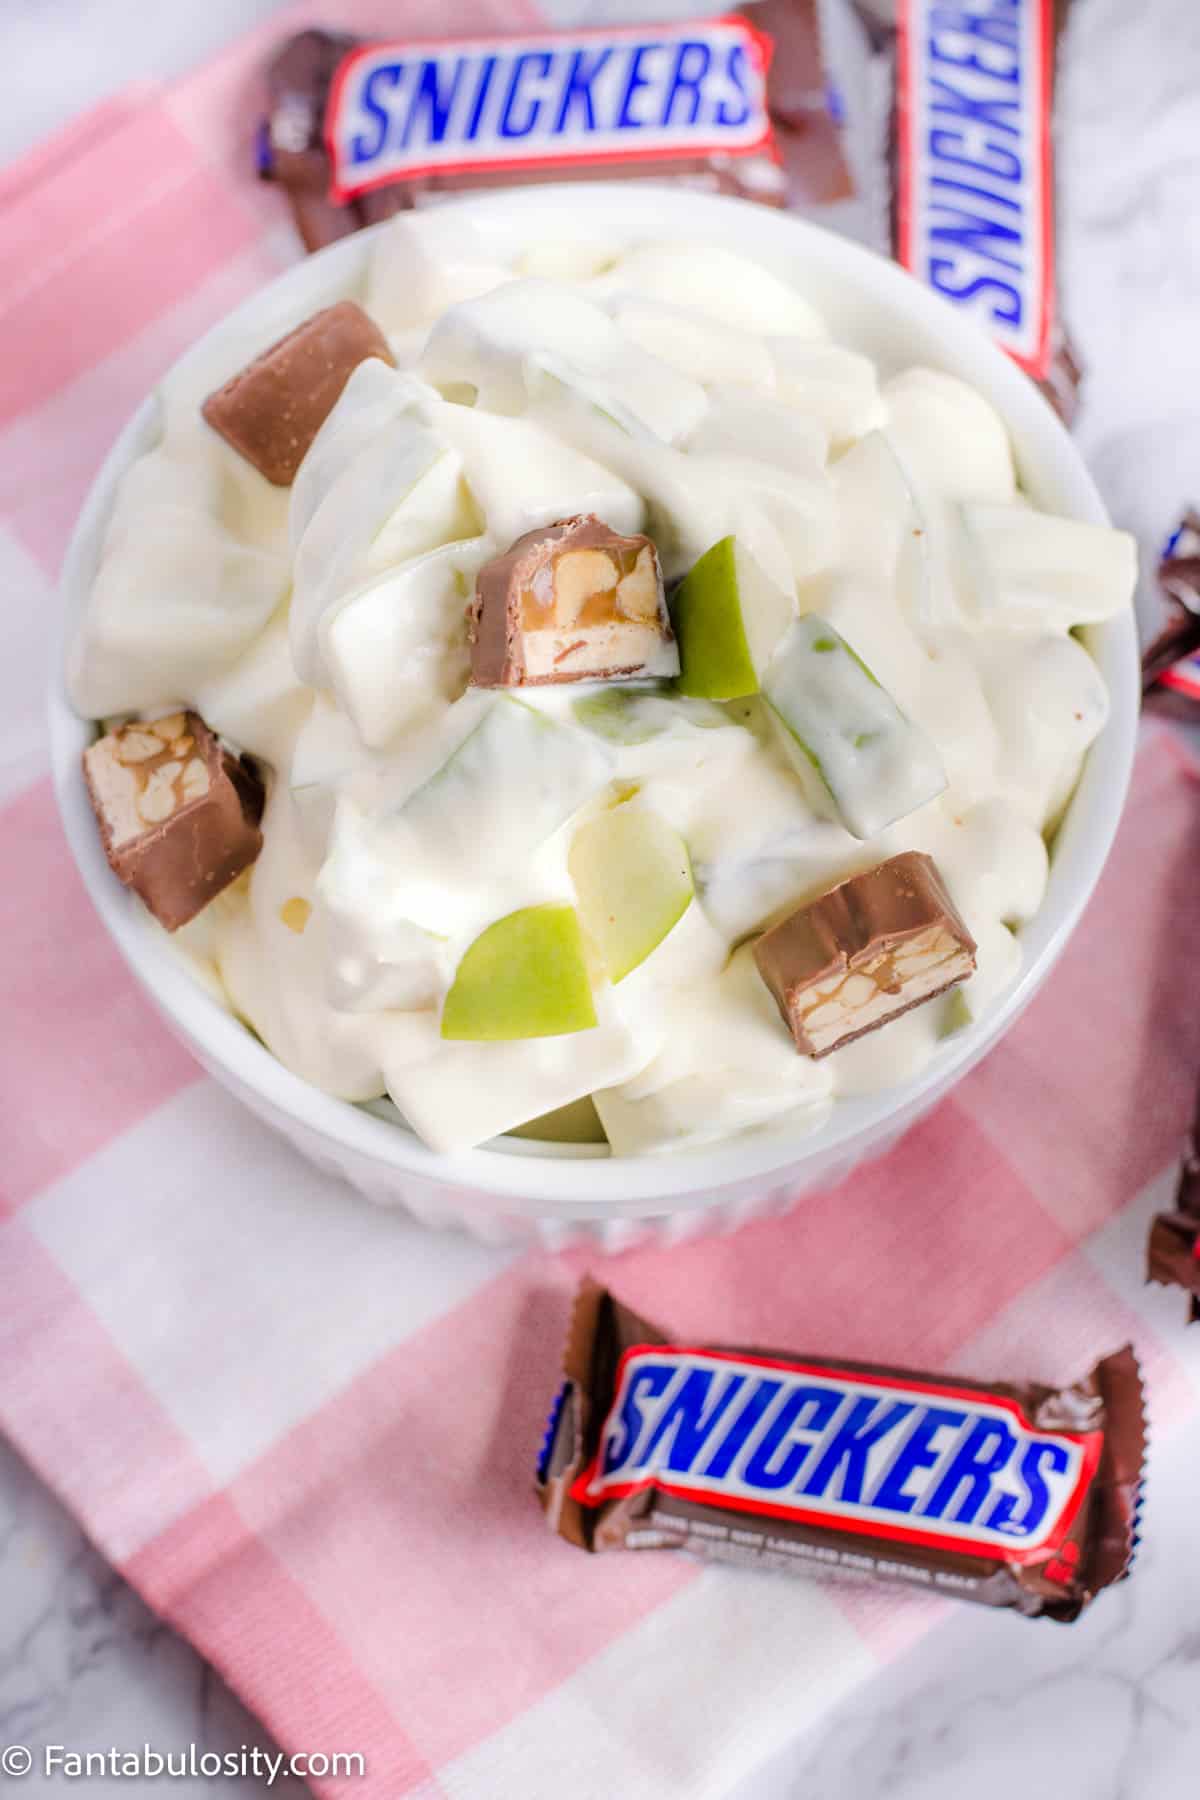
    TIP: If you want to, or have any leftovers of this Snickers salad recipe, I think it’s fun to chop extra candy bars and apples, so I can place them on top of the salad for a pretty presentation of this apple Snickers salad recipe.

    Apple Snicker Salad in bowl with fun size Snickers all around

    Storage

    You can enjoy this Snickers salad recipe as soon as you mix it up or you can store it for later. (Note: If you do end up dicing extra apples to place on top of the salad, to make it look pretty for an event such as a church event or just as a party dish, your apples may turn a bit brown. So you’ll probably want to wait to add any extra chopped apples until right before serving.)

    To store any leftovers, store in an airtight container, or cover the big bowl with plastic wrap, in the refrigerator and keep refrigerated when not serving.

    It’s best to enjoy within the same day but we’ve also enjoyed it the next day.

    Variations

    Although we love this candy bar salad just the way it is, I know it can be fun to experiment so I wanted to share some ideas that you can also try:

    • Add Caramel: Drizzle caramel sauce on top and make it a Snickers Caramel Apple Salad. Or even drizzle chocolate syrup on top for another fun spin on things!
    • Instant Pudding: Don’t have vanilla pudding on hand? What about trying one of your other favorite flavors of pudding, such as butterscotch pudding or banana pudding? I think both of those would also create a fun recipe.
    • Apples: Curious about using red apples such as red delicious apples? You absolutely can but note that this recipe may be sweeter if so. The tart Granny Smith apples help offset the sweetness of everything else.
    Apple Snicker Salad in white bowl

    More Desserts You’ll Love:

    If you love apple salads, make sure to check out all of the apple salad recipes Jessica has gathered for you too!

    If you love the idea of apples and pudding, like in this recipe, then don’t miss this other apple salad recipe that is easy to make with pudding, nuts, and dried berries!

    We’re also BIG fans of this honey lime fruit salad, bread pudding recipe, and this Butterbeer Recipe that I know you’ll love too!

    More Old-Fashioned Dessert Salads

    • Pistachio Salad - a classic pistachio fluff salad
    • Orange Fluff - light, sweet, and perfect for potlucks
    • Fruit Salad with Cool Whip - simple and crowd-pleasing

    Did you make this? I’d be so grateful if you left a “star” rating below to let me know what you thought! Then, the next time you need a quick and easy recipe, come back to Fantabulosity to browse all of my easy recipes!

    Originally published: November 2023
    Updated photos and republished: March 2025

    Recipe

    Chopped green apples, and chopped Snickers candy bars on top of vanilla pudding with caramel drizzle.
    Print Pin
    5 from 7 votes

    Snickers Salad

    This Snicker Salad Recipe is easy to make, ready in minutes and the crisp, tart apples, sweet chunks of Snickers bars, and a simple, creamy sauce bring this salad together, making it one of our FAVORITE salad recipes to date!
    Course Dessert, Side Dish
    Cuisine American
    Prep Time 10 minutes minutes
    Total Time 10 minutes minutes
    Servings 12 servings
    Calories 196kcal
    Author Jessica Burgess

    Ingredients

    • 3.4 ounce box instant vanilla pudding mix
    • 1 ½ cups milk
    • 8 ounce container Cool Whip, thawed
    • 5 cups granny smith apples, chopped into bite size chunks
    • 1½ cups snickers, cut into equal size chunks as apples This is about 6 full-size, or 12 fun size Snickers
    • caramel drizzle optional

    Instructions

    • Whisk together the instant pudding mix and milk in a large bowl until very thick.
      Thick vanilla pudding in bowl.
    • Fold in the thawed Cool Whip and stir until evenly combined.
      Cool Whip in pudding in bowl.
    • Add the chopped apples and snickers to the bowl and mix well. Eat immediately or refrigerate. This salad is best eaten the same day.
      Snickers and chopped granny smith apples in pudding.

    Video

    Notes

    Storage:
    You can enjoy this salad as soon as you mix it up or you can store it for later but do know that the liquid can seep from the apples so you’ll want to store it before serving if you do make it ahead.
    (Note: If you do end up dicing extra apples to place on top of the salad, to make it look pretty for an event such as a church event or just as a party dish, your apples may turn a bit brown. So you’ll probably want to wait to add any extra chopped apples until right before serving.)
    To store any leftovers, store in an airtight container, or cover the big bowl with plastic wrap, in the refrigerator and keep refrigerated when not serving.
    It’s best to enjoy it within the same day but we’ve also enjoyed it the next day.

    Nutrition

    Serving: 1serving | Calories: 196kcal | Carbohydrates: 32g | Protein: 3g | Fat: 7g | Saturated Fat: 3g | Polyunsaturated Fat: 1g | Monounsaturated Fat: 2g | Trans Fat: 0.1g | Cholesterol: 9mg | Sodium: 122mg | Potassium: 184mg | Fiber: 2g | Sugar: 26g | Vitamin A: 141IU | Vitamin C: 2mg | Calcium: 79mg | Iron: 0.2mg

    Peanut Butter Chocolate Chip Cookies

    June 15, 2019

    Peanut Butter Chocolate Chip Cookies - Cookies on baking sheet - chocolate chip peanut butter cookies

    Peanut Butter Chocolate Chip Cookies: Two flavors combined that will excite your tastebuds! Plus, how to roll up the dough and even freeze it for later to slice and bake cookies!

    We absolutely love cookie recipes, so we’ve made sure to offer fun spins on the recipe like with this chocolate and peanut butter cookie but also with a traditional peanut butter cookie and these cake mix peanut butter cookies.

    Peanut Butter Chocolate Chip Cookies Recipe

    Peanut Butter Chocolate Chip Cookies

    Is there really anything better than a chocolate chip cookie? (Or the cookie dough that you’re NOT supposed to eat, but I do…)

    Well something that could be better is a peanut butter chocolate chip cookie.

    Taking one of my favorite dessert recipes and adding another favorite ingredient, just.made.sense.

    More Cookie Recipes You’ll Also Love:

    • Oatmeal Breakfast Cookies
    • Chocolate Caramel Gooey Butter Cookies
    • Strawberry Shortcake Gooey Butter Cookies
    • The BEST Sugar Cookie Recipe

    Easy Peanut Butter Chocolate Chip Cookie Recipe

    Full recipe and printable recipe card towards the end of this post for your convenience.

    For these chewy AND crunchy cookies, you get to use everyday ingredients like:

    • 1 cup vegetable shortening (Crisco)
    • 1 cup softened butter
    • 2 cups granulated sugar
    • 2 cups packed brown sugar
    • 2 cups creamy Peanut Butter ( you can use Sun Butter or Wow Butter, Peanut free, as a substitute for Peanut allergy)
    • 2 teaspoons vanilla
    • ¼ cup milk
    • 3 eggs
    • 5 cups flour
    • 4 ½ teaspoons baking soda
    • ½ teaspoon salt

    that makes this cookie recipe so easy that you can whip them up at the last minute for an impromptu family gathering or as a fun dessert for the kids on the weekend.

    Homemade Slice & Bake Cookies

    What I also love about this peanut butter chocolate chip cookie recipe, is that it can be made and baked right away, or you can roll all of it/some of it and freeze for up to six months!

    Slice and Bake Peanut Butter Chocolate Chip Cookies

    How to Freeze Cookie Dough

    If you want to freeze part of the dough for this cookie recipe, simply wrap waxed paper tight around the cookie log, (more instructions on that in the recipe card) and wrap in aluminum foil, tightly.

    Place in freezer, and keep up to 6 months.

    Simply thaw in the refrigerator overnight, remove the log, and slice and bake when desired.

    Chocolate Chips on slice and bake peanut butter cookies

    Chocolate Chip Cookie Tips

    When it comes to backing, I’ve found some favorites for cookie supplies and tips to make cookies even better!

    • Bake on parchment paper to reduce clean-up!
    • Or, grab this silicone Silpat Baking Mat to change your cookie life.
    • Chilling your cookie dough can make a BIG difference in how the finished cookies turn out. Refrigerating solidifies the fats in the cookies, so it takes a longer time to melt when in the oven, makes a fluffier cookie. (Rather than spreading out super thin.)
    • Salt? YES… adding salt can create the perfect salty/sweet contrast. I always shake the shaker one or two times more than the recipe calls for because I love that extra little kick. (It’s a secret I’ve had since making chocolate chips cookies as a little girl.)
    • Let your baking sheet cool before adding a new batch of cookie dough to them. If you don’t, they will start cooking before you place them into the oven
    Cookies on baking sheet - chocolate chip peanut butter cookies

    If you’re a fan of cookies with chocolate chips, then you must know about this chocolate chip banana cookie recipe too!

    Recipe

    Peanut Butter Chocolate Chip Cookies Recipe
    Print Pin
    5 from 1 vote

    Peanut Butter Chocolate Chip Cookies

    Peanut Butter Chocolate Chip Cookies Recipe: Two flavors combined that will excite your tastebuds! Plus, how to roll up the dough and even freeze it for later for slice and bake cookies!
    Course Dessert
    Cuisine American
    Prep Time 20 minutes minutes
    Cook Time 10 minutes minutes
    Chill Time 1 hour hour
    Total Time 1 hour hour 30 minutes minutes
    Servings 28 cookies
    Calories 467kcal
    Author Jessica Burgess

    Ingredients

    • 1 cup vegetable shortening (Crisco)
    • 1 cup softened butter
    • 2 cups granulated sugar
    • 2 cups packed brown sugar
    • 2 cups creamy peanut butter Or sun butter, wow butter, peanut free)
    • 2 teaspoon vanilla extract
    • ¼ cup milk
    • 3 eggs
    • 5 cups flour
    • 4.5 teaspoon baking soda
    • .5 teaspoon salt (I prefer kosher or pink Himalayan salt)
    • 6 oz. chocolate chips (or more/less depending on what you prefer)

    Instructions

    • In a stand mixer, cream the butter, shortening, sugar, brown sugar, peanut butter, eggs, water and vanilla, until light, creamy and smooth.
    • In a separate bowl, mix the flour, baking soda and salt until well blended, and add to peanut butter mixture a little at a time, mixing until smooth, scraping the sides of the mixing bowl to make sure all ingredients are well blended.
    • Remove cookie dough, and divide into three equal amounts, placing dough on waxed paper.
    • Form into a log, about 10 inches long, each, and place dough in refrigerator to chill, about an hour.

    Bake Peanut Butter Chocolate Chip Cookies

    • Remove log from refrigerator, and slice ¼ inch thick.
    • Roll edges of cookies in mini chocolate chips, and place on cookie sheet lined with parchment paper.
    • Bake at 350 degrees for about 10 minutes, or until cookies are golden brown.
    • Remove from oven and cool on cookie sheet before removing.
    • Remove slightly warm cookies to cooling rack to completely cool. Enjoy!

    To Freeze Cookie Dough

    • If you want to freeze part of the dough for later, chill and roll in chocolate chips, but then simply wrap the waxed paper tight around the cookie log, and wrap in aluminum foil, tightly.
    • Place in freezer, and keep up to 6 months.
    • Simply thaw in the refrigerator overnight, remove log, and slice and bake when desired.

    Notes

    Please keep in mind that the nutritional information provided below is just a rough estimate and variations can occur depending on the specific ingredients used. 

    Nutrition

    Serving: 1cookie | Calories: 467kcal | Carbohydrates: 55g | Protein: 8g | Fat: 25g | Saturated Fat: 9g | Cholesterol: 36mg | Sodium: 403mg | Potassium: 176mg | Fiber: 2g | Sugar: 35g | Vitamin A: 245IU | Vitamin C: 0.1mg | Calcium: 38mg | Iron: 1.7mg
    Peanut Butter Chocolate Chip Slice and Bake Cookies

    Love Easy Dessert Recipes?

    If you love easy recipes, then you’ll want to get your hands on our quick and easy desserts! Pin them for later, so you can remember them for when you need them!

    Pin These Peanut Butter Chocolate Chip Cookies Recipe

    Ooooh la la! These are DELISH! Easy and chewy peanut butter and chocolate chip cookie recipe! #chocolatechipcookies #peanutbutter #peanutbutterchocolatechipcookies #easy #cookierecipe #cookies #chewycookies

    25+ Easy Air Fryer Recipes for Beginners

    May 31, 2023

    Easy air fryer recipes collage.

    Air Fryer Recipes: A collection of easy recipes for the air fryer for fish, chicken, pork, and more for beginners with an air fryer.


    Air fryer recipes collage and text overlay.

    Air Fryer Recipes

    If you are trying to cut back on the amount of oil you consume, an air fryer is a great option! I’m going to assume that you have an air fryer, but if not, head over to find out WHICH air fryer I chose after researching and looking for the very best, in my Air Fryer Reviews post!

    What is an Air Fryer?

    Air fryers allow you to still enjoy delicious fried foods, but without all the oil that comes with traditional frying!

    If you have never used an air fryer before, the concept can sometimes be a little tricky. Whether you are looking for a dessert, quick lunch, or dinner, the possibilities of what you can make are endless!

    25+ Air Fryer Recipes

    
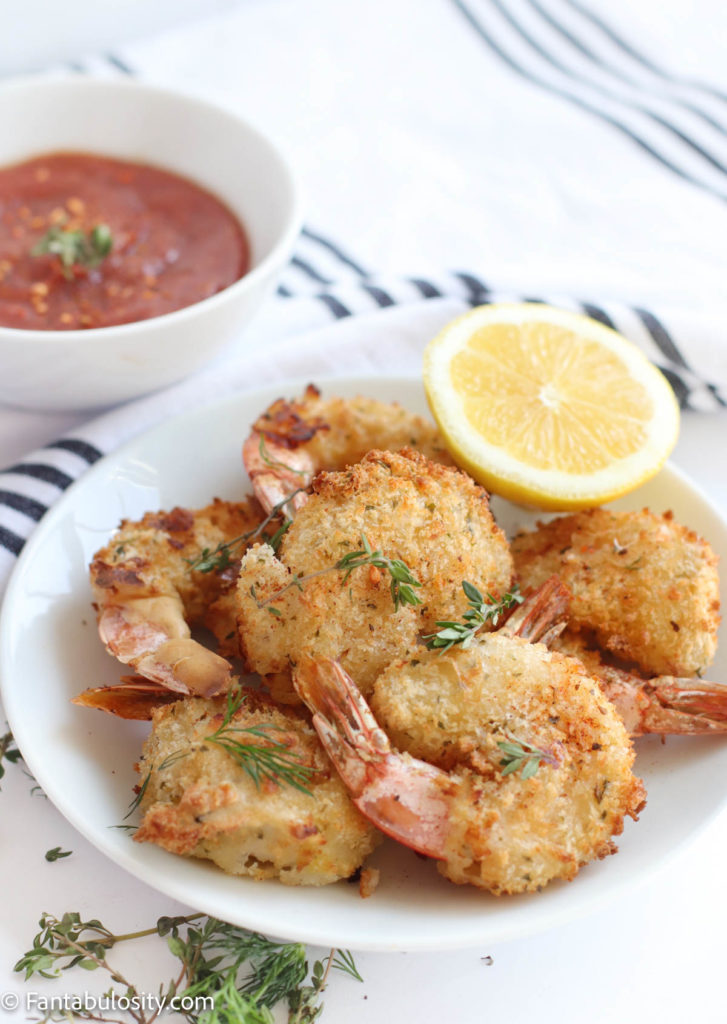
A plate of fried shrimp with cocktail sauce and a lemon wedge.

    Air Fryer Fried Shrimp with Cocktail Sauce

    Shrimp with cocktail sauce is always a good idea. This recipe makes a favorite dish a little lighter by air frying it.

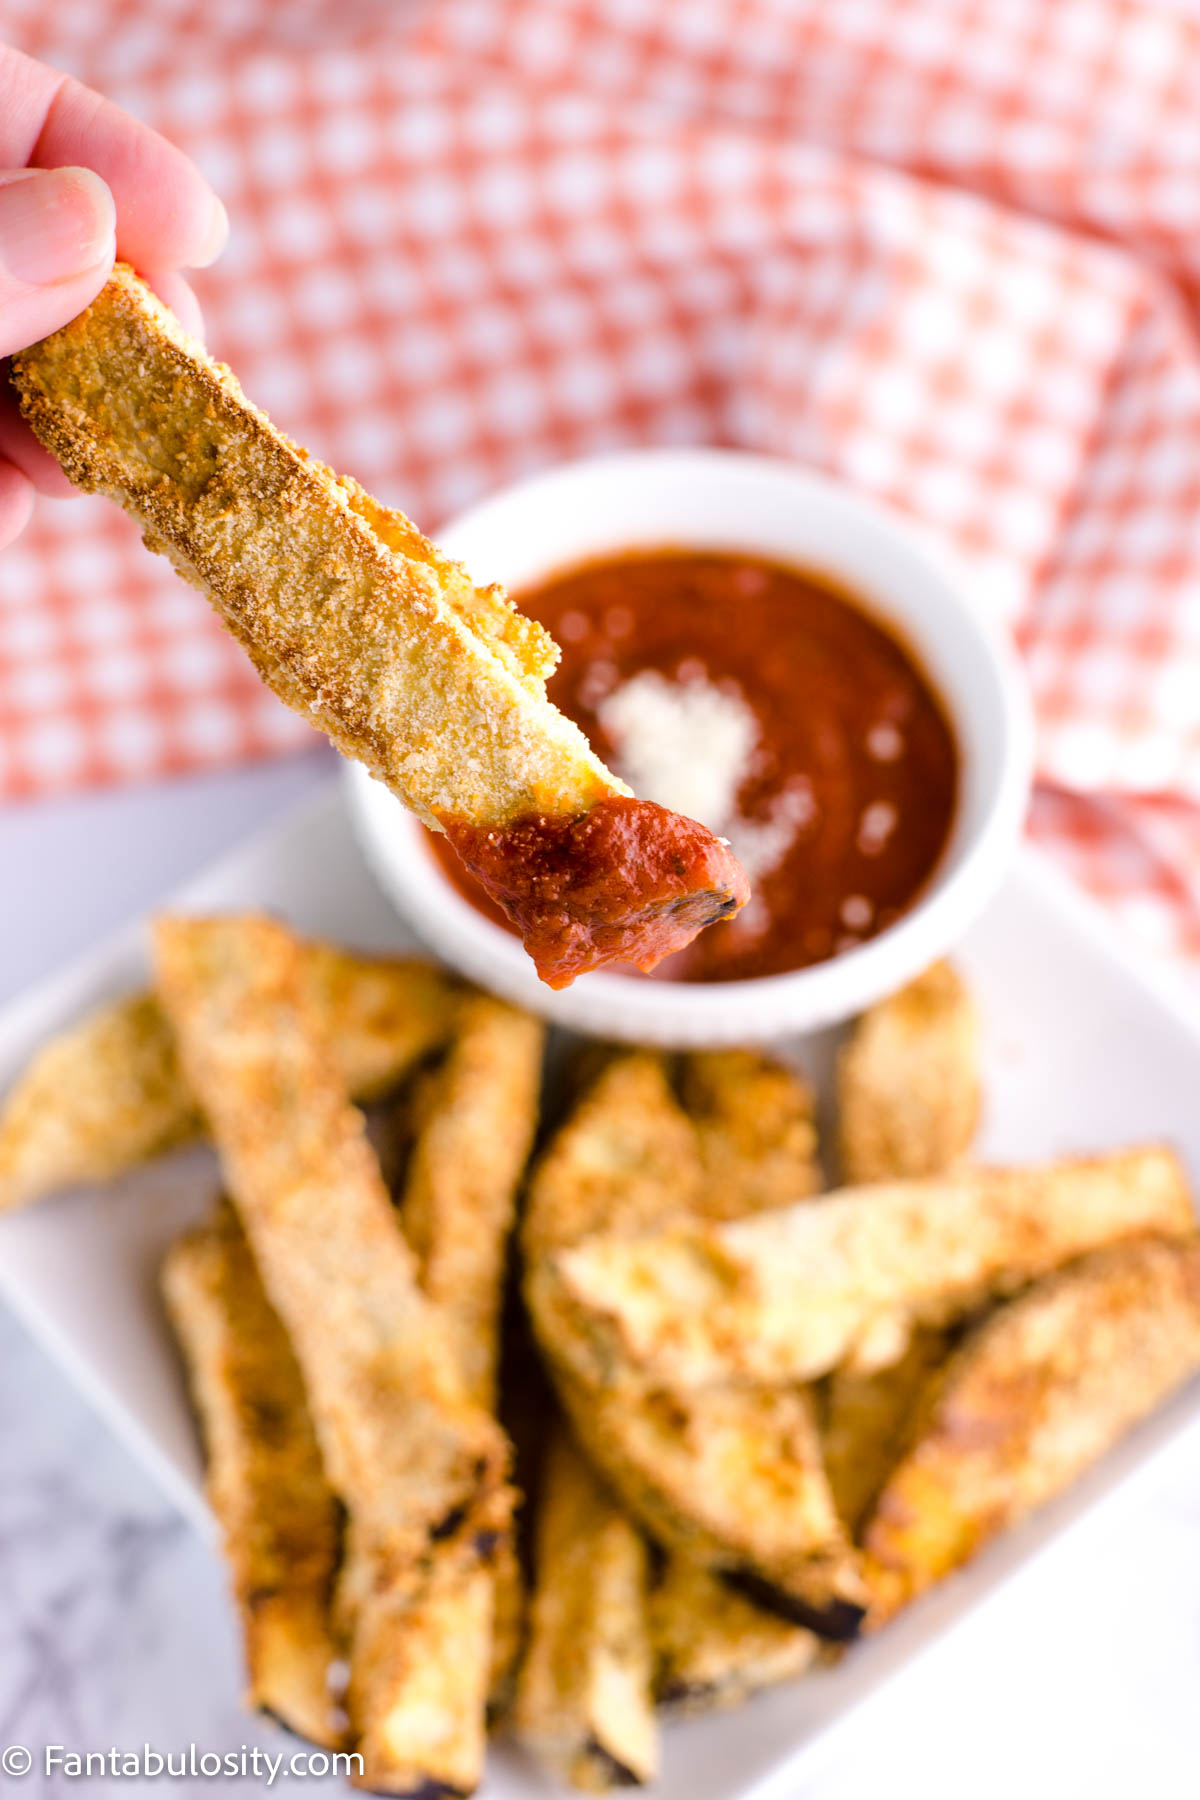
    Eggplant fries with red sauce.

    Eggplant Fries

    Make fries from eggplant for a crispy and delicious way to add more veggies to your day. This recipe is so tasty that everyone will want seconds of this easy dish. One of our favorite ways to cook eggplants.

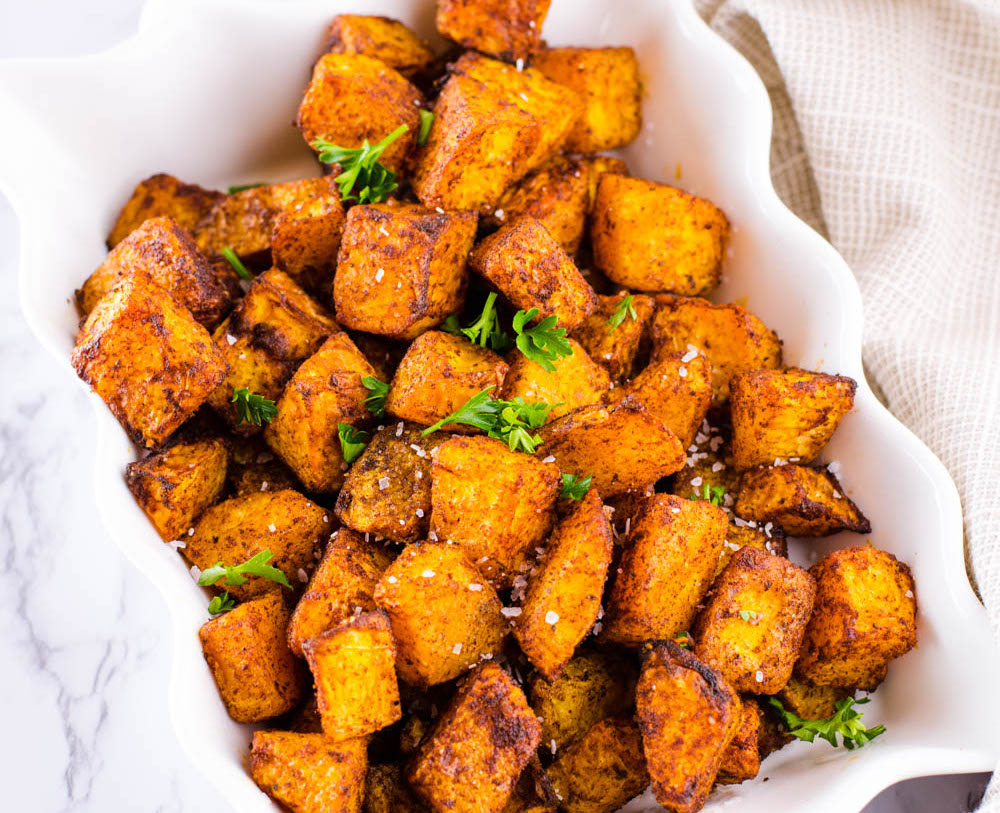
    A platter with butternut squash cubes.

    Air Fryer Butternut Squash

    Make this easy air fryer butternut squash for an easy side everyone will love. This healthy option cooks in no time for tender and tasty flavor that compliments fall meals perfectly.

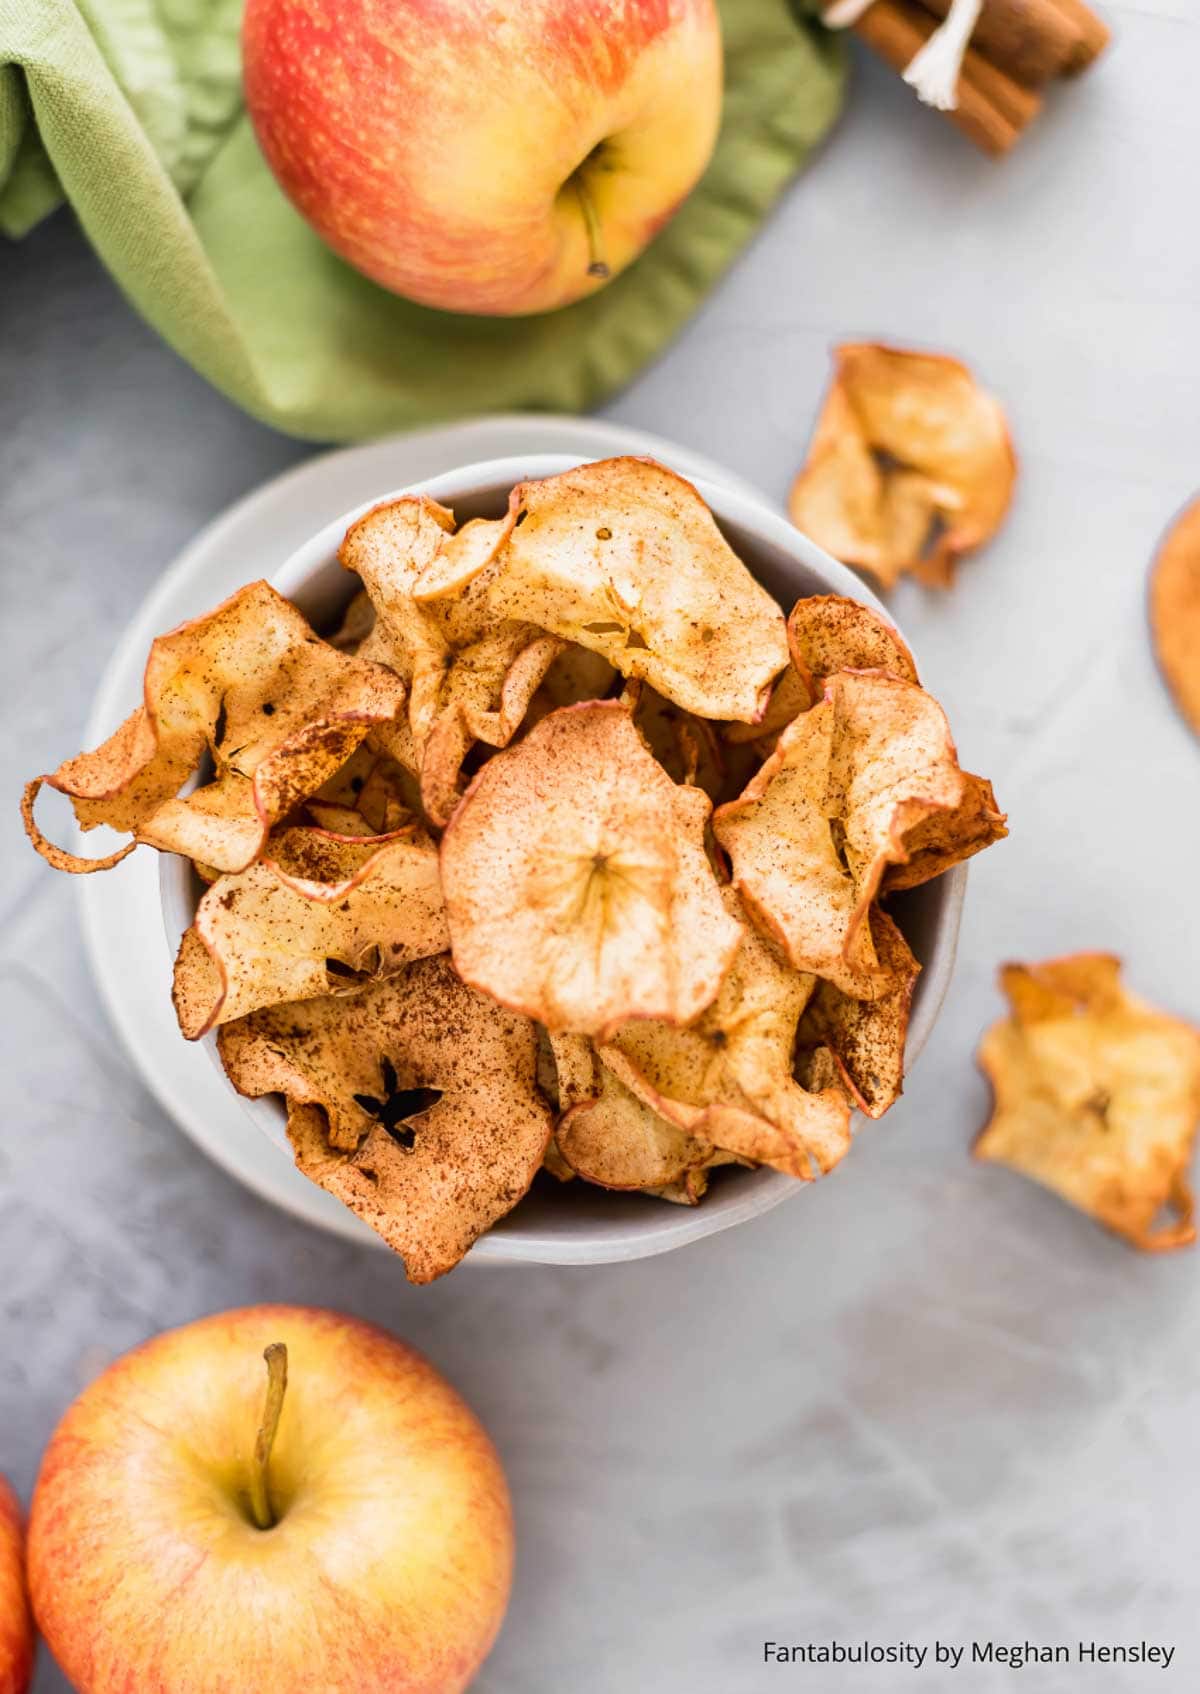
    Air fryer apples in a bowl, that are coated in cinnamon.

    Air Fryer Apple Chips

    Make an easy and healthy snack that the whole family can enjoy with these apple chips. Make these for a crunchy and flavorful treat that packs well in lunches, or hits the spot as you snack while watching your shows at night.

    Glazed apple fritters on a wire cooling rack.


    Air Fryer Apple Fritters

    No need to head to the bakery to get the fritter flavor you crave. You can make them in the air fryer for a healthier take on a breakfast classic.

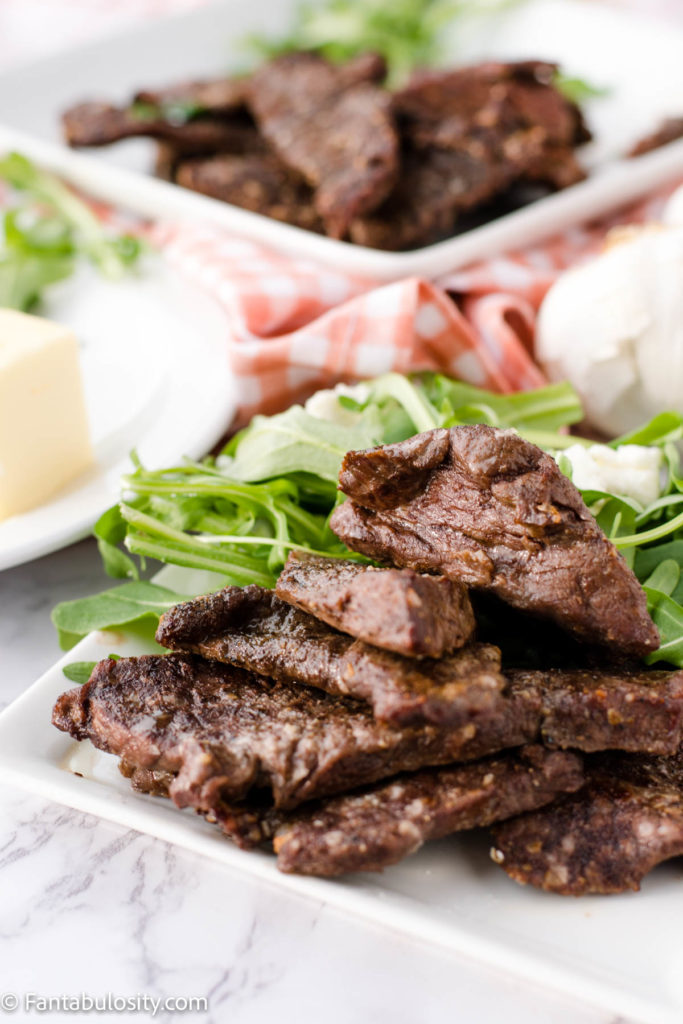
    A plate stacked with venison meat.

    Air Fryer Venison

    If you want to make the best deer meat, you need to cook it in the air fryer. It turns out so tender and flavorful for a family meal everyone will enjoy.

    
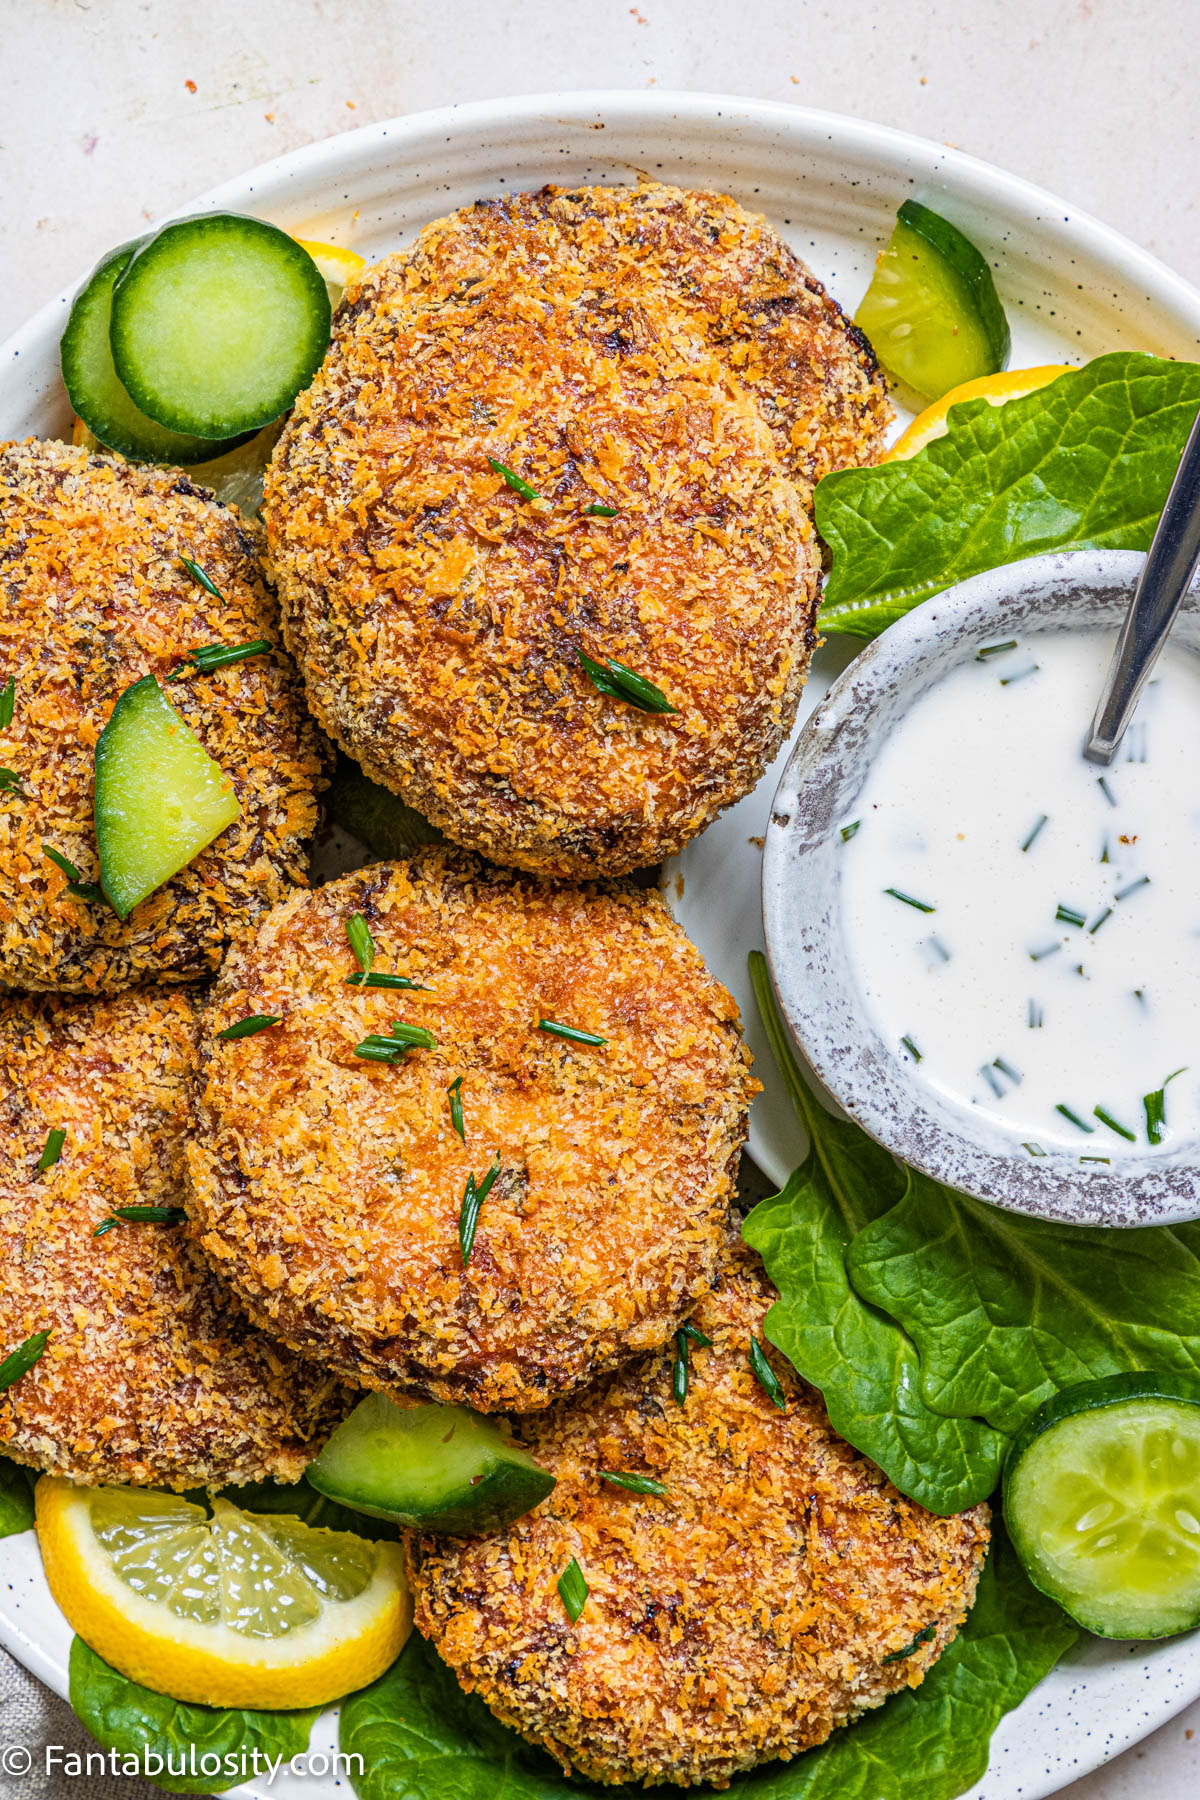
Salmon patties with cucumbers and lemons on a plate.

    Air Fryer Salmon Patties

    Salmon patties make for a great dinner to make in your air fryer. This method is easy and has the best crunch!

    
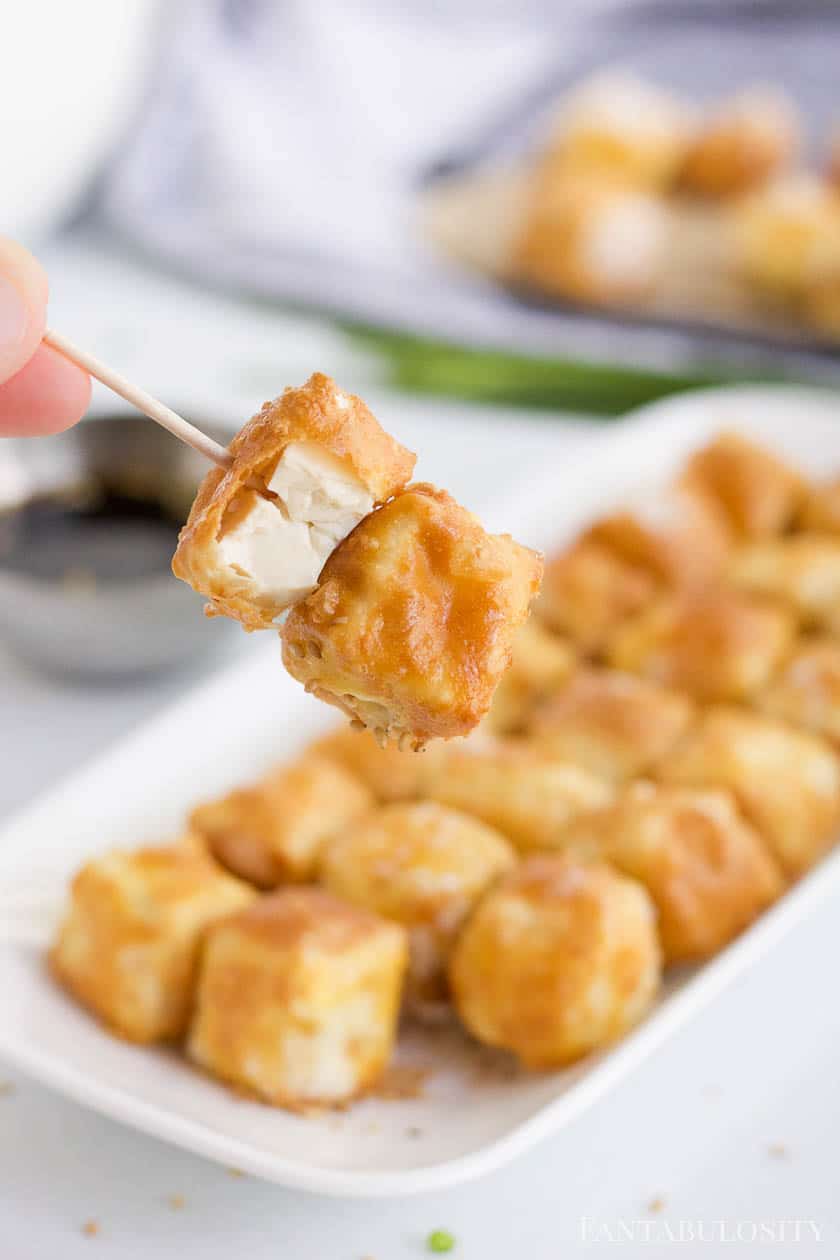
Crispy tofu on a toothpick.

    Crispy Air Fryer Tofu

    Make this super crispy tofu in your air fryer for a 12 minute dish that everyone will want a second bite of.

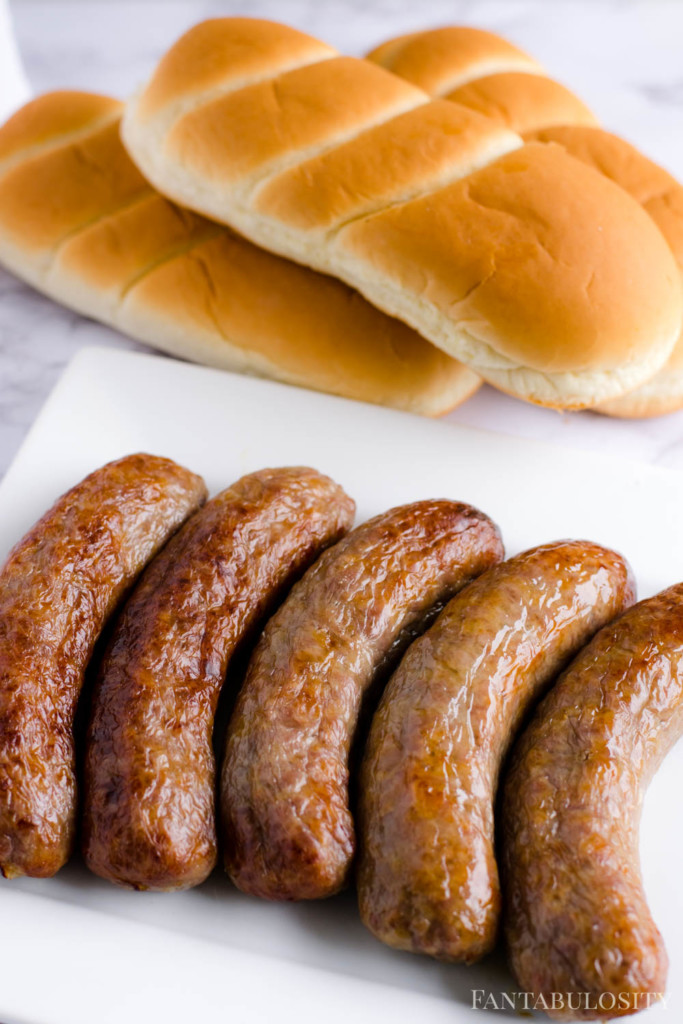
    A platter of buns and air fried brats.

    Air Fryer Brats

    You can get great brat flavor without firing up the grill! This method cooks them in the air fryer for a fast and fuss free dinner option you can serve with sweet potato fries.

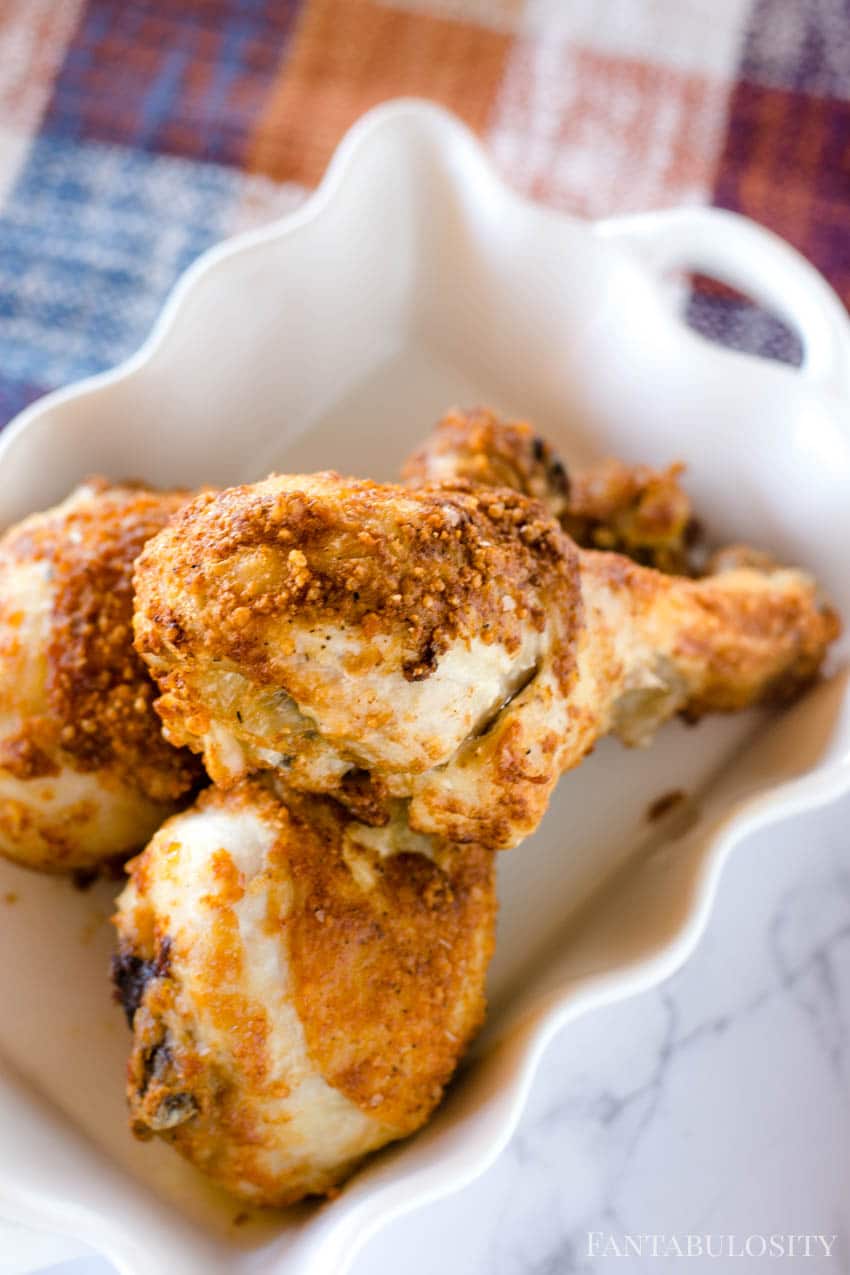
    A plate of crispy air fryer chicken legs.

    Air Fried Chicken Legs

    Skip the greasy mess of frying chicken legs. You can coat them and pop them in the air fryer for a fast and budget friendly dinner.

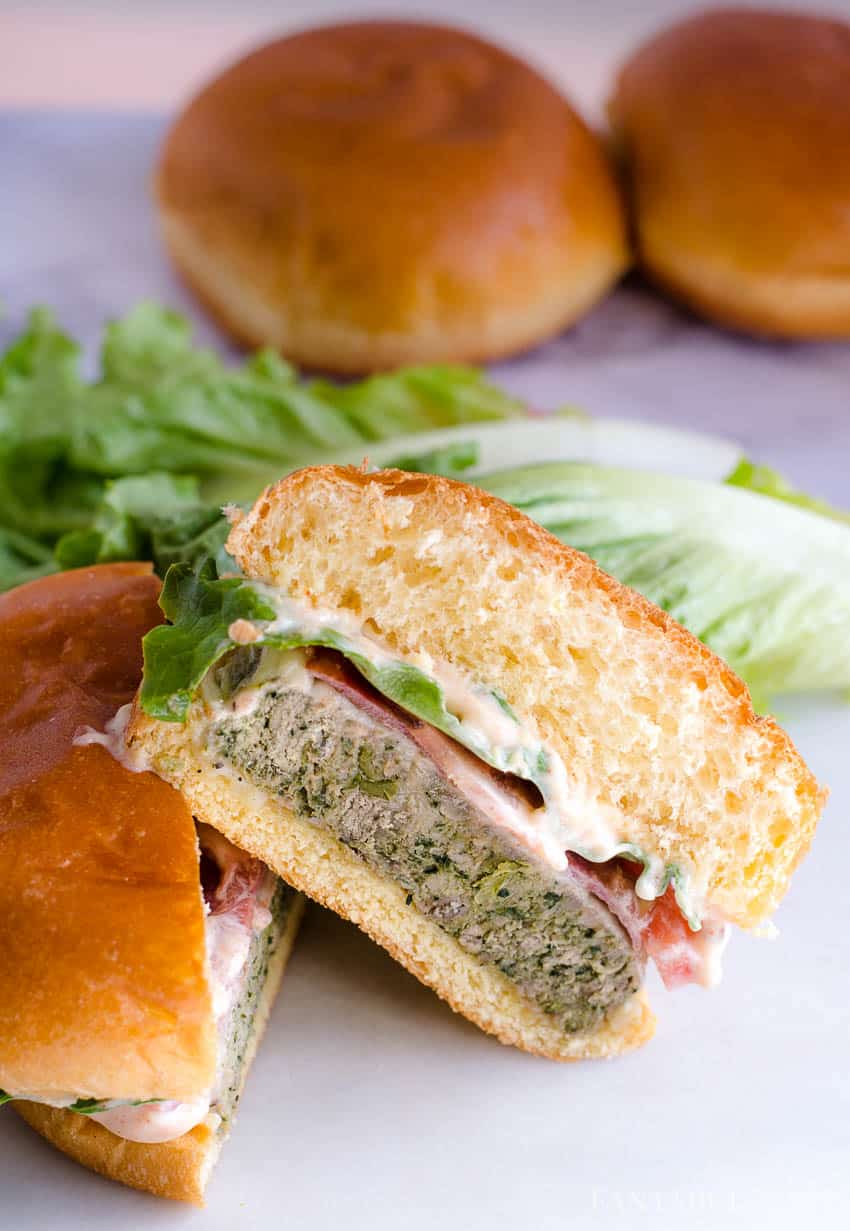
    Loaded turkey burgers on a white plate.

    Baked Turkey Burgers

    Pop these healthy and lean patties into the air fryer for a juicy turkey burger that tastes amazing and cooks in a flash.

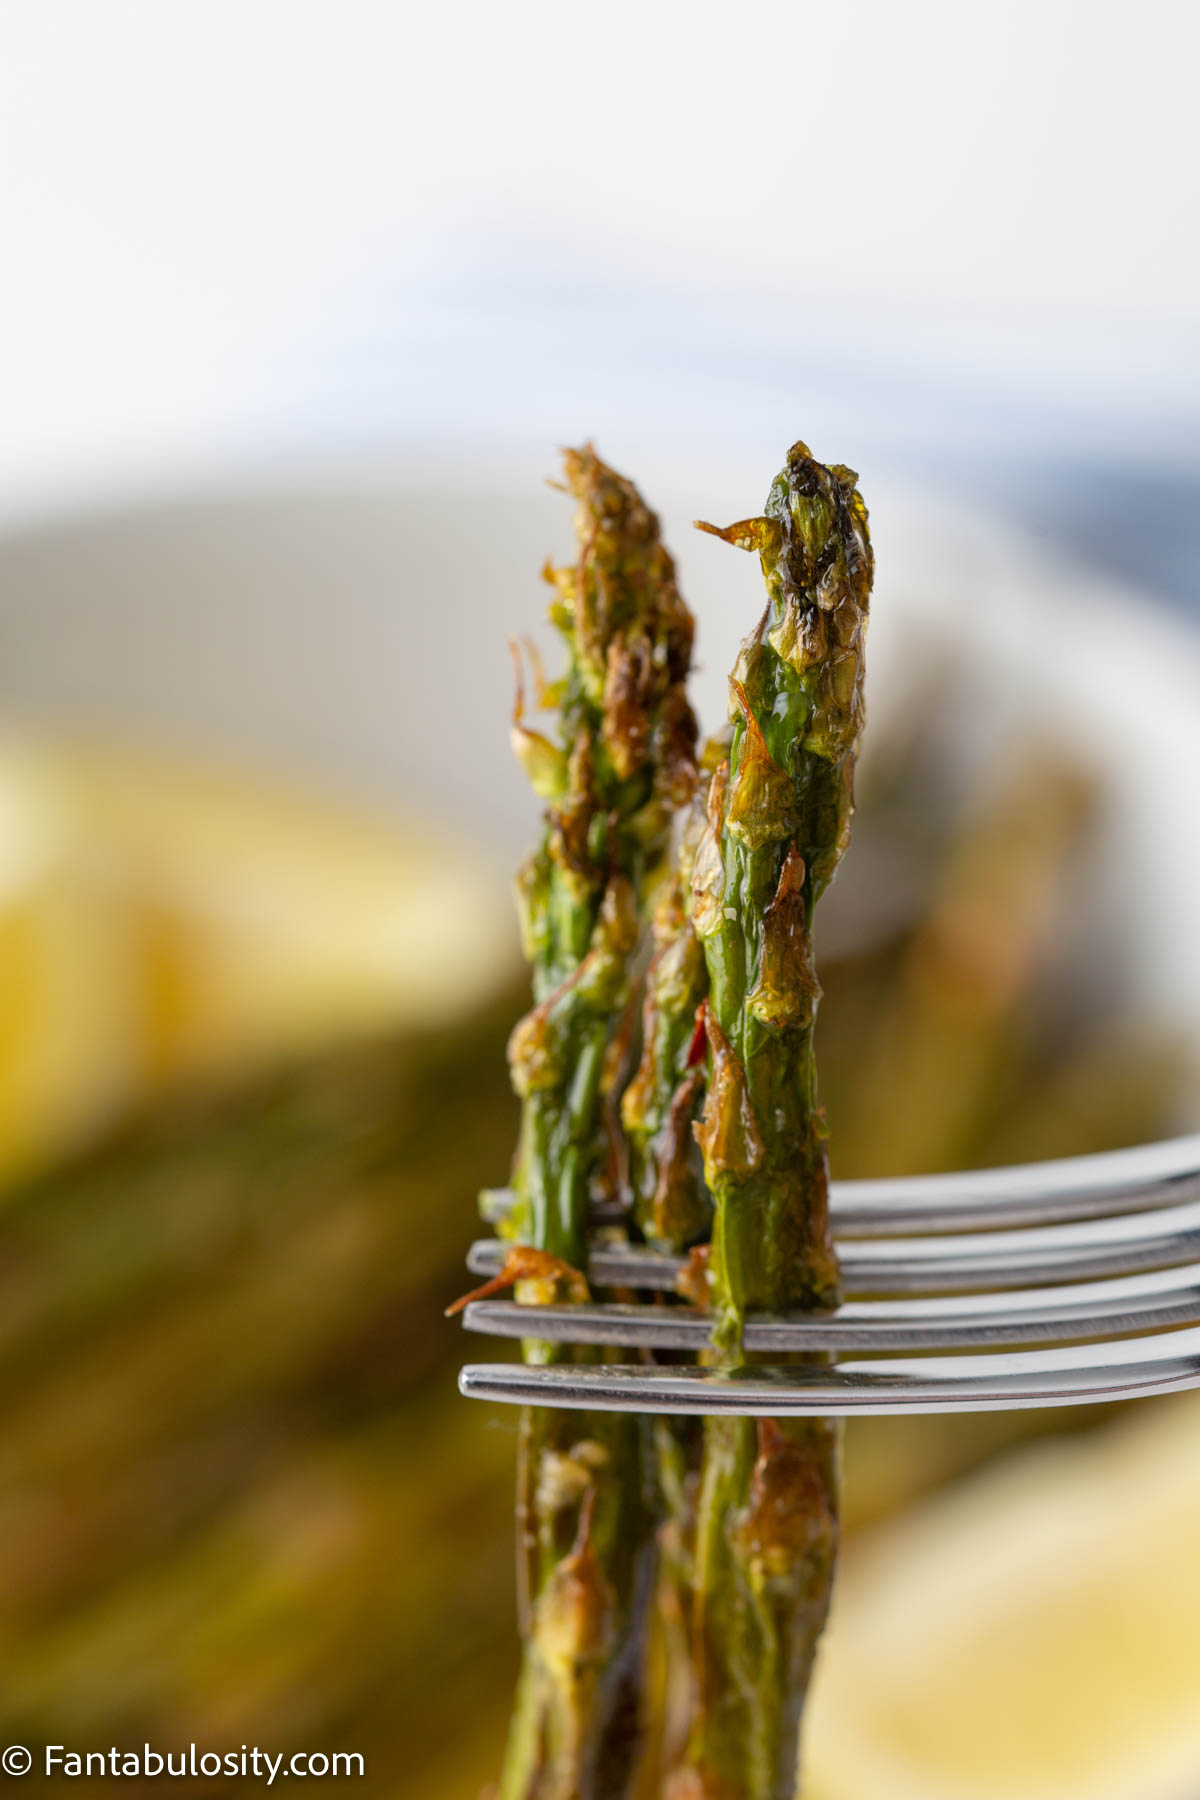
    Air fryer asparagus

    Air Fryer Asparagus

    If you like crispy and crunchy asparagus, you are going to love it made in the air fryer. This is an easy and delicious side dish idea to go with so many meals.

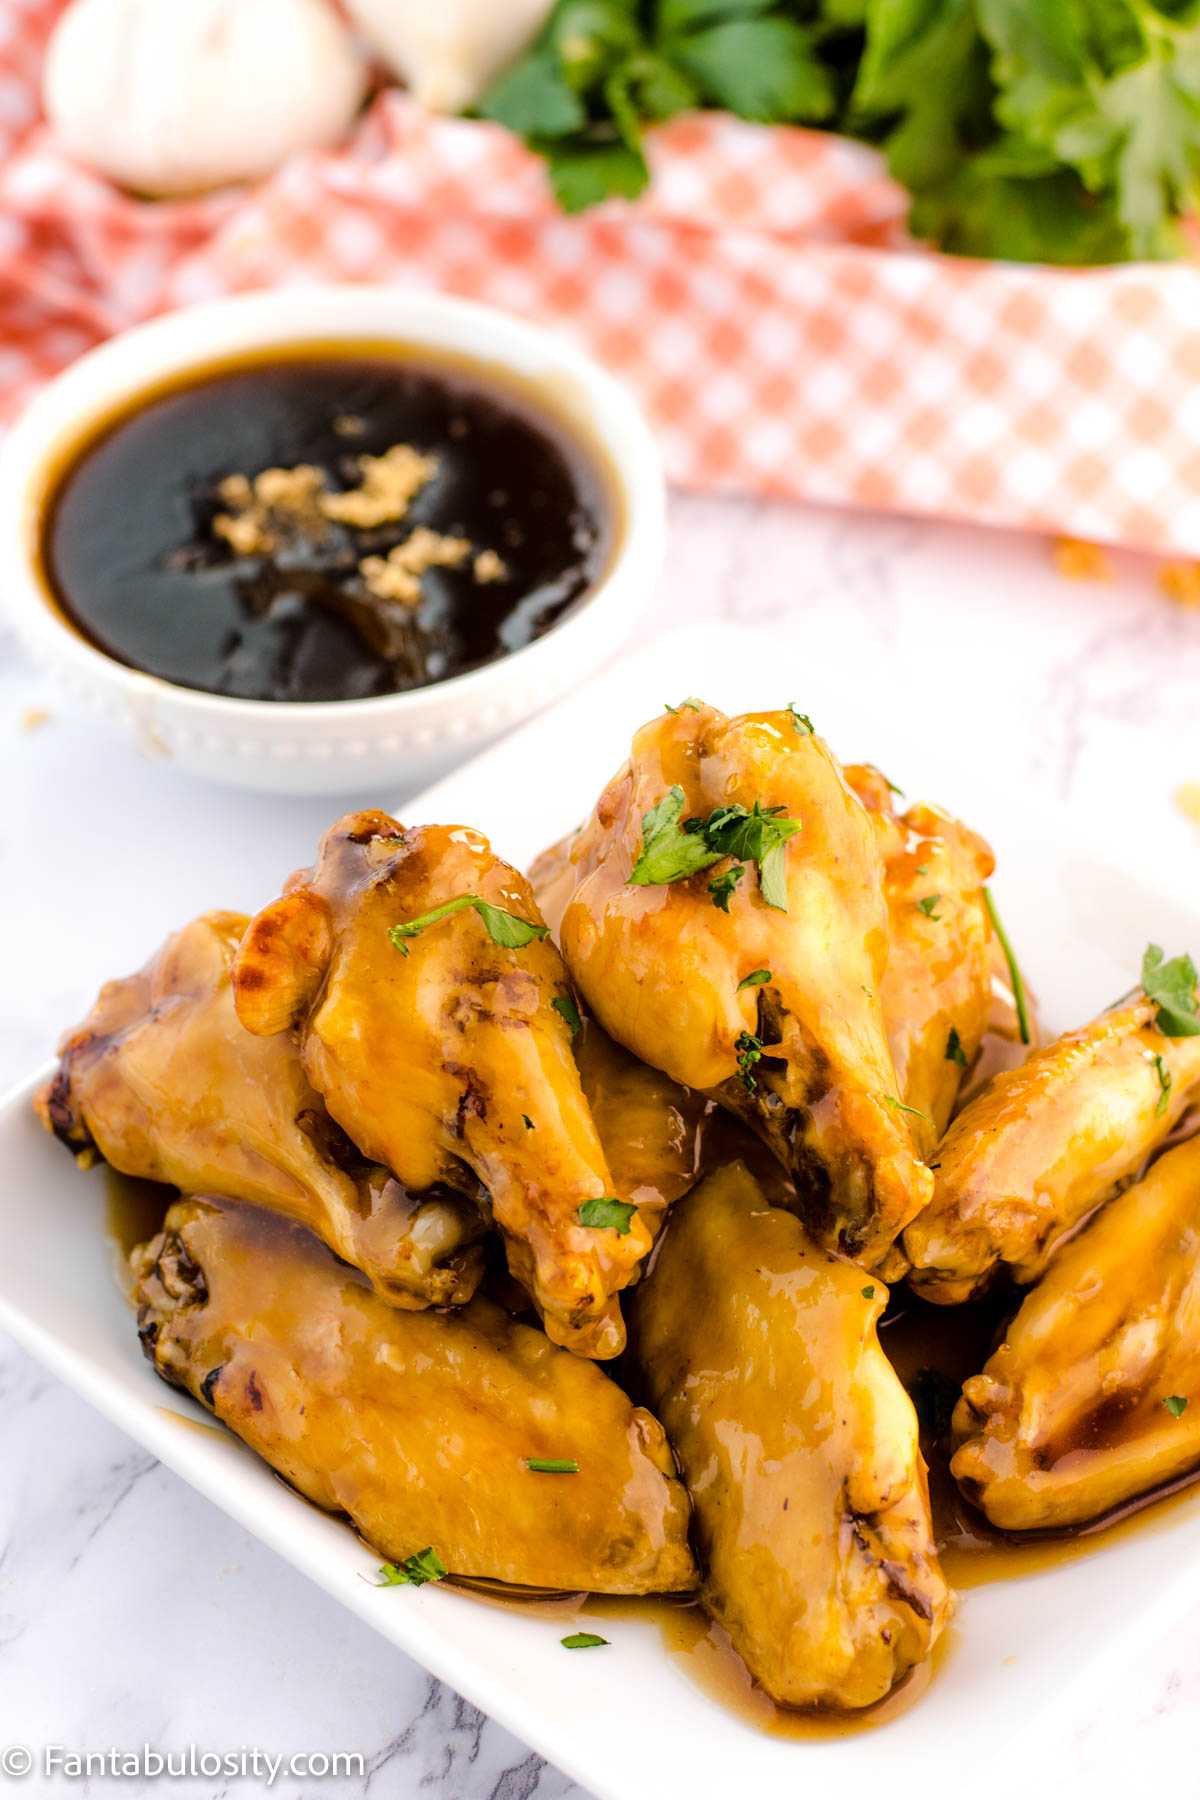
    A plate of air fryer chicken wings.

    Air Fryer Chicken Wings

    Frozen wings come out of the freezer, and into the air fryer to make such a great appetizer, snack or addition to dinner.

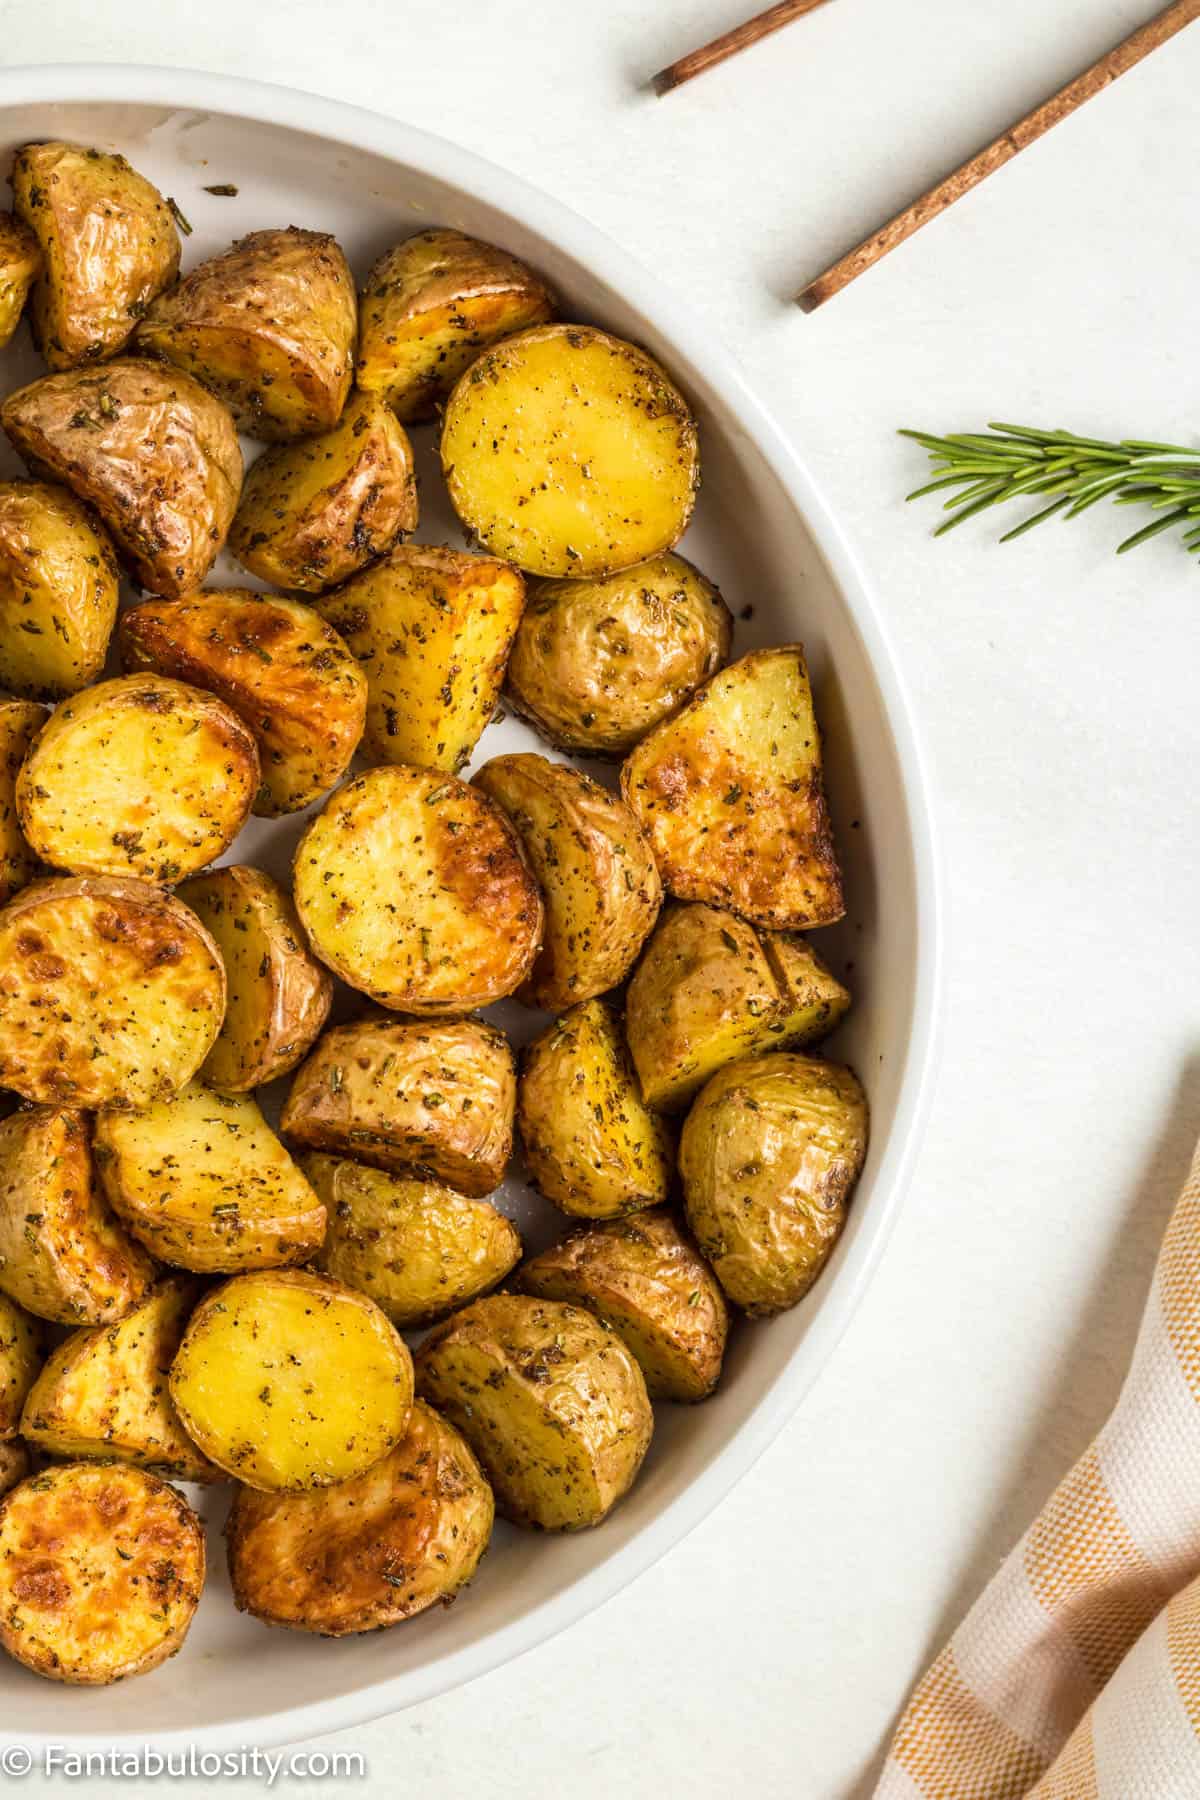
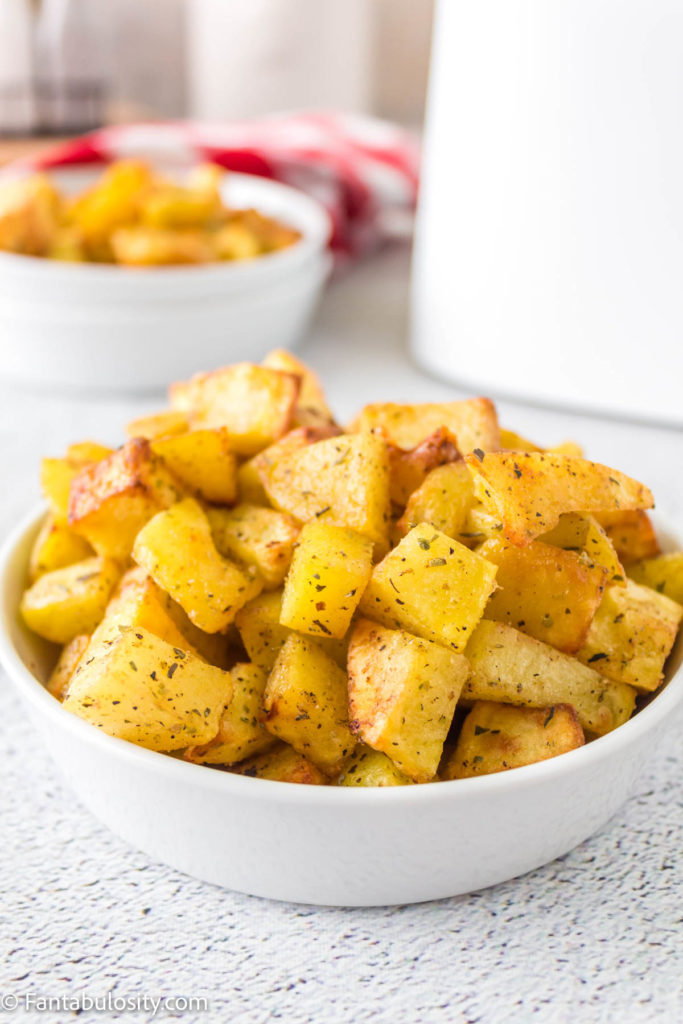
    A plate of air fryer roasted potatoes.

    Air Fryer Potatoes

    If you have potatoes, a few seasonings and some olive oil you can make this easy side that goes well with most proteins.

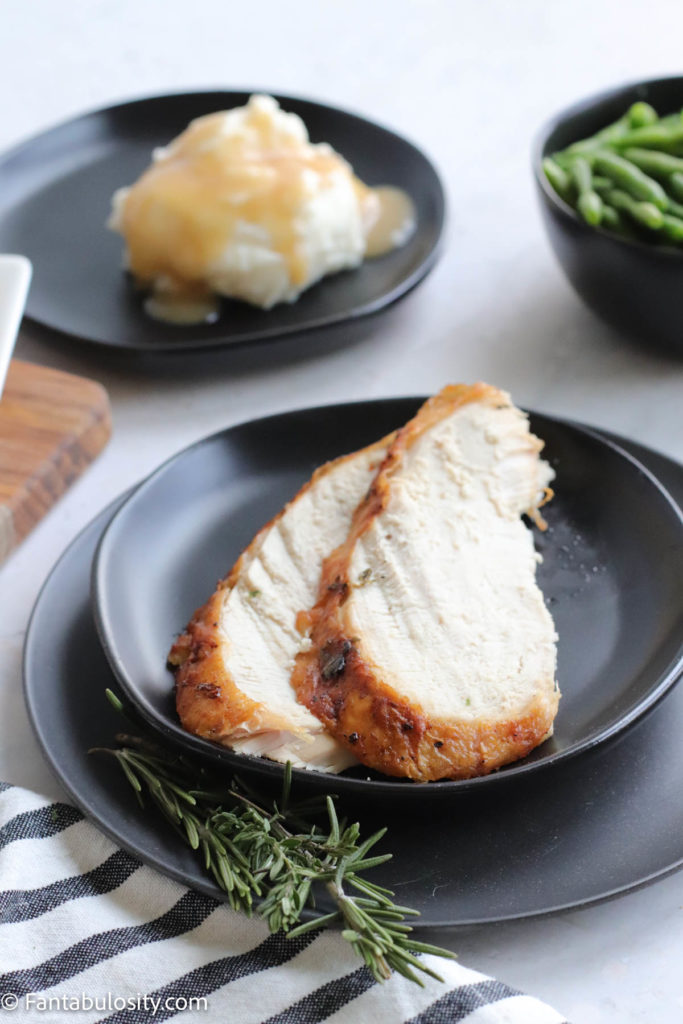
    Slices of air fried turkey breast on a plate.

    Air Fryer Turkey Breast

    Get juicy turkey breast on the table for a satisfying meal. This recipe cooks in the air fryer for a fuss free method that is done in a flash.

    A plate of air fryer potatoes.

    Air Fryer Breakfast Potatoes

    Get home fry flavor on the table without having to fry on the stovetop. This method cooks potatoes in the air fryer for a hearty addition to your morning that everyone will enjoy.

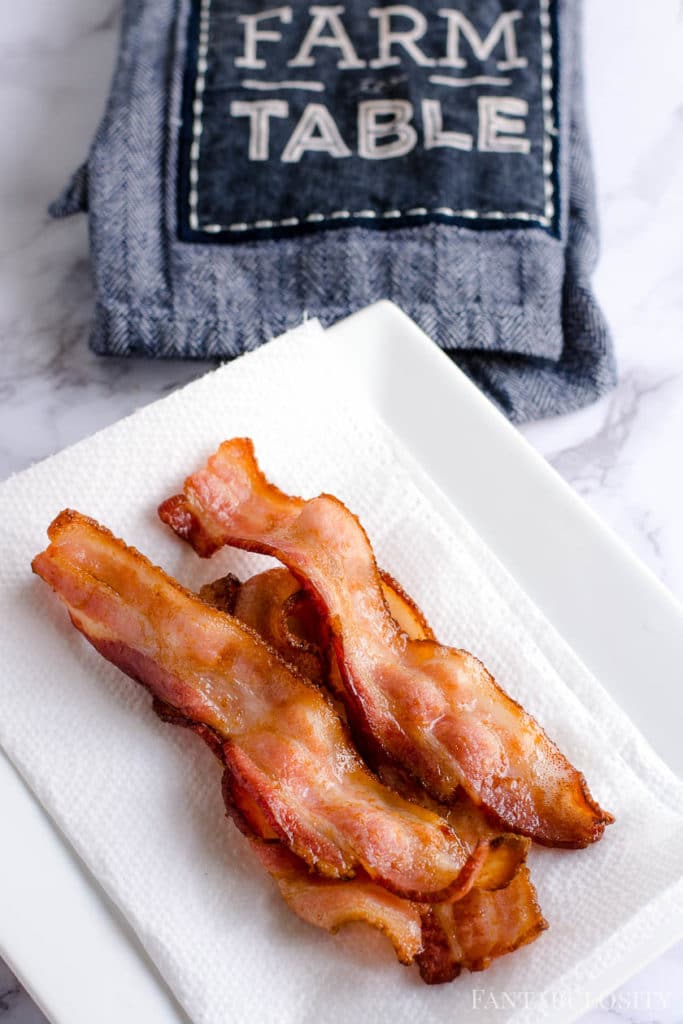
    A plate with bacon strips.

    Air Fryer Bacon

    Did you know you can make the crispiest bacon in your air fryer? You are going to love that this fast and fuss free method can be replicated by anyone with an air fryer.

    A plate with pigs in a blanket stacked on it.

    Air Fryer Pigs in a Blanket

    Wrap some little franks in dough and make a classic dinner like pigs in a blanket. The whole family will enjoy these easy air fryer treats.

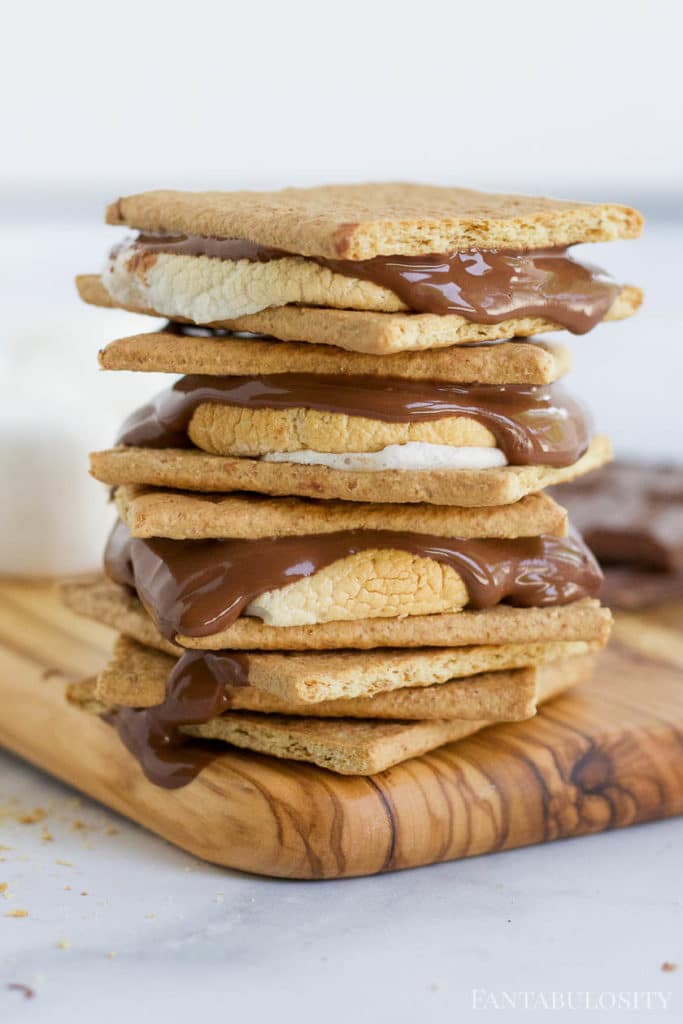
    A stack of melty s’mores from the air fryer.

    Air Fryer S'mores

    Make these s'mores in the air fryer for a fast way to get your sweet treat cravings cured without having to start a bonfire.

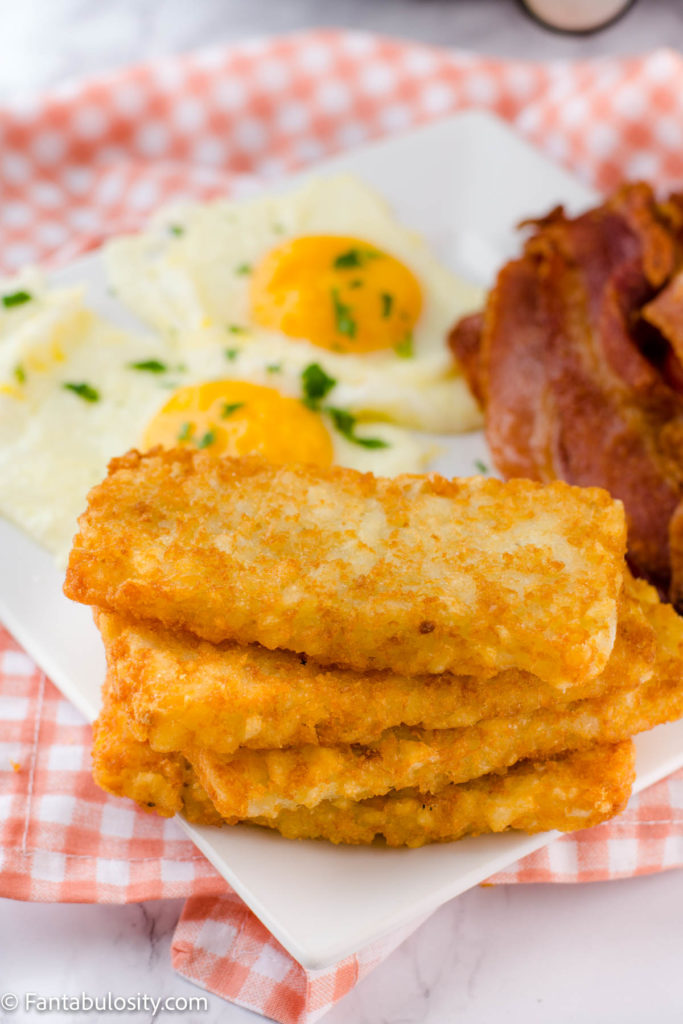
    A plate with hash browns, eggs and bacon.

    Air Fryer Hash Browns

    Make these hash browns in the air fryer for a fast addition to breakfast that fills you up with great flavor.

    
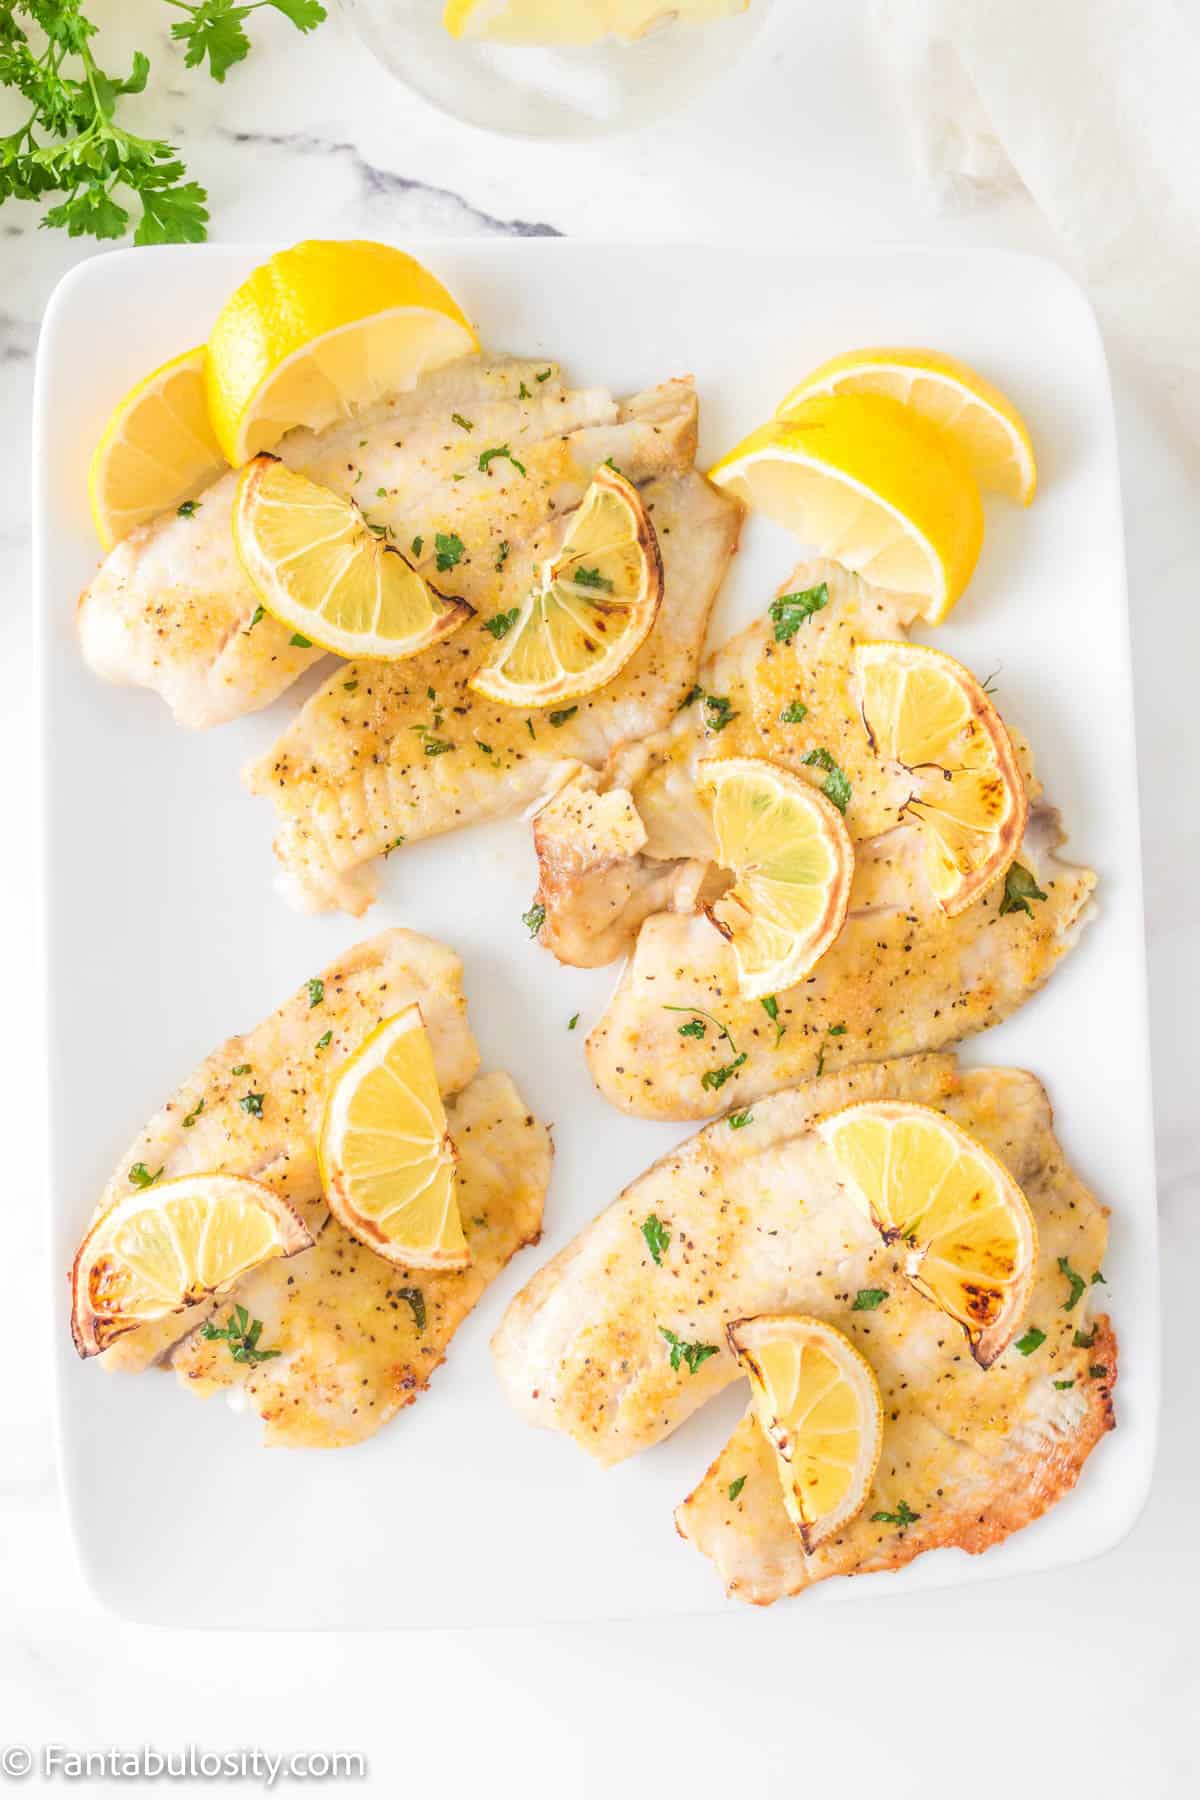
A platter of air fryer tilapia with lemon wedges.

    Air Fryer Tilapia

    Tilapia makes for such an easy air fryer meal. Make this with a salad and some crusty bread for a fast and filling dinner option. You will love how easy tilapia is to make in the air fryer.

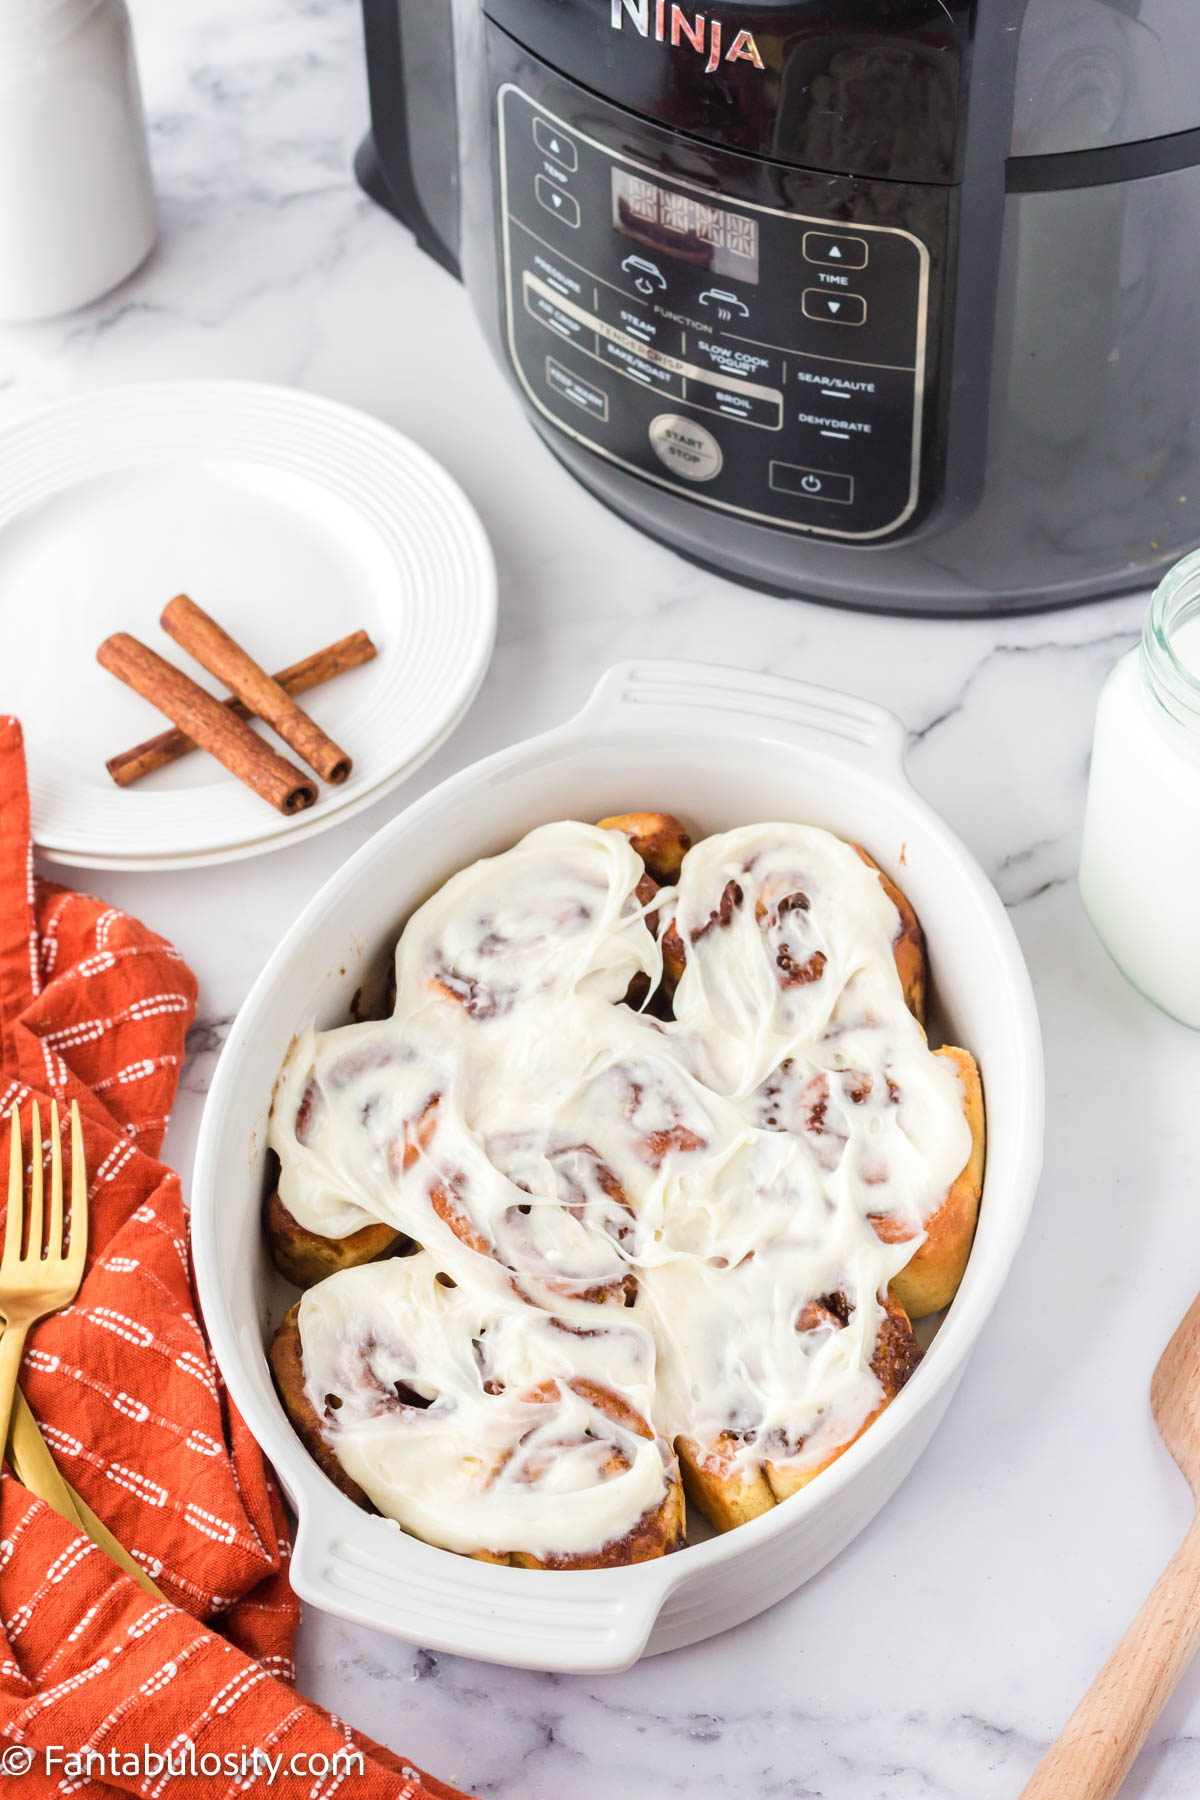
    A casserole with cinnamon rolls with icing.

    Air Fryer Cinnamon Rolls

    Did you know you can make cinnamon rolls in the air fryer? This is perfect for a fast and flaky breakfast or dessert that everyone will love with a glass of milk or coffee.

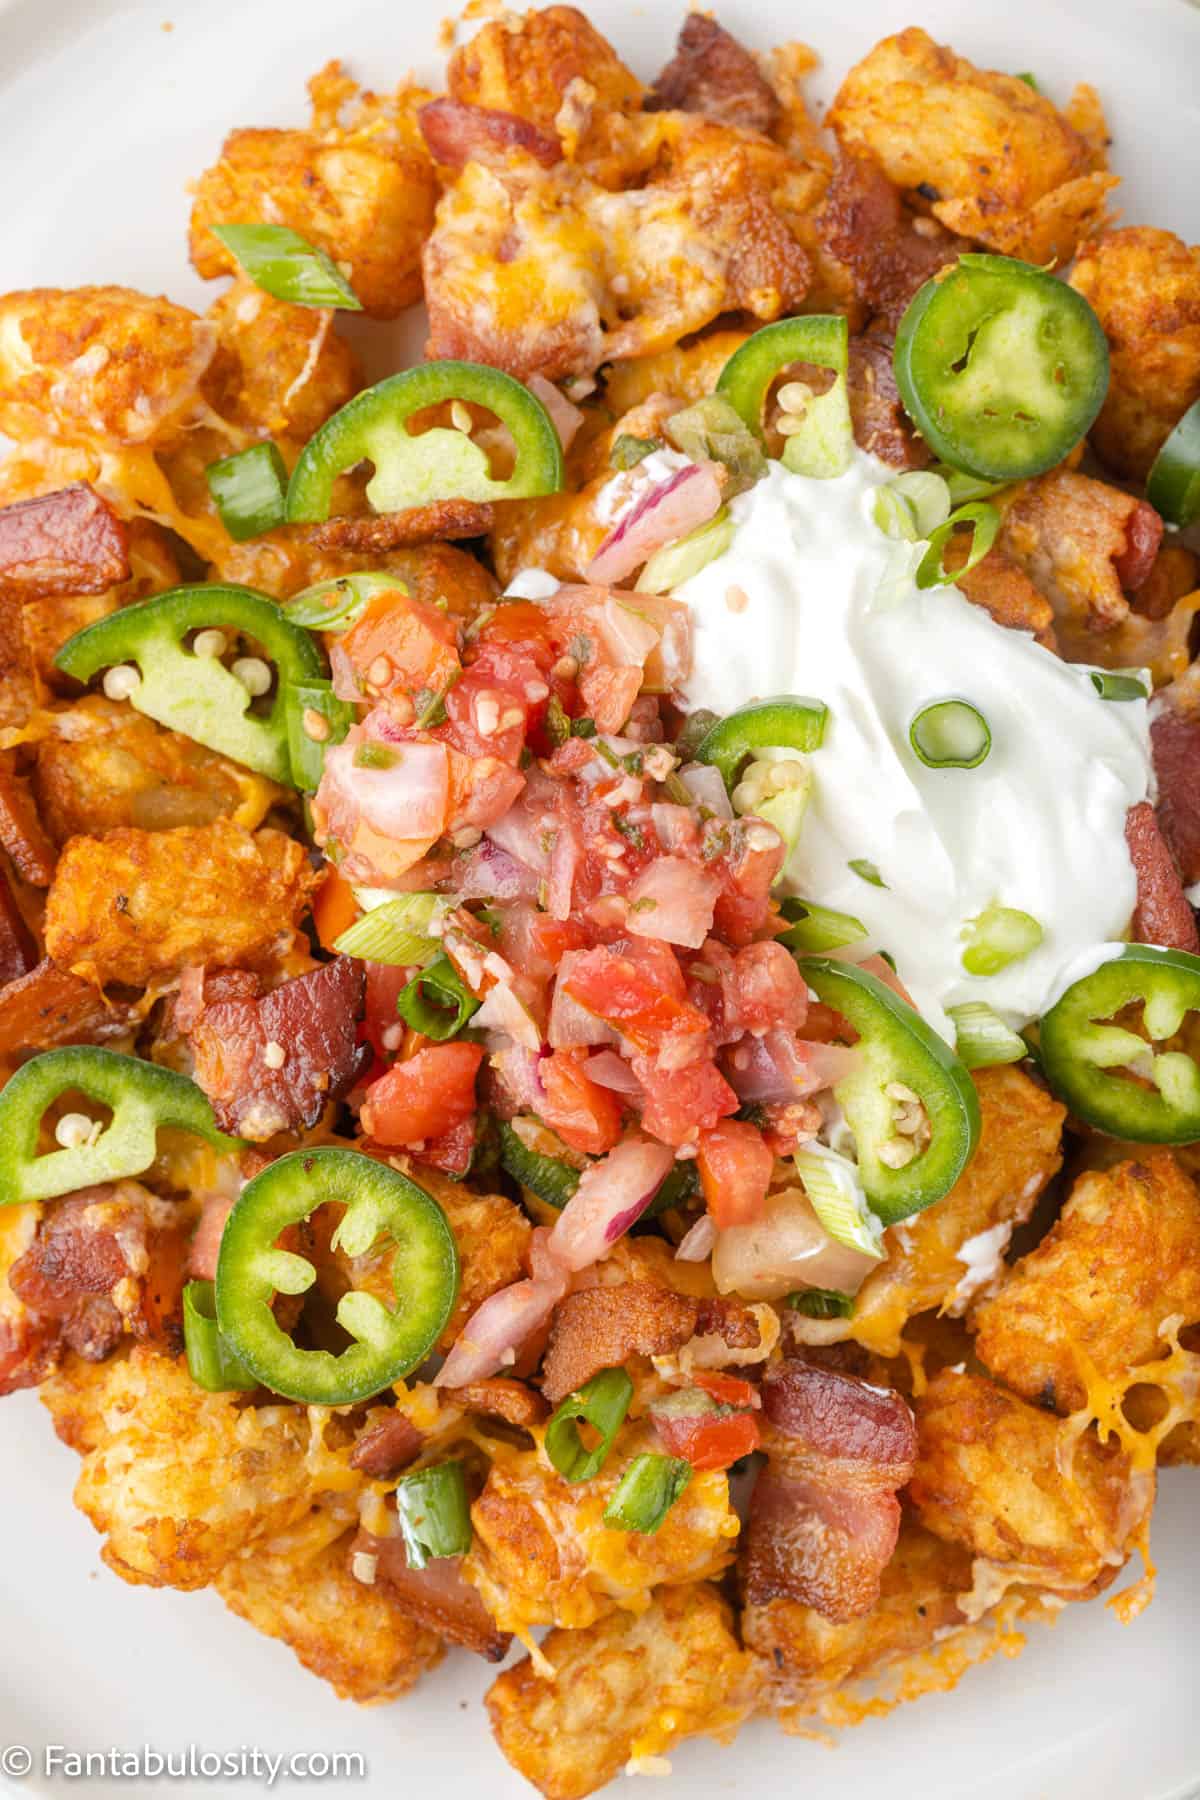
    Tater tots with tomatoes, jalapenos and cheese.

    Loaded Tater Tots

    If you like tots with your meals, you are going to want to make this easy air fryer recipe asap. It is loaded with all of the best toppings for a side that you could totally make a meal of if you like.

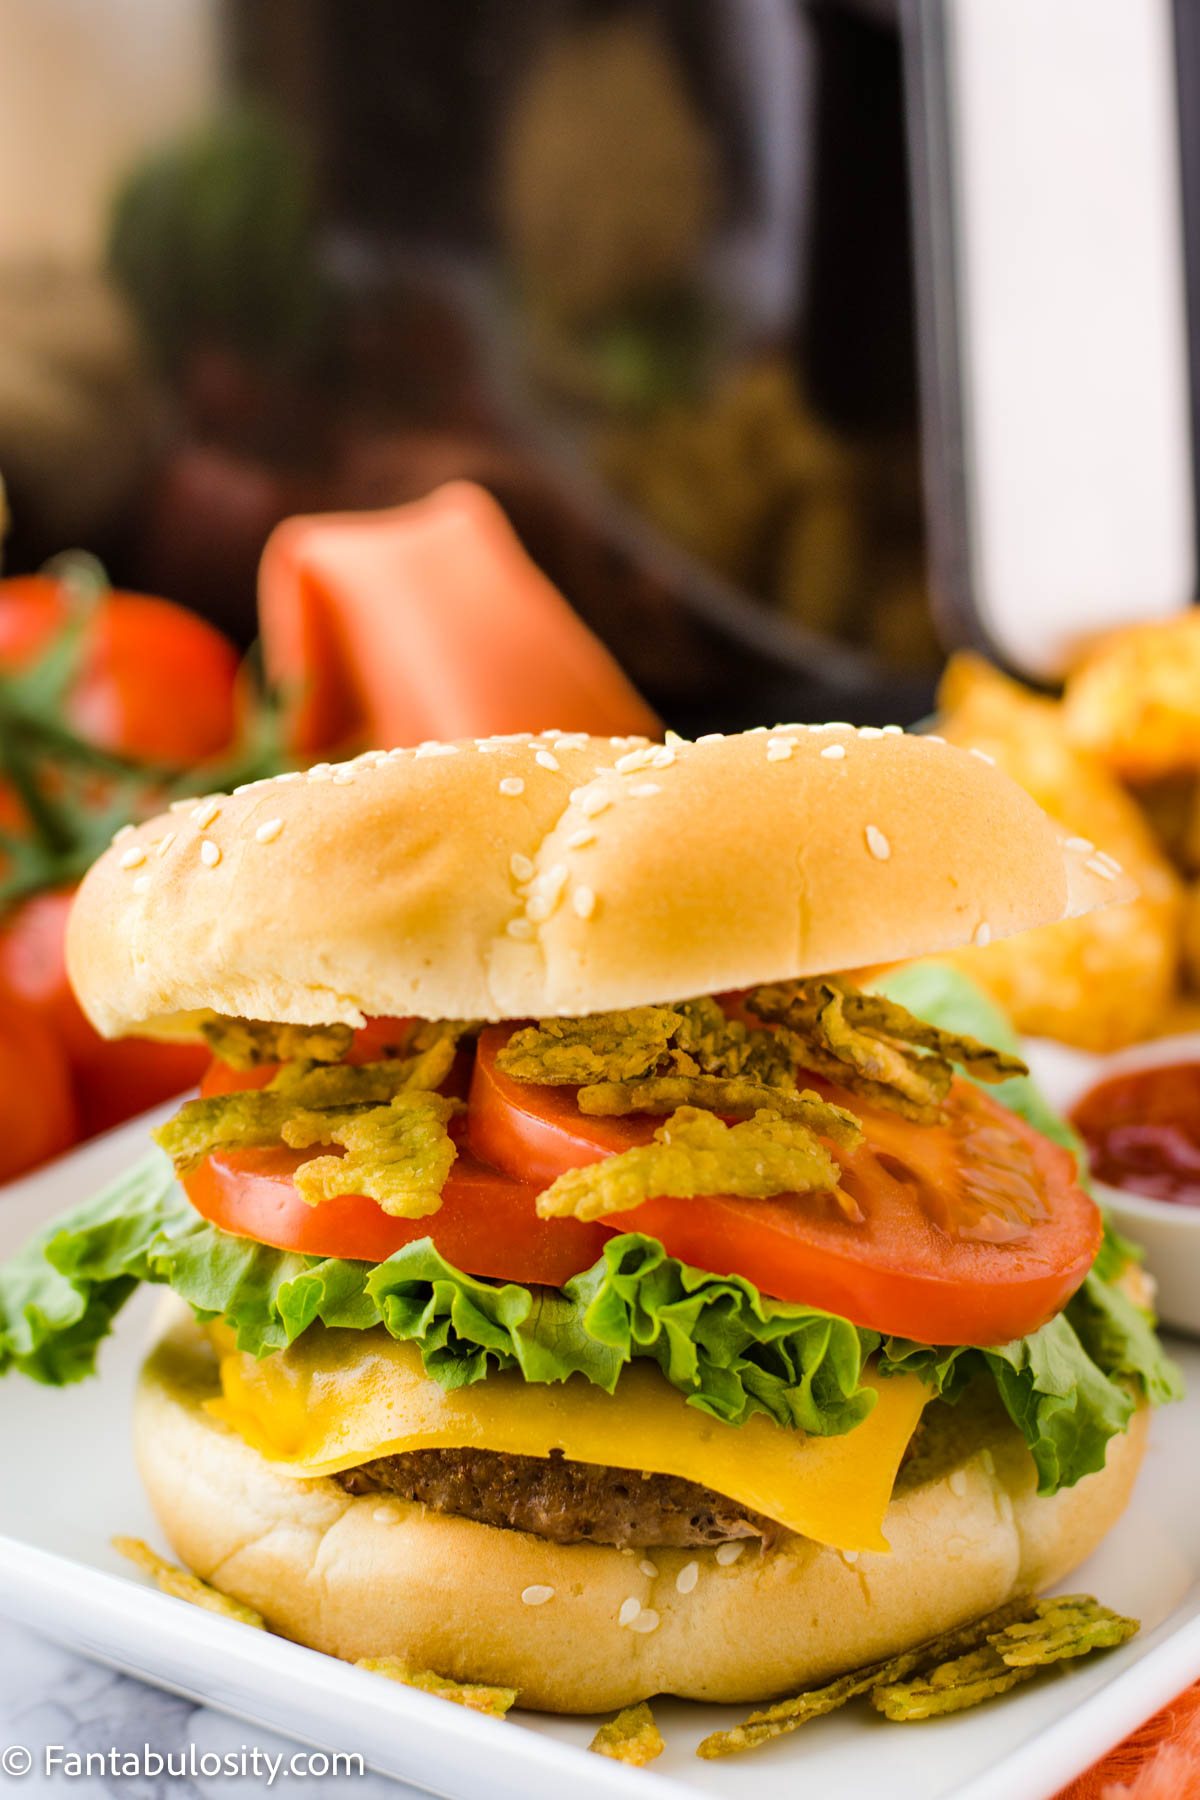
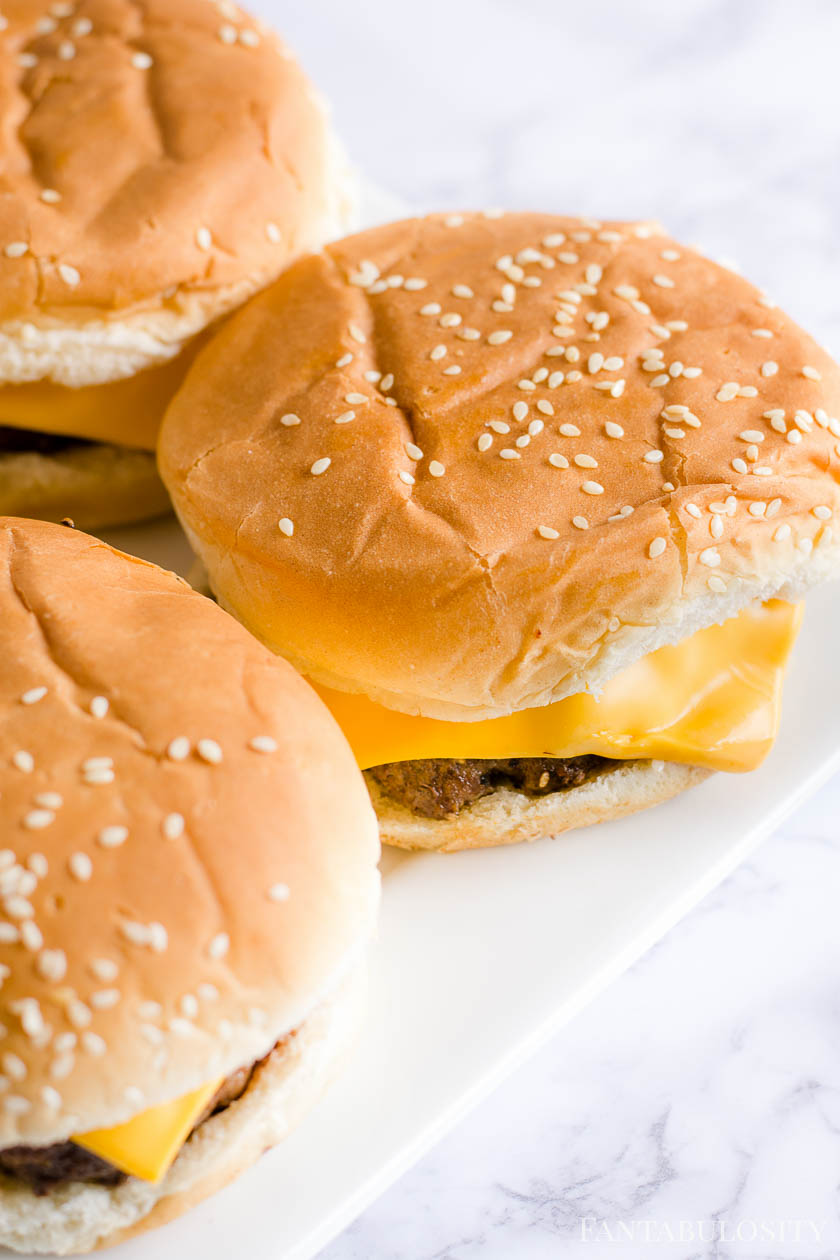
    A platter of air fryer cheeseburgers.

    Air Fryer Burgers

    Make burgers the easiest way. Cooked in the air fryer, they turn out with such a juicy flavor that will pair great with a salad, or some fries.

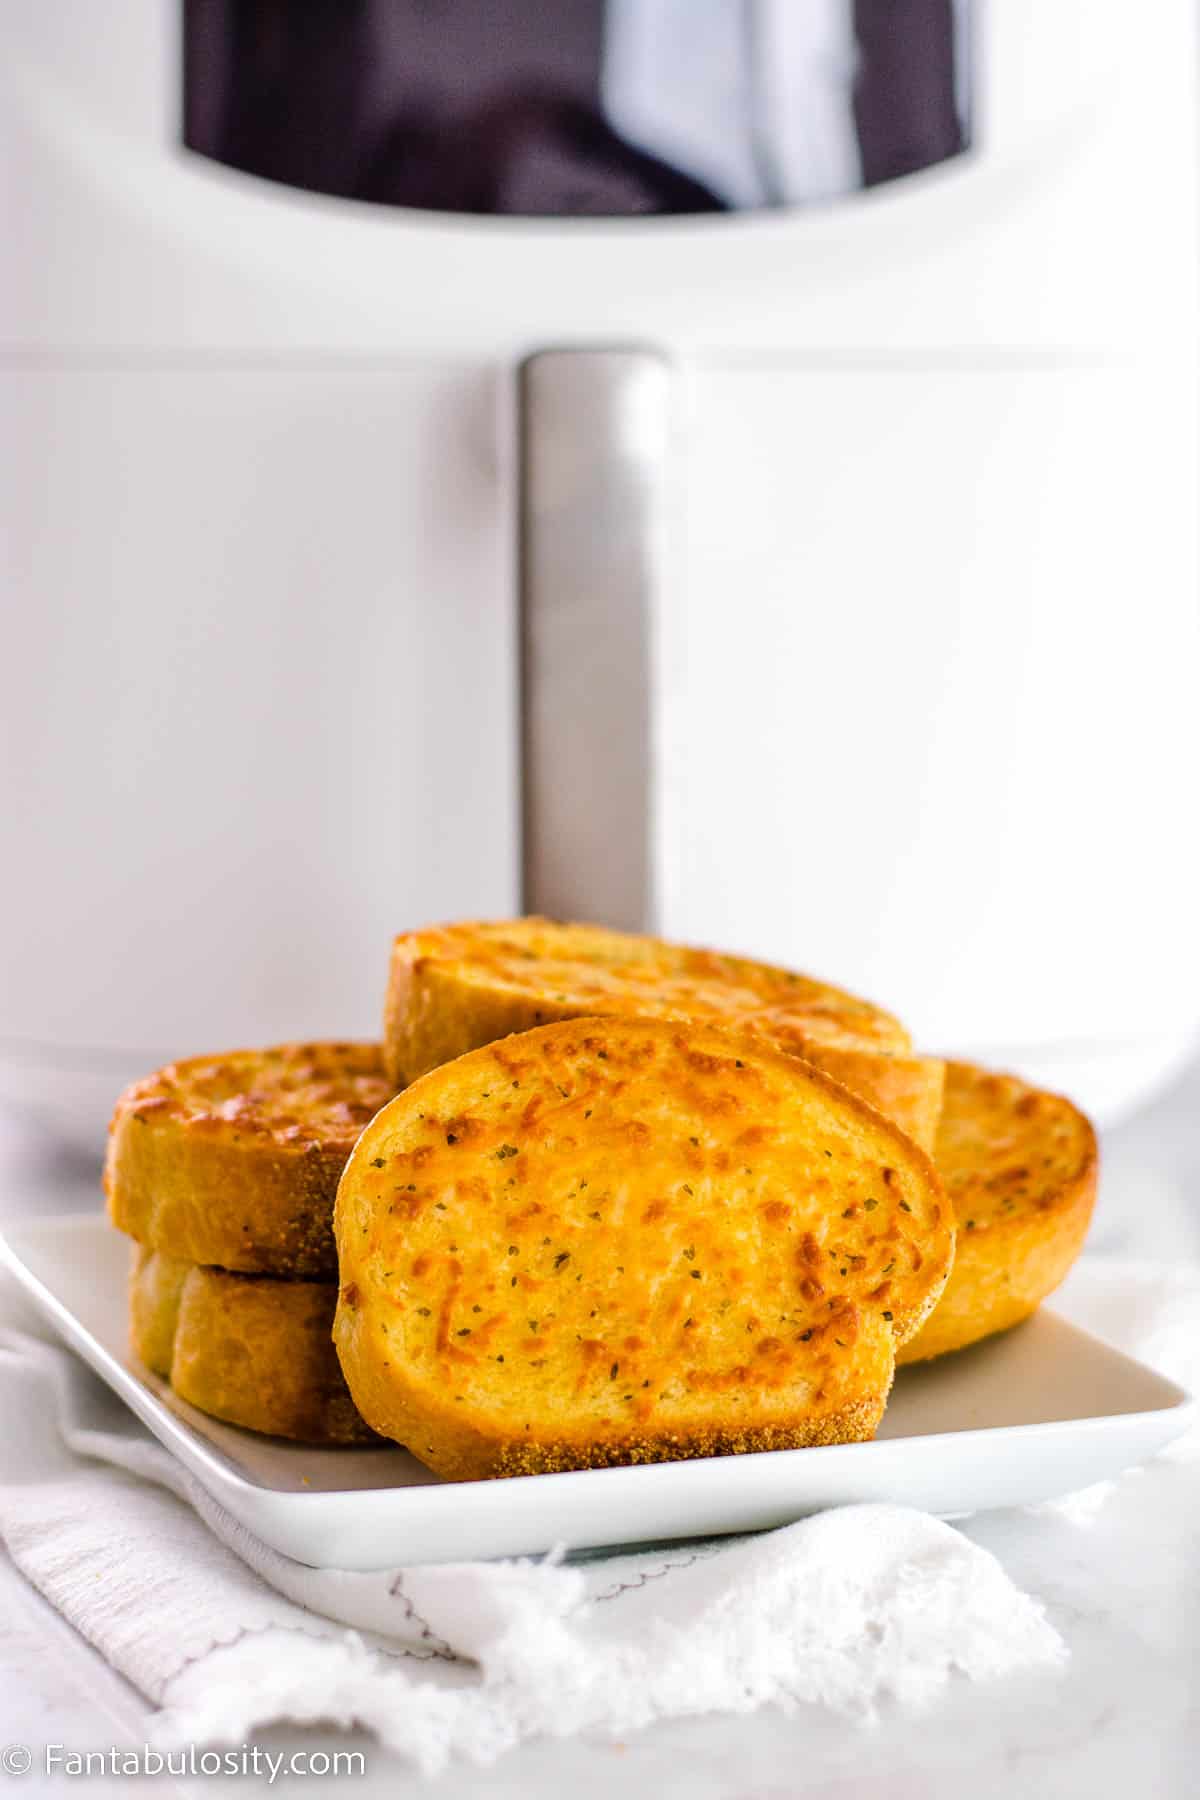
    Garlic bread cooked in an air fryer.

    Frozen Garlic Bread

    Get buttery garlic bread on the table for a good side dish  in just a few minutes. You don't have to fire up the oven to get the flavor, you can use your air fryer!

    Do you have favorite recipes for an air fryer? Share them right here in the comments below so we can add them to the list!

    Need a New Air Fryer?

    My favorite air fryer, by FAR is the Bella air fryer! But I’ve also tried out the Cosori Toaster Oven Air Fryer and although it is a different style of air fryer than I prefer, it was a great small appliance too!

    You’ll Also Love These Fried Recipes:

    Although they’re not air-fried recipes, these fried recipes on the blog are favorites!

    • Easy Fried Mushrooms – Try these in the air fryer!
    • Fried Deer Meat Recipe
    • Fried Shrimp Recipe

    Love Our Recipe Collections?

    If you love these easy recipe ideas, you’ll love these other collections where we’ve gathered some of the best:

    • Collage of chicken and rice casserole, crock pot turkey breast, school pizza, and Milky Way cake, labeled Easy Weekly Meal Plan, Week 8.
      Easy Weekly Meal Plan #8: Five Dinners and Milky Way Cake
    • Collage of chicken pot pie, smothered cube steak, slow cooker ham, and Texas sheet cake, labeled Easy Weekly Meal Plan, Week 7.
      Easy Weekly Meal Plan #7: Five Dinners and Texas Sheet Cake
    • Four chicken dishes around a pale label reading 8 Easy Crockpot Chicken Recipes.
      8 Easy Crockpot Chicken Recipes for Cozy Dinners
    • Collage of poppy seed chicken casserole, salisbury steak, fried catfish, and apple dapple cake, labeled Easy Weekly Meal Plan, Week 6.
      Easy Weekly Meal Plan #6: Five Dinners and Apple Dapple Cake

    Browse more of the easy recipes here on Fantabulosity, and pin them on Pinterest for later so you’re armed and ready for dinnertime!

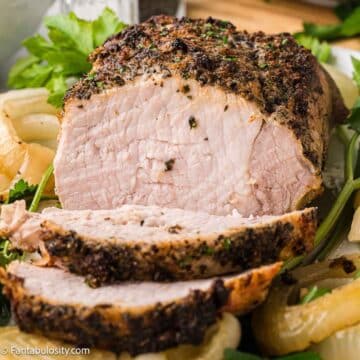
    Pork Tenderloin in the Oven

    February 9, 2024

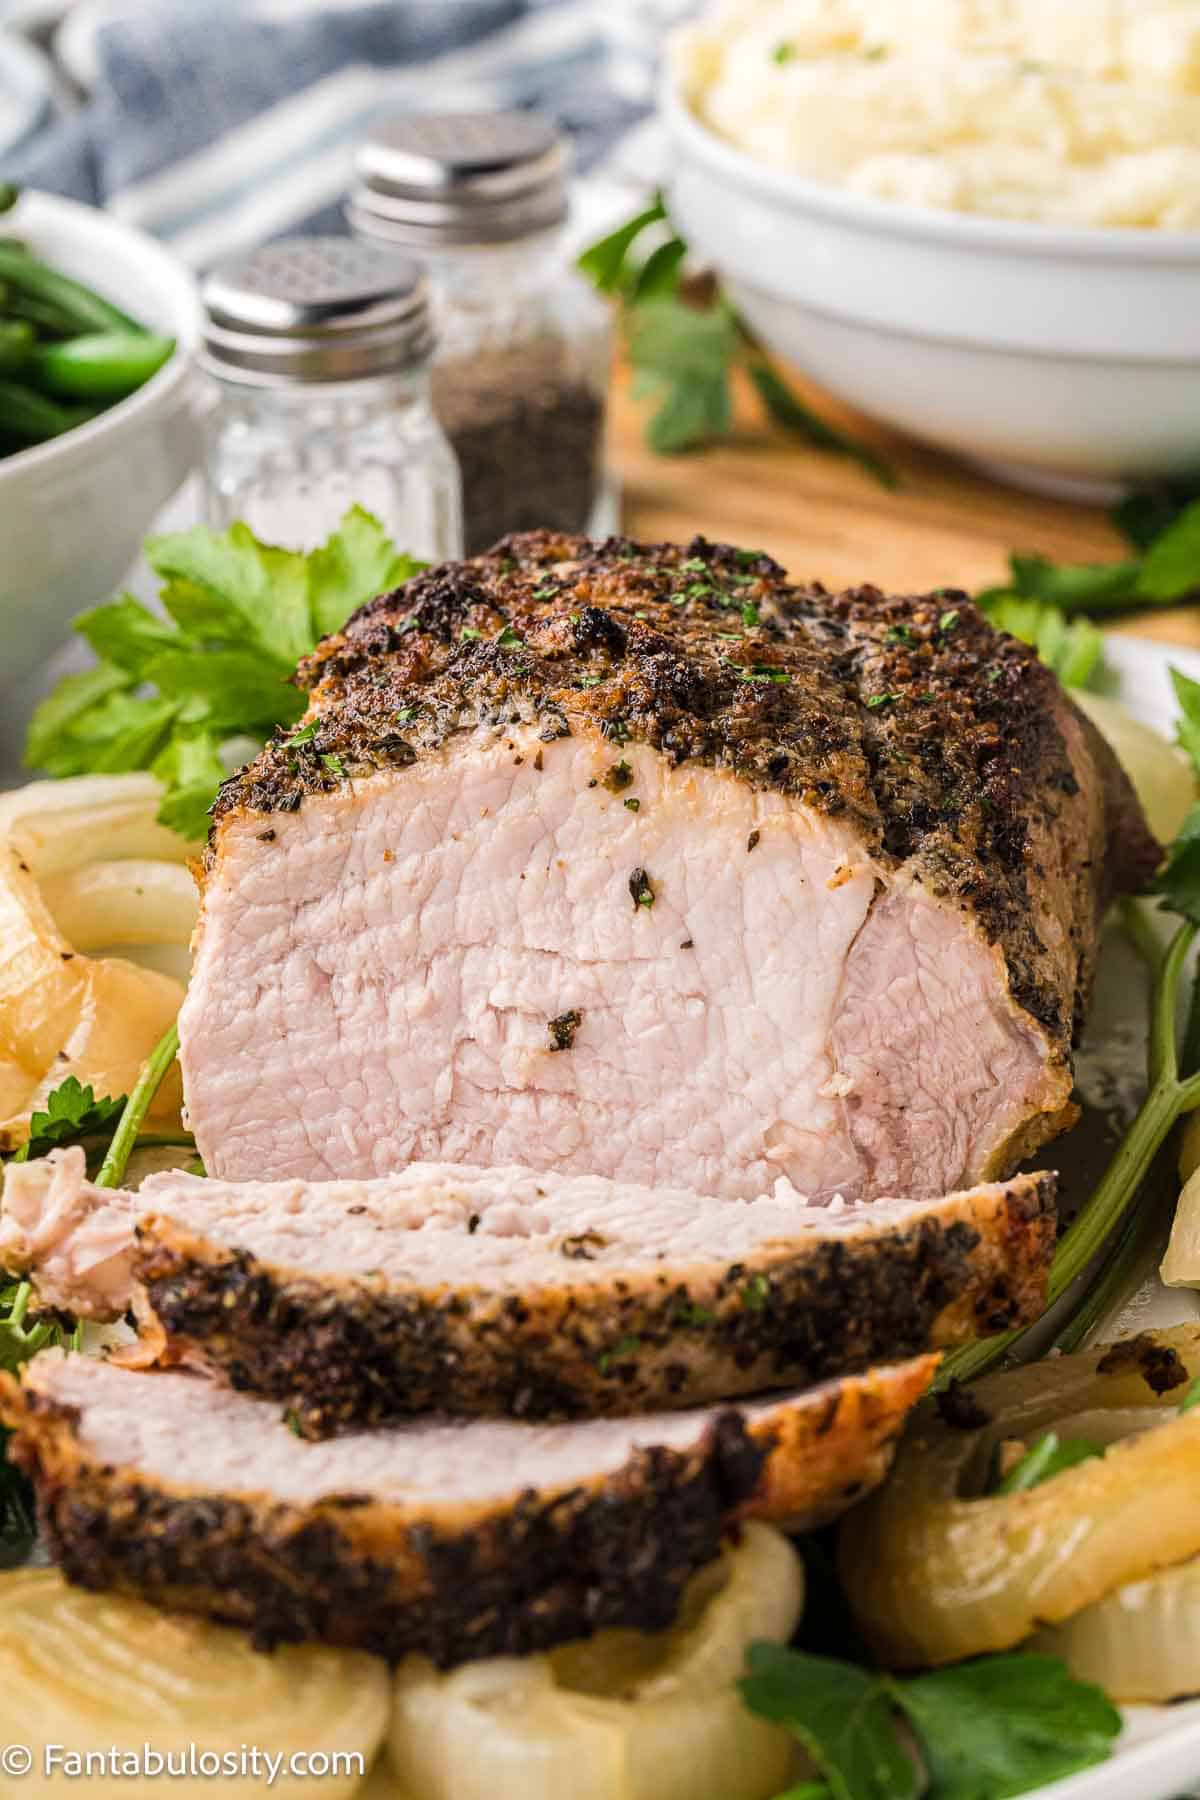
    Roasted pork tenderloin sliced on platter, surrounded by onions.

    Pork Tenderloin in the Oven: Easy ingredients such as onions, butter, salt, pepper, thyme, basil, garlic, and onion powder… the flavor packs a punch!

    Roasted pork tenderloin on platter with cooked onions.

    Tenderloin recipes are one of our favorite cuts of meat around here, so make sure to check out our beef tenderloin and deer tenderloin recipes too! Pork tenderloin also comes out great as a slow cooker recipe.

    Hey Fantabulosity readers! It's Meg from Meg’s Everyday Indulgence, again checking in with a ridiculously delicious and easy roasted pork tenderloin.

    [feast_advanced_jump_to]

    Why You’ll Love This Recipe

    • It uses a few ingredients: I'm betting you have all the ingredients for this juicy pork tenderloin (except for maybe the pork) in your pantry and refrigerator already.
    • Amazing flavor: This roasted pork starts with a sliced onion on the bottom of your pan. This provides a delicious little rack for the pork so it doesn't sit in the juices while it roasts, adds some flavor, and gives a yummy little accompaniment to the pork when it's finished.
    • Effortless yet impressive: Despite its simplicity, this recipe creates a tenderloin that is mouth-wateringly succulent and brimming with flavor, making it an impressive main dish for any occasion. It’s the perfect go-to when you want to present an elegant meal without spending hours in the kitchen.

    How to Cook Pork Tenderloin Perfectly

    This best baked pork tenderloin recipe only takes about 35 minutes to roast in the oven at 400°.

    I don't know about you all but pork was a meat I always used to struggle to cook. It was either underdone or cooked so long it resembled jerky when chewing it. I just couldn't seem to find the sweet spot when it came to pork.

    What changed things for me? A digital meat thermometer with a temperature alert feature. You set the temperature you would like your food to be cooked, insert the probe in the thickest part of the meat, and put it in the oven (or grill or slow cooker). It's oven safe and an alert will go off when the desired temperature has been reached.

    I'm telling you, the instant-read thermometer is a complete game-changer. Especially when it comes to pork.

    The safe temperature to cook pork to is now 145 degrees F so I set it to that temperature and then let it rest for 10 minutes after removing it from the oven.

    Letting the pork rest, allows the pork to redistribute the juices and will keep it juicy rather than everything running out when you slice it.

    TIP: The pork will also continue to cook in those 10 minutes so you could even set your thermometer to 140 degrees F instead if you want it cooked right to 145 degrees.

    For me, I like it a little more just because even though I know it's safe, the pink still freaks me out a little.

    You can tell by looking at this gorgeously roasted pork tenderloin that it's fancy enough to make for special dinner guests but you can also easily whip it up for your family on a Wednesday night too.

    Slow Cooker or Crock Pot Pork Tenderloin Option

    Although cooking pork tenderloin is rich and juicy when roasted in the oven, it's also a great option for the slow cooker. I tested it both ways and they yielded in amazing flavor and buttery goodness.

    So, if you need to be away from your oven, prepare the pork tenderloin exactly as stated in the instructions, just placing it in the slow cooker instead of a roasting pan. Cook on high for 4 hours and dinner will be ready to go.

    Ingredients Needed

    I’ve highlighted a couple of ingredients with some relevant notes. Aside from this, the ingredients needed are pretty basic.

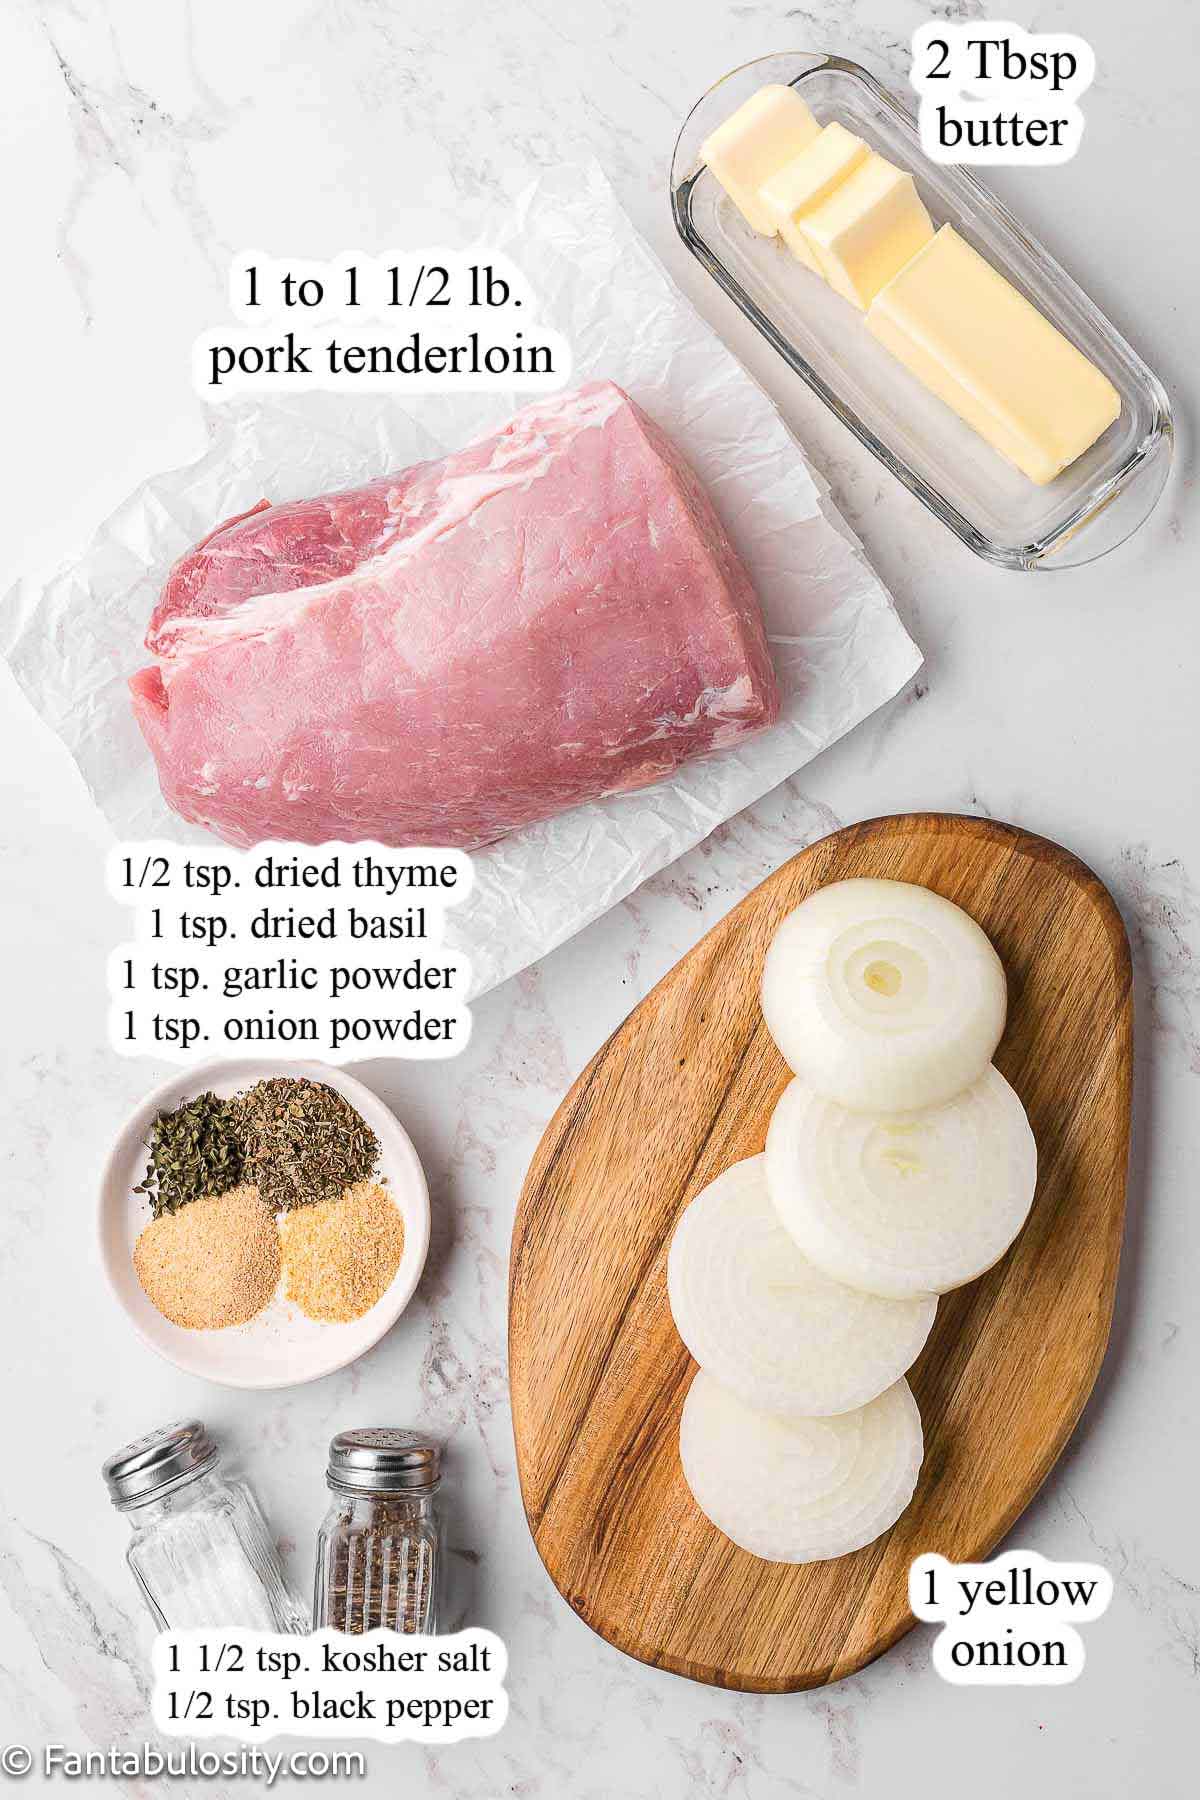
    Labeled ingredients for roasted pork tenderloin sitting on counter.
    • Pork Tenderloin – It’s important to trim any excess fat from the pork tenderloin before seasoning and roasting. Though some fat can add flavor and juiciness to a lean cut of meat, too much may cause a greasy outcome which can overshadow the other flavors. 
    • Dried Thyme and Basil – Dried herbs such as thyme and basil pack a potent punch, so use them sparingly. They are ideal for roasting as they hold up well under high heat and infuse the meat with a rich, aromatic flavor profile. Remember, you can always add more, but you can’t take it away once it’s in there!
    • Butter – The ingredient image above shows 2 Tablespoons of butter. This was the original recipe, however, adding one more tablespoon of butter helps spread items around much easier, so 3 are recommended.
    • Garlic Powder – Garlic powder offers a smoother, less aggressive flavor than fresh garlic. It mixes well with other dry seasonings, providing a consistent garlic flavor throughout the dish. However, be careful not to confuse it with garlic salt, which would alter the salt content of your dish.
    • Water – although not shown in the ingredient photo, it’s best to add about ¼ cup of water to bottom of the pan so items don’t burn.

    *Be sure to see the recipe card below for the full ingredients list & instructions!*

    Substitutions

    Sometimes substitutions are necessary because of ingredients that are unavailable or needed for dietary restrictions. Here are some suggestions that can help:

    • Butter – If you’re looking for a lower-fat option, you can use olive oil, which adds a nice, rich flavor. For a dairy-free alternative, you can use coconut oil. It has a slight coconut taste but shouldn’t significantly affect the overall flavor of the dish.
    • Salt – For those watching their sodium intake, you can use a salt substitute or simply reduce the amount of salt used. Keep in mind that this may affect the overall taste.
    • Onion – If you’re out of onions, you can use shallots or even a bit of leek for a similar flavor. As an absolute last resort, a small amount of onion powder can be used, but fresh is best for this simple recipe. 
    • Dried Thyme and Basil – For a different flavor profile, you could use rosemary or oregano as an alternative. If you have fresh herbs, remember that you typically need to triple the amount as fresh herbs are less potent than dried. 
    • Garlic Powder and Onion Powder – If you don’t have these, you can substitute them with fresh garlic and onion, but remember that the flavor could be more intense. If you have granulated garlic or onion, you can use them in a 1:1 ratio.

    Variations

    • Spicy Pork Tenderloin: If you enjoy a little heat in your meals, incorporate some chili flakes, cayenne pepper, or a spice rub into your rub. The heat will contrast nicely with the richness of the pork.
    • Citrus Flavored Pork: Citrus flavors pair wonderfully with pork. Try adding some grated lemon or orange zest to your rub for a zesty twist.
    • Herb-Crusted Tenderloin: For an even more pronounced herb flavor, consider creating a dry rub crust of mixed herbs such as rosemary, oregano, and thyme. Press them onto the surface of the pork before roasting.
    • Honey Glazed Pork: For a sweet spin on the recipe, prepare a glaze using honey, Dijon mustard, and a bit of soy sauce. Brush this onto the pork in the last 10 minutes of cooking for a beautifully caramelized exterior.
    • Bacon-Wrapped Pork: For a truly indulgent variation, wrap your pork tenderloin in bacon before roasting. The bacon not only adds flavor but also keeps the pork moist and juicy.

    How to Make Roasted Pork Tenderloin

    This roast pork recipe is broken into 2 components:

    • Prepare the meat rub
    • Cook the tenderloin
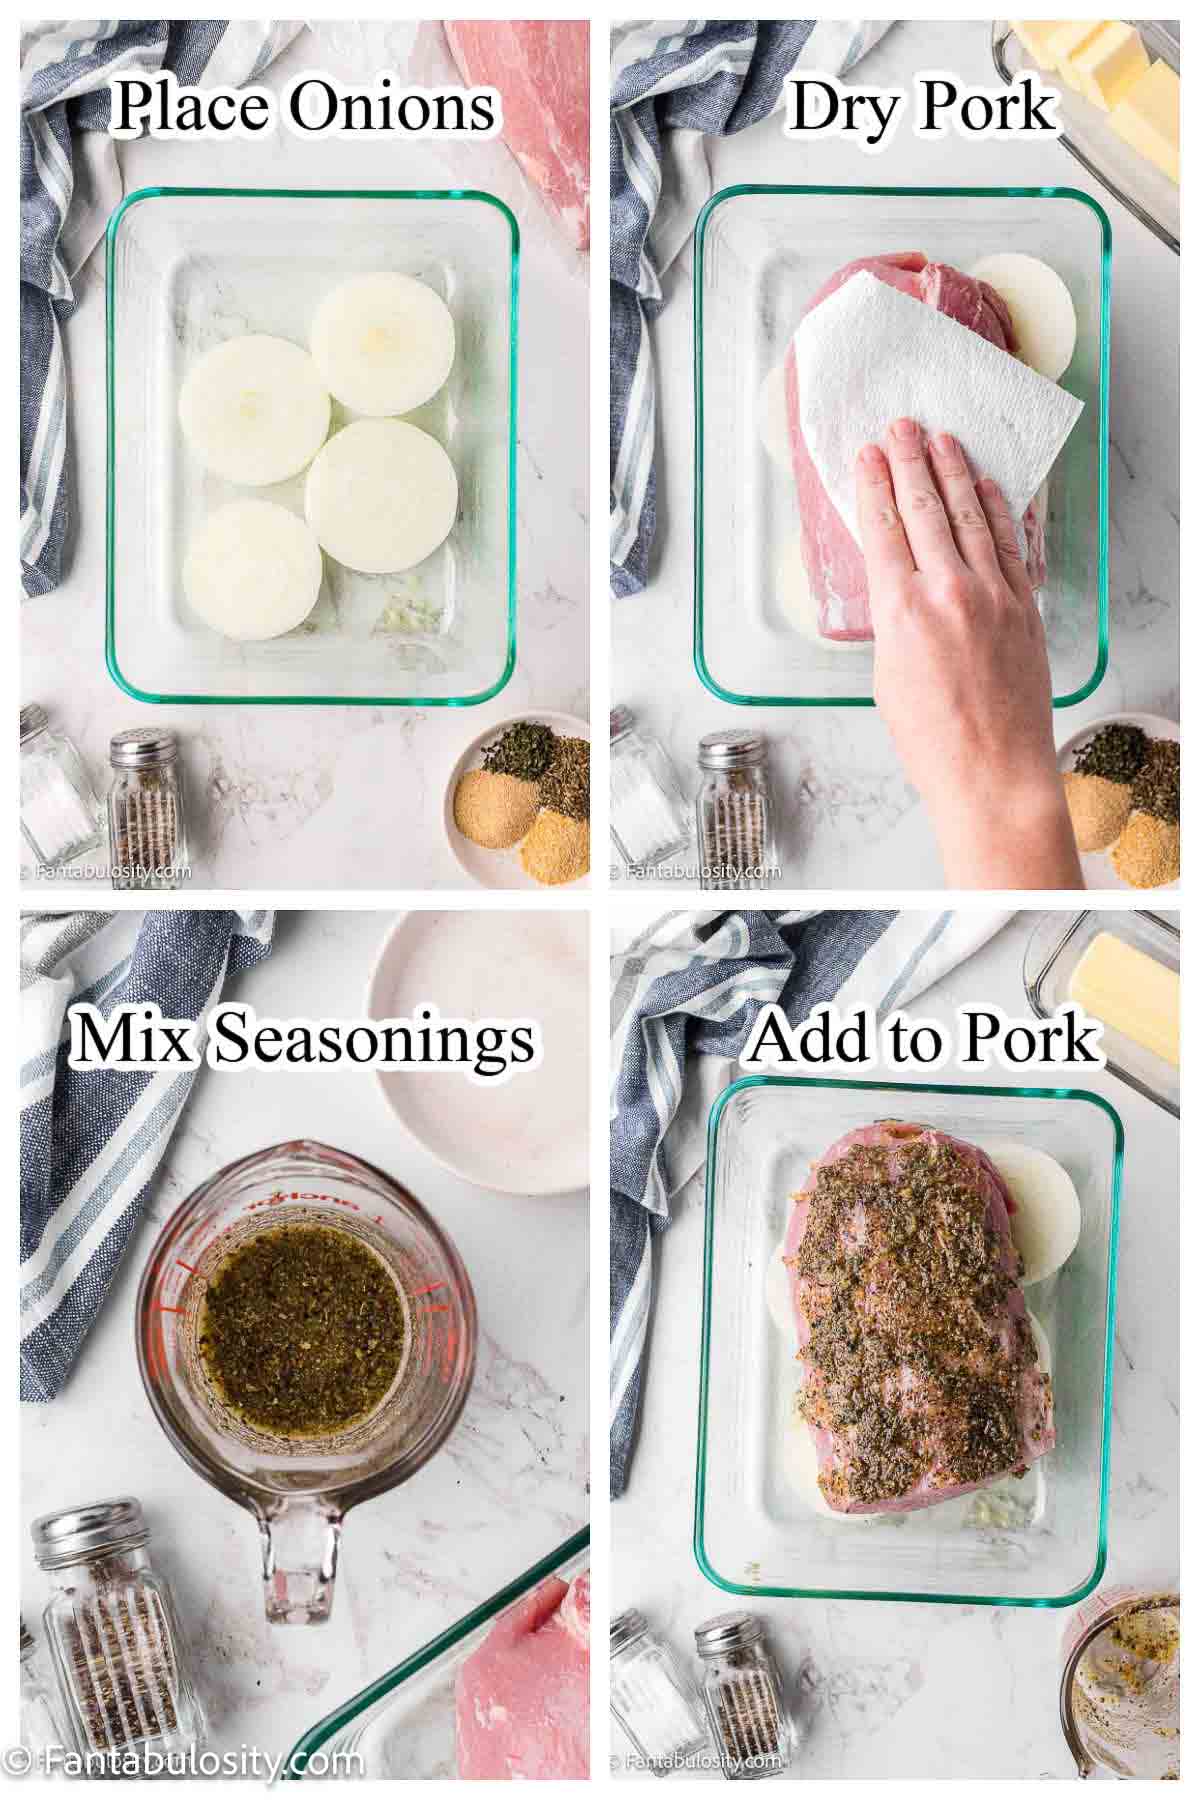
    Image collage of roasted pork tenderloin showing steps of the process.

    STEP 1. Preheat oven. preheat oven temperature to 400 degrees F. Layer onion in the bottom of a small baking dish. Pat dry the pork.

    STEP 2. Prepare pork. Rub the pork evenly with butter and place on top of the onions. Add ¼ of a cup of water to the bottom of the pan to prevent the onions from burning.

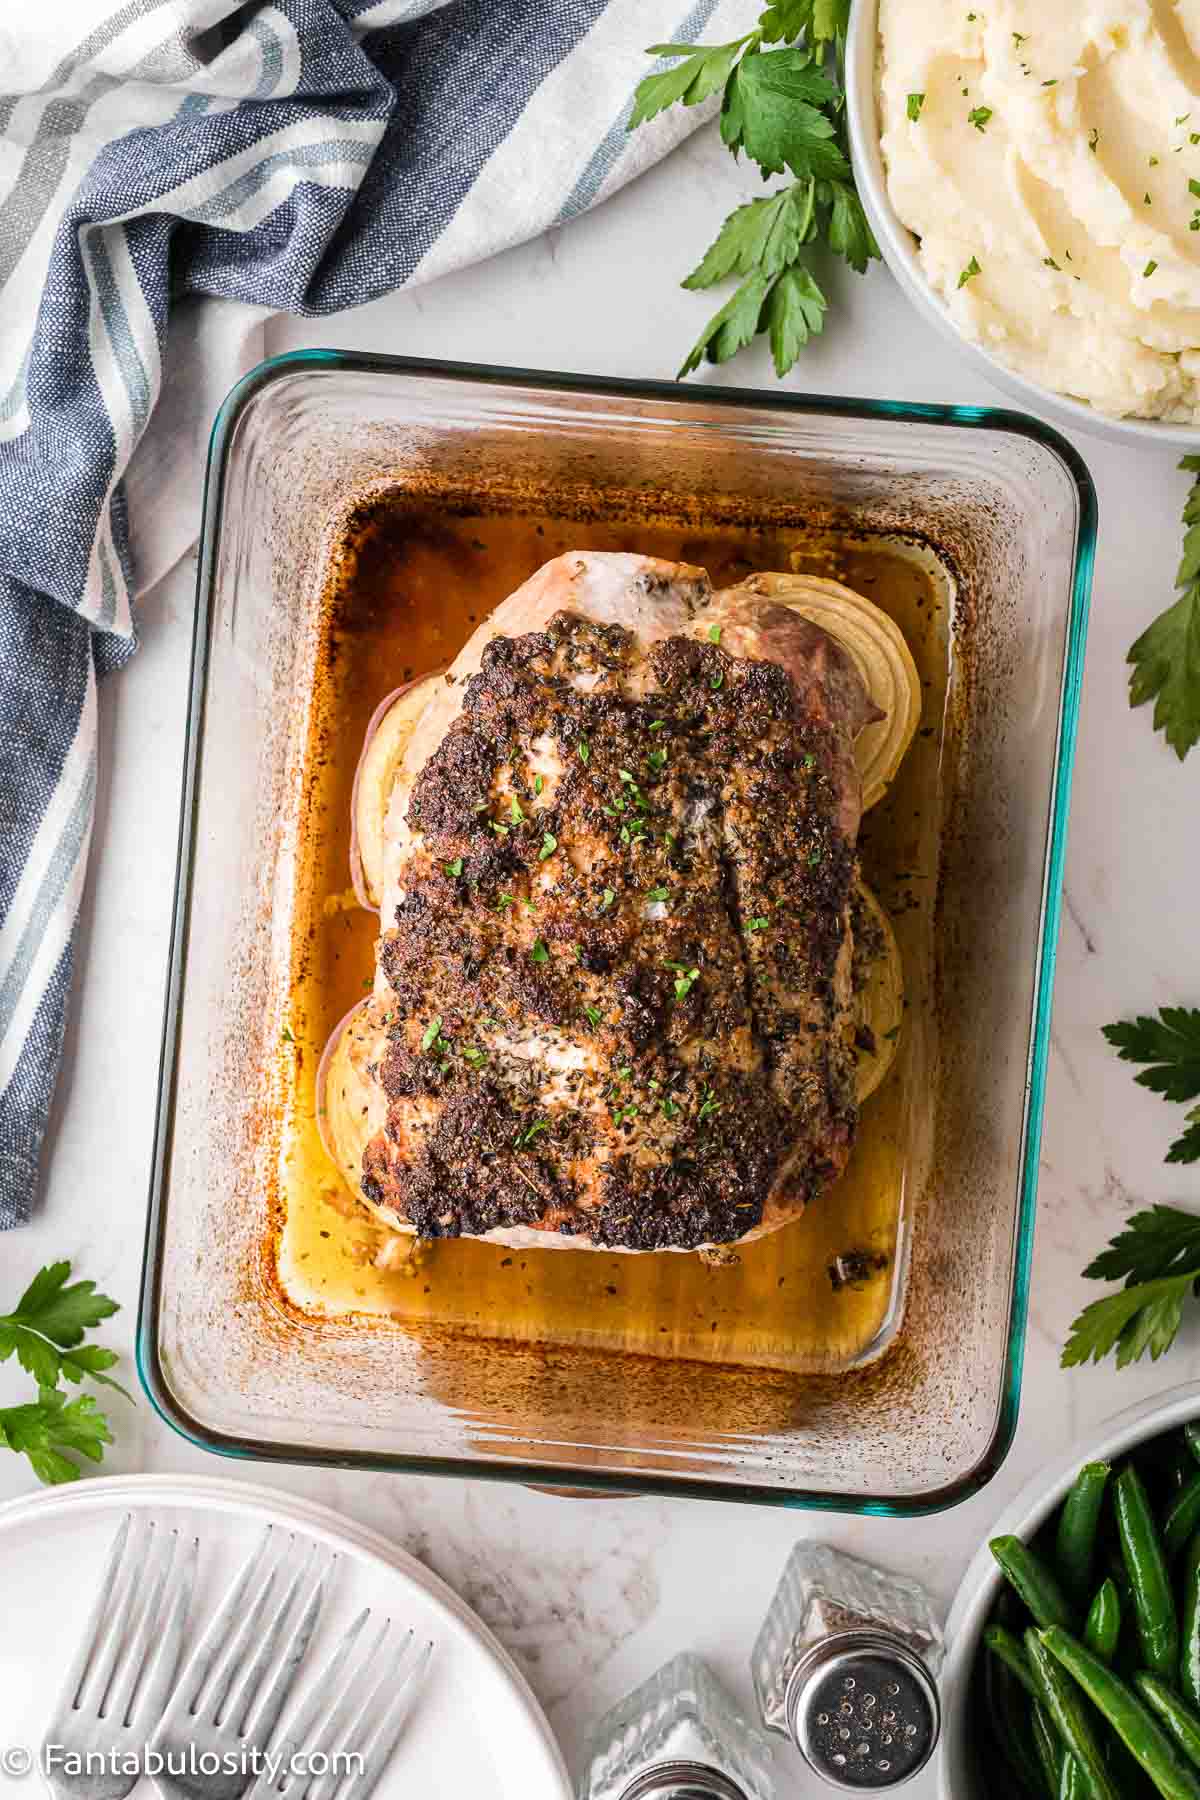
    Baked pork tenderloin in baking dish.

    STEP 3. Make rub. In a small bowl, combine the salt, pepper, thyme, basil, garlic powder, and onion powder. Sprinkle evenly over the pork tenderloin and slightly press into the butter. 

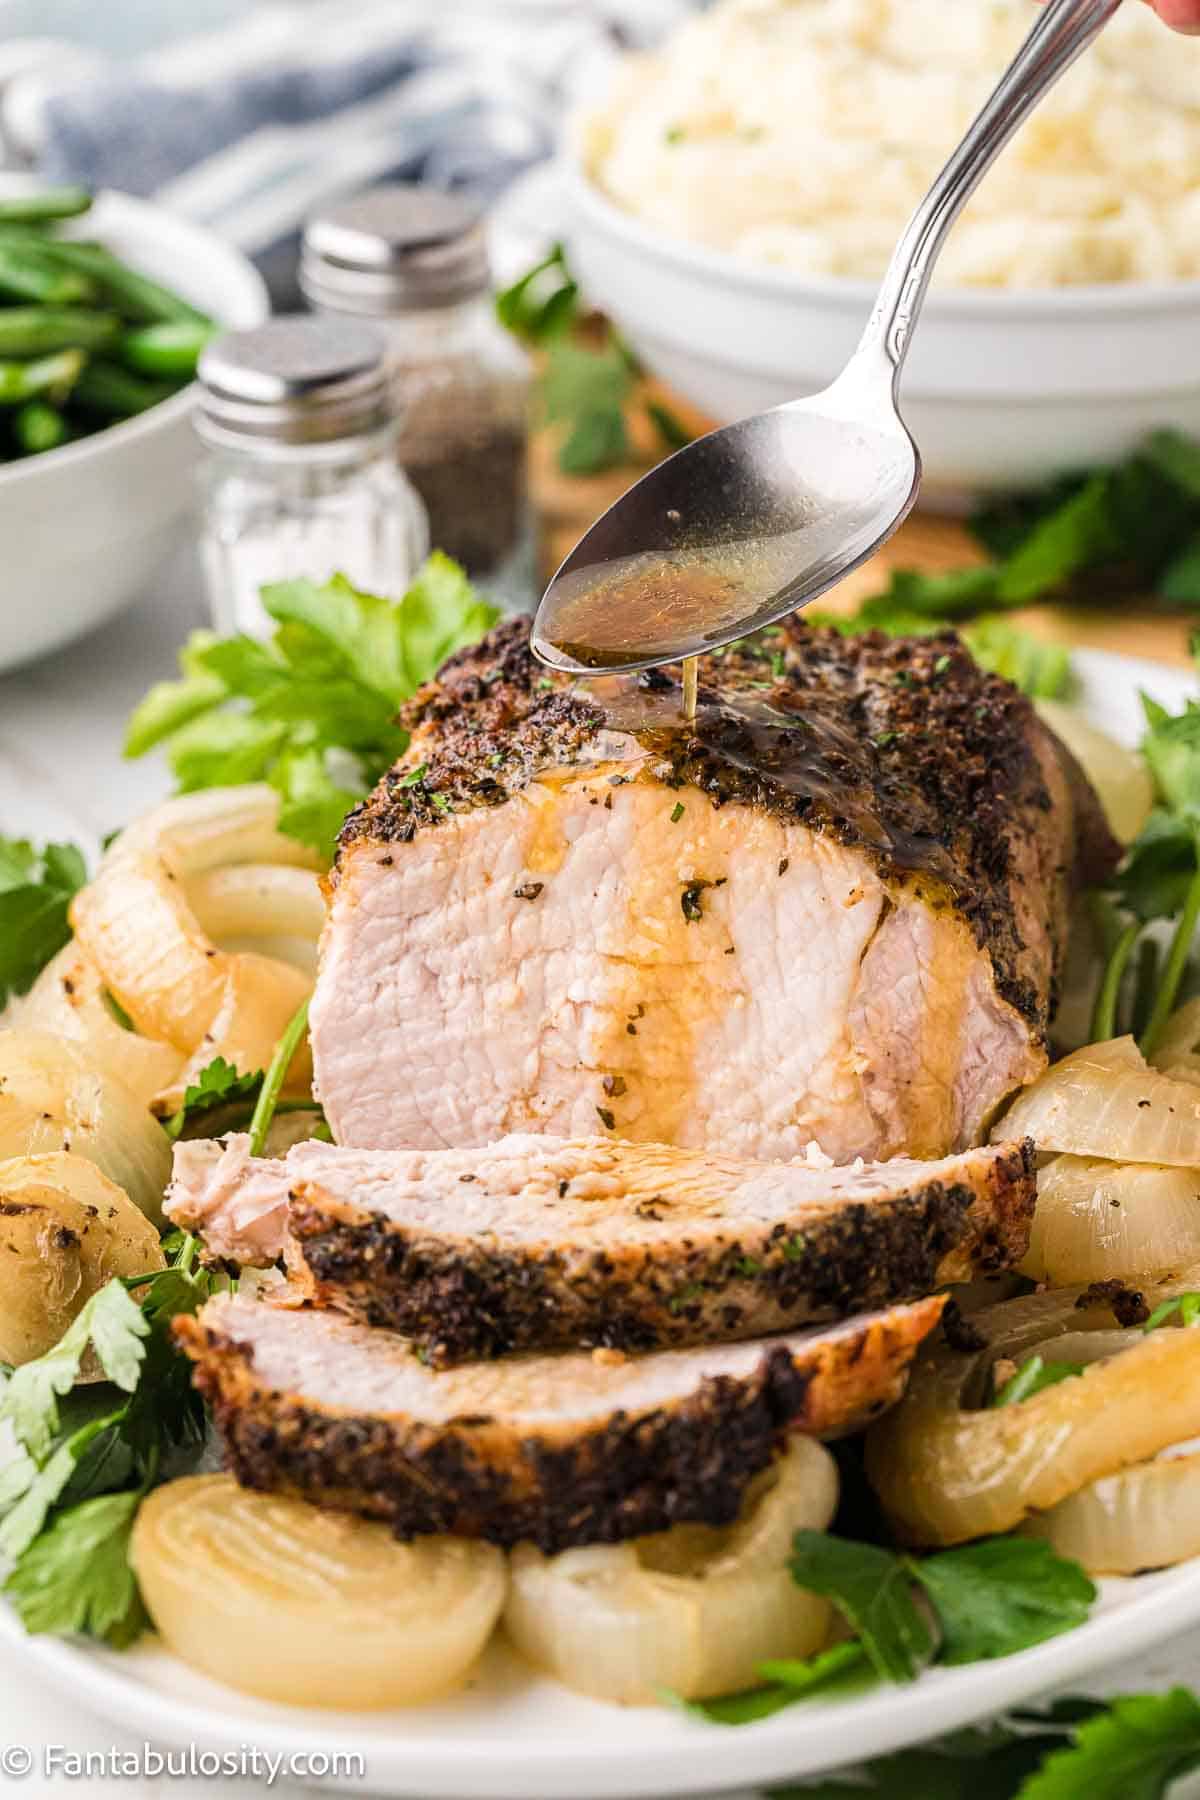
    STEP 4. Bake. The cooking time is about 27 to 35 minutes, or until the internal temperature reaches 145 degrees F and is a nice golden brown. Remove from the hot oven and allow to rest for 10 minutes before slicing. Drizzle pan sauce over the pork when serving. 

    Recipe Pro Tips

    • Resting the Meat. For the best results, resting the pork tenderloin after it comes out of the oven is a crucial step. This allows the juices to redistribute throughout the meat, resulting in a moist and flavorful dish.
    • Quality of Ingredients. Using high-quality ingredients is the best way to enhance the taste of your dish. For instance, using fresh herbs instead of dried ones (where possible) can bring out more vibrant flavors.
    • Avoid Overcooking. Pork tenderloin can easily become dry if overcooked. To prevent this, use a meat thermometer and pull the pork out of the oven when it reaches 145 degrees F. Remember, the meat will continue to cook a little even after it’s removed from the oven due to residual heat.
    • Seasoning. Don’t rush the seasoning process. Allow the seasonings to meld with the pork for at least 15 minutes before cooking. If you have time, let it marinate in the fridge for a few hours for even better flavor.
    Sliced roasted pork tenderloin on platter, with spoon pouring gravy over the top.

    Recipe FAQs

    Can I use different cuts of meat?

    Yes, you can substitute pork loin for pork tenderloin in this recipe. However, pork loin is larger and therefore will require a longer cooking time. Always use a meat thermometer to ensure that the internal temperature
     reaches 145 degrees F
    .

    Can I make this recipe ahead of time?

    Yes, you can prepare the pork tenderloin and rub the day before cooking. Store it in the refrigerator and allow it to come to room temperature before cooking.

    Can I use fresh herbs instead of dried?

    Absolutely. Fresh herbs will give the dish a more vibrant flavor. Remember, you will need to triple the amount because fresh herbs are less potent than dried.

    What if I don’t have a meat thermometer?

    While it’s recommended to use a meat thermometer to ensure precise cooking, you can also make a small cut into the thickest part of the pork to check its doneness. If the juices run clear and the meat is only slightly pink, it’s usually done.

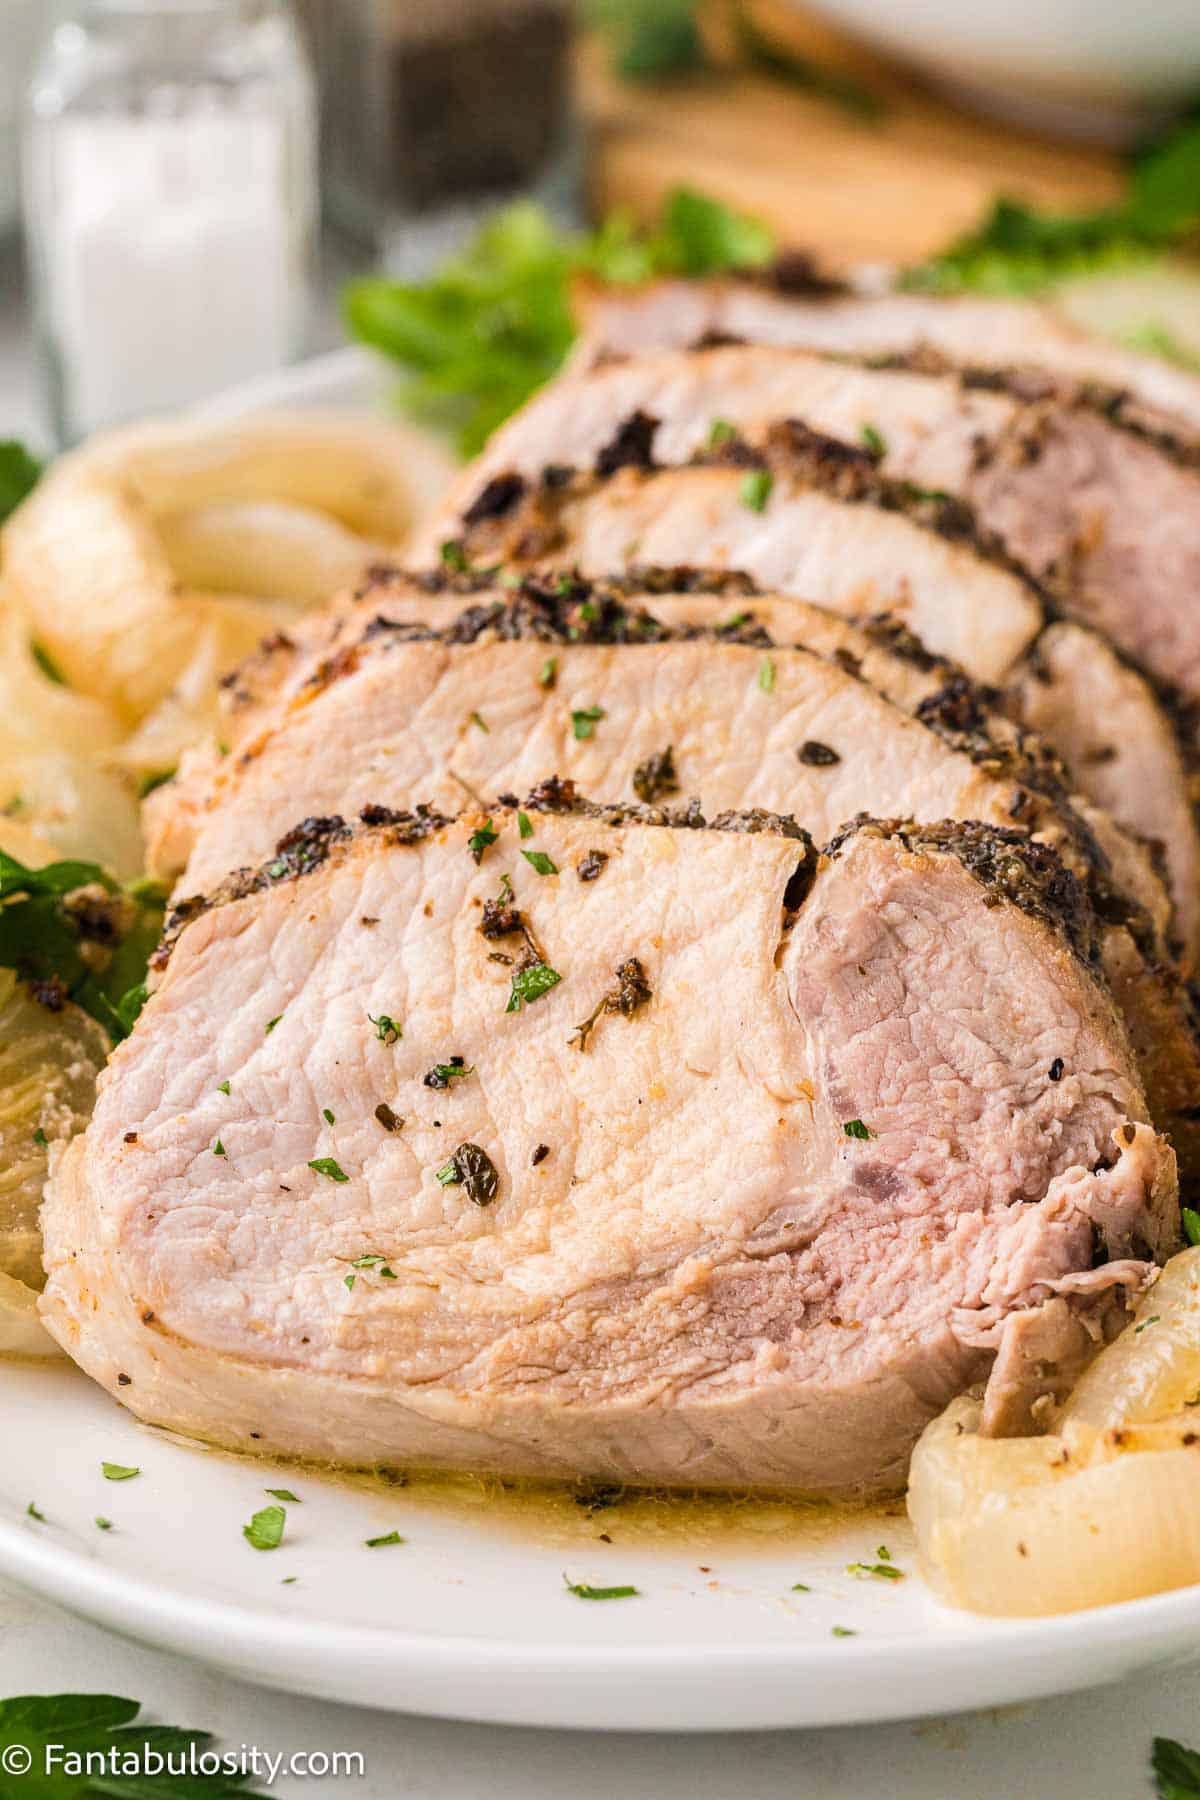
    Sliced pork tenderloin on white platter, with juices drizzled on top.

    What to Serve with Roasted Pork Tenderloin

    Most love serving this best pork tenderloin recipe with roasted vegetables or roasted potatoes as side dishes! Here are our favorites to serve with it:

    • Garlic Roasted Broccoli
    • Baked Fiesta Ranch Potato Wedges
    • Instant Pot Green Beans and Potatoes

    Or, serve this delicious roasted pork tenderloin with spring mix apple raspberry salad to create the ultimate spring meal.

    Storage

    You can store the leftover roasted pork tenderloin in an airtight container in the refrigerator for up to 3-4 days. The next time you are ready to eat, simply reheat in the oven or in a skillet over medium heat until warmed through. 

    As for freezing, yes, cooked pork tenderloin freezes well. Allow the pork to cool completely, then wrap it in aluminum foil and place it in a freezer-safe bag or container. It can be frozen for up to 3 months. When ready to eat, thaw in the refrigerator overnight before reheating.

    More Pork Recipes You’ll Love

    If you love pork recipes, you’ll absolutely go wild over this pork steak recipe and this one pan pork chops and veggies dish!

    • Close up of southern fried pork chops on white plate, with a pork gravy poured on top.
      Southern Fried Pork Chops
    • Cooked Instant Pot pork butt in white bowl, sitting next to barbecue sauce.
      Instant Pot Pork Butt
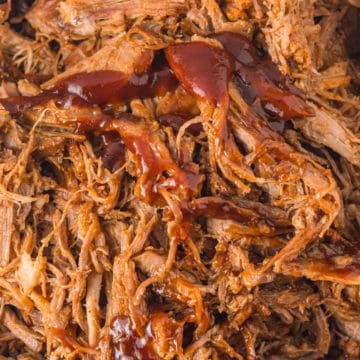
    • Slow Cooker Pulled Pork shredded with bbq sauce
      Cherry Coca-Cola Slow Cooker Pulled Pork
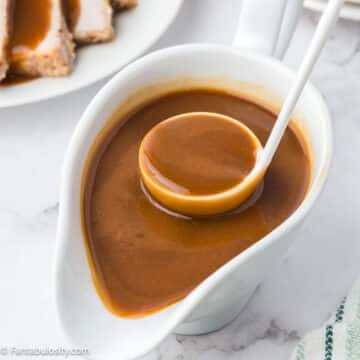
    • Pork gravy in white gravy boat with ladle spooning it in to the dish.
      Easy Homemade Pork Gravy Recipe with Drippings

    Did you make this? I’d be so grateful if you left a “star” rating below to let me know what you thought! Then, the next time you need a quick and easy recipe, come back to Fantabulosity to browse all of my easy recipes!

    Recipe

    Roasted pork tenderloin sliced on platter, surrounded by onions.
    Print Pin
    4.52 from 39 votes

    Pork Tenderloin in the Oven

    This Pork Tenderloin in the Oven recipe is simply covered with melted butter and spices, and then baked to a delicous perfection for an easy dinner!
    Course Main Course
    Cuisine American
    Prep Time 10 minutes minutes
    Cook Time 35 minutes minutes
    Total Time 45 minutes minutes
    Servings 4
    Calories 82kcal
    Author Jessica Burgess

    Ingredients

    • 1 large yellow onion peeled and sliced into 4 thick rings
    • 1 to 1 ½ pounds pork tenderloin
    • 3 Tablespoons butter, softened
    • 1 ½ teaspoons kosher salt
    • ½ teaspoon black pepper
    • ½ teaspoon dried thyme
    • 1 teaspoon dried basil
    • 1 teaspoon garlic powder
    • 1 teaspoon onion powder
    • ¼ cup water

    Instructions

    • Preheat oven to 400 degrees F. Layer onion in the bottom of a small roasting pan. Pat dry the pork. 
    • Rub the pork evenly with butter and place on top of the onions. Add ¼ of a cup of water to the bottom of the pan to prevent the onions from burning.
    • In a small bowl, combine the salt, pepper, thyme, basil, garlic powder and onion powder. Sprinkle evenly over the pork tenderloin and slightly press into the butter. 
    • Cook for 27 to 35 minutes, or until the internal temperature reaches 145 degrees F. Remove from the oven and allow to rest for 10 minutes before slicing. Drizzle pan sauce over the pork when serving. 

    Video

    Notes

    • Resting the Meat. Resting the pork tenderloin after it comes out of the oven is a crucial step. This allows the juices to redistribute throughout the meat, resulting in a moist and flavorful dish.
    • Quality of Ingredients. Using high-quality ingredients can significantly enhance the taste of your dish. For instance, using fresh herbs instead of dried ones (where possible) can bring out more vibrant flavors.
    • Avoid Overcooking. Pork tenderloin can easily become dry if overcooked. To prevent this, use a meat thermometer and pull the pork out of the oven when it reaches 145 degrees F. Remember, the meat will continue to cook a little even after it’s removed from the oven due to residual heat.
    • Seasoning. Don’t rush the seasoning process. Allow the seasonings to meld with the pork for at least 15 minutes before cooking. If you have time, let it marinate in the fridge for a few hours for even better flavor.

    Nutrition

    Serving: 1serving | Calories: 82kcal | Carbohydrates: 6g | Protein: 1g | Fat: 6g | Saturated Fat: 3g | Cholesterol: 15mg | Sodium: 773mg | Potassium: 113mg | Fiber: 1g | Sugar: 1g | Vitamin A: 210IU | Vitamin C: 3.4mg | Calcium: 55mg | Iron: 2.1mg

    Chicken Bacon Ranch Pasta

    September 14, 2021

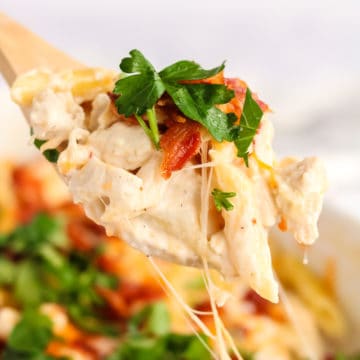
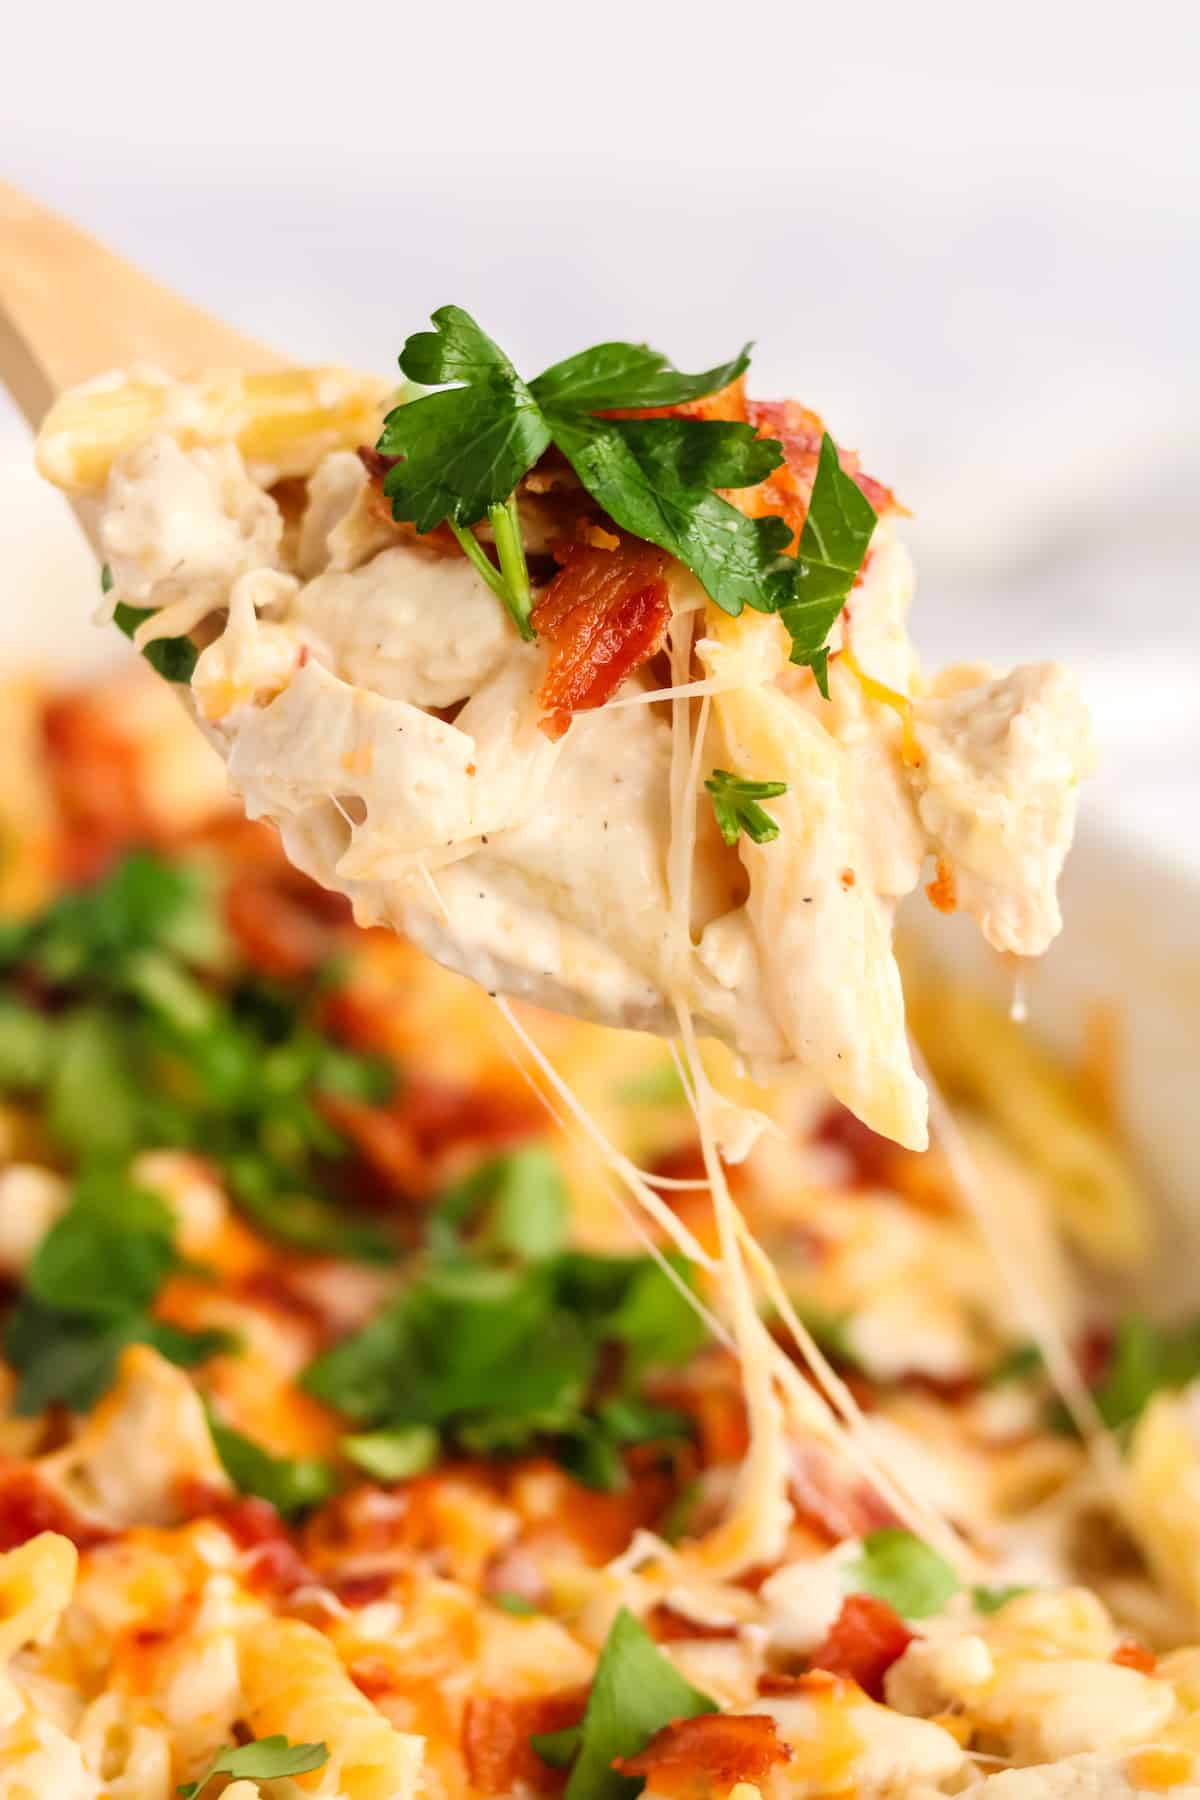
    scoop of chicken bacon ranch pasta

    Chicken Bacon Ranch Pasta: A comforting baked dish casserole recipe that’s an easy dinner idea to make with everyday ingredients that the whole family will love on a busy weeknight!

    Using ingredients like crispy bacon, chicken breasts, and creamy ranch dressing, makes this a delicious pasta recipe, the ultimate comfort food in only 30 minutes. Ready for this in sandwich form too? This chicken bacon ranch sandwich recipe and these crack chicken sandwiches are other amazing easy dinners.

    Spoonful of chicken bacon ranch pasta

    Why You’ll Love This Recipe

    You all… I had NO idea how much you were going to love the bacon ranch pasta salad recipe.

    I mean, I don’t blame you. When you combine ranch and bacon with ANYTHING, it’s going to be amazing… but adding it to pasta (carbs) is the ultimate combination.

    So when realizing how much you loved it, (and this cream cheese pasta) I knew it was time to add a warm bacon and ranch pasta to the mix, and even a little chicken to make it a bit hearty to classify it as a main dish.

    The chicken-bacon-ranch pairing can also be stuffed into slider rolls as an appetizer or lunch.


    Easy Ingredients

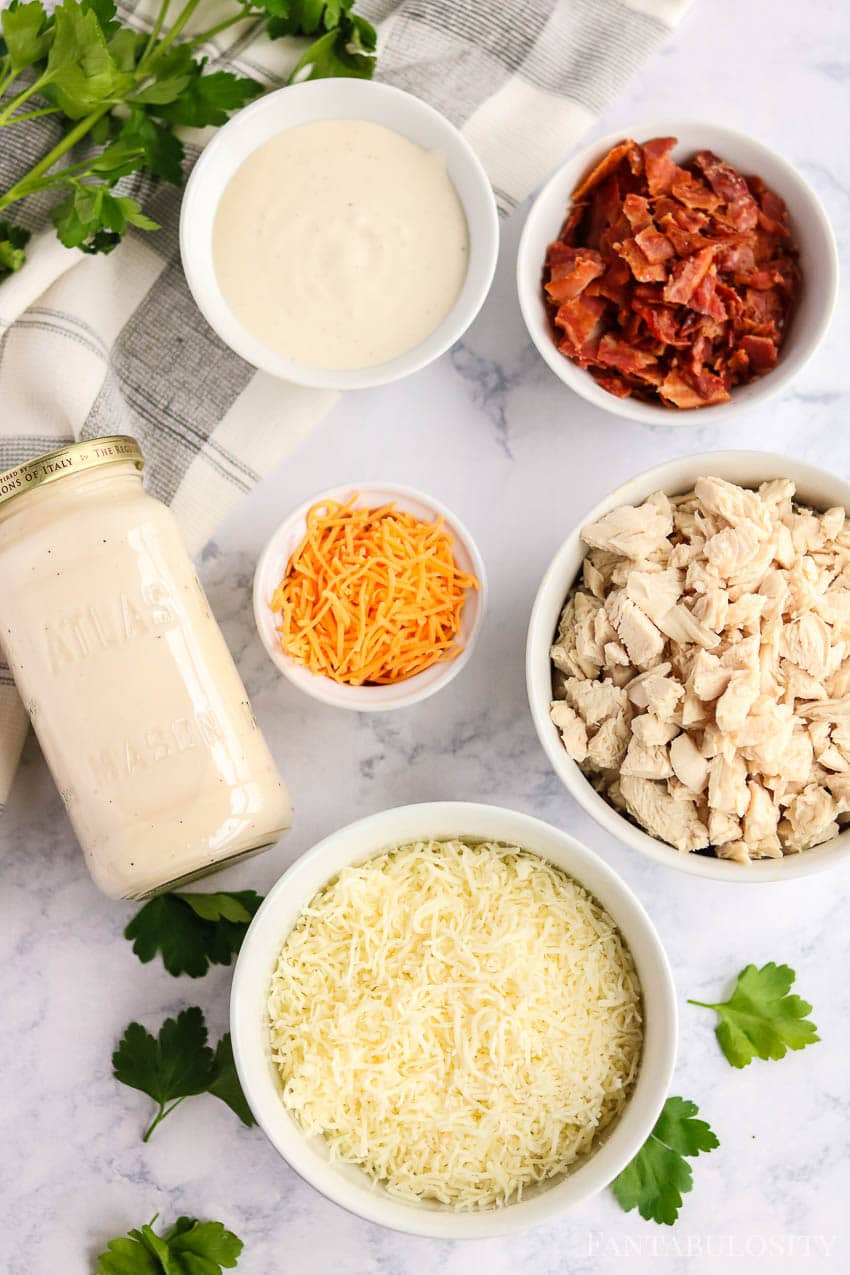
    If this is your first time here, I must tell you that we LOVE easy recipes that use everyday ingredients. This recipe is no different. It uses:

    • Penne pasta (or pasta of choice) – I use rotini in this crockpot Parmesan garlic chicken pasta and this Marry Me Chicken Pasta recipe.
    • Chicken (boil/bake & shred or use a rotisserie chicken for ease, and then make a chicken stock out of the rotisserie chicken!)
    • Jarred Alfredo sauce (my favorite is Bertolli) or you can make my easy Alfredo sauce instead.
    • Ranch dressing
    • Bacon
    • Shredded cheddar cheese
    • Shredded mozzarella cheese
    • Green onions, (if desired)
    • Fresh parsley (if desired)
    Ingredients for chicken bacon ranch pasta recipe

    Use Chopped Bacon – How to Bake Bacon (if desired)

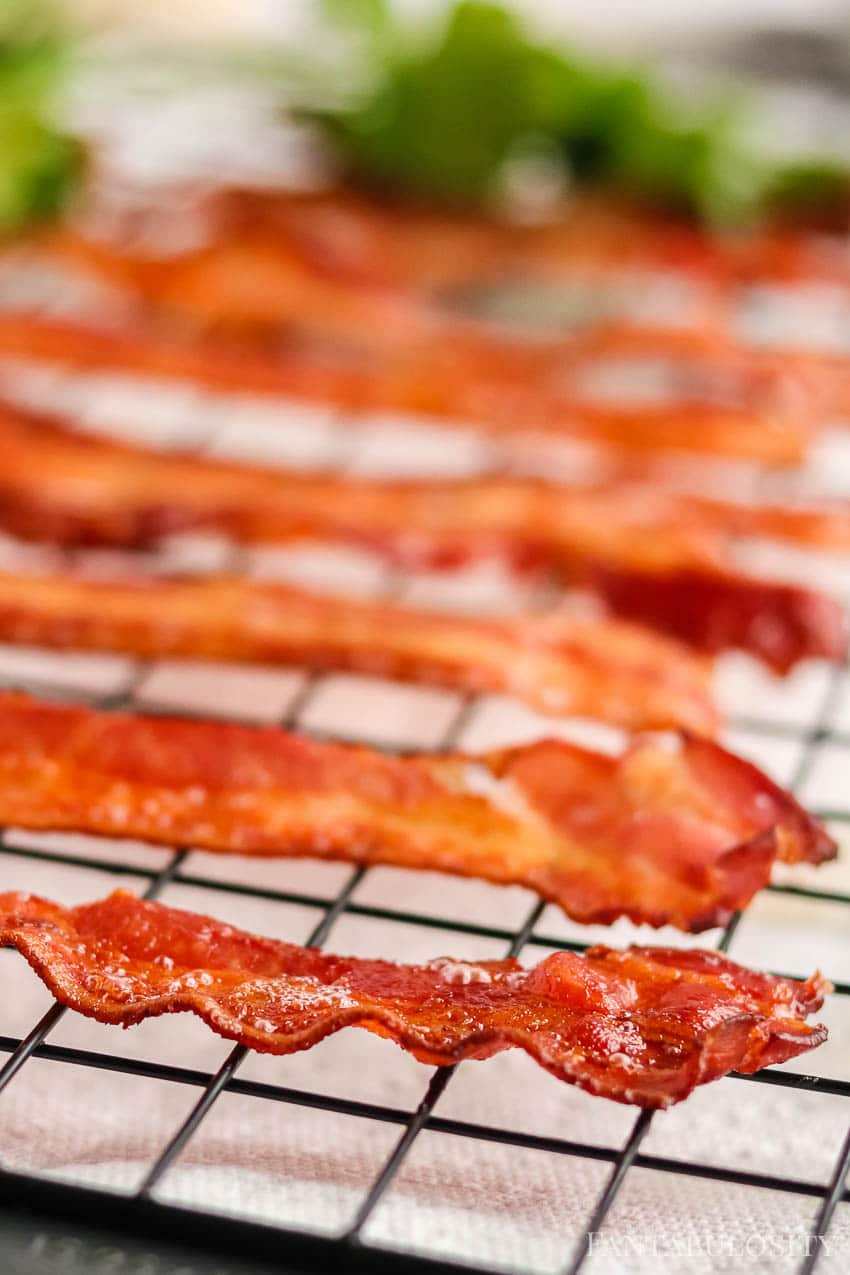
    If you don’t already have cooked bacon, you’ll want to cook the bacon before baking this pasta dish, and since you’ll need the oven hot anyway, it’s easy to place the bacon in a cool oven on a baking sheet.

    Bake at 425˚ until bacon is crisp. Then lower the heat of the oven to 350˚ so it’s ready to bake the pasta. (Or, you can cook bacon in the air fryer if you prefer.)

    Cook bacon in the oven and cool off to chop

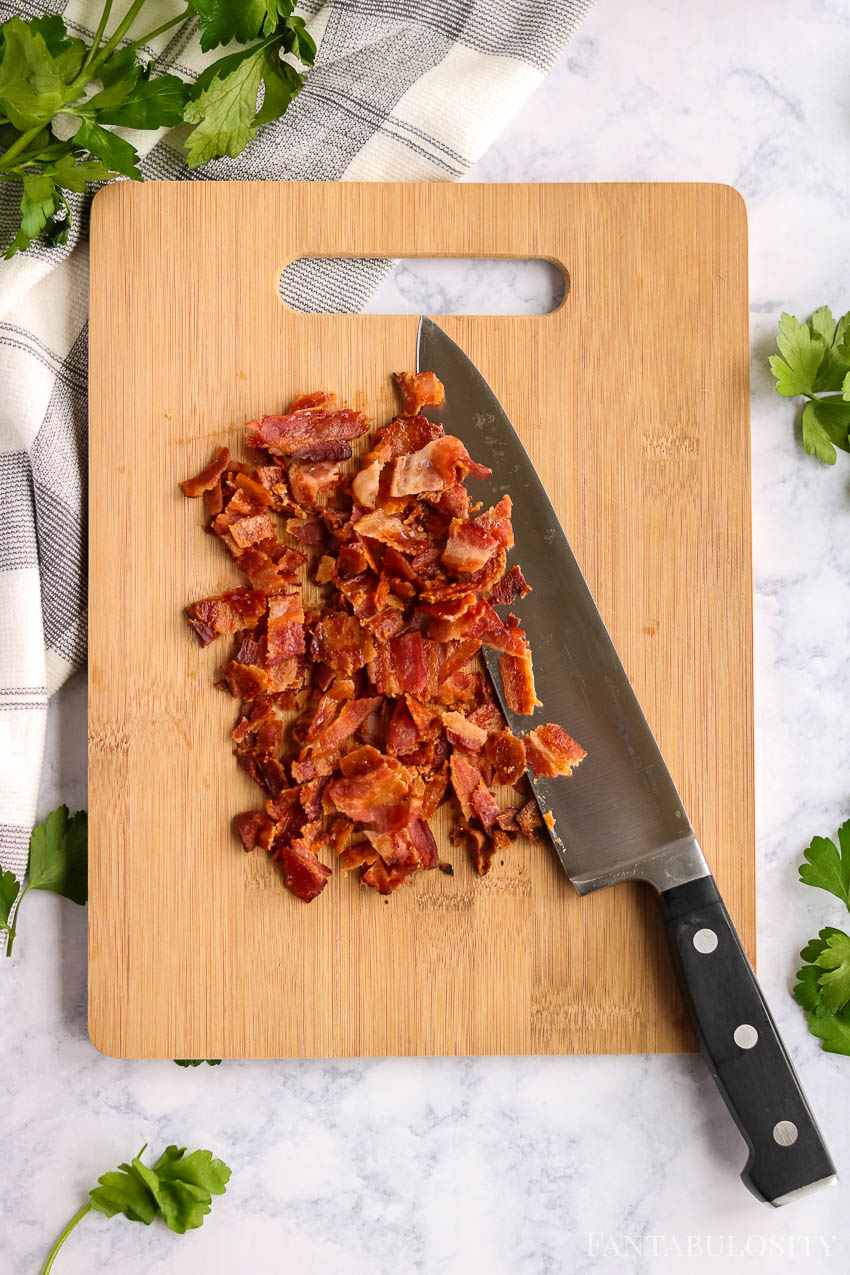
    After the bacon has cooled a bit, go ahead and chop in to bacon pieces and set aside.

    Chopped bacon on a cutting board

    What Kind of Chicken to Use

    You can absolutely use any kind of chicken that you want to for this recipe but make sure it’s cooked chicken before mixing it with the other ingredients and before baking. Some suggestions are:

    • chicken breast
    • rotisserie chicken
    • leftover chicken

    What Kind of Pasta to Use

    Penne is LOVELY for this recipe, but feel free to use your favorite short pastas or whatever you have on hand.

    Farfalle or bowtie pasta is another favorite that we have here, and it looks super pretty if you’re feeding a crowd.

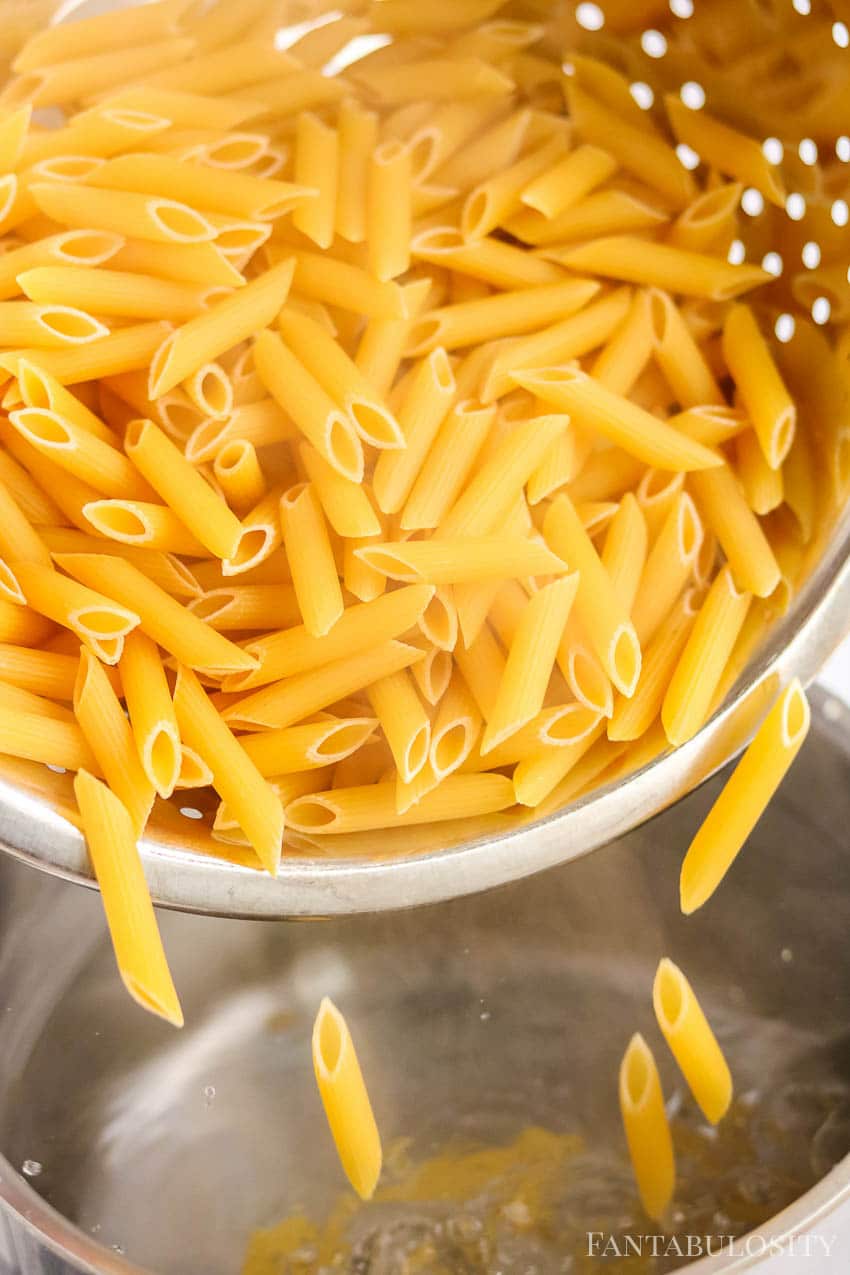
    Cook pasta according to package directions, (usually al dente) drain and pour cooked pasta into a large bowl with the chicken, alfredo sauce and ranch dressing and mix gently until combined.

    Pouring penne in to a stockpot to boil

    Step by Step Directions

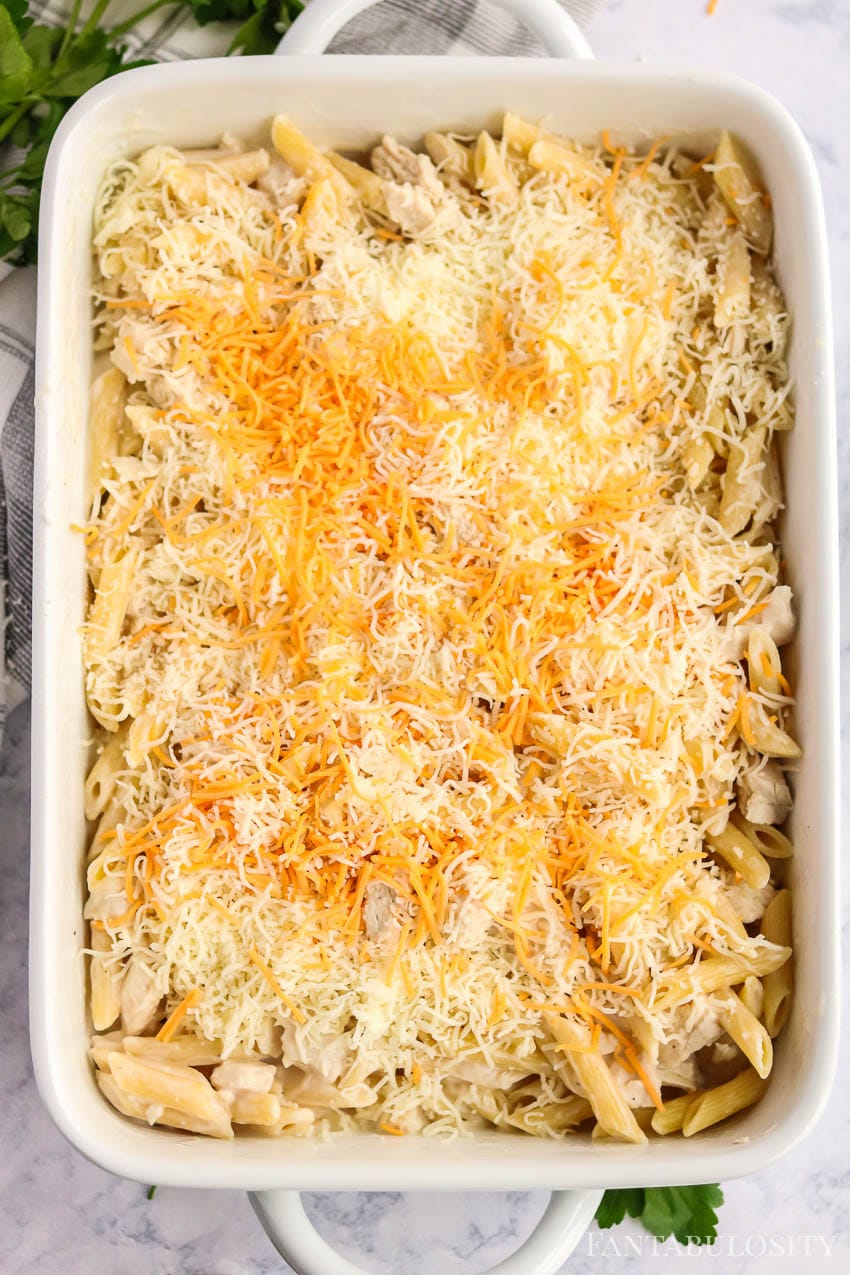
    • To finish off this easy chicken bacon ranch pasta, pour mixture into a greased 9×13 in. baking dish and evenly spread it out.
    • To add some depth to this dish, add ½ cup sharp cheddar cheese along with the mozzarella for some added cheesy “oomph”.
    Pasta in a baking dish with cheddar cheese

    Bacon and Bake

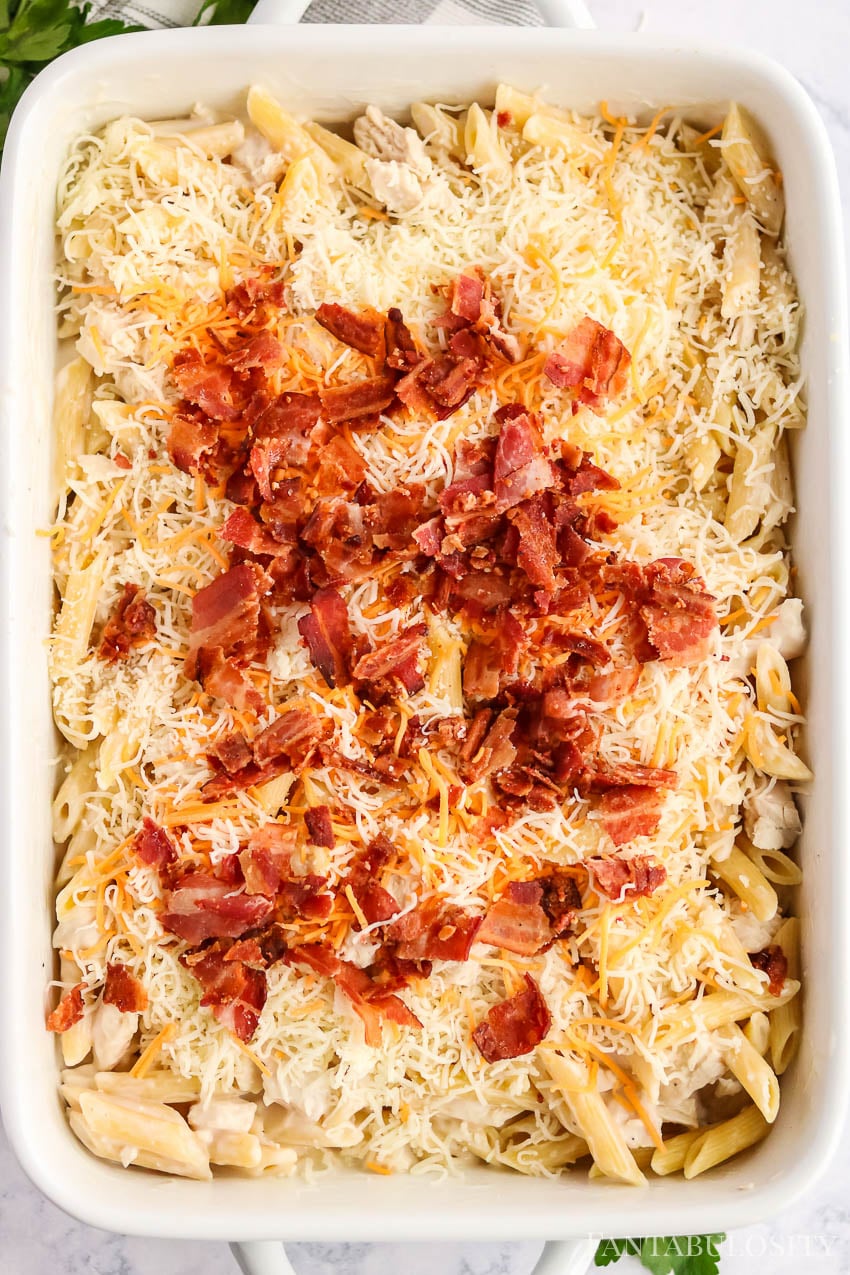
    Sprinkle the chopped bacon on top, cover with aluminum foil, and bake at 350˚ for 10 minutes.

    Sprinkled bacon on top of chicken bacon ranch pasta in baking dish

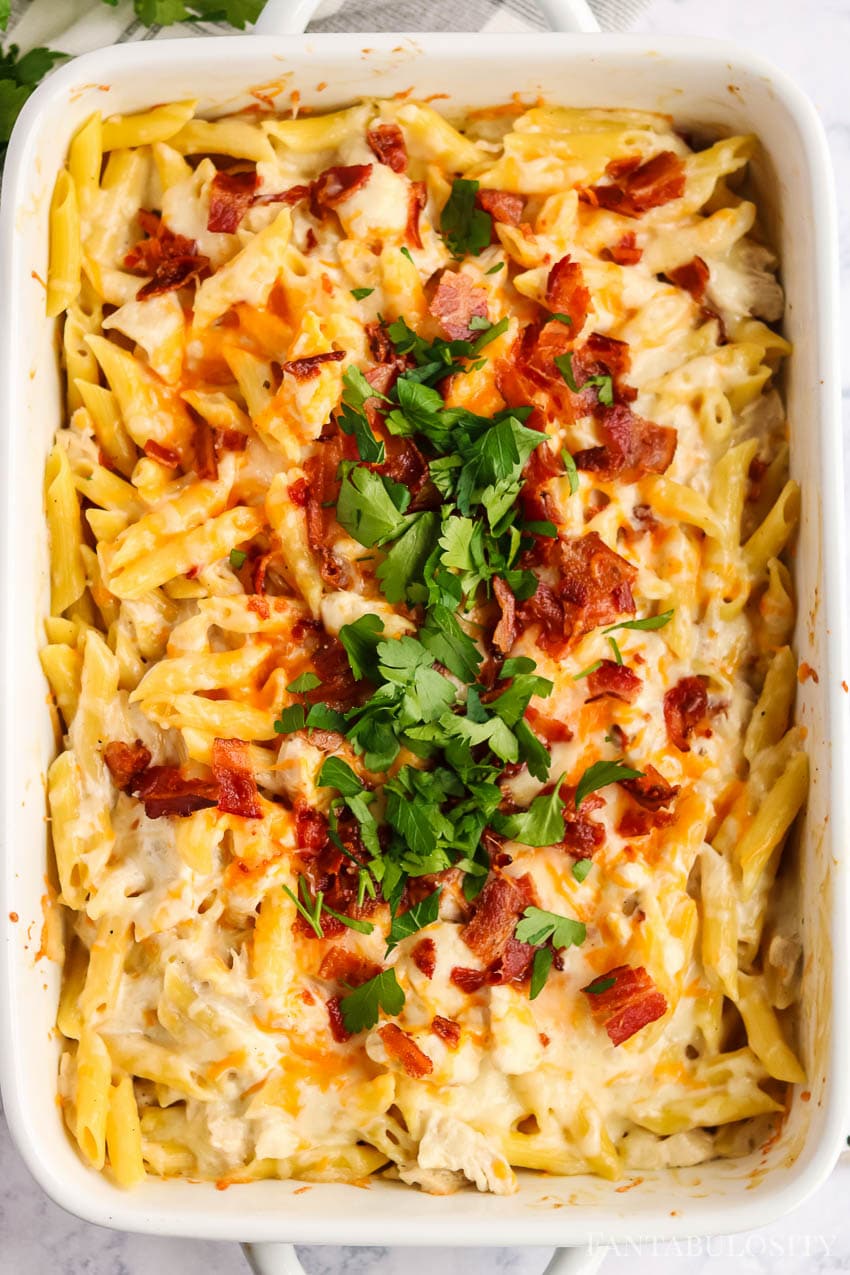
    Uncover and bake for an additional 10 minutes or until the cheese has melted.

    Fresh herbs sprinkled on top of bacon chicken ranch pasta

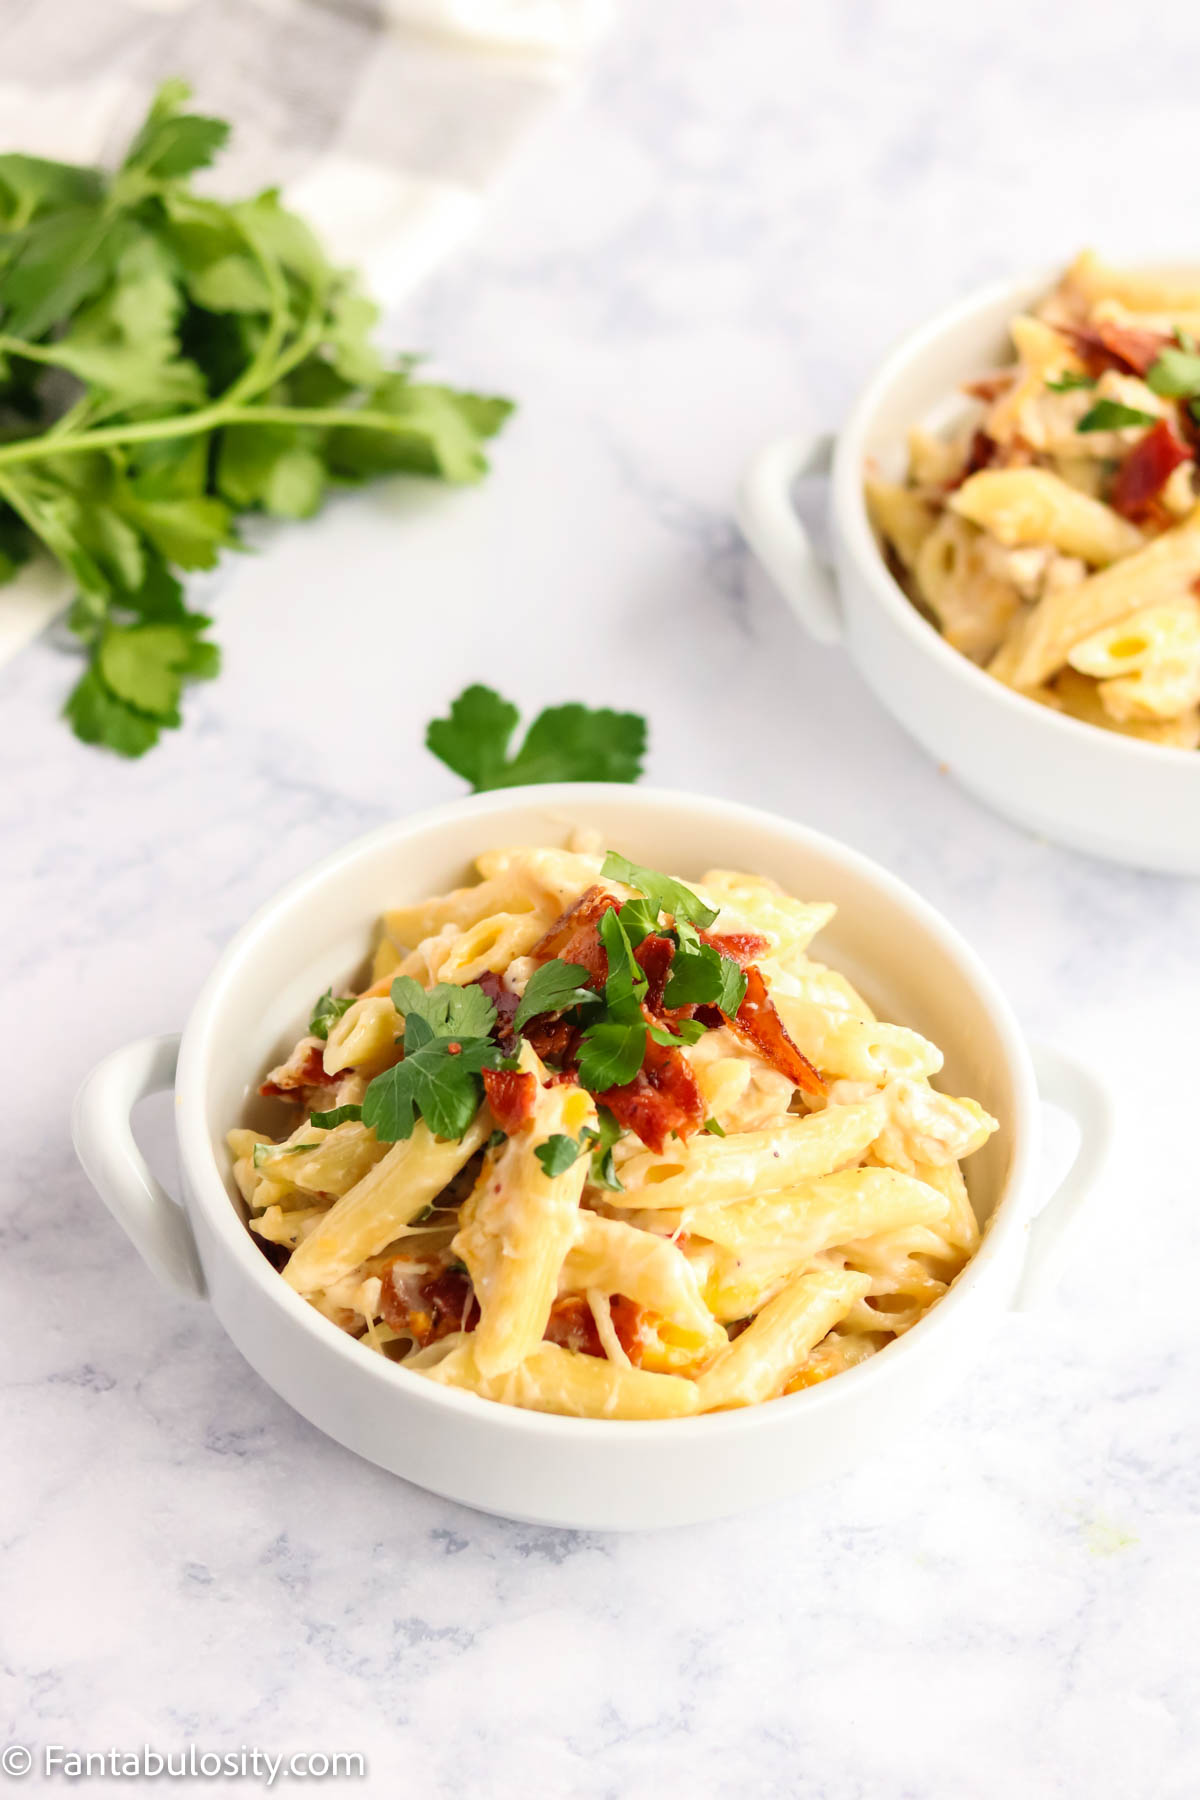
    Now you have an easy recipe for dinner tonight, that the entire family will love!

    Garnish Ideas

    Garnish with fresh parsley if you wish, but it’s not required.

    We also love topping this with parmesan cheese and adding green onions – or you can even add broccoli, similar to my chicken and broccoli alfredo recipe.

    Chicken Bacon Ranch Pasta in White Bowl

    Substitutions

    If you want to mix things up or if you’re out of some of the ingredients for this recipe, it’s really easy to substitute items! For instance:

    • Use monterey jack cheese
    • Add cream cheese (like in our cream cheese pasta recipe) or sour cream and ranch dressing mix
    • Store bought bacon bits instead of cooking bacon
    • Whole wheat pasta
    • Use crab meat instead of chicken, like we did in this crab casserole recipe.

    How to Bake a Freezer Pasta Meal:

    Do you love making pasta dishes as a freezer meal? Whip up this chicken bacon ranch alfredo pasta recipe and instead of baking, cover with aluminum foil (or however you prep your freezer meals) and place in the freezer.

    Now I’ve yet to try this myself with this recipe, so I’m assuming that this should work just as great as the other freezer pasta meals. So if you try this, I’d LOVE to hear how it did for you and what worked.

    Thaw in the fridge (may take up to 48 hours) or thaw in the microwave on defrost setting. Bake at 350 degrees according to instructions.

    If cooking frozen, bake for 60 minutes at 350˚ (time may vary, so check it after 30-45 minutes depending on your oven – mine cooks super fast and hot- with foil on. Then remove foil and bake another 10 minutes to brown the cheese.

    How to Store

    If you have leftovers of this delicious pasta dish, you can store it in an airtight container and in the refrigerator for 3-4 days. Simply reheat in the microwave or place back in the oven on 350° until heated through.

    What to Serve with Chicken Bacon Ranch Casserole

    If you’re looking for a delicious side dish, some of our favorite recipes to serve with this easy pasta recipe, are this side salad, garlic bread and this focaccia bread!

    More Pasta Recipes

    Pasta recipes are sort of our “thing” around here. They’re easy and most use everyday ingredients that we usually have on hand. So you’re also going to love this ham casserole, cheeseburger macaroni in the Instant Pot, and this creamy chicken and noodles recipe! Or keep frozen ravioli in the freezer to make this ravioli bake when you’re not sure what to make for dinner.

    Or, one of our recent favorites to have for dinner, is this garlic parmesan linguine.

    You’ll Also Love:

    If you love the combination of these flavors, then you’re really going to love this grilled cheese with chicken, Chicken Bacon Ranch Crescent Bites, and these Chicken Casserole Recipes!

    Did you make this? I’d be so grateful if you left a “star” rating below to let me know what you thought! Then, the next time you need a quick and easy recipe, come back to Fantabulosity to browse all of my easy recipes!

    Recipe

    scoop of chicken bacon ranch pasta
    Print Pin
    5 from 3 votes

    Chicken Bacon Ranch Pasta

    Chicken Bacon Ranch Pasta: A comforting baked dish casserole recipe that's easy to make with everyday ingredients that the whole family will love on a busy weeknight!
    Course Main Course
    Cuisine Italian
    Prep Time 10 minutes minutes
    Cook Time 20 minutes minutes
    Total Time 30 minutes minutes
    Servings 6 servings
    Calories 816kcal
    Author Jessica Burgess

    Ingredients

    • 1 lb penne pasta or favorite pasta, cooked al dente
    • 2 cups cooked shredded or diced chicken rotisserie chicken or leftover chicken for ease!
    • 15 oz jar alfredo pasta sauce we like Bertolli
    • ½ cup ranch dressing
    • 8 slices cooked bacon chopped
    • ½ cup shredded cheddar cheese
    • 2 cups mozzarella cheese
    • 3 tablespoon fresh parsley optional
    • green onions if desired

    Instructions

    • Preheat oven to 350 degrees and grease a 9×13 pan.
    • Cook penne pasta according to directions and drain.
    • In a large mixing bowl, pour in the pasta, chicken, alfredo sauce and ranch dressing and mix gently until combined.
    • Pour mixture into baking pan and top with the cooked chopped bacon and cheeses. 
    • Cover with aluminum foil and bake for 10 minutes. Remove cover and bake for an additional 10 minutes or until cheese is melted. 
    • Garnish with fresh parsley and green onions if desired, and serve. 

    Notes

    Substitutions
    If you want to mix things up or if you’re out of some of the ingredients for this recipe, it’s really easy to substitute items! For instance:
    • Use monterey jack cheese
    • Add cream cheese or sour cream and ranch dressing mix
    • Store bought bacon bits instead of cooking bacon
    • Whole wheat pasta
    Freezer Pasta Meal
    Do you love making pasta dishes as a freezer meal? Whip up this recipe and instead of baking, cover with aluminum foil (or however you prep your freezer meals) and place in the freezer.
    Now I’ve yet to try this myself with this recipe, so I’m assuming that this should work just as great as the other freezer pasta meals. So if you try this, I’d LOVE to hear how it did for you and what worked.
    How to Bake a Freezer Pasta Meal:
    Thaw in the fridge (may take up to 48 hours) or thaw in the microwave on defrost setting. Bake at 350 degrees according to instructions.
    If cooking frozen, bake for 60 minutes at 350˚ (time may vary, so check it after 30-45 minutes depending on your oven – mine cooks super fast and hot- with foil on. Then remove foil and bake another 10 minutes to brown the cheese.
    How to Store
    If you have leftovers of this delicious pasta dish, you can store it in an airtight container and in the refrigerator for 3-4 days. Simply reheat in the microwave or place back in the oven on 350° until heated through.

    Nutrition

    Serving: 1serving | Calories: 816kcal | Carbohydrates: 61g | Protein: 30g | Fat: 48g | Saturated Fat: 19g | Cholesterol: 125mg | Sodium: 1200mg | Potassium: 321mg | Fiber: 2g | Sugar: 4g | Vitamin A: 545IU | Vitamin C: 3.5mg | Calcium: 283mg | Iron: 1.7mg

    More Easy Recipes

    For more everyday recipes, browse and “pin” your favorites in our easy recipes!

    Easy Indian Chilli Chicken

    April 5, 2019

    Chilli chicken in bowl with rice.

    This Easy Chilli Chicken recipe is a DELICIOUS Indian dish that you can make at home in under 30 minutes!

    Chilli Chicken in a bowl on top of rice with green onions sprinkled on top
    Chilli Chicken Indian Dish

    Chilli Chicken

    So I’m ashamed to admit that I’m in my mid-thirties and I JUST NOW became a fan of Indian food.

    I never really had a desire to try it until my husband told me that he fell in love with it, and a few months ago I decided to take one for the team and broaden my horizons with my tastebuds.

    WHAT HAVE I BEEN DOING! I’ve been missing out all along, and feel like I’ve wasted my taste buds for YEARS without having Indian food!

    How to Make Chilli Chicken

    Well with my new-found love of Indian food, I had been hearing so much about chilli chicken and I knew it needed to make its way on the blog because I know just how much you love quick and easy recipes around here.

    Quick & Easy Chilli Chicken

    So most of the chilli chicken Indian dishes out there are really complex with many ingredients that are hard to find.

    But here on Fantabulosity, we only believe in quick and easy recipes that STILL taste delicious. So you’ll find that you can make this Indian dish in under 30 minutes!

    How to Make Chilli Chicken

    You’ll find that this recipe uses basic, everyday ingredients that you may even already have on-hand, or can easily pick up at the grocery store down the road.

    You’ll start by frying your chicken pieces, sautéing vegetables and then combining spices and condiments to create the rich, flavorful sauce.

    Indian Chilli Chicken Recipe

    Now because I believe food is love, I believe images of the recipe process tell the love story.

    But you can find the full recipe and ingredients list at the bottom of this post!

    Jump to Recipe
    Chilli Chicken Ingredients - Easy

    If you’ve never had chilli chicken before, you’re missing out! Its sweet, sour, tangy and smoky and perfect over white rice.

    Chilli Chicken Sauce for Indian recipe
    Chilli Chicken Sauce pouring over raw chicken in a bowl

    Breaded Chicken + Egg Mixture

    When prepping the chicken, you’ll combine the flour, garlic powder, and chilli powder in a bowl.

    In another bowl, whisk together egg, soy sauce, and chili sauce.

    Chilli Chicken ready to cook Indian dish

    Then, you’ll dip the chicken into the egg mixture, and then toss in flour to cover. Set aside. Repeat steps until all chicken pieces are breaded.

    Easy Indian Chilli Chicken in a skillet

    How to Cook Chicken for Chilli Chicken

    Fry those chicken pieces for about 5-10 minutes until golden brown and cooked throughout. (Don’t those look like the insanely delicious chicken nuggets from Chick-fil-A?)

    Easy Indian Chilli Chicken Cooked on Rack

    Saute Vegetables

    Next, cook the onions and green peppers for 3 minutes, then add garlic and green onions and cook until vegetables are tender.

    White onions and green onions for Indian Chilli Chicken

    Combine the Veggies, Chicken & Chilli Sauce

    Once veggies are tender, add the chicken back to the skillet and in a small bowl, mix together the chili powder, chili sauce, ketchup, and 2 Tb water, and pour over the chicken.

    Chilli Chicken with veggies in skillet ready for sauce
    Easy Indian Chilli Chicken Sauce

    TIP: If you want it to be saucier, then you can add an extra tablespoon of water at the end!

    Chilli Chicken ready to serve in a skillet

    Final Cooking…

    Stir and cook an additional two minutes…

    Chilli Chicken in white serving bowl

    Extra Toppings…

    …and serve over rice.

    If desired, sprinkle additional chopped green onions on top for some added flair and enjoy!

    Chilli Chicken on top of rice in a white bowl
    Chilli Chicken bite on a fork

    The chilli chicken was a welcomed challenge. There were soooo many versions out there and it was difficult to determine what direction to go in. Some of the highest rated versions were really complex with many ingredients that were hard to find. I know that is not what your blog is about! So, I simplified it as much as I could and came up with a chilli chicken recipe that is very approachable and can give your readers a semi-authentic Indian inspired meal at home in under 30 minutes.

    Recipe

    Chilli chicken in bowl with rice.
    Print Pin
    4.75 from 4 votes

    Chilli Chicken

    This Easy Chilli Chicken recipe is a DELICIOUS Indian dish that you can make at home in under 30 minutes! 
    Course Main Course
    Cuisine Indian
    Prep Time 10 minutes minutes
    Cook Time 15 minutes minutes
    Total Time 25 minutes minutes
    Servings 5 servings
    Calories 293kcal
    Author Jessica Burgess

    Ingredients

    For the Chicken:

    • oil for frying
    • 4 chicken breasts cut into ¾ inch pieces
    • ¼ cup flour
    • ¼ teaspoon garlic powder
    • ¼ teaspoon chili powder
    • 1 egg
    • 1 tablespoon soy sauce
    • 2 tablespoon chili sauce

    For the Stir-Fry:

    • 2 cloves garlic chopped
    • 3 green onions
    • 2 medium onions
    • 1 green pepper
    • ½ teaspoon chili powder
    • 2 tablespoon soy sauce
    • 1 tablespoon chili sauce
    • 2 tablespoon ketchup

    Instructions

    • Combine flour, garlic powder, chili powder in a bowl.
    • In another bowl, whisk together egg, soy sauce, and chili sauce.
    • Dip chicken in egg mixture, then toss in flour to cover. Set aside. Repeat steps until all chicken pieces are breaded.
    • Heat pan in oil until it reads 350 degrees on a candy thermometer. (Usually, medium-high heat.)
    • Fry chicken pieces until they are golden brown. About 5-10 minutes.
    • Remove from oil and place on a cooling rack with paper towels underneath.
    • In a new skillet, heat 1Tb oil for stir fry. Cook onions and green pepper for 3 minutes, then add garlic and green onions and cook until vegetables are tender.
    • Add chicken back to skillet and mix together the chili powder, chili sauce, ketchup, and 2 Tb water, and pour over the chicken.
    • Stir and cook an additional 2 minutes.
    • Serve over white rice.

    Nutrition

    Serving: 1serving | Calories: 293kcal | Carbohydrates: 15g | Protein: 42g | Fat: 5g | Saturated Fat: 1g | Cholesterol: 148mg | Sodium: 1018mg | Potassium: 884mg | Fiber: 2g | Sugar: 5g | Vitamin A: 480IU | Vitamin C: 28mg | Calcium: 34mg | Iron: 1.7mg

    More Easy Recipes You’ll Love

    If you love quick and easy recipes then don’t miss these reader favorites;

    Asian Chicken Lettuce Wraps

    Easy Fried Rice Recipe

    Asian Chopped Salad

    June 22, 2019

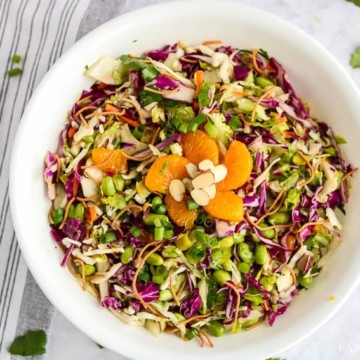
    Chopped Asian Salad - in a white bowl with mandarin oranges on top

    Asian Chopped Salad: A flavorful salad that’s easy to make at home and is a wonderful change-up from the typical garden salad!

    Chopped Asian Salad - in a white bowl with mandarin oranges on top
    Asian Chopped Salad

    We are HUGE fans of salad recipes here, but having the same old salad every day can get boring.
    Unless we’re having the BEST Side Salad recipe… that one NEVER gets old.

    So tossing things up (no pun intended… well, ok, maybe a little) making this Asian Chopped Salad to serve alongside a weeknight dinner or to take along to a potluck dinner, adds amazing flavors to the menu!

    Recipes You’ll Also Love:

    • Asian Chicken Lettuce Wraps
    • Asian Sloppy Joes
    • Italian Chopped Salad
    • Thai Salad Recipe

    Salad Ingredients

    As with all the recipes here on Fantabulosity, you can count on easy to use, everyday ingredients, and HOPEFULLY ingredients that you already have on hand, or can easily pick up at the nearby grocery store.

    This salad is no different, although some of the ingredients may need to be picked up if you don’t usually have an Asian recipe on the menu!

    This recipe is very forgiving, so if you don't have an ingredient on hand don't be afraid to skip it!

    Grab the following to make this salad:
    (Full, printable recipe card is at the bottom of this post for your convenience!)

    Salad Ingredients:

    Ingredients in Chopped Asian salad recipe
    Ingredients for Asian Chopped Salad
    • small package cabbage and carrot coleslaw mix
    • packaged red cabbage
    • romaine lettuce leaves
    • cilantro
    • green onions
    • can mandarin oranges- drained
    • crunchy rice noodles
    • edamame – shelled and cooked
    • slivered almonds for garnish
    Chopped Asian Salad Recipe in a white bowl

    Asian Dressing Ingredients:

    • sesame Oil
    • olive Oil
    • rice Vinegar
    • juice from can of mandarin oranges
    • honey
    • clove garlic
    • fresh ginger
    • juice from half a lime
    Grating ginger for Asian chopped salad
    Ginger
    Making the salad dressing for the Asian chopped salad
    Honey
    Mix dressing with a whisk for the Asian chopped salad recipe
    Asian Salad Dressing

    Tips for Making this Asian Chopped Salad

    As with any recipes, feel free to change/add what works best for you. But here are some tips to make this recipe easier or faster.

    • You can chop your own cabbage and carrots if desired.
    • You can find shelled and cooked edamame in the freezer section.
    • The edamame provides a punch of protein to make this a filling lunch option.
    • Serving suggestion: Fried Rice or Spring Rolls (Can grab both in the freezer section!) Or, if you have the time to prepare, these crispy avocado wontons would taste great with this salad.
    Chopped Asian Salad with mandarin oranges

    Recipe

    Chopped Asian Salad - in a white bowl with mandarin oranges on top
    Print Pin
    5 from 5 votes

    Asian Chopped Salad

    Asian Chopped Salad: A flavorful salad that's easy to make at home and is a wonderful change-up from the typical garden salad!
    Course Salad
    Cuisine Asian
    Prep Time 20 minutes minutes
    Cook Time 0 minutes minutes
    Total Time 20 minutes minutes
    Servings 6 people
    Calories 187kcal
    Author Jessica Burgess

    Ingredients

    Asian Salad Ingredients

    • 16 oz.

      cabbage and carrot coleslaw mix

    • 1.5 cups packaged red cabbage or shred red cabbage
    • 3 romaine lettuce leaves
    • .25 cup fresh cilantro
    • 2 green onions chopped
    • 15 oz. can mandarin oranges with 1 tablespoon of juice reserved
    • .5 cup crunchy rice noodles
    • 1.5 cups edamame shelled and cooked
    • slivered almonds for garnish optional

    Asian Salad Dressing

    • 1 tablespoon sesame oil
    • 1 tablespoon olive oil
    • 1 tablespoon rice vinegar
    • 1 tablespoon juice from mandarin oranges
    • 2 tablespoon honey
    • 1 clove garlic small, minced
    • 1 teaspoon fresh ginger minced
    • Juice from half a lime

    Instructions

    • In a large salad bowl, combine all salad ingredients.
    • In a small bowl, whisk together dressing ingredients and pour over salad.
    • Toss thoroughly to combine.
    • Top with extra crispy rice noodles and almonds, if desired.

    Notes

    • You can chop your own cabbage and carrots if desired.
    • You can find shelled and cooked edamame in the freezer section.
    • The edamame provides a punch of protein to make this a filling lunch option.
    • Serving suggestion: Fried Rice or Spring Rolls (Can grab both in the freezer section!)

    Nutrition

    Serving: 1serving | Calories: 187kcal | Carbohydrates: 27g | Protein: 7g | Fat: 7g | Saturated Fat: 1g | Sodium: 29mg | Potassium: 494mg | Fiber: 6g | Sugar: 16g | Vitamin A: 2590IU | Vitamin C: 69.2mg | Calcium: 81mg | Iron: 1.8mg

    Favorite Salad Recipes

    If you love salads, then you’ve come to the right place! Browse our favorite savory salad recipes and our dessert salads to fill up your Pinterest boards!

    Best Side Salad Recipe

    Instant Pot Chili Mac

    June 8, 2019

    Instant Pot Chili Mac: An easy weeknight meal or the ultimate comfort food! This hearty chili mac is made in under 30 minutes in just one pot for easy clean-up.

    Hungry for more one-pot dinners? Check out my full list of cozy soup recipes.

    With so many Instant Pot favorites around here, this recipe is NO exception!

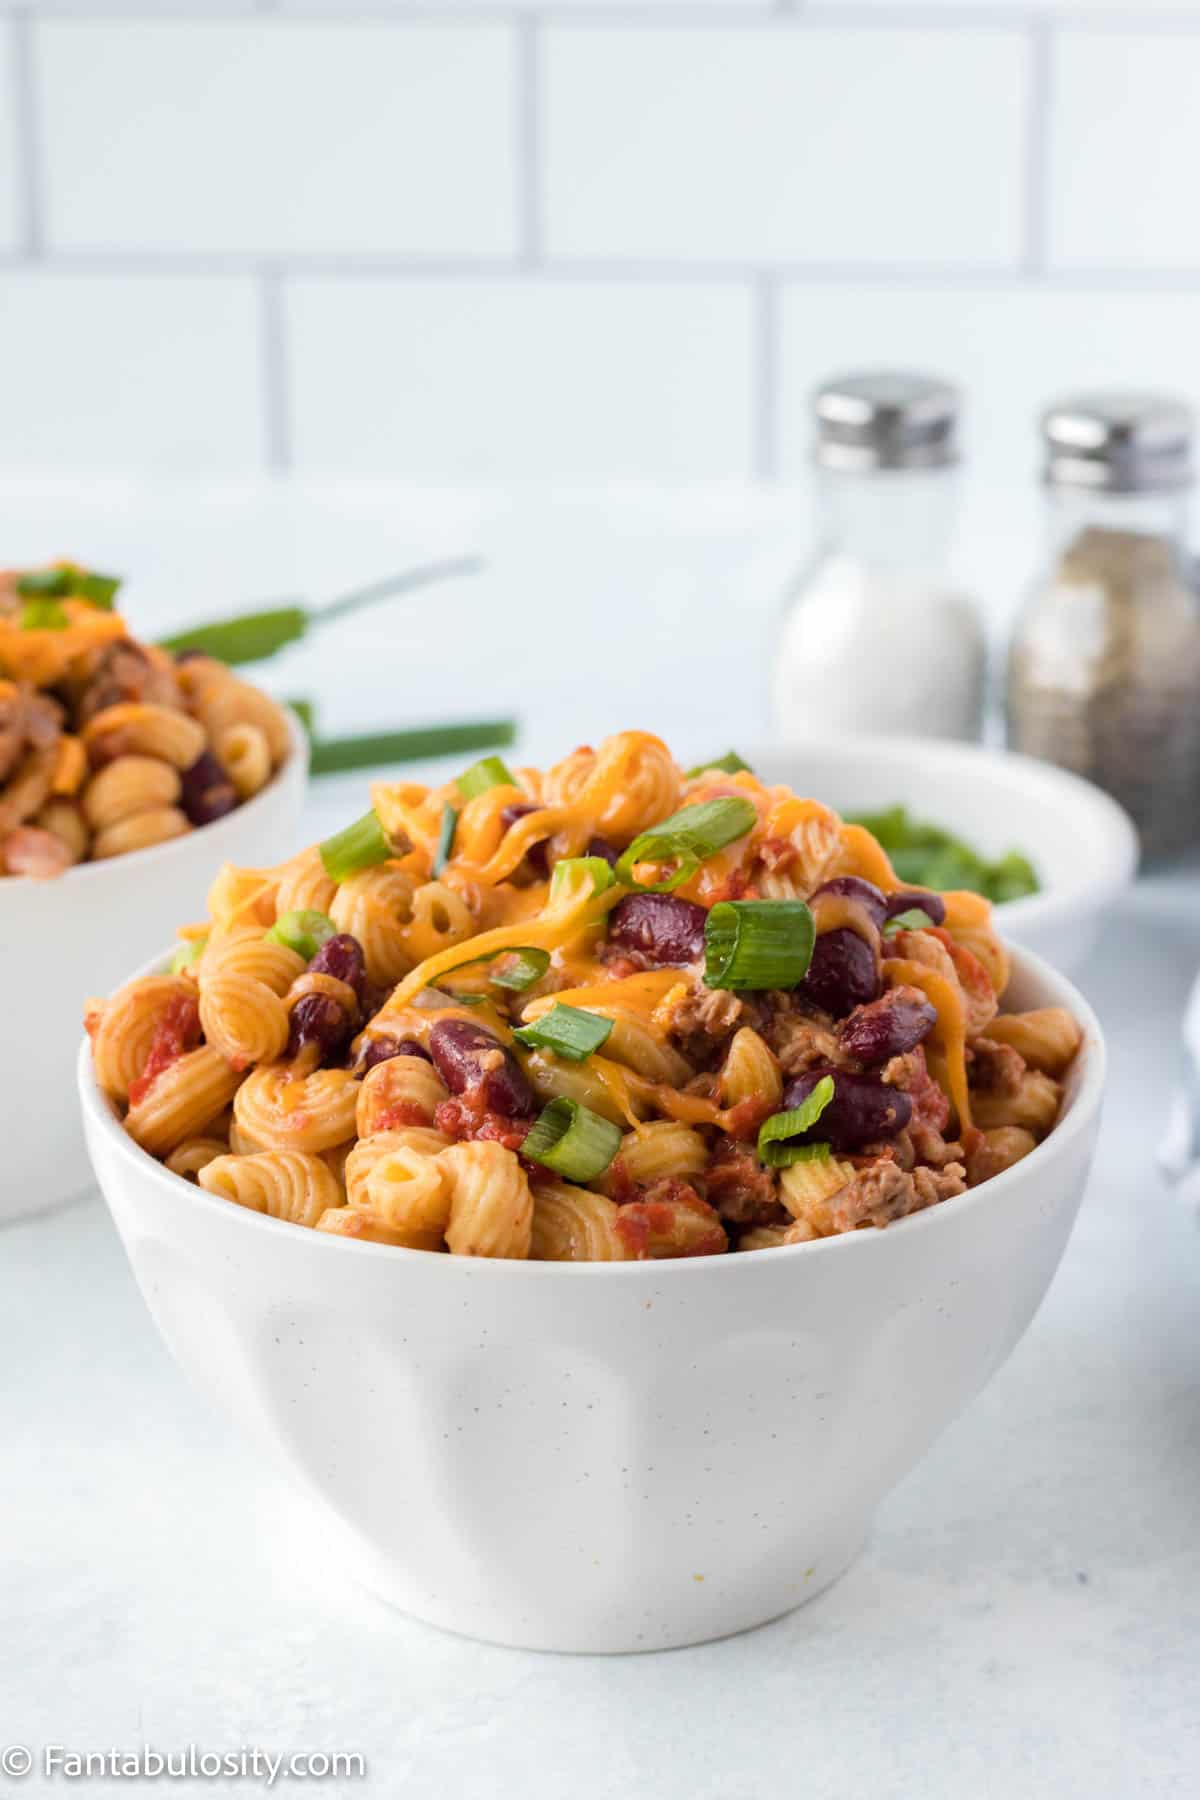
    Instant pot chili mac in white bowl
    Instant Pot Chili Mac
    [feast_advanced_jump_to]

    Why You’ll Love This Recipe

    This recipe, like the Instant Pot Cajun Pasta that we love so much too, is perfect for those busy weeknights and last-minute dinner ideas because you can keep the ingredients on hand! Made with lots of cheese, elbow pasta, lean ground beef, and other pantry ingredients that you almost always have!

    A one-pot meal is my favorite type of meal because it takes much less time to clean up. All you have to do is throw the instant pot in the dishwasher when you’re done!

    Hearty meals like instant pot chili mac, white chicken chili, or this Frito chili pie are the ultimate comfort food for dreary days. They’re the perfect pick-me-up for the whole family. (Especially this crock pot goulash if you’re feeding the family!)

    Ingredients for Instant Pot Chili Mac

    • 1 tablespoon oil
    • 1 lb lean ground beef (see more ground beef recipes for dinner)
    • 1 red onion (chopped)
    • 1 green bell pepper (diced)
    • 1 can (15oz)kidney beans drained and rinsed
    • 1 can (28oz) diced tomatoes
    • 2 cups vegetable broth
    • 1 tablespoon chili powder
    • 1 teaspoon cumin
    • Salt and pepper to taste
    • 4 ½ cups elbow macaroni
    • 1 ½ cups cheddar cheese
    • ¼ cup chopped green onions

    Similar ingredients are used in this hamburger mac and cheese recipe!

    Ingredients for instant pot chili mac
    Ingredients

    How to Make Instant Pot Chili Mac

    1. Press saute mode on the Instant Pot, add oil and wait 3 minutes.
    2. Once the oil is hot, add the ground beef and saute, during cooking, with the help of a wooden spoon, break it into small pieces. Cook the meat long enough for it to be fully brown.
    3. Add onion and bell pepper and cook for another 5 minutes until the onion is softened.
    beef, onions in instant pot
    ground beef, peppers and onions
    1. Add the rest of the ingredients except ½ cup of cheddar cheese and green onions. Give it a good stir.
    Instant pot chili mac
    beans, tomatoes, cheese, pasta
    1. Close the lid, and place the valve on sealing mode. Select high pressure and cook for 5 minutes. (Keep in mind that it will take about 20 minutes for the pressure to rise and start cooking)
    2. Once cooked, release the pressure immediately, open the lid, and stir.
    instant pot chili mac and cheese
    Cooked pasta
    1. Serve in a hot bowl, add more cheese and green onion.

    Substitutions

    Here are a few substitutions for you in case you’re out of a particular ingredient or follow a certain diet…

    • Impossible meat – For instant pot vegetarian mac, you can use impossible meat or another plant-based meat.
    • Different noodles – If you don’t have macaroni pasta or cavatappi noodles, you can use bow-tie, rotini noodles, or penne noodles.
    • Ground turkey – If you’re out of ground beef or rather use another type of meat, you can use ground turkey instead.
    • Black beans – Kidney beans and/or black beans work great in this recipe so feel free to use your favorite or add half and half.

    Variations

    Although this recipe is hearty and delicious as is, there are a few ways you can spice it up…

    • Extra cheese – Topping classic chili and instant pot chili mac with extra cheese is one of my favorite things. The cheese melts and adds this ooey gooey texture.
    • Sour cream – You can also top this pressure cookie chili mac with sour cream or a dollop of greek yogurt. (unsweetened greek yogurt!)
    • Spicier – Adding a little extra spice to easy recipes is never a bad idea! Top with cayenne pepper or chili flakes for extra zing.
    pasta with beans in white bowl

    Storage

    You can store this chili mac in the fridge for up to 4 days. Leftover chili mac is just as delicious as fresh chili mac and it’s super convenient. Store in an airtight container to preserve freshness.

    You can also store this pressure cooker chili mac in the freezer for up to 5 months. Make sure you use a freezer-safe container and freeze into separate servings so you can thaw single servings at a time.

    Equipment

    You’ll need an Instant Pot or another pressure cookie for this chili mac recipe. You can order an Instant Pot online or find one at your local Walmart or grocery store.

    2 bowls of chili mac with spoons on white table

    Expert Tips and FAQs

    What is the difference between goulash and chili mac?

    Goulash and chili mac are very similar in the sense they are a one-pot meal with ground beef, tomatoes, pasta, cheese, etc. but American goulash doesn’t contain beads.

    Is chili mac a midwest thing?

    Instant pot chili mac with beans is a common Midwest meal or side dish. It’s great for game day parties, neighborhood gatherings, and other laid-back events.

    Why did my chili burn in the instant pot?

    The burn message on your instant pot simply means that the inner pot of your instant pot has gotten too hot. You might have a small amount of burnt chili mac in the bottom of your pot but not enough to ruin the whole dish.

    Instant pot chili mac recipe
    Cheesy Chili Mac

    Related Recipes

    If you’re a fan of chili, you’ll also love this classic chili recipe and this white chicken chili. I love making chili because it keeps well in the fridge and is perfect for leftovers.

    Recipe

    Print Pin
    5 from 5 votes

    Instant Pot Chili Mac

    An easy weeknight meal or the ultimate comfort food! This hearty chili mac is a made in under 30 minutes in just one pot for easy clean up.
    Course Main Course
    Cuisine American
    Prep Time 10 minutes minutes
    Cook Time 20 minutes minutes
    Total Time 30 minutes minutes
    Servings 8 servings
    Calories 638kcal
    Author Jessica Burgess

    Ingredients

    • 1 tablespoon oil
    • 1 pound ground beef
    • 1 red onion chopped
    • 1 green bell pepper diced
    • 15 ounces kidney beans drained and rinsed 1 can
    • 28 ounces diced tomatoes
    • 2 cups vegetable broth
    • 1 teaspoon chili powder
    • 1 teaspoon cumin
    • salt and pepper to taste
    • 4 ½ cups elbow macaroni
    • 1 ½ cups cheddar cheese
    • ¼ cup chopped green onions

    Instructions

    • Press saute mode on the Instant Pot, add oil and wait 3 minutes.
    • Once the oil is hot, add the impossible meat or ground beef and saute, during cooking, with the help of a wooden spoon, break it into small pieces. Cook the meat long enough for it to be fully brown.
    • Add onion and bell pepper and cook for another 5 minutes until the onion is softened.
    • Add the rest of the ingredients except ½ cup of cheddar cheese and green onions. Give it a good stir.
    • Close the lid, and place the valve on sealing mode. Select high pressure and cook for 5 minutes. (Keep in mind that it will take about 20 minutes for the pressure to rise and start cooking)
    • Once cooked, release the pressure immediately, open the lid, and stir.
    • Serve in a hot bowl, add more cheese and green onion.

    Notes

    Substitutions

    Here are a few substitutions for you in case you’re out of a particular ingredient or follow a certain diet…
    • Impossible meat – For instant pot vegetarian mac, you can use impossible meat or another plant-based meat.
    • Different noodles – If you don’t have macaroni pasta or cavatappi noodles, you can use bow-tie, rotini noodles, or penne noodles.
    • Ground turkey – If you’re our of ground beef or rather use another type of meat, you can use ground turkey instead.
    • Black beans – Kidney beans and/or black beans work great in this recipe so feel free to use your favorite or add half and half.

    Nutrition

    Serving: 1serving | Calories: 638kcal | Carbohydrates: 79g | Protein: 31g | Fat: 22g | Saturated Fat: 9g | Polyunsaturated Fat: 2g | Monounsaturated Fat: 8g | Trans Fat: 1g | Cholesterol: 63mg | Sodium: 603mg | Potassium: 814mg | Fiber: 8g | Sugar: 7g | Vitamin A: 711IU | Vitamin C: 23mg | Calcium: 235mg | Iron: 5mg

    Italian Chopped Salad

    April 4, 2019

    Italian Chopped salad in white bowl

    Italian Chopped Salad – Using romaine, ditalini pasta, chicken, bacon, blue cheese, honey mustard, & more, makes this one of our NEW favorite salad recipes!

    Italian Chopped Salad Recipe like at Portillo's and Giordanos

    Why You’ll Love This Italian Chopped Chicken Salad

    I don’t even know how to begin telling you about this salad.

    Well, I’ll start here I guess…

    Last month I went to Chicago for a home influencer conference, and before leaving town on the last day, I was STARVING and on the hunt for something good.


    I decided to pop in to a popular pizza restaurant to order that delicious deep dish pizza that I had already fallen in love with, and I saw a salad on the menu that caught my eye.

    So after making an indulgent decision of getting deep dish pizza AND this salad, I quickly found myself in salad (and pizza) heaven.

    Salad with Pasta?

    I know, it probably sounds crazy right? But it caught my eye on the menu and let me tell you… the added texture of the ditalini pasta in this lettuce salad, is delicious. This Chicken Pasta Caesar Salad is another great example where pasta and lettuce go together lovely!

    So since Chicago is too far away to simple go down the road to get this salad anytime that I wish, I decided I better try and recreate it at home. Friend, I got it pretty close… and it has now come a favorite in our house.

    Salad Ingredients

    Combine the romaine (and head lettuce if you wish) and ditalini with ingredients like:

    • bacon
    • chicken
    • green onions
    • Roma tomatoes
    • chopped red cabbage
    • blue cheese crumbles
    • honey mustard dressing

    …and this salad is going to fill you up on so many levels with the protein, flavor.

    How to Make Italian Chopped Salad

    If you’ve made my “BEST Side Salad” recipe, then you know how I feel about big hunks of lettuce leaves in my salad.

    I don’t feel that anyone should have to slice and dice their salad just to take a bite. (Unless it’s a wedge salad of course, but we’ll save that deliciousness for another day.)

    Another great Italian classic is to add Salami and make a Grinder Salad. All your favorite sub fillings without the bread!

    Romaine Lettuce Leaves

    But what I do differently in this salad than my side salad recipe, is that I leave some of the stalks of the romaine for a bit more crunch.

    3 heads of romaine lettuce to use for salad

    However, I remove a lot of the white, bitter part of the stalk, and only keep the little bit towards the top of the leaves. (You can adjust this with how you prefer it too! Salads are super flexible, so change it up on how you prefer it!)

    Cut romaine off of stalks - using a cutting board

    Feel free to use some romaine AND some head lettuce to really up your salad texture game here.

    Chopped romaine lettuce and/or iceberg

    Salad Toppings

    Besides the photo below looking super pretty with all of the colors of the salad ingredients, the flavors that these bring in to this Italian Chopped Salad are where.it’s.at.

    Make sure to chop up all of your ingredients into smaller pieces, so it becomes the “chopped salad” you’re aiming for.

    Toppings for chopped salad - chicken, blue cheese, bacon, red cabbage, green onions, tomatoes

    TIP: I like prepping and chopping my salad ingredients ahead of time, while the chicken, bacon and the pasta are cooking, to help speed things up.

    Cooked Ditalani pasta on Italian chopped salad

    Easy Italian Chopped Salad

    I’ve liked salad since being a little girl, but now that I’m older and I’m the “head chef” here in my house, I STILL love salads because they’re so easy to make, versatile and forgiving.

    Feel free to assemble how you wish because you will toss this all anyway, but I wanted you to get a good look at the ingredients as I added them in!

    I believe food is love, and I believe photos can help tell the love story…

    Ditalani pasta on top of lettuce in a salad bowl
    Italian Chopped Salad - tomatoes on top
    Italian Chopped Salad like from portillo's and Giordano's - red cabbage
    Italian Chopped Salad - blue cheese, gorgonzola on top
    Chopped green onions on top of Italian chopped salad
    Chopped bacon on top of an iItalian chopped salad

    Chopped Italian Chicken Salad

    Now although you can leave the chicken out of this salad and use the ingredients as a side salad, rather than as a hearty main dish… I DO love the texture (and protein) that the chicken provides.

    If you cut out the chicken, you can serve it as a side salad alongside a pasta dish like this Chicken Bacon Ranch Pasta or this Spaghetti Bolognaise!

    Feel free to use and cook chicken tenders like I did for this recipe, or even grab a rotisserie chicken from the deli of your grocery store to make things super quick and easy.

    Chopped chicken on top of Italian Chopped Salad

    What Kind of Salad Dressing for Italian Chopped Salad?

    Well, when I think of an Italian salad of any kind, I think of using Italian dressing.

    But when I had this salad in Chicago, it was made with what tasted like a honey mustard dressing, so I went with that, and I was NOT disappointed.

    SIDE NOTE: I actually used the honey mustard dipping sauce you see below, instead of honey mustard dressing. Why? Because that’s what I had on hand.

    But I’m actually liking the thicker texture it provided on this salad, so I’m not sure if I’ll ever use a different one.

    Honey mustard dressing or dip - Sweet Baby Rays Bottle

    Make-Ahead Salad

    Planning on serving this salad at a party or later in the day? No problemo! I like making things ahead of time, and am especially a fan of make-ahead salads.

    REMEMBER: Refrain from adding the dressing to the salad until right before serving, but feel free to go ahead and toss the ingredients beforehand and place it in the refrigerator until ready.
    (However, I wouldn’t make this salad or blend the ingredients together until the day you’re planning on serving it, in case the toppings make the lettuce soggy.)

    Mix together ingredients for Italian Chopped Salad
    Individual Italian Chopped Salad in serving bowl

    Tossing the Chopped Salad

    If you have one of the large Pampered Chef mixing bowls, or similar, I LOVE using it for this salad.

    It’s big enough to mix the salad and I can even slip the lid right on it if I need to store it for later.

    Chopped Salad in a large bowl with lid to mix in dressing

    Serving the Whole Salad

    If you’re dressing the entire salad at once, rather than dressing individual salads, and depending on the size of your bowl with a lid, a fun tip I have is to pour your honey mustard dressing on top of your salad, put the lid on, and shake it!

    Such an easy way to dress your salad! Grab some tongs and portion out the salad on to individual salad plates!

    Italian Chopped Salad Recipe like from Portillo's or Giordanos

    Substitution

    If you’re not a fan of the honey mustard dressing, you may prefer using something like this steak salad dressing instead!

    What to Serve with this Salad

    I believe these Italian slider sandwiches go amazing with this salad recipe, and this French bread pizza is the perfect pairing.!

    Did you make this? I’d be so grateful if you left a “star” rating below to let me know what you thought! Then, the next time you need a quick and easy recipe, come back to Fantabulosity to browse all of my easy recipes!

    Love Salad Recipes?

    We do too. We’ve gathered all of our favorite salad recipes for you so you can keep them all in one spot!

    Here are just a few you’ll find here on the blog:

    • Roasted potato salad in serving bowl, topped with cheese, bacon and green onions.
      Roasted Potato Salad
    • Curry chicken salad with grapes in a white bowl.
      Curry Chicken Salad
    • Chicken salad with grapes and apples, sitting on bread.
      Harvest Chicken Salad
    • A bowl of wilted lettuce, that's leaf lettuce with bacon grease and salt.
      Wilted Lettuce

    Recipe

    Italian Chopped salad in white bowl
    Print Pin
    5 from 3 votes

    Italian Chopped Salad

    Italian Chopped Salad – Using romaine, ditalini pasta, chicken, bacon, blue cheese, honey mustard, & more, makes this one of our NEW favorite salad recipes!
    Course Main Course
    Cuisine Italian
    Prep Time 15 minutes minutes
    Cook Time 15 minutes minutes
    Total Time 30 minutes minutes
    Servings 6
    Calories 523kcal
    Author Jessica Burgess

    Ingredients

    • 5 chicken tenderloins
    • 1 tablespoon olive oil
    • 8 slices bacon
    • 1 cup cooked and cooled ditalini pasta (About ½ cup uncooked.)
    • 3 heads romaine lettuce
    • 1½ cups chopped red cabbage raw
    • 5 green onions chopped
    • 2 roma tomatoes chopped
    • 1 cup blue cheese crumbles
    • honey mustard dressing

    Instructions

    • Begin by dicing chicken tenderloins in to small, bite-size peices and saute and cook thouroughly in 1 tablespoon of olive oil in a pan. Set aside.
    • Cook bacon according to package directions. (I prefer a softer bacon texture, rather than crunchy for this particular salad.) Set aside.
    • Tear romaine leaves off of the stalks and wash and dry (air or salad spinner).
    • With a knife (my favorite knife) chop lettuce into bitesize peices. (I remove most of the white stalks and disgard, as this tends to add bitter flavors to the salad.)
    • Chop remaining veggies and bacon in to small, bite-size peices. 
    • In a large bowl, combine all of the ingredients and toss with honey mustard dressing, either individually or as a bulk salad! (Just remember, tossing all of your salad with the dressing will make any leftovers soggy!)

    Video

    Notes

    Please keep in mind that the nutritional information provided below is just a rough estimate and variations can occur depending on the specific ingredients used. 

    Nutrition

    Serving: 1g | Calories: 523kcal | Carbohydrates: 51g | Protein: 25g | Fat: 22g | Saturated Fat: 8g | Cholesterol: 62mg | Sodium: 799mg | Potassium: 1236mg | Fiber: 8g | Sugar: 14g | Vitamin A: 27980IU | Vitamin C: 30.4mg | Calcium: 249mg | Iron: 4.1mg

    Vegetarian Chili Recipe

    March 19, 2019

    Vegetarian chili in small bowl with avocado slices.

    This Vegetarian Chili Recipe is simple to make and packed full of flavor. The hearty ingredients will fill you up and you won't even miss the meat.

    Want more meatless comfort? See the rest of my easy soup recipes.

    Whip up a batch and pour it on top of Fritos for a Frito Chili Pie or on top of corn dogs for these chili cheese corn dogs.

    Vegetarian Chili Recipe

    Hi Fantabulosity friends! Meg here popping in again this month with a delicious, flavorful vegetarian chili recipe that you're going to love.

    I'm not a vegetarian, so this easy chili recipe is more my style, but I have a picky kiddo that doesn't care for the texture or flavor of most meat so I'm always on the hunt for new ways to get protein into his diet.

    But I do like to go meatless some days so this vegetarian chili was a big hit at my house.

    Pantry Ingredients for the Win

    All of the ingredients in this chili are pretty simple pantry staples that you may already have on hand.

    • Canned tomatoes
    • Beans
    • Onion
    • Garlic
    • Sweet Potatoes
    • Oregano
    • Chili Powder
    • Cumin
    • Salt

    …are all you need to whip up a big batch of vegetarian chili.

    A Protein Winner

    For the hardcore carnivores out there (I live with one), no need to worry. Even though this is a vegetarian chili it's still packed with protein thanks to the black beans, like Jessica used in her White Chicken Chili recipe, and pinto beans.

    That means a bowl of this chili will keep you full and happy without the need for meat.

    The sweet potatoes also contribute to the heartiness of this chili recipe. They add a creamy texture to the chili and make it super filling. The sweetness of the sweet potatoes is a nice contrast to the spicy chili powder and smoky cumin.

    When all these flavors mingle together it creates something kind of magical and hearty and soul-warming.


    Vegetarian Chili in the Slow Cooker or Crock-Pot

    Now, I haven't tried this in the slow cooker yet, but if you're needing to give it a try, I'd recommend stirring everything together in the slow cooker, and cook it for 4-5 hours on high, or until the sweet potatoes are soft.

    NOTE: This may make the chili a lot thinner, so test it out or check on it as it cooks. Let me know in the comments below if you give this a try! I’d love to hear how cooking it in a crock-pot turns out!


    How to Make Vegetarian Chili on the Stovetop

    To start things off, sauté a diced onion in a little oil until it's softened.

    Throw in some garlic and kosher salt and let that cook another minute.

    The sweet potatoes join the party next and are cooked a few minutes to get a little color on them and allow them to start to soften.

    The spices and tomato paste are added to the pot next and this is an important step…Before you add any more liquid or ingredients allow the tomato paste to cook for a few minutes, stirring it often.

    It will turn a rusty color and that's when you know it's time to add the remaining ingredients.

    This little step provides more flavor and cooks out the tin taste that can sometimes occur with canned tomato products.

    Crushed tomatoes or diced tomatoes, depending on your preference for chunkiness are added along with a carton of vegetable stock and the chili simmers away until the sweet potatoes are softened and the chili is thickened.

    Stir in the beans during the last few minutes of cooking and you're ready to eat. You don't want to simmer the chili with the beans for too long because they'll soften too much and lose their texture. (Which is why if you decide to cook this in a slow cooker instead, I’d love to hear how it turns out!)

    Simple Weeknight Meal

    All together the chili takes about an hour to make but the majority of that time is inactive simmering.

    So, that means you can get dinner going then attend to homework, work projects, game playing or a little down time while dinner cooks itself.

    It also reheats well making it great for lunches or leftover night. Who doesn't love a leftover night?!

    Keep this vegetarian chili in mind on your next meatless Monday or any night of the week.

    More Easy Chili Recipes

    If you love chili as much as we do around here, then you’ll LOVE these:

    White Chicken Chili Recipe

    Easy Chili Recipe

    Venison Chili Recipe

    Recipe

    Vegetarian chili in small bowl with avocado slices.
    Print Pin
    5 from 2 votes

    Vegetarian Chili

    This Vegetarian Chili is simple to make and hearty enough to keep you full. Perfect for Meatless Monday or any night of the week.
    Course Main Course
    Cuisine American
    Diet Vegetarian
    Prep Time 10 minutes minutes
    Cook Time 55 minutes minutes
    Total Time 1 hour hour 5 minutes minutes
    Servings 6 servings
    Calories 358kcal
    Author Jessica Burgess

    Ingredients

    • 1 Tablespoon olive oil
    • 1 small yellow onion, diced
    • 3 large garlic cloves, finely minced
    • 1 teaspoon kosher salt
    • 2 medium sweet potatoes, diced into ½-inch chunks
    • 1 ½ Tablespoons chili powder
    • 1 Tablespoon cumin
    • 1 teaspoon dried oregano
    • 6 ounce can tomato paste
    • 28 ounces can crushed or diced tomatoes, depending on how chunky you like your chili
    • 4 cups vegetable broth
    • 15.5 ounces black beans, rinsed
    • 15.5 ounces pinto beans, rinsed
    • Optional toppings: shredded cheese, sliced avocado, sour cream, tortilla strips

    Instructions

    • Heat a large pot over medium heat. Add olive oil and allow it to get hot. Add onion, garlic and salt and cook for 3 minutes, stirring often. Add sweet potatoes and cook another 5 minutes, until the sweet potatoes start to get some color. 
    • Sprinkle in the spices and stir to evenly distribute. Add tomato paste and cook for a minute, stirring often until it turns a rusty red color. 
    • Add crushed or diced tomatoes and vegetable broth. Bring chili to a simmer and cook for 45 minutes, or until the sweet potatoes are tender. During the last 5 minutes of cooking, stir in the black beans and pinto beans. Top with desired toppings and enjoy.

    Nutrition

    Serving: 1serving | Calories: 358kcal | Carbohydrates: 68g | Protein: 17g | Fat: 4g | Saturated Fat: 1g | Polyunsaturated Fat: 1g | Monounsaturated Fat: 2g | Sodium: 1330mg | Potassium: 1454mg | Fiber: 19g | Sugar: 12g | Vitamin A: 12224IU | Vitamin C: 22mg | Calcium: 154mg | Iron: 7mg

    Easy Bacon Ranch Pasta Salad

    June 1, 2021

    close up of bacon ranch pasta salad in gray bowl

    Cheese, Ranch, Bacon… all wrapped up in this cold pasta salad is one of our FAVORITE creamy pasta salad recipes to date! Add chicken to make a quick weeknight dinner that’s perfect any time of year!

    bacon ranch pasta in gray bowl
    [feast_advanced_jump_to]

    Why You’ll Love this Recipe

    With spring and summer potlucks and barbecues just around the corner, this Bacon Ranch Pasta Salad is a cold pasta salad recipe that you need on deck. Simple ingredients and prep work make this pasta salad a snap to put together and it just may become one of your favorite summer salads!


    Hey Fantabulosity readers, it's Meg popping in from Meg's Everyday Indulgence. I promise you are going to love today's easy pasta salad – my Bacon Ranch Pasta Salad Recipe

    A good pasta salad is so perfect to have in your wheelhouse. Whether it’s for a potluck dinner, dinner party, barbecue or you’re looking for the perfect side dish for a quick weeknight dinner!

    Recipe Ingredients

    (You can find the full printable recipe card with instructions below too!)

    You only need 6 ingredients for this delicious pasta salad.

    Ingredients for bacon ranch pasta salad
    • 1 lb. short cut pasta -The first of course is the pasta. You can use whatever type of pasta you prefer but I definitely recommend it being a short cut pasta. Elbows, penne, shells, bowtie or my personal favorite, cavatappi, all work really well. We love a fun shaped pasta around here.
    • 1 lb. bacon – What makes this pasta salad its best self, is a whole pound of crispy bacon. It gets cooked up to crispy perfection before being stirred into the pasta salad. A pound may seem like a lot but with a pound of pasta, it's the perfect amount!
    • 1 dry ranch mix
    • 1 cup mayonnaise
    • ¾ cup whole milk
    • 2 cups cubed cheddar cheese – I firmly believe cheese makes most things better and that's very true with this bacon ranch pasta salad. I personally prefer cubed cheese over shredded cheese in a pasta salad. Shredded seems to get a little weird in texture. Dare I say squishy? And who doesn't love a big bite of cheese with their creamy pasta?! It's a way better option in my opinion.

    Salad Dressing Tips

    The ranch flavor comes from a ranch dressing packet, mayo and milk.

    When you mix together the dressing for the pasta salad it will be runny. It'll seem too runny but trust me, it's just right. The magic to this pasta salad is making it ahead of time to allow it to soak up the delicious sauce and thicken up to create a creamy ranch dressing!

    Note: You don't have to make it the night before, but it should be mixed up at least an hour before serving to allow the flavors to mingle.

    Step by Step Directions

    • Bring a large pot of water to a boil. Cook pasta according to the package directions.
    • Meanwhile, heat a large skillet over medium heat. Dice bacon into small pieces and add to the hot skillet. Cook until crisp. Drain on paper towel. 
    • In a large mixing bowl, whisk together the ranch dressing mix, mayonnaise and milk. Set aside. (IMAGE 1)
    • Once pasta is done, rinse well with cold water. Shake as much water off the pasta as possible. Add to the ranch mixture. Add bacon and cheese cubes. Stir well. Let sit in the fridge for at least an hour or up to overnight. Stir again before serving. (IMAGE 2)
    collage - mix together dressing and stir in pasta

    I love the textures in this pasta salad. The pasta has that little bite, the bacon keeps its crispiness, the cheese is a little chewy and the creamy sauce brings it all together. I am not embarrassed to say I wanted to hide this from my whole family. I didn't but I seriously considered it because it’s a great recipe!

    cold bacon ranch pasta salad in individual servings

    Optional Pasta Salad Mix-In Ideas

    This pasta salad is super basic but I've listed some ideas of additional ingredients you can stir in to make it a little different and cater to your family’s tastes.

    We like the basic ranch, bacon, cheese situation at our house for a side dish idea, but you can stir in sliced black olives, fresh veggies like sweet peas or orange bell pepper, red onions, green onions, garlic powder, onion powder, or diced tomatoes.

    bacon ranch pasta salad in serving bowls

    Chicken Bacon Ranch Pasta Salad

    Know what else I love? Being able to add a protein like chicken to salad recipes or sausage, like in this cowboy pasta salad, and transform it into a jam-packed, heartier dish, or even a main dish recipe!

    Feel free to grab a cooked rotisserie chicken from the grocery store, frozen cooked chicken breast, or even make your own chicken in the Instant Pot to keep this recipe quick and easy but hearty!

    If you're looking forward to warm weather and outdoor gatherings as much as me, keep this bacon ranch pasta salad in mind. It’s one of the easy recipes you’ll want to keep on hand for so many reasons!

    Bacon ranch pasta salad in gray bowls

    You will also love this amazing collection of pasta salads, especially this Italian Pasta Salad, so you can fill your summer meal plan with many different salads!

    Recipe

    close up of bacon ranch pasta salad in gray bowl
    Print Pin
    4.82 from 53 votes

    Bacon Ranch Pasta Salad (with Video)

    This 6 ingredient bacon ranch pasta salad is so simple and delicious. Perfect for potlucks, barbecues or a weeknight side dish. 
    Course Side Dish
    Cuisine American
    Prep Time 1 hour hour 10 minutes minutes
    Cook Time 15 minutes minutes
    Total Time 1 hour hour 25 minutes minutes
    Servings 12 servings
    Calories 510kcal
    Author Jessica Burgess

    Ingredients

    • 1 pound short cut pasta
    • 1 pound bacon
    • 1 ounce ranch dressing packet
    • 1 cup mayonnaise
    • ¾ cup whole milk
    • 2 cups cubed cheddar cheese

    Instructions

    • Bring a large pot of water to a boil. Cook pasta according to the package directions.
    • Meanwhile, heat a large skillet over medium heat. Dice bacon into small pieces and add to the hot skillet. Cook until crisp. Drain on paper towel. 
    • In a large bowl, whisk together the ranch dressing mix, mayonnaise and milk. Set aside.
    • Once pasta is done, rinse well with cold water. Shake as much water off the pasta as possible. Add to the ranch mixture. Add bacon and cheese cubes. Stir well. Let sit in the fridge for at least an hour or up to overnight. Stir again before serving.

    Video

    Nutrition

    Serving: 1serving | Calories: 510kcal | Carbohydrates: 29g | Protein: 15g | Fat: 36g | Saturated Fat: 11g | Cholesterol: 54mg | Sodium: 500mg | Potassium: 201mg | Fiber: 1g | Sugar: 2g | Vitamin A: 240IU | Calcium: 164mg | Iron: 0.8mg

    Donut Bread Pudding

    December 6, 2024

    Donut bread pudding in baking dish, next to donuts.

    This donut bread pudding recipe is so easy and delicious, using only simple ingredients; using regular glazed or Krispy Kreme donuts but feel free to experiment with your favorite kind!

    It’s hard to top our favorite bread pudding, but donuts have been a top favorite since I recommend trying new types of bread to use in that recipe.

    Donut bread pudding in baking dish, sitting next to donuts.
    [feast_advanced_jump_to]

    Why Make a Donut Bread Pudding?

    Well, why not?

    But in all seriousness… we’ve all been there. Our eyes were bigger than our belly and we ordered way too many donuts. So when they start to get a little stale, it’s hard to throw away those golden little circles.

    So using up donuts in a bread pudding is the next best thing. You may even want to make a batch of these Bronuts, just to use them in a bread pudding!

    Recipe Ingredients

    Donut bread pudding ingredients on a table.
    • Milk – I like to use whole milk but you can use your favorite type.
    • Butter – Salted or unsalted butter will work.
    • Donuts – I’ve listed types of donuts that work great for this recipe below but making sure they’re stale is key.

    See the recipe card for a full list of ingredients and quantities.

    Notice that I didn’t use sugar in this recipe, like in my original bread pudding recipe. That’s because donuts already have sugar and adding more isn’t typically necessary.

    However, if your donuts aren’t very sweet, you may choose to add ¼ cup of white granulated sugar if you feel it is needed.

    What Kind of Donuts to Use

    We recommend using your favorite glazed donuts, like Krispy Kreme’s, but feel free to use other flavors like:

    • apple cider donuts
    • chocolate iced
    • cake donuts (like my circus animal donuts or red velvet cake donuts)
    • donut holes
    • gluten free donuts
    • … really any kind of stale or “day old” donuts that you have on hand should work. (However, watch the “filled” and “jelly donuts” as those may add a texture that you’re not looking for.)

    How to Make Donut Bread Pudding

    You can find the full recipe card with ingredients and instructions toward the bottom of this post!

    Begin by preheating your oven to 350°F. and grease an 8×8 baking dish with nonstick spray or butter.

    Pieces of glazed donuts in baking dish for bread pudding.
    Step 1. Break donuts in to approx. 1-inch pieces and place in dish. Pour melted butter over the top.
    Egg mixture with spices in glass mixing bowl for bread pudding recipe.
    Step 2. Mix eggs, milk, cinnamon and vanilla in a bowl.
    Bread pudding batter poured over donut pieces in baking dish.
    Step 3. Pour the egg mixture over the broken pieces of donuts and press to make sure the donut pieces have been saturated. Allow to sit for 10 minutes.
    Baked donut bread pudding in baking dish.
    Step 4. Bake in the preheated oven for 45 minutes. Enjoy warm.

    What to Serve with Donut Bread Pudding

    My favorite way to serve this donut bread pudding is warm. You may also choose to make a vanilla cream sauce to go on top but it’s not required.

    Fresh berries or even a whipped cream would look and taste lovely on the side as well.

    Recipe Tips

    • Donuts not stale? If you have donuts that are not stale, you can leave them out, uncovered, overnight.
    • Want to add more or different toppings? Feel free to add fruit glazes (think jelly-filled donut flavor), fruit, chocolate chips, nuts, and more!
    • Feeling creative? Feel free to add nutmeg, pumpkin pie spice, or your favorite warm spice to this recipe as well.

    Recipe FAQs

    What can I do with leftover doughnuts?

    Making doughnut bread pudding is a great way to use leftover doughnuts, and you can even freeze them (or it) for later.

    Do you have to refrigerate bread pudding?

    Yes. Even though it is baked, it’s best to refrigerate any leftovers. Wait until it has fully cooled before covering it and storing it in the refrigerator.

    How long to bake donut bread pudding?

    Baking this donut bread pudding for 45 minutes gives a “soggier” type bread pudding, so baking it longer is recommended if you prefer a different, dryer, texture.

    More Dessert Recipes Like This

    If you love desserts like this one, then you’ll also love this easy chocolate bread pudding, sweet potato pudding, this croissant bread pudding recipe and this banana bread pudding recipe!

    Did you make this? I’d be so grateful if you left a “star” rating below to let me know what you thought! Then, the next time you need a quick and easy recipe, come back to Fantabulosity to browse all of my easy recipes!

    Recipe

    Donut bread pudding in baking dish, next to donuts.
    Print Pin
    4.95 from 40 votes

    Donut Bread Pudding

    This donut bread pudding recipe is so easy and delicious, using simple ingredients; and glazed donuts or your favorite day-old donuts.
    Course Dessert
    Cuisine American
    Prep Time 5 minutes minutes
    Cook Time 45 minutes minutes
    Total Time 50 minutes minutes
    Servings 6 servings
    Calories 617kcal
    Author Jessica Burgess

    Ingredients

    • 6 stale glazed donuts
    • 2 tablespoons melted butter
    • 1 teaspoon vanilla
    • 4 beaten eggs
    • 2 cups milk
    • 1 teaspoon cinnamon

    Instructions

    • Pre-heat oven to 350 degrees.
    • Grease an 8×8 baking dish with nonstick spray or extra butter.
    • Cut up 6 stale donuts in to small cubes and place in the greased baking dish. Pour melted butter over the top of the donuts.
    • In a medium mixing bowl, add in 4 beaten eggs (or beat the eggs in the bowl before adding the following ingredients).
    • Add in the 2 cups of milk, 1 teaspoon of cinnamon, and 1 teaspoon of vanilla extract and mix until combined well.
    • Pour the mixture over the cubed donuts. Let soak for 10 minutes.
    • Bake for 45 minutes. Serve warm. You can also top it with this vanilla sauce recipe.

    Video

    Notes

    • If you have donuts that are not stale, you can leave them out, uncovered, overnight.
    • Want to add more or different toppings? Feel free to add fruit glazes (think jelly-filled donut flavor), fruit, chocolate chips, nuts, and more!

    Nutrition

    Serving: 1serving | Calories: 617kcal | Carbohydrates: 65g | Protein: 12g | Fat: 35g | Saturated Fat: 15g | Polyunsaturated Fat: 5g | Monounsaturated Fat: 11g | Trans Fat: 1g | Cholesterol: 104mg | Sodium: 453mg | Potassium: 120mg | Fiber: 3g | Sugar: 33g | Vitamin A: 217IU | Vitamin C: 0.2mg | Calcium: 213mg | Iron: 5mg

    30th Birthday Ideas for Him (Food, Themes & Easy Party Ideas for Men)

    March 10, 2019

    30th birthday party ideas for men

    30th birthday party ideas: When he turns 30, it’s a milestone to celebrate! Here are the BEST themes and ideas for the big celebration!

    This list of 30th birthday party ideas for men is so helpful !

    30th Birthday Party Ideas

    Birthday parties are such a fun way to celebrate milestones in our lives. If you are looking for some great party ideas for that special man in your life, these 30th birthday party ideas for men are perfect!

    Need gift ideas? Head over to see our favorite 30th birthday gift ideas for him!

    Here you'll find 30th birthday party ideas for men that you can use for any special man in your life to throw the perfect party. 

    These ideas work great for friends, spouses, in-laws, or other family members you may be planning a party for.

    What to Serve at a 30th Birthday Party for Him

    If you're planning a party, the food is usually what guests remember most. These easy ideas work for everything from casual get-togethers to bigger celebrations.

    Crowd-Favorite Party Foods

    • Cheeseburger sliders or comfort food sandwiches
    • Crockpot BBQ Meatballs or appetizers that can stay warm
    • Dips and chips for easy snacking, such as Rotel Dip, Hot Taco Dip, and Pepperoni Pizza Dip

    Food Bar Ideas (Always a Hit)

    • Taco bar
    • Nacho bar
    • Burger bar
    • Hot dog bar

    Easy Desserts

    • Easy Cake Recipes
    • Brownies Recipes
    • Ice cream cake

    30th Birthday Party Themes & Decor Ideas

    Favorite Things Party: Who says a Favorite Things party has to be for women? I know a LOT of men who would love to receive their guests “favorite things”! Tell your guests if they wish to bring a gift, bring a $5 or $10 item that they consider one of their favorite things! The birthday boy may just end up of a collection of new favorite things of his own!

    This 30th Party in a Box is perfect for taking your party on the go or to celebrate with those from far away! The Sweetest Occasion

    These fun Confetti Balloons would be a fun way to decorate your space. Modge Podge Rocks

    If your special guy is a football fan, they are going to love these easy football party food ideas from right here at Fantabulosity!

    Looking for a great baseball themed party? Then you will love this Baseball themed 30th Party idea. The Sweetest Occasion

    Then we can’t forget about basketball party ideas!

    These Party Cups Dipped in Confetti are a fun way to dress up your cups for a party. Modge Podge Rocks

    30th Birthday Party Games

    Just as fun as our article on 40th birthday party games, these games will be some fun at the party!

    These fun Minute to Win it Party Games will keep your guests entertained for hours! Happiness is Homemade

    This fun Tic Tac Toe Beer Pong game is great for a family or adult party! Frugal Fun for Boys

    This Saran Wrap Party Game is a great game for adults or kids to play. Must Have Mom

    Don’t forget the simple and classic games like poker, darts, or even fun board games like:

    Cards Against Humanity 

    What Do You Meme?

    Apples to Apples

    Drinks

    A non-alcoholic option is my favorite party punch that we make at least once a year!

    These Homemade Bottled Cocktails are perfect for party favors or to serve to your guests. The Sweetest Occasion

    This Tropical Rum Punch would be great for a beach themed party or a summer party. The Soccer Mom Blog

    Beer Tasting: If the man of honor is a beer drinker, having a beer tasting may just be what he wants! Head to the liquor store and see if they offer a mix and match option for bottled and/or canned beer where you can get many different kinds of beer for your guests to try!

    Have a Favorite 30th Birthday Party Idea?

    What are your favorite party ideas for men? Share them right here in the comments below! I’d love to hear it!


    Baked Turkey Burgers

    February 21, 2021

    Baked turkey burger on bun with lettuce, tomato, cheese and fiesta mayo.

    Baked Turkey Burgers – Cooking turkey burgers in the oven is EASY! It locks in juices and there’s less mess!

    Baked Turkey Burgers on bun with lettuce and tomato and turkey bacon

    Have a package of ground turkey for burgers? Consider making burger sliders, using ground turkey instead!

    Why You’ll Love These:

    This recipe is incredibly easy and I even give you a quick fun flavored mayo recipe to top it with! Or, if you own an air fryer, you may want to also consider trying these air fryer turkey burgers to see which recipe you prefer!

    You can find the full recipe card below with more details on how to whip up this “gourmet” tasting burger, that doesn’t require a gourmet chef at all!

    You’ll Also Love these Oven-Baked Hamburgers, these Air Fryer Burgers, Smoked Burgers, and these electric skillet burgers.

    Plain Ground Turkey or Pre-Pattied Seasoned

    Pre-Made Turkey Burgers

    For this turkey burger recipe, I wanted to keep things super simple, so I used a pre-pattied ground turkey burger that included spinach and kale.

    But you can absolutely use regular ground turkey for this! However, it’s a lot of fun to mix things up from time to time, just to add some different flavors to the mix!

    Making Your Own Patties: If you’re making your own turkey patties, you can add the seasoning right into the ground turkey before making your patties, but I find that waiting until after I patty them out, I can taste the flavors a LOT more. But whichever way you prefer to season them is just fine!

    Pre-Pattied Burgers: I love the turkey burgers (and any burgers really) that come with paper liners, because it makes separating the patties for easy seasoning and less mess. Here’s how I do it…

    Step by Step Directions

    For the turkey burgers, I wanted to allow the toppings and the fiesta mayo (recipe below) to season the burgers in a BIG way.

    So for seasoning, I kept it simple and just used salt and pepper! (My favorites… kosher salt and peppercorn medley.)

    If you’re using plain ground turkey, I feel that adding salt and pepper is a MUST. Some other additional seasonings I recommend for turkey burgers are:

    • garlic powder
    • garlic pepper
    • a mixture of basil, oregano, parsley
    • onion powder
    • cumin
    • red pepper flakes

    … there are many others you can experiment with, but just keep in mind what seasonings you’re using, so you don’t overpower the burger if you use a sauce like my fiesta mayo recipe below! 

    Grilled or Skillet Cooking

    You can absolutely cook your turkey burgers in a skillet or grill them. I prefer the oven-baked method to cut down on the mess in my kitchen, and when it’s too cold outside to grill. But feel free to cook them how you like!

    So let’s get to what I now call, the “BEST Turkey Burger Recipe“… the Turkey Club Burger. I’ll walk you through the recipe with photos in case you’re a visual person, but feel free to jump to the bottom of the post where I provided a recipe card that you can print and follow the directions in one spot!

    How to Make

    You’ll want to start by preheating your oven to 375 degrees and lining a baking dish with a drizzle of olive oil. (Approximately 1 tablespoon.)

    Seasoned burgers stacked on paper liners

    Season the top of a burger with salt and pepper or desired seasonings (if you wish), grab the paper liner, and flip the burger over on to the baking dish. Peel the paper off and season the other side.

    Turkey burger placed facedown, using the paper liner for a clean release

    Work your way through the other patties in the same way.

    The paper helps keep my hands cleaner while handling raw meat!

    Turkey burgers in white baking dish, seasoned and ready for the oven

    How Long to Cook Turkey Burgers in the Oven

    Pop the baking dish with turkey patties into the preheated 375° oven and bake for 30 minutes, until it reaches an internal temperature of 165 degrees. We do this a lot for our hamburger recipes, and even use this method for our ground venison burgers!

    How to Cook Turkey Bacon

    One of my favorite ways to cook turkey bacon is in the skillet because of “how” I cook it.

    My boys prefer crispy bacon, and with turkey bacon tending to lay flat, I like to form it while it’s cooking to give it the texture that my boys are used to. You can also bake turkey bacon in the oven!

    turkey bacon in skillet

    How to Make Turkey Bacon Crispy

    If cooking in a pan, I start by spraying my skillet with cooking spray and then line the skillet with a few pieces of turkey bacon. Then, flipping the bacon often will help crisp it up.

    Fun trick for frying turkey bacon to make it look like regular bacon - manually curl up bacon

    However, while it’s cooking and I’m flipping, I’ll also “pinch” the bacon with my tongs so it will mimic the bacon texture they’re used to.

    We’re big texture people here if you haven’t guessed.

    Crispy turkey bacon

    After the bacon is finished cooking, and the turkey patties are still baking, this a great time to mix up your fiesta mayo, or any sauce like this chipotle aioli that you plan on serving on your turkey burger club!

    Fiesta Mayo - Hidden Valley Ranch Mix with mayo

    Fiesta Mayo Recipe

    Using a 12 ounce container of mayo and half a packet of Hidden Valley Fiesta Ranch Dips Mix (or similar dressing mix), mix the two together and you have a flavor of a mayo that will knock your socks off.
    (Note, this will create more than you need for this recipe, so feel free to make a smaller batch.)

    TIP: If you LOVE having a sauce like this on hand, feel free to use a 30 oz. container of mayo and a full packet of the dressing mix.

    Fiesta Mayo Recipe mixed together in small bowl

    Topping Ideas for Baked Turkey Burgers

    For this baked turkey club burger recipe, I’m using toppings like the bacon that you saw above, and the following extras:

    • brick cheese
    • tomatoes
    • leaf lettuce
    • fiesta mayo
    • brioche buns
    Ingredients for baked turkey burger club

    Once the burgers have baked for 30 minutes, pull the burgers out of the oven and top each turkey burger with a slice of cheese, and place the baking dish back in the oven for just seconds to allow the cheese to melt.

    Cooked turkey burgers in white baking dish
    Sliced cheese on top of turkey burgers in baking dish

    Once the cheese has melted, remove your baking dish from the oven and top your burger with what you desire!

    Cheese melted on to burgers, ready to eat
    Placing cheese turkey burger on bun

    Like, turkey bacon…

    Add turkey bacon to burger

    tomato…

    Baked turkey club burger with bacon and tomato

    leaf lettuce…

    Bacon lettuce and tomato turkey club burger

    fiesta mayo (or similar sauce)…

    Fiesta Mayo on a baked turkey burger

    then top with a brioche bun, and enjoy!

    Baked Turkey Burgers

    …and I mean it, I have a feeling that you WILL enjoy these as much as we did!

    Baked turkey burger - sliced in half!

    What to Serve with Turkey Burgers

    Side dishes for turkey burgers are similar to those that are great with ground beef burgers. Here are my favorite side dishes for turkey burgers:

    • side salad on white plate drizzled with ranch
      The BEST Side Salad Recipe
    • close up of bacon ranch pasta salad in gray bowl
      Easy Bacon Ranch Pasta Salad
    • Close up of red skin potato salad in white bowl, with wooden spoon.
      Easy Red Skin Potato Salad
    • Close up of cooked carrots covered in a butter brown sugar glaze and garnished with fresh parsley
      Glazed Carrots

    Related Recipes

    If you loved making this recipe in the oven, then you’ll also love these hot ham and cheese sandwiches or these favorites:

    • Sliced oven baked ribs on parchment showing tender meat under a dark BBQ glaze
      Oven Baked Ribs (Fall Off the Bone Baby Back Ribs)
    • Baked BBQ chicken thighs with crispy skin and a sticky caramelized glaze, sprinkled with parsley.
      Baked BBQ Chicken Thighs with Crispy Skin
    • A slice of pumpkin cheesecake cake, on a round plate.
      Pumpkin Cheesecake Cake
    • Pumpkin Dump Cake serving on round plate.
      Pumpkin Dump Cake

    Did You Make This?
    Snap a pic and hashtag it #Fantabulosity - I love to see your creations on Instagram and Facebook.

    Recipe

    Baked turkey burger on bun with lettuce, tomato, cheese and fiesta mayo.
    Print Pin
    4.93 from 26 votes

    Baked Turkey Burgers Recipe

    Baked Turkey Burgers – Cooking turkey burgers in the oven is EASY! It locks in juices and there's less mess!
    Course Main Course
    Cuisine American
    Prep Time 10 minutes minutes
    Cook Time 35 minutes minutes
    Total Time 45 minutes minutes
    Servings 4 people
    Calories 871kcal
    Author Jessica Burgess

    Ingredients

    • 4 Turkey Patties or 1 pound ground turkey, formed in to 4 patties plain or choice of flavored
    • salt to taste
    • pepper to taste
    • 4 slices cheese I used “brick cheese”
    • 4 brioche or hamburger buns
    • 4 slices tomato
    • 4 lettuce leaves
    • 4 slices bacon
    • 4 tablespoons fiesta mayo recipe in post, or choice of sauce

    Instructions

    • Begin by preheating your oven to 375 degrees.
    • Line a baking dish (big enough to fit 4 turkey patties without touching) with olive oil
    • Season both sides of turkey patties with salt and pepper if you wish, and place them in baking dish. Bake for 30 minutes.
    • White turkey patties are baking, fry your turkey bacon in a skillet. See above for tips for frying bacon!
    • This is also a good time to mix up your fiesta mayo (or other condiment/sauce you wish to make). 
    • When turkey burgers have reached 30 minutes, the internal temperature of each burger should be 165 degrees, before consuming.
    • If turkey burgers are to 165, place one slice of cheese on each burger and place back in the oven for seconds (or a few minutes) to allow the cheese to melt.
    • Remove burgers from oven and build turkey club by stacking on a brioche bun, bacon, lettuce, tomato and fiesta mayo! Enjoy!

    Notes

    You can use pre-pattied burgers or patty out your own! For 4 burgers, you’ll need at least 1 pound of ground turkey.
    Feel free to use pre-seasoned or regular turkey burgers for this recipe.

    Nutrition

    Serving: 4people | Calories: 871kcal | Carbohydrates: 41g | Protein: 49g | Fat: 54g | Saturated Fat: 22g | Cholesterol: 300mg | Sodium: 1108mg | Potassium: 193mg | Sugar: 1g | Vitamin A: 3135IU | Vitamin C: 8mg | Calcium: 288mg | Iron: 3.1mg

    Sausage and Egg Casserole

    October 14, 2022

    sausage and egg casserole being lifted out of baking dish

    Sausage and Egg Casserole: This easy recipe is filled with all your favorite breakfast ingredients: sausage, tater tots, eggs, cheese, and more! Perfect for Christmas morning or even busy mornings!

    You only need about 15 minutes to put this casserole together.

    Sausage and Egg Casserole being lifted out of baking dish

    Using similar ingredients, these breakfast egg rolls are a fun twist that you’ll also love!

    Meg here with another great recipe to share this month! We are big fans of breakfast recipes at my house and I hope you feel the same. (I also made this Instant Pot breakfast casserole too, in case you love Instant Pot recipes too!)

    Why You’ll Love This Breakfast Casserole

    I am all for breakfast food at any time of the day. How do you all feel about breakfast for dinner? We partake in it often at my house because it makes everyone happy and when that happens you just have to go with it.

    Breakfast casserole is definitely one of my go-to options when I need an easy, filling option for a great breakfast or dinner. Or sometimes I’ll even switch it out for this breakfast casserole with biscuits and gravy or this ham and cheese croissant bake, if we’re in the mood for something heavier!

    Let's talk about how easy this casserole is to make. It’s really similar to the easy quiche recipe that Jessica made but has a different spin on things with the hashbrowns, really tying in the breakfast flavor!

    The most work you put into the prep is cooking the sausage to brown, crispy perfection. And the great thing is you can prep all the remaining ingredients while the sausage is cooking.

    TIP: While this is baking, you could put frozen biscuits in the air fryer to serve them alongside this casserole.

    Ingredients for Breakfast Casserole

    This casserole is filled with simple ingredients, and it's just so good.

    Ingredients for sausage and egg casserole
    Ingredients
    • Breakfast sausage – we love using Jimmy Dean but any brand will do.
    • Tube crescent dough sheets – or crescent dough rolls with seams pressed together
    • Tater tots – frozen tater tots cut in half or hash browns
    • Shredded cheddar cheese – shredding block cheese can create a creamier casserole but pre-shredded is just fine.
    • Milk – 2% or whole preferably

    Make sure to check the recipe card below for the full list of ingredients and instructions.

    Substitutions and Variations

    Although this recipe is delicious just the way it is, here are some ideas you can try if you’d like to:

    • Sausage: I use ground sausage for this recipe but if you’re in a pinch and you only have sausage links, you can use those too! Just bake sausage links in the oven and chop them up!
    • Add-ins: You can add chopped bell peppers, mushrooms, fresh spinach, dry mustard or your favorite casserole additions!
    • Cheese: Feel free to change up the type of shredded cheese or even add more! Pepper jack cheese is a great way to add a small kick of flavor!

    Instructions

    Not only does this recipe use simple ingredients but it’s simple to put together, too! Here’s how:

    Crescent Dough

    First, a layer of flaky crescent dough. I mean, it can't be bad if it starts with bread. Am I right?!

    I love using the crescent sheets in the tube but if your store doesn't carry them, simply press together the seams of crescent rolls into the bottom of the baking dish.

    crescent rolls spread in to baking dish
    Crescent rolls
    Sausage in baking pan on top of crescent rolls
    Add sausage & tater tots

    Sausage

    Next up is of course breakfast sausage which adds lots of bulk to the casserole.

    When I tested the recipe, I tried it the first time with regular 'ole breakfast sausage and it was delicious. The second time I went with spicy and I loved it even more. I think maple would be crazy good too.

    So, the moral of this story is, use your favorite variety of sausage. All options are great choices.

    Cheese sprinkled on baking dish
    Add cheese

    Tater Tots

    I think my favorite addition to this casserole is the mini tater tots. First, because mini things are so dang cute and always seem to taste better.

    Second, because they add that yummy, starchy potato goodness. I like that there's bigger chunks of potato rather than the usual shredded hash brown option. Again, if you can't find the mini version at your store, regularly sized tater tots will work too.

    Eggs and Cheese

    And like any good breakfast casserole, there's a healthy amount of eggs and cheese to round it all out. Because it just can't be casserole without cheese.

    eggs in bowl before whisking
    Crack eggs
    Eggs whisked in bowl
    Whisked eggs

    My cooking mantra is all about taking simple, easy to find ingredients and turning them into something different and special and this casserole is the epitome of that stance.

    eggs poured over casserole
    Pour eggs over casserole

    Casserole for a Crowd

    This recipe makes a big, hearty 13×9 pan full of breakfast casserole so you can feed a decent sized crowd with this one.

    Now that the holidays are upon us, I love casseroles like this for holiday mornings because they'll keep your crew full until the big meal.

    Another big selling point is that it doesn't take much work to put together in the morning since the last thing you need on a holiday is more food prep.

    Baked Sausage and Egg Casserole
    Baked Casserole

    Can you make breakfast casserole ahead of time?

    You could cook the sausage and whisk up the eggs the night before so all you would have to do in the morning is a quick assembly.

    Whether you're having a big holiday breakfast, a simple weeknight meal or brunch with your friends, this Sausage Breakfast Casserole is a great main dish option.

    Serving of casserole being lifted out of dish with spatula

    How to Store Leftover Breakfast Casserole

    If you have leftover casserole, allow it to fully cool to room temperature and then cover with plastic wrap, aluminum foil or a lid or store in a smaller airtight container. Place in the refrigerator and enjoy for 3-5 days.

    Reheat it the next morning by place it back in the oven for a little bit (covered) or reheat small portions in the microwave!

    Bite of sausage and egg casserole on fork

    What to Serve with Breakfast Casserole

    If you’re looking for something to serve with this dish, we love having this fresh fruit salad with it, as well as something sweet, like these blueberry buttermilk muffins.

    More Breakfast Recipes You’ll Love

    A recipe, similar to this one, in sandwich form is this breakfast sliders recipe! You’ll also love this Avocado BLT, this French Toast Casserole and the super popular Cinnamon Roll Casserole!

    Try baking sausage patties in the oven too, for an easy breakfast side dish!

    Or, if you love using your slow cooker, especially for brunch recipes, you’ll love these crock pot cheesy potatoes!

    Did you make this? I’d be so grateful if you left a “star” rating below to let me know what you thought! Then, the next time you need a quick and easy recipe, come back to Fantabulosity to browse all of my easy recipes!

    Recipe

    sausage and egg casserole being lifted out of baking dish
    Print Pin
    5 from 8 votes

    Sausage and Egg Casserole

    Sausage and Egg Casserole: This easy recipe is filled with all your favorite breakfast ingredients: sausage, tater tots, eggs, cheese, and more! Perfect for Christmas morning or even busy mornings!
    Course Breakfast
    Cuisine American
    Prep Time 15 minutes minutes
    Cook Time 1 hour hour
    Total Time 1 hour hour 15 minutes minutes
    Servings 10 servings
    Calories 440kcal
    Author Jessica Burgess

    Ingredients

    • 1 pound breakfast sausage
    • 8 ounce tube crescent dough sheets (or crescent dough rolls with seams pressed together)
    • 2 cups mini tater tots (or regular tater tots cut in half)
    • 2 cups shredded cheddar cheese
    • 1 ½ cups milk (2% or whole preferably)
    • 9 large eggs
    • ½ teaspoon kosher salt
    • ¼ teaspoon pepper

    Instructions

    • Preheat oven to 350 degrees. Heat a large skillet over medium heat. Crumble the sausage into the hot skillet and cook until browned and crispy. Drain fat.
    • Meanwhile, spray a 13×9 baking dish with nonstick spray. Press crescent dough into the bottom of the prepared dish. Sprinkle tater tots and cooked sausage over the dough. Sprinkle with cheese.
    • In a large bowl, whisk together the eggs, milk, salt and pepper. Pour egg mixture over the sausage mixture. 
    • Cover with foil and bake for 30 minutes. Remove foil and bake another 25-30 minutes, until cooked through and slightly browned. 

    Nutrition

    Serving: 1serving | Calories: 440kcal | Carbohydrates: 18g | Protein: 20g | Fat: 32g | Saturated Fat: 13g | Polyunsaturated Fat: 5g | Monounsaturated Fat: 11g | Trans Fat: 0.1g | Cholesterol: 225mg | Sodium: 927mg | Potassium: 309mg | Fiber: 1g | Sugar: 4g | Vitamin A: 541IU | Vitamin C: 2mg | Calcium: 235mg | Iron: 2mg

    M&M’S® Candies Gift Idea

    December 9, 2018

    M&M Gift Idea for Christmas and Neighbors

    This post has been sponsored by Mars Wrigley Confectionery. All thoughts and opinions are my own.

    All year, and especially around the holidays, my boys absolutely LOVE to surprise others with gifts, whether that be if they see something in the store that a friend would love or if they make something at home.

    M&M'S® Pantry Jar at Sam's Club

    The M&M’s candies are the perfect colors, they’re a treat that my boys will LOVE to craft with, and they’re something that everyone will love.

    M&M’s Candies Gift Idea

    Knowing I should keep things simple, I came up with an idea that would be something they could help with and that the recipient would actually love and use.

    I grabbed the supplies we needed and told the boys all about it when I got home.

    When they saw the M&M’s Red & Green Milk Chocolate Pantry Jar, you should have SEEN their eyes light up. You better believe they were game for crafting and giving!

    M&M’S® Christmas Gift Tutorial

    So to “house” the M&M’s candies, I decided to use little plastic jars (that also serve as Christmas ornaments… how cute is that?!) and let the boys help me fill them.

    Mason jar ornament with m&ms

    They may have accidentally “dropped” a couple, just so they could say,

    “Ooops Mom. I better eat that one.”

    Uh huh, I know that trick. I do it myself. I suppose I taught them well.

    Fill jar with m&m's for treats

    Free Printable Christmas Treat Tags

    Now I’ll be honest… I did have thoughts of letting the boys color and create their own little gift tags to put on the jars but then quickly realized they’d tire of that after a couple. I decided it would be best to go ahead and make some so all they had to do was string them on the ribbon!

    Download Your Own Tags!

    I’m super glad I chose this route. Why? Because now I have a free printable to give you so you can make your own M&M’S gifts!

    After pondering on a fun saying for a little bit, I finally came up with (what I think) is a super cute one. It incorporates a lot of words that started with “m” to tie in the red and green M&M’S candies.

    “Merry Christmas from us to you! May it be Magical and full of Munching too!”

    To download your own treat tags, click on the image below!

    TIP: I used white cardstock for mine, so it was more of a sturdy type of paper since we were planning to do some “crafting” with them.

    String the Tags On

    Once I cut out the tags, the boys were able to hole punch them and string the ribbon through!

    I tied the ribbon on around the opening of the jar…

    Then, using the little red berries from the craft store, I cut little twigs off of each bunch, and the boys were able to stick a strand inside the tied ribbon!

    Get Creative with Decorating

    If you know me, you know that I can’t leave well enough alone and I tend to have to mix things up. Well, this craft wasn’t any different.

    I didn’t want all of the jars to look the same (I have no idea why, because they’re all super cute) so I changed some of them up a bit.

    I mean, we had enough M&M’S candies to make a lot of treats. So even though the boys had fun… momma had fun getting creative and decorating a LOT of jars, too!

    Christmas Tree Jar Tutorial

    For this little jar, I simply used the same tags and layered them over blank canvas tags so the printable would “POP.” I finished it off by tying a little winter Christmas tree around the lid, too!

    This may be my favorite one.

    Surprise! Hand Delivery!

    We ended up making quite a few of the little jars and hand delivered them to neighbors, friends, and family.

    My boys LOVE walking up, ringing someone’s doorbell with a smile and getting a big ole “thank you” after giving such a fun surprise.

    If it involves M&M’S candies, crafting, smiles and gifting… you better believe my boys are counting it as one of the “BEST DAYS EVER.”

    Pumpkin Streusel Muffins

    August 23, 2022

    A jumbo pumpkin muffin with streusel topping.

    Pumpkin Streusel Muffins: Delicious pumpkin muffins with an incredible streusel topping that sits on top of the muffins, all made with simple ingredients!

    Baking through pumpkin season? Here’s the rest of my Halloween and fall recipes.

    Streusel makes everything better. Looking for more pumpkin recipes for fall? Start here.

    Jumbo pumpkin muffin with streusel topping on vintage plate.

    Why You’ll Love This Recipe

    • Muffins are always an amazing choice for a breakfast recipe that can be on-the-go or served as a sweet treat on something such as a coffee bar area!
    • When Fall rolls around, there’s nothing better than pumpkin flavors in some of our favorite easy recipes, and this recipe is perfect for a cool Fall morning, along with a cup of coffee!
    • They’re super moist muffins, packed with pumpkin and spices. Topped with a streusel for the perfect amount of crunch and finished off with a drizzle of cinnamon glaze. But I think you’ll also love our easy pumpkin bread, especially if you’re a cream cheese lover!
    • If you were a fan of our cheesecake pumpkin bars, our pumpkin cheesecake bites, and our no-bake pumpkin pie, then you’ll also love this similar recipe!

    Ingredients

    When you see the list of ingredients below for these pumpkin crumb muffins, don’t worry about the amount! Many of them are the same ingredient but we just use them in the muffins, streusel and icing!

    Muffins

    • 1¾ cup All-purpose flour
    • 1 teaspoon Baking soda
    • 2 teaspoon Ground cinnamon
    • 1 teaspoon Pumpkin pie spice
    • ½ teaspoon Salt
    • ½ cup Vegetable oil
    • ¼ cup Milk
    • 2 large Eggs
    • 1½ teaspoon Vanilla extract
    • ½ teaspoon Rum extract
    • ½ cup Granulated sugar (white sugar)
    • ½ cup Light brown sugar
    • 1½ cup Pumpkin puree 

    Streusel topping

    • ¾ cup All-purpose flour
    • ¼ cup Granulated sugar
    • ¼ cup Light brown sugar
    • 1 teaspoon Pumpkin pie spice
    • ½ teaspoon Ground cinnamon
    • 6 tablespoon Melted butter, unsalted

    Icing

    • ½ cup Powdered sugar
    • ½ teaspoon Ground cinnamon
    • 2 teaspoon Milk
    Pumpkin streusel muffins on white counter
    Pumpkin Muffins

    Instructions

    Much like the simple ingredients, the instructions are simple too! Here’s how to make this pumpkin streusel muffins recipe:

    For Muffins

    1. Preheat oven to 425 degrees Fahrenheit.
    2. In a large bowl, whisk together the flour, baking soda, cinnamon, pumpkin pie spice, and salt.
    3. Add the vegetable oil, milk, eggs, and extracts.
    sugar and cinnamon in mixing bowl
    Dry Ingredients
    Egg added to dry mixture
    Add wet ingredients
    1. Use a hand mixer on low speed to mix just until combined.
    2. Add the sugars and mix just until combined.
    3. Lastly, add the pumpkin puree and mix just until the batter is streak free. 
    Sugars added in to pumpkin mix
    Add sugars
    pumpkin puree added to mixture
    Add pumpkin
    1. Grease a muffin pan or line it with paper liners, then fill the cups about ¾ full with batter.
    2. Set aside and begin preparing the topping.
    Pumpkin muffin batter in mixing bowl
    Mix
    Muffin batter in muffin tins and liners
    Fill muffin cups

    Streusel Topping

    1. In a small bowl (or clean out the same mixing bowl), combine all the streusel ingredients with a fork until a coarse crumble forms. 
    Wet ingredients in dry ingredients in mixing bowl for streusel topping
    Streusel Ingredients
    1. Place 1-2 Tbsp. of the streusel on top of each of the batter-filled muffin cups for a little added pumpkin flavor and texture.
    2. Lightly tap the streusel into the batter. 
    streusel topping in metal mixing bowl
    Streusel mixture
    Streusel added to top of muffin batter in muffin tin
    Add streusel

    Bake Time

    1. For standard muffins, bake at 425°F for 5 minutes, then without opening the oven, reduce the heat to 350°F and bake for an additional 16-17 minutes or until a toothpick placed in the center comes out clean. 
    2. Remove from the oven and allow to cool for 3-5 minutes.

    Jumbo Muffin Option

    Jumbo pumpkin muffin on vintage plate.

    This recipe makes 6 jumbo muffins. When I made them, I had a little batter left over, but not enough for another muffin. Grease a jumbo muffin pan or use liners, fill the cups about ¾ full with batter, and add the streusel topping.

    Bake at 425°F for 5 minutes, then without opening the oven, lower the temperature to 350°F and bake for 24 more minutes. That is 29 minutes total, which is when a toothpick came out clean in my batch. Start checking at 28 minutes total, inserting the toothpick through the streusel into the center of a muffin. If it has wet batter on it, continue baking and check again in 1-2 minutes.

    Cinnamon Glaze

    1. Prepare the icing by placing the sugar, cinnamon, and milk into a bowl.
    2. Whisk until the icing is clump free and smooth.
    3. Spoon the icing over each muffin.
    4. Serve and enjoy. 
    Pumpkin muffins on white counter
    Pumpkin Muffins with Glaze

    Storage

    If you have leftover muffins, store in an airtight container, or securely wrap in plastic wrap, for up to 4 days at room temperature. (You can also place them in the refrigerator to keep even more fresh.)

    Substitutions and Variations

    You don’t have to include the glaze on these muffins but it’s highly recommend as it adds the best texture combined with the streusel topping!

    Top Tips

    • Be sure you use pure pumpkin puree and not pumpkin pie filling! Pumpkin puree is plain pumpkin, where pumpkin pie filling has spices and other ingredients in it!
    • Use an ice cream scoop to portion the batter into the prepared muffin cups to make it easier!

    Related Recipes

    If you love muffin recipes like this one, then I think you’ll also love these strawberry chocolate chip muffins and these buttermilk blueberry muffins!

    Or, if you’re looking for muffins for breakfast, definitely check out these healthy breakfast muffins.

    Did you make this? I’d be so grateful if you left a “star” rating below to let me know what you thought! Then, the next time you need a quick and easy recipe, come back to Fantabulosity to browse all of my easy recipes!

    Recipe

    A jumbo pumpkin muffin with streusel topping.
    Print Pin
    5 from 8 votes

    Pumpkin Streusel Muffins

    Pumpkin Streusel Muffins: Delicious pumpkin muffins with an incredible streusel topping that sits on top of the muffins, all made with simple ingredients!
    Course Breakfast
    Cuisine American
    Prep Time 20 minutes minutes
    Cook Time 22 minutes minutes
    Total Time 42 minutes minutes
    Servings 16 muffins
    Calories 296kcal
    Author Jessica Burgess

    Ingredients

    Muffins

    • 1 ¾ cups all-purpose flour
    • 1 teaspoon baking soda
    • 2 teaspoons ground cinnamon
    • 1 teaspoon pumpkin pie spice
    • ½ teaspoon salt
    • ½ cup vegetable oil
    • ¼ cup milk
    • 2 large eggs
    • 1 ½ teaspoons vanilla extract
    • ½ teaspoon rum extract
    • ½ cup granulated sugar
    • ½ cup light brown sugar
    • 1 ½ cup pumpkin puree 

    Streusel

    • ¾ cup all purpose flour
    • ¼ cup granulated sugar
    • ¼ cup light brown sugar
    • 1 teaspoon pumpkin pie spice
    • ½ teaspoon ground cinnamon
    • 6 Tablespoons unsalted butter melted

    Glaze

    • ½ cup powdered sugar
    • ½ teaspoon ground cinnamon
    • 2 teaspoons milk

    Instructions

    • Preheat oven to 425 degrees Fahrenheit.

    Muffins

    • In a large mixing bowl, whisk together the flour, baking soda, cinnamon, pumpkin pie spice, and salt.
    • Add the vegetable oil, milk, eggs, and extracts. Use a hand mixer on low speed to mix just until combined.
    • Add the sugars and mix just until combined.
    • Lastly, add the pumpkin puree and mix just until the batter is streak free.
    • Grease a muffin pan or line it with paper liners, then fill the cups about ¾ full with batter. Set aside and begin preparing the streusel topping.

    Streusel

    • In a mixing bowl, combine all the streusel ingredients with a fork until a coarse crumble forms.
    • Place 1-2 Tbsp. of the streusel on top of the batter in each muffin cup. Lightly tap the streusel into the batter.
    • For standard muffins, bake at 425°F for 5 minutes, then without opening the oven, reduce the heat to 350°F and bake for an additional 16-17 minutes or until a toothpick placed in the center comes out clean. For the jumbo muffin yield and baking time, see the notes below.
    • Remove from the oven and allow to cool for 3-5 minutes.

    Icing

    • Prepare the icing by placing the sugar, cinnamon, and milk into a bowl.Whisk until the icing is clump free and smooth.
    • Spoon the icing over each muffin. Serve and enjoy.

    Notes

    Jumbo muffin option: This recipe makes 6 jumbo muffins. My batch had a little batter left over, but not enough for another muffin. Grease a jumbo muffin pan or use liners, fill the cups about ¾ full with batter, and add the streusel topping.
    Bake at 425°F for 5 minutes, then without opening the oven, reduce the temperature to 350°F and bake for 24 more minutes—29 minutes total. A toothpick came out clean at that point in my batch. Start checking at 28 minutes total, inserting a toothpick through the streusel into the center of a muffin. If it has wet batter on it, continue baking and check again in 1-2 minutes.
    The recipe card’s yield and cook time are for standard muffins. Nutrition is estimated per standard muffin, based on a yield of 16.

    Nutrition

    Serving: 1muffin | Calories: 296kcal | Carbohydrates: 42g | Protein: 3g | Fat: 13g | Saturated Fat: 4g | Polyunsaturated Fat: 5g | Monounsaturated Fat: 3g | Trans Fat: 0.2g | Cholesterol: 35mg | Sodium: 170mg | Potassium: 105mg | Fiber: 1g | Sugar: 25g | Vitamin A: 3749IU | Vitamin C: 1mg | Calcium: 34mg | Iron: 2mg

    The BEST Green Bean Casserole with Bacon and Cheese

    November 18, 2018

    Scoop of the best green bean casserole.

    The BEST Green Bean Casserole with Bacon and Cheese: One of the most popular green bean recipes, and such an easy side dish that shouldn’t just be for Thanksgiving!

    Putting together the holiday menu? This casserole is one of my go-to Thanksgiving sides.

    Green bean casserole being scooped out of dish.

    Not gonna lie, finding green bean recipes that I swoon over, are far and few between. (Unless I’m just going to open up a can of green beans… and then I have this extensive list of ways to make green beans taste better, in a pinch!)

    And I’m sure we’ve all had the infamous green bean casserole at a ladies’ lunch after a church gathering (along with this vintage green bean recipe) and even on our Thanksgiving tables… but I couldn’t resist sharing a recipe here when I made it to go with the Creole Roasted Turkey recipe for Thanksgiving.

    It’s a basic green bean casserole, but I couldn’t help but add extra cheese and bacon to this one to really “umph” the flavor a bit. And friends, I have to say… it really is the BEST green bean casserole I’ve ever had.

    How to Make the Best Green Bean Casserole

    If you’re here for the recipe, you’ll find that below, but I’ve also included photos of the process in case you’re more of a visual person and prefer to see image step by steps.

    French style green beans in mixing bowl.

    Preheat your oven to 350° so it’s ready when you are!

    French Green Bean Casserole

    Start by pouring your drained, canned French-style green beans into a large bowl.

    Soup and milk mixture in mixing bowl.

    In a separate bowl, combine the soup, milk, and pepper.

    Pour on top of the green beans and stir until completely coated.

    Milk mixture added to green beans.

    Add in the cooked chopped bacon and stir until mixed in.

    Chopped crispy bacon added to green beans.

    Next, add in half of the french fried onions and mix in too!

    Crispy French fried onions added to mixture.
    Crispy bacon and onions added to green bean casserole.

    Once mixed together, pour into a greased baking dish. I used a baking dish that was about an 8×8, but you can use a smaller/bigger dish if desired.

    Green bean casserole in baking dish before baking.

    Bake in the oven for 25 minutes. Remove and sprinkle on remaining french fried onions and cheese, until you’ve evenly covered the top.

    Add back into the 350 oven and bake for an additional 5-10 minutes or until the cheese is melted and a nice golden color!

    Baked green bean casserole in baking dish.

    Oh my goodness. Can we have a moment of silence for this golden warm casserole?

    Scoop of green bean casserole with cheese and bacon.

    Easy Green Bean Casserole

    Wasn’t that easy? I mean, I see why it’s a classic staple for family gatherings and pot luck… but this is going to start being a staple in my home for weeknight dinners too since it’s so easy!

    Serving of green bean casserole with cheese and bacon.

    Related Recipes

    If you love classics like this recipe you’ll also love these recipes:

    • Sweet potato crunch in white baking dish, with wooden spoon dipping out.
      Sweet Potato Crunch
    • Corn Casserole Recipe
      The BEST Corn Casserole
    • Southern broccoli casserole with cheese
      Southern Broccoli Casserole
    • Crack green beans on wooden spoon.
      Crack Green Beans

    Recipe

    Scoop of the best green bean casserole.
    Print Pin
    4.84 from 110 votes

    The BEST Green Bean Casserole with Cheese and Bacon

    The BEST Green Bean Casserole with Bacon and Cheese: One of the most popular green bean recipes, and such an easy side dish that shouldn't just be for Thanksgiving! 
    Course Side Dish
    Cuisine American
    Prep Time 5 minutes minutes
    Cook Time 30 minutes minutes
    Total Time 35 minutes minutes
    Servings 6
    Calories 243kcal
    Author Jessica Burgess

    Ingredients

    • 2 – 14.5 ounce cans of french style green beans drained
    • 10.5 ounce can of cream of mushroom soup
    • ¾ cup milk I used 2% but any will do!
    • pinch pepper or to taste
    • 1½ cups french fried onions divided – half will go in, half will sprinkle on top
    • 1 cup shredded cheddar cheese
    • 4 slices cooked bacon chopped
    • salt to taste (remember, bacon has salt!)

    Instructions

    • Preheat oven to 350 degrees
    • Start by pouring your drained, canned green beans into a large bowl.
    • In a separate bowl, combine the soup, milk, and pepper.
    • Pour on top of the green beans and stir until completely coated.
    • Add in the cooked chopped bacon and stir until mixed in.
    • Next, add in half of the french fried onions and mix in too!
    • Once mixed together, pour into a greased baking dish. (I used a baking dish that was about an 8×8, but you can use a smaller/bigger dish if desired.)
    • Bake in the oven for 25 minutes. Remove and sprinkle on remaining french fried onions and cheese, until you’ve evenly covered the top.
    • Add back into the 350 oven and bake for an additional 5-10 minutes or until the cheese is melted and a nice golden color!

    Video

    Notes

    You can use your favorite type of green beans if you don’t like the French style.
    Prep casserole in advance without the topping of French fried onions and cheese, and bake as directed.

    Nutrition

    Serving: 0.5cup | Calories: 243kcal | Carbohydrates: 7g | Protein: 7g | Fat: 19g | Saturated Fat: 9g | Cholesterol: 32mg | Sodium: 344mg | Potassium: 87mg | Sugar: 1g | Vitamin A: 240IU | Calcium: 170mg | Iron: 0.2mg

    Creole Turkey

    November 11, 2018

    How to bake a turkey

    This Creole Turkey recipe is part of a family recipe that gives an oven-roasted turkey a flavor that will leave guests asking YOU for the recipe for their own Thanksgiving turkey!

    Roast Turkey - How to Cook a Turkey in the oven

    I can’t wait to show you this family recipe that my husband’s aunt and uncle so kindly shared with us this year, to share with you!

    Although they deep fry a turkey with this recipe in mind, I wanted to provide an oven baked recipe to fit more of the traditional approach!

    Cajun Turkey

    Oven Roasted Turkey Recipe

    LOOK at the crispy crunchy skin on that turkey! To snag the full recipe, you can see everything that you need and even print out the recipe card at the very end of this post.

    However, I’d love to walk you through with photos too in case you love getting a detailed look at how to make this recipe for your own family!

    How to cook a turkey in the oven

    Fresh and Frozen Turkey Prep

    If you’ve grabbed a fresh turkey this year, then you won’t have to worry about thawing.

    However, if you need to thaw your turkey, keep in mind that you will need to allow about 24 hours for each 4 to 5 pounds of frozen turkey in the refrigerator. (If making this recipe I’m sharing below, pull the turkey out of the refrigerator and inject the marinade the night before baking if possible!)

    Once Thawed:

    • Cut off the plastic around the legs

    • Remove the neck, cut off the tail, and remove the giblet bag from the inside.

    How to prep a turkey

    PRO TIP: Allow turkey to become as close to room temperature before baking!

    Injected Marinade Tips

    Using ingredients like chicken broth (even my homemade chicken broth recipe), onion juice, garlic juice, liquid smoke, Worcestershire sauce, and lemon juice, from the Creole Roast Turkey recipe below…creates a flavor that packs the inside of the turkey with a flavor, making it a step you don’t want to skip!

    What is onion juice and garlic juice?

    I had the same question when we took the first peek at the recipe from our family. Those juices are sold by the bottle in some areas, but if you struggle to find them, you can do what I did…

    For the onion juice, I grabbed a juicer to extract the juices. (You may also be able to use the liquid that jarred onions rest in.)

    For the garlic, I simply bought a jar of minced garlic and used the liquid that the garlic rests in, inside of the jar.

    Whole turkey marinade recipe

    Once the marinade ingredients are mixed together, they’re ready to inject into your turkey!

    How to inject a turkey

    How to Inject a Turkey

    To inject your turkey, you’ll want to inject multiple areas with the marinade, especially through the breast, thighs, thick part of the wings, and legs.

    Then, if injecting the night before, place your turkey back in the refrigerator the rest of the night and pull out to allow enough time for the turkey to become room temperature before baking.

    Inject a turkey with a marinade overnight - marinade recipe

    PRO TIP: Preheat oven to 475, and while preheating, you can mix up your rub!

    Creole Rub

    This is where the creole flavor comes in, and really gives a kick to your turkey!

    Before baking, mix together the creole seasoning and mustard in a bowl.

    Oven roasted turkey rub recipe

    “Rub” It On…

    When evenly mixed, coat the outside of the turkey with ½ of rub, apply about a ¼ under the skin around the neck, and then use the remaining rub to coat the inside walls of the turkey.

    Crispy skin recipe for whole turkey

    Turkey Cook Time and Temperature

    Once the turkey is injected and has the rub applied, place your turkey into a turkey roaster with a roasting rack.

    Bake at 475 degrees for 30 minutes, then reduce the temperature to 350 and bake until the internal temperature of the turkey reaches 165 degrees. (This was about 3 hours for us, and for our bird. Yours can differ depending on size and oven temperature!)

    PRO TIP: Some turkeys come with a pop-up timer. But if you plan to use your own thermometer, make sure to insert the thermometer in the thickest part of the thigh, right where the thigh meets the breast, and push it in until you feel it slide into the thigh meat. (DON’T push it all the way into the bone.)

    How to bake a whole turkey in the oven

    Oven Roasted Turkey – Thanksgiving Table Worthy

    Now doesn’t that turkey look like something you’d be proud to put on your Thanksgiving table this year?

    Friends, if you’re intimidated by cooking a whole turkey this year, I encourage you to try this one.

    Or, if you’re planning a big meal, and need two turkeys, you can bake this one and also do a pellet grill smoked turkey.

    Thanksgiving turkey recipe

    My Favorite Thanksgiving Side Dish

    Are you looking for side dishes to go along with your Creole Roasted Turkey?

    For our Thanksgiving dinner, we ALWAYS have a salad, and when I’m assigned to bring a salad, you can almost bet that I’ll be bringing along the BEST Side Salad there is! It has a secret that makes it the best, and you’ll more than likely never go back to just dumping some lettuce in a bowl!

    Recipe

    How to bake a turkey in the oven
    Print Pin
    4.50 from 6 votes

    Creole Turkey Recipe

    This Creole Roasted Turkey recipe is part of a family recipe that gives an oven roasted turkey a flavor that will leave guests asking YOU for the recipe for their own Thanksgiving turkey!
    Course Main Course
    Cuisine American
    Prep Time 20 minutes minutes
    Cook Time 3 hours hours
    Resting Time 15 minutes minutes
    Total Time 3 hours hours 20 minutes minutes
    Servings 12 people
    Calories 317kcal
    Author Jessica Burgess

    Ingredients

    Turkey

    • 1 Whole Turkey 12-14 lbs

    Injected Marinade

    • 14.5 oz can chicken broth
    • 4 oz onion juice bottled or homemade
    • 2 tablespoon garlic juice
    • 2 tablespoon liquid smoke
    • 2 tablespoon Worcestershire sauce
    • juice from 1 lemon

    Rub

    • ⅓ cup creole seasoning
    • 4 tablespoon yellow mustard the condiment, not the dried spice

    Instructions

    • In medium-size bowl, mix together all ingredients for marinade.
    • Preferably the night before baking, inject completely thawed turkey with the marinade mixture and let sit overnight. 
    • When ready to bake, pre-heat oven to 475 degrees.
    • While pre-heating, mix together “rub” (mustard and creole seasoning) in a small bowl. 
    • Coat outside of turkey with ½ of rub, apply about a ¼ under the skin around the neck, and then use the remaining rub to coat the inside walls of the turkey.
    • Place turkey on rack and roasting pan and bake in 475 degree oven for 30 minutes, then reduce oven temperature to 325 degrees.
    •  Bake until internal temperature of turkey reaches the proper food and safety requirements of at least 165 degrees. (See notes in blog post for recommended thermometer placement to receive accurate temperature readings.)

    Notes

    Please keep in mind that the nutritional information provided below is just a rough estimate and variations can occur depending on the specific ingredients used. 

    Nutrition

    Serving: 1g | Calories: 317kcal | Carbohydrates: 2g | Protein: 47g | Fat: 12g | Saturated Fat: 3g | Cholesterol: 154mg | Sodium: 456mg | Potassium: 561mg | Vitamin A: 120IU | Vitamin C: 4.3mg | Calcium: 38mg | Iron: 2.2mg

    How to Cook Pork Chops in the Oven (Bone-In & Boneless Guide)

    March 18, 2026

    A sliced, boneless pork chop that was baked in the oven, sitting on a plate.

    Cooking pork chops in the oven is one of the easiest ways to get juicy, flavorful results every time. Whether you're using bone-in or boneless chops, this simple method works for busy weeknights or Sunday supper.

    Round out Sunday supper with my Sunday Best Mac and Cheese, a rich, creamy baked side with a golden cheese topping.

    The No-Stress Way to Make Juicy Pork Chops

    If you've ever pulled dry, tough pork chops out of the oven, you're not alone. Pork is lean, and it overcooks quickly. The good news is that once you understand temperature and timing, oven-baked pork chops become one of the most reliable dinners you can make.

    Baked boneless pork chop, sliced to show middle, sitting on a plate.

    After testing different temperatures, thicknesses, and cuts, this method consistently delivers tender pork chops with great flavor and no guesswork.

    Frequently Asked Questions

    What is the safe internal temperature for pork chops?

    Pork chops are safe to eat at 145°F, followed by a 3-minute rest. Use a meat thermometer inserted into the thickest part of the chop for accuracy.

    Should I bake pork chops covered or uncovered?

    Bake pork chops uncovered for better browning. If they are thick and you're worried about drying out, you can loosely tent with foil during the last few minutes.

    Why are my pork chops dry?

    Dry pork chops usually mean they were overcooked. Even a few extra minutes can make a difference. Always cook to temperature, not just time.

    Do bone-in and boneless pork chops cook differently?

    Yes. Bone-in pork chops typically take slightly longer to cook and often stay a bit juicier because the bone helps retain moisture.

    Can I cook pork chops from frozen?

    It's best to thaw them first for even cooking. Cooking from frozen can lead to dry outsides and undercooked centers.

    Pork chops in the oven cooking time chart at 400 degrees showing thickness and bake times.

    Bone-In vs. Boneless Pork Chops

    Both work beautifully in the oven, but here's what to expect:

    Bone-In Pork Chops

    • Slightly longer cook time
    • Often more flavorful
    • Tend to stay juicier

    Boneless Pork Chops

    • Cook faster
    • Easier to slice and serve
    • Great for quick weeknight meals

    Either option works with the timing guide below.

    What Temperature to Bake Pork Chops

    The oven temperature affects both texture and cook time.

    350°F - More gentle cooking, slightly longer time
    375°F - Balanced option for tenderness and browning
    400°F - My preferred temperature for juicy results with good color
    425°F - Faster cooking, better browning, watch carefully

    If you prefer high, direct heat from above for faster browning, you may also like broiled pork chops.

    For most 1-inch thick pork chops, 400°F gives the best combination of tenderness and flavor.

    How Long to Bake Pork Chops

    Cooking time depends on thickness and oven temperature.

    At 400°F:

    • ½-inch thick: 8-12 minutes
    • 1-inch thick: 15-20 minutes
    • 1½-inch thick: 20-25 minutes

    Always confirm with a thermometer. Remove from oven at 145°F and let rest 3-5 minutes before serving.

    Three baked boneless pork chops in a glass baking dish.

    Ingredients

    • Pork chops (bone-in or boneless) - The star of the dish. Choose evenly sized chops for even cooking.
    • Olive oil - Helps the seasoning stick and promotes browning.
    • Salt - Enhances natural flavor and helps retain moisture.
    • Black pepper - Adds simple, classic warmth.
    • Garlic powder - Provides savory depth without overpowering the pork.
    • Paprika - Adds mild smokiness and beautiful color.

    You can customize seasoning based on preference, but this simple blend works beautifully.

    Instructions

    1. Preheat your oven to 400°F.
    2. Pat pork chops dry with paper towels. This helps them brown instead of steam.
    3. Rub both sides lightly with olive oil.
    4. Season generously with salt, pepper, garlic powder, and paprika.
    5. Place pork chops on a baking sheet or in a baking dish, leaving space between each one.
    6. Bake according to thickness guidelines above.
    7. Remove from oven once internal temperature reaches 145°F.
    8. Rest for 3-5 minutes before serving.

    Flavor Variations

    Once you've mastered the basic oven method, try one of these reader-favorite versions:

    • BBQ Baked Boneless Pork Chops - Sweet, saucy, and perfect for weeknights.
    • Grilled Pork Chops - Bold flavor with a caramelized finish.
    • Crock Pot Pork Chops - A hands-off, slow cooker version for extra tenderness.
    • Southern Fried Pork Chops - Crispy and classic comfort food.

    This guide gives you the base method. From there, flavors are endless.

    Tips for Perfect Pork Chops

    • Use a thermometer. Guessing leads to dry pork.
    • Let chops come closer to room temperature before baking.
    • Rest after baking to keep juices inside.
    • Avoid overcrowding the pan.
    • Thicker chops stay juicier than very thin ones.

    Recipe

    A sliced, boneless pork chop that was baked in the oven, sitting on a plate.
    Print Pin
    4.34 from 3 votes

    Oven Baked Pork Chops (Bone-In & Boneless)

    This easy oven baked pork chop method works for both bone-in and boneless chops. Bake at 400°F until the internal temperature reaches 145°F for juicy, tender results every time.
    Course Main Course
    Cuisine American
    Prep Time 5 minutes minutes
    Cook Time 15 minutes minutes
    Total Time 20 minutes minutes
    Servings 4 servings
    Calories 241kcal
    Author Jessica Burgess

    Ingredients

    • 4 pork chops bone-in or boneless, about 1 inch thick
    • 1 tablespoon olive oil
    • 1 teaspoon salt
    • ½ teaspoon black pepper
    • ½ teaspoon garlic powder
    • ½ teaspoon paprika

    Instructions

    • Preheat your oven to 400°F.
    • Pat pork chops dry with paper towels. This helps them brown instead of steam.
    • Rub both sides lightly with olive oil.
    • Season generously with salt, pepper, garlic powder, and paprika.
    • Place pork chops on a baking sheet or in a baking dish, leaving space between each one.
    • Bake according to thickness guidelines above.
    • Remove from oven once internal temperature reaches 145°F.
    • Rest for 3-5 minutes before serving.

    Notes

    This seasoning amount works well for 4 standard pork chops. Adjust slightly if using very large or thick cuts.
    • Cooking time depends on thickness.
    At 400°F:
    • ½-inch thick: 8-12 minutes
    • 1-inch thick: 15-20 minutes
    • 1½-inch thick: 20-25 minutes
    • Bone-in chops may take slightly longer.
    • Always cook to 145°F internal temperature and rest 3-5 minutes.
    • See full post above for temperature chart and thickness guide.
     

    Nutrition

    Serving: 1pork chop | Calories: 241kcal | Carbohydrates: 1g | Protein: 29g | Fat: 13g | Saturated Fat: 4g | Polyunsaturated Fat: 2g | Monounsaturated Fat: 7g | Trans Fat: 0.1g | Cholesterol: 90mg | Sodium: 646mg | Potassium: 513mg | Fiber: 0.2g | Sugar: 0.04g | Vitamin A: 130IU | Vitamin C: 0.01mg | Calcium: 12mg | Iron: 1mg

    Baked BBQ Pork Chops in the Oven

    October 22, 2024

    BBQ Pork Chops in the Oven are super simple but full of flavor! It’s an easy dinner idea that goes with so many great side dishes, especially these baked beans with hamburger. The recipe is similar to how to cook pork steaks and the result is a juicy, delicious cut of meat.

    Hello again Fantabulosity readers. It's Meg from Meg's Everyday Indulgence again! I'm so pumped to share this recipe with you today. (Photos updated by Fantabulosity in 2024.)

    Baked bbq pork chops on a bed on sliced onions.

    I have a feeling a lot of you out there are always on the hunt for simple yet delicious dinners that you can get on the table in a flash. You know, the ones that don't require a mountain of ingredients that you don't have on hand. (Or at least the recipes that require little prep like this Coca-Cola BBQ Pulled Pork or bbq pork steak recipes.)

    Why You’ll Love These Baked Pork Chops

    If you love easy recipes that use simple ingredients, then you’ll love this one!

    You’ll find that these baked pork chops use staple ingredients, so much like these broiled pork chops and these creamy crock pot pork chops, and I'm betting you already have all or most of these on hand.

    • Pork Chops
    • Onions
    • Barbecue Sauce
    • Basic Spices (to create a delicious, flavorful rub)

    Also, since the pork chops are thinly cut and boneless, they cook very quickly, making them perfect for nights when you don't have much time to get dinner on the table.

    Baking cuts of meat in the oven can result in a juicy, tender cut of meat, and these pork chops are no different. For complete temperature and timing guidance, see our full guide on how to cook pork chops in the oven.

    Ingredients

    Ingredients for baked bbq pork chops.

    Pork Chop Rub

    Before the boneless pork chops go into the oven to bake, a simple rub is sprinkled all over both sides.

    All the ingredients in the rub are pretty basic pantry staples. This includes salt, pepper, garlic powder, onion powder, chili powder, and paprika.

    Almost all of the spices are used in equal amounts (excluding the salt, and if you’re using table salt, you may want to use ½ teaspoon) so it's super simple to mix up and makes a big impact on the flavor.

    The Secret to Good Pork Chops

    This boneless pork chop recipe has a little secret that adds so much flavor to this cut of pork. By slicing an onion and and layering it along the bottom of your baking dish, adds a lot of flavor to the pork chops.

    Baked pork chops on white plate, sitting next to cast iron skillet.

    How to Cook Baked Pork Chops

    First, as the chops sit on the onion slices and bake away, the onion flavor is imparted upon them. But no fear, it's not a crazy oniony taste that will cause your kids to revolt but a nice, subtle flavor boost.

    Sliced onions in bottom of baking dish.
    Uncooked pork chops and onions in baking dish.

    The second plus is that once the chops are done cooking, the onions have softened and become seasoned with the rub, barbecue sauce, and pork juices, which makes for a great topping to your chops.

    Baked bbq pork chops on plate with sliced onions.

    TIP: You could easily double or triple the amounts and keep the extra in an airtight container to have it ready for next time.

    Barbecue Sauce for Pork Chops

    Now the great debate may be on. What kind of barbecue sauce do you like? Hot, sweet, smoky, all of the above?! I'm a sweet, Kansas City style barbecue sauce girl all the way. My husband grew up in KC and I grew up just a few hours away so it's in our DNA to like the sweet saucy stuff.

    You obviously can use whatever kind of barbecue sauce you like best and they will all pair well with the rub.

    That same sauce is just as good on chicken. These BBQ chicken thighs in the oven use the same trick of baking first and saucing at the end.

    Expert Tip

    I chose to use somewhat thinly cut chops to keep this a quick cooking meal. I'm always on the lookout for quick, healthy and homemade dinner options for nights when we have dance, Cub Scouts or conferences so it's nice to have another option to add to the arsenal.

    What to Serve with BBQ Pork Chops

    There’s nothing better than the staples when it comes to sides dishes that go with BBQ. This red skin potato salad is one of our favorite savory salad recipes but pasta salad recipes are always a good option too! Or, it’s hard to have pork without this KFC Copycat Coleslaw recipe!

    More Pork Chop and Pork Steak Recipes You'll Love:

    If you love cuts of pork these are some other great easy recipes that you’ll want to try out for sure. Or, if you’re a fan of using the slow cooker, give these slow cooker bbq pork steaks a try! (Pork steaks are taken from the shoulder of a pig and are usually tougher than chops… but juicier.)

    • Close up of southern fried pork chops on white plate, with a pork gravy poured on top.
      Southern Fried Pork Chops
    • A sliced, boneless pork chop that was baked in the oven, sitting on a plate.
      How to Cook Pork Chops in the Oven (Bone-In & Boneless Guide)
    • Grilled pork chop on plate next to asparagus.
      Grilled Pork Chops Recipe
    • Baked BBQ Pork Steaks on white plate
      Pork Steaks in the Oven

    Did you make this? I’d be so grateful if you left a “star” rating below to let me know what you thought! Then, the next time you need a quick and easy recipe, come back to Fantabulosity to browse all of my easy recipes!

    Recipe

    Print Pin
    4.88 from 33 votes

    Baked BBQ Pork Chops

    Baked BBQ Pork Chops in the oven are a super easy dinner that's on the table in 30 minutes. Sweet, smoky, simple and delicious.
    Course Main Course
    Cuisine American
    Prep Time 5 minutes minutes
    Cook Time 25 minutes minutes
    Total Time 30 minutes minutes
    Servings 4 servings
    Calories 119kcal
    Author Jessica Burgess

    Ingredients

    • 1 large yellow onion, sliced into ¼-inch rings
    • 1 Tablespoon olive oil
    • 4 ¼-inch thick boneless pork chops
    • ½ cup barbecue sauce

    For the BBQ Rub:

    • 1 ½ Tablespoon kosher salt If using table salt, you may want to use less.
    • ½ teaspoon garlic powder
    • ½ teaspoon onion powder
    • ½ teaspoon chili powder
    • ½ teaspoon paprika
    • ½ teaspoon black pepper

    Instructions

    • Preheat oven to 400 degrees F. Layer onions in a large cast iron skillet or 9×3 baking dish. Drizzle with olive oil. Set aside.
    • In a small bowl, combine the kosher salt, garlic powder, onion powder, chili powder, paprika and pepper. 
    • Sprinkle both sides of the pork chops with the bbq rub. Place the seasoned chops on top of the onions. Bake for 15 minutes. 
    • Remove from the oven and brush both sides of the chops generously with barbecue sauce. Bake another 10 minutes or until the internal temperature reaches 145 F. Remove from oven and let rest for 3 minutes before slicing. Top with onions when serving.

    Video

    Notes

    This recipe is easy to double or triple if you need larger amounts.
    Make sure not to overlap the pork chops so they cook evenly.

    Nutrition

    Serving: 1g | Calories: 119kcal | Carbohydrates: 20g | Protein: 1g | Fat: 4g | Sodium: 2528mg | Potassium: 163mg | Fiber: 1g | Sugar: 13g | Vitamin A: 565IU | Vitamin C: 3mg | Calcium: 23mg | Iron: 0.6mg

    Pork Steaks in the Oven

    April 10, 2023

    Baked BBQ Pork Steaks on white plate

    Pork steaks are one of those cuts that used to scare me off, but the oven makes them easy. You season them, bake them until they hit 145°F, and brush on your barbecue sauce. That’s it. They come out tender every time, and you don’t have to babysit a grill to get there. If you love my slow cooker pork steaks, this is the same fork-tender result straight from the oven.

    Chicken gets the same treatment. These oven baked BBQ chicken thighs bake plain first and get their sauce in the last few minutes, so it never burns.

    Baked bbq pork steaks on white plate.

    Why You’ll Love These Baked Pork Steaks

    If you have pork steaks or pork shoulders (or blade steaks) sitting in your freezer or refrigerator, then you may have happened upon here while trying to find one of the BEST pork steak recipes you can find, for an easy dinner recipe.

    Some pork recipes are grilled, some cooked in a cast iron pan with gravy drippings, some in a slow cooker, like this slow cooker bbq pulled pork, and more! But baking is by far our favorite way to have bbq pork steaks, with no marinade required!

    When I shared how to cook steak in the oven, and how easy it is to get a melt-in-your-mouth steak with that process, I knew you’d love seeing how to bake all different kinds of steaks.

    I think you’re in the right place and that you’re going to love how easy and how delicious this pork steak recipe is. Serve them with these Dr. Pepper Baked Beans and your dinner will be incredible.

    If you also saw my slow cooker bbq pork steaks recipe, then you may already know that cooking them slowly, over a longer period of time makes the pork steak meat literally fall off of the bone.

    But when you need something a bit quicker, baking pork steaks in the oven is an alternative that definitely won’t disappoint you and will also leave you with tender pork steaks.

    The day that I made these to take photos for the blog, I only made two steaks, as it was just the right amount for what we needed that day…however I’ve created the recipe in the recipe card below to reflect 4 pork steaks, as that would be more common for a family of 4.

    What is a Pork Steak?

    Pork steaks are a section of a hog that’s cut from the shoulder, and /or butt. Some grocery stores or butcher shops have pork steaks ready for you. However, if you are not able to find them, you can ask them to cut pork shoulder or pork butt in to steaks for grilling.

    Recipes like this are perfect examples of classic old-fashioned dinner ideas.

    Uncooked pork steaks sitting on packaging.

    What is the Difference Between Pork Chops and Pork Steaks?

    Since pork steaks come from the shoulder and or butt area of a hog, the pork chops are cut from the loin section. Pork chops like these Baked Pork Chops, tend to be lean than pork steaks and can sometimes be more “dry” than pork steaks, where pork steaks tend to have more fat around the meat to help make them juicy. Now, if you have pork chops instead, this fried pork chops recipe is easy to make and frying them can add so much flavor!

    How to Keep Pork Steaks Tender and Not Tough

    Pork steaks come from the shoulder, so they’re marbled and forgiving, but they can turn tough if you rush them. Two things keep them tender. First, give them the full bake time so the fat and connective tissue soften. Pulling them early is what leaves them chewy. Second, cook to 145°F and then let them rest a few minutes before serving so the juices settle back in. Slice against the grain and they’ll practically fall apart.

    Ingredients for Pork Steaks in the Oven

    All you’ll need for these delicious, tender porks steaks are:

    • Pork Steaks – As many as you’ll need to serve.
    • Salt – This is optional, and remember that your barbeque sauce could have salt in it.
    • Pepper – This is also optional, and it’s important to keep in mind how spicy the bbq sauce is that you’re using.
    • BBQ Sauce – your favorite kind will do! We love using Sweet Baby Rays.

    How to Cook Pork Steak

    Now of course you don’t have to cook pork steaks with bbq sauce, but for us, it’s really hard to cook them/eat them any other way.

    Feel free to have fun creating sauces and using different spices for your pork steaks, but if you’re wanting to bake your steaks in the oven, then this is a great reference to find out how long to cook them.

    You can find the full recipe card with an ingredient list and instructions at the bottom of this post.

    Start by preheating your oven to 400º and then cover your pork steaks with salt and pepper (if desired).

    PRO TIP: You can even pound your pork steaks with a meat tenderizer before seasoning them if you want to make sure they’re super tender.

    4 image collage of baked pork steaks.
    1. Next, line a baking pan (large enough to fit the number of steaks you’re cooking, so they don’t overlap) with aluminum foil for easy cleaning, and then drizzle a layer of barbeque sauce on the aluminum foil where you’ll place each steak.
    2. Place your steaks down on the foil and sauce.
    3. Then, cover steaks with the remaining bbq sauce.

    How Long Should You Cook Pork Steaks in the Oven?

    1. Bake the pork steaks uncovered for 50-60 minutes, (on the middle rack) or until the internal temperature of the steaks reaches 145 degrees.

    NOTE: Oven temperatures can vary, and some have reported that they prefer baking at 350 for 50-60 minutes, or checking the internal temp after 30 minutes to avoid over-cooking. I’ve even used different ovens and have found myself, cooking them for shorter/longer times, so it’s best to check to see what works best for yours.

    Cut bbq pork steaks with a piece on a fork.

    Expert Tips:

    • Flexible: You can cook one pork steak up to as many as you want/need, as long as they fit in the baking pan you plan to use, and if you have enough bbq sauce to cover them. You can even pop some hot dogs in the oven for the kids, since you bake those at the same temperature. (Just not as long!)
    • Dinner Meal Plan: Cook more than you need, and serve the leftovers, sliced, on bbq nachos, on a side salad to make it an entree, or as a sandwich!

    Recipe FAQs

    What temperature do you cook pork steaks?

    Bake pork steaks at 400° for 50-60 minutes.

    Should pork steaks rest before serving?

    Although it’s not a must, it is a great idea to allow it to rest for a few minutes before serving to all of the juices to set in before slicing.

    What should the internal temperature be of cooked pork steaks?

    The internal temperature of cooked pork steaks should reach at least 145°F before eating.

    Why are my pork steaks tough?

    Usually they came out of the oven too soon. Pork steaks need time for the fat and connective tissue to break down. Let them reach 145°F, then rest before slicing. Cutting into them right away lets the juices run out and makes them dry.

    Can I use a different barbecue sauce?

    Absolutely. Sweet Baby Ray’s is our go-to for that sweet, sticky finish, but any barbecue sauce you love will work. A thicker sauce clings better and caramelizes nicely in the oven.

    Can you make baked pork steaks ahead of time?

    Yes. Bake them, cool them, and refrigerate. Reheat covered so they don’t dry out, adding a little extra sauce before they go back in. They’re great for meal prep or a make-ahead Sunday dinner.

    Can you freeze pork steaks?

    You can. Let them cool completely, then freeze in an airtight container [add your tested freeze time, commonly up to 2 to 3 months]. Thaw in the fridge overnight and reheat gently with a bit more sauce.

    How to Store

    Refrigerate: If you have leftover pork steaks, it’s best to allow them to cool and then place in an airtight container, in the refrigerator for 3-4 days.

    Freeze: You can freeze leftover pork steaks in a freezer-safe container for up to 3-4 months.

    Thaw: Thaw the pork steaks in the refrigerator overnight.

    Reheat: Sometimes reheating cooked pork steaks can make them dry. So if reheating in the oven, place the pork steaks in a baking pan (with raised sides) and pour about ¼ cup of broth in the bottom, to help add moisture to the steaks while reheating.

    What Side Dishes to Serve with Pork Steaks

    Side dishes that go with BBQ pulled pork are often delicious with pork steaks too! This KFC coleslaw is a staple side dish for pork recipes but I also LOVE Pasta Salads!

    This creamy corn casserole recipe, Amish Potato Salad or this old-fashioned potato salad (or this cauliflower potato salad for low-carb eaters), and this Cornbread Salad.

    But, adding some ground beef to baked beans lately has been a winner too!

    Meal Planning for the Week?

    Since the oven is hot, consider making burgers in the oven too, so you can eat on them all week! Just re-heat and serve! Or, making these cube steaks in the slow cooker is so easy!

    More Pork Recipes

    We love having pork steaks and pork chops around here. They’re so easy and actually pretty affordable. Here are our favorite pork recipes that you don’t want to miss…

    • BBQ Baked Boneless Pork Chops
    • Sweet & Smokey Grilled Pork Chops
    • Baked Pork Chops & Veggies in the Oven
    • Ribs on the Grill: Chipotle Apple Butter Ribs

    Recipe

    BBQ pork steaks cooked in the oven, that are on a white plate.
    Print Pin
    4.64 from 407 votes

    BBQ Pork Steaks in the Oven

    These BBQ pork steaks in the oven are so easy. Season, sauce and bake at 400° F. for delicious, tender and juicy pork steaks.
    Course Main Course
    Cuisine American
    Prep Time 10 minutes minutes
    Cook Time 50 minutes minutes
    Total Time 1 hour hour
    Servings 4 steaks
    Calories 208kcal
    Author Jessica Burgess

    Equipment

    • Large Baking Sheet rimmed

    Ingredients

    • 4 pork steaks or pork shoulders
    • salt to taste
    • pepper to taste
    • 16 ounce bottle of barbecue sauce I use Sweet Baby Rays

    Instructions

    • Prep: Preheat oven to 400 degrees
    • Season: Rub salt and pepper on both sides of each pork steak if desired
      4 pork steaks or pork shoulders, salt, pepper
    • Cover Pan: Line a baking pan (large enough to fit the number of steaks you're cooking, so they don't overlap) with aluminum foil.
    • Sauce the Pan: Drizzle half a bottle of barbeque sauce on the aluminum foil where you'll place each steak.
      16 ounce bottle of barbecue sauce
    • Sauce the Steaks: Place your steaks down on the foil and sauce, and then cover steaks with remaining bbq sauce.
    • Bake: Bake the pork steaks at 400 degrees, uncovered for 50-60 minutes, (on the middle rack) or until the internal temperature of the steaks reaches 145 degrees.
      NOTE: Oven temperatures can vary, and some have reported that they prefer baking at 350 for 50-60 minutes, or checking the internal temp after 30 minutes to avoid over-baking.

    Video

    Notes

    Storage of Leftovers:
    Refrigerate: If you have leftover pork steaks, it’s best to allow them to cool and then place in an airtight container, in the refrigerator for 3-4 days.
    Freeze: If you’d like to freeze leftovers, allow them to fully cool, and store in a freezer-safe container for 3-4 months.
    Thaw: Thaw the pork steaks in the refrigerator overnight.
    Reheat: Sometimes reheating cooked pork steaks can make them dry. So if reheating in the oven, place the pork steaks in a baking pan (with raised sides) and pour about ¼ cup of broth in the bottom, to help add moisture to the steaks while reheating.

    Nutrition

    Serving: 1steak | Calories: 208kcal | Protein: 28g | Fat: 9g | Saturated Fat: 3g | Cholesterol: 89mg | Sodium: 66mg | Potassium: 499mg | Calcium: 9mg | Iron: 0.7mg

    Cinnamon Roll Casserole

    December 22, 2024

    slice of cinnamon roll casserole on plate

    An easy Cinnamon Roll Casserole that’s perfect for breakfast, made of cinnamon roll pieces, butter, cinnamon, vanilla, heavy cream, syrup and eggs!

    cinnamon roll casserole on white plate

    If you love cinnamon, you’ll also love to see how we make cinnamon rolls in the air fryer, this cinnamon coffee cake recipe, and this vintage supper cake.

    Why You’ll Love this Recipe

    Oh heavens. Your Saturday morning is going to be complete with this easy breakfast recipe. But specifically, here’s why you’ll love this one:

    • This recipe is made using refrigerated cinnamon rolls! YES! We love shortcuts in the kitchen (like when we used crescent rolls for this biscuit and gravy casserole) and this recipe is no exception!
    • You can also make this recipe ahead of time and I give instructions and tips on how to do that below!
    slice of cinnamon roll casserole on white plate with baking dish in back

    Ingredient Notes

    By using canned cinnamon rolls, it really cuts down on the other simple ingredients for this recipe!

    labeled ingredients for cinnamon roll casserole, on counter
    • unsalted butter – You can use salted butter too, and it turns out just fine!
    • canned cinnamon rolls – We used Pillsbury cinnamon rolls but any brand/type will do, and either the original icing or cream cheese icing works great as well.

    To skip right to the recipe card where you can find the ingredients and instructions for this easy recipe, just scroll down to the bottom of this post and there you’ll find where you can print and gather all of the info that you need!

    Step by Step Directions

    1. First, preheat the oven to 375 degrees and lightly spray an 8×8 baking pan.
    2. Then start breaking the cinnamon rolls in to small pieces and place in to greased baking dish.
    small pieces of cinnamon rolls in dish
    Break cinnamon rolls in to pieces
    Melted butter pouring on top
    Pour melted butter on top
    1. In a medium bowl, beat together the eggs, heavy cream, cinnamon, and vanilla until combined well.
    heavy cream pouring in bowl with eggs
    Pour heavy cream in eggs
    Cinnamon pouring in to bowl
    Add cinnamon
    Vanilla pouring in to bowl
    Add vanilla
    Mixing ingredients together in bowl
    Mix ingredients together
    1. Pour egg mixture over the top of the cinnamon rolls in the dish.
    fully mixed batter in bowl
    Ready for pouring
    Pouring batter over cinnamon rolls
    Pour batter over rolls
    1. Drizzle the maple syrup all over the top.
    Pouring syrup over rolls
    Pour syrup over rolls
    1. Place in your preheated oven and bake for 20-30 minutes (see tips below for your desired baking time), until the top is golden brown, and let cool for a few minutes.
    baked cinnamon roll casserole
    Fresh from the oven
    1. Remove the metal lid from the icing container and microwave the icing for 5-10 seconds, until it's thin enough to drizzle. Then, pour the icing all over the top of the casserole!
    Pouring icing over cinnamon rolls
    Pour icing on top
    icing all over top of cinnamon rolls
    Icing on top

    How Long to Bake Cinnamon Roll Casserole

    If you see the photos below, the first image of the cinnamon roll casserole is baked for 20 minutes at 375°. This is a more gooey, soft, doughy center, that some prefer. For instance, if you love a gooey cinnamon roll… then you may prefer 20 minutes.

    The second image is the cinnamon roll casserole baked for 25-30 minutes, giving the casserole more of a “cooked” fluffy center that others may prefer.

    cinnamon roll casserole on spatula
    Baked for 20 minutes
    Cinnamon roll casserole on spatula
    Baked for 25-30 minutes
    1. When the casserole is baked to your desired level, sprinkle powdered sugar on top, if desired and enjoy!
    Powdered sugar on top of casserole
    Sprinkle powdered sugar

    Keep in mind, this delicious breakfast casserole is best served as a warm casserole, with a little extra syrup and powdered sugar.

    Cinnamon roll casserole bite on fork

    FAQs

    Can I double this cinnamon roll casserole recipe?

    Absolutely! Just double the ingredients and use an 8×11 baking pan or casserole dish. Cooking time should still be the same, but keep in mind how gooey you want the center. See notes in post for different bake time.

    What about a 9×13 pan? Although this pan size may be more common in your home, it may work ok but I haven’t tried this. I caution against it because there’s a lot of space left between the cinnamon roll pieces and this allows the egg/cream mixture to sit, and could be sections of a scrambled egg texture.

    Can I make cinnamon roll casserole in advance?

    This casserole can all be put together the night before, covered and stored in the refrigerator, and then baked the next morning. The baking temperature stays the same but since the casserole will be really cold from refrigeration, you may want to leave it to sit out on the counter for 30 minutes or so before baking may keep the baking time but not necessary.

    How do you store this sweet breakfast casserole?

    If you happen to have leftovers of this cinnamon roll breakfast bake, store in an airtight container or allow casserole to come to room temperature and place plastic wrap on top of baking dish and place in the refrigerator. For best results, enjoy the next morning or within 5 days.

    More Recipes You’ll Love

    Now although I’ve called this a cinnamon roll casserole, this could easily be called a cinnamon roll french toast casserole because of the eggs and maple syrup drizzle… so call it whatever you like, and whatever tickles your fancy!

    If you love this easy breakfast casserole recipe, then you’ll adore these other breakfast recipes, such as these pancakes in the oven, this French Toast Bake, and this Easy, Fluffy Pancake Recipe.

    Then of course, if you’d like to browse ALL of the easy breakfast recipes, especially mini cinnamon rolls, you’re sure to find more to add to your weekend favorites for the perfect breakfast or for even a holiday brunch!

    Did you make this? I’d be so grateful if you left a “star” rating below to let me know what you thought! Then, the next time you need a quick and easy recipe, come back to Fantabulosity to browse all of my easy recipes!

    Recipe

    slice of cinnamon roll casserole on plate
    Print Pin
    4.71 from 87 votes

    Cinnamon Roll Casserole

    An easy Cinnamon Roll Casserole that's perfect for breakfast, made of cinnamon roll pieces, butter, cinnamon, vanilla, heavy cream, syrup and eggs!
    Course Breakfast
    Cuisine American
    Prep Time 5 minutes minutes
    Cook Time 20 minutes minutes
    Total Time 25 minutes minutes
    Servings 6 servings
    Calories 382kcal
    Author Jessica Burgess

    Ingredients

    • 2 tablespoons unsalted butter
    • 12.4 ounces can Pillsbury Original Icing Cinnamon Rolls
    • 3 large eggs
    • ¼ cup heavy cream
    • 1 teaspoon ground cinnamon
    • 1 teaspoon vanilla extract
    • ½ cup maple syrup
    • powdered sugar if desired

    Instructions

    • Preheat oven to 375 degrees and lightly spray an 8×8 baking pan with non-stick cooking spray.
    • Break cinnamon rolls apart in to small pieces and place in greased baking dish.
    • Melt the butter and pour it on top of cinnamon rolls.
    • In a medium bowl, beat together the eggs, heavy cream, cinnamon and vanilla until well combined. Pour over the top of the cinnamon rolls in the dish. 
    • Drizzle the maple syrup all over the top. 
    • Bake for 20-25 minutes, until top is golden brown. Cool for a few minutes. (See notes in post for specific baking times for desired texture.)
    • Remove the metal lid from the icing container and microwave the icing for 5-10 seconds, until it's thin enough to drizzle. 
    • Pour the icing all over the top. Best served warm with a little extra syrup and powdered sugar. 

    Video

    Notes

    Making cinnamon roll casserole in advance:
    This casserole can all be put together the night before, covered and stored in the refrigerator, and then baked the next morning. The baking temperature stays the same but since the casserole will be really cold from refrigeration, you may want to leave it to sit out on the counter for 30 minutes or so before baking may keep the baking time but not necessary.

    Nutrition

    Serving: 1serving | Calories: 382kcal | Carbohydrates: 48g | Protein: 6g | Fat: 19g | Saturated Fat: 9g | Polyunsaturated Fat: 1g | Monounsaturated Fat: 3g | Trans Fat: 1g | Cholesterol: 114mg | Sodium: 462mg | Potassium: 108mg | Fiber: 1g | Sugar: 29g | Vitamin A: 398IU | Vitamin C: 1mg | Calcium: 54mg | Iron: 1mg

    Thai Salad Recipe with Noodles and Cabbage

    September 26, 2018

    Thai Salad with Noodles and Cabbage is packed full of flavor and texture.

    This Thai Salad Recipe with Rice Noodles and Cabbage is unlike any you've seen before. Soft rice noodles, crunchy cabbage, red bell peppers and more drenched in a deliciously rich peanut sauce.

    Hi friends! It's Meg again from Meg's Everyday Indulgence. I am so excited to be sharing another delicious and super flavorful recipe with you today, Thai Salad with rice noodles and cabbage. It’s just ONE of the many salad recipes here on Fantabulosity!

    Thai Salad Recipe

    Thai Salad with Noodles and Cabbage is packed with flavor and texture.

    Let's break down everything in this textural Thai salad:

    • Tender skinny rice noodles
    • Crunchy cabbage
    • Thinly sliced red bell peppers
    • Shredded carrots
    • Green onions
    • Cilantro
    • Dry roasted peanuts
    • Delicious and simple homemade peanut sauce

    Such an Easy Recipe!

    What's not to like, right?!

    I know the ingredient list may seem long but please don't let it scare you away. They are all common ingredients you can find in any decent sized grocery store. And you may already have them in your refrigerator and pantry.

    And it is super simple to throw together with just a few minutes of chopping vegetables and a quick buzz of the food processor or blender for the peanut sauce. All of which can be done while you are waiting for the water to boil for the rice noodles.

    And you can even take some shortcuts like I did by purchasing the cabbage and carrots already shredded. I'm always down for some store-bought help.

    Thai Salad with Noodles and Cabbage is packed full of flavor and texture.

    All About that Texture

    The textures in this salad are out of this world good. Like, so so good. I love lots of texture in my food and this salad is packed full of it.

    Shredded cabbage, shredded carrots, red bell peppers, and peanuts bring a major crunch factor while the noodles add something soft to the mix. Then, of course, there's the creamy peanut sauce that brings it all together.

    Thai Salad with Noodles and Cabbage is packed full of flavor and texture.

    Thai Salad Dressing – Peanut Sauce

    We need to talk about that peanut sauce next my friends. The base is honey roasted peanut butter and it's a total game changer. It's extra rich and nutty and the honey brings the perfect amount of sweetness to the sauce.

    I mean, you could use regular peanut butter and add in a drizzle of honey if you HAD to but the honey roasted version really does make a big difference. My favorite is fresh ground from Fresh Thyme so if you have one of them in your area RUN there now and get some. It's kind of life changing.

    There's a good amount of soy sauce in it which brings some extra depth and umami. Lime juice balances out the sweetness and the acidity helps balance out the richness of the other ingredients.

    It's so good you may want to drink it. Or dunk all the things in it.

    Add Meat – Chicken, Beef

    This is great as a side dish or if you wanted to turn it into a main dish, you could add some shredded or chopped meat like chicken (did somebody say Costco rotisserie chicken for a Thai Chicken Salad?) to bulk it up.

    Thai Salad with Noodles and Cabbage is packed full of flavor and texture.

    It would also be a really fun and different contribution to a potluck.

    No matter how you decide to enjoy it, I'm pretty sure the flavors and texture are going to blow your mind.

    Recipe

    Thai Salad with Noodles and Cabbage is packed full of flavor and texture.
    Print Pin
    5 from 4 votes

    Thai Salad Recipe with Noodles and Cabbage

    Thai Salad Recipe with Noodles and Cabbage is the perfect way to enjoy all those Thai flavors. Super simple to make and packed full of flavor and texture.
    Course Salad, Side Dish
    Cuisine Asian
    Prep Time 10 minutes minutes
    Cook Time 5 minutes minutes
    Total Time 15 minutes minutes
    Servings 4 servings
    Calories 389kcal
    Author Jessica Burgess

    Ingredients

    • 4 oz. thin rice noodles
    • 8.5 oz. shredded cabbage mix
    • ½ red bell pepper, thinly sliced
    • 2 green onions, white and green thinly sliced
    • ¼ cup shredded carrots
    • 2 Tbsp. torn cilantro
    • ¼ cup dry roasted peanuts

    For the Peanut Sauce:

    • ½ cup honey roasted peanut butter
    • 2 cloves garlic, peeled
    • ½ tsp. grated fresh ginger
    • 2 Tbsp. soy sauce
    • 2 Tbsp. lime juice
    • 1 Tbsp. rice vinegar
    • ½ tsp. sesame oil

    Instructions

    • Cook rice noodles according to package directions. Meanwhile, slice the vegetables for the salad. Toss together cabbage, bell pepper, green onions, carrots and cilantro in a large bowl. Set aside.
    • In a food processor or blender, combine the sauce ingredients. Blend until sauce is completely smooth. 
    • Once noodles are cooked, rinse well under cold water. Drain well and toss with the vegetables in the bowl. Pour about ¾ of the dressing over the salad and mix together until everything is coated. Add remaining dressing if desired and toss again. Sprinkle salad with cilantro and peanuts.

    Notes

    Please keep in mind that the nutritional information provided below is just a rough estimate and variations can occur depending on the specific ingredients used. 

    Nutrition

    Serving: 1serving (about ½ cup) | Calories: 389kcal | Carbohydrates: 39g | Protein: 13g | Fat: 21g | Saturated Fat: 4g | Sodium: 697mg | Potassium: 501mg | Fiber: 5g | Sugar: 6g | Vitamin A: 2420IU | Vitamin C: 47.4mg | Calcium: 63mg | Iron: 1.8mg

    What Do You Think?

    Did you try this recipe? We’d LOVE to hear about what you think. Give it a review and drop us a note to let us know!

    Looking for other easy side dish recipes? Then you’ll love our side dish archives. Give them a browse HERE!

    [simple-author-box]

    Oreo Cheesecake

    May 11, 2025

    Slice of no bake Oreo cheesecake on a plate with a Hugs Kiss, candy bar and Oreo cookie.

    This Oreo cheesecake recipe is a no-bake dessert that has an Oreo crust, and a creamy filling made of cream cheese, Oreo cookie cream filling, and Cool Whip.

    Slice of Oreo cheesecake on a plate, sitting in front of whole cheesecake.

    We are MAJOR Oreo fans in this house. I mean, so much so, that we’ve even had them for breakfast in Oreo pancakes, and when they come out with one of their new flavors, you MAY find us dancing in the store aisles and making an Oreo mug cake just to test them out. But the plain ole original Oreos will always have my heart.

    Anything cookies and cream or Oreo-flavored is going to win over my family, and this Oreo cheesecake recipe is no exception. We even used Oreos to make this Nutella cheesecake recipe and brookies with Oreos.

    Why You’ll Love This Recipe

    • No-Bake Recipe: No-bake desserts like this cheesecake, these Oreo rice Krispy treats, and this Oreo dessert recipe, are just some of our favorite no-bake desserts! “No-bake” usually means less time in the kitchen and fewer opportunities to mess something up. That’s a combination that I love.
    • Simple Ingredients: Only 8 ingredients are needed (and really, you could get away with only some of them if you leave off the candy garnishes) and you may already have the items in your refrigerator and pantry.
    • Make-Ahead: If hosting a party, cooking for a holiday, or just wanting to make an easy dessert in advance, this cheesecake is great to make ahead of time, since it needs to chill for at least 4 hours. This Oreo fudge is a hit around Christmas time though if you’re looking for a new fudge recipe to try.

    Love easy no-bake cheesecakes? This cherry cheesecake recipe is similar and even looks beautiful when served alongside this cookie cheesecake on the dessert table.

    Ingredients for Oreo Cheesecake

    • Oreos: Or your favorite brand of chocolate sandwich cookies. Personally, I think Oreos are the best, and use them in all of my chocolate cookie recipes, especially in this reader-favorite, Oreo Layered Dessert recipe. Buy extra Oreos so you can also make this Oreo pizza later.
    • Butter: Salted or unsalted will work for this recipe. I always seem to have salted butter on hand, and I love how the bit of salt has a tasty contrast with the sweetness of a dessert like this one.
    • Cream Cheese: Softened cream cheese is easier to work with in recipes like this one so allowing it to sit out an hour or so before starting, is a great idea.
    • Sugar: White granulated sugar is recommended for this recipe.
    • Whipped Cream: Feel free to make your own whipped cream but I love using Cool Whip to keep things easy in the kitchen.
    • Cookies and Cream Hershey Bars: These are optional, and are decorative (while also being delicious) on top of the finished cheesecake.
    • Cookies and Cream Hershey Kisses: Also optional, these are decorative and add a fun bite to the smooth cheesecake.
    • Vanilla Icing: Optional, drizzling vanilla frosting on top adds a fun look and another bite of chocolate. Buying pre-made icing in the piping bags is a great option for this.

    Substitutions

    Although an Oreo cookie crust is absolutely amazing, if you’d like to change some things up, you can try this pie crust recipe made of Biscoff cookies.

    How to Make Oreo Cheesecake

    You’ll find the full recipe card below, but I like to give photo instructions and little tidbits along the way too, in case you find that it helps you with the recipe.

    Two images with first photo showing the cheesecake filling and second image showing Oreo cookies in food processor.

    You’ll want to begin by grabbing a package and a half of the Oreos and separating the cookies and the cream centers.

    Making the Cheesecake Filling

    Place the cream centers of the cookies into a mixing bowl and the cookies into a food processor.

    Add your cream cheese and sugar into the mixing bowl and mix with a hand mixer until smooth.

    Next, add in your Cool Whip and the rest of your Oreos (broken up). Don’t forget to save about 6 of the Oreos though to use as the topping garnish!

    Mix well with a hand mixer until well blended and smooth. Set aside.

    Oreo Cookie Crust

    In a food processor, process the cookies until fine.

    Gradually add butter, until the cookies become slightly moist. (Wet sand consistency.)Then, mix well.

    Press the cookie mixture into the bottom of a greased cheesecake pan, and press down firmly.

    Pour cheesecake batter over the crust and smooth out evenly, and refrigerate for at least 3 hours.

    Two images, with left showing Oreo cookie crust and right showing Oreo cheesecake filling in pan.

    Toppings + Garnishes for Cheesecake

    Once the cheesecake has set, you can top your cheesecake and garnish with the Hershey Cookies and Cream Kisses, Cookies and Cream Hershey Bars, and remaining Oreo cookies!

    Or, top with your favorite fruit, like strawberries! But if you love strawberry cheesecake, then you’re really going to love this strawberry crunch cheesecake!

    Oreo cheesecake in pan, with toppings.

    Freeze the Oreo Cheesecake for One Hour

    Last, after decorating, you’ll want to pop it in the freezer for an hour to help it all set even more, and then serve and enjoy!

    Now if that doesn’t conquer your sweet tooth, I don’t know what would!

    No bake Oreo cheesecake on cake stand.

    How to Store Oreo Cheesecake

    Store the Oreo cheesecake in the freezer for best results, or if serving soon, store in the refrigerator to allow for easier slicing.

    Slice of Oreo cheesecake with a bite taken off, sitting on a plate.

    More Oreo Recipes:

    Love Oreo cookies as much as I do? Then you’ll also love these favorites:

    • Oreo Cupcakes with Oreo Buttercream Frosting
      Oreo Cupcakes and Oreo Buttercream Frosting
    • A bowl of Oreo dip with an Oreo in it and crumbled Oreos on top.
      Oreo Dip
    • Cookies and Cream Cinnamon Rolls
      Oreo Cinnamon Rolls
    • Oreo fudge, stacked on top of one another.
      Oreo Fudge

    Did you make this? I’d be so grateful if you left a “star” rating below to let me know what you thought! Then, the next time you need a quick and easy recipe, come back to Fantabulosity to browse all of my easy recipes!

    Originally published: 2018
    Updated and republished: May 2025

    Recipe

    Slice of no bake Oreo cheesecake on a plate with a Hugs Kiss, candy bar and Oreo cookie.
    Print Pin
    5 from 1 vote

    Oreo Cheesecake

    Oreo Cheesecake Recipe: A no bake cheesecake recipe on an Oreo crust that cookies and cream lovers will ADORE and that’s easy to make for a chocolate dessert recipe!
    Course Dessert
    Cuisine American
    Prep Time 15 minutes minutes
    Refrigeration/Freezing 4 hours hours
    Total Time 15 minutes minutes
    Servings 10 servings
    Calories 779kcal
    Author Jessica Burgess

    Ingredients

    • 2 13 ounce packages Oreos (Set 6 aside for topping)
    • 3-4 tablespoons butter melted
    • 16 ounces cream cheese
    • ⅔ cup sugar
    • 16 ounces whipped cream
    • 1 cookies and cream candy bars optional for garnish
    • Cookies and Cream Hershey Kisses optional for garnish

    Instructions

    • Start by separating a package and a half of Oreos. Placing the centers in a mixing bowl and the cookie into a food processor.
    • Add your cream cheese and sugar into the mixing bowl and mix with a hand mixer until smooth.
    • Next, add in your cool whip and the rest of your Oreos (broken up). Mix well with a hand mixer until well blended and smooth. Set aside.
    • In a food processor, process cookies until fine.
    • Gradually add butter, until cookies become slightly moist. (Wet sand consistency, unless you want a crumbly crust.) Mix well.
    • Press cookie mixture into the bottom of a greased cheesecake pan. Press firmly.
    • Pour cheesecake batter over crust and smooth out evenly.
    • Place in the fridge for 3 hours.
    • Once set, add frosting swirls to the top of cheesecake.
    • Then top with Oreos, Hershey kisses, and Hershey candy bars. However, you desire.
    • Place in the freezer for one hour.
    • Serve and enjoy!

    Video

    Nutrition

    Serving: 1slice (about 1/10 cake) | Calories: 779kcal | Carbohydrates: 85g | Protein: 9g | Fat: 47g | Saturated Fat: 23g | Cholesterol: 93mg | Sodium: 596mg | Potassium: 324mg | Fiber: 2g | Sugar: 55g | Vitamin A: 1025IU | Calcium: 111mg | Iron: 8.1mg

    Amish Potato Salad

    December 1, 2018

    A bowl filled with a heaping serving of Amish Potato Salad.

    Amish Potato Salad – a potato salad recipe that can be made with or without an Instant Pot, and that uses simple ingredients, with a hint of sweetness, unlike our red-skin potato salad recipe. It’s one of many of our savory salad recipes that we recommend as a side dish for any barbeque.

    Amish Potato Salad - Instant Pot Recipe

    Amish Potato Salad

    We’re BIG fans of salad recipes around here and adding this Amish Potato salad recipe to the mix was a MUST!

    Speaking of what we’re fans of… then we can’t fail to mention that we’re also big fans of the Instant Pot.

    (See my Instant Pot review, and the Instant Pot recipes here on the blog that you’ll want to get your hands on too!)

    So, creating an Amish potato salad recipe that you can make by using the Instant Pot just made sense, and is hopefully a quick and easy solution for making this very popular side dish! If you prefer to roast your potatoes instead, this potato salad with roasted potatoes lets the potatoes caramelize, adding a touch more flavor with every bite. 

    What’s the Difference in Amish Potato Salad and Regular Potato Salad?

    I had this question too. After reading an article online about this, I now know! Turns out, Amish potato salad tends to have a sweeter taste, than traditional potato salad. You can read more about that on RecipeLion: “Difference Between Amish & Regular Potato Salad“

    How to Make Amish Potato Salad

    Although we’re fans of using an Instant Pot for this recipe, it’s not a MUST. (Especially making eggs in the Instant Pot for this!)

    Boiling your potatoes in a stock pot on the stove will work just as well, and can be made just as easy!

    You’ll find the full recipe at the end of this post, but I’d love to walk you through with photos in case you love the step-by-step tutorial too!

    Amish Potato Salad

    Cut the Red Potatoes

    Cut your potatoes into bite-sized pieces, and place into the Instant Pot.

    Chicken Broth for potato salad in instant pot

    Add in the Chicken Stock

    Pour in the chicken stock, secure the lid of the Instant Pot, close the steam vent, and set to manual high for 4 minutes. If you need chicken broth, you can make my easy chicken broth recipe.

    If Making Without the Instant Pot

    In a stock pot, bring water to a boil, add potatoes and reduce to a simmer. Cook for 8-12 minutes or until potatoes are tender. (Not mushy!) Drain and set aside.

    Amish Potato Salad

    While cooking, or once the potatoes are finished, chop the hard-boiled eggs, onion, celery, and red pepper into small pieces. Add to cooked potatoes.

    Instant Pot Amish Potato Salad
    Instant Pot Potato Salad

    Potato Salad “Dressing”

    In a medium bowl, combine mayonnaise, vinegar, sugar, mustard, sweet relish, milk, salt, and celery seed. Stir until thoroughly combined.

    Amish Potato Salad - Instant Pot Ingredients
    Use a whisk to mix potato salad mixture
    Instant Pot Potato Salad

    Add dressing mix to potatoes, carefully stir a few times while pouring, making sure to coat all of the potatoes.

    Amish Potato Salad in the Instant Pot

    Chill and Serve!

    Chill and store in the refrigerator until ready to serve.

    Amish Potato Salad
    Amish Potato Salad Recipe

    Easy Side Dish Recipe

    So in just a few minutes, you can have an easy side dish to serve your family on a busy weeknight, to make for a summer bbq, or even for a potluck at your next church event!

    Amish Potato Salad - Instant Pot Potato Salad Recipe

    Now that’s an easy Amish Potato Salad recipe, yes? We love easy recipes around here, not to mention salad recipes.

    More Salad Recipes

    If you’re a fan of salad recipes, here are a few more that we know you’ll love!

    • Close-up of the cranberry, cream cheese, and crumbly pretzel layers in a slice of cranberry pretzel salad.
      Cranberry Pretzel Salad
    • Cowboy Pasta Salad in bowl with wooden spoon.
      Cowboy Pasta Salad
    • Chicken macaroni salad in a bowl.
      The BEST Chicken Macaroni Salad
    • Chicken Caesar Pasta Salad in big bowl, sitting on napkin.
      Chicken Caesar Pasta Salad Recipe

    Recipe

    A bowl filled with a heaping serving of Amish Potato Salad.
    Print Pin
    4.25 from 4 votes

    Amish Potato Salad

    Amish Potato Salad – In the Instant Pot: A potato salad recipe that can also be made without an Instant Pot and that’s a side dish full of flavor!
    Course Side Dish
    Cuisine American
    Prep Time 15 minutes minutes
    Cook Time 4 minutes minutes
    Total Time 19 minutes minutes
    Servings 10 servings
    Calories 419kcal
    Author Jessica Burgess

    Ingredients

    • 3 pounds red potatoes
    • 1 cup chicken stock
    • 6 hard boiled eggs
    • 1 cup celery sliced
    • ½ cup red onion diced
    • 1 ½ cup mayonnaise
    • 2 tablespoons distilled white vinegar
    • ¼ cup sugar
    • 3 tablespoons yellow mustard
    • 4 tablespoons sweet relish
    • ⅓ cup whole milk
    • ½ teaspoon salt
    • ½ teaspoon celery seed

    Instructions

    • Cut potatoes into bite-sized pieces. Add potatoes and chicken stock to the Instant Pot. Set to manual high for 4 minutes and close the steam vent.
    • Chop hard-boiled eggs, onion, celery, and red pepper into small pieces. Add to cooked potatoes.
    • In a medium bowl, combine mayonnaise, vinegar, sugar, mustard, sweet relish, milk, salt, and celery seed. Stir until thoroughly combined.
    • Add mix to potatoes, stir a few times while pouring.
    • Chill and store in the refrigerator until ready to serve. 

    Nutrition

    Serving: 0.5cup | Calories: 419kcal | Carbohydrates: 31g | Protein: 7g | Fat: 29g | Saturated Fat: 5g | Cholesterol: 127mg | Sodium: 537mg | Potassium: 743mg | Fiber: 2g | Sugar: 10g | Vitamin A: 320IU | Vitamin C: 12.6mg | Calcium: 51mg | Iron: 1.7mg

    Pecan Pie Recipe

    October 13, 2023

    A slice of pecan pie on a white plate, with pecans sprinkled beside it.

    Our pecan pie recipe is not only easy to make but the extra addition of cinnamon gives the perfect flavor of fall or the touch of holiday spice. One of the most traditional pie recipes that we have, this will be perfect for your Thanksgiving table or your Christmas dinner.

    Pecan pie anchors our Thanksgiving table every year. Here are the other fall desserts for the holidays we count on.

    Paired with a store-bought pie crust to speed things up, or with our delicious, buttery pie crust recipe, this pecan pie will become your new favorite dessert!

    Baked pecan pie sitting on cooling rack.

    During the holidays, you can more than likely count on finding this peanut butter pie and these 7 layer bars on the dessert table, next to pecan pie.

    But no matter what is sitting next to this pecan pie recipe, it will be a top favorite for your guests!

    Want the same flavor with a fraction of the work? Try the pecan pie dump cake instead.

    [feast_advanced_jump_to]

    Why You’ll Love This Recipe

    • The cinnamon touch: A lot of pecan pie recipes don’t use cinnamon and we love the touch it adds to this recipe! It gives it the perfect flavor of fall, or even taste of the holidays.
    • Make-ahead recipe: If making this for the holidays, make this ahead of time so you don’t have to worry about it on the day of.
    • Simple ingredients: A pecan pie recipe may sound intimidating but it’s not. This recipe is really easy to make but so full of flavor.

    Ingredients Needed

    The ingredients needed for this recipe are really simple and you may even have most of them on hand already!

    Labeled ingredients for pecan pie recipe.

    Ingredient Notes and Substitutions:

    • Pie crust – To keep things really simple, you can use a store-bought pie crust, or if you prefer a homemade crust, this buttery crust recipe is always a great choice! If using store-bought crust, you can make these pie crust cookies with the second crust that comes in the package.
    • Corn syrup – We used light corn syrup in this recipe but feel free to use dark corn syrup if you prefer. It comes out delicious either way.
    • Sugars – we do white sugar and brown sugar for this recipe to give it a bit of a “twist” in flavor. However if you prefer to use just one cup of white sugar, instead of brown sugar, that works too.
    • Pecans – I usually buy the halved pecans so I can use some of them to sprinkle on the top for looks. So then I’ll chop them myself when putting them in to the pie. You can also leave them all halved, instead of chopping if you prefer.

    Equipment

    We use a 9-inch pie plate to make this recipe. This buttermilk pie recipe is another vintage dessert that you can make to serve during the holidays.

    How to Make Pecan Pie

    *Be sure to see the recipe card below for the full ingredients list & instructions!*

    First, preheat your oven to 350 degrees F. and remove pie crust from the refrigerator.

    TIP: Place a rimmed cookie sheet on the bottom shelf of the oven so it will catch any spillage that may take place during baking.

    Steps 1-4 of how to make pecan pie.

    STEP 1. Prep the batter. In a large mixing bowl, mix together the eggs, sugars, vanilla, cinnamon, corn syrup and butter until evenly combined.

    STEP 2. Add pecans. Next, add in the chopped pecans and stir to combine.

    Tip: You’ll want to stir this again just before pouring in to pie crust so the pecans are mixed together well with the batter.

    STEP 3. Pie crust. Unroll pie crust and place and gently press in to in a 9-inch pie plate, pinching the sides (optional) to form a “wall” for the pecan pie filling. Make sure the pie crust is evenly spread over the pie plate, for best results.

    STEP 4. Add filling. When pie crust is arranged in to pie plate, pour pecan pie filling in to the crust.

    Whole, baked pecan pie on a cooling rack.

    STEP 5. Bake. Gently move pecan pie to the oven, place on the rimmed baking sheet, and bake at 350 degrees for 60 minutes or until the middle springs back when lightly touched.

    STEP 6. Cool. All the pecan pie to cool for at least 2 hours before serving.

    Recipe Pro Tips

    • Allow to fully cool. Placing the baked pie on a cooling rack will help it cool faster and more evenly.
    • Altitude. The altitude can make this pie bake differently. You may find that it needs longer to to bake, so keeping an eye on it is best when making it for the first time so you’ll know for the future.
    • Prevent crust from burning. Sometimes the oven can cook the crust too fast, before the pie is done. If you notice the pie crust getting too brown, cover the crust edges with pieces of foil or use a pie shield.
    Slice of pecan pie on a white plate.

    Recipe FAQs

    What is the filling made of in pecan pie?

    We use eggs, corn syrup, cinnamon, vanilla, butter, white sugar, brown sugar, and pecans.

    How do you make pecan pie crust not soggy?

    Although we don’t find that our crust gets soggy with this recipe, if you want to, you can whip an egg white and brush it on the crust before pouring the filling in.

    Can I use light corn syrup instead of dark for pecan pie?

    Absolutely! We’ve used dark and light corn syrup, interchangeably and it turns out great every time.

    Slice of pecan pie on a white plate.

    Storage

    After pecan pie has fully cooled, it’s best to store the pie in the refrigerator until ready to serve.

    More Holiday Recipes You’ll Love

    If you love making desserts for the holidays, you’ll also love these top favorites:

    • Close-up slice of chocolate mayonnaise cake with thick chocolate buttercream and a jar of mayonnaise behind it.
      Chocolate Mayonnaise Cake (Old-Fashioned Recipe)
    • Grandma Ann's chocolate chip cookies piled on a white plate with a gold floral pattern.
      Grandma Ann's Chocolate Chip Cookies
    • Apple crumble without oats with golden crumbs and apple filling on a serving spoon in a glass baking dish.
      Easy Apple Crumble Without Oats
    • A close-up of peanut butter oatmeal bars with peanut butter drizzle.
      Peanut Butter Oatmeal Bars (3 Ingredients, No Bake)

    Did you make this? I’d be so grateful if you left a “star” rating below to let me know what you thought! Then, the next time you need a quick and easy recipe, come back to Fantabulosity to browse all of my easy recipes!

    Recipe

    A slice of pecan pie on a white plate, with pecans sprinkled beside it.
    Print Pin
    4.75 from 4 votes

    Pecan Pie Recipe

    This easy pecan pie recipe uses a touch of cinnamon to give it the perfect fall flavor or holiday spice that you're looking for!
    Course Dessert
    Cuisine American
    Prep Time 10 minutes minutes
    Cook Time 1 hour hour
    Total Time 1 hour hour 10 minutes minutes
    Servings 12 servings
    Calories 303kcal
    Author Jessica Burgess

    Ingredients

    • ½ cup white sugar
    • ½ cup brown sugar
    • 1 cup corn syrup light or dark
    • 2 Tablespoons melted butter
    • 1 teaspoon cinnamon
    • 1 teaspoon vanilla extract
    • 3 eggs
    • 1 cup pecans chopped (or halved)
    • 1 unbaked 9-inch pie crust or use this pie crust recipe

    Instructions

    • Preheat oven to 350F degrees. and place a rimmed baking sheet on the middle rack in the oven. Remove pie crust from refrigerator.
    • In a mixing bowl, mix together the sugars, eggs, corn syrup, vanilla, melted butter and cinnamon together until evenly mixed.
    • Add in the chopped pecans and stir to combine.
    • Unroll pie crust and place in baking dish, spreading it evenly to fit. Optional: pinch top sides of pie crust to create a "ruffle" for looks, and to help keep the pecan pie filling secure in the pie plate.
    • Stir the pecan pie filling one more time and pour in to pie plate.
    • Place pie plate on to the reheated baking sheet in the oven, and bake for 60 minutes or until the middle springs back when lightly touched.
    • Remove from oven, and allow to cool for at least 2 hours before serving.

    Notes

    If you find that the pie crust edges are turning brown too quickly, you can cover them with pieces of aluminum foil to prevent them from burning.
    Store: Refrigerate pie once it has fully cooled.

    Nutrition

    Serving: 1slice | Calories: 303kcal | Carbohydrates: 47g | Protein: 3g | Fat: 13g | Saturated Fat: 3g | Polyunsaturated Fat: 3g | Monounsaturated Fat: 6g | Trans Fat: 0.1g | Cholesterol: 46mg | Sodium: 109mg | Potassium: 77mg | Fiber: 1g | Sugar: 39g | Vitamin A: 123IU | Vitamin C: 0.1mg | Calcium: 28mg | Iron: 1mg

    Disney World Tips – 10 Tips for a Better Vacation

    February 1, 2019

    Tips for Disney

    Disney World Tips – These 10 tips and tricks are so helpful for those who have never been to Disney or who are looking to make their next trip even better!

    With tons of world-class dining options, many fabulous resort choices, and countless entertainment possibilities, it can be overwhelming trying to plan your Disney vacation.

    I’ve invited Amy with The Travel Bug Company, who I call the “Disney Guru“, to share her favorite top 10 tips for those who have never been to Disney, and who are thinking about making it a family vacation soon!

    Tips for Disney

    Disney World Tips

    1. Use a stroller for young children

    A stroller can be brought from home or rented and delivered to your resort to be picked up once you arrive.

    On our last trip, we walked 10 miles on our first park day and I hadn't taken my own advice for my 5-year-old.
    That afternoon I rented a stroller from a company that I trust and picked it up the next morning on the way to the bus stop.

    It was such a GAME CHANGER. Less whining, extra storage space, and you know exactly where your young one is when navigating through security and crowded walking areas.

    2. Get a dining plan

    Disney World Dining Plan

    The dining plan is one of my favorite components of the Disney World experience, because, well… food.

    I think Disney has really upped its food game, and the meals and snacks we eat while there are pretty fabulous.

    The dining plan is offered as a perk of staying at a Disney resort and can offer a lot of value to your vacation, making it easy to enjoy many of their most popular dining options.

    There are several dining plans to pick from, and you can choose the plan that best fits your budget and vacation style.

    Most Popular Dining Plan?

    The most popular is the Disney Dining Plan, and it includes:

    •  1-table service meal
    • 1-quick service meal
    • and two snacks per person, per night of your stay.

    You also get a souvenir drink cup that has pixie dust and can be used at your resort for unlimited tea, coffee, and soda.

    The Disney Dining Plan may not sound like enough food, but trust me, I have two growing teenage boys and it was more food than they could eat in a day!

    3. Disposable ponchos

    Do you need ponchos for Disney

    I buy mine from Amazon in packs of 10 and keep one per person in my bag with me when we leave the resort.

    I recommend wearing one if you ride Splash Mountain in Magic Kingdom or Kali River Rapids in Animal Kingdom.

    They are also useful for afternoon showers when you want to get to the bus or hop to another ride.

    4. Memory Maker

    This is another of my favorites, and is a really fun way to make sure everybody gets in those photos, including Mom or Dad!

    There are Disney photographers sprinkled throughout the parks, especially near the iconic landmarks like Cinderella's Castle and the Epcot sphere.

    The photographer will be wearing a vest labeled “Photopass Photographer” and will be carrying a large camera, so you can't miss them.

    They will take your family's picture in your matching Mickey Mouse shirts and connect it to your reservation so you can save them when you get home. How cool is that!?

    There are videos from some of the rides that make for really fun viewing… like with your hair in the wind when you come around a bend on Seven Dwarfs Mine Train.

    Magic Shots are also offered in different locations, where an animation or overlay is added to your pic after it's taken. So so fun to have.

    5. Stay on site

    Staying on Disney property, in the "Disney Bubble," can add a lot of perks to your vacation. (For instance like I mentioned above, the dining plan is only available for resort guests.)

    Transportation to the parks and Disney Springs is complimentary, as well as Magical Express shuttle to and from the airport for Disney World guests.

    Fun story: On one of our bus rides from Hollywood Studios back to “Art of Animation” we had the most entertaining bus driver who quizzed us all with Disney trivia, making the bus ride feel quick and fun.

    You don't have to worry about parking or driving while you are there, and the resorts are known for theming, convenience and adding the benefit of being able to return to your room for a break on park day if your little ones need it. It ADDS to the whole vacation experience!

    6. No backpack in the parks

    A backpack in a theme park is very common, but we don't do it.

    I recommend a cross body bag or a fanny pack, or a small diaper bag that can be easily removed from the stroller basket when going through security and when parking the stroller.

    Backpacks can be tricky when getting into and out of rides, and I do not like having sweaty backs in the heat.

    In my cross body bag, I carry:

    • ponchos
    • sunglasses
    • travel-size sunscreen
    • ID and credit cards
    • phone
    • rechargeable phone battery
    • a couple of blister bandages
    • and a few other make-up/toiletry items.

    Every night I empty my bag and repack it for the next day.

    But here is an AMAZING resource for what to carry in your bag at Disney!

    7. Pin trading with cast members

    Almost every “Cast Member” (what Disney employees are called) will have character pins that they can trade with you for.

    We order a mixed bag from Amazon before our trip, divide them up at home, and trade in the parks.

    It's really fun to see what my kids keep and which ones they trade.

    We've used pin lanyards and wallet-type holders, with my favorite being a wallet that hangs on a lanyard.

    It's a good idea to discuss with your child that he or she needs to let you know if they would like to go trade pins with a Cast Member, as you could continue walking and not realize they are not there! (EEEk! Not that it's happened to us or anything.) Ha!

    Buy the character pins we get HERE!

    8. Pick up a Disney park times guide

    Disney's park entertainment options are subject to change, and this is a great way to keep track of what time they start and what is being offered that day.

    A few that come to mind are Animal Encounters in Animal Kingdom, Great Moments in History in Magic Kingdom or March of the First Order in Hollywood Studios.

    A times guide is available next to the maps as you enter the park.

    9. Wear ears or a Goofy hat

    Wearing something on your head is a really fun way to get into the Disney experience.

    Whether you order it ahead of time and coordinate all your outfits or get one headband and wear it the first day only, it's a lot of fun and makes for great photos. I usually wear mine to the airport on arrival and departure days, getting into the Disney spirit and relaxing into my vacation, and have a few I rotate during the week (yes, they match my outfits).

    The ears and hats are available online and throughout the parks, resorts and Disney Springs. Of course, Disney themed Christmas lights also go well with your favorite headgear…

    Disney clothes and headband

    10. Use a professional Disney travel planner

    Trying to plan your trip on your own, can be stressful. Using a Disney planner who knows ins and outs to get great deals, the best times for activities and so much more… can be so helpful with alleviating stress ahead of time and while you’re there, so you too can have fun too!

    Where do you find this Disney planner???

    I can’t WAIT to help you!

    I (Amy here) am a professional Disney travel planner with a goal to maximize your Disney experience with detailed daily plans, dining arrangements, ride reservations, and more!

    Together, we figure out the best fit for your family and I take care of all the details.

    Your vacation begins with me! You will get the benefit of a Disney expert and you won't have to do countless hours of research, discovery, and planning to have the best Disney vacation ever. (Ack!)

    Free Consultations

    YES! I offer free consultations.  So to learn more about my customized Disney travel services and how I can best meet your vacation needs, I’m just an email away.
    To schedule a time to chat, email me at

    [email protected]

     Have you ever visited Boca Grande Florida? See Jessica’s Boca Grande Florida vacation review to see if that’s somewhere you want to visit.

    Facebook:

    Or, I'm also on Facebook at Travel Bug Company if you’d like to visit me there!

    Want to See More Disney Photos?

    Head over to my Instagram at https://www.instagram.com/travel_bug_company

    I can’t wait to help plan your Disney vacation!

    Disney Planner - free consultations

    — Amy

    Thank you SO much Amy! As someone who’s never been to Disney, I have to say…you’ve already taught me so many helpful things!

    More Disney Tips?

    Friends, I’m dying to know what your favorite Disney tips are. Do you have any favorites? Let me know in the comments below! Thank you for sharing them with us!

    10 Disney World Tips and Tricks! These were SO helpful!

    The BEST Fried Shrimp

    March 25, 2025

    fried shrimp on plate next to sauce

    Fried Shrimp is so much easier to make at home than you think. Just a few, simple pantry ingredients to create this fried shrimp batter using flour and cornmeal to make it crispy, and now you’ll know how to make pan-fried shrimp for easy dinners and it will become a true favorite!

    Pan fried shrimp on a plate with sauce

    Roll up your sleeves, break out your pans and get to dredging. You’re less than 30 minutes away from crispy shrimp and old bay cocktail sauce or the dipping sauce recipe I share below, at home tonight or on “Fried Friday” in your Dinner Theme System.

    Serving tip: Serve this with steak! Not sure how to make steak? Here’s my favorite restaurant-quality steak recipe to use, How to Cook Steak or keep frying and make this deer meat recipe if you have venison in the freezer.

    Hey there! Meg here and I'm so excited to share another recipe with you all! I know how much you loved this grilled shrimp so this will be another seafood recipe to add to your cookbook!

    Why You’ll Love This Recipe

    I don't know about you but sometimes I find making fried foods at home kind of intimidating unless it’s air fryer shrimp.

    • Easy Breading: When frying, there's the whole dredging process and the sometimes messy, (tip below on how to make very little mess) frying of the food in hot oil. But I'm here to tell you, you will LOVE how easy this recipe is and it’s way better than the store-bought, frozen breaded shrimp, that’s for sure!
    • Restaurant quality fried shrimp at home in less than 20 minutes.
    • Batter Secret: Plus, using cornmeal and flour together in the batter, creates a crispy shrimp that’s hard not to love!
    Fried shrimp on plate next to dipping sauce.

    Fried Shrimp Cornmeal and Flour Batter

    The mixture of flour and cornmeal adds such a delicious crust to the shrimp. The cornmeal adds a crazy crunch and the flour adds its own wonderful touch for the crispiest fried shrimp!

    A good amount of onion powder, garlic powder, kosher salt, and a nice sprinkle of cayenne pepper in the batter also bring lots of flavor and interest.

    Fried Shrimp Recipe Ingredients

    The ingredient list for this fried shrimp recipe is small and basic but it packs a punch! You’ll find that ingredients are similar to other fried recipes on the blog, so if you have pork chops handy, you’ll also love this fried pork chops recipe!

    *Be sure to see the recipe card below for the full ingredients list & instructions!*

    Fried Shrimp Ingredients on table

    Shrimp + Oil

    • Canola oil for frying (or vegetable oil)
    • 24 ounces large raw shrimp, peeled and deveined

    Egg Wash

    • 2 large eggs
    • 1 cup buttermilk (or milk)
    • ½ teaspoon kosher salt
    • ½ teaspoon black pepper

    Batter and Shrimp Seasoning Ingredients

    Keeping the seasoning simple is key for a crispy coating! Just a few favorite spices really give this shrimp, tons of flavor! You’ll be using these spices to mix with the flour and cornmeal!

    • 1 ½ cups all-purpose flour
    • 1 cup cornmeal
    • 2 teaspoon kosher salt
    • ½ teaspoon black pepper
    • 2 teaspoons garlic powder
    • 2 teaspoons onion powder
    • 1 teaspoon cayenne pepper

    Optional Dipping Sauce:

    This sauce recipe is optional but highly recommended.

    • ¾ cup mayo
    • ½ cup sweet chili sauce

    Similar to this sauce, this boom boom shrimp is coated in a delicious tangy sauce!

    Step by Step Directions:

    Before beginning: Heat oil in a large, heavy-bottomed skillet over medium heat. Line a large plate with a paper towel, set aside. Aim for an oil temperature of 350°F. If you don’t have a thermometer, drop a pinch of the breading in, and it should sizzle steadily right away.

    Steps 1-4 of how to make fried shrimp.
    1. In a cake pan, pie plate, shallow dish or shallow bowl, whisk together eggs and buttermilk. Add ½ teaspoon of salt and pepper.  (Image below.)
    2. In another cake pan, mix together the flour, cornmeal, salt, pepper, garlic powder, onion powder, and cayenne pepper. 
    3. Add shrimp to the egg mixture and coat shrimp well.
    4. A few at a time, add the shrimp to the flour/cornmeal mixture and coat completely. (Place on a clean plate while you bread the remaining shrimp.)

    TIP: Allowing the shrimp to rest while breading the other shrimp, will help prevent the breading from falling off during frying.

    Steps 5-8 on how to make fried shrimp.
    1. Add shrimp to skillet in a single layer, making sure not to overcrowd the pan. Let shrimp cook and fry for 3 minutes, until crispy and to a golden brown perfection.
    2. Remove shrimp from oil with a slotted spoon and drain on a prepared plate that has layers of paper towels to soak up any excess oil. Continue until all shrimp is fried. 

    Dipping Sauce Recipe for Shrimp

    Mayo and sweet chili sauce mix up to a creamy, spicy, slightly sweet sauce that really compliments the crispy, tender fried shrimp.

    1. Place the mayo and sweet chili sauce in a separate small bowl.
    2. Mix together the ingredients until evenly combined and serve with the cooked fried shrimp.
    Pan fried shrimp on a plate with sauce

    Recipe Pro Tips

    The Key to Less Mess: Ideally, set up two pie plates to create a breading station. You can use bowls if necessary but the wide, shallow shape of pie or cake pans makes the process much easier. One cake pan will have the liquid ingredients, in this case, an egg and buttermilk. The second pan will hold the dry ingredients, flour, cornmeal, and spices for a major flavor punch.

    Tips for How to Batter Shrimp

    This is by far the best shrimp batter, and after so many others have made this too and left reviews saying they think it’s delicious too… it’s safe to say it’s an easy recipe that you’ll want to cook shrimp in from here on out!

    Use one hand (I usually use my left since I move through the process left to right) to coat the shrimp in the egg mixture. Pick up the shrimp with the wet hand and place it in the dry mixture. Now use your other hand to gently coat the shrimp.

    Because you aren't going back and forth with both hands they aren't getting goopy and gross. One hand will have egg and one hand flour but not a big lumpy mess.

    It's not anything revolutionary but it makes a big difference in the mess level of battering and frying.

    Recipe FAQs

    How long do you fry shrimp for?

    Once battered, it only takes 3 minutes to fry the shrimp in oil.

    Do you have to soak shrimp in milk before frying?

    You can soak it but it’s not required. However, dipping shrimp in to milk (or buttermilk) instead of soaking, before frying is recommended. The buttermilk helps the batter stick to the shrimp and provides a thicker coating.

    How do you get breading to stick to shrimp?

    A buttermilk and egg will help the flour and cornmeal batter stick to the fried shrimp.

    How to fry shrimp

    Fried Shrimp Sauces

    If you don’t want to make the sauce recipe above, here are some other dipping options for your shrimp that you will love:

    • honey mustard
    • cocktail sauce
    • spicy ketchup
    • country white gravy
    • tartar sauce
    • hot sauce
    • remoulade sauce
    • ranch or even this jalapeno ranch

    Side Dishes to Serve with Southern Fried Shrimp

    Serve this southern shrimp recipe (or so we think it’s “southern”) with Amish potato salad or a side salad to round out your meal and enjoy. P.S. That side salad will give you LIFE.

    Or, serve popular side dishes such as:

    • fried mushrooms
    • hush puppies
    • since you’re frying shrimp, might as well make these fried pickles too!
    • seasoned potato wedges
    • french fries (or polenta fries or eggplant fries for healthier options)
    • roasted brussels sprouts
    • Instant Pot corn on the cob

    Or, if you want to serve it alone, you can easily add lemon wedges to the side and even a little chopped fresh parsley if you like!

    Easy Fried Shrimp Recipe and batter how-to!

    How to Store Leftover Shrimp

    To store any leftover shrimp, store it in an airtight container in the refrigerator for up to 3 days.

    How to Reheat Fried Shrimp

    When ready to reheat the fried shrimp, using the air fryer works amazingly well! Or, you can bake it in the oven or a toaster oven (around 400 degrees for a few minutes until heated through) to crisp it up a little.

    Using a microwave can leave the fried shrimp soggy but it’s definitely a way you can reheat if preferred.

    Classic, crispy fried shrimp is so much easier to make at home than you think. Just a few, simple pantry ingredients and you're on your way to fried perfection.

    More Recipes You’ll Love

    Want more yummy recipes? You’ll also love this shrimp baked potato, grilled shrimp marinade recipe. Or, if you love fried recipes, this southern country fried steak is a great southern staple.

    This fried rice recipe is perfect to create a fried shrimp rice recipe.
    Or serve up this fried shrimp recipe as an appetizer with some of our other favorite easy appetizer recipes that we have here on the blog.

    Originally published in 2019, then updated in November 2024 and in March 2025.

    Recipe

    fried shrimp on plate next to sauce
    Print Pin
    4.88 from 182 votes

    Fried Shrimp

    Classic, crispy fried shrimp is so much easier to make at home than you think. Just a few, simple pantry ingredients and you're on your way to fried perfection.
    Course Main Course
    Cuisine American
    Prep Time 15 minutes minutes
    Cook Time 6 minutes minutes
    Total Time 21 minutes minutes
    Servings 6 servings
    Calories 492kcal
    Author Jessica Burgess

    Ingredients

    • Canola oil for frying
    • 24 ounces large raw shrimp, peeled and deveined

    Egg Wash

    • 2 large eggs
    • 1 cup buttermilk (or milk)
    • ½ teaspoon kosher salt
    • ½ teaspoon black pepper

    Batter

    • 1 ½ cups all-purpose flour
    • 1 cup cornmeal
    • 2 teaspoon kosher salt
    • ½ teaspoon black pepper
    • 2 teaspoon garlic powder
    • 2 teaspoon onion powder
    • 1 teaspoon cayenne pepper

    Dipping Sauce:

    • ¾ cup mayo
    • ½ cup sweet chili sauce

    Instructions

    • Heat ½-inch of oil in a large, heavy-bottomed skillet over medium heat. Line a large plate with a paper towel, set aside.
    • In a cake pan or pie plate whisk together eggs and buttermilk. Add ½ teaspoon of salt and pepper. 
    • In another cake pan, mix together the flour, cornmeal, salt, pepper, garlic powder, onion powder, and cayenne pepper. 
    • Add shrimp to the egg mixture and coat well. A few at a time, add the shrimp to the flour and coat completely. Place on a clean plate while you bread the remaining shrimp. 
    • Add shrimp to skillet making sure not to overcrowd the pan. Fry for 3 minutes, until crispy and golden brown. Drain on prepared plate. Continue until all shrimp is fried. 

    Dipping Sauce

    • Mix mayo and sweet chili sauce in a bowl for dipping. 

    Notes

    Breading the shrimp with less mess:
    Set up your breading station using two pie plates. (Bowls can be used but the wide, shallow shape of pie or cake pans makes the process much easier.)
    One cake pan will have the liquid ingredients and the second pan will hold the dry ingredients, flour, cornmeal, and spices.
    Use one hand to coat the shrimp in the egg mixture. Pick up the shrimp with the wet hand and place it in the flour mixture. Now use your other hand to gently coat the shrimp. Because you aren’t going back and forth with both hands they aren’t getting goopy and gross. One hand will have egg and one hand flour but not a big lumpy mess.
    Aim for an oil temperature of 350°F. If you don’t have a thermometer, drop a pinch of the breading in, and it should sizzle steadily right away. 

    Nutrition

    Serving: 1g | Calories: 492kcal | Carbohydrates: 57g | Protein: 9g | Fat: 24g | Saturated Fat: 4g | Cholesterol: 82mg | Sodium: 1217mg | Potassium: 197mg | Fiber: 4g | Sugar: 11g | Vitamin A: 460IU | Vitamin C: 1mg | Calcium: 27mg | Iron: 2.9mg

    Cold Pasta Salad Recipes

    June 3, 2023

    Cold Pasta Salad Recipes Collage.

    Salad recipes are our FAVORITE around here, so this roundup of cold pasta salad recipes fits right in! 

    Whether you need cold pasta salad recipes for a potluck, spring dinner ideas, for a fun picnic food idea, or just looking for a side dish that doesn't require turning on the oven, here are some of the BEST pasta salad recipes to choose from!

    “Pin” your favorites to your favorite board on Pinterest so you have them when you need them!

    Post originally published in January 2019, updated in June 2023.

    Cold pasta salad recipes collage.

    Pasta Salad Recipes

    During the warmer months, the last thing you want to do is turn on your oven to make lunch or dinner.

    With these cold pasta salad recipes, use a little heat once, and enjoy it for days without turning on the oven!

    Here you'll find some that make the perfect dinner or even a side dish to bring to a party!

    Bacon Ranch Pasta Salad

    This 6 ingredient bacon ranch pasta salad is so simple and delicious. Perfect for potlucks, barbecues or a weeknight side dish.

    A bowl of chicken macaroni salad in a large serving bowl.

    Chicken Macaroni Salad

    An easy recipe using pasta, mayo, mustard, seasoned salt, pepper, celery, onion, and chicken to create a side dish favorite!

    Chicken Caesar Pasta Salad Recipe in a bowl with a cloth

    Chicken Caesar Pasta Salad

    It may sound odd to put pasta in a lettuce salad but talk about DELICIOUS! You will have a hard time going back to a regular Caesar salad after this one!

    
Bowls of zesty pasta salad with tomatoes and banana peppers.

    Zesty Italian Pasta Salad

    This super easy recipe is made using any type of pasta you prefer, a few other simple ingredients, and Zesty Italian dressing!

    
A large white bowl filled with shrimp pasta salad.

    Shrimp Macaroni Salad

    The flavors in this shrimp macaroni salad are absolutely amazing and it only uses simple ingredients that you may even already have on hand!

    A large white bowl filled with tuna pasta salad.

    Tuna Pasta Salad

    With easy ingredients and most of them being items that you can keep on hand, and even in the pantry… this recipe is a perfect last-minute option!

    Thai Salad Recipe with Noodles and Cabbage

    Thai Salad Recipe with Noodles and Cabbage is the perfect way to enjoy all those Thai flavors. Super simple to make and packed full of flavor and texture.

    BBQ Pasta Salad with Tuna

    This BBQ Pasta Salad with Tuna from My Crazy Good Life is way more exciting than your traditional pasta salad recipe, but with all the flavors of a backyard barbecue.

    Creamy Summer Pasta Salad

    With this Creamy Summer Pasta Salad from Fun Food Frolic, you can enjoy all the flavors of summer in one simple meal.

    Dressing tossed with cowboy pasta salad in glass bowl.
    Cowboy Pasta Salad

    Cowboy Pasta Salad

    It’s hearty, cheesy and full of flavor. It’s a potluck recipe that everyone asks for the recipe.

    Peach Pasta Salad

    This unique Chicken and Peach Pasta Salad from A Magical Mess is bursting with flavor and is the perfect dish to change things up without heating up your home.

    Sriracha Shrimp Pasta Salad

    This Sriracha Shrimp Pasta Salad from Accidental Happy Baker is so easy to make ahead and is both spicy and fresh!

    Primavera Pasta Salad

    This quick and easy Primavera Pasta Salad from It Bakes Me Happy is perfect for busy nights, and a break from the traditional pasta salad recipes.

    Asparagus Tortellini Pasta Salad

    This Asparagus Tortellini Pasta Salad from Who Needs a Cape brings summertime to the table in a unique and veggie filled way!

    Broccoli pasta salad in bowl.

    Broccoli Seafood Salad

    This quick and easy Broccoli Seafood Pasta Salad from Confessions of an Overworked Mom, is so simple to make and perfect for busy days.

    Olive pasta salad in bowl.

    Tri Colored Pasta Salad

    This Tricolor Pasta Salad from Courtney's Sweets is so easy to make and perfect for picnics or barbecues.

    Broccoli Lemon Pasta Salad

    This delicious mayo-free Broccoli Lemon Pasta Salad from Home Cooking Memories is perfect for picky eaters who don't like mayo.

    Tortellini Caprese Salad

    This delicious Tortellini Caprese Salad Who Needs a Cape has some of the best flavors of summer all in one pasta salad.

    A bowl of roasted veggie pasta salad.

    Roasted Veggie Pasta Salad

    Zucchini, tomatoes, sweet onions and peppers make this filling pasta salad super healthy and easy to make on a busy night.

    Vegan Macaroni Salad

    This summertime Vegan Macaroni Salad Vegan Huggs is the perfect way to feed those on a special diet, and still enjoy the deliciousness of pasta salad.

    More Easy Side Dish Recipes?

    You’ll only find delicious and easy recipes here, so get your “pinning” on and fill your Pinterest boards with our recipes for easy meal planning!

    Cornbread Salad Recipe

    More Recipe Collections

    If you love our collections, don’t miss these top favorites:

    • Collage of chicken and dumplings, smothered pork chops, stuffing meatloaf, and hot fudge cake, labeled Easy Weekly Meal Plan, Week 5.
      Easy Weekly Meal Plan #5: Five Dinners and Hot Fudge Cake
    • Collage of sausage tortellini soup, baked chicken drumsticks, walking taco casserole, and sock it to me cake, labeled Easy Weekly Meal Plan, Week 4.
      Easy Weekly Meal Plan #4: Five Dinners and Sock it to Me Cake
    • Collage of chili, baked chicken cutlets with green beans, loaded baked potato soup, and pumpkin sheet cake, labeled Easy Weekly Meal Plan, Week 3.
      Easy Weekly Meal Plan #3: Five Dinners and Pumpkin Sheet Cake
    • Collage of six cozy soups, stews, and chili recipes.
      20 Cozy Soup Recipes for Fall (Easy Soups, Stews & Chili)

    Tired of Searching for Recipes?

    Well if you’re here for the first time, then you’ll want to get your hands on my NEW cookbook, Fabulously Fast Dinners. 

    Aren’t you tired of spending hours thinking about what the main dish to make for your family, and then realizing you STILL need a side dish to go with it?

    I’ve done all of this for you! An easy and fast main dish recipe, paired with a side dish recipe and even alternative suggestions for sides and desserts along the way!

    Dinnertime just got fabulous, and FAST!

    Easy Pound Cake Recipe

    October 25, 2024

    Pound cake made in a bundt pan, with powdered sugar and blackberries on top.

    This easy pound cake recipe is made with a few everyday ingredients to make this classic, vintage dessert a favorite to serve during the holidays or for potlucks.

    Pound cake earned its name from the original one-pound-each recipe. Browse more vintage dessert cakes.

    Serve this cake alone as it is or top with the included glaze recipe, your favorite toppings, or choose from the list of ideas that I’ve given below! One of my favorites is drizzling on some homemade vanilla sauce that I also use on my bread pudding recipe.

    Pound cake

    Why You’ll Love This Cake Recipe

    Ease: We’re all about “easy recipes” around here, and when you use that phrase in front of a word like easy cake recipes, you know you’re in the right place.

    Flexible: With a classic cake like this one, it means that you can serve it alone or elevate it with your favorite toppings.

    Texture: Pound cake can be a “spongey” texture, and more dense than say, an angel food cake.

    Vintage recipe: I love the vintage classic recipes. You really can’t go wrong with grandma’s favorites. You’ll also love this vintage peanut brittle recipe, this egg custard recipe, and this light and fluffy cloud cake that my grandma shared with me.

    Easy Pound Cake
    Cakes for the Potluck Table cookbook by Jessica Burgess, cover and open recipe spread

    My cookbook · Coming this spring

    Cakes for the
    Potluck Table

    Sixty cakes that never come home leftover. Six are yours free right now.

    Send me the six cakes

    Ingredients

    Here are a few notes about some of the ingredients you’ll need for this cake recipe. You can also jump to the recipe card below for a full list of ingredients.

    Jump to Recipe
    • Eggs and egg yolks: Plan on needing a total of 7 eggs for this recipe, although you’ll just be using 3 of them for the yolks. Use the leftover egg whites for this lemon meringue!
    • Cake flour: I recommend using cake flour in this recipe. However, I know that it may not be something that you always have on hand. So if you only have all-purpose flour, you can measure out two cups of flour and remove 4 tablespoons and put it back in your flour container. Replace the removed 4 tablespoons of flour with 4 tablespoons of cornstarch.

    Pound Cake Flavor + Topping Ideas

    What I love about a pound cake, is that you can flavor it or top it with just about anything to customize the flavor you’re looking for, or leave it plain and capture the buttery-sugary goodness.

    • glaze (like this recipe)
    • fresh fruit – if you have strawberries on hand, this strawberry pound cake is a great option
    • crunchy items (like cookies, nuts, graham crackers, etc.)
    • icing
    • sugars

    If you’d like a sauce to spoon over each slice, browse my homemade sauces and sweet toppings, including vanilla sauce and hot fudge.

    How to Make Pound Cake

    You can find the full recipe card below, but I love to show the process in images as well in case you’re a visual person like me!

    …………………………….

    You’ll start by mixing together the butter and the sugar for about 3 minutes. (Why do almost all good dessert recipes start with butter & sugar?!?!)

    Then, add in the eggs, yolks, and vanilla and mix for about 5 minutes.

    How to make pound cakeNext, in a separate bowl, sift together the flour, baking powder, and salt.
    The BEST Pound cake recipeReduce mixer speed to low, and add half of the flour mixture and half the milk to the butter/sugar mixture, and mix for 5 minutes.
    Recipe for pound cakeAdd the second half of flour mixture and milk… and mix for 5 minutes.
    Recipe for easy pound cake

    Grease and flour your bundt pan (or pan of your choosing) pour in the batter, and smooth out any bubbles!

    What kind of pan for a pound cake - bundt cakePlace the pan in a cool oven and set the temperature to 350℉ and bake for 1 hour.
    The cake will be done when a toothpick inserted into the cake comes out clean!

    Allow 30 minutes for the cake to cool, and then remove from the pan (using a butter knife around the edges help) and turn upside down to finish cooling.

    You’ll want the cake fully cooled before drizzling the glaze.

    Pound Cake Glaze

    The glaze for your pound cake is really, really simple. Although the buttery goodness of a pound cake it plenty, the glaze adds a delicious touch and smooth, creamy, silky texture. 

    For the glaze, you’ll need:

    • 1 ¾ cup of confectioners sugar
    • 4 tablespoons of whole milk
    Glaze or Icing recipe for pound cake

    Simply add powdered sugar (confectioners sugar) to a bowl, and add 1 tablespoon of milk to the sugar at a time, stirring it in until smooth.

    glaze for pound cake recipe

    Drizzle over your cooled cake and serve! (If the cake is still hot, the glaze will melt in to the cake, which is still delicious but you won’t be able to see it as much.)

    Pretty Pound cake pan and recipe

    Doesn’t that look amazingly scrumptious? I’m not sure if there’s anything better than the classics. 

    Drizzle for pound cake

    More Easy Dessert Recipes

    If you love easy desserts, then you’re in the right place. You’ll LOVE these no matter if you’re just in the “sweets” mood, or if you need a dessert to take along to a potluck!

    • Red velvet poke cake slice with cream cheese frosting and white chocolate curls on a plate.
      Red Velvet Poke Cake (The Easiest One You'll Ever Make)
    • A square slice of apple dapple cake topped with caramel glaze on a white plate next to a green apple.
      Apple Dapple Cake (Old-Fashioned Recipe With Caramel Glaze)
    • A slice of pumpkin sheet cake with brown butter frosting on a vintage plate.
      Pumpkin Sheet Cake with Brown Butter Frosting
    • A serving of hummingbird cake on a vintage, round dessert plate.
      Hummingbird Sheet Cake
    sprinkle powdered sugar on your pound cake if you prefer!

    Easily top your pound cake with fresh berries and extra powdered sugar for an added touch of flavor and cuteness!

    Recipe

    Pound cake made in a bundt pan, with powdered sugar and blackberries on top.
    Print Pin
    5 from 2 votes

    Easy Pound Cake Recipe

    Easy Pound Cake Recipe – This simple recipe made with eggs, butter, sugar, flour, and a few other everyday ingredients is the perfect staple dessert!
    Course Dessert
    Cuisine American
    Prep Time 20 minutes minutes
    Cook Time 1 hour hour
    Cool 30 minutes minutes
    Total Time 1 hour hour 20 minutes minutes
    Servings 12
    Calories 387kcal
    Author Jessica Burgess

    Ingredients

    • 4 eggs room temperature
    • 3 egg yolks room temperature
    • 2 sticks unsalted butter room temperature
    • 1 teaspoon vanilla extract
    • 4 Tablespoons whole milk
    • 2 cups cake flour
    • 1 teaspoon baking powder
    • ¼ teaspoon salt
    • 1 ¼ cup sugar

    Glaze

    • 1 ¾ cup confectioners sugar
    • 4 Tablespoons whole milk

    Instructions

    • Move oven rack to middle of the oven.
    • Mix butter and sugar in large bowl until creamed, about 3 minutes.
    • Add eggs, yolks, and vanilla, beat 5 minutes on medium.
    • Sift together flour, baking powder and salt.
    • Reduce mixer speed to low and add ½ of the flour mixture and half the milk. Mix 5 minutes.
    • Add second half of flour mixture and milk. Mix for 5 minutes.
    • Generously grease and flour bundt pan.
    • Pour batter into pan and tap to remove bubbles.
    • Place pan in cool oven, set temperature to 350℉ and bake 1 hour. Cake will be done when a toothpick inserted into the cake comes out clean.
    • Allow to cool 30 minutes before releasing the edges with a knife and turning the pan upside down to finish cooling. 

    Glaze

    • Add one tablespoon of milk at a time to confectioners sugar to achieve desired consistency. 
    • Drizzle over cake. Enjoy!

    Nutrition

    Serving: 1slice | Calories: 387kcal | Carbohydrates: 54g | Protein: 4g | Fat: 17g | Saturated Fat: 10g | Cholesterol: 96mg | Sodium: 77mg | Potassium: 100mg | Sugar: 38g | Vitamin A: 565IU | Calcium: 45mg | Iron: 0.5mg

    Roasted Brussel Sprouts with Bacon, Cranberries + Sweet Glaze

    January 19, 2019

    Roasted brussel sprouts cranberries and a glaze.

    These Roasted Brussels Sprouts with Bacon and Cranberries are covered in a sweet honey glaze with pecans and pair as a delicious side dish to your favorite dinner recipe.

    This is the dressed-up version for company. It’s one of my 40+ Thanksgiving side dishes.

    Roasted Brussel Sprouts Recipe

    Why You’ll Love This Brussels Sprouts Recipe

    I’m not sure who it was that got me to try brussels sprouts for the first time. But man alive I’m so glad that they did.

    P.S. I’m pretty sure they’re supposed to be called “brussels sprouts” but a common way that they’re spelled nowadays is without the “s”. So I’m just going to keep on keepin’ on and stick with brussel, for the sake of what I’ve found that most are calling it online.

    But I have to admit… I’ve never really had any that weren’t roasted, and that may make a big difference because they get an incredible flavor when cooked this way, and even better when slightly charred… in my opinion. I found this out when I made my favorite garlic roasted broccoli!

    Sweet Brussel Sprouts

    I’ll never forget the first time I’ve had a sweet glaze on a brussel sprout because it was a GAME CHANGER.

    So if you haven’t had a sweeter brussel sprouts recipe like this one that’s combined with the flavors of the bacon, dried cranberries and pecans, I really encourage you to try it.

    How to Make Roasted Brussel Sprouts

    I’ll walk you through how to make the brussel sprouts if you’re more of a visual person, but if you prefer to jump right to the recipe, you can scroll to the very bottom and grab the recipe card, print, save on Pinterest, or whatever you prefer to do!

    1. Preheat your oven to 425 degrees.
    2. Wash, trim and cut your 3 pounds of brussel sprouts in half.
    Baked Brussel Sprouts

    3. Place your brussel sprouts in a baking sheet…

    Roasted Brussel Sprouts baked in the oven

    4. In a small bowl, mix ¼ cup of olive oil, ½ cup honey, ½ tsp. salt, and ½ tsp. pepper.

    sweet honey glaze for brussel sprouts
    Honey glaze for brussel sprouts
    Seasoning for brussel sprouts in the oven

    5. Pour mixture over brussel sprouts.

    Pour sweet honey glaze over the brussel sprouts

    6. Hand toss to coat…

    Roasted brussel sprouts

    7. Bake at 425 degrees for 30 minutes, stirring once during bake time. (Or until slightly blackened.)

    Roasted Brussel Sprouts with cranberries, pecans and bacon with honey glaze

    8. Evenly distribute 12 slices of cooked, crumbled bacon, ½ cup of dried cranberries and ¾ cup toasted pecans, chopped, and bake an additional 5 minutes.

    Roasted Brussel Sprouts - with a sweet honey glaze

    Recipe

    Roasted brussel sprouts cranberries and a glaze.
    Print Pin
    5 from 2 votes

    Roasted Brussel Sprouts with a Sweet Glaze

    Roasted Brussel Sprouts with Bacon, Cranberries and Pecans: This baked in the oven recipe using a sweet honey glaze, is an easy side dish you'll love!
    Course Side Dish
    Cuisine American
    Prep Time 10 minutes minutes
    Cook Time 35 minutes minutes
    Total Time 45 minutes minutes
    Servings 8
    Calories 285kcal
    Author Jessica Burgess

    Ingredients

    • 3 pounds raw brussel sprouts
    • 12 slices cooked bacon crumbled
    • ¾ cup toasted pecans chopped
    • ½ cup dried cranberries
    • ½ cup honey
    • ½ teaspoon salt
    • ½ teaspoon pepper
    • ¼ cup olive oil

    Instructions

    • Preheat oven to 425℉
    • Prepare brussel sprouts by washing, trimming and cutting in half.
    • Place brussel sprouts on a baking sheet.
    • In a small bowl, mix olive oil, honey, salt, and pepper.
    • Drizzle olive oil mixture over brussel sprouts on the pan.
    • Hand toss to coat.
    • Bake at 425℉ for 30 minutes or until slightly blackened stir once during bake time.
    • Evenly distribute bacon crumbles, toasted pecans, and dried cranberries to the baking sheet. Bake 5 more minutes.
    • Serve and enjoy!

    Nutrition

    Serving: 0.5cup | Calories: 285kcal | Carbohydrates: 24g | Protein: 4g | Fat: 19g | Saturated Fat: 5g | Cholesterol: 21mg | Sodium: 365mg | Potassium: 76mg | Sugar: 22g | Vitamin A: 10IU | Vitamin C: 0.1mg | Calcium: 3mg | Iron: 0.3mg

    The sweet flavors combined with the salty crunch of the crisp leaves of the outer edges of the brussel sprouts are INCREDIBLE.

    Roasted Brussel Sprouts baked in the oven with bacon

    More Easy Side Dishes You’ll Love

    If you love easy side dishes, whether that’s to serve with a fancy steak dinner or a quick weeknight dinner for your family… you’ll love these:

    The BEST Side Salad Recipe:

    Best Side Salad Recipe

    Garlic Roasted Broccoli:

    This was so easy, and GOOD! I don't even like broccoli that much! Healthy Side Dish Recipe

    Check out the RECIPE ARCHIVES for more easy recipes you’ll love!

    No-Bake S’Mores Cheesecake Recipe

    June 9, 2019

    Smores Cheesecake - No Bake Recipe

    This no-bake s’mores cheesecake recipe is an easy dessert that is made using ingredients of your favorite fireside treat!

    Similar flavors are in our Arkansas Possum Pie (yes, that’s the real name of it!) and it’s delicious too! We actually have a lot of no bake dessert recipe ideas that feature these ingredients, so if you’re a fan… then you’re in the right place!

    Smores Cheesecake - No Bake Recipe

    S’mores Cheesecake

    I told you how much I love a good s’more when I shared the pumpkin white chocolate smores.

    I’m also a fan of that blissful dessert that’s easy to whip up over a campfire, and it’s something my kids BEG for when they hear we’re doing ANYTHING related with camping.

    More Cheesecake Recipes You’ll Love:

    • Oreo Cheesecake
    • Nutella Cheesecake
    • Cheesecake Bites
    • Brownie Peanut Butter Cup Cheesecake Trifle

    No Bake S’mores Cheesecake Recipe

    But I don’t believe that s’mores should only make an appearance during a cookout, and I’m also a believer that combining two favorite desserts, deserves its own recipe blog post. I bring you this delicious no-bake dessert.

    Grab the full printable recipe below!

    Marshmallow Fluff

    You’ll start by mixing together the cream cheese, marshmallow ice cream topping, and sugar with a blender or mixer… then set aside. This creates a yummy marshmallow “fluff” that will be the filling.

    Marshmallows for smores cheesecake recipe

    Try not to take a bite while it sits there. Or do. Whatever floats your boat.

    smores cheesecake marshmallows

    Graham Cracker Crust

    In a food processor (or my handy dandy trick of shoving them in a ziptop bag and beating the heck out of it with a rolling pin) blend (or beat) until fine. (You could also try making this Biscoff crust recipe if you’d prefer that!)

    Crust for no bake cheesecake

    Add in melted butter (yep, you can pour this right in the bag if you want) and mix it together until it forms a wet sand consistency.

    Press it in to the bottom of a cheesecake pan until even.

    Smores cheesecake graham cracker crust

    No-Bake Cheesecake Filling

    Add in the whipped cream to the marshmallow mixture (and now take a quick bite if you wish) and blend on high until smooth.

    Now pour mini marshmallows in to the batter and mix, gently folding them in.

    Pour the batter over the crust and smooth out evenly.

    Refrigerate Cheesecake

    Cover and refrigerate for 2 hours.

    Decorate Your No-Bake Cheesecake

    There’s no “right” way to decorate your cheesecake, so feel free to decorate with icing, Hershey bars, and leftover graham crackers.

    Freeze Your Cheesecake

    Place in the freezer and freeze for one hour.

    Top with a little chocolate drizzle like the magic shell fudge, if desired!

    S'mores Cheesecake - no bake recipe

    Related Recipes

    If you love this recipe, then you’ll also love this chocolate cream cheese pie and our no bake turtle pie, that are full of chocolate and a no-bake prep, similar to our Nutella Oreo cheesecake!

    Recipe

    Smores Cheesecake - No Bake Recipe
    Print Pin
    5 from 1 vote

    S’mores Cheesecake Recipe – No Bake

    This No-Bake S'mores Cheesecake Recipe is an easy dessert that is made using ingredients of your favorite fireside treat!This No-Bake S'mores Cheesecake Recipe is an easy dessert that is made using ingredients of your favorite fireside treat!
    Course Dessert
    Cuisine American
    Prep Time 10 minutes minutes
    Refrigerator and Freezer Time 3 hours hours
    Total Time 2 hours hours 10 minutes minutes
    Servings 8 slices
    Calories 600kcal
    Author Jessica Burgess

    Ingredients

    • 12.5 oz. jar of Smucker's Marshmallow Ice Cream Topping
    • 3 tablespoon Melted Butter
    • 2.5 14.4 packages of Graham Crackers 2 ½ boxes
    • 16 oz. Cream Cheese
    • ⅔ cup Sugar
    • 16 oz. Whipped Cream
    • 1 cup Mini Marshmallows
    • Vanilla Icing 
    • Mini Hershey Bars
    • Magic Shell Fudge (optional for topping)

    Instructions

    • Start by placing your cream cheese, sugar, and marshmallow ice cream topping into a large mixing bowl and mix with a hand mixer until smooth, and set aside.
    • Next place 2 packages of graham crackers into your food processor and blend until fine.
    • Add in melted butter gradually, blending after each tablespoon, until it forms a wet sand consistency. 
    • Pour crumb mixture into the bottom of a cheesecake pan, and press down evenly to form crust.
    • Add your whipped cream to your cheesecake batter and blend on high until smooth.
    • Pour your mini marshmallows into your cheesecake batter and fold until mixed well.
    • Pour batter over crust and smooth out evenly.
    • Place in refrigerator for 2 hour and let set.
    • Remove from fridge and decorate with icing, hershey bars, and left over graham crackers, as desired.
    • Place in the freezer for one hour. 

    • Drizzle with magic shell fudge if desired. 

    Notes

    Please keep in mind that the nutritional information provided below is just a rough estimate and variations can occur depending on the specific ingredients used. 

    Nutrition

    Serving: 1slice | Calories: 600kcal | Carbohydrates: 69g | Protein: 5g | Fat: 36g | Saturated Fat: 22g | Cholesterol: 117mg | Sodium: 232mg | Potassium: 162mg | Sugar: 54g | Vitamin A: 1283IU | Calcium: 114mg | Iron: 1mg

    More Easy Dessert Recipes

    If you love easy desserts, then you’re in the right place. Food is love around here, and desserts are extra bonus points for letting someone know how you feel.

    So if it’s easy, and tasty, then you better believe it will be shared in our dessert recipes archive.

    Blank Calendar – FREE Vertical Monthly Calendar Printable

    December 27, 2018

    Blank Calendar Printable - Free Download

    Blank Calendar – FREE Monthly Calendar Printable: A vertical calendar printable that’s super chic and perfect for those who love a minimalistic way to keep dates on track!

    Often, I see printable calendars available online, but they either lack something that I’m looking for or aren’t the right orientation and size that I need. So what’s a girl to do? Or at least this girl? I make my own.

    What else do I do? Make it available for you too!

    Vertical Monthly Calendar Printable

    Want to be able to type in to this calendar too? Then you’ll LOVE my home management binder that not only allows you to type in each day… but you get access to over 50+ printables to help you manage your life and home!

    Free calendar download - printables

    When you search “BLANK CALENDAR” on Google, there are a lot of horizontal (landscape orientation) options that pop up.

    But if you’re like me and like to put your blank calendar sheets in a 3-ring binder in a vertical (portrait orientation), then you’ll love this printable.

    5 Week AND 6 Week Calendar Options

    When making my own calendars, I like as much room to write as possible. (I’m a big note-taker.)

    So for this printable, I made a blank calendar template that only has 5 weeks (rows) to allow more writing space.

    However, some months, some years, may need an extra row in there for a couple of days if the month starts later in the week.

    So to accommodate all months and years, I’ve made two calendar options for you.

    Why Not Just Make Each Month Have 6 Weeks (rows)?

    I just hated to make them all 6 weeks, that reduces the size of each daily box, limiting the space you have to write. Space to write is CRUCIAL to me, so I thought you may be the same!

    But since I’m also more of a type “A” personality, I completely understand the need for symmetry, so I’ve created 2 different styles to hopefully make things easier for those of you who prefer things a certain way.

    free calendar downloads

    With this Free Calendar, You Can Either:

    • Save and print the “5-week calendar” (bigger squares to write in) and for the months that require an additional row (for 2019, this will be for March 31st and June 30), you can just write in the extra dates at the bottom of the sheet.
    • Save the entire year of the 6-week calendar months (smaller squares) so all of the boxes are symmetrical with every month, even though the boxes will be smaller.

    Month in Advance Organization

    Another tool that I love to use to stay organized, is this month-in-advance printable that helps me see an overhead view of things to come!

    Blank Calendar – FREE Printable

    So grab access to this printable calendar and all of the other printables that I’ve created for you here…

    Get 5 Week Calendar Here!
    Get 6-Week Calendar Here!

    Noodle Bowl – Easy, Vegan, Gluten Free

    December 21, 2018

    Noodle Bowl - Vegan Recipe & Veggies

    Noodle Bowl -An easy, healthy weeknight meal that can be made vegan and gluten-free, and is a veggie bowl that even non-vegetarians will love!

    Noodle Bowl - Vegan Recipe & Veggies

    Noodle Bowl

    I am such a fan of a dish having a crunch to it so that usually means that nuts, seeds or veggies have to be in it. Well, this noodle bowl recipe is hitting the “crunch” factor perfectly!

    Plus, if you’re a fan of vegan recipes, you’ll want to add this to your recipe box PRONTO!

    With ingredients like:

    • Soba/Buckwheat Noodles
    • Coconut Oil
    • Garlic
    • Fresh Ginger
    • Mushrooms
    • Shallots
    • Broccoli
    • Carrots
    • Kale
    • Green onion and Sesame Seeds (optional)
    Ingredients for Vegan Noodle Bowl
    Noodle Bowl - Veggie Recipe Vegan

    the texture is AMAZING and with the added sauce made of:

    • Soy Sauce
    • Olive Oil
    • Lemon Juice
    • Sesame Oil
    • Maple Syrup (or honey, if not vegan)
    • Sriracha
    • Grated Ginger

    the flavor is dynamite!

    Noodle Bowl - Vegan bowl recipesYou’ll start by cooking your noodles according to package directions.

    Then, whisk together ingredients for the sauce in a small bowl, and set aside.

    Cook the Mushrooms First:

    Grab your skillet or wok, and melt 2 tablespoonful coconut oil over medium-high heat.

    Add your garlic and ginger, and cook for one minute.

    Grab your mushrooms and cook for about five minutes, and remove mushrooms from skillet.

    Cook Remaining Veggies

    Melt remaining 2 tablespoons coconut oil in the skillet, and add shallots and cook about three minutes. Then add broccoli, carrots, and kale, and cook for about 5 minutes. Add your mushrooms back into the skillet and cook another 3 to 5 minutes, until the veggies are tender.

    Veggie bowl recipe that's vegan

    Noodles

    Add the cooked noodles and the sauce to the skillet, and stir to coat. Cook for about 2 minutes and serve in bowls topped with sesame seeds and green onion.

    Noodle Bowl - Vegan veggie recipe

    Serve this gloriousness in bowls topped with sesame seeds and green onion and you’re ready for a bowl of flavor!

    noodle bowl - vegan recipe
    Noodle Bowl - veggie recipe

    More Gluten-Free Recipes

    Although we don’t usually share a lot of gluten-free recipes with you, if gluten-free is something you’re making more of, I encourage you to check out these gluten-free recipes!

    Recipe

    Noodle Bowl - Vegan Recipe & Veggies
    Print Pin
    5 from 3 votes

    Noodle Bowl With Veggies

    Noodle Bowl -An easy, healthy weeknight meal that can be made vegan and gluten-free, and is a veggie bowl that even non-vegetarians will love!
    Course Main Course
    Cuisine Asian
    Diet Vegan
    Prep Time 10 minutes minutes
    Cook Time 30 minutes minutes
    Total Time 40 minutes minutes
    Servings 4
    Calories 450kcal
    Author Jessica Burgess

    Ingredients

    • 5 oz Soba/buckwheat noodles or ½ package
    • 4 tablespoon coconut oil divided
    • 3 cloves garlic minced
    • 1 teaspoon fresh ginger grated (can substitute ½ teaspoon ginger powder)
    • 1 qt. mushrooms sliced
    • 1 shallot chopped
    • 1.5 cup broccoli florets
    • 1 carrot julienned or shredded
    • 3 stalks kale de-ribbed and chopped
    • green onion chopped, for garnish/topping
    • sesame seeds for garnish/topping

    For the Sauce

    • .25 cup soy sauce
    • 3 tablespoon olive oil
    • 1 tablespoon lemon juice
    • 2 teaspoon sesame oil
    • 1 tablespoon maple syrup (or honey, if not vegan)
    • 1 teaspoon Sriracha or more if desired
    • 1 teaspoon grated ginger

    Instructions

    • Cook noodles according to package directions.
    • Whisk together ingredients for the sauce in a small bowl, and set aside.
    • Melt 2 tablespoonful coconut oil in skillet or wok, over med-high heat. Add garlic and ginger. Cook for 1 minute.
    • Add in mushrooms and cook for about 5 minutes. Remove mushrooms from skillet.
    • Melt remaining 2 tablespoons coconut oil in skillet. Add shallots and cook about 3 minutes. Add broccoli, carrots and kale. Cook about 5 minutes.
    • Add mushrooms back to skillet and cook another 3 to 5 minutes, until veggies are tender.
    • Add the cooked noodles and the sauce to the skillet. Stir to coat. Cook about 2 minutes.
    • Serve in bowls topped with sesame seeds and green onion.

    Notes

    *Can use any noodle of choice, but buckwheat/soba noodles are GF; substitute tamari for soy sauce if GF

    Nutrition

    Calories: 450kcal | Carbohydrates: 44g | Protein: 15g | Fat: 27g | Saturated Fat: 13g | Sodium: 1158mg | Potassium: 1070mg | Fiber: 3g | Sugar: 9g | Vitamin A: 2835IU | Vitamin C: 40.8mg | Calcium: 53mg | Iron: 2.9mg

    More Easy Main Dish Recipes

    If you’re meal planning or just looking to add more recipes to your rotating dinner menu, then you’ll LOVE the recipes in our EASY RECIPES archives.

    More Easy Recipes

    Thai Salad with Noodles and Cabbage is packed full of flavor and texture.
    cornbread salad
    Easy asian noodle recipe - vegan and gluten free

    Grilled Shrimp Recipe and Marinade

    December 17, 2024

    grilled shrimp in white bowl

    Grilled Shrimp: This shrimp marinade is perfect for grilling or sautéing, to serve on chicken street tacos, pasta, side salad, kabobs, even eating alone, for a healthy main course that the whole family will love!

    Not only will you find an easy marinade below, but you’ll also get the instructions on how to grill shrimp too! Now you may also love using this egg wash for fried shrimp, to make a fried battered shrimp!

    shrimp marinade - for grilling - shrimp in white bowl
    [feast_advanced_jump_to]

    Hey my Fantabulosity friends! It's Meg popping in again with a delicious and ridiculously simple recipe for you to try!

    Shrimp Marinade Recipe

    I wanted to create a shrimp marinade with a ton of flavor using ingredients that you would already have right in your pantry and refrigerator, that you could easily prep for Marinate Monday in the Dinner Theme System, or any night of the week. My philosophy has always been finding ways to use our common, everyday ingredients in ways that will wow your family and friends.

    So, there's nothing crazy or obscure in this recipe but I promise it is the best shrimp!

    What do you soak shrimp in?

    Soaking shrimp in a marinade is ideal! For this recipe, you’ll use ingredients such as Worcestershire sauce, vinegar, olive oil, mustard, garlic, salt, and pepper.

    What is the best way to season shrimp?

    We feel like the best way to season shrimp is with the marinade. But extra spices may be something you’re interested in sprinkling on, just before grilling/cooking. Such as, garlic powder, salt, pepper, Italian seasoning, seasoned salt, etc.

    How long should you marinate shrimp?

    30 minutes to an hour.
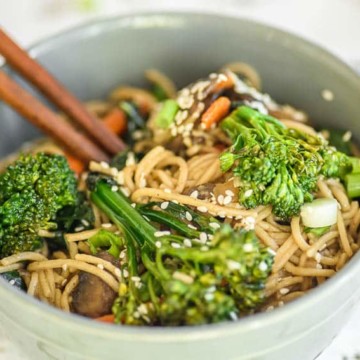
    Should you marinate shrimp overnight?

    I wouldn’t. If you marinate it longer than an hour, that it can actually start to cook the shrimp.

    Ingredient Checklist

    Let's talk about the simple ingredients that go into this shrimp marinade. Like a lot of marinades, extra-virgin olive oil and vinegar are the base ingredients that keep things saucy. Another oil could be used here in place of the olive oil if you wish.

    Worcestershire brings lots of deep, rich flavor and standard yellow mustard adds a delicious tang to the marinade. Because everything is better with fresh garlic, a clove is mixed in to punch up the flavor even more.

    ingredients for shrimp marinade

    How to Marinate Shrimp

    In a small bowl, whisk together the olive oil, vinegar, Worcestershire sauce, mustard, salt, black pepper, and garlic. Pour into a zip-top bag. Add shrimp, seal, and shake around to ensure the shrimp is coated.

    Shrimp marinade ingredients in a bowl.
    Pour marinade ingredients in a bowl.

    How Long to Marinate Shrimp

    Shrimp, and any seafood, in general, do not need much time in a marinade to soak up the flavors.

    In fact, if it sits in the marinade too long the acidic vinegar can start to essentially cook the shrimp which will mess with the texture in all the wrong ways. That's something we want to actively avoid.

    Lucky for us, that means this shrimp only needs to marinate for an hour. You could even get away with just 30 minutes too if you're in a hurry. Fresh shrimp (raw shrimp) is ideal but if you have frozen shrimp, it’s best to thaw it out before marinating or put it in the marinade, frozen, and leave it in a little longer than an hour so it has time to soak in.

    Shrimp marinating in ziploc bag

    Quick Appetizer or Easy Dinner Idea

    Because you only need up to an hour to marinate this recipe is a perfect weeknight meal or even as an easy party appetizer. Especially considering that once the marinating time is up, you’ll only need 4 minutes, YES JUST 4, to grill the shrimp and have it on the table.
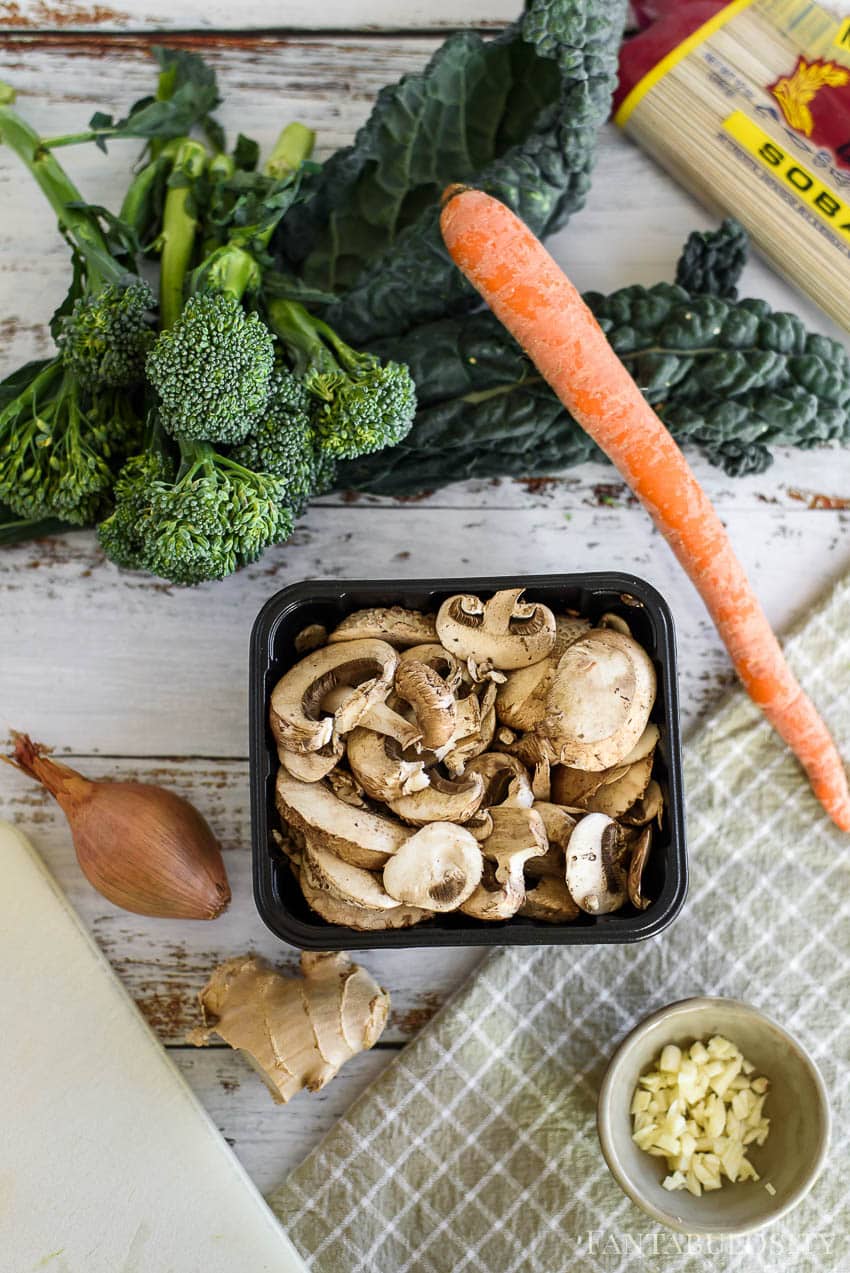
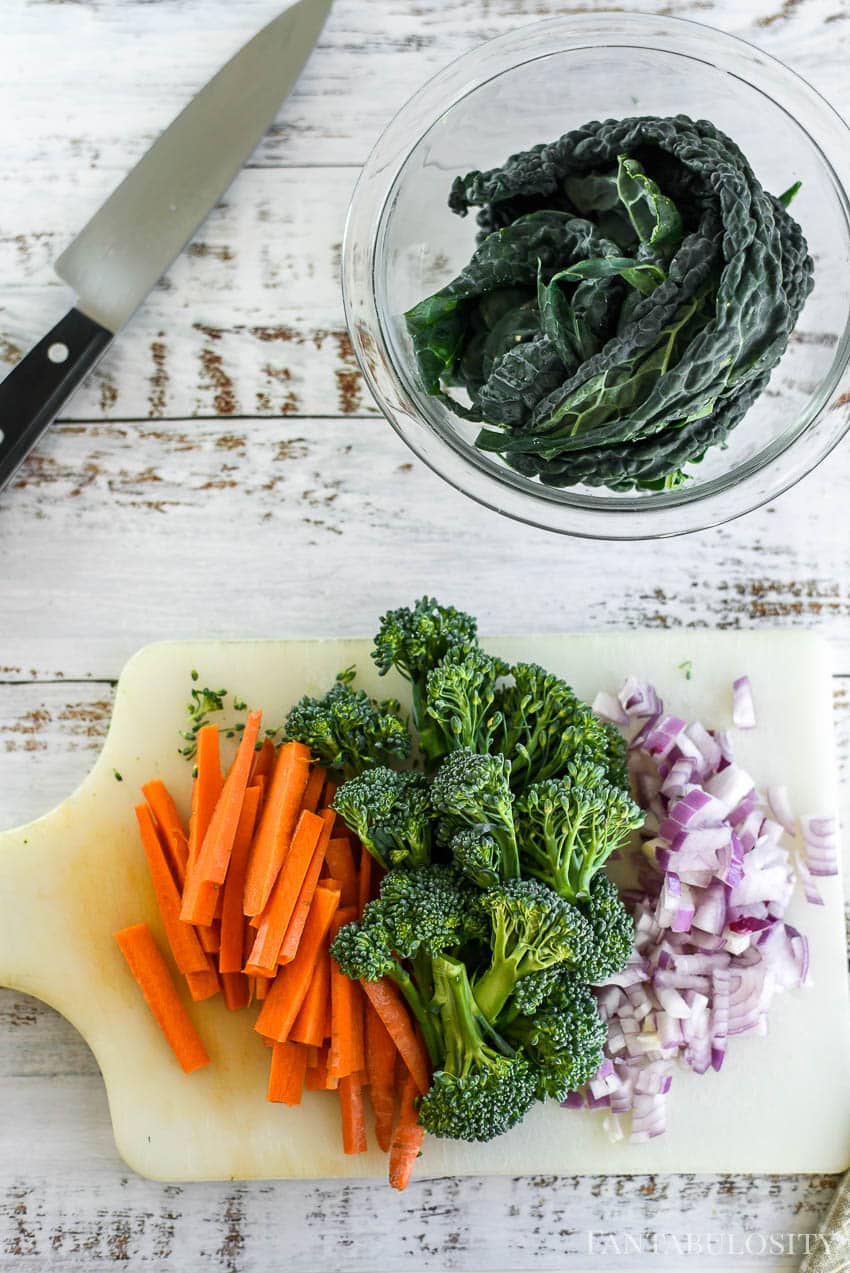
    That means while the shrimp is soaking up this delicious marinade, you can whip up a side salad, make some rice, and roast some vegetables for a wonderful side dish for the best grilled shrimp, too!

    How to Grill Marinated Shrimp

    raw shrimp on skewers for kabobs

    You can absolutely cook the shrimp any way you wish. (Air fryer, stove top, pan fry, cast iron pan, etc.) But if you’re planning on grilling shrimp on an outdoor grill, it may be best to put the uncooked shrimp on skewers and serve as shrimp kabobs. (If using wooden skewers, don’t forget to soak them before grilling!)

    Or, you can use a grill basket or tray to make things even easier!

    Cooked shrimp on a grill.

    How to Grill Shrimp

    • Preheat a grill or grill pan over medium heat.
    • Place shrimp on grill grates for 2 minutes per side.

    Note: For best results, if you are using an outdoor grill, it would be helpful if you put the shrimp on skewers to keep them from falling down the grates.

    If desired, sprinkle with fresh parsley or your favorite fresh herbs on top of the grilled shrimp skewers.

    Marinated grilled shrimp kabobs

    How to Store Leftover Shrimp

    If you happen to have leftover shrimp after cooking, store in an airtight container for 3 to 4 days!

    Start the new year off right with this simple and healthy Grilled Marinated Shrimp. Staple ingredients make up this shrimp marinade, perfect for weeknights.

    It would be a perfect option for meal prepping for lunches throughout the week if that's your thing. I'm trying my hardest to make it my thing but it's hard to keep on it consistently.

    Versatile Shrimp Marinade

    Although this marinade is the delicious on shrimp, it would be just as delicious with roasted pork tenderloin, smoked chicken tenders, and other seafood. I'm betting it would be great as a simple salad dressing too (just make sure you use it solely on a salad for that batch, nobody wants a foodborne illness).

    Whether you're looking for something healthy, something simple for weeknights or a main dish the whole family will adore, I've got you covered with this Grilled Marinated Shrimp recipe.

    Start the new year off right with this simple and healthy Grilled Marinated Shrimp. Staple ingredients make up this shrimp marinade, perfect for weeknights.

    What to Serve with Grilled Shrimp

    Since the grill is already heated up and ready, it’s a great idea to cook vegetables on the grill too! They pair wonderfully with a recipe like this grilled shrimp.

    Or, you can also make this boom shrimp sauce to go along with grilled shrimp! To keep the seafood theme going, this mussels recipe in a white wine sauce is easy to make and such a great appetizer.

    More Easy Shrimp Recipes You’ll Love

    We love easy recipes around here, and if you love shrimp, then you don’t want to miss this easy fried shrimp recipe, this loaded shrimp potato, and this air fryer fried shrimp recipe!

    Or, for a fun twist on shrimp, try these shrimp burgers!

    Recipe

    grilled shrimp in white bowl
    Print Pin
    4.44 from 30 votes

    Grilled Shrimp Recipe and Marinade

    This grilled shrimp recipe and marinade that's made with everyday ingredients like mustard, Worcestershire sauce, vinegar, and garlic makes things easy! Plus, grilling instructions!
    Course Main Course
    Cuisine American
    Prep Time 1 hour hour
    Cook Time 4 minutes minutes
    Total Time 1 hour hour 4 minutes minutes
    Servings 4 servings
    Calories 443kcal
    Author Jessica Burgess

    Ingredients

    • ⅔ cup olive oil
    • ¼ cup vinegar (white, red wine, apple cider)
    • 1 ½ tablespoons Worcestershire sauce
    • 1 tablespoon yellow mustard
    • ½ teaspoon kosher salt
    • ¼ teaspoon black pepper
    • 1 clove garlic, finely minced
    • 1 pound 41/50 shrimp, raw, peeled and deveined

    Instructions

    • In a bowl, whisk together the olive oil, vinegar, Worcestershire sauce, mustard, salt, pepper and garlic. Pour into a zip top bag.
      Add shrimp, seal and shake around to ensure the shrimp is coated.
      Marinate in the refrigerator for an hour.
    • Preheat a grill or grill pan over medium heat. Grill shrimp for 2 minutes per side.
      Note: If you are using an outdoor grill, it would be helpful if you put the shrimp on skewers to keep them from falling down the grates.

    Notes

    Tip for Grilling: If using wooden skewers, soak them in water before assembling them so they don’t burn.

    Nutrition

    Serving: 1serving | Calories: 443kcal | Carbohydrates: 1g | Protein: 23g | Fat: 37g | Saturated Fat: 5g | Cholesterol: 285mg | Sodium: 1217mg | Potassium: 135mg | Vitamin C: 5.6mg | Calcium: 170mg | Iron: 3mg

    Blueberry Granola Bars

    January 2, 2019

    Blueberry Granola Bars with Yogurt Drizzle

    Stevia In The Raw® has sponsored this blog post and has provided product samples for these Blueberry Granola Bars with Yogurt Drizzle!

    Stevia In The Raw® Bakers Bag - Granola Bars

    Plus, now with the new year approaching, I know that so many of you are looking for recipes to help you through those resolutions. Today, I’m going to help you tackle that craving for sweets… with less sugar! Yes! LESS sugar!
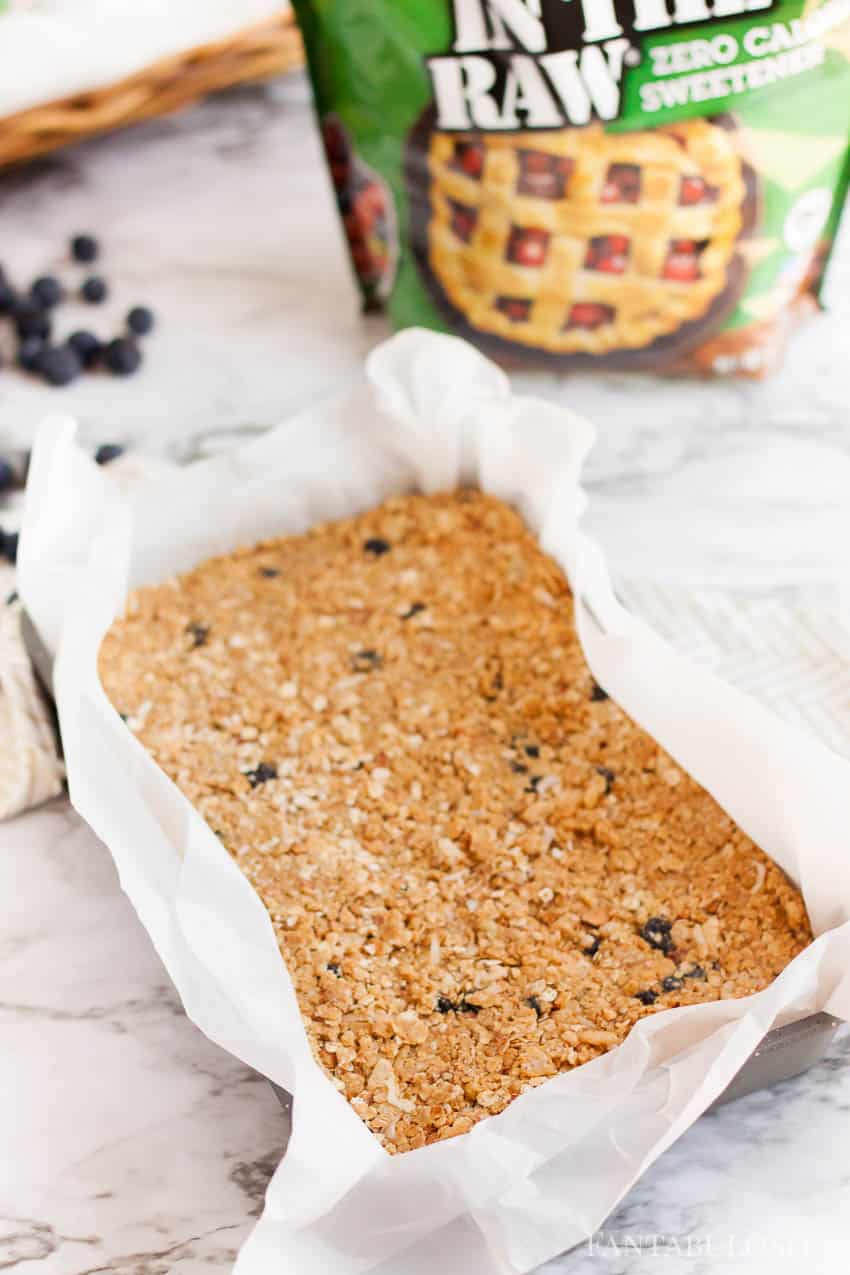
    Blueberry Granola Bars with Yogurt Drizzle Made with Stevia In The Raw®

    Oh friends, the ingredients in these granola bars are enough to make you swoon…

    • Stevia In The Raw® Bakers Bag
    • Rolled Oats
    • Crispy rice cereal
    • Dried blueberries
    • Creamy peanut butter
    • Butter or coconut oil
    • Shredded coconut
    • Chopped roasted almonds
    • Vanilla extract
    • Salt

    …but wait until you see them all together, topped with the amazing yogurt drizzle (also sweetened with Stevia In The Raw®)!

    You can find the full recipe card at the end of this post, but I wanted to give you the process in photos too, in case you’re the visual type. Plus, who doesn’t love drooling over food photos?!

    Blueberry Granola Bars Recipe

    Ingredients for blueberry granola bars

    Prepare 7 x 11 baking pan by lining with parchment paper.

    Then, combine the peanut butter, butter or coconut oil, vanilla extract, salt and Stevia In The Raw® into a small saucepan, and warm on “low” heat until it is easy to pour.

    Peanut Butter for granola bars made with stevia
    coconut oil for granola bars made with stevia - healthy recipe
    Ingredients for granola bars - made with stevia

    Next, in a large bowl, combine oats, crispy rice cereal, shredded coconut and almonds and blueberries.

    Healthy granola bars made with stevia in the raw

    Pour peanut butter mixture over the oat mixture and stir together, making sure everything is mixed together thoroughly.

    Granola bar recipe - stevia blueberries and rice krispies
    Blueberry Granola Bars Recipe with peanut butter and stevia

    Next, press mixture into the prepared pan and place in the freezer for 2 hours to set.

    Granola bars recipe made with blueberries, peanut butter, stevia

    Yogurt Drizzle for Granola Bars

    While the granola is setting, this is the perfect time to make the drizzle.

    Place the Stevia In The Raw® that is allotted for the drizzle in to a blender and blend for 2 minutes to create a powdered version.

    Yogurt Drizzle recipe for granola bars, using stevia

    Whisk together the blended Stevia In The Raw®, yogurt and milk until creamy.

    Yogurt Drizzle Recipe with less sugar

    Remove the granola from the freezer and cut into 12-16 bars.

    Then, line out the frozen bars on parchment paper, drizzle the yogurt mixture over each bar, and let the drizzle set (You can also freeze them again to move this process along)!

    Blueberry Granola Bars with Yogurt drizzle made with Stevia

    I mean, don’t they look absolutely mouthwatering?

    PRO TIP: Have fresh blueberries? Snacking along with or topping the granola bars with fresh blueberries are both great ways to make your delicious snack/dessert POP with even more flavor!

    Top with those blueberries - stevia recipe

    Store extras/leftovers in an airtight container and you have the perfect snack to satisfy your sweet tooth craving!

    Blueberry Peanut Butter Granola Bars with Yogurt Drizzle made with Stevia In The Raw

    Want to Use Stevia In The Raw® for More?

    Stevia In The Raw® Bakers Bag helps simplify baking with stevia. It measures cup for cup with sugar, so it can easily be used in recipes to reduce sugar and calories with no conversion necessary (Thank goodness! Easier the better, right?)! Plus, it's formulated so that 1 cup has the same sweetness as 1 cup of sugar.

    Know what else? Up to 700 calories are saved for every cup of sugar that is replaced with Stevia In The Raw®. Now THAT'S something to get excited about!

    Pro Tip:

    When using Stevia In The Raw® Bakers Bag for baking recipes, it is recommended that the user replaces about half of the sugar in order to achieve the proper browning, rising and caramelizing that only sugar can provide.

    Made with Stevia - granola bar recipes

    Recipe

    Blueberry Granola Bars with Yogurt Drizzle
    Print Pin
    5 from 1 vote

    Blueberry Granola Bars with Yogurt Drizzle, Made with Stevia In The Raw®

    Blueberry Granola Bars with Yogurt Drizzle Made with Stevia In The Raw® – Made with less sugar and a quick and easy recipe to help tackle that sweets craving!
    Course Dessert
    Cuisine American
    Prep Time 10 minutes minutes
    Freezing Time 2 hours hours
    Total Time 2 hours hours 10 minutes minutes
    Servings 16 bars
    Calories 289kcal
    Author Jessica Burgess

    Ingredients

    Granola Bars

    • 2 cups rolled oats
    • 1.5 cups crispy rice cereal
    • 1 cup dried blueberries
    • 1.5 cup creamy peanut butter
    • 3 tablespoon butter or coconut oil
    • .25 cup shredded coconut
    • .5 cup chopped roasted almonds
    • 3 teaspoon vanilla extract
    • .5 teaspoon salt
    • 6 tablespoon Stevia In The Raw® Bakers Bag

    Yogurt Drizzle

    • .5 cup greek vanilla yogurt
    • 3 tablespoon whole milk
    • 1.5 cup Stevia In The Raw® Bakers Bag

    Instructions

    Granola Bars

    • Prep a 7×11 baking pan by lining it with parchment paper.
    • Combine peanut butter, butter, vanilla extract, salt and Stevia In The Raw® in a small saucepan and warm on low heat until it is easy to pour.
    • In a large bowl, combine oats, crispy rice cereal, shredded coconut, almonds, and blueberries.
    • When ready, pour peanut butter mixture over oat mixture and stir together, making sure everything is mixed together thoroughly.
    • Press mixture into prepared pan, and place in freezer for 2 hours to set.

    Yogurt Drizzle

    • While the granola is setting, make the drizzle.
    • Place Stevia In The Raw® in a blender and blend for 2 minutes to create a powdered version.
    • Whisk together blended Stevia In The Raw®, yogurt and milk until creamy.
    • Cut frozen granola into 12-16 bars, and line out bars on to parchment paper.
    • Drizzle yogurt mixture over each bar and let set up (harden). You can freeze to move this process along if you prefer.
    • Store any leftovers in an airtight container!

    Nutrition

    Serving: 1bar | Calories: 289kcal | Carbohydrates: 24g | Protein: 9g | Fat: 19g | Saturated Fat: 5g | Polyunsaturated Fat: 4g | Monounsaturated Fat: 8g | Trans Fat: 0.1g | Cholesterol: 6mg | Sodium: 200mg | Potassium: 297mg | Fiber: 4g | Sugar: 9g | Vitamin A: 75IU | Vitamin C: 0.02mg | Calcium: 46mg | Iron: 1mg
    Stevia in the Raw - granola bar recipe

    Venison Chili – Stovetop or Slow Cooker Recipe

    February 27, 2021

    Ladle of venison chili coming out of pot.

    This venison chili is one of the easiest ground deer meat recipes that you can make on the stove or in a slow cooker! The addition of the bacon helps give it a flavor that will leave you craving it on those cold winter days!

    Craving more warm bowls? Here are all my soups, stews, and chili.

    Deer meat and bacon make a chili worth bragging about. See our favorite slow cooker meals for more.

    Venison Chili

    We absolutely love deer meat recipes and are always looking for new ways to use it, since we live in Montana and my husband is a hunting guide. So if you have a freezer full of venison, adding deer chili to your menu plan is always a good idea! Or, put it on top of Frito’s and make a chili pie!

    [feast_advanced_jump_to]

    Why You’ll Love This Venison Chili

    I love using ground venison to make chili because it’s a great way to use up that deer that can’t be cut in to steaks.

    NOTE: If you’re someone who doesn’t really care for a gamey venison taste, using it in chili is a great way to use it up!

    Want Slow Cooker Venison Chili?

    Similar to our stovetop or slow cooker bean soup, this recipe process below will show you how to cook on the stovetop. However, if you’re planning on making this in the slow cooker… here is what we recommend:

    • Cook the bacon, venison, onions, peppers, and garlic together in a skillet over medium-high heat until the venison and bacon is cooked through.
    • Add it to the slow cooker with the rest of the ingredients.
    • Cook on high heat for about 5 hours or on low heat for about 8 hours. (Temperature settings on different slow cookers may vary. Check periodically for best results!)

    How to Make Deer Chili

    If you’re ready to get started on this venison chili, you can find the full stove-top recipe at the bottom of this post.
    However, I LOVE to show you process photos too in case you like to follow along visually like I do, when making a recipe I find online!

    Ground Venison Recipe - Deer Chili

    First, you’ll chop up your bacon and cook it over medium heat in a large pot for about 10 minutes until done. (Or longer if you prefer a crispier bacon in your chili.)

    Venison Chili Recipe

    Add your onion, garlic and bell peppers and cook for 5 minutes.

    Then, add the ground venison until venison is no longer pink.

    Spices and ingredients for chili recipe

    Stir in the chili powder, cumin, onion powder and salt until the meat is evenly coated.

    Deer chili recipe

    Pour in the tomato sauce, diced tomatoes, chili beans, and kidney beans.
    Venison Recipes

    Stir in the brown sugar…

    How to make deer chili

    Bring to a boil, reduce heat and let simmer for 15 minutes!

    Doesn’t this look amazing?!

    Venison Chili Tip

    If you’re using 100% ground venison, you’ll want to keep all of the bacon grease that cooks out. However, if you are using processed venison, drain the bacon grease because beef or pork may have been added to it during the process, giving it the fat that this recipe needs.
    Venison Chili Recipe

    Side Dishes for Venison Chili:

    If you’re looking for something to serve alongside this deer chili recipe, you love these:

    • Side Salad Recipe
    • Easy Focaccia Bread
    • Caprese Chicken Sandwich
    • or put it on top of these chili cheese corn dogs

    More Chili Recipes You’ll Love:

    • Easy Chili Recipe
    • Vegetarian Chili
    • Chili Mac
    • White Chicken Chili

    More Venison Recipes You’ll Love:

    • Deer Steak on the Stovetop
    • Fried Deer Meat
    • Grilled Deer Steak

    Recipe

    Ladle of venison chili coming out of pot.
    Print Pin
    4.84 from 18 votes

    Venison Chili

    This venison chili is one of the easiest ground deer meat recipes that you can make on the stove or in a slow cooker! The addition of the bacon helps give it a flavor that will leave you craving it on those cold winter days!
    Course Main Course
    Cuisine American
    Prep Time 5 minutes minutes
    Cook Time 20 minutes minutes
    Simmer 15 minutes minutes
    Total Time 40 minutes minutes
    Servings 8 servings
    Calories 514kcal
    Author Jessica Burgess

    Ingredients

    • 12 ounces thick sliced bacon
    • 2 pounds ground venison
    • 1 large yellow onion
    • 1 green bell pepper
    • 3 teaspoons minced garlic
    • 3 tablespoons chili powder
    • 1 ½ tablespoons cumin
    • 1 tablespoons onion powder
    • ½ tablespoons salt
    • 15 ounces can tomato sauce
    • 2 cans 14.5 oz. cans diced tomatoes or similar size
    • 15 ounces can hot chili beans or mild if you’re not in to “hot”
    • 15 ounces can kidney beans
    • 1 tablespoon brown sugar

    Instructions

    • Chop bacon into small pieces.
    • In a large pot, over medium heat, cook bacon about 10 minutes (you can cook it longer if you prefer a crispier bacon).
    • Add chopped onions, bell pepper, and garlic. 
    • Cook vegetable together with the bacon for 5 minutes. 
    • Add the ground venison and cook until the venison is no longer pink.
    •  Stir in the chili powder, cumin, onion powder and salt until the meat is evenly coated. 
    • Pour in the tomato sauce, diced tomatoes, chili beans, and kidney beans. 
    • Stir to combine. 
    • Stir in brown sugar.
    • Bring the chili to a boil and then reduce the heat and let it simmer for at least 15 minutes.

    Notes

    To Make Venison Chili in the Slow Cooker:
    • Cook the bacon, venison, onions, peppers, and garlic together in a skillet over medium-high heat until the venison and bacon is cooked through.
    • Add it to the slow cooker with the rest of the ingredients.
    • Cook on high heat for about 5 hours or on low heat for about 8 hours. (Temperature settings on different slow cookers may vary. Check periodically for best results!)
    TIP: If you’re using 100% ground venison, you’ll want to keep all of the bacon grease that cooks out. However, if you are using processed venison, drain the bacon grease because beef or pork may have been added to it during the process, giving it the fat that this recipe needs.

    Nutrition

    Serving: 2cups | Calories: 514kcal | Carbohydrates: 31g | Protein: 38g | Fat: 27g | Saturated Fat: 10g | Cholesterol: 119mg | Sodium: 1666mg | Potassium: 1350mg | Fiber: 9g | Sugar: 11g | Vitamin A: 1331IU | Vitamin C: 29mg | Calcium: 117mg | Iron: 8mg
    • « Go to Previous Page
    • Page 1
    • Interim pages omitted …
    • Page 19
    • Page 20
    • Page 21
    • Page 22
    • Page 23
    • Interim pages omitted …
    • Page 27
    • Go to Next Page »

    Primary Sidebar

    Jessica Burgess standing in kitchen holding a hummingbird cake.

    Hi, I'm Jessica! - Owner and Creator of the blog and brand, Fantabulosity.

    I’m here to help you make easy comfort food and nostalgic recipes, using simple ingredients, that everyone will love.

    More about me →

    Recipe Collections

    • Crockpot recipe collage
      26 Easy Crockpot Dinners (Slow Cooker Recipes for Busy Weeknights)
    • Church supper recipes collage.
      Church Supper Recipes
    • Fall Dessert Recipes collage, showing pumpkin, apple and pecan desserts.
      Easy Fall Desserts (34 Cozy Recipes for the Whole Season)
    • Collage of Thanksgiving side dishes.
      40+ Thanksgiving Side Dishes (Easy Recipes for a Crowd)
    • Old fashioned potluck cake recipes collage.
      Old-Fashioned Cakes That Still Show Up at Every Potluck
    • Collage of potluck desserts.
      Easy Potluck Desserts (Simple Recipes That Always Get Asked For)

    Popular Recipes

    • bread pudding in baking dish
      Bread Pudding Recipe: Easy Old Fashioned Recipe (With Video!)
    • Burger baked in the oven, steamed in aluminum foil, and placed on white plate.
      Burgers in the Oven
    • two tuna salad sandwiches stacked on top of each other
      The BEST Tuna Salad Recipe
    • doritos chicken casserole on plate
      Doritos Chicken Casserole
    • Strawberry brownies on white marble cutting board.
      Strawberry Brownies Recipe
    • Cheeseburger Sliders made with Hawaiian Rolls, stacked on top of one another.
      Cheeseburger Sliders

    Footer

    ↑ back to top

    Featured in Parade, TODAY, House Beautiful, First for Women, The Pioneer Woman, BuzzFeed, Martha.com, Country Living, Woman’s World, and Access Hollywood.

    About

    • About Jessica
    • Contact
    • Collaborate
    • A Month of Dinners

    Easy Recipes

    • All Recipes
    • Vintage Recipes
    • Dinner Recipes
    • Desserts

    Popular Recipes

    • Cake Recipes
    • Bread Pudding
    • Chicken Spaghetti
    • 3-Ingredient Biscuits

    Privacy Policy |Accessibility Copyright © 2026 Fantabulosity | Terms & Conditions | FTC
    All recipes, photos, and content are copyrighted and may not be reproduced, republished, or distributed without written permission.

    Rate This Recipe

    Your vote:


    A rating is required
    A name is required
    An email is required