
• Skip to primary navigation
  • Skip to main content
  • Skip to primary sidebar

Fantabulosity logo

  • All Recipes
  • Vintage Recipes
  • Holiday
  • Dinner Theme System
  • About
  • Navigation Menu: Social Icons

    • Facebook
    • Instagram
    • Pinterest
    • TikTok
    • YouTube
menu icon
go to homepage
  • Recipes
  • Desserts
  • Dinners
  • Cookbook
  • Holidays
  • Gatherings
  • About Jessica
    • Facebook
    • Instagram
    • Pinterest
    • TikTok
    • YouTube
  • search icon
    Homepage link
    • Recipes
    • Desserts
    • Dinners
    • Cookbook
    • Holidays
    • Gatherings
    • About Jessica
    • Facebook
    • Instagram
    • Pinterest
    • TikTok
    • YouTube
  • ×
    Home » Recipes

    DIY Teddy Bear Cookies

    DIY Teddy Bear Cookies

    January 28, 2017

    Teddy Bear Food Idea - DIY Cookies. So cute for a woodland friends, camping, or forest party as a party favor too!

    Teddy Bear Food Idea – DIY Bear Cookies: A “beary” good food or snack idea for kids, for a birthday party treat, dessert, sweets, or party favor idea.

    Teddy Bear Food Idea made out of Star Crunch with vanilla wafers.

    DIY Teddy Bear Cookies

    My friend and I were grocery shopping together the other day (Yes, it’s WAY more fun to grocery shop with a friend), and we stood in the snack cake aisle drooling brainstorming over cute ways to create a fun treat for our kiddos, making something out of something on the shelves.

    The minute I saw the Little Debbie Star Crunch’s, I saw the potential “fur,” of a little critter. I ran it by my friend, and she exclaimed “YES! Let’s do it.” So we grabbed a box and headed back to my house to experiment. We had so much fun creating these little DIY Teddy Bear Cookies, and my kids went NUTS when they got home and saw them.

    Then I began to think of how fun these would be if you’re looking for a bear food idea on Pinterest, for a “Build a Bear” birthday party, or a forest birthday party, so I couldn’t WAIT to share them with you. I also realized how adorable they would have been for the Woodland Friends Birthday Party and Camping Party that I designed in the past, and I was slappin’ myself. See those two parties here to get your party fix…

    Camping Sleepover
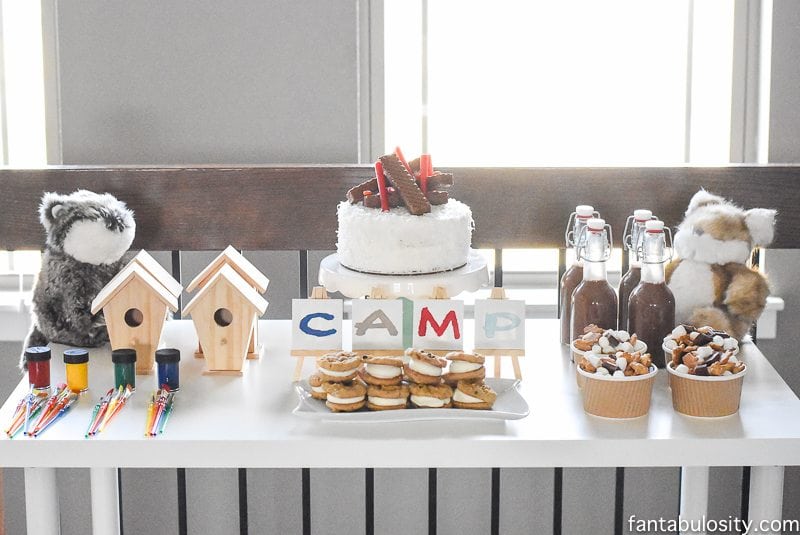
    A Camping Sleepover Birthday Party!  Fire birthday cake, smores mix, all on a table.

    Woodland Friends

    Woodland Friends First Birthday Party Dessert Table

    DIY Teddy Bear Cookies or not… the parties still turned out pretty cute I think.) 😉 

    Bear Cookie Video Tutorial

    If you’re looking for a photo tutorial, you can see that below too!

    Bear Cookie Photo Tutorial
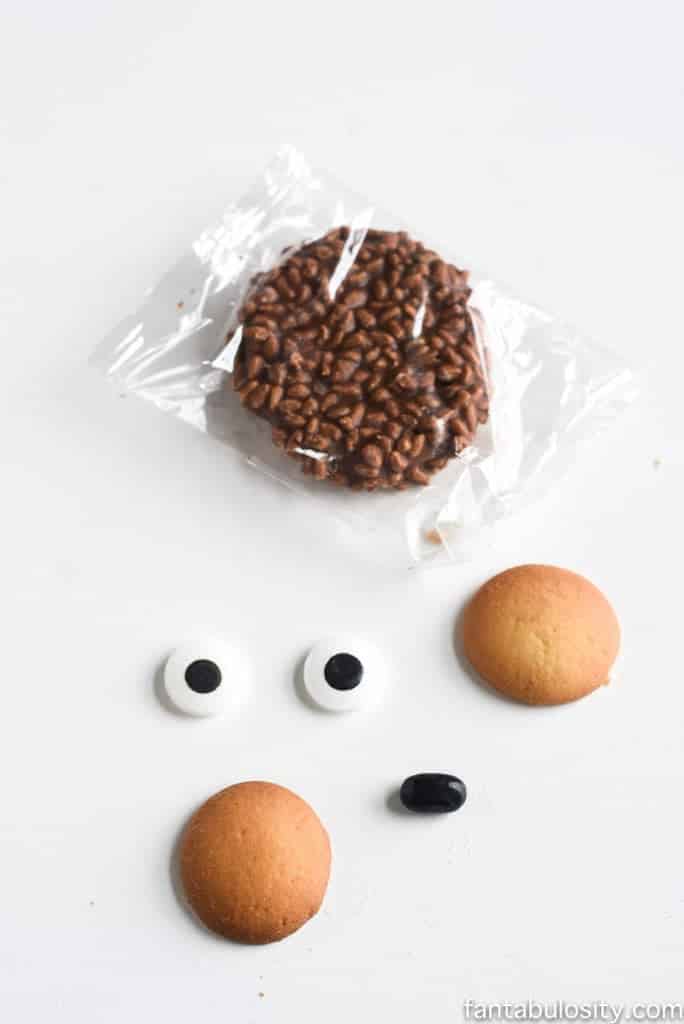
    Ingredients for Teddy Bear Food Idea
    Teddy Bear Food Idea

    What you’ll need:

    (To make one bear snack)

    • One Little Debbie Star Crunch

    • 2 Vanilla Wafers

    • 2 candy eyes

    • 1 black jelly bean

    • Royal Icing for “glue.” (You MAY be able to use canned frosting, but royal seems to hold up much better.)

    • Brown icing coloring (if desired) to color the royal icing.

    How to Assemble:

    • To “glue,” each of the pieces on to the Star Crunch, royal icing seemed to work best. I use Wilton Royal Icing Mix, and added in a couple of drops of brown Wilton icing coloring to help blend in with the colors of the “bear,” but it’s not necessary.

    • “Glue” one Vanilla Wafer on to the Star Crunch smearing some of the royal icing to the underside of the wafer, and press down on to the Star Crunch.

    • Using a small dab of the royal icing, attach the black jelly bean sideways on to the wafer.

    • Next, using a couple of dabs of royal icing on each eye, secure the eyes to the Star Crunch

    • Cut the other Vanilla Wafer in half, using a knife. (I seemed to have better luck with a clean cut when I sliced it, rather than pushing straight down.)

    • Attach each “ear” to the “bear,” using the royal icing, and hold in place for about 30 seconds to 1 minute. Once the royal icing hardens, the ears should stay in place.

    Teddy bear made out of Star Crunch.

    Teddy Bear Food Idea

    If you’ve found your way here, looking for a bear food idea… I sure hope you like this one! It was incredibly easy and it turned out even cuter than I imagined. Based off of the reaction of my kiddos, I’d say they were a hit too! 😉

    Little boy holding DIY teddy bears.

    We think you’ll also love these chocolate covered Teddy Bear snacks!

    Teddy Bear Food Idea with Starcrunch

    21 Day Fix Dinner Recipe: Quick & Easy Soft Chicken Tacos

    January 29, 2017

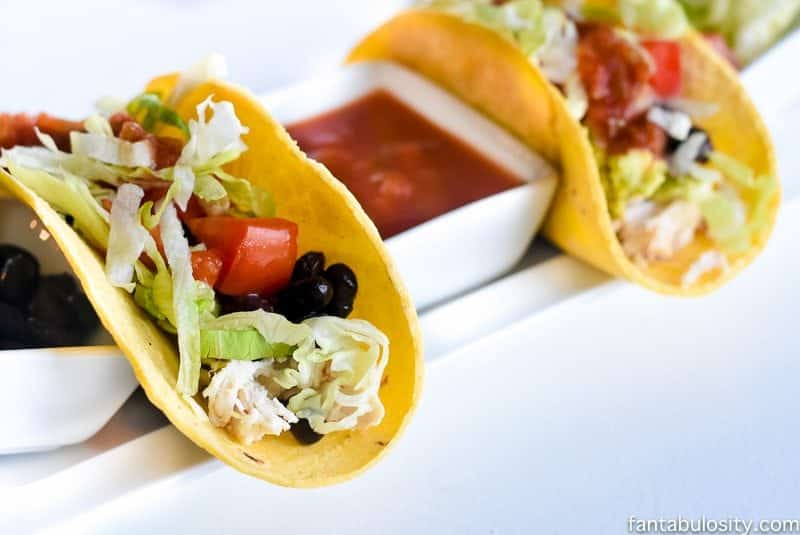
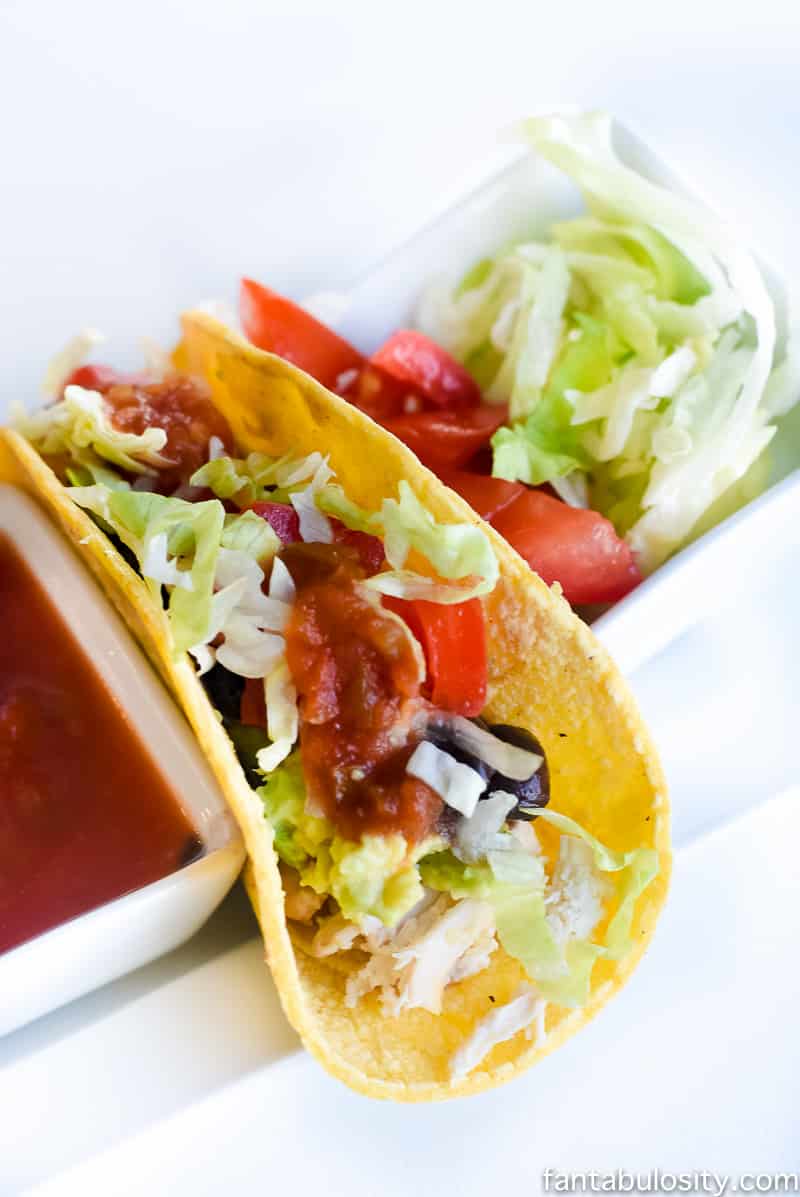
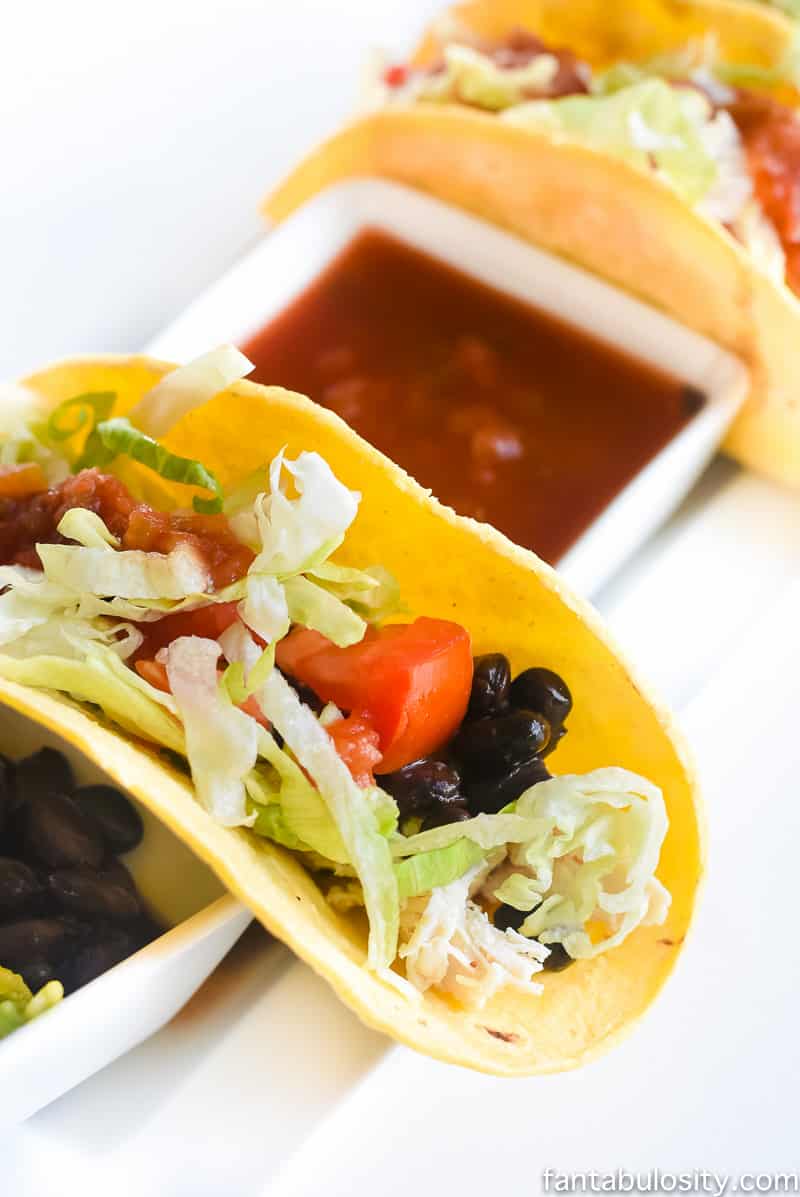
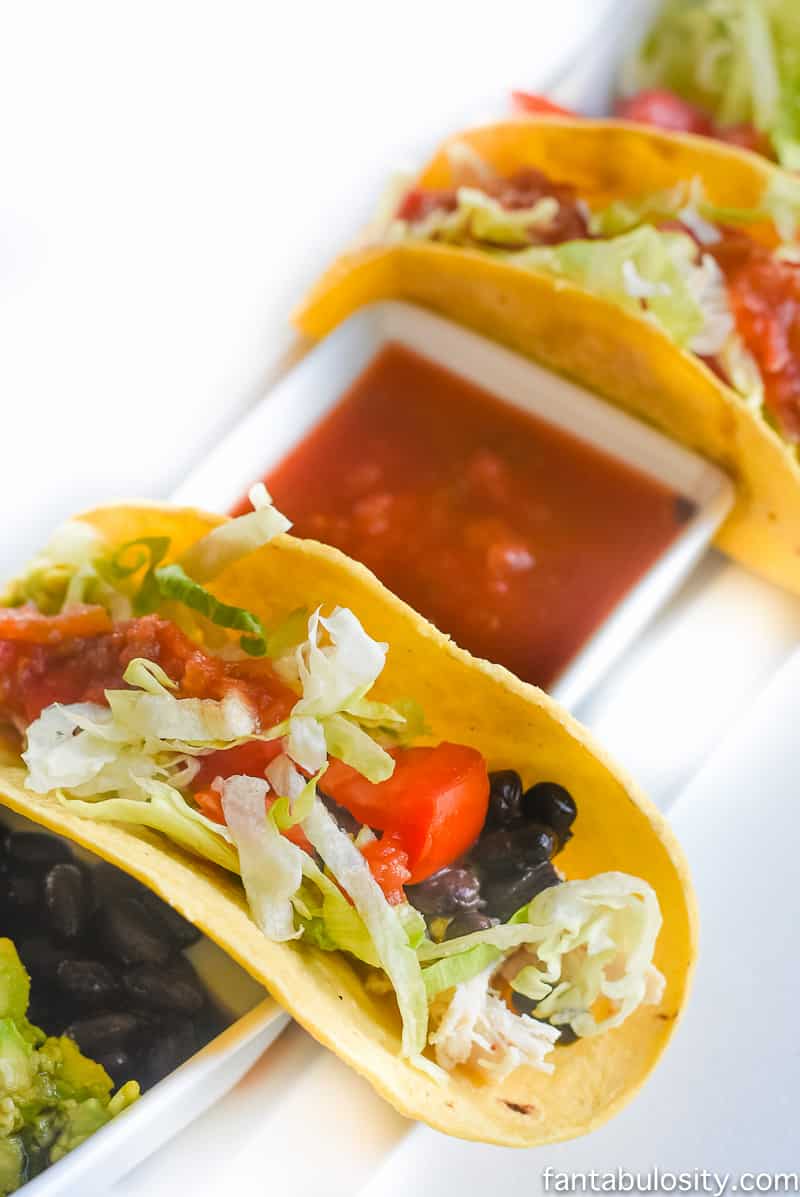
    21 Day Fix Dinner Recipe: Quick & Easy Soft Chicken Tacos

    21 Day Fix Dinner Recipe: Quick & Easy Soft Chicken Tacos… that aim to please for those doing Beach Body, and looking for something tasty and fast!

    21 Day Fix Dinner Recipe: Quick & Easy Soft Chicken Tacos

    We are huge fans of crispy chicken tacos, but if you’re not in the mood for baking, these stovetop chicken tacos are going to be a great option!

    21 Day Fix Dinner Recipe: Quick & Easy Soft Chicken Tacos

    My friend Amy is a Beach Body Coach, and I’ve been seeing the most delicious looking recipes that she’s been sharing on her Instagram page lately. Then, while browsing on Pinterest the other day for a dinner recipe, I started seeing “21 Day Fix,” EVERYWHERE! (And the food actually looked delish!)

    So I reached out to Amy and asked if she had a 21 Day Fix dinner recipe that she’d like to share with me, so I could make it and hand it out to all of you. She agreed, and here we are! Let me tell you… I took a bite immediately after adding the last topping, (as you’ll see in the video below) and it was absolutely tasty.

    Recipe and more photos below:

    21 Day Fix Soft Chicken Taco Tutorial Video:

    In this video, I simply warmed up the rotisserie chicken with the spices in the coconut oil, since it’s already cooked.

    If the video didn’t do it justice… the photos make my mouth water alone. Even if you aren’t participating in the 21 Day Fix, you’ll want to try this one. It was so incredibly quick to make, and it will now go on my dinner rotation. PLUS, I’ll feel so much better about how healthy it is.

    21 Day Fix Dinner Recipe: Quick & Easy Soft Chicken Tacos

    Chicken Tip:

    Amy mentioned that we could use a rotisserie chicken from the store to make it even easier. (I knew she was my friend for a reason. She’s speaking my love language for certain.)  Then, once we were done with the rotisserie, we boiled it in a bit of water, veggies, and spices to make our own rotisserie chicken stock; WHICH later became the base of my favorite Homemade Chicken Noodle Soup that my husband loves so much. Get that recipe here: The BEST Chicken Noodle Soup.

    21 Day Fix Dinner Recipe: Quick & Easy Soft Chicken Tacos

    21 Day Fix Measurements:

    *1 red (chicken), 2 yellow (if using both tortillas & black beans), 1 blue (avocado), 1 green (lettuce & tomato), ½ purple (salsa), 1 teaspoon (oil)
    You could substitute the avocado for cheese (still would count as 1 blue container).

    21 Day Fix Dinner Recipe: Quick & Easy Soft Chicken Tacos

    Don’t they look delish!?

    21 Day Fix Dinner Recipe: Quick & Easy Soft Chicken Tacos

    If you love delicious chicken recipes like this one, then I think you’re also going to love these chicken fajitas wraps! Or if taco recipes in general are your thing, make sure to try this walking taco casserole recipe that’s delicious!
    Recipe

    21 Day Fix Dinner Recipe: Quick & Easy Soft Chicken Tacos
    Print Pin
    5 from 1 vote

    21 Day Fix Dinner Recipe: Quick & Easy Soft Chicken Tacos

    Whether you are on the 21 Day Fix or not, this healthy tacos recipe is so easy to make and takes less than 20 minutes. Shredded chicken and veggies wrapped in a corn tortilla is the ultimate, Mexican-inspired dinner idea!
    Course Main Course
    Cuisine Mexican
    Prep Time 15 minutes minutes
    Cook Time 10 minutes minutes
    Total Time 25 minutes minutes
    Servings 4 tacos
    Calories 363kcal
    Author Jessica Burgess

    Ingredients

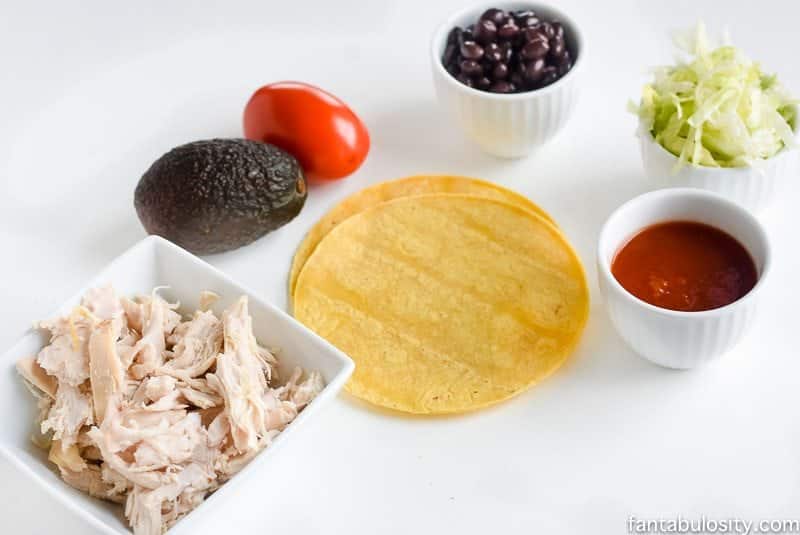
    • 3 cups shredded chicken Rotisserie chicken already cooked from the grocery store is a great option! If not, about 4 pieces of frozen chicken tenderloin pieces
    • 1 cup black beans
    • 4 corn tortillas
    • 1 avocado mashed
    • ½ cup salsa
    • ½ cup lettuce
    • ½ cup tomatoes diced
    • coconut oil or olive oil if cooking chicken
    • minced garlic
    • salt and pepper to taste

    Instructions

    • Cook chicken in a skillet with oil & garlic until done & then shred
    • Heat up black beans & tortillas (just in the microwave)
    • Place chicken, black beans, avocado, tomatoes, & lettuce in a tortilla & enjoy!

    Nutrition

    Serving: 1taco | Calories: 363kcal | Carbohydrates: 29g | Protein: 30g | Fat: 15g | Saturated Fat: 3g | Cholesterol: 81mg | Sodium: 540mg | Potassium: 839mg | Fiber: 9g | Sugar: 2g | Vitamin A: 465IU | Vitamin C: 8.4mg | Calcium: 61mg | Iron: 2.1mg

    Mini Chocolate Cake

    October 29, 2023

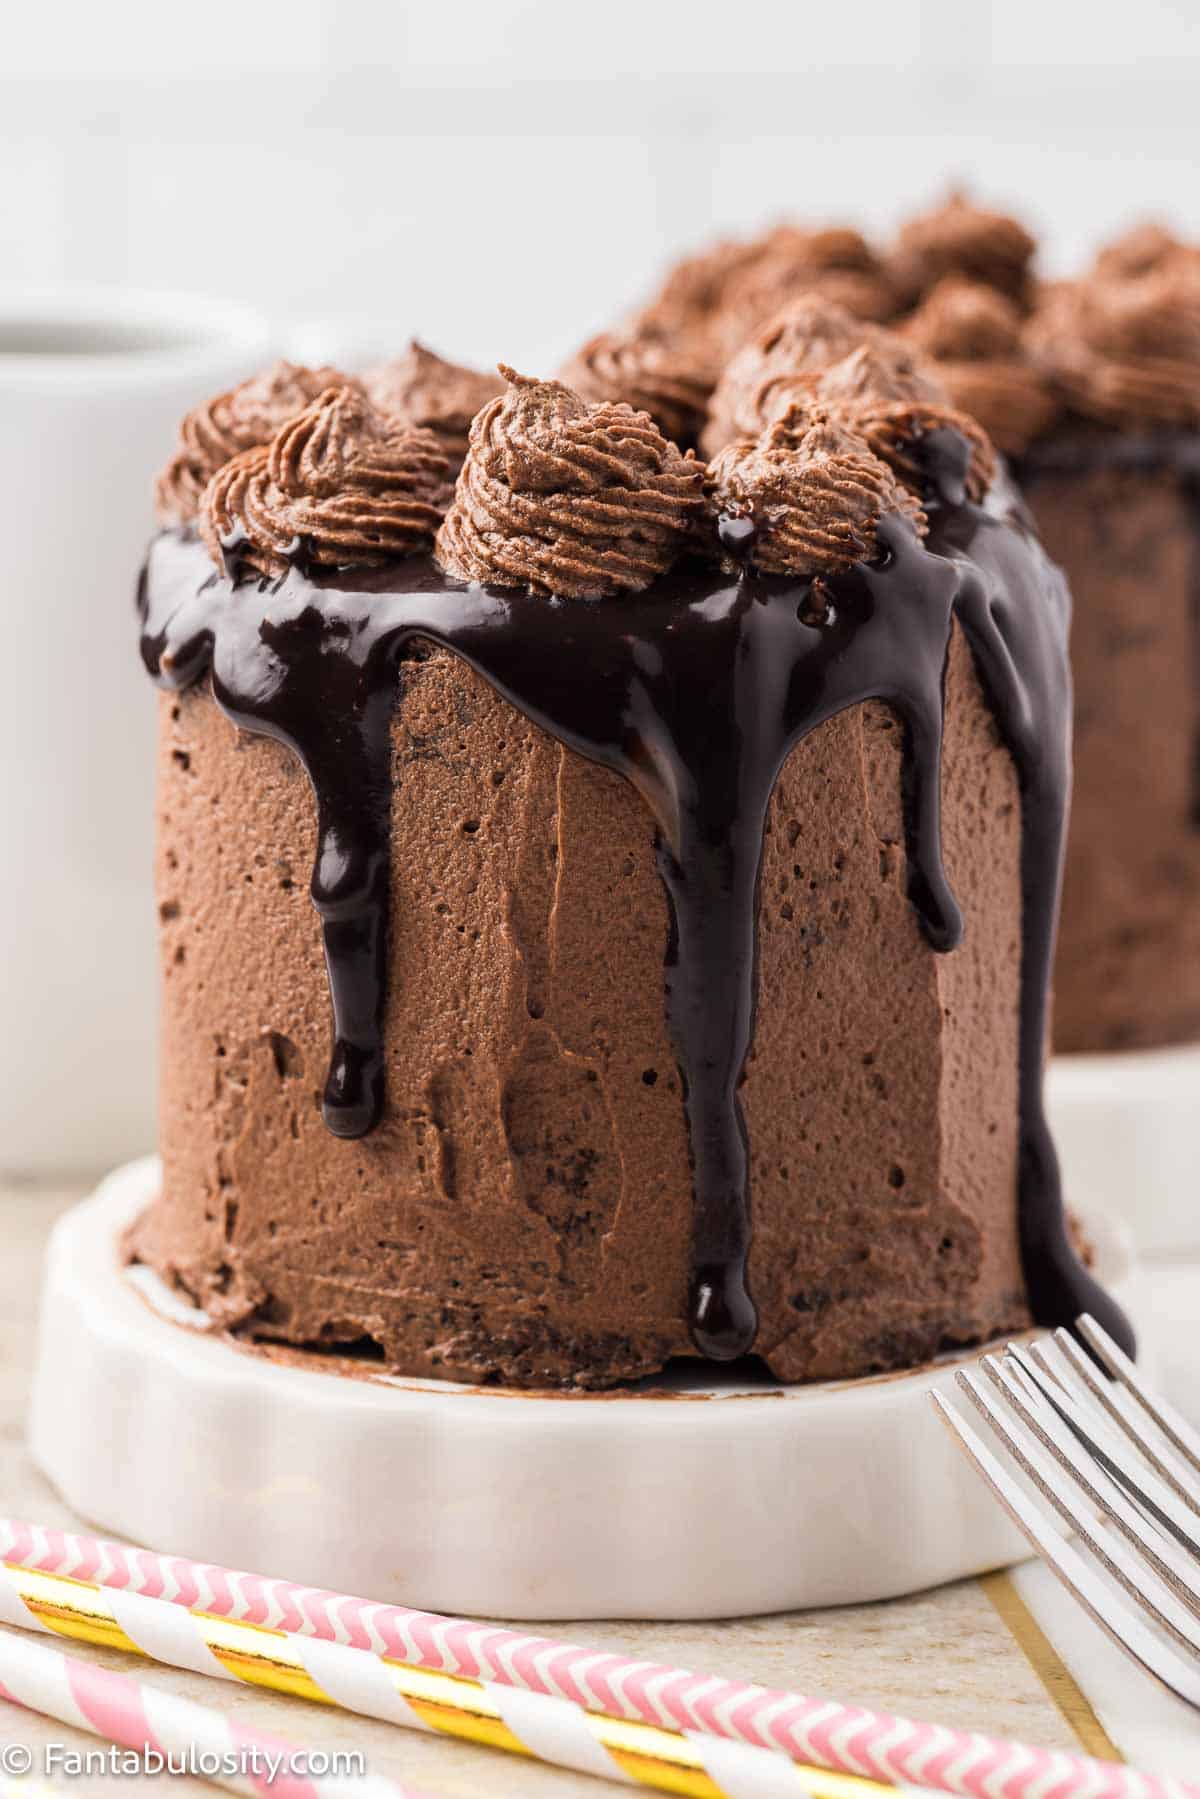
    Mini chocolate cake on small cake stand.

    This mini chocolate cake recipe is a beautiful small cake, that’s perfect for a small amount of people. This recipe makes either 2, 2-tiered cakes or 4, 1-layer cakes, (your choice!) this chocolate cake is the perfect dessert for a romantic date night, easy cake recipe for the weekend, or for making for a birthday party!

    Mini chocolate cake on small white plate.

    If you love chocolate cake as much as we do, then you’re also going to want to make this hot fudge cake, this wacky cake recipe, and this Milky Way cake, the second you get the chance! Or, this no-bake chocolate cake is fun to make and enjoy!

    Or, if you love baking for one, don’t forget about the fun mug cakes like this vanilla mug cake and this Oreo mug cake!

    [feast_advanced_jump_to]

    Why You’ll Love This Recipe

    • Small serving: If you’re baking for only two, this small chocolate cake recipe is the perfect size to satisfy that sweet tooth. It feeds 2, with a small amount of leftovers for the next day, or 4 people for single-servings.
    • Big flavor: Even though this is a small cake recipe, it has big flavor, with coffee and yogurt being the key factors in making this cake full of flavor.
    • Impressive: This mini cake is absolutely stunning, with the beautiful chocolate ganache and whipped frosting.

    Ingredients Needed

    I’ve highlighted a couple of ingredients below with some relevant notes. Aside from this, the ingredients needed are pretty basic.

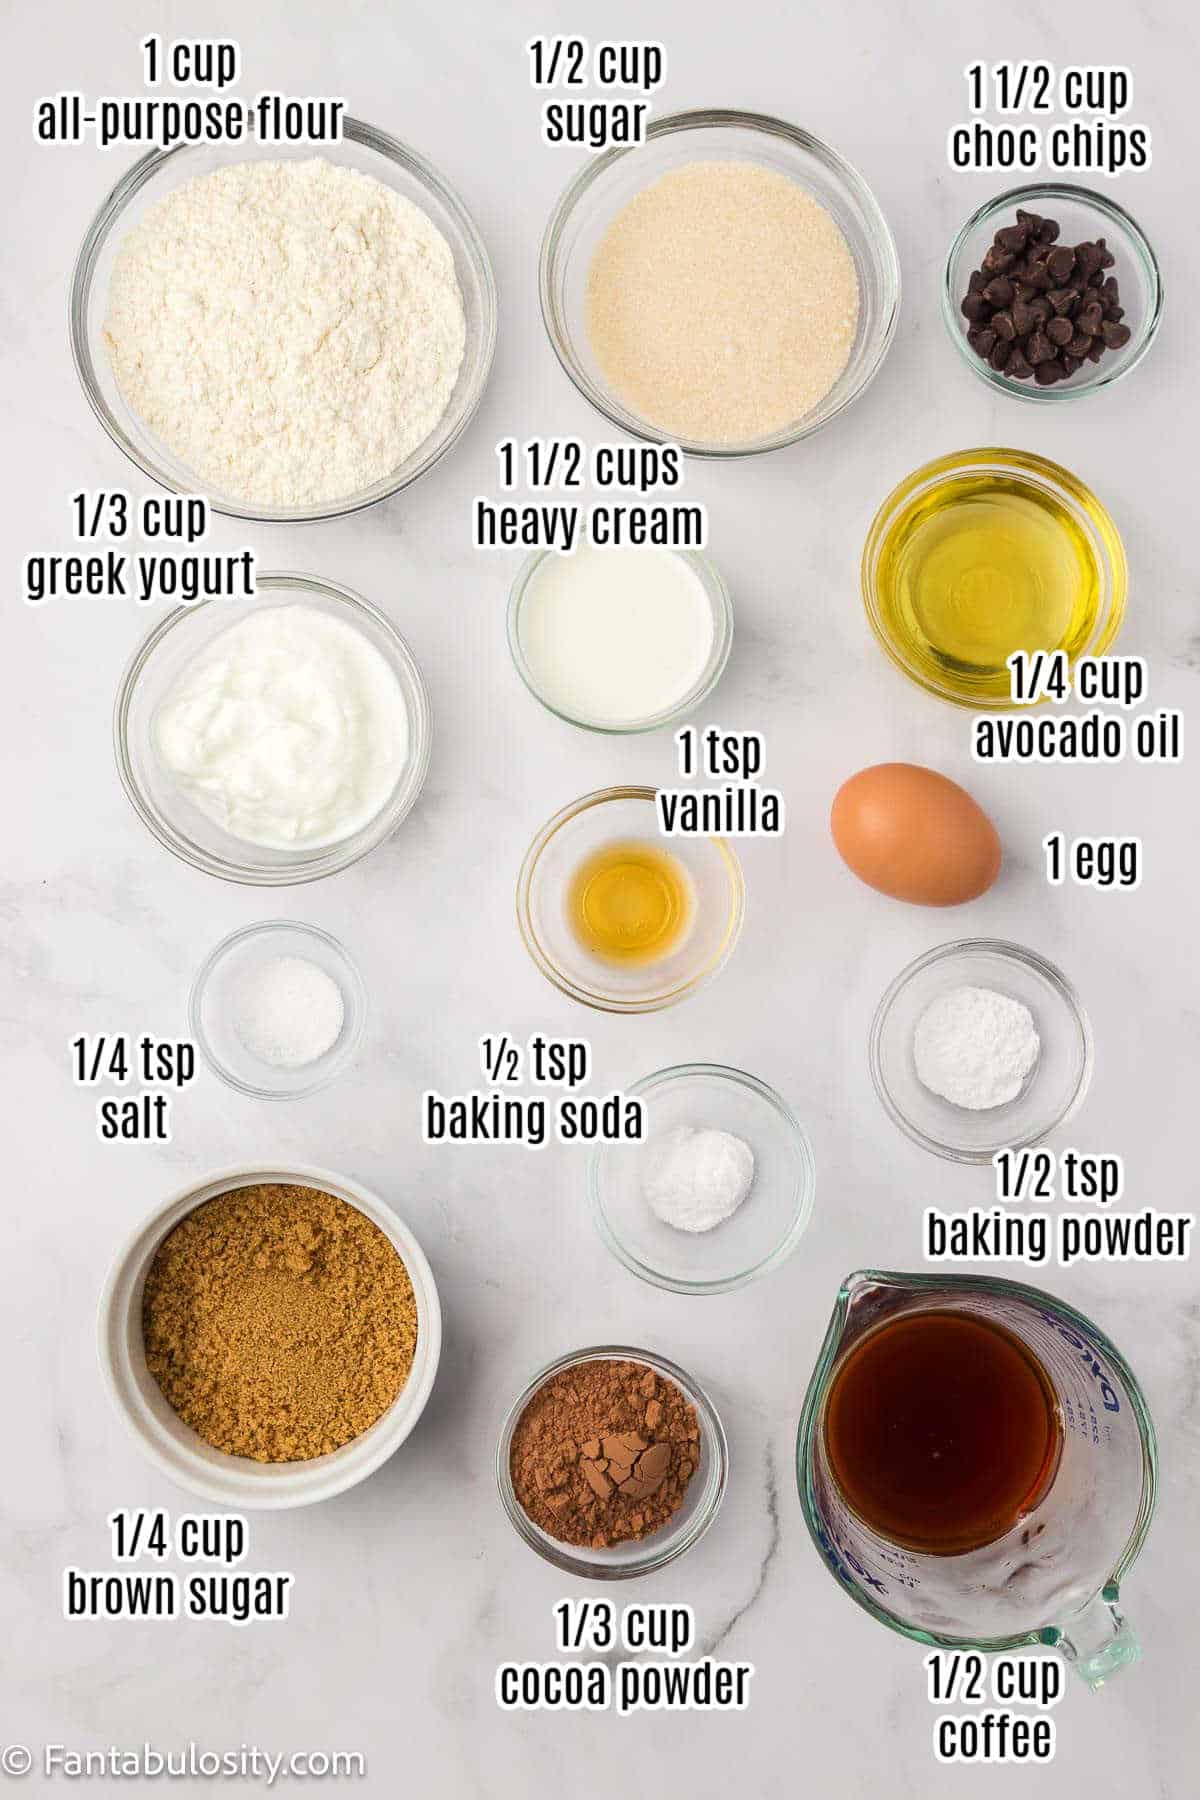
    Labeled ingredients for mini chocolate cake.
    • Coffee: For best results, you'll want to use hot coffee so the cocoa powder blooms easily in the liquid. You can substitute hot water for coffee if you want to omit caffeine.
    • Oil: We like to bake with avocado oil as it's a nice neutral flavored oil. You can substitute any neutral-flavored oil if you do not have avocado oil. (See substitutions below.)
    • Yogurt: I used Greek yogurt in this recipe, any plain yogurt or sour cream can be substituted. We have not tested using nonfat or low-fat yogurt.

    Substitutions

    Sometimes substitutions are necessary because of ingredients that are unavailable or needed for dietary restrictions. Here are some suggestions that can help:

    • Oil – if you prefer, you can use other neutral oils like vegetable or canola.
    • Yogurt – Full-fat Greek Yogurt was used; you can substitute plain yogurt or sour cream. Avoid using flavored yogurt as it will affect the flavor of the cake and may be too sweet.
    • Coffee – We used coffee to bloom the cocoa powder. You can use hot water, or even hot black tea as a substitute.

    Equipment

    You will need the following for this recipe:

    • 4 ramekins
    • Spatula
    • Whisk
    • Mixing bowls
    • Electric mixer

    How to Make Mini Chocolate Cakes

    Although this is an impressive cake, it’s really easy to make and simple to decorate! We’ll walk you through how to make your own.

    This Mini Chocolate Cake is broken into 3 components:

    • making the small chocolate cakes
    • mixing the chocolate ganache
    • decorating the cake

    This cake doesn’t take a lot of active time to make but it is recommended to make with a few hours notice so the cake has time to cool, so you will not feel rushed.

    *Be sure to see the recipe card below for the full ingredients list & instructions!*

    For the Cake

    Preheat the oven to 350 degrees.

    Spray 4 ramekins with baking spray, place them on a baking sheet, and set aside.

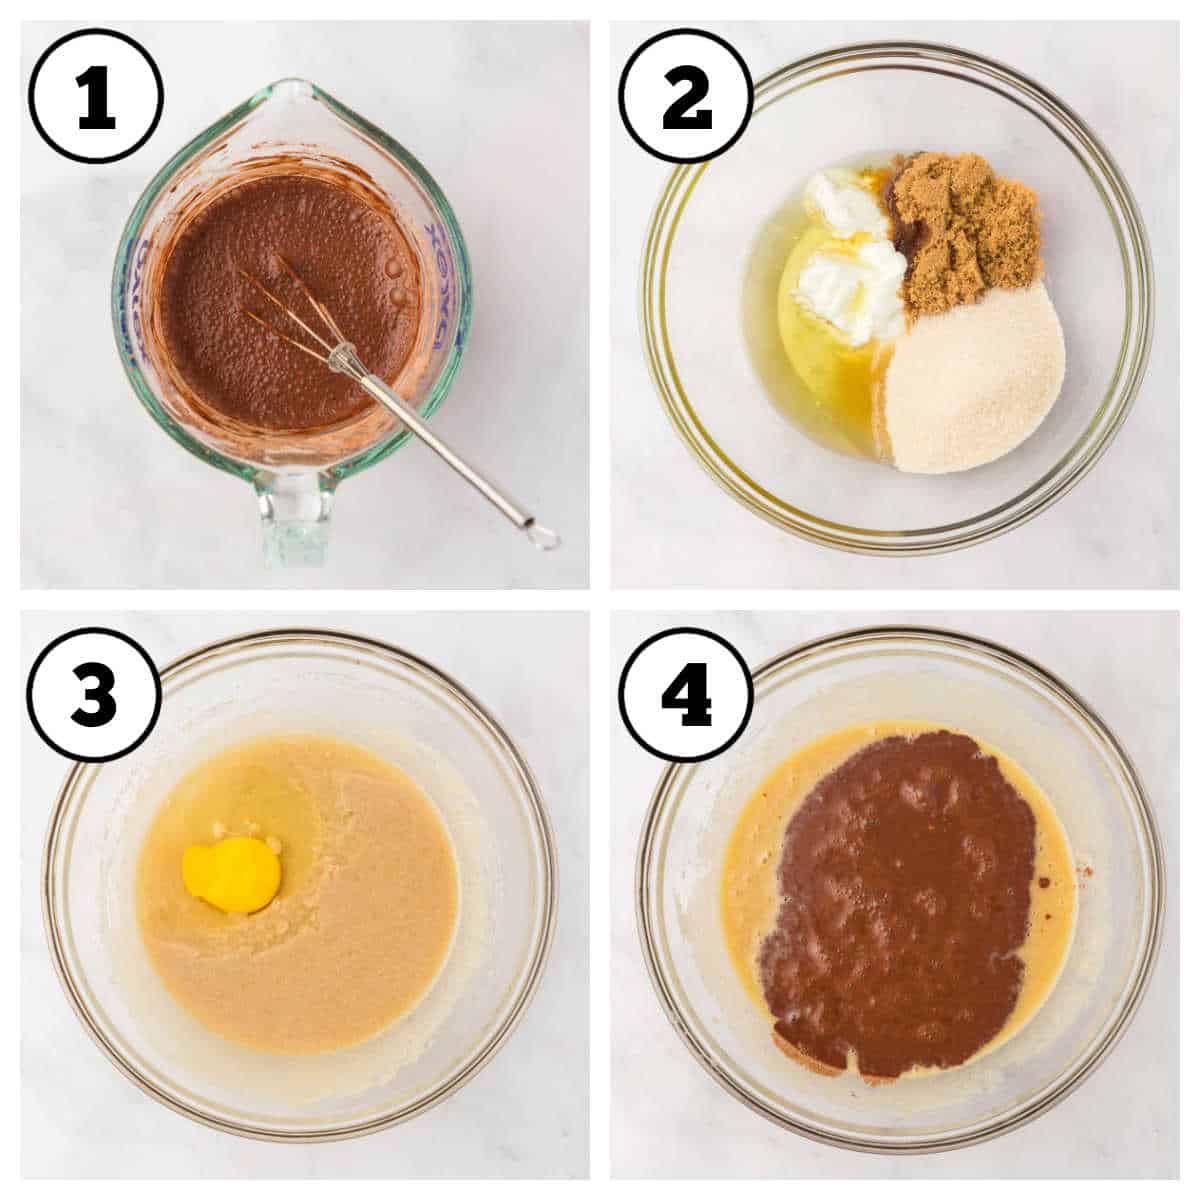
    Steps 1-4 of how to make mini chocolate cake.

    STEP 1. Coffee & Cocoa. In a medium small sized bowl combine the coffee and cocoa powder. Set aside. **For best results you want your coffee to be hot. (Image 1).

    STEP 2. Mix batter. In a mixing bowl combine the greek yogurt, oil, sugar and brown sugar. Using a whisk or an electric mixer, mix until the sugars have just dissolved (Image 2).

    STEP 3. Add the egg and whisk the mixture until the egg is well incorporated (Image 3).

    STEP 4. Combine together. Add the cocoa-coffee mixture and whisk the mixture until the chocolate has been well mixed through (Image 4).

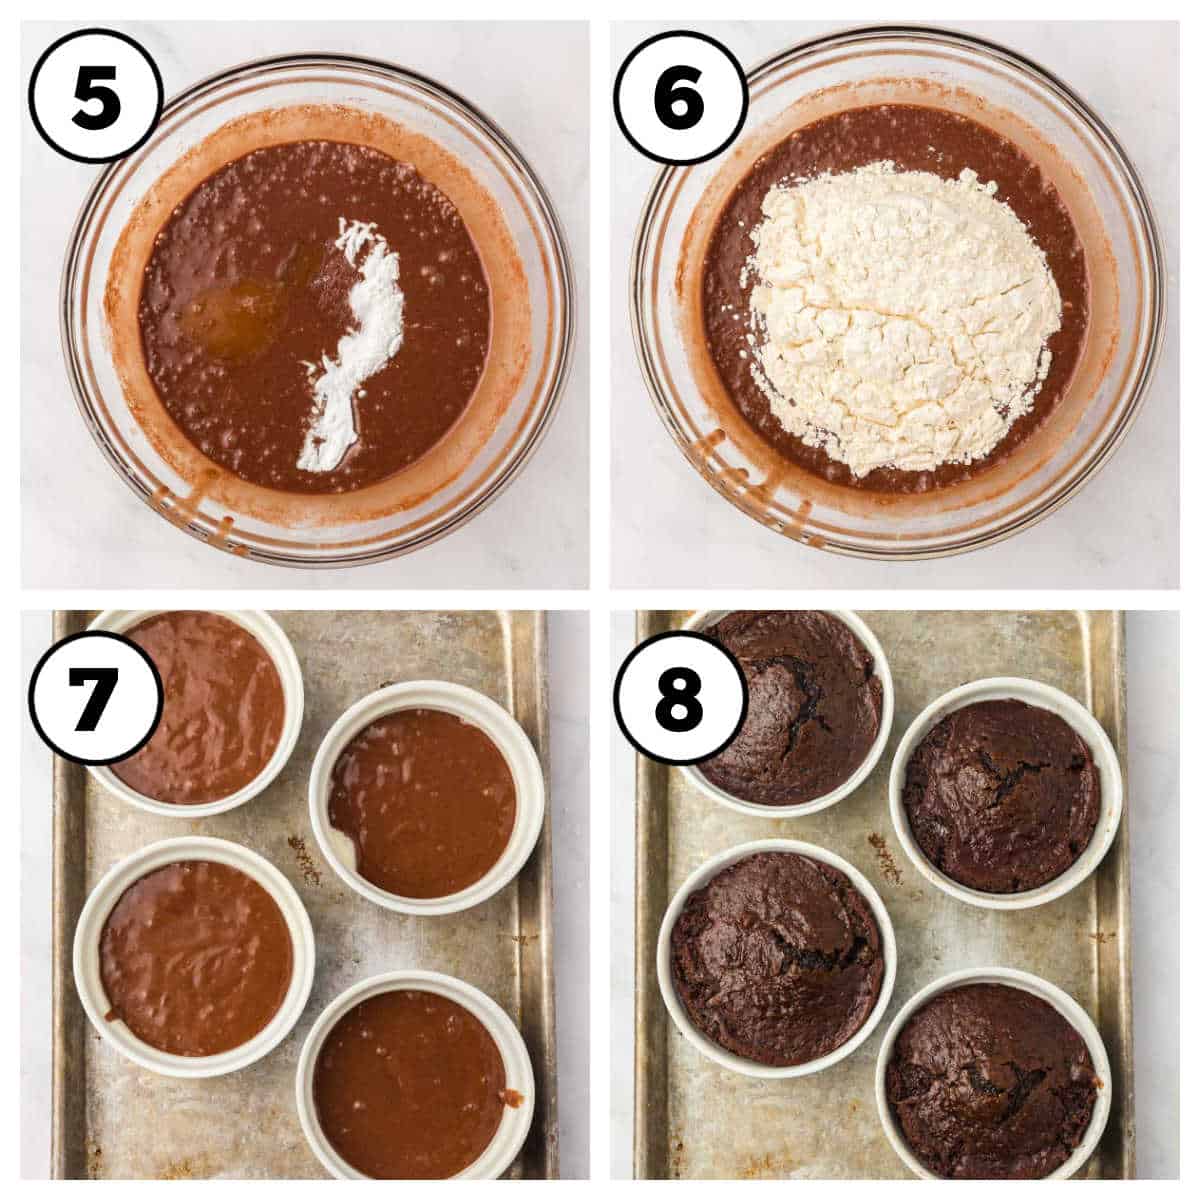
    Collage of images showing steps 5-8 for making a mini chocolate cake.

    STEP 5. Mix in dry goods. Then add the baking powder, baking soda, salt, and vanilla extract. Using a whisk mix until the ingredients are well incorporated (Image 5).

    STEP 6. Add flour. Then slowly add in the flour so the flour becomes well incorporated and the cake batter is smooth (Image 6).

    STEP 7. Pour in ramekins. Add the cake batter to the prepared ramekins so they're evenly distributed between each of the ramekins (Image 7).

    STEP 8. Bake at 350 degrees F for 30 minutes or until a toothpick comes out clean in the center (Image 8).

    Allow them to cool for 30 minutes before removing them.

    Once they've cooled for 30 minutes remove them from the ramekins and place the cakes on a cooling rack and allow to cool for 30 more minutes before frosting them.

    Ready to eat the cake now? No problem! Frost the tops of the cakes in the ramekins and enjoy with a spoon!

    Directions for the Ganache

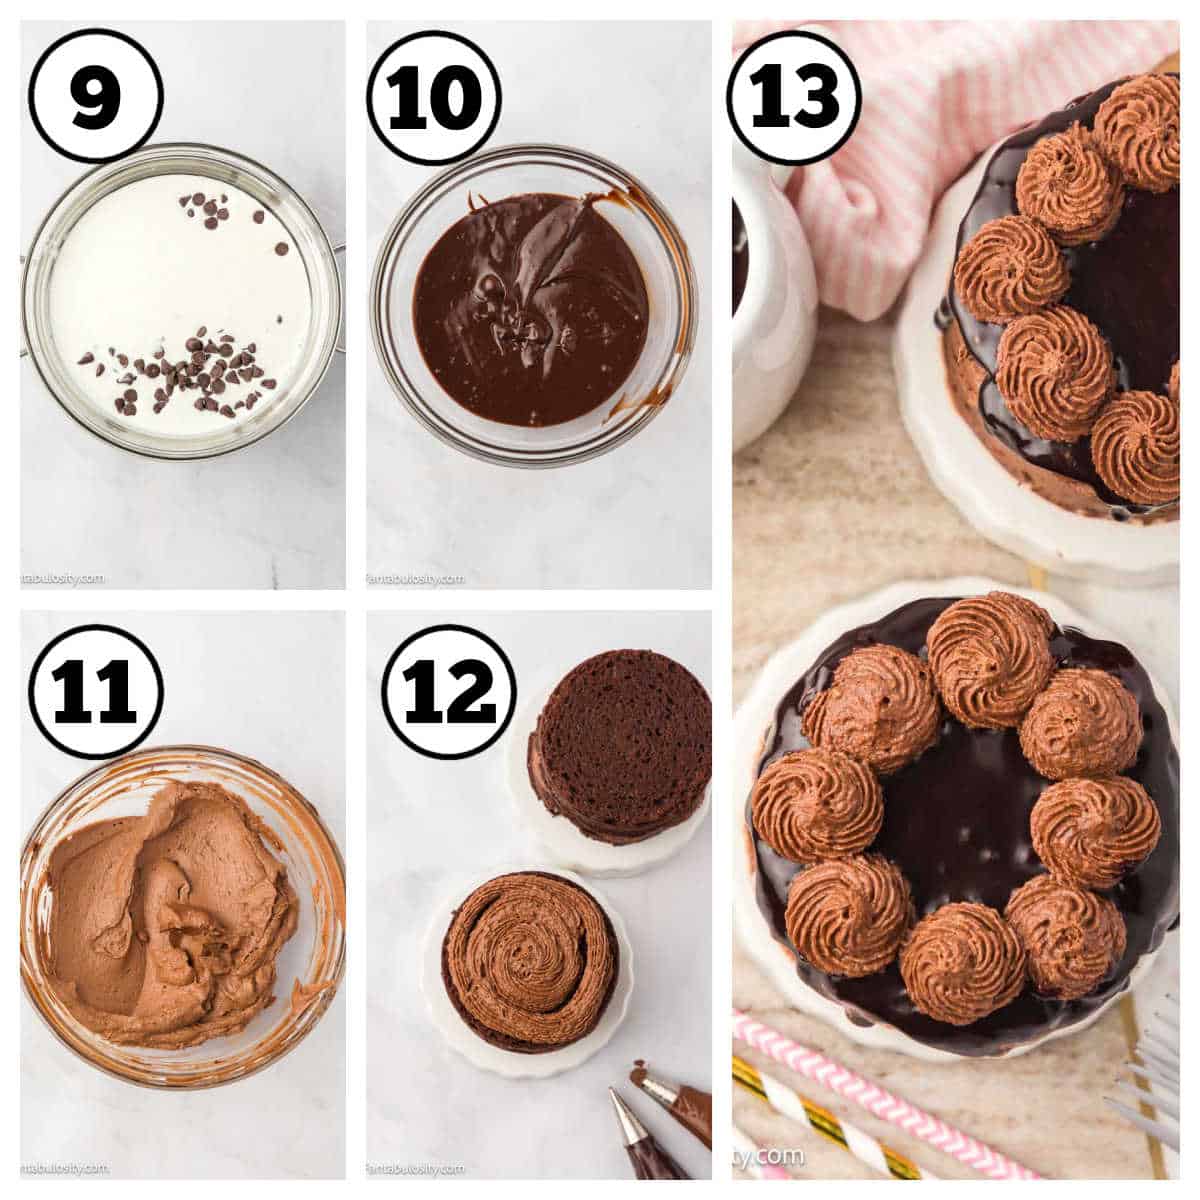
    Image collage of steps 9-13 of how to make and decorate mini chocolate cake.

    Note: The ganache will be separated into 2 when frosting the cake. This recipe uses a combination of ganache and whipped ganache.

    STEP 9. Heat milk & chips. Fill a saucepan up halfway with water and place it over medium heat. Place a heat safe bowl (like glass) on top. The bowl will want to be large enough so it doesn't fall into the water but rests nicely over top of the saucepan.

    Add the chocolate chips and the heavy cream to the bowl and allow the chocolate to melt, using a spatula stir the mixture to incorporate the cream and chocolate chips together (Image 9).

    STEP 10. Stir. Once the chocolate chips have melted, remove from the heat and continue to stir until the ingredients are incorporated (Image 10).

    Allow the ganache to cool in the fridge for 10 minutes.

    STEP 11. Divide. Divide the mixture into 2 bowls. Place 1 of the bowls back in the fridge for the time being. Then using an electric mixer, beat 1 of the halves of ganache until it's doubled in volume and is whipped nicely (Image 11).

    To Frost the Cake:

    STEP 12. Frosting with Ganache. Add both chocolate ganaches to a piping bag. Use a star tip for the whipped ganache and a fine tip top for the original ganache.

    Take 1 of the cooled cakes and place it on a small plate then pipe a layer of whipped ganache to the first layer. Using an offset spatula, smooth out the ganache so it's evenly distributed and smoothed out. Then add a cake on top of the frosted layer. Pipe another layer of whipped ganache then using an offset spatula smooth out the ganache so it's evenly distributed and smoothed out.

    STEP 13. Liquid ganache. Add a good layer of the original ganache on top of the cake so it slightly drips off the sides.

    Add piped dollops of the whipped ganache over the top for a little decoration.

    Repeat this process for both cakes (Image 13).

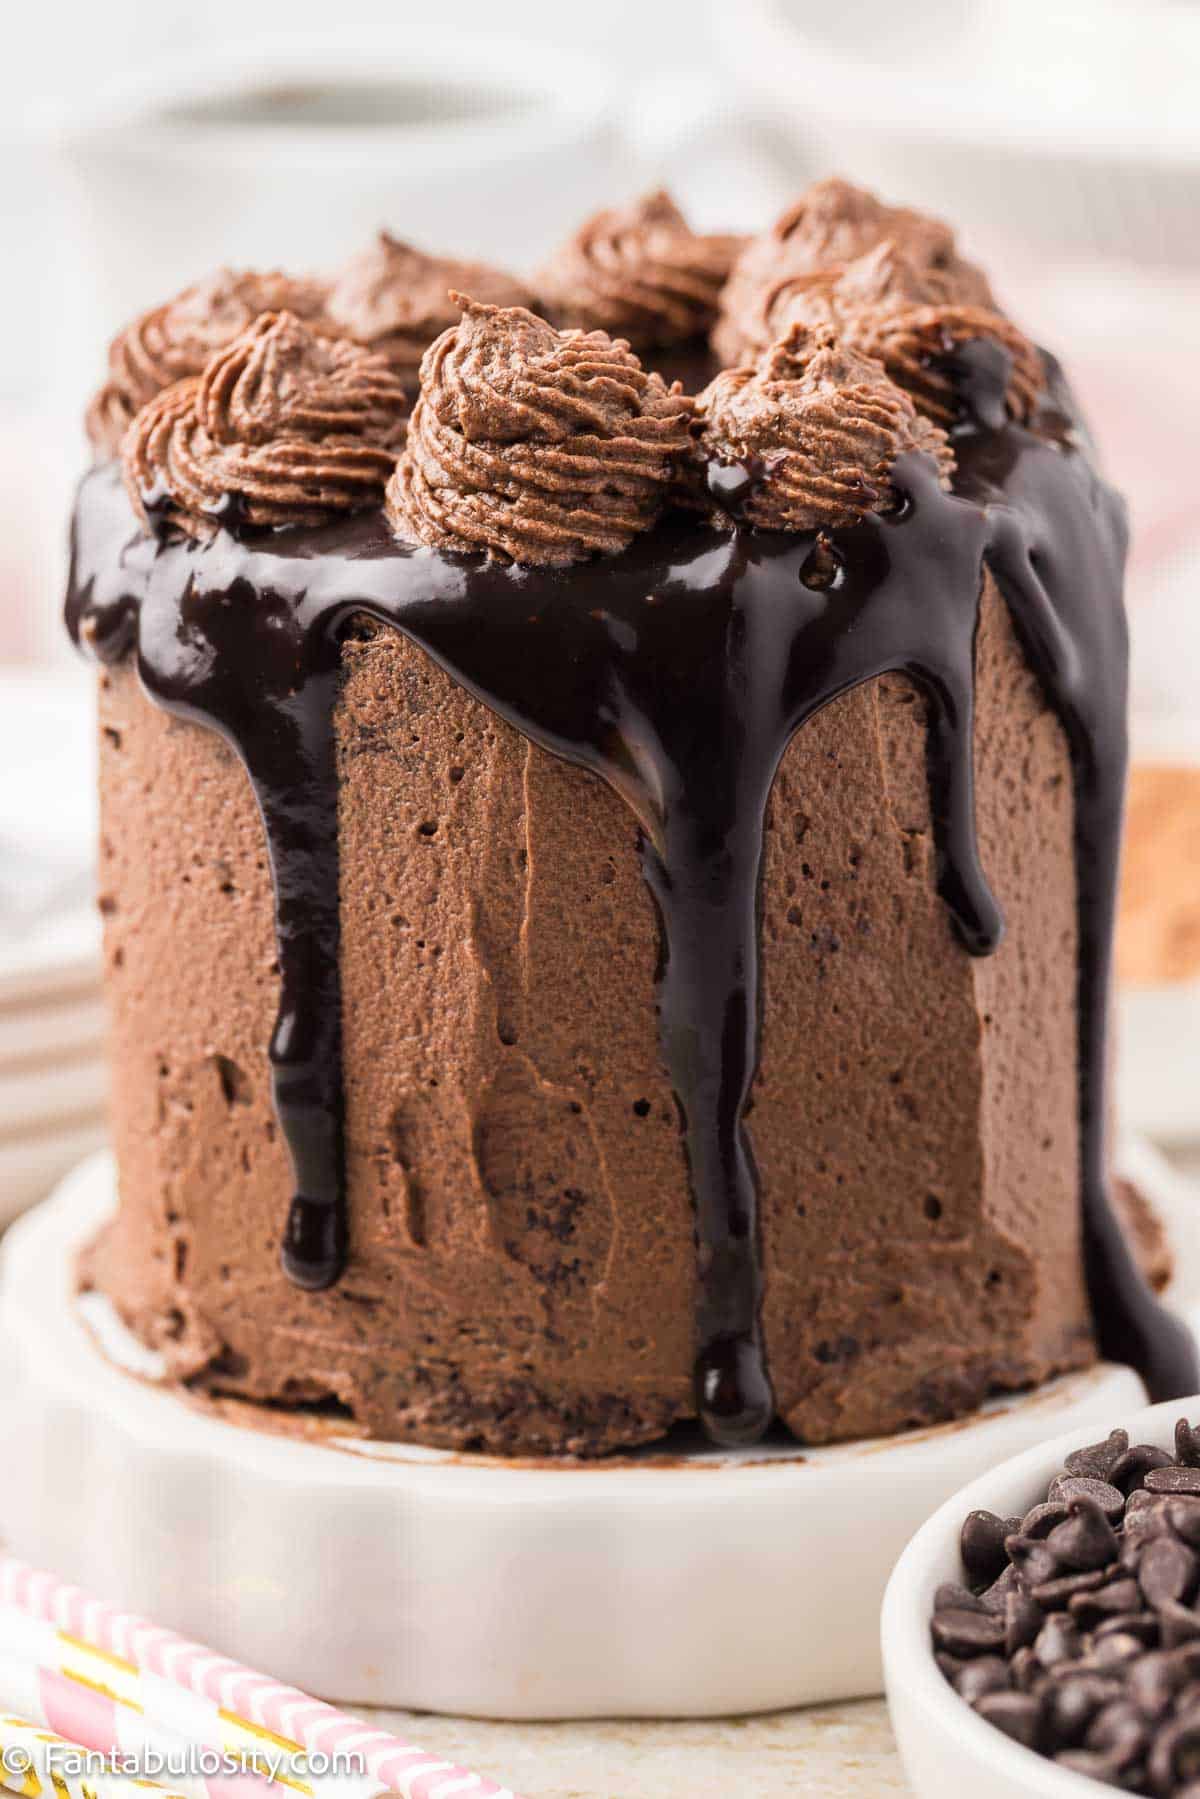
    Close up of side view of mini chocolate cake.

    Recipe Pro Tips

    • Original, liquid ganache: The original ganache will want to stay at room temperature so it will make the drips. If it's too cold it will firm up.
    • Whipped ganache: You will want to work with cold whipped ganache. It helps hold the shape when it's piped out of the piping bag.

    Recipe FAQs

    What size is a mini cake?

    When made in ramekins, they’re 4 inches in width.

    How many mini cakes per person?

    This recipe makes 2, two-tiered cakes (where two cakes serve 4 people) or 4, one-layer cakes (where four cakes serve 4 people).

    What temperature do you bake a small cake?

    Bake these mini cakes at 350 degrees for 30 minutes.

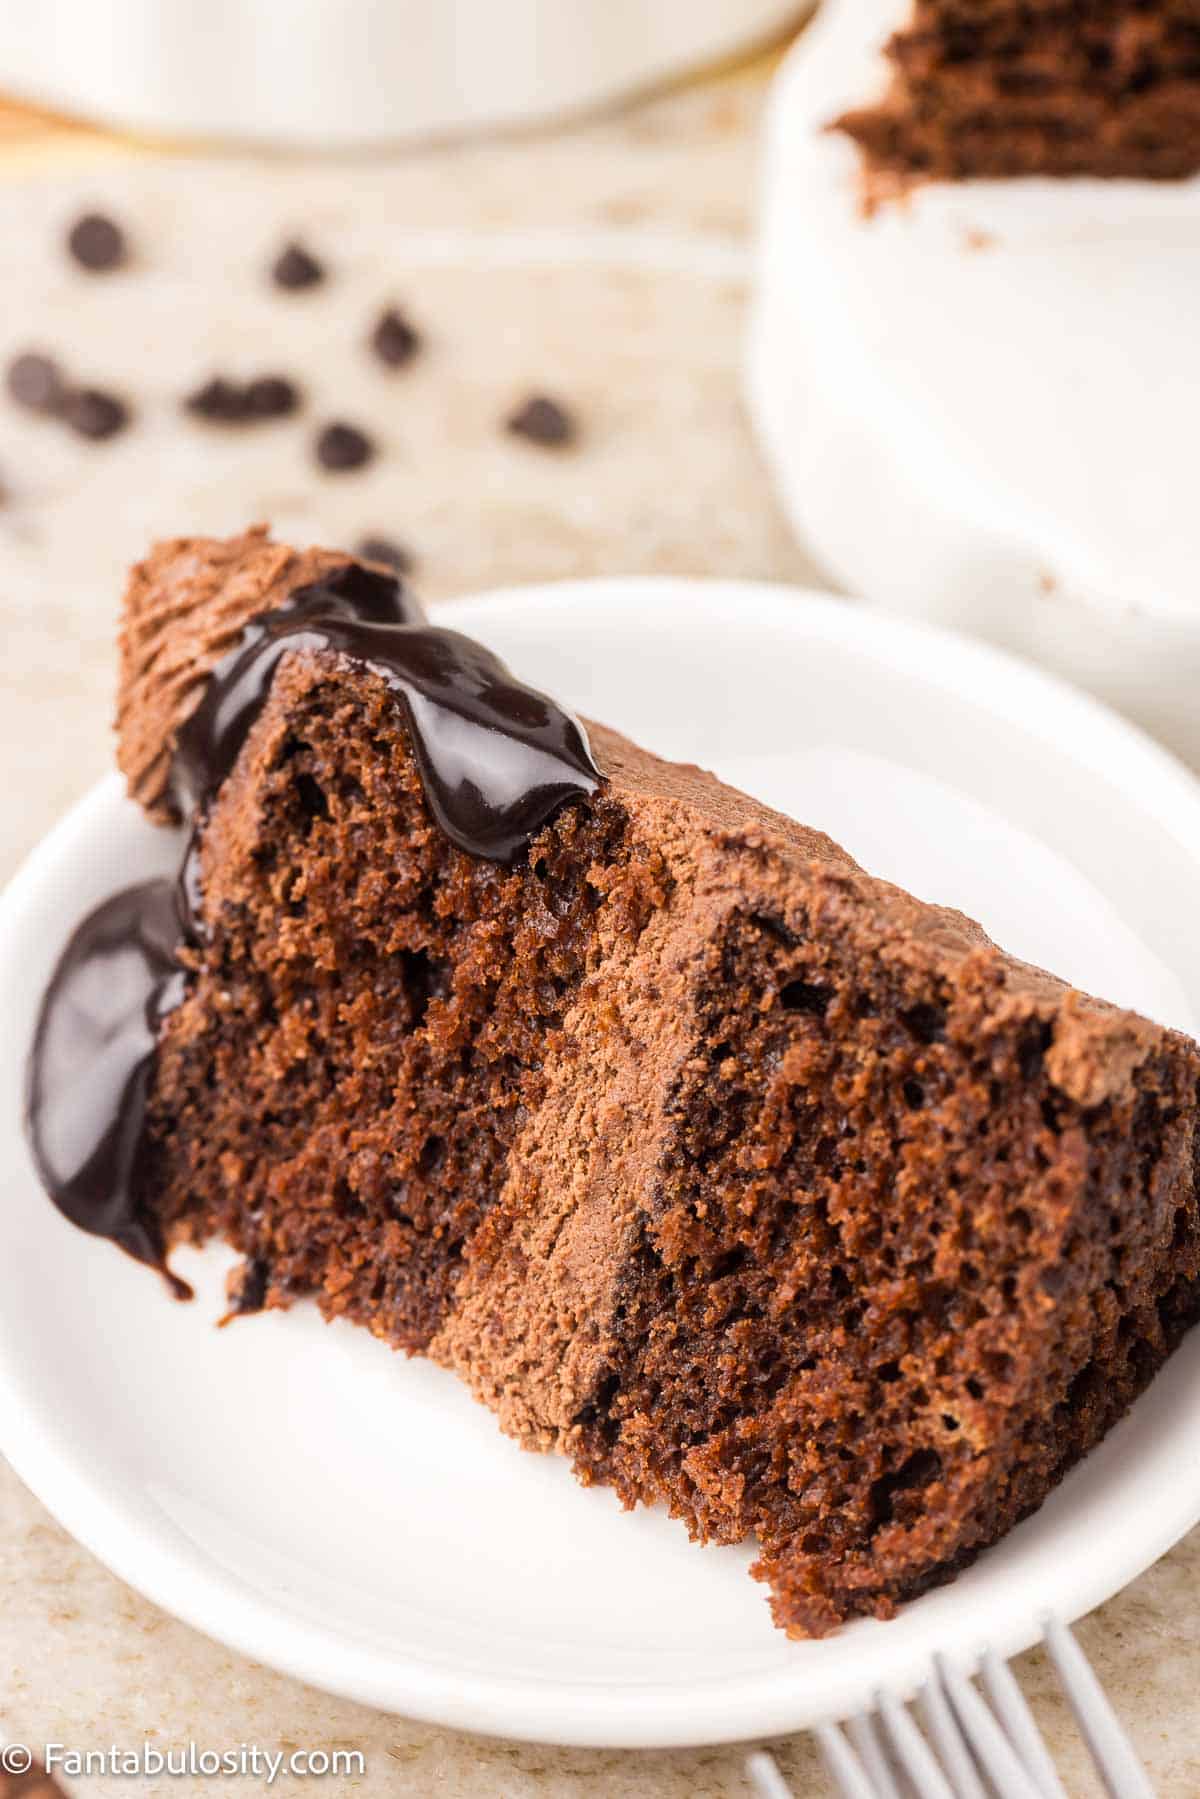
    Slice of mini chocolate cake on white plate, showing whipped chocolate ganache in the center.

    Storage

    Leftovers: If you have any leftovers, you'll want to cover the decorated cake with plastic wrap so it's airtight, or in an airtight container. Store in the fridge for 3 days.

    To Freeze: Wrap the unfrosted cake in plastic wrap and place that in a freezer bag. They can be stored for up to 3 months. To use, allow the cakes to thaw completely before decorating or serving.

    More Cake Recipes You’ll Love

    If you love cake recipes, we think you’re really going to love these favorites:

    • Close-up slice of chocolate mayonnaise cake with thick chocolate buttercream and a jar of mayonnaise behind it.
      Chocolate Mayonnaise Cake (Old-Fashioned Recipe)
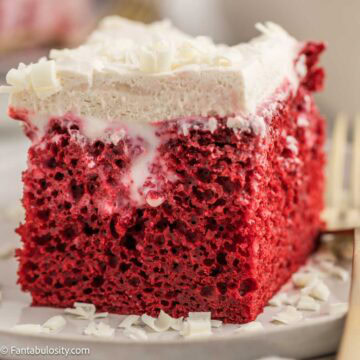
    • Red velvet poke cake slice with cream cheese frosting and white chocolate curls on a plate.
      Red Velvet Poke Cake (The Easiest One You'll Ever Make)
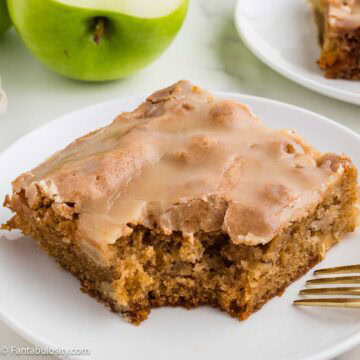
    • A square slice of apple dapple cake topped with caramel glaze on a white plate next to a green apple.
      Apple Dapple Cake (Old-Fashioned Recipe With Caramel Glaze)
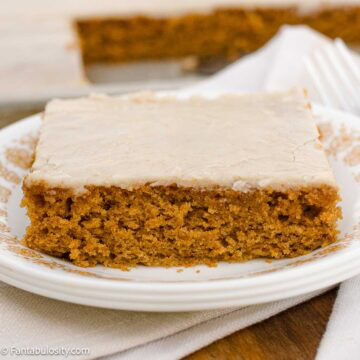
    • A slice of pumpkin sheet cake with brown butter frosting on a vintage plate.
      Pumpkin Sheet Cake with Brown Butter Frosting

    Did you make this? I’d be so grateful if you left a “star” rating below to let me know what you thought! Then, the next time you need a quick and easy recipe, come back to Fantabulosity to browse all of my easy recipes!
    Recipe

    Mini chocolate cake on small cake stand.
    Print Pin
    Be the first to rate!

    Mini Chocolate Cake

    This mini chocolate cake recipe makes the perfect for a small batch. With this easy recipe, and simple ingredients, this cake turns out with a delicious texture and flavor.
    Course Dessert
    Cuisine American
    Prep Time 15 minutes minutes
    Cook Time 30 minutes minutes
    Cooling Time 2 hours hours
    Total Time 2 hours hours 45 minutes minutes
    Servings 4 servings
    Calories 1058kcal
    Author Jessica Burgess

    Ingredients

    For the Cake

    • ⅓ cup Cocoa Powder
    • ½ cup Black Coffee
    • ⅓ cup Greek Yogurt
    • ¼ cup oil We used avocado but you can use vegetable, canola, etc.
    • ½ cup sugar
    • ¼ cup brown sugar
    • ½ teaspoon baking powder
    • ½ teaspoon baking soda
    • ¼ teaspoon salt
    • 1 teaspoon vanilla extract
    • 1 cup all-purpose flour

    For the Chocolate Ganache

    • 1½ cups chocolate chips semi sweet or milk chocolate
    • 1½ cups heavy cream

    Instructions

    For the Cake

    • Preheat the oven to 350 degrees.
    • Spray 4 ramekins with baking spray, place them on a baking sheet, and set aside.
    • In a medium small sized bowl combine the coffee and cocoa powder. Set aside. **For best results you want your coffee to be hot.
    • In a mixing bowl combine the greek yogurt, oil, sugar and brown sugar. Using a whisk or an electric mixer, mix until the sugars have just dissolved.
    • Add the egg and whisk the mixture until the egg is well incorporated.
    • Add the cocoa-coffee mixture and whisk the mixture until the chocolate has been well mixed through.
    • Then add the baking powder, baking soda, salt, and vanilla extract. Using a whisk mix until the ingredients are well incorporated.
    • Then slowly add in the flour so the flour becomes well incorporated and the cake batter is smooth.
    • Add the cake batter to the prepared ramekins so they're evenly distributed between each of the ramekins.
    • Bake at 350 degrees F for 30 minutes or until a toothpick comes out clean in the center.
    • Allow them to cool for 30 minutes before removing them.
    • Once they've cooled for 30 minutes remove them from the ramekins and place the cakes on a cooling rack and allow to cool for 30 more minutes before frosting them.

    Ganache Instructions

    • The ganache will be separated into 2 when frosting the cake. This recipe uses a combination of ganache and whipped ganache.
    • Fill a saucepan up halfway with water and place it over medium heat. Place a heat safe bowl (like glass) on top. The bowl will want to be large enough so it doesn't fall into the water but rests nicely over top of the saucepan.
    • Add the chocolate chips and the heavy cream to the bowl and allow the chocolate to melt, using a spatula stir the mixture to incorporate the cream and chocolate chips together.
    • Once the chocolate chips have melted, remove from the heat and continue to stir until the ingredients are incorporated.
    • Allow the ganache to cool in the fridge for 10 minutes.
    • Divide the mixture into 2 bowls. Place 1 of the bowls back in the fridge for the time being. Then using an electric mixer, beat 1 of the halves of ganache until it's doubled in volume and is whipped nicely.

    Frosting the Cake

    • Add both chocolate ganaches to a piping bag. Use a star tip for the whipped ganache and a fine tip top for the original ganache.
    • Take 1 of the cooled cakes and place it on a small plate then pipe a layer of whipped ganache to the first layer. Using an offset spatula, smooth out the ganache so it's evenly distributed and smoothed out. Then add a cake on top of the frosted layer. Pipe another layer of whipped ganache then using an offset spatula smooth out the ganache so it's evenly distributed and smoothed out.
    • Add a good layer of the original ganache on top of the cake so it slightly drips off the sides.
    • Add piped dollops of the whipped ganache over the top for a little decoration.
    • Repeat this process for both cakes. 

    Notes

    Ganache Tips:
    The original ganache will want to stay at room temperature so it will make the drips. If it’s too cold it will firm up.
    You will want to work with cold whipped ganache. It helps hold the shape when it’s piped out of the piping bag.

    Nutrition

    Serving: 1serving | Calories: 1058kcal | Carbohydrates: 116g | Protein: 12g | Fat: 63g | Saturated Fat: 32g | Polyunsaturated Fat: 6g | Monounsaturated Fat: 17g | Trans Fat: 0.2g | Cholesterol: 112mg | Sodium: 366mg | Potassium: 336mg | Fiber: 5g | Sugar: 84g | Vitamin A: 1464IU | Vitamin C: 1mg | Calcium: 204mg | Iron: 4mg

    Fried Cake Bites — At Home Carnival Food

    June 16, 2017

    Fried Cake Bites - Carnival Food at Home

    Fried Cake Bites - At Home Carnival Food: A sweet treat that your taste buds will fall in love with, and it will BLOW your mind how easy they are!

    Fried Cake Bites - Carnival Food at Home

    Oh friends… I couldn’t keep this from you any longer, and I may have stumbled upon a guilty pleasure that will engage your taste buds on so many levels. Anytime a dessert is “fried,” it tends to become a new favorite in our house, like these fried chocolate pies.

    So while at the grocery store the other day, walking past the

    “Oooops, I Baked Too Much”

    sign, I saw this incredibly delicious cake sitting all by its lonesome on the shelf, with a bright yellow price tag. The cake was marked down so cheap that I didn’t think twice about putting it in my cart (with no plan in mind for this sweet treat at all).

    The next day when my gal pal Kate came over (on the day where we get crafty in the kitchen), we started pondering over how we could use this cake for something incredible. Well friends, the thought “Fried Cake Bites” came to mind, and we ran with it. I can’t WAIT to show you how easy this was, and I especially can’t wait to hear how much you’re a new fan of fried cake bites too!

    Fried Cake Bites Tutorial:

    Alright, we’re going to keep things super simple here and you’re going to LOVE the outcome.

    Fried Cake Bites - Using a store bought cake to make this super easy.

    Frosted Store Bought Cake

    You’re MORE than welcome to make your own cake and add your own frosting for these, but it was insanely easy to just use a store-bought frosted cake. The cake we used was a 2 layer, 8-inch vanilla cake with vanilla icing. But any flavor should do.

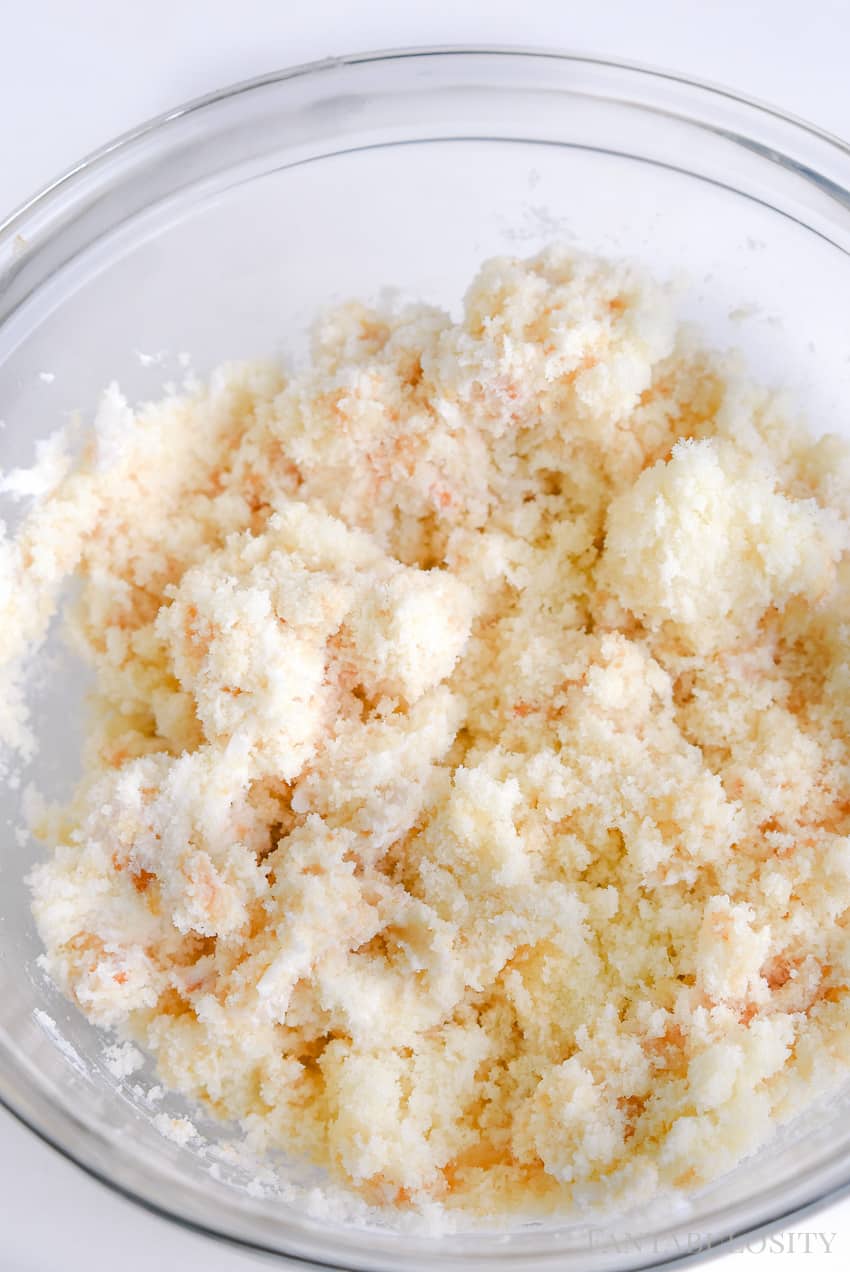
    Stir/mash until frosting is evenly distributed with cake.

    Fried Cake Bites - at home carnival food

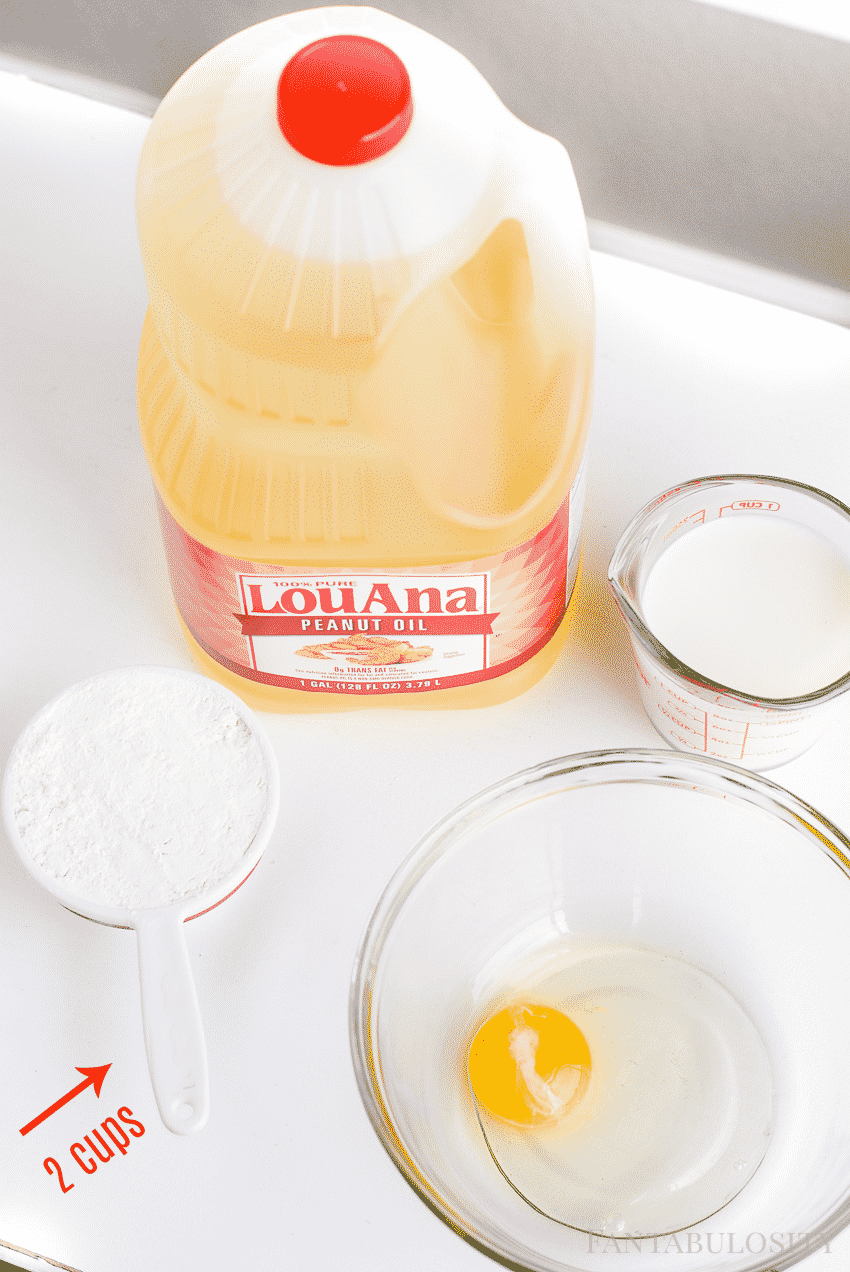
    Although a store-bought cake makes things super easy, these cake bites wouldn’t be NEAR anything special without the other stars of the show that make them to-die-for.

    • LouAna Peanut Oil –  See notes below
    • Pancake Mix
    • Egg
    • Milk
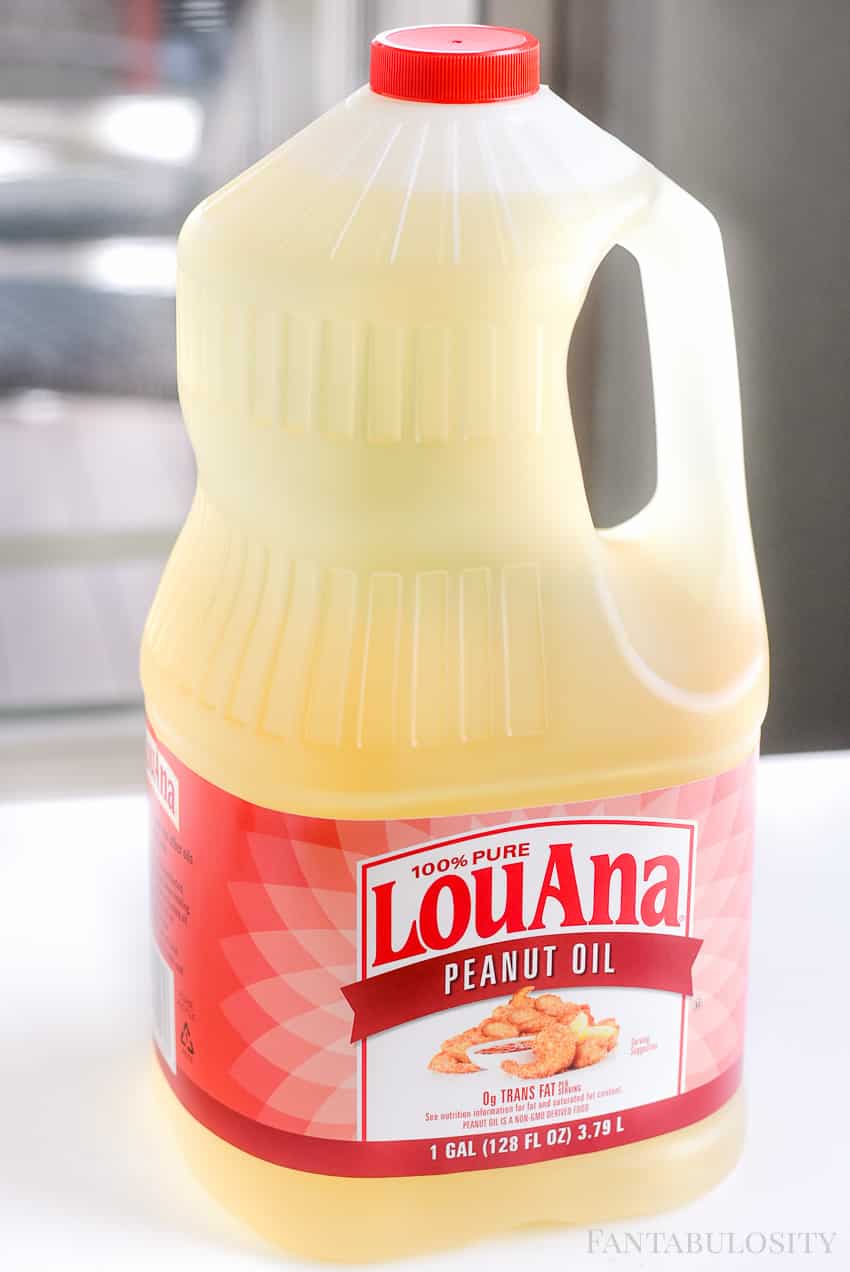
    Peanut Oil for fried cake bites dessert idea

    LouAna Peanut Oil

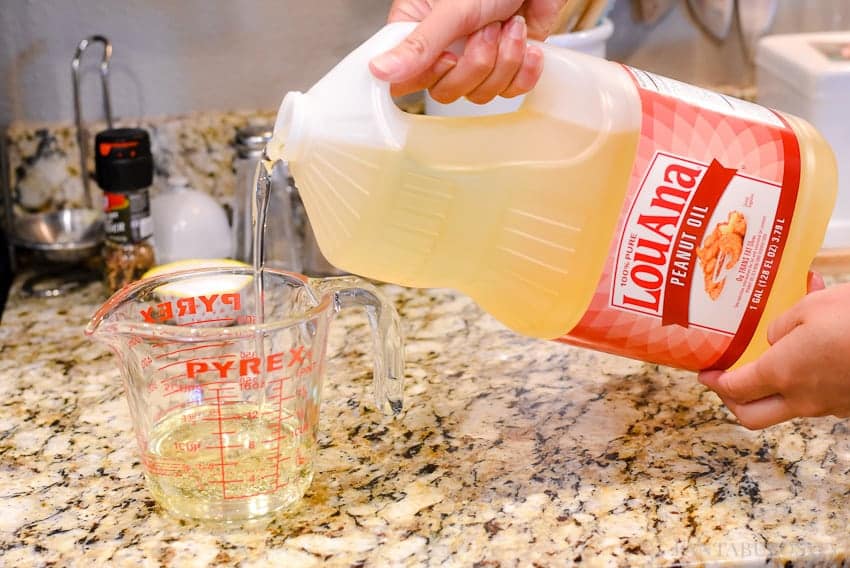
    You’re going to use 2 teaspoon of Peanut Oil and mix it in with the pancake batter, but you’ll also use 2 cups of the oil to fry the cake bites in.

    Fried Cake Bites - Carnival Food at home

    Cake Bite Batter + Assembly

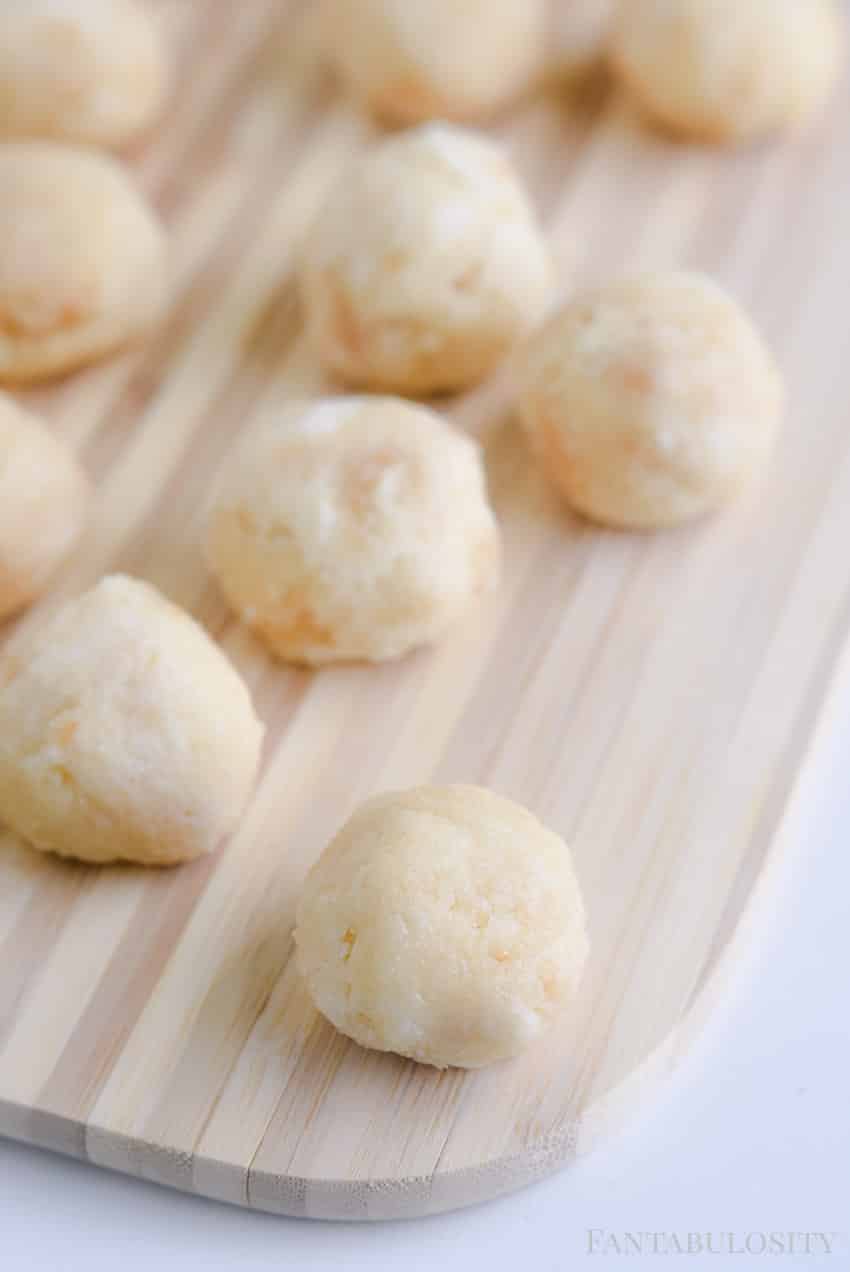
    Using your hands, roll up individual cake bites into about one-inch balls and set aside.

    In a separate bowl, mix together the 2 teaspoon oil, egg, milk, and pancake mix.

    Fried Cake Bites
    Fried Cake Bites - Carnival Food dessert idea

    Fry those Babies

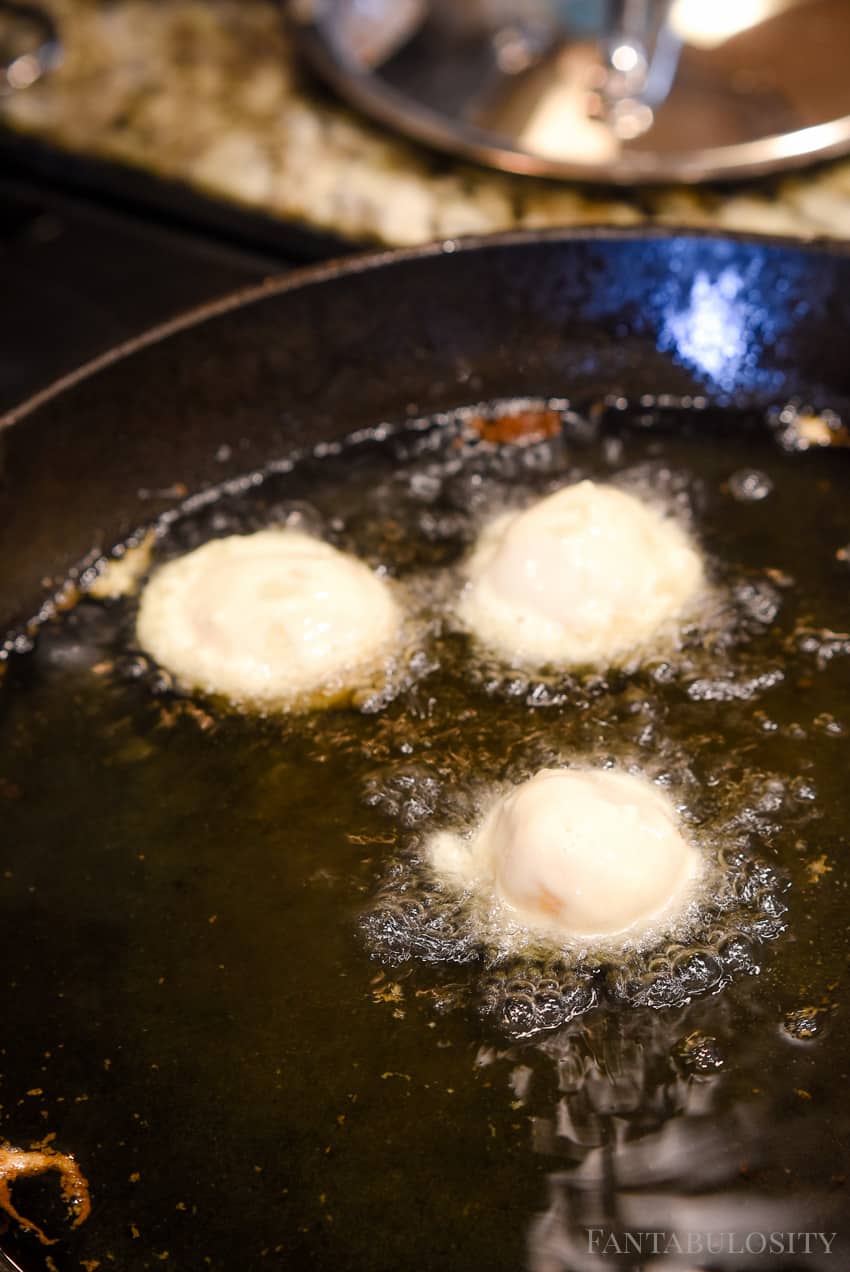
    Heat up 2 cups of Peanut Oil in a pan/skillet (my favorite to use for these is cast iron), over medium-low heat. To test to see if the oil is ready (and not too hot), drop in a dab of the batter to make sure it’s ready for frying.

    Once the oil is ready, dip each cake bite into the pancake batter and gently place each cake ball in to the pan.

    Fry for one minute, rotating often, until each cake bite reaches a golden brown. Place fried cake bites on to a plate lined with paper towels to absorb excess oil.

    Fried Cake Bites - easy dessert idea

    Remove from pan and allow to cool for a few minutes, and sprinkle with powdered sugar if desired.

    Fried Cake Bites - easy dessert idea

    I Mean… For Real…

    Are the insides of these a glance at Heaven or what? You could even dip them in to a fun ice cream topping for some extra tastiness, or eat them just like they are.

    TIP: These are not the best leftover (just like any of your favorite carnival food), so make sure you make yourself sick eating as many as you can right away. 😉

    Fried Cake Bites - easy dessert idea

    If you love fun dessert recipes like these, then you’re also going to really love this cakesicles recipe!

    Recipe

    Fried Cake Bites - easy dessert idea
    Print Pin
    5 from 2 votes

    Fried Cake Bites

    Fried Cake Bites - At Home Carnival Food: A sweet treat that your taste buds will fall in love with, and it will BLOW your mind how easy they are!
    Course Dessert
    Cuisine American
    Prep Time 20 minutes minutes
    Cook Time 10 minutes minutes
    Total Time 30 minutes minutes
    Servings 25 cake bites (number may vary based on size)
    Calories 181kcal
    Author Jessica Burgess

    Ingredients

    • 1 premade 2 layer 8-in cake frosted
    • 1 egg beaten
    • 1 cup milk
    • 2 cups pancake mix
    • 2 cups + 2 teaspoons peanut oil divided
    • powdered sugar for garnishing if desired

    Instructions

    • Crumble store-bought cake in a large bowl
    • Stir until frosting is evenly mixed with the cake
    • Roll cake mixture in to one-inch balls
    • In a separate bowl, mix together egg, milk, pancake mix, and 2 teaspoons of oil.
    • Heat 2 cups of oil in a cast iron skillet over medium-low heat.
    • Test oil by dropping in a dab of the batter to make sure it’s hot enough, or not too hot.
    • Roll each cake ball into pancake batter, then place in oil.
    • Fry each cake ball for about 1 minute, rotating often, until golden brown.

    Nutrition

    Serving: 1cake bite | Calories: 181kcal | Carbohydrates: 29g | Protein: 2g | Fat: 6g | Saturated Fat: 1g | Cholesterol: 14mg | Sodium: 227mg | Potassium: 53mg | Sugar: 17g | Vitamin A: 50IU | Vitamin C: 0.1mg | Calcium: 80mg | Iron: 0.6mg
    Fried Cake Bites - Carnival Food at home

    I can see fried cake bites making an appearance at your next family gathering, or at a future birthday party! (Or on a random weekend in your house, just because you want something fun & sweet!) I can’t wait to hear how you topped them, or if you prefer them plain!

    Thank you so much for coming by! If you’re in the mood for more recipe browsing, you can see all of our recipes here on the blog:

    More Easy Recipes

    DIY Stencil Drink Serving Tray

    June 23, 2017

    Flamingo DIY Drink Tray using Martha Stewart Paint

    As part of the Martha Stewart “Make it Martha” program, I received complimentary products to make this DIY craft. Thank you Martha!

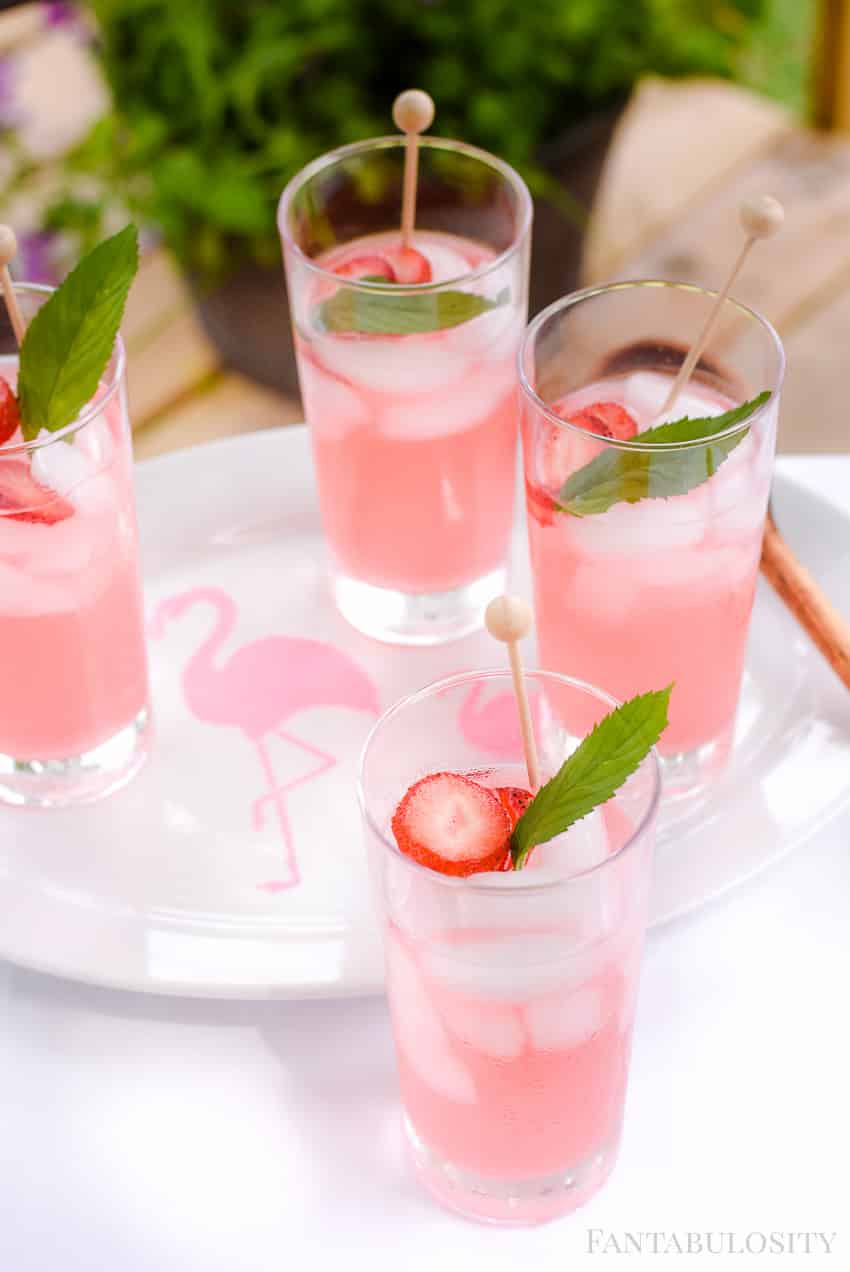
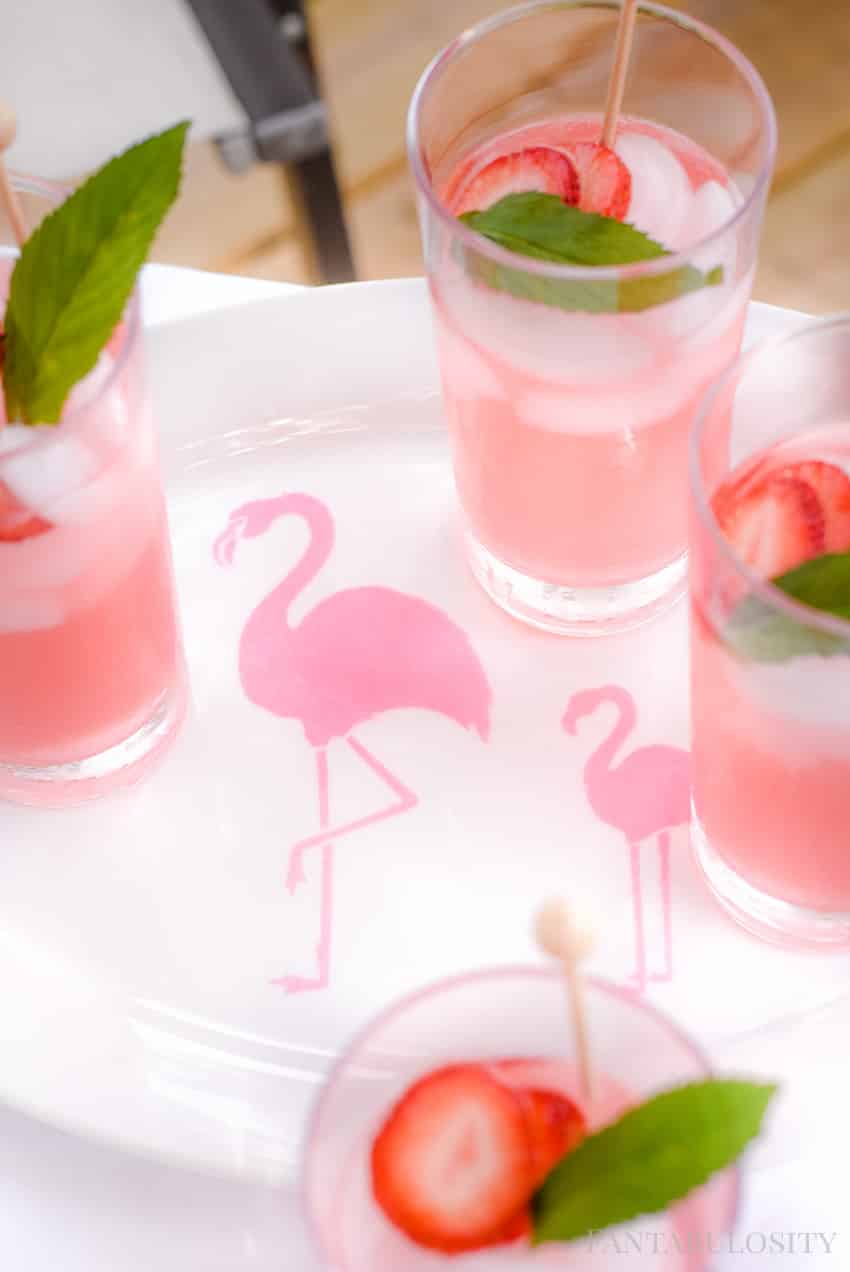
    DIY Stencil Drink Serving Tray: Using Martha Stewart’s new line of paints, we created the cutest flamingo serving tray for summer entertaining! 

    Flamingo DIY Drink Tray using Martha Stewart Paint

    DIY Drink Serving Tray

    Since my childhood, I’ve been so infatuated with the creativity of Martha Stewart. She totally encompasses everything I love: DIY, cooking, home decor, flowers, and so much more. So I’m sure you can guess how I did cartwheels when I received the invitation to work with the “Make it Martha” program for Martha Stewart.

    I may have jumped up and down, done a twirl, and left my husband saying “Uh, what’s going on, and why are you acting like that?” 

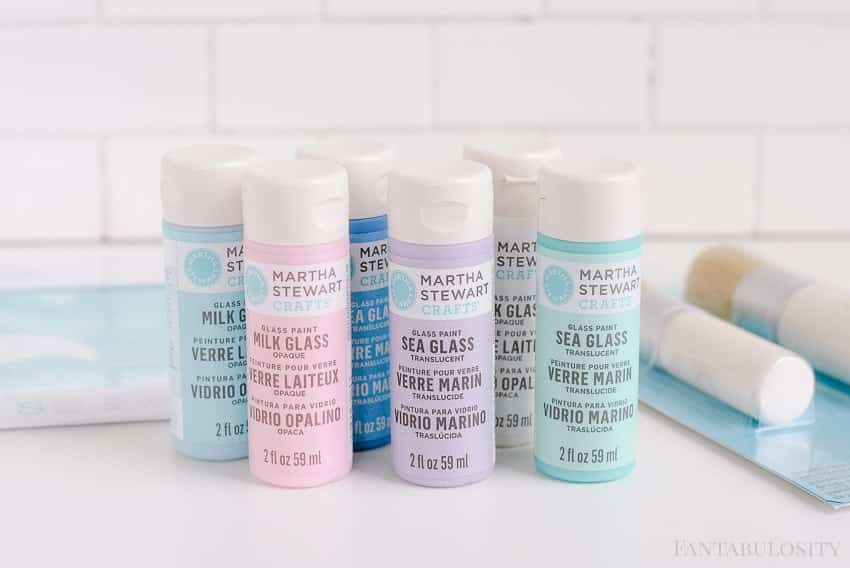
    Martha Stewart Paint for DIY crafts

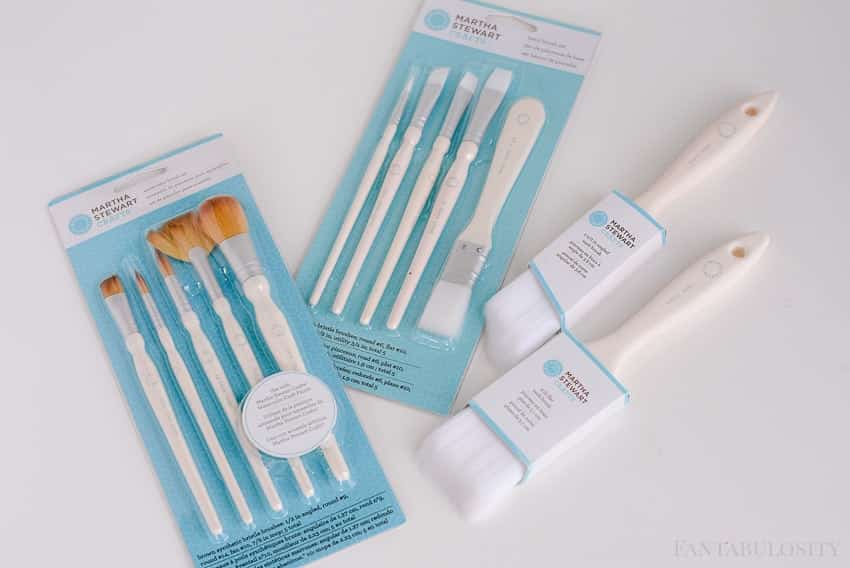
    Here’s a peek at some of the Martha Stewart goodies that I’ve received. I canNOT wait to get to crafting a ton of DIY projects with the new line of paints and paint tools at Michaels!

    Martha Stewart Paint for DIY crafts

    DIY Stencil Drink Serving Tray Tutorial

    The first craft I wanted to tackle was this drink serving tray. When the idea came to me, I knew EXACTLY where I was headed. To the FERGUSON FARM. My momma is the ultimate crafter, and she knows her way around a stencil or two. She was a huge help making this project!

    This DIY tutorial was incredibly easy, since I was able to use the new adhesive stencils. Have you used these!? Oh my goodness. The adhesive helps so much with any potential paint leakage, and prevents the stencil from moving around while painting. These were MADE for people like me!

    Flamingo DIY Stencil Drinking Tray

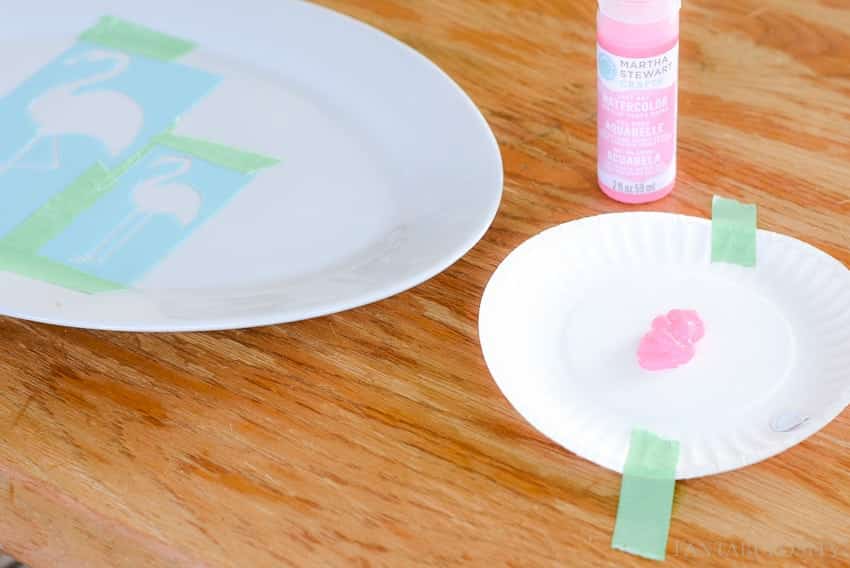
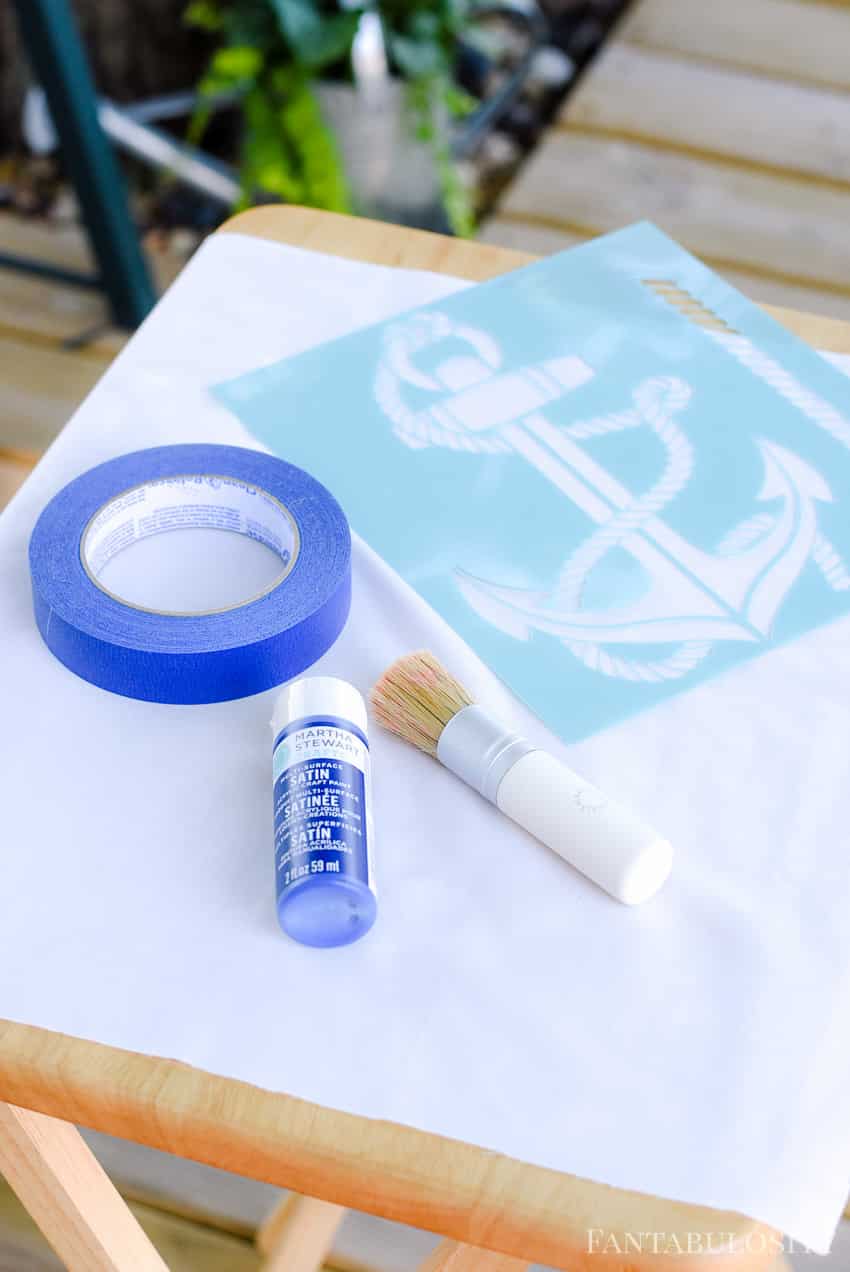
    To get started, we used the following:

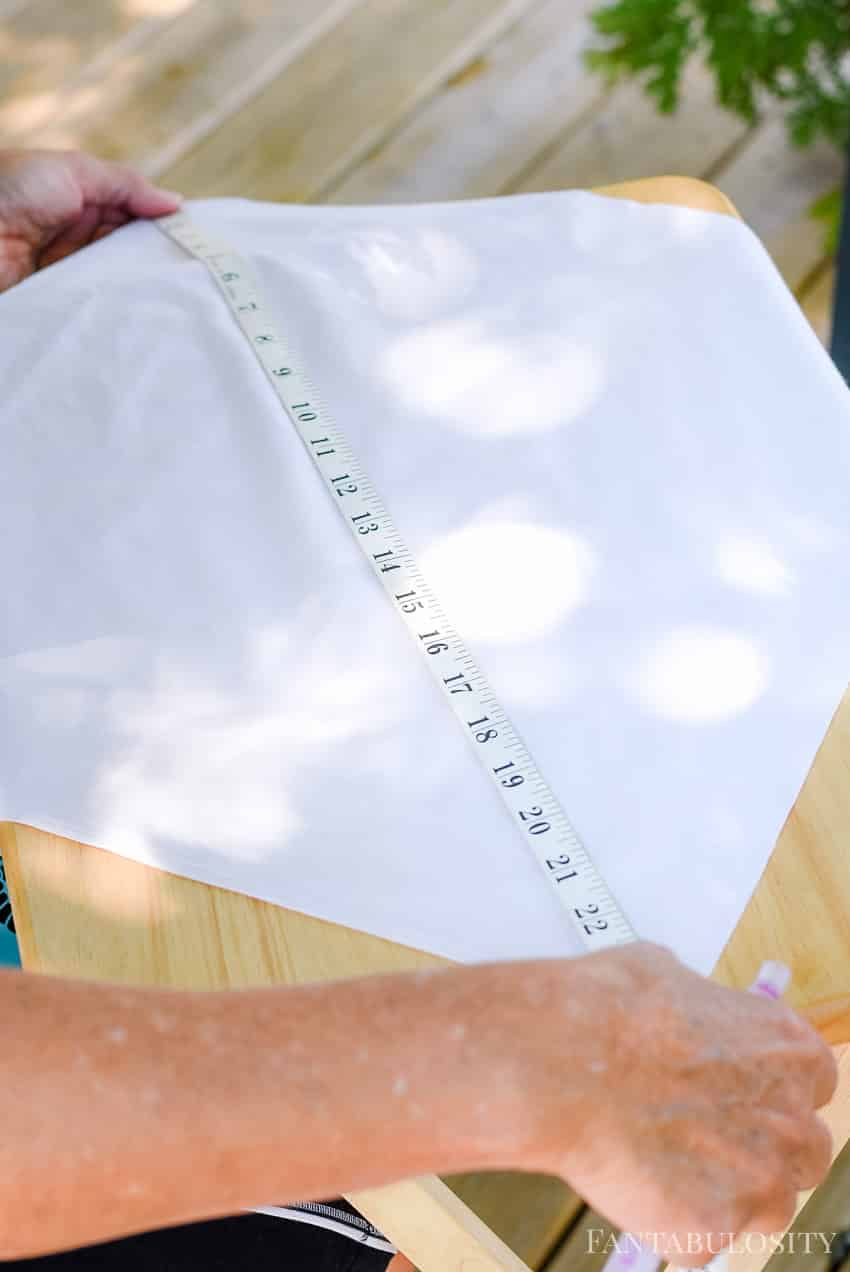
    • White platter/tray

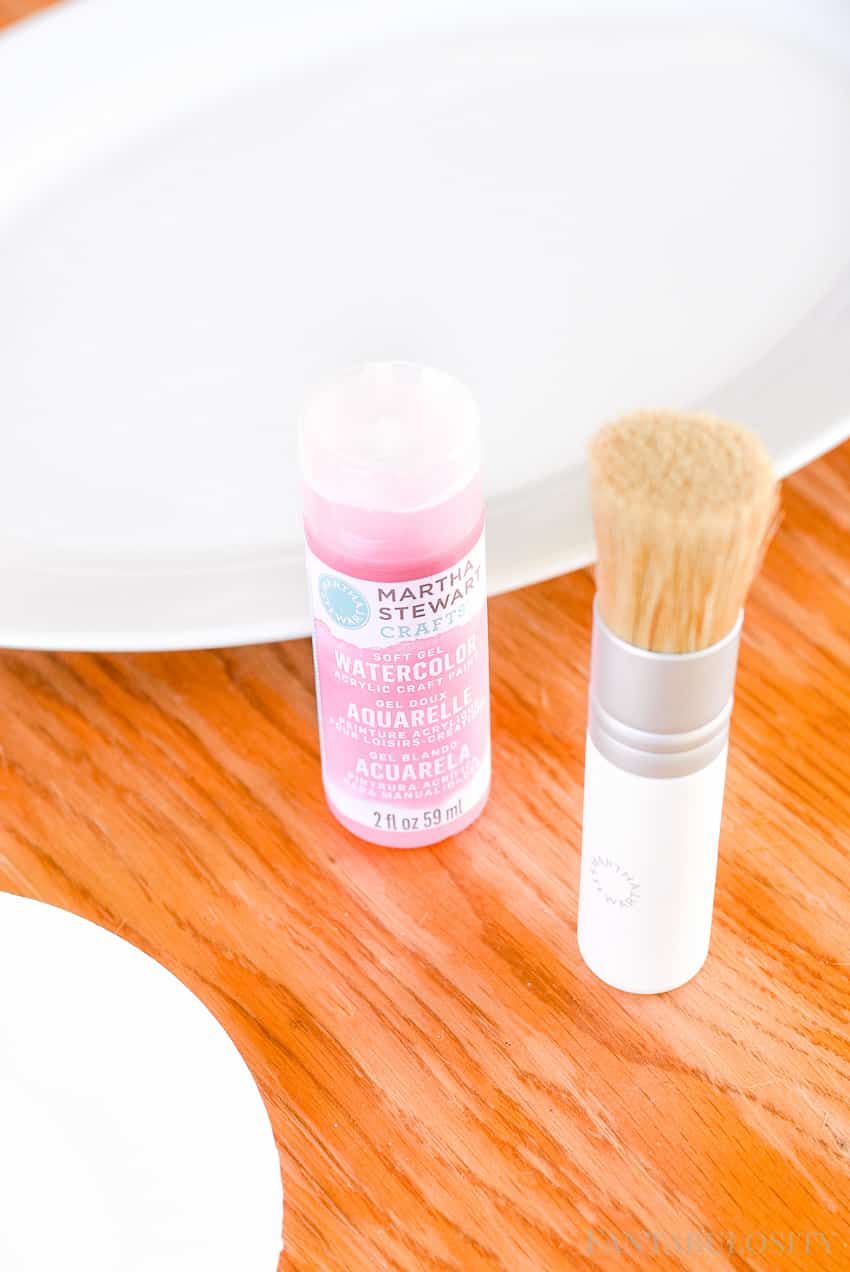
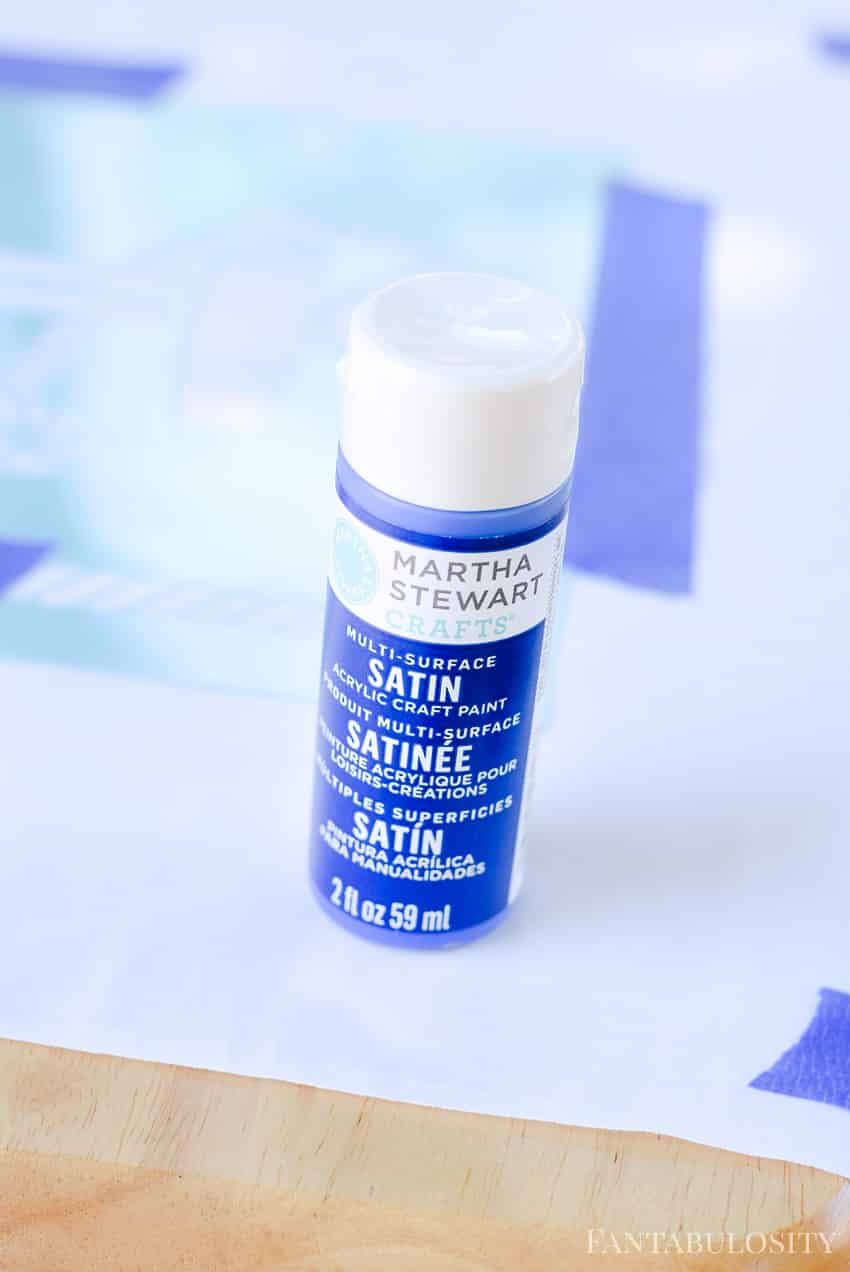
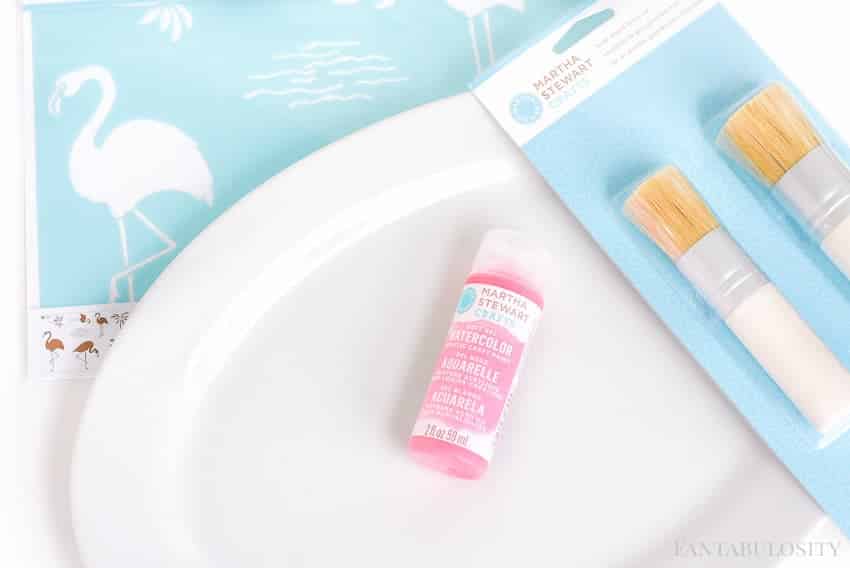
    • Martha Stewart Crafts® Soft Gel Watercolor Paint, Pink Dahlia color

    • Martha Stewart Crafts® large stencil brush set

    • Martha Stewart Crafts® Adhesive Laser-Cut Stencil

    • Painter’s tape

    • Paper towel

    • Paper plate

    Martha Stewart Paint for the drink tray

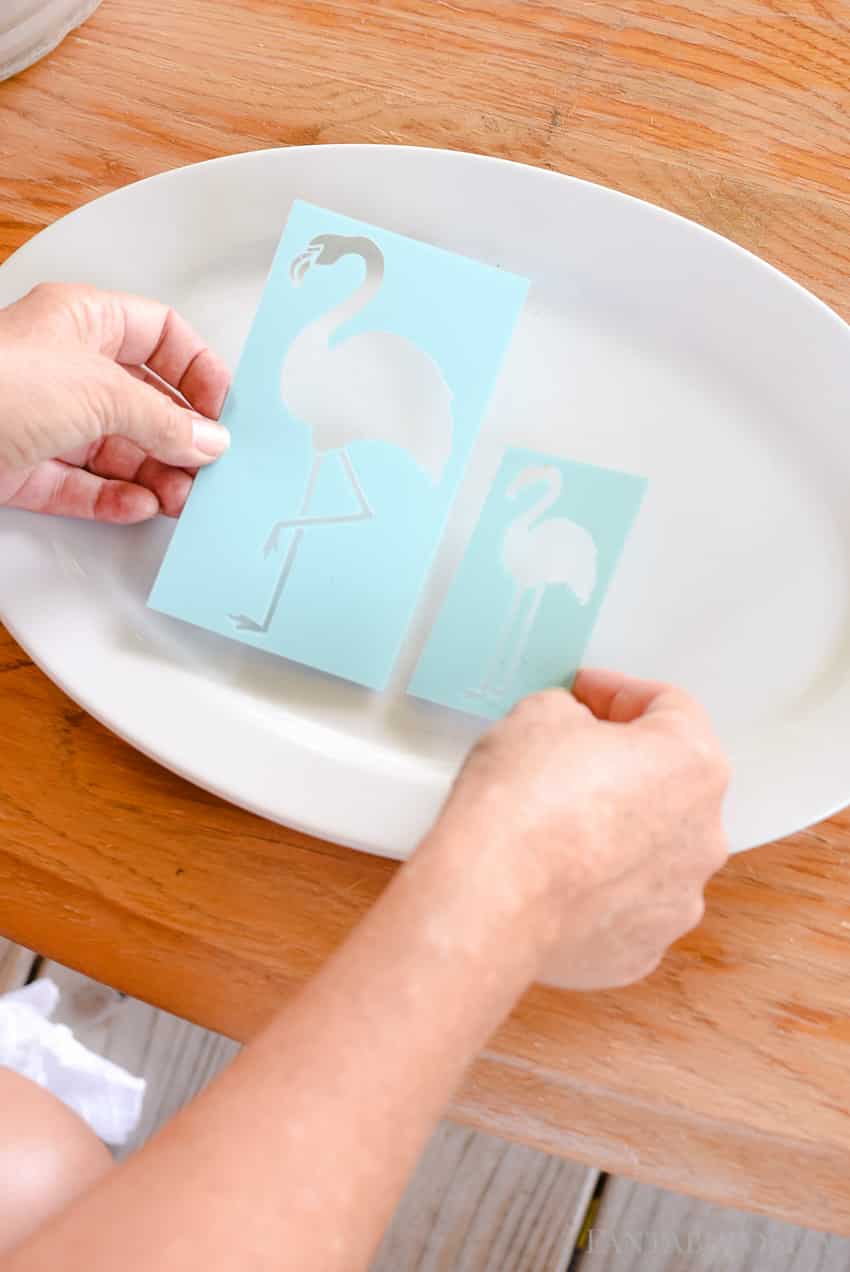
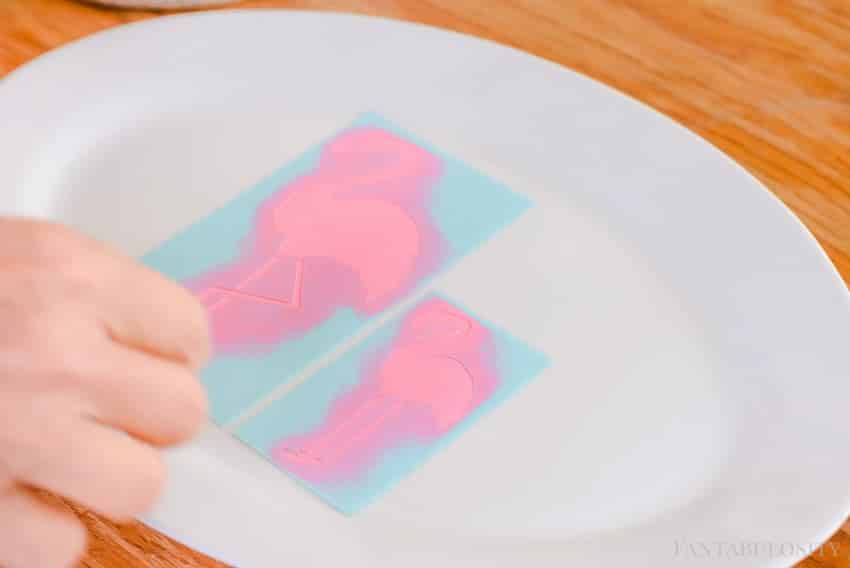
    Peel the stencil from the adhesive paper, and place the stencil where you’d like it on the tray. We preferred it centered on ours.

    Flamingo stencils from Martha Stewart DIY crafts

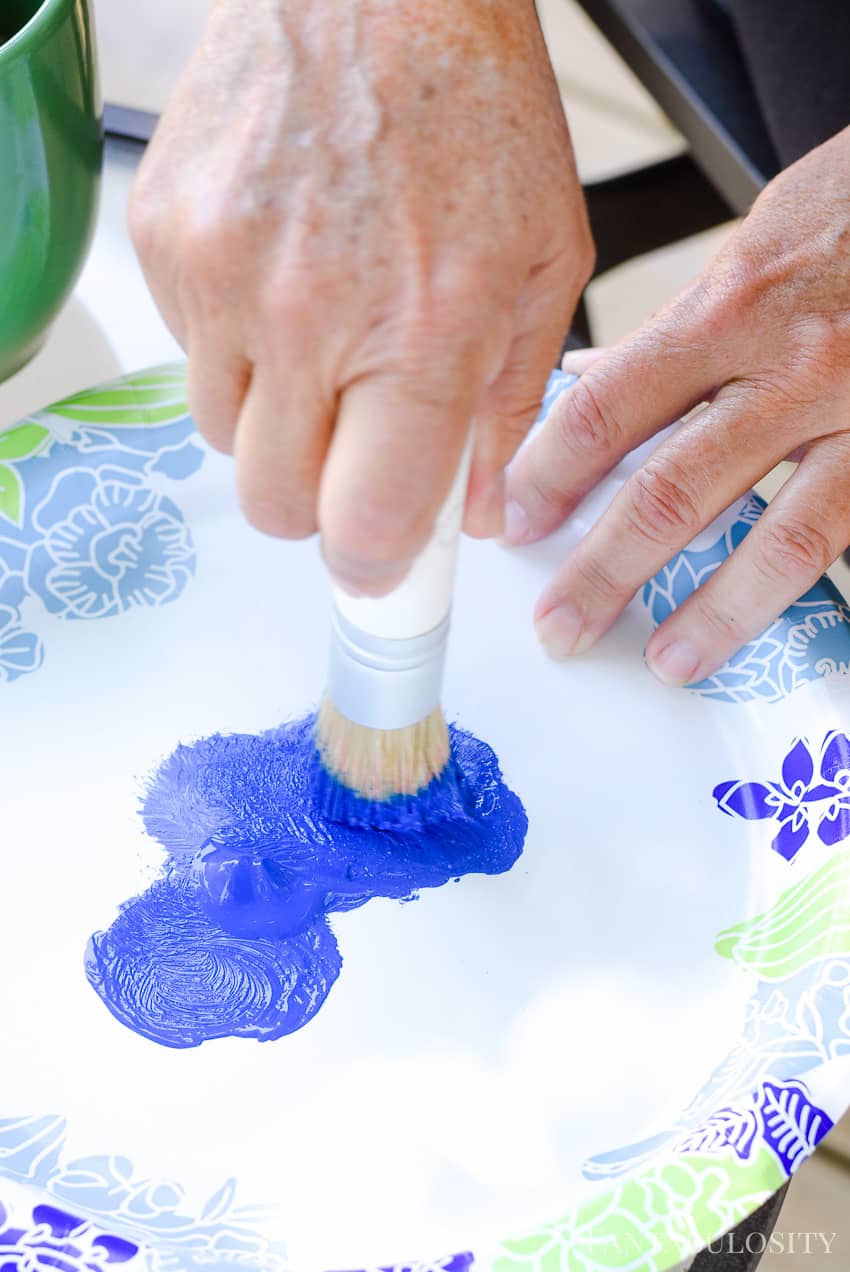
    Next, disburse a small amount of paint (a small amount will go a long way) on to a paper plate.

    Pink paint for flamingo drink serving tray
    We taped our paper plate to the surface so the wind wouldn’t blow it away while crafting outside.

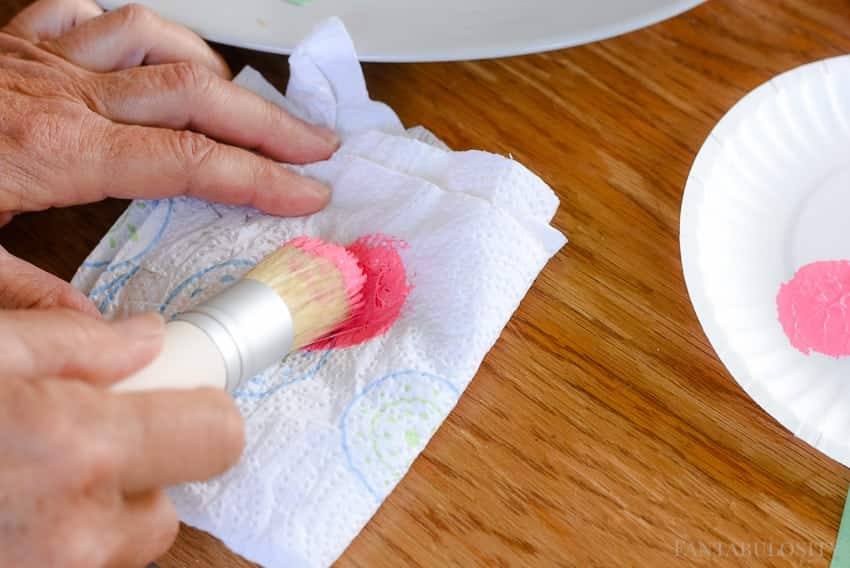
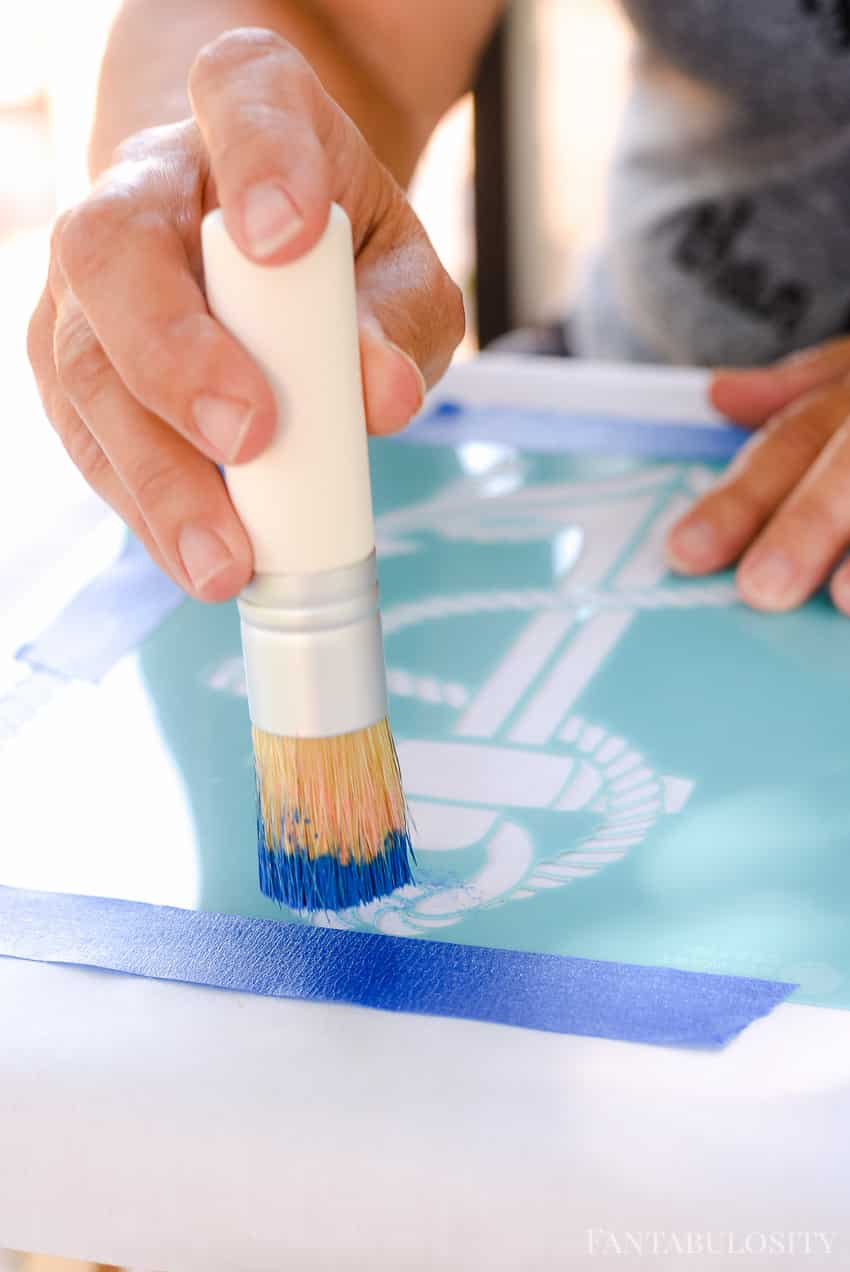
    Push the paint up in the brush for the stencil. Martha Stewart Paints

    Dab the stencil brush gently into the paint, and blot it on a paper towel, twirling in a circular motion, pushing the paint up into the stencil brush.

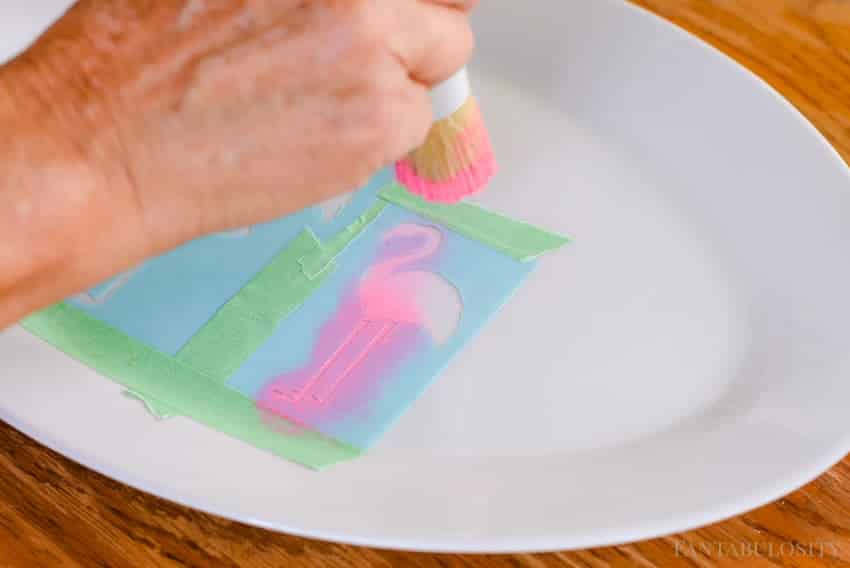
    Flamingo DIY Drink Serving Tray: Martha Stewart Paints

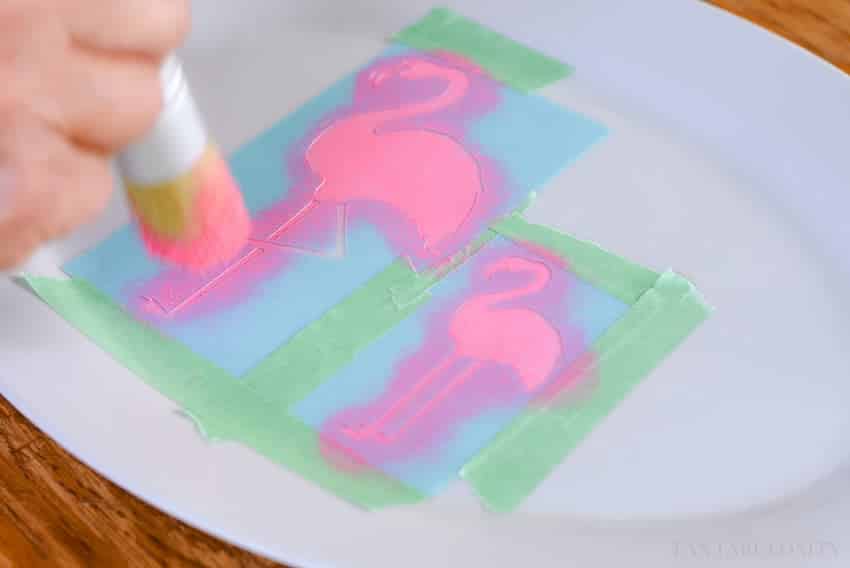
    Next, dab the brush onto the stencil, covering the stencil cut-out. Repeat the process until your craft has reached the desired look.

    Pink stencils for drink serving tray using Martha Stewart paint

    Flamingo DIY Stencil Drinking Tray using Martha Stewart Paint for DIY Projects

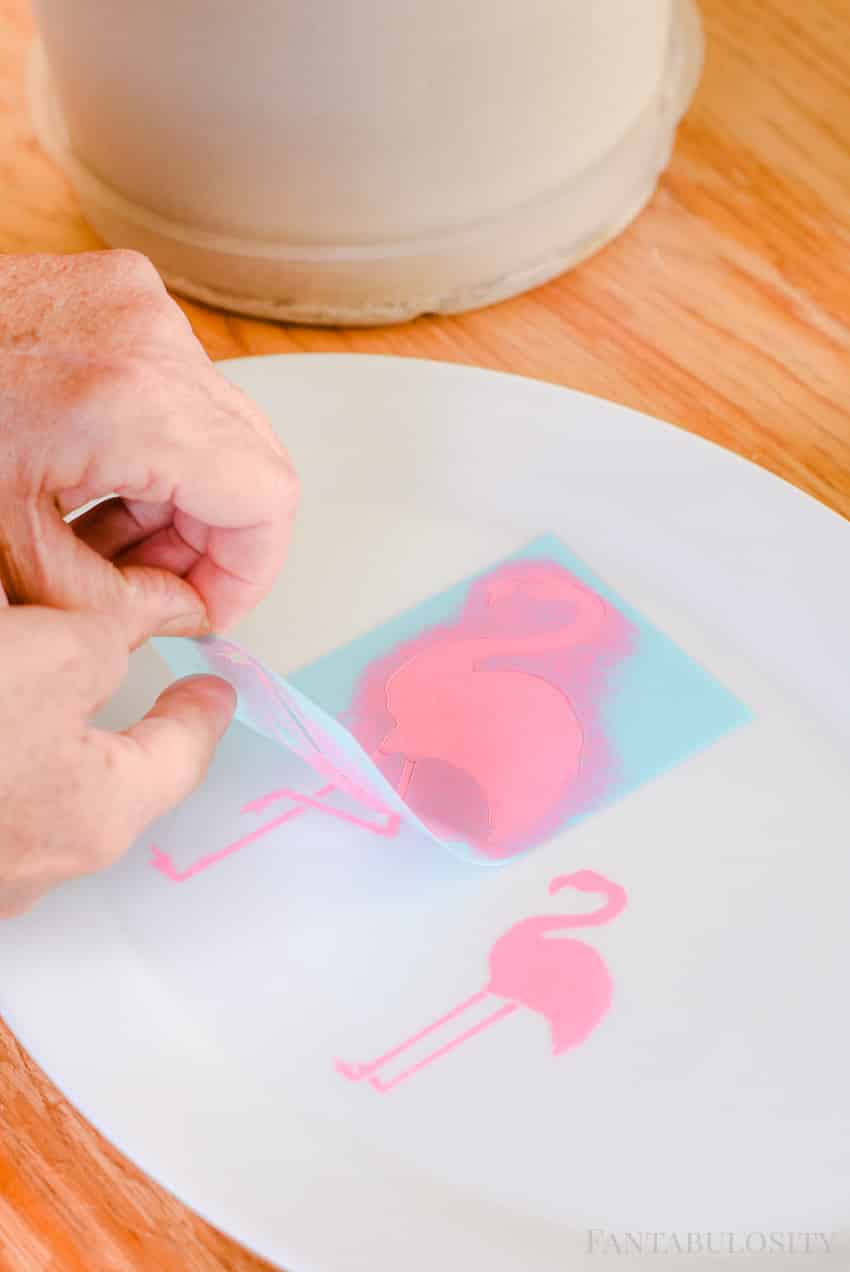
    When you’ve finished painting the stencil cut-out, remove the stencil very carefully.

    Pink stencils for DIY flamingo drink tray

    DIY Drink Serving Tray - Pink Flamingos

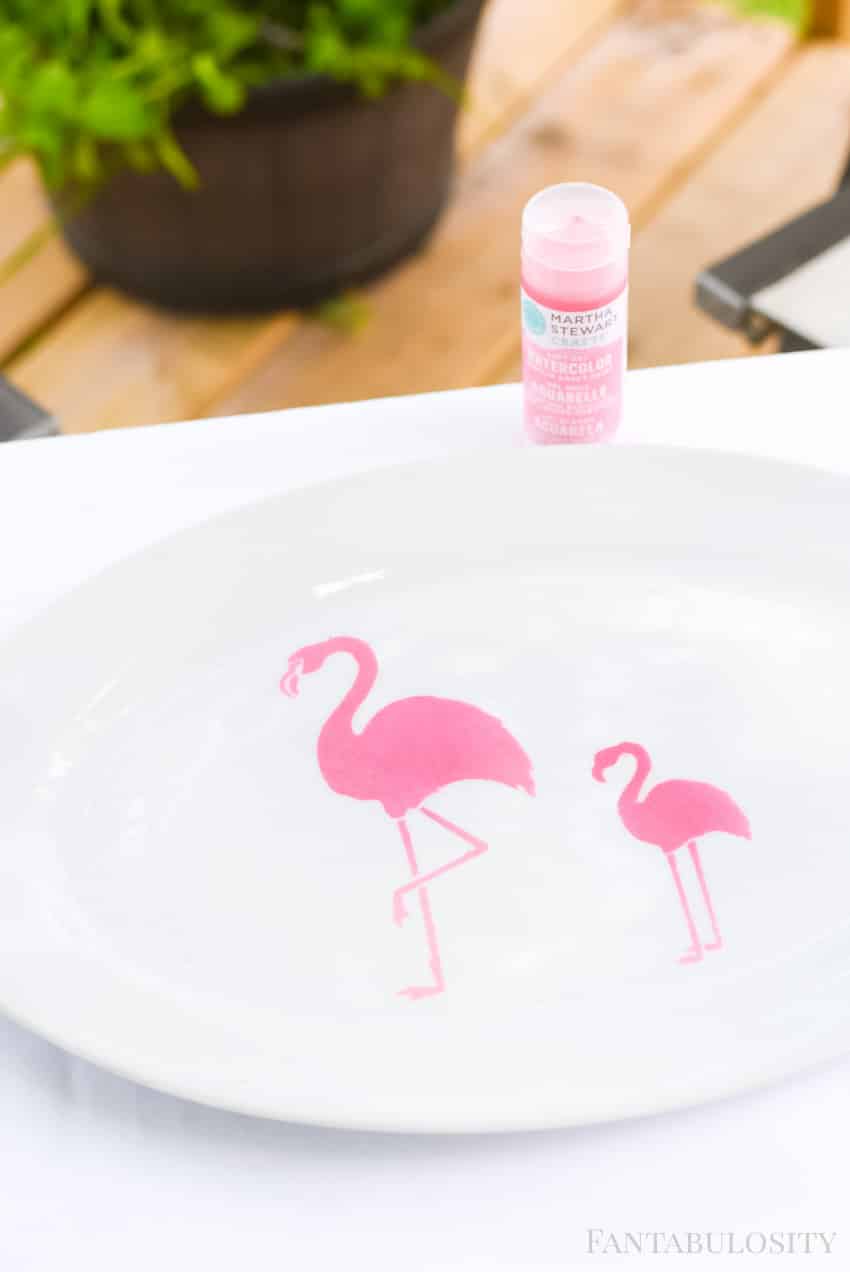
    When the paint dries, it’s ready to use!

    NOTE: Paint is not dishwasher or food safe!

    Drink Serving Tray made with Martha Stewart Paint

    Drink Serving Tray made with Martha Stewart Paint. Such a cute DIY

    Flamingo DIY Drink Serving Tray using Martha Stewart paints

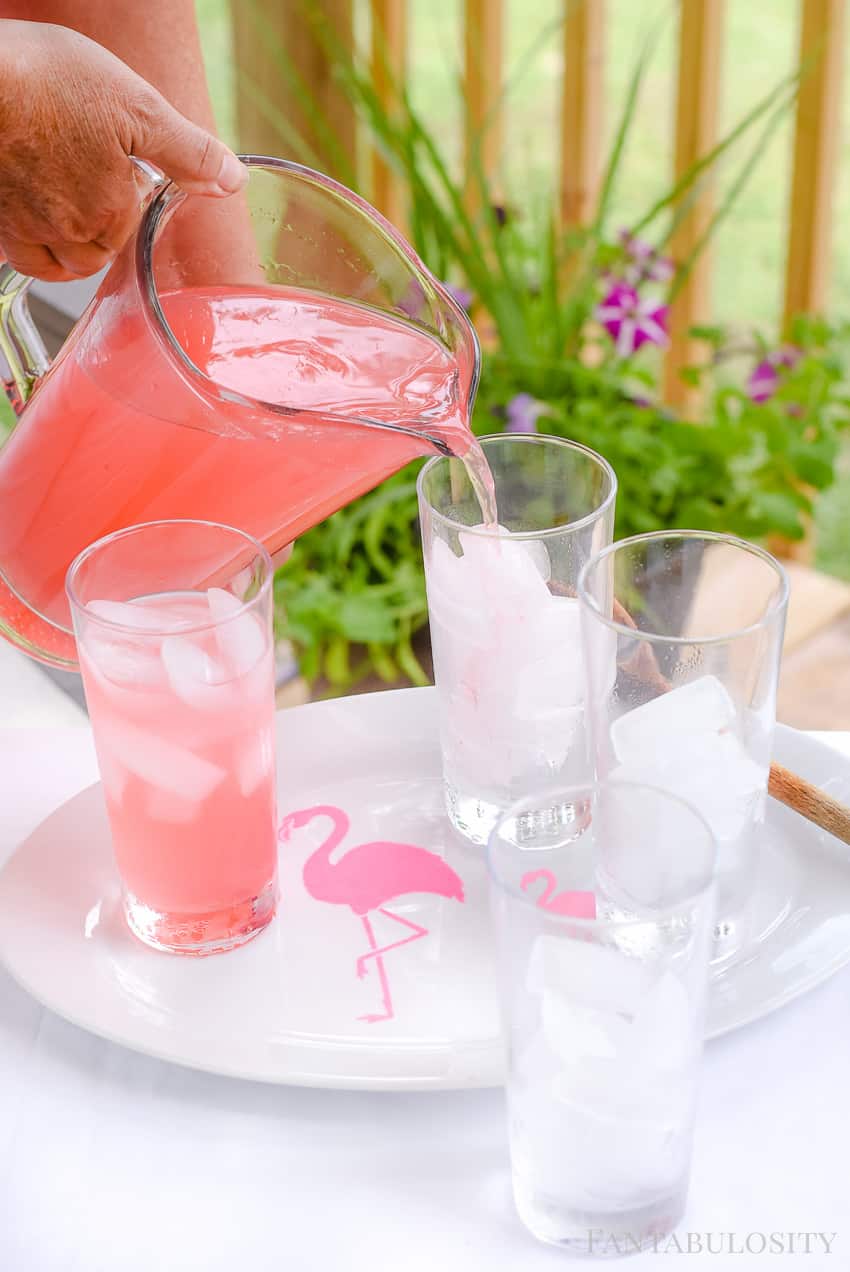
    After crafting, the boys took a break from playing in the bubbles and mud, and thought they needed to partake in my little lemonade party.

    Kiddo drinking lemonade

    Martha Stewart Crafts® Line at Michaels

    You can find all of the Martha Stewart Crafts® at Michaels.com, that I used on this DIY project here:

    Pink Dahlia Martha Stewart Crafts® Watercolor Paint

    Martha Stewart Crafts® Adhesive Laser-Cut Stencil, Flamingo

    Martha Stewart Crafts® Stencil Brush Set, Large

    Thank you!

    Thank you so much for coming by! I’d LOVE to hear what you plan to stencil on your drink serving tray! Let me know below in the comments!

    Fried Mushrooms – Easy Pan or Deep Fried Recipe

    October 29, 2024

    Fried mushrooms on plate next to a bowl of ranch dressing.

    Fried mushrooms are easy to make, and this recipe uses only a few simple ingredients! Using sliced mushrooms is key, as they’re easier to eat and tastier to dip!

    Whether you need a side dish or a quick appetizer recipe, whip these store-bought sliced mushrooms up and serve alongside your favorite dipping sauce, and maybe even these fried pickle slices, and they’ll both become your new favorite!

    Fried mushrooms with batter, next to ranch dip.
    Fried Mushrooms with Egg Breading

    Why You’ll Love This Easy Fried Mushrooms Recipe

    • Texture: I prefer using sliced mushrooms instead of button mushrooms for the texture and or the ease of eating! Using an egg in the batter provides a thicker breading and give the mushrooms a slight crunch.
    • Quick: Sliced mushrooms don’t take long to cook through, and there’s very little prep time, making this recipe great for a quick side dish or appetizer to snack on while waiting for dinner.
    • Ease: Fried sliced mushrooms are really easy and great for a beginner who may be looking to fry things for the first time too! So you’ll be frying all kinds of recipes, and I think this deer meat recipe should be next on the list.
    [feast_advanced_jump_to]

    Deep Fried Mushrooms

    When it comes to deep frying mushrooms, I like to deep fry them in my cast iron with oil but you can also use a deep fryer if you prefer. The mushrooms will float, so flipping may be required.

    Can You Use Button Mushrooms?

    You can! But we personally don’t like button mushrooms because of the texture when you bite in to them. However feel free to follow this same recipe, knowing that the cook time may be a little longer, waiting for the centers to cook too.

    How to Wash Mushrooms

    Did you know you’re not supposed to soak mushrooms? They’ll absorb water, and you sure don’t want that for taste/frying.

    Just wipe or lightly rinse with cool water and pat dry. (Better yet, if you have time, wash them early and let air dry after you pat dry too… just so there is little chance of any water remaining on the mushrooms.)

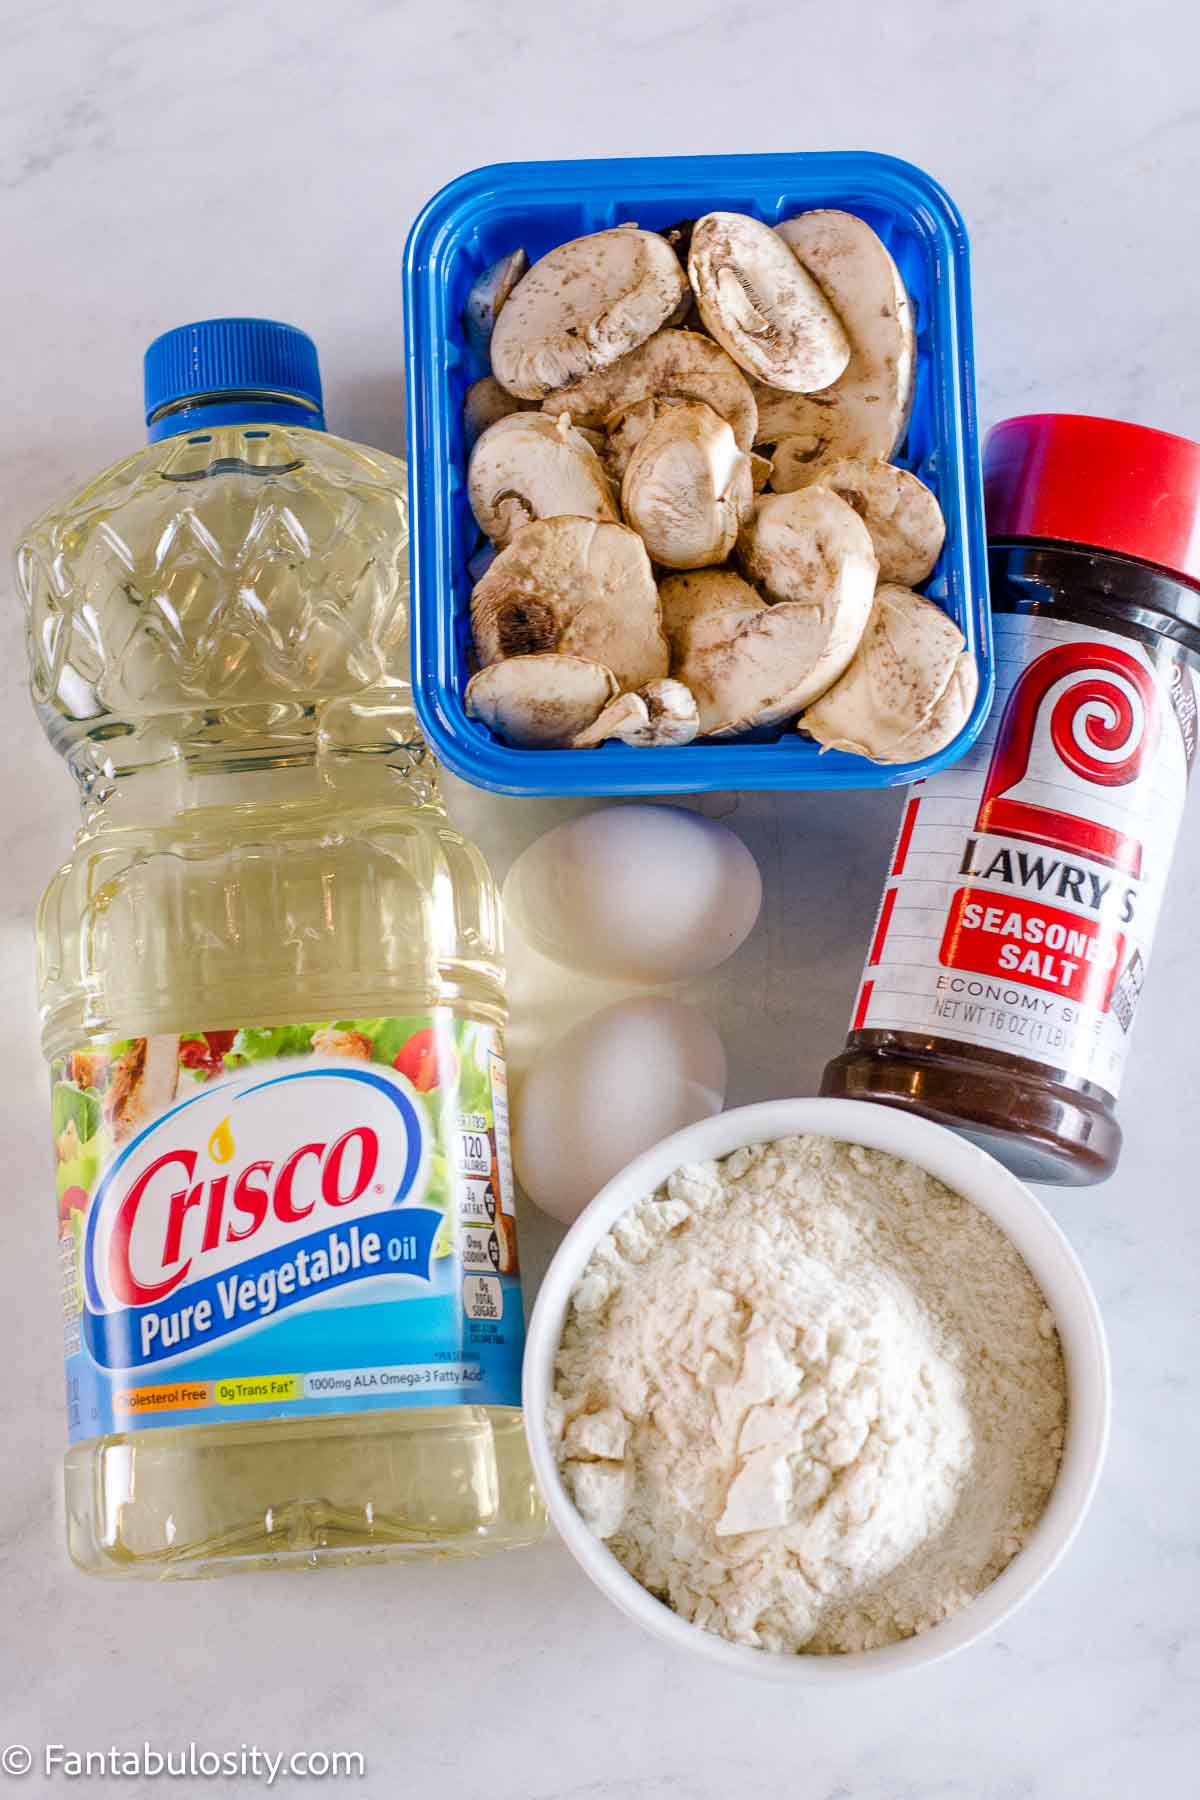
    Ingredients for fried mushrooms on table.

    Ingredients

    • Seasoned salt
    • Flour
    • Eggs (if making the thicker breading – see images below)
    • Sliced Mushrooms
    • Oil

    That’s it. The seasoned salt was super tasty in the flour breading and made a big difference. But feel free to use a different seasoning.
    Some seasoning options to consider are:

    • lemon pepper
    • garlic pepper
    • french fry seasoning
    • greek seasoning

    How to Fry Mushrooms

    I’ll touch on a few key notes below on how to make fried mushrooms but you can also scroll down to the recipe card where you’ll find all of the details in one place.

    To make the fried mushrooms without egg, for a thin breading:

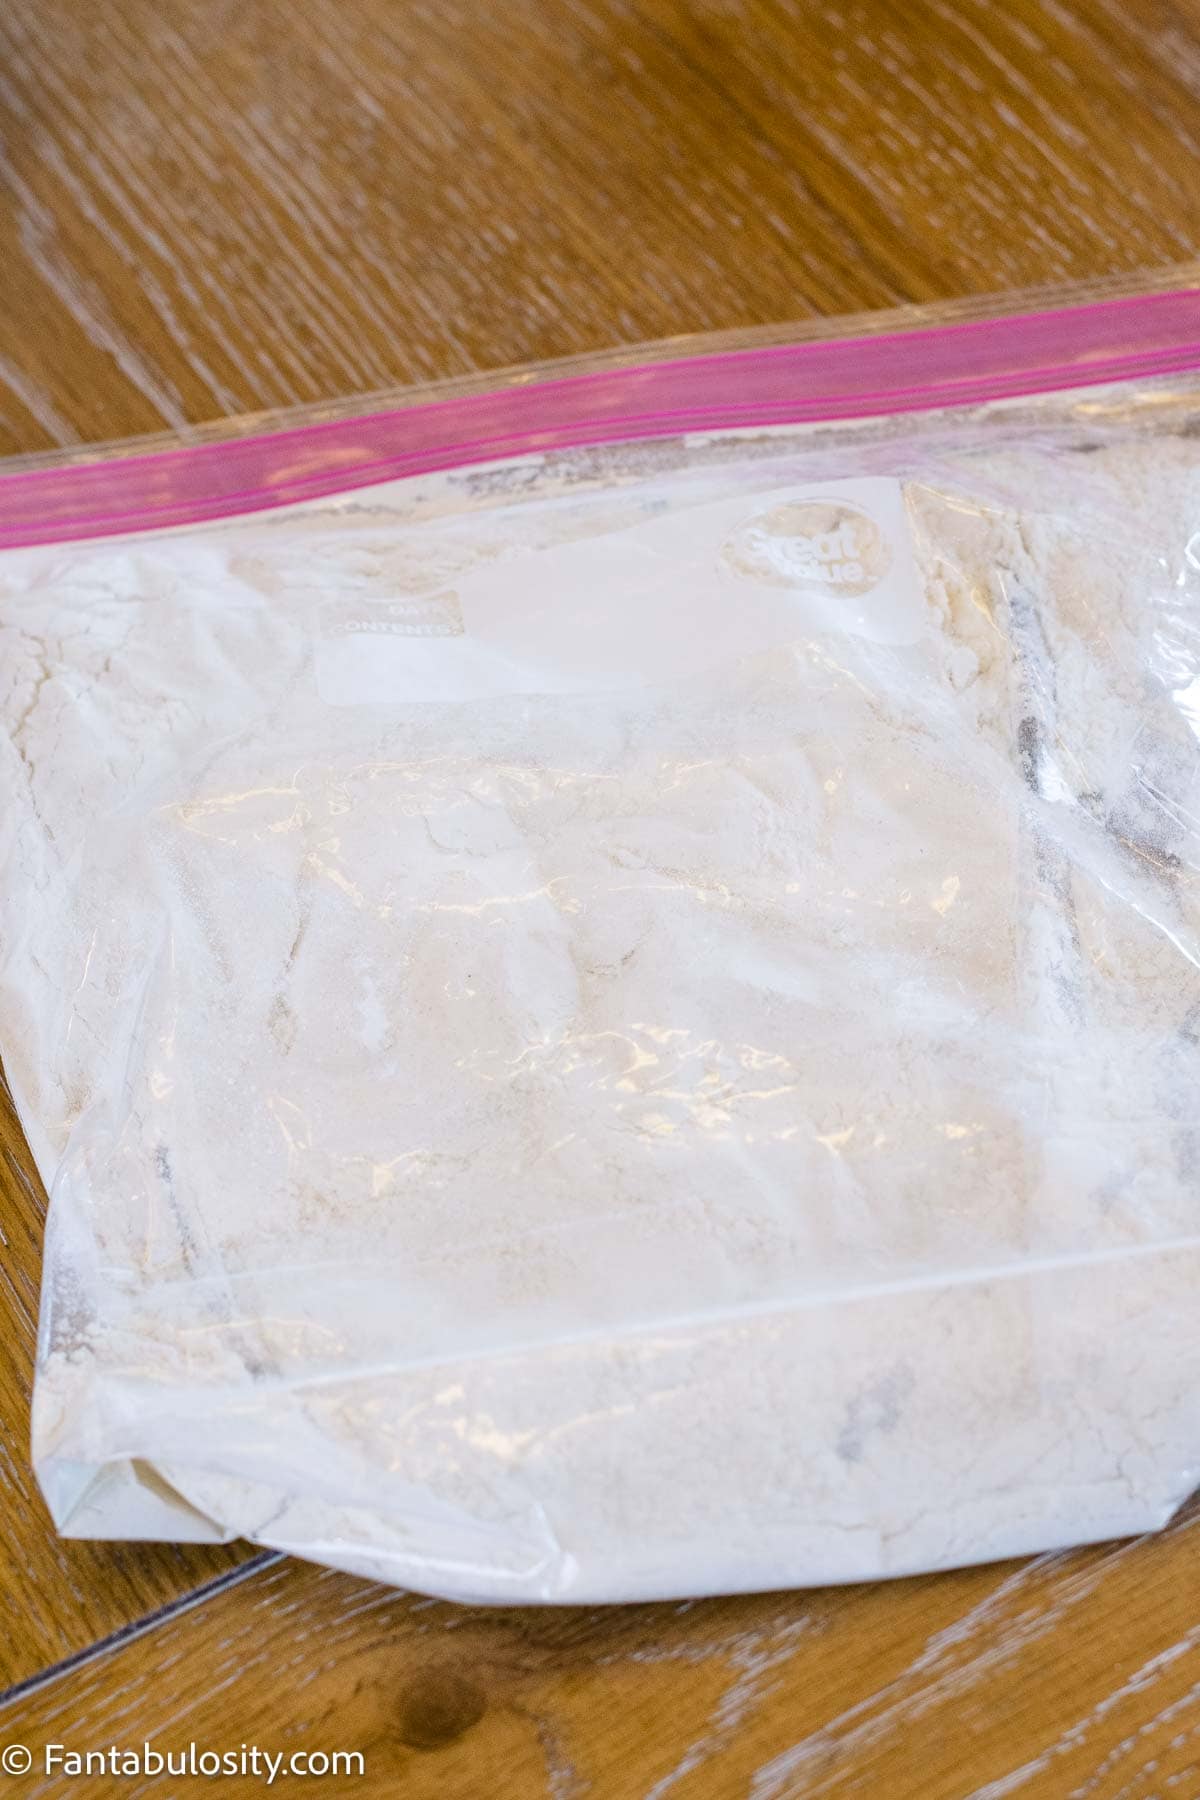
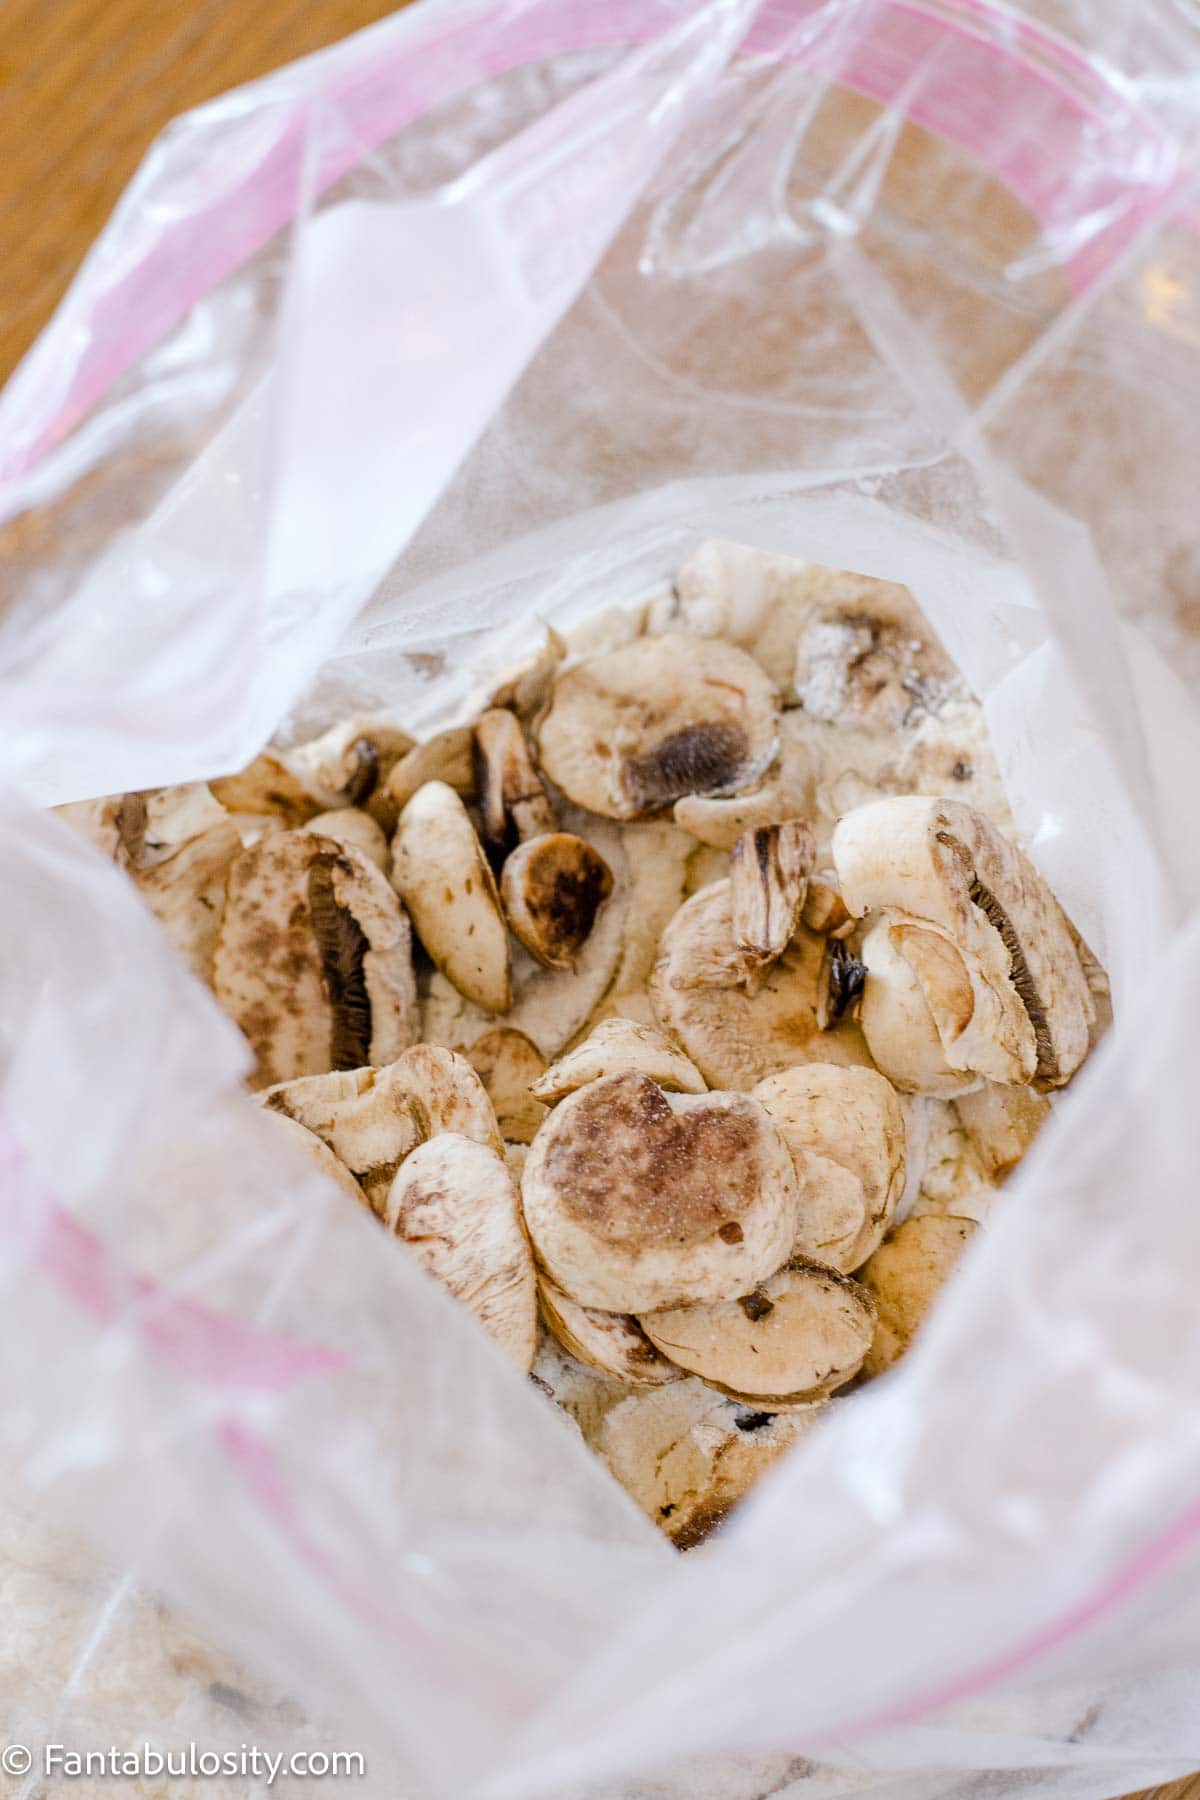
    Flour and seasoned salt in a plastic storage bag for battering mushrooms.
    Sliced mushrooms in bag with flour and seasoning.
    • Bring oil to a temperature of about 375° F or hot enough over medium-high heat, that when a little flour is sprinkled in, it sizzles.
    • You’ll start by combining the flour and seasoned salt in a bowl or zip-top bag.
    • Add in your clean mushrooms and shake or stir to coat with the flour-spice mixture.
    • Place them, one-by-one in the hot oil and cook for 2-3 minutes on each side or until golden brown.
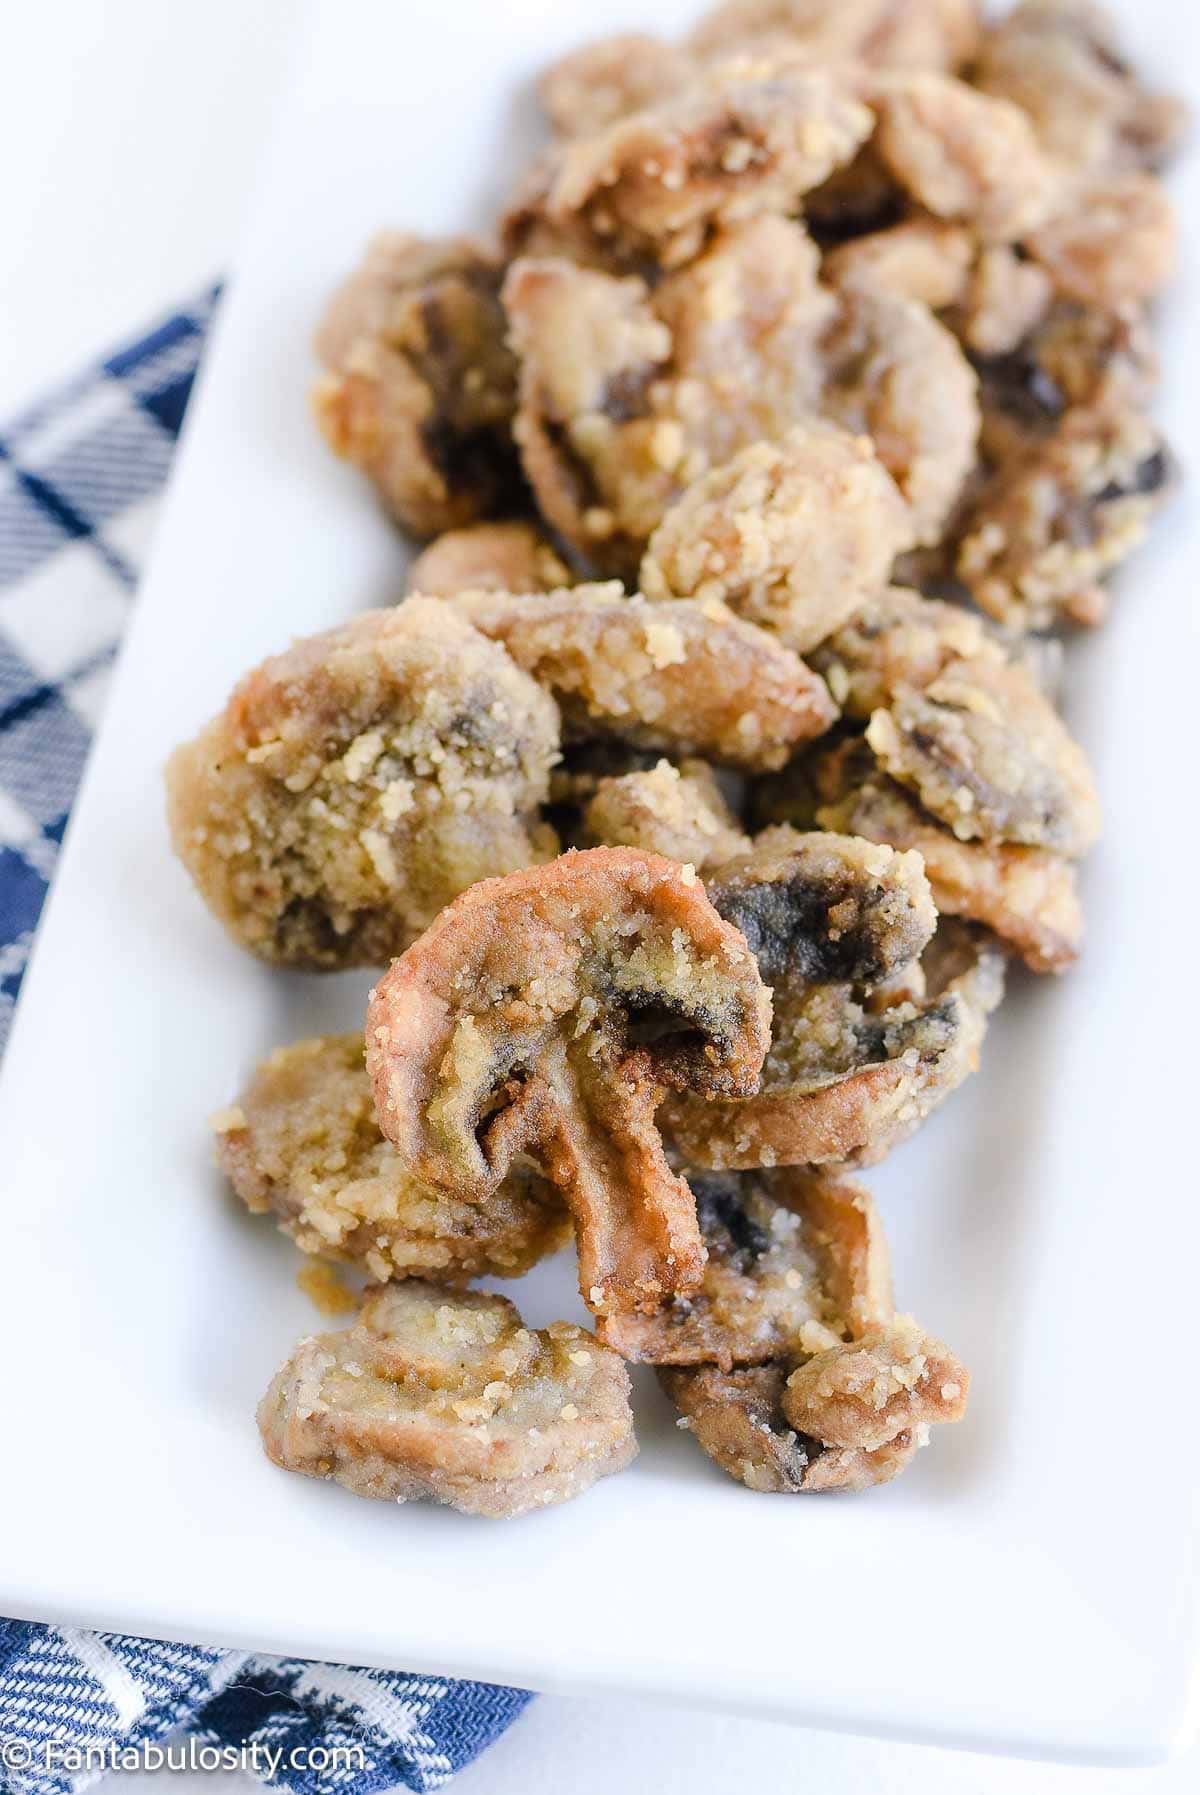
    Easy fried mushrooms on a plate.
    Mushrooms with Thin Breading

    To make the fried mushrooms with egg, for a thicker breading, you’ll:

    • Bring oil to a temperature of about 375° F or hot enough over medium-high heat, that when a little flour is sprinkled in, it sizzles.
    • You’ll start by combining the flour and seasoned salt in a bowl or zip-top bag.
    • Next, whisk your eggs in a separate bowl.
    • Place your mushrooms in the egg, and then place in seasoned flower to coat. (I seal the bag and shake until mushrooms are coated.)
    • Place battered mushrooms in hot oil and allow them to fry on each side for about 2-3 minutes or until golden brown.
    • When fried mushrooms are finished, remove them from the oil with a slatted spatula and place them on a plate, platter, or baking sheet that is lined with paper towels (to soak up excess grease) and serve immediately.
    Fried mushroom being dipped in ranch dressing.
    Mushrooms Fried with Egg in Breading

    To Use Egg or Not Use Egg

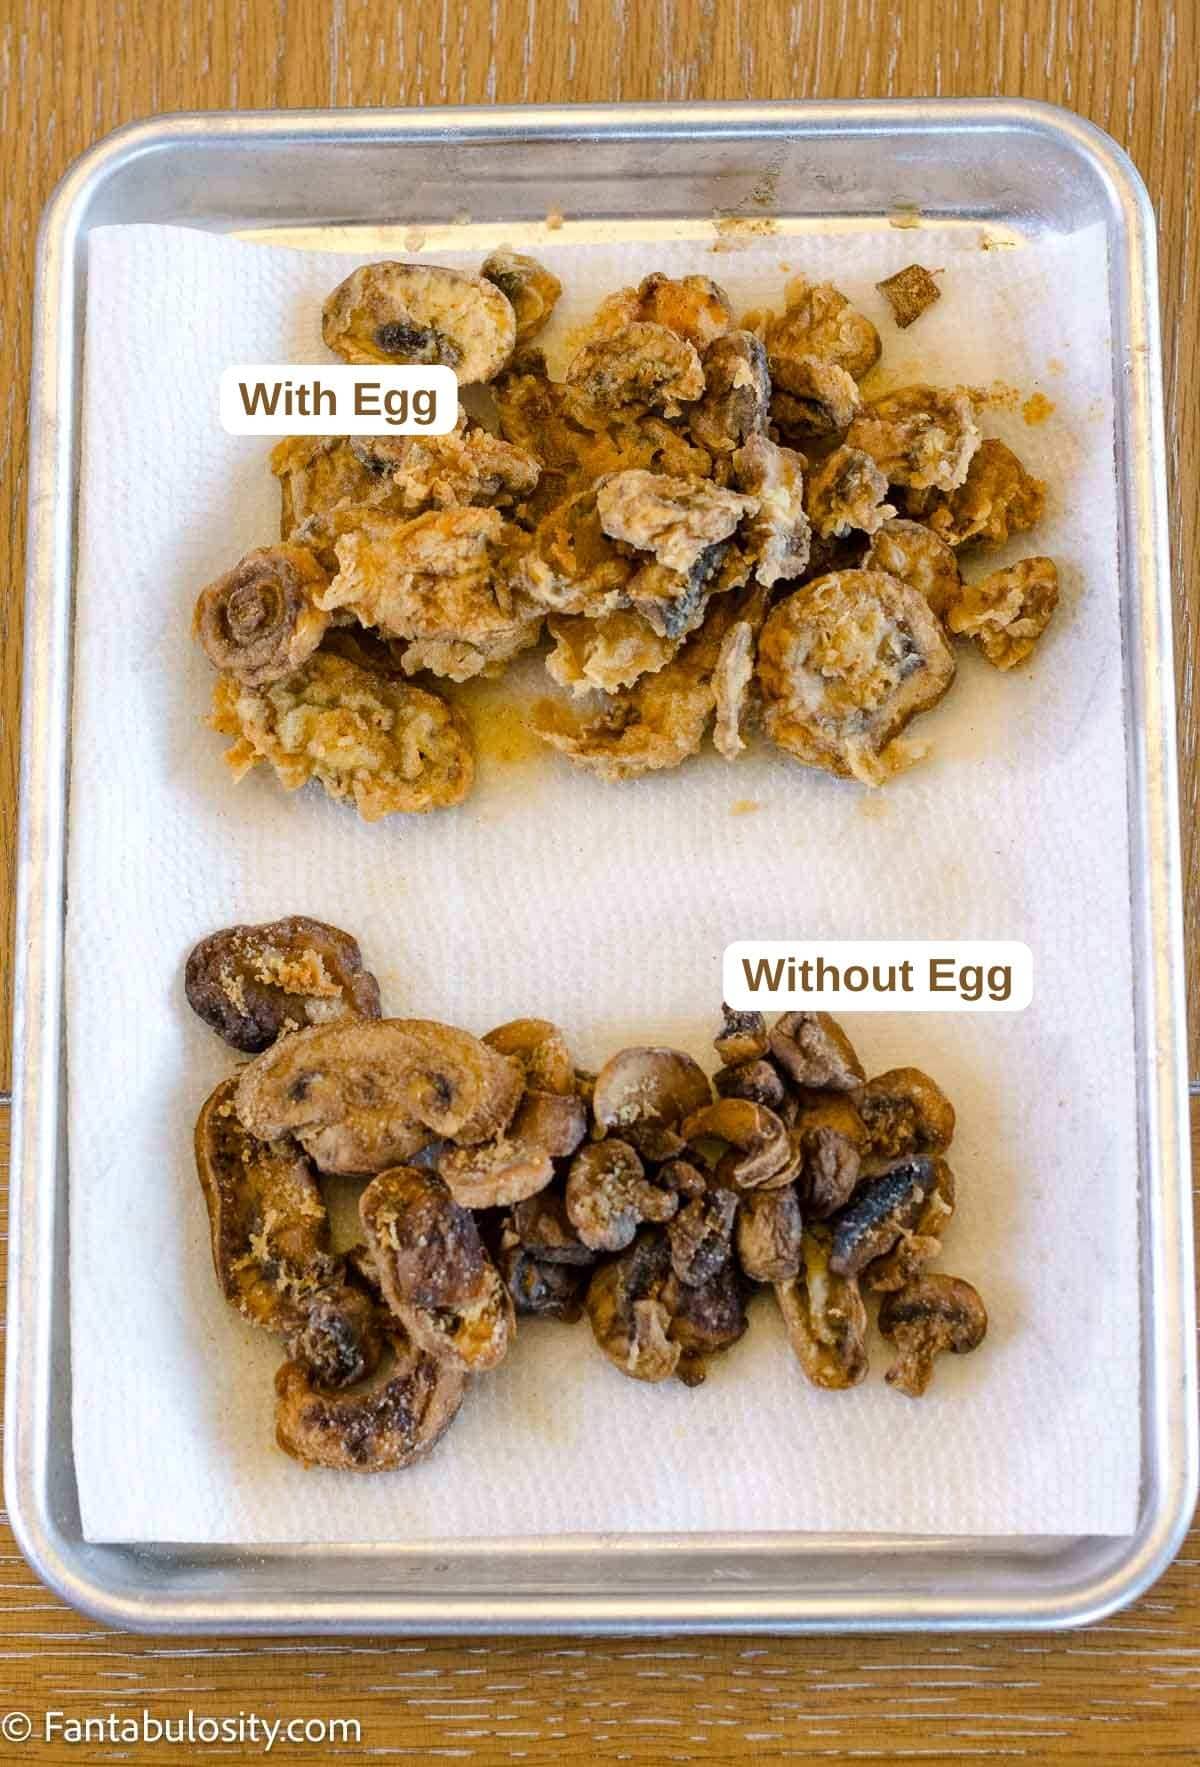
    My pick is to use egg. My dad is the one who taught me how to make fried mushrooms and he prefers the mushrooms without the egg in the breading, so it results in a thinner coating.

    I suggest trying both so you can be the judge of what you prefer!

    Fried mushrooms made two ways.

    What to Serve with Fried Mushrooms

    Eating these mushrooms by themselves is great but they’d also be amazing alongside this jalapeno ranch or this chipotle sauce!

    FAQs

    What is the best way to fry mushrooms?

    Deep frying mushrooms in vegetable or canola oil, is a great way to fry them, to get that breading and crunch.

    What type of mushroom is good for frying?

    Sliced mushrooms are great for frying but you can also fry button mushrooms if you prefer that texture.

    How to know when fried mushrooms are done?

    When the mushrooms have turned slightly golden brown, they’re ready to remove from the oil on to a paper towel-lined plate, to soak up excess oil.

    Related Recipes

    If you love easy recipes like this one, you’ll also love these:

    • Stuffed portobello mushrooms
      Baked Portobello Mushrooms
    • Smoked stuffed mushrooms in a platter.
      Smoked Stuffed Mushrooms
    • fried shrimp on plate next to sauce
      The BEST Fried Shrimp
    • Air fryer eggplant fries dipped in marinara sauce.
      Air Fryer Eggplant Fries

    Recipe

    Fried mushrooms on plate next to a bowl of ranch dressing.
    Print Pin
    3.89 from 63 votes

    Fried Mushrooms Recipe

    This fried mushrooms recipe using sliced mushrooms is so easy with two options for breading thickness.
    Course Appetizer, Side Dish
    Cuisine American
    Prep Time 10 minutes minutes
    Cook Time 5 minutes minutes
    Total Time 10 minutes minutes
    Servings 4 servings
    Calories 160kcal
    Author Jessica Burgess

    Ingredients

    • 8 ounces sliced mushrooms cleaned
    • 1 cup flour
    • 2 Tablespoon seasoned salt
    • vegetable or canola oil enough to create an inch or more of oil in pan if pan frying, or enough for your deep fryer requirements.
    • 2 eggs leave out the eggs if you prefer a more thin, breading. See instructions below.

    Instructions

    • Heat oil in the pan over medium heat if pan frying. If deep frying, heat oil to about 375° F, or turn on medium heat and test with sprinkle of flour for sizzle. (See below.)
    • Combine flour and seasoned salt in large bowl or zip-top bag.

    For Thin Mushroom Breading

    • Pour mushrooms into flour/salt mixture and stir or shake to coat.
    • When oil is heated through (to test if oil is ready, sprinkle a pinch of flour in oil. If sizzles, it's ready.)

    For Thicker Mushroom Breading

    • Coat mushrooms in the eggs, then seasoned flour, and place the mushrooms in the heated oil, and fry for 2-3 minutes, (flipping if necessary) until they turn to a golden brown.
    • If deep frying, fry for 2-3 minutes or until golden brown.
    • Remove from oil and drain on a plate topped with paper towels to soak up excess oil.
    • Serve warm!

    Video

    Notes

    Wash your mushrooms but do not soak them! They’ll retain water and they will not cook appropriately.
    You can also sprinkle on additional seasonings after the mushrooms have been fried if you’re looking for more.

    Nutrition

    Serving: 1serving (¼ recipe) | Calories: 160kcal | Carbohydrates: 23g | Protein: 3g | Fat: 5g | Saturated Fat: 4g | Sodium: 1744mg | Potassium: 33mg | Calcium: 5mg | Iron: 1.5mg

    Gift Basket Ideas – For Men, Women, Babies, Holiday’s & More!

    October 22, 2017

    Bread Basket Hostess Gift Idea: DIY and FREE Printable!! fantabulosity

    Gift Basket Ideas – For Men, Women, Babies, Holiday’s & More! Easy gift baskets you can re-create, with fun themes for anyone on your list!

    I’m not sure what it is, but when it comes to gift giving, creating a gift basket for someone is always my first thought. They’re full of goodies, and SURELY there will be something in the basket that the recipient will love, right?

    I also feel like it looks like more heart and thought went in to the gift, rather than just picking something up at the last minute and throwing it in to a gift bag. (I’m totally guilty of doing that by the way.)

    Gift Basket Ideas – For Men, Women, Babies, Holiday’s & More!

    If you’re on a hunt for gift basket ideas, then you’ve come to the right place. I’ve compiled all of our gift basket ideas right here on this post. That way, you can take a peek to find one that tickles your fancy, and click through the one you pick and get the tutorial on how to re-create it yourself!

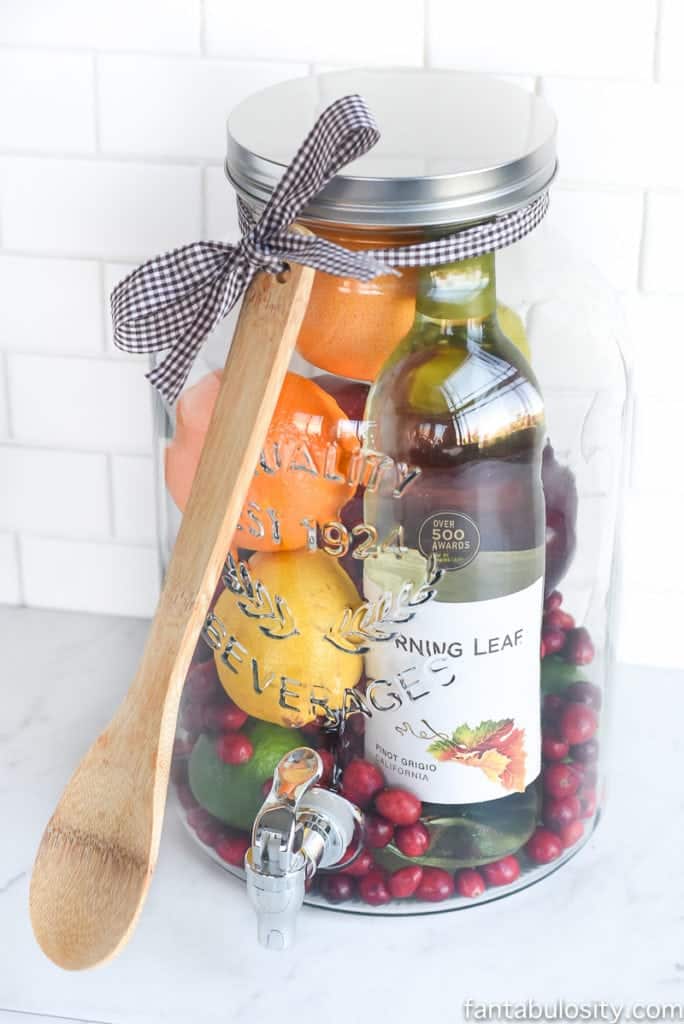
    Aw, how cool is this! DIY Gift Idea: Sangria for Friends, housewarming, for women, new neighbor, anyone! Who wouldn't love this!? They can even use the drink dispenser again and again!

    DIY Sangria Kit Gift Idea

    Even though it’s not a “basket,” it’s by far one of the most popular gift ideas on the blog, so I wanted to include it here first! Fill a drink dispenser with the contents to make a sangria and it’s the gift that keeps on giving. Get the tutorial for this wine gift idea!

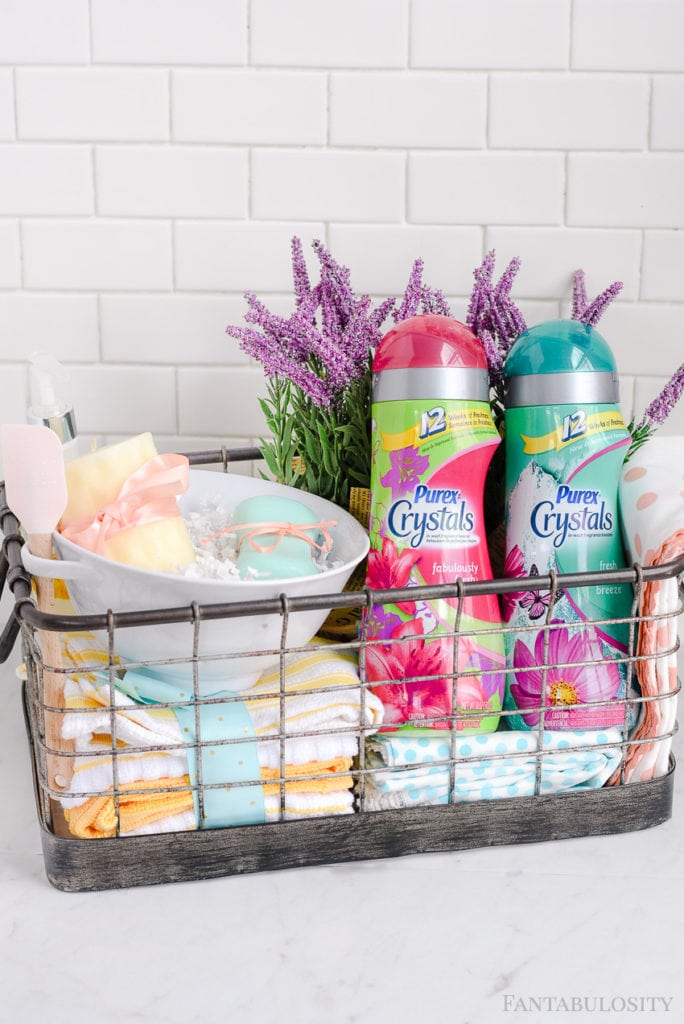
    DIY Housewarming Gift Basket

    Giving a housewarming gift basket is one of my favorite ways to welcome someone to the neighborhood, or to congratulate a friend on their new home. See what’s all included in this DIY Housewarming Gift Basket!

    Gift Idea for Him- I think you're red Hot Gift Basket Ideas

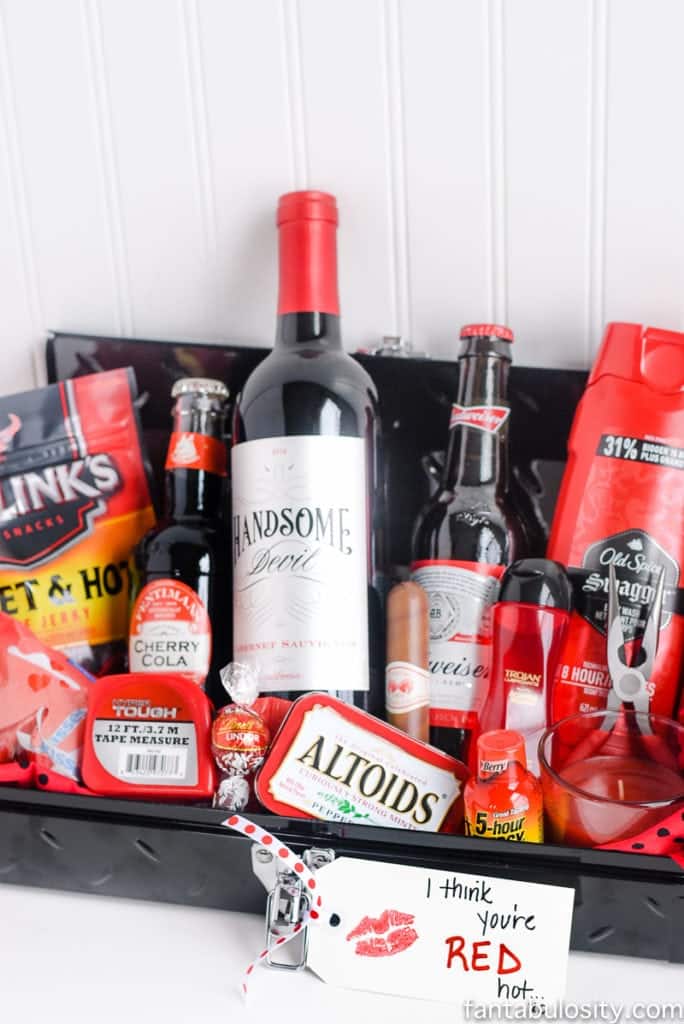
    “You’re RED Hot!” – Gift Basket for Men

    Gift ideas for men can be hard to come by. So when it was time to give a gift to my husband for Valentine’s Day, I filled a toolbox that he could use over and over again with all things red! Get more “You’re RED Hot” gift basket ideas for a Valentine’s Day Gift Basket Idea!

    This is so smart! Sending necessities to those who've recently lost someone, so they don't have to worry about having things on hand for guests. Sympathy Gift Basket Idea for bereavement, grieving, funeral, and condolence.

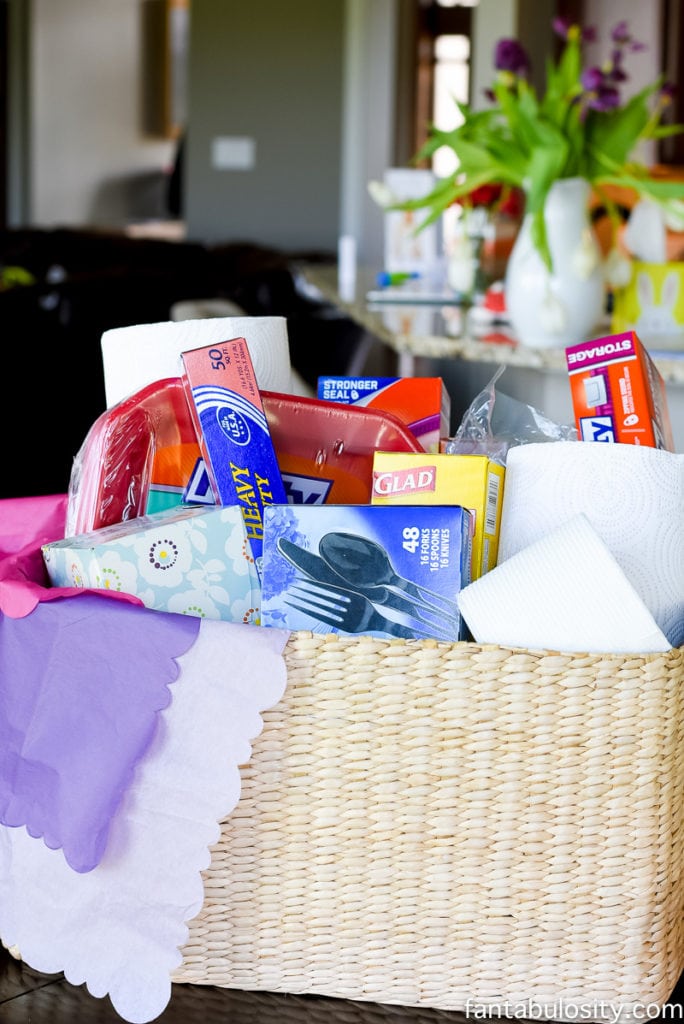
    Sympathy Gift Basket

    During a time of loss, it can be so hard to think of something to do for someone we love and care about. I’ll never forget when someone gifted us a gift basket like this when we lost my husband’s father. It was incredibly helpful, and something I’ll always remember. Get the tutorial for the Sympathy Gift Basket idea Sympathy Gift Basket Idea.

    New Baby Gift Basket Ideas https://fantabulosity.com

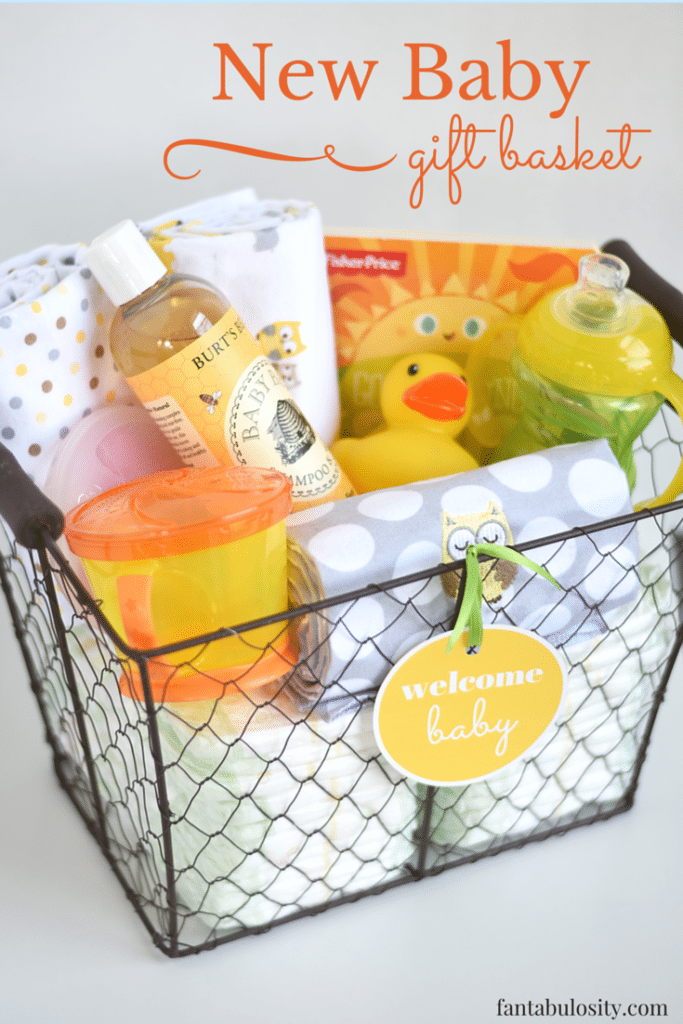
    Gift Basket for a New Baby

    If you’ve found yourself in a position where everything has already been purchased from the baby registry, or if you just want to give someone a sweet gift after their new baby has arrived… our new baby gift basket idea may be just what you’re looking for. Get the tutorial AND free printable for this new baby gift basket New Baby Gift Basket!

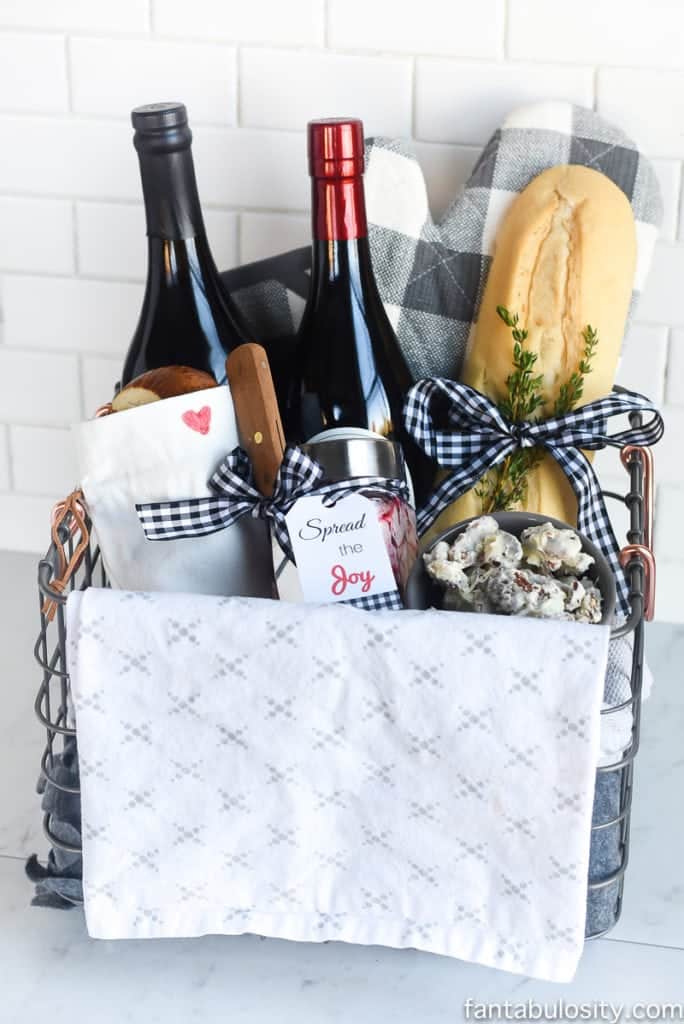
    Bread Basket Hostess Gift Idea: DIY and FREE Printable!! fantabulosity

    Hostess Bread Basket Gift Idea

    What is it about bread that encompasses “comfort?” If you’re attending a party, housewarming, or any other occasion where you find yourself visiting a friends home, take along this bread basket gift. Filled with wine, bread, and a yummy homemade fruit butter… your friends/family will be overjoyed! Get the tutorial for this hostess gift basket idea!

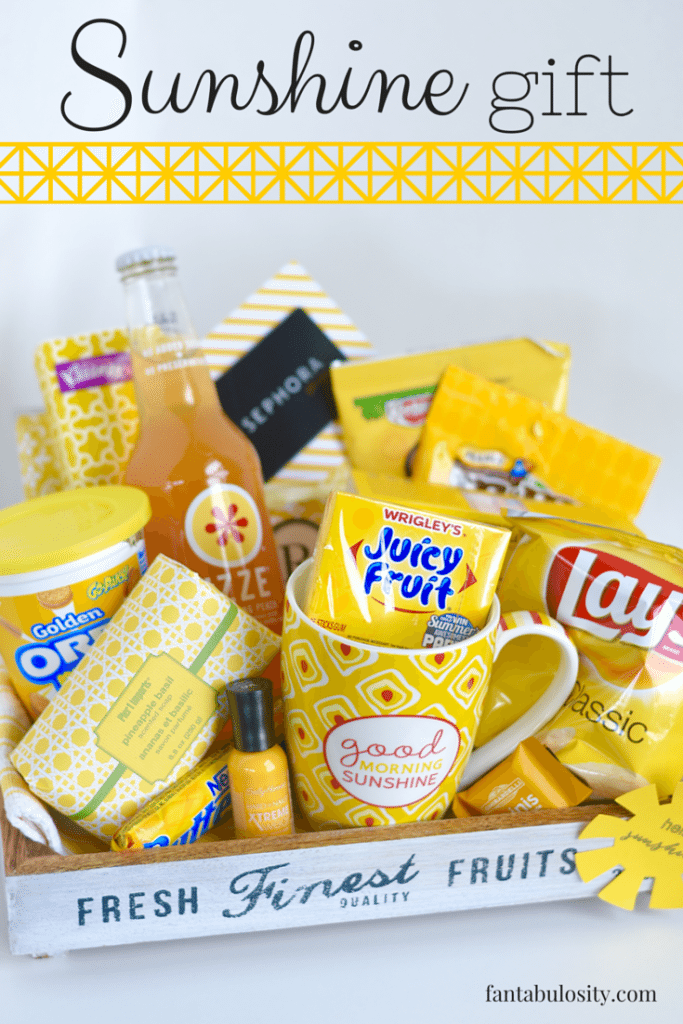
    Sunshine Gift Basket or Box Ideas! fantabulosity.com

    Sunshine Gift Basket Idea

    Bring a little sunshine to someone in your life by filling a box, basket, bucket, or anything you can think of with everything YELLOW! Get the tutorial and free printable for this Sunshine Gift Basket Idea!

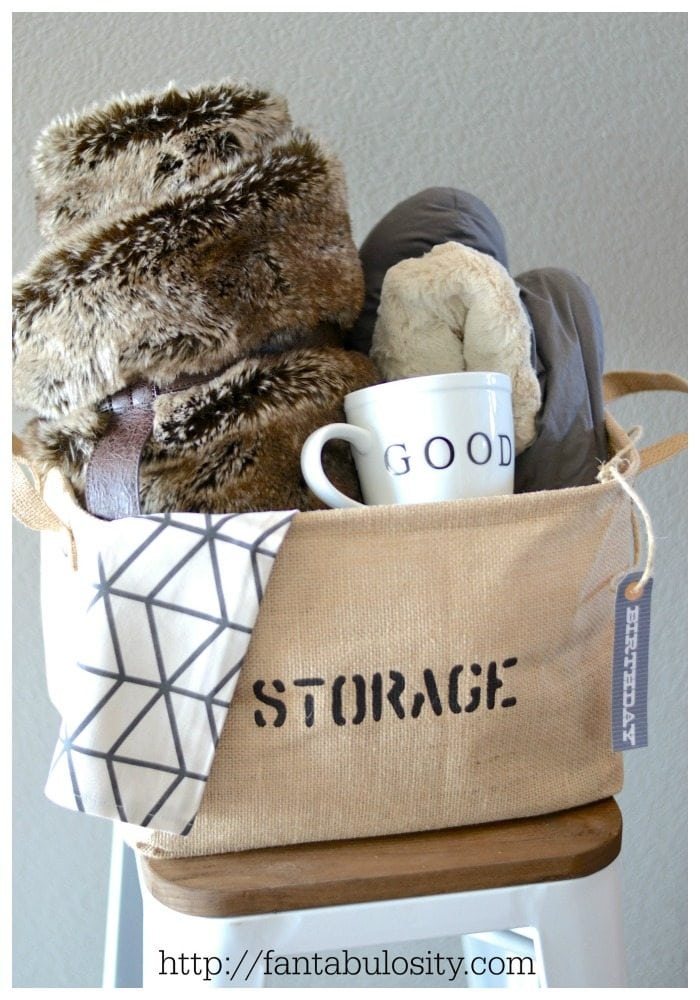
    Gift basket idea for men or women

    Take It Easy Gift Basket

    If you’re looking for gift baskets for men or women… or even holiday gift baskets, a “Take it Easy” gift basket may be the perfect idea! Who doesn’t love to take it easy, and who wouldn’t LOVE to get a basket full of things to help them relax! Get the tutorial and links to purchase some of the goodies you see Relaxation Gift Basket!

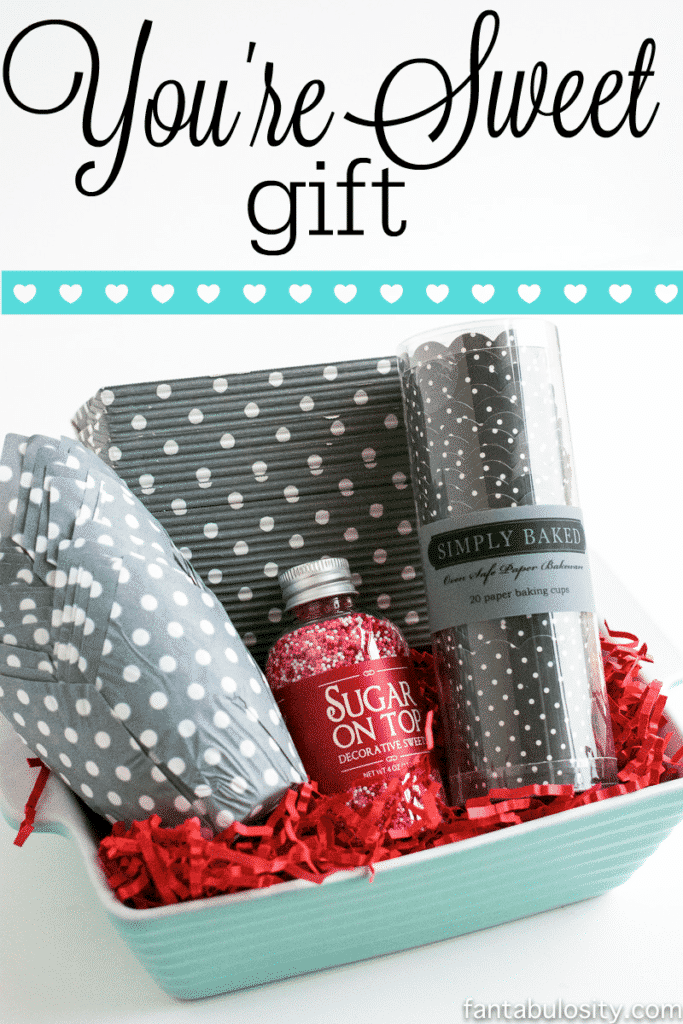
    "You're Sweet" Gift Idea. This is PERFECT for a hostess gift idea, or gift idea for best friend! fantabulosity.com

    “You’re Sweet” Gift

    If you have a friend that loves to bake, a “sweet” gift to give is an adorable little baking pan filled with baking accessories that they may not buy themselves. A small gift that packs big sweetness. Get the tutorial “You’re sweet” Gift Basket Idea!

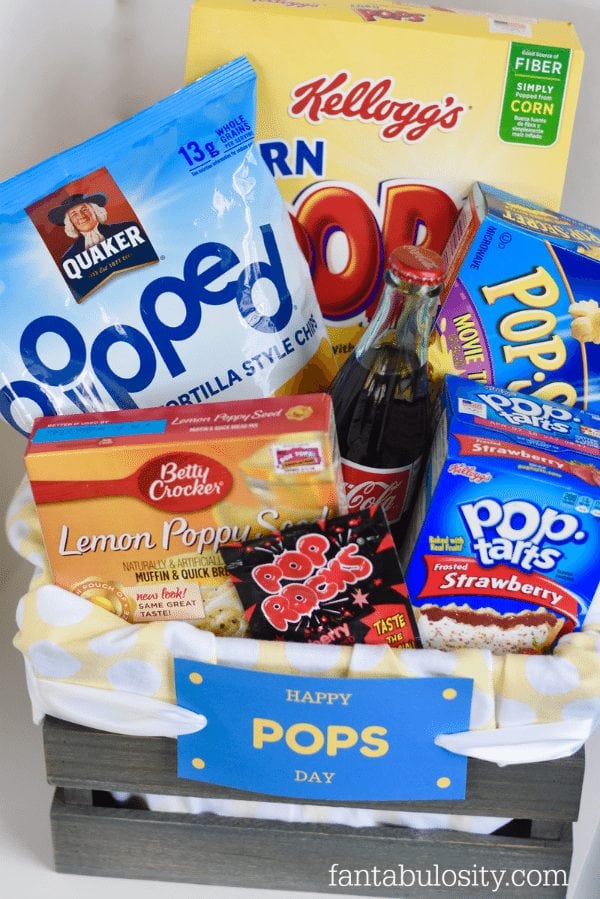
    Happy Pops Day! Father's Day Gift Idea! Love this! https://fantabulosity.com

    Happy “POPS” Day!

    When Father’s Day comes around again this year, keep this gift basket idea in mind. Or, if you’re looking for a gift idea for dad for his birthday or any other holiday… you can easily change this to “You’re the Best, “Pop!” Get the tutorial for this Father’s Day Gift Basket Idea!

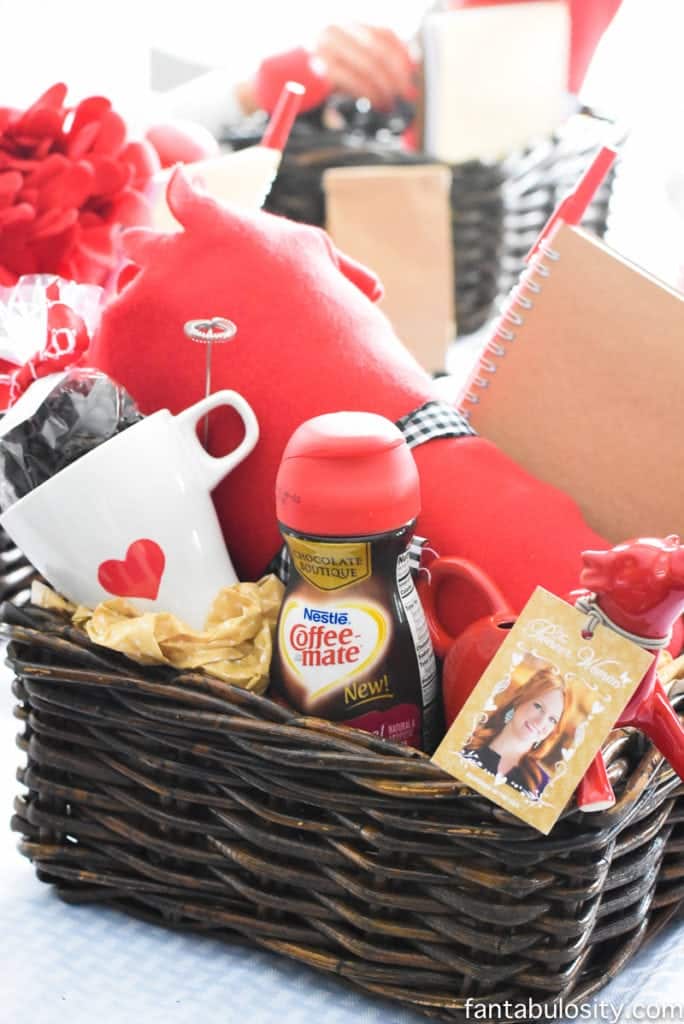
    I can SO do this!!! Coffee Bar Party: "You've Warmed My Heart," theme! LOVE what she did as a random act of kindness with her guests! DIY Coffee bar ideas galore, and SO easy! fantabulosity.com

    “You’ve Warmed my Heart” Thank You Gift Basket

    If there is someone in your life that you want to “thank,” a “You’ve Warmed my Heart,” gift basket may be fitting for the occasion. See how we incorporated these gift baskets in with a coffee bar party “Thank you” gift basket!

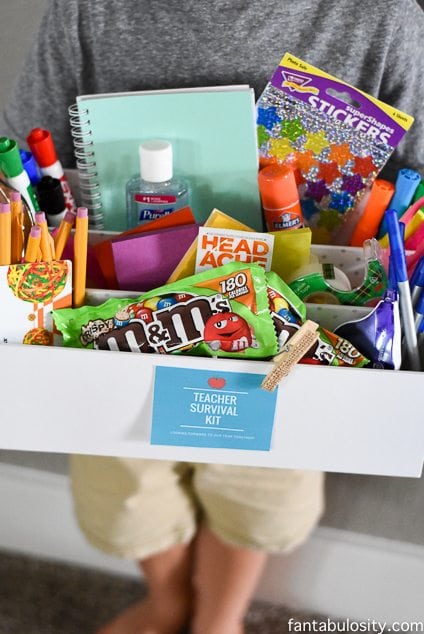
    Teacher Survival Kit - Teacher Gift Idea https://fantabulosity.com

    Teacher Survival Kit

    What better way to thank a teacher, or prepare them for the school year, than a Teacher Survival Kit!? Get the tutorial of what all we put in our teacher gift basket idea!

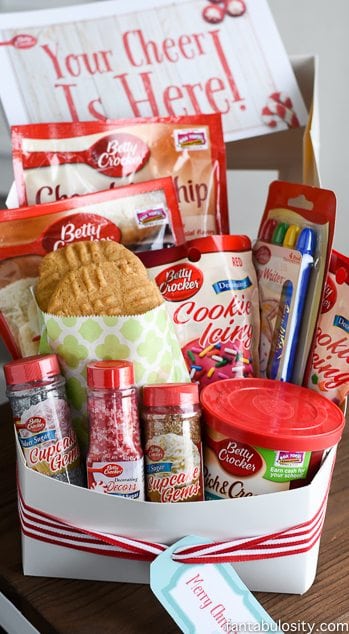
    Holiday Baking Kit, DIY Christmas gift idea

    Holiday Baking Kit

    If you know someone who LOVES to bake, gifting them with a holiday baking kit may be right up their alley! Filled with cookie and cake mixes, frosting and TONS of sprinkles… it will surely be a hit.

    Meal Care Package

    Did someone you know bring home a new baby? What about someone who’s had a rough go lately, and could use dinner delivered? This meal care package idea is a great way to show them you’re thinking about them! Get the tutorial for this Meal Care Package!

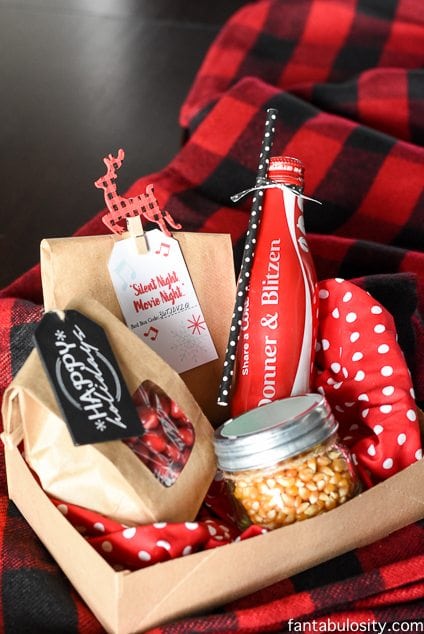
    Red Box Movie Night Gift Idea fantabulosity.com

    Movie Night In

    What a fun way to give a family a head start to a fun family night in! A gift basket (or box) filled with the goodies to create a fun family movie night! Get the tutorial for this Movie Night Gift Basket!

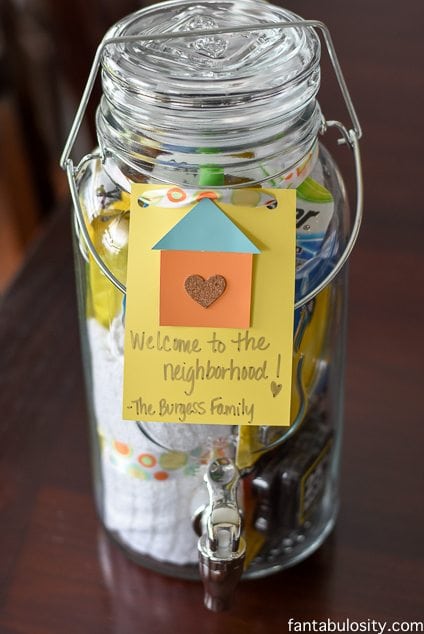
    DIY House Warming Gift Ideas. Mason Jar Drink dispenser with all of those "always need," items when moving in! Awesome! https://fantabulosity.com

    Welcome to the Neighborhood Gift Idea

    Filling a drink dispenser full of items that someone may need for all of the moving struggles and breaking in the new house, is a great way to show someone you’re thinking about them during the move! Plus, the drink dispenser can be used to fill with a favorite beverage to quench the thirst after all of that hard labor of moving and decorating! Get the tutorial for this Welcome to the Neighborhood Gift Basket Idea!

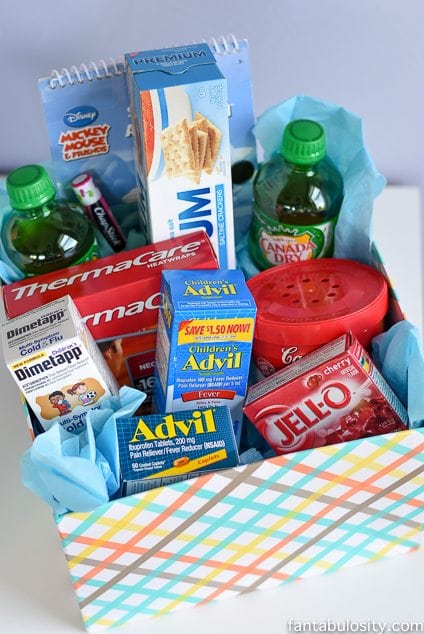
    Sick Kit - Get Well Gift for Kids & Mom https://fantabulosity.com

    TLC Kit- Get Well Soon!

    Know someone under the weather? How amazing would it be to receive a gift box full of medicine and other goodies to help comfort during a time of feeling so awful!? Get the tutorial for this Get Well Gift Basket Idea!

    Have I Forgotten Any?

    Whew… now that’s a lot of gift basket ideas right?! I sure hope you found one that you want to create too! Is there a gift basket idea that you’d love to see added to this list? Let me know in the comments below, and I’ll see if I can create something!

    Halloween Party Ideas

    October 23, 2017

    Halloween Party Ideas for kids - Fantabulosity.com

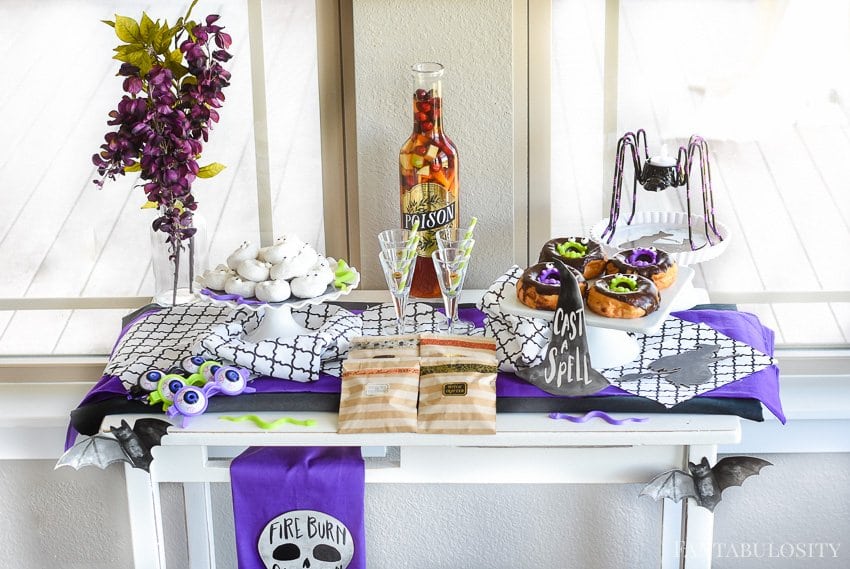
    Halloween Party Ideas: A fun, easy party table for snacks for trick-or-treaters or for a party that you’re hosting!

    Halloween Party Ideas for kids - Fantabulosity.com

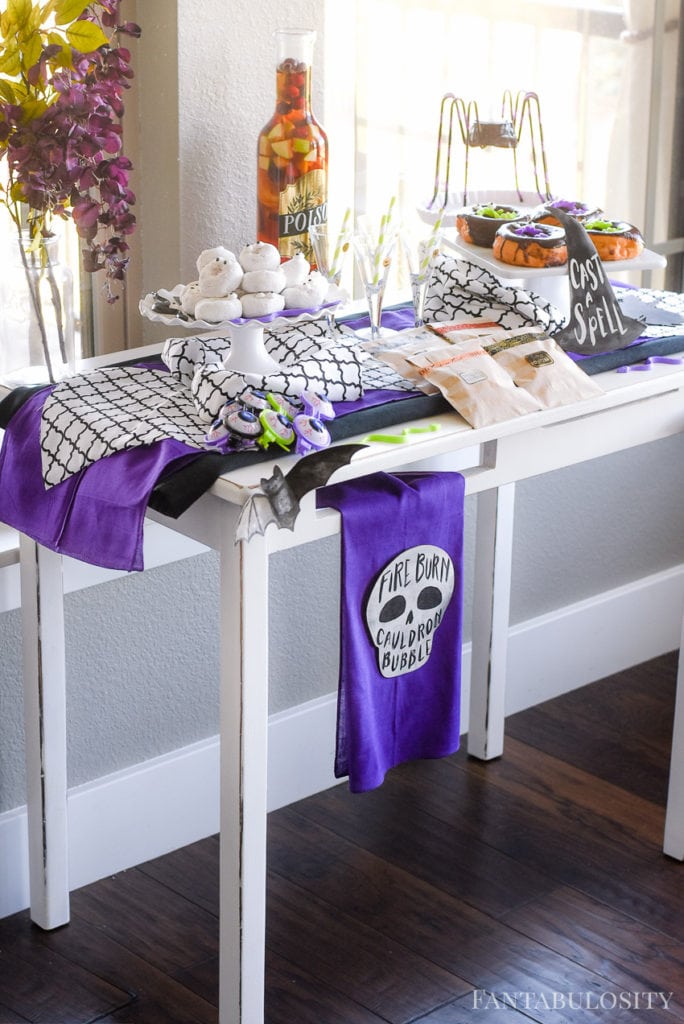
    A Wicked Play Date – Halloween Party Tablescape

    My boys are at the age where just about ANYTHING is fun, or can be turned in to a lot of fun. So each time a holiday rolls around, they get extremely excited and love to get in to the theme.

    Halloween is probably one of their favorites. They dress up in costumes all year long (and love making these Nutter Butter mummy cookies) so when they’re “supposed” to wear costumes to Halloween parties and for trick or treating… well they’re on cloud 9.

    This year, as part of the Make it Martha team for Martha Stewart.com, I received fun goodies from the Martha Stewart line at Michael’s and thought I’d create a fun play date party table for the kids and a couple of their friends.

    Halloween Party Decor

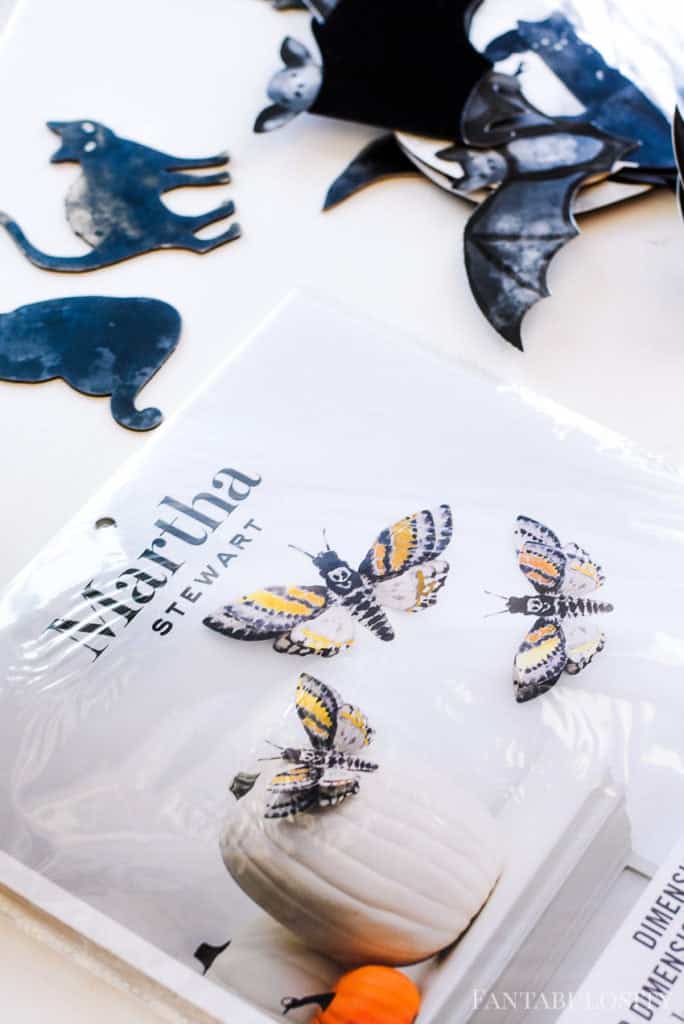
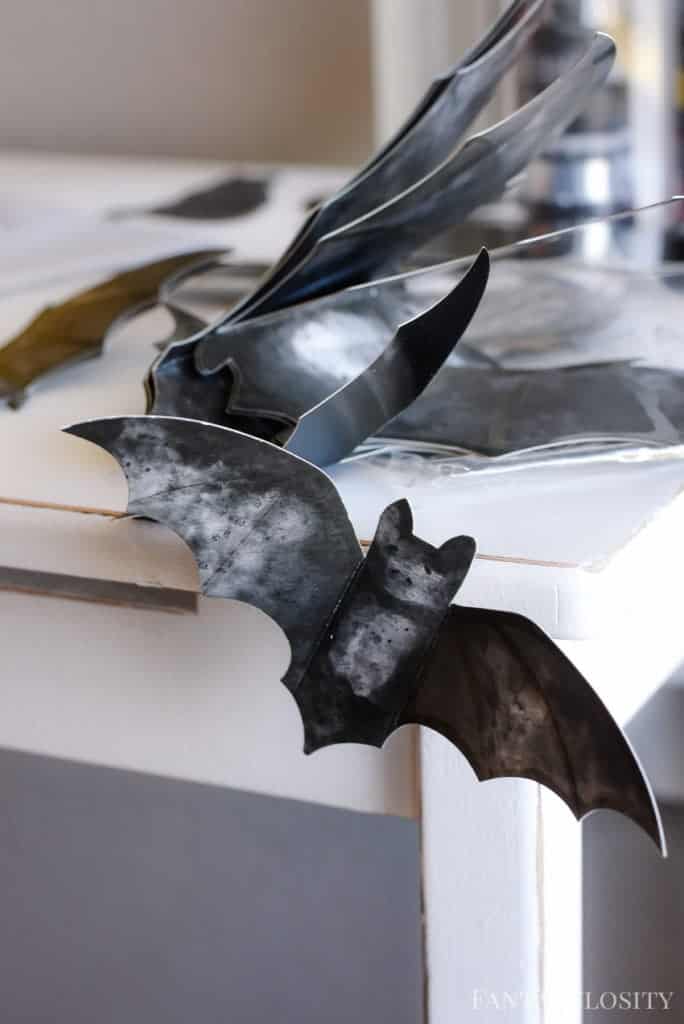
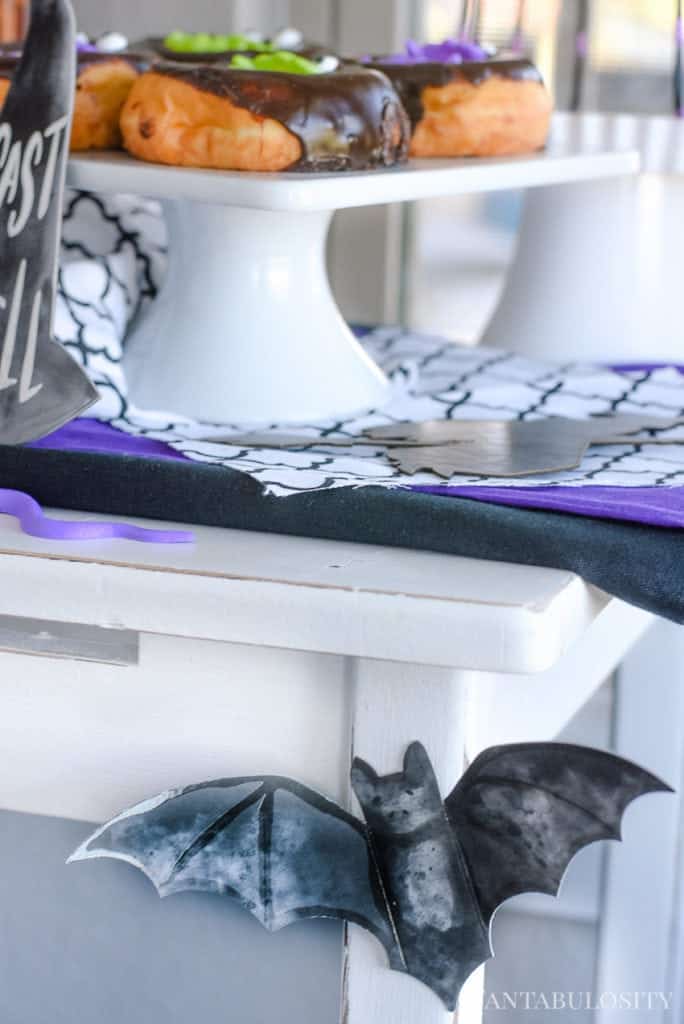
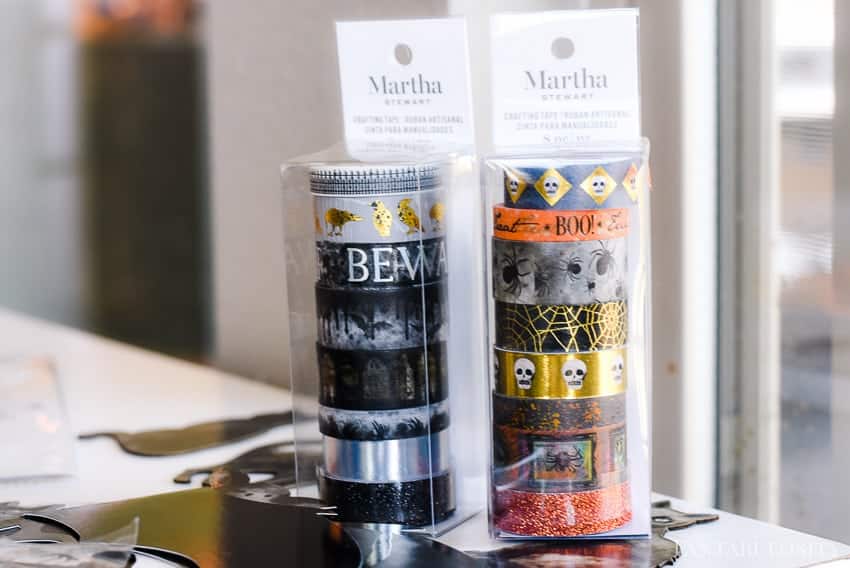
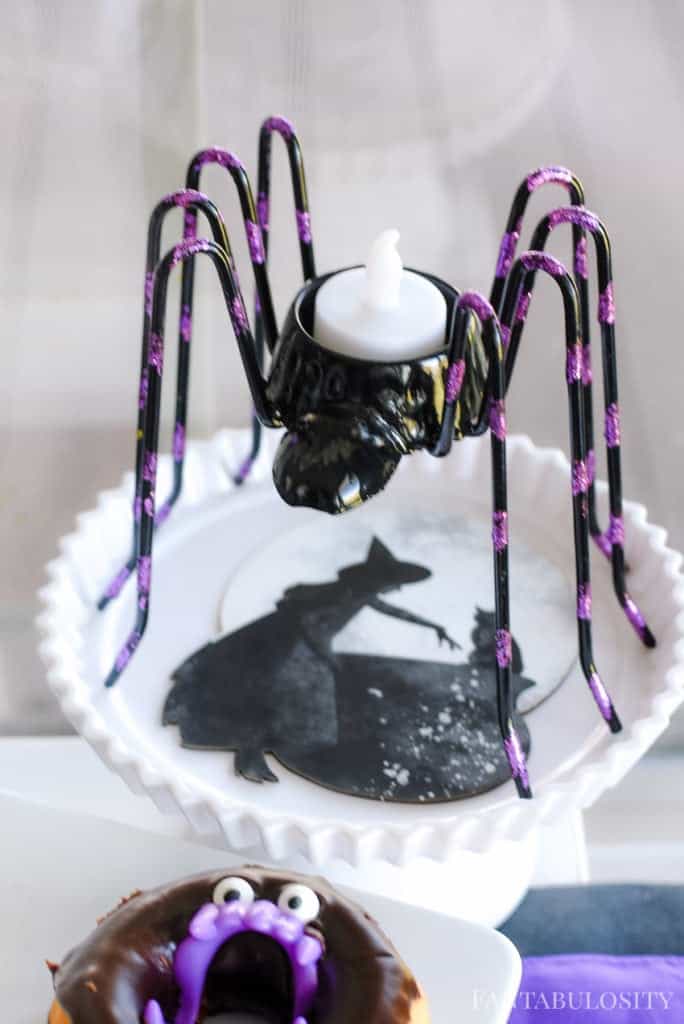
    The party-ready Halloween decor made decorating for this wicked play date, SO easy. The dimensional decor, diecuts, washi tape, and other goodies all went together so well that it took out all of the guesswork of styling the table.

    Martha Stewart Halloween Decorations for Party at Michael's - Fantabulosity.com
    Martha Stewart Halloween Decorations for Party at Michael's - Fantabulosity.com
    Halloween Party Decorating Ideas - Martha Stewart from Michael's
    Halloween Party Decorating Ideas - Martha Stewart Die Cuts
    Halloween Washi Tape from Martha Stewart from Michael's - Fantabulosity.com

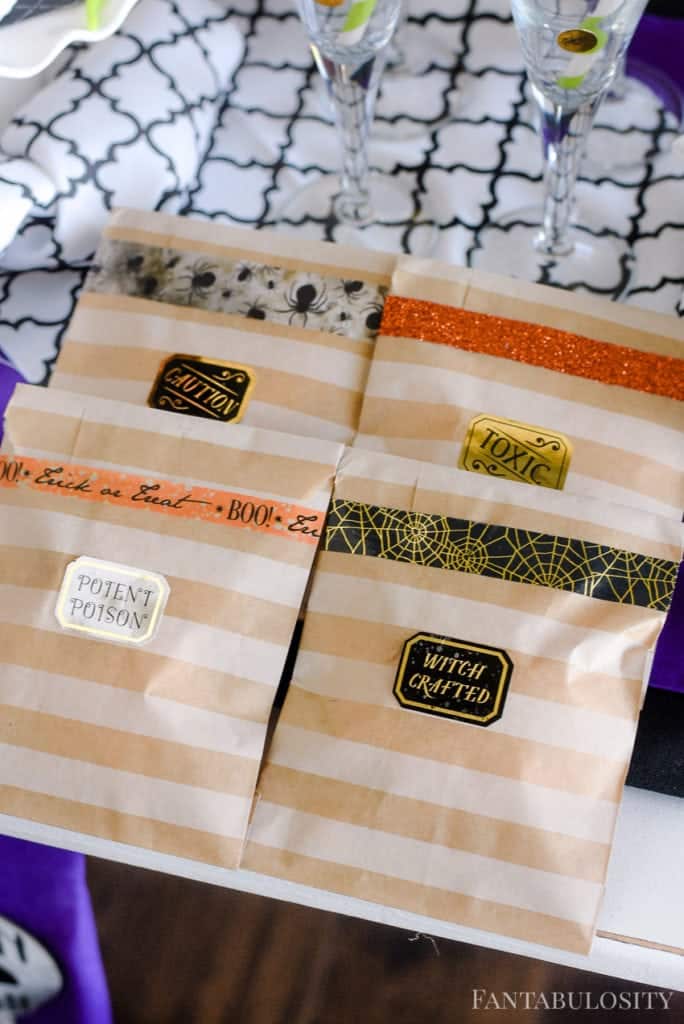
    I already had the kraft favor bags on hand, and decided to dress them up with the washi tape and stickers from the collection, and it was the perfect touch! (And SO SO easy.)

    Fill treat bags with this Halloween Snack Mix and you’ll have very happy guests!

    Halloween Party Favors - Washi Tape and treat bags
    Halloween Party Die Cuts from Martha Stewart are an easy way to add tabletop decor
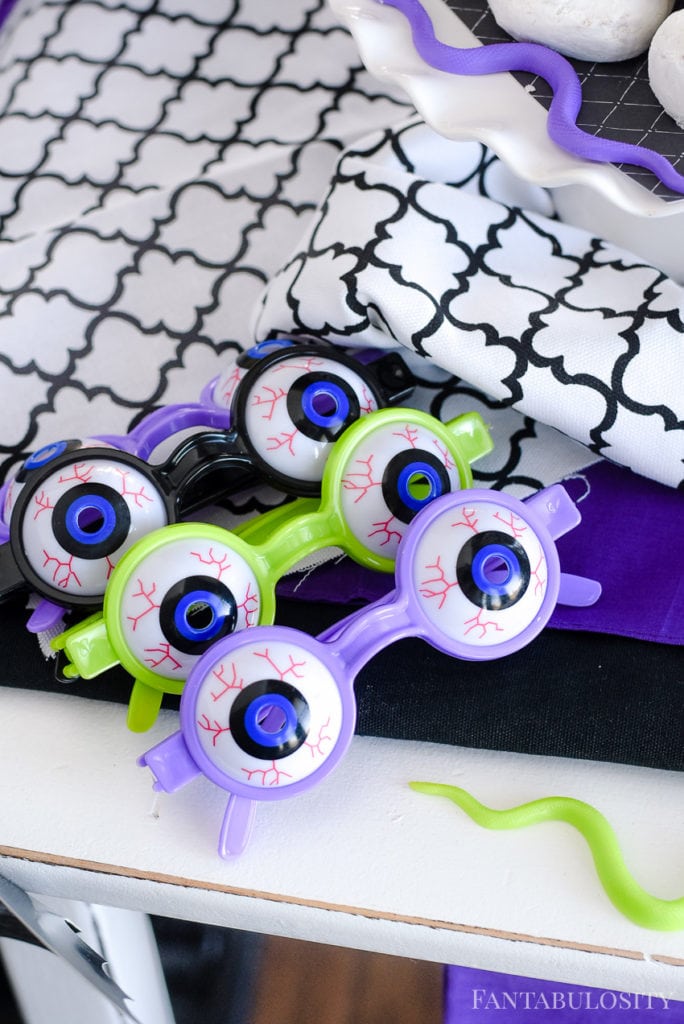
    Halloween Party Favors - Monster Eye Glasses

    Halloween Party Food

    My boys LOVE a good donut. I guess it’s safe to say that they get that from their mother. (It’s my rainy day pick-me-up, kryptonite.) So after realizing that they were about to be overflowing with candy from the school parties and actual trick or treating on Halloween, I wanted something other than candy.

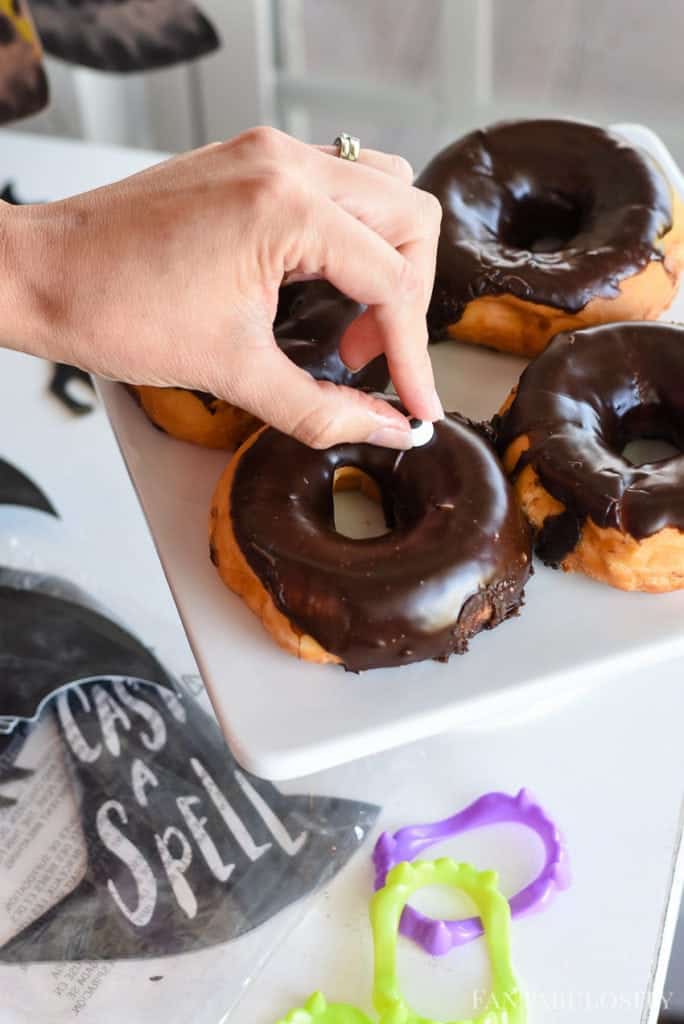
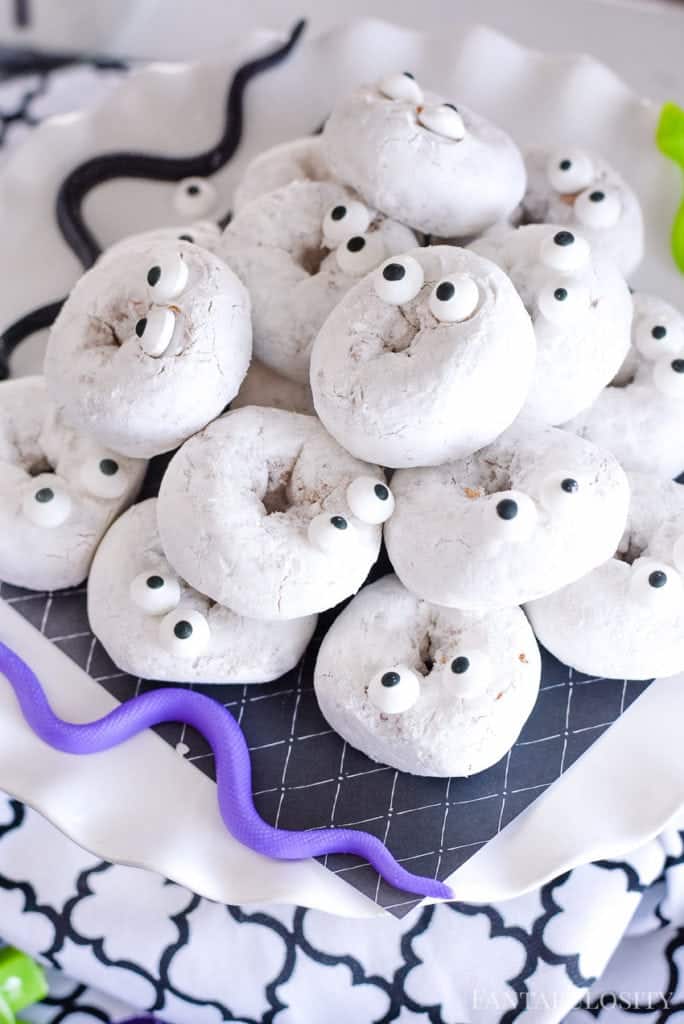
    So donuts it is! (Besides… I secretly wanted an excuse to buy both kinds of donuts.) After seeing others put scary teeth inside donuts at Halloween parties, it was a MUST for these too. I literally chucked every time I looked at these. Then, with the white powdered donuts… well those just needed some googly eyes to make them a little more fun.

    I wish I would have made this pumpkin patch with strawberry pumpkins too but I ran out of time!

    Monster Donuts for a Halloween Party for kids - food idea
    Halloween Party Food Ideas - Monster Donuts Fantabulosity.com

    If you love these donuts, you’re also going to love how easy it is to make these mummy rice krispie treats!

    Halloween Donuts - Candy Eyes and white powdered donuts. So cute for a halloween party idea

    Halloween Party Drink

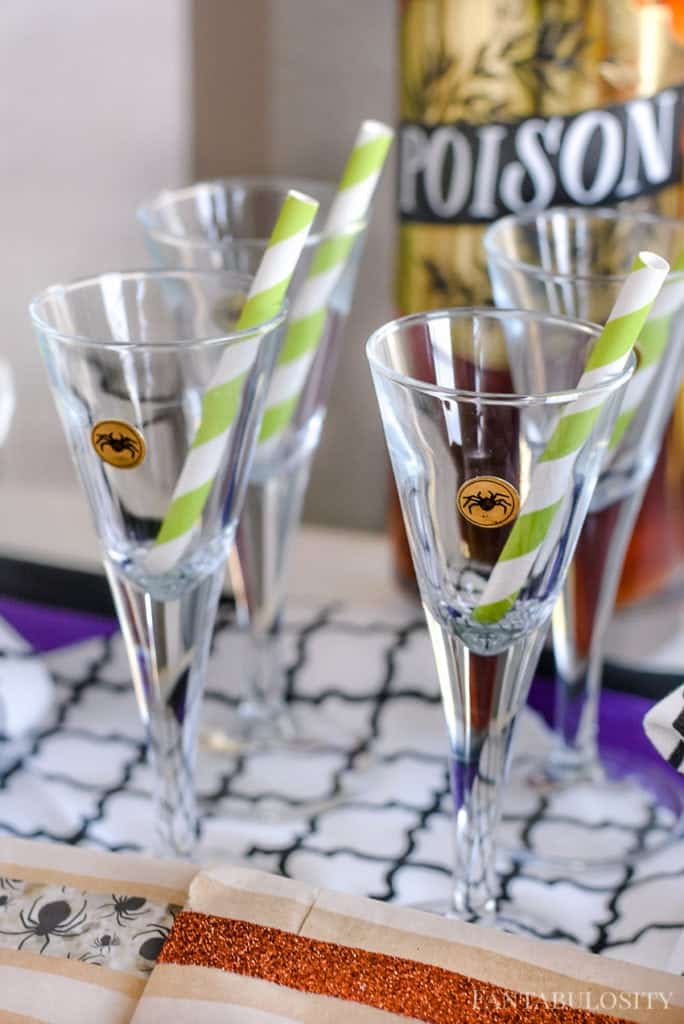
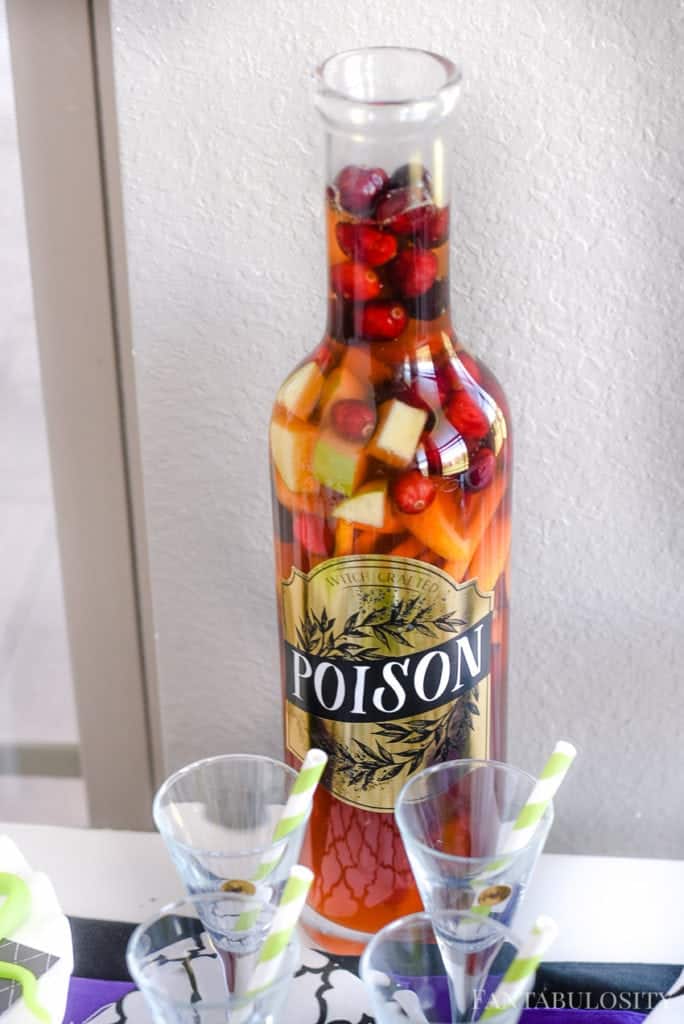
    For some reason when I think of drinks for a Halloween party, I think of RED. So we loved making this fruit punch recipe and dicing up fruit to add some character.

    The “poison” stickers really made a statement though! You can get these poison stickers if you’d like to do the same!

    Halloween Party Drink Idea - poison potion
    Halloween Party Drink Ideas - Poison Potion - Sangria Mocktail

    Are You Hosting A Halloween Party?

    The boys absolutely swooned over the table full of tricks & treats, and it was the perfect jumpstart for all of the Halloween festivities!

    If you’re looking for a fun Halloween craft for kids to make, this Ghost craft idea is fun for kiddos as little as toddlers to older kids!

    Halloween Party Ideas for Kids - Martha Stewart from Michael's - Fantabulosity
    Halloween Party Play Date Ideas - Fantabulosity

    I mean… those eyes, right?! I rarely say no to this one.

    To check out more of our parties and holiday-themed ideas, you can browse away all things holidays, especially if you’d love to see another purple party like this one!

    Peppermint Latte Recipe

    August 27, 2022

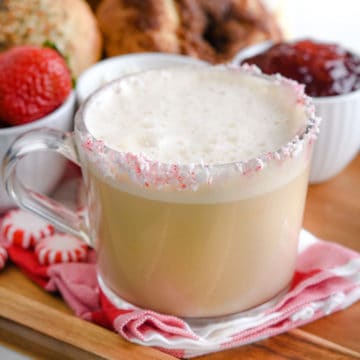
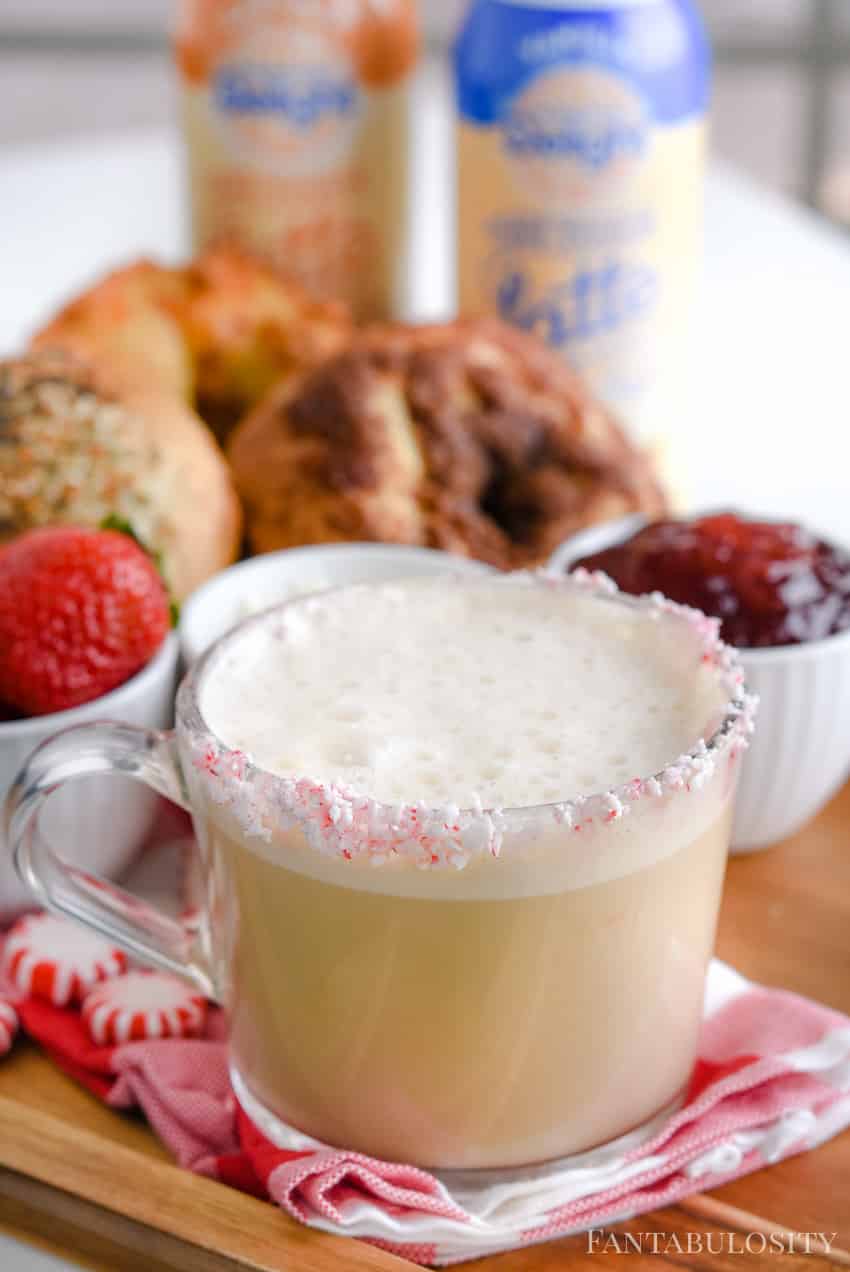
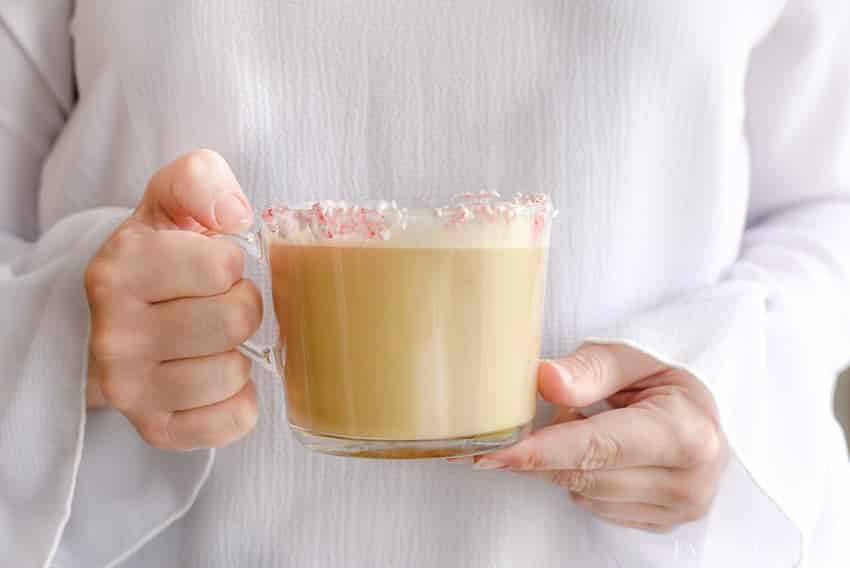
    peppermint latte in glass mug

    Peppermint Latte Recipe: Save money and make your favorite seasonal latte at home, using your favorite vanilla creamer, peppermint extract, coffee, and a few other simple ingredients!

    We love making our favorite coffee shop drinks at home, so make sure to check out our iced coffee recipe and our whipped coffee recipe too!

    Peppermint Vanilla Latte Recipe - Perfect for the holidays

    Why you’ll love this recipe:

    Every holiday season, if you look forward to all of the peppermint drinks at the coffee shop but aren’t a fan of the amount of money you spend each time you get one… then this may just be your new best friend! (I fell in love with a Dirty Chai latte at our local coffee shop, so it was a must to make it at home.)

    This peppermint latte can be made to suit your favorite flavors and uses simple ingredients to help you get that holiday feeling, in your own home! (Serve it with this No-Bake Candy Cane Pie recipe, for the ultimate peppermint experience!)

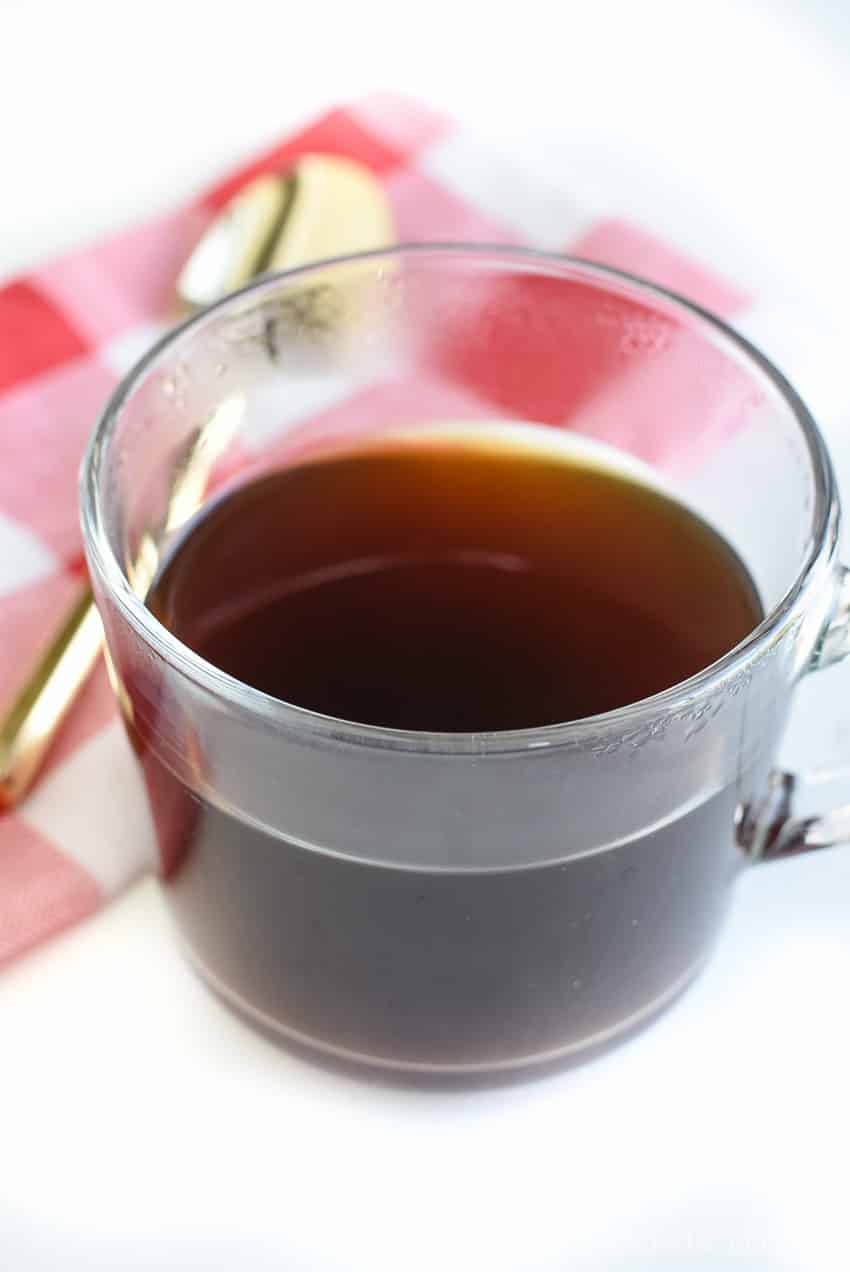
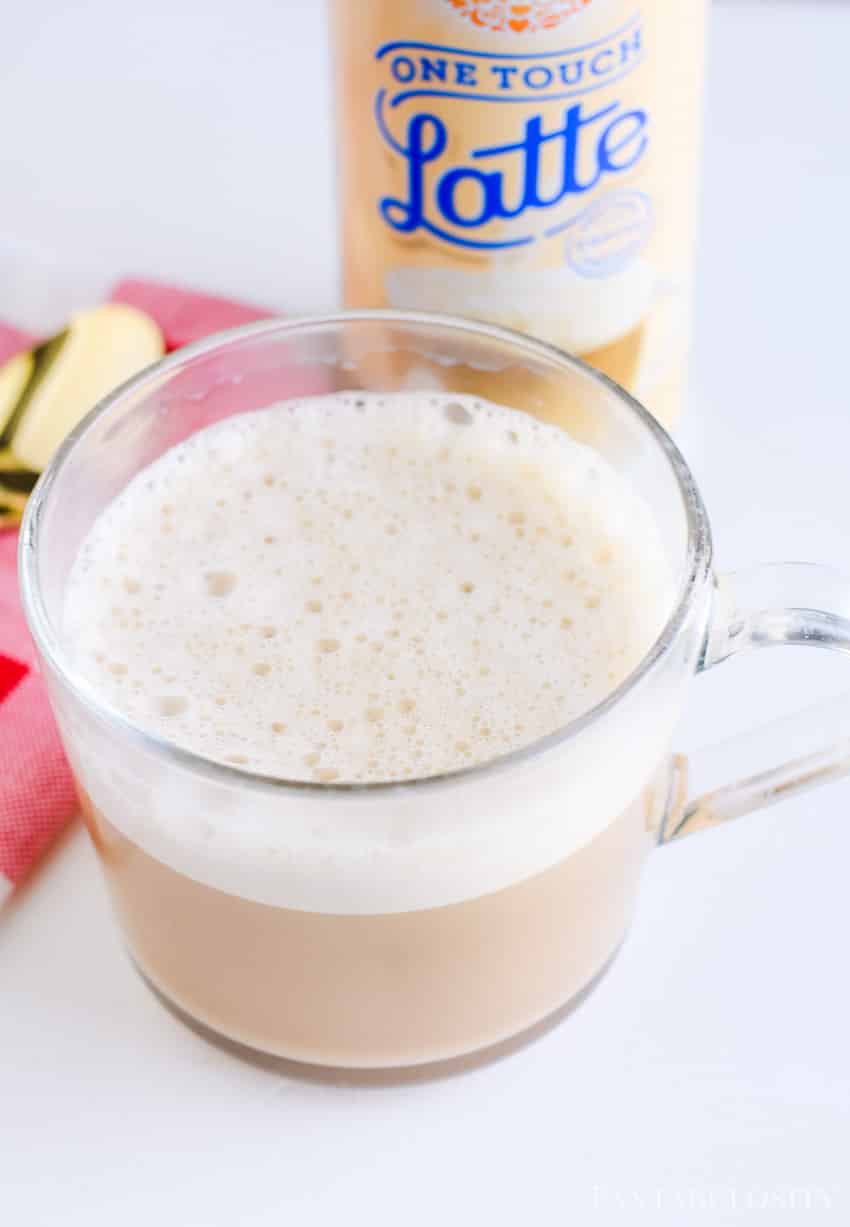
    Fill ⅔ full of coffee and then spray the One Touch Latte in!

    Ingredients

    • ¾ cup black coffee
    • 1 teaspoon peppermint extract
    • 2 Tablespoons vanilla creamer
    • whipped cream, optional
    • crushed peppermint candies for garnish; optional
    It's a latte in a jiffy! Peppermint vanilla latte

    Instructions

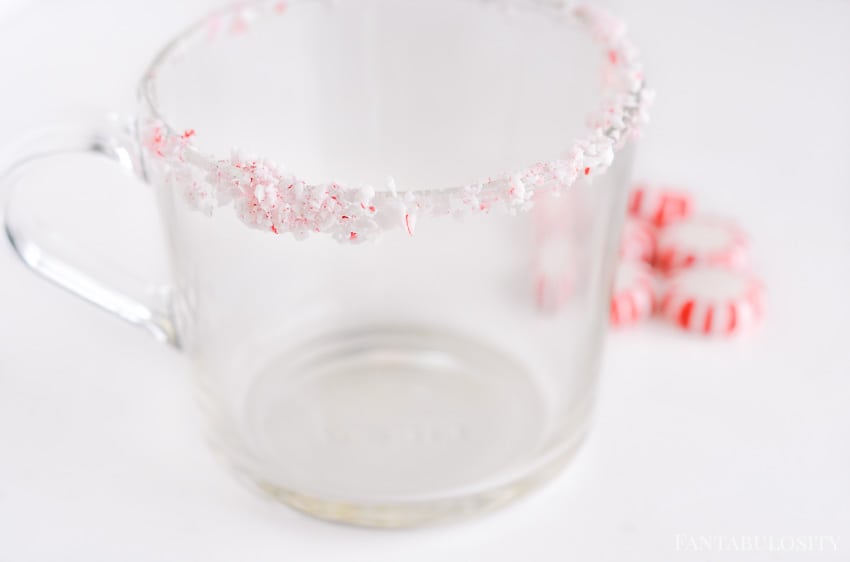
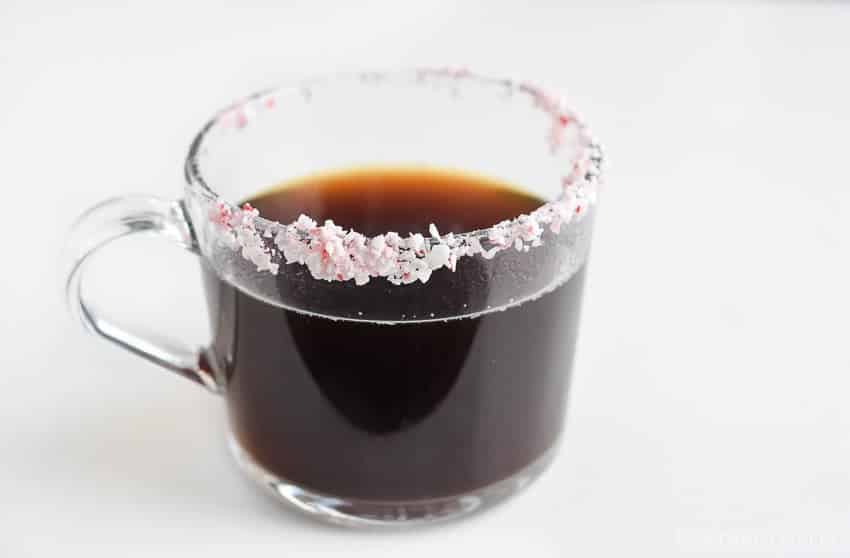
    If you’d love to have the crushed peppermint candy around the rim as you see here:

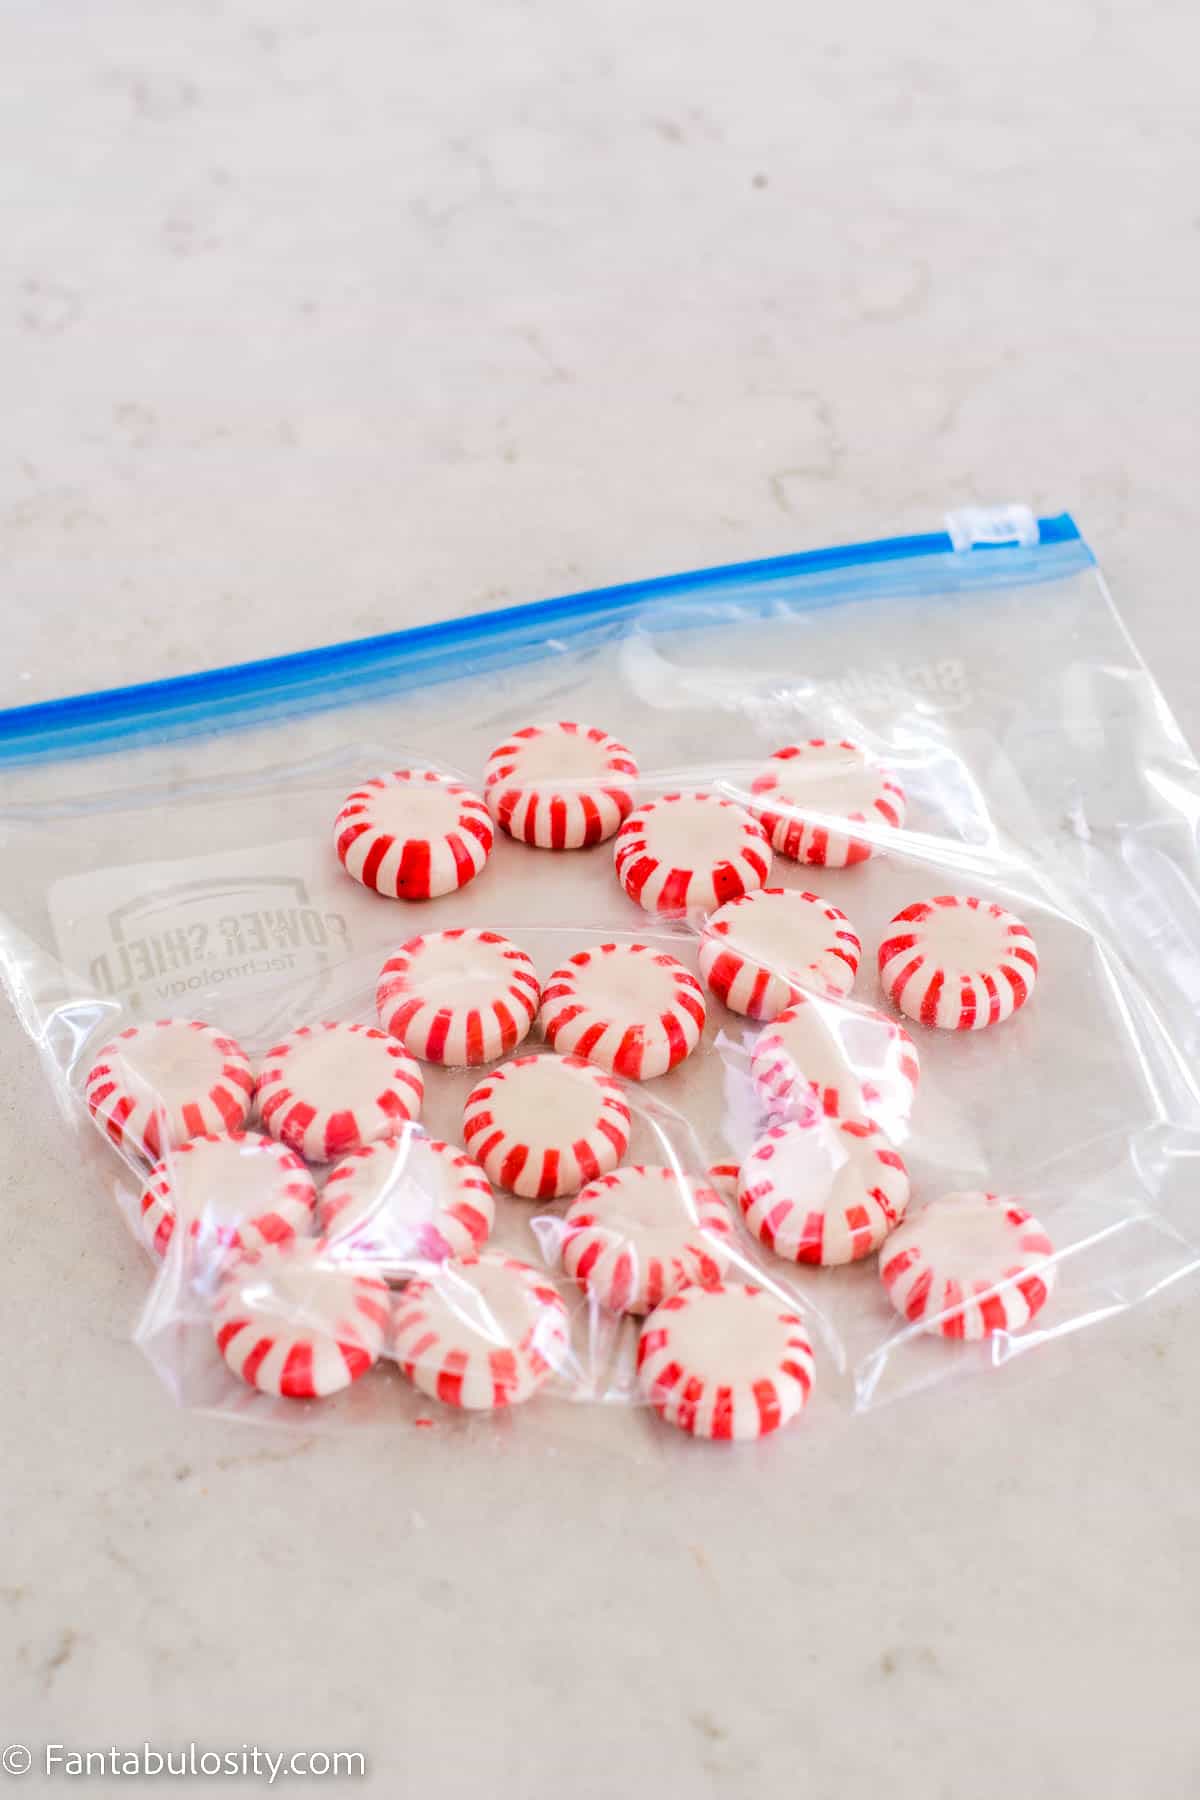
    1. Take 3-4 peppermint candies and place them into a plastic ziptop bag.
    2. Using a mallet or rolling pin, crush the peppermints into small pieces.
    3. Using your finger, wet the rim of your coffee cup with water. Dip the rim of your cup into a saucer of crushed peppermints.
    Rim your coffee glass with crushed peppermint for an added flair to your holiday latte!
    1. Fill your coffee cup ⅔ full, with black coffee.
    Peppermint Vanilla Latte Recipe - One Touch Latte
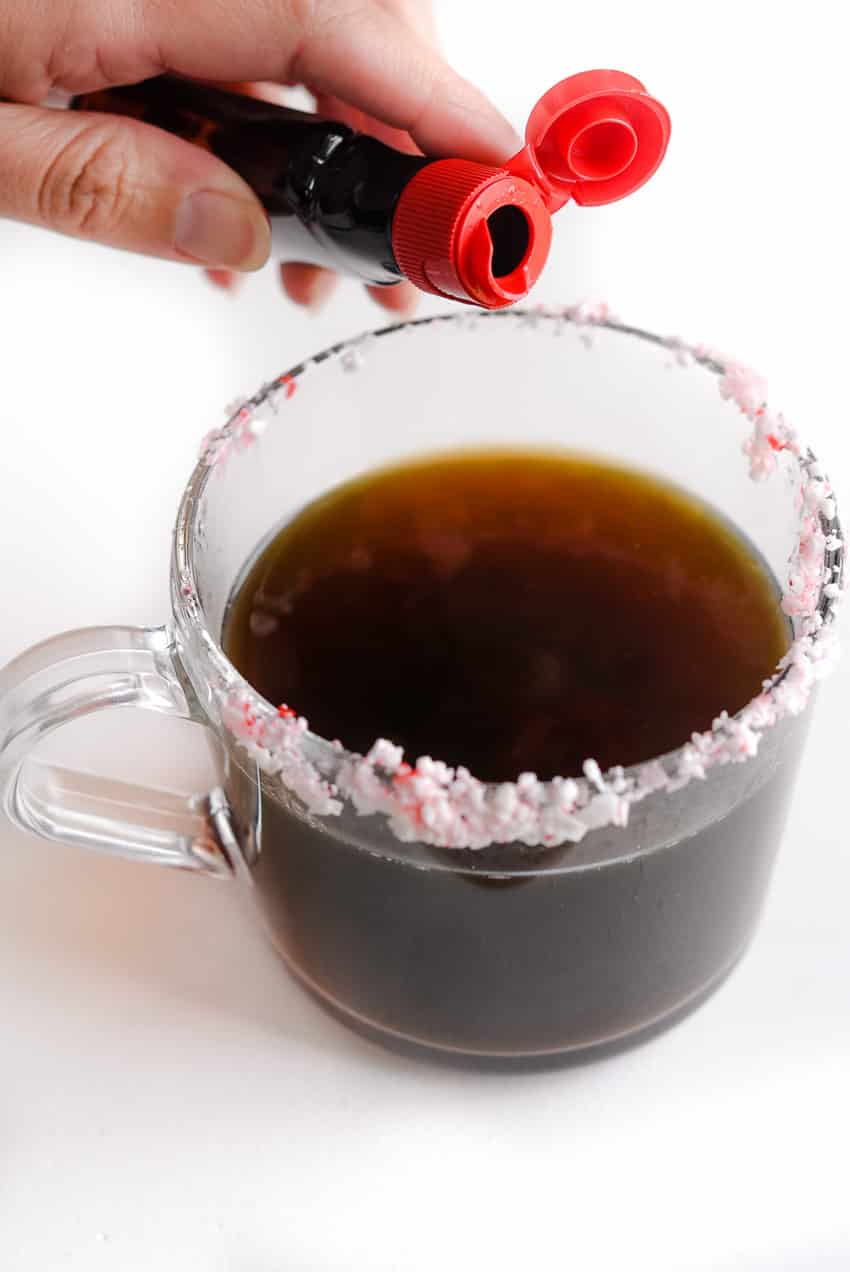
    1. Next, add about a teaspoon of peppermint extract and stir.
    Add teaspoon of peppermint extract to your coffee
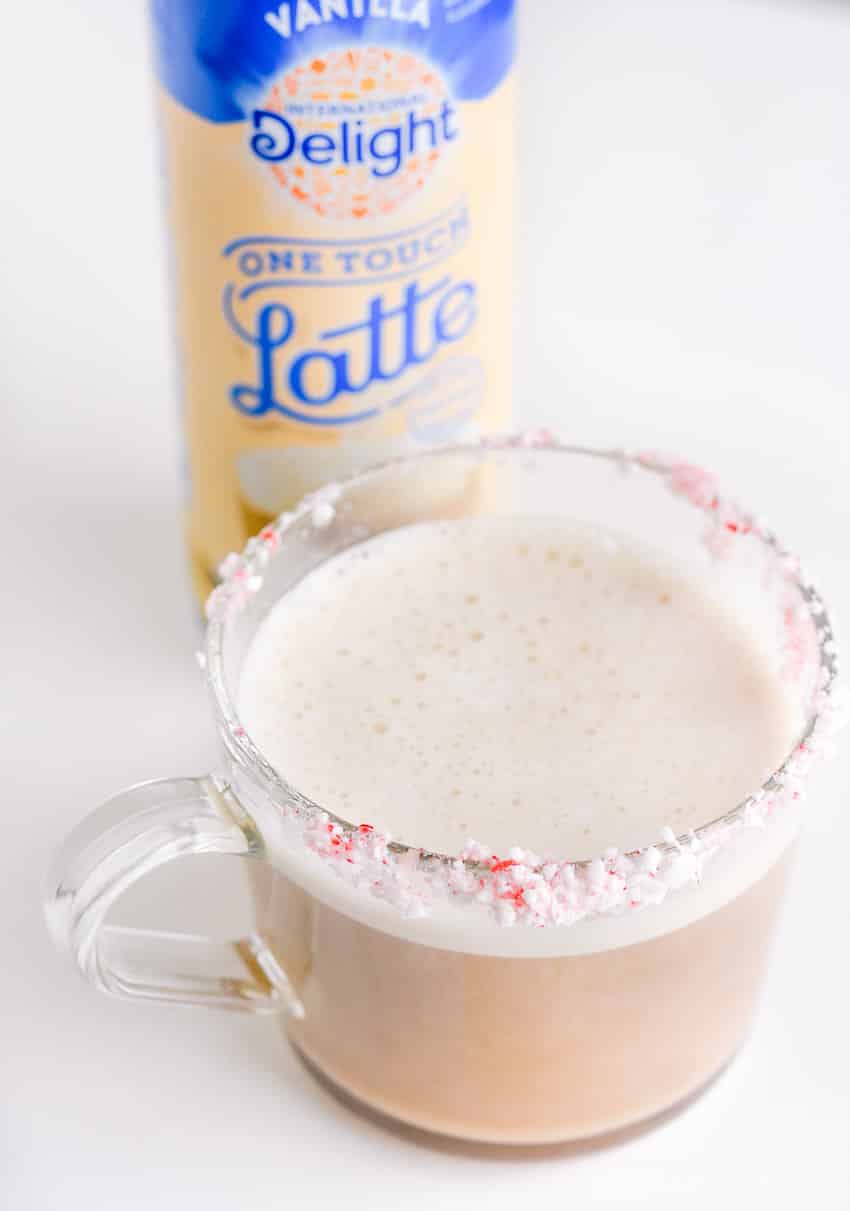
    1. Pour the amount of vanilla creamer in to your coffee, as you’d prefer.
    2. If desired, add whipped cream to the top of the latte (or use a frother to reach the “look” as you see in the photos).
    Use the Vanilla International Delight Vanilla One Touch Latte
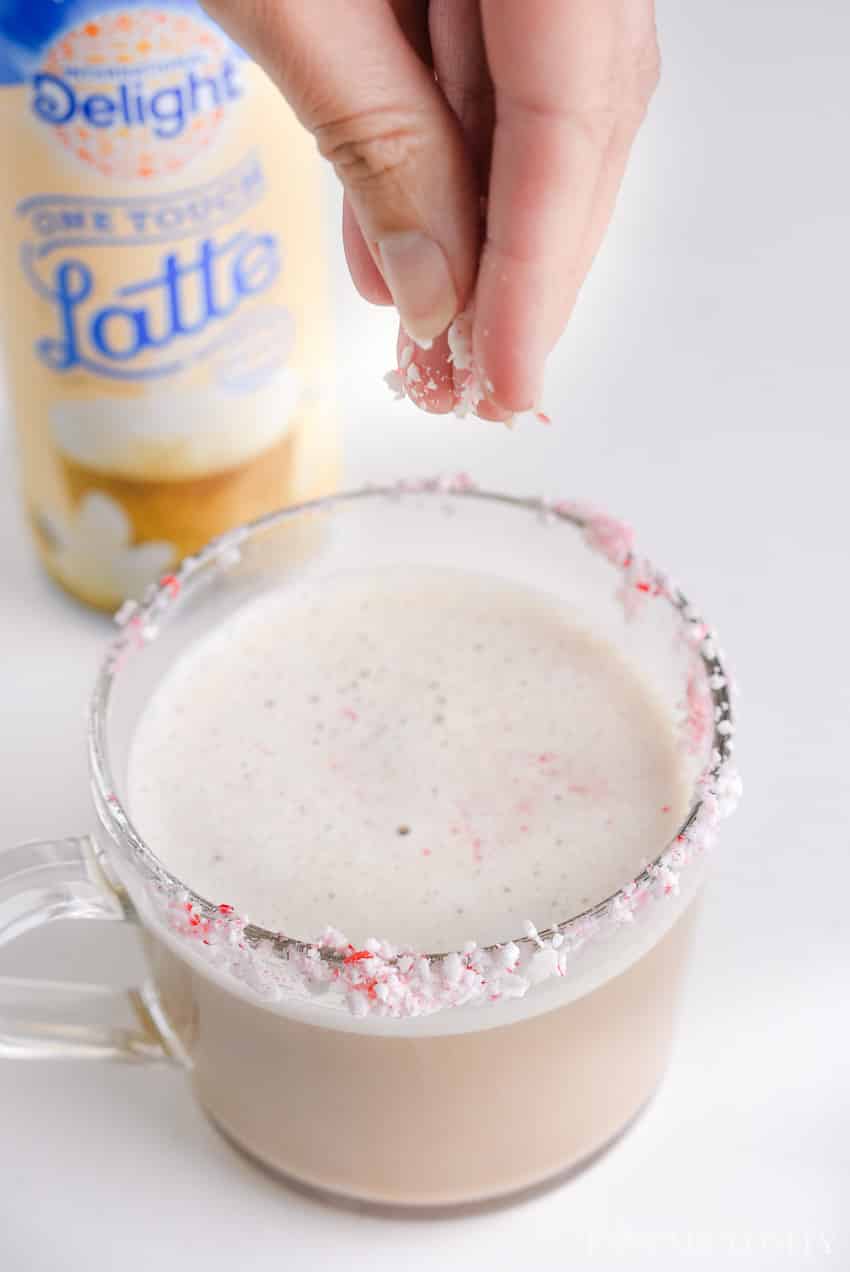
    1. Optional: Sprinkle in a little more crushed peppermint on top of the froth, and serve!
    Sprinkle in a little more crushed peppermint for the vanilla latte

    Substitutions

    You can easily change things up to reflect different flavors if you’re not looking for, or want top change things up from a peppermint latte recipe! You can use items such as:

    • almond whipped cream
    • different crushed candies
    • different flavors of extract (think butterscotch, or vanilla)
    • sprinkles on mini chocolate chips and drizzle chocolate syrup for a peppermint mocha
    Peppermint Vanilla Latte Recipe - Perfect holiday latte drink idea!

    I’d love to hear what kind of latte you want to make now! Let me know in the comments below!

    Mmmm! A peppermint vanilla latte sounds incredible.

    Did you make this? I’d be so grateful if you left a “star” rating below to let me know what you thought! Then, the next time you need a quick and easy recipe, come back to Fantabulosity to browse all of my easy recipes!

    Recipe

    peppermint latte in glass mug
    Print Pin
    5 from 3 votes

    Peppermint Latte Recipe

    Peppermint Latte: Save money and make your favorite seasonal latte at home, using your favorite vanilla creamer, peppermint extract, coffee, and a few other simple ingredients!
    Course Drinks
    Cuisine American
    Prep Time 10 minutes minutes
    Total Time 10 minutes minutes
    Servings 1 latte
    Calories 52kcal
    Author Jessica Burgess

    Ingredients

    • ¾ cup black coffee
    • 1 teaspoon peppermint extract
    • 2 Tablespoons vanilla creamer
    • crushed peppermint candies for garnish; optional

    Instructions

    • Take 3-4 peppermint candies and place them into a plastic ziptop bag.
    • Using a mallet or rolling pin, crush the peppermints into small pieces.
    • Using your finger, wet the rim of your coffee cup with water. Dip the rim of your cup into a saucer of crushed peppermints.
    • Fill your coffee cup ⅔ full, of black coffee.
    • Add 1 teaspoon peppermint extract, stir.
    • Pour in vanilla creamer, and stir or use a frother to achieve the "foam" look that so many lattes have.
    • If desired, sprinkle in a little more crushed peppermint candies to the top of your latte, and serve!

    Nutrition

    Serving: 1latte | Calories: 52kcal | Carbohydrates: 1g | Protein: 1g | Fat: 3g | Saturated Fat: 2g | Cholesterol: 11mg | Sodium: 16mg | Potassium: 126mg | Sugar: 8g | Vitamin A: 105IU | Calcium: 31mg

    Overnight Self Care Kit Gift Idea

    November 22, 2017

    Overnight Toiletries Bag Gift Idea - Self Care

    This post has been sponsored by Philips Sonicare™ and I have received free product to review. All thoughts and opinions are my own.

    Overnight Self Care Kit Gift Idea: A gift idea that keeps on giving, with the makeup bag and other goodies that she’d never buy for herself, who deserves so much!

    Overnight Toiletries Bag Gift Idea - Self Care

    Overnight Self Care Kit Gift Idea

    I am such a sucker for giving gift baskets and gifts that are full of other little gifts. I’m especially a fan of giving gifts that keep on giving, by filling a container or object with something that can be used over and over again! It brings a whole new level to a gift when it’s something they can hold on to and use again and again, instead of tossing it in the trash. (i.e. paper gift bag)

    Taking Care of the “Carer”

    Someone on my gift-giving list, deserves to get a little extra treatment this year. My mom is not only the woman who took care of me from day ONE, but has continued to be someone in my life that I can turn to when I need support, and someone who will celebrate the special things with me.

    When I sat and thought about what to get her this year, I knew it was time to repay her (although I’ll NEVER be able to repay her fully) for the love, hard work, and CARE that she has given me, all 34 years of my life. I decided to create a gift for her that she could take care of herself with for a change, and filled it with items she may never purchase for herself. With this gift, I’m going to encourage her to take this bag, take an overnight trip with one of her friends, and take some time for herself! I can’t wait to show you what all I put in this for her, to give you ideas of how you can create your own for someone too!

    Overnight Care Kit Gift Idea

    Philips Sonicare 2 Series

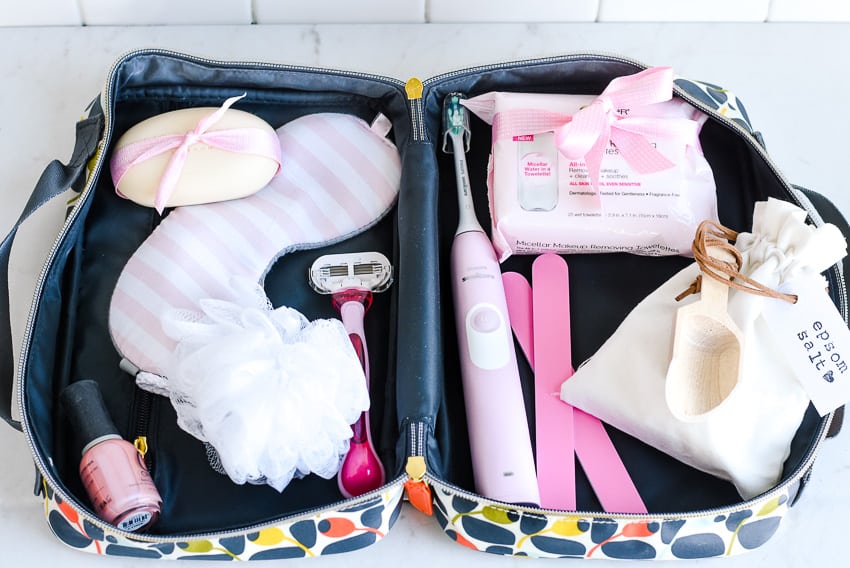
    On my monthly weekly Target run the other day, I started scouting out goodies to include in my mom’s self care kit gift. The Philips Sonicare 2 Series is definitely the hero in this gift. (I usually try to include one “wow factor” gift in each “basket” I make, and then surround it with other, smaller goodies.) When I saw that it came in PINK, it was like the gift gods were smiling down on me. Not only would my mom love something like this, but being able to get something for her that she’d normally skip buying for herself, was perfect. Then of course, the fact that it comes in pink is a huge bonus for a gift all about her!

    Sonicare toothbrush - self care gift idea

    I love how it comes apart, so it fits easily in the overnight bag and looks super classy!

    Now, if you’re making this gift for someone who’s not in to pastel pink, they come in other exclusive colors (only at Target) of blue, steel and aqua, so there’s a color for everyone in the whole family! But even if you’re not able to make an overnight gift bag for someone, solely giving the Philips Sonicare 2 Series if a brilliant gift idea. Just think… it’s another gift that keeps on giving; it gives a healthy smile all year long! I’ll fill you in more below on where and how to get one too!

    Sonicare toothbrush - Overnight gift idea

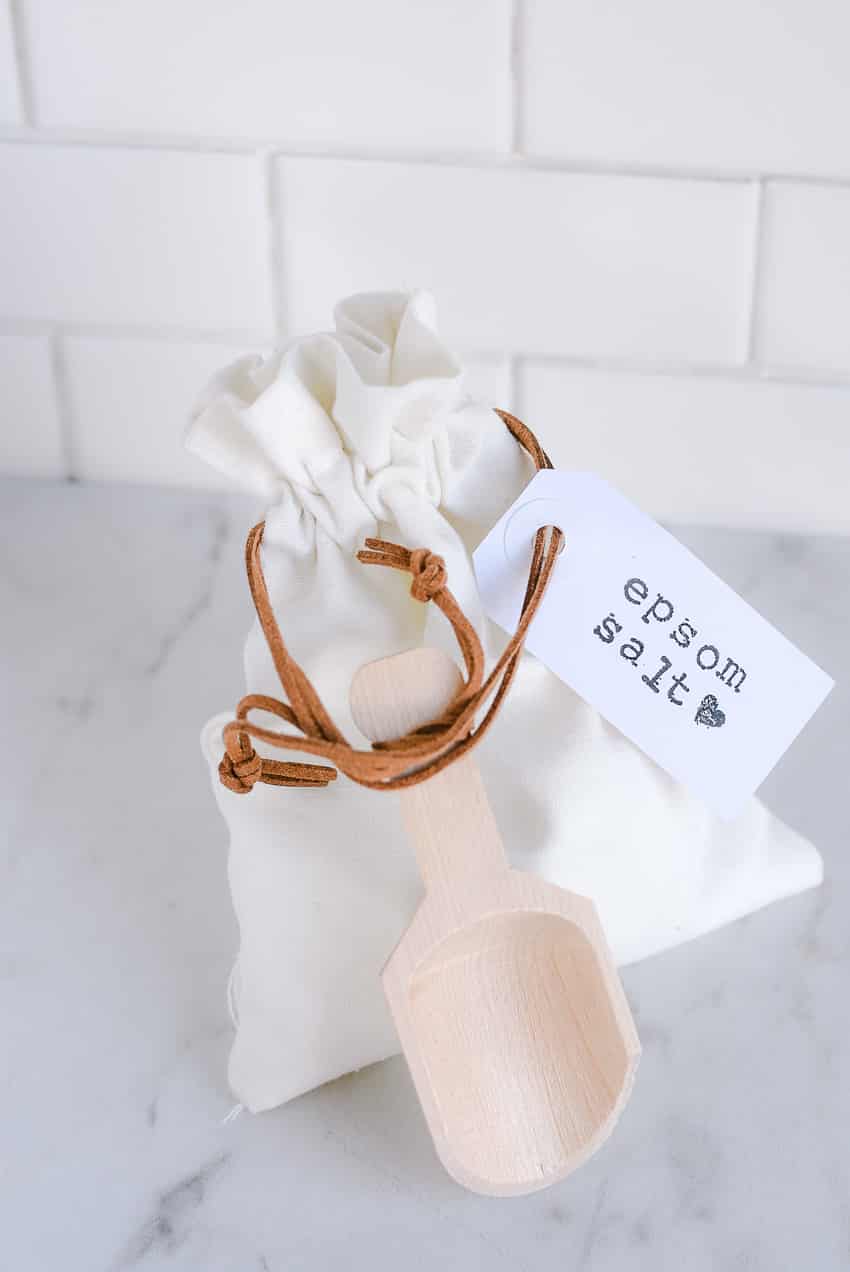
    Scented Epsom Salt

    One of my favorite gift basket tips: Remove items from the containers, and put it in my own packaging. When it comes to epsom salt, isn’t it adorable in this little fabric bag with a cute tag (quickly made with a little stamp set + blank tag) and little scoop, than in the packaged plastic store bag?

    It’s the little things that can really give your gifts a personal touch, and it’s so easy, right? You can also find different scents of epsom salt in the store, or you can make your own with essential oils! This way, Mom can take a hot bath and soak in epsom salts on her night away from home!

    Epsom Salt - Scented Overnight gift bag idea

    Makeup Remover Wipes

    Who wouldn’t love makeup remover wipes in their overnight bag? You never know, Mama may stay out late on her night away from home, and she’ll need a quick solution to remove her makeup before bed.

    Tip: Remember above how I suggested taking items out of it’s store packaging before adding it to the gift? Well sometimes it’s not the best thing to do. Removing the wipes from this packaging may make the wipes dry out. So to dress up the store packaging a bit, I simply added a matching ribbon to add a little flair!

    Face wipes for overnight care gift idea

    Nail File + Nail Polish

    On her night away, she may want to really soak in her “me time,” and take care of some things she never gets to do at home. Providing her with the tools like a nail file and polish, to feel a little more pretty and girly is an excellent addition to the gift!

    Self Care Gift Set idea overnight bag

    Soak + Sleep

    What better way to end an evening of self care with a warm bath and a peaceful night’s sleep. A bar of soap infused with relaxing scents and a luffa is an easy way to create a customized bath away from home. Then, she can head off to la-la land with an adorable eye mask to block out any light that may be poking through the curtains.

    Sleep mask, soap, etc. for an overnight gift bag idea

    Make-Up + Toiletries Bag

    Once you’ve rounded up all of the goodies, fill a make-up/toiletries bag with everything and seal it with a cute tag and ribbon. Now, she has a new bag to use over and over again… as well as other fun goodies inside!

    Overnight care for Mom - Gift idea Overnight Self Care Kit Gift Idea

    Thank you SO much for coming by to see my overnight care kit gift idea! I hope you love it, and are inspired to create your own! For more gift ideas, you can see our gift archives HERE!

    Spa at Home Gift Basket Idea

    December 4, 2017

    Spa at Home Gift Basket Idea - Fantabulosity

    This is a sponsored conversation written by me on behalf of Amopé. The opinions and text are all mine.

    A Spa at Home Gift Basket Idea: A box full of goodies for someone special to experience a day of pampering at home when they can’t get out to the spa!

    Spa at Home Gift Basket Idea - Fantabulosity

    Spa at Home Gift Basket Idea for the Holidays

    When a birthday or holiday rolls around, and I’m looking for a gift basket to create for someone, I always prefer to build my own gift basket instead of purchasing one of the pre-made baskets. The pre-made baskets are COMPLETELY ok, and are actually a great way to snag a quick gift for someone.

    But what I love about creating my own gift basket, is that I get to personalize the gift so much more, and it shows some extra thought in their gift.

    One of my favorite tips for building and creating the perfect gift basket, is to have one “wow” factor. This “wow” factor can be something big in size, more expensive than the others, or an item that could really excite the recipient!

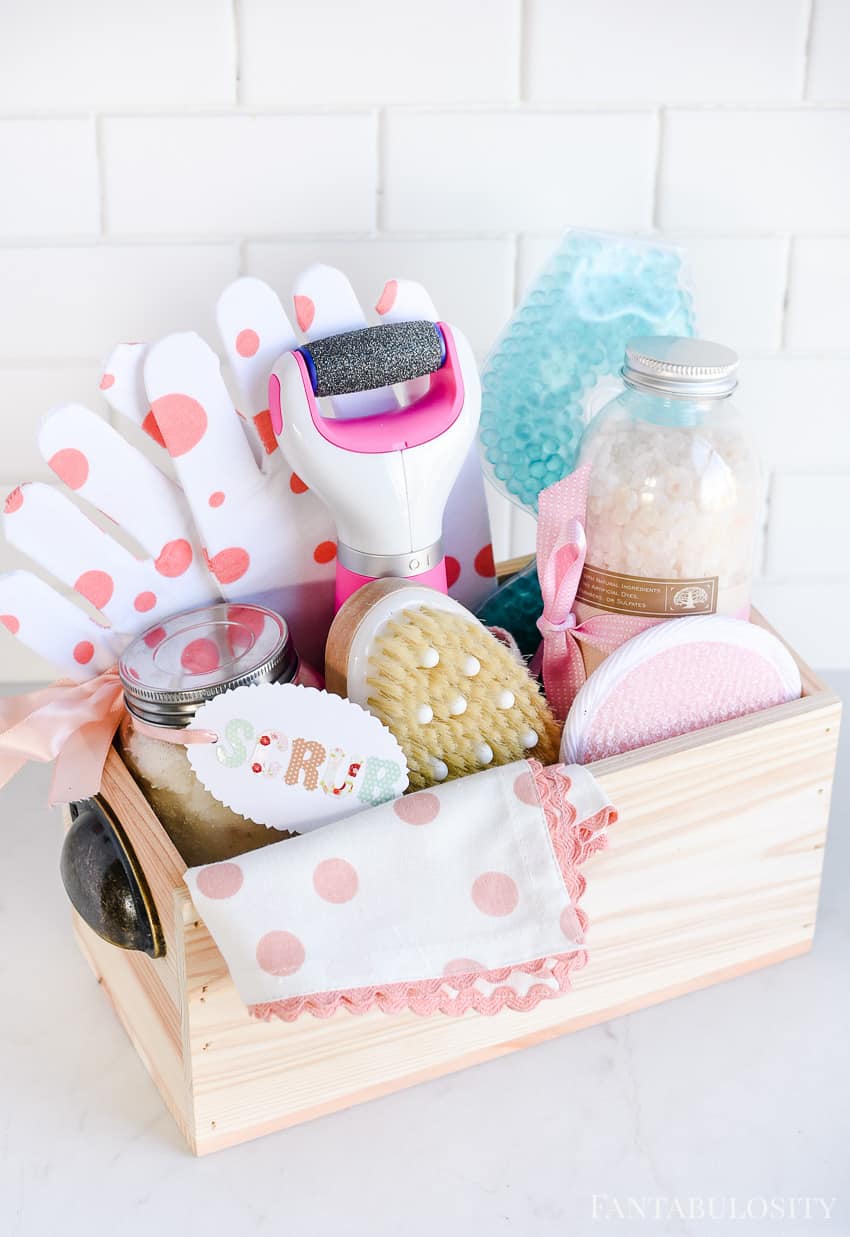
    For this “Spa at Home” gift basket that I created, I chose to have the Amopé Pedi Perfect Extra Coarse Electronic Foot File as the “wow” factor. My mom has been talking about this for months, and has been giving it out to all of her friends for birthdays. (INCLUDING snagging one for herself.) So when I planned to make a spa at home gift basket, I knew the Amopé Pedi Perfect Extra Coarse Electronic Foot File would be the heart of the gift.

    Amope Pedi Perfect in a spa gift basket idea - Fantabulosity

    I actually bought myself one from CVS, and I fell in LOVE with it immediately. The heels of my feet were so neglected during the summer, and within minutes it was like I went and had a pedicure at the salon. The extra coarse roller head with long lasting micro-abrasive particles comes with finely ground diamond crystals. It buffs away hard skin leaving you with visibly touchable smooth feet. Even my husband commented on how smooth my feet finally felt!

    Where to Get It…

    I found my Amopé Pedi Perfect Extra Coarse Electronic Foot File at my local CVS. Now, it can be a little hard to find, but you can find it in the foot care aisle.

    So you can grab one for yourself or grab one for the spa gift basket you’re building someone for the holidays! (Or both of course! No judgement here if you want to gift yourself with something for a change!)

    Spa gift idea - gift basket for her

    Spa at Home Gift Basket Contents

    Spa at Home Gift Basket Contents

    I put the Amopé Pedi Perfect Extra Coarse Electronic Foot File front and center of course (remember, “wow factor”) and surrounded it with other goodies to carry on the “spa” theme. As I’ve mentioned before in my other gift basket tutorials, one of the most important tricks in making a gift basket, is to take what you can out of the store packaging. It can make all of the difference in the world; giving it  less of a store-bought packaged “look.”

    If you’re making a spa at home gift basket, here’s a list of the items I included in mine so you can easily replicate! For the “basket,” or box rather, I chose one at a local craft store that wouldn’t be too big for the items I wanted to put in it, and that would color coordinate with the goodies. (A natural or white color worked best for this one!)

    Contents:

    • Amopé Pedi Perfect Extra Coarse Electronic Foot File
    • Body Scrub (I actually removed the scrub from the store container and put it in to a glass jar with ribbon and homemade tag for a little personal touch. You can make your own DIY scrub too by searching for recipes on Pinterest!)
    •  Bath Gloves
    • Body Brush
    • Cute fabric for “fill” instead of tissue paper
    • Exfoliating Facial Sponge
    • Gel Eye Mask
    • Bath Salts

    Spa and relaxation gift idea for her!

    One-Stop Shop

    I was able to snag what I needed (excluding the box) for this gift basket at CVS when I picked up the Amopé Pedi Perfect Extra Coarse Electronic Foot File. Talk about easy shopping!

    Spa at Home gift basket idea for her. So easy and so cute!

    Thank you so much for coming by! I’d love to hear what kind of gift baskets you love to create and give for a birthday or holiday!

    Hot Chocolate Muddy Buddies Recipe

    December 10, 2017

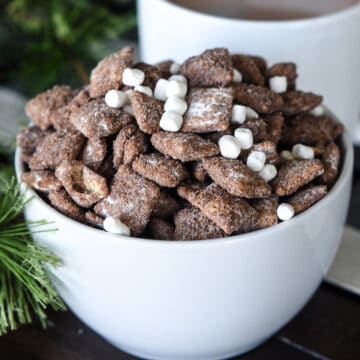
    Hot chocolate muddy buddies in white bowl

    This is a sponsored conversation written by me on behalf of Chex, however, the opinions and text are all mine! #Sponsored

    Hot Chocolate Muddy Buddies: Chex Party Mix is a crowd favorite that doesn't require lots of time and effort. It keeps you out of the kitchen, and enjoying the party.

    Hot Chocolate Muddy Buddies

    Do you have those “go-to” recipes for when you’re hosting a party? I sure do, and you can almost guarantee that they’re recipes that are quick, easy and if possible… made ahead of time.

    This hot chocolate dip recipe would also be amazing for a party, and you could even make these hot chocolate gifts as party favors!

    A Party Favorite | Or Anytime Snack Favorite, Really

    When I was a little girl, I fell in love the first time my mom made Muddy Buddies! I watched her make them, and when I realized how easy they were, I started making them myself. From that moment on, it has been a snack that gets made all year long, ESPECIALLY for parties. Whether it’s a savory or sweet recipe, Chex Party Mix is an easy, crowd-favorite recipe to make for the holidays, so I want to share this fun spin on a classic recipe with you.

    Hot Chocolate Muddy Buddies Recipe

    When thinking about a fun spin to put on the original Muddy Buddies recipe, we took the time of year in to consideration and thought that incorporating “hot chocolate” would be VERY fitting, and potentially delicious! Boy were we right. I can’t wait to share this recipe with you below, and walk you through the quick and easy steps.

    Rice Chex with General Mills - Muddy Buddies Recipe

    Chex

    For this recipe, I chose Rice Chex, but you can use Corn Chex or even Chocolate Chex!

    I love using ingredients that can shave off time, and Chex is NO exception! Chex gets the party started with recipes made in 15 minutes or less.

    Hot cocoa muddy buddies ingredients recipe

    Hot Chocolate Muddy Buddies Tutorial

    You’ll start by measuring your Chex in to a bowl, and in a separate bowl you’ll melt the chocolate chips, peanut butter, butter, and vanilla.

    Hot Cocoa Muddy Buddies Recipe using CHEX

    Once melted, you’ll poor the chocolate peanut butter mixture over the top of the Chex.

    Hot Chocolate Muddy Buddies Recipe

    Stir to coat the Chex, completely.

    Coat the Chex with chocolate and peanut butter - muddy buddies

    You can then pour them in to a 2-gallon food storage plastic bag, with the powdered sugar and hot chocolate mix! Seal and shake!
    (We mixed ours in to a super large bowl, but shaking in a plastic bag is MUCH easier!)

    Add powdered sugar in for muddy buddies
    Hot Chocolate Mix - Muddy Buddies Recipe with Chex
    Hot Chocolate Muddy Buddies Recipe

    As much as I love the original Muddy Buddies recipe, I can’t help but swoon over the addition of the hot chocolate mix. It gave it a whole new fun flavor.

    Once the Chex are fully coated, toss in some mini marshmallows to bring in a bit more of a “hot chocolate” feel! Then…you’re all set for snacking!

    Hot Cocoa Muddy Buddies Recipe

    Creative Tip: Take one of your “go-to” recipes, and add a little spin to mix things up a bit.

    Adding a few crushed peppermint candies to the mix was a seasonal touch that brought in the holidays perfectly! These hot chocolate muddy buddies are ideal for a holiday dessert bar and often make an appearance along with this Butterfinger puppy chow.

    Hot Chocolate Muddy Buddies with Peppermint Candies Recipe

    I so hope you enjoy this recipe! But feel free to take a classic Chex Party Mix recipe and add your own personal spin to spread the holiday joy! Visit Chex.com for more fun recipes like this one!

    Hot Chocolate Muddy Buddies

    To browse MORE quick and easy recipes, you’ll want to visit our recipe archives HERE to add to your favorite Pinterest board!

    Recipe

    Hot chocolate muddy buddies in white bowl
    Print Pin
    4.72 from 7 votes

    Hot Chocolate Muddy Buddies Recipe

    Rich chocolate, creamy peanut butter, and sweet powdered sugar cover these Chex mix cereal for a delicious snack! Make this easy recipe for a crowd-pleasing holiday recipe.
    Course Dessert, Snack
    Cuisine American
    Prep Time 20 minutes minutes
    Total Time 20 minutes minutes
    Servings 18 servings
    Calories 200kcal
    Author Jessica Burgess

    Ingredients

    • 9 cups Rice Chex™ Corn Chex™ or Chocolate Chex™ cereal (or combination)
    • 1 cup milk chocolate chips
    • ½ cup peanut butter
    • ¼ cup butter or margarine
    • 1 teaspoon vanilla extract
    • 1-½ cups powdered sugar
    • 3 individual serving packets of Hot Chocolate we used .73 oz. packets
    • miniature marshmallows optional
    • crushed peppermint optional

    Instructions

    • In a large bowl, measure cereal; set aside.
    • In a 1-quart microwavable bowl, microwave chocolate chips, peanut butter, and butter uncovered on High 1 minute; stir.
    • Microwave about 30 seconds longer or until mixture can be stirred smooth. Stir in vanilla. Pour mixture over cereal, stirring until evenly coated.
    • Pour into 2-gallon resealable food-storage plastic bag. Add powdered sugar and hot cocoa powder. Seal bag; shake until well coated.
    • Add marshmallows and crushed peppermint candies if desired. Shake.
    • Spread on waxed paper to cool. Store in airtight container in refrigerator.

    Nutrition

    Serving: 1serving (½ cup) | Calories: 200kcal | Carbohydrates: 22g | Protein: 3g | Fat: 11g | Saturated Fat: 4g | Cholesterol: 7mg | Sodium: 189mg | Potassium: 127mg | Fiber: 1g | Sugar: 9g | Vitamin A: 335IU | Vitamin C: 3mg | Calcium: 60mg | Iron: 5.3mg

    Bacon and Sausage Quiche

    August 20, 2023

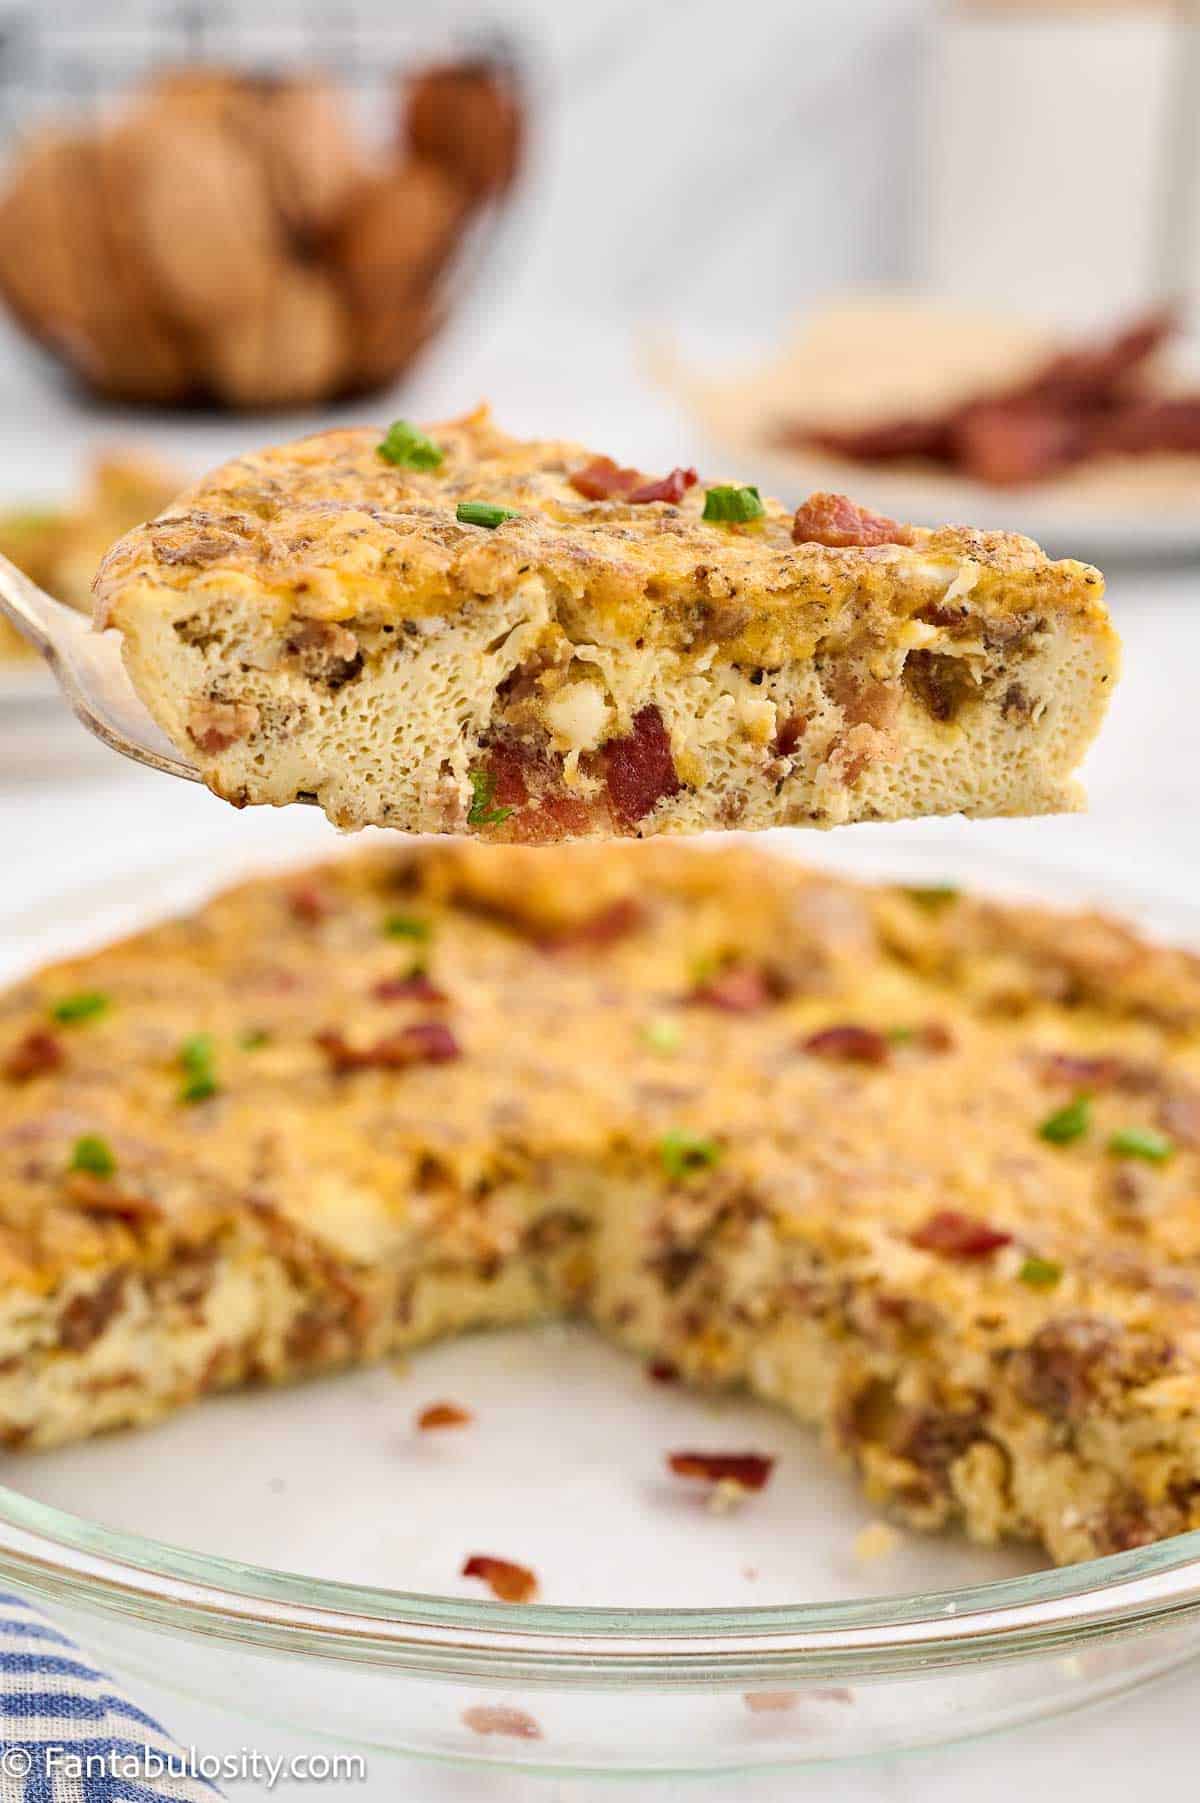
    Slice of bacon and sausage quiche on spatula.

    This Bacon and Sausage Quiche is a simple crustless recipe that uses items like sausage, bacon, and other simple ingredients that you may already have on hand!

    Savory breakfast recipes are some of our favorites, and we think you’re also going to love these breakfast egg rolls if you love recipes like this quiche!

    Slice of bacon and sausage quiche on a spatula above the whole quiche.

    This quiche recipe brings a whole new meaning to eating your bacon and eggs in the morning for a hearty breakfast. It’s loaded with flavor and hearty enough with protein that will keep the kids full until lunchtime. Or, for an easy dinner idea, this quiche is meaty enough that it won’t even feel like a breakfast dish!

    [feast_advanced_jump_to]

    Why You’ll Love This Recipe

    • Enjoy any time of day: Whether you need a quiche recipe for brunch, weekend breakfast, or even a dinner idea… this recipe is perfect for ANY time of the day.
    • Crustless: Cutting out the crust, means that it’s fewer ingredients and fewer carbs.
    • Prep ahead of time: Although quick to whip up in the evening after work, feel free to shave off some time and prepare this in the morning, and bake it when you get home from work!

    Ingredients Needed

    I’ve highlighted a couple of ingredients below with some relevant notes. Aside from this, the ingredients needed are pretty basic.

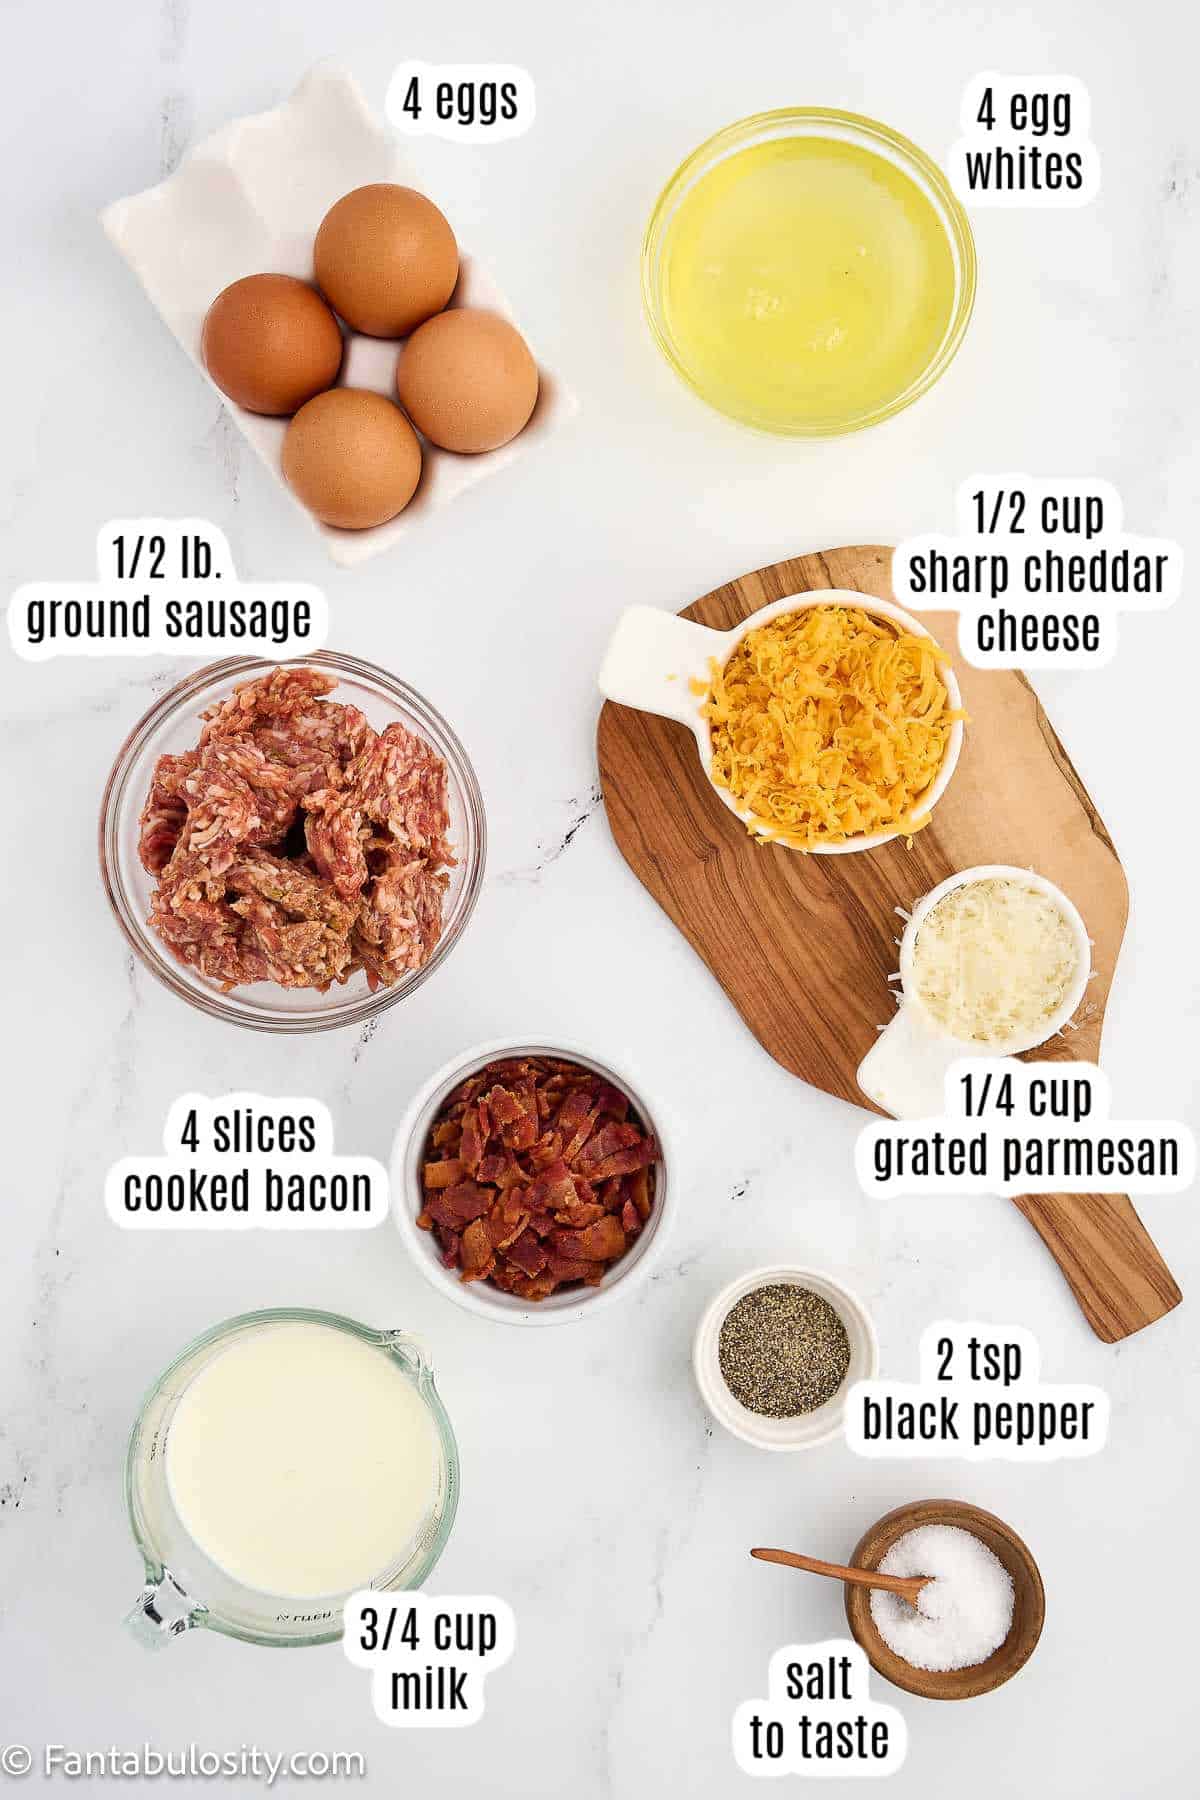
    Labeled ingredients for bacon and sausage quiche.
    • Cheddar cheese – When it comes to having shredded cheese in a recipe, you can buy pre-shredded in the store but when you shred your own, it doesn’t have the caking ingredient that prevents cheese from sticking together in the package, and that means your cheese won’t have the powdery texture. So if you’re able, it’s best to shred your own cheese.
    • Sausage – I use mild ground sausage but you can use hot and spicy if you prefer a “kick” to recipes like I like to use in this sausage and tortellini soup. Or you can also use baked sausage links if needed as a substitute in a pinch.
    • Milk – the type of milk used is up to you! Skim, 2%, whole, or even almond, soy, or coconut milk should work.
    • Salt – the amount of salt is up to you. Remember that bacon and sausage have a lot of salt already so you won’t want to overdo it, and you can always add salt but it’s harder to take it away.

    How to Make This Bacon and Egg Quiche

    *Be sure to see the recipe card below for the full ingredients list & instructions!*

    Before Cooking: Preheat oven to 350 degrees Fahrenheit.

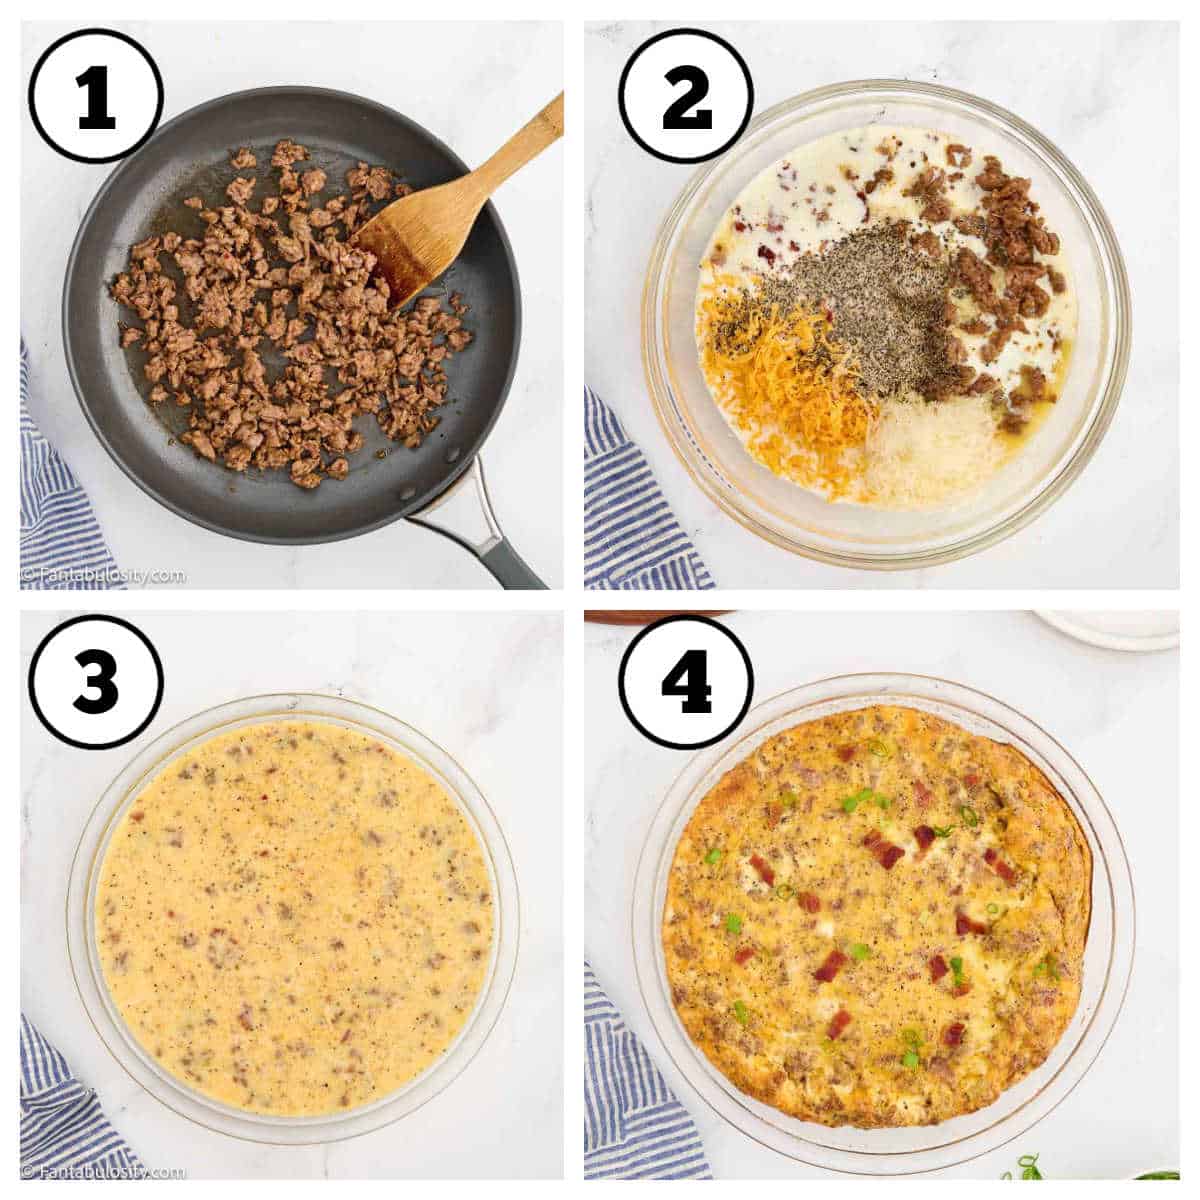
    Steps 1-4 of how to make bacon and sausage quiche.

    STEP 1. Brown ground sausage, drain and set aside.

    STEP 2. In a mixing bowl, whisk eggs and egg whites. Add milk, salt, pepper, cheese, and cooked meats.

    STEP 3. Pour mixture into greased pie pan and bake uncovered for 40 minutes.

    STEP 4. Remove from oven, slice, and enjoy!

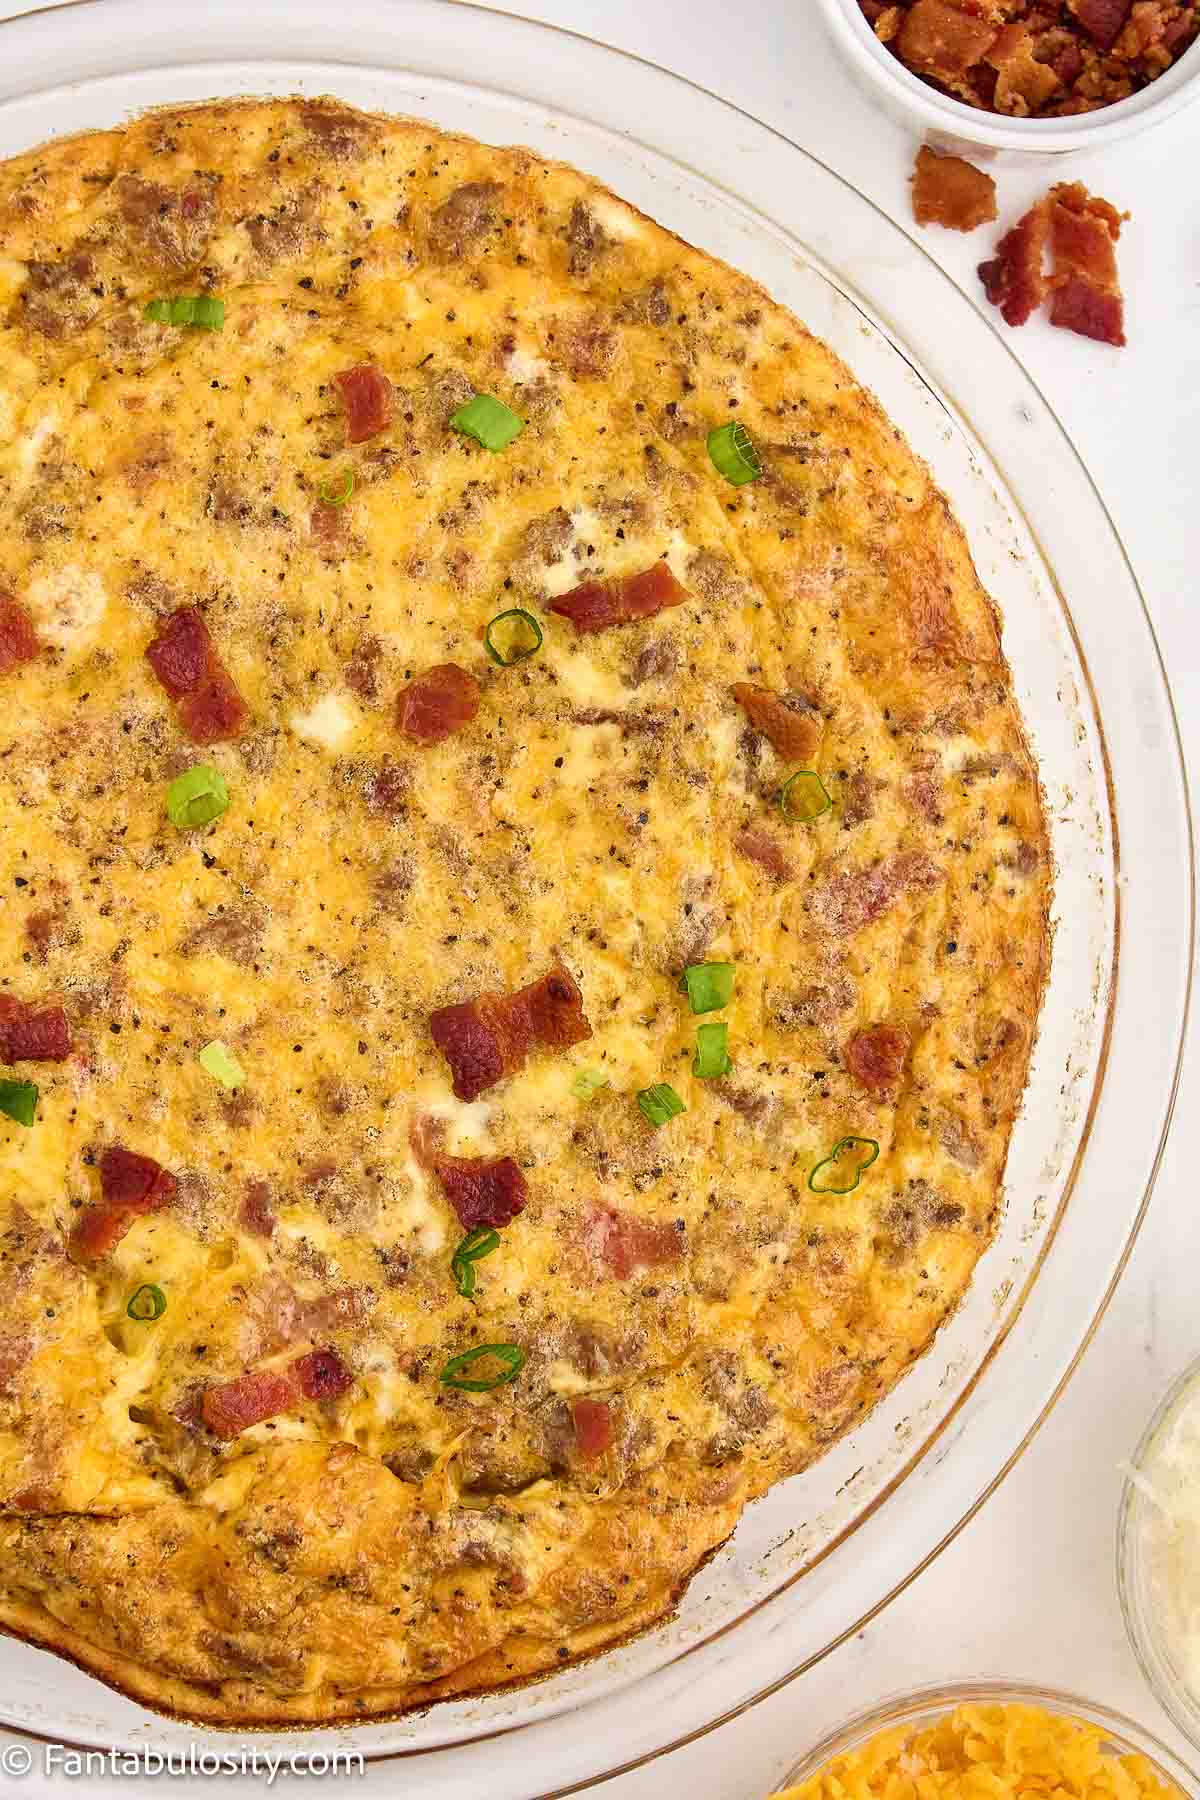
    Cooked bacon and sausage quiche in pie plate.

    Recipe Pro Tips

    • Add veggies. If you’re looking to add some vegetables to this quiche recipe, that’s perfectly ok! Adding chopped spinach, celery, or carrots to this recipe is a great idea for sneaking in some vegetables.
    • Toppings. If you’re looking for more things to garnish this quiche with, a dollop of sour cream, parsley, or even a drizzle of syrup can add more flair to this recipe.
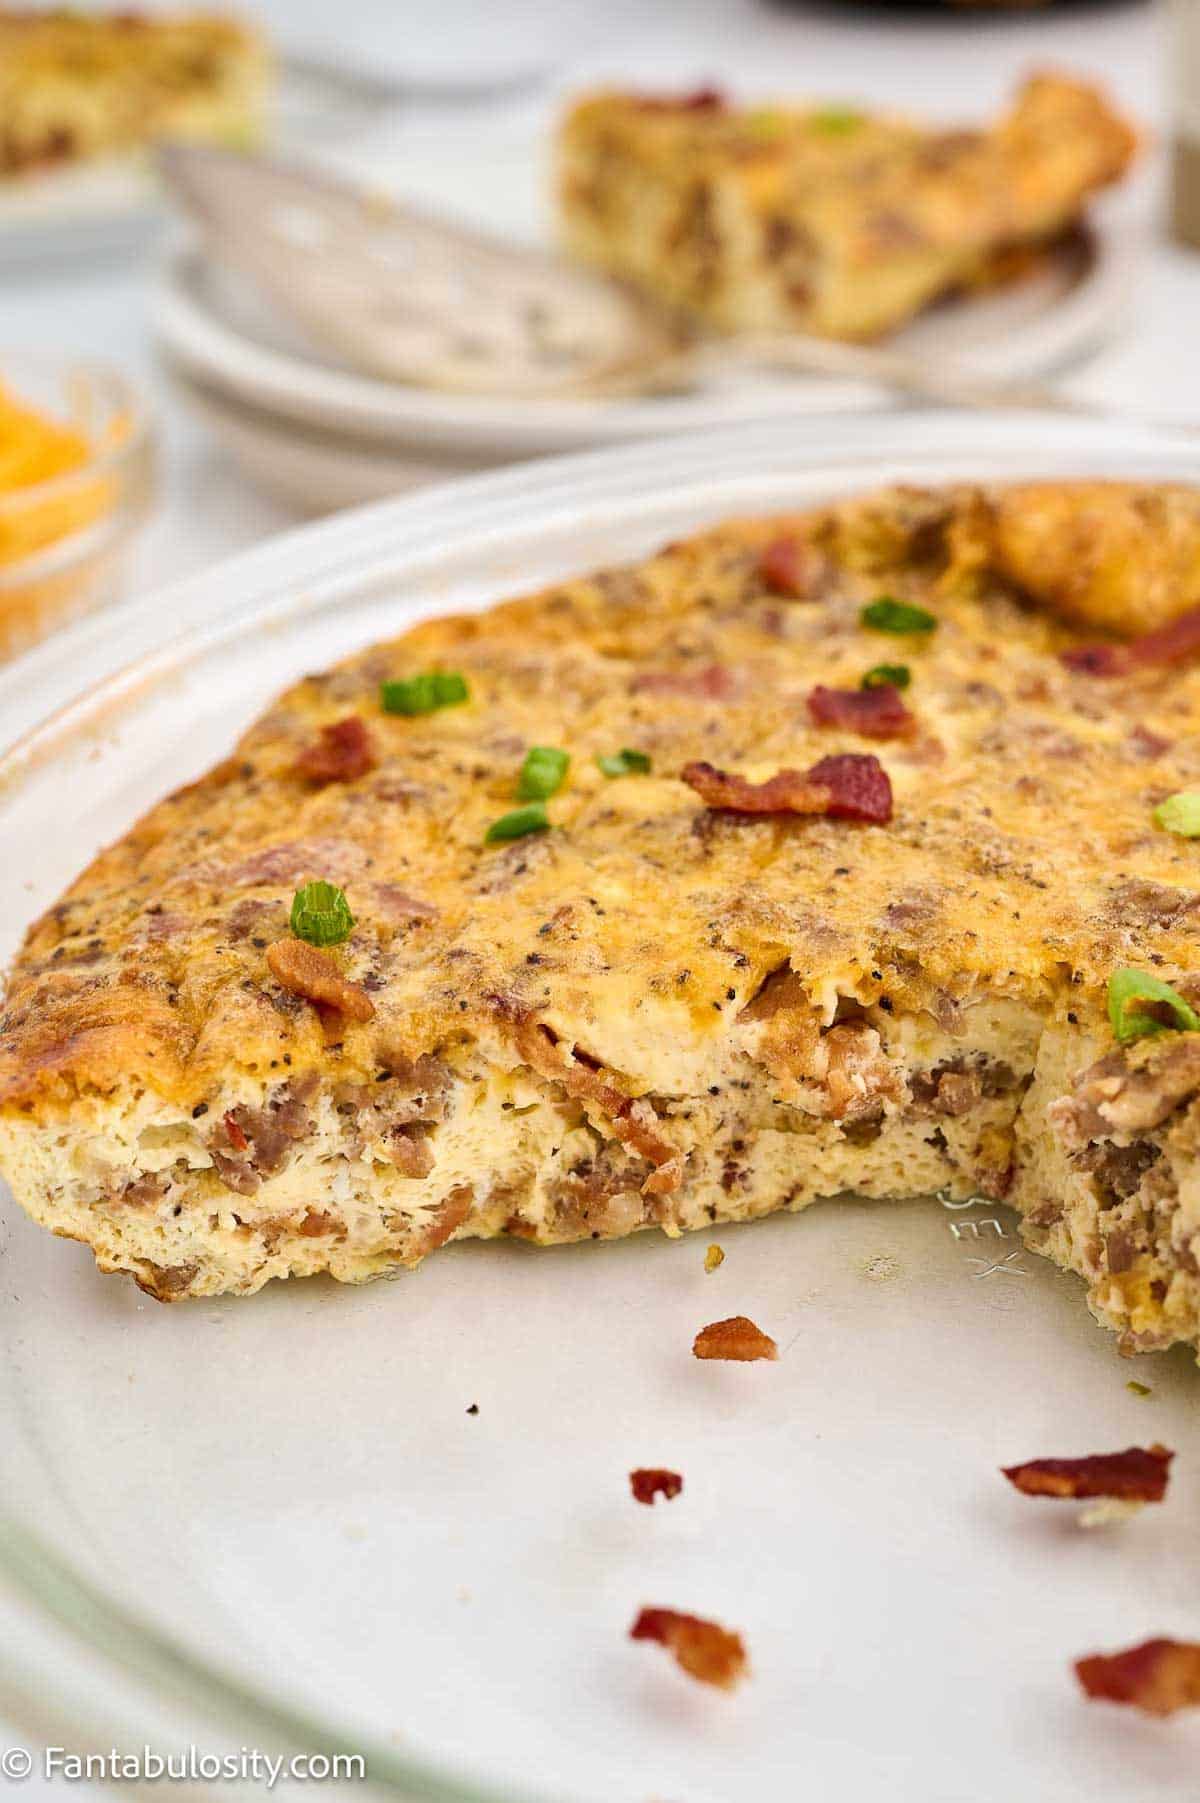
    Bacon and sausage quiche sliced, and a close-up of the inside.

    What to Serve with Quiche

    If hosting a breakfast or brunch, serving different dishes with quiche may be a good idea, especially something simple like baked sausage patties. Or, if you’re simply wanting something else to serve with a delicious breakfast quiche at home, these recipes are delicious alongside this savory recipe:

    • Honey Lime Fruit Salad
      Honey Lime Fruit Salad
    • A breakfast waffle charcuterie board.
      Breakfast Waffle Charcuterie Board
    • Strawberry chocolate muffins on cooling rack.
      Strawberry Chocolate Muffins
    • A close up photo of a stack of cinnamon swirled pancake squares that were baked on a sheet pan
      Sheet Pan Pancakes

    Storage

    If you have leftover quiche, allow it to fully cool and then cover with plastic wrap, or place in an airtight container and in the refrigerator for 3-4 days.

    More Breakfast Recipes You’ll Love

    If you’re having this quiche for breakfast, then I think you’ll also love this easy breakfast casserole for another morning!

    • Bagel French Toast casserole in the crock pot.
      Crock Pot Bagel French Toast Casserole
    • Crock Pot rice pudding in small bowl.
      Crock Pot Rice Pudding
    • White gravy recipe on top of biscuits next to bacon on a vintage plate.
      White Gravy Recipe
    • A slice of Amish applesauce cake on plate with fork.
      Amish Applesauce Cake

    Did you make this? I’d be so grateful if you left a “star” rating below to let me know what you thought! Then, the next time you need a quick and easy recipe, come back to Fantabulosity to browse all of my easy recipes!

    Recipe

    Slice of bacon and sausage quiche on spatula.
    Print Pin
    4.15 from 7 votes

    Bacon and Sausage Quiche

    This bacon and sausage quiche is full of meaty and cheesy flavor. Easy to make, and hearty enough making it a filling breakfast or dinner recipe.
    Course Breakfast
    Cuisine French
    Prep Time 15 minutes minutes
    Cook Time 40 minutes minutes
    Total Time 55 minutes minutes
    Servings 6 servings
    Calories 262kcal
    Author Jessica Burgess

    Ingredients

    • 4 slices cooked bacon crumbled
    • ½ pound sausage
    • 4 large eggs
    • 4 egg whites
    • ¾ cup milk
    • 2 teaspoon black pepper
    • ½ cup sharp cheddar cheese shredded
    • ¼ cup grated parmesan
    • salt to taste

    Optional Add-Ins:

    • onions diced
    • bell peppers diced
    • tomatoes diced
    • broccoli finely chopped
    • ham diced
    • spinach chopped

    Instructions

    • Preheat oven to 350 degrees Fahrenheit.
    • Brown ground sausage, drain and set aside.
    • In mixing bowl, whisk eggs and egg whites. Add milk, salt, pepper, cheeses and cooked meats.
    • Pour mixture into greased pie pan and bake uncovered for 40 minutes.

    Nutrition

    Serving: 1serving (⅙ recipe) | Calories: 262kcal | Carbohydrates: 2g | Protein: 14g | Fat: 21g | Saturated Fat: 7g | Cholesterol: 167mg | Sodium: 462mg | Potassium: 217mg | Sugar: 1g | Vitamin A: 295IU | Vitamin C: 0.2mg | Calcium: 106mg | Iron: 1.2mg

    Caramel Corn Recipe

    October 20, 2024

    Caramel Corn in black metal stand.

    This homemade caramel corn recipe doesn’t require baking and uses just a few, easy ingredients! Plus, make your popcorn using my easy homemade popcorn recipe and you’re ready for the ultimate fall, snack!

    Great for handing out at a party. Here’s the rest of my Halloween snacks and treats.

    Caramel corn in black metal french fry stand.

    Each year when the temps lower to…oh… say 40 degrees or so, I start craving all the winter goodies. Like this Peppermint latte, peppermint cake, sugar cookies, and well… just about anything not good for me. Caramel corn is one of those winter staples that I begin craving instantly

    You may also love:

    • Hot Chocolate Muddy Buddies
    • Perfect Marshmallow Treats
    • Fried Cake Bites

    I remember making caramel corn as a kid with my parents, and I thought it was one of the coolest things ever.  Now, I can make caramel corn with my kids and make our own memories!

    Why You’ll Love This Easy Recipe

    No baking required! Yes really. I love how it doesn’t take hours to make this recipe and you can start eating it as soon as it cools off. (For real, make sure it cools off. I can’t tell you how many times I’ve burnt my tongue because I’m too impatient.)

    Ingredients

    Labeled ingredients for caramel corn recipe.

    With only using a few ingredients, you can make this super easy caramel corn at home too. Here are the everyday ingredients you’ll be using but make sure to see the recipe card below for the full list of ingredients and instructions all in one place.

    • Popped Popcorn – I prefer making my own with kernels so I don’t have to worry about the flavorings and extras that microwave popcorn tends to have.
    • Butter – Real butter is recommended here.
    • Light Brown Sugar – You can use dark brown sugar too!
    • Vanilla Extract – I prefer to use real vanilla, instead of imitation.
    • Baking Soda
    • Salt

    How to Make the Caramel Corn

    Making caramel corn on the stove top, no baking! It's so quick and easy!

    First you’ll brown your butter, then add the brown sugar and salt. Allow those items to boil and then add vanilla and baking soda! Mix to combine and then pour over the prepared popcorn.

    Pour caramel syrup over popcorn - homemade caramel corn recipe

    Pour the caramel covered popcorn on to a greased, or parchment paper lined baking sheet and allow it the caramel to harden and dry.

    Caramel Corn Recipe - easy

    Pro Tips

    • I like to stir the popcorn after about 10 minutes while it’s cooling to help dry it out faster.
    • This caramel corn recipe is great to give out as gifts during the holiday season. Package it up in cute packaging with a gift tag (like these Christmas popcorn balls) and it’s ready to go! Just make sure it has cooled off before packaging or it will get soggy.
    Hand holding a piece of homemade caramel corn.

    More Snack Recipes

    If you love easy snacks like this one, you’ll also love these new favorite snack recipes:

    • A close-up of peanut butter oatmeal bars with peanut butter drizzle.
      Peanut Butter Oatmeal Bars (3 Ingredients, No Bake)
    • A basket full of baseball snack ideas.
      Baseball Snack Ideas for Kids (Easy + Team Snack Ideas Moms Love)
    • Pumpkin cheese ball on plate surrounded by crackers.
      Pumpkin Cheese Ball
    • Pumpkin fluff in Pyrex serving bowl, with Reddi Wip and pumpkin pie spice on top.
      Pumpkin Fluff

    If you’re a caramel fan, this caramel cream pie is a crowd favorite.

    Recipe

    Caramel Corn in black metal stand.
    Print Pin
    4.50 from 10 votes

    Caramel Corn Recipe

    It only takes a handful of ingredients to make this easy caramel corn recipe. No baking required for this quick snack recipe!
    Course Dessert, Snack
    Cuisine American
    Prep Time 10 minutes minutes
    Cook Time 10 minutes minutes
    Total Time 20 minutes minutes
    Servings 16 servings
    Calories 463kcal
    Author Jessica Burgess

    Ingredients

    • 8 cups Popped Popcorn
    • 1 cup butter
    • 1 cup light brown sugar
    • 2 teaspoon vanilla extract
    • ½ teaspoon baking soda
    • 1 teaspoon salt or to taste (We like to use kosher salt.)

    Instructions

    • Make plain popcorn by following this homemade popcorn recipe or using store bought, and place in large mixing bowl.
    • Melt butter in a saucepan over medium heat.
    • Add brown sugar and salt and stir until mixed.
    • Bring the butter and sugar mixture up to a boil, stirring consistently.
    • When it begins to boil, stop stirring and allow it to cook for 5 minutes, but after 4 minutes add vanilla and stir to mix.
    • Continue to boil for one more minute and then add the baking soda, stir until mixed in.
    • Grab the bowl of popcorn and drizzle the caramel sauce over the top. Using a spatula or wooden spoon, gently stir until all the popcorn is covered with the sauce.
    • Pour the popcorn out and spread out onto a flat surface to allow cooling. (i.e cookie sheet, wax paper, etc.)

    Video

    Notes

    Although not required, I like to stir the popcorn after about 10 minutes of cooling to help speed up the process and keep the popcorn crunchy.

    Nutrition

    Serving: 1serving (about ½ cup) | Calories: 463kcal | Carbohydrates: 74g | Protein: 9g | Fat: 15g | Saturated Fat: 8g | Cholesterol: 31mg | Sodium: 290mg | Potassium: 246mg | Fiber: 10g | Sugar: 14g | Vitamin A: 355IU | Calcium: 19mg | Iron: 2.6mg

    Peppermint Cupcakes

    October 25, 2022

    Peppermint cupcakes on baking rack

    Peppermint Cupcakes: A white cake mix that uses simple ingredients to make the cupcakes better than a boxed mix, with peppermint extract added for the perfect touch of flavor! Then, if desired, a homemade buttercream frosting with peppermint candies on top!

    Peppermint cupcakes on baking sheet
    Peppermint Cupcakes

    When one of our favorite chocolate cakes with peppermint went over so well, I knew it was time to add something like this to our easy dessert recipes. But this time, I wanted it to be a batch of cupcakes since so many seem to love our cupcake recipes too!

    Why you’ll love these:

    • They use a cake mix! But…I do a few things to it, to make them better than a cake mix cupcake recipe! I also love using a cake mix for this other holiday, eggnog tres leches cake.
    • The vanilla cupcake has a hint of peppermint flavor (like in our chocolate mint cupcakes) that gives an almost “cooling” feel when you bite in to it. They’re perfect any time of year but especially around the holiday season, or for holiday parties!
    • With the peppermint cupcake topped with this homemade buttercream and crushed peppermint candies, it’s a flavor combination that can’t be beat!
    • They’re perfect when entertaining for Christmas! The peppermint flavor, individual little cakes… it just makes perfect sense! (If you love peppermint, you’ll also want to try this candy cane pie recipe!)

    Ingredients:

    This recipe uses simple ingredients, that you can find at almost any grocery store!

    Cupcake Ingredients

    • 16.25-ounce white cake mix
    • ½ cup melted butter
    • 3 egg whites
    • 1 cup water
    • 1 teaspoon of peppermint extract

    Buttercream Frosting Ingredients

    • ½ Cup Vegetable Shortening½
    •  Cup Unsalted Butter (1 stick softened)
    • 4 Cups Powdered Sugar (sifted)
    • 2 Tablespoons Milk (or heavy cream)
    • 1 teaspoon vanilla extract
    • Pinch of salt
    • About 20 peppermint candies
    Ingredients for peppermint cupcakes
    Ingredients

    Substitutions and Variations

    • Peppermint Extract: We do not put peppermint extract in to the buttercream, as we think the peppermint in the cupcakes and the crushed peppermint candies on top of the cupcake, are the perfect amount of flavor. However, feel free to add a small drop (it’s very powerful!) to the buttercream for a strong peppermint flavor to make a peppermint frosting. You may even want to try our mint buttercream recipe for these!
    • Cupcake Flavor: You can use a yellow cake mix, or even chocolate to make chocolate peppermint cupcakes if you prefer. If using something other than a white cake mix, you can use the egg yolks too, instead of just the egg whites.
    • Melted butter vs. Oil for Cupcakes: If you don’t have butter for the cupcakes, you can use vegetable oil.
    • Peppermint Candies: Feel free to use crushed candy canes, or even mini candy canes for a special Christmas idea!

    Instructions

    First, you’ll want to make the cupcakes. Then, while the cupcakes are cooling, it’s a great time to make the buttercream frosting.

    TIP: If you plan to make this buttercream frosting recipe, go ahead and get the stick of butter out, so it can be softening while you’re baking the cupcakes.

    How to make the cupcakes:

    1. Preheat oven to 350 degrees and line muffin tin with cupcake liners.
    2. In a large bowl, pour in cake mix, melted butter, egg whites, water, and peppermint extract.
    3. Mix on medium speed for 2 minutes. (If using a Kitchenaid mixer, use the paddle attachment if you have it. (I only had my whisk attachment, so I used that. Using this makes the cupcakes airier too.)
    cake mix and butter in white mixing bowl
    Make cupcakes
    Cupcake batter in mixing bowl
    Cupcake Batter
    1. Pour about 3 tablespoons of cupcake batter in to each cupcake liner, in the muffin cups. (Or ⅔ full.) I use a cookie scoop for this to make it easier.
    cupcake batter in cupcake pan
    Pour batter in liners
    1. Bake the cupcakes for 12 minutes or until the tops of the cupcakes bounce back when your finger gently touches them. If it leaves an indention, the cupcakes need to bake longer.

      Remove from the cupcake pan and place cupcakes on a wire rack to cool to room temperature.
    baked cupcakes on cooling rack with oven mit behind them
    Baked peppermint cupcakes

    How to make the buttercream frosting:

    1. In a large mixing bowl, mix together the stick of softened butter and shortening until light and fluffy. You may need to use a rubber spatula to scrape down the sides a couple of times to make sure the ingredients blend evenly. (Make sure to turn the mixer off before scraping.)
    2. Next, start adding the powdered sugar, making sure the mixer is on low speed, for about 1 cup at a time, mixing together completely before adding the next cup of sugar. Do this until all of the powdered sugar has been mixed in.
    butter and crisco in mixing bowl
    Butter & Crisco
    Powdered sugar pouring in to mixing bowl
    Add powdered sugar
    1. Add in vanilla extract, and mix in completely.
    2. Then, pour in the milk and mix on medium-high speed until the buttercream looks fully combined and fluffy.
    vanilla pouring in to mixing bowl
    Add vanilla
    Milk pouring in to mixing bowl
    Add milk
    1. Optional: Although optional, I do recommend adding a pinch of salt and mixing it in to the buttercream.
    hand pinching salt for buttercream
    Add salt
    Buttercream frosting in piping bag
    Buttercream in piping bag
    1. If you have a piping bag, it’s time to place the buttercream in to a large piping bag, and begin piping the frosting on to the cupcakes. You can spread the frosting on to the cupcakes instead, if that’s what you prefer!
    Buttercream piping on to cupcake
    Add buttercream
    Peppermint candies on top of cupcakes
    Add peppermints
    1. Unwrap peppermint candies and place them in to a small plastic, sealable bag, and crush them until fine.
    Peppermint candies in plastic bag
    Crush peppermints
    1. Sprinkle the crushed peppermint candies on top of the buttercream, on the cupcakes.
    Peppermint cupcakes on baking rack
    Finished Peppermint Cupcakes

    Storage

    If you have leftover cupcakes, leaving them out will result in the cupcakes and buttercream getting hard. It’s best to place them in a single layer in an airtight container, and place in the refrigerator (since it has milk in the buttercream).

    Peppermint cupcake sliced in half
    Airy peppermint cupcakes

    Related Recipes

    If you’re a fan of peppermint recipes, you’re going to love this peppermint latte recipe and these chocolate-dipped waffle bowls that are rimmed in peppermints, which are perfect to serve desserts in!

    Or, for an easy Christmas no-bake dessert recipe, you’re going to love this Christmas Tree Cake Dip!

    Did you make this? I’d be so grateful if you left a “star” rating below to let me know what you thought! Then, the next time you need a quick and easy recipe, come back to Fantabulosity to browse all of my easy recipes!

    Recipe

    Peppermint cupcakes on baking rack
    Print Pin
    5 from 5 votes

    Peppermint Cupcakes

    Peppermint Cupcakes: A vanilla cake mix that uses simple ingredients to make the cupcakes better than a boxed mix, with peppermint extract added for the perfect touch of flavor! Then, if desired, a homemade buttercream frosting with peppermint candies on top!
    Course Dessert
    Cuisine American
    Prep Time 20 minutes minutes
    Cook Time 12 minutes minutes
    Total Time 32 minutes minutes
    Servings 24 cupcakes
    Calories 275kcal
    Author Jessica Burgess

    Ingredients

    Peppermint Cupcake Ingredients

    • 16.25 ounce box white cake mix
    • ½ cup melted butter
    • 3 egg whites
    • 1 cup water
    • 1 teaspoon peppermint extract

    Buttercream Ingredients

    • ½ cup vegetable shortening
    • ½ cup unsalted butter softened
    • 4 cups powdered sugar sifted
    • 2 Tablespoons milk or heavy cream
    • 1 teaspoon vanilla extract
    • pinch of salt optional
    • 20 peppermint candies

    Instructions

    How to Make the Peppermint Cupcakes

    • Preheat oven to 350 degrees and line the cupcake pan (or muffin tin) with cupcake liners.
    • In a large mixing bowl, pour in the cake mix, melted butter, egg whites, water, and peppermint extract, and mix on medium speed for 2 minutes.
    • Pour about 3 tablespoons of cupcake batter in to each cupcake liner. (Or ⅔ full.)
    • Bake the cupcakes for 12 minutes or until the tops of the cupcakes bounce back when your finger gently touches them. If it leaves an indention, the cupcakes need to bake longer.
      Remove from the cupcake pan and place cupcakes on a wire rack to cool.

    How to Make the Buttercream Frosting

    • In a large mixing bowl, mix together the stick of softened butter and shortening until light and fluffy. You may need to use a rubber spatula to scrape down the sides a couple of times to make sure the ingredients blend evenly.
    • Next, start adding the powdered sugar, about 1 cup at a time, mixing together completely before adding the next cup of sugar. Do this until all of the powdered sugar has been mixed in.
    • Add in vanilla extract, and mix in completely. Then, pour in the milk and mix in until buttercream looks fully combined and fluffy.
    • Optional: Although optional, I do recommend adding a pinch of salt and mixing it in to the buttercream.
    • If you have a piping bag, it's time to place the buttercream in to the piping bag, and begin piping the frosting on to the cupcakes. You can spread the frosting on to the cupcakes instead, if that's what you prefer!
    • Unwrap peppermint candies and place them in to a small plastic, sealable bag, and crush them until fine.
    • Sprinkle the crushed peppermint candies on top of the buttercream, on the cupcakes. Serve!

    Nutrition

    Serving: 1cupcake | Calories: 275kcal | Carbohydrates: 40g | Protein: 1g | Fat: 13g | Saturated Fat: 6g | Polyunsaturated Fat: 2g | Monounsaturated Fat: 4g | Trans Fat: 1g | Cholesterol: 20mg | Sodium: 172mg | Potassium: 23mg | Fiber: 0.2g | Sugar: 31g | Vitamin A: 238IU | Calcium: 47mg | Iron: 0.4mg

    Sugar Cookies with Nutella® Hazelnut Spread

    December 11, 2017

    Sugar Cookies topped with Nutella

    This is a sponsored conversation written by me on behalf of my partnership with Nutella®. All opinions are mine.

    Sugar Cookies with Nutella® Hazelnut Spread: Spreading Nutella® on to this sugar cookie recipe is an easy and delicious treat that your family will LOVE!

    Sugar Cookies topped with Nutella

    Sugar Cookies with Nutella® Hazelnut Spread

    It never fails. During one of our family get-togethers during the holidays, someone asks,

    "Jessica, can you bring a dessert?"

    Well this year, I'm volunteering to bring a dessert to our family gatherings, because I can't WAIT to have them all try these Sugar Cookies with Nutella® hazelnut spread.

    I'm excited about these for a couple of reasons. One, they're crazy good. Two, my nephew is allergic to peanut butter (but not to hazelnuts!) and I try very carefully to think of desserts and dishes that won't put him at risk if he walks up to the dessert table.

    He LOVES Nutella® hazelnut chocolate spread, so I can’t wait to include one of his favorites in this recipe!
    Not only do I think he'll love these, but the rest of the family will too!

    Best Sugar Cookies for Decorating AND eating!

    The BEST Sugar Cookie Recipe

    First, start out with my ever so favorite sugar cookie recipe, to make the base of this recipe. It’s a favorite of mine because it doesn’t have to be chilled, and the flavorful ingredients make this cookie the PERFECT base for this recipe.

    Best Sugar Cookies for Decorating AND eating!

    Pro Tip: I love using big-white, art paper, to roll my sugar cookies out. It keeps my counter "cleaner," and I can just roll it up and throw it in the trash when I'm done rolling them out.

    Sprinkle a little flour on the paper, that way the cookie dough doesn't stick!

    Nutella on top of sugar cookies is amazing!

    Spread Nutella® on Top

    Nutella® hazelnut spread has become a household favorite, and we love spreading it on to new things for fun creations, or to make a dessert centered around Nutella, like this No Bake Nutella Cheesecake!

    Nutella as a topping on cookie
    Round sugar cookies with nutella topping
    Strawberries, walnuts, and pretzels on top of sugar cookies
    Strawberries, walnuts, and pretzels on top of sugar cookies
    Spread Nutella on top of cookies

    A Little Bit Goes a Long Way

    Once the cookies are baked and have cooled, it’s time to spread the Nutella® on. Keep in mind that a little bit of Nutella® goes a long way. The flavor of the Nutella® on top of the sugar cookies is heavenly. I’ll have a hard time making sugar cookies any other way from now on. I mean, how much easier can this get?

    Spread Nutella on top of sugar cookies - chocolate hazelnut spread
    Piped on Nutella, on to sugar cookies with strawberries, walnuts, pretzels.
    Top the sugar cookies with Nutella and other toppings
    Place sliced strawberries on top of the sugar cookies with Nutella

    Fruit, Nuts, and Pretzels

    How cute and fun do these cookies look, topped with strawberries, walnuts and pretzels? Not only cute but the flavor of the toppings combined with the Nutella® is INCREDIBLE. You can top your cookies with fruit, nuts, and pretzels… or with Nutella® alone. Either way, they’re going to be a crowd pleaser at your holiday gathering.

    Pretzels on top of sugar cookies
    Sliced strawberries on top of sugar cookies with Nutella

    Cookie Variations

    Skip the traditional sugar cookie recipe and make this sugar cookie recipe with chocolate chips for some added chocolate.

    Walnuts on top of sugar cookies with Nutella

    Related Recipes

    If you loved these, then you’ll also LOVE these:

    • Sugar Cookie Sandwiches
    • Chocolate Buttercream
    • No Bake Cookies

    Recipe

    Sugar Cookies topped with Nutella
    Print Pin
    5 from 2 votes

    Sugar Cookies with Nutella® Hazelnut Spread

    Sugar cookies topped with Nutella and strawberries make the best dessert recipe! 
    Course Dessert
    Cuisine American
    Prep Time 30 minutes minutes
    Cook Time 8 minutes minutes
    Total Time 38 minutes minutes
    Servings 24 cookies
    Calories 160kcal
    Author Jessica Burgess

    Ingredients

    • 1 cup softened butter
    • 1 cup sugar
    • 1 teaspoon butter vanilla emulsion Can use regular vanilla extract
    • ½ teaspoon almond emulsion Can use regular almond extract
    • 1 egg
    • 2 teaspoon baking powder
    • 3 cups flour
    • Nutella® 1 Tbsp. per cookie
    • Sliced Strawberries
    • Walnuts
    • Pretzels

    Instructions

    • Heat oven to 350 degrees Fahrenheit
    • Cream the butter and sugar
    • Add in extract and eggs
    • In a separate bowl, combine flour and baking powder
    • Slowly add flour mixture to wet ingredients, until mixed
    • Place dough out on a rolling surface
    • LIGHTLY sprinkle with flour, IF necessary, to reduce sticking (too much flour can make the dough crumbly)
    • Knead dough, and roll out to a ¼ thickness
    • Cut cookies into desired shapes
    • Bake for 6-8 minutes
    • Once cookies are cooled, spread on about 1 tablespoon of Nutella® on to each cookie.
    • If desired, top cookies with sliced strawberries, nuts, and/or pretzels. Serve.

    Nutrition

    Serving: 1cookie | Calories: 160kcal | Carbohydrates: 20g | Protein: 1g | Fat: 8g | Saturated Fat: 4g | Cholesterol: 27mg | Sodium: 70mg | Potassium: 63mg | Sugar: 8g | Vitamin A: 245IU | Calcium: 24mg | Iron: 0.8mg
    Assorted sugar cookies with Nutella on top

    I'm so excited to be able to bring along a dessert this year to our family holiday gathering, that will make my nephew and other family members smile. I have a feeling I'm going to be asked to bring these every year!

    I’d love to hear what YOU like to spread Nutella® on too!

    How to Respect Your Husband & How it May Save a Marriage

    November 2, 2017

    How to Respect Husband - In marriage
    How to respect your husband and How it May Save Your Marriage – Respecting our husband is HARD at times, but it could be what saves our relationships.
    How to Respect Husband - In marriage

    How to Respect Your Husband & How it May Save a Marriage

    Respecting my husband. I’m awful at it.
    Can I get real with you for a minute? Our 9 year wedding anniversary (but 19 years together) is coming up this week. For all of those years, I THOUGHT I respected my husband. I’d even argue the fact when we would get in to quarrels.
    I mean, in my head I did respect him for some areas in life. But my “always having to be right” attitude/personality crippled me/us more than I realized. Or the thought of “Well he’s my husband and my boy’s dad… it’s his job. He should HAVE to help/do this for me,” would become my snotty attitude.
    Now, don’t get me wrong… I’m talking “past tense” in this post, because I’m still struggling and learning about respecting my husband today.


    You May Also Love This Marriage Talk:

     
    • 29 Tips on How to Be a Good Wife
    • Affection in my Marriage: My Husband Isn’t Affectionate Anymore
    • 5 Simple Ways to Make Your Husband Want to Come Home
     

    So Why the “How to Respect Your Husband” Jargon?

    I started reading the book “Love and Respect,” (Thank you to who referred this book to me) a few weeks ago, and I haven’t even reached the part where it gives us tips on how to respect my husband.
    BUT… it has covered WHY it is so stinking important in a marriage, and what kind of crazy good returns it can have when we respect our husbands. Our husbands want/NEED respect from us, while we want “love” from our husbands.

    “Respect Testing” 

    Now, I’ve started “testing,” if you will… being super intentional about respecting my husband, and holy smokes ladies. We still don’t have a perfect marriage, and we still get in to quarrels… but the closeness and husband superhero-tendencies, have REALLY shown through as an outcome of this respect practicing.
     
    Perhaps I’m noticing these changes because he really does feel respected, so he’s showing me more love in the process… or it could also be that my mental mindset of respecting him has shifted, instead of focusing on what he does wrong and how I feel that he’s not loving me in certain ways. Whatever it is… I’ll take it.

    For Real… Read It.

    So do I think you need to read the book? YES.
    Do you hate to read? I do. Here’s what I did…
     
    Since I despise reading, I downloaded the Kindle version on my phone, and I read it when I’m going to bed at night and can’t fall asleep because I’m thinking about all of the stressful things going on in my life right now. (Instead of spending that time browsing Facebook and Pinterest like I used to.)
    It makes my mind pause and push those awful thoughts to the back burner, and focuses on my marriage and the love and respect I want it to have.
    I also read this when I wake up in the middle of the night, and can’t go back to sleep. (Reading puts me to sleep if you haven’t gathered this already.)

    My Marriage Depends On It 

    So although I can’t stand to read, I knew this was a book that I had to read and I had to find a way that I would. I hope if you decide to read this too, that you find a way that works best for you. Whether it be a hard copy, an audio version, or a digital version like me… please know that I truly feel my marriage depended on this, in this moment in life, and I’m so thankful already for the first few chapters of this book. It’s not a cure-all, and we won’t all have a perfect marriage because of this book. But after reading this, I’m able to say to myself… “I truly believe I’m doing everything I know how to do in this moment, to make my marriage better than it is.”

    Gag. He Needs to EARN My Respect!

    If you even have the SLIGHTEST feeling that you may not be respecting your husband like you could… give this book a read. If you find yourself saying, “Oh Jessica, gag. When he starts earning my respect, I’ll give it to him.” Know that I was/am still a bit there. But I’ve also learned that, that kind of attitude isn’t doing anyone any good. Including myself, my kids, or my husband.

    Is It You? 

    I woke up at 4:50 this morning, with this heavy on my mind so I jumped out of bed to share this with you all. I don’t know if that’s because someone needed to hear it, or I posted it just to acknowledge it myself… but either way, I hope it helps someone today.
     
    You can snag the book on Amazon here: 

    Love and Respect

    (That’s my affiliate link, which means I could make like 20 cents if you use it. So don’t think I’m referring this book to you to get rich. I truly am referring this book to you to enhance your marriage/life, and I love using my affiliate links to track and see if any of you are interested in books/reading. Feel free to type in “Love and Respect” in to your Amazon search bar if you don’t want to use my referral link.)
     

    What Others Have Told Me About this Book…

    In our Creating Your Happy group (more on that below), other’s have read this book and this is what some of them have said about it:
     
    Savanna:
    “My husband and I actually went through the Love and Respect class….twice….PRE marriage. We still regularly remind each other to “speak pink/blue”. It’s difficult to do at times, for SURE…. but as you said… HOLY MOLY the results are a much happier marriage!”
    Dottie:
    “Read it yrs ago and it absolutely hit home. I think I’ll pick it up again for a refresher!”

    The Fab Society Facebook Group 

    I’d love to hear from you below if you have anything you want to share! Even if you just want to join my “I suck(ed) at respecting my husband for years,” club, so I know I’m not alone. 🙂
    "The Fab Society" is a sister of the life + style blog, Fantabulosity.com, a place where we encourage women to find their passions in life, and overall happiness. Watch some of our recent Creating Your Happy videos on topics like marriage, finance, parenting and so much more, like this one here:

    As a mom, wife, sister, friend, employee, boss, and whatever else society calls you… we sometimes need to be reminded what it is that makes us happy, so we can fulfill our duties with the best intentions and that way we choose and want.

    DISCLAIMER from the owner/founder: "I fail each day, trying to be the "best," mom, wife, sister, and friend. But if I can be intentional & recognize one LITTLE thing that I accomplished that day… I can be "happy," with that, and should celebrate it."

    Please feel free to post in our group any celebrations (big or small) that you'd like for us to celebrate with you. Sometimes seeing it on "paper" can help us acknowledge and appreciate it even more. XOXO

    Join Now for FREE!

    How respecting your husband can save your marriage

    2 Ingredient Cran-Apple Martini

    October 23, 2018

    Yum! Only 2 ingredients!? This drink recipe is so easy and classy! Perfect for a red themed party of for the holidays! 2 ingredient cran apple martini

    2 Ingredient Cran-Apple Martini: Easy as mixing cranberry juice with apple vodka, this martini recipe can be served in a pinch, and has flavors that are perfect ANY time of year!

    Yum! Only 2 ingredients!? This drink recipe is so easy and classy! Perfect for a red themed party of for the holidays! 2 ingredient cran apple martini

    Now you know that the ONLY recipes you’ll find here on Fantabulosity, are quick and easy.  Well alcoholic beverages and cocktails around here, are NO different.

    When I can come up with a drink that takes little skill but is BIG in flavor, then I add it to my mental cocktail cookbook.

    Cranberry Apple Martini – Only 2 Ingredients

    Staring at the big container of cranberry juice left over from a previous recipe in my refrigerator, it was time to experiment.

    I was pleasantly surprised when I found the green apple vodka in my cabinet because a cran-apple cocktail sounded perfect for the holiday season!

    But after taste testing this refreshing martini, I realized that this combo would be crazy delicious ANY time of year! It’s a fruity (yet not sugary sweet) blend that’s great for Spring, that will even carry over into the Fall season.

    You’ll Also Love:

    • Snowy Red Apple Martini
    • Summer Cocktails for a Crowd
    Yum! Only 2 ingredients!? This drink recipe is so easy and classy! Perfect for a red themed party of for the holidays! 2 ingredient cran apple martini

    If the cranberry juice is already chilled, just mixing the two ingredients, and serving will be perfectly fine.  But if an ice cold martini is preferred, then shaking it over ice is recommended! Or, even though martinis don’t have ice, this fruit ice cube recipe is so pretty in drinks.

    Recipe

    Yum! Only 2 ingredients!? This drink recipe is so easy and classy! Perfect for a red themed party of for the holidays! 2 ingredient cran apple martini
    Print Pin
    4.50 from 4 votes

    2 Ingredient Cran Apple Martini

    2 Ingredient Cran-Apple Martini: Easy as mixing cranberry juice with apple vodka, this martini recipe can be served in a pinch, and has flavors that are perfect ANY time of year!
    Course Drinks
    Cuisine American
    Prep Time 2 minutes minutes
    Total Time 2 minutes minutes
    Servings 1 Martini
    Calories 4kcal
    Author Jessica Burgess

    Ingredients

    • 3 shots of cranberry juice
    • 1 shot green apple vodka

    Instructions

    • In a cocktail shaker, mix, shake, then serve.
    • (Shake in shaker over ice if colder drink preferred)

    Notes

    Please keep in mind that the nutritional information provided below is just a rough estimate and variations can occur depending on the specific ingredients used. 

    Nutrition

    Serving: 1g | Calories: 4kcal | Carbohydrates: 1g | Protein: 1g | Sodium: 1mg | Potassium: 2mg | Sugar: 1g | Vitamin A: 1IU | Vitamin C: 1mg | Calcium: 1mg | Iron: 1mg

    Bulk Serving and Garnish Ideas

    So if you’re lacking bartender skills like myself, don’t fret. You can whip up this 2 ingredient drink recipe in no time, and impress yourself and your guests!

    To add a bit of flair to the cocktail, feel free to garnish with an apple slice (round & flat), cranberries, sugared cranberries, a lime (for a touch of green for the holiday season), or a cinnamon stick for the Fall season!

    Go ahead and double, triple, quadruple, or make a big ole batch of this to serve at a party!

    Yum! Only 2 ingredients!? This drink recipe is so easy and classy! Perfect for a red themed party of for the holidays! 2 ingredient cran apple martini

    Thank you so much for popping by! If you’re into quick and easy recipes or looking for the perfect dish to make for a party, then make sure you head over to my recipe archives for more ideas!

    Chicken and Noodles Recipe

    January 13, 2023

    Chicken and noodles in a white bowl with fork holding a bite.

    This Chicken and Noodles Recipe is made using only a few simple ingredients such as cream of chicken soup, chicken, chicken broth, herbs and spices, and it’s ready in just 25 minutes!

    Comfort food like this belongs in the rotation with my other church cookbook classics.

    Chicken and noodles in white bowl, next to large serving.

    This recipe ranks right up there in “chicken and noodle” recipe favorites, with the homemade chicken noodle soup and this easy chicken and dumplings recipe that I make.

    Old-fashioned chicken and noodles is more of a pasta dish with a creamy sauce, instead of a soup recipe. I remember having this growing up at home, and even in the school cafeteria, served with these hot rolls.

    [feast_advanced_jump_to]

    Why This Recipe Works

    • Simple ingredients: It doesn’t get much easier than this recipe, since it uses ingredients that you probably already have on hand, or that you can easily pick up at almost any grocery store.
    • Crowd-Pleaser: If you’re looking for an easy dinner idea for a crowd, this can easily be doubled or tripled to feed a group.
    • Kid-Friendly: Have picky eaters? I haven’t found a kid yet that turns this dish away!

    Ingredients Needed

    I’ve highlighted a couple of ingredients with some relevant notes. Aside from this, the ingredients needed are pretty basic.

    • Chicken – The type of chicken you can use in this recipe, is up to you! Chicken breast, pulled chicken from a boiled chicken, rotisserie chicken (then you can boil the rotisserie chicken carcass), chicken thighs, or even leftover chicken. As long as it’s cooked shredded chicken, it will work!
    • Chicken Broth – I tend to use homemade chicken broth for this recipe because after I boil a whole chicken, and use the meat for this dish, I have the broth too. (Storebought chicken broth is totally fine too, and I do use that sometimes.)
    • Garlic – I use the jarred, minced garlic but you can definitely chop your own garlic cloves if you prefer or even use garlic powder if that’s all you have on hand. (You just won’t saute the garlic powder… but rather add it in with the salt and pepper.)

    Substitutions

    If needed, substitutions can be made, and here a few that may come in handy:

    • Chicken – if you find that you have leftover turkey from Thanksgiving or any holiday dinner, this works wonderfully in this dish, instead of chicken.
    • Noodles – store-bought egg noodles are the classic choice for this recipe. However, you can use a different type of noodle, like making homemade egg noodles or some type of homemade noodles if you prefer. Or, using elbow macaroni, bow-tie pasta, or even fettuccini noodles could be a substitute if needed.

    Variations

    Although we love this recipe just the way it is, there are some ways you can add some variety to it; such as:

    • Vegetable Chicken and Noodles – Adding frozen mixed vegetables in with the broth, allowing them to cook through, is a great way to add vegetables to your dish.
    • Condensed Soup Flavor – Although I haven’t tried this yet, you may be curious about using cream of celery or cream of mushroom soup instead of cream of chicken. I don’t see why this wouldn’t turn out ok but it may have more of a beef stroganoff with cream of mushroom flavor, than the flavor of the chicken.

    Step-by-Step

    I’ve shared the process of this recipe and you’ll be able to see just how easy it is to throw this classic comfort food dish together, that the whole family will love.

    This recipe is broken into 3 components:

    • saute the onion and garlic
    • add liquid to build base
    • finish with tender chicken and noodles

    *Be sure to see the recipe card below for the full ingredients list & instructions!*

    The beautiful thing about this dish is that it’s a one-pot dish, so make sure you start with a large pot or large dutch oven to fit all of the ingredients, including the four cups of chicken stock.

    Melted butter and onion in stock pot.
    Image 1
    Minced garlic added to butter and onion in stock pot.
    Image 2

    STEP 1. Saute onion in butter. Melt butter over medium heat and then add onion and cook for 5 minutes. (Image 1).

    STEP 2. Saute garlic. Next, add the garlic and stir to combine. (Image 2).

    Cream of chicken soup added to stock pot.
    Image 3
    Broth added to soup in stock pot.
    Image 4

    STEP 3. Add liquid. Pour in condensed soups (Image 3) and broth (Image 4), and then turn up the heat to medium high heat.

    Tip: The broth is what will cook the noodles so there’s no need to pre-cook the egg noodles before adding to the pot.

    Uncooked egg noodles added to broth mixture.
    Image 5
    Egg noodles mixed in to broth and soup mixture.
    Image 6

    STEP 4. Add noodles. When soups/broth starts to boil, add in the in dry egg noodles (Image 5). Turn the heat down to medium low heat, stir and cook the noodles for about 10 minutes or until al dente (Image 6).

    Chicken added to broth mixture.
    Image 7
    Spices add to broth and noodle mixture.
    Image 8

    STEP 5. Add meat and spices. Next, pour in the chicken (Image 7), salt and pepper (Image 8) and then stir to combine.

    Noodles mixed with broth, and condensed soup mixture.
    Image 9
    Spoon lifting chicken and noodles out of stock pot.
    Image 10

    STEP 6. Simmer. Cook for an additional couple of minutes to allow chicken to heat through (Images 9 & 10).

    Recipe Pro Tips

    • Garnish. If desired, sprinkle some fresh parsley on top for a garnish.
    • Meal Planning Recipe. This is an amazing recipe to keep on hand for meal planning dinner and a last-minute meal. Whether that’s keeping frozen chicken in the freezer, and the rest of the ingredients in the pantry, it can be tossed together for those last-minute meals, especially on busy weeknights.

    Recipe FAQs

    What goes well with chicken and noodles?

    A simple piece of buttered bread, or buttermilk biscuit goes wonderful with chicken noodles. Or, a simple salad or these candied carrots are great too!

    How do I thicken chicken and noodles?

    This recipe is thickened by adding the condensed soup. However, if too much broth is added, you can thicken it by mixing a small amount of a mixture of flour and water (about 2 Tablespoons of each) and add it to the dish, and cook on low until it thickens.

    Can you freeze chicken and noodles?

    Yes! Allow it to fully cool and then store in an airtight, freezer container for up to 3 months. To thaw, remove from the freezer and place in the refrigerator so it thaws. Then, pour the chicken and noodles in a stock pot on the stove top, and gently warm it back up, on a “low” burner.

    Chicken and noodles in a big white bowl.

    Storage

    Simply store any leftovers in an airtight container (once it has cooled) for 3-5 days.

    More Easy Dinner Recipes

    If you love quick and easy dinner ideas, I think you’ll also love:

    • Crispy fried steak fingers piled on a plate beside white gravy.
      Steak Fingers
    • Four chicken dishes around a pale label reading 8 Easy Crockpot Chicken Recipes.
      8 Easy Crockpot Chicken Recipes for Cozy Dinners
    • Smothered cube steak topped with onion gravy beside mashed potatoes.
      Smothered Cube Steak with Onion Gravy (Skillet Recipe)
    • Collage of six cozy soups, stews, and chili recipes.
      20 Cozy Soup Recipes for Fall (Easy Soups, Stews & Chili)

    Did you make this? I’d be so grateful if you left a “star” rating below to let me know what you thought! Then, the next time you need a quick and easy recipe, come back to Fantabulosity to browse all of my easy recipes!

    Recipe

    Chicken and noodles in a white bowl with fork holding a bite.
    Print Pin
    4.24 from 26 votes

    Chicken and Noodles Recipe

    This Chicken and Noodles Recipe is made using only a few simple ingredients such as cream of chicken soup, chicken, chicken broth, herbs and spices, and it's ready in just 25 minutes!
    Course Main Course
    Cuisine American
    Cook Time 25 minutes minutes
    Total Time 25 minutes minutes
    Servings 6 servings
    Calories 365kcal
    Author Jessica Burgess

    Ingredients

    • ¼ cup butter
    • ½ cup chopped white or yellow onion or a medium sized onion
    • 1 Tablespoon minced garlic
    • 4 cups chicken broth
    • 2 cans 10.5 oz cream of chicken soup
    • 3 cups uncooked egg noodles
    • 2 cups cooked, shredded chicken
    • ½ teaspoon salt
    • ¼ teaspoon black pepper

    Instructions

    • Melt butter over medium heat and then add onion and cook for 5 minutes.
    • Next, add the garlic and stir to combine.
    • Add in both soups and broth, and then turn up the heat to medium high heat.
    • When it starts to boil, add in the in egg noodles. Turn the heat down to medium low heat and cook the noodles for about 10 minutes.
    • Add in the chicken, salt and pepper and then stir to combine.
    • Cook for an additional couple of minutes to allow chicken to heat through.

    Notes

    Tip: The broth is what will cook the noodles so there’s no need to pre-cook the egg noodles before adding to the pot.
    Storage: Simply store any leftovers in an airtight container (once it has cooled) for 3-5 days.
    Freezing Instructions: Allow it to fully cool and then store in an airtight, freezer container for up to 3 months. To thaw, remove from the freezer and place in the refrigerator so it thaws. Then, pour the chicken and noodles in a stock pot on the stovetop, and gently warm it back up, on a “low” burner.

    Nutrition

    Serving: 1serving | Calories: 365kcal | Carbohydrates: 30g | Protein: 19g | Fat: 19g | Saturated Fat: 8g | Polyunsaturated Fat: 3g | Monounsaturated Fat: 6g | Trans Fat: 0.3g | Cholesterol: 90mg | Sodium: 1589mg | Potassium: 244mg | Fiber: 1g | Sugar: 2g | Vitamin A: 461IU | Vitamin C: 2mg | Calcium: 44mg | Iron: 2mg

    Zesty Italian Pasta Salad Recipe

    June 1, 2022

    ingredients in bowl for zesty Italian pasta salad

    Zesty Italian Pasta Salad: This super easy recipe is made using any type of pasta you prefer, a few other simple ingredients, and Zesty Italian dressing!

    You know we love salad recipes around here right? Well this one is at the top of our favorites list for sure! And if you’re an overall fan of pasta salads then you’ll especially love this shrimp pasta salad!

    Post originally published in 2017 – Updated in June of 2022!

    If you need a little something to go along with this pasta salad, these Hot Italian Sliders would pair amazingly with this!

    Pasta Salad Recipe – Cold, Italian Style and SO Easy

    I’m sharing how to make pasta salad, the super easy and delicious way!

    It not only looks gorgeous as a side dish with all of the pops of color, but it is packed with TONS of flavor.

    Plus, in “slightly homemade” and Fantabulosity fashion, this side dish recipe is quick and oh so easy to whip up for a weeknight meal. Another quick and easy option is this cowboy pasta salad that also comes together quickly and easily.

    Cold Pasta Salad

    A nice cold, flavorful pasta salad is a side dish that is PERFECT for a summer bbq. (Like I served at our Backyard BBQ Party!) But I must admit, no matter what time of year it is, it’s quite delicious any time of year, paired with some of main course, and one of my favorite steak sides!

    Plus, with it being a cold pasta salad recipe, that means NO cooking, and very little prep! One of my favorite recipe combinations!

    Italian Pasta Salad

    When I started experimenting with this pasta salad, I was craving an Italian pasta salad. The thought of mixing together herbs with oils and vinegar crossed my mind, but then that sounded WAY too time consuming and fancy for this momma. So when I eyed the Zesty Italian salad dressing in my pantry, I knew it was exactly what this Italian pasta salad needed!

    Then, the addition of the cute little pepperoni and mozzarella helped tie in the Italian theme as well.

    But the combo of flavors with the red pepper, banana peppers, cherry tomatoes, and spinach rounding off the rest of it, is just what this cold pasta salad needed!

    Tip for Pasta Salad Recipes:

    When I’m making pasta salads, or ANY salad that has tomatoes in it (like one of my favorites: My Tomato Mozzarella and Avocado Salad), PLEASE don’t make this ahead of time and chill it. Now, if it makes life so much easier to… then that’s ok, go ahead. But the refrigeration of the tomatoes causes them to lose SO much flavor. But not only that, the pasta will soak up the dressing and it begins to lose that punch of flavor too.

    What about left overs?  Well save them… I do. But if you have any extra Italian dressing laying around to add more to your left overs, that helps a ton!

    Mason Jar Pasta Salad

    I couldn’t help but to also show you how I assemble the pasta salad in to a jar, when I’m making it to-go, to deliver to family and friends, or when you need an easy picnic food idea. The presentation of the rainbow layer of colors is my all-time favorite.

    Here’s the step by step layering I do when making this Italian Pasta Salad for a care package!

    Finish off the jar with a cute little ribbon and all they have to do is dump it out in to a bowl, stir and serve to their family!

    4 image collage of pasta salad in jar
    Steps 1-4
    4 image collage of zesty italian pasta salad recipe
    Steps 5-8
    2 image collage of pasta salad in mason jar
    9-10

    Love Easy Side Dishes?

    If you love easy side dishes, then you’ll LOVE the others here on the blog. Check out more easy side dishes and pin all of those that you love to your Pinterest board for when you need them!

    Recipe

    ingredients in bowl for zesty Italian pasta salad
    Print Pin
    4.73 from 18 votes

    Zesty Italian Pasta Salad

    Zesty Italian Pasta Salad: This super easy recipe is made using any type of pasta you prefer, a few other simple ingredients, and Zesty Italian dressing!
    Course Side Dish
    Cuisine Italian
    Prep Time 10 minutes minutes
    Cook Time 8 minutes minutes
    Total Time 13 minutes minutes
    Servings 5 servings
    Calories 871kcal
    Author Jessica Burgess

    Ingredients

    • 1 lb bowtie pasta
    • 1 16-ounce bottle zesty Italian dressing
    • 5 ounces cherry tomatoes sliced
    • 1 cup sliced banana peppers
    • 5 ounces mini pepperoni’s
    • 8 ounces of mozzerella pearls
    • 2 cups chopped spinach
    • 1 cup finely diced red onion

    Instructions

    • Cook bowtie pasta according to package directions.
    • Drain pasta and rinse in cold water until pasta is fully cooled.
    • Mix the past together with all of the remaining ingredients.
    • Serve!

    Nutrition

    Serving: 1cup | Calories: 871kcal | Carbohydrates: 86g | Protein: 30g | Fat: 44g | Saturated Fat: 13g | Cholesterol: 65mg | Sodium: 1763mg | Potassium: 635mg | Fiber: 4g | Sugar: 15g | Vitamin A: 1690IU | Vitamin C: 33.3mg | Calcium: 293mg | Iron: 2.8mg

    Low Carb Parmesan Chicken Tenders

    January 15, 2018

    Almond meal chicken tenders recipe.

    Low carb chicken recipes are great for the keto diet or any low carb diet! These Parmesan Chicken Tenders are made with almond flour, heavy cream, parmesan cheese and eggs, and they’re packed with flavor!

    This almond meal chicken tenders recipe is so easy and so good! It's perfect for Keto chicken recipes and low carb chicken recipes! This is also an easy chicken breast recipe idea

    Low Carb Chicken Recipes

    Ever since my son was diagnosed with epilepsy, we’ve been trying to incorporate low carb and keto recipes in to our home, as much as we can. With a picky eater, keto and low carb chicken recipes seems to be a popular “go-to” in our house.

    Almond Flour vs. Almond Meal

    While at Trader Joes the other day, I was on the hunt for almond flour, so I could make keto pancakes, and other low carb bread-like recipes. I couldn’t find it for some reason, and the nice lady working there told me they only had almond meal in stock at the moment. Then she said,

    You know though, I LOVE making chicken using almond meal. Just bread it and fry it in a pan in butter or oil.

    Well that sounded easy enough. So in to my cart the almond meal went.

    Almond meal tends to be a thicker consistency than almond flour, and it’s great for breading meats. (Although I have used it in pancakes and bread like recipes too, when in a pinch. But I prefer it for breading meats.) I found this resource on almond flour recipes too, that has been SO helpful!

    Low Carb Parmesan Chicken Tenders

    I’ve baked chicken more times than I’d like to admit. I can switch up the seasonings, add cheese, so on and so on. But sometimes I just want a different way to cook chicken, for a different spin on things.

    So while brainstorming over what to make for lunch, I remembered the nice gal at Trader Joes said how much she liked to cook chicken on the stovetop, and I thought it would be a great way to use the chicken tenderloins in the fridge. She was SOOO right. With a few spices and adding Parmesan cheese, this is will be a new go-to low carb chicken recipe in our house. Even my youngest said,

    Mommy, dat chicken is willy good!

    BONUS!

    Almond meal chicken tenders recipe is so easy and so good! It's perfect for the Keto diet and low carb chicken recipes!

    So if you’re on a low carb or keto diet, I’d love for you to give this a try and see if you like it! It’s super easy, and a kid friendly meal too! (Yay for only having to make one recipe for the whole family, right!?)

    Recipe

    Almond meal chicken tenders recipe.
    Print Pin
    4.16 from 13 votes

    Almond Meal Parmesan Chicken Tenders

    Substituting traditional bread crumbs with almond meal make these chicken tenders low-carb and delicious! Make this easy chicken recipe for your next weeknight meal.
    Course Main Course
    Cuisine American
    Prep Time 10 minutes minutes
    Cook Time 6 minutes minutes
    Total Time 16 minutes minutes
    Servings 4 servings
    Calories 621kcal
    Author Jessica Burgess

    Ingredients

    • 8 chicken tenderloins
    • 4 Tablespoons butter
    • 1 egg
    • 2 Tablespoons heavy cream
    • 2 cups almond meal
    • ½ cup shredded Parmesan cheese
    • 1 teaspoon salt
    • pepper to taste

    Instructions

    • Mix together heavy cream and egg in a small dish
    • In a separate bowl, mix together almond meal, Parmesan cheese, salt, and pepper
    • Melt butter in a skillet over medium heat
    • Dip chicken tenderloins in egg/cream mixture, then into the almond meal
    • Place tenderloins in butter in skillet, and cook over medium heat 2-3 minutes on each side, until juices run clear and internal temperature reaches 165 degrees
    • ** I covered my cast iron with a lid to speed up the cooking process and to trap moisture.

    Nutrition

    Serving: 1serving (2 chicken tenders) | Calories: 621kcal | Carbohydrates: 12g | Protein: 39g | Fat: 48g | Saturated Fat: 13g | Cholesterol: 153mg | Sodium: 1016mg | Potassium: 396mg | Fiber: 5g | Sugar: 2g | Vitamin A: 645IU | Vitamin C: 1.2mg | Calcium: 285mg | Iron: 2.8mg

    Easy Chicken Breast Recipes

    If you’re out of, or couldn’t find chicken tenderloins… feel free to use this as an easy chicken breast recipe too! I’m always on the hunt for a good way to use chicken breasts. I always make sure to have a bag/box of those in my freezer for a quick go-to dinner idea.

    I’d LOVE to hear if you gave this a try. Can you let me know below in the comments? I’d also like to know what your favorite low carb/keto dinner meal is. We can always use help with new recipes for my little guy!

    Low Carb Steak Recipe

    Although I had no intentions of creating a low carb steak recipe, my all-time favorite oven baked steak recipe totally fits the “low carb” bill. It’s flavored with salt and pepper, seared in brown butter, and baked for only a few minutes… creating the BEST oven-baked steak recipe there is!

    More Easy Recipes?

    If you’re on the hunt for more easy recipes, don’t forget to check out my recipe archives where you can always count on quick and easy in the kitchen! See the recipes HERE!

    How to Cook Steak in the oven! RecipeThis was so easy and incredible, with the browned butter! Easy Steak Recipe: Pan Fried and in the Oven Photo

    Easy Pico De Gallo Recipe

    September 13, 2017

    Easy pico de gallo in a square dish.

    Easy Pico De Gallo Recipe: Doing this one simple step during the process will MAKE this your favorite homemade pico recipe! 

    Easy Pico De Gallo Recipe - SOOOO so good with the lime juice and cilantro

    Easy Pico De Gallo Recipe

    My girlfriend Kate came over the other day, and we had cooking on the agenda to create some recipes for the Slightly Homemade Dinners cookbook. A Catalina Taco Salad (yes, yum… right?) was on the list, and we needed some pico for garnish.

    I looked at her and said,

    Does our grocery store even have fresh pico?

    She followed with,

    No, but we can totally make our own… really easy.

    So we rolled with it, and I’m SO thankful that we did. It was incredible.

    Easy pico de gallo recipe - the cilantro and lime mixed with the tomatoes and onions are to die for! So fresh with one little trick.

    There’s a Secret

    I’ve never really disliked pico, but I didn’t realize how much better making fresh pico at home could be… than pico that’s pre-made at the store, or even served in restaurants. It seems as if a lot of pico is runny and soupy, which is… well, ok. But when Kate told me the secret step to amazing pico, is to scoop out the seeds and juices from the middle… it became a GAME CHANGER.

    By doing this, it creates a whole new CRISP texture that’s incredibly hard to beat.

    Easy Pico De Gallo Recipe - With using this technique, it makes an incredible fresh pico!

    Now we ended up putting most of this pico on top of the taco salad that we made, but we completely finished it off with a bag of tortilla chips, in no time.

    Don’t be afraid to serve a side of this pico and chips as an appetizer at a party, or even as a side dish for your family dinner on a busy weeknight. You can make this recipe super quick and even eat on it for days as a snack!

    Recipes that serve multiple purposes are my FAVORITE!

    If you love quick and easy recipes, you won’t find anything but that in our recipe archives. Take a browse, and pin your favorite on Pinterest for a quick reference!

    Recipe

    Easy pico de gallo in a square dish.
    Print Pin
    4.50 from 4 votes

    Easy Pico De Gallo Recipe

    Fresh tomatoes, cilantro, onion with a pinch of salt and dash of lemon juice is all it takes to make this easy pico de gallo recipe. Pair with chips for the ultimate appetizer!
    Course Appetizer
    Cuisine Mexican
    Prep Time 20 minutes minutes
    Total Time 20 minutes minutes
    Servings 6 servings (makes about 3 cups)
    Calories 16kcal
    Author Jessica Burgess

    Ingredients

    • 5 roma tomatoes
    • 2 Tablespoons fresh cilantro chopped
    • 1 teaspoon kosher salt
    • 1 small white onion peeled and diced
    • juice of 1 lime or 3 Tablespoons of prepared lime juice

    Instructions

    • Slice the Roma tomatoes in half, scoop out and discard seeds.
    • Dice tomatoes and onions in small pieces
    • Mix in the cilantro, salt, and lime juice. Serve!

    Notes

    Super important to discard insides of tomatoes. This helps reduce juices and capture the texture desired.

    Nutrition

    Serving: 1serving (about ½ cup) | Calories: 16kcal | Carbohydrates: 3g | Sodium: 390mg | Potassium: 149mg | Sugar: 2g | Vitamin A: 440IU | Vitamin C: 8.4mg | Calcium: 9mg | Iron: 0.2mg

    Wine Bottle Craft: Vase DIY Tutorial

    August 19, 2017

    Wine bottle crafts: DIY tutorial painted vase

    Wine Bottle Craft: Vase DIY Tutorial – Such a fun way to make crafts using wine bottles. Create a vase for home decor or for party centerpieces.

    I have a LOT to learn in the creativity department of repurposing, but it’s slowly becoming a thing for me. The idea of taking something that would normally be thrown in the trash, and turning it in to something that can be beautiful for a party tablescape or as home decor… really tickles my fancy.

    Wine bottle crafts image: LOVING the colors of this summer soiree! Navy coral and gold. So classy and elegant!

    Wine Bottle Craft: Vase DIY Tutorial

    When my gal pal Kate came over the other day, we started thinking about ways we could tie in the color “gold,” to the Summer Soiree Party that we styled for Columbus Craft Meats last month. Somehow, no matter the topic, our minds tend to lean towards the subject of “wine.”

    So when the idea of using a wine bottle as a vase with big, beautiful flowers in it for the party table came up, it was a no-brainer!

    Since I’m incredibly lucky to be a part of the Make it Martha team on Martha Stewart, I had the PERFECT Metallic Gold Martha Stewart Crafts® paint in my craft room, and I knew it would look incredible brushed on to the wine bottle.

    Wine Bottle Vase Tutorial:

    Wine Bottle Crafts: Martha Stewart Crafts paint diy vase project

    Paint + Brush

    For this craft, we used the Metallic Gold Soft Gel Watercolor Acrylic Craft Paint, because it works great on glass. Then, to paint it on, we used one of brushes from the Martha Stewart Crafts® Watercolor Brush Set. Friends, if you haven’t tried any of the paint brushes from the Martha Stewart Crafts® collection, do it. I never thought that the quality of a brush really mattered… until we tried these. ESPECIALLY the stencil brushes that we used on the flamingo drink tray and nautical anchor pillow.

    Wine bottle crafts Martha Stewart Crafts paint brushes for painted DIY vase

    Using a wine bottle to make a vase for a party display or centerpiece - wine bottle crafts

    Wine Bottle Transformation:

    Step 1: Drink the wine out of the wine bottle. All of it. (Haha… totally kidding. Kind of.)

    Step 2: Remove label. Clean the bottle, inside and out. Making sure to remove any glue left from label.

    Gold metallic paint - Martha Stewart Crafts

    Step 3: Pour a small amount of the paint on to a disposable dish, like a paper plate. This paint can go a long way, so start with a small amount.

    Martha Stewart paint brush to make DIY vase - wine bottle craft

    Step 4: Starting at the top of the wine glass, begin brushing paint strokes down the bottle.

    We opted for a “sheer,” brushed look on the bottle, instead of fully covering the bottle, and LOVED the way it turned out. But you can do more of a fully covered look if you prefer!

    Painting a wine bottle to make a vase for party decor - wine bottle crafts

    Using paint, paint a wine bottle to make a flower vase. DIY project using a wine bottle.

    wine bottle diy craft: paint to make a vase

    Wine Bottle Vase DIY Tutorial

    The wine bottle vase was dry in no-time, and ready for flowers! We ended up making two for the Summer Soiree Party, but we now have them placed around the house for an added touch of gold decor.

    Wine bottle crafts photo: This is SO pretty and so easy! DIY Wine Bottle Gold Vase Tutorial

    What Would Make This Craft Even Better?

    Host a wine and craft night with your girlfriends, and serve wine from the new Martha Stewart Wine Co.! Have you heard of this? I’m super excited to try it! For party ideas for your own wine and craft night, browse our latest parties HERE!

    Then, for more crafts and DIY ideas, head over HERE for more inspiration!

    Southern Fried Chicken

    December 8, 2023

    Close up of southern fried chicken on white plate.

    Southern Fried Chicken: The best fried chicken is made up of two things: juicy meat and quality seasonings.

    Nothing disappears faster at a potluck. See the rest of my church potluck recipes.

    This Southern fried chicken recipe checks off the boxes. Get ready to take a mouth-watering bite into a perfectly fried, golden brown piece of chicken once you are done making this recipe.

    Crispy fried chicken on black wire cooling rack.

    Love some high-quality, classic southern dishes? You have to try out Southern Broccoli Casserole, Macaroni and Tomatoes, and some Southern Fried Pork Chops next!

    [feast_advanced_jump_to]

    Why You’ll Love This Recipe

    • It uses a few ingredients: You likely have everything you need for this recipe already on hand which is so helpful!
    • It’s fairly inexpensive: Make this recipe super affordable by purchasing the cheapest cuts of bone-in chicken.
    • Ready in only 40 minutes: Talk about a quick and easy dinner idea! This restaurant-quality fried chicken is ready in 40 minutes or less.

    Ingredients Needed

    I’ve highlighted a couple of ingredients below with some relevant notes. Aside from this, the ingredients needed are pretty basic.

    Labeled ingredients for southern fried chicken.
    • Bone-In Chicken – We used a whole chicken for this recipe (chicken breast, chicken thighs, and chicken wings)
    • Spices – These are what make or break the recipe. Do NOT skip!
    • Buttermilk – The key to some stellar fried chicken pieces is buttermilk.

    Variations

    While this recipe is originally prepared on the stovetop, you could also cook the fried chicken in the air fryer. We share the notes for such in the recipe card as well as here:

    To air fry this fried chicken recipe, preheat the air fryer to 375 degrees F. and then place the chicken in a single layer on the bottom of the air fryer pan. Bake for four minutes, turn, and bake for another four or until the internal temperature reaches 165 degrees F.

    Other recipe variations:

    • Seasoning – you could easily add to the seasonings listed (We don’t recommend taking any out). Add in some cayenne pepper or chili powder for an added kick or something like Dan O’s for some more flavor.
    • Turn up the heat – Add some hot sauce into the buttermilk mixture for some hot chicken!

    How to Make the Best Fried Chicken

    Making this fried chicken recipe is broken down into 3 components:

    • making the batter
    • soaking the chicken
    • frying the chicken

    *Be sure to see the recipe card below for the full ingredients list & instructions!*

    Image collage showing steps 1-4 of how to make Southern fried chicken.

    STEP 1. Make the marinade. In a large mixing bowl, whisk together the buttermilk, mustard, salt, pepper, and smoked paprika. (Image 1).

    STEP 2. Marinade the chicken. Place the chicken in the bowl with the marinade, toss to coat, cover the bowl with plastic wrap, and chill in the fridge for 4-6 hours. (Image 2).

    Tip: Letting the chicken pieces hang out in the wet mixture for a bit will lead to more tender, juicier chicken. Highly recommend!

    STEP 3. Make the breading. Whisk together the flour, onion powder, poultry seasoning, and garlic powder. (Image 3).

    STEP 4. Dredge. Remove the chicken from the fridge and dredge each piece in the flour mixture before placing it on a wire rack. Let the chicken sit on the rack for about 15 minutes to allow the flour mixture to soak up the buttermilk mixture which will give you that great crispy flakey texture when frying your chicken. (Image 4).

    Image collage showing steps 5-7 of how to make southern fried chicken.

    STEP 5. Fry. Heat the oil in a large heavy-bottomed skillet or Dutch oven to 350-360°F and fry the chicken for 8-10 minutes on either side or until a meat thermometer inserted into the largest piece reads 165°F. Do not crowd the pan. Fry in batches if you need to. (Image 5 + 6).

    STEP 6. Drain the oil. Transfer the fried chicken to a plate lined with paper towels to allow the oil to drain off.
    (Image 7).

    Southern fried chicken in white platter with white parchment paper underneath.

    Recipe Pro Tips

    • Allow to slightly cool. Fried chicken right off the stovetop is HOT! Let it sit for a few minutes before eating.
    • Correct temperature. Always make sure cooked chicken has an internal temperature of 165 degrees F. before removing it from the heat source.
    Close up of fried chicken leg on white rack.

    Recipe FAQs

    How long to fry fried chicken in a pan?

    Fry your chicken for 7-8 minutes on each side over medium-high heat in oil on the stovetop. Make sure the internal temp reaches 165 degrees F. prior to removing from heat.

    What are the best seasonings for fried chicken?

    We recommend garlic powder, onion powder, smoked paprika, black pepper, salt, all-purpose seasoning, and dry mustard for the best flavor.

    Can I use cornflakes as breading for chicken?

    Absolutely! This is a common variation of this recipe. However, to get the best result for traditional Southern Fried Chicken, we suggest sticking with all-purpose flour.

    What is the secret to good fried chicken?

    A salty marinade is the key to tasty and juicy fried chicken. Add your salt right into your buttermilk mixture for the most flavor!

    What kind of oil do you fry chicken in?

    You can fry chicken in almost any oil with a high smoke point, but we recommend vegetable oil.

    Why put chicken in milk before frying?

    In short, it helps jumpstart the tenderization process.

    What can I soak chicken in to make it tender?

    We recommend buttermilk, however, you could also soak it in citrus juices, vinegar, or yogurt to get that tender, juicy chicken outcome.

    Which cut of chicken is the best for frying?

    Well, that all comes back to personal preference! While we love the white meat of chicken breast, many people we know enjoy the dark meat pieces (such as chicken thighs) instead!

    What is another variation I can make?

    You can make this Southern fried chicken in the oven. Marinade and dredge the chicken as you normally would, arrange it on a wire rack set above a baking sheet, and bake at 425°F for 45 minutes. Flip the chicken 15 minutes before the cook time is up. 

    Do I have to use store-bought poultry seasoning or can I make my own?

    You are more than welcome to make your own poultry seasoning if you want a little more control over your flavor profile. Store-bought is just so convenient! 

    Can I make this ahead of time and freeze it?

    Yep! Seal the marinating chicken in a freezer-safe airtight container and store it in the freezer for up to 3 months. When you are ready to fry, allow the chicken to thaw in the fridge. Once the chicken has thawed, whisk together the ingredients for the breading, dredge, and fry.

    What size skillet did you use?

    I used a 10 inch skillet but you could use a nice and sturdy, deep 12-16-inch skillet instead. You can use something smaller, you just might have to fry in more batches to prevent crowding the pan. You can also use a large dutch oven, this allows for a deeper fry because you can safely fill the dutch oven with more oil.

    Can I skip the buttermilk?

    You can. Buttermilk does a wonderful job of tenderizing the chicken but, if you are dairy-averse (or in a rush and want to skip the marinade), go ahead and leave it out. Just dip each piece of chicken in some flour, then in an egg wash, and then dredge in the seasoned flour mixture. 

    How much oil do I need?

    I used 2 cups of vegetable oil in my skillet. You just need it to go two inches up the sides of the skillet. You could use enough oil to fill a Dutch oven halfway if you'd like to use one. You'll get a more even fry that way but you will have to use a lot more oil and it will take longer to heat up. 

    The breading fell off the chicken when frying.

    Make sure you are adding the chicken to the oil when it’s already hot and ready! If you add the chicken to your oil before it’s ready, the breading will slide right off. Another thing, make sure you are not overcrowding your skillet. Every piece of cold chicken is going to bring down your oil temperature a bit.

    What to Serve with Southern Fried Chicken

    The only thing that can make this traditional fried chicken recipe any better are some good quality sides. Make sure to check out my recipes for Red Skin Potato Salad, Macaroni Chicken Salad, and Orange Fluff Salad for just that!

    But the classic side dishes for fried chicken are mashed potatoes and white country gravy, or these easy fried onions and potatoes.

    Close up of fried chicken on white platter.

    Storage

    Refrigerator. Once the chicken has cooled completely, seal it in an airtight container and store it in the fridge for up to 4 days. 

    Freezer. Allow the chicken to cool to room temperature before sealing it in a freezer-safe airtight container and storing it in the freezer. It will stay good for up to 3 months. Allow the chicken to thaw in the fridge before reheating.* 

    * Note that the breading is likely to fall off of your chicken upon thawing. For this reason, we prefer not to freeze my fried chicken, but the choice is yours.

    To reheat. Arrange the chicken pieces in a single layer in a baking dish, cover with aluminum foil, and bake at 350°F for 10-15 minutes or until heated through.

    More Chicken Recipes You’ll Love

    If you love quality-made, juicy chicken recipes, we have you covered!

    • Fried chicken sliders on white plate, topped with mayo, lettuce and pickles.
      Fried Chicken Sliders
    • Crispy Chicken Burger
      Crispy Chicken Burger (KFC Zinger Burger)
    • Cornflake fried chicken on plate, with fresh parsley sprinkled on top.
      Cornflake Fried Chicken
    • Chicken drumsticks baked in oven
      Juicy Chicken Drumsticks in the Oven

    Did you make this? I’d be so grateful if you left a “star” rating below to let me know what you thought! Then, the next time you need a quick and easy recipe, come back to Fantabulosity to browse all of my easy recipes!

    Recipe

    Close up of southern fried chicken on white plate.
    Print Pin
    4.84 from 6 votes

    Southern Fried Chicken

    Deliciously simple and crazy crunchy, this classic Southern Fried Chicken recipe lives up to the hype. It is super tender and juicy; everything fried chicken should be!
    Course Main Course
    Cuisine American
    Prep Time 20 minutes minutes
    Cook Time 20 minutes minutes
    Total Time 40 minutes minutes
    Servings 8 servings
    Calories 475kcal
    Author Jessica Burgess

    Ingredients

    • 2 cups flour
    • 2 cups buttermilk
    • 3 pounds bone-in chicken (7-8 pieces of breasts, thighs, and legs)
    • 2 teaspoons garlic powder
    • 2 teaspoons smoked paprika
    • 2 teaspoons dry mustard
    • 2 tablespoons all purpose seasoning
    • 1 teaspoon onion powder
    • 1 teaspoon black pepper
    • 2 teaspoons salt
    • vegetable oil 2 inches in a large skittle or Dutch oven

    Instructions

    • Make the marinade. In a large mixing bowl, whisk together the buttermilk, mustard, salt, pepper, and smoked paprika.
    • Marinade the chicken. Place the chicken in the bowl with the marinade, toss to coat, cover the bowl with plastic wrap, and chill in the fridge for 4-6 hours.
    • Make the breading. Whisk together the flour, onion powder, poultry seasoning, and garlic powder.
    • Dredge. Remove the chicken from the fridge and dredge each piece in the flour mixture before placing it on a wire rack. Let the chicken sit on the rack for about 15 minutes to allow the flour mixture to soak up the buttermilk mixture which will give you that great crispy flakey texture when frying your chicken.
    • Fry. Heat the oil in a large heavy-bottomed skillet or Dutch oven to 350-360°F and fry the chicken for 8-10 minutes on either side or until a meat thermometer inserted into the largest piece reads 165°F. Do not crowd the pan. Fry in batches if you need to.
    • Drain the oil. Transfer the fried chicken to a plate lined with paper towels to allow the oil to drain off.

    Notes

    To air fry this fried chicken recipe, preheat the air fryer to 375 degrees F. and then place the chicken in a single layer on the bottom of the air fryer pan. Bake for four minutes, turn, and bake for another four or until the internal temperature reaches 165 degrees F.

    Nutrition

    Serving: 1chicken wing | Calories: 475kcal | Carbohydrates: 28g | Protein: 29g | Fat: 27g | Saturated Fat: 8g | Polyunsaturated Fat: 5g | Monounsaturated Fat: 11g | Trans Fat: 0.1g | Cholesterol: 148mg | Sodium: 757mg | Potassium: 441mg | Fiber: 1g | Sugar: 3g | Vitamin A: 460IU | Vitamin C: 0.1mg | Calcium: 91mg | Iron: 3mg

    Stuffed French Toast (Crispy Outside, Creamy Inside)

    October 20, 2023

    This stuffed French toast is crispy on the outside, soft and creamy on the inside, and filled with sweet cream cheese and strawberry jam. It's an easy breakfast recipe that comes together quickly but feels special enough for weekends, holidays, or when you just want something a little extra.

    A No-Fail Breakfast That Feels a Little Fancy

    If you've ever made stuffed French toast that turned soggy or fell apart in the pan, this method fixes that. With thick slices of bread, a quick dip in the custard, and a simple cream cheese filling, you get that golden, lightly crisp exterior with a warm, creamy center every time.

    Stuffed french toast slices on white plate, with strawberries.

    It's the kind of breakfast that looks impressive, tastes like something you'd order at a restaurant, but is simple enough to make at home without overthinking it.

    It’s super easy to whip up, perfect for special occasions, and lazy Sundays for a delicious breakfast recipe.

    Golden-brown French toast filled with luscious cream cheese and strawberry jam takes traditional French toast to a whole new level, similar to when we had fun making this French toast casserole.

    If you want to test out some other French toast recipes, you could try some Brioche French Toast that’s creamy and packed with flavor. Or for something more kiddo-friendly, try these EASY Cinnamon French Toast Sticks and top them with delicious blueberries. This crock pot bagel French toast is another, hands-off option.

    [feast_advanced_jump_to]

    Why You’ll Love This Recipe

    • Crispy outside, creamy inside - the texture is what makes this stand out
    • Simple ingredients - nothing complicated or hard to find
    • Quick to make - ready in about 15 minutes
    • Easy to customize - swap the jam or filling to fit what you have

    What is French Toast?

    Classic French toast, known as ‘pain perdu’ in France, is a beloved breakfast dish that’s been gracing our tables since the 5th century. It’s a culinary magic trick that transforms stale bread into a sweet and savory delight. 

    At its core, regular French toast is bread soaked in a mixture of eggs and whole milk, then fried to a yummy, golden perfection. Its fluffy interior and crispy exterior serve as a perfect canvas for a sprinkle of powdered sugar, a drizzle of maple syrup, or a dollop of your favorite fruit jam. It’s not just a breakfast option but also an opportunity to get creative in the kitchen!

    How to Keep Stuffed French Toast from Getting Soggy

    The biggest mistake when making stuffed French toast is over-soaking the bread. A quick dip is all you need. Just enough to coat the outside without saturating the center.

    Also, using thick, sturdy bread like sourdough or brioche also helps hold the filling without falling apart. For extra crispness, lightly toast the bread before assembling.

    Ingredients Needed

    I’ve highlighted a couple of ingredients below with some relevant notes. Aside from this, the ingredients needed are pretty basic.

    Labeled ingredients for stuffed french toast.
    • Bread – Sourdough bread is definitely the best bread for this recipe. You’ll need 16 slices for it, 2 per portion. Thick-cut bread is better than thinner bread
    • Cream cheese – You can use any cream cheese but aim for one that isn’t flavored as this can change how the French toast will taste.
    • Maple syrup – You’ll want a good quality maple syrup to add to the toast and also as one of the toppings.

    Best Bread for Stuffed French Toast

    Not all bread works the same here. You want something thick and sturdy that can handle the filling and the custard.

    • Sourdough - Slightly tangy and holds its shape well
    • Brioche - Soft, rich, and slightly sweet
    • Challah - Fluffy with a tender texture

    Avoid thin sandwich bread, as it tends to get too soft and can fall apart when cooking.

    Substitutions

    Sometimes substitutions are necessary because of ingredients that are unavailable or needed for dietary restrictions. Here are some suggestions that can help:

    • Sourdough Bread – If you can’t find sourdough bread, any kind of sturdy thick bread like challah, brioche, or French bread will do. For a healthier option, you can use whole-grain or gluten-free bread.
    • Cream Cheese – If you’re dairy-free or just want to cut some calories, a non-dairy cream cheese substitute or Greek yogurt works well.
    • Strawberry Jam – Not a fan of strawberries? Swap it out with your favorite fruit jam, like raspberry or apricot. For a less sweet option, you could use fresh fruit compote. Or simply leave out the strawberry jam entirely.
    • Vanilla Extract – No vanilla extract in the cupboard? Almond extract can provide a delightful twist. You can also use a vanilla bean; just scrape out the seeds.
    • Cinnamon – If you’re out of cinnamon, nutmeg or allspice can be a good substitute. They’ll give a different but still delicious flavor profile.
    • Maple Syrup – Honey or agave syrup can stand in for maple syrup. Or for a unique take, try a flavored syrup like blueberry or caramel. 

    Variations

    Traditional French toast is like a culinary canvas - it’s open to all sorts of delightful twists and flavor combinations! Here are a few variations you might want to try out the next time you’re in the mood for a breakfast adventure:

    • Chocolate Hazelnut Cream Cheese Delicious Stuffed French Toast: Swap the regular cream cheese for some chocolate hazelnut spread and cream cheese blend, and you’ve got yourself a Nutella lover’s dream breakfast! It’s like a deliciously decadent dessert but for breakfast. 
    • Apple Cinnamon Stuffed French Toast: Bring the flavors of fall to your breakfast table by mixing diced apples and a sprinkle of cinnamon into your cream cheese. It’s like biting into a warm, comforting apple pie - first thing in the morning!
    • Tropical Stuffed French Toast: Missing the beach? Bring a taste of the tropics right to your kitchen by filling your French toast with a cream cheese and crushed pineapple mixture. Drizzle with some coconut syrup for an extra tropical touch!
    • Berry Blast Stuffed French Toast: Instead of strawberry jam, try mixing a variety of fresh berries - like raspberries, blueberries, and blackberries - into your cream cheese for a fresh and fruity breakfast treat. 

    Remember, the best part about cooking is making it your own - so don’t be afraid to experiment with different fillings and toppings! Who knows, you might just discover a new breakfast favorite.

    How to Make Stuffed French Toast

    This French Toast is broken into 3 components:

    • Prepare the ingredients
    • Create the French Toast
    • Cook and serve

    *Be sure to see the recipe card below for the full ingredients list & instructions!*

    STEP 1: Heat the skillet. Preheat your electric skillet to 375°F (or 191°C) and apply a small amount of non-stick baking spray. Allow the skillet to warm up.

    STEP 2: Mix the cream cheese and sugar. In a medium bowl, combine the softened cream cheese, powdered sugar, and 1 teaspoon of vanilla extract. Use an electric mixer to beat the ingredients until they are fully incorporated and have a creamy texture. Set aside. (Image 1)

    Four images showing how to make stuffed french toast.

    STEP 3: Combine the eggs and milk. In a pie pan or similar shallow bowl, combine the eggs, milk, remaining vanilla extract, cinnamon, and maple syrup. Stir the mixture with a fork or small whisk until well combined. Set it aside for now. (Image 2)

    STEP 4: Pipe the filling into the bread. Using a piping bag, spoon the cream cheese mixture onto one side of the bread, about a tablespoon per piece. Top it off with a small dollop (approximately 1 tsp) of strawberry jam. Make sure there’s a slight oozing effect when cutting into it by adding enough cream cheese mixture. Repeat this process for 8 pieces of bread, ensuring each one has a cream cheese mixture and strawberry jam on one side. (Image 3)

    STEP 5: Add the jam. On the other slice of bread, create a small circle of space to ensure the jam stays on top without peeking through. Sandwich the bread together. (Image 3)

    Tip: For a crispier texture on your French toast, start by toasting the bread before spreading the cream cheese mixture in the middle and dipping it into the custard mixture. This will give your French toast a delightful crunch while maintaining the delicious flavors intact.

    STEP 6: Cover in egg mixture. Take one assembled piece of bread and dip it in the egg-milk mixture, allowing the custard to saturate the bread. Flip the bread to ensure that the egg-milk mixture covers the entire surface. Transfer it directly onto the heated skillet. Repeat this procedure for all eight pieces of assembled sourdough bread.

    A hot griddle cooking stuffed french toast.

    STEP 7: Cook the toast. On the hot skillet, cook the French toast for approximately 5 minutes on one side, then flip it over and cook for an additional 4 minutes. Aim for a golden brown color on both sides of the toast. Serve immediately. 

    STEP 8: Add toppings and serve. Add your favorite toppings – a sprinkle of powdered sugar and mixed berries. Finish it off with a drizzle of maple syrup on top.

    Cooked stuffed french toast on wooden cutting board.

    Recipe Pro Tips

    • Pre-toast the Bread: If you like your French toast extra crispy on the outside, try toasting your bread slices lightly before you stuff and dip them. This will give them an extra crunch that contrasts beautifully with the soft, creamy filling.
    • Customize Your Fillings: Don’t feel limited by the fillings suggested in this recipe. Feel free to get creative and use what you and your family love or what you have on hand. You can try different jams, nuts, or even chocolate chips!
    • Keep It Warm: If you’re cooking for a crowd and need to keep the first few pieces of toast warm while you finish cooking the rest, simply place them on a baking sheet in an oven set to a low temperature (about 200°F or 93°C). This will ensure everyone gets a warm, delicious piece of stuffed French toast.
    • Don’t Soak the Bread Too Long: Be careful not to leave your bread slices in the egg mixture for too long. A quick dip is all they need. If the bread soaks up too much liquid, it can become soggy and difficult to handle.
    • Experiment With Bread Types: Sourdough, challah, and brioche bread are all great options, but don’t be afraid to experiment with different types of bread. Just remember that the bread needs to be sturdy enough to hold the stuffing and withstand being dipped in the egg mixture.
    Stuffed french toast on a plate with fresh berries on top.

    Recipe FAQs

    Can I use non-dairy milk for the egg mixture? Question 1

    Absolutely! Almond milk, soy milk, or oat milk can all be great substitutes for dairy milk in this recipe. Keep in mind, that each may slightly alter the flavor, but your Stuffed French Toast will still be deliciously indulgent.

    What if I’m gluten intolerant?

    Don’t worry, you can still enjoy this recipe! Just switch out the regular bread for your favorite gluten-free bread. Do note that gluten-free bread can be a bit more delicate, so be extra careful when stuffing and dipping.

    Can I prepare Stuffed French Toast the night before? 

    Yes, you can! Assemble the sandwiches the night before and let them sit in the fridge overnight. Dip them in the egg mixture and cook them up fresh in the morning. Voila, breakfast is served!

    I’m not a fan of sweet fillings, any savory suggestions?

    Of course! Feel free to experiment with savory fillings like ham and cheese, or spinach and ricotta. Just adjust your toppings accordingly - think a sprinkle of herbs instead of powdered sugar.

    Do you have to use an electric skillet?

    No. If you don’t have an electric skillet, you can use a large nonstick skillet instead.

    What to Serve with Stuffed French Toast

    Stuffed French Toast is a crowd-pleaser on its own, but it can be beautifully complemented with other delightful dishes for a full breakfast feast. Here are some suggestions:

    • Fresh Fruit: A side of fresh, colorful fruit not only adds a vibrant touch to your plate but also provides a refreshing contrast to the rich French toast. Think fresh strawberries, banana slices, or a tropical fruit salad!
    • Bacon or Sausage: For meat lovers, a side of crispy bacon or savory sausage makes a perfect pairing. The saltiness of the meat balances the sweetness of the toast.
    • Scrambled Eggs: Light and fluffy scrambled eggs are a breakfast staple that pairs well with just about everything, including stuffed French toast.
    • Hash Browns: Crispy on the outside, and soft on the inside – hash browns add a lovely texture variety to your breakfast spread.
    • Yogurt: A cup of Greek yogurt can add a tangy, creamy element to your breakfast that pairs wonderfully with the sweet, stuffed French toast. Add a drizzle of honey or a handful of granola for extra flavor and crunch.

    Storage

    Storing leftover Stuffed French Toast is a breeze! Simply place the cooled leftovers in an airtight container and pop them in the refrigerator. They’ll stay fresh and delicious for up to 2-3 days. When you’re ready to enjoy them again, just reheat in a toaster oven or standard oven at a low temperature until warmed through. 

    And yes, you can absolutely freeze this dish for future indulgence! To freeze, lay your cooled leftover French Toast on a baking sheet and place it in the freezer for a couple of hours. Once each piece is individually frozen, transfer them to a freezer-safe bag or container. This method prevents the pieces from sticking together and makes it easy to take out individual servings as needed. 

    Frozen stuffed French Toast can last up to 2 months in the freezer. When you’re ready to serve, just defrost overnight in the fridge and reheat in the oven or toaster oven. Perfect for those busy mornings or when you’re craving a sweet, comforting breakfast!

    More Breakfast Recipes You’ll Love

    Looking for more ideas for a special breakfast that’s a little different? How about trying these Mini Waffle Breakfast Sandwiches for the perfect start to the day? Or if you are feeding lots of people, make a Breakfast Waffle Charcuterie Board and let everyone tuck into their favorites.

    • A slice of pumpkin cheesecake cake, on a round plate.
      Pumpkin Cheesecake Cake
    • Pumpkin Dump Cake serving on round plate.
      Pumpkin Dump Cake
    • A serving of hummingbird cake on a vintage, round dessert plate.
      Hummingbird Sheet Cake
    • A slice of pineapple sunshine cake on a round plate.
      Pineapple Sunshine Cake

    Did you make this? I’d be so grateful if you left a “star” rating below to let me know what you thought! Then, the next time you need a quick and easy recipe, come back to Fantabulosity to browse all of my easy recipes!

    Recipe

    Print Pin
    5 from 1 vote

    Stuffed French Toast

    This stuffed French toast is filled with sweet cream cheese and jam, then cooked until golden and crispy on the outside with a soft, creamy center.
    Course Breakfast
    Cuisine American
    Prep Time 20 minutes minutes
    Cook Time 10 minutes minutes
    Total Time 30 minutes minutes
    Servings 4 servings
    Calories 337kcal
    Author Jessica Burgess

    Ingredients

    • 16 pieces sliced Sourdough Bread
    • 8 ounce block of Cream Cheese softened
    • 3 Tablespoons Strawberry Jam optional
    • 1 cup Powdered Sugar plus more for dusting (optional)
    • 2 Eggs room temperature
    • 1 ½ cups Milk
    • 2 teaspoons Vanilla Extract divided
    • ½ teaspoon Cinnamon
    • 1 Tablespoon Maple Syrup

    Instructions

    • Warm your electric skillet to 375 degrees F (or 191 degrees C). Add a small amount of non-stick baking spray to the skillet and allow the skillet to warm.
    • In a medium bowl, add the cream cheese, powdered sugar, and 1 teaspoon of vanilla extract. Using an electric mixer, beat until the ingredients are fully incorporated and are nice and creamy. Set aside.
    • In a shallow bowl like a pie pan, add the eggs, milk, rest of the vanilla extract, cinnamon, and maple syrup. Using a fork or a small whisk, stir to combine. Then set-aside.
    • Spoon the cream cheese mixture into a piping bag, and pipe about a tablespoon of cream cheese mixture to 1 side of the bread. Then add a small dollop (about 1 teaspoon) of strawberry jam on top. You'll want to add enough cream cheese mixture so there's a small amount of oozing when cutting into it. Repeat this process so 8 pieces of bread have cream cheese mixture and strawberry jam on 1 side.
    • On the other piece of bread, add a small amount in a circle so there's room for the jam to stay on top and not peek through the top.
    • Sandwich the bread together.
    • Place 1 assembled piece of bread in the egg-milk mixture, allowing the custard to soak up into the bread. Flip the bread over so the egg-milk mixture is fully coating the bread. Place it directly onto the heated skillet. Repeat this process for all 8 pieces of assembled sourdough bread.
    • Allow the French toast to cook for about 5 minutes, then flip it over and cook for 4 more minutes. **You want the French toast to become browned on each side.
    • Serve immediately.
    • Optional toppings – sprinkle with a dusting of powdered sugar and mixed berries. Drizzle maple syrup on top.

    Notes

    I used 2% milk in this recipe; any milk on hand will work. You can even use half and half.
    If you want a crunchier texture to the French toast, you’ll want to toast the bread first before adding the cream cheese mixture to the middle and dipping it into the custard mixture.
    I pipped on the cream cheese mixture to give the French toast a gooier look, but this isn’t necessary; you can spread the cream cheese mixture using a butter knife or a spoon. Being stingy with the cream cheese mixture will affect the flavor of the stuffed French toast.

    Nutrition

    Calories: 337kcal | Carbohydrates: 39g | Protein: 14g | Fat: 13g | Saturated Fat: 4g | Cholesterol: 256mg | Sodium: 414mg | Potassium: 215mg | Fiber: 2g | Sugar: 13g | Vitamin A: 465IU | Vitamin C: 8.8mg | Calcium: 124mg | Iron: 3.2mg

    Home Tour Part 18 — Craftsman Home Patio Reveal

    June 27, 2017

    Back patio with white cushions, yellow pillows! Craftsman style home

    Home Tour Part 18 - Craftsman Home Patio Reveal: It’s an outdoor oasis surrounded by white patio curtains, with a white cushion sectional from our craftsman style home.

    Craftsman Home Patio Back patio with white cushions, yellow pillows! Craftsman style home

    Craftsman Home Patio Reveal

    I featured our “old” patio in our home tour a couple of years ago (see our other patio decorating ideas), and it has been a YEAR from the moment I started thinking about a new patio look, and I’m happy to say that I finally have it how I’ve wanted it. There have been incredible hurdles through this process, and the crazy part is… there’s really not much to it.

    I mean, new furniture and some patio curtains. How hard can that be, right?! Well oh my goodness. This patio project quickly turned into a story similar to the storyline in the movie The Money Pit. Although I didn’t spend a lot of money on this project, it seemed as if everything kept going wrong from the start. I’d get one item figured out, and then something else would go wrong.

    It definitely wasn’t as easy as the front porch of our craftsman home.

    First the Furniture…

    I originally ordered the new sectional to have for my Favorite Things Party, but the original seating set that I ordered never made it. (Lost in shipping.) Then after reordering, it went on back order for a few months. When I finally received it, the cushions were gray instead of white, and the furniture was black instead of brown. I kind of went a bit crazy during this time, but I must say that after about 5 months of back and forth… Wayfair sent me the white cushions, and I decided to just live with the wrong color of furniture. So, needless to say, THIS is why my patio wasn’t complete and ready to reveal last season.

    Craftsman Home Patio. Outdoor curtains for a back patio. LOVE the white flow to this on this craftsman style home

    Then the Patio Curtains…

    I LOOOOOVE my patio curtains. (I talked about them a lot in the post about how to make DIY Patio Curtain Tie Backs) But our house is up on a hill, and the back patio can take a big gust of wind like nobody’s business. So through a bit of trial and error, I think we finally have these babies hung on hooks that can take a tornado. Bring it, mother nature!

    You can buy the same patio curtains!

    You can also buy the outdoor curtain rods!

    Plus, get my DIY tutorial curtain tie-backs that I made for these, for under $5.00!

    But I’m In Love…

    Even though it has been a bit of a struggle here and there, I’m happy to say that the patio is now a place I refer to as my oasis. It’s simple and it’s relaxing.

    Video Tour

    Along with the photos that you’ll see below, I’ve created a quick video tour on my YouTube channel to give you an up-close visual experience too!

    Craftsman Home Patio. Back patio seating area with couch/sectional and white cushions! Perfect with a craftsman home style.

    I’ve included links to similar furniture pieces at the end of this post, in case you’re in the market for your own patio too!

    Craftsman Home Patio. Back patio design with sectional and curtains. White and yellow pillows - Fantabulosity Home Tour

    White Cushions? She-Crazy!

    When shopping for a new sectional for the back patio, I knew I wanted white-white cushions. My friends thought I was crazy, and STILL think I’m crazy to have white cushions with two messy little boys at home. But I wanted to take the risk, and I’m happy to say that a year later… I’m still happy with the decision.

    Scotchgard has been my best friend, and bleach and OxyClean have also been a swell thing to have on hand.

    Craftsman Home Patio. Yellow outdoor pillows for a white sectional sofa

    Yellow Throw Pillows

    With dark brown (almost black) furniture, and white cushions and patio curtains, I had the hardest time deciding on a pillow color. But when I stopped in at World Market the other day, they had their outdoor pillows on sale and the yellow caught my eye. I’m still not 100% sure I’m going to stick with yellow, but they’ll work for now. I’ll be honest, I’m keeping my eye out for some pale pink pillows, and will just hope that my hubby doesn’t notice them. 

    Craftsman Home Patio. Flowers for a back patio—craftsman style home with white cushions and pillows

    Floral Touch

    I’m a sucker for a green plant on my patio. I’m not much of a green-thumb, so if it’s a plant that can take care of itself, that’s even better. I snagged this one at Lowe’s the day I took these photos, and my poor little flower died the next day. Looks like succulents are in my future.

    Or Fake Grass…

    Better than succulents, is FAKE greenery. It may not look the best, but it at least adds a pop of color and can withstand that wind and nasty weather that may come about.

    Craftsman Home Patio. Greenery floral for back porch and patio decor fantabulosity home tour

    I put this arrangement on my dining table. I love having this table and chairs out for when the kiddos want to eat outside or when we have people over for a cookout.

    Craftsman Home Patio. Outdoor dining table for patio. Aluminum - brown with white curtains

    My Happy Place

    The back patio is definitely my happy place. Feel free to virtually come over anytime! You’ll more than likely find me out here (yes, I’m sitting out here typing this now) if the weather is above 60 degrees here.

    Craftsman Home Patio. Brown outdoor wicker with white cushions and yellow pillows - craftsman house plan

    Sectional Details

    Sectional seen here against the wall, but with gray cushions: Magari 4 Piece Deep Seating Group

    Similar sectional with white cushions: Outsunny Rattan Wicker 7 pc Sectional

    Similar sectional with white cushions: Varick Gallery Camron Lounge Seating Group

    4-Piece Seating Group Details

    Similar 4-piece seating set with gray cushions: Varick Gallery Ferreira Deep Seating Group

    Similar 4-piece seating set with beige cushions: Overstock – Costway 4 Pcs Outdoor Seating Set

    Similar seating set with white (or they look white) cushions: Best Choice Sectional

    Tour the Other Rooms in Our Home:

    Part 1: The Exterior

    Part 2: The Master Bedroom

    Part 3:  The Master Bath

    Part 4: The Kitchen

    Part 5: The Playroom

    Part 6: The Guest Bath

    Part 7: The Pantry

    Part 8: The Patio/Deck

    Part 9: The Nursery

    Part 10: *Old* The Office/Craft Room

    Part 11: Big Boy Room

    Part 12: The NEW Nursery

    Part 13: The Dining Room/Foyer

    Part 14: The Guest Bedroom

    Part 15: The Living Room

    Part 16: New Office Reveal

    Part 17:  Garage 

    Craftsman Home Patio. Patio on craftsman style home-how to decorate

    Apple Pie Nachos with Cinnamon Sugar Tortilla Crisps

    July 3, 2017

    Apple Pie Nachos - Cinnamon Sugar baked tortillas, topped with apple pie filling! fantabulosity

    Apple Pie Nachos with Cinnamon Sugar Tortilla Crisps - A recipe that you can whip up with a few store-bought ingredients, with an option to make them even easier!

    Perfect for a fall get-together. Browse the rest of my Halloween party food.

    Store-bought shortcuts make entertaining easy. Find more simple fall desserts to round out the table.

    Apple Pie Nachos - Cinnamon Sugar baked tortillas, topped with apple pie filling! fantabulosity

    Wait til you see how you can think outside the box with a can of pie filling here! This is such a fun dessert, and I’ve actually also used pie filling in these Apple Pie Baked Beans! How fun is that?

    That same canned filling makes an easy apple crumble without oats when you want a warm dessert to scoop into bowls.

    Apple Pie Nachos

    I can’t tell you the last time I devoured an entire platter of dessert, practically on my own. Well… until two days ago when my friend Kate came over, and we made apple pie nachos. I had texted her the night before and said:

    Hey, I’m headed to the store. Do you have any fun dessert ideas that we can whip up really quick for the blog?

    She replied with:

    Yep, grab some soft burrito tortillas and a can of apple pie filling. We’re going to make some apple pie nachos.

    Uh, hello! You got it, sister.

    Apple pie nachos ingredients, quick and easy using canned pie filling

    Apple Pie Nachos

    I have seen others make cinnamon-sugar tortilla crisps/wedges/whatever… and serve them with fruit salsa. (I think I Heart Naptime has my favorite recipe for that delicious dish.)

    But when Kate told me that we were going to pour apple pie filling over the top of them, I kind of fell in love with her.

    UPDATE: While browsing Pinterest, I found this other recipe where Mandy’s Recipe Box Blog used tortilla chips to make Caramel Apple Nachos! So so cool! I love all of the different ways that you can make the “chip” part of these nachos.

    But when you have a few minutes to spare, I have a feeling that making these cinnamon-sugar tortilla crisps at home will tickle your fancy a bit more.

    Slice each burrito size soft tortillas in to 8 triangles. After baking, top with the apple pie filling
    Slice a burrito size soft tortilla in to triangles and bake them with sugar and cinnamon for a quick apple pie dessert
    Using canned pie filling, top the baked cinnamon sugar tortillas
    Canned apple pie filling on top of baked cinnamon and sugar tortilla triangles - easy dessert idea when you don't want to make a whole pie

    We literally ate the apple pie nachos just like this. The filling was poured right out of the can on to the crisps and we ate it. BUT, if you pop this in the microwave for a minute, I bet it would be OUT of this world.

    Top the apple pie nachos with whipped cream for a yummy quick dessert idea
    Using chocolate syrup or caramel drizzle, top the apple pie nachos for a delicious quick and easy dessert idea
    Apple Pie Nachos with Baked Cinnamon Sugar Tortillas

    I caught my kids AND my husband devouring their own little platter when we left the room the other day to work on something else for the Fabulously Fast Dinners Cookbook. So it’s safe to say that this recipe is family approved!

    Recipe

    Apple Pie Nachos - Cinnamon Sugar baked tortillas, topped with apple pie filling! fantabulosity
    Print Pin
    5 from 2 votes

    Apple Pie Nachos with Cinnamon Sugar Tortilla Crisps

    Apple Pie Nachos with Cinnamon Sugar Tortilla Crisps - A recipe that you can whip up with a few store-bought ingredients, with an option to make them even easier!
    Course Dessert
    Cuisine American
    Prep Time 15 minutes minutes
    Cook Time 20 minutes minutes
    Total Time 35 minutes minutes
    Servings 4 servings
    Calories 282kcal
    Author Jessica Burgess

    Ingredients

    • 4 large burrito size tortillas
    • 1 21-ounce can apple pie filling
    • ¼ cup sugar
    • 2 teaspoon cinnamon
    • 1 Tablespoon water
    • 2 Tablespoon melted butter
    • caramel or chocolate drizzle and whipped cream if desired

    Instructions

    • Preheat over to 350 degrees Fahrenheit
    • Using a pizza cutter, cut each tortilla in to 8 triangles
    • Combine sugar and cinnamon
    • Place triangles in a single layer on a greased cookie sheet
    • Brush tortillas with melted butter, and sprinkle with cinnamon/sugar mixture
    • Bake for 15-20 minutes until crispy
    • Assemble nachos by layering tortillas on a serving plate, and top with a ¼ of apple pie filling.
    • Warm in oven/microwave for a few minutes if desired
    • Top with whipped cream and caramel/chocolate drizzle if desired

    Notes

    Nutritional information is figured WITHOUT drizzle and whipped cream. Also, please keep in mind that the nutritional information provided below is just a rough estimate and variations can occur depending on the specific ingredients used. 

    Nutrition

    Serving: 1serving (¼ recipe without whipped cream) | Calories: 282kcal | Carbohydrates: 44g | Protein: 5g | Fat: 10g | Saturated Fat: 5g | Cholesterol: 15mg | Sodium: 462mg | Potassium: 92mg | Fiber: 2g | Sugar: 15g | Vitamin A: 175IU | Calcium: 74mg | Iron: 2.1mg

    A Letter to My Friends: I’m Sorry I’ve Gone Missing

    March 21, 2020

    Letter to my friends: Woman wearing pink dress in the middle of a field
    Letter to my friends: Woman wearing pink dress in the middle of a field

    This post has been sitting in my drafts since July of 2017 and I never published it because it didn’t feel right. I couldn’t explain why at the time, why I didn’t put it out for the world to see… but looking back now, in 2020, I totally get it. It kind of goes hand in hand with my “God, I’m exhausted and I’m done trying to fix it” post.

    It wasn’t the right time because I wasn’t the same person back then as I am now and it would have been published for the wrong reasons.

    It was written with a whole different mindset than I have now and I’m so incredibly thankful to be aware of this.

    However, I felt it is appropriate to publish now because although it has the same words… it has a new meaning. I’ll explain more below.

    So What Was the Wrong Reason for Writing This Letter in 2017?

    I wrote this originally as an apology to my friends (or who I thought were my friends – but more to come on that later) in hopes that they’d forgive me for not being the Jessica that they were used to…a redeemed chronic people pleaser here.

    I even had an editor look over the blog post back in 2017 to make sure it was written “ok” and that it wouldn’t hurt anyone’s feelings when I published it.

    Now don’t get me wrong… I’m all about doing things for your friends and being there for them and being a kind person… and not being someone to hurt others.

    But that’s not what this letter was about. This post that I wrote was about making sure I still looked “good” to them and so they (hopefully) wouldn’t talk bad about me behind my back anymore… since I had supposedly “changed”.

    So with that said, let’s dive in to my 2017 post and then at the end, I’ll share more about what I’ve discovered since and I’d LOVE to hear from you how you can relate.


    2017 – Post/Letter to my Friends

    You could put my face on a milk carton.  When it comes to describing my current stage of life in regards to my friendships with even my closest of gal pals… you can say “I’ve gone missing.” I promise it’s not an act of being unkind. It’s a season.

    This Season of Life is Full

    A letter to my friends : Time for girlfriends

    I’m in my thirties, a mom of two littles, and my oldest is getting ready to start kindergarten.  The closer it gets to August. The pit in my stomach gets bigger and bigger, thinking about how our days are limited of when we can come and go as we please on any day of the week. I find myself spending countless hours each day, trying to diminish the pit by squeezing in as much play, and laid back activities as we can before the next stage of life hits.

    For the last year or so, my husband and I have been so incredibly dedicated, focusing on reaching a level of connection that some marriages unfortunately never reach.  We attend marriage counseling once a week to set aside dedicated time to discuss important topics and to build a state of love and respect for one another that we never realized we could reach.

    I’m a working momma, running my own business at home.  Emails, deadlines, hand-on creative projects for brands, and dreams of my own that I’m working towards fulfilling.

    A letter to my friends about being busy: Family photo of a boy mom

    I’m a major advocate of spending time with friends.  The connections, closeness, and relatability that can come from girl time is so good for the soul.

    But lately, I’ve been silent with texts and checking in. I’ve missed birthday parties. I’ve fallen short on planning that girls dinner that I’ve been saying I want to have for weeks now. I’ve slacked on planning the annual girls night party in my home. (And other ridiculous things we women tell ourselves that defines “being a good friend.” But more on that at a later date.)

    Owning the Season

    So if I feel so strongly about the importance of girl time, why do my friends probably think I’ve gone missing?

    Because I’ve decided to take the reigns of my current season of life and control how I fill each and every day:

    — I’m being intentional about spending time at home with my “babies” before sending them out the door with a backpack.

    — I’m taking advantage of every moment to nurture my marriage.

    — I’m wrapping my arms around every incredible opportunity coming my way, to grow and improve my business.

    Marriage - Focusing and working on a relationship

    After being able to put my current state of mind in to words, I couldn’t help but journal my feelings about my absence, in a letter to my friends…

    A Letter To My Friends:

    Dear Friends,

    I’m so sorry I’ve gone missing.  It’s not anything you’ve done.  It’s something I have done.  You’d be so proud of me, really. I’ve taken the reigns on items in my life that are priceless and that long for my attention.

    Unscheduled days of fun with my kids before school starts; Intentional time to work on my marriage to reach a deep connection that I never knew could exist; and capturing a turning point in my business that could be something incredible for my family.

    This doesn’t mean that you’re not important to me. You’re so very important to me. I cherish our friendship, deep heartfelt chats, and hilarious stories when we spend time together.  So please don’t take my absence as a hidden message of some horrible meaning or change of heart.  Please understand that this is good.  When I spend time focusing on the items that can benefit from my dedicated attention, you’ll see the love overflow in to the other areas of my life and flourish beyond measure. Know that I adore pollinating our friendship when I’m fueled on this end.

    It’s a season, and I can’t wait to be there for you when you go through a season.

    Signed,

    Your friend that’s still here…”

    Who’s There on the Flipside

    So although my friends are incredibly important to me, it’s a season. It’s a season in life that I’ve chosen to be intentional about and focus on the items that are super important to me. This doesn’t mean that my friends aren’t important. This doesn’t mean that “I’m putting my friends on the back burner.”  But it does mean that it’s a time in my life that I’m going to be intentional about, that may leave my friends saying,

    What in the world is going on with her?

    During times like this, it’s so incredible to see who’s there after a season we have in life. Who’s there to say “Hey I’ve missed you. Tell me all about it.” And most importantly “I understand, and don’t judge you one bit.” Those are the little golden nuggets in life that can make a friendship something to cherish.

    End of Letter – Now Present Day 2020

    The words in the letter that I wrote are still true. I still believe them and feel like they have merit.

    But you see, when I wrote that letter, those words were meant to be “excuses” in hopes that my friends would still like me, even though I chose my family over them in that moment. I’d even go so far to say that I felt “bad” that I was choosing my family over them. It’s like you could almost feel me saying,

    “Please don’t forget about me and forgive me. Please still be my friend when I’m done putting my family first.”

    Today, I’m ashamed I felt that way.

    After going through such a difficult time these last 3 years (more to come on that later, as soon as I can figure out how to tell the long story) I’ve realized what’s important:

    God, my husband, my kids, and my family.

    Don’t hear what I’m not saying (my favorite quote by my favorite pastor, Bryan Mills) friends are important. In fact,

    “God has created us to need people.”

    Erwin Mcmanus

    But real, true, genuine friends are important.

    I encourage you today to really look at those you’re investing your time with… and what priorities you have set for yourself.

    quote about seasons in life - "We all go through seasons in life. Hold on to the friend who's with you through the "time change". - Jessica Burgess of Fantabulosity

    Now, today, I could write the same letter and send it out to my friends… but it would be to the friends that would read it and think:

    “We get it. You’re going through a season and doing what’s important right now. We’ll be here on the flipside and during it if you need me.”

    And you know what? I have those friends now. I’m so thankful for those friends and will NEVER ever let that go unappreciated.

    It is my mission to also be that friend for them and to be understanding even when it doesn’t make sense.

    Best Websites to Buy Dresses

    June 22, 2021

    favorite dresses for the summer months

    As a busy mom always looking for cute cheap summer clothes, dresses tend to lead the pack when it comes to an easy summer wardrobe.

    From cute summer dresses to casual summer dresses for women, I’ve gathered a HOT list of online stores where I tend to always have success when shopping online for mom clothes!

    Top 5 Online Websites for Dresses

    Husband and Wife Family Photos: Pink dress and blue shirt with gray shorts

    H&M

    When I need an affordable, casual t-shirt dress or even a dress that can double as a swimsuit cover-up, I head to H&M. The prices are usually affordable and they have a broad selection of dresses that can work for so many different occasions.

    I actually bought the dress that you see above, at H&M for family photos! It was the casual, yet relaxed-classy look I was going for!

    Chicwish

    Oh how I love Chicwish for dresses! Some of the dresses aren’t really my style but they have such a large selection, that I can usually find a dress for a wedding or special event that we’re going to!

    I actually found this fun flamingo dress at Chicwish a few years ago and I wore it to a business retreat and for a lifestyle brand photoshoot! It was one of those dresses that was a conversation piece everywhere I went! Something like this would also be super cute and fun for a “favorite things party” with your girlfriends… am I right?!

    flamingo dress

    Modcloth

    I have to say, Modcloth is the very first place that I look when I need a new dress. I don’t always find a dress there but when I do… it’s my absolutely FAVORITE! They’re super stylish and I never find anything like it anywhere else.

    Don’t look at just the dresses though… they usually have adorable skirts too! I’m a sucker for an a-line dress and Modcloth usually has multiple to choose from and you can even filter for trending styles to make your search even easier! Being from Montana, I tend to find myself looking for cute dresses to wear with cowboy boots from Modcloth too!

    I snagged this amazing green dress below from Modcloth a few years ago and it was one of my favorites for so many years. Sadly, after a LOT of wear and tear, the zipper broke and it was a sad, sad day. Still not sure why I didn’t fix the zipper and keep the dang thing.

    Green dress from modcloth

    Forever 21

    I may be in my 30’s, almost 40 but this gal STILL shops at Forever 21 for an affordable summer dress.

    They’re usually so cheap that it’s hard to pass them up and it’s also another store I shop at to find swimsuit cover-ups, even if they’re a “dress”.

    This t-shirt dress that I found, in the photo below, was about $7.00 and is the perfect dress for a hot summer day, or to wear over my swimming suit if we go out on the lake!

    Make sure to check out their rompers and jumpsuits too, that can sometimes pass for a dressier occasion.

    T Shirt from Forever21: White with green stripes

    Pink Lily

    Pink Lily is a newer love, where I’ve become obsessed with their denim shorts! But they have super cute dresses too that I love. I’ve even found super cute jumpsuits on their website that can be dressed up or down!

    black jumpsuit from pink lily

    Now, I do also love Target, Red Dress Boutique (where I got my favorite coral dress) and Amazon when shopping for women’s clothes but these featured today were specifically for dresses!

    I so hope you found something that you love! Drop me a note and let me know!

    How to Make a Peanut Butter and Jelly Sandwich

    August 22, 2022

    Close up of peanut butter and jelly sandwich

    This is a sponsored conversation written by me on behalf of The J.M. Smucker Company. The opinions and text are all mine. #PBLove Originally posted in 2017. Updated in 2022.

    How to Make a Peanut Butter and Jelly Sandwich: Did you know that there’s a certain way to make a pb&j even better? It’s true. Keep reading!

    peanut butter and jelly sandwiches stacked on top of one another
    Peanut Butter and Jelly Sandwiches

    Do you know that 2400 people search google a month, asking:

    How do you make a peanut butter and jelly sandwich?

    It’s true! But I love it because even though there are many tricks and different ways to make one, I’m sharing my favorite way with you today. So keep reading because you may find one of my favorite tricks is your new favorite!

    However, if you’re wanting the best way to make a peanut butter and jelly, you’ll love this fried pb&j and may never go back.

    What is the correct way to make a peanut butter and jelly?

    My mind was blown the other day when I stumbled upon a post on Facebook of someone arguing with another person when asked,

    “What is the correct way to make a peanut butter and jelly sandwich?”

    …and I promise you, there were hundreds… HUNDREDS of comments on this thread of people backing one another up, arguing with who was right, wrong and why.

    But I’ll tell you… I DID learn something from that thread and even though there’s a part of me that wishes I had that 15 minutes of my life back, I kind of feel like I owe it to those who taught me something that day.

    TWO of the Most Popular Ways to Make a Peanut Butter and Jelly Sandwich:

    1. Apply peanut butter to both sides first and then jelly on top of both peanut buttered sides – Why? Because that way it keeps the jelly from soaking through the bread, especially if you’re making a PB&J for someone to take with them for the day, and they can’t eat it until later. (School, work, field trip, etc.) Ok ok… so that’s something I didn’t know until I spent 15 minutes of my one life here on Earth, reading these Facebook comments.
    2. Apply peanut butter to one side and jelly to the other – Why? Because the jelly sticks MUCH better to the sandwich creation, whereas when you put peanut butter on both sides, sometimes it’s hard to get the jelly to stick inside of the sandwich and it can seep out.

    So from above, there is no wrong or right way… unless you discuss it in a Facebook group and then someone will surely tell you you’re wrong. However, here’s my favorite tip for making a peanut butter and jelly the best:

    Should you use a spoon or knife to spread peanut butter?

    A spoon? Hear me out…

    Our assignment in college was to prepare a speech on giving a tutorial for the class. I remember one speech - and one speech only - from that day, and it wasn't mine. A fellow classmate stood up and said,

    "Today I'm going to teach you how to make a peanut butter and jelly sandwich."

    We all chuckled because we didn’t know how he was going to make an entire speech on this topic. But to my surprise, my classmate taught me something that day. I was making a peanut butter and jelly ALL wrong.

    Ingredients:

    You only need three ingredients to make a classic peanut butter and jelly.

    • peanut butter (Crunchy or creamy)
    • jelly (Your favorite flavor. We prefer strawberry or grape.)
    • bread (White, wheat, or your favorite type of bread.)
    ingredients on table for peanut butter and jelly

    How do you make a peanut butter and jelly sandwich better?

    I'll show you below what I learned that day, and how it changed my peanut butter and jelly sandwich-making life.

    If only I would have known back then that in 15 years I'd have little boys at home who want a PB&J every single day for lunch, I'd probably give that guy a big hug.

    hand spreading peanut butter on bread with spoon

    1. Use a Spoon:

    So many people that I know use a butter knife to spread their peanut butter and jelly, and it rips their bread and gets so messy.

    1. A spoon scoops the peanut butter and jelly out easier than a knife.
    2. Using the back of the spoon, spread the peanut butter and jelly onto each piece of bread.

    I promise, if you’re still using a butter knife to make your pb&j’s, use a spoon next time to see if it works better for you. It’s just one of those little life hacks that is so simple, but incredibly helpful!

    hand using spoon to spread jelly on bread

    Place the two pieces of bread together, making sure the peanut butter and jelly are touching.

    peanut butter and jelly sandwich on counter

    2. Criss-Cross Cuts:

    With a house full of little boys, I’ve learned that cutting their sandwiches diagonal both ways helps keep the mess down. Their little hands hold on to the small triangles MUCH easier than a whole sandwich, or even half of a sandwich.

    If you choose to cut this way:

    1. Cut from corner to corner, in a diagonal way, twice.
    Knife cutting one corner in the sandwich
    Cut one diagonal
    Hand cutting the other corner of the sandwich
    Cut the other corner
    Sandwich cut in to 4 triangles

    What to Use Instead of Peanut Butter for PB&J

    If you can’t have peanut butter, you may love this almond butter recipe!

    You can also use something such as Nutella or even omit the peanut butter completely or even the jelly!

    Stacked small triangles of peanut butter and jelly sandwiches

    What is Your Favorite Way to Make a PB&J?

    When we had a big family gathering a few weeks ago, and I was thinking about this blog post… I asked everyone in the room how they make and prefer their pb&j. It was hilarious how different everyone prefers a simple pb&j.

    • The crust cut off
    • Mix together peanut butter & jelly and then apply to the bread
    • Eat whole, cut diagonally or cut down the middle
    • Fried (That’s my husband’s favorite way, and I’ve shared how to make a fried peanut butter and jelly sandwich!)
    • Peanut butter with syrup or honey instead of jelly

    If you’re making a PB&J for a school lunch, you’ll love these “school lunch love notes”.

    Related Recipes

    Love quick sandwiches? Then you’ll also love this egg salad sandwich, this hot ham and cheese and this tuna salad! They’re some of our favorite lunch recipes to date!

    Did you make this? I’d be so grateful if you left a “star” rating below to let me know what you thought! Then, the next time you need a quick and easy recipe, come back to Fantabulosity to browse all of my easy recipes!

    Recipe

    Close up of peanut butter and jelly sandwich
    Print Pin
    5 from 7 votes

    How to Make a Peanut Butter and Jelly Sandwich

    How to Make a Peanut Butter and Jelly Sandwich: Did you know that there's a certain way to make a pb&j even better? It's true. Keep reading!
    Course Breakfast, Main Course, Side Dish, Snack
    Cuisine American
    Prep Time 5 minutes minutes
    Total Time 5 minutes minutes
    Servings 1 sandwich
    Calories 305kcal
    Author Jessica Burgess

    Ingredients

    • 2 slices bread white, wheat or favorite type of bread
    • 1 tablespoon peanut butter creamy or crunchy
    • 1 tablespoon jelly or jam – any flavor

    Instructions

    • Using a spoon, scoop about a tablespoon of peanut butter and simply spread on one slice of bread. After the majority of the peanut butter is on the bread, turn the spoon over, and using the back of the spoon, spread the peanut butter to the corners. (Using a knife for this can cut the bread and tear it.)
    • Using a different spoon (or clean the first one) scoop about a tablespoon of jelly or jam, and pour on to the other slice of bread, and spread to the edges using the back of the spoon, as you did with the peanut butter.
    • Place the peanut butter bread and the jelly bread together, so the peanut butter and jelly are touching. Enjoy!
    • If desired, cut in to half or cut in to 4 small triangular shapes.

    Nutrition

    Serving: 1sandwich | Calories: 305kcal | Carbohydrates: 44g | Protein: 10g | Fat: 11g | Saturated Fat: 2g | Polyunsaturated Fat: 3g | Monounsaturated Fat: 4g | Trans Fat: 0.02g | Sodium: 340mg | Potassium: 185mg | Fiber: 3g | Sugar: 15g | Vitamin A: 1IU | Vitamin C: 2mg | Calcium: 82mg | Iron: 2mg

    Potato Soup with Instant Potatoes

    July 11, 2017

    Easy Potato Soup Recipe Using Instant Potatoes on the stovetop. So quick!!

    Easy Potato Soup: This Quick Stovetop Recipe using instant potatoes can be made in under 10 minutes! I also added leftover chicken too, but it’s not mandatory!

    Need more quick dinners? Here’s my whole page of easy soup recipes.

    Easy Potato Soup Recipe Using Instant Potatoes on the stovetop. So quick!!

    I hadn’t gone grocery shopping in DAYS! Ok… WEEKS! Things were getting pretty slim in the house.

    I knew I had leftover chicken tenders in the refrigerator, and wanted to utilize them to make something different so I didn’t hear:

    Chicken tenders AGAIN!?

    from my kids.

    Easy Potato Soup: Quick Stovetop Recipe

    Well we all know how I feel about slightly homemade recipes. (Recipes that are made at home, but utilize some store-bought ingredients and shortcuts to make things quick and easy.)

    So when I saw the instant potato package in the pantry, I knew right away that I should utilize those in some way with the chicken. Who knew adding chicken broth and a little heavy cream to this would make a crazy quick and tasty soup for dinner! (You can even make my easy homemade chicken broth for this soup.)

    NOTE: You DO NOT have to use chicken for this soup like I did. (Or I would call this Easy Chicken Potato Soup) But I found it a great way to add some protein and texture to the soup using leftovers, kind of like when I use leftover ham to make this bean soup recipe!)

    Using instant potatoes to make a stovetop potato soup is sooo easy!

    NOTE: I believe it’s HIGHLY important to use a loaded or supreme package of instant potatoes, or else you may need to add cheese, spices, sour cream, and other ingredients to give this soup some flavor.

    Another favorite soup to make with rotisserie or leftover chicken is my chicken noodle soup recipe! Mmm… the herbs in it make a dynamite flavor.

    What to serve with this potato soup

    These garlic cheddar biscuits are similar to the cheddar biscuits at Red Lobster, so when I can fix them alongside a soup like this, it makes me feel all warm and cozy inside!

    Chicken Noodle Soup Recipe

    Get the chicken noodle soup recipe!

    The Best Chicken Noodle Soup Recipe - Quick and Easy

    Freeze For Later

    Another tip I love? Afraid that chicken will spoil if you don’t do something with it quickly? Make this soup and freeze in containers for quick lunches!

    Easy Potato Soup Recipe Using Instant Potatoes on the stovetop. So quick!!

    More Soup Recipes

    If you love easy soups, then you’ll really love these other soup recipes here on Fantabulosity! You may also love this easy loaded potato soup too!

    • Bowl of ham and beans with spoon, and cornbread sitting on side of bowl.
      Ham and Beans Recipe
    • Homemade chili in small bowl with Fritos and cheese on top.
      Simple Chili Recipe
    • Southern chicken and dumplings in bowl.
      Chicken and Dumplings
    • Homemade Chicken Broth

    Recipe

    Easy Potato Soup Recipe Using Instant Potatoes on the stovetop. So quick!!
    Print Pin
    5 from 1 vote

    Potato Soup with Instant Potatoes

    This Quick Stovetop Recipe using instant potatoes can be made in under 10 minutes! I also added leftover chicken too, but it's not mandatory!
    Course Soup
    Cuisine American
    Prep Time 10 minutes minutes
    Cook Time 8 minutes minutes
    Total Time 18 minutes minutes
    Servings 4 servings
    Calories 217kcal
    Author Jessica Burgess

    Ingredients

    • 1 package supreme or loaded instant potatoes I used a 3.74 oz package of Idaho Spuds Supreme
    • 4 cups (32-ounces) chicken broth
    • 1 cup heavy cream

    Optional:

    • left over cooked or rotisserie cubed or shredded chicken I used 2 cups of chicken
    • shredded cheese for garnish
    • parsley for garnish
    • sour cream for garnish

    Instructions

    • In a stockpot over medium heat, combine the package of instant potatoes, heavy cream, chicken broth, and chicken if desired. Cook, stirring often, over medium heat and until heated through. (About 7-8 minutes for me.)
    • Serve!

    Nutrition

    Serving: 1serving (¼ recipe without chicken or garnishes) | Calories: 217kcal | Carbohydrates: 2g | Protein: 2g | Fat: 22g | Saturated Fat: 13g | Cholesterol: 81mg | Sodium: 888mg | Potassium: 233mg | Vitamin A: 875IU | Vitamin C: 16.9mg | Calcium: 53mg | Iron: 0.5mg

    I Took YouTube Away from my Kids, and This is What Happened

    July 14, 2017

    I Took YouTube Away for a Week, and This is What Happened

    I Took YouTube Away from my Kids for a Week, and This is What Happened. This isn’t another post on limiting screen time, or I’m a Better Than You Post…

    In the event that this post gets shared on social media, I want to be completely up front with those of you who are visiting my blog for the first time. I write from passion, heart, and experience. I’m not a perfect mom. I’m not a perfect writer, and I’m sure as heck not a child psychologist. But I do speak from the heart, and adore sharing what I love and am passionate about. My children are by far one of those things that I’m passionate about, so here I go…

    I Took YouTube Away from my Kids for a Week, and This is What Happened

    I Took YouTube Away for a Week, and This is What Happened

    Don’t worry, this isn’t a blog post about “spend more time with your children,” and how you should get on the “limit electronic time” train.

    And I’m also not saying avoid electronics. It’s inevitable. It’s where the world is going. I’m an advocate for online presence and we use it daily in our home.

    I’m not saying avoid YouTube. Heck, I have a YouTube channel and MY KID even has a YouTube channel. So don’t hear what I’m not saying…

    We can’t avoid YouTube. We can’t avoid electronics. But when our children are just that-children-and they are unable to make rational decisions on their own while their tiny little brains are still forming and learning… it’s time we get in touch with what we want influencing our children.

    The Free Babysitter

    Truly, I put YouTube in front of my kids (ages 6 and 3) at times as a babysitter. It’s amazing. I’m able to clean the house, attend a quick meeting, make dinner, get some work done with little interruption. Yet, when I take it away, the iPad goes dead, or we forget it for a long car ride, the “gimmies” make an appearance. The whining amplifies. The ungratefulness soars.

    So I began to notice where the gimmies started rising to the surface on a high level. I began to watch, observe, take notes and become aware of when the bratty attitude started showing more.

    Friends, it was when my 6 year old had control of what he could pick and watch on YouTube (and yes, even YouTube Kids).

    I took YouTube away from them for a week, and the difference in behavior was incredible. Respect started showing back up, the gimmies weren’t as plentiful, and the whining subsided. Not kidding. Coincidence? Maybe. But maybe not.

    Kids on YouTube

    SOME kids on YouTube are the stars of the show. They talk back to parents, get what they want by whining and complaining, and the parents let it happen. Why? Because (are you ready for this?) it sells.  (YES. If you did not know that YouTube makes money for some of these people on YouTube… you know now.)

    They know exactly what they’re doing by giving kids what they want to watch. Kids at a young age are learning independence, seeing what they can get away with. So watching a young boy or girl on TV gain that independence by telling mommy “Meh, I don’t want that, I want this and I’m getting it,” is our child’s preferred behavior and they thrive on seeing someone like them get what they want.

    • Endless amounts of toys

    • “I want to go to McDonalds” OK!

    • “I don’t want to Mommy!” - Ok sweetie. It’s your show. Whatever you want.

    Impressionable Actions

    You Can’t Avoid the Influence in Life

    Our young children are so impressionable, and they learn by seeing. They learn by action. When they spend so much time watching a young kid on TV mouth back to his/her parents, whine, complain, get all of these fabulous toys… what do you think our children are soaking in and learning?

    I could have 50 talks with my boys every single day about important roles in life, and about topics that I think will influence them in a good way. But when they see someone their age getting whatever they want by acting an absurd way on their favorite YouTube channel, over and over and over again (because let’s face it: our kids watch the same videos over and over again, yes!?), you might as well throw everything I said to them away.

    “Alright Then, So What Should They Watch?”

    “Okay then Jessica, what should they watch? Or should they not watch it at all?”

    Well that’s up to you. The parent. The adult. The decision maker of the household.

    If  you love the ease and convenience of YouTube, then maybe consider what show/channel you want influencing your child. Is it the Berenstein Bears? A kid who is amazing at science and does science experiments? Bible stories? Is it videos to prep him/her for the next school year?

    It’s up to you. This isn’t a “I’m a better mom than you are blog post,” that tells you what you should do.

    If you like the ease and convenience of YouTube and how it holds the attention span of your kiddo… fabulous. But maybe consider what they’re watching, and consider how whatever they’re watching is influencing and teaching our kids how to live and learn.

    For me, I’ll continue to let them watch YouTube. I’ll just be more selective of what they watch. After our YouTube break last week, this week I reintroduced it and let them watch videos on kindergarten lessons. After a quick “Mom, this will be boring,” they were soon sharing their excitement for how they learned to add and subtract! Bonus!

    I took youtube away for a week and this is what happened

    Let the “Perfect” Parents Shine…

    Now, some will argue this and say:

    “Well it’s all in the parenting. We can’t avoid this stuff, and it’s up to us as parents to teach what’s right and wrong.”

    Yep, I agree with you 100%. But why can’t we at least tackle some of what we know may be causing some of the non-preferred behavior upfront, instead of going back to try and erase it later? I’m a huge fan of using the term “baby steps.” We don’t have to conquer the world all at once, or find one major life changing tactic that will turn our children into perfect adults. But we can do baby steps, and small bits along the way to improve aspects in our lives. So why not start with something small, and with what we know causes behavior that we’d rather not see?

    There may also be parents that comment below saying: 

    “I knew this. I NEVER let my child choose what they want to watch on YouTube.”

    …and yatta yatta yatta. Well that’s because some parents like to hear themselves say they’re doing a good job, and that they knew something before me. Well, if that’s true, yes… you realized something before me. And YES, you are doing a good job. How do I know? Because you saw a blog post about children and you came over to read it. You care for your children and want what’s best for them. That’s a good job as a parent, right?

    I’m only sharing what I have experienced in my own home, and if we really want our children to grow in to something amazing (although we can’t control them, and we are certainly not perfect parents), I think it’s time we get in tune with our children and focus on who/what is teaching/influencing them how life works.

    Home Finance: Routines + Tools for the Bookkeeper at Home

    July 18, 2019

    Home Finance: Routines + Tools for the Bookkeeper at Home

    Home Finance: Routines + Tools for the Bookkeeper at Home. Easy tactics and streamline procedures to reduce the dreaded taboo topic!

    First Finance Tip:
    Prayer - Ha! Only kidding. Sort of. You guys, when you own your own business, I swear some people think that you’re swimming in gold coins like the cartoon Duck Tales. Please tell me this was someone’s favorite childhood cartoon too!?

    Home finance and ways to save sanity

    Alright, but for real… money has been a stressful situation here in our household before, and no matter what you do for a living, whether you work for someone or own your own business… know you’re not alone. Prayer has sure been something I turn to during stressful times, but let’s get down to the nitty-gritty tips and tricks that you can do to tackle this topic at home:

    How I manage them, use certain tools to organize, and tactics to keep my sanity.

    Home Finance: Routines + Tools for the Bookkeeper at Home

    I mentioned in the video that I really encourage you to read the blog post details below because I link to some of the items I talk about, so you can see what I’m talking about and referring to.

    So if you aren’t able to watch the video now, that’s a-ok; you can see details below. But I totally encourage you to come back and watch it when you get time, because sometimes hearing it sinks in more than reading it.

    Home Finance: Routines + Tools for the Bookkeeper at Home

    1. Quickbooks

    Back when I worked in my husband’s office as a bookkeeper, I started using Quickbooks. I was terrified and so intimidated by it - until I started using it. It is incredibly user-friendly, and I picked it up super quick.

    When I came back home full-time, I knew I wanted to continue using Quickbooks for our home finances. This way, I can track expenses easily, and believe it or not… using Quickbooks makes finances so much easier. I have mine set up to where it syncs with my bank and my credit cards, so that’s less data entry that I have to do. Plus, I use the online version so I can track/use it if I’m about and about if I need to! It’s crazy good to be able to keep track of where and how you’re spending money and come tax time, your accountant may just love you.

    I have the Simple Start plan, and you get it free for 30 days! You can sign up for it here:

    Get Quickbooks

    I also use Quickbooks for my business (this here blog), and it’s so nice to be able to track my income/expenses each month and see how much I make and bring in each month/year.

    Home Finance - Schedule a day

    2. Pick a Day Each Week

    I’ve chatted about theme days before on Creating Your Happy, and finance falls into one of my theme days.

    I know each week on Tuesday (for example), that THAT’S the day I work in my finances. So each week, I know when Tuesday rolls around, it’s go-time. I log in to my Quickbooks, grab my “bills to be paid” folder, my wallet, and I get to work.

    This can routine can work if you get a paycheck once a week, every two weeks, randomly in bigger chunks, or however you make an income. For example:

    Weekly/Bi-Weekly Paycheck:

    If you get paid every two weeks on Friday, perhaps setting your “finance day,” to every Saturday morning would be a good fit for you. On the Fridays where you get a paycheck, you know that the next morning is when you sit down and pay the bills. But on the Saturday morning after a Friday that you do not get paid… YOU STILL sit down and work on finance. This could look like:

    • Updating your checkbook/Quickbooks
    • Gathering up bills and taking a mental note of what’s on the horizon
    • Following up on a bill that you’ve been meaning to call and ask a question about

    So even though you may not physically be paying bills on your “off” week, still sitting down, updating and checking in, can make a HUGE difference.

    Things won’t catch you off-guard as much, you may not forget about that “one” bill that you’ve been meaning to check in to, etc.

    Self Owned Business/Commission Income:

    If you own your own business or work off of commission, this routine can be so beneficial. Checking in once a week, whether you have the funds yet or not… can be a huge help.

    Updating transactions weekly can really help avoid the dreaded bank reconciliation time, or “Crap, how much do I REALLY have in the account” moments, by organizing and updating it in small chunks. No one wants to sit in front of a checkbook for 5 hours on a Saturday updating 3 months of transactions, do they?

    Plus, when you still check in weekly, whether you’ve received your commission or payout from a project yet or not… you’ll most likely avoid the “Oh crap, I thought I was going to have WAY more than that left-over after I paid bills…” when you finally got paid.

    Weekly & Bi-Weekly

    So, like with the weekly/bi-weekly paycheck people above, your “off weeks” could look something like this when waiting for the “big” check to come in:

    • Update your checkbook/Quickbooks
    • Gather up bills and take a mental note of what’s on the horizon
    • Follow up on a bill that you’ve been meaning to call and ask a question about

    Your finance day can be chosen by you. What day/time do you REALLY see yourself working on this for a few minutes each week?

    Don’t set yourself up for failure before you even start. Then, once you determine that day… stick to it. You’d be surprised how much better your days/weeks can become if you just sit down and tackle it in small chunks, instead of assuming/ignoring your finances.

    Don’t Ignore It

    With finance being so taboo in some homes, we tend to ignore it until we have to deal with it. Which this can cause so much anxiety, fear, and overall misery in our day to day when something triggers a thought relating to it. Not to mention the unhealthy spending habits that some can make when they assume they had enough money to buy that new hot tub they’ve wanted.

    Home finance using mobil deposit

    3. Mobile & Automatic Deposits

    Yes, I know this may not be an “ah-ha” moment for some of you. But for those of you who haven’t given it a chance, just hear me out. I fought this so hard for so long too. It was new and I didn’t trust it. But the moment I tried it for the first time with a small $8.00 check (because what do I have to lose?) was so refreshing to know that I didn’t have to pack the kids up or remember to stop by while out running errands to make the deposit.

    Give that mobile deposit (if your bank offers it) a chance. The time that you save waiting in line, packing the kids in the car, driving across town, can be a game-changer.

    4. Same Online Login for Accounts

    I mention in the video above that I’m NO Dave Ramsey. And if he watched this, he may slap my hand. For those who really lack in the financial management and self-control area… this may not be a good tip for you.

    But for those of you who do have some self-control, this may be a helpful tip. I keep at least two of my accounts under the same bank login. Why? Because when I forget or need something at the last minute (on the weekend, evening, whenever) I’m able to go into my bank login and make a transfer of funds from one account to the other. It automatically hits and I’m able to use the funds right away.

    This could vary from bank to bank, but this practice has come in super handy for me.

    Example: It’s Sunday morning and your refrigerator just went out. Your emergency money is in your savings account, but you need it in your checking PRONTO so you can use the debit card to buy a new one. Tomorrow is a holiday and the banks are closed. It will be Tuesday before you can get to the bank and withdraw your emergency money.

    If the two accounts that you have under your bank login are a savings account (that you only touch during emergencies) and a checking account (that you use to pay your daily/monthly bills) or if your emergency checking and your regular checking were on the same bank login, you could (depending on your bank) just transfer to the money to the checking account and head to Lowe’s to snag a new fridge.

    Less stress + less work = sanity.

    Home finance with husband and wife

    5. Determine Who Gets What Debit Card

    The moment my husband looked at me and said,

    “How about I get rid of this debit card, so you’re the only one that has it, and then I’ll have my own? That way, you’ll always know what’s coming out when and there won’t be any surprises?”

    …changed our marriage-financial relationship. I no longer go day to day thinking, “Well what if he used the debit card today for something big that I didn’t plan on him getting?”

    This can look different in so many households, and I get it. But if you find yourself constantly arguing, getting upset because he/she didn’t bring that receipt back to you, or they forgot to tell you about that big purchase he/she made that just made a check that you made out and mailed, bounce… I really encourage you to come to an agreement on who has what debit card.

    Home Finance Printable sheets, pink and black
    Image Via: ElagantInk

    6. Finance Printables

    Last, if you’re a pen and paper kind of person, then you just may LOVE the finance printables that I use and fell in love with. I’ve mentioned these in a blog post before: 7 Organization Ideas & Tips to Stay Organized, and I thought they were worth mentioning again.

    I love being able to have an overview of what’s coming up, and there’s just something about being able to handwrite it all out to make it “stick” in my brain. So if you’re wired like me, you may find these super helpful too. You can get them here:

    Finance Printables

    Or, if you have debt to payoff, this debt tracker free printable will be so helpful too!

    I so hope you found these home finance tips helpful and found something that may take some stress off of a sometimes stressful topic in your house!

    For more tips like this, you’ll LOVE my post on How to Make Your Desk Work More Productive! 

    Thank you so much for coming by. I’d love it if you’d drop a note below to say hey, and tell me what you use to help with your finances at home!

    DIY Stenciled Anchor Pillow Cover for Guest Room

    July 19, 2017

    DIY Anchor Pillow with a stencil

    As part of the Martha Stewart "Make it Martha" program, I received complimentary products to make this DIY craft. Thank you Martha!

    DIY Stenciled Anchor Pillow Cover for Guest Room using Martha Stewart Crafts® paint and stencil. This easy tutorial and craft made decorating a breeze!

    DIY Anchor Pillow with a stencil

    DIY Stenciled Anchor Pillow Cover Tutorial

    If you’ve been on my home tour, then you may have kicked your shoes off and stayed a while in part 14, the Guest Room.

    Fantabulosity's Home Tour Part 14- The Guest Bedroom https://fantabulosity.com

    Well in that room, the adorable new chair that I purchased specifically for this space looked incredibly lonely sitting there without a pop of color. So when I saw this anchor stencil, I knew it would be the PERFECT accent on the guest room chair!

    Martha Stewart Paint Crafts DIY Anchor PIllow

    If you saw my flamingo drink serving tray that I featured last month, then you know how I run to my momma’s house anytime I want to stencil something. The woman knows her STENCILS. For real. For years I thought you just dip your brush in the paint and fill in the stencil.

    Friends, to have the best results with stenciling, there are certain techniques you can follow. With approval from my mom, I get to share with you her favorite stenciling techniques. While tackling this project with my momma, on a warm summer day on her back porch, I captured the process and her pro tips to share with you all today!

    DIY Stencil Pillow Tutorial

    First, I’ll briefly show you the process of how we made the actual pillow cover, but to get started on the right foot for cutting and measuring your pillow cover, you should really check out this post: Three Ways to Make a Pillow Cover on MarthaStewart.Com.

    Martha Stewart Crafts Satin Paint - Blue LOVE this paint!

    Supplies Needed to Stencil Pillow Cover

    • For this painting project, we used the “Greek Tile” Multi-Surface Satin Acrylic Craft Paint that you can also find on Michaels.com. The variety of colors that you can choose from is incredible.

    • Anchor Stencil

    • Martha Stewart Crafts® Stencil Brush, Large

    • Fabric Cut to Size for Pillow Cover

    • Tape Measure

    • Painter’s Tape

    • Paper Plate

    • Pencil

    Measure to the center of the pillow cover to know where to center the stencil

    Measure the Center

    When you have your pillow cover cut to size (front piece), grab a tape measure and mark where the center of the cover is, and place your stencil in the dead center.

    Using painters tape, tape the stencil (if it's not adhesive especially) to hold in place. Using Martha Stewart anchor stencil

    Tape Down the Edges

    Using painter’s tape, tape down the stencil so it does not move during the stenciling process.

    Dab stencil brush in to Martha Stewart Craft Paints

    Paint and Dab

    Next, pour a small amount of paint on your paper plate. (You’d be surprised that you don’t need as much as you think. So pour a little and you can always add more if need be.)

    Using your stencil brush, barely tap your brush in to the paint and move to a clean part of you plate and begin rotating and pushing the brush down to remove any excess paint from your brush. (Having too much paint on your brush can result in the stencil bleeding, so better safe to apply two coats of stencil paint, than sorry.)

    When the paint has moved up inside the stencil brush, take it to your stencil and begin dotting the stencil.

    Stencil tutorial on to a pillow with this anchor cut out from Martha Stewart

    Two Coats

    For this craft, we did one coat of paint, and decided to make it darker. So a second coat was applied and then it was ready!

    How to stencil a pillow. Using martha stewart crafts supplies from Michaels

    TIP: To check to see if you’re happy with the color darkness of your first coat, barely raise one corner of the stencil to take a peek. This way, if you decide to do another coat, you won’t have to reapply the entire stencil.

    Love this anchor look. She's making a pillow using a stencil with Martha Stewart Crafts

    Time to Stuff and Sew

    The stencil turned out perfect. Allow to dry (it dries really fast) and then you can move on with the pillow cover!

    Remember, to get a FULL pillow cover tutorial, you can find that on MarthaStewart.Com.

    Don’t be intimidated. If I can sew a pillow, you can sew a pillow cover. But if my crafty mom is around (like on this day) you better believe I’ll ask for her assistance. 

    Cut out the other pillow square: How to make a pillow cover

    Final Pillow Cover Steps

    Next, she measured and cut out the back of the pillow cover to sew to the front that we just stenciled.

    (Make sure when cutting your fabric for the cover, you add an inch in measurement, to make the cover one inch larger than the insert. (This way you’ll leave space for sewing the edge and room to stuff.)

    Flipping the stenciled cover over, we placed it on top of the other sheet of fabric. You do this so when you sew, the stitching is on the inside of the pillow cover. (You’ll flip the cover inside-out before stuffing with the insert.) 

    How to make a pillow cover then stencil a design on it.

    Time to Sew

    After pinning the edges together, it was time to head to the sewing machine.

    I absolutely love her sewing machine. It has been around for AGES and it has so many stories and memories to go along with it. What a champ. I can’t even begin to tell you how many outfits and crafts this thing has made for our family.

    Sewing machine making a pillow cover and stenciling with Martha Stewart Crafts paint

    Flip It!

    Once three of the sides were sewed up (leaving the bottom of the cover open so you can insert the pillow) it was time to flip the cover right-side out and insert that pillow!

    Sew the Gap

    Once the pillow insert is in, it’s time to sew up the opening. My mom chooses to hand sew this edge so it has a cleaner look.

    Hand sew the top of the pillow cover for a clean look.

    Decorate!

    I mean for real. Look how adorable this little craft project turned out to be! Want to know the best part? It was the exact look that I wanted for the bedroom and haven’t been able to find online anywhere.

    Another great tip?

    My mom found the white fabric that we used at a yard sale. Anytime that she finds white curtains, a tablecloth, or anything in white fabric at a yard sale or flea market… she snags it up, because you never know when you’ll want a white pillow for something!

    So so cute! This DIY stencil anchor pillow in the guest bedroom

    Perfect Pop of Color

    This pillow turned out to the best perfect pop of color for the guest room! Now… I’m already thinking of what other pillows can be made with a stencil.

    This anchor pillow was made using a Martha Stewart stencil from Michaels.

    Love DIY Projects

    If you love this project to create DIY projects for your home, I think you’re also going to love this Wine Bottle DIY Vase we made, which would look beautiful in your home with your favorite paint colors and flowers!

    Chocolate Gooey Butter Cookies

    June 13, 2026

    caramel drizzling on chocolate gooey butter cookie

    Chocolate Gooey Butter Cookies made with a Devil’s Food Cake Mix (or any chocolate cake mix you’d like, makes these some of the easiest and best cookie recipes. (Along with this Rocky Road Cookies recipe and these Devil’s Food Chocolate Cookies that use a cake mix too, of course!)

    Chocolate Caramel Gooey Butter Cookies

    At first, I really didn’t think it could get much better than the original gooey butter cookie. I swore it was the best cookie I ever had.

    But now… although those are still amazingly delicious… I bring you the ultimate gooey butter cookie: Chocolate Gooey Butter Cookies.

    But then we also took things up a notch for Christmas and made these reindeer cookies!

    Ingredients

    With only a few ingredients (and ingredients that you more than likely have on hand), these cookies can be made in a jiffy and last-minute!

    • 8-ounce package cream cheese softened
    • ½ cup (1 stick) butter softened
    • ¼ teaspoon vanilla
    • 1 egg
    • 1 devils food box cake mix (we also use this for these turtle cookies!)
    • ¾ cup powdered sugar
    • caramel drizzle for the top if you want a little flair
    Ingredients for chocolate caramel gooey butter cookies

    Instructions

    1. Preheat oven to 350 degrees Fahrenheit
    2. Mix together cream cheese, and butter until well blended.
    3. Add in vanilla, egg, cake mix until combined.
    4. Roll into 1 in. size balls
    5. Roll each ball in powdered sugar
    Rolled gooey butter cookies - chocolate caramel
    1. Bake on a greased baking sheet at 350 for 12 minutes.
    Baked chocolate gooey butter cookies with caramel. This recipe is easy and delicious
    1. Remove from baking sheet and drizzle each cookie with caramel and additional powdered sugar if desired.
    Easy chocolate cookie recipe with cream cheese, cake mix and powdered sugar

    Caramel Drizzle Tidbit

    Once the cookies have cooled, drizzle on the caramel sauce. (We used ice cream topping to keep things super simple. This didn’t harden, so if you’re looking for something to harden more, melting caramel candies may work better for you!)

    After cooled, drizzle more caramel on to the gooey butter cookies

    Love caramel in your cookies too? This Twix cookie recipe is definitely one to try.

    Mmmm! Chocolate Caramel gooey butter cookie recipe. So easy and delicious!

    They won’t last long, and you’ll eat WAY more than you should. As a mom who loves her children unconditionally and would do anything for them… I still hid this batch and ate almost every single one -without sharing!

    Let chocolate caramel gooey butter cookies cool on the wire rack

    Substitutions

    Although the chocolate devil’s food cake mix is absolutely delicious, you can absolutely switch out the cake mix for your favorite!

    Try red velvet cookies, or even funfetti cookies with a cake mix!

    Oh my WORD! Chocolate Caramel Gooey Butter Cookies! These are so easy, and the caramel drizzle and adding it to the batter takes this original cookie to a whole new level with a chocolate cake mix

    More recipes you’ll love:

    Thank you so much for coming by, and don’t forget to check out the other fun dessert recipes, such as these caramel cupcakes with a caramel buttercream frosting and this chocolate bread and butter pudding.

    Recipe

    caramel drizzling on chocolate gooey butter cookie
    Print Pin
    5 from 4 votes

    Chocolate Gooey Butter Cookies

    Chocolate Gooey Butter Cookies: An easy chocolate cake mix cookie that uses just a few ingredients with cream cheese to give it that gooey texture.
    Course Dessert
    Cuisine American
    Prep Time 15 minutes minutes
    Cook Time 12 minutes minutes
    Total Time 27 minutes minutes
    Servings 30 cookies (number may vary depending on size)
    Calories 137kcal
    Author Jessica Burgess

    Ingredients

    • 8 ounce cream cheese softened
    • ½ cup (1 stick) butter softened
    • ¼ teaspoon vanilla
    • 1 egg
    • 1 devils food box cake mix
    • ¾ cup powdered sugar
    • ¾ cup salted caramel ice cream topping if desired for topping

    Instructions

    • Preheat oven to 350 degrees Fahrenheit
    • Mix together cream cheese, and butter until well blended.
    • Add in vanilla, egg, and cake mix
    • Roll into 1 in. size balls
    • Roll each ball in powdered sugar
    • Bake on a greased baking sheet at 350 for 12 minutes.
    • Remove from baking sheet and drizzle each cookie with remaining caramel and additional powdered sugar if desired.

    Video

    Nutrition

    Serving: 1cookie | Calories: 137kcal | Carbohydrates: 15g | Protein: 2g | Fat: 9g | Saturated Fat: 4g | Polyunsaturated Fat: 1g | Monounsaturated Fat: 3g | Trans Fat: 0.1g | Cholesterol: 23mg | Sodium: 173mg | Potassium: 67mg | Fiber: 0.4g | Sugar: 9g | Vitamin A: 222IU | Vitamin C: 0.02mg | Calcium: 35mg | Iron: 1mg

    Affordable + Adorable Swim Suit Finds – Zaful Review

    July 28, 2017

    Black off the shoulder swimming suit from Zaful. So affordable and adorable! One piece! Zaful review

    Affordable + Adorable Swim Suit Finds – Zaful Review: I took a chance on this online store, and so glad that I did! Cheap and cute swimsuits! 

    Black off the shoulder swimming suit from Zaful. So affordable and adorable! One piece! Zaful review

    We’ve all seen it. The ad that pops up in our Facebook newsfeed, showing us the super affordable swimsuits at Zaful. I even found myself saying

    Ok this is way too good to be true. Seriously, $12-$13 for a swimsuit?

    So when I couldn’t resist anymore, I asked you all on Facebook what you thought. Some of you said “RUN!” While others said, “Well, check out ‘so-in-so’s’ review on YouTube. She kind of liked them…”

    So I was STILL torn. Then, I decided that $12-$13 for a swimsuit was totally worth the risk, so I took a chance. I put two suits in my shopping cart and crossed my fingers…

    Affordable + Adorable Swim Suit Finds – Zaful Review

    First, I never thought in a million years I’d get the nerve to do a photo AND video review of me wearing a swim suit in front of so many people. But let me tell you… when I find something good, cute, and affordable… I’m not about to keep that from you. So I’ll risk showing you my mom-bod. Just please be nice!

    Zaful Good or Bad?

    Friends, please don’t hear what I’m not saying. You may end up ordering something from Zaful and have a horrible experience. But this being my first time ordering from them, I am totally pleased. It took maybe a week and a half to get my two suits, and when they arrived… they fit.

    Now, I did pay attention to the reviews of each one, to see if I should order “up.” I did order a large in both suits, and I’m thrilled that I did. They fit perfectly! (I’m 5’4, 140 lbs and a 34 DD or 32DDD – according to Victoria Secret.)

    Photos and Links Below to Each Swimming Suit…

    Off The Shoulder Flounced One-Piece Swimming Suit

    I think I love this one the most. It has a bit of ruffle (we all know from my Trunk Club’s how much I love ruffles, yes?) and I swear… when I wore it this week swimming, it literally felt like it sucked some of my stomach in. Hello bonus!

    This also comes in other SUPER cute colors, like an army green, white, bright yellow and a pastel pink! So so cute! I would like one in every color!

    Black off the shoulder swimming suit from Zaful. So affordable and adorable! One piece

    Buy this Off-the-Shoulder Suit HERE!

    Buy my Favorite Sun Hat HERE!

    The image shows straps that come with it, and I’ll be totally honest: I forgot that it came with straps and have no clue what I even did with them. The suit fit great without them and stayed up on me just fine while swimming!

    Cut Out High Leg Scalloped Swimming Suit

    I love this suit a ton for the price too! My belly and back (ahem, flab) does tend to stick out the front and back a bit when I don’t stay on top of adjusting it… but it’s totally wearable and doable.

    I love the scalloped look to the bust, so so much! This one also comes in more colors, like an adorable baby blue that I’m DYING to get!

    Black scallop swim suit one piece from zaful! Zaful review, cheap and cute swimming suits! Such a good experience and review!

    Buy this Scalloped Swimming Suit HERE!

    Thank you SO much for coming by to see what I thought about Zaful. If you choose to buy from them, I hope you have a good experience like I did! I’d love to hear about your experience too, to help others out! Just comment below!

    zaful reviews

    Summer Dinner Ideas

    May 7, 2023

    Easy Summer Dinner Ideas image collage with text overlay.

    Recipes for summer dinner ideas, when you come in late on those summer nights and need something quick and easy to feed your family.

    Since it’s summertime, you will also love these food ideas for a romantic picnic and these summer snack ideas! Or, if it’s too hot outside, an indoor picnic may be a better idea, and you can serve these summer dinner ideas on a blanket, in your floor!

    Easy summer dinner recipe collage with text overlay.

    I always keep summer meals and dinner recipe ideas handy for those warm nights when I want to:

    • Avoid heating up the oven – at least for hours.
    • Make something QUICK and easy.
    • Make something light, instead of heavy.

    Summer Dinner Ideas

    Here is a collection of my favorite summer dinner recipes ALL in one place, so when you need something quick and easy, it will all be right here! But before you dive in, remember that I have a great collection of pasta salads that can be a great, easy, light dinner option in the summer too.

    grilled marinated shrimp

    Grilled Marinated Shrimp

    This marinated shrimp recipe is so tasty. Grill these and serve them with tacos, or on a salad for a light summer dinner. Or, if you’re a fan of fried shrimp, it’s one of the most popular recipes here!

    Italian Sliders

    These sandwiches might be small in size, but they have such a delicious, big flavor! Serve them with chips or summer corn on the cob for a simple meal everyone will enjoy.

    Pasta with Corn and Tomatoes   

    Fettuccine with corn and tomatoes makes for a simple summer meal that has so many fresh flavors in the mix. Make this on a hot night when you want a light meatless meal. You could also serve these mozzarella wraps with this pasta as a side dish or use any leftover ingredients to make them the next night.

    Panko Crusted Cod

    Cod is a great meal no matter how you serve it. This recipe uses panko crumbs for a crunchy crust that is unbeatable.

    Smoked Cornish Hens

    Smoked Cornish game hens make for such a nice summer meal. They are small in size but have such a delectable smoky flavor!

    Air Fryer Turkey Burgers

    Air Fryer Turkey Burgers 

    Make juicy turkey burgers in your air fryer for a fast family dinner. You can pile these high with summer veggies for a complete meal, or serve them with some really yummy air fryer eggplant fries.

    Baked hot dogs on hot dog buns, sitting on white plate.

    Hot Dogs in the Oven

    I know heating up the oven isn’t ideal in the summer but you’ll only need to cook these hot dogs for 10 minutes so it shouldn’t heat up the house too much. Baking hot dogs in the oven is a great way to cook them when you need a large amount for a summer party too!

    Instant pot orange chicken in a white bowl with broccoli and rice

    Instant Pot Orange Chicken

    No need to stop for take out on the way home. This orange chicken cooks in a flash in the instant pot for a great dinner.

    Burger on a bun with red onion, pickles and cheese

    Stove Top Burgers

    If you are too tired to fuss with the grill tonight, this recipe for stove-top burgers is just what you need. These flavorful and juicy burgers are sure to be a family favorite. Or, kick things up a notch and make these cowboy burgers, with all the fun toppings.

    side salad with cheese and dressing on a white plate

    The Best Side Salad 

    Summer is the perfect time to make a great salad and make a meal of it. With garden fresh veggies and your favorite dressing there is a lot to like about this salad. You can even add a quick protein to this salad to make it main dish.

    Chicken Macaroni Salad

    This is not your mama's macaroni salad! It has chicken mixed in for a dish you can dig into for an easy summer meal.

    Pinwheel sandwiches stacked on top of one another, on cutting board.

    Pinwheel Sandwiches 

    These pinwheels have so much fun all wrapped up in a couple of bites! They’re a meal that is cool, delicious, and super simple on a hot summer night.

    Salmon patties, stacked on top of one another on a bed of lettuce.

    Old-Fashioned Salmon Patties

    Salmon patties are fried to a golden-brown color, yet still light enough for a summer dinner, that won’t weigh you down. Similarly, these crab cake sandwiches are also a great summer dinner idea. Have an air fryer? Try these Air Fryer Salmon Patties too!

    Hot ham and cheese sandwich with pasta salad

    Hot Ham and Cheese

    You can't go wrong with a classic like ham and cheese. Pop these in the oven, or toss them on the grill for an easy summer dinner that never goes out of style.

    Blue Cheese burger on pretzel bun, sitting on square plate with french fries.

    Blue Cheese Burgers

    Love this spin on a traditional cheeseburger recipe. If you love blue cheese, then you’ll love how the crumbles are built right in to your burger! Or for a really fun spin on burgers, that are perfect for summer flavors, these Aloha Burgers are a hit!

    Maid Rite sandwich sitting on white plate, next to cooked french fries.

    Maid-Rite Sandwiches

    This old recipe is sometimes called a “loose meat sandwich” and is similar to a traditional sloppy joe, and has been around for ages. It’s a great, easy way, to make a sandwich in the summertime.

    Grilled pork chops

    Sweet and Smoky Grilled Pork Chops

    These pork chops are sweet and smoky and grill fast! You only need a few minutes per side to get a great dinner on the table.

    Salsa, cheese and beef burritos

    Cheesy Salsa Burritos

    With some simple ingredients like beef, beans, salsa, and cheese you can wrap up a great family-friendly meal. Who could resist these burritos? You can make them ahead of time and freeze them for those nights you need a hand with dinner. Love Mexican food in the summertime too? These chicken fajitas wraps and steak quesadillas are great to put on the dinner rotation.

    Ham and cheese sliders stacked on top of one another.

    Ham and Cheese Sliders

    Sometimes called, “funeral sandwiches” these sliders aren’t just for funerals or parties! Sliders are a great summer dinner idea to keep things easy and bite-size! Spice things up a bit and also give these buffalo chicken sliders a try!

    Vegan noodle bowls with broccoli and sesame seeds

    Vegan Noodle Bowls

    Noodle bowls are always a good idea! This recipe is packed with veggies for a gluten free vegan meal option.

    Parmesan crusted chicken tenders

    Parmesan Crusted Chicken Tenders

    These tenders are low carb and so tasty. Make these for a guilt-free dinner that the entire family will love. Or if you have a smoker, these smoked chicken tenders are easy to make and so full of flavor.

    sloppy joe meat on slider buns with cheese

    Sloppy Joe Sliders

    Sloppy joe sliders are small in size but have all of the bold flavors of Sloppy Joes! Pile these high with saucy meat and cheese for a dinner the kids will LOVE. (They’ll also love these chicken bacon ranch sliders too!)

    French fries baked on baking sheet with cheese, pepperoni and pizza sauce.

    Pizza Fries

    Who doesn’t love pizza and fries? Combine the two and you have an amazing easy dinner idea! Watch these disappear quickly! Love having pizza in different forms? These pizza sliders are amazing too, and you can use leftover ingredients to make these the next night.

    Texas toast pizza with cheese and pepperoni

    Texas Toast Pizza

    If you ever have one of those nights that you just aren't sure what to serve for dinner, you can't go wrong with Texas toast pizzas! These are tasty and so easy to make after a day of summer fun. Now, not as quick as these Texas Toast pizzas… but this school pizza recipe will make the kids love summertime even more.

    Close up of grinder salad in white bowl with serving serving utensils.

    Grinder Salad

    If you love the grinder sandwiches, making them in salad-form is such a great, light dinner idea for those warm days.

    Air fryer brats on a white plate with buns

    Air Fryer Brats

    Too hot outside to stand over the grill? No sweat, you can make the best brats in your air fryer while you soak up some AC on a hot day. Or, make stove-top brats to keep the heat down in the house too!

    Air Fryer Breaded shrimp on a plate with lemon and cocktail sauce

    Air Fryer Shrimp

    This shrimp recipe is so easy when you use your air fryer. These are crunchy and pair perfectly with cocktail sauce. Have more shrimp on hand? This Boom Boom Shrimp recipe is out of this world!

    BBQ chicken pasta on a white plate

    BBQ Chicken Pasta

    Get bbq chicken flavor without having to host a cookout. This recipe makes for such a tasty pasta that captures the flavor of summer perfectly. I know pasta can seem heavy in the summer but recipes like this creamy lemon pasta too, are light enough and won’t weigh you down in the heat.

    Fried chicken sliders with lettuce and pickles

    Fried Chicken Sliders

    Sliders are awesome for summer meals. They aren't too big or heavy for a hot day, but they bring so much flavor to the table. These roast beef sliders are also a fun recipe to make for an easy dinner!

    Tuna salad sandwich with crackers on plate

    Tuna Salad Sandwich – The BEST!

    I know a tuna salad sandwich isn’t anything new but wait until you try this one! There’s something about the flavors that come together in this recipe, that has everyone leaving 5-star reviews!

    Cold crab salad

    Crab Salad 

    This recipe for crab salad is great on lettuce, or your favorite bread. It is so tasty you might want to just eat it as it is for a cool summer meal.

    Close up of taco salad with Catalina dressing on a fork.

    Dorito Taco Salad

    Have you ever had a taco salad with Catalina dressing in it? I’m telling you what, this recipe is packed with flavor and has become my husband’s new favorite dish.

    Cream cheese pasta swirled on a fork

    Cream Cheese Pasta

    If you have 20 minutes you can make this creamy pasta for a comforting meal. You only need 7 ingredients to recreate this simple dish that gets rave reviews every time.

    Fried tacos on a wooden cutting board.

    Fried Tacos

    As if tacos could get any better… oh wait, they can! If you haven’t tried making fried tacos yet, this is your sign to make them! Or, even though slow cooker recipes in the summer aren’t that popular, I think it’s a great way to make and enjoy shredded beef tacos, so you’re not hovering over the stove!

    Cheeseburger sub on white plate, next to potato chips.

    Cheeseburger Subs

    Everyone loves a good cheeseburger, so why not mix them up from time to time, and serve them differently? We love our burgers in the oven but it’s so fun to whip up these cheeseburger subs too!

    Chicken Bolognese

    This bolognese uses chicken for a tasty twist that is healthy and delicious. Pair this with a salad for an easy summer dinner you can have ready in 30 minutes.

    Meatball Stuffed Peppers in a skillet

    Meatball Stuffed Peppers

    This stuffed pepper recipe is so good! Use garden fresh peppers and frozen meatballs to make an easy and tasty dinner that is perfect for a busy summer night. 

    Shrimp baked potatoes

    Shrimp Baked Potatoes

    Bring two favorites for dinner together into one amazing stuffed potato. This recipe has a creamy cajun sauce that compliments both the shrimp and the baked potato, making it a perfect summer supper.

    Asian chicken lettuce wraps

    Asian Chicken Wraps

    These leafy lettuce wraps are so yummy. You are going to love this bold Asian flavor in a healthy wrap that makes a healthy meal. Then, if you’re a fan of using chicken for an easy dinner, it doesn’t get much easier than these salt and pepper chicken bites!

    Chicken street tacos on white platter.

    Chicken Street Tacos 

    This recipe brings street taco flavor to your kitchen. You won't need to chase down your favorite food truck to get a great and easy meal on the table tonight!

    BBQ Meat over queso chips

    BBQ White Queso Nachos

    Clean out your freezer and make an awesome meal in the process with this easy dish. It uses all of the best flavors like cheese, bbq, and whatever meat you have on hand.

    Asian chopped salad with mandarin oranges

    Asian Chopped Salad

    Chopped salad makes for such a good summer meal. Use prepackaged coleslaw mix and whip up a delectable homemade dressing to change up your salad game from the standard lettuce and tomato option.

    Chicken bacon ranch sandwiches on wooden cutting board.

    Chicken Bacon Ranch Sandwiches

    Why are the ingredients, chicken, bacon, and ranch, together, so delicious? The creaminess of these flavors on a bun, will knock your socks off!

    Chicken grilled cheese sandwich

    Grilled Chicken Cheese

    Tuck juicy chicken into a grilled cheese for a delicious, protein-packed summer meal. You can pair this with a salad, or some fresh veggies and dip for easy eating.

    Crock pot shredded chicken breasts

    Slow Cooker Shredded Chicken

    This shredded chicken cooks low and slow while you are at work for such a good dinner. Make sandwiches or tacos with this, or toss some shredded chicken into a great side salad for a healthy summer meal.

    Pretzel slider buns with chicken salad to make sandwiches.

    Chicken Salad Recipe

    If you love ordering chicken salad at your favorite cafe, you’ll likely get chicken salad similar to this one, which has grapes, apples, and pecans in it, giving it that amazing creaminess and crunchy textures. Or, for a fun twist, you can make this curry chicken salad too! Love cold salad sandwiches? This egg salad recipe is easy to make and great to keep in the refrigerator for easy dinners.

    Turkey sliders stacked on cutting board.

    Turkey and Cheese Sliders

    Although we do pop these in the oven, I feel like they are a great, light, summertime dinner option. Or, you can make other fun slider recipes like these salmon sliders and fish sliders.

    Air Fryer Tilapia with lemons on a white plate

    Air Fryer Tilapia

    Tilapia makes for such a healthy and light meal. Make this on a hot summer night, and let your air fryer for the cooking while you unwind after work.

    Sliced French bread pizza slices on wooden cutting board with meat and vegetable toppings.

    French Bread Pizza

    This unique pizza recipe uses French bread as the crust, and this recipe is made to keep a crispy, not a soggy, crust.

    Stacked wedges of peanut butter and jelly sandwiches.

    Peanut Butter and Jelly Sandwiches

    I wanted to wrap up this amazing list of dinner ideas with a classic that we can sometimes forget about. Yes, I know you probably know how to make a PB&J but did you know that there are ways that you can make it even better? It’s true! Or, you can also make a fried peanut butter and jelly to take the classic to a new level.

    More Dinner Ideas

    If you love easy dinner ideas, you’ll want to make sure you check out some of our most popular dinner ideas here:

    • Burger baked in the oven, steamed in aluminum foil, and placed on white plate.
      Burgers in the Oven
    • Baked BBQ Pork Steaks on white plate
      Pork Steaks in the Oven
    • BBQ Pork Steaks
      BBQ Pork Steaks in the Slow Cooker
    • Oven Baked Steak with Butter and a side of potatoes
      How to Cook Steak in the Oven

    We love gathering recipes for you, depending on cuisine, ingredients, holiday, or season! See all of our amazing recipe collections!

    Easy Party Appetizers

    August 6, 2017

    Image collage of easy party appetizers.

    Easy Appetizers For a Party or For Snacking – A collection of party appetizers that are simple to whip up for guests or just for enjoying at home!

    Image collage of easy party appetizers.

    Easy Party Appetizers

    Before any of my parties, I find myself thinking

    Ok, now that I know what the theme is… what in the heck am I going to make?

    Most of the time, I LOVE to fix appetizers for a party, more than main dishes. It’s easier for the guests to pick at all evening, and it leaves a ton of variety instead of trying to pick one or two main dishes, HOPING everyone likes it.

    I’ve found that a lot of you are looking for party appetizers too, so I wanted to make it super easy for you to find some great recipes and ideas. Besides, that’s what we’re all about here, isn’t it? (Real life. Well Styled.)

    So you’ll find all of the easy party appetizers from our archives right here on this page… all in one place! Simply select the one that tickles your fancy and it will take you right to the recipe!

    Baked Brie with Maple Syrup and Bacon

    Maple Baked Brie 

    Gooey melty cheese, topped with crunchy nuts and sweet maple syrup makes a great appetizer that everyone will want to grab a second taste of.

    Ham and cheese sliders stacked on top of one another.

    Ham and Cheese Sliders

    Sometimes called “funeral sandwiches” these sliders are the perfect party food or even an easy dinner idea!

    Little smokies in grape jelly and bbq sauce, cooked in crockpot, in green bowl.

    BBQ Little Smokies

    Made in the Crock Pot, these little smokies are a crowd-pleaser at any type of party! Easy to make, simple ingredients, and tons of flavor!

    Reuben dip in white pie dish, and a spoon scooping out a serving.

    Reuben Sandwich Dip

    Serve this cheesy meaty dip with crusty rye bread slices. This is a unique and tasty way to get the sandwich flavor you crave in a dish that can feed a crowd.

    A plate of soft pretzels with cheese dip.

    Homemade Soft Pretzels

    Everyone loves a soft pretzel. Make these for a delicious appetizer that you can top with seasonings, or dip into melty cheese.

    A platter of smoked stuffed mushrooms.

    Smoked Stuffed Mushrooms

    A platter of stuffed mushrooms is always a good idea for a party food to share. This recipe makes stuffed mushrooms even tastier by smoking them.

    Pizza monkey bread with sauce in a bowl.

    Pizza Monkey Bread

    This take on pizza is perfect for a crowd. Everyone will want to dip this cheesy treat into sauce for a really delicious appetizer option!

    Bacon wrapped dates that are stuffed with blue cheese.

    Bacon Wrapped Dates

    Make a tasty yet elegant option to wow your guests with these bacon wrapped dates. They are sweet, salty and so yummy!

    Cheese board with pita, grapes, and nuts.

    Cheese Board

    Setting up an epic cheese board doesn't have to be complicated. This idea uses fruit, cheese, nuts and crackers to set up a spread worthy of celebrating at your next gathering.

    Mini potato trifles with sour cream on top with bacon crumbles.

    Easy Potato Trifles

    These trifles have all of the goodies you like on a baked potato like bacon and cheese, but they are served in little glasses for a parfait unlike any other!

    Frito Chili Pie in food boat.
    Frito Chili Pie with all the fixings!

    Frito Chili Pie

    Appetizers don't have to be fancy! Tasty is enough to make it worthy of sharing. This recipe makes for a frito pie that your guests will work up an appetite for.

    A bowl of pico de gallo.

    Easy Pico de Gallo

    Set out a bag of chips and a big bowl of this easy pico de gallo for a simple yet satisfying appetizer. Everyone is going to love these fresh flavors.

    Close-up of chicken empanadas.

    Cheesy Chicken Empanadas

    These empanadas are loaded with chicken, cheese and rotel tomatoes for a really delicious snack. These are portable so you can munch and mingle at your next party.

    Bacon ranch and chicken bites on a cake stand.

    Chicken Bacon Ranch Crescent Cups

    These crescent cups are filled with chicken bacon ranch flavor for a snack that everyone will hope to grab seconds of. Maybe you should make a double batch for your party?

    Fruit and crackers sitting next to cream cheese dip in a small white bowl, all on a white platter.

    Fruit Board

    This easy spread offers fruit, cookies and the best dip! Set this out for your guests to graze on and you are sure to have a sweet party.

    Slices of focaccia bread, on a wooden cutting board.

    Easy Focaccia Bread

    You can't go wrong with homemade bread as a starter. This recipe is so easy to make, you might want to add it to your weekly routine for fresh and flavorful bread.

    Berries stuffed with cheesecake.

    Cheesecake Stuffed Strawberries

    I know you are going to love this recipe for strawberries stuffed with creamy cheesecake. This is easy and so elegant! Serve these at a party for a summer inspired snack.

    A bowl of jalapeno artichoke dip.

    Jalapeno Artichoke Dip

    This dip is creamy, spicy and so good! Serve with chips, crusty bread or crackers for a crowd pleasing appetizer.

    A pile of pigs in a blanket.

    Air Fryer Pigs in a Blanket

    You can't go wrong with a classic like pigs in a blanket for a snack. This recipe is so easy to make as it bakes in the air fryer for perfectly flaky rolls with beefy franks in the middle.

    Football cheeseball on platter that's made out of food to look like football field.

    Loaded Cream Cheese Dip

    While this appetizer is perfect for football party food, it is so tasty you can serve it at any gathering. Be sure to have a variety of dippers to go with this dish.

    Southwestern egg rolls on a plate with green dipping sauce.

    Southwest Egg Rolls

    These egg rolls have the best flavor! They are made with chicken, corn, black beans and plenty of spices. You are going to love this tasty dipping sauce also.

    Close-up of pinwheel sandwich on cutting board.

    Pinwheel Sandwiches

    These mini sandwiches are easy to make, using deli meat, cheese and your favorite toppings!

    A plate of portobello mushrooms.

    Baked Portobello Mushrooms

    Baked portobello mushrooms with plenty of cheese and spices makes for a really tasty offering to serve to guests at your next party.

    A platter of pinwheels shaped like a tree.

    Christmas Tree Pinwheels

    The presentation of this appetizer makes it the perfect holiday party food. This recipe is so delicious you can serve it anytime of year for a crowd pleasing snack.

    A bowl of elote dip with chips.

    Elote Dip

    Mexican street corn flavor is going to be a big hit as an appetizer. This recipe is fuss free and makes enough that everyone can have a bite of this great dip!

    A charcuterie board shaped like a Christmas tree.

    Christmas Tree Charcuterie

    Plan to make this epic and adorable charcuterie board for the holidays! It has such a colorful and tasty variety of ingredients so everyone can find their favorite combination.

    Spicy ranch crackers close-up.

    Spicy Ranch Crackers

    If you want something simple yet so good to snack on with friends, then try this easy spicy ranch crackers! These are so tasty you won't be able to stop at just one.

    A cheesy biscuit.

    Cheddar Biscuits

    If you love those iconic biscuits from Red Lobster, then you will appreciate this recipe. It has plenty of cheese, butter and garlic to make a biscuit that will keep everyone coming back to the food table for another taste.

    Air fryer buffalo chicken tenders on plate next to ranch dressing.

    Air Fryer Buffalo Tenders

    This finger food is perfect for a party or just to snack on! If you are a fan of bold buffalo flavor, then you are going to want to make these ASAP. Serve with blue cheese dip and celery on the side.

    Cheese dip with soft pretzels.

    Pretzel Cheese Dip

    If you want a simple snack that was made to share, then try this cheese dip with pretzels. This is so cheesy and so delicious!

    Orange bell pepper slice being dipped in to smoked queso.

    Smoked Queso

    You can't go wrong with chips and smoky, cheesy queso as a starter. This recipe is perfect for taco night, or anytime you need some melty cheesy goodness in your day.

    Texas toast topped with pizza toppings.

    Texas Toast Pizza

    Who could resist pizza as a starter? This recipe uses garlic bread to make a tiny slice of pizza that is bursting with buttery, garlic flavors!

    A casserole with taco layer dip.

    Taco Layer Dip

    Taco dip is such a good starter or snack. But, it is so delicious that you could totally make a meal of this! Serve with chips and soft taco shells for a dish that you will fall in love with from the first bite.

    A bowl of rotel dip with chips.

    Rotel Dip

    Cheesy, spicy dip with plenty of ground beef, chiles and spices makes for such a good starter. Serve this with taco night, enchiladas or just as a snack.

    Close up of bbq meatballs.

    Slow Cooker BBQ Meatballs

    Pop these meatballs in the slow cooker with plenty of bbq sauce and grape jelly. This recipe uses sriracha to spice things up for a delicious flavor addition. I know you will love these as a party food, or serve them at the holidays for a light snack.

    A skillet of queso with black beans, corn and lime.

    Cowboy Queso

    Make this queso with black beans, corn and plenty of cheese for a starter that is so tasty and filling! Serve with chips, but save a few spoons to top your taco with, if you can!

     A bowl of saucy meatballs.

    Instant Pot Frozen Meatballs

    Go from frozen to fabulous in no time with this easy instant pot recipe that is great for any occasion. These are ready in just 4 minutes for fast and filling food!

    A bowl of blue cheese dip surrounded by veggies.

    Buffalo Bacon Blue Cheese Dip

    Serve this extra flavorful dip with chips, crusty bread or fresh raw veggies for the best starter. This is great to offer guests, or to graze on before dinner. It has a pronounced flavor that you are sure to find delectable.

    Close-up of blue cheese dip in white bowl.

    Blue Cheese Dip

    If you enjoy the flavor of blue cheese this is the dip for you! It has simple ingredients, takes no time to make, and goes so well with fresh veggies, chips or crackers.

    Guacamole in a small white bowl.

    Homemade Guacamole

    A great appetizer doesn't have to be complicated. This guacamole recipe uses plenty of fresh veggies to make a starter that you will want to serve with many future meals.

    Air fried shrimp on a white plate, sitting next to a lemon.

    Air Fryer Shrimp

    Pop these succulent shrimp into the air fryer for a fast first course. Pair with your favorite cocktail sauce for a classic appetizer option.

    A dish of hot taco dip topped with onion and tomato.

    Hot Taco Dip

    Serving something spicy tonight? Why not offer this tasty taco dip as a starter? This also makes a good option for parties as it is delicious and easy.

    Close-up of pinwheel sandwich on cutting board.

    Pinwheels

    Make a few of these pinwheels, and cut them into rounds to share with friends at a party. These have so many fresh flavors to entice your guests to have a bite.

    Marinated grilled shrimp kabobs

    Grilled Shrimp Marinade

    Make this marinade for grilled shrimp and serve this as your first course. These would be great on lettuce cups, skewered with grilled veggies, or on mini tacos.

    Sliders with crunchy fried chicken and pickles.

    Fried Chicken Sliders

    Bring classic fried chicken flavor to your first course with these sliders. They are small in size but have such the big, tasty flavor of comfort food in every bite. 

    A stack of Italian sliders.

    Italian Sliders

    Serve some super flavorful sliders as an appetizer if you want to indulge in sub shop flavors while serving a healthy dinner.

    A  bowl of fruit salad with honey lime dressing.

    Honey Lime Fruit Salad

    Start the meal with a bowl of juicy fruit salad with a tantalizing dressing for an appetizer that appeals to everyone! Use your favorite in season fruits to make this salad unique to your preferences.

    Everything bagel dip with fresh veggies and bagel chips.

    Everything But The Bagel Dip

    Serve this flavorful dip with veggies, chips, bread or even bagel chips if you like. It has a great flavor that works as party food, or a simple starter for so many meals.

    A plate of saucy sloppy joe sliders with cheese.

    Sloppy Joe Sliders

    Start the meal off with some saucy sloppy joe sliders. These are just the right size to entice your appetite for more.

    A plate of wontons made with guacamole.

    Avocado Wontons

    If you love the flavor of guacamole, then you need to make these fresh and flavorful wontons. Make them in your air fryer for a super healthy appetizer everyone will love.

    Strawberry jalapeno bruschetta.

    Strawberry Jalapeno Bruschetta

    Sweet, spicy and so good are the ways to describe this bruschetta recipe. Use in season berries and peppers for the freshest flavor.

    Mussels cooked and in plate.

    Mediterranean Style Mussels 

    This fancy starter is so easy to make! They have a great Mediterranean flavor that feels elegant, but is fuss free for the perfect party food.

    More Party Ideas

    Whew! That’s a lot of party appetizer recipes! I hope you found one or 15 recipes that you want to make! If you now have your party menu planned and need decorating thought-starters, feel free to browse my easy party ideas to snag more simple and easy party planning ideas!

    Home Tour Part 19 – Breakfast Nook

    August 14, 2017

    Breakfast Nook - Modern Farmhouse Craftsman Home

    Craftsman Home Tour Part 19 – Breakfast Nook: It’s possibly the most used room of our home, and where we gather for meals no matter what time of day.

    I’ll be honest. I can’t even believe we’ve lived in this house for almost 4 years now. We usually have a track record of moving once a year or so, but for some reason we’ve grounded ourself in this home longer than usual.

    If this is your first time here, visiting a part of our home tour, you can see the other rooms on the craftsman home tour.

    Breakfast Nook - Modern Farmhouse Craftsman Home

    Home Tour Part 19 – Breakfast Nook

    But can I be even more honest? We’re getting the “bug,” and I’ve noticed the talk of “moving” popping up in our conversations more and more lately.

    I really really really want to live in a small home again. Four houses ago, we lived in a small craftsman style home, and I fell in love with it.

    No matter what room we were in, I still felt connected to other family members because they were close by. The bigger the house, the more space family members have to run and hide. Now don’t get me wrong, I LOVE our home now. But the idea of living in a small home again really tickles my fancy.

    So we shall see. You never know what will happen around here. But no matter what, a goal I’ve had was to get this breakfast nook DONE. It took me so long to get it to a point of “done” because we were using a pub style table for so long here in this space, and it was on it’s last leg… literally.

    It had seen better days, and I had always wanted a table like the one we have now. But getting rid of a dining table, just to get rid of it…seemed silly. So we waited and waited and then one day, decided it was time.

    Breakfast Nook - Modern Farmhouse Craftsman Home

    The Table

    I absolutely love this table. When it arrived, we had to attached the legs to the table, but that was it! It’s sturdy and I great for the kids to sit/eat at, because it has a “worn” look to it, so it’s forgiving if something happens cosmetically, to it.

    Breakfast area and brown table with metal chairs - Modern Farmhouse Craftsman Home
    Brown Farmhouse chairs Breakfast Nook - Modern Farmhouse Craftsman Home

    Metal Tub Chairs

    I bought the metal tub chairs from Target, and they work perfectly with this table. A great height, and they slide in just enough to get out of the way, but still stick out to show side chairs.

    Metal tub chairs - Breakfast Nook - Modern Farmhouse Craftsman Home

    Centerpiece

    I couldn’t decide which centerpiece to have on the table when I took the photos of the breakfast nook, because I change this decor out at least once a month. I’m a sucker for seasonal flowers in a white pitcher, or incorporating holiday decor in this space. But I adore how white cotton stems really help pop the other white accents in the room, so I chose this one for now!

    I’m often asked where I find white cotton stems like these, and I’ve found some here!

    Cotton stems centerpiece - Breakfast Nook - Modern Farmhouse Craftsman Home

    Side note: Did you see this DIY farmhouse apron rack? This would look adorable in the kitchen!

    Gather Modern Farmhouse sign - Breakfast Nook - Modern Farmhouse Craftsman Home

    DIY Gather Sign

    I stared at the space between the two windows for the four years that we’ve lived here. Then, after seeing all of the adorable signs floating around on Pinterest, I finally decided I wanted a sign that said “Gather” right here in this space. We gather in this room at least 3 times a day, every day… for eating, crafting, and visiting. So “GATHER,” just seemed appropriate. (We save the formal/fancier dinners and gatherings for the formal dining room.)

    I made this DIY Farmhouse sign, and it was really easy to do, and it adds so much to the room!

    GATHER sign - Breakfast Nook - Modern Farmhouse Craftsman Home

    Cake, for Breakfast

    If you’ve taken a peek at any of our parties on the blog, then this space in the breakfast nook may look super familiar. We style a lot of parties right here because of the abundance of natural light in photographs, and this adorable little table is perfect for a buffet party spread.

    Eat cake for breakfast - Breakfast Nook - Modern Farmhouse Craftsman Home

    When we’re not styling a party, I keep a few favorite items on display on this little table. I found this “Eat Cake for Breakfast” sign at Hobby Lobby.

    Cake stand - Breakfast Nook - Modern Farmhouse Craftsman Home

    Cake Stand

    My Martha Stewart Cake stand is one of my FAVORITES. The scallop detail and the glass dome make me all giddy inside each time I look at it. So, instead of pushing this in the cabinet with the rest, I wanted this one on display ALL of the time.

    Fake cake - Breakfast Nook - Modern Farmhouse Craftsman Home
    gold silverware - Breakfast Nook - Modern Farmhouse Craftsman Home

    Serveware

    I love having this gold silverware on display to add a little pop of gold to any space. I’ve stacked my white dinner plates from Target, along with fabric napkins that match whatever season we’re in.

    Breakfast Nook - Modern Farmhouse Craftsman Home

    Thank you SO much for popping over to see part 18 of our home tour: the breakfast nook. If you’re on the hunt for more craftsman style home ideas, or even modern-craftsman decorating idea, take a peek at some of the other rooms in our home to see if any spark your interest!

    Tour the Other Rooms in Our Home:

    Part 1: The Exterior

    Part 2: The Master Bedroom

    Part 3:  The Master Bath

    Part 4: The Kitchen

    Part 5: The Playroom

    Part 6: The Guest Bath

    Part 7: The Pantry

    Part 8: The Patio/Deck

    Part 9: The Nursery

    Part 10: *Old* The Office/Craft Room

    Part 11: Big Boy Room

    Part 12: The NEW Nursery

    Part 13: The Dining Room/Foyer

    Part 14: The Guest Bedroom

    Part 15: The Living Room

    Part 16: New Office Reveal

    Part 17:  Garage 

    Part 18: Patio Re-do Reveal

    Breakfast nook ideas for craftsman style home

    Meatball Stuffed Bell Peppers

    February 7, 2025

    Bell peppers stuffed with meatballs and rice.

    I’m not sure you’ll find an easy weeknight dinner as easy as this one. This Meatball Stuffed Bell Pepper recipe combines frozen meatballs, a package of seasoned rice, bell peppers, and cheese. That’s it!

    Easy Meatball Stuffed Peppers - beef meatballs, cheese, rice... it's so quick and easy!

    Dinner Ideas for Family

    One of my favorite things to do is to turn one of our favorite dishes into a slightly homemade recipe, making it faster, easier, and of course…delicious. So when I began brainstorming the other day about what dinners I could have at my fingertips for the busy weeknights, stuffed peppers came to mind. Then, I came up with a quick solution for one of our favorites.

    “Meatballs! Why couldn’t I use meatballs to make a stuffed pepper recipe even easier!” So I did. This meatball casserole also uses meatballs that transform an everyday pasta casserole into a hearty and satisfying meal.

    Easy Dinner Recipes

    If you love 30-minute or less dinners or just easy dinner recipes like this one, some of your favorites will also be:

    • BBQ Baked Pork Chops – Ready in 30 minutes and using just a handful of ingredients, this dinner is a favorite for my family and I know it will be for yours too.
    • Burgers in the Oven – The most popular dinner recipe on my blog, all because of one little trick that makes these the best burgers.
    • Italian Sausages in the Oven – Simply bake the sausages and let everyone enjoy them as they wish; either on a bun, sliced to dip in sauce, or served with onions and sauerkraut.

    How to Make This Easy Dinner Recipe

    Ingredients for one of our family favorite weeknight meals. Easy Meatball Stuffed Peppers - beef meatballs, cheese, rice... it's so quick and easy!

    All you need is the following… (but make sure to see the recipe card below for exact amounts and instructions).

    • Bell Peppers: You can choose any color that you like. I prefer to use a mixture of colors to add different flavor variations and the presentation is beautiful.
    • Meatballs: You can make meatballs from scratch but using frozen meatballs make this a quick dinner recipe with very little prep. I’ve even loved cooking frozen meatballs in the Instant Pot. You could also spice things up and make these Chicken Fire Cracker Meatballs.
    • Cheese: Storebought shredded cheese helps keep this recipe fast but shredding your own cheese can give the recipe an even better result since the cheese will melt smoother and be more delicious. Types of cheeses you can use are shredded cheddar, shredded fiesta, or your favorite blend.
    • Rice: When I have time, I love making cheesy rice for this recipe but if in a time crunch, using a package of Spanish rice is my go-to solution. You can also do packaged cheesy rice, or your favorite flavor to mix things up.

    Meatball Stuffed Peppers

    Begin by making the rice, according to the recipe you’re using or the package directions.

    Easy stuffed bell peppers recipe - using meatballs and a rice packet make these the perfect easy weeknight meal

    Next, cook meatballs according to your favorite recipe or the package directions.

    Tip: While the meatballs and rice are cooking, this is a great time to also prep your bell peppers by washing them, slicing the tops off, and removing the membranes and seeds.

    Beef meatballs mixed with rice and cheese for a stuffed bell peppers recipe

    Combine the cooked rice, cooked meatballs, and ½ cup of shredded cheese.

    Stuffed Peppers Recipe - mix cooked meatballs, rice and cheese together and stuff the bell peppers and bake! Yum! So easy and quick too.

    Begin filling the bell pepper cavities with the rice, cheese and meatball mixture until it reaches the top.

    Stuffed peppers recipe - using bell peppers and beef meatballs.

    Place the stuffed peppers in a baking dish or oven-safe pan.

    Stuffed peppers recipe, using bell peppers and baking in a cast iron pan. Cheese, rice and meatballs.

    Sprinkle the remaining cheese on top of the stuffed bell peppers.

    Melt cheese over the top of bell peppers - stuffed peppers recipe

    Bake in the oven at 350°F for 25-30 minutes.

    Mmm! Stuffed peppers recipe - using beef meatballs, spanish rice and shredded cheese. This made this super easy and quick to put together.

    While these baked, the smell of all the flavors coming together made me so hungry that I nearly reached in to sneak a meatball to hold me over.

    Stuffed bell pepper recipe - using frozen meatballs and rice with cheese for a delicious weeknight meal.

    How to Serve Stuffed Bell Peppers

    This is the type of recipe that can be served alone since it’s so filling but it also pairs with a side salad recipe, cream cheese corn dip and chips, or something light like stuffed celery.

    Stuffed bell pepper recipe - using meatballs to make it super easy

    How Store Meatball Stuffed Peppers

    If you have leftover stuffed peppers, once they’re cooled, store them in an airtight container for up to 3-4 days.

    Reheat the stuffed peppers in the microwave or in the oven, until heated through. Tip: If baking to reheat, it may be best to cover them with aluminum foil.

    More Easy Dinner Recipes

    Make sure you also try these popular easy dinner recipes that the family will love.

    • My husband said that I HAVE to make this again. It's so easy, so SURE! BBQ Chicken Pasta Recipe
      BBQ Chicken Pasta
    • Loaded Potato Soup in small crock, next to fabric napkin.
      Loaded Baked Potato Soup Recipe
    • Instant Pot Pot Roast
    • Italian Chopped salad in white bowl
      Italian Chopped Salad

    Did you make this? I’d be so grateful if you left a “star” rating below to let me know what you thought! Then, the next time you need a quick and easy recipe, come back to Fantabulosity to browse all of my easy recipes!

    Recipe

    Bell peppers stuffed with meatballs and rice.
    Print Pin
    5 from 2 votes

    Meatball Stuffed Bell Peppers Recipe

    Meatball Stuffed Peppers only takes a few ingredients to whip up this easy recipe! Perfect for weeknight dinners, this is great for the entire family.
    Course Main Course
    Cuisine American
    Prep Time 15 minutes minutes
    Cook Time 25 minutes minutes
    Total Time 40 minutes minutes
    Servings 6 stuffed peppers
    Calories 386kcal
    Author Jessica Burgess

    Ingredients

    • 14 ounce bag Frozen Meatballs
    • 5.6 ounce Flavored Rice Packet prepared – we used Spanish rice flavor
    • 1 cup Shredded Cheese divided
    • 6 bell peppers any assorted color

    Instructions

    • Preheat oven to 350 degrees Fahrenheit.
    • Frozen meatballs, cooked according to package directions.
    • Combine prepared rice, meatballs, and ½ cup of shredded cheese in a mixing bowl.
    • Cut the tops off of each pepper, and remove cores and seeds.
    • In a baking dish, line up the peppers with cavities facing up.
    • Begin spooning equivalent amounts of the meatball and rice mixture in to each pepper.
    • Sprinkle tops of peppers with remaining shredded cheese.
    • Bake 25-30 minutes or until heated through.

    Notes

    If you have a few more minutes, you can make this cheesy rice recipe instead of using packaged rice for the best flavor.
    You can also add a little spaghetti sauce in the rice and meatball mixture for extra flavor, and smoother texture.

    Nutrition

    Serving: 1stuffed pepper | Calories: 386kcal | Carbohydrates: 69g | Protein: 11g | Fat: 6g | Saturated Fat: 2g | Cholesterol: 18mg | Sodium: 128mg | Potassium: 367mg | Fiber: 3g | Sugar: 5g | Vitamin A: 3850IU | Vitamin C: 152mg | Calcium: 124mg | Iron: 1.3mg

    • « Go to Previous Page
    • Page 1
    • Interim pages omitted …
    • Page 13
    • Page 14
    • Page 15
    • Page 16
    • Page 17
    • Interim pages omitted …
    • Page 27
    • Go to Next Page »

    Primary Sidebar

    Jessica Burgess standing in kitchen holding a hummingbird cake.

    Hi, I'm Jessica! - Owner and Creator of the blog and brand, Fantabulosity.

    I’m here to help you make easy comfort food and nostalgic recipes, using simple ingredients, that everyone will love.

    More about me →

    Recipe Collections

    • Crockpot recipe collage
      26 Easy Crockpot Dinners (Slow Cooker Recipes for Busy Weeknights)
    • Church supper recipes collage.
      Church Supper Recipes
    • Fall Dessert Recipes collage, showing pumpkin, apple and pecan desserts.
      Easy Fall Desserts (34 Cozy Recipes for the Whole Season)
    • Collage of Thanksgiving side dishes.
      40+ Thanksgiving Side Dishes (Easy Recipes for a Crowd)
    • Old fashioned potluck cake recipes collage.
      Old-Fashioned Cakes That Still Show Up at Every Potluck
    • Collage of potluck desserts.
      Easy Potluck Desserts (Simple Recipes That Always Get Asked For)

    Popular Recipes

    • bread pudding in baking dish
      Bread Pudding Recipe: Easy Old Fashioned Recipe (With Video!)
    • Burger baked in the oven, steamed in aluminum foil, and placed on white plate.
      Burgers in the Oven
    • two tuna salad sandwiches stacked on top of each other
      The BEST Tuna Salad Recipe
    • doritos chicken casserole on plate
      Doritos Chicken Casserole
    • Strawberry brownies on white marble cutting board.
      Strawberry Brownies Recipe
    • Cheeseburger Sliders made with Hawaiian Rolls, stacked on top of one another.
      Cheeseburger Sliders

    Footer

    ↑ back to top

    Featured in Parade, TODAY, House Beautiful, First for Women, The Pioneer Woman, BuzzFeed, Martha.com, Country Living, Woman’s World, and Access Hollywood.

    About

    • About Jessica
    • Contact
    • Collaborate
    • A Month of Dinners

    Easy Recipes

    • All Recipes
    • Vintage Recipes
    • Dinner Recipes
    • Desserts

    Popular Recipes

    • Cake Recipes
    • Bread Pudding
    • Chicken Spaghetti
    • 3-Ingredient Biscuits

    Privacy Policy |Accessibility Copyright © 2026 Fantabulosity | Terms & Conditions | FTC
    All recipes, photos, and content are copyrighted and may not be reproduced, republished, or distributed without written permission.

    Rate This Recipe

    Your vote:


    A rating is required
    A name is required
    An email is required