This is a sponsored post written by me on behalf of The Hershey Company. All opinions are 100% mine. Ice Cream Party Decorations, Treats & Theme Ideas: A birthday party for ANY time of the year, that’s MORE than just serving ice cream!
Words cannot describe how excited I am, to share a party with you that we styled for Hershey’s! Hershey’s has been a lifelong friend in our home, and it’s an absolute honor to create a birthday party idea, using their new birthday products.
Easy Party Decorating Tip:
When styling a party, I’m always on the hunt for color/theme coordinating candies to include on the dessert table. It’s an easy way to decorate and include “color.”
So when I found out that Hershey’s came out with products like Hershey Kisses Birthday Cake Candies, Reese’s Peanut Butter Cups Miniatures, and Hershey’s Kisses Chocolates, that are designed for “birthday celebrations,” I felt like I hit the jackpot. Party styling just got a whole lot easier, folks!
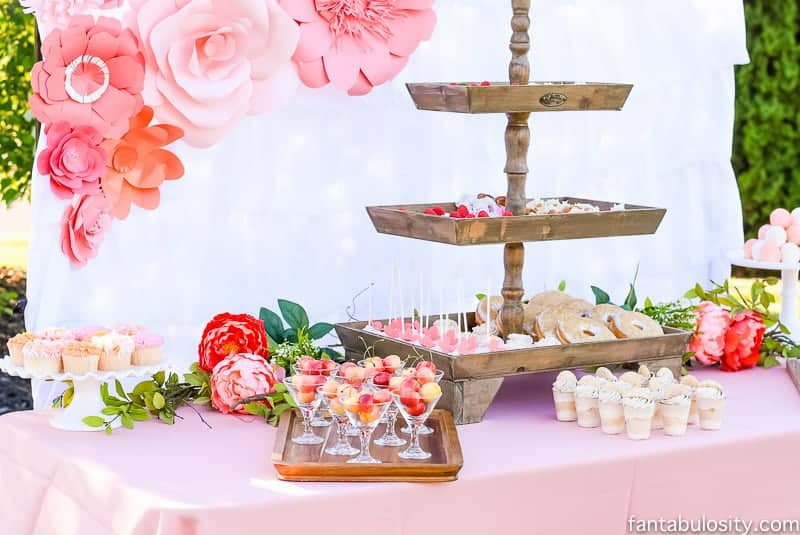
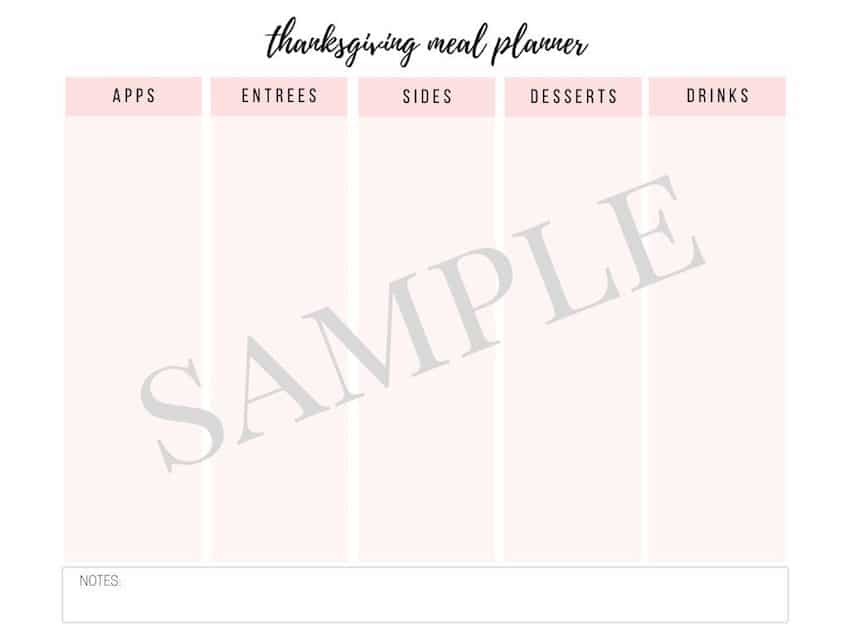
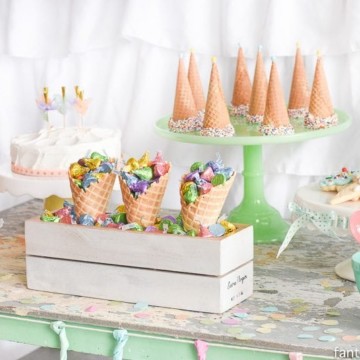
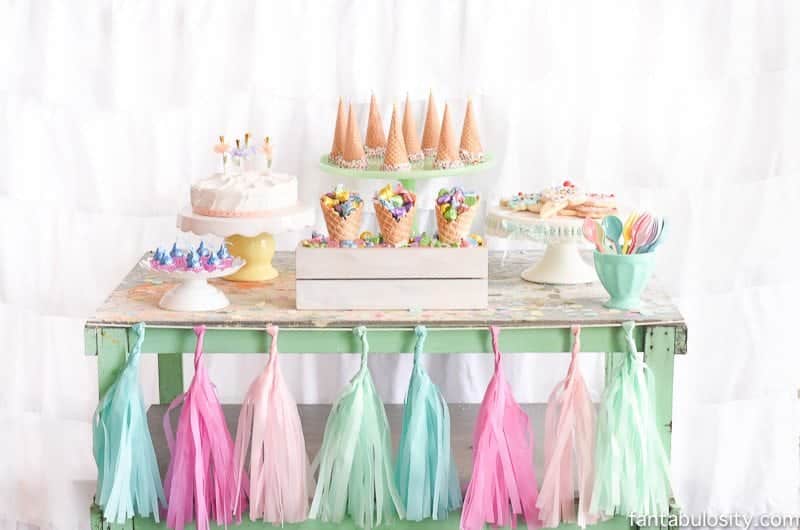
Ice Cream Party Decorations, Treats & Theme Ideas
Pastels have always been a favorite, but in a home full of boys that love the dirt and mud… I couldn’t really get away with pretty pastel colors for their birthday parties.
With Summer coming to an end, and for those little guys and gals that have birthday’s coming up, I thought it would be a marvelous idea to give them a party theme that’s typically only styled during the Summer months. Leave the mess of melted ice cream outside, for Summer!
“Ice Cream” Cone
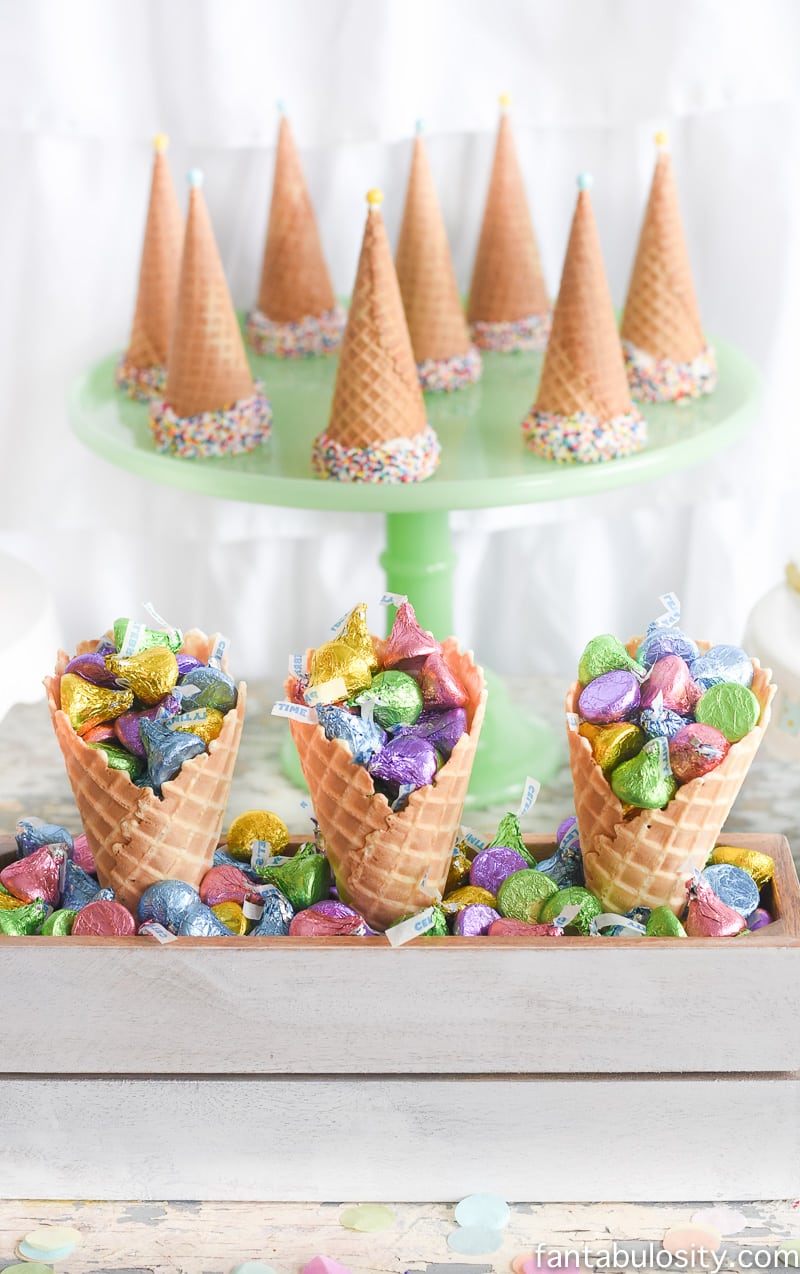
Using Hershey’s Kisses Chocolates, we filled sugar cones with a mixture of pastel colors to create a party favor that the guests are SURE to love. Giving the appearance of ice cream in a cone, the candies are a treat that they can enjoy later at home, rather than the struggle of melted ice cream everywhere; PERFECT for a party favor.
Aren’t the new colors ADORABLE!? They are dressed in their party-best, in brightly wrapped foils to fit a variety of birthday themes and help make the day that much sweeter.
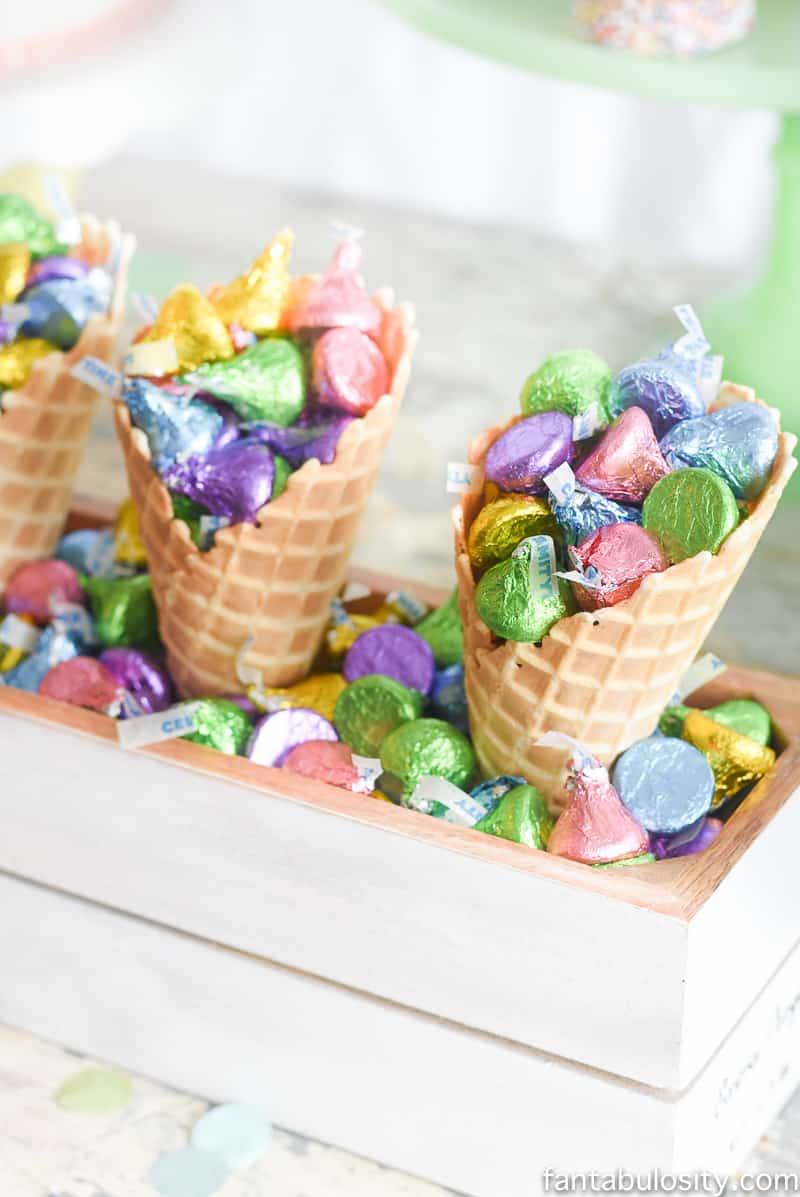
I found the white wooden box at H&M home, online but I’ve seen many similar boxes at craft stores too!
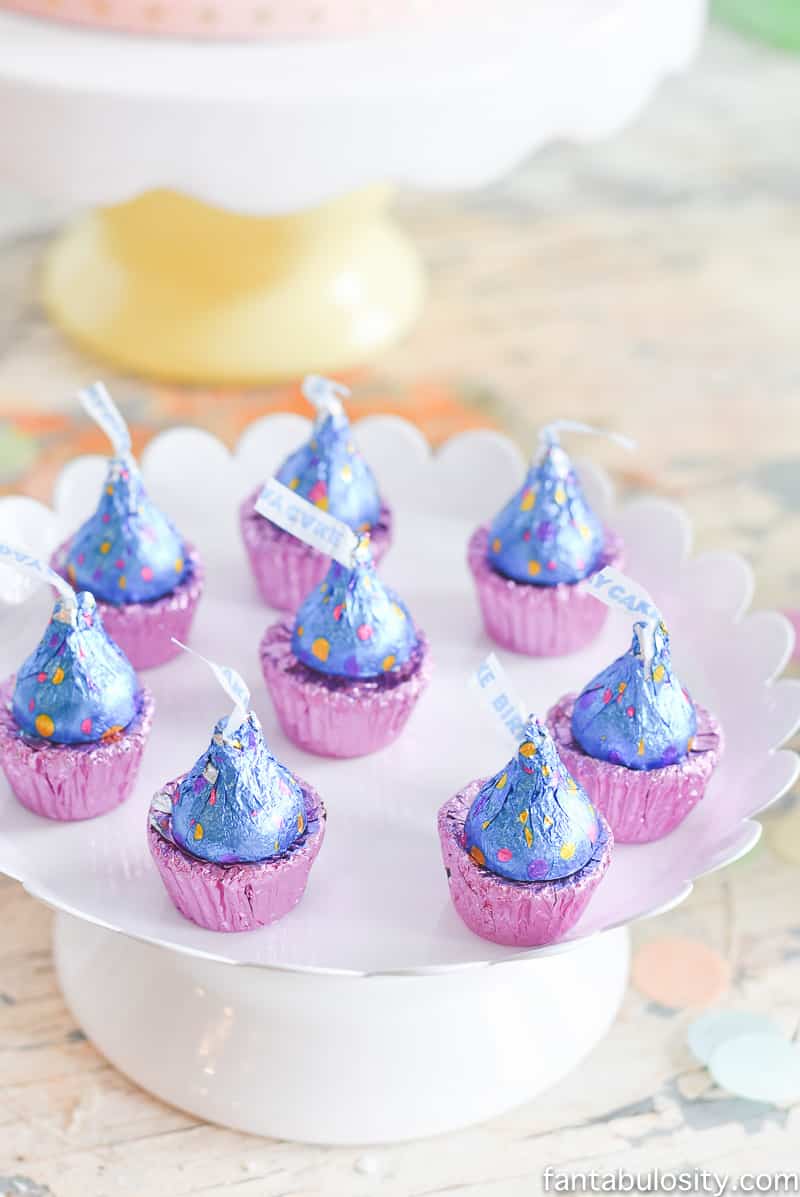
Mini “Cupcakes”
The simplicity of adding one of the Hershey’s Kisses Birthday Cake Candies to the top of a Reese’s Peanut Butter Cup Miniatures, gives the appearance of the cutest little cupcake… fit for a birthday party.
So are you ready for this? See those adorable little blue “confetti,” foil wrappers? Those are the new Hershey’s Kisses Birthday Cake Candies, that taste like birthday cake, complete with a “crunch!” Be still my heart.
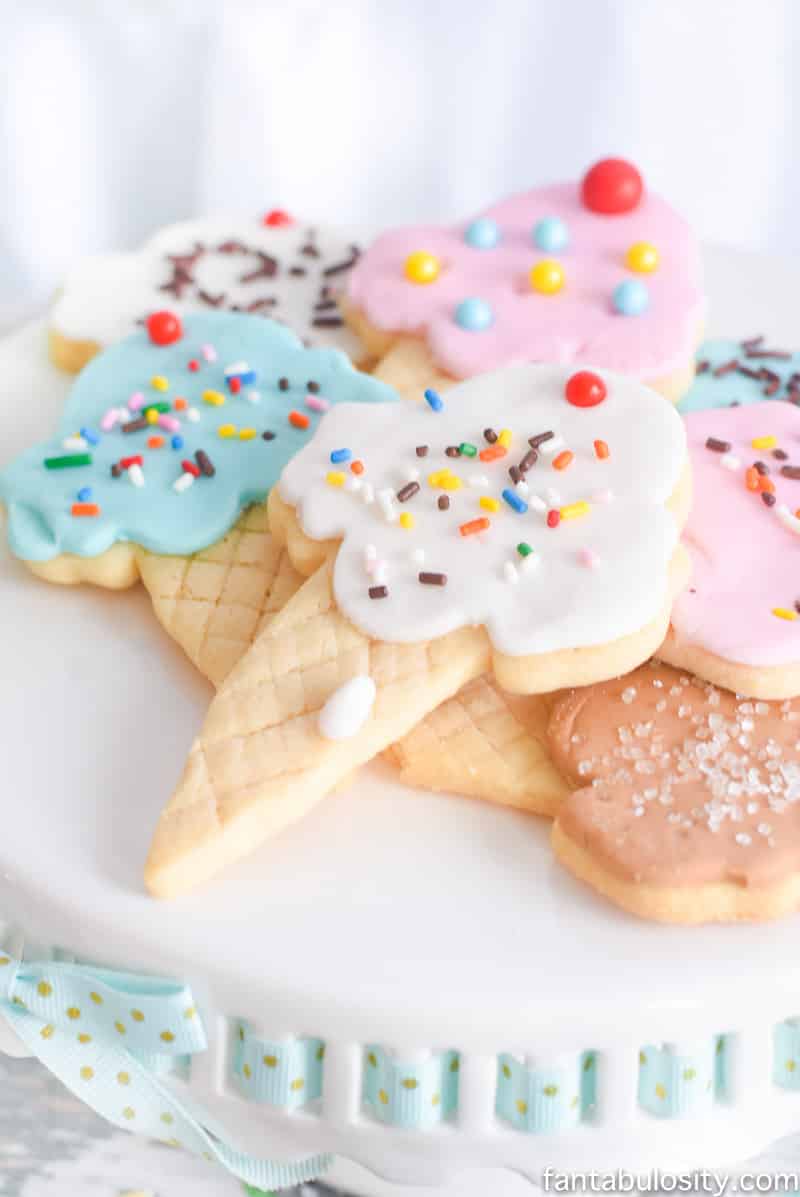
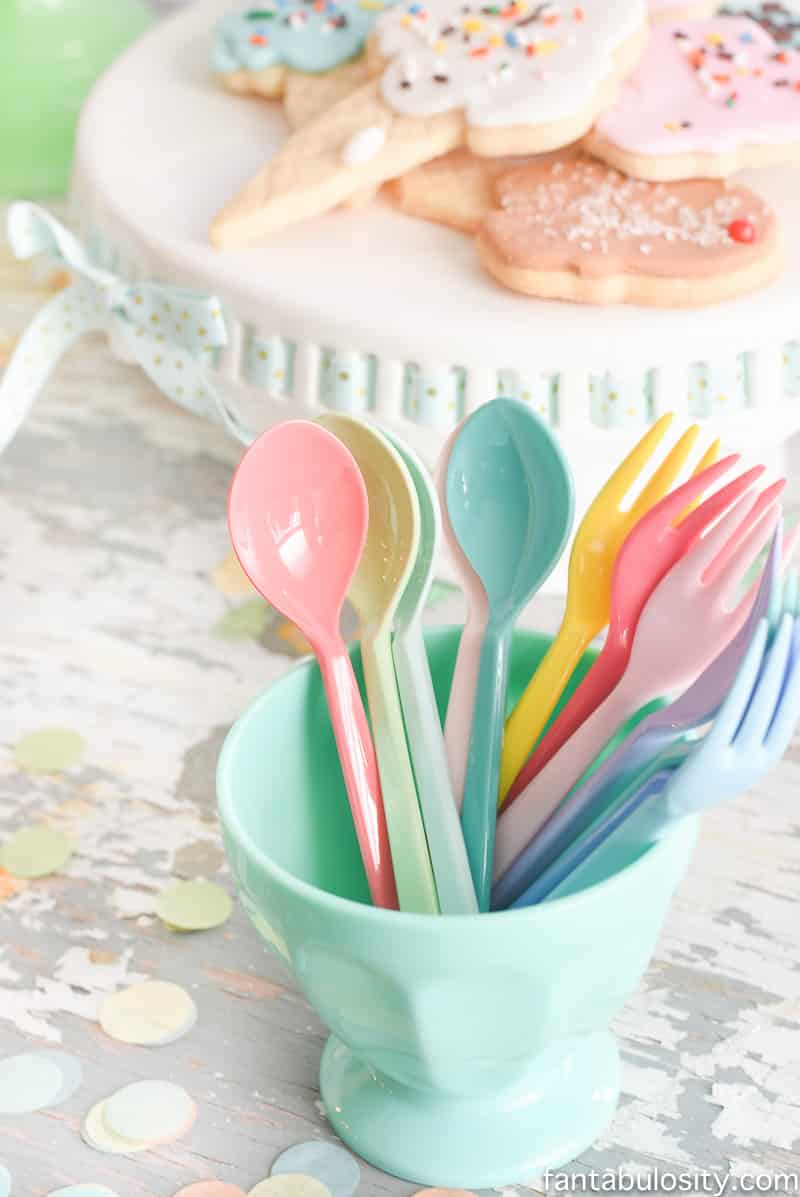
If you caught my post a while back, you saw the ice cream sugar cookies that we experimented with, that turned out almost too adorable to eat. ALMOST.
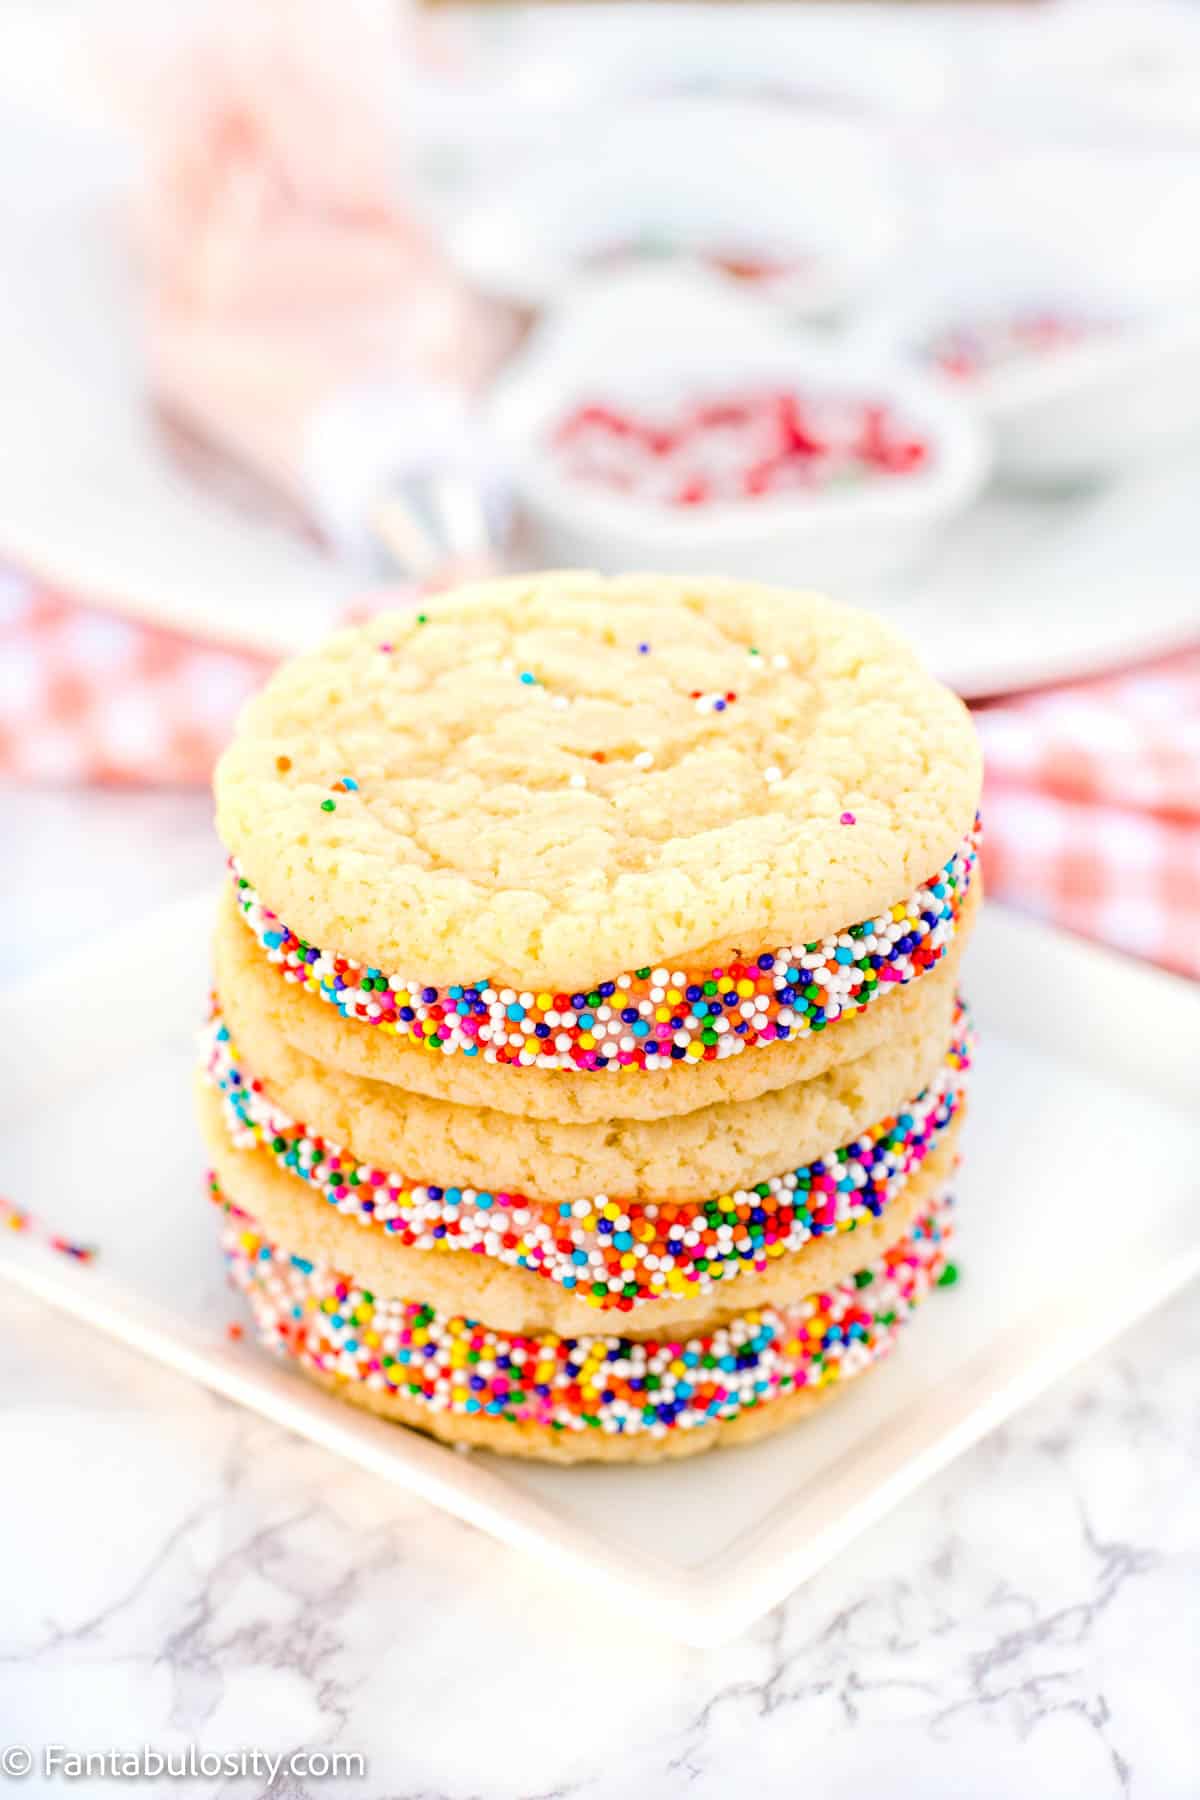
But if you don’t have an ice cream cone cookie cutter, this sugar cookie sandwich recipe is a GREAT substitute to still include the fun colors!
When the day came to style this party, we knew the ice cream sugar cookies would be a must-have, on the table.
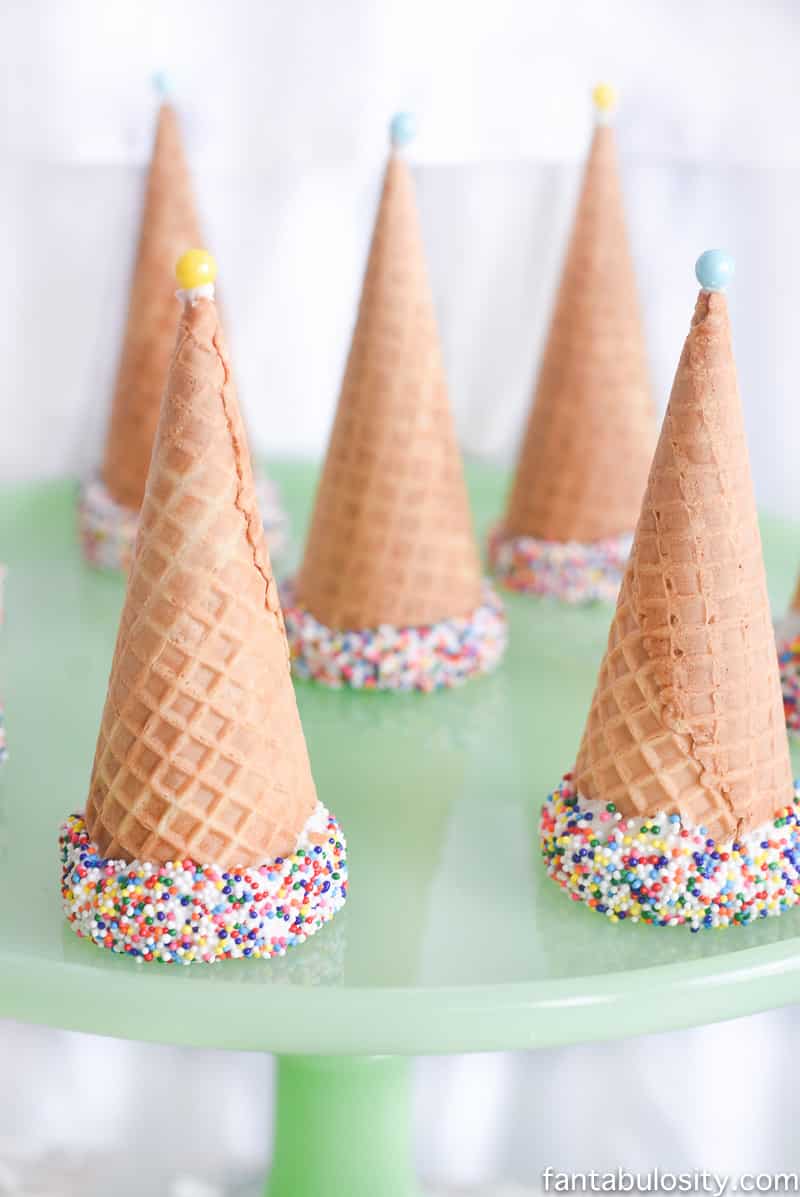
If you ask me, I think ice cream cones are simply cute by themselves. But when we decided to add sprinkles to the rims of each cone, I kind of fell in love all over. This way, the guests can add their scoop of ice cream as they wish, all with an extra touch of sprinkle fun! I can imagine making this peanut buster parfait in a cone!
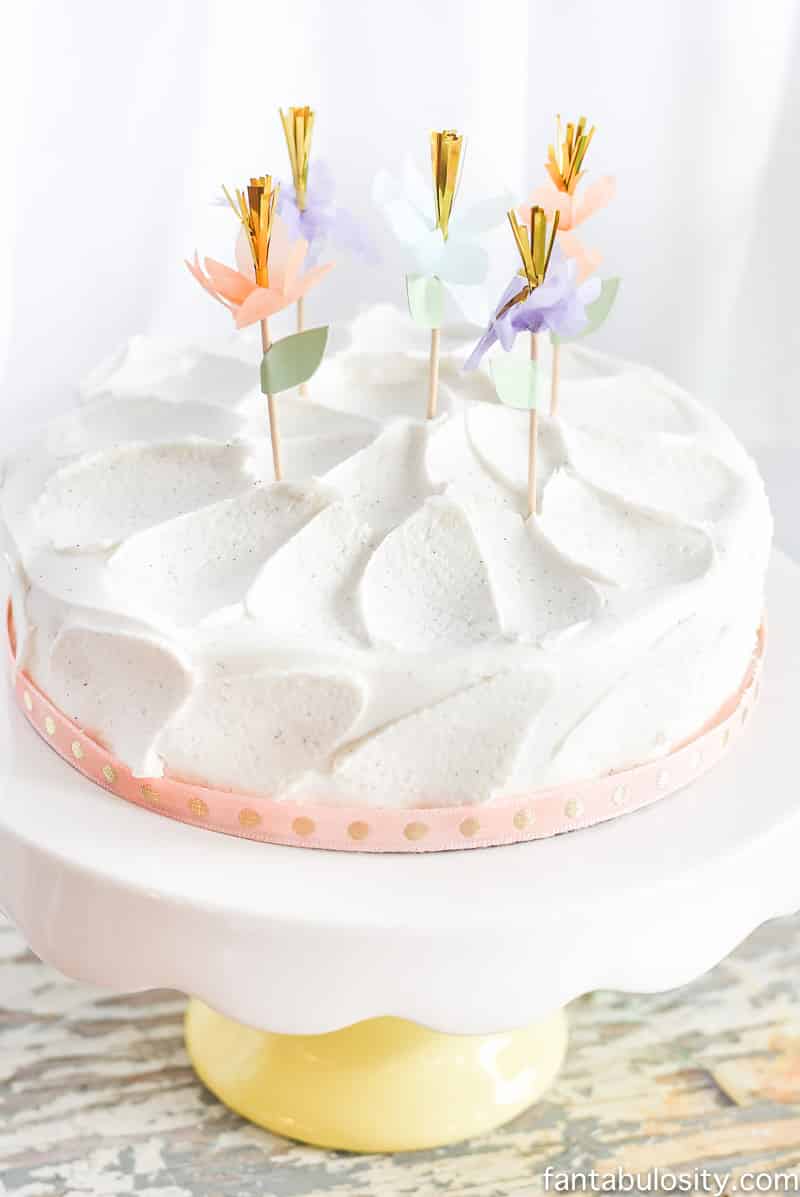
To create the cake topper, we staggered a few cupcake toppers to give the cake a bit of height. Sometimes replacing candles for the cake, can be a charming way to add some flair!
Buy similar cupcake toppers HERE!
You may want to make this ice cream sandwich cake for the party!
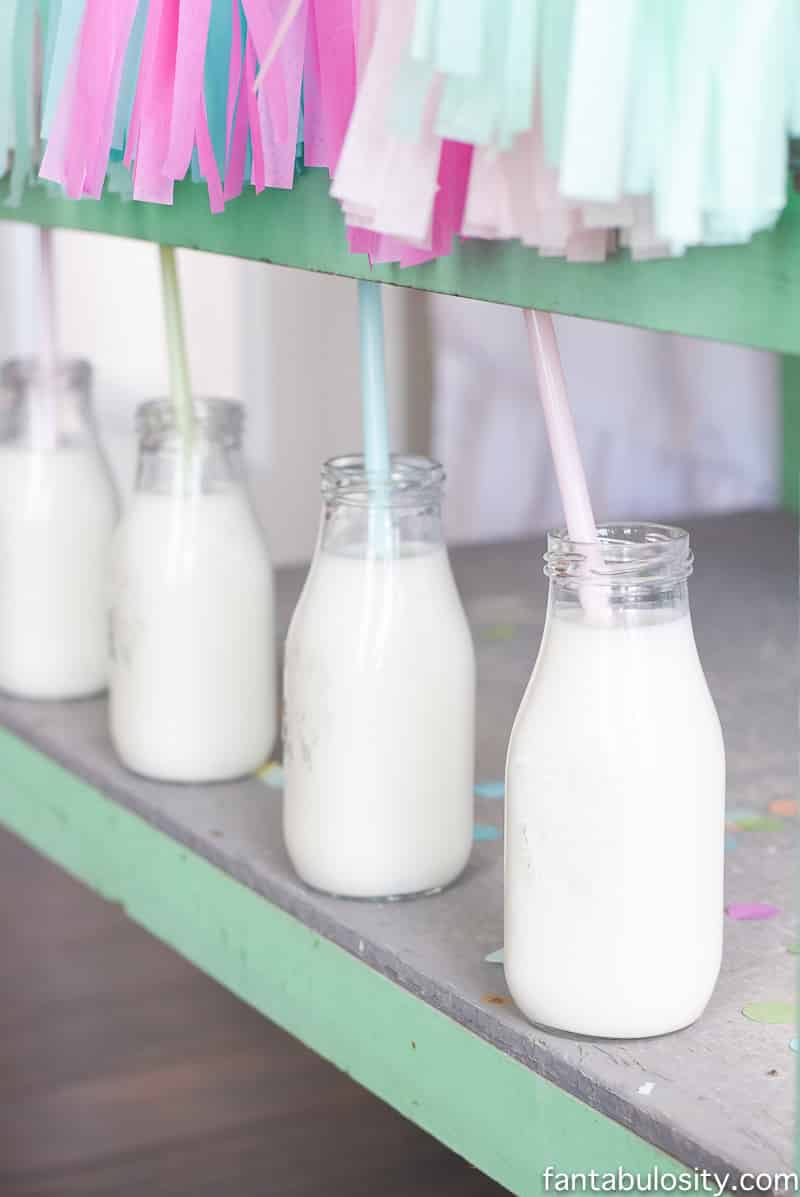
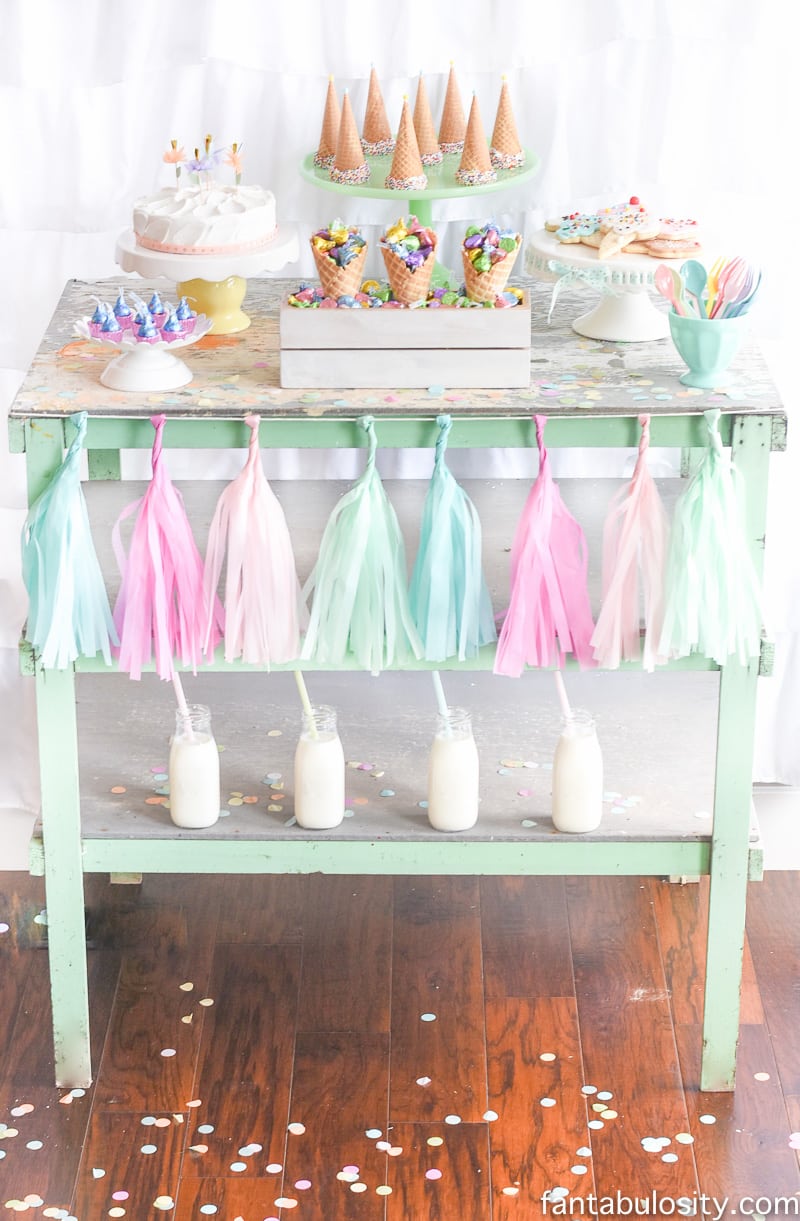
Shop similar milk bottles HERE!
Buy pastel straws HERE!
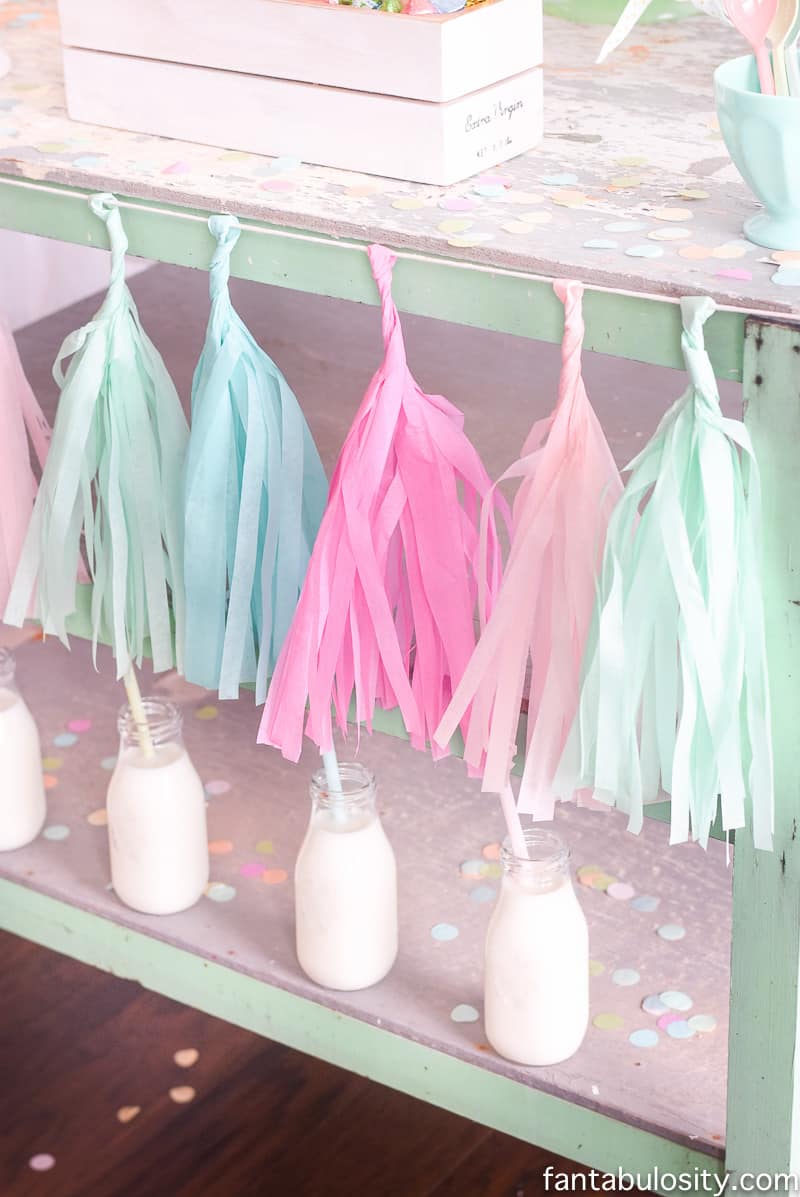
You can buy a similar pastel tassel garland HERE!

White Backdrop:
Would you believe that I actually used a shower curtain for the backdrop of this party setup?! I did, I did! Thinking outside of the box can really open up the possibilities of decorating for a party.
Get the white backdrop HERE!