• Skip to primary navigation
  • Skip to main content
  • Skip to primary sidebar

Fantabulosity logo

  • All Recipes
  • Vintage Recipes
  • Holiday
  • Dinner Theme System
  • About
  • Navigation Menu: Social Icons

    • Facebook
    • Instagram
    • Pinterest
    • TikTok
    • YouTube
menu icon
go to homepage
  • Recipes
  • Desserts
  • Dinners
  • Gatherings
  • Holidays
  • About Jessica
    • Facebook
    • Instagram
    • Pinterest
    • TikTok
    • YouTube
  • search icon
    Homepage link
    • Recipes
    • Desserts
    • Dinners
    • Gatherings
    • Holidays
    • About Jessica
    • Facebook
    • Instagram
    • Pinterest
    • TikTok
    • YouTube
  • ×
    Home » Recipes

    Buffalo Chicken Dip

    Buffalo Chicken Dip

    January 9, 2024

    Close up of chip dipping in to buffalo chicken dip.

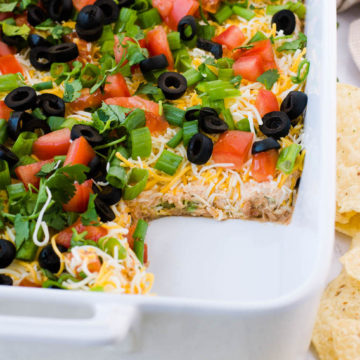
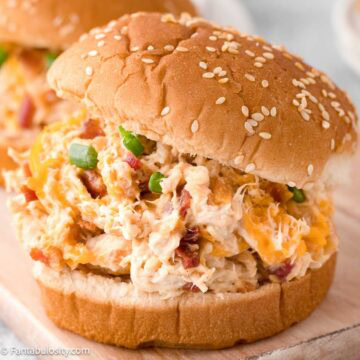
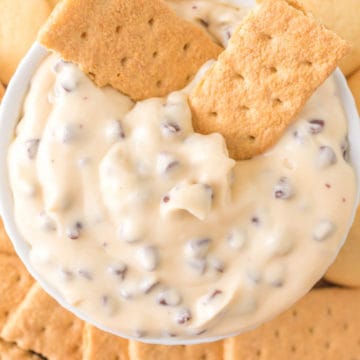
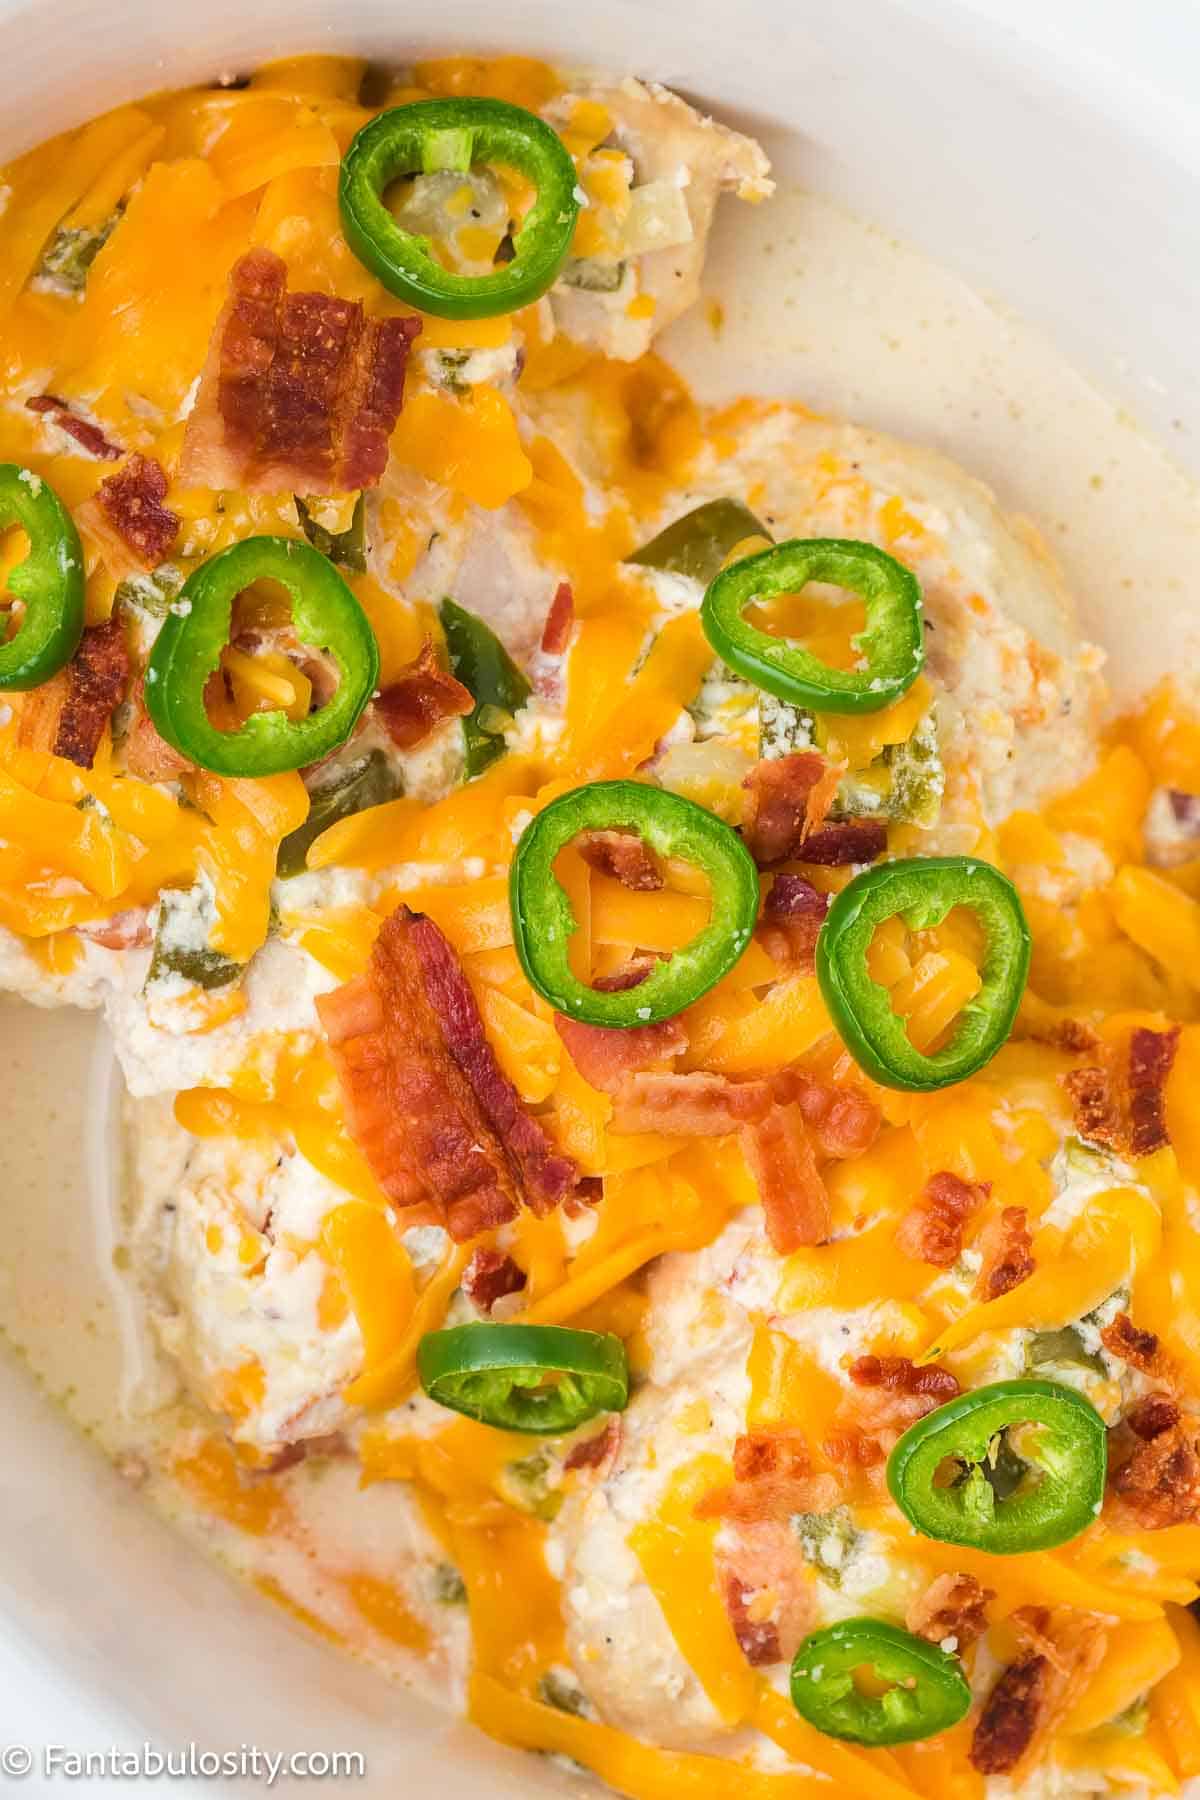
    Buffalo wings are a classic game-day appetizer, but sometimes you don’t want the mess. Enter, this Buffalo Chicken Dip with all the same spicy and creamy flavors without the messy fingers.

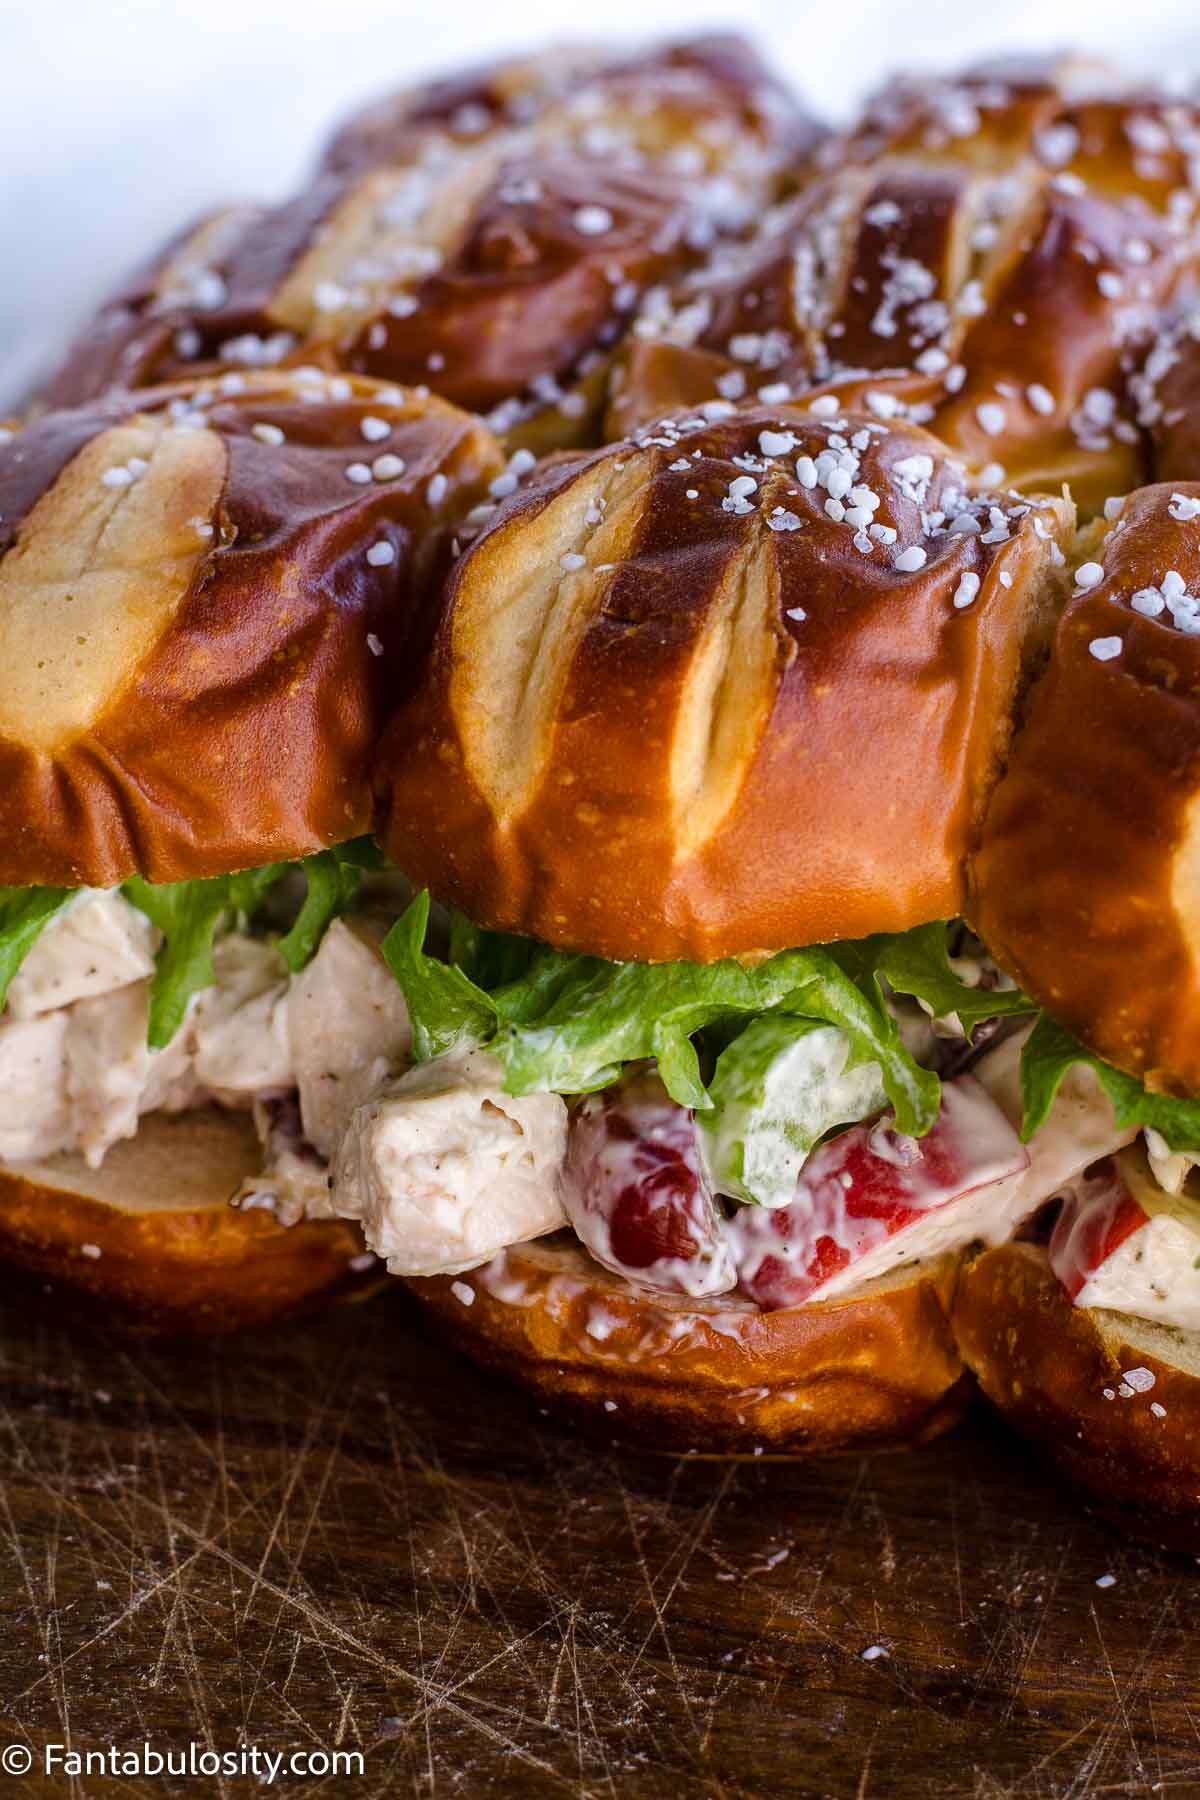
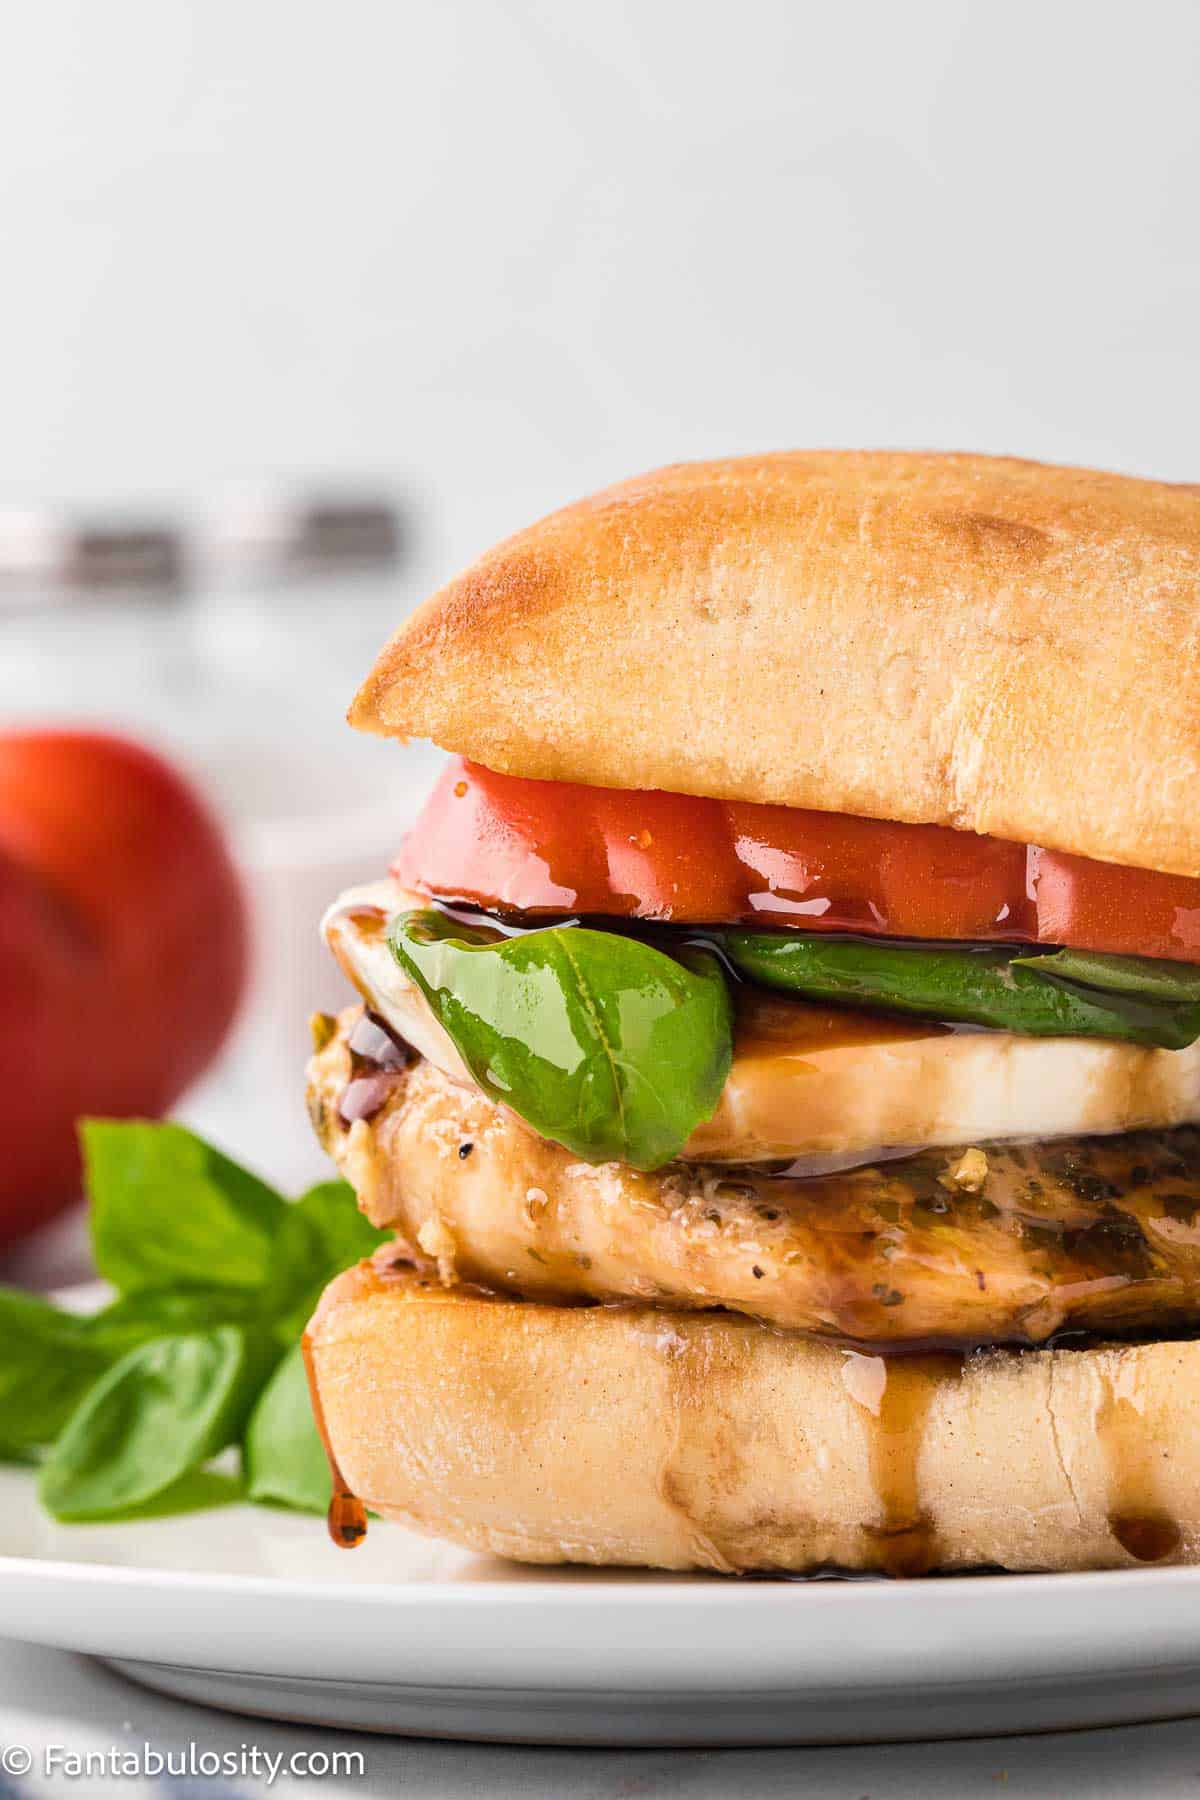
    You’ll find the same flavors you love, in our buffalo chicken lasagna, buffalo chicken soup and buffalo chicken sliders, too! Or, for a hearty dish, this buffalo chicken pasta is a favorite too!

    Chip pulling buffalo chicken dip out of a white dish with cheese stretching.

    I love to serve a meal of just easy appetizers! Whether you are watching the big game or just having a fun dinner with family and friends, finger foods are a big hit. It allows everyone to have lots of variety on their plate without being over-stuffed.

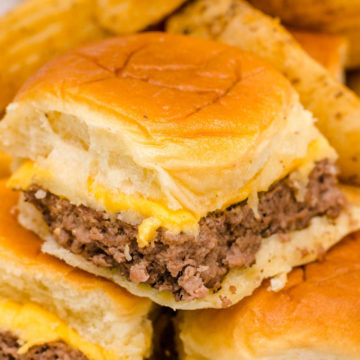
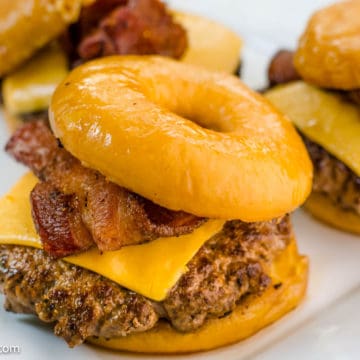
    Besides chicken, heat up some easy Cheeseburger Sliders to fill up your plate. And since you have chips out, salsa and guacamole will be great dips with Rotel Dip as well.

    [feast_advanced_jump_to]

    Why You’ll Love This Recipe

    • Crowd pleaser: This is a great dip because it fits low-carb diets and can be dipped with veggies to stay gluten-free.
    • Make-ahead recipe: It’s easy to mix everything up and set the dish in the fridge until ready to bake and serve.
    • Easy to customize: Adjust the heat to your liking as well as change up the cheese for a new flavor experience.
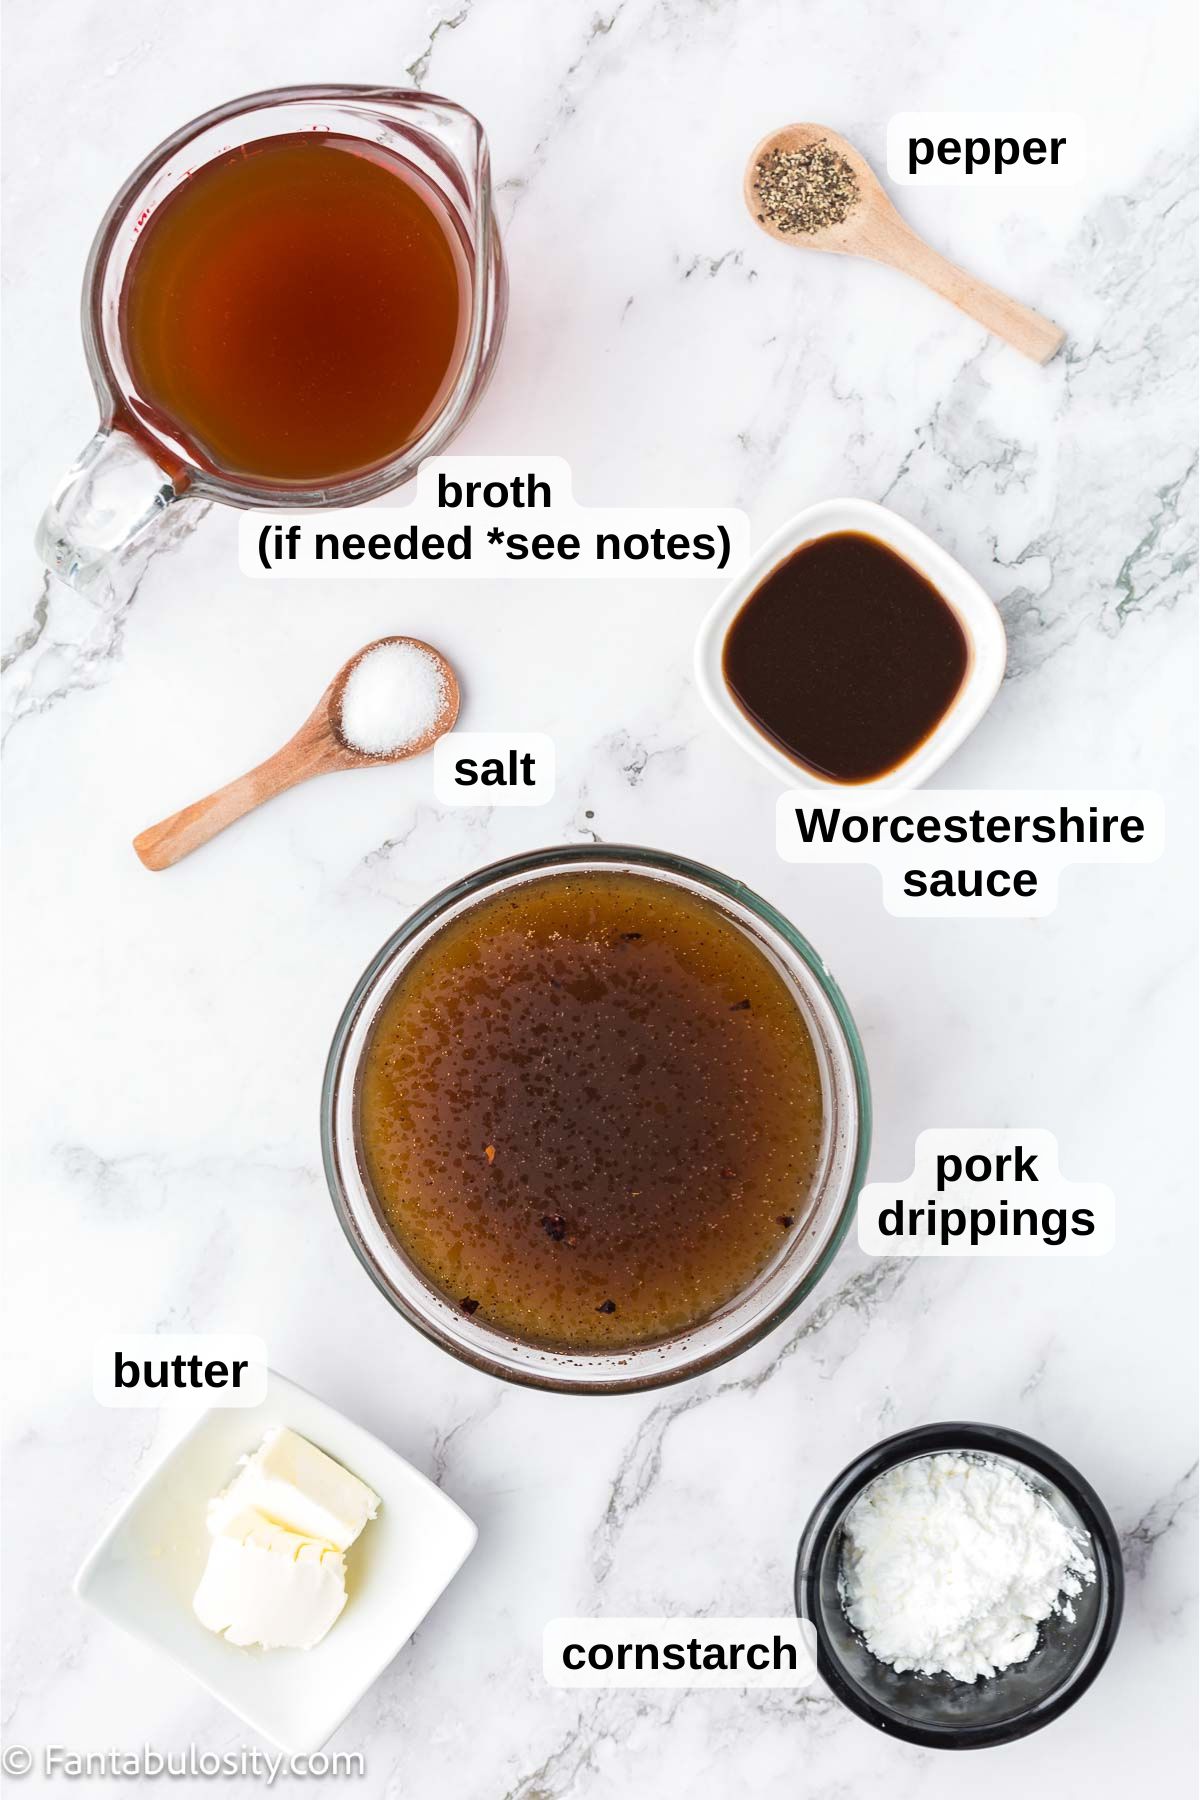
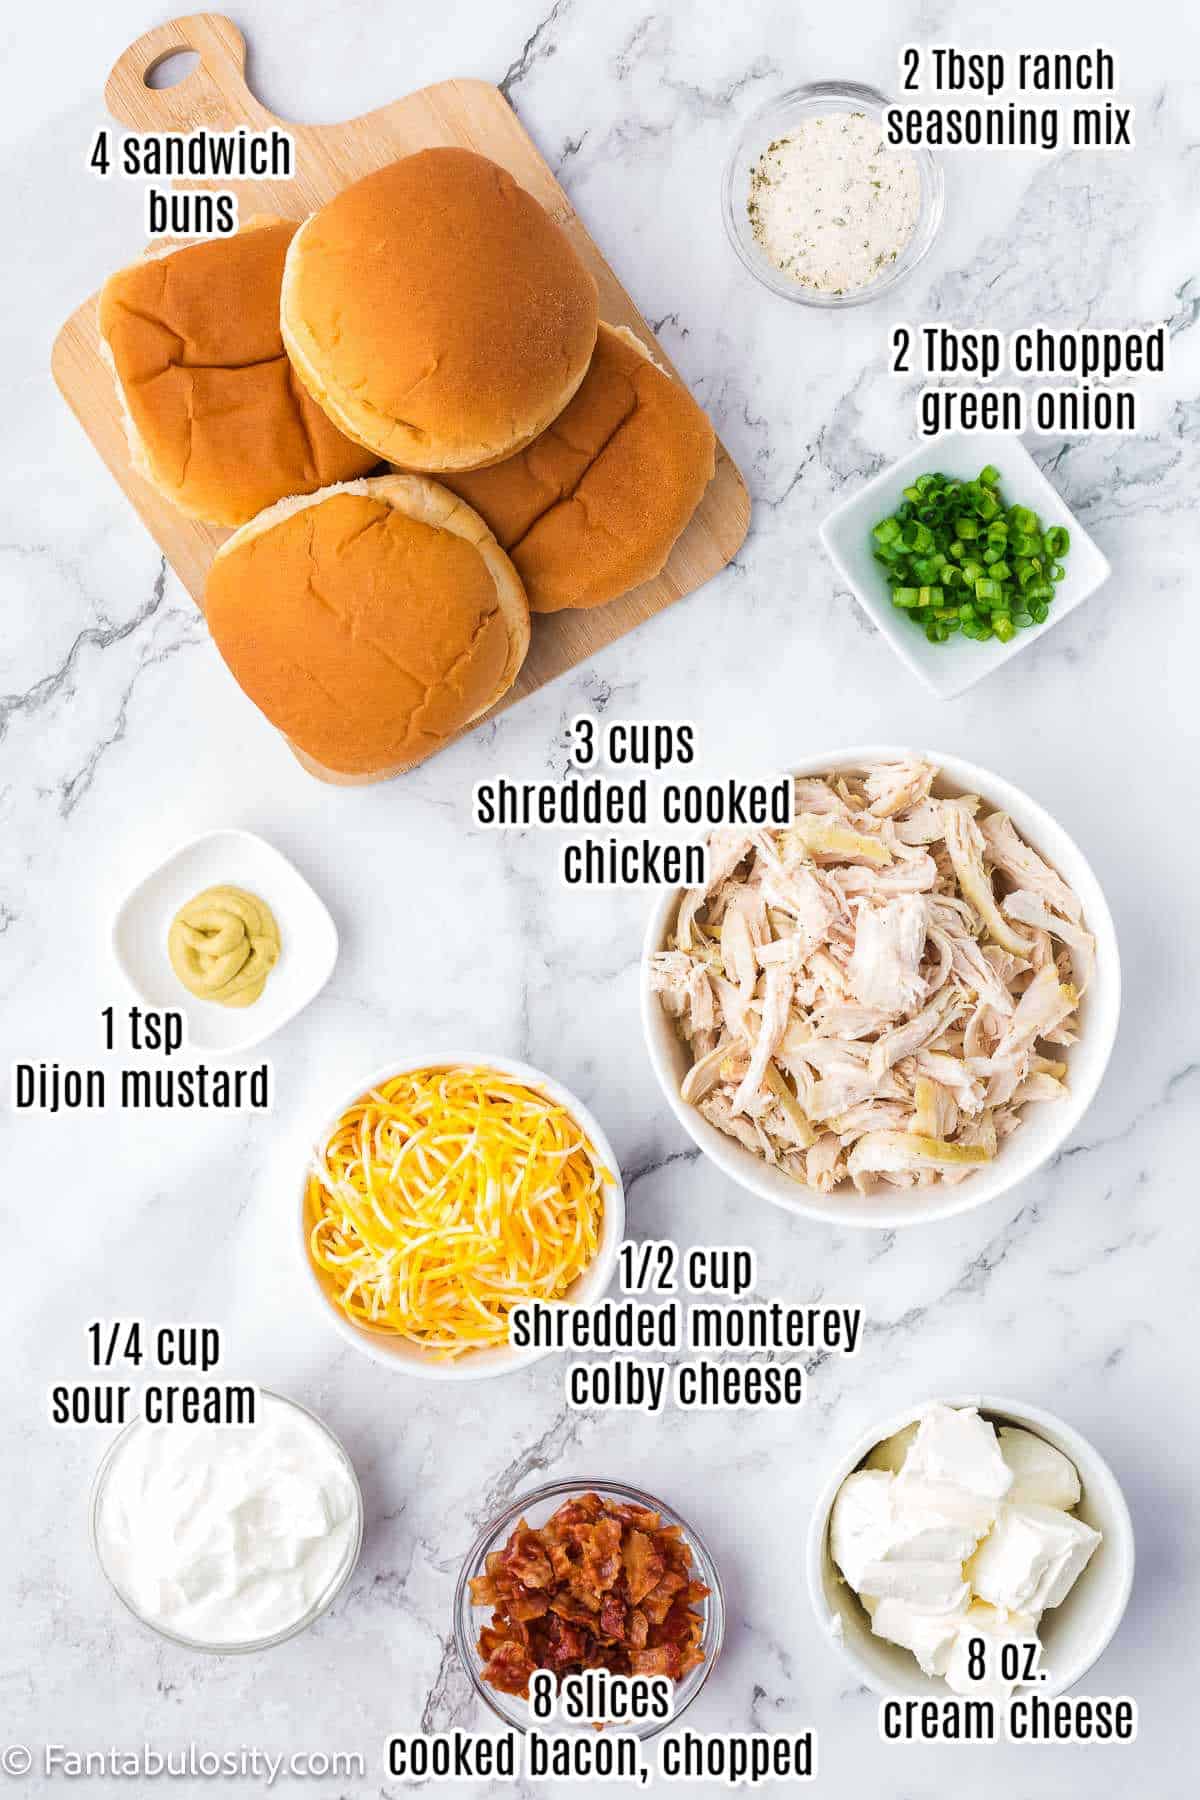
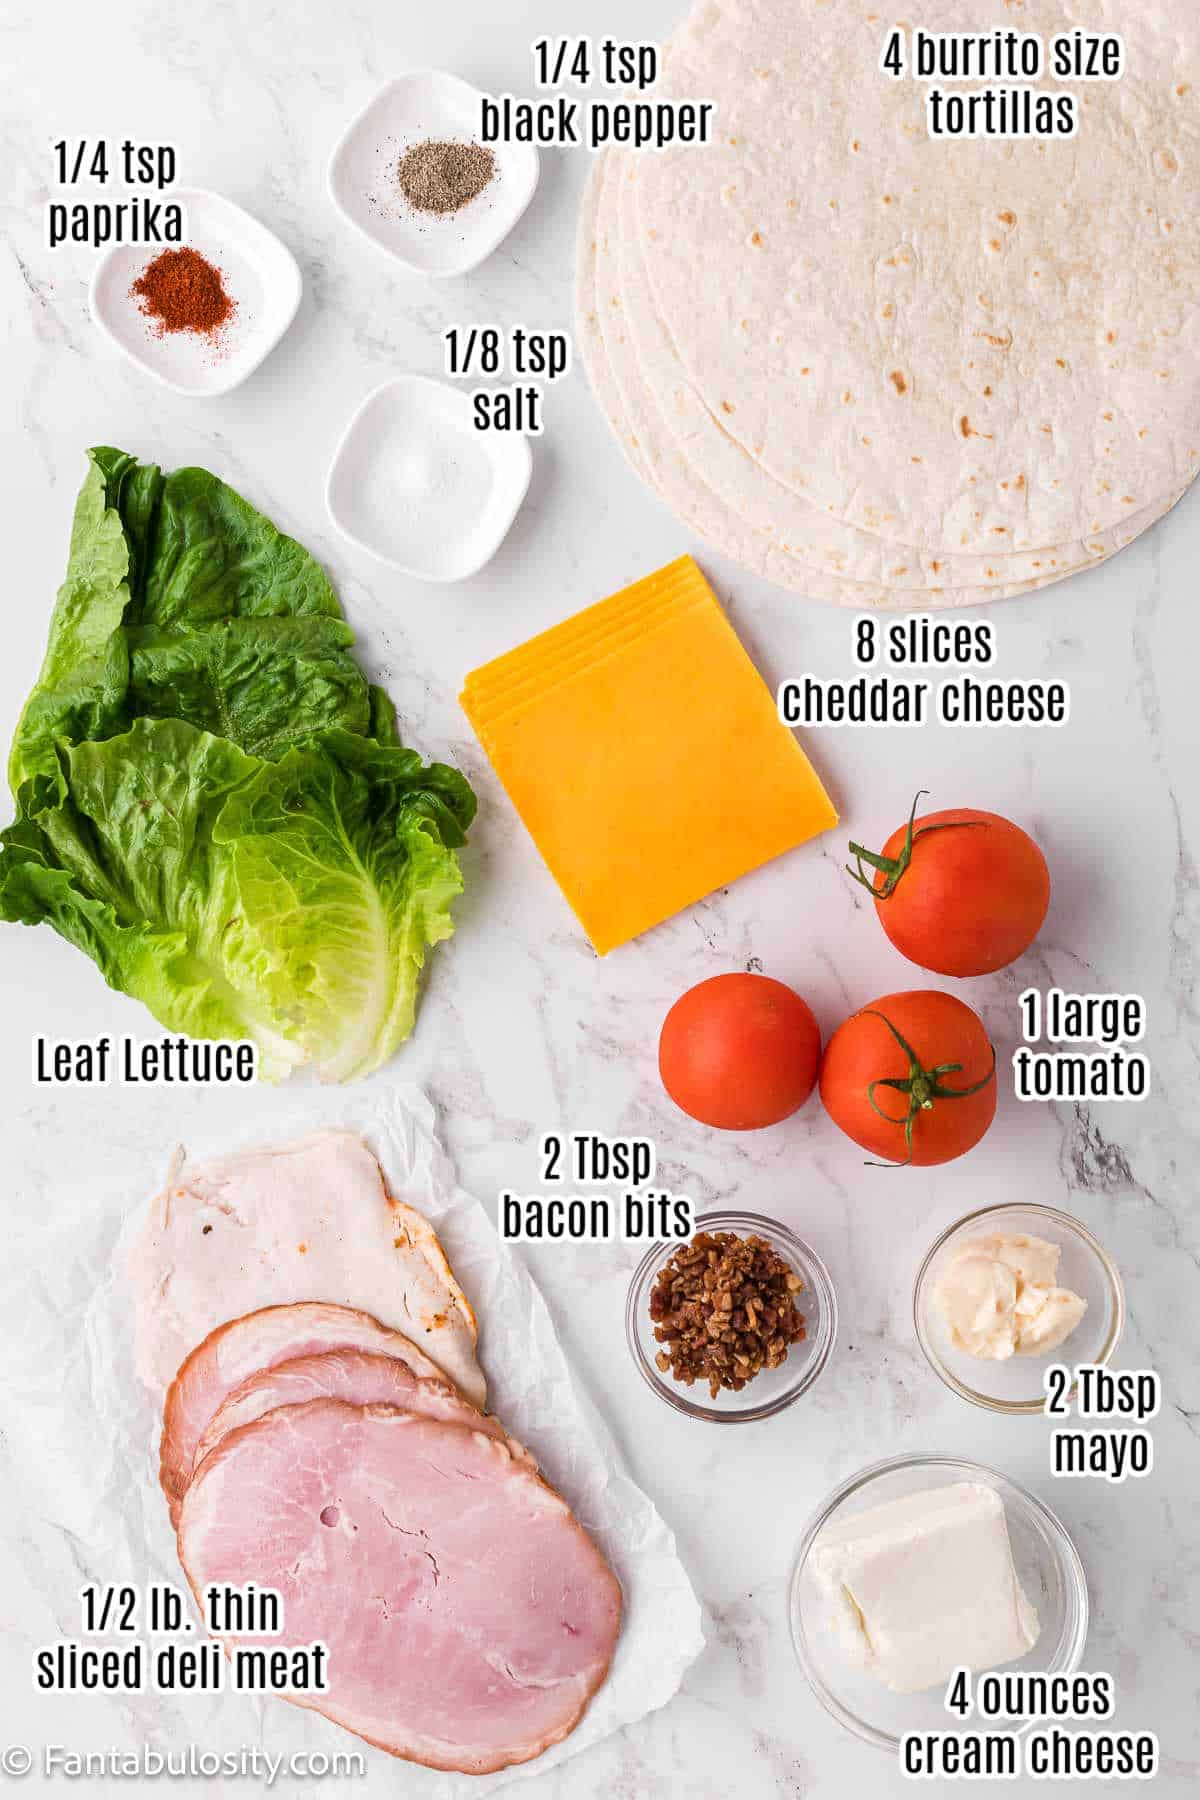
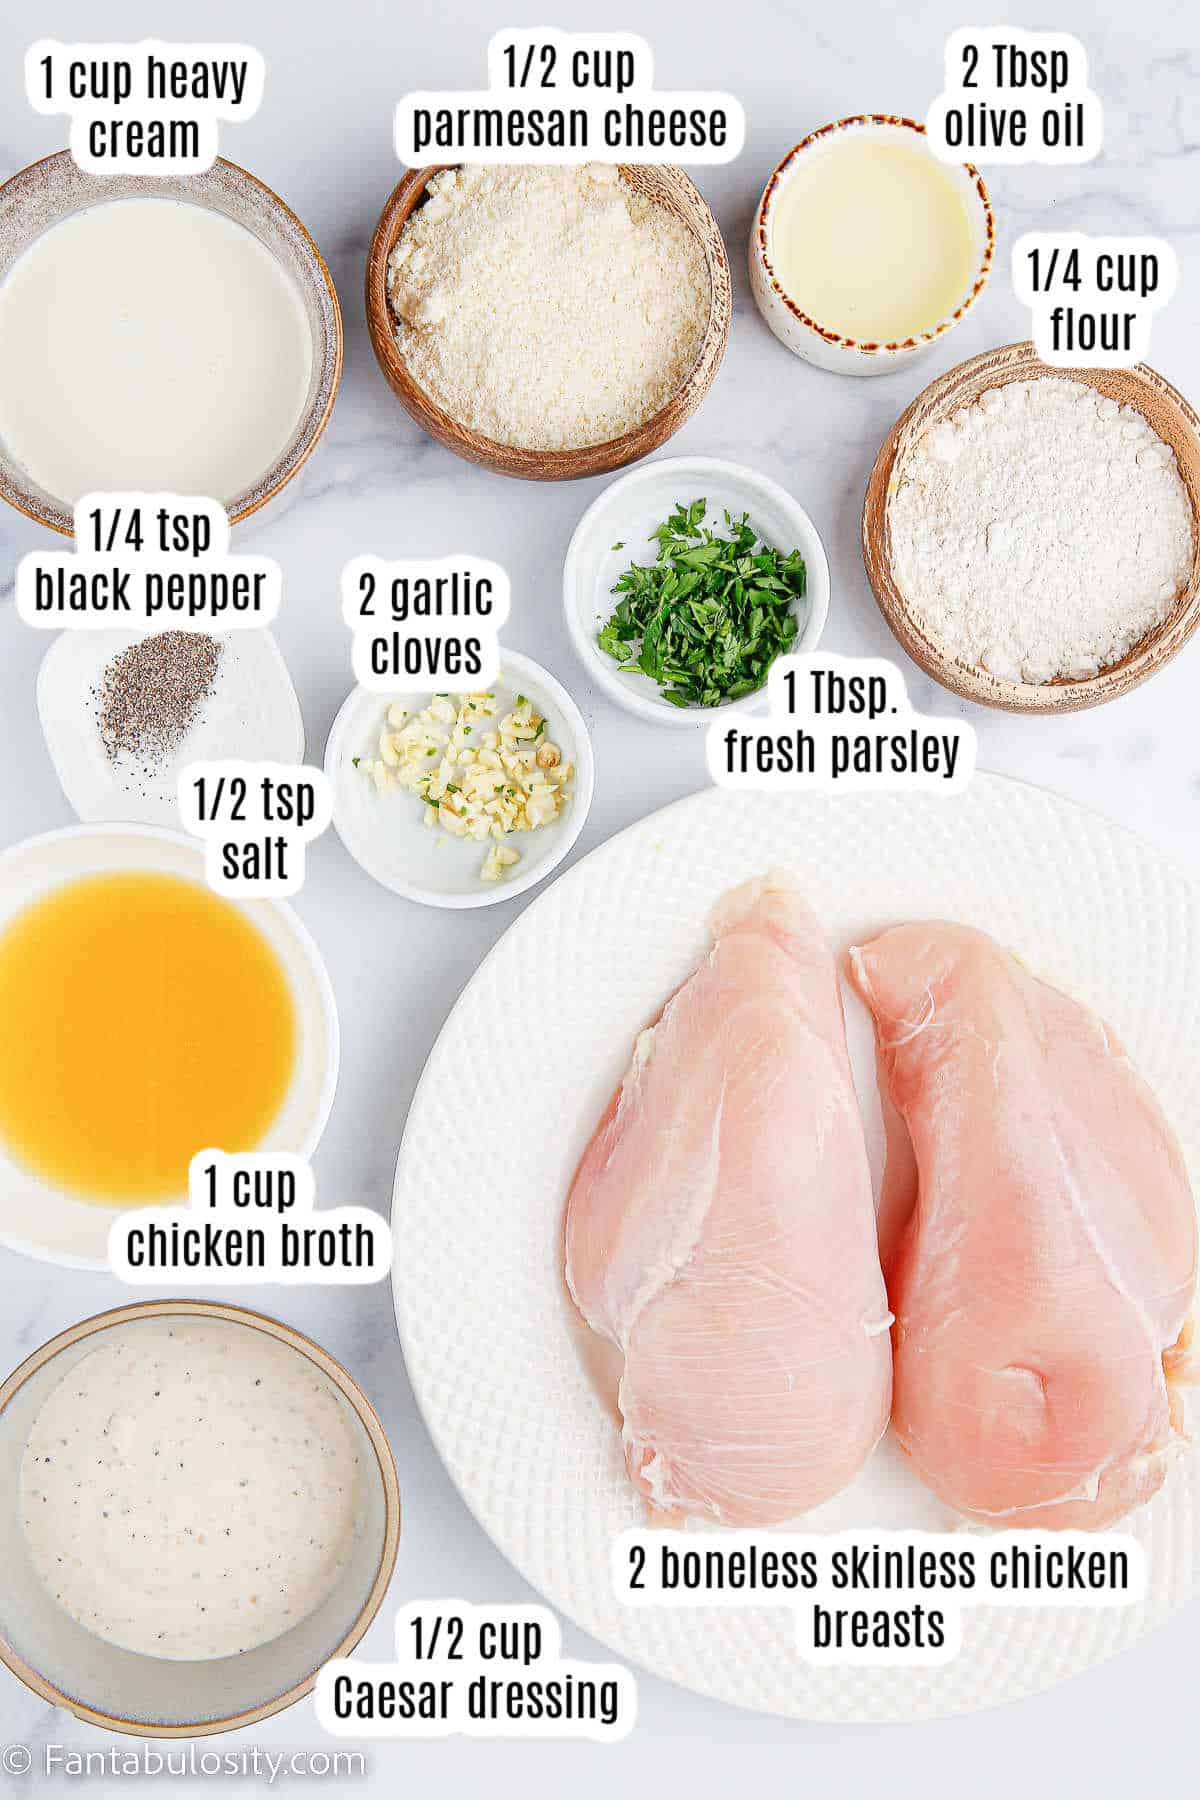
    Key Ingredients

    Here’s what you’ll need to make this buffalo chicken dip:

    Labeled ingredients for a buffalo chicken dip recipe.
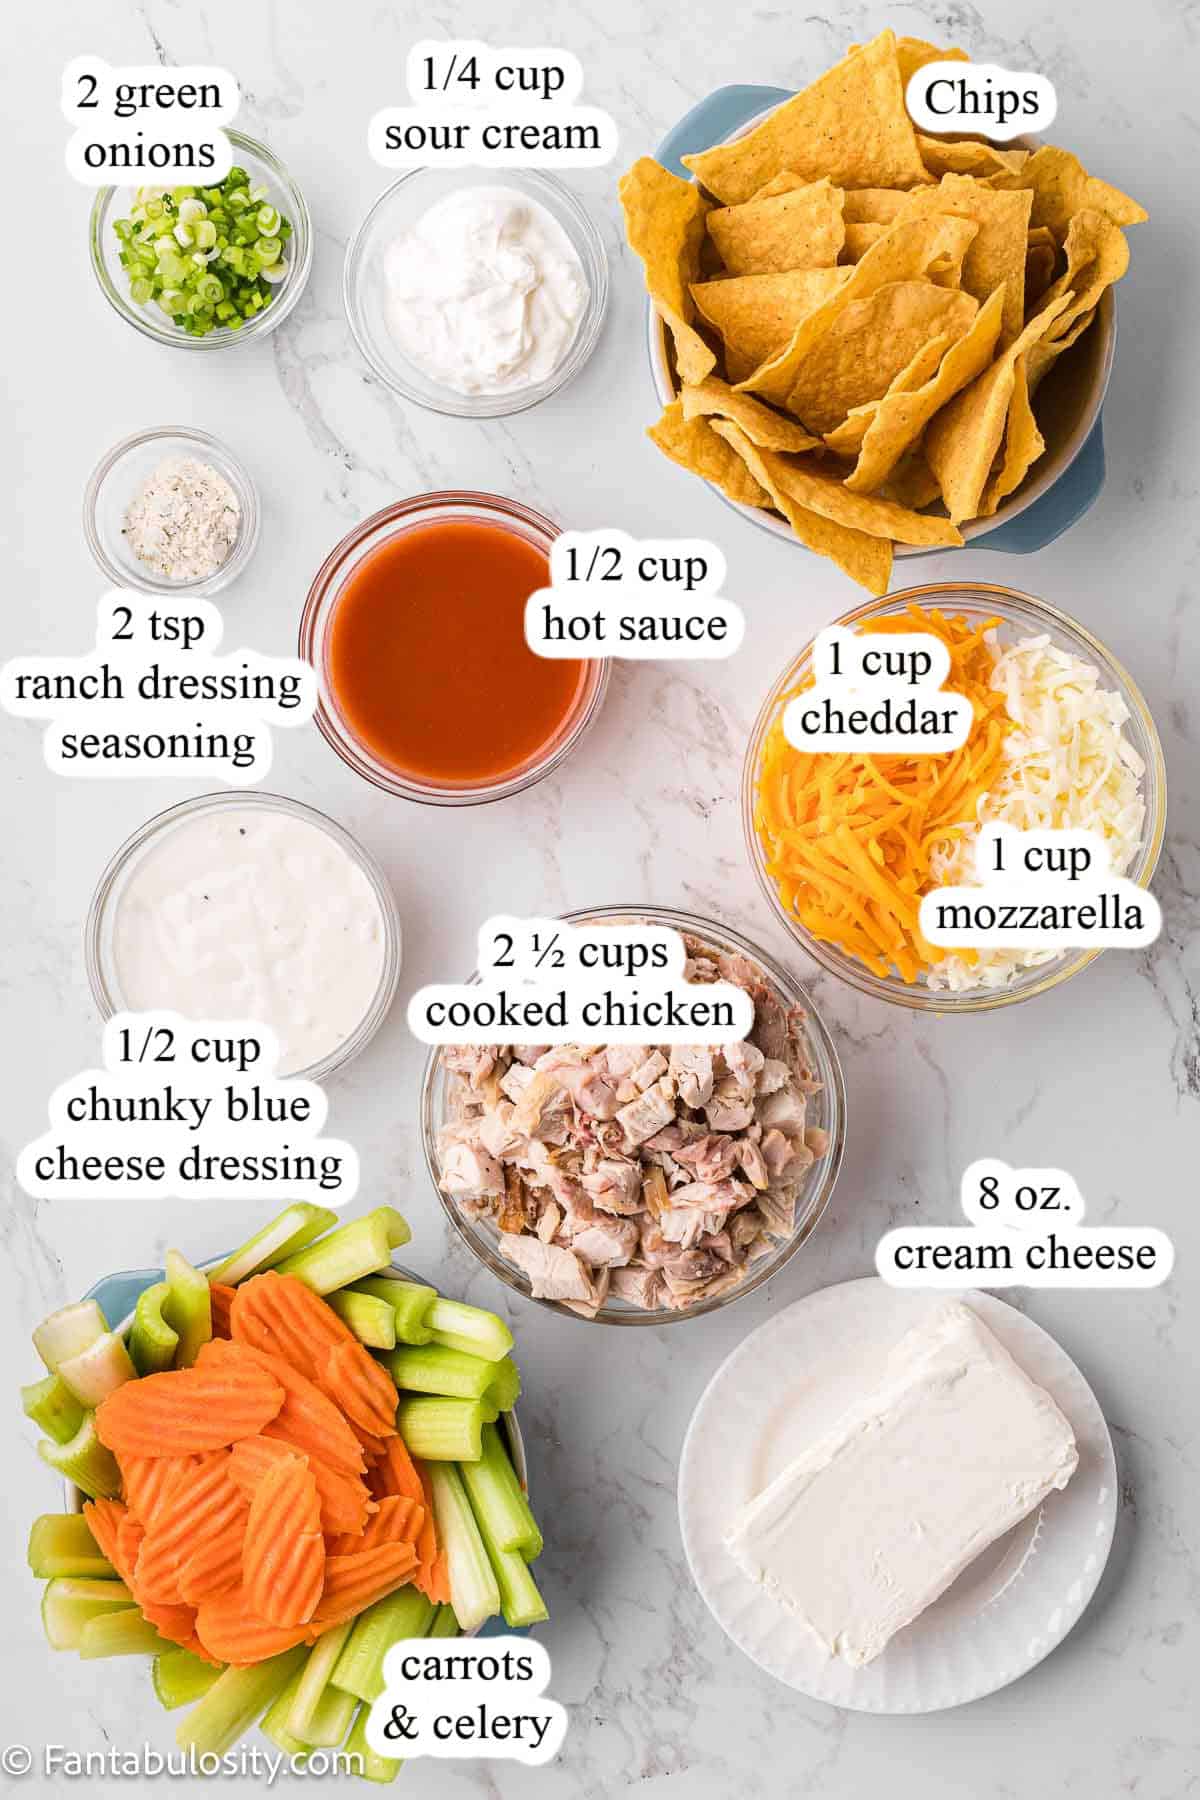
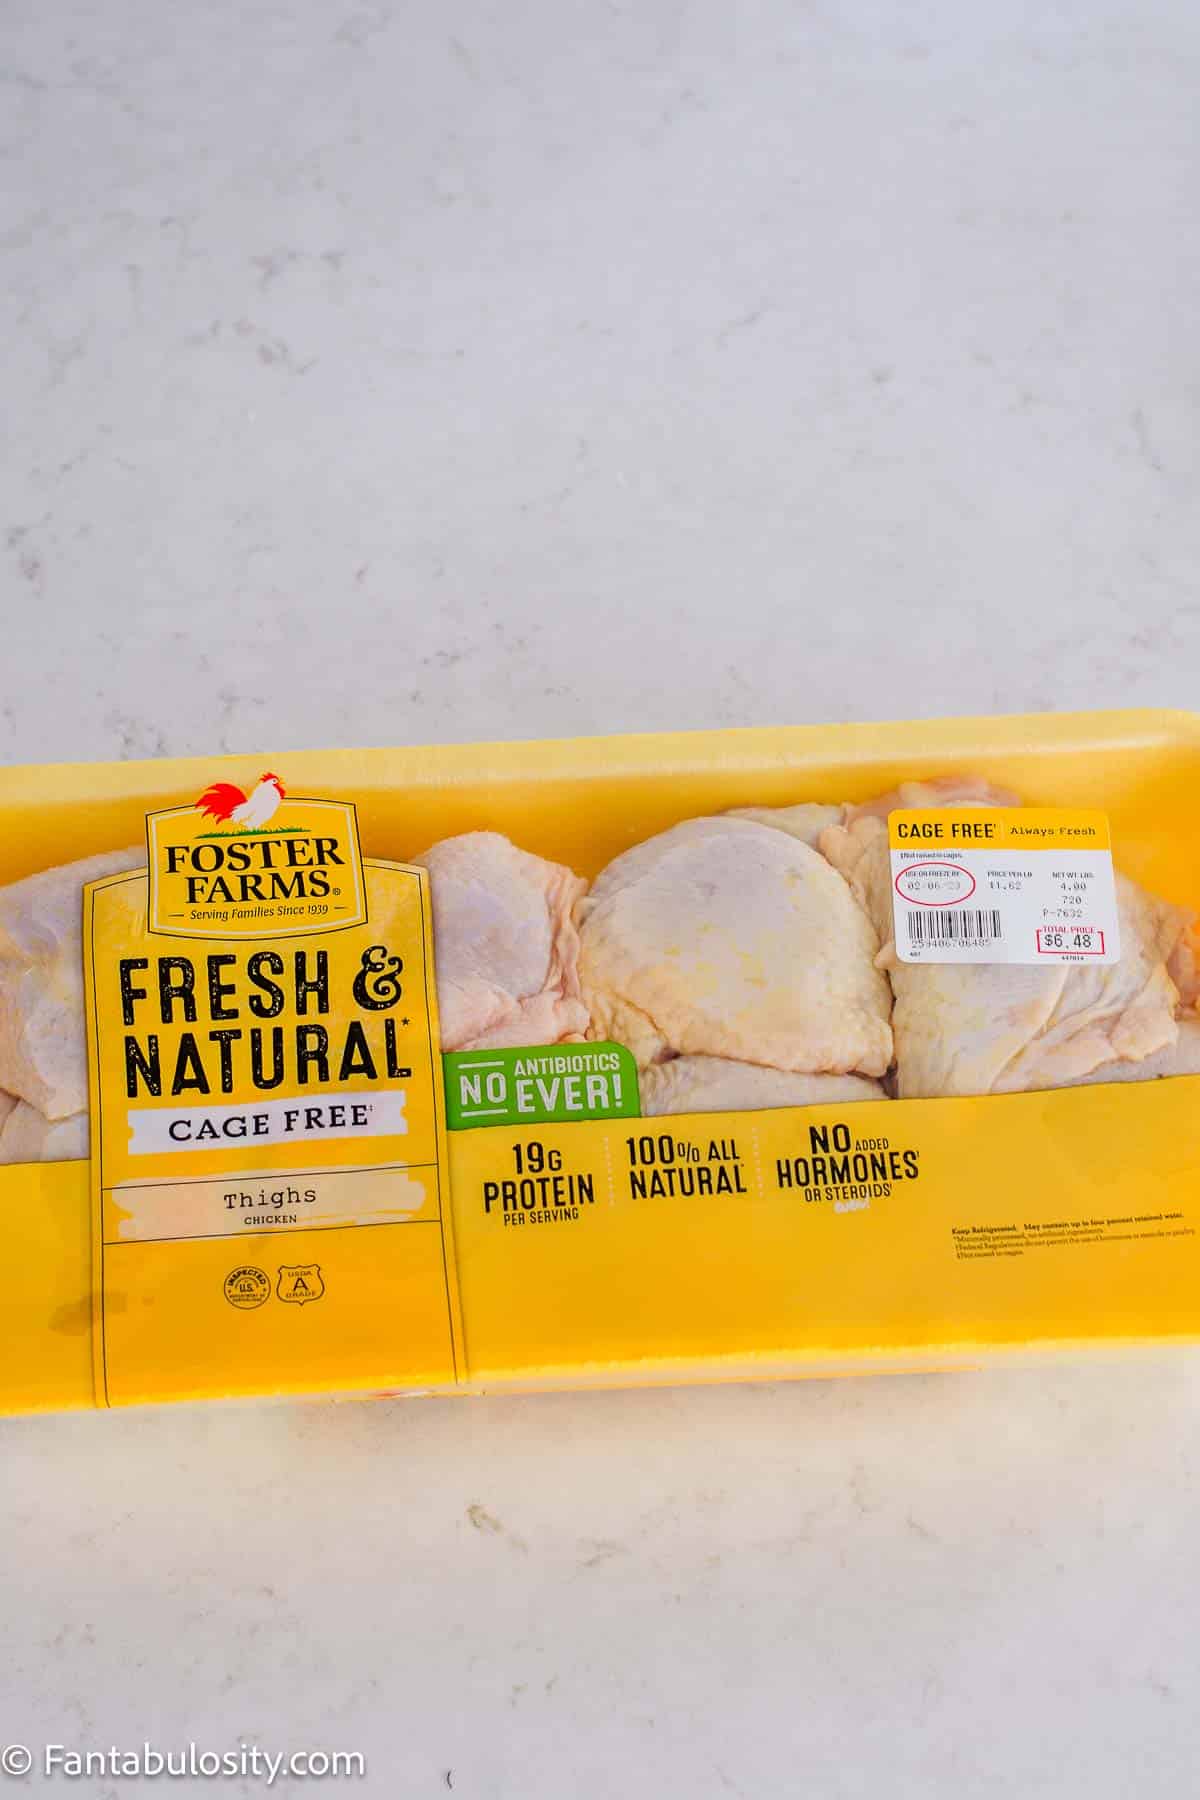
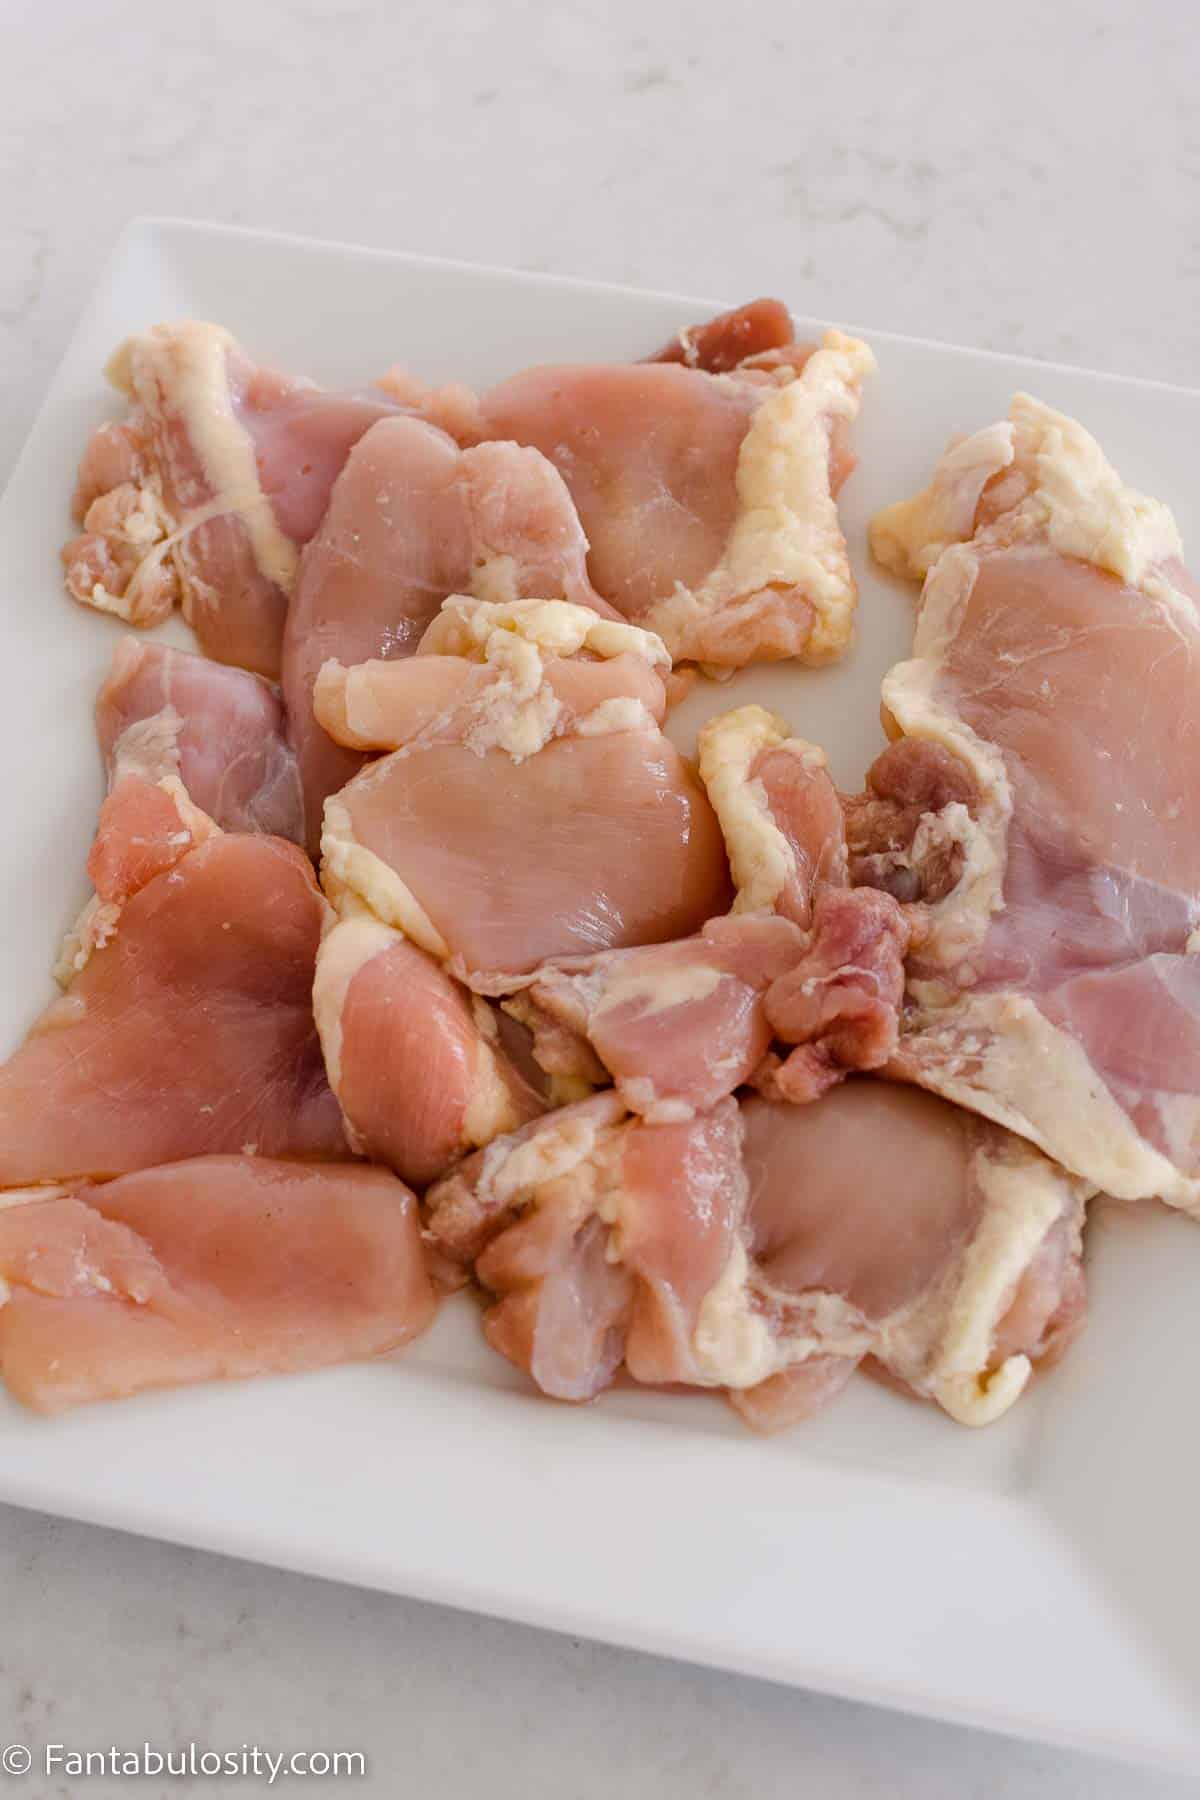
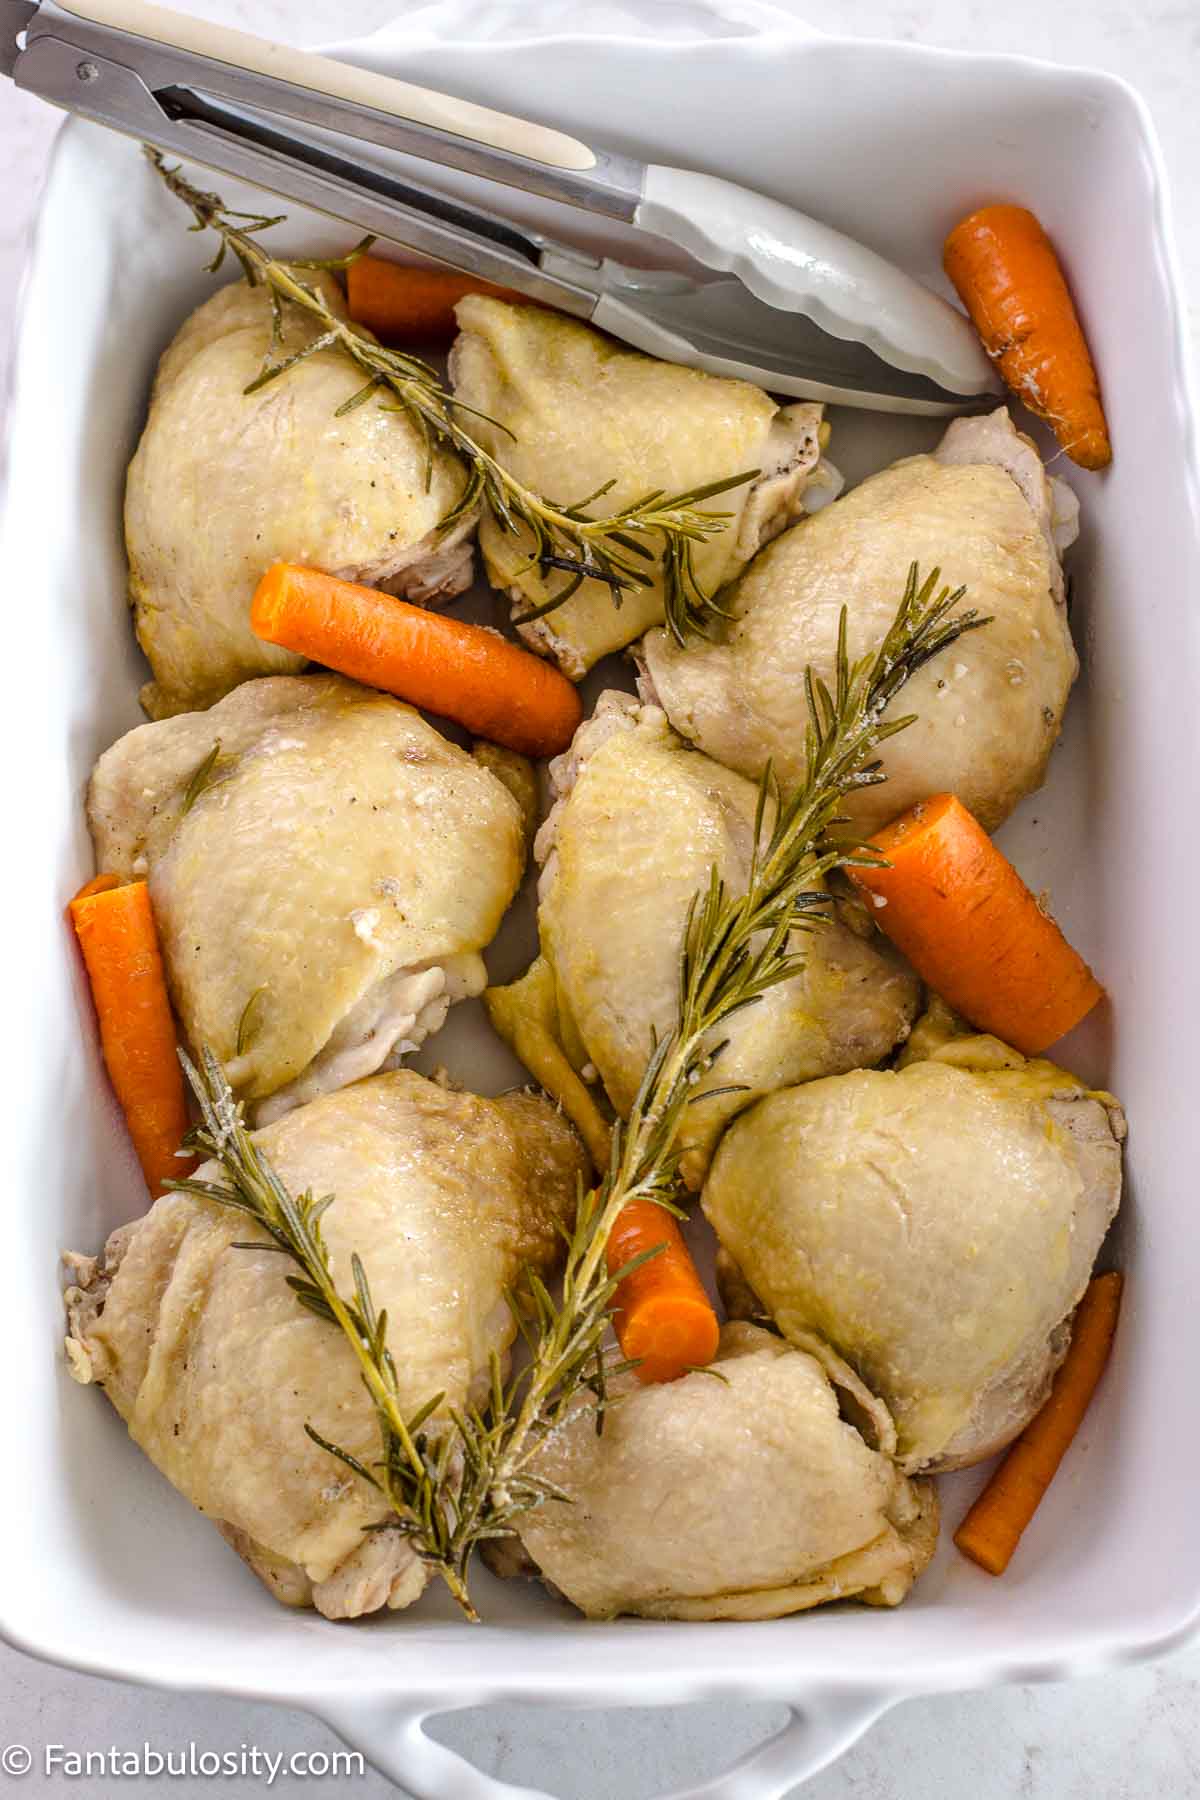
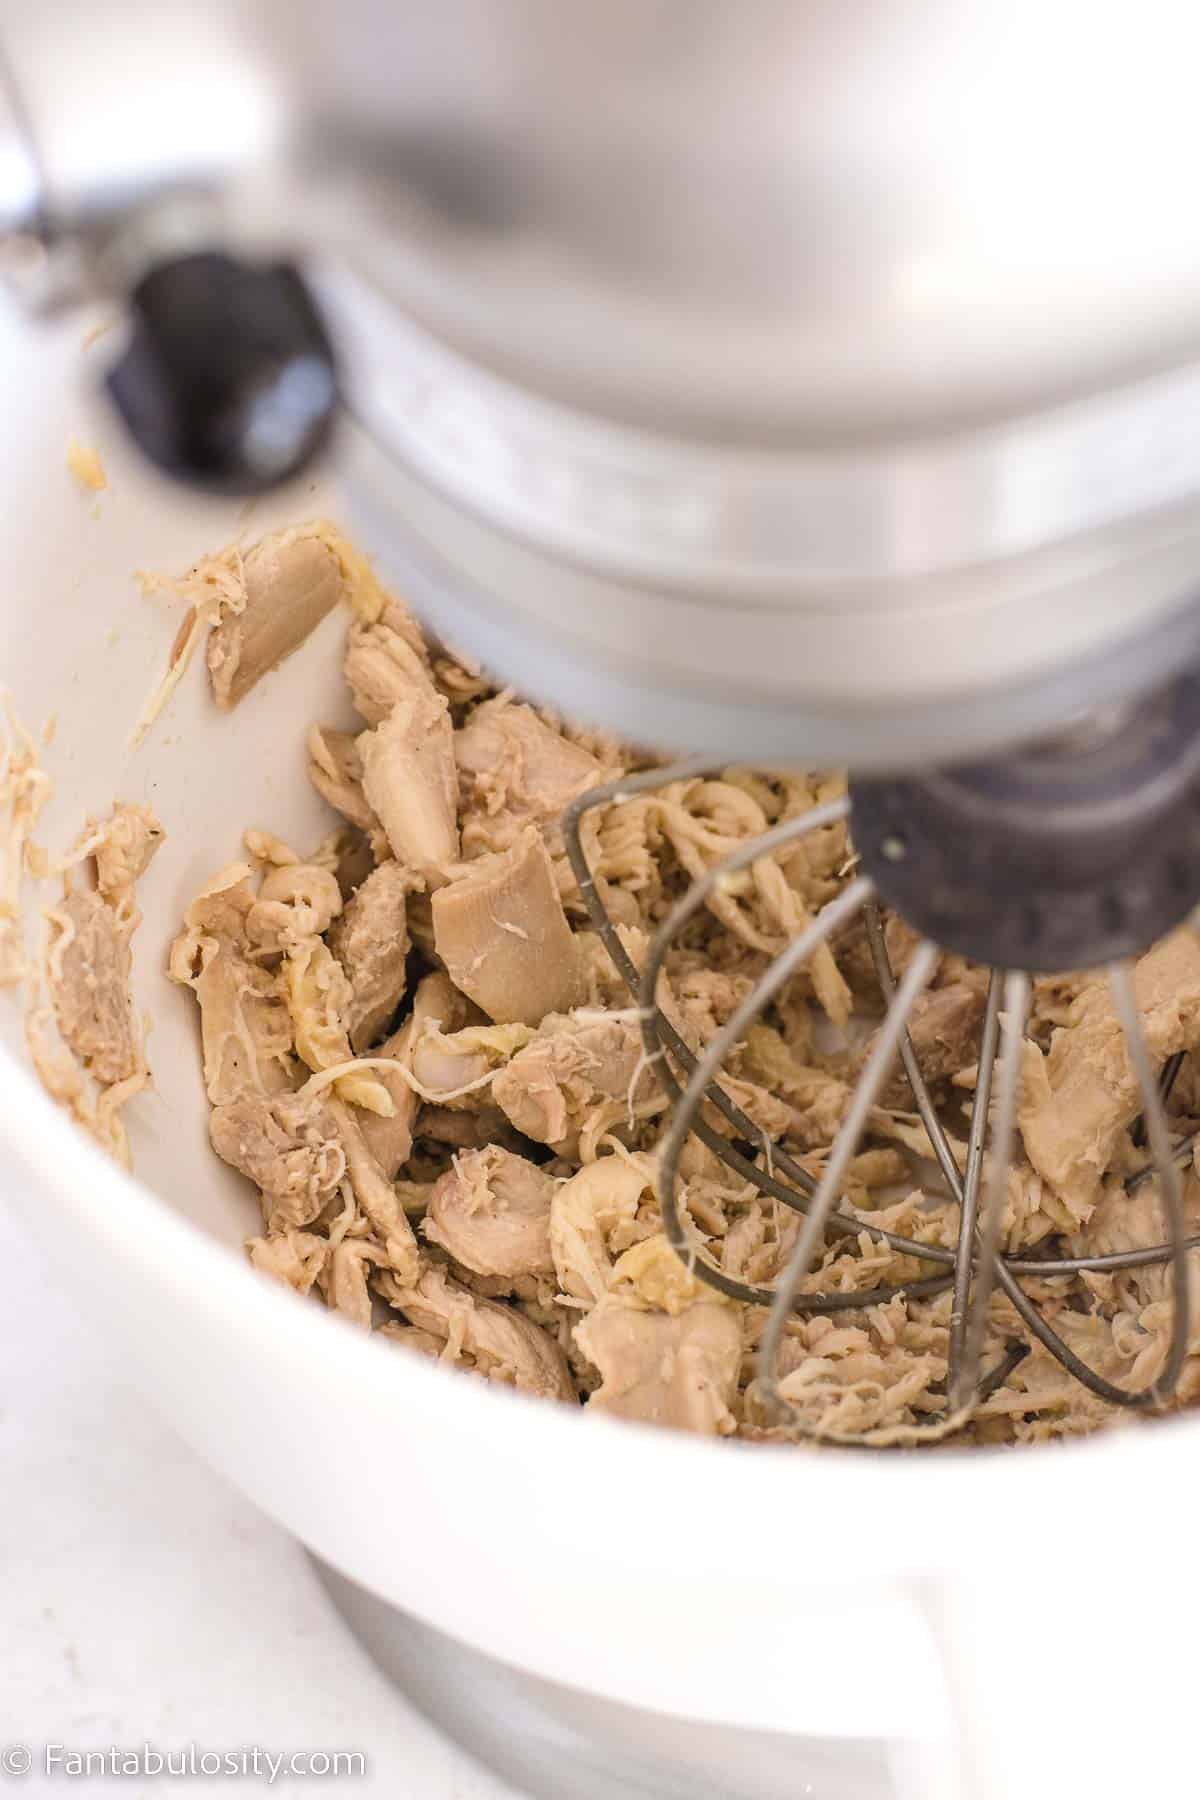
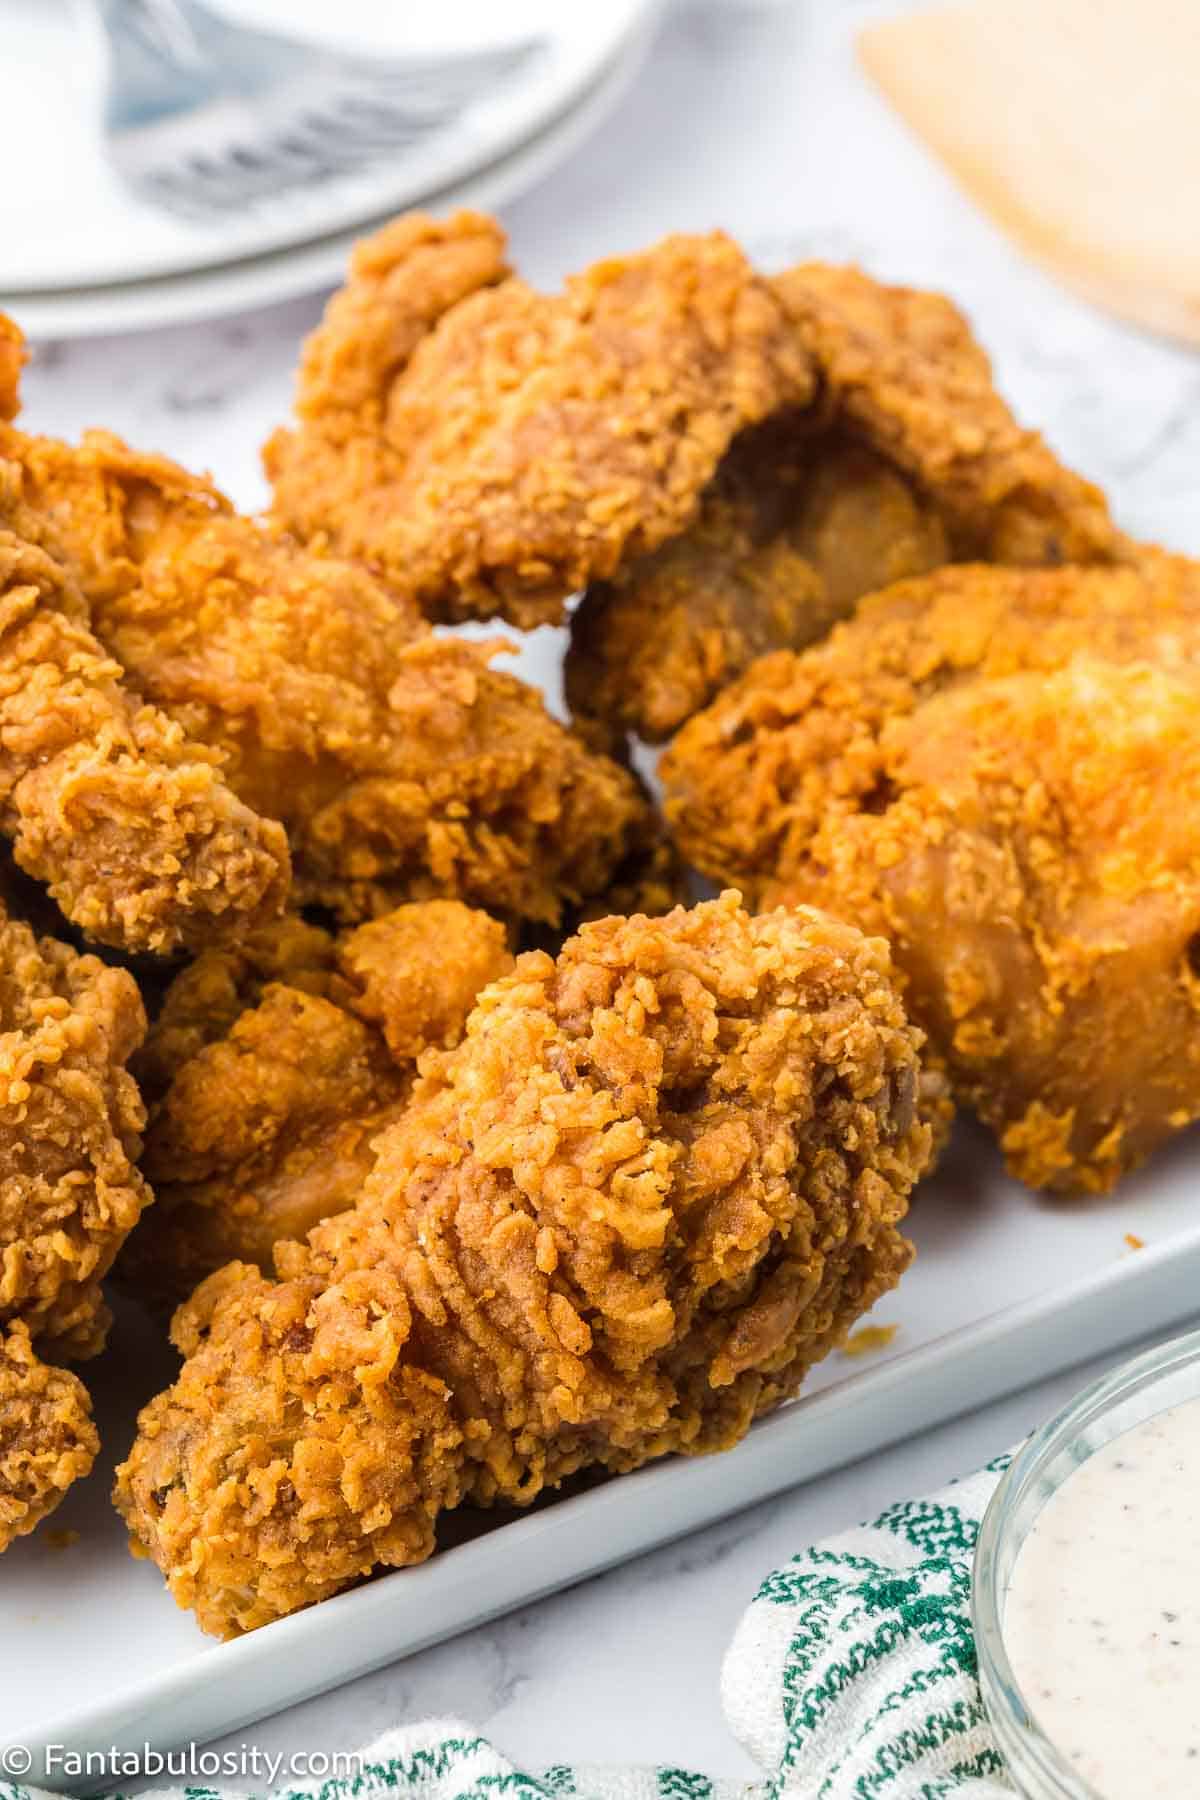
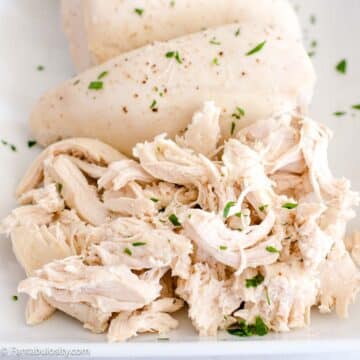
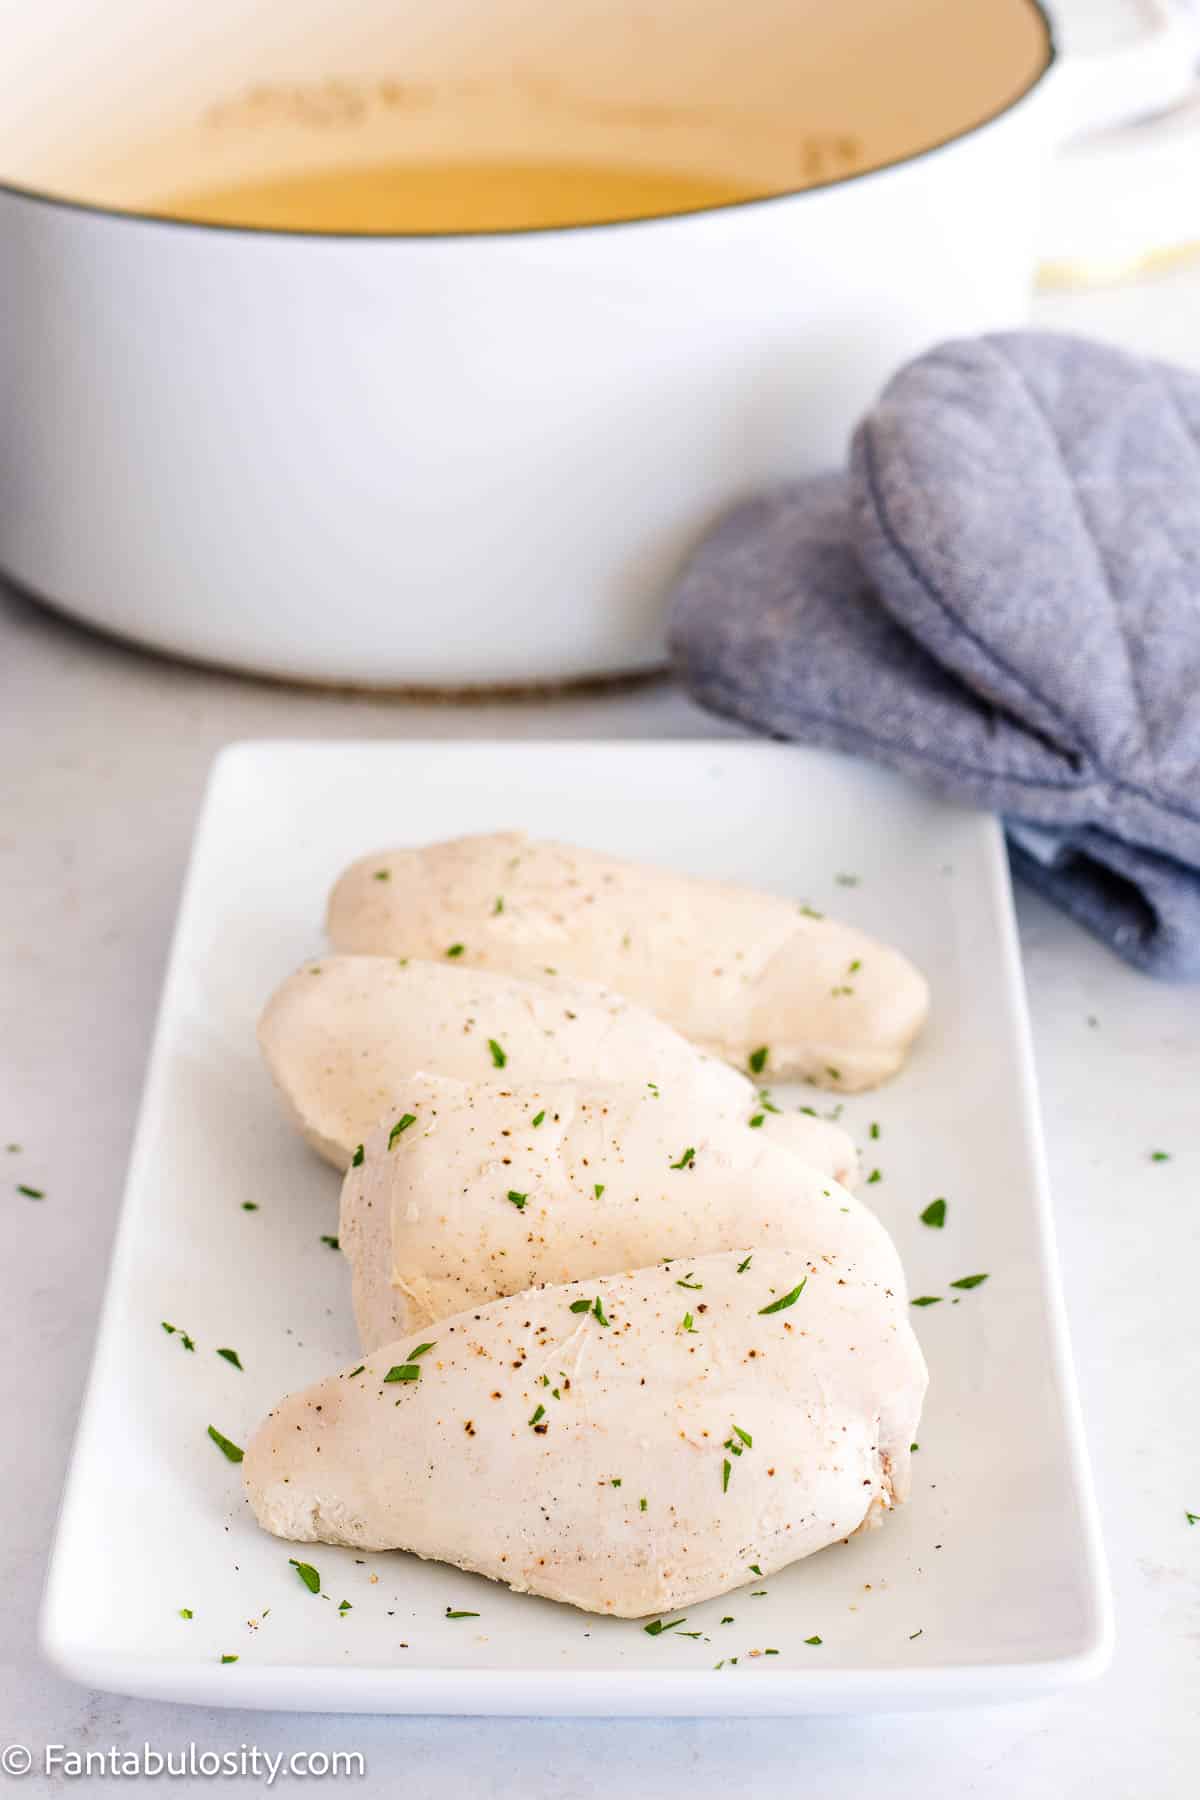
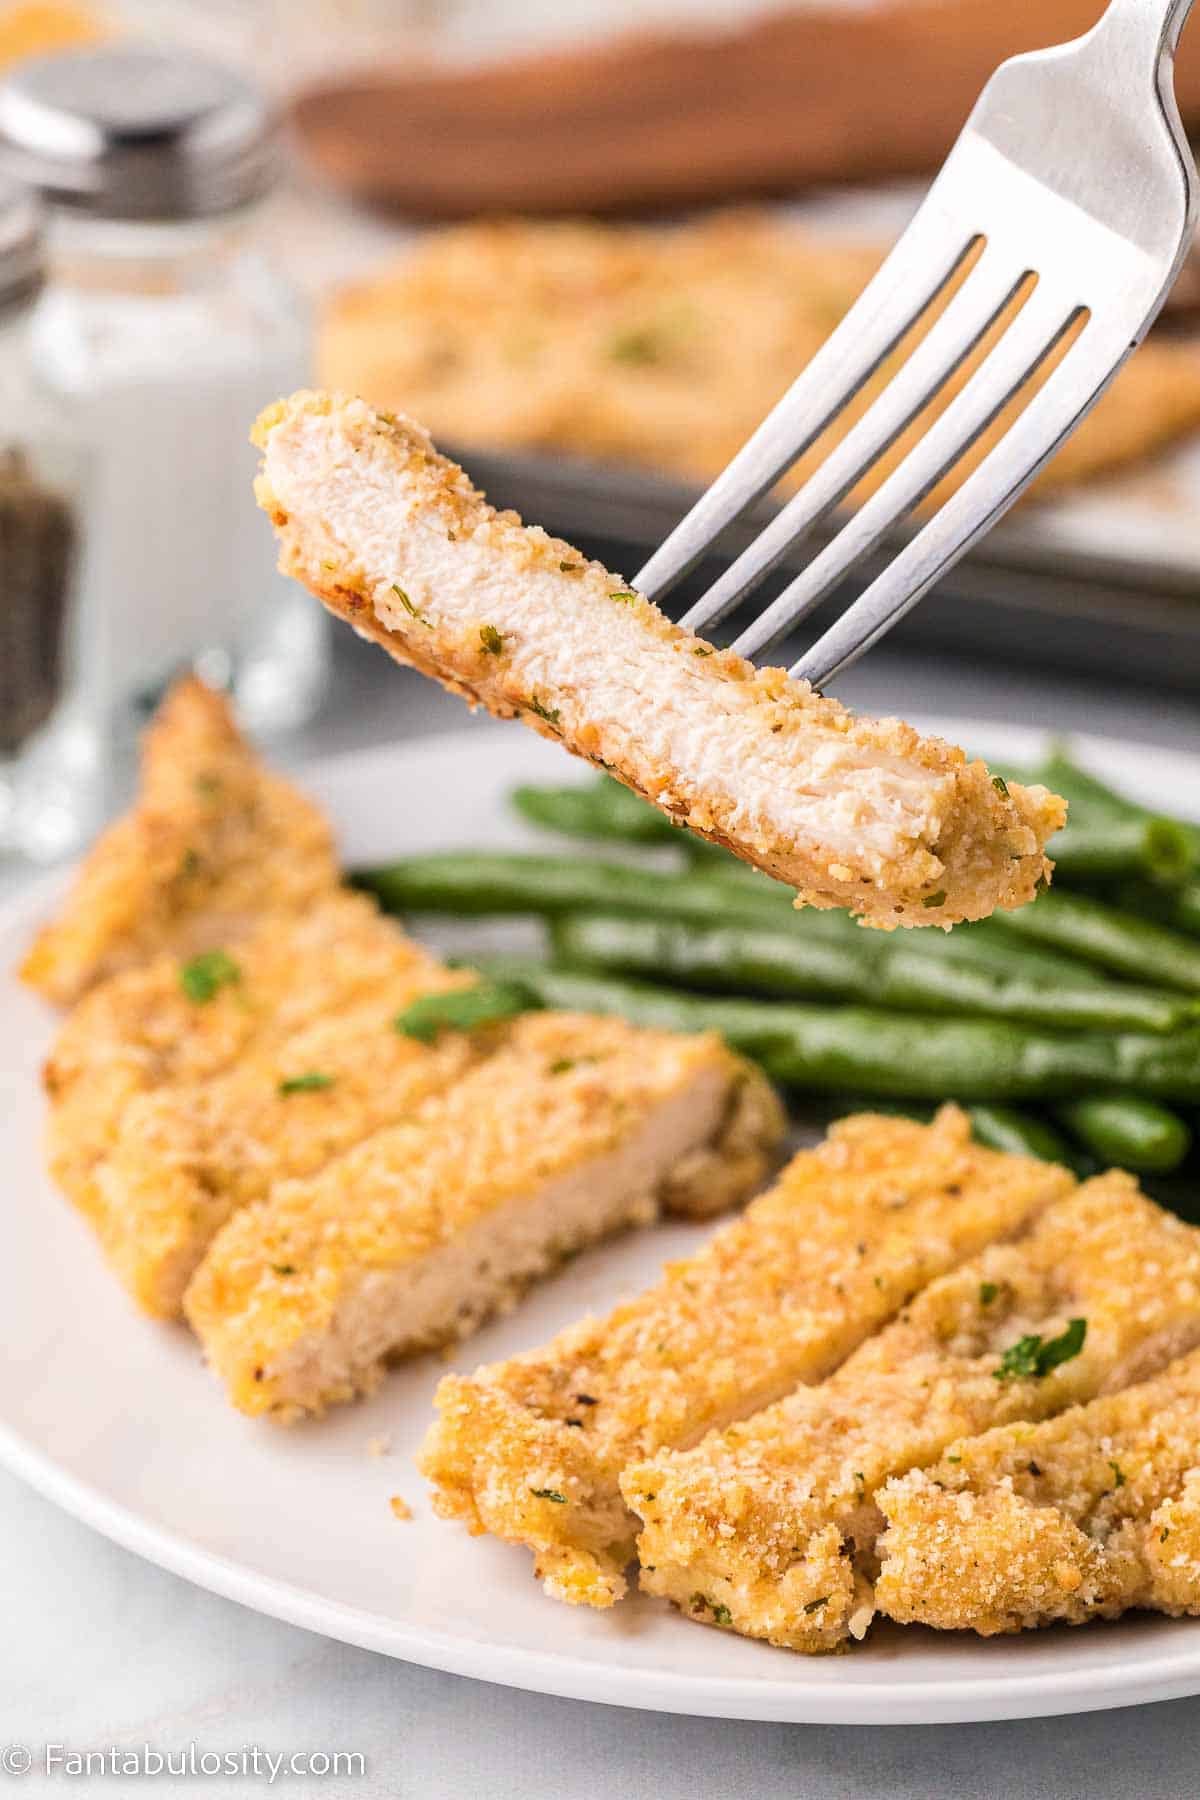
    • Chicken – We are using cooked chicken because the dip is basically being heated, not cooked. Shredded or diced both work, but you’ll want it all small enough to scoop up with your dippers!
    • Cheese – I recommend a mix of mozzarella and cheddar, but you can use really any cheese here. A Mexican/fiesta blend or pepper jack cheese would be great options. Just use 2 cups total of shredded cheese.
    • Cream cheese – Use full fat, or the ⅓ reduced fat will work. Stay away from fat free as the texture won’t be right.
    • Dressing – The tang of blue cheese pairs well with buffalo, but if you aren’t a fan you can go ahead and use ranch dressing instead. You can skip the powdered ranch if using ranch dressing.
    • Sour cream – Again, be sure and use reduced fat or full fat here and not fat free for the best texture in your finished dip.
    • Hot sauce – This is what brings the heat so feel free to adjust to your liking! After mixing all the ingredients but before adding chicken is a great time to taste test and adjust.

    *Be sure to see the recipe card below for the full ingredients list & instructions!*

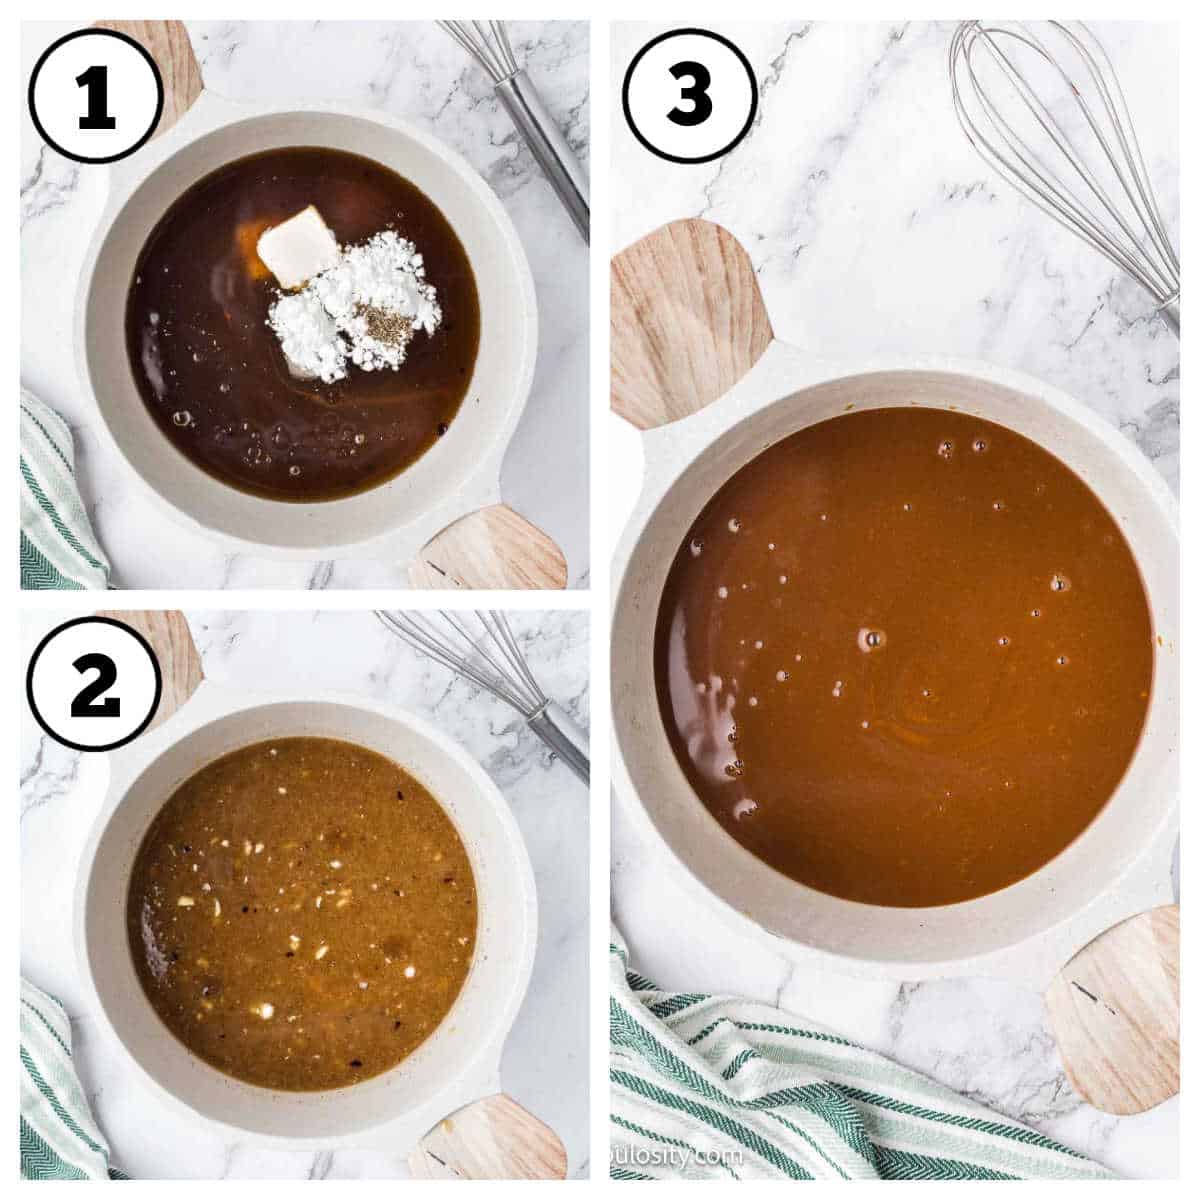
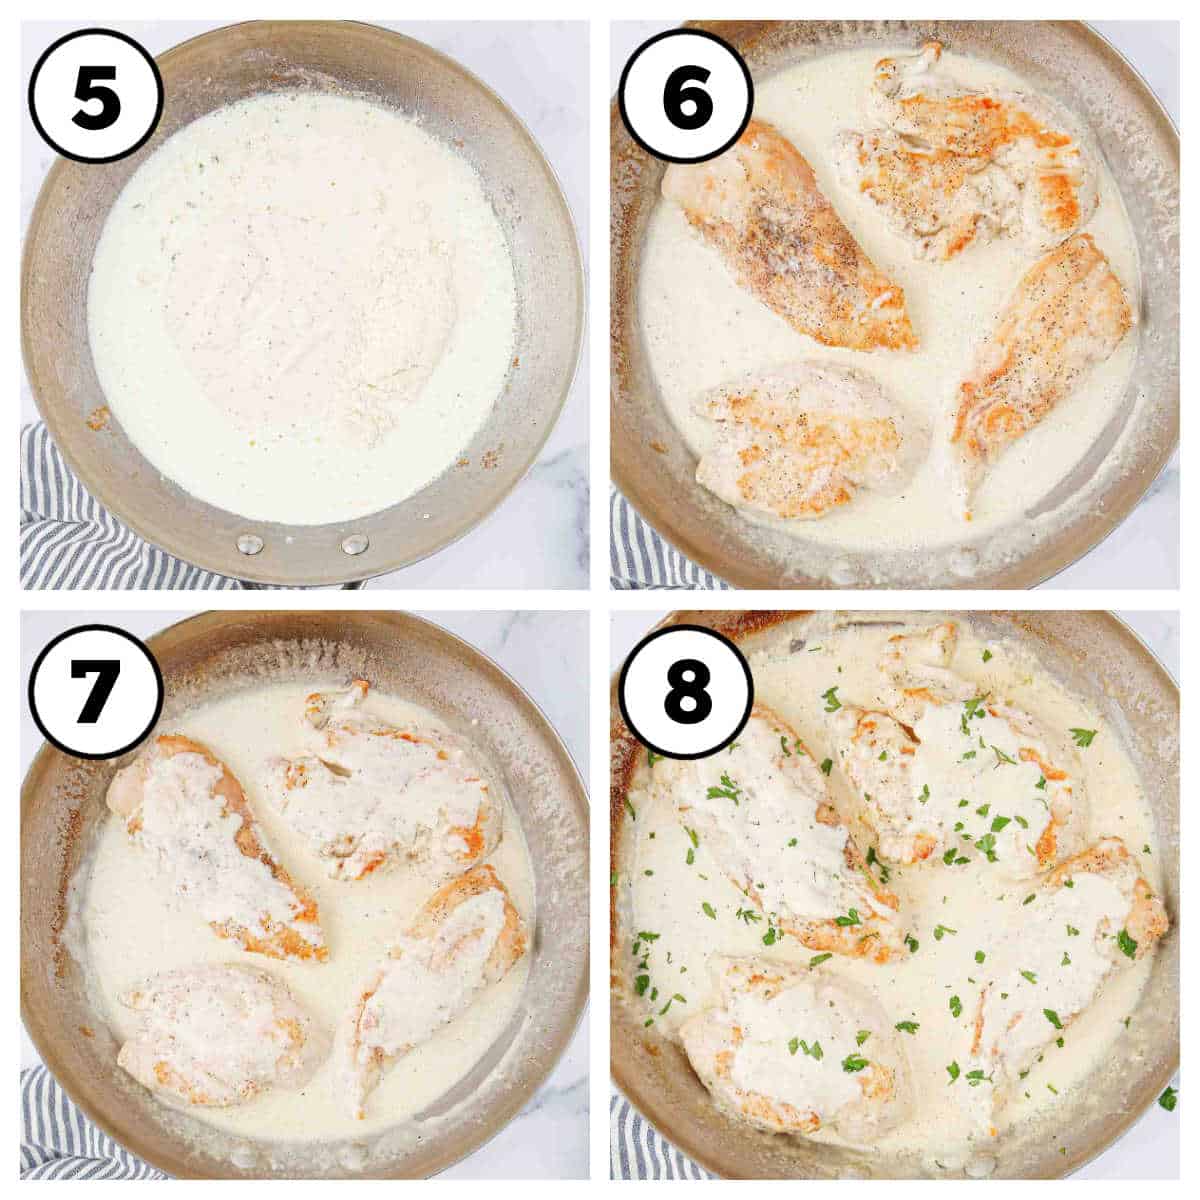
    How to Make Buffalo Chicken Dip

    This Buffalo Chicken Dip couldn’t be easier:

    • mix ingredients
    • spread in a dish
    • bake to bubbly perfection

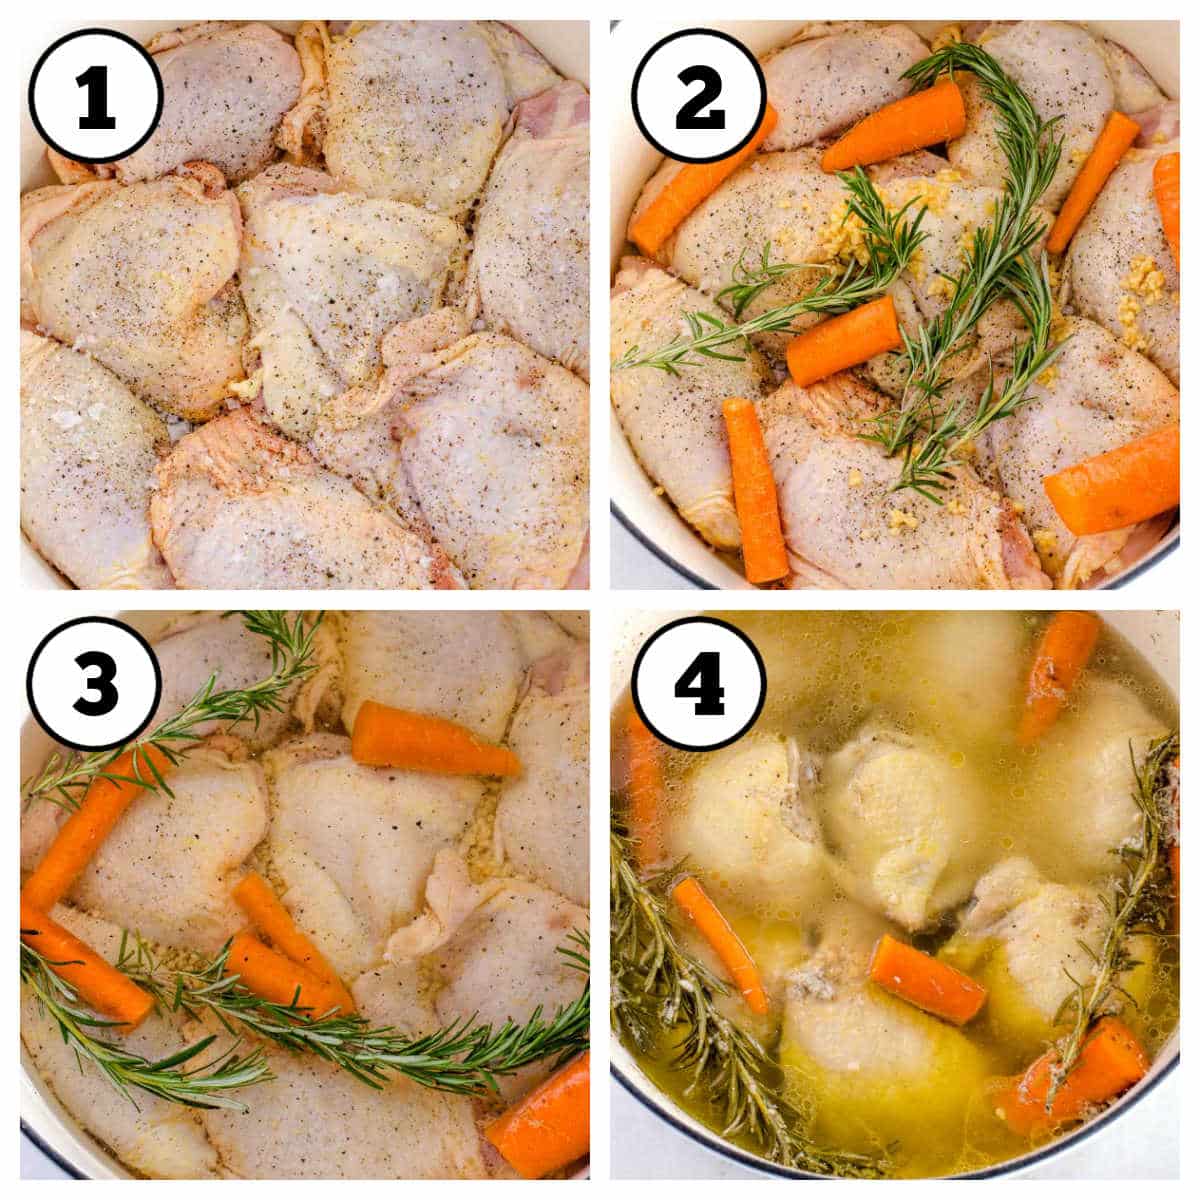
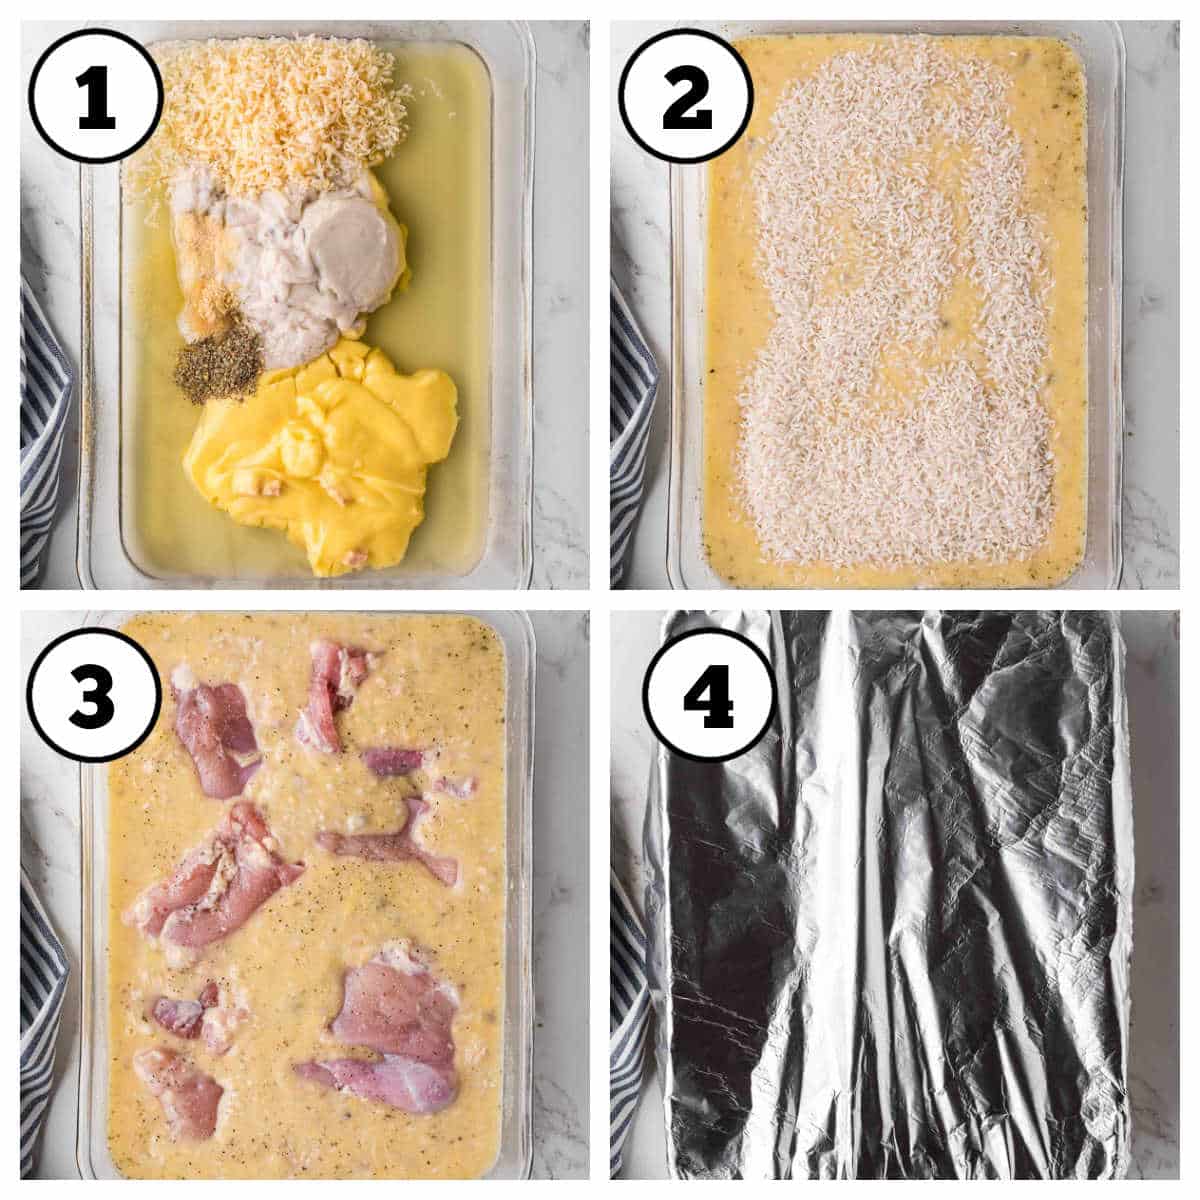
    STEP 1. Make the base. Add everything except the chicken and green onions to a mixing bowl. Stir until well combined and mostly smooth.

    Tip: After step 1 is a great place to taste test for heat. Also if you are using ranch dressing instead of blue cheese, feel free to leave out the powdered ranch until you see what this alteration tastes like.

    STEP 2. Stir in chicken. Stir in the cooked chicken and green onions. The dip should be mostly smooth but some lumps of cream cheese are ok.

    Close up of buffalo chicken dip in white pie dish, with cheese and green onions sprinkled on top.

    STEP 3. Prepare dish. Spread the dip evenly in your prepared dish and pop in the oven until nice and bubbly.

    STEP 4. Top and serve. Add remaining cheese to the top of the dip and continue baking until melted. Let rest 10 minutes before serving.

    Chip pulling buffalo chicken dip up out of baking dish.

    Recipe Pro Tips

    • Control the heat. Amp up or cool off the heat by changing how much buffalo sauce you use.
    • Make ahead. Layer everything up and store in the fridge, baked or unbaked, so you can serve it up quickly.

    Recipe FAQs

    Can I use canned chicken in this dip?

    Yes – just be sure to drain well so the dip isn’t watered down. This is the perfect recipe to use canned chicken, leftover chicken, or specifically make extra with another meal to use here.

    How do I make it less spicy?

    You can control the spice level by adding less buffalo sauce if you like. If you’ve added too much buffalo sauce already, you can add more blue cheese dressing or ranch dressing to help calm the heat.

    Can I make it ahead of time?

    Yes you absolutely can. You can make the recipe up until the baking step, cover and refrigerate. When ready to cook and serve, remove from the refrigerator and bake. Do note: The baking time may differ since the ingredients will be cooler at the time of baking. Or, you can prepare the recipe as directed, bake and then allow to cool and store in the refrigerator. Then, when ready to serve later, simply reheat in the oven until heated through.

    What Goes Best with Buffalo Chicken Dip

    Chips, carrots, celery are all perfect options. I also love using pretzel crisps! Serve with other party foods for a great finger food spread, such as Crockpot BBQ meatballs or whipping up cheese dip for pretzels.

    Storage

    You can make this ahead as directed above, to serve it up quickly. However, freezing buffalo chicken dip isn’t recommended, as the cheese and dairy products can change in texture.

    More Dip Recipes You’ll Love

    • A bowl of everything but the bagel dip with vegetables and crackers around it.
      Everything But The Bagel Dip
    • Rotel dip with meat, in white bowl, that has a chip dipping in to it.
      Rotel Dip
    • Chip holding a bite of crack corn dip, above bowl of dip.
      Cream Cheese Corn Dip
    • A tortilla chip being dipped in a bowl of jalapeño artichoke dip.
      Jalapeno Artichoke Dip

    Did you make this? I’d be so grateful if you left a “star” rating below to let me know what you thought! Then, the next time you need a quick and easy recipe, come back to Fantabulosity to browse all of my easy recipes!

    Recipe

    Close up of chip dipping in to buffalo chicken dip.
    Print Pin
    5 from 4 votes

    Buffalo Chicken Dip

    Creamy and spicy, this buffalo chicken dip is perfect for game day or any day!
    Course Appetizer
    Cuisine American
    Prep Time 10 minutes minutes
    Cook Time 35 minutes minutes
    Total Time 45 minutes minutes
    Servings 12 servings
    Calories 180kcal
    Author Jessica Burgess

    Ingredients

    • 1 cup shredded cheddar cheese
    • 1 cup shredded mozzarella cheese
    • 8 oz cream cheese at room temperature
    • ½ cup Franks Red Hot Sauce
    • ½ cup chunky blue cheese dressing
    • ¼ cup sour cream
    • 2 teaspoons ranch seasoning
    • 2 ½ cups chicken diced or shredded small
    • 2 green onions thinly sliced plus some for garnish

    Instructions

    • Preheat the oven to 350*F and prepare a 9-inch pie plate or 5 cup baking dish by spraying with non-stick spray.
    • Add the cream cheese, Franks Red Hot, sour cream, blue cheese dressing, ranch seasoning, and half of the cheeses to a mixing bowl.
    • Blend until well combined; the mixture should be mostly smooth, but if there are few chunks, don't worry as they'll melt in the oven
    • Stir in the chicken and green onions.
    • Pour mixture into prepared dish and bake for 30-35 minutes
    • When the edges are bubbly and starting to turn brown add the remaining cheese on top of the dip. Bake for an additional 5 minutes.
    • Once cheese is melted, remove from the oven; let stand for 10 minutes before serving.

    Notes

    • To Serve: garnish with sliced green onions, blue cheese crumbles, or drizzle extra Franks on top.
    • You can also make this recipe in a crock pot. Follow steps 1-4; for step 5 place the dip mixture into a crockpot and cook on high for 2 hours. 

    Nutrition

    Serving: 1serving | Calories: 180kcal | Carbohydrates: 3g | Protein: 8g | Fat: 15g | Saturated Fat: 8g | Polyunsaturated Fat: 1g | Monounsaturated Fat: 4g | Trans Fat: 0.01g | Cholesterol: 47mg | Sodium: 667mg | Potassium: 73mg | Fiber: 0.1g | Sugar: 1g | Vitamin A: 477IU | Vitamin C: 1mg | Calcium: 149mg | Iron: 0.3mg

    Dorito Taco Salad with Catalina Dressing

    December 31, 2023

    Close up of taco salad with Catalina dressing on a fork.

    This Taco Salad with Catalina Dressing is such an easy dinner recipe, that has tons of flavor! In less than 30 minutes, this taco salad recipe is ready for dinner, similar to this Doritos Nachos recipe!

    Nacho Cheese chips (such as Doritos) combined with seasoned taco meat, iceberg lettuce, shredded cheddar cheese, Catalina salad dressing, optional green onions, and any of your other favorite taco toppings, make this one of our favorite dinner recipes and even salad recipes!

    Taco salad mixed with Catalina dressing in a white bowl.

    Any way I can get a salad in to my meal plan for the family, it’s a win! Yes, I may be adding Doritos to the salad, but that crunch combined with the softness of the ground beef and the cold crisp lettuce, is delicious.

    [feast_advanced_jump_to]

    Key Ingredients

    Here’s what you’ll need to make this Catalina dressing taco salad! (Plus any other fun toppings you may want to include. I’ll give my favorite taco topping ideas below, too!)

    Labeled ingredients for taco salad with Catalina dressing.
    • Ground Beef – Once the ground beef is cooked, you’ll want to drain any excess grease. You could also use ground turkey, chicken (like our chicken street tacos), or even ground pork if you prefer. Or, mix things up by using grilled shrimp, or even salmon, shredded beef (like in our shredded beef tacos) or juicy steak bites.
    • Chips – Our favorite chips for this recipe are nacho cheese chips (we also used them in this Dorito Chicken Casserole) but you may also choose to use other flavors, such as ranch, taco-flavored or plain! Or, you may also find that you want to use corn chips, such as Fritos like we used in this walking taco casserole.
    • Cheese – Shredded cheddar cheese is delicious on taco salad. We highly recommend shredded it yourself if you can but pre-shredded from the store is easier and a great option! You can also use pepperjack, fiesta blend shredded cheese or even shredded Colby Jack cheese.
    • Lettuce – Crispy, iceberg lettuce is a popular option for taco salad but you can also use romaine and even a mix of spinach and your favorite lettuce.
    • Seasoning – to keep things easy I used a storebought package of taco seasoning but you can also make your own taco seasoning out of spices that you probably have on hand!

    Find a complete list of ingredients and amounts can be found in the recipe card below.

    Instructions

    *Be sure to see the recipe card below for the full ingredients list & instructions!*

    If making this for dinner and want to make it as one big batch, it’s best to serve it right after mixing it all together since the lettuce can get soggy (even though my husband actually preferred it this way, so you may too).

    Making it for a crowd? Taking it to a potluck? Keeping the items separately and combining them right before serving, is best. (Also see our other salad recipes for a crowd.) Or, you can also make individual servings by layering items together on each plate.

    Image collage of steps for how to make taco salad with Catalina dressing.

    STEP 1: Cook beef. Brown the ground beef in a skillet over medium heat, and drain any grease after it is fully cooked.

    STEP 2: Taco seasoning. Mix the taco seasoning and cooked ground beef together. TIP: Some packets of taco seasoning call for water – and that’s ok to add it to this as well. However, we only add a splash of water instead of what the packet calls for, so it doesn’t make the taco salad watery.

    STEP 3: Chop lettuce. Make sure your head lettuce has been washed, and dried (we love using this salad spinner), and chop or tear the lettuce in to small, bite-size pieces.

    STEP 4: Assemble. Depending on how you plan to serve this taco salad, could depend on how you handle this step:

    → If serving to a crowd: it’s a great idea to place all of the chopped lettuce in to a large serving bowl or on a platter. Then, top with cooked seasoned taco meat, shredded cheese, crushed Doritos, and Catalina dressing, and toss then serve.

    → If serving individual servings: this recipe divides in to 4 separate servings really well. So using a ¼ of each ingredient for one serving (i.e. lettuce, taco meat, chips, cheese, dressing) on a serving plate/bowl, will help make sure that leftovers won’t get soggy whether you store them for later, or someone eats at a different time than you.

    Bite of taco salad with Catalina dressing on a fork, above white bowl.

    Taco Salad Topping Ideas

    If you’re looking for more items to top your taco salad with, here are some of my favorite ideas, and you can find a bigger list in our taco bar ideas!

    • jalapenos
    • red onions
    • sour cream
    • nacho cheese sauce
    • salsa
    • taco sauce
    • refried beans
    • avocado
    • chili beans
    • peppers (red, green, orange, yellow)
    • corn, drained if canned

    Recipe FAQs

    Are Catalina and French dressing the same?

    They’re similar, although Catalina tends to have a bit more ketchup than French dressing.

    What’s the difference between taco salad and Catalina taco salad?

    Regular taco salad doesn’t have Catalina dressing in it. The addition of Catalina dressing gives the taco salad a sweeter, fun, flavor.

    What to Serve with Catalina Dressing Taco Salad

    A delicious guacamole recipe, quick pico de gallo, or cowboy queso pairs wonderfully with taco salad and they can also be great additional toppings!

    Or this cold taco dip is great for serving a crowd as well, and this hot taco dip next to a cool taco salad is a great pair!

    How do you Store Leftover Taco Salad?

    As I mentioned earlier, if you plan to have leftovers, it’s best to store the ingredients separately so the lettuce and chips do not get soggy. However, sometimes that’s not how it works out and you’ll have leftover taco salads that have already been mixed together, and that’s ok!

    Simply store the individual ingredients in the refrigerator (besides the chips), or store the mixed taco salad in an airtight container and refrigerate for up to 3-4 days.

    If you find that you have leftover taco meat that you won’t be using for a taco salad, here are my favorite ways for using leftover taco meat.

    More Taco Recipes You’ll Love

    If you’re a taco lover like we are in our house, I know you’re going to also love these taco reader favorites:

    • Taco Chicken Casserole on a plate.
      Taco Chicken Casserole
    • taco layer dip recipe
      Easy Taco Layer Dip Recipe
    • Creamy taco soup serving in white bowl.
      Creamy Taco Soup
    • Crispy chicken tacos baked on baking sheet.
      Crispy Chicken Tacos

    Did you make this? I’d be so grateful if you left a “star” rating below to let me know what you thought! Then, the next time you need a quick and easy recipe, come back to Fantabulosity to browse all of my easy recipes!

    Recipe

    Close up of taco salad with Catalina dressing on a fork.
    Print Pin
    5 from 5 votes

    Taco Salad with Catalina Dressing

    Taco salad with Catalina dressing takes traditional taco salad flavor to the next level with the crisp lettuce, tender beef and cheese, and crunchy Doritos!
    Course Dinner, Main Course, Salad
    Cuisine American, Mexican
    Prep Time 10 minutes minutes
    Cook Time 10 minutes minutes
    Total Time 20 minutes minutes
    Servings 4 servings
    Calories 1102kcal
    Author Jessica Burgess

    Ingredients

    • 1 pound ground beef
    • 1 packet taco seasoning
    • 1 head of iceberg lettuce
    • 1 cup shredded cheddar cheese
    • 2 cups Catalina dressing
    • 9.75 ounce bag of nacho cheese chips, crushed such as Doritos
    • chopped green onions optional

    Instructions

    • First, cook ground beef in a skillet on a the stove, over medium-heat, mashing and breaking in to small pieces until the meat is no longer pink. If there's grease after cooking, drain the grease.
    • Next, add package of taco seasoning and a splash of water and stir to combine. Allow meat to cool.
    • Wash lettuce and allow it to dry, and chop in to bite-size pieces.
    • If serving as a large batch, place chopped lettuce in a large bowl, or large platter. Top with all of the taco meat, shredded cheese, crushed Doritos, and Catalina dressing. Toss until thouroughly mixed together. Top with chopped green onions if desired.
      If making individual servings, place a ¼ of the lettuce in a dinner plate or dinner bowl, and top with ¼ of all of the remaining ingredients, and toss until combined. Enjoy!

    Video

    Notes

    Tips for Serving:
    For Large Batch: If serving as a large batch, and/or for a crowd, it’s best to mix the ingredients together right before serving.
    Make-ahead: This recipe is great for prepping the ingredients beforehand, and storing them in the refrigerator in separate containers for an easy dinner later.


    Nutrition

    Serving: 0.25batch | Calories: 1102kcal | Carbohydrates: 84g | Protein: 33g | Fat: 68g | Saturated Fat: 18g | Polyunsaturated Fat: 9g | Monounsaturated Fat: 16g | Trans Fat: 1g | Cholesterol: 105mg | Sodium: 2987mg | Potassium: 513mg | Fiber: 5g | Sugar: 37g | Vitamin A: 1114IU | Vitamin C: 4mg | Calcium: 312mg | Iron: 4mg

    Easy Homemade Pork Gravy Recipe with Drippings

    December 20, 2023

    Pork gravy in white gravy boat with ladle spooning it in to the dish.

    This easy pork gravy recipe comes together to top your favorite recipes like fried pork chops, roasted pork tenderloin, and these sweet and smoky grilled pork chops.

    Pork gravy in white gravy boat, sitting next to platter of pork tenderloin.

    A simple blend of pork drippings, cornstarch, butter, seasonings, and our favorite optional touch, Worcestershire sauce, make up this easy recipe. It will surely be your new go-to side dish recipe for your favorite pork recipes (skip the lemon juice in this broiled pork recipe if using this gravy), or even on top of side dishes like these fried potatoes and onions.

    Making a gravy recipe may sound difficult but we like to keep things simple and easy around here, without sacrificing the flavor. Our white gravy recipe is not only easy but it’s delicious served on so many breakfast dishes and dinner dishes, as well.

    Or for fun, we like to kick things up a notch and make gravies like this jalapeno gravy and this chorizo sausage gravy to top homemade biscuits with!

    [feast_advanced_jump_to]

    Why You’ll Love This Recipe

    • It uses simple ingredients: With only a few simple ingredients, you more than likely have the ingredients that you need to make this easy gravy.
    • The flavor: Although the Worcestershire sauce is optional, it adds a kick of flavor that’s absolutely delicious. See below which brand we recommend for the best outcome, for the best gravy.
    • Ready in only 12 minutes: With such a quick cooking time, you’ll have homemade gravy to top your Instant Pot mashed potatoes and pork recipe, in no time!

    Ingredients Needed

    Ingredients for pork gravy recipe.

    • Pork Roast Drippings – These are the juices that are left after cooking pork. Typically, you’ll find these juices in the bottom after baking a cut of pork. (However, when we fry pork, we will use the pan drippings from that and make this fried pork gravy.)
    • Broth – Using pork broth would be best but I understand that this can be hard to find. So using my homemade chicken broth, beef, or vegetable broth will work, although it can alter the flavor of the recipe a bit.
    • Worcestershire sauce - This is optional, but I love the flavor it brings. We highly recommend using Lea & Perrine’s brand because it has the best flavor and provides a rich gravy.

    How to Make Pork Gravy

    Just a few simple steps to make this easy pork gravy, the best way!

    *Be sure to see the recipe card below for the full ingredients list & instructions!*

    Image collage showing the three steps of making pork gravy.
    • STEP 1. Mix the ingredients. Place the roast drippings, cornstarch, butter, salt, pepper, broth, and Worcestershire sauce into a medium saucepan and whisk together. It’s okay if it’s not mixed well, the ingredients will melt and mix together when placed on heat (Image 1).
    • STEP 2. Cook over medium-low heat to melt the butter until it melts, stir continuously. This should take about 5 minutes (Image 2).
    • STEP 3. Thicken. Allow the mixture to come to a simmer over medium heat and cook while stirring until it becomes a creamy gravy, which is about 2 minutes (Image 3).
    Finished pork gravy being scooped out of sauce pan.

    Tip: Using a whisk to help blend the cornstarch seems to work better than using a spoon.

    Pork gravy cooked and ready in gravy boat.

    Recipe FAQs

    What is pork gravy made of?

    Pork drippings, cornstarch, Worcestershire sauce, broth, butter, and a few seasonings, make a delicious pork gravy.

    What sauce goes good with pork?

    Pork roast gravy, made out of pork drippings goes well with pork. However, you can also serve other sauces with pork, like this teriyaki sauce recipe without ginger.

    What is the secret to good gravy?

    Using fats like butter and drippings, while cooking it slow and low, while watching it and stirring it often, can result in a good flavorful pork gravy recipe.

    How do you fix thin gravy?

    Pork roast dripping varies in consistency depending on how your pork was cooked and the ingredients used to prepare it. This can significantly affect the thickness of the gravy. You can add more cornstarch while stirring until the desired consistency is reached. Don't overdo the cornstarch though, it gets thick pretty quick!

    What to Serve Pork Gravy With:

    This beautiful gravy goes perfect over a boneless pork loin roast, baked pork steaks, boneless or bone-in pork chops, mashed potatoes or baby potatoes.

    Storage

    • To store. Once the gravy has cooled completely, seal it in an airtight container and store it in the fridge for up to 4 days or in the freezer for up to 3 months. 
    • To reheat. Allow the gravy to thaw in the fridge (if applicable) before heating it over medium-low heat on the stovetop, whisking occasionally. Feel free to add a little extra stock or water to loosen it up. 
    • Can you freeze gravy? You can. Follow the recipe from start to finish, seal the gravy in a freezer-safe airtight container, and store it in the freezer for up to 3 months. Allow it to thaw in the fridge before reheating on the stovetop over medium-low heat. 
    Pork gravy drizzled over cooked pork loin, sitting on white plate.

    More Recipes You’ll Love

    • Chicken and gravy on top of mashed potatoes on white plates
      Chicken and Gravy Recipe
    • Crock Pot cube steak on top of mashed potatoes, sitting on white plate.
      Crock Pot Cube Steak
    • A close up of a slice of biscuit and gravy casserole.
      Biscuit and Gravy Casserole
    • Cracker Barrel country fried steak on black plate, next to green beans and biscuits.
      Cracker Barrel Country Fried Steak

    Did you make this? I’d be so grateful if you left a “star” rating below to let me know what you thought! Then, the next time you need a quick and easy recipe, come back to Fantabulosity to browse all of my easy recipes!

    Recipe

    Pork gravy in white gravy boat with ladle spooning it in to the dish.
    Print Pin
    5 from 2 votes

    Pork Gravy

    This easy pork gravy recipe is made using pork drippings, butter, cornstarch and a few other ingredients to create a delicious, sauce to go over pork.
    Course Side Dish
    Cuisine American
    Prep Time 5 minutes minutes
    Cook Time 7 minutes minutes
    Total Time 12 minutes minutes
    Servings 2 cups
    Calories 209kcal
    Author Jessica Burgess

    Ingredients

    • 1 cup pork roast drippings (Or 2 cups if you have enough and omit the broth below.)
    • 2 ½ tablespoons cornstarch
    • 3 tablespoons butter
    • ½ teaspoons salt
    • ½ teaspoons black pepper
    • 1 cup broth pork, chicken, vegetable or broth (See notes)
    • ½ tablespoons Worcestershire sauce

    Instructions

    • Mix the ingredients. Place the roast drippings, cornstarch, butter, salt, pepper, broth (if using), and Worcestershire sauce into a medium saucepan and whisk together. It's ok if it's not mixed well, the ingredients will melt and mix together when placed on heat. 
    • Cook over medium-low heat until the butter melts, stir continuously. This should take about 5 minutes.
    • Thicken. Allow the mixture to come to a simmer over medium heat and cook while stirring until the gravy thickens to your liking. About 2 minutes.

    Notes

    The type of broth that you use can alter the flavor a bit, so although pork broth would be best, I know that can be hard to find. So using a broth such as chicken, vegetable or beef are substitutes if needed.

    Nutrition

    Serving: 0.25cup | Calories: 209kcal | Carbohydrates: 11g | Protein: 2g | Fat: 18g | Saturated Fat: 11g | Polyunsaturated Fat: 1g | Monounsaturated Fat: 5g | Trans Fat: 1g | Cholesterol: 48mg | Sodium: 1655mg | Potassium: 132mg | Fiber: 0.2g | Sugar: 1g | Vitamin A: 533IU | Vitamin C: 1mg | Calcium: 24mg | Iron: 1mg

    Christmas Movie Night Ideas

    December 18, 2023

    Christmas movie night ideas in an image collage.

    Christmastime is filled with exciting parties, thoughtful gifts, holiday games, and memories made for a lifetime! If your family holds a Christmas movie night each year, and you’re looking for fun ways to celebrate, we’re sharing a list of easy ideas to make your movie might the best!

    A big part of any Christmas movie night is the food, and having easy snacks and drinks ready makes it even more fun.

    Collage of Christmas movie night ideas.
    [feast_advanced_jump_to]

    The Joy of Christmas Movie Nights

    In a world of phones, video games, and all kinds of distractions, having a tradition of a Christmas movie night can be a great way to bring your family or group of friends together to celebrate the Christmas season, and spend quality time together.

    Now, although spending time with others will be amazing in itself, you can make the night epic by adding in some of these suggestions to make it the best movie night ever!

    Atmosphere

    Creating the perfect atmosphere before the movie even starts can help get everyone in the mood!

    • Cozy, cozy, cozy. We’re talking fuzzy blankets, pillows, bean bags, sleeping bags, or whatever else your room will need to make everyone feel cozy and comfortable during the movie.
    • Smells. Whether you’re making your favorite Christmas cookies recipe, simmering a pot of holiday smells, and that’s what’s adding the comforting smell to the room, or you have your favorite candle or air freshener (we use a Pura and use the seasonal scents), the smell of the room can help put the Christmas spirit in the air!
    • Decorate. If you have Christmas lights, a tree, tinsel, or garlands, you can decorate your space with any of these to help add some Christmas cheer!

    Christmas Movie Night Snacks

    You can’t have a Christmas movie night without yummy snacks! You can do a themed food night, like foods from the movie “Elf” or even do something fun like a taco bar or a nacho bar!

    These easy snack ideas are perfect for a Christmas movie night and make hosting simple without a lot of prep.

    Or, if Christmas-themed snacks are on the menu, here are some of our favorites:

    • A rectangular white platter holds charcuterie in the shape of a Christmas tree
      Christmas Tree Charcuterie Board
    • Christmas Tree Cake Dip in white bowl
      Christmas Tree Cake Dip
    • Christmas Dessert Charcuterie Board
      Christmas Dessert Charcuterie Board
    • A popcorn ball that has been rolled in red and green sprinkles has been placed in a cellophane bag that is tied closed with red ribbon.
      Christmas Popcorn Balls with Free Gift Tag Printable
    • Peppermint cupcakes on baking rack
      Peppermint Cupcakes
    • Christmas Chex Mix in white bowl
      Christmas Chex Mix
    • Nuts and Bolts mix in wooden bowl
      Nuts and Bolts Recipe
    • Winter cupcakes sitting on kitchen counter.
      Tree Forest Winter Cupcakes

    Christmas Movie Night Drinks

    Keep the holiday spirit alive with drinks for the kids and even the adults! From punch recipes, hot drinks, and even cocktails, these are our favorites for serving alongside movie night food:

    • fruit punch in glass with orange slice
      Fruit Punch Recipe
    • peppermint latte in glass mug
      Peppermint Latte Recipe
    • Red apple martini in martini glass.
      Red Apple Martini Cocktail
    • DIY Beverage Chocolate Melts: Coffee or Hot Chocolate Toppers! Fantabulosity
      DIY Chocolate Melts Gift Idea

    Christmas Pajamas

    Part of the Christmas tradition in our house is buying new Christmas pajamas for the kiddos to open on the night of Thanksgiving. (TIP: Buy pajamas that are Christmas colors but not necessarily “Christmas” specific, so they can wear them all year!)

    Where to get Christmas pajamas? We love getting them at Old Navy or The Children’s Place for the kids and the adults.

    Christmas Movies

    There are so many fun movies to choose from for a Christmas movie night! Whether romance is in the air, comedy, or more of a heartwarming feel, here are some great Christmas movie night ideas to choose from:

    Classics:

    • “It’s a Wonderful Life”
    • “A Christmas Story”
    • “A Christmas Carol”
    • “Miracle on 34th Street”
    • “Rudolph the Red-Nosed Reindeer”
    • “A Charlie Brown Christmas”
    • “Scrooged”
    • “Meet Me in St. Louis”

    Family Favorites:

    • “Home Alone” series
    • “The Polar Express”
    • “The Nightmare Before Christmas”
    • “Jingle All the Way”
    • “The Santa Claus” series
    • “Elf”
    • “Fred Claus”
    • “Dr. Seuss’ How the Grinch Stole Christmas”
    • “The Muppet Christmas Carol”
    • “The Polar Express”
    • “Jack Frost”
    • “Deck the Halls”
    • “Christmas with the Kranks”

    Adult Comedy and Romance:

    • “National Lampoon’s Christmas Vacation”
    • “Four Christmases”
    • “Bad Santa”
    • “Love Actually”
    • “The Family Stone”
    • “The Holiday”

    Activity Ideas

    Love doing an activity while watching movies? This could be making crafts, exchanging gifts, or playing games! Here are some of our favorite ideas for keeping the fun going during the movie or after it’s over:

    • Cut out and baked sugar cookies that hold their shape, sitting on cutting board.
      Easy Sugar Cookie Recipe
    • Gingerbread ornaments on white table next to string and scissors.
      DIY Gingerbread Ornaments
    • letter to santa example
      Letter to Santa Template
    • Martini Bar Ideas fantabulosity.com Red apple martini and White Chocolate Peppermint Martini
      Favorite Things Party Ideas

    Christmas Party Ideas

    Or if you’re watching a holiday movie during your annual Christmas party, here are some of our favorite Christmas parties that we’ve hosted, to give you some ideas:

    • Ahh! Such an adorable theme! Vintage Christmas Party Ideas: Truck with Christmas Tree, cupcakes, red green and white, hot chocolate bar
      Vintage Christmas Party Ideas (Easy Food & Dessert Table Ideas)
    • Favorite Things Party Ideas
      How to Host a Favorite Things Party (Easy Gift Exchange + Setup Guide)
    • White Christmas Party Ideas- Dessert Table https://fantabulosity.com
      White Christmas Party Ideas (Easy Food, Drinks & Theme Inspiration)
    • Snowman Christmas Play Date

    Party Favors & Hostess Gifts

    When guests arrive, it would be a lot of fun to give them their own movie night box! Fill it with goodies like candy-covered chocolates, a bottle of soda with a festive paper straw, popcorn (in a cute little jar), and brown paper bags to make their popcorn!

    Red Box Movie Night Gift Idea fantabulosity.com

    This holiday baking kit (on a smaller scale) would be so cute to give as party favors! Or, package up some of the Christmas Sugar Cookie Fudge in small plastic bags would be a great treat to send them with!

    If you have a hostess, easily whip up this DIY Sangria Gift Kit that will be the gift that keeps on giving!

    Wrap-Up

    No matter if your movie night is full of guests, treats, activities and funny movies… or if it’s a low-key night at home with your loved ones, watching your favorite heartfelt movie, remember the reason for the season and have a wonderful evening!

    Old Fashioned Sloppy Joes Recipe

    December 16, 2023

    Old fashioned sloppy joes on a bun, sitting on a white plate.

    Do you have favorite old-fashioned recipes from your childhood? Sloppy Joes is one of mine – it was always a really great family dinner recipe! Let’s make this homemade recipe to relive those days!

    But make sure you also give these sloppy joe sliders a try too because they are the perfect large crowd party food, or even just a fun twist on the classic sandwich recipe.

    Old fashioned sloppy joes on a bun, sitting on white plate.

    Are you a fan of beef? It’s often a favorite meat in many households, and I especially love to use it in sandwiches! A classic French Dip made in the Instant Pot is a great option, and I also love the ease of layering up Roast Beef Sliders.

    This recipe is a great budget-friendly option where the beef is still the star. There are so many ways to use ground beef, and this saucy sandwich is no exception! I also use it in my Asian sloppy joes.

    [feast_advanced_jump_to]

    Why You’ll Love This Recipe

    • It uses a few ingredients: Some pantry seasonings take this sauce up a notch!
    • Make-ahead recipe: Double this and set half aside before serving dinner and you’ll have a dinner stashed in the freezer!
    • Ready in only 30 minutes: Just simmer on the stove while you gather up some side dishes and dinner is served. Almost as fast as our cheeseburger subs that you’ll want to make too!
    • If you love easy family dinners, you’ll find more ideas in these old-fashioned dinner recipes.

    Ingredients Needed

    I’ve highlighted a couple of ingredients below with some relevant notes. Aside from this, the ingredients needed are pretty basic.

    Labeled ingredients for old fashioned sloppy joes.
    • Ground beef – Use a lean ground beef and there won’t be any grease to drain.
    • Tomato sauce – Check the salt level here and adjust any added salt as needed.
    • Ground mustard – Dry mustard is a great spice to keep on hand for dishes like this or adding to macaroni and cheese.
    • Pepper and onion – Did you know you can freeze these? Dice the whole green pepper and onion and freeze the second half, labeled so you know to use it next time you make this recipe!
    • Worcestershire sauce – Adds the perfect umami as well as a hit of salt to enhance flavor. Check ingredients if you need gluten-free.
    • Brown sugar – Sloppy Joes often have a hint of sweet in them, which is why we add just a touch!

    Substitutions

    Sometimes substitutions are necessary because of ingredients that are unavailable or needed for dietary restrictions. Here are some suggestions that can help:

    • Buns – serve on your favorite buns, whether wheat or gluten-free. You can also serve over pasta or potatoes like a chili sauce.
    • Meat – you can use ground chicken or turkey, or a combination here instead.
    • Pepper – green is the classic or typical here, but you can also reach for a red bell pepper too!

    How to Make the Best Sloppy Joe Recipe

    All we do here is season, simmer, and serve!

    *Be sure to see the recipe card below for the full ingredients list & instructions!*

    Steps 1-3 of how to make old fashioned sloppy joes.

    STEP 1. Sauté veggies. Give the onions and peppers a quick turn in the pan to soften (Image 1).

    Tip: This recipe uses half an onion and half a pepper. You can freeze the other halves together in a bag ready for another time!

    STEP 2. Add sauce. Add the remaining ingredients and stir to combine (Image 2). Simmer until desired thickness is reached (Image 3).

    Old fashioned sloppy joe sandwich on white plate, next to potato chips.

    Recipe Pro Tips

    • Thin it out. Meal not “sloppy” enough? Add up to ¼ cup water with the tomato sauce for a thinner sauce. Or – simmer longer for a nice thick sauce!
    • Lean beef. I used an 85/15 mix and I didn’t need to drain much at all. You can use whatever you like, just be aware that you may need to drain grease before adding sauce.

    Recipe FAQs

    What’s the difference between Sloppy Joes and Sloppy Janes?

    They have the same sauce! The only difference is a Jane has ground turkey instead. So if you feel like lightening up your meal, go ahead and reach for some poultry instead of ground beef.

    Do you drain the meat when making sloppy joes?

    It all depends on the fat content of your meat, and whether you are using turkey, chicken, or beef. The meat is browned first and then it’s time for draining if necessary. This way you aren’t removing any seasonings or sauce!

    What is Sloppy Joe sauce made of?

    A savory and sweet tomato-based sauce, grab some plan tomato sauce and doctor it up with brown sugar and Worcestershire plus a few seasonings. Some people add a squirt of ketchup for that touch of sweetness!

    What is a substitute for Sloppy Joe sauce?

    Grab that bottle of barbecue sauce from the fridge! This is a sauce made with vinegar and sugar, which gives us the sweet vs savory we are looking for. You could try doctoring up your own sauce with bbq sauce and a bit of tomato paste, or even a bit of ketchup. And with all that sweet, you’ll want to dash in some umami such as Worcestershire or even soy sauce.

    What to Serve with The Best Sloppy Joes

    Some people love to top their sandwiches with a slice of cheese or some bread and butter pickle slices. You could also try a scoop of slaw for a great texture contrast!

    Serve these sloppy joes with a side of blue cheese dip, this easy Elote dip or this old-fashioned macaroni and tomatoes recipe!

    Storage

    Store leftovers in an airtight container in the fridge for up to 3 days. To freeze, let cool completely before transferring to a bag or freezer-safe container for up to 3 months. Defrost overnight before reheating.

    I prefer to reheat in a skillet for the best flavor. Add a splash of water or beef broth to loosen things up if needed. You can also microwave leftovers, but be sure and use a cover of some sort to combat splatter!

    More Ground Beef Recipes You’ll Love

    • Creamy taco soup serving in white bowl.
      Creamy Taco Soup
    • french onion beef casserole scooped up out of white dish
      French Onion Beef Casserole
    • Close up photo of a bowl brimming with noodles, vegetables and ground beef in a rich red tomato based sauce
      Crock Pot Goulash
    • Rotel dip with meat, in white bowl, that has a chip dipping in to it.
      Rotel Dip

    Did you make this? I’d be so grateful if you left a “star” rating below to let me know what you thought! Then, the next time you need a quick and easy recipe, come back to Fantabulosity to browse all of my easy recipes!

    Recipe

    Old fashioned sloppy joes on a bun, sitting on a white plate.
    Print Pin
    5 from 6 votes

    Old Fashioned Sloppy Joes Recipe

    This old fashioned sloppy joe recipe is easy to make and so full of flavor. Serve on a hamburger bun, and with your favorite side dish for a delicious dinner!
    Course Main Course
    Cuisine American
    Prep Time 10 minutes minutes
    Cook Time 20 minutes minutes
    Total Time 30 minutes minutes
    Servings 6 servings
    Calories 233kcal
    Author Jessica Burgess

    Ingredients

    • 1 tablespoon olive oil
    • ½ medium yellow onion diced
    • ½ medium green bell pepper diced
    • 1 pound lean ground beef
    • 1 can tomato sauce 15 ounces
    • 2 tablespoons Worcestershire sauce
    • 1 ½ tablespoons brown sugar
    • ½ teaspoon garlic powder
    • ½ teaspoon ground mustard
    • ¼ teaspoon salt
    • ¼ teaspoon ground black pepper

    Instructions

    • Set a large skillet over medium high heat and add the oil. Saute the onions and bell pepper until they begin to soften, about 4-5 minutes.
    • Add ground beef and cook until browned (may not be cooked through yet), using a wooden spoon to break up any chunks. This should take about 5 minutes.
    • Add remaining ingredients and stir well to combine.
    • Bring the mixture up to a boil, then reduce heat to low. Simmer until desired thickness is reached, about 10-15 minutes.
    • Serve hot on your choice of buns.

    Notes

    • If you like a wetter sauce, add up to ¼ cup water with the tomato sauce.
    • If after 15 minutes the sauce isn’t thick enough for your liking, you may simmer longer, over low heat to ensure it doesn’t burn.
    • Sloppy joes are traditionally slightly sweet, but you may reduce the brown sugar as desired.

    Nutrition

    Serving: 1sandwich | Calories: 233kcal | Carbohydrates: 12g | Protein: 16g | Fat: 14g | Saturated Fat: 5g | Polyunsaturated Fat: 1g | Monounsaturated Fat: 7g | Trans Fat: 1g | Cholesterol: 51mg | Sodium: 764mg | Potassium: 644mg | Fiber: 2g | Sugar: 8g | Vitamin A: 533IU | Vitamin C: 17mg | Calcium: 40mg | Iron: 3mg

    Tree Forest Winter Cupcakes

    December 14, 2023

    Winter cupcakes sitting on kitchen counter.

    These winter cupcakes are incredibly easy to assemble, especially because they use store-bought cupcakes. However, feel free to make your own cupcake recipe but you’ll want to use white frosting to mimic the snow!

    Oh my gosh, how easy and cute! Tree Forest Winter Cupcakes

    As a “semi-homemade,” kind of gal… you can guess how much I adore these little tree forest winter cupcakes.

    If you’re hosting a winter-themed birthday party, organizing a holiday event, or just want to top your kitchen counter tops with an adorable cake stand of cupcakes for Winter… then a winter forest cupcake may be JUST the thing that you need.

    They are incredibly easy to assemble, especially if you go the route that I usually like to take.

    Ingredients

    Ingredient for winter cupcakes, sitting on kitchen counter.

    Store-Bought

    I am such a sucker for store bought items, that I can add some “flair,” to, to make life and entertaining a little easier. If you’ve been around and have seen any of the parties that I style for brands and myself, then it’s NO secret that semi-homemade and store-bought items are my best friend. I’d rather spend time decorating and styling, than cooking and baking. Grab plain white cupcakes at the store, and you have a blank canvas to get creative!

    Winter cupcake sitting on blue plate.

    Assembly & How-To

    Cupcakes: We simply grabbed plain white cupcakes with white icing from the bakery department at our local grocery store.

    Rosemary: This herb is my BEST friend in the Winter. (Well, anytime of the year really.) It looks like evergreen, smells amazing, and is overall a BEAUTIFUL herb. Turning a rosemary sprig, upside down, stick the rosemary in to the top of the cupcake.

    Fresh rosemary placed in to the top of a cupcake.

    Powdered Sugar: With the resemblance of snow, a little powdered sugar sprinkled on top of a dessert can really “dress,” it up! Barely sprinkle a little powdered sugar over the top of the cupcakes and rosemary… being a little messy if your space allows for a “snowy” look.

    Snowy cupcakes with fresh rosemary sitting on top.

    Done! That’s it! 

    Even though these are as easy as pie to assemble, I still think they’re my favorite project this year. Perhaps that’s WHY they’re my favorite.

    I WILL be finding a way to use these for a future party that I style.

    Vanilla cupcakes sitting on blue plate, with rosemary leaves in the top.

    Storage

    You’ll want to store any leftover cupcakes in an airtight container or the frosting will dry-out and become hard.

    A Woodland Themed Birthday Party???

    If you’ve made your way here because you’re styling a Woodland Themed Party, you’ll want to see the Woodland Friends Party that I styled for my son’s first birthday. It was a HOOT! (Pun very intended.)

    Woodland Friends First Birthday Party Dessert Table - https://fantabulosity.com

    Free Party Planning Checklist

    Make sure you download your FREE Party Planning Checklist before you head out too! It’s a life saver when it comes to throwing and hosting parties!

    free party planning checklist

    Recipe

    Winter cupcakes sitting on kitchen counter.
    Print Pin
    Be the first to rate!

    Winter Cupcakes

    These winter cupcakes are easy! Use store-bought cupcakes if you wish, and in minutes you have an adorable treat for parties or for an after-school snack!
    Course Dessert
    Cuisine American
    Prep Time 5 minutes minutes
    Total Time 5 minutes minutes
    Servings 4 cupcakes
    Calories 177kcal
    Author Jessica Burgess

    Ingredients

    • 4 vanilla frosted cupcakes Or any amount you prefer
    • 1 package fresh rosemary One package may have more rosemary than needed for 4 cupcakes.
    • 3 tablespoons powdered sugar

    Instructions

    • Cut any large pieces of fresh rosemary down in to smaller sizes so they fit on top of the cupcakes better.
    • Gently flip a piece of rosemary upside down and stick it in to the top of the cupcake. Repeat for all of your cupcakes.
    • Sprinkle each cupcake with a pinch of powdered sugar.

    Notes

    Make sure you store any leftover cupcakes in an airtight container to make sure they don’t become stale.
    You can make as many cupcakes as you like but just make sure you get enough rosemary and powdered sugar to make them all!

    Nutrition

    Serving: 1cupcake | Calories: 177kcal | Carbohydrates: 31g | Protein: 2g | Fat: 5g | Saturated Fat: 1g | Polyunsaturated Fat: 1g | Monounsaturated Fat: 2g | Cholesterol: 1mg | Sodium: 141mg | Potassium: 43mg | Fiber: 0.4g | Sugar: 21g | Vitamin A: 30IU | Vitamin C: 0.1mg | Calcium: 57mg | Iron: 1mg

    Easy Chocolate Turtle Cookies Recipe

    December 14, 2023

    Turtle cookies on white parchment paper.

    Turtle Cookies: Imagine sinking your teeth into a cookie that perfectly balances a crunchy exterior with a soft, gooey caramel center, combined with chocolate and a sprinkle of chopped pecans.

    This isn’t just any cookie recipe, they’re Caramel Turtle Cookies – a sweet delight that embodies indulgence. This easy dessert recipe is not only easy to follow, but also fun to make, offering you a fantastic opportunity to whip up a batch of our favorite cookie recipe right in your own kitchen. 

    Turtle cookies on a white surface.

    Looking for more ideas for cookie recipes to make? You could try these Key Lime Pie Cookies - Crumbl Copycat for something tangy and delicious. Or go with a classic and make a batch of Rocky Road Cookies, or similarly, these Devil’s Food Cookies that also use a chocolate cake mix.

    [feast_advanced_jump_to]

    Why You’ll Love This Recipe

    • Perfect for any occasion: Whether you’re hosting a holiday party or just craving a sweet treat, these cookies are a perfect choice. They look and taste fancy, but they’re surprisingly easy to make!
    • Delicious and versatile: The combination of chocolate, soft caramels, and pecans is heavenly, but feel free to experiment with other fillings or toppings. Swap the pecans for almonds, or add a sprinkle of sea salt on top for an extra flavor boost. They resemble the Twix cookies that are popular on the blog.
    • Great for sharing: These tasty cookies make the perfect gift. Deliver a batch to a friend or neighbor to brighten their day, or bring them to a potluck for a dessert that everyone will love. These chocolate turtle cookies make the perfect holiday cookie for cookie exchanges.

    What Are Turtle Cookies?

    Turtle Cookies, as the name might suggest, do not have anything to do with the beloved shelled reptiles. These decadent treats draw inspiration from the classic Turtle Candy, a sweet concoction of caramel, chocolate, and pecans. 

    Each bite of a Turtle Cookie encapsulates these three key components. Beginning with a sturdy cookie base, often chocolate-based to complement the other two elements, you’ll find rich caramel chunks, much like the caramel filling in the original candy. Finally, the best part, the cookie also has pecan pieces, adding a delightful crunch that contrasts beautifully with the soft caramel and rich chocolate. 

    Ingredients Needed

    I’ve highlighted a couple of ingredients below with some relevant notes. Aside from this, the ingredients needed are pretty basic.

    Labeled ingredients for turtle cookies.
    • Chocolate Cake Mix – This versatile ingredient is your secret weapon for these cookies, providing a deep and rich chocolate flavor without the fuss of combining cocoa and flour. 
    • Caramel Bits – These small morsels melt beautifully into the cookie, creating that dreamy caramel center. Here’s a tip: make sure to keep your caramel bits at room temperature before adding them to the mix. This ensures they melt evenly and prevents the formation of any hard, chewy bits.
    • Pecans – Pecans add a lovely crunch and pair perfectly with caramel and chocolate. Toasting them beforehand will bring out their flavor even more. Just remember to let them cool before adding to your dough!
    • Semi-Sweet Chocolate Chips – These add an extra chocolatey punch to your cookies. If you’re a chocoholic, feel free to substitute them with dark chocolate chips for an intense cocoa flavor. But remember, they are sweeter than dark chocolate, so balance is key to avoiding an overly sweet cookie.

    Substitutions

    Sometimes substitutions are necessary because of ingredients that are unavailable or needed for dietary restrictions. Here are some suggestions that can help:

    • Chocolate Cake Mix – If you’re out of chocolate cake mix, a blend of all-purpose flour, cocoa powder, sugar, baking powder, and a little salt can do the trick. For a gluten-free version, you can use a gluten-free flour mix and add cocoa powder to it.
    • Caramel Bits – If you don’t have caramel bits, feel free to use soft caramel candies. Cut them into small caramel pieces so they melt just as nicely. For a vegan version, look for dairy-free caramels.
    • Pecans – Walnuts or almonds make excellent substitutes for pecans. If you’re catering to a nut-free diet, consider using pumpkin seeds or sunflower seeds to keep that lovely crunch.
    • Semi-Sweet Chocolate Chips – If you’re out of semisweet chocolate chips, dark chocolate chips or chopped dark chocolate can be used instead. For a dairy-free alternative, opt for dairy-free dark chocolate. Remember, the aim is to maintain the balance of flavors, so adapt according to your taste buds.

    Variations

    • Cookie Base Variation – Why not switch things up a bit? Instead of sticking to the original chocolate cookie base, you could try a vanilla or red velvet cake mix for a fun twist. Imagine a red velvet Turtle Cookie for Valentine’s Day – now that’s a creative treat everyone will talk about!
    • Filling Variation – Are you a fan of peanut butter? Try adding a dollop of it to the center of your cookies for a delicious surprise. Just remember to adjust the amount of caramel accordingly to ensure the cookie isn’t too gooey.
    • Topping Variation – For a festive spin during the holiday season, a great addition is a tiny amount of crushed peppermint candy sprinkled on top of the cookies right after they come out of the oven. The heat will slightly melt the candy, infusing your cookies with a subtle minty flavor that pairs wonderfully with the chocolate.
    • Vegan Turtle Cookies – Yes, it’s possible! Use a vegan cake mix for the base, dairy-free caramels for the filling, and a sprinkle of sea salt instead of pecans for the topping. Trust me, these vegan variations are just as delicious!

    How to Make Turtle Cookies

    This turtle cookies recipe is broken into 2 components:

    • prepare the ingredients
    • bake the cookies

    *Be sure to see the recipe card below for the full ingredients list & instructions!*

    STEP 1: Prepare the equipment. Set your oven to a temperature of 350 degrees F. Prepare two cookie sheets by lining them with parchment paper.

    STEP 2: Toast the pecans. Take a small skillet and toast the pecans over medium heat for around 4-5 minutes until they become fragrant. This step can be skipped but is advisable for the best flavor. (Image 1)

    Steps 1-5 of how to make turtle cookies.

    STEP 3: Mix the cake mix. In a large bowl, combine cake mix, eggs, and oil. Ensure all ingredients are blended well. The resulting dough will be thick. (Image 2)

    STEP 4: Add the other ingredients. Include ½ cup of each caramel bits, toasted pecans, and chocolate chips into the dough. Ensure they are evenly distributed. (Image 4)

    STEP 5: Portion out the cookie dough. Using a large cookie scoop, portion out cookie dough balls onto your prepared cookie sheets. Allow at least two inches of space in between each cookie to account for spreading during baking. Press the remaining pecans, caramel bits, and chocolate chips on top of the cookie dough.

    Turtle cookie dough on baking sheet and parchment paper.

    STEP 6: Bake cookies. Place the cookies in the preheated oven for 11-13 minutes. The cookies are done when the edges are set, but the middle remains soft.

    STEP 7: Cool and serve. After baking, leave the cookies to cool on the sheets for 10 minutes. Then, move them to a wire rack to finish cooling.

    Baked turtle cookies, stacked on top of one another.

    Recipe Pro Tips

    • Cold Dough is Key. If your dough is too soft or warm, your cookies might spread too much during baking. Keep your dough chilled right up until it’s time to pop them in the oven. I learned this the hard way during one hectic school holiday!
    • Don’t Overmix. When combining your ingredients, mix just until they come together. Overmixing can lead to dense, tough cookies. We all want soft, chewy cookies!
    • Rotate Your Baking Sheets. To ensure an even bake, rotate your baking sheets halfway through. Especially if you have a naughty oven like mine that loves to play hot and cold!
    • Keep An Eye on Your Cookies. All ovens vary slightly in temperature. Start checking your cookies a couple of minutes before the advised baking time. Nothing smells worse than burned chocolate, believe me!
    Bite taken out of turtle cookie on white parchment paper.

    Recipe FAQs

    Can I use store-bought cookie dough for Turtle Cookies? 

    Absolutely, you can! If you’re short on time, store-bought chocolate cookie dough can be a great shortcut. Just remember to add the caramel bits, pecans, and chocolate chips to the dough before portioning and baking.

    What can I do if my dough is too sticky to handle? 

    If you find the dough too sticky to handle, chill it in the refrigerator for about 30 minutes. This will make it easier to form into balls and will also help prevent the cookies from spreading too much during baking.

    Why are my cookies coming out too flat? 

    The culprit could be too much butter or oil, dough that’s too warm when it goes into the oven or an oven that’s not hot enough. Make sure you’re accurately measuring your ingredients, chilling your dough before baking, and preheating your oven to the right temperature.

    My cookies didn’t turn out as chewy as I’d like, what went wrong? 

    A key factor to achieving chewy cookies is not overbaking them. Pull them out of the oven when the edges are set, but the middle still looks a little underdone. They’ll continue to cook from the residual heat as they cool on the baking sheet, resulting in perfectly chewy cookies.

    Can I use a different kind of nut in my Turtle Cookies? 

    Definitely! Feel free to experiment with other nuts like almonds or walnuts. Just remember to toast them first to bring out their flavors.

    What to Serve with Turtle Cookies

    Turtle cookies, with their harmonious blend of chewy caramel, crunchy pecans, and rich chocolate, are a dessert superstar in their own right. However, pairing them with the right beverages or other treats can elevate your snacking or dessert experience to new heights. 

    • Dairy-Free Almond Milk Latte: This creamy, frothy milk alternative complements the richness of the cookies perfectly, offering a smooth and subtle nutty flavor. Plus, who can resist the charm of a warm cookie paired with a frothy latte?
    • Vanilla Ice Cream: A scoop of classic vanilla ice cream served alongside a Turtle Cookie is a match made in dessert heaven. The cool creaminess of the ice cream balances the rich chocolate cookies, the chewy intensity of the cookie, creating a delightful contrast. For a fancier touch, you could even create an ice cream sandwich with two Turtle Cookies! 
    • Berry Fruit Salad: For a guilt-free accompaniment, a fresh berry salad works wonders. The tartness of the berries counterbalances the sweetness of the cookie, providing a refreshing palate cleanser between bites. Strawberries, blueberries, and raspberries would all make excellent additions. 

    Storage

    After cooling completely, you can store the cookies in an airtight container or ziplock bag. Keep them at room temperature, where they’ll maintain their freshness for up to a week. 

    If you’ve baked more than you can eat in seven days (I know, hard to imagine!), these cookies are also freezer-friendly. Simply place the cooled cookies in a freezer-safe bag or container. They can last up to 3 months in the freezer. Then, when you’re ready to enjoy them, just let them thaw at room temperature. Oh, and a small tip – remember to slip a small piece of parchment paper between each cookie to prevent them from sticking together.

    You can freeze the cookie dough for up to three months. Scoop pieces of cookie dough onto a parchment-lined cookie sheet and place it in the freezer. Once frozen, transfer the dough to an airtight container or freezer bag. If baking the cookies from frozen, add 2-3 minutes to the baking time.

    🍫 More Chocolate Recipes You’ll Love

    If these cookies have left you with the urge for more delicious chocolate cookie recipes, here’s a couple to try. Make this simple No Bake Chocolate Pie for a delicious dessert that doesn’t need the oven. Or you could try this version of another classic dessert with this Chocolate Bread Pudding.

    Make sure to check out these other dessert recipes that you’ll also love:

    • Cherry bread with cherry icing on wooden cutting board.
      Cherry Bread with Cherry Glaze
    • A collage of old-fashioned dessert recipes
      Old-Fashioned Desserts Everyone Knows and Loves
    • Blueberry dump cake, with serving spoon resting in pan.
      Blueberry Dump Cake (Easy, Buttery Dessert with Fresh Berries)
    • Cherry dump cake topped with homemade whipped cream, served in a dessert bowl.
      Cherry Dump Cake (Easy 3-Ingredient Dessert)

    Did you make this? I’d be so grateful if you left a “star” rating below to let me know what you thought! Then, the next time you need a quick and easy recipe, come back to Fantabulosity to browse all of my easy recipes!

    Recipe

    Turtle cookies on white parchment paper.
    Print Pin
    5 from 1 vote

    Turtle Cookies

    These turtle cookies are not only easy but they use a cake mix to keep the ingredients needed, even easier! The chocolate and caramel combo you'll love!
    Course Dessert, Snack
    Cuisine American
    Prep Time 10 minutes minutes
    Cook Time 12 minutes minutes
    Total Time 22 minutes minutes
    Servings 14 Cookies
    Calories 146kcal
    Author Jessica Burgess

    Ingredients

    • 15.25 ounces box of chocolate cake mix
    • 2 large eggs
    • ⅓ cup vegetable oil
    • ¾ cup caramel bits divided
    • ¾ cup pecans roughly chopped, divided
    • ¾ cup semi sweet chocolate chips divided

    Instructions

    • Preheat the oven to 350 degrees F.
    • Line two cookie sheets with parchment paper and set aside.
    • Toast the pecans in a small dry skillet over medium heat for 4-5 minutes or until toastyand fragrant. This step is optional but highly recommended.
    • Mix the cake mix, eggs, and oil in a large bowl until well combined. The mixture will be thick.
    • Fold in ½ cup each of caramel bits, toasted pecans, and chocolate chips.
    • Scoop the cookie dough on the prepared cookie sheets using a large cookie scoop.
    • Leave at least two inches between each cookie. The cookies will spread a good amount during baking.
    • Press the remaining pecans, caramel bits and chocolate chips into the top of the cookie dough.
    • Bake the cookies for 11-13 minutes or until the edges of the cookies have set. The cookies will form a dry crust but should still be soft in the middle.
    • Allow the cookies to cool on the cookie sheets for 10 minutes before transferring them to a wire rack to finish cooling.

    Notes

    Store leftovers in an airtight container for up to three days. I like to place my leftover cookies in the microwave for 5-10 seconds so the chocolate and caramel become salty.
    The cookie dough can be frozen for up to three months. Scoop the cookie dough and place on a parchment-lined cookie sheet in the freezer. Once the cookie dough is frozentransfer to an airtight container of freezer bag. If baking the cookies from frozen add 2-3minutes to your bake time.
    You can use a medium cookie scoop to make smaller cookies. If using a medium scoop, start checking for doneness starting after 8 minutes of baking.
    If the cookie dough is too sticky to scoop, place it in the refrigerator for 20-30 minutes to firm up.
    Use your favorite chocolate cake mix. I used Devil’s food chocolate cake mix for these cookies, but any chocolate cake mix will work.
    If you cannot find caramel bits, you can use caramel candies cut into small pieces.
    The semi-sweet chocolate chips can be substituted with milk or bittersweet chocolate chips.
    This recipe was tested using Betty Crocker devil’s food cake mix, Kraft caramel bits, and Ghiradelli semi-sweet chocolate chips.
    I highly recommend toasting the pecans before adding them to the cookie dough. Toasting the pecans amplifies their nutty flavor and makes them crispier, creating the perfect textural contrast to the soft cookie

    Nutrition

    Serving: 1cookie | Calories: 146kcal | Carbohydrates: 11g | Protein: 2g | Fat: 11g | Saturated Fat: 2g | Polyunsaturated Fat: 5g | Monounsaturated Fat: 4g | Trans Fat: 0.05g | Cholesterol: 25mg | Sodium: 46mg | Potassium: 75mg | Fiber: 1g | Sugar: 9g | Vitamin A: 55IU | Vitamin C: 0.1mg | Calcium: 40mg | Iron: 0.3mg

    Chicken Bacon Ranch Sandwich Recipe

    December 12, 2023

    Chicken bacon ranch sandwich on white plate.

    Chicken Bacon Ranch Sandwich: Chicken, bacon, and ranch. What more could you need in your beautiful sandwich dreams? Take a bite out of one of these mouthwatering sandwiches that are packed with crispy bacon and delicious rotisserie chicken salad and fall in love with your meal plan for dinner.

    Chicken bacon ranch sandwich on white plate.

    Big fan of the ranch + bacon combo? Check out this deliciously simple Chicken Bacon Ranch pasta or these Chicken Bacon Ranch Crescent Bites for even more of that flavor we all crave!

    Or, if you want to see which one you like better, this Crack Chicken Sandwich recipe is similar but you may find that you prefer one over the other.

    [feast_advanced_jump_to]

    Why You’ll Love This Recipe

    • Awesome way to use leftovers: Have leftover chicken or strips of bacon slices? Put them together and you have some yummy sandwiches!
    • Cheesy goodness: Not only does this recipe have both ranch and bacon flavors, but it has a good amount of cheesiness mixed in there too!
    • Ready in only 15 minutes: From start to finish, this recipe takes 15 minutes to put together. Perfect for a speedy lunch with only a few minutes of prep time that the whole family will love.

    Ingredients Needed

    I’ve highlighted a couple of ingredients below with some relevant notes. Aside from this, the ingredients needed are pretty basic.

    Labeled ingredients to make a chicken bacon ranch sandwich.
    • Bacon – We cooked our own bacon for this recipe
    • Cream Cheese – Make sure your cream cheese is softened for smooth mixing.
    • Sour Cream – This is what makes that amazingly thick and creamy ranch dressing for this recipe. Do not skip!

    Substitutions

    Here are some suggestions that can help if you need to substitute something in this recipe:

    • Sour Cream – For a healthier, higher protein alternative, use plain Greek yogurt!
    • Bacon – Not a fan of cooking your own bacon? Premade thick-cut bacon or bacon crumbles work just as well.
    • Rotisserie Chicken – If you’d rather cook your own skinless chicken breast or use chicken thighs, that works for this recipe as well. You just need 3 cups of some kind of shredded cooked chicken. I do not suggest chicken slices, just shredded chicken for this recipe.

    Variations

    The best part about this recipe? It can easily be dressed up! Here are some ideas:

    • Bring on the Heat – Kick this recipe up a notch with some diced jalapenos or your other favorite hot peppers.
    • Add in the Veggies – For some more fiber and vitamins, add in some chopped vegetables such as green peppers or cucumbers.
    • Cheese – Change up the cheese and use your favorite varieties. Cheddar cheese would keep things simple while some sharp cheddar, swiss cheese, or provolone cheese would really bump up the melty cheese flavor.

    How to Make Crack Chicken Sandwiches

    Making these delicious bacon-filled chicken sandwiches is super simple and can be broken down into three parts for the best of easy weeknight meals.

    • Making the cream cheese mixture
    • Adding in the chicken
    • Layering the sandwich

    For added ease, I suggest shredding the chicken and cooking up the crispy bacon ahead of time. Store them in the fridge and you’ll be ready to make these sandwiches all week long!

    *Be sure to see the recipe card below for the full ingredients list & instructions!*


    To begin, make sure you have softened cream cheese. Softened cream cheese blends better and makes for a creamy base, whereas cold cream cheese straight from the fridge will lead to a lumpy base.

    To soften cream cheese, just leave it at room temperature for about 30 minutes. If you’re in a hurry, you can also place the sealed package in a bowl of warm water for 10-15 minutes.

    Steps 1-4 of how to make chicken bacon ranch sandwiches.

    STEP 1. Mix. In a large bowl, mix together the ranch seasoning mix, Dijon mustard, cream cheese, sour cream, and shredded cheese until smooth. (Image 1).

    STEP 2. Add Chicken. While the chicken is still warm (or re-heat), stir it into the cheese ranch mix until it is all well combined and smooth. (Image 2).

    STEP 3. Layer the Sandwich. Start by spreading on the chicken mixture on your bottom bun and then top with chopped bacon and your diced green onion. (Images 3 + 4). This would also be when you’d layer on any other ingredients such as lettuce or chopped green peppers.

    STEP 4. Serve. Serve this sandwich as is!

    Chicken bacon ranch sandwiches on white platter.

    Recipe Pro Tips

    • Serve right away. This recipe is best served cold so enjoy right away!
    • Best with good bread. The better the bun, the better the sandwich! Use a high-quality bun for a delicious sandwich.
    • Go the extra mile. Turn these sandwiches up a notch by toasting them on a hot griddle or your seasoned cast iron skillet.

    Recipe FAQs

    Should I eat my chicken bacon ranch sandwich warm or cold?

    You'll want to mix the chicken with the cheesy ranch mix while the chicken is still warm. This allows the flavors to better sink into the meat. You can load up your sandwich roll and enjoy it while the chicken mixture is still warm but these sandwiches are just as good cold.

    What is another variation I can make?

    Instead of using rotisserie chicken, you can load a crock pot up with 2 large chicken breasts and mix in the cheeses and ranch seasoning. Cook on low for 3 hours or on high for 1.5 hours. When the chicken is done cooking, shred it, and assemble your sandwiches just as you normally would. 

    Do I have to use store-bought bread or can I make my own?

    You can 100% use homemade bread or sandwich rolls here. So satisfying!

    Can I make this ahead of time and freeze it?

    Yep! Follow the recipe up to the point of assembling the sandwiches. Seal the chicken filling in a freezer-safe airtight container and store it in the freezer for up to 3 months. Allow it to thaw before loading up your sandwiches. 

    My cheesy ranch mix is salty.

    Make sure you are using ranch seasoning mix and not the ranch dressing mix. When in doubt, check the label on the back and compare the sodium levels. Sometimes rotisserie chicken can be a bit salty too, so be sure to taste it before using it. 

    What is chicken bacon ranch made of?

    Well, as the name suggests, any recipe that focuses on “chicken bacon ranch” includes those three things! They also typically include varying kinds of cheese and some kind of carb (bread or pasta, for example).

    Chicken bacon ranch sandwiches on wooden cutting board.

    Bun Ideas for the Best Chicken Bacon Ranch Sandwiches

    A classic bun might be the traditional go-to for these yummy bacon ranch chicken sandwiches, but there are so many other bun options to explore! Here are some yummy bread recipes that make for a good bun:

    • Homemade Biscuits
    • Easy Italian White Bread
    • Easy Focaccia Bread

    You could also use a sub sandwich roll to make a yummy chicken bacon ranch sub. Sticking with classic Brioche buns or Hawaiian rolls is also a good call. A great thing about this chicken bacon ranch sandwich recipe is that the options are endless!

    What to Serve with Easy Chicken Bacon Ranch Sandwiches

    This chicken recipe goes well with just about any side dish. My favorites to pair with this tasty shredded chicken sandwich are Macaroni Pasta Salad, Italian Chopped Salad, and Air Fryer Zucchini. You could also keep things simple and serve the sandwiches with some potato chips or french fries.

    Storage

    If you find yourself with leftovers, I highly recommend storing the chicken filling separately from the buns to prevent them from getting soggy. Here's how it’s done.

    • Refrigerator. Once the chicken has cooled to room temperature, seal it in an airtight container and store it in the fridge for up to 4 days. 
    • Freezer. Allow the chicken filling to cool to room temperature before sealing it in a freezer-safe airtight container and storing it in the freezer for up to 3 months. Allow it to thaw in the fridge before reheating. 

    To reheat. Reheat the chicken filling in the oven, covered, at 300°F for 25 minutes, or pop it in the microwave. Microwave in 30-second intervals (stirring between each) until heated through. 

    More Chicken Recipes You’ll Love

    Big fan of all things chicken? Here are some tasty recipes that are packed full of flavor that center around some juicy chicken!

    • Cornflake fried chicken on plate, with fresh parsley sprinkled on top.
      Cornflake Fried Chicken
    • Spatula holding up a piece of cheesy chicken.
      Cheesy Chicken
    • Fried chicken sliders on white plate, topped with mayo, lettuce and pickles.
      Fried Chicken Sliders
    • Crispy Chicken Burger
      Crispy Chicken Burger (KFC Zinger Burger)

    Did you make this? I’d be so grateful if you left a “star” rating below to let me know what you thought! Then, the next time you need a quick and easy recipe, come back to Fantabulosity to browse all of my easy recipes!

    Recipe

    Chicken bacon ranch sandwich on white plate.
    Print Pin
    5 from 3 votes

    Chicken Bacon Ranch Sandwich

    Chicken Bacon Ranch Sandwich: Thick cut bacon, creamy ranch dressing, and shredded rotisserie chicken make for the most delicious 15 minute sandwich recipe. Here is how to make the best shredded chicken sandwich!
    Course Dinner, Lunch
    Cuisine American
    Prep Time 15 minutes minutes
    Total Time 15 minutes minutes
    Servings 4 Sandwiches
    Calories 739kcal
    Author Jessica Burgess

    Ingredients

    • 3 cups shredded rotisserie chicken
    • 8 slices cooked bacon chopped
    • 2 tablespoons ranch seasoning mix
    • 1 teaspoon Dijon mustard
    • 8 ounces cream cheese softened
    • ¼ cup sour cream
    • ½ cup shredded Monterey Colby jack cheese
    • 4 sandwich buns
    • 2 tablespoons sliced green onion

    Instructions

    • Mix. In a large bowl, mix together the ranch seasoning mix, Dijon mustard, cream cheese, sour cream, and shredded cheese until smooth.
    • Add Chicken. While the chicken is still warm (or re-heat), stir it into the cheese ranch mix until it is all well combined and smooth.
    • Make a sandwich. Spread the chicken mixture on each bun, top with the chopped bacon and green onion.

    Nutrition

    Serving: 1sandwich | Calories: 739kcal | Carbohydrates: 39g | Protein: 35g | Fat: 48g | Saturated Fat: 22g | Polyunsaturated Fat: 6g | Monounsaturated Fat: 16g | Trans Fat: 0.1g | Cholesterol: 161mg | Sodium: 1497mg | Potassium: 426mg | Fiber: 1g | Sugar: 4g | Vitamin A: 1170IU | Vitamin C: 2mg | Calcium: 251mg | Iron: 3mg

    How to Boil Chicken Thighs

    December 10, 2023

    Boiled bone-in chicken thighs in white baking dish with rosemary and carrots.

    We’re sharing the easy steps on how to boil chicken thighs, whether they’re boneless, bone-in, frozen, or fresh!

    Similar to how to boil chicken breasts, boiling a whole chicken, and how-to chicken drumsticks, this method for chicken thighs is just as easy!

    Boiled chicken thighs in baking dish.
    [feast_advanced_jump_to]

    Enjoying the cooked chicken thighs just like they are, is a great easy dinner idea.

    However, when using this cooking method, it’s also a great way to prep for easy meals similar to when cooking shredded chicken in the slow cooker. Cooked chicken can be used in recipes like this Frito Chicken Casserole or this Stove Top Stuffing Chicken Casserole.

    Why You’ll Love This Recipe

    • Flexible: This method for boiling chicken thighs is flexible to where you can add different vegetables, spices, and herbs if desired.
    • Make-ahead recipe: Love making dishes ahead of time, or meal prepping? Boiling a large pack of chicken is a great way to secure cooked chicken for other recipes.

    Ingredients Needed

    Ingredients can vary for boiled chicken thighs. In this example, we’ve made chicken thighs, alone, with just water, and chicken thighs with vegetables and herbs.

    Bone-in chicken thighs in packaging.

    The above image shows a package of bone-in chicken thighs, whereas the image below shows boneless chicken thighs.

    Boneless chicken thighs on white plate.

    Why use boneless or bone-in thighs?

    This could vary for different reasons. Some say bone-in chicken thighs are juicier and more affordable.

    However boneless chicken thighs are easier for sandwich recipes and are still a juicy cut of chicken meat.

    Substitutions

    Substitution options are endless with boiling chicken thighs. They can be boiled by themselves or you can add your favorite fresh herbs, fresh vegetables, and spices. Here are some ideas that may help:

    • Onions
    • Fresh Thyme
    • Parsley
    • Bay Leaves
    • Celery

    Equipment

    A large stockpot that’s big enough to fit the chicken and any other ingredients you wish to put in with it, along with the amount of water that it needs, as well as allowing a lid to sit on top.

    How to Make Bone-In Chicken Thighs

    *Be sure to see the recipe card below for the full ingredients list & instructions!*

    If you have bone-in chicken thighs, you’ll want to follow the cooking time below. You can boil them by themselves or like how we boiled them with carrots, rosemary, and spices for extra flavor.

    Steps 1-4 of how to boil bone-in chicken thighs.

    For Thawed Bone in Chicken Thighs

    1. Place chicken thighs in a large pot (one that is large enough to fit everything you plan to cook, as well as the water it will take to cover the chicken with about an inch of water above the top of the chicken) and season with salt and black pepper.
    2. Next, add in any other ingredients you wish to boil with the chicken thighs. We added 3 carrots, 1 tablespoon of minced garlic, and 3 sprigs of rosemary.
    3. Fill the pot with water, so that the water is about an inch of water above the top of the chicken.
    4. Turn the stovetop burner to high heat, to allow it to boil. When boiling, reduce heat to medium heat, cover with a lid, and allow to boil for 20 minutes or until the internal temperature of the thickest part of the chicken, reaches 165 degrees when checked with a meat thermometer.

    For Frozen Bone in Chicken Thighs:

    It could take up to 40-45 minutes for the frozen chicken thighs to cook to 165 internal temperature.

    Boiled chicken thighs in baking dish, with carrots and rosemary.
    • Remove chicken thighs from the water, and serve or use for another recipe.

    TIP: If you love a crispy skin, you can place the chicken thighs in a baking dish, and set the oven on “broil” and broil the chicken thighs for a couple of minutes or until they reach the desired golden-brown color that you desire.

    How to Make Boneless Chicken Thighs

    If you have boneless chicken thighs, you’ll want to follow the cooking times below. You can cook them by themselves or with spices, vegetables, and herbs like we used above.

    Steps 1-4 of how to boil boneless chicken thighs.
    1. Place boneless chicken thighs in stock pot (one that is large enough to fit everything you plan to cook, as well as the water it will take to cover the chicken with about an inch of water above the top of the chicken) and season with salt and pepper.
    2. Fill the pot with water, covering the chicken so that there’s about an inch of water above the top of the chicken.
    3. Turn the stovetop burner to high heat, to allow it to boil. When boiling, reduce heat to medium, cover with a lid, and let simmer for about 10 minutes until chicken is done, or internal temp reaches 165 degrees.
      If frozen boneless chicken thighs: it could take up to 20-25 minutes to reach an internal temperature of 165 degrees.
    4. Remove the cooked chicken thighs from the water and enjoy or use them in other chicken recipes.
    Boiled boneless chicken thighs on white plate, next to stock pot.

    Spices and Sauces for Chicken Thighs

    If you’re looking to serve these tender chicken thighs by themselves, you may like to serve them with more seasonings or your favorite sauce. Here are some ideas that you may find helpful:

    • bbq sauce
    • buffalo sauce
    • teriyaki sauce like I use in this recipe for teriyaki chicken too!
    • jalapeno ranch dip
    • chipotle aioli
    • blue cheese dip
    • bbq seasoning

    How to Shred Cooked Chicken Thighs

    If shredding the chicken, it’s easiest to shred cooked chicken when it’s warm. You can do this by using two forks, or if you have a stand mixer, it’s a great way to shred chicken fast. You can see below how using this whisk attachment on our stand mixer, shredded the chicken so nicely!

    Stand mixer shredding warm chicken thighs.

    Recipe Pro Tips

    • Cooking time can vary: Depending on the size of your chicken thighs, the cooking time can vary. Make sure the internal temperature reaches 165 degrees before serving.
    • Boil in chicken broth (optional): If desired, you can boil the chicken thighs in chicken broth instead, for more flavor.
    • Make broth. When boiling the chicken in water, it can make a homemade chicken broth that you can use to make easy homemade chicken noodle soup, buffalo chicken soup, or other soup recipes!
    Boiled bone-in chicken thigh, being held by tongs up above the pot of chicken.

    Recipe FAQs

    How do you boil raw chicken?

    Place the raw chicken in a stock pot with water covering it, and boil long enough that the internal temperature reaches 165 degrees.

    How long does it take to boil chicken thighs?

    If fresh, boneless chicken thighs, allow it to come to a rolling boil, and then reduce heat to medium, cover, and allow it to cook for about 10 minutes or until the internal temperature of the chicken thighs reaches 165 degrees.

    Are boiled chicken thighs good?

    Yes! It is so tender, and depending on what you boil it with, or how you serve it when cooked, it can be a new favorite cut of chicken.

    What to Serve with Boiled Chicken Thighs

    Boiled chicken thighs are delicious served with old-fashioned side dishes such as this pea salad, macaroni and tomatoes or with these delicious homemade biscuits.

    Or, you can serve this boiled chicken thighs recipe on top of this cream cheese pasta for a great combination!

    Storage

    Leftover chicken thighs: Store cooled leftover chicken thighs in an airtight container and place in the refrigerator for 3-4 days.

    Freeze: Once the chicken thighs have cooled, store them in a freezer-safe container or freezer bag, for 3-4 months.

    Thaw: To thaw the chicken thighs, place them in the refrigerator to thaw.

    More Chicken Thigh Recipes You’ll Love

    Love cooking with chicken thighs? So do we! Here are some of our favorite chicken thigh dinner ideas:

    • Oven Baked Bacon Wrapped Chicken Thighs
    • Instant Pot Chicken Thighs- Lemon and Herb
      Instant Pot Chicken Thighs – Lemon and Herb
    • Chicken and gravy on top of mashed potatoes on white plates
      Chicken and Gravy Recipe
    • Fried chicken sliders on white plate, topped with mayo, lettuce and pickles.
      Fried Chicken Sliders

    Did you make this? I’d be so grateful if you left a “star” rating below to let me know what you thought! Then, the next time you need a quick and easy recipe, come back to Fantabulosity to browse all of my easy recipes!

    Recipe

    Boiled bone-in chicken thighs in white baking dish with rosemary and carrots.
    Print Pin
    5 from 3 votes

    How to Boil Chicken Thighs

    Boiling chicken thighs is a great and easy way to cook chicken, whether it's boneless chicken, bone-in chicken thighs, fresh or frozen.
    Course Dinner, Main Course
    Cuisine American
    Diet Low Calorie, Low Fat
    Prep Time 5 minutes minutes
    Cook Time 20 minutes minutes
    Total Time 25 minutes minutes
    Servings 8 chicken thighs
    Calories 2kcal
    Author Jessica Burgess

    Ingredients

    • 4 pounds chicken thighs bone-in or boneless, amount can vary
    • water enough to cover the chicken and other ingredients that you may choose to add, with at least one inch of water above the top of the chicken.

    Instructions

    For Fresh Bone in Chicken Thighs

    • Place chicken thighs in a large pot (one that is large enough to fit everything you plan to cook, as well as the water it will take to cover the chicken with about an inch of water above the top of the chicken) and season with salt and pepper.
    • Next, add in any other ingredients you wish to boil with the chicken thighs. We added 3 carrots, 1 tablespoon of minced garlic, and 3 sprigs of rosemary.
    • Fill the pot with water, so that the water is about an inch of water above the top of the chicken.
    • Turn the stovetop burner to high heat, to allow it to boil. When boiling, reduce heat to medium, cover with a lid, and allow to boil for 20 minutes or until the internal temperature of the thickest part of the chicken, reaches 165 degrees.

    For Frozen Bone-In Chicken Thighs:

    • It could take up to 40-45 minutes for the frozen chicken thighs to cook to 165 internal temperature.
    • TIP: If you love a crispy skin, you can place the chicken thighs in a baking dish, and set the oven on "broil" and broil the chicken thighs for a couple of minutes or until they reach the desired golden-brown color that you desire.

    For Fresh Boneless Chicken Thighs

    • Place boneless chicken thighs in stock pot (one that is large enough to fit everything you plan to cook, as well as the water it will take to cover the chicken with about an inch of water above the top of the chicken) and season with salt and pepper.
    • Fill the pot with water, covering the chicken so that there's about an inch of water above the top of the chicken.
    • Turn the stovetop burner to high heat, to allow it to boil. When boiling, reduce heat to medium, cover with a lid, and let simmer for about 10 minutes until chicken is done, or internal temp reaches 165 degrees.

    For Frozen Boneless Chicken Thighs

    • It could take up to 20-25 minutes to reach an internal temperature of 165 degrees.

    Nutrition

    Serving: 2thighs | Calories: 2kcal | Carbohydrates: 0.003g | Protein: 0.2g | Fat: 0.2g | Saturated Fat: 0.04g | Polyunsaturated Fat: 0.04g | Monounsaturated Fat: 0.1g | Trans Fat: 0.001g | Cholesterol: 1mg | Sodium: 1mg | Potassium: 2mg | Vitamin A: 1IU | Calcium: 0.1mg | Iron: 0.01mg

    Southern Fried Chicken

    December 8, 2023

    Close up of southern fried chicken on white plate.

    Southern Fried Chicken: The best fried chicken is made up of two things: juicy meat and quality seasonings.

    This Southern fried chicken recipe checks off the boxes. Get ready to take a mouth-watering bite into a perfectly fried, golden brown piece of chicken once you are done making this recipe.

    Crispy fried chicken on black wire cooling rack.

    Love some high-quality, classic southern dishes? You have to try out Southern Broccoli Casserole, Macaroni and Tomatoes, and some Southern Fried Pork Chops next!

    [feast_advanced_jump_to]

    Why You’ll Love This Recipe

    • It uses a few ingredients: You likely have everything you need for this recipe already on hand which is so helpful!
    • It’s fairly inexpensive: Make this recipe super affordable by purchasing the cheapest cuts of bone-in chicken.
    • Ready in only 40 minutes: Talk about a quick and easy dinner idea! This restaurant-quality fried chicken is ready in 40 minutes or less.

    Ingredients Needed

    I’ve highlighted a couple of ingredients below with some relevant notes. Aside from this, the ingredients needed are pretty basic.

    Labeled ingredients for southern fried chicken.
    • Bone-In Chicken – We used a whole chicken for this recipe (chicken breast, chicken thighs, and chicken wings)
    • Spices – These are what make or break the recipe. Do NOT skip!
    • Buttermilk – The key to some stellar fried chicken pieces is buttermilk.

    Variations

    While this recipe is originally prepared on the stovetop, you could also cook the fried chicken in the air fryer. We share the notes for such in the recipe card as well as here:

    To air fry this fried chicken recipe, preheat the air fryer to 375 degrees F. and then place the chicken in a single layer on the bottom of the air fryer pan. Bake for four minutes, turn, and bake for another four or until the internal temperature reaches 165 degrees F.

    Other recipe variations:

    • Seasoning – you could easily add to the seasonings listed (We don’t recommend taking any out). Add in some cayenne pepper or chili powder for an added kick or something like Dan O’s for some more flavor.
    • Turn up the heat – Add some hot sauce into the buttermilk mixture for some hot chicken!

    How to Make the Best Fried Chicken

    Making this fried chicken recipe is broken down into 3 components:

    • making the batter
    • soaking the chicken
    • frying the chicken

    *Be sure to see the recipe card below for the full ingredients list & instructions!*

    Image collage showing steps 1-4 of how to make Southern fried chicken.

    STEP 1. Make the marinade. In a large mixing bowl, whisk together the buttermilk, mustard, salt, pepper, and smoked paprika. (Image 1).

    STEP 2. Marinade the chicken. Place the chicken in the bowl with the marinade, toss to coat, cover the bowl with plastic wrap, and chill in the fridge for 4-6 hours. (Image 2).

    Tip: Letting the chicken pieces hang out in the wet mixture for a bit will lead to more tender, juicier chicken. Highly recommend!

    STEP 3. Make the breading. Whisk together the flour, onion powder, poultry seasoning, and garlic powder. (Image 3).

    STEP 4. Dredge. Remove the chicken from the fridge and dredge each piece in the flour mixture before placing it on a wire rack. Let the chicken sit on the rack for about 15 minutes to allow the flour mixture to soak up the buttermilk mixture which will give you that great crispy flakey texture when frying your chicken. (Image 4).

    Image collage showing steps 5-7 of how to make southern fried chicken.

    STEP 5. Fry. Heat the oil in a large heavy-bottomed skillet or Dutch oven to 350-360°F and fry the chicken for 8-10 minutes on either side or until a meat thermometer inserted into the largest piece reads 165°F. Do not crowd the pan. Fry in batches if you need to. (Image 5 + 6).

    STEP 6. Drain the oil. Transfer the fried chicken to a plate lined with paper towels to allow the oil to drain off.
    (Image 7).

    Southern fried chicken in white platter with white parchment paper underneath.

    Recipe Pro Tips

    • Allow to slightly cool. Fried chicken right off the stovetop is HOT! Let it sit for a few minutes before eating.
    • Correct temperature. Always make sure cooked chicken has an internal temperature of 165 degrees F. before removing it from the heat source.
    Close up of fried chicken leg on white rack.

    Recipe FAQs

    How long to fry fried chicken in a pan?

    Fry your chicken for 7-8 minutes on each side over medium-high heat in oil on the stovetop. Make sure the internal temp reaches 165 degrees F. prior to removing from heat.

    What are the best seasonings for fried chicken?

    We recommend garlic powder, onion powder, smoked paprika, black pepper, salt, all-purpose seasoning, and dry mustard for the best flavor.

    Can I use cornflakes as breading for chicken?

    Absolutely! This is a common variation of this recipe. However, to get the best result for traditional Southern Fried Chicken, we suggest sticking with all-purpose flour.

    What is the secret to good fried chicken?

    A salty marinade is the key to tasty and juicy fried chicken. Add your salt right into your buttermilk mixture for the most flavor!

    What kind of oil do you fry chicken in?

    You can fry chicken in almost any oil with a high smoke point, but we recommend vegetable oil.

    Why put chicken in milk before frying?

    In short, it helps jumpstart the tenderization process.

    What can I soak chicken in to make it tender?

    We recommend buttermilk, however, you could also soak it in citrus juices, vinegar, or yogurt to get that tender, juicy chicken outcome.

    Which cut of chicken is the best for frying?

    Well, that all comes back to personal preference! While we love the white meat of chicken breast, many people we know enjoy the dark meat pieces (such as chicken thighs) instead!

    What is another variation I can make?

    You can make this Southern fried chicken in the oven. Marinade and dredge the chicken as you normally would, arrange it on a wire rack set above a baking sheet, and bake at 425°F for 45 minutes. Flip the chicken 15 minutes before the cook time is up. 

    Do I have to use store-bought poultry seasoning or can I make my own?

    You are more than welcome to make your own poultry seasoning if you want a little more control over your flavor profile. Store-bought is just so convenient! 

    Can I make this ahead of time and freeze it?

    Yep! Seal the marinating chicken in a freezer-safe airtight container and store it in the freezer for up to 3 months. When you are ready to fry, allow the chicken to thaw in the fridge. Once the chicken has thawed, whisk together the ingredients for the breading, dredge, and fry.

    What size skillet did you use?

    I used a 10 inch skillet but you could use a nice and sturdy, deep 12-16-inch skillet instead. You can use something smaller, you just might have to fry in more batches to prevent crowding the pan. You can also use a large dutch oven, this allows for a deeper fry because you can safely fill the dutch oven with more oil.

    Can I skip the buttermilk?

    You can. Buttermilk does a wonderful job of tenderizing the chicken but, if you are dairy-averse (or in a rush and want to skip the marinade), go ahead and leave it out. Just dip each piece of chicken in some flour, then in an egg wash, and then dredge in the seasoned flour mixture. 

    How much oil do I need?

    I used 2 cups of vegetable oil in my skillet. You just need it to go two inches up the sides of the skillet. You could use enough oil to fill a Dutch oven halfway if you'd like to use one. You'll get a more even fry that way but you will have to use a lot more oil and it will take longer to heat up. 

    The breading fell off the chicken when frying.

    Make sure you are adding the chicken to the oil when it’s already hot and ready! If you add the chicken to your oil before it’s ready, the breading will slide right off. Another thing, make sure you are not overcrowding your skillet. Every piece of cold chicken is going to bring down your oil temperature a bit.

    What to Serve with Southern Fried Chicken

    The only thing that can make this traditional fried chicken recipe any better are some good quality sides. Make sure to check out my recipes for Red Skin Potato Salad, Macaroni Chicken Salad, and Orange Fluff Salad for just that!

    But the classic side dishes for fried chicken are mashed potatoes and white country gravy, or these easy fried onions and potatoes.

    Close up of fried chicken on white platter.

    Storage

    Refrigerator. Once the chicken has cooled completely, seal it in an airtight container and store it in the fridge for up to 4 days. 

    Freezer. Allow the chicken to cool to room temperature before sealing it in a freezer-safe airtight container and storing it in the freezer. It will stay good for up to 3 months. Allow the chicken to thaw in the fridge before reheating.* 

    * Note that the breading is likely to fall off of your chicken upon thawing. For this reason, we prefer not to freeze my fried chicken, but the choice is yours.

    To reheat. Arrange the chicken pieces in a single layer in a baking dish, cover with aluminum foil, and bake at 350°F for 10-15 minutes or until heated through.

    More Chicken Recipes You’ll Love

    If you love quality-made, juicy chicken recipes, we have you covered!

    • Fried chicken sliders on white plate, topped with mayo, lettuce and pickles.
      Fried Chicken Sliders
    • Crispy Chicken Burger
      Crispy Chicken Burger (KFC Zinger Burger)
    • Cornflake fried chicken on plate, with fresh parsley sprinkled on top.
      Cornflake Fried Chicken
    • Chicken drumsticks baked in oven
      Juicy Chicken Drumsticks in the Oven

    Did you make this? I’d be so grateful if you left a “star” rating below to let me know what you thought! Then, the next time you need a quick and easy recipe, come back to Fantabulosity to browse all of my easy recipes!

    Recipe

    Close up of southern fried chicken on white plate.
    Print Pin
    4.84 from 6 votes

    Southern Fried Chicken

    Deliciously simple and crazy crunchy, this classic Southern Fried Chicken recipe lives up to the hype. It is super tender and juicy; everything fried chicken should be!
    Course Main Course
    Cuisine American
    Prep Time 20 minutes minutes
    Cook Time 20 minutes minutes
    Total Time 40 minutes minutes
    Servings 8 servings
    Calories 475kcal
    Author Jessica Burgess

    Ingredients

    • 2 cups flour
    • 2 cups buttermilk
    • 3 pounds bone-in chicken (7-8 pieces of breasts, thighs, and legs)
    • 2 teaspoons garlic powder
    • 2 teaspoons smoked paprika
    • 2 teaspoons dry mustard
    • 2 tablespoons all purpose seasoning
    • 1 teaspoon onion powder
    • 1 teaspoon black pepper
    • 2 teaspoons salt
    • vegetable oil 2 inches in a large skittle or Dutch oven

    Instructions

    • Make the marinade. In a large mixing bowl, whisk together the buttermilk, mustard, salt, pepper, and smoked paprika.
    • Marinade the chicken. Place the chicken in the bowl with the marinade, toss to coat, cover the bowl with plastic wrap, and chill in the fridge for 4-6 hours.
    • Make the breading. Whisk together the flour, onion powder, poultry seasoning, and garlic powder.
    • Dredge. Remove the chicken from the fridge and dredge each piece in the flour mixture before placing it on a wire rack. Let the chicken sit on the rack for about 15 minutes to allow the flour mixture to soak up the buttermilk mixture which will give you that great crispy flakey texture when frying your chicken.
    • Fry. Heat the oil in a large heavy-bottomed skillet or Dutch oven to 350-360°F and fry the chicken for 8-10 minutes on either side or until a meat thermometer inserted into the largest piece reads 165°F. Do not crowd the pan. Fry in batches if you need to.
    • Drain the oil. Transfer the fried chicken to a plate lined with paper towels to allow the oil to drain off.

    Notes

    To air fry this fried chicken recipe, preheat the air fryer to 375 degrees F. and then place the chicken in a single layer on the bottom of the air fryer pan. Bake for four minutes, turn, and bake for another four or until the internal temperature reaches 165 degrees F.

    Nutrition

    Serving: 1chicken wing | Calories: 475kcal | Carbohydrates: 28g | Protein: 29g | Fat: 27g | Saturated Fat: 8g | Polyunsaturated Fat: 5g | Monounsaturated Fat: 11g | Trans Fat: 0.1g | Cholesterol: 148mg | Sodium: 757mg | Potassium: 441mg | Fiber: 1g | Sugar: 3g | Vitamin A: 460IU | Vitamin C: 0.1mg | Calcium: 91mg | Iron: 3mg

    How to Boil Chicken Breasts

    December 8, 2023

    Close up of whole chicken breasts that have been boiled, and shredded chicken breasts.

    Boiling chicken breasts is easy and a great way to cook chicken to enjoy them as they are or to serve in other easy dinner recipes.

    Much like boiling a whole chicken, boiling thighs, and boiling chicken legs, it’s easy to boil chicken breasts too.

    Boiled chicken breasts sitting on white platter, in front of dutch oven.

    If you’re planning to boil chicken breasts to use the chicken meat in other recipes, as we do with our slow cooker shredded chicken, you’ll love using this cooked chicken in this White Chicken Chili, Buffalo Chicken Lasagna, and this Taco Chicken Casserole.

    [feast_advanced_jump_to]

    Why You’ll Love This Recipe

    • It’s easy: Boiling chicken breasts is so easy. Simply add water and chicken breasts to the stock pot and cook!
    • Versatile: We kept this tutorial for how to boil chicken breasts basic, as we weren’t sure how you’d use the chicken, so we kept the ingredients low. Feel free to adjust and add your favorites. See our suggestions below.
    • Ready in less than 30 minutes: In less than 30 minutes, you’ll have cooked chicken breasts ready to enjoy or to serve in other dishes.

    Ingredients Needed

    We only used salt, pepper, and chicken breasts in this tutorial but you can add other ingredients to fit your needs if desired. We’ve given suggestions below on what else you can add if you’d like a flavorful chicken.

    Raw chicken breasts in the packaging, sitting next to salt and pepper.
    • Chicken Breasts – Sizes of chicken breasts can vary and it could change how long the cooking time is, if the chicken breasts are very large or very small. Boneless chicken breasts may take less time to cook than bone-in chicken breasts. However, you’ll find all of the cooking times below.

    Substitutions and Variations

    If you’d like to add other ingredients to flavor your chicken breasts while boiling, here are some suggestions that may help:

    • garlic
    • onions
    • fresh herbs – such as rosemary, thyme, parsley
    • bay leaves
    • carrots
    • celery

    Equipment

    Large stockpot or Dutch oven that’s big enough to house the chicken and any other ingredients, while keeping in mind that water will need to be used to cover the breasts completely.

    How Long to Boil Chicken Breasts

    There’s not much to boiling chicken breasts because it’s really easy!

    *Be sure to see the recipe card below for the full ingredients list & instructions!*

    Steps for how to boil chicken breasts on the stove.

    STEP 1. Add chicken. Place chicken breasts in a large stock pot of dutch oven. (Image 1).

    STEP 2. Add salt & pepper. Next, season the chicken breasts with salt and pepper. The amount can depend on your desired flavoring. (Image 2).

    Tip: Remember that you can always add salt and pepper after they’re cooked but you can’t take it away. However, adding water can dilute the flavor of the chicken’s seasoning, so more is usually recommended. You can also use the leftover chicken water as homemade chicken broth.

    STEP 3. Add water & boil. Add water to the stockpot, making sure to add enough that it sits about an inch above the chicken.


    Boiled Chicken Cooking Times

    For all chicken types, cook on “high” until a rolling boil. Reduce heat to medium and follow the below guidelines:

    Fresh boneless chicken breasts: Simmer on medium for 20 minutes or until the internal temperature of the chicken breasts is 165 degrees (Image 3).

    Frozen boneless chicken breasts: Simmer on medium for 25-30 minutes or until the internal temperature reaches 165 degrees.

    Fresh bone-in chicken breasts: Simmer on medium for 30 minutes, or until the internal temperature reaches 165 degrees.

    Frozen bone-in chicken breasts: Simmer on medium for about 30-40 minutes or until the internal temperature reaches 165 degrees.


    STEP 4. Remove chicken. Once the chicken breasts have finished cooking, remove them from the broth and serve or use it in other recipes (Image 4).

    Boiled chicken breasts sitting on white plate, that have been sprinkled with fresh parsley.

    Recipe Pro Tips

    • Dips & Seasonings. If serving boiled, feel free to add extra seasoning or your favorite sauces to the cooked chicken. Seasonings such as garlic powder or your favorite BBQ seasoning are delicious. For sauces, BBQ sauce, easy teriyaki sauce, or this delicious jalapeno ranch dressing is a great choice.
    • Meal Prep. Boiling a lot of chicken breasts at one time is a great way to plan for future meals. Or, you can even freeze cooked chicken breasts for later. This works great if chicken breasts are on sale and you want to stock up on them and save them for later.
    • Shred Warm. It’s easier to shred chicken when it’s warm, so shredding right after boiling is best if you can. You can also shred chicken easily by using two forks or even easier; shred using a stand mixer.
    Cooked chicken breast being shredded with two forks on white plate.

    Recipe FAQs

    How long should I boil chicken breast for?

    Boiling fresh, boneless chicken breasts for 20 minutes is a good gauge for how long to boil chicken. However, the cooking time can vary, depending on how small or large the breasts are, if they’re frozen or fresh, and if they have bones or are boneless. Make sure the internal temperature of the chicken breasts is 165 degrees.

    How long do you boil chicken breasts to shred?

    Boiling for 20 minutes, or until the internal temperature reaches 165 should make the chicken breast easy to shred, especially is shredding while still warm.

    Do you put chicken in before or after the water boils?

    Putting the chicken in the pot at the same time as the water, is just fine. Allow it to come to a boil and then simmer to finish cooking.

    How to Serve Boiled Chicken Breasts

    Boiled chicken breasts can be served alone, as is, or with other seasonings and dips. The chicken breasts can also be shredded or diced in to small pieces to be included in casserole recipes, salad recipes, in to easy sandwich recipes, comforting pasta recipes, or in soup recipes.

    Shredded chicken breasts on white plate.

    Storage

    Leftover chicken breasts: Store cooled leftovers in an airtight container in the refrigerator for 3-4 days.

    Freeze: Store cooled chicken breasts in a freezer-safe container or freezer bag for 3-4 months.

    Thaw: To thaw, place frozen chicken breasts in the refrigerator to slowly thaw.

    More Chicken Recipes You’ll Love

    Chicken can be used in so many recipes! Here are some of our reader’s favorites:

    • Crispy Chicken Burger
      Crispy Chicken Burger (KFC Zinger Burger)
    • Creamy Caesar Chicken in a skillet.
      Creamy Caesar Chicken
    • Chicken club sandwich in platter next to french fries.
      Chicken Club Sandwich
    • Fried chicken sliders on white plate, topped with mayo, lettuce and pickles.
      Fried Chicken Sliders

    Did you make this? I’d be so grateful if you left a “star” rating below to let me know what you thought! Then, the next time you need a quick and easy recipe, come back to Fantabulosity to browse all of my easy recipes!

    Recipe

    Close up of whole chicken breasts that have been boiled, and shredded chicken breasts.
    Print Pin
    5 from 2 votes

    How to Boil Chicken Breasts

    See how to boil chicken breasts, the easy way! This tutorial shows how long to boil fresh chicken breasts or frozen, to eat as they are or to be used in other recipes.
    Course Dinner, Main Course
    Cuisine American
    Diet Low Calorie, Low Fat
    Cook Time 20 minutes minutes
    Total Time 20 minutes minutes
    Servings 2 pounds
    Calories 780kcal
    Author Jessica Burgess

    Ingredients

    • 2 pounds boneless chicken breasts Or see different types of chicken breasts and their relative cooking times, below. Amount of chicken breasts can vary.
    • water
    • salt Season as desired
    • pepper Season as desired

    Instructions

    • Place chicken breasts in a large stock pot (large enough to hold chicken breasts – in a single layer if possible).
    • Season chicken breasts with salt and pepper.
    • Cover chicken breasts with enough water that there's at least an inch of water above the top of the chicken.
    • For all chicken types, cook on "high" until a rolling boil. Reduce heat to medium and follow the below guidelines:

    Fresh boneless chicken breasts:

    • Simmer on medium for 20 minutes or until the internal temperature of the chicken breasts is 165 degrees (Image 3).

    Frozen boneless chicken breasts:

    • Simmer on medium for 25-30 minutes or until the internal temperature reaches 165 degrees.

    Fresh bone-in chicken breasts:

    • Simmer on medium for 30 minutes, or until the internal temperature reaches 165 degrees.

    Frozen bone-in chicken breasts:

    • Simmer on medium for about 30-40 minutes or until the internal temperature reaches 165 degrees.
    • Remove chicken from water and serve or shred/dice/slice for other recipes.

    Nutrition

    Serving: 1chicken breast | Calories: 780kcal | Protein: 95g | Fat: 42g | Saturated Fat: 12g | Polyunsaturated Fat: 9g | Monounsaturated Fat: 17g | Trans Fat: 0.5g | Cholesterol: 290mg | Sodium: 286mg | Potassium: 998mg | Vitamin A: 376IU | Calcium: 50mg | Iron: 3mg

    Cookie Decorating for Beginners with Royal Icing

    December 7, 2023

    Sugar cookies decorated on wooden cutting board.

    Cookie Decorating for Beginners with Royal Icing: Sharing tips and tricks on how to make cooking decorating easier.

    I’ve always been a fan of sugar cookies, but I only became intrigued with actually decorating them with royal icing when I saw all of the super fun cookie decorating videos on my Facebook feed. Now it’s our favorite cookie recipe to make every Christmas season and all year long!

    Decorated Christmas cookies on wooden cutting board.

    Fill up your cookie recipe box with some of my favorite cookie recipes like my no-bake cookies, sugar cookies with Nutella, ice cream cone sugar cookie cut-outs and if you’re on the hunt for Christmas cookies, then don’t miss the 20 Easy Christmas Cookie Recipes!

    I had made the decision in the beginning that I was going to attempt decorating cookies, and I knew going into it, that my cookies wouldn’t look near as good as the pros but I didn’t mind.

    I just wanted the satisfaction that I could decorate a cookie with royal icing.

    Come to find out, there are a lot of you out there, just like me, who are dying to attempt this, but aren’t sure where to start! This is where I hope I can come in to help, and you can laugh at my mistakes and “first attempts,” along the way.

    Cookie Decorating for Beginners: Royal Icing How To fantabulosity.com

    A full list of products that I use to decorate cookies is at the end of this post…

    🎄 Christmas and Party Cookie Decorating

    The pink & green cookies that you see here in this post, are actually my second attempt in decorating cookies. The first time I gave it a “go,” was on the Christmas cookies below… and all that did was begin my cookie decorating obsession.

    Although they are SO far from perfect, they were so fun to make, addicting, and super therapeutic!

    Cookie Decorating for Beginners: Royal Icing How To fantabulosity.com

    You can see in the above photo, that my little snowman is cracking, and my royal icing on the stocking isn’t a smooth flat surface like I’d like. This will iron out in the future cookie decorating attempts, I hope!

    For the sake of this post to help you see that a beginner like myself can do it (not perfect, but do it at least!), I wanted to use the new elephant, dog and cupcake cookie cutters that I found and had to have!

    Cookie Decorating for Beginners: Royal Icing How To fantabulosity.com

    This little guy would be fun for a baby shower, zoo birthday party, or I even squeezed him in for a Valentine’s Day treat. ESPECIALLY if you’re throwing a baking-themed birthday party like I helped style for my niece!

    Cookie Decorating for Beginners: Royal Icing How To fantabulosity.com

    The dog cracks me up, to be honest. After I finished decorating him, I realized he looked just like the “Pink,” Victoria Secret dog.

    Hmm… I wonder if they’ll hire me to make little cookies for all of their store? Haha…doubt it.

    Cookie Decorating for Beginners: Royal Icing How To fantabulosity.com

    ✅ What is Needed to Start Decorating Cookies?

    First, you’ll need a cut-out sugar cookie recipe that will hold it’s shape after baking, and one that tastes good too is a bonus.

    Baked cut out sugar cookies on wooden cutting board.

    Royal Icing for Cookies

    Soooo many of you have asked what royal icing recipe I use. THIS my friends is the “secret weapon,” I have been talking about.

    If you’re like me, royal icing seemed SO intimidating. I thought there was NO way I’d be able to make an icing that slid so perfect across a cookie. The only icing I knew of, and was semi-comfortable with, was frosting in a little plastic tub from the store.

    Until now…

    Royal Icing Mix:

    All of you professional cookie decorator’s out there… I can hear you laughing at me hysterically. Why?

    1. Because I had no idea there was even a “Royal Icing Mix,” that existed.

    2. Because I use a “mix,” instead of making my own.

    Buy the Royal Icing Mix here: Wilton Royal Icing

    Cookie Decorating for Beginners: Royal Icing How To fantabulosity.com

    Well, I’m here to say, that I’m PLEASANTLY surprised with how easy this has made my cookie decorating hobby.

    Not only is it easy, but delicious!!!

    I am blown away, that all I have to do is throw the mix in my Kitchenaid Mixer, and add WATER. Yes, WATER!

    The Wilton icing mix, is a favorite of mine, as I’ve tried a couple of other brands. It’s easy to work with, and the taste is hard to beat.

    Icing Colors

    Wilton Icing Colors from Walmart

    I also use Wilton Icing Colors, to mix into the royal icing mix. There are an abundant supply of colors to choose from, and that gets me ALL excited, thinking about the different colors of cookies that I can make.

    Tip Set

    Wilton Master Decorating Set from Walmart

    A basic starter kit of tips, like my Wilton Master Decorating Tip Set, is what I started with, and are so handy to have. I’m able to play around with a ton of different tips and get to experiment with which ones do what. I currently use Wilton Tip #2, or similar, to make a lot of my cookies. It’s a fine point, that allows me to trace around the outside edges of the cookies.

    Wilton Piping Bags

    Wilton Piping Bags from Walmart

    The disposable Wilton Disposable Piping Bags are my fave. I’m not a fan of cleanup, so when I’m able to just toss the bags in the trash when I’m done… it makes clean-up a lot easier.

    Other Fun Cookie Decorating Supplies

    But then some of the cookie decorating supplies below are FUN to use, but of course not required for all cookies. It depends on what you want, and how you want to decorate them. But these are a few ideas to get you started!

    • Cookie Cutters
    • Cookie Scribes (or I’ve used a toothpick, but these are nice to have!)
      or you can get a set of other tools with one too!
    • Edible Glitter
    • Sprinkles
    • Baking Boxes to gift them in

    ⏲ Favorite Baking Tools for Cookies

    • Silpat Mat – This is a GAME CHANGER when it comes to baking cookies. Trust me! The bottoms never burn and all of my cookies turn out lovely with this!
    • Kitchenaid Mixer – Definitely not necessary, but if you’re getting in to baking, you’d love to have a stand mixer if you don’t already!
    • GOOD baking sheets for cookies!
    • Mini Serving Spatula – I love being able to lift the cookies off of the baking sheets after they’re finished, without rubbing up against the others on the sheet, damaging them. That’s why a “mini” is handy!
    • Cooling Rack – Any should do, but I can barely pass up a gorgeous rose or champagne gold cooling rack.

    💡 Cookie Decorating FAQ’s

    Even as an experienced baker, sometimes questions come up. For instance, how many ounces are in a gallon? I have to remind myself of this often, and there’s no shame in that!

    So here are some of the frequently asked questions about cookie decorating are:

    How long will decorated sugar cookies last?

    Your decorated sugar cookies should last a few days in a sealed, air-tight container.

    How do you store decorated sugar cookies?

    In an air-tight container, but place a piece of wax paper between each layer for best results.

    How do you host a cookie decorating party?

    Bake the cut-out cookies a day in advance (or a few days in advance and freeze them!) so guests can have fun decorating, rather than wait on the cookies to bake!
    OR… have each guest bring their own cookies to decorate!

    Supply decorating items such as royal icing, frosting, sprinkles, edible glitter, piping bags, scribers, parchment paper to decorate on, and cute to-go baking boxes for their creations! See my other parties for more inspiration!

    How to Decorate Cookies Video Tutorial

    I’ve compiled a super QUICK video, to show you how I decorate cookies, as a beginner. One minute and 45 seconds, sums up little quick tips and tricks that I use, to make the cookies I’ve always dreamed of making.

    Cookie Decorating Tip:

    As you’ll see in the video, I outline the cookies first, and then fill the centers and spread out any bubbles or space as needed. Then if you want to decorate will multiple colors on the same cookie, make sure you let the first color dry before adding the next or it will leak in to the other color(s).

    Don’t Be Intimidated:

    I SO hope this helped you tackle your “cookie decorating,” desire. Mostly, if you were intimidated by all of those professionals, decorating cookies… I hope this has given you the confidence to give it a whirl!

    We all have to start somewhere. The best part??? You don’t have to share photos of your first and second attempts like I decided to, if you don’t want to. But I would LOVE to see your creations!

    Share them on the Fantabulosity Facebook book page!

    Cut Out Sugar Cookie Recipe for Decorating:

    Remember, if you need a good sugar cookie recipe that holds it’s shape and tastes delish too… you should try the BEST Sugar Cookie recipe I’ve used for a few years now!

    Best Sugar Cookies for Decorating AND eating!

    Or want to decorate your sugar cookies without royal icing? Maybe a mix of both? We LOVE these sugar cookie sandwiches that are filled with strawberry buttercream frosting!

    Baking for the Holidays?

    If you’re baking and love easy dessert recipes, then you’ll LOVE:

    • Hot Chocolate Puppy Chow
    • Peppermint Cupcakes
    • Tree Forest Winter Cupcakes
    • Peppermint Mocha Crunch Cake
    • Easy Pound Cake

    Blackened Chicken Alfredo Recipe

    December 7, 2023

    Close up of blackened chicken on top of pasta Alfredo in skillet.

    This Blackened Chicken Alfredo may look fancy but it’s really easy to make and uses simple ingredients. Soon, you’ll have a dinner recipe that may just become one of your new favorite pasta recipes.

    This Instant Pot Cajun Pasta is another recipe that we think you’ll love if you’re a fan of chicken pastas, with a kick! Or, this creamy lemon chicken pasta is easy to make as well, and has tons of flavor.

    Close up of blackened chicken on top of Alfredo pasta in skillet.

    There’s something about the combination of chicken and pasta… especially when you add a creamy sauce to it, like in this blackened chicken recipe and in this chicken lasagna recipe.

    Blackened chicken pastas is a dish that you’ll feel is a restaurant quality meal but it’s easy to make at home to impress your family and your guests!

    [feast_advanced_jump_to]

    Why You’ll Love This Recipe

    • It uses simple ingredients: It may sound intimidating to make a fancy dish but this recipes uses ingredients that you should be able to find at almost any grocery store!
    • Perfect for entertaining: If you’re hosting guests soon, this dish is a great dish that so many people will love! Chicken dishes are more traditional and the creamy pasta is something kids will love. Serve this Chicken Alfredo Garlic bread too.
    • Ready in only 30 minutes: This recipe only takes 30 minutes from start to finish! So this can even be made on a busy night for dinner!

    Ingredients Needed

    I’ve highlighted a couple of ingredients below with some relevant notes. Aside from this, the ingredients needed are pretty basic.

    Labeled ingredients for Blackened chicken alfredo.
    • Chicken – Boneless and skinless chicken breasts are best for this recipe for flavor and presentation. We share below the steps to make them even better for this dish.
    • Grated Parmesan – Freshly grated parmesan is recommended for this recipe so it melts even better but you can use shredded Parmesan if needed, as you can see it used in this Alfredo sauce recipe.
    • Blackening Seasoning – Any brand of blackening seasoning will do.

    Substitutions

    Sometimes substitutions are necessary because of ingredients that are unavailable or needed for dietary restrictions. Here are some suggestions that can help:

    • Chicken- Although we say to use chicken breasts for this recipe, you can also use chicken thighs. Or, you may choose to use a different protein completely, such as salmon or shrimp, and that’s fine too!
    • Blackened Seasoning – If you can’t find blackening seasoning, you may choose to use a Cajun seasoning instead.

    Equipment

    For this recipe, you’ll want to use a heavy bottomed-skillet to help get a delicious crust on the chicken. You’ll also want to use a colander if you have one, to drain the pasta, a plastic bag for beating the chicken, and a whisk for the Alfredo sauce.

    How to Make Blackened Chicken Alfredo

    *Be sure to see the recipe card below for the full ingredients list & instructions!*

    Image collage showing 4 steps to making blackened chicken Alfredo.

    STEP 1. Cook pasta. Boil and drain pasta according to the package and set aside. (Image 1).

    STEP 2. Slice chicken. Cut chicken lengthwise into even pieces. You can use one hand to put pressure on the top of the chicken while cutting down the middle to create more even pieces (Image 2). 

    STEP 3. Beat chicken. Place chicken pieces into a plastic bag or between two pieces of plastic wrap. Using the flat side of a meat mallet pound the chicken pieces into an even thickness. About ¼ inch (Image 3).

    STEP 4. Season chicken. Sprinkle each side of the cutlets with the blackening seasoning. You may have some leftover, about a teaspoon, that will be used in a later step (Image 4).

    Steps 5-8 of how to make blackened chicken Alfredo.

    STEP 5. Melt butter and oil. Place skillet over medium-high heat until very hot then add olive oil and 2 tablespoons of butter (Image 5).

    Tip: Using a heavy bottomed skillet, such as stainless steel or cast iron, will help to get a good crust on the chicken.

    STEP 6. Add chicken. Once the butter is melted, add the chicken cutlets to the pan, do not overcrowd, you may need to cook in two separate batches (Image 6). 

    STEP 7. Cook chicken. Cook chicken 3 to 4 minutes on each side until cooked through and very brown (Image 7).

    STEP 8. Remove chicken. Once chicken is done remove it from the pan and place on a plate. Tent plate with aluminum foil and set aside. Wait at least 5 minutes before slicing chicken (Image 8).

    Image collage showing steps 9-12 of how to make blackened chicken Alfredo pasta.

    STEP 9. Add butter. Do not wipe out the pan, return it to medium-low heat and add the rest of the butter (Image 9).

    STEP 10. Heavy cream. Once butter is melted slowly mix in the heavy cream, scraping up any bits on the bottom as you stir (Image 10).

    STEP 11. Add parmesan. Once the cream is well mixed, stir in the parmesan cheese (Image 11).

    STEP 12. Add seasonings. Finally, once the cheese is melted add the garlic, salt, and pepper and cook for an additional 1-2 minutes (Image 12).

    Steps 13-14 showing how to make blackened chicken Alfredo pasta.

    STEP 13. Add pasta. Stir in the pasta coating well (Image 13).

    STEP 14. Add chicken. Place sliced chicken into the pan with the pasta. Serve immediately (Image 14).

    Alfredo pasta on white plate, topped with blackened chicken.

    Recipe Pro Tips

    • We recommend using freshly grated parmesan for better melting. 
    • Do not overcook the pasta. It is best served al dente with this dish. 
    • If your alfredo sauce is too thick, use pasta water or my chicken broth recipe to thin.

    Recipe FAQs

    What can I add to chicken Alfredo to make it better?

    We think cheese makes everything better. Adding parmesan to the finished dishes can help make it even better.

    What thickens chicken Alfredo sauce?

    In this blackened chicken Alfredo sauce, the parmesan cheese is the thickening agent in this recipe.

    How long do you cook blackened chicken alfredo?

    It takes about 20 minutes to make blackened chicken Alfredo.

    Fork twisting pasta on white plate, next to blackened chicken.

    What to Serve with Blackened Chicken Alfredo

    When it comes to what side dishes go with pasta, we feel like an Italian chopped salad is a great pairing. Or, of course bread recipes like air fryer garlic toast is always a great idea too! Roasted broccoli and pasta are so delicious together, just like in this chicken and broccoli alfredo.

    Storage

    Leftovers: Blackened chicken Alfredo is best if eaten immediately, but it can be refrigerated in an airtight container for 3-4 days.

    Reheating: When reheating, stir constantly over low heat to help prevent the sauce from separating.  

    Tip to Speed Things Up Even More

    Speed up this dish with using left over chicken, pre-cooked slow cooker chicken, or buying a pre-cooked rotisserie chicken at the grocery store, and have more of a shredded-style chicken. (Then, you could even save the rotisserie chicken bones and make this rotisserie chicken broth.)

    Or, if you’re a shrimp lover, you’re going to love this Cajun Shrimp Fettuccini Alfredo too!

    Weeknight dinners are so much more enjoyable when they can be this simple, and it’s honestly a runner-up, next to these cream cheese noodles!

    Similar Recipes You’ll Love

    Although we use a jarred Alfredo sauce in this recipe, we want to make sure to offer this Healthy Alfredo Sauce as an option too!

    If you love these types of recipes, you’ll also love these reader favorites:

    • Close up of pasta recipe with kielbasa on white plate.
      Kielbasa Pasta
    • scoop of chicken bacon ranch pasta
      Chicken Bacon Ranch Pasta
    • Cream Cheese Pasta being scooped up and held above the plate.
      Cream Cheese Pasta
    • Crab pasta bake being lifted out of baking dish with tongs.
      Crab Pasta Bake

    Did you make this? I’d be so grateful if you left a “star” rating below to let me know what you thought! Then, the next time you need a quick and easy recipe, come back to Fantabulosity to browse all of my easy recipes!

    Recipe

    Close up of blackened chicken on top of pasta Alfredo in skillet.
    Print Pin
    5 from 5 votes

    Blackened Chicken Alfredo

    This delicious, wonderfully seasoned, Blackened Chicken Alfredo is ready in only 30 minutes and is a great easy dinner idea that you'll love for a quick dinner or for entertaining guests.
    Course Main Course
    Cuisine American
    Prep Time 10 minutes minutes
    Cook Time 20 minutes minutes
    Total Time 30 minutes minutes
    Servings 4 servings
    Calories 1293kcal
    Author Jessica Burgess

    Ingredients

    • 16 ounces fettuccine noodles
    • 1 pound boneless skinless chicken breasts
    • 1½ Tablespoons blackening seasoning
    • 2 Tablespoons cooking oil
    • 6 Tablespoons butter divided
    • 1½ cup heavy cream
    • 2 cups grated parmesan cheese
    • ¼ teaspoon salt
    • ¼ teaspoon black pepper
    • 1 teaspoon fresh garlic

    Instructions

    • Boil and drain pasta according to the package and set aside.
    • Cut chicken lengthwise into even pieces. You can use one hand to put pressure on the top of the chicken while cutting down the middle to create more even pieces. 
    • Place chicken pieces into a plastic bag or between two pieces of plastic wrap. Using the flat side of a meat mallet pound the chicken pieces into an even thickness. About ¼ inch.
    • Sprinkle each side of the cutlets with the blackening seasoning. You may have some left over, about a teaspoon, that will be used in a later step. 
    • Place skillet over medium high heat until very hot then add olive oil and 2 tablespoons of butter. Once the butter is melted, add the chicken cutlets to the pan, do not overcrowd, you may need to cook in two separate batches. 
    • Cook chicken 3 to 4 minutes on each side until cooked through and very brown.
    • Once chicken is done remove it from the pan and place on a plate. Tent plate with aluminum foil and set aside. Wait at least 5 minutes before slicing chicken. 

    Making the Alfredo Sauce

    • Do not wipe out the pan, return it to medium low heat and add the rest of the butter. 
    • Once butter is melted slowly mix in the heavy cream, scraping up any bits on the bottom as you stir.
    • Once the cream is well mixed, stir in the parmesan cheese. Finally once the cheese is melted add the garlic, salt, and pepper and cook for an additional 1-2 minutes.
    • Stir in the pasta coating well. Place sliced chicken into the pan with the pasta. Serve immediately. 

    Notes

    Recipe Tips:
      • We recommend using freshly grated parmesan for better melting. 
      • Do not over cook the pasta. It is best served al dente with this dish. 
      • If your Alfredo sauce is too thick, use pasta water or broth to thin.

    Nutrition

    Serving: 1serving | Calories: 1293kcal | Carbohydrates: 90g | Protein: 58g | Fat: 78g | Saturated Fat: 42g | Polyunsaturated Fat: 7g | Monounsaturated Fat: 22g | Trans Fat: 1g | Cholesterol: 357mg | Sodium: 1735mg | Potassium: 883mg | Fiber: 4g | Sugar: 5g | Vitamin A: 2374IU | Vitamin C: 2mg | Calcium: 553mg | Iron: 3mg

    How to Boil Chicken Legs

    December 6, 2023

    Raw chicken legs in dutch oven with veggies.

    An easy tutorial on how to boil chicken legs using simple ingredients, for delicious chicken legs to enjoy by themselves or to use in other easy dinner ideas.

    Whether you have fresh chicken legs or frozen chicken legs, this tutorial will work for you!

    Raw chicken legs in white dutch oven with carrots, rosemary, and onions.

    We love using chicken legs to make dinner, as they seem to be a more affordable cut of chicken. We’ve made chicken legs in the air fryer, chicken legs in the oven, and have even cooked slow cooker chicken legs.

    [feast_advanced_jump_to]

    Why You’ll Love This Recipe

    • Versatile: Chicken legs can be enjoyed alone or can even be used to shred and use in other recipes.
    • Make-ahead recipe: Make these boiled chicken legs in advance, and enjoy them later in a recipe like these Chipotle Chicken Melts.
    • Done in less than 30 minutes: In less than 30 minutes, you’ll have cooked chicken legs, ready for however you plan to enjoy them!

    Ingredients Needed

    Although we use specific ingredients for this, you can switch out the ingredients that you prefer or add others to it. We’ve highlighted a few notes below that can help.

    Keep in mind the ingredients besides the chicken legs are not required but they do provide a more flavorful chicken.

    Raw chicken legs, carrots, onions, fresh rosemary and salt and pepper on white counter.
    • Chicken legs – We used a pack of 8 for this tutorial, however you can use as many or as little as you prefer.
    • Onion – A whole, white, medium-sized onion was used in this method.
    • Carrots – Feel free to leave the peels on the carrots for this.

    Substitutions

    If you’ve found that you need to substitute some of the ingredients, here are some suggestions that can help:

    • Onions – feel free to use a yellow onion for this, instead of white.
    • Chicken – you can also boil a whole chicken, bone-in or boneless chicken thighs, bone-in or boneless chicken breasts, or other cuts of chicken, similarly to this method.
    • Celery – although we didn’t use celery in this method this time, you can use it here. We love using celery too, especially if making homemade chicken broth. I also use it in this rotisserie chicken stock.
    • Herbs – Other herbs you may enjoy using are fresh thyme, fresh parsley, bay leaf or fresh basil.
    • Garlic – We used minced garlic when we boiled a whole chicken, so you may prefer to use that as well.

    Equipment

    A large pot is recommended, or a stockpot the big enough to cover the amount of chicken you’re boiling, by one inch.

    How Long to Boil Chicken Legs

    Boiling chicken legs is easy, and it only requires a few simple steps of adding the ingredients in to a large stockpot, and boiling until the chicken is done.

    *Be sure to see the recipe card below for the full ingredients list & instructions!*

    Raw chicken legs in dutch oven with vegetables, and water.

    STEP 1. Add to the pot. Add all of the ingredients to the pot and cover it with enough water that sits about an inch above the chicken.

    Tip: This is where you can also add other ingredients if you prefer specific items we haven’t listed here.

    STEP 2. Boil. Turn the stovetop burner to high heat until it comes to a rolling boil, and then turn to medium heat, cover, and let simmer for about 10 minutes or until chicken is done or internal temp reaches 165 degrees.

    How Long to Boil Frozen Chicken Legs

    To boil frozen chicken drumsticks, the cooking time will be between 25 – 30 minutes.

    Boiled chicken legs in white dutch oven.

    At this point you can remove the chicken from the broth, and serve or allow it to cool.

    Cooked chicken leg being held by tongs, up above dutch oven.

    Recipe Pro Tips

    • Allow to fully cool. If making these boiled chicken legs for later, make sure to allow them to cool before placing them in the refrigerator or freezer.
    • Broil. If you love crispy skin, you may choose to place the chicken legs in a baking dish and the oven on broil for a few minutes until they brown to your liking. Make sure to watch them carefully so they do not burn and overcook
    Boiled chicken legs, sitting on white plate, next to dutch oven.

    Recipe FAQs

    How long does it take to boil chicken legs?

    If boiling fresh chicken legs, it will take anywhere from 10 minutes to 20 minutes, depending on the size of the chicken legs. Make sure to check the internal temperature of the chicken legs, and that they reach 165 degrees.

    How do you boil chicken properly?

    Make sure that water is about an inch above the chicken, to ensure that the chicken can boil evenly.

    Should you boil chicken legs covered or uncovered?

    Boil the chicken legs covered to ensure that the chicken legs cook appropriately.

    How to Serve Boiled Chicken Legs

    You can serve the boiled chicken legs by themselves or by coating them in your favorite sauce, such as teriyaki sauce, buffalo sauce or BBQ sauce.

    or you can shred the chicken meat and serve it in other easy recipes, such as chicken pot pie casserole or these buffalo chicken sliders.

    Serve these boiled chicken legs with easy side dishes like macaroni and tomatoes, green beans, and with these easy homemade biscuits.

    Storage

    Leftover chicken legs: Store any cooled, leftover chicken legs in an airtight container in the refrigerator for 3-4 days.

    Freeze: If freezing, store cooled chicken legs in a freezer-safe container or freezer bag for 3-4 months.

    To Thaw: Remove frozen chicken legs from the freezer and place them in the refrigerator to thaw.

    More Chicken Recipes You’ll Love

    If you love cooking chicken or cooking with chicken, you’ll also love these chicken recipes that readers love:

    • Frito chicken casserole being lifted out of baking dish.
      Frito Chicken Casserole
    • Spoonful of Stove Top Stuffing Chicken Casserole.
      Stove Top Stuffing Chicken Casserole
    • Curry chicken salad with grapes in a white bowl.
      Curry Chicken Salad
    • scoop of chicken bacon ranch pasta
      Chicken Bacon Ranch Pasta

    Did you make this? I’d be so grateful if you left a “star” rating below to let me know what you thought! Then, the next time you need a quick and easy recipe, come back to Fantabulosity to browse all of my easy recipes!

    Recipe

    Raw chicken legs in dutch oven with veggies.
    Print Pin
    5 from 4 votes

    How to Boil Chicken Legs

    Boiling chicken legs is an easy way to cook chicken, that can be enjoyed as they are or to be shredded and used in other chicken recipes.
    Course Dinner, Main Course
    Cuisine American
    Diet Low Fat
    Prep Time 5 minutes minutes
    Cook Time 15 minutes minutes
    Total Time 20 minutes minutes
    Servings 8 chicken legs
    Calories 282kcal
    Author Jessica Burgess

    Ingredients

    • 8 fresh chicken legs Amount can vary to use less or more.
    • water Enough water that it sits above the chicken by about an inch.
    • 1 white onion
    • 2 carrots
    • 2 sprigs fresh rosemary
    • salt
    • black pepper

    Instructions

    • Place chicken legs in stock pot with fresh herbs and vegetables.
    • Add water; enough that it sits about an inch above the top of the chicken.

    Fresh Chicken Legs

    • Place on stove burner and turn to high heat until it boils. Once boiling, reduce heat to medium and allow it to simmer for about 10 minutes or until the internal temperature reached 165 degrees.

    Frozen Chicken Legs

    • If chicken legs are frozen, the cooking time can be 25-30 minutes, depending on how big the chicken legs are.

    Nutrition

    Serving: 1chicken leg | Calories: 282kcal | Carbohydrates: 2g | Protein: 21g | Fat: 21g | Saturated Fat: 6g | Polyunsaturated Fat: 4g | Monounsaturated Fat: 9g | Trans Fat: 0.1g | Cholesterol: 120mg | Sodium: 119mg | Potassium: 310mg | Fiber: 0.4g | Sugar: 1g | Vitamin A: 2667IU | Vitamin C: 1mg | Calcium: 17mg | Iron: 1mg

    How to Boil Whole Chicken

    December 4, 2023

    Whole chicken in dutch oven, boiling with vegetables.

    An easy tutorial on how to boil a whole chicken, using simple ingredients and the stove-top, that can even leave you with a bonus of homemade chicken broth and can make an easy chicken noodle soup!

    Whole, cooked, boiled, chicken in a white dish, with cooked carrots, rosemary and onions.

    When making a boiled chicken, you can meal prep and either freeze it for later or you can use the meat a lot of different ways to make dishes like this Dorito Chicken Casserole, Crispy Chicken Tacos, or even this easy Chicken Caesar Pasta Salad.

    Although you don’t have to use all of the other ingredients, such as vegetables and herbs, they help make more flavorful meat, as the chicken meat boils and cooks. You’ll see below how you can make substitutions and changes to best fit your needs for boiling a chicken.

    Boiling chicken thighs, even boiling chicken legs, boneless chicken chicken breasts, and chicken wings, is possible too! But today we’re focusing on boiling a whole chicken.

    [feast_advanced_jump_to]

    Why You’ll Love This Recipe

    • It’s easy: It doesn’t get much easier than boiling a chicken. Just place the chicken and the preferred ingredients in to a stock-pot and place on the stove. With a 90 minute cooking time, you have a chicken ready to cook with or eat off of.
    • Meal prep: If you love meal prepping, boiling a chicken is a great way to pre-make chicken for those easy dinner ideas that require shredded chicken, like this Chicken Caesar Sandwich.
    • Flexible flavor: Love your chicken flavored with different vegetables and spices? No problem. Feel free to add your favorites, and use ours as a guide for boiling times and temperatures.

    Ingredients Needed

    The ingredients we use for this tutorial can be switched out to best fit your favorites and needs. However, we’ve listed a few notes below about some of the ingredients that we used in case you find it helpful.

    Raw, whole chicken, in a bowl, sitting next to salt and pepper, garlic, carrots, onion and fresh rosemary.
    • Fresh Whole Chicken – Whole chickens can usually be found in the poultry section of your meat department or your local grocery store. The size we usually try to find ranges anywhere from 3-5 pounds, so it fits in our stock pot.
    • Fresh Rosemary – Not necessary but we love using fresh rosemary in a lot of our dishes and it can add so much wonderful flavor.
    • Onion – White or yellow onions work for this and although you can use a red or green onion, we suggest white or yellow.
    • Carrots – No need to peel the carrots for this!
    • Water
    • Salt
    • Black Pepper
    • Garlic – we used minced garlic for this but you can add whole, peeled cloves if you prefer.

    Substitutions

    If you prefer different ingredients for boiling a chicken, than the herbs and vegetables we’ve suggested, that’s ok. Here are some suggestions that you may find helpful:

    • Celery – You can add celery with this mixture or if you don’t have carrots on hand.
    • Herbs – fresh herbs like thyme, basil, and bay leaves are a great addition or substitution for rosemary if you prefer.
    • Water – You can use chicken broth to boil the chicken in for added flavor.

    Equipment

    A large stock pot is needed to boil a whole chicken. Make sure your pot is large enough to fit the chicken that you have, and enough water to cover the size of the chicken.

    How to Boil a Whole Chicken

    It’s really easy to boil a chicken and requires only the prep and boiling.

    *Be sure to see the recipe card below for the full ingredients list & instructions!*

    STEP 1. Place in stock pot. Place whole chicken (make sure to remove any giblets that may have been left inside of the chicken) in to a large pot, as well as any other vegetables, herbs, and spices you prefer to boil with it.

    STEP 2. Add water. Cover everything with cold water, enough to cover at least an inch above the chicken.

    STEP 3. Bring to a boil. Place the stock pot on the stove burner, and cook on high heat, until the water boils. When boiling, reduce to low heat, cover, and allow to cook for 90 minutes or until the chicken is cooked and the internal temperature reaches 165-175 degrees when checked with a meat thermometer.

    Raw, whole chicken in dutch oven, with water, vegetables and seasonings.

    Tip: Make sure to watch the boil, so the water doesn’t boil over. If it does, simply turn the heat lower.

    Cooked whole chicken in a dutch oven, surrounded by broth, and vegetables.

    Remove the chicken from your stock pot and serve as is, or shred or cut in to pieces to use in other recipes, much like we do with crock pot shredded chicken.

    Cooked whole chicken in white dish, surrounded by vegetables and herbs.

    Recipe Pro Tips

    • Allow to fully cool. If making this boiled chicken for later, allow the chicken to cool before placing it in the refrigerator.
    • Freeze any extras. If you have leftover cooked chicken, you can freeze it for later to put in casserole recipes, or your favorite shredded chicken dishes.

    Recipe FAQs

    How long does it take to boil a whole chicken?

    It takes 90 minutes to boil a whole chicken.

    Can you boil a frozen chicken?

    You can. Boiling may require 20-25 more minutes per pound, to make sure it cooks all the way through. Make sure the internal temperature of the whole chicken reaches at least 165-175 degrees.

    Should you boil chicken covered or uncovered?

    Cover the pot while boiling the whole chicken. Just watch it carefully in case the temperature is set too high and it boils over.

    Can you eat the vegetables that are cooked with boiled chicken?

    Of course! Serving the carrots, celery, and onions with your boiled chicken can be a great easy dinner or an addition to your favorite dish.

    How to Use Boiled Chicken

    Boiled chicken can be used in so many dishes like soup recipes, delicious sandwiches, pasta recipes, simple salads, casserole recipes, side dishes, and so much more.

    We think you’ll love it in this Buffalo Chicken Soup, Chicken Tater Tot Casserole, and this Chicken and Noodles recipe.

    Storage

    Refrigerate: If storing the cooked whole chicken in the refrigerator, it can be stored in an airtight container, or securely covered for 3-4 days.

    Freeze: If freezing, store the cooled, whole chicken in a freezer-safe container or freezer bags, for 3-4 months.

    Thawing: To thaw, place the leftover chicken in the refrigerator and allow it to thaw.

    More Chicken Recipes You’ll Love

    If you love cooking chicken or cooking with chicken, we think you’re also going to love these reader favorites:

    • Chicken drumsticks baked in oven
      Juicy Chicken Drumsticks in the Oven
    • Eight cooked chicken drum sticks are swimming in a sauce in a black crock pot
      Slow Cooker Chicken Drumsticks
    • Spatula holding up a piece of cheesy chicken.
      Cheesy Chicken
    • Sliced baked chicken cutlets on white plate, next to green beans.
      Baked Chicken Cutlets

    Did you make this? I’d be so grateful if you left a “star” rating below to let me know what you thought! Then, the next time you need a quick and easy recipe, come back to Fantabulosity to browse all of my easy recipes!

    Recipe

    Whole chicken in dutch oven, boiling with vegetables.
    Print Pin
    5 from 6 votes

    How to Boil Whole Chicken

    An easy tutorial showing how to boil a whole chicken, with simple ingredients for added flavor. Perfect for eating as is or to use in other recipes.
    Course Dinner, Soup
    Cuisine American
    Prep Time 5 minutes minutes
    Cook Time 1 hour hour 30 minutes minutes
    Total Time 1 hour hour 35 minutes minutes
    Servings 4 servings
    Calories 502kcal
    Author Jessica Burgess

    Ingredients

    • 4 pound whole chicken Weight can vary and that's ok! As long as the chicken can fit in the pot you'll be boiling it in with the lid being able to go on top.
    • water enough to cover the chicken by 1 inch.
    • 3 carrots
    • 3 sprigs fresh rosemary
    • 1 white onion
    • 1 Tablespoon salt or taste preference
    • 1 teaspoon pepper or taste preference
    • 1 Tablespoon minced garlic
    • celery if desired
    • thyme if desired
    • basil if desired

    Instructions

    • Place chicken, and the vegetables, herbs, seasonings that you wish to boil the chicken with.
    • Next, fill the pot with water, so it covers the chicken by about an inch, or the best that you can.
    • Cover the pot with a lid, and bring the water to a boil. Reduce the heat to low, and gently boil/simmer for 90 minutes or until chicken is done.

    Nutrition

    Serving: 1serving | Calories: 502kcal | Carbohydrates: 8g | Protein: 41g | Fat: 33g | Saturated Fat: 9g | Polyunsaturated Fat: 7g | Monounsaturated Fat: 14g | Trans Fat: 0.2g | Cholesterol: 163mg | Sodium: 1930mg | Potassium: 614mg | Fiber: 2g | Sugar: 3g | Vitamin A: 7953IU | Vitamin C: 9mg | Calcium: 53mg | Iron: 2mg

    Hot Dog Sauce

    December 2, 2023

    Hot dogs with hot dog sauce on top.

    This simple hot dog sauce recipe will elevate your plain dogs! Whether you call them chili dogs, coney dogs, or just delicious, I guarantee this one is a winner.

    This recipe is thicker than our chili recipe and it’s geared more towards a thick sauce, although having a side of chili with hot dogs is also a great idea! Or, this Frito chili pie of course!

    Hot dogs with chili sauce on top, and one hot dog with mustard.

    I’ve covered hosting a hot dog party in the past, with so many fun varieties tucked into the bun. I never tackled meat hot dog sauce, and I’m thrilled to offer it to you today!

    These chili dogs are great for parties when everyone can add their own custom toppings to round out their meal. I don’t think anyone would complain if you also offered these baked burgers under the sauce!

    [feast_advanced_jump_to]

    Why You’ll Love This Recipe

    • Super easy and flavorful: You likely always have these ingredients on hand so you can make it whenever the mood strikes, and easy enough to make alongside these nostalgic wiener winks.
    • Make-ahead recipe: This reheats beautifully. I even think it’s better leftover as the flavors really pull together.
    • Ready in only 30 minutes: While the sauce simmers, you can cook your dogs on the stove or grill and have everything ready at once.

    Ingredients Needed

    I’ve highlighted a couple of ingredients below with some relevant notes. Aside from this, the ingredients needed are pretty basic.

    Labeled ingredients for hot dog sauce.
    • Beef – Use a lean ground beef and drain well to ensure your sauce isn’t greasy.
    • Broth – Low sodium is perfect as we are adding other umami ingredients.
    • Tomato paste – This will give us the perfect tomato flavor without excess liquid, rather than using tomato sauce.
    • Ketchup – Adds sweetness when combined with a touch of brown sugar.
    • Spice – Hot sauce and chili powder add just a light touch of heat to the sauce that isn’t overpowering.

    Substitutions

    Sometimes substitutions are necessary because of ingredients that are unavailable or needed for dietary restrictions. Here are some suggestions that can help:

    • Broth – there is so much flavor here that any broth will work. If you’ve got chicken or vegetable open in the fridge, go for it!
    • Meat – lighten things up by using turkey or chicken for half of the ground beef. This will reduce the fat but still allow the beef flavor to come through.

    Variations

    • Cook Method – this recipe can also be made in the slow cooker if needed. Simply brown the meat first and then add the remaining ingredients to the slow cooker and cook on low for 4 hours. Easy and hands-off!

    How to Make Old Fashioned Hot Dog Sauce

    *Be sure to see the recipe card below for the full ingredients list & instructions!*

    Steps 1-4 of image collage of how to make hot dog sauce.

    STEP 1. Brown beef. Cook the beef over medium heat until no pink remains (Image 1).

    Tip: Use lean ground beef or even add some chicken or turkey to cut down on any greasiness. If you see a lot of grease after browning the meat, be sure and drain it off before adding the remaining ingredients.

    STEP 2. Sauce it up. Add liquid ingredients and stir in (Image 2).

    Hot dog sauce poured on top of cooked hot dogs on buns.

    STEP 3. Season well. Add remaining ingredients and stir well to combine (Image 3).

    STEP 4. Develop flavor. Let simmer, covered, until thickened and the flavors have developed (Image 4). Add some water if it becomes too thick.

    Cooked hot dogs on white plate with hot dog sauce poured on top of hot dogs on buns.

    Recipe Pro Tips

    • Use your favorite hot dogs. While the sauce is beef, you can feel free to use beef dogs, turkey dogs, or whatever you prefer. You may even find it fun to serve this with homemade mini corn dogs.
    • Toast the buns. Toasted buns will hold up to the weight of the amazing sauce!

    Recipe FAQs

    How do I store leftovers?

    Leftover hot dog sauce will keep for up to 3 days in the fridge. Reheat in the microwave or on the stovetop before serving.

    What is the best sauce for hot dogs?

    No one likes a dry dog on a bun. That’s no fun! You can consider anything a sauce whether it’s ketchup, mustard, or cheese. This hot dog sauce recipe with ketchup and brown sugar combines heat and sweet with beef for a really meaty meal.

    What’s the difference between hot dog sauce and Coney sauce?

    These both are a red, meaty sauce, but that’s where it ends. A chili dog or hot dog sauce can then have cheese, onions, and anything you want added on top. A Coney dog has the meat sauce plus raw onions and a line of mustard, that’s it!

    What to Serve with Hot Dogs

    Serve Coney dogs or chili dogs with all the best summer sides! Red Skin Potato Salad can be made the day ahead or cut the carbs with a cauliflower version. Don’t forget the chips or maybe some french fries!

    You’ll also want your favorite hot dog toppings like ketchup, yellow mustard, relish, peppers, anything goes.

    More Hot Dog Recipes You’ll Love

    • A bowl full of air fryer pigs in a blanket.
      Air Fryer Pigs in a Blanket
    • hot dog toppings
      Hot Dog Bar Toppings and Ideas for Your Next Party
    • Pizza hot dog, on a bun.
      Hot Dog Week: Pizza Dog

    Did you make this? I’d be so grateful if you left a “star” rating below to let me know what you thought! Then, the next time you need a quick and easy recipe, come back to Fantabulosity to browse all of my easy recipes!

    Recipe

    Hot dogs with hot dog sauce on top.
    Print Pin
    5 from 1 vote

    Hot Dog Sauce

    This simple hot dog sauce recipe will elevate your plain dogs! Whether you call them chili dogs, coney dogs, or just delicious, I guarantee this one is a winner.
    Course Main Course
    Cuisine American
    Prep Time 5 minutes minutes
    Cook Time 25 minutes minutes
    Total Time 30 minutes minutes
    Servings 6 servings
    Calories 392kcal
    Author Jessica Burgess

    Ingredients

    • 2 pounds ground beef
    • ¾ cup beef broth
    • 12 oz tomato paste
    • ¼ cup ketchup
    • 1 Tablespoon chili powder
    • 1 teaspoon brown sugar
    • 1 teaspoon garlic salt
    • 1 teaspoon hot sauce
    • 1 teaspoon onion powder
    • 1 teaspoon Worcestershire sauce

    Instructions

    • Brown the ground beef in a skillet over medium heat until no pink remains. Drain if necessary.
    • Add all remaining ingredients to cooked beef and stir to combine well.
    • Cover the skillet and bring to a boil. Then, reduce the heat and simmer for 20 minutes. Stir occasionally so it doesn't stick to the pan.
    • Ready to serve over your favorite hot dogs!

    Notes

    • Cook longer to bring out more flavors – taste as you go!
    • If the sauce is too thick for your liking, stir in a bit of water to loosen things up.

    Nutrition

    Calories: 392kcal | Carbohydrates: 15g | Protein: 31g | Fat: 23g | Saturated Fat: 9g | Polyunsaturated Fat: 1g | Monounsaturated Fat: 10g | Trans Fat: 1g | Cholesterol: 103mg | Sodium: 1191mg | Potassium: 1104mg | Fiber: 3g | Sugar: 10g | Vitamin A: 1313IU | Vitamin C: 14mg | Calcium: 54mg | Iron: 5mg

    How to Cook Brats on the Stove

    November 30, 2023

    Cooked brats in a cast iron pan, mixed with onions and butter.

    Feeling like brats but too cold to fire up the grill? You can achieve amazing flavor in no time when you cook brats on the stove! Stovetop recipes can mean a quick and easy dinner, and this recipe is no different!

    Cooked bratwursts on white plate, sitting next to cast iron pan.

    We love brats! On a bun with all the fixings, or you can enjoy these on a plate of noodles with fried white onions. Any way you slice it, brats are a classic dinner that can be enjoyed year-round.

    Looking to contain the mess? You can simply pop your brats right into the air fryer for a totally hands-off meal! Got a bit more time? Brats also cook up in the oven, which is perfect if you are already turning it on to make some sides.

    [feast_advanced_jump_to]

    Why You’ll Love This Recipe

    • No need to grill: Whether it’s too cold out OR you don’t yet own a grill, you can still enjoy brats indoors!
    • Ready in 30: Slice the onions while the pan heats and then you’ll be done cooking just 15 minutes later.
    • Cook for the week: This is a great meal prep option! I find the family will readily eat leftovers all week if they have cooked brats in the fridge.

    Ingredients Needed

    I’ve highlighted a couple of ingredients below with some relevant notes. Aside from this, the ingredients needed are pretty basic.

    Raw, uncooked brats, sitting next to white onion and butter.
    • Brats – Select your favorite brand and flavor, whether it’s beer, cheese, etc.
    • Onion – This helps to add a layer of flavor to the pan, similar to how we use them in this fried potatoes recipe.
    • Butter – Perfect for frying onions and locking in the flavor on the brats.

    Substitutions

    Sometimes substitutions are necessary because of ingredients that are unavailable or needed for dietary restrictions. Here are some suggestions that can help:

    • Onion – feel free to use yellow or sweet onions if that’s what you get at the store. And if you really love onions, nothing is stopping you from using the entire thing! Just keep in mind you may need to use more butter.
    • Liquid – I love to cook brats in a pan on the stove with water; the butter and onions do all the flavoring. However, if you’re looking for a bit more oomph, you can use beef broth or beer as your liquid.

    How to Make Brats Indoors

    *Be sure to see the recipe card below for the full ingredients list & instructions!*

    Select your favorite skillet! Nonstick or stainless is fine, but I always reach for cast iron. Mine is seasoned really well plus we are using butter, so the brats won’t stick and tear.

    Steps 1-4 of how to cook brats on the stove.

    STEP 1. Melt butter. Melt the butter over medium-high heat(Image 1) then add the brats to sear on the first side (Image 2).

    Tip: Don’t slice the onions too thinly. They will be cooking in liquid with the brats and you don’t want them to melt away into nothing.

    STEP 2. Brown. Brown the brats on their second side (Image 3). Make sure you’ve got great color all around!

    Cooked bratwursts in cast iron pan, with cooked onions.

    STEP 3. Build flavor. Add the sliced onion and toss to coat, then add liquid and cover (Image 4). Simmer until cooked through.

    Cooked brats on white platter, with cooked onions on top.

    Recipe Pro Tips

    • Watch the temp. Ensure your heat isn’t too high while the brats simmer so they don’t burst.
    • Correct temperature. A true instant-read thermometer is your friend. This is the best way to make sure your brats are cooked through to a safe temperature.
    Bratwurst cut in to a small piece, with cooked onions, and fresh parsley.

    Recipe FAQs

    How long should you cook brats on the stove?

    After browning, brats take anywhere from 10-15 minutes to cook through. You can’t go by color alone, but rather should use a thermometer to ensure they have reached 160°F in the centers.

    Do I have to boil brats before frying?

    Nope! I find that only makes them lose flavor – you aren’t consuming that cooking liquid and that’s where all the flavor went! Cooking “low and slow” is what allows them to cook through without burning or bursting and is why I use just a little bit of liquid to more steam than boil.

    What is the best way to fry brats?

    I love my cast iron skillet! Adding a bit of butter ensures they don’t stick to the pan. Also make sure and give them time to fry up on the first side, because that beautiful crust is what releases them from the pan without tearing!

    What to Serve with Stovetop Brats

    So many good choices – and potatoes feature prominently! You can go with a classic red potato salad, roasted potato wedges, or pop some sweet potato fries in the air fryer.

    Also serve up a quick green side salad and you’ve rounded out your plate!

    Storage

    Keep in the fridge for up to 3 days. They will lose some of their “bite” when reheated but still taste great.

    More Meaty Favorites You’ll Love

    • Air fryer deer meat on platter and hand holding a piece.
      Air Fryer Venison
    • Burger baked in the oven, steamed in aluminum foil, and placed on white plate.
      Burgers in the Oven
    • Baked turkey burger on bun with lettuce, tomato, cheese and fiesta mayo.
      Baked Turkey Burgers
    • Baked Italian sausages in baking dish.
      How to Cook Italian Sausages in the Oven

    Did you make this? I’d be so grateful if you left a “star” rating below to let me know what you thought! Then, the next time you need a quick and easy recipe, come back to Fantabulosity to browse all of my easy recipes!

    Recipe

    Cooked brats in a cast iron pan, mixed with onions and butter.
    Print Pin
    5 from 6 votes

    How to Cook Brats on the Stove

    It's really easy to cook brats on the stove without beer! This quick recipe is perfect for dinner, to serve bratwursts alone or on a bun!
    Course Main Course
    Cuisine American
    Prep Time 5 minutes minutes
    Cook Time 20 minutes minutes
    Total Time 25 minutes minutes
    Servings 5 brats
    Calories 264kcal
    Author Jessica Burgess

    Ingredients

    • 5 brats
    • ½ white onion sliced
    • 2 tablespoons butter
    • ½ cup water optional (or could do broth, beer)

    Instructions

    • Melt butter in skillet, add brats and sear both sides over medium heat, turning to brown both sides - a total of about 5 minutes.
    • Add sliced onions, toss brats and onions and cook over medium heat for 2 minutes, turning often. Turn heat to low and add ½ cup water, cover and let simmer for 12 minutes or until internal temperature of brats reach 160 degrees.

    Video

    Notes

    • You CAN do without the water if desired, but the water helps "steam" and allow the brats to cook through.

    Nutrition

    Serving: 1brats | Calories: 264kcal | Carbohydrates: 3g | Protein: 9g | Fat: 24g | Saturated Fat: 9g | Polyunsaturated Fat: 2g | Monounsaturated Fat: 11g | Trans Fat: 0.2g | Cholesterol: 61mg | Sodium: 596mg | Potassium: 247mg | Fiber: 0.2g | Sugar: 0.5g | Vitamin A: 144IU | Vitamin C: 1mg | Calcium: 23mg | Iron: 0.4mg

    Pepperoni Dip

    November 28, 2023

    Hand dipping crostini in pepperoni dip.

    Pepperoni Dip: Ever crave the pizza toppings without the crust? If so, you have to try this ooey-gooey pepperoni pizza dip recipe.

    Usually served as an appetizer, this is made with three kinds of cheese, pizza sauce, and pepperoni, it is simple as can be while also being one of the most delicious cheesy dips you will ever try.

    Pepperoni dip in cast iron skillet, with hand dipping crostini in.

    Who doesn’t love pizza recipes? We’ve grown quite fond of these Texas Toast Pizzas, and these French Bread Pizzas too.

    Obsessed with delicious dips? If the answer is yes, you have to try this Jalapeno Artichoke Dip and this Cowboy Queso Dip. But if you don’t have this buffalo chicken dip recipe saved anywhere, you’ll want to have that as a staple for all of your parties!

    [feast_advanced_jump_to]

    Why You’ll Love This Recipe

    • It uses easy ingredients: You will easily be able to find all of the ingredients for this recipe. No special stores are required!
    • Make-ahead recipe: Easily prep this recipe ahead of time and then pop into the oven right before serving.
    • Ready in only 30 minutes: Talk about a quick and easy snack idea! From start to finish, this recipe takes 30 minutes. You can also make these bagel pizzas in a flash with similar ingredients!

    Ingredients Needed

    I’ve highlighted a couple of ingredients below with some relevant notes. Aside from this, the ingredients needed are pretty basic.

    Labeled ingredients for pepperoni dip on counter.
    • Sour Cream – I used regular sour cream for this recipe.
    • Cream Cheese – Make sure your cream cheese is softened.
    • Pizza Sauce – Feel free to use store-bought pizza sauce or make your own.
    • Fresh Basil – I highly suggest fresh basil for this yummy dip recipe.

    Substitutions

    Sometimes substitutions are necessary because of ingredients that are unavailable or needed for dietary restrictions. Here are some suggestions that can help:

    • Sour Cream – If you’d like to add a bit more protein to this recipe, use plain Greek yogurt in place of the sour cream. Use equal measurements.
    • Cheeses – If you are going for a Dairy-Free dip, opt for your favorite dairy-free cheeses (and sour cream).
    • Pepperoni – Feel free to use your favorite pizza meat variety for this recipe. Turkey pepperoni would be a healthier option!
    • Red Pepper Flakes – If you are not a spicy person, or you’re cooking for kids, feel free to leave these out.

    Variations

    There are a few variations you can make with this cheesy pepperoni dip. Here are some ideas

    • Meats – Feel free to change up the meats in this recipe. Go for mini pepperoni for some more fun, or use salami, ground pork, or even bacon!
    • Veggies – Bell peppers, like green peppers, would be a great addition to this easy pepperoni dip recipe. Roasted red peppers or olives would also be tasty, but you could easily mix in any of your favorite pizza toppings.
    • Dippers – While we suggest baguette slices for dipping, you could also use tortilla chips, bagel chips, pita chips, or corn chips.
    • Kick up the flavor – Feel free to add in some more flavor to this simple dip with some Italian seasoning, garlic powder or onion powder.
    • Spice it up – Turn this cheesy pepperoni dip into a hot pizza dip by adding in some of your favorite hot sauce (I think some Aardvark sauce would be delicious!). Turning this into a hot pepperoni dip recipe would be the perfect appetizer for football season game day, a dinner party, or movie night.
    • White pizza dip – Not a fan of marinara sauce? Opt for some Alfredo or Garlic Parmesan sauce for a yummy white cheesy pizza dip.

    How to Make Pepperoni Dip in the Crockpot

    While no equipment is required for this version of a pepperoni dip recipe, you could easily swap this into a slow cooker pizza dip. In that case, you would need a slow cooker. All you would need to change is your cooking time when making this into a slow cooker pizza dip. Instead of the 25 minutes in the oven, shoot for 2 hours in the slow cooker on low. After the 2 hours, flip on the warm setting and leave it at that.

    How to Make Easy Pepperoni Dip in the Oven

    Making this easy-baked pepperoni dip is super simple. All you need to do is make the cheese mixture, layer it in your baking dish, top it with the pizza sauce, sprinkle on some cheese, lay on your pepperoni, and bake!

    I suggest baking this recipe right before you intend to serve it. You can prepare ahead of time, but stick it in the oven about 30-40 minutes before you plan to serve.

    *Be sure to see the recipe card below for the full ingredients list & instructions!*

    Begin this recipe by preheating your oven to 350°F.

    Image collage of how to make pepperoni dip.

    STEP 1. Make cheese mixture. Combine 1 block of softened cream cheese, 1 cup of sour cream, ¾ cup of mozzarella cheese, ¼ cup of grated parmesan cheese, ½ teaspoon garlic powder, ½ teaspoon dried oregano, ¼ teaspoon red pepper flakes in a mixing bowl. Stir until the mixture is smooth and well blended. (Image 1).

    Tip: Make sure your cream cheese has come to room temperature prior to making this recipe. If you didn’t prepare ahead of time, simply unwrap the cream cheese and stick it in a microwave-safe bowl.

    Microwave in 13-second increments, turning the bowl ½ turn clockwise each time, 3 times in the microwave. That should soften the cream cheese. If not, keep going in 10-13 second intervals, turning the bowl each time, until soft enough to whip.

    STEP 2. Layer. Spread this cream cheese mixture in the bottom of a medium baking dish or an 8-inch cast-iron skillet. Pour 1 cup pizza sauce evenly over the cream cheese mixture. Sprinkle the remaining ¼ cup mozzarella and ¼ cup parmesan cheese over the pizza sauce. Add pepperoni as the next layer. (Image 2-4).

    Pepperonis added on top of pepperoni dip, in cast iron pan.

    STEP 3. Bake. Bake the dip in the preheated oven for about 20 – 25 minutes or until it’s bubbling and the cheese on top is melted and slightly golden.

    STEP 4. Garnish. If you like, garnish the pizza dip with fresh basil leaves before serving.

    STEP 5. Serve. Serve hot with sliced baguette, tortilla chips, or garlic bread. ENJOY!

    Baked pizza dip in a cast iron pan, sitting on counter.

    Recipe Pro Tips

    • Allow to fully cool. Making sure that you allow the cake to completely cool before frosting is key or the frosting won’t turn out the way that it should.
    • Correct temperature. Butter, eggs, and cream are the key ingredients that should be at room temperature before making this recipe.
    Spoon scooping up pepperoni dip in cast iron skillet.

    Recipe FAQs

    What do you serve with pizza dip?

    While we suggest baguette slices for dipping, you could also use tortilla chips, bagel chips, or corn chips.

    Can I make pizza dip without cream cheese?

    Yes, you can easily make this pizza dip recipe without cream cheese. Ricotta cheese would be a good alternative!

    Can I freeze this pepperoni dip recipe?

    Absolutely! I suggest freezing this recipe before baking. Simply store in an air-tight container in the freezer and pull out to bake when ready. Start with the recommended time of 25 minutes and go from there. It’ll likely take 10-15 extra minutes from frozen.

    What to Serve with Pepperoni Dip

    Pepperoni dip would be so good with so many things. From fresh Italian bread or rolls to even pizza itself (like these Texas Toast Pizzas). Or better yet, dipping this pizza monkey bread in to it would be the ultimate pizza treat!

    Storage

    Allow the pizza dip to cool to room temperature before storing it. Placing hot dip directly in the refrigerator can lead to condensation, which can affect the texture and flavor. Scoop the remaining pizza dip into an airtight container. Glass or plastic containers with well-fitting lids work well. Store for 3 – 4 days.

    More Dip Recipes You’ll Love

    If you love dips, then you’re also going to love these easy dip recipes that are perfect for any party idea:

    • Spoonful of hot taco dip in dish.
      Hot Taco Dip
    • Ranch beer dip in tan bowl, next to pretzels and crackers.
      Pretzel Dip with Cream Cheese
    • Rotel dip with meat, in white bowl, that has a chip dipping in to it.
      Rotel Dip
    • Chip holding a bite of crack corn dip, above bowl of dip.
      Cream Cheese Corn Dip

    Did you make this? I’d be so grateful if you left a “star” rating below to let me know what you thought! Then, the next time you need a quick and easy recipe, come back to Fantabulosity to browse all of my easy recipes!

    Recipe

    Hand dipping crostini in pepperoni dip.
    Print Pin
    5 from 5 votes

    Pepperoni Dip

    Pepperoni pizza dip is pure cheesy goodness. This great recipe is made up of pepperoni slices, melty cheese, and delicious marinara sauce. Together, they make for one tasty, easy appetizer worth trying!
    Course Appetizer
    Cuisine American
    Prep Time 5 minutes minutes
    Cook Time 25 minutes minutes
    Total Time 30 minutes minutes
    Servings 8 Servings
    Calories 170kcal
    Author Jessica Burgess

    Ingredients

    • 1 block cream cheese, softened 8 oz
    • 1 cup sour cream
    • 1 cup ¾ + ¼ cup shredded mozzarella cheese (divided)
    • ½ cup ¼ + ¼ cup grated parmesan cheese (divided)
    • ½ teaspoon garlic powder
    • ½ teaspoon dried oregano
    • ¼ teaspoon red pepper flakes adjust to your preferred level of spiciness
    • 1 cup pizza sauce
    • ½ cup sliced pepperoni
    • Fresh basil leaves for garnish optional
    • Sliced baguette tortilla chips, or garlic bread for dipping

    Instructions

    • Preheat your oven to 350°F.
    • Combine 1 block of softened cream cheese, 1 cup of sour cream, ¾ cup of mozzarella cheese, ¼ cup of grated parmesan cheese, ½ teaspoon garlic powder, ½ teaspoon dried oregano, ¼ teaspoon red pepper flakes in a mixing bowl. Stir until the mixture is smooth and well blended.
    • Spread this cream cheese mixture in the bottom of a medium baking dish or an 8-inch cast-iron skillet. Pour 1 cup pizza sauce evenly over the cream cheese mixture. Sprinkle the remaining ¼ cup mozzarella and ¼ cup parmesan cheese over the pizza sauce. Add pepperoni as the next layer.
    • Bake the dip in the preheated oven for about 20 – 25 minutes or until it’s bubbling and the cheese on top is melted and slightly golden.
    • If you like, garnish the pizza dip with fresh basil leaves before serving.
    • Serve hot with sliced baguette, tortilla chips, or garlic bread. ENJOY!

    Notes

    • An 8-inch cast iron skillet or a similarly sized skillet or baking dish works well.
    • Customize this pizza dip with your favorite pizza toppings, such as cooked sausage, sliced onions, or jalapeños for extra heat. 
    • It’s a great appetizer for game days, parties, or any casual gathering where you want to enjoy pizza flavors in a dip format.
    • You can prepare the pizza dip in advance and refrigerate it until you’re ready to bake it. This makes it a convenient option for parties.

    Nutrition

    Serving: 1serving | Calories: 170kcal | Carbohydrates: 4g | Protein: 7g | Fat: 14g | Saturated Fat: 7g | Polyunsaturated Fat: 1g | Monounsaturated Fat: 4g | Trans Fat: 0.1g | Cholesterol: 40mg | Sodium: 464mg | Potassium: 174mg | Fiber: 1g | Sugar: 2g | Vitamin A: 483IU | Vitamin C: 2mg | Calcium: 163mg | Iron: 1mg

    Cheeseburger Subs

    November 26, 2023

    Cheeseburger sub on white plate.

    Who says you can’t have your favorite burger flavors in a sub? Let’s dive into the world of our fantastic Cheeseburger Subs! This recipe takes the beloved classic cheeseburger and packs it into a convenient, easy-to-eat subform.

    It’s perfect for those busy weekdays when you’re juggling a million tasks or for those lazy weekends when all you want to do is relax and enjoy a good meal.

    Cheeseburger sub on white plate, with toppings.

    Want to try more burger recipes? Why not test out the Crispy Chicken Burger (KFC Zinger Burger)? For something a little different, try a Waffle Burger. Or if you need something for a party, make some of these simple Burger Bombs.

    [feast_advanced_jump_to]

    Why You’ll Love This Recipe

    • Delivers a flavor punch: Each bite of this Cheeseburger Sub is a delightful mix of juicy beef, gooey cheese, and a kick of spices. It’s like a flavor party in your mouth!
    • Kid-friendly: Worried about pleasing picky eaters? Don’t! This recipe is a proven hit with the little ones. After all, who can resist a cheeseburger and a sub combined?
    • Versatile: Feeling creative? You can easily tweak this recipe to suit your palate. Add some grilled onions, swap the cheese, or throw in some mushrooms – the possibilities are endless!

    Ingredients Needed

    I’ve highlighted a couple of ingredients below with some relevant notes. Aside from this, the ingredients needed are pretty basic.

    Labeled ingredients for cheeseburger subs.
    • Ground Beef –  Opt for lean ground beef to keep those calories in check. But remember, a little fat adds great flavor, so a ratio of 85:15 lean to fat can give your Cheeseburger Sub that mouth-watering taste without going overboard on the calories. 
    • Cheddar Cheese – A Cheeseburger Sub isn't complete without that cheesy goodness! My go-to is sharp cheddar for its rich, tangy flavor, but feel free to use your favorite type. If you’re looking for melt-in-your-mouth cheese, grate it yourself.  Pre-shredded cheese often has anti-caking agents, which can affect meltability.
    • Sandwich Rolls – Fresh sandwich rolls or sub buns can take this Sub to another level. If you can, get them from a local bakery the day you plan to make your dish. If that’s not feasible, a high-quality store-bought brand will do just fine. 

    Substitutions

    Sometimes substitutions are necessary because of ingredients that are unavailable or needed for dietary restrictions. Here are some suggestions that can help:

    • Ground Beef: Not a fan of beef or just don’t have it on hand? Ground turkey is a great alternative – it’s lean, high in protein, and still delivers a satisfying texture. For vegetarians, a meat substitute like lentils can work wonders.
    • Onion Powder: Freshly chopped onions can give you that same onion flavor if you don’t have any onion powder. White or yellow onions will do the trick. Alternatively, garlic powder can also be used for a different flavor profile.
    • Cheddar Cheese: If cheddar isn’t your favorite or you don’t have it in your fridge, don’t worry! Mozzarella, Monterey Jack, or Swiss cheese can also provide that creamy, melty goodness. Vegans can opt for vegan cheese substitutes.
    • Sandwich Rolls: If you’re gluten intolerant or simply want to switch it up, gluten-free bread, whole grain rolls, or even lettuce wraps are excellent alternatives.
    • Mayonnaise, Ketchup, Yellow Mustard: Looking for a healthier spread or just ran out of these condiments? Greek yogurt is a nice substitute for mayonnaise. A mixture of vinegar and sugar can mimic the tangy sweetness of ketchup. For mustard, turmeric and vinegar mixed together can give a close flavor match. 
    Toppings added to the sandwich.

    Variations

    • Bacon Lover’s Dream: If you’re a firm believer that everything is better with bacon, this one’s for you. Cook up some crispy bacon and add it to your sub for that extra crunch and smoky flavor. 
    • Spice It Up: For those who enjoy a little heat, toss in some jalapenos or sprinkle on some crushed red pepper flakes. It’s a surefire way to bring some spice to your subs!
    • Extra Cheesy Extravaganza: Double the cheese, double the fun! Try adding another type of cheese to your sub. A blend of cheddar and mozzarella could be your next favorite. 
    • Avocado: Add a few slices of fresh avocado or a dollop of this easy guacamole recipe for a creamy, nutrient-packed addition to your sub.
    • Herb Delight: Fresh herbs like basil or cilantro can add a burst of freshness and elevate the flavor profile of your Cheeseburger Sub.
    • Mushroom Magic: Sauteed mushrooms can give your sub an earthy flavor and a wonderful texture contrast.

    How to Make Cheeseburger Subs

    This cheeseburger sub recipe is broken into 2 components:

    • Cook the beef
    • Make the sub

    *Be sure to see the recipe card below for the full ingredients list & instructions!*

    STEP 1: Cook the Ground Beef: Start by cooking your ground beef in a large skillet over medium heat. (So these sandwiches won’t have burger patties like a stovetop burger or air fryer burger… they’ll have loose meat such as a sloppy joe recipe.) Add seasonings as you cook, and make sure there is no pink left in the meat. (Image 1).

    STEP 2: Prepare the Sauce: While the beef is cooking, mix your sauce. Combine mayonnaise, ketchup, and mustard in a bowl until they’re well blended. (Image 2).

    STEP 3: Prep Your Baking Sheet: Cover your baking sheet with foil and lay out the sandwich rolls on it. (Image 3).

    Steps 1-4 of how to make cheeseburger subs.

    STEP 4: Assemble the Subs: With your sandwich rolls laid out, add your cooked beef to the bottom half of each roll. Top the beef with a slice of cheese or more, depending on your preference. (Image 4).

    STEP 5: Broil the Subs: Place the assembled subs in the oven and broil on high for 1-2 minutes. You’re looking for the cheese to melt and the rolls to toast.

    STEP 6: Add the Sauce and Toppings: After you remove the subs from the oven, apply the sauce to the top half of each roll and add your favorite toppings. Enjoy your cheeseburger subs!

    Cheeseburger sub on white plate, next to potato chips.

    Recipe Pro Tips

    • Savor the Flavor: Cooking the ground beef over medium heat will help to keep it juicy and flavorful. Don’t rush this step – taking your time will ensure maximum flavor!
    • Cheese Matters: The cheese you use can make or break your sub. Experiment with different types to find your perfect match. And remember, quality matters. A good quality cheese will melt better and taste richer.
    • Freshness is Key: Using fresh ingredients, especially when it comes to your toppings, can really elevate your sub. Fresh lettuce, tomato slices, and onions can add a wonderful crunch and freshness that complements the rich, savory beef and cheese beautifully.
    • Get Saucy: Don’t skimp on the sauce! This is what brings all the flavors together. Feel free to adjust the quantities to suit your taste. This is the burger sauce we like to use because it is quick and easy and also has our preferred ratio of mayo, ketchup, and mustard. You can always dress it up by adding pickle relish, Worcestershire sauce, garlic or onion powder, or replacing the yellow mustard with a brown or spicy variety.
    • Watch the Broil: Keep a close eye on your subs when they’re under the broiler. It can go from perfectly toasted to burnt in a matter of seconds. You want your cheese to be bubbly and slightly golden and your buns toasty but not too hard.
    Close up of cheeseburger sub, sitting on white plate.

    Recipe FAQs

    Can I use a different type of meat for this Cheeseburger Sub recipe?

    Definitely! While we’ve used ground beef in this recipe, you can easily replace it with ground turkey, chicken, or even a vegetarian alternative like lentils or a meat substitute. 

    Can I make this recipe ahead of time?

    Yes, you can. Cook the meat and prepare the sauce ahead of time, then store them separately in the refrigerator. When you’re ready to eat, assemble your subs and pop them under the broiler. Remember, the bread can go from toasted to burnt in a blink, so keep a close eye on it!

    What can I use instead of onion powder?

    If you don’t have any onion powder on hand, freshly chopped onions can deliver that same onion flavor. White or yellow onions will work equally well. Alternatively, garlic powder can provide a different, yet equally delicious, flavor profile! 

    Can I modify the sauce?

    Absolutely! The sauce is what brings all the flavors together, so feel free to adjust the quantities to suit your taste. You can add pickle relish, Worcestershire sauce, garlic, or onion powder, or swap out the yellow mustard for a brown or spicy variety. Get creative and make this cheeseburger sub your own!

    What to Serve with Cheeseburger Subs

    Cheeseburger Subs are a meal in themselves, but pairing them with a few other dishes can turn a simple sandwich into a complete feast! Here are some delightful side dish ideas to serve with your subs:

    • Air Fryer Sweet Potato Fries: Swap out the traditional French fries for a healthier, yet equally delicious, sweet potato version. They’re easy to make, and their sweet flavor pairs amazingly with the savory subs.
    • Fresh Garden Salad: If you’re looking for a lighter side, a fresh garden side salad loaded with your favorite veggies like red onions and green peppers is a great choice. Drizzle with a tangy vinaigrette to bring out the freshness of the veggies.
    • Dill Pickle Spears: Add some tang and crunch to your Cheeseburger Sub meal with some dill pickle spears. It’s a simple addition that packs a punch of flavor.
    • Baked Beans: Baked beans are a classic side for any burger meal, and they’re just as good with subs. Their sweet and smoky flavor complements the meaty subs perfectly.
    • Creamy Mac ‘n’ Cheese: For all the cheese lovers out there, serving your Cheeseburger Subs with a side of creamy mac ‘n’ cheese is like a dream come true! It’s a comfort food match made in heaven.

    Storage

    Storing and Freezing Cheeseburger Subs: If you happen to have any leftovers, you can store them in covered air-tight containers in the refrigerator for up to 4 days. To reheat, pop them in a toaster oven or under the broiler until the cheese is melty and the bun is crisped to your liking. 

    I recommend freezing the components separately for best results. Cool the cooked ground beef, then store it in an airtight container or freezer bag. You can store the sauce in a separate container. 

    When you’re ready to assemble your subs, just thaw your ingredients in the refrigerator, heat up the beef, and you’re good to go. Remember, always label your containers with the date so you know when you need to use them by. 

    More Sandwich Recipes You’ll Love

    Looking for more sandwich ideas? I have some tasty ones for you! First, there’s the Italian Sliders with Hawaiian Rolls that make use of delicious Hawaiian rolls, and I also use them for this smoked sliders recipe. For a more traditional sandwich, make this Mozzarella Wrap with Tomato and Basil. Or, for a twist on the classic, test out this Peanut Butter and Syrup Sandwich.

    • Chicken salad with grapes and apples, sitting on bread.
      Harvest Chicken Salad
    • Crack Chicken Sandwich on wooden cutting board.
      Crack Chicken Sandwiches
    • egg salad on croissant
      The BEST Egg Salad Recipe
    • Wiener Winks baked and resting on parchment-paper-lined baking sheet.
      Wiener Winks

    Did you make this? I’d be so grateful if you left a “star” rating below to let me know what you thought! Then, the next time you need a quick and easy recipe, come back to Fantabulosity to browse all of my easy recipes!

    Recipe

    Cheeseburger sub on white plate.
    Print Pin
    5 from 1 vote

    Cheeseburger Subs

    Cheeseburger Subs: This recipe takes the beloved classic cheeseburger and packs it into a convenient, easy-to-eat sub form.
    Course Dinner, Lunch
    Cuisine American
    Prep Time 5 minutes minutes
    Cook Time 15 minutes minutes
    Total Time 20 minutes minutes
    Servings 6 sandwiches
    Calories 544kcal
    Author Jessica Burgess

    Ingredients

    • 1 pound Ground Beef
    • ½ teaspoon Onion Powder
    • ½ teaspoon Salt
    • ¼ teaspoon Black Pepper
    • 6 slices of Cheddar Cheese
    • 6 Sub Sandwich Rolls
    • ½ cup Mayonnaise
    • ¼ cup Ketchup
    • 2 teaspoons Yellow Mustard

    Instructions

    • Place beef and seasonings into a skillet over medium heat. Cook until the meat is done and no longer pink.
    • Next, make the sauce. Mix the mayonnaise, ketchup, and mustard together until well combined.
    • Cover a baking sheet with foil. Place the rolls onto the baking sheet to assemble. Next, add cooked beef to the bottom of the bun, then add a slice, or more, of cheese.
    • Leaving the sandwiches open, broil in the oven on Hi, for 1-2 minutes. The cheese should be melted, and the bread toasted when done.
    • Once done, spoon the sauce on to the top half of the bun and then add your favorite burger toppings.

    Notes

    1. If meat is very greasy/oily, drain before putting on rolls.
    2. You can use shredded cheese, but I felt like the sliced cheese held the ground beef on the sandwich better. 
    3. This is the burger sauce we like to use because it is quick and easy and also has our preferred ratio of mayo, ketchup, and mustard. You can always dress it up by adding pickle relish, Worcestershire sauce, garlic or onion powder, or replacing the yellow mustard with a brown or spicy variety.
    4. We enjoyed our cheeseburger subs topped with onions, dill pickle, lettuce, and tomato. 
    5. We recommend storing leftovers separately so that the bread does not get soggy. Refrigerate for up to five days. 
    6. These were so fun and easy to make! Cooking them this way made for easy prep and clean up….no grill to heat up or patties to make. 

    Nutrition

    Serving: 1sandwich | Calories: 544kcal | Carbohydrates: 36g | Protein: 24g | Fat: 33g | Saturated Fat: 10g | Polyunsaturated Fat: 9g | Monounsaturated Fat: 9g | Trans Fat: 1g | Cholesterol: 76mg | Sodium: 875mg | Potassium: 273mg | Fiber: 1g | Sugar: 7g | Vitamin A: 235IU | Vitamin C: 0.5mg | Calcium: 143mg | Iron: 12mg

    Buffalo Chicken Sliders

    November 24, 2023

    Buffalo chicken sliders on wooden cutting board.

    Ready for a mouthwatering meal that’s sure to be a crowd-pleaser? Say hello to our Buffalo Chicken Sliders Recipe! These little flavor-packed sandwiches are just the right mix of spicy and savory, with a dash of tangy goodness.

    Perfect for game day food, a family gathering, a party appetizer, or just a fun, casual dinner at home, they’re quick to whip up and guaranteed to have a hungry crowd reaching for seconds. 

    Buffalo chicken sliders on wooden cutting board, with one flipped to the side to see the inside.

    Want to try more recipes with the distinctive buffalo chicken flavor sauce? Then you’ll want to try my buffalo chicken dip recipe, this Instant Pot Buffalo Chicken Pasta? Or you could bring out the lasagna sheets and try making my Buffalo Chicken Lasagna.

    Need a break from the buffalo heat? Chicken Bacon Ranch is a great option for sliders, or try Fried Chicken Sliders.

    [feast_advanced_jump_to]

    Why You’ll Love This Recipe

    • It uses simple ingredients: With only a few simple ingredients, there’s nothing unusual needed to make these chicken sliders.
    • Batch recipe: Need to make more than 12 sliders? Then you can easily make a bigger batch of these sandwiches.
    • Ready in only 30 minutes: Talk about a quick and easy lunch idea! The prep time for this great recipe, from start to finish, only takes half an hour.

    Ingredients Needed

    I’ve highlighted a couple of ingredients below with some relevant notes. Aside from this, the ingredients needed are pretty basic.

    Labeled ingredients for buffalo chicken sliders.
    • Chicken – We used cooked and shredded chicken for the recipe as it is easier to add to the sandwiches. You could use sliced chicken or cook some chicken breasts and cut it up.
    • Buffalo sauce –  This is what gives the sliders their signature spicy kick. If you prefer a milder flavor, just use less sauce.
    • Slider buns – You can find these in most grocery stores. They’re just smaller versions of regular hamburger

    Substitutions

    Sometimes substitutions are necessary because of ingredients that are unavailable or needed for dietary restrictions. Here are some suggestions that can help:

    • For Shredded Chicken: If you’re going for a vegetarian twist or just want to mix it up, try using jackfruit. It has a great texture that resembles pulled meat and absorbs flavors beautifully. Tofu or tempeh can be good protein-packed alternatives as well! 
    • Buffalo Sauce: If you’re not a fan of the heat, BBQ sauce can be a great swap. It gives you a tangy, sweet flavor that’s a hit in sandwiches. If you’re in a real pinch, a blend of hot sauce and melted butter can also save the day.
    • Slider Buns: Don’t have slider buns? No worries! Regular hamburger buns can work as well – just be ready for a bigger bite. For a low-carb alternative, try using lettuce leaves to wrap your filling. 
    • Provolone Cheese: Mozzarella or Monterey Jack cheese can easily step in for provolone. They melt well and have a mild flavor that works beautifully with the buffalo sauce.
    • Minced Garlic: Garlic powder or granulated garlic can be used in a pinch. Remember, a quarter teaspoon of these substitutes is about equivalent to one clove of fresh garlic. If you want an entirely different flavor profile, minced shallots can also work!

    Variations

    If you’re looking to mix things up a little, why not try these fun and delicious spins on the classic Buffalo Chicken Slider?

    • BBQ Pulled Pork Sliders: Swap out the chicken for some slow-cooked, pulled pork slathered in your favorite BBQ sauce. This version is a surefire hit at summer picnics!
    • Vegan Chickpea Sliders: For all my plant-based friends out there, try using mashed chickpeas mixed with vegan mayo and your favorite spices instead of chicken. It’s a hearty, protein-packed alternative that’s just as satisfying.
    • Hawaiian Chicken Sliders: Add a sweet and tangy twist by topping your buffalo chicken with a slice of pineapple. It’s a sweet surprise that pairs perfectly with the spicy buffalo sauce. It’s definitely a twist on our fried chicken sliders.
    • Buffalo Chicken Pizza Sliders: Combine two favorites in one by turning your sliders into mini pizzas. Spread a bit of marinara sauce on your bun, add the buffalo chicken, sprinkle on some mozzarella, and then pop it in the oven until the cheese is melted and bubbly. Then, you can serve them with a side of blue cheese dressing for dipping!

    How to Make Buffalo Chicken Sliders

    This easy chicken slider recipe is broken into 3 components:

    • make the buffalo chicken
    • make the sliders
    • bake in the oven

    *Be sure to see the recipe card below for the full ingredients list & instructions!*

    STEP 1: Prepare the equipment. Begin by preheating your oven to a temperature of 350°F (175°C). Next, either apply grease to a 9×13-inch baking dish or place parchment paper on a baking sheet. 

    STEP 2: Mix the chicken. Next, get a mixing bowl and combine buffalo sauce with shredded chicken, making sure the chicken is thoroughly coated. (Image 1)

    STEP 3: Prepare the sliders. The slider rolls need to be cut in half horizontally, but keep them joined together as a single piece. Place the bottom half of the rolls on your prepared baking pan. (Image 2)

    Steps 1-4 of how to make buffalo chicken sliders.

    STEP 4: Add the chicken and cheese. Now, apply an even layer of the buffalo chicken mixture onto the bottom portion of the slider rolls. Over this mixture, arrange the slices of provolone cheese. (Image 3)

    STEP 5: Put the tops of the rolls on. The top of the rolls comes next; place it over the cheese, forming sandwiches. (Image 5)

    STEP 6: Mix the garlic butter. In a separate small bowl, create a mixture of minced garlic, melted butter, and finely chopped parsley.  This mixture is then to be brushed uniformly over the slider rolls’ top surface. (Image 6-7)

    Steps 5-8 of how to make buffalo chicken sliders.

    STEP 7: Bake in the oven. The next step is to bake this in your preheated oven for an estimated 10-15 minutes. You’ll know it’s done when the cheese has fully melted and the tops have taken on a golden brown hue.

    STEP 8: Cool and serve. Once baked, allow the sliders to cool off for a couple of minutes prior to serving. When serving, consider adding a side of blue cheese dressing, creamy ranch, or hot sauce. 

    Sliced buffalo chicken sliders on wooden cutting board.

    Recipe Pro Tips

    • Mix It Up: Don’t be afraid to experiment with different kinds of cheese for your sliders. Extra sharp cheddar, smoked gouda, or even pepper Jack can add an unexpected and memorable twist to the flavor profile.
    • Make Ahead: These sliders can be prepared ahead of time, making them perfect for busy weekdays. Just assemble them as instructed, cover them with plastic wrap, and pop them in the fridge. Then, when you’re ready to eat, simply bake as directed in the recipe.
    • Serving Size: These sliders are the perfect size for little hands, making them a hit with kids. If you’re feeding a crowd, you can easily double or even triple the recipe.
    • Spice to Your Liking: The buffalo sauce can be adjusted to suit your family’s taste buds. If you have some heat-lovers in your home, feel free to lay on the sauce! For those with milder palates, dial it back a bit.
    • Toppings: If you love adding toppings, feel free to add additional toppings such as sliced red onion, pickles, or ranch dressing (or this jalapeno ranch for extra heat) to customize your sliders. 
    Cheese being pulled from one buffalo chicken slider  to pull apart.

    Recipe FAQs

    Can I use a different kind of meat for these sliders?

    Absolutely! This recipe is versatile. You can replace the buffalo chicken with shredded pork, turkey, or even a vegetarian option like jackfruit.

    Can I substitute the buffalo sauce with another sauce?

    Of course! If buffalo sauce isn’t your thing, you can experiment with BBQ sauce, teriyaki, or even honey mustard. The choice is yours! However, remember to adjust the quantity to your taste.

    What if I don’t have any slider rolls? Can I use regular bread instead?

    While slider rolls are the best choice for this recipe, you can use regular bread in a pinch. Just cut them into smaller sizes to fit the slider format. Brioche buns or mini bagels can also work well.

    I don’t like provolone cheese. Can I use a different type of cheese?

    Yes, feel free to use any cheese that melts well and complements the other flavors in the sliders. Some good alternatives to provolone include mozzarella, cheddar, or even gouda.

    What to Serve with Buffalo Chicken Sliders

    Buffalo Chicken Slider Recipe is the star of the show, but what’s a feast without some fantastic sides? Let’s complete your meal with some easy, delicious, and crowd-pleasing accompaniments:

    • Sweet Potato Fries: The sweet and salty combo from these fries makes them a perfect pairing with your spicy buffalo sliders. Plus, they’re healthier and so easy to make at home.
    • Classic Coleslaw: Tangy, refreshing, and crunchy slaw – a scoop of homemade coleslaw can balance out the heat of the buffalo sauce. Plus, it’s a great way to sneak in some veggies. Coleslaw is popular alongside pulled pork sliders too.
    • Red Potato Salad: This delicious and easy potato salad uses red potatoes and is easy to make! Each bite is a flavorful explosion that complements your spicy sliders beautifully.
    • Instant Pot Corn on the Cob with Butter: A summer classic that never goes out of style. The sweet taste of the corn with melting butter will be a great counterpoint to the heat of the sliders.
    • Creamy Mac ‘n’ Cheese: It’s always a hit with the kiddos, and let’s be honest, we adults love it too! The creaminess of the mac ‘n’ cheese goes well with the spicy and tangy sliders, making a comforting and satisfying meal.
    • Honey Sriracha Chex Mix is great to have on hand to nibble on before the sliders are ready.
    Buffalo chicken slider being dipped in ranch dressing.

    Storage

    If you’re lucky enough to have some leftover chicken, just tuck them into an airtight container and pop them into the fridge. They’ll stay good for up to 3-4 days. 

    And here’s a pro mom tip: if you’re planning for a busy week, these sliders freeze beautifully. Just wrap each slider individually in aluminum foil and place them in a zip-top freezer bag. They can be frozen for up to 3 months. 

    To reheat the sliders, you can thaw them overnight in the fridge and then warm in the oven, and then you have a quick and tasty meal ready to go. 

    More Slider Recipes You’ll Love

    If these shredded buffalo chicken sliders have given you the urge to make more slider recipes, check out this one for simple Salmon Sliders. Or if you are up for something featuring beef, make everyone these Sloppy Joe Sliders on game night. Or of course, these other favorite sliders that you’ll love:

    • Turkey slider sitting on top of other turkey sliders with cheese.
      Turkey Sliders
    • Stack of roast beef sliders.
      Roast Beef Sliders
    • Italian sliders on Hawaiian buns
      Italian Sliders (Easy Party Sandwiches)
    • Cheeseburger Sliders
      Cheeseburger Sliders with Hawaiian Rolls

    Did you make this? I’d be so grateful if you left a “star” rating below to let me know what you thought! Then, the next time you need a quick and easy recipe, come back to Fantabulosity to browse all of my easy recipes!

    Recipe

    Buffalo chicken sliders on wooden cutting board.
    Print Pin
    5 from 4 votes

    Buffalo Chicken Sliders

    Buffalo Chicken Sliders: These little flavor-packed sandwiches are just the right mix of spicy and savory, with a dash of tangy goodness. Perfect for game day food, a family gathering, a party appetizer, or just a fun.
    Course Appetizer, Dinner, Side Dish
    Cuisine American
    Prep Time 15 minutes minutes
    Cook Time 14 minutes minutes
    Total Time 29 minutes minutes
    Servings 12 sliders
    Calories 140kcal
    Author Jessica Burgess

    Ingredients

    • 2 Cups Cooked Shredded Chicken
    • ½ Cup Buffalo Sauce
    • 12 Sweet Hawaiian Slider Rolls
    • 12 Slices Provolone Cheese
    • 4 Tablespoons Unsalted Butter Melted
    • 2 Cloves Garlic Minced
    • 1 Tablespoons Fresh Parsley Finely Chopped

    Instructions

    • Preheat your oven to 350°F (175°C). Grease a 9×13-inch baking dish or line a baking sheet with parchment paper.
    • In a mixing bowl, combine the shredded chicken and buffalo sauce. Stir until the chicken is well coated.
    • Slice the slider rolls in half horizontally, keeping them connected as a sheet of rolls.
    • Place the bottom half of the slider rolls on the baking pan.
    • Spread the buffalo chicken mixture evenly over the bottom half of the slider rolls.
    • Lay the provolone cheese slices on top of the chicken.
    • Place the top half of the slider rolls over the cheese to close the sandwiches.
    • In a small bowl, mix together the melted butter, minced garlic, and chopped parsley.
    • Brush the garlic butter mixture evenly over the top of the slider rolls.
    • Bake in a preheated oven for about 10-15 minutes, or until the cheese is melted and the tops are golden brown.
    • Remove form the oven and let the sliders cool for a few minutes before serving.
    • Serve with a side of blue cheese dressing, ranch, or hot sauce. Enjoy!

    Notes

    Feel free to adjust the amount of buffalo sauce to your desired level of spiciness.
    You can add additional toppings such as sliced red onion, pickles, or ranch dressing to customize your sliders. 
    Leftover sliders can be stored in an airtight container in the refrigerator for up to 3 days. Reheat in the oven or microwave until warmed through.

    Nutrition

    Serving: 1slider | Calories: 140kcal | Carbohydrates: 1g | Protein: 11g | Fat: 10g | Saturated Fat: 6g | Polyunsaturated Fat: 1g | Monounsaturated Fat: 3g | Trans Fat: 0.2g | Cholesterol: 41mg | Sodium: 463mg | Potassium: 85mg | Fiber: 0.02g | Sugar: 0.1g | Vitamin A: 322IU | Vitamin C: 1mg | Calcium: 149mg | Iron: 0.4mg

    DIY Gingerbread Ornaments

    November 22, 2023

    Gingerbread ornaments on white table next to string and scissors.

    Gingerbread Ornaments: If you are looking for something adorable to decorate your tree with this year for Christmas, look no further than these easy-to-make gingerbread ornaments. These homemade Christmas ornaments are seriously cute and a craft idea that is so easy to make.

    Coming together with just a few simple ingredients, these ornaments that look like gingerbread cookies are sure to impress.

    DIY gingerbread ornaments on white counter sitting next to string and scissors.

    While these adorable little Christmas tree decorations look edible, they are not. Do not eat a homemade ornament! If you are in the mood for some holiday desserts after making these, I suggest trying out these easy gingerbread men cookies, these yummy sugar cookies, or this Christmas cake dip.

    [feast_advanced_jump_to]

    ❤️ Why You’ll Love This Recipe

    • It uses easy ingredients: You likely already have the necessary ingredients for this adorable DIY in your pantry!
    • Easy to make: These gingerbread cookie ornaments are just as easy to make as they are adorable.
    • Great family activity: Did I mention these are easy to make? Grab the kids or grandkids and get to baking this holiday season.

    🧾 Ingredients Needed

    I’ve highlighted a couple of ingredients below with some relevant notes. Aside from this, the ingredients needed are pretty basic.

    Labeled ingredients on counter.
    • Spices – While these aren’t necessary for the look of the salt dough ornaments, they do make them smell delicious!
    • Salt – Salt is the most important piece of this recipe.
    • Flour – We used all-purpose flour for this recipe.

    📖 Variations

    If you want to take this up a notch, you could just as easily make a gingerbread house ornament out of this recipe. All you need are some different cookie cutters and some glue! Make the recipe as stated, but when it comes to cutting out the shapes, cut your shapes in preparation for building gingerbread houses. Once baked and dried, hot glue the pieces together and then decorate!

    Christmas cookie cutters other than gingerbread men would also be a great choice.

    Another step you could take is adding some festive essential oils to the dough prior to baking for a long-lasting holiday scent!

    ✄ Supplies

    You will need quite a few things in order to bring these gingerbread salt dough ornaments to life including:

    • Writing paint or White Glue
    • Hand mixer
    • Whisk
    • Large bowl
    • Rolling pin
    • Parchment paper
    • Baking sheet
    • Scissors
    • Ribbon or Twine
    • Straw or Toothpick
    • Gingerbread Man cookie cutter
    • Basting brush
    • Icing bag for glue or writing paint (optional)
    • Edible spray glitter (optional)
    Supplies needed for making gingerbread ornaments.

    👩🏻‍🍳 How to Make Gingerbread Men Ornaments

    There are quite a few steps to this recipe in order for the gingerbread men to turn out correctly. The steps are simple but make sure to follow them closely!

    I suggest making these salt dough ornaments a few days before you plan on stringing them together or decorating with them.

    *Be sure to see the recipe card below for the full ingredients list & instructions!*

    You are going to begin this recipe by preheating the oven to 200 degrees F.

    Image collage showing how to make gingerbread ornaments.

    STEP 1. Combine the dry. Put all dry ingredients into a large bowl and mix with a whisk. (Image 1).

    STEP 2. Add water. Next, use the hand mixer and slowly pour in the water until the dough is formed. (Image 2).

    STEP 3. Lay down some parchment. Place the piece of parchment paper down on the countertop to roll out the dough. To avoid white spots on the dough, do not add flour to your surface.

    STEP 4. Roll out the dough. Roll dough ⅛ inch thick. Using a rolling pin with thickness rings can help guide you with this. If you make the dough thicker, then the ornaments will puff up and not be flat. Use a gingerbread man cookie cutter to cut out the shapes. (Image 3).

    STEP 5. Poke some holes. Then place the straw or toothpick at the top of the ornament in the middle of the head to make a hole for the ribbon or twine. (Image 4).

    Tip: Make sure to poke the hole all the way through so that you can easily string the ornaments together after baking & cooling.

    STEP 6. Place parchment on cookie sheet. Place parchment paper on the baking sheet and then place the ornaments on top spacing them evenly apart.

    STEP 7. Bake. Next, put the cookie sheet in the oven for 2 ½ to 3 hours until the ornaments are hard and dry. If you turn the temperature up higher, they with puff up and not be flat and if you take them out sooner, they won't be as hard.

    STEP 8. Cool. Let the ornaments cool completely before decorating.

    Brushing oil on to gingerbread ornaments.

    STEP 9. Make ’em shine. If you want the ornaments to have a shine, then coat each ornament with olive oil or any cooking oil you might have. Use a basting brush or a small paintbrush to apply the oil. Wipe off any extra oil as needed. If you want to keep the rustic look then leave the olive oil off.

    Undecorated gingerbread ornaments.

    STEP 10. Prepare to decorate. Pour writing paint into an icing bag and cut off a very small tip at the tip of the bag. This will allow you to make thinner lines with the writing paint. This step is optional. Leave in the bottle if you do not want to do this step.

    Decorating paint in bag.

    STEP 11. Decorate. Decorate each tree ornament as shown above using writing paint, sugar, and edible glitter spray or any way you would like. Enjoy and have fun.

    STEP 12. Dry. Let dry completely before hanging ornaments.

    💭 Recipe Pro Tips

    • Allow to fully cool. Allow the salt dough ornaments to fully cool before any decorating.
    • Allow to dry. Give them a few days to air dry before you decorate with them.
    • Not edible ornaments. Remember, these beautiful gingerbread man ornaments are not edible!
    • Make a night of it. Make these during a Christmas movie night for some added fun!
    Decorated gingerbread ornaments.

    📋 Recipe FAQs

    How many ornaments does this gingerbread ornament recipe make?

    If using a gingerbread man cookie cutter that is 3 inches wide and 3 inches tall, the recipe should make 36 ornaments. I rolled my dough ⅛ inch thick using a rolling pin with thickness rings.

    Can I use flour on my surface or a rolling pin?

    You can but it possibly will make your ornament have white spots on them. Roll with long rolls instead of a back-and-forth motion to avoid dough sticking to the rolling pin without having to add more flour.

    What can I use to decorate these salt dough ornaments?

    Some ideas are Puff Paint, Acrylic Paint, Glue, Sprinkles, Watercolors, and Glitter.

    Are my ornaments supposed to look rustic with a white coating on them?

    Yes, they will look like this unless you put a light coat of olive oil on them. The oil will give them a nice shine and finished look.

    Why did my DIY gingerbread men salt dough ornaments puff up?

    If they puffed up, try baking them with a lower temperature and for a longer time.

    What is the significance of gingerbread at Christmas?

    Gingerbread is a Christmas star because it brings tradition and warmth to the festive table. With its cozy spices and the fun of decorating, it’s not just a treat but also a festive family activity that adds a dash of joy to the holiday season!

    Decorated gingerbread ornament.

    ❄️ Storage

    Store in an air-tight container in order to avoid them breaking and store in a dry place such as a closet.

    🧵 More DIY Ideas That You’ll Love

    If you’re in the mood for more DIY activities, we think you’ll really love these DIY ornaments and these ideas too:

    Did you make this? I’d be so grateful if you left a “star” rating below to let me know what you thought! Then, the next time you need a quick and easy recipe, come back to Fantabulosity to browse all of my easy recipes!

    Recipe

    Gingerbread ornaments on white table next to string and scissors.
    Print Pin
    5 from 1 vote

    Gingerbread Ornaments

    Gingerbread salt dough ornaments are a fun tradition you can start this year with your kids. These easy to make Christmas salt dough ornaments are made with simple ingredients and perfect for a holiday activity!
    Prep Time 30 minutes minutes
    Cook Time 2 hours hours 30 minutes minutes
    Total Time 3 hours hours
    Author Jessica Burgess

    Ingredients

    • 3 cups all-purpose flour
    • 1 cup salt
    • 2 tablespoon cinnamon
    • 1 teaspoon ginger
    • ½ teaspoon ground cloves
    • 1 ½ cup water
    • ½ cup sugar for decorating optional
    • 1 tablespoon olive oil for shine optional

    Supplies

    • Writing paint or White Glue
    • Hand mixer
    • Whisk
    • Large bowl
    • Rolling pin
    • Parchment paper
    • Baking sheet
    • Scissors
    • Ribbon or Twine
    • Straw or Toothpick
    • Gingerbread Man cookie cutter
    • Basting brush
    • Icing bag for glue or writing paint optional
    • Edible spray glitter optional

    Instructions

    • Preheat oven to 200 degrees F.
    • Put all dry ingredients into a large bowl and mix with a whisk.
    • Next use the hand mixer and slowly pour in the water until the dough is formed.
    • Place parchment paper down on countertop to roll out dough. To avoid white spots on dough, do not add flour to your surface.
    • Roll dough ⅛ inch thick. Using a rolling pin with thickness rings can help guide you with this. If you make the dough thicker, then the ornaments will puff up and not be flat. Use a gingerbread man cookie cutter to cut out the shapes.
    • Then place the straw or toothpick at the top of the ornament in the middle of the head to make a hole for the ribbon or twine.
    • Place parchment paper on the baking sheet and then place the ornaments on top spacing them evenly apart.
    • Next, put the baking sheet in the oven for 2 ½ to 3 hours until the ornaments are hard and dry. If you turn the temperature up higher, they with puff up and not be flat and if you take them out sooner, they won't be as hard.
    • Let the ornaments cool completely before decorating.
    • If you want the ornaments to have a shine, then coat each ornament with olive oil or any cooking oil you might have. Use a basting brush or a small paint brush to apply the oil. Wipe off any extra oil as needed. If you want to keep the rustic look then leave the olive oil off.
    • Pour writing paint into an icing bag and cut off a very small tip at the tip of the bag. This will allow you to make thinner lines with the writing paint. This step is optional. Leave in bottle if you do not want to do this step.
    • Decorate as shown above using writing paint, sugar, and edible glitter spray or any way you would like. Enjoy and have fun.
    • Let dry completely before hanging ornaments.

    Notes

    • let cool completely before decorating
    • let dry completely before stringing them or decorating with them
    • store in a hard box in a dry place

    Macaroni and Tomatoes

    November 20, 2023

    Macaroni and Tomatoes in white bowl.

    Macaroni and Tomatoes: Comforting meets old-fashioned with this hearty macaroni and tomato recipe. Enjoy the simplicity of old-fashioned style cooking with this easy recipe. It’s perfect as a light dinner recipe or even as a side dish to go along with another country-style meal like Southern fried pork chops or these country fried steaks.

    Coming together in only 30 minutes, this classic comfort food is about to become a weeknight staple.

    Macaroni and tomatoes in white bowl.

    Are you a fan of a good classic Southern dish? Me too! If you are drooling over this macaroni and tomatoes with butter recipe, I also suggest this Old Fashioned Bread Pudding recipe along with this Old Fashioned Tuna Casserole recipe.

    Add some cheese to your tomato pasta and try out Rotel Pasta, which amps up the heat!

    [feast_advanced_jump_to]

    Why You’ll Love This Recipe

    • It uses a few ingredients: Only a few basic ingredients are needed to put together this classic macaroni dish.
    • Easy to find, simple ingredients: You might already have everything you need to make this simple recipe in your pantry as they are pantry staples, but if not, they are easy to find around the grocery store!
    • Ready in only 30 minutes: Talk about a quick and easy dinner recipe! This classic dish comes together in no time, making it a no-brainer weeknight dinner option for family or family gatherings.

    Ingredients Needed

    I’ve highlighted a couple of ingredients below with some relevant notes. Aside from this, the ingredients needed are pretty basic.

    Labeled ingredients for macaroni and tomatoes recipe.
    • Elbow Macaroni – We used classic elbow macaroni for this recipe.
    • Canned Tomatoes – We found that the best route to go for this recipe is canned tomatoes. If you can’t find the Diced Roasted Tomatoes with Garlic, you can add 1 teaspoon of garlic powder in with the other spices.
    • Chicken Broth – This is essential for cooking the noodles in a flavorful way! You can also make this easy homemade chicken broth recipe for it.

    Substitutions

    Sometimes substitutions are necessary because of ingredients that are unavailable or needed for dietary restrictions. Here are some suggestions that can help:

    • Butter – If you prefer to use another oil in your cooking over butter, that is totally okay!
    • Chicken Broth – While we used premade chicken broth, you can easily use bullion for this recipe or make chicken stock from a rotisserie chicken. Vegetable broth would make this dish vegetarian!

    Variations

    • Canned Tomatoes – Feel free to use your favorite canned tomato varieties for this recipe. Stewed tomatoes would also be a great option.
    • Butter – Use a herbed butter for even more flavor.
    • Herbs – Change up the herbs or add some spice with some red chili flakes!
    • Pasta – Feel free to use your favorite cooked pasta for this recipe! While elbow noodles are the classic option, some rotini or bowtie pasta shells would also be yummy!
    • Additional Ingredients – This is the traditional way to make this dish but some other add-ins or garnishes could be: bacon bits, ground beef, Parmesan cheese, diced onions, or diced green peppers.

    How to Make Old Fashioned Macaroni and Tomatoes with Sugar

    Making this recipe has you going back to basics. All you have to do is bring the broth to a boil with the spices, and your noodles and cook, then stir in your butter and tomatoes. Easy as 1, 2, 3!

    I suggest making this recipe right before you intend to serve it for the freshest taste. If you are making this as a make-ahead recipe, cook the noodles al dente to support their structure when reheating.

    *Be sure to see the recipe card below for the full ingredients list & instructions!*

    To begin, break out your Dutch Oven or large pot and stick it on the stovetop.

    Image collage of first 4 steps of making macaroni and tomatoes.

    STEP 1. Boil the broth. In a large pot or Dutch oven bring broth to a boil.  (Image 1).

    STEP 2. Add herbs and noodles. Once boiling add in the salt, basil, parsley, sugar, and pepper. Stir to combine. Then add in the macaroni noodles. (Image 2).

    Step 3. Cook noodles. Cover and cook noodles, over medium-low heat, for 15 minutes; stirring occasionally to prevent sticking. (Image 3).

    Tip: Carefully watch the noodles so they do not overcook. Remember, if you are planning this meal to be a make-ahead recipe, cook them al dente.

    Step 4. Add butter. Stir in the butter when the noodles are done and all liquid is absorbed. (Image 4).

    Tomatoes added to elbow macaroni.

    STEP 5. Add tomatoes. Finally, add the tomatoes. Cook for another 3-5 minutes until tomatoes are warm. 

    STEP 6. Serve. Top with chopped parsley and pepper to garnish.

    Cooked macaroni and tomatoes in pot.

    Recipe Pro Tips

    • Serve right away: This recipe is best served warm on the stove.
    • Make it your own: This is the traditional way to make this dish but some other add-ins or garnishes could be: bacon bits, Parmesan cheese, diced onions, or diced green peppers. 
    • Keep the juice: Make sure to not leave out that yummy tomato juice from the cans!
    Macaroni and tomatoes in white serving bowl with serving spoon.

    Recipe FAQs

    Are canned tomatoes good for pasta?

    Canned tomatoes are perfect for pasta! Not only do they make delicious sauces, but they make the act of cooking dinner easier and that is a win all around.

    Does macaroni and tomatoes freeze well?

    I would suggest not freezing this recipe. Cooked noodles tend to not reheat well after freezing.

    Can I use fresh tomatoes for macaroni and tomatoes?

    Yes, you can use fresh tomatoes for macaroni and tomatoes. You’ll have to go the extra mile and dice them first and then cook them down on the stove with some herbs. To make things easy, just stick to your canned tomatoes.

    What cheese would be best with macaroni and tomatoes?

    I suggest parmesan for any tomato sauce and noodle dish, but you could also use mozzarella!

    What to serve with macaroni and tomatoes?

    Bread or salad is always the go-to option with a pasta dish. You could even cook up some parmesan zucchini for some added nutrition.

    What to Serve with Macaroni and Tomatoes

    While macaroni and tomatoes are good on their own, it is also great served along with your other favorite recipes! Try this Chicken Ceasar Salad for a tasty vegetable side or this Easy Italian White Bread for something to dip into your bowl.

    Macaroni and tomatoes on a white plate.

    Storage

    Store this recipe in an airtight container for up to one week.

    More Pasta Recipes You’ll Love

    Pasta is THE superior weeknight meal, if you ask me. Here are some more easy pasta dish dinner recipes perfect for weeknight cooking!

    • Mac and Cheese with Ham in bowl.
      Mac and Cheese with Ham
    • Chicken macaroni salad in a bowl.
      The BEST Chicken Macaroni Salad
    • Chicken Caesar Pasta Salad in big bowl, sitting on napkin.
      Chicken Caesar Pasta Salad Recipe
    • Shrimp Pasta Salad With Mayo
      Shrimp Macaroni Salad

    Did you make this? I’d be so grateful if you left a “star” rating below to let me know what you thought! Then, the next time you need a quick and easy recipe, come back to Fantabulosity to browse all of my easy recipes!

    Recipe

    Macaroni and Tomatoes in white bowl.
    Print Pin
    5 from 6 votes

    Macaroni and Tomatoes

    Old fashioned style macaroni and tomatoes is a wonderful meatless Monday weeknight dinner option. Made with macaroni noodles, canned tomatoes, and herbs, this recipe is easy and ready in 30 minutes!
    Course Dinner
    Cuisine American
    Prep Time 2 minutes minutes
    Cook Time 30 minutes minutes
    Total Time 32 minutes minutes
    Servings 8 servings
    Calories 258kcal
    Author Jessica Burgess

    Ingredients

    • 4 cups Chicken Broth
    • 1 teaspoon Salt
    • 1 teaspoon Dried Basil
    • 1 teaspoon Dried Parsley
    • 1 teaspoon Sugar
    • ¼ teaspoon Black Pepper
    • 3 cups Elbow Macaroni Uncooked
    • 2 tablespoons Butter
    • 14.5 ounce Can Petite Diced Tomatoes
    • 14.5 ounce Can Diced Fire Roasted Tomatoes with Garlic if it doesn't have garlic, you can add a teaspoon of garlic powder

    Instructions

    • In a large pot or Dutch oven bring broth to a boil.
    • Once boiling add in the salt, basil, parsley, sugar, and pepper. Stir to combine. Then add in the macaroni noodles.
    • Cover and cook noodles, over medium low heat, for 15 minutes; stirring occasionally to prevent sticking.
    • Stir in the butter when noodles are done and all liquid absorbed.
    • Finally add the tomatoes. Cook for another 3-5 minutes until tomatoes are warm.
    • Top with chopped parsley and pepper to garnish.

    Video

    Notes

    If you plan on storing this recipe, cook the noodles al dente for better texture after reheating.

    Nutrition

    Serving: 1serving | Calories: 258kcal | Carbohydrates: 46g | Protein: 9g | Fat: 4g | Saturated Fat: 2g | Polyunsaturated Fat: 0.5g | Monounsaturated Fat: 1g | Trans Fat: 0.1g | Cholesterol: 10mg | Sodium: 899mg | Potassium: 294mg | Fiber: 3g | Sugar: 6g | Vitamin A: 407IU | Vitamin C: 6mg | Calcium: 53mg | Iron: 2mg

    Fried Tacos

    November 18, 2023

    Fried tacos on wooden cutting board.

    Crispy and crunchy, these beef-fried tacos are fun to make! You’ll love the tasty filling wrapped in a crunchy, quick-fried tortilla.

    They’re an easy dinner recipe made in only 30 minutes and something the whole family will love! Serve them with an easy salsa recipe, and a side of this guacamole recipe.

    Cooked fried tacos on wooden cutting board.

    It’s no secret that we love tacos. Doesn’t everyone? You can make them crunchy with chicken, make a taco salad recipe, or turn them into a creamy taco soup. The flavors may be similar, but everyone has their favorite textures!

    If you’re looking for fresh new ideas in between tacos, I also love making chicken fajita wraps for an easy lunch, and steak quesadillas can easily be made ahead.

    [feast_advanced_jump_to]

    Why You’ll Love This Recipe

    • Quick and easy: Brown the beef, then fry the tacos and serve!
    • Tasty leftovers: Easily reheat leftovers in a dry pan so you can get the mess of frying out of the way once.
    • Perfect toppings: Just meat and cheese are in these tacos, and everyone can add their own toppings!

    Ingredients Needed

    I’ve highlighted a couple of ingredients below with some relevant notes. Aside from this, the ingredients needed are pretty basic.

    Labeled ingredients for fried tacos on counter.
    • Beef – Use a lean ground beef and also drain the fat before adding the seasoning.
    • Taco seasoning – Use your family’s favorite, whether it’s spicy or mild.
    • Corn tortillas – Look for thicker ones, generally yellow corn, so they won’t tear when you fill and fry.
    • Cheese – Just a bit to add creaminess to the beef.
    • Oil – Select a neutral frying oil.

    Substitutions

    Sometimes substitutions are necessary because of ingredients that are unavailable or needed for dietary restrictions. Here are some suggestions that can help:

    • Cheese – swap out cheddar for Monterey Jack, Mexican blend, or even chihuahua.
    • Meat – feel free to use ground chicken or turkey instead. Use Chicken Taco Seasoning for amazing flavor.

    Variations

    • Cook Method – this recipe can also be made in the slow cooker if needed. Simply brown the meat first and then add the remaining ingredients to the slow cooker and cook on low for 6-8 hours.

    Equipment

    I recommend using a candy thermometer to ensure your frying oil is the correct temp!

    How to Make This Fried Tacos Recipe

    These fried tacos are broken into 3 components:

    • brown the beef
    • fill the tacos
    • fry and serve

    *Be sure to see the recipe card below for the full ingredients list & instructions!*

    Steps 1-4 of how to make fried tacos.

    STEP 1. Brown the beef. Brown the beef in a skillet until cooked through (Images 1 & 2).

    STEP 2. Season the meat. Add water and seasoning and stir to combine (Images 3 & 4).

    Steps 1-4 of how to make fried tacos.

    STEP 3. Fill tacos. Add shredded cheese and beef to each tortilla, being sure not to overfill so they still close neatly (Images 5 & 6).

    Tip: Gently heat the tortillas in the microwave before filling and folding to help them resist tearing. The package will usually have suggestions on how to do this.

    STEP 4. Fry tacos. Once your oil is hot, place two tacos in the pan. You may need to hold them shut with tongs initially (Image 7).

    STEP 5. Flip tacos. Cook on the second side and then remove to a paper-towel-lined plate to drain while you cook the remaining tacos (Image 8).

    Fried tacos on a wooden cutting board.

    Recipe Pro Tips

    • Use the right tortillas. Use regular corn tortillas that are thicker, so they don’t tear.
    • Correct temperature. Your oil should be around 375 for perfect frying. Hotter, and they may burn. Colder, and they will soak up lots of oil.
    Fried taco being dipped in to salsa, on wooden cutting board.

    Recipe FAQs

    How do I store and heat leftovers?

    Store cooled tacos in the fridge for a few days. You can reheat in a dry pan on the stove or pop them in the oven for a few minutes. I don’t recommend the microwave as they will be soggy.

    What are fried tacos called in Mexico?

    These are known as tacos dorados in Mexico. Any sort of fried taco has this name, and if you roll them up before frying they are then flautas.

    What oils are good for frying?

    Vegetable, peanut, and canola oil are all good options for frying. These will work for both shallow and deep-frying foods. Just make sure your oil doesn’t come up too far in your pan so it doesn’t overflow when you add the tacos.

    What to Serve with Pan-Fried Tacos

    Make sure you have everyone’s favorite toppings on hand – salsa, sour cream, guacamole, and even smoked queso would be a great dip. A quick taco bean dip can also cool things down.

    More Taco Recipes You’ll Love

    • Taco Chicken Casserole on a plate.
      Taco Chicken Casserole
    • Shredded beef tacos that were cooked in slow cooker, sitting on white plate.
      Slow Cooker Shredded Beef Tacos
    • Walking Taco Casserole being lifted out of baking dish with spoon.
      Walking Taco Casserole
    • Crispy chicken tacos baked on baking sheet.
      Crispy Chicken Tacos

    Did you make this? I’d be so grateful if you left a “star” rating below to let me know what you thought! Then, the next time you need a quick and easy recipe, come back to Fantabulosity to browse all of my easy recipes!

    Recipe

    Fried tacos on wooden cutting board.
    Print Pin
    5 from 1 vote

    Fried Tacos

    Crispy and crunchy, these fried tacos are fun to make! You'll love the tasty filling wrapped in a crunchy, quick fried tortilla, giving them a texture that is delicious!
    Course Main Course
    Cuisine Mexican
    Prep Time 10 minutes minutes
    Cook Time 20 minutes minutes
    Total Time 30 minutes minutes
    Servings 10 servings
    Calories 301kcal
    Author Jessica Burgess

    Ingredients

    • 1 Pound Lean Ground Beef
    • 1 Packet Taco Seasoning
    • ⅔ Cup Water
    • 20 Corn Tortillas
    • 2 Cups Cheddar Cheese or Mexican Blend Cheese
    • ¾ to 1 Cup Cooking Oil

    Instructions

    • Brown ground beef over medium heat breaking into small pieces while cooking.
    • Once the beef is done and no longer pink stir in water and taco seasoning. Return to a boil then reduce to a simmer until thickened; about 3-4 minutes.
    • Prepare your tacos by placing a small amount of cheese and meat inside each tortilla then folding in half. (I strongly recommend warming your tortillas before filling to make them easier to fold.)
    • Heat oil over medium to medium high heat. The oil needs to be at least 375 degrees but not over 400 degrees or the tacos will burn.
    • Place tacos, two at a time, into the hot oil; do not overcrowd your pan. You may need to briefly hold the tortilla closed with tongs, to make sure they stay closed.
    • Cook until golden brown on each side; about 30 to 45 seconds on each side.
    • Once done remove with tongs and allow any oil to drain back into the pan before placing on a paper towel lined plate or pan.
    • Once the tacos are done and slightly cooled, top with your favorite toppings and enjoy!

    Notes

    • Warming tortillas will help them not to break when folding.
    • Do not overfill your tortillas as they will possibly break and not stay closed while cooking.
    • I recommend using the regular corn tortillas, not the thin ones. Also white or yellow corn tortillas will work great.
    • We loved these with salsa, cilantro, onions, and sour cream, but you could use any of your favorite taco toppings. Such as pico de gallo, avocado, jalapenos, tomatoes, lettuce etc.
    • I prefer reheating in a skillet on the stove top or you can warm them in the oven. You can use a microwave but they will be more soggy this way.

    Nutrition

    Serving: 2tacos | Calories: 301kcal | Carbohydrates: 24g | Protein: 16g | Fat: 16g | Saturated Fat: 7g | Polyunsaturated Fat: 1g | Monounsaturated Fat: 5g | Trans Fat: 0.4g | Cholesterol: 53mg | Sodium: 483mg | Potassium: 240mg | Fiber: 4g | Sugar: 1g | Vitamin A: 556IU | Vitamin C: 2mg | Calcium: 206mg | Iron: 2mg

    Cornflake Fried Chicken

    November 16, 2023

    Cornflake fried chicken on plate, with fresh parsley sprinkled on top.

    Want to know the secret to super crispy fried chicken? It’s all about what you bread your chicken with. Give this Cornflake Fried Chicken a try, as a fun alternative to traditional fried chicken.

    Yes! We’re really coating chicken in Corn Flakes Cereal and it’s better than you can even imagine! Soon, this will become an easy dinner recipe on rotation for your meal planner!

    Cooked cornflake fried chicken on white platter.

    Who doesn’t love crispy chicken? No one will be complaining about boring, bland chicken breasts when you whip these up. I also love this texture for crispy chicken sandwiches, and you can even cut them down to make cute chicken sliders for game day.

    I know not everyone is a fan of frying, whether it’s the mess of it or consuming the fat. These are shallow fried which I find easier to control messes! You can always choose to bake your chicken with a coating and still achieve a crispy coating.

    [feast_advanced_jump_to]

    Why You’ll Love This Recipe

    • Crispy and crunchy: Get restaurant-quality chicken without the cost of going out to eat.
    • Super flavorful: We’re adding lots of seasoning to the cornflakes to achieve the perfect taste. It’s still neutral enough to go with any cuisine.
    • Frozen chicken: Do yourself a favor and make extra to freeze! You’ll have dinner in a flash the next time you need it.

    Ingredients Needed

    I’ve highlighted a couple of ingredients below with some relevant notes. Aside from this, the ingredients needed are pretty basic.

    Labeled ingredients for cornflake fried chicken.
    • Chicken – You can either slice up your own chicken breasts or use the pre packaged chicken tenders. I prefer to cut mine to make them the size I like.
    • Cornflakes – Be sure and get plain cornflakes, not frosted flakes! These are the base of our breading and we will be seasoning it like mad.
    • Flour – Flour helps to coat the chicken so the egg and breading stick to each piece.
    • Seasonings – Feel free to adjust these to your liking. For example, if you have regular paprika rather than smoked, use that instead.

    Substitutions

    Sometimes substitutions are necessary because of ingredients that are unavailable or needed for dietary restrictions. Here are some suggestions that can help:

    • Flour – use a 1-to-1 gluten-free substitute if you’d like. Keep in mind though that not all brands of corn flakes are gluten-free, so read the labels if you need that!
    • Cereal – try crushing up Cheerios, or any plain Chex variety.
    • Egg wash – use a Dijon mustard or hot honey before adding the breading.

    Variations

    • Bake – feel free to make this cornflakes chicken in the oven. Preheat the oven to 400°F and arrange the chicken on a wire rack set over a baking sheet. Bake for 20-25 minutes or until an instant-read thermometer inserted into the thickest part of the chicken reads 165°F.
    • Deep Fry – Fill a Dutch oven or a heavy-bottomed saucepan with about 3 inches of vegetable oil. Heat the oil over medium heat until it reaches 350°F (I highly suggest you use a candy thermometer to check the temperature of the oil). Carefully lower the chicken pieces into the oil (do not crowd the oil) and fry for 5 minutes or until an instant-read thermometer inserted into the thickest part of the chicken reads 165°F. Transfer the chicken to a wire rack to allow the oil to drain off. 

    Equipment

    Especially if deep frying, I highly recommend a candy thermometer. This tells you if your oil is the correct temperature. If it’s too hot, your breading will burn before the chicken cooks through. If too cool, the chicken will soak up the oil rather than fry in it. You’ll also want an instant-read thermometer to check the temperature of the cooked chicken.

    If you have a cooling rack that fits in a half sheet pan, that is the perfect way to let the chicken drain and cool.

    How to Make Cornflake Chicken

    Prepare everything in stations so you are ready to bread and fry! It’s so much easier to have everything in place instead of needing to grab something when your fingers are coated in egg and flour.

    *Be sure to see the recipe card below for the full ingredients list & instructions!*

    Steps 1-4 of how to make cornflake fried chicken.

    STEP 1. Prepare breading. Crush the cereal and add seasonings. Stir to combine (Image 1). Set out bowls of flour and egg.

    STEP 2. Coat the chicken wedge each piece of chicken through flour then egg, (Images 2 & 3) and finally into the breading. Gently press the breading into the chicken so it doesn’t fall off (Image 4).

    Cornflake battered chicken cooking in skillet.

    STEP 3. Heat oil in a skillet. Heat your oil so that the chicken immediately sizzles when added. Flip once the first side is browned.

    Tip: Wear an apron when frying! I also find I have to wipe down the floor in front of the stove when I am done as oil tends to splatter everywhere even if you are shallow frying.

    STEP 4. Drain and cool. Let the chicken rest on a wire rack over paper towels for any excess oil to drain.

    Flipped cornflake chicken in skillet.

    Recipe Pro Tips

    • Crush the cereal. When crushing the cornflakes, make sure to leave some larger pieces. This isn’t supposed to be a fine flour coating, but have nice crispy pieces.
    • Dredge easily. Use one hand to dip the chicken into the flour, then the other to move to the eggs. This keeps your hands from getting a thick coating.
    Cooked cornflake fried chicken on white platter.

    Recipe FAQs

    Can I make cornflake fried chicken ahead of time?

    You can. Bread the chicken and arrange it in a single layer on a baking sheet. Place it in the freezer for a couple of hours to firm up (this is called flash freezing). Once the chicken is firm, transfer it to an airtight, freezer-safe container and store it in the freezer for up to 2 months. 

    When you are ready to enjoy, arrange the chicken on a wire rack set over a baking sheet and bake at 400°F for 30-35 minutes or until an instant-read thermometer inserted into the thickest part of the chicken reads 165°F.

    Why use chicken breasts instead of tenders?

    Honestly either one will work fine. I like cutting my own chicken breasts because it allows me to control the size of my chicken strips (this is great to ensure even cooking time) but chicken tenders will work just fine. 

    What to Serve with Cornflake Chicken

    I definitely recommend having your favorite dips on hand! Pretzel cheese dip is also great on chicken, and a spicy jalapeño ranch would pair nicely. Roast up your favorite veggies as a quick side dish.

    Cooked piece of cornflake chicken dipping in to mustard.

    Storage

    • Refrigerator. Allow the chicken to cool to room temperature before sealing it in an airtight container and storing it in the refrigerator. You can keep it there for up to 4 days. 
    • Freezer. Once the chicken has cooled completely, transfer it to an airtight container or freezer bag (make sure to get as much air out of the bag as possible) and store it in the freezer for up to 3 months. Allow the chicken to thaw in the fridge before reheating.  
    • To reheat. Allow the chicken to sit at room temperature for 15 minutes or so while you preheat the oven to 400 degrees F. Arrange the chicken on a wire rack set above a baking sheet and bake for 12-15 minutes or until heated through.  I don't recommend reheating in a microwave, the corn flakes. While still tasty, the cornflakes lose their crispiness and have a soggy dry texture when reheated in the microwave.

    More Chicken Recipes You’ll Love

    • Chicken legs that were cooked in the air fryer.
      Air Fryer Chicken Legs
    • Crispy Chicken Burger
      Crispy Chicken Burger (KFC Zinger Burger)
    • Fried chicken sliders on white plate, topped with mayo, lettuce and pickles.
      Fried Chicken Sliders
    • Sliced baked chicken cutlets on white plate, next to green beans.
      Baked Chicken Cutlets

    Did you make this? I’d be so grateful if you left a “star” rating below to let me know what you thought! Then, the next time you need a quick and easy recipe, come back to Fantabulosity to browse all of my easy recipes!

    Recipe

    Cornflake fried chicken on plate, with fresh parsley sprinkled on top.
    Print Pin
    5 from 4 votes

    Cornflake Fried Chicken

    I've got the secret to super crispy fried chicken! It's all about what you bread your chicken with. Give this Cornflake Fried Chicken a try and you won't make anything else.
    Course Main Course
    Cuisine American
    Prep Time 15 minutes minutes
    Cook Time 8 minutes minutes
    Total Time 23 minutes minutes
    Servings 6 servings
    Calories 427kcal
    Author Jessica Burgess

    Ingredients

    • 4 cups cornflakes
    • 1 teaspoon smoked paprika
    • 1 ½ teaspoons salt
    • 2 teaspoons garlic powder
    • 1 teaspoon onion powder
    • ½ teaspoon ground black pepper
    • 1 teaspoon mustard powder
    • 1 teaspoon chili powder optional
    • 2 eggs
    • 1 tablespoon water
    • 2 pounds boneless skinless chicken breasts cut in half lengthwise
    • ½ cup flour
    • 1 ½ cups vegetable oil
    • Chopped fresh parsley to garnish

    Instructions

    • Make the breading. Lightly crush the cornflakes and mix them with the smoked paprika, salt, garlic powder, onion powder, pepper, mustard powder, and chili powder.
    • Prepare to bread the chicken. Whisk together the eggs and the water in one bowl and put the flour in another.
    • Bread the chicken. One piece at a time, dredge the chicken in flour before coating it in the egg wash and then in the corn flakes mixture. Set them aside in a single layer until all of the chicken strips are breaded. A cooking sheet with parchment paper works well for this.
    • Fry the chicken. Heat the oil over medium-high heat in a large, heavy-bottomed skillet. Fry the breaded chicken pieces for 4 minutes on either side or until an instant-read thermometer inserted into the thickest part of the chicken reads 165 degrees F. You may have to fry the strips in batches so that they are not overlapping. Transfer the chicken to a wire cooling rack.
    • Rest. Let the cornflake chicken rest for about 5 minutes. This will allow the corn flakes to get nice a crisp!
    • Serve. Serve warm garnished with fresh parsley.

    Notes

    • You may also use chicken tenders if you don’t want to cut your own chicken breasts.
    • Feel free to “deep fry” as well if you like! I just always like using less oil total so go the shallow fry route.
    • Nutrition facts are calculated with 1 tablespoon frying oil absorbed per serving.

    Nutrition

    Calories: 427kcal | Carbohydrates: 25g | Protein: 37g | Fat: 19g | Saturated Fat: 3g | Polyunsaturated Fat: 9g | Monounsaturated Fat: 5g | Trans Fat: 0.1g | Cholesterol: 151mg | Sodium: 921mg | Potassium: 656mg | Fiber: 1g | Sugar: 2g | Vitamin A: 722IU | Vitamin C: 6mg | Calcium: 24mg | Iron: 7mg

    Rocky Road Cookies

    November 14, 2023

    Close up of rocky road cookie.

    Semi-sweet chocolate chunks meet mini marshmallows inside these delectable rocky road cookies. All you need are three simple ingredients to make the chocolate cookie base before you add in your mix-ins, making these chocolatey cookies a dream come true!

    If you love classic Rocky Road ice cream, you’re in for a treat with these chocolate lover’s dream cookies! It’s a cookie recipe that you’ll want to hang on to in your recipe box, along with these similar turtle cookies!

    Rocky road cookies spread out on white counter.

    Obsessed with all things chocolatey? Me too. Check out my yummy Chocolate Cream Cheese Pie or Oreo Brookies to satisfy more of your chocolate-loving sweet tooth after making this Rocky Road cookie recipe! Or, for another chocolate cake mix cookie, these Devil’s Food cookies are a must-make!

    [feast_advanced_jump_to]

    ❤️ Why You’ll Love This Recipe

    • It uses a few ingredients: With only 3 ingredients for the cookie base, these chocolate cookies are super simple!
    • Customizable: While the original rocky road cookies recipe calls for mini marshmallows, semi-sweet chocolate chunks, and peanuts, you can easily change it up with some more of your favorite treats!
    • Ready in only 20 minutes: From ingredients to wire rack chilling, this recipe only takes 20 minutes to make.

    🧾 Ingredients Needed

    I’ve highlighted a couple of ingredients below with some relevant notes. Aside from this, the ingredients needed are pretty basic.

    Labeled ingredients for rocky road cookies.
    • Chocolate Cake Mix – I used a basic chocolate cake mix for this recipe.
    • Chocolate Chunks – I highly recommend chunks of chocolate over chocolate chips for a dreamy melty chocolate cookie.
    • Peanuts – Unsalted peanuts are what this recipe calls for. No need for salted!

    📖 Substitutions

    Sometimes substitutions are necessary because of ingredients that are unavailable or needed for dietary restrictions. Here are some suggestions that can help:

    • Eggs – If you’re short on eggs, you can use applesauce in this recipe instead.
    • Canola Oil – You can swap this out for any oil you prefer.

    📖 Variations

    Easily change up this basic Rocky Road cookie recipe with a few simple variations:

    • Cake Mix – You can use chocolate fudge, milk chocolate, or devil's food cake mix for this recipe. You could even take it a step further and go with a flavored chocolate cake mix.
    • Chocolate – Feel free to use your favorite chocolate for this recipe. Just remember, chunks of chocolate bars will serve the best results and are always the right answer for cookies!
    • Nuts – You don’t have to stick to peanuts for this recipe. Crunchy nuts like pecans, almonds, or walnuts would also be great options to take the cookies to the next level.

    👩🏻‍🍳 How to Make Chewy Rocky Road Cookies

    This fudgy chocolate cookies recipe is super simple to make. I am talking, 3 steps from start to finish!

    These Rocky Road Cookies are broken into 3 components:

    • making the cookie base
    • adding your mix-ins
    • baking to ooey-gooey perfection

    I suggest doubling this recipe because you are not going to be able to get enough out of the 15 cookies the original makes. You will run out on day one and crave more of the gooey marshmallows and melty chocolate from these chewy chocolate cookies!

    *Be sure to see the recipe card below for the full ingredients list & instructions!*

    Begin by preheating your oven to 350 degrees and line two large cookie trays with a layer of parchment paper. You could also use a silicone mat.

    Steps 1-4 of how to make rocky road cookies.

    STEP 1. Make the cookie base. In a large bowl, combine the cake mix, eggs, and oil until you achieve a smooth mixture. You could also use a stand mixer or electric hand mixer for this on medium-high speed. (Image 1).

    STEP 2. Add mix-ins. Gently fold in ½ cup each of marshmallows, chocolate chunks, and peanuts. (Image 2).

    STEP 3. Scoop and Set. Use a large scoop to place the cookie dough onto each prepared baking sheet, ensuring there’s about two inches of space between each scoop. You can use a medium cookie scoop to get a greater number of cookies within the batch. Top each dough ball with 2-3 chocolate chunks and peanuts. (Image 4).

    Tip: Push in any marshmallows around the outside of the dough ball shape to prevent overspilling some melted marshmallows that lead to misshapen cookies. If you like a crispy edge, ignore this tip!

    Baked rocky road cookies on parchment paper.

    STEP 4. Bake. Bake in the preheated oven for 9-10 minutes.

    STEP 5. Finish ’em off. Once the cookies are out of the oven, add 3-4 mini marshmallows on top of the cookies. Then, return the cookies to the oven for an additional 1 minute before placing them on your cooling rack.

    Bite taken out of rocky road cookie.

    💭 Recipe Pro Tips

    • Add the last-minute marshmallows. Adding a few marshmallows on the tops of each cookie at the end of baking will lead to some extra ooey-gooeyness!
    • Use quality chocolate. Your chocolate cookies are only as good as the chocolate you use. Splurge a bit here on some delicious chocolate!
    Stacked rocky road cookies, separated by wax paper.

    📋 Recipe FAQs

    What are Rocky Road cookies made of?

    Rocky Road cookies have a chocolate base and are filled with mini marshmallows, chocolate chunks, and peanuts. To keep things easy, you can use a base chocolate cake mix for the cookie as I did in this recipe.

    What type of nut is in Rocky Road?

    Peanuts are the usual nut that is in Rocky Road, however, you can change it up with almonds, walnuts, or pecans.

    How to make Rocky Road cookie bars?

    To turn this Rocky Road chocolate cookies recipe into a bar recipe, simply press the cookie dough mixture into a large baking dish and bake for roughly 20 minutes. Check for doneness around the 17-minute mark.

    Why are they called Rocky Road cookies?

    Rocky Road cookies are named after the famous ice cream flavor “Rocky Road.” The term “rocky road” is often associated with a combination of chocolate, marshmallows, and nuts. The name is thought to have originated in the United States during the Great Depression, as a way to describe something that was rough and bumpy, just like the texture of these cookies or the ice cream.

    How to get a circle cookie shape?

    Cookies oftentimes come out of the oven in imperfect shapes. To get that perfect circle cookie look, use a large round cookie cutter or glass to stick around the outside of the cookie and gently swirl the cookie around in the glass to re-shape it into beautiful cookies.

    What is the key to a good chewy cookie?

    Making good, chewy Rocky Road cookies comes back to how much moisture is in your batter prior to cooking. Be sure to stick to the measurements to ensure a yummy, chewy texture.

    🍽 What to Serve with Chocolate Rocky Road Cookies

    Serve these yummy Rocky Road cookies with your favorite ice cream or a tall glass of milk. If you’re looking to take it a step further, try out a cookie dip like this Oreo Dip or this Marshmallow Fluff Dip.

    ❄️ Storage

    Keep the cookies in an airtight container at room temperature for a maximum of three days. To prevent them from sticking together, consider placing a piece of parchment paper between the layers.

    🍪 More Cookie Recipes You’ll Love

    Feeling like Cookie Monster lately? Indulge in some of these yummy cookie recipes below! Or if you’re just looking for something sweet, you’ll love all of our easy dessert recipes!

    • Stacked snickerdoodle cookies on a vintage plate.
      Mom’s Snickerdoodle Cookies
    • Cookies with cherries, dates and walnuts, stacked on vintage plate.
      Grandma’s Christmas Cookies
    • A slice of chocolate chip cookie pie on a plate with a fork.
      Chocolate Chip Cookie Pie
    • Strawberry cake mix cookies on white plate.
      Strawberry Cake Mix Cookies

    Did you make this? I’d be so grateful if you left a “star” rating below to let me know what you thought! Then, the next time you need a quick and easy recipe, come back to Fantabulosity to browse all of my easy recipes!

    Recipe

    Close up of rocky road cookie.
    Print Pin
    5 from 1 vote

    Rocky Road Cookies

    These simple Rocky Road cookies come together in 20 minutes or less from start to finish and are made with a chocolate cake mix bake and yummy chocolate chunks for chocolate gooey-ness!
    Course Dessert
    Cuisine American
    Prep Time 10 minutes minutes
    Cook Time 10 minutes minutes
    Total Time 20 minutes minutes
    Servings 15 cookies
    Calories 225kcal
    Author Jessica Burgess

    Ingredients

    • 1 box chocolate cake mix
    • ⅓ cup canola oil
    • 2 large eggs
    • ½ cup mini marshmallows plus extra for topping the cookie
    • ½ cup semi-sweet chocolate chunks plus extra for topping the cookie
    • ½ cup roasted unsalted peanuts, plus extra for topping the cookie

    Instructions

    • Preheat your oven to 350 degrees Fahrenheit.
    • Line two large cookie trays with parchment paper and set them aside.
    • In a large bowl, combine the cake mix, eggs, and oil until you achieve a smooth mixture.
    • Gently fold in ½ cup each of marshmallows, chocolate chunks, and peanuts.
    • Use a large scoop to place the cookie dough onto the prepared trays, ensuring there’s about two inches of space between each scoop. Top each dough ball with 2-3 chocolate chunks and peanuts.
    • Bake in the preheated oven for 9-10 minutes.
    • Once the cookies are out of the oven, add 3-4 mini marshmallows on top of each cookie. Then, return the cookies to the oven for an additional 1 minute.

    Notes

    • When baking these cookies, don’t be surprised if they don’t come out perfectly round. As the marshmallows melt during baking, they might spill out and cause some misshapen cookies. To prevent this, be mindful when scooping the cookie dough, avoiding an excessive amount of marshmallows on the sides or bottom of the dough balls. If you notice large marshmallow pieces sticking out, gently push them back into the dough ball. You can also use a cookie cutter (larger than your cookies) or the edge of a glass to shape the cookies back into circles right after taking them out of the oven.
    • Chocolate fudge, milk chocolate, or devil’s food cake mix are all suitable for this recipe.
    • If you don’t have chocolate chunks, you can substitute them with chocolate chips.
    • Similarly, you can replace peanuts with walnuts, cashews, almonds, or pecans. If using any of these nuts, it’s recommended to roughly chop them before adding them to the cookie dough, and toasted nuts will impart the best flavor.
    • To ensure consistent cookie sizes, use a cookie scoop. This not only enhances presentation but also helps maintain uniform baking times.

    Nutrition

    Serving: 1cookie | Calories: 225kcal | Carbohydrates: 25g | Protein: 5g | Fat: 13g | Saturated Fat: 3g | Polyunsaturated Fat: 3g | Monounsaturated Fat: 6g | Trans Fat: 0.03g | Cholesterol: 27mg | Sodium: 252mg | Potassium: 166mg | Fiber: 1g | Sugar: 14g | Vitamin A: 35IU | Calcium: 51mg | Iron: 2mg

    Peanut Butter Fluff

    November 12, 2023

    Peanut butter fluff in a large white bowl.

    Peanut Butter Fluff: Creamy peanut butter meets cream cheese goodness in this delicious peanut butter dip recipe.

    Peanut butter fluff in white bowl, with Nutter Butter cooking dipping out of it.

    Made with all things yummy, this delicious dip will become your new go-to snack recipe for movie nights, family gatherings, and birthday parties. Peanut butter lovers won’t be able to get enough!

    Obsessed with creamy dip recipes for snacks? Check out this Oreo Cookie Dip or this Banana Pudding Dip ASAP! They’re no-bake recipes that are easy to make and perfect for snacking.

    [feast_advanced_jump_to]

    Why You’ll Love This Recipe

    • It uses easy-to-find, simple ingredients: All of the ingredients you’ll need to make this peanut butter cookie dip are easy to find at your local grocery store making your shopping list simple as can be.
    • Make-ahead recipe: You can easily make a big batch of this sweet treat ahead of time and snack on it all week long.
    • Comes together quick: This dip recipe comes together in minutes before needing to chill which makes it ideal for making the morning of your party!

    Ingredients Needed

    I’ve highlighted a couple of ingredients below with some relevant notes. Aside from this, the ingredients needed are pretty basic.

    Labeled ingredients for peanut butter fluff.
    • Cream Cheese – Make sure you use room temperature, softened cream cheese for this recipe.
    • Peanut Butter – We used creamy peanut butter for this recipe to make the dip super creamy.
    • Marshmallow Cream – This ingredient is essential for creating that fluffy dip!
    • Peanut Butter Cups – If you have extra, make these chocolate chip peanut butter cup cookies!

    If you love anything peanut-flavored, you’ll also love this vintage peanut brittle recipe!

    Substitutions

    Sometimes substitutions are necessary because of ingredients that are unavailable or needed for dietary restrictions. Here are some suggestions that can help:

    • Peanut Butter – Natural peanut butter would work for this recipe, too. If you cannot have peanut butter, any alternative nut butter would work. Just make sure it is creamy!
    • Dairy – Feel free to use your favorite dairy-free products in this recipe.

    Variations

    There are a few different variations you can make with this yummy dip recipe:

    • Candies – We used Reese’s peanut butter cups and Mini Chocolate Chips for this recipe, but feel free to use whichever chocolatey candies you enjoy most. Some peanut butter chips would also be yummy! For an extra crunch, try out some graham crackers or even potato chips.
    • Peanut Butter – While we enjoy the use of creamy peanut butter most, you could swap in your favorite chunky peanut butter.
    • Cocoa Powder – Change up this recipe and make it a chocolate peanut butter dip by mixing in some cocoa powder.

    How to Make Peanut Butter Mousse

    Putting this creamy peanut butter dip together is super simple.

    This Peanut Butter Fluff is broken into 2 components:

    • Mixing together
    • Chilling

    I suggest making this dip the morning before you plan to serve it for optimal chilling time.

    *Be sure to see the recipe card below for the full ingredients list & instructions!*

    You’re going to start this crowd-pleaser recipe by bringing out a large bowl and electric mixer. If you prefer a stand mixer, you can use that instead of a hand mixer.

    Then go ahead and pop the chopped peanut butter cups and mini chocolate chips into the freezer, using freezer-safe containers or ziplock bags. Now we can get started!

    Steps 1-4 of how to make peanut butter fluff.

    STEP 1. Whip together the base. Begin by putting the cream cheese spread, marshmallow creme, and peanut butter in the bowl of a stand or hand mixer with a paddle attachment. Mix them on medium speed until they are well combined. (Image 1).

    Tip: Make sure your cream cheese is at room temperature to avoid clumps.

    STEP 2. Add vanilla extract. Reduce the speed to low and gradually add the vanilla extract, mixing thoroughly.

    STEP 3. Fold in whipped topping. Using a rubber spatula, gently fold in the whipped topping until fully incorporated. (Image 2).

    STEP 4. Fold in your candies. Retrieve the frozen chocolates and blend in ¾ of a cup of mini chocolate chips and 2 cups of peanut butter cups. Place the remaining peanut butter cups and mini chocolate chips back in the freezer. (Image 3).

    STEP 5. Chill. Transfer the prepared peanut butter fluff to your serving dish and refrigerate it for 2-3 hours to chill. (Image 4).

    Peanut butter fluff in white bowl, with Reese's Cups on top.

    STEP 6. Serve. When you’re ready to serve, sprinkle the remaining ¼ cup of mini chocolate chips and the remaining cup of peanut butter cups on top. Serve with optional side accompaniments.

    Close up of peanut butter fluff, with hand dipping Oreo cookie in.

    Recipe Pro Tips

    • Allow to fully chill. This recipe tastes best chilled for at least 2-3 hours.
    • Correct temperature. Make sure your cream cheese is softened and your candies are frozen for optimal dip-making.

    Recipe FAQs

    Can I halve or double this recipe?

    Peanut Butter Fluff is perfect for gatherings, and this particular recipe yields a generous portion. If you prefer a smaller batch, you can easily halve the ingredients. Or if you are feeding a large crowd, it is very easy to double!

    Why do I need to freeze the chocolates?

    Before cutting the chocolates, I recommend freezing them. This minimizes mess and prevents them from melting everywhere.

    How to fold in whipped cream to peanut butter fluff?

    When adding the whipped topping, consider doing it in stages. This approach makes it much simpler to blend into your fluff.

    What other candies can I use in peanut butter fluff?

    Feel free to get creative with the candies! Try using Reese's Pieces or even chopped Butterfinger for a fun twist!

    How can I make this recipe healthier?

    For a healthier version, you could swap in PB2 powder for the peanut butter or Greek yogurt for the cream cheese. This will also add more protein!

    What is good to dip in peanut butter fluff?

    Peanut butter fluff dip is incredibly versatile, and there are numerous delectable options for dipping. Fresh fruit slices like apples, bananas, strawberries, and grapes provide a healthy and refreshing contrast to the sweet and creamy dip.

    Classic choices such as chocolate graham crackers or chewy peanut butter cookies offer a satisfying crunch that pairs perfectly with the peanut butter and marshmallow flavors of this creamy dip.

    You can also try out the savory side with pretzels or even potato chips for a delightful blend of salty and sweet. If you’re feeling adventurous, try dipping crispy bacon strips for a unique twist. Other options include marshmallows, cookies, rice cakes, celery sticks, and even mini donut holes.

    What to Serve with Peanut Butter Fluff

    There are so many options for dipping, but I would suggest starting with some new recipes like Monster Cookies, Oreo Rice Krispie Treats, or these yummy Bronuts (brownie donuts)! Take it a step further and use it as filling for some fluffernutter sandwiches.

    If you are looking for healthier options, some fresh fruit such as apple slices or bananas would be perfect with the yummy peanut butter flavor.

    Storage

    To keep your Peanut Butter Fluff fresh, store it in the refrigerator within an airtight container or covered with plastic wrap. This helps prevent it from absorbing any unwanted odors or flavors from other fridge items.

    When stored properly, your Peanut Butter Fluff should maintain its quality for approximately 1-2 weeks. However, remember to inspect it for any signs of spoilage, such as an unusual odor or mold growth, before enjoying it.

    It’s worth noting that freezing isn’t recommended for this dip, as it can cause separation and a liquid consistency when thawed.

    More Dessert Recipes You’ll Love

    Got a big sweet tooth? Me too. Try out some of these other unique, no-bake, delicious dessert recipes below to satisfy your late-night sweets craving!

    • A bowl of booty dip surrounded by crackers and with two graham crackers in the dip.
      Booty Dip
    • A sweet cheeseball that has bee rolled in colorful M&M's is centered with pretzels and sugar wafer cookies waiting for dipping
      Chocolate Chip Cheese Ball with M&M’s
    • Close up photo of a stack of Biscoff Truffles with the center truffle missing a bite
      Biscoff Truffles
    • Lucky Charms Treats stacked on top of one another, sitting on white counter.
      Lucky Charms Treats

    Did you make this? I’d be so grateful if you left a “star” rating below to let me know what you thought! Then, the next time you need a quick and easy recipe, come back to Fantabulosity to browse all of my easy recipes!

    Recipe

    Peanut butter fluff in a large white bowl.
    Print Pin
    5 from 1 vote

    Peanut Butter Fluff

    Peanut butter fluff is a delicious blend of cream cheese, creamy peanut butter, marshmallow creme, and whipped topping. It comes together fast and is the perfect peanut butter flavored treat for parties!
    Course Dessert
    Cuisine American
    Prep Time 15 minutes minutes
    Chill Time 2 hours hours
    Total Time 2 hours hours 15 minutes minutes
    Servings 10 servings
    Calories 801kcal
    Author Jessica Burgess

    Ingredients

    • 3 cups chopped peanut butter cups divided – frozen helps!
    • 1 cup mini chocolate chips divided
    • 1 package cream cheese spread, softened 8 ounces
    • 1 jar marshmallow creme 7-ounce
    • 1 ¼ cup creamy peanut butter
    • 1 teaspoon vanilla extract
    • 1 container whipping topping, thawed 8 ounces

    Instructions

    • PRO TIP: If you want to, freeze your peanut butter cups before starting so they're easier to cut!
    • Begin by putting the cream cheese spread, marshmallow creme, and peanut butter in the bowl of a stand or hand mixer with a paddle attachment. Mix them on medium speed until they are well combined.
    • Reduce the speed to low and gradually add the vanilla extract, mixing thoroughly.
    • Using a rubber spatula, gently fold in the whipped topping until fully incorporated.
    • Retrieve the frozen candy and blend in ¾ of a cup of mini chocolate chips and 2 cups of peanut butter cups. Place the remaining peanut butter cups back in the freezer.
    • Transfer the prepared peanut butter fluff to your serving dish and refrigerate it for 2-3 hours to chill. (Ideal but not a must. It's good either way!)
    • When you’re ready to serve, sprinkle the remaining ¼ cup of mini chocolate chips and the remaining cup of peanut butter cups on top. Serve with optional side accompaniments.

    Video

    Notes

    • Peanut Butter Fluff is perfect for gatherings, and this particular recipe yields a generous portion. If you prefer a smaller batch, you can easily halve the ingredients.
    • Before cutting the chocolates, I recommend freezing them. This minimizes mess and prevents them from melting everywhere.
    • When adding the whipped topping, consider doing it in stages. This approach makes it much simpler to blend into your fluff.
    • Feel free to get creative with the candies! Try using Reese's Pieces or even chopped Butterfinger for a fun twist!

    Nutrition

    Serving: 1serving | Calories: 801kcal | Carbohydrates: 68g | Protein: 18g | Fat: 54g | Saturated Fat: 20g | Polyunsaturated Fat: 9g | Monounsaturated Fat: 21g | Trans Fat: 0.03g | Cholesterol: 31mg | Sodium: 525mg | Potassium: 504mg | Fiber: 5g | Sugar: 56g | Vitamin A: 392IU | Vitamin C: 0.4mg | Calcium: 125mg | Iron: 2mg

    Chicken Meatloaf

    November 10, 2023

    Slices of chicken meatloaf on a white plate.

    This ground chicken meatloaf recipe is baked in the oven, and is leaner than traditional family favorite meatloaf made with ground beef.

    This easy dinner recipe is bound to become a new family weeknight comfort food staple that makes for the perfect leftover meatloaf for the next day that the whole family will love.

    Cooked chicken meatloaf on white platter.

    Homemade meatloaf with chicken is just one of many versions of classic dinners that our parents used to make. Using ground chicken in dishes instead of ground beef can be easily done. This chicken bolognese and these chicken lettuce wraps are a perfect example of that.

    If you love a good, hearty home-cooked meal, check out this old-fashioned tuna casserole recipe as well as this super easy chili recipe.

    [feast_advanced_jump_to]

    Why You’ll Love This Recipe

    • It uses easy-to-find, simple ingredients: You probably already have most of the ingredients on hand.
    • It is budget-friendly: You won’t find anything on the ingredients list that can’t be found at an affordable price at the grocery store.
    • Makes for perfect leftovers: Who doesn’t love leftover meatloaf? Easily double this recipe for another chicken meatloaf night this week to make life easier for you!

    Ingredients Needed

    *Be sure to see the recipe card below for the full ingredients list & instructions!*

    We’ve highlighted a couple of ingredients below with some relevant notes. Aside from this, the ingredients needed are pretty basic.

    Labeled ingredients for chicken meatloaf.
    • Ground Chicken – Freshly ground chicken is optimal for this recipe.
    • Breadcrumbs – Unseasoned Panko breadcrumbs are what we used for this recipe but you can use Stove Top Stuffing if you have that on hand, like we did in this Stove Top Stuffing Meatloaf recipe. Panko crumbs are also used to make this crispy panko chicken if you have leftovers!
    • Milk – We used 2% cow’s milk for this recipe.

    Substitutions

    Sometimes substitutions are necessary because of ingredients that are unavailable or needed for dietary restrictions. Here are some suggestions that can help:

    • Milk – If you do not drink cow’s milk, you can easily swap in one of your favorite brands of non-dairy milk such as almond milk.
    • Meat – While this recipe is specifically for ground chicken in the meatloaf, you can swap it out for any ground meat of your choosing. Ground turkey or ground pork would make good options too!

    Variations

    • Smoky Flavor – If you want a smokey flavor you can substitute the ketchup for BBQ sauce. For an even bigger smokey flavor add in a ¼ teaspoon of liquid smoke.
    • Breadcrumbs – I used plain breadcrumbs but any flavored breadcrumbs will work. I haven't tested using panko, that might affect the texture.

    How to Make Healthy Ground Chicken Meatloaf

    This Ground Chicken Meatloaf Recipe is broken into 3 components:

    • combining ingredients
    • shaping meat mixture in a prepared baking dish
    • baking

    To begin, you are going to preheat the oven to 350 and line a loaf pan or baking sheet with parchment paper.

    Steps 1-4 of how to make chicken meatloaf.

    STEP 1. Start the Chicken Loaf. In a large mixing bowl add the ground chicken, onion, garlic, and egg. Using a spatula or a wooden spoon fold everything together so it's well combined. (Images 1).

    Tip: You could also put on some gloves and mix the meat mixture with your hands.

    STEP 2. Continue the Ground Chicken Mixture. Next add in the breadcrumbs, milk, and parmesan cheese fold the ingredients in so they're fully distributed. (Image 2).

    STEP 3. Finish by Combining the Chicken Meatloaf Ingredients. Next add the Worcestershire sauce, tomato paste, ketchup, mustard, garlic powder, salt, pepper, and red pepper flakes. Fold the mixture together trying not to over-work all of the ingredients. (Image 3).

    STEP 4. Add to Loaf Pan or Baking Sheet. Once all of the ingredients are incorporated, place the chicken into the prepared loaf pan. You can also shape the meatloaf mixture into a loaf shape on a lined baking sheet with your hands. Use gloves and plastic wrap if you don’t want to touch the meat! (Image 4).

    Steps 5-8 for making chicken meatloaf.

    STEP 5. Make the Glaze. In a small bowl add the ketchup, Worcestershire sauce, and brown sugar. Using a whisk or a fork, stir to combine the ingredients. (Image 5).

    STEPS 6-7. OPTIONAL: You can bake the meatloaf in the bread pan, or you can pull the shaped loaf out of the pan and place it directly on the prepared baking sheet. This is a more exact way to get the loaf shape over attempting to shape the loaf yourself. (Images 6 & 7).

    STEP 8. Glaze. Brush the glaze over the top of the chicken mixture. Reserve 2 tablespoon of the glaze mixture and set aside for later use. (Image 8).

    STEP 9. Bake. Place it in the oven and bake for 1 hour and 10 minutes or until the internal temperature reaches 165 degrees on a meat thermometer. Once the chicken meatloaf has reached 165 degrees F remove it from the oven and brush on the reserved glaze.

    STEP 10. Serve. Serve with your favorite sides like mashed potatoes and steamed or roasted vegetables. You could even make a tasty meatloaf sandwich!

    Baked chicken meatloaf on baking sheet.

    Recipe Pro Tips

    • Serve with tasty sides. Meatloaf is best accompanied by delicious side dishes like mashed potatoes, scalloped potatoes, mac and cheese, or baked veggies.
    • Serve right away. Chicken meatloaf is best served warm out of the oven but you can let the meatloaf rest for a few minutes to let the juices do their thing outside of the oven.
    Cooked ground chicken meatloaf on white platter.

    Recipe FAQs

    How to make a chicken meatloaf moist?

    The secret to making a moist chicken meatloaf is adding moisture to the chicken before baking. The addition of egg and milk is the key to keep the chicken from drying out while baking.

    Can I bake the chicken meatloaf in a loaf pan?

    Yes! We baked the meatloaf on a baking sheet because it does cut the cook time down and it evenly bakes the chicken and gives it a nice 'crust' on the outside.

    Do I have to use ground chicken for meatloaf?

    No, you don’t have to use ground chicken for meatloaf. You can use other ground meats like beef, pork, or turkey depending on your preference. Meatloaf can be made with a variety of ground meats and it all comes back to your own personal preference.

    What ingredient keeps meatloaf from falling apart?

    Eggs are typically the ingredient that helps meatloaf hold together by acting as a binding agent. They help to keep the meatloaf from crumbling when it’s cooked and then cut into.

    Can you make your own ground chicken?

    Yes, you can make your own ground chicken by grinding boneless, skinless chicken breast or thigh meat in a food processor or using a meat grinder. Using your own freshly ground chicken breast allows you to control the texture and freshness of the ground chicken for your recipes.

    What goes into a meatloaf glaze?

    A meatloaf glaze typically consists of a mixture of ingredients like ketchup, brown sugar, Worcestershire sauce, and sometimes mustard. This glaze is applied to the top of the meatloaf before or during baking to add flavor and a sweet, tangy finish to the dish. You can also add varieties of mustard and honey to kick up the flavor profile.

    What to Serve with Ground Chicken Meatloaf

    As mentioned earlier, classic meatloaf is nothing without its sides! Some tasty side dishes to try out with this easy ground chicken meatloaf recipe would be Garlic Roasted Broccoli, Instant Pot Mashed Potatoes, or Instant Pot Sweet Potatoes.

    Adding more ketchup mixture on to top of meatloaf.

    Storage

    Store any leftovers in an airtight container in the fridge for up to 4 days. You can reheat the meatloaf leftovers in the microwave making sure to use a microwave-safe container when reheating the chicken meatloaf.

    Slices of chicken meatloaf on white plate, next to vegetables.

    More Chicken Recipes You’ll Love

    For more yummy chicken-inspired recipes, check out the ones below!

    • Chicken and gravy on top of mashed potatoes on white plates
      Chicken and Gravy Recipe
    • Sliced baked chicken cutlets on white plate, next to green beans.
      Baked Chicken Cutlets
    • Spatula holding up a piece of cheesy chicken.
      Cheesy Chicken
    • Oven Baked Bacon Wrapped Chicken Thighs

    Did you make this? I’d be so grateful if you left a “star” rating below to let me know what you thought! Then, the next time you need a quick and easy recipe, come back to Fantabulosity to browse all of my easy recipes!

    Recipe

    Slices of chicken meatloaf on a white plate.
    Print Pin
    5 from 1 vote

    Chicken Meatloaf Recipe

    Chicken meatloaf is a great option if you are looking for a healthier dinner choice using ground chicken. This family-favorite dinner recipe is a classic!
    Course Dinner
    Cuisine American
    Prep Time 8 minutes minutes
    Cook Time 1 hour hour 10 minutes minutes
    Total Time 1 hour hour 18 minutes minutes
    Servings 8 servings
    Calories 313kcal
    Author Jessica Burgess

    Ingredients

    • 2 pounds ground chicken
    • 1 medium onion finely chopped
    • 2 cloves garlic finely chopped
    • 1 egg
    • 1 ½ cup breadcrumbs
    • 1 cup milk
    • ¾ cup parmesan cheese grated
    • 3 tablespoons Worcestershire sauce
    • 2 tablespoons tomato paste
    • 2 tablespoons ketchup
    • 1 tablespoons mustard
    • 1 teaspoon garlic powder
    • 1 teaspoon salt
    • ½ teaspoon pepper
    • ¼ teaspoon red pepper flakes

    Glaze

    • ⅓ cup ketchup
    • 1 teaspoon Worcestershire sauce
    • 2 tablespoon brown sugar

    Instructions

    • Preheat the oven to 350 degrees F.
    • Line a bread pan with parchment paper and set aside (optional).
    • Line a baking sheet with a piece of parchment paper and set aside.
    • In a bowl add the ground chicken, onion, garlic, and egg. Using a spatula or a wooden spoon fold everything together so it's well combined.
    • Next add in the breadcrumbs, milk, and parmesan cheese fold the ingredients in so they're fully distributed.
    • Next add the worcestershire sauce, tomato paste, ketchup, mustard, garlic powder, salt, pepper, and red pepper flakes. Fold the mixture together trying not to over-work all of the ingredients.
    • Once all of the ingredients are incorporated, place the chicken into the prepared loaf pan. **This step is optional, you can create a loaf shape without placing the chicken in the loaf pan. I taking this step made the process easier.
    • Turn the chicken out onto the prepared lined baking sheet and set aside.
    • Time to make the glaze. In a small bowl add the ketchup, worcestershire sauce, and brown sugar. Using a whisk or a fork, stir to combine the ingredients.
    • Reserve 2 tablespoon of the glaze mixture and set aside for later use.
    • Brush the remaining glaze over the top of the chicken mixture.
    • Place it in the oven and bake for 1 hour 10 minutes or until the interal reaches 165 degrees on a meat thermometer.
    • Once the chicken meatloaf has reach 165 degrees F remove it from the oven and brush on the reserved glaze. Serve with you favorite sides like mashed potatoes and steamed or roasted vegetables.

    Notes

    Can I make the chicken meatloaf in a pan instead?
    Absolutely. Baking the meatloaf on a baking sheet because it cuts the cook time down and it evenly bakes the chicken and gives it a nice ‘crust’ on the outside.

    Nutrition

    Serving: 1serving | Calories: 313kcal | Carbohydrates: 21g | Protein: 27g | Fat: 14g | Saturated Fat: 5g | Polyunsaturated Fat: 2g | Monounsaturated Fat: 5g | Trans Fat: 0.1g | Cholesterol: 128mg | Sodium: 883mg | Potassium: 849mg | Fiber: 1g | Sugar: 10g | Vitamin A: 310IU | Vitamin C: 4mg | Calcium: 200mg | Iron: 2mg

    Southern Fried Pork Chops

    November 8, 2023

    Close up of southern fried pork chops on white plate, with a pork gravy poured on top.

    Southern Fried Pork Chops – This delicious, bone-in pork chops recipe is simple to make, so juicy on the inside and crispy on the outside. Similar to our country-fried steak recipe, the pork chops are marinated in a buttermilk seasoning mixture, and they come out flavorful after being cooked on the stove-top in the skillet.

    Southern fried pork chops on white platter, after cooked.

    Serve this Southern fried pork chops recipe with your favorite side dishes, like Instant Pot mashed potatoes (or this fried potatoes recipe) with white country gravy, green beans, and a country-style homemade biscuit for the ultimate, classic Southern dish and dinner idea.

    If you love country-fried recipes like this one, we think you’re also going to love how we cooked deer tenderloin. It’s similar to the cooking process, and it uses up that venison that you may have in the freezer. Or, a classic Southern staple, this Southern Fried Chicken is always another great choice.

    [feast_advanced_jump_to]

    Why You’ll Love This Recipe

    • Simple Ingredients: More than likely, you have most, if not all, of the ingredients on hand to make the perfect pork chop. If not, the ingredients can easily be found at most grocery stores.
    • Marinade: Some recipes don’t call for a pork chop marinade but this one does! The seasoned buttermilk will help tenderize the meat and help flavor it more.
    • Classic Southern food: A deep-fried comfort dish, these delicious southern fried pork chops will soon become a family favorite.

    Ingredients Needed

    With the ingredients being simple and easy, there’s not much to say about what’s required, however, we’ve touched on a few notes and tips below that can be helpful!

    Labeled ingredients for southern fried pork chops.
    • Pork Chops – For this recipe, we like to use bone-in pork chops, the same as in this broiled pork chops recipe. We typically use 4 pork chops, although if they’re really small, you can get by with 6, with the ingredients. You may get less meat when choosing bone-in but you’ll have more flavor when choosing bone-in. If you have boneless pork chops, this creamy crock pot pork chop recipe is delicious too!

      For complete temperature and timing guidance, see our full guide on how to cook pork chops in the oven.
    • Red Pepper Flakes & Chili Powder – You can leave these out if you prefer but they add a bit of a kick, which is delicious in this type of recipe.
    • Flour – Use all-purpose flour for this recipe.

    Substitutions

    If you find that substituting is necessary, or desired, here are some suggestions that can help:

    • Pork Chops – You could use boneless pork chops if you would like, however, they will cook a little more quickly. If you prefer to use thick-cut pork chops, instead of storebought thin pork chops, they will take longer to cook and you might find that your breading starts to brown a bit too much (bordering on burning) before the pork chops are cooked all the way through. If you choose to go with thick-cut pork chops, I suggest using a meat thermometer to check that the internal temperature reaches 145°F. 
    • Oil – Feel free to use canola oil or peanut oil instead of vegetable oil.
    • Paprika - Smoked paprika will also do the trick and will add a nice smokiness to the dish. 

    Oven Fried Pork Chops Option:

    Baking the pork chops in the oven is an option if you prefer it. Here’s how:

    • Oven-Baked Fried Pork Chops – You could also make these pork chops in the oven. Arrange the dredged pork chops in a single layer on a wire rack set above a baking sheet. Bake at 425°F for 20 minutes, flipping halfway through. 

    For complete temperature and timing guidance, see our full guide on how to cook pork chops in the oven.

    Equipment

    • Mixing bowls 
    • Measuring cups and spoons
    • Whisk 
    • Wire rack 
    • Skillet – Wee used a 12-inch skillet. You could use a larger or a smaller one. Just make sure you have 1 inch of oil filling it for proper frying. One benefit of using a larger pan is that you won't have to fry in as many batches to avoid crowding the oil. 
    • Candy thermometer (optional, but recommended) 
    • Tongs 

    How to Make Fried Pork Chops

    Making these southern-fried pork chops is easy but there are three steps to make these one of your favorite pork chop recipes:

    • marinating the pork chops
    • coating the pork chops in the seasoned flour mixture
    • frying the pork chops in the hot oil

    *Be sure to see the recipe card below for the full ingredients list & instructions!*

    Steps 1-4 of how to make Southern fried pork chops with flour batter.
    1. Make the marinade. Whisk together the buttermilk, salt, pepper, ½ teaspoon garlic powder, ½ teaspoon onion powder, and paprika in a bowl. 
    2. Marinate. Add the pork to the bowl with the buttermilk mixture, making sure to coat the meat in the marinade. Cover the bowl with plastic wrap, and chill in the fridge for 2-4 hours.
    3. Make the Breading. Whisk together the four, red pepper flakes, chili powder, 1 teaspoon onion powder, and 1 teaspoon garlic powder. 
    4. Dredge. Dredge the sides of the pork chops in the flour mixture, making sure to coat each piece thoroughly, and arrange the pieces on a wire rack until you are ready to fry. 
    Pork chop being fried in skillet, with black tongs flipping it.
    1. Heat the oil. Pour the oil into a large skillet (you should have about 1-inch of oil). Heat the oil over medium heat, to medium-high heat (don’t want to get it too hot, so make sure it gets to 350-360°F – I recommend using a candy thermometer to check the temperature). 
    2. Fry. Fry the pork for 8-10 minutes, flipping halfway through until they’re golden brown. Transfer the fried pork to a plate lined with paper towels. Be careful not to crowd the pan here folks. If you need to fry the pork in batches, do so by adding the remaining pork chops to the oil. Just be sure to bring the oil back to temperature between batches.
    Cooked fried pork chop on black cooling rack.

    Recipe FAQs

    Can I make pork chops ahead of time and freeze them?

    You can. Place the marinading pork chops in a freezer-safe airtight container and store them in the freezer for up to 3 months. When you are ready to enjoy, allow them to thaw in the fridge, prepare the breading, dredge, and fry. 

    How to make pork chops tender when frying?

    Being careful not to overcook them is one way to keep them tender. Marinating them in buttermilk is another way to keep them tender.

    How do you keep breading on fried pork chops?

    Soaking the pork chops in buttermilk will help secure the breading on to the pork chops.

    Cooked fried pork chop on white plate.

    Storage

    • Refrigerator. Once the pork chops have cooled to room temperature, seal the leftover pork chops in an airtight container and store them in the fridge for up to 4 days. 
    • Freezer. Allow the leftover fried pork chops to cool completely before sealing them in a freezer-safe airtight container and store them in the freezer for up to 3 months. Allow them to thaw in the fridge before reheating. (Do note that the breading for these pork chops is prone to falling off upon thawing. They will still taste delicious, though!)
    • To reheat. Arrange the pork chops in a single layer in a baking dish, cover with aluminum foil, and bake at 350°F for 10-15 minutes or until heated through. 
    Fork cutting out a bite from cooked Southern fried pork chop.

    Brown Fried Pork Chop Gravy:

    If you prefer a white gravy, you can follow our white gravy recipe but use pork drippings instead of bacon grease.

    What you’ll need for brown, pork chop gravy:

    • 4 tablespoon of reserved seasoned flour
    • 2 cups beef broth
    • 1 tablespoon reserved pork drippings/oil
    Image collage showing how to make fried pork chop gravy in 4 steps.

    If you love gravy on your pork chops, there’s a delicious pork gravy you can make to go on top. Here’s how you can make it with the fried pork chop drippings:

    1. Make sure to reserve the extra seasoned flour that you used to coat the pork chops.
    2. Allow the oil to cool a bit, after frying the pork chops, and then reserve about a tablespoon of oil and fried pork bits. (TIP: I will pour the oil in to another dish, and use a mesh strainer to capture the pork bits, and place back in my skillet.)
    3. Turn the burner to low and pour in one cup of beef broth. Allow this to warm through for a couple of minutes. (You don’t want this to be too hot when adding the remaining ingredients, so the cold/cooler broth and flour won’t curdle when adding.)
    4. Next, mix together 4 Tablespoons of the reserved seasoned flour (or new flour if you’ve ran out), with one cup of beef broth. Whisk this together until blended and pour in to the broth that’s already warm in the skillet.
    5. Whisk this together, turn the heat up to medium, or medium-high heat, whisking constantly until thickened.

    Usually, this gravy could still use some salt and pepper since we’ve added broth. Feel free to add salt and pepper to your taste preference. Or, we’ve also shared a pork gravy recipe that is a bit different for some zing. Love mushrooms in your gravy? This mushroom gravy on Salisbury steaks will be a recipe you’ll love too!

    Southern fried pork chop topped with brown pork gravy, sitting on white plate.

    More Southern Recipes You’ll Love

    Whether you’re looking for more Southern side dishes or main dishes to add to your meal planner, we feel like you’re going to be a fan of these too:

    • Southern broccoli casserole with cheese
      Southern Broccoli Casserole
    • fried shrimp on plate next to sauce
      The BEST Fried Shrimp
    • Fried chicken sliders on white plate, topped with mayo, lettuce and pickles.
      Fried Chicken Sliders
    • Baked chicken and rice casserole in baking dish.
      Old Fashioned Chicken and Rice Casserole

    Did you make this? I’d be so grateful if you left a “star” rating below to let me know what you thought! Then, the next time you need a quick and easy recipe, come back to Fantabulosity to browse all of my easy recipes!

    Recipe

    Close up of southern fried pork chops on white plate, with a pork gravy poured on top.
    Print Pin
    5 from 5 votes

    Southern Fried Pork Chops

    These Southern fried pork chops are made with simple ingredients, marinated in buttermilk, and so juicy on the inside and crispy on the outside.
    Course Main Course
    Cuisine American
    Prep Time 20 minutes minutes
    Cook Time 10 minutes minutes
    Marinade Time 2 hours hours
    Total Time 2 hours hours 30 minutes minutes
    Servings 4 servings
    Calories 447kcal
    Author Jessica Burgess

    Ingredients

    • 1 cup buttermilk
    • 1½ teaspoons salt
    • ½ teaspoon black pepper
    • 1½ teaspoons garlic powder divided
    • 1 teaspoon onion powder divided
    • ½ teaspoon paprika
    • 4-6 bone-in pork chops
    • 1 cup flour
    • ½ teaspoon red pepper flakes
    • ½ teaspoon chili powder
    • Vegetable oil Enough for 1-inch in the skillet

    Optional Pork Chop Gravy

    • 4 Tablespoons reserved seasoned flour from breading pork chops
    • 1 Tablespoon reserved pork drippings/oil
    • 2 cups beef broth chicken or vegetable will work too

    Instructions

    • Make the marinade. Whisk together the buttermilk, salt, pepper, ½ teaspoon garlic powder, ½ teaspoon onion powder, and paprika in a bowl. 
    • Marinade. Add the pork to the bowl with the buttermilk mixture, making sure to coat the meat in the marinade. Cover the bowl with plastic wrap, and chill in the fridge for 2-4 hours.
    • Make the breading. Whisk together the flour, red pepper flakes, chili powder, 1 teaspoon onion powder, and 1 teaspoon garlic powder. 
    • Dredge. Dredge the pork in the flour mixture, making sure to coat each piece thoroughly, and arrange the pieces on a wire rack until you are ready to fry. 
    • Heat the oil. Pour the oil into a skillet (you should have about 1-inch of oil). Heat the oil to 350-360°F (I recommend using a candy thermometer to check the temperature). 
    • Fry. Fry the pork for 8-10 minutes, flipping halfway through. Transfer the fried pork to a plate lined with a paper towel. Be careful not to crowd the pan here folks. If you need to fry the pork in batches, do so. Just be sure to bring the oil back to temperature between batches.

    Optional Pork Chop Gravy

    • Reserve flour. Make sure to reserve the extra seasoned flour that you used to coat the pork chops.
    • Save drippings. Allow the oil to cool a bit, after frying the pork chops, and then reserve about a tablespoon of oil and fried pork bits and leave in the skillet. (TIP: I will pour the oil in to another dish, and use a mesh strainer to capture the pork bits, and place back in my skillet.)
    • Add 1 cup broth. Turn the burner to low and pour in one cup of beef broth. Allow this to warm through for a couple of minutes. (You don't want this to be too hot when adding the remaining ingredients, so the cold/cooler broth and flour won't curdle when adding.)
    • Mix. Next, mix together 4 Tablespoons of the reserved seasoned flour (or new flour if you've ran out), with one cup of beef broth. Whisk this together until blended, and then pour in to the broth that's already warm in the skillet.
    • Whisk. Whisk this together, turn the heat up to medium, or medium-high heat, whisking constantly until thickened. Pour over cooked pork chops.
      TIP: Usually, this gravy could still use some salt and pepper since we've added broth. Feel free to add salt and pepper to your taste preference.

    Notes

    For Oven Baked Pork Chops: Arrange the dredged pork chops in a single layer on a wire rack set above a baking sheet. Bake at 425°F for 20 minutes, flipping halfway through. 

    Nutrition

    Serving: 1porkchop | Calories: 447kcal | Carbohydrates: 29g | Protein: 41g | Fat: 18g | Saturated Fat: 6g | Polyunsaturated Fat: 2g | Monounsaturated Fat: 7g | Trans Fat: 0.2g | Cholesterol: 124mg | Sodium: 1038mg | Potassium: 733mg | Fiber: 1g | Sugar: 3g | Vitamin A: 382IU | Vitamin C: 0.1mg | Calcium: 113mg | Iron: 3mg

    Crockpot Grape Jelly Little Smokies

    November 8, 2023

    Crockpot grape jelly little smokies inside of slow cooker.

    Crockpot Grape Jelly Little Smokies: Whether you’re hosting a party, organizing a game night, or simply having a night in with family and friends, these crockpot grape jelly little smokies will steal the spotlight. They make for ideal finger food that vanishes in no time and the simple recipe is quite the crowd-pleasing appetizer, that can stay in the Crockpot.

    Grape jelly little smokies on wooden spatula over crockpot.

    Crock pot little smokies make for a delicious recipe and great appetizer for your party thanks to their ease of assembly and small size. If you are in the market for some more party food options, check out these classic Air Fryer pigs in a blanket or this crack corn dip.

    [feast_advanced_jump_to]

    ❤️ Why You’ll Love This Recipe

    • It uses a few ingredients: With only 4 ingredients, this recipe uses simple ingredients that are easy to find.
    • Make-ahead recipe: Throw this recipe in the crockpot before your party and leave it be! So simple.
    • Budget-friendly: This recipe is made with 4 cheap ingredients that you can find at any supermarket!

    🧾 Ingredients Needed

    I’ve highlighted a couple of ingredients below with some relevant notes. Aside from this, the ingredients needed are pretty basic.

    Labeled ingredients for little smokies in crockpot.
    • Little Smokies – We used beef lil smokies for this recipe but there are also pork and vegetarian cocktail weenies options.
    • Tangy BBQ Sauce – Feel free to use your favorite BBQ sauce for this recipe. You could also make your own with some brown sugar, ketchup, apple cider vinegar, honey, and Worcestershire sauce.
    • Chili Sauce – This will add that extra kick to your crockpot grape jelly little smokies. It’s usually a mix of tomatoes and spices. If you can’t get your hands on chili sauce, just use ketchup with a dash of hot sauce or some crushed red pepper flakes for a similar vibe.
    • Grape Jelly – Grape jelly gives that sweet touch that evens out the smoky and tangy vibes. You can tweak how much jelly you add to match your own taste. If you’re not big on sweetness, just cut back a bit on the jelly.

    📖 Substitutions

    Sometimes substitutions are necessary because of ingredients that are unavailable or needed for dietary restrictions. Here are some suggestions that can help:

    • BBQ Sauce – For a lower-sugar option, select your favorite brand of low-sugar or sugar-free BBQ sauce.
    • Grape Jelly – For a lower-sugar option, select your favorite brand of low-sugar or sugar-free grape jelly.
    • Little Smokies – You could swap them out for meatballs to make a sweet and sour meatballs recipe in the slow cooker!

    📖 Variations

    You can easily make this easy Crockpot little smokies recipe your own with a few variations. Making your own savory sauce alterations would be a yummy idea and here are some of the different ways to do so:

    • Little Smokies – While we used beef little smokies for this recipe, it would be just as good with your favorite go-to little smokies!
    • BBQ Sauce – Change it up a bit and use a flavored BBQ sauce for an even denser flavor profile.
    • Chili Sauce – If you don’t want an added kick, skip this one and it’ll make the recipe a tad more kid-friendly.
    • Asain Inspired – Add an Asian twist to your mini sausages by swapping out the barbecue and chili sauces for some teriyaki sauce. Throw in a bit of grated ginger and a drizzle of honey to harmonize the flavors. Top it off with sesame seeds and chopped green onions for a burst of freshness when serving.
    • Tex-Mex Inspired – Give your smokies a Tex-Mex infusion by incorporating a combination of barbecue sauce and chipotle sauce in the mixture.
    • Add Some More Spice – If you’re in the mood for a bit of heat, stir in a couple of tablespoons of Sriracha sauce or your preferred hot sauce into the sauce blend. This will give your smokies a fantastic fiery punch that complements the grape jelly’s sweetness beautifully.
    • Replace Grape Jelly – Swap out the jar of grape jelly for pineapple preserves or crushed pineapple to add a tropical twist.

    🍳 Equipment

    You will need a slow cooker/Crockpot for this recipe.

    👩🏻‍🍳 How to Make Little Smokies with Grape Jelly

    Making your Crockpot grape jelly little smokies is super simple.

    These Grape Jelly Little Smokies are broken into 3 components:

    • mixing the sauce
    • adding to the crockpot
    • slow cooking

    This recipe is pretty hands-off. Your work is over in less than five minutes before you let the Crockpot do its thing. After 3 hours, your only job is to scoop some out to enjoy!

    *Be sure to see the recipe card below for the full ingredients list & instructions!*

    As mentioned above, all you have to do for this recipe is make the sauce, pour the sauce and sausages into your Crockpot, and then slow cook!

    Steps on how to make little smokies with grape jelly.

    STEP 1. Make the Simple Sauce. In a medium-sized bowl, mix together the barbecue sauce, chili sauce, and grape jelly until well combined. (Images 1 & 2).

    Tip: Taste the sauce before going onto the next step. Feel free to add a bit more of any ingredient to match the flavor you want!

    STEP 2. Add to Crockpot. Place the little smokies into your slow cooker and generously pour the sauce mixture over them, ensuring each sausage is evenly coated. (Images 3 & 4).

    Cooked little smokies in white crockpot.

    STEP 3. Cook. Cover the slow cooker with its lid and set it to the low heat setting for a duration of 3 hours. At the halfway point of the cooking time, gently stir the sausages to guarantee that they’re all immersed in the sauce.

    STEP 4. Serve. Once done, arrange the sausages on a platter or in a bowl, and remember to drizzle some of the remaining sauce over them to add an extra burst of flavor. Serve the sausages with toothpicks for convenient snacking.

    Little smokies in grape jelly and bbq sauce, cooked in crockpot, in green bowl.

    💭 Recipe Pro Tips

    • Serve right away. Serve the little smokies recipe with grape jelly right out of the slow cooker.
    • Serve with Toothpicks. Make things easy on your guests and provide toothpicks for easy snacking on these slow cooker little smokies.

    📋 Recipe FAQs

    What are little smokies?

    Little smokies are small cocktail wieners or mini-smoked sausages. They are typically made from pork, beef, or a combination of both, and they have a smoky flavor due to the smoking process during their making. These sausages are often used as appetizers or in recipes for various dishes, like cocktail wieners, pigs in a blanket, or served in a sauce as a party snack (like these ones). They are a popular choice for finger food at parties and gatherings.

    Can I freeze little smokies?

    Can I use frozen little smokies for crockpot lil smokies?

    If you’ve got frozen smoked sausages, it’s a smart move to let them thaw before tossing them into the slow cooker. This way, they’ll cook evenly and soak up the sauce’s flavors more effectively.

    Do I need to stir little smokies while they cook in the Crockpot?

    While the slow cooker handles the bulk of the work, it’s a good idea to stir the sausages gently every now and then. This ensures that the sauce spreads evenly and keeps any sausages from getting stuck to the bottom.

    What can I serve with little smokies from the Crockpot?

    Take things up a notch by presenting the Slow Cooker Little Smokies alongside an array of dipping sauces. Consider options like zesty mustard, tangy ketchup, or a flavorful garlic aioli.

    How to keep little smokies warm during a party?

    When you’re dishing out the Little Smokies at your party or get-together, think about maintaining their warmth by either keeping the slow cooker on the “warm” setting or using a buffet warmer.

    Can I double this recipe?

    This recipe is quite flexible. You can effortlessly increase or decrease the amounts depending on the number of guests you have. Simply tweak the ingredients while keeping the same flavor balance intact.

    🍽 What to Serve with Crockpot Grape Jelly Little Smokies

    Take things up a notch by presenting the Slow Cooker Little Smokies alongside an array of dipping sauces. Consider options like zesty mustard, tangy ketchup, or a flavorful garlic aioli.

    ❄️ Storage

    Refrigerating: After they’ve cooled down, put your little smokies in an airtight container. You can keep both the sausages and the sauce together for ease. To enjoy them at their best, it’s advisable to consume them within 3-4 days to keep the flavor and freshness intact.

    Freezing is also an option; they’re great for up to 2-3 months in the freezer inside of a freezer-safe container. When you want to use the frozen sausages, simply move them from the freezer to the refrigerator and let them thaw gradually overnight. This slow thawing process helps preserve their texture.

    🥘 More Easy Crockpot Recipes You’ll Love

    For more delicious appetizer recipes for your next party, check out these yummy ideas!

    Did you make this? I’d be so grateful if you left a “star” rating below to let me know what you thought! Then, the next time you need a quick and easy recipe, come back to Fantabulosity to browse all of my easy recipes!

    Recipe

    Crockpot grape jelly little smokies inside of slow cooker.
    Print Pin
    5 from 1 vote

    Crockpot Grape Jelly Little Smokies

    Crockpot grape jelly little smokies are the perfect easy slow cooker appetizer idea for your next party that takes just 5 minutes of prep and 3 hours in the Crockpot.
    Course Appetizer
    Cuisine American
    Prep Time 5 minutes minutes
    Cook Time 3 hours hours
    Total Time 3 hours hours 5 minutes minutes
    Servings 10 servings
    Calories 460kcal
    Author Jessica Burgess

    Ingredients

    • ½ cup barbecue sauce
    • ¼ cup chili sauce
    • ¾ cup grape jelly
    • 42 ounces mini cocktail sausages 3, 14-ounce packages

    Instructions

    • In a medium-sized bowl, mix together the barbecue sauce, chili sauce, and grape jelly until well combined.
    • Place the little smokies into your slow cooker and generously pour the sauce mixture over them, ensuring each sausage is evenly coated.
    • Cover the slow cooker with its lid and set it to the low heat setting for a duration of 3 hours.
    • At the halfway point of the cooking time, gently stir the sausages to guarantee that they’re all immersed in the sauce.
    • Once done, arrange the sausages on a platter or in a bowl, and remember to drizzle some of the remaining sauce over them to add an extra burst of flavor.
    • Serve the sausages with toothpicks for convenient snacking.

    Nutrition

    Serving: 1serving | Calories: 460kcal | Carbohydrates: 27g | Protein: 15g | Fat: 32g | Saturated Fat: 11g | Polyunsaturated Fat: 3g | Monounsaturated Fat: 15g | Cholesterol: 76mg | Sodium: 1464mg | Potassium: 284mg | Fiber: 1g | Sugar: 20g | Vitamin A: 78IU | Vitamin C: 3mg | Calcium: 24mg | Iron: 2mg

    Strawberry Sweet Rolls

    November 6, 2023

    Baking pan of strawberry cinnamon rolls.

    Making cinnamon rolls from scratch is a labor of love. Add some fun natural colors by making Strawberry Sweet Rolls with fresh fruit in the filling. These will make an impressive breakfast, that’s perfect for all year long.

    Serve them along with a savory dish like baked sausage patties, since the oven is hot already. Or, if hosting a brunch, this breakfast sausage casserole is an amazing contrast to a sweet dish.

    Strawberry cinnamon roll on a white plate.

    Love easy bread recipes? Mini cinnamon rolls are perfect for small appetites or wanting to make a fun brunch spread. Sometimes you just want to make things extra special – which is how we added strawberries to the filling!

    If you’re looking for a little less work this morning, there’s always the option of popping canned dough into the air fryer. Those same tubes also make a fantastic cinnamon roll casserole!

    [feast_advanced_jump_to]

    Why You’ll Love This Recipe

    • Bright and cheery: The strawberries in this recipe make the entire pan such a pretty pink. It’s perfect for gatherings like a baby shower.
    • Freezer friendly: Bake these rolls and cool them completely before wrapping them well to freeze. Don’t add icing until thawed and ready to serve.
    • Make easy swaps: Not a fan of strawberries? You can use any fruit here to make a fun breakfast treat.

    Ingredients Needed

    I’ve highlighted a couple of ingredients below with some relevant notes. Aside from this, the ingredients needed are pretty basic.

    Labeled ingredients for strawberry cinnamon rolls.
    • Strawberries – Fresh or frozen both work here – it will just change your cooking time on the filling. We like to use frozen to make the filling and fresh for some added bite, but thawed and drained will also work in place of fresh. So save that strawberry cake mix for these strawberry brownies, instead!
    • Yeast – Active dry is used here, and “instant” or rapid rise will also work, you just may need less time proofing.
    • Milk – I use 2% for most baking as it’s right in the middle of fat levels. You can also use non-dairy milk in a pinch.
    • Butter – We use unsalted for this recipe but you can use salted if you prefer. Just remember that you may want to reduce the amount of salt the recipe calls for if using salted butter.
    • Lemons – Definitely grab a fresh lemon at the store here. It adds the most amazing flavor and it’s super easy to zest and then juice.

    Substitutions

    Sometimes substitutions are necessary because of ingredients that are unavailable or needed for dietary restrictions. Here are some suggestions that can help:

    • Fruit – not a fan of strawberries? Reach for blueberries, raspberries, or peaches.
    • Butter – salted is best for brushing over the top of the rolls before baking because you’ll taste it. You can use salted throughout the dough, but you’ll want to reduce the added salt by half.

    Equipment

    A nice baking or casserole dish is essential. It will help the cinnamon rolls proof into a nice solid base of dough. This way they will keep their shape. Line your pan with parchment first if your baked goods tend to stick.

    How to Make Fresh Strawberry Sweet Rolls

    These Strawberry Sweet Rolls are broken into 3 components:

    • mix up the dough
    • cook down some filling
    • bake and add icing

    Make the filling while the dough is proofing so it has time to cool down some before using.

    *Be sure to see the recipe card below for the full ingredients list & instructions!*

    Steps 1-4 of making strawberry cinnamon rolls.

    STEP 1. Prepare dough. Melt the butter into the milk, and make sure it’s not too warm (Image 1). Combine half the flour and remaining dry ingredients in a bowl (Image 2).

    STEP 2. Mix dough. Stir the milk into the flour. This will be very wet (Image 3). Add in the remaining flour in increments until a smooth dough forms (Image 4).

    Image collage showing steps 5-8 of how to make strawberry cinnamon rolls.

    STEP 3. Let it grow. Let the dough rest, covered, until doubled in size (Image 5).

    Tip: There are many ways to proof dough. You want to make sure you don’t place the bowl somewhere too warm or too cold, rather just right, like Goldilocks. Many suggest placing it in the closed oven with just the light on – it’s a great method as long as you remember to remove it before turning on the oven to preheat!

    STEP 4. Prepare filling. Bring strawberries to a boil with the sugar (Image 6). Then add a cornstarch slurry and break up the fruit into the thickened sauce (Images 7-8).

    Steps 9-12 of how to make strawberry cinnamon rolls.

    STEP 5. Spread it out. Punch down the dough and press or roll into a rough rectangle. Spread the filling evenly over the dough (Images 9-10).

    STEP 6. Roll it up. Roll tightly from one long edge, pinching the edge as you go (Image 11). Pinch the long seam to seal (Image 12).

    Uncooked strawberry cinnamon rolls in baking dish.

    STEP 7. Roll it up. Cut the dough into 12 equal rounds and place in a prepared pan.

    Images show steps 13-16 for making strawberry cinnamon rolls.

    STEP 8. Make icing. Add icing ingredients to a bowl (Image 13). Whisk to remove lump (Image 14).

    STEP 9. Cool and serve. Let the rolls cool before spreading icing over the whole pan. Cut and serve (Images 15-16).

    Recipe Pro Tips

    • Use a thermometer. If you want to make sure your milk isn’t too hot for the yeast, use an instant read thermometer. Aim for between 105 and 115°F for the best proofing. Do not go any higher or you will kill the yeast.
    • Cool filling. Let your filling come down to room temp before spreading on the dough. If too warm it will hinder the yeast growth and your rolls won’t double in size before baking.

    Recipe FAQs

    How do I store cinnamon rolls?

    Store any leftovers in an airtight container at room temperature for up to 2 days or in the fridge for up to 4 days.

    What fruit goes with cinnamon rolls?

    I love to pair strawberries here in this filling, but you can use any other berry as well. They will all cook nicely into the filling. Just remember that some berries have more seeds than others and you may want to strain those out if they bother you. Jam can also be used.

    Can I use a different form of yeast?

    This recipe calls for instant yeast, which is generally standard in home kitchens. Instant yeast may be used 1:1 but keep in mind that it may double quicker so keep an eye on it. You don’t want to overproof your dough.

    Why didn’t my dough double?

    Your yeast may be old, or the room may be cold and you have to wait longer. It is also possible the milk was too warm and killed the yeast. To test your yeast, you can add a teaspoon of yeast to a bowl with ¼ cup of lukewarm water. Stir it together and allow the yeast to soften and bloom. If bubbles form after 10 minutes your yeast is good to use.

    Baked strawberry cinnamon rolls in baking dish.

    What to Serve with Sweet Rolls

    I love to offset a sweet breakfast treat by serving it with a protein such as eggs or oven-baked bacon. You can serve cheesecake-stuffed strawberries on the side for the ultimate strawberry experience! And the strawberry heaven is perfect for when you don’t feel like turning on the oven.

    Cooked strawberry cinnamon roll on white plate.

    More Breakfast Recipes You’ll Love

    • Donut Burger - Luther Burger
      Donut Burger
    • 20 mini cinnamon rolls in a 9x13 baking dish, 7 of them with frosting on top.
      Crescent Roll Cinnamon Rolls
    • Stuffed French Toast (Crispy Outside, Creamy Inside)
    • A close up photo of a stack of breakfast slider sandwiches
      Hawaiian Roll Breakfast Sliders

    Love strawberry recipes? These strawberry cake mix cookies are such an easy cookie recipe, to fix that strawberry craving too!

    Did you make this? I’d be so grateful if you left a “star” rating below to let me know what you thought! Then, the next time you need a quick and easy recipe, come back to Fantabulosity to browse all of my easy recipes!

    Recipe

    Baked strawberry cinnamon rolls in baking dish.
    Print Pin
    5 from 4 votes

    Strawberry Sweet Rolls

    Making sweet rolls from scratch is a labor of love. Add some fun natural colors by making Strawberry Sweet Rolls with fresh fruit in the filling.
    Course Breakfast
    Cuisine American
    Prep Time 30 minutes minutes
    Cook Time 35 minutes minutes
    Proofing 2 hours hours
    Total Time 3 hours hours 5 minutes minutes
    Servings 12 rolls
    Calories 403kcal
    Author Jessica Burgess

    Ingredients

    Dough

    • 1 ½ cup milk 355 ml
    • 4 to 4 ½ cups all-purpose flour 480-540 g
    • ¼ cup unsalted butter 57 g
    • ¼ cup sugar 50 g
    • 2 ¼ teaspoons dry active yeast 7.88 g
    • 1 teaspoon salt 2 g
    • 2 tablespoons salted butter melted (reserved for the top of the rolls before baking) 30 ml

    Filling

    • 2 cups frozen strawberries 300 g
    • 2 tablespoons lemon juice 30 ml
    • 1 tablespoon lemon zest 6 g
    • ½ cup sugar 100 g
    • ¼ teaspoon salt 0.5 g
    • 2 tablespoons cornstarch 20 g
    • 2 tablespoons cool water 30 ml
    • ½ cup fresh strawberries tops removed and quartered (optional) (72 g)

    Icing

    • 2 tablespoons lemon juice 30 ml
    • 2 tablespoons water 30 ml
    • 2 ½ cups powdered sugar 280 g
    • 2 tablespoons reserved strawberry filling 25 g
    • ¼ teaspoon salt 0.5 g

    Instructions

    • In a saucepan, add the sugar, milk, and unsalted butter. Place over medium-low heat and stir until the sugar starts to dissolve and the butter just starts to melt. Allow the mixture to warm to about 110 degrees F (43 degrees C). **You'll be able to place a finger in the mixture without burning yourself. If it's too hot, allow it to cool until you can touch the mixture. Do not allow the mixture to get warmer than that as it will burn the yeast.
    • In the bowl of an electric stand mixer, using the dough hook attachment, or a large mixing bowl, add 2 cups of the all-purpose flour, yeast, and salt. Stir to fully combine the ingredients.
    • Once the milk mixture has come to temperature and the butter has just melted, pour the mixture into the bowl with the flour. If using a stand mixer, stir to combine and allow all of the flour to become incorporated with the milk. **The mixture will be wet. If you're making this by hand, use a whisk to incorporate the milk and flour mixtures together.
    • Slowly add in more of the all purpose flour ⅓ cup at a time, mixing the dough on medium speed. Once the flour is incorporated, repeat this process until you've added all of the flour and the dough is releasing itself from the sides. **The amount of flour that you use will be determined by how dry or humid the air is and how the flour is measured. For best results, spoon the flour into the measuring cup and level it out using a butter knife or measure the flour using a digital scale. Try to avoid dipping and scooping the measuring cup into the flour. It packs the flour down and you may add too much flour resulting in a dry dough.
    • Once the dough has formed and it is not sticking to the sides of the bowl when it's being mixed, turn the dough out onto a lightly floured surface.
    • Lightly grease the bowl with some spray oil and place the dough back into the bowl, cover with plastic wrap or a tea towel. Place the dough in a warm place and allow the dough to rise for about 1 ½ hours or until the dough has doubled in size. **Place the dough on the counter and run the dishwasher, the dishwash warms the counter slightly. You can also place the dough in the oven with the light on. DO NOT TURN ON THE OVEN.
    • While the dough is rising, it's time to prepare the filling. Place the frozen strawberries, lemon juice, lemon zest, sugar, and salt in a saucepan. Turn the burner on to medium heat. Using a spoon, stir the mixture constantly until the strawberries start to melt and juices start to be released and bring to a boil.
    • While the strawberries are thawing, in a small bowl add the cornstarch and water. This is called a slurry and will help thicken the strawberry mixture.
    • Once boiling, add the slurry to the strawberry mixture and stir to combine.
    • Turn the heat to low, using your spoon or a potato masher break up the strawberries so there aren't any full strawberries. This will make it easier to spread the filling on the dough.
    • Once the strawberry mixture has thickened, transfer it to a bowl and place it in the fridge to cool. **make sure that the strawberry mixture is cooled before placing it on the dough, it can melt the dough.
    • Grease a 9×13 casserole dish with baking spray oil and set aside. **For an added layer of protection (if food tends to stick to your casserole dish), add a layer of parchment paper to the bottom of your casserole dish.
    • Prepare the fresh strawberries, if using, by removing the tops and cutting them into quarters.
    • Once the dough has doubled in size, turn the dough out onto a lightly floured surface. Roll the dough into a 15"x20" rectangle (about double the size of your casserole dish).
    • Reserve 2 tablespoon of the strawberry mixture for the icing. Add that to a small bowl and set aside.
    • Spread a small layer of the strawberry mixture (reserving 2 tablespoon for the frosting) over the top of the dough making sure it's evenly distributed.
    • Sprinkle the cut strawberries over the top.
    • Roll the dough up to form a log. Using a knife, or a bench scraper, cut the dough into 12 rolls (about 2" rolls). Place them in the prepared casserole dish. Cover with a piece of plastic wrap or a tea towel and allow to sit for 30 minutes.
    • Preheat the oven to 350 degrees F (177 degrees C).
    • Brush the tops with melted butter.
    • Bake at 350 degrees F (177 degrees C) for 35-40 minutes or until they're golden brown.
    • While the rolls are baking, prepare the frosting by adding the lemon juice, water, powdered sugar, reserved strawberry filling, and salt to a bowl. Using a whisk, stir to fully combine the ingredients.
    • Once the rolls are done baking, place them on a cooling rack (keeping them in the casserole dish). Pour the frosting over the top of the rolls.
    • Allow them to cool for 20 minutes before serving.

    Notes

    • Fresh strawberries can be used. The cooking time for the filling will be shorter.
    • You can easily substitute strawberry jam for the fresh strawberry filling.

    Nutrition

    Serving: 1roll | Calories: 403kcal | Carbohydrates: 79g | Protein: 6g | Fat: 7g | Saturated Fat: 4g | Polyunsaturated Fat: 0.5g | Monounsaturated Fat: 2g | Trans Fat: 0.2g | Cholesterol: 19mg | Sodium: 320mg | Potassium: 156mg | Fiber: 2g | Sugar: 40g | Vitamin A: 231IU | Vitamin C: 20mg | Calcium: 53mg | Iron: 2mg

    Pinwheel Sandwiches

    November 5, 2023

    Close-up of pinwheel sandwiches stacked on top of one another.

    These pinwheel sandwiches are the perfect party appetizer for game day, or even a easy lunch idea! Your favorite deli meat (we use turkey and ham), combined with lettuce, cheese, bacon, and a seasoned cream cheese spread.

    They are a sandwich recipe that you can customize with your favorite sandwich fillings and that can be a great, to-go-style meal if needed, too!

    Pinwheel sandwiches stacked on top of one another, sitting on a large lettuce leaf.

    Deli meat recipes can be so fun to make since there are so many different variations that you can make for a sandwich.

    Although you can use your favorite deli meat, we love using turkey and ham for this recipe, and we use similar meats on these Italian Sliders. You can also use roast beef like we do on these roast beef sliders!

    [feast_advanced_jump_to]

    Why You’ll Love This Recipe

    • Party Food: When you need an easy appetizer that’s not a dip or something hearty like chicken wings, this pinwheel sandwich recipe is a great appetizer choice for your next party or for something classy like a baby shower! They also don’t have to stay warm, like so many other appetizers do.
    • Customize: Have a favorite deli meat? What about a favorite cheese? Love certain things on a sandwich? Easy pinwheel sandwich recipes like this one, can easily be customized to fit your taste.
    • Ready in under 30 minutes: We love it when something can be made quickly, and these pinwheels fit the bill!

    Ingredients Needed

    I’ve highlighted a couple of ingredients below with some relevant notes but these can easily be switched out and replaced with your favorite items! See more about them below.

    Labeled ingredients for pinwheel sandwiches.
    • Deli Meat – We love club sandwiches so much so we usually choose to use deli ham and slices of turkey for these pinwheels. (We use ham on these chicken club sandwiches too, if you’re looking for a hearty sandwich recipe for dinner.)
    • Cream Cheese & Mayo – These are mixed together to create a cream cheese mixture, that helps give the pinwheels a bit of a creamy texture, paired with meat, cheese, and tortillas.

    Substitutions

    Looking to switch some items out? No problem! Here are some suggestions that we have:

    • Mayonnaise – Not a fan of mayonnaise? No problem. You can use sour cream instead if you’d like.
    • Deli Meat – Roast beef, bologna, flavored turkey, salami, and all kinds of other deli meats can be used instead of turkey and ham. Or, you can also use rotisserie chicken! Looking for a vegetarian option? You can leave the meat out and make a veggie pinwheel.
    • Cheese – We love the sharpness of cheddar cheese but you can use American, provolone, pepperjack, mozzarella cheese, or your favorite cheese.
    • Lettuce leaves– Spinach is another great option to roll up in these tortilla pinwheel sandwiches if you don’t want to use green leaf lettuce or romaine.
    • Flour Tortillas – You may choose to use a spinach or whole wheat tortillas and that’s just fine. However, make sure you use the burrito size, or very large sizes, so they can roll well.
    • Vegetables – You may also prefer to add other items to these like green onion, black olives, or even red bell peppers like we used in our Christmas Tree Pinwheels.
    • Paprika – You can take this out or you can also use garlic powder to add that garlic flavor to your sandwich wraps.

    How to Make Pinwheel Sandwiches

    It’s really easy to make these pinwheels but we’re still going to walk you through to show you the best way to make them.

    *Be sure to see the recipe card below for the full ingredients list & instructions!*

    First, you’ll begin by mixing together the cream cheese spread, so you can spread that on the tortilla first. Then, you’ll prep your other ingredients and start to assemble the pinwheels.

    Steps showing how to start out making pinwheel sandwiches.

    STEP 1. Make spread. Add the cream cheese, mayonnaise, salt, pepper, and paprika into a medium-sized mixing bowl, mix until smooth. (Image 1).

    STEP 2. Slice tomatoes. Using a mandolin slicer or very sharp knife, cut thin slices of tomato (Image 2).

    Tip: Cutting the tomatoes thin will help the sandwich to roll better.

    STEP 3. Dry tomatoes. To remove excess moisture from the tomatoes, press between layers of paper towels. This will keep the pinwheels from getting soggy as fast (Image 3).

    STEP 4. Time to spread. Spread 2 tablespoons of cream cheese spread onto a tortilla in a thin even layer (Image 4).

    Image collage showing steps 5-8 for making pinwheels.

    STEP 5. Add bacon. Sprinkle on a little more than 1 teaspoon of bacon bits, or as many as you would like (Image 5).

    STEP 6. Add meat. Next, add two slices of deli meat across the center or lower ⅓ of the tortilla (Image 6).

    STEP 7. Add cheese. Add two slices of cheese on top of the meat (Image 7).

    STEP 8. Layer tomatoes. Place sliced tomatoes on top of the cheese (Image 8).

    Steps 9-12 for making pinwheel sandwiches.

    STEP 9. Add lettuce. Lastly, add a single layer of lettuce. Removing the thick stem will help make the sandwich roll better (Image 9).

    STEP 10 & 11. Roll up. Finally roll the tortilla toward the center, and keep the roll as tight as possible (Images 10 & 11).

    STEP 12. Cut. Then place the rolled tortillas on a cutting board and cut into 1-inch slices (Image 12).

    Recipe Pro Tips

    • Same day. These easy pinwheel sandwiches are best if eaten on the same day that they’re made.
    • Slicing the ends. We like to trim the ends of the roll before cutting to make even slices.
    Pinwheel sandwiches on wooden cutting board.

    Recipe FAQs

    Can you make pinwheels the night before?

    You can but it’s best to make them as close to serving as possible, or within one day, so they don’t get soggy.

    How do I keep my pinwheels from falling apart?

    If you find that your pinwheels are falling apart, you can refrigerate them to allow the cream cheese to secure the pinwheels more.

    How many pinwheels per person?

    It’s safe to say that 4-6 pinwheels per person is a good amount if serving as a meal. If an appetizer, 2-3 may be more likely.

    What to Serve with Pinwheels

    With these pinwheels having protein, dairy and veggies all in one bite… you really don’t have to serve anything with them. However, if having for lunch, these would pair wonderfully with potato chips, seasoned potato wedges, french fries, or even chips and salsa or smoked queso dip.

    You can also dip this perfect finger food in to ranch, or this fun jalapeno ranch dip.

    Close-up of pinwheel sandwich on cutting board.

    Storage

    Refrigerate any leftovers in an airtight container for 1-2 days. You can also wrap them in plastic wrap to secure them even more!

    More Recipes You’ll Love

    Love easy recipes like this one? We think you’re also going to love our other easy recipes.

    • bratwursts on bun with toppings
      How to Cook Brats in the Oven
    • A pan full of beanie weenies with a wooden spoon dishing out a serving.
      Beanie Weenies Recipe
    • School lunch pizza on blue lunch tray, next to corn.
      School Pizza Recipe
    • Hot Dog Mummies resting on round plate.
      Hot Dog Mummies

    Article fully updated with a new recipe on November 5th 2023.

    Did you make this? I’d be so grateful if you left a “star” rating below to let me know what you thought! Then, the next time you need a quick and easy recipe, come back to Fantabulosity to browse all of my easy recipes!

    Recipe

    Close-up of pinwheel sandwiches stacked on top of one another.
    Print Pin
    3.98 from 72 votes

    Pinwheel Sandwiches

    These pinwheel sandwiches use simple ingredients and they're easy to make with your favorite deli meat! Perfect appetizer or even a lunch idea.
    Course Appetizer
    Cuisine American
    Prep Time 25 minutes minutes
    Total Time 25 minutes minutes
    Servings 28 pinwheels
    Calories 89kcal
    Author Jessica Burgess

    Ingredients

    Spread

    • 1 cup shredded cheese
    • 4 ounces cream cheese
    • 2 tablespoons mayonnaise
    • ¼ teaspoon black pepper
    • ¼ teaspoon paprika
    • ⅛ teaspoon salt

    Toppings and Wrap

    • 4 burrito size tortillas
    • 2 tablespoons bacon bits the "real" bacon bits (not dried)
    • ½ pound sliced deli meat we prefer turkey and ham
    • 8 slices cheddar cheese (thinly sliced) or your favorite cheese
    • 1 large tomato
    • leaf lettuce

    Instructions

    Prepare Ingredients

    • Mix all ingredients except tortillas, in a bowl.
    • Add the cream cheese, mayonnaise, salt, pepper, and paprika into a medium size mixing bowl, bend until smooth.
    • Using a mandolin slicer or very sharp knife, cut thin slices of tomato.
    • To remove excess moisture from the tomatoes, press between layers of paper towels. This will keep the pinwheels from getting soggy as fast. 

    Assemble Pinwheels

    • Spread 2 tablespoons of cream cheese spread onto a tortilla in a thin even layer.
    • Sprinkle on a little more than 1 teaspoon of bacon bits, or as many as you would like.
    • Next add two slices of deli meat across the center or lower ⅓ of the tortilla.
    • Add two slices of cheese on top of the meat.
    • Place sliced tomatoes on top of the cheese.
    • Lastly add a single layer of lettuce. Removing the thick stem will help make the sandwich roll better.
    • Finally roll the tortilla toward the center, keep the roll as tight as possible. Then cut into 1 inch slices.
    • Repeat three times.

    Notes

    1. We like to use ham and turkey to make it like a Club Sandwich, but any type of deli meat will do. 
    2. Cutting the tomatoes thin will help the sandwich to roll better.
    3. I like to trim the ends of the roll before cutting to make even slices.
    4. I like to use cheddar cheese but any cheese could be used. 
    5. Sour cream can be substituted for the mayonnaise. 
    6. These are best if eaten on the same day. 

    Nutrition

    Serving: 1pinwheel | Calories: 89kcal | Carbohydrates: 5g | Protein: 4g | Fat: 6g | Saturated Fat: 3g | Polyunsaturated Fat: 1g | Monounsaturated Fat: 1g | Trans Fat: 0.002g | Cholesterol: 15mg | Sodium: 255mg | Potassium: 56mg | Fiber: 0.4g | Sugar: 1g | Vitamin A: 194IU | Vitamin C: 1mg | Calcium: 73mg | Iron: 0.5mg

    Chocolate Chip Sugar Cookies

    November 4, 2023

    Chocolate chip sugar cookies stacked on top of one another, sitting on white plate.

    This Chocolate Chip Sugar Cookie Recipe brings together two classic tastes into one tasty package, making it one of the most fun cookie recipes to date!

    Obviously, everyone loves a great, chewy, chocolate chip cookie. I’ve already added chocolate chips to easy peanut butter cookies, and I got to thinking that chocolate would be the perfect addition to a classic sugar cookie dough!

    Chocolate chip sugar cookies placed on white platter.

    If you want more traditional cookies tucked into the freezer ready for a cookie tray, don’t forget some Easy Oatmeal Raisin Cookies or Pecan Snowballs. They’re super popular around the holidays!

    [feast_advanced_jump_to]

    Why You’ll Love This Recipe

    • No equipment necessary: Mix these up with only a wooden spoon and some elbow grease.
    • Perfect to freeze: Did you know cookies freeze beautifully? If they are thin enough, you can also eat them pretty much straight from the freezer as the perfect snack.
    • Small batch: This recipe makes 2 dozen, which is perfect when you have a taste for cookies but don’t want to be making tray after tray.

    Ingredients Needed

    I’ve highlighted a couple of ingredients below with some relevant notes. Aside from this, the ingredients needed are pretty basic.

    Labeled ingredients for chocolate chip sugar cookies.
    • Butter – We use unsalted butter for this recipe but you can use salted if you prefer. Just remember that you may want to reduce the amount of salt the recipe calls for if using salted butter.
    • Sugar – Mainly white sugar with a hint of brown will give these cookies their classic taste.
    • Extract – Yes, both vanilla and almond!

    Variations

    • Extract – almond is less likely to be in your pantry, so feel free to omit it for more vanilla or why not give peppermint a try?
    • Gluten-free – your favorite 1:1 blend should work fine here.

    Equipment

    I love to bake on parchment paper. This is easy cleanup, just throw the paper out, but it also allows the cookies not to stick to the pan. Paper also keeps cookies from spreading too thin.

    How to Make Easy Chocolate Chip Sugar Cookies

    Take a little time to set yourself up here. Melt the butter and let it cool down while the egg warms up to room temp. Preheat the oven and line your baking sheets.

    *Be sure to see the recipe card below for the full ingredients list & instructions!*

    Steps 1-4 chocolate chip sugar cookies.

    STEP 1. Dry ingredients. Mix the dry ingredients together in a large bowl (Image 1).

    Tip: Pick up scoops in several sizes to have on hand. Some are listed in tablespoons and others in numbers that might seem mysterious to you – but a “40 disher” means 40 scoops per quart, which is actually 1.5 tablespoons and perfect for cookies.

    STEP 2. Wet ingredients. Make a well in the dry ingredients and pour in the wet ingredients (Image 2). No need to dirty a second bowl!

    Baked chocolate chip sugar cookies on baking pan.

    STEP 3. Mix it up. Fold dry into wet until you have the dough all together, without over-mixing. Stir in the chocolate chips (Image 3).

    STEP 4. Scoop. I don’t find that these spread very much, so don’t worry about getting the dough balls too close together (Image 4). Bake until puffed and golden.

    Tip: Want the perfect picture-ready cookies you see here? The trick that many bakeries use is to press some extra chocolate chips into the tops of the cookies as soon as they come out of the oven. This way there is no doubt how chocolatey and delicious they are!

    Baked chocolate chip sugar cookies on cooling rack.

    Recipe Pro Tips

    • Allow to fully cool. Ensure the cookies are completely cool before storing. If they have any warmth they will cause condensation in the container and turn soggy.
    • Correct temperature. Make sure your butter and eggs are room temperature before using. Not only will this give you the perfect texture in your finished cookie, they will be easier to work with by hand.
    Stacked chocolate chip sugar cookies on a small white plate.

    Recipe FAQs

    Is sugar cookie dough the same as chocolate chip cookie dough?

    So what sets a chocolate chip sugar cookie apart from a plain ol' chocolate chip cookie? A chocolate chip sugar cookie is sweet and sugary while the chocolate chip cookie is slightly less sugary. A sugar cookie typically uses a few different types of sugar and more flour vs. a chocolate chip cookie who uses a different ratio of flour to sugar.

    What’s the difference between sugar cookies and butter cookies?

    A sugar cookie has a higher ratio of flour to butter, so that they hold their shape really well. When you think of cut-out cookies, they are often sugar cookie dough. Butter cookies have a high proportion of butter, making them softer. Think of cookies from a European bakery, or “spritz” cookies that are piped. And then of course there is shortbread, which doesn’t contain eggs and are buttery and crumbly.

    Should sugar cookies be crunchy or soft?

    This is often personal preference. However, most sugar cookies are softer than not, especially when they are thicker for cut outs or in this recipe. You can often play with types of sugars in a dough to change the flavor and texture.

    What to Serve with Chocolate Chip Cookies

    I love to pair cookies with a tall glass of milk, or you might enjoy dipping one into a Peppermint Latte? Whipped Coffee is always a fun drink to make. And don’t forget that these will be perfect for any holiday cookie tray!

    Storage

    Allow the cookies to cool completely before sealing them in an airtight container or a Ziplock bag. They will be happy on the countertop for up to 1 week. If you would like to prolong their life, go ahead and pop the properly stored cookies in the freezer instead. You can keep them there for up to 3 months. Allow them to thaw at room temperature before diving in. 

    Don't store these cookies in the fridge. They will dry out. 

    More Cookie Recipes You’ll Love

    • Cut out and baked sugar cookies that hold their shape, sitting on cutting board.
      Easy Sugar Cookie Recipe
    • Big Fat Chewy Chocolate Chip Cookies.
      Big Fat Chewy Chocolate Chip Cookies
    • Peanut butter cookies with the classic criss-cross pattern on top.
      Easy Peanut Butter Cookie Recipe
    • Sugar cookie sandwiches recipe
      Sugar Cookie Sandwiches

    Did you make this? I’d be so grateful if you left a “star” rating below to let me know what you thought! Then, the next time you need a quick and easy recipe, come back to Fantabulosity to browse all of my easy recipes!

    Recipe

    Chocolate chip sugar cookies stacked on top of one another, sitting on white plate.
    Print Pin
    5 from 5 votes

    Chocolate Chip Sugar Cookies

    Chocolate Chip Sugar Cookies: Have you ever added chocolate chips to your basic sugar cookies? it's really delightful and different from the norm.
    Course Dessert
    Cuisine American
    Prep Time 15 minutes minutes
    Cook Time 10 minutes minutes
    Total Time 25 minutes minutes
    Servings 24 cookies
    Calories 161kcal
    Author Jessica Burgess

    Ingredients

    • 1 ¾ cups all-purpose flour
    • 1 teaspoon baking soda
    • ¾ teaspoon salt
    • 1 cup granulated sugar
    • 2 tablespoons brown sugar
    • ½ cup butter melted at room temperature
    • 1 large egg room temperature
    • ¼ teaspoon almond extract
    • 1 teaspoon vanilla extract
    • 1 ¼ cup semi-sweet chocolate chips

    Instructions

    • Prep. Preheat the oven to 350 degrees F and line two baking sheets with parchment paper.
    • Combine the dry ingredients. Whisk together the flour, baking soda, salt, granulated sugar, and brown sugar.
    • Add the wet ingredients. Make a well in the center of the dry ingredients and add the butter, egg, almond extract, and vanilla extract.
    • Mix it all together. Fold the dry ingredients into the wet ingredients and mix until everything is just incorporated. Be careful not to overmix.
    • Add the chocolate chips. Fold in 1 cup of chocolate chips.
    • Bake. Drop the dough in 1 ½ inch clumps onto the prepared cookie sheets, leaving about 2 inches between each. Bake for 10 minutes (see note).
    • Top. Upon pulling the cookies out of the oven, top them with the remaining chocolate chips. They will melt beautifully into the warm cookies.

    Notes

    • These cookies have a hard time flattening. So, unless you want slightly puffy cookies, use a flat-bottomed glass or the back of a metal measuring cup to lightly press the cookies down halfway through the baking time.

    Nutrition

    Serving: 1cookie | Calories: 161kcal | Carbohydrates: 21g | Protein: 2g | Fat: 8g | Saturated Fat: 5g | Polyunsaturated Fat: 0.3g | Monounsaturated Fat: 2g | Trans Fat: 0.2g | Cholesterol: 18mg | Sodium: 153mg | Potassium: 69mg | Fiber: 1g | Sugar: 13g | Vitamin A: 134IU | Calcium: 10mg | Iron: 1mg

    13 Boneless Chicken Breast Recipes

    November 3, 2023

    Chicken breast recipe images.

    13 Boneless Chicken Breast Recipes: Easy chicken breast recipes that you can make for dinner, that the family will love!

    Image collage of chicken breast recipes.

    Alright friends, chicken breast recipes always seem to be a quick go-to dinner idea when it comes time to decide on what to have for dinner around our house. Chicken breasts tend to always be “in-stock” in my deep freezer, so I know when we’re falling short on groceries, it’s a safe bet.

    TIPS: If you have time and want to add some extra flavor to your chicken, this easy chicken brine has become our “go-to” for almost all chicken recipes! Or, make shredded chicken in the crock pot in advance and freeze it for quick meal planning!

    Just select the link below each image for the full recipe! Happy chicken cooking!

    Chicken Club Sandwich

    With a delicious chicken breast, whether that’s one that you make yourself or that you cut off of a rotisserie chicken, a chicken club sandwich will hit the spot!

    Chicken club sandwich cut in to wedges, on a white plate.

    Chicken Caesar Sandwiches

    Chicken breasts cooked in the crock pot, then shredded and tossed in a Caesar dressing, parmesan cheese, and piled on a hamburger bun make these Chicken Caesar Sandwiches easy, and full of flavor.

    Chicken Caesar sandwich built and sitting on plate.

    Chicken Grilled Cheese

    Although you can use something as simple as canned chicken or a rotisserie chicken for this delicious, cheesy chicken grilled cheese, making a batch of chicken breasts for that sandwich is my favorite!

    Chicken Grilled Cheese Sandwich
    Chicken Grilled Cheese

    Crispy Chicken Burger

    A fried, crispy chicken burger is a favorite at so many fast food restaurants but now you can make it at home!

    Crispy Chicken Burger

    Get the recipe: Crispy Chicken Burger

    Chicken Salad Recipe

    A delicious chicken salad, made from diced chicken breasts creates a great lunch idea of a light dinner recipe!

    Chicken salad with grapes and apples on slider buns.

    Get the recipe: Chicken Salad Recipe

    Baked Chicken Cutlets

    I’m going to go ahead and say that this probably IS the best, baked chicken recipe out there.

    Sliced crispy chicken cutlet piece on fork, holding up above plate.

    Get the recipe here: Baked Chicken Cutlets

    Jalapeno Chicken

    A bit of spice, with creamy cheeses, this jalapeno chicken recipe is made in the slow cooker and is really easy to make!

    Cheese melted and bacon and jalapenos on top of chicken in slow cooker.

    Get the recipe: Jalapeno Chicken

    Creamy Caesar Chicken

    If you love Caesar salad, this Caesar Baked Chicken uses chicken breasts and is an easy dinner recipe!

    Creamy Caesar chicken on pasta.

    Get the recipe: Creamy Caesar Chicken

    Chicken Caprese Sandwich

    If you love caprese salads, why not have it in chicken-form on a sandwich? The delicious blend of flavors makes this a top-notch dinner recipe!

    Close up of caprese chicken sandwich.

    Get the recipe: Caprese Chicken Sandwich

    Cheesy Chicken Recipe

    Delicious flavors of cheese, tender chicken, and a few other ingredients make this an easy dinner recipe!

    Cooked cheesy chicken on white plate.

    Get this cheesy chicken recipe!

    What’s Your Favorite Boneless Chicken Breast Recipe?

    So I’ve only included 13 chicken recipes here, but I know there are TONS more out there. Have you found one that you love? I’d love to hear about it, and add it to my Fantabulous Main Dishes, Pinterest board. You know… so I can have every intention of using it later, only to get distracted with how to makeover my guest bathroom in the process.

    Looking For More Easy Recipes?

    If you’re here for the first time, then you’re going to love this. I only create and share EASY, slightly homemade recipes that can be made in a flash, using everyday ingredients. Go ahead, get lost in all of our easy recipes here on the blog, to add to your recipe Rolodex!

    • Church supper recipes collage.
      Church Supper Recipes
    • Close up of cooked salmon patties on a plate, with fresh parsley sprinkled on top.
      Old-Fashioned Salmon Patties Recipe
    • A sliced, boneless pork chop that was baked in the oven, sitting on a plate.
      How to Cook Pork Chops in the Oven (Bone-In & Boneless Guide)
    • A wooden spoon dishing out a serving of meatball casserole in a 9x13 baking dish.
      Meatball Casserole

    Walking Taco Casserole

    November 2, 2023

    Walking Taco Casserole being lifted out of baking dish with spoon.

    Everyone loves the flavors of a walking taco – but not everyone enjoys actually walking while eating! Gather around and enjoy this Walking Taco Casserole sitting at the table while still having the walking flair!

    It’s one of many casserole recipes here, and dare I say, one of our favorite easy dinner ideas!

    Walking taco casserole being lifted out of baking dish.

    A really easy way to plan your weekly meals is by using theme nights. So make Tuesday for tacos, but not just pulled beef tacos every week. Switch it out to mean any sort of Mexican dish! Perhaps this taquito chicken casserole is on your wishlist too!

    Can’t get enough of salty, crunchy chips? Frito Chili Pie is similar but includes beans. Switch out your proteins and give Frito Chicken Casserole a try as well.

    [feast_advanced_jump_to]

    Why You’ll Love This Recipe

    • Pantry ingredients: Many people have most of these ingredients on hand and can add the produce to their weekly shopping.
    • Make-ahead recipe: I love to “cook once, eat twice”! You can make two of these at once and put one in the oven and one in the freezer before baking.
    • Easy to personalize: Everyone can add their favorite toppings to make their bowl their own. Spicy or mild, creamy or crunchy!

    Ingredients Needed

    I’ve highlighted a couple of ingredients below with some relevant notes. Aside from this, the ingredients needed are pretty basic.

    Labeled ingredients for walking taco casserole that are sitting on the counter.
    • Beef – Use a lean ground beef or make sure and scoop out any extra grease before continuing with the recipe.
    • Onion – I like a sweet onion here to blend with the other flavors, but you can also use white or yellow. I don’t like the pungency of red onion in this dish.
    • Cream cheese – Just a half a brick here, and then you can use the rest in Chicken Grilled Cheese!
    • Corn chips – Pick up regular Fritos here, not the big scoops, so they are easy to eat with a fork.
    • Cheese – Mexican blend and Colby jack are a perfectly flavored melty mix but you can grab cheddar or whatever else is in your fridge.
    • Corn – Southwest canned corn adds SO much flavor here! This is usually a mix of fire-roasted corn and diced peppers. Any sort of corn can be used here, canned or frozen.
    • Taco seasoning – Make your own seasoning or pick up a packet, whichever you normally use in your tacos.

    Substitutions

    Sometimes substitutions are necessary because of ingredients that are unavailable or needed for dietary restrictions. Here are some suggestions that can help:

    • Produce – not a fan of diced chiles? You can use a can of Rotel in place of the diced tomato and canned Chile. Swap out for a different variety or omit the onion.
    • Meat – you can use ground chicken, turkey, or pork. I usually alter my seasoning a bit based on my meat, like using chicken taco seasoning.
    • Chips – walking tacos also work well with Doritos or tortilla chips. We used Doritos in this Taco Salad recipe too!

    Variations

    • Cook Method – Rather than transferring to a baking dish, use an oven-safe skillet such as cast iron to brown the beef. Then you can go straight from stove to oven! If your skillet isn’t oven-safe, you can also just simmer on the stove, and add a lid to help the cheese melt. No need to turn on the oven on a hot day!

    How to Make Walking Taco Casserole

    If you want to make this ahead of time, do everything up until you put it in the oven and either refrigerate or freeze. You’ll just add a little bit to the baking time when you are ready since you are starting with a cold dish.

    *Be sure to see the recipe card below for the full ingredients list & instructions!*

    Steps 1-4 of how to make walking taco casserole.

    STEP 1. Dice the onions. Dice the onions and saute in just a bit of oil (Image 1).

    STEP 2. Cook the beef. Add the beef and seasoning to the onions and cook through (Image 2). Add the corn, peppers, tomatoes, and cream cheese and stir until melted and combined (Image 3).

    STEP 3. Dish it up. Pour everything from the skillet into a baking dish (Image 4).

    Tip: Drain the corn and chiles well, and make sure your tomato isn’t too watery. This way your casserole won’t be too wet.

    Steps 5-8 of how to make walking taco casserole.

    STEP 4. Melt it good. Add cheese to the top of the casserole (Image 5) and bake until melted and hot (Image 6).

    STEP 5. Top and serve. Top with Fritos and all your favorites like peppers, sour cream, and lettuce (Images 7 & 8).

    Scoop of walking taco casserole taken out of baking dish.

    Recipe Pro Tips

    • Drain liquids. If using canned corn, make sure and drain it along with the green chiles. You will also want to make sure your diced tomato isn’t too watery in the center, and maybe scoop that part out first. Otherwise your casserole will be watery.
    • Chips last! I always add the Fritos to the top of the baked casserole. This way they stay nice and crunchy. You do have the option to top the casserole with them when you add cheese, but they will be much softer this way.
    One serving of walking taco casserole on white plate, sitting next to baking dish.

    Recipe FAQs

    Why is it called walking tacos?

    A walking taco generally refers to a bag of corn chips stuffed with not only corn chips but also other taco ingredients such as seasoned ground beef, shredded lettuce, diced tomatoes, cheese, and taco-appropriate toppings. The idea is that you can walk around and eat them out of the bag with a spoon or fork without making a total mess. Kind of fun, right? 

    What’s the difference between a walking taco and Frito pie?

    I often think of Frito pie as having beans. A yummy addition! Plus the pie is always…baked in a dish! Walking tacos will usually be made in the mini bags of chips as an on-the-go type of meal. So while they do have similar ingredients, they are cooked and enjoyed differently.

    What other toppings can I add?

    I encourage you to get creative with your toppings here. You can really add anything you like in your tacos. Spiced black or pinto beans come to mind as well as avocado, guacamole, roasted bell peppers, and Cotija cheese. The sky is the limit. Let me know what you come up with. 

    What to Serve with Walking Tacos Casserole

    This walking taco casserole only uses a part of the can of corn, so feel free to heat up the rest on the side. And while I suggest serving lettuce as a topping, you could also serve this over a bed of greens to add more veggies.

    If you’re looking for a heartier side dish, consider making these fun fried tacos to go along with the casserole.

    Bite of walking taco casserole on fork, being held up above plate of taco casserole.

    Storage

    • Refrigerator. Allow the casserole to cool to room temperature before wrapping it tightly in a double layer of plastic wrap. You could also transfer slices of casserole to an airtight container. In either case, you can store it in the fridge for up to 4 days. 
    • Freezer. Once it has cooled completely, wrap the casserole dish tightly in a double layer of plastic wrap or transfer slices to a freezer-safe airtight container. Store the casserole in the freezer for up to 3 months. Allow it to thaw completely before reheating. 
    • To reheat. Transfer the desired portion to a baking dish (if applicable), cover with aluminum foil, and bake at 325 degrees F for 10 minutes or until heated through. You could also microwave individual portions in the microwave in 30-second intervals until heated through. 
    • Note- if you plan to store some for another day instead of eating it all, make sure to add the Fritos after reheating! They get a bit soggy when stored with the casserole. 

    More Casserole Recipes You’ll Love

    • doritos chicken casserole on plate
      Doritos Chicken Casserole
    • sausage and egg casserole being lifted out of baking dish
      Sausage and Egg Casserole
    • Spoonful of Stove Top Stuffing Chicken Casserole.
      Stove Top Stuffing Chicken Casserole
    • Old Fashioned Tuna Casserole on white plate.
      Old Fashioned Tuna Casserole

    Did you make this? I’d be so grateful if you left a “star” rating below to let me know what you thought! Then, the next time you need a quick and easy recipe, come back to Fantabulosity to browse all of my easy recipes!

    Recipe

    Walking Taco Casserole being lifted out of baking dish with spoon.
    Print Pin
    5 from 1 vote

    Walking Taco Casserole

    Enjoy the great flavors of a walking taco while…sitting at the table! This awesome casserole takes all the great flavors of a walking taco and bakes them up together.
    Course Dinner
    Cuisine Mexican
    Prep Time 5 minutes minutes
    Cook Time 25 minutes minutes
    Total Time 30 minutes minutes
    Servings 10 servings
    Calories 470kcal
    Author Jessica Burgess

    Ingredients

    For the casserole

    • 1 tablespoon olive oil
    • 1 large sweet onion chopped
    • 1 pound ground beef
    • 1 packet taco seasoning
    • 4 ounces cream cheese softened at room temperature
    • 2 tablespoons water
    • 4.5 ounces green chilis drained
    • ½ tomato diced
    • ½ cup southwest corn
    • 1 cup shredded Colby and Monterey Jack cheese
    • 1 cup shredded Mexican blend cheese

    Toppings

    • 4 cups Frito corn chips
    • ½ cup sour cream
    • 1 cup shredded lettuce
    • ½ tomato diced
    • 2 sliced jalapenos

    Instructions

    • Prep. Preheat the oven to 375 degrees F and grease a 9X13-inch baking dish with cooking spray.
    • Sauté the onions. Heat the olive oil over medium-high heat in a large, heavy bottomed pan. Add the onions and sauté until translucent.
    • Brown the beef. Add the beef to the pan and sauté until browned and cooked through, breaking it up as you go, and then drain the grease from the pan. Stir in the taco seasoning and water. Mix until all meat is coated in seasoning.
    • Complete the filling. Mix in the cream cheese, chilis, ½ of the diced tomato, and the corn over low heat. Combine the ingredients until all are melted and mixed well.
    • Bake. Transfer the contents of the pan to the prepared baking dish and top with the Colby Jack and Mexican blend cheese. Bake uncovered for 15 minutes or until the cheese has melted and gotten nice and bubbly.
    • Top. Top the casserole with Fritos, sour cream, shredded lettuce, diced tomato, and sliced jalapenos.

    Notes

    • I always put my Fritos on top so they stay crunchy. If you layer them under the cheese they will be soggy.

    Nutrition

    Calories: 470kcal | Carbohydrates: 28g | Protein: 18g | Fat: 33g | Saturated Fat: 12g | Polyunsaturated Fat: 7g | Monounsaturated Fat: 11g | Trans Fat: 1g | Cholesterol: 69mg | Sodium: 756mg | Potassium: 312mg | Fiber: 3g | Sugar: 3g | Vitamin A: 918IU | Vitamin C: 9mg | Calcium: 303mg | Iron: 2mg

    Cheesy Chicken

    October 31, 2023

    Spatula holding up a piece of cheesy chicken.

    Cheesy Chicken: Cheese and chicken go hand in hand and this cheesy chicken casserole dish is going to be your favorite go-to fall, casserole recipe.

    Four cheeses go into this simple cheesy chicken bake recipe and it is absolutely mouth-watering and worthy of the “best family dinners” list.

    Cheesy chicken being pulled out of baking dish.

    Big fan of this cheesy chicken breast recipe? You should try out this Chicken Grilled Cheese or this Instant Pot Buffalo Chicken Pasta recipe next because they also contain chicken and cheeses for that loveable comfort meal.

    [feast_advanced_jump_to]

    Why You’ll Love This Recipe

    • It uses a few ingredients: With only 9 easy-to-find simple ingredients, this cheesy chicken casserole recipe uses items that you may even have on hand.
    • Make-ahead recipe: You can easily make this recipe ahead of time and then reheat it to serve. Scroll down to the end of this post for my tips!
    • Ready in only 35 minutes: Talk about a quick and easy dinner idea! This recipe, from start to finish, only takes about half an hour.

    Ingredients Needed

    I’ve highlighted a couple of ingredients below with some relevant notes. Aside from this, the ingredients needed are pretty basic.

    Labeled ingredients for cheesy chicken recipe.
    • Chicken Breast – We used fresh boneless, skinless chicken breasts for this recipe.
    • Cheeses – This recipe calls for four separate cheeses; cream cheese, cheddar cheese, mozzarella cheese, and parmesan cheese.
    • Garlic – We used mined garlic for this recipe, but you could definitely use fresh garlic that you chop up yourself!
    • Parsley – This is a great serving ingredient, but definitely optional.

    Substitutions

    Sometimes substitutions are necessary because of ingredients that are unavailable or needed for dietary restrictions. Here are some suggestions that can help:

    • Cheeses – If you would like to make this recipe dairy-free, feel free to swap out the cheeses for your favorite DF varieties. Or, You can substitute the mozzarella cheese with provolone cheese, the cheddar cheese with Monterey jack cheese or Colby jack cheese, and the shredded parmesan cheese with grated parmesan cheese. 
    • Chicken – While we used chicken breast, you could easily use other cuts of chicken for this recipe. You could also use rotisserie chicken breast! Keep in mind that the texture and flavor might vary a little bit.
    • Garlic – You can substitute the minced garlic with 2 tablespoons of garlic powder (not garlic salt) if you prefer.

    Variations

    • Cook Method – You can also make this cheesy garlic chicken in your slow cooker/crockpot. Prepare as instructed but instead of a 9×13 baking dish, you can use a 6-8-quart crockpot. Cook on high for 3-4 hours or on low for 6-8 hours. This method would also make excellent cheesy shredded chicken and make for wonderful comfort food.
    • Cheeses – You could easily swap out the cheeses for any of your favorites. Swap in Sharp Cheddar Cheese, Provolone, Colby Jack, or Monterey Jack for even more flavor to these cheesy chicken breasts!

    How to Make Cheesy Chicken

    To make this delicious baked cheesy chicken recipe, you will begin by combining the ingredients aside from the chicken and then you’ll spread that mixture on top of the chicken breasts before baking.

    This Baked Cheesy Chicken Breast is broken into 3 components:

    • making the cheesy mixture
    • spreading on the cheese mixture
    • baking to perfection

    I suggest making this dish right before you plan to serve it. That way it is perfectly warm for your busy night dinner!

    *Be sure to see the recipe card below for the full ingredients list & instructions!*

    Begin by preheating your oven to 375 degrees and spraying a 9×13 baking dish with nonstick cooking spray.

    Steps 1-4 of how to make baked cheesy chicken.

    STEP 1. Make the Cheese Mixture. In a large bowl combine cream cheese, cheddar cheese, mozzarella cheese, parmesan cheese, garlic, melted butter, and Italian seasoning until well mixed. There may be clumps of cream cheese, and this is ok. (Image 1).

    Tip: If you don’t want the cream cheese chunks, let the cream cheese come to room temperature prior to making this recipe.

    STEP 2. Add Chicken to Baking Dish and Smother with Cheese Mixture. Place chicken breasts into the baking dish and spread the creamy cheese sauce over the breasts evenly. (Images 2&3).

    STEP 3. Bake. Bake uncovered for 30 minutes or until the internal temperature of each chicken breast reaches at least 165 degrees. (Image 4).

    Cooked cheesy chicken on white plate.

    STEP 4. Serve. Top the cooked chicken breasts with parsley and serve warm.

    Sliced cheesy chicken on white plate.

    Recipe Pro Tips

    • Let rest for a few minutes before serving. This dish is best served warm, however, make sure to let it sit for a few minutes and do not eat straight out of the oven.
    • Use room-temperature cream cheese. While not necessary, it will help the layering of cream cheese be spread throughout the dish.
    Piece of cheesy chicken on white plate, with fork sticking out.

    Recipe FAQs

    Can I make the chicken from frozen?

    You can make this cheesy baked chicken recipe from frozen chicken breasts, you'll just need to adjust the cooking time to 45-60 minutes depending on how thick your chicken breasts are. Always check the internal temperature of each chicken breast and make sure it reaches at least 165 degrees.

    Can I make this ahead of time and freeze it?

    Yes, you can make this cheesy garlic chicken ahead of time and freeze it in a freezer-safe container for up to 4 months. To thaw, place the chicken in your refrigerator for about 24 hours or until fully thawed throughout. It's not a good idea to thaw meat at room temperature due to food-borne illnesses while the outside meat is warmer than the inside meat. 

    How to reheat cheesy chicken?

    To reheat this cheesy garlic chicken, you can heat it in an oven pre-heated to 350 for about 15 minutes or you can also use a microwave to heat individual servings. Microwave time will vary depending on the size of each portion.

    Can I make this recipe with bone-in chicken?

    Yes, you can make this cheesy garlic chicken with bone-in chicken. You'll need to adjust the time and temperature to 400 degrees for about 60 minutes depending on the thickness of your chicken breasts. Always check the internal temperature of each chicken breast closest to the bone of the chicken. Make sure it reaches at least 165 degrees. 

    What cheese goes well with chicken?

    Chicken pairs well with a variety of cheeses like Parmesan for classics like chicken parmesan, and mozzarella for dishes like chicken pizza or caprese chicken. Cheddar cheese can offer the best cheesy sauce for the chicken. Ultimately, it depends on your preference and the recipe you’re cooking up!

    What makes juicy chicken breasts?

    Chicken stays juicy when it’s not overcooked - aim for an internal temperature of 165°F (74°C) but avoid going much higher. Using marinades, brines, or a simple olive oil and seasoning rub can also help lock in moisture and flavor.

    What makes tender chicken taste delicious?

    Chicken tastes delicious when it’s seasoned well with herbs, spices, or marinades that complement your preferences. Cooking it just right, whether grilling, roasting, or pan-frying, also brings out its natural flavors and juices.

    What to Serve with Cheesy Chicken

    This baked chicken with cheese on top goes well with some Homemade Foccacia Bread or Air Fryer Zucchini. If you want to keep things easy for your busy weeknights, simply make up some classic white rice using instant rice and a side salad for a tasty and fitting side dish for this perfect meal.

    Storage

    This cheesy garlic chicken can be stored in an airtight container in your refrigerator for up to 4 days. It can also be stored in your freezer in a freezer-safe container for up to 4 months. 

    More Chicken Recipes You’ll Love

    If you love chicken casseroles, I think you will love these yummy and easy chicken recipes next time!

    • Chicken and gravy on top of mashed potatoes on white plates
      Chicken and Gravy Recipe
    • scoop of chicken bacon ranch pasta
      Chicken Bacon Ranch Pasta
    • Chicken Grilled Cheese Sandwich
      Chicken Grilled Cheese
    • Butter Chicken next to white rice in large serving bowl.
      Butter Chicken Recipe

    Did you make this? I’d be so grateful if you left a “star” rating below to let me know what you thought! Then, the next time you need a quick and easy recipe, come back to Fantabulosity to browse all of my easy recipes!

    Recipe

    Spatula holding up a piece of cheesy chicken.
    Print Pin
    5 from 3 votes

    Cheesy Chicken

    Cheesy chicken is an easy, family-favorite casserole dish that is perfect for weeknight dinners. Let baked cheesy chicken breast become your next regular family dinner!
    Course Dinner
    Cuisine American
    Prep Time 5 minutes minutes
    Cook Time 30 minutes minutes
    Total Time 35 minutes minutes
    Servings 4 servings
    Calories 429kcal
    Author Jessica Burgess

    Ingredients

    • 4 boneless skinless chicken breast
    • 8 ounces cream cheese one block, cubed and softened
    • ¼ cup cheddar cheese shredded
    • ¼ cup mozzarella cheese shredded
    • ⅛ cup parmesan cheese shredded
    • 1 ½ tablespoons garlic minced
    • 1 tablespoon butter melted
    • 3 tablespoons Italian seasoning
    • parsley optional

    Instructions

    • Preheat your oven to 375 degrees and spray a 9×13 baking dish with nonstick cooking spray
    • In a large bowl combine cream cheese, cheddar cheese, mozzarella cheese, parmesan cheese, garlic, butter, and Italian seasoning until well mixed. There may be clumps of cream cheese, and this is ok.
    • Place chicken breasts into the baking dish and spread the cream cheese mixture over the breasts evenly.
    • Bake uncovered for 30 minutes or until the internal temperature of each chicken breast reaches at least 165 degrees.
    • Top the cooked chicken breasts with parsley and serve warm.

    Notes

    • Use room-temperature cream cheese if you do not want the cream cheese chunks in the cheese mixture.
    • Serving with parsley is optional.
    • Minced garlic is preferred over garlic powder.

    Nutrition

    Serving: 1chicken breast | Calories: 429kcal | Carbohydrates: 7g | Protein: 32g | Fat: 30g | Saturated Fat: 17g | Polyunsaturated Fat: 2g | Monounsaturated Fat: 8g | Trans Fat: 0.1g | Cholesterol: 152mg | Sodium: 473mg | Potassium: 567mg | Fiber: 2g | Sugar: 2g | Vitamin A: 1089IU | Vitamin C: 2mg | Calcium: 249mg | Iron: 2mg

    Mini Chocolate Cake

    October 29, 2023

    Mini chocolate cake on small cake stand.

    This mini chocolate cake recipe is a beautiful small cake, that’s perfect for a small amount of people. This recipe makes either 2, 2-tiered cakes or 4, 1-layer cakes, (your choice!) this chocolate cake is the perfect dessert for a romantic date night, easy cake recipe for the weekend, or for making for a birthday party!

    Mini chocolate cake on small white plate.

    If you love chocolate cake as much as we do, then you’re also going to want to make this hot fudge cake, this wacky cake recipe, and this Milky Way cake, the second you get the chance! Or, this no-bake chocolate cake is fun to make and enjoy!

    Or, if you love baking for one, don’t forget about the fun mug cakes like this vanilla mug cake and this Oreo mug cake!

    [feast_advanced_jump_to]

    Why You’ll Love This Recipe

    • Small serving: If you’re baking for only two, this small chocolate cake recipe is the perfect size to satisfy that sweet tooth. It feeds 2, with a small amount of leftovers for the next day, or 4 people for single-servings.
    • Big flavor: Even though this is a small cake recipe, it has big flavor, with coffee and yogurt being the key factors in making this cake full of flavor.
    • Impressive: This mini cake is absolutely stunning, with the beautiful chocolate ganache and whipped frosting.

    Ingredients Needed

    I’ve highlighted a couple of ingredients below with some relevant notes. Aside from this, the ingredients needed are pretty basic.

    Labeled ingredients for mini chocolate cake.
    • Coffee: For best results, you'll want to use hot coffee so the cocoa powder blooms easily in the liquid. You can substitute hot water for coffee if you want to omit caffeine.
    • Oil: We like to bake with avocado oil as it's a nice neutral flavored oil. You can substitute any neutral-flavored oil if you do not have avocado oil. (See substitutions below.)
    • Yogurt: I used Greek yogurt in this recipe, any plain yogurt or sour cream can be substituted. We have not tested using nonfat or low-fat yogurt.

    Substitutions

    Sometimes substitutions are necessary because of ingredients that are unavailable or needed for dietary restrictions. Here are some suggestions that can help:

    • Oil – if you prefer, you can use other neutral oils like vegetable or canola.
    • Yogurt – Full-fat Greek Yogurt was used; you can substitute plain yogurt or sour cream. Avoid using flavored yogurt as it will affect the flavor of the cake and may be too sweet.
    • Coffee – We used coffee to bloom the cocoa powder. You can use hot water, or even hot black tea as a substitute.

    Equipment

    You will need the following for this recipe:

    • 4 ramekins
    • Spatula
    • Whisk
    • Mixing bowls
    • Electric mixer

    How to Make Mini Chocolate Cakes

    Although this is an impressive cake, it’s really easy to make and simple to decorate! We’ll walk you through how to make your own.

    This Mini Chocolate Cake is broken into 3 components:

    • making the small chocolate cakes
    • mixing the chocolate ganache
    • decorating the cake

    This cake doesn’t take a lot of active time to make but it is recommended to make with a few hours notice so the cake has time to cool, so you will not feel rushed.

    *Be sure to see the recipe card below for the full ingredients list & instructions!*

    For the Cake

    Preheat the oven to 350 degrees.

    Spray 4 ramekins with baking spray, place them on a baking sheet, and set aside.

    Steps 1-4 of how to make mini chocolate cake.

    STEP 1. Coffee & Cocoa. In a medium small sized bowl combine the coffee and cocoa powder. Set aside. **For best results you want your coffee to be hot. (Image 1).

    STEP 2. Mix batter. In a mixing bowl combine the greek yogurt, oil, sugar and brown sugar. Using a whisk or an electric mixer, mix until the sugars have just dissolved (Image 2).

    STEP 3. Add the egg and whisk the mixture until the egg is well incorporated (Image 3).

    STEP 4. Combine together. Add the cocoa-coffee mixture and whisk the mixture until the chocolate has been well mixed through (Image 4).

    Collage of images showing steps 5-8 for making a mini chocolate cake.

    STEP 5. Mix in dry goods. Then add the baking powder, baking soda, salt, and vanilla extract. Using a whisk mix until the ingredients are well incorporated (Image 5).

    STEP 6. Add flour. Then slowly add in the flour so the flour becomes well incorporated and the cake batter is smooth (Image 6).

    STEP 7. Pour in ramekins. Add the cake batter to the prepared ramekins so they're evenly distributed between each of the ramekins (Image 7).

    STEP 8. Bake at 350 degrees F for 30 minutes or until a toothpick comes out clean in the center (Image 8).

    Allow them to cool for 30 minutes before removing them.

    Once they've cooled for 30 minutes remove them from the ramekins and place the cakes on a cooling rack and allow to cool for 30 more minutes before frosting them.

    Ready to eat the cake now? No problem! Frost the tops of the cakes in the ramekins and enjoy with a spoon!

    Directions for the Ganache

    Image collage of steps 9-13 of how to make and decorate mini chocolate cake.

    Note: The ganache will be separated into 2 when frosting the cake. This recipe uses a combination of ganache and whipped ganache.

    STEP 9. Heat milk & chips. Fill a saucepan up halfway with water and place it over medium heat. Place a heat safe bowl (like glass) on top. The bowl will want to be large enough so it doesn't fall into the water but rests nicely over top of the saucepan.

    Add the chocolate chips and the heavy cream to the bowl and allow the chocolate to melt, using a spatula stir the mixture to incorporate the cream and chocolate chips together (Image 9).

    STEP 10. Stir. Once the chocolate chips have melted, remove from the heat and continue to stir until the ingredients are incorporated (Image 10).

    Allow the ganache to cool in the fridge for 10 minutes.

    STEP 11. Divide. Divide the mixture into 2 bowls. Place 1 of the bowls back in the fridge for the time being. Then using an electric mixer, beat 1 of the halves of ganache until it's doubled in volume and is whipped nicely (Image 11).

    To Frost the Cake:

    STEP 12. Frosting with Ganache. Add both chocolate ganaches to a piping bag. Use a star tip for the whipped ganache and a fine tip top for the original ganache.

    Take 1 of the cooled cakes and place it on a small plate then pipe a layer of whipped ganache to the first layer. Using an offset spatula, smooth out the ganache so it's evenly distributed and smoothed out. Then add a cake on top of the frosted layer. Pipe another layer of whipped ganache then using an offset spatula smooth out the ganache so it's evenly distributed and smoothed out.

    STEP 13. Liquid ganache. Add a good layer of the original ganache on top of the cake so it slightly drips off the sides.

    Add piped dollops of the whipped ganache over the top for a little decoration.

    Repeat this process for both cakes (Image 13).

    Close up of side view of mini chocolate cake.

    Recipe Pro Tips

    • Original, liquid ganache: The original ganache will want to stay at room temperature so it will make the drips. If it's too cold it will firm up.
    • Whipped ganache: You will want to work with cold whipped ganache. It helps hold the shape when it's piped out of the piping bag.

    Recipe FAQs

    What size is a mini cake?

    When made in ramekins, they’re 4 inches in width.

    How many mini cakes per person?

    This recipe makes 2, two-tiered cakes (where two cakes serve 4 people) or 4, one-layer cakes (where four cakes serve 4 people).

    What temperature do you bake a small cake?

    Bake these mini cakes at 350 degrees for 30 minutes.

    Slice of mini chocolate cake on white plate, showing whipped chocolate ganache in the center.

    Storage

    Leftovers: If you have any leftovers, you'll want to cover the decorated cake with plastic wrap so it's airtight, or in an airtight container. Store in the fridge for 3 days.

    To Freeze: Wrap the unfrosted cake in plastic wrap and place that in a freezer bag. They can be stored for up to 3 months. To use, allow the cakes to thaw completely before decorating or serving.

    More Cake Recipes You’ll Love

    If you love cake recipes, we think you’re really going to love these favorites:

    • A serving of 3-ingredient dump cake in a bowl with a dollop of homemade whipped cream.
      Dump Cake Recipe (Easy 3-Ingredient Dessert That Always Works)
    • Orange upside down cake sliced on spatula.
      Orange Upside Down Cake
    • A slice of peach cobbler cheesecake sitting on a plate next to a fork.
      Peach Cobbler Cheesecake (Easy Baked Recipe with Streusel Topping)
    • A slice of Westhaven cake on a round plate.
      Westhaven Cake

    Did you make this? I’d be so grateful if you left a “star” rating below to let me know what you thought! Then, the next time you need a quick and easy recipe, come back to Fantabulosity to browse all of my easy recipes!

    Recipe

    Mini chocolate cake on small cake stand.
    Print Pin
    Be the first to rate!

    Mini Chocolate Cake

    This mini chocolate cake recipe makes the perfect for a small batch. With this easy recipe, and simple ingredients, this cake turns out with a delicious texture and flavor.
    Course Dessert
    Cuisine American
    Prep Time 15 minutes minutes
    Cook Time 30 minutes minutes
    Cooling Time 2 hours hours
    Total Time 2 hours hours 45 minutes minutes
    Servings 4 servings
    Calories 1058kcal
    Author Jessica Burgess

    Ingredients

    For the Cake

    • ⅓ cup Cocoa Powder
    • ½ cup Black Coffee
    • ⅓ cup Greek Yogurt
    • ¼ cup oil We used avocado but you can use vegetable, canola, etc.
    • ½ cup sugar
    • ¼ cup brown sugar
    • ½ teaspoon baking powder
    • ½ teaspoon baking soda
    • ¼ teaspoon salt
    • 1 teaspoon vanilla extract
    • 1 cup all-purpose flour

    For the Chocolate Ganache

    • 1½ cups chocolate chips semi sweet or milk chocolate
    • 1½ cups heavy cream

    Instructions

    For the Cake

    • Preheat the oven to 350 degrees.
    • Spray 4 ramekins with baking spray, place them on a baking sheet, and set aside.
    • In a medium small sized bowl combine the coffee and cocoa powder. Set aside. **For best results you want your coffee to be hot.
    • In a mixing bowl combine the greek yogurt, oil, sugar and brown sugar. Using a whisk or an electric mixer, mix until the sugars have just dissolved.
    • Add the egg and whisk the mixture until the egg is well incorporated.
    • Add the cocoa-coffee mixture and whisk the mixture until the chocolate has been well mixed through.
    • Then add the baking powder, baking soda, salt, and vanilla extract. Using a whisk mix until the ingredients are well incorporated.
    • Then slowly add in the flour so the flour becomes well incorporated and the cake batter is smooth.
    • Add the cake batter to the prepared ramekins so they're evenly distributed between each of the ramekins.
    • Bake at 350 degrees F for 30 minutes or until a toothpick comes out clean in the center.
    • Allow them to cool for 30 minutes before removing them.
    • Once they've cooled for 30 minutes remove them from the ramekins and place the cakes on a cooling rack and allow to cool for 30 more minutes before frosting them.

    Ganache Instructions

    • The ganache will be separated into 2 when frosting the cake. This recipe uses a combination of ganache and whipped ganache.
    • Fill a saucepan up halfway with water and place it over medium heat. Place a heat safe bowl (like glass) on top. The bowl will want to be large enough so it doesn't fall into the water but rests nicely over top of the saucepan.
    • Add the chocolate chips and the heavy cream to the bowl and allow the chocolate to melt, using a spatula stir the mixture to incorporate the cream and chocolate chips together.
    • Once the chocolate chips have melted, remove from the heat and continue to stir until the ingredients are incorporated.
    • Allow the ganache to cool in the fridge for 10 minutes.
    • Divide the mixture into 2 bowls. Place 1 of the bowls back in the fridge for the time being. Then using an electric mixer, beat 1 of the halves of ganache until it's doubled in volume and is whipped nicely.

    Frosting the Cake

    • Add both chocolate ganaches to a piping bag. Use a star tip for the whipped ganache and a fine tip top for the original ganache.
    • Take 1 of the cooled cakes and place it on a small plate then pipe a layer of whipped ganache to the first layer. Using an offset spatula, smooth out the ganache so it's evenly distributed and smoothed out. Then add a cake on top of the frosted layer. Pipe another layer of whipped ganache then using an offset spatula smooth out the ganache so it's evenly distributed and smoothed out.
    • Add a good layer of the original ganache on top of the cake so it slightly drips off the sides.
    • Add piped dollops of the whipped ganache over the top for a little decoration.
    • Repeat this process for both cakes. 

    Notes

    Ganache Tips:
    The original ganache will want to stay at room temperature so it will make the drips. If it’s too cold it will firm up.
    You will want to work with cold whipped ganache. It helps hold the shape when it’s piped out of the piping bag.

    Nutrition

    Serving: 1serving | Calories: 1058kcal | Carbohydrates: 116g | Protein: 12g | Fat: 63g | Saturated Fat: 32g | Polyunsaturated Fat: 6g | Monounsaturated Fat: 17g | Trans Fat: 0.2g | Cholesterol: 112mg | Sodium: 366mg | Potassium: 336mg | Fiber: 5g | Sugar: 84g | Vitamin A: 1464IU | Vitamin C: 1mg | Calcium: 204mg | Iron: 4mg

    Oreo Fudge

    October 29, 2023

    Oreo fudge, stacked on top of one another.

    This fudge recipe needs just one pot and is so simple to make. What could be better than your favorite cookie added into smooth white chocolate fudge? Oreo Fudge will be your new favorite treat.

    As popular as this layered Oreo dessert is, and this Oreo mug cake, we knew this Oreo fudge would be the next best thing!

    Oreo fudge stacked on top of one another, sitting next to milk.

    It’s no secret that we love chocolate! When you think chocolate cookie, I think everyone goes straight to Oreos, right? That’s why I love chopping them up to add to whipped mousse or making a fantastic Oreo cheesecake dip!

    If you aren’t the biggest fan of chocolate, feel free to pull out the Biscoff cookies to make your own Biscoff truffles or crumble them into their own pan of Biscoff fudge.

    [feast_advanced_jump_to]

    Why You’ll Love This Recipe

    • Use pantry ingredients: Especially when you are getting ready for the holidays, this ingredient list is made from items you already have in the pantry.
    • Make-ahead recipe: Fudge freezes beautifully, so you can keep it in the freezer for surprise gatherings (or just get ahead of your to-do list).
    • Kids can help: If your kids are older, they can help stir at the stove. Younger kids will love pressing cookies into the fudge and it’s soft enough to cut with a plastic knife.

    Ingredients Needed

    I’ve highlighted a couple of ingredients below with some relevant notes. Aside from this, the ingredients needed are pretty basic.

    Labeled ingredients for Oreo fudge, sitting on counter.
    • Oreos – This classic cookie is known for its contrasting cream and chocolatey cookie. I suggest name brand here.
    • White Chocolate Chips – Any brand will do here. Pick one that you enjoy the flavor of on its own.
    • Sweetened Condensed Milk – This thickened milk has sugar added and is the perfect way to sweeten our fudge.
    • Powdered Sugar – Fluffy sugar gives the fudge just the right bite!

    Substitutions

    Sometimes substitutions are necessary because of ingredients that are unavailable or needed for dietary restrictions. Here are some suggestions that can help:

    • Cookies – not a fan of chocolate? Use any cookie here! Nilla wafers, animal crackers, Biscoff, shortbread…
    • Chocolate – especially if switching your cookies out to non-chocolate options, why not swap in milk chocolate chips?

    Equipment

    I like to use an 8×8 baking pan. You will want to line it with a parchment paper “sling” to be able to easily remove the fudge.

    How to Make Oreo Fudge with Condensed Milk

    This is a quick recipe, so measure everything out before beginning, and make sure you will have the time to keep a watchful eye on the stove.

    *Be sure to see the recipe card below for the full ingredients list & instructions!*

    Steps 1-4 of how to make Oreo fudge.

    STEP 1. Crush the cookies. Add the Oreos to a bag and crush with a rolling pin or chop on a cutting board with a knife (Image 1).

    Tip: Always line your pan with parchment paper that overhangs the edges. This will allow you to lift the entire pan of fudge out at once for easy cutting!

    STEP 2. Turn up the heat. Add the remaining ingredients to a saucepan and heat gently while stirring occasionally (Image 2). Make sure not to burn the fudge!

    Sliced Oreo fudge on white marble counter.

    STEP 3. Cookie crunch. Stir the chopped Oreos into the fudge (Image 3).

    Tip: This is a great tip for both cookies and fudge. Save some cookies back to press gently into the top of the fudge. This way you ensure there are Oreos on top rather than trusting the stirred-in ones to make an appearance.

    STEP 4. Spread smoothly. Spread the fudge evenly into the pan and top with the reserved cookies before chilling (Image 4).

    Oreo fudge stacked on top of one another.

    Recipe Pro Tips

    • Heat gently. Don’t turn the stove up too high – you don’t want to boil and you don’t want anything to burn! You can even remove the pan from the heat when you still have some “lumps” of chocolate and they will finish melting as you stir.
    • Chill before enjoying. Make sure and chill your pan for at least 2 hours in the fridge before eating. It will be too difficult to cut before it has set.
    Oreo fudge stacked on top of one another, with a bite taken out of it.

    Recipe FAQs

    What is Oreo fudge made of?

    The main ingredients are white chocolate chips, condensed milk, and powdered sugar. These make the fudgy, chewy texture you think of when you make fudge! And then of course, it wouldn’t be Oreo fudge without the actual cookie crushed up inside.

    Can you put fudge in the freezer?

    Most definitely! This makes it a great holiday option for your cookie platters. You can freeze it for up to 3 months, so go ahead and make it well in advance. Just thaw and serve! Some people might even like to savor a small frozen piece in their mouth and let it melt slowly.

    Can I make fudge in the microwave?

    There are recipes specifically to make fudge in the microwave, and I suppose you could try here as well. However, I much prefer to make this on the stovetop where I can stir frequently and keep an eye on things. Using the microwave you do risk burning the chocolate, so if you try it, cook in short bursts, stirring in between.

    Storage

    The best Oreo fudge recipe is easy to store. You can use it on your cookie trays and be all set for your holiday gatherings. It will last at room temp for up to 2 weeks in an airtight container. Keep it in the fridge for up to 3 weeks or pop it in the freezer for 3 months!

    More Fudge Recipes You’ll Love

    • The center of the photo is a stack of 3 pieces of fudge with additional pieces scattered around the stack
      Biscoff Fudge
    • Chocolate Chip Cookie Dough Fudge
      Cookie Dough Fudge
    • squares of peanut butter fudge on white plate
      Peanut Butter Fudge with Condensed Milk
    • Close up photo of stacked squares of white chocolate fudge topped with red, green and white sprinkles
      Sugar Cookie Fudge

    Did you make this? I’d be so grateful if you left a “star” rating below to let me know what you thought! Then, the next time you need a quick and easy recipe, come back to Fantabulosity to browse all of my easy recipes!

    Recipe

    Oreo fudge, stacked on top of one another.
    Print Pin
    5 from 1 vote

    Oreo Fudge

    Just 6 ingredients and one pan are all you need to make some amazing white Oreo fudge!
    Course Dinner
    Cuisine American
    Prep Time 10 minutes minutes
    Chill 2 hours hours
    Total Time 2 hours hours 10 minutes minutes
    Servings 30 pieces
    Calories 199kcal
    Author Jessica Burgess

    Ingredients

    • 3 cups white chocolate chips
    • 14 oz can of sweetened condensed milk
    • ½ cup powdered sugar
    • 2 tablespoons butter
    • 1 teaspoon vanilla
    • 24 Oreo cookies

    Instructions

    • Line an 8×8 baking dish with parchment paper.
    • Set 3 or 4 Oreos aside and place the rest in a ziploc bag. Crush them with a rolling pin or can. You will want some big and small pieces so don't crush them too much. You can also use a knife to give the cookie a rough chop.
    • In a large saucepan over medium heat, melt the chocolate chips, condensed milk, sugar, butter, and vanilla. Stir to combine and remove from the heat.
    • Mix in the chopped Oreos.
    • Pour the mixture into the lined pan. Top with remaining Oreos, chopping them in fourths first. Place in the fridge for 2-4 hours to set before cutting.

    Video

    Notes

    • Make sure and chill before eating! Otherwise it will be too difficult to cut neatly.
    • You can freeze this ahead for up to 3 months.

    Nutrition

    Serving: 1piece | Calories: 199kcal | Carbohydrates: 27g | Protein: 3g | Fat: 10g | Saturated Fat: 5g | Polyunsaturated Fat: 1g | Monounsaturated Fat: 3g | Trans Fat: 0.04g | Cholesterol: 10mg | Sodium: 76mg | Potassium: 123mg | Fiber: 0.3g | Sugar: 24g | Vitamin A: 64IU | Vitamin C: 0.4mg | Calcium: 76mg | Iron: 1mg

    Peanut Buster Parfait

    October 27, 2023

    Peanut Buster Parfait in white bowl.

    The Peanut Buster Parfait ice cream dessert is a fusion of crunchy peanuts, hot fudge or chocolate sauce, and creamy vanilla soft-serve ice cream that tantalizes the taste buds. This dessert recipe for ice cream lovers is a joy to prepare and an even greater delight to devour.

    Although ice cream is typically a summertime dessert, with rich fudge and crunchy peanuts, this is a dessert that is perfect all year long. Serve this ice cream parfait alone with this ding-dong cake or next to this turtle pie recipe.

    Peanut buster parfaits in white bowls.

    Inspired to try a few more recipes using loads of peanuts or even peanut butter? You could try making Easy Peanut Butter Cookie Recipe which is a delicious and simple cookie recipe. Or for a different type of snack, make some Energy Bites: Chocolate + Peanut Butter, No Bake Recipe which are ideal for long days.

    [feast_advanced_jump_to]

    Why You’ll Love This Recipe

    • It uses a few simple ingredients: With only 3 ingredients, you don’t need anything complicated to make this dessert.
    • Use what you have: Because it is so simple, you can also easily change the ingredients to get different variations.
    • Ready in only 5 minutes: Talk about a quick dessert option! The recipe takes only a few minutes to put together and even if you heat the fudge, that only adds another 5-10 minutes to it.

    Ingredients Needed

    I’ve highlighted a couple of ingredients with some relevant notes. Aside from this, the ingredients needed are pretty basic.

    Ingredients for a peanut buster parfait.
    • Ice cream – We went for vanilla ice cream for this recipe as it works perfectly as the base for the other ingredients.
    • Fudge – Hot fudge is best as this melts into the ice cream and is delicious. You can use store-bought, or for an extra luxurious flavor, this homemade hot fudge is so easy to make.
    • Peanuts – Salted peanuts are the favorite for this in our house but you can use plain ones if you want to cut back on the salt. Use your leftover peanuts to make this old-fashioned peanut brittle!

    The ingredients are similar to turtle recipes, like these easy turtle cookies and this easy turtle pie!

    Substitutions

    Sometimes substitutions are necessary because of ingredients that are unavailable or needed for dietary restrictions. Here are some suggestions that can help:

    • Ice Cream: For a healthier alternative, you can use Greek yogurt or a dairy-free ice cream made from almond milk or coconut milk. For those with dietary restrictions, lactose-free ice cream is also an option. You can also choose different flavors such as vanilla bean ice cream or chocolate ice cream.
    • Hot Fudge: A homemade chocolate ganache can replace the hot fudge, or you can use a sugar-free chocolate syrup for a lower-calorie option. Vegan dark chocolate can also be used for those following a vegan diet.
    • Peanuts: If you’re allergic to peanuts, try substituting them with almond slivers or crushed pecans. For a nut-free version, you can use pretzel pieces or granola for that needed crunch.

    Variations

    • Berry Delight: Swap out the fudge and peanuts for a handful of mixed berries and a drizzle of honey. The tartness of the berries and the sweetness of the honey with layers of creamy vanilla create a refreshing flavor profile.
    • Tropical Twist: For a summer-inspired variation, replace the peanuts with toasted coconut flakes and add a spoonful of pineapple chunks. Drizzle with a touch of caramel sauce for a tropical paradise in a bowl.
    • Coffee Crunch: For all the coffee lovers, infuse your vanilla ice cream with a shot of espresso and replace the peanuts with chocolate-covered espresso beans for a delightful crunch and a caffeine kick.

    How to Make Peanut Buster Parfait

    *Be sure to see the recipe card below for the full ingredients list & instructions!*

    STEP 1: Heat the fudge. Heat the fudge in a small saucepan until it gently bubbles. Don’t overcook it or it will burn.

    STEP 2: Dish out the ice cream. Put scoops of ice cream into small bowls (how many depends on your preference!) (Image 1)

    Steps 1-3 peanut buster parfait.

    STEP 3: Add the fudge. Pour over tons of rich hot fudge sauce. (Image 2)

    STEP 4: Add the peanuts. Top with chopped peanuts and serve. (Image 3)

    Peanut Buster Parfaits in white bowls.

    Recipe Pro Tips

    • Use high-quality ingredients: Because this recipe is so straightforward, the taste of each ingredient really shines through. So, opt for premium ice cream, fresh peanuts, and high-quality hot fudge for the best results.
    • Chill your serving dishes: The best tip if you want your ice cream to stay cold for longer, consider chilling your serving dishes in the freezer for 10-15 minutes before assembling the parfaits.
    • Mix and match: Feel free to get creative and mix and match the flavors. You could use a different flavor of ice cream, such as chocolate or strawberry, or try a variety of toppings like caramel sauce, whipped cream, or cherry on top.
    • Serve immediately: This dessert is best enjoyed immediately after it’s made. The contrast between the hot fudge and cold ice cream is part of what makes this dessert so delightful.
    • Add a cherry on top: For an extra special touch, top each parfait with a cherry. It adds a pop of color and a sweet finish to the dessert.
    • Sundae: You can also use a tall sundae dish and use a layer of fudge sauce alternating with a ice cream layer and peanuts on a  special occasion or birthday celebrations.
    Peanut buster parfait with a bite on a spoon, lifting out of bowl.

    Recipe FAQs

    What can I use instead of hot fudge for a peanut buster parfait?

    If you don't have hot fudge on hand, you can make a quick and easy substitute at home by melting chocolate chips with a little bit of cream. Chocolate syrup can also work in a pinch, though it may not have quite the same rich flavor.

    Can I use a different type of nut for a peanut buster parfait?

    Absolutely! While the traditional version uses peanuts, you can definitely substitute with other nuts like almonds, hazelnuts, or macadamia nuts. Just be sure to chop them up for the best texture.

    Can I make a vegan version of this ice cream sundae recipe?

    Yes, you can make a vegan version by using dairy-free ice cream, vegan hot fudge, and ensuring your peanuts are not coated in any dairy products. 

    Is there a way to reduce the sugar in this ice cream dessert?

    To reduce the sugar, you can use sugar-free ice cream and a low-sugar hot fudge sauce. Be mindful that altering the ingredients can affect the final taste and texture of the dessert.

    What to Serve with Peanut Buster Parfait

    The Peanut Buster Parfait is a rich and indulgent dessert that can stand alone as the star of the show. However, if you’re looking to create a more comprehensive dessert experience, consider pairing it with other treats. A slice of warm apple pie or a soft, gooey brownie could provide a delightful contrast in temperature and texture. 

    For a lighter option, you might serve it alongside a plate of freshly cut fruits like strawberries or mangoes which can help cleanse the palate. 

    Storage

    Storing leftover Peanut Buster Parfait can be a bit tricky due to its mixed-temperature components, but it’s not impossible. The key is to disassemble it – and not to worry if a little fudge ends up in the ice cream! 

    Place any leftover ice cream back in its container and return it to the freezer. Store the leftover fudge in an airtight container in the fridge. You can also store your leftover peanuts in an airtight container at room temperature. 

    When you’re ready to have it again, simply reassemble and enjoy. Remember, however, that this dessert is best enjoyed fresh.

    More Ice Cream Recipes You’ll Love

    It’s the height of summer and there’s no reason to stop here with the parfait royal treat! Another great idea is Cookies and Cream Milkshake which is a refreshing and easy-to-make drink for a hot day. Or go for another delicious treat, a traditional idea with an Ice Cream Sandwich Cake that works perfectly to cool everyone down.

    Did you make this? I’d be so grateful if you left a “star” rating below to let me know what you thought! Then, the next time you need a quick and easy recipe, come back to Fantabulosity to browse all of my easy recipes!

    Recipe

    Peanut Buster Parfait in white bowl.
    Print Pin
    5 from 1 vote

    Peanut Buster Parfait

    A peanut buster parfait is a combination of vanilla ice cream, hot fudge and crunchy peanuts! So easy to make and the crunchy peanuts combined with hot fudge sauce, and cool ice cream is a combo to love.
    Course Dessert
    Cuisine American
    Prep Time 9 minutes minutes
    Total Time 9 minutes minutes
    Servings 1 parfait
    Calories 385kcal
    Author Jessica Burgess

    Ingredients

    • 1 scoop vanilla ice cream
    • 2 Tablespoons salted peanuts
    • 2 Tablespoons hot fudge

    Instructions

    • Place one scoop of vanilla ice cream in a parfait glass or bowl.
    • Heat up hot fudge and pour over vanilla ice cream.
    • Top with peanuts and serve.

    Notes

    Have fun changing up your parfait by using strawberry syrups, sprinkles, chocolate chips or whatever else you love serving on top of your ice cream sundaes.

    Nutrition

    Serving: 1parfait | Calories: 385kcal | Carbohydrates: 43g | Protein: 10g | Fat: 20g | Saturated Fat: 8g | Polyunsaturated Fat: 4g | Monounsaturated Fat: 8g | Cholesterol: 29mg | Sodium: 271mg | Potassium: 394mg | Fiber: 3g | Sugar: 27g | Vitamin A: 279IU | Vitamin C: 0.5mg | Calcium: 123mg | Iron: 1mg

    Creamy Caesar Chicken

    October 25, 2023

    Creamy Caesar Chicken in a skillet.

    Caesar Chicken: a creamy dish of perfectly cooked chicken, elevated by Parmesan cheese and the zip of the tangy, peppery flavors of Caesar dressing.

    When it comes to cooking chicken dishes on the stove-top, we also love this chicken fried steak and gravy, this chicken and noodles recipe, and this chicken and gravy recipe!

    Creamy caesar chicken in skillet.

    Want to use up that bottle of Caesar dressing? Then you can also make this classic Chicken Caesar Pasta Salad Recipe that is perfect for a warm day.

    What is Caesar Dressing?

    Caesar Dressing is a delightful dressing that adds an extra zing to any dish it graces. This creamy dressing, originally crafted by restaurateur Caesar Cardini, boasts a rich blend of garlic, Dijon mustard, Worcestershire sauce, lemon juice, and anchovies, topped off with a pinch of freshly grated Parmesan. 

    But it’s not just for salad recipes. Whether you’re drizzling it over your preferred protein like for this crock pot Caesar chicken sandwich, or using it as a veggie dip, Caesar dressing is the secret sauce that can instantly transform your meal from ‘meh’ to ‘marvelous’!

    [feast_advanced_jump_to]

    Why You’ll Love This Recipe

    • A ton of flavor: The combination of the tangy Caesar dressing with the saltiness of the Parmesan works perfectly alongside the chicken.
    • Make-ahead recipe: Did you know you can make this easy baked chicken recipe in advance if you want to? It’s true; see my tips below on how to do that!
    • Ready in less than 30 minutes: Talk about a quick and easy recipe idea! This chicken recipe takes less than half an hour, from meal prep to finish.

    Ingredients Needed

    I’ve highlighted a couple of ingredients below with some relevant notes. Aside from this, the ingredients needed are pretty basic.

    Labeled ingredients for creamy caesar chicken.
    • Chicken – We prefer boneless skinless chicken breasts for this recipe as they cook easily and slice nicely.
    • Caesar dressing – You can use a good grocery store-bought dressing for the recipe or even try making your own.
    • Cheese – Parmesan is definitely the best for this as the saltiness adds to the recipe without overwhelming the flavors of the dressing. If cheese and chicken together are your favorite, then this cheesy chicken will be a hit!

    Substitutions

    Sometimes substitutions are necessary because of ingredients that are unavailable or needed for dietary restrictions. Here are some suggestions that can help:

    • Chicken Breasts – If you don’t have chicken breasts, feel free to use other parts of the chicken, like thighs or drumsticks. For a vegetarian spin, portobello mushrooms or tofu can work wonders.
    • Garlic Clove – If fresh garlic isn’t available, you can use about ⅛th teaspoon of garlic powder to substitute for a single clove. 
    • Caesar Dressing – No Caesar dressing in the pantry? No worries! Try using a mix of mayonnaise, a little lemon juice, and Dijon mustard for a similar tangy, creamy effect.
    • Heavy Cream – Milk can be a stand-in if you’re out of cream. Add a tablespoon of butter to a cup of milk to enhance the richness.
    • Parmesan – In the absence of Parmesan, you could use other hard, salty cheeses like Pecorino Romano or Grana Padano. For a dairy-free alternative, nutritional yeast provides a similar umami punch.

    Variations

    • Spice it up: For those wanting a bit of heat, adding red pepper flakes or a dash of cayenne pepper to the chicken before baking can create a delightful spicy variation to suit your personal preference.
    • Go Green: Add chopped fresh herbs like parsley, basil, or thyme before baking for a fresh and aromatic touch to your Caesar Chicken.
    • Cheese Variety: While Parmesan is a great addition to this dish, feel free to explore with others, like sharp Cheddar or Gouda, for a different flavor profile.
    • Veggies Inclusion: Want to make it a complete meal? The best way is to toss some cherry tomatoes, zucchini, or bell peppers into the baking dish alongside your chicken for a wholesome and colorful twist.
    • Grill it: If you’re up for outdoor cooking, this recipe can be easily adapted for the grill. Just remember to keep an eye on it to prevent the chicken from drying out.
    • Vegan Twist: Swap chicken with firm tofu or seitan, use a vegan Caesar dressing, and replace Parmesan with a sprinkle of nutritional yeast for a delightful vegan version of Caesar Chicken.
    • Chicken Caesar Wrap: Use any leftover chicken with romaine lettuce and a bit of grated cheese for lunch the following day with a Chicken Caesar wrap!

    How to Make Creamy Caesar Chicken

    *Be sure to see the recipe card below for the full ingredients list & instructions!*

    STEP 1: Heat the skillet. Heat a large skillet over medium-high heat and add 1 tablespoon of olive oil, allowing it to melt.

    STEP 2: Slice and cook the chicken. Cut boneless chicken breasts in half lengthwise and season them with salt and black pepper. Coat the chicken breasts in flour and transfer them to a skillet. Cook for approximately 3-4 minutes on each side or until the chicken is fully cooked and reaches an internal temperature of 165F. Set the chicken aside. (Images 1-2)

    Steps 1-4 for how to make Caesar chicken.

    STEP 3: Cook the garlic. Heat the remaining oil and sauté the garlic in the pan for one minute until it becomes fragrant. Pour the broth into the pan and deglaze, making sure to scrape up any browned bits. (Images 3-4)

    STEP 4: Make the sauce and add the chicken. First, bring the broth to a vigorous boil. Then, add the Caesar dressing, cream, and Parmesan cheese, and continue cooking for an additional 2-3 minutes or until the liquid thickens and reduces. Next, place the chicken breasts back into the pan and cook for another 1-2 minutes, spooning the creamy sauce over the chicken. (Images 5-7)

    Steps 5-8 for how to make Caesar chicken in creamy sauce.

    STEP 5: Serve with parsley. Serve promptly over pasta or rice garnished with fresh parsley, and savor the flavors!

    Creamy Caesar chicken in skillet.

    Recipe Pro Tips

    • Choosing the Right Chicken: For best results when buying chicken, look for breasts that are even in size for consistent cooking, or you can pound the thicker end of the chicken breast to even it out. 
    • Homemade Caesar Dressing: Making your own creamy Caesar dressing can take this dish to the next level. The fresh flavors are hard to beat, and you have control over the ingredients. Plus, it’s easier than you might think! You can also try making homemade croutons.
    • Let it Rest: After removing the chicken from the oven or skillet, let it rest for a few minutes. This allows the juices to redistribute throughout, making extra juicy, moist chicken!
    • Prep Ahead: Want to make dinnertime less hectic? You can prep this recipe in advance. Simply follow the steps to add the Caesar dressing, cream, and Parmesan cheese. On the day of serving, pick up from there and cook until the chicken is done.
    • Add a Side: While this is a complete dish on its own, you can serve it with a side of steamed veggies, a fresh salad, or even some fluffy rice to round out the meal.
    Creamy Caesar chicken on pasta.

    Recipe FAQs

    Can I use chicken thighs instead of chicken breasts in this recipe?

    Absolutely! Chicken thighs can make a delicious alternative to breast meat
     in this recipe. They’re juicier and have more flavor due to their higher fat content. Adjust the cooking time, as thighs may need longer to cook thoroughly.

    What if I’m lactose intolerant? Can I still enjoy Caesar Chicken?

    Of course you can! There are plenty of lactose-free alternatives available for the cream and Parmesan cheese. Use lactose-free cream or a dairy-free milk alternative like almond or oat milk, along with a pinch of flour to thicken the sauce. For the cheese, look out for lactose-free Parmesan or nutritional yeast for a cheesy flavor.

    Is there a low-carb option for Caesar Chicken?

    Certainly! This dish can be easily adapted to fit a low-carb diet. Simply serve it with steamed veggies or a fresh salad instead of pasta or rice. You could try it with some cauliflower rice for a deliciously healthy twist. 

    Can I make this recipe gluten-free?

    Sure thing! To make this recipe gluten-free, use gluten-free flour to coat the chicken and ensure your Caesar dressing is gluten-free too. Always double-check the labels, just to be safe!

    How do I know when the chicken is fully cooked?

    The safest way to ensure your chicken is fully cooked is to use a meat thermometer. The internal temperature should reach at least 165F. If you don’t have a thermometer, slice into the thickest part of the chicken. The juices should run clear, and the meat should be white, not pink.

    What to Serve with Creamy Caesar Chicken

    The creamy, decadently savory Caesar Chicken pairs beautifully with various side dishes to complete your meal and make it even more satisfying. How about a serving of garlic bread on the side? Its crisp texture and buttery flavor match the rich, tangy notes of the chicken. (Or this fun cheesy pull-apart bread.)

    A light, refreshing, simple salad can complement the dish wonderfully – try a simple green salad or a cucumber salad for a contrasting, fresh note. Hearty green vegetables such as garlic broccoli, bacon-wrapped asparagus, or candied carrots can add a nice balance to your meal. 

    For those who prefer a heartier accompaniment, a side of creamy mashed potatoes or a portion of fluffy rice can be a perfect match. And if you’re up for a bit of Italian flair, serve the Caesar Chicken over a bed of al dente pasta, similar to this creamy lemon chicken pasta. 

    Caesar chicken on spaghetti noodles.

    Storage

    Storing leftovers of this sumptuous Caesar Chicken is a breeze. Simply place the cooled leftovers in an airtight container and store them in your refrigerator. The dish will stay fresh and delicious for 3-4 days. 

    And guess what? This recipe is freezer-friendly too!
    When freezing, ensure your container is airtight and freezer-safe to maintain the quality of your meal. You can keep it frozen for up to 2-3 months. 

    To reheat, let it thaw overnight in the refrigerator and warm it up on the stove or in the oven. You have yourself a ready-to-eat, scrumptious meal for those busy days when you don’t have time to cook from scratch. 

    More Chicken Recipes You’ll Love

    Looking for inspiration for more things to do with chicken on busy weeknights? There’s plenty here! Why not try some simple Fried Chicken Sliders for a great lunch idea? Or, for a hearty meal, try this Easy Slow Cooker Shredded Chicken that the whole family will enjoy. If pasta is more your style, this chicken and broccoli pasta is a must-make!

    Or these others:

    • Get ready for some major comfort food. Lasagna Stuffed Chicken is packed with three cheeses and red sauce for the ultimate low carb meal.
      Lasagna Stuffed Chicken
    • Cooked chicken bites with salt, pepper and browned butter.
      Chicken Bites
    • Sliced baked chicken cutlets on white plate, next to green beans.
      Baked Chicken Cutlets
    • Oven Baked Bacon Wrapped Chicken Thighs

    Did you make this? I’d be so grateful if you left a “star” rating below to let me know what you thought! Then, the next time you need a quick and easy recipe, come back to Fantabulosity to browse all of my easy recipes!

    Recipe

    Creamy Caesar Chicken in a skillet.
    Print Pin
    5 from 2 votes

    Creamy Caesar Chicken

    Caesar Chicken: Tender chicken breasts in a creamy, cheesy, caesar sauce that's delicious by itself or served over pasta noodles.
    Course Dinner
    Cuisine American
    Prep Time 10 minutes minutes
    Cook Time 15 minutes minutes
    Total Time 25 minutes minutes
    Servings 4
    Calories 434kcal
    Author Jessica Burgess

    Ingredients

    • 2 boneless skinless chicken breasts
    • 2 tablespoons olive oil
    • ¼ cup flour
    • ½ teaspoon kosher salt
    • ¼ teaspoon black pepper
    • 2 garlic cloves minced
    • ⅓ cup chicken broth Get my homemade chicken broth recipe.
    • ½ cup caesar dressing
    • ½ cup parmesan cheese grated
    • ⅓ cup heavy cream
    • 1 tablespoon chopped fresh parsley for garnish

    Instructions

    • Melt 1 tablespoon of olive oil in a large skillet over medium high heat.
    • Slice both chicken breasts in half, lengthwise, and season with salt and pepper. Dredge the chicken breasts in the flour and place into the skillet. Cook for 3-4 minutes on each side, or until the chicken is cooked through and reaches an internal temperature of 165F. Set chicken aside.
    • Melt the remaining oil and add the garlic to the pan to saute for one minute until fragrant. Add the broth to the pan and scrape up any browned bits. Bring the broth to a boil then add in the caesar dressing, cream and parmesan cheese and cook for another 2-3 minutes or until the liquid thickens and reduces. Return the chicken breasts back to the pan and cook for another 1-2 minutes, spooning the sauce over the chicken.
    • Serve immediately over pasta or rice with fresh parsley, enjoy!

    Notes

    Leftovers: Store in an airtight container in the fridge for up to 3-4 days, or in the freezer for up to 3 months.

    Nutrition

    Serving: 1chicken breast | Calories: 434kcal | Carbohydrates: 9g | Protein: 19g | Fat: 36g | Saturated Fat: 11g | Polyunsaturated Fat: 11g | Monounsaturated Fat: 12g | Trans Fat: 0.01g | Cholesterol: 79mg | Sodium: 991mg | Potassium: 273mg | Fiber: 0.5g | Sugar: 2g | Vitamin A: 502IU | Vitamin C: 3mg | Calcium: 185mg | Iron: 1mg

    Old Fashioned Chicken and Rice Casserole

    October 23, 2023

    Baked chicken and rice casserole in baking dish.

    Old Fashioned Chicken and Rice Casserole: This chicken rice recipe is a vintage, family-favorite dinner that’s easy to make in the oven, using canned soups and tender chicken thighs.

    Close up of chicken and rice casserole on wooden spoon in baking dish.

    Our version of this classic favorite combines the wholesome goodness of chicken with the heartiness of rice, all baked to perfection in a creamy sauce seasoned to please. And the best part? This casserole recipe is easy to whip up, even on your busiest days.

    Much like our chicken tater tot casserole, our Dorito chicken casserole, and our Stove Top chicken casserole.

    If you have some chicken thighs left to use, you could also make this Bacon Wrapped Chicken Thighs recipe as an ideal appetizer. Or try some Instant Pot Chicken Thighs - Lemon and Herb for another one-pot flavorful meal.

    [feast_advanced_jump_to]

    Why You’ll Love This Recipe

    • It uses simple ingredients: With items like cream of chicken soup and cream of mushroom soup, you can whip up a tasty meal with no unusual ingredients.
    • Batch recipe: You can easily increase the amount of ingredients you use if you need a big batch for a special event.
    • One pot recipe: Keep the dishes to a minimum with this one pot recipe, where everything goes into one pan.
    • Old-fashioned recipe: If you love the classics, this old-fashioned recipe will fit right in with your dinner meal plan. Rotate this one with this macaroni and tomatoes recipe and this easy chicken pot pie recipe, for a southern classic. Or, if you have chicken left, these chicken and dumplings from scratch are a must-make.

    Ingredients Needed

    I’ve highlighted a couple of ingredients below with some relevant notes. Aside from this, the ingredients needed are pretty basic.

    Labeled ingredients for chicken and rice.
    • Canned soup – This easy recipe uses mushroom and chicken canned soups as it adds flavor and creaminess without needing any actual cream.
    • Broth – Chicken broth is ideal for this as it complements the flavor of the chicken thighs and works well with the canned soup. You can make my homemade chicken broth recipe if you don’t have any on hand.
    • Chicken – We use chicken thighs for this recipe as it works perfectly.

    Substitutions

    Sometimes substitutions are necessary because of ingredients that are unavailable or needed for dietary restrictions. Here are some suggestions that can help:

    • Mushroom Soup – If you don’t have mushroom soup at hand or prefer not to use it, you can opt for cream of celery soup or onion soup mix. They maintain the creamy texture while giving a unique flavor to the dish.
    • Chicken Soup – Not a fan of canned chicken soup? No problem. You can use homemade broth thickened with cornstarch or vegetable cream soup to switch things up a little. Remember, the aim is to keep that delicious creaminess intact.
    • White Rice – If white rice isn’t your grain of choice, feel free to substitute it with brown rice, wild rice, or even quinoa. Make sure to adjust the cooking time per the grain you choose; these alternatives might take a bit longer.
    • Chicken Thighs – Chicken breast is an excellent alternative if you want to go lean. For vegetarians, tofu or a hearty mix of mushrooms can work just as well. Remember to adjust your cooking times accordingly.
    • Parmesan Cheese – If you’re dairy-free or just don’t have Parmesan on hand, nutritional yeast provides a cheesy flavor while being vegan-friendly. Otherwise, any cheese that melts well, like sharp cheddar cheese or mozzarella, can make a good substitute. Go ahead and experiment with what suits your taste buds! If you love cheese with chicken, this cheesy chicken is a recipe that’s also a must-make!

    Variations

    • Southwest Twist: For a little Tex-Mex flair, incorporate some black beans, corn, diced tomatoes, and a hint of chili powder. Top with a sprinkle of shredded Pepper Jack cheese and fresh cilantro for a delightful zest!
    • Mediterranean Mood: Substitute the chicken thighs with diced lamb or beef, replace white rice with couscous, and add a mix of Mediterranean spices like cumin, coriander, and a dash of cinnamon. Remember to add a sprinkle of feta cheese on top before serving!
    • Vegetarian Delight: Replace chicken thighs with your choice of protein-packed beans, hearty mushrooms, or nutritious tofu. Pair with your favorite veggies such as bell peppers, zucchinis, or aubergines for a wholesome, meat-free feast.
    • Seafood Sensation: Swap out chicken for shrimp or chunks of white fish like cod or haddock. Add a splash of white wine for an extra flavor punch. This variation pairs well with a squeeze of fresh lemon and a sprinkle of dill before serving!

    How to Make Old Fashioned Chicken and Rice Casserole

    This simple chicken casserole is broken into 2 components:

    • Add the ingredients
    • Bake in the oven

    *Be sure to see the recipe card below for the full ingredients list & instructions!*

    STEP 1: Prepare the casserole dish. Preheat the oven to 350 degrees f and generously grease a 9 x 13 inch casserole dish with cooking spray or oil.

    STEP 2: Mix the ingredients. Combine the soups, broth, cheese, and seasonings in a casserole dish, whisking until smooth. Ensure minimal clumps are remaining in the mixture. (Image 1)

    STEP 3: Add the rice. Gently scatter the rice over the soup mixture, stirring it well. This will ensure that the rice is evenly incorporated into the soup, promoting consistent cooking throughout. (Image 2)

    Showing steps 1-4 of how to make chicken and rice casserole.

    STEP 4: Add the chicken. Add the chicken pieces to the soup and rice mixture, gently pressing each piece down until the edges are submerged. (Image 3)

    STEP 5: Season the casserole. Season with salt and pepper according to your taste preferences.

    STEP 6: Bake in the oven. Place a layer of foil over the pan and bake for one hour. Then, uncover and continue cooking for an additional 10 minutes until the rice is fully cooked and the edges are bubbly. (Image 4)

    Baked chicken and rice casserole in baking dish on counter.

    STEP 7: Rest, then serve. Remove the dish from the oven and rest for 10 minutes before serving. This step allows the juices to seep back in, resulting in a creamy texture.

    Serving of chicken and rice casserole on white plate.

    Recipe Pro Tips

    • Don’t rush the baking: Casseroles need time to cook evenly. Rushing this process by increasing the oven temperature could result in a dish that’s overcooked on the outside and undercooked inside.
    • Use a deep dish: The recipe calls for a 9 x 13 inch casserole dish, but if your baking dish is shallow, you may want to opt for a slightly smaller yet deeper dish to prevent spillage in the oven.
    • Season to taste: The canned soups and cheese naturally contain salt. Taste your mixture before adding salt to prevent an overly salty end product.
    • Let it rest: Don’t skip the resting period after baking! This allows all the flavors to meld together and the rice to absorb any remaining liquid, resulting in a creamier, tastier dish.
    Old fashioned chicken and rice casserole being scooped out of baking dish.

    Recipe FAQs

    Can I use brown rice instead of white?

    Absolutely! Remember that brown rice takes a bit longer to cook than white rice. You might need to increase your baking time by about 15-20 minutes to ensure even cooking.

    Is it okay to use cooked chicken in this rice and chicken casserole?

    Yes. If you have leftover chicken, feel free to use it. Just make sure to adjust the cooking time, as the chicken won't need as long to cook. Add it in during the last 15 minutes of baking to avoid overcooking.

    Can I make this chicken and rice casserole ahead of time?

    Yes, you can! Just prepare the casserole as directed, let it cool, then cover it and store it in the refrigerator. When you’re ready to enjoy it, bake it in the oven at 350°F until it’s heated through. This makes it a perfect dish for busy school nights or when you expect company. 

    Why is my casserole dry?

    If your casserole turns out dry, it could be that it was cooked for too long or at too high a temperature. Use a timer to avoid overcooking, and ensure you use the correct oven temperature. Also, ensure the foil cover is secure to hold in moisture while baking. Everyone’s oven is different, so getting the timing right might take a few tries.

    Can you use other meat in place of chicken in chicken and rice casserole?

    Absolutely! This casserole can easily be customized to your preferences. Such as skinless chicken breasts, turkey, beef, or for a vegetarian option, you can substitute with tofu. Just adjust the cooking time accordingly and ensure the meat is cooked through before serving.

    Side Dishes for Chicken and Rice

    This Old-Fashioned Chicken and Rice Casserole pairs wonderfully with various sides. For a refreshing contrast to the hearty casserole, consider serving it with a crisp, green side salad packed with your favorite veggies – think crunchy cucumbers, ripe cherry tomatoes, and thinly sliced red onions, all tossed in your go-to dressing. The freshness of the salad complements the richness of the casserole beautifully. 

    If salads aren’t your thing, a side of canned green beans, or even air fryer zucchini may be an easy side dish idea for you! Or something like these candied carrots are a sweet side to pair with the savory casserole. However, if you love a good starchy bread with a casserole, like we do, these cheesy garlic biscuits are the perfect fit!

    Storage

    Leftovers can be stored in an airtight container and kept in the refrigerator for up to 4 days.

    To freeze, allow the casserole to cool completely before wrapping it tightly with aluminum foil and placing it in a freezer-safe container or freezer bag. It will keep well for up to 3 months. 

    To reheat, thaw the casserole overnight in the refrigerator; if frozen, bake at 350°F until heated through, about 20-30 minutes. If reheating from the fridge, you can either microwave individual servings or heat in the oven at the same temperature. Just ensure it’s heated through the middle, and you’re all set for another round of this delightful comfort food!

    More Casserole Recipes You’ll Love

    If this great recipe for easy chicken and rice casserole leaves you wanting to make more, why not try my Southern Broccoli Casserole for a simple and delicious vegetable recipe?

    Or, for another easy dinner recipe for comfort food style dishes, make this French Onion Beef Casserole for dinner on a cold night the whole family will love.

    If you enjoy classic chicken dinners like this, you’ll love this popular Chicken Spaghetti with Rotel, and these other old-fashioned dinner recipes.

    • 9x13 baking dish with party potatoes inside, and a wooden serving spoon, spooning it out.
      Party Potatoes
    • Wooden spoon holding a serving of old-fashioned cornbread dressing.
      Old-Fashioned Cornbread Dressing
    • Ham and cheese croissant bake serving being lifted out of baking dish.
      Ham and Cheese Croissant Bake
    • slice of cinnamon roll casserole on plate
      Cinnamon Roll Casserole

    Did you make this? I’d be so grateful if you left a “star” rating below to let me know what you thought! Then, the next time you need a quick and easy recipe, come back to Fantabulosity to browse all of my easy recipes!

    Recipe

    Baked chicken and rice casserole in baking dish.
    Print Pin
    4.86 from 7 votes

    Old Fashioned Chicken and Rice Casserole

    This chicken and rice casserole uses simple ingredients and is so easy to make, all while being full of flavor and an absolutely delicious dinner recipe!
    Course Dinner
    Cuisine American
    Prep Time 5 minutes minutes
    Cook Time 1 hour hour 20 minutes minutes
    Total Time 1 hour hour 25 minutes minutes
    Servings 6 servings
    Calories 389kcal
    Author Jessica Burgess

    Ingredients

    • 1 can Cream of Mushroom Soup
    • 1 can Cream of Chicken Soup
    • 1 can Chicken Broth
    • ½ cup Parmesan Cheese Shredded
    • ½ teaspoon Italian Seasoning
    • ½ teaspoon Onion Powder
    • ¼ teaspoon Garlic Powder
    • 1 ¼ cup White Rice Raw
    • 1 ½ pound Boneless Skinless Chicken Thighs
    • Salt and Pepper to Taste

    Instructions

    • Heat oven to 350 degrees and coat a 9 x 13 inch casserole dish with cooking spray or oil.
    • Place soups, broth, cheese, and seasonings into the casserole dish and whisk together. Only a few small clumps of soup should remain.
    • Sprinkle the rice onto the soup mixture, then stir. The rice should be evenly mixed into the soup mixture to ensure even cooking.
    • Place chicken into soup and rice mixture. Press each piece down into the mixture until the edges are just covered.
    • Add salt and pepper to taste.
    • Cover the pan with foil and bake for 1 hour. After one hour, remove the foil and cook for an additional 10 minutes until the rice is done and the edges are bubbly.
    • Remove the dish from the oven and allow it to rest for 10 minutes before serving. This allows the juices to soak back in and become creamy.

    Notes

    Store leftovers in an airtight container in the refrigerator for up to one week. 
    Reheat this casserole in the oven or in the microwave.

    Nutrition

    Serving: 1serving | Calories: 389kcal | Carbohydrates: 38g | Protein: 31g | Fat: 11g | Saturated Fat: 4g | Polyunsaturated Fat: 2g | Monounsaturated Fat: 4g | Trans Fat: 0.02g | Cholesterol: 121mg | Sodium: 1139mg | Potassium: 433mg | Fiber: 1g | Sugar: 1g | Vitamin A: 189IU | Vitamin C: 0.1mg | Calcium: 134mg | Iron: 2mg
    • « Go to Previous Page
    • Page 1
    • Interim pages omitted …
    • Page 7
    • Page 8
    • Page 9
    • Page 10
    • Page 11
    • Interim pages omitted …
    • Page 25
    • Go to Next Page »

    Primary Sidebar

    Jessica Burgess of Fantabulosity, slicing an avocado.

    Hi, I'm Jessica! - Owner and Creator of the blog and brand, Fantabulosity.

    I’m here to help you make easy comfort food and nostalgic recipes, using simple ingredients, that everyone will love.

    More about me →

    Potluck Recipes

    • A slice of strawberry jello cake, topped with a strawberry slice, sitting on a round plate.
      Strawberry Jello Cake (Easy, Moist Strawberry Cake)
    • Crack green beans on wooden spoon.
      Crack Green Beans
    • Old fashioned potluck cake recipes collage.
      Old-Fashioned Cakes That Still Show Up at Every Potluck
    • Collage of potluck desserts.
      Easy Potluck Desserts (Simple Recipes That Always Get Asked For)
    • Cold Pasta Salad Recipes Collage.
      Cold Pasta Salad Recipes
    • Chicken Casserole recipes image collage.
      20 Chicken Casserole Recipes

    Popular Recipes

    • bread pudding in baking dish
      Bread Pudding Recipe: Easy Old Fashioned Recipe (With Video!)
    • Burger baked in the oven, steamed in aluminum foil, and placed on white plate.
      Burgers in the Oven
    • two tuna salad sandwiches stacked on top of each other
      The BEST Tuna Salad Recipe
    • Sliced banana bread on white platter
      Best Banana Bread
    • Strawberry brownies on white marble cutting board.
      Strawberry Brownies Recipe
    • Cheeseburger Sliders
      Cheeseburger Sliders with Hawaiian Rolls

    Footer

    ↑ back to top

    Featured In

    About

    • About Jessica
    • Contact
    • Collaborate
    • Dinner System

    Easy Recipes

    • All Recipes
    • Vintage Recipes
    • Dinner Recipes
    • Desserts

    How to Cook

    • Oven-Baked
    • Stove-Top
    • No Bake
    • Cooking Basics

    Privacy Policy |Accessibility Copyright © 2026 Fantabulosity | Terms & Conditions | FTC
    All recipes, photos, and content are copyrighted and may not be reproduced, republished, or distributed without written permission.

    Rate This Recipe

    Your vote:


    A rating is required
    A name is required
    An email is required