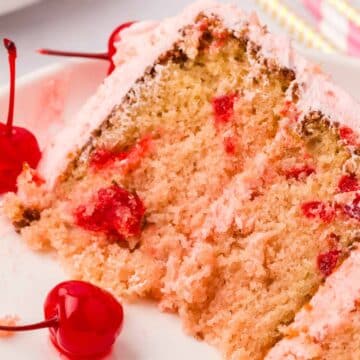
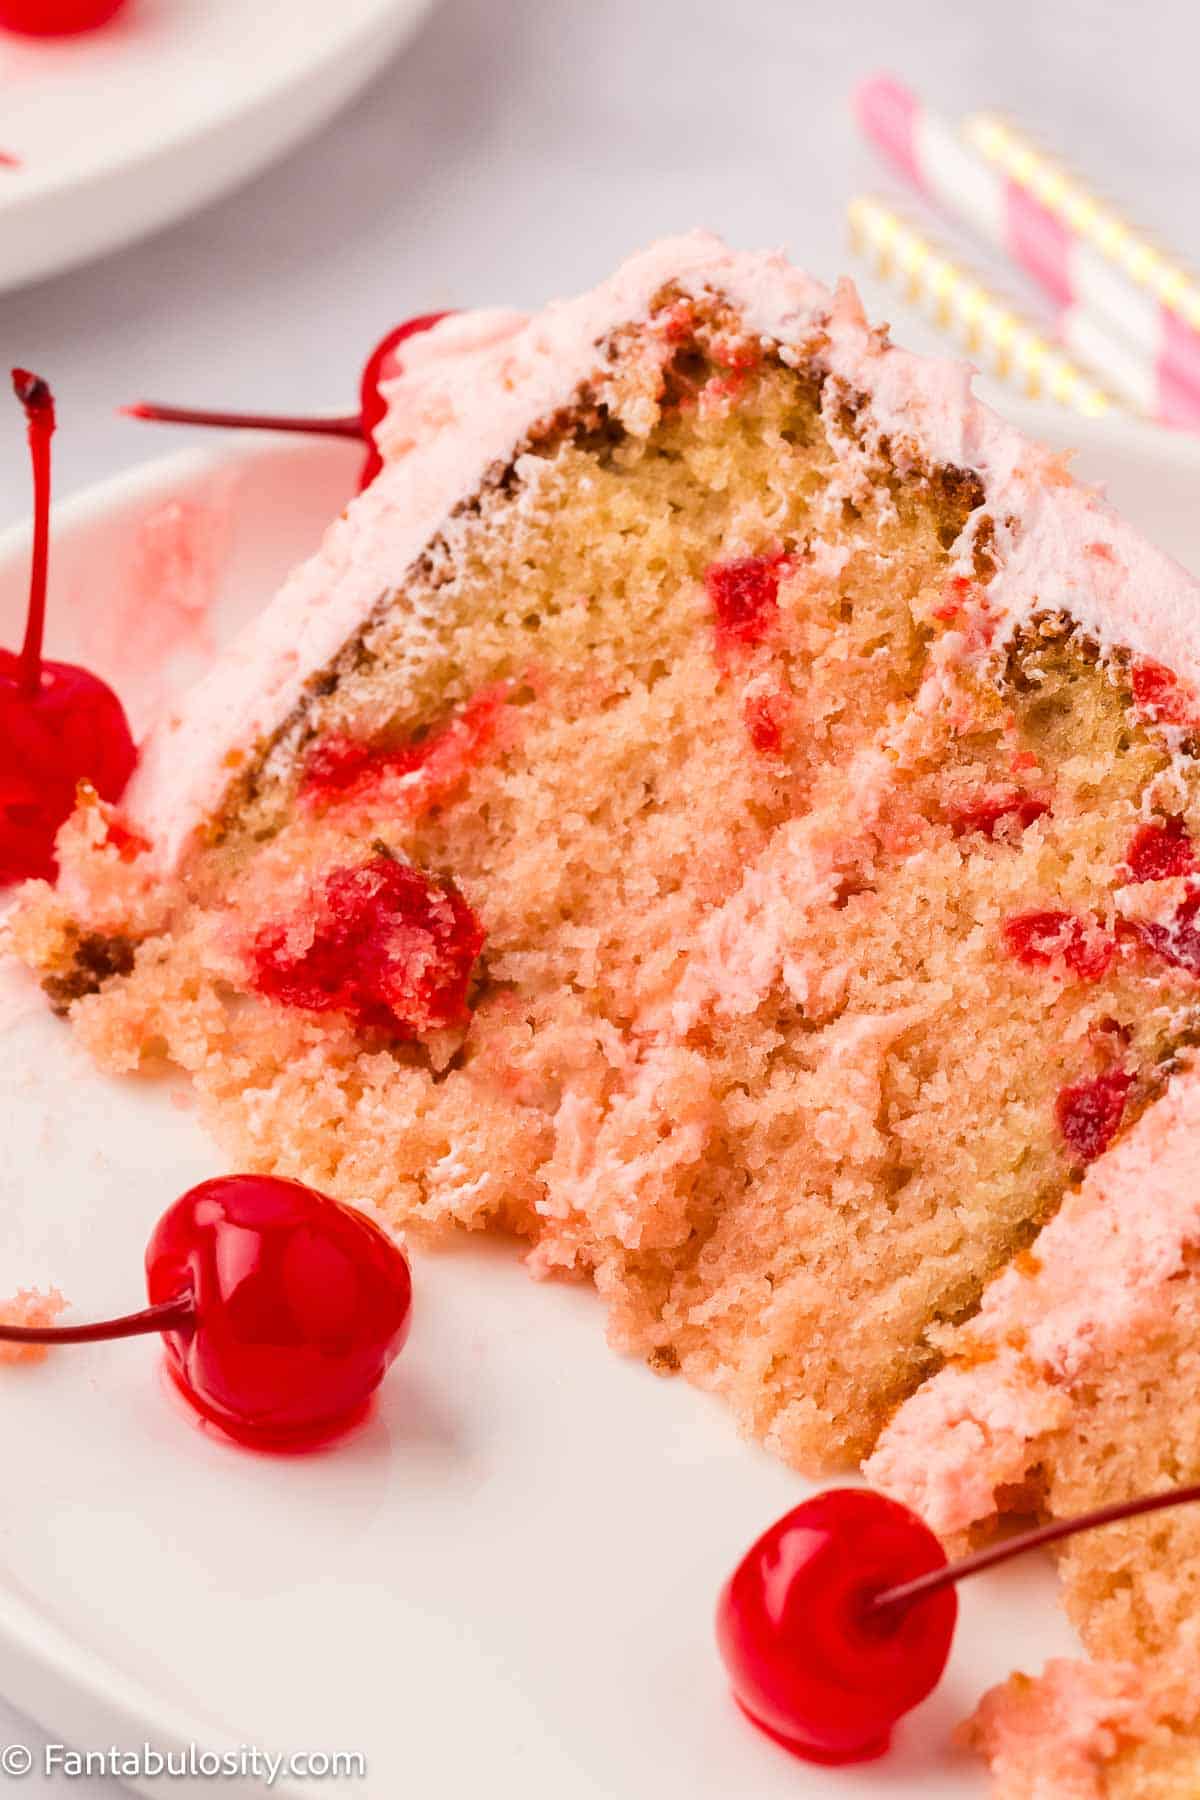
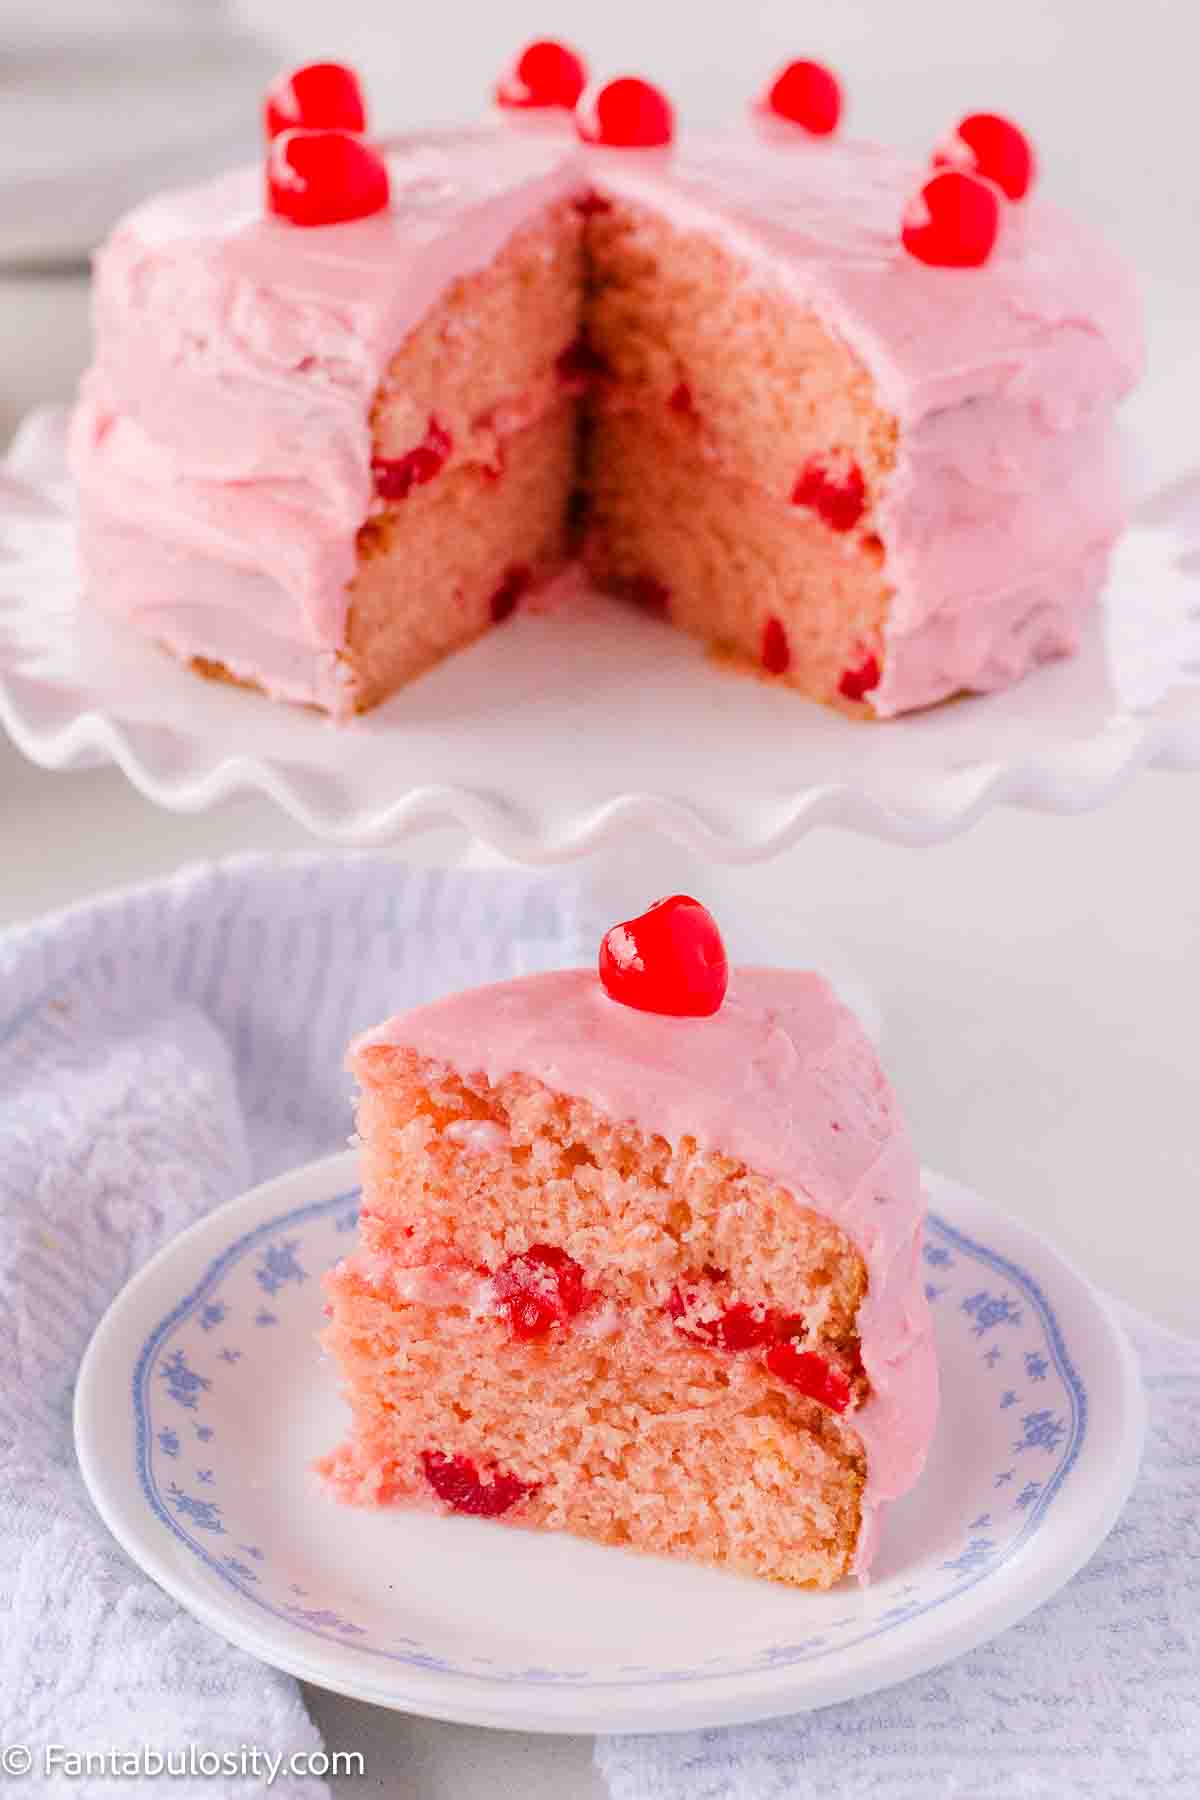
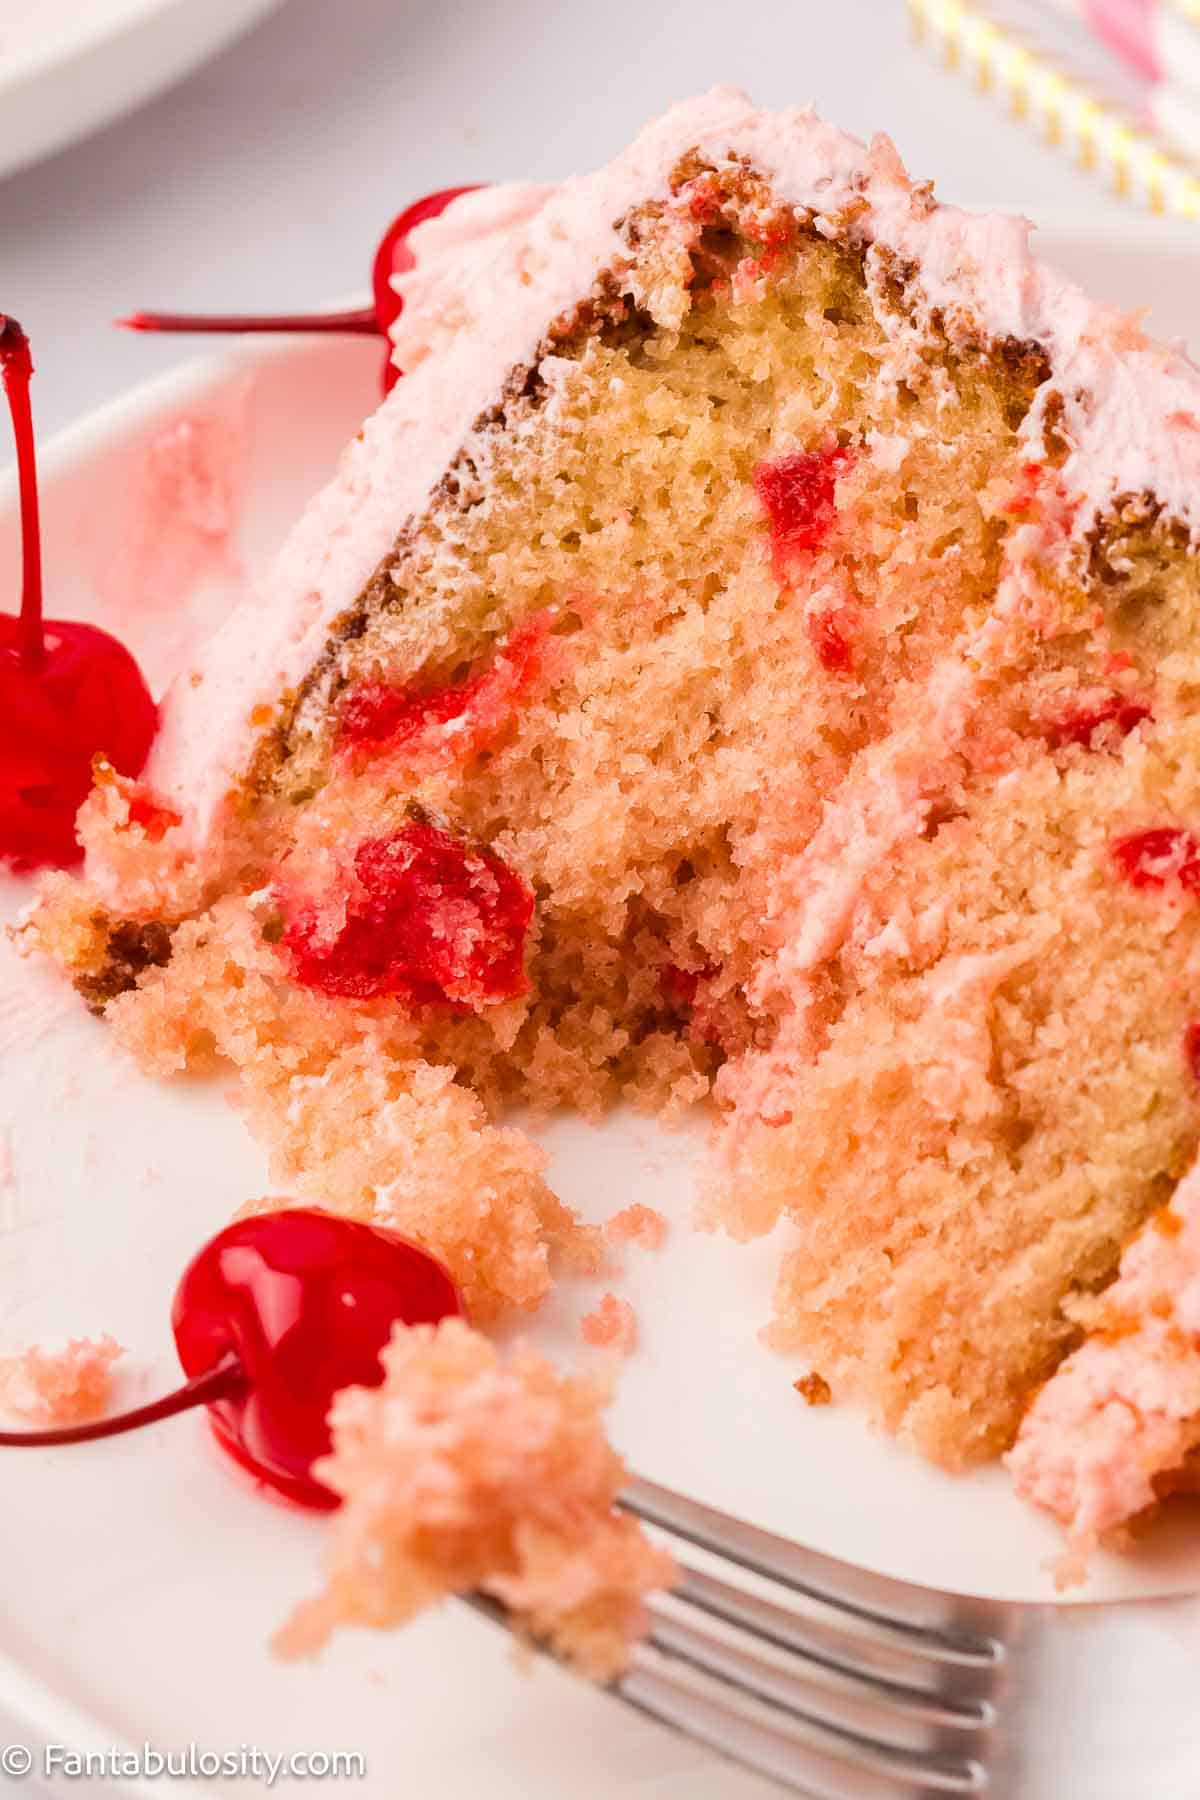
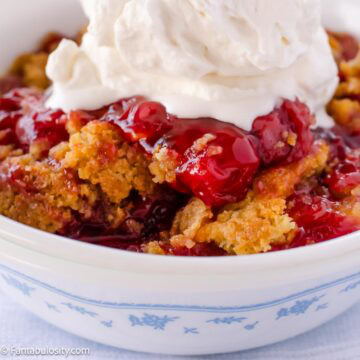
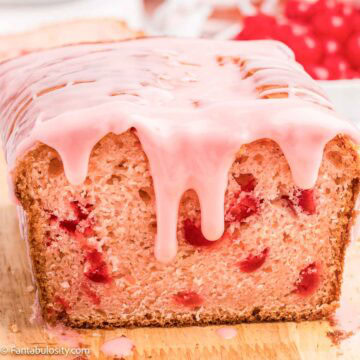
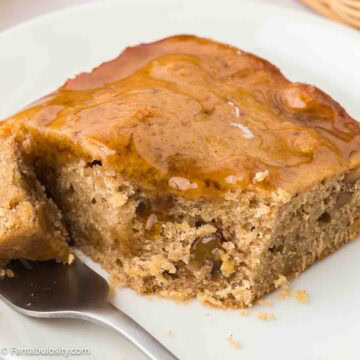
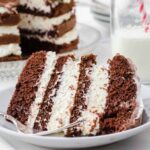
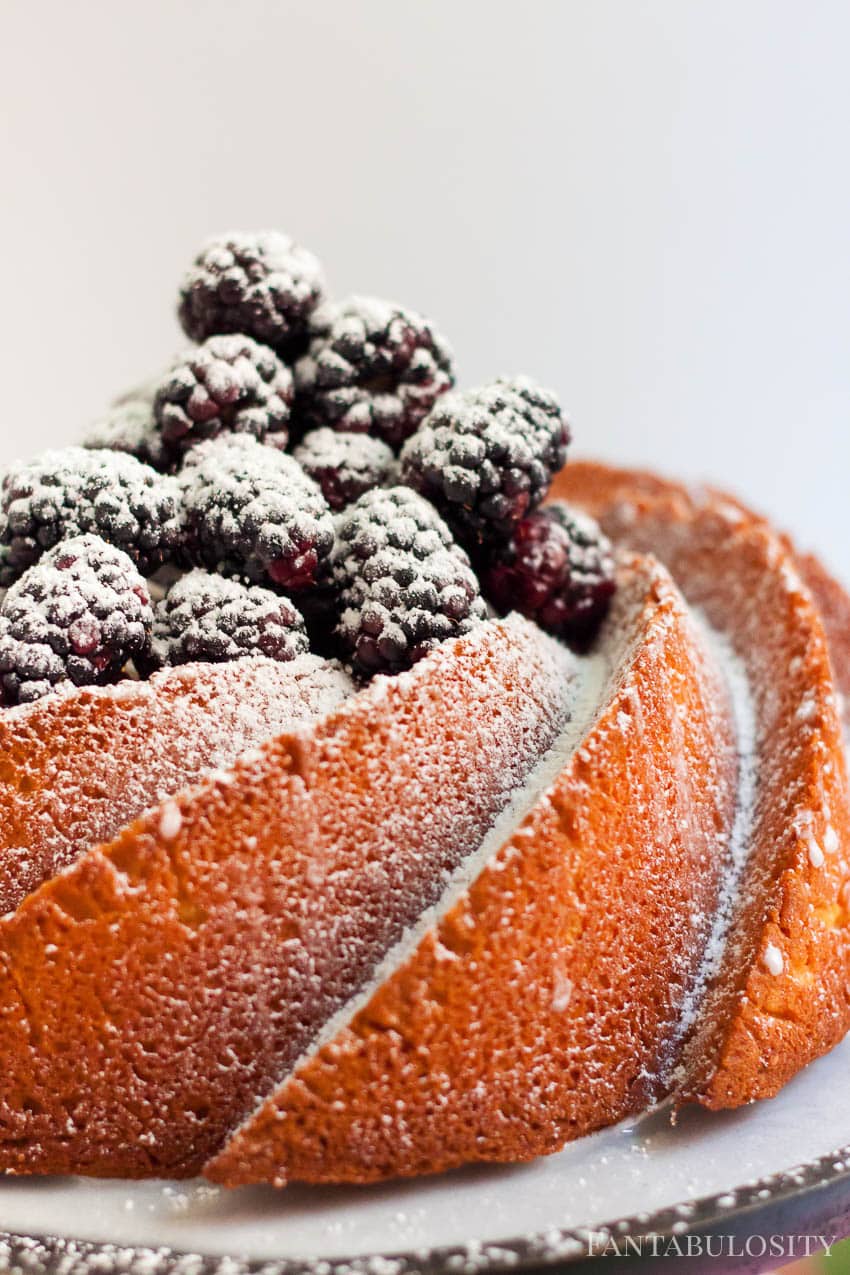
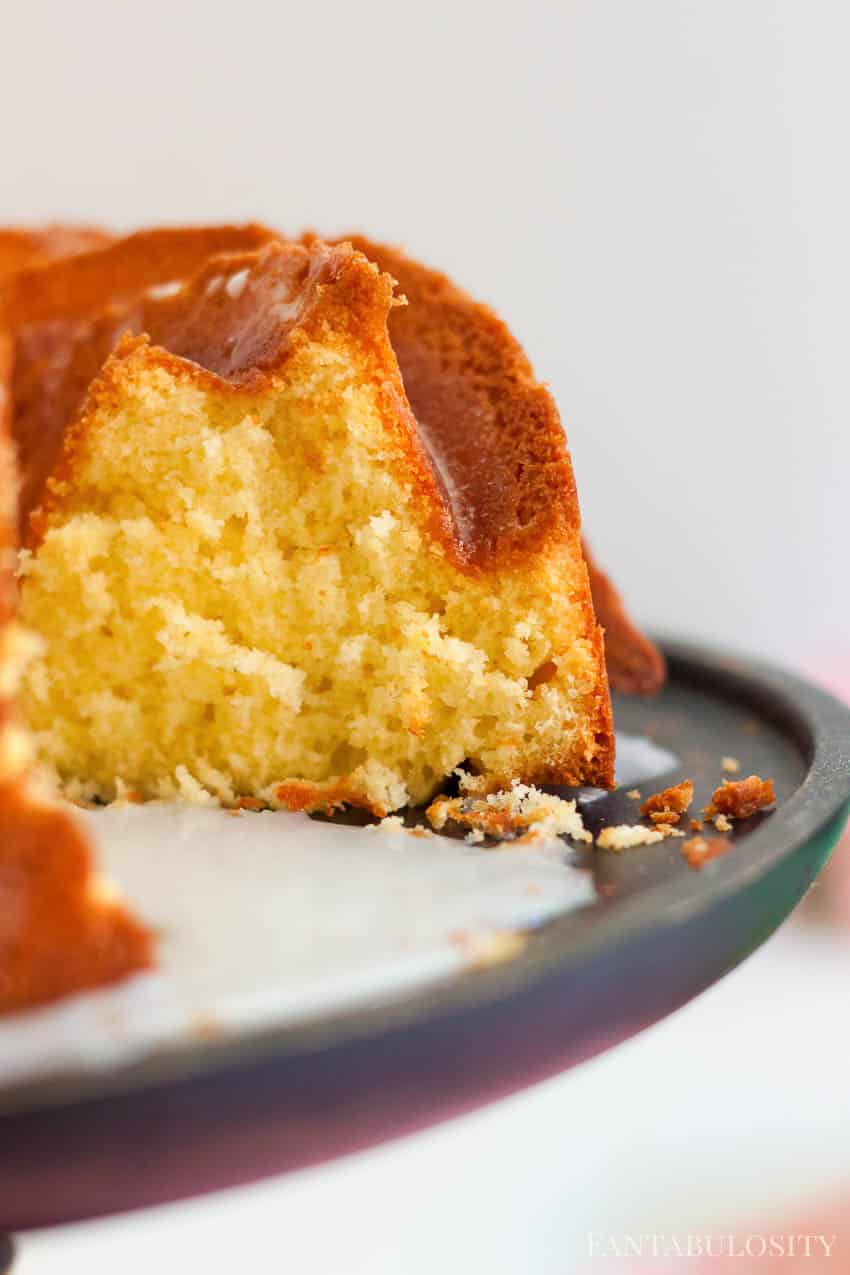
Cherry Chip Cake: This from-scatch recipe uses simple ingredients to make this deliciously moist cake, with bits of cherries in almost every bite. The gorgeous pink frosting is a show-stopper and adds an amazing layer of flavor to the already delicious cake recipe.
The cake recipes that we have here are not taken lightly! They’re all delicious and we really think you’re also going to love this strawberry crunch cake. Or, if you love icebox cakes, this strawberry cream cheese icebox cake is a must.
Cherries are usually in season during the summer but I also believe they’re amazing during Christmas because they can add that beautiful pop of color to dessert recipes. So feel free to use up any extra maraschino cherries in these Chocolate Cherry Cookies or this Fruit Salad with Cool Whip recipe that’s so popular on holiday dessert tables!
[feast_advanced_jump_to]What is Cherry Chip Cake?
It’s a from-scratch recipe that uses simple ingredients, and special ingredients to help make the recipe moist. The cake has maraschino cherries mixed in to the delicious layers and frosted with a delicious, and gorgeous pink frosting.
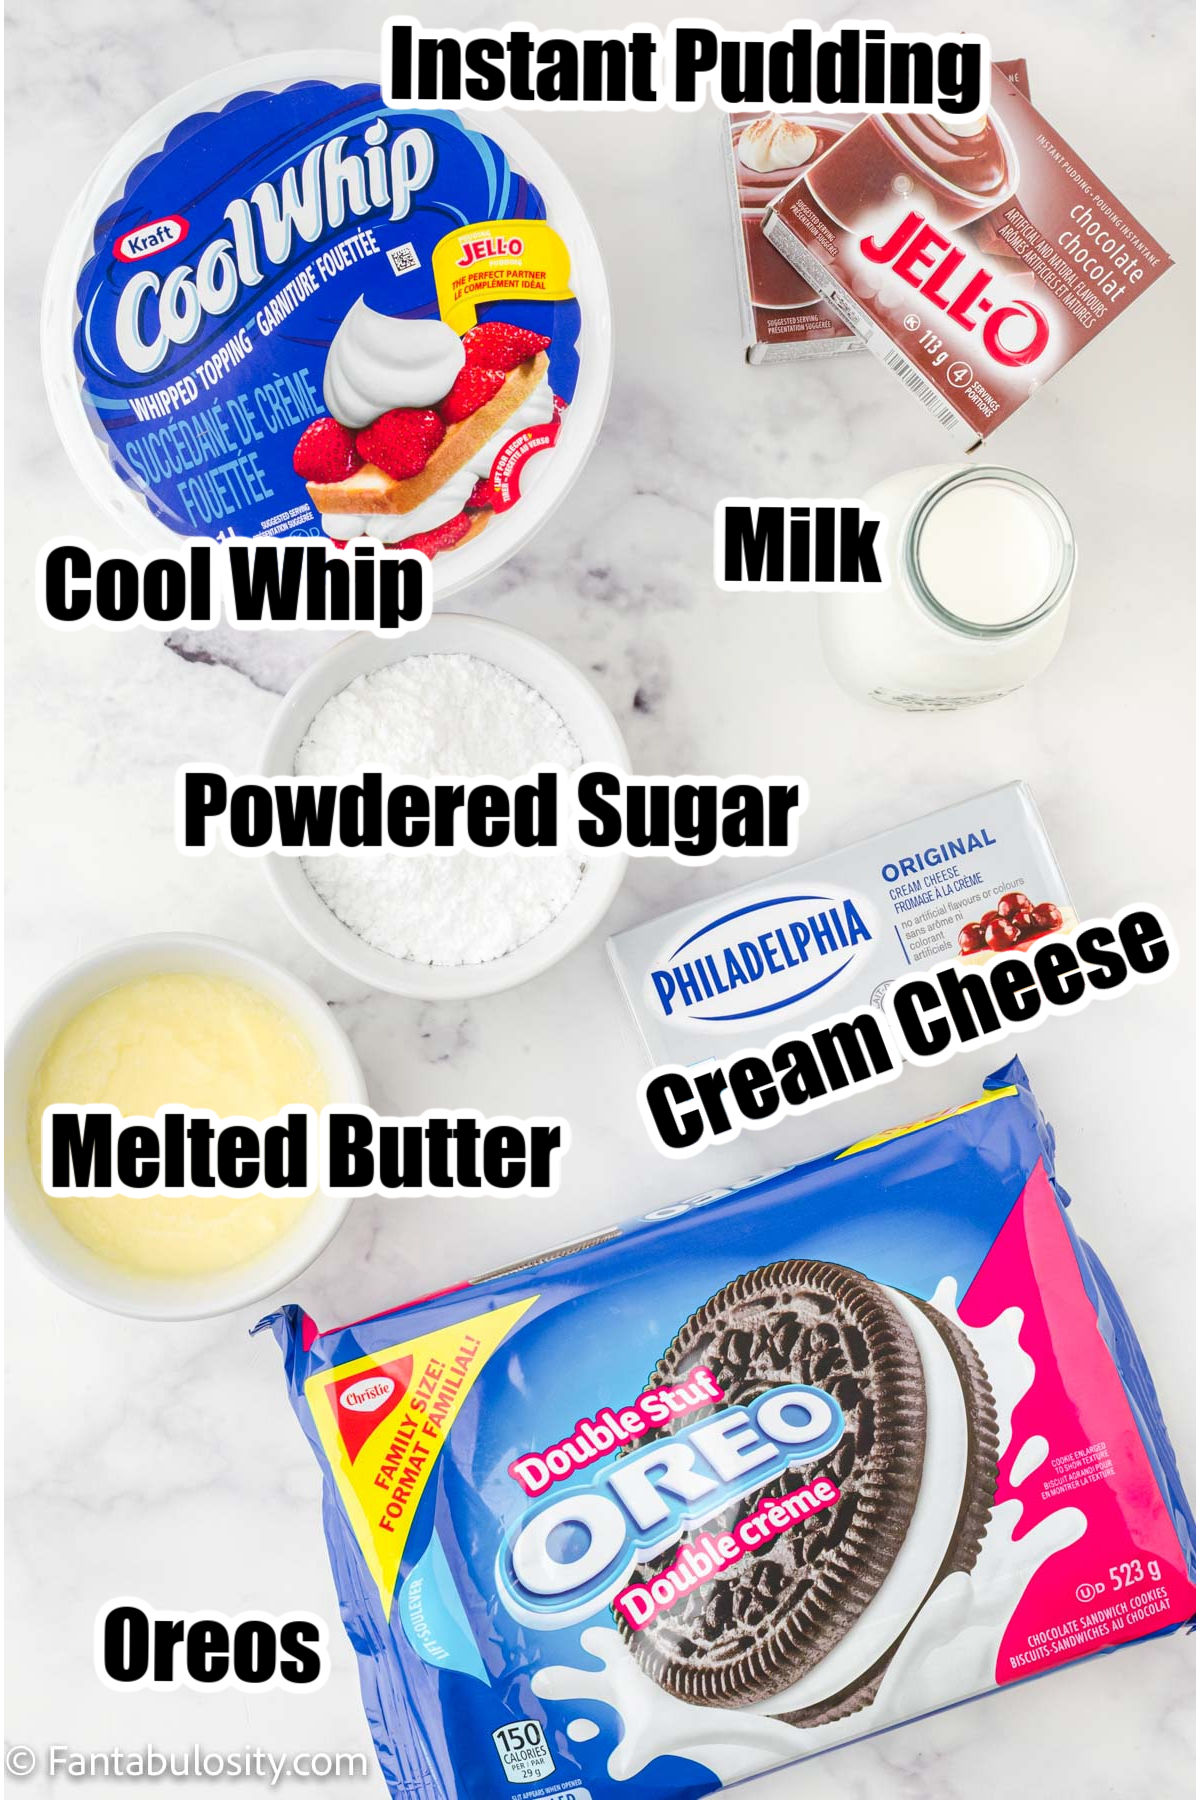
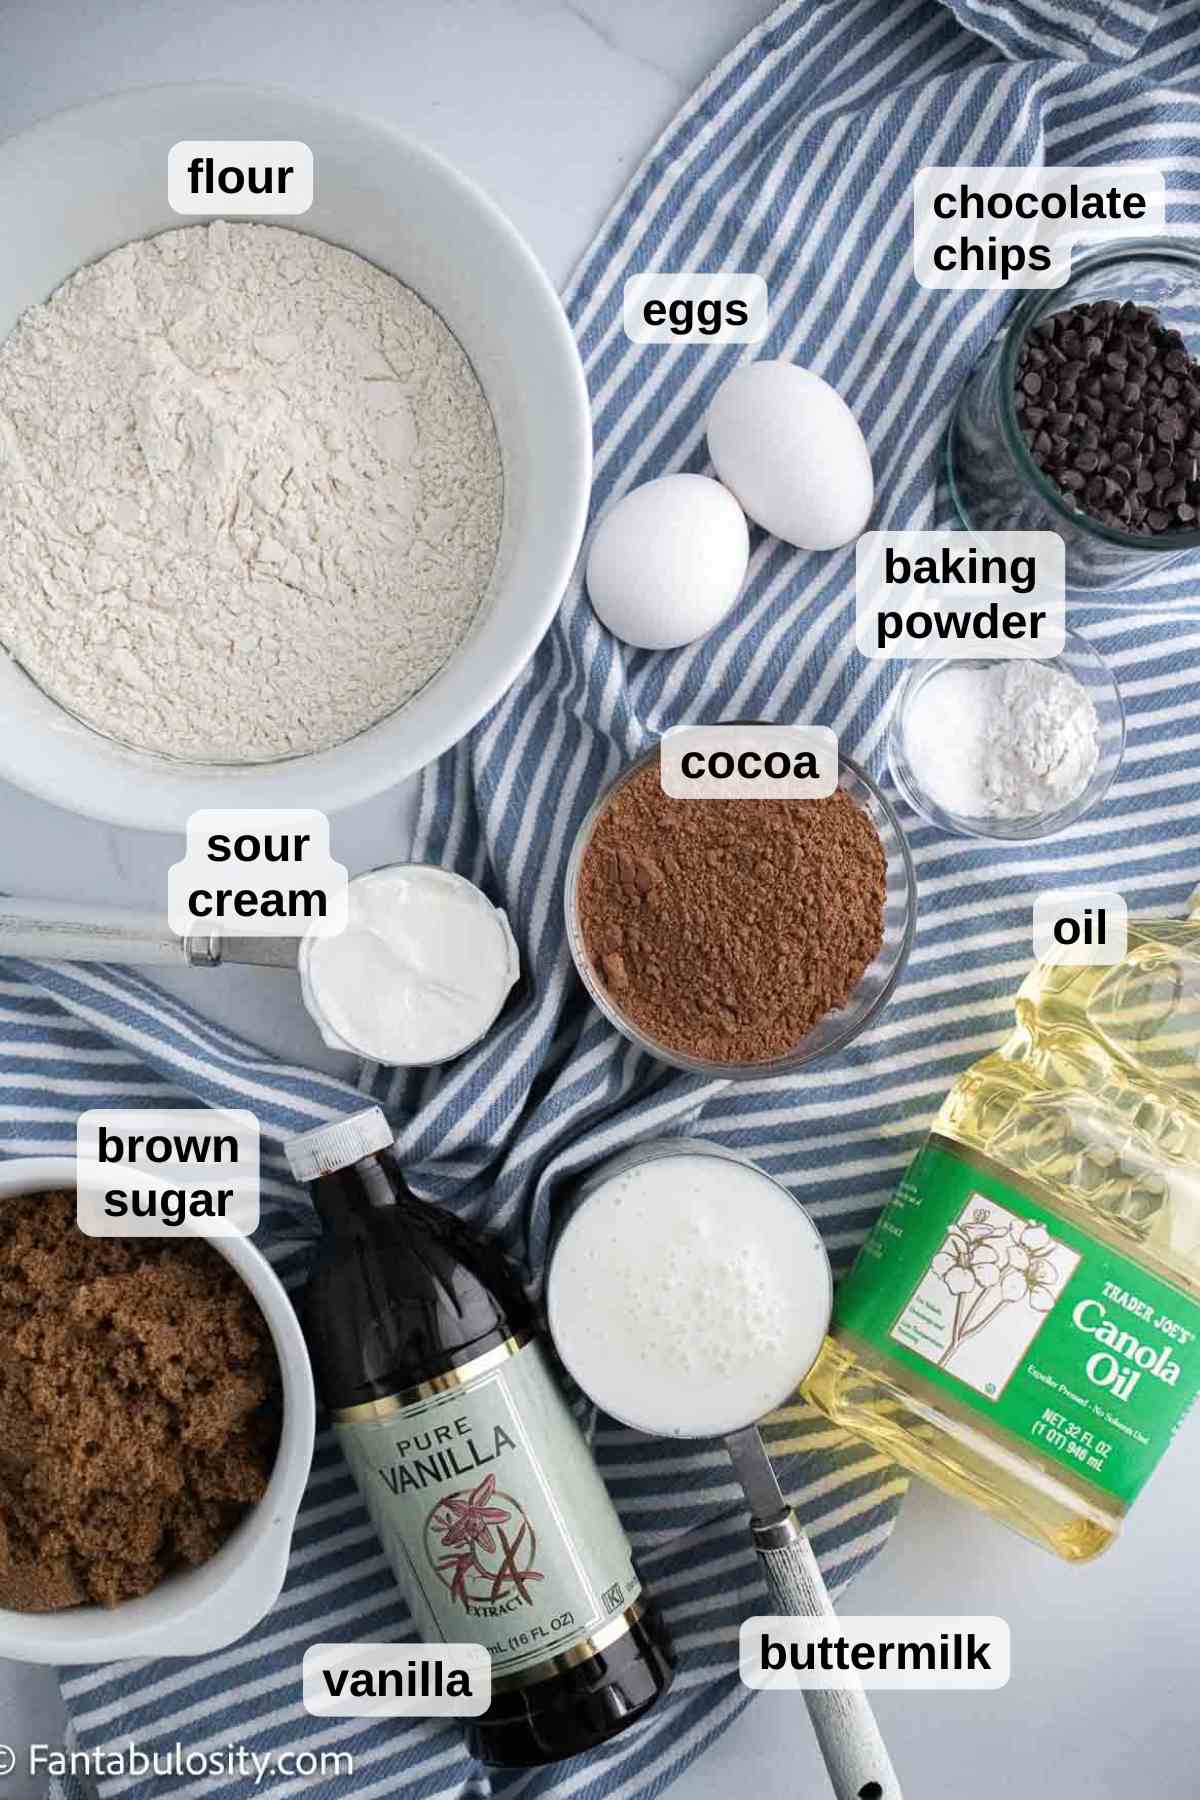
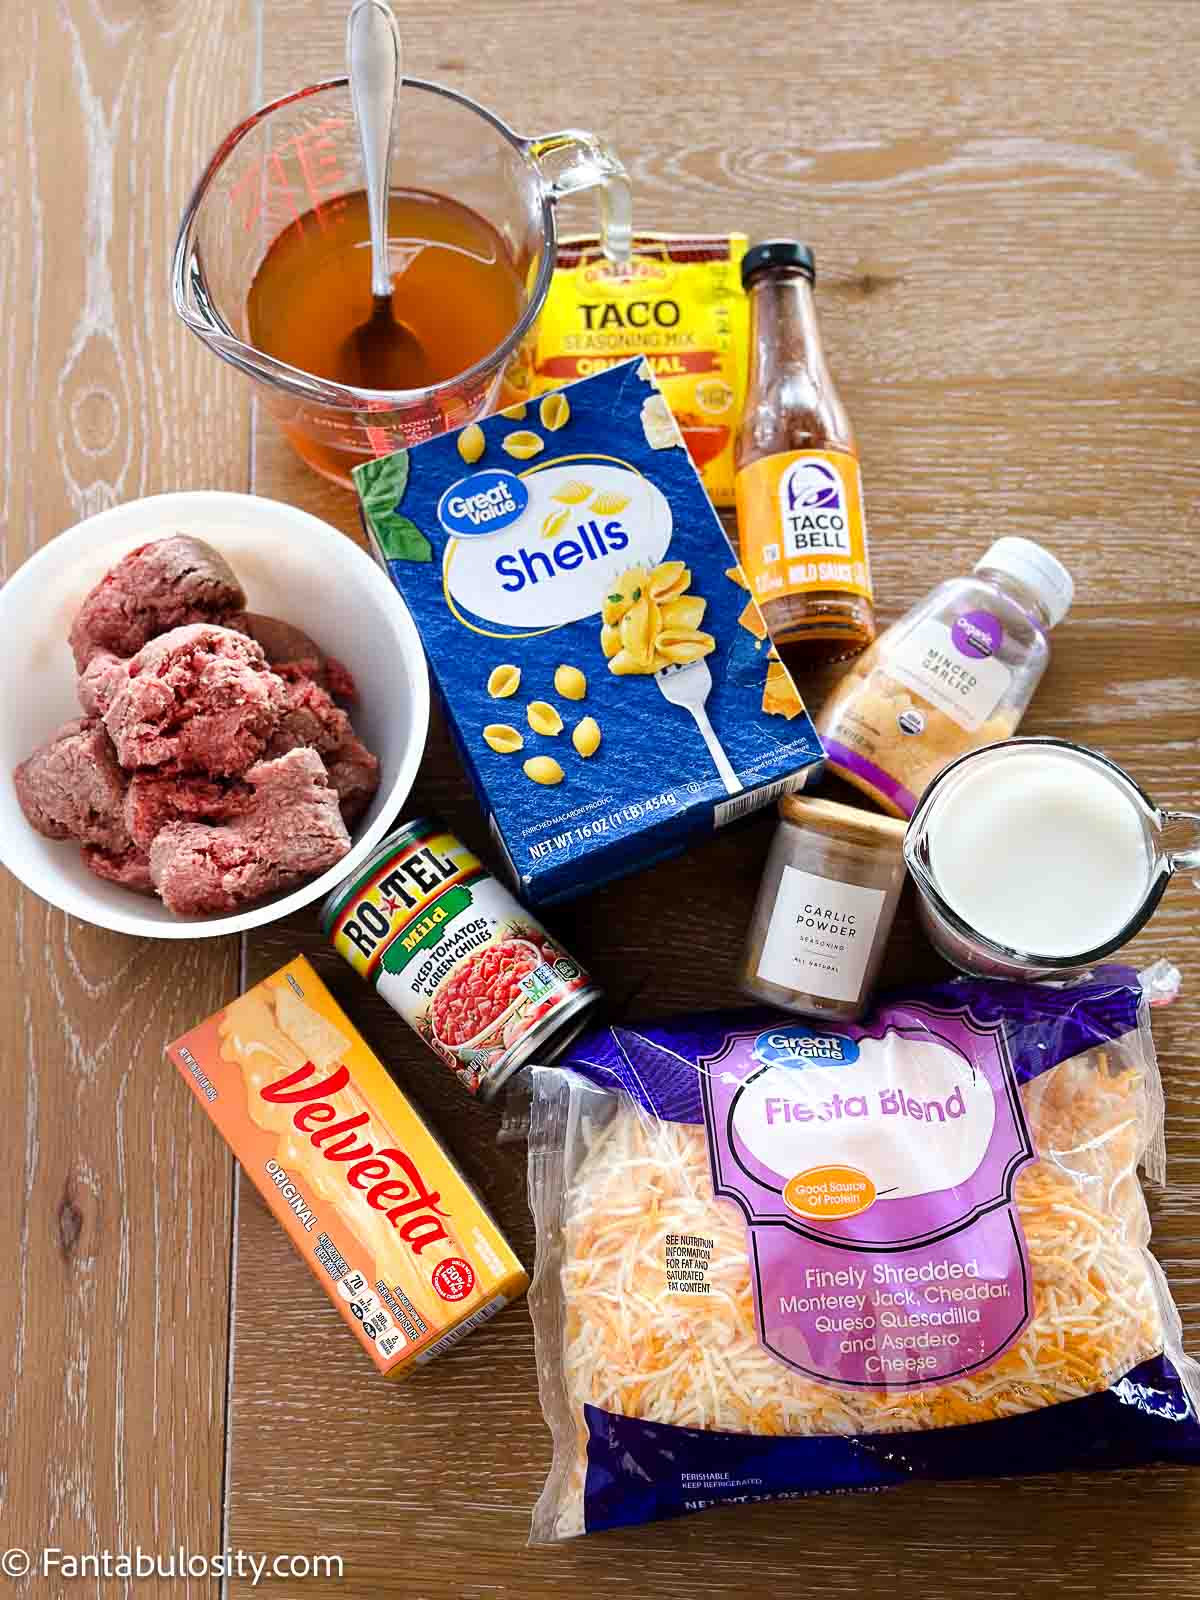
Ingredients Needed for Cake
Additional cherry chip frosting ingredients below.
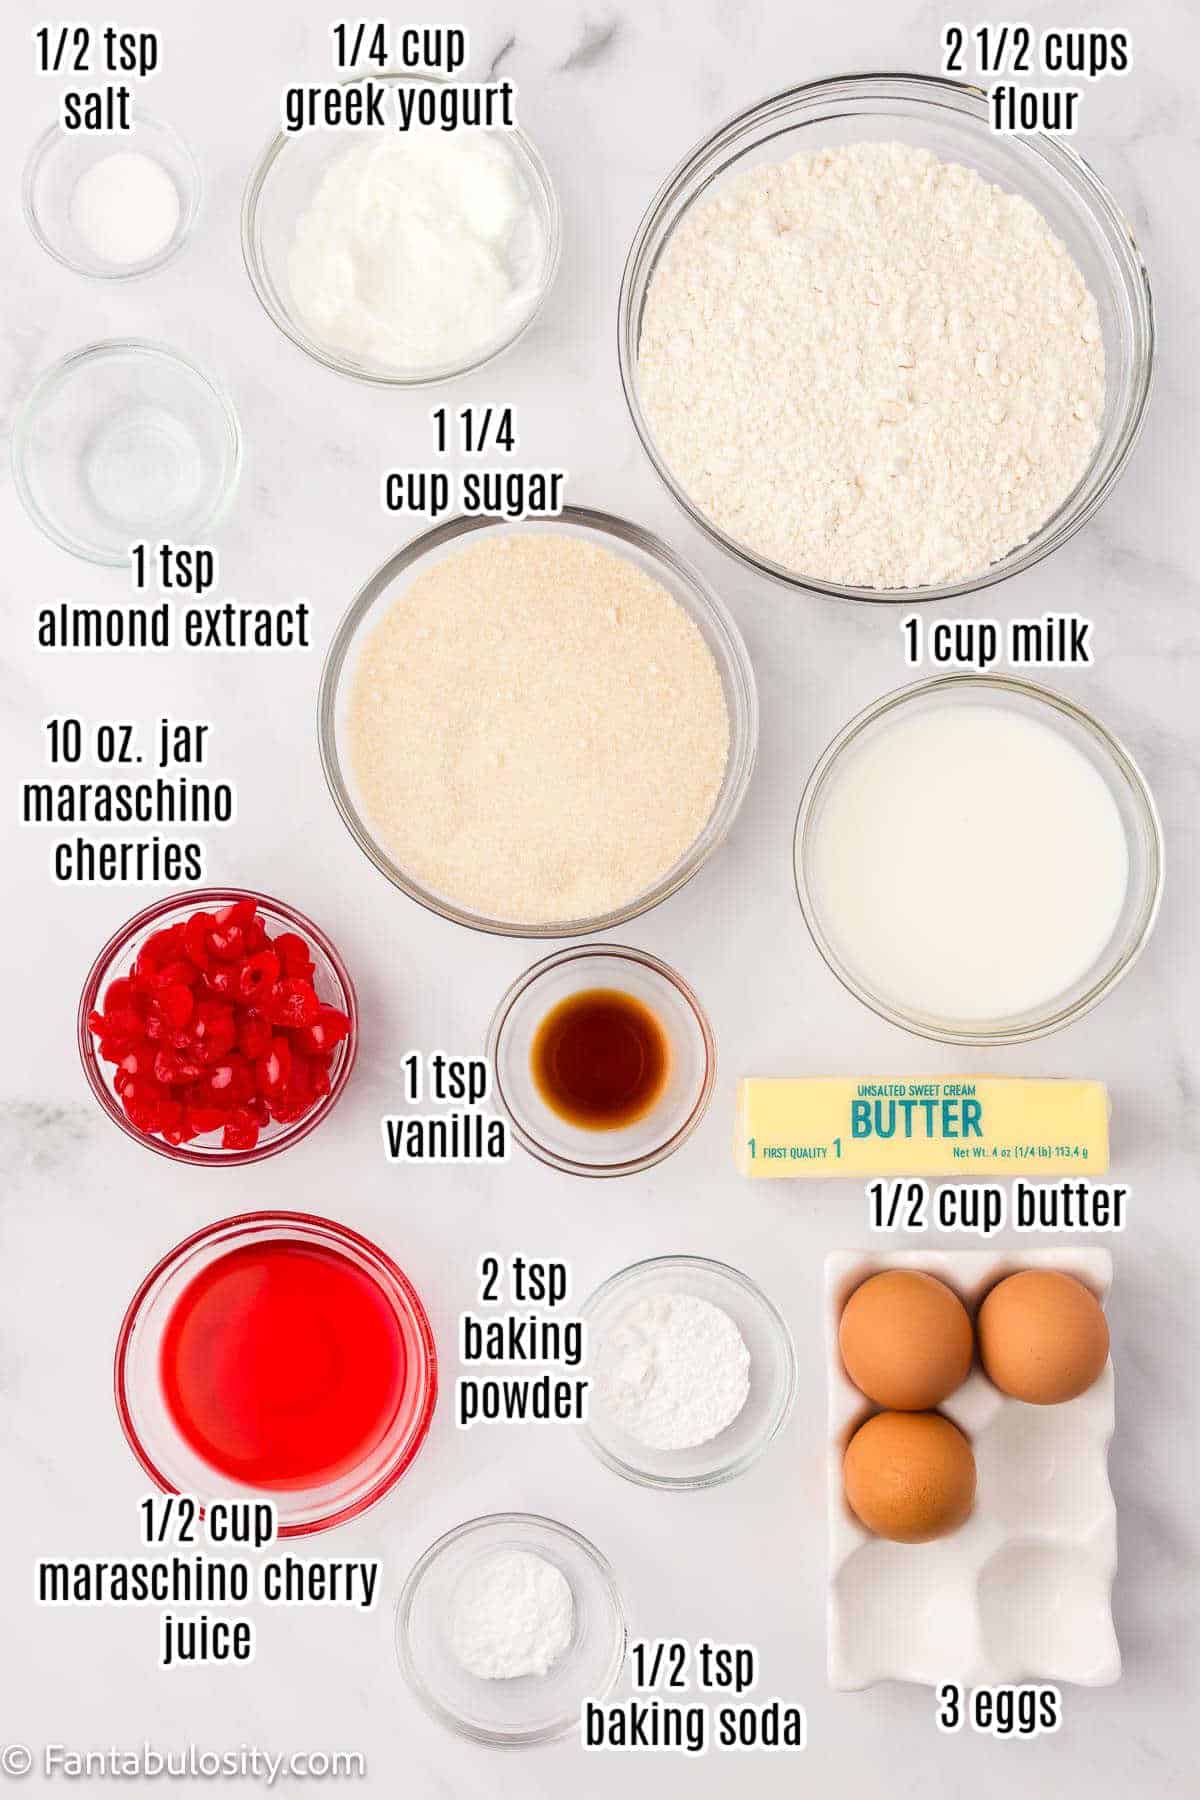
- Butter – We use unsalted butter for this recipe but if you only have salted butter, it may be best to cut back on the ½ teaspoon of salt.
- Maraschino cherry juice – This is simply the juice from the jar of cherries.
- Flour – you’ll want to use all-purpose flour for this recipe.
- Almond extract – If you need, you can remove this from the recipe if desired but if you can use it, we highly recommend it.
See the full list of ingredients in the recipe card at the bottom of this post.
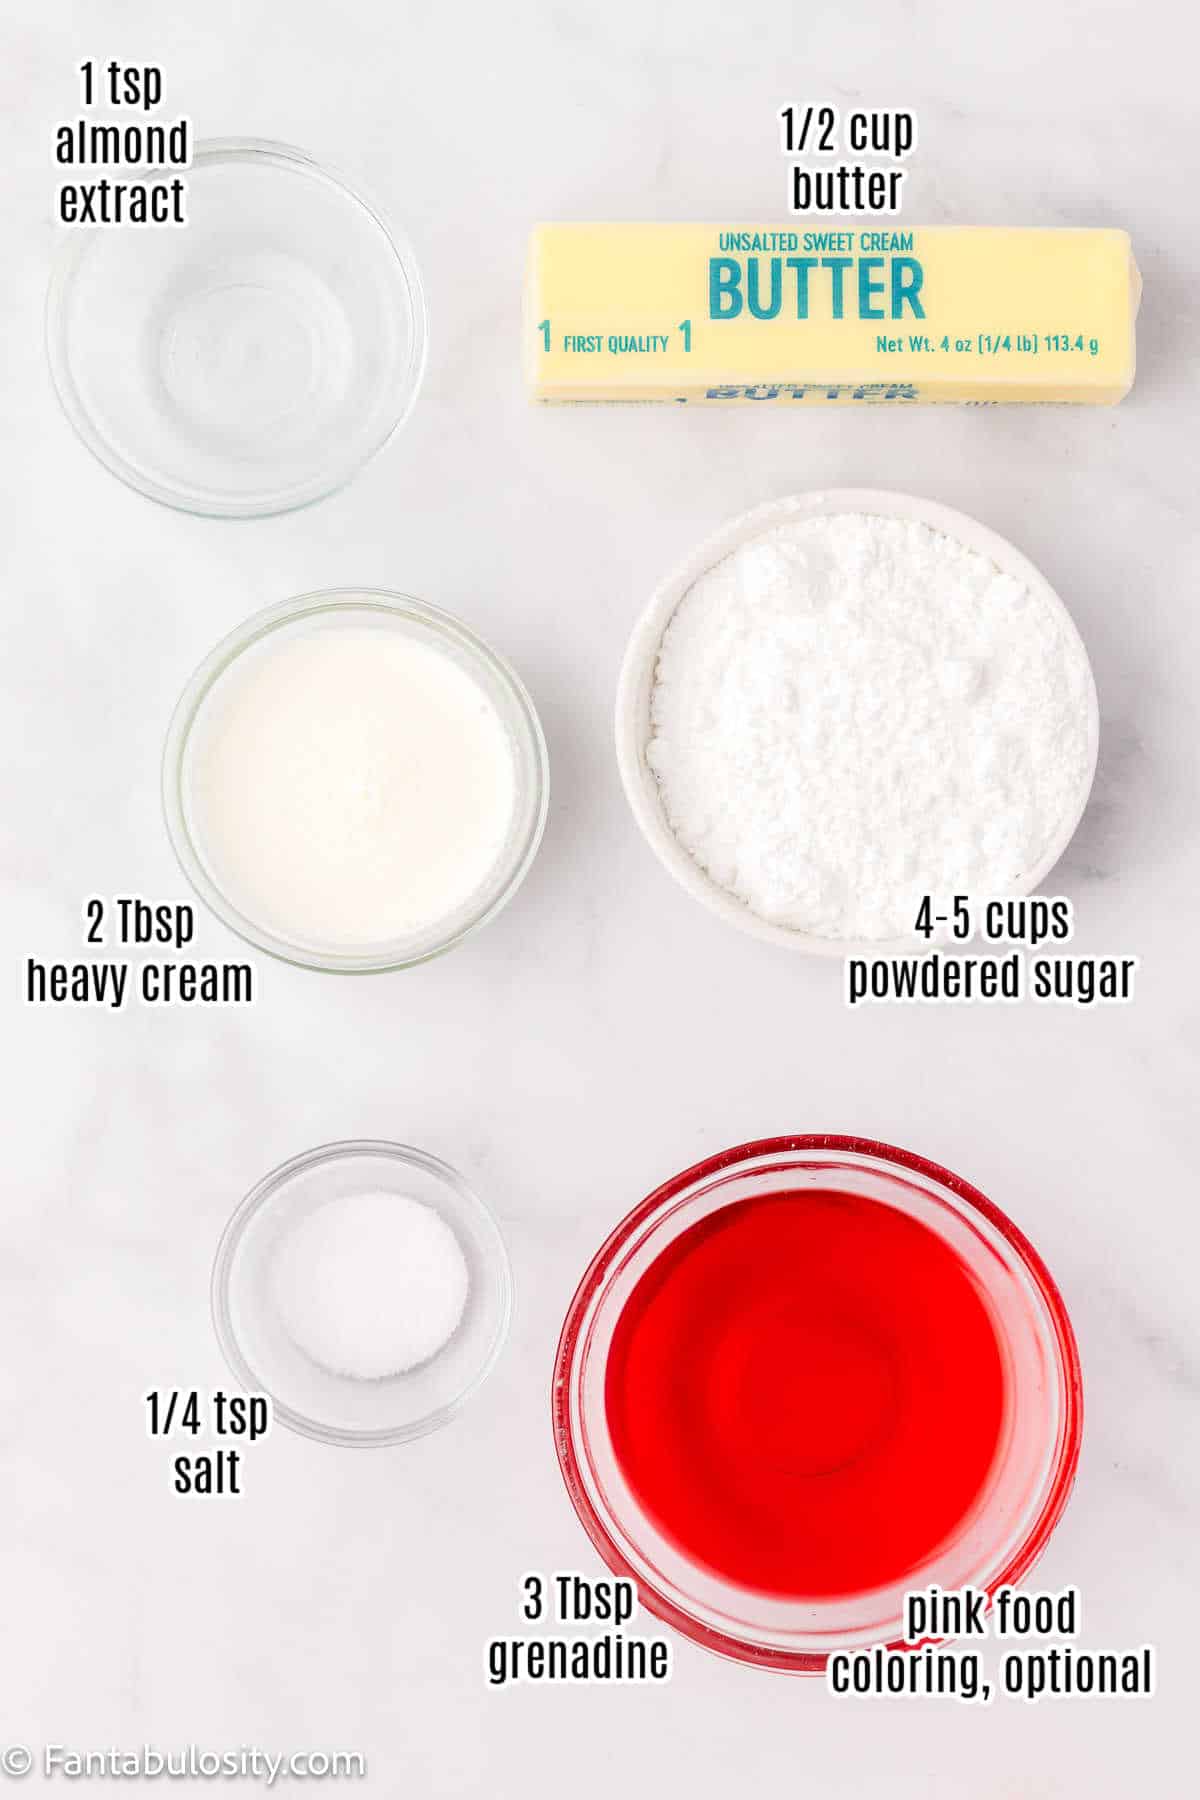
Frosting Ingredients
Although you may want to use your own frosting, we highly recommend this frosting for its beautiful colors and delicious flavors.
Brands of Ingredients Used:
You absolutely do not have to use the same brands as we did in this recipe but sometimes it’s helpful to see what was used in case different results are reached and it’s needed for troubleshooting.
Brands Used:
- Kroger brand Unsalted Butter
- C&H Organic Granulated Sugar
- Chobani Greek Yogurt (non-fat plain)
- Wilcox Brown Eggs
- Kirkland Vanilla Extract
- Simply Organic Almond Extract
- Great Value Maraschino Cherry Juice
- Costco Organic Unbleached All-Purpose Flour
- Bob's Red Mill Baking Powder
- Arm and Hammer Baking Soda
- Kirkland Sea Salt
- Darigold 2% Milk
- Great Value Maraschino Cherries
- Kroger brand Unsalted Butter
- C&H Powdered Sugar
- Dairgold Heavy Whipping Cream
- Rose's Grenadine
Substitutions
You can substitute the Greek Yogurt for your favorite plain yogurt or neutral flavored oil like canola oil, avocado oil, or grapeseed oil.
Equipment
- (2) 8' Round Cake Pans or (3) 6' Round Cake Pans
- Stand Mixer
- Cooling Rack
- Plastic Wrap
- Offset Spatula
How to Make Cherry Chip Cake
To begin, preheat the oven to 350 degrees F (or 177 degrees C).
Then, grease and line 2 8" round cake pans or 3 6" round pans (6" pans were used for the photos).
*Be sure to see the recipe card below for the full ingredients list & instructions!*
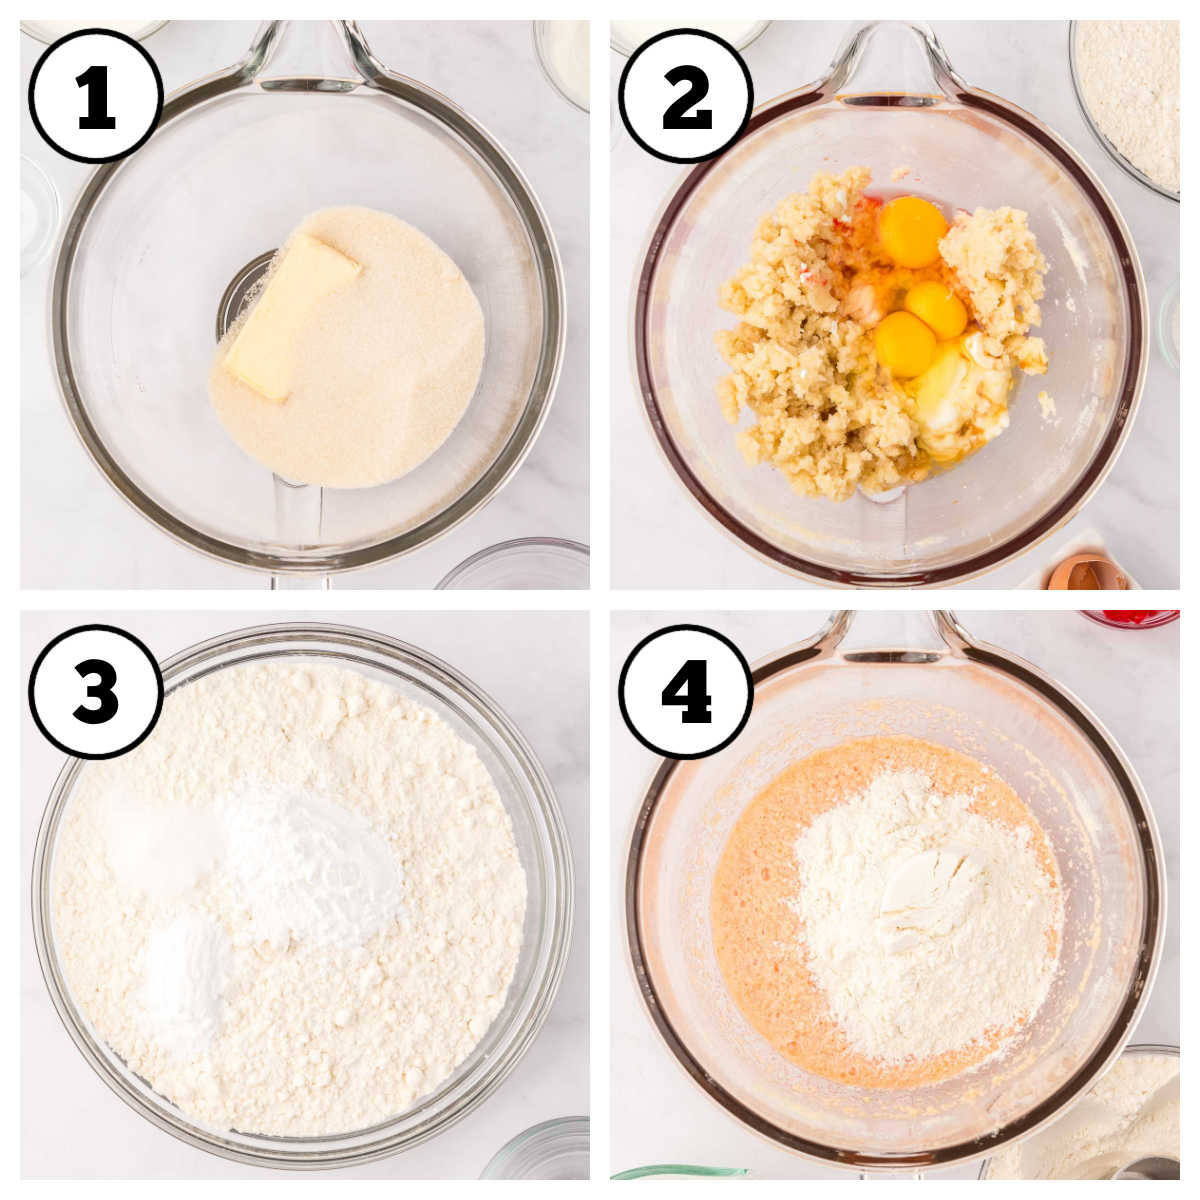
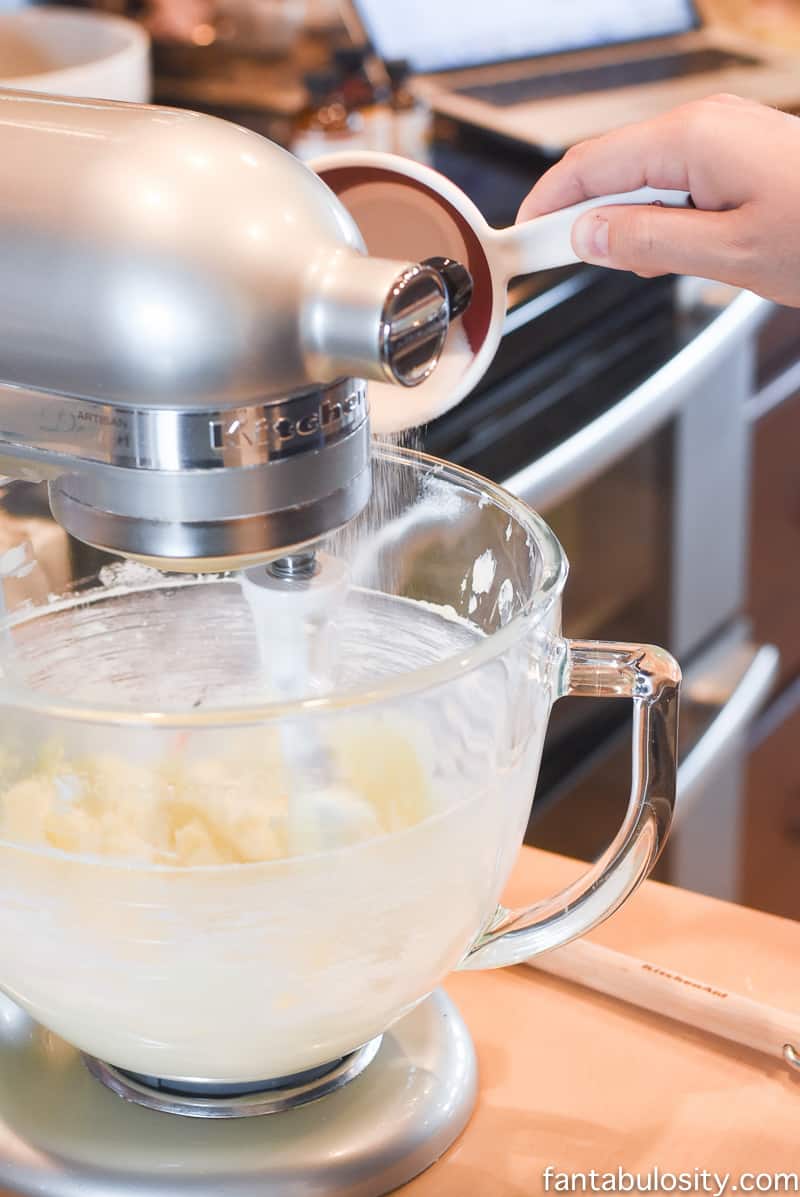
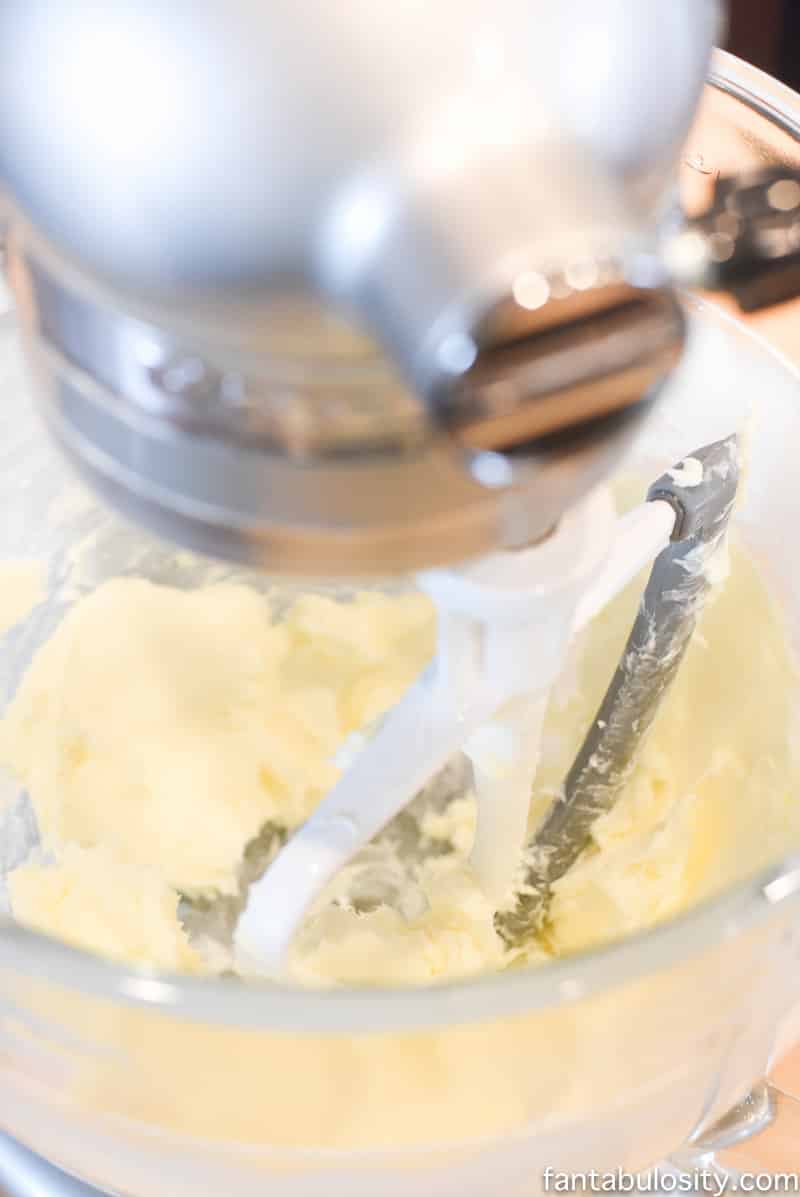
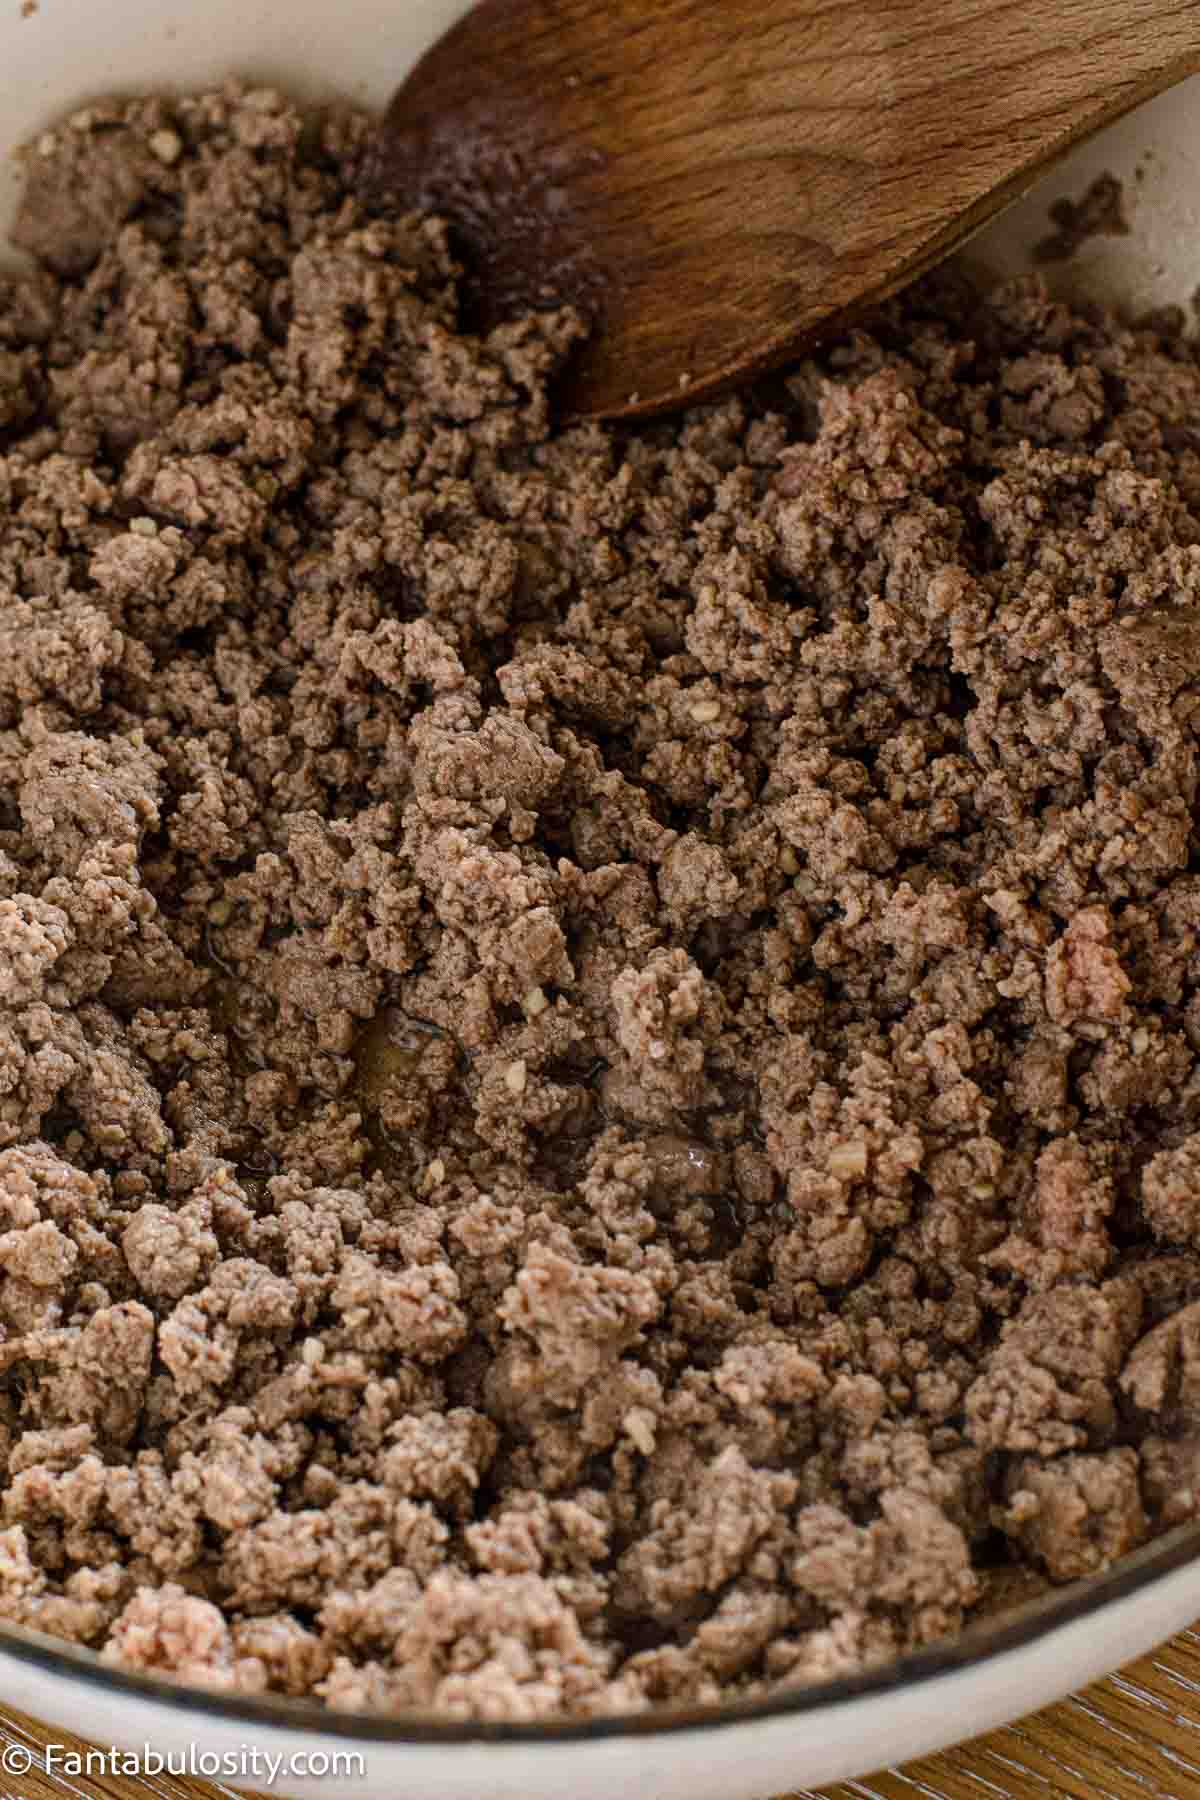
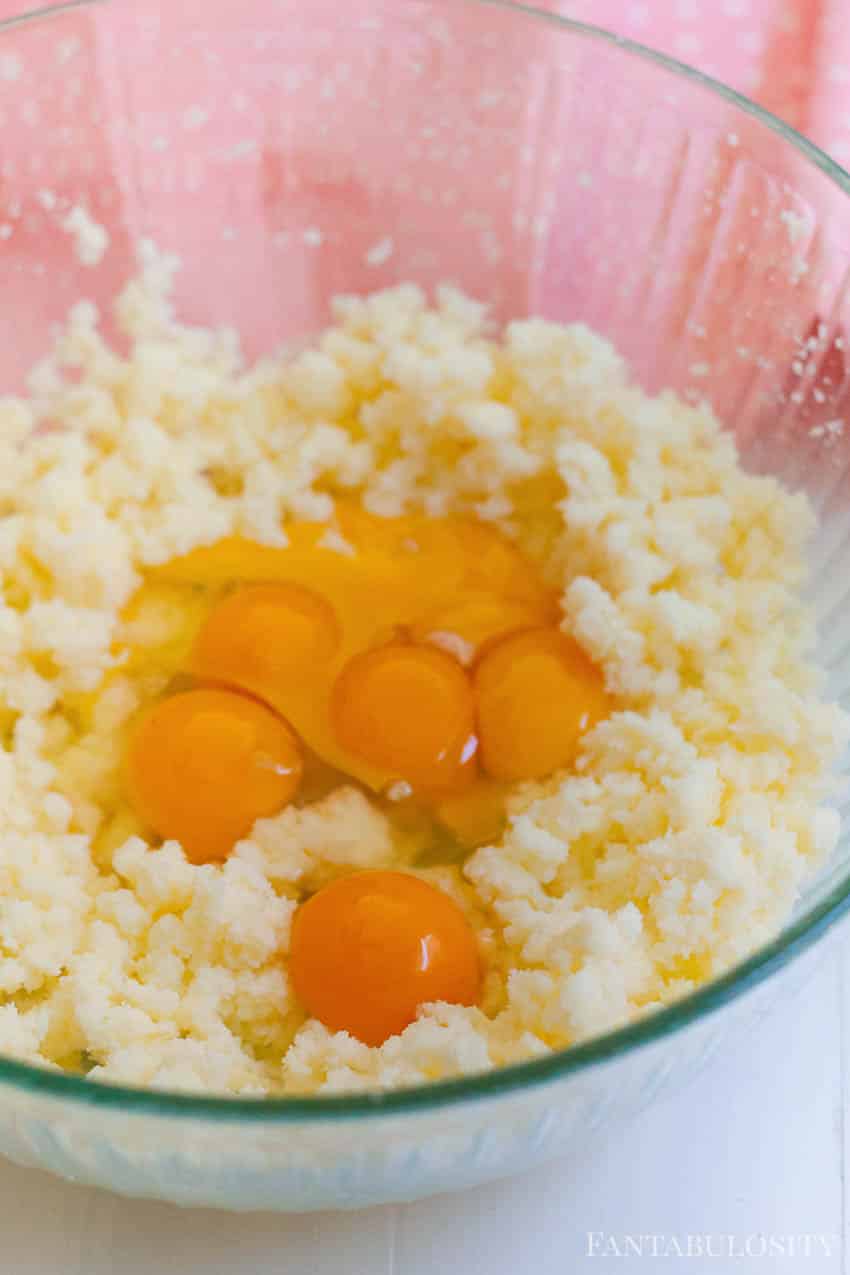
In the bowl of your stand mixer with the paddle attachment, add the butter and sugar. Mix until well combined.
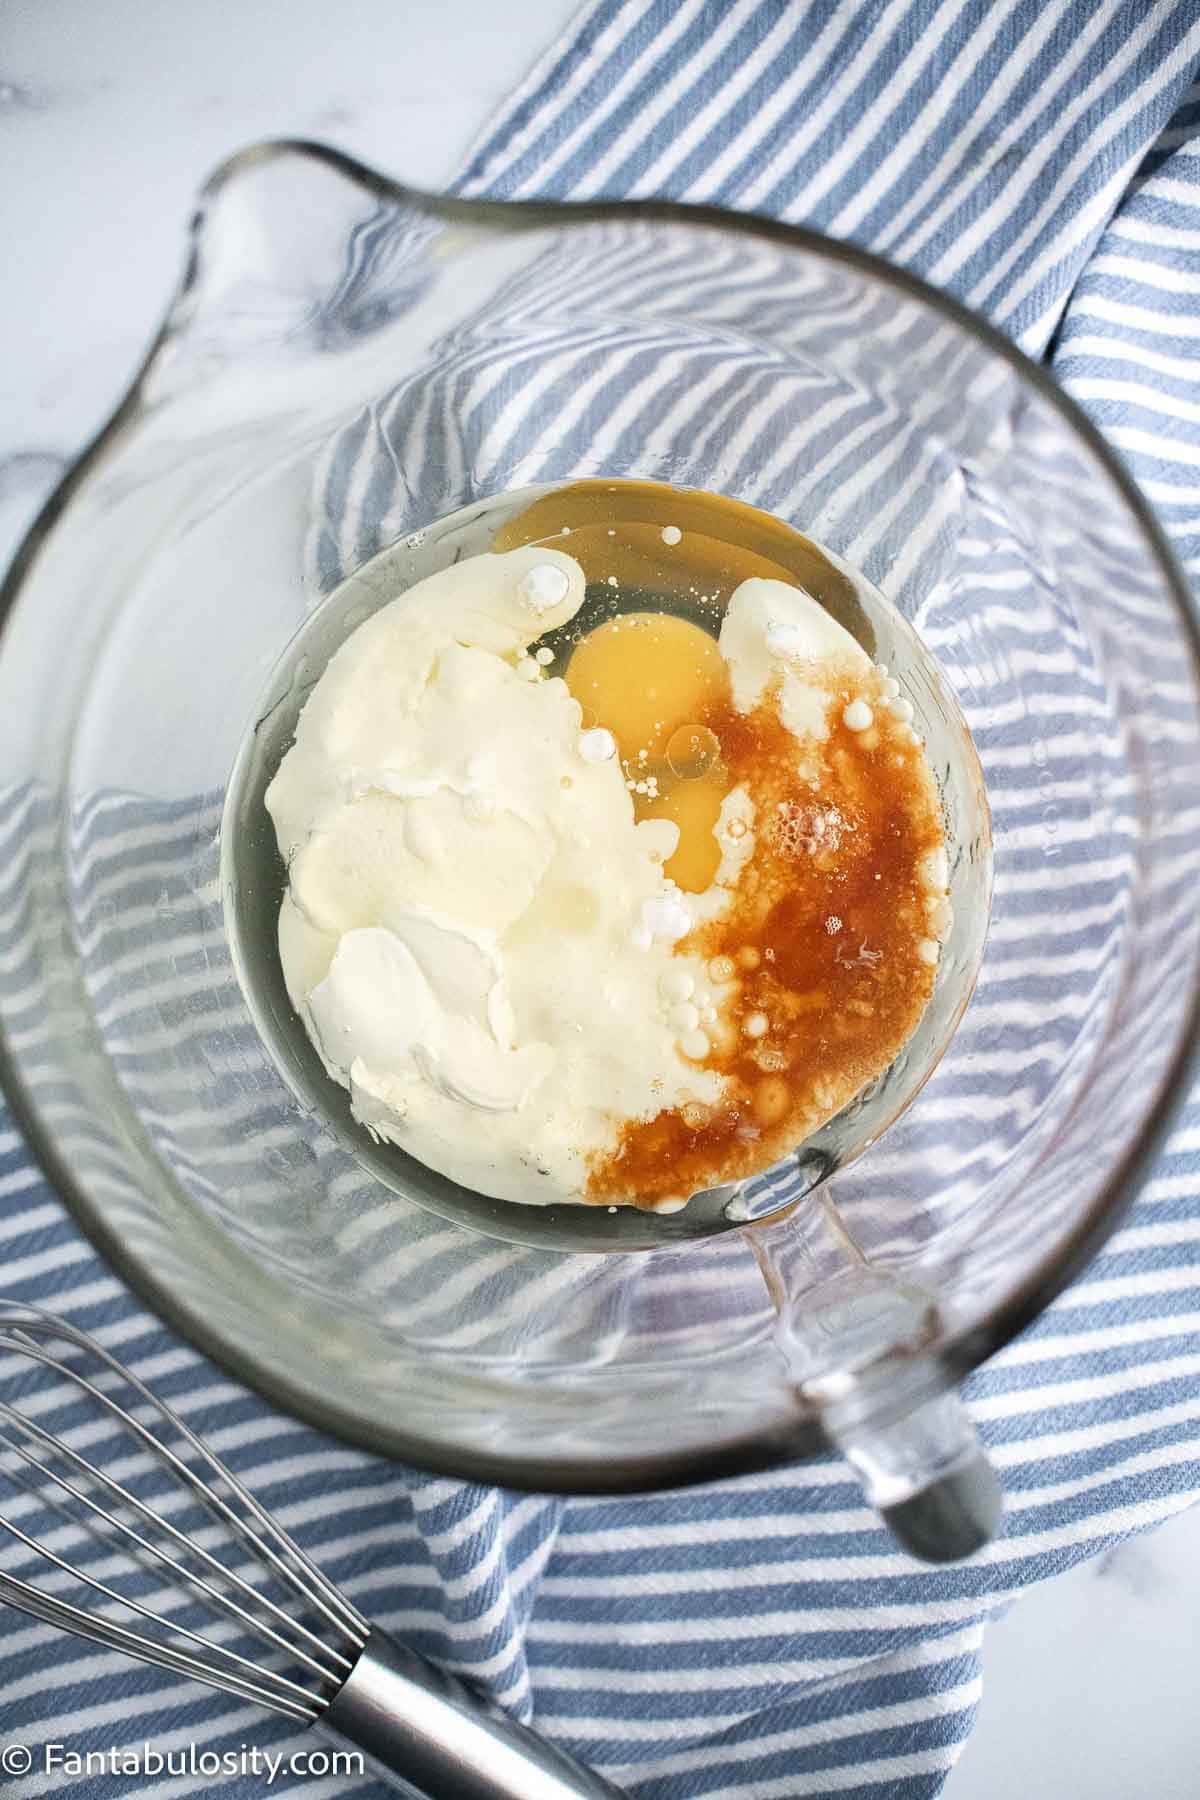
Add the Greek yogurt, eggs, vanilla extract, almond extract, and cherry juice. Mix until well combined.
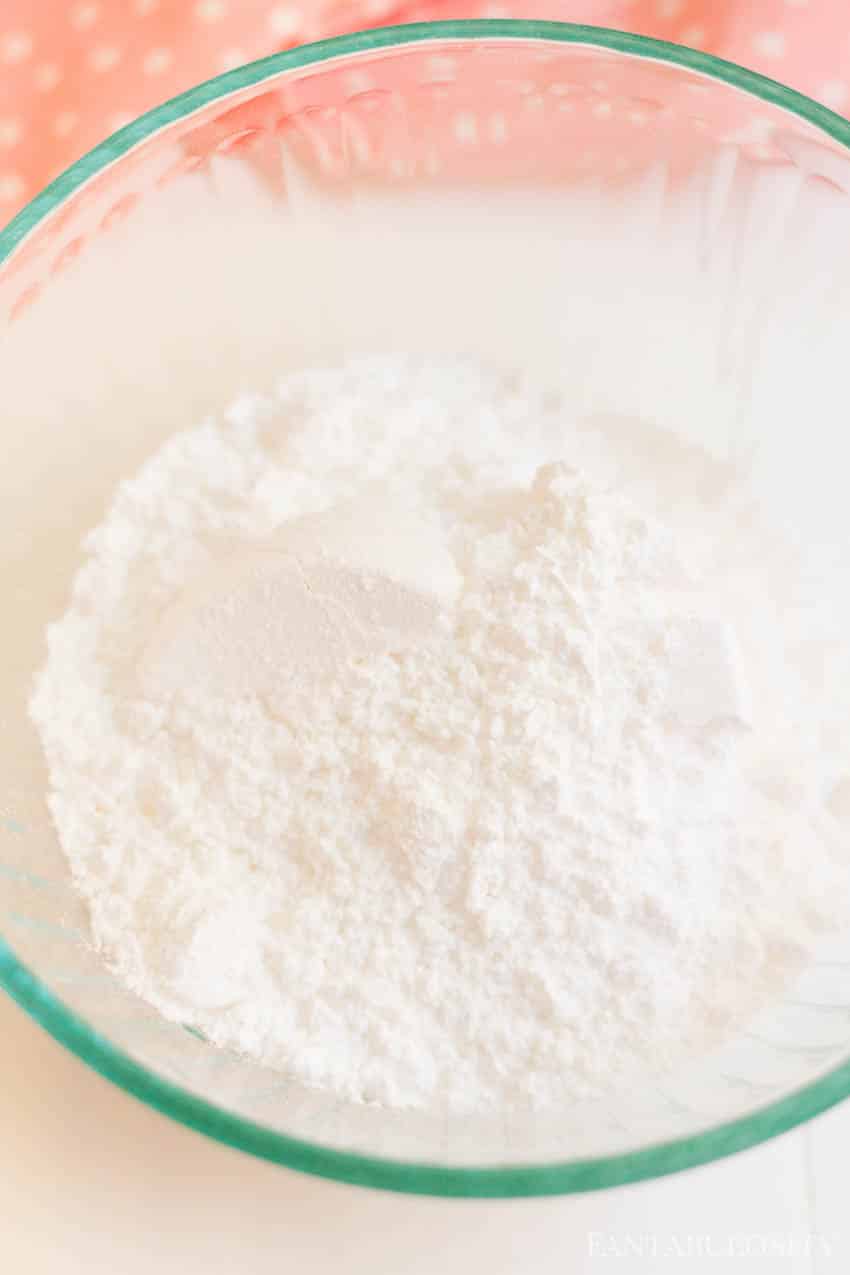
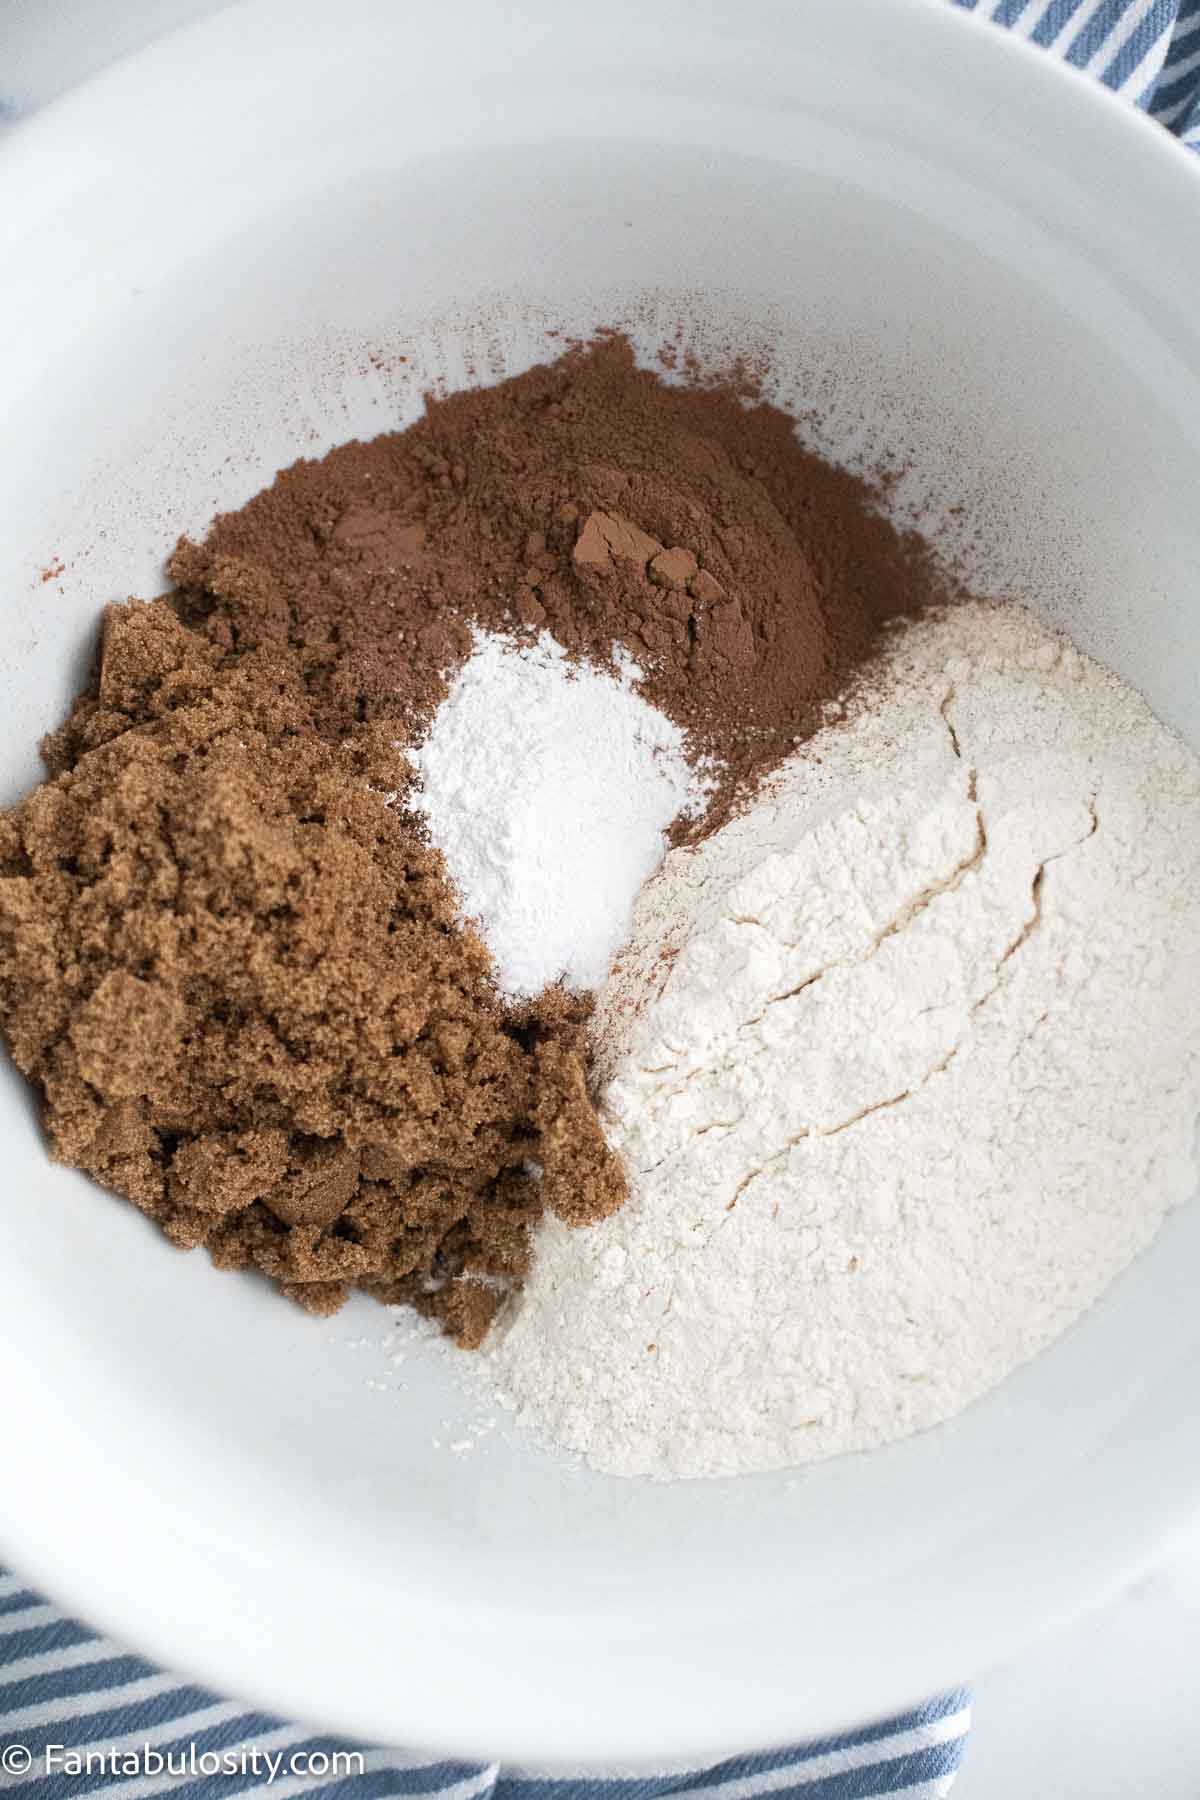
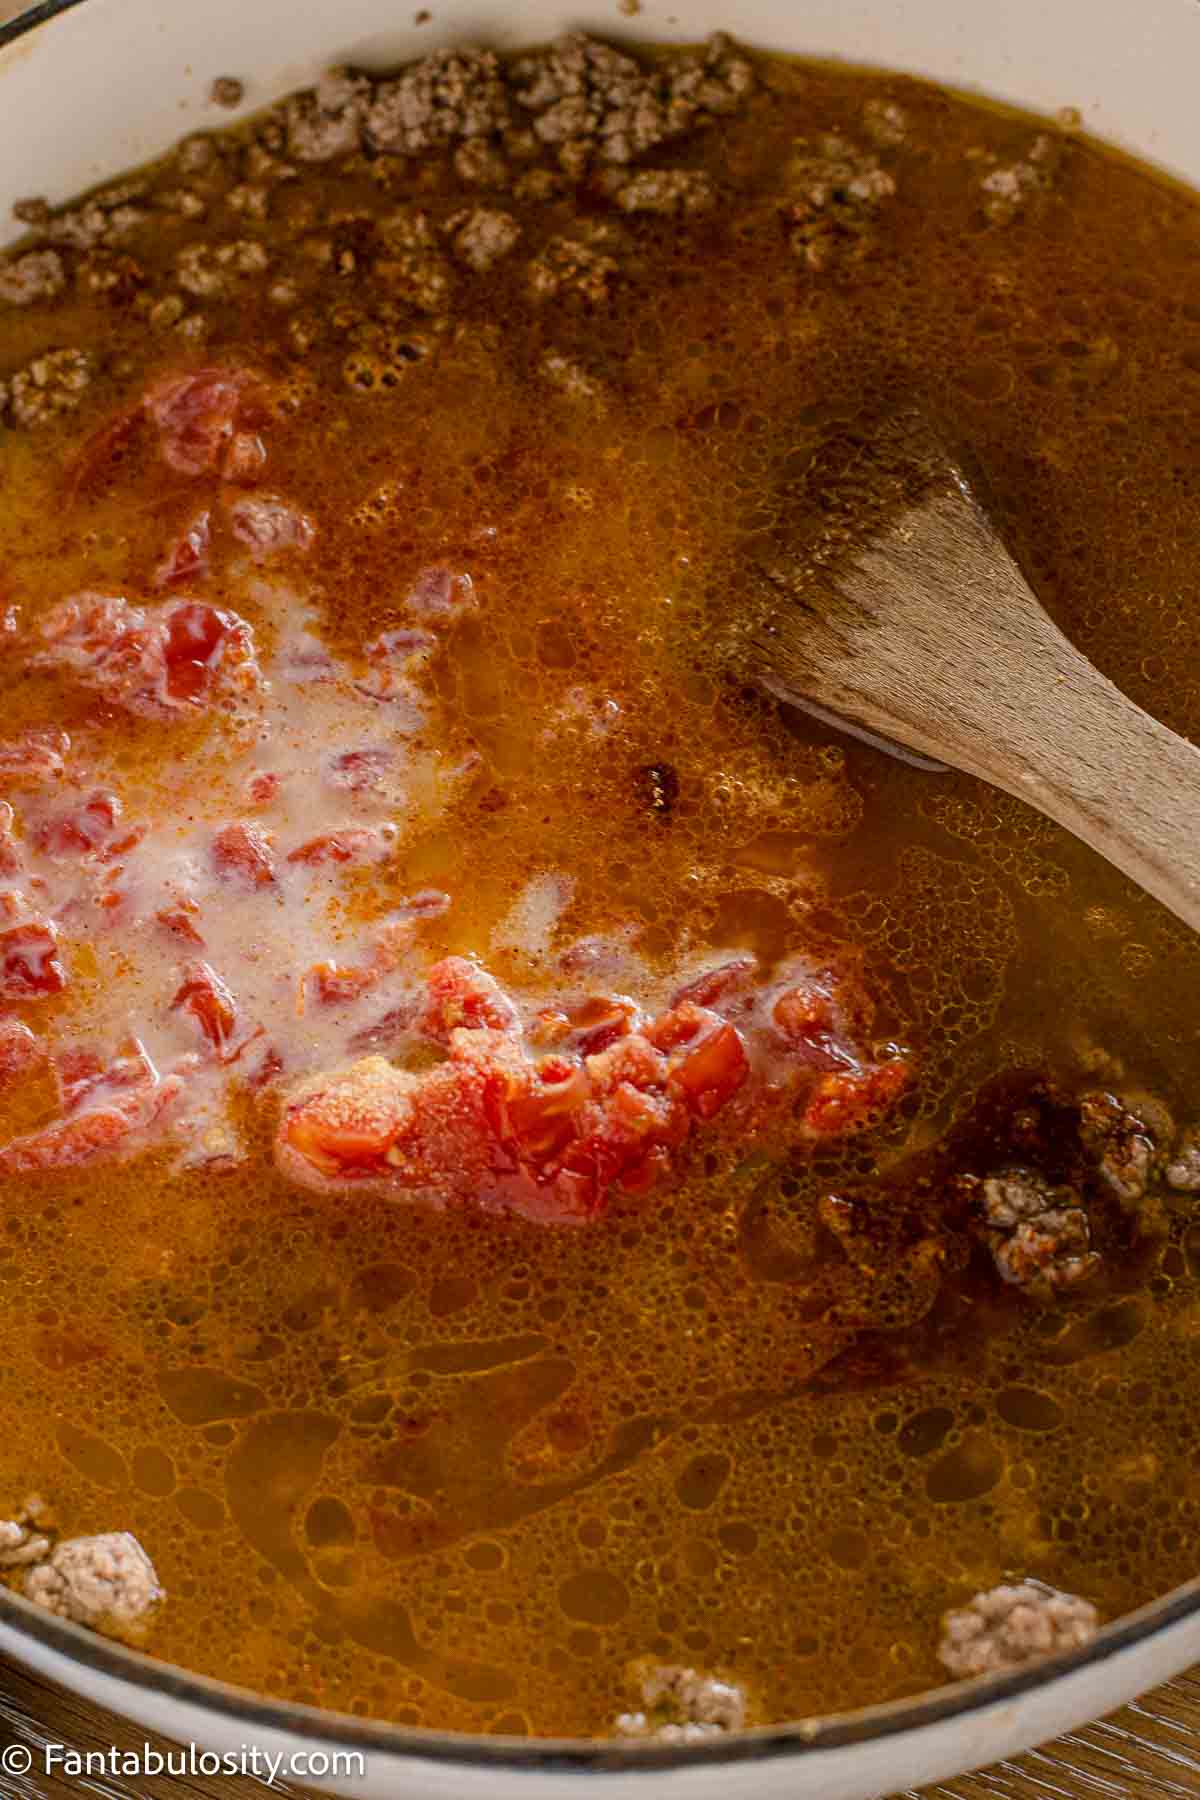
In a separate bowl add the flour, baking powder, baking soda, and salt. Stir to combine.
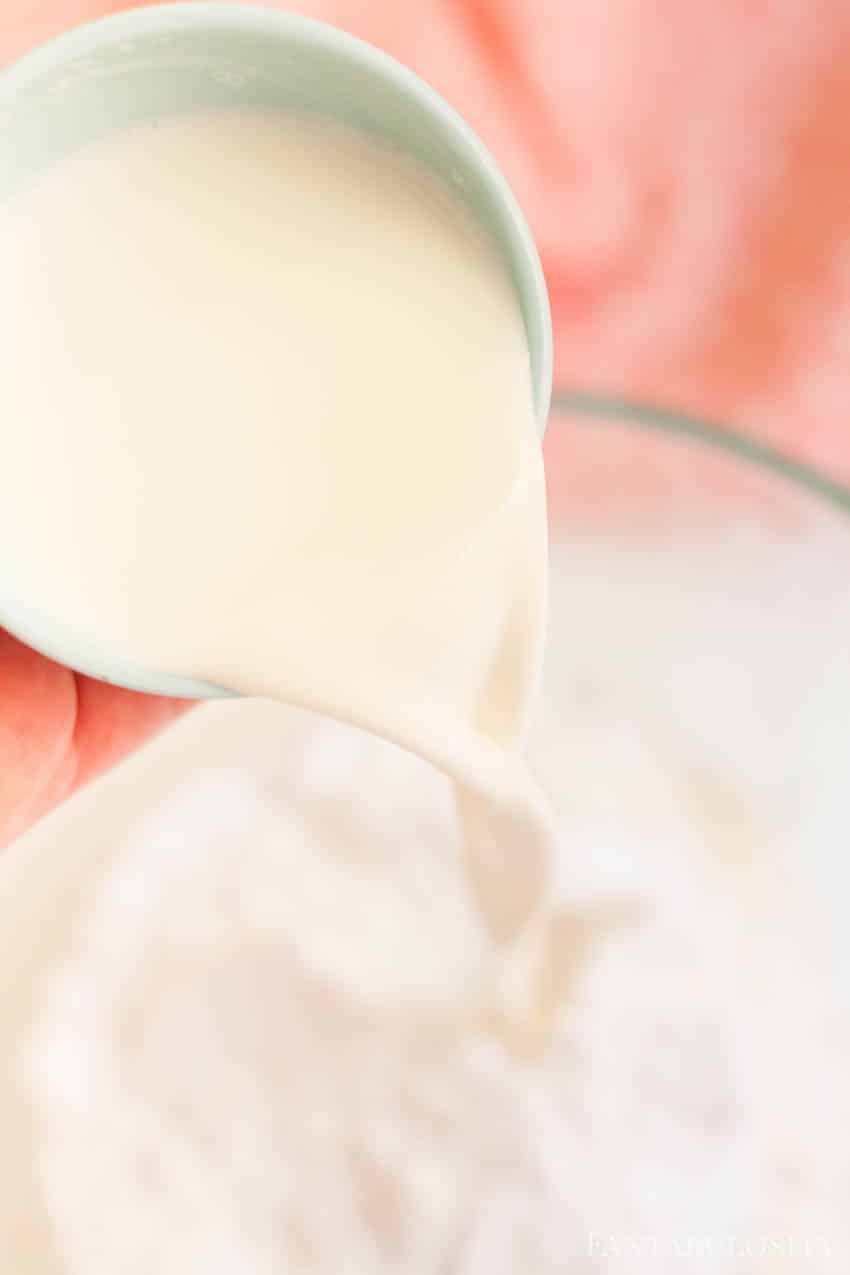
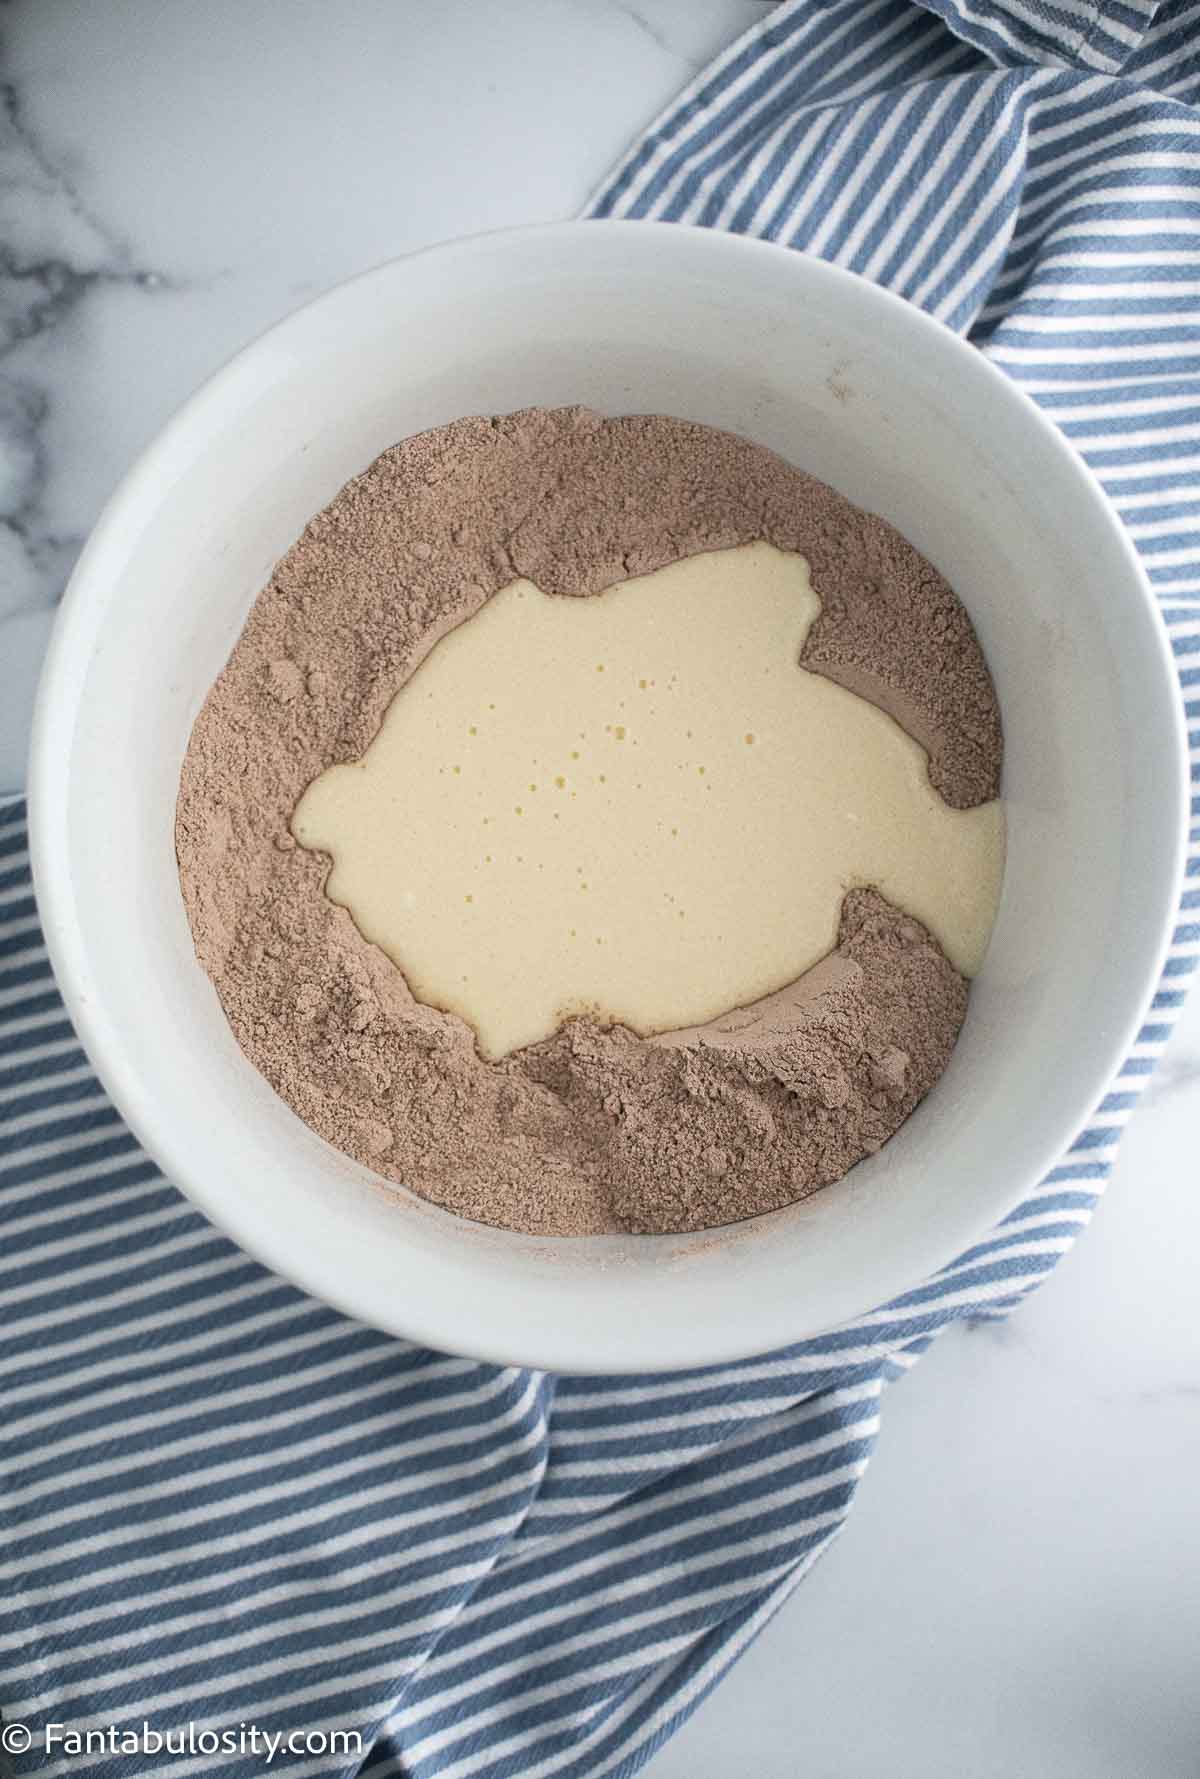
Alternatively, add a small amount of the flour mixture and then the milk. Continue to alternatively add the flour and milk until it's all added.
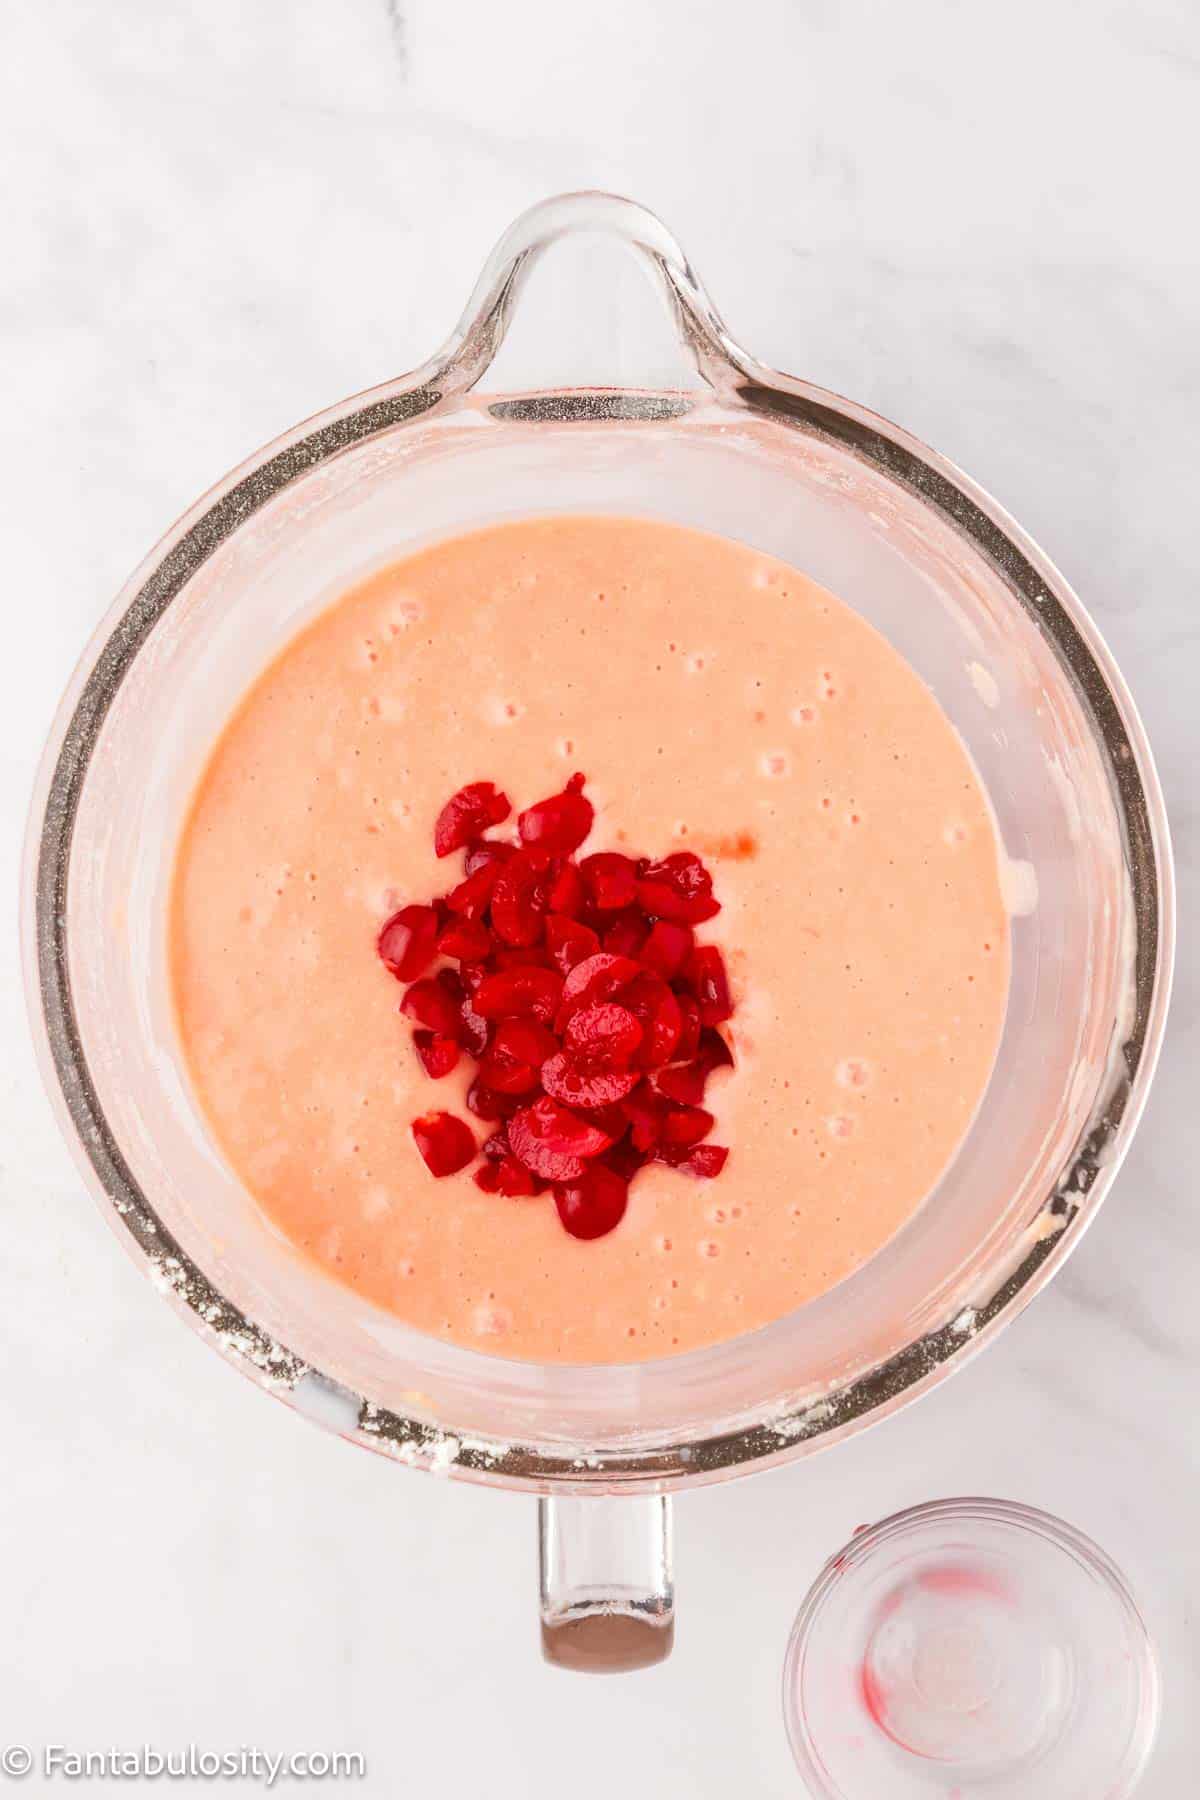
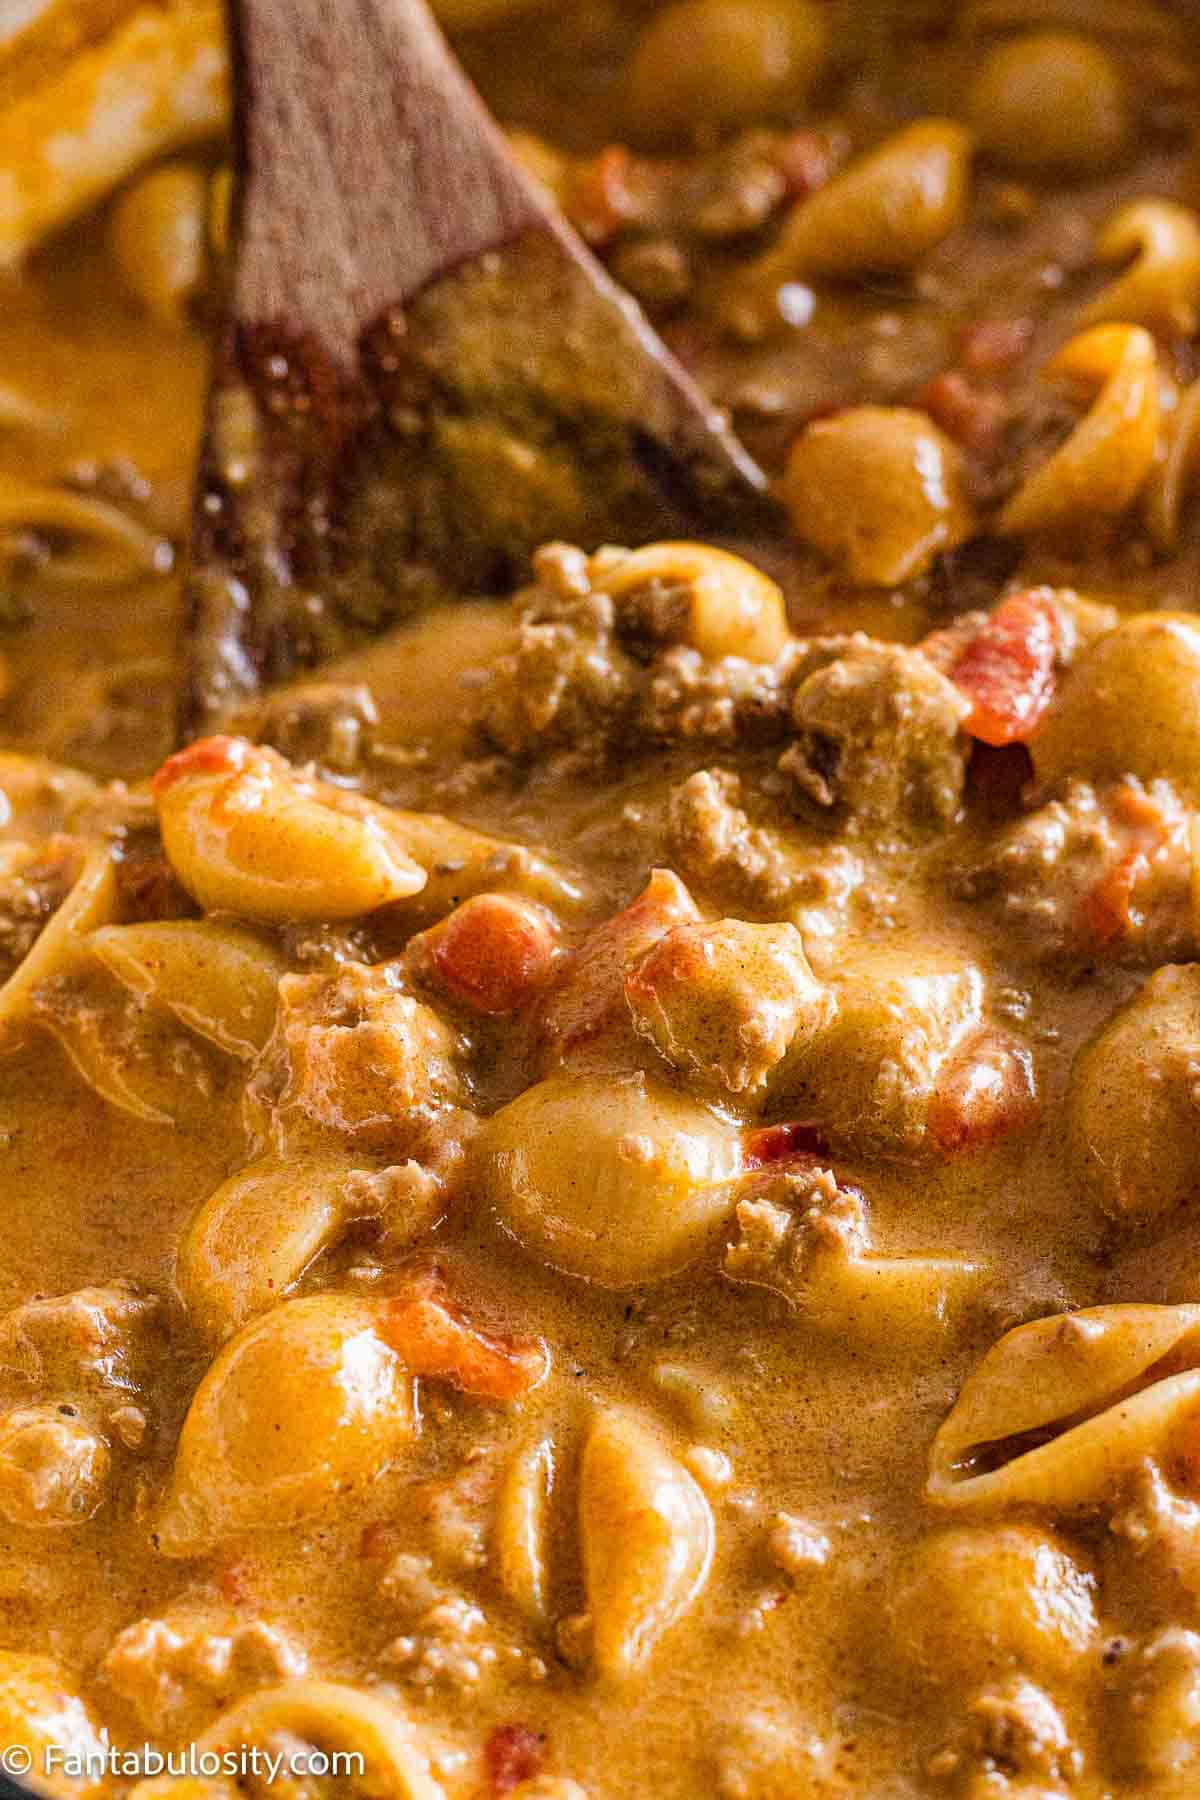
Add in the chopped Maraschino Cherries and fold them in so they're well distributed throughout the cake batter.
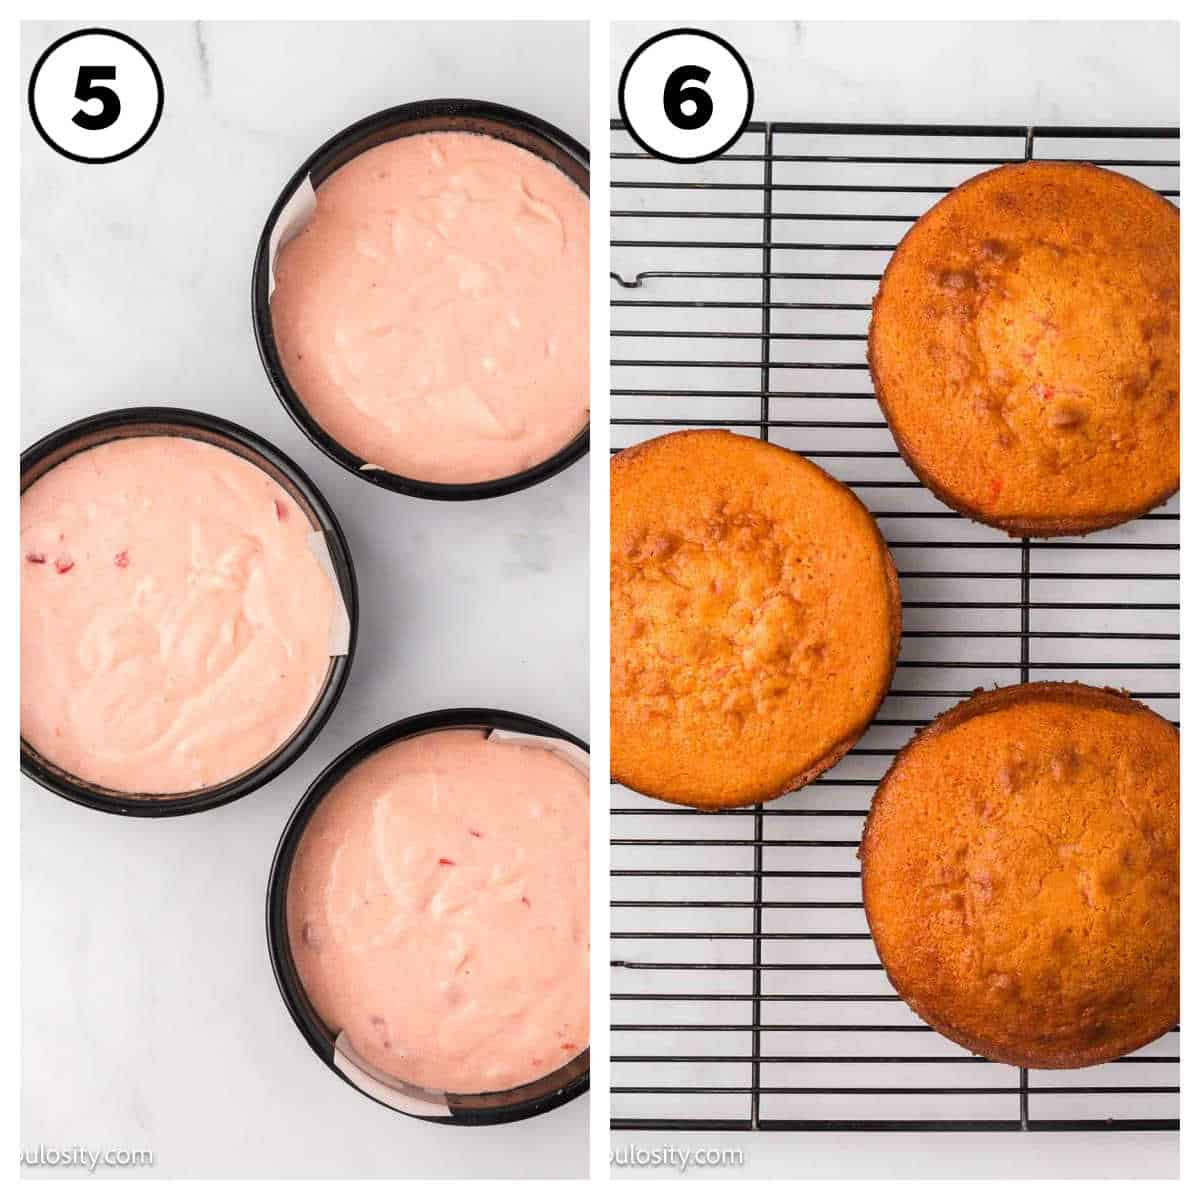
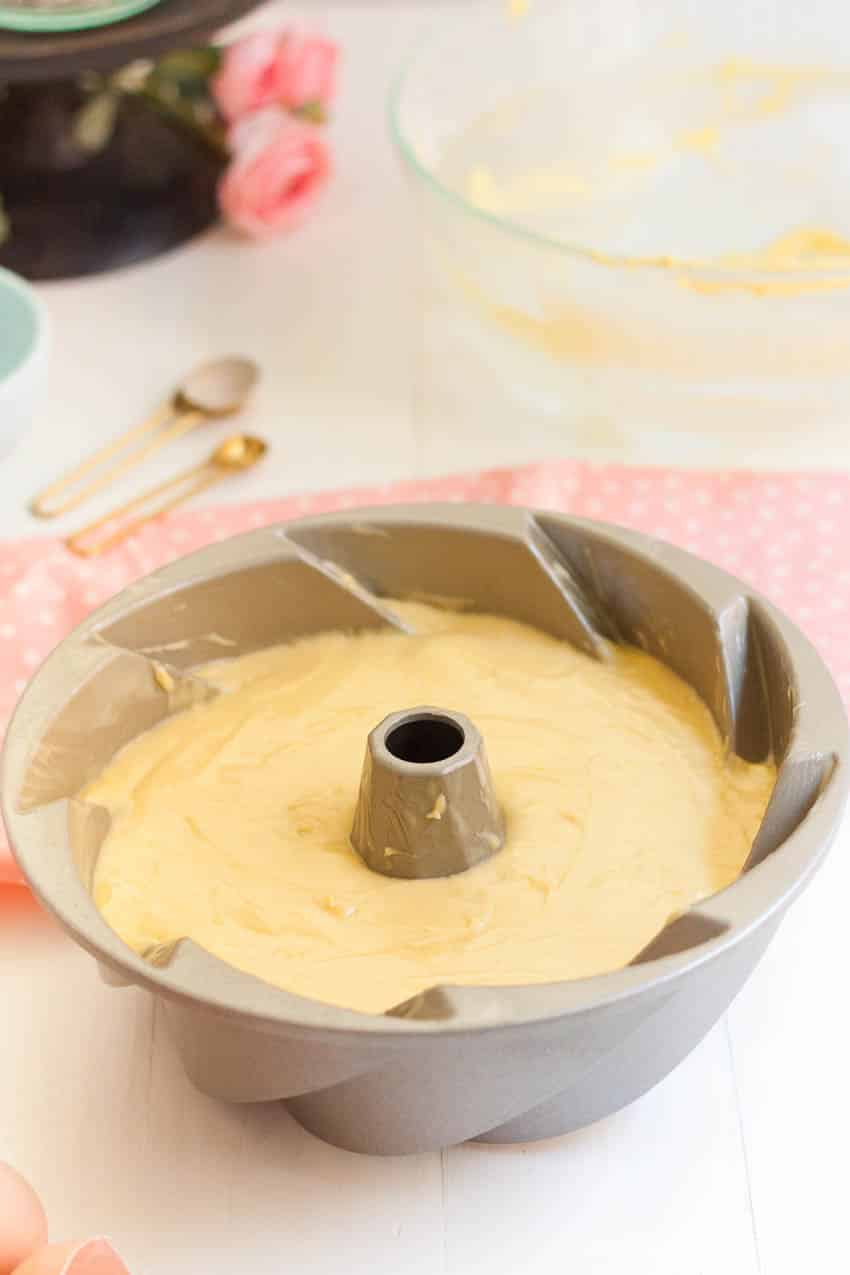
Pour out the cake batter evenly among the prepared cake pans.
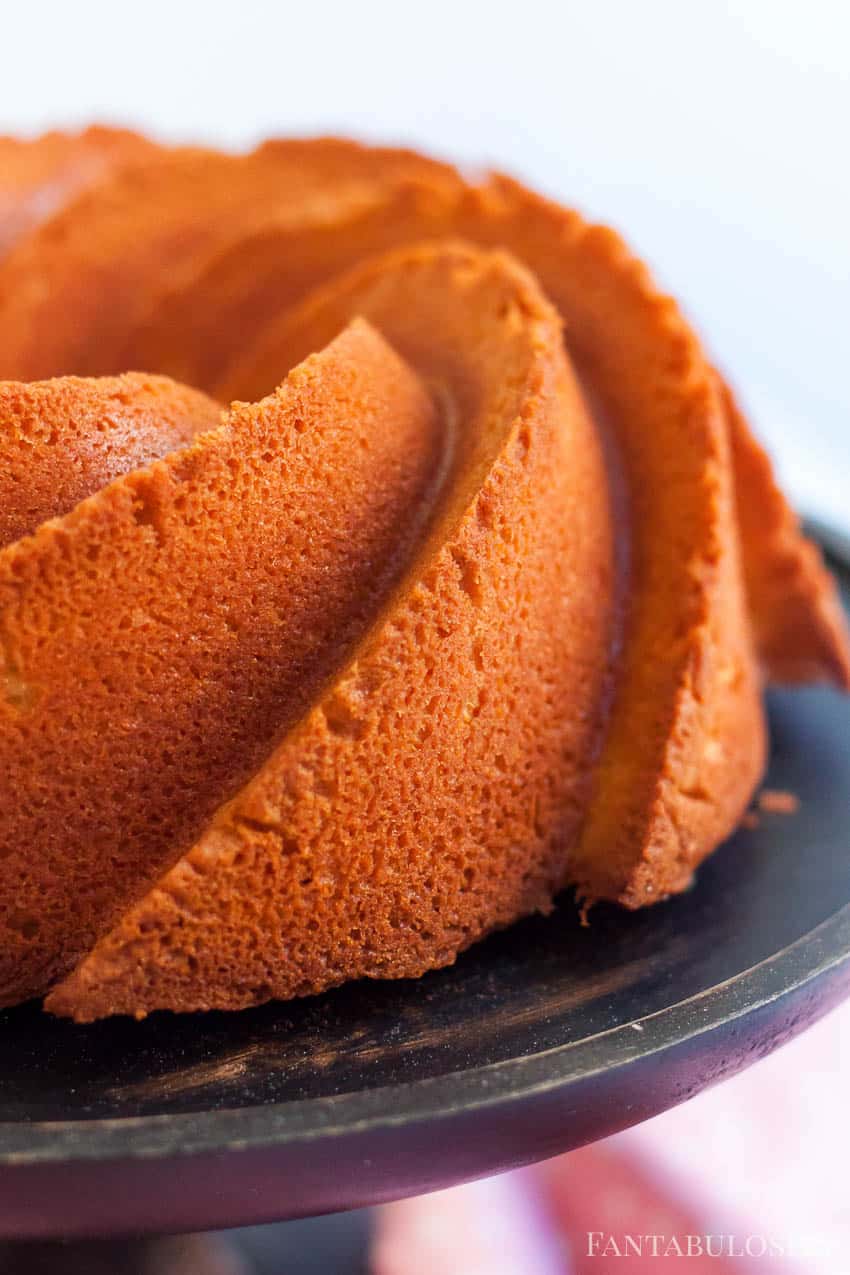
Bake at 350 degrees F (or 177 degrees C) for 30-32 minutes (for 6" round pans) to 32-36 minutes (for 8" pans). Check the cake by putting a toothpick in the middle until it comes out clean.
Remove them from the oven and allow them to cool for 15 minutes. Then, remove the cakes from the pans and place them on a cooling rack to cool for another 15-30 minutes until cooled completely.
How to Make the Frosting for Cherry Cake
While you're waiting for the cake to cool you can make the frosting.
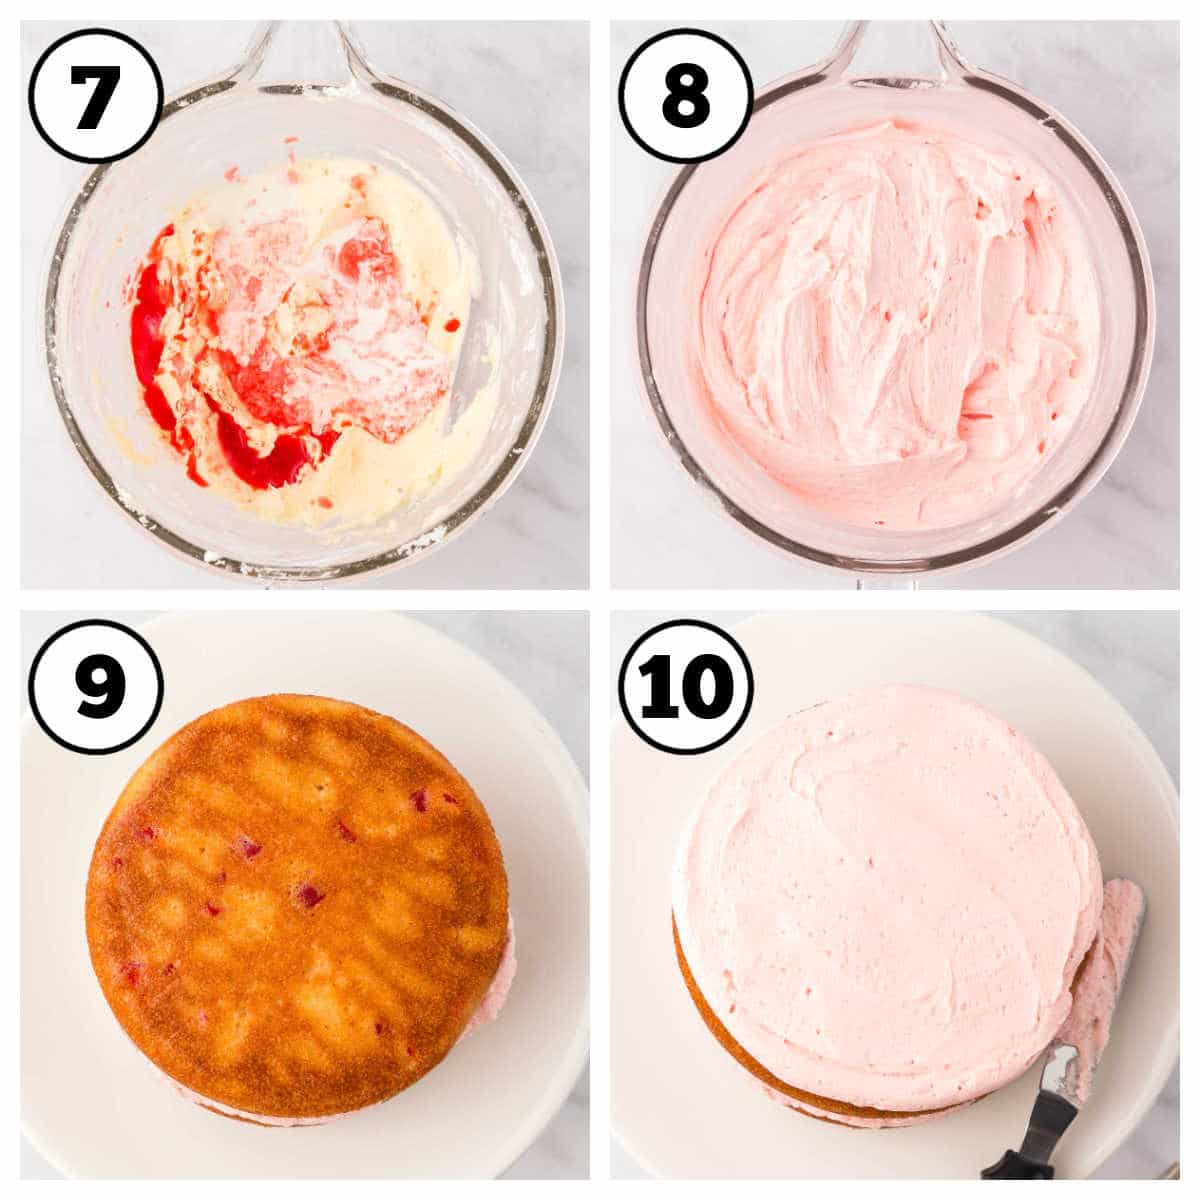
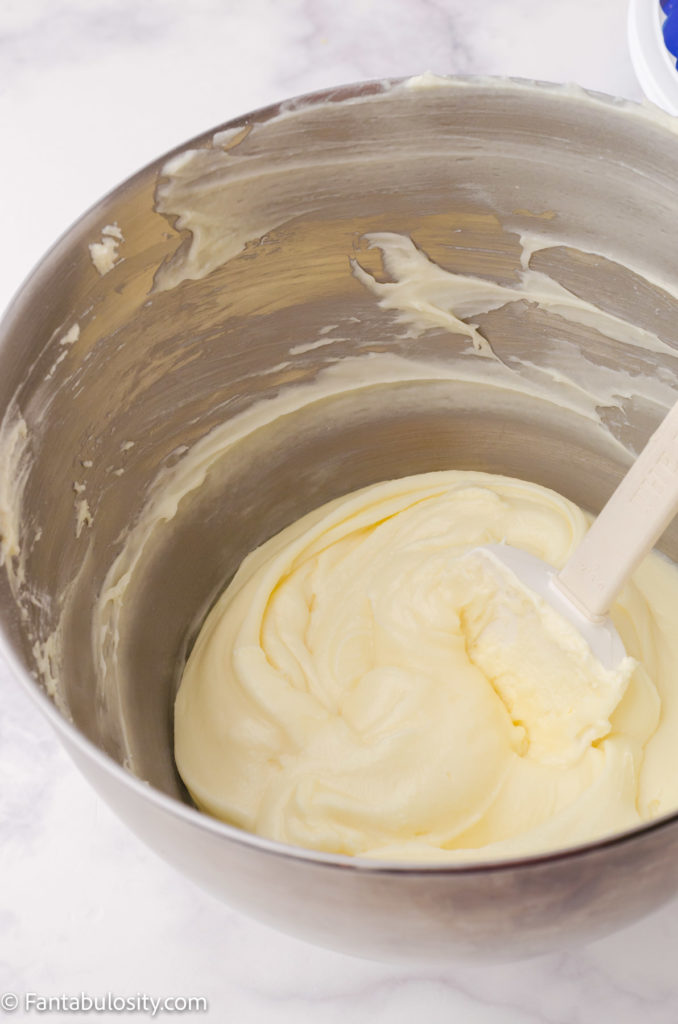
In the bowl of your stand mixer with the whisk attachment, add the room-temperature butter and 2 cups of powdered sugar. Stir to combine.
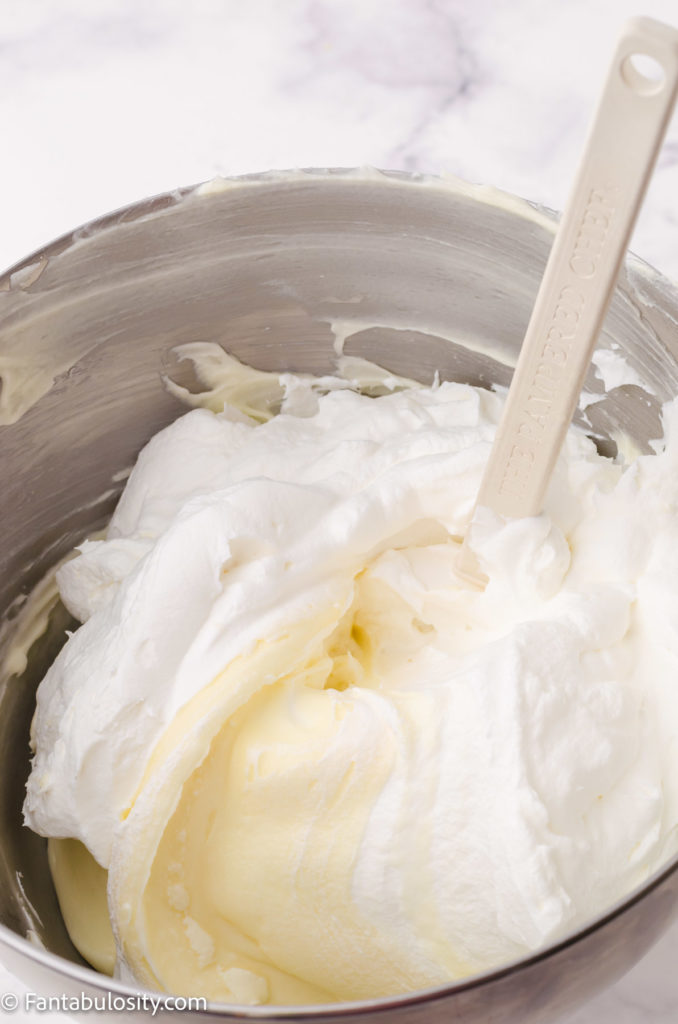
Slowly add the grenadine, whipping cream, salt, and almond extract. Stir to fully combine.
Slowly add in the rest of the powdered sugar to thicken up the frosting. Add in enough powdered sugar until you gain the consistency you like when decorating a cake.
Note: ** You will want the frosting to hold its shape but not too stiff that you can't spread it over the cake.
To enhance the pink color you can add some additional pink food coloring. **This is completely optional and not used in this recipe.
Once fully mixed, transfer the frosting to a piping bag with a round tip. Set aside.
Preparing the Cake for Frosting
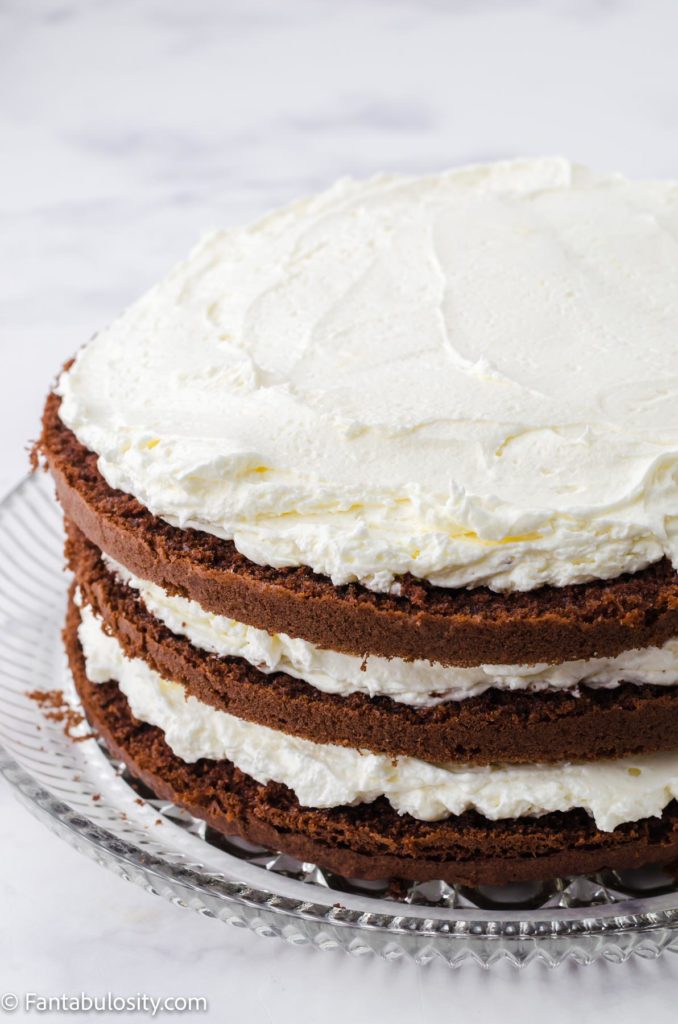
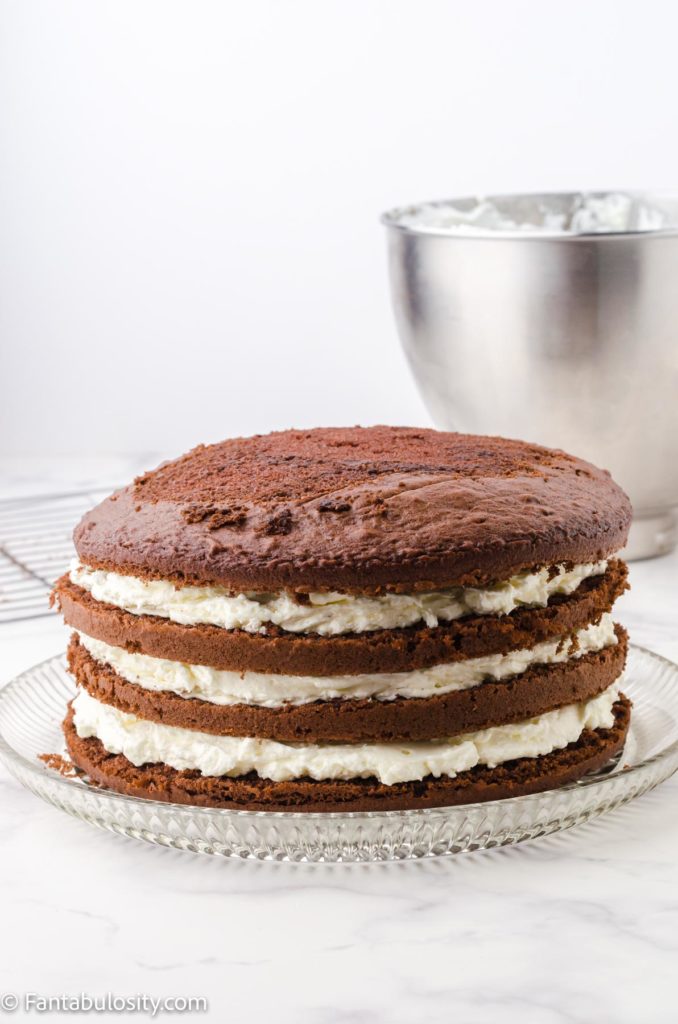
Level each cake out by slicing the top "dome" off the cake. You can discard this or eat it while decorating.
How to Frost the Cake
Add a small dollop of frosting on to the cake stand. This will help keep your cake in place.
Place the first cake layer on a cake stand and then pipe some frosting on the cake. Using an offset spatula, even out the frosting so it's evenly distributed. Place the next layer on top and pipe more frosting on the next layer and then even out the frosting. Repeat this process until you've frosted each layer of cake and your cake is fully frosted.
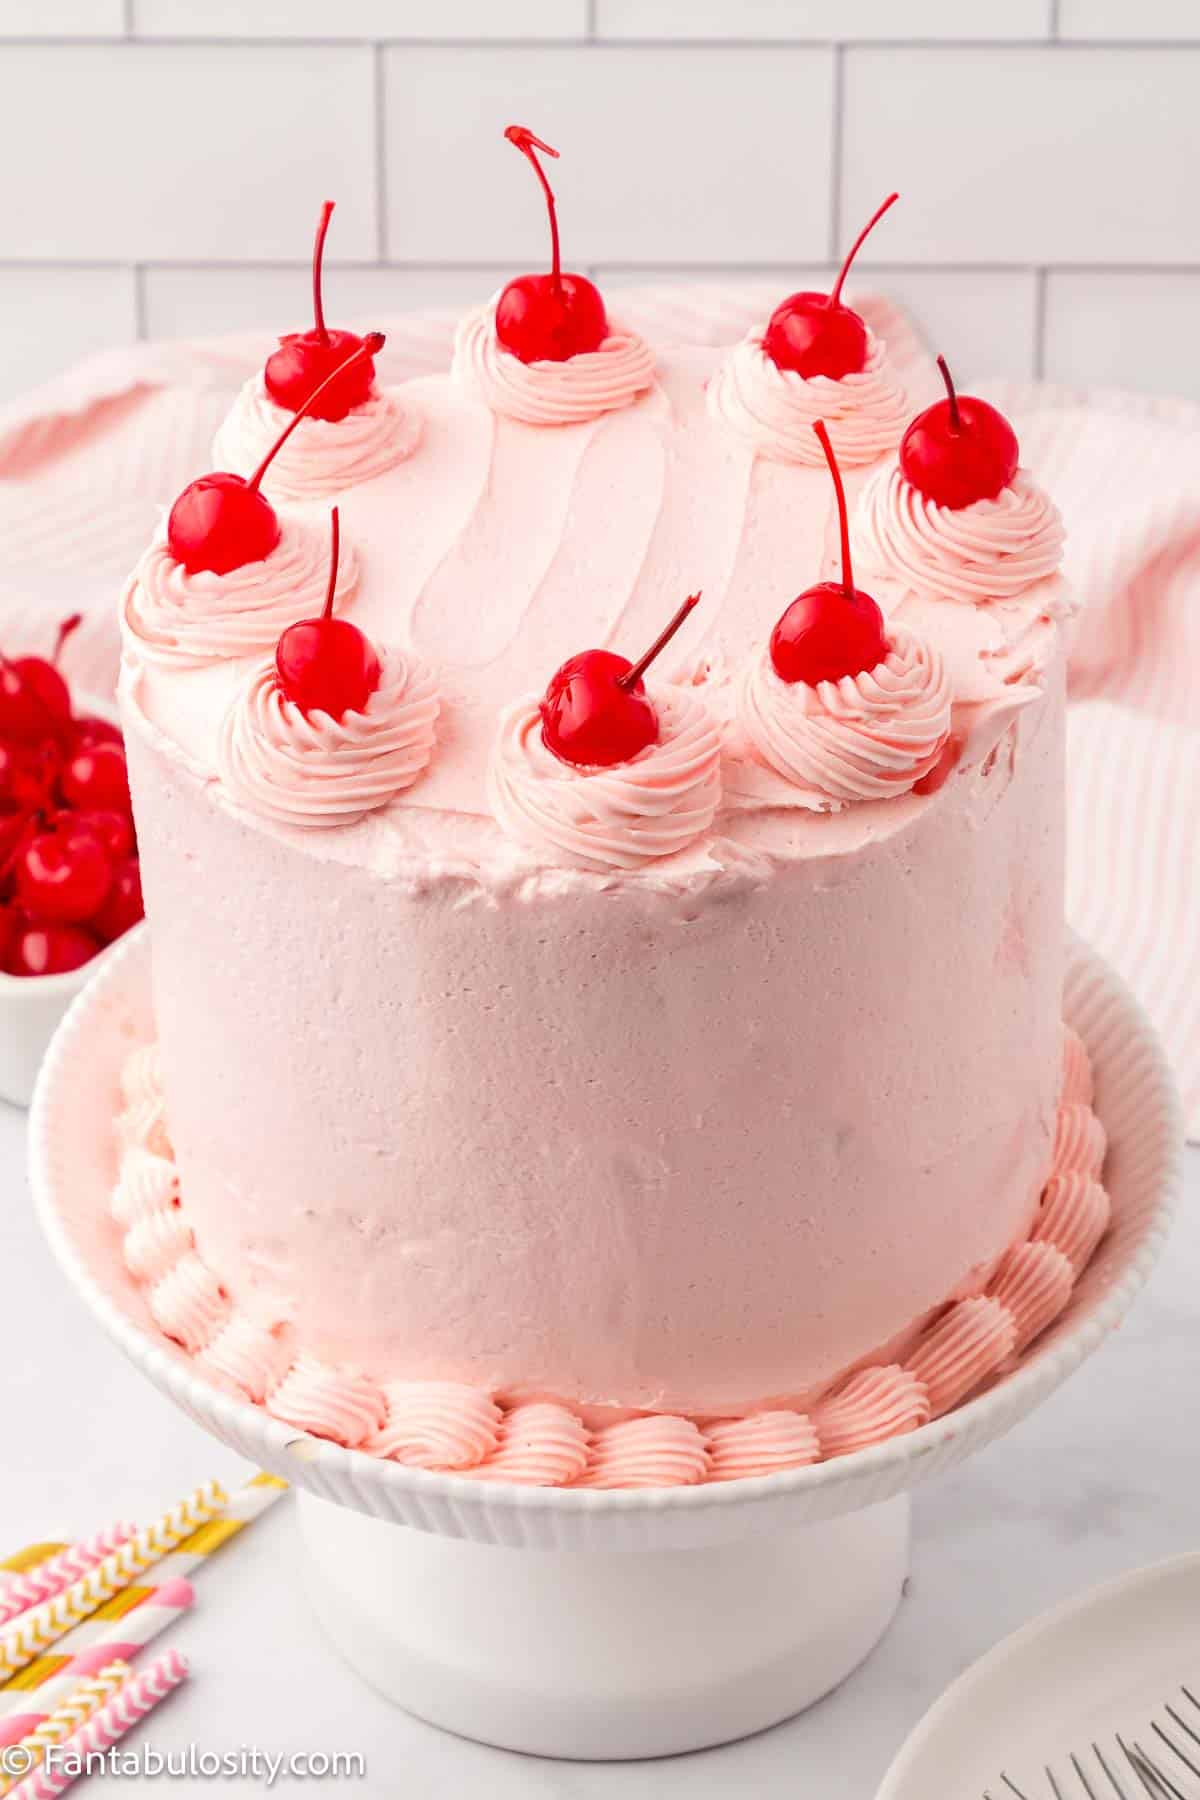
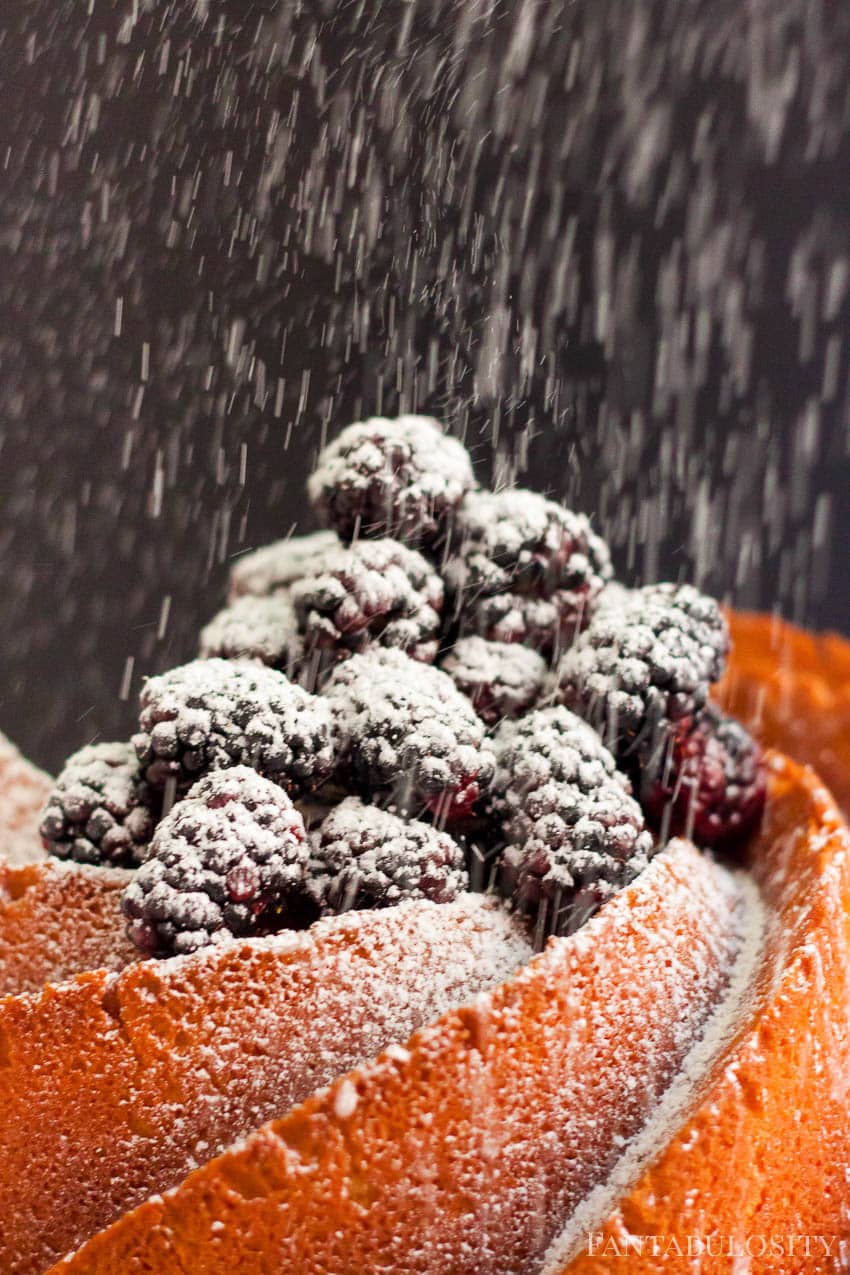
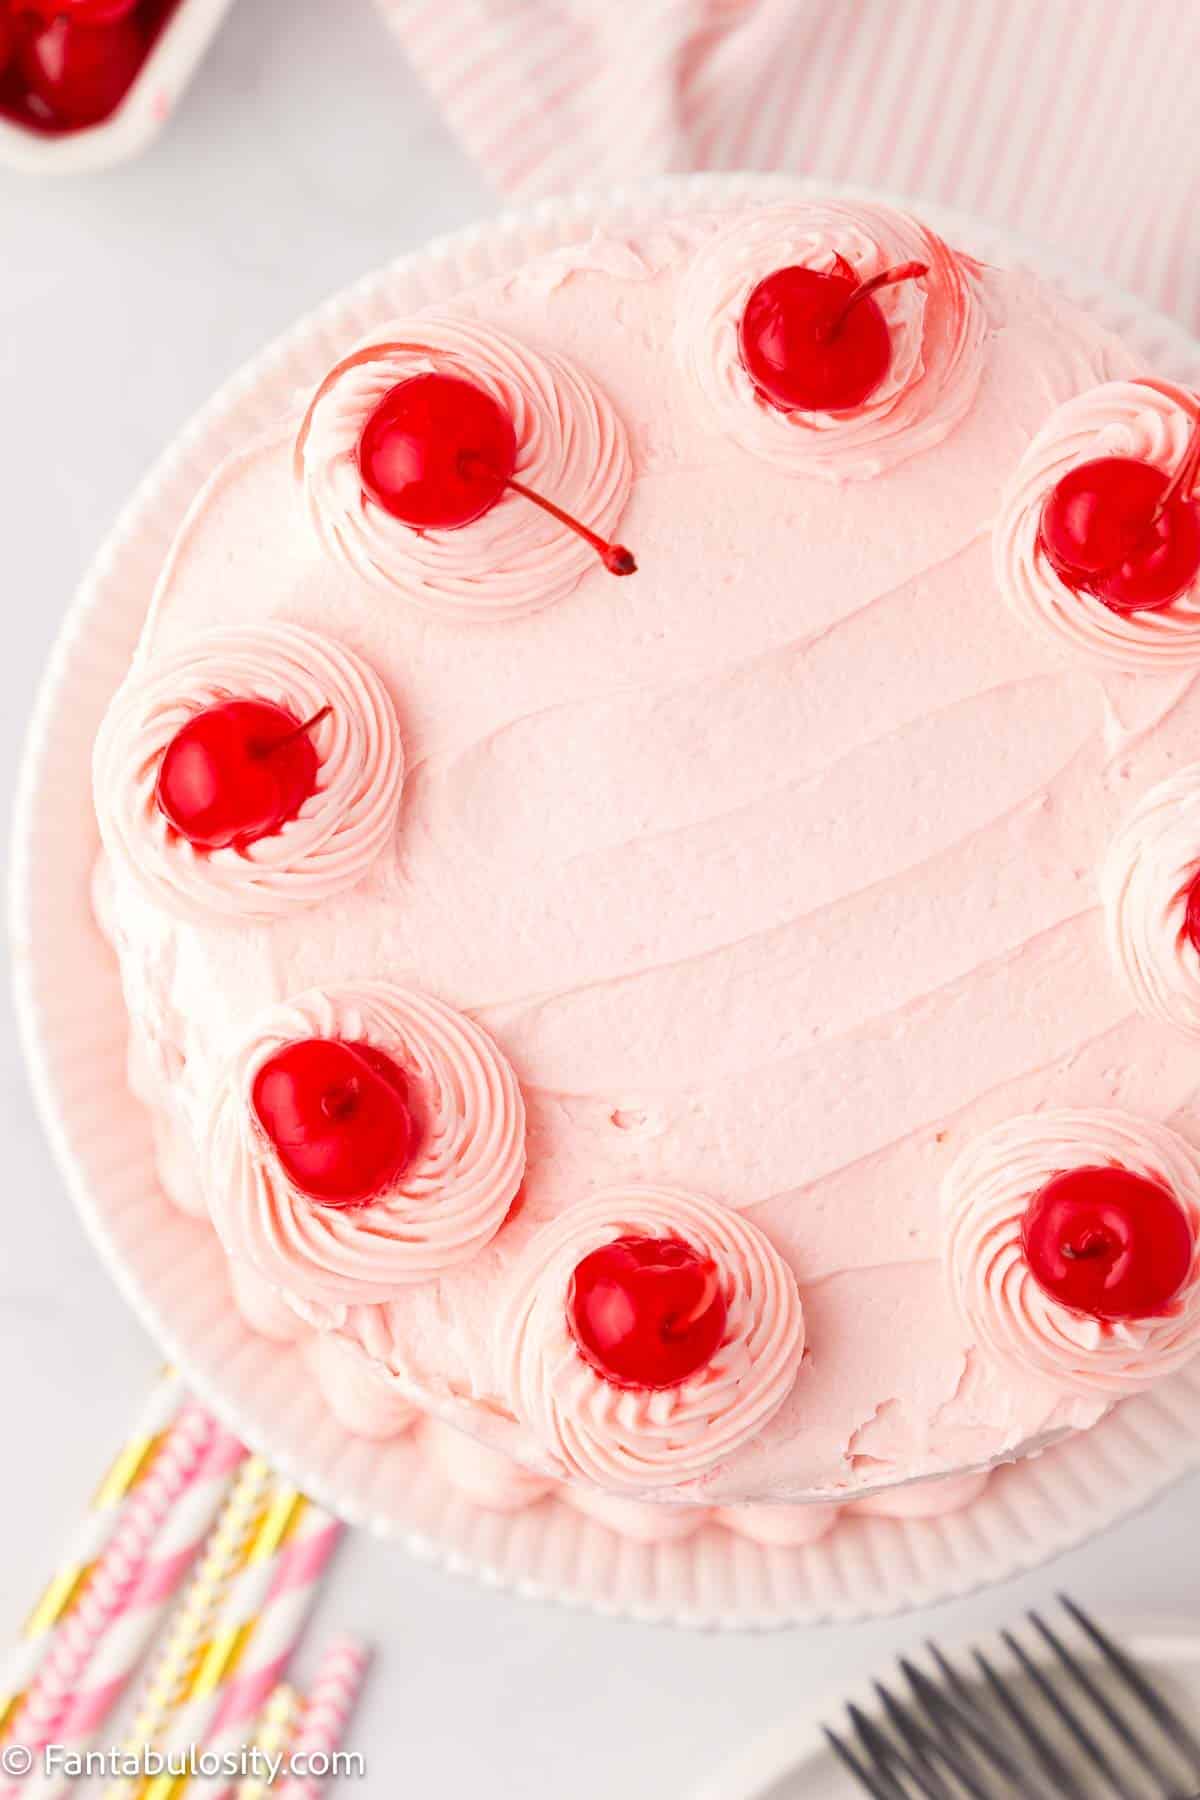
Optional step: Using a star tip, pipe a dollop of frosting on top then place a maraschino cherry on top. Repeat this process 7 more times so you have a total of 8 dollops and 8 cherries. You can also pipe some flowers or shells at the base of the cake for extra decoration.
Recipe Pro Tips
- The juice from the jar of Maraschino Cherries is what we used in the cake batter, and we used additional grenadine for the frosting.
- The almond extract can be omitted but it really does improve the flavor of the cake.
- The whipping cream gives the frosting a light and fluffy texture. This can be omitted if you want a denser frosting.
Expert Tips and FAQs
While old-fashioned cherry chip cake is traditionally made with maraschino cherries, you can most definitely use fresh chopped cherries as well! You will want to blend some cherries to form a substitute for the cherry juice if you don't have a can of maraschino cherries on hand and you opt to use fresh instead.
If you feel like there’s enough cherry flavor in this cake without adding cherry frosting too, there are several other options you can try.
You could try an old-fashioned vanilla frosting.
If you are looking for something unique, you could try this seven-minute frosting that incorporates egg whites, corn syrup, and sugar to make a fluffy meringue style frosting!
A chocolate frosting like this fluffy chocolate buttercream would pair nicely with the cherries in this recipe.
A marshmallow frosting like this one would be a fun one to try with this cake!
You could also frost this cake with a tangy cream cheese frosting like the one you’ll find in our easy carrot cake recipe.
Storage
Store the cake covered at room temperature for 3 days. You can store it covered in the fridge for up to 5 days. When storing it in the fridge, make sure it's completely covered, the fridge can dry out the cake if it's not completely covered.
Related Recipes
Now that you’ve mastered making a cherry chip cake from scratch, why not try another kind of cake from-scratch like our easy carrot cake recipe or our easy homemade marble cake!
Or, if a cherry chip fan, these cherry chip cake mix cookies are hard to beat!
Recipe

Cherry Chip Cake
Ingredients
Cherry Chip Cake
- ½ cup unsalted butter room temperature (113 g)
- 1¼ cup sugar (250 g)
- ¼ cup greek yogurt (70 g)
- 3 eggs room temperature
- 1 teaspoon vanilla (5 ml)
- 1 teaspoon almond extract (5 ml)
- ½ cup reserved Maraschino cherry juice (118 ml)
- 2½ cups all purpose flour (300 g)
- 2 teaspoon baking powder (9.6 g)
- ½ teaspoon baking soda (2.4 g)
- ½ teaspoon salt (1 g)
- 1 cup milk (237 ml)
- 10 ounce jar of Maraschino cherries chopped, juice drained and reserved for batter. (Save 8 whole cherries for topping)
Cherry Chip Cake Frosting
- ½ cup unsalted butter room temperature (113 g)
- 4-5 cups powdered sugar for desired consistency (448-575 g)
- 2 Tablespoons heavy whipping cream (27 ml)
- 3 Tablespoons grenadine (48 ml)
- 1 teaspoon almond extract (5 ml)
- ¼ teaspoon salt (0.5 g)
- pink food coloring optional – not used in the photos you see
Instructions
Cherry Chip Cake
- Preheat the oven to 350 degrees F (or 177 degrees C).
- Grease and line 2 8" round cake pans or 3 6" round pans (6" pans were used for the photos).
- In the bowl of your stand mixer with the paddle attachment, add the butter and sugar. Mix until well combined.
- Add the Greek yogurt, eggs, vanilla extract, almond extract, and cherry juice. Mix until well combined.
- In a separate bowl add the flour, baking powder, baking soda, and salt. Stir to combine.
- Alternatively, add a small amount of the flour mixture and then the milk. Continue to alternatively add the flour and milk until it's all added.
- Add in the chopped Maraschino Cherries and fold them in so they're well distributed throughout the cake batter.
- Pour out the cake batter evenly among the prepared cake pans.
- Bake at 350 degrees F (or 177 degrees C) for 30-32 minutes (for 6" round pans) to 32-36 minutes (for 8" pans). Check the cake by putting a toothpick in the middle until it comes out clean.
- Remove them from the oven and allow them to cool for 15 minutes. Then, remove the cakes from the pans and place them on a cooling rack to cool for another 15-30 minutes until cooled completely.
Cherry Frosting
- While you're waiting for the cake to cool you can make the frosting.
- In the bowl of your stand mixer with the whisk attachment, add the room-temperature butter and 2 cups of powdered sugar. Stir to combine.
- Slowly add the grenadine, whipping cream, salt, and almond extract. Stir to fully combine.
- Slowly add in the rest of the powdered sugar to thicken up the frosting. Add in enough powdered sugar until you gain the consistency you like when decorating a cake. **You will want the frosting to hold its shape but not too stiff that you can't spread it over the cake.
- NOTE: To enhance the pink color you can add some additional pink food coloring. **This is completely optional and not used in the recipe featured.Once fully mixed, transfer the frosting to a piping bag with a round tip. Set aside.
Preparing the Cakes for Decorating
- Level each cake out by slicing the top "dome" off the cake. You can discard this or eat it while decorating.
Frosting the Cake
- Add a small dollop of frosting on to the cake stand. This will help keep your cake in place.
- Place the first cake layer on a cake stand and then pipe some frosting on the cake. Using an offset spatula, even out the frosting so it's evenly distributed.
- Place the next layer on top and pipe more frosting on the next layer and then even out the frosting. Repeat this process until you've frosted each layer of cake and your cake is fully frosted.
- Optional step: Using a star tip, pipe a dollop of frosting on top then place a maraschino cherry on top. Repeat this process 7 more times so you have a total of 8 dollops and 8 cherries. You can also pipe some flowers or shells at the base of the cake for extra decoration.
Video
Notes
-
- Do not frost the cake while it's warm, the warm cake will melt the frosting.
- Try to add between ¼" to ½" of frosting between each layer.
- Cutting the "dome" off the top of the cake will help create a layer cake that doesn't lean and stands straight.
- When measuring out the flour you can either weigh the flour (for exact measurement) or spoon the flour into the measuring cup then level out the flour. Avoid dipping the measuring cup into the flour so you don't use too much flour.
- When frosting the cake you can add a thin layer on the sides of the cake called a crumb coat, then chill the cake and add another layer of frosting this will give you a clean frosting look without any crumbs being added to the cake.


 Next, in a separate bowl, sift together the flour, baking powder, and salt.
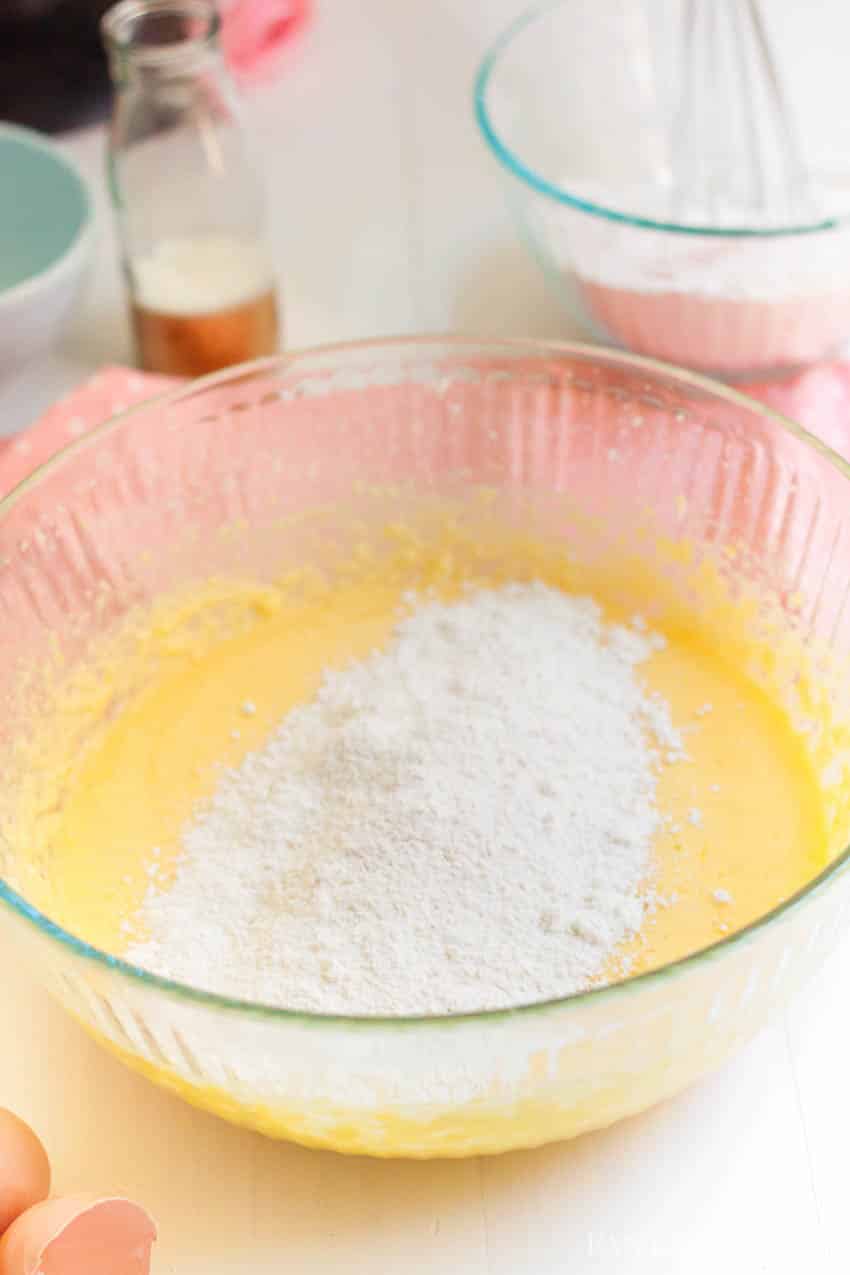 Reduce mixer speed to low, and add half of the flour mixture and half the milk to the butter/sugar mixture, and mix for 5 minutes.
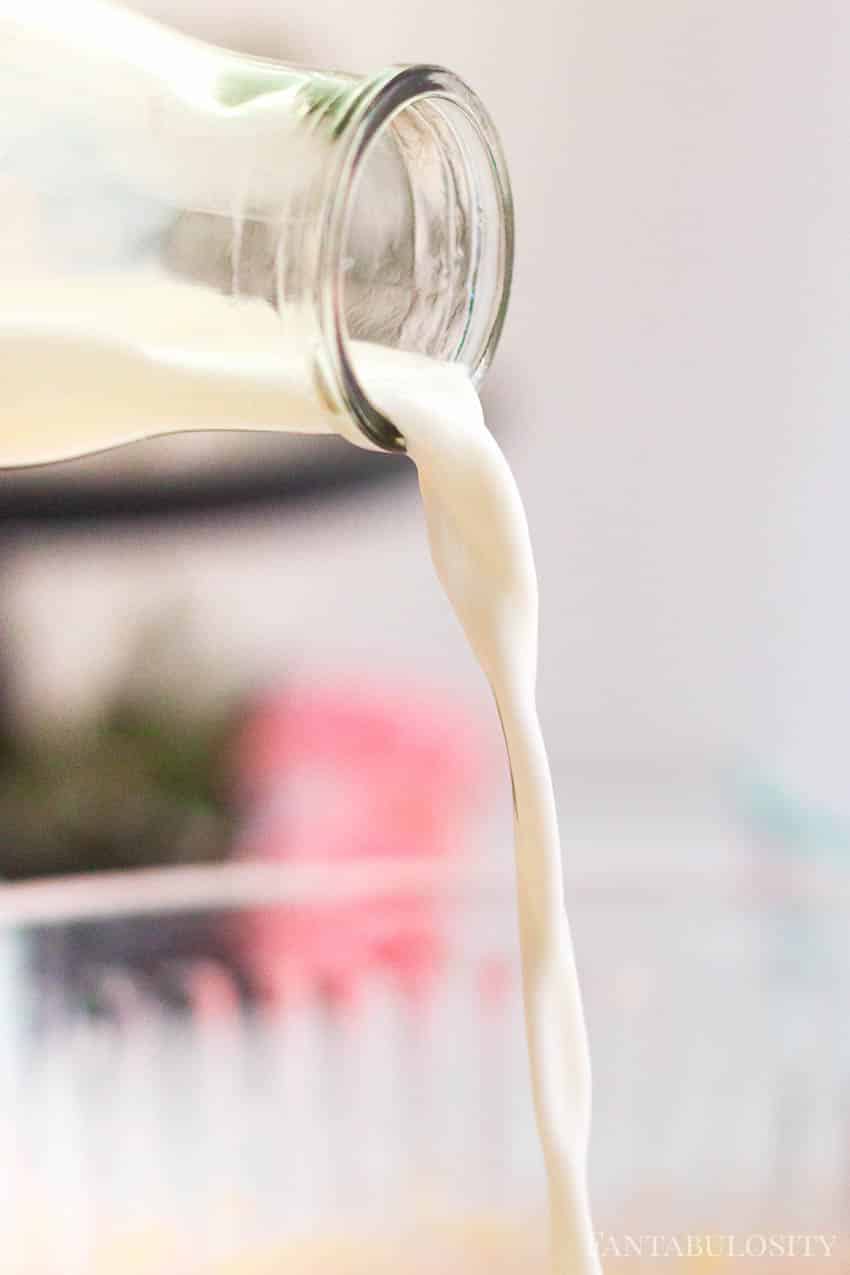 Add the second half of flour mixture and milk… and mix for 5 minutes.
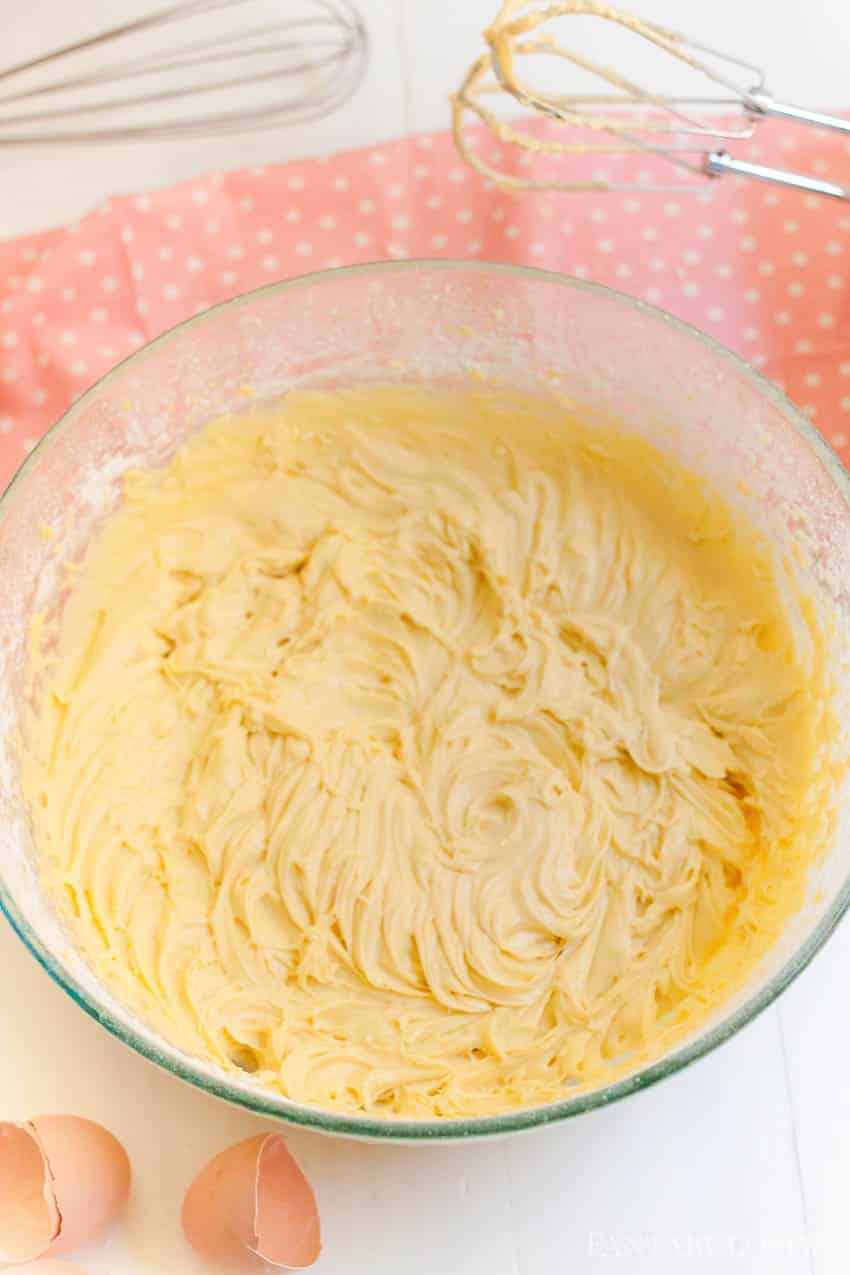
 Place the pan in a cool oven and set the temperature to 350℉ and bake for 1 hour.