• Skip to primary navigation
  • Skip to main content
  • Skip to primary sidebar

Fantabulosity logo

  • All Recipes
  • Vintage Recipes
  • Holiday
  • Dinner Theme System
  • About
  • Navigation Menu: Social Icons

    • Facebook
    • Instagram
    • Pinterest
    • TikTok
    • YouTube
menu icon
go to homepage
  • Recipes
  • Desserts
  • Dinners
  • Gatherings
  • Holidays
  • About Jessica
    • Facebook
    • Instagram
    • Pinterest
    • TikTok
    • YouTube
  • search icon
    Homepage link
    • Recipes
    • Desserts
    • Dinners
    • Gatherings
    • Holidays
    • About Jessica
    • Facebook
    • Instagram
    • Pinterest
    • TikTok
    • YouTube
  • ×
    Home » Recipes

    Turkey Sliders

    Turkey Sliders

    May 11, 2023

    Turkey slider sitting on top of other turkey sliders with cheese.

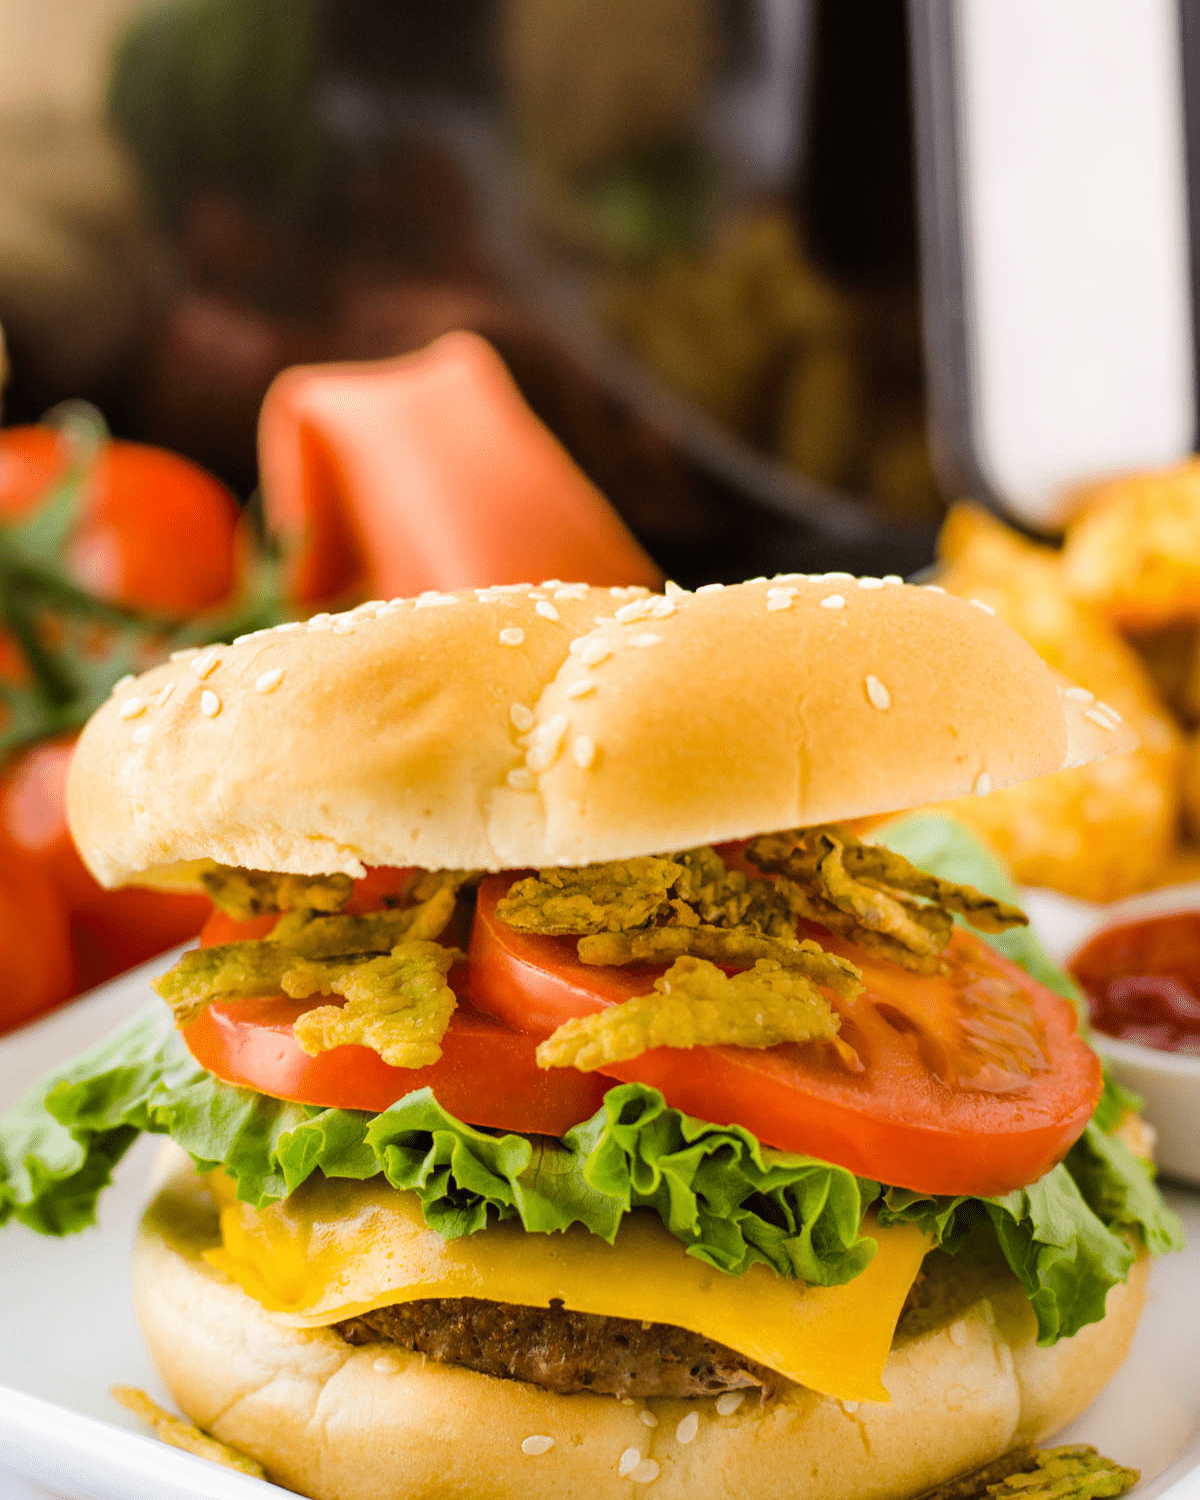
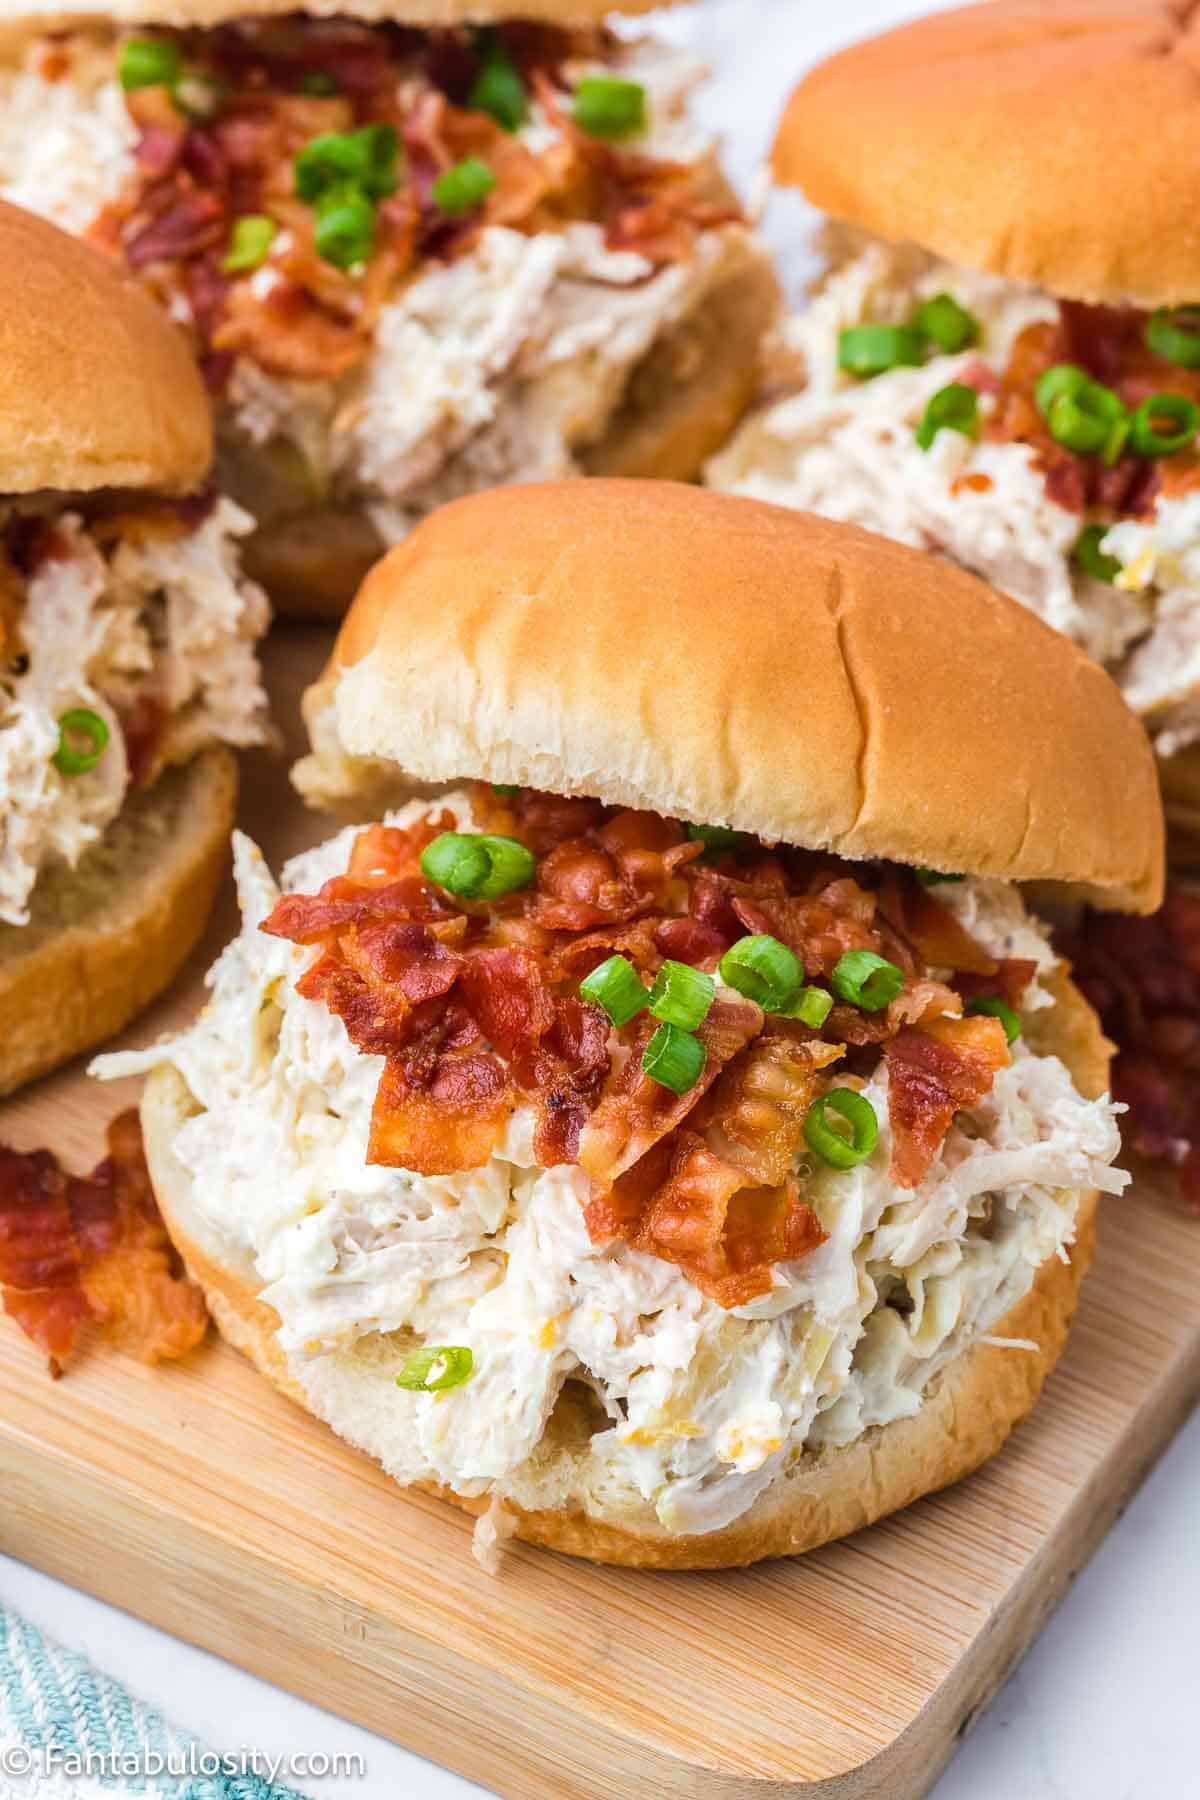
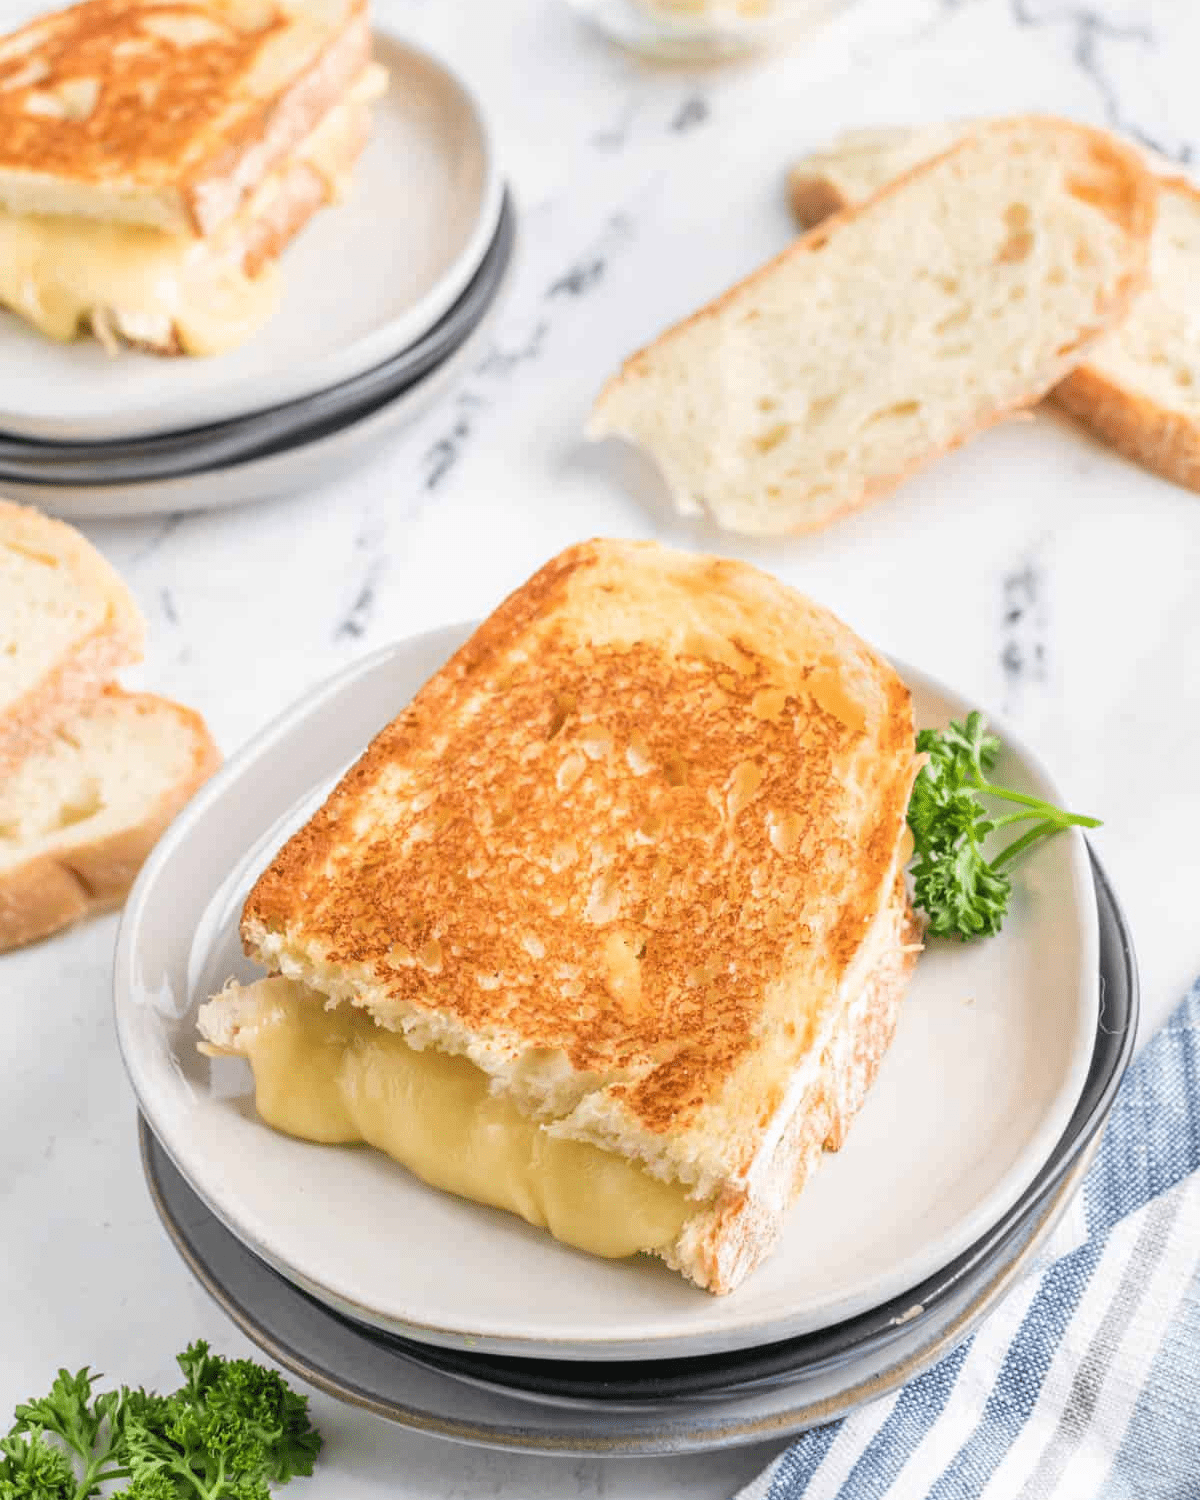
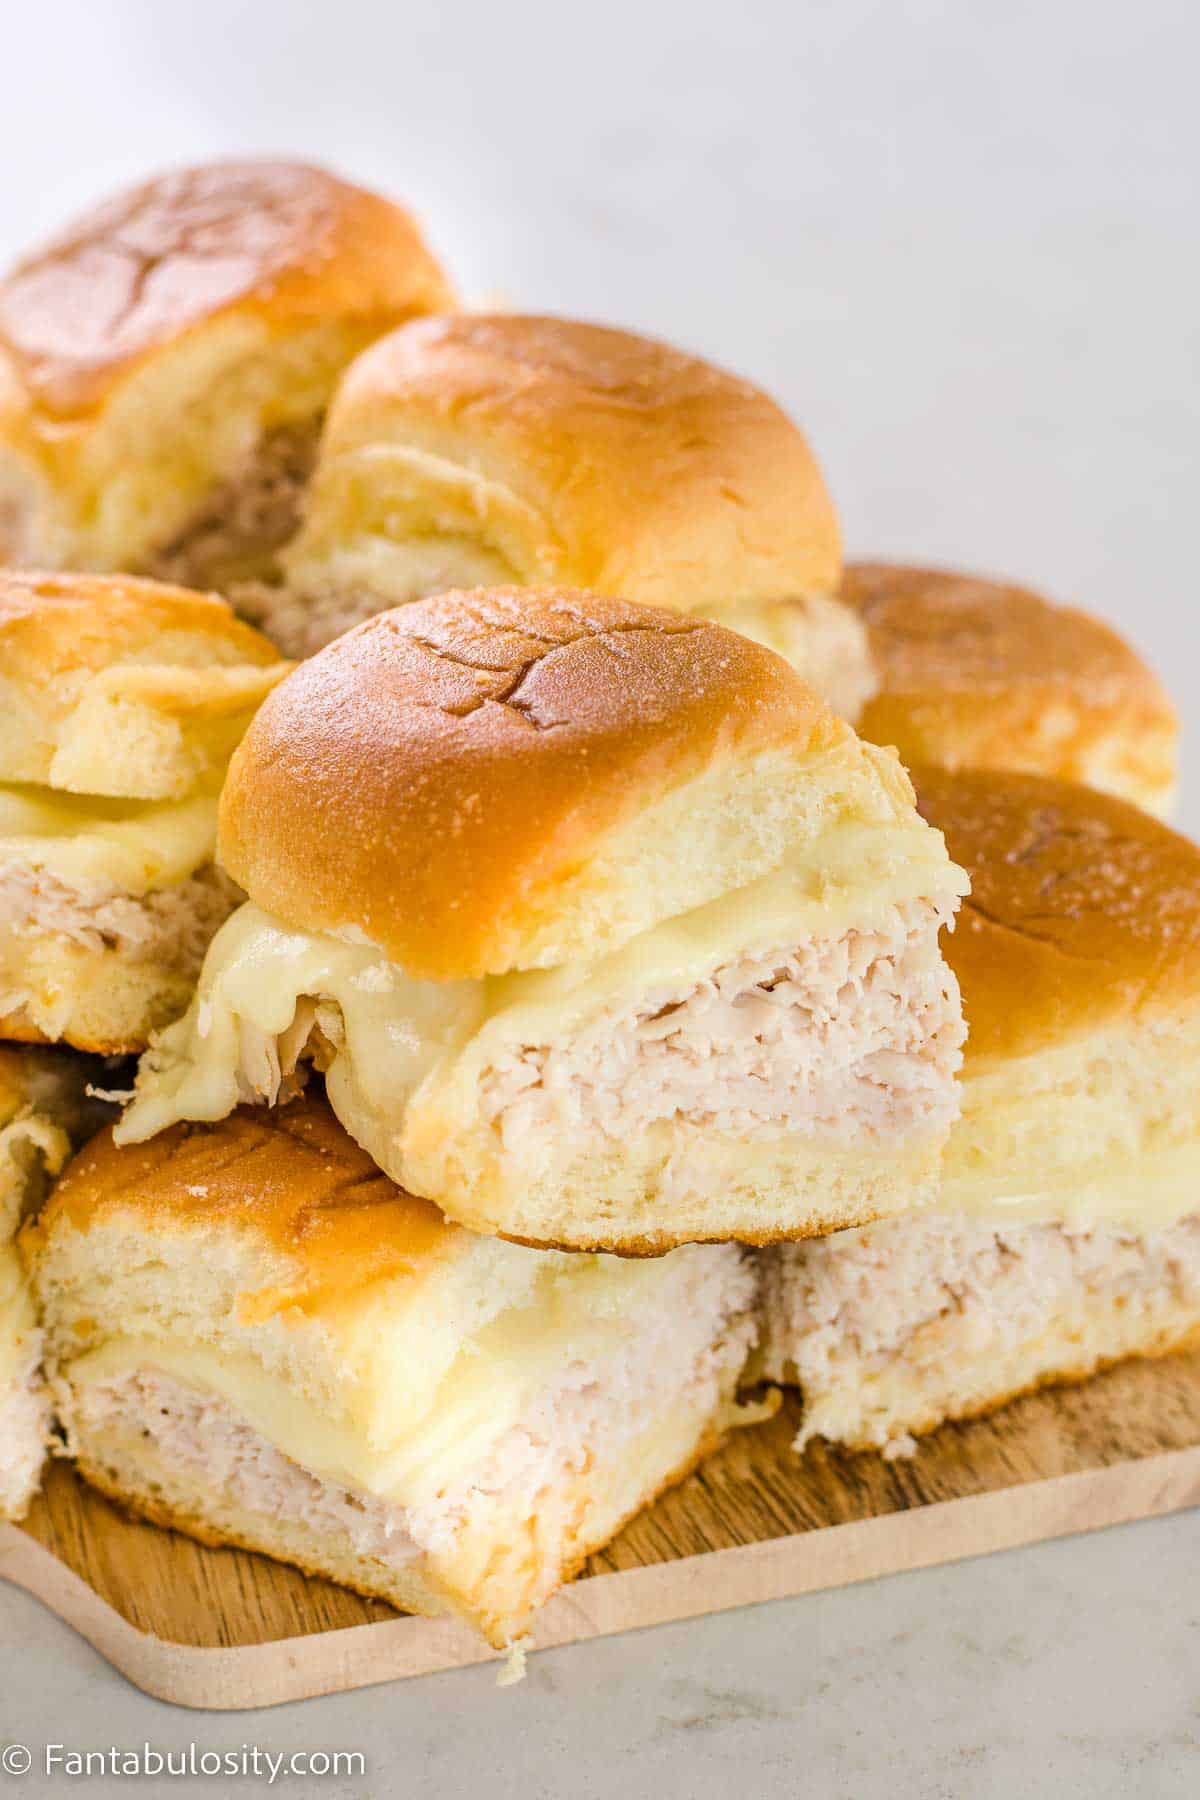
    Turkey Sliders are the perfect party appetizer recipe or game-day snack! These little sandwiches are easy to make, packed with flavor, and perfect for feeding a crowd.

    Stacked turkey sliders with melted cheese.

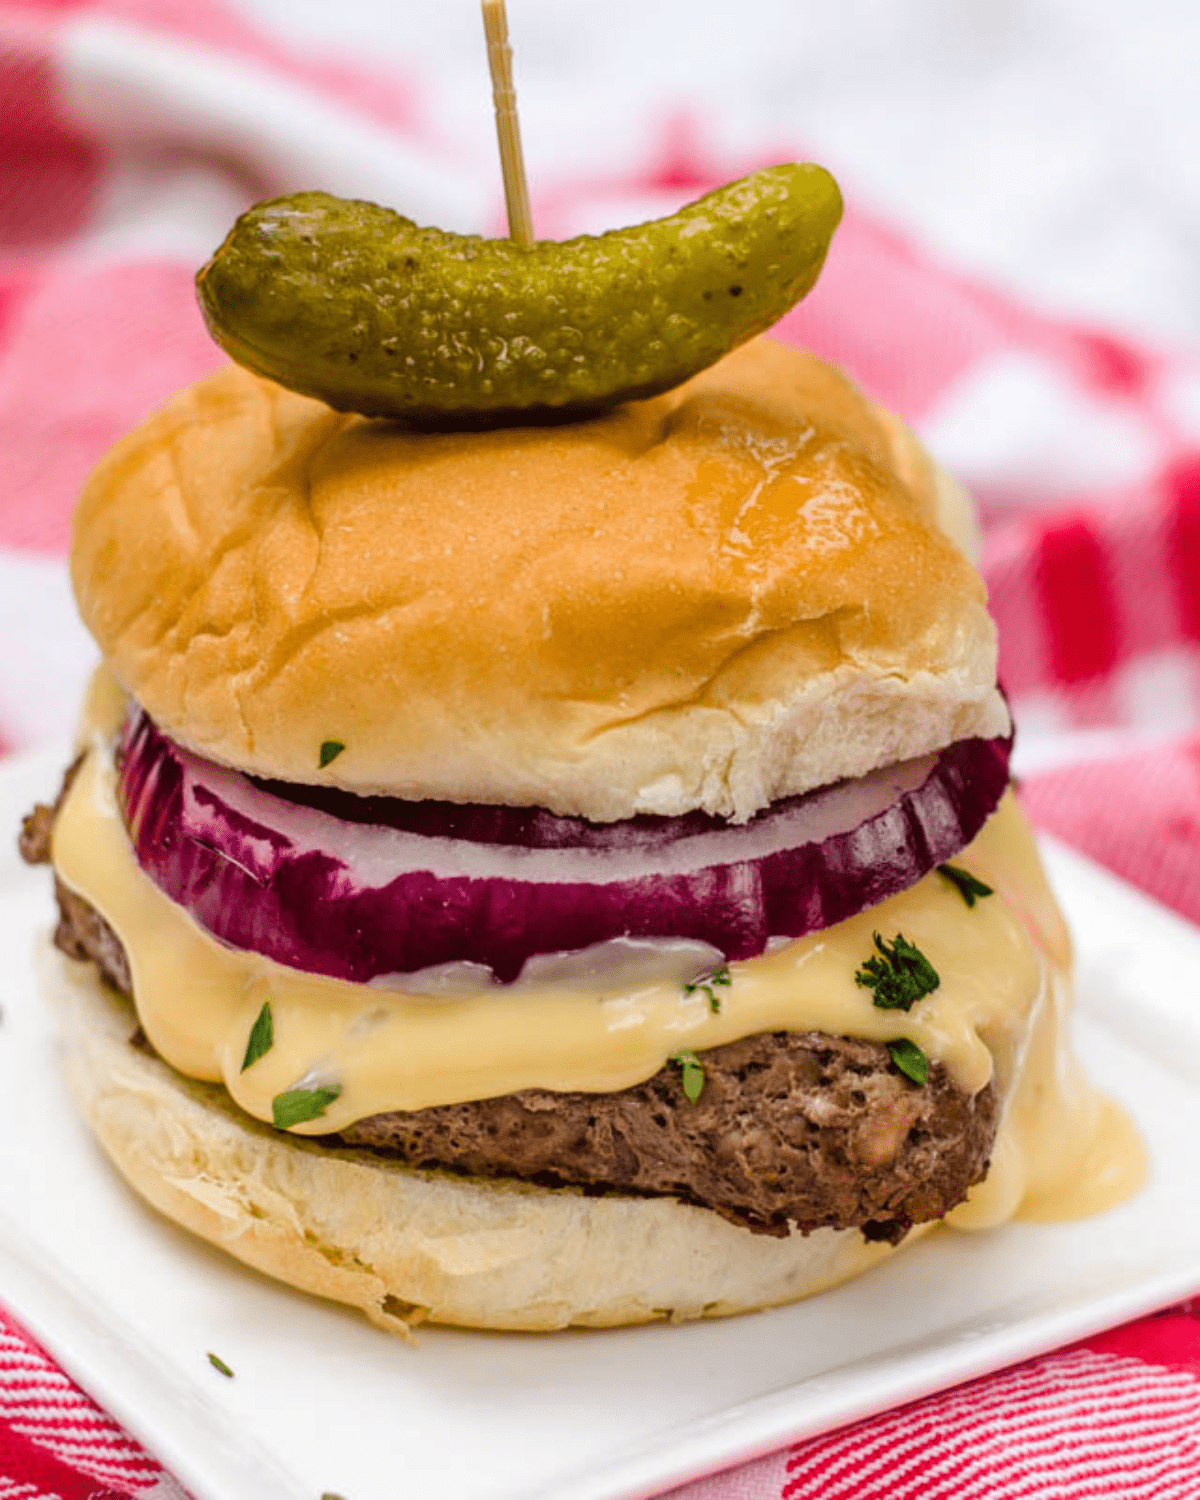
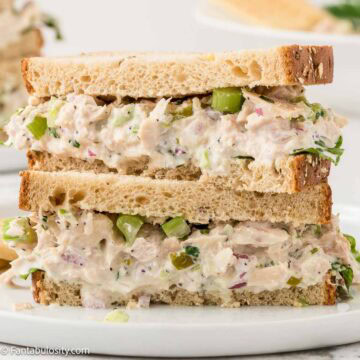
    With sliced turkey, a little garlic, and melty cheese, these sliders are sure to be a hit. Plus, they’re so simple to customize with your favorite toppings and condiments, a lot like our popular cheeseburger sliders recipe that so many have fallen in love with! Next, you’ll want to try these roast beef sliders or this corned beef sliders recipe, that are full of flavor.

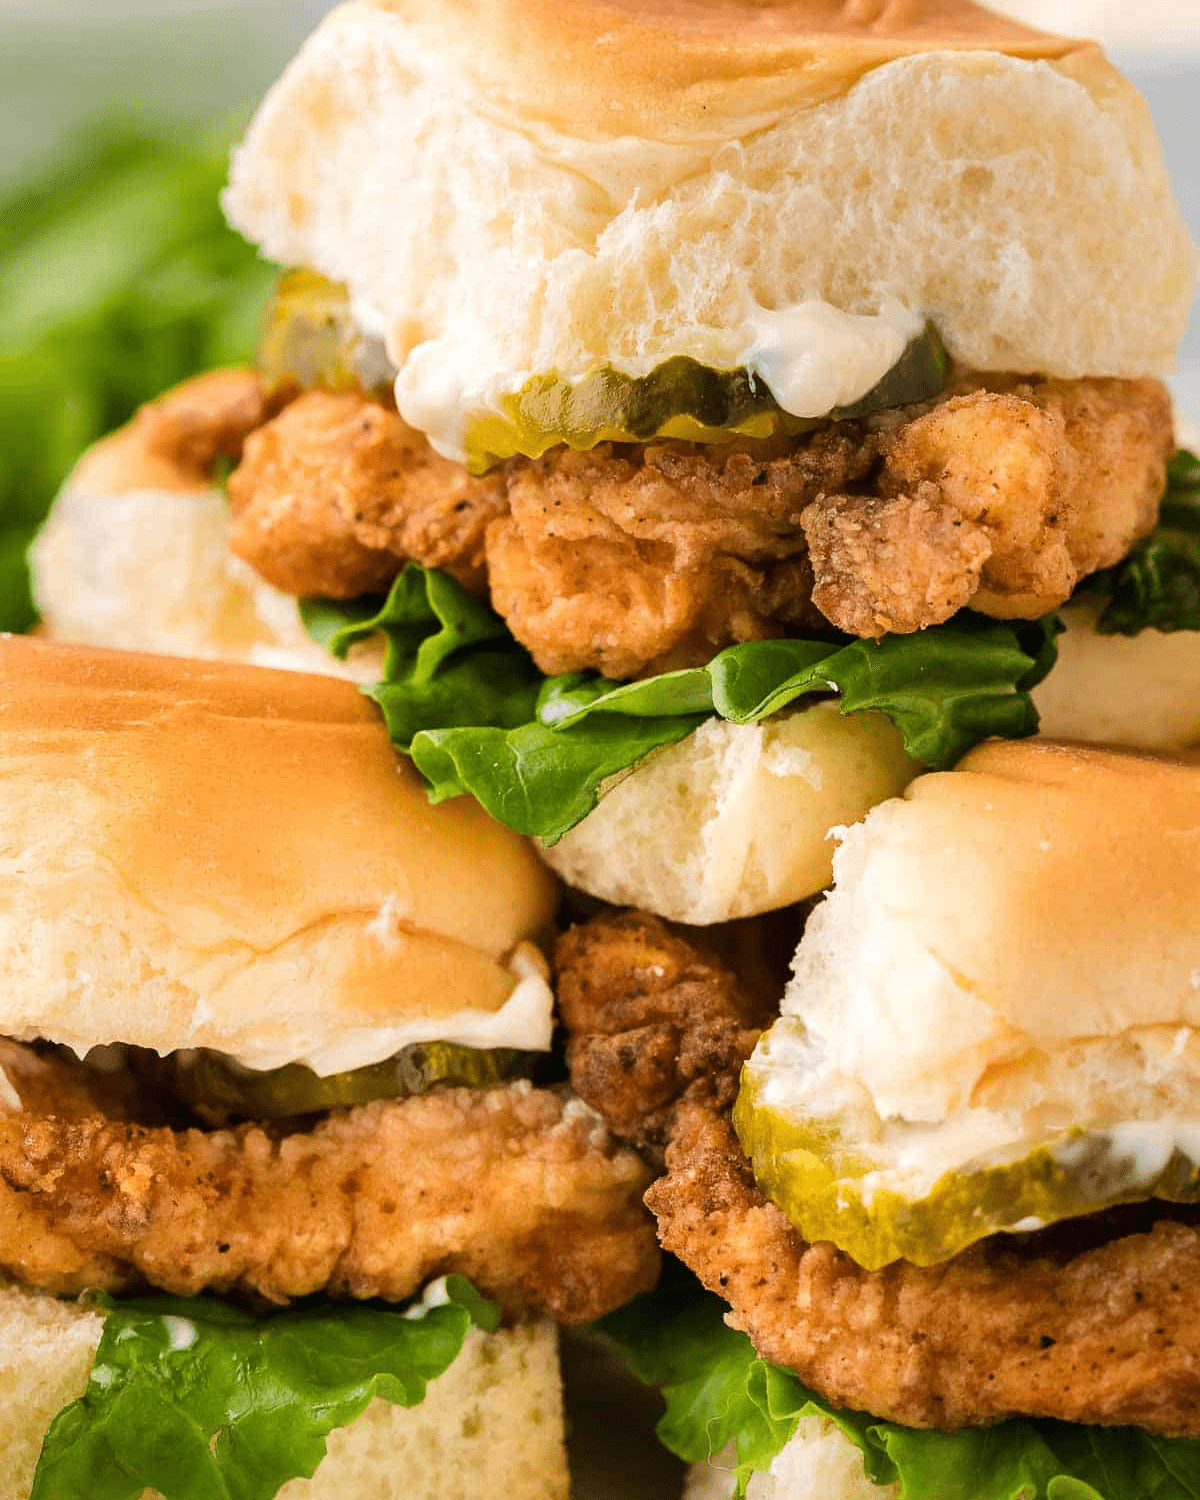
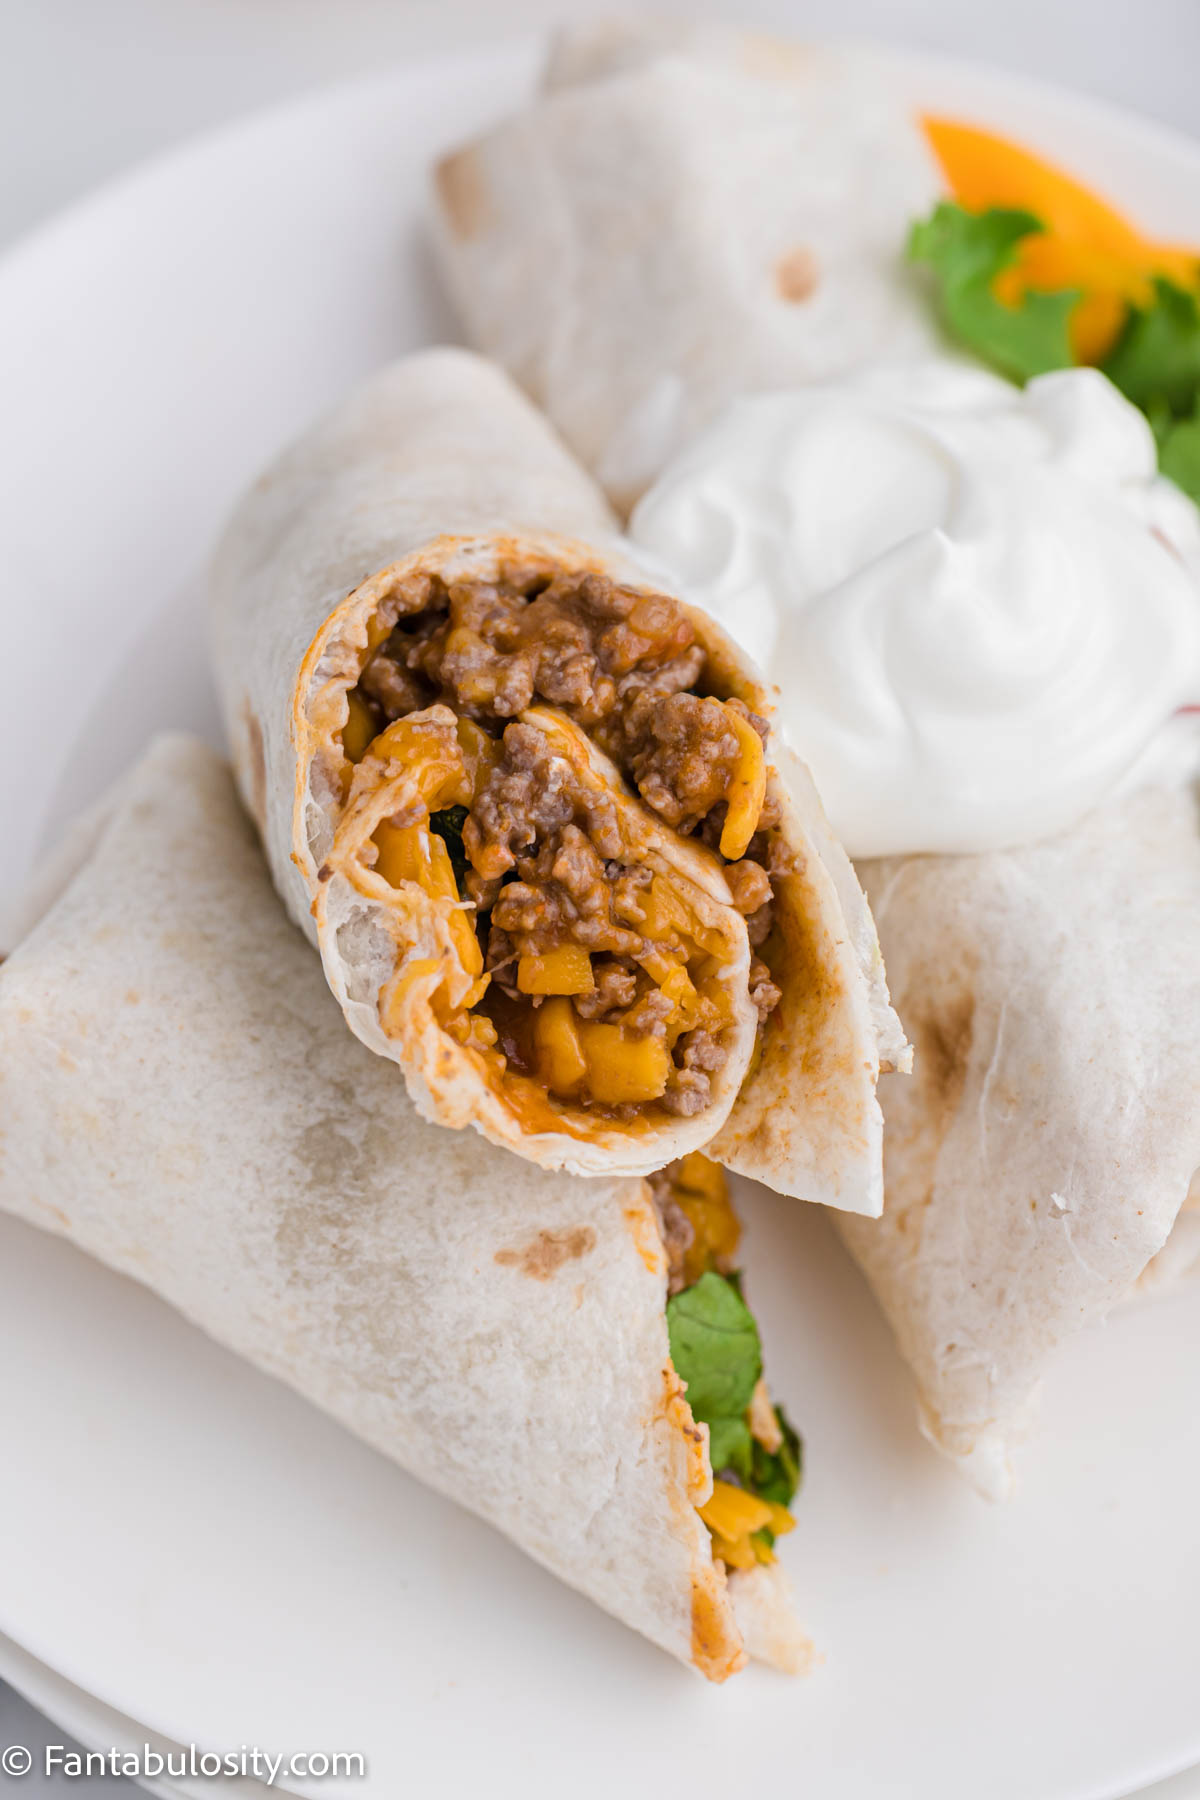
    Looking for more ideas to use up that pack of Hawaiian rolls? Why not try these Fried Chicken Sliders or something a little different with the Sloppy Joes Sliders?

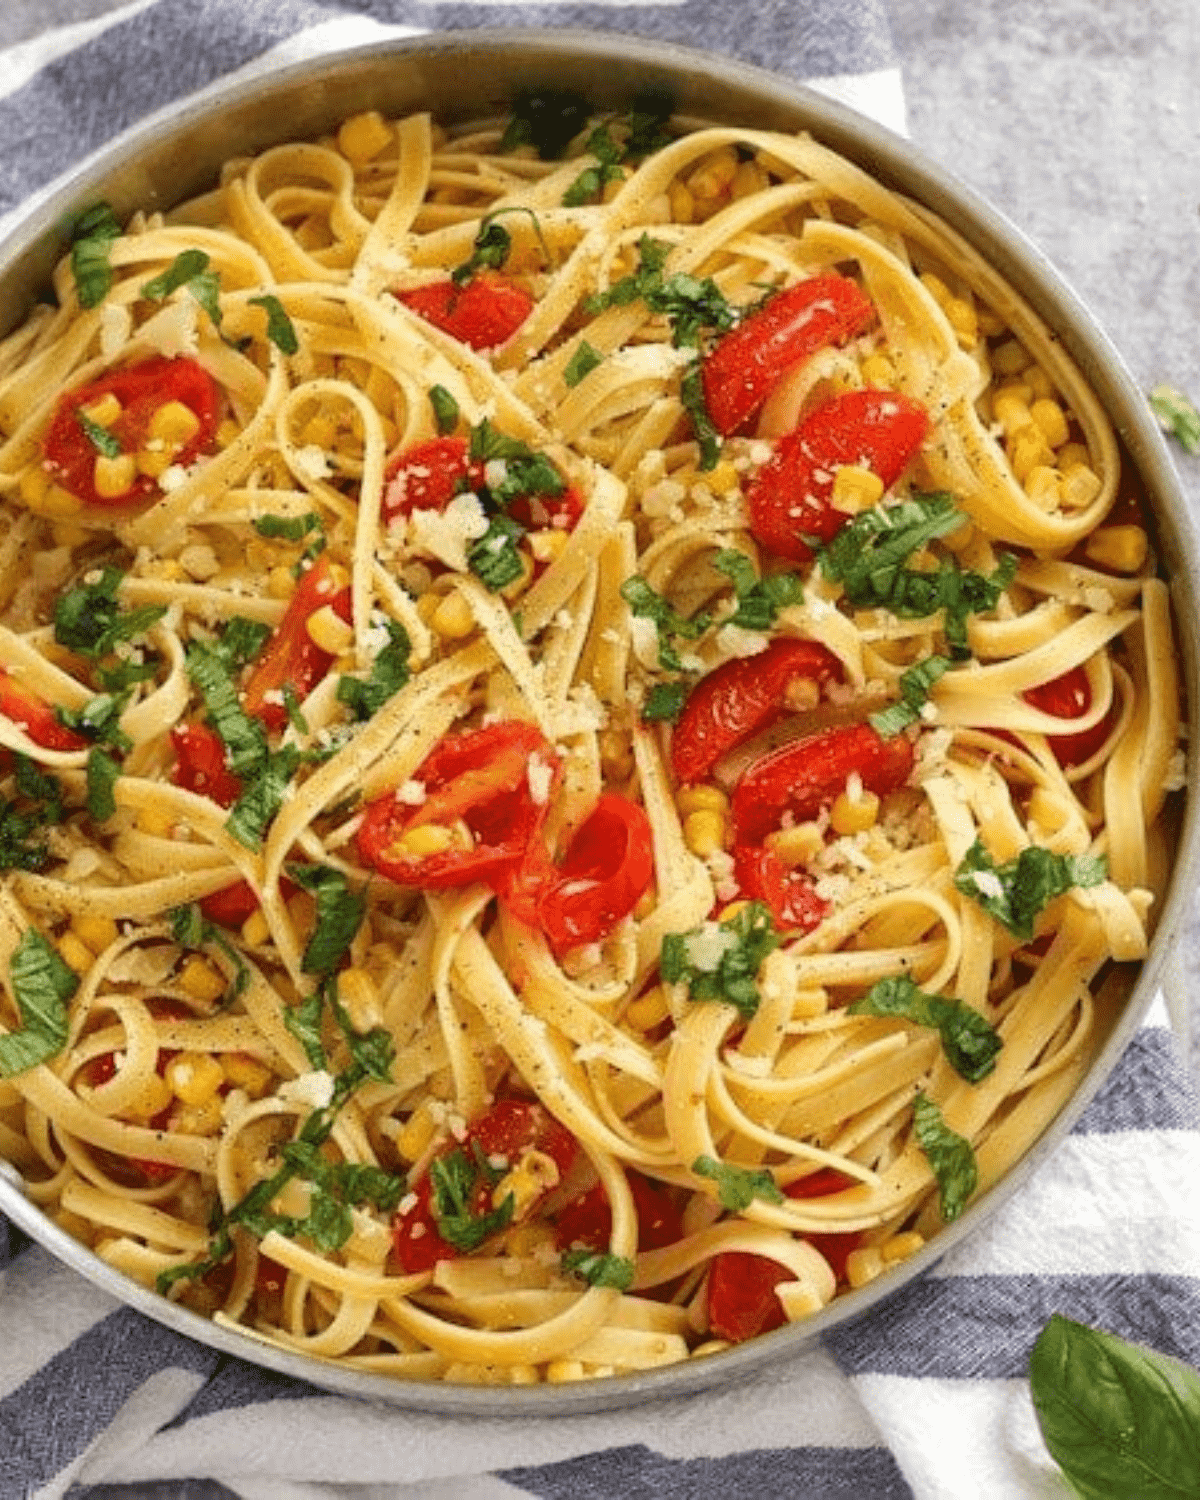
    Or, if you’re looking for a larger slider idea, using the bigger sliders, making these salmon sliders make more of a meal than a small appetizer slider.

    [feast_advanced_jump_to]

    Why This Recipe Works

    • It uses a few ingredients: With only 5 ingredients, this recipe uses items that you may even have on hand.
    • Great leftovers recipe: Use up leftover turkey or whatever cheese you have in the refrigerator, as long as it melts well
    • Ready in 30 minutes: This is a simple recipe to make that takes around 30 minutes so ideal when you don’t have a lot of time.

    Ingredients Needed

    I’ve highlighted a couple of ingredients with some relevant notes. Aside from this, the ingredients needed are pretty basic.

    Ingredients labeled, sitting on counter.
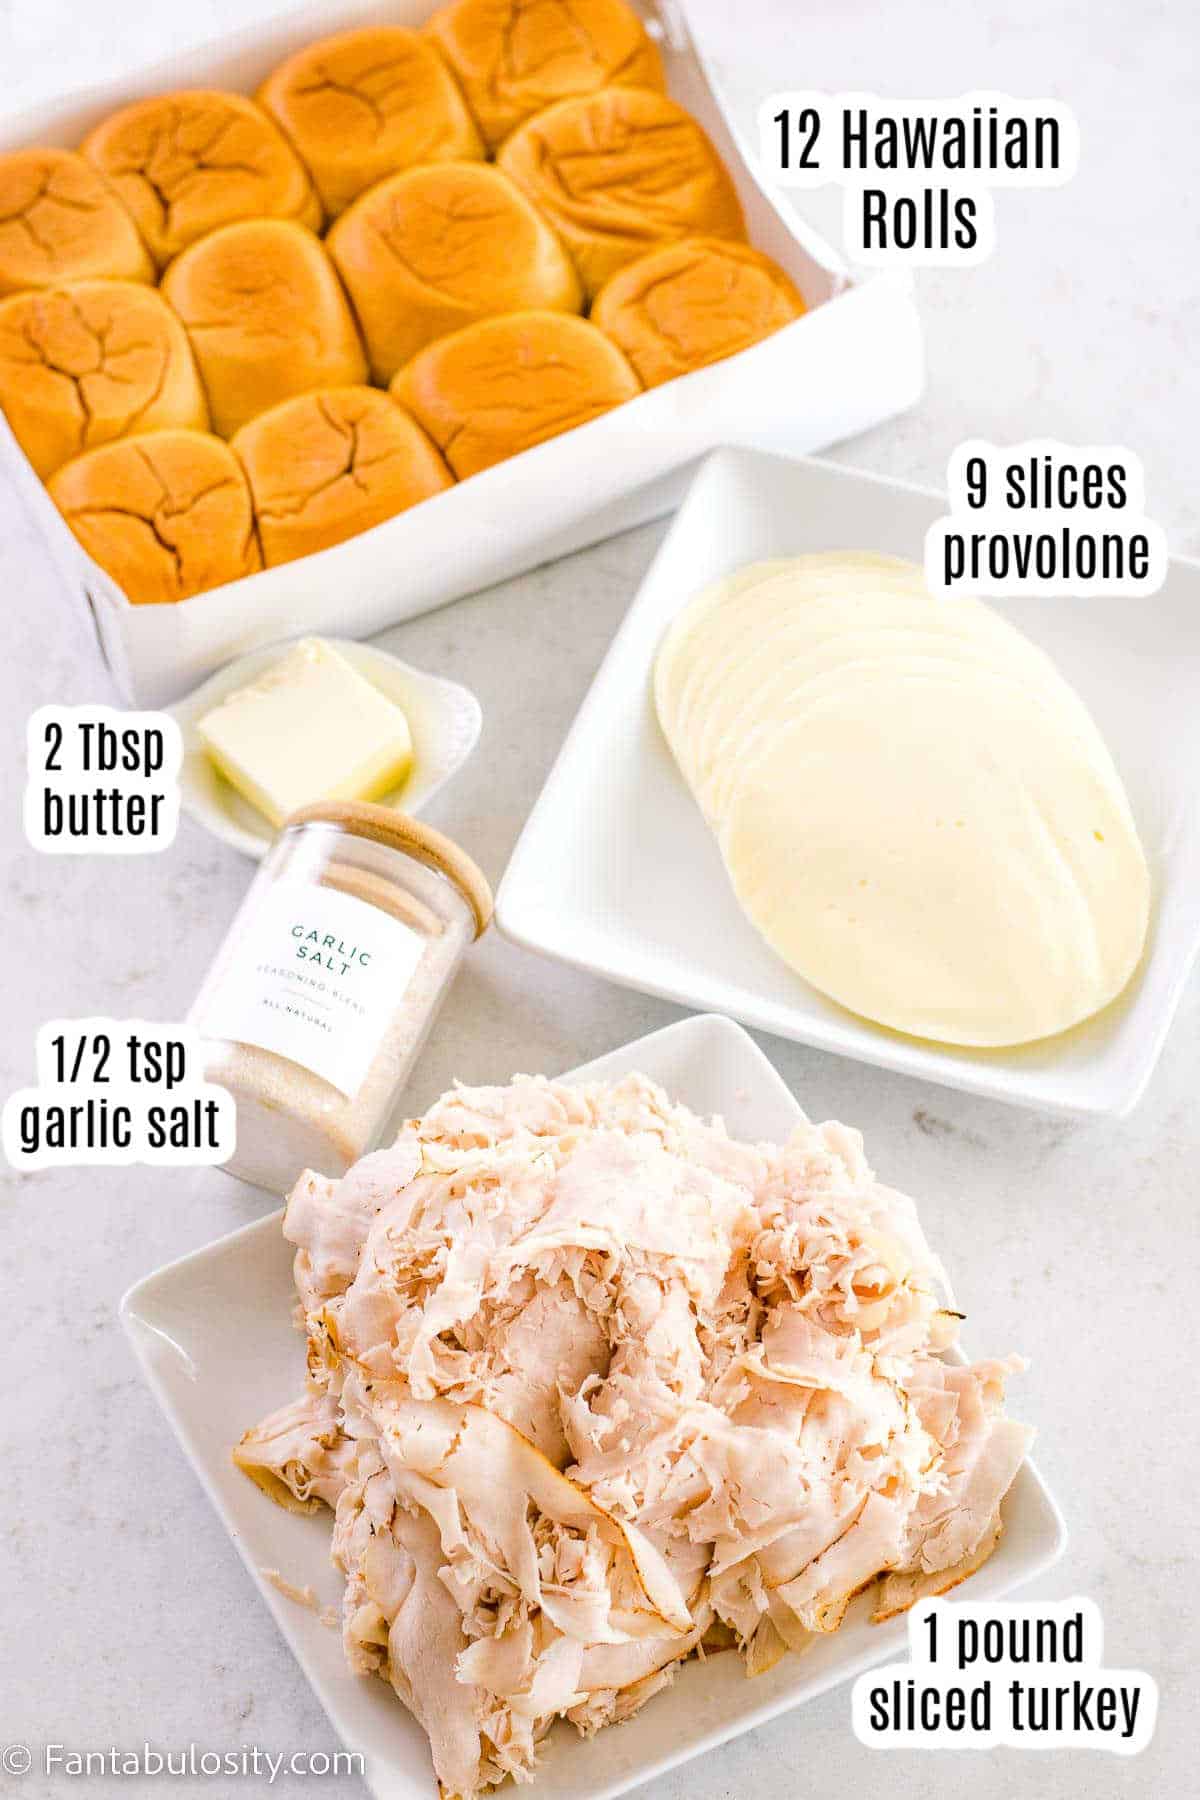
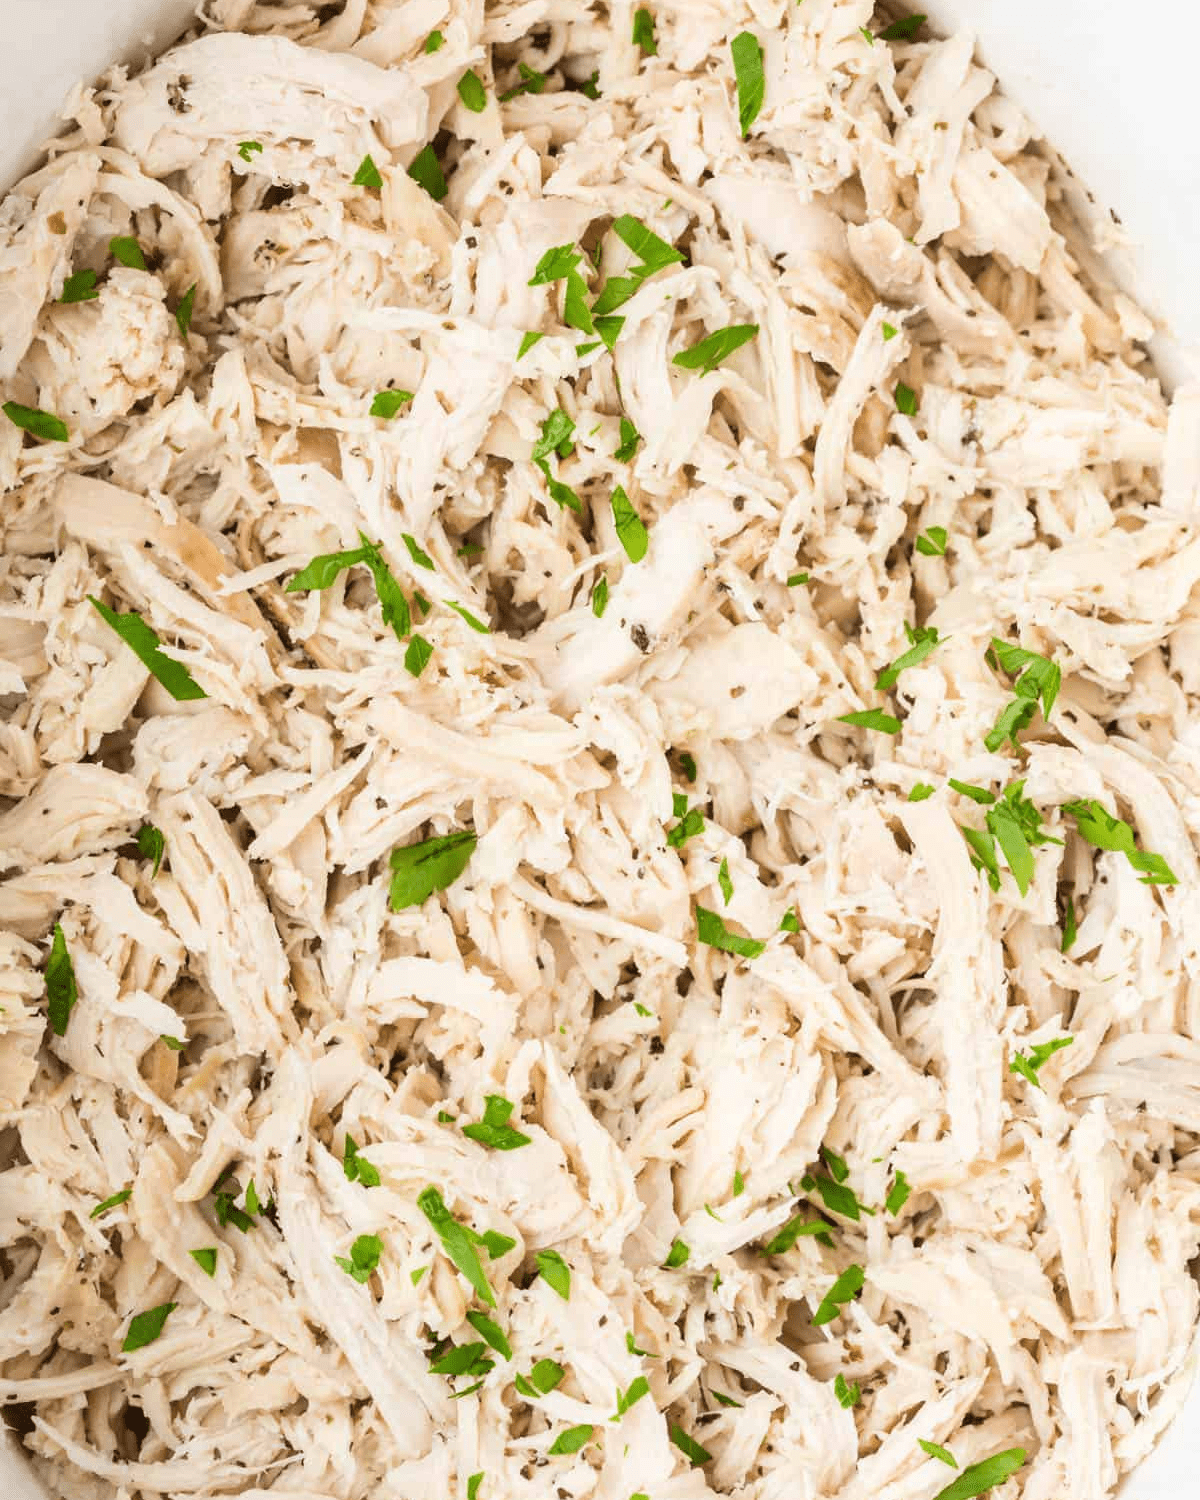
    • Turkey – We use deli turkey for this recipe because it was sliced really thinly and so heated up well.
    • Cheese – Provolone sliced cheese is perfect for sliders because they melt nicely.
    • Garlic salt – This adds more flavor to the rolls.

    Substitutions

    Sometimes substitutions are necessary because of ingredients that are unavailable or needed for dietary restrictions. Here are some suggestions that can help:

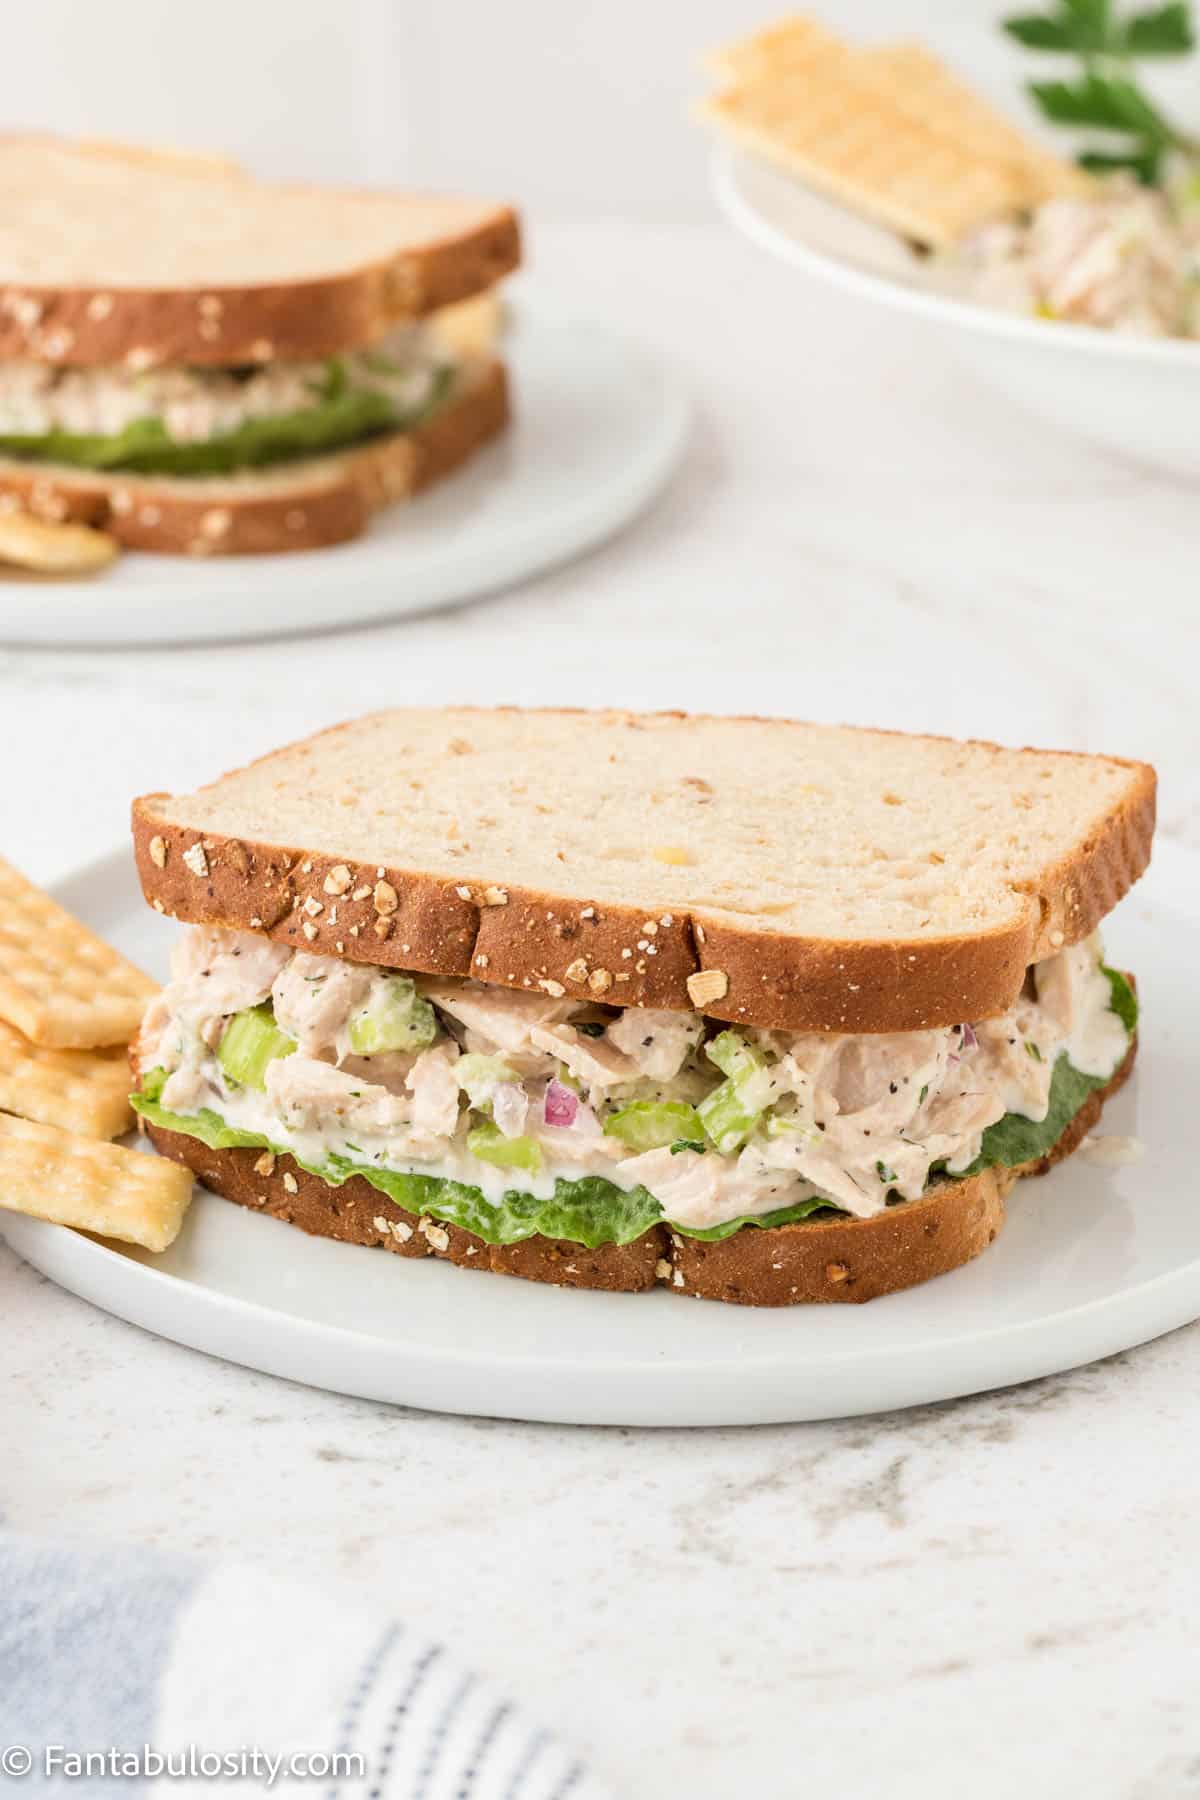
    • Turkey – if you have leftover turkey, you can use this in the recipe. Check out this recipe on Cranberry Turkey Sliders to get the best tips on how to make them. Or these pinwheel sandwiches are absolutely delicious to make with turkey!
    • Cheese – any good melting cheese will work well in sliders and bring their own taste. Monterey Jack and Cheddar are two great examples.

    Variations

    If you don’t have Hawaiian rolls for your sliders, there are a few other types of bread or buns that can work as a replacement. You can try using slider buns, dinner rolls, potato rolls, or even ciabatta bread or sliced baguette. Keep in mind that the texture and flavor may vary slightly depending on your choice of bread, so choose one that complements the flavors in your turkey slider recipe.

    How to Make Turkey Sliders

    This is a very simple recipe that only really has three steps to make. This means if you are looking for a simple but tasty dish, it is ideal.

    *Be sure to see the recipe card below for the full ingredients list & instructions!*

    Preheat oven to 350 degrees F.

    Steps 1-4 turkey sliders, showing how to build the meat and cheese on buns.

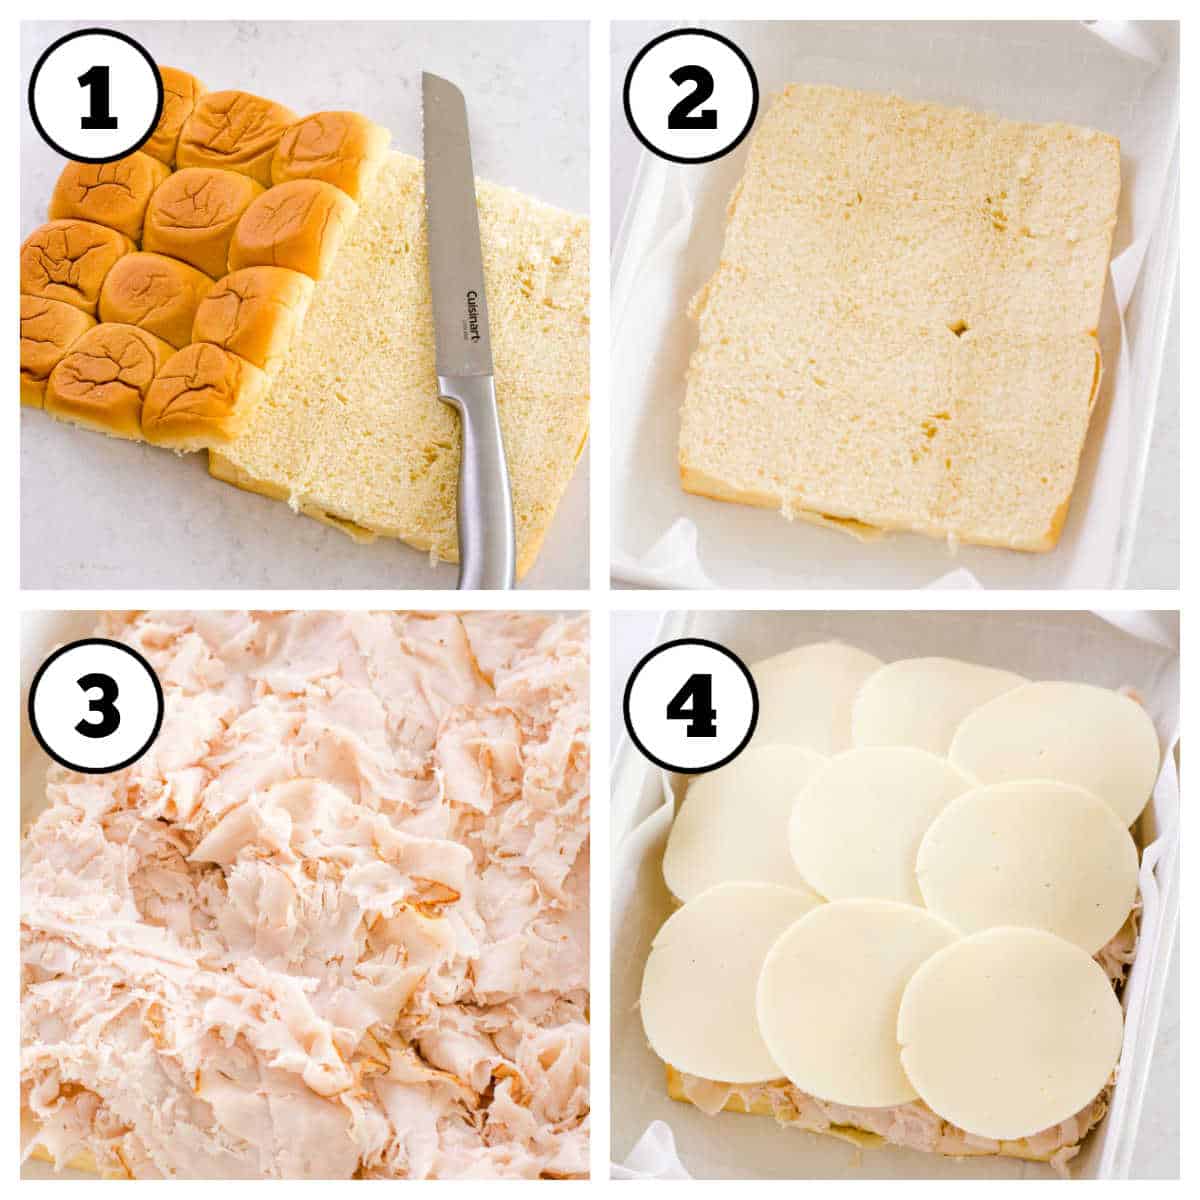
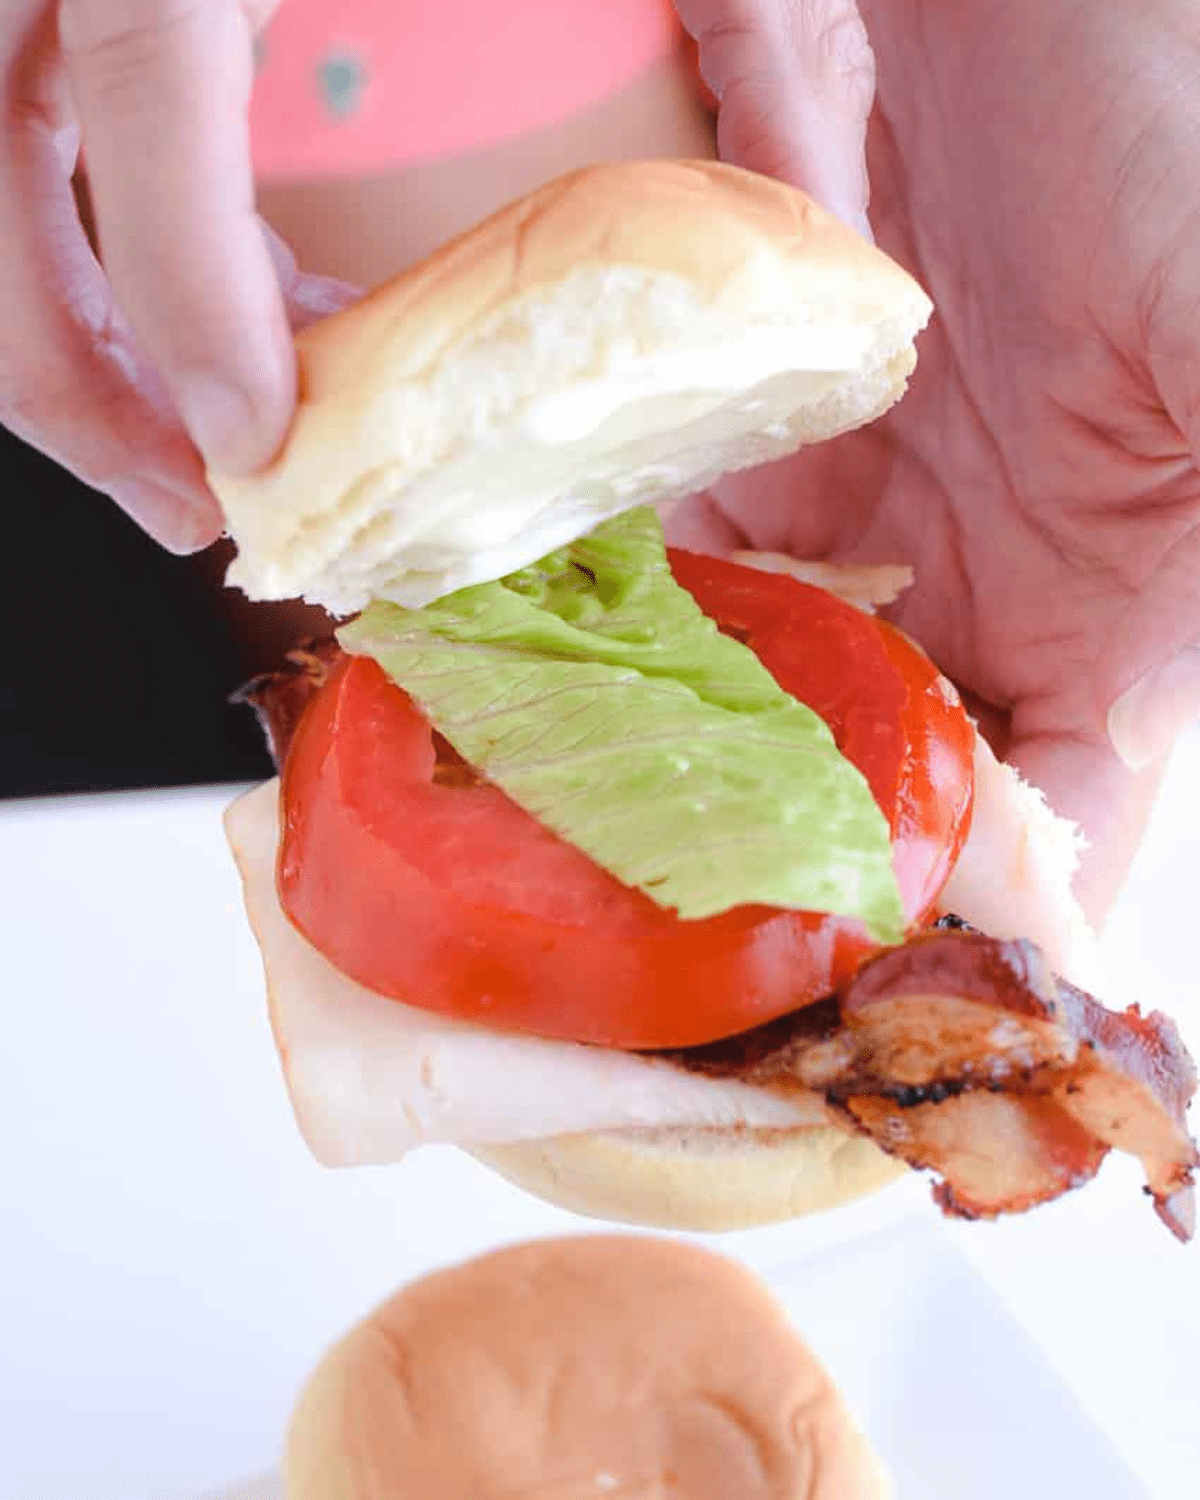
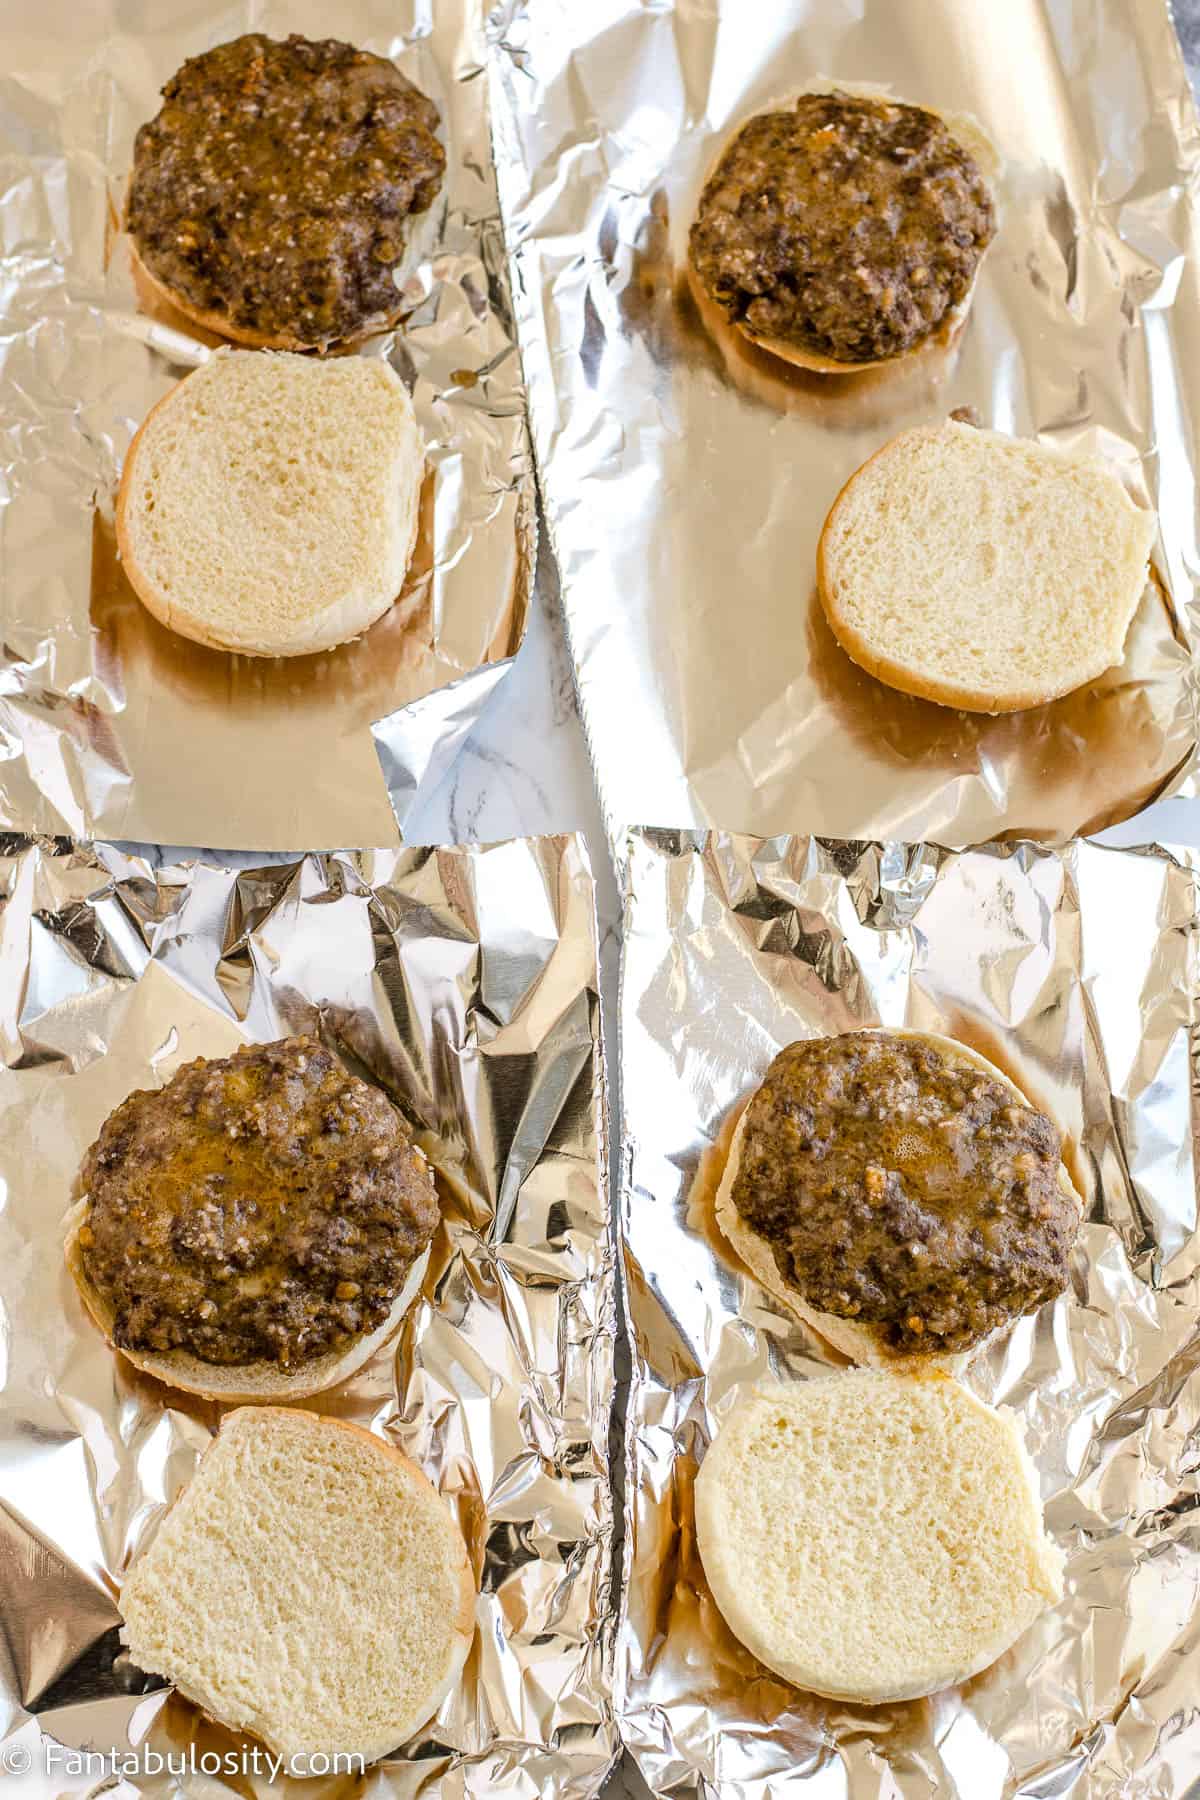
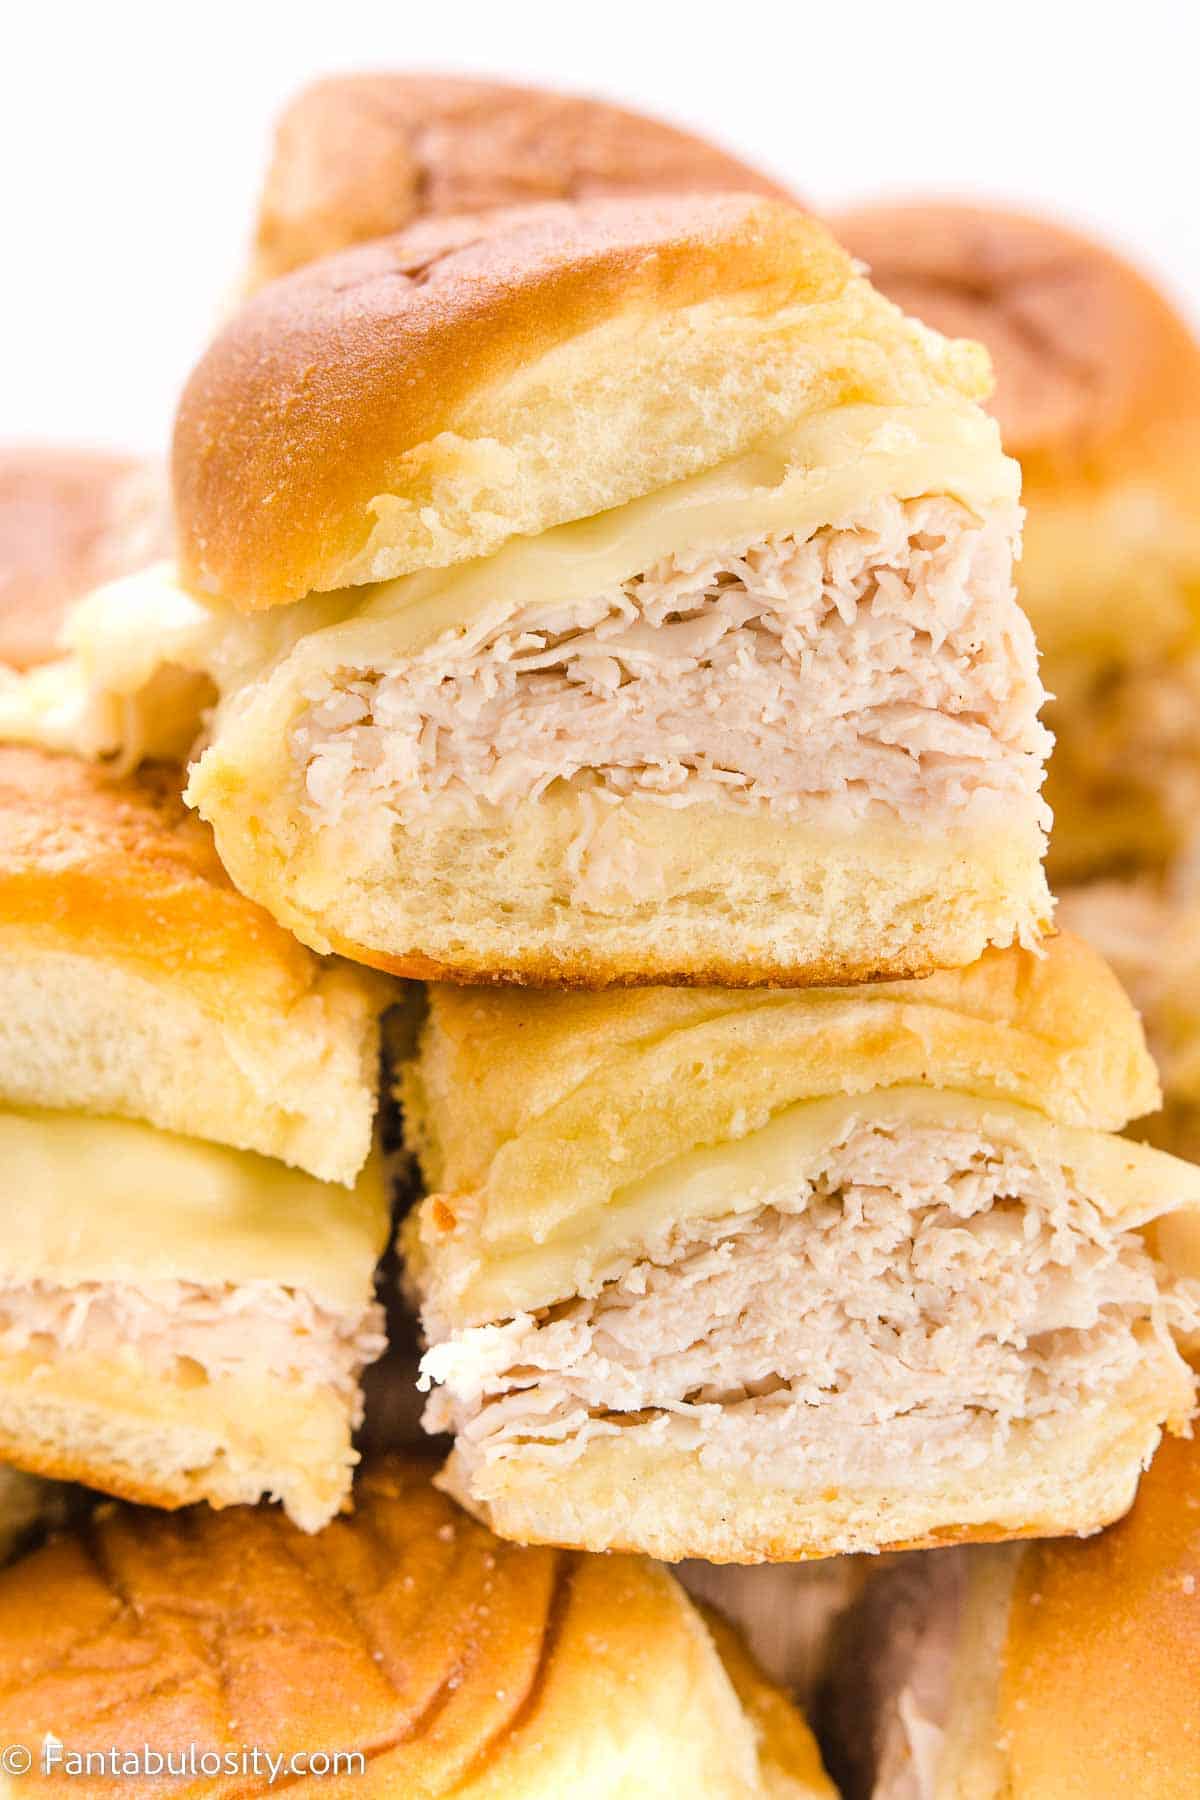
    STEP 1 and 2. Prepare the rolls. Slice the 12-pack of Hawaiian rolls in half, to where it makes a top bun and bottom buns. Place the bottom layer of buns in the prepared baking dish.

    STEP 3. Add turkey. Next, add a layer of sliced turkey to the buns, making sure to cover the entire layer of buns.

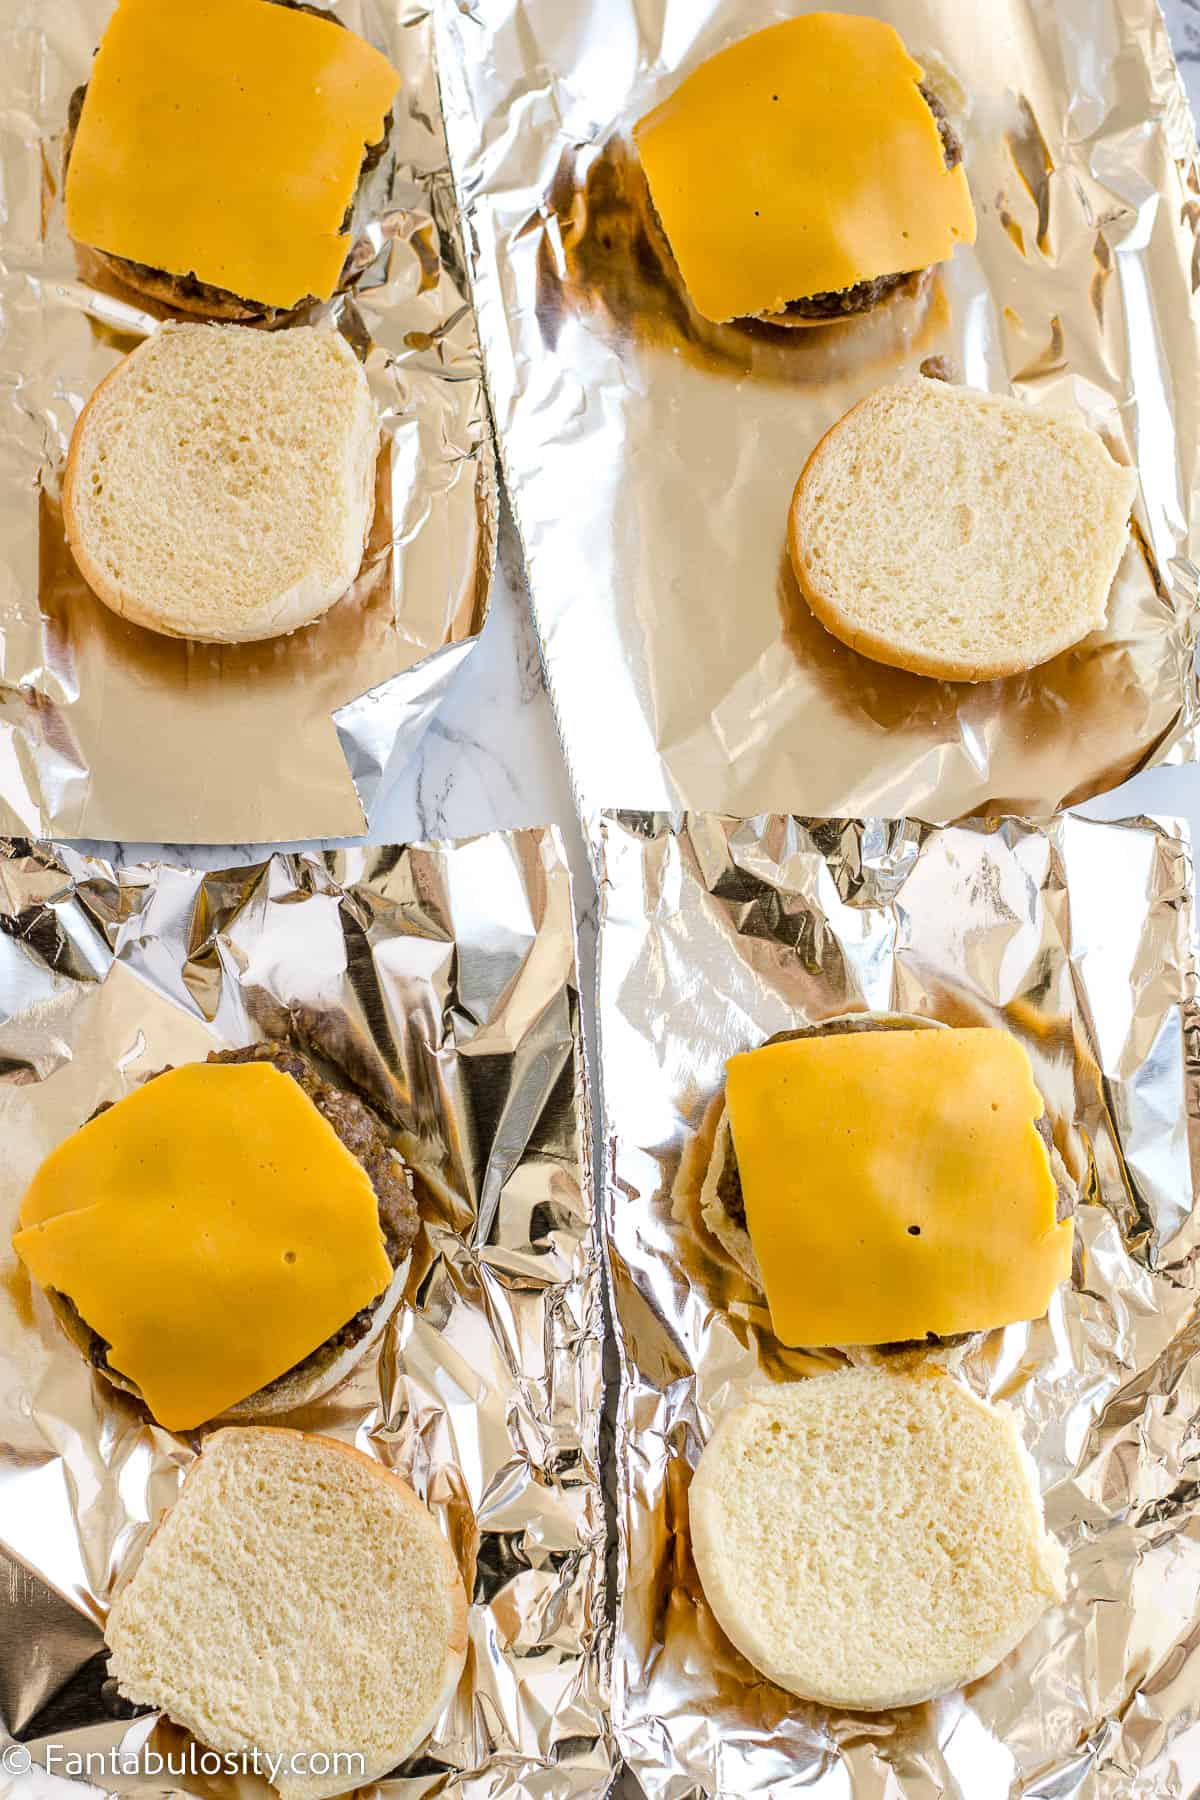
    STEP 4. Add cheese. Place cheese on top of the turkey, making sure to cover as much of the turkey as possible with each piece.

    Steps 5-8 on building turkey sliders, melting butter, brushing, covering with foil and baking.

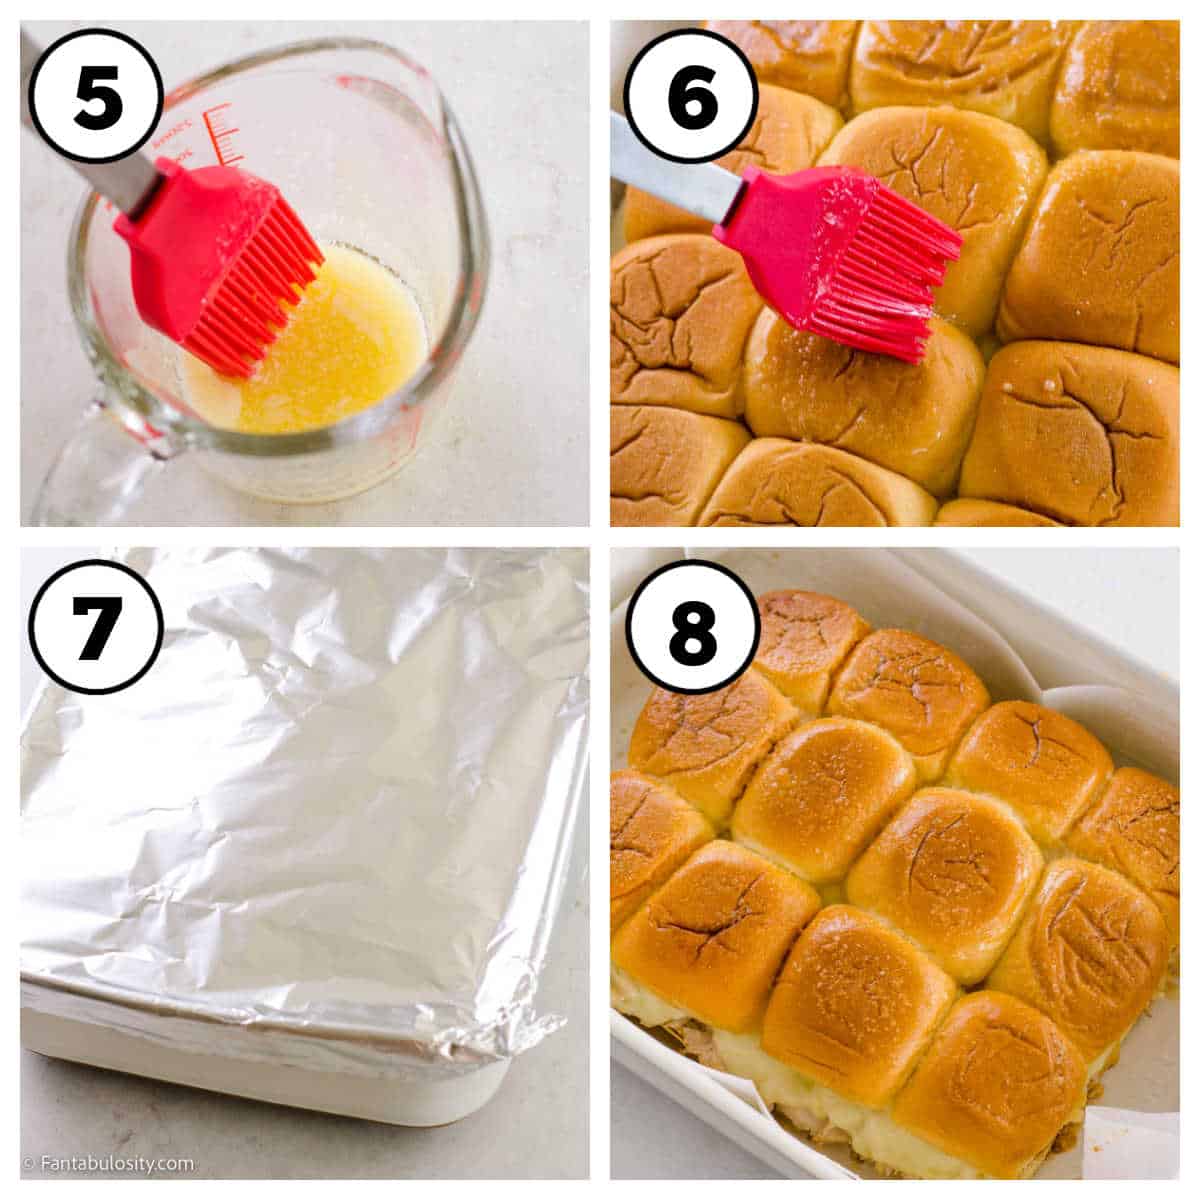
    STEP 5. Garlic butter. Melt butter and stir in garlic salt.

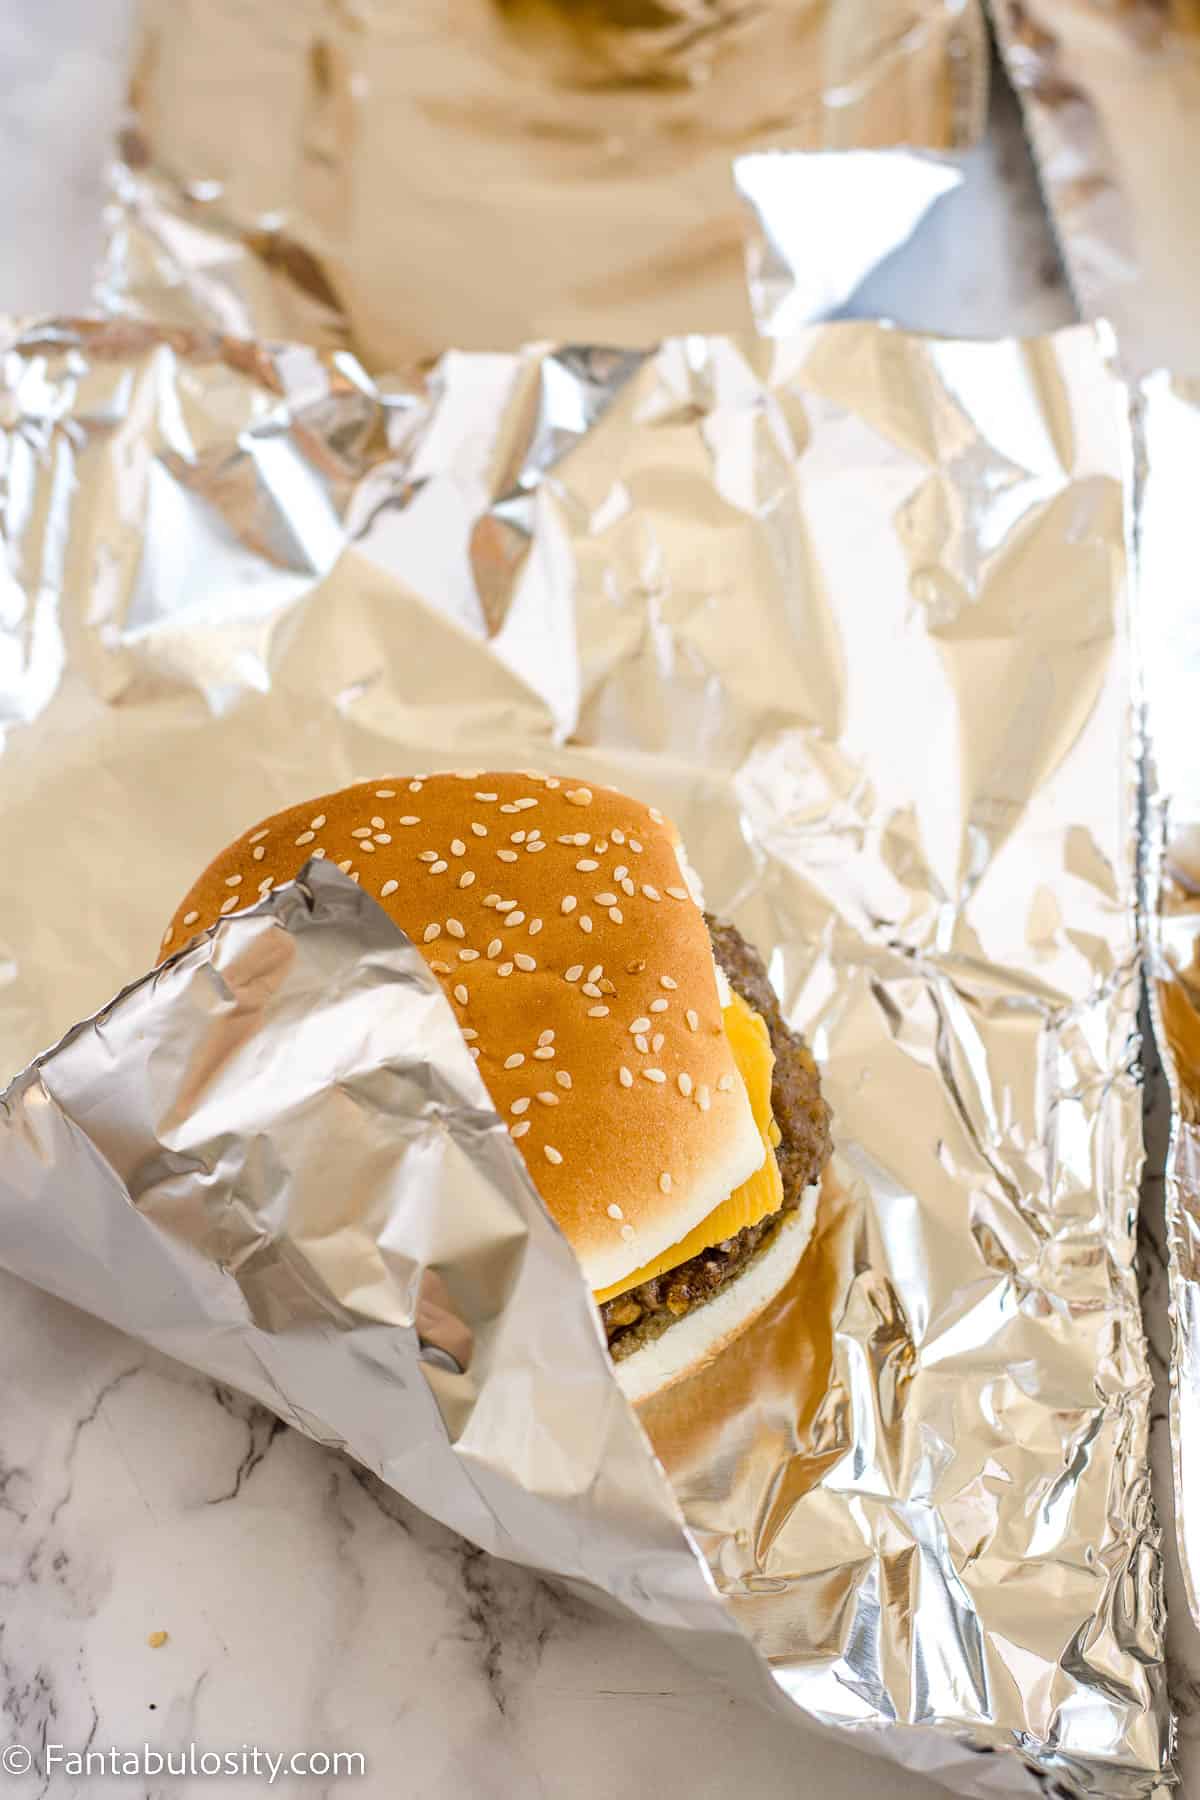
    STEP 6. Brush buns. Place the top buns on top of cheese and brush garlic butter on top of the rolls.

    TIP: You can save some of the garlic butter to brush on after they are baked.

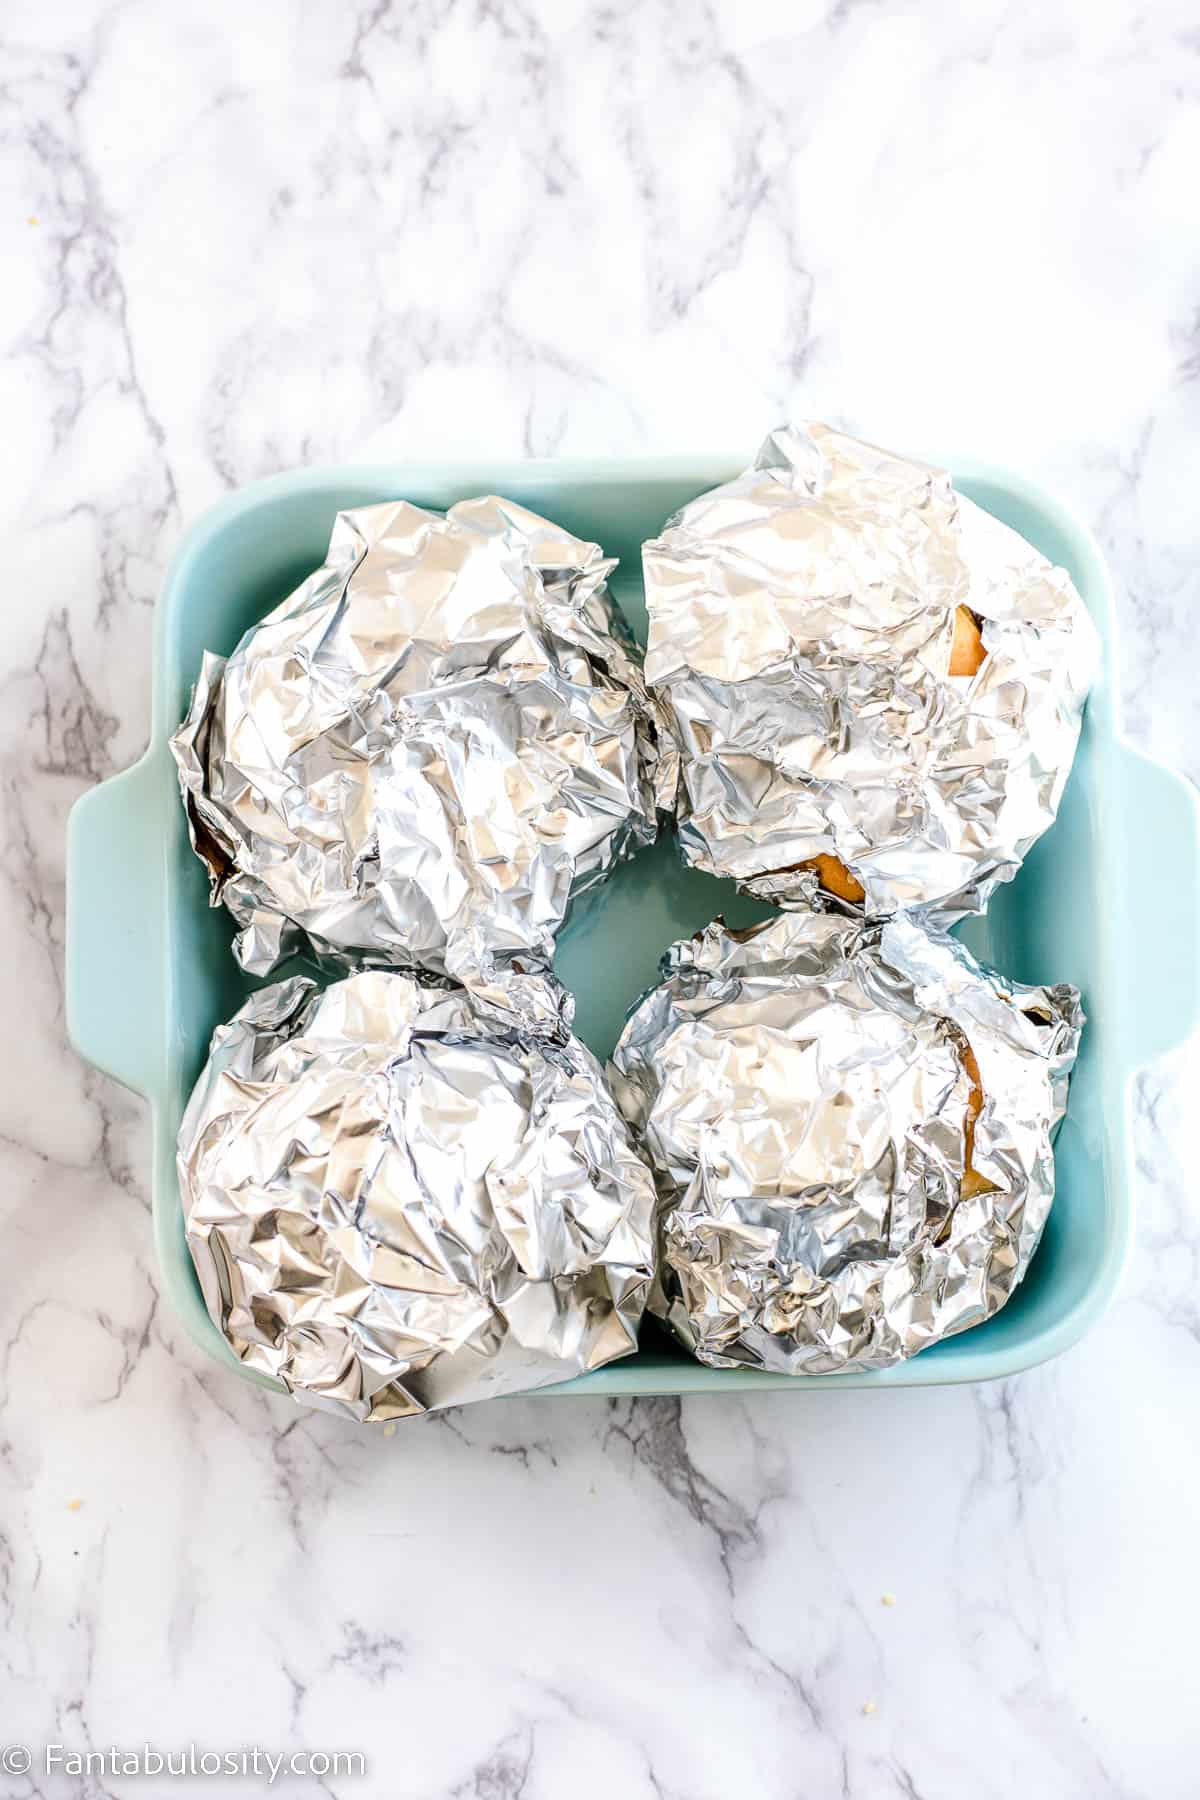
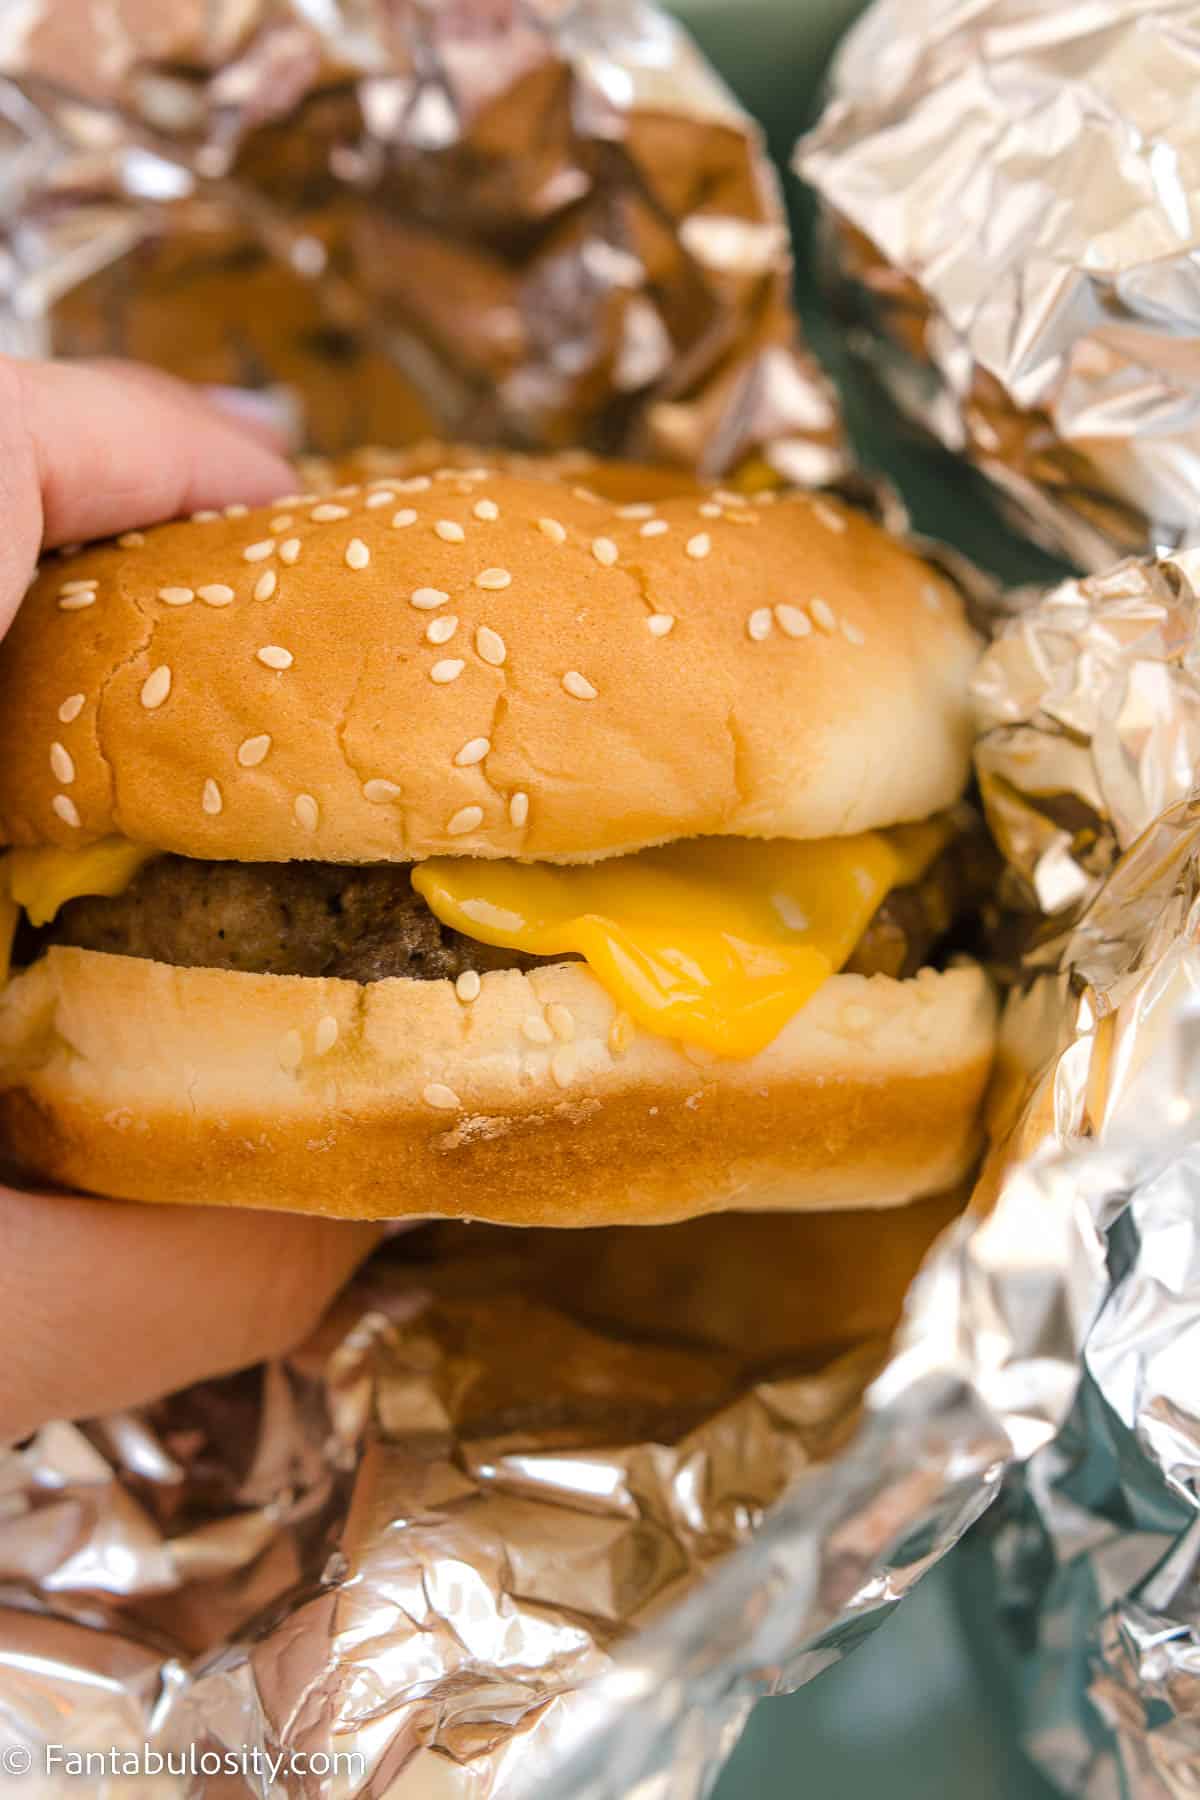
    STEP 7. Cook the sliders. Cover the rolls with foil and bake for 25 minutes at 350F.

    STEP 8. Final bake. Remove the foil and cook for another 5 minutes.

    Brush on the remaining garlic butter if you reserved any for this step.

    Turkey sliders on parchment paper.

    Recipe Pro Tips

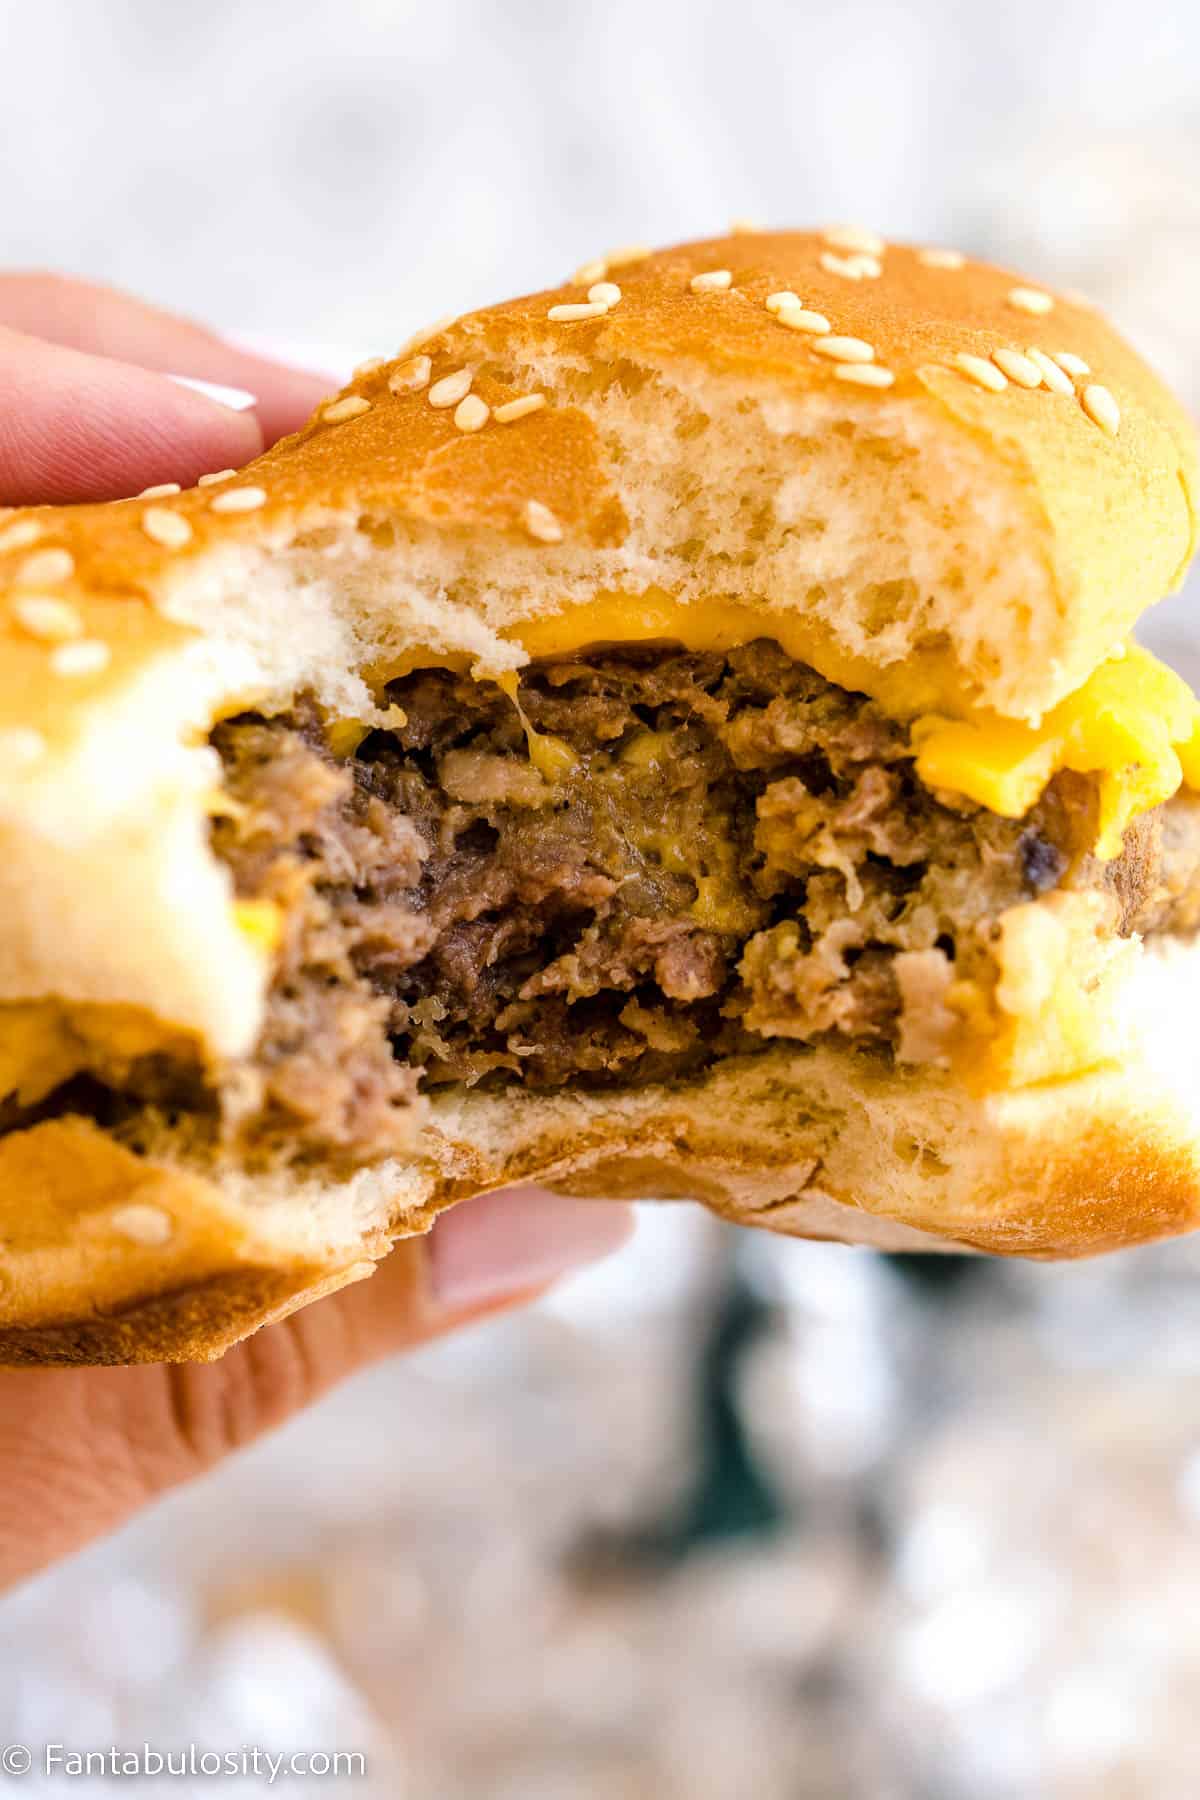
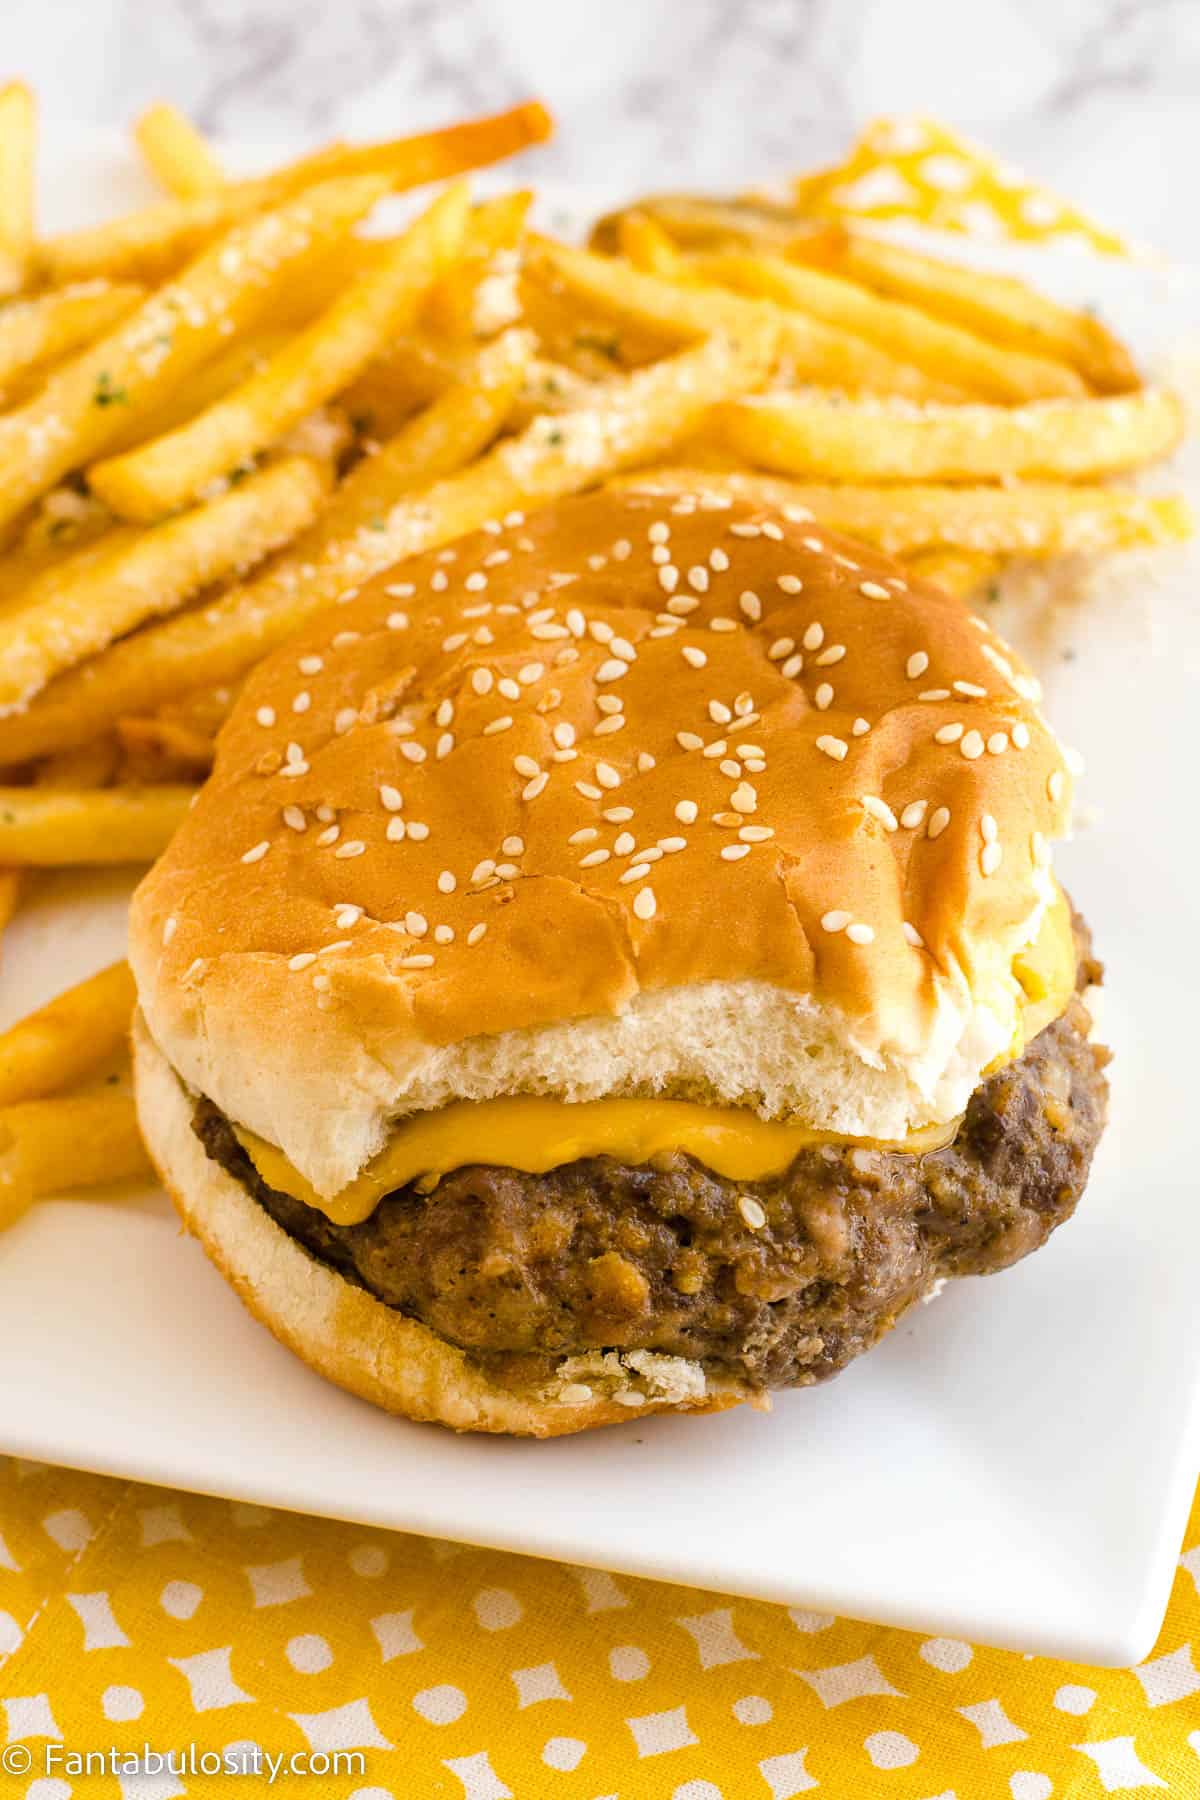
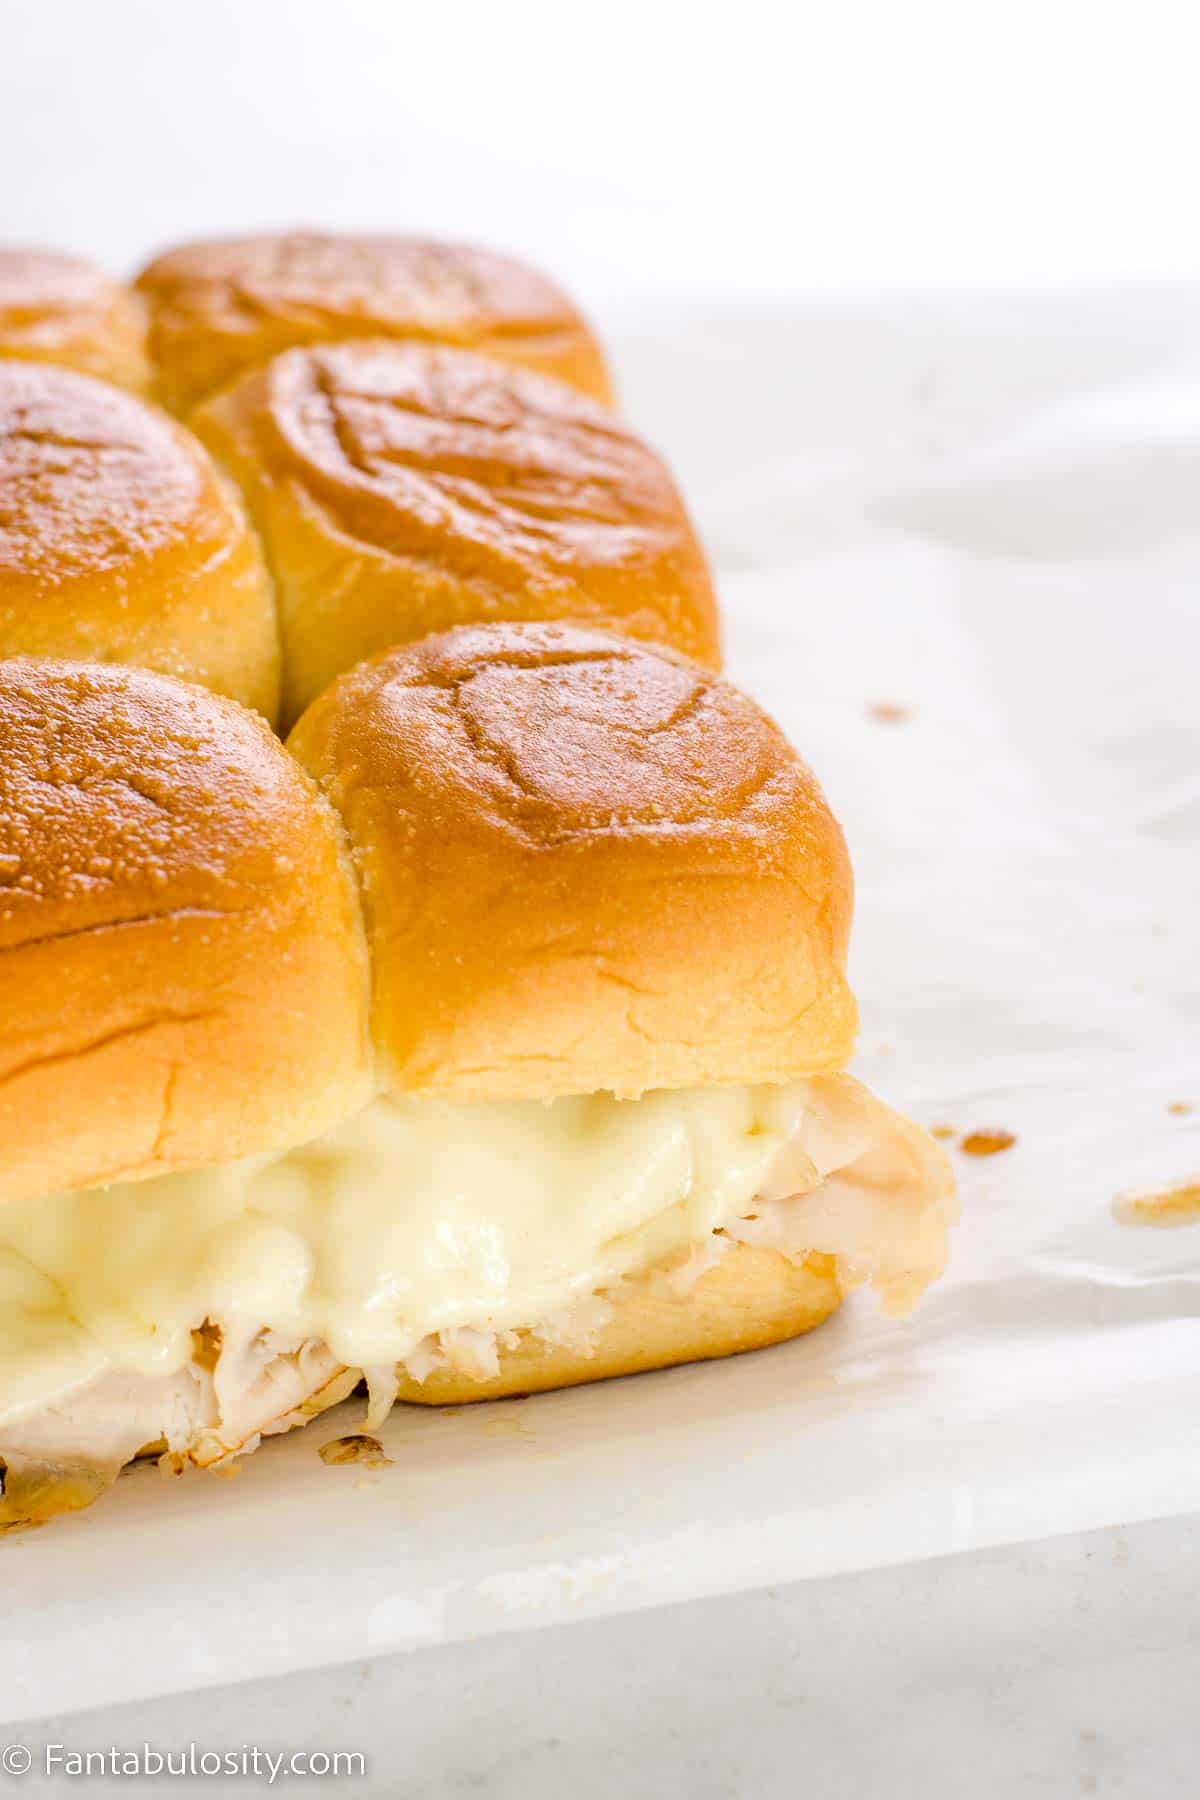
    • Sprinkle with parsley. Finish the recipe with a sprinkling of fresh chopped parsley before you serve.
    • Watch the melted cheese. The cheese will be hot when it comes out of the oven so make sure little fingers don’t get burned.
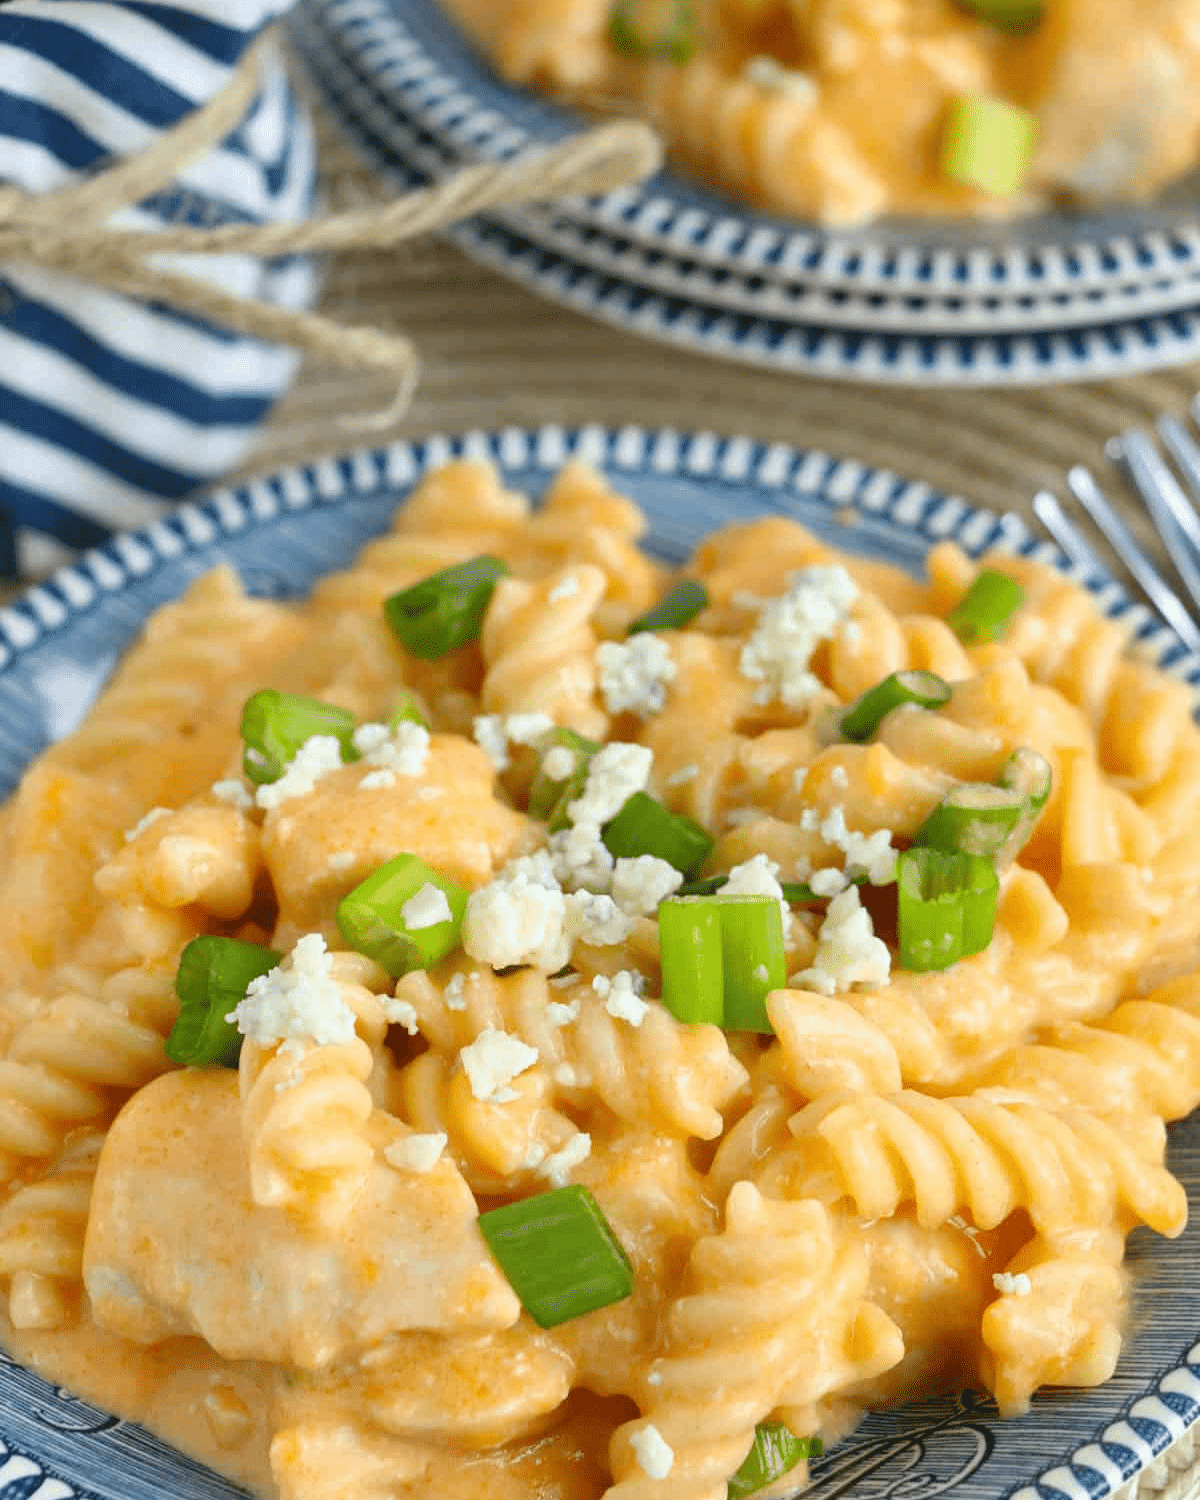
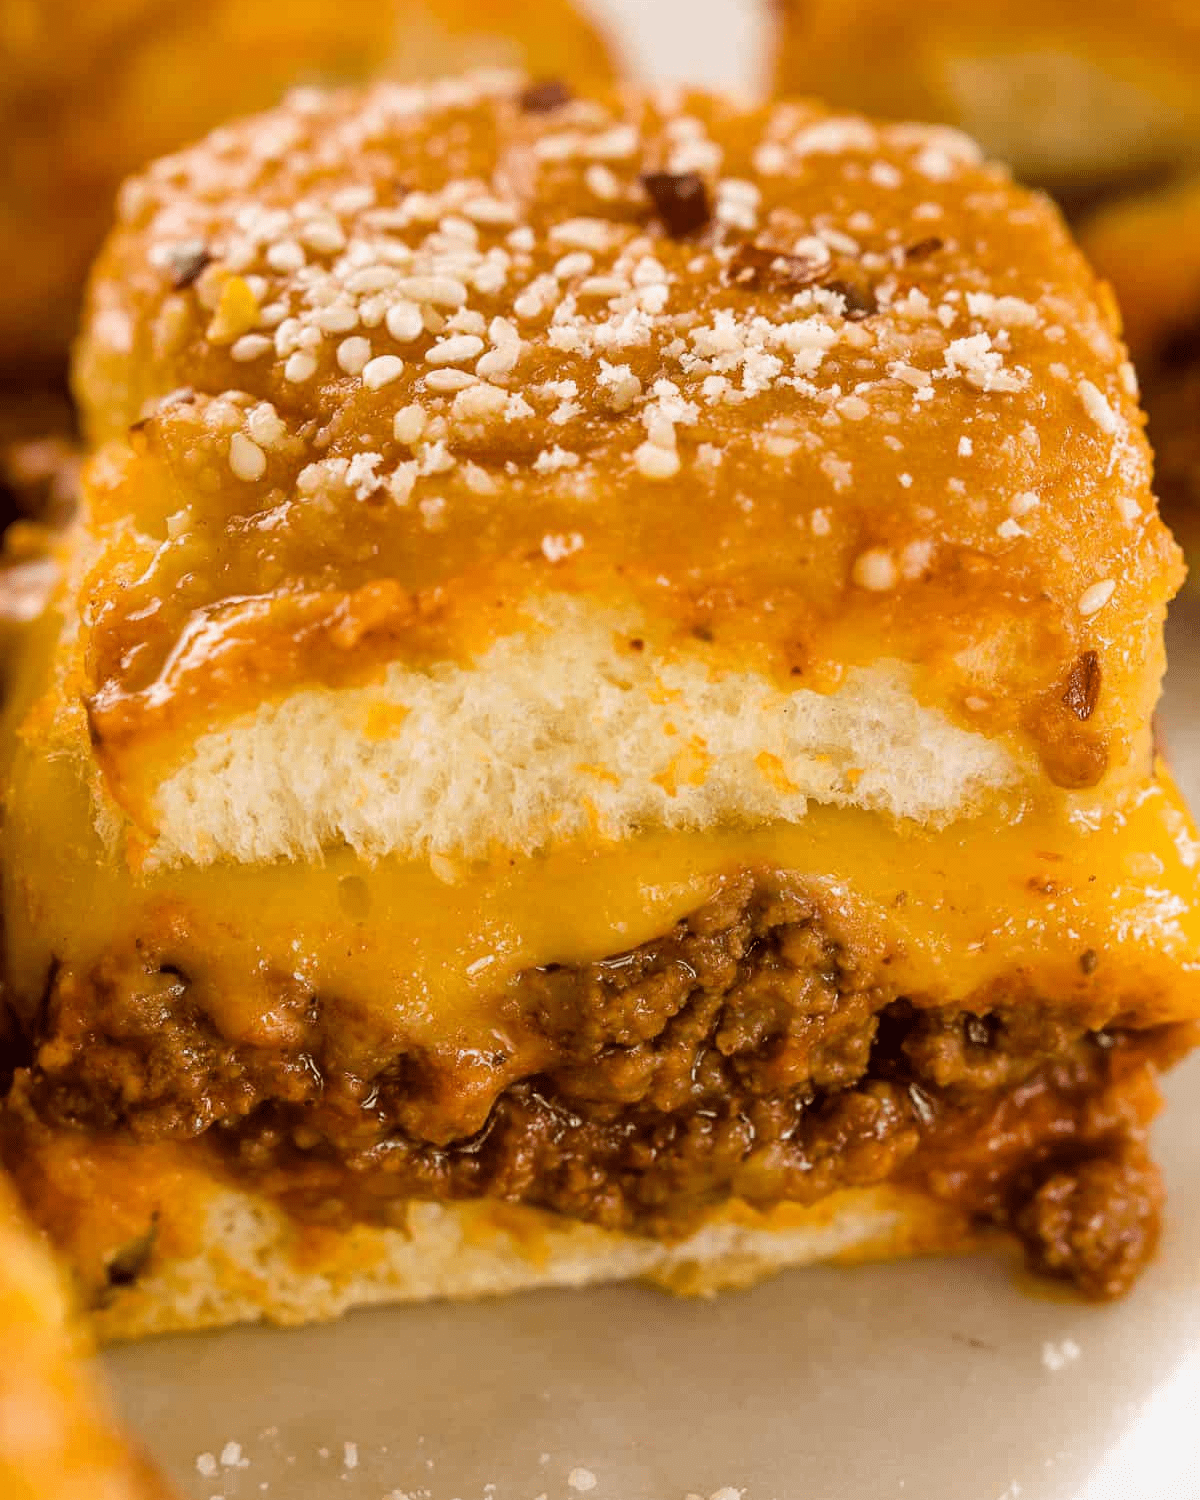
    • Spicy Turkey Sliders. Drizzle the turkey sliders with hot sauce if you like things spicy. We make these buffalo chicken sliders when we’re feeling the heat.
    Turkey sliders stacked on cutting board.

    Recipe FAQs

    How do you cut dinner rolls for sliders?

    To cut dinner rolls for sliders, first, make sure the rolls are slightly chilled or at room temperature. This will help to prevent them from squishing and will give you cleaner cuts. Next, place the entire package of rolls onto a large cutting board and use a serrated knife to slice horizontally through the middle of all the rolls at the same time, creating a top and bottom half. Then, cut vertically along the seams of the rolls to separate them into individual buns. Use a sharp knife to cut through the layers of the bun without compressing them. Your dinner rolls are now ready to be used as buns for your turkey sliders.

    Can I make turkey sliders ahead of time?

    Yes you can make the sliders ahead of time. Add all the ingredients into the rolls and store them in the refrigerator until you are ready to cook them. You may need to cook a little longer if they are cold when going in the oven.

    How do you keep sliders from getting soggy?

    Sliders can become soggy if they sit for too long after being assembled. One way to prevent this from happening is to add a layer of a moisture barrier between the bread and the toppings. This can be done by spreading a thin layer of butter or mayonnaise on the inside of both the top and bottom buns before adding the toppings. Another way to prevent sogginess is to serve the sliders immediately after assembling them, while the bread is still fresh and the toppings are warm.

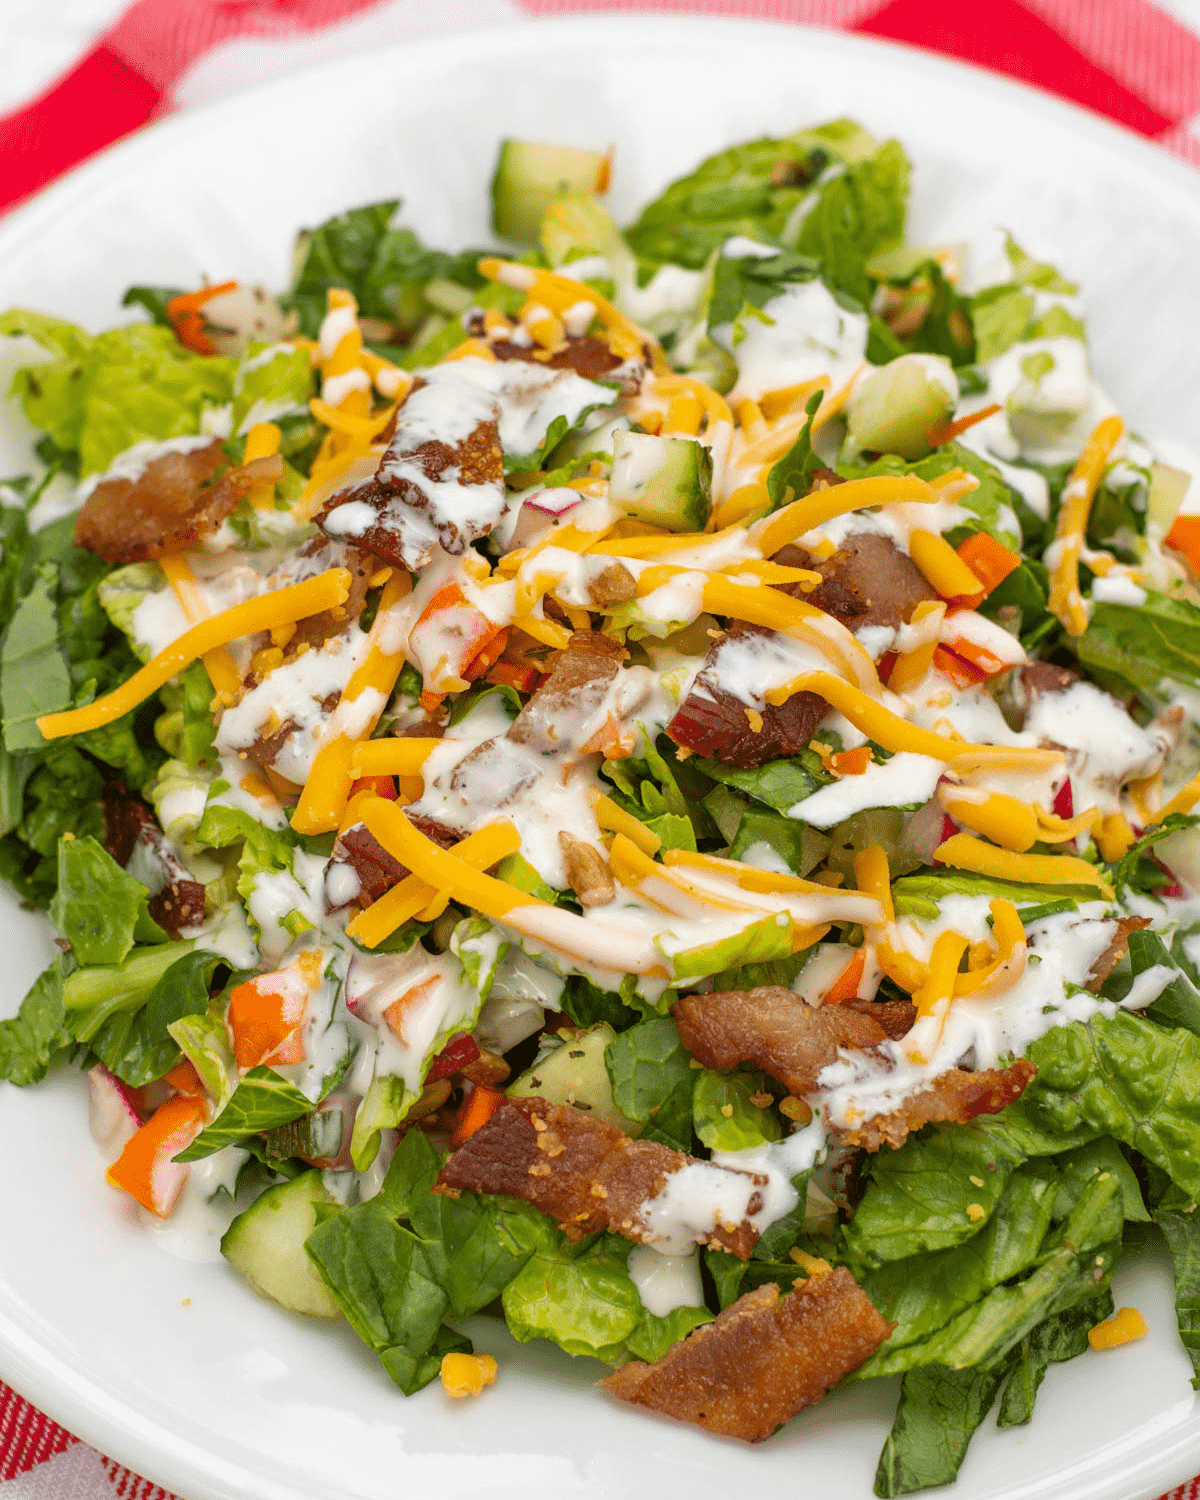
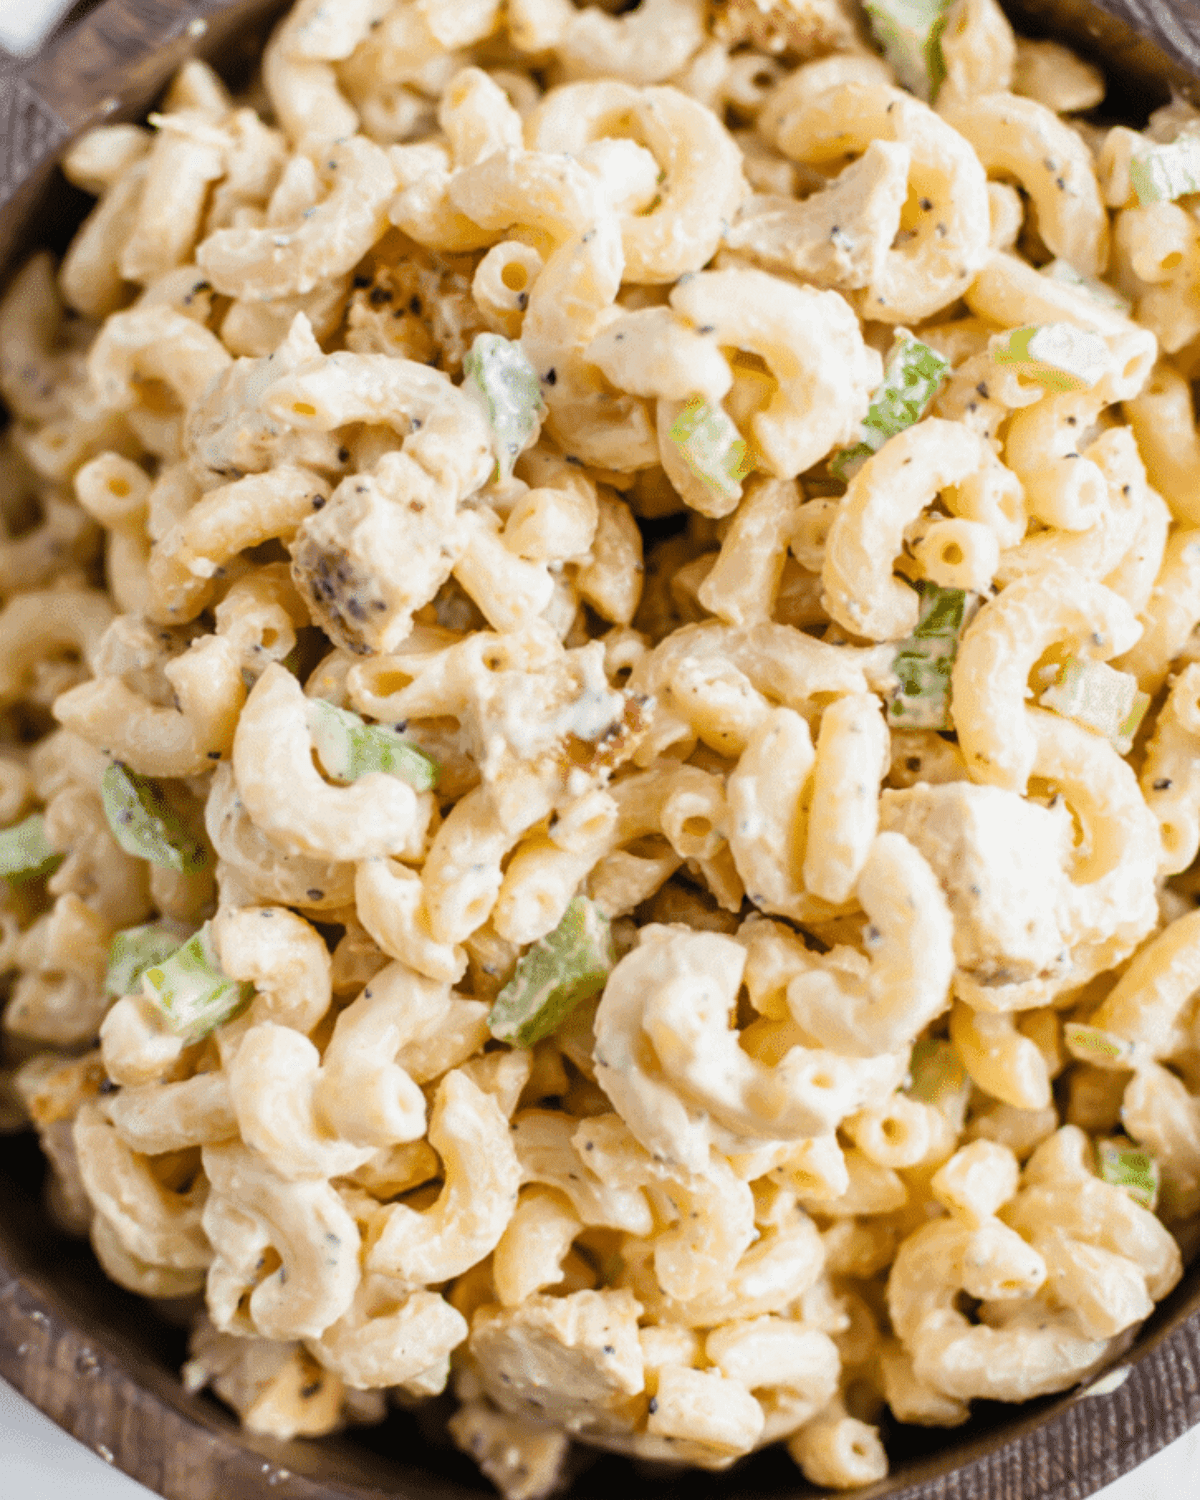
    What to Serve with Turkey Sliders

    Turkey slider sandwiches are a delicious and satisfying meal on their own, but if you’re serving them for a party or gathering, you might want to consider pairing them with some tasty sides or snacks. Here are a few ideas:

    • Air fried Sweet potato fries or regular French fries
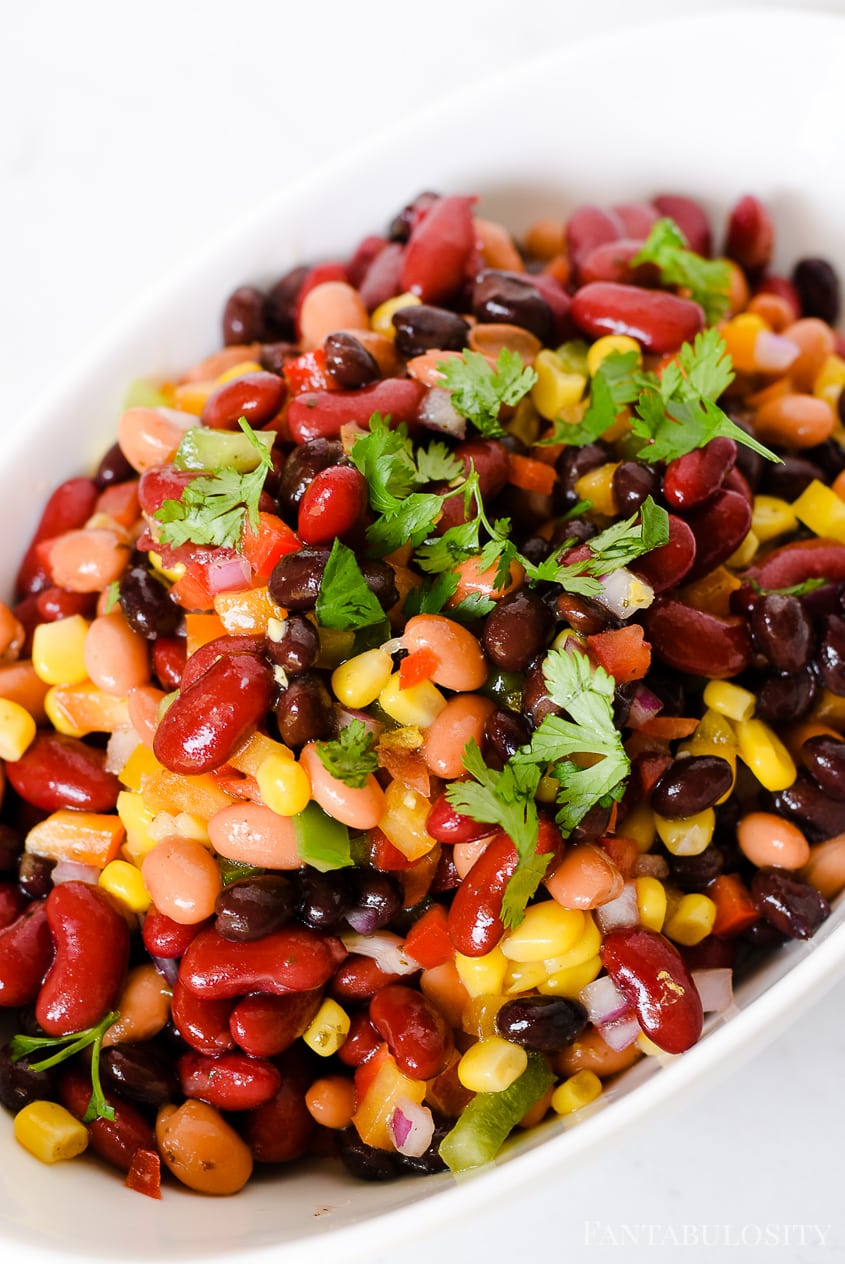
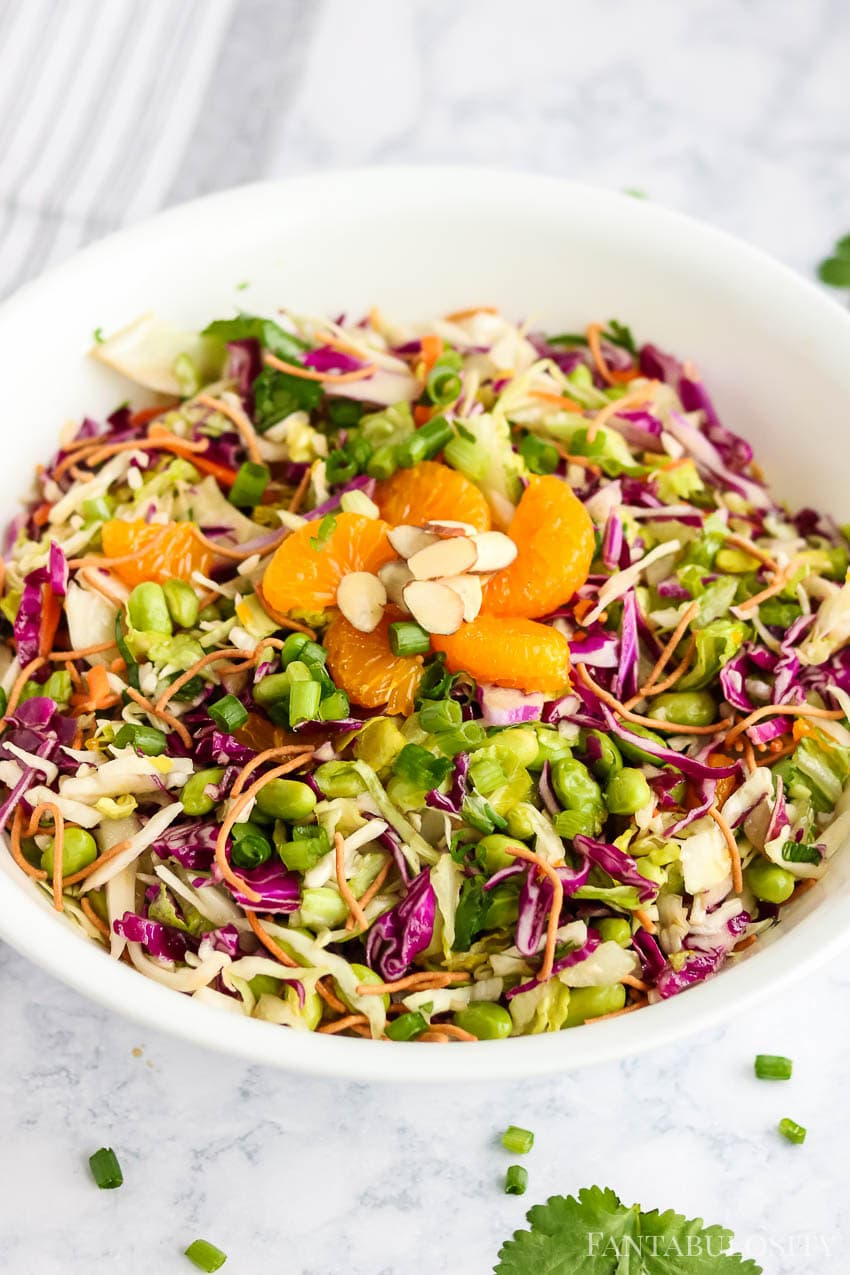
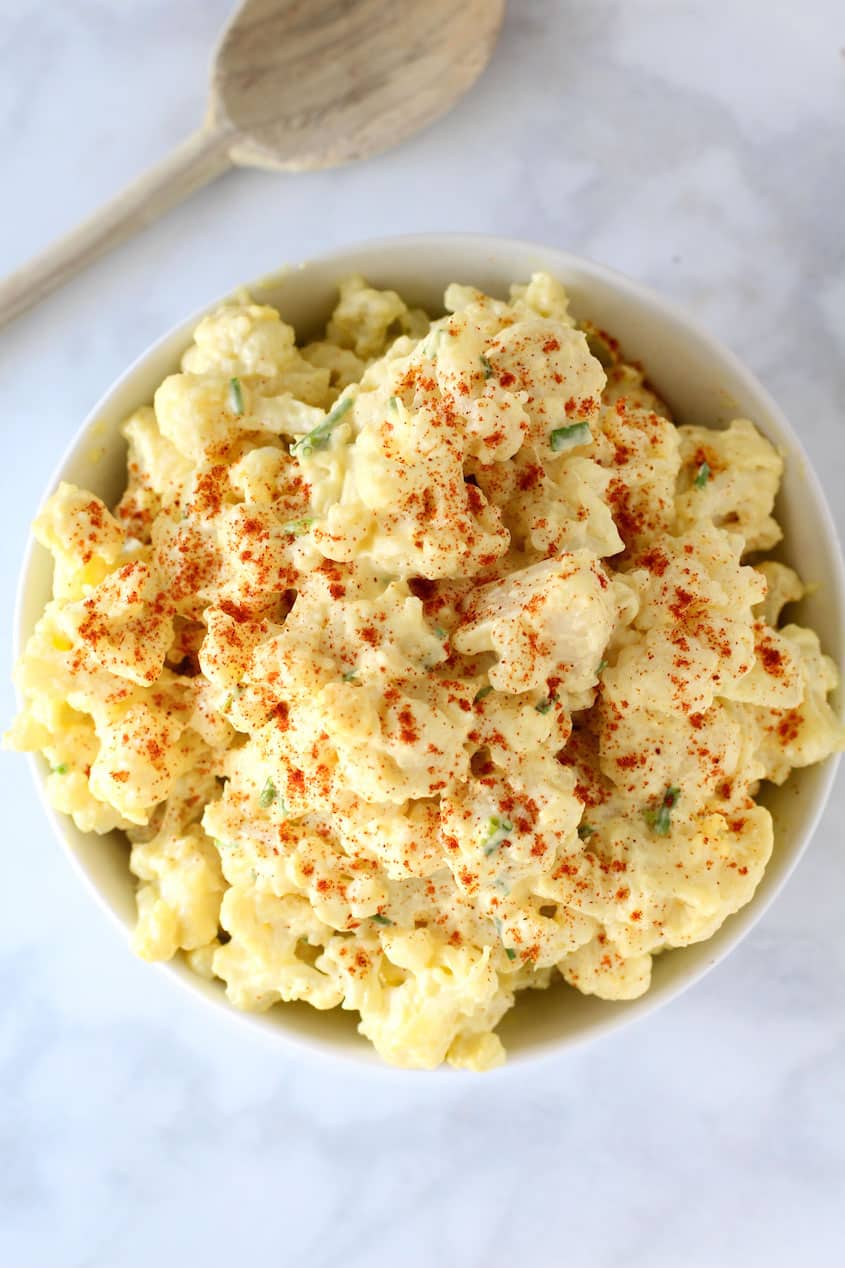
    • Coleslaw or Amish potato salad
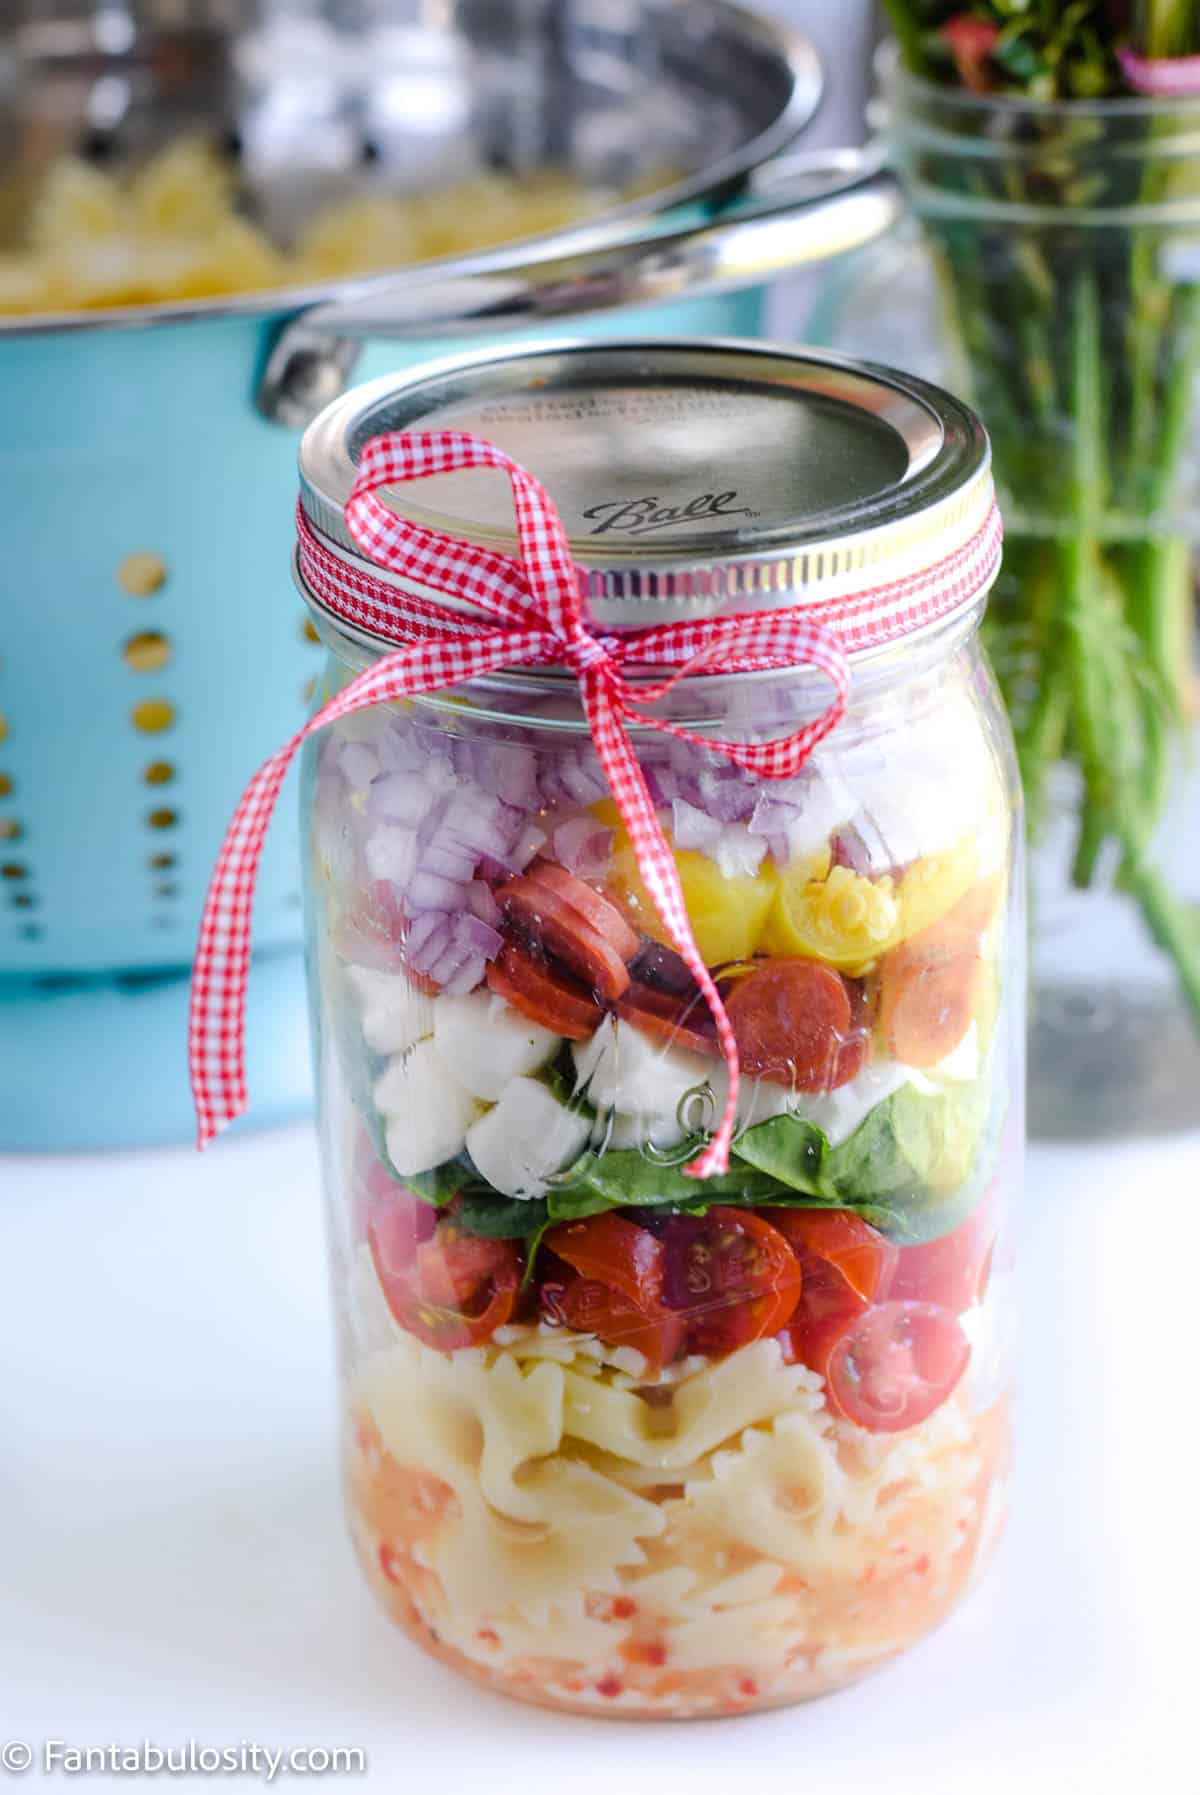
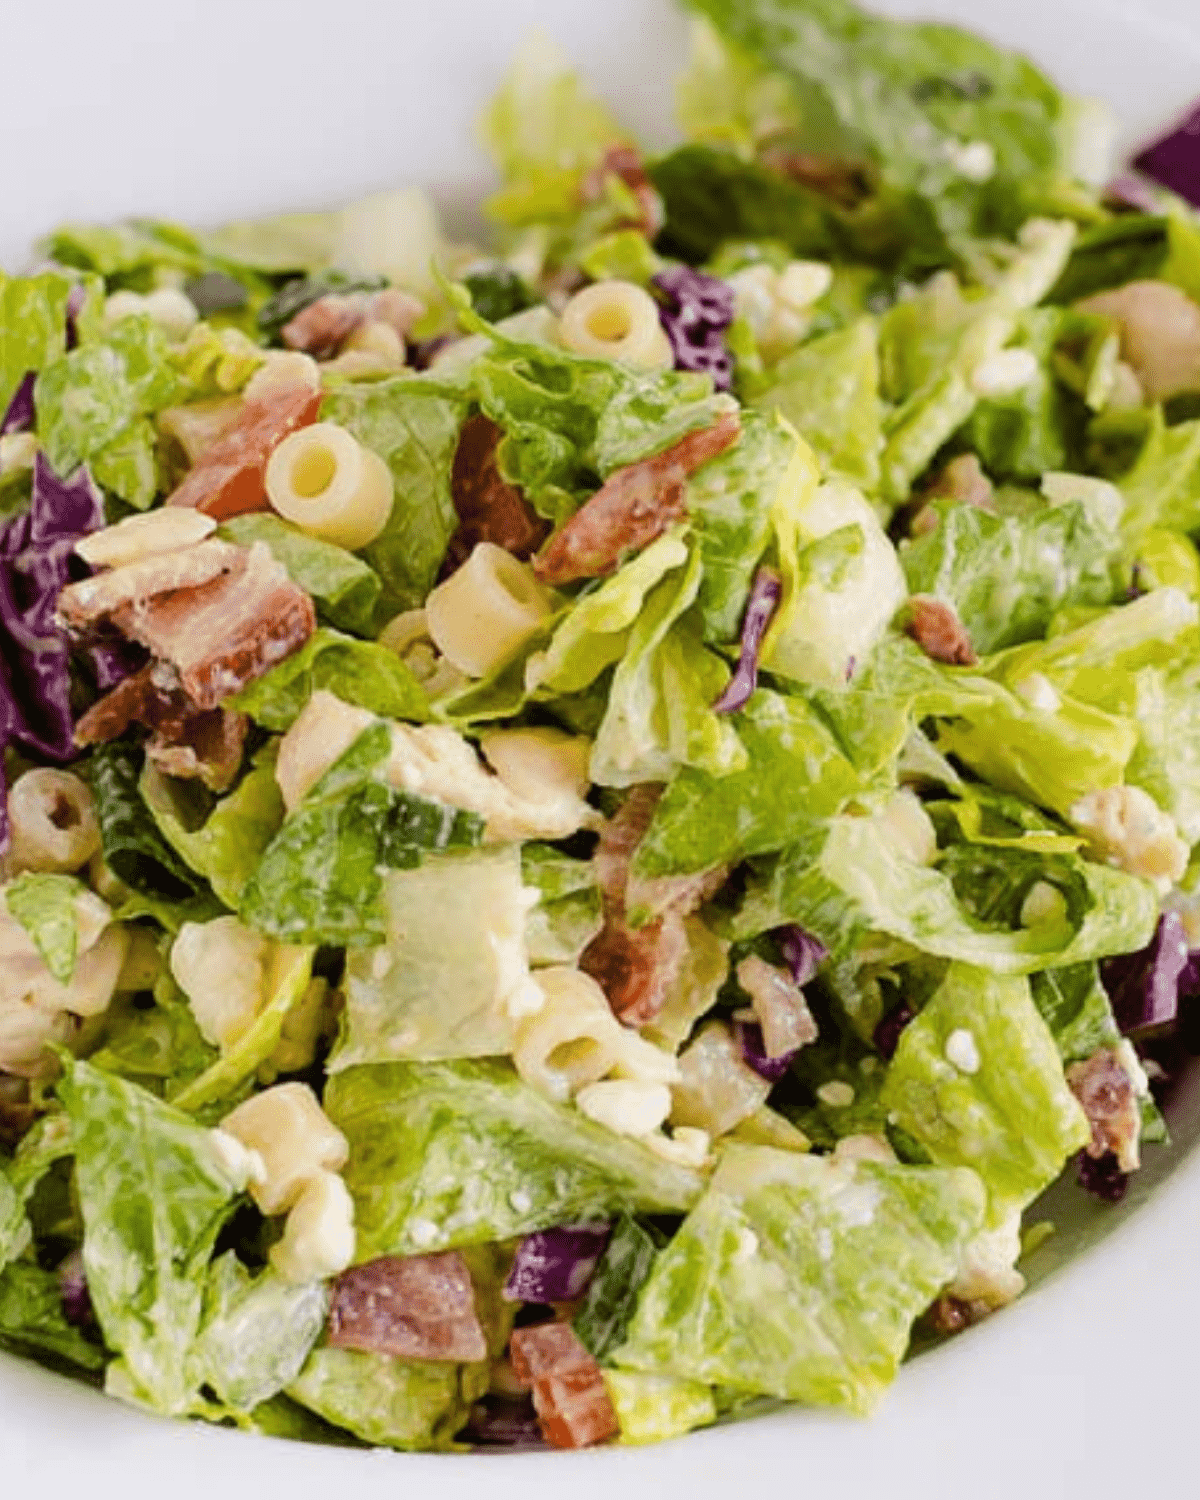
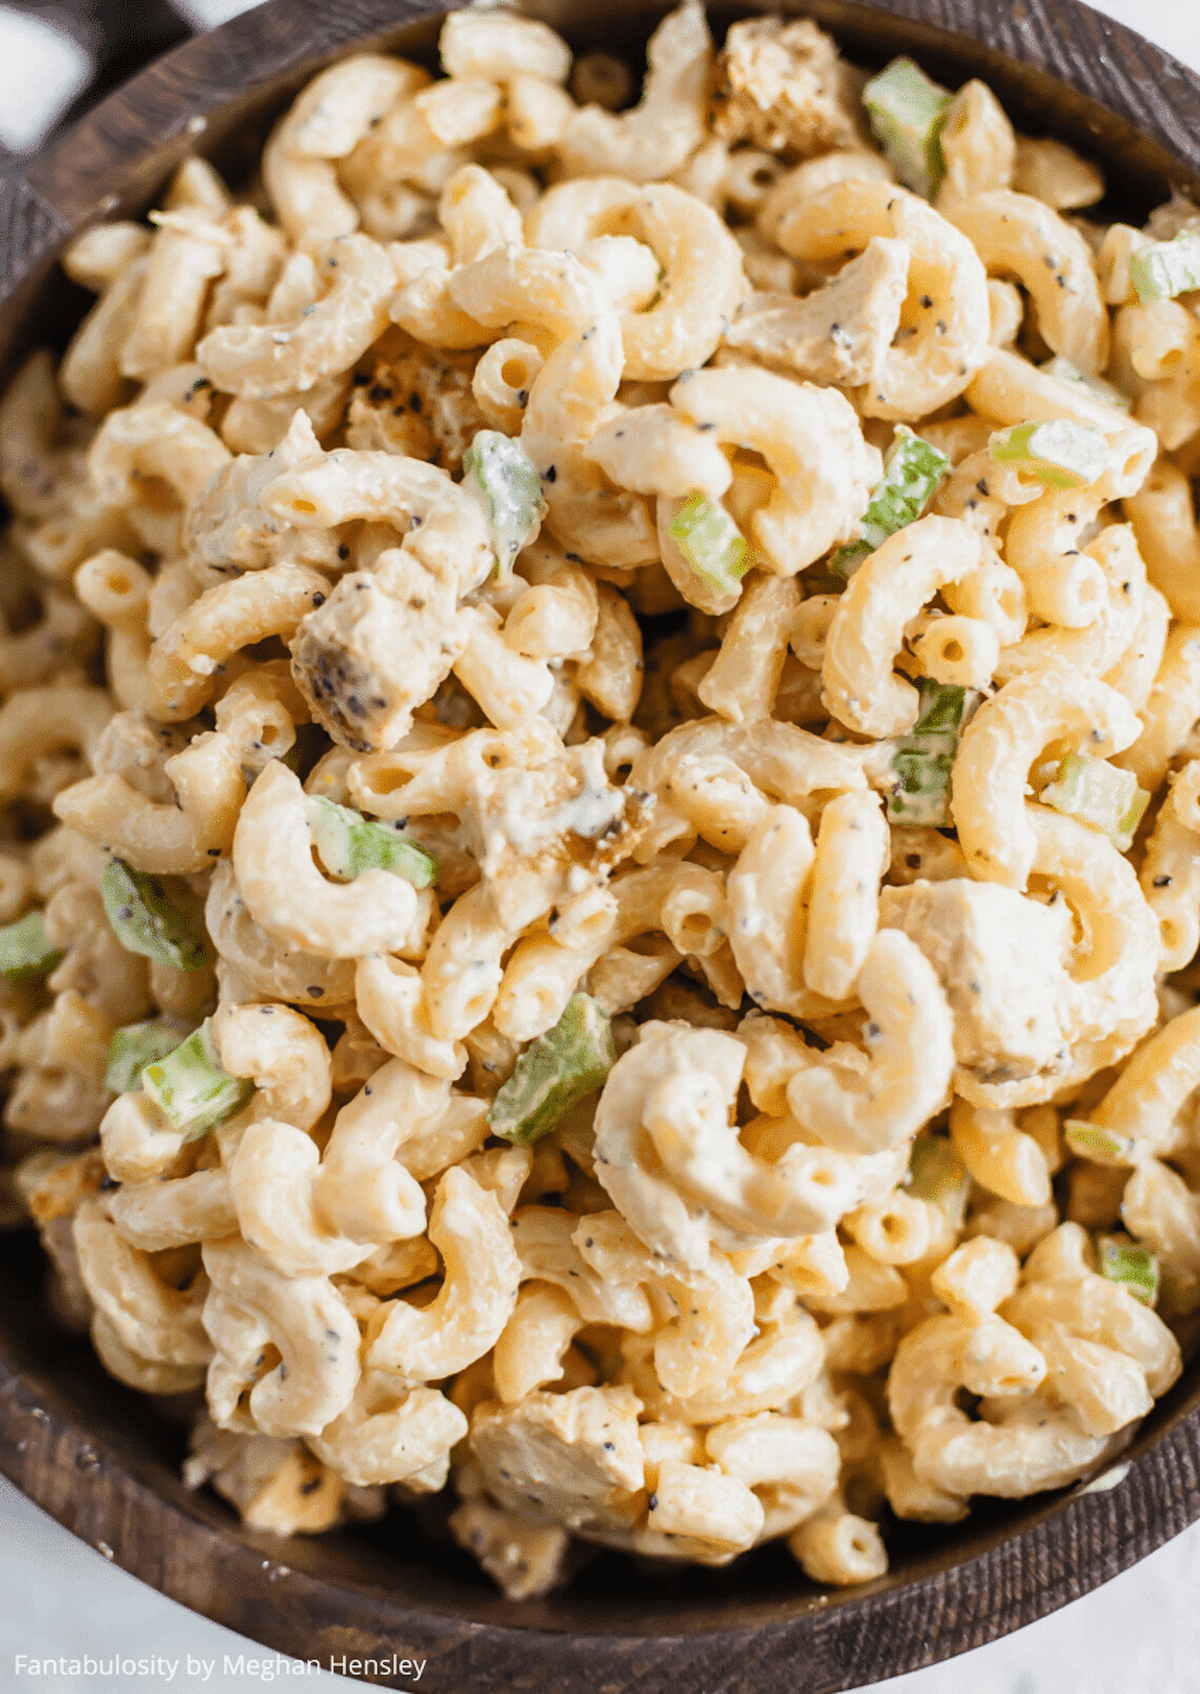
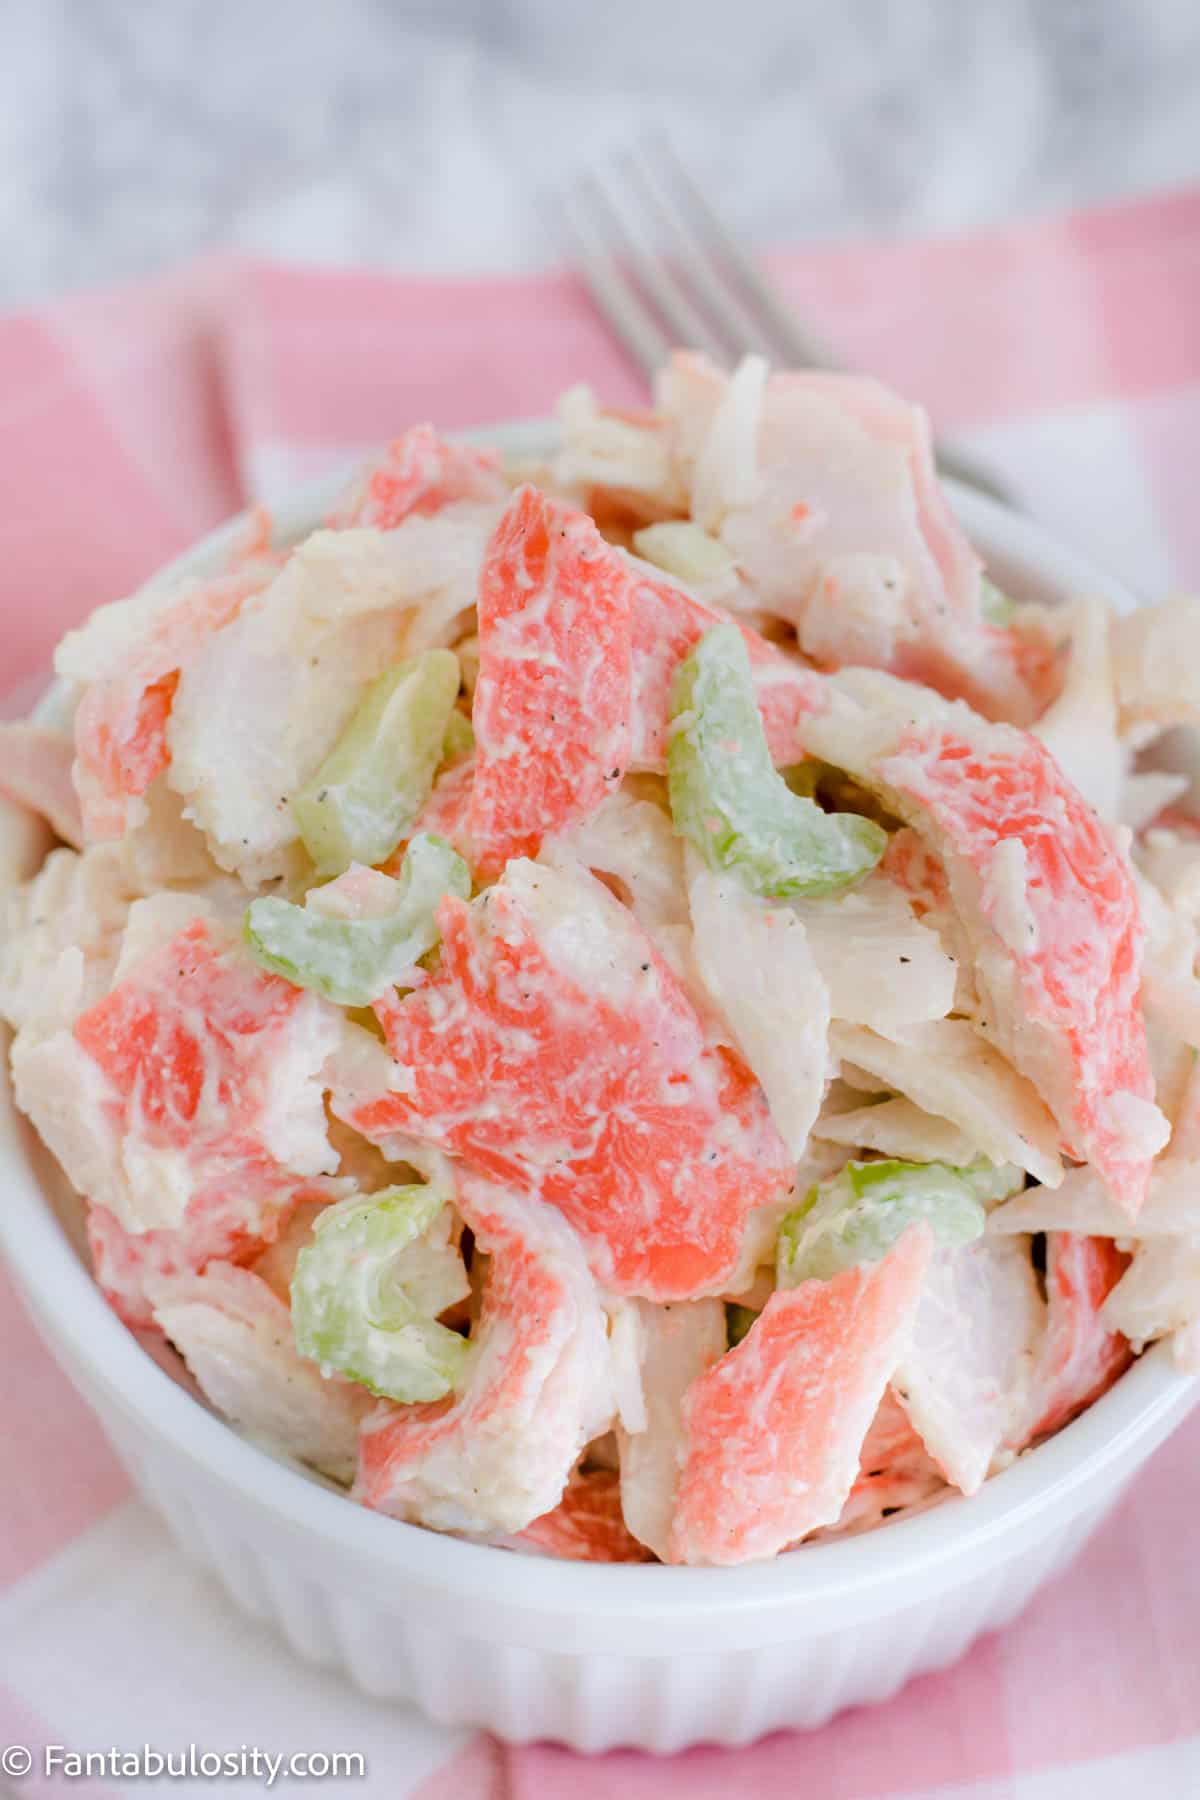
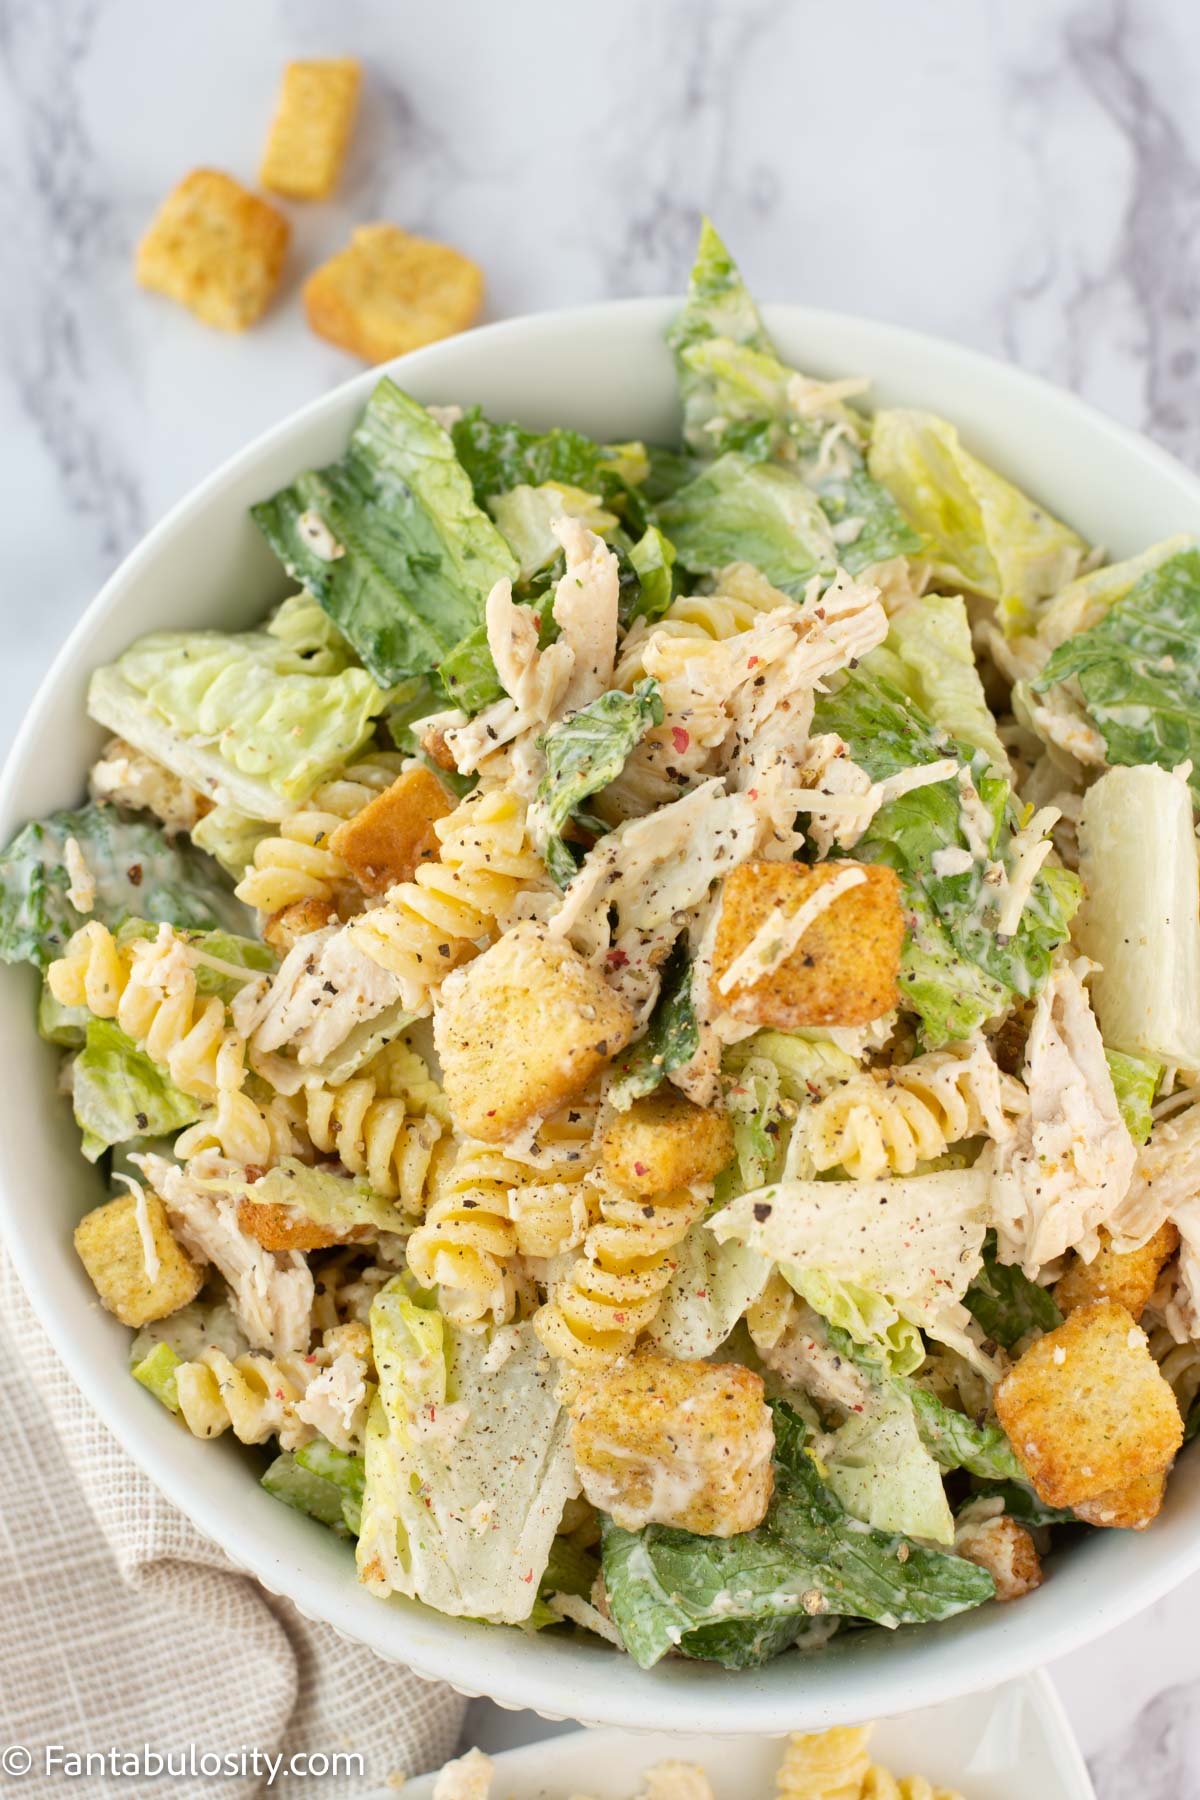
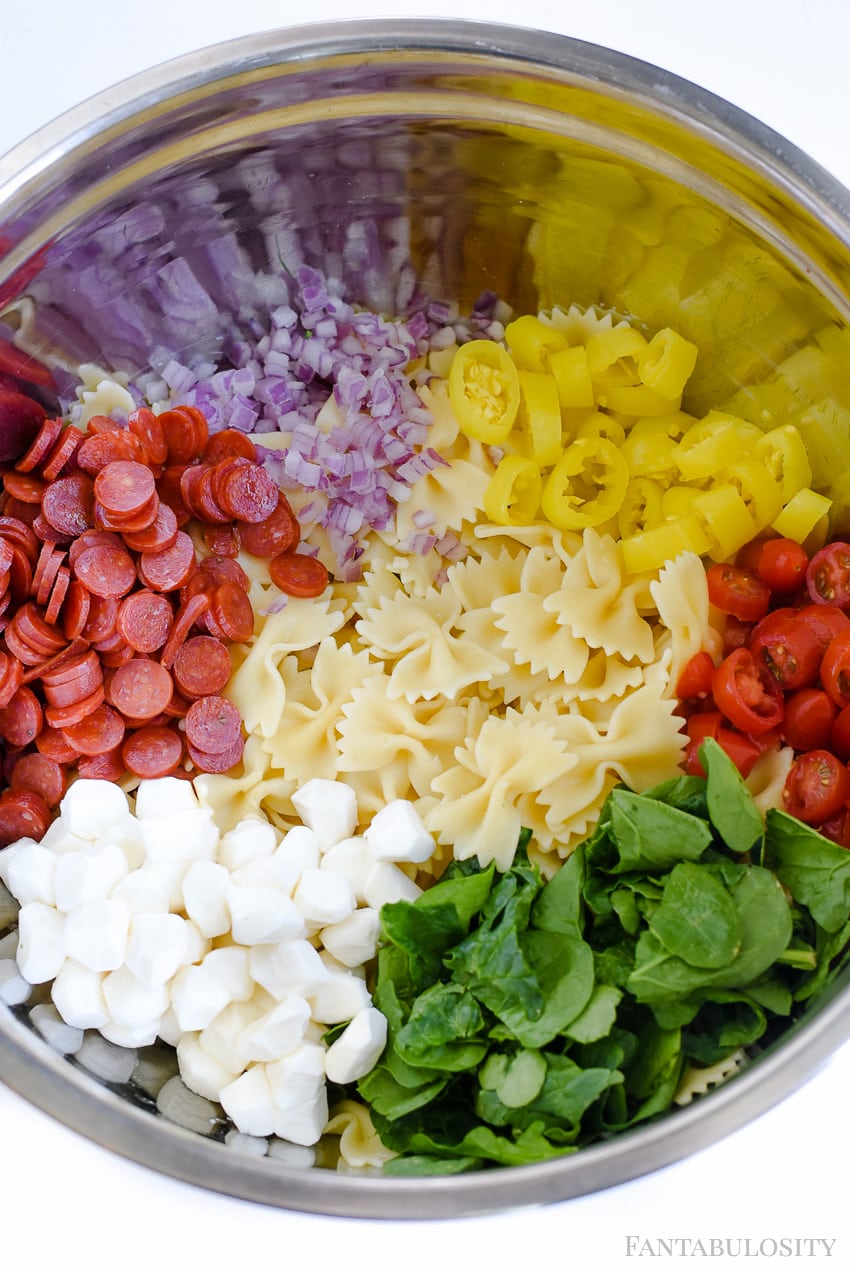
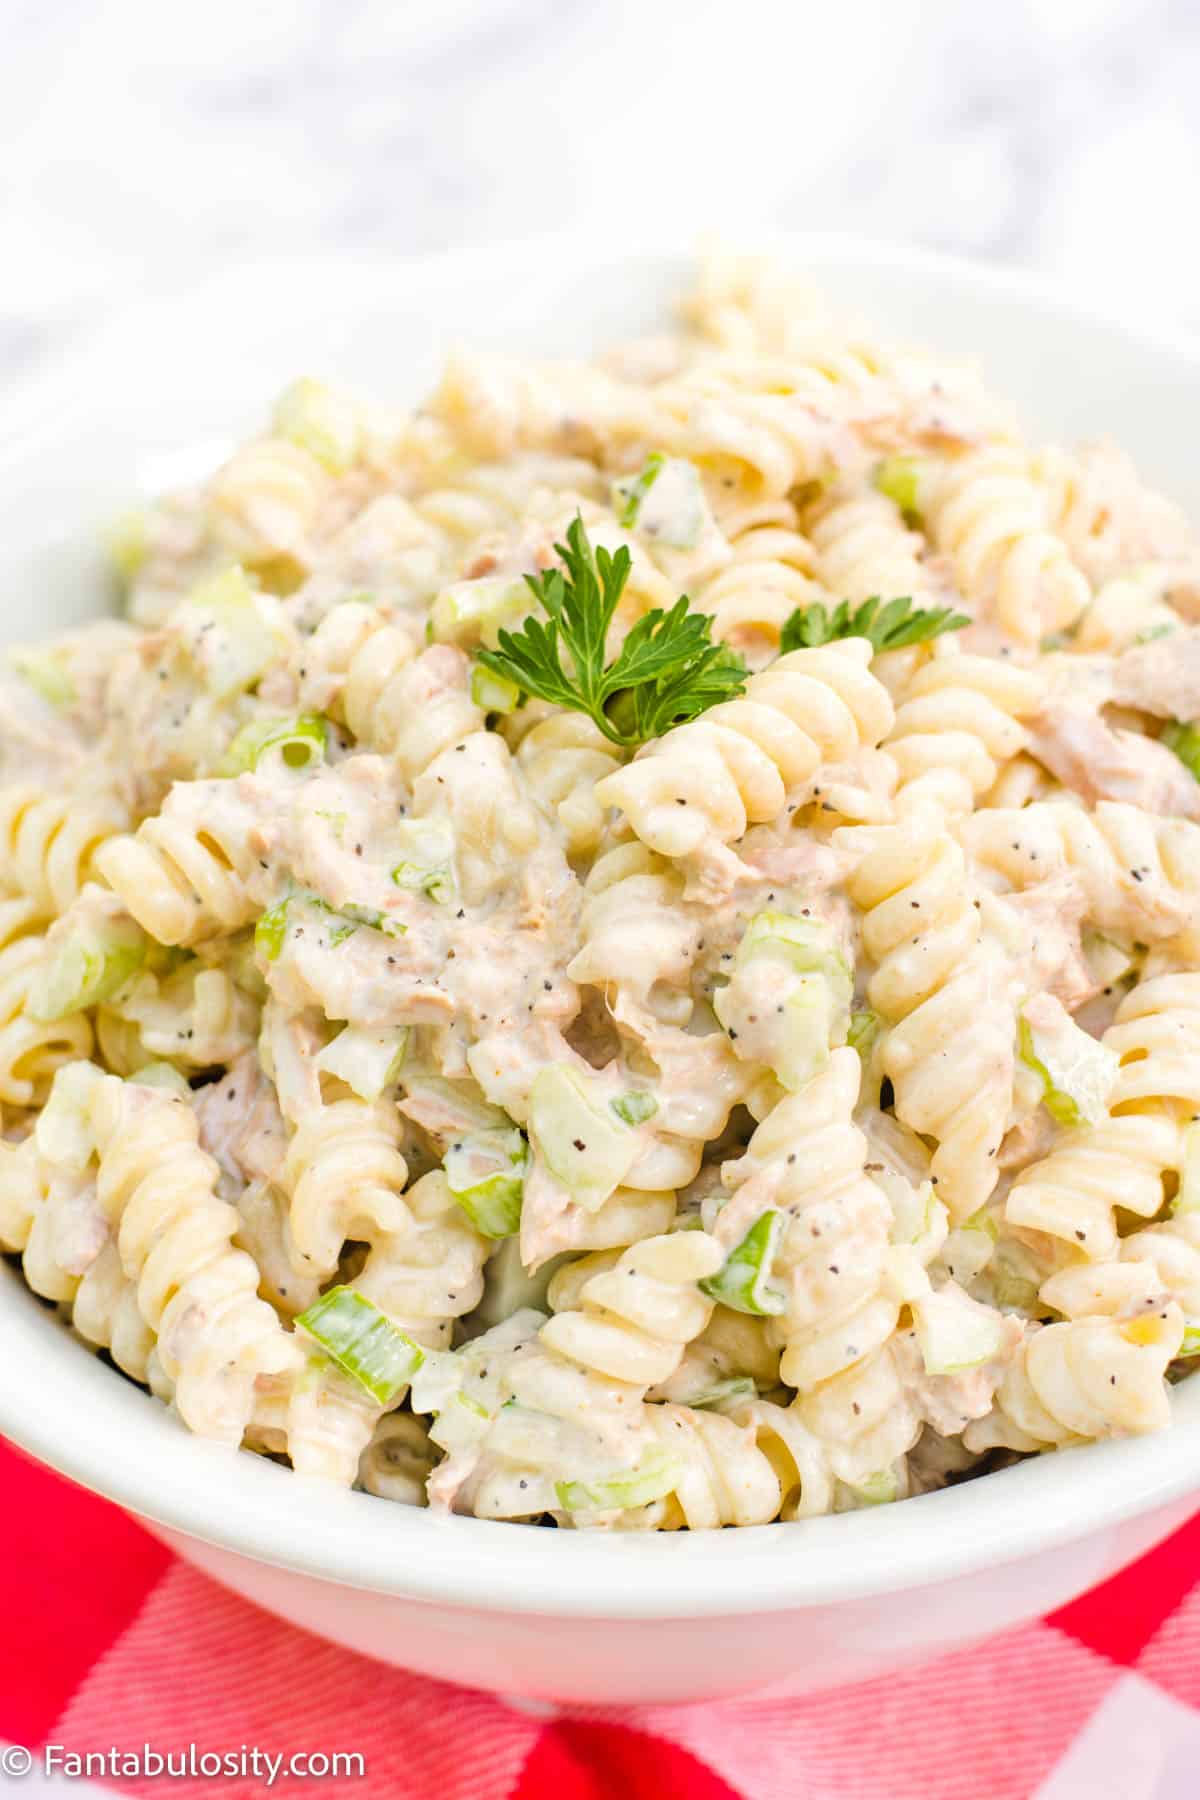
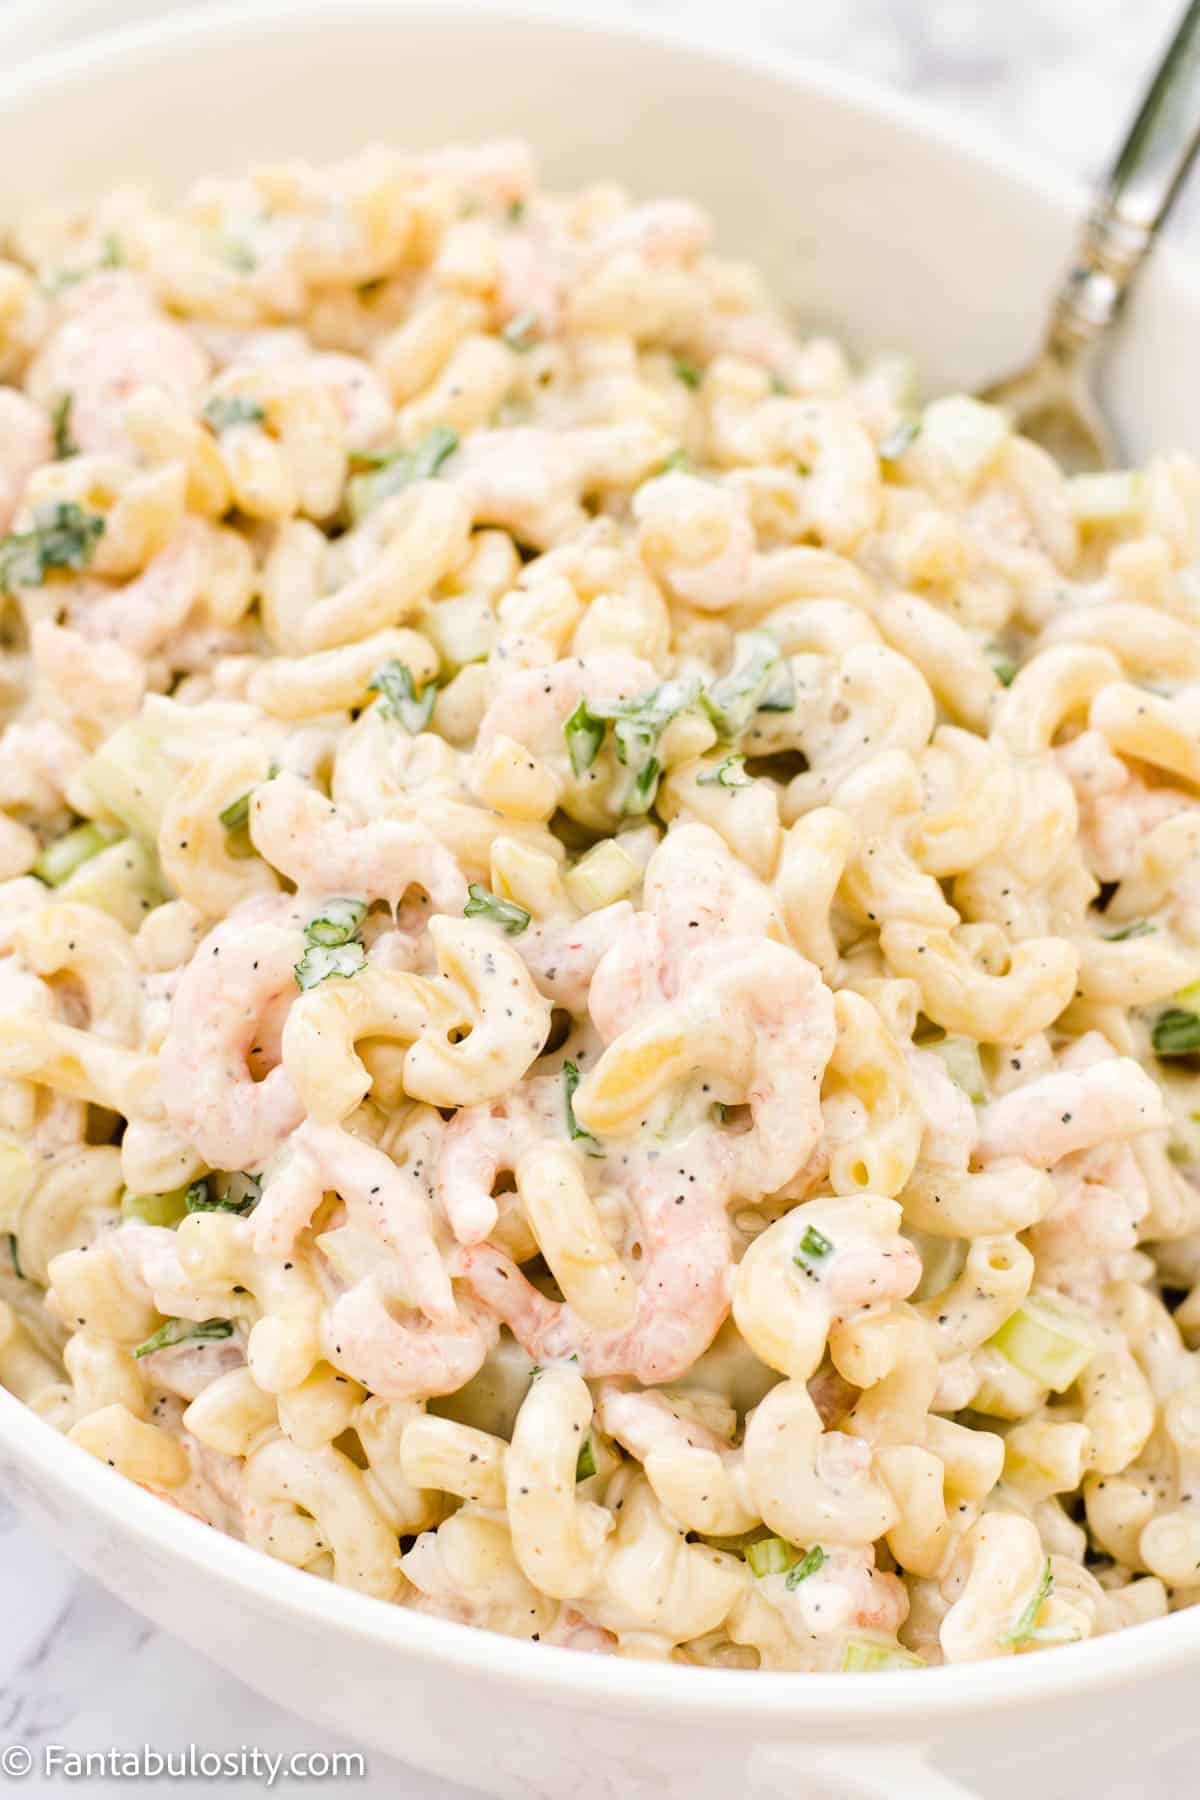
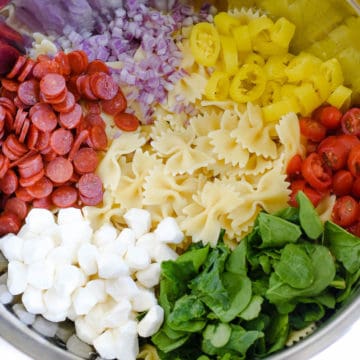
    • A delicious pasta salad recipe
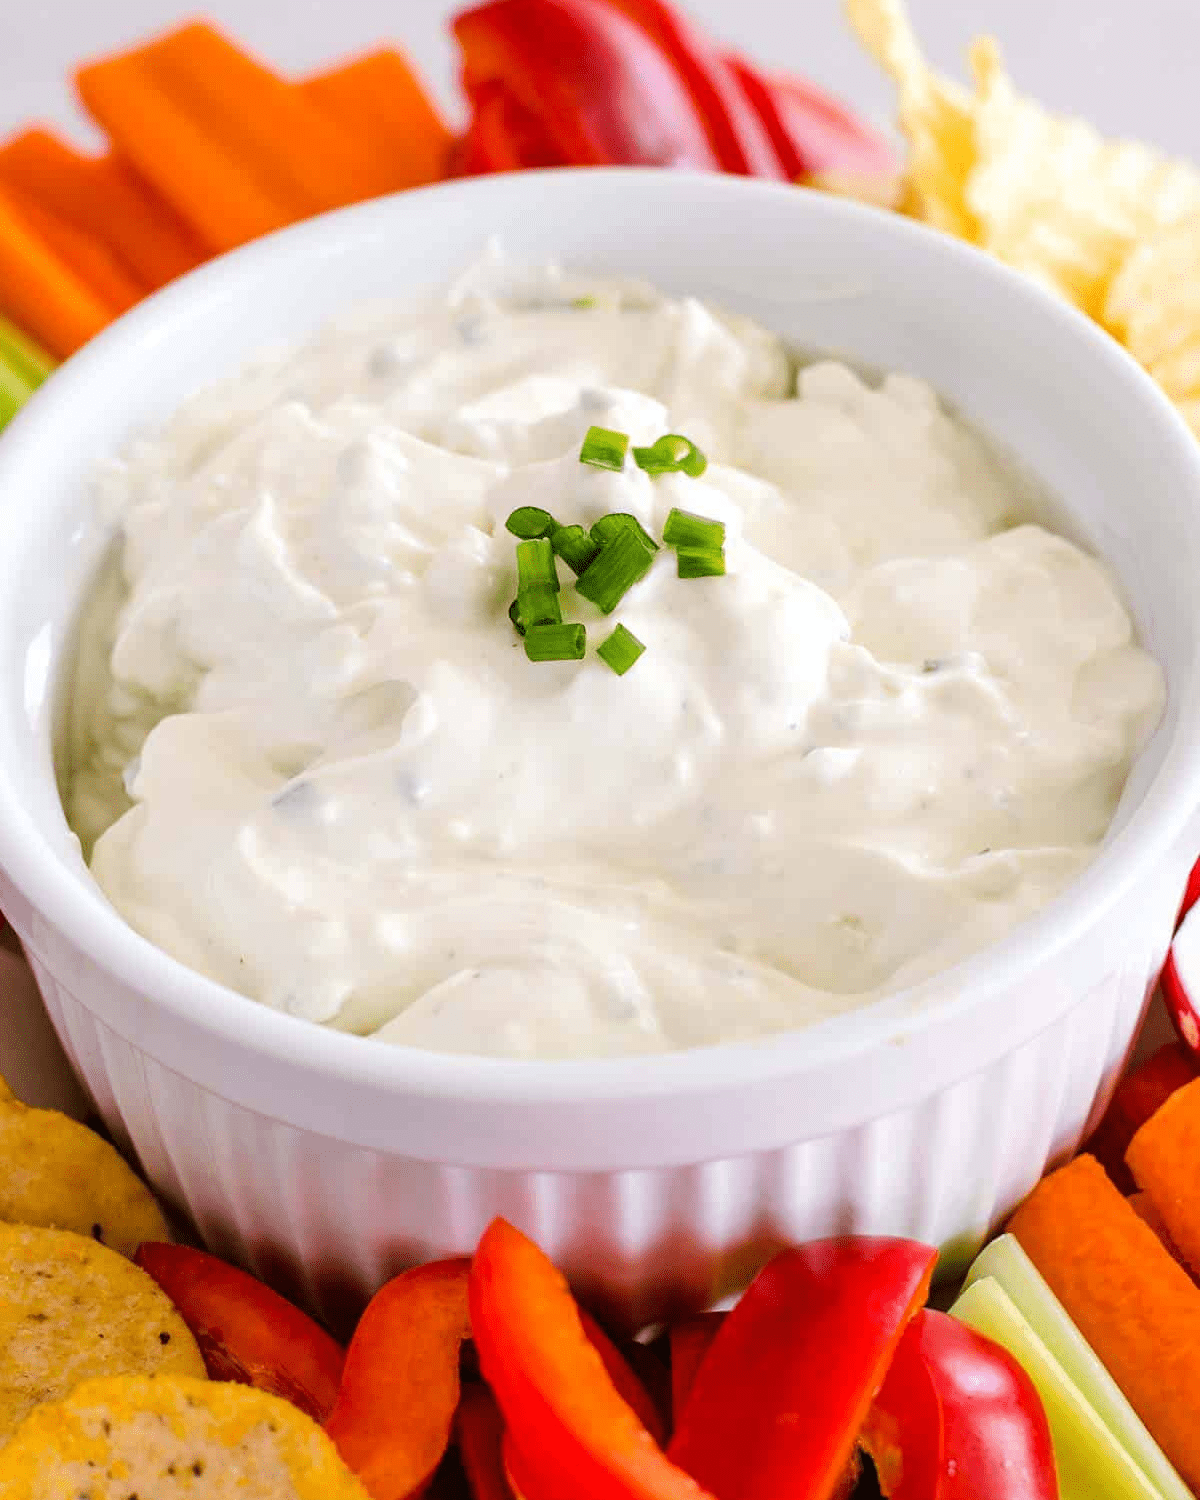
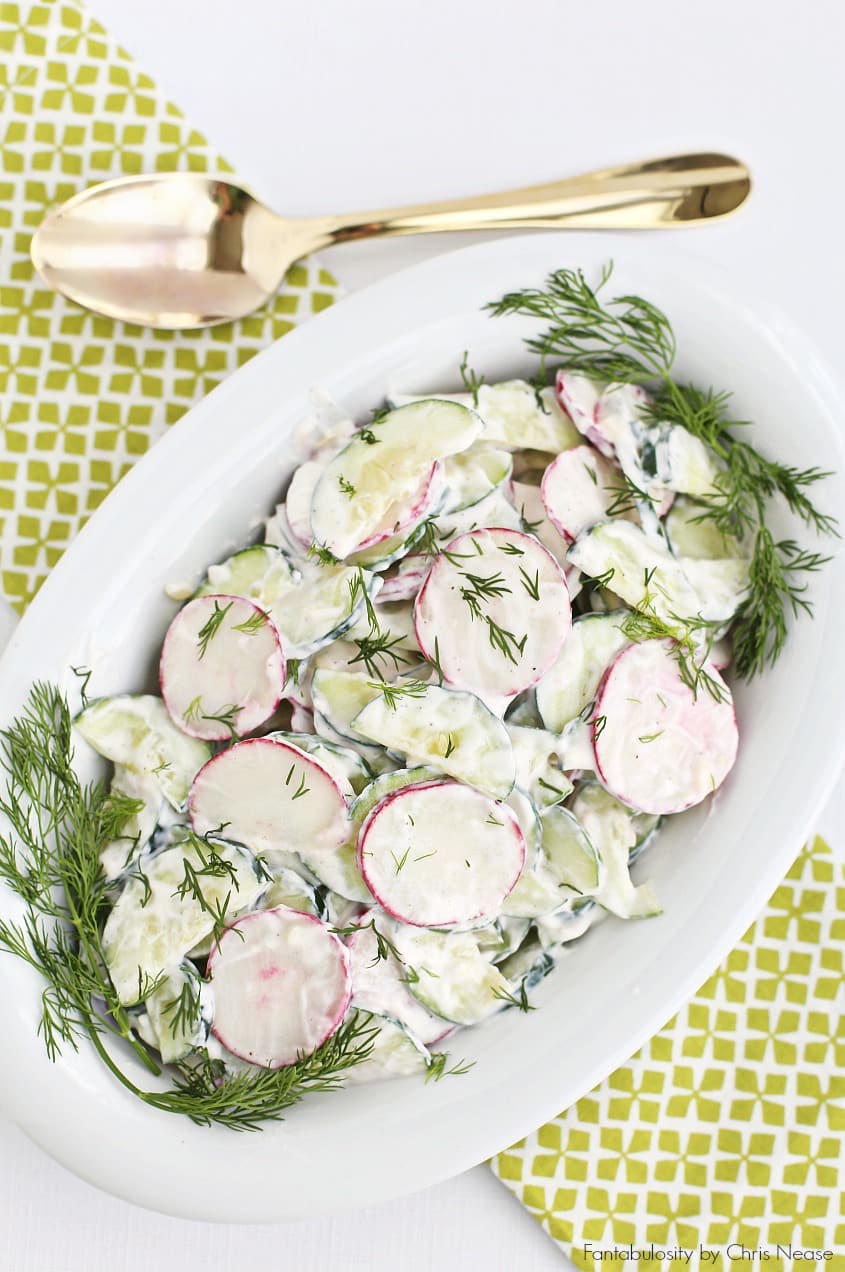
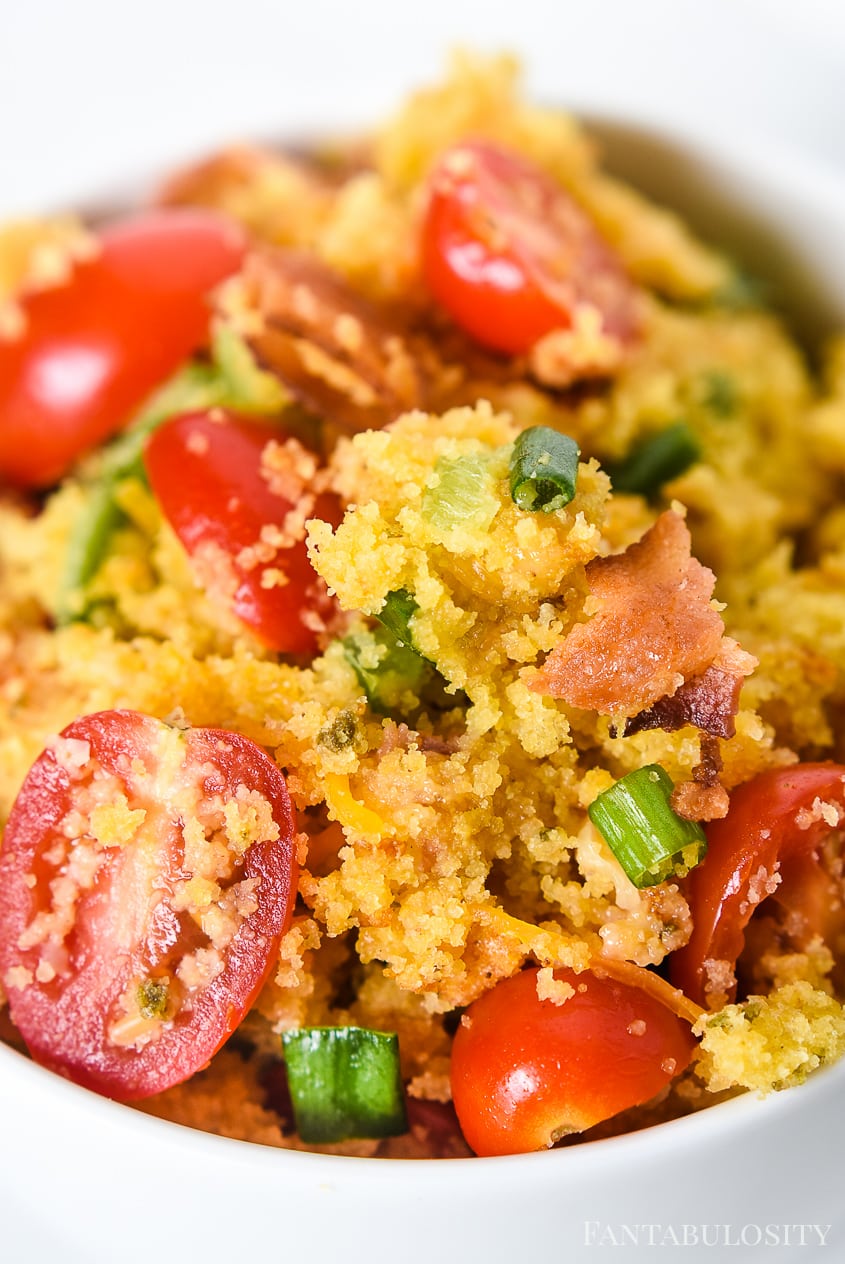
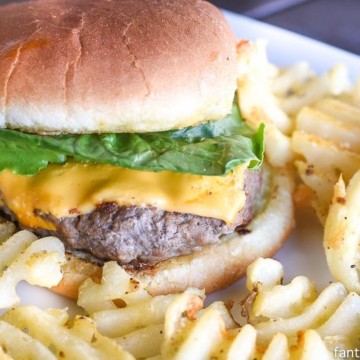
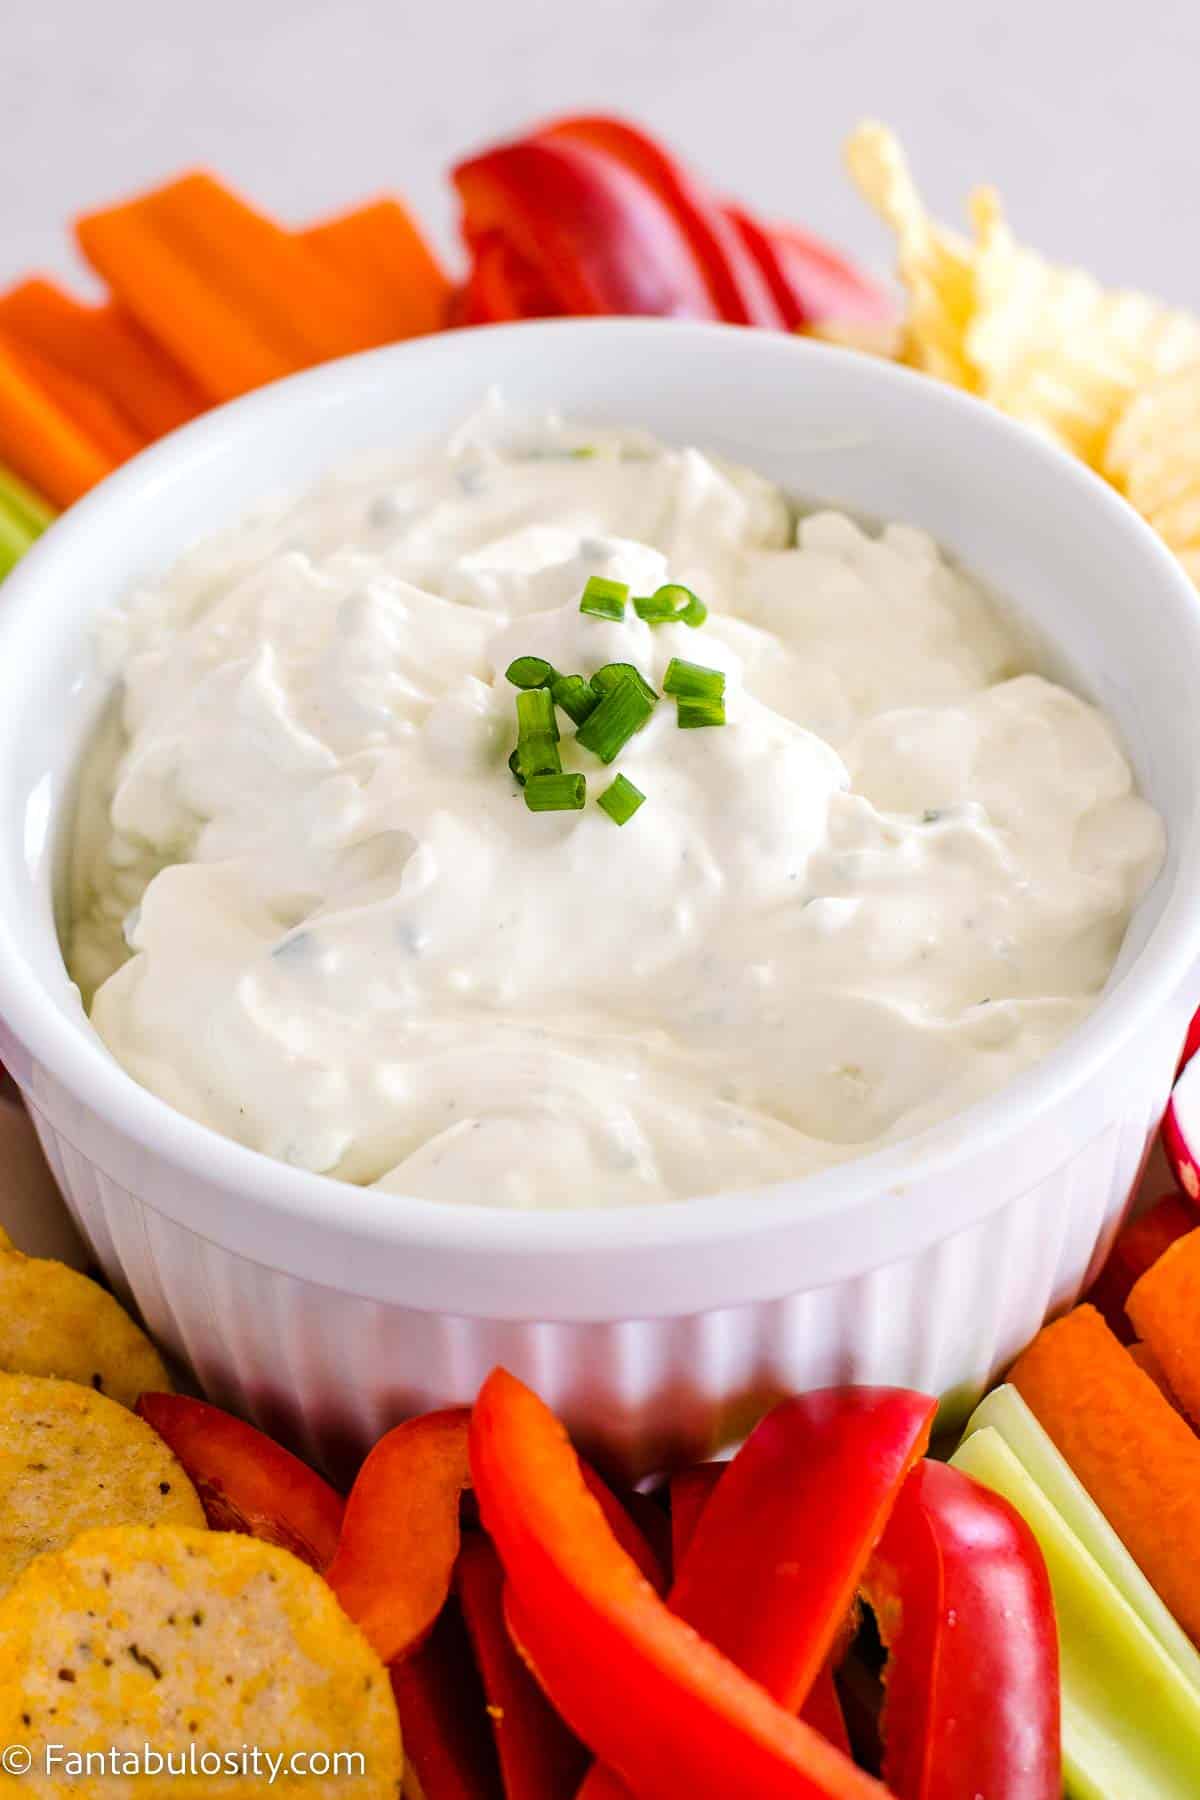
    • Crudites like carrots, celery, and cherry tomatoes with ranch (like this jalapeno ranch dip) or hummus for dipping
    • A fruit salad with Cool Whip or fruit skewers
    • Chips and dip, such as homemade salsa or this popular guacamole recipe
    • Mini quiches or savory tarts

    These sides and snacks will complement the flavors of the turkey sliders and provide a well-rounded meal for your guests.

    Refrigeration, Freeze, and Thaw

    Refrigeration: To store sliced turkey sliders, place them in an airtight container and store in the refrigerator. You can also wrap them tightly in plastic wrap or aluminum foil before storing in the refrigerator. Sliders are best when consumed within 3-4 days of preparation.

    Freeze: You can freeze these turkey sliders! We prefer wrapping the sliders (once they’ve cooled) in Glad Press’n Seal, and then place in a freezer bag. Freeze them for up to 3 months.

    Thaw: To thaw these turkey sliders, place them in the refrigerator overnight, and then place in a covered baking dish, in the oven, and bake at 350 until heated through, which was about 20 minutes for us. This could vary based on how cold/frozen the sliders may still be.

    More Sandwich Recipes You’ll Love

    Still want to try a new sandwich recipe? You could also make some Hawaiian Breakfast Sandwiches for a great start to the day. Or try what I’m sure is the Best Egg Salad as a sandwich filler. You could even go for a classic grilled cheese with a twist by trying this Caprese Chicken Sandwich!

    • Curry chicken salad with grapes in a white bowl.
      Curry Chicken Salad
    • Chicken salad with grapes and apples, sitting on bread.
      Harvest Chicken Salad
    • Crack Chicken Sandwich on wooden cutting board.
      Crack Chicken Sandwiches
    • egg salad on croissant
      The BEST Egg Salad Recipe

    Did you make this? I’d be so grateful if you left a “star” rating below to let me know what you thought! Then, the next time you need a quick and easy recipe, come back to Fantabulosity to browse all of my easy recipes!

    Recipe

    Turkey slider sitting on top of other turkey sliders with cheese.
    Print Pin
    5 from 4 votes

    Turkey Sliders

    Turkey sliders are great for a warm lunch option or party appetizer. The sweet flavors of the Hawaiian rolls combined with the salty flavors of cheese and turkey create the perfect combination.
    Course Appetizer, Lunch
    Cuisine American
    Prep Time 5 minutes minutes
    Cook Time 30 minutes minutes
    Total Time 35 minutes minutes
    Servings 12 sliders
    Calories 198kcal
    Author Jessica Burgess

    Ingredients

    • 1 pound turkey sliced very thin from the deli (Or your preferred thickness and type.)
    • 6 ounces provolone cheese sliced
    • ½ teaspoon garlic salt
    • 2 tablespoons unsalted butter
    • 12 Hawaiian slider rolls
    • chopped parsley if desired

    Instructions

    • Prepare the rolls. Slice the 12-pack of Hawaiian rolls in half, to where it makes a top bun and bottom buns. Place the bottom layer of buns in the prepared baking dish.
      12 Hawaiian slider rolls
    • Add turkey. Next, add a layer of sliced turkey to the buns, making sure to cover the entire layer of buns.
      1 pound turkey
    • Add cheese. Place cheese on top of the turkey, making sure to cover as much of the turkey as possible with each piece.
      6 ounces provolone cheese
    • Garlic butter. Melt butter and stir in garlic salt.
      ½ teaspoon garlic salt, 2 tablespoons unsalted butter
    • Brush buns. Place the top buns on top of cheese and brush garlic butter on top of the rolls. TIP: You can save some of the garlic butter to brush on after they are baked.
    • Cook the sliders. Cover the rolls with foil and bake for 25 minutes at 350F.
    • Final bake. Remove the foil and cook for another 5 minutes.
      Brush on the remaining garlic butter if you reserved any for this step.
      Sprinkle on chopped parsley if desired.
      chopped parsley

    Video

    Notes

    Storage Insructions:
    Refrigeration: To store sliced turkey sliders, place them in an airtight container and store in the refrigerator. Best when consumed within 3-4 days of preparation.
    Freeze: Wrap the sliders (once they’ve cooled) in Glad Press’n Seal, and then place them in a freezer bag. Freeze them for up to 3 months.
    Thaw: Place them in the refrigerator overnight, and then place in a covered baking dish, in the oven, and bake at 350 until heated through, for about 20 minutes.

    Nutrition

    Serving: 1slider | Calories: 198kcal | Carbohydrates: 15g | Protein: 15g | Fat: 8g | Saturated Fat: 5g | Polyunsaturated Fat: 0.3g | Monounsaturated Fat: 2g | Trans Fat: 0.1g | Cholesterol: 50mg | Sodium: 329mg | Potassium: 109mg | Sugar: 4g | Vitamin A: 194IU | Calcium: 112mg | Iron: 0.4mg

    20 Picnic Food Ideas for Couples

    May 10, 2023

    Image collage of picnic food ideas for couples.

    If you want to do something special for your sweetie, you are going to love these picnic food ideas for couples. Outdoor dates can be so romantic. With a comfy picnic set up, tasty snacks, and some good music, you are sure to have a really lovely time together, without crowds of people or pricey restaurant meals. You could even have a picnic for an at-home date night idea, by creating an indoor picnic menu or make a charcuterie board with salami roses for a romantic touh.

    If you aren’t sure what to take along on your picnic, you are in the right place. I have gathered some of my favorite picnic foods for couples! From seasoned crackers to munch on with a nice cheese, as an easy summer snack idea; to turkey club sliders which are the perfect size for a picnic. I know you will find a few recipes to try.

    Image collage of picnic food ideas for couples.

    If you’re going away for the weekend or just spending a weekend at home, make sure to also get my tips for how to prepare for a romantic weekend with your husband!

    Food Ideas for a Romantic Picnic

    Spicy ranch crackers close-up.

    Spicy Ranch Crackers

    These spicy ranch crackers are awesome to much on as you lounge on a picnic blanket. Pair with your favorite cheese and thin slices of meat for a grown up charcuterie lunch.

    Strawberry jam bruschetta on bread.

    Strawberry Bruschetta

    This take on Bruschetta is perfect for a picnic. The strawberries with a hint of heat taste just like summer when piled onto a cream cheese crusty bread! It would even look amazing on one of these charcuterie boards.

    Homemade Chex mix in a wooden bowl.

    Nuts and Bolts

    This simple snack makes for a really great picnic offering. A handful here and there will sustain you as you soak up some summer sun. Or, go spicy and try this Honey and Sriracha Mix.

    Curry chicken salad on croissant bread.

    Curry Chicken Salad

    Juicy grapes and savory chicken come together to make the best summer salad. Tuck this tasty salad into a flaky croissant for an easy-to-pack picnic food for couples.

    Egg salad on a croissant with lettuce and bacon.

    Best Ever Egg Salad

    This egg salad sandwich is easy to whip up for a picnic lunch. It has such a creamy texture. After one bite you are sure to agree this recipe is the best ever.

    Chipotle Chicken Melt

    This 4 ingredient Chicken Chipotle Melt comes together in just a few minutes and is cheesy and delicious.

    Chicken Caesar pasta salad.

    Chicken Cesar Pasta Salad

    Bring great flavor to a simple-to-make picnic food. This recipe pairs chicken Caesar salad with pasta for a filling picnic option that travels well and tastes amazing on a summer day.

    Summer side salad in white bowl, with avocado slices on top.

    Summer Side Salad

    This salad is packed with fresh greens, crunchy nuts, fresh strawberries, and a few other ingredients, making it the perfect picnic salad idea!

    Tuna salad on sliced bread.

    Best Tuna Salad

    This easy to make tuna salad uses red onions, celery, and a few tasty herbs and spices to make a perfect picnic lunch option. Serve on your favorite bread with chips on the side for a classic combination for a picnic.

    Honey lime fruit salad in white bowl.

    Honey Lime Fruit Salad

    This fruit salad has a delicious and simple dressing that will really make the flavors of the fruit stand out.

    Crab salad in white bowl.

    Crab Salad

    Crab salad makes for a really great picnic option. Serve it on bread, with crackers, or wrapped in leafy lettuce for a delicious cool meal worth sharing.

    Zesty pasta salad in mason jar.

    Zesty Pasta Salad

    Arrange pasta salad in a mason jar so it transports well, and you have a delicious meal waiting for you when you’re ready. Storing the dressing on the bottom makes serving this dish, fresh, and easy!

    Small triangles of peanut butter and jelly sandwiches, stacked on top of one another.

    Peanut Butter and Jelly Sandwiches

    You can’t go wrong with a simple classic like peanut butter and jelly sammy! Make a few of these with a favorite bread to have a simple and satisfying picnic idea. Homemade raspberry jam is perfect with peanut butter.

    Turkey club sliders.

    Turkey Club Sliders

    These little sandwiches are so tasty. Pile them high with turkey, bacon and cheese for a really great lunch that is easy to make ahead and take along in your picnic basket.

    Rice krispie treats on wooden cutting board.

    Rice Krispie Treats

    Rice krispie treats are a favorite snack and dessert for so many! They’re easy to make and perfect to tag along on your picnic.

    Close-up of pinwheel sandwich on cutting board.

    Pinwheels Sandwiches

    A few bites are all it takes to finish a pinwheel, but they are so tasty you will want to nibble on a few on your couples’ picnic.

    A bowl of everything but the bagel dip with vegetables and crackers around it.

    Everything But the Bagel Dip

    This dip adds so much flavor to your picnic. Serve with crackers or veggies, and snack away on this delicious dip recipe.

    Layers of meat and peppers on hawaiian buns
    Italian Sliders Recipe

    Italian Sliders

    If you need a sandwich with some substance, then these Italian sliders are just the thing to make. This sandwich is piled high with meat and cheese for a filling option.

    Old fashioned ham salad sandwiches on wooden cutting board.

    Old Fashioned Ham Salad

    Using just a few simple ingredients, this ham salad transports well, and tastes delicious on your favorite bread or dipped with your favorite crackers.

    Booty dip in a bowl with graham crackers on top.

    Booty Dip

    Dessert has never been so decadent! These are with nutella and berries and lots of chocolate for a summer indulgence to take along on your outdoor dinner date.

    Creamy peanut butter yogurt dip is shown in the center of the photo on an orange background. There is a spoon on the left and graham crackers for dipping on the right.

    Peanut Butter Yogurt Dip

    Perfectly paired with your favorite fruit, crackers or cookies, this easy sweet dip recipe will be great for your picnic!

    Picnic Drink Ideas

    Don’t forget the drinks! You can make a delicious sweet tea, lemonade or this fruit punch recipe that so many have been loving.

    Tips for a Perfect Picnic Date

    If you’re planning the perfect picnic, here are some tips to help you plan the perfect one:

    • Choose a scenic location that offers plenty of space to spread out from other picnickers.
    • Pack plenty of drinks and napkins.
    • Bring an outdoor game.
    • Dress Comfortably.
    • Prepare for your time together with these tips for preparing for a romantic weekend!

    We love gathering recipes for you, depending on cuisine, ingredient, holiday, or season! See all of our amazing recipe collections!

    35 Easy Summer Snacks Ideas

    May 9, 2023

    Summer snack ideas photo collage with text overlay.

    The best summer snacks are light and full of flavors. They make use of fresh fruits and veggies and aren't too heavy on a hot day. If you are looking for some new summer snack ideas, you are going to love these recipes! They have been tried and tweaked to perfection so you can get a delicious snack with every recipe.

    See more of our easy snack recipes for any time of year and our summer dinner ideas to prep you for your summer, especially for a picnic! Or, if it’s too hot to be outside, make sure you see these indoor picnic food ideas for a treat at home.

    Summer Snack Ideas

    From a spicy and creamy artichoke dip that is just as good as any starter from a chain restaurant, to pretty in pink chocolate-covered strawberries that make for a perfectly portioned after-dinner treat. I am sure you will find a few recipes that you can't wait to try. They’d also be great food ideas for a picnic if you’re planning to take advantage of the warm weather.

    You might want to save this collection of 35 Summer Snack Ideas to your snack ideas board.

    Jalapeno artichoke dip with chips

    Jalapeno Artichoke Dip

    This easy dip has 6 ingredients and is perfect for a summer snack. It is creamy, spicy and pairs perfectly with chips or veggies!

    nuts and bolts snack mix in a brown bowl

    Nuts and Bolts

    This is the snack to make and pack for a road trip or to take along for a beach day. It is easy to make with simple ingredients and it tastes amazing, no matter where you snack on it.

    Mexican street corn dip in a white bowl with lime

    Elote Dip

    Get street corn flavor in a tasty dip for summer snacking. Take this elote dip along to a picnic, or to a BBQ for authentic flavors that can feed a crowd.

    fruits on a platter with dip and cookies

    Fruit Board

    This platter of fresh fruit is just the thing to serve on a hot summer day. Luscious juicy fruits taste so good with this creamy dip. 

    Oreo cookie dip with cookies and pretzels

    Oreo Dip

    If you love cookies and cream flavors, you are going to want to save this decadent oreo dip recipe. You can dip cookies, graham crackers or fruits into this for a dreamy indulgent treat.

    Chocolate Rice Krispie treats on a tray with a bowl of chocolate chips beside them.

    Chocolate Rice Krispie Treats

    These no bake treats are so good! Kids and adults alike are going to reach for a second. They have so much fluffy chocolate flavor in a tidy little square that packs great for a road trip or a camping trip.

    Taco dip in a baking dish

    Taco Layer Dip

    This dip has layers of meat, cheese, veggies and cream cheese for a totally delicious summer snack that can feed a crowd. Serve with chips or tortilla shells for a really tasty option that will fuel hours of summer fun.

    Tater tots with cheese and jalapeno peppers

    Loaded Tater Tots 

    Take tots from the side dish category and turn them into a crispy, cheesy snack! This recipe cooks in the air fryer for a satisfying snack you can serve anytime! These are perfect for cocktail hour with friends.

    Chocolate Dipped Waffle Cones

    Make ice cream a special snack with this easy chocolate dipped waffle bowl. Soft ice cream paired with a crispy bowl and plenty of sweet chocolate make for a memorable goodie to share.

    Spicy ranch crackers close-up.

    Spicy Ranch Crackers

    This simple snack is seriously so good! Make spicy ranch crackers for a budget friendly snack that you won't be able to stop munching on.

    Marshmallow Fruit Dip 

    You are going to love this easy marshmallow fluff fruit dip. It tastes amazing with berries, pineapple and apples! You also will love this with graham crackers.

    Red, white and blue layered cupcakes

    4th of July Layered Cupcakes

    These layered cupcakes are popping with festive colors! Make a few dozen of these and take them to a 4th of July picnic for a really fun dessert.

    guacamole wontons with avocados

    Avocado Wontons

    This recipe makes for the best wontons to serve with chips and salsa for a unique summer snack. If you like avocados, you are going to want to grab 2 of these because they are so good!

    Everything bagel dip with veggies and crackers

    Everything Bagel Dip

    Put your garden fresh veggies and pair them with this dreamy, creamy dip! It has all of the flavors of an everything bagel for a healthier snack option.

    easy pico de gallo with tortilla chips

    Garden Fresh Pico de Gallo

    Garden fresh onions, tomatoes and herbs make for the best summer snack! Thispico de gallo  is easy to make and tastes so good! Pair this with a summer cocktail if you want to unwind with the freshest flavors.

    edible chocolate chip cookie dough in a glass jar

    Edible Cookie Dough

    If you are craving cookies but don't want to turn on the oven and heat up the house, check out this edible cookie dough recipe. Store a jar of this in the fridge for a fast summer snack on demand.

    Mixed berry trifle

    Mixed Berry Trifles

    Make these trifles in individual jars for a portable summer snack! These are full of fresh summer berries for a pretty and delicious after dinner sweet.

    booty dip with wafers

    Booty Dip

    Don't give up on a sweet treat because it is too hot to bake. This booty dip is a viral sensation for good reason. It is nothing short of amazing! So decadent and tasty and easy to make.

    Rice krispie stars layered with red, white and blue

    Red, White and Blue Star Rice Krispie Treats

    This festive summer snack needs no baking and is perfect to pack in a picnic basket and share as you watch fireworks. Everyone will love the colorful layers and shape!

    cool whip fruit salad in a bowl

    Cool Whip Fruit Salad

    This fluffy fruit salad uses cool whip to make a delicious sweet treat to share. You will love how this tastes after a hot day in the sun.

    Cowboy queso dip with chips

    Cowboy Queso

    This cheesy dip is packed with tasty things! Black beans, corn, and avocado make this dip hearty enough to satisfy a crowd of hungry snackers!

    strawberry jalapeno bruschetta

    Strawberry Jalapeno Bruschetta

    I know you are going to love this easy snack! It is sweet, spicy and so easy to make on a summer afternoon. This pairs well with a glass of wine or a glass of fruit punch.

    Blue cheese dip with crackers and veggies

    Blue Cheese Dip

    This dip is so flavorful! Make it and enjoy with chips or fresh veggies like peppers and celery for a summer snack that is very satisfying. This is great as a side with burger night too!

    graham cracker crumbs sprinkled on top of strawberries

    Cheesecake Stuffed Berries

    This recipe for cheesecake stuffed berries is perfect for summer snacking! They are sweet, tart and creamy!

    Fruity pebbles marshmallow treats

    Fruity Pebbles Treats

    Fruity pebbles make this unique marshmallow treat pop with colors and flavors! Make these at the last minute for a treat you can share with everyone.

    smoky cheese dip with fresh veggies

    Smoked Queso 

    If you are entertaining on the patio, you are going to want to dig this smoked queso! It is awesome with chips, veggies, or even drizzled over a taco if you like.

    Oreo rice krispie treats stacked on a plate

    Oreo Rice Krispie Treats

    Give your oreo cookies a whole new experience by mixing them into rice krispie treats! These are so good! You are definitely going to make these to take to the next summer party.

    key lime cookies with a bite taken out

    Key Lime Pie Cookies

    Cookies are always a good idea, and this recipe is no exception! Make these crumbl copycats when you crave a fruity snack. These soft cookies have the best tart kick to them for an afternoon pick me up.

    peanut butter yogurt dip

    Peanut Butter Yogurt Dip

    This dip is the ultimate cool and creamy dessert. It has peanut butter, honey and yogurt to make a healthy sweet snack that everyone will want to dip a fruit or cookie into.

    Cheese board with fruit and nuts.

    How to Make a Cheese Board

    Pair meat (you can even make salami roses) cheese, fruit and crackers together for a snack that you can share. You can also add in your favorite options to make this cheese board unique to your taste buds. 

    Skinny No Bake Cookie Oatmeal

    If you have been craving cookies, then this skinny oatmeal makes a guilt free summer treat you can munch on without the guilt. This tastes so much like no bake cookies. You are going to love it.

    Air fryer apple chips

    Air Fryer Apple Chips

    Take a healthy air fryer snack along on all of your adventures this summer with these crunchy apple chips. These are satisfying, nutritious and so easy to make.

    Best ever guacamole in a bowl

    Easy Guacamole Recipe 

    Get fresh flavor in every bite with the best ever homemade guacamole. I know you are going to want to make this every week for a summer snack to savor with fresh veggies.

    Lemon puppy chow in white bowl, sitting next to lemons.

    White Chocolate Lemon Puppy Chow

    White chocolate and lemon are so good together in this sweet and crunchy snack. Make this puppy chow in a big bowl and pass it out for a light snack that will fuel summer fun until you stop for dinner.

    pink chocolate coated strawberries

    Pink Chocolate Strawberries

    After your next trip to the strawberry patch, you have to make these pretty pink chocolate covered berries. They are so delicious and easy to make. The results are completely luscious.

    Which of these snacks do you want to make first? I would love for you to leave a comment and let me know what you like to munch on in the summer.

    Tips for Making Summer Snacks

    Since you’re looking for ideas for snacks for the summertime, here are some tips to keep in mind:

    • Use fresh ingredients whenever possible. Your garden is a great source of snack ingredients, as is your local farmers market!
    • Be creative with your fresh ingredients to discover new flavor combinations that taste amazing.
    • Store your snacks in an airtight container to keep them fresh until you are ready to serve them.
    • Keep them cold in the fridge, or nestled on a bed of ice to keep your snacks fresh in the summer sun.

    We love gathering recipes for you, depending on cuisine, ingredient, holiday, or season! See all of our amazing recipe collections!

    Ham Salad Recipe

    May 9, 2023

    Old fashioned ham salad on white bun, next to pickles and potato chips

    You’ll definitely want to try out this delicious and easy-to-make Old Fashioned Ham Salad recipe. Not only is making an easy sandwich a great way to use up leftover ham, but it’s also packed with flavor, much like our tuna salad recipe and egg salad sandwiches that you love!

    Whether you’re looking for a quick lunch, a potluck dish, or an appetizer to bring to a party, this jam-packed ham salad is sure to satisfy your taste buds.

    Old fashioned ham salad on bun, sitting next to chips and pickles, all on white plate.

    Looking for ideas to use up the ham and cheese? Try these Hot Ham and Cheese Sandwiches or grab some rolls and make some Italian Sliders with Hawaiian Rolls. You can also check out this collection of Salad Recipes if this dish gets you in the mood for more salad experiments.

    Prefer more lettuce in your salad? Chop up a Grinder Salad, which includes ham and all the best sub sandwich toppings but without the bread.

    [feast_advanced_jump_to]

    Why You’ll Love This Recipe

    • It uses a few ingredients: With only 6 ingredients, this recipe uses items that you may even have on hand.
    • Make-ahead recipe: This recipe actually works best when it sits in the refrigerator for an hour or so which makes it a great recipe to prepare early
    • Ready in only 15 minutes: This recipe, from start to finish, only takes a quarter of an hour. So it is great to make it when you don’t have a lot of time.

    What is Ham Salad?

    Ham salad is a classic dish made from chopped pieces of ham, mixed with a variety of seasonings and vegetables, such as celery, onion, and mayo. It’s a simple and easy way to use up leftover ham from a holiday or a Sunday dinner, and it’s a popular option for picnics, potlucks, and sandwiches.

    The origins of ham salad are unknown, but it has been a staple dish in American cuisine for many years. You can find ham salad recipes in cookbooks dating as far back as the 1900s, and it remains a beloved comfort food to this day.

    Ingredients Needed

    I’ve highlighted a couple of ingredients with some relevant notes. Aside from this, the ingredients needed are pretty basic.

    Ingredients to make ham salad recipe on counter.
    • Mayonnaise – We used ¾ a cup of mayo in this salad recipe but you can add more or less depending on your tastes.
    • Dijon mustard – If you aren’t sure about the flavor of mustard, you can always reduce the amount a little. But it definitely adds something so it is worth keeping in the mix.

    Substitutions

    Sometimes substitutions are necessary because of ingredients that are unavailable or needed for dietary restrictions. Here are some suggestions that can help:

    • Celery – if you don’t like celery, you could add carrots or green peppers to give a bit of crunch to the recipe. We love celery in our sandwich recipes, like this chicken salad sandwich recipe and it adds that perfect crunch.
    • Sweet pickle relish – you can use dill pickle relish, chopped capers or some chopped green olives as a substitute for this.
    • Dijon mustard – yellow mustard has a similar flavor, while whole grain mustard is a bit less tangy. Honey mustard is the sweeter version and works really well with the saltiness of the ham.

    How to Make Old-Fashioned Ham Salad

    This Old Fashioned Ham Salad is broken into 3 components:

    • Prepare the salad ingredients
    • Make the mustard mayonnaise
    • Combine the ingredients

    *Be sure to see the recipe card below for the full ingredients list & instructions!*

    Steps 1-4 for making old fashioned ham salad.

    STEP 1. Prepare the salad ingredients. Add chopped ham to the bowl of the food processor. Pulse several times. Add chopped celery and onion to the food processor and pulse until desired consistency is met. Be careful not to over-mix. (Image 1).

    Tip: If you don’t have a food processor, you can use a sharp knife to chop the meat and vegetables for the first step.

    Steps 5-8 for making old fashioned ham salad.

    STEP 2. Make the mustard mayonnaise. In a small mixing bowl, combine mayonnaise, relish, and Dijon mustard. Mix to combine. (Image 2).

    STEP 3. Combine the ingredients. In a large mixing bowl combine ham and mayonnaise mixtures and stir to combine. Add salt and pepper to taste. (Image 3).

    STEP 4. Serve with bread, crackers or sliced celery sticks. (Image 4).

    Old fashioned ham salad in mixing bowl.

    Recipe Pro Tips

    • Let the salad sit for a bit. You can serve the dish as soon as you have made it, but it definitely benefits from sitting in the refrigerator for an hour or so. This enhances the flavors and is definitely worth waiting for.
    • Use leftover ham. You can use fresh ham for the recipe, but it is a great way to use leftover ham from another recipe and cut down on food waste. Then, if you still have leftover ham, you’ll also love this ham casserole that uses a lot more!
    Old fashioned ham salad sandwiches on wooden cutting board.

    Recipe FAQs

    Why does my ham salad get watery?

    If you’ve noticed that your ham salad has become watery, there are a few potential causes. If you’ve added too much mayonnaise or other wet ingredients, this can also contribute to a watery consistency. To avoid this issue, ensure your ingredients are fresh and add enough mayonnaise to bind the ingredients together without overdoing it.
    You can also try draining any excess liquid from the chopped vegetables before mixing them into the ham salad, to reduce moisture content and prevent your ham salad from becoming too watery.

    What is the difference between deviled ham and ham salad?

    Both deviled ham and ham salad are tasty dishes made from chopped ham, but they differ in their texture and flavor. Deviled ham is smoother and creamier in texture, with a slightly spicier flavor due to the addition of mustard and Worcestershire sauce. Ham salad typically contains chunks of ham and vegetables, such as celery and onion, with mayonnaise, relish, and other seasonings for a sweet and savory flavor.

    What to Serve with Ham Salad

    This delicious old-fashioned ham salad goes well with a variety of side dishes. Here are a few great options:

    • Potato salad: This classic side dish offers a nice contrast to the salty and savory flavor of ham salad. This Amish potato salad recipe is a great classic!
    • Fresh fruit salad: A side of fresh fruit, such as grapes or sliced apples, is a refreshing and healthy option that complements the flavors of the ham salad.
    • Cole Slaw: This tangy and crunchy side dish pairs well with ham salad and adds a nice textural contrast.
    • Pasta salad: A cold pasta salad with colorful vegetables and a light dressing is a great side dish that won’t overpower the flavors of the ham salad. See all of our easy pasta salads for recipe ideas!
    • Veggies: Vegetables, such as these candied carrots, oven roasted broccoli, or roasted Brussels sprouts, are a healthy and flavorful side dish that complements the rich and savory flavors of the ham salad.

    Storage

    Ham salad can be stored in the refrigerator for up to 3 to 5 days. However, it’s important to keep the ham salad in an airtight container to prevent it from drying out and to reduce the risk of contamination.

    For best results, try to eat your ham salad within the first few days, as the ingredients may start to break down over time, affecting the flavor and texture.

    More Salad Recipes You’ll Love

    Want to add a few more salads to your menu plan? You could try this Italian Chopped Salad with pasta and delicious blue cheese. Or try an Asian Chopped Salad that combines sweet and savory ingredients in the best way. Or check out one of these 20+ of the Best Make-Ahead Salads when you are a bit short on time!

    • Cowboy Pasta Salad in bowl with wooden spoon.
      Cowboy Pasta Salad
    • A bowl of wilted lettuce, that's leaf lettuce with bacon grease and salt.
      Wilted Lettuce
    • Chicken macaroni salad in a bowl.
      The BEST Chicken Macaroni Salad
    • Chicken Caesar Pasta Salad in big bowl, sitting on napkin.
      Chicken Caesar Pasta Salad Recipe

    Did you make this? I’d be so grateful if you left a “star” rating below to let me know what you thought! Then, the next time you need a quick and easy recipe, come back to Fantabulosity to browse all of my easy recipes!

    Recipe

    Old fashioned ham salad on white bun, next to pickles and potato chips
    Print Pin
    4.93 from 14 votes

    Ham Salad Recipe

    This ham salad recipe is delicious as an appetizer served with crackers or for lunch or dinner served with chips, a side salad or soup. This dish is a definite crowd pleaser at showers, birthday parties and family gatherings served in finger sandwich rolls.
    Course Appetizer, Dinner, Lunch
    Cuisine American
    Prep Time 15 minutes minutes
    Total Time 15 minutes minutes
    Servings 6 sandwiches
    Calories 389kcal
    Author Jessica Burgess

    Ingredients

    • 1 pound ham roughly chopped
    • 1 rib celery roughly chopped
    • 1 small onion roughly chopped
    • ¾ cup mayonnaise
    • 2 tablespoons sweet pickle relish
    • 2 tablespoons Dijon mustard
    • salt and pepper to taste

    Instructions

    • Add chopped ham to the bowl of food processor.  Pulse several times.  Add chopped celery and onion to the food processor and pulse until desired consistency is met.  Be careful not to over mix.
    • In a large mixing bowl (one that will be big enough to add all of the ham and veggies to) combine mayonnaise, relish, Dijon mustard. Mix to combine
    • Pour the ham, onion and celery mixture in to the mayonnaise mixture and stir to combine. Add salt and pepper to taste.
    • Serve with bread, crackers or sliced celery sticks.

    Video

    Notes

    Recipe Tips:
    • This dish can be served once prepared, however, allowing it to sit in the refrigerator for up to an hour will enhance the flavors
    • If you do not have access to a food processor you can use a knife to chop the meat and vegetables.
    • Leftovers can be stored in refrigerator for up to 4 days.

    Nutrition

    Serving: 1sandwich | Calories: 389kcal | Carbohydrates: 3g | Protein: 17g | Fat: 34g | Saturated Fat: 8g | Polyunsaturated Fat: 14g | Monounsaturated Fat: 11g | Trans Fat: 0.1g | Cholesterol: 59mg | Sodium: 1177mg | Potassium: 265mg | Fiber: 1g | Sugar: 2g | Vitamin A: 113IU | Vitamin C: 1mg | Calcium: 16mg | Iron: 1mg

    Oven Baked Bacon Wrapped Chicken Thighs

    May 8, 2023

    This bacon wrapped chicken thighs recipe is a simple weeknight meal. Tender chicken thighs paired with the delicious flavor of bacon create the perfect dinner in less than one hour. Add your favorite side dishes, and you’re set.

    Bacon wrapped chicken thighs on a white plate

    The reason that chicken is so popular is because it’s so versatile to make. From Chicken Street Tacos to Baked Chicken Cutlets, chicken can literally take on any flavor and taste.

    But when it comes to boneless chicken thighs specifically, we also love this chicken thighs and gravy recipe!

    ⭐️ Why This Recipe Works

    • It’s quick! You only need about 40 minutes from start to finish to make this easy meal.
    • Ingredients: Minimal ingredients create maximum flavor!
    • Great for leftovers: If you’re lucky enough to have leftovers, this chicken recipe heats up perfectly the next day.

    🧾 Ingredients Needed

    I’ve highlighted a couple of ingredients with some relevant notes. Aside from this, the ingredients are common.

    Ingredients list for making chicken wrapped in bacon
    • Chicken thighs – If you’re not familiar with using chicken thighs, you may be surprised to hear that thighs can be extremely flavorful and juicy compared to chicken breasts. We love using thighs in recipes, such as these Instant Pot Chicken Thighs, because they turn out so juicy and sometimes, are more affordable than breasts.
    • Brown sugar – You can also use coconut sugar if you’re looking for a paleo recipe.
    • Bacon – Thin bacon is really the best option for this recipe. Thicker bacon can cook for the full 30 minutes and still be soggy. You want the timing for the bacon and chicken to work out perfectly so that they are both done at the same time, so thin is the way to go. If you like extra crispy bacon, you can pan-sear the bacon for several minutes (you do not want to cook it fully just help the process along)right before wrapping the chicken thighs(allowing the bacon to cool before handling).
    • Dijon mustard – this adds flavor and helps the seasoning adhere to the chicken; however, avoid adding too much so that the bacon does not become crisp. There is no need to add mustard to the side of the chicken that will be folded to be on the inside when cooking.

    📖 Substitutions

    Sometimes substitutions are necessary because of ingredients that are unavailable or because you prefer to change things up. Here are some suggestions that can help:

    • Chicken breasts – Chicken breasts can be used instead of thighs, however, they can vary significantly in size so you may need to wrap the breast with several slices of bacon ensuring that the bacon does not overlap. Chicken breasts will cook quicker if the chicken breasts are small (about the same size as thighs).
      Because of the variation in cook time, be sure to use a meat thermometer to ensure the chicken reaches an internal temperature of 165 F. Avoid overcooking because chicken breasts are leaner, they can become dry if overcooked.
    • Use regular mustard – If you don’t have Dijon mustard, you can use regular mustard in its place.
    • Use seasoned bacon – Maple bacon would be really good with this dish!

    🍳 Equipment

    • tinfoil
    • wire baking rack
    • mixing bowl

    👩🏻‍🍳 How to Make Bacon Wrapped Boneless Chicken Thighs

    You’ll start by preheating the oven to 400 degrees.

    *Be sure to see the recipe card below for the full ingredients list & instructions!*

    Mixing the ingredients in a bowl

    STEP 1: Prepare a baking sheet. Add tinfoil to the baking sheet and then place a wired baking rack on top of the foil.

    STEP 2: Mix the seasonings. In a bowl, mix the kosher salt, coconut sugar, black pepper, paprika, garlic powder, and ground mustard. Stir so everything is combined well.

    Covering the chicken with seasonings

    STEP 3: Prepare the chicken. Pat the chicken thighs with a clean paper towel and then place them on a plate with the exterior surface of the thighs facing up. Coat the exterior surface with mustard, and then sprinkle the spice rub mixture on top of the mustard.

    Adding the seasoning to the top of the chicken

    STEP 4: Fold the chicken. Once the thighs are seasoned, fold them in half so that the seasoned thighs are the only part exposed. Wrap each thigh with a piece of bacon, but don’t overlap the bacon.

    TIP: Toothpicks can be used to secure the bacon, but I found them to be more of a hassle than helpful.

    Put the thighs on the wire baking rack, keeping the chicken as flat as possible. Repeat with all the thighs, and leave 2 inches in between.

    Wrap the bacon around the chicken

    STEP 5: Cook. Place the thighs in the oven and bake for 25-30 minutes. The bacon should be crisp, and the internal temperature of the chicken should be 165 degrees. Remove and serve.

    Close up of chicken thighs perfectly cooked

    💭 Recipe Pro Tips

    • Don’t overlap the bacon. If you overlap the bacon, it won’t crisp up. Make sure that you wrap it in a single layer on the chicken thighs.
    White plate full of cooked chicken wrapped in bacon

    ❄️ How to Store and Reheat

    • Storage: Store these chicken thighs in an airtight container in the fridge and consume within 3-4 days of cooking. (Keep in mind the “sell by” or “use by” date on the chicken.)
    • Reheat: Since this recipe has bacon in it, it is best to reheat it in the air fryer or oven. Microwaving works too if you don't mind soft bacon. To reheat, place the chicken in the oven or air fryer at 400 F and cook for 5-10 minutes or until the chicken is warm and the bacon is crispy. When reheating, note that the bacon can burn at this temperature if cooked for too long.
    Chicken thighs with a piece cut out, paired with a side of broccoli

    📋 Recipe FAQs

    How long does it take to cook chicken wrapped in bacon in the oven?

    Chicken thighs and bacon is a fast and easy recipe! The cook time for this recipe varies between 25-30 minutes.

    Why are my baked chicken thighs tough?

    Chicken will turn tough if it’s overcooked. For the best cooked chicken bacon thighs, using a meat thermometer is the best bet.

    Insert the probe of the meat thermometer into the thickest part of the chicken. As long as the reading is 165 degrees, the chicken should be moist, tender, and delicious.

    Can you put cooked bacon on raw chicken?

    You can! If you want to have bacon that is extra crispy, sear it for a few minutes before wrapping it around the chicken.

    What to serve with bacon wrapped chicken?

    The fun part about making bacon wrapped chicken thighs in the oven is that they pair with just about anything. Steamed broccoli, side salads, or even homemade macaroni and cheese.

    How do I know when chicken is fully cooked?

    Bacon chicken thighs are delicious when they’re cooked perfectly, and this is where a meat thermometer comes into play. The internal temperature needs to be 165 degrees for chicken to be fully cooked and safe to eat.

    Can I make this recipe in an air fryer?

    Absolutely! This recipe can be done in an air fryer and you won't need to alter the recipe much, in order to use this cooking method. Cook the chicken at 400 F in the air fryer for 25-30 minutes, ensuring there is adequate space between the chicken thighs. If you are using a small air fryer or an air fryer that uses a basket, you may need to work in batches.
    Still, consider using some type of rack to help the bacon become crisp, and line the tray below with tinfoil to make clean-up easier.

    🥗 What to Serve with Chicken Thighs

    This bacon-wrapped chicken pairs amazing with a green salad recipe and this focaccia bread recipe. Or, you can also dip it in this jalapeno ranch dressing for an added kick!

    🍗 More Delicious Chicken Recipes

    If you love this easy chicken dinner as much as we do, here are other chicken recipes we think you'll love:

    • Fried chicken sliders on white plate, topped with mayo, lettuce and pickles.
      Fried Chicken Sliders
    • Chicken Bolognese on spaghetti noodles.
      Chicken Bolognese Recipe
    • A plate holds a serving of crock pot chicken enchiladas that has been topped with sour cream and chives
      Crock Pot Chicken Enchiladas
    • Eight cooked chicken drum sticks are swimming in a sauce in a black crock pot
      Slow Cooker Chicken Drumsticks

    Did you make this? I’d be so grateful if you left a “star” rating below to let me know what you thought! Then, the next time you need a quick and easy recipe, come back to Fantabulosity to browse all of my easy recipes!

    Recipe

    Bacon wrapped chicken thighs on white plate.
    Print Pin
    4.38 from 8 votes

    Bacon Wrapped Chicken Thighs in the Oven

    This bacon wrapped chicken thighs recipe is a simple weeknight dinner! So fast and easy to make in the oven.
    Course Main Course
    Cuisine American
    Diet Gluten Free
    Prep Time 10 minutes minutes
    Cook Time 30 minutes minutes
    Total Time 40 minutes minutes
    Servings 8 servings
    Calories 244kcal
    Author Jessica Burgess

    Ingredients

    • 2 pounds boneless skinless chicken thighs
    • 8 slices bacon thin cut
    • 2 tablespoons Dijon mustard
    • 2 tablespoons brown sugar
    • 1 teaspoon kosher salt
    • 1 teaspoon black pepper
    • 1 teaspoon garlic powder
    • ½ teaspoon paprika
    • ½ teaspoon ground mustard seed

    Instructions

    • Prep: Preheat the oven to 400 degrees. Add tinfoil to the baking sheet and then place a wired baking rack on top of the foil.
    • Spices: In a bowl, mix the kosher salt, brown sugar, black pepper, paprika, garlic powder, and ground mustard. Stir so everything is combined well.
    • Prep chicken: Pat the chicken thighs with a clean paper towel and then place them on a plate with the exterior surface of the thighs facing up. Coat the exterior surface with mustard, and then sprinkle the spice rub mixture on top of the mustard.
    • Coat chicken: Once the thighs are seasoned, fold them in half so that the seasoned thighs are the only part exposed. Wrap each thigh with a piece of bacon, but don't overlap the bacon. Put the thighs on the wire baking rack, keeping the chicken as flat as possible. Repeat with all the thighs, and leave 2 inches in between.
    • Bake: Place the thighs in the oven and bake for 25-30 minutes. The bacon should be crisp, and the internal temperature of the chicken should be 165 degrees. Remove and serve.

    Notes

    Tips:
    Don’t overlap the bacon. Overlapping the bacon will prevent the bacon from turning crispy.
    Storage: 
    Store in airtight container in the fridge and consume within 3-4 days of cooking. 
     

    Nutrition

    Serving: 1thigh | Calories: 244kcal | Carbohydrates: 4g | Protein: 25g | Fat: 14g | Saturated Fat: 4g | Polyunsaturated Fat: 3g | Monounsaturated Fat: 6g | Trans Fat: 0.05g | Cholesterol: 122mg | Sodium: 580mg | Potassium: 343mg | Fiber: 0.3g | Sugar: 3g | Vitamin A: 101IU | Vitamin C: 0.04mg | Calcium: 19mg | Iron: 1mg

    Summer Dinner Ideas

    May 7, 2023

    Easy Summer Dinner Ideas image collage with text overlay.

    Recipes for summer dinner ideas, when you come in late on those summer nights and need something quick and easy to feed your family.

    Since it’s summertime, you will also love these food ideas for a romantic picnic and these summer snack ideas! Or, if it’s too hot outside, an indoor picnic may be a better idea, and you can serve these summer dinner ideas on a blanket, in your floor!

    Easy summer dinner recipe collage with text overlay.

    I always keep summer meals and dinner recipe ideas handy for those warm nights when I want to:

    • Avoid heating up the oven – at least for hours.
    • Make something QUICK and easy.
    • Make something light, instead of heavy.

    Summer Dinner Ideas

    Here is a collection of my favorite summer dinner recipes ALL in one place, so when you need something quick and easy, it will all be right here! But before you dive in, remember that I have a great collection of pasta salads that can be a great, easy, light dinner option in the summer too.

    grilled marinated shrimp

    Grilled Marinated Shrimp

    This marinated shrimp recipe is so tasty. Grill these and serve them with tacos, or on a salad for a light summer dinner. Or, if you’re a fan of fried shrimp, it’s one of the most popular recipes here!

    Italian Sliders

    These sandwiches might be small in size, but they have such a delicious, big flavor! Serve them with chips or summer corn on the cob for a simple meal everyone will enjoy.

    Pasta with Corn and Tomatoes   

    Fettuccine with corn and tomatoes makes for a simple summer meal that has so many fresh flavors in the mix. Make this on a hot night when you want a light meatless meal. You could also serve these mozzarella wraps with this pasta as a side dish or use any leftover ingredients to make them the next night.

    Panko Crusted Cod

    Cod is a great meal no matter how you serve it. This recipe uses panko crumbs for a crunchy crust that is unbeatable.

    Smoked Cornish Hens

    Smoked Cornish game hens make for such a nice summer meal. They are small in size but have such a delectable smoky flavor!

    Air Fryer Turkey Burgers

    Air Fryer Turkey Burgers 

    Make juicy turkey burgers in your air fryer for a fast family dinner. You can pile these high with summer veggies for a complete meal, or serve them with some really yummy air fryer eggplant fries.

    Baked hot dogs on hot dog buns, sitting on white plate.

    Hot Dogs in the Oven

    I know heating up the oven isn’t ideal in the summer but you’ll only need to cook these hot dogs for 10 minutes so it shouldn’t heat up the house too much. Baking hot dogs in the oven is a great way to cook them when you need a large amount for a summer party too!

    Instant pot orange chicken in a white bowl with broccoli and rice

    Instant Pot Orange Chicken

    No need to stop for take out on the way home. This orange chicken cooks in a flash in the instant pot for a great dinner.

    Burger on a bun with red onion, pickles and cheese

    Stove Top Burgers

    If you are too tired to fuss with the grill tonight, this recipe for stove-top burgers is just what you need. These flavorful and juicy burgers are sure to be a family favorite. Or, kick things up a notch and make these cowboy burgers, with all the fun toppings.

    side salad with cheese and dressing on a white plate

    The Best Side Salad 

    Summer is the perfect time to make a great salad and make a meal of it. With garden fresh veggies and your favorite dressing there is a lot to like about this salad. You can even add a quick protein to this salad to make it main dish.

    Chicken Macaroni Salad

    This is not your mama's macaroni salad! It has chicken mixed in for a dish you can dig into for an easy summer meal.

    Pinwheel sandwiches stacked on top of one another, on cutting board.

    Pinwheel Sandwiches 

    These pinwheels have so much fun all wrapped up in a couple of bites! They’re a meal that is cool, delicious, and super simple on a hot summer night.

    Salmon patties, stacked on top of one another on a bed of lettuce.

    Old-Fashioned Salmon Patties

    Salmon patties are fried to a golden-brown color, yet still light enough for a summer dinner, that won’t weigh you down. Similarly, these crab cake sandwiches are also a great summer dinner idea. Have an air fryer? Try these Air Fryer Salmon Patties too!

    Hot ham and cheese sandwich with pasta salad

    Hot Ham and Cheese

    You can't go wrong with a classic like ham and cheese. Pop these in the oven, or toss them on the grill for an easy summer dinner that never goes out of style.

    Blue Cheese burger on pretzel bun, sitting on square plate with french fries.

    Blue Cheese Burgers

    Love this spin on a traditional cheeseburger recipe. If you love blue cheese, then you’ll love how the crumbles are built right in to your burger! Or for a really fun spin on burgers, that are perfect for summer flavors, these Aloha Burgers are a hit!

    Maid Rite sandwich sitting on white plate, next to cooked french fries.

    Maid-Rite Sandwiches

    This old recipe is sometimes called a “loose meat sandwich” and is similar to a traditional sloppy joe, and has been around for ages. It’s a great, easy way, to make a sandwich in the summertime.

    Grilled pork chops

    Sweet and Smoky Grilled Pork Chops

    These pork chops are sweet and smoky and grill fast! You only need a few minutes per side to get a great dinner on the table.

    Salsa, cheese and beef burritos

    Cheesy Salsa Burritos

    With some simple ingredients like beef, beans, salsa, and cheese you can wrap up a great family-friendly meal. Who could resist these burritos? You can make them ahead of time and freeze them for those nights you need a hand with dinner. Love Mexican food in the summertime too? These chicken fajitas wraps and steak quesadillas are great to put on the dinner rotation.

    Ham and cheese sliders stacked on top of one another.

    Ham and Cheese Sliders

    Sometimes called, “funeral sandwiches” these sliders aren’t just for funerals or parties! Sliders are a great summer dinner idea to keep things easy and bite-size! Spice things up a bit and also give these buffalo chicken sliders a try!

    Vegan noodle bowls with broccoli and sesame seeds

    Vegan Noodle Bowls

    Noodle bowls are always a good idea! This recipe is packed with veggies for a gluten free vegan meal option.

    Parmesan crusted chicken tenders

    Parmesan Crusted Chicken Tenders

    These tenders are low carb and so tasty. Make these for a guilt-free dinner that the entire family will love. Or if you have a smoker, these smoked chicken tenders are easy to make and so full of flavor.

    sloppy joe meat on slider buns with cheese

    Sloppy Joe Sliders

    Sloppy joe sliders are small in size but have all of the bold flavors of Sloppy Joes! Pile these high with saucy meat and cheese for a dinner the kids will LOVE. (They’ll also love these chicken bacon ranch sliders too!)

    French fries baked on baking sheet with cheese, pepperoni and pizza sauce.

    Pizza Fries

    Who doesn’t love pizza and fries? Combine the two and you have an amazing easy dinner idea! Watch these disappear quickly! Love having pizza in different forms? These pizza sliders are amazing too, and you can use leftover ingredients to make these the next night.

    Texas toast pizza with cheese and pepperoni

    Texas Toast Pizza

    If you ever have one of those nights that you just aren't sure what to serve for dinner, you can't go wrong with Texas toast pizzas! These are tasty and so easy to make after a day of summer fun. Now, not as quick as these Texas Toast pizzas… but this school pizza recipe will make the kids love summertime even more.

    Close up of grinder salad in white bowl with serving serving utensils.

    Grinder Salad

    If you love the grinder sandwiches, making them in salad-form is such a great, light dinner idea for those warm days.

    Air fryer brats on a white plate with buns

    Air Fryer Brats

    Too hot outside to stand over the grill? No sweat, you can make the best brats in your air fryer while you soak up some AC on a hot day. Or, make stove-top brats to keep the heat down in the house too!

    Air Fryer Breaded shrimp on a plate with lemon and cocktail sauce

    Air Fryer Shrimp

    This shrimp recipe is so easy when you use your air fryer. These are crunchy and pair perfectly with cocktail sauce. Have more shrimp on hand? This Boom Boom Shrimp recipe is out of this world!

    BBQ chicken pasta on a white plate

    BBQ Chicken Pasta

    Get bbq chicken flavor without having to host a cookout. This recipe makes for such a tasty pasta that captures the flavor of summer perfectly. I know pasta can seem heavy in the summer but recipes like this creamy lemon pasta too, are light enough and won’t weigh you down in the heat.

    Fried chicken sliders with lettuce and pickles

    Fried Chicken Sliders

    Sliders are awesome for summer meals. They aren't too big or heavy for a hot day, but they bring so much flavor to the table. These roast beef sliders are also a fun recipe to make for an easy dinner!

    Tuna salad sandwich with crackers on plate

    Tuna Salad Sandwich – The BEST!

    I know a tuna salad sandwich isn’t anything new but wait until you try this one! There’s something about the flavors that come together in this recipe, that has everyone leaving 5-star reviews!

    Cold crab salad

    Crab Salad 

    This recipe for crab salad is great on lettuce, or your favorite bread. It is so tasty you might want to just eat it as it is for a cool summer meal.

    Close up of taco salad with Catalina dressing on a fork.

    Dorito Taco Salad

    Have you ever had a taco salad with Catalina dressing in it? I’m telling you what, this recipe is packed with flavor and has become my husband’s new favorite dish.

    Cream cheese pasta swirled on a fork

    Cream Cheese Pasta

    If you have 20 minutes you can make this creamy pasta for a comforting meal. You only need 7 ingredients to recreate this simple dish that gets rave reviews every time.

    Fried tacos on a wooden cutting board.

    Fried Tacos

    As if tacos could get any better… oh wait, they can! If you haven’t tried making fried tacos yet, this is your sign to make them! Or, even though slow cooker recipes in the summer aren’t that popular, I think it’s a great way to make and enjoy shredded beef tacos, so you’re not hovering over the stove!

    Cheeseburger sub on white plate, next to potato chips.

    Cheeseburger Subs

    Everyone loves a good cheeseburger, so why not mix them up from time to time, and serve them differently? We love our burgers in the oven but it’s so fun to whip up these cheeseburger subs too!

    Chicken Bolognese

    This bolognese uses chicken for a tasty twist that is healthy and delicious. Pair this with a salad for an easy summer dinner you can have ready in 30 minutes.

    Meatball Stuffed Peppers in a skillet

    Meatball Stuffed Peppers

    This stuffed pepper recipe is so good! Use garden fresh peppers and frozen meatballs to make an easy and tasty dinner that is perfect for a busy summer night. 

    Shrimp baked potatoes

    Shrimp Baked Potatoes

    Bring two favorites for dinner together into one amazing stuffed potato. This recipe has a creamy cajun sauce that compliments both the shrimp and the baked potato, making it a perfect summer supper.

    Asian chicken lettuce wraps

    Asian Chicken Wraps

    These leafy lettuce wraps are so yummy. You are going to love this bold Asian flavor in a healthy wrap that makes a healthy meal. Then, if you’re a fan of using chicken for an easy dinner, it doesn’t get much easier than these salt and pepper chicken bites!

    Chicken street tacos on white platter.

    Chicken Street Tacos 

    This recipe brings street taco flavor to your kitchen. You won't need to chase down your favorite food truck to get a great and easy meal on the table tonight!

    BBQ Meat over queso chips

    BBQ White Queso Nachos

    Clean out your freezer and make an awesome meal in the process with this easy dish. It uses all of the best flavors like cheese, bbq, and whatever meat you have on hand.

    Asian chopped salad with mandarin oranges

    Asian Chopped Salad

    Chopped salad makes for such a good summer meal. Use prepackaged coleslaw mix and whip up a delectable homemade dressing to change up your salad game from the standard lettuce and tomato option.

    Chicken bacon ranch sandwiches on wooden cutting board.

    Chicken Bacon Ranch Sandwiches

    Why are the ingredients, chicken, bacon, and ranch, together, so delicious? The creaminess of these flavors on a bun, will knock your socks off!

    Chicken grilled cheese sandwich

    Grilled Chicken Cheese

    Tuck juicy chicken into a grilled cheese for a delicious, protein-packed summer meal. You can pair this with a salad, or some fresh veggies and dip for easy eating.

    Crock pot shredded chicken breasts

    Slow Cooker Shredded Chicken

    This shredded chicken cooks low and slow while you are at work for such a good dinner. Make sandwiches or tacos with this, or toss some shredded chicken into a great side salad for a healthy summer meal.

    Pretzel slider buns with chicken salad to make sandwiches.

    Chicken Salad Recipe

    If you love ordering chicken salad at your favorite cafe, you’ll likely get chicken salad similar to this one, which has grapes, apples, and pecans in it, giving it that amazing creaminess and crunchy textures. Or, for a fun twist, you can make this curry chicken salad too! Love cold salad sandwiches? This egg salad recipe is easy to make and great to keep in the refrigerator for easy dinners.

    Turkey sliders stacked on cutting board.

    Turkey and Cheese Sliders

    Although we do pop these in the oven, I feel like they are a great, light, summertime dinner option. Or, you can make other fun slider recipes like these salmon sliders and fish sliders.

    Air Fryer Tilapia with lemons on a white plate

    Air Fryer Tilapia

    Tilapia makes for such a healthy and light meal. Make this on a hot summer night, and let your air fryer for the cooking while you unwind after work.

    Sliced French bread pizza slices on wooden cutting board with meat and vegetable toppings.

    French Bread Pizza

    This unique pizza recipe uses French bread as the crust, and this recipe is made to keep a crispy, not a soggy, crust.

    Stacked wedges of peanut butter and jelly sandwiches.

    Peanut Butter and Jelly Sandwiches

    I wanted to wrap up this amazing list of dinner ideas with a classic that we can sometimes forget about. Yes, I know you probably know how to make a PB&J but did you know that there are ways that you can make it even better? It’s true! Or, you can also make a fried peanut butter and jelly to take the classic to a new level.

    More Dinner Ideas

    If you love easy dinner ideas, you’ll want to make sure you check out some of our most popular dinner ideas here:

    • Burger baked in the oven, steamed in aluminum foil, and placed on white plate.
      Burgers in the Oven
    • Baked BBQ Pork Steaks on white plate
      Pork Steaks in the Oven
    • BBQ Pork Steaks
      BBQ Pork Steaks in the Slow Cooker
    • Oven Baked Steak with Butter and a side of potatoes
      How to Cook Steak in the Oven

    We love gathering recipes for you, depending on cuisine, ingredients, holiday, or season! See all of our amazing recipe collections!

    7UP Cake

    April 30, 2023

    Slice of 7up cake on white plate, sitting next to a can of 7up.

    7UP cake is not only easy to make but with its citrus flavor, it makes it one of the best cake recipes for summer. It uses simple ingredients, and is ready in a little over an hour, making it a quick dessert recipe whether it’s for serving guests or simply enjoying after dinner on the weekends.

    Recipe originally published February 2019, updated April 2023.

    Sliced 7Up Cake on cake stand.

    Hey Fantabulosity readers! Meg here from Meg's Everyday Indulgence, bringing you this delicious 7Up Pound Cake. Knowing that you all love easy dessert recipes and like the easy pound cake recipe here on Fantabulosity, I knew this cake recipe would fit right in with your favorites to serve after one of our favorite spring dinner recipe ideas!

    🍰 Why You’ll Love This Cake Recipe

    • Lemon Flavor: Lemon is at the top of the list when I think of Spring flavors so I'm super excited to be sharing this simple, zingy cake with you today. Similar to Jessica’s creamy lemon bundt cake, this one uses 7up to add some extra fun citrus flavor! The first hint of citrus flavor in the 7Up Pound Cake comes from the 7Up. The lemon-lime flavor of the soda bakes up in the cake with a slight lemon flavor.
    • Simple Recipe: Let's start off by talking about just how simple it is to whip up this cake. You only need 6 ingredients. And it's completely from scratch. Butter, sugar, egg, flour, 7Up, and lemon zest. That's it!
    • Not Overpowering Lemon: The zest of a lemon is also mixed into the batter to really amp up the lemon flavor throughout the cake. There isn't an overpowering lemon flavor to the cake but it definitely has a citrusy background.
    • Cake Texture: The 7Up in the cake lends a slight effervescence and lightens up the texture a bit so that it's not as dense as a traditional pound cake. This cake has a moist and tender crumb that is the perfect mix in texture between a traditional cake and a pound cake.

    If you love lemon too, you’ll also love this lemon puppy chow and these lemon cake mix brownies.

    🧾 Ingredients for 7UP Cake

    Make sure to scroll to the bottom of the post if you're looking for the recipe card with ingredient measurements and directions for this traditional egg custard!

    The ingredients for this recipe are simple, and can be found at most grocery stores.

    Labeled ingredients for 7up cake.

    🥤 How to Make 7UP Cake

    Preheat oven to 350 degrees F. Heavily grease then flour a bundt pan. Set aside. 

    Steps 1-4 for 7up cake.

    Step 1. In the bowl of a stand mixture, cream the butter.

    Step 2. Add the sugar and beat until light and fluffy, 1 to 2 minutes. 

    Steps 3 & 4. Add eggs, incorporating after each addition, until well combined.

    Cream the flour and lemon and 7up in the cake batter. Steps 5-8.

    Steps 5 & 6. Add flour and mix until just incorporated. 

    Steps 7 & 8. Add 7UP and lemon zest and turn on low. Slowly incorporate until the batter just comes together.

    Pro Tip: You could also add in the zest of a lime to infuse even more citrus goodness into this cake.

    Steps 9-10, showing baking the 7up cake.

    💡 Expert Tip

    For this cake, and all cakes baked in a bundt pan, it's very important to grease and flour the pan properly to keep it from sticking and breaking. There's not much worse in the baking realm than trying to release a cake after the work of mixing it up and baking just to find it completely stuck.

    Step 9. Pour into the prepared bundt ban and smooth out the top.

    Step 10. Bake for an hour to 1 hour and 10 minutes.

    Baked 7UP cake, cooling on wire rack.

    Step 11. Remove from oven and place on wire cooling rack for 10 minutes. Invert the bundt pan and allow it to fully cool. Slice into 12 to 16 pieces and serve.

    Slice of 7up cake on white plate, topped with whipped cream, and sitting next to strawberry and 7up can.

    🍋 Lemon Glaze for 7UP Cake

    If you choose to top this 7UP cake with a glaze, we prefer using:

    • 2 cups powdered sugar
    • 1-2 Tablespoons milk
    • 1 Tablespoon lemon juice
    • lemon zest, optional

    NOTE: Allow cake to fully cool before topping with this glaze, or glaze will soak in to warm cake.

    1. In a bowl, mix powdered sugar, lemon juice, and zest.
    2. Next, pour in milk until it reaches the thickness you want for your cake.
    3. Drizzle lemon glaze over cake, and serve.

    ❄️ Storage

    Without glaze: If making the 7UP cake without the glaze, this cake can sit, stored on the counter at room temperature. (It’s best to put in an airtight container to retain freshness.)

    With glaze: Is using glaze, refrigerating the cake is best, since milk will be used.

    🍓 What to Serve with 7UP Cake

    You can enjoy it deliciously on its own, with the glaze above, or you can fancy it up in a few ways. Here are some of our favorite suggestions:

    • powdered sugar
    • strawberries or other fresh berries
    • whipped cream

    🧁 Similar Dessert Recipes

    If you love dessert recipes like this one, we think you’re also going to love these reader favorites:

    • Pink champagne cupcake on white marble counter.
      Pink Champagne Cupcakes
    • Strawberry brownies on white marble cutting board.
      Strawberry Brownies Recipe
    • Strawberry shortcake cookies stacked on top of one another.
      Strawberry Shortcake Cookies
    • Sliced pineapple bread on a wood cutting board.
      Pineapple Bread

    Recipe

    Slice of 7up cake on white plate, sitting next to a can of 7up.
    Print Pin
    4.53 from 17 votes

    7UP Cake

    This simple 7UP Cake Recipe: this easy 6 ingredient cake from scratch is dense in texture with a bright, citrusy flavor by using 7UP and lemon!
    Course Dessert
    Cuisine American
    Prep Time 10 minutes minutes
    Cook Time 1 hour hour 15 minutes minutes
    Total Time 1 hour hour 25 minutes minutes
    Servings 12 servings
    Calories 549kcal
    Author Jessica Burgess

    Ingredients

    • 1 ½ cups unsalted butter, room temperature
    • 3 cups granulated sugar
    • 5 large eggs, room temperature
    • 3 cups all-purpose flour
    • ⅔ cup 7Up
    • zest of 1 lemon

    Optional Glaze Ingredients (Not Pictured)

    • 2 cups powdered sugar
    • 1 Tablespoon milk
    • 1 Tablespoon lemon juice
    • lemon zest optional

    Instructions

    • Prep: Preheat oven to 350 degrees F. Heavily grease and flour a bundt pan. Set aside. 
    • Cream Butter and Sugar: In the bowl of a stand mixture, cream the butter. Add the sugar and beat until light and fluffy, 1 to 2 minutes. 
    • Eggs & Flour: Add eggs, incorporating after each addition, until well combined. Add flour and mix until just incorporated. 
    • Add Soda & Zest: Add 7Up and lemon zest and turn on low. Slowly incorporate until the batter just comes together.
    • Pour: Pour into the prepared bundt ban and smooth out the top.
    • Bake Cake: Bake for an hour to 1 hour and 15 minutes or until a toothpick inserted in to the center comes out clean.
      Remove from oven and place on wire cooling rack for 10 minutes. Invert bundt pan and allow to fully cool. Slice into 12 to 16 pieces and serve.

    Optional Lemon Glaze (Not Pictured)

    • In a bowl, mix powdered sugar, lemon juice, and zest.
    • Next, pour in milk until it reaches the thickness you want for your cake.
    • Drizzle lemon glaze over cake, and serve.

    Notes

    Important Note About Greasing Your Pan: For this cake, and all cakes baked in a bundt pan, it's very important to grease and flour the pan properly to keep it from sticking and breaking. There's not much worse in the baking realm than trying to release a cake after the work of mixing it up and baking just to find it completely stuck.

    Nutrition

    Serving: 1slice | Calories: 549kcal | Carbohydrates: 75g | Protein: 6g | Fat: 25g | Saturated Fat: 15g | Cholesterol: 148mg | Sodium: 39mg | Potassium: 72mg | Sugar: 51g | Vitamin A: 835IU | Calcium: 25mg | Iron: 1.9mg

    Chicken Street Tacos

    April 29, 2023

    Chicken Street Tacos on white plate.

    Chicken Street Tacos: A delicious and easy taco recipe, that’s fun to serve on taco night! With only a 30-minute to an hour, marinate time, these delicious and flavorful tacos are a great easy dinner idea.

    Mexican food, especially those made with chicken, are some of our favorites! We think you’re also going to love this chicken fajitas wrap recipe!

    Chicken street tacos on white plate.

    It is NO secret around here that tacos and taco bars and taco recipes are a favorite of ours. We think you’re going to love these, especially if you’ve loved these baked chicken tacos, since they’re similar and a favorite!

    Hey there! Meg here from Meg's Everyday Indulgence with another delicious recipe to share. These street tacos are customizable, simple to make, and sure to become a dinner staple. You could even serve them at a fiesta party, for a fun party dish.

    [feast_advanced_jump_to]

    Ingredients Needed

    The ingredients needed for this chicken street tacos recipe are basic and can be found at most grocery stores!

    Labeled ingredients for chicken street tacos
    • Boneless skinless chicken breasts – you could make a large batch of chicken in the slow cooker, after marinating it for this recipe if that’s helpful! You can also use boiled chicken thighs if desired.
    • Taco seasoning – We love this chicken taco seasoning recipe.
    • Small corn or flour tortillas – you can choose which type you prefer, however, we prefer corn tortillas for this recipe.
    • Pico – We love making this easy Pico de gallo recipe to serve on top of these tacos.
    • Queso Fresco – Queso fresco is that crumbly, slightly salty white cheese you see on authentic street tacos. It's creamy, yet crumbly and adds the perfect touch to these tacos. If you're unable to find it, you can substitute a Mexican blend of shredded cheese or pepper jack.

    Tip for Marinating Chicken

    Fast Marinating: Thinly sliced chicken is key to making this recipe quickly. You can either buy chicken cutlets or cut your chicken breasts. Boneless chicken thighs would also be great in this recipe since they tend to be juicy!

    Slicing the Chicken: Grab 2 boneless skinless chicken breasts and cut each one widthwise so that you end up with two thin pieces of chicken per breast.

    How to Make Chicken Street Tacos

    Steps 1-4 of chicken street tacos recipe.

    Cutting the chicken: Filet the chicken so that you have 4 thinly sliced pieces of chicken.

    Marinate: In a bowl, whisk together 2 tablespoons olive oil, taco seasoning, and juice of lime. Add chicken and toss to coat. Marinate for 30 minutes to an hour.

    Steps 5-8 for how to make chicken street tacos.

    Cook chicken: Heat a large cast iron skillet over medium heat. Add remaining tablespoon of olive oil to the hot skillet. Add chicken and cook for 2 to 3 minutes per side, until juices run clear. Remove to a cutting board and let rest for 5 minutes. Dice into small pieces.

    Tips for Heating Tortillas:

    • First, choose what kind of tortillas you want to use.
    • You can either wrap them in a damp paper towel and microwave for 30 seconds or wrap them in foil and place in your oven at around 200 degrees while you're preparing the chicken.
    • Keep them wrapped until right when you're serving dinner. This will keep them warm and soft. You can even buy those tortilla warmers they use in restaurants to keep them warm if you wish.
    • You can also char corn tortillas over the grill or your gas stove. Hold them over the flame (using tongs) until the edges are charred. Flip and repeat on the other side.
    Steps 9-12 for making chicken street tacos.

    To assemble tacos: Lay tortillas on a plate. Top with a spoonful of chicken, pico de gallo, and crumbled queso fresco. Top with sour cream, if desired.

    Chicken street tacos on white platter.

    Additional Topping Options:

    Check out the free printable, “Taco Topping Ideas” for more, out-of-the-box ideas for toppings, or here are the most common:

    • Pickled onions
    • Fresh cilantro
    • Shredded lettuce
    • Shredded cheese
    • Fresh or pickled jalapenos
    • Homemade salsa
    • Charred corn or corn salsa
    • Crushed chips (like we used on our Easy Taco Salad Recipe)

    Or, you’ll really love this avocado salsa to pour on top! We use a lot of these same toppings on this walking taco casserole recipe and fried tacos too if you’re meal planning!

    Recipe FAQs

    How to cook chicken for chicken street tacos?

    You can cook chicken on the stovetop in a skillet, bake it in the oven, grill it, smoke the chicken or whatever your preferred method is.

    What kind of chicken should you use for chicken street tacos?

    Chicken breasts, chicken thighs, or your favorite type of chicken can be used for this recipe.

    How do you know when chicken is done?

    The internal temperature of chicken should reach 165° F for it to be considered safe to eat.

    More Mexican Recipes

    Love easy chicken recipes? Then you’ll LOVE these chicken fajitas!

    We are also huge fans of this chicken taco casserole and these slow-cooker chicken enchiladas!

    If you’re looking for more taco recipes in general, these slow-cooker shredded beef tacos are delicious for dinner!

    Or don’t miss these reader favorites:

    • Elote corn dip in a bowl with lime wedges.
      Elote Dip
    • Spoonful of hot taco dip in dish.
      Hot Taco Dip
    • Beef and Cheese Burritos on plate.
      Beef and Cheese Burritos
    • A plate holds a serving of crock pot chicken enchiladas that has been topped with sour cream and chives
      Crock Pot Chicken Enchiladas

    If you enjoyed this post, be sure to follow me on Instagram, Facebook, Pinterest and YouTube! Share a photo of your recipe and use the hashtag #Fantabulosity so I can find it and follow along!

    Recipe

    Chicken Street Tacos on white plate.
    Print Pin
    5 from 8 votes

    Chicken Street Tacos

    These chicken street tacos can be made quickly, after marinating for about 30 minutes, and have such amazing flavor. Top with your favorite taco toppings and enjoy for taco night!
    Course Main Course
    Cuisine Mexican
    Prep Time 1 hour hour
    Cook Time 10 minutes minutes
    Total Time 1 hour hour 10 minutes minutes
    Servings 6 servings
    Calories 433kcal
    Author Jessica Burgess

    Ingredients

    • 2 boneless skinless chicken breasts
    • 3 Tablespoons olive oil, divided
    • 2 Tablespoons taco seasoning
    • 1 lime, juiced
    • 18 street corn or flour tortillas
    • pico de gallo
    • crumbled queso fresco
    • sour cream

    Instructions

    • Cut and Marinate Chicken: Filet the chicken so that you have 4 thinly sliced pieces of chicken. In a bowl, whisk together 2 tablespoons olive oil, taco seasoning and juice of lime. Add chicken and toss to coat. Marinate for 30 minutes to an hour.
    • Heat Tortillas: Wrap tortillas in a damp paper towel and microwave for 30 seconds to a minute, until warmed through. Wrap in foil then place in a warm oven until ready to serve.
    • Cook Chicken: Heat a large cast iron skillet over medium heat. Add remaining tablespoon of olive oil to the hot skillet. Add chicken and cook for 2 to 3 minutes per side, until juices run clear. Remove to a cutting board and let rest for 5 minutes. Dice into small pieces.
    • To assemble: lay tortillas on a plate. Top with a spoonful of chicken, pico de gallo and crumbled queso fresco. Top with sour cream, if desired.

    Nutrition

    Serving: 3tacos | Calories: 433kcal | Carbohydrates: 49g | Protein: 23g | Fat: 15g | Saturated Fat: 3g | Cholesterol: 48mg | Sodium: 1103mg | Potassium: 416mg | Fiber: 3g | Sugar: 5g | Vitamin A: 485IU | Vitamin C: 5mg | Calcium: 99mg | Iron: 4mg

    20+ No-Bake Desserts

    April 24, 2023

    Image collage of no bake desserts

    With these no-bake desserts, there’s no need to turn on the oven to make your sweet tooth happy! This collection of dessert recipes that are also “no bake” has something for everyone. From Oreo Nutella cheesecake which is as dreamy as it sounds, to a cool and creamy orange fluff salad, this list has something for everyone on it, no matter what you are craving!

    Image collage of no bake desserts with text overlay.

    If you are in search of summer desserts that need no baking and taste amazing, you are in the perfect place because we have a ton of no-bake recipes here. Some would even work perfectly for a date-night or date-day picnic food idea.

    I have tried and tested a whole bunch of tasty treats in my kitchen so that you can indulge your family and get great results every time. These recipes are easy to make and require common pantry supplies to create decadent desserts.

    Grab your favorites below, and make sure to check out all of the other easy recipes on the blog!

    Oreo Nutella Cheesecake

    This cheesecake brings Oreo cookies and Nutella together to make a dreamy and creamy no bake treat that is perfect for curing those chocolate cravings! 

    Peanut butter M&M Cheese ball with pretzels

    M&M Chocolate Chip Cheese Ball

    This cheese ball has so much chocolate flavor! It has m&m candies, chocolate chips and a great peanut butter center. Serve with cookies or graham crackers for a great no bake treat.

    no bake peanut butter pie with peanut butter cups

    Peanut Butter Pie 

    This pie is packed with luscious peanut butter flavor! This dessert needs no baking, and has plenty of peanut butter cups sprinkled over the top to satisfy your chocolate cravings.

    no bake cherry cheesecake

    Cherry Cheesecake

    This cheesecake has loads of cherries for a classic combo that tastes amazing. One bite of this and you will agree, this is an absolute dream dessert.

    A slice of lemon lush on a plate, with a fork taking a bite out.

    Lemon Lush Recipe

    This no-bake lemon lush recipe (sometimes called Lemon Delight) is an easy dessert to make and full of bright and tangy, and sweet flavor.

    Peanut Butter and chocolate bars no bake candy

    Peanut Butter Chocolate Bars 

    This recipe makes something even better than Reese's! Layer peanut butter and chocolate and chill for a few hours then slice this homemade candy and share it with anyone with a sweet tooth! 

    Slice of possum pie on a white plate, sitting next to a fork with a bite.

    Possum Pie

    When you combine the flavors of cream cheese, pudding, whipped cream, and a peach-shortbread crust, you can’t go wrong. This possum pie is full of flavor! (And no, don’t worry, no actual possum was actually used in this recipe!)

    Chocolate pie with oreo crust and whipped cream

    No Bake Chocolate Pie

    If you like creamy chocolate pudding then this pie is just the thing to make for an easy no bake dessert.  You will love the layers of chocolate combined with an oreo crust.

    Banana pudding dip with wafers, fruit and pretzels

    Banana Pudding Dip

    This dip has all of the flavor of banana pudding, but it is made for dipping! Pretzels, fruit or cookies make this snack especially yummy.

    Cheesecake stuffed strawberries

    Cheesecake Stuffed Strawberries

    Split your berries then stuff them cheesecake for a bite sized dessert that looks amazing but isn't too hard to make. These need no baking and are nothing short of decadent.

    edible chocolate chip cookie dough in a glass jar

    Edible Cookie Dough

    This egg free recipe needs no baking, just grab a spoon and grab a bite or two. You can whip this up in 15 minutes for cookie dough cravings.

    cream cheese chocolate pie

    Cream Cheese Chocolate Pie

    Chocolate pie is perfect for a creamy frozen dessert. You can whip this up in minutes and enjoy it on a hot summer night.

    angel food cake cubes with blueberries and strawberries.

    Mixed Berry Trifles

    If you love berries and white cake together then these trifles make for such a good dessert. Use store-bought angel food cake and mixed summer berries for a fast and flavorful no bake treat.

    biscoff fudge with biscoff cookies

    Biscoff Fudge 

    Bring cookie butter flavor to creamy fudge with this easy no bake recipe. This biscoff fudge makes for a great gift or an indulgent snack to munch on.

    Pudding, cool whip and oreo cookies layered in a baking dish

    The Best Oreo Dessert

    The only way to describe this dessert is that it is the best! Layers of luscious Cool Whip, cream cheese, and Oreo cookies create a decadent sweet to share with anyone who loves cookies and cream flavor.

    No bake oreo mousse layered in a bowl with oreo cookies

    Oreo Mousse

    Bring Oreo flavor with this easy-to-make-at-home mousse! This no-bake dessert is perfect for those days when you crave cookies and cream flavor.

    Banana cream pie slice with banana bunch

    Banana Cream Pie

    This no-bake pie is luscious, creamy and has so much banana flavor. Since it has fruit in the mix, it totally counts as a healthier dessert.

    Peanut butter cup brownie trifle in a glass bowl

    Brownie Peanut Butter Cup Trifle

    This trifle has a great medley of flavors; peanut butter, brownies and cheesecake! You are going to love this easy dessert for a no bake treat that is easy to assemble. Take this along to a picnic or party for a dreamy indulgence that everyone will compliment.

    No bake s'mores cheesecae with marshmallows, hershey bars

    S'mores Cheesecake

    Bring the flavor of summer to your next cheesecake. This no bake pie is packed with gooey s'mores flavors and will absolutely hit the spot after dinner.

    Booty dip in a bowl with graham crackers on top.

    Booty Dip

    Grab 6 ingredients and start mixing! This viral booty dip is an awesome last-minute treat to make that requires no baking. What will you dip with? Cookies or graham crackers? Or maybe even berries? This dip would be amazing to serve as an indoor picnic food idea too.

    Snickers salad with apples and mini candy bars

    Snickers Apple Salad

    Bring Snickers candy and crisp apples together into this salad. Make no mistake, this is absolutely a dreamy dessert and you won't need to turn on the oven to make it.

    Orange fluff salad with mandarin oranges and mini marshmallows

    Orange Fluff Salad

    This fluffy dish has loads of oranges and cream flavor! Add plenty of mini marshmallows to make this dessert extra special! 

    An Easy Microwave Dessert Recipe

    If you’re still looking for a no-bake dessert but want a warm and comforting recipe, this vanilla mug cake is cooked in the microwave in just minutes!

    More Dessert Recipes

    If you love easy dessert recipes, then you’ll love these old-fashioned dessert recipes and these popular recipes that have been loved by many:

    • Cherry bread with cherry icing on wooden cutting board.
      Cherry Bread with Cherry Glaze
    • A collage of old-fashioned dessert recipes
      Old-Fashioned Desserts Everyone Knows and Loves
    • Blueberry dump cake, with serving spoon resting in pan.
      Blueberry Dump Cake (Easy, Buttery Dessert with Fresh Berries)
    • Cherry dump cake topped with homemade whipped cream, served in a dessert bowl.
      Cherry Dump Cake (Easy 3-Ingredient Dessert)

    The BEST Side Salad Recipe

    April 24, 2023

    side salad on white plate drizzled with ranch

    This is the BEST side salad recipe you’ll ever have! It’s the requested side dish at family gatherings and not your ordinary run-of-the-mill side salad.

    There’s a SECRET! How to cut the lettuce and add these two common spices that change your salad-making life, and you can see more about this below.

    Best Salad Recipe in White Plate with Red Napkin

    Of all of the salad recipes we’ve ever had, this is by far the favorite and easy side salad to serve alongside your favorite dinner recipes, whether it’s a steak in the oven recipe, creamy lemon chicken pasta, chicken drumsticks in the oven, air fryer fish, or whatever the main course is!

    [feast_advanced_jump_to]

    Expert Tip:

    If you’re making this salad as a main dish, you should try making this tuna salad recipe to go on top of it! You won’t believe how delicious the creaminess of the tuna, adds to the salad… so much so, that you may not even need a dressing! It’s the perfect lunch or light dinner!

    What Makes it the BEST Green Salad:

    I have to thank my mother-in-law for teaching me how to make the BEST of the best when it comes to side salad recipes. The woman has some serious salad skills and I couldn’t wait to share her secret with you. Don’t worry, I asked for her permission!

    For this side salad, there are two ingredients and a certain way to cut the lettuce.

    I bet you even have the two ingredients in your pantry!

    Tips on How to Make the Best Salad

    So there are a few secrets to the best side salad recipe that has literally left people saying,

    I don’t know what it is, but it’s SO good! Why is it so good!?

    Well, it’s a couple of things.

    1. How the Lettuce is Cut

    Two image collage of cutting romaine lettuce.

    Romaine Lettuce:

    You’ll want to use romaine for a side salad. I’ve used other greens like, mixed greens, leaf lettuce and head lettuce and although they’ll do in a pinch, those types of lettuce don’t measure up to romaine. However, what’s even better than just romaine is a combination of TWO different kinds of greens…

    Using Spinach Too:

    Using fresh spinach along with romaine is definitely optional but it REALLY adds a delicious texture to the salad.

    Even as someone who’s not a huge fan of spinach salads, I always try to incorporate a small handful of chopped spinach in to this salad now because it makes a wonderful difference.

    How to Cut Romaine Lettuce (and Spinach)

    The key is chopping the lettuce into small pieces and removing the white part (the stem) because it can overpower and cause your salad to taste bitter.

    Have you ever eaten a “chopped salad” at a restaurant and found the texture and flavor to be so much more amazing than a head-lettuce or romaine salad with all of the white crunchy pieces like you typically find on a salad bar?

    This is why it’s so good. The lettuce is easier to eat, less bitter and so much more enjoyable.

    Side salad with toppings in clear bowl.
    There are 2 ingredients that make this salad the best!

    The 2 Ingredients That Make It the BEST Salad

    Basil & Garlic Powder.

    Isn’t that EASY?

    This combination on a salad is dynamite. I’m talking dried basil and garlic powder that you probably already have in your pantry. (But if you have fresh basil, chop a few leaves up instead of dried and the flavor is even more incredible!)

    Sprinkle on your desired taste preference, and toss.

    By FAR one of my favorite touches to this side salad. It’s easy, and it makes a HUGE difference for your salad…. making it the BEST salad recipe of all time. At least in our house! 🙂

    Side Salad Ingredients and Toppings

    Salad ingredients on plate with dressing on the side.
    Pick your favorite salad ingredients and dressing

    Along with the right lettuce and the garlic powder and basil, we love adding our favorite toppings!

    Feel free to use what you like and take out what you don’t!

    • Carrots
    • Celery
    • Hard-Boiled Eggs
    • Shredded Cheese – bagged is just fine but fresh shredded block cheddar is amazing!
    • Bacon (or Air Fryer Bacon)
    • Tomato
    • Cucumber
    • Radish
    • Sunflower Seeds
    • Green Onions
    • Croutons (especially these brioche croutons)

    Or turn your side salad in to a main dish by adding proteins like:

    • grilled chicken (These chicken bites are incredible in this side salad.)
    • baked chicken
    • buffalo chicken
    • steak
    • salmon
    • shrimp (like this grilled shrimp recipe)
    • crab
    • pork (like this slow cooker BBQ pulled pork)
    • leftover meats (smoked brisket, roast, etc.)
    • lunchmeat (ham, turkey)

    Toppings Tip: Cutting the lettuce in to small bite-size pieces is important. But if you chop all of your toppings too, it makes it even better!

    Dinner salad on white plate with red and white cloth.
    The perfect dinner salad

    Making This Simple Salad Ahead of Time

    We have this salad at least a couple of times a week at home. It gets in our veggies, and it takes a lot of guesswork out of what we are going to have alongside our main dish because it goes with almost everything!

    I’ve never been a huge fan of making a large salad in bulk because I’ve been told that cut lettuce won’t “keep” as long in the refrigerator.

    But I AM a fan of pre-chopping the ingredients and putting them in containers ahead of time, so my side dishes get easier and easier throughout the week.

    See more make-ahead salads that we love!

    Recipe FAQs

    What kind of dressing is best for a side salad?

    Feel free to top it with the dressing of your choice, but we are HUGE fans of making the Hidden Valley Ranch Buttermilk Dressing, with the seasoning packet that you can make with mayo and buttermilk! See below.

    What is a side salad?

    A small green salad to serve alongside a main dish recipe, that usually includes a house dressing or favorite salad dressing like ranch, blue cheese, or oil & vinegar!

    How big is a side salad?

    Plan on 1 to 1 ½ cups of salad for a side salad to go with dinner.

    Homemade Salad Dressing

    For this salad recipe, there’s no better dressing than this homemade salad dressing, using Hidden Valley Buttermilk Ranch, Restaurant Style!

    Ingredients:

    • 1 package of Hidden Valley Buttermilk Recipe (Restaurant Style)
    • 1 cup mayo
    • 1 cup buttermilk (you can use regular milk if that’s all you have but the buttermilk is thicker and is much better!)

    Mix all three ingredients together and chill for about 30 minutes. Drizzle on this green salad and enjoy!

    Store any remaining salad dressing in the refrigerator in an air-tight container or mason jar!

    Or, if you love a spicy kick, you may love this homemade jalapeno ranch dressing instead!

    Hidden Valley Buttermilk Ranch Dressing Packet.
    Our favorite dressing for a salad – Hidden Valley Ranch Restaurant Style Dressing

    More Salad Recipes

    We’re BIG fans of salad around here, whether that’s pasta salad, a quick lettuce salad, savory salads, or dessert salads. If you love them too, here are our favorite salad recipes, that I think you’ll love, especially this crab salad that we’re addicted to!

    More Side Dishes

    You may also love these side dishes that are popular with others:

    • side salad on white plate drizzled with ranch
      The BEST Side Salad Recipe
    • two tuna salad sandwiches stacked on top of each other
      The BEST Tuna Salad Recipe
    • Old fashioned ham salad on white bun, next to pickles and potato chips
      Ham Salad Recipe
    • Pistachio Salad in white bowl on pink background
      Pistachio Salad

    Did you make this? I’d be so grateful if you left a “star” rating below to let me know what you thought! Then, the next time you need a quick and easy recipe, come back to Fantabulosity to browse all of my easy recipes!

    More Lettuce Salad Recipes You’ll Love:

    • Summer Side Salad
    • Italian Chopped Salad
    • Apple Cranberry Salad

    Recipe

    side salad on white plate drizzled with ranch
    Print Pin
    4.18 from 553 votes

    The BEST Side Salad Recipe

    The BEST Side Salad Recipe: There's a SECRET to this salad, and it tops all salad recipes we've tried!
    Course Side Dish
    Cuisine American
    Prep Time 15 minutes minutes
    Total Time 15 minutes minutes
    Servings 5 servings
    Calories 222kcal
    Author Jessica Burgess

    Ingredients

    • 3 heads romaine lettuce See how to cut and remove stalk
    • 2 cups chopped fresh spinach optional
    • 1 tablespoon dried basil or fresh!
    • 1 teaspoon garlic powder or more/less if you prefer!
    • ½ cup shredded cheddar cheese For best results, shred your own block cheese
    • 1 roma tomato chopped
    • 3-4 slices cooked bacon chopped
    • 2 boiled eggs chopped
    • ¼ cup celery chopped
    • ¼ cup carrots chopped
    • 1 radish chopped
    • 1 stalk green onions chopped
    • 1 tablespoon sunflower seeds hulled

    Instructions

    • Slice romaine leaves off of white stems, (discard white stems) and chop lettuce into small pieces and pour in large serving bowl. If also using fresh spinach, chop and add to romaine in bowl.
    • Next layer on your favorite toppings, such as chopped tomato, bacon, eggs, radishes, green onions, celery, carrots, sunflower seeds and cheddar cheese.
    • Sprinkle the garlic powder and the dried basil on top.
    • Serve with choice of dressing. (Our favorite is to make the Hidden Valley Buttermilk Ranch dressing, with the seasoning packet, buttermilk and mayo.)

    Video

    Notes

    TIPS to make this the best side salad:
    • Chop everything in to small pieces, including the lettuce.
    • We love using Hidden Valley Buttermilk Ranch for dressing (The packet that you make with mayo and buttermilk) and making this before starting the salad so it can sit in the refrigerator for 30 minutes, according to package directions.
    • If you want to make this ahead of time, chop up the toppings and store them separately so the toppings don’t make the lettuce soggy.
    Topping Ideas: 
    Carrots, radishes, green onions, tomatoes, cooked bacon, hard-boiled eggs, celery, sunflower seeds, and shredded cheddar cheese.

    Nutrition

    Serving: 1salad (⅕ recipe; without dressing) | Calories: 222kcal | Carbohydrates: 16g | Protein: 13g | Fat: 13g | Saturated Fat: 5g | Polyunsaturated Fat: 2g | Monounsaturated Fat: 5g | Trans Fat: 1g | Cholesterol: 95mg | Sodium: 233mg | Potassium: 1177mg | Fiber: 9g | Sugar: 6g | Vitamin A: 35288IU | Vitamin C: 21mg | Calcium: 256mg | Iron: 5mg

    30-Minutes or Less Dinners

    April 21, 2023

    30 minute dinner ideas collage with text overlay.

    This collection of 30-minute or less dinners has so many tasty and simple meal ideas for you. These recipes have been tested to bring great meals to your family in a flash, so you can turn to them when meal planning.

    30 minute dinner ideas collage with text overlay.

    On a really busy day, it can be so tempting to open an app on your phone and order dinner to go, or even worse, hop in line at the drive-thru.

    Even on the most hectic of days, your family still needs to eat, and cereal just won't cut it. Luckily for you, I have gathered 20 of our favorite 30 minute or less dinner ideas. From Instant Pot cheeseburger macaroni to stovetop skillet burgers, this list has hearty, delicious dinner ideas to please your hungry family.

    📌 Don't forget to save these recipes to your dinner board on Pinterest for future reference.

    If you have a lot of ground beef in the freezer, you’ll also want to bookmark this list of ground beef dinner recipes.

    Burger with melted cheese, being opened to show cheese pull.

    Burgers in the Oven

    With a special “trick” these burgers have been claimed as the best burgers, and even better than Mcdonald’s! Besides tasting delicious, these burgers are made in under 30 minutes!

    Pasta with buffalo chicken and green onions on a blue plate

    Instant Pot Buffalo Chicken Pasta

    Bring big bold buffalo chicken flavors to a comforting pasta dish. This meal cooks in the instant pot in minutes to make such a delicious dinner! Add a salad to the side for a fast and filling busy night meal.

    Pepperoni, salami and ham on a mini bun with peppers and cheese

    Italian Sliders

    Prep these in the morning, and bake them in a half an hour for a casual family dinner. With three different deli meats in the mix, these little sliders are sure to satisfy! 

    Instant pot cheeseburger macaroni. Noodles with ground beef

    Instant Pot Cheeseburger Macaroni

    Skip the box and get homemade hamburger helper flavor on the table in a flash thanks to your instant pot. This dish is cheesy, filling and so tasty.

    Kielbasa and cabbage

    Kielbasa and Cabbage in the Instant Pot

    If you have 9 minutes, you can have this comfort food classic on the table. Kielbasa and cabbage make for a budget-friendly meal that cooks super fast and will fill up the hungriest family. Pair with potatoes or bread for a complete meal.

    Buffalo chicken soup with fritos and green onions in a white bowl

    Buffalo Chicken Soup

    Get creamy, spicy soup ready in just 30 minutes. This has the bold flavor of buffalo wings, in a comforting soup form. This is a great dish to make ahead of time as a part of your meal prep, and the soup freezes beautifully for a future busy night.

    Cheeseburger on bun with red onions, pickle

    Stovetop Burgers 

    A juicy, flavorful burger is only about 15 minutes away with this recipe that makes them in a skillet, on the stovetop. These make for a classic busy night meal the family won't mind sinking their teeth into!

    Taco pasta in skillet with fresh cilantro on top.

    Taco Pasta

    Craving tacos? This pasta dish has all of the flavors you desire, in an easy to make on a weeknight pasta. This dish is great hot, but you can also serve it cold if you need to make dinner ahead of time. I think it is even better chilled.

    A burger served on waffles with cheese.

    Waffle Burgers 

    The trendiest burger joint has nothing on these homemade burgers! Skip the bun and use waffles for a tasty and fun twist on a classic busy night meal.

    Sausages baked in a white oven dish

    Oven Cooked Sausages

    No need to fire up the grill to get perfectly cooked sausages. This recipe makes them in the oven for home-cooked fast food. Pair these sausages with a great bun and some fries for a family friendly 15-minute meal.

    classic chicken and noodles served in a white bowl

    Chicken and Noodles

    Get classic chicken and noodle flavor on the table in 25 minutes for a feel good family dinner that is wholesome and hearty. Serve with tender spring peas and rolls for a complete meal.

    Fried leftover spaghetti with garlic bread

    Fried Spaghetti

    This recipe puts leftovers to good work. Repurpose leftover spaghetti to make this dish that is ready in ten minutes. Your kids are going to love the crispy bites of pasta.

    chicken thighs with lemons in a blue and white bowl

    Instant Pot Chicken Thighs

    Pull out your instant pot to make this budget friendly meal in just about a half an hour. Chicken thighs are economical to buy and this recipe makes them tastier than ever.

    Air fryer chicken wings with sauce

    Air Fryer Chicken Wings

    Frozen wings are ready in just 25 minutes with this easy air fryer recipe. You can get these on the table faster than Wingstop can deliver, and the results are just as delicious!

    Beef and cheese burrito
    Beef and Cheese Burritos

    Beef and Cheese Burritos

    With just a handful of simple ingredients, these burritos are not only a kid-favorite but everyone seems to love them because they can customize their own with their favorite toppings!

    Spoonful of chicken bacon ranch pasta
    Chicken Bacon Ranch Pasta Recipe

    Chicken Bacon Ranch Pasta

    Anytime you combine the flavors of chicken, bacon, and ranch, it’s going to be good! These are the ultimate flavors to add to pasta for a filling family meal that you can prep in the morning and bake when you get home from work.

    chili chicken on rice

    Chilli Chicken

    If you have been craving Indian food, then you will want to make this chili chicken asap. It is tangy, smoky, and sweet, and best of all, you can get this ready in just 25 minutes.

    burger sliders
    Baked Burger Sliders

    Cheeseburger Sliders

    There’s a trick to make these cheeseburger sliders even easier! Simply cook a large burger patty and easily place them on slider buns for a delicious burger slider.

    sloppy joe sliders on seeded buns with cheese

    Sloppy Joe Sliders

    While these sliders might be small in size, they are absolutely loaded with cheese and meat! Make these with tots or a simple side for a meal your family will devour. 

    Chili in small white bowl.

    Easy Chili Recipe

    With this easy chili recipe, it’s the perfect base for everyone’s favorite toppings. Just a few ingredients, and you’ll have a warm delicious pot of chili (that can easily be doubled or tripled to feed a crowd) ready for dinner!

    More Easy Dinner Recipes

    We know what it’s like to always try and think of something new for dinner. Here are some of our favorite other dinner recipes that you’ll love:

    • Church supper recipes collage.
      Church Supper Recipes
    • Close up of cooked salmon patties on a plate, with fresh parsley sprinkled on top.
      Old-Fashioned Salmon Patties Recipe
    • A sliced, boneless pork chop that was baked in the oven, sitting on a plate.
      How to Cook Pork Chops in the Oven (Bone-In & Boneless Guide)
    • A wooden spoon dishing out a serving of meatball casserole in a 9x13 baking dish.
      Meatball Casserole

    We love gathering recipes for you, depending on cuisine, ingredient, holiday, or season! See all of our amazing recipe collections!

    20 Spring Dinner Ideas

    April 20, 2023

    Spring dinner ideas image collage with text overlay.

    These spring dinner ideas are easy to make, light, and filling! If you want to spend less time in the kitchen, and more time outdoors, tending to your flower beds, or playing with the kids, then you are in the right place, and you’ll love these recipes. You may even want to plan some of these dinners for an indoor picnic if the spring brings rain showers!

    I have gathered 20 of my favorite spring dinner ideas to share with you. These easy spring dinners have been tried and tested to bring quick and delicious dinners to your table, just like our summer dinner ideas! However, if you’re meal planning for your family, make sure to also visit all of our other easy dinner recipes to get a lot of ideas!

    Spring dinner ideas collage

    Easy Spring Recipes

    From easy mozzarella wraps that have juicy tomatoes and basil tucked inside for a cheesy dinner that has Caprese vibes to a light, and really tasty sausage Alfredo pasta that makes for a satisfying one-dish meal. I know you will find a few recipes that you want to save to your meal ideas pinterest board or to save when you’re planning that spring picnic and need an easy picnic food idea.

    You can even pair most of these dinners with this spring mix salad!

    Mozzarella wrap with tomato and basil.

    Mozzarella Wrap with Tomato and Basil

    No need to spend a lot of time making dinner. With this wholesome and healthy mozzarella wrap with tomato and basil, you can grab a quick bite that captures the best fresh flavors, so you can get back to enjoying a lovely spring day.

    Cajun shrimp stuffed baked potatoes.

    Shrimp Baked Potatoes 

    Baked potatoes might be a simple side, but with this recipe you can make them a satisfying meal. Load baked potatoes up with creamy cajun shrimp for a filling and easy dinner that your family will love on a warm spring night. 

    Cheesy stuffed portobello mushrooms

    Baked Portobello Mushrooms 

    Stuff meaty portobello mushrooms with cream cheese and then add even more cheese. The result is a recipe for the best baked portobellos you have ever had!

    Instant pot risotto in a white bowl

    Instant Pot Risotto 

    This easy and fast instant pot risotto is so delicious that you might want to make a meal of this on a busy spring night. Serve with asparagus or a salad for a very comforting dinner that is ready in no time.

    Chopped Italian salad with pasta, bacon and cheese

    Chopped Italian Salad

    With pasta, bacon, bleu cheese, honey mustard and more, this chopped salad makes for a great spring dinner idea that is light, healthy and completely delicious.

    Smoked sausage, rice and veggies in a skillet with a spoon

    Skinny Mexican Skillet 

    This Mexican skillet makes for a great dinner option the whole family will enjoy. Using smoked sausage in this dish makes it budget-friendly and super simple to prepare on a night when you would rather be outdoors!

    Creamy lemon pasta with chicken

    Creamy Lemon Chicken Pasta 

    This creamy lemon chicken pasta is perfect for a simple yet satisfying spring meal. This combination of flavors tastes like a rival dish from your favorite restaurant.

    Chicken street tacos with lime juice being squeezed over the tacos

    Chicken Street Tacos

    No need to search out a food truck to get street taco flavor. This recipe is ready in no time for a recipe that cures your cravings for Mexican food.

    Chipotle apple butter ribs on the grill

    Chipotle Apple Butter Grilled Ribs

    Apple butter and chipotle make for a sweet and spicy combo that is perfect for ribs. Toss a rack on the grill for a meal that is made for enjoying on the deck on a warm evening.

    Buffalo chicken topped hot dogs on napkin

    Buffalo Chicken Hot Dogs

    Don't turn your nose up at the idea of hot dogs for a spring meal. This recipe makes for a mash-up meal that is absolutely delicious. Buffalo chicken flavor meets hot dogs for a dinner that is as tasty as it is unique.

    Meatball stuffed peppers with cheese over the top

    Meatball Stuffed Peppers

    Stuffed peppers are always a good dinner idea, but this recipe makes them so easy! Pop a meatball into the mix for great flavor and a time saver.

    Fritos with cheese, onions and chili.

    Frito Chili Pie

    Cheese, chips, chili, and onions come together to make a really delicious dinner that is easy to assemble and is fun to eat. If you need to take dinner on the go for spring sports with the kids, use individual bags of Fritos.

    Panko crusted cod with a fork and broccoli on a plate

    Panko Crusted Cod 

    Spring meals are meant to be delicious, nutritious, and not too heavy. This panko-crusted cod is just the thing to make. Serve with a salad for a healthy meal you will want to keep on your meal plan.

    Marinated shrimp in a white bowl

    Grilled Marinated Shrimp

    Fire up the grill to make these deliciously marinated shrimp. These are awesome in a salad, or served with fresh veggies. My family especially enjoys tacos made from this recipe.

    Juicy grilled pork chops with asparagus on a white plate

    Sweet and Smoky Grilled Pork Chops 

    This easy grilled pork chop recipe is budget-friendly and so tasty. Use bone in chops for a meal that cooks in about 6 minutes for the perfect balance of sweet and smoky.

    Fish finger tacos with cheese, avocado, chips and salsa

     Fish Finger Tacos 

    This recipe for tacos puts leftover fish fingers to work. With the hummus and avocados, this is such a good spring meal idea that brings great flavor to the table.

    cream cheese pasta in stainless skillet

    Cream Cheese Pasta

    It’s light, it’s filling, and it’s easy to make. This cream cheese pasta recipe only takes 20 minutes to make and only 7 ingredients.

    Air fryer brats on a plate with buns

    Air Fryer Brats 

    Pop some brats into your air fryer and get dinner ready in just a few minutes. You are going to appreciate that this dinner requires very little clean up. Add some fries and a veggie for a fast meal.

    Chicken caesar salad with pasta in a bowl

    Chicken Caesar Pasta Salad 

    Salads are always a good dinner idea on a nice spring evening. This recipe brings pasta salad and chicken Caesar salad together into a really delicious meal that satisfies without being too filling.

    Smoked sausage with noodles and peas

    Sausage Alfredo Pasta

    Adding smoked sausage into pasta alfredo makes for a really yummy and easy meal idea that the entire family will love. This one-dish meal has budget-friendly smoked sausage and tender spring peas for a complete meal.

    🍽 Spring Side Dishes

    Now that you’ve found some great spring dinner ideas for spring, how about some of these amazing side dishes that you’ll love:

    • Tuna pasta salad in white bowl
      Tuna Pasta Salad
    • Crab salad in serving bowl.
      The BEST Crab Salad Recipe (Easy, Classic Recipe)
    • A large white bowl holds a fluffy orange dessert salad that is sprinkled with mandarin orange slices and mini marshmallows
      Orange Fluff Salad
    • Blue cheese dip in small white bowl, with hand holding chip.
      Blue Cheese Dip

    Make sure to check this list of no bake dessert recipes to make after your spring dinner!

    We love gathering recipes for you, depending on cuisine, ingredient, holiday, or season! See all of our amazing recipe collections!

    Recipe

    Spring dinner ideas collage
    Print Pin
    5 from 3 votes

    20 Spring Dinner Ideas

    Some of the best easy spring dinner ideas that are delicious and that use simple ingredients. One of our favorites is this oven baked cod.
    Course Main Course
    Cuisine American
    Prep Time 7 minutes minutes
    Cook Time 14 minutes minutes
    Total Time 21 minutes minutes
    Servings 4 filets
    Calories 705kcal
    Author Jessica Burgess

    Ingredients

    Oven Baked Cod Recipe

    • 1 pound cod filets about 4 pieces
    • ½ teaspoon salt
    • ½ teaspoon black pepper
    • 1 Tablesppon fresh lemon juice
    • 2 teaspoons Mrs. Dash Table Blend
    • ⅛ teaspoon cayenne pepper
    • 1 Tablespoon grated parmesan cheese
    • ⅓ cup plain panko crumbs
    • 2 Tablespoons butter melted
    • 2 Tablespoons fresh parsley finely chopped

    Instructions

    • Grease a 9 x13 baking dish or sheet pan and preheat the oven to 425 degrees.
    • Coat fish with lemon juice then sprinkle salt and pepper over filets. Place Cod filets into a greased baking pan. (Note: if using frozen filets be sure to press as much water as possible out of the filets before seasoning.)
    • In a small bowl mix cayenne pepper, Mrs. Dash, parmesan cheese, and Panko crumbs together.
    • Pour in melted butter; mix well to coat the crumbs. Then stir in fresh parsley.
    • Spoon crumb mixture evenly onto the top of the fish filets. Press crumbs into fish.
    • Place the pan into the oven and bake for 12-14 minutes until the fish is flakey and opaque throughout.
    • Serve with fresh lemons and garnish with additional parsley if desired.

    Nutrition

    Serving: 1filet | Calories: 705kcal | Carbohydrates: 23g | Protein: 86g | Fat: 29g | Saturated Fat: 16g | Polyunsaturated Fat: 3g | Monounsaturated Fat: 7g | Trans Fat: 1g | Cholesterol: 260mg | Sodium: 1829mg | Potassium: 2117mg | Fiber: 6g | Sugar: 2g | Vitamin A: 1876IU | Vitamin C: 16mg | Calcium: 334mg | Iron: 7mg

    Free “Hello Summer” Printable

    April 19, 2023

    Hello summer free printable.

    This “hello summer” free printable is perfect to frame, and show off in your home, or even fun if you’re hosting a summer party and you’re looking for table decor.

    I absolutley love giving you free printables to download and use, and this summer printable is no different.

    What I love about this printable is that it’s simple, classic and looks good with almost any decor or color scheme you plan to use it with. I personally think it would look amazing on a table when you’re hosting, sitting next to some summer cocktails, and next to some of these delicious summer dinner ideas that may be sitting on the table too.

    You could also even include a framed copy of this inside of this sunshine gift basket for an adorable touch.

    Hello summer printable - free download.

    I hope you enjoy this super cute summer printable. Simply click the “Download the printable HERE” button below, to get your free download that’s not watermarked! It was created as an 8.5 x 11 pdf but if your printer settings allow you to print smaller, such as a 5×7, etc. that should work too!

    Download the Printable HERE!

    More Printables You’ll Love:

    Don’t forget to download this “End of Summer” checklist too, to make sure you don’t forget to do your favorite things, and grab this list of summer snacks to take on your adventures!

    Pink Champagne Cupcakes

    April 18, 2023

    Pink champagne cupcake on white marble counter.

    Pink Champagne Cupcakes: A from-scratch (and also a cake mix recipe option) recipe that walks you through exactly how to make sparkling wine or champagne cupcakes!

    Cupcake recipes are perfect for birthday parties or for a weekend treat. You’re also going to love our popular Biscoff cupcakes, these Oreo cupcakes and of course, our caramel cupcakes!

    Orignally published in December of 2019 – Updated in April 2018

    Pink champagne cupcake on marble counter.

    Then, if you want to really make an impression, whip up a batch of these easy pink chocolate strawberries and make one of these pink drink ideas to go along with them!

    It is NO secret around here how much I love easy desserts for parties and even just to make for fun after main course!

    More Posts You’ll Love if You’re Planning a Pink-Themed Party!

    • Baking Birthday Party Ideas
    • Ice Cream (Pretty Pastels) Birthday Party
    • Circus Animal Cookie Donuts

    💞 Why You’ll Love these Cupcakes

    • Pink Color: They’re a beautiful pink cupcake that’s perfect for a pink-themed party, or to add a bit of prettiness to any gathering.
    • Easy Recipe: They’re easy, whether you choose to make them from scratch or with the cake mix recipe, also below.
    • Flexible: There are a few areas where you may prefer to leave some items out, or even add more of something. You’ll see how you can make this recipe with your own preferences, with the tips throughout the recipe.
    Pink champagne bottle.

    How to Make Pink Champagne Cupcakes from Scratch

    Before you start mixing together the ingredients, preheat the oven to 325 degrees and line a cupcake baking pan with paper liners and set aside.

    Champagne Reduction (Not as difficult as it sounds!)

    Pink champagne in saucepan.
    1. Open the bottle of champagne and measure out 1 ½ cups of champagne. 
    2. Pour it into a saucepan and simmer for about 6-8 minutes and let it reduce until there's only ¾ cup of liquid remaining (image above).
    3. Let this concentrated liquid cool down to room temperature before adding to your batter.
    4. Reserve 1-2 Tablespoons for the buttercream frosting.
    Flour and dry ingredients in white bowl with whisk.
    1. Next, in a small bowl, measure and whisk together flour, baking powder, salt and set aside (image above).
    2. In a separate bowl, use a mixer to beat butter and vanilla together until smooth and creamy.
    3. Then, add sugar, vegetable oil and eggs. Continue mixing until combined.
    Pink champagne pouring in to mixing bowl.
    1. Set the mixer to medium speed, gradually alternate between adding flour mixture and concentrated liquid champagne (image above).
    2. Stir until each one is almost completely combined before adding the next and scrape down the sides and bottom of the bowl as you work.

    Pink Food Coloring – Optional

    To make your cupcakes a little more pink, feel free to use pink food coloring in to the batter before baking!

    Pro Tip: Just a small amount of pink food coloring will do. A simple dip in to the food coloring with a toothpick will add a significant amount of color.

    Mix until fully blended!

    However, if you aren’t a fan of food coloring, it’s definitely not necessary!

    Hand mixer mixing cupcakes in mixing bowl.
    1. On the cupcake batter is all mixed, fill the cupcake liners ¾ full and bake for 18-20 minutes!
    Pink champagne cupcakes in baking pan.

    How to Make Pink Champagne Buttercream Frosting

    Now for the champagne icing, you can kick it up a notch on the champagne if you prefer, for a more intense champagne flavor.

    Pro Tip: The recipe calls for 1 tablespoon of champagne reduction, but feel free to use 2 if you’re going big or going home!

    While the cupcakes are baking, it’s a great time to whip up the buttercream frosting

    Powdered sugar in measuring cup.
    1. In a large bowl, using an electric mixer, beat the butter, powdered sugar, vanilla and 1-2 tablespoons of the champagne reduction until smooth.
    2. Then, add milk as needed to reach the desired consistency!
    3. To add some pink color to your buttercream, this is the pink food coloring I recommend!

    Pro Tip: It doesn’t take much food coloring! Simply dip of a toothpick into the coloring will add a great amount of color to your buttercream!

    If using food coloring, mix thoroughly and set aside and wait for the cupcakes to fully cool before frosting!

    How to Frost the Pink Cupcakes

    Once the cupcakes have baked and have sat out to cool (it’s important to let them cool or the frosting will instantly melt and slide off of your cupcakes!) it’s time to frost those cuties!

    Baked pink champagne cupcakes in cupcake tin.

    Now I’m NO frosting and piping expert, but I have found it really easy to frost cupcakes when using a piping bag and tips!
    Feel free to use any tips that you wish! My favorites are in a set of tips like these and disposable piping bags.

    Piping pink champagne buttercream on top of cupcakes.

    Cupcake Sprinkles and Toppings

    Of course, you can decorate your cupcakes any way you like, but to have your cupcakes look like these, you can grab the following supplies here:

    • White Ball Sprinkles
    • Clear Sprinkles
    • Pink Sugar Pearls
    Pink champagne cupcakes on clear, glass cake stand.
    Pink Champagne Cupcakes

    How to Make Pink Champagne Cupcakes with a Cake Mix

    If wanting to make these cupcakes using a box mix, it’s simple!
    However, if scratch is more your style, see the printable recipe card below with full instructions!

    Makes 24 cupcakes

    Prep time:  12 minutes Cook time:  20 min Total Time: 22 minutes

    • 1 boxed white cake mix
    • 1 cup Pink Champagne reduce
    • ⅓ cup Vegetable Oil
    • 3 eggs
    • Pink food coloring

    Cupcakes from Box Mix Directions:  

    1. Preheat the oven to 325 degrees. Line a cupcake baking tray with paper liners and set aside. 
    2. In a small saucepan over medium heat, add 2 cups Pink Champagne and simmer until it is reduced to 1 cup liquid, about 6-8 minutes.
      Set aside until room temperature. Reserve 1-2 Tablespoons to use in buttercream icing. 
    3. Combine Cake mix, oil, and eggs together until well blended.  Add a drop of pink coloring to the cooled reduced champagne to a light pink and stir well.  Add champagne reduction to the batter and blend well.
    4. Fill each paper cup ⅔ full and bake at 325 degrees for 18-20 minutes or until a toothpick inserted in the center comes out clean.

    Pink champagne cupcakes on marble counter.

    ❄️ How to Store the Cupcakes

    • Room Temperature: If you’d like to store the cupcakes at room temperature, it’s best to store them in an airtight container for up to 3 days.
    • Refrigerate: If you’d like to refrigerate these pink champagne cupcakes, place them in an air tight container, in the refrigerator for up to 5 days. (Do note, that sometimes refrigerating cupcakes can make them dry out more.)
    • Freeze: If freezing the cupcakes is something you need or want to do, freeze them without frosting, in a freezer-safe container (preferably also wrapping the cupcakes in Glad’s Press’n Seal — as we’ve found this is the best for freezing), for up to 3 months.
    • Thaw: When ready to defrost the cupcakes, simply let them thaw in the container, on the counter before frosting.

    Expert Tips

    • Feel free to use or buy any kind of pink champagne for this recipe. Because it will be reduced down, the quality doesn't really matter. You just want to give the cupcakes that pop of spritz in the background!
    • Feel free to use a sparkling wine if that’s more of your style or what you have on hand.

    Recipe FAQs

    Can kids eat pink champagne cupcakes?

    Yes! When cooked properly, cupcakes made with pink champagne should be safe to eat because during the reduction process, the alcohol is cooked out.

    What can I substitute for pink champagne in baking?

    If you prefer another sparkling beverage instead of pink champagne, you can try using sparkling grape juice.

    Love Easy Dessert Recipes?

    If you love easy desserts like we do, then you’ll also love these recent favorites:

    • 4th of July cupcakes.
      4th of July Cupcakes – Red, White, and Blue Layers
    • Winter cupcakes sitting on kitchen counter.
      Tree Forest Winter Cupcakes
    • Close up photo of a light tan cupcake cut in half with Biscoff spread in the center and a fluffy buttercream swirl on top of the cupcake
      Biscoff Cupcakes
    • Red velvet cupcake with chocolate chip frosting.
      Red Velvet Cupcakes with Creamy Chocolate Chip Frosting

    Looking for a keto option for cupcakes? I love that we have options for this diet now. My son has to do keto often and these keto cupcakes come in handy!

    Did You Make This?
    Snap a pic and hashtag it #Fantabulosity - I love to see your creations on Instagram and Facebook.

    Recipe

    Pink champagne cupcake on white marble counter.
    Print Pin
    5 from 13 votes

    Pink Champagne Cupcakes from Scratch

    Pink Champagne Cupcakes: A from scratch AND box recipe option that will walk you through exactly how to make sparkling wine or champagne cupcakes!
    Course Dessert
    Cuisine American
    Prep Time 20 minutes minutes
    Cook Time 20 minutes minutes
    Total Time 40 minutes minutes
    Servings 24 cupcakes
    Calories 207kcal
    Author Jessica Burgess

    Equipment

    • oven

    Ingredients

    • 1 ½ cups pink champagne or sparkling wine, divided
    • 1 stick salted butter room temperature
    • 1 tablespoon vanilla extract
    • ½ cup vegetable oil
    • 2 cups granulated sugar
    • 1 ½ teaspoon baking powder
    • 2 ⅔ cups all-purpose flour
    • ¼ teaspoon salt
    • 4 large eggs
    • pink food coloring Just a small dip in to the coloring with a toothpick should be enough

    Pink Champagne Buttercream Frosting

    • 1-2 tablespoon reserved pink champagne reduction
    • ½ cup unsalted butter room temperature
    • 2 cups confectioners sugar
    • ½ teaspoon vanilla extract
    • 1-2 tablespoon milk as needed for desired consistency
    • Silver and gold sparkling sugar as desired

    Instructions

    • Preheat the oven to 325 degrees. Line a cupcake baking pan with paper liners and set aside. 
    • Open the bottle and measure out 1 ½ cups of champagne.  Place in a saucepan and simmer for about 6-8 minutes and let it reduce until there's only ¾ cup of liquid remaining. Let this concentrated liquid cool down to room temperature before adding to your batter. Reserve 1-2 Tablespoons for the buttercream frosting.
    • In a small bowl, measure and whisk together flour, baking powder, salt and set aside.
    • In a separate bowl, use an electric mixer to beat butter and vanilla together until smooth and creamy
    • Add sugar, vegetable oil and eggs (and pink food coloring if desired.) Continue mixing until combined.
    • Set the mixer to medium speed, gradually alternate between adding flour mixture and concentrated liquid champagne.  Stir until each one is almost completely combined before adding the next. Scrape down sides and bottom of the bowl as you work.
    • Fill cupcake liners ¾ full and bake for 18-20 minutes.

    Pink Champagne Buttercream Frosting

    • In a large bowl, using an electric mixer, beat butter, powdered sugar, vanilla and 2 tablespoons of the champagne reduction until smooth. Add milk as needed to reach desired consistency.

    Notes

    *I personally prefer only 1 Tablespoon of the reduction in the buttercream recipe for a subtle flavor, but you can use 2 for a more intense champagne flavor*
    See blog post for a cake mix (box) recipe for Pink Champagne Cupcakes!

    Nutrition

    Serving: 1cupcake | Calories: 207kcal | Carbohydrates: 28g | Protein: 2g | Fat: 9g | Saturated Fat: 6g | Cholesterol: 37mg | Sodium: 46mg | Potassium: 38mg | Fiber: 1g | Sugar: 17g | Vitamin A: 157IU | Calcium: 9mg | Iron: 1mg

    If you love easy desserts, then you really going to love this cookie dough fudge, no-bake chocolate oatmeal cookies, and peanut butter chocolate chip cookies!

    20+ Make Ahead Salads for a Crowd

    April 17, 2023

    Collage of salad images with text overlay.

    20+ Make Ahead Salads for a Crowd: Whether you're whipping up an easy pasta salad, potato salad, or even just a standard lettuce side salad for your next get-together, salad recipes can be so easy to make ahead of time.

    There are so many delicious ways to make a salad that can feed a crowd.

    I’ve gathered some of the best make ahead salads for a crowd, so you have plenty to choose from when you need them!

    Make ahead salad collage of images with text overlay.

    Post originally published February 2019 – Updated April 2023

    Make Ahead Salads for a Crowd

    You’ll find that these make-ahead salads for a crowd are perfect for barbecue parties, cookouts, spring dinner recipe ideas, or any other fun parties where you need a dish. You can easily whip one of these up and you're ready to go!

    Or, if you like to make side dishes ahead of time or that easy to whip up in a pinch to go with dinner for your family, then you’ll find a fabulous amount of salad recipes to choose from here. (Salads are PERFECT as a side dish to accompany a ton of main dishes!)

    20+ Salad Recipes for a Crowd

    Wooden spoon holding serving of red skin potato salad.

    Red Skin Potato Salad

    This delicious and easy potato salad recipe is a side dish staple at any barbecue. Easy to make and it can be made in advance, and transports well!

    Best Salad Recipe in White Plate with Red Napkin
    The BEST Salad Recipe

    The BEST Side Salad Recipe

    This side salad recipe has gone CRAZY on Pinterest with so many fans! We make this often ahead of time, to eat on all week or to take to a function. TIP: Make sure to store the toppings separately that could make your lettuce soggy. (i.e. bacon, cheese, etc.)

    EASY broccoli raisin salad recipe

    Broccoli Salad

    Loaded with both texture and flavor, this salad is a great way to change things up from a lettuce salad, and a great way to get in the greens.

    Apple Snicker Salad in white bowl
    Apple Snicker Salad

    Snickers Salad

    The crowd is going to LOVE this one as a dessert or to even have as a sweet side dish during the holidays. It’s one of our top favorite no bake dessert recipes, that we also consider a fun salad side dish.

    Carrot salad in a white bowl, next to blue napkin.

    Easy Carrot Salad Recipe

    Get in your extra veggies with this veggie salad that has carrots, and a lot of crunch!

    Thai salad in a wooden bowl.

    Thai Salad with Noodles

    A fantastic twist on a salad recipe that has texture and is full of flavor!

    Apple salad with yogurt in white bowl.

    Apple Salad

    This crispy and sweet salad is a great dessert salad that you can make ahead of time!

    Pistachio salad in bowl on black and white linen
    Pistachio Salad

    Pistachio Salad

    This may be more of a dessert salad but it’s a crowd-pleaser for sure, and a great addition to any holiday table.

    Chicken macaroni salad in brown wooden bowl.
    Chicken Macaroni Salad

    Chicken Macaroni Salad

    This pasta salad is so simple to make, and a great go-to for any party. The addition of chicken adds protein to make it a light, yet hearty dish.

    3 bean salad recipe - quick and easy and a great side dish idea

    Three Bean Salad

    A bean salad is a nice change from lettuce and pasta salads. It’s also perfect for cookouts or anywhere that you want to bring a healthier dish. 

    Chopped Asian Salad with mandarin oranges

    Asian Chopped Salad

    This is a light salad recipe that’s perfect to serve in the spring and summer and is so easy to make.

    This creamy cucumber crunch salad is a delicious side dish for potluck parties.

    Creamy Crunchy Cucumber Salad

    A fresh and light salad recipe for a hot summer day! Make it in advance, and pull it out of the refrigerator when it’s time to eat!

    This low carb cauliflower potato salad is a great low carb recipe! So easy and definitely a low carb vegetable for the keto diet!

    Cauliflower “potato” salad

    If you’re counting carbs or watching carbohydrates, this faux potato salad recipe is perfect for low-carb eaters!

    crab salad in white bowl with pink napkin underneath

    Crab Salad

    When it comes to make-ahead salad recipes, this crab salad is one that can be made in advance, and it only gets better with time!

    caesar chicken pasta salad recipe in a white bowl on a marble table

    Chicken Caesar Pasta Salad

    It may sound different to put some of these ingredients together but talk about a flavor combination that you’ll love! This chicken Caesar pasta salad is a favorite at functions. When making it ahead of time though, it’s best to prep everything and store the dressing and pasta in different containers. Then, combine all of it just before serving.

    Fruit salad with Cool Whip in gray bowl on counter.

    Fruit Salad with Cool Whip

    As seen on so many holiday tables, this dessert salad is one that can be made ahead of time, and is so easy to whip up!

    cornbread salad

    Cornbread Salad

    This savory Cornbread Salad is the perfect combination of sweet, crunchy, and savory to make the perfect salad for your next get-together with friends. 

    Italian Pasta Salad Recipe - This cold blend of ingredients is amazingly good! Love the bowtie pasta, and how easy it is!

    Cold Italian Pasta Salad

    An easy, cold salad that can be made in a pinch and that sits wonderfully and absorbs flavors. TIP: Take along extra dressing if it will be sitting a while, and drizzle with more dressing right before serving, in case the pasta soaks up the majority of the dressing.

    A close up photo of a large oblong white bowl holding a fluffy orange desserts salad sprinkled on top with mini marshmallows and mandarin orange slices

    Orange Fluff Salad

    Have you seen this delicious pile of fluff at family reunions and holidays? It’s a popular recipe that so many love, and is one of the best make-ahead salad recipes, due to how long it can sit.

    Tuna pasta salad in white bowl

    Tuna Pasta Salad

    A lovely combination of the creamy dressing, the tender pasta and the flavor of the tuna, all combe together to make a delicious pasta salad.

    Honey lime fruit salad in white bowl.

    Honey Lime Fruit Salad

    This fruit salad is a wonderful way to make prep a make-ahead salad for any event or for snacking on during the week.

    shrimp macaroni salad in bowl

    Shrimp Macaroni Salad

    Much like our tuna salad, this salad uses salad shrimp, and the combination of the seafood with the tender pasta is incredible.

    Cold bacon ranch pasta salad in individual servings.

    Bacon Ranch Pasta Salad

    The cubed cheese, cooked bacon and tender pasta, all drenched in a creamy dressing is a pasta salad that will be a hit at the next reunion.

    KFC Coleslaw in white bowl, sitting next to big bowl.

    KFC Copycat Coleslaw Recipe

    This easy coleslaw is such a great copycat recipe! So similar and it can be made at home in minutes!

    You won’t find only salad recipes around here…

    You’ll find TONS of easy recipes that can be made using everyday ingredients, that your family will love! Browse the easy recipes and pin your favorites!

    What are some of your favorite make-ahead salads for a crowd? Share them right here in the comments below!

    We love gathering recipes for you, depending on cuisine, ingredient, holiday, or season! See all of our amazing recipe collections!

    French Toast Casserole

    April 13, 2023

    Slice of French toast casserole on white plate with blueberries and strawberries.

    French Toast Casserole – This breakfast dish using French bread, heavy cream, brown sugar, and a blend of spices, smells, and tastes amazing in the morning! Perfect for a Mother’s Day brunch, Christmas morning, or a weekend breakfast.

    Slice of french toast casserole on white plate with syrup and berries.

    It’s also an easy breakfast casserole that you will make the night before and simply bake the next morning for a delicious recipe that the entire family will love, maybe even as much as the Brioche French Toast and Cinnamon Roll Casserole that’s REALLY popular! Equally delicious and hands-off is this Crock Pot Bagel French Toast Casserole.

    [feast_advanced_jump_to]

    Why You’ll Love this Recipe

    My favorite thing about making this French Toast Bake is that I can make it the night before, and practically throw the thing in the oven when I wake up. An hour later, it looks like I’ve been up since dawn, working my fingers to the bone, in the kitchen. Plus, it reminds me of my favorite bread pudding recipes so the fact that I can eat it for breakfast is like a little piece of heaven on earth.

    It’s also an easy way to have a warm and comforting dish for a weekend morning for special occasions or just as a family tradition, and serve alongside this ham and cheese croissant casserole if feeding a large crowd.

    How do you Keep French Toast Bake From Getting Soggy?

    I’ve never had this recipe turn out soggy but if you do, make sure you’re using the right kind of bread. The best bread, is a crispy bread or bread such as:

    • French bread
    • Challah bread
    • Brioche
    • Italian bread
    • Stale, thick bread

    This stale bread helps crisp up the casserole, especially since it sits all night.

    Are French Toast Casserole and French Toast Bake the Same?

    Yes! Although it may be called one or the other, the recipe typically uses the same ingredients and has the same cooking process so it’s essentially the same type of recipe.

    Recipe Ingredients:

    This recipe uses simple ingredients, and you may even have most, if not all, of them on hand already!

    Labeled ingredients for french toast casserole.

    How to Make this French Toast Casserole

    Although you can find the full printable recipe card at the bottom of this post for this delicious French toast bake, I also like to share tips along the way to help you make the best overnight French toast bake!

    PRO TIP: To allow enough time for the bread to soak up the batter, it’s ideal to make this dish the day or the night before you plan to serve it. However, it’s not a “must” but it would still be good to allow it to soak for a few hours if possible.

    Grease a 9×13 casserole dish with butter or non-stick spray.

    Steps 1-4 of French toast bake process.

    Mix Together the Batter & Bread:

    1. Tear or cut the French bread into chunks/cubes, ( about 1-inch cubes) and place on the bottom of the baking dish, in a single layer and spread out the bread, the best that you can.
    2. In a separate mixing bowl, add whisk eggs, milk, cream white sugar, brown sugar & vanilla.
    3. Stir to mix the mixture evenly.
    4. Pour egg mixture over the top of the bread pieces, trying to coat/cover all of the bread. Cover the bread with a lid, aluminum foil, or plastic wrap, and store in the refrigerator until ready to bake. Preferably overnight.
    Steps 5-8 of how to make French toast bake.

    How to Make the Crumble Topping:

    1. In a medium bowl, pour the flour, brown sugar, cinnamon, salt, and nutmeg in a separate bowl.
    2. Mix together until evenly combined.
    3. Add the pieces of butter, and mix together with either a pastry cutter or a fork (supplementing your hands, combining the ingredients, until the texture is fine pebbles) to create the crumbly topping. Store the topping in the fridge, separate from the bread mixture, until right before baking.

    How to Bake the French Toast Casserole:

    Preheat over to 350 degrees F.

    1. Sprinkle the crumbly topping over the French toast mixture and bake uncovered for 1 hour or until golden brown on top.
    Baked french toast casserole in white baking dish.

    How to Serve the French Toast Casserole

    This breakfast casserole is best, served with syrup, fresh berries, fresh fruit, or your favorite toppings!

    Slice of French toast casserole on spatula.

    What to do with Leftover French Toast Casserole

    If you happen to have leftover French toast bake, you can store it in an airtight container, in the refrigerator for 3-5 days.

    Syrup pouring over French toast casserole in white plate with blueberries.

    Recipe FAQs

    Can French toast casserole be frozen?

    Yes! In a freezer-safe container, bake as instructed and then allow it to cool to room temperature.
    Or, prepare up until adding the crumbly topping. (You will add this right before baking.)
    How to Freeze: Wrap and/or cover the casserole, preferably in cling plastic wrap — as we’ve found this works best for freezing food — and freeze up to three months.
    To Reheat: allow it to thaw in the refrigerator before reheating. When thawed, if fully baked, bake at 350° for 30 minutes or until heated through. If unbaked, thaw, top with crumbly topping, and bake as instructed in the recipe card.

    Piece of French toast casserole on fork.

    Related Recipes:

    You’re also going to love this sheet pan pancakes recipe and our favorite pancakes from scratch, which are so comforting and easy to make! You’ll also love this brioche french toast, cinnamon french toast sticks, and this easy french toast recipe!

    Recipe

    Slice of French toast casserole on white plate with blueberries and strawberries.
    Print Pin
    4.80 from 10 votes

    French Toast Casserole

    A baked french toast casserole recipe that you can spend 15 minutes preparing, let sit overnight and then bake it in the morning. A delicious breakfast dish to serve out of town guests, or a hungry family!
    Course Breakfast
    Cuisine American
    Prep Time 15 minutes minutes
    Cook Time 1 hour hour
    Resting Time 6 hours hours
    Total Time 1 hour hour 15 minutes minutes
    Servings 12 servings
    Calories 399kcal
    Author Jessica Burgess

    Ingredients

    • 1 loaf French bread
    • butter or non-stick spray for coating casserole dish
    • 8 large eggs
    • 2 cups whole milk
    • ½ cup heavy cream
    • ½ cup sugar
    • ½ cup brown sugar
    • 2 Tablespoons pure vanilla extract

    Topping:

    • ½ cup flour
    • ½ cup brown sugar packed
    • 1 teaspoon cinnamon
    • ¼ teaspoon salt
    • 1 pinch nutmeg
    • 1 stick butter cold; cut into pieces

    Instructions

    • Grease a 9×13 casserole dish with butter or non-stick spray.
    • Tear or cut the French bread into chunks/cubes, and place on the bottom of the baking dish, spread out the best that you can.
    • In a separate bowl, mix the eggs, milk, cream white sugar, brown sugar & vanilla.
    • Pour egg mixture over the top of the bread pieces, trying to coat/cover all of the bread.
    • Cover the bread with a lid, aluminum foil or plastic wrap, and store in the refrigerator until ready to bake. Preferably overnight.

    Topping:

    • In a medium bowl, mix together the flour, brown sugar, cinnamon, salt, and nutmeg in a separate bowl.
    • Add the pieces of butter, and mix together with either a pastry cutter or a fork (supplementing your hands, combining the ingredients, until the texture is fine pebbles) to create the crumbly topping.
    • Store topping in the fridge, separate from the bread mixture, until right before baking.

    Bake the French Toast:

    • Preheat over to 350 degrees F.
    • Sprinkle crumbly topping over the french toast mixture.
    • Bake uncovered for 1 hour.
    • Serve with syrup, fresh berries or desired toppings.

    Notes

    Important to Note: To allow enough time for the bread to soak up the batter, it’s ideal to make this dish the day or the night before you plan to serve it. 
    Freezing Instructions: In a freezer-safe container, bake as instructed and then allow it to cool to room temperature.
    Or, prepare up until adding the crumbly topping. (You will add this right before baking.)
    How to Freeze: Wrap and/or cover the casserole, preferably in cling plastic wrap — as we’ve found this works best for freezing food — and freeze up to three months.
    To Reheat: allow it to thaw in the refrigerator before reheating. When thawed, if fully baked, bake at 350° for 30 minutes or until heated through. If unbaked, thaw, top with crumbly topping, and bake as instructed in the recipe card.

    Nutrition

    Serving: 1serving (⅙ recipe) | Calories: 399kcal | Carbohydrates: 52g | Protein: 10g | Fat: 16g | Saturated Fat: 9g | Polyunsaturated Fat: 1g | Monounsaturated Fat: 5g | Trans Fat: 1g | Cholesterol: 162mg | Sodium: 361mg | Potassium: 186mg | Fiber: 1g | Sugar: 29g | Vitamin A: 628IU | Vitamin C: 1mg | Calcium: 106mg | Iron: 2mg

    * Recipe originally published in 2015. Updated in June 2021 and April 2023.

    The Lodge at Whitefish Lake, Montana

    April 13, 2023

    Winter in Whitefish Montana - Lodge at Whitefish.

    Looking for a weekend getaway in Montana for our family, we decided The Lodge at Whitefish Lake would be our destination. If you’ve been thinking about a quick trip, here’s why you’ll want to stay here!

    View from condo of frozen lake at The Lodge at Whitefish.
    Frozen Lake View from Condo

    As you can probably tell from the photos, we chose to visit The Lodge at Whitefish in the winter (March, actually… but it was still “winter” there).

    I highly recommend this time of year if you have a little cabin fever and need to get the kids out of the house.

    See more Fantabulosity travel ideas!

    Of course, the pool isn’t open but the hot tubs are, they have s’mores at night, and of course there are snow activities that some families may even enjoy doing. (We’re not one of those families… so you won’t be seeing any skiing adventures or snowshoeing trips here. Now cocktails… and food? We’re your family.)

    Video Highlight of our Weekend Trip to The Lodge at Whitefish

    I’ve compiled a reel on Instagram if you want to see even more details of our trip but make sure you see more details below with images, tips, and more about a weekend getaway for your family in Whitefish.

    View this post on Instagram

    A post shared by Fantabulosity.com (@fantabulosity_blog)

    Whitefish Montana Weekend Trip

    If you’re not from Montana, or rather, from Whitefish, then you may just be taken away by the beautiful views on the way TO Whitefish. We were lucky enough to drive through Polson, and around Flathead Lake on our route, and it was STUNNING.

    But that wasn’t all… there were beautiful spots (like the one below) made up of mountains, beautiful (clean!) roads, and as my kids love to see… “tunnels!”

    Driving to Whitefish montana, with a view of the road and mountains.

    The Lodge at Whitefish Lake

    When we arrived at the lodge, check-in was a breeze, and not to mention, beautiful with a welcoming outdoor fireplace. (See that in the highlight reel.)

    When we called to book a room, we explained that we wanted a separate area for the kids to sleep in, so my husband and I could have our own room. (This is always a priority for us, so we can have our alone time.)

    2 Bedroom Condo

    We opted for the two-bedroom condo, so we’d have our own room, and the boys could share a bedroom.

    After all the years of traveling, we actually prefer this type of hotel-style, condo accommodation, over Airbnb travel.

    The condo had a living area, dining area, and full kitchen, which made it nice so we could cook an easy breakfast and quick lunches/meals in the condo when we didn’t feel like going out.

    Besides… when you have two growing boys, it’s important to always have food around, and having a refrigerator made this easier to keep healthy snacks on hand.

    The view from our condo was beautiful, even in the winter. The frozen lake, fluffy white snow, and even a train in the far distance (that you couldn’t hear) that looked beautiful passing by through the mountains.

    View of frozen lake at Lodge of Whitefish Condo.

    Whitefish Lodge Resort Services and Events

    To be honest, we were only there for a couple of days, so we didn’t get to take advantage of nearly half of the amazing amenities and services that The Lodge at Whitefish offers, even in the winter!

    Below you can see the winter resort services booklet that they gave us, and I so wish we would have been able to take part in the S’mores Outdoors, and family movie night for sure.

    Events calendar at Lodge at Whitefish Lake

    The Boat Club at The Lodge at Whitefish Lake

    The first night we were there, we arrived around 7:00 so we immediately went to dinner, and couldn’t wait to dine at the Boat Club. The menu looked incredible and the reviews were wonderful.

    We walked over to the restaurant from our room (super easy walk) and the boys had pizza off of their kid’s menu. My husband had a steak, and I had a small Caesar salad and we munched on their charcuterie board as an appetizer.

    Our waitress was a lovely lady, and she even surprised us with a fun (free) cocktail sample at the beginning of dinner. (My kind of lady!)

    Man and son walking at The Lodge at Whitefish.

    Hot Tub at Whitefish Lodge

    The next day, the boys were begging to go to the hot tub. We had a few to choose from; one inside with waterfalls and one outside, overlooking the frozen lake and mountains.

    As you can see, we chose the one outside but I’m not going to lie… the boys were begging to head to the one with waterfalls afterward but we ran out of time.

    Hot tub and lake view at The Lodge at Whitefish.

    Downtown Whitefish Shops

    Later in the day, we headed to downtown Whitefish to check out the shops and we were not disappointed. The mountain views, cute stores, and local goods were plentiful.

    Downtown Whitefish.

    The shops were plentiful, everyone was friendly, and we even saw some of the cutest dogs, shopping along with their owners along the way, and we were able to love on them for a few minutes.

    Downtown Whitefish Family Photo

    We love cruising the shops in little towns like this to see all the things that we don’t need but want.

    Some gift items at the shops in Whitefish.

    Restaurants in Whitefish

    After visiting Whitefish quite a few times now, we’ve eaten some GREAT food. Our favorites are:

    • Craggy Range – Bar food, and Jessica, the bartender is my FAVORITE.
    • Latitude 48 Bistro – Pricey, but they have great martinis, great food, and a fun atmosphere in the basement.
    • The Boat House – This is in the Lodge at Whitefish Lake, and is a higher end atmosphere. We’ve had Thanksgiving dinner here and it was a pretty penny but it was delicious. We’ve also had dinner and drinks here often, and are always pleased.
    • The Palace – This is a bar, and they had $4 burgers that were incredible! Love supporting places like this that have good food, affordably.
    • Jalisco Cantina – Mexican food, that has wonderful cocktails and tacos!
    Boy eating bbq at Piggyback BBQ in Whitefish.

    While waiting for our lunch, we have to keep ourselves entertained… and the boys are usually really good at that. It’s either this or play UNO and Old Maid while we wait for food to help pass the time. (I recommend keeping cards in your purse so you can play while you wait.)

    Boys smiling at the camera, laughing, in a 4 image collage.

    Wrapping Up our Weekend Trip to Whitefish Montana

    It was a quick trip to Whitefish, and we definitely didn’t get to do everything that we wanted to do, so we’ll be going back. Will we stay at The Lodge at Whitefish again? I don’t know. Would we? YES. Will we try something else so we can share it with you? We just may. Stay tuned for more travel ideas in Montana. We can’t stay home, and we know you’ll love visiting the places we do too.

    What is there to do at Lodge at Whitefish Lake?

    Depending on the time of year, there are many things you can do at Lodge at Whitefish Lake. In the winter, there are snow sports, hot tubs, S’mores Outdoors, family movie nights, dining, and more! In the summer, the lake is great for water sports, and the pool and outdoor areas are full of activities. If you’re looking for relaxation, the spa is also an amazing amenity.

    How much does it cost to stay at Lodge at Whitefish Lake?

    This depends on a few things: the time of year, the type of room you reserve, and who you book it through. We found it to be more affordable during the winter months, than in the summer months.

    Is parking available at Lodge at Whitefish Lake?

    Yes! Valet parking was offered upon arrival but self-parking, near the condos, was available as well.

    What are some of the property amenities at Lodge at Whitefish Lake?

    Free wifi, a restaurant that serves breakfast, lunch, and dinner, hot tubs and pools, a bar area, live music, free wine tastings, a spa, and family-friendly activities.

    Pork Steaks in the Oven

    April 10, 2023

    Baked BBQ Pork Steaks on white plate

    These baked BBQ pork steaks in the oven are so easy and just like our slow cooker pork steaks, this is one that can be made with little effort, showing you how to bake!

    Baked bbq pork steaks on white plate.

    Why You’ll Love These Baked Pork Steaks

    If you have pork steaks or pork shoulders (or blade steaks) sitting in your freezer or refrigerator, then you may have happened upon here while trying to find one of the BEST pork steak recipes you can find, for an easy dinner recipe.

    Some pork recipes are grilled, some cooked in a cast iron pan with gravy drippings, some in a slow cooker, like this slow cooker bbq pulled pork, and more! But baking is by far our favorite way to have bbq pork steaks, with no marinade required!

    When I shared how to cook steak in the oven, and how easy it is to get a melt-in-your-mouth steak with that process, I knew you’d love seeing how to bake all different kinds of steaks.

    I think you’re in the right place and that you’re going to love how easy and how delicious this pork steak recipe is. Serve them with these Dr. Pepper Baked Beans and your dinner will be incredible.

    If you also saw my slow cooker bbq pork steaks recipe, then you may already know that cooking them slowly, over a longer period of time makes the pork steak meat literally fall off of the bone.

    But when you need something a bit quicker, baking pork steaks in the oven is an alternative that definitely won’t disappoint you and will also leave you with tender pork steaks.

    The day that I made these to take photos for the blog, I only made two steaks, as it was just the right amount for what we needed that day…however I’ve created the recipe in the recipe card below to reflect 4 pork steaks, as that would be more common for a family of 4.

    What is a Pork Steak?

    Pork steaks are a section of a hog that’s cut from the shoulder, and /or butt. Some grocery stores or butcher shops have pork steaks ready for you. However, if you are not able to find them, you can ask them to cut pork shoulder or pork butt in to steaks for grilling.

    Recipes like this are perfect examples of classic old-fashioned dinner ideas.

    Uncooked pork steaks sitting on packaging.

    What is the Difference Between Pork Chops and Pork Steaks?

    Since pork steaks come from the shoulder and or butt area of a hog, the pork chops are cut from the loin section. Pork chops like these Baked Pork Chops, tend to be lean than pork steaks and can sometimes be more “dry” than pork steaks, where pork steaks tend to have more fat around the meat to help make them juicy. Now, if you have pork chops instead, this fried pork chops recipe is easy to make and frying them can add so much flavor!

    Ingredients for Pork Steaks in the Oven

    All you’ll need for these delicious, tender porks steaks are:

    • Pork Steaks – As many as you’ll need to serve.
    • Salt – This is optional, and remember that your barbeque sauce could have salt in it.
    • Pepper – This is also optional, and it’s important to keep in mind how spicy the bbq sauce is that you’re using.
    • BBQ Sauce – your favorite kind will do! We love using Sweet Baby Rays.

    How to Cook Pork Steak

    Now of course you don’t have to cook pork steaks with bbq sauce, but for us, it’s really hard to cook them/eat them any other way.

    Feel free to have fun creating sauces and using different spices for your pork steaks, but if you’re wanting to bake your steaks in the oven, then this is a great reference to find out how long to cook them.

    You can find the full recipe card with an ingredient list and instructions at the bottom of this post.

    Start by preheating your oven to 400º and then cover your pork steaks with salt and pepper (if desired).

    PRO TIP: You can even pound your pork steaks with a meat tenderizer before seasoning them if you want to make sure they’re super tender.

    4 image collage of baked pork steaks.
    1. Next, line a baking pan (large enough to fit the number of steaks you’re cooking, so they don’t overlap) with aluminum foil for easy cleaning, and then drizzle a layer of barbeque sauce on the aluminum foil where you’ll place each steak.
    2. Place your steaks down on the foil and sauce.
    3. Then, cover steaks with the remaining bbq sauce.

    How Long Should You Cook Pork Steaks in the Oven?

    1. Bake the pork steaks uncovered for 50-60 minutes, (on the middle rack) or until the internal temperature of the steaks reaches 145 degrees.

    NOTE: Oven temperatures can vary, and some have reported that they prefer baking at 350 for 50-60 minutes, or checking the internal temp after 30 minutes to avoid over-cooking. I’ve even used different ovens and have found myself, cooking them for shorter/longer times, so it’s best to check to see what works best for yours.

    Cut bbq pork steaks with a piece on a fork.

    Expert Tips:

    • Flexible: You can cook one pork steak up to as many as you want/need, as long as they fit in the baking pan you plan to use, and if you have enough bbq sauce to cover them. You can even pop some hot dogs in the oven for the kids, since you bake those at the same temperature. (Just not as long!)
    • Dinner Meal Plan: Cook more than you need, and serve the leftovers, sliced, on bbq nachos, on a side salad to make it an entree, or as a sandwich!

    Recipe FAQs

    What temperature do you cook pork steaks?

    Bake pork steaks at 400° for 50-60 minutes.

    Should pork steaks rest before serving?

    Although it’s not a must, it is a great idea to allow it to rest for a few minutes before serving to all of the juices to set in before slicing.

    What should the internal temperature be of cooked pork steaks?

    The internal temperature of cooked pork steaks should reach at least 145°F before eating.

    How to Store

    Refrigerate: If you have leftover pork steaks, it’s best to allow them to cool and then place in an airtight container, in the refrigerator for 3-4 days.

    Freeze: You can freeze leftover pork steaks in a freezer-safe container for up to 3-4 months.

    Thaw: Thaw the pork steaks in the refrigerator overnight.

    Reheat: Sometimes reheating cooked pork steaks can make them dry. So if reheating in the oven, place the pork steaks in a baking pan (with raised sides) and pour about ¼ cup of broth in the bottom, to help add moisture to the steaks while reheating.

    What Side Dishes to Serve with Pork Steaks

    Side dishes that go with bbq pulled pork are often delicious with pork steaks too! This KFC coleslaw is a staple side dish for pork recipes but I also LOVE Pasta Salads!

    This creamy corn casserole recipe, Amish Potato Salad or this old-fashioned potato salad (or this cauliflower potato salad for low-carb eaters), and this Cornbread Salad.

    But, adding some ground beef to baked beans lately has been a winner too!

    Meal Planning for the Week?

    Since the oven is hot, consider making burgers in the oven too, so you can eat on them all week! Just re-heat and serve! Or, making these cube steaks in the slow cooker is so easy!

    More Pork Recipes

    We love having pork steaks and pork chops around here. They’re so easy and actually pretty affordable. Here are our favorite pork recipes that you don’t want to miss…

    • BBQ Baked Boneless Pork Chops
    • Sweet & Smokey Grilled Pork Chops
    • Baked Pork Chops & Veggies in the Oven
    • Ribs on the Grill: Chipotle Apple Butter Ribs

    Recipe

    BBQ pork steaks cooked in the oven, that are on a white plate.
    Print Pin
    4.64 from 406 votes

    BBQ Pork Steaks in the Oven

    These BBQ pork steaks in the oven are so easy. Season, sauce and bake at 400° F. for delicious, tender and juicy pork steaks.
    Course Main Course
    Cuisine American
    Prep Time 10 minutes minutes
    Cook Time 50 minutes minutes
    Total Time 1 hour hour
    Servings 4 steaks
    Calories 208kcal
    Author Jessica Burgess

    Equipment

    • Large Baking Sheet rimmed

    Ingredients

    • 4 pork steaks or pork shoulders
    • salt to taste
    • pepper to taste
    • 16 ounce bottle of barbecue sauce I use Sweet Baby Rays

    Instructions

    • Prep: Preheat oven to 400 degrees
    • Season: Rub salt and pepper on both sides of each pork steak if desired
      4 pork steaks or pork shoulders, salt, pepper
    • Cover Pan: Line a baking pan (large enough to fit the number of steaks you're cooking, so they don't overlap) with aluminum foil.
    • Sauce the Pan: Drizzle half a bottle of barbeque sauce on the aluminum foil where you'll place each steak.
      16 ounce bottle of barbecue sauce
    • Sauce the Steaks: Place your steaks down on the foil and sauce, and then cover steaks with remaining bbq sauce.
    • Bake: Bake the pork steaks at 400 degrees, uncovered for 50-60 minutes, (on the middle rack) or until the internal temperature of the steaks reaches 145 degrees.
      NOTE: Oven temperatures can vary, and some have reported that they prefer baking at 350 for 50-60 minutes, or checking the internal temp after 30 minutes to avoid over-baking.

    Video

    Notes

    Storage of Leftovers:
    Refrigerate: If you have leftover pork steaks, it’s best to allow them to cool and then place in an airtight container, in the refrigerator for 3-4 days.
    Freeze: If you’d like to freeze leftovers, allow them to fully cool, and store in a freezer-safe container for 3-4 months.
    Thaw: Thaw the pork steaks in the refrigerator overnight.
    Reheat: Sometimes reheating cooked pork steaks can make them dry. So if reheating in the oven, place the pork steaks in a baking pan (with raised sides) and pour about ¼ cup of broth in the bottom, to help add moisture to the steaks while reheating.

    Nutrition

    Serving: 1steak | Calories: 208kcal | Protein: 28g | Fat: 9g | Saturated Fat: 3g | Cholesterol: 89mg | Sodium: 66mg | Potassium: 499mg | Calcium: 9mg | Iron: 0.7mg

    The BEST Tuna Salad Recipe

    April 9, 2023

    two tuna salad sandwiches stacked on top of each other

    This tuna salad recipe is a classic, easy lunch made with simple ingredients like canned tuna, mayonnaise, celery, and seasoning. This version comes together in about 10 minutes and is perfect for sandwiches, crackers, or lettuce wraps.

    This classic tuna salad will become your new favorite! It's everything you want in a classic tuna salad, but with a few extra ingredients that give it more flavor and texture than the basic version. Just read the reviews…it's not just me saying that!

    Tuna sandwiches, stacked on top of one another

    In only 10 minutes, this easy recipe will become what you consider, the best tuna salad recipe! It ranks right up there with the BEST Chicken Salad Recipe and this Avocado BLT.

    Why You’ll Love This Recipe

    During the summer months, tuna salad sandwiches are one of my favorite summer recipes to make for a lunch recipe. (But you can have it for main course too! Especially after being outside all day on a hot day!) It’s a great sandwich to rotate between ham salad sandwiches and egg salad sandwiches!

    • Made with simple pantry ingredients
    • Ready in 10 minutes
    • Classic flavor with a slight upgrade
    • Great for sandwiches, wraps, or salads

    Which Type of Tuna is Best?

    It’s so nice to be able to keep a can of tuna in the pantry for those last minute meals, like this tuna pasta salad recipe and this tuna casserole, and for this tuna recipe, you can use whatever kind of tuna you prefer: albacore, tuna with olive oil, etc.

    However, I think the best kind of tuna is white tuna in water, in case you find that helpful! (See “substitutions” and FAQs below if you decide to use something other than what I used!)

    [feast_advanced_jump_to]

    Ingredients for this Tuna Salad Recipe

    I’ve had and have made tuna salad sandwiches many different ways over the years but I keep coming back to the classic tuna salad that uses simple ingredients, and that’s what I want to share with you today!

    ingredients for tuna salad on table

    See the recipe card below for full ingredients and instructions.

    • Canned tuna: For this recipe we choose solid white albacore tuna in water and flaked it after draining. You may use other canned tuna if you have a preference.
    • Real mayonnaise: Mayo is used as a binder for the ingredients to come together in perfect harmony. There are many options for mayo. For this recipe we prefer to use real mayonnaise. Elevate this recipe by using mayo made with olive oil!
    • Sweet pickle relish: You may substitute dill relish or even chop your own favorite pickles!
    • Red onion: Depth and savory flavor profile.
    • Celery: Celery brings a fresh crunch to this elevated dish.
    • Fresh lemon juice and flat-leaf parsley: Both of these ingredients elevate this dish and bring a freshness to the recipe.
    • Dried chives and garlic powder: Chives elevate and enhance the flavor profile of this delicious salad.
    • Kosher salt and ground black pepper: Salt and pepper are perfect companions for tuna!

    Substitutions

    1. If you choose canned tuna packed in oil, you may want to reduce the mayonnaise to ¼ cup.
    2. You may use a number of mayonnaise options including mayo alternatives, such as Miracle Whip, plant based mayo, avocado oil mayo, plain Greek yogurt, etc.
    3. You may use dill relish or your own minced sweet pickles or dill pickles instead of sweet relish if you prefer less sweetness.
    4. If you are averse to red onion, try substituting green onion, diced apples or grapes!
    5. Lime juice instead of lemon juice. (I haven’t tried this but I’m sure it would have great flavor!)

    Variations

    • Make a tuna melt: Simply make the tuna salad as stated, and then make it like a grilled cheese sandwich!
    • Tuna Lettuce Wrap: Serve this recipe on a bed of lettuce or in one giant romaine lettuce leaf as a wrap!
    • Additional Mix-in ideas: Looking to kick things up a notch? Here are some extra ingredients I’ve added to tuna salad before, that you may want to try: hot sauce, curry powder (like the flavors in our curry egg salad), garlic clove – chopped, (or garlic powder) a teaspoon of dijon mustard (or so), red bell pepper, or fresh dill!

    How to Make This Tuna Salad Recipe

    To make tuna salad, combine drained canned tuna with mayonnaise, chopped celery, onion, relish, and seasonings. Stir until well mixed and serve immediately or chill before serving.

    See how below…

    drained tuna placed in glass bowl
    Pour drained tuna in glass bowl
    mayo, onion, celery and relish added to bowl
    Add mayo, onion, relish, celery & lemon juice
    1. Drain the water from the tuna and place in a medium mixing bowl.
    2. Next, add ⅓ cup real mayonnaise, ¼ cup sweet pickle relish, 2 tablespoons red onion, minced, 1 stalk celery, minced, and 1 tablespoon of lemon juice to the mixing bowl of tuna.
    herbs & seasonings added to bowl
    Add herbs & seasonings
    tuna mixed with ingredients in bowl
    Stir to combine
    1. Then add 1 tablespoon flat-leaf parsley, 1 teaspoon dried chives, 1 teaspoon garlic powder, ¼ teaspoon kosher salt, and ½ teaspoon ground black pepper.
    2. Combine together using a rubber spatula or spoon. Be sure all of the ingredients are well blended.
    tuna salad on lettuce leaf, on top of bread slice

    Hint: To elevate and add heat to this delicious recipe, add 1 small minced jalapeno!

    close up of tuna salad on bread

    Recipe FAQs

    When it comes to tuna and even tuna salad, there may be some questions that you have. Here are answers to the most common questions:

    What mixes well with canned tuna?

    Canned tuna mixes so well with so many things. Mayo, mashed avocado, lettuce salad, pasta, breadcrumbs, eggs, and so much more. Some of these items mixed in with tuna, make amazing dishes such as tuna salad, tuna casseroles, avocado toast, and even tuna patties.

    What can I add to canned tuna to make it better?

    Fresh herbs, seasonings, spices, creamy bases, and veggies for a crunch, are always good options to add to canned tuna to make it better! Using tuna as a protein like you would other proteins like salmon and chicken can be a great idea.

    Why does restaurant tuna salad taste better?

    If you find that your tuna at home doesn’t taste as good as it does when eating at a cafe, diner, or restaurant, it’s possibly because the tuna salad was made earlier, and it has allowed the flavors to combine and settle together in the refrigerator. Try making your tuna salad in advance, and then not only will the flavors have time to blend, but it will be a quick meal idea too!

    What can I use in tuna instead of mayo?

    Greek yogurt, plain yogurt or Miracle Whip can be a substitute for mayo in tuna, if desired. If looking for a vegan option though, a vegan mayo can be used. Mashed avocado can also be a great substitute for a creamy base.

    Should I rinse canned tuna before using?

    No need to rinse canned tuna before using it. It’s safe to eat right out of the can unless it’s in oil, and then you may want to rinse it.

    Is tuna in oil better than water for tuna salad?

    This is a personal preference and it could also depend on how you’re serving or using the canned tuna. Tuna in oil can add a slightly different flavor and more calories. Tuna in water could reduce the calories and help capture the true tuna flavor.
    The texture of tuna with oil is something to think about, compared to water as well. As far as blending canned tuna with other ingredients, oily tuna can blend well with the other creamy ingredients too.

    Tuna salad sandwich with crackers on plate

    What to Serve with Tuna Salad

    Tuna Sandwich: You can enjoy the tuna salad on only slices of bread, or you can top the tuna salad sandwich with: crisp lettuce, bacon (you can even do bacon cooked in the air fryer or turkey bacon), a slice of onion, avocado halves (or slices), a drizzle of balsamic vinegar, fresh veggies or more fresh herbs, or even top with potato chips for an extra “crunch!”

    Tuna Salad: This is delicious when served with crackers or even your favorite chips. (You could even use sliced peppers or sliced cucumbers to dip if going low-carb.) It’s also delicious when served on top of a leafy green salad.

    Storage

    You may store this tuna salad in the refrigerator using an airtight container, for up to 5 days! Make this crab salad recipe ahead of time for an extra choice for a quick lunch or light dinner.

    Due to the fact that there is mayonnaise in this recipe, refrigerate after 2 hours for food safety reasons.

    Top Tip

    If you choose a solid white canned tuna, you may need to flake the meat after you drain the water.

    Related Recipes

    If you loved this classic recipe, then you’ll also love this egg salad recipe, this chicken grilled cheese, and this fried peanut butter and jelly!

    Recipe

    two tuna salad sandwiches stacked on top of each other
    Print Pin
    5 from 92 votes

    The BEST Tuna Salad Recipe

    This tuna salad recipe is the best and will become your new favorite! Red onion, sweet pickle relish, celery, and a few simple spices will combine for INCREDIBLE flavor!
    Course Main Course, Salad, Side Dish
    Cuisine American
    Prep Time 10 minutes minutes
    Cook Time 0 minutes minutes
    Total Time 10 minutes minutes
    Servings 4 sandwiches
    Calories 266kcal
    Author Jessica Burgess

    Ingredients

    • 12 ounces can tuna, drained
    • ⅓ cup real mayonnaise see substitutions in post
    • ¼ cup sweet pickle relish see substitutions in post
    • 2 Tablespoons red onion, minced
    • 1 stalk celery, minced
    • 1 Tablespoon lemon juice
    • 1 Tablespoon flat-leaf parsley
    • 1 teaspoon dried chives if desired
    • ½ teaspoon garlic powder
    • ¼ teaspoon kosher salt
    • ½ teaspoon ground black pepper

    Instructions

    • Drain the water from the tuna and place in a medium mixing bowl.
    • Next, add ⅓ cup real mayonnaise, ¼ cup sweet pickle relish, 2 tablespoons red onion, minced, 1 stalk celery, minced, and 1 tablespoon of lemon juice to the mixing bowl of tuna.
    • Then add 1 tablespoon flat-leaf parsley, 1 teaspoon dried chives, 1 teaspoon garlic powder, ¼ teaspoon kosher salt, and ½ teaspoon ground black pepper and combine together using a rubber spatula. Be sure all of the ingredients are well blended.
    • Serve on your favorite bread or a bed of lettuce with crackers. Enjoy!

    Video

    Notes

    TIP: If you choose a solid white canned tuna, you may need to flake the meat after you drain the water.
    Storage: Store this tuna salad in the refrigerator using an airtight container, for up to 5 days. Especially since there is mayonnaise in this recipe, refrigerate after 2 hours for food safety reasons.

    Nutrition

    Serving: 1sandwich | Calories: 266kcal | Carbohydrates: 8g | Protein: 21g | Fat: 17g | Saturated Fat: 3g | Polyunsaturated Fat: 9g | Monounsaturated Fat: 4g | Trans Fat: 1g | Cholesterol: 44mg | Sodium: 719mg | Potassium: 296mg | Fiber: 1g | Sugar: 5g | Vitamin A: 1188IU | Vitamin C: 12mg | Calcium: 32mg | Iron: 1mg

    Fried Peanut Butter and Jelly Sandwich

    April 4, 2023

    Fried peanut butter and jelly sandwich, sliced on white plate.

    This Fried Peanut Butter and Jelly Sandwich takes your classic pb&j recipe to the next level. The outside is golden brown, and inside the two slices of bread is gooey peanut butter combined with warm jelly.

    Made like a grilled cheese sandwich (and our chicken grilled cheese) it’s cooked on the stovetop over medium-low heat, to get the crispy bread. It’s the perfect easy lunch idea or even a warm breakfast recipe.

    Fried peanut butter and jelly sandwich on a white plate.
    [feast_advanced_jump_to]

    We all love the pb&j from childhood, and now, with this method, you can still have the famous sandwich but with a twist, with a delicious, buttery coating.

    Why You’ll Love this Recipe

    • Crispy & Creamy: The texture of this sandwich is completely different than simply spreading peanut butter and jelly on two pieces of bread. The golden, crispy, outside texture combines perfectly with the inside, creamy texture.
    • Restaurant Style: If you ever watch shows that feature fun and different recipes, this fried peanut butter & jelly feels like something you’d find at a “must-visit” diner.
    • Ready in minutes: With a regular pb&j only taking a few minutes, don’t be intimidated by the extra step of frying or grilling! It will only take a few minutes to cook the sandwich on both sides.
    Sliced friend peanut butter and jelly sandwich on white plate, surrounded by milk jars and strawberries.

    Fried PB&J Ingredients & Variations

    The beautiful thing about this sandwich is that you can use your favorite ingredients that you love using to make a peanut butter and jelly, and then add one more ingredient (butter).

    Ingredients for fried peanut butter and jelly sandwich.
    • Bread – There are so many options for bread. Brioche, sliced white bread, wheat, or your favorite sandwich bread.
    • Peanut Butter – Crunchy or creamy, or even a substitute like Nutella or your favorite nut butter will work too.
    • Jelly – Strawberry or grape jelly work, or you can even use your favorite flavor of jam.
    • Butter – Using spreadable butter is recommended so it slides across the bread easier. Or, if you have stick butter, melt it gently to make it smooth to spread easier. Salted butter is a great option because it adds that hint of salt with all of the sweetness.

    How to Make a Fried Peanut Butter and Jelly Sandwich

    *Be sure to see the recipe card below for the full ingredients list & instructions!*

    Steps 1-4 image collage of how to make a friend peanut butter and jelly.
    1. Add Peanut Butter – Spread peanut butter on one side, of one slice of bread.
    2. Spread Jelly – Then, spread jelly on one side, of the other slice of bread.
    3. Butter the Bread – Place the coated sides of the bread together, so they form a classic pb&j. Next, coat the outside of both sides of the sandwich, with butter and place on a skillet, and cook over medium-high heat for 3-4 minutes or until the side facing down, is a golden brown.
    4. Toast the Bread – Flip once golden, and cook the other side for 3-4 minutes, or until golden brown. Serve!
    Fried, whole, peanut butter and jelly sandwich on white plate.

    Tip: Sprinkle with a little powdered sugar if desired for an extra sweet treat.

    Sliced fried peanut butter and jelly sandwich on white plate.

    Recipe Pro Tips

    • Multiple Sandwiches – If making multiple sandwiches, make as many sandwiches as you need, up until the point of adding them to a skillet. Using a griddle (a much larger cooking surface) place all of the assembled sandwiches on the griddle at the same time, in a single layer, to cook them at the same time. This way, you’re not making one at a time, which can be time-consuming.
    • Fun Additions. Love bananas on your peanut butter sandwich? Slice bananas to place on the peanut butter, or add other fun items like marshmallow fluff or honey or syrup like in our peanut butter and syrup sandwich, bacon, or even sprinkles!

    Recipe FAQs

    Should peanut butter and jelly sandwiches be toasted?

    They don’t have to be but they’re delicious when toasted. But frying them in a pan is ideal, rather than using a toaster because the jelly and peanut butter can melt out.

    What is the best bread for PB&J?

    We think sliced white bread is the best for pb&j but brioche is a delicious option too.

    Do you use smooth or crunchy peanut butter in PBJ?

    This is a personal preference, however, crunch peanut butter can make the sandwich “unbalanced” so the bread can slip around more, due to the nuts.

    Is jam or jelly better for PB&J?

    Either one works but jam will slide on more smooth, as jelly can be a little “bumpy” causing the bread to slide around a little more.

    More Sandwich Recipes

    If you love classic sandwiches and fun recipes to make for lunch, you’ll love these reader favorites too:

    • Fried Bologna and Egg Sandwich
      Fried Bologna and Egg Sandwich
    • two tuna salad sandwiches stacked on top of each other
      The BEST Tuna Salad Recipe
    • Hot ham and cheese sandwich on white plate
      Hot Ham and Cheese Sandwiches
    • egg salad on croissant
      The BEST Egg Salad Recipe

    Recipe

    Fried peanut butter and jelly sandwich, sliced on white plate.
    Print Pin
    5 from 7 votes

    Fried Peanut Butter and Jelly Sandwich

    A fried peanut butter and jelly sandwich is your classic pb&j, cooked on the stovetop with butter, giving it a crispy outside with a warm and gooey inside.
    Course Main Course, Snack
    Cuisine American
    Prep Time 5 minutes minutes
    Cook Time 5 minutes minutes
    Total Time 10 minutes minutes
    Servings 1 sandwich
    Calories 326kcal
    Author Jessica Burgess

    Ingredients

    • 2 slices bread Your favorite sliced sandwich bread
    • 1 ½ Tablespoon peanut butter smooth or crunchy
    • 1 ½ Tablespoon jelly or jam
    • 1 Tablespoon butter

    Instructions

    • Add Peanut Butter – Spread peanut butter on one side, of one slice of bread.
    • Spread Jelly – Then, spread jelly on one side, of the other slice of bread.
    • Butter the Bread – Place the coated sides of the bread together, so they form a classic pb&j. Next, coat the outside of both sides of the sandwich, with butter and place on a skillet, and cook over medium-high heat for 3-4 minutes or until the side facing down, is a golden brown.
    • Toast the Bread – Flip once golden, and cook the other side for 3-4 minutes, or until golden brown. Serve!

    Notes

    Multiple Sandwiches – If making multiple sandwiches, make as many sandwiches as you need, up until the point of adding them to a skillet. Using a griddle (a much larger cooking surface) place all of the assembled sandwiches on the griddle at the same time, in a single layer, to cook them at the same time. This way, you’re not making one at a time, which can be time-consuming.
     

    Nutrition

    Serving: 1sandwich | Calories: 326kcal | Carbohydrates: 36g | Protein: 7g | Fat: 17g | Saturated Fat: 8g | Cholesterol: 30mg | Sodium: 430mg | Potassium: 153mg | Fiber: 2g | Sugar: 8g | Vitamin A: 350IU | Vitamin C: 0.9mg | Calcium: 77mg | Iron: 2mg

    Hamburger Hashbrown Casserole

    April 3, 2023

    Hamburger hashbrown casserole in baking dish with ladle resting in it.

    This hamburger hashbrown casserole recipe is full of creamy and cheesy goodness and has so much flavor with the seasonings and the peppers and onions. It’s a casserole recipe that’s amazing as a main dish recipe that the whole family will love, or even as a hearty side dish recipe that’s great for the holidays or potlucks!

    Hamburger hashbrown casserole in baking dish with spoon resting in it.

    There’s something so comforting about seeing a hashbrown casserole on the dinner table. It’s usually full of cheese, shredded hashbrowns, or diced potatoes, and finished with a creamy soup and seasonings.

    Ground beef dinners like this are classic old-fashioned comfort food recipes.

    This easy meal is no different. But what makes this recipe better than others, is that it has the flavors of the peppers and onions, for that perfect hint of pepper flavor on top of all of the other amazing flavors going on.

    Now, if you’re looking for a dish that doesn’t have meat, these crock pot cheesy potatoes may be for you! Or, this sausage casserole in the slow cooker with kielbasa is a similar dish, that uses a different type of meat.

    [feast_advanced_jump_to]

    Ingredients Needed

    Labeled ingredients on counter for hamburger hashbrown casserole.
    • 2 pounds ground beef
    • 2 teaspoons cooking oil
    • 1 teaspoon black pepper, divided
    • 2 teaspoons salt, divided
    • 1 teaspoon garlic powder
    • 2 cups frozen seasoning blend
    • 2 – 10.5 ounce cans cream of mushroom soup
    • 12 ounce can evaporated milk
    • 30 ounce package frozen hashbrown potatoes – if you have cubed hash browns, you’ll also love this party potatoes recipe.
    • 4 Tablespoons butter, melted
    • 2 cups cheddar cheese, shredded (divided)
    • 1 cup mozzarella cheese, shredded 

    Substitutions

    This recipe can be flexible if you prefer certain flavors, types of meat or you simply only have specific items on hand. Here are some suggestions that you may find helpful:

    • Cheese – we love using cheddar and mozzarella for this recipe but feel free to use your favorite types of melty cheese instead. Or, you could also try using canned cheddar cheese soup or
    • Meat – you can use ground chicken, ground sausage, or your favorite ground meat substitute, instead of this ground beef casserole, if you prefer. (In case you want to use it for these other ground beef dinner ideas.)
    • Soup – Cream of chicken soup instead of cream of mushroom soup would also be a great soup to use if you’d rather have that.
    • Potatoes – although we highly recommend using frozen shredded hashbrowns, you could also use frozen diced potatoes instead.

    How to Make Hamburger Hashbrown Casserole

    *Be sure to see the recipe card below for the full ingredients list & instructions!*

    Before Beginning: Heat oven to 375 degrees, grease a 9 x 13 inch casserole dish, and remove hashbrowns from the freezer so they can thaw while you’re prepping other things.

    Steps 1-4 on how to make hashbrown hamburger casserole.
    1. Place oil and ground beef in a medium to large skillet. Brown ground beef over medium heat until the beef is just done and is not pink, about 5 minutes. Make sure to break beef into small pieces while cooking.
    2. Once the ground beef is done cooking, drain the meat and return to the skillet.
    3. Stir in 1 ½ teaspoons salt, ½ teaspoon black pepper, garlic, and seasoning blend.
    4. Cook for an additional 5 minutes stirring frequently to make sure seasonings are evenly distributed.
    Steps 5-8 of making hashbrown hamburger casserole.
    1. Then stir in half (1 cup) of the cheddar cheese, and stir to mix in.
    1. In a medium bowl combine the cans of mushroom soup with the evaporated milk. Mix together until smooth. You can do this with a mixer but a fork also works well. 
    1. Spread the ground beef mixture into the bottom of the greased 9 x 13 inch pan.
    2. Pour the soup mixture over the beef mixture in the pan. Spread out the soup mixture with a spoon or spatula to make sure it covers the beef evenly.
    Steps 9-12 of how to make hamburger hash brown casserole.
    1. In a small bowl, mix the remaining salt (½ teaspoon) and pepper (½ teaspoon) with the melted butter.
    1. Pour over the partially thawed hash browns that are in a large mixing bowl. Toss to coat the hash browns in the butter mixture.

    Pro Tip: If you have excess water, discard this, instead of mixing it with the melted butter and seasonings.

    1. Evenly spread the buttered hash browns onto the soup mixture.
    1. Bake in the preheated oven for 45 minutes to 1 hour or until the edges are bubbly and light golden brown and the center is hot. Then, after baking for one hour, sprinkle the cheddar and mozzarella cheese on top of the casserole and bake for an additional 5 minutes until the cheese is melted.
    Baked hamburger hashbrown casserole in glass baking dish.

    Allow to Rest: Let the hashbrown hamburger casserole rest for 5 minutes before serving.

    Ladle holding hamburger hashbrown casserole above the baking dish.

    Recipe Pro Tips

    • For a smaller batch: This recipe can easily be halved and baked in an 8 ½ X 4 ½ in (6 cup) loaf pan. Cook for 40 minutes at 375 before adding cheese when doing this. 
    • Make ahead: This dish is easy to make the day before. To do this layer the beef, soup, and potatoes then cover and refrigerate. When ready to cook the next day, cover the pan with foil and bake at 375 degrees for 45 minutes. Then remove the foil and bake for 15 minutes until bubbly and cooked through. Then add cheese and bake for an additional 5 minutes to melt the cheese. 

    Recipe FAQs

    Do I have to thaw frozen hash browns for casserole?

    It’s best for them to thaw before baking hashbrowns in a casserole. If you pull them out of the freezer right when starting this recipe, they’ll thaw while making the ground beef and prepping the layers.

    Why is my hash brown casserole soggy?

    If it’s soggy it could be because the hashbrowns were not thawed, and the water from the hashbrowns has caused the casserole to be wet.

    Do you cook meat before putting it in a casserole?

    Yes! Cooking the ground beef before adding it to the baking in the dish is important.

    Hamburger hashbrown casserole serving on white dinner plate.

    Storage

    Allow the casserole to cool to room temperature and then refrigerate any leftovers of the hamburger hash brown casserole in an airtight container, or cover with plastic wrap, for up to 3 days. To reheat, microwave in a microwave-safe dish.  

    Fork holding a bite of hamburger hashbrown casserole.

    What to Serve with this Casserole

    So many things can go great with this delicious casserole. A green salad recipe or even something like this roasted garlic broccoli is delicious with it! Or, if you want to keep things really simple, see how to make canned green beans taste better!

    Similar Recipes

    If you love simple recipes like this one, you’ll also love these reader favorites that are similar with ground beef or potatoes:

    • beef stroganoff in black skillet
      Easy Beef Stroganoff Recipe
    • french onion beef casserole scooped up out of white dish
      French Onion Beef Casserole
    • Dutch oven beef stew in white pot.
      Dutch Oven Beef Stew
    • Fiesta Ranch potato wedges on plate next to a small bowl of ranch dressing.
      Fiesta Ranch Baked Potato Wedges

    Did you make this? I’d be so grateful if you left a “star” rating below to let me know what you thought! Then, the next time you need a quick and easy recipe, come back to Fantabulosity to browse all of my easy recipes!

    Recipe

    Hamburger hashbrown casserole in baking dish with ladle resting in it.
    Print Pin
    5 from 13 votes

    Hamburger Hashbrown Casserole

    Hamburger hashbrown casserole is a delicious and hearty main dish or side dish recipe that uses simple ingredients but has so much flavor. Perfect for an easy dinner or a potluck!
    Course Main Course
    Cuisine American
    Prep Time 15 minutes minutes
    Cook Time 45 minutes minutes
    Total Time 1 hour hour
    Servings 8 servings
    Calories 680kcal
    Author Jessica Burgess

    Ingredients

    • 2 pounds ground beef
    • 2 teaspoons cooking oil
    • 1 teaspoon black pepper divided
    • 2 teaspoons salt divided
    • 1 teaspoon garlic powder
    • 2 cups frozen veggie seasoning blend Frozen vegetable mixture of onions, red pepper, green pepper, celery, and parsley, or similar.
    • 2 – 10.5 ounce cans cream of mushroom soup
    • 12 ounce can evaporated milk
    • 30 ounces frozen shredded hashbrowns
    • 4 Tablespoons butter melted
    • 2 cups shredded cheddar cheese divided
    • 1 cup shredded mozzarella

    Instructions

    • Heat oven to 375 degrees, grease a 9 x 13 inch pan, and remove hash browns from the freezer so they can thaw while you're prepping the rest.
    • Place oil and ground beef in a medium to large skillet. Cook ground beef over medium heat until the beef is just done and is not pink, about 5 minutes. Make sure to break beef into small pieces while cooking.
    • Once done drain meat and return to the skillet.
    • Stir in 1 ½ teaspoons salt, ½ teaspoon black pepper, garlic, and seasoning blend. Cook for an additional 5 minutes stirring frequently to make sure seasonings are evenly distributed. Then stir in half (1 cup) of the cheddar cheese.
    • Spread beef mixture into the bottom of the greased 9 x 13 inch pan.
    • In a medium bowl combine the cans of mushroom soup with the evaporated milk. Mix together until smooth. You can do this with a mixer but a fork also works well. 
    • In a large bowl mix the remaining salt (½ teaspoon) and pepper (½ teaspoon) with the melted butter and pour over the partially thawed hash browns. Toss to coat the hash browns in the butter mixture.
    • Pour the soup mixture over the beef mixture in the pan. Spread out the soup mixture with a spoon or spatula to make sure it covers the beef evenly.
    • Evenly spread the buttered hash browns onto the soup mixture.
    • Bake for 45 minutes to 1 hour or until the edges are bubbly and light brown and the center is hot.
    • Once done cooking sprinkle cheddar and mozzarella cheeses on top and bake for an additional 5 minutes until cheese is melted.
    • Let the casserole rest for 5 minutes before serving.

    Nutrition

    Serving: 1serving | Calories: 680kcal | Carbohydrates: 31g | Protein: 36g | Fat: 46g | Saturated Fat: 22g | Polyunsaturated Fat: 2g | Monounsaturated Fat: 16g | Trans Fat: 2g | Cholesterol: 147mg | Sodium: 1067mg | Potassium: 877mg | Fiber: 3g | Sugar: 5g | Vitamin A: 2966IU | Vitamin C: 14mg | Calcium: 427mg | Iron: 4mg

    Cowboy Stew

    April 1, 2023

    Cowboy stew in white dutch oven.

    Cowboy Stew: A hearty soup made of ground beef, kielbasa, bacon, and hearty vegetables, is the perfect soup recipe to feed a crowd or to serve on a cold day. Serve this stew with cheesy biscuits or one of these salads for a crowd, and you’ll have a delicious, rounded-out meal!

    Cowboy stew in white dutch oven on the counter.

    What you’ll love about cowboy stew is that it’s not as thick as say, hearty stew recipes such as this beef stew recipe. It’s lighter but yet hearty enough to fill up those bellies for a busy day dinner or a comforting dish for Sunday dinner.

    If you’re looking for more dishes for the hungry cowboys in your life (or just those who love cowboy favorites) you’ll also love these cowboy burgers and this cowboy queso.

    [feast_advanced_jump_to]

    Ingredients Needed

    Labeled ingredients for cowboy stew on counter.

    You’ll need the following simple ingredients:

    • 6 slices bacon, chopped
    • 1 pound ground beef (See more of our other ground beef dinners.)
    • 1 (12 ounce) package kielbasa sausage, sliced into rounds
    • 1 medium onion, diced
    • 3 garlic cloves, minced
    • 2 teaspoons Chili powder – Adjust spices to your taste, for more heat add additional chili powder. 
    • 1 teaspoon smoked paprika
    • 1 teaspoon salt
    • ½ teaspoon black pepper
    • 14.5 ounce can Fire Roasted tomatoes
    • 15 ounce can Great North beans or other white beans, drained and rinsed
    • 4 ounce can chopped green chilies, with liquid
    • 32 oz carton of beef stock (4 cups)
    • 1 cup frozen corn
    • 1 cup frozen peas
    • 3 medium Yukon Gold potatoes (approximately 1 ½ cups), diced – if you have a large back of potatoes you may also want to make this loaded potato soup.
    • Garnishes:  fresh parsley, shredded Monterey jack cheese, sour cream

    Substitutions & Variations

    • Ground Beef: You can use different kinds of meat, such as ground turkey, ground venison, ground elk, ground chicken, or your favorite ground meat, instead of ground beef. Or, you could also try ground Italian sausage in soup.
    • Beans: You can use other white beans, such as pinto beans instead of great white northern beans.
    • Potatoes: If you’d like to use red potatoes instead of Yukon gold, you can! However, we do not recommend using Russet potatoes as they tend to get too soft in stews.
    • Additions: If you’d like to add other times to this cowboy soup, you absolutely can. Some add cumin (which you could add about 1 teaspoon if you love that cumin flavor.) You may want to add items such as black beans, hot sauce for that extra kick, red kidney beans, chili beans, and more!

    Equipment

    • A Dutch oven or large stock pot is needed for this easy cowboy stew recipe.

    How to Make Cowboy Stew

    *Be sure to see the recipe card below for the full ingredients list & instructions!*

    Bacon cooking in white dutch oven.
    Image 1
    Kielbasa cut up and sautéing in white dutch oven.
    Image 2
    1. In a dutch oven or large pot cook bacon until crisp.  Using a slotted spoon remove bacon and place on paper towel lined plate to drain.
    2. Add sliced kielbasa to pan with bacon drippings and cook over medium-high heat until browned.  Using a slotted spoon remove the kielbasa and place it on a plate with bacon.  
    Cooked ground beef in dutch oven.
    Image 3
    Sausage, ground beef and bacon in white dutch oven.
    Image 4
    1. Add ground beef, onion and garlic to pan and cook over medium heat, breaking up the beef with a spoon or spatula and cook until brown and no longer pink.  Drain excess grease.
    2. Return bacon and kielbasa to the pot and add chili powder, smoked paprika, salt, and pepper to the ground beef mixture.  Stir for one to two minutes until combined.
    Beans, tomatoes, and meat in white dutch oven.
    Image 5
    Items mixed together with beef stock in dutch oven.
    Image 6
    1. Next, add fire roasted tomatoes, drained beans, canned green chilies, and beef broth to pan.  Stir to combine. Bring to a boil then lower eat and simmer.
    Potatoes added to cowboy stew in dutch oven.
    Image 7
    Frozen corn and peas added to cowboy stew in dutch oven.
    Image 8
    1. Once the beef mixture is at a steady simmer, add potatoes and continue simmering for 20 minutes until the potatoes are soft and cooked through. 
    2. Add frozen corn and peas and simmer for an additional 5 minutes until cooked through.  
    Dutch oven full of cowboy stew.

    How to Serve Cowboy Stew

    If desired, garnish with chopped fresh parsley, crushed tortilla strips, cheese, or sour cream.

    One serving of cowboy stew in white bowl, sitting on wooden pot holder.

    Recipe Pro Tips

    • Make ahead. As with so many soup recipes, like our chili recipe or even taco soup recipe, sometimes soups can be even better the next day because the flavors have had more time to blend together. This cowboy stew recipe is no different.
    • Freeze a batch. Soups are one of those dishes that are amazing to make and freezer for a quick meal later. Freezing cowboy stew is a great option for future meal planning or a way to store leftovers. See the tips below for freezing tips.

    Recipe FAQs

    What is cowboy stew made of?

    Cowboy stew is made of bacon, ground beef, and kielbasa for a hearty base. It then usually had vegetables, mixed in with a tomato broth and spices.

    Where did cowboy stew originate?

    Cowboy stew came from Texas! Although this Texas cowboy stew recipe could also be a cowboy soup, it’s called cowboy stew because you combine all of the ingredients in to a stew.

    Is cowboy stew the same as beef stew?

    Cowboy stew had thinner consistency, where beef stew tends to have a thicker consistency.

    Storage

    Refrigerate: Store any leftovers in an airtight container in the refrigerator for 3-4 days.

    Freeze: To freeze any leftovers, once cooled, pour cowboy stew in to freezer-safe container and freeze for up to 3 months.

    Thaw: When ready to enjoy the frozen stew, place in the refrigerator to thaw. Or, place stew in a stockpot (if you can get it out of the container) and turn on low, and cook until heated through.

    What to Serve with Cowboy Soup

    Cheddar biscuits are delicious, served with this soup. You’d also love having something fun like Texas Toast pizzas as a side with this hearty dish!

    Or, if you love sliders, try serving these sloppy joe sliders with it, as we haven’t met a cowboy yet that doesn’t love them!

    More Soup Recipes

    If you love soup recipes like this old-fashioned cowboy stew, you’ll also love these:

    • Homemade chili in small bowl with Fritos and cheese on top.
      Simple Chili Recipe
    • Southern chicken and dumplings in bowl.
      Chicken and Dumplings
    • Homemade Chicken Broth
    • Loaded Potato Soup in small crock, next to fabric napkin.
      Loaded Baked Potato Soup Recipe

    Did you make this? I’d be so grateful if you left a “star” rating below to let me know what you thought! Then, the next time you need a quick and easy recipe, come back to Fantabulosity to browse all of my easy recipes!

    Recipe

    Cowboy stew in white dutch oven.
    Print Pin
    5 from 3 votes

    Cowboy Stew

    This cowboy stew recipe is made with hearty meats such as ground beef, kielbasa and bacon, potatoes and vegetables. It's easy, and so delicious for a comforting lunch or dinner.
    Course Soup
    Cuisine American
    Prep Time 20 minutes minutes
    Cook Time 25 minutes minutes
    Total Time 45 minutes minutes
    Servings 8 servings
    Calories 536kcal
    Author Jessica Burgess

    Equipment

    • Dutch Oven or large stock pot

    Ingredients

    • 6 slices uncooked bacon chopped
    • 1 pound ground beef
    • 12 ounces kielbasa sausage sliced into rounds
    • 1 medium onion diced
    • 3 cloves garlic minced
    • 2 teaspoons chili powder
    • 1 teaspoon smoked paprika
    • 1 teaspoon salt
    • ½ teaspoon pepper
    • 14.5 ounces can fire roasted tomatoes
    • 15 ounces canned great northern beans or other white beans drained and rinsed
    • 4 ounces canned chopped green chilies, with liquid
    • 32 ounces beef stock or 4 cups
    • 1 cup frozen corn
    • 1 cup frozen peas
    • 3 medium Yukon Gold potatoes (approximately 1 ½ cups), diced
    • Optional Garnishes:  fresh parsley, shredded monterey jack cheese, tortilla chips, sour cream

    Instructions

    • In a dutch oven or large pot cook bacon until crisp.  Using a slotted spoon remove bacon and place on paper towel lined plate to drain.
    • Add sliced kielbasa to pan with bacon drippings and cook over medium heat until browned.  Using a slotted spoon remove kielbasa and place on plate with bacon.
    • Add ground beef, onion and garlic to pan and cook over medium heat, breaking up the beef with a spoon or spatula and cook until brown and no longer pink.  Drain excess grease.
    • Return bacon and kielbasa to the pot and add chili powder, smoked paprika, salt and pepper to the ground beef mixture.  Stir for one to two minutes until combined.
    • Next, add fire roasted tomatoes, drained beans, canned green chilies, and beef broth to pan.  Stir to combine. Bring to a boil then lower eat and simmer.
    • Once beef mixture is at a steady simmer, add potatoes and continue simmering for 20 minutes until potatoes are soft and cooked through. 
    • Add frozen corn and peas and simmer for an additional 5 minutes until cooked through.  
    • Optional:  Garnish with chopped fresh parsley, cheese, or sour cream

    Nutrition

    Serving: 1serving | Calories: 536kcal | Carbohydrates: 37g | Protein: 28g | Fat: 31g | Saturated Fat: 11g | Polyunsaturated Fat: 3g | Monounsaturated Fat: 14g | Trans Fat: 1g | Cholesterol: 81mg | Sodium: 1178mg | Potassium: 1098mg | Fiber: 7g | Sugar: 4g | Vitamin A: 625IU | Vitamin C: 26mg | Calcium: 90mg | Iron: 4mg

    Ugly Duckling Cake

    April 1, 2023

    Slice of ugly duckling cake on white plates.

    This ugly duckling cake recipe is a rich buttery fruit cocktail cake that starts with a yellow cake mix… But nobody will ever know it’s that easy!

    Recipes like this are exactly why old-fashioned cake recipes are still so popular today.

    ugly duckling cake

    When I’m in charge of a dessert recipe for parties, I almost always consider a cake recipe.

    Cakes are so easy and always crowd-pleasers. My personal favorites are creamy lemon bundt cake, ding dong cake, this easy carrot cake, and gooey butter cake!

    Why You’ll Love This Recipe:

    • Not only is this ugly duckling cake delicious, but it’s the perfect party dessert because it’s a conversation starter! Who doesn’t want to take about a cake that’s called an “ugly duckling cake!?”
    • Fruit cocktail cake (aka ugly duckling cake), is a classic southern dessert that does not disappoint. It’s a refreshing cake which makes it perfect for summer or hot weather!
    • You guys know me, I’m all about amazing food without the difficulty! This cake recipe is just that. You’ll only need basic ingredients and minimal baking skills to get the perfect fruit cocktail cake. It’s also very similar to this vintage Granny Cake.

    Why is it Called an “Ugly Duckling Cake?”

    You know, I’m not 100% sure… but I assumed it was because it wasn’t necessarily a beautiful cake on the outside but the inside was absolutely beautiful. (In looks and in taste!)

    Plus, the outside of the cake has coconut flakes that could resemble a duck? That’s all just a guess but I’ll go with it! How about you?

    The inside of the cake also has a nice little red surprise from the cherries in the fruit cocktail and the kids find that so fun!

    fruit cocktail cake with coconut

    Ingredients for Duckling Cake

    • One box yellow cake mix
    • 1 – 16 ounce can of fruit cocktail undrained
    • 2 ½ cups of coconut (flaked and divided)
    • two eggs
    • ½ cup brown sugar
    • ½ cup butter
    • ½ cup of granulated/white sugar
    • ½ cup of evaporated milk

    Step-by-Step Directions

    1. Heat oven to 325 degrees f.
    2. Grease 9 x 13″ baking dish and set aside.
    3. In large mixing bowl, combine cake mix with can of fruit cocktail, one cup of coconut, and eggs (Image 1).
    4. Beat with an electric mixer at medium speed for two minutes.
    5. Pour into prepared cake pan and then sprinkle with brown sugar (Image 2).
    Ugly duckling cake steps 1 and 2.
    1. Bake for 45 minutes or until cake springs back when touched.
    2. In a small saucepan bring butter, sugar, and evaporated milk to a boil (Image 3).
    3. Boil for two minutes stirring constantly remove from heat and stir in remaining coconut. Spread over hot cakes (Image 4). Served warm or cool!
    Steps to make ugly duckling cake.

    Expert Tips and FAQs

    How do I store yellow duckling cake?

    You can store yellow duckling cake in an airtight container on the counter at room temperature for a couple of days. Storing in the refrigerator may change the texture of the cake.

    Can I freeze fruit cocktail coconut cake?

    Yes! You can freeze this cake for up to 6 months. For the best flavor and texture, you’re going to want to make sure that the cake is completely thawed before serving.

    Can I use white cake mix?

    No, white cake mix and yellow cake mix have different flavors and textures. Yellow cake mix will work much better for this recipe. There’s more about the differences on white vs yellow cake mix in this post!

    What’s the difference between yellow and white cake mix?

    Yellow cakes are made with egg yolks or whole eggs while white cake mixes are made with egg whites. In addition to that, yellow cake mix uses whole-wheat pastry flour while white cake mix uses all-purpose flour. These differences add body, flavor, and a more dense texture to the yellow cake mix.

    ugly duckling cake with cake mix

    What to Top an Ugly Duckling Cake with

    There are so many yummy options for the top of the cake if you wish to do so! Here are great ideas to consider:

    • cherries
    • cool whip
    • vanilla ice cream
    • extra coconut flakes
    • pecans
    • almond slivers

    They’d all taste amazing on top of the warm cake! Feel free to branch out from these options as well.

    fruit cocktail cake with coconut

    More Easy Dessert Recipes You’ll Love

    If you love easy desserts like this one, especially if you love coconut, then you’ll also love these magic cookie bars! Or, if the fruit desserts are your favorite, then you’ll also love our pineapple cake!

    Recipe

    Slice of ugly duckling cake on white plates.
    Print Pin
    5 from 17 votes

    Ugly Duckling Cake

    This Ugly Duckling Cake is a rich and buttery fruit cocktail cake made with a yellow cake mix and coconut to create a flavorful, moist dessert!
    Course Dessert
    Cuisine American
    Prep Time 15 minutes minutes
    Cook Time 45 minutes minutes
    Total Time 1 hour hour
    Servings 12 slices
    Calories 457kcal
    Author Jessica Burgess

    Ingredients

    • 1 Box Yellow cake mix
    • 16 ounce fruit cocktail undrained 1 can
    • 2 ½ cups flaked coconut divided
    • 2 eggs
    • ½ cup brown sugar
    • ½ cup granulated sugar
    • ½ cup butter
    • ½ cup evaporated milk

    Instructions

    • Preheat the oven to 325 degrees f
    • Grease 9 x 13" pan and set aside.
    • In large mixing bowl, combine cake mix with can of fruit cocktail, one cup coconut, and eggs.
    • Beat with an electric mixer at medium speed for two minutes.
    • Pour into prepared cake pan and then sprinkle with brown sugar (Image 2).
    • Bake for 45 minutes or until cake springs back when touched.
    • In a small sauce pan bring butter, sugar, and evaporated milk to a boil.
    • Boil for two minutes stirring constantly remove from heat and stir in remaining coconut.
    • Spread over hot cake. Served warm or cool!

    Video

    Notes

    How do I store yellow duckling cake? 
    You can store yellow duckling cake in an airtight container on the counter at room temperature for a couple of days. Storing in the refrigerator may change the texture of the cake.
    Can I use white cake mix? 
    No, white cake mix and yellow cake mix have different flavors and textures. Yellow cake mix will work much better for this recipe. There’s more about the differences on white vs yellow cake mix in this post!

    Nutrition

    Serving: 1slice | Calories: 457kcal | Carbohydrates: 64g | Protein: 5g | Fat: 22g | Saturated Fat: 16g | Polyunsaturated Fat: 1g | Monounsaturated Fat: 3g | Trans Fat: 0.4g | Cholesterol: 51mg | Sodium: 408mg | Potassium: 207mg | Fiber: 4g | Sugar: 44g | Vitamin A: 380IU | Vitamin C: 1mg | Calcium: 140mg | Iron: 2mg

    Rotisserie Chicken Stock

    March 30, 2023

    Rotisserie Chicken Stock in mason jar.

    Rotisserie Chicken Stock: A great way to use a leftover carcass from a rotisserie chicken, to get the most out of it! Combine the leftover rotisserie chicken carcass with water, vegetables or vegetable scraps, and herbs to create a homemade stock that’s full of so much flavor.

    Rotisserie chicken stock in mason jar, surrounded by other jars.

    It’s delicious in soup recipes like this homemade chicken soup, and even hearty recipes like chicken and noodles. Or, store it for later when you need it for an easy dinner recipe!

    There are different ways you can make homemade chicken broth, and the great thing about it is that it’s really flexible with the types of chicken, fresh vegetables, and herbs that you can use.

    For instance, we also use raw chicken when we make this whole chicken bone broth recipe. You could also use leftover bones from a cooked chicken (or even something like these smoked cornish hens or from a bone-in chicken thighs recipe.) But using a rotisserie chicken that you pick up from the grocery store, is a great way to utilize the leftovers after using the meat.

    [feast_advanced_jump_to]

    What does rotisserie broth taste like?

    The combination of chicken bones, vegetables, and herbs gives the stock a savory and slightly sweet flavor, with hints of garlic, bay leaves, and black pepper. The fresh thyme and parsley add a layer of herbaceousness to the broth, while the long simmering time helps to extract all of the flavors from the ingredients.

    Rotisserie Broth Ingredients

    Labeled ingredients on white counter, for rotisserie chicken stock.
    • 1 leftover rotisserie chicken carcass
    • 2 onions, roughly chopped and unpeeled
    • 2-3 carrots, roughly chopped and unpeeled
    • 2-3 stalks of celery, roughly chopped
    • 3-4 sprigs fresh thyme OR 2 teaspoons dried thyme
    • 4 garlic cloves, smashed and unpeeled
    • 2 bay leaves
    • ¼ cup fresh parsley leaves, roughly chopped
    • 1 teaspoon whole black peppercorns OR ½ teaspoon ground black pepper
    • 2 teaspoons Italian seasoning
    • 1 teaspoon salt, plus more to taste
    • 3 quarts water (12 cups of water), or fill up to the top of your pot

    Substitutions

    • Carrots: If you don’t have carrots, you can try using parsnips, turnips, or celery roots to add a similar earthy sweetness.
    • Celery stalks: Fennel or bok choy are a great substitute for a similar flavor and texture to celery.
    • Thyme: If you don’t have fresh, you can use dried thyme.
    • Garlic cloves: If you don’t have fresh garlic cloves, garlic powder, minced garlic, or roasted garlic can be used in this recipe.
    • Bay leaves: Try using dried thyme or dried oregano if you don’t have bay leaves on hand, to add a similar flavor.
    • Black peppercorns or ground black pepper: White peppercorns or red pepper flakes can be used in place of black peppercorns or ground black pepper to add a different heat and flavor.
    • Italian seasoning: You can substitute Italian seasoning with dried basil or dried rosemary for a similar flavor.
    • Fresh parsley leaves: You can use dried parsley instead or for a slightly different flavor, you can use fresh oregano.

    Equipment

    1. Large stockpot
    2. Fine mesh strainer or cheesecloth
    3. Ladle
    4. Airtight containers for storage (e.g. mason jars, plastic containers)
    5. Cutting board

    How to Make Leftover Rotisserie Chicken Stock

    *Be sure to see the recipe card below for the full ingredients list & instructions!*

    1. First, remove all the meat from the rotisserie chicken carcass, and set it aside for another use, such as this easy chicken pot pie casserole, a chicken caesar pasta salad or this chicken grilled cheese!

      Break the carcass into several pieces so it will fit in your pot, optional.
    Fresh herbs and vegetables in stock pot for chicken broth.
    Image 1
    Water added to vegetables, chicken and herbs for Rotisserie chicken stock.
    Image 2
    1. In a large stock pot, combine the chicken carcass pieces, onions, carrots, celery, garlic, bay leaves, black peppercorns, Italian seasoning, parsley, thyme, and salt.
    2. Then, fill the pot with water until the ingredients are completely covered. (This could be around 3 quarts of water, but this can vary depending on the size of your pot.)
    Cooked rotisserie chicken stock in stock pot.
    Image 3
    Drain vegetables and herbs from broth.
    Image 4
    1. Bring the water in the pot to a boil over high heat on the stove top, then reduce the heat to low and cover. Let this chicken stock simmer for at least 4 hours, or until the liquid has reduced by half and the vegetables are very soft.

    Tip: Note that the total time will vary slightly depending on how long you let the stock simmer on the stove. The longer it simmers, the more concentrated and flavorful it will become. After cooking, the stock will need to be strained and cooled, which will add additional time to the process.

    1. Once the rotisserie chicken stock has finished cooking, use a slotted spoon to remove the solids from the pot.
    2. Next, strain the liquid through a fine-mesh strainer to remove any remaining solids. Then, discard the solids.
    3. Now, taste the stock and add salt as needed to bring out the flavor, if desired. You may choose not to add more salt, so you can add salt to the recipe later, that you plan to use the stock for.
    Rotisserie chicken stock in glass pitcher.
    1. If not using the rotisserie chicken bone broth right away, let the stock cool to room temperature, and then transfer it to airtight containers and store in the refrigerator. See the tips below for freezing for later, to use in your favorite recipes.
    Close up of homemade rotisserie chicken stock.

    Recipe Pro Tips

    • Amount it makes: As a general rule, you can expect to yield about 8-12 cups of stock from a recipe like this, depending on the size of your pot and the concentration of the stock. If you cook the stock longer, you will be left with a more concentrated stock, but it will produce less liquid.
    • Flexible. This recipe is very flexible, so feel free to add other vegetables or herbs to the pot to suit your tastes. Some great options to consider might include mushrooms, rosemary, or sage. You could also add some crushed red pepper flakes for a spicy kick.
    Pouring homemade Rotisserie chicken stock in to mason jar.

    Recipe FAQs

    Can you use rotisserie chicken bones for stock?

    Yes! There’s so much flavor that can come from a rotisserie chicken, especially if it was cooked with seasonings. But the delicious broth that can come from any leftover skin left and the bones themselves, is fantastic.

    Can I use this stock in place of water in other recipes, such as soups or stews?

    This is a great stock to use in place of water in other recipes! However, keep in mind that if the recipe calls for salt, the broth will already have a saltiness to it, unlike water.

    Is chicken stock the same as chicken broth?

    They’re very similar but stock is usually created when using bones, and broth is usually made using the meat. However they are often used interchangeably.

    Spoonful of homemade rotisserie chicken stock being lifted out of mason jar.

    Storage

    • To store: To store leftover rotisserie chicken stock, it is best to let it cool to room temperature before transferring it to airtight containers. Some even pour stock in ice cube trays, so they can pop out small servings as needed.
    • Refrigerate: The stock can be stored in the refrigerator for up to 5 days, and to keep on hand to make recipes like my tortellini soup recipe.
    • To freeze: It can be stored in the freezer, in a freezer-safe container or freezer bag, for up to 3 months. it is recommended to leave enough headspace in the container to allow for expansion as the liquid freezes.
    • To thaw: When ready to use, simply thaw the stock in the refrigerator overnight and reheat it on the stove until hot and simmering.
    Mason jar full of rotisserie chicken stock.

    Recipes for Stock

    Looking for ways to use your new rotisserie chicken stock, other than a chicken noodle soup? We think you’ll love these ways to use chicken broth:

    • Chicken and gravy on top of mashed potatoes on white plates
      Chicken and Gravy Recipe
    • buffalo chicken soup in white bowl with green onions and chips
      Buffalo Chicken Soup Recipe
    • Instant Pot Chicken and Potatoes
      Instant Pot Chicken and Potatoes
    • White chicken chili in white bowl
      White Chicken Chili with Cream Cheese

    Did you make this? I’d be so grateful if you left a “star” rating below to let me know what you thought! Then, the next time you need a quick and easy recipe, come back to Fantabulosity to browse all of my easy recipes!

    Recipe

    Rotisserie Chicken Stock in mason jar.
    Print Pin
    5 from 10 votes

    Rotisserie Chicken Stock

    Make rotisserie chicken stock out of your bones instead of tossing them, using fresh vegetables and herbs, that you can use in soups and other recipes.
    Course Soup
    Cuisine American
    Prep Time 10 minutes minutes
    Cook Time 4 hours hours
    Total Time 4 hours hours 10 minutes minutes
    Servings 9 cups
    Calories 179kcal
    Author Jessica Burgess

    Equipment

    • Large stockpot
    • Fine mesh strainer
    • Ladle
    • Airtight containers for storage (e.g. mason jars, plastic containers)
    • Cutting board

    Ingredients

    • 1 rotisserie chicken carcass
    • 2 onions roughly chopped and unpeeled
    • 2-3 carrots roughly chopped and unpeeled
    • 2-3 celery stalks roughly chopped
    • 3-4 sprigs fresh thyme OR 2 teaspoons dried thyme
    • 4 cloves garlic smashed and unpeeled
    • 2 bay leaves
    • ¼ cup fresh parsley leaves roughly chopped
    • 1 teaspoon whole black peppercorns OR ½ teaspoon ground black pepper
    • 2 teaspoon Italian seasoning
    • 1 teaspoon salt plus more to taste
    • 3 quarts water (12 cups), or fill up to the top of your pot

    Instructions

    • First, remove all the meat from the rotisserie chicken carcass, and set it aside for another use. Break the carcass into several pieces so it will fit in your pot, optional.
    • In a large stock pot, combine the chicken carcass pieces, onions, carrots, celery, garlic, bay leaves, black peppercorns, Italian seasoning, parsley, thyme, and salt.
    • Then, fill the pot with water until the ingredients are completely covered. (This could be around 3 quarts of water, but this can vary depending on the size of your pot.)
    • Bring the water in the pot to a boil over high heat, then reduce the heat to low and cover. Let this chicken stock simmer for at least 4 hours, or until the liquid has reduced by half and the vegetables are very soft.
    • Once the rotisserie chicken stock has finished cooking, use a slotted spoon to remove the solids from the pot.
    • Next, strain the liquid through a fine-mesh strainer to remove any remaining solids. Then, discard the solids.
    • Now, taste the stock and add salt as needed to bring out the flavor, if desired. You may choose not to add more salt, so you can add salt to the recipe later, that you plan to use the stock for.
    • If not using right away, let the stock cool to room temperature, and then transfer it to airtight containers and store in the refrigerator. See the tips below for freezing.

    Notes

    Tip: The total time can vary depending on how long you let the stock simmer on the stove. 
    Amount it makes: As a general rule, you can expect to yield about 8-12 cups of stock from a recipe like this, depending on the size of your pot and the concentration of the stock. If you cook the stock longer, you will be left with a more concentrated stock, but it will produce less liquid.
    How to Store: There are refrigeration and freezer options for storing this broth. See post in the “Storage” section for more details.

    Nutrition

    Serving: 1cup | Calories: 179kcal | Carbohydrates: 5g | Protein: 32g | Fat: 4g | Saturated Fat: 1g | Polyunsaturated Fat: 1g | Monounsaturated Fat: 2g | Trans Fat: 0.04g | Cholesterol: 95mg | Sodium: 650mg | Potassium: 426mg | Fiber: 1g | Sugar: 2g | Vitamin A: 2456IU | Vitamin C: 6mg | Calcium: 51mg | Iron: 1mg

    20 Non-Candy Easter Basket Ideas

    March 28, 2023

    Easter graphic with text on image for Easter basket non candy ideas.

    Easter is one of the top holidays for kids, hands down. Egg hunting, baskets, and candy. So much candy. But honestly, there can be a bit too much candy.

    When filling a basket, it can be hard to find non-sugary options. Which is where this list of 20 non-candy Easter basket ideas comes in to save the day.

    Easter graphic with text on image for Easter basket non candy ideas.
    Non-Candy Easter Basket Ideas

    Make sure you check out our other Easter ideas here, to fill your holiday with fun things to try!

    Non-Candy Easter Basket Ideas for Toddlers

    Toddlers don't need too much sugar regardless, holiday or not. While a little candy every once in a while won't necessarily hurt a toddler, it's still better to stay away from it whenever possible. These non-candy Easter basket ideas for toddlers offer multiple basket fillers for little ones.

    Peekaboo Learning Farm 

    This bright, colorful toy will please kids who are learning how to grab and manipulate objects. The Peekaboo Learning Farm contains a series of colored barns that hide rubber farm animals inside. These make great Easter basket ideas. Toddlers will love opening them and finding out what animals are there to be found.

    Biscuit’s Pet & Play Easter: A Touch & Feel Book 

    Little kids love books, even if they can't really read just yet. But they love being read to, and it helps them develop language skills as well. The

    Biscuit’s Pet & Play Easter is a great book for toddlers who can touch the different textures and surfaces. Plus, Biscuit the pup is a classic children's character, and this is a perfect introduction to that little dog.

    Nesting Easter Eggs Toy 

    Toddlers love to stack things, and to put things into other things. This 

    Nesting Easter Eggs Toy allows them to do both to their heart's content. The cute, colorful plastic eggs have little faces on them that toddlers will be drawn to.

    6 Pack Wooden Percussion Musical Shake Eggs 

    To toddlers, toys are great, but toys that make noise are even better. Toddlers love to shake things around anyway, but any toy that gives them feedback is sure to be a hit. These Wooden Percussion Musical Shake Eggs are perfect. The bright, colorful eggs are on theme for Easter, and the fact that they are shakers mean toddlers won't be able to put them down.

    Lil’ Nibbles Textured Silicone Teether 

    Bunnies love carrots, historically. Now your toddler can love carrots as well, or at least the Lil’ Nibbles Textured Silicone Teether. This carrot-shaped teether will appeal to little ones pushing out teeth, and the bright colors and soft texture mean they will latch on to this teether happily.

    Educational Wooden Carrot Toys 

    This Wooden Carrot Toys Shape Size Sorting Matching Puzzle lets toddlers put carrots into holes all the live-long day. Plus, as they do it more and more, they will start to learn that certain carrots go into certain holes, which makes it a learning experience as well.

    Non-Candy Easter Egg Fillers

    Those plastic Easter eggs are an Easter mainstay, and always need to be filled. Candy is the easiest option, but since we're trying to avoid candy, something else will need to fill the void. What follows are a number of great non-candy fillers for those plastic eggs.

    60 PCS Fun Erasers 

    Here we have a whole collection of cute little Mini Novelty Tiny Take-Apart Puzzle Erasers for kids to play with. They can collect them, take them apart and put them together, even erase things with them, if they feel so inclined.

    Easter Slap Bracelets  

    Another thing kids love are little bracelets. The more brightly colored, the better. This Easter Slap Bracelets and Rubber Wristbands pack comes with a good assortment of rubber bracelets and slap bracelets, so there is sure to be something to please each of them.

    Mini Pop Keychain Fidget Toys 

    Kids love pop keychains. Basically reusable bubble wrap, these keychains are made of durable rubber. The Mini Pop Keychain Fidget Toys come in a variety of bright colors and fun shapes, so kids will be happy collecting and trading them.

    DIY Flower Garden Building Block 

    These DIY Flower Garden Building Block sets are high quality and come with a really nice assortment of flowers that can be put together by the kids. This bouquet of building block flowers will be so much fun once it's all put together.

    Easter Temporary Tattoos  

    Kids always love temporary tattoos, and they make perfect non-candy Easter egg stuffers, too. These cute little Easter tattoos are sure to please kids who will end the holiday with more than one piece of artwork on their arms. In terms of non-candy Easter ideas, you can't go wrong with tattoos.

    Non-Candy Easter Gifts

    Let's face it, a lot of gifts that go into Easter baskets aren't of the highest quality. Especially those pre-packed ones at grocery stores. But that doesn't have to be the case by any means. The following are all good quality toys or gifts that are on theme with the holiday, but that kids won't just toss out as soon as they are done pretending that they really like it.

    White Rabbit Animal Toy Building Set 

    The Lego Easter bunny is a great model for the Easter holiday. It's very cute, and kids will love building it. Plus, it can be converted to a couple of other models as well. Legos are perfect Easter gifts.

    Light Up Bunny Easter Bubble Wand 

    A bubble wand is a no-brainer, really. Kids love bubbles, and they will definitely love this Light Up Bunny Easter Bubble Wand. It lights up and shoots bubbles, and that's all they really need. When looking for good Amazon Easter gifts, a light-up bubble wand is a great way to go.

    Easter Bunny Go Fish Card Game  

    A fun game is always a welcome change, and Go Fish is a classic. This Easter Bunny Go Fish Card Game will give them something to do after the egg hunt and Easter lunch have ended.

    Easter Egg Toss 

    Another fun game for kids to play comes with this Easter Egg Toss.They can toss it back and forth, but they have to be gentle, and avoid breaking the egg.

    4 Pack Easter Wooden Puzzles 

    This one is perfect for the younger egg hunters out there. The 4 Pack Easter Wooden Puzzles for Kids are nice, quality wood puzzles with fun Easter scenes on them that little ones can put together.

    Non-Candy Easter Basket Ideas for Tweens and Teens

    Teens and Tweens aren't going to be happy with just some temporary tattoos, however. It usually takes a bit more to please them. Luckily, this list has several different options for a variety of non-candy Easter basket stuffers for tweens as well as teens.

    Burt’s Bees Easter Basket Stuffers  

    Tweens and teens love flavored lip balms, and tend to like Burt's Bees products as well. The Burt’s Bees Easter Basket Stuffers Spring Surprise Set scratches both of those itches with a couple nice Easter basket ideas for teens.

    LED Neck Reading Light 

    Staying up reading is something a lot of kids this age will do. If they are going to do it anyway, might as well do it right. The LED Neck Reading Light will help them read without straining their eyes, and it's rechargeable. Creative Easter baskets sporting a gift like this will go over very well.

    Emojinks Emoji Card Game 

    Kids love emojis. They just seem drawn to them. This Emojinks Emoji Card Game gives them something to play with their friends while comparing basket hauls after the egg hunt. A good card game is one of the most unique Easter gifts.

    Anti Blue Light Glasses

    These adorable blue light glasses are perfect for tweens and teens. They’re stylish, and affordable and we haven’t met a gal yet who wouldn’t love these! (Make sure you also check out some of the cutest accessories that SheIn has, that make perfect Easter basket gifts.)

    More Easter Ideas

    So there are plenty of options for people who want to keep the sugar levels down on Easter Sunday, regardless of the ages of the kids involved. While some candy is just fine, it's great to have options that aren't sugared up to keep everybody just a little bit calmer.

    For more Easter ideas, you’ll love these reader favorites:

    • A slice of strawberry heaven cake dessert on a plate.
      Strawberry Heaven
    • Strawberry Pound Cake on cake stand.
      Strawberry Pound Cake with Strawberry Glaze Icing
    • A slice of strawberry cheesecake poke cake on a round plate.
      Strawberry Cheesecake Poke Cake
    • A slice of burnt sugar cake on a round, vintage plate.
      Burnt Sugar Cake

    Old Fashioned Tuna Casserole

    March 27, 2023

    Old Fashioned Tuna Casserole on white plate.

    This old fashioned tuna casserole is the classic, comforting recipe so many of us grew up with, which is made with egg noodles, a creamy mushroom sauce, and a crispy topping. It's simple, filling, and perfect for busy weeknights, potlucks, or when you want an easy, nostalgic dinner.

    Casserole recipes are perfect for an easy dinner, for a potluck or to take in a meal care package for someone.

    Old fashioned tuna casserole on a white plate.

    Tuna is so versatile and can be used in so many dishes, warm or cold. We’ve used it in a tuna pasta salad, and in this tuna salad recipe, and they’ve both been extremely popular recipes, so I knew you’d love this old-fashioned tuna noodle casserole too.

    What Makes This an Old-Fashioned Tuna Casserole

    This recipe keeps all the traditional elements that make tuna casserole a classic. From the creamy base made with pantry staples to the tender egg noodles and crispy topping, it's the kind of simple, no-fuss dinner that's been passed down for generations.

    Unlike newer versions that use fresh sauces or complicated ingredients, this one sticks to the basics, giving you that familiar flavor and texture that makes it so comforting and dependable.

    [feast_advanced_jump_to]

    Ingredients for Tuna Casserole

    Labeled ingredients for old fashioned tuna casserole.

    You’ll need the following for this old-fashioned tuna casserole:

    • 12 Ounces Wide Egg Noodles, Cooked Al Dente 
    • 2 – 5oz Cans Tuna (For a lighter tuna flavor use canned Albacore Tuna.)
    • 4 Tablespoons Butter, Melted
    • 2 Tablespoons Pimento Peppers (optional)
    • 1 Teaspoon Onion Powder
    • ½ Teaspoon Salt
    • ½ Teaspoon Pepper
    • 2 – 15.5oz Cans Cream of Mushroom
    • 1 Cup Sour Cream
    • 1 Cup Frozen Peas and Carrots
    • 1 Cup Cheddar Cheese
    • ½ Cup Milk
    • 1 Cup French Fried Onions

    Substitutions & Variations

    • French Fried Onions – you could use potato chips, buttered crackers (such as Ritz crackers), bread crumbs, or a combination of the three!
    • Vegetables – you can leave these out, or use one of the two, and could even use canned instead of frozen or fresh peas as I use in this easy homemade chicken pot pie.
    • Noodles – You don’t have to use egg noodles. You can use elbow noodles (like we used in this old-fashioned macaroni and tomatoes recipe) penne pasta, or your favorite type. Just make sure to cook them to al dente, or if cooked until soft, they’ll become mushy after baking in the oven.
    • Soup – if you only have cream of celery soup or cream of chicken soup, you could try using one of those instead.
    • Additional Ingredients – you could also try adding garlic powder, parmesan cheese, or your favorite spices and toppings.

    How to Make Tuna Casserole

    *Be sure to see the recipe card below for the full ingredients list & instructions!*

    1. Preheat the oven to 425 degrees and spray a 9 x 13 casserole dish with cooking spray.
    Tuna with other ingredients in glass mixing bowl.
    Image 1
    Mixed ingredients in glass mixing bowl.
    Image 2
    1. In a large mixing bowl stir together tuna, melted butter, pimento peppers, onion powder, salt, and pepper. 
    Cheese, vegetables, soup and other ingredients in glass mixing bowl.
    Image 3
    Mixed soup with vegetables and cheeses, in glass mixing bowl.
    Image 4
    1. Then add the cans of soup, sour cream, peas and carrots, cheese, and milk to the bowl. Mix well.
    Noodles added in to soup and vegetable mixture in glass mixing bowl.
    Image 5
    Egg noodles mixed in to soup and vegetable mixture in glass mixing bowl.
    Image 6
    1. Finally add the cooked noodles to the bowl and fold into the mixture. 

    Tip: Make sure the cooked noodles are cooked until al dente. If cooked too much, they’ll be mushy after baking in the oven.

    Tuna casserole mixture in baking dish.
    Image 7
    French fried onions sprinkled on top of tuna casserole in baking dish.
    Image 8
    1. Spread the mixture evenly in the casserole dish.
    2. Sprinkle fried onions over the top.
    3. Bake in the preheated oven for 15-20 minutes until warm all the way through and golden brown.
    Baked tuna casserole in baking dish.

    Recipe Pro Tips

    • Freezer Meal Plan. Make two batches or make in advance, and freeze for later for an easy dinner. This would fit perfectly in some of the dinner themes in my dinner theme system!
    • Bake in the middle of the oven. It’s best to bake on an oven rack in the middle of the oven so the top does not burn before heated through. If you noticed the french fried onions cooking too quick, without the casserole heated through, cover the dish with aluminum foil.
    Spoon rested in baking dish where tuna casserole was baked.

    Recipe FAQs

    Why is my tuna casserole so dry?

    It could be because the noodles sat too long and soaked up milk before baking, or perhaps the dish was too big and it allowed the liquid to cook out, instead of cook in to the casserole.

    How long does tuna casserole last in the fridge?

    It’s best to enjoy tuna casserole within 3-4 days from making.

    Does tuna casserole have to be refrigerated?

    It does! Once fully cooled, store covered, in the refrigerator.

    What is old fashioned tuna casserole made of?

    Old-fashioned tuna casserole is typically made with egg noodles, canned tuna, a creamy soup base like cream of mushroom, and a crunchy topping such as fried onions or crackers. It's known for using simple pantry ingredients and being easy to prepare.

    Spoonful of tuna casserole holding up above baking dish.

    Storage

    Refrigerator: Refrigerate leftover tuna casserole when it has come to room temperature, in an airtight container or covered in plastic wrap for 3-4 days. 

    To Freeze: You can freeze the casserole before or after cooking. When freezing, wrap the pan in two layers of aluminum foil and freeze for up to 6 months.

    To Thaw: Fully thaw the casserole in the refrigerator overnight, then bake as directed. 

    Plate of old fashioned tuna casserole.

    What to Serve with Tuna Casserole

    If you’re looking for a side dish to serve with this classic tuna casserole and family favorite, these are highly recommended:

    • A basket of homemade biscuits lined with a tea towel.
      Easy Homemade Buttermilk Biscuits
    • side salad on white plate drizzled with ranch
      The BEST Side Salad Recipe
    • Close up image of old fashioned pea salad in a bowl.
      Old Fashioned Pea Salad
    • A Bisquick cheddar biscuit, broken in half so you can see the fluffy texture inside.
      Bisquick Cheddar Biscuits

    Did you make this? I’d be so grateful if you left a “star” rating below to let me know what you thought! Then, the next time you need a quick and easy recipe, come back to Fantabulosity to browse all of my easy recipes!

    Recipe

    Old Fashioned Tuna Casserole on white plate.
    Print Pin
    4.88 from 8 votes

    Old Fashioned Tuna Casserole

    This old fashioned tuna casserole is easy to make, is a hearty and classic comfort food, and is a recipe that's perfect for dinner, a potluck or as a meal to make for a family in need.
    Course Main Course
    Cuisine American
    Prep Time 10 minutes minutes
    Cook Time 15 minutes minutes
    Total Time 25 minutes minutes
    Servings 6 servings
    Calories 524kcal
    Author Jessica Burgess

    Ingredients

    • 12 ounces wide egg noodles cooked, al dente
    • 2 – 5 ounce cans of tuna
    • 4 tablespoons butter melted
    • 2 tablespoons pimento peppers optional
    • 1 teaspoon onion powder
    • ½ teaspoon salt
    • ½ teaspoon black pepper
    • 2 – 15.5 ounce cans cream of mushroom soup
    • 1 cup sour cream
    • 1 cup frozen peas and carrots
    • ½ cup milk
    • 1 cup cheddar cheese
    • 1 cup french fried onions

    Instructions

    • Preheat the oven to 425 degrees and spray a 9 x 13 casserole dish with cooking spray.
    • In a large mixing bowl stir together tuna, butter, pimento peppers, onion powder, salt, and pepper.
    • Then add the cans of soup, sour cream, peas and carrots, cheese, and milk to the bowl. Mix well.
    • Finally add the cooked noodles to the bowl and fold into the mixture. 
    • Spread the mixture evenly in the casserole dish.
    • Sprinkle fried onions over the top.
    • Bake for 15-20 minutes until warm all the way through.

    Notes

    Bake in the middle of the oven. It’s best to bake on an oven rack in the middle of the oven so the top does not burn before heated through. If you noticed the french fried onions cooking too quick, without the casserole heated through, cover the dish with aluminum foil.
    To Store:
    Refrigerator: Refrigerate leftovers in an airtight container for 3-4 days. 
    To Freeze: You can freeze the casserole before or after cooking. When freezing, wrap the pan in two layers of aluminum foil and freeze for up to 6 months.
    To Thaw: Fully thaw the casserole in the refrigerator overnight, then bake as directed.

    Nutrition

    Serving: 1serving | Calories: 524kcal | Carbohydrates: 51g | Protein: 15g | Fat: 29g | Saturated Fat: 15g | Polyunsaturated Fat: 2g | Monounsaturated Fat: 6g | Trans Fat: 0.3g | Cholesterol: 112mg | Sodium: 509mg | Potassium: 295mg | Fiber: 3g | Sugar: 4g | Vitamin A: 3079IU | Vitamin C: 8mg | Calcium: 228mg | Iron: 2mg

    Biscoff Cupcakes

    March 25, 2023

    Close up photo of a light tan cupcake cut in half with Biscoff spread in the center and a fluffy buttercream swirl on top of the cupcake

    These delicious, from-scratch, Biscoff cupcakes combine a fluffy cupcake with Biscoff cookie flavor.

    Biscoff biscuits and the Lotus Biscoff spread, all mixed in with the easy cupcake batter and Biscoff buttercream frosting, will leave everyone asking for this easy cupcake recipe!

    A frosted cupcake has been drizzled with melted cookie butter and topped with a Biscoff cookie

    Speculoos cookies (or Biscoff cookies) are becoming increasingly popular and a household name. We’ve even made tons of Biscoff recipes using the Biscoff flavor, such as these Biscoff truffles and this Biscoff fudge.

    We’ve even made a Biscoff cheesecake and a No Bake Biscoff pie, that uses a Biscoff crust. So you can say we’re getting pretty comfortable with using this delicious cookie around here and can totally relate to other Biscoff lovers out there.

    [feast_advanced_jump_to]

    Biscoff Cupcake Ingredients

    Labeled ingredients for Biscoff Cupcakes and Biscoff Buttercream

    You’ll need the following to make this Biscoff cupcake recipe:

    Cupcakes:

    • ¾ cup unsalted butter, softened
    • ¾ cup soft brown sugar
    • 3 eggs
    • 1 cup all-purpose flour
    • 1 ¼ teaspoons baking powder

    Cupcake Filling:

    • 12 teaspoons Biscoff spread

    Biscoff Buttercream:

    • ¾ cup unsalted butter, softened
    • 2 cups powdered sugar
    • 1 cup Biscoff spread
    • 2 Tablespoons boiling water

    To decorate:

    • 4 Tablespoons Biscoff spread
    • 12 Biscoff cookies

    Pro Tip: We used soft brown sugar to add a touch of caramel flavor to the cupcakes since this is a great accompaniment to the caramelized/cookie butter flavor of the Biscoff itself.

    Substitutions

    Sugar: If you don’t have soft brown sugar, you can substitute white sugar.

    Equipment

    • Mixer: You can use a hand-held electric mixer to make the cupcake batter or a stand mixer fitted with the paddle attachment.
    • Corer: To core the cupcakes you can use a cupcake corer, sharp pairing knife or we have found an upturned piping nozzle to be the perfect size and sharp enough to remove the cupcake middle cleanly.

    How to Make these Biscoff Cupcakes

    1. Preheat the oven to 350°F. and line a 12-cup cupcake pan with cupcake liners.
    2. Add the butter and brown sugar to a mixing bowl and mix together on high speed until it’s fluffy.
    3. Add the eggs to the bowl and beat on a high speed until light and expanded.
    4. Combine the flour and baking powder and add it to the bowl, and then mix on a low speed until combined.
    A bowl holding creamed butter and sugar has had 3 eggs added to it and a hand mixer is nearby prepared to mix them in
    Flour and baking soda have been added to a mixing bowl with cupcake batter in it
    1. Divide the batter evenly between the 12 cupcake liners.
    A cupcake tin has 12 white cupcake papers waiting to be filled with cupcake batter
    A hand holding a cookie scoop is adding cupcake batter to the last of 12 cupcake liners in a cupcake tin
    1. Place the cupcake pan in the center of the preheated oven and bake for 18 minutes or until the cupcakes have risen and are a pale golden brown. Set aside to cool on a wire rack.

    Pro Tip: When properly baked, the cupcakes will have risen to the top of the cupcake liners, be a pale golden brown, and will spring back when gently touched with a finger.

    Butter and powdered sugar have been creamed together in the mixing bowl of a stand mixer
    Powdered sugar have been added to a bowl of creamed butter for buttercream frosting
    1. Briefly heat the 12 teaspoons of Biscoff spread in the microwave – just until it's a little runnier than usual, so it will be easier to fill the cupcakes with.
    2. Core the center from the cooled cupcakes and add a teaspoon of Biscoff spread to each hole.

    Pro Tip: We didn't replace the piece of cupcake we cut away as it can make the cupcake look a little lopsided. You can if you want to (or eat them!!).

    A hand is using a metal piping tip to remove the center of 12 baked cupcakes in preparation to fill them with cookie butter
    A hand is shown filling a cupcake with melted cookie butter spread

    How to Make the Biscoff Buttercream

    1. Add the softened butter to the bowl of a stand mixer fitted with the paddle attachment or to another type of bowl, to mix with hand mixer and beaters. Beat on a medium speed for 2-3 minutes until creamy. Then add the powdered sugar, half a cup at a time. Once all the powdered sugar has been added, beat on medium speed for a further 2 minutes.
    2. Next, add the Biscoff spread to the mixing bowl, increase the speed to medium-high and beat for 5 minutes.
    3. Add the boiling water and beat on a low speed, this will change the buttercream to a smoother consistency.

    Pro Tip: Adding boiling water to the Biscoff buttercream helps smooth it out so that it almost looks the texture of a Swiss meringue buttercream. However if you find the buttercream is too thin you can add the powdered sugar a tablespoon at a time. If it's too thick, add extra boiling water a teaspoon at a time to reach the consistency that you need.

    Biscoff spread has been added to a bowl with creamed butter and sugar in it
    The bowl of a stand mixer holds very light brown fluffy buttercream frosting
    1. Next, transfer the buttercream to a piping bag that’s fitted with a star nozzle. Pipe buttercream swirls on top of each cupcake.

    Pro Tip: A Wilton 1M piping nozzle was used to frost these Lotus Biscoff cupcakes.

    1. Warm the remaining Biscoff spread in the microwave for a few seconds or until it is pourable. Drizzle the warm Biscoff spread over the top of the cupcakes then add Biscoff cookies on top of each cupcake.
    A single cupcake is shown on a white plate and a piping bag of frosting is visible piping frosting onto the cupcake
    A spoon with melted cookie butter is drizzling the Biscoff spread over a frosted cupcake

    How to Serve

    Crush and sprinkle Biscoff cookie crumbs on top or add them whole as decoration (or a bit of both!) on top of the buttercream.

    These delicious Biscoff cupcakes would be amazing on a dessert table with these caramel cupcakes, or served with this iced caramel latte for the ultimate sweet pairing.

    A close up photo of a buttercream frosted cupcake that has been drizzled with melted cookie butter

    Storage

    In the refrigerator: You can store these cupcakes in an airtight container in the refrigerator for up to 3 days.

    In the freezer: Unfrosted Biscoff cupcakes can be frozen for up to 1 month, if stored properly in a freezer-safe container.

    A hand is placing a Biscoff cookie on a frosted cupcake that has been drizzled with Biscoff spread

    Delicious cupcakes like these won’t hang around long. They’re fun to make for a weekend treat or for even a birthday party, or to serve at a beautiful get-together for a girls’ get-together!

    A frosted cupcake topped with buttercream, a drizzle of Biscoff spread and a Biscoff cookie is centered with additional cupcakes visible in the background

    FAQs

    What can I replace Biscoff spread with?

    If you can’t find Biscoff spread or butter but you still want to make these with the cookies, you could fill the cupcakes with peanut butter or maybe even a caramel filling.

    What flavor is Biscoff?

    It resembles a caramel flavor, but yet it’s still unique enough that it has its own distinct flavor.

    What kind of frosting is good on Biscoff Cupcakes?

    We think the Biscoff buttercream is perfect for this recipe. However, you could also use a chocolate buttercream frosting recipe or vanilla frosting.

    A frosted cupcake has been cut in half, revealing a center stuffed with Biscoff spread

    More Dessert Recipes

    • A serving of 3-ingredient dump cake in a bowl with a dollop of homemade whipped cream.
      Dump Cake Recipe (Easy 3-Ingredient Dessert That Always Works)
    • Orange upside down cake sliced on spatula.
      Orange Upside Down Cake
    • Hot fudge sauce dripping from spoon in to bowl.
      Hot Fudge Sauce Recipe
    • Strawberry Bread loaf with Strawberry Icing, dripping down the side.
      Strawberry Bread with Strawberry Icing

    Did you make this? I’d be so grateful if you left a “star” rating below to let me know what you thought! Then, the next time you need a quick and easy recipe, come back to Fantabulosity to browse all of my easy recipes!

    Recipe

    Close up photo of a light tan cupcake cut in half with Biscoff spread in the center and a fluffy buttercream swirl on top of the cupcake
    Print Pin
    5 from 5 votes

    Biscoff Cupcakes

    These Biscoff Cupcakes with Biscoff buttercream from scratch are easy to make and are full of the speculoos cookie flavor.
    Course Dessert
    Cuisine American
    Prep Time 15 minutes minutes
    Cook Time 18 minutes minutes
    Total Time 33 minutes minutes
    Servings 12 cupcakes
    Calories 602kcal
    Author Jessica Burgess

    Ingredients

    For the cupcakes

    • ¾ cup unsalted butter softened
    • ¾ cup brown sugar
    • 3 large eggs
    • 1 cup all purpose flour
    • 1 ¼ teaspoons baking powder

    Biscoff Filling

    • 12 teaspoons Biscoff spread

    For the Biscoff buttercream

    • ¾ cup unsalted butter softened
    • 2 cups powdered sugar
    • 1 cup Biscoff spread
    • 2 tablespoons boiling water

    To decorate the cupcakes

    • 4 tablespoons Biscoff spread
    • 12 Biscoff cookies

    Instructions

    For the Biscoff cupcakes

    • Preheat the oven to 350 degrees F. Line a 12-cup cakecake pan with cupcake liners.
    • Add ¾ cup unsalted butter and ¾ cup brown sugar to a large mixing bowl. Use a hand mixer or a stand mixer on high speed to beat them together until fluffy.
    • Add 3 large eggs to the bowl and beat on high speed until light and fluffy.
    • In a smaller bowl, combine 1 cup flour and 1 ¼ teaspoon baking powder. Add it to the creamed mixture and beat it on low speed until the dry ingredients are just combined.
    • Divide the cupcake batter evenly between the cupcake liners.
    • Bake in the center of a preheated oven for 18 minutes or until the cupcakes have risen and are a pale golden brown.
      Set the cupcakes aside to cool completely.

    Cupcake Filling

    • Gently warm the Biscoff spread in the microwave by brieflyl heating it just until it's a little runnier than usual.
    • Core the center of each cupcake and then add a teaspoon of the Biscoff spread in to each hole. (See notes below about center pieces of cupcakes.)

    Frosting the Cupcake

    • Add the softened butter to the bowl and beat on a medium speed for 2-3 minutes until creamy.
      Then add the powdered sugar, half a cup at a time. Once all the powdered sugar has been added, beat on medium speed for a further 2 minutes.
    • Next, add the Biscoff spread to the mixing bowl, increase the speed to medium-high and beat for 5 more minutes.
    • Add the boiling water and beat on a low speed, this will change the buttercream to a smoother consistency.
    • Next, transfer the buttercream to a piping bag that's fitted with a star nozzle. Pipe buttercream swirls on top of each cupcake.
    • Warm the remaining Biscoff spread in the microwave for a few seconds or until it is pourable so you can drizzle the warm Biscoff spread over the top of the cupcakes then add Biscoff cookies on top of each cupcake.

    Notes

    Tips:
    • Bake to perfection: When properly baked, the cupcakes will have risen to the top of the cupcake liners, be a pale golden brown, and will spring back when gently touched with a finger.
    • Middle of cupcake: We didn't replace the piece of cupcake we cut away as it can make the cupcake look a little lopsided. You can if you want to (or eat them!!).
    • Piping tip: A Wilton 1M piping nozzle was used to frost these Lotus Biscoff cupcakes.
    Storage: 
    Store any leftover cupcakes in an airtight container in the refrigerator and enjoy within 3 days.

    Nutrition

    Serving: 1cupcake | Calories: 602kcal | Carbohydrates: 57g | Protein: 5g | Fat: 36g | Saturated Fat: 18g | Polyunsaturated Fat: 1g | Monounsaturated Fat: 6g | Trans Fat: 1g | Cholesterol: 102mg | Sodium: 24mg | Potassium: 94mg | Fiber: 0.3g | Sugar: 43g | Vitamin A: 768IU | Calcium: 44mg | Iron: 1mg

    Dutch Oven Beef Stew

    March 23, 2023

    Dutch oven beef stew in white pot.

    This Dutch oven beef stew recipe is made with potatoes, vegetables, stew meat and made without wine! It’s cooked on the stove but then transferred to the oven for a couple of hours to allow the flavors to blend and cook together perfectly.

    Close up of beef stew in a dutch oven.

    Like our Dutch oven pot roast, we recommend you use a chuck roast for the most tender meat, like we also use in this easy slow cooker pulled beef recipe!

    Beef stew is an old-fashioned recipe that’s usually made of large chunks of beef with vegetables, usually thicker than most soup recipes, and is a total comfort food. If you’re looking for a thinner soup, this Cowboy Stew may be more of what you’re looking for!

    It’s the ideal Sunday dinner, along with this Instant Pot Roast and this Tri-Tip Roast recipe.

    [feast_advanced_jump_to]

    Why This Recipe Works

    This easy Dutch oven beef stew uses simple ingredients, that create an amazing, hearty flavor that the whole family will love.

    The tender beef pieces cook in the beef stock, seasonings, and veggies, all come together to give a great texture and rich flavor.

    Ingredients Needed

    I’ve highlighted a couple of ingredients with some relevant notes. Aside from this, the ingredients needed are pretty basic.

    • Meat – The best cut of beef to use for stew is boneless chuck roast because it is well-marbled with fat. This will help ensure you have tender meat in your Dutch oven stew. TIP: Make sure any large hard pieces of fat and silver skin are removed before searing. 
    • Onion – Using a yellow onion for this recipe is our favorite because it provides a sweeter onion flavor and pairs best with beef recipes.
    • Potatoes – We recommend using Yukon Gold potatoes for this recipe so they hold their shape and don’t get mushy like russet potatoes can. If you have russet potatoes, you could make this loaded potato soup with them.
    Labeled ingredients on white countertop.

    Substitutions

    Sometimes substitutions are necessary because of ingredients that are unavailable or needed for dietary restrictions. Here are some suggestions that can help when making Dutch oven beef stew:

    • Meat – Rump roasts and bottom rounds are also good options if you don’t have a chuck roast.
    • Potatoes – If you don’t have Yukon Gold potatoes, you can use red potatoes.
    • Tomatoes – We like using canned diced tomatoes but you can use fresh if you prefer.
    • Peas – Keeping frozen peas on hand is handy for our favorite recipes (like our pea salad) but you can use canned. (Do note: that canned peas won’t need the 5-10 minutes to cook as frozen will.)

    Equipment

    We like using a large Dutch oven for this recipe so it can go from stove-top to baking in the oven.

    How to Make Dutch Oven Beef Stew

    To help the variety of ingredients cook properly, we do it in stages. The steps consist of:

    • searing the meat
    • cooking the base
    • combining ingredients to bake
    • adding in remaining, quick-cook items

    *Be sure to see the recipe card below for the full ingredients list & instructions!*

    STEP 1. Preheat. Begin by preheating your oven to 350° F.

    STEP 2. Prep meat. Pat the beef dry with a paper towel and season generously with salt and pepper.

    Stew meat in a dutch oven.
    Image 1
    Onions sautéing in dutch oven.
    Image 2

    STEP 3. Brown meat. Heat 1 tablespoon of olive oil in a large Dutch oven over medium-high heat. Brown the pieces of meat in a single layer, in batches (not to overcrowd) searing for around 1-2 minutes per side. Add more oil as needed between batches. Set the beef aside (Image 1).

    Tip: Do not overcrowd the pan with beef pieces as this will cause the meat to steam, not sear.

    STEP 4. Cook onions. Reduce the heat to medium and add another 1 tablespoon of olive oil to the Dutch oven. Saute the diced onions for 5 minutes or until soft and starting to turn golden. Add the garlic and cook for another 1 minute or until fragrant (Image 2).

    Onions cooking in dutch oven with flour.
    Image 3
    Tomato paste added in to dutch oven with sliced onions.
    Image 4

    STEP 5. Add flour. Next, add an additional 1 tablespoon of olive oil and allow it to heat through for about 30 seconds. Sprinkle the flour over the cooked onion and garlic, and then cook for about 1 minute, stirring constantly (Image 3).

    STEP 6. Add tomato paste & broth. Then, add the tomato paste and cook for about 1 minute, stirring constantly. While stirring, slowly pour in the beef stock, and make sure the flour is mixed in and not lumpy (Image 4).

    Broth, tomatoes, stew meat and more added to dutch oven.
    Image 5
    Potatoes and carrots added to dutch oven for beef stew.
    Image 6

    STEP 7. Seasonings. Next, add the diced tomatoes, Worcestershire sauce, seared beef (that you set aside earlier) thyme, oregano, and bay leaves to the pot and bring to a simmer (Image 5).

    STEP 8. Time for oven. Cover the pot and transfer to the oven. Cook for 1 hour.

    STEP 9. Carrots & Potatoes. Add the potatoes and carrots to the pot and stir. Cover the pot and return to the oven for an additional 1 hour (Image 6).

    Frozen peas added to dutch oven full of beef stew.
    Image 7
    Dutch oven beef stew in white pot, simmering.
    Image 8

    STEP 10. Add peas. Remove the Dutch oven from the oven and remove the bay leaves. Now, add the frozen peas, stir, and cover the pot (Image 7).

    STEP 11. Simmer. Allow the beef stew to sit for 5-10 minutes to allow the peas to heat through before serving. Season with salt and pepper as needed (Image 8).

    Spoonful of beef stew being lifted up out of dutch oven.

    Recipe Pro Tips

    • Do not skip browning the beef. I know it may be tempting but searing the meat helps to seal moisture in the beef resulting in tender beef. The brown bits on the bottom of the pot also add depth of flavor to the stew. 
    • Better the next day? As with other hearty soup recipes like this one, you may find that you even enjoy this Dutch oven beef stew the next day because it sits and the flavors blend together even more. See the tips below for storing.

    Recipe FAQs

    What is the secret to tender beef stew?

    Using the right type of beef and cooking it long enough, is the key to tender beef stew.

    Is it better to cook stew meat on the stove or in the oven?

    Cooking stew meat in the oven allows the meat to slowly cook and tenderize. However, searing the meat on the stovetop gives a flavor that you can’t get from solely baking it.

    How do you thicken stew in a Dutch oven?

    The flour that’s cooked in with the onions, and then combined with beef stock, will be the key to thickening this Dutch oven stew. However, if you need to thicken your stew even more, mix together a roux, by combining 1 tablespoon of flour with 1 tablespoon of melted butter. Add a few tablespoons of beef stew liquid in to roux, stir until there are no lumps, and then stir into beef stew. Simmer and it should thicken. Repeat if necessary.

    White bowl of a serving of dutch oven beef stew.

    Storage

    Refrigerate leftovers: If you have leftover Dutch oven beef stew, allow it cool and then store it in an airtight container for up to 4 days.

    How to freeze: allow the beef stew to cool completely before adding to an freezer container or freezer bag. You can then freeze it up to three months.

    Reheat: Allow the stew to defrost in the refrigerator before reheating, and then you can re-warm it in the Dutch oven on low-medium heat until heated through. (The time will differ, depending on the amount you’re reheating.)

    More Soup Recipes You’ll Love

    Although beef stew isn’t really a soup recipe, we think you’ll also love these soup recipes that are similar:

    • Lobster bisque in small bowl with crackers on a plate underneath.
      Easy Lobster Bisque Recipe
    • Soup ladle with a creamy sausage and tortellini soup inside of it.
      Sausage Tortellini Soup
    • Creamy taco soup serving in white bowl.
      Creamy Taco Soup
    • Cowboy stew in white dutch oven.
      Cowboy Stew

    Did you make this? I’d be so grateful if you left a “star” rating below to let me know what you thought! Then, the next time you need a quick and easy recipe, come back to Fantabulosity to browse all of my easy recipes!

    Recipe

    Dutch oven beef stew in white pot.
    Print Pin
    5 from 5 votes

    Dutch Oven Beef Stew

    Dutch Oven Beef Stew: This hearty beef stew is cooked in a dutch oven, starting on the stovetop and then placed in the oven for a couple of hours to achieve the tender pieces of beef, delicious vegetables and amazing flavors.
    Course Main Course, Soup
    Cuisine American
    Prep Time 10 minutes minutes
    Cook Time 2 hours hours
    Total Time 2 hours hours 10 minutes minutes
    Servings 6 servings
    Calories 495kcal
    Author Jessica Burgess

    Equipment

    • Dutch Oven or large, oven-safe stock pot

    Ingredients

    • 2½ pounds stew meat (beef) cut into 1½ inch chunks
    • 3½-4 tablespoons olive oil
    • 2 medium yellow onions quartered and sliced
    • 5 cloves garlic minced
    • ¼ cup all-purpose flour
    • 1 tablespoon tomato paste
    • 3 cups beef broth
    • 14.5 ounce can diced tomatoes
    • 3 tablespoons worcestershire sauce
    • 1 teaspoon dried thyme
    • ½ teaspoon dried oregano
    • 2 bay leaves
    • 4 medium carrots cut into 1-inch chunks
    • 1 pound Yukon Gold potatoes cut into 1-inch cubes (3-4 potatoes)
    • 1 cup frozen peas
    • Salt and pepper to season

    Instructions

    • STEP 1. Preheat. Begin by preheating your oven to 350° F. 
    • STEP 2. Prep meat. Pat the beef dry with a paper towel and season generously with salt and pepper.
    • STEP 3. Brown meat. Heat 1 tablespoon of olive oil in a large dutch oven over medium-high heat. Brown the pieces of meat in a single layer, in batches (not to overcrowd) searing for around 1-2 minutes per side. Add more oil as needed between batches. Set the beef aside (Image 1).
    • STEP 4. Cook onions. Reduce the heat to medium and add another 1 tablespoon of olive oil to the dutch oven. Saute the diced onions for 5 minutes or until soft and starting to turn golden. Add the garlic and cook for another 1 minute or until fragrant (Image 2). 
    • STEP 5. Add flour. Next, add an additional 1 tablespoon of olive oil and allow it to heat through for about 30 seconds. Sprinkle the flour over the cooked onion and garlic, and then cook for about 1 minute, stirring constantly (Image 3).
    • STEP 6. Add tomato paste & broth. Then, add the tomato paste and cook for about 1 minute, stirring constantly. While stirring, slowly pour in the beef stock, and make sure the flour is mixed in and not lumpy (Image 4).
    • STEP 7. Seasonings. Next, add the diced tomatoes, Worcestershire sauce, seared beef (that you set aside earlier) thyme, oregano, and bay leaves to the pot and bring to a simmer (Image 5).
    • STEP 8. Time for oven. Cover the pot and transfer to the oven. Cook for 1 hour.
    • STEP 9. Carrots & Potatoes. Add the potatoes and carrots to the pot and stir. Cover the pot and return to the oven for an additional 1 hour (Image 6).
    • STEP 10. Add peas. Remove the dutch oven from the oven and remove the bay leaves. Now, add the frozen peas, stir, and cover the pot (Image 7).
    • STEP 11. Simmer. Allow the beef stew to sit for 5-10 minutes to allow the peas to heat through before serving. Season with salt and pepper as needed (Image 8).

    Video

    Notes

    Tips:
    • Make sure any large hard pieces of fat and silver skin are removed before searing. 
    • When searing meat, make sure it’s in a single layer and you do not crowd the meat, or it will steam instead of sear.
    Storage:
    Refrigerate leftovers: If you have leftover stew, allow it cool and then store it in an airtight container for up to 4 days.
    How to freeze: allow the beef stew to cool completely before adding to a freezer container or freezer bag. You can then freeze it for up to three months.
    Reheat: Allow the stew to defrost in the refrigerator before reheating, and then you can re-warm it in the dutch oven on low-medium heat until heated through. (The time will differ, depending on the amount you’re reheating.)

    Nutrition

    Serving: 1serving | Calories: 495kcal | Carbohydrates: 31g | Protein: 51g | Fat: 18g | Saturated Fat: 4g | Polyunsaturated Fat: 1g | Monounsaturated Fat: 10g | Cholesterol: 117mg | Sodium: 318mg | Potassium: 1320mg | Fiber: 5g | Sugar: 7g | Vitamin A: 7040IU | Vitamin C: 32mg | Calcium: 94mg | Iron: 6mg

    No Bake Chocolate Pie

    March 17, 2023

    Slice of no bake chocolate pie on white plate.

    See how easy it is to make this no bake chocolate pie, with just a few ingredients, that you may even have on hand. This chocolate pudding pie is one of our favorite pie recipes, and it’s a smooth, creamy, chilled dessert that is perfect for the summer months or enjoyed as a holiday dessert recipe.

    A slice of no bake chocolate pie on spatula, holding above the pie.

    This dessert recipe is one of the many, easy no bake recipes and even no bake desserts, that we have come up with for you, (similar to our Chocolate Turtle Pie) and it just may be the perfect dessert for what you need.

    What makes this no-bake chocolate pie recipe better than the rest? The layers. If you look closely, you can see:

    • an Oreo crust
    • then a darker chocolate pudding layer
    • a lighter chocolate layer (chocolate pudding and whipped cream mixture)
    • then finely, a creamy Cool Whip layer.

    The chocolate no-bake layers are similar to this no-bake Oreo dessert recipe that has become so popular, and this Oreo mousse. But sometimes the old-fashioned feel that comes from a creamy pie, is the best choice for family gatherings or to pair alongside a hot cup of coffee on a rainy day; just like this chocolate cream cheese pie and no bake peanut butter pie that we make too!

    [feast_advanced_jump_to]

    Ingredients Needed

    To make this no-bake chocolate pudding pie, you’ll need simple ingredients like: chocolate pudding mix, cold milk, Cool Whip (whipped topping), chocolate pie crust (or an Oreo cookie crust, made out of crushed Oreo cookies and melted butter), and a chocolate bar.

    Labeled ingredients for no bake chocolate pie

    Substitutions

    Sometimes it’s fun to switch things up if you’re feeling creative, or perhaps you’ll need to change some ingredients out to use what you have on hand. Either way, here are some ideas to help get you started:

    • Crust – A simple storebought graham cracker crust will work for this recipe too, or you can make this Biscoff pie crust for a twist on flavor that will pair perfectly with the chocolate filling.
    • Pudding Mix – White chocolate pudding mix or any flavor of pudding mix, really, would also make a delicious pie filling, just make sure it’s instant pudding mix. (We use cook-and-serve pudding mix in this possum pie if that’s what you have on hand though!)
    • Whipped Topping – We use Cool Whip for a lot of recipes here because it’s a great shortcut and saves time, like when we used it in this pumpkin pie with graham cracker crust, recipe. However, if you prefer a homemade whipped topping as we used in our no-bake candy cane pie, using heavy whipping cream and sugar, then you can use that as well!

    Step-by-Step Instructions

    This may be the easiest pie you’ve ever made because, with only 5 ingredients, it’s simply a matter of mixing and pouring, and allowing the pie to “set” in the refrigerator.

    *Be sure to see the recipe card below for the full ingredients list & instructions!*

    Pudding mix and milk in white mixing bowl.
    Image 1
    Pudding mix and milk mixed together in a white mixing bowl, with a whisk inside.
    Image 2
    1. Mix pudding. Combine the chocolate pudding and milk in a large bowl and whisk until the pudding thickens (Images 1 & 2).
    Chocolate pie filling inside of chocolate pie crust.
    Image 3
    Cool Whip being mixed in to remaining chocolate pie filling.
    Image 4
    1. Fill pie crust. Spread half of the chocolate pudding over the bottom of the pie crust and set aside (Image 3).
    2. Make creamy chocolate layer. Add half of the whipped topping to the remaining pudding and fold to combine (Image 4).
    Chocolate and whipped cream mixture in white mixing bowl.
    Image 5
    Chocolate and whipped cream mixture on top of pie.
    Image 6
    1. Add cream and chocolate layer. Spread the mixture over the pudding in the pie crust (Image 6).
    Cool Whip topping on top of chocolate pie.
    Image 7
    Chocolate shavings on top of no bake chocolate pie.
    Image 8
    1. Add whipped cream layer & chill. Top the pie with the remaining whipped topping. Refrigerate for at least four hours (Image 7).
    2. Sprinkle on chocolate. Garnish with chocolate shavings on the top of your pie if desired before slicing and serving (Image 8). You could also top with chocolate chips, flaked coconut, or your favorite sprinkles.
    Slice of chocolate pie on white plate, next to pie plate.

    Recipe Pro Tips

    • Use instant pudding: Make sure you use instant pudding and not the cook-and-serve kind.
    • Type of milk: Whole milk is recommended in this recipe as it will result in a thicker, creamier filling. If you use 1 or 2% milk, the filling will not be as thick. 
    • How to make chocolate shavings: To make the chocolate shavings run a vegetable peeler along the long side of a chocolate bar. You can also use chocolate chips for the topping if that’s easier or you prefer those. Putting chocolate chips in this chocolate chip cookie pie is a favorite, too.

    Recipe FAQs

    Even if you’ve been cooking for years, sometimes there are some questions you may have about making a no-bake pie. Here are some of the most popular questions that are asked about a chocolate pudding pie:

    How do you store a chocolate pie?

    Store a no-bake chocolate pie or any leftovers in the refrigerator, covered with plastic wrap or aluminum foil, or in an airtight container for up to 3 days.

    How do you make pudding thicker for pie filling?

    You can use heavy cream instead of milk for this recipe, to achieve an even thicker pie filling.

    How long should a no-bake chocolate pie set?

    It’s best to allow at least 4 hours for a no-bake chocolate pie to set.

    Why is my chocolate pudding pie runny?

    It’s possible that the chocolate pie hasn’t set long enough or that thinner milk was used instead of whole milk.

    Bite taken out of slice of no bake chocolate pie.

    More Chocolate Dessert Recipes

    If you love no-bake desserts like this one, then these other easy recipes will be perfect to satisfy that chocolate craving.

    • Slice of Oreo Nutella Cheesecake on spatula.
      Oreo Nutella Cheesecake
    • Slice of no bake Oreo cheesecake on a plate with a Hugs Kiss, candy bar and Oreo cookie.
      Oreo Cheesecake
    • Fried Chocolate Pies stacked on a plate.
      Fried Chocolate Pies
    • No bake cookies on aluminum foil.
      The BEST No Bake Cookies Recipe

    Did you make this? I’d be so grateful if you left a “star” rating below to let me know what you thought! Then, the next time you need a quick and easy recipe, come back to Fantabulosity to browse all of my easy recipes!

    If smooth, chocolate desserts are your favorite, you’ll also love this homemade chocolate pudding!

    Recipe

    Slice of no bake chocolate pie on white plate.
    Print Pin
    5 from 7 votes

    No Bake Chocolate Pie

    See how easy it is to make this no bake chocolate pie recipe using only 5 ingredients! This creamy, smooth pie only takes 10 minutes to make and then chills for a few hours.
    Course Dessert
    Cuisine American
    Diet Vegetarian
    Prep Time 10 minutes minutes
    Chill Time 4 hours hours
    Total Time 4 hours hours 10 minutes minutes
    Servings 10 slices
    Calories 146kcal
    Author Jessica Burgess

    Ingredients

    • 1 chocolate pie crust 9-inch
    • 2 packages instant chocolate pudding mix 3.9 ounce each
    • 2½ cups cold milk
    • 8 ounce container of whipped topping, thawed
    • Chocolate bar for shavings (optional for garnish)

    Instructions

    • Combine the chocolate pudding and milk in a large bowl and whisk until the pudding thickens. 
    • Spread half of the chocolate pudding over the bottom of the pie crust and set aside.
    • Add half of the whipped topping to the remaining pudding and fold to combine. Spread the mixture over the pudding in the pie crust.
    • Top the pie with the remaining whipped topping. Refrigerate for at least four hours. 
    • Garnish with chocolate shavings if desired before slicing and serving.

    Video

    Notes

    Tips for making this the best chocolate pie:
      • Use instant pudding: Make sure you use instant pudding and not the cook-and-serve kind.
      • Type of milk: Whole milk is recommended in this recipe as it will result in a thicker, creamier filling. If you use 1 or 2% milk, the filling will not be as thick. 
      • How to make chocolate shavings: To make the chocolate shavings run a vegetable peeler along the long side of a chocolate bar. 
    To Store Leftovers: You’ll want to store any leftovers in the refrigerator for up to 3 days.
    An even thicker pie: If desired, you can try using heavy cream instead of milk for this recipe, to achieve an even thicker pie filling.
    My pie is runny. If your pie is runny, then it’s possible that the chocolate pie hasn’t set long enough, or that skim or 2% milk was used instead of whole milk.

    Nutrition

    Serving: 1slice | Calories: 146kcal | Carbohydrates: 26g | Protein: 3g | Fat: 3g | Saturated Fat: 2g | Polyunsaturated Fat: 0.2g | Monounsaturated Fat: 1g | Trans Fat: 0.01g | Cholesterol: 11mg | Sodium: 324mg | Potassium: 163mg | Fiber: 1g | Sugar: 20g | Vitamin A: 139IU | Calcium: 102mg | Iron: 0.3mg

    Venison Burgers

    March 16, 2023

    Venison burger on white plate, sitting next to french fries.

    Venison Burgers: Baked in the oven, these juicy venison burgers are combined with ground sausage, and a few spices and there’s a special trick at the end like we use in our baked burgers, that makes these deer burgers the best!

    Stack of venison burgers with cheese.

    Burger recipes are probably our favorite thing to make when it comes to dinner recipes. They’re easy to make, and once we developed and figured out how to use aluminum foil to “steam and toast” the buns, it was a game-changer for our burgers.

    So when it came to wanting to make venison burgers, we knew we’d keep that trick the same but there were a few things we needed to do differently than our other burgers since deer meat tends to be pretty lean.

    Now, if you love burger recipes in general, you’ll definitely want to check out our cowboy burger, stovetop burgers, and these cheeseburger sliders. Or if venison recipes are your thing, you’ll really love this fried deer meat recipe that has become so popular!

    [feast_advanced_jump_to]

    Why This Recipe Works

    • Juicy! If you cook venison burgers and only use venison, the burgers can come out pretty dry. So we like to add ground sausage (it’s optional) to this recipe to create the juiciest burgers.
    • Not gamey: Have a freezer full of venison but not a fan of the gamey taste? With this recipe, the pork fat flavor can help reduce the gamey flavor you may normally taste in venison burgers. If you have more venison, you may also love this deer chili recipe and this super popular deer steak recipe.
    • Flexible: Even though this deer burger recipe calls for a pound of ground sausage to go with the meat, you don’t have to use that much. You can reduce the sausage to half a pound, and still get the juicy result… but without the strong sausage flavor.

    Ingredients Needed

    I’ve highlighted a couple of ingredients with some relevant notes. Aside from this, the ingredients needed are pretty basic.

    Ingredients for venison burgers on white counter, that are labeled.
    • Ground Sausage – We used a pound of ground sausage in this recipe but that results in a strong sausage flavor. So if you prefer to use less, you absolutely can. I’d recommend using only ½ pound sausage instead. However, we like using the entire pound of sausage, to spread out the number of burgers that we can make, and we actually like the sausage flavor to help make the burgers less “gamey” tasting.
    • Worcestershire sauce – If you can get it, we highly recommend Lea & Perrines for this recipe. We used to buy whatever brand was the most affordable but when I had Lea & Perrines for the first time, I decided I’d never buy a different brand. (It’s a world of difference in flavor.)
    • Crackers and the egg – the purpose of these two ingredients is to help hold the venison together in the shape of a patty. Deer meat is so lean that the burgers can be dry and crumbly if you don’t add something to help keep it together.

    Substitutions

    Sometimes substitutions are necessary because of ingredients that are unavailable or needed for dietary restrictions. Here are some suggestions that can help:

    • Ground Sausage – if you don’t want to use ground pork sausage, you could substitute it with ground beef, ground turkey or even ground chicken. If you don’t want to use any other type of meat to mix with the venison, that’s ok too but just know that it could result in a “dry” burger. The addition of the other meat is to help the burgers be juicier.
    • Crackers – we used buttery-round crackers (such as Ritz) but you could also use saltines if you’d like. Crush these so they’ll be in small pieces and mix in to the meat mixture well.

    How to Make Venison Burgers

    You’ll first combine the meat with spices and binders. We feel this results in the best and most flavorful burgers.

    *Be sure to see the recipe card below for the full ingredients list & instructions!*

    STEP 1. Preheat and Prep. Preheat your oven to 375° F. and get out a baking dish that will be big enough for all of the (6 or 8) burger patties, and place them in a single layer, without overlapping.

    Ground venison and sausages with crackers, eggs in glass bowl.
    Image 1
    Hand pouring worcestershire sauce in to ground venison mixture, in to glass bowl.
    Image 2

    STEP 2. Mix meat with binders. In a large bowl, add the ground venison meat, the ground sausage, the egg, and the crushed crackers (Image 1).

    STEP 3. Add sauce. Next, pour in the Worcestershire sauce (Image 2).

    Spices are being poured in to ground meat mixture in glass bowl.
    Image 3
    Hand mixing ground deer and spices in bowl.
    Image 4

    STEP 4. Add spices. Next, pour in the paprika, garlic powder, onion powder, and pepper (Image 3).

    STEP 5. Mix. Using your hands or a large spoon, mix together the meat with all of the binders and the spices until evenly combined (Image 4).

    Ground venison, sausage and spices mixed together in bowl.
    Image 5
    Ground venison burger patties in baking dish.
    Image 6

    STEP 6. Make burgers. Patty out 6-8 burgers (depending on how thin/thick you want your burgers — just note they may not need to bake as long if on the thin side) and place them in the baking dish in a single layer (Image 6).

    Hand sprinkling salt on top of burgers that are in a white baking dish.
    Image 7
    Seasoned venison burgers in baking dish.
    Image 8

    STEP 7. Sprinkle with salt. If desired, sprinkle each burger patty with salt (Image 7).

    Baked venison burger patties in white baking dish.

    STEP 8. Bake the burgers, uncovered, in the oven for 25 minutes or until juices are running clear (Image above) or until the internal temp reaches 165° since it has sausage in it.

    Tip: After baking, leave the oven on if you want to do the following steps.

    The Trick…

    Cooked deer burgers on buns, on top of aluminum foil.
    Image 9
    Slices of American cheese on top of burger patties.
    Image 10

    STEP 9. Wrap and steam. Although this step is optional, it is highly recommended. For each burger that you plan to eat, tear aluminum foil squares for each one. (Make sure each square is large enough to wrap a burger on a bun, completely.)

    STEP 10. Top with bun & cheese. If desired, top each burger patty with a slice of cheese and place the burgers on buns (Images 9 & 10).

    Venison burgers being wrapped up in aluminum foil.
    Image 11
    Venison burgers wrapped in aluminum foil, in baking dish, ready for oven.
    Image 12

    STEP 11. Wrap in foil. Wrap each assembled burger that’s on a hamburger bun with cheese, in a piece of aluminum foil and place in another baking dish or cookie sheet (or even back on the oven rack) for about 2-3 minutes (Images 11 & 12).

    Don’t forget to turn the oven off!

    Baked venison burgers ready for eating.

    Enjoy! Or top with your favorite toppings! (Tip: sometimes the bun and cheese can stick together after this trick — but you can put toppings on the bottom bun if so, or add your toppings before toasting.)

    Recipe Pro Tips

    • Chill meat. If you find that your raw meat is on the warmer side, or not very cold, and it’s not easy to work with, it may be best to refrigerate and chill the meat after mixing with crackers and egg (and other ingredients) for about 15 minutes, so it will form in to patties better and hold their shape.
    • ½ pound of sausage. Use only ½ pound of sausage to reduce the “sausage” flavor, if desired, if you want more of a gamey flavor. (But you can keep the ingredient amounts on everything else the same.)
    Bite taken out of deer burger.

    Recipe FAQs

    What to mix with venison to make burger?

    You can mix other types of meat with venison to make hamburgers if you want. If you don’t, the venison burgers can be dry unless you had a fattier meat with it. This could be sausage, ground beef, etc.

    Is deer meat good for hamburgers?

    Absolutely. If you’re not a fan of deer meat flavors, you can add sausage to the venison, to help camouflage the wild game flavor.

    What is the best binder for venison burger?

    Crackers and egg are a great binder for burgers, as these tend to hold the lean meat together. However, if your raw meat is still struggling to hold together, you can chill the meat for about 15 minutes to have it form better.

    Storage

    If you have leftover burgers (without the buns), store them in an airtight container or wrap in plastic wrap for 3-5 days.

    If you pre-made the burgers and the buns with the “trick” mentioned above, it may be harder to reheat the burgers but it’s not impossible. It would be best to place the assembled burgers in at 375° oven, wrapped in aluminum foil, for about 8-10 minutes or until heated through.

    Venison burgers on white plate next to french fries.

    More Burger Recipes

    If you love burgers as much as we do, you’re also going to love these:

    • Air Fryer Burgers
    • A juicy Lucy burger cut in half so we can see the cheese inside and stacked one half on top of the other.
      Juicy Lucy Burgers
    • Smoked burger on a white plate, topped with pickles, cheese and tomato.
      Smoked Burger Recipe
    • These were SO juicy and easy! Love what she uses. The BEST Cheeseburger recipe!
      Electric Skillet Hamburgers

    Did you make this? I’d be so grateful if you left a “star” rating below to let me know what you thought! Then, the next time you need a quick and easy recipe, come back to Fantabulosity to browse all of my easy recipes!

    Recipe

    Venison burger on white plate, sitting next to french fries.
    Print Pin
    5 from 4 votes

    Venison Burgers

    Venison Burgers: Baked in the oven, these juicy venison burgers are combined with ground sausage, and a few spices and there's a special trick at the end that makes these deer burgers the best!
    Course Main Course
    Cuisine American
    Prep Time 5 minutes minutes
    Cook Time 25 minutes minutes
    Total Time 30 minutes minutes
    Servings 6 burgers
    Calories 504kcal
    Author Jessica Burgess

    Ingredients

    • 1 pound ground venison
    • 1 pound ground sausage or ½ pound if less sausage flavor desired
    • 1 egg
    • 5 buttery round crackers such as Ritz
    • 1 Tablespoon garlic powder
    • 1 Tablespoon onion powder
    • 1 teaspoon paprika
    • ½ teaspooon salt
    • 1 teaspoon pepper
    • 1 Tablespoon worcestershire sauce
    • sliced cheese if desired
    • hamburger buns

    Instructions

    • Preheat oven to 375° F.
    • In a large bowl, combine ground venison, sausage, and the rest of the ingredients except salt, buns and cheese, until evenly combined.
    • For meat mixture in to burger 6-8 burger patties (Note: Thicker may result in longer cooking time.) and place in single layer on a baking dish.
    • Bake in the oven at 375° F for 25 minutes or until internal temp reaches 165° since it has sausage in it.
    • If desired, place a piece of cheese on each burger and place back in to the oven to allow the cheese to melt, unless toasting and steaming buns in next step.

    To Toast and Steam Buns with Aluminum Foil, if desired.

    • Assemble the burgers by place a burger patty on a bun, and top with a slice of cheese.
    • Create squares of aluminum foil that are big enough to wrap each assembled burger.
    • Wrap each burger in a piece of aluminum foil and place the foil wrapped burgers in a baking dish or on the oven rack, and allow to cook for an additional 2-3 minutes until the buns are nice and steamed/toasted. Serve!

    Notes

    If meat is falling apart: You can chill the meat after mixing with crackers and egg (and other ingredients) for about 15 minutes, so it will form in to patties better and hold their shape.
    If you don’t want a strong sausage flavor: Instead of a pound of sausage, you can use ½ pound to reduce the “sausage” flavor, if desired.

    Nutrition

    Serving: 1burger | Calories: 504kcal | Carbohydrates: 26g | Protein: 34g | Fat: 28g | Saturated Fat: 10g | Polyunsaturated Fat: 4g | Monounsaturated Fat: 11g | Trans Fat: 0.2g | Cholesterol: 142mg | Sodium: 853mg | Potassium: 565mg | Fiber: 1g | Sugar: 4g | Vitamin A: 265IU | Vitamin C: 2mg | Calcium: 96mg | Iron: 5mg

    Blue Cheese Dip

    March 15, 2023

    Blue cheese dip in small white bowl, with hand holding chip.

    Blue Cheese Dip: Made of simple ingredients like sour cream, mayo, green onions, spices, lemon juice, and of course, blue cheese crumbles. This no bake recipe is delicious to serve with fresh vegetables, your favorite crackers, or even as a thick blue cheese dressing on top of a side salad.

    Blue Cheese Dip in white bowl, surrounded by vegetables.

    I’m just going to say it, this will be your all-time favorite blue cheese dip recipe. Yes, this buffalo blue cheese dip is good too but this one takes the cake.

    It’s delicious served as an appetizer with your favorite crackers, vegetables, or whatever you love serving with savory dips like this one; such as these air-fried chicken wings. You may also want to serve this delicious crack corn dip too!

    [feast_advanced_jump_to]

    Ingredients Needed

    I’ve highlighted a couple of ingredients with some relevant notes. Aside from this, the ingredients needed are pretty basic.

    Labeled ingredients on white counter for blue cheese dip.
    • Blue Cheese – You can use blue cheese crumbles but I love to use the block cheese and crumble it myself but either will do! If you have extra, consider these blue cheese burgers to up your burger game too!
    • Mayo – The brand of mayo that you use is up to you but I absolutely love either Kraft mayo or Hellman’s mayo for this dip.
    • Buttermilk – If you only have regular milk on hand, it’s ok to use that instead but we prefer buttermilk for that extra tang.

    How to Make Blue Cheese Dip

    It’s really simple to make this dip, and it only involves placing all of the ingredients in a bowl, mixing until combined, and chilling! See below!

    *Be sure to see the recipe card below for the full ingredients list & instructions!*

    Ingredients for blue cheese dip in clear glass bowl.
    Image 1
    Ingredients for blue cheese dip mixed together in glass bowl.
    Image 2

    STEP 1. Place all ingredients in bowl. Combine all ingredients in a bowl, and stir until evenly combined (Images 1 & 2).

    STEP 2. Chill.  Cover the bowl and place in the refrigerator and chill for at least 2 hours and then serve!

    Tip: This dip can be enjoyed after just a couple of hours but it’s even better when it sits in the refrigerator at least overnight, or for a day to really allow the flavors to combine.

    Blue cheese dip in white bowl, on platter that's surrounded by vegetables and crackers.

    Recipe FAQs

    What is blue cheese dip made of?

    The base is made of sour cream, mayo, lemon juice, buttermilk, spices and of course, blue cheese crumbles.

    How long does blue cheese dip last?

    Blue cheese dip is good for at least 4-5 days, if stored properly in the refrigerator.

    What do you eat blue cheese with?

    Celery and carrots are very popular dippers for blue cheese dip. However, crackers, summer sausage, and other vegetables are delicious when served with blue cheese.

    Hand holding chip with dip on the end of it, holding above a platter of dip and vegetables.

    If you’re a dip fan, and even a cheesy fan… you’ll definitely want to dip your pretzels in to this beer cheese pretzel dip.

    Or if you need dip recipes for dipping French fries, your favorite protein, or to drizzle on your favorite fish, this Chipotle aioli recipe is a must-try too.

    More Blue Cheese Recipes

    If you love blue cheese, you’ll love seeing how we used blue cheese in these recipes:

    • Buffalo Chicken Lasagna
      Buffalo Chicken Lasagna
    • Bacon Wrapped Dates with Blue Cheese
      Bacon Wrapped Dates with Blue Cheese
    • Blue cheese burger on pretzel bun, with lettuce leaf, sitting next to french fries on plate.
      Blue Cheese Burgers
    • Instant Pot Buffalo Chicken Pasta

    Did you make this? I’d be so grateful if you left a “star” rating below to let me know what you thought! Then, the next time you need a quick and easy recipe, come back to Fantabulosity to browse all of my easy recipes!

    Recipe

    Blue cheese dip in small white bowl, with hand holding chip.
    Print Pin
    5 from 3 votes

    Blue Cheese Dip

    Blue Cheese Dip: Made of simple ingredients like sour cream, mayo, green onions, spices, lemon juice, and of course, blue cheese crumbles. This no bake recipe is delicious to serve with fresh vegetables, your favorite crackers, or even as a thick blue cheese dressing on top of a side salad.
    Course Appetizer, Snack
    Cuisine American
    Diet Vegetarian
    Prep Time 5 minutes minutes
    Inactive Time 2 hours hours
    Total Time 5 minutes minutes
    Servings 8 servings
    Calories 300kcal
    Author Jessica Burgess

    Ingredients

    • 1 cup mayo
    • 1 cup sour cream
    • 1 Tablespoon buttermilk Or you can use regular milk
    • 4 ounces blue cheese crumbles
    • 1 Tablespoon lemon juice
    • ½ teaspoon garlic powder
    • 1 Tablespoon chopped green onion
    • 1 teaspoon chopped chives
    • ¼ teaspoon salt
    • ¼ teaspoon pepper

    Instructions

    • Pour all of the ingredients in to a small or medium mixing bowl and stir to combine.
    • Cover the bowl with a lid or plastic wrap, and place in the refrigerator and chill for a few hours at least, or even overnight.

    Notes

    Storage: Blue cheese dip is good for at least 4-5 days, if stored properly in the refrigerator.
    What to dip in blue cheese: Celery, carrots, crackers, summer sausage, and other vegetables are great to serve with this dip.

    Nutrition

    Serving: 0.25cups | Calories: 300kcal | Carbohydrates: 2g | Protein: 4g | Fat: 31g | Saturated Fat: 9g | Polyunsaturated Fat: 13g | Monounsaturated Fat: 7g | Trans Fat: 0.1g | Cholesterol: 40mg | Sodium: 425mg | Potassium: 88mg | Fiber: 0.1g | Sugar: 1g | Vitamin A: 322IU | Vitamin C: 1mg | Calcium: 110mg | Iron: 0.2mg

    Biscoff Pie Crust

    March 14, 2023

    Biscoff pie crust in white pie plate.

    Biscoff Pie Crust: A delicious and easy pie crust recipe that’s made of Biscoff cookies and butter, and then baked for a few minutes to set. (Or, simply freeze until set.)

    It’s perfect for your favorite pie recipes, as an alternative to a graham cracker crust or a baked buttery pie crust, especially like this Biscoff pie!

    Biscoff pie crust in white pie plate.

    This Biscoff crust idea stemmed from wanting to make a Biscoff pie recipe because of a Biscoff craving, and since we already have a Biscoff cheesecake recipe, Biscoff truffles, Biscoff cupcakes, and Biscoff fudge, we wanted something a little different.

    But when I thought about using a regular graham cracker crust (although it would be good) it just wouldn’t be as good as a crust made of Biscoff, so I got to work and this recipe was born. (Save those graham cracker crusts for this no bake pumpkin pie recipe!)

    Now, this crust would be delicious with another kind of pie, such as this chocolate cream cheese pie, this peanut butter pie, and this banana cream pie.

    [feast_advanced_jump_to]

    Why This Recipe Works

    • Only 2 ingredients: Yes, you read that right! It only takes 2 ingredients to make this Biscoff cookie crust.
    • Easy to make: When you think of homemade recipes, they can sound hard and complicated. However, this crust is made by making Biscoff cookie crumbs out of Biscoff cookies, combining them with butter, pressing into a pie plate, and baking.
    • Works with many pies: This Biscoff crust recipe will work well with so many different recipes for your favorite pie fillings or even as a cheesecake crust for recipes that call for a cheesecake filling, like this cherry cheesecake or this coconut cheesecake.

    Ingredients Needed

    Only two simple ingredients are required for this recipe, and you probably even have one of them on hand!

    Biscoff cookies and butter in white pie plate.
    • Butter – I chose to use salted butter for this recipe because the small addition of salt, combined with a cookie that makes a sweet crust, makes a delicious combination.
    • Biscoff Cookies – You may have heard these called different things, such as Biscoff biscuits, or Speculoos cookies, and no matter what they’re called, they’re super delicious.

    Substitutions

    Sometimes substitutions are necessary because of ingredients that are unavailable or needed for dietary restrictions. Here are some suggestions that can help:

    • Cookies – can’t find the Biscoff cookies at the grocery store but still need an easy pie crust? You can try switching out the Biscoff for graham crackers, Oreo cookies, etc.
    • Butter – if you only have unsalted butter, that’s ok to use too! I would just add a small pinch of salt (don’t have to) for that “zip” that it can give in combination with the sweetness of the crumb crust.

    Equipment

    If you don’t have a food processor, you can still make this crust recipe. It just may take some elbow grease to make the cookies in to fine crumbs. If you’re not using a food processor, place the cookies in a plastic ziptop bag (like a Ziploc bag), seal it well, and mash the cookies with a rolling pin or something that can crush the cookies in to very small, fine, pieces.

    How to Make a Biscoff Pie Crust

    It’s really easy to make this pie crust but I’ll show you the step-by-step to make it even easier!

    There are 3 steps to this pie crust recipe:

    • crushing the cookies
    • mixing the crumbs with butter
    • baking in the pie pan to set (Or freeze if you prefer a no-bake recipe. See more below.)

    *Be sure to see the recipe card below for the full ingredients list & instructions!*

    Preheat to an oven temperature of 350° F.

    Biscoff cookies in food processor.
    Image 1
    Biscoff cookies crushed in to fine crumbs in food processor.
    Image 2

    STEP 1. Crush cookies. Place the Biscoff cookies in a food processor, and crush until the cookies are finely crushed (Images 1 and 2).

    Tip: If you don’t have a food processor, you can crush the cookies in to fine crumbs with a zip top bag and rolling pin.

    Melted butter poured in to Biscoff cookie crumbs.
    Image 3
    Buttery Biscoff crumbs in pie plate.
    Image 4

    STEP 2. Add melted butter. Next, in a small bowl, combine cookie crumbs and melted butter and give it a good mix until the crumbs are evenly mixed with butter (Image 3).

    STEP 3. Press in pie plate. Pour buttery crumb mixture in to a pie plate (mine was an 8 inch pie plate), press down (you can even use the bottom of a measuring cup) and make sure the bottom is covered and spread evenly with crumbs (Image 4).

    NOTE: The crumbs can press up on to the sides of the pan, a little bit if needed, to make the bottom an even thickness.

    Pressed Biscoff crumbs in white pie plate.
    Image 5

    STEP 4. Bake. Place pie dish in preheated oven and bake at 350° for 9-10 minutes, or until the crust looks like it has turned a slight, light, brown, and has hardened. (You don’t want it to burn so if it looks like it’s getting too dark, remove from the oven.)

    Refrigerated Biscoff pie crust in white pie plate.

    Recipe Pro Tips

    • Freeze instead of bake. If you don’t want to bake the pie crust, you can opt to freeze it instead. Instead of preheating the oven, place the pie crust in the freezer for at least 30 minutes to “set”.
    • Allow to cool. If making a no-bake pie recipe with this crust, make sure you allow the crust to cool to room temperature before you fill it with pie filling. You can place the pie plate on wire rack to help it cool off faster.

    Recipe FAQs

    Can you substitute Biscoff cookies for graham crackers?

    Absolutely! If you need a graham cracker crust but need to substitute them, you can use Biscoff cookies to make the pie crust, with this easy recipe!

    Are Biscoff like graham crackers?

    They do taste a bit different than graham crackers and can often be used in similar ways as a graham cracker.

    What flavor is Biscoff?

    Biscoff is a unique flavor that actually has a slight caramel flavor.

    Storage

    If you’re making a Biscoff pie crust in advance, you can store it covered with plastic wrap in the refrigerator for 3-4 days or you can even freeze it (if stored in freezer-safe containers) for up to 3 months.

    More Dessert Recipes

    If you love easy desserts, you’re also going to love these reader favorites:

    • A slice of lemon lush sitting on a clear plate, with a fork bite taken out.
      Lemon Lush (Easy Layered Lemon Delight Dessert)
    • A slice of peach cobbler cheesecake sitting on a plate next to a fork.
      Peach Cobbler Cheesecake (Easy Baked Recipe with Streusel Topping)
    • A slice of Westhaven cake on a round plate.
      Westhaven Cake
    • A slice of shoofly cake sitting on round plate.
      Shoofly Cake

    Did you make this? I’d be so grateful if you left a “star” rating below to let me know what you thought! Then, the next time you need a quick and easy recipe, come back to Fantabulosity to browse all of my easy recipes!

    Recipe

    Biscoff pie crust in white pie plate.
    Print Pin
    5 from 5 votes

    Biscoff Pie Crust

    This Biscoff pie crust is made using only 2 ingredients, Biscoff cookies and butter, and can be baked to set, or frozen. Perfect for many different pie or cheesecake recipes.
    Course Dessert
    Cuisine American
    Diet Vegetarian
    Prep Time 10 minutes minutes
    Cook Time 10 minutes minutes
    Total Time 20 minutes minutes
    Servings 1 crust
    Calories 1885kcal
    Author Jessica Burgess

    Equipment

    • Food Processor
    • Pie plate

    Ingredients

    • 8.8 ounce package of Biscoff cookies
    • 6 Tablespoons melted butter

    Instructions

    • Preheat the oven to 350° F.
    • Add entire package of Biscoff cookies to the bowl of a food processor and crush until they are crushed in to fine crumbs.
    • Pour crumbs in to small bowl and mix with melted butter until evenly combined.
    • Place buttery crumbs in to a pie plate (8 or 9 inch) and press down until they're in an even layer, covering the bottom of the pie plate, and slightly pressed up on to the sides of the plate.
    • Bake the pie crust at 350° F for 9-10 minutes or until the crust becomes a light brown, and it looks as if the pie crust is set.
    • Remove from oven and let cool before filling with pie filling.

    Notes

    TIP: You can freeze instead of bake if preferred: If you don’t want to bake the pie crust, you can opt to freeze it instead. Instead of preheating the oven, place the pie crust in the freezer for at least 30 minutes to “set”.
     

    Nutrition

    Serving: 1crust | Calories: 1885kcal | Carbohydrates: 159g | Protein: 14g | Fat: 133g | Saturated Fat: 63g | Polyunsaturated Fat: 23g | Monounsaturated Fat: 34g | Trans Fat: 3g | Cholesterol: 181mg | Sodium: 1421mg | Potassium: 240mg | Fiber: 3g | Sugar: 54g | Vitamin A: 2314IU | Calcium: 53mg | Iron: 7mg

    Instant Pot Frozen Meatballs

    March 13, 2023

    Instant Pot frozen meatballs in white bowl, with fresh parsley sprinkled on top.

    Instant Pot Frozen Meatballs: A quick and easy way (Only takes 4 minutes!) to make the most delicious Italian meatballs. Serve them on your favorite homemade bolognese recipe or simply have them as an easy meal!

    White bowl full of cooked Instant Pot frozen meatballs.

    When we make Italian dishes with a red sauce, we usually try to use a quick, favorite marinara sauce using tomato sauce and Italian seasoning (the dressing mix). It is so easy and one of our favorite flavors.

    We use it in our venison spaghetti (then of course it’s a given that it’s used in our fried spaghetti recipe) but you can use any of your favorite jar of sauce for these meatballs instead, if you prefer. But it’s our favorite pasta sauce for this Instant Pot meatball recipe.

    [feast_advanced_jump_to]

    Why This Recipe Works

    • Quick: Using the Instant Pot, makes this one of the quickest, and easy Instant Pot recipes, with 4 minutes of cook time.
    • Busy Weeknights: They’re quick for a busy weeknight or any night of the week! The kids love them by themselves for a one-pot meal, or you can make meatball subs, stuff meatballs in bell peppers, or add them to a meatball casserole for a hearty meal, and an easy dinner is served!
    • Frozen Meatballs: Since the meatballs are frozen, they’re great to keep in the freezer for those last-minute meal ideas or as an appetizer like these slow cooker BBQ meatballs!

    Ingredients Needed

    I’ve highlighted a couple of ingredients with some relevant notes. Aside from this, the ingredients needed are pretty basic.

    Ingredients for Instant Pot frozen meatballs, all sitting on counter in front of Instant Pot.
    • Meatballs – Since we’re using a spaghetti sauce to coat these meatballs in, we chose to use frozen Italian-style meatballs.
    • Italian seasoning – The seasoning we use for the sauce, is the Italian dressing seasoning packet. You can usually find this at your local grocery store but it’s different than Italian seasoning in the spice aisle. You want the packet that you can make the salad dressing out of – although you’ll just be using the seasoning.
    • Water – ½ cup of water is added to create a liquid substance for the pressure cooking, to help prevent getting a burn notice, so don’t skip this ingredient.

    Substitutions

    Sometimes substitutions are necessary because of ingredients that are unavailable or needed for dietary restrictions. Here are some suggestions that can help:

    • Meatballs – I know you may love homemade meatballs more than frozen, and that’s absolutely ok! If you make your own meatballs (like we do with our easy Swedish meatballs) and freeze them for later, this should also work just fine! Fresh meatballs, however, may cook a bit differently since frozen meatballs tend to be fully cooked and only frozen… so that’s important to keep in mind. You may also choose to make turkey meatballs, ground beef meatballs, or even a different flavor of meatballs, and that’s just fine too.
    • Water – if you’d rather use a broth, such as my homemade chicken broth or beef broth instead of water, you absolutely can! Keep in mind, that if you use a regular broth, instead of low-sodium broth, this could make the meatballs very salty, with the salt that’s already in the Italian seasoning packet.
    • Pasta sauce – we think using the recipe we use for the sauce in the recipe card below is better than most sauces, but you can use your favorite brand or recipe. Just make sure you’re using enough, especially if you plan to serve any excess sauce over pasta.

    Equipment

    We make this Instant Pot meatballs recipe, using an electric pressure cooker or what you may call an “Instant Pot.” But any brand will do, to make these pressure cooker meatballs. (Do note, that different brands can vary for cooking time.)

    Some may use a steamer basket for easy removal of the cooked meatballs from the bottom of the pot, but I don’t feel there’s a need for this. However, it won’t hurt anything if you do decide to use this.

    How to Make Frozen Instant Pot Meatballs

    Cooking these meatballs at high pressure means that they only have to cook for 4 minutes. It’s a great way to serve juicy meatballs as, or as part of a delicious dinner.

    *Be sure to see the recipe card below for the full ingredients list & instructions!*

    STEP 1. Make sauce. In a medium-sized bowl, mix together the 2 cans of tomato sauce and 2 packets of Italian dressing seasoning mixes until combined.

    Uncooked frozen meatballs in Instant Pot.
    Image 1
    Tomato sauce and seasonings mixed, and poured on top of frozen meatballs, inside of Instant Pot.
    Image 2

    Tip: If making the meatballs to serve over pasta, now is a good time to start boiling your pasta, so it can be cooking while the meatballs are pressuring.

    STEP 2. Water and meatballs. Pour ½ cup water and frozen meatballs in to the Instant Pot metal insert (Image 1).

    STEP 3. Add sauce. Next, pour the seasoned tomato sauce in, over the meatballs (Image 2).

    Marinara sauce mixed in with frozen meatballs, inside of Instant Pot.
    Image 3
    Cooked frozen meatballs that are cooked in spaghetti sauce, inside of Instant Pot.
    Image 4

    STEP 4. Stir and Secure. Stir to combine the sauce and meatballs. Secure the lid on the Instant Pot, turn the steam valve to “seal” and set the timer for 4 minutes (Image 3).

    STEP 5. Remove lid. When the timer ends, quick-release the steam valve and when the float valve goes down, remove the lid (Image 4).

    Cooked, Instant Pot meatballs in ladle, holding above the Instant Pot.

    STEP 6. Serve! Finally, serve and enjoy. If desired, sprinkle on grated parmesan cheese, fresh basil, and/or fresh parsley.

    Recipe Pro Tips

    • Make ahead. Even though these cook quickly, you can also make a big batch to eat on for a few days, or even freeze again for a quick spaghetti and meatballs recipe when you need something hearty and fast.
    • Stock up on ingredients. Since all of the ingredients can be stored for quite a while, this is a great recipe to stock up on so you can make them when you’re not sure what to have for a main dish!
    Cooked, Instant Pot meatballs that are in a small white bowl.

    Recipe FAQs

    How long does it take to make frozen meatballs?

    When cooking meatballs in the Instant Pot, it only takes 4 minutes to cook. Then, you’ll quick-release and allow the float valve to go down before removing the lid. (This could take a few extra minutes.)

    How do you store leftover Instant Pot meatballs?

    Allow the meatballs to cool off, and then place them in an airtight container and in the refrigerator for 3-4 days.

    Can you freeze leftover meatballs?

    Absolutely. The best way to freeze cooked meatballs is to let them cool completely, and then place them in a single layer, without touching, either on a cookie sheet or in an airtight container. When they’ve become frozen, you can place them together in a freezer bag or freezer container to store easier. (Freezing them separately at first, keeps them from sticking together when freezing.)

    Cooked meatballs from Instant Pot, sitting in white bowl with fresh parsley on top.

    More Italian Recipes

    If you love easy Italian recipes like this one, then you’ll also love these:

    • Lasagna soup in white bowl with dollop of ricotta cheese on top.
      Lasagna Soup
    • Italian sliders on Hawaiian buns
      Italian Sliders (Easy Party Sandwiches)
    • ingredients in bowl for zesty Italian pasta salad
      Zesty Italian Pasta Salad Recipe
    • Texas Toast Pizza on baking sheet
      Texas Toast Pizzas

    Did you make this? I’d be so grateful if you left a “star” rating below to let me know what you thought! Then, the next time you need a quick and easy recipe, come back to Fantabulosity to browse all of my easy recipes!

    Recipe

    Instant Pot frozen meatballs in white bowl, with fresh parsley sprinkled on top.
    Print Pin
    5 from 6 votes

    Instant Pot Frozen Meatballs

    Instant Pot Frozen Meatballs – in only 4 minutes, your Italian meatballs will be ready to serve over your favorite pasta or to eat alone! This 2-step marinara sauce recipe is better than any store-bought sauce too!
    Course Appetizer, Main Course, Side Dish
    Cuisine Italian
    Prep Time 6 minutes minutes
    Cook Time 4 minutes minutes
    Total Time 10 minutes minutes
    Servings 11 servings
    Calories 236kcal
    Author Jessica Burgess

    Equipment

    • Pressure Cooker such as an Instant Pot

    Ingredients

    • ½ cup water
    • 32 ounce bag of frozen Italian meatballs
    • 30 ounces tomato sauce 2 – 15 ounce cans
    • 2 – .7 ounce packets Italian dressing seasoning mix
    • grated parmesan cheese and fresh parsley if desired

    Instructions

    • In a medium-sized bowl, mix together the 2 cans of tomato sauce and 2 packets of Italian dressing seasoning mixes until combined.
    • Pour ½ cup water and frozen meatballs in to the Instant Pot metal insert.
    • Next, pour the seasoned tomato sauce in, over the meatballs and stir to combine.
    • Secure the lid on the Instant Pot, turn the steam valve to "seal" and set the timer for 4 minutes.
    • When the timer ends, quick-release the steam valve and when the float valve goes down, remove the lid.
    • Serve the meatballs! If desired, sprinkle on grated parmesan cheese and fresh parsley.

    Notes

    How to Store Leftover Meatballs: Allow the meatballs to cool off, and then place them in an airtight container and in the refrigerator for 3-4 days.
    Can you freeze frozen cooked meatballs? Sure! The best way to freeze cooked meatballs is to let them cool completely, and then place them in a single layer, without touching, either on a cookie sheet or in an airtight container. When they’ve become frozen, you can place them together in a freezer bag or freezer container to store easier. (Freezing them separately at first, keeps them from sticking together when freezing.)

    Nutrition

    Serving: 6meatballs | Calories: 236kcal | Carbohydrates: 4g | Protein: 15g | Fat: 18g | Saturated Fat: 7g | Polyunsaturated Fat: 2g | Monounsaturated Fat: 8g | Cholesterol: 59mg | Sodium: 432mg | Potassium: 466mg | Fiber: 1g | Sugar: 3g | Vitamin A: 341IU | Vitamin C: 6mg | Calcium: 23mg | Iron: 1mg

    Ham and Beans Recipe

    March 9, 2023

    Bowl of ham and beans with spoon, and cornbread sitting on side of bowl.

    Ham and Beans: An old-fashioned and flavorful ham and bean soup recipe that’s made of canned great northern beans, ham, spices, and chicken broth!

    With only a 7-minute prep time and 45-minute cooking time, this easy recipe is a vintage soup recipe you’ll want to add to your meal plan for dinner or a weekend comfort meal.

    Ham and beans in a white bowl with side of cornbread dipped in.

    Sometimes a warm, and easy bowl of soup is what sounds good on a cold day. This 15 bean soup is one that we love to have on the rotation along with this ham and beans recipe. They’re both so easy to make but the 15-bean soup has more of a cajun flair while this ham and beans recipe has a gentle warm flavor that the whole family will love.

    But if you’re looking for multiple soup recipes, perhaps for a food bar or to serve at a pot-luck, you may also love our hearty soups, like this Cowboy Stew recipe, our taco soup recipe, easy chili recipe, and this easy lasagna soup recipe!

    [feast_advanced_jump_to]

    Why This Recipe Works

    • Large Batch Cooking: Although this recipe serves 6, it’s a great recipe that’s enjoyed the next day so it’s a great way to cook once and have a meal for days if you’re only cooking for a small amount or you can easily double or triple for a huge batch!
    • Great way to use leftover ham: This recipe calls for a hearty ham that you can buy at the grocery store but it’s also a great use of leftover ham bone, ham shanks, ham hocks, leftover holiday ham (like leftover Easter ham) or whatever you think is the best ham!
    • Old Fashioned Recipe: It’s a recipe that has been around for many years and is a delicious soup that you would normally find in a large soup pot served with cornbread muffins at Grandma’s table, next to this easy chicken pot pie recipe! Pork dinners like this have long been part of old-fashioned comfort cooking.

    Ingredients Needed

    I’ve highlighted a couple of ingredients with some relevant notes but all are simple ingredients.

    Labeled ingredients on counter for ham and beans
    • Broth – We use my homemade chicken broth for this recipe although you can also use low-sodium broth.
    • Beans – Using canned beans instead of dried beans is a faster way to make ham and beans since the beans have already been cooked
    • Ham – Using pre-diced ham saves time but leftover ham (like we did for this ham casserole) works great as well. Dicing a ham steak or thickly sliced deli meat is also a great choice.

    Substitutions

    Sometimes substitutions are necessary because of ingredients that are unavailable or needed for dietary restrictions. Here are some suggestions that can help:

    • Beans – you can use navy beans, dried beans with a quick soaking of beans method, cannellini beans, or pinto beans. If using dried beans, soak the beans overnight and drain. Simmer with broth, meat, and seasonings for 2-3 hours. 
    • Ham – ham shanks, smoked ham hock, any extra ham you may have on hand or just an easy ham that you love to cook with.
    • Broth – You can use vegetable broth or even homemade chicken broth.

    Equipment

    We cooked this ham and beans recipe on the stove top in a dutch oven but you may also want to try making it in the crock pot or an electric pressure cooker.

    How to Make Ham and Beans

    There aren’t many steps to this recipe since it’s a quick, dump-and-go soup!

    *Be sure to see the recipe card below for the full ingredients list & instructions!*

    Beans, ham, and ham hock added to stock pot, with broth and spices sitting around pot.
    Image 1
    Broth and spices added to stock pot with ham and beans.
    Image 2

    STEP 1. Beans and Ham. Place beans, ham, and ham hock to a large pot or dutch oven. (Image 1).

    STEP 2. Broth and Spices. Next, add broth and spices and stir to combine (Image 2).

    Ham hock and bay leaves removed from pot
    Image 3
    Ham hock on cutting board with bay leaves sitting beside the board.
    Image 4

    STEP 3. Boil. Bring to a boil for 5-10 min* stirring frequently.

    Tip: *For creamier beans, boil for 10 minutes and stir often. If less creamy beans are desired boil for a shorter amount of time and stir less often.

    STEP 4. Reduce heat to a simmer. Simmer for 30-35 min stirring occasionally (Image 3).

    STEP 5. Remove. Once done remove bay leaves and ham hock (Image 4).

    Ham pieces from ham hock, added back in to the stock pot.
    Image 5
    Simmering ham and beans in stock pot.
    Image 6

    STEP 6. Remove meat. Remove as much meat as possible from the ham hock and return the meat to the pot (Image 5). 

    STEP 7. Stir & Serve. Stir once more and serve with cornbread and a dash of black pepper if desired (Image 6).

    Ladle full of cooked ham and beans in stock pot.

    Recipe Pro Tips

    • Side dishes for ham and beans. It’s common to serve ham and beans with cornbread but you could also serve it with rice, air fryer garlic bread, or French bread.
    • More veggies. Adding thinly sliced carrots in the last 10 minutes of cooking is something you can do if you’re looking to add more color or vegetables to your recipe.
    Bowl of ham and beans with spoon inside, and a piece of cornbread on side of bowl.

    Recipe FAQs

    Should I use ham hocks for ham shanks for ham and beans?

    You can use either. Ham hocks tend to have less meat on them than ham shanks, however, they both work well.

    What kind of beans do you put in ham and beans?

    There are many different kinds of beans you can put in your ham and beans. The most popular types are great northern beans, navy beans, pinto, or cannellini beans.

    How do you thicken ham and beans?

    Cooking your beans longer, and stirring the beans often, can make a creamier, thicker, ham and beans. Or, you can also combine a mixture of flour and water or broth (about 3 Tablespoons of flour and 1 cup of liquid) and pour in to the pot, and allow to simmer until thickened.

    Storage

    Refrigerate any leftovers in an airtight container for up to 5 days. Reheat on the stove or in the microwave. You can also freeze ham and beans in an airtight container for up to 3 months. Let them thaw in the refrigerator overnight before warming. 

    More Comfort Food

    If you love comforting meals like this, you might enjoy browsing these old-fashioned dinner recipes too.

    • Close up photo of a bowl brimming with noodles, vegetables and ground beef in a rich red tomato based sauce
      Crock Pot Goulash
    • Chicken and gravy on top of mashed potatoes on white plates
      Chicken and Gravy Recipe
    • french onion beef casserole scooped up out of white dish
      French Onion Beef Casserole
    • Dutch oven pot roast, with potatoes, carrots and rosemary on top.
      Dutch Oven Pot Roast

    Did you make this? I’d be so grateful if you left a “star” rating below to let me know what you thought! Then, the next time you need a quick and easy recipe, come back to Fantabulosity to browse all of my easy recipes!

    Recipe

    Bowl of ham and beans with spoon, and cornbread sitting on side of bowl.
    Print Pin
    4.82 from 11 votes

    Ham and Beans Recipe

    Ham and Beans: A flavorful ham and bean soup recipe that's made of canned great northern beans, ham, spices, and chicken broth! With only a 7-minute prep time and 45-minute cooking time, this easy recipe is a soup recipe you'll want to add to your meal plan for dinner or a weekend comfort meal.
    Course Main Course
    Cuisine American
    Prep Time 7 minutes minutes
    Cook Time 45 minutes minutes
    Total Time 52 minutes minutes
    Servings 6 servings
    Calories 554kcal
    Author Jessica Burgess

    Ingredients

    • 5 – 15 ounce cans great northern beans 3 drained and 2 undrained
    • 4 cups chicken broth
    • 2 cups diced ham
    • 2 Tablespoons dried minced onions
    • 2 bay leaves
    • 1 smoked ham hock
    • 1 teaspoon dried basil
    • ¼ teaspoon salt
    • ¼ teaspoon black pepper
    • ¼ teaspoon cayenne pepper

    Instructions

    • Place all ingredients into a large pot or dutch oven.
    • Bring to a boil for 5-10 min* stirring frequently.
    • Reduce heat to a simmer. Simmer for 30-35 min stirring occasionally.
    • Once done remove bay leaves and ham hock.
    • Remove as much meat as possible from the ham hock and return the meat to the pot. 
    • Stir once more and serve with sweet cornbread and a dash of black pepper if desired. 

    Video

    Notes

    * For creamier beans, boil for 10 minutes and stir often. If less creamy beans are desired boil for a shorter amount of time and stir less often.
    To Store: Refrigerate any leftovers in an airtight container for up to 5 days.
    To Freeze: You can also freeze ham and beans in an airtight container for up to 3 months. Let them thaw in the refrigerator overnight before warming. 

    Nutrition

    Serving: 1serving | Calories: 554kcal | Carbohydrates: 77g | Protein: 42g | Fat: 10g | Saturated Fat: 3g | Polyunsaturated Fat: 1g | Monounsaturated Fat: 3g | Cholesterol: 54mg | Sodium: 1259mg | Potassium: 1410mg | Fiber: 18g | Sugar: 2g | Vitamin A: 42IU | Vitamin C: 6mg | Calcium: 209mg | Iron: 7mg

    Cornflake Brownies

    March 7, 2023

    A cornflake brownie propped up around other brownies.

    Cornflake Brownies: Fudgy brownies made with a brownie mix, that’s topped with a delicious cornflake topping that’s made of Corn Flakes, caramels, and evaporated milk. They’re a deliciously soft and chewy brownie recipe that’s perfect for a sweet craving.

    We love putting twists on brownie recipes, and if you do too, then we think you’re going to love these red velvet brownies!

    Stack of cornflake brownies.

    If you love brownie recipes as much as we do, then you’re going to love the twist that we put on a lot of these! We’ve made strawberry brownies, banana pudding brownies, lemon brownies, and even butterscotch brownies!

    But I have to say, these caramel cornflake brownies rank right up there at the top of the best chocolate brownies for sure, and even on of our top favorite dessert recipes.

    [feast_advanced_jump_to]

    Why This Recipe Works

    • Chewy, Crunchy, and Soft: The texture of the crunchy cornflakes, combined with the chewy caramel and the soft brownie base, is a texture that’s hard to beat.
    • Simple Recipe: Since this recipe uses a brownie mix, it makes this an easy recipe that uses just a few simple ingredients to make a decadent dessert. If you don’t want to use a brownie mix, you may prefer this homemade brownie recipe.
    • Bake and Chill: Once you bake the brownies from the boxed mix directions, you’ll only need to chill the rest. So you can make this recipe ahead of time and allow it to sit in the refrigerator until you’re ready to serve!

    Ingredients Needed

    I’ve highlighted a couple of ingredients with some relevant notes. Aside from this, the ingredients needed are pretty basic.

    Ingredients for corn flake brownies on kitchen counter.
    • Brownie Mix – I chose to use the Betty Crocker Supreme Original brownie mix but you can use your favorite mix. Do note that you’ll need to gather the ingredients that your box mix calls for as well, such as eggs, oil, water, etc.
    • Caramels – Using caramel candies is best for this recipe, instead of the caramel baking bits that you may see in the grocery store.
    • Cornflakes – You’ll want to use regular cornflakes instead of frosted cornflakes (although you can use them but it may be a lot sweeter and the recipe is sweet as it is).

    Substitutions

    Sometimes substitutions are necessary because of ingredients that are unavailable or needed for dietary restrictions. Here are some suggestions that can help:

    • Cereal – if you don’t have cornflakes on hand for this recipe, you should be able to use other cereal such as Cheerios.
    • Brownies – you can absolutely make brownies from scratch instead of using a box mix if you prefer. Or, you can try a dark chocolate brownie mix instead of a milk chocolate mix for a different type of sweet combo.

    How to Make Cornflake Brownies

    Make sure you allow enough time for the caramel cornflake topping to chill and thicken before serving.

    These cornflake brownies are broken into 3 components:

    • making the brownies
    • making the caramel topping
    • chill brownies and caramel topping

    *Be sure to see the recipe card below for the full ingredients list & instructions!*

    Make the Brownies

    STEP 1. Preheat and Prep. Begin by preheating the oven to the temperature your brownie mix or recipe recommends, (mine was 350°) and line an 8×8 or 9×9 baking dish or square pan with parchment paper.

    I lined my baking dish with parchment paper (cut the corners) and sprayed the baking dish with cooking spray before adding the paper.

    Brownie mix with egg, oil and water.
    Image 1
    Brownie mix, mixed together in glass bowl.
    Image 2

    STEP 2. Make brownie batter. Make your brownie mix batter according to the package directions (Images 1 & 2).

    My brownie mix required one egg, 3 tablespoons of water, and ⅓ cup oil.

    Mine baking pan was a 9×9 so I did 28 minutes.

    Brownie batter in 8x8 baking dish, sitting on white kitchen counter.
    Image 3
    Baked brownies in white 8x8 baking dish, sitting on cooling rack.
    Image 4

    STEP 3. Bake brownies. Pour the brownie mix in to prepared pan (Image 3).

    STEP 4. Bake. Next, bake the brownies according to the brownie mix’s directions, remove them from the oven, and allow them to cool on a wire rack (Image 4).

    Tip: This is why I specifically love using parchment paper to line the baking dish with. To speed up the cooling process of the freshly baked brownies, I can easily lift up the parchment paper, lifting the brownies out, allowing them to sit on the cooling rack to cool faster than resting in the baking dish. This saves time and prevents putting super hot brownies in the refrigerator.

    Caramel candies in glass bowl with evaporated milk.
    Image 5
    Melted caramel candies in glass bowl.
    Image 6

    Make the Caramel Cornflake Topping

    While the brownies are cooling on a wire rack make the cornflake topping.

    STEP 5. Add caramels and milk to bowl. Add evaporated milk and caramels to a microwave-safe bowl that will be big enough to add in the 4 cups of cornflakes in a bit (Image 5).

    STEP 6. Melt. In 30-second intervals, melt the caramels and milk together in the microwave and stir after each 30-second interval. (This took a total of about 5 times for me.)

    Corn Flakes poured in to melted caramel in glass bowl.
    Image 7
    Corn Flakes stirred and mixed in with melted caramel candies.
    Image 8

    STEP 7. Add cereal. Add cornflakes to the caramel and stir to combine (Images 7 & 8).

    Caramel cornflake mixture poured on top of baked brownies in baking dish.
    Image 9
    Caramel cornflakes spread out evenly on top of baked brownies.
    Image 10

    Then place the brownies back in the baking dish (if you removed them).

    STEP 8. Top brownies. Pour the cornflake topping on top of the brownies, and spread evenly to create a cornflake layer (Images 9 & 10).

    Chilled caramel corn flakes on top of baked brownies, sitting on parchment paper.

    STEP 9. Chill. Place in refrigerator and allow to cool for 2-3 hours, or until topping has hardened (Image above).

    Cornflake brownies cut in to squares, and the middle on sticking up to see the brownie and the topping.

    STEP 10. Slice. Slice and serve the caramel cornflake crunch brownies. I sliced mine in to 9 squares (Image above).

    Recipe Pro Tips

    • Leftover evaporated milk. Since this recipe doesn’t use a full can, we use any leftovers as coffee creamer.
    • Smaller pieces. The brownies are very sweet and rich. You can cut them into smaller sizes to stretch out the servings and it will be plenty for a serving.
    Hand holding a square corn flake brownie.

    Recipe FAQs

    How do you store cornflake brownies?

    To keep the caramel crunch topping thick, store the brownies covered, in an airtight container, in the refrigerator for best results, instead of room temperature, for 3-4 days.

    Can you make cornflake brownies ahead of time?

    Absolutely. Actually, since the brownies need time to chill so the topping with harden, making them ahead of time is ideal. However, I would recommend still making them the night before or the morning of.

    Can I make these brownies from scratch instead?

    Of course! This recipe is very forgiving so making the brownies from scratch, even if it makes more than what this recipe calls for, should be ok. It may just change the ratio of the thickness of the topping compared to the brownie layer. These Instant Pot Brownies are made from scratch, which would also be fun to try.

    More Cereal Recipes You’ll Love

    Love using cereal in recipes? We do too. Here are some of our other favorites:

    • Lucky Charms Treats stacked on top of one another, sitting on white counter.
      Lucky Charms Treats
    • Close up of cornflake candy cookies
      Cornflake Candy Cookies
    • lucky charms pancakes
      Lucky Charms Pancakes
    • Rice krispie treats on wooden board.
      The BEST Rice Krispie Treats

    Did you make this? I’d be so grateful if you left a “star” rating below to let me know what you thought! Then, the next time you need a quick and easy recipe, come back to Fantabulosity to browse all of my easy recipes!

    Recipe

    A cornflake brownie propped up around other brownies.
    Print Pin
    5 from 10 votes

    Cornflake Brownies

    Cornflake Brownies: Fudgy brownies made with a brownie mix, that's topped with a delicious cornflake topping that's made of Corn Flakes, caramels, and evaporated milk. They're a deliciously soft and chewy brownie recipe that's perfect for a sweet craving.
    Course Dessert
    Cuisine American
    Prep Time 2 minutes minutes
    Cook Time 28 minutes minutes
    Chill Time 2 hours hours
    Total Time 2 hours hours 30 minutes minutes
    Servings 9 brownies
    Calories 331kcal
    Author Jessica Burgess

    Ingredients

    • 16 ounce boxed brownie mix or your favorite brownie recipe
    • ingredients needed according to your brownie mix directions Mine used an egg, oil and water.

    Cornflake Topping

    • ⅓ cup evaporated milk
    • 2 cups caramels
    • 4 cups Corn flakes

    Instructions

    • Preheat oven to the temperature that's instructed on your brownie mix or favorite brownie recipe. I preheated my oven to 350° F.
    • Line a 9×9 baking dish with parchment paper. See blog post for tips.
    • Make brownie mix according to package direcctions, and bake.
    • Remove brownies from the oven once they're baked, and allow them to cool while making caramel cornflake topping.

    Caramel Cornflake Topping

    • Add caramels and milk to bowl. Add evaporated milk and caramels to a microwave-safe bowl that will be big enough to add in the 4 cups of cornflakes in a bit.
    • Melt. In 30-second intervals, melt the caramels and milk together in the microwave and stir after each 30-second interval. (This took a total of about 5 times for me.)
    • Add cereal. Add cornflakes to the caramel and stir to combine
    • Top brownies. Pour the cornflake topping on top of the brownies, and spread evenly.

    Chill

    • Chill. Place in refrigerator and allow to cool for 2-3 hours, or until topping has hardened.
    • Slice in to 9 squares (Or smaller if you prefer more, smaller, servings.)

    Notes

    Smaller pieces. The brownies are very sweet and rich. You can cut them into smaller sizes to stretch out the servings and it will be plenty for a serving.
    How to store: Store leftovers in an airtight container in the refrigerator for 3-4 days.

    Nutrition

    Serving: 1brownie | Calories: 331kcal | Carbohydrates: 52g | Protein: 4g | Fat: 13g | Saturated Fat: 2g | Polyunsaturated Fat: 4g | Monounsaturated Fat: 6g | Trans Fat: 0.03g | Cholesterol: 6mg | Sodium: 230mg | Potassium: 162mg | Fiber: 0.4g | Sugar: 37g | Vitamin A: 267IU | Vitamin C: 3mg | Calcium: 98mg | Iron: 4mg

    Crispy Chicken Tacos

    February 27, 2023

    Crispy chicken tacos baked on baking sheet.

    Crispy Chicken Tacos: Crunchy tacos, baked on a baking sheet, using chicken, shredded cheddar cheese, lime juice, and chicken taco seasoning to make the most delicious crunchy chicken tacos. It’s a 30-minute or less dinner that you’ll want to add to your meal plan rotation!

    Love crispy tacos? If so, you’ll also want to make sure to try these fried tacos soon too!

    Baked crispy chicken tacos on baking sheet.

    We love a good taco recipe on taco night and these easy crispy chicken tacos are by far one of our favorites. These chicken street tacos and fish finger tacos are other easy recipes that your whole family will love too! Or, if you’re looking for healthier recipes, these 21-Day Fix chicken tacos are a great option, or you can even make a taco salad with Catalina dressing to get in some greens.

    [feast_advanced_jump_to]

    Why This Recipe Works

    • A nice change from beef: Ground beef tacos are delicious but switching things up by using chicken, is a wonderful change every once in a while. You can use any ground beef for this walking taco casserole this week!
    • They’re baked: When the chicken and cheese are baked in to the crispy shells, it creates an amazing warm combo of flavors!
    • Ready in about 15 minutes: With just a few minutes to prep the chicken taco meat, fill the shells, and then bake… these tacos are ready for toppings in about 15 minutes; perfect for weeknight dinners.

    Ingredients Needed

    • Cooked Shredded Chicken – We love boiling boneless, skinless chicken thighs to use for a lot of different chicken recipes but especially this one. You can cook your own slow cooker shredded chicken ahead of time, or even use a rotisserie chicken from the grocery store (then you can even use the bones to make a rotisserie chicken broth), cooked chicken breasts, or your favorite type of chicken.

    TIP: Cook extra chicken so you can also make these chicken fajita wraps and these Chicken Chipotle Melts, soon!

    Boiled chicken thighs on a white plate.
    Shredded boiled chicken thighs
    • Lime Juice – you don’t have to put this in the recipe but it’s absolutely encouraged. It adds the perfect hint of tang for a delicious Mexican dish.
    • Taco Seasoning – you can use a packet of store-bought taco seasoning but we absolutely love using 3 Tablespoons of this homemade chicken taco seasoning recipe.
    • Avocado Oil – to help the seasoning cling to the chicken, oil is recommended.
    Ingredients for crispy chicken baked tacos
    • Shredded Cheddar – we love using the Mexican-style blend cheeses for this recipe.
    • Crunchy Taco Shells – the store-bought shells are perfect for this recipe, however, you’re more than welcome to bake your own corn tortillas.
    • Taco Toppings – top your tacos with your favorite toppings, such as lettuce, Rotel Salsa, salsa verde, corn salsa, more cheese, sour cream, black olives, black beans, jalapeno ranch dressing, chunky guacamole, green chiles, fresh cilantro, hot sauce.

    Substitutions

    Sometimes substitutions are necessary because of ingredients that are unavailable or needed for dietary restrictions. Here are some suggestions that can help:

    • Cheese – you can use shredded cheddar, monterey jack, pepper jack, or your favorite melty cheese.
    • Meat – you can use ground chicken, ground beef, venison, seafood, or your favorite type of meat that you have on hand! Or, these shredded beef tacos in the slow cooker are a great option too!
    • Oil – you can use olive oil instead of avocado oil if you prefer.

    Equipment

    A rimmed sheet pan lined with parchment paper is ideal for baking in the oven but you could use a baking dish if needed. You can also use a small toaster oven as well.

    How to Make Crispy Chicken Tacos

    Making this chicken taco recipe is so easy, with just a few steps!

    *Be sure to see the recipe card below for the full ingredients list & instructions!*

    If you already have the pre-cooked chicken, preheat your oven to 325°F. If you still need to cook your chicken, do this prior to preheating and prepping the tacos.

    STEP 1. Prep Baking Sheet. Line a large, rimmed baking sheet with parchment paper, that’s large enough to fit 10 tacos.

    Shredded Chicken with taco seasoning, lime juice and oil in bowl.
    Image 1
    Cooked shredded chicken in bowl with taco seasoning, lime juice and oil.
    Image 2

    STEP 2. Make seasoned chicken. Coat the cooked chicken with oil, lime juice, and taco seasoning (Image 1). Stir until combined and seasoning is mixed in with the chicken, as evenly as possible (Image 2).

    Crispy taco shells on baking sheet, filled with chicken and cheese.
    Image 3
    Baked crispy chicken tacos on baking sheet.
    Image 4

    STEP 3. Fill tacos. Fill the taco shells with about ¼ cup of the chicken mixture, and sprinkle about a Tablespoon of shredded cheese on top of the chicken filling. Arrange tacos on a baking sheet in a single layer. (Image 3).

    Tip: Propping the tacos up on one another, making the first row lean against the rim on the baking sheet can help start the propping-up process. Propping them up will help the cheese and chicken mixture stay inside of the shells while baking.

    STEP 4. Bake. Place the baking sheet in the oven and bake at 325° for about 6-7 minutes or until the cheese is melted and the shells are golden brown (Image 4).

    Crispy chicken tacos on baking sheet, that are topped with lettuce, salsa and sour cream.

    STEP 5. Enjoy. Enjoy the tacos as they are, or top them with your favorite toppings!

    Recipe Pro Tips

    • Add toppings as you go. In case there are leftovers, it’s best to top the tacos with your favorite toppings when you’re going to eat them. This is better for reheating or to help prevent the tacos from getting too soggy from wet ingredients.
    • Serve at a party. Serving baked tacos at a party is a great way to feed a crowd! Bake them in advance, serve them at a taco bar or fiesta party, and let your guests top them with their favorite toppings!

    Recipe FAQs

    How do you make crispy tacos?

    Baking crunchy taco shells in the oven will give you a crispy taco, and is our favorite way to make them.

    How do you keep crunchy tacos crispy?

    If you have leftover crunchy tacos, sometimes they can become soft when chilled from the moisture. Reheat crunchy tacos in the air fryer to get them crispy again.

    What do you serve with chicken tacos?

    Popular sides to serve with chicken tacos are this pico de Gallo recipe, cowboy queso, rotel dip, hot taco dip, cold taco dip, Spanish rice, and this elote dip recipe.

    Storage

    If you have leftover baked chicken tacos, store them in an airtight container or a sealable, plastic bag, and place in the refrigerator for 3-4 days.

    More Recipes You’ll Love

    If you love easy Mexican recipes like this one, then you’ll also love these:

    • A plate holds a serving of crock pot chicken enchiladas that has been topped with sour cream and chives
      Crock Pot Chicken Enchiladas
    • Creamy taco soup serving in white bowl.
      Creamy Taco Soup
    • Close-up of pinwheel sandwiches stacked on top of one another.
      Pinwheel Sandwiches
    • Taco Chicken Casserole on a plate.
      Taco Chicken Casserole

    Did you make this? I’d be so grateful if you left a “star” rating below to let me know what you thought! Then, the next time you need a quick and easy recipe, come back to Fantabulosity to browse all of my easy recipes!

    Recipe

    Crispy chicken tacos baked on baking sheet.
    Print Pin
    5 from 4 votes

    Crispy Chicken Tacos

    Crispy Chicken Tacos: Crunchy tacos, baked on a baking sheet, using chicken, shredded cheddar cheese, lime juice, and chicken taco seasoning to make the most delicious crunchy chicken tacos!
    Course Appetizer, Main Course
    Cuisine Mexican
    Prep Time 8 minutes minutes
    Cook Time 7 minutes minutes
    Total Time 15 minutes minutes
    Servings 10 tacos
    Calories 195kcal
    Author Jessica Burgess

    Ingredients

    • 10 crunchy taco shells
    • 2½ cups cooked, shredded chicken
    • 6 ounces shredded Mexican-style cheese Or about ½ -1 cup shredded cheese
    • 1 packet taco seasoning Or 3 Tablespoons of this homemade chicken taco seasoning.
    • 1 teaspoon lime juice
    • 2 Tablespoons avocado oil
    • Your favorite toppings

    Instructions

    • Preheat oven to 325°F, and line a rimmed baking sheet with parchment paper.
    • Combine cooked, shredded chicken with taco seasoning, lime juice and oil. Stir until combined and chicken is coated with seasoning mixture.
    • Begin filling crunchy taco shells with about ¼ cup of chicken mixture, and then top with about 1 Tablespoon of shredded cheese.
    • Line baking sheet with tacos, in a single layer.
    • Bake at 325°F for 6-7 minutes or until cheese is melted and shells are a deep golden brown.
    • Top with your favorite toppings if desired, and enjoy!

    Notes

    Tip: Propping the tacos up on one another, making the first row lean against the rim on the baking sheet can help start the propping-up process. Propping them up will help the cheese and chicken mixture stay inside of the shells while baking.
    Storage: If you have leftover baked chicken tacos, store them in an airtight container or a sealable, plastic bag, and place in the refrigerator for 3-4 days. 

    Nutrition

    Serving: 1taco | Calories: 195kcal | Carbohydrates: 10g | Protein: 14g | Fat: 11g | Saturated Fat: 4g | Polyunsaturated Fat: 2g | Monounsaturated Fat: 5g | Trans Fat: 0.03g | Cholesterol: 37mg | Sodium: 480mg | Potassium: 124mg | Fiber: 1g | Sugar: 1g | Vitamin A: 445IU | Vitamin C: 2mg | Calcium: 212mg | Iron: 1mg

    Chicken Taco Seasoning

    February 26, 2023

    Homemade Chicken Taco Seasoning in small white bowl.

    Chicken Taco Seasoning: Make your own seasoning that helps you know what’s in it, unlike the store-bought packets. This homemade chicken taco seasoning makes the best chicken taco around, especially baked crispy chicken tacos!

    Chicken taco seasoning in small white bowl.

    Our favorite way to season taco recipes is with this homemade taco seasoning mix. Some of our favorite recipes to use this spice mix in, are this taco chicken casserole and these chicken street tacos.

    [feast_advanced_jump_to]

    Why This Recipe Works

    • Clean ingredients: This seasoning blend is made using ingredients that you probably already have in your spice cabinet (or can easily get at the grocery store) and you don’t have to worry about ingredients in it that you can commonly find in a packet of taco seasoning; such as corn syrup solids, food dye, and corn maltodextrin.
    • Make a big batch: Even though this recipe makes one small batch, the best part is that you can make a double batch, triple, or larger batch of this spice blend and store it in a container such as a mason jar, and use it as needed or when meal prepping other dinners like this Catalina Taco Salad, and is ready for you on busy weeknights.
    • Use it in other recipes too! Even though this is a chicken taco seasoning that you may think you can only use in a chicken recipe, you can absolutely use it in a ground turkey or ground beef recipe too! We love it in this hot taco dip, this taco soup recipe, this taco pasta, taco pinwheels, and this taco layer dip. Or, have fun with it in these shredded beef tacos!

    This recipe makes about 3 Tablespoons of chicken taco seasoning and will be ready to go in your ground chicken tacos, turkey tacos, shredded chicken, or your favorite Mexican dishes!

    Ingredients Needed

    Just a few basic ingredients are all it takes to make this easy homemade taco mix!

    *Be sure to see the recipe card below for the full ingredients list & instructions!*

    Labeled ingredients for chicken taco seasoning.

    Substitutions

    If you’re shorthanded on some of the spices and ingredients, you may want to substitute some of the items. Here are tips that can help:

    • Garlic Powder – if you’re short on garlic powder, you could use garlic salt instead but reduce the amount of salt that the recipe calls for.
    • Smoked Paprika – if you have regular paprika instead of smoked paprika, that should be just fine.
    • Oregano – coriander can be substituted for oregano if desired.
    Spice jars on counter, that are used to make chicken taco seasoning.

    Buy the spice jars I use, and love! Use code: FANTAB10 for 10% off.

    How to Make Chicken Taco Seasoning

    It’s super easy to make this homemade seasoning blend!

    I suggest making a large batch so you can store it and have it on hand when you need to make a quick taco recipe.

    Seasonings in glass bowl, ready to be mixed for homemade taco seasoning.
    Image 1
    Mixed seasonings for homemade chicken taco seasoning.
    Image 2

    STEP 1. Mix. Add all of the ingredients/seasonings to a small glass bowl (Image 1) and stir until combined (Image 2).

    STEP 2. Use or store. If using right away, using the full batch (about 3 Tablespoons) is delicious with about a pound of meat.

    Tip: Add to your meat as you normally would or mix with ⅓ cup of tomato sauce for an enhanced tomato-based flavor.

    Feel free to use less/more based on your taste preference. We use all 3 Tablespoons for one pound of meat.

    Recipe Pro Tips

    • Flexible. If you prefer stronger garlic, saltiness, or spicier seasoning, this recipe is flexible and you can add more or less of the ingredients to suit your taste, or you can even use it as the seasoning for these chicken fajita wraps.
    • Gift Giving. If you love making DIY or homemade gifts, this seasoning is a great give to package up in to these small cute jars!

    Recipe FAQs

    What is the difference between taco seasoning and chicken taco seasoning?

    There’s not much of a difference between the two, and both seasonings can be used for beef and chicken.

    Do you cook meat before adding taco seasoning?

    Yes. Fully cook the meat you’re making, and then coat it with the taco seasoning.

    How do you store chicken taco seasoning?

    Store homemade taco seasoning in an airtight container and make sure it’s in a cool, dark place, such as a pantry or a cabinet.

    More Recipes You’ll Love

    If you love finding ways to skip store-bought recipes and make your own homemade recipes, you’ll also love these:

    • Jalapeno Ranch Dip in small crock.
      Jalapeno Ranch Dip (Or Dressing!) Recipe
    • Cheese dip in sauce pan, with soft pretzels surrounding it.
      Pretzel Cheese Dip
    • Chipotle Aioli in small bowl, with a polenta fry dipping in to it.
      Chipotle Aioli Recipe
    • Buffalo Blue Cheese Bacon Dip- Easy dip recipe for a party, or to serve alongside french fries, chips, or a steak!
      Buffalo Blue Cheese Dip

    Did you make this? I’d be so grateful if you left a “star” rating below to let me know what you thought! Then, the next time you need a quick and easy recipe, come back to Fantabulosity to browse all of my easy recipes!

    Recipe

    Homemade Chicken Taco Seasoning in small white bowl.
    Print Pin
    5 from 1 vote

    Chicken Taco Seasoning

    Chicken Taco Seasoning: Make your own seasoning that helps you know what's in it, unlike the store-bought packets. This homemade chicken taco seasoning makes the best chicken taco around!
    Course Main Course
    Cuisine Mexican
    Prep Time 5 minutes minutes
    Total Time 5 minutes minutes
    Servings 3 Tablespoons
    Calories 63kcal
    Author Jessica Burgess

    Ingredients

    • 1 Tablespoon ground cumin
    • 1 Tablespoon chili powder
    • ¼ teaspoon black pepper
    • ¼ teaspoon red pepper flakes
    • ½ teaspoon oregano
    • ¼ teaspoon salt (plus more to taste)
    • ½ teaspoon smoked paprika
    • 1 teaspoon garlic powder

    Instructions

    • Mix all of the ingredients together in a small bowl, until evenly blended as possible.
    • Use as you would in your favorite taco recipe or store in an airtight container in a cool dark place.
      This makes 3 Tablespoons of your own taco seasoning. Use this for 1 pound of meat. (You can use 2 Tablespoons if desired but we like a stronger taco flavor in our dishes!)
    • **You may find that you want to add ⅓ cup of water to help the meat absorb the seasoning more. Or, instead of water, you can use ⅓ cup tomato sauce to get an extra tomato flavor.

    Notes

    Tip: Add to your meat as you normally would or mix with ⅓ cup of tomato sauce for an enhanced tomato-based flavor.
    Flexible. If you prefer stronger garlic, saltiness, or spicier seasoning, this recipe is flexible and you can add more or less of the ingredients to suit your taste.

    Nutrition

    Serving: 3tablespoons | Calories: 63kcal | Carbohydrates: 11g | Protein: 3g | Fat: 3g | Saturated Fat: 0.4g | Polyunsaturated Fat: 1g | Monounsaturated Fat: 1g | Sodium: 734mg | Potassium: 351mg | Fiber: 5g | Sugar: 1g | Vitamin A: 3109IU | Vitamin C: 1mg | Calcium: 107mg | Iron: 6mg

    The BEST Rice Krispie Treats

    February 25, 2023

    Rice krispie treats on wooden board.

    What makes these rice krispie treats the best? Adding a bit of milk to the marshmallows makes them creamy and helps make them become a gooey treat that’s hard to beat!

    Rice krispie treats on wooden cutting board.

    Even though we absolutely love these chocolate rice krispie treats, these cookies and cream rice krispie treats, and of course… these caramel rice krispie treats, sometimes there’s nothing better than classic homemade rice krispie treats.

    [feast_advanced_jump_to]

    Why This Recipe Works

    • It’s a classic! You’ll commonly find this favorite dessert at family gatherings, holidays, summer BBQs, and many more events. It’s something that guests see on the table and they trust it! So why not be the one to bring the best rice krispie treat recipe there is?
    • No bake: When you need something to travel or you simply don’t want to have to worry about keeping a dessert cold or warm, this is a great option! It’s great for camping, boating, and many more trips!
    • Bakery style: Have you ever been to a bakery where the delicious treats are large, thick, and look so appealing? If made using the tips below, you can have your own bakery-style treats too!

    Ingredients Needed

    I’ve highlighted a couple of ingredients with some relevant notes. Aside from this, the ingredients needed are pretty basic.

    Ingredients for rice krispie treats on a white counter.
    • Butter – We use unsalted for this recipe but you can use salted if you prefer. Sometimes the slight saltiness combined with the sweetness is the perfect touch.
    • Milk – You can use whole milk or 2% for this recipe, or even see the substitution ideas below for a twist.
    • Marshmallows – Did you know you can make rice krispie treats with marshmallow fluff too? That may be something you want to try next time!

    Substitutions

    Sometimes switching things out can be fun, or a necessity if you’re short on items. Here are some ideas of what can be substituted if you’d like:

    • Cereal – It’s easy to switch the types of cereal out if needed. Some ideas that we’ve tried or these Fruity Pebbles treats and these Lucky Charms treats. However, you can also try Cheerios, Golden Grahams, and more.
    • Milk – if you’re short on milk, check to see if you have a can of sweetened condensed milk on hand for a substitute.

    How to Make this Classic Dessert

    *Be sure to see the recipe card below for the full ingredients list & instructions!*

    Prepare a 9X13 inch baking dish with cooking spray and set aside.

    Melted butter in stock pot for rice krispie treats.
    Image 1
    Milk and vanilla added to butter in stock pot for rice krispie treats.
    Image 2

    STEP 1. Butter. In a large saucepan over low heat, melt the butter (Image 1).

    STEP 2. Marshmallow mixture. Then add the milk and vanilla extract (Image 2).

    Marshmallows added to stock pot with butter, milk and vanilla.
    Image 3
    Melted marshmallows being lifted up on wooden spoon.
    Image 4

    STEP 3. Marshmallow mixture. Next, add the mini marshmallows to the butter mixture (Image 3).

    Step 4. Melt. Stirring constantly, melt marshmallows over low heat until they are fully melted. This may take around 5 minutes. Remove the pan from the heat (Image 4).

    Rice krispies add to melted marshmallows in stock pot.
    IMage 5
    Wooden spoon stirring marshmallows and rice krispies.
    Image 6

    STEP 5. Add cereal. Next, stir in the rice krispie cereal until it’s fully mixed in (Images 5 & 6).

    Rice krispie marshmallow treats poured in to baking pan.
    Image 7

    STEP 6. Press in pan. Pour the mixture into the prepared pan, gently pressing the mixture down.

    Tip: Don’t press too hard, as this can make the treats hard. (See more tips below.)

    Rice krispie treat square on white background.

    STEP 7. Cool and cut. Let it cool and stiffen, and then cut into squares and enjoy!

    Recipe Pro Tips

    • Nonstick Pressing. Use the back of a spoon, the bottom of a smooth juice glass, or even your fingers, that’s greased with cooking spray will make it even easier and less sticky when pressing.
    • Thinner treats. If preferred, you can place the treats in a half sheet pan and this will result in a thinner rice krispie bar.

    Recipe FAQs

    Can I make Rice Krispie Treats the night before?

    You can, even though they’re best enjoyed the day of. Just make sure to store them properly to ensure freshness.

    What is the best way to cut Rice Krispie Treats?

    Once cooled, you can dump the large rectangle of treats on to a cutting board and then cut them evenly. However, you can also cut them right in the pan if needed.

    Do you freeze or bake rice crispy treats?

    Neither. However, you can freeze rice krispie treats if needed.

    Storage

    Store any leftover rice krispie treats in an airtight container or plastic bag. Make sure it is sealed the best way possible, to help the treats stay soft and fresh for as long as possible.

    Wrap properly in freezer paper and in a freezer bag or freezer container for up to 1-2 months. Remove from freezer and allow to call at room temperature and then enjoy.

    More No-Bake Recipes

    If you love no-bake recipes, then you’ll love these other treats that can be made with no oven or cooking involved, especially these fun carrot cake rice krispie treats.

    • A slice of caramel cream pie on a round plate, with a fork lying next to it.
      Caramel Cream Pie
    • squares of peanut butter fudge on white plate
      Peanut Butter Fudge with Condensed Milk
    • A slice of pumpkin lush on round plate.
      Pumpkin Lush
    • A slice of cherry cheesecake on a plate, next to full cheesecake.
      No Bake Cherry Cheesecake

    Did you make this? I’d be so grateful if you left a “star” rating below to let me know what you thought! Then, the next time you need a quick and easy recipe, come back to Fantabulosity to browse all of my easy recipes!

    Recipe

    Rice krispie treats on wooden board.
    Print Pin
    5 from 4 votes

    The BEST Rice Krispie Treats

    This rice krispie treats recipe is made with milk, making the marshmallows more creamy and the treats gooey and soft!
    Course Dessert
    Cuisine American
    Prep Time 10 minutes minutes
    Cook Time 5 minutes minutes
    Cooling time 1 hour hour
    Total Time 15 minutes minutes
    Servings 16 squares
    Calories 198kcal
    Author Jessica Burgess

    Ingredients

    • ½ cup butter
    • 2 Tablespoons milk
    • 1 Tablespoon vanilla extract
    • 10 cups mini marshmallows
    • 10 cups puffed rice cereal

    Instructions

    • Prepare a 9X13 inch baking dish with cooking spray and set aside.
    • In a large saucepan over low heat, melt the butter. Then add the milk,vanilla extract and the mini marshmallows.
      Stirring constantly, melt marshmallows over low heat until they are fully melted. This may take around 5 minutes. Remove the pan from the heat.
    • Next, stir in the rice krispie cereal until it's fully mixed in.
    • Pour the mixture into the prepared pan, gently pressing the mixture down. (Don't press too hard, as this can make the treats hard.)
    • Let it cool and stiffen, an then cut into squares and enjoy!

    Video

    Notes

    These result in soft, thick treats! You can use a larger pan if you prefer treats that are thinner.
    Tip: 
    Grease whatever you use to gently press the treats in, with cooking spray to prevent sticking.
    How to store leftovers:
    Store any leftover rice krispie treats in an airtight container or plastic bag. Make sure it is sealed the best way possible, to help the treats stay soft and fresh for as long as possible.
    Wrap properly in freezer paper and in a freezer bag or freezer container for up to 1-2 months. Remove from freezer and allow to call at room temperature and then enjoy.

    Nutrition

    Serving: 1serving | Calories: 198kcal | Carbohydrates: 36g | Protein: 2g | Fat: 6g | Saturated Fat: 4g | Polyunsaturated Fat: 0.3g | Monounsaturated Fat: 2g | Trans Fat: 0.2g | Cholesterol: 15mg | Sodium: 72mg | Potassium: 21mg | Fiber: 0.2g | Sugar: 18g | Vitamin A: 180IU | Calcium: 6mg | Iron: 0.4mg

    Hot Taco Dip

    February 24, 2023

    Spoonful of hot taco dip in dish.

    Hot Taco Dip Recipe: Made of layers of delicious taco meat, creamy cheeses, beans, and salsa and topped with a lime and onion topping, this warm taco dip is baked and makes a deliciously easy appetizer recipe. It’s delicious served alongside other Mexican dishes, especially this walking taco casserole!

    Hot taco dip in a pie plate with a spoon dishing out a serving.

    When hosting a party or looking for a dip to make for any occasion, a taco dip is always an excellent choice, whether it’s this warm taco dip or this cold taco dip.

    But if taco recipes, in general, are your favorite, like they are ours, you’ll also love this taco chicken casserole, this taco soup, and this taco pasta!

    [feast_advanced_jump_to]

    Why This Recipe Works

    This is the best taco dip recipe! Here’s why:

    • Taco flavors: Who doesn’t love tacos? When you can have tacos in dip form, it gets even better!
    • Make-ahead recipe: You can assemble this up to two days ahead of time if needed. To do this, layer the dip but do not add the topping. Store the layered dip in the fridge until you are getting ready to cook.  Let it sit out at room temp for about 20-30 minutes before baking and add 10 minutes to the cooking time. Place foil on over the top for the first 10 minutes of cooking then remove for the last 25 minutes to keep the cheese from burning. 
    • Ready in only 45 minutes: Assemble, bake, and enjoy in about 45 minutes! Perfect for a last-minute dip idea when entertaining.

    Ingredients Needed

    I’ve highlighted a couple of ingredients with some relevant notes. Aside from this, the ingredients needed are pretty basic.

    Ingredients for hot taco dip on white counter.
    • Cheeses – This recipe uses shredded cheeses and if you have time and the ability to shred the block cheeses yourself, that can make the dip even creamier. However, using pre-shredded cheese is just fine to use.
    • Taco meat – we give directions on how to make the taco meat but if you have leftovers from tacos the night before, it’s a great way to use leftover taco meat!
    • Refried beans – we use black refried beans for this recipe but feel free to use your favorite.
    • Salsa – we use thick and chunky salsa for this recipe to reduce the amount of liquid in the dip, which could make it soupy.
    • Taco Seasoning – we love using homemade taco seasoning but you can use a package of storebought for this recipe.

    Substitutions

    If there are some items in this recipe that you’re not fond of, or that you may be out of, here are some suggestions that may help:

    • Cheeses – we feel like cheddar and Monterey Jack cheeses are the best for this dip but other cheeses such as a Mexican cheese blend or pepper jack cheese could also be wonderful!
    • Meat – we love using ground beef for this recipe but you could also use ground turkey, sausage, or your favorite meat substitute. See more of our ground beef dinner ideas!

    Make it Spicy

    If you love adding spice, you can use some or all of these ingredients: hot taco seasoning, unseeded jalapenos, pickled jalapenos, hot sauce, chili powder, or hot salsa.

    Equipment

    We used a pie dish for this cheesy beef taco dip but if you need to bake it in something different, you can try using a 13×9 casserole dish or a 9×9 square baking dish, being careful not to overfill the dish, where it could bubble-over. (To be safe, you can place the dish on a rimmed baking sheet in the oven, to catch any overflow.)

    How to Make Hot Taco Dip

    This is an easy taco dip recipe, and takes just a few steps!

    This taco dip is broken into 4 components:

    • cooking taco meat
    • assemble the layers
    • bake
    • top with toppings

    *Be sure to see the recipe card below for the full ingredients list & instructions!*

    Heat oven to 350 degrees and spray a 9.5 inch deep dish pie plate with cooking spray.

    Raw ground beef in skillet.
    Image 1
    Cooked ground beef in skillet.
    Image 2

    STEP 1. Brown ground beef. Brown meat over medium heat in a large skillet, making sure to break up into small pieces while cooking. When done, and no pink remains, drain and rinse fat from beef then return it to the pan (Images 1 & 2).

    Taco seasoning in skillet on top of cooked ground beef.
    Image 3
    Cooked ground beef with taco seasoning mixed in, in skillet.
    Image 4

    STEP 2. Make taco meat. Add taco seasoning and stir until fully incorporated (Images 3 & 4).

    Tip: Do not add water like the taco seasoning packaging may call for. This will make it soupy. However, if you prefer a juicier dip, you can add a bit of water.

    Cream cheese and sour cream in glass bowl.
    Image 5
    Cream cheese and sour cream mixed together in glass bowl.
    Image 6

    STEP 3. Make creamy mixture. In a medium mixing bowl stir together cream cheese and sour cream. Stir until very few clumps remain or use a mixer (Images 5 & 6).

    Refried beans layer in baking dish.
    Image 7
    Cream cheese and sour cream mixture spread over refried beans in pie plate.
    Image 8

    How to Layer Hot Taco Dip

    STEP 4. Beans and Creamy Layer. Evenly spread refried beans in the bottom of the dish (Image 7) and then spread the cream cheese mixture on top of the beans (Image 8).

    Salsa layer on top of cream cheese mixture in pie plate.
    Image 9
    Ground beef taco mixture on top of salsa layer.
    Image 10

    STEP 5. Salsa and beef. Spread the salsa on top of the cream cheese mixture (Image 9) then spread the ground beef over the salsa (Image 10).

    Shredded cheddar cheese on top of taco meat.
    Image 11
    Shredded monterey jack cheese on top of cheddar cheese on taco dip.
    Image 12

    STEP 6. Cheese. Finally sprinkle the cheeses on top of the meat (Images 11 & 12).

    STEP 7. Bake. Bake for 25 minutes until warm and bubbly. 

    Onion, cilantro, tomatoes in a glass bowl, ready for mixing.
    Image 13
    Mixed tomatoes, onions and herbs for topping on taco dip.
    Image 14

    STEP 8. Making toppings – if desired. While the dip is baking, mix all the topping ingredients (lime juice, red onion, cilantro, jalapeno, tomatoes) together in a small bowl (Images 13 & 14).

    Baked taco dip in baking dish, ready for toppings.
    Image 15
    Onions, tomatoes, cilantro on top of hot taco dip in baking dish.
    Image 16

    STEP 9. Add toppings. After baking let dip cool for 5 minutes before adding the topping (if doing so) and serve with your favorite corn chips (Images 15 & 16).

    Hot taco dip being lifted out of baking dish with a chip.

    Recipe Pro Tips

    • Additional topping ideas. If you’re looking to add more toppings to this cheesy taco dip, you may want to try black olives, pickled jalapenos, taco sauce, avocados, corn, Mexican cheeses, black beans, chopped green onions, shredded lettuce, etc. 
    • What to serve with this hot dip: Tortilla chips, corn chips (such as Fritos), fresh vegetables, pita chips, and more!

    What to Serve this Taco Dip with:

    This warm taco dip would be delicious to serve with these Tostadas.

    Or, these crispy chicken tacos or these fried tacos would be amazing along with it!

    Recipe FAQs

    What is taco dip made of?

    Most taco dips are made of a taco seasoned ground beef, with a creamy layer of cream cheese and sour cream, and then topped with your favorite taco toppings.

    Why does my taco dip get runny?

    It could be because the ground beef wasn’t drained enough, water was added when making taco meat or the salsa was more watery.

    How do you store taco dip?

    Store any leftovers in an airtight container, or cover with plastic wrap, once it has cooled off, for 2-3 days in the refrigerator.

    More Dip Recipes You’ll Love

    If you love dips as much as we do, then you’ll also love these other dip recipes:

    • A tortilla chip being dipped in a bowl of jalapeño artichoke dip.
      Jalapeno Artichoke Dip
    • Rotel dip with meat, in white bowl, that has a chip dipping in to it.
      Rotel Dip
    • Reuben dip being scooped out of baking dish with metal spoon.
      Reuben Dip Recipe
    • A tortilla chip is being dipped into a big bowl of cowboy queso.
      Cowboy Queso

    Did you make this? I’d be so grateful if you left a “star” rating below to let me know what you thought! Then, the next time you need a quick and easy recipe, come back to Fantabulosity to browse all of my easy recipes!

    Recipe

    Spoonful of hot taco dip in dish.
    Print Pin
    5 from 8 votes

    Hot Taco Dip

    Hot Taco Dip Recipe: Made of layers of delicous taco meat, creamy cheeses, beans, salsa and topped with a lime and onion topping, this warm taco dip is baked and makes a delicious easy appetizer recipe.
    Course Appetizer, Side Dish
    Cuisine Mexican
    Prep Time 15 minutes minutes
    Cook Time 25 minutes minutes
    Total Time 40 minutes minutes
    Servings 6 cups
    Calories 648kcal
    Author Jessica Burgess

    Equipment

    • 9.5 inch, deep dish pie plate

    Ingredients

    • 1 pound ground beef
    • ¼ cup taco seasoning or 1 Packet
    • 1 cup black refried beans
    • ½ cup sour cream
    • 8 ounces cream cheese softened to room temperature
    • 1¼ cup thick and chunky salsa
    • 1½ cup monterey jack cheese shredded
    • 1½ cup cheddar cheese shredded

    Optional Toppings

    • 2 teaspooons lime juice 
    • 2 Tablespoons red onion diced
    • 2 Tablespoons fresh cilantro chopped
    • 2 Tablespoons jalapeno seeded and diced
    • 3 Tablespoons tomato diced

    Instructions

    • Heat oven to 350 degrees and spray a 9.5 inch deep dish pie plate with cooking spray.
    • Brown meat over medium heat, making sure to break up into small pieces while cooking. When done, and no pink remains, drain and rinse fat from beef then return it to the pan. Add taco seasoning and stir until fully incorporated. 
    • In a medium mixing bowl stir together cream cheese and sour cream. Stir until very few clumps remain or use a mixer.

    To Layer Hot Taco Dip

    • Evenly spread refried beans in the bottom of the dish, next spread the cream cheese mixture on top of the beans, spread the salsa on top of the cream cheese mixture, then spread meat over the salsa, and finally sprinkle cheese on top of the meat.

    Bake Dip

    •  Bake for 25 minutes until warm and bubbly.
    •  While the dip is baking, mix all the topping ingredients together in a small bowl.
    • After baking let dip cool for 5 minutes before adding the topping (if doing so) and serve with your favorite corn chips. 

    Video

    Notes

    Leftovers: Store any leftovers in an airtight container, or cover with plastic wrap, once it has cooled off, for 2-3 days in the refrigerator.
    More topping ideas: black olives, pickled jalapenos, taco sauce, avocados, corn, Mexican cheeses, black beans, chopped green onions and shredded lettuce.
    What to serve with this dip: tortilla chips, corn chips, fresh veggies, pita chips and more.

    Nutrition

    Serving: 0.5cup | Calories: 648kcal | Carbohydrates: 18g | Protein: 32g | Fat: 50g | Saturated Fat: 26g | Polyunsaturated Fat: 2g | Monounsaturated Fat: 15g | Trans Fat: 1g | Cholesterol: 157mg | Sodium: 1911mg | Potassium: 498mg | Fiber: 5g | Sugar: 8g | Vitamin A: 2470IU | Vitamin C: 13mg | Calcium: 511mg | Iron: 3mg

    Oreo Mousse

    February 22, 2023

    Oreo mousse in a clear glass single serving container.

    Oreo Mousse: A delicious no bake dessert made with Oreo cookies, heavy whipping cream, and a few other simple ingredients to make a creamy mousse. This can also be made in individual serving cups or in a large bowl, and it only takes 15 minutes to make, and chills for 3 hours before serving!

    Oreo mousse in small clear glass.

    No bake Oreo desserts recipes are some of our favorite dessert recipes around here. This Oreo pudding dessert is a reader favorite and this Oreo dip is amazing to serve with your favorite crackers or other cookies for an easy dessert recipe.

    This 5 ingredient Oreo mousse recipe is a delicious dessert that comes together with simple ingredients, and is the perfect dessert to serve at a summer dinner party or for the holidays or any Oreo lover.

    [feast_advanced_jump_to]

    Why This Recipe Works

    • It uses a few ingredients: With only 5 ingredients, this decadent Oreo recipe uses items that you may even have on hand.
    • Make-ahead recipe: Did you know that you can make this recipe in advance if you want to? Since it needs to chill for at least 3 hours anyway, it’s great to make hours before serving so you can focus on other things.
    • Oreo recipes: Oreos are so popular and if you’re a fan of our Oreo Pizza, this Oreo No-Bake Cheesecake, this Oreo Cheesecake, and these Oreo Rice Krispie Treats, then you’re also going to love this one!

    Ingredients Needed

    I’ve highlighted a couple of ingredients with some relevant notes. Aside from this, the ingredients needed are pretty basic.

    Ingredients for Oreo mousse on white counter.
    • Baking Chocolate – we used semisweet chocolate (chips or baking bar chopped)
    • Heavy Cream – Make sure you use heavy cream, and not milk, as the texture won’t be the same.

    Substitutions

    Sometimes substitutions are necessary because of ingredients that are unavailable or needed for dietary restrictions. Here are some suggestions that can help:

    • Oreos – although we haven’t tried it, we don’t see a reason why you couldn’t use Golden Oreos for this recipe instead, or even other types of cookies.
    • Chocolate – you can use milk chocolate chips as well but the mousse will be sweeter overall. Or, you can use a mix of chocolate chips if you wish; such as half semi sweet and half milk chocolate. This is a great way to use any partial bags you may have.

    Equipment

    We love making small individual cups (we used 6.8 ounce cups) of mousse but you can absolutely make one bowl of this recipe and dish it out in to servings, as needed.

    How to Make Oreo Mousse

    First, it’s best to make space for the finished mousse cups in your refrigerator, so once you’ve made the mousse, you can place it in to chill right away.

    *Be sure to see the recipe card below for the full ingredients list & instructions!*

    How to Make the Chocolate

    STEP 1. Heat cream. Heat ½ Cup of Heavy Cream in the microwave for 40-45 seconds.

    Heavy cream poured over chocolate pieces in glass mixing bowl.
    Image 2
    Melted chocolate and heavy cream in glass bowl.
    Image 3

    STEP 2. Make chocolate. Pour Heated cream over chocolate (Image 2). Let the chocolate and cream sit for 3 minutes before stirring. Once stirred if the chocolate is not melted and smooth, microwave for 15 additional seconds and stir again. Continue to do this until melted. Once smooth, and melted, sit aside to cool (Image 3).

    Oreo cookies in food processor.
    Image 4
    Crushed Oreo cookies in food processor.
    Image 5

    Crushing the Cookies

    STEP 3. Make Oreo crumbs. In a food processor finely blend 12 cookies in to fine crumbs. Reserve 1 Tablespoon of crumbs for garnish if desired (Images 4 & 5).

    If you have extra, you’ll love sprinkling crushed Oreo crumbs on top of these dirt cupcakes!

    Oreo cookies in small, sealable bag, to be crushed.
    Image 6
    Oreos broken in to small pieces, in a small glass bowl.
    Image 7

    STEP 4. Crush cookies. Next place 8 cookies into a ziplock bag and roughly crush into pieces (Images 6 & 7).

    Sugar, vanilla and cream in a large mixing bowl.
    Image 8
    Whipped and mixed cream, sugar and vanilla in glass mixing bowl.
    Image 9

    How to Make the Mousse

    STEP 5. Cream ingredients. Add the remaining cream, powdered sugar, and vanilla to a large mixing bowl and beat until stiff soft peaks form (Images 8 & 9).

    Crushed Oreos added to cream and sugar mixture.
    Image 10
    Crushed Oreos mixed in with cream, sugar and vanilla mixture.
    Image 11

    STEP 6. Add cookies. Add cookie crumbs into cream mixture and stir until combined. Then remove 1 ½ cups of the cookies and cream mixture to set aside to use as the cream layer when assembling the mousse.

    Melted chocolate poured in to remaining Oreo mousse mixture.
    Image 12
    Melted chocolate mixed in with mousse mixture.
    Image 13

    STEP 7. Add melted chocolate. Pour the cooled chocolate from step 2, into the remaining cookie and cream mixture and carefully stir the chocolate into the mixture until fully incorporated.

    Layering the Mousse

    Tip: For a cleaner look you can pipe the mixtures into the desert cups. 

    First layer of Oreo chocolate mousse in dish.
    Image 14
    Broken Oreo pieces on top of chocolate mousse
    Image 15

    STEP 8. First layer. Fill a small bowl about ⅔ full with chocolate mixture, sprinkle roughly crushed Oreo cookie pieces – about one cookie worth (Images 14 & 15).

    Oreo mousse on top of chocolate mousse in glass container.
    Image 16
    Crushed Oreo on top of mousse, with Oreos placed around dish.
    Image 17

    STEP 9. Layer 2. Spoon the reserved cookie and cream mixture on top of crushed cookies, if desired sprinkle with reserved cookie crumbs, and top with a whole cookie (Images 16 & 17).

    STEP 10. Refrigerate. Refrigerate desserts for at least 3 hours before serving, to allow mousse to set.

    A bit of Oreo mousse on a spoon.

    Recipe Pro Tips

    • Cover with plastic wrap. When chilling in the refrigerator, if you cover with plastic wrap, it will help prevent odors from other foods from seeping in to the mousse.
    • Top with whipped cream. Although it’s not necessary, you could add whipped cream to the top of the mousse, especially if your containers are bigger and you need to fill more space in each cup/dish.

    Recipe FAQs

    What is Oreo mousse made of?

    A mixture of chocolate, heavy cream, vanilla extract, powdered sugar and Oreo cookies make up this easy Oreo mousse.

    What is the difference between pudding and mousse?

    Pudding tends to be more dense than mousse and either is cooked or it uses ingredients for thickening, while mousse is more airy.

    Why is it called mousse?

    Mousse originated in France and means “foam” which is a similar texture to mousse.

    Storage

    To store leftovers, refrigerate in an airtight container or cover with plastic wrap, for about 3-4 days.

    More No Bake Dessert Recipes

    If you love no bake simple desserts as much as we do, then you’ll also love these favorites:

    • Smores Cheesecake - No Bake Recipe
      No-Bake S’Mores Cheesecake Recipe
    • Edible cookie dough in glass jar.
      Edible Cookie Dough Recipe
    • A bowl of booty dip surrounded by crackers and with two graham crackers in the dip.
      Booty Dip
    • No bake chocolate pie slice on wood spatula
      Chocolate Cream Cheese Pie

    Have extra Oreos left? Make this Oreo Pancakes Recipe tomorrow morning for breakfast!

    Did you make this? I’d be so grateful if you left a “star” rating below to let me know what you thought! Then, the next time you need a quick and easy recipe, come back to Fantabulosity to browse all of my easy recipes!

    Recipe

    Oreo mousse in a clear glass single serving container.
    Print Pin
    5 from 5 votes

    Oreo Mousse

    Oreo Mousse: A delicious no bake dessert made with Oreo cookies, heavy whipping cream, and a few other simple ingredients to make a creamy mousse that can also be made in individual serving cups or in a large bowl, and it only takes 15 minutes to make, and chills for 3 hours before serving!
    Course Dessert
    Cuisine American
    Diet Vegetarian
    Prep Time 15 minutes minutes
    Chill Time 3 hours hours
    Total Time 3 hours hours 15 minutes minutes
    Servings 8 servings
    Calories 617kcal
    Author Jessica Burgess

    Ingredients

    • 5 ounces semi sweet baking chocolate chips or baking bar chopped
    • 3 cups heavy cream divided
    • 28 chocolate sandwich cookies (I used original Oreos)
    • ¼ cup powdered sugar
    • 1 teaspoon vanilla extract

    Instructions

    Prepare

    • Make space for finished mousse cups in your refrigerator.

    Melt Chocolate

    • Heat ½ cup of heavy cream in the microwave for 40-45 seconds.
      Then pour the heated cream over chocolate. Let the chocolate and cream sit for 3 minutes before stirring.
      Once stirred, if the chocolate is not melted and smooth, microwave for 15 additional seconds and stir again. Continue to do this until melted. Once smooth, and melted, sit aside to cool.

    Prepare Cookies

    • In a food processor finely blend 12 cookies. Reserve 1 Tablespoon of crumbs for garnish if desired.
      Next, place 8 cookies into a ziplock bag and roughly crush into pieces.

    Making the Mousse

    • Add the remaining cream, powdered sugar, and vanilla to a large mixing bowl and beat until stiff peaks form. Fold cookie crumbs into cream mixture. Then remove 1 ½ cups of the cookie and cream mixture to use as the cream layer.
    • Pour the cooled chocolate into the remaining cookie and cream mixture. Carefully fold chocolate into the mixture until fully incorporated.

    To Layer Dessert

    • Fill a small dessert cup about ⅔ full with chocolate mixture, sprinkle some roughly crushed cookies on top (about one cookie worth), then spoon the reserved cookie and cream mixture on top of crushed cookies, if desired sprinkle with reserved cookie crumbs, and top with a whole cookie. Repeat in the remaining cups.
    • Refrigerate desserts for at least 3 hours before serving, to allow mousse to set.

    Notes

    Tip: For a cleaner look you can pipe the mixtures into the desert cups. 
    Serving: You can serve this in a large bowl or individual serving bowls like we did.
    Storage: To store leftovers, refrigerate in an airtight container for about 3 days.

    Nutrition

    Serving: 1serving | Calories: 617kcal | Carbohydrates: 45g | Protein: 6g | Fat: 47g | Saturated Fat: 27g | Polyunsaturated Fat: 3g | Monounsaturated Fat: 14g | Trans Fat: 0.04g | Cholesterol: 102mg | Sodium: 189mg | Potassium: 284mg | Fiber: 3g | Sugar: 30g | Vitamin A: 1322IU | Vitamin C: 1mg | Calcium: 79mg | Iron: 6mg
    • « Go to Previous Page
    • Page 1
    • Interim pages omitted …
    • Page 10
    • Page 11
    • Page 12
    • Page 13
    • Page 14
    • Interim pages omitted …
    • Page 25
    • Go to Next Page »

    Primary Sidebar

    Jessica Burgess of Fantabulosity, slicing an avocado.

    Hi, I'm Jessica! - Owner and Creator of the blog and brand, Fantabulosity.

    I’m here to help you make easy comfort food and nostalgic recipes, using simple ingredients, that everyone will love.

    More about me →

    Potluck Recipes

    • A slice of strawberry jello cake, topped with a strawberry slice, sitting on a round plate.
      Strawberry Jello Cake (Easy, Moist Strawberry Cake)
    • Crack green beans on wooden spoon.
      Crack Green Beans
    • Old fashioned potluck cake recipes collage.
      Old-Fashioned Cakes That Still Show Up at Every Potluck
    • Collage of potluck desserts.
      Easy Potluck Desserts (Simple Recipes That Always Get Asked For)
    • Cold Pasta Salad Recipes Collage.
      Cold Pasta Salad Recipes
    • Chicken Casserole recipes image collage.
      20 Chicken Casserole Recipes

    Popular Recipes

    • bread pudding in baking dish
      Bread Pudding Recipe: Easy Old Fashioned Recipe (With Video!)
    • Burger baked in the oven, steamed in aluminum foil, and placed on white plate.
      Burgers in the Oven
    • two tuna salad sandwiches stacked on top of each other
      The BEST Tuna Salad Recipe
    • Sliced banana bread on white platter
      Best Banana Bread
    • Strawberry brownies on white marble cutting board.
      Strawberry Brownies Recipe
    • Cheeseburger Sliders
      Cheeseburger Sliders with Hawaiian Rolls

    Footer

    ↑ back to top

    Featured In

    About

    • About Jessica
    • Contact
    • Collaborate
    • Dinner System

    Easy Recipes

    • All Recipes
    • Vintage Recipes
    • Dinner Recipes
    • Desserts

    How to Cook

    • Oven-Baked
    • Stove-Top
    • No Bake
    • Cooking Basics

    Privacy Policy |Accessibility Copyright © 2026 Fantabulosity | Terms & Conditions | FTC
    All recipes, photos, and content are copyrighted and may not be reproduced, republished, or distributed without written permission.

    Rate This Recipe

    Your vote:


    A rating is required
    A name is required
    An email is required